AWS VPC Lab
VPC
Build a VPC with Public and Private Subnets (from Scratch)
https://play.whizlabs.com/site/task_details?lab_type=1&task_id=14&quest_id=35
Objective
- Learn how to build Public and Private subnets from scratch.
- The VPC wizard will not be used. Every component required to build public and private subnets will be created and configured manually.
- This will give an in-depth understanding of internal components of VPCs and subnets.
Lab Details
- This lab walks you through AWS Virtual Private Cloud (VPC) creation from scratch.
- In this lab, we will create a VPC without using VPC Wizard. We will create our own public and private subnets. Along with that, we will be configuring Route tables.
Introduction
What is VPC?
- VPC stands for Virtual Private Cloud.
- It’s a custom-defined virtual network within the AWS Cloud.
- Users can logically create their personal network, designing and implementing a separate and independent network that would operate in the AWS Cloud.
- Primary components are:
Subnets,IP addresses,NAT Devices (Instances & Gateways),Route Tables,Internet & Virtual Private Gateways,Access Control Lists,Security groups,VPC Endpoints.- A subnet is a segment of the VPC IP address range, where we can launch EC2 Instances, RDS, and other AWS resources.
- Subnet are further classified as Public and Private.
- Public subnets hold resources that can be accessed from the Internet.
- Common attributes for instances in Public Subnets to have are:
- Elastic IP (EIP) address or Public IP address attached to the EC2 instance.
- IGW attached to the VPC.
- The subnet must have a route table entry with destination as internet gateway (IGW)
0.0.0.0/0.
- Security groups and NACLs should not block remove access.
- Public subnets are associated with a route table that directs subnet traffic to the internet using an Internet Gateway.
- Private subnets hold resources that can be accessed from within the VPC network.
- Multiple subnets can be associated with a single route table. However, a single subnet cannot be associated with multiple route tables.
- Route tables hold sets of rules, called routes that are used to determine where the traffic is directed.
- Every subnet in a VPC is linked to the route table.
- Primary or Main route tables are the ones that automatically come with your VPC. They control the routing for all subnets that are not explicitly associated with any other route table.
- The default route table cannot be deleted.
- Custom route tables are the ones you create for your VPC, and you can add routes as needed.
- Custom route tables can be deleted when not required.
- Internet Gateway (IGW) is a virtual router which helps a VPC connect to the Internet.
- By default, instances that are launched in a VPC cannot communicate with the Internet. To enable Internet access, Internet gateway needed to be attached to the VPC.
- Public subnets gets connected to IGW through route tables to get accessed over the Internet.
- Internet Gateways are horizontally scalable, highly available and redundant.
- EIP, Elastic IP address is a static IPv4 address used by AWS to manage its dynamic cloud computing services.
- It is associated with an AWS Account, and you can use it to mask if an instance failure occurs i.e., if a server fails, we can map this IP address to another server and keep moving without any issues.
- NAT devices can be either an Instance / Gateway residing in Public subnet, (to which an EIP is assigned).
- NAT devices help instances in Private subnets interact with the Internet.
- Access Control List (ACL) is an optional layer of security that acts as a firewall for controlling network traffic in and out of the subnet.
- Rules are defined with the ACL for allowing or denying network traffic either on ports / IP addresses.
Lab Tasks
- Log into AWS Management Console.
- Create a VPC without using the VPC Wizard.
- Create an Internet Gateway.
- Create private and public subnets for the VPC.
- Create and Configure Route tables.
Basic Understanding before we start building VPC from scratch
- When you create an Amazon AWS VPC, you specify a set of IP addresses in the form of a Classless Inter-Domain Routing (CIDR) block (Ex:
10.0.0.0/16). - You can assign a single CIDR block to a VPC. The allowed block size is between a
/28netmask and/16netmask. In other words, the VPC can contain from 16 to 65,536 IP addresses.
Architecture Diagram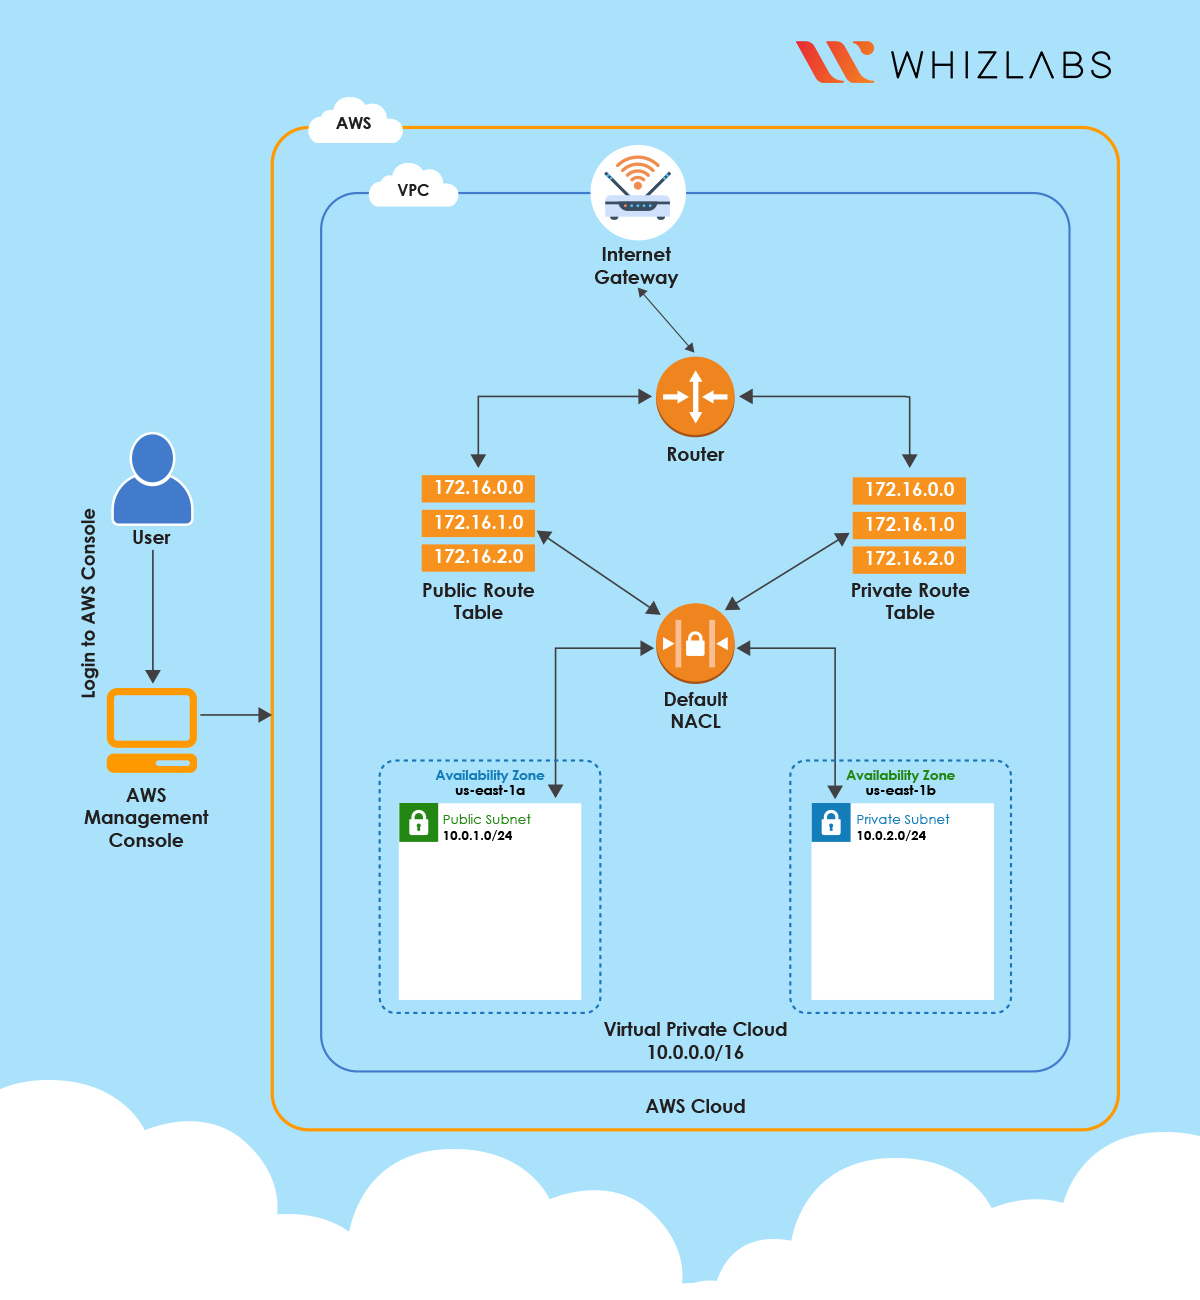
VPC Configuration
Services -> VPC
Create VPC
Click on VPC (under Networking & Content Delivery section) or you can also search for VPC.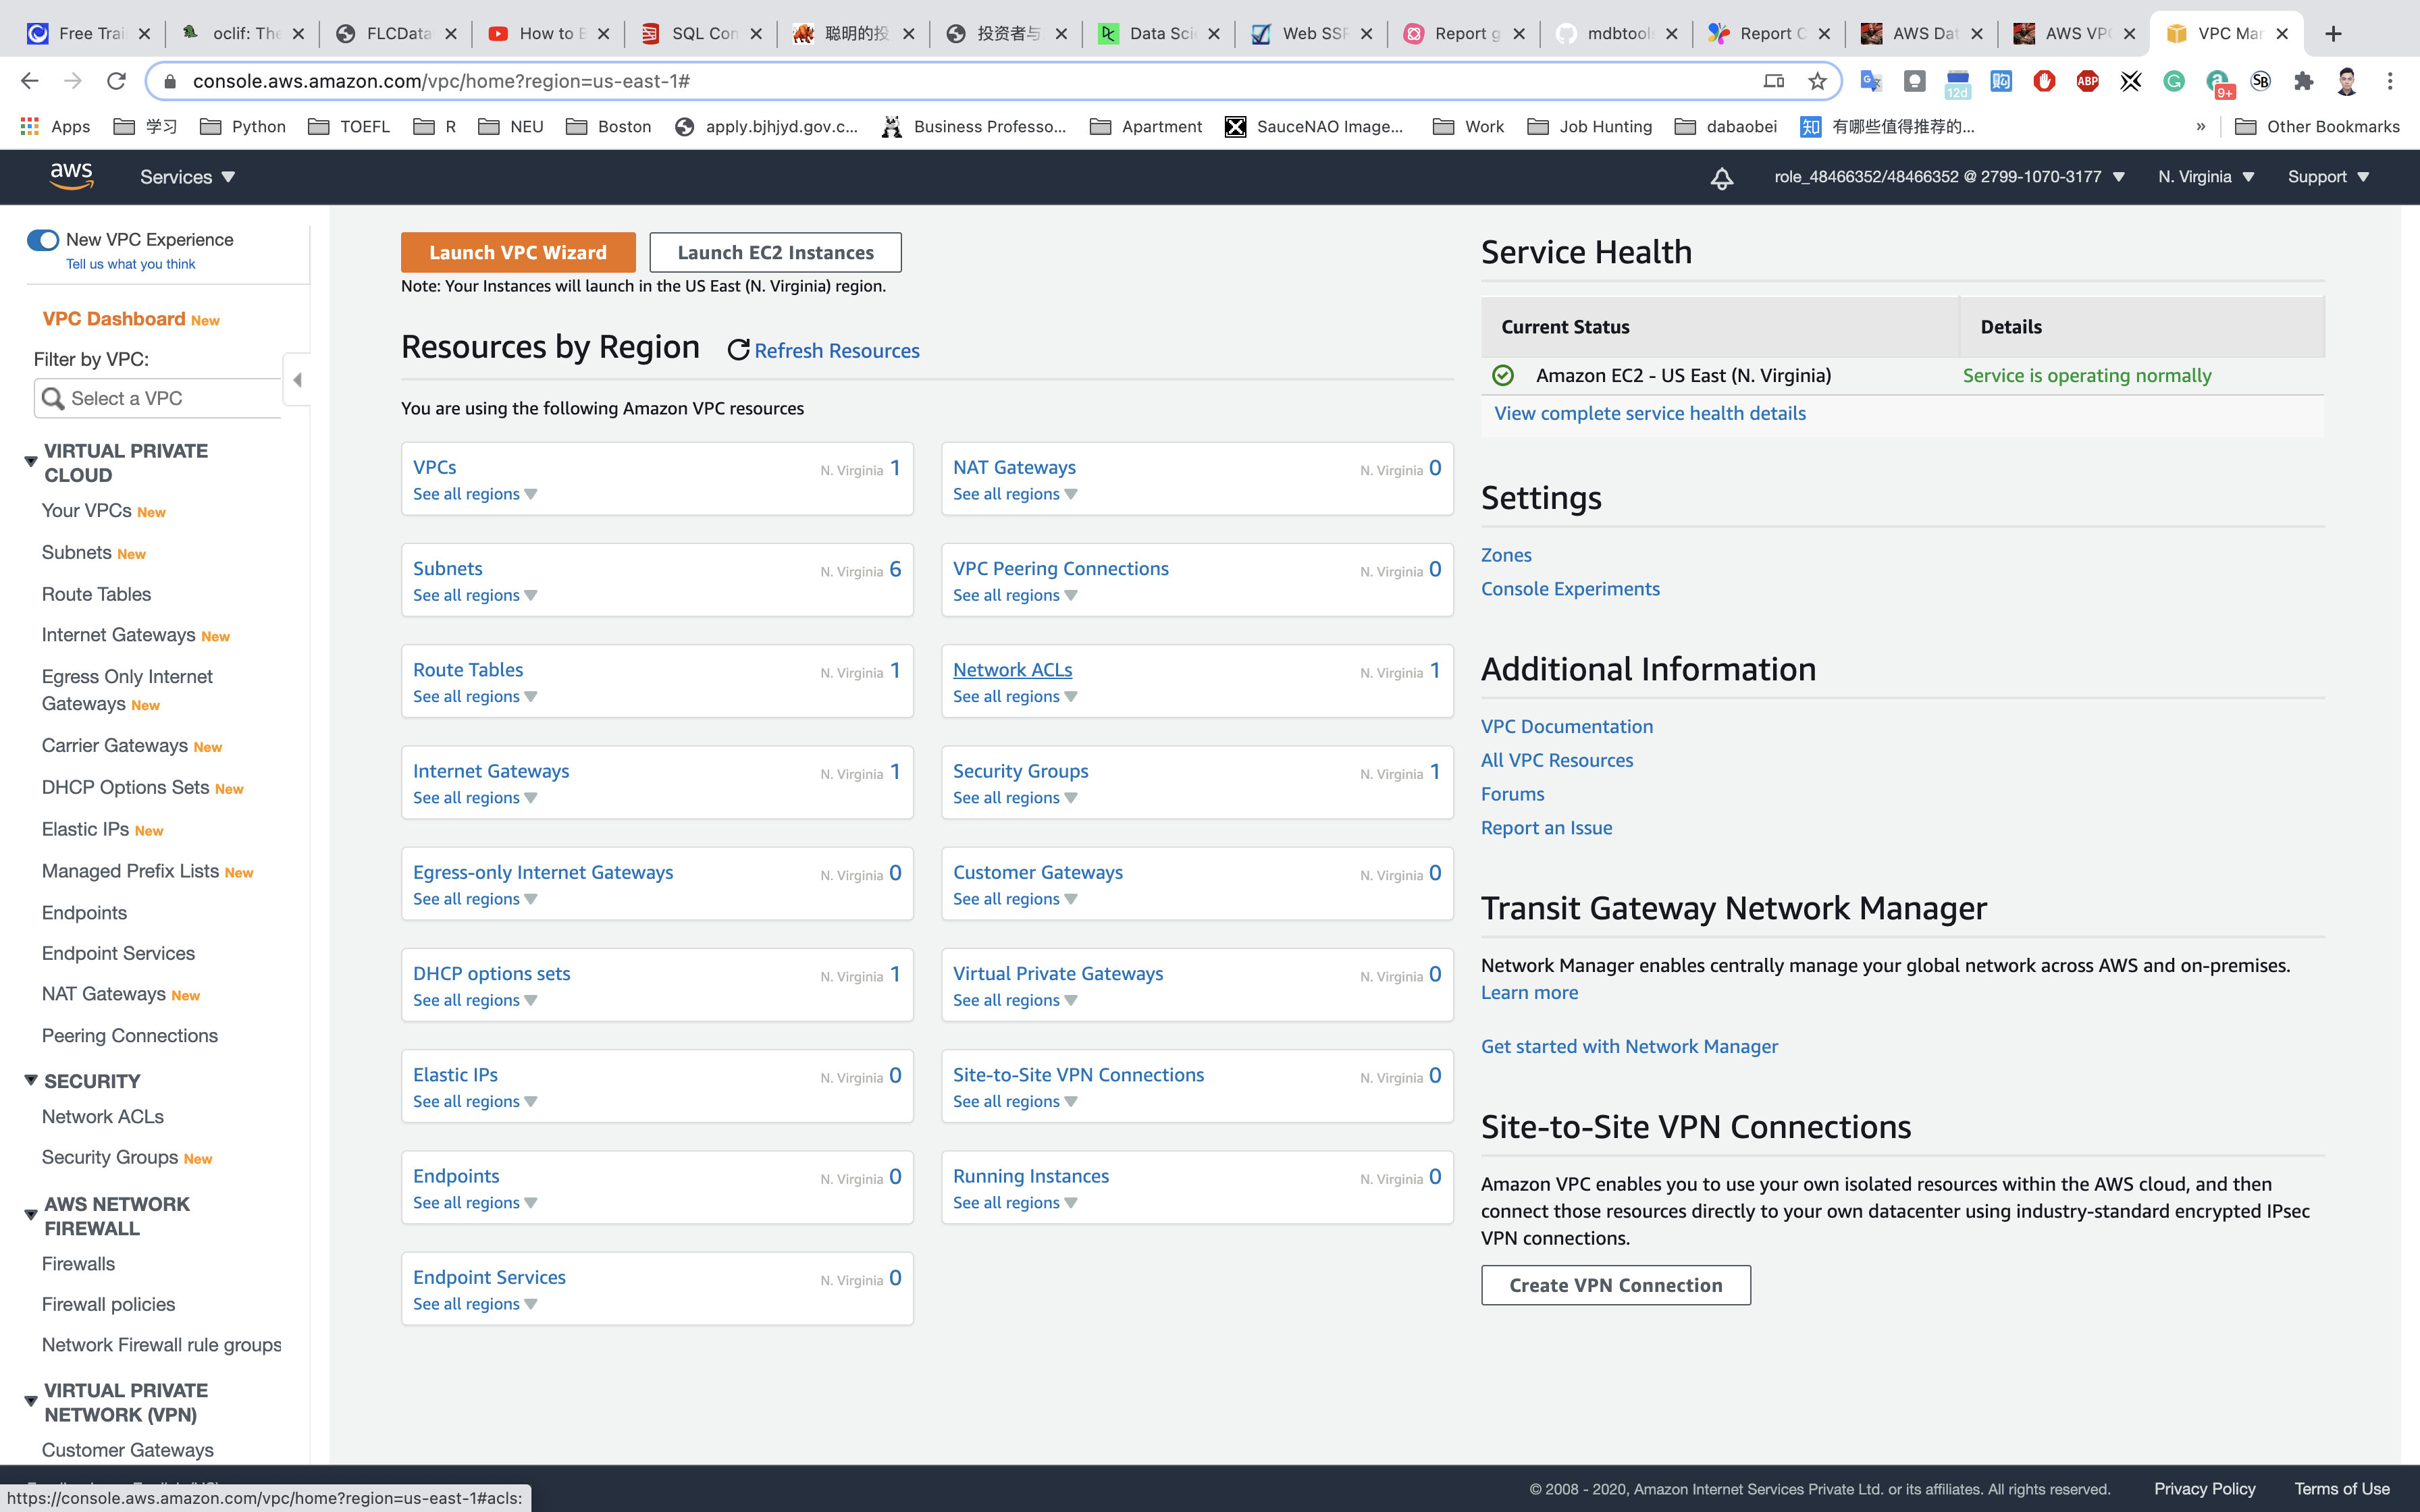
Click on Your VPCs from the left menu.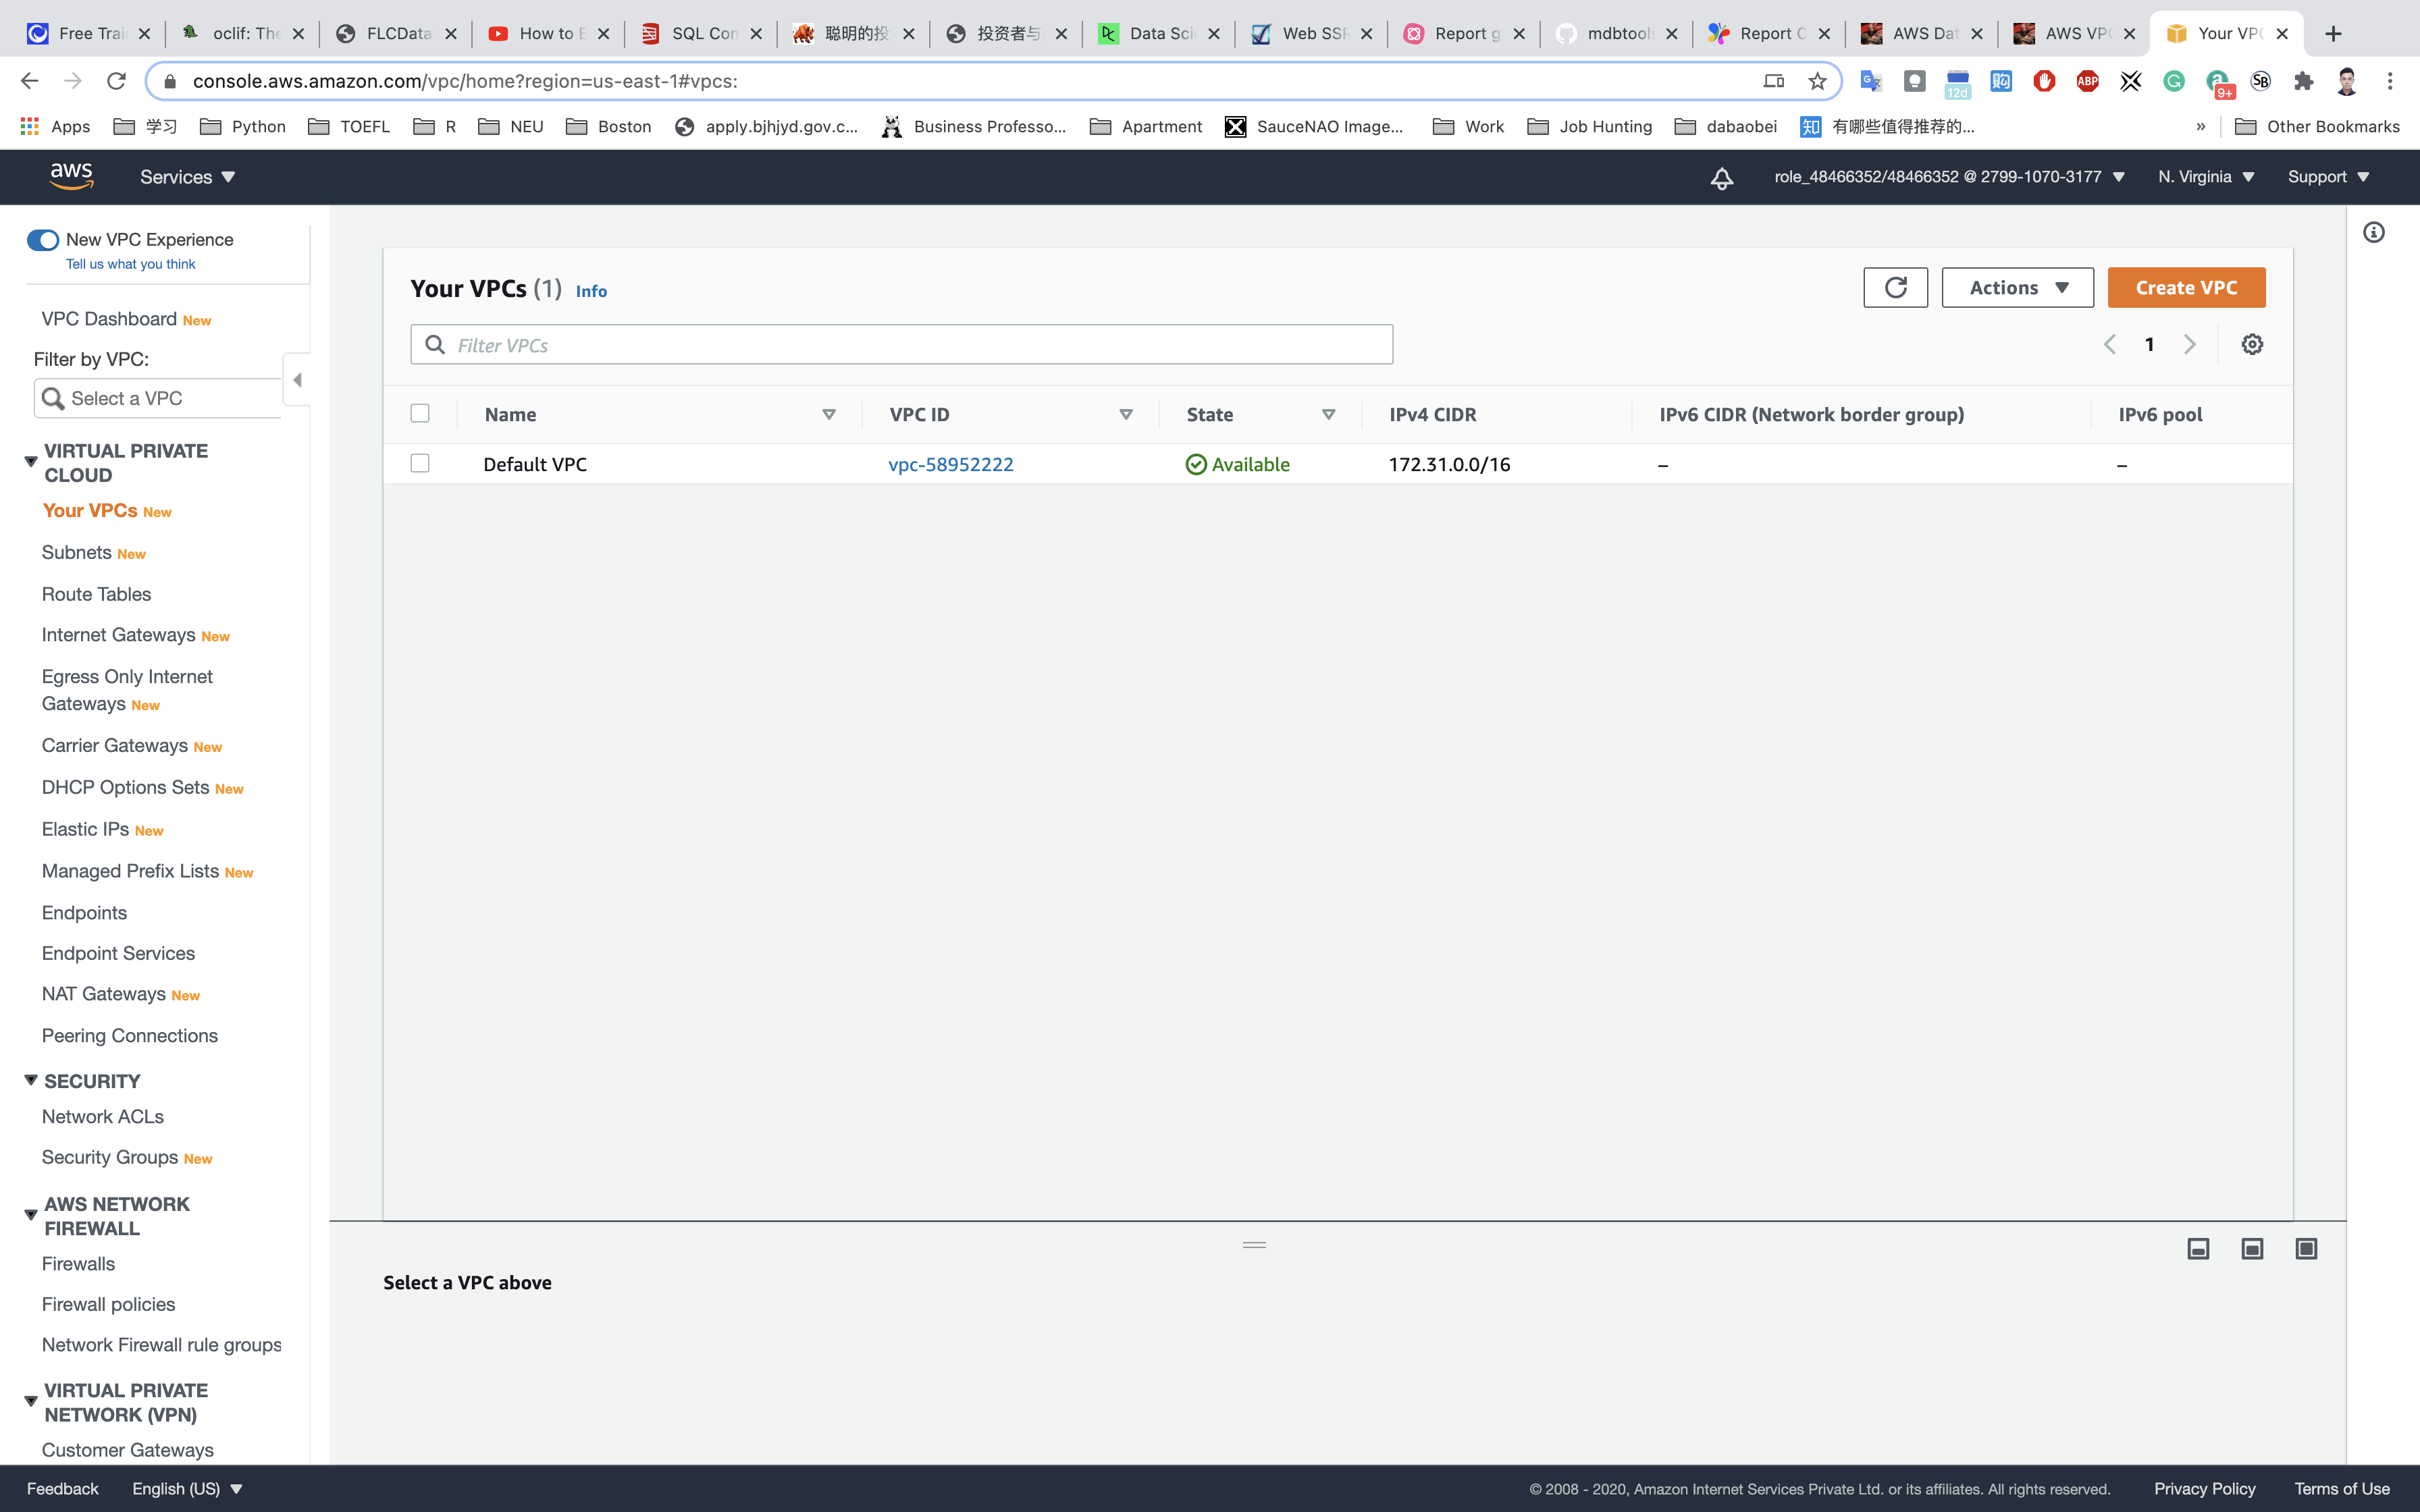
Here you can see the list of all VPC, No need to do anything with the existing and default VPCs, we will create a new VPC for this lab.
Click on Create VPC.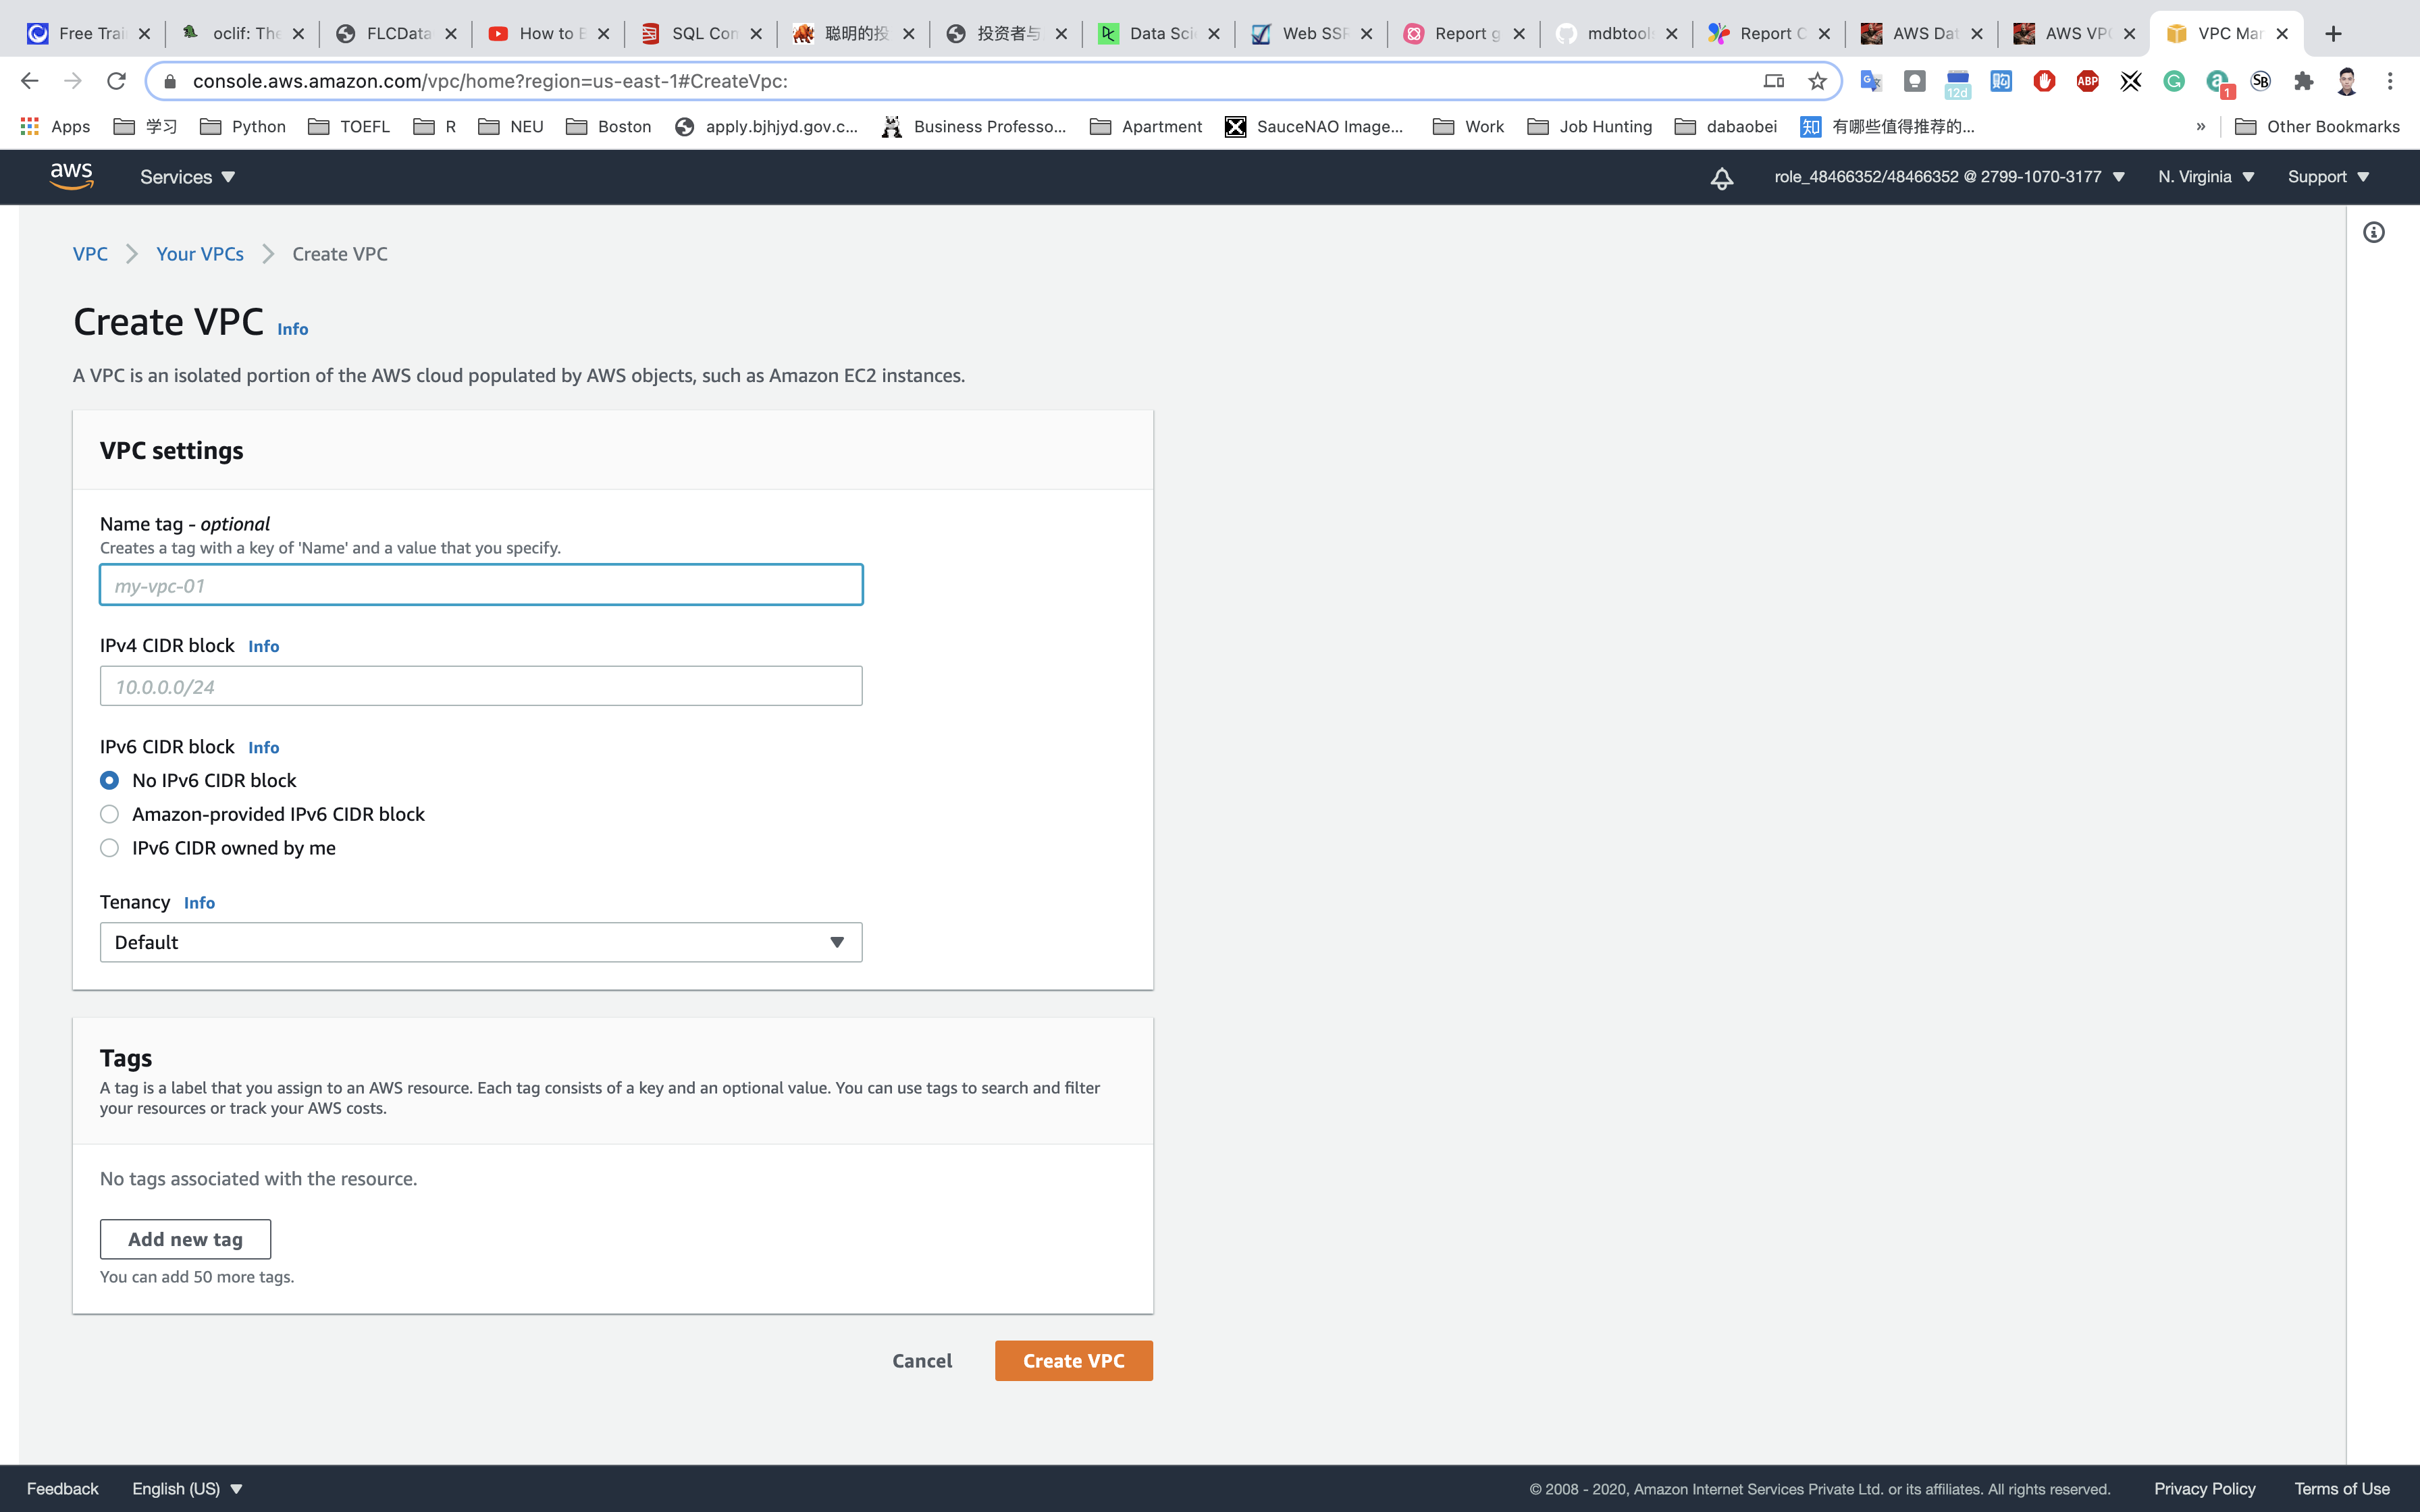
- Name tag:
testVPC - IPv4 CIDR block:
10.0.0.0/16 - IPv6 CIDR block: No need to change this, make sure No IPv6 CIDR Block is checked.
- Tenancy: No need to change this, make sure Default is selected.
Now click on Create VPC.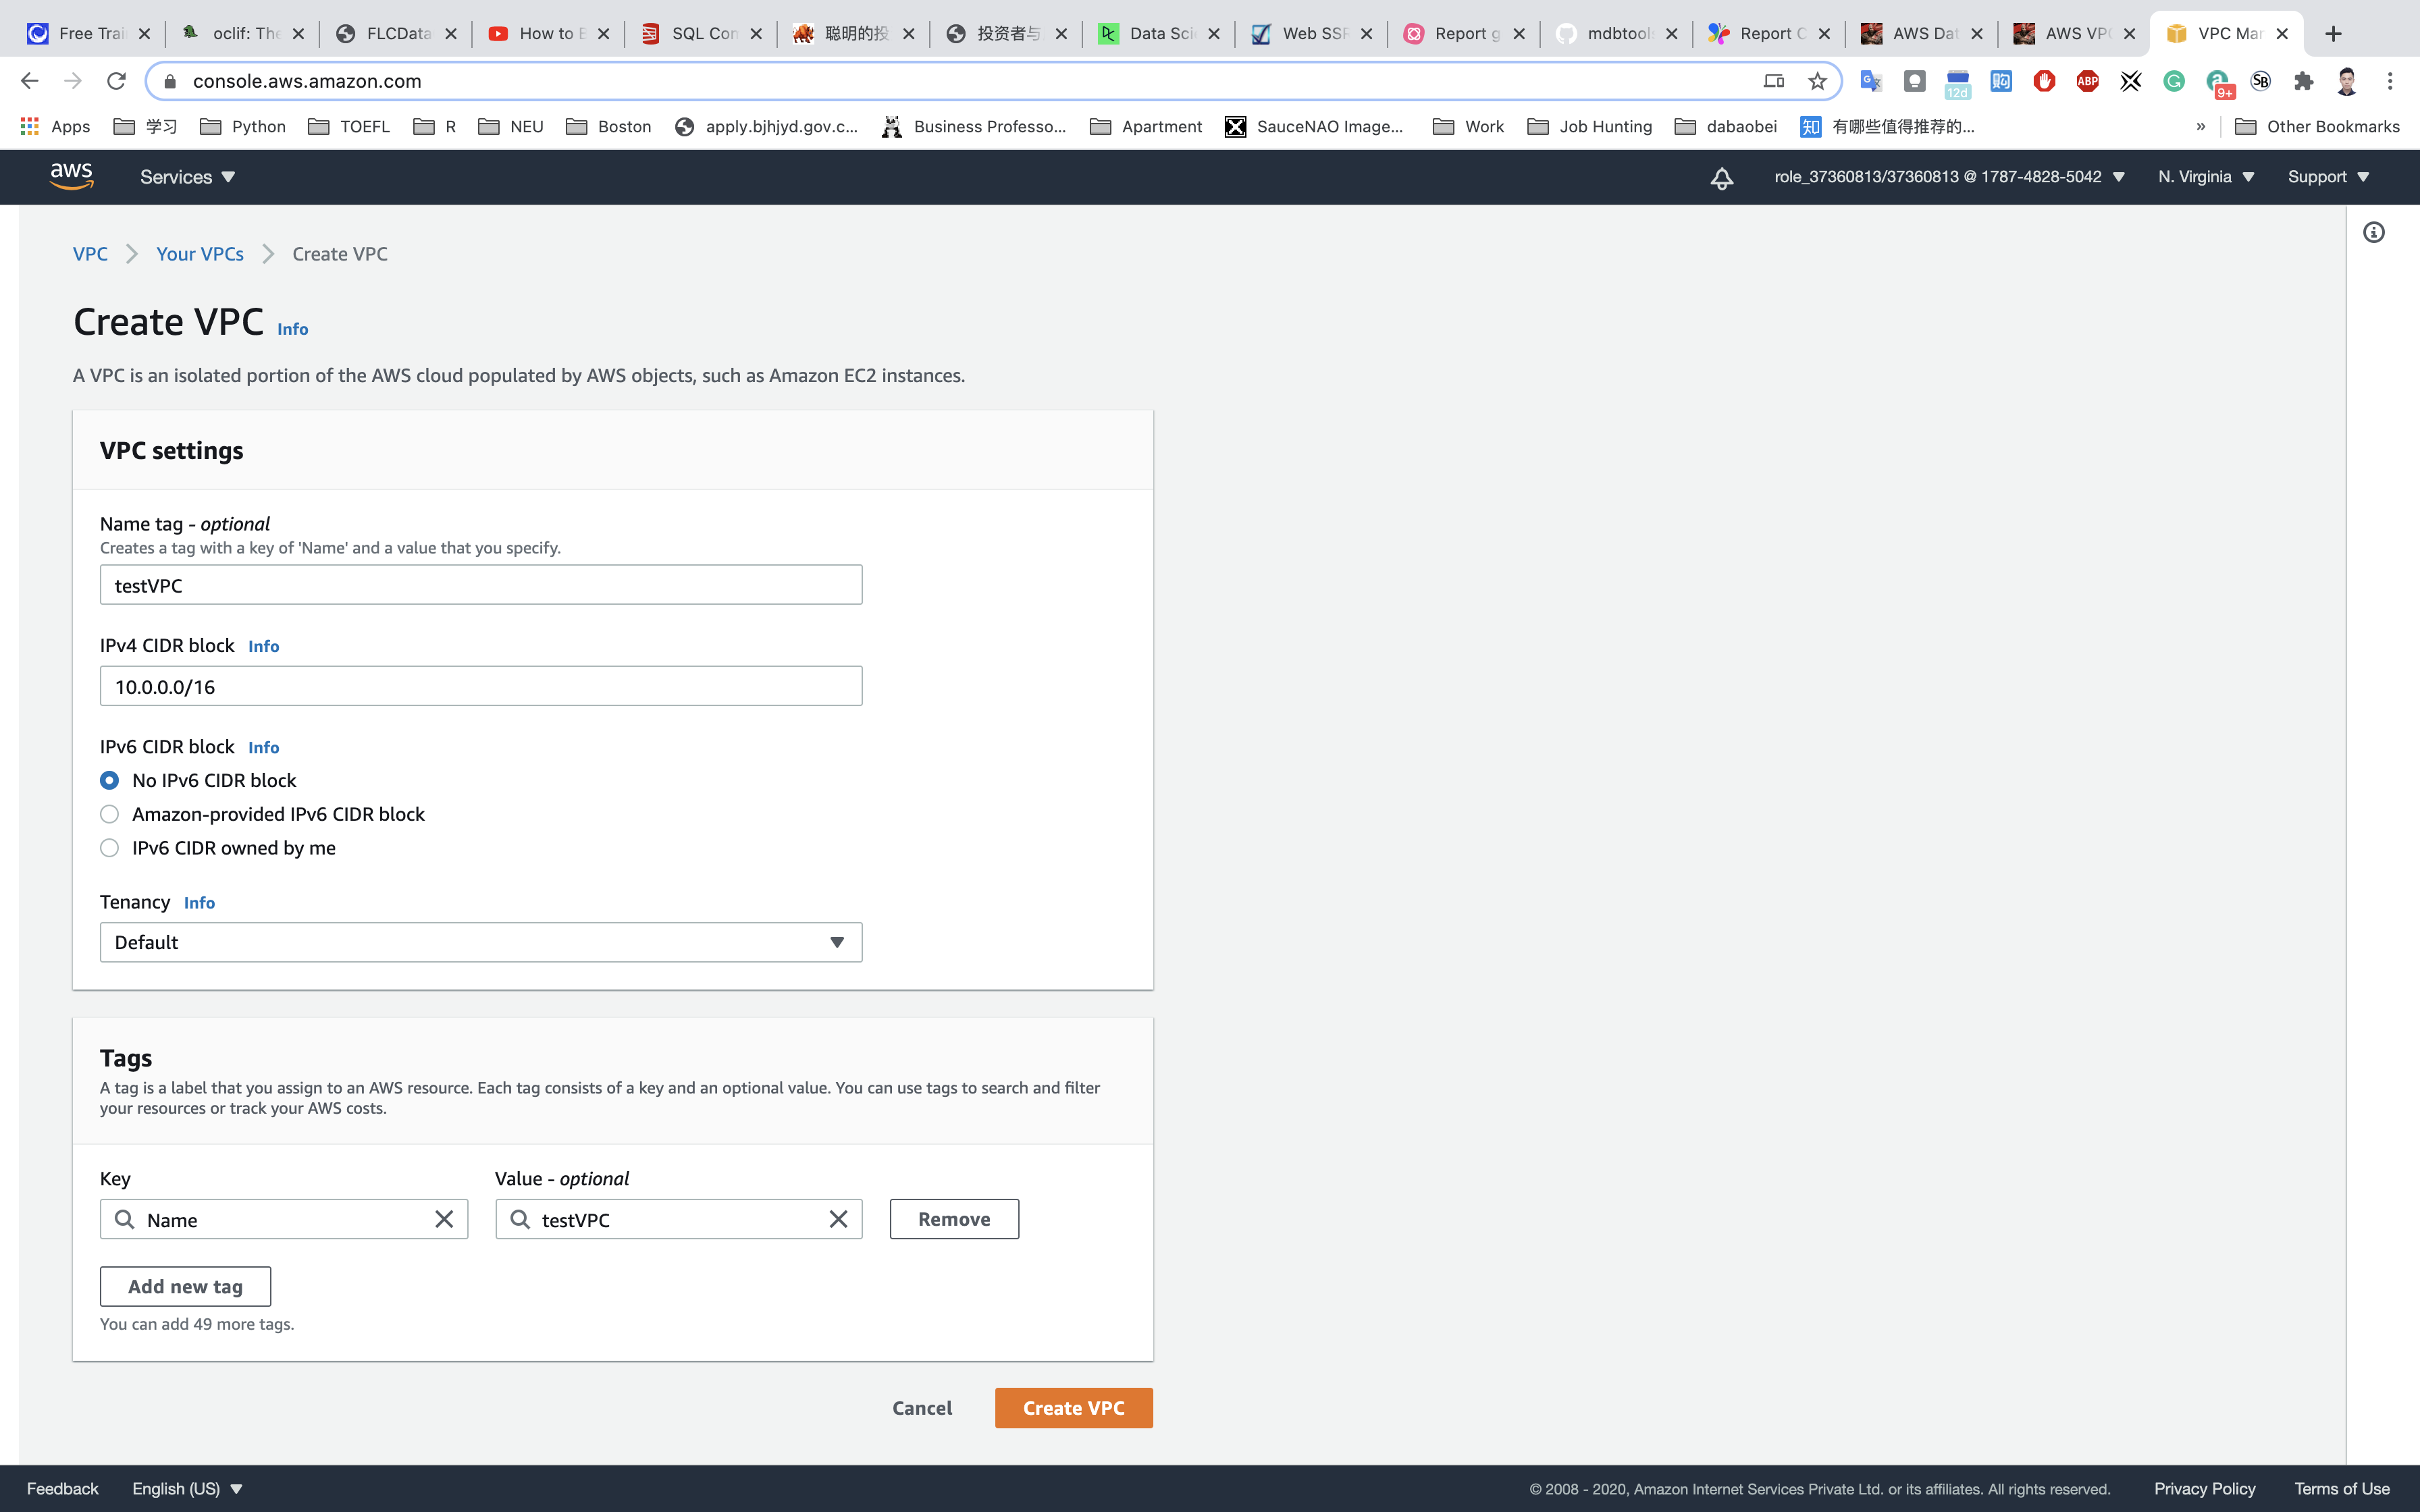
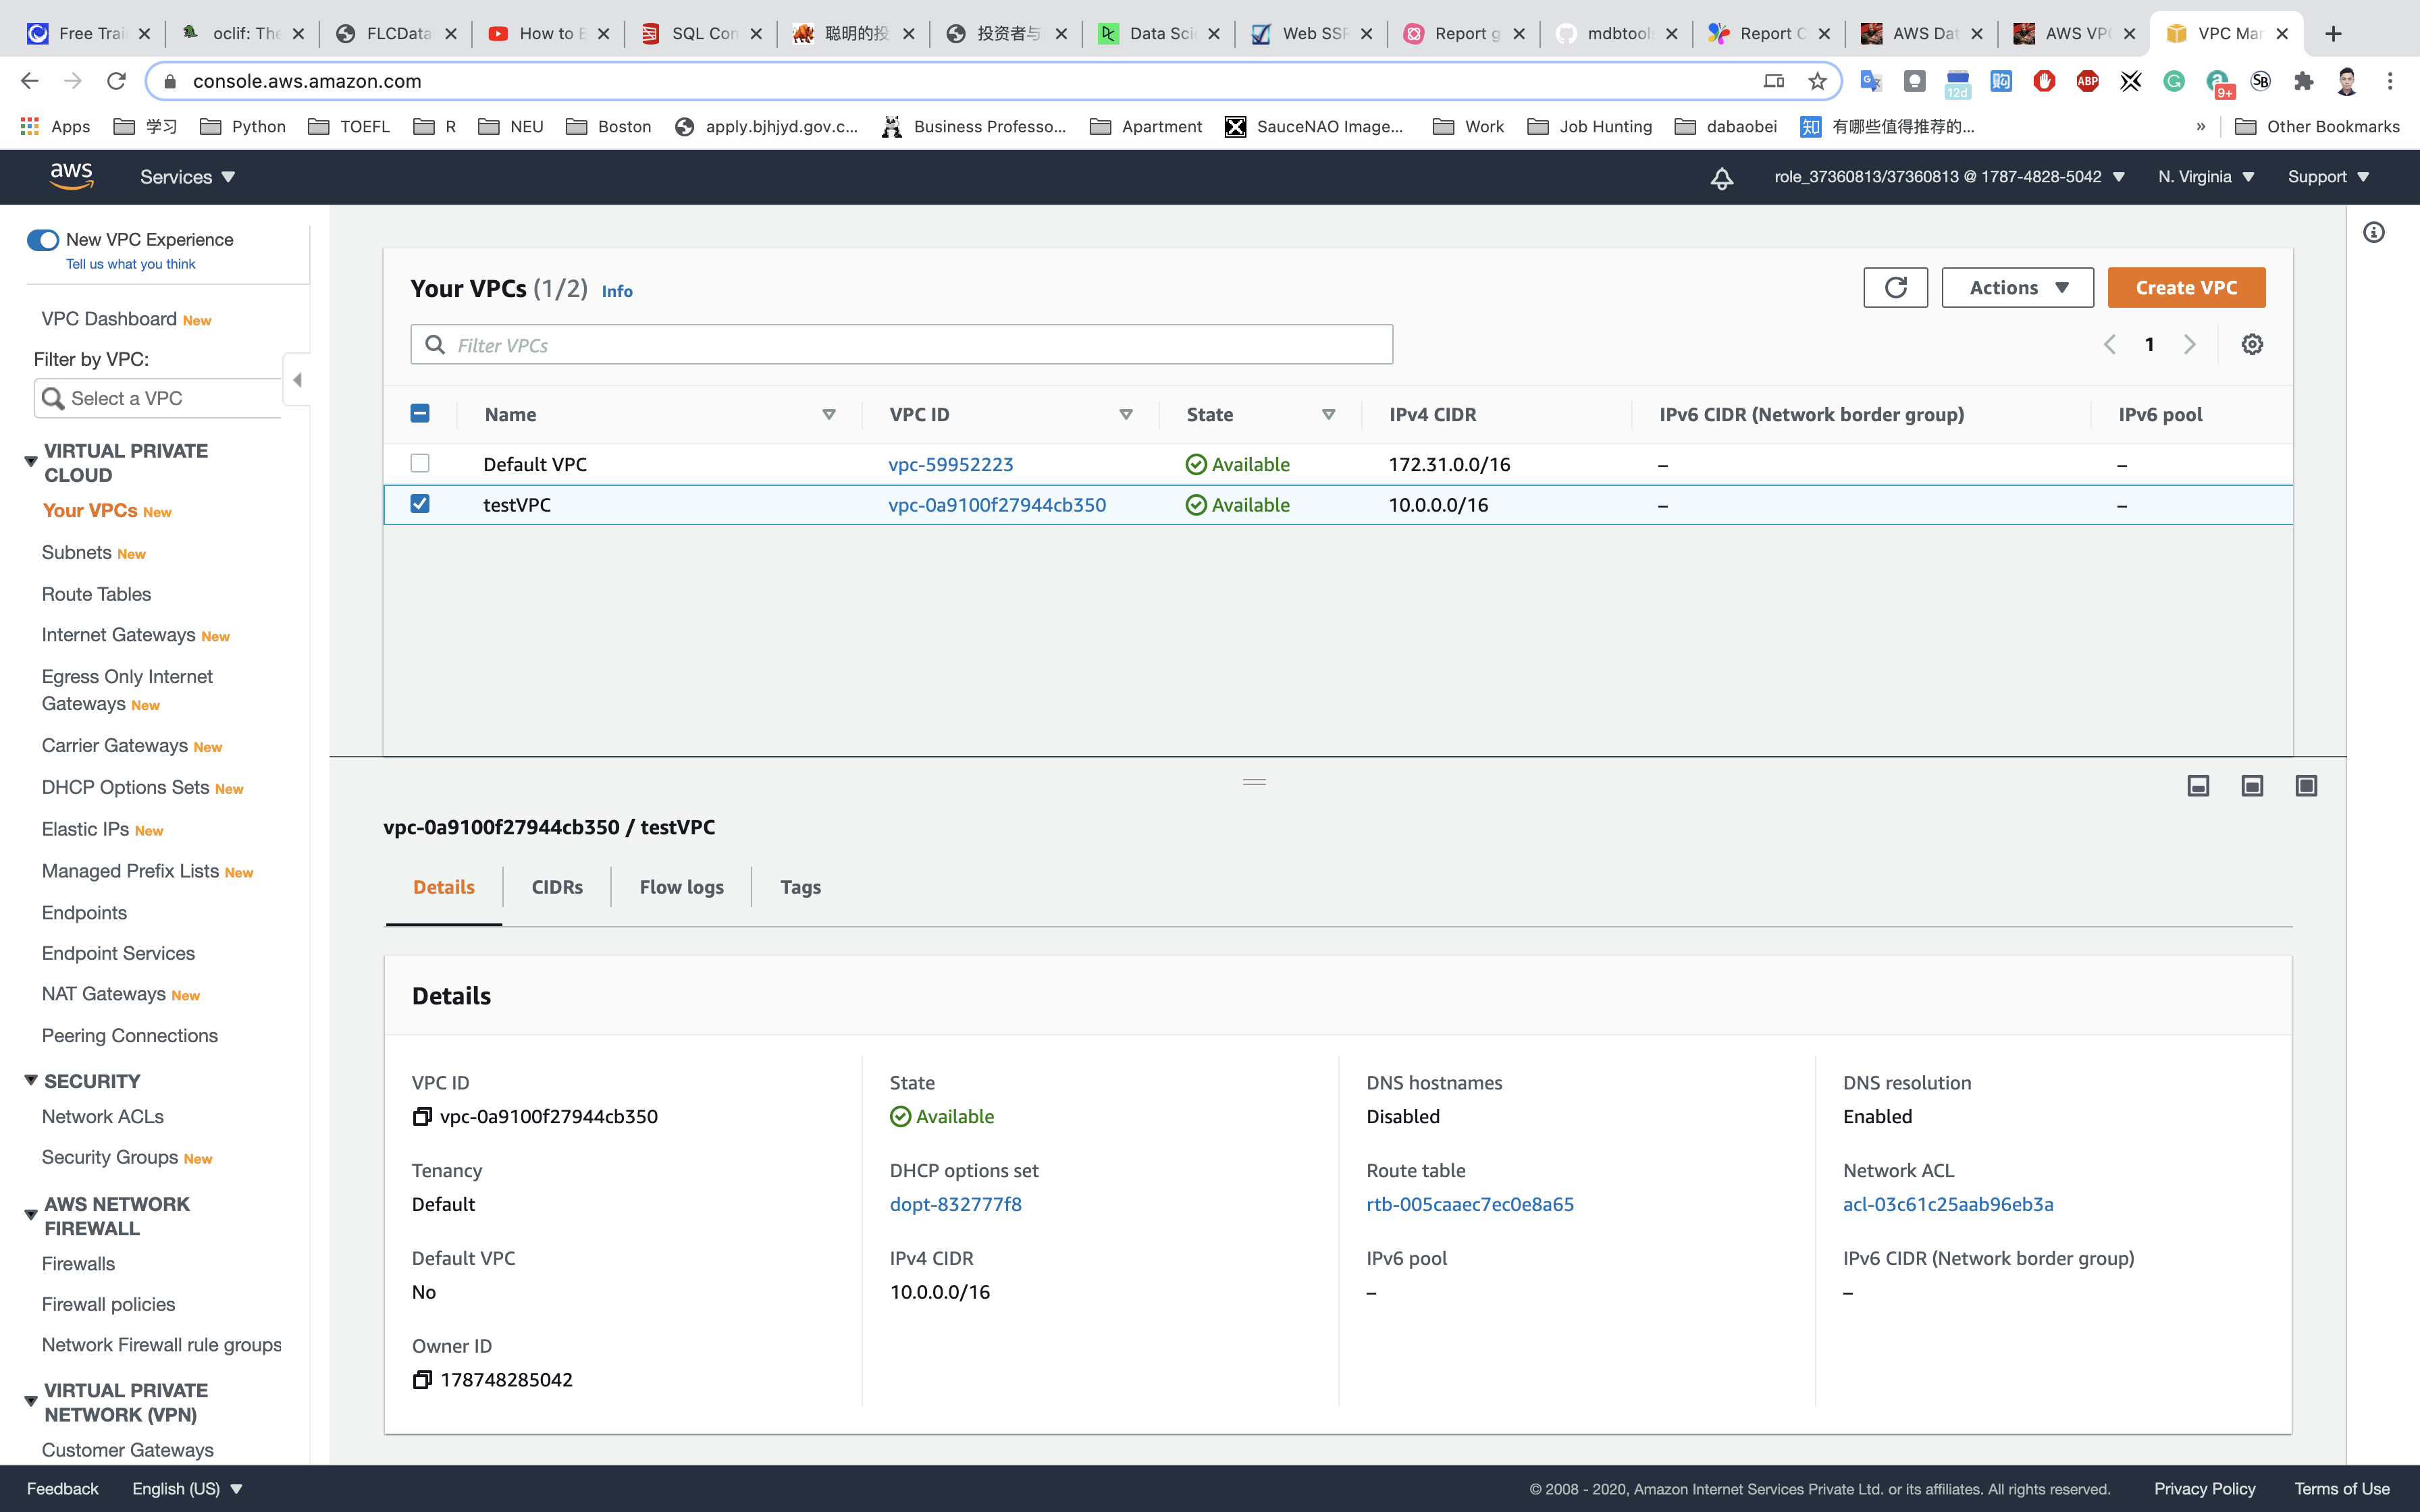
Once VPC is created, click on Your VPCs.
It will appear with details as shown below: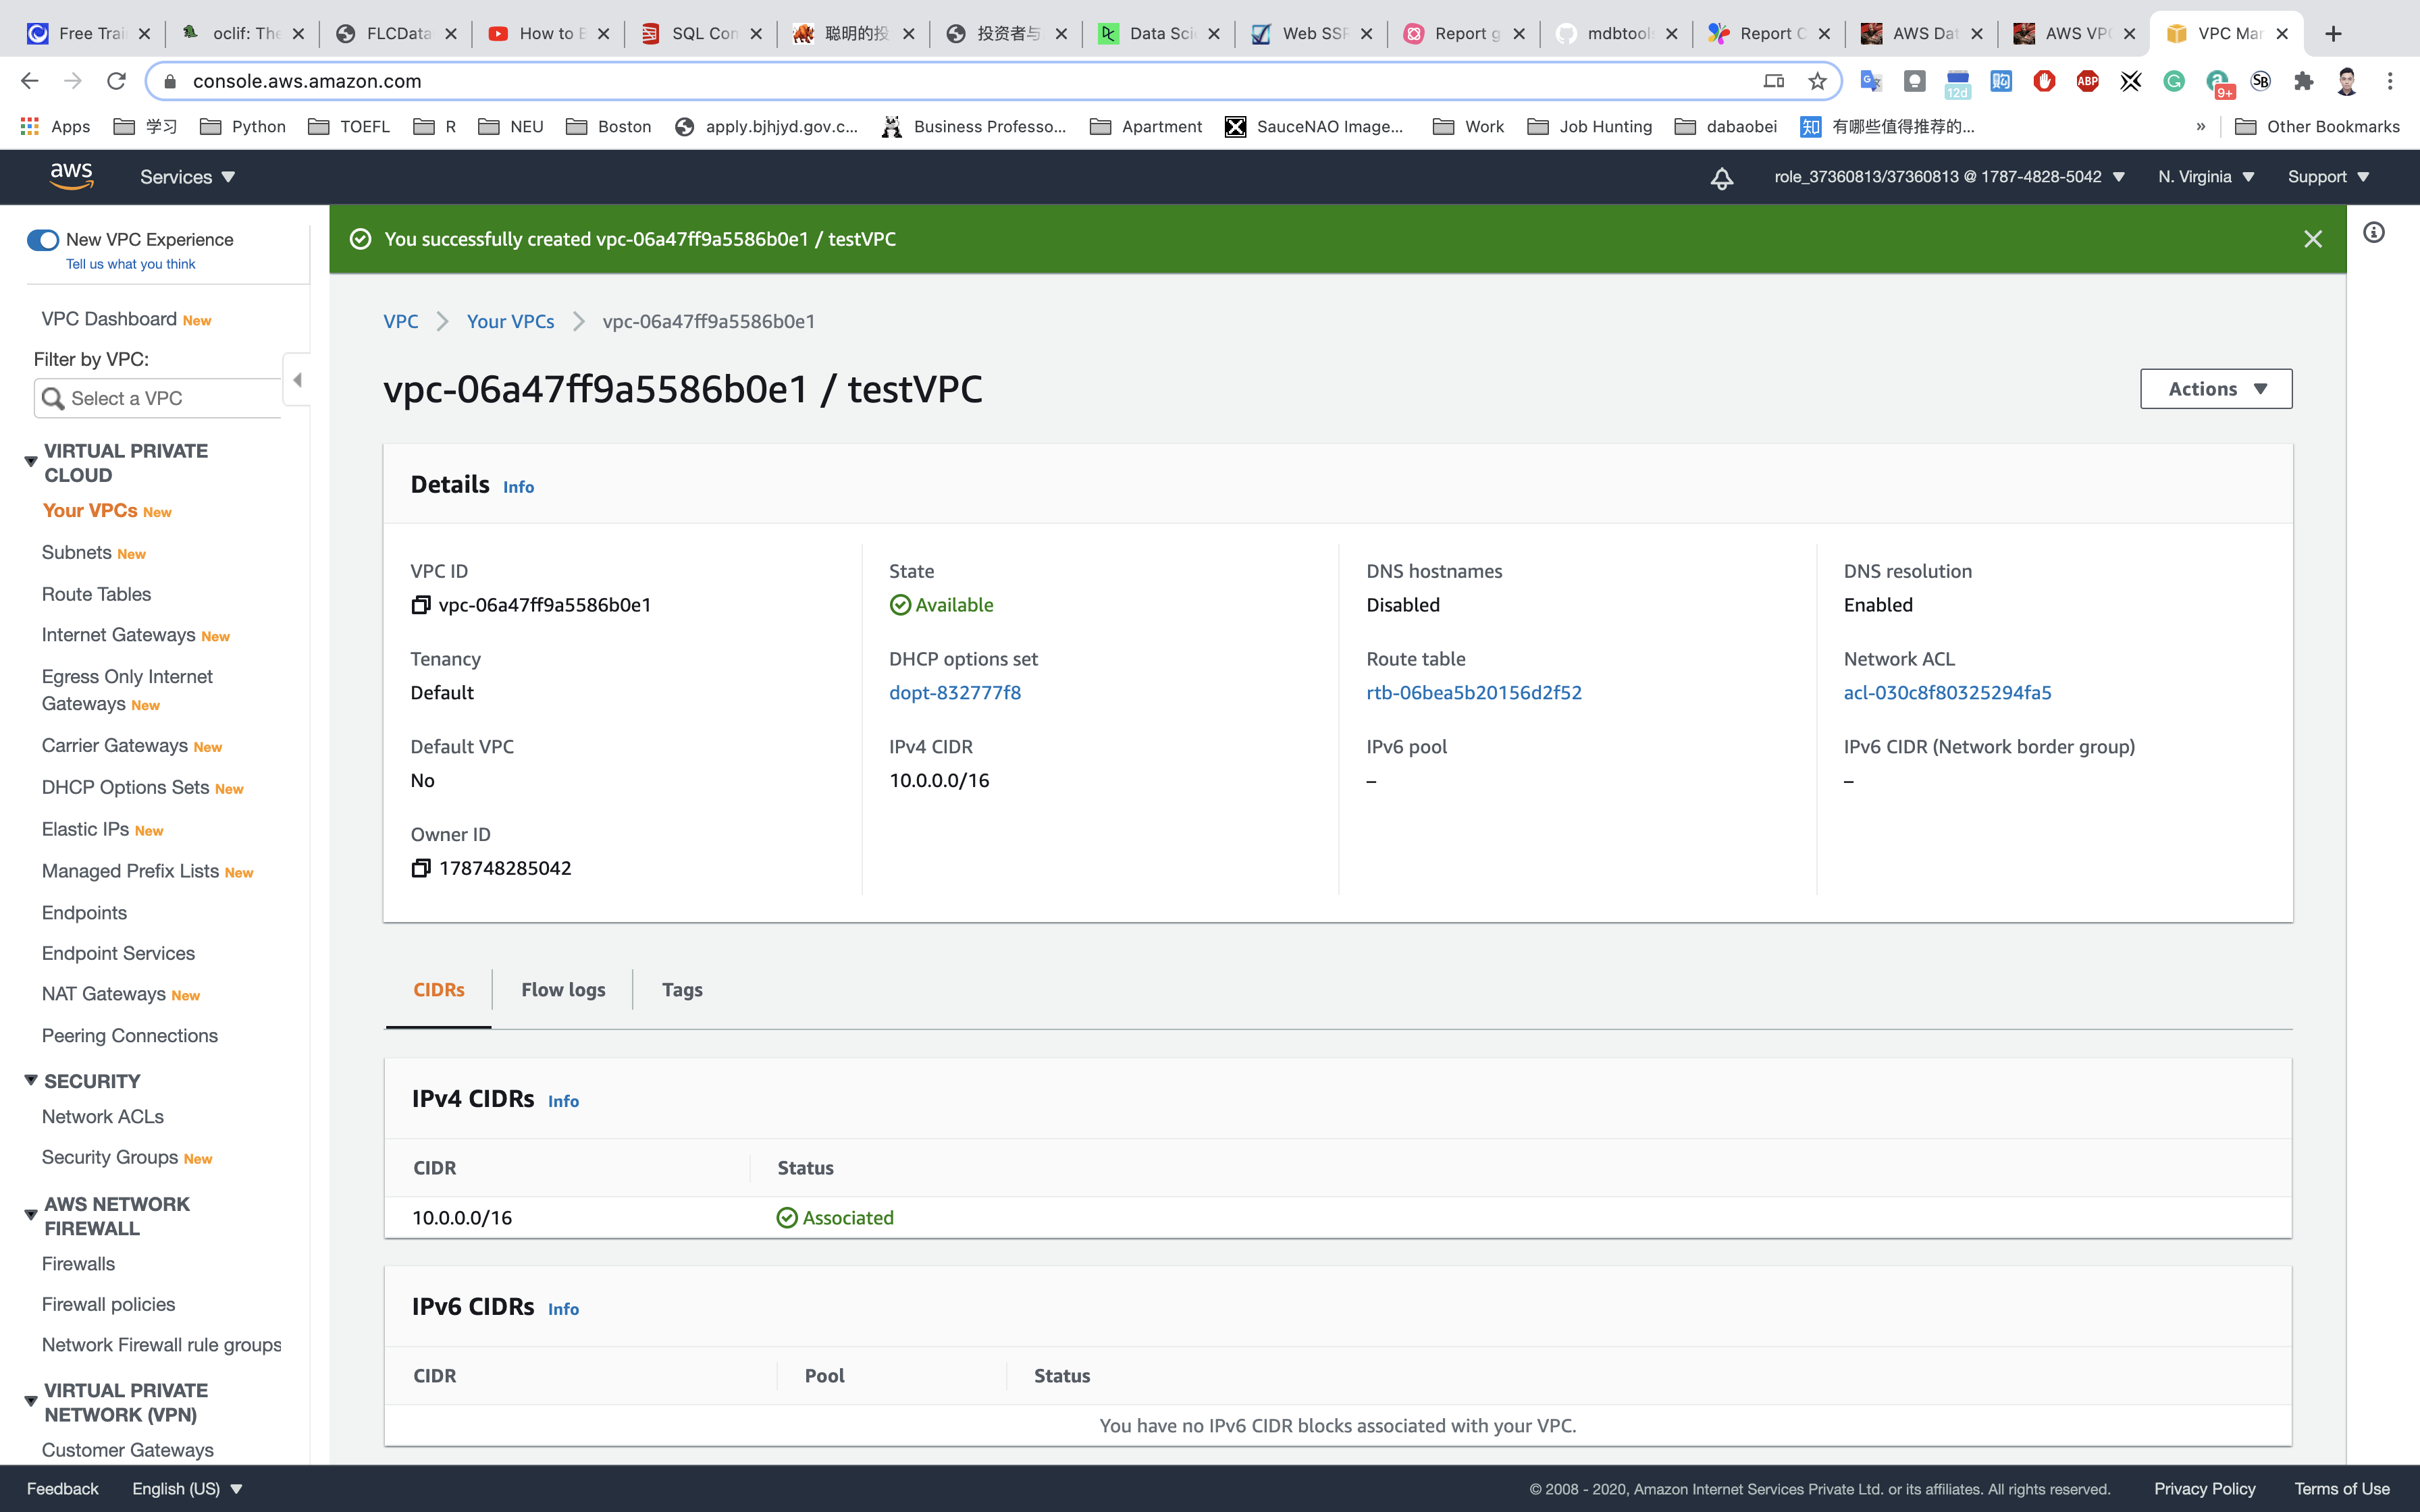
Create Subnet
In this lab, we will create one public subnet and a private subnet in us-east-1a and us-east-1b Availability Zones respectively as follows: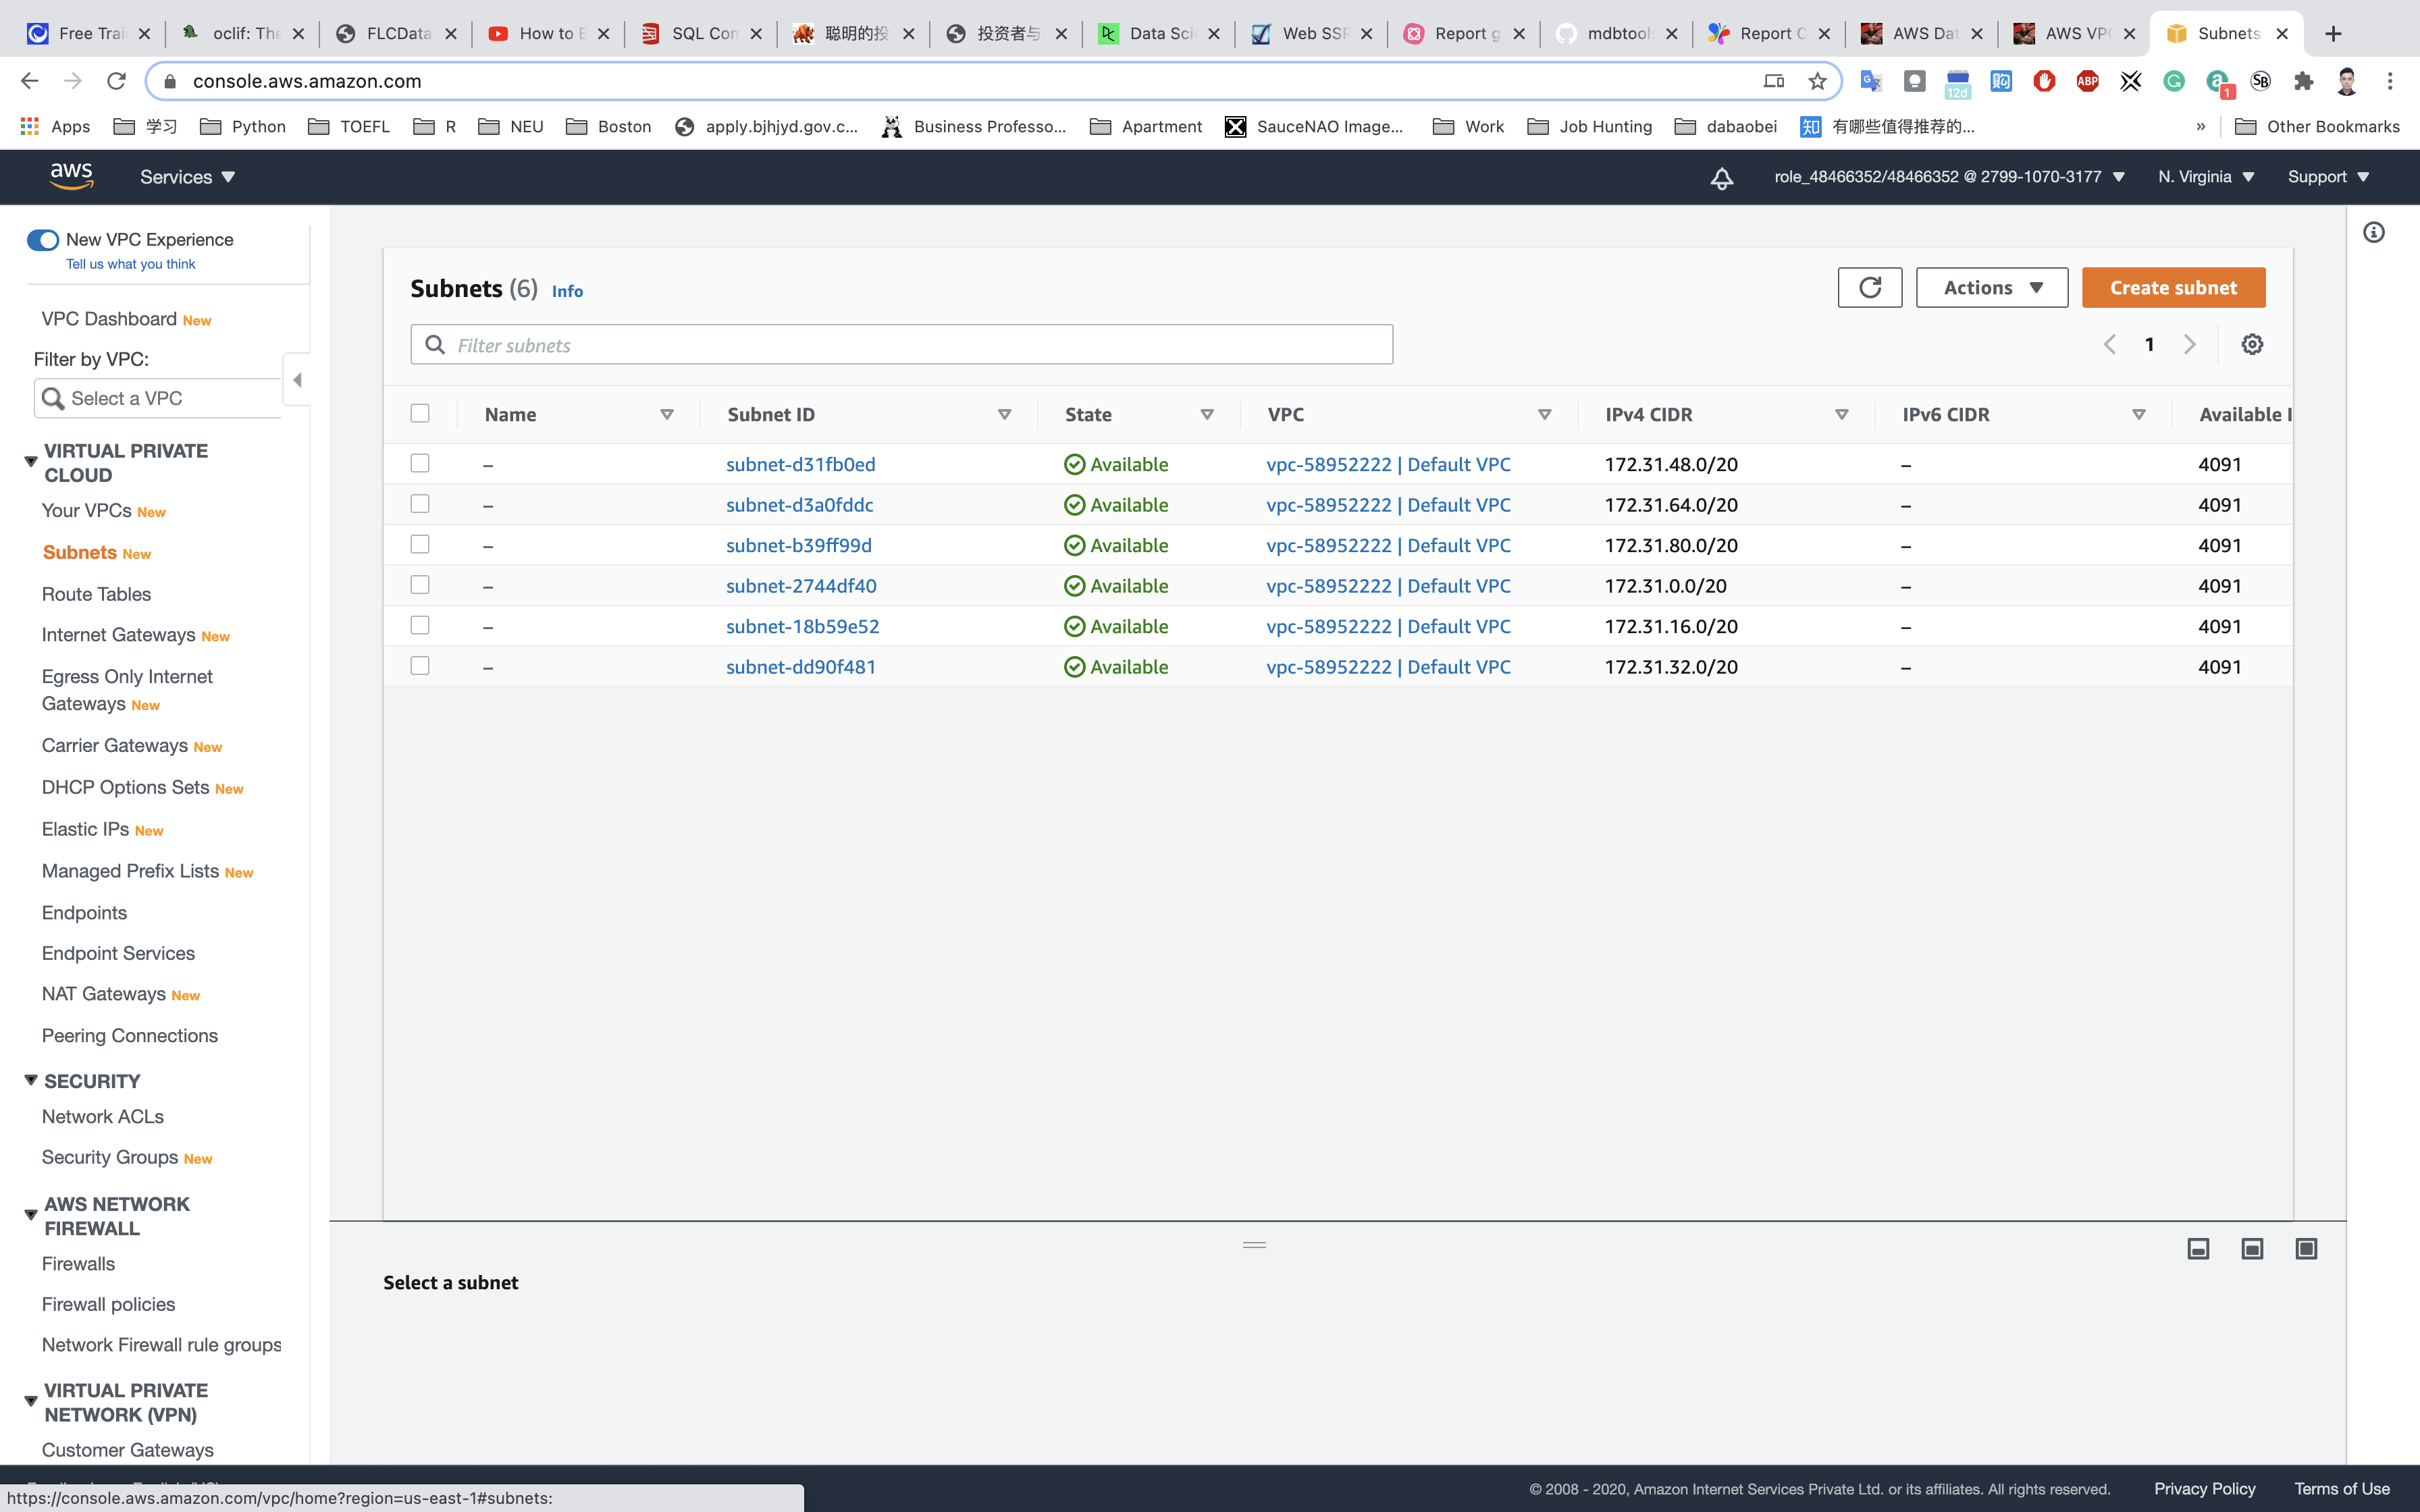
- For the Public Subnet, click on Subnets from the left menu and click on
Create subnet.- VPC: Select
testVPCfrom the list you created earlier. - Name tag:
PublicSubnet - Availability Zone: Select
us-east-1a - IPv4 CIDR block: Enter the range
10.0.1.0/24
- VPC: Select
Click on Create subnet.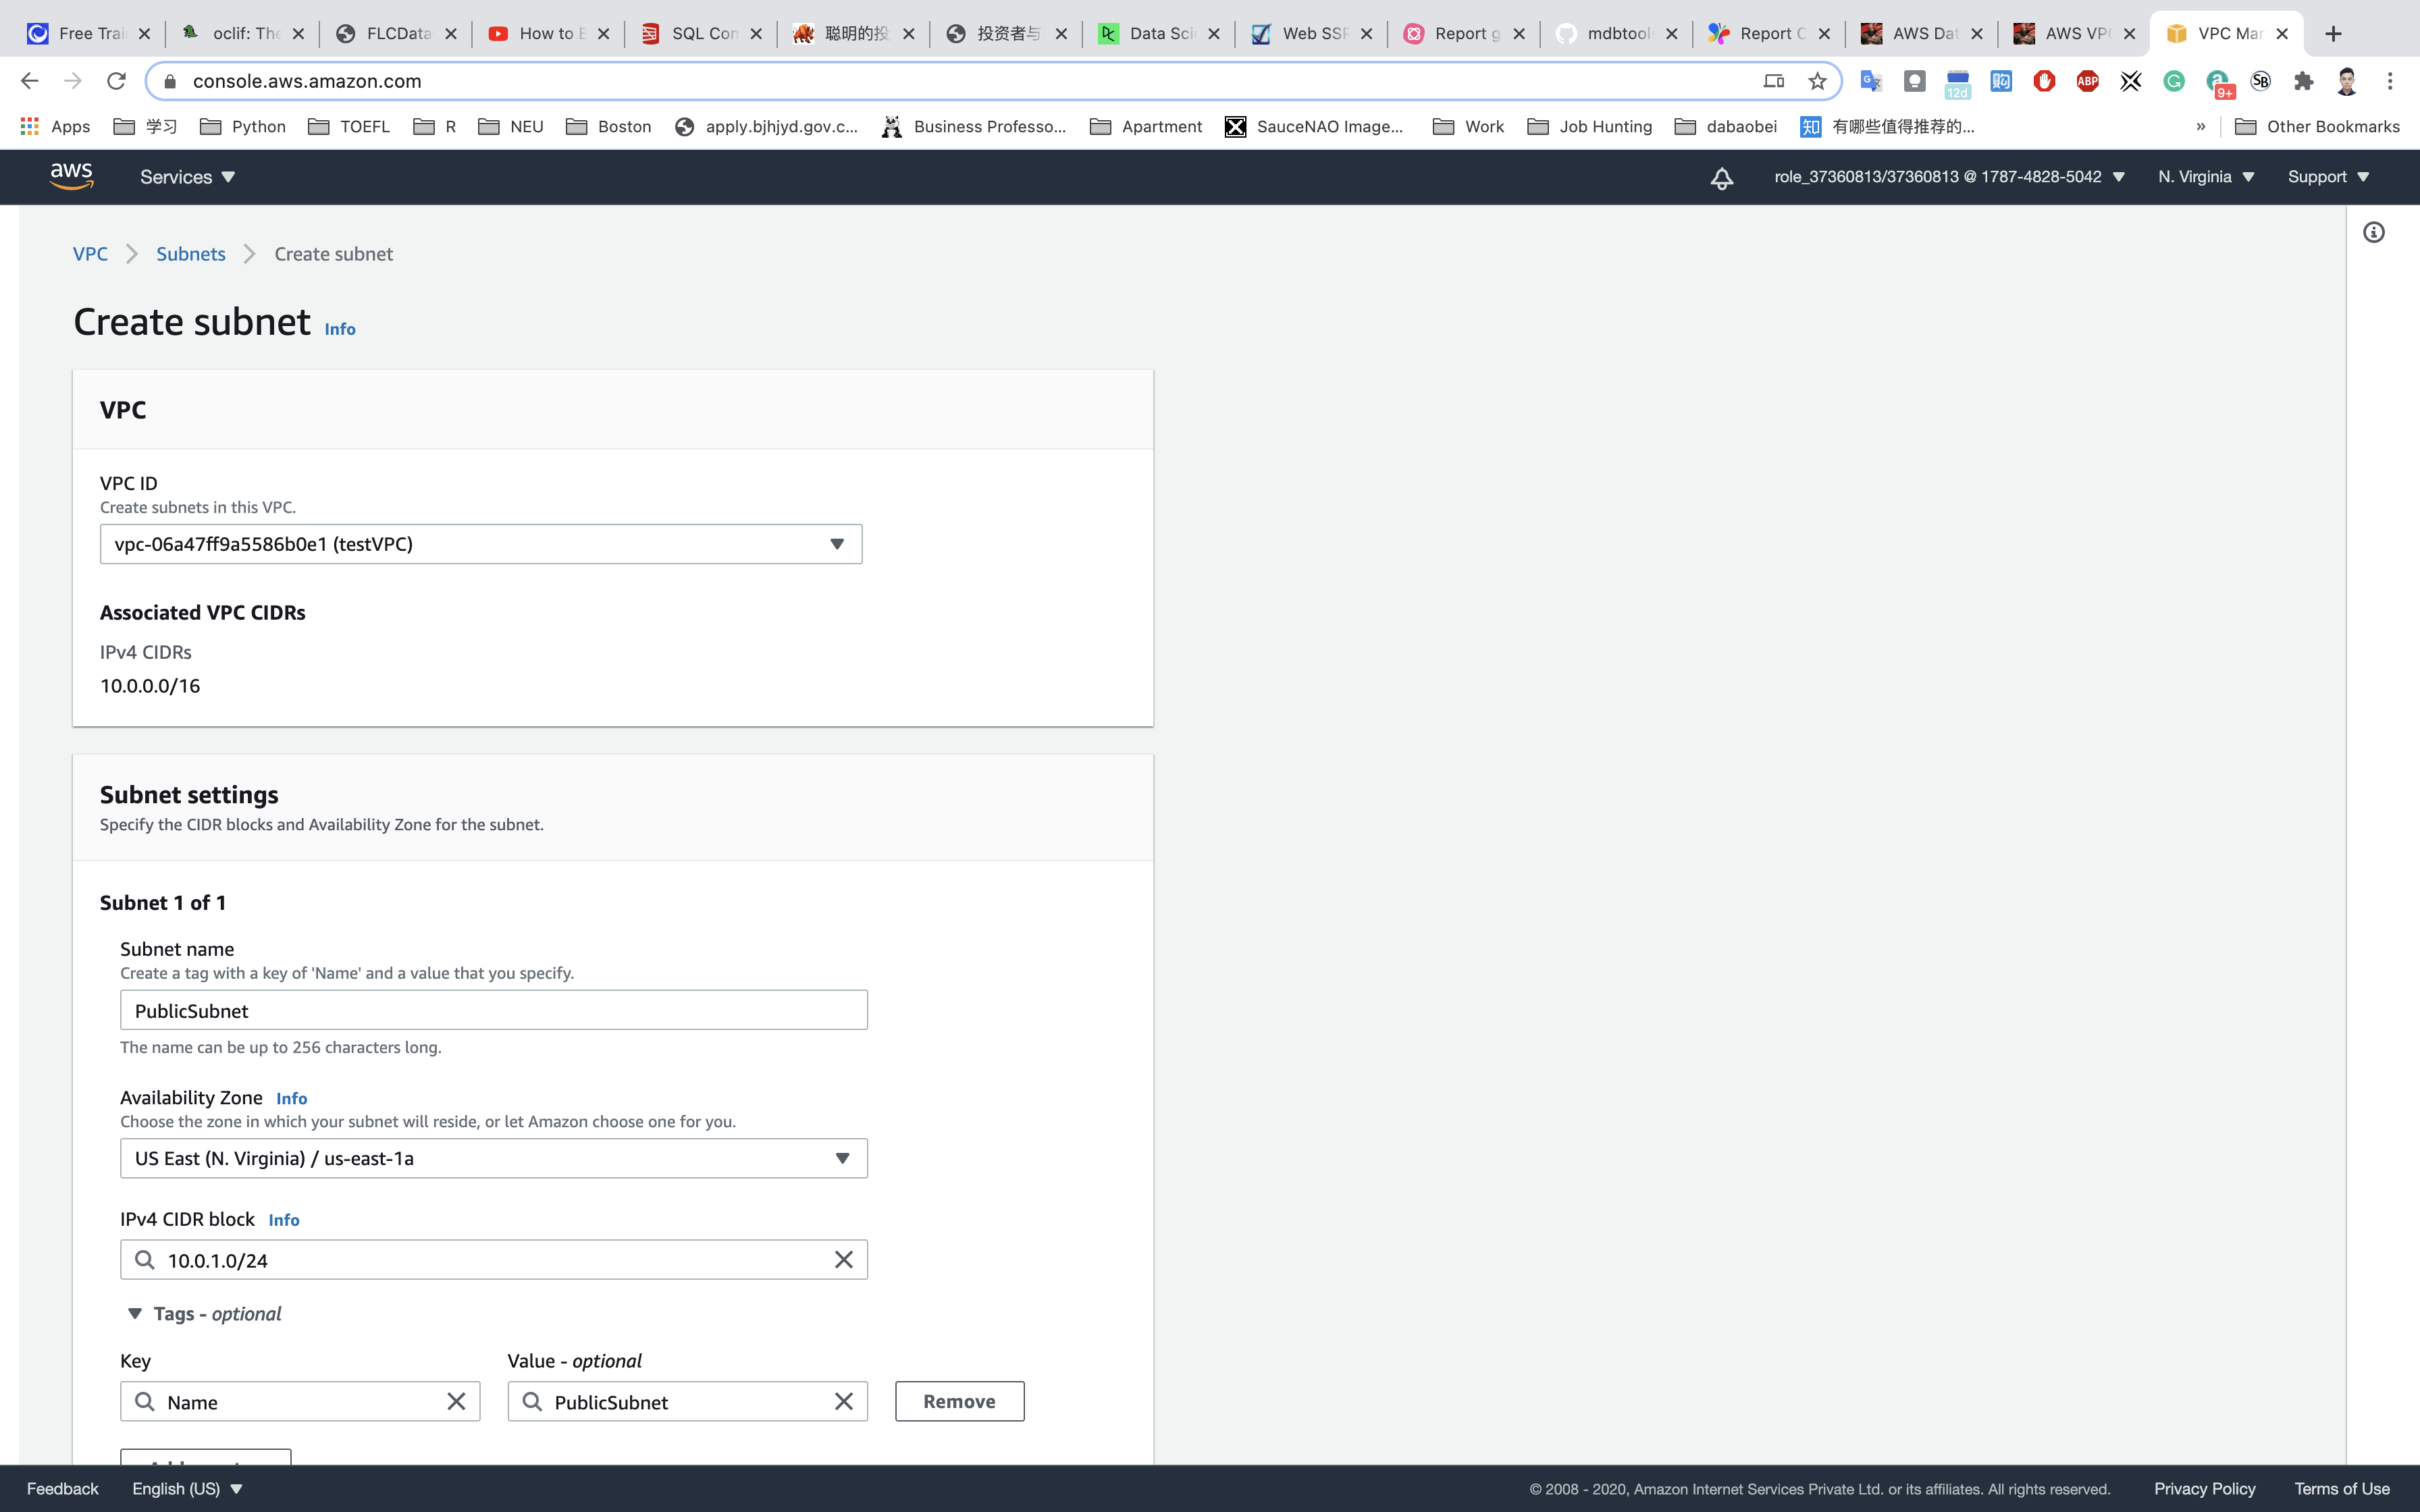
- For the Private Subnet, click on Subnets from the left menu and click on
Create subnet.- VPC: Select
testVPCfrom the list you created earlier. - Name tag:
PrivateSubnet - Availability Zone: Select
us-east-1b - IPv4 CIDR block: Enter the range
10.0.2.0/24
- VPC: Select
Click on Create subnet.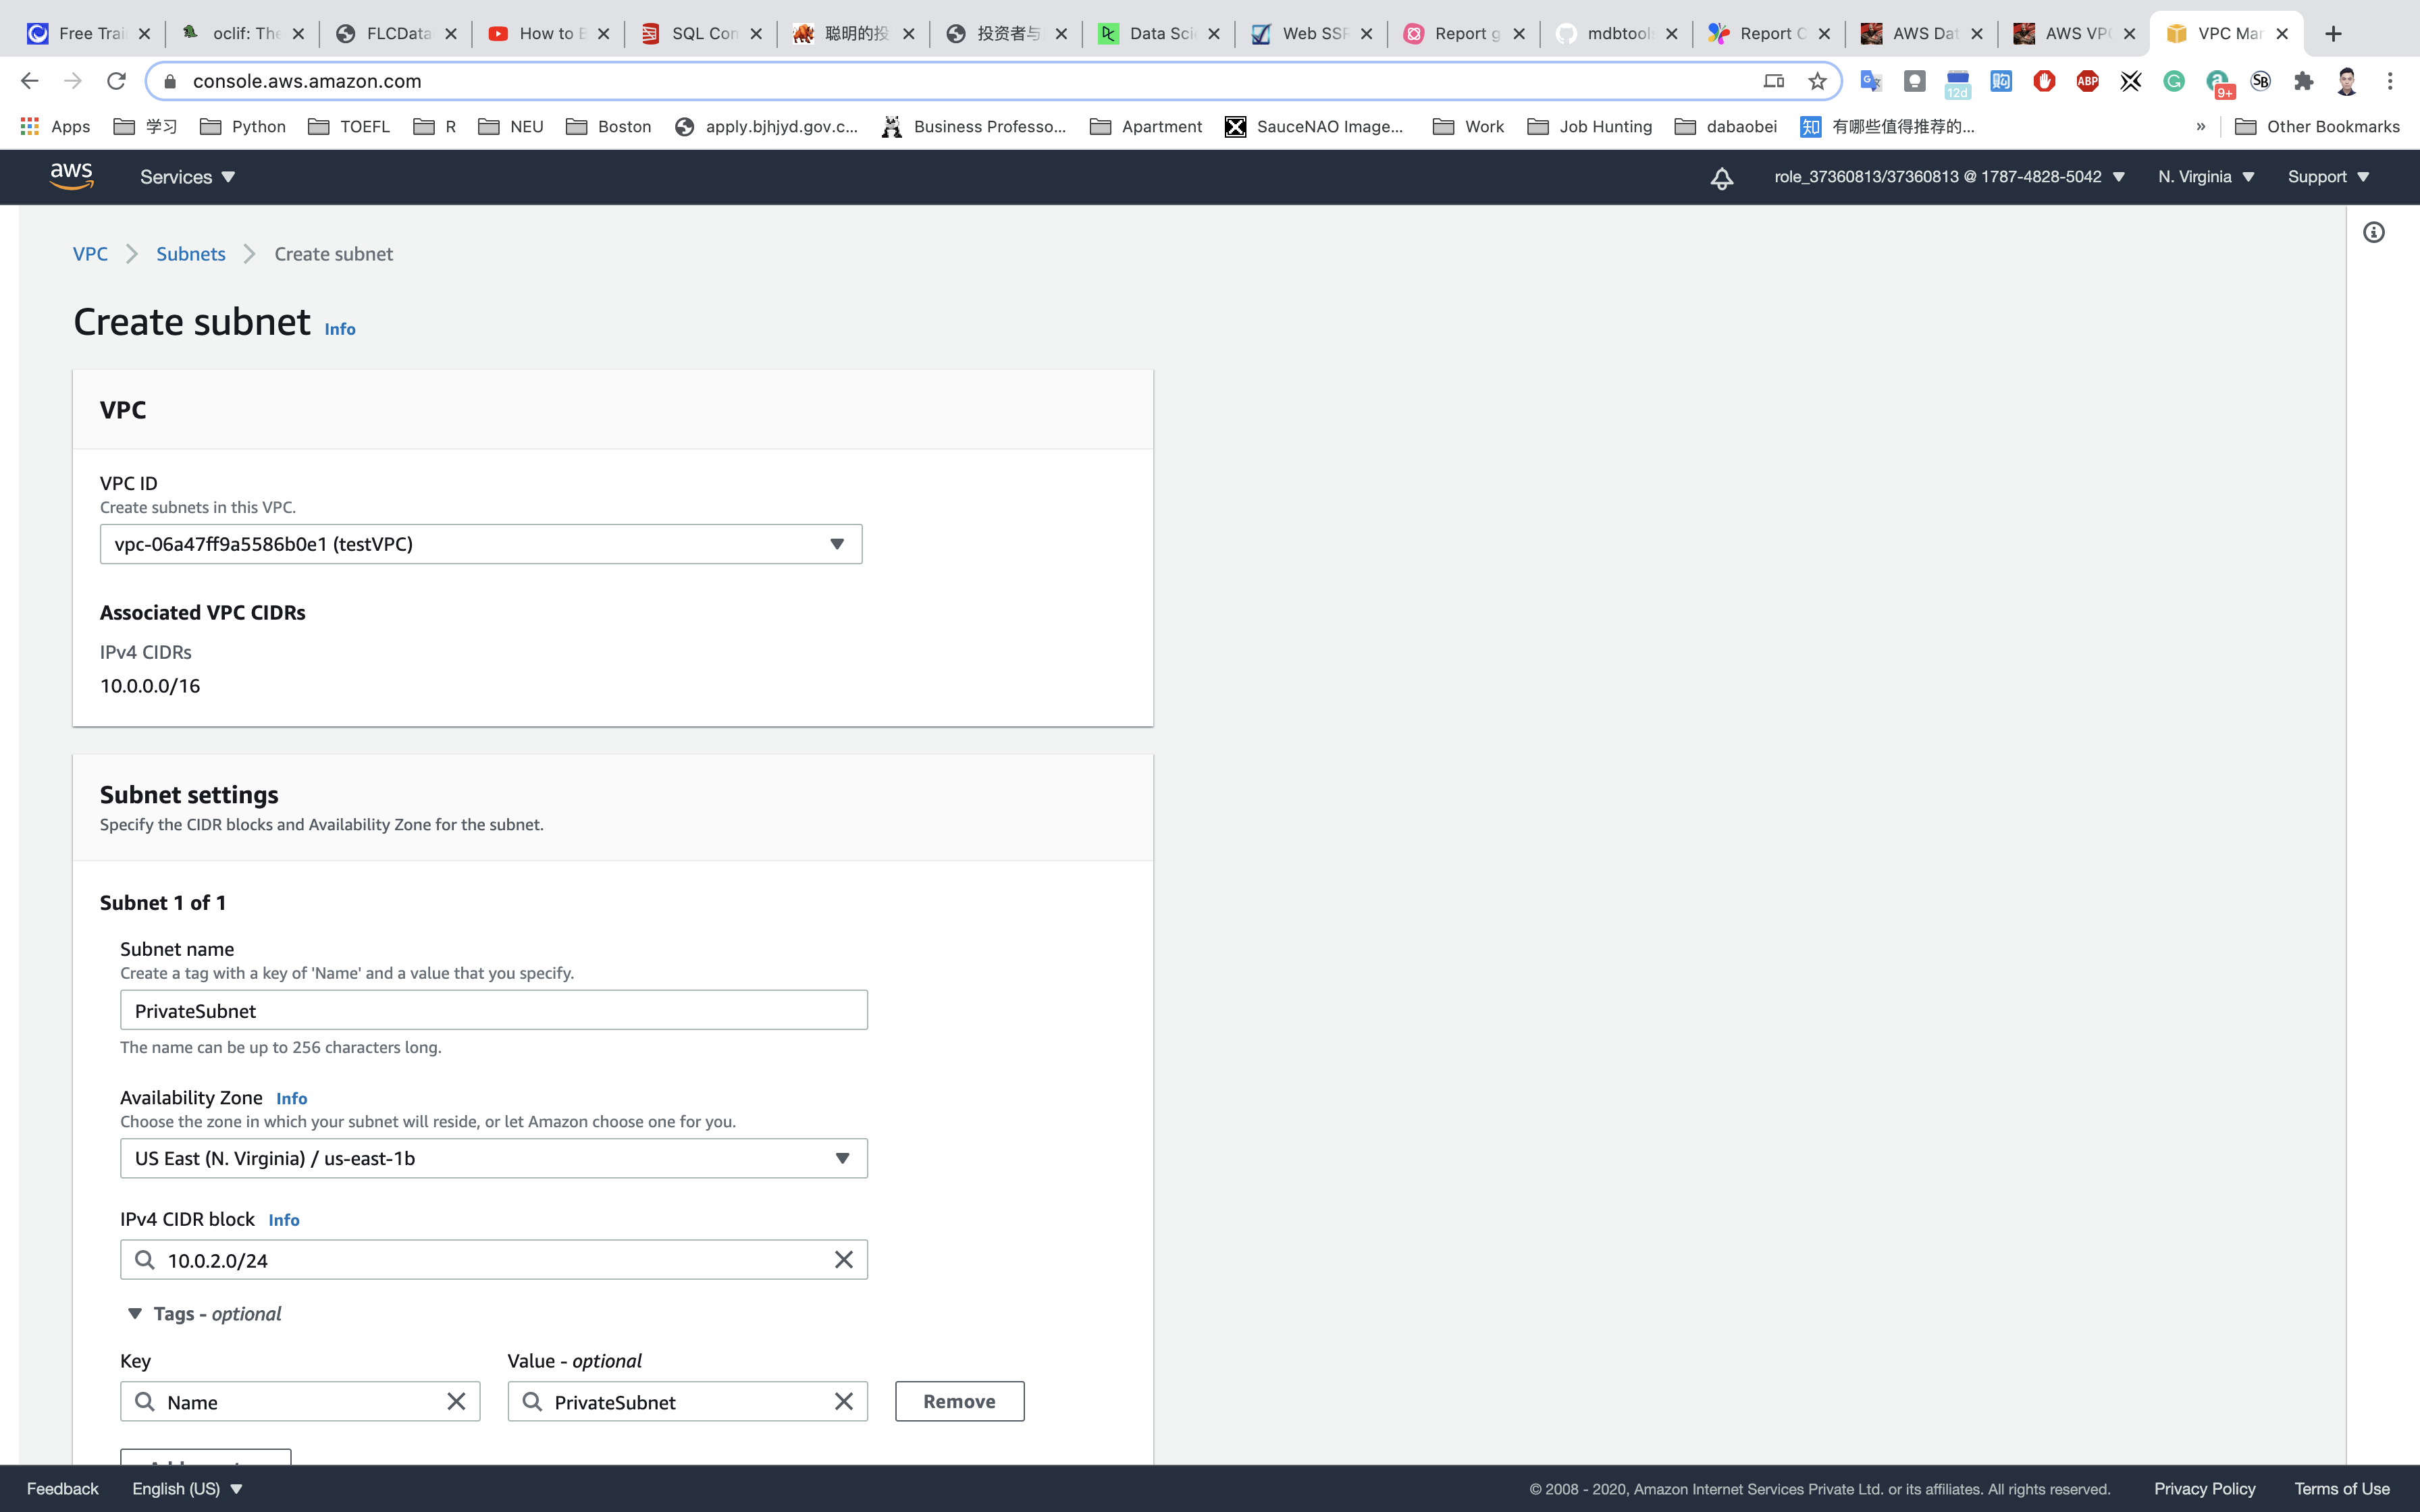
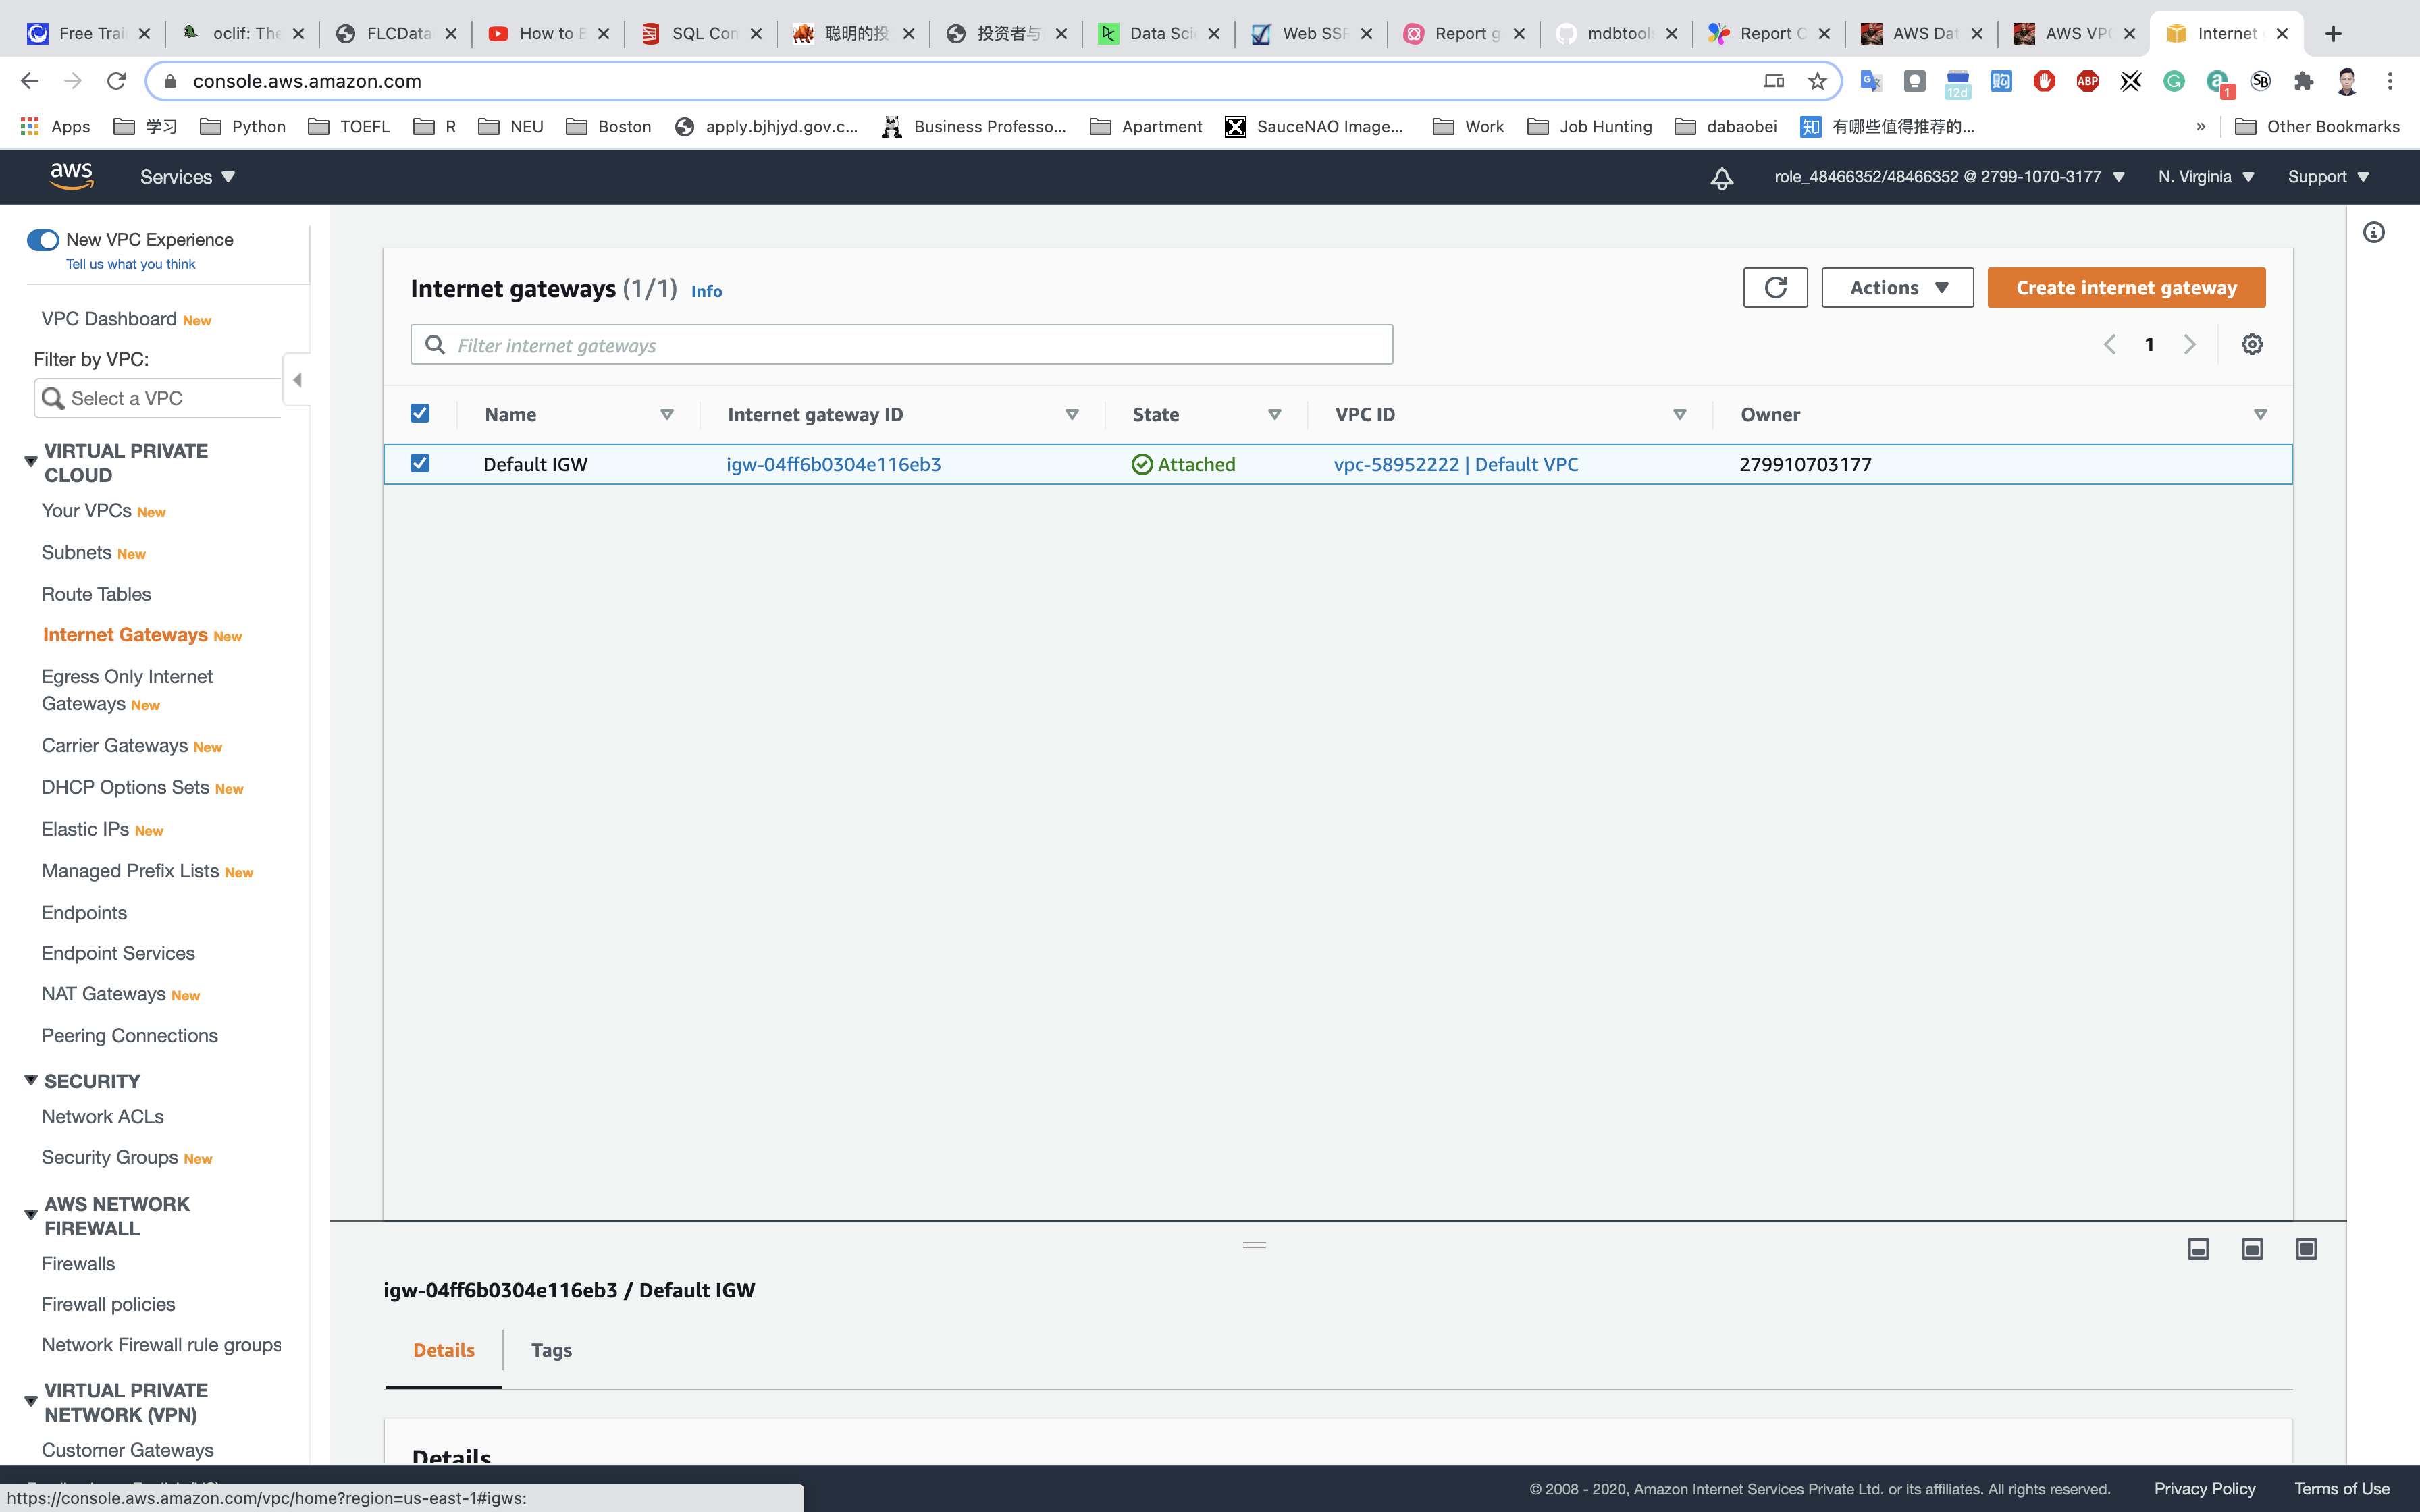
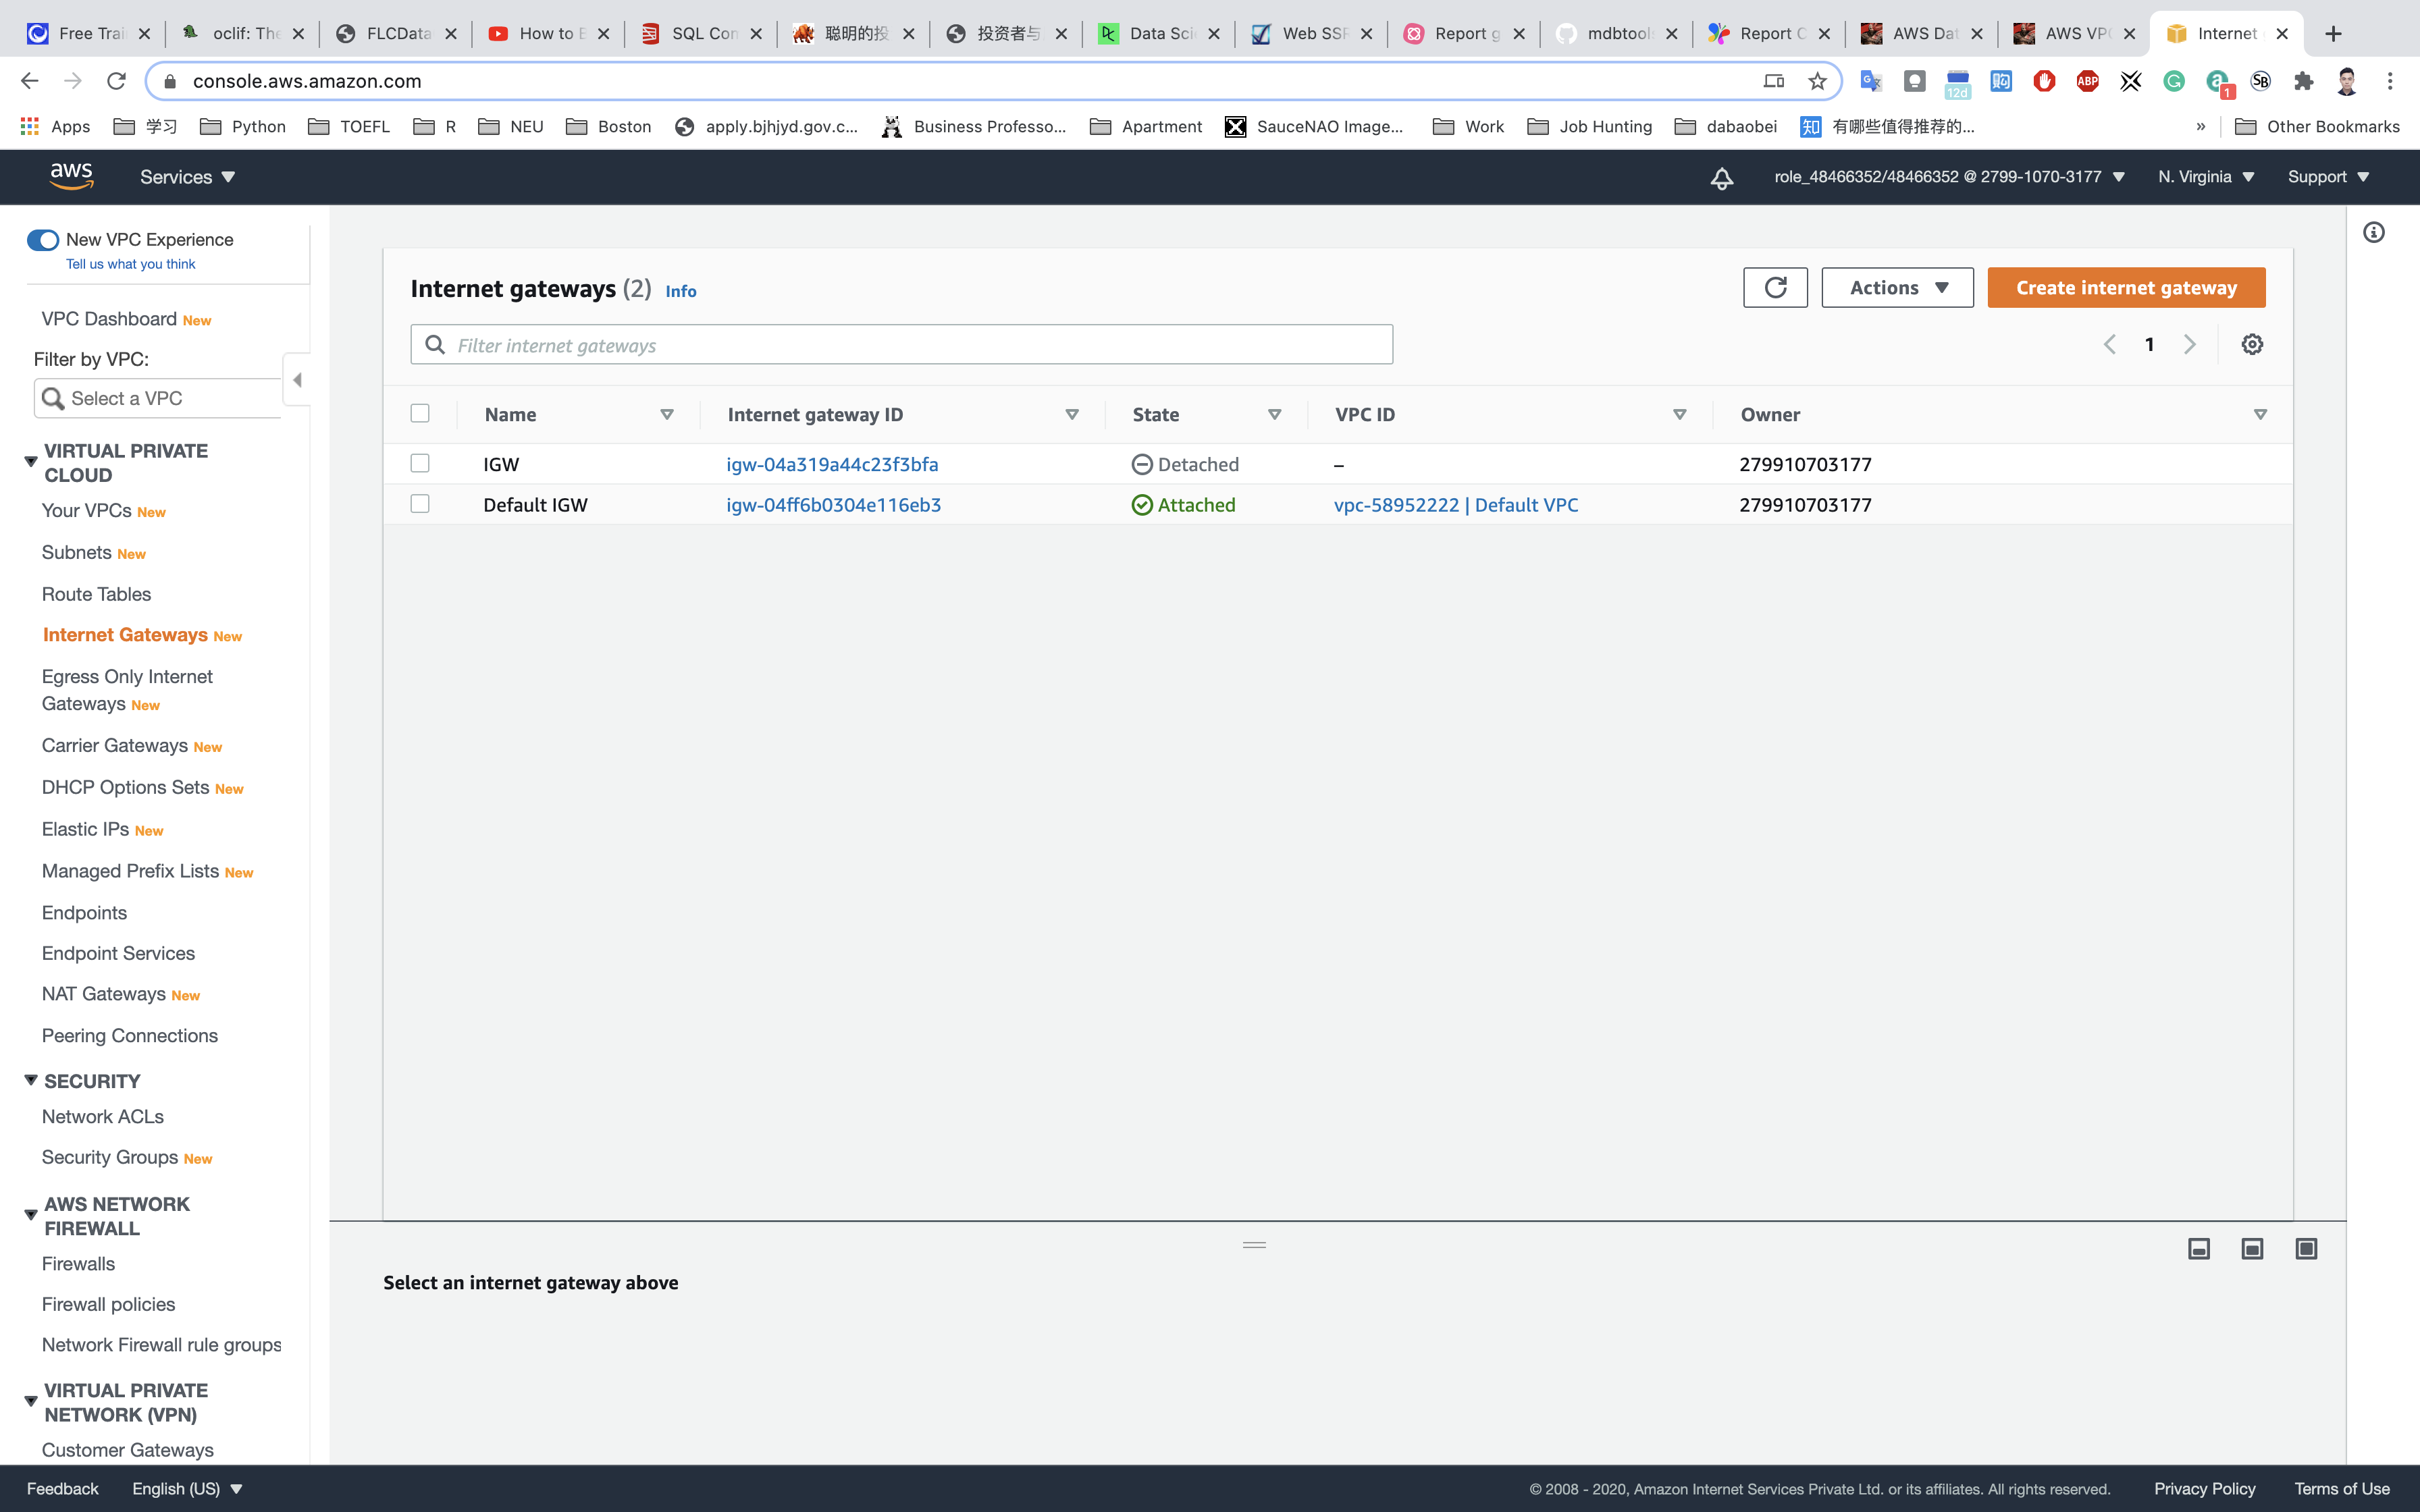
Create and configure Internet Gateway
- Click on
Internet Gatewaysfrom the left menu and click onCreate internet gateway.
- Name Tag :
IGW.
Click on Create internet gateway.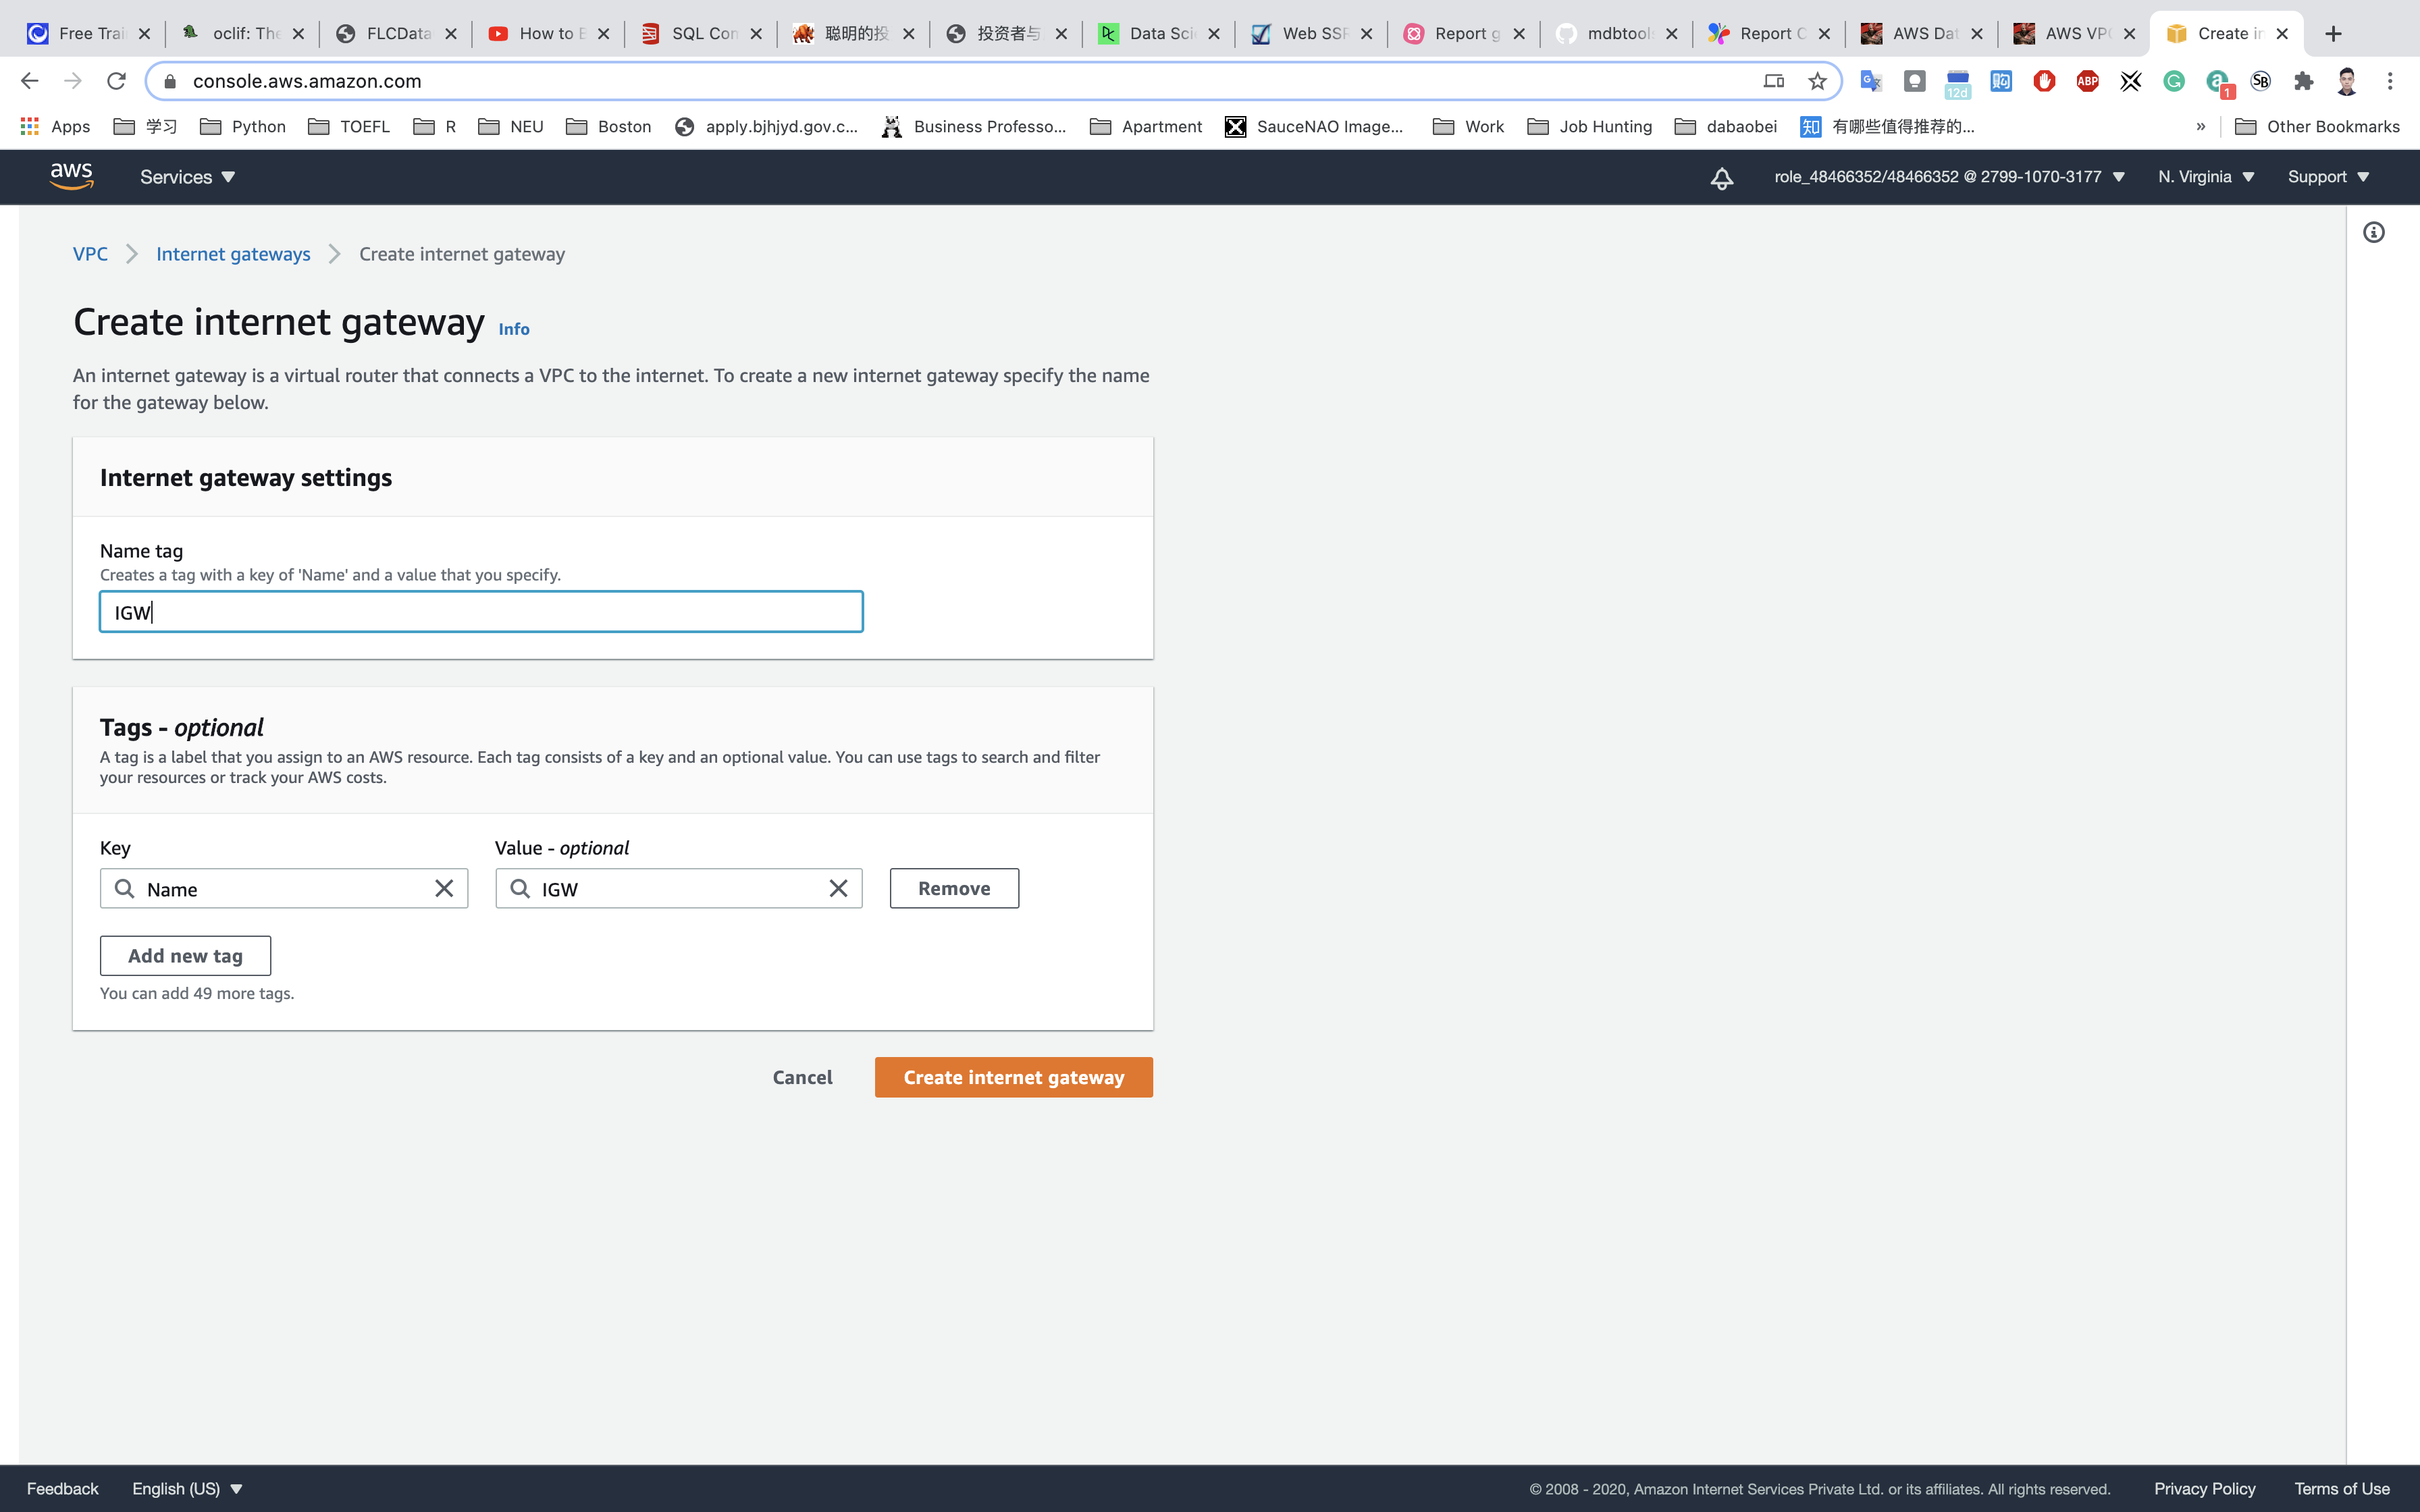
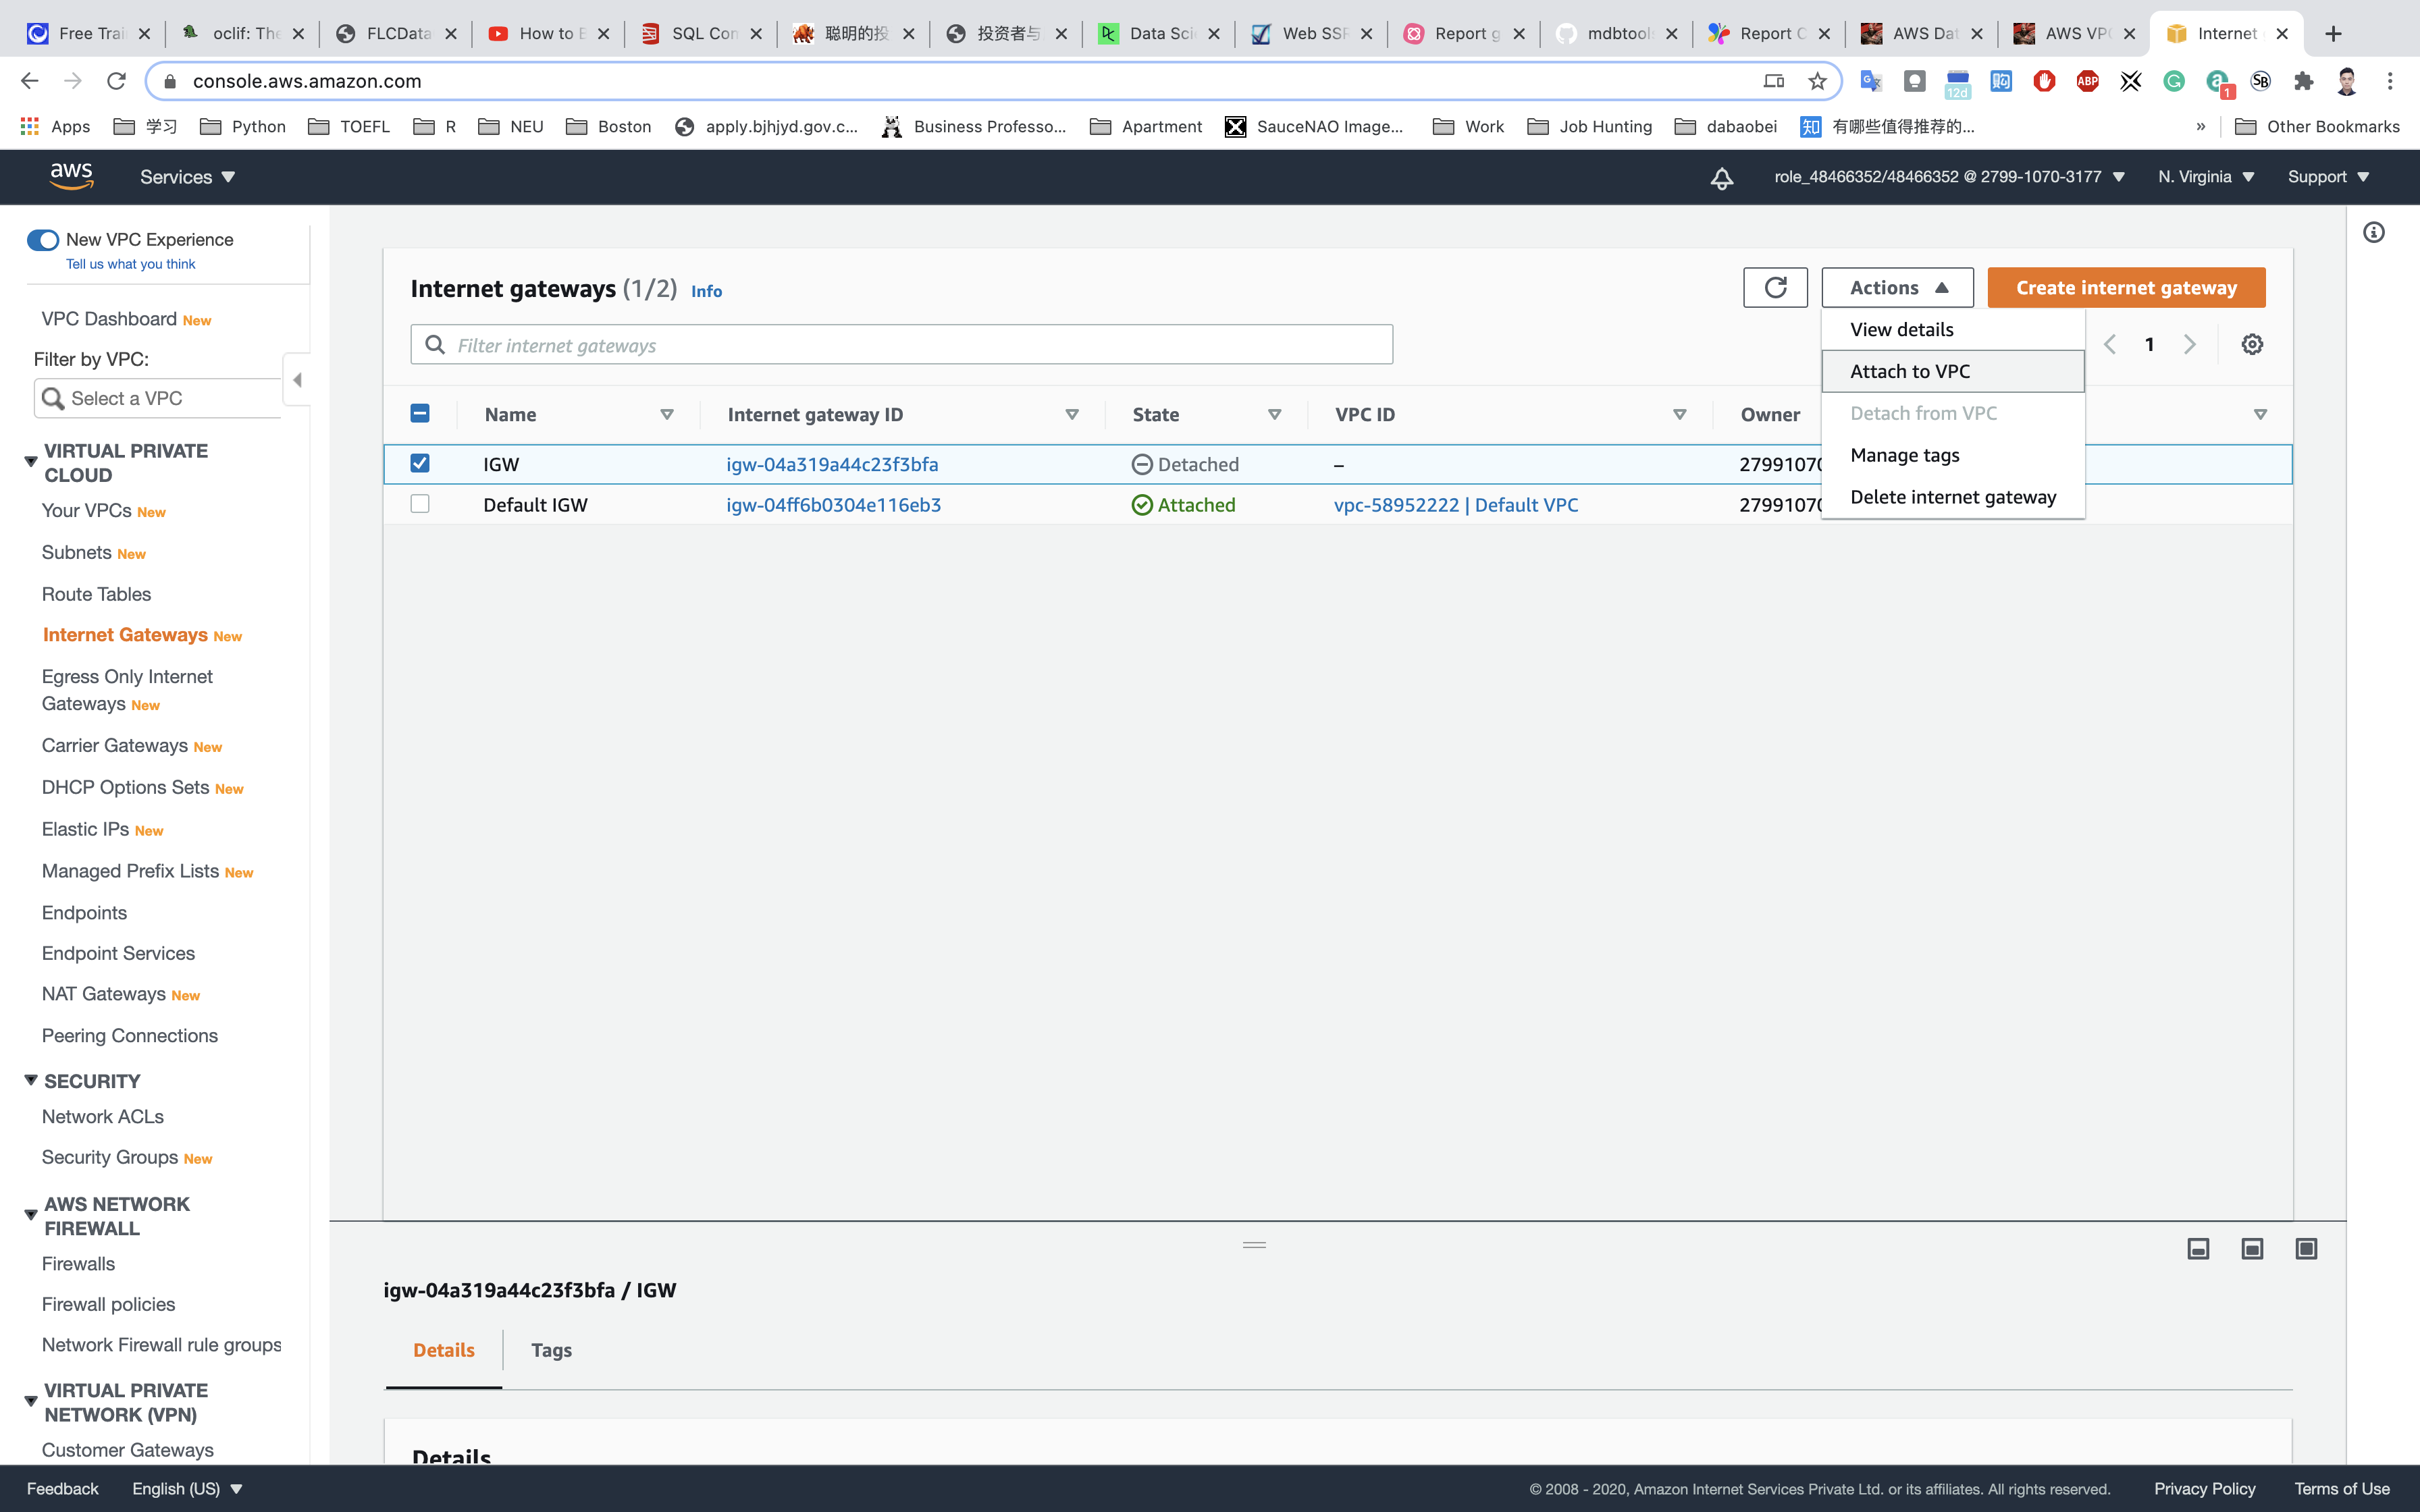
- Select the Internet gateway you created from the list
- Click on
Actions. - Click on
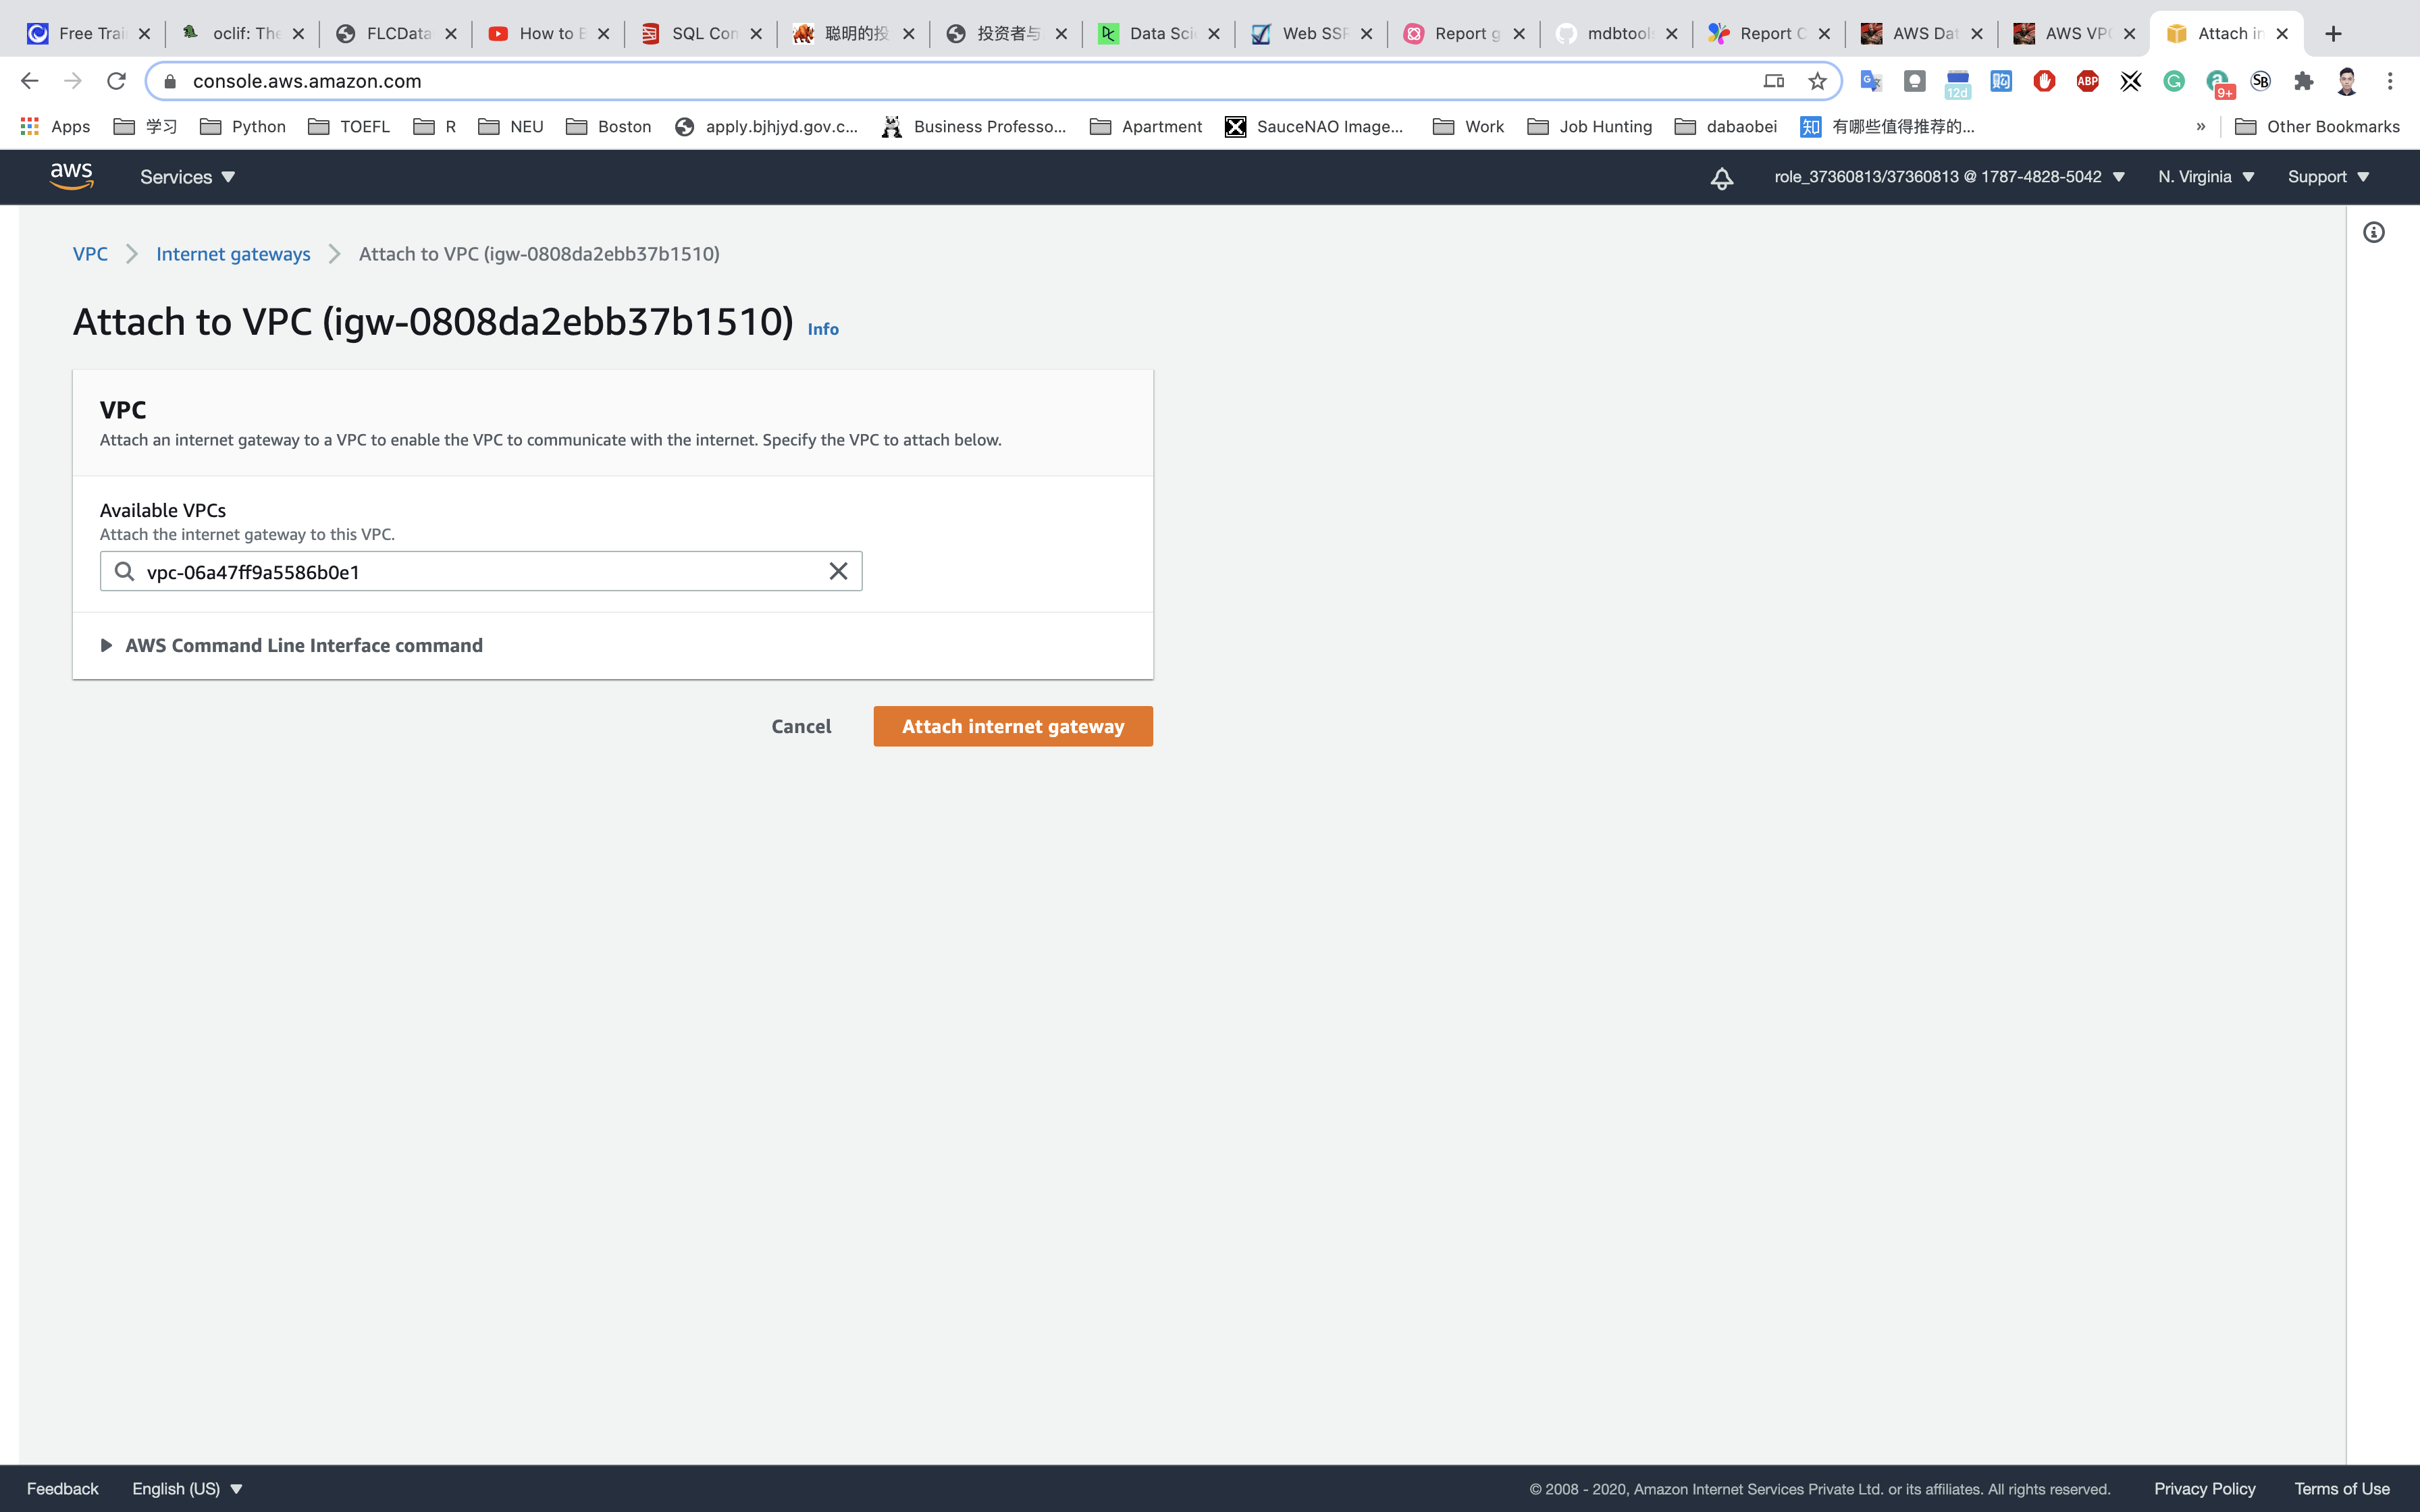
Attach to VPC. - Select
testwhich you created from the list and click onAttach internet gateway.
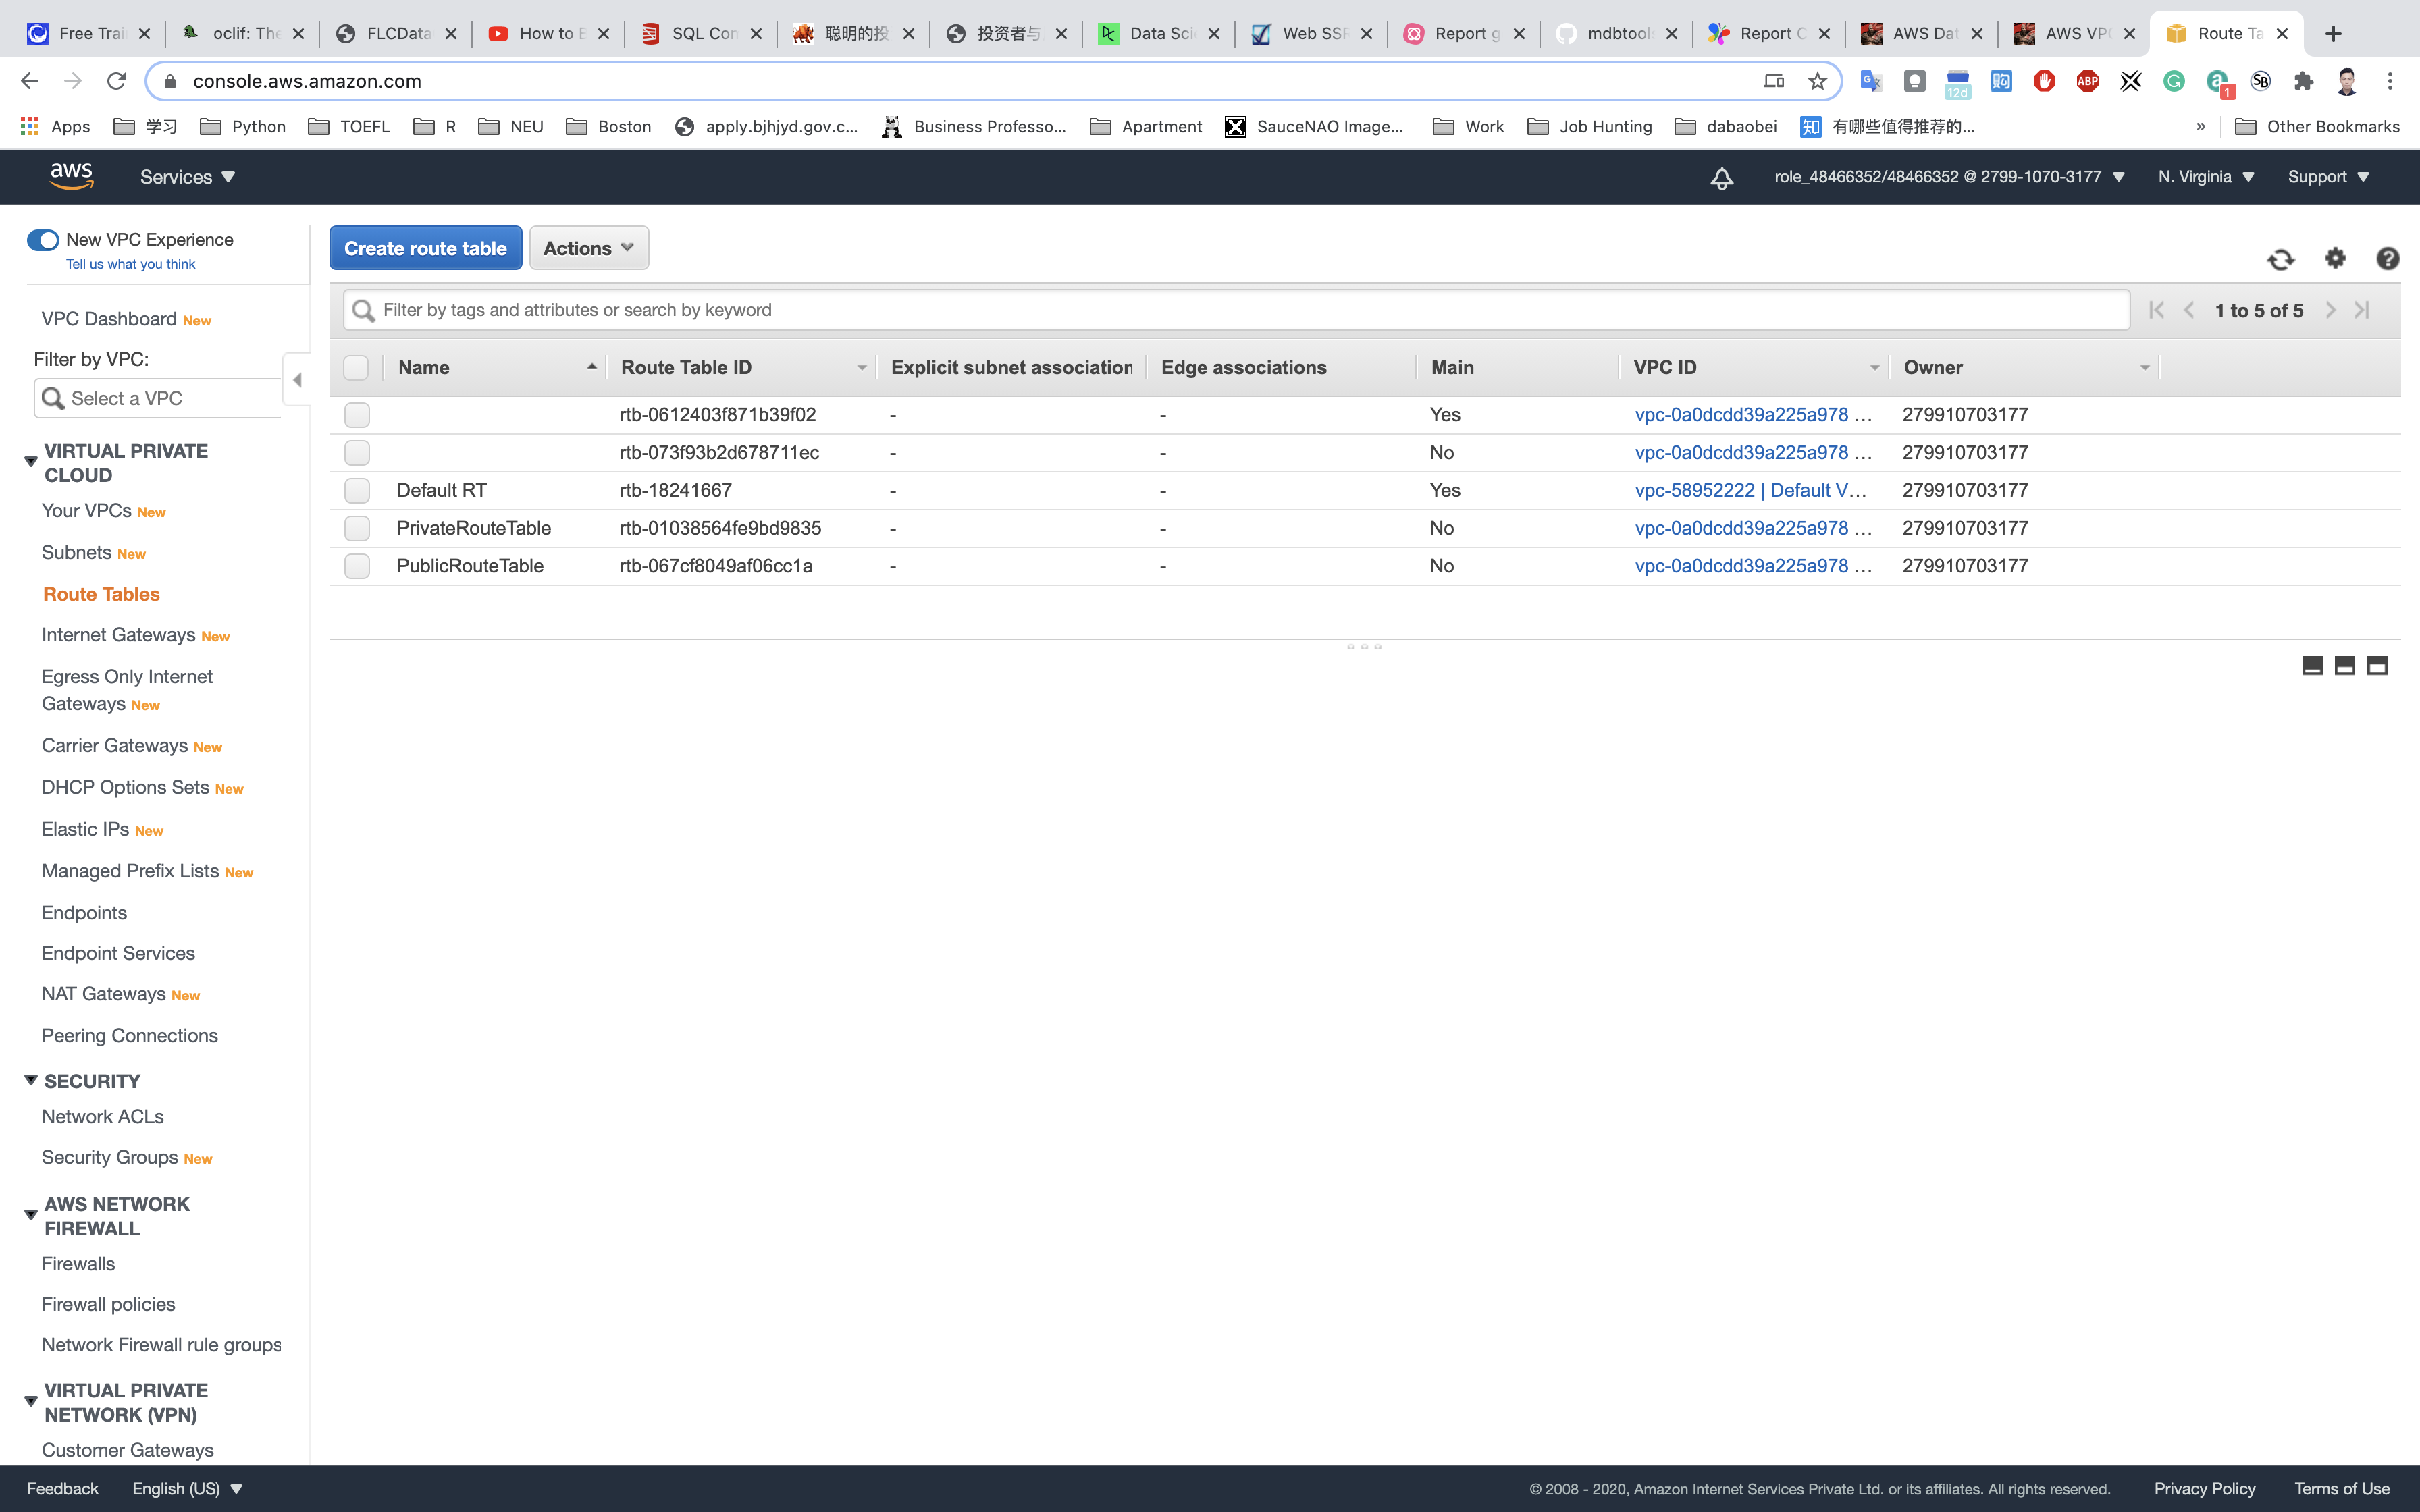
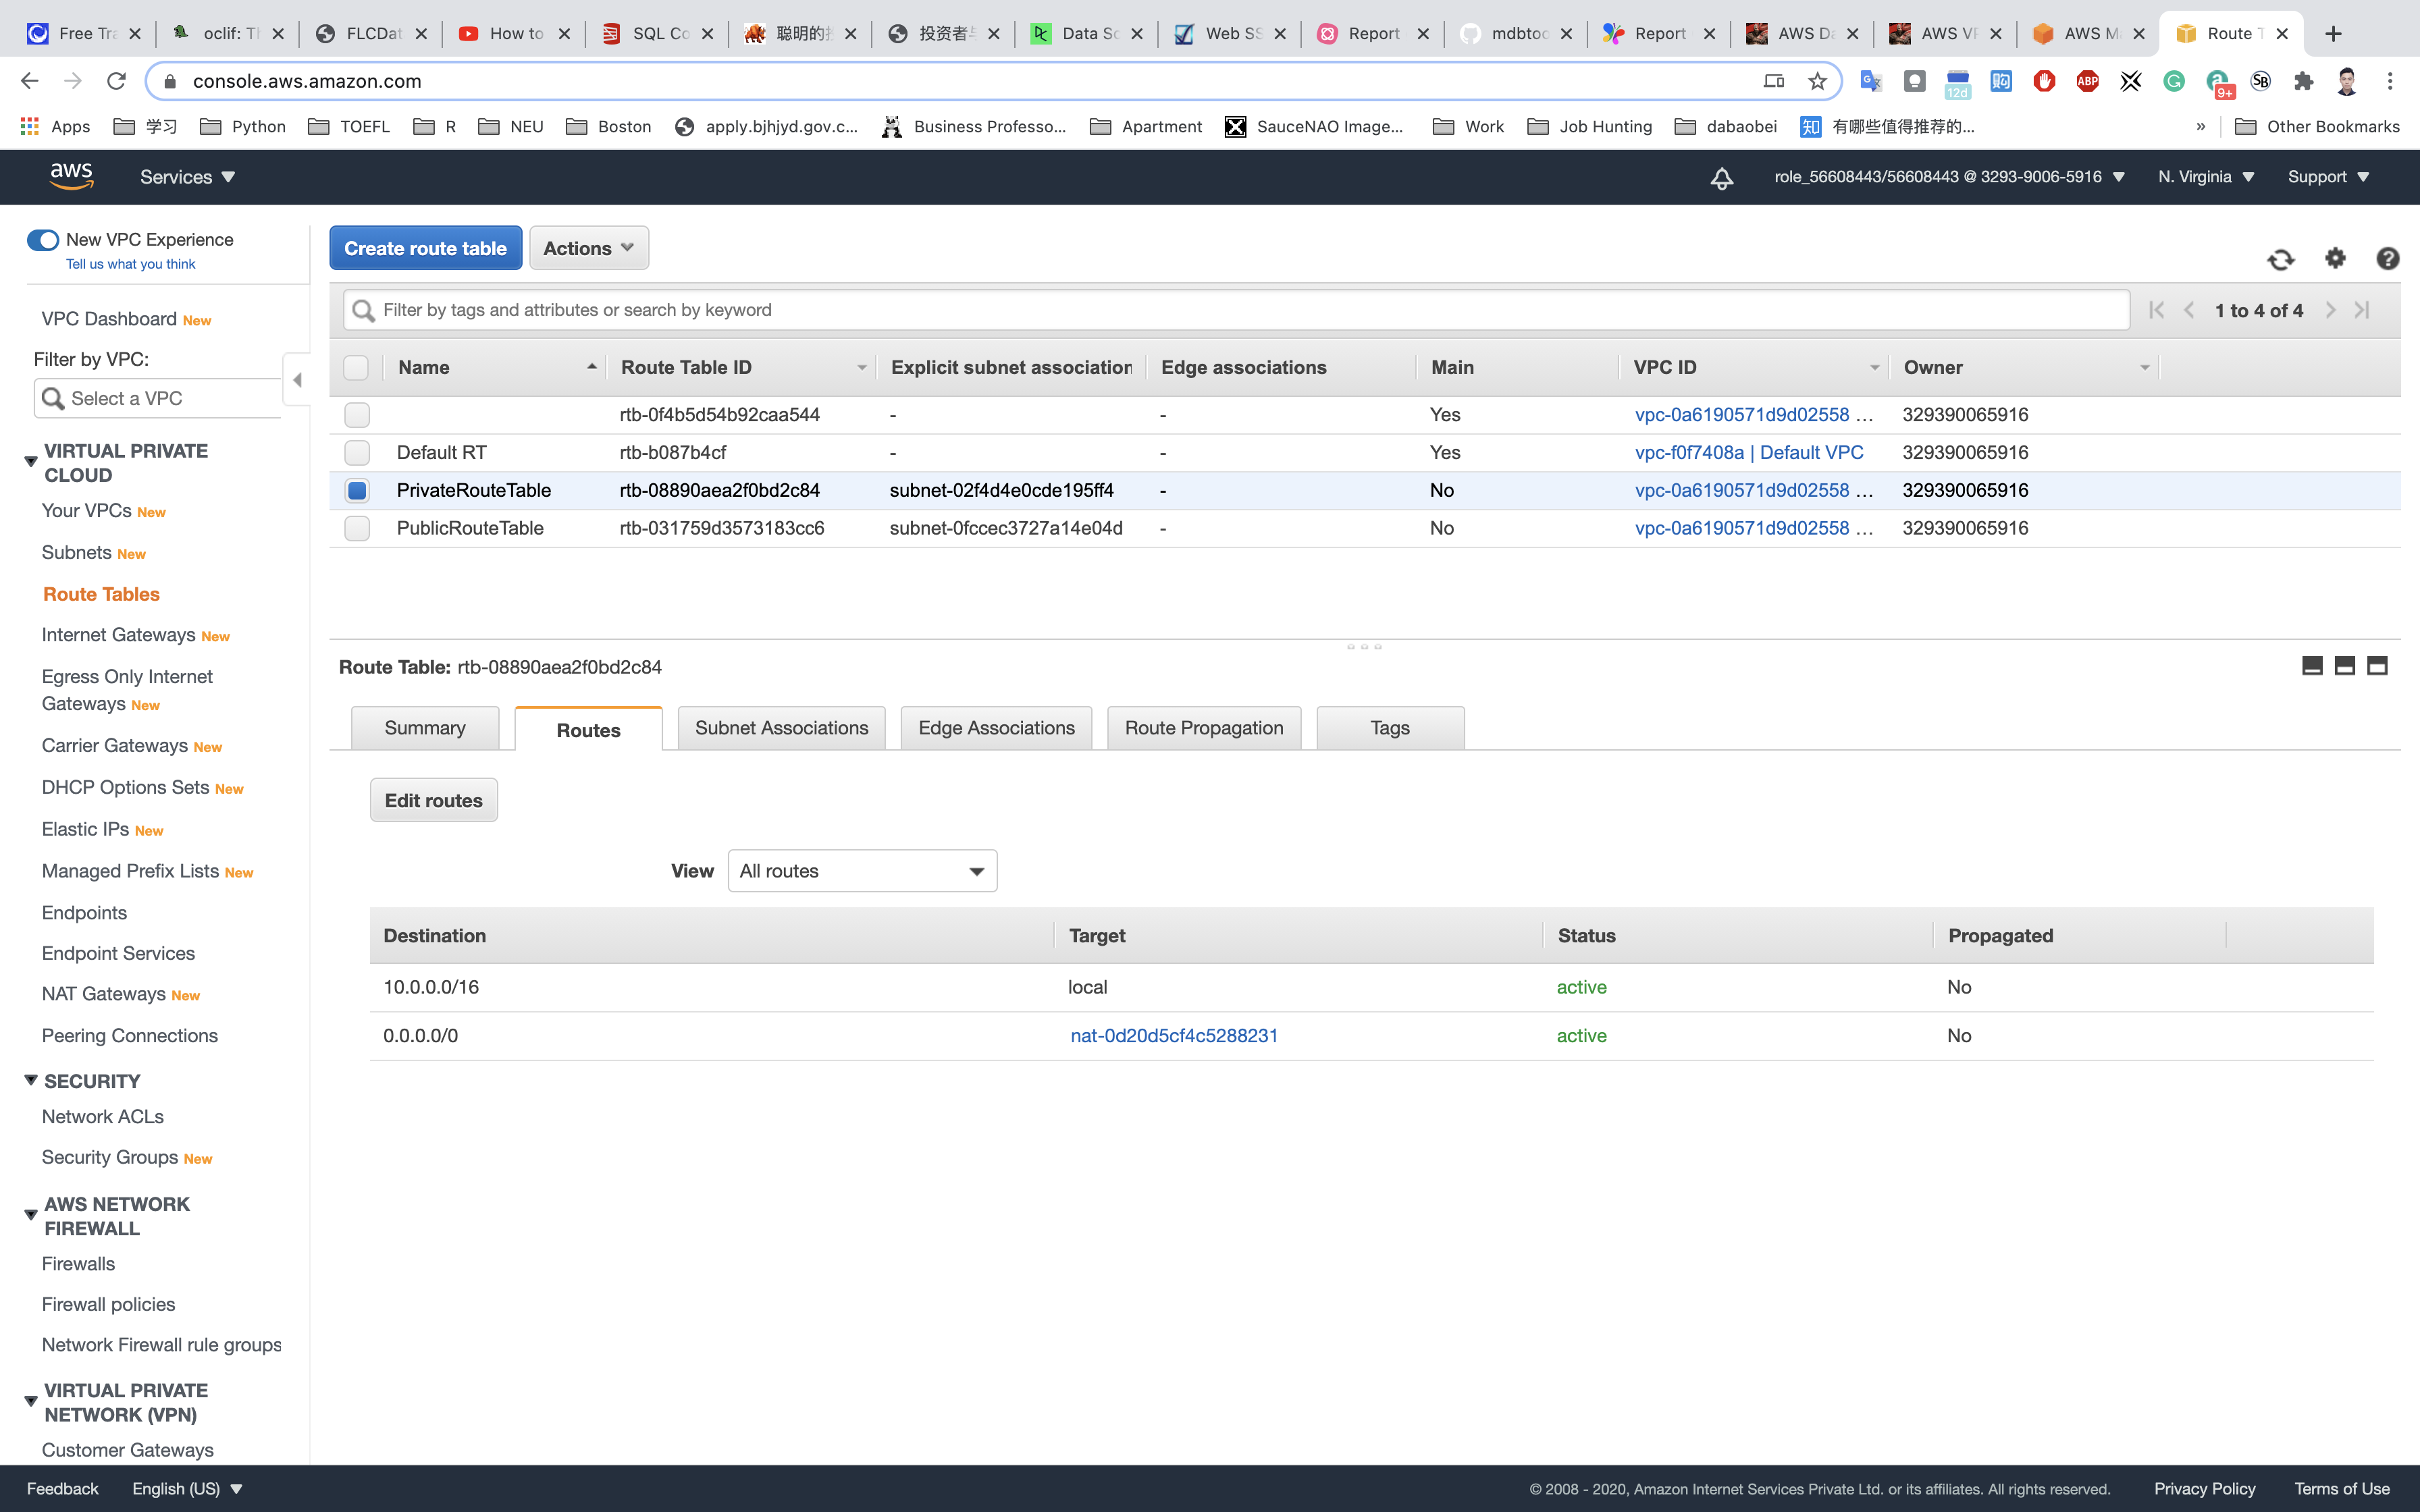
Create Route Tables
- Go to
Route Tablesfrom the left menu and click onCreate route table.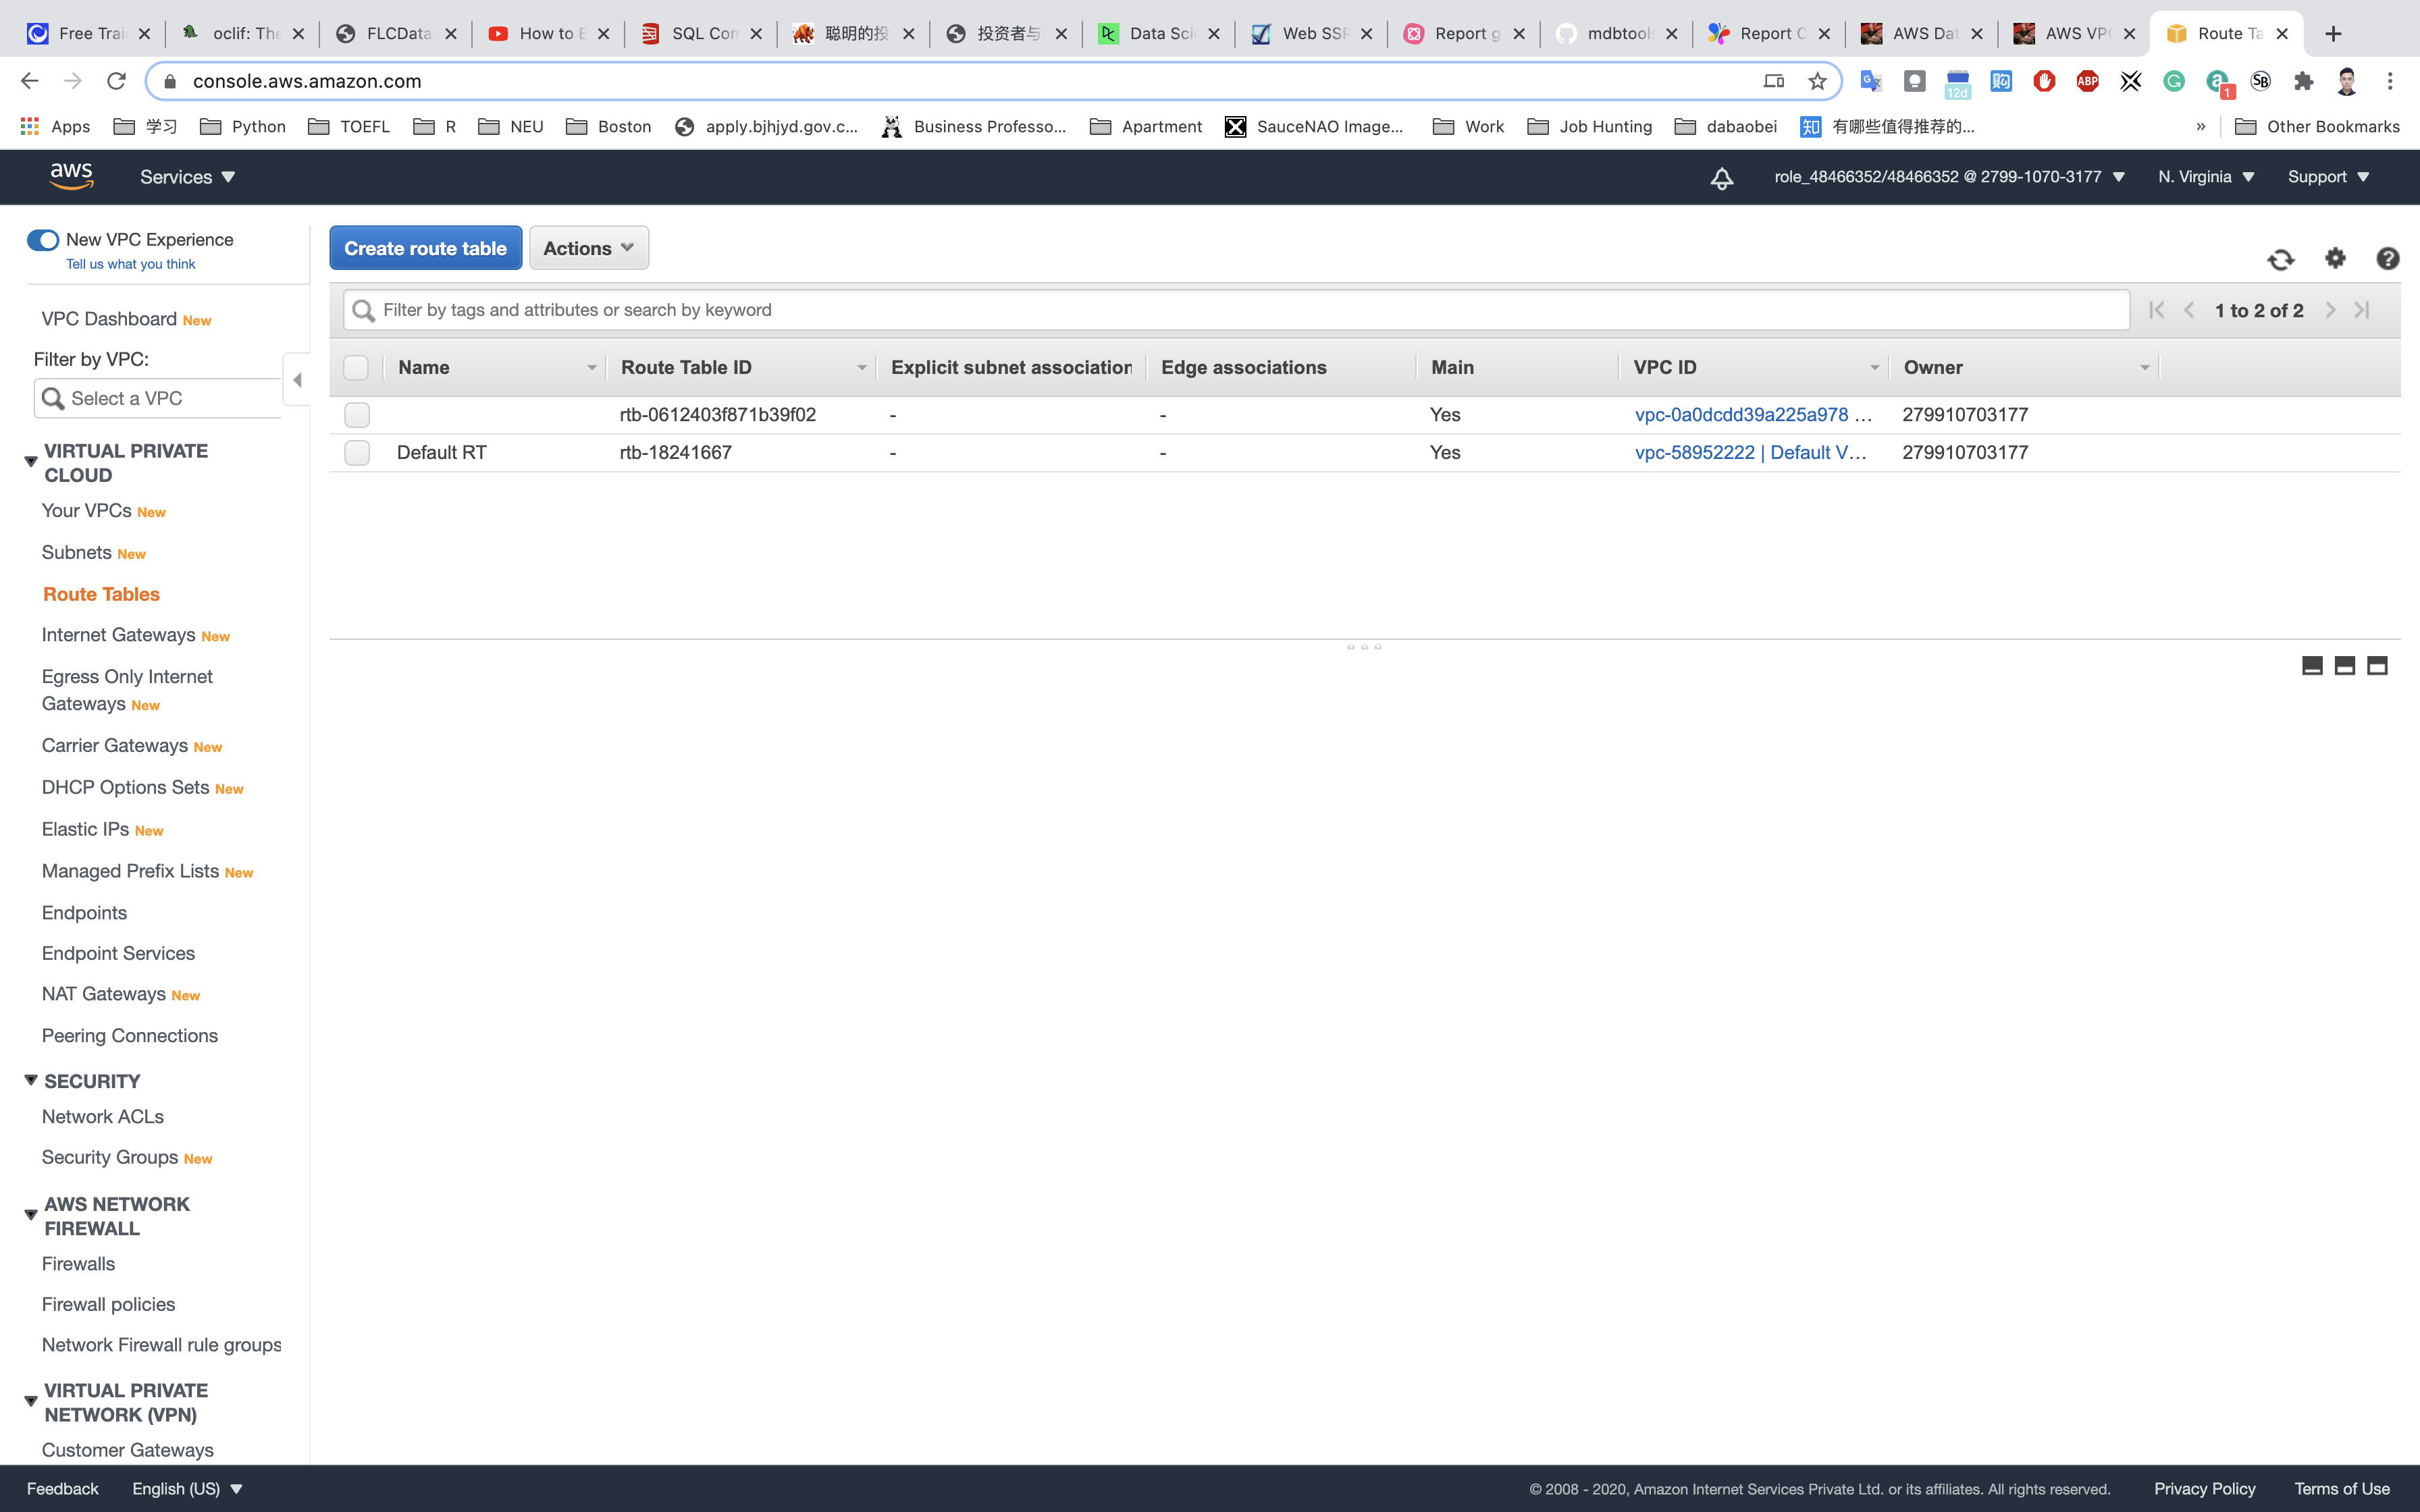
- Name Tag:
PublicRouteTable. - VPC: Select
testVPCfrom the list.
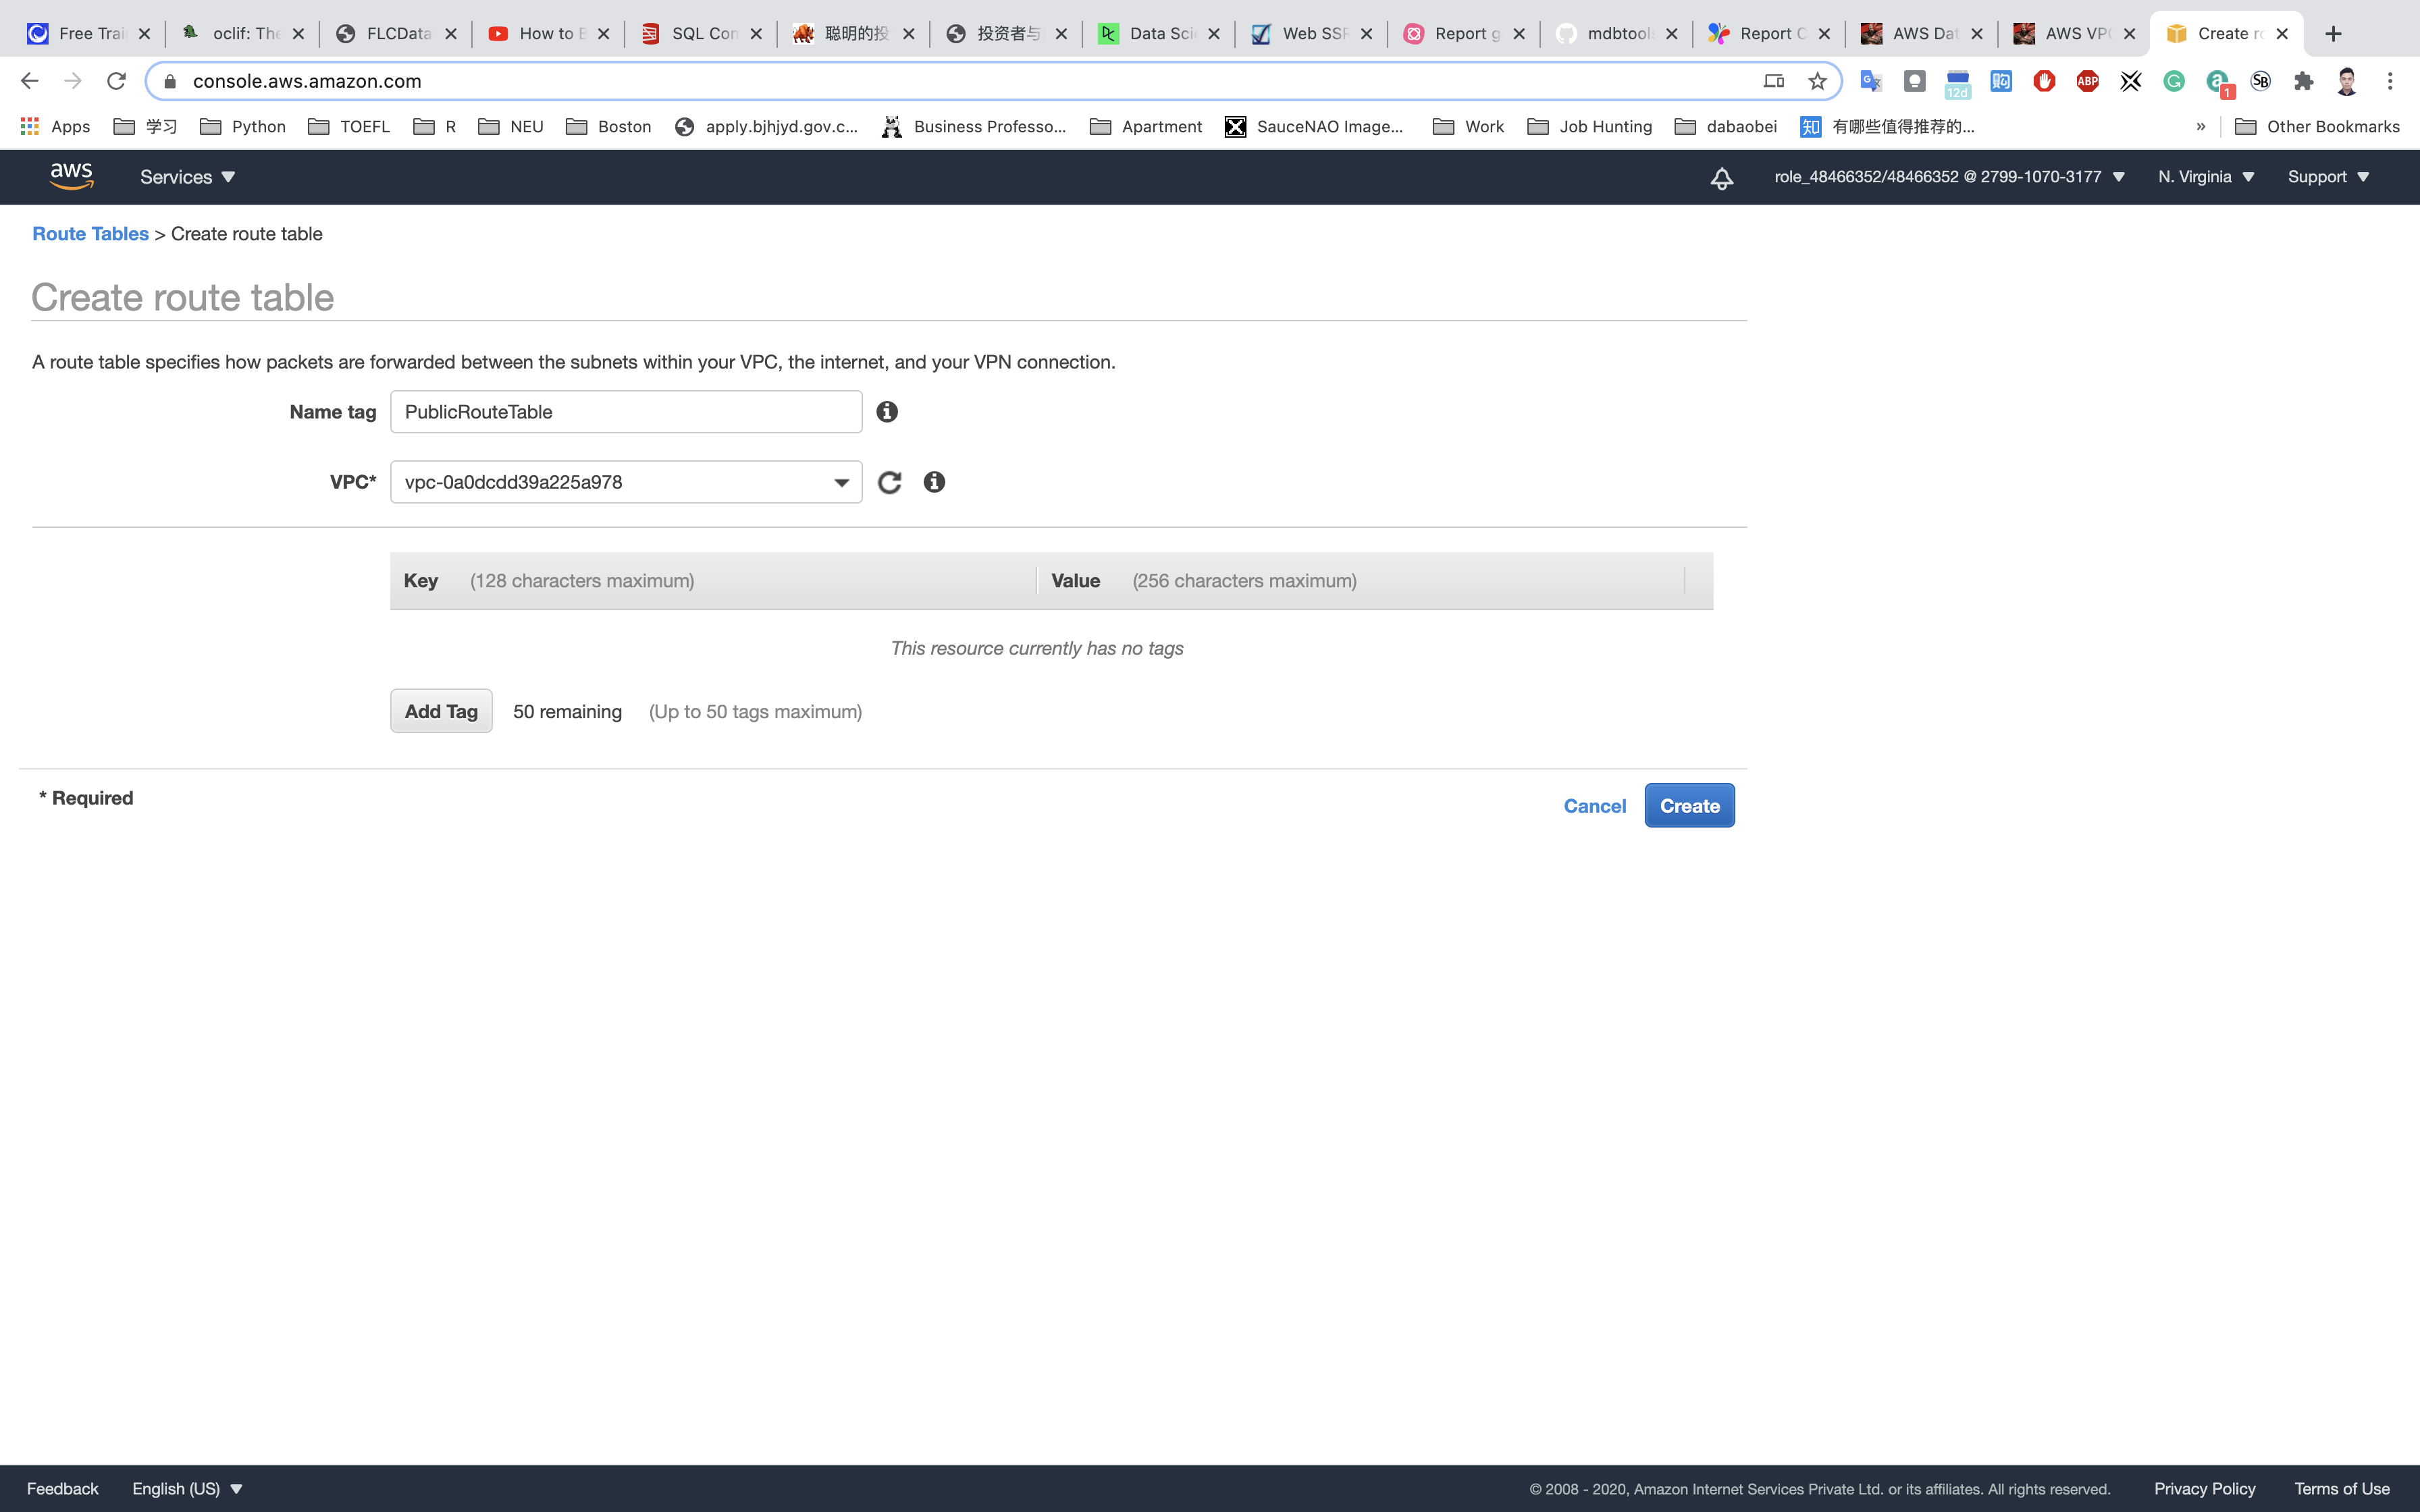
Click on Create.
Repeat the same steps to create a route table for the RDS database tier (Private Subnet).
- Name Tag:
PrivateRouteTable. - VPC: Select
testVPCfrom the list.
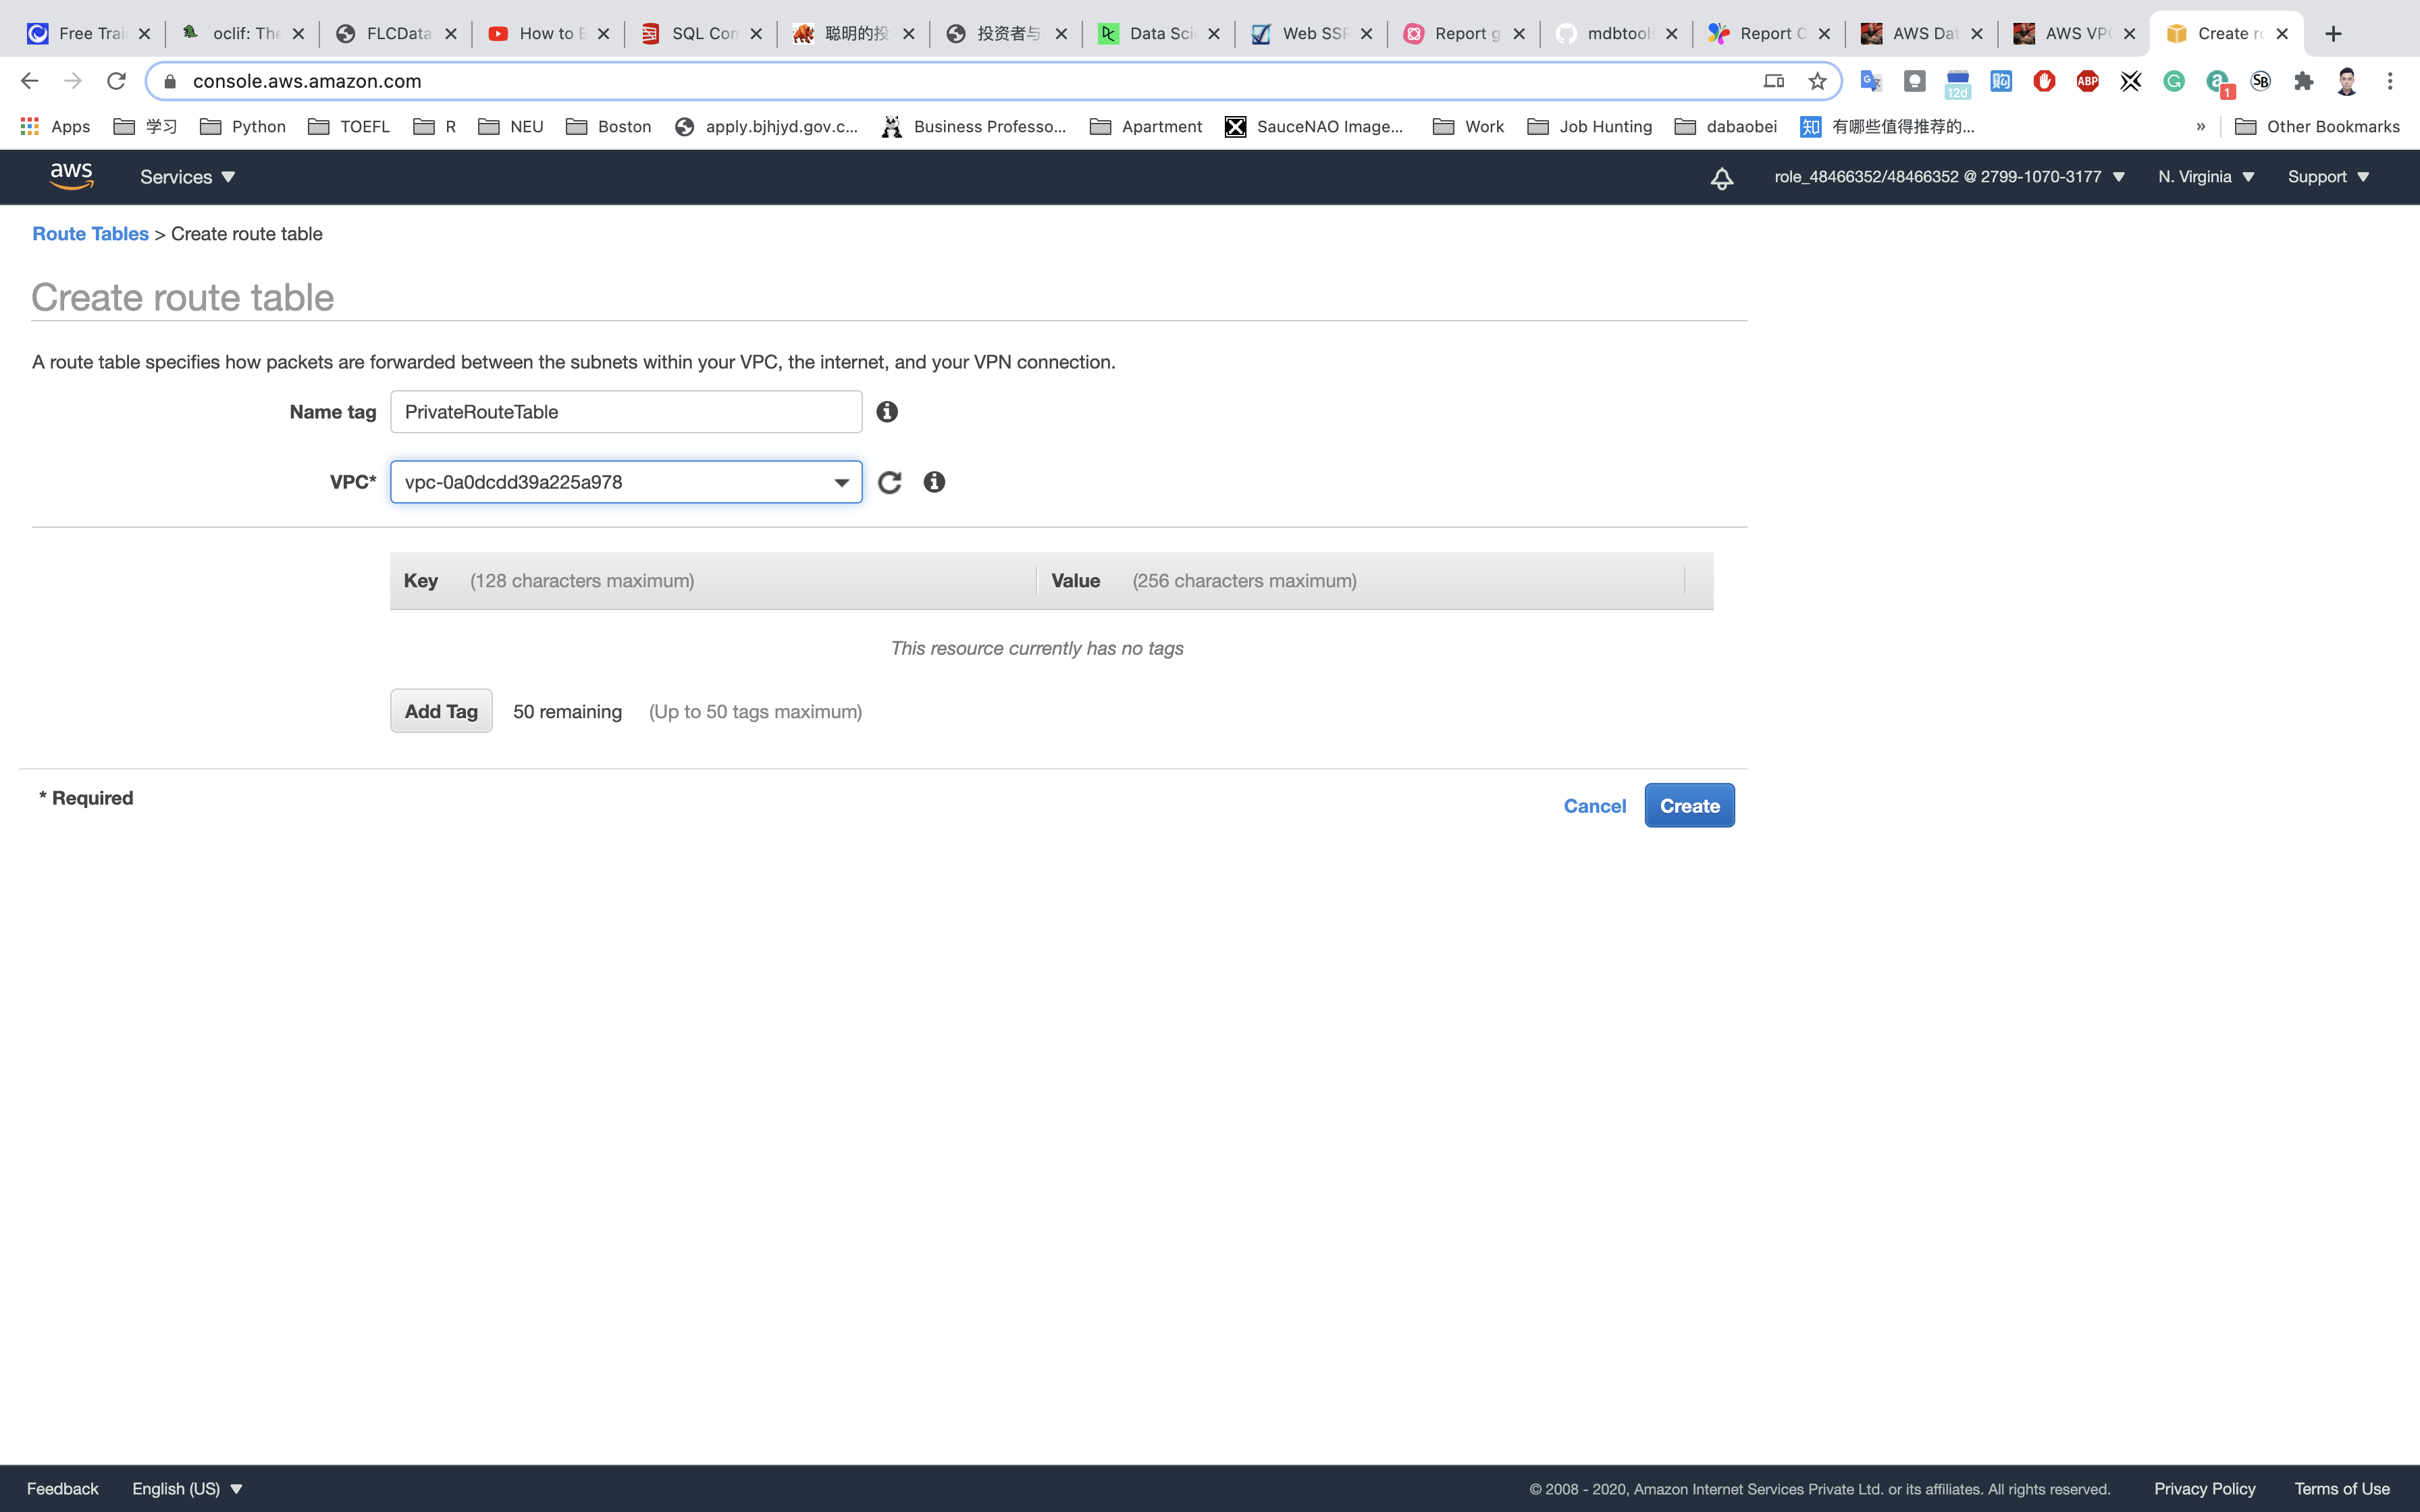
Click on Create.
Associate the public subnet to the public route table.
Select PublicRouteTable and go to the Subnet Associations tab.
Click on Edit subnet associations.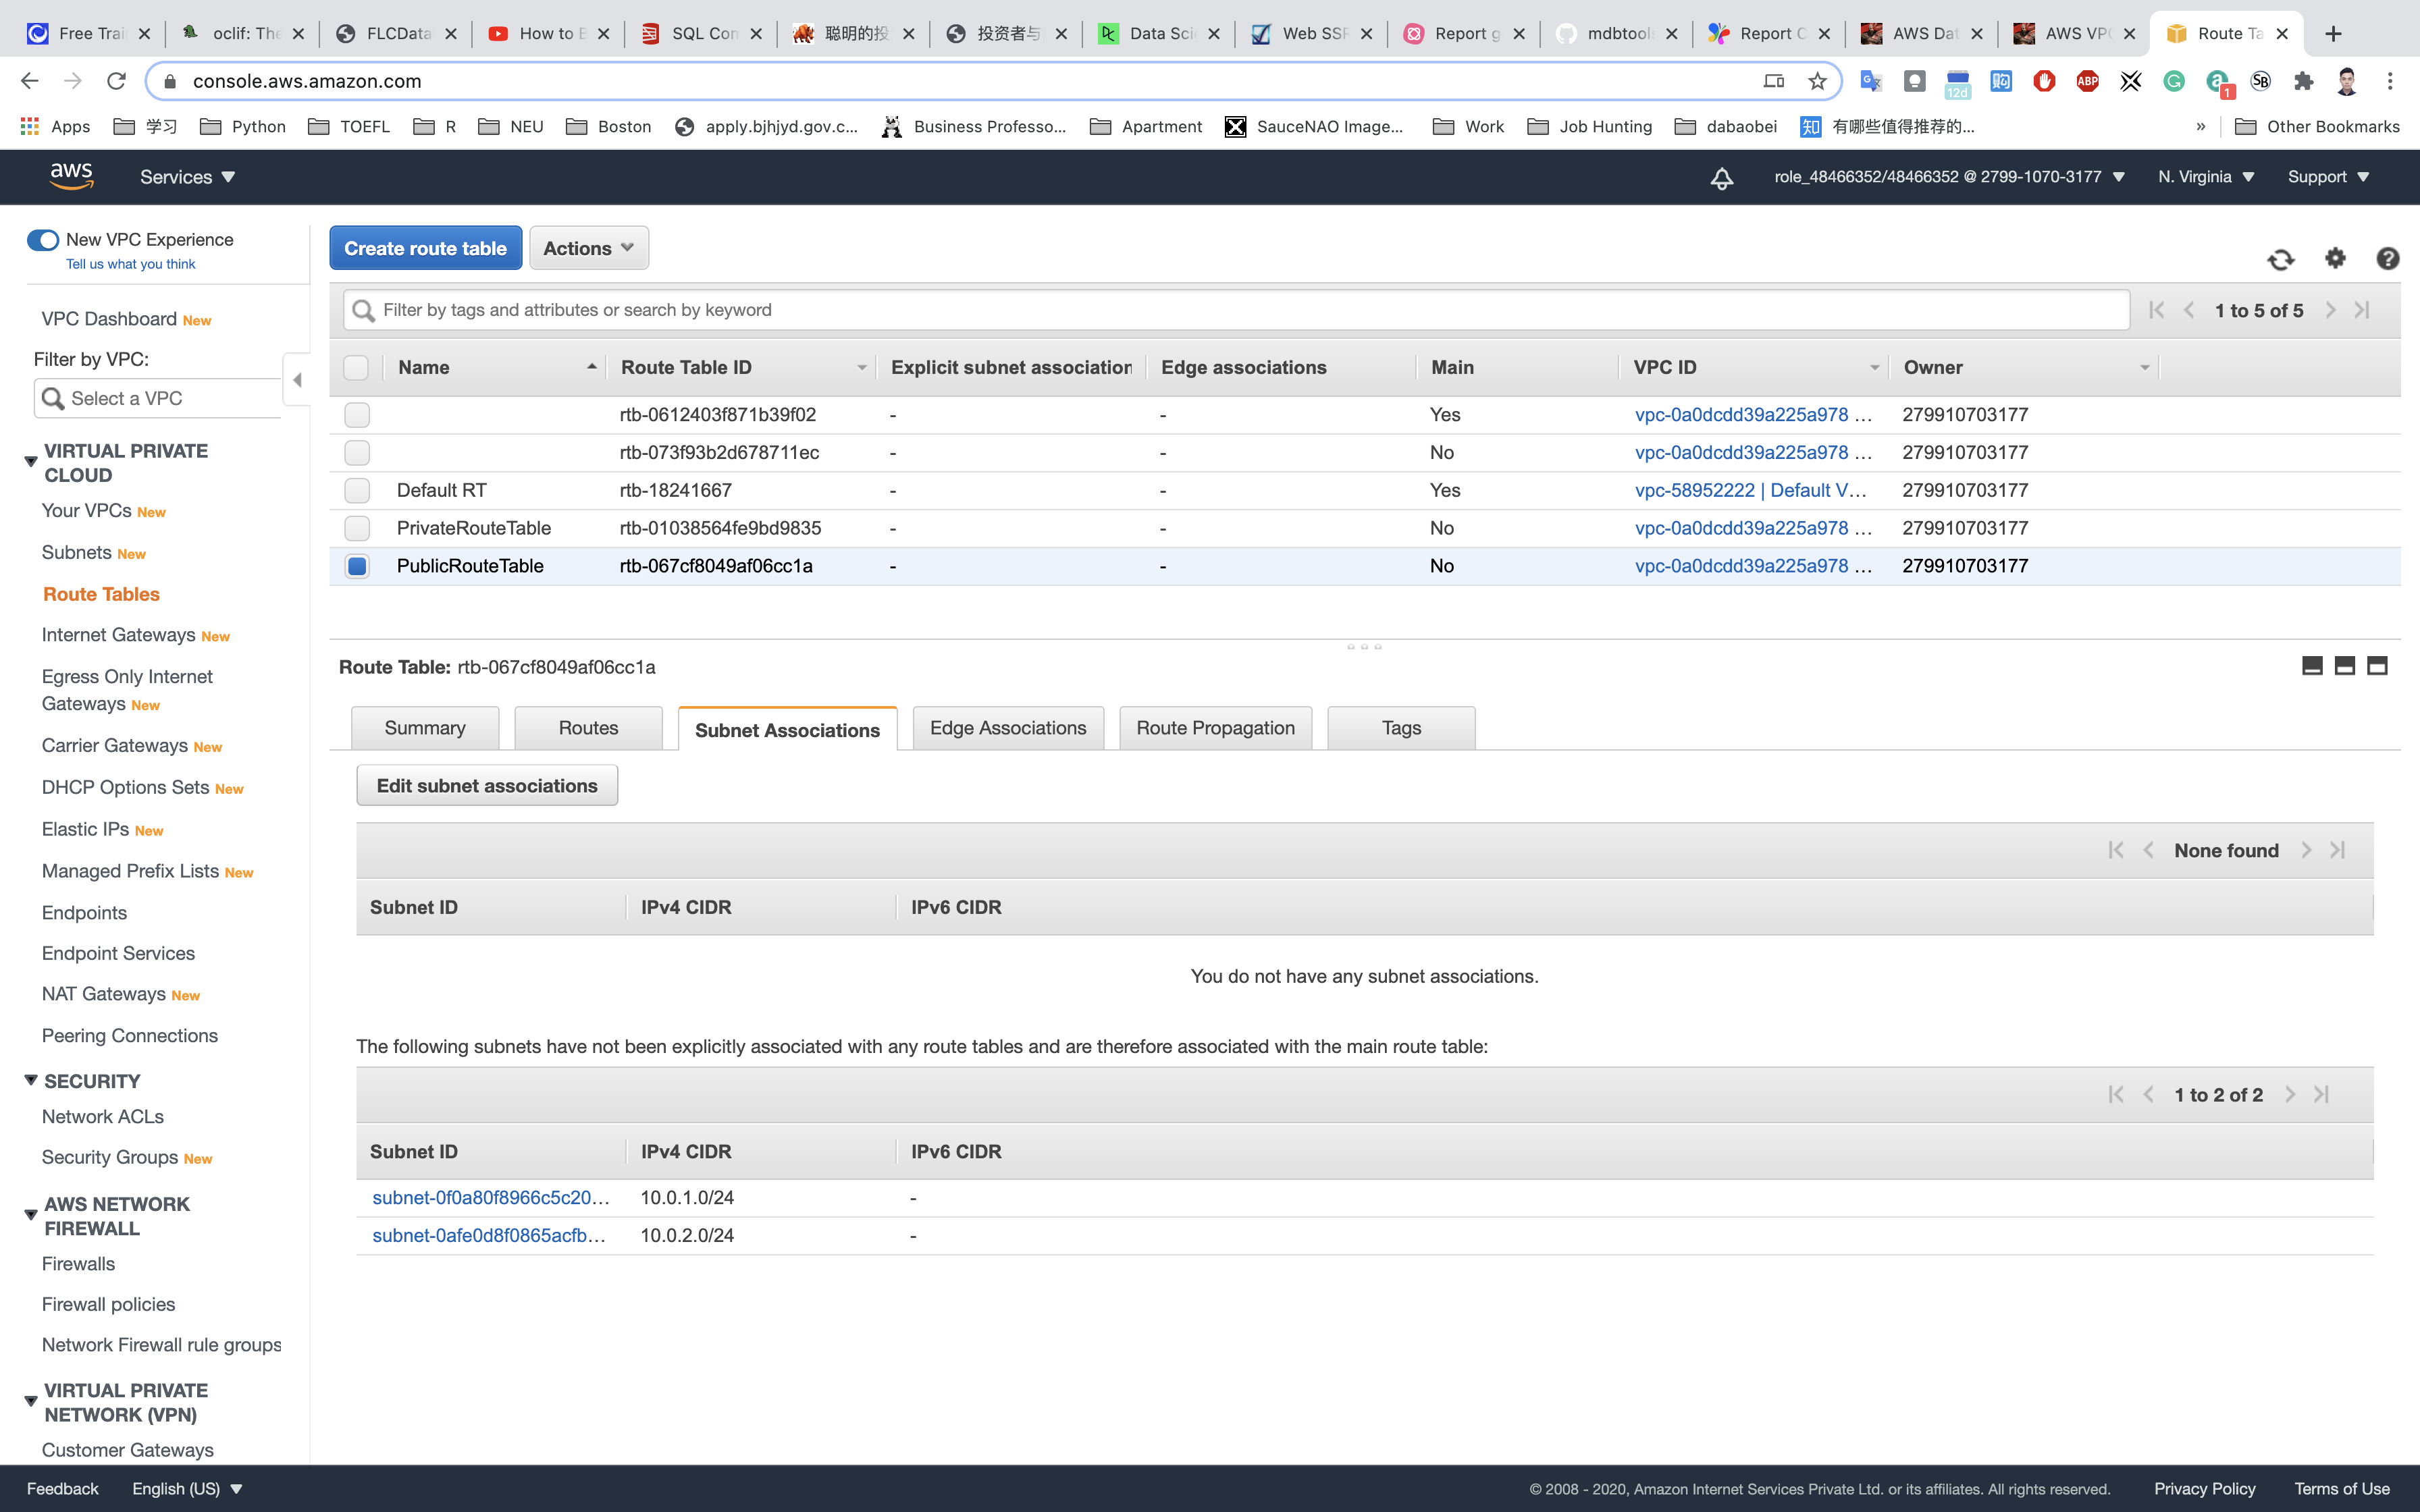
Select PublicSubnet from the list.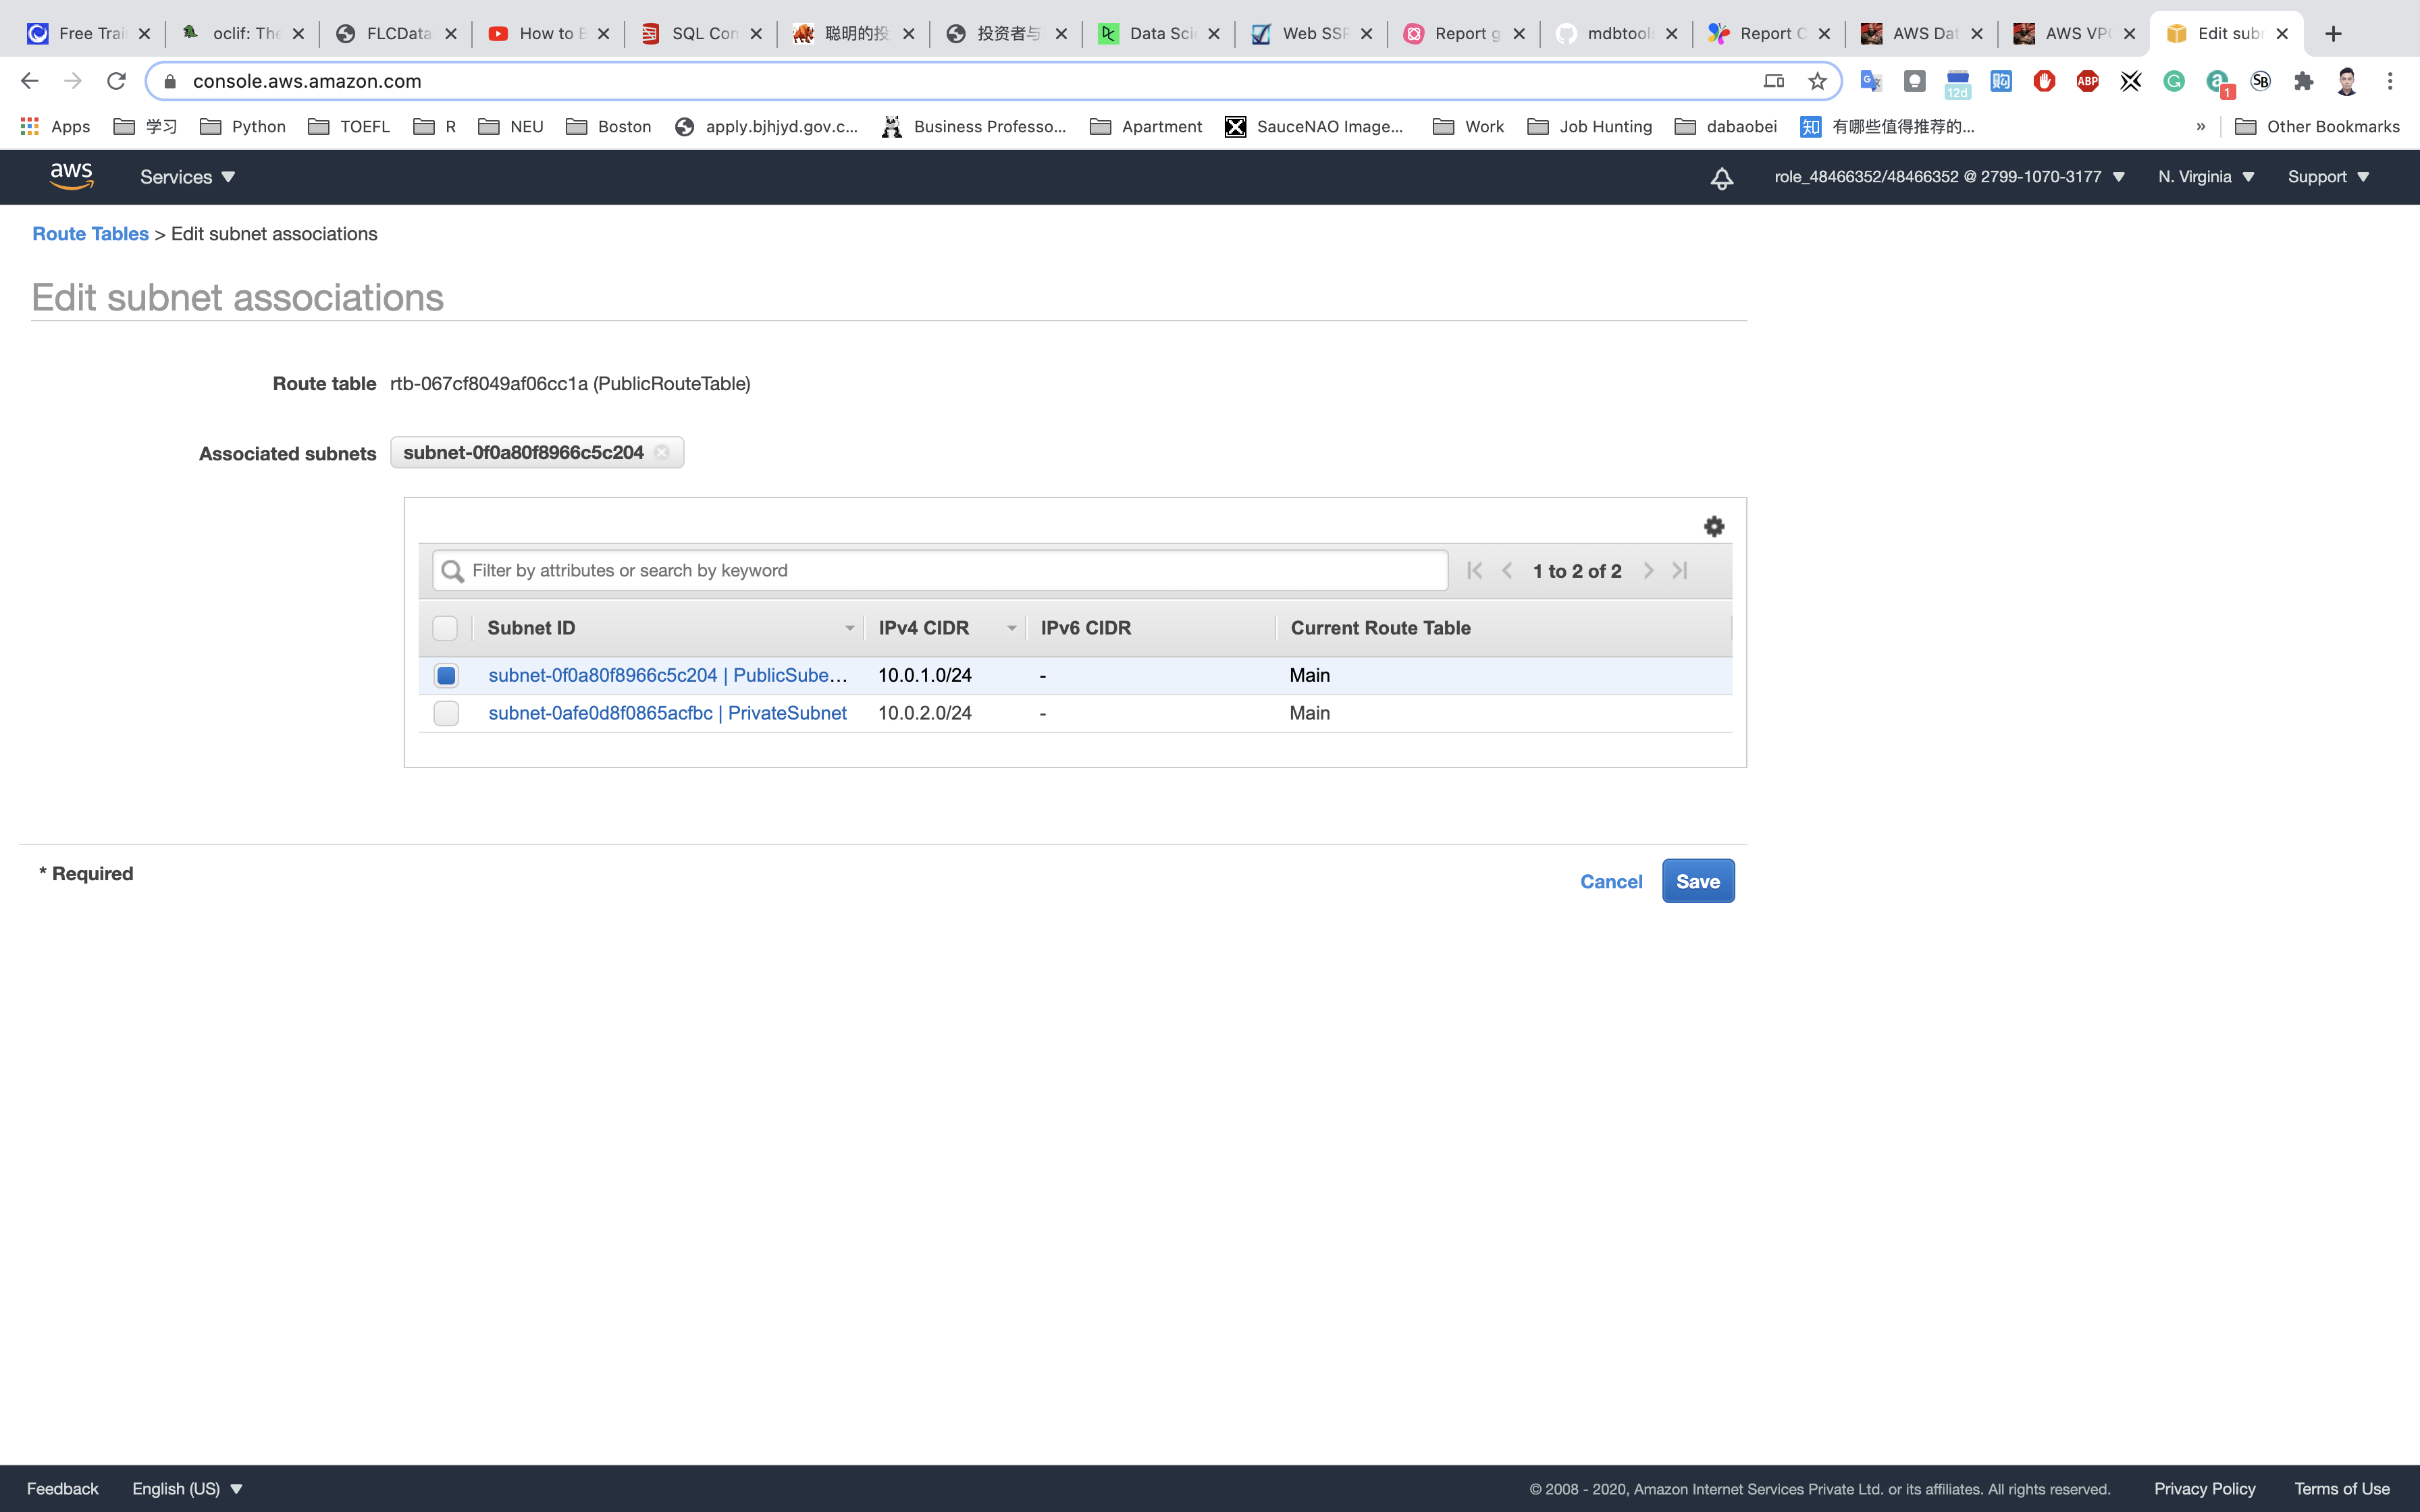
Click on Save.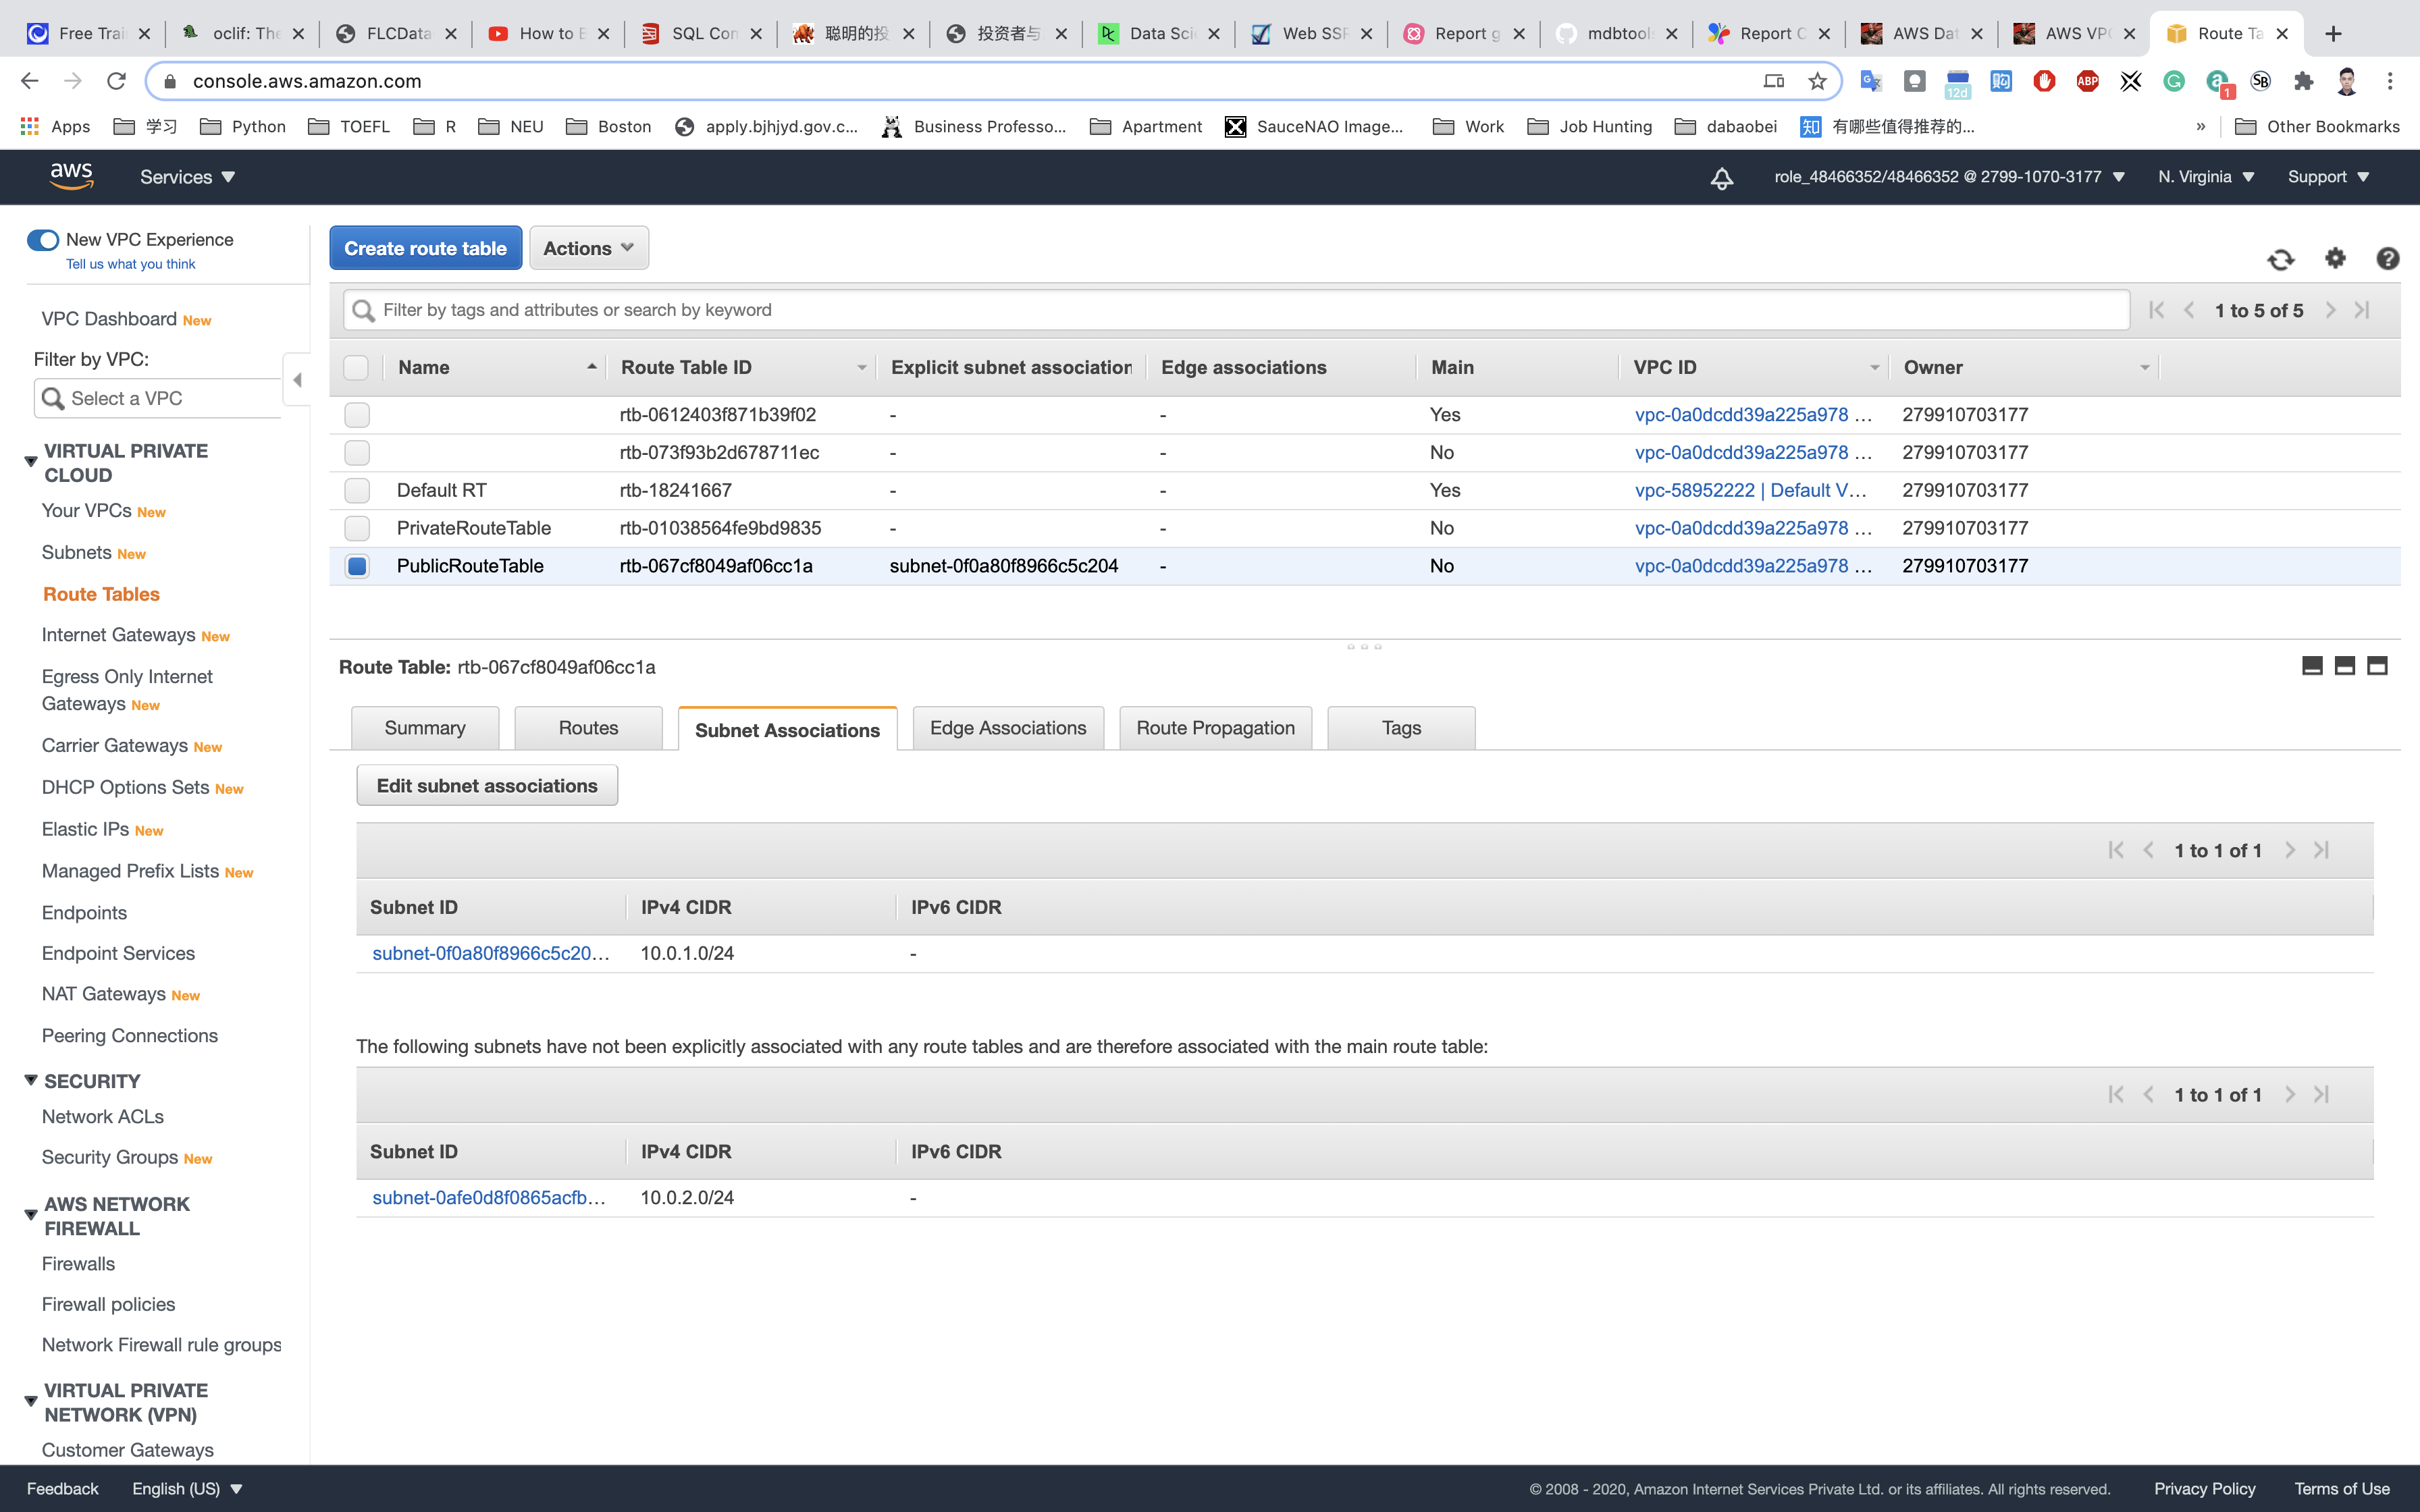
Associate the private subnet to the private route table.
Select PrivateRouteTable and go to the Subnet Associations tab.
Click on Edit subnet associations.
Select PrivateSubnet from the list.
Click on Save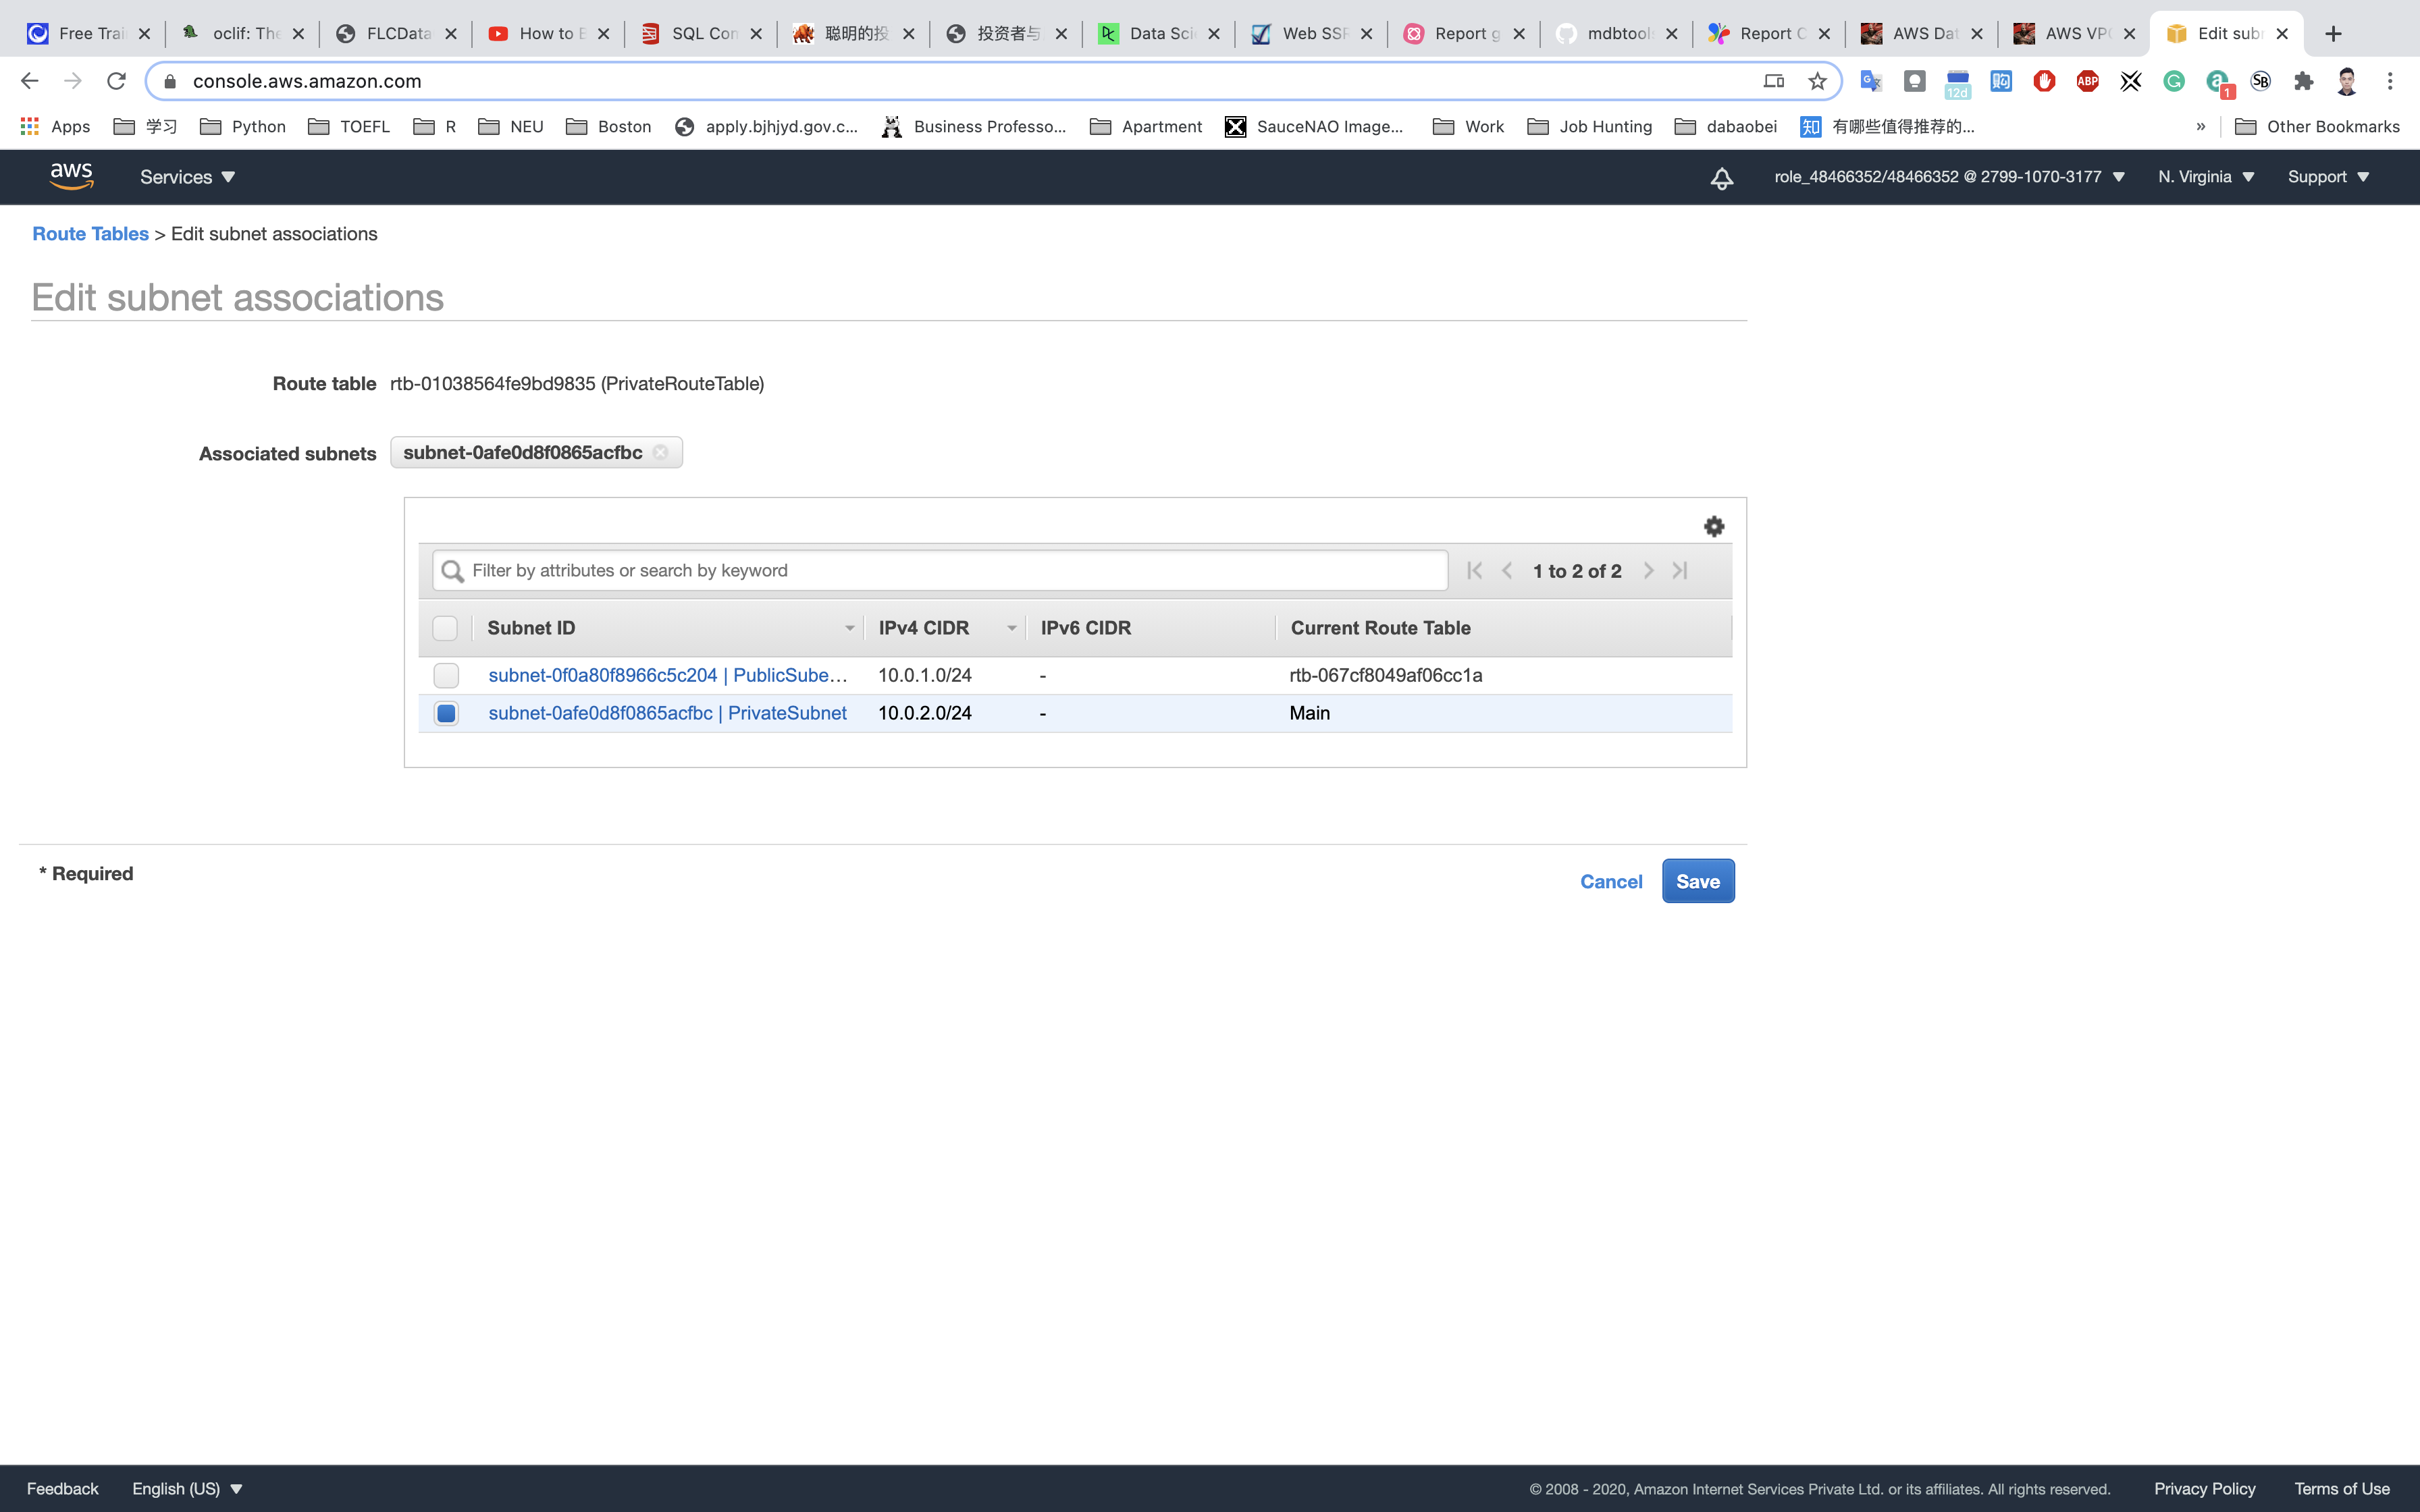
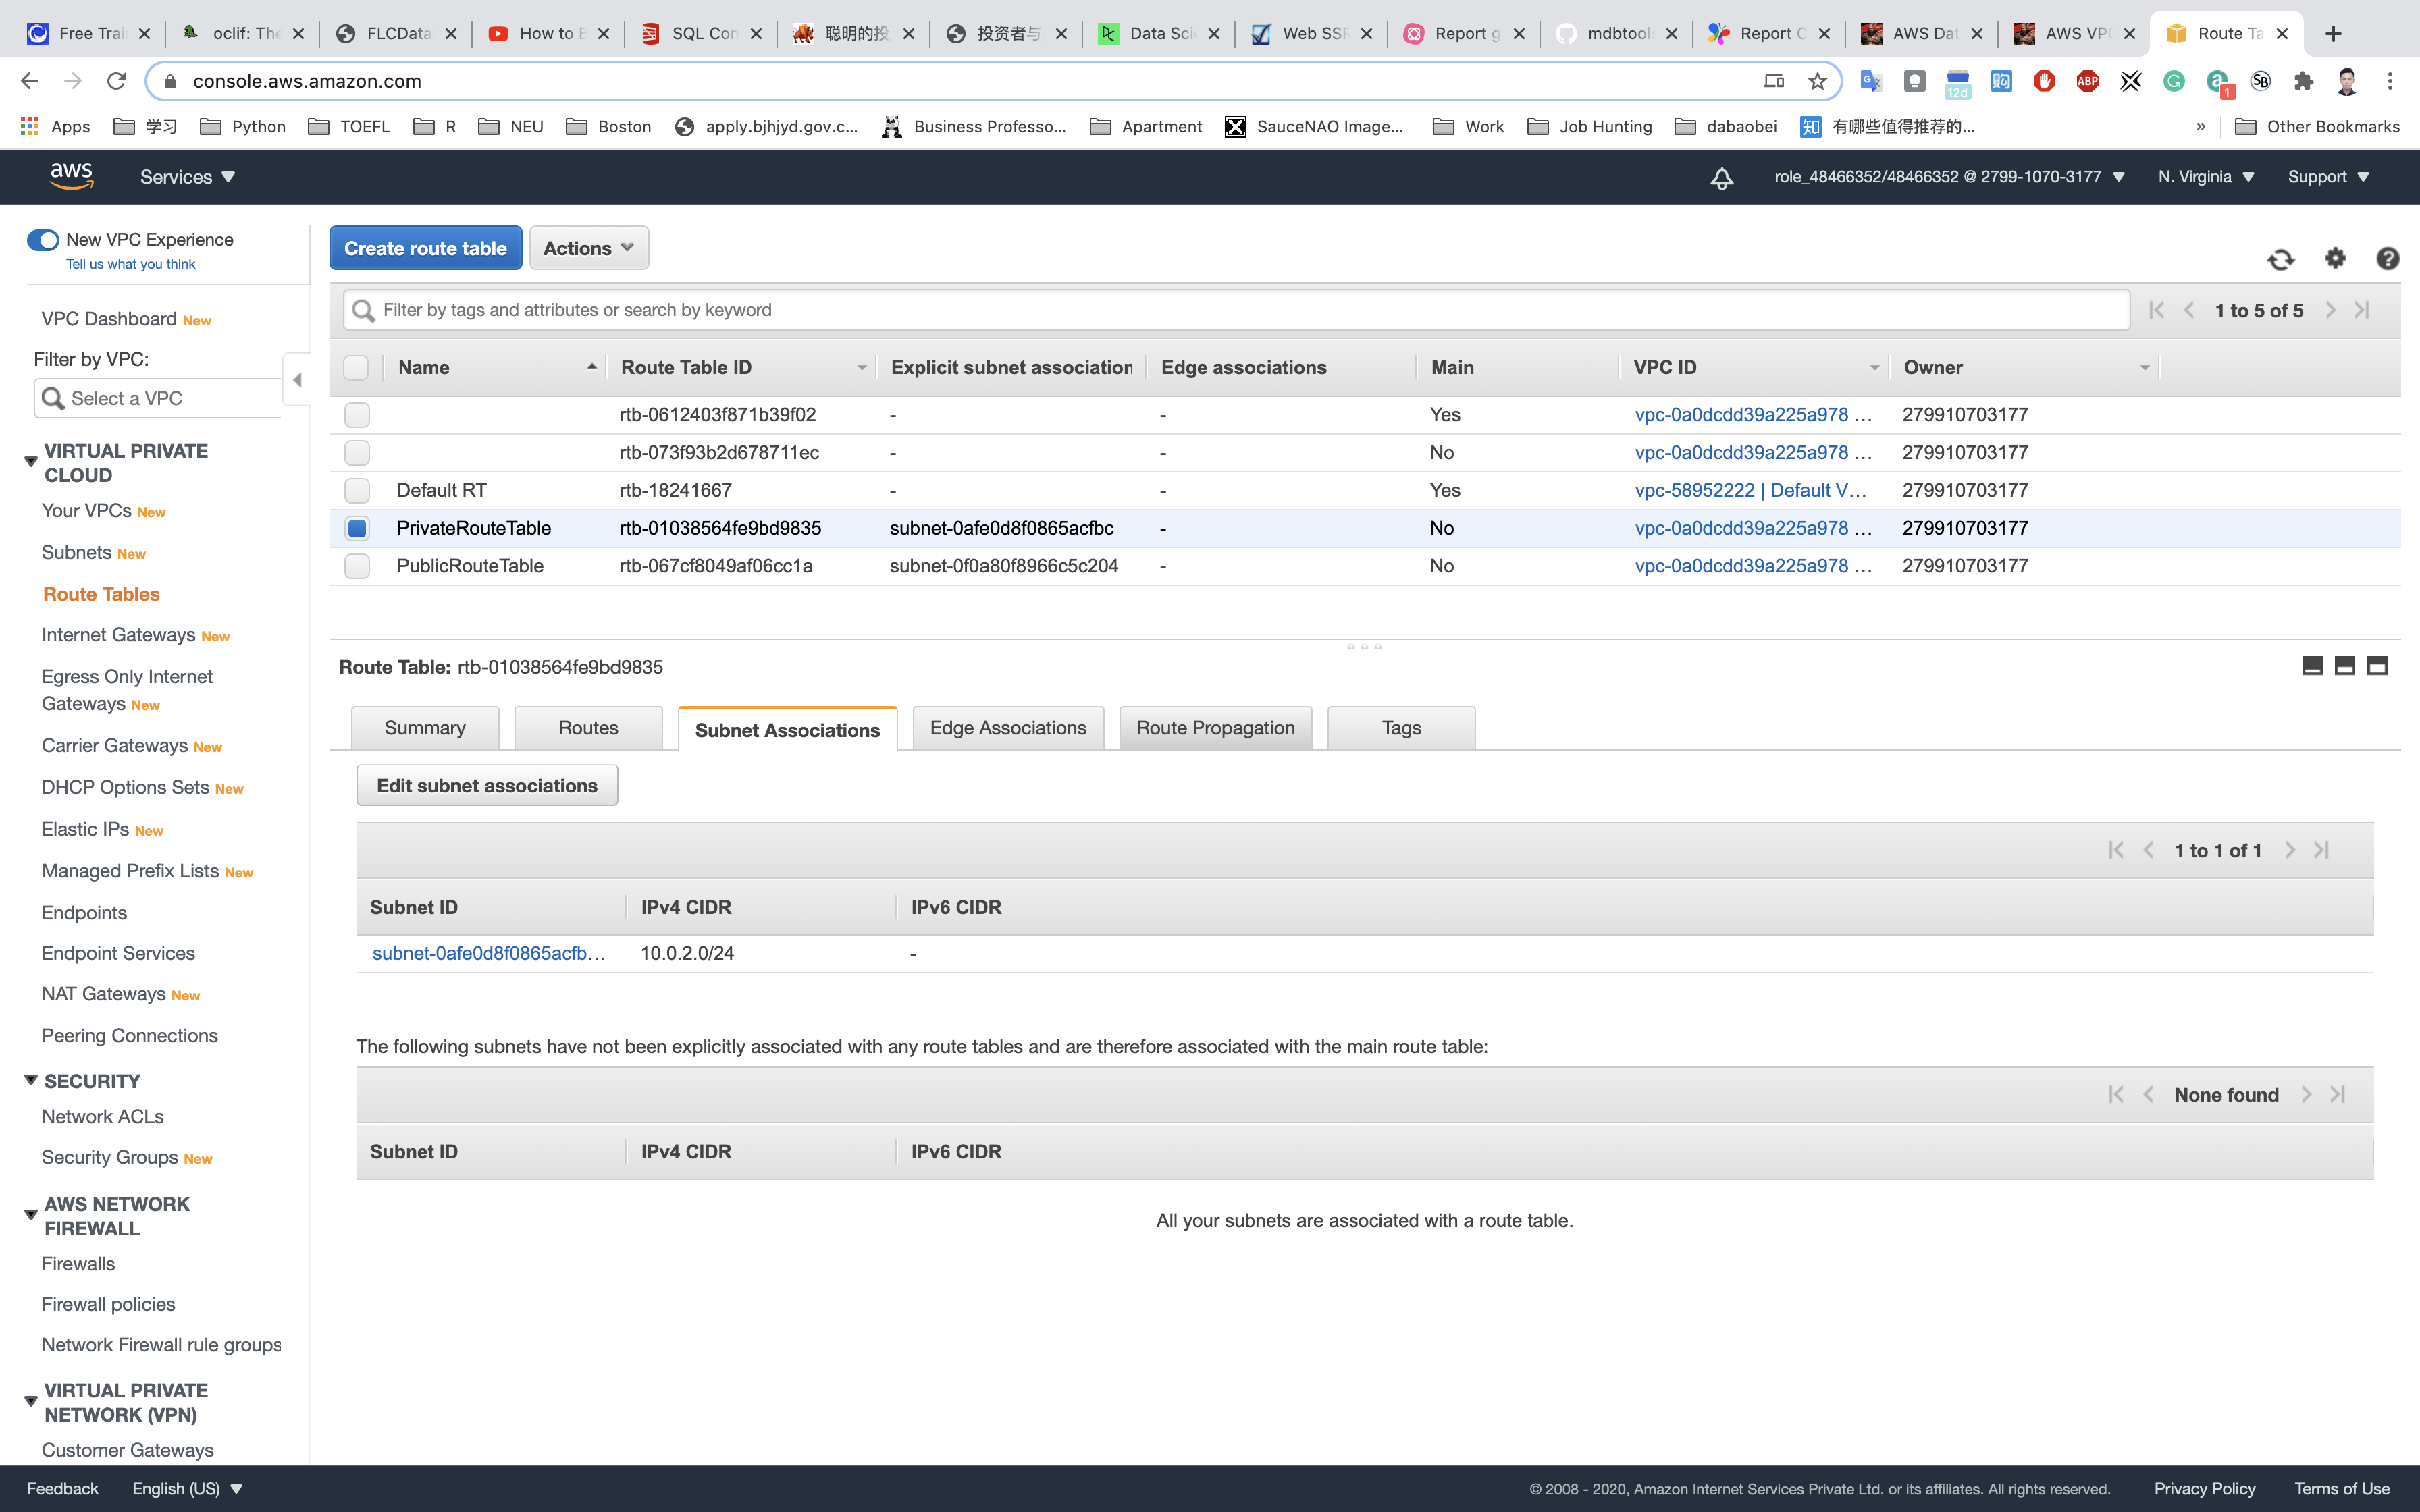
Make sure not to associate any subnets with the Main Route Table.
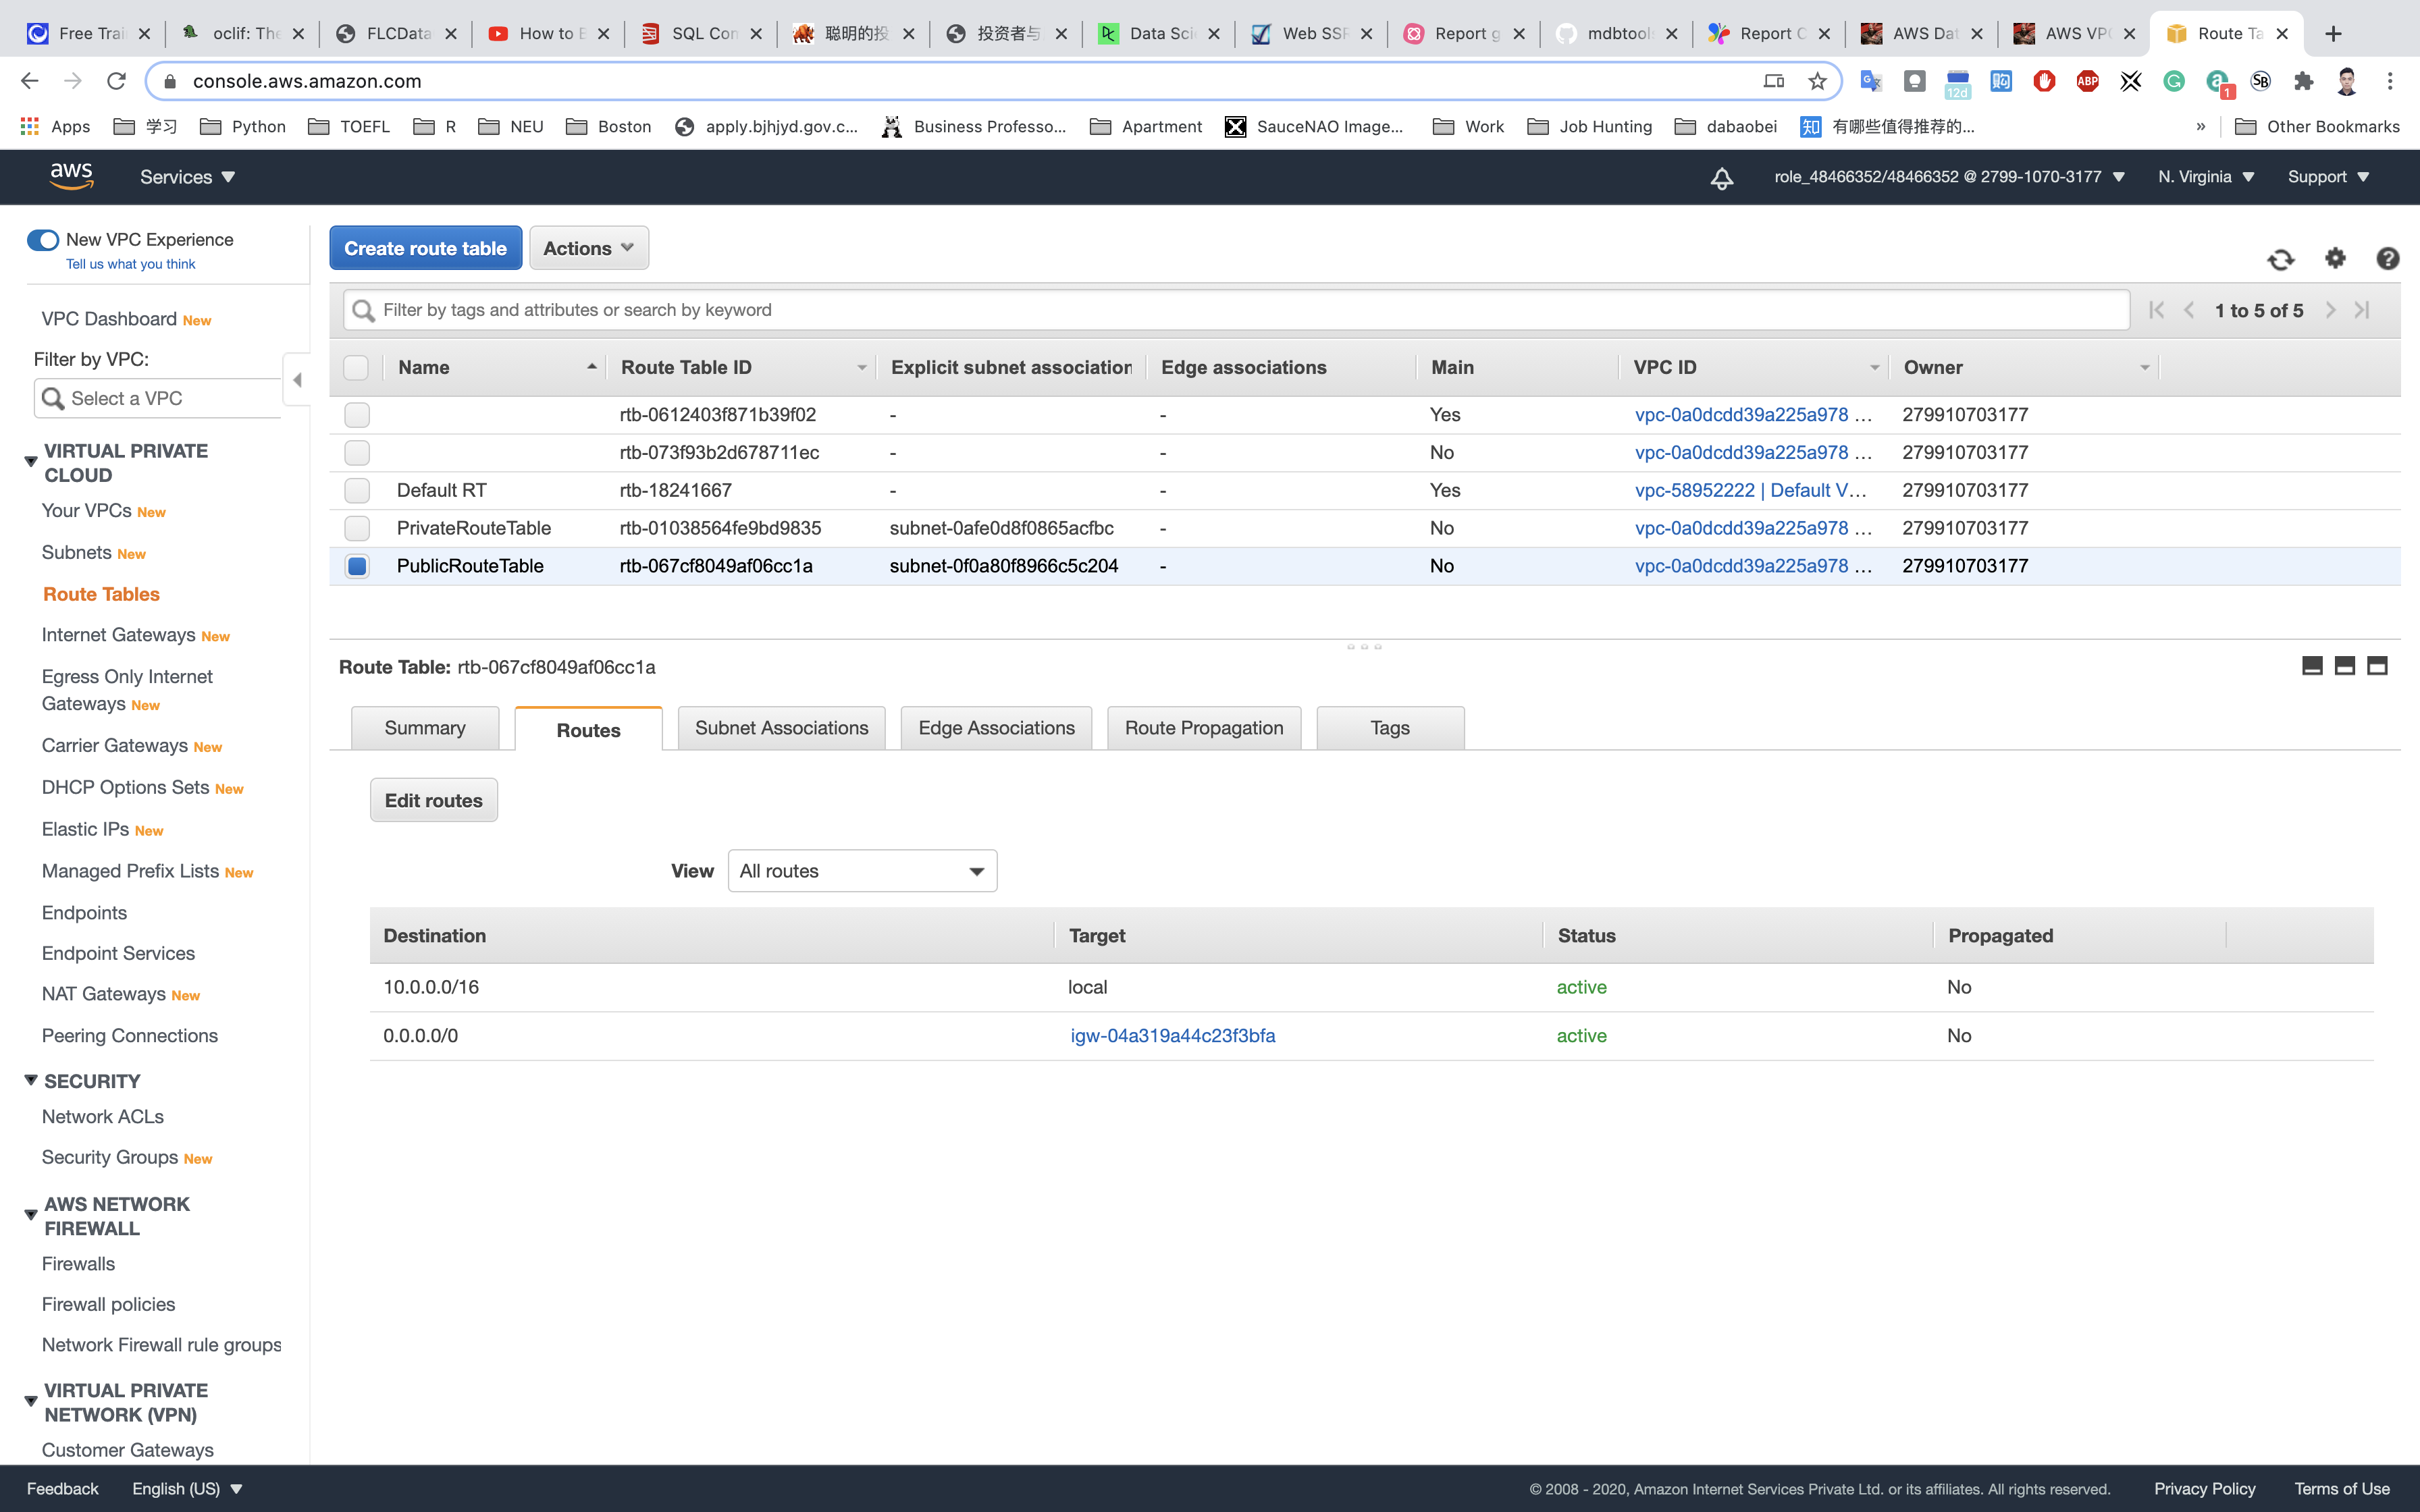
PublicRouteTable: Add a route to allow Internet traffic to the VPC.
Select PublicRouteTable from the list.
Go to Routes tab, click on Edit routes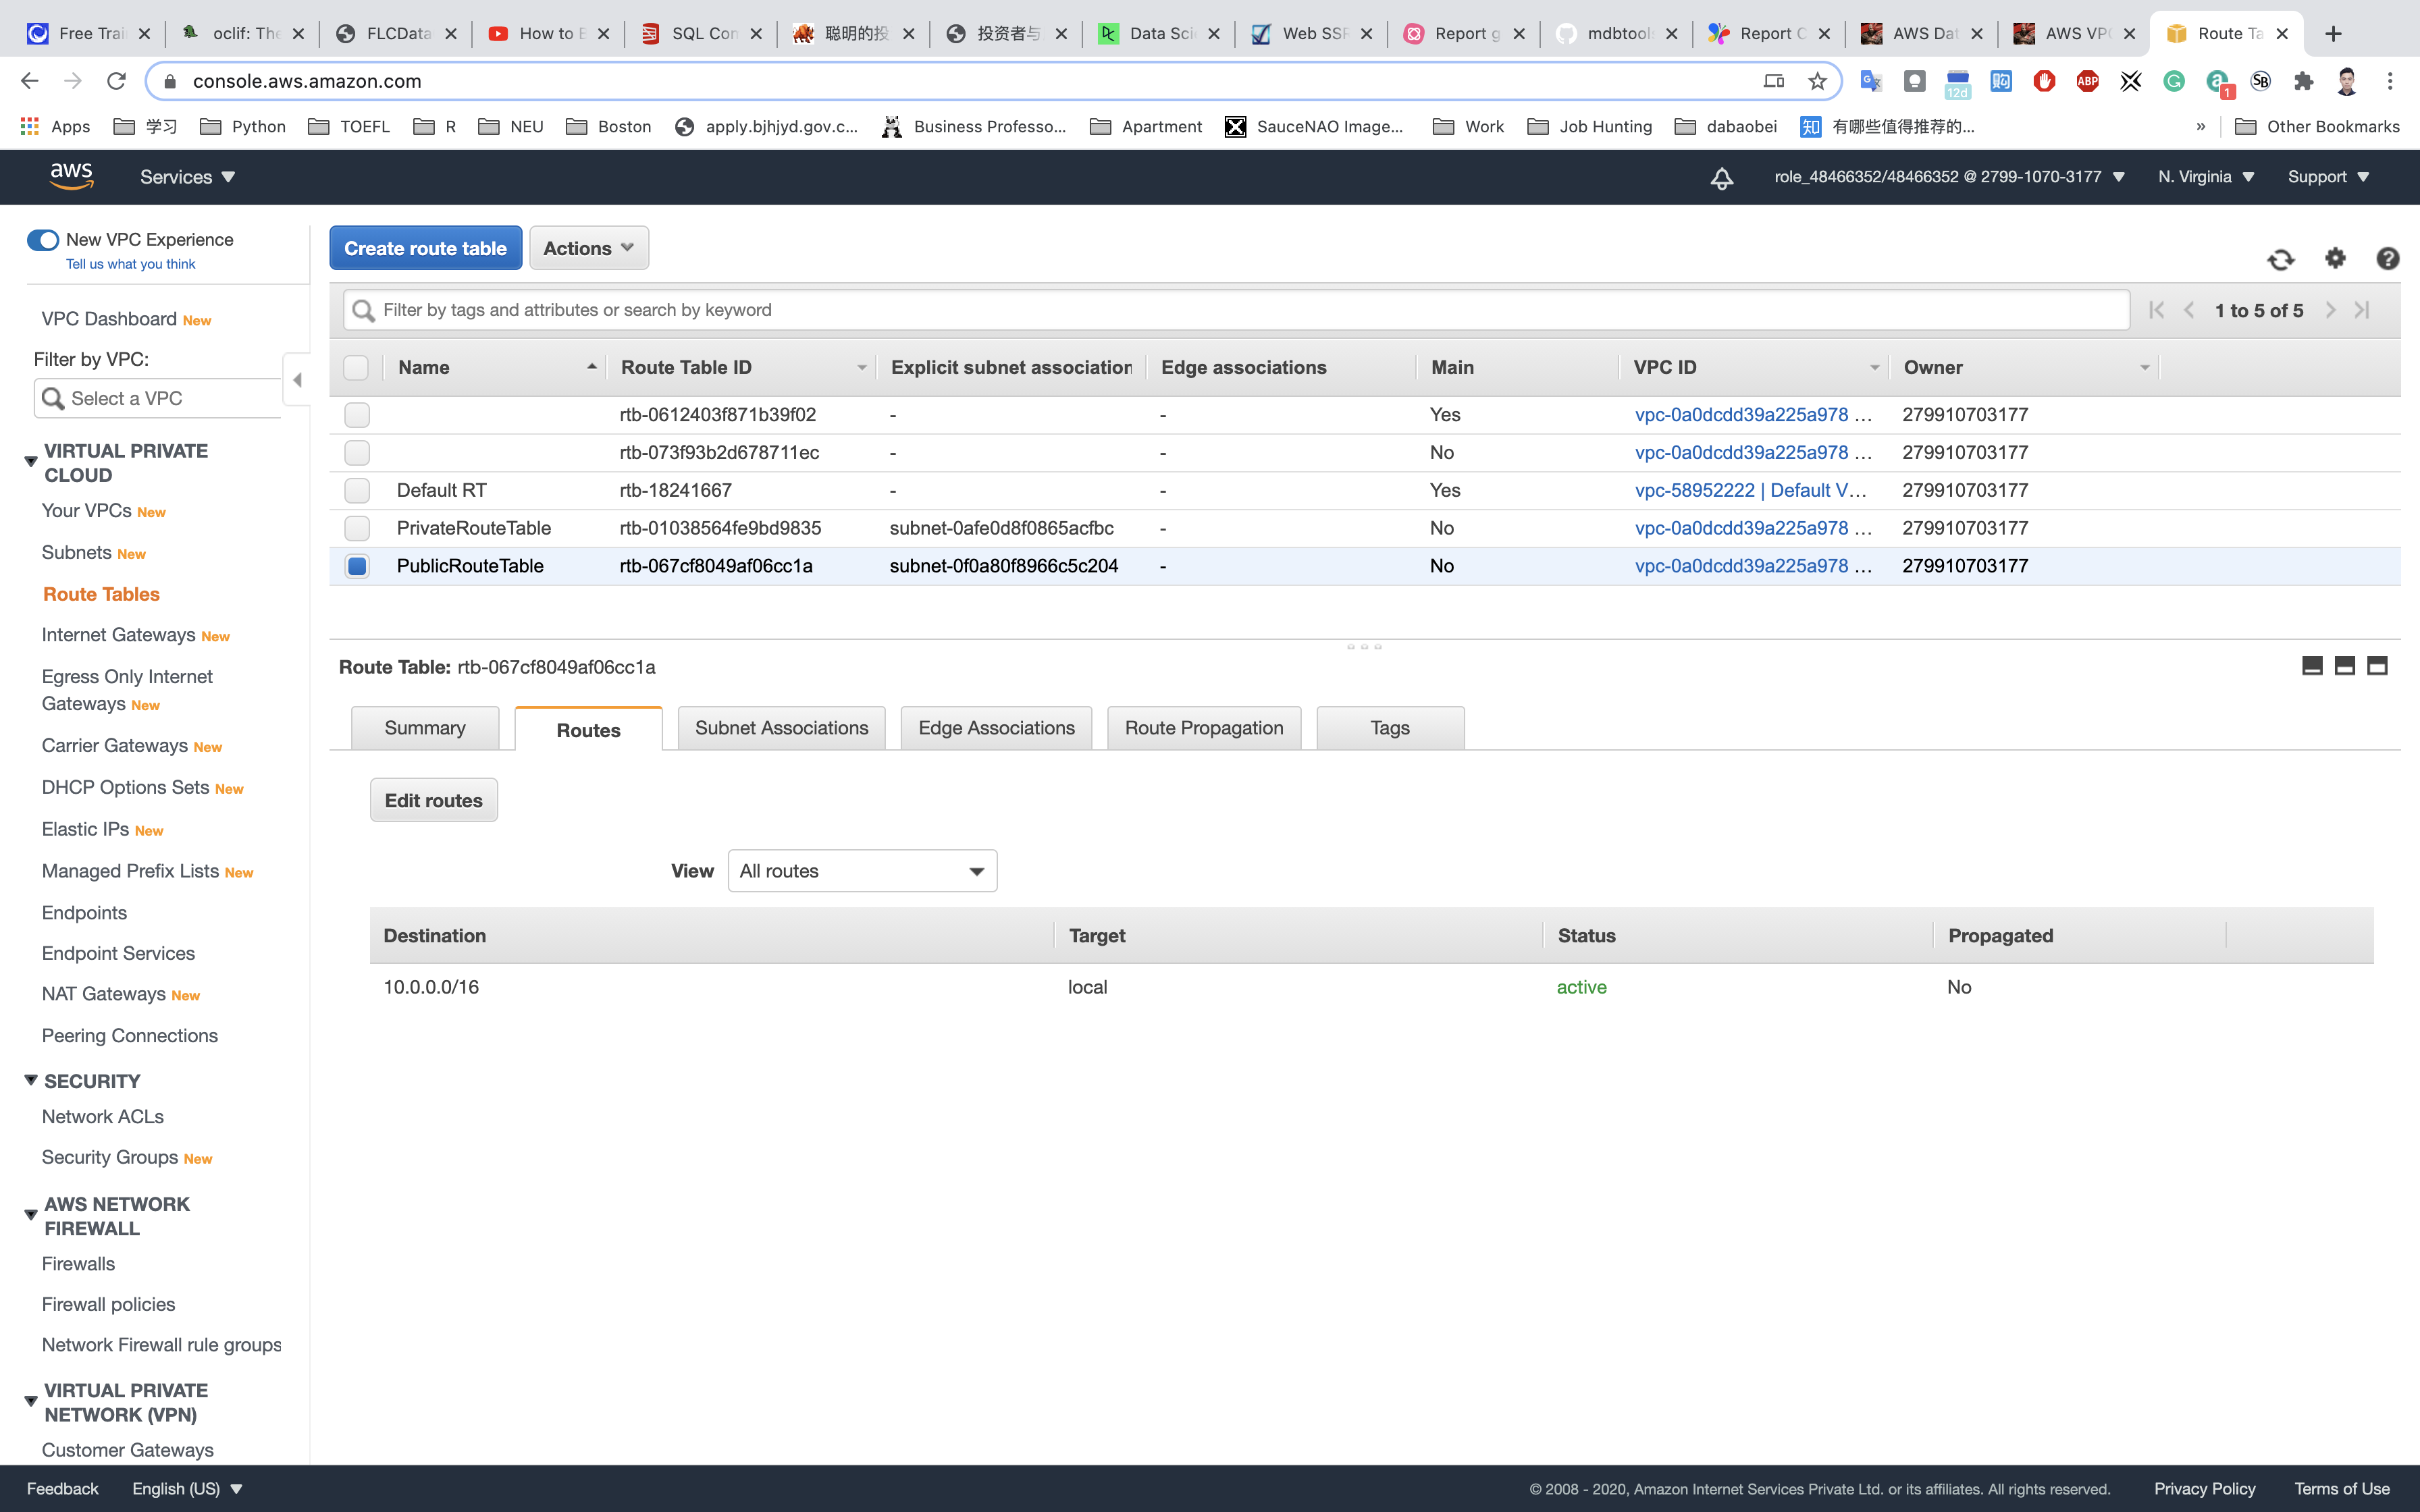
Specify the following values:
- Destination:
0.0.0.0/0 - Target: Select Internet Gateway from the dropdown menu to select
IGW.
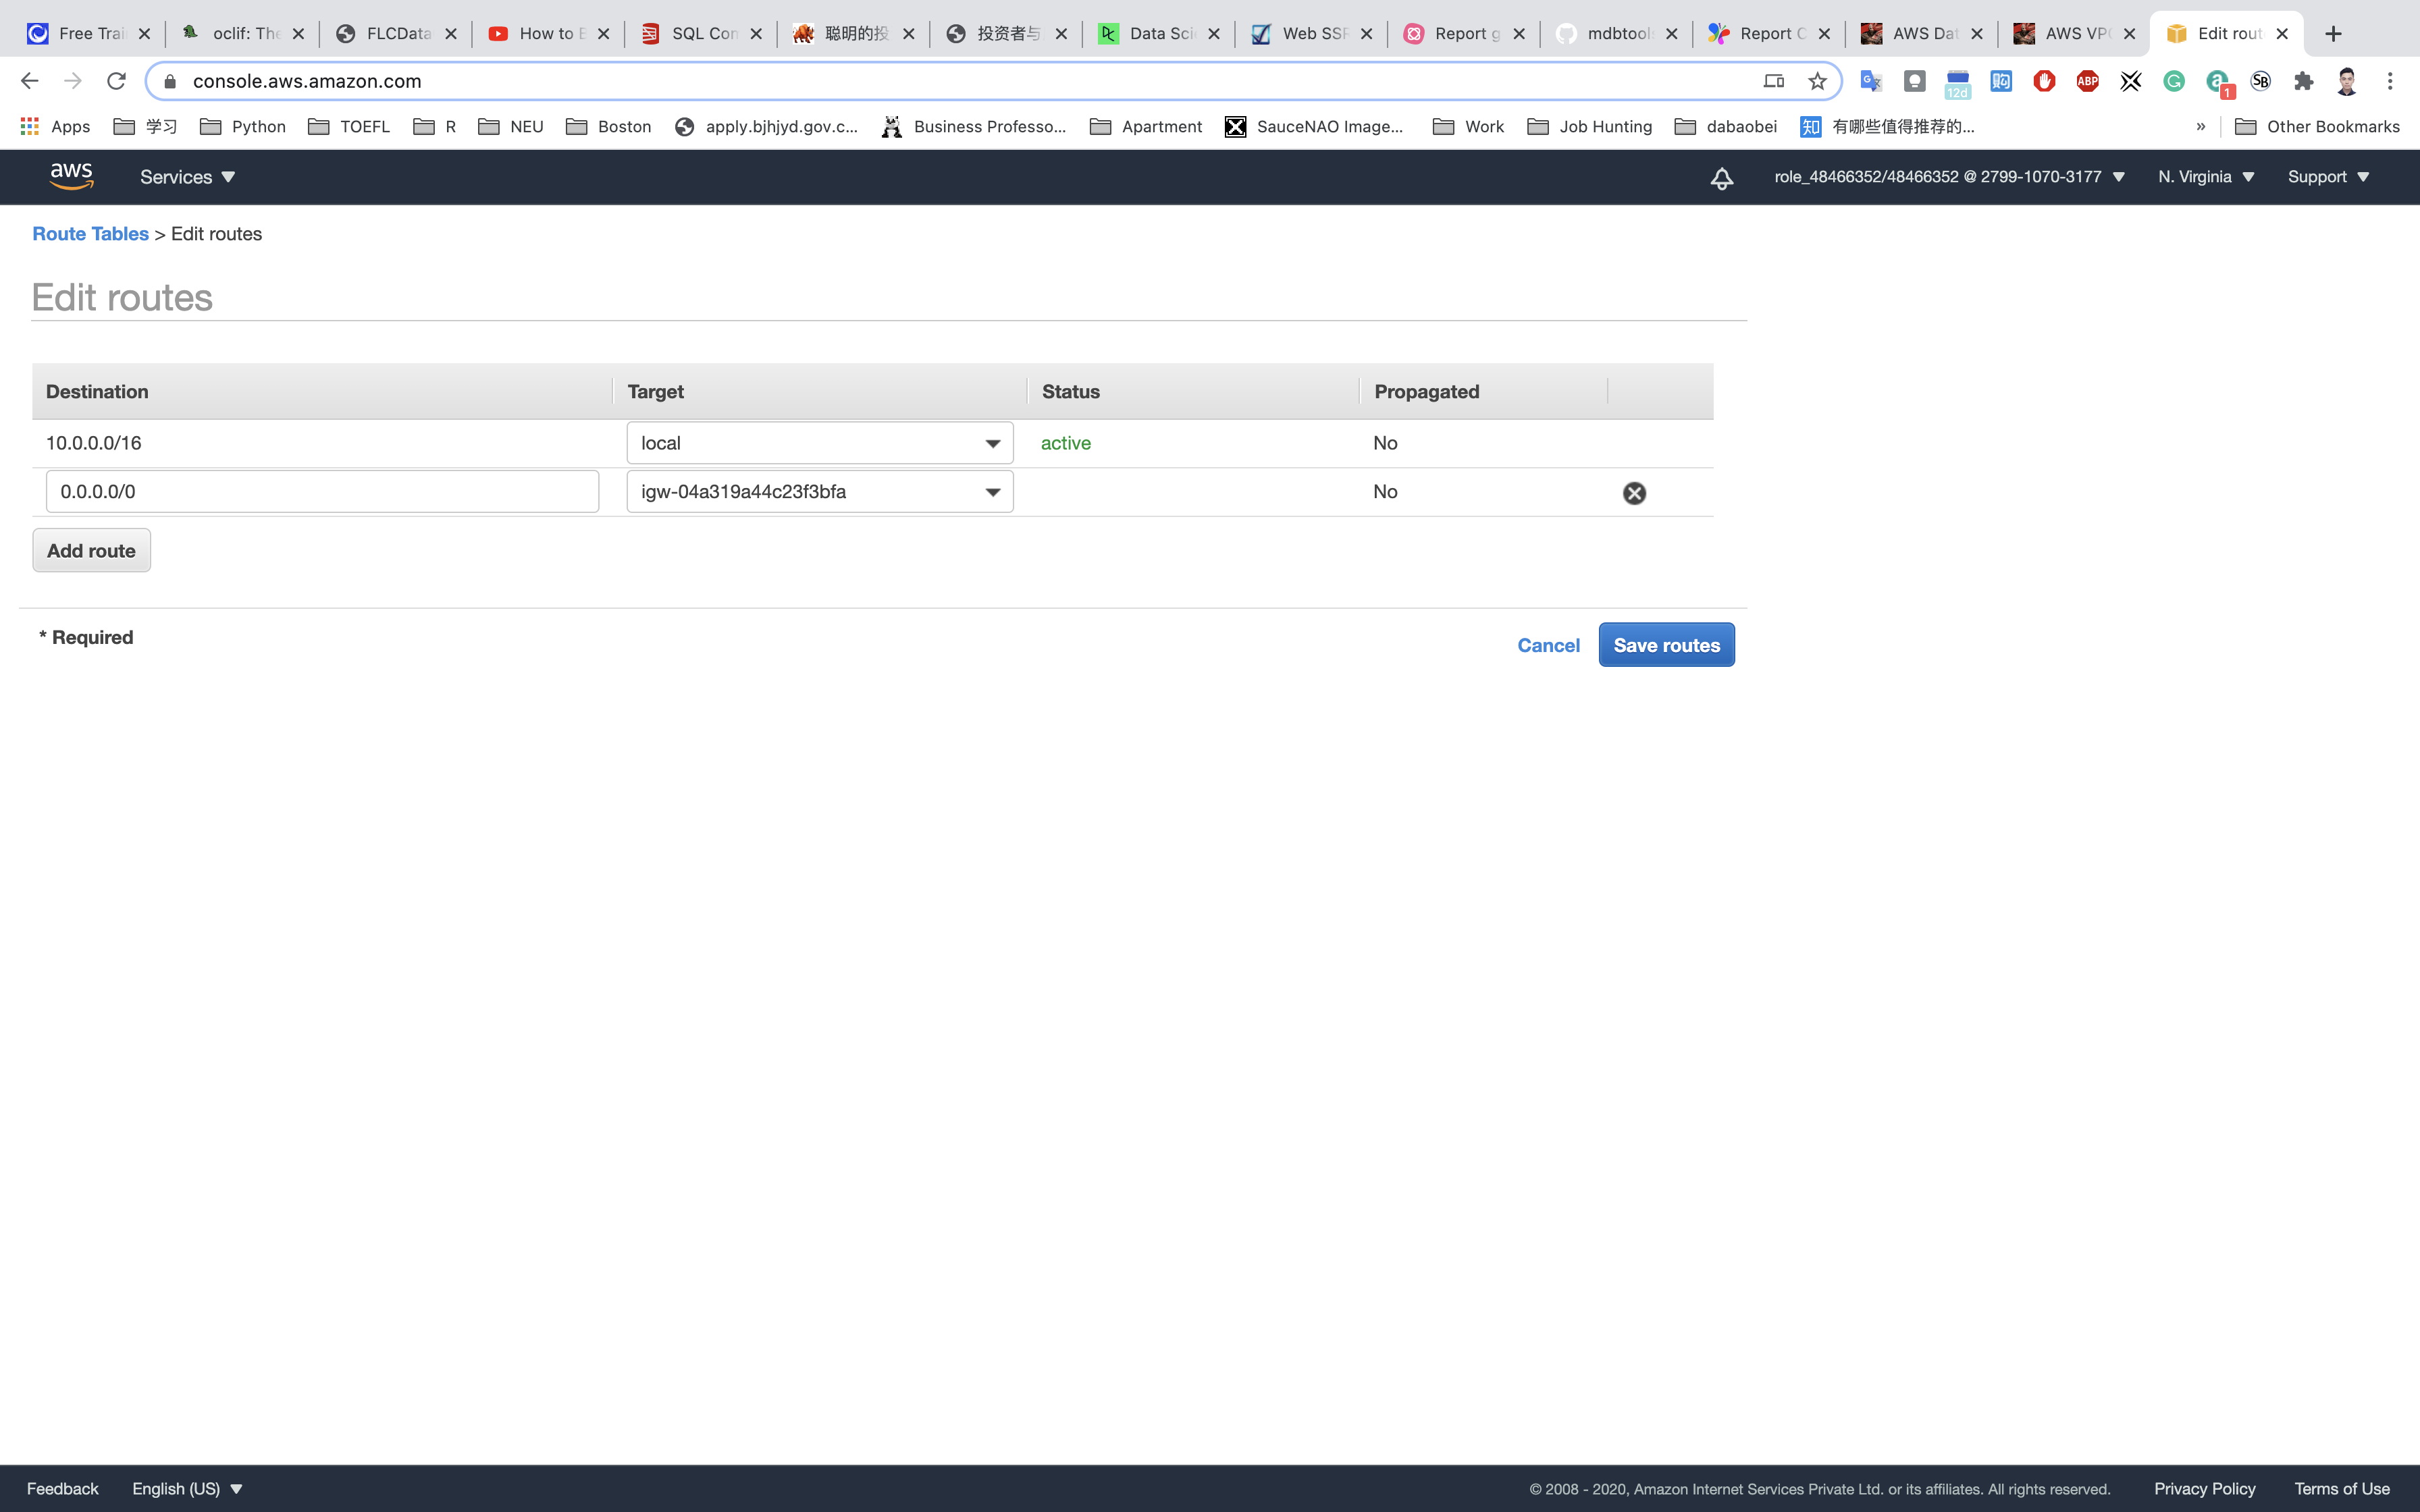
Click on Save routes.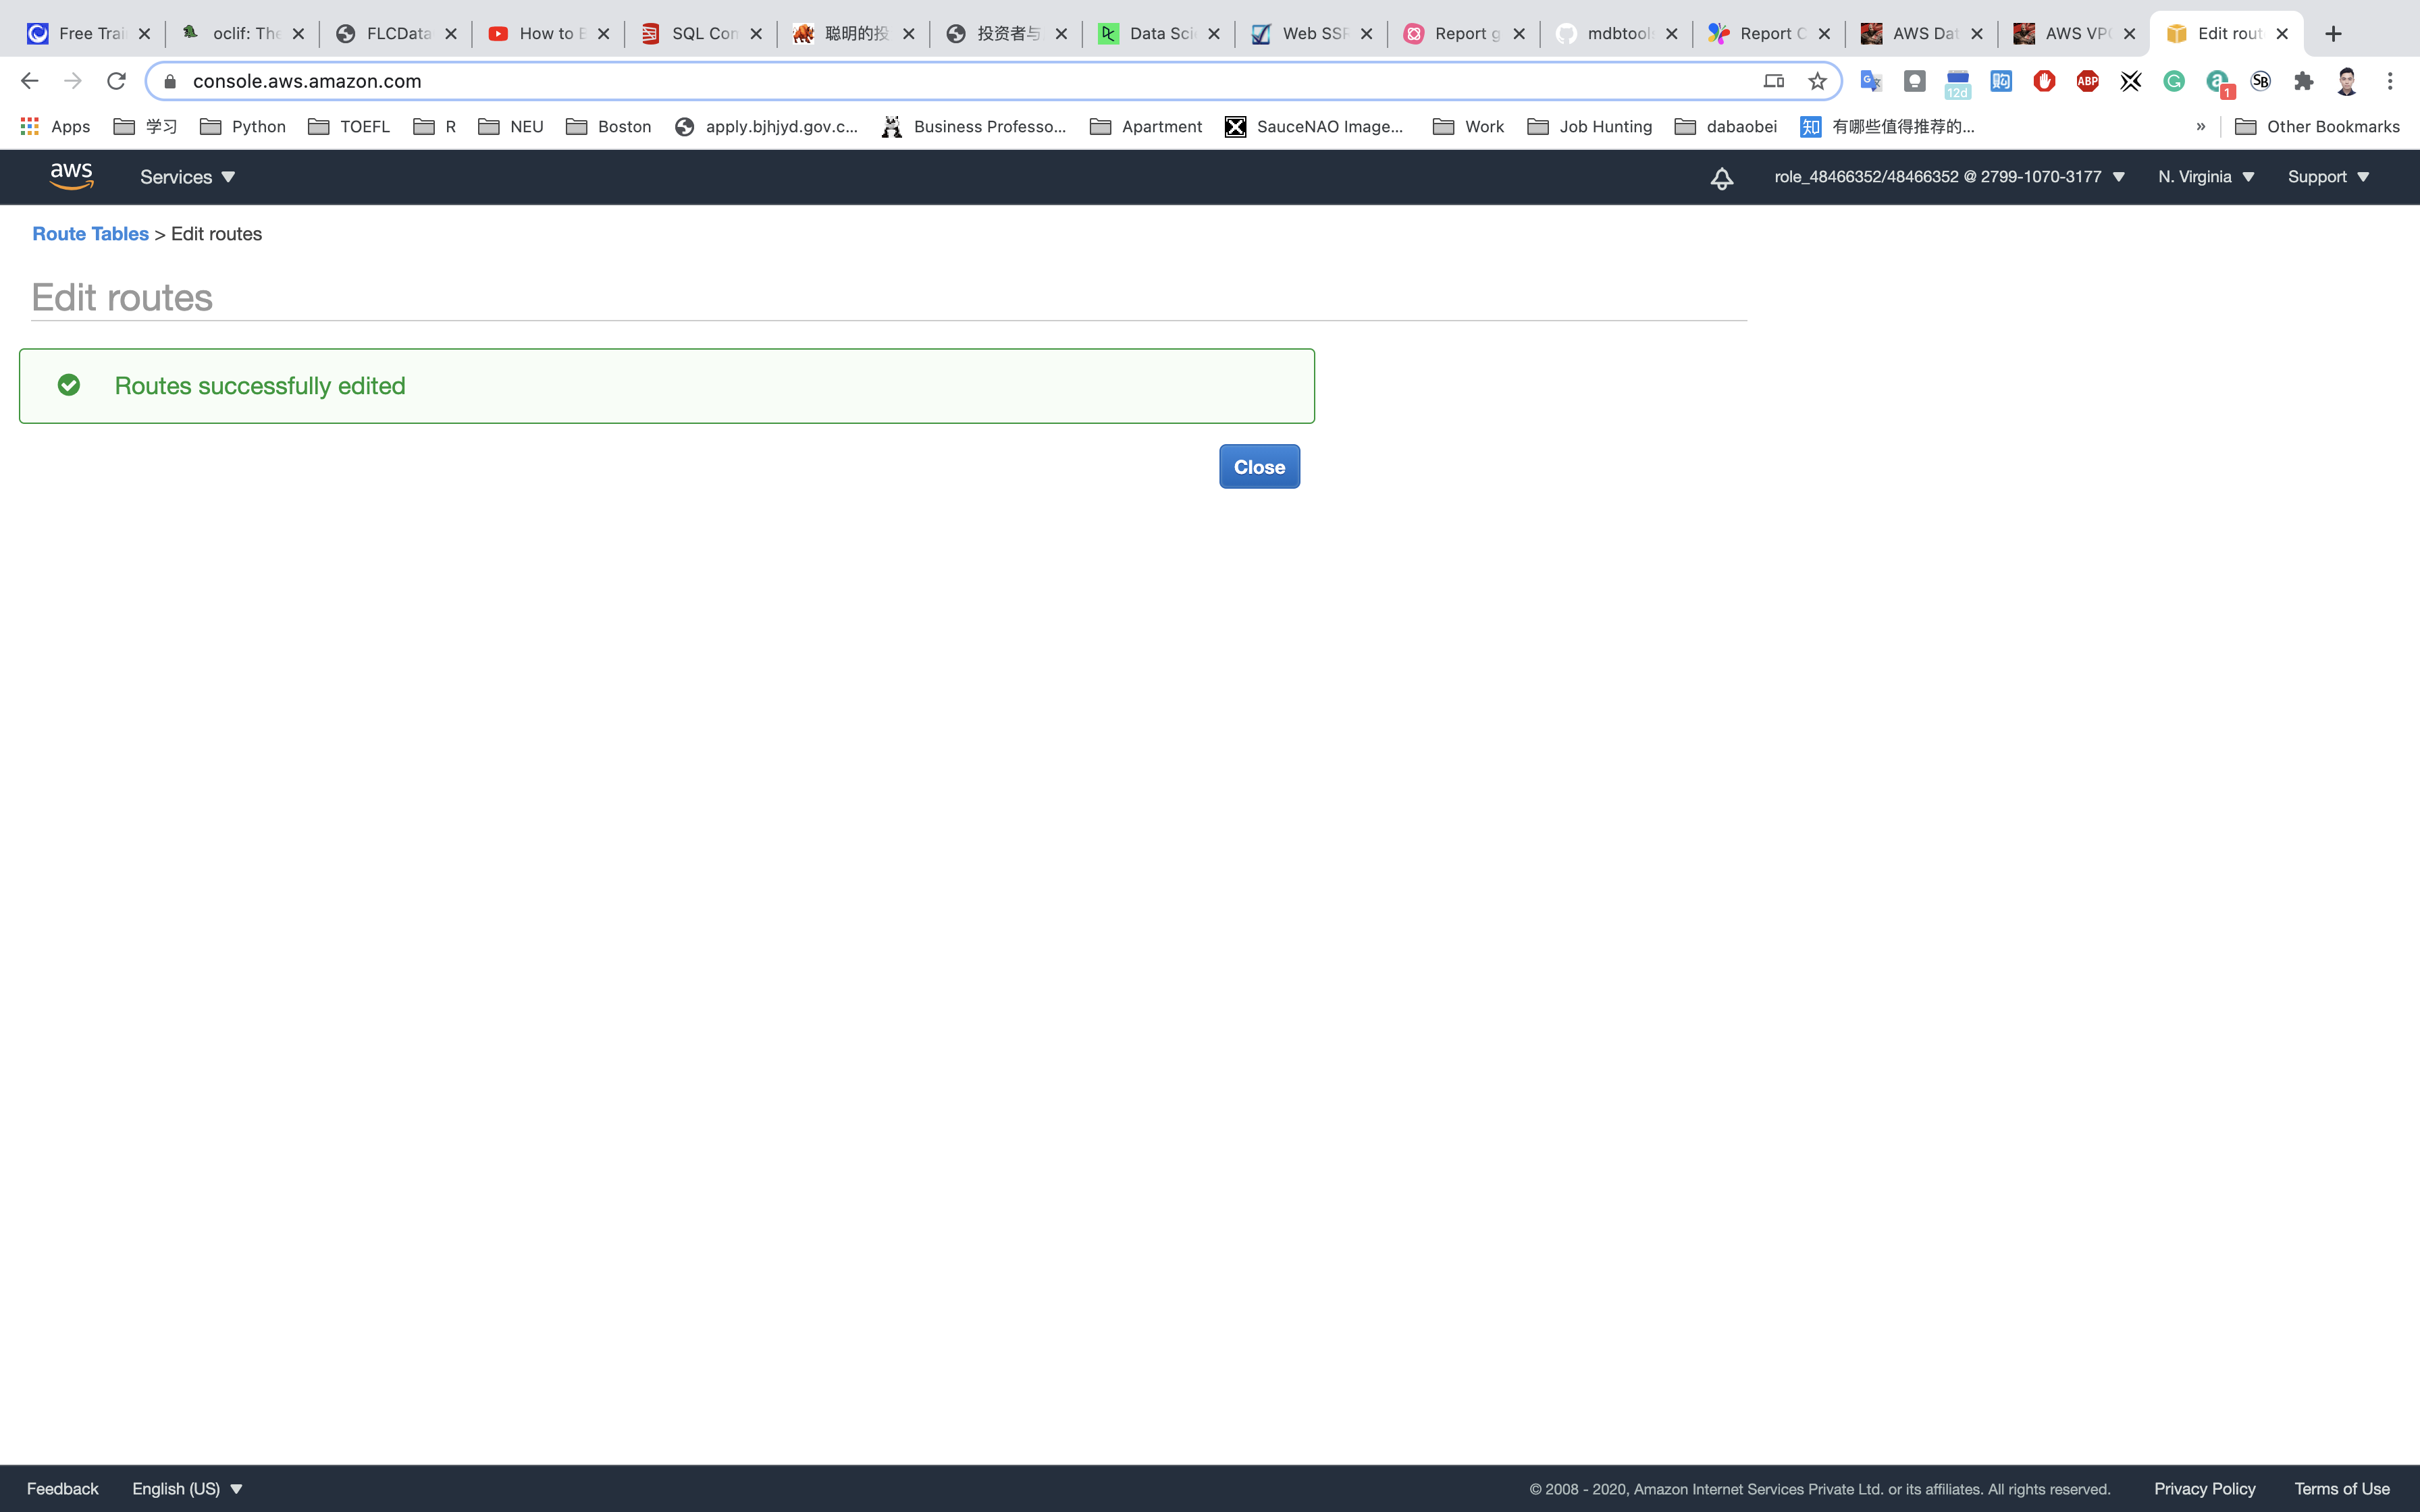
Completion and Conclusion
- You have successfully completed and learned how to create public and private subnets.
- You have learned how to create an Internet Gateway and associate it to VPC.
- You now understand how public and private subnets are different (through associating Internet Gateway or not).
- The instances launched inside the public subnet will be able to access the internet and instances launched inside the private subnet will not have access to the internet.
Creating NAT Gateways in AWS
https://play.whizlabs.com/site/task_details?lab_type=1&task_id=35&quest_id=35
Lab Details
- This lab walks you through the steps to create a NAT Gateway and allow internet access to an Instance in a private subnet.
Introduction
What is NAT Gateways?
- NAT stands for Network Address Translation.
- A NAT Gateway is a device used to enable instances in a private subnet to connect to the internet or other AWS services.
- It prevents the internet from initiating connections with the instances present in the private subnet.
- It forwards traffic from the instance in the private subnet to the internet or other AWS services, and then sends the response back to the instances.
- Changes the instances IP address with the NAT device’s address when the traffic goes to the Internet.
- We have 2 kinds of NAT devices:
- NAT Instance
- NAT Gateway
- NAT Instance uses Amazon Linux AMIs.
- NAT Instance limit depends on your instance type limit for the region.
- NAT Instance does not support IPv6 traffic.
- NAT Gateway usage is charged to the customer on an hourly basis.
- NAT Gateway does not support IPv6 traffic.
- AWS recommends the usage of NAT Gateway, since they provide better availability and bandwidth over NAT Instances.
Tasks
- Log into AWS Management Console.
- Create a VPC. Create public and private subnet and attached Internet Gateway to public subnet.
- Create EC2 instances for each public and private subnet.
- SSH and test the internet access from an instance in private subnet.
- To provide internet access to the Instance in the private subnet, create a NAT Gateway and attach it to the VPC.
- Attach NAT Gateway to correct route table.
- Test the internet access from the Instance created inside the private subnet.
Architecture Diagram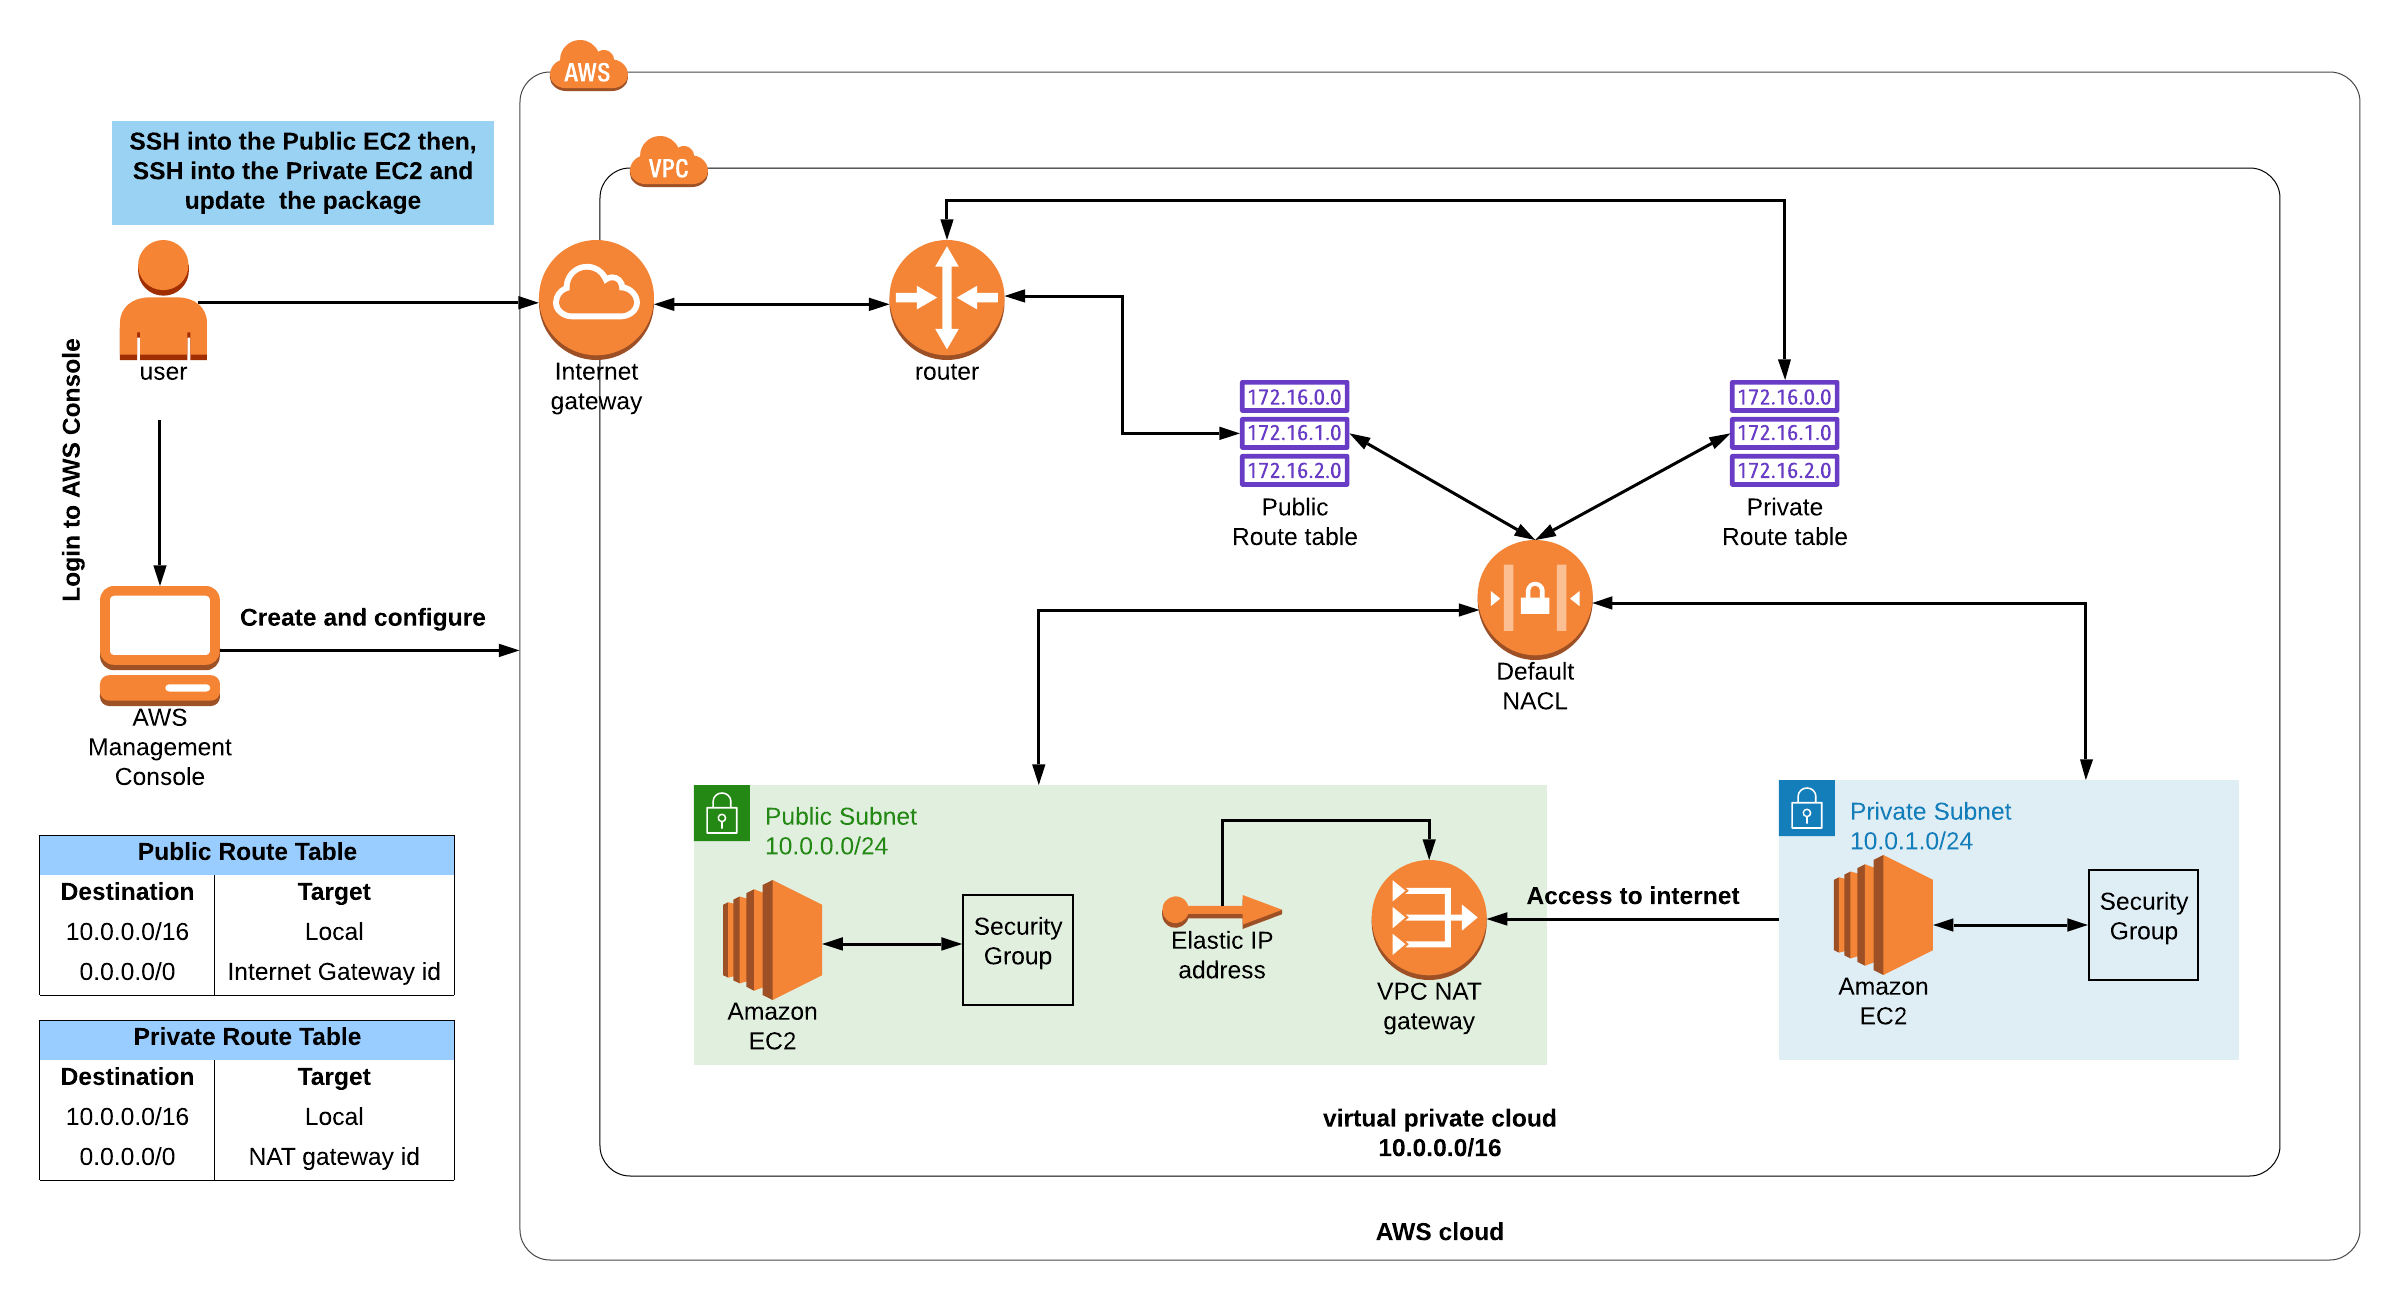
VPC Configuration
Services -> VPC
Create VPC
Click on VPC (under Networking & Content Delivery section) or you can also search for VPC.
Click on Your VPCs from the left menu.
Here you can see the list of all VPC, No need to do anything with the existing and default VPCs, we will create a new VPC for this lab.
Click on Create VPC.
- Name tag:
testVPC - IPv4 CIDR block:
10.0.0.0/16 - IPv6 CIDR block: No need to change this, make sure No IPv6 CIDR Block is checked.
- Tenancy: No need to change this, make sure Default is selected.
Now click on Create VPC.
Once VPC is created, click on Your VPCs.
It will appear with details as shown below:
Create Subnet
In this lab, we will create one public subnet and a private subnet in us-east-1a and us-east-1b Availability Zones respectively as follows:
Public Subnet
For the Public Subnet, click on Subnets from the left menu and click on Create subnet.
- VPC: Select
testVPCfrom the list you created earlier. - Name tag:
PublicSubnet - Availability Zone: Select
us-east-1a - IPv4 CIDR block: Enter the range
10.0.1.0/24
Click on Create subnet.
Let’s enable Auto Assign public IP to Instances created within this subnet,
Select PublicSubnet , Click on Actions.
Click on Modify auto-assign IP settings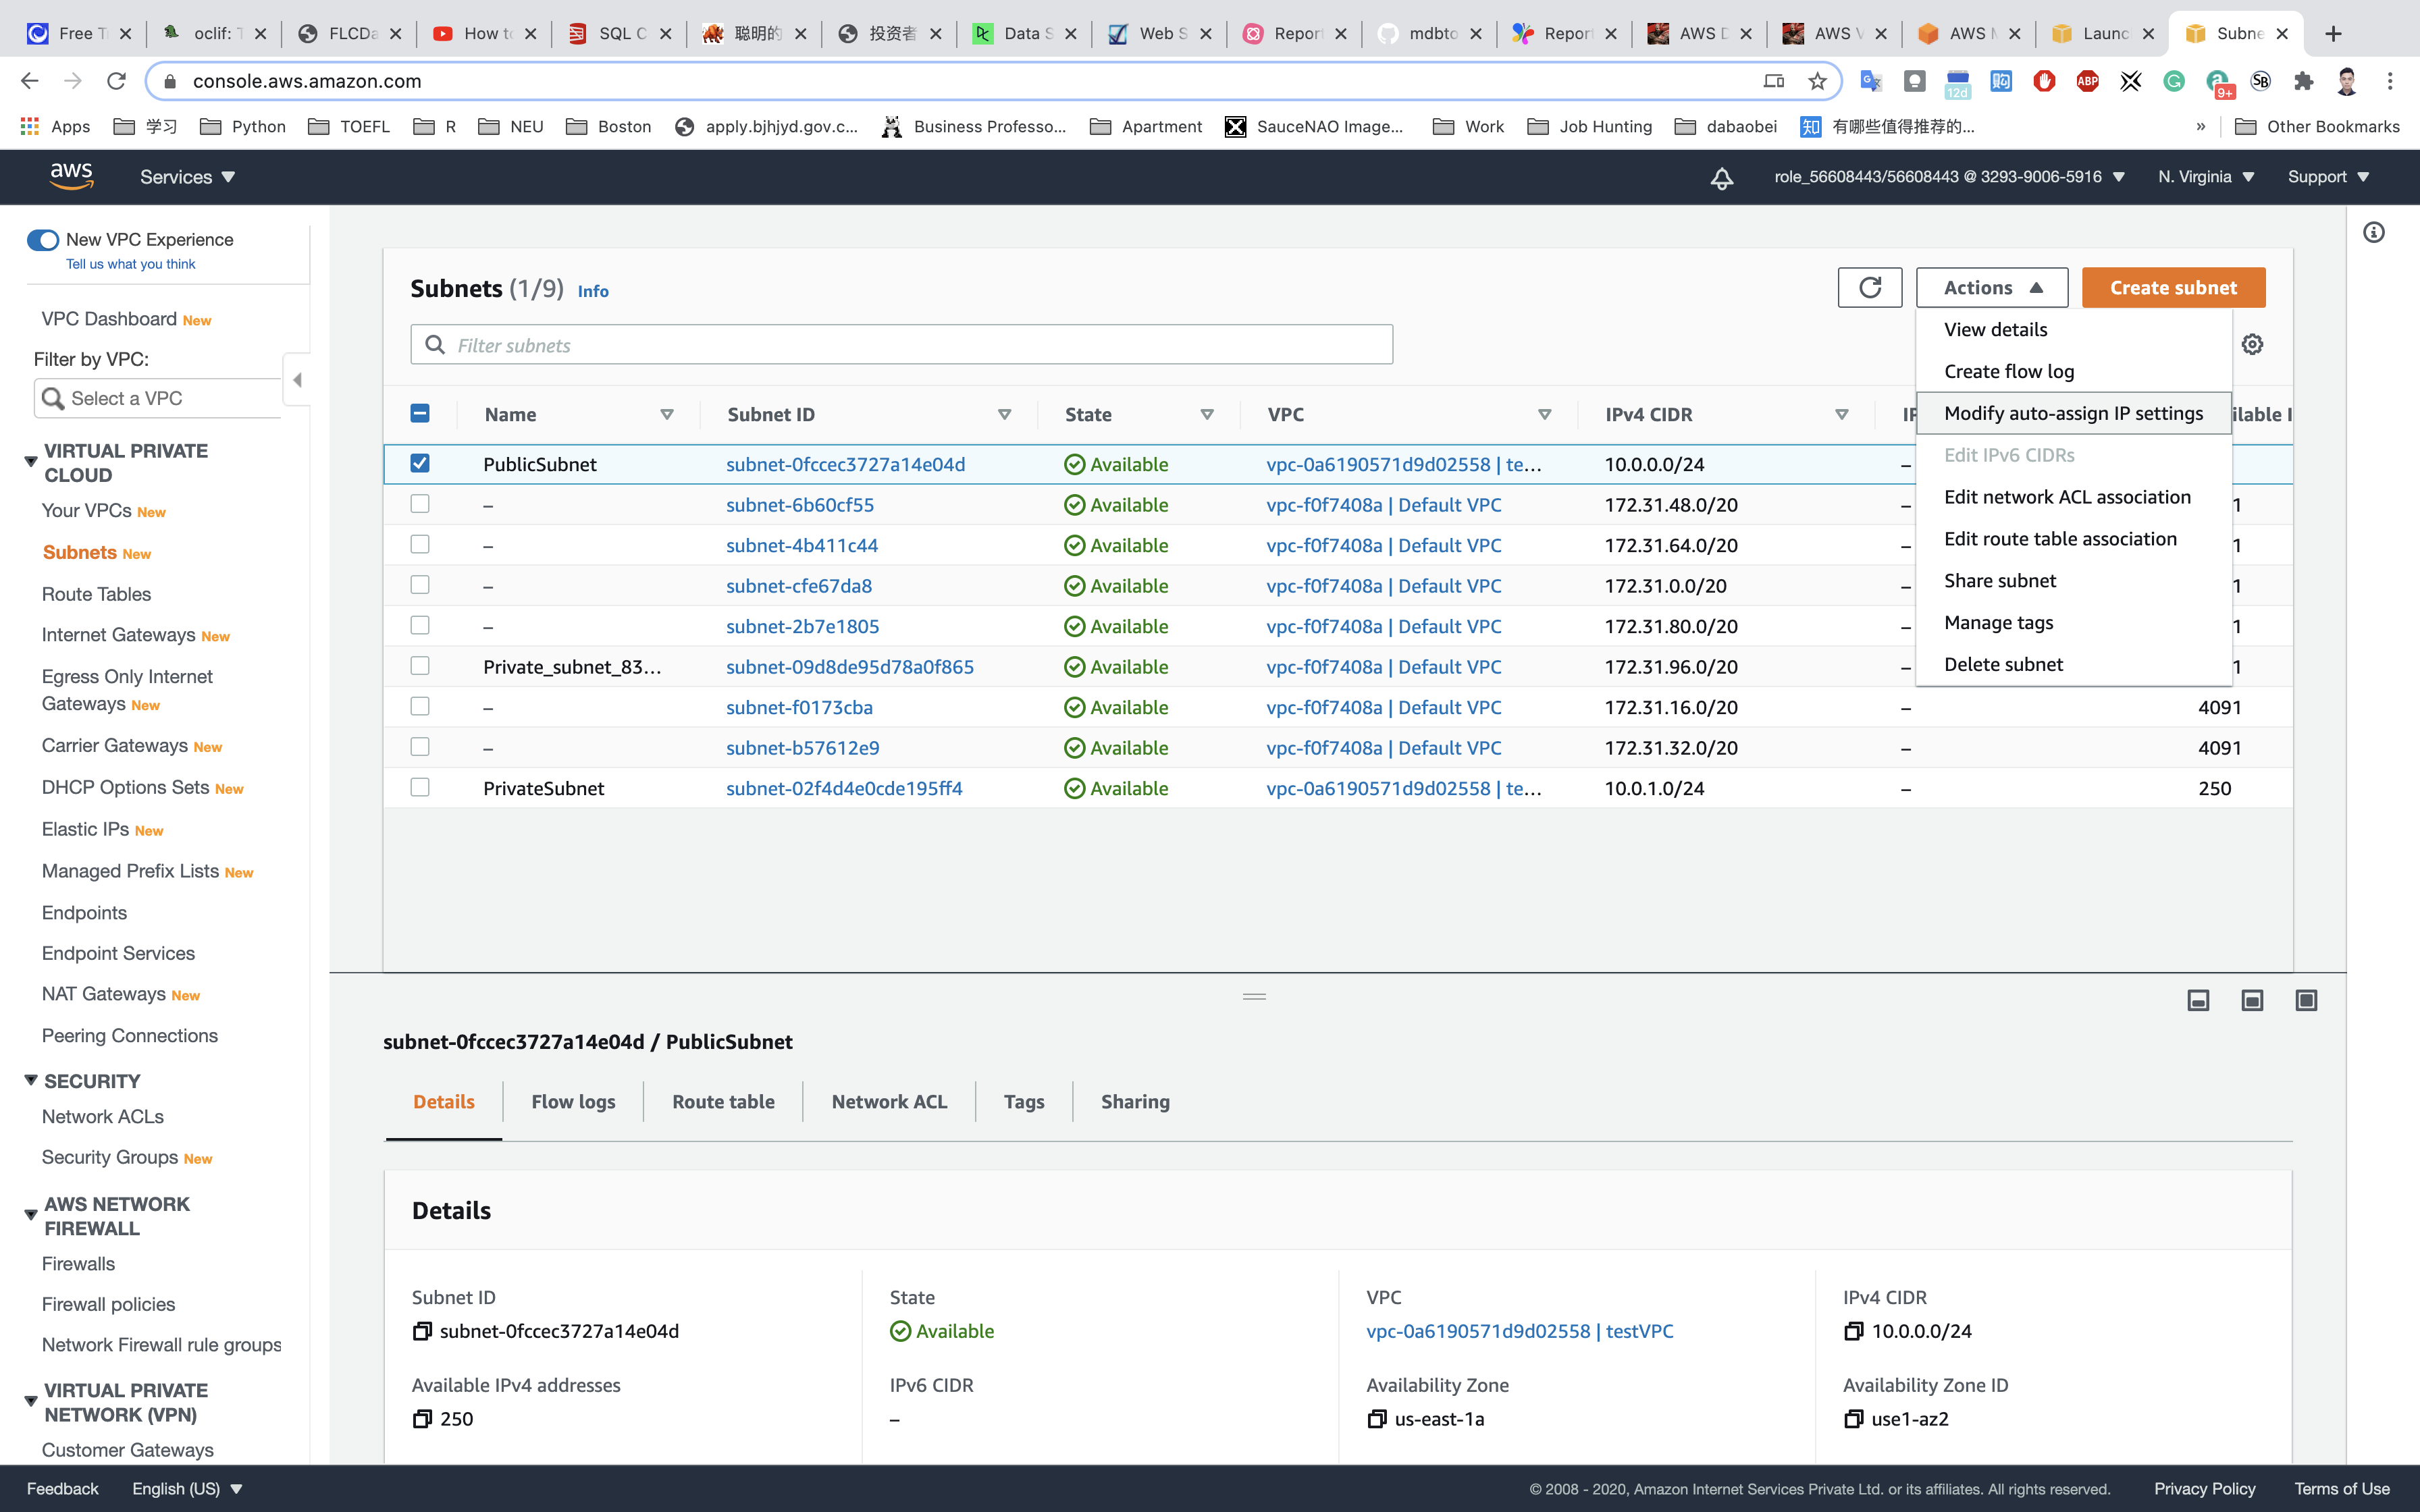
Auto-assign IPv4: Check Enable auto-assign public IPv4 address
Click on Save.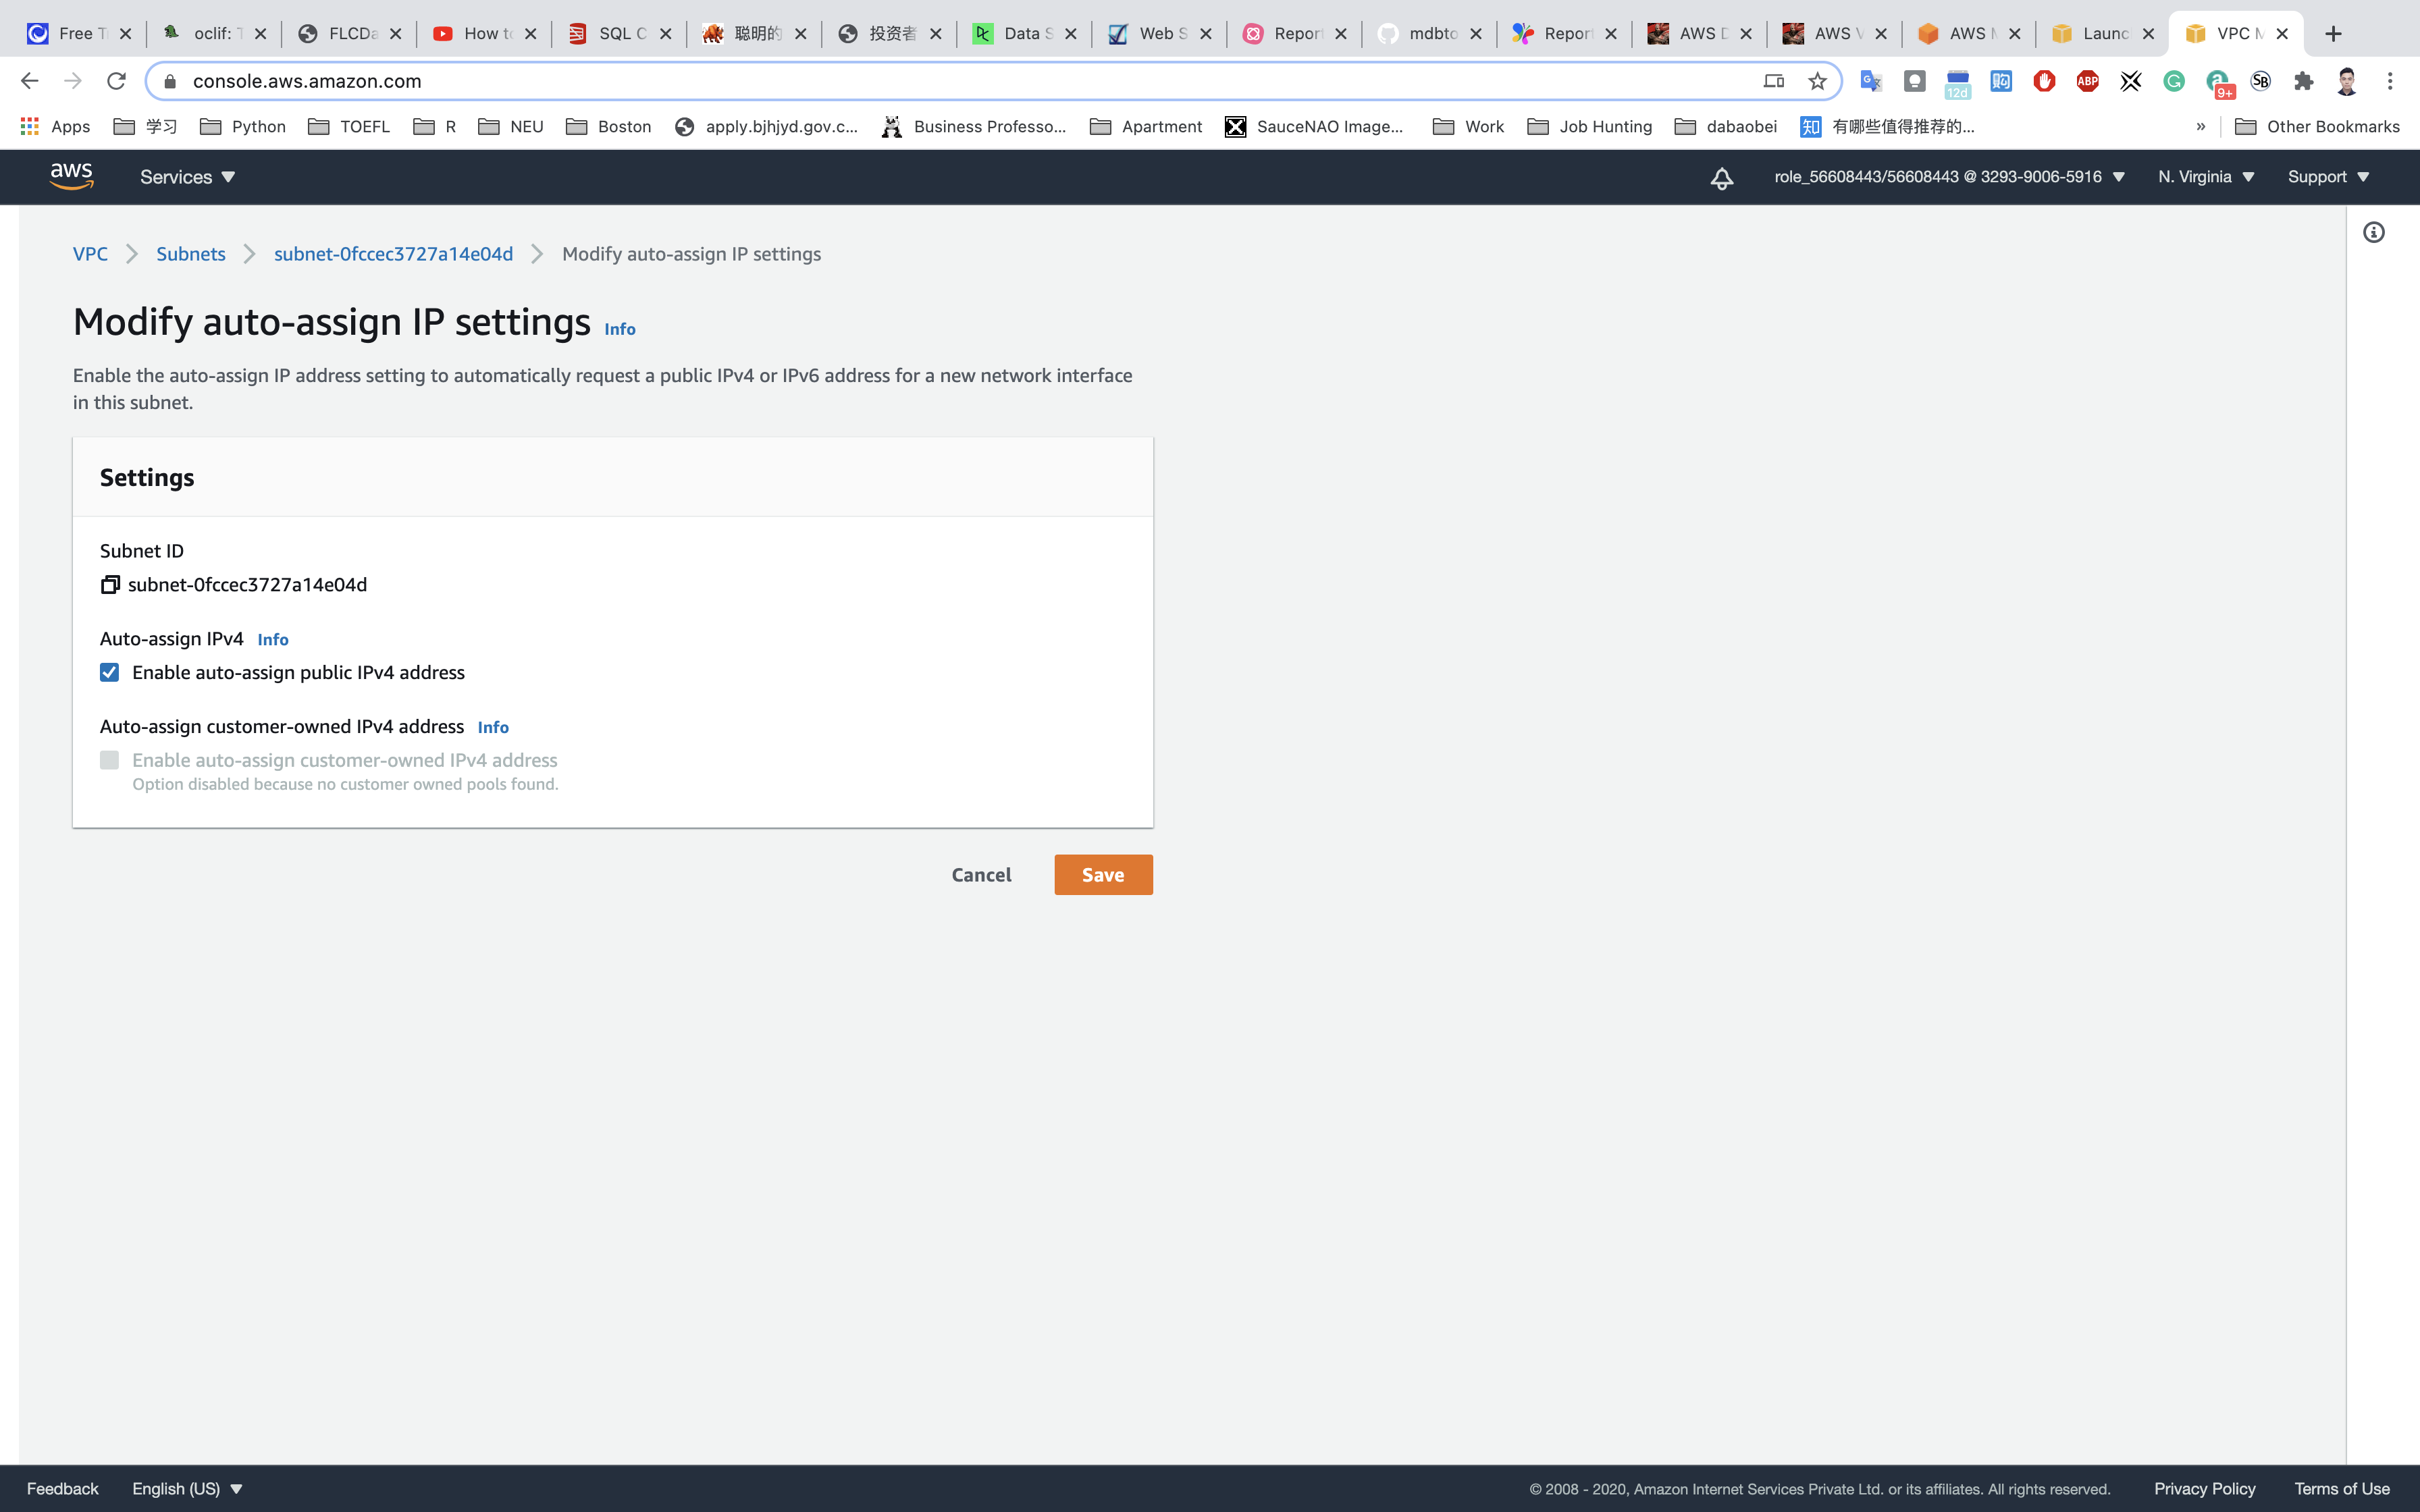
Now the Instances launched inside the PublicSubnet will have Public IPs assigned to them by default.
Private Subnet
For the Private Subnet, click on Subnets from the left menu and click on Create subnet.
- VPC: Select
testVPCfrom the list you created earlier. - Name tag:
PrivateSubnet - Availability Zone: Select
us-east-1b - IPv4 CIDR block: Enter the range
10.0.2.0/24
Click on Create subnet.
Create Gateways
Internet Gateway
- Click on
Internet Gatewaysfrom the left menu and click onCreate internet gateway.
- Name Tag:
IGW.
Click on Create internet gateway.
- Select the Internet gateway you created from the list
- Click on
Actions. - Click on
Attach to VPC. - Select
testwhich you created from the list and click onAttach internet gateway.
NAT Gateway
- Click on
NAT Gatewaysfrom the left menu and click onCreate NAT gateway.
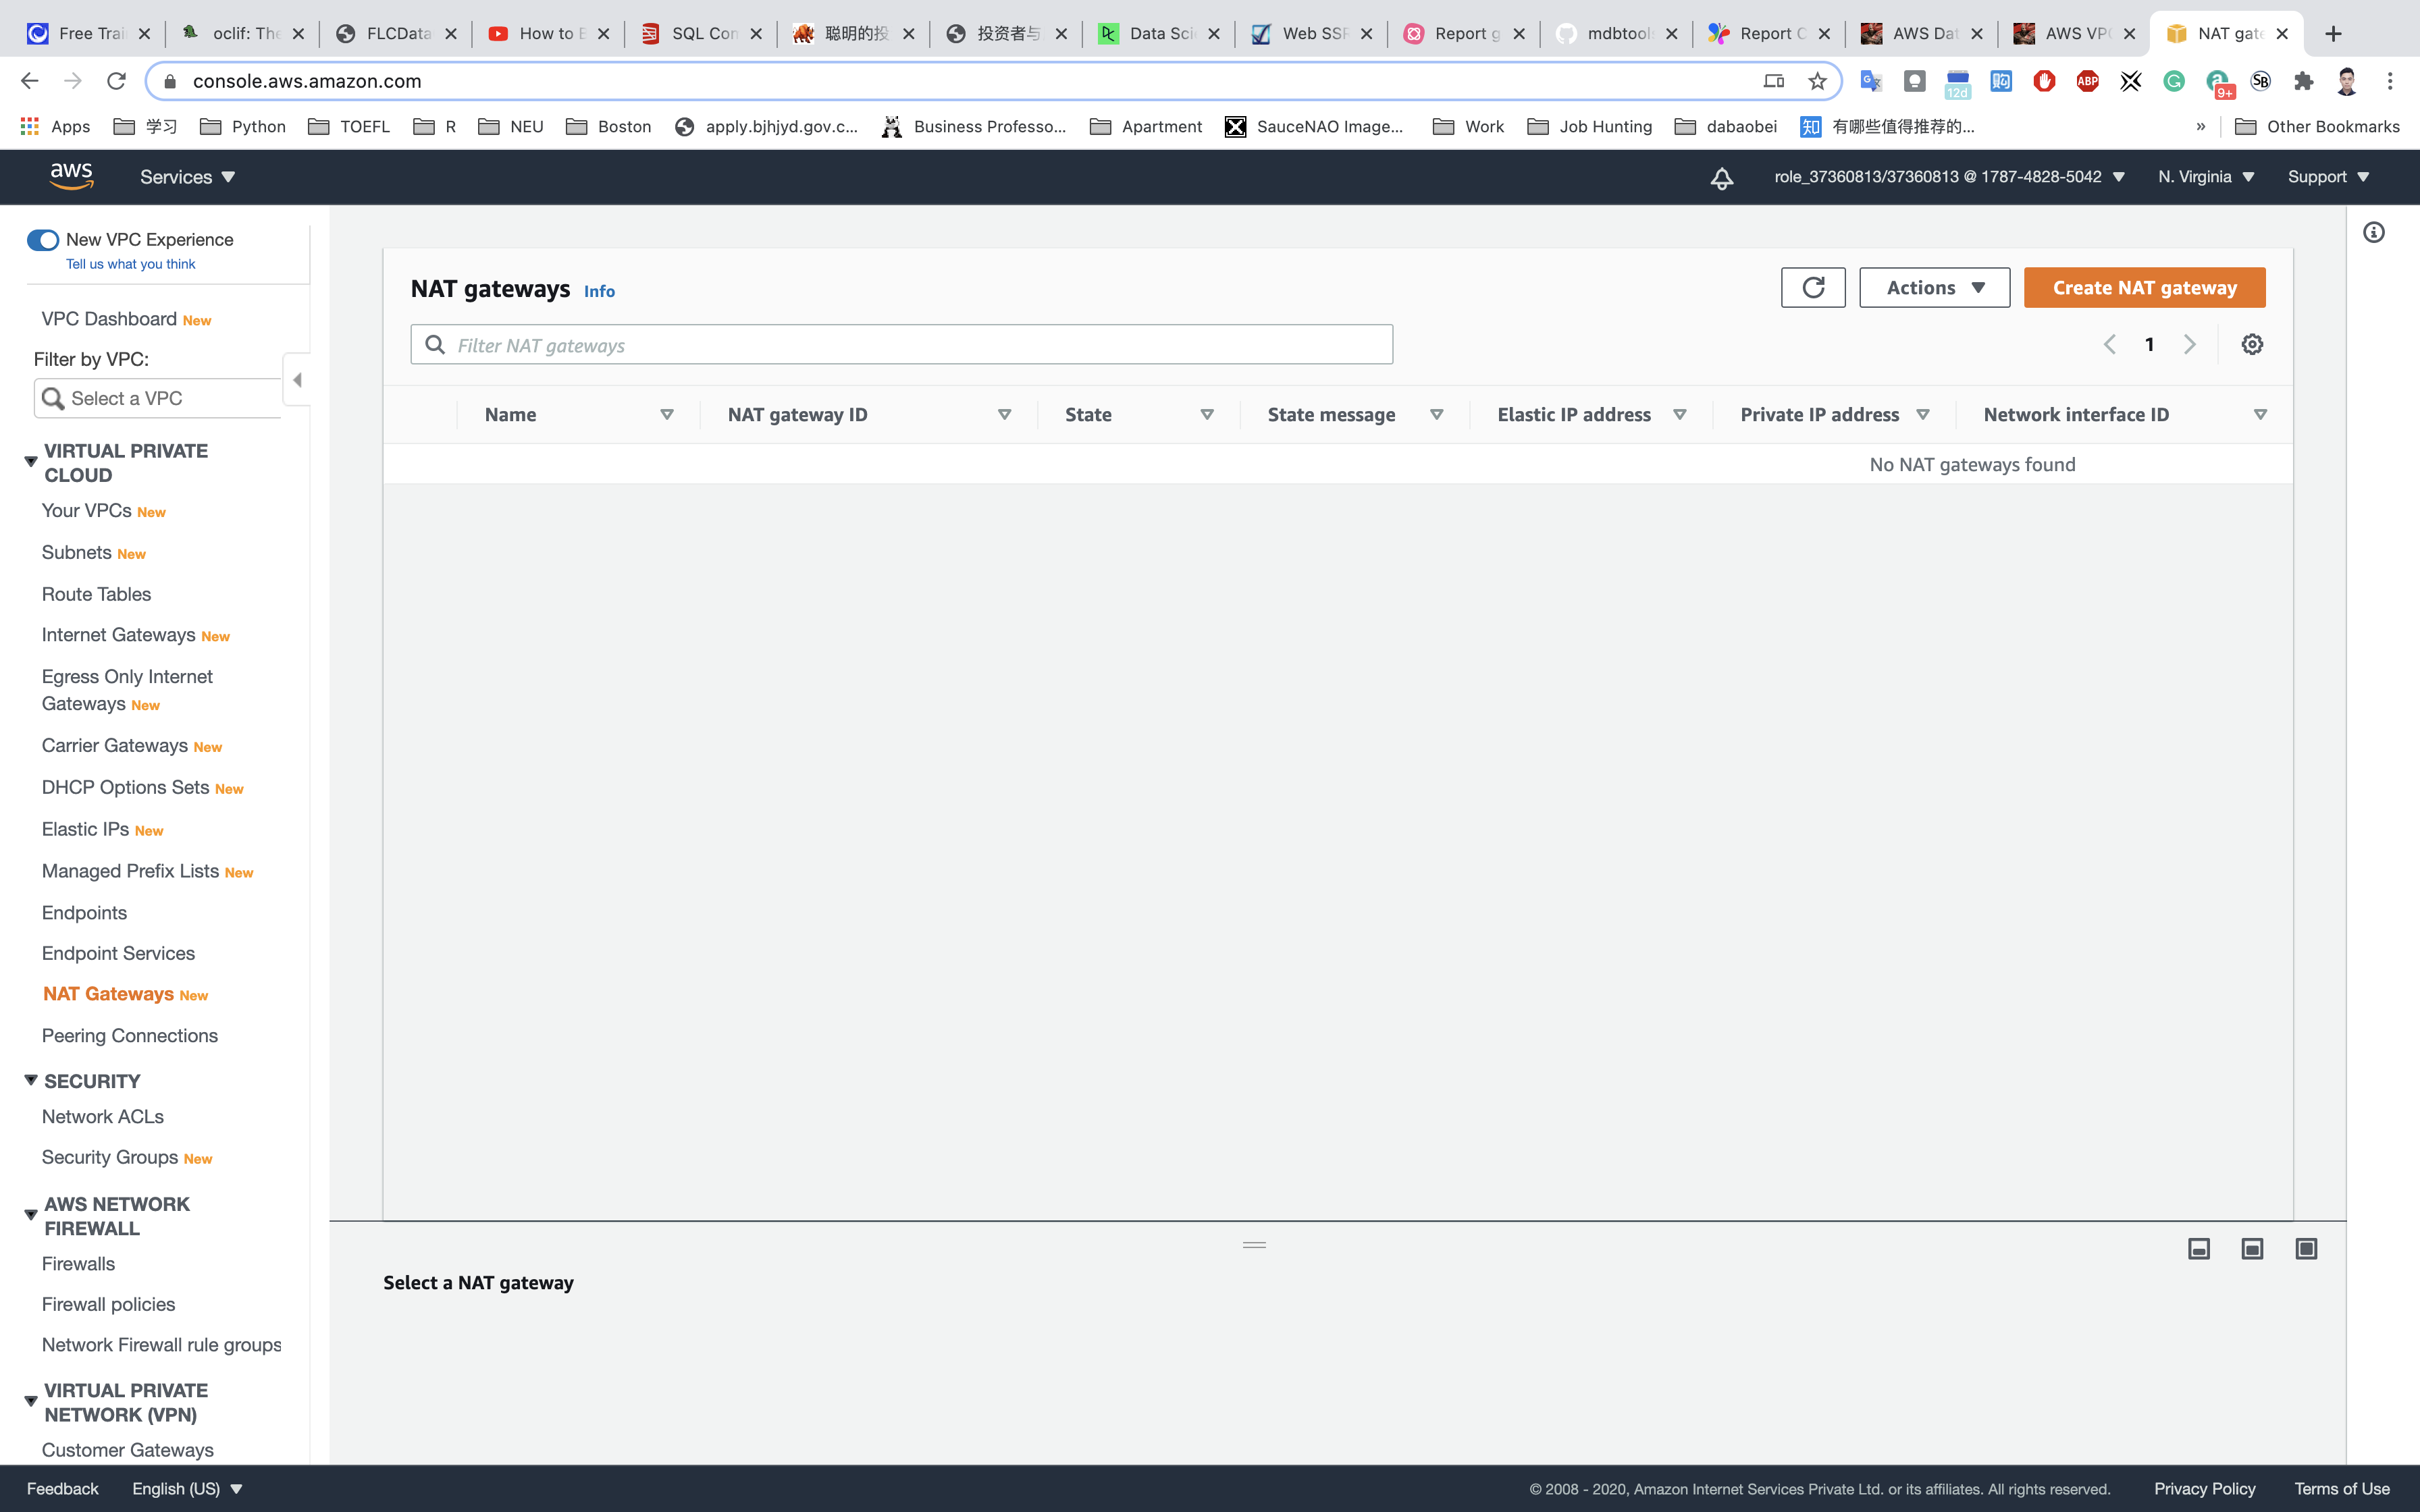
- Name Tag:
NGW. - Subnet:
PublicSubnet
Click on Allocate Elastic IP.
Click on Create NAT gateway.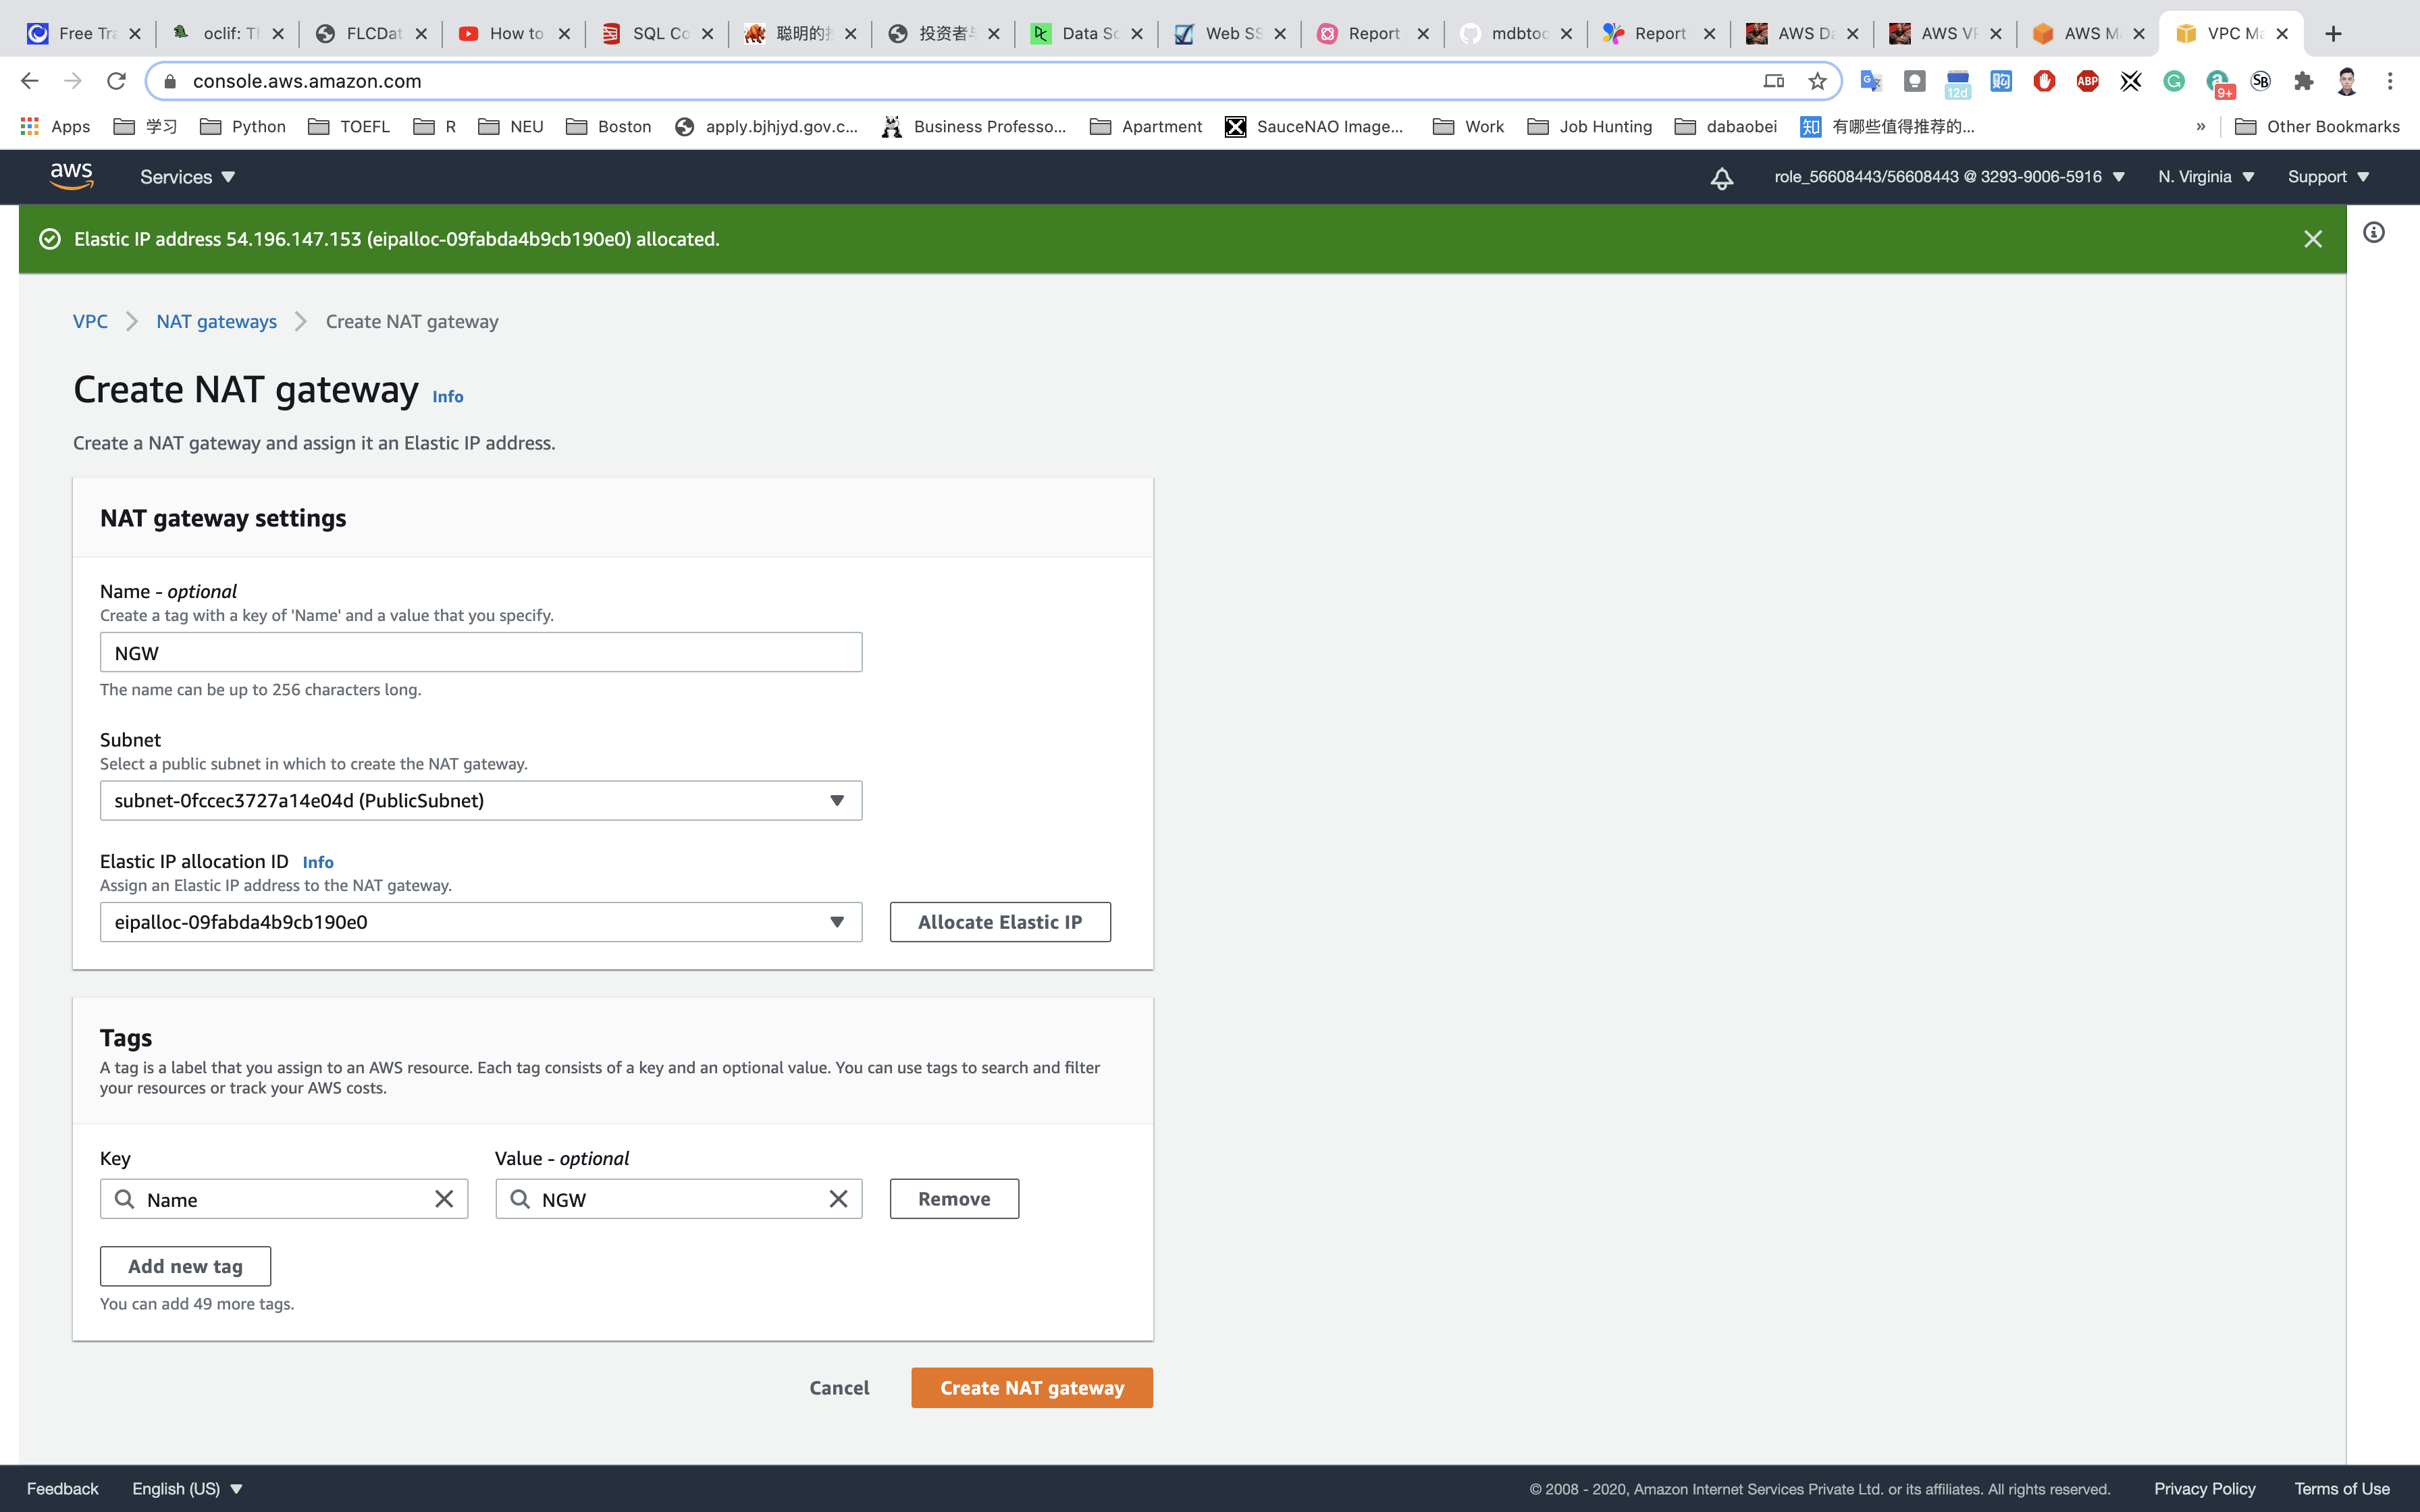
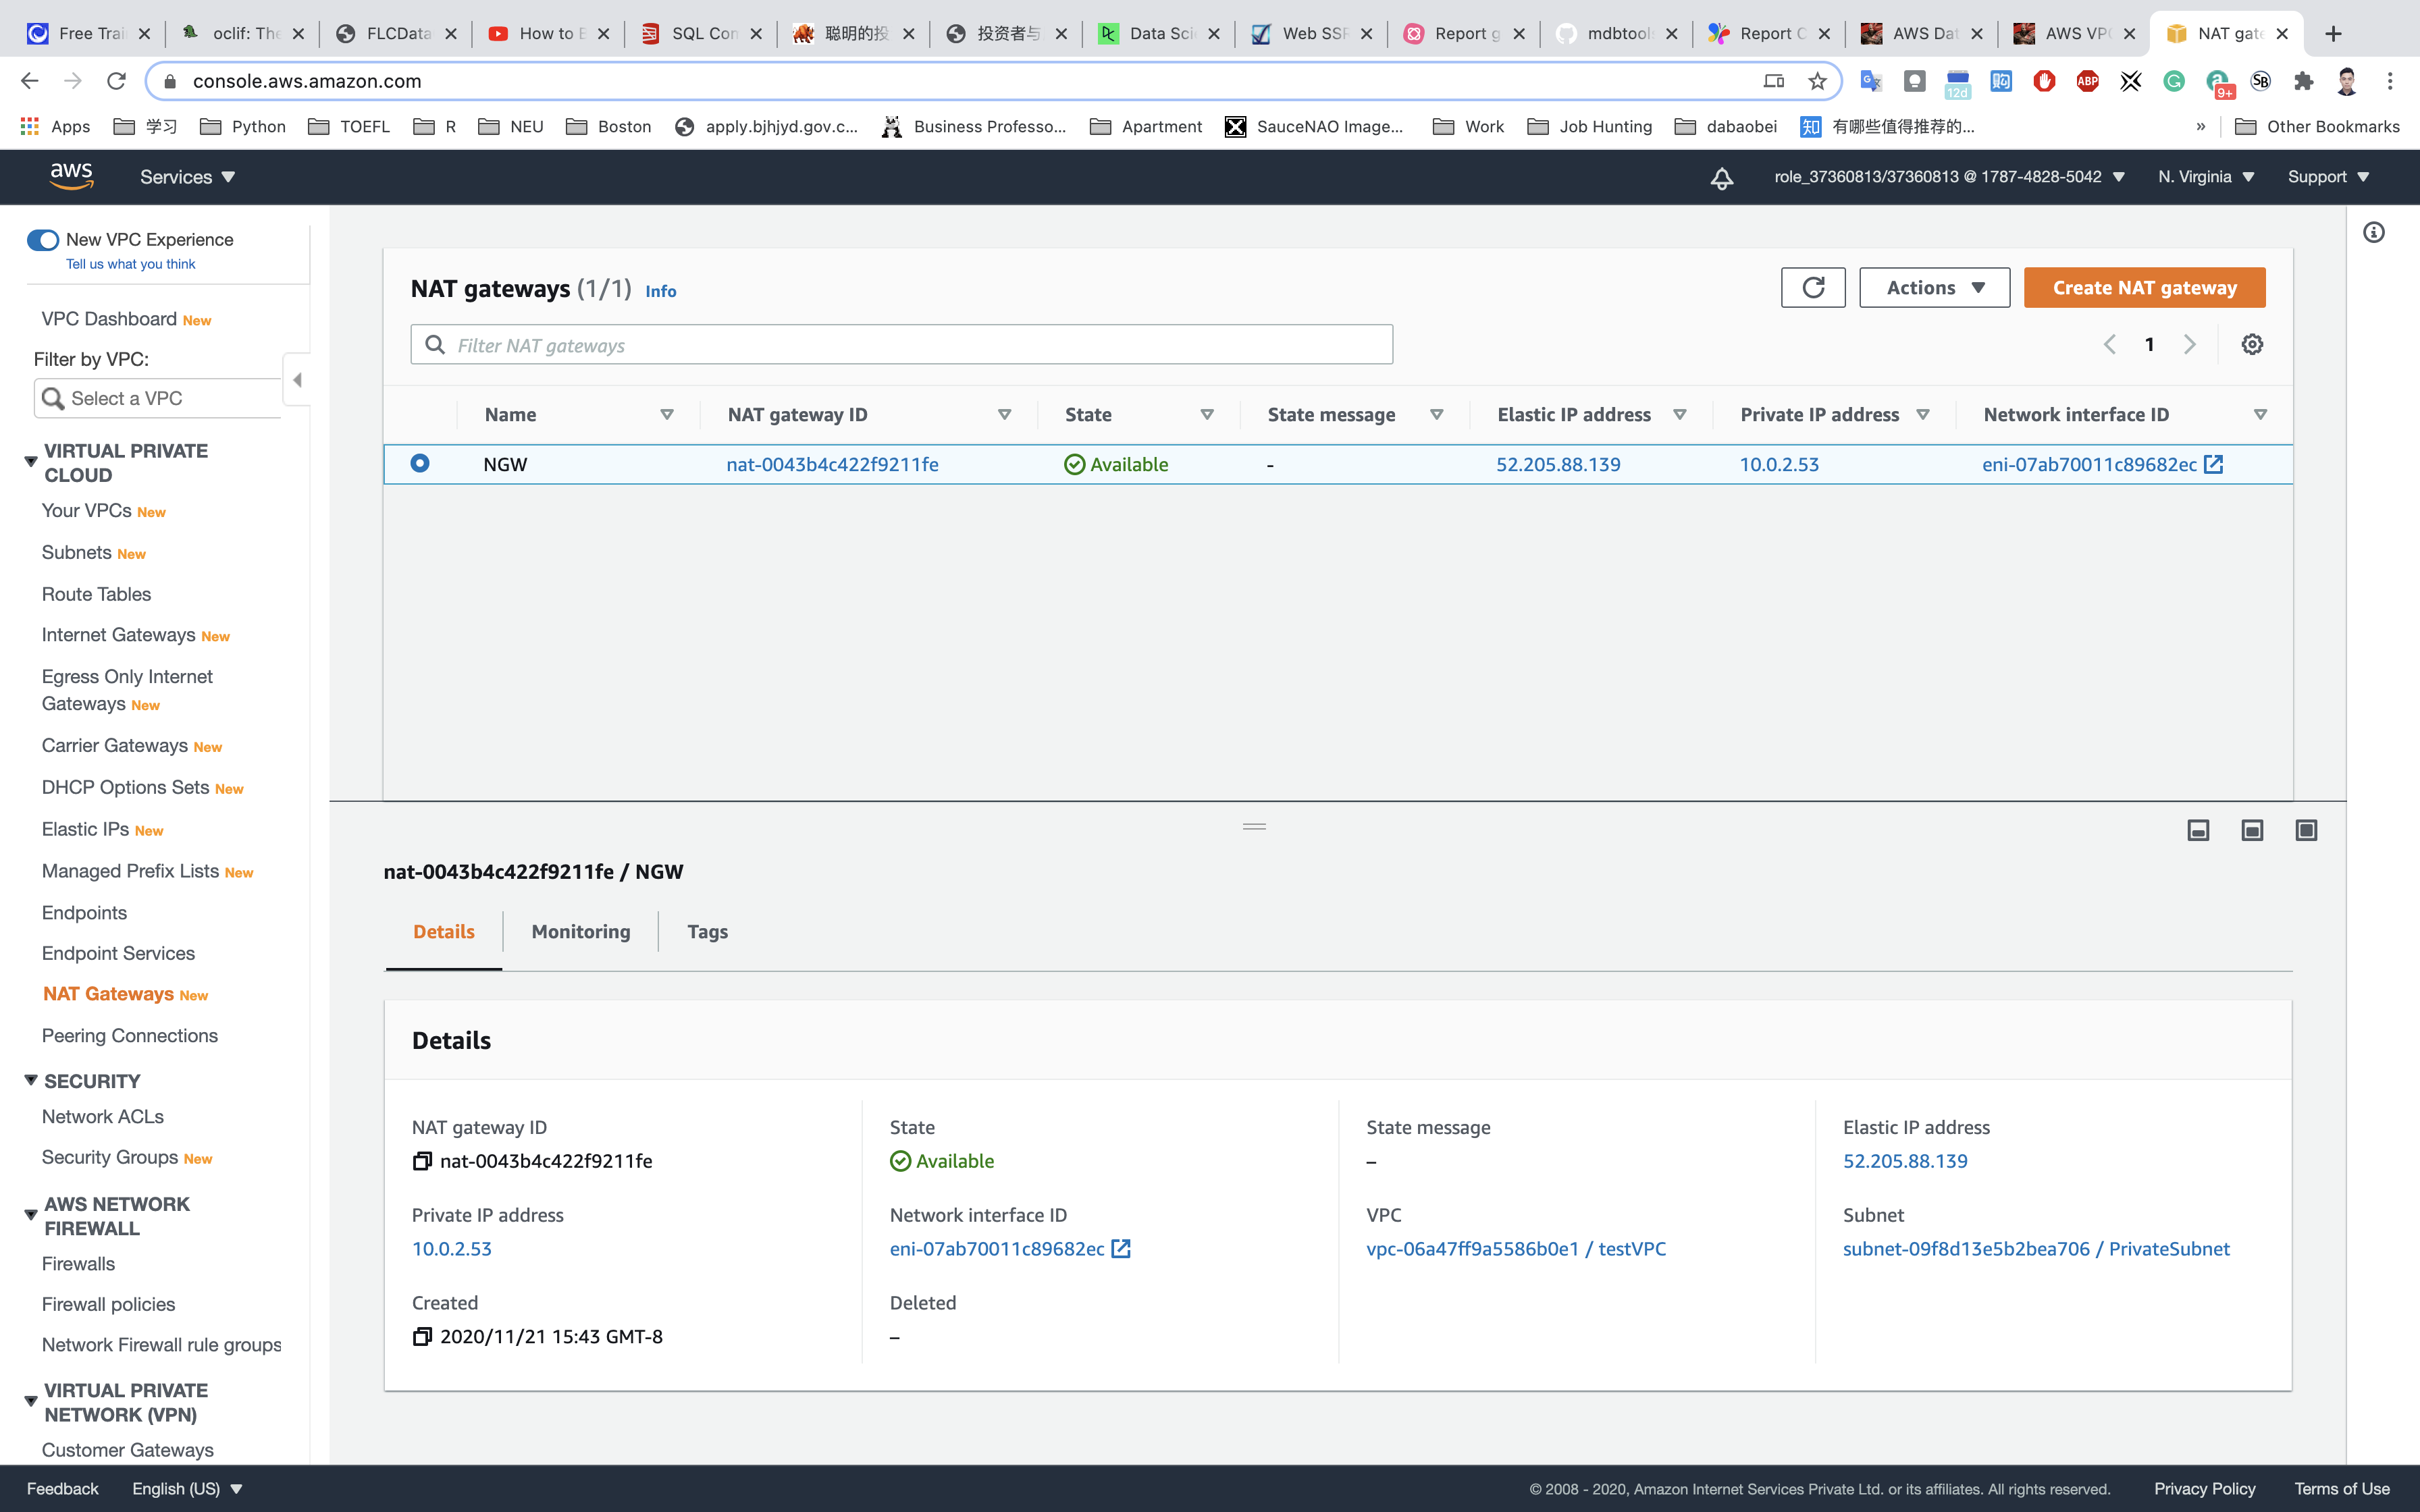
Note that NAT Gateway is always created in a public subnet.
NAT Gateway will be created in a few minutes. Once created, the status will change to available.
Create Route Tables
- Go to
Route Tablesfrom the left menu and click onCreate route table.
- Name Tag:
PublicRouteTable. - VPC: Select
testVPCfrom the list.
Click on Create.
Repeat the same steps to create a route table for the RDS database tier (Private Subnet).
- Name Tag:
PrivateRouteTable. - VPC: Select
testVPCfrom the list.
Click on Create.
Associate the public subnet to the public route table.
Select PublicRouteTable and go to the Subnet Associations tab.
Click on Edit subnet associations.
Select PublicSubnet from the list.
Click on Save.
Associate the private subnet to the private route table.
Select PrivateRouteTable and go to the Subnet Associations tab.
Click on Edit subnet associations.
Select PrivateSubnet from the list.
Click on Save
Make sure not to associate any subnets with the Main Route Table.
PublicRouteTable: Add a route to allow Internet traffic to the VPC.
Select PublicRouteTable from the list.
Go to Routes tab, click on Edit routes
Specify the following values:
- Destination:
0.0.0.0/0 - Target: Select Internet Gateway from the dropdown menu to select
IGW.
Click on Save routes.
Now the Instances launched within PublicSubnet will have access to the Internet.
PrivateRouteTable: Add a route to allow the private subnet to connect to the public subnet, the Internet(if you have public subnet with correct settings), and other private subnets.
Select PrivateRouteTable from the list.
Go to Routes tab, click on Edit routes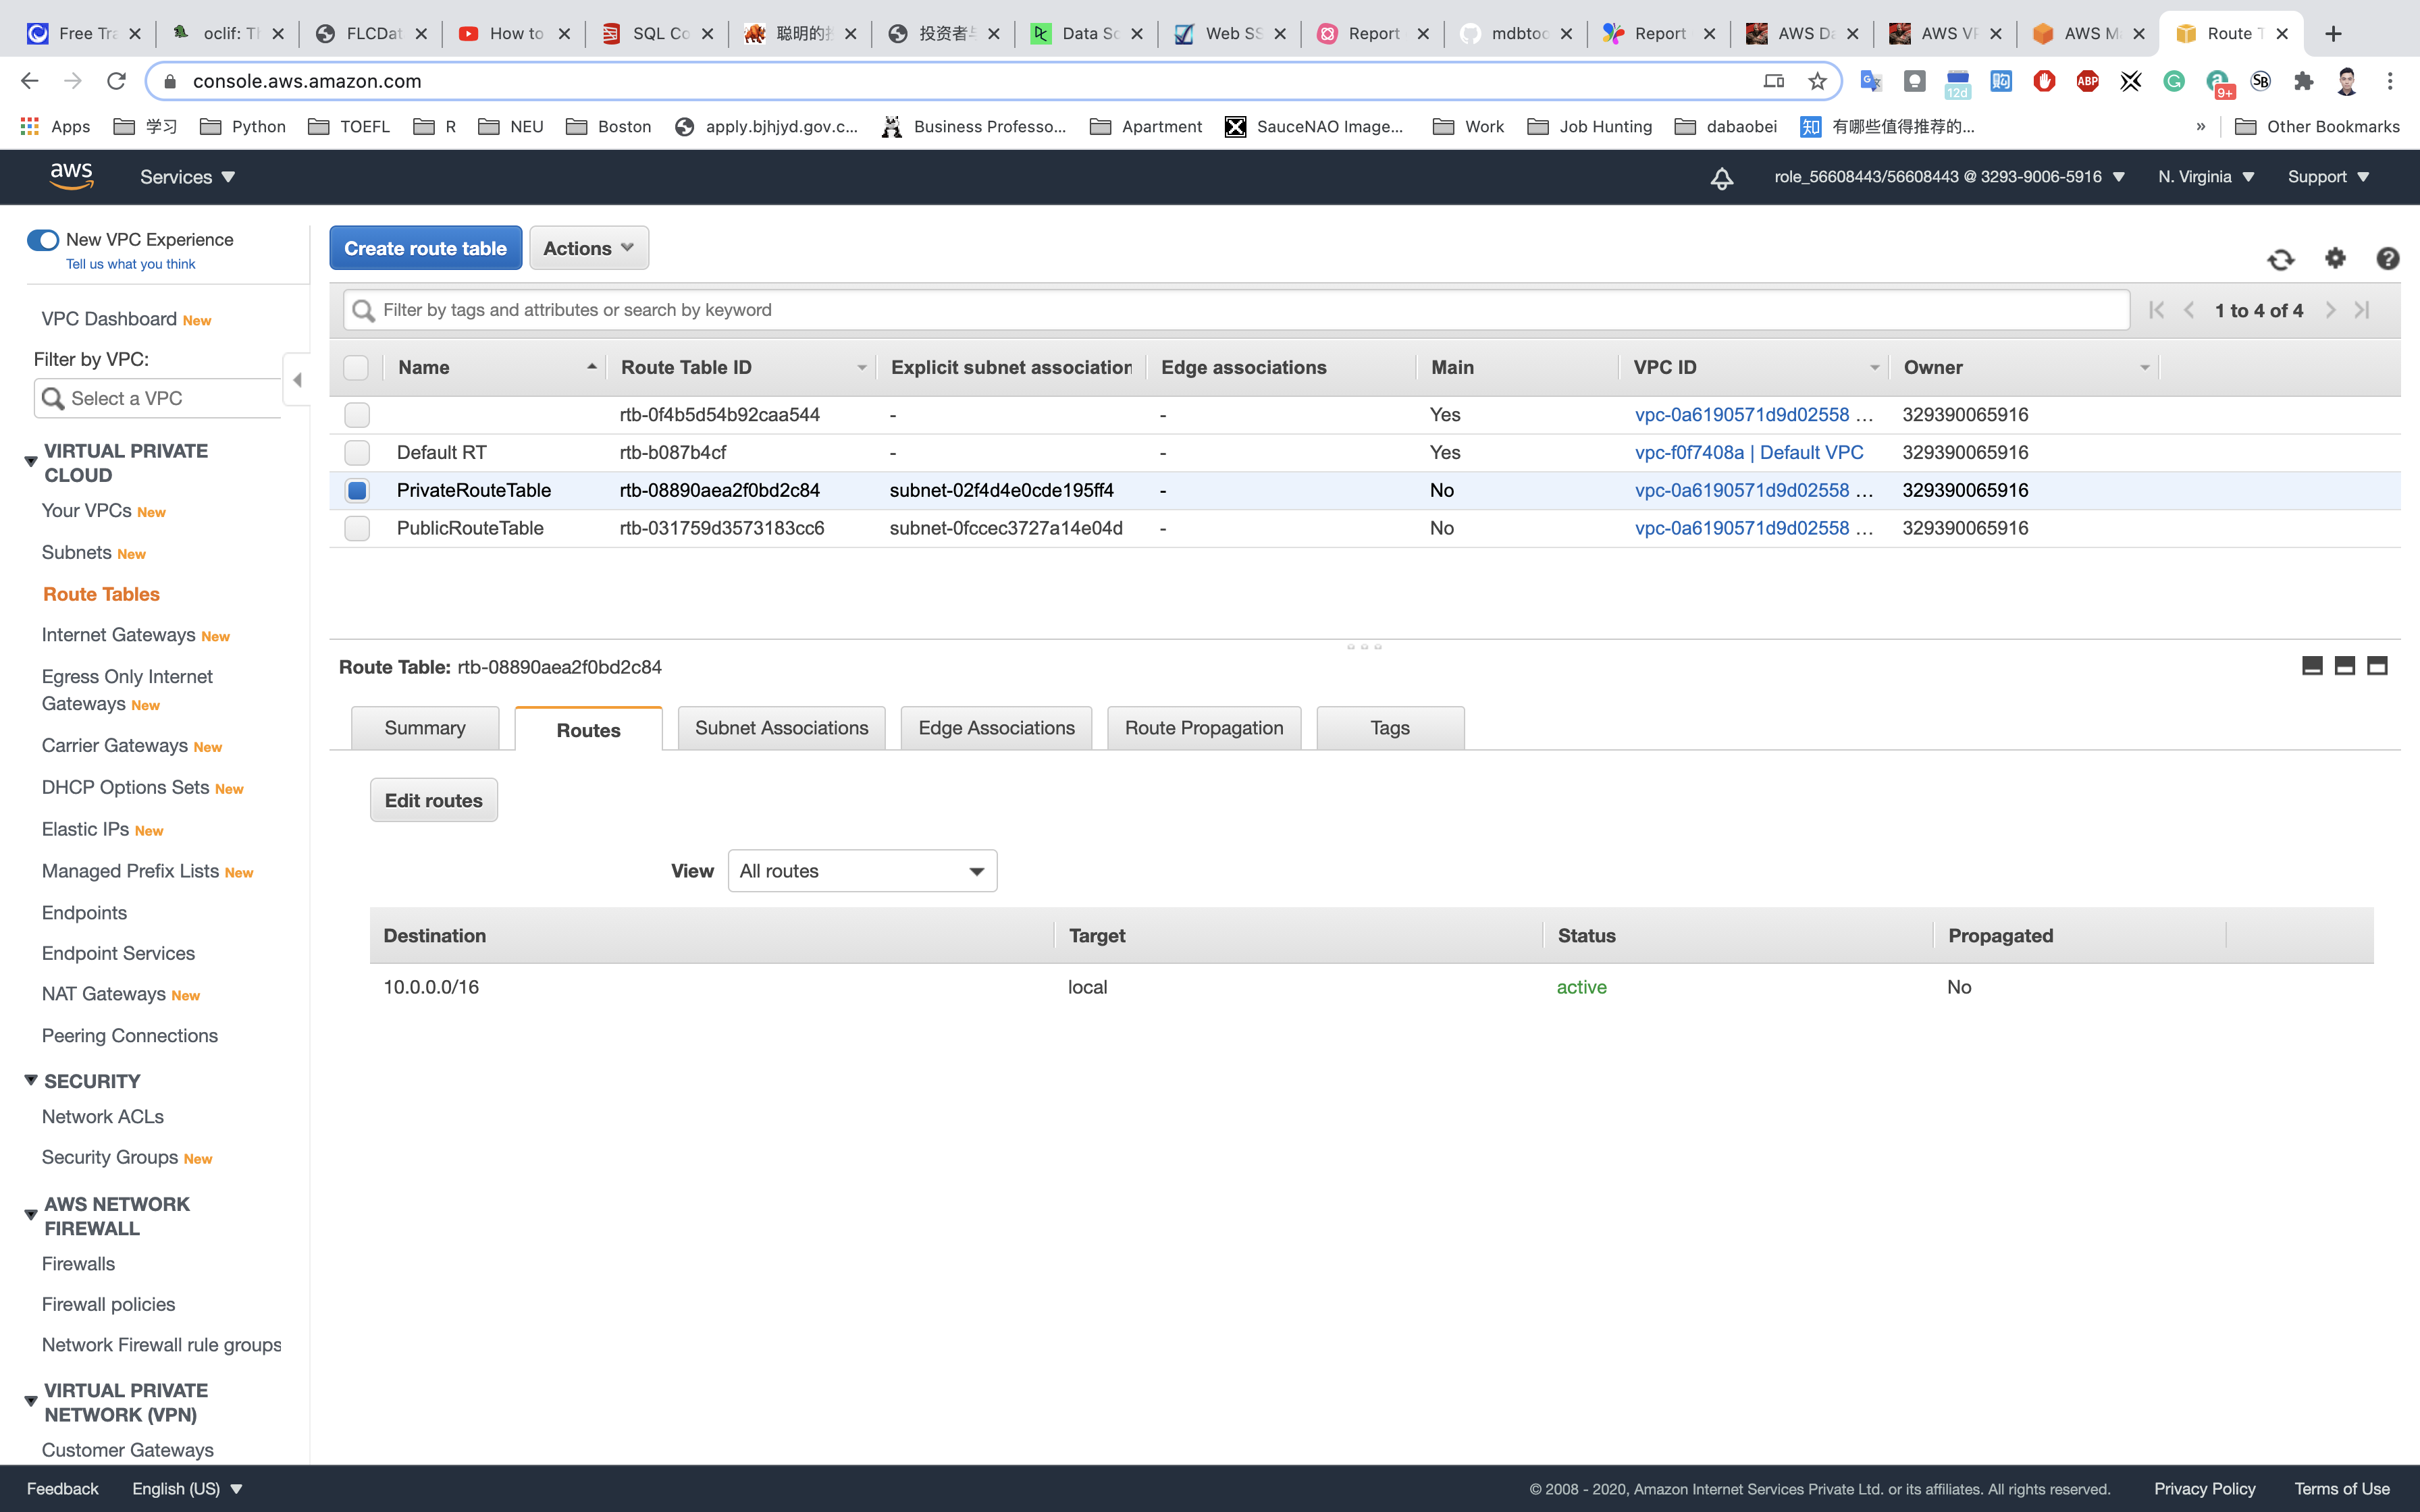
Specify the following values:
- Destination:
0.0.0.0/0 - Target: Select Internet Gateway from the dropdown menu to select
NGW.
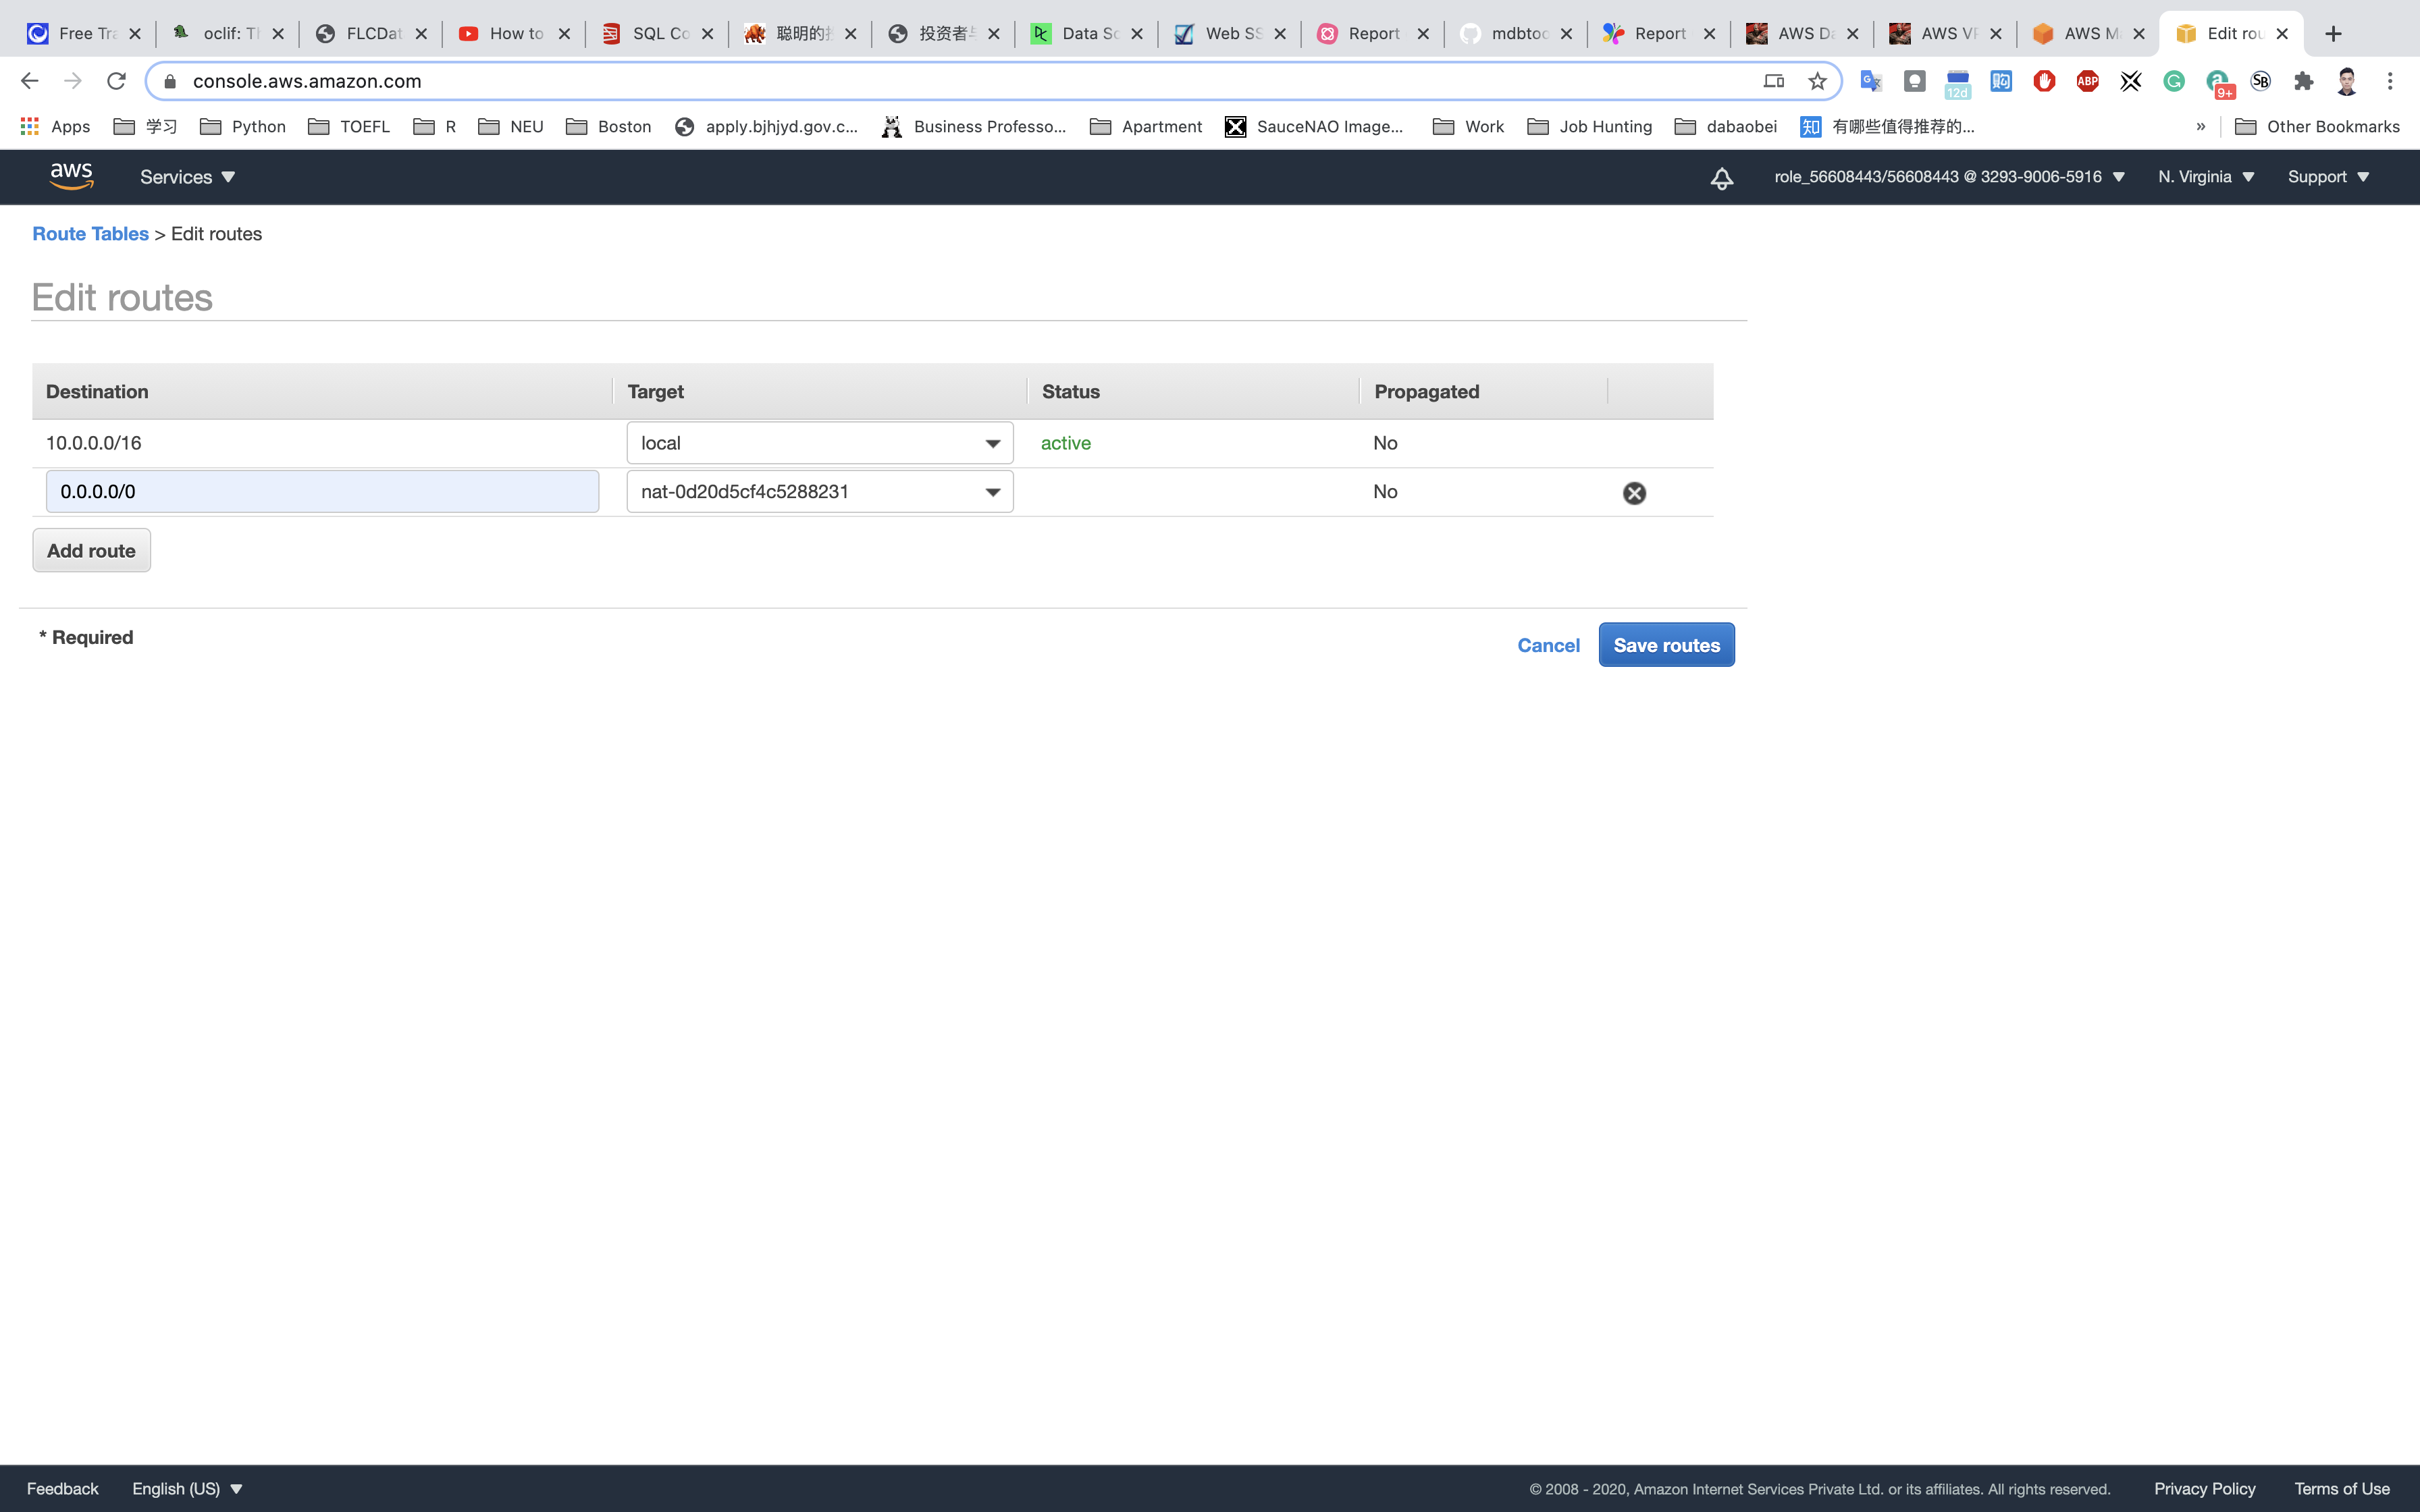
Click on Save routes.
Now the Instances launched within PrivateSubnet will have access to the Internet.
EC2 Configuration
Service -> EC2 -> Instances
Launching an EC2 Instance in Public Subnet
Click on Launch Instance.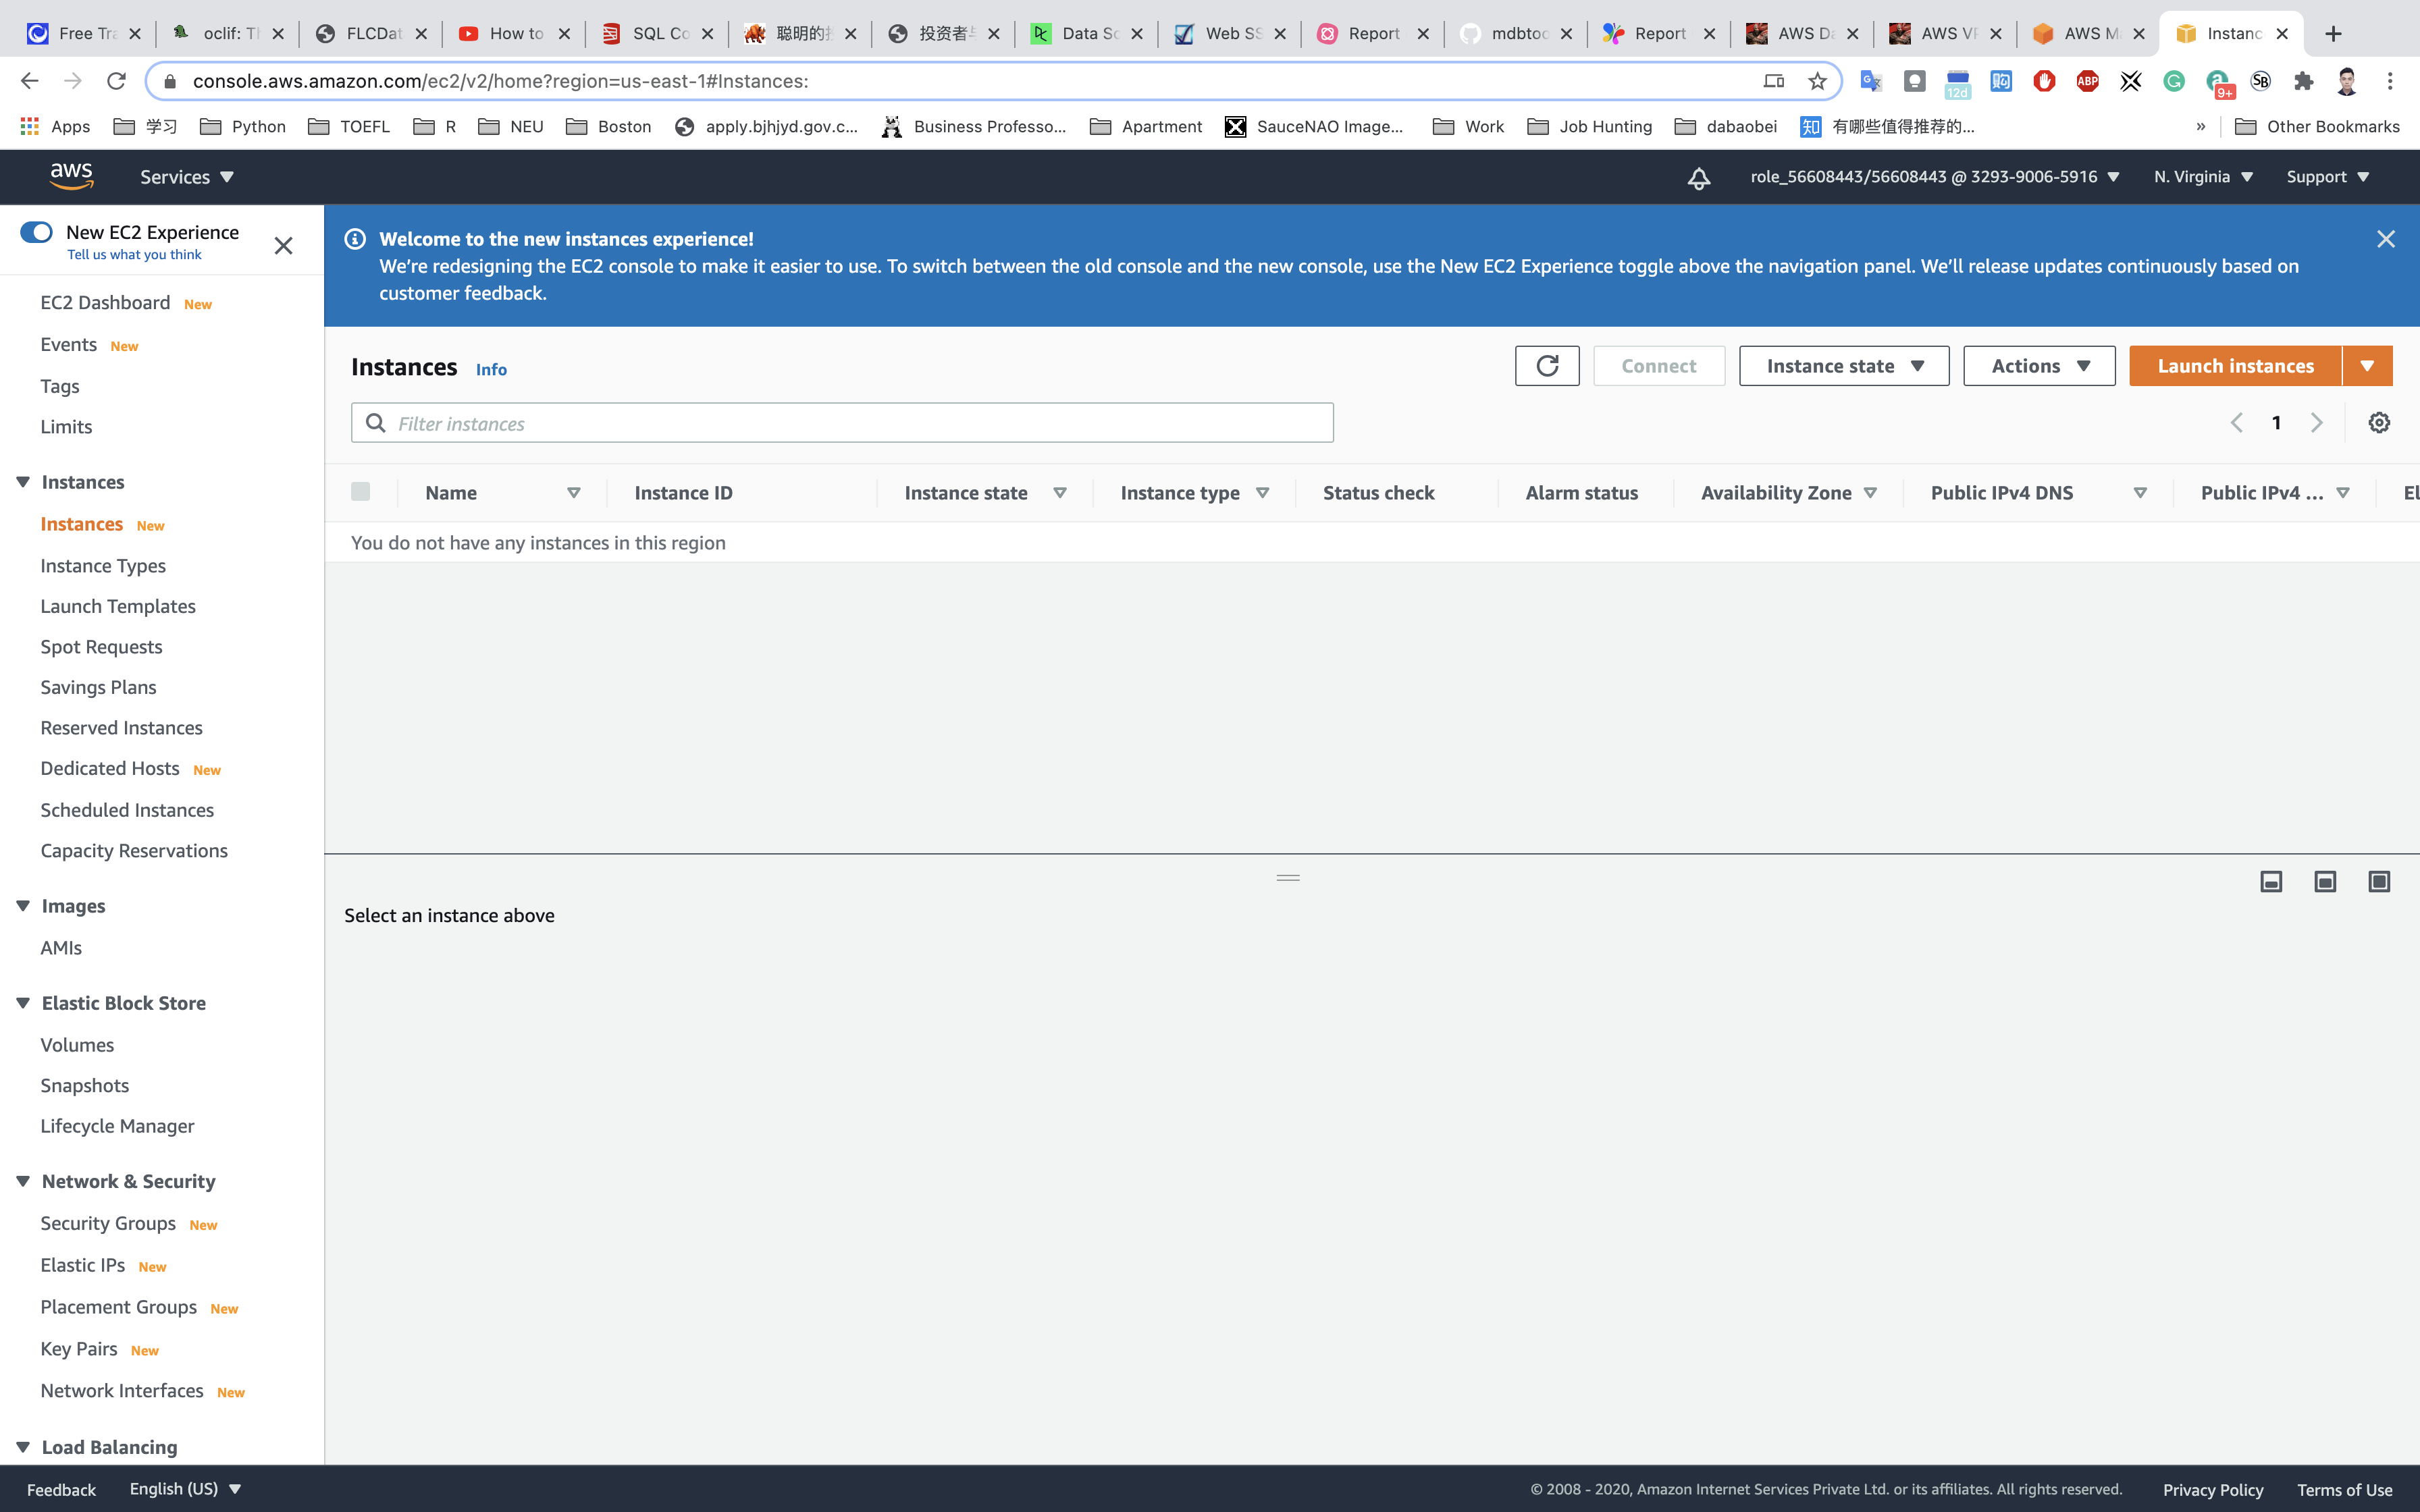
Choose an Amazon Machine Image (AMI): Search for Amazon Linux 2 AMI in the search box and click on the select button.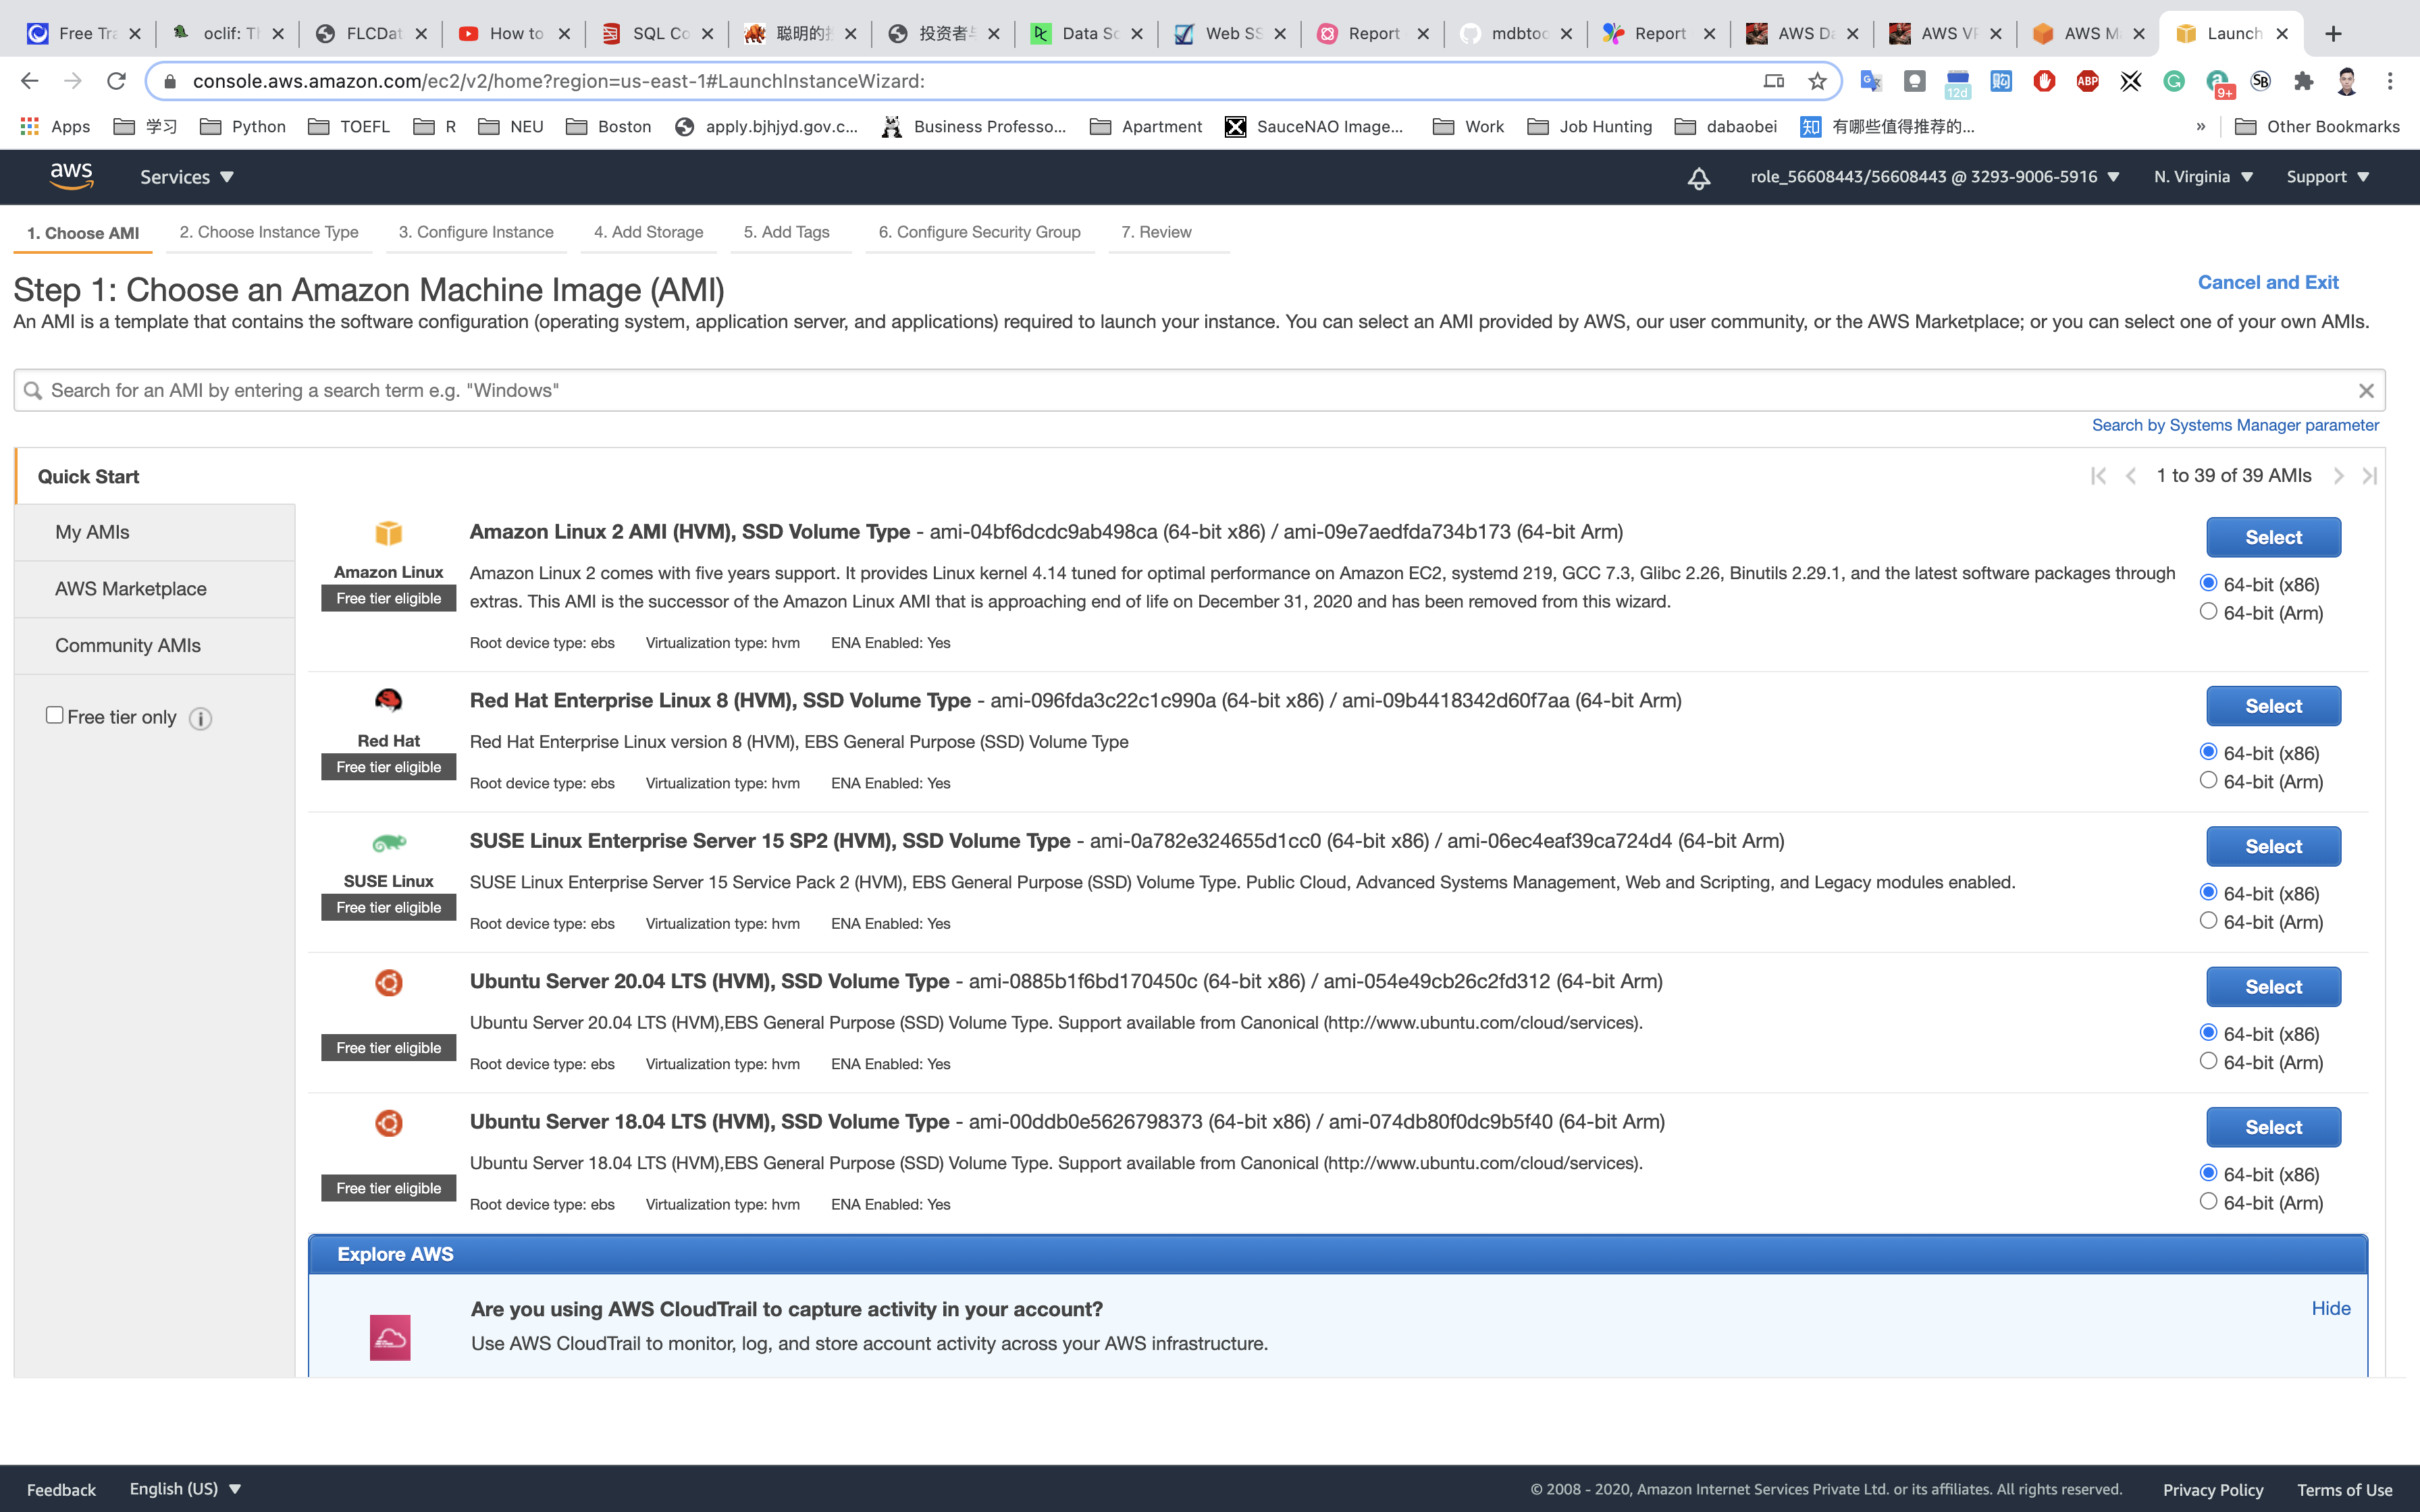
Choose an Instance Type: select t2.micro and click on the Next: Configure Instance Details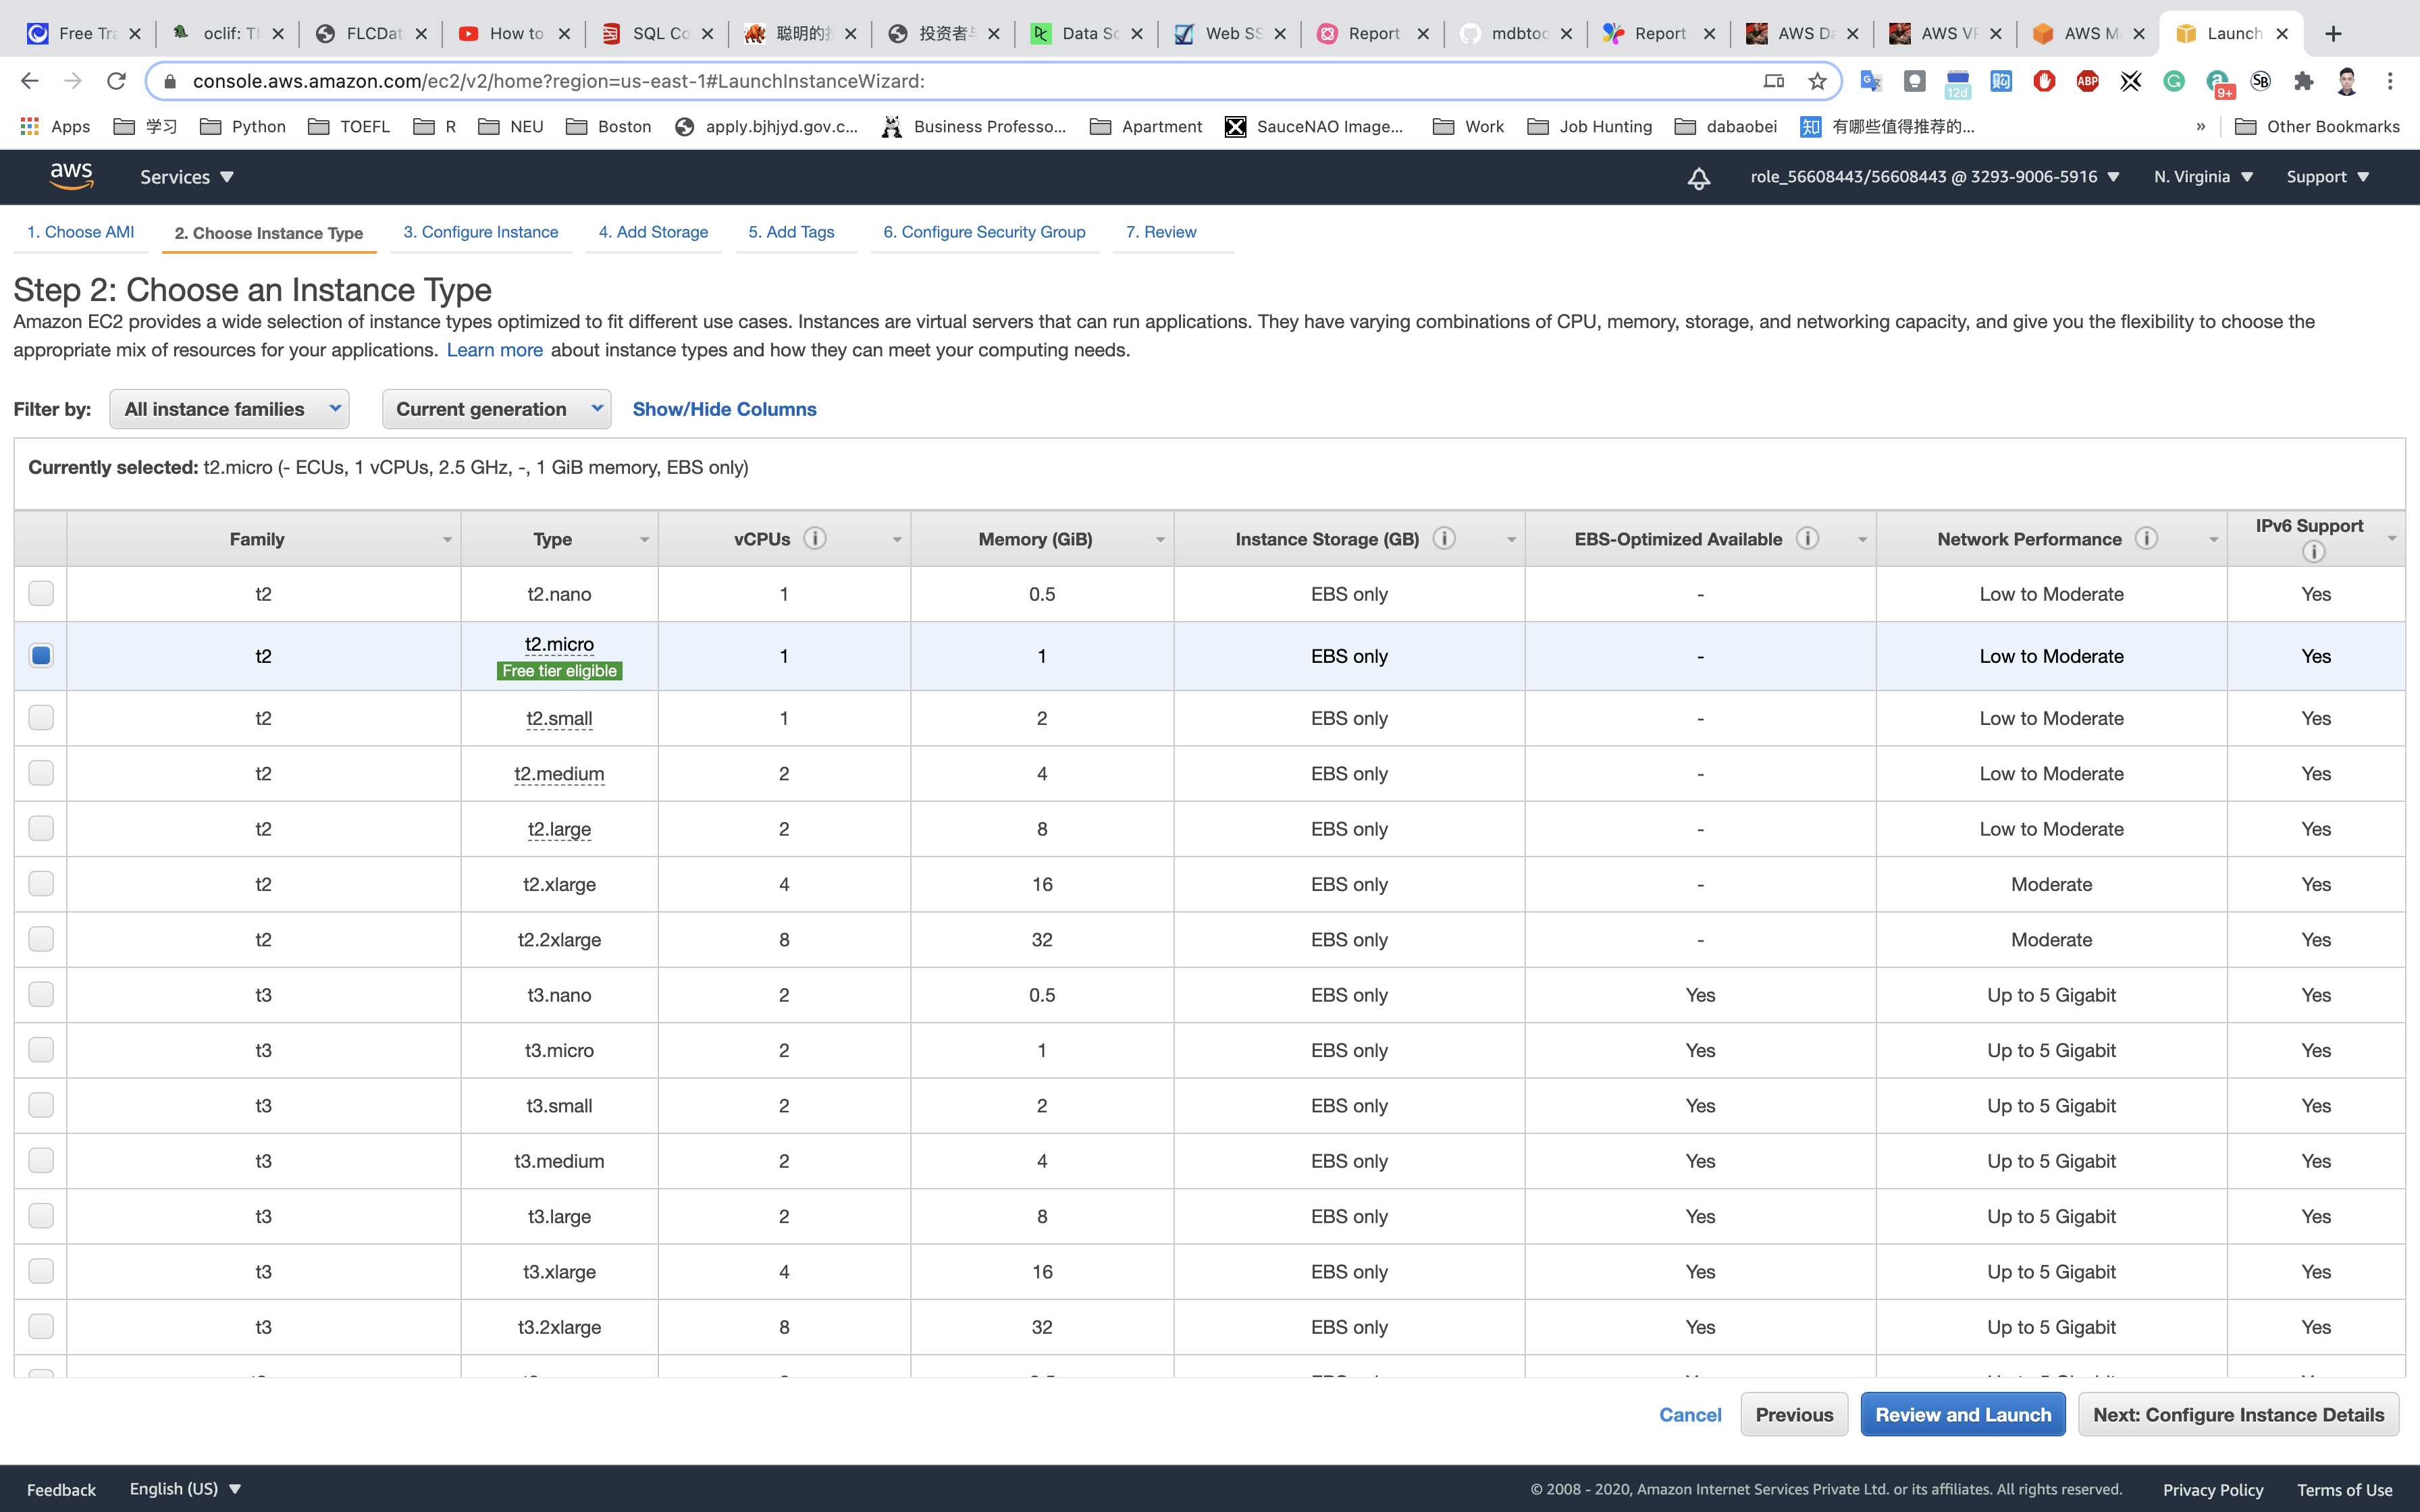
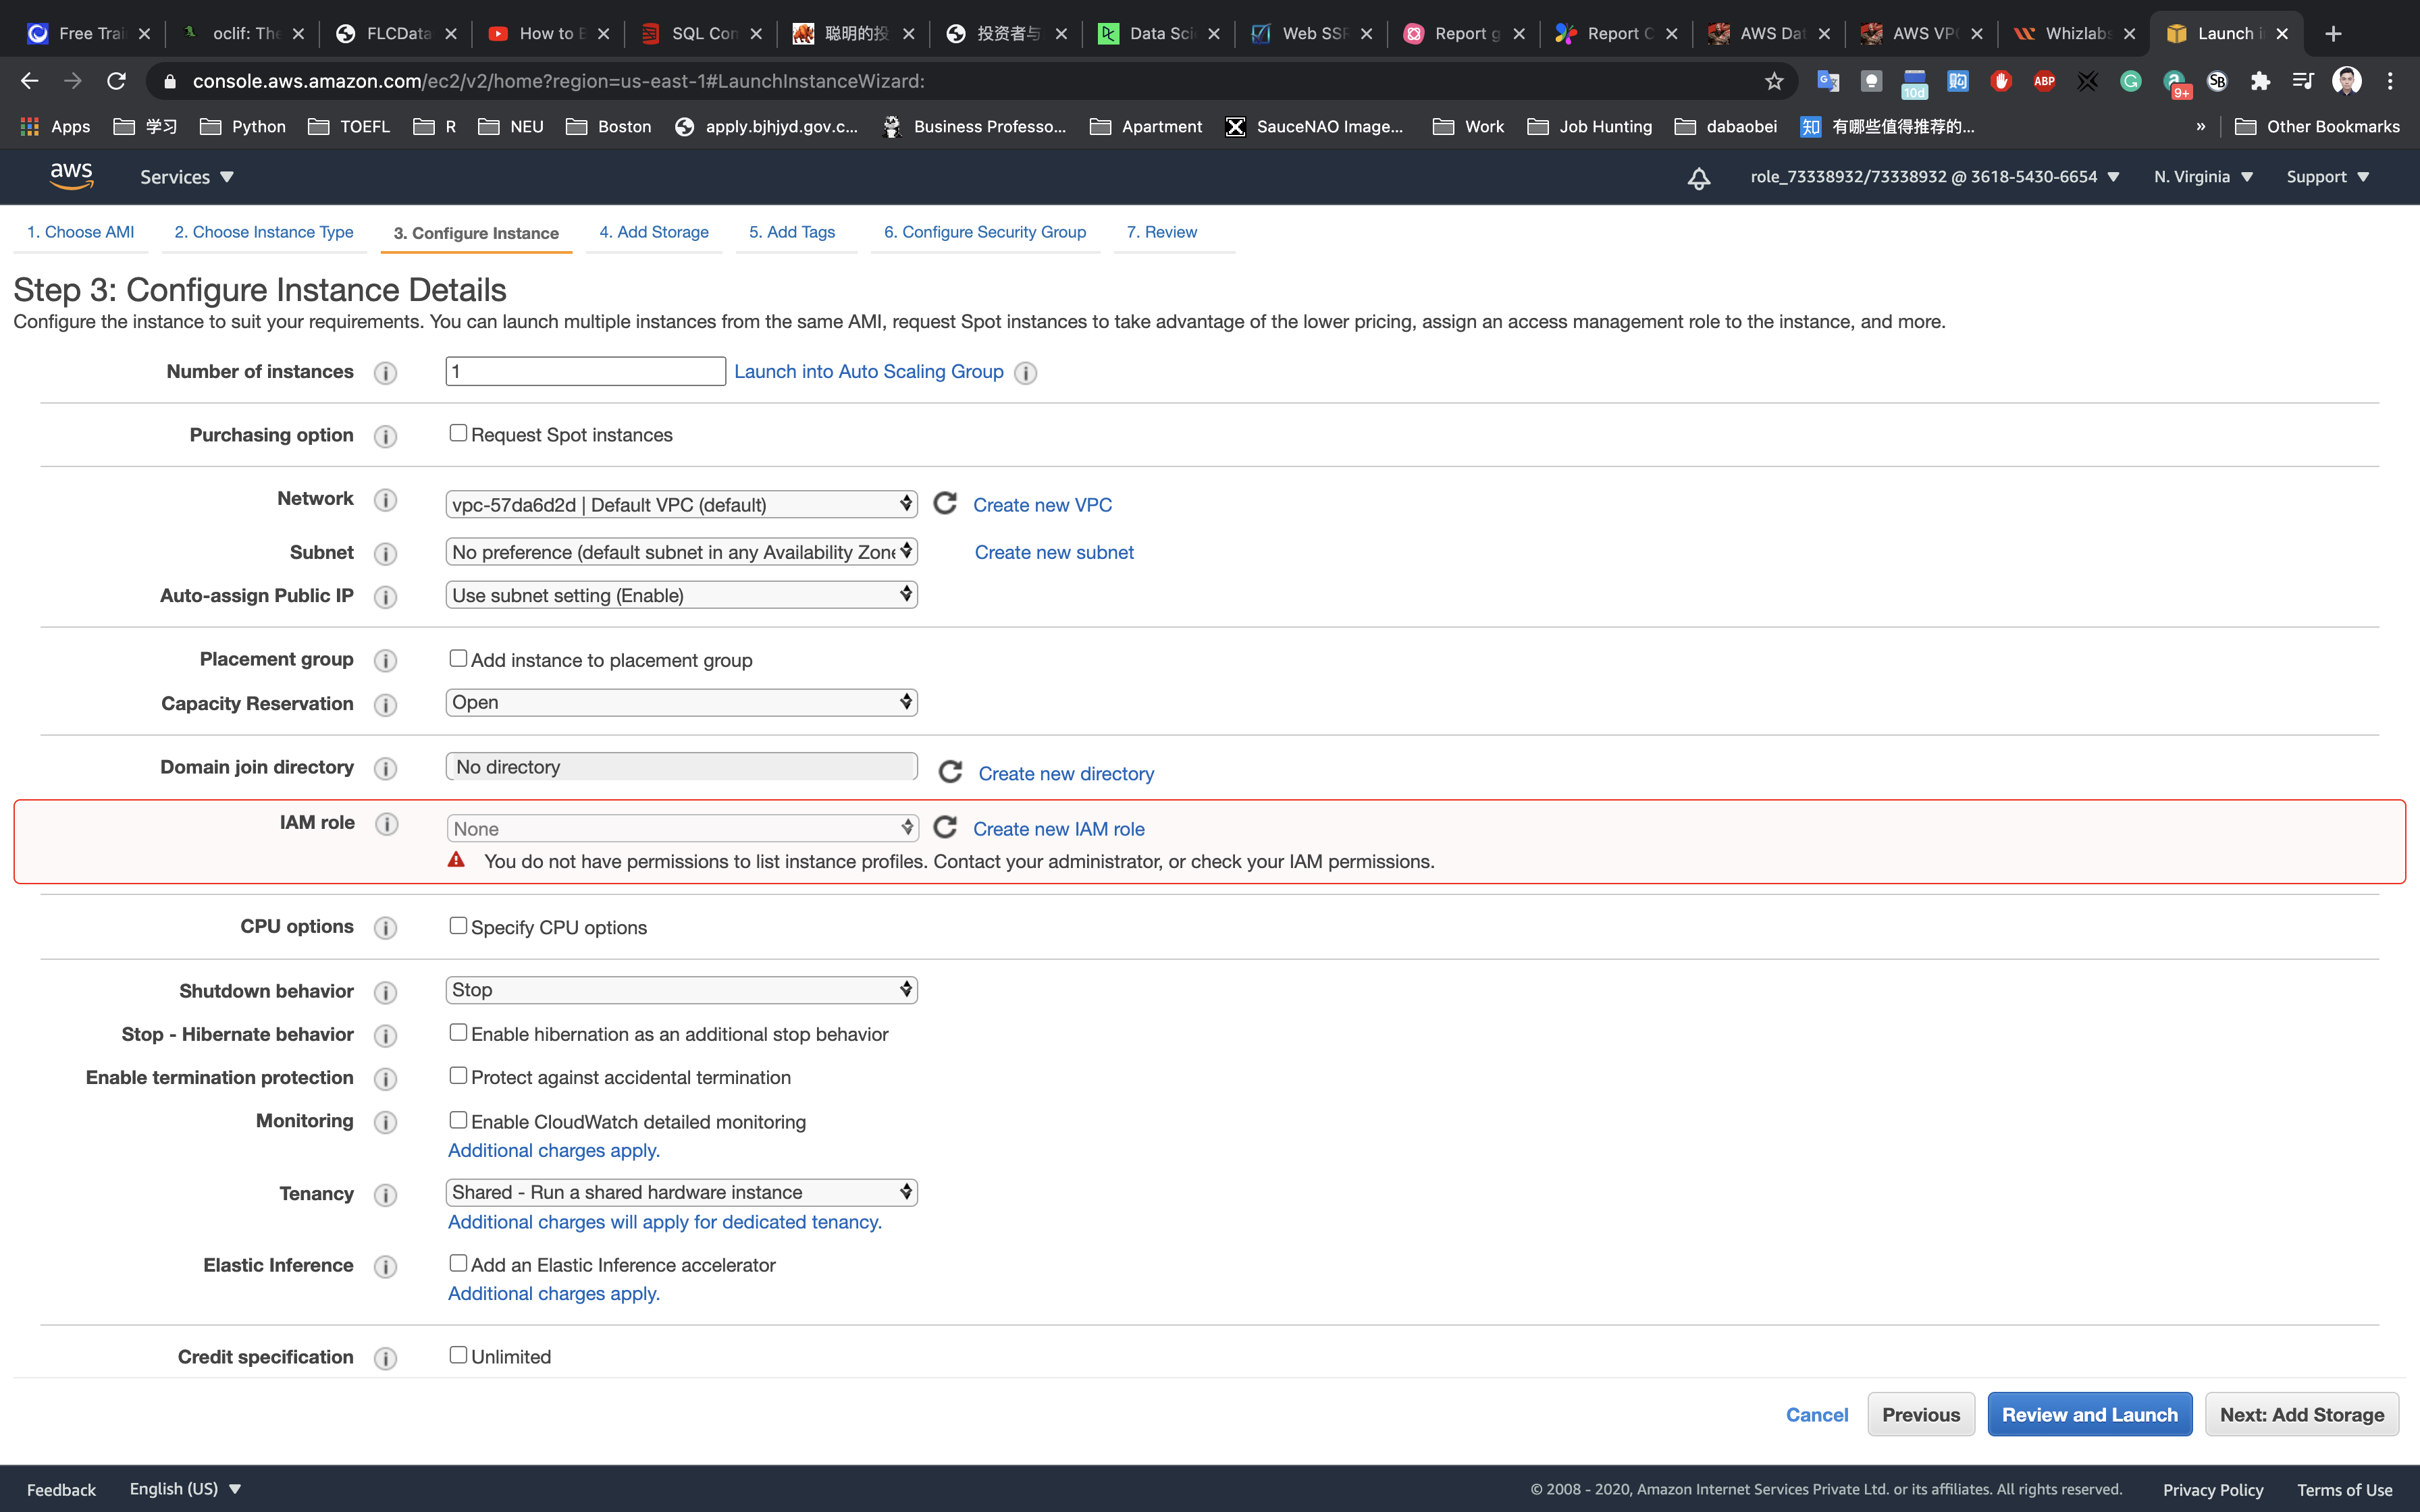
Configure Instance Details:
- Network:
testVPC - Subnet:
PublicSubnet - Auto-assign Public IP:
Use Subnet Setting (Enable) - default - Leave all other settings as default.
Click on Nex: Add Storage
Add Storage: No need to change anything in this step. Click on Next: Add tags
Add Tags: Click on Add tag
- Key:
Name - Value:
MyPublicEC2Server
Click on Next: Configure Security Group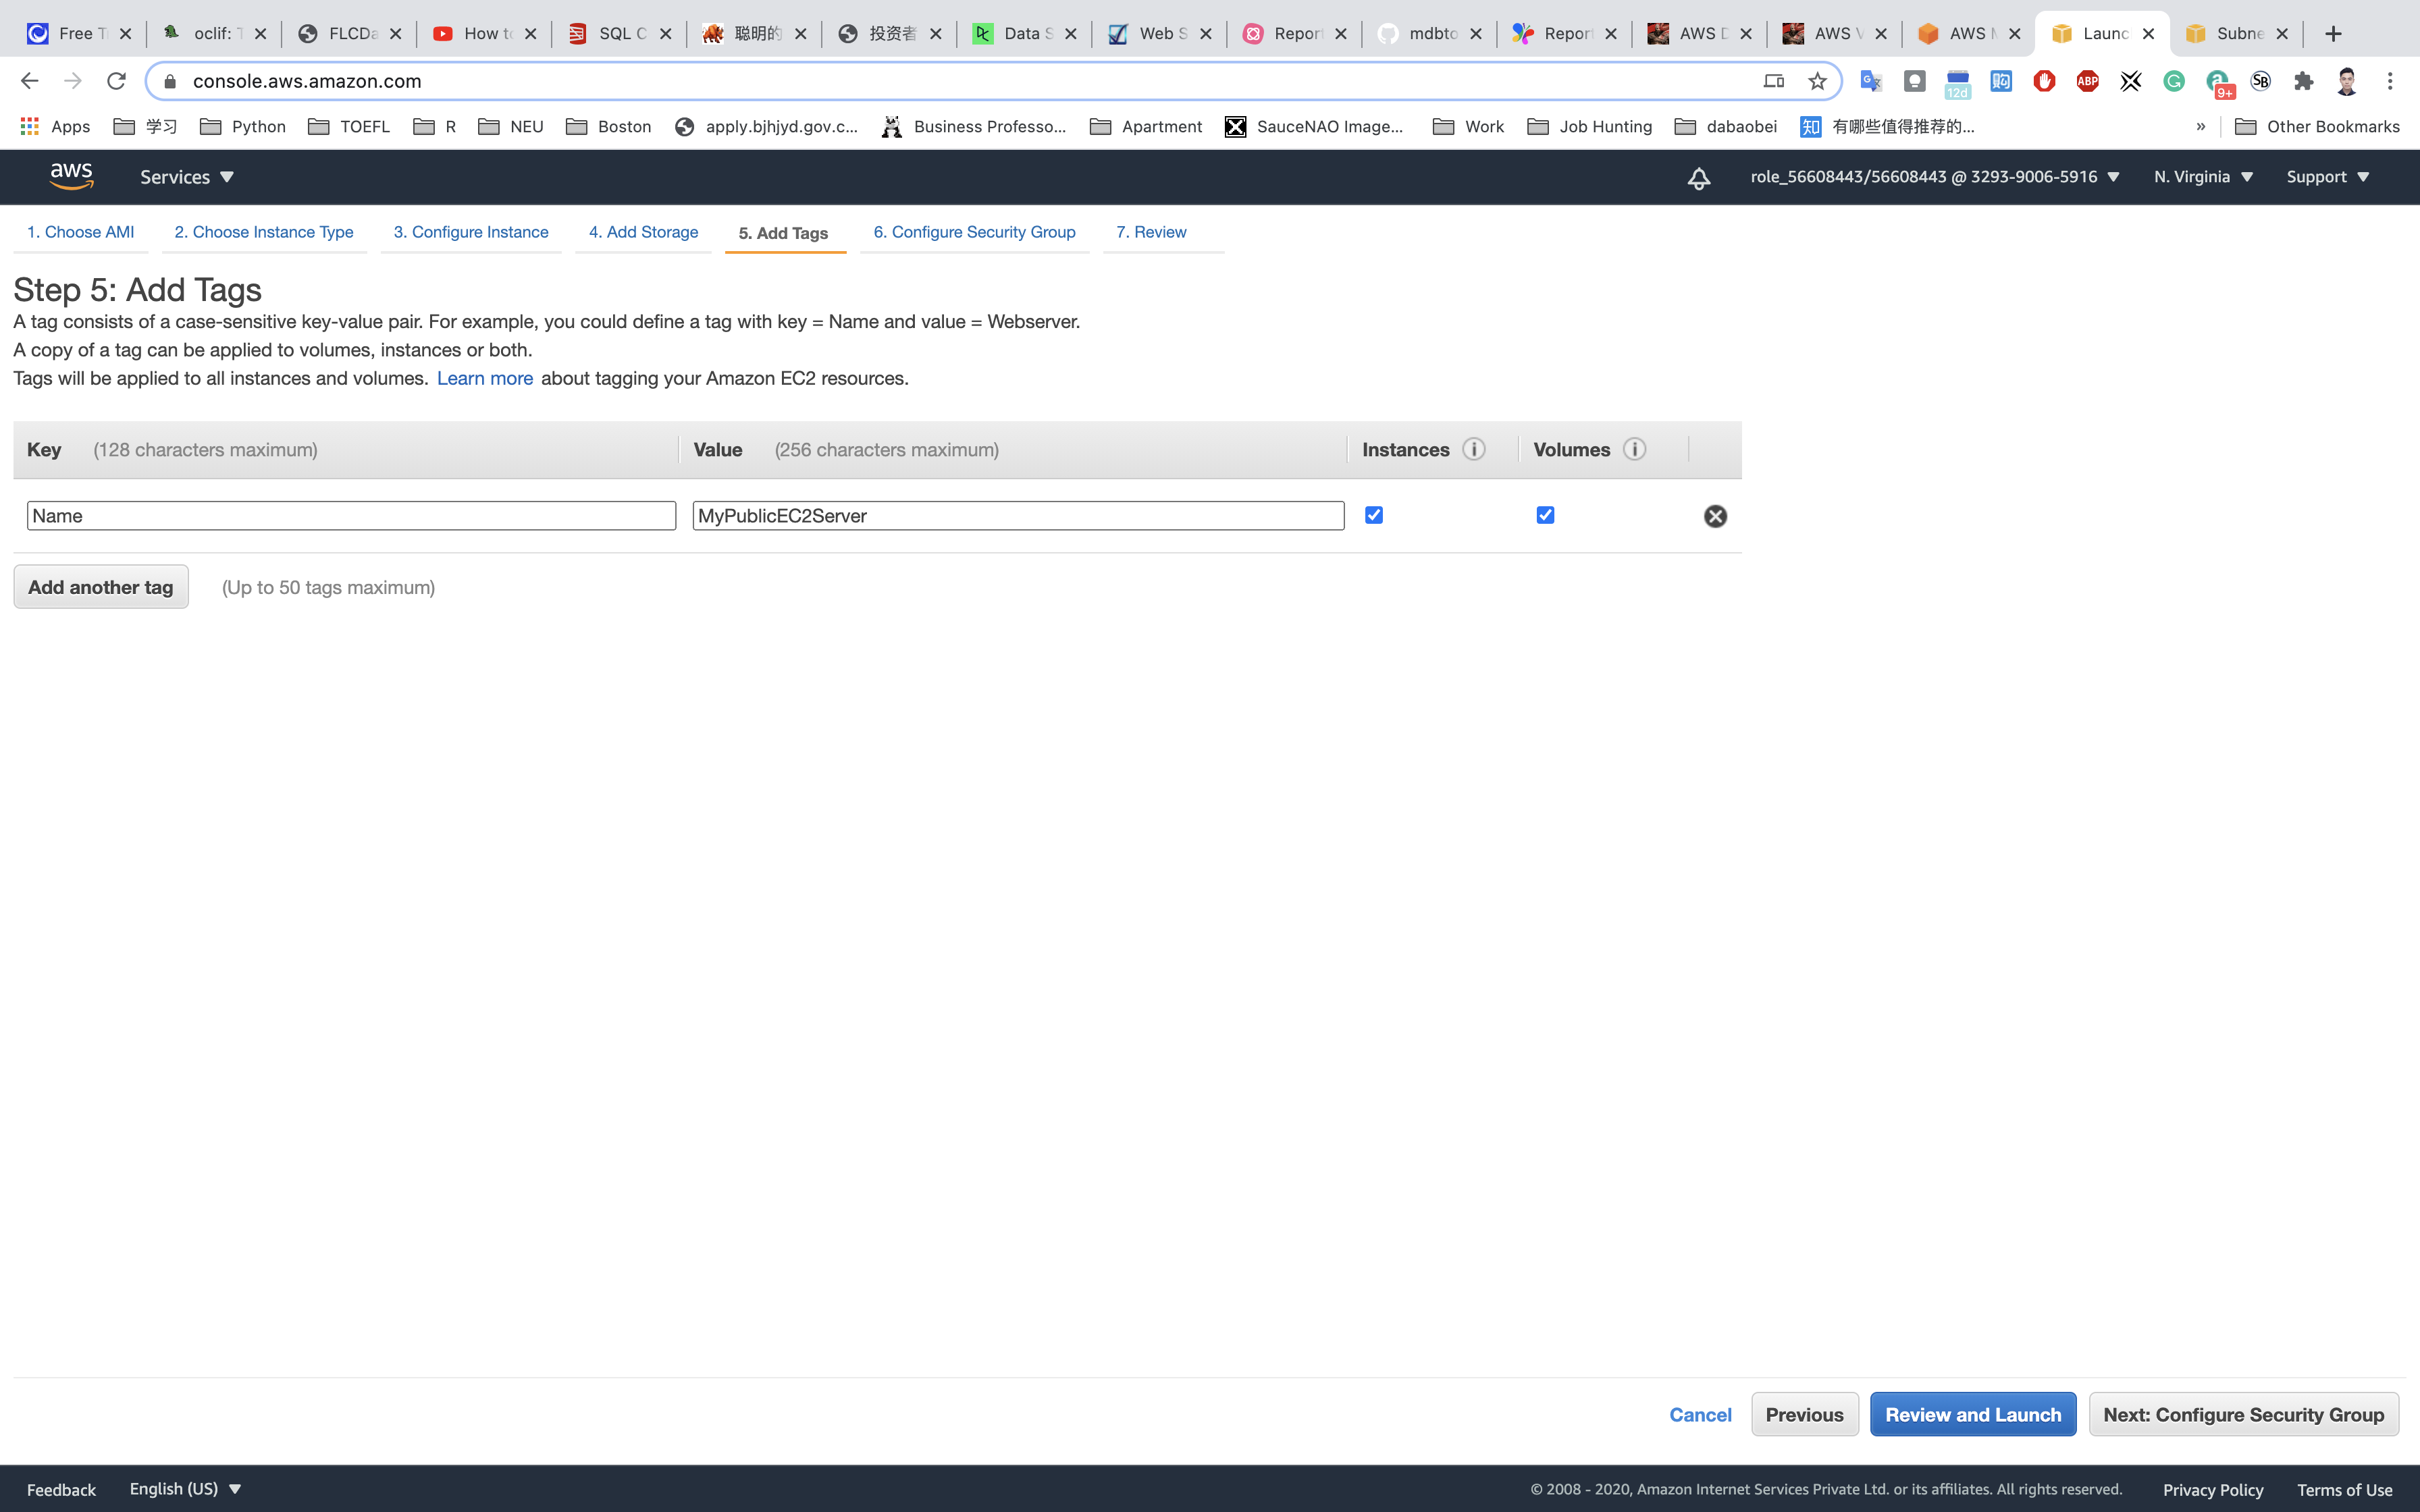
Configure Security Group:
- SSH is already available:
- Security Group Name:
PublicSG - Description:
Security Group for EC2 running on public subnet. - Choose Type:
SSH - Source:
Anywhere
- Security Group Name:
Click on Review and Launch
Review and Launch : Review all settings and click on Launch.
- Select
Create a new key pair - Key pair Name:
aws-ec2
Click on Download Key Pair.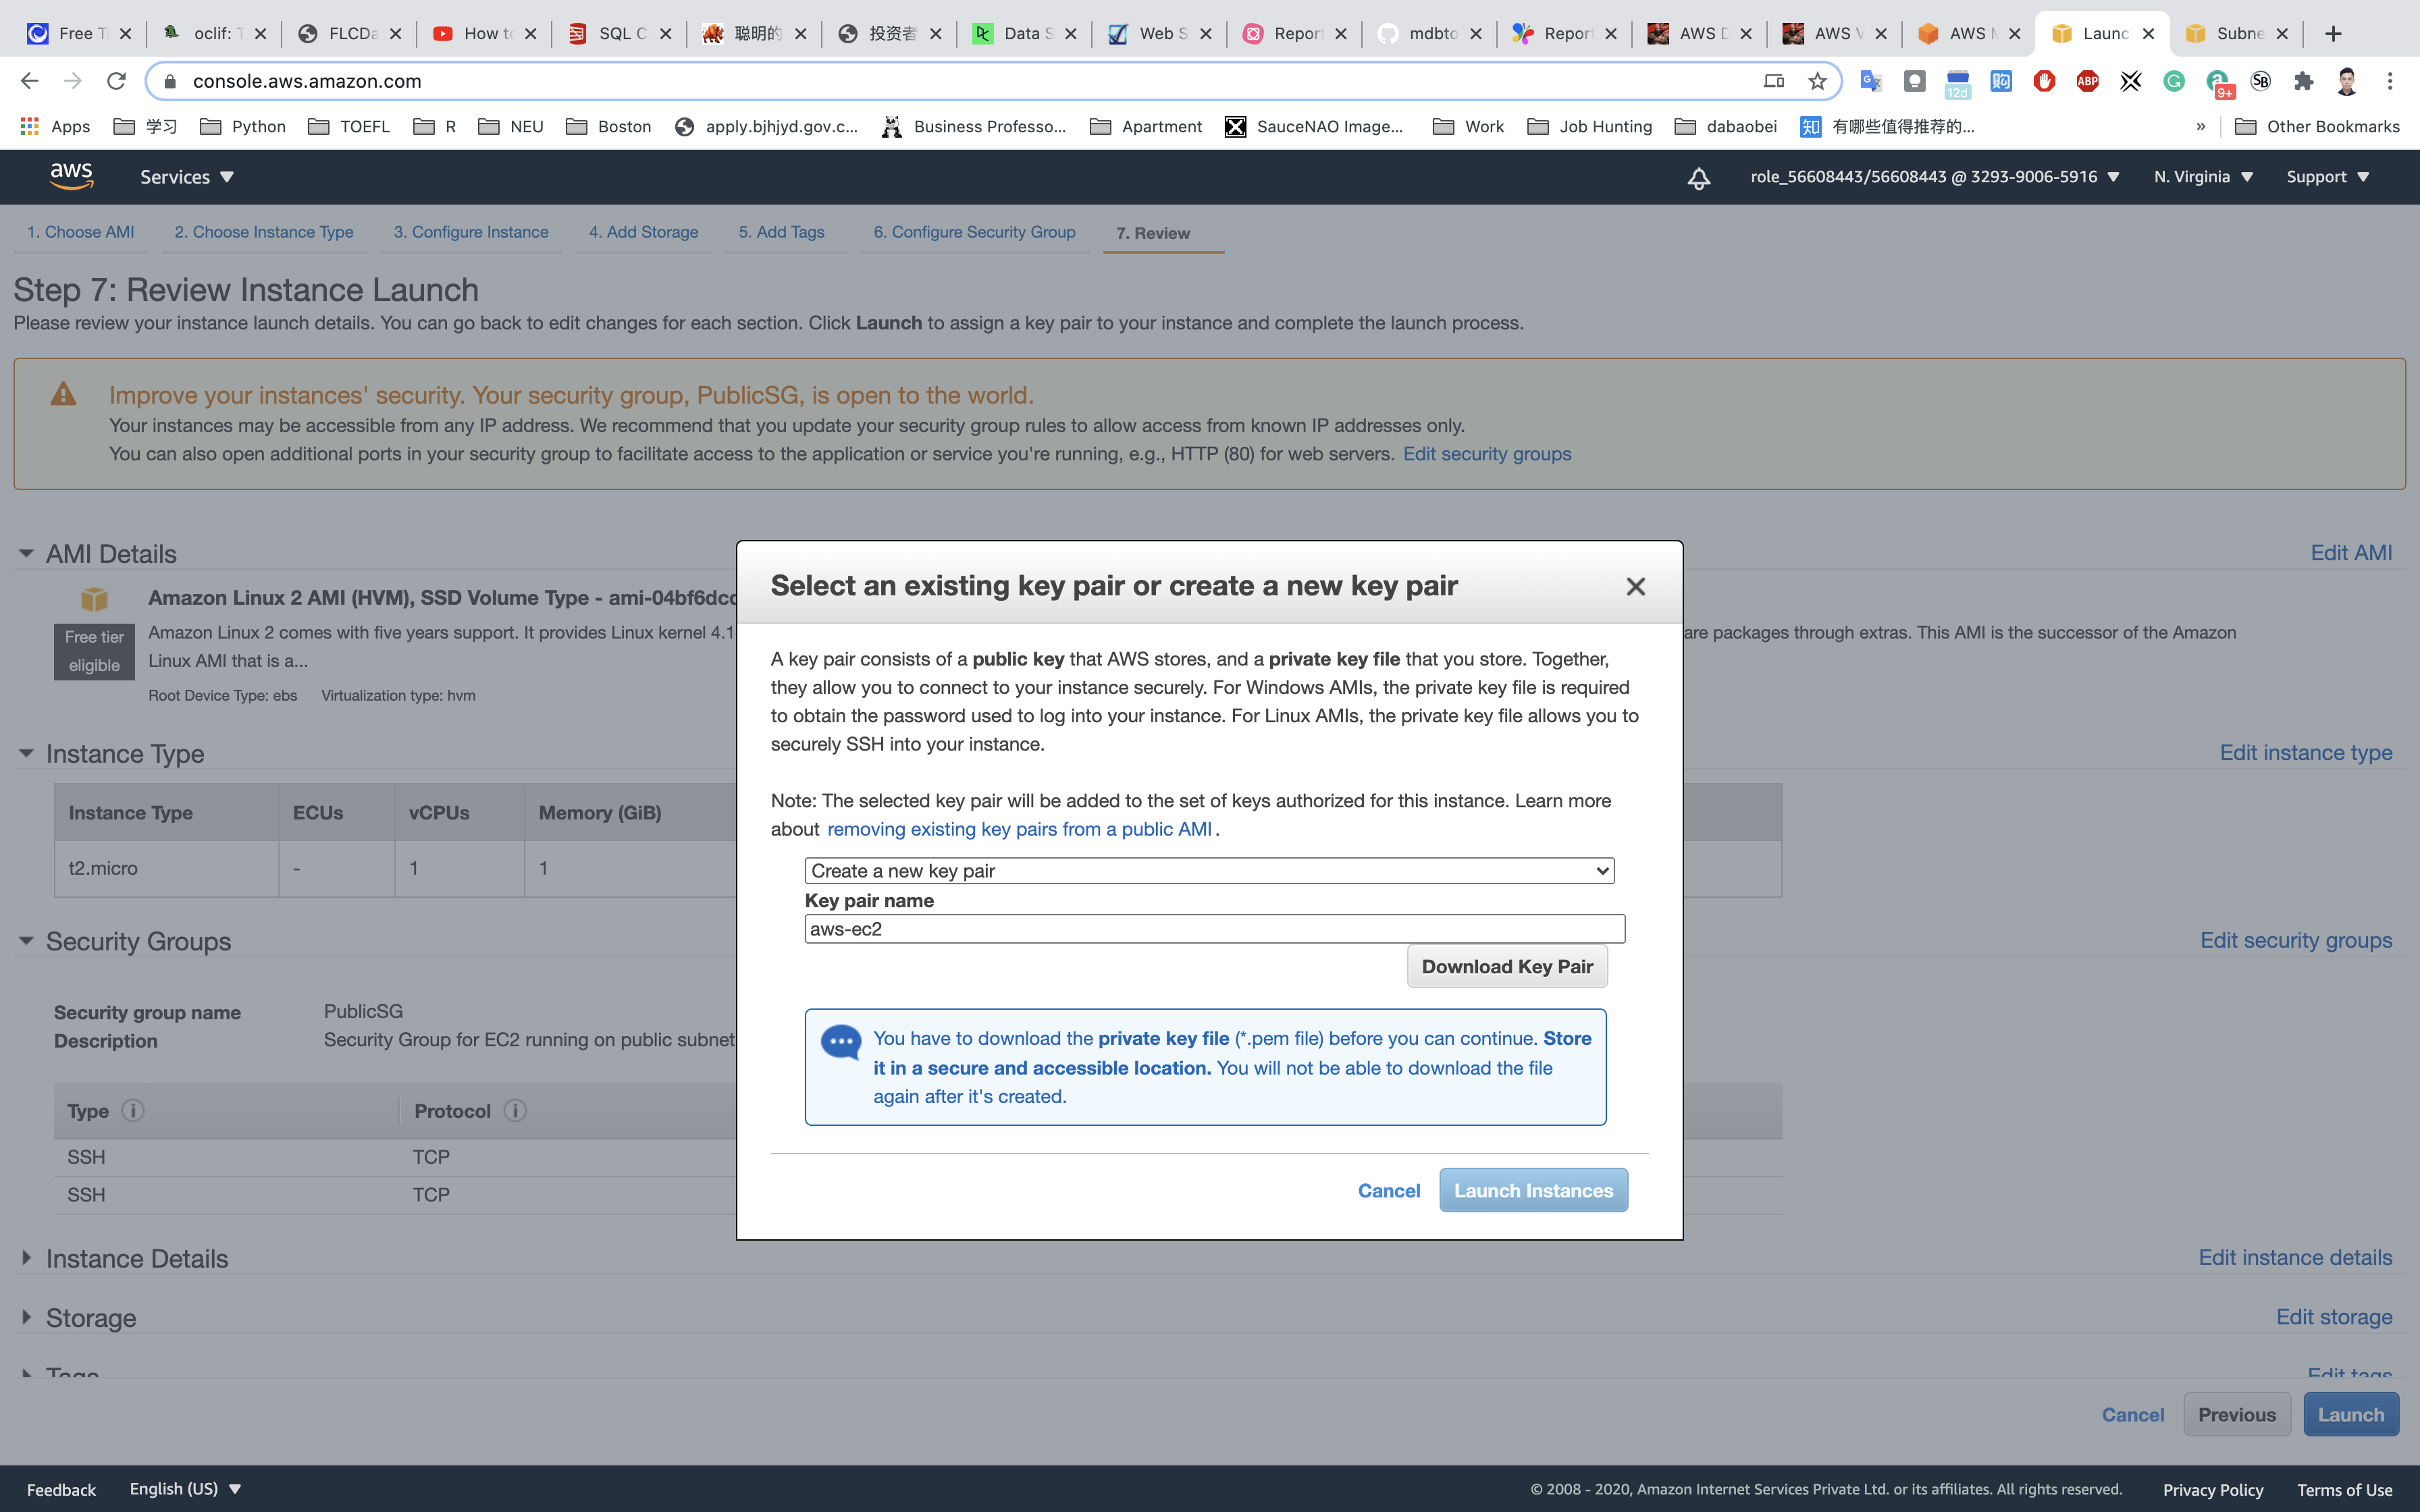
Click on Launch Instances.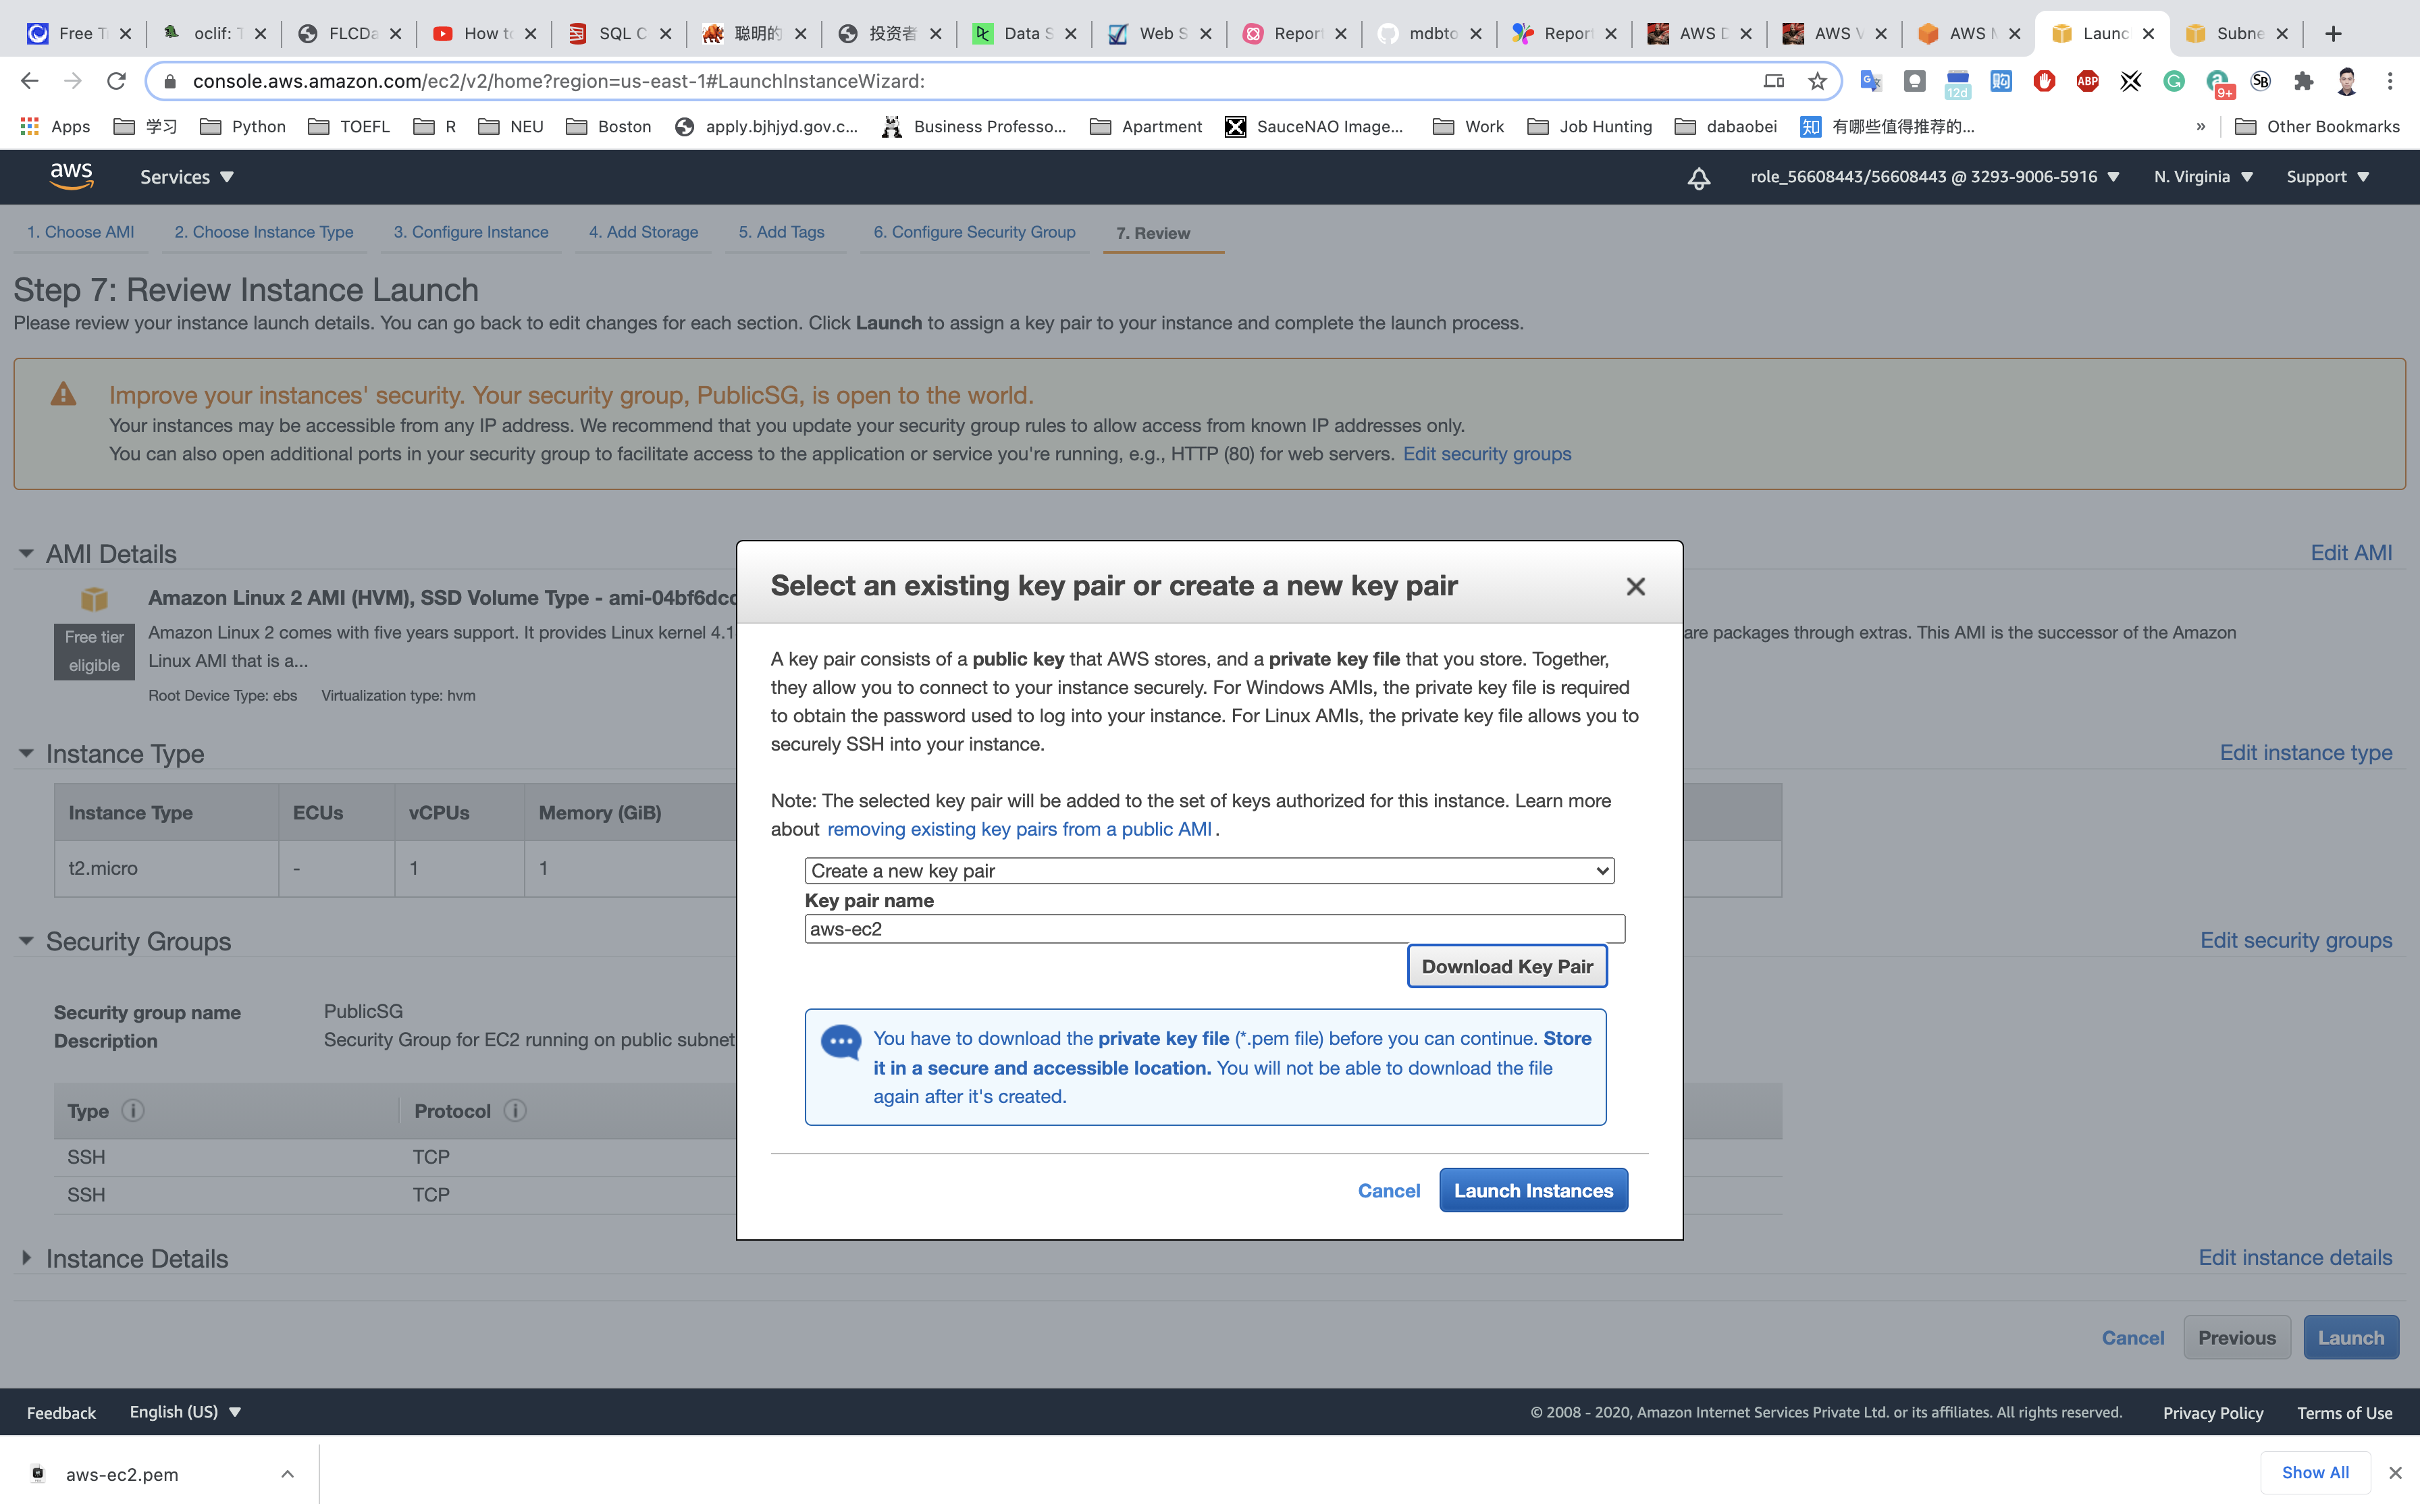
Launch Status: Your instance is now launching, Select the instance and wait for it to change status to running.
Note down the Public IP address of PublicEC2Server: 3.89.215.39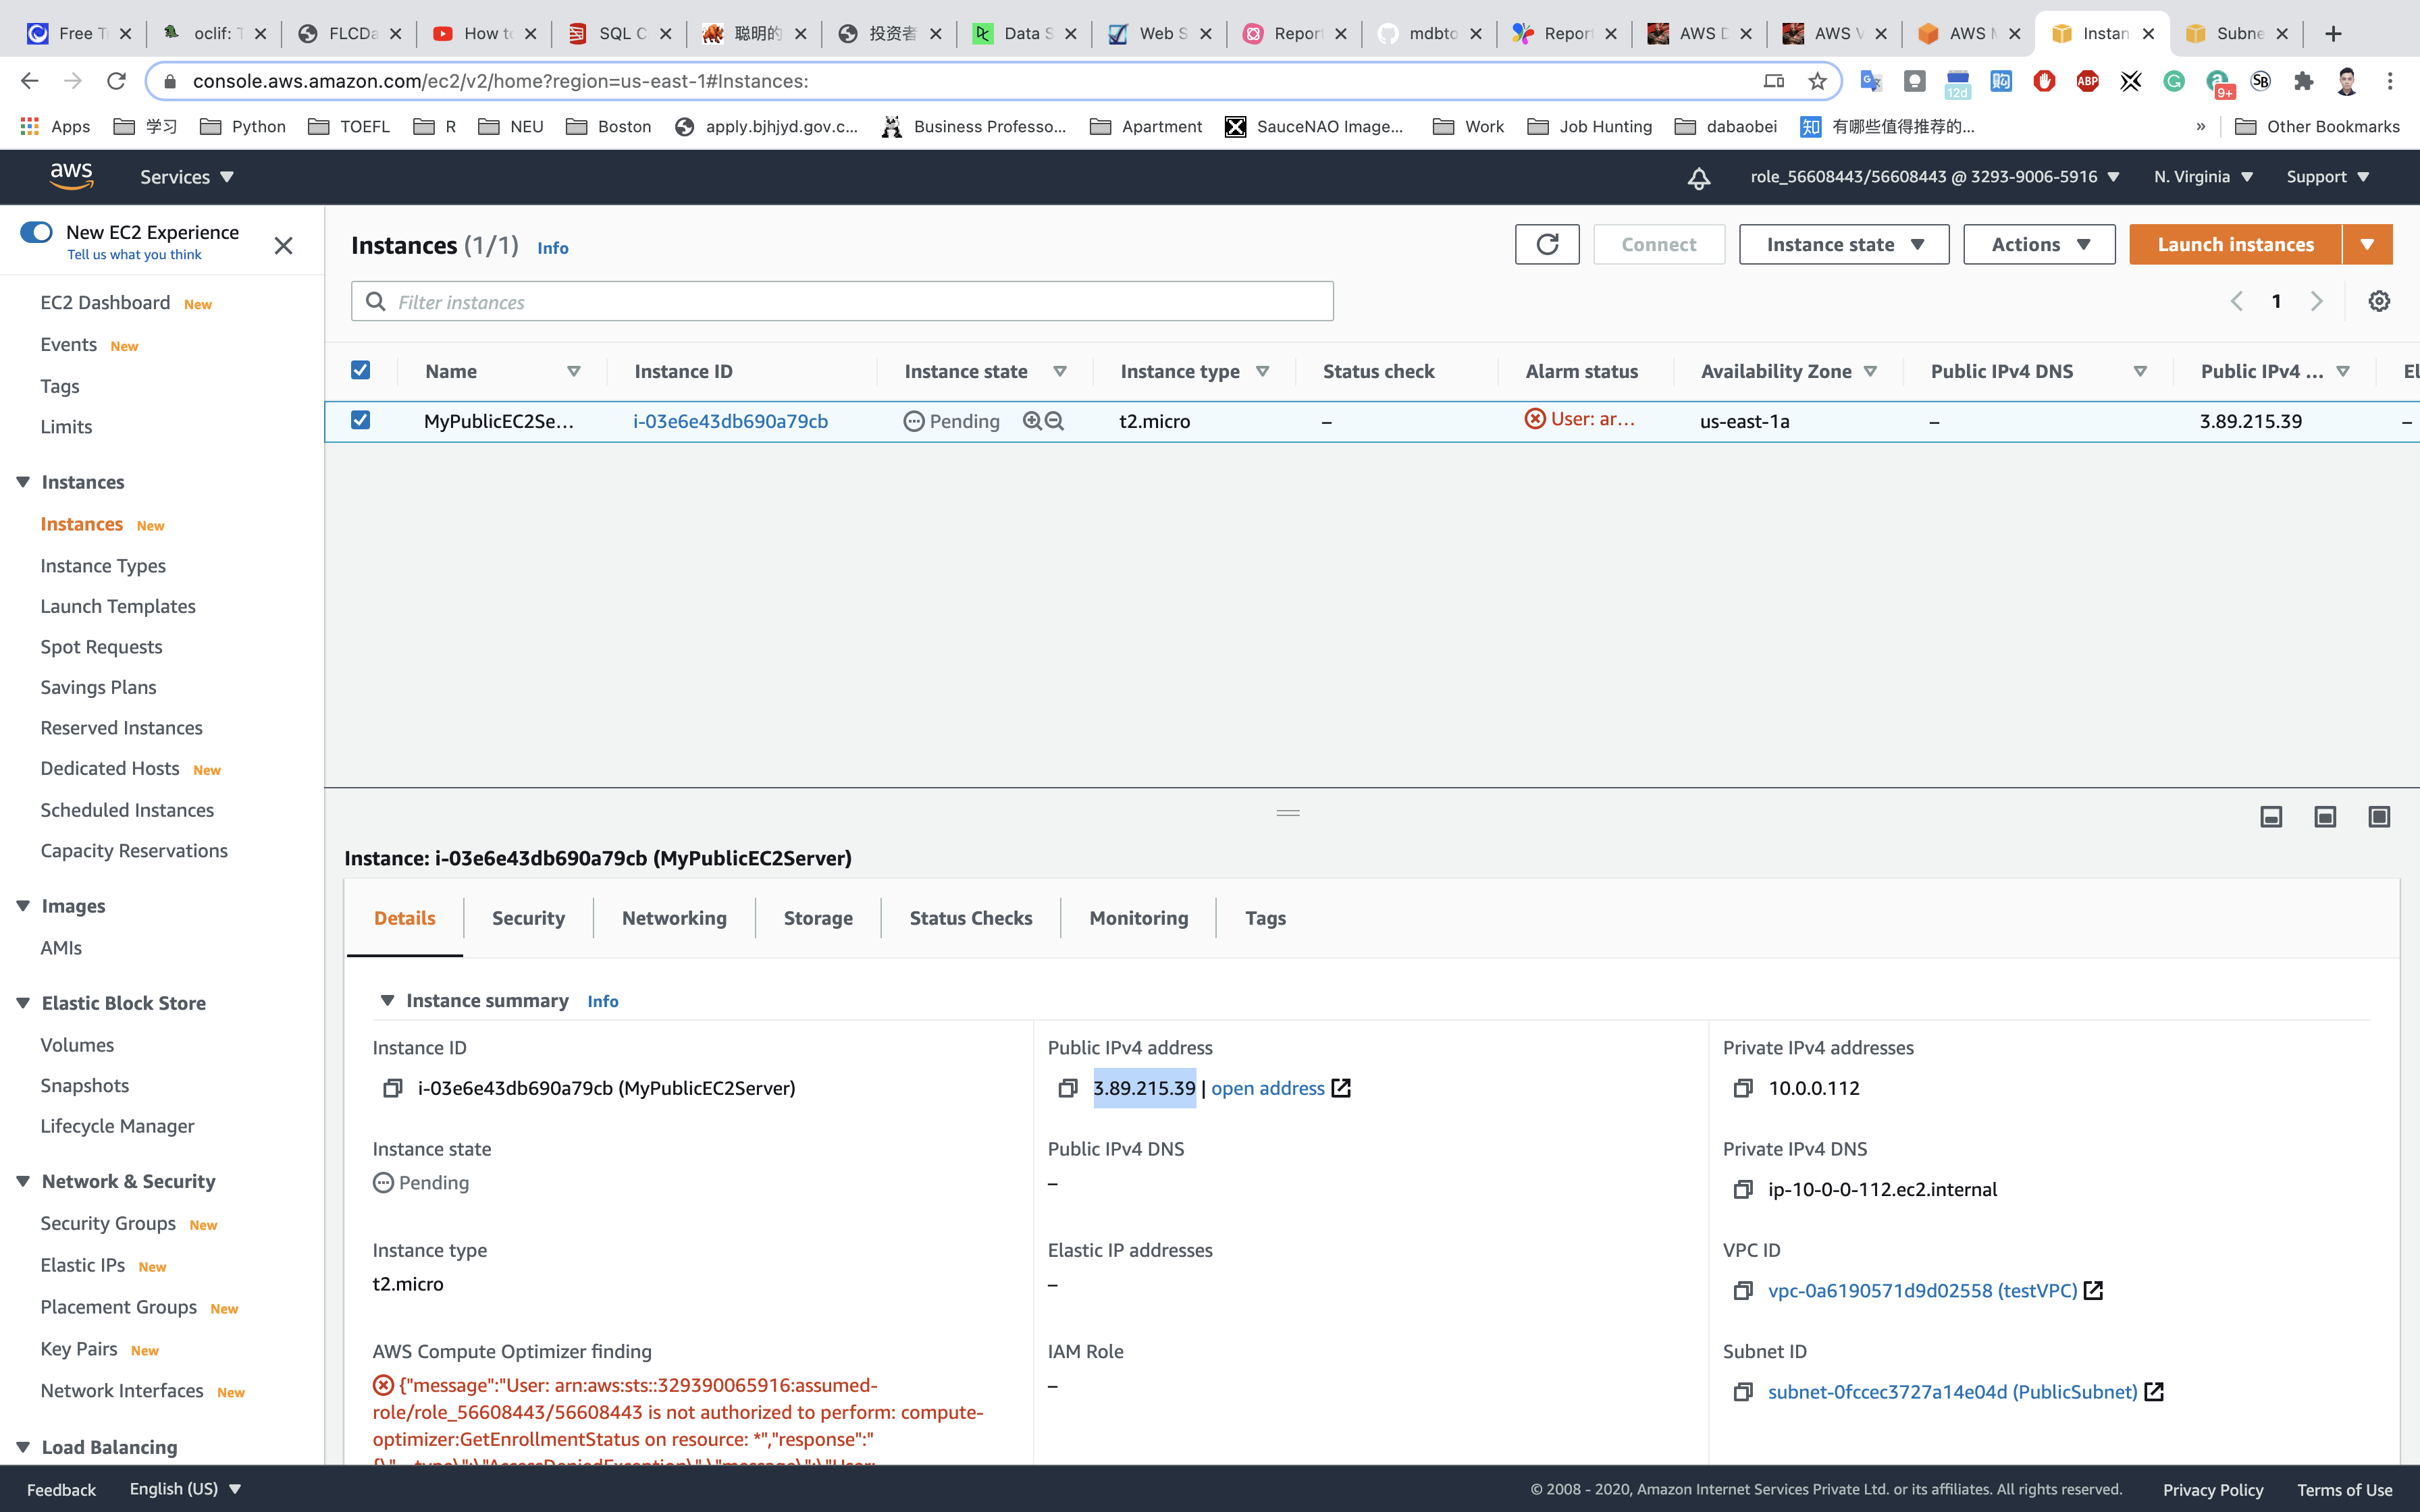
Launching an EC2 Instance in Private Subnet
Click on Launch Instance.
Choose an Amazon Machine Image (AMI): Search for Amazon Linux 2 AMI in the search box and click on the select button.
Choose an Instance Type: select t2.micro and click on the Next: Configure Instance Details
Configure Instance Details:
- Network:
testVPC - Subnet:
PrivateSubnet - Auto-assign Public IP:
Use Subnet Setting (Disable) - default - Leave all other settings as default.
Click on Nex: Add Storage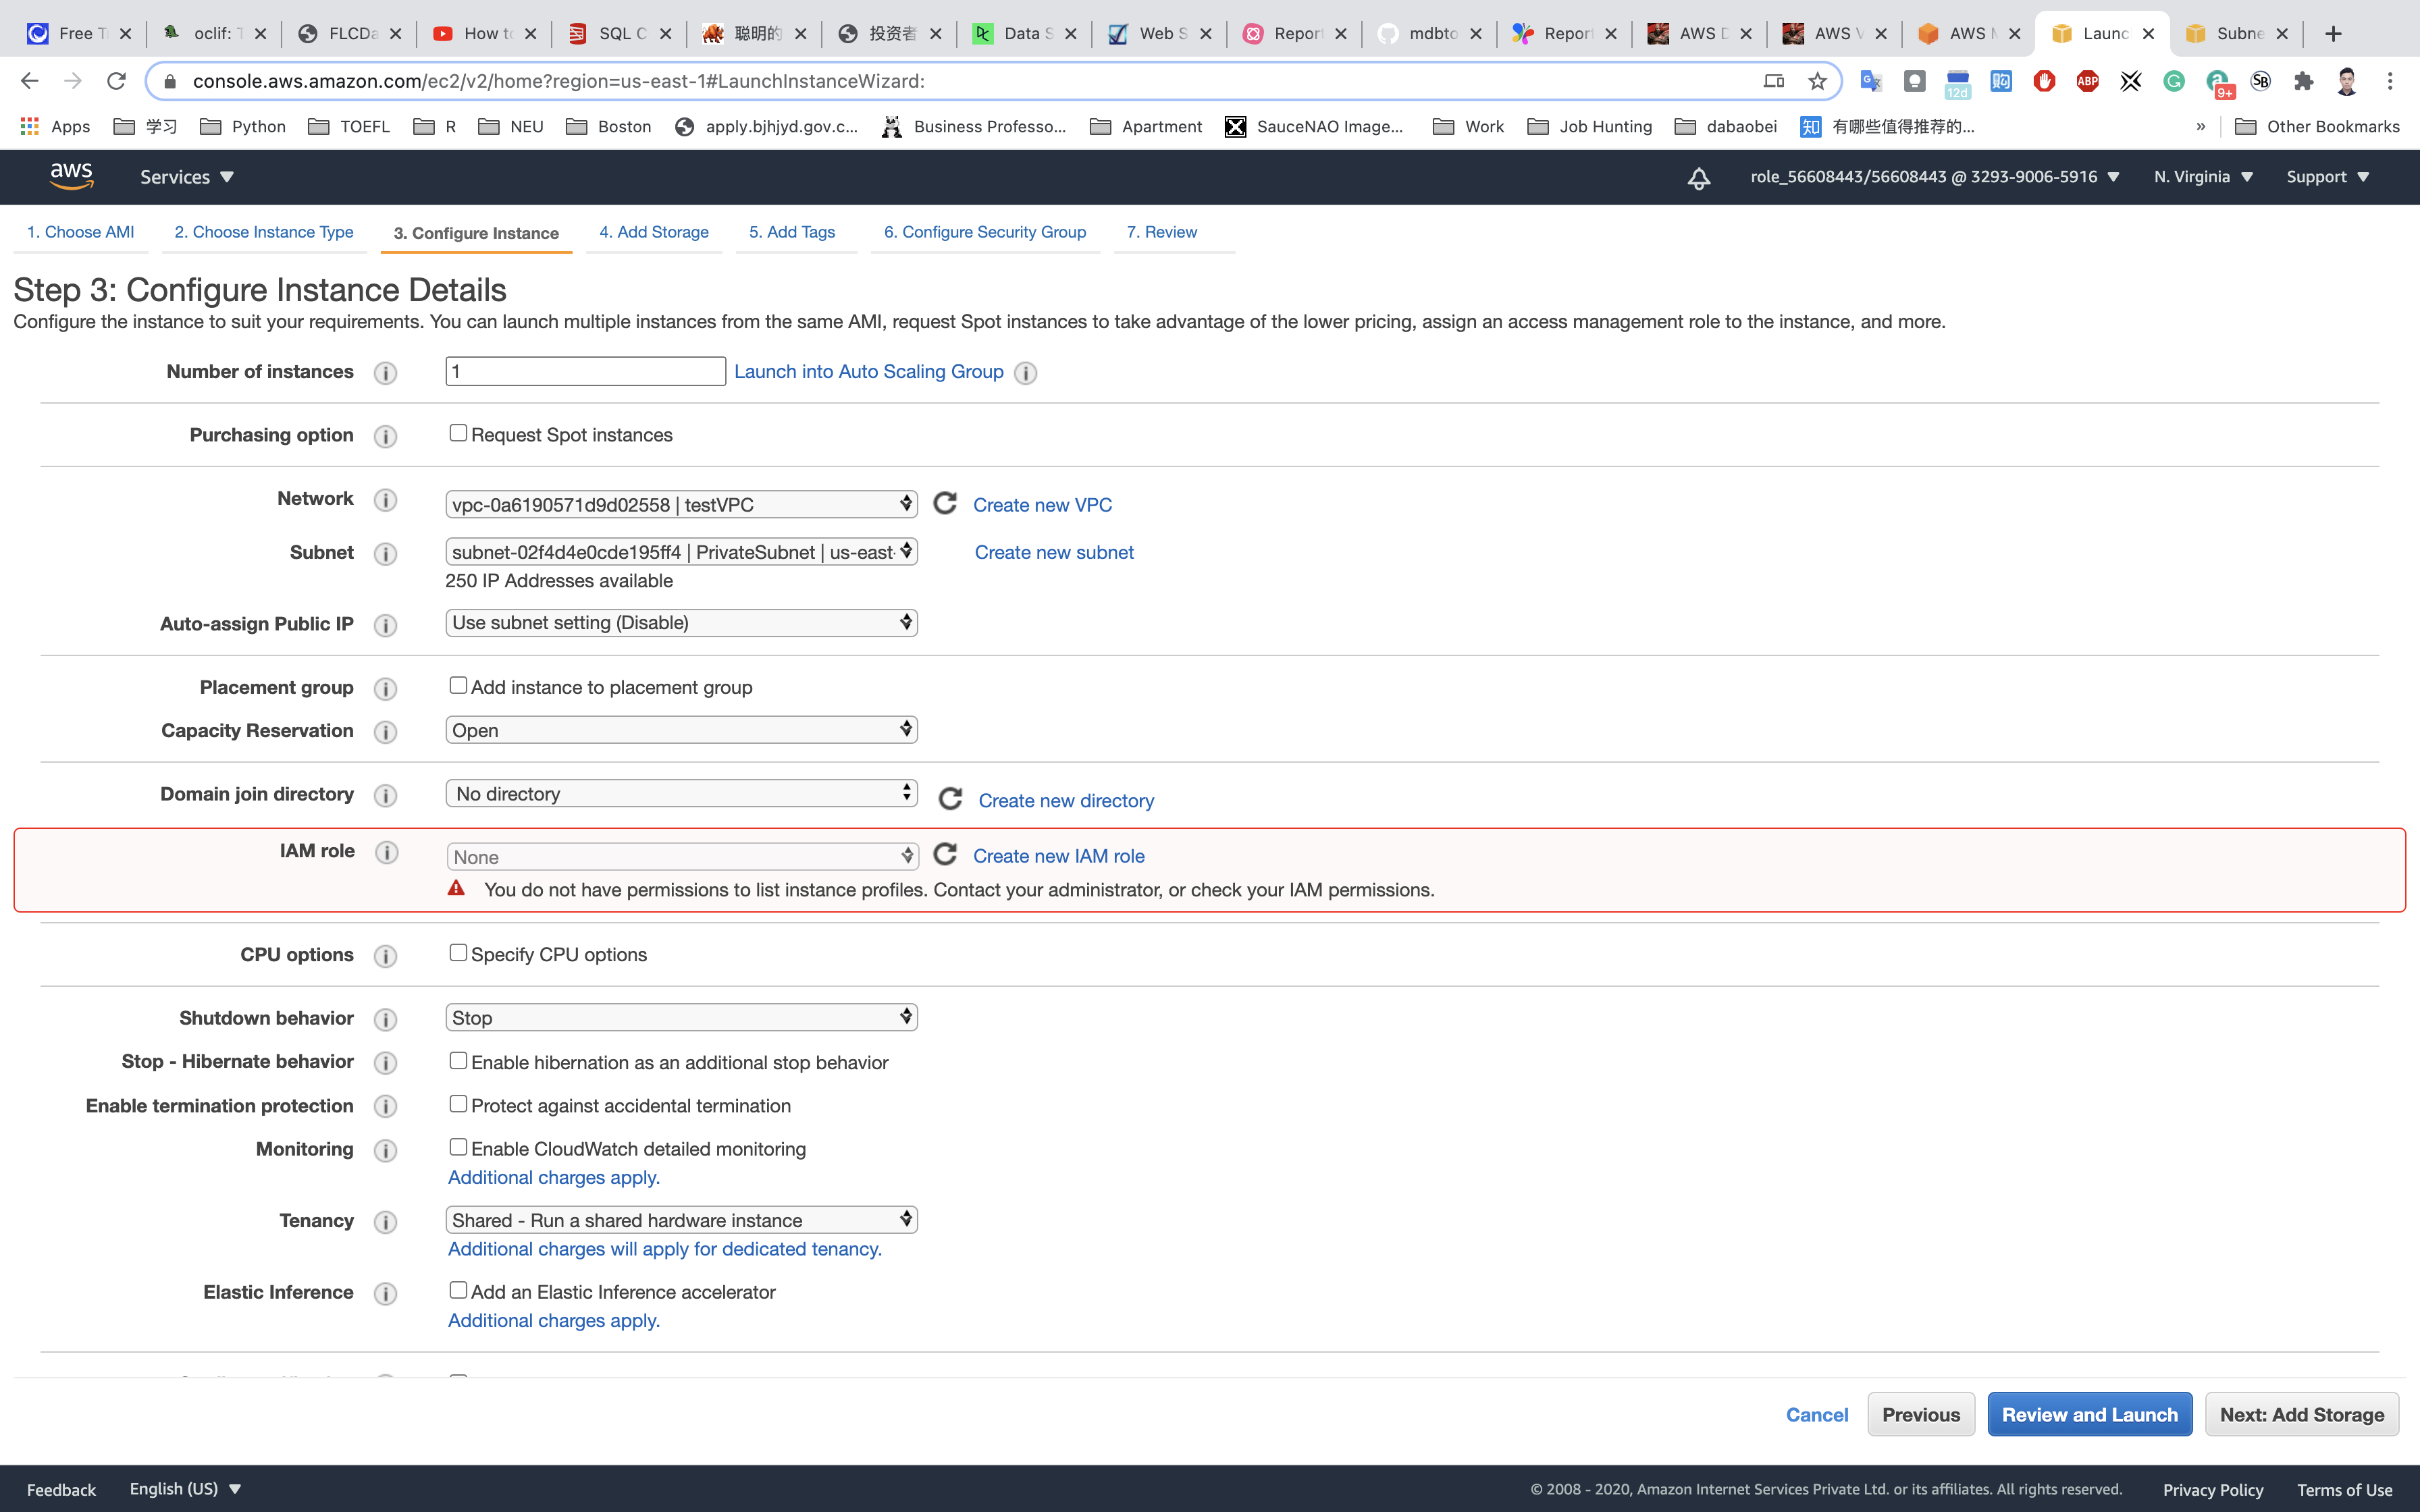
Add Storage: No need to change anything in this step. Click on Next: Add tags
Add Tags: Click on Add tag
- Key:
Name - Value:
MyPrivateEC2Server
Click on Next: Configure Security Group
Configure Security Group:
- SSH is already available:
- Security Group Name:
PrivateSG - Description:
Security Group for EC2 running on private subnet. - Choose Type:
SSH - Source:
Anywhere
- Security Group Name:
Click on Review and Launch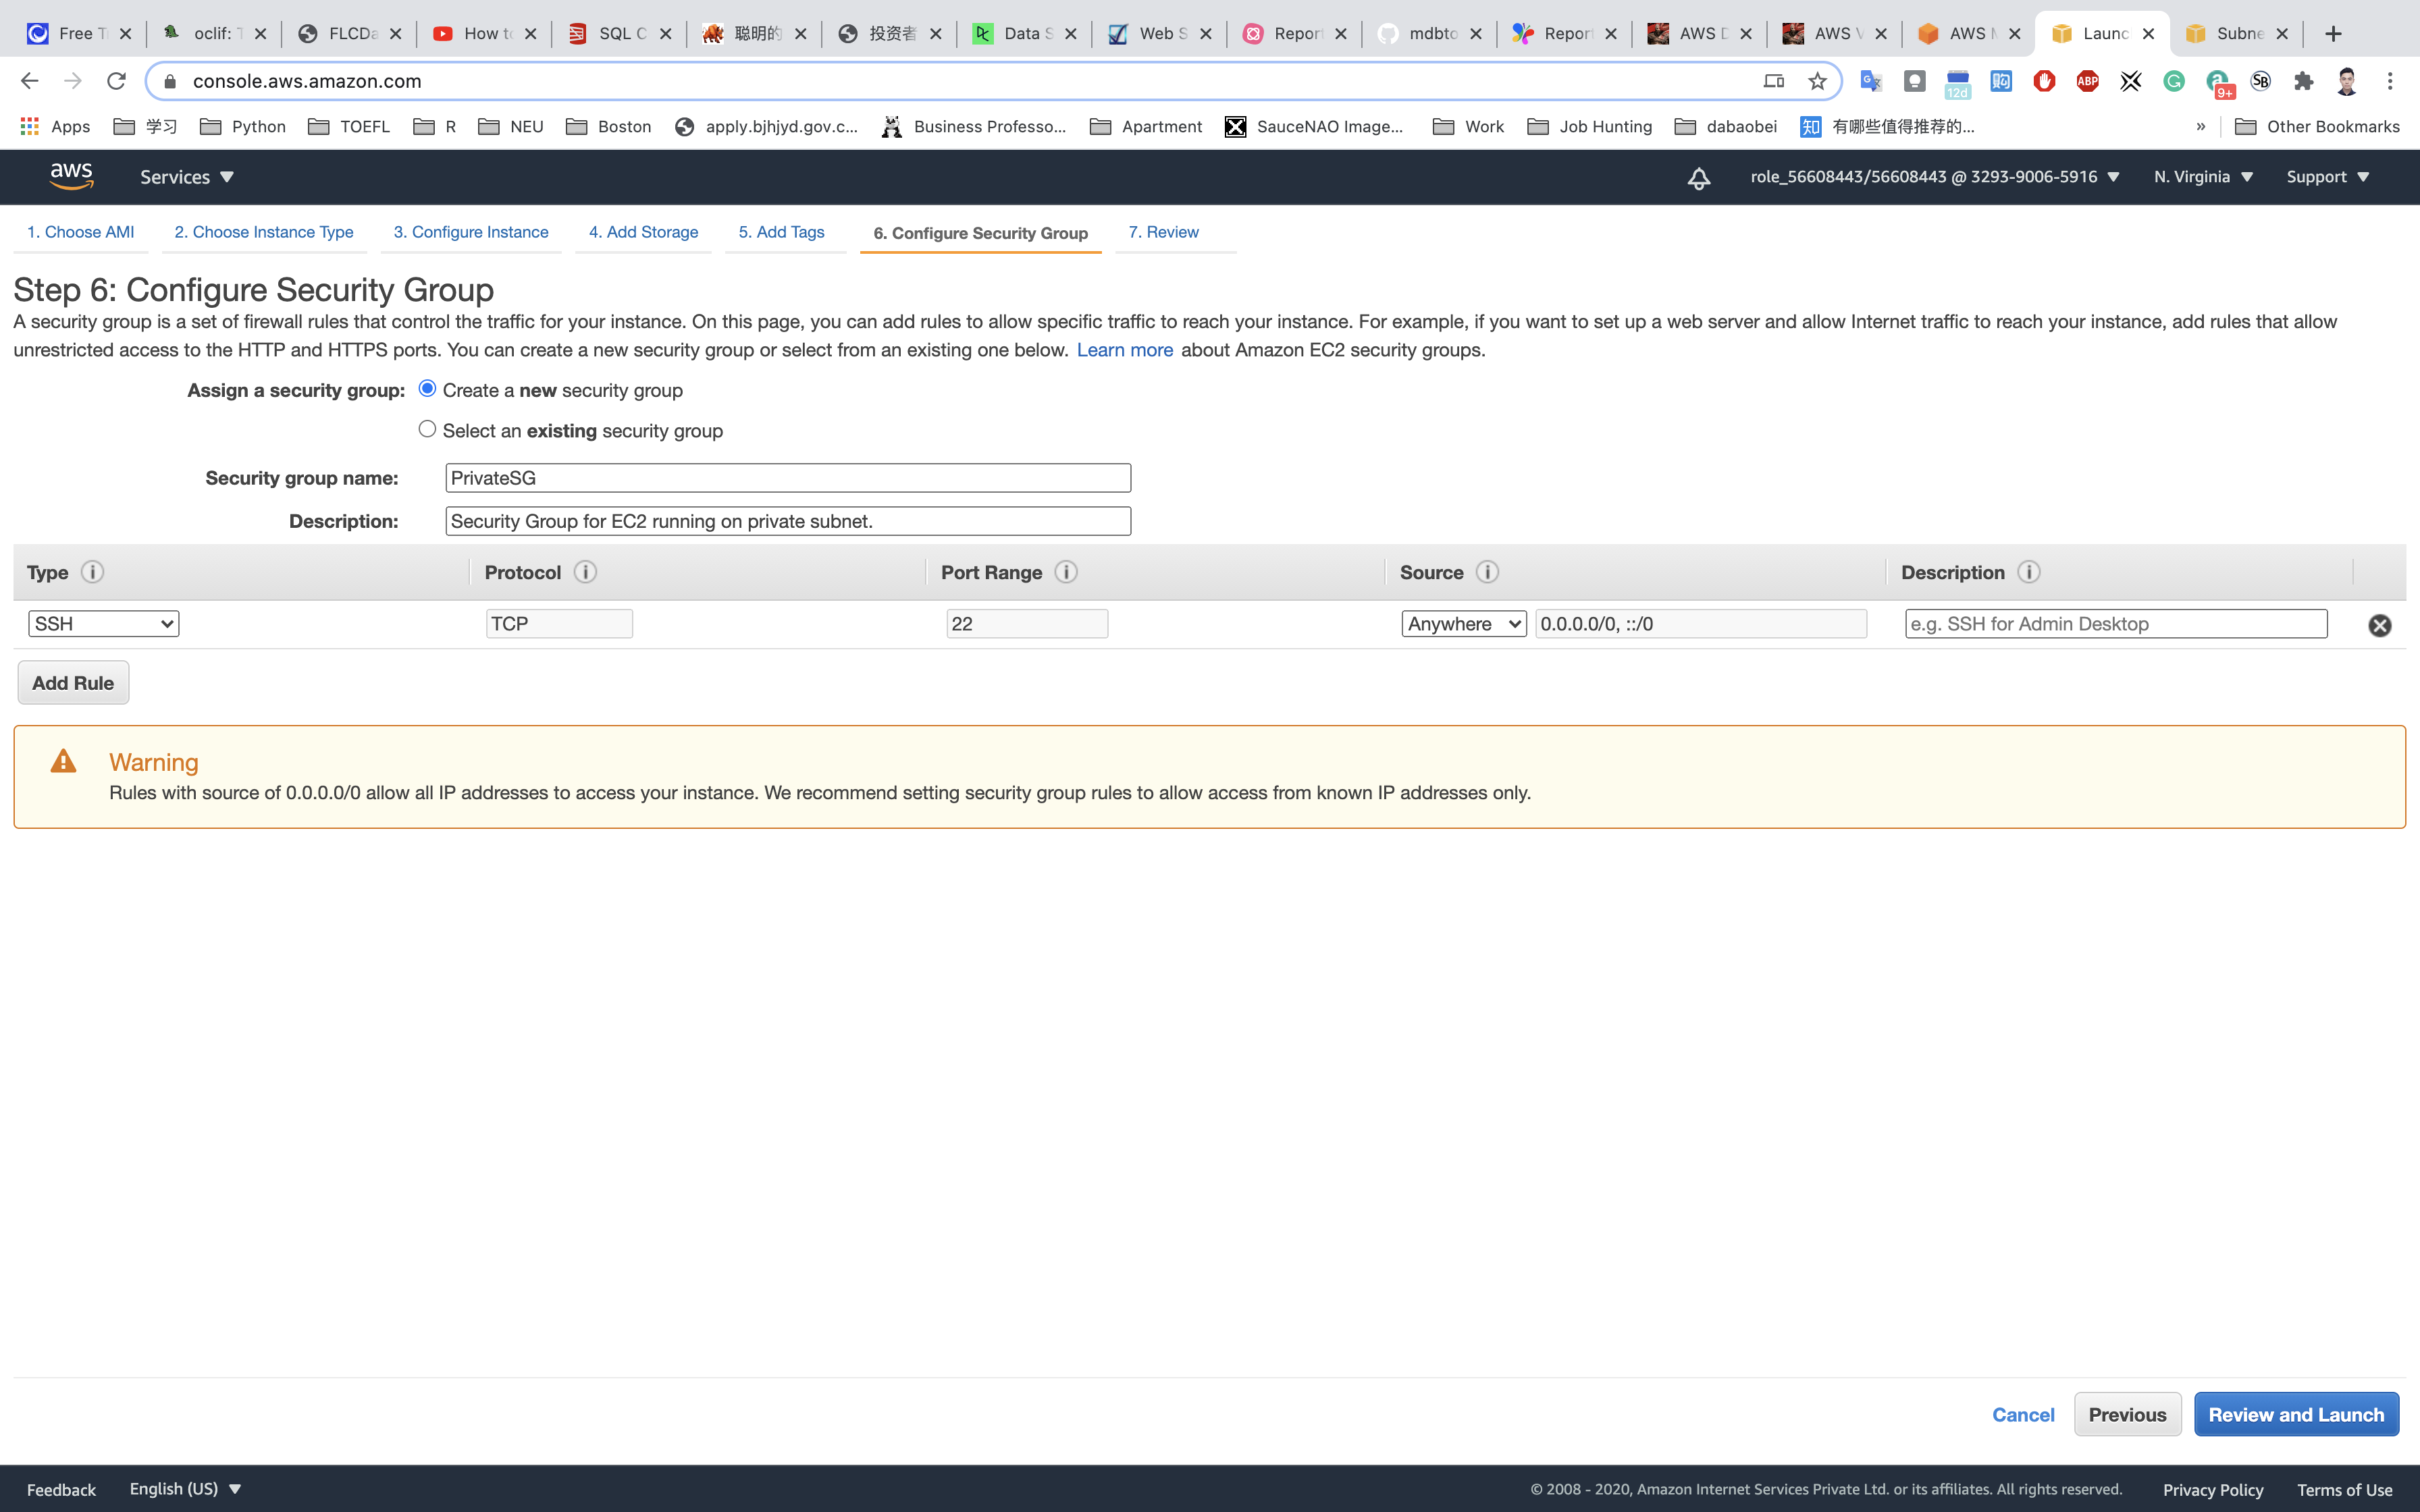
Review and Launch : Review all settings and click on Launch.
- Select
Choose an existing key pair - Select a key pair:
aws-ec2
Click on Launch Instances.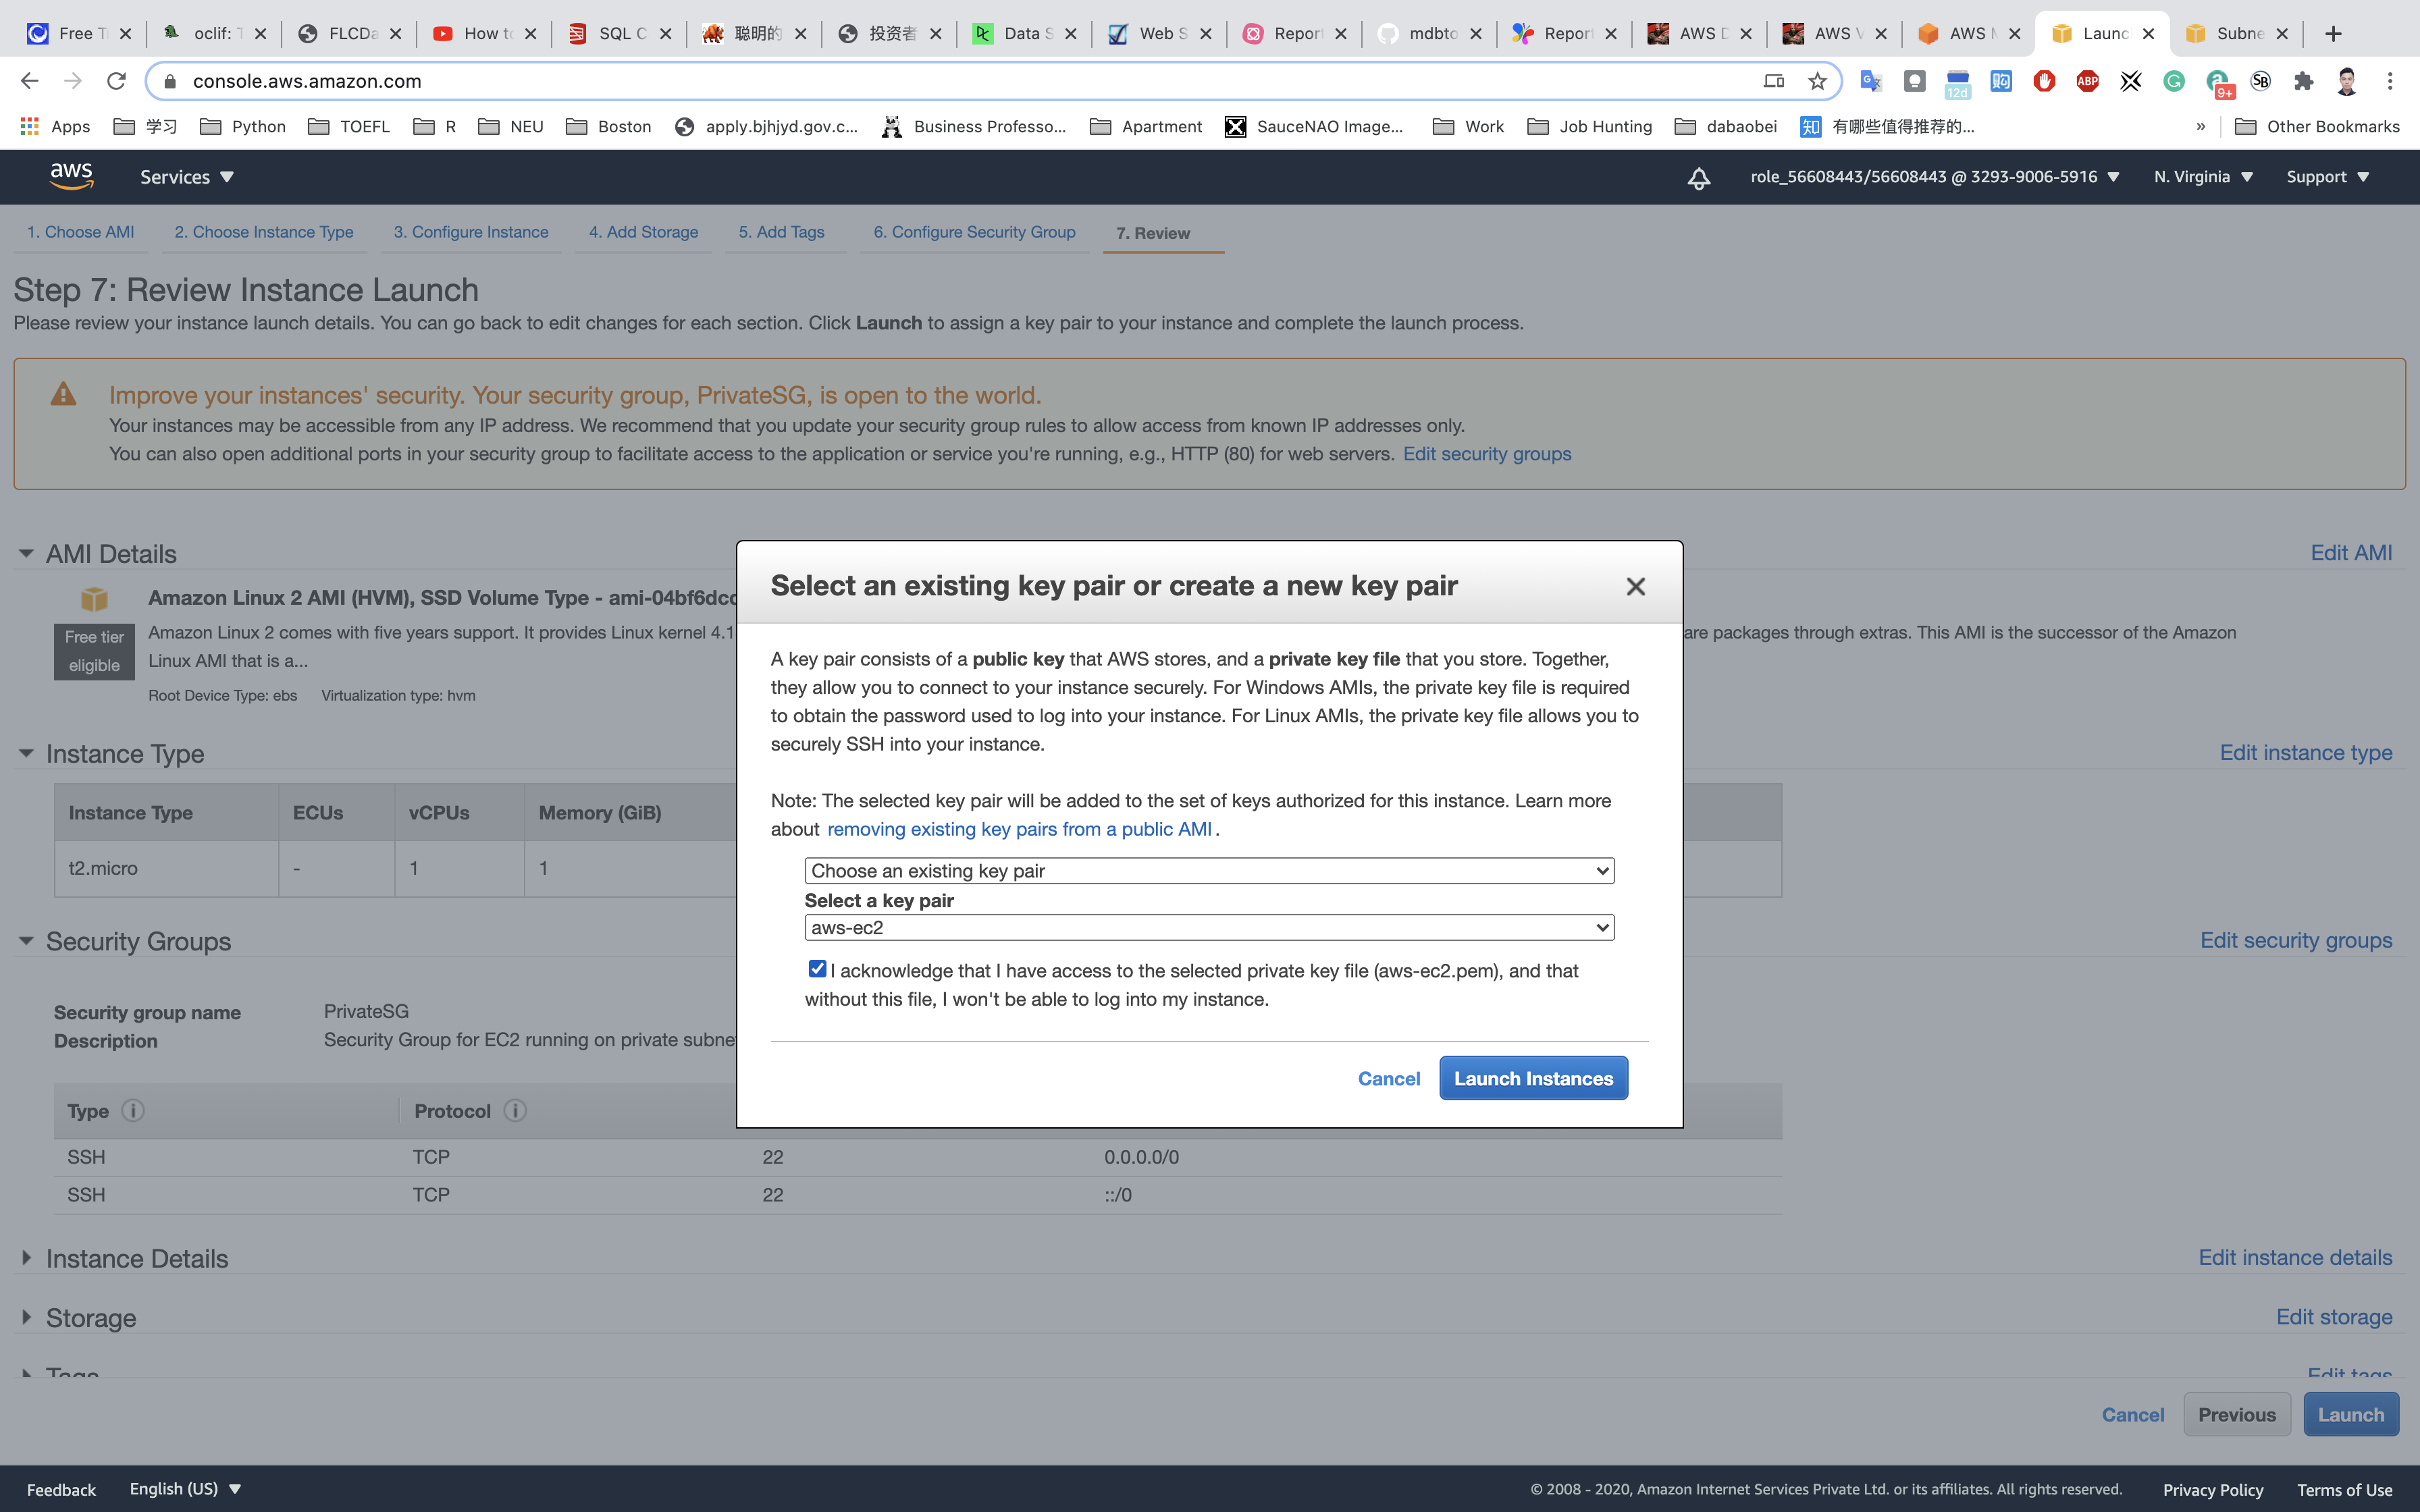
Launch Status: Your instance is now launching, Select the instance and wait for it to change status to running.
Note down the Public IP address of PublicEC2Server: None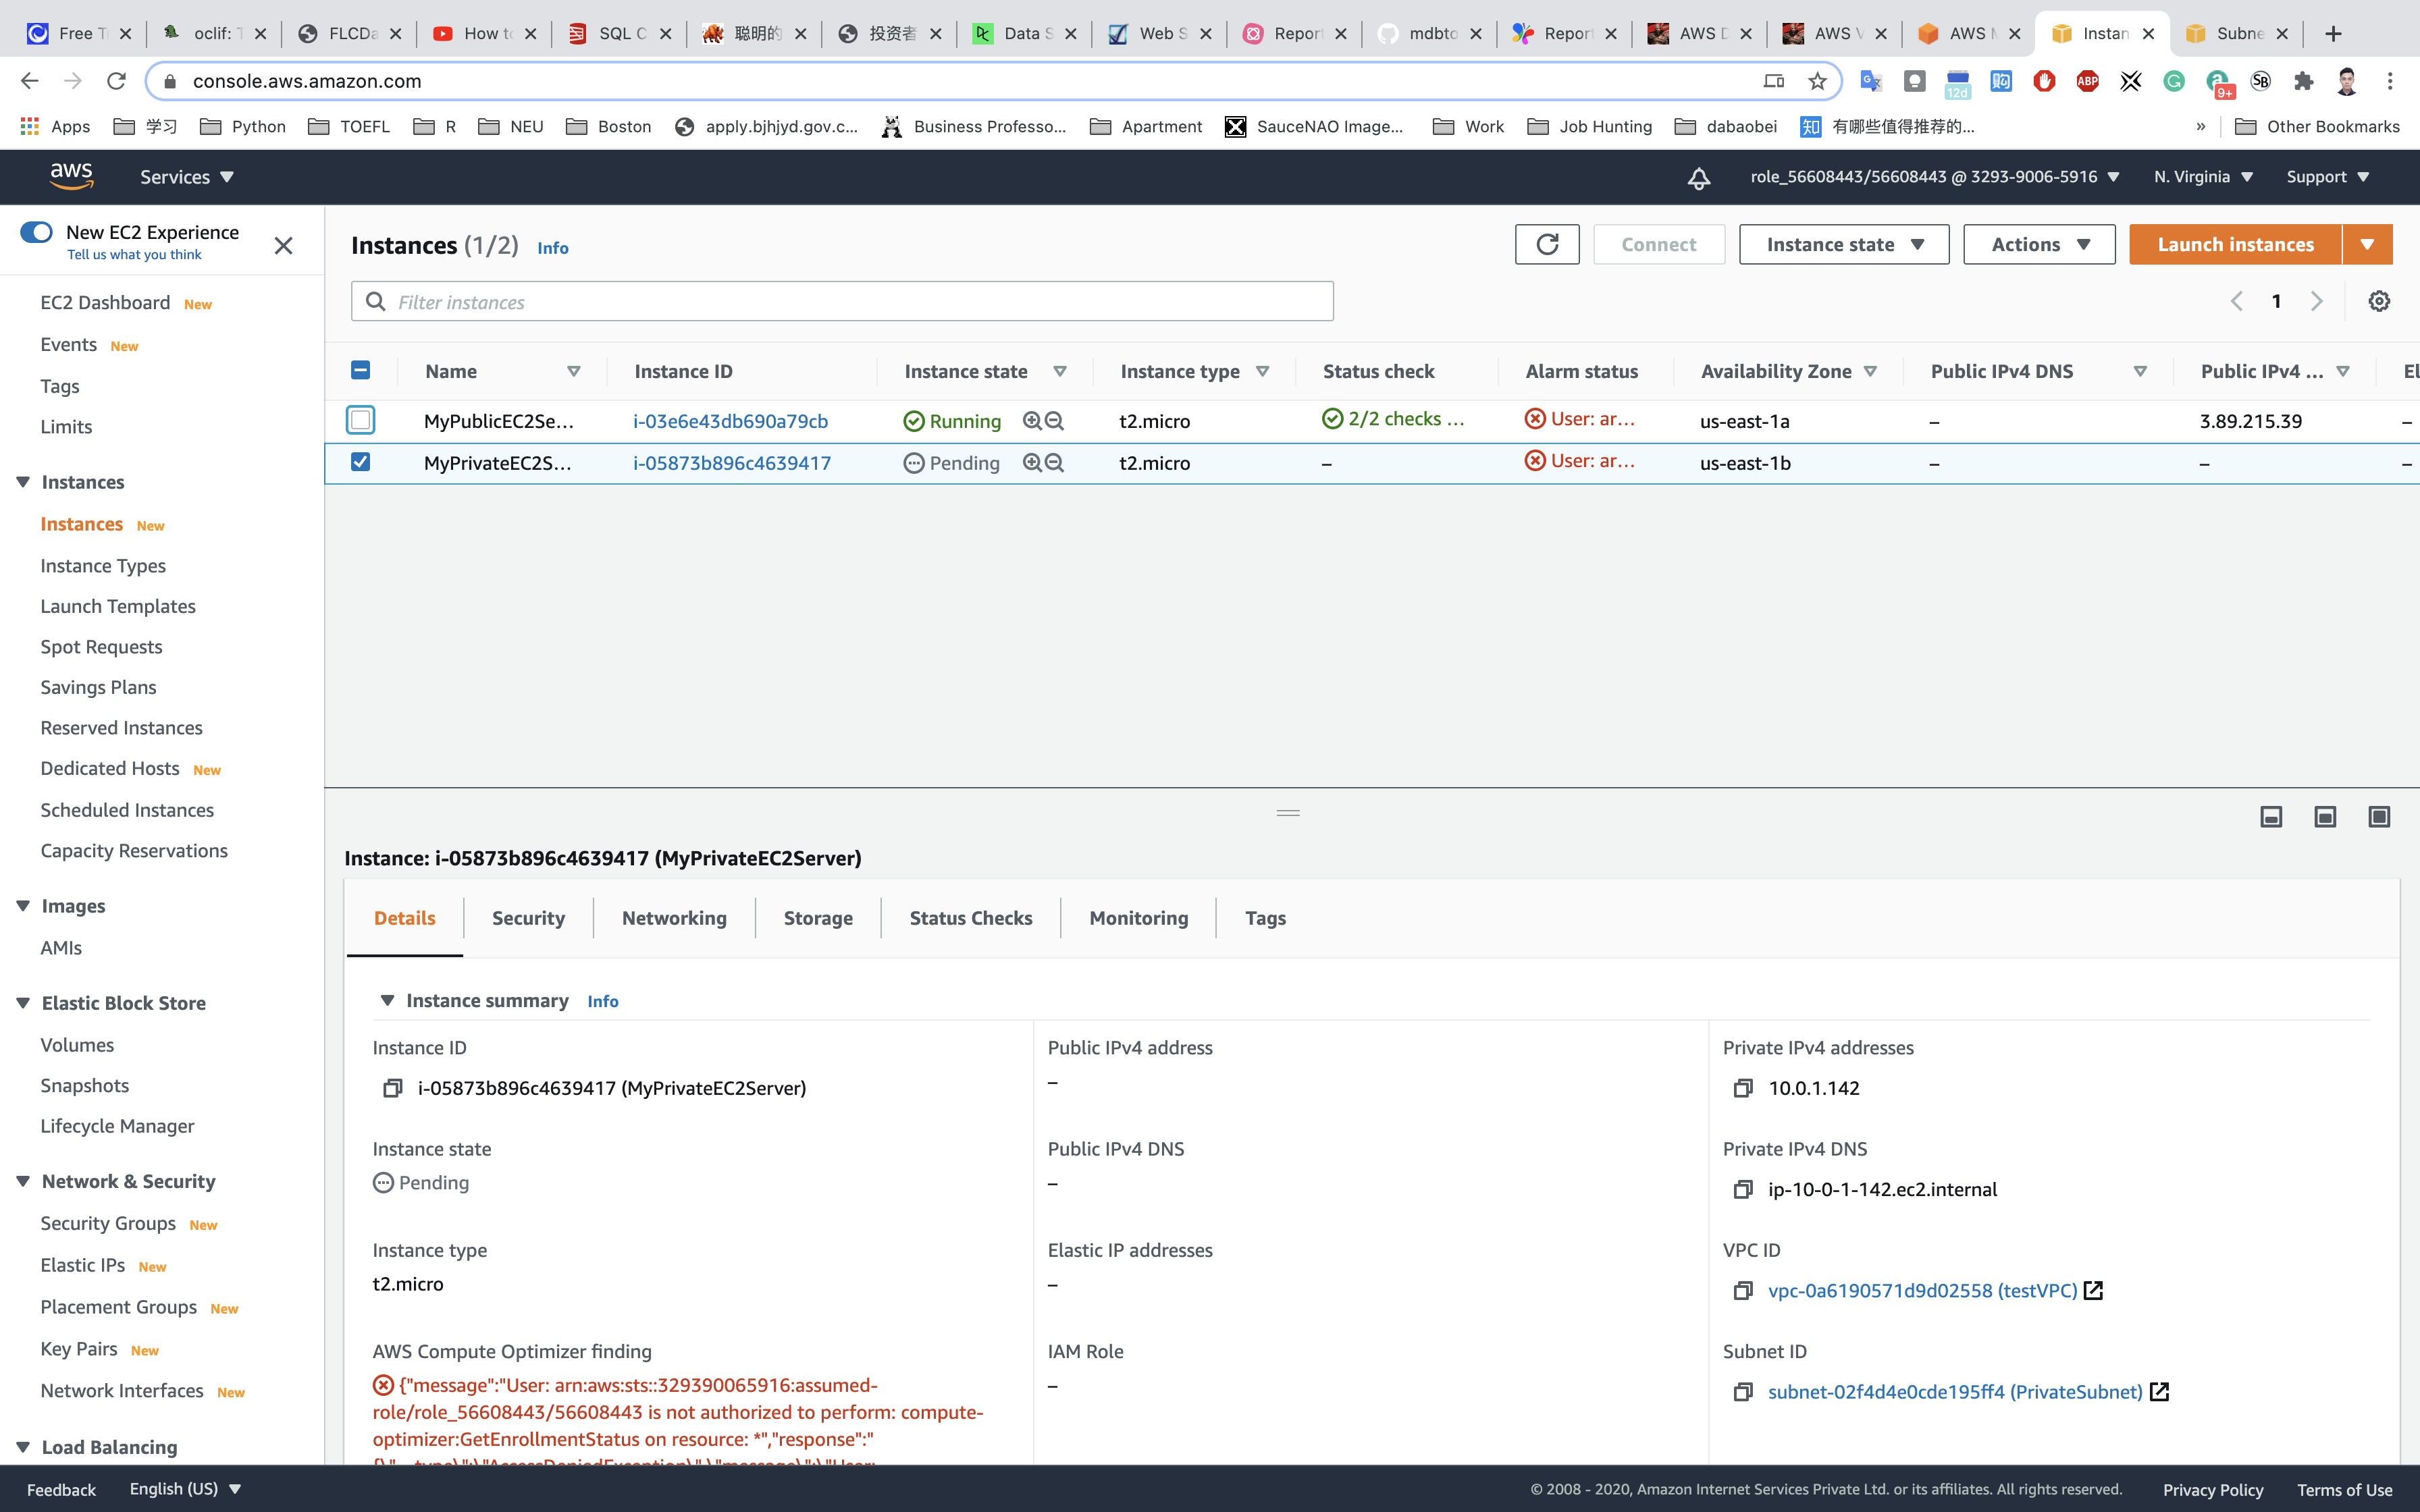
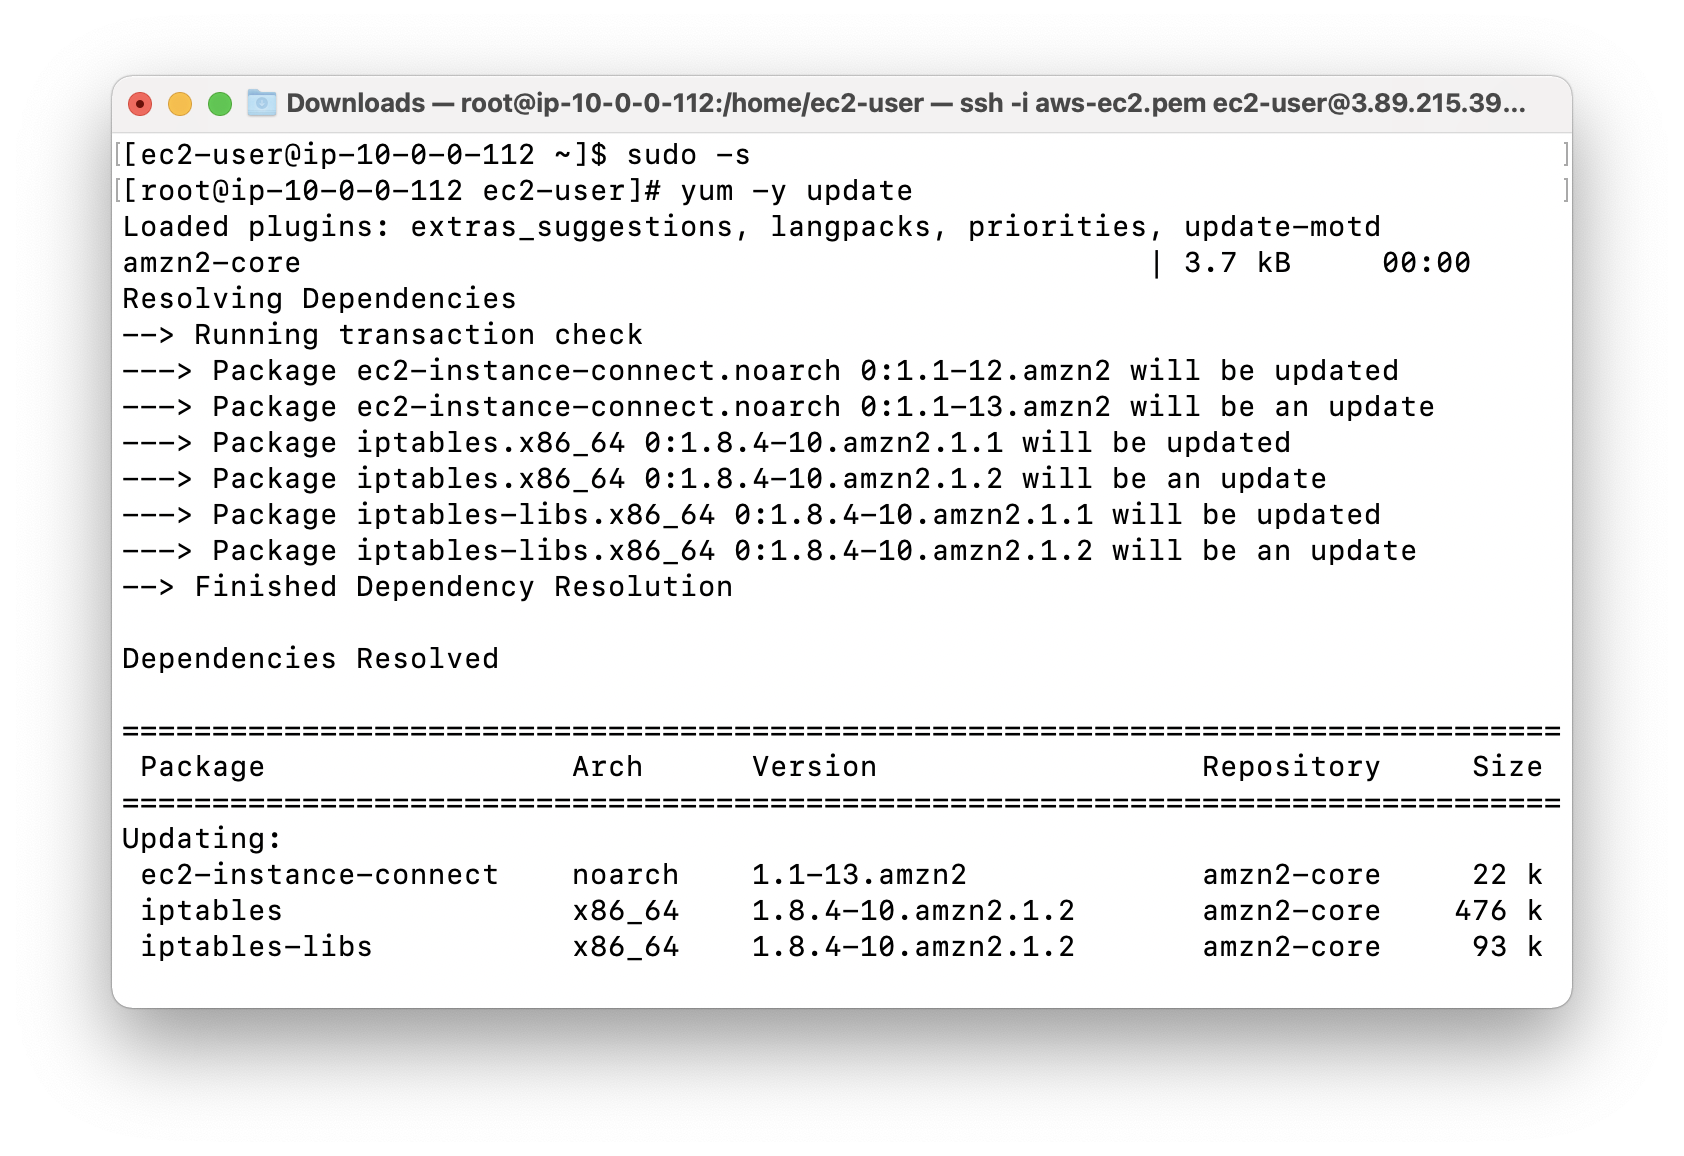
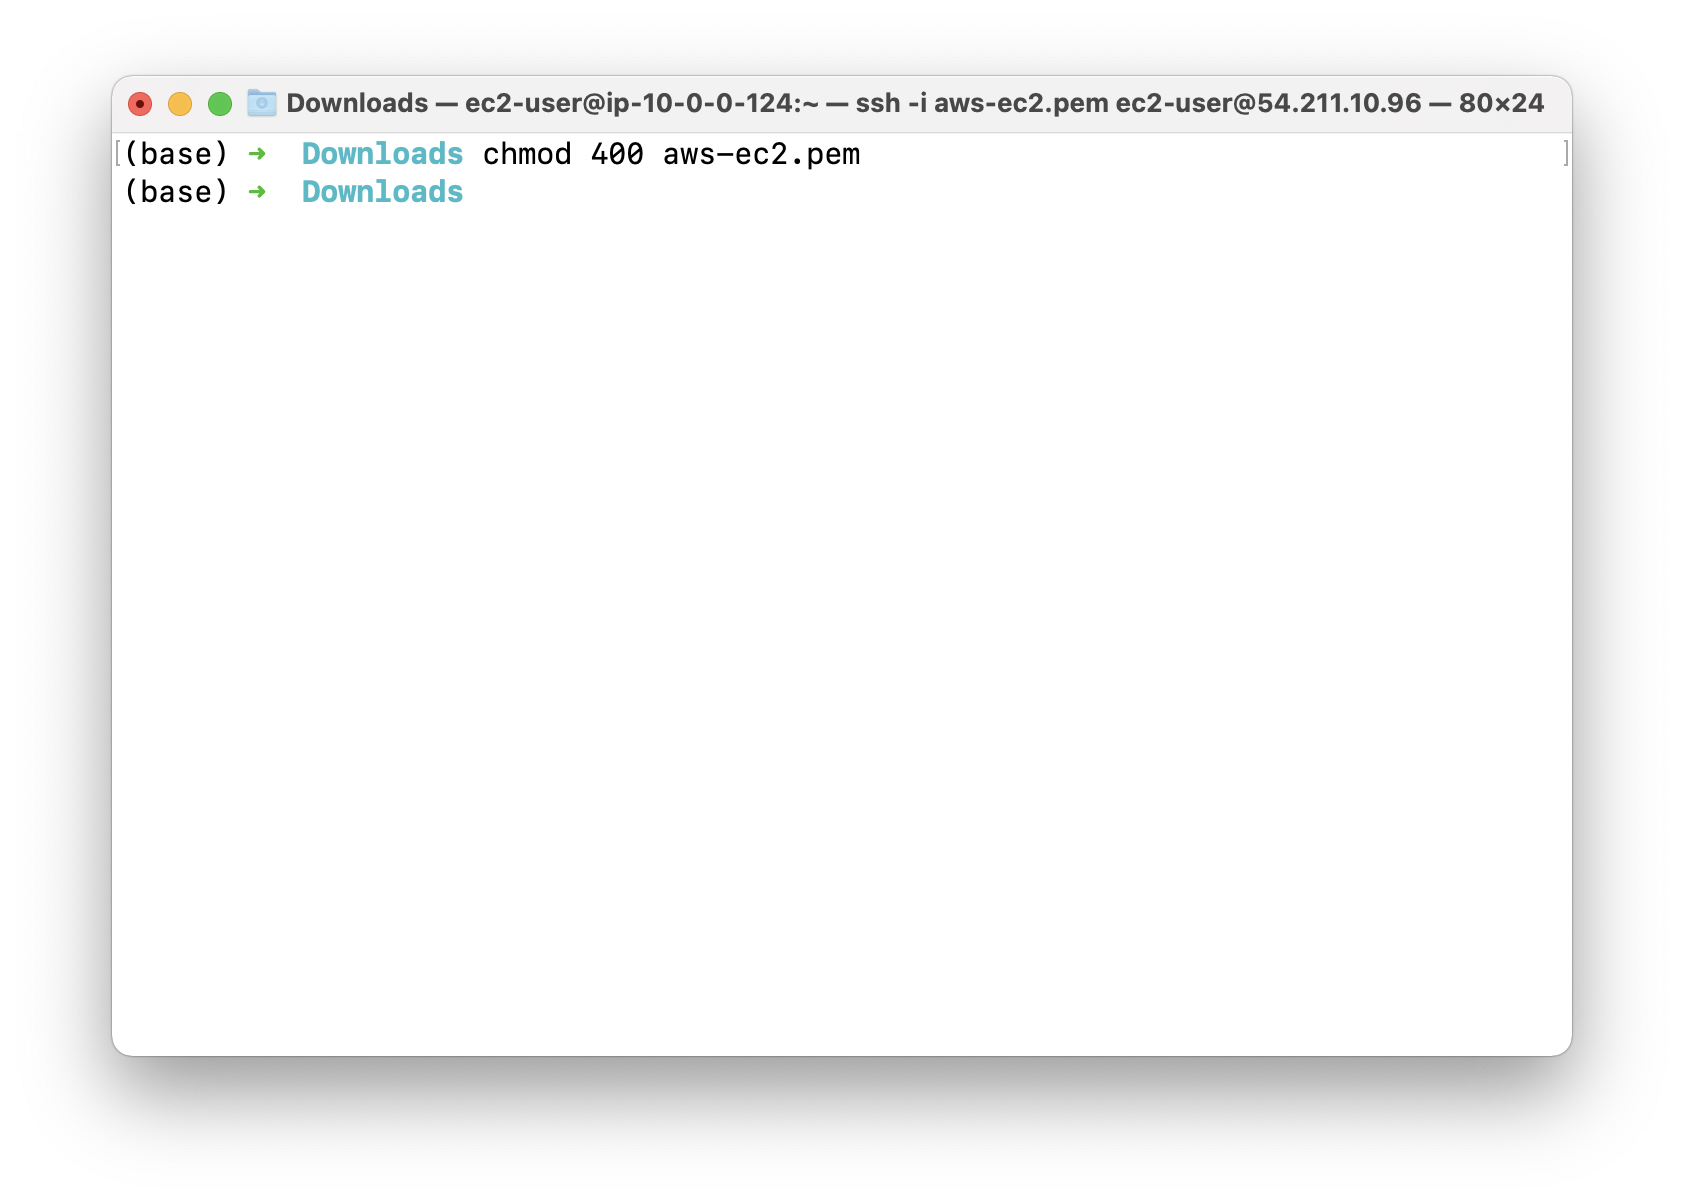
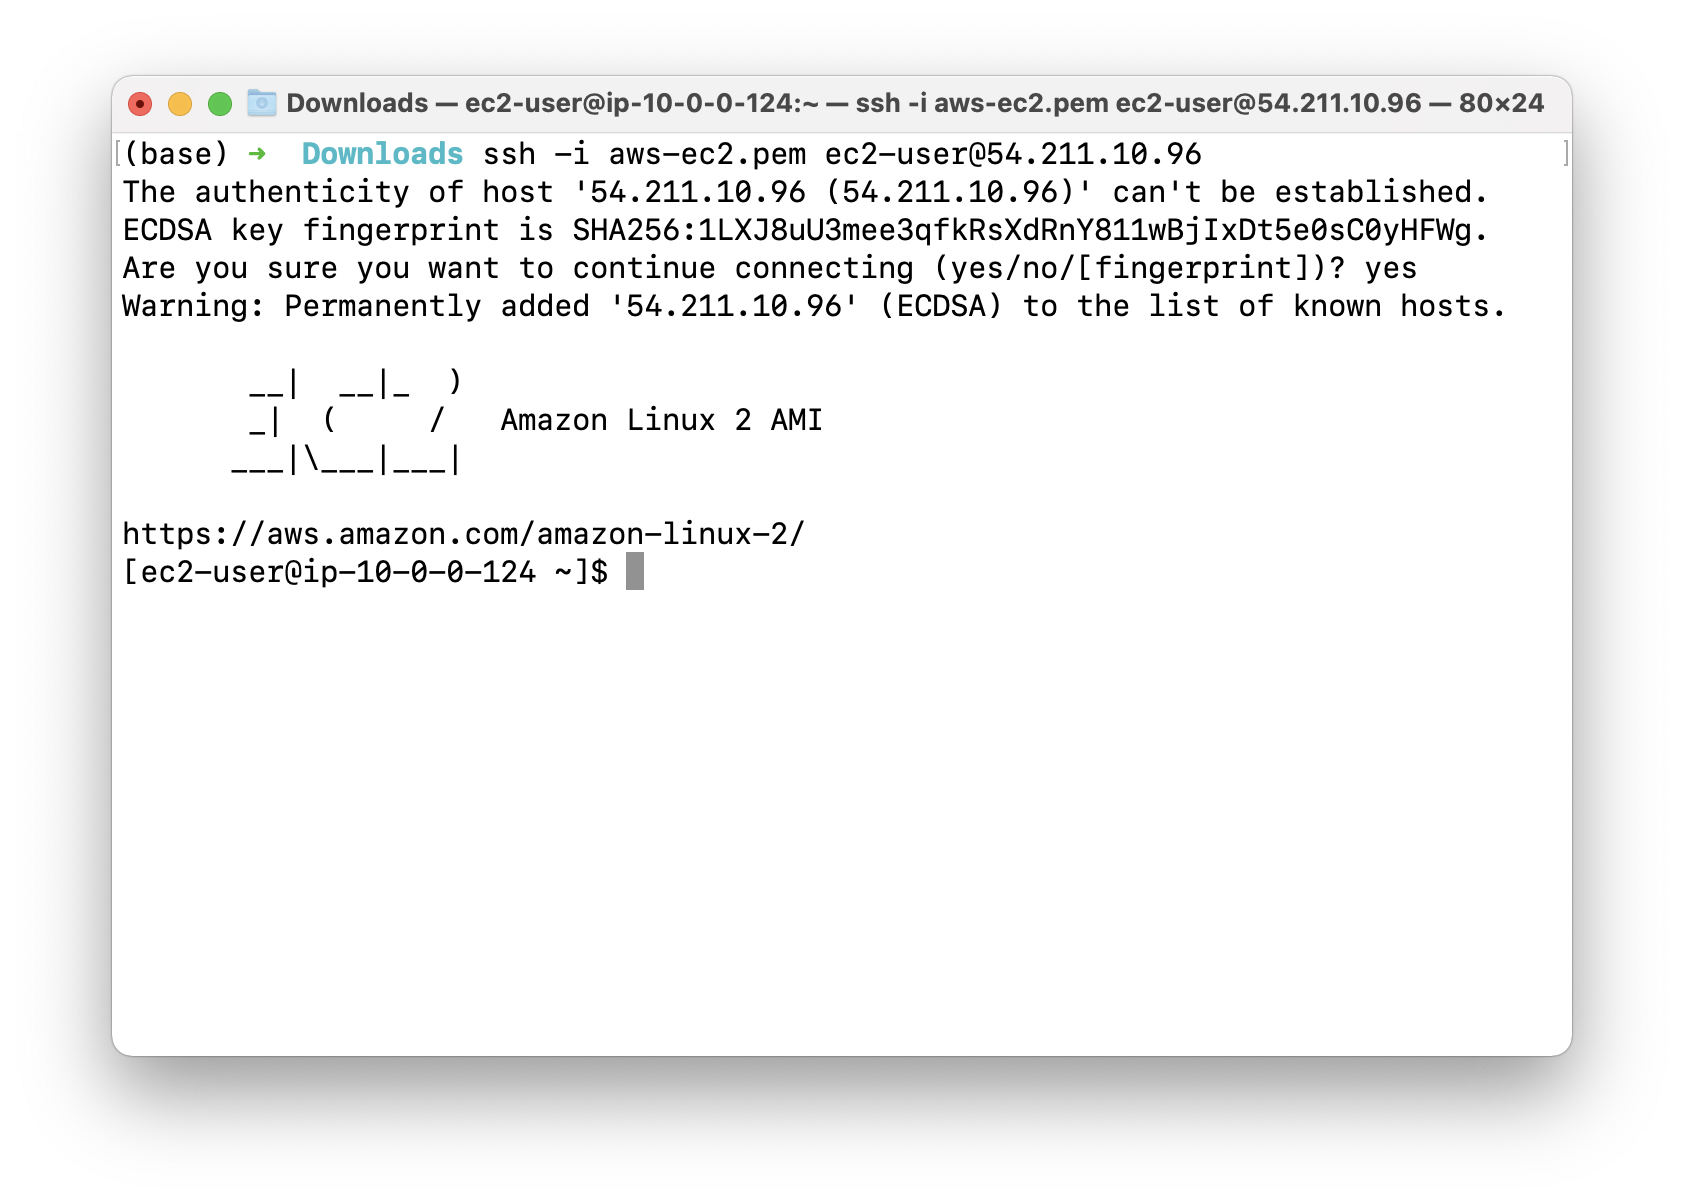
SSH into Public and Private EC2 Instance and Test Internet Connectivity
SSH into EC2 running on public subnet
If you cannot understand the following steps. Click on SSH into EC2 instance
Using the public IP address, SSH into PublicEC2Server.
SSH into the EC2 running on public subnet, and paste the public IP address from AWS EC2 console web page.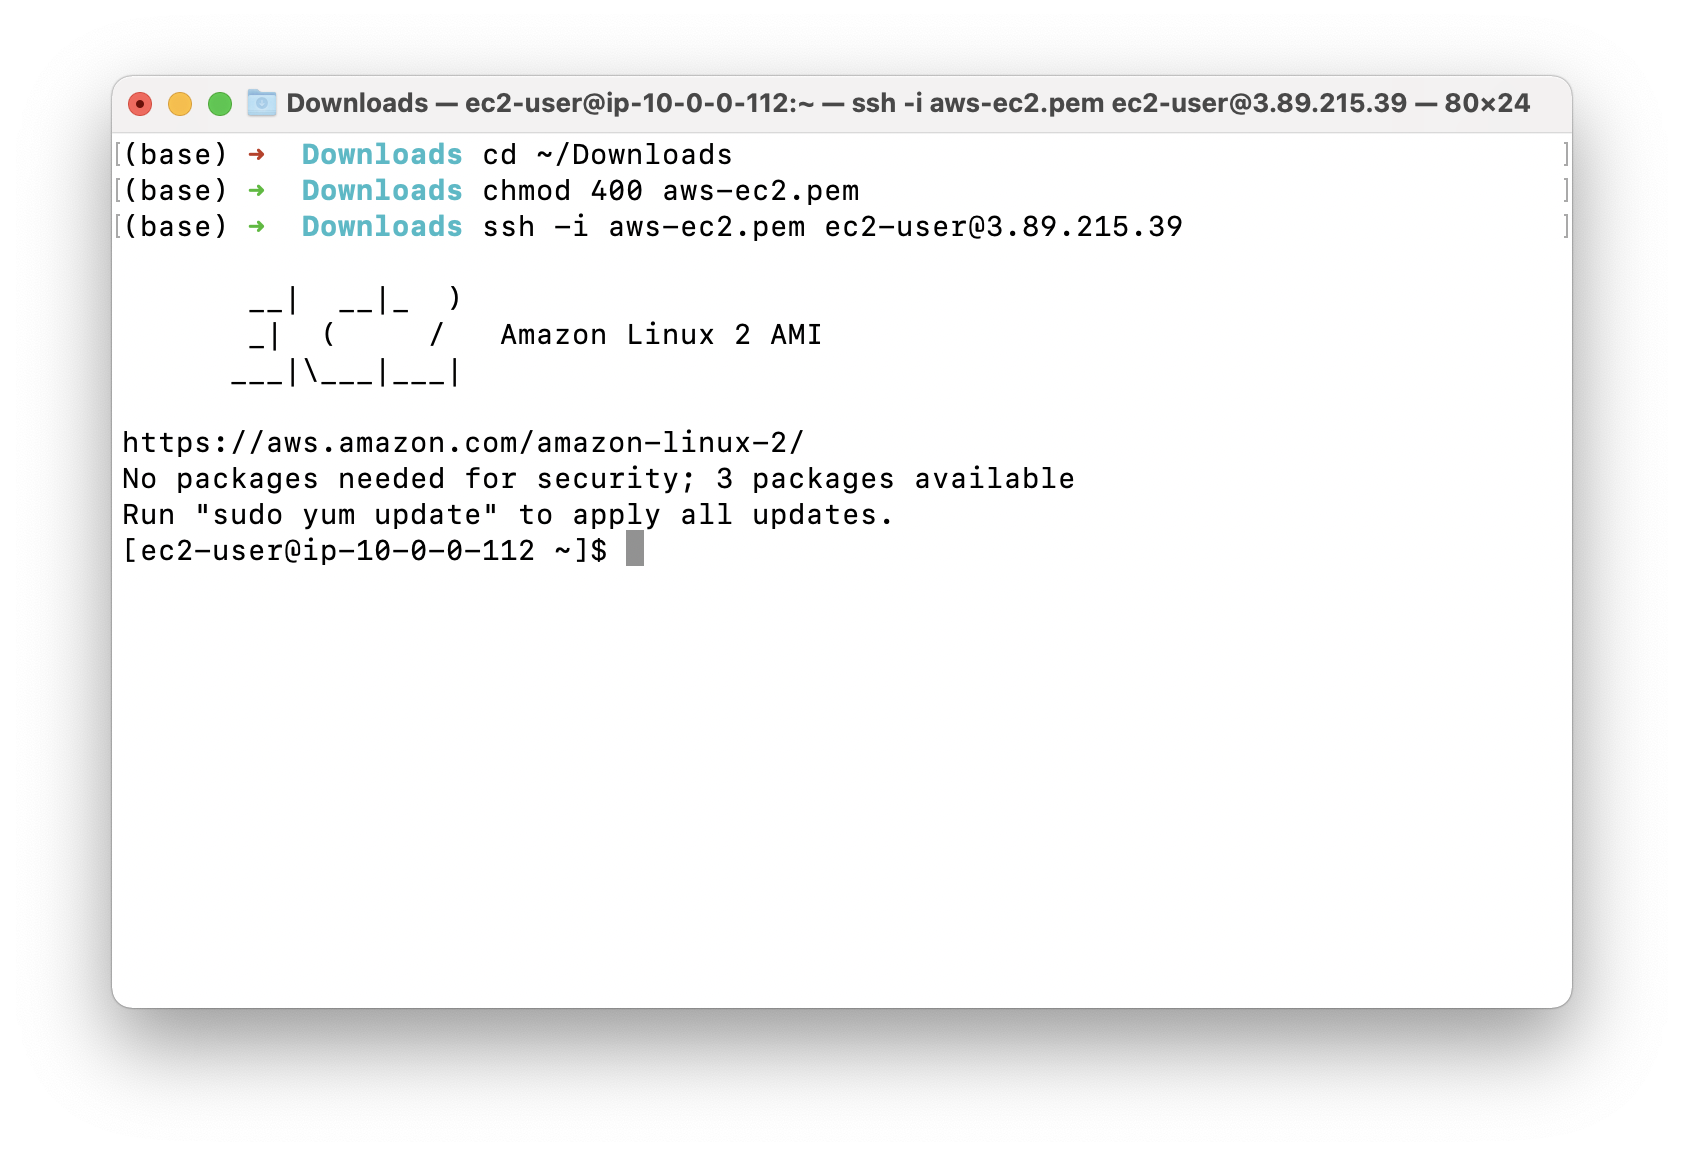
See current working directory.
Open another terminal. And transfer file aws-ec2.pem from your local machine to the EC2 server running on public subnet.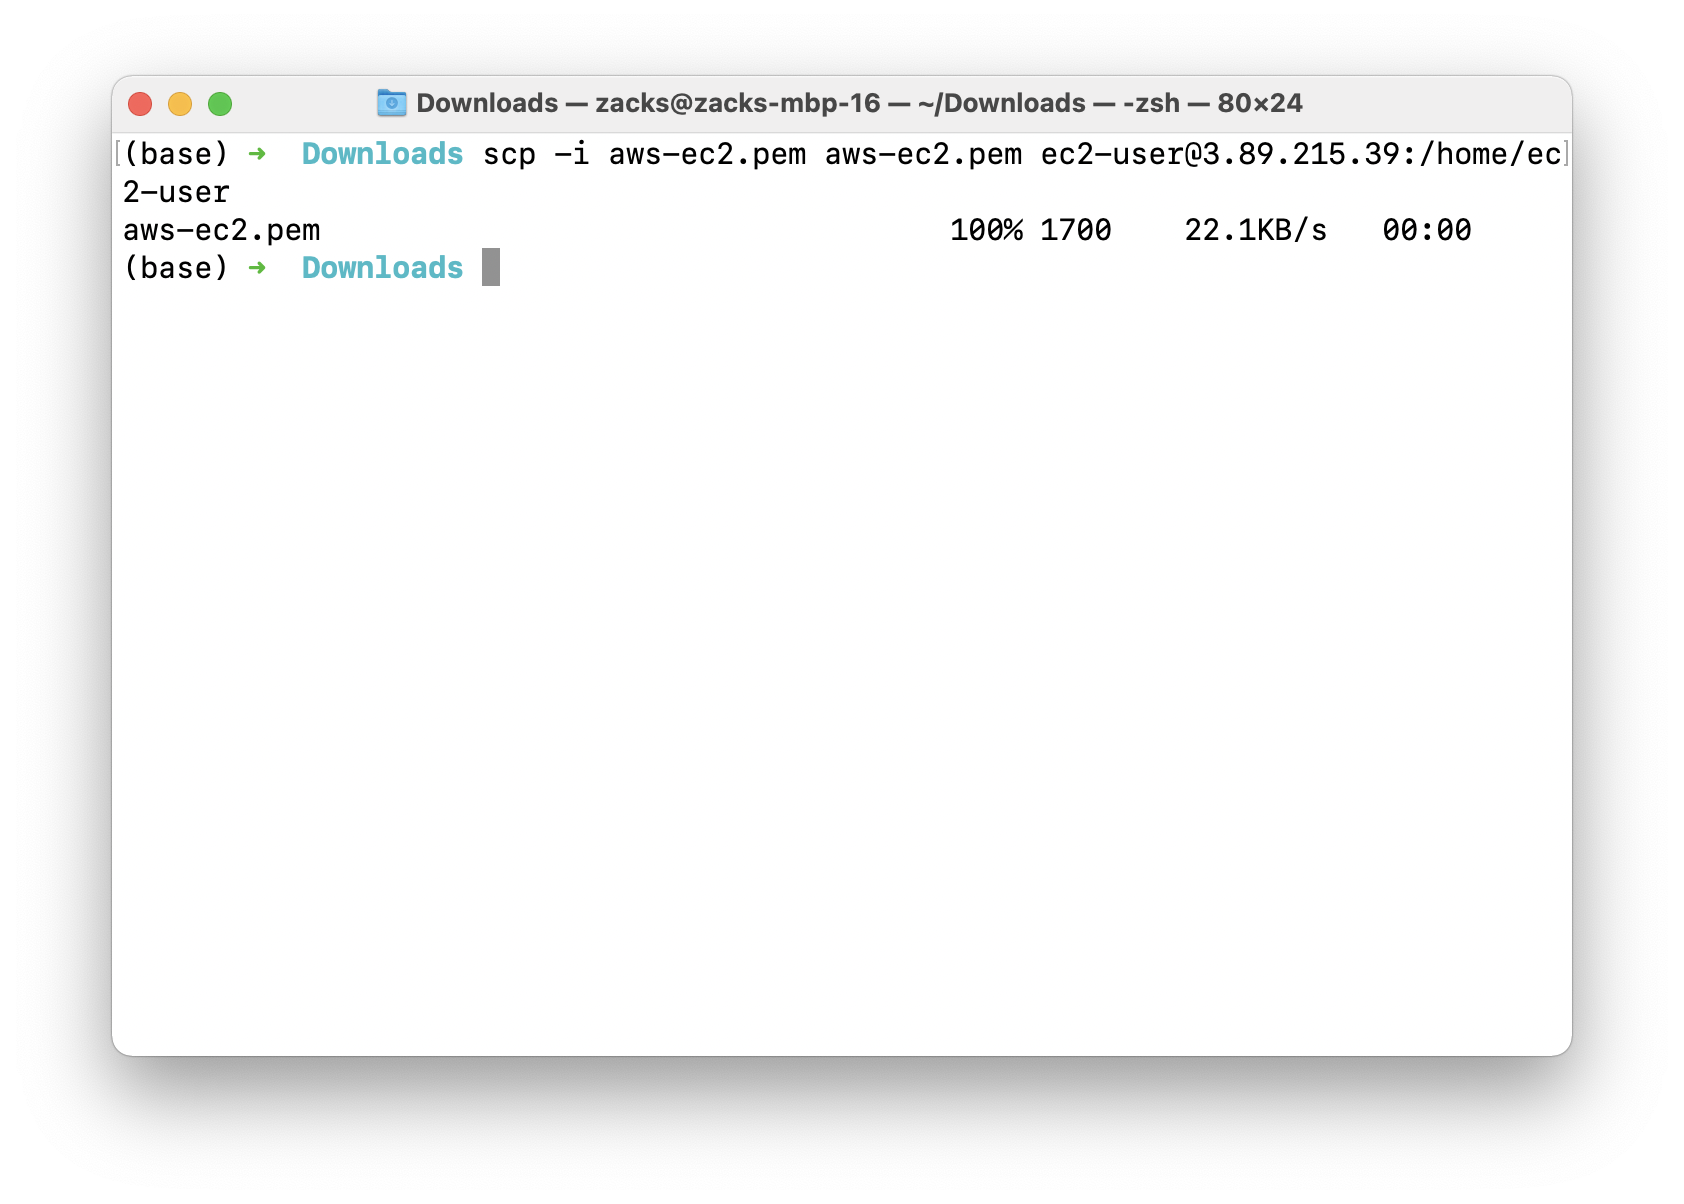
Using ls to see if aws-ec2.pem is successfully transferred.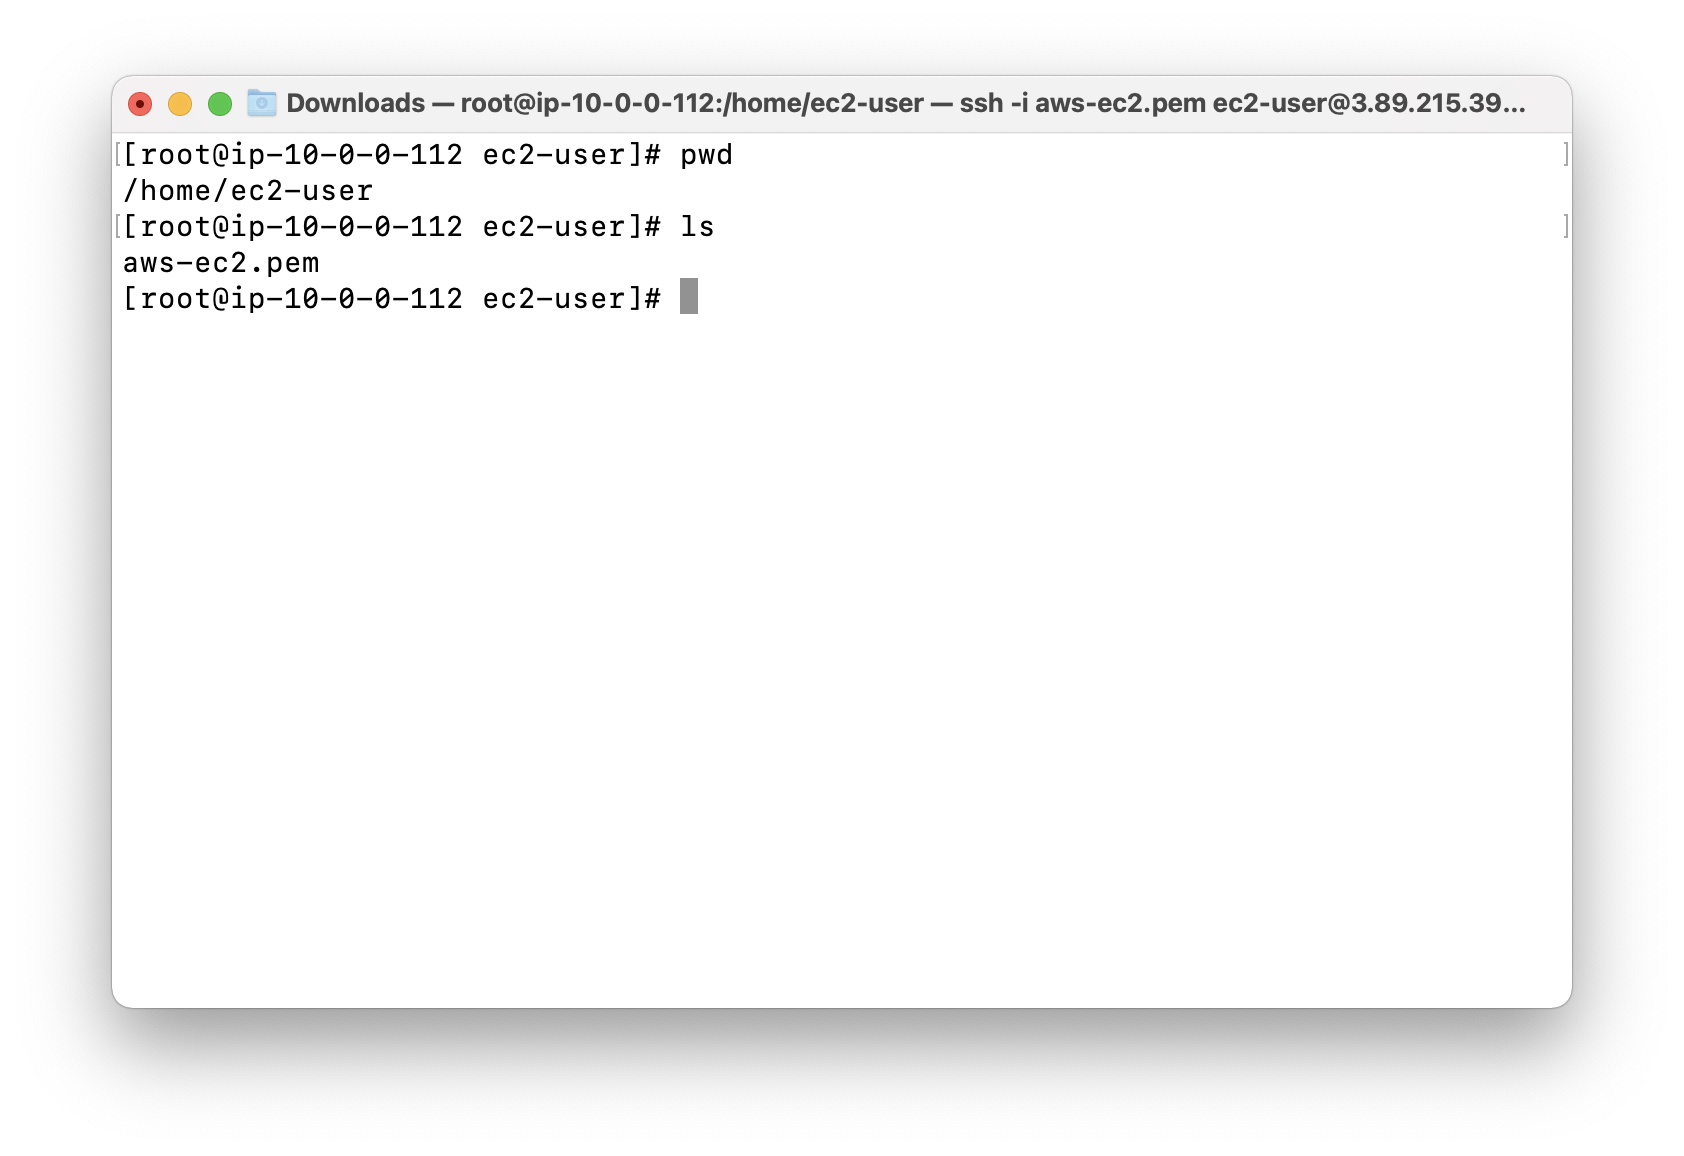
SSH into EC2 running on private subnet
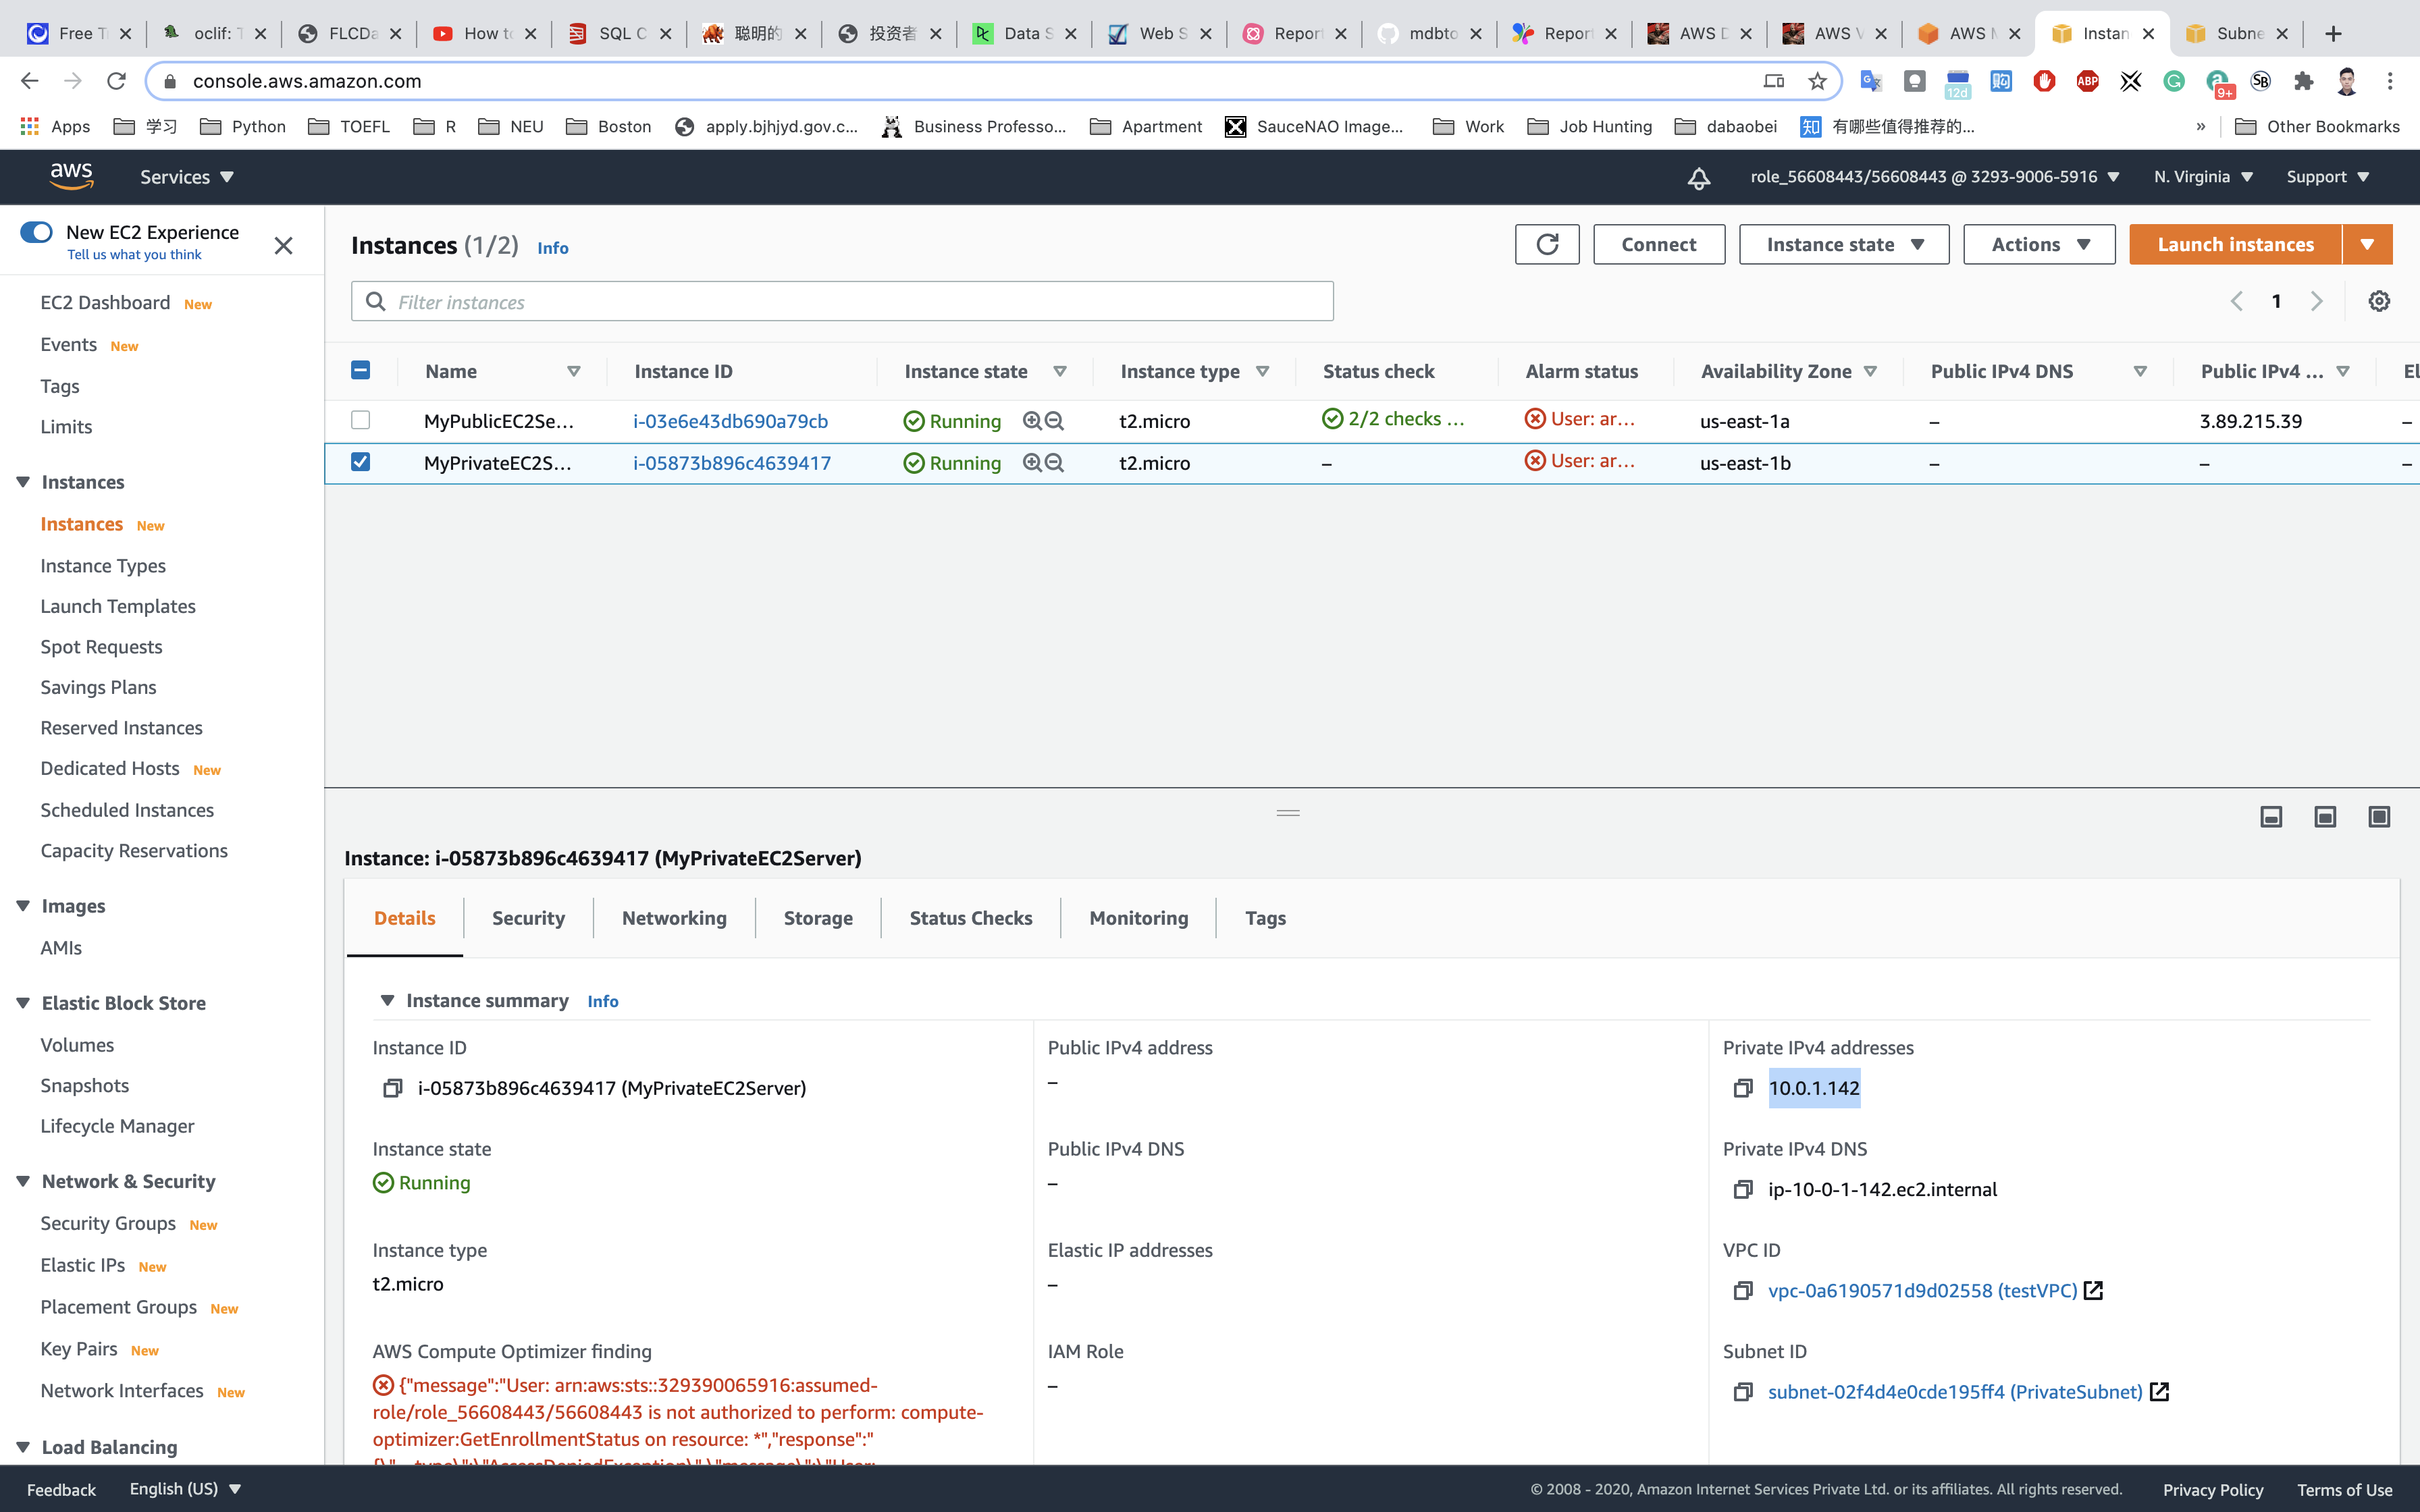
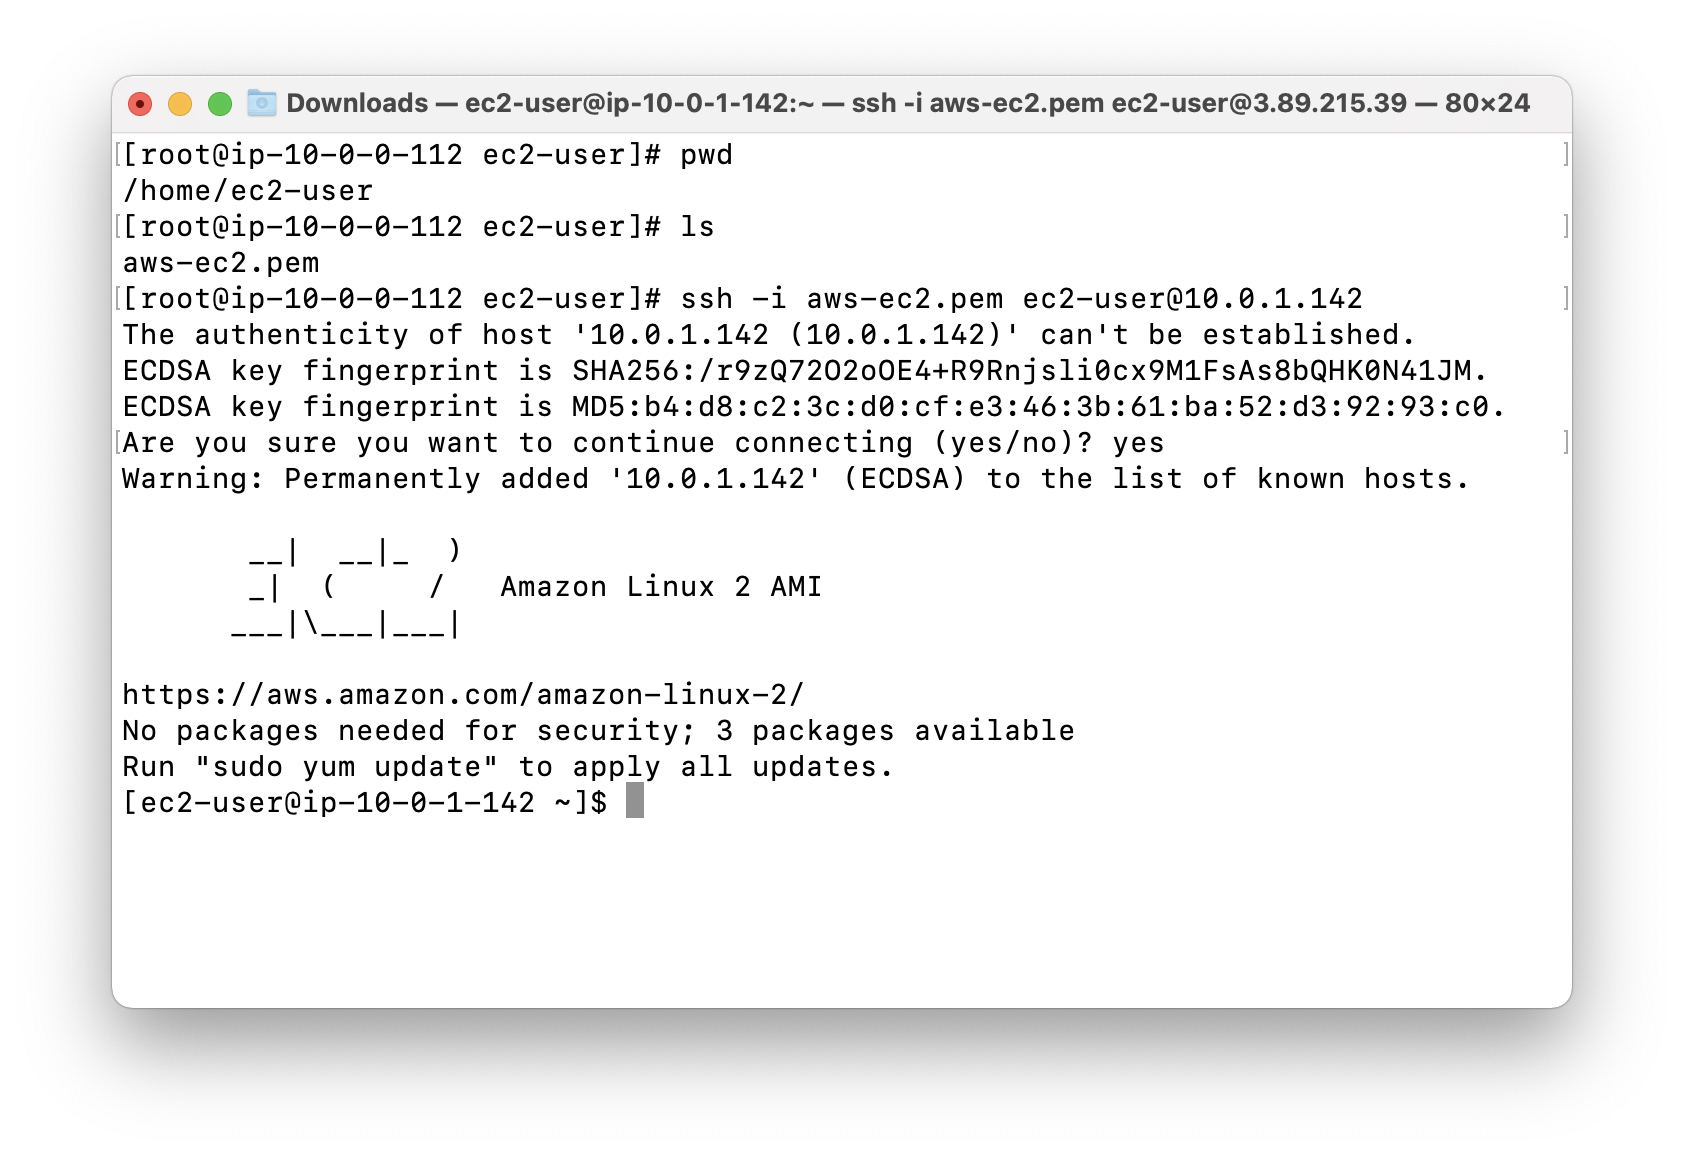
SSH into the EC2 running on private subnet from the one running on public subnet, and paste the private IP address from AWS EC2 console web page.
Understanding and Configuring Layered Security in an AWS VPC
https://play.whizlabs.com/site/task_details?lab_type=1&task_id=66&quest_id=35
Lab Details
- This lab walks you through the steps to Configure Multi-layered Security in AWS VPC and to launch 2 EC2 instances (one in a public subnet and another in a private subnet)
- You will practice it using Amazon VPC, Amazon EC2
Introduction
Amazon Virtual Private Cloud
- Amazon VPC allows us to launch AWS resources in an isolated network that is defined by us in a more private and secure environment.
- This feature enables us to increase the security level of the AWS resources.
- The AWS resources can be protected using multilayered VPC which includes security groups and Network Access Control list.
- The VPC security group provides security at instance level which acts like a firewall and controls both inbound and outbound traffic.
- The VPC NACL provides security at Network Level i.e subnet level which acts like a firewall for associated subnets and controls inbound and outbound traffic.
Lab Tasks
- In this lab, we are going to Configure Multi layered VPC security and launch 2 AWS EC2 instances. Create a VPC with your custom CIDR block IP range.
- Create 2 subnets for public and private resources. AWS resources in the subnet will have access to the internet AWS resources in the private subnet will be protected and isolated from the internet.
- Create an Internet gateway and associate it with the VPC. This is needed in order for the resources to connect to the external world.
- Create 2 Route tables (one for public routing and one for private) and then provide the routes and associate the subnets accordingly.
- Launch 2 AWS EC2 instances (one in the public subnet and one in the private subnet).
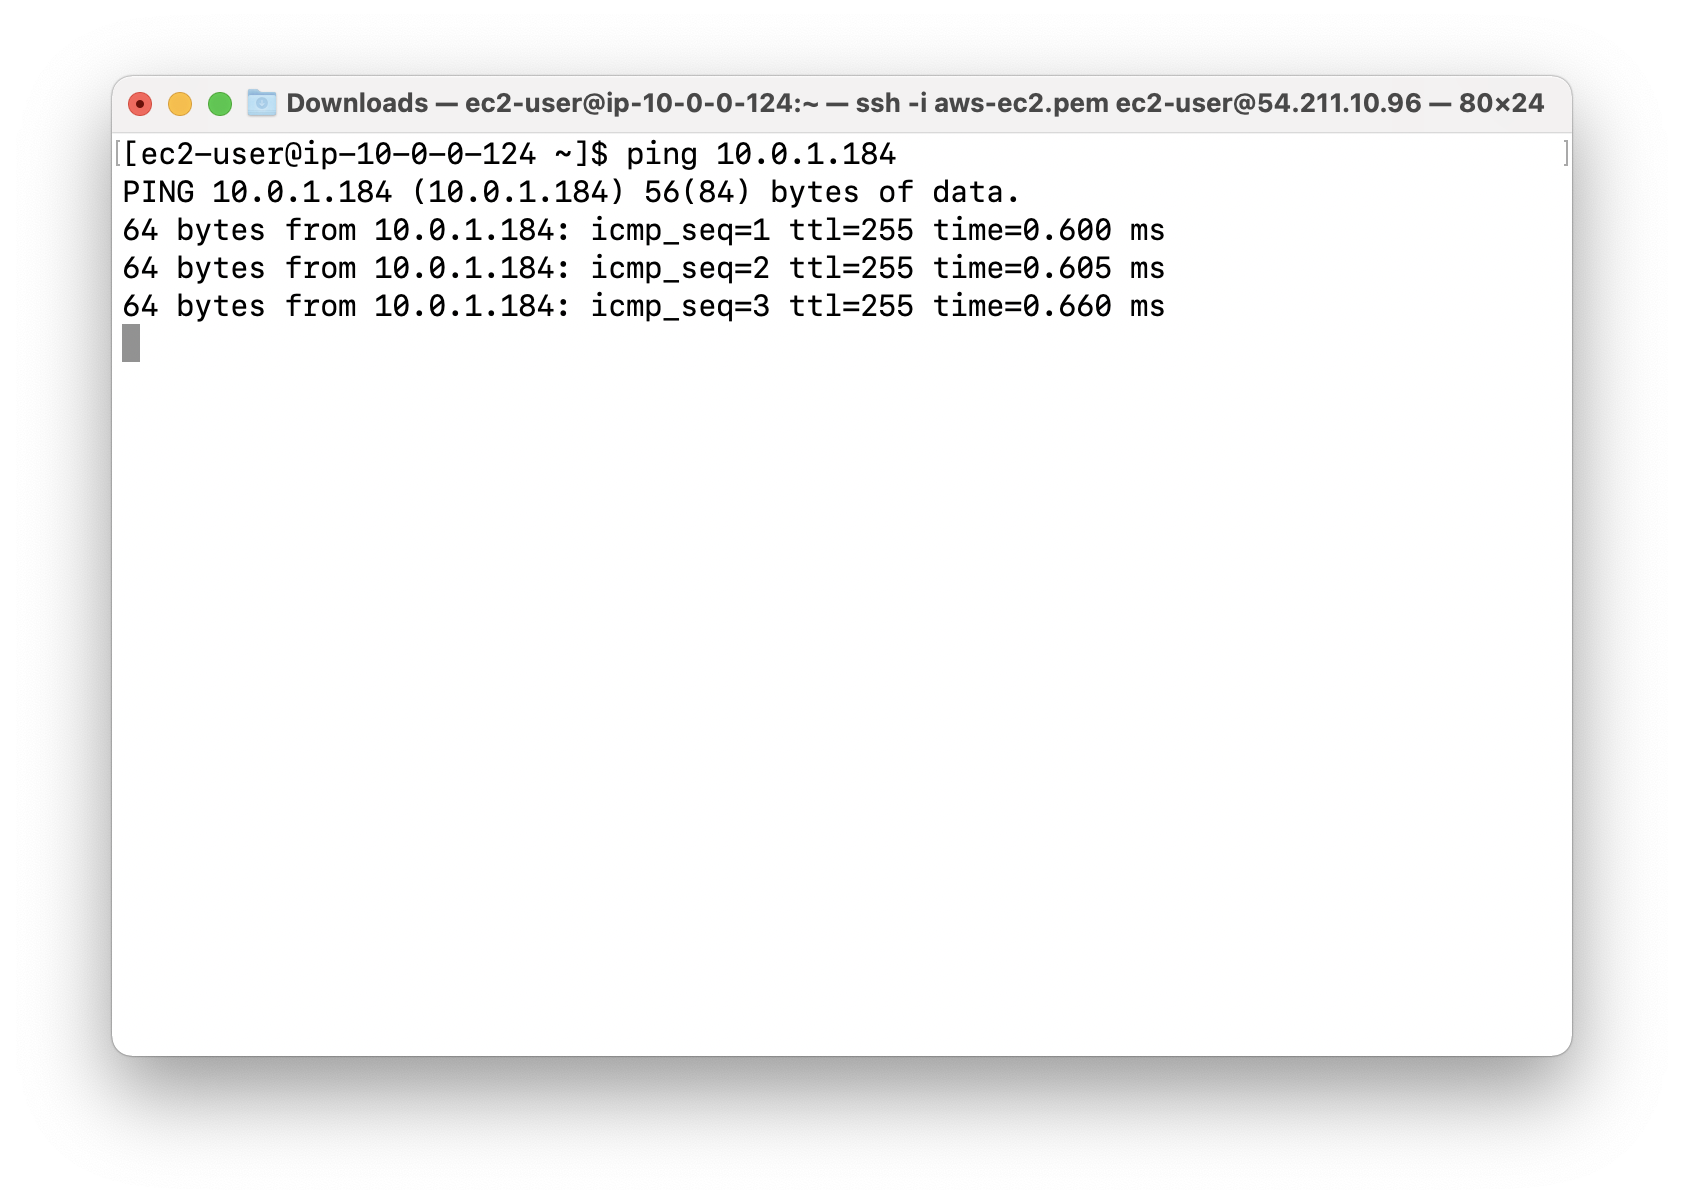
- SSH into the public EC2 Instance and use the ping command, try to reach the Private IP of the private EC2 instance.
- Verify the response of the ping command to know whether the instance is reachable from the internet.
Architecture Diagram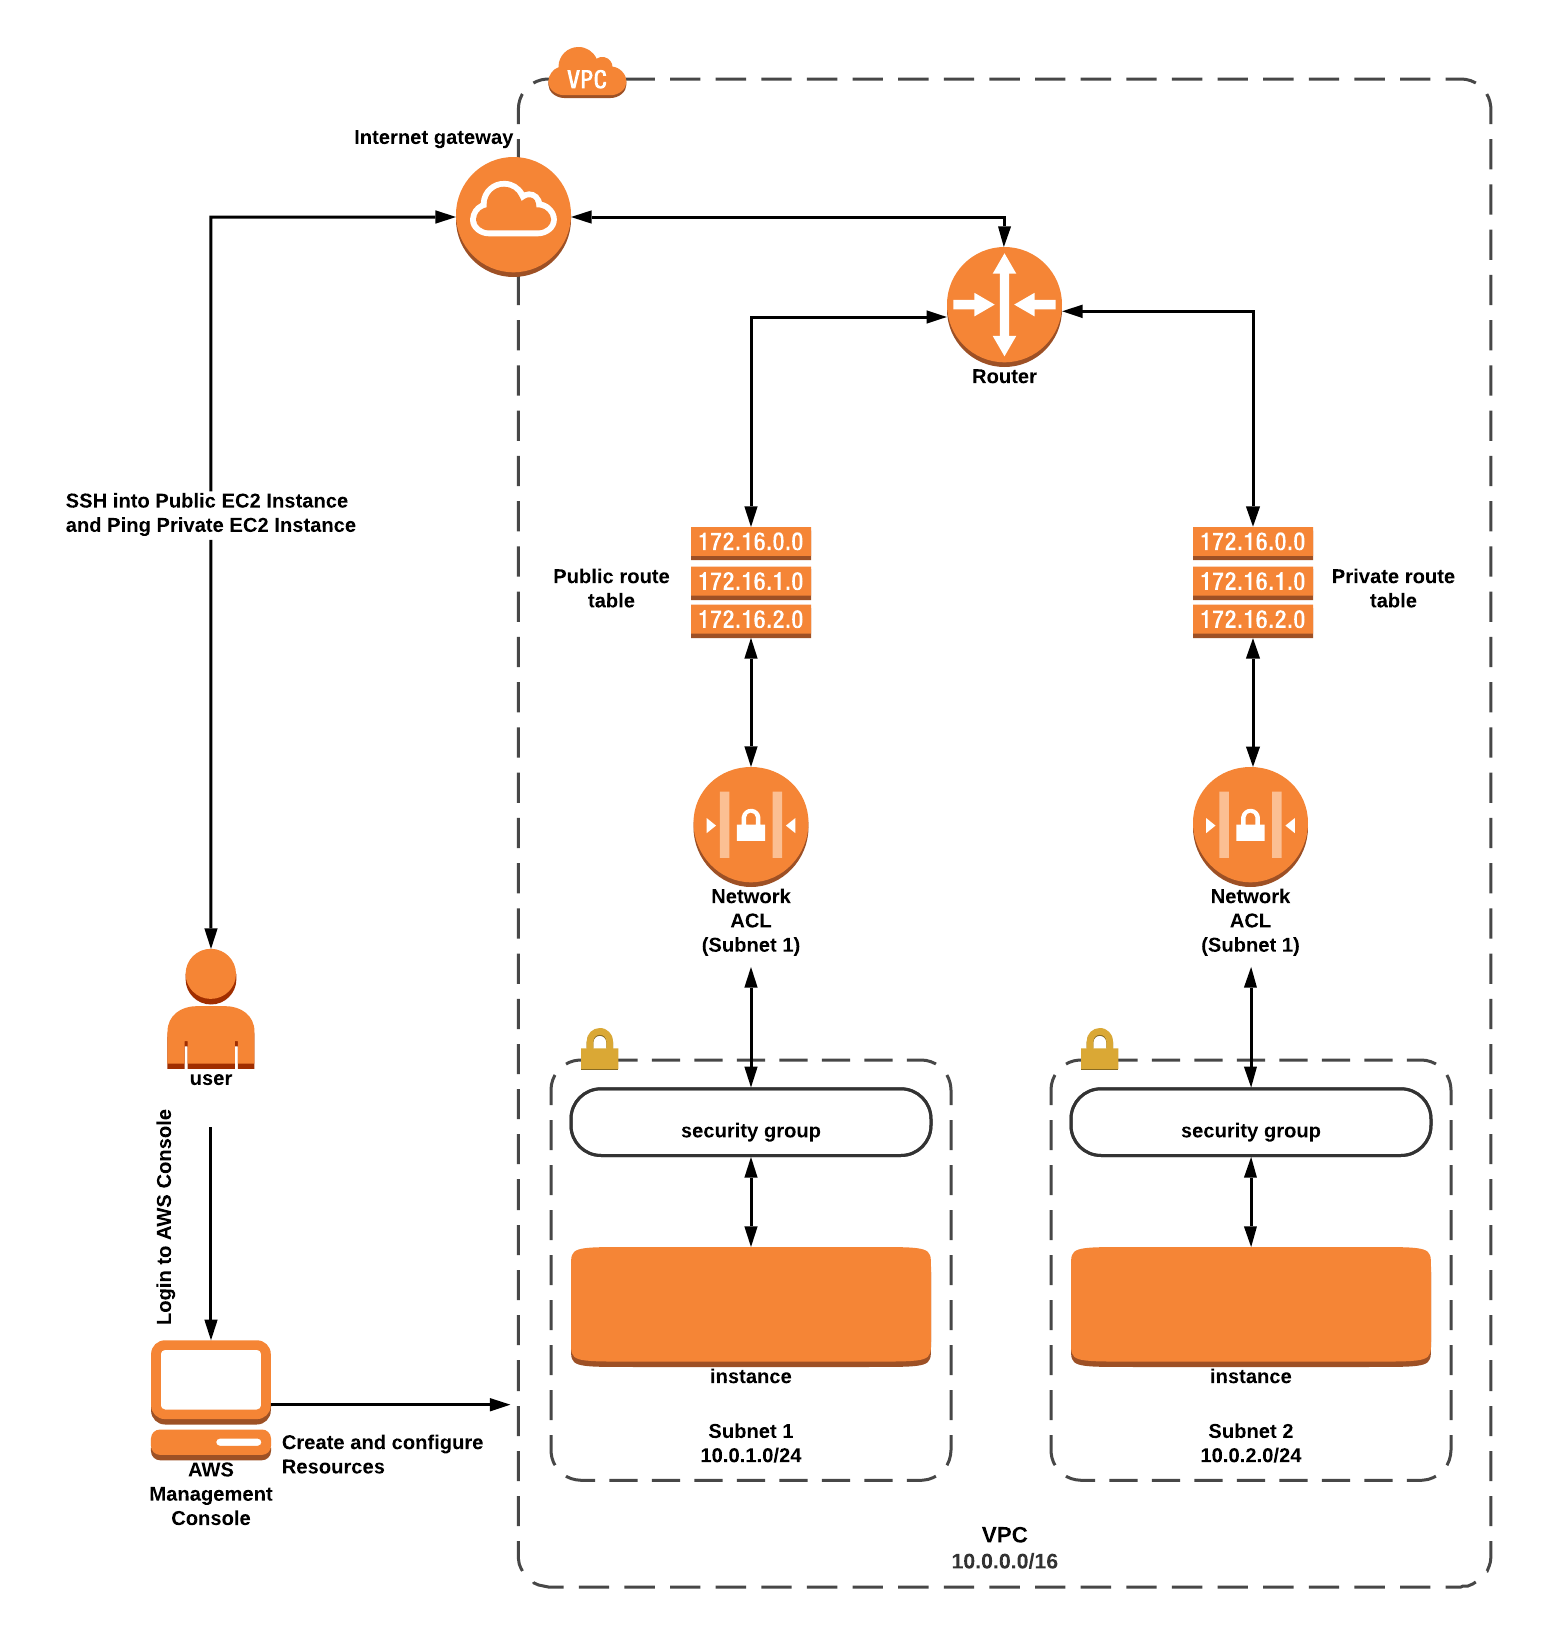
VPC Configuration
Services -> VPC
Create VPC
Click on VPC (under Networking & Content Delivery section) or you can also search for VPC.
Click on Your VPCs from the left menu.
Here you can see the list of all VPC, No need to do anything with the existing and default VPCs, we will create a new VPC for this lab.
Click on Create VPC.
- Name tag:
testVPC - IPv4 CIDR block:
10.0.0.0/16 - IPv6 CIDR block: No need to change this, make sure No IPv6 CIDR Block is checked.
- Tenancy: No need to change this, make sure Default is selected.
Now click on Create VPC.
Once VPC is created, click on Your VPCs.
It will appear with details as shown below:
Create Subnet
In this lab, we will create one public subnet and a private subnet in us-east-1a and us-east-1b Availability Zones respectively as follows:
Public Subnet
For the Public Subnet, click on Subnets from the left menu and click on Create subnet.
- VPC: Select
testVPCfrom the list you created earlier. - Name tag:
PublicSubnet - Availability Zone: Select
us-east-1a - IPv4 CIDR block: Enter the range
10.0.1.0/24
Click on Create subnet.
Private Subnet
For the Private Subnet, click on Subnets from the left menu and click on Create subnet.
- VPC: Select
testVPCfrom the list you created earlier. - Name tag:
PrivateSubnet - Availability Zone: Select
us-east-1b - IPv4 CIDR block: Enter the range
10.0.2.0/24
Click on Create subnet.
Create Gateways
Internet Gateway
- Click on
Internet Gatewaysfrom the left menu and click onCreate internet gateway.
- Name Tag:
IGW.
Click on Create internet gateway.
- Select the Internet gateway you created from the list
- Click on
Actions. - Click on
Attach to VPC. - Select
testwhich you created from the list and click onAttach internet gateway.
NAT Gateway
- Click on
NAT Gatewaysfrom the left menu and click onCreate NAT gateway.
- Name Tag:
NGW. - Subnet:
PublicSubnet
Click on Allocate Elastic IP.
Click on Create NAT gateway.
Note that NAT Gateway is always created in a public subnet.
NAT Gateway will be created in a few minutes. Once created, the status will change to available.
Create Route Tables
- Go to
Route Tablesfrom the left menu and click onCreate route table.
- Name Tag:
PublicRouteTable. - VPC: Select
testVPCfrom the list.
Click on Create.
Repeat the same steps to create a route table for the RDS database tier (Private Subnet).
- Name Tag:
PrivateRouteTable. - VPC: Select
testVPCfrom the list.
Click on Create.
Associate the public subnet to the public route table.
Select PublicRouteTable and go to the Subnet Associations tab.
Click on Edit subnet associations.
Select PublicSubnet from the list.
Click on Save.
Associate the private subnet to the private route table.
Select PrivateRouteTable and go to the Subnet Associations tab.
Click on Edit subnet associations.
Select PrivateSubnet from the list.
Click on Save
Make sure not to associate any subnets with the Main Route Table.
PublicRouteTable: Add a route to allow Internet traffic to the VPC.
Select PublicRouteTable from the list.
Go to Routes tab, click on Edit routes
Specify the following values:
- Destination:
0.0.0.0/0 - Target: Select Internet Gateway from the dropdown menu to select
IGW.
Click on Save routes.
Now the Instances launched within PublicSubnet will have access to the Internet.
PrivateRouteTable: Add a route to allow the private subnet to connect to the public subnet, the Internet(if you have public subnet with correct settings), and other private subnets.
Select PrivateRouteTable from the list.
Go to Routes tab, click on Edit routes
Specify the following values:
- Destination:
0.0.0.0/0 - Target: Select Internet Gateway from the dropdown menu to select
NGW.
Click on Save routes.
Now the Instances launched within PrivateSubnet will have access to the Internet.
Creating Security Groups
Create a security group which will provide security at the instance level. Go to Services → VPC → Security → Click on Security Groups → Click on Create Security Group and then provide the following details: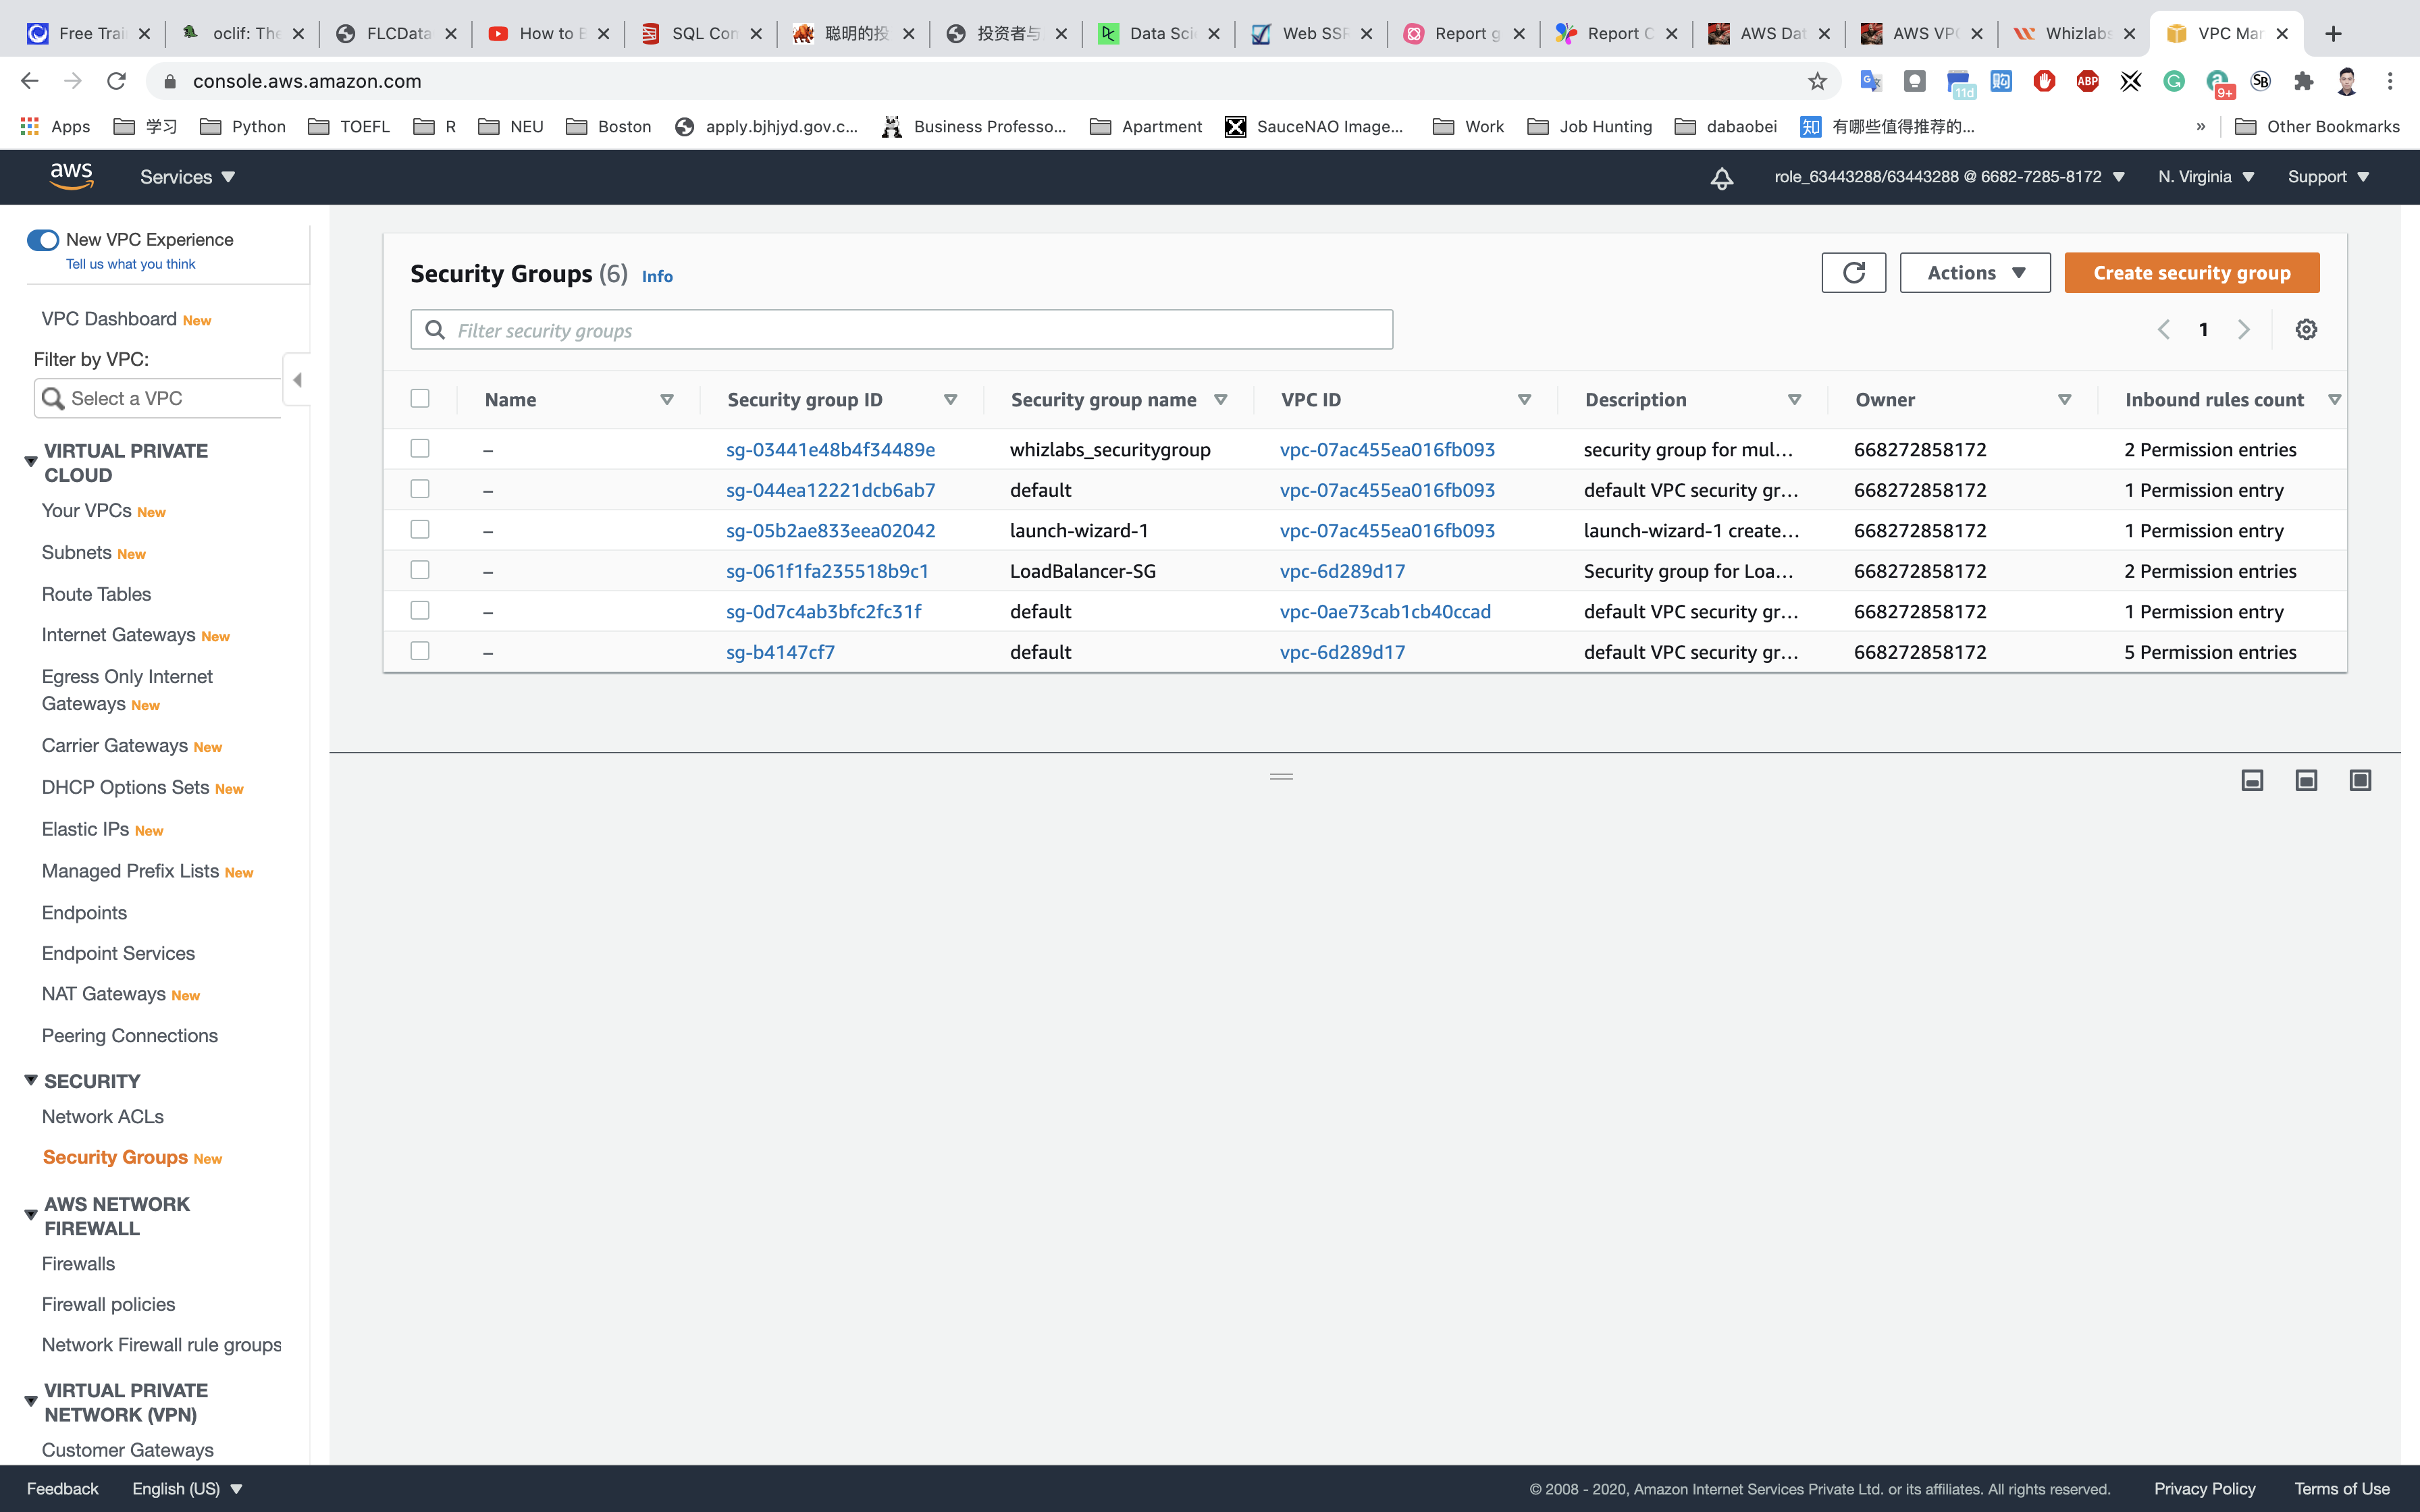
- Security group name:
ConnectionTestSG - Description: security group for multilayered VPC
- VPC:
testVPC(select from the dropdown)
Under Inbound Rules, click on Add Rule.
To add SSH,
- Choose Type:
SSH - Source:
Anywhere
To add All ICMP - IPv4, click on Add Rule.
- Choose Type:
All ICMP - IPv4 - Source:
Anywhere
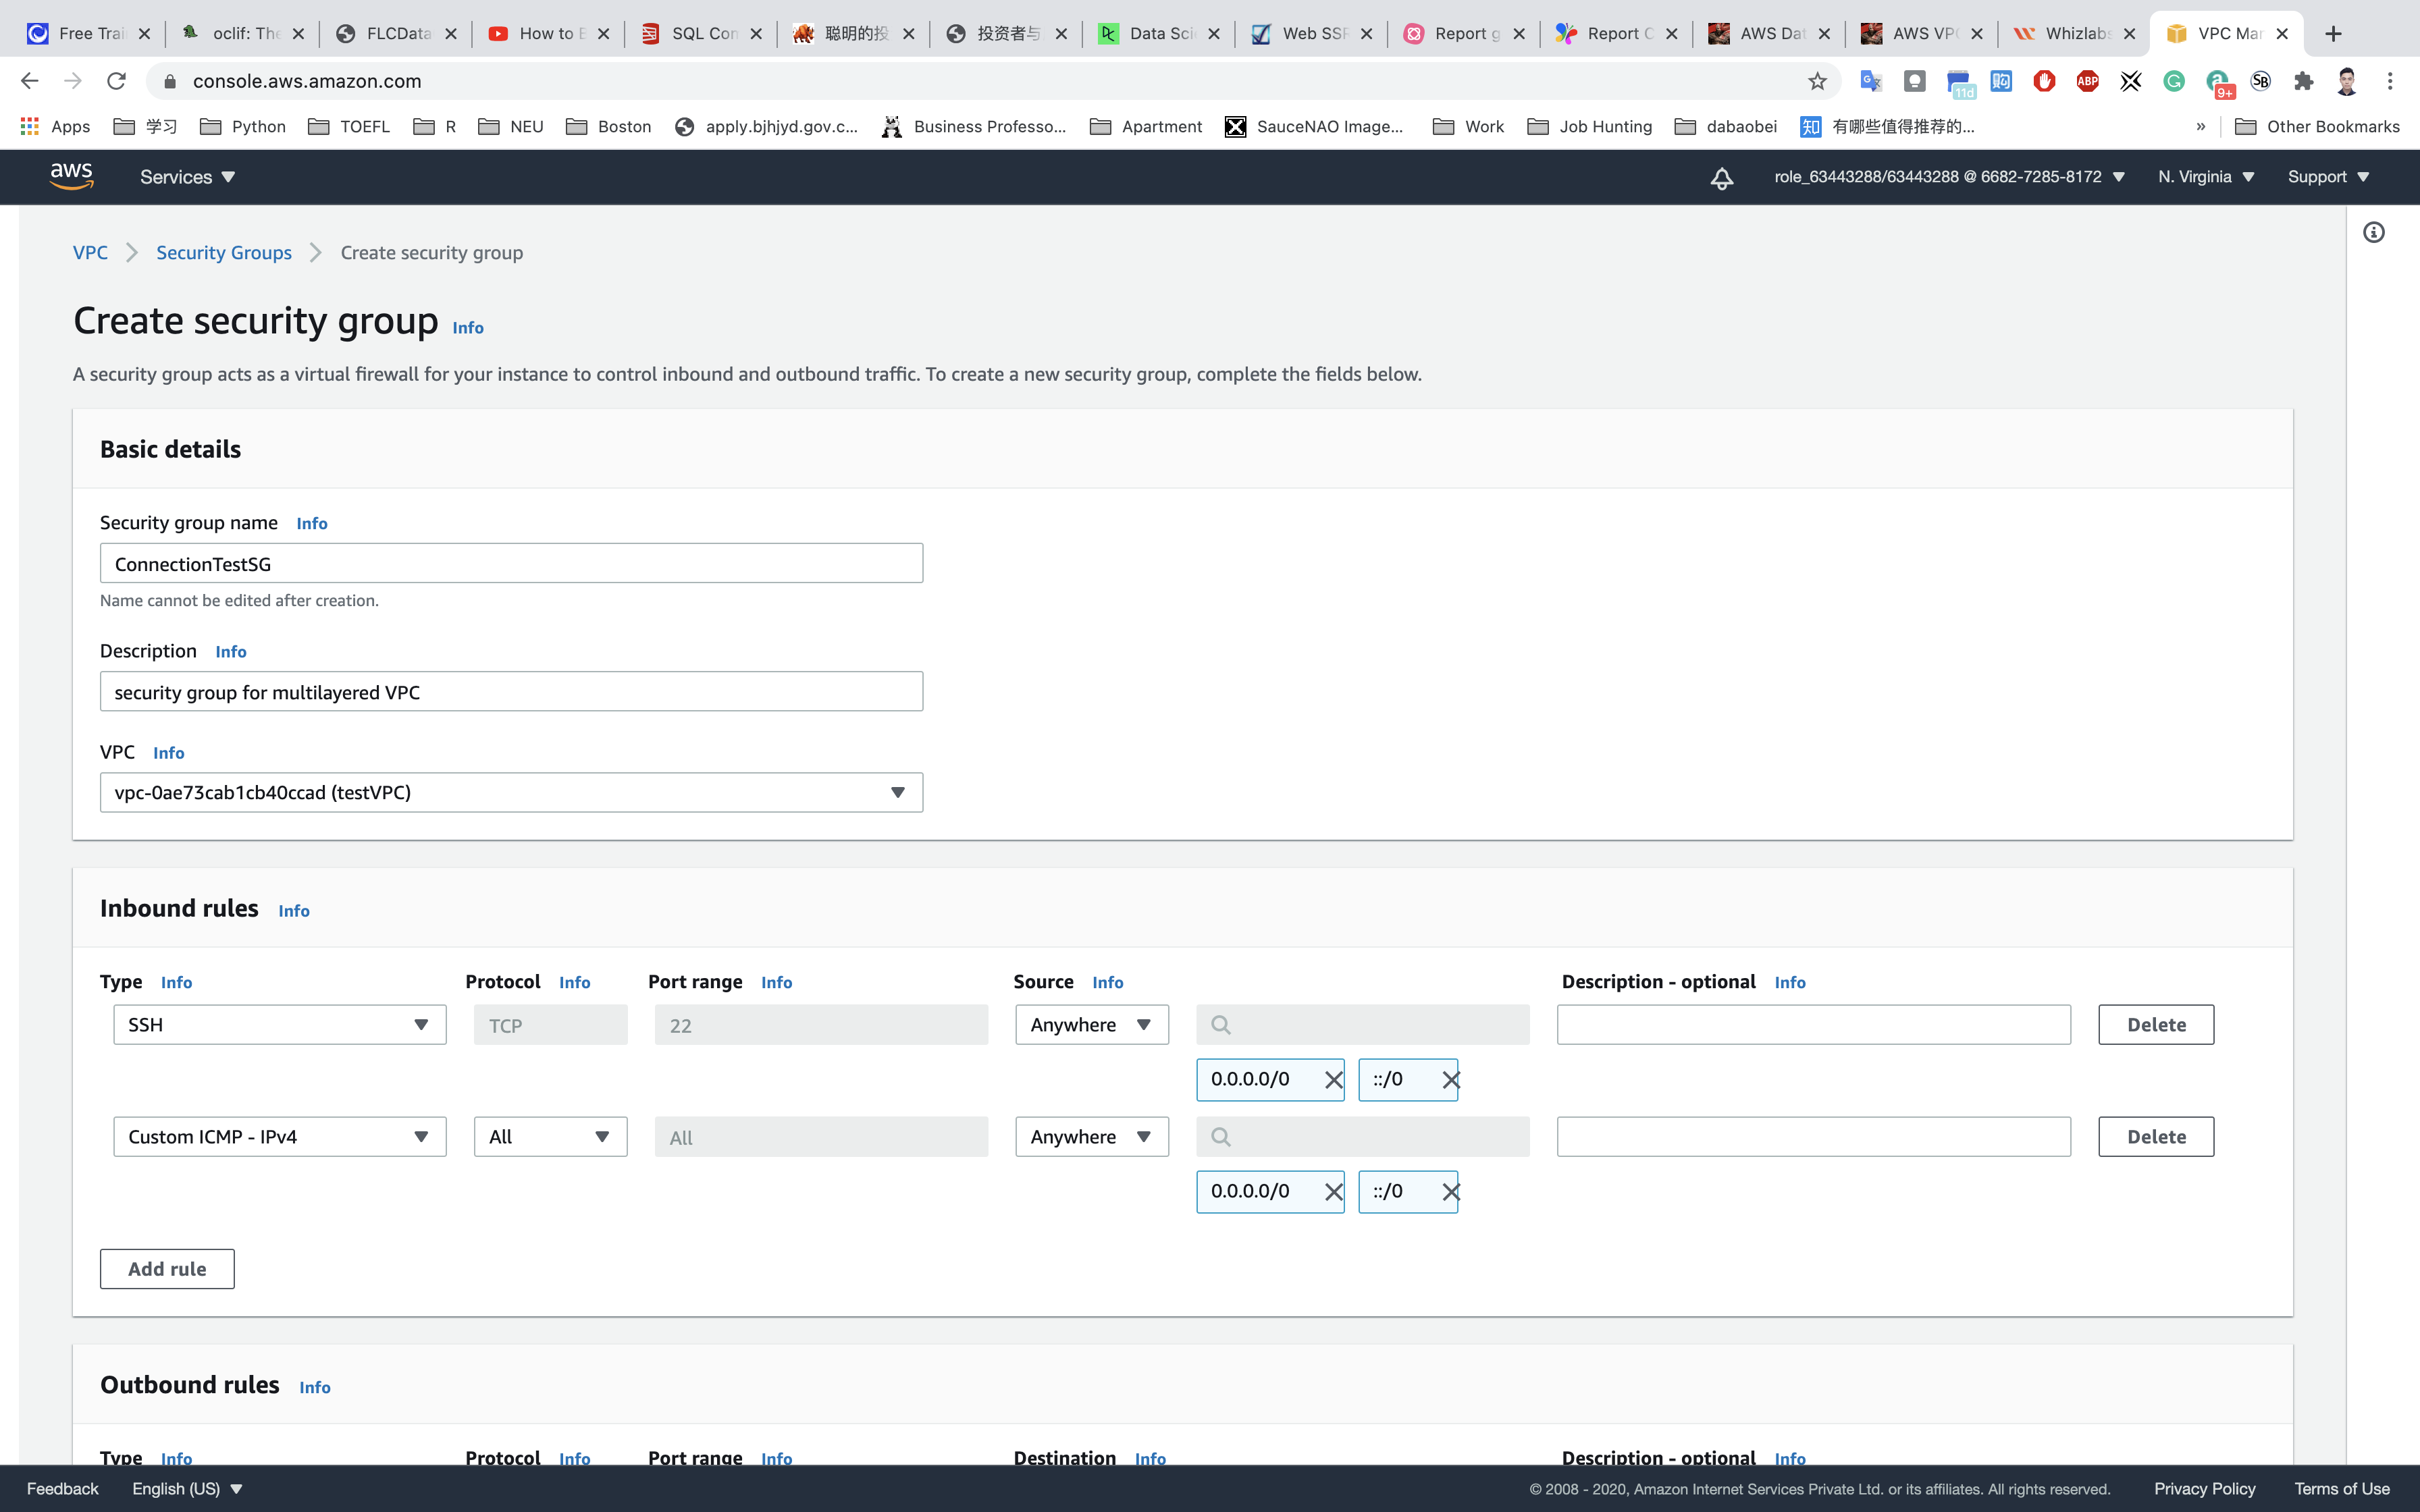
Click on Create security group
Creating a NACL, Configuring Inbound Rules and Associating Subnets
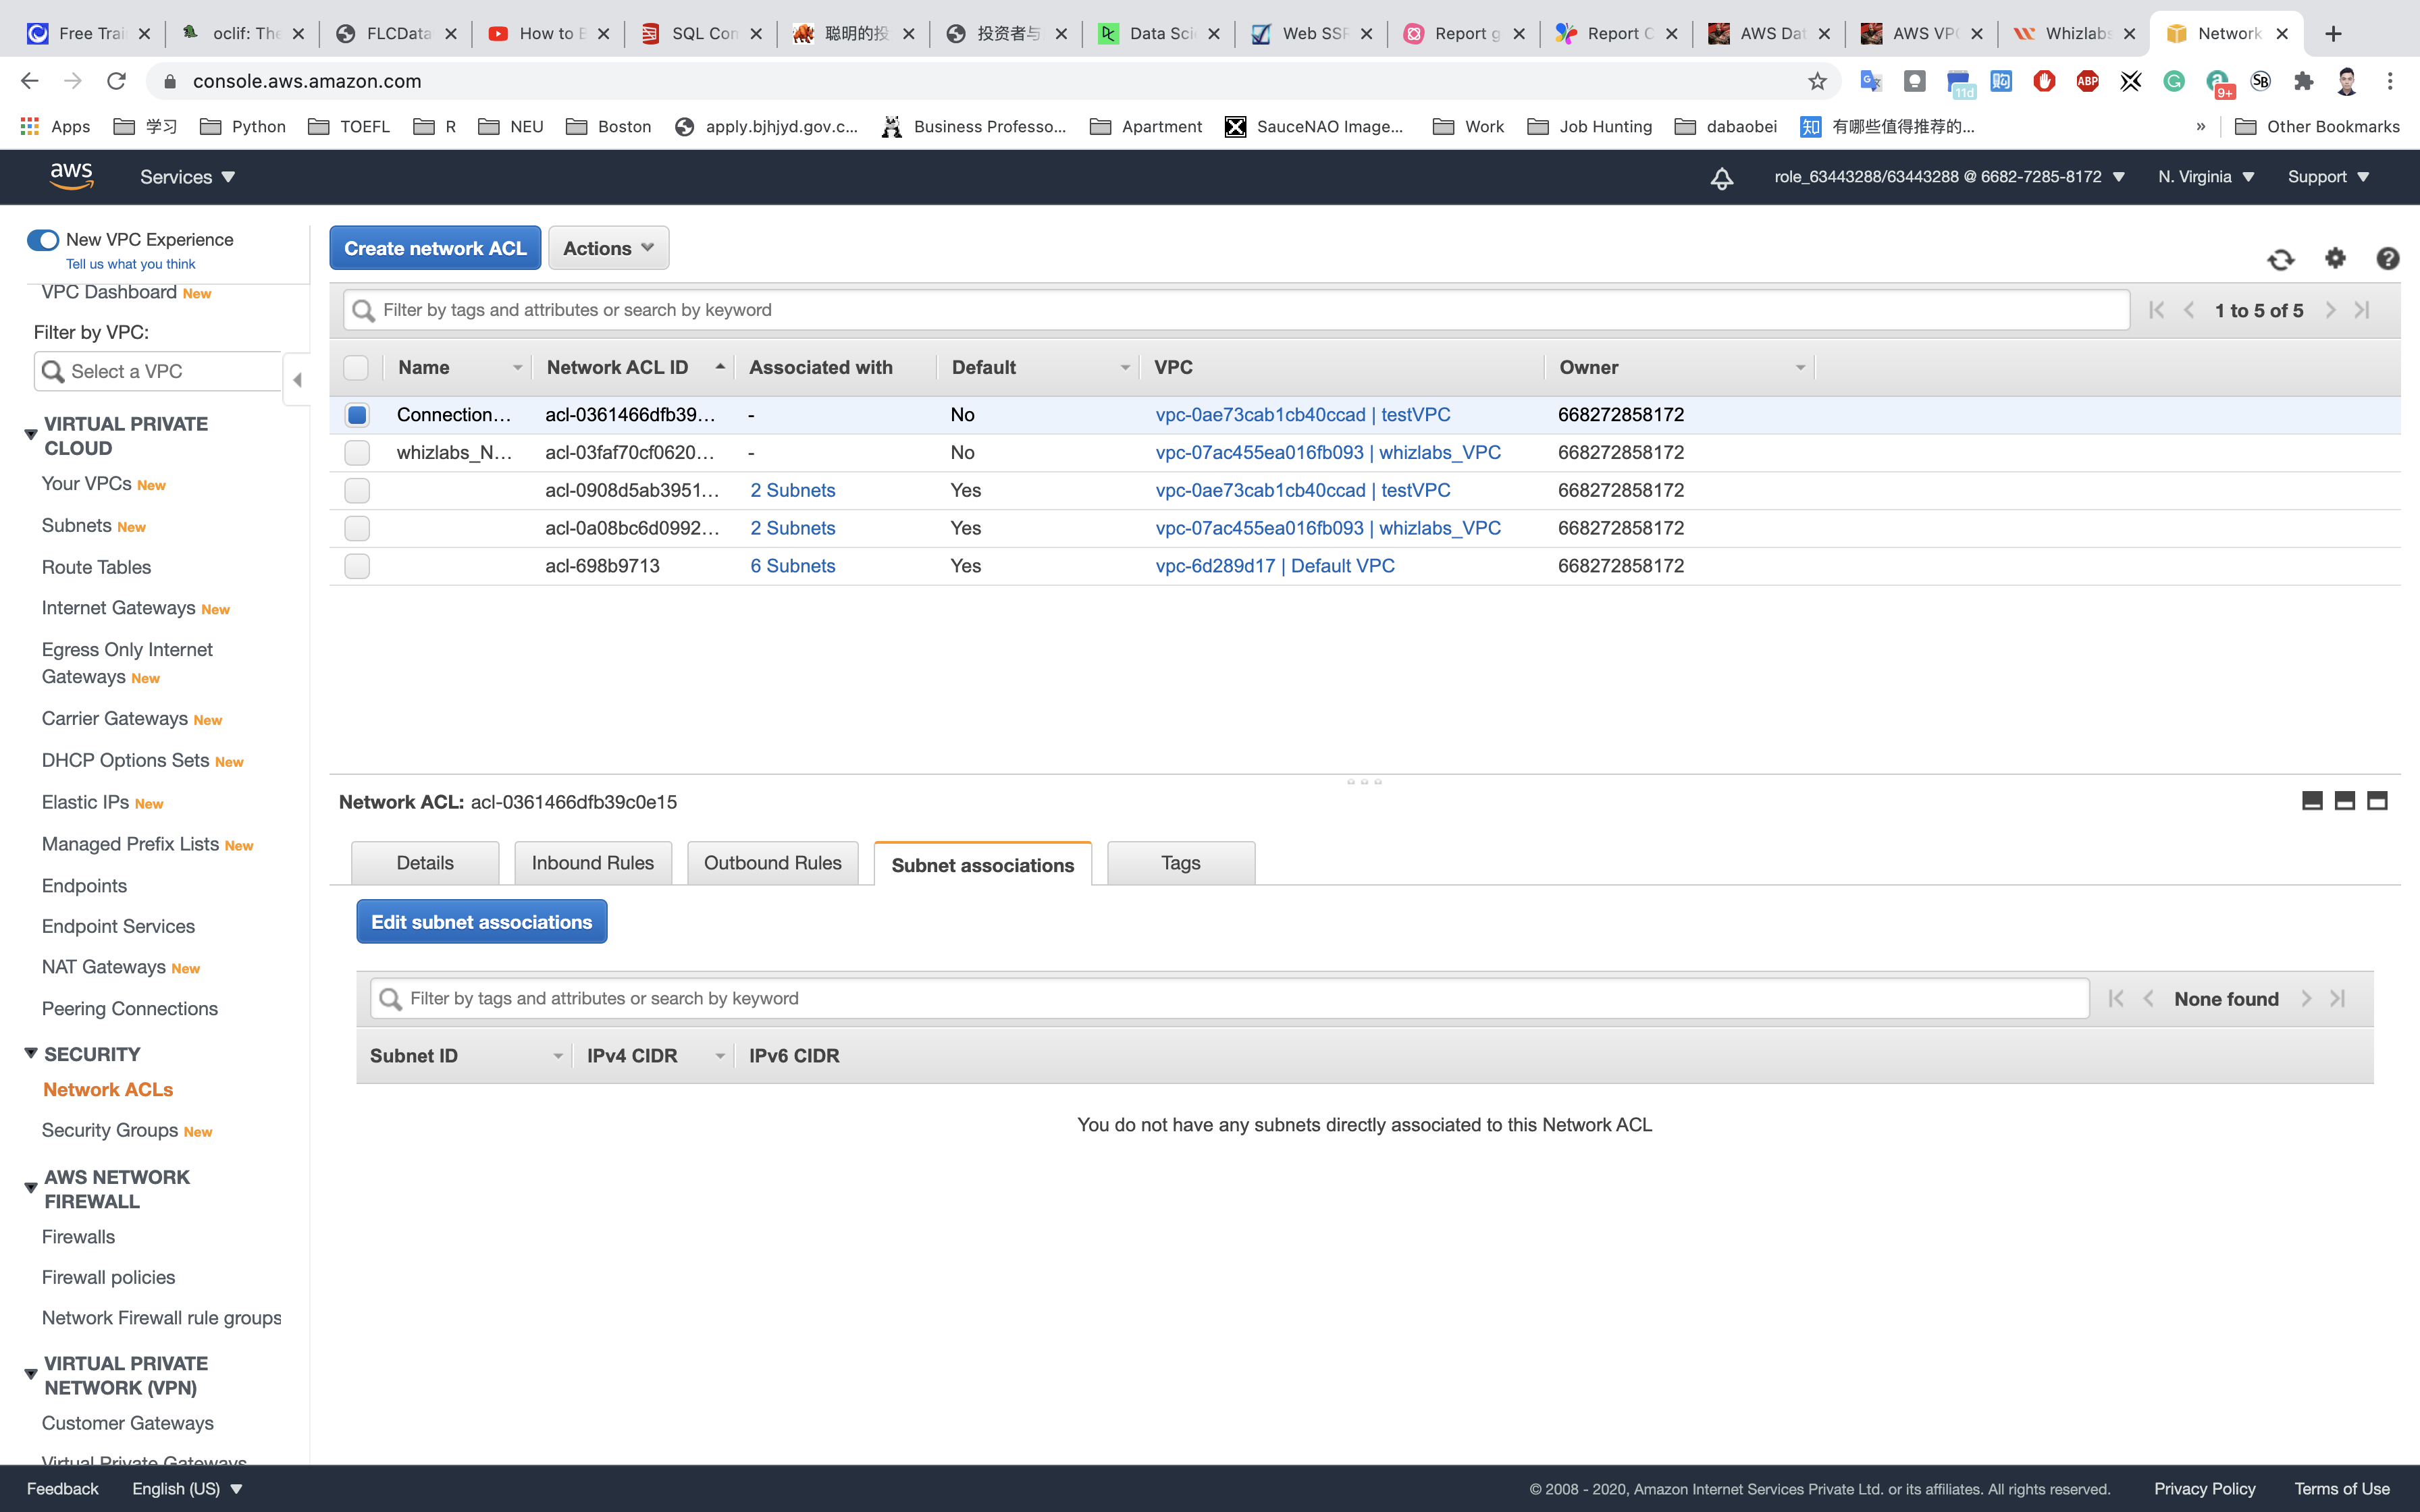
We will start by creating a NACL. To do so go to Go to Services → VPC → Network ACLs and click on Create Network ACL Provide the following details: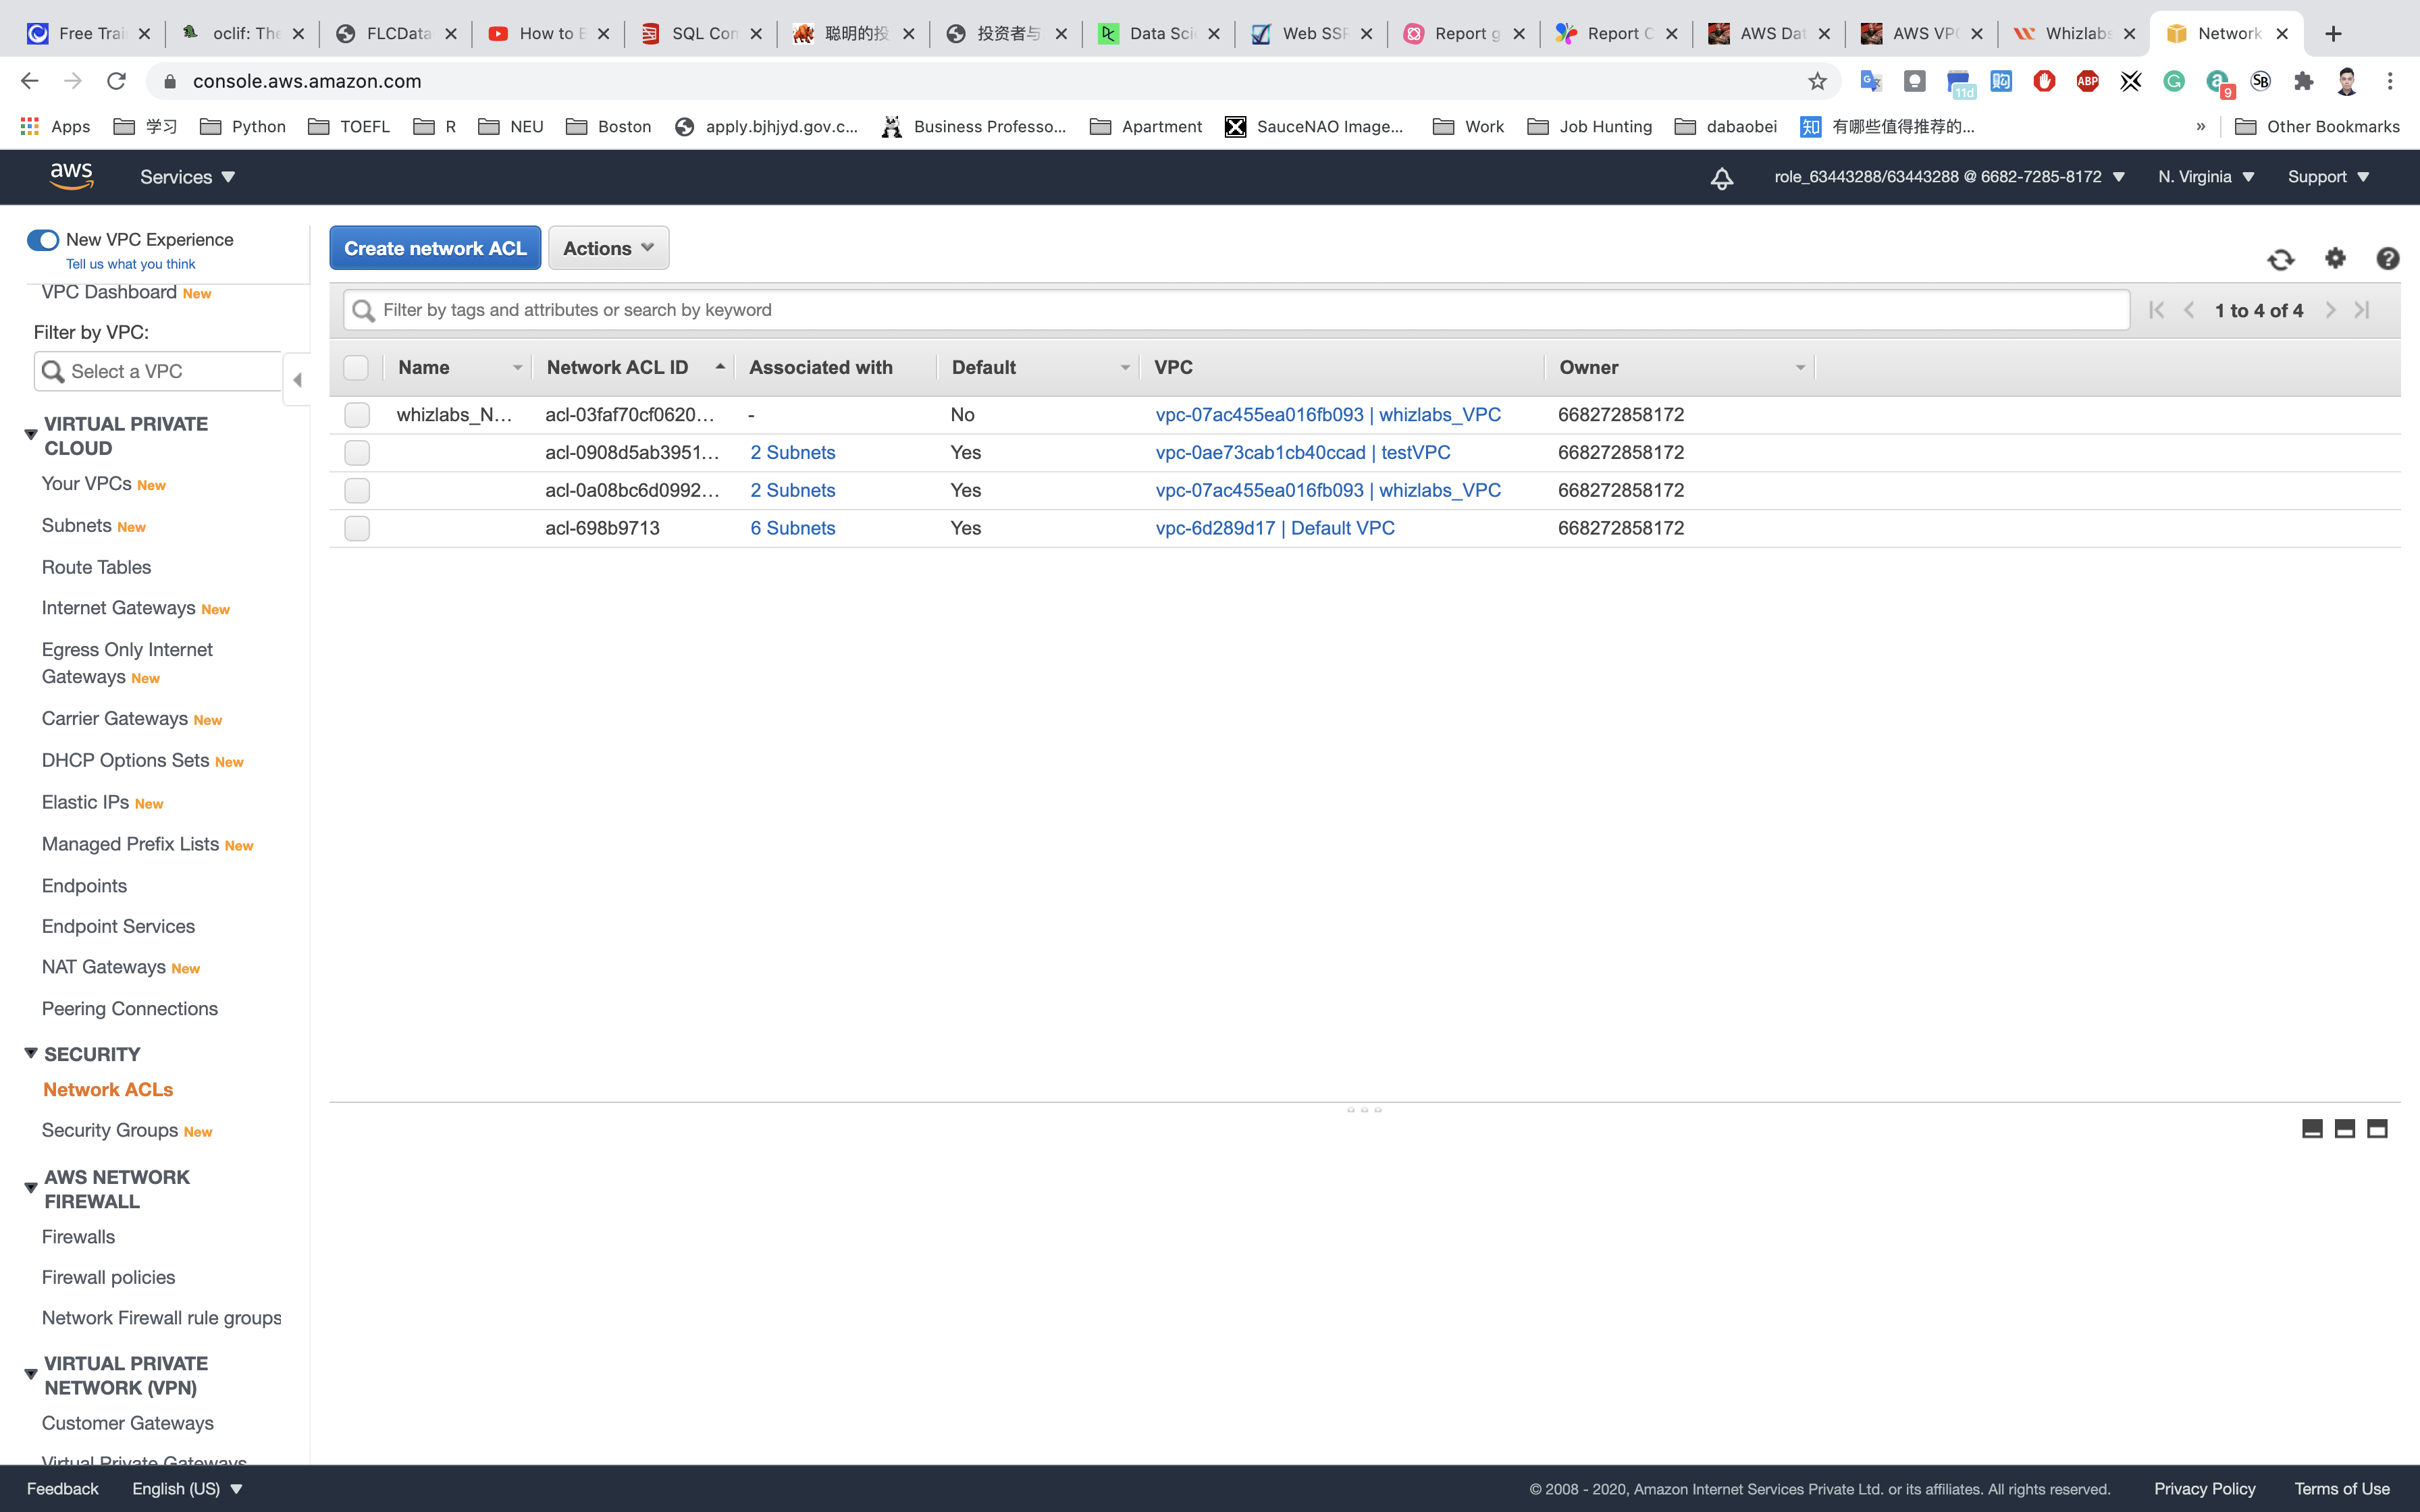
- Name tag:
ConnectionTestNACL - VPC:
TestVPC(Select the VPC which you created from the dropdown)
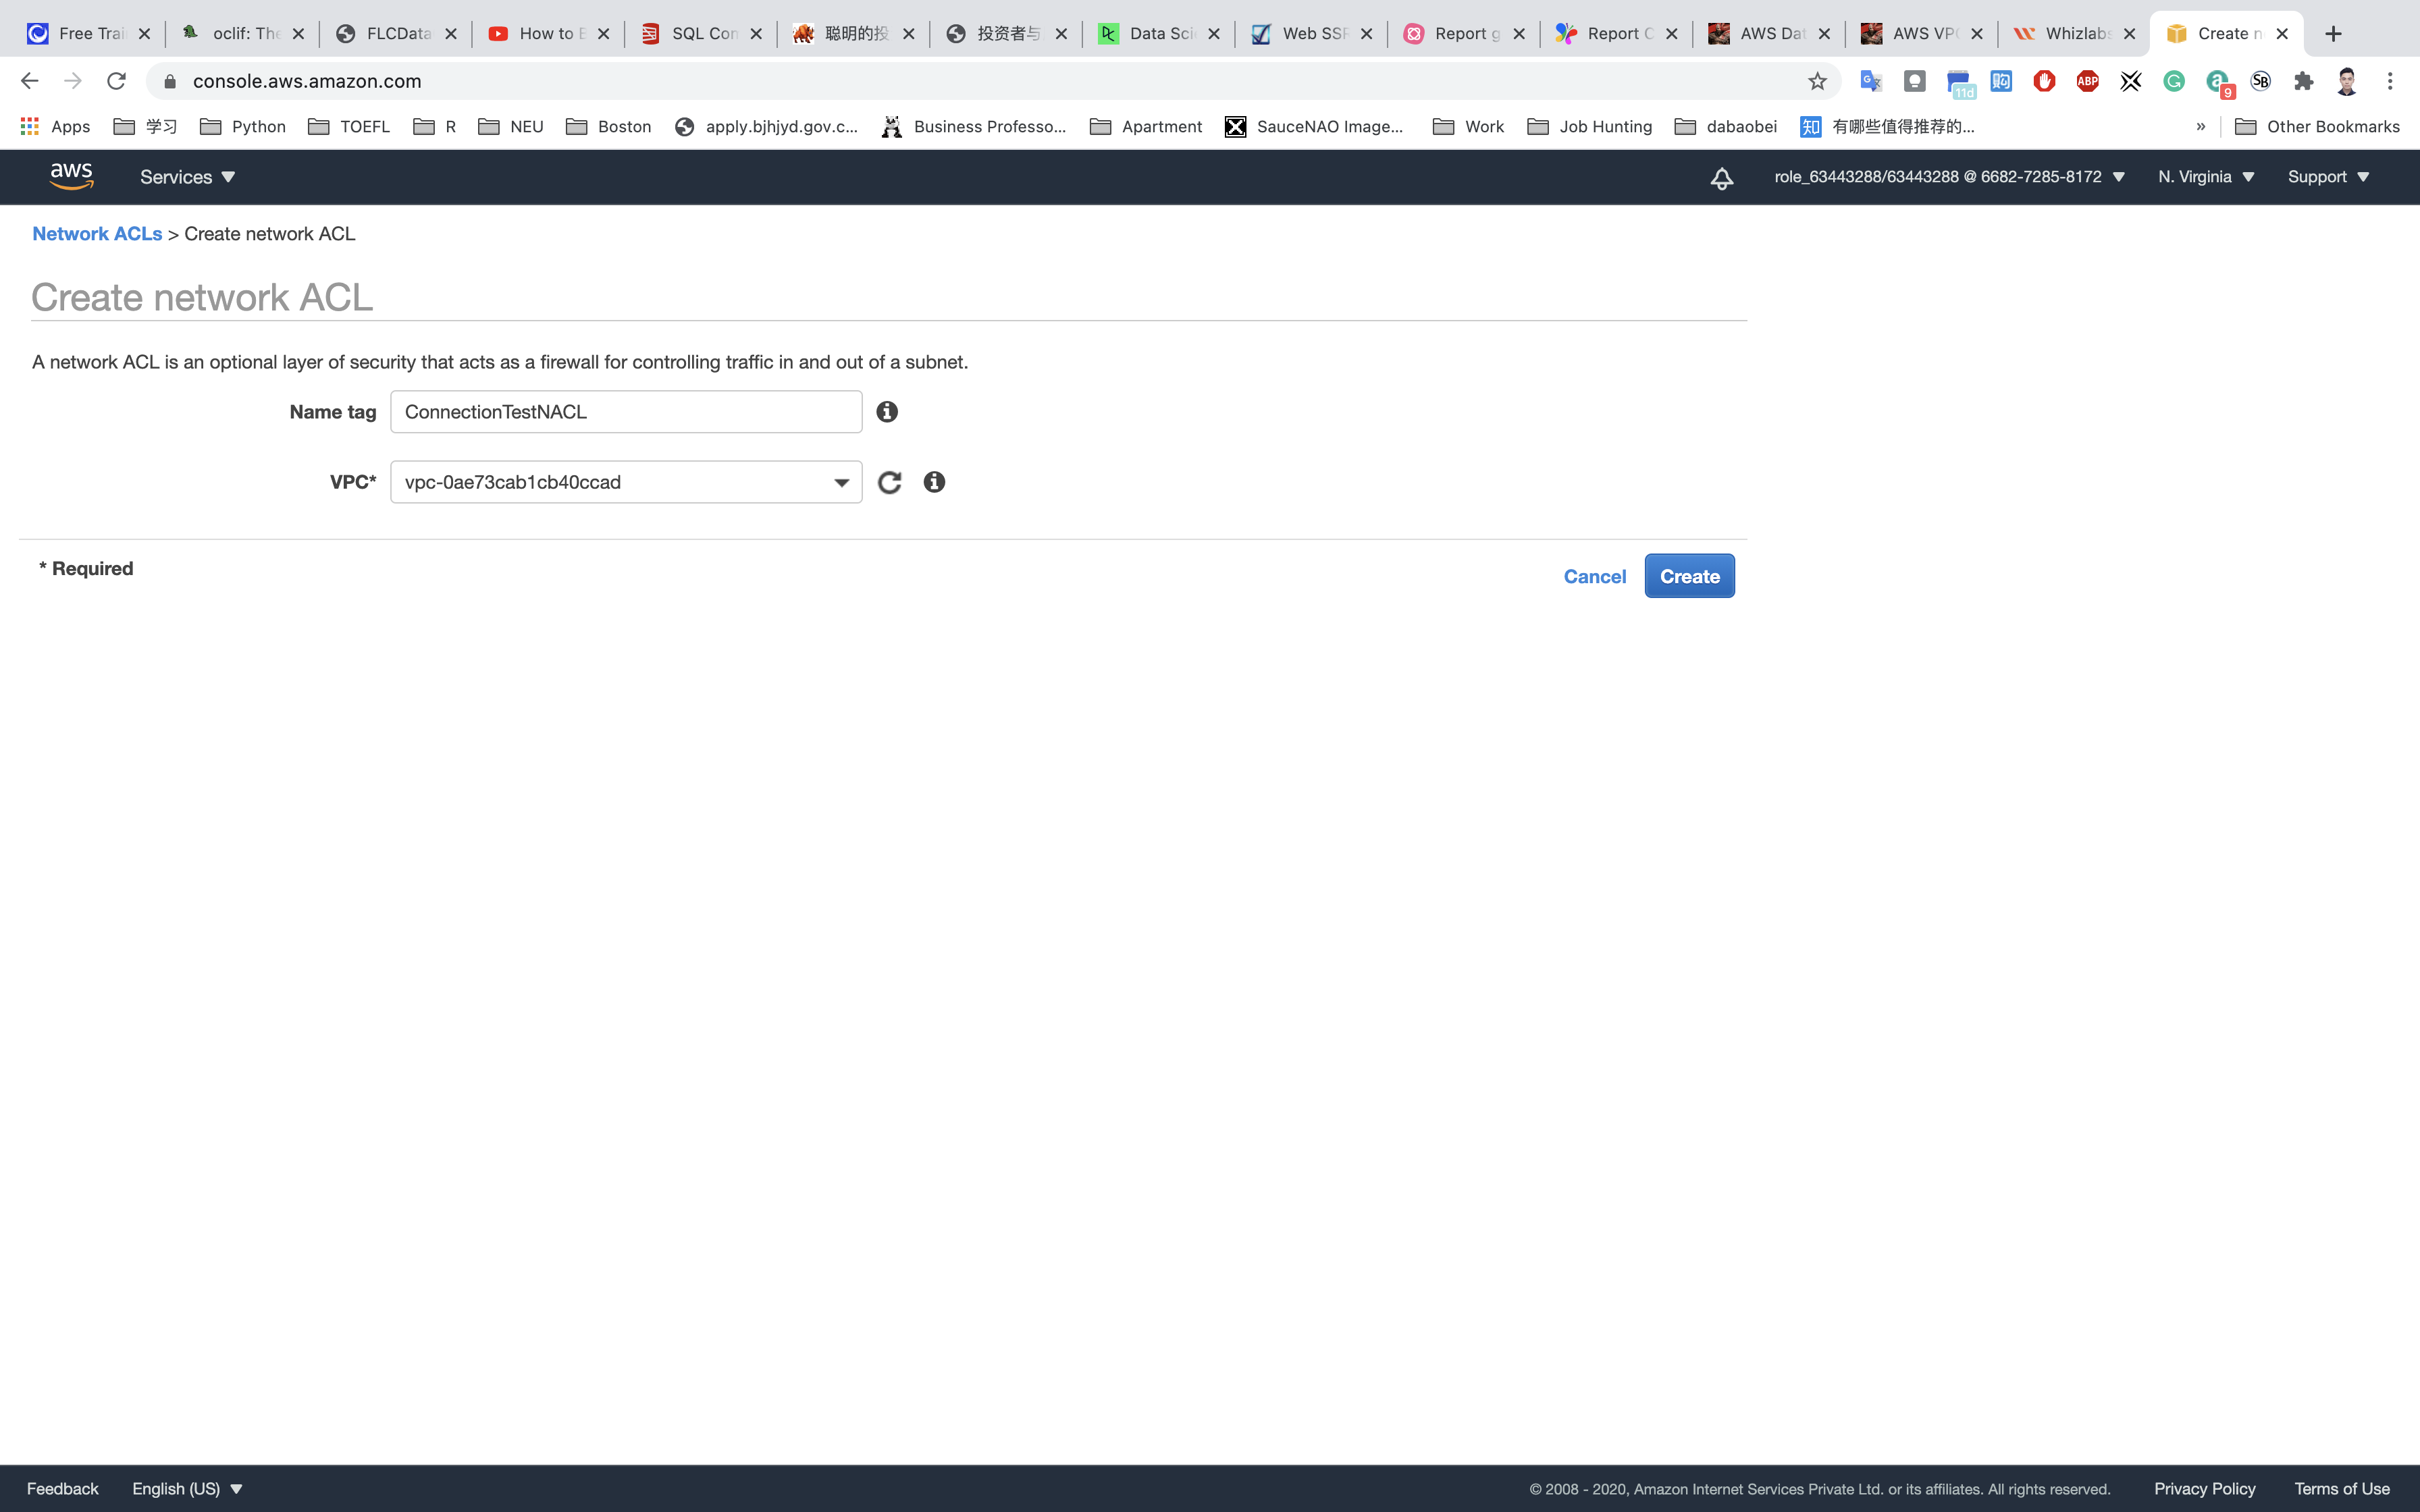
Click on Create and Close.
Select ConnectionTestNACL and then in the bottom window click on Inbound Rules → Edit Inbound Rules and then click on the Add Rule.
Add the following rules:
For SSH, click on Add Rule,
- Rule#:
100 - Type:
SSH (22) - Source:
0.0.0.0/0 - Allow / Deny:
Allow
For ALL ICMP- IPv4, click on Add Rule,
- Rule#:
200 - Type:
ALL ICMP - IPv4 - Source:
0.0.0.0/0 - Allow / Deny:
Allow
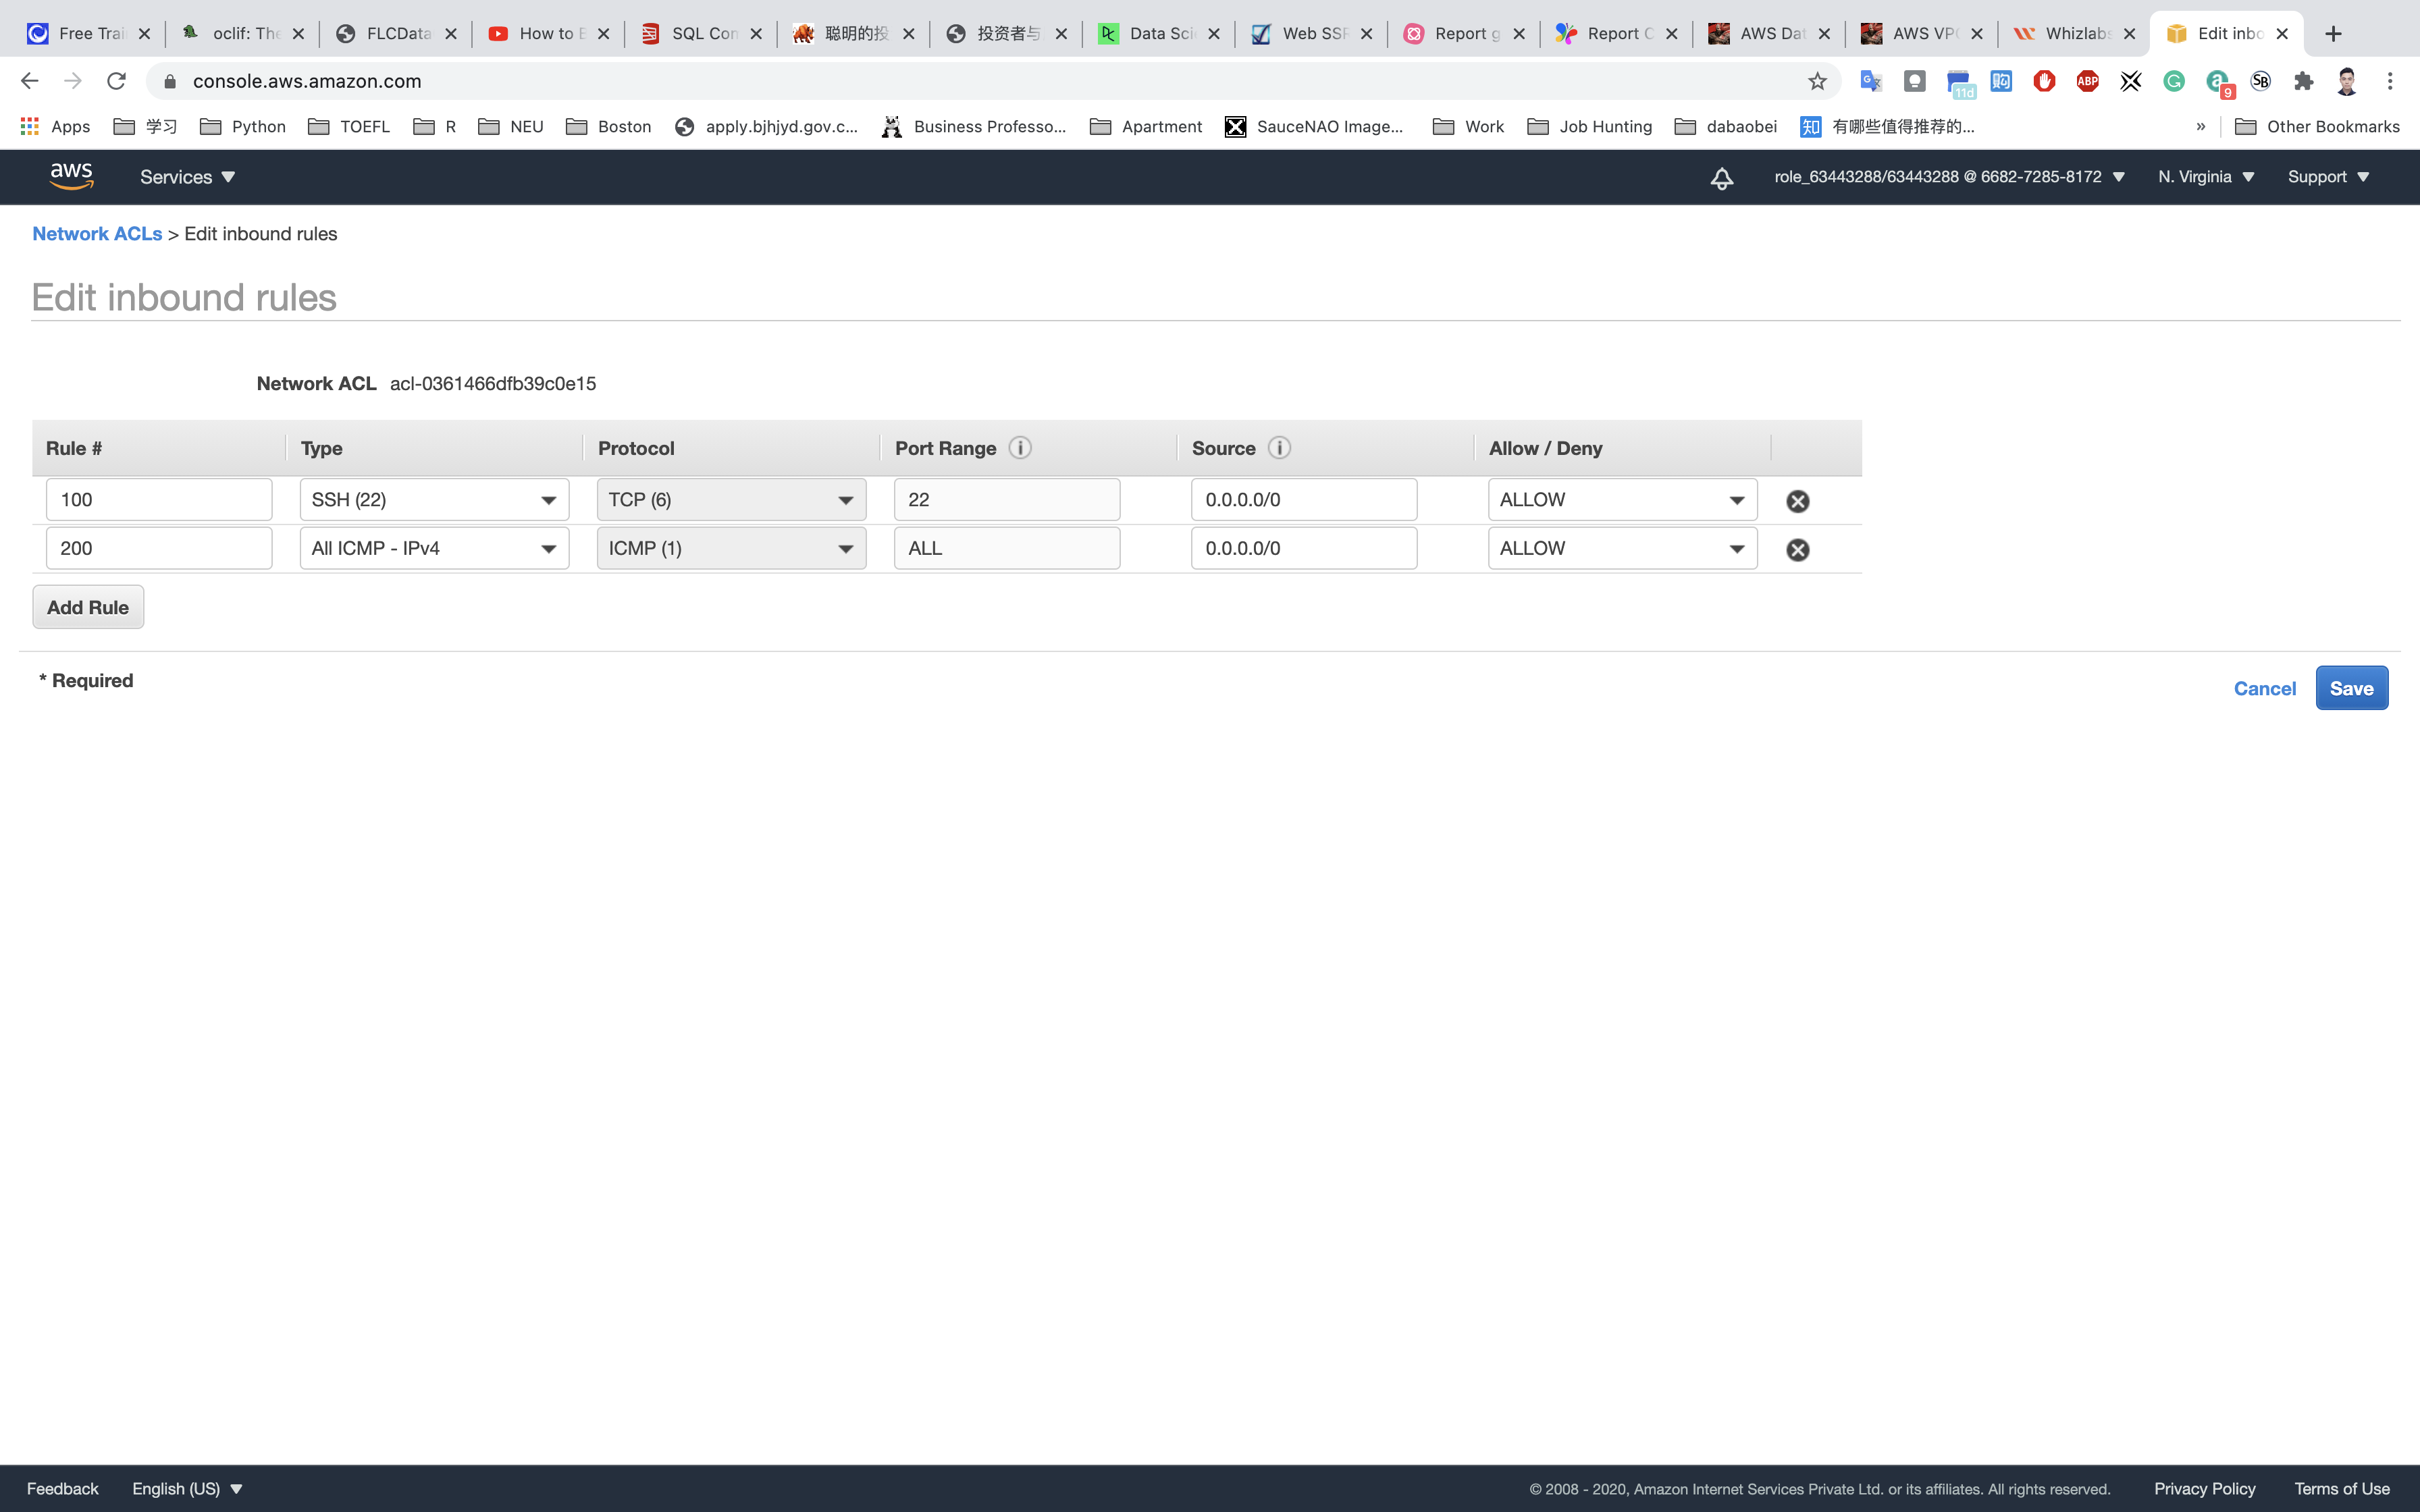
Click on Save.
NACLs are stateless. You need to add the same rule in Outbound rules too. To do so click on Outbound Rules → Edit Outbound Rules → Add Rule and then provide the following details: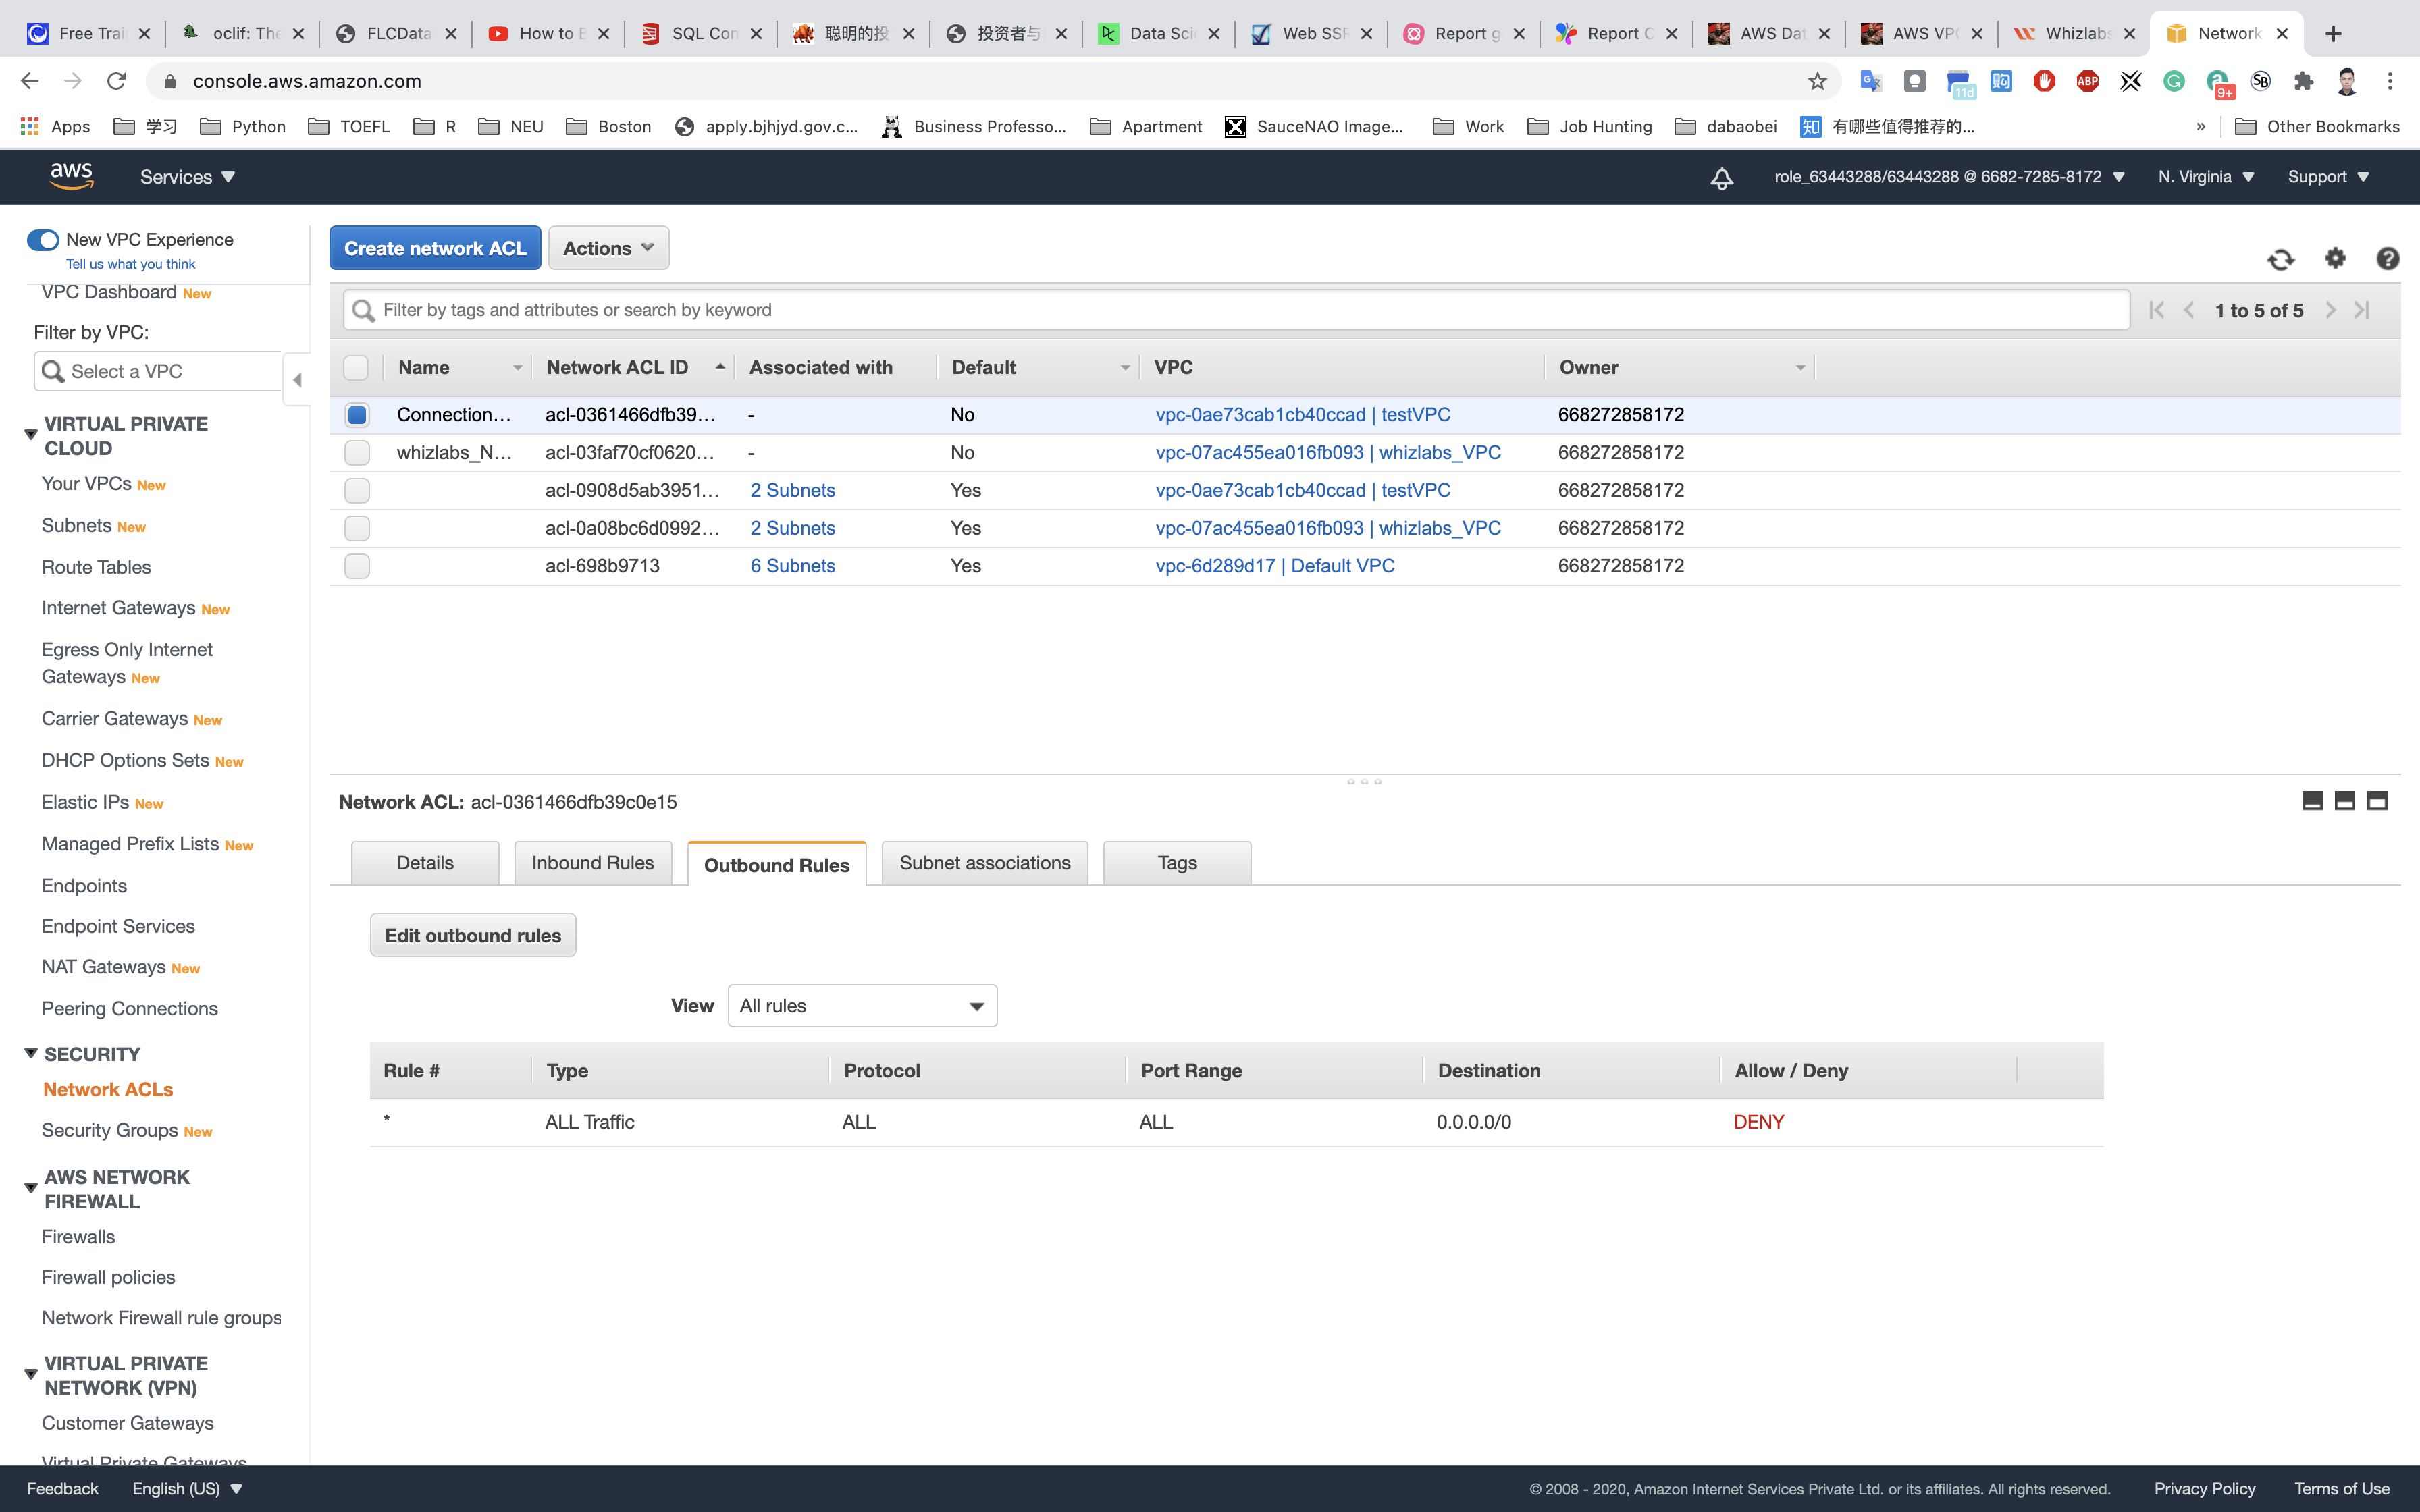
Add the following rules:
For SSH, click on Add Rule,
- Rule#:
100 - Type:
SSH (22) - Source:
0.0.0.0/0 - Allow / Deny:
Allow
For ALL ICMP- IPv4, click on Add Rule,
- Rule# :
200 - Type:
ALL ICMP - IPv4 - Source:
0.0.0.0/0 - Allow / Deny:
Allow
For Custom TCP Rule, click on Add Rule,
- Rule#:
300 - Type:
Custom TCP Rule - Port Range:
1024-65535 - Source:
0.0.0.0/0 - Allow / Deny:
Allow
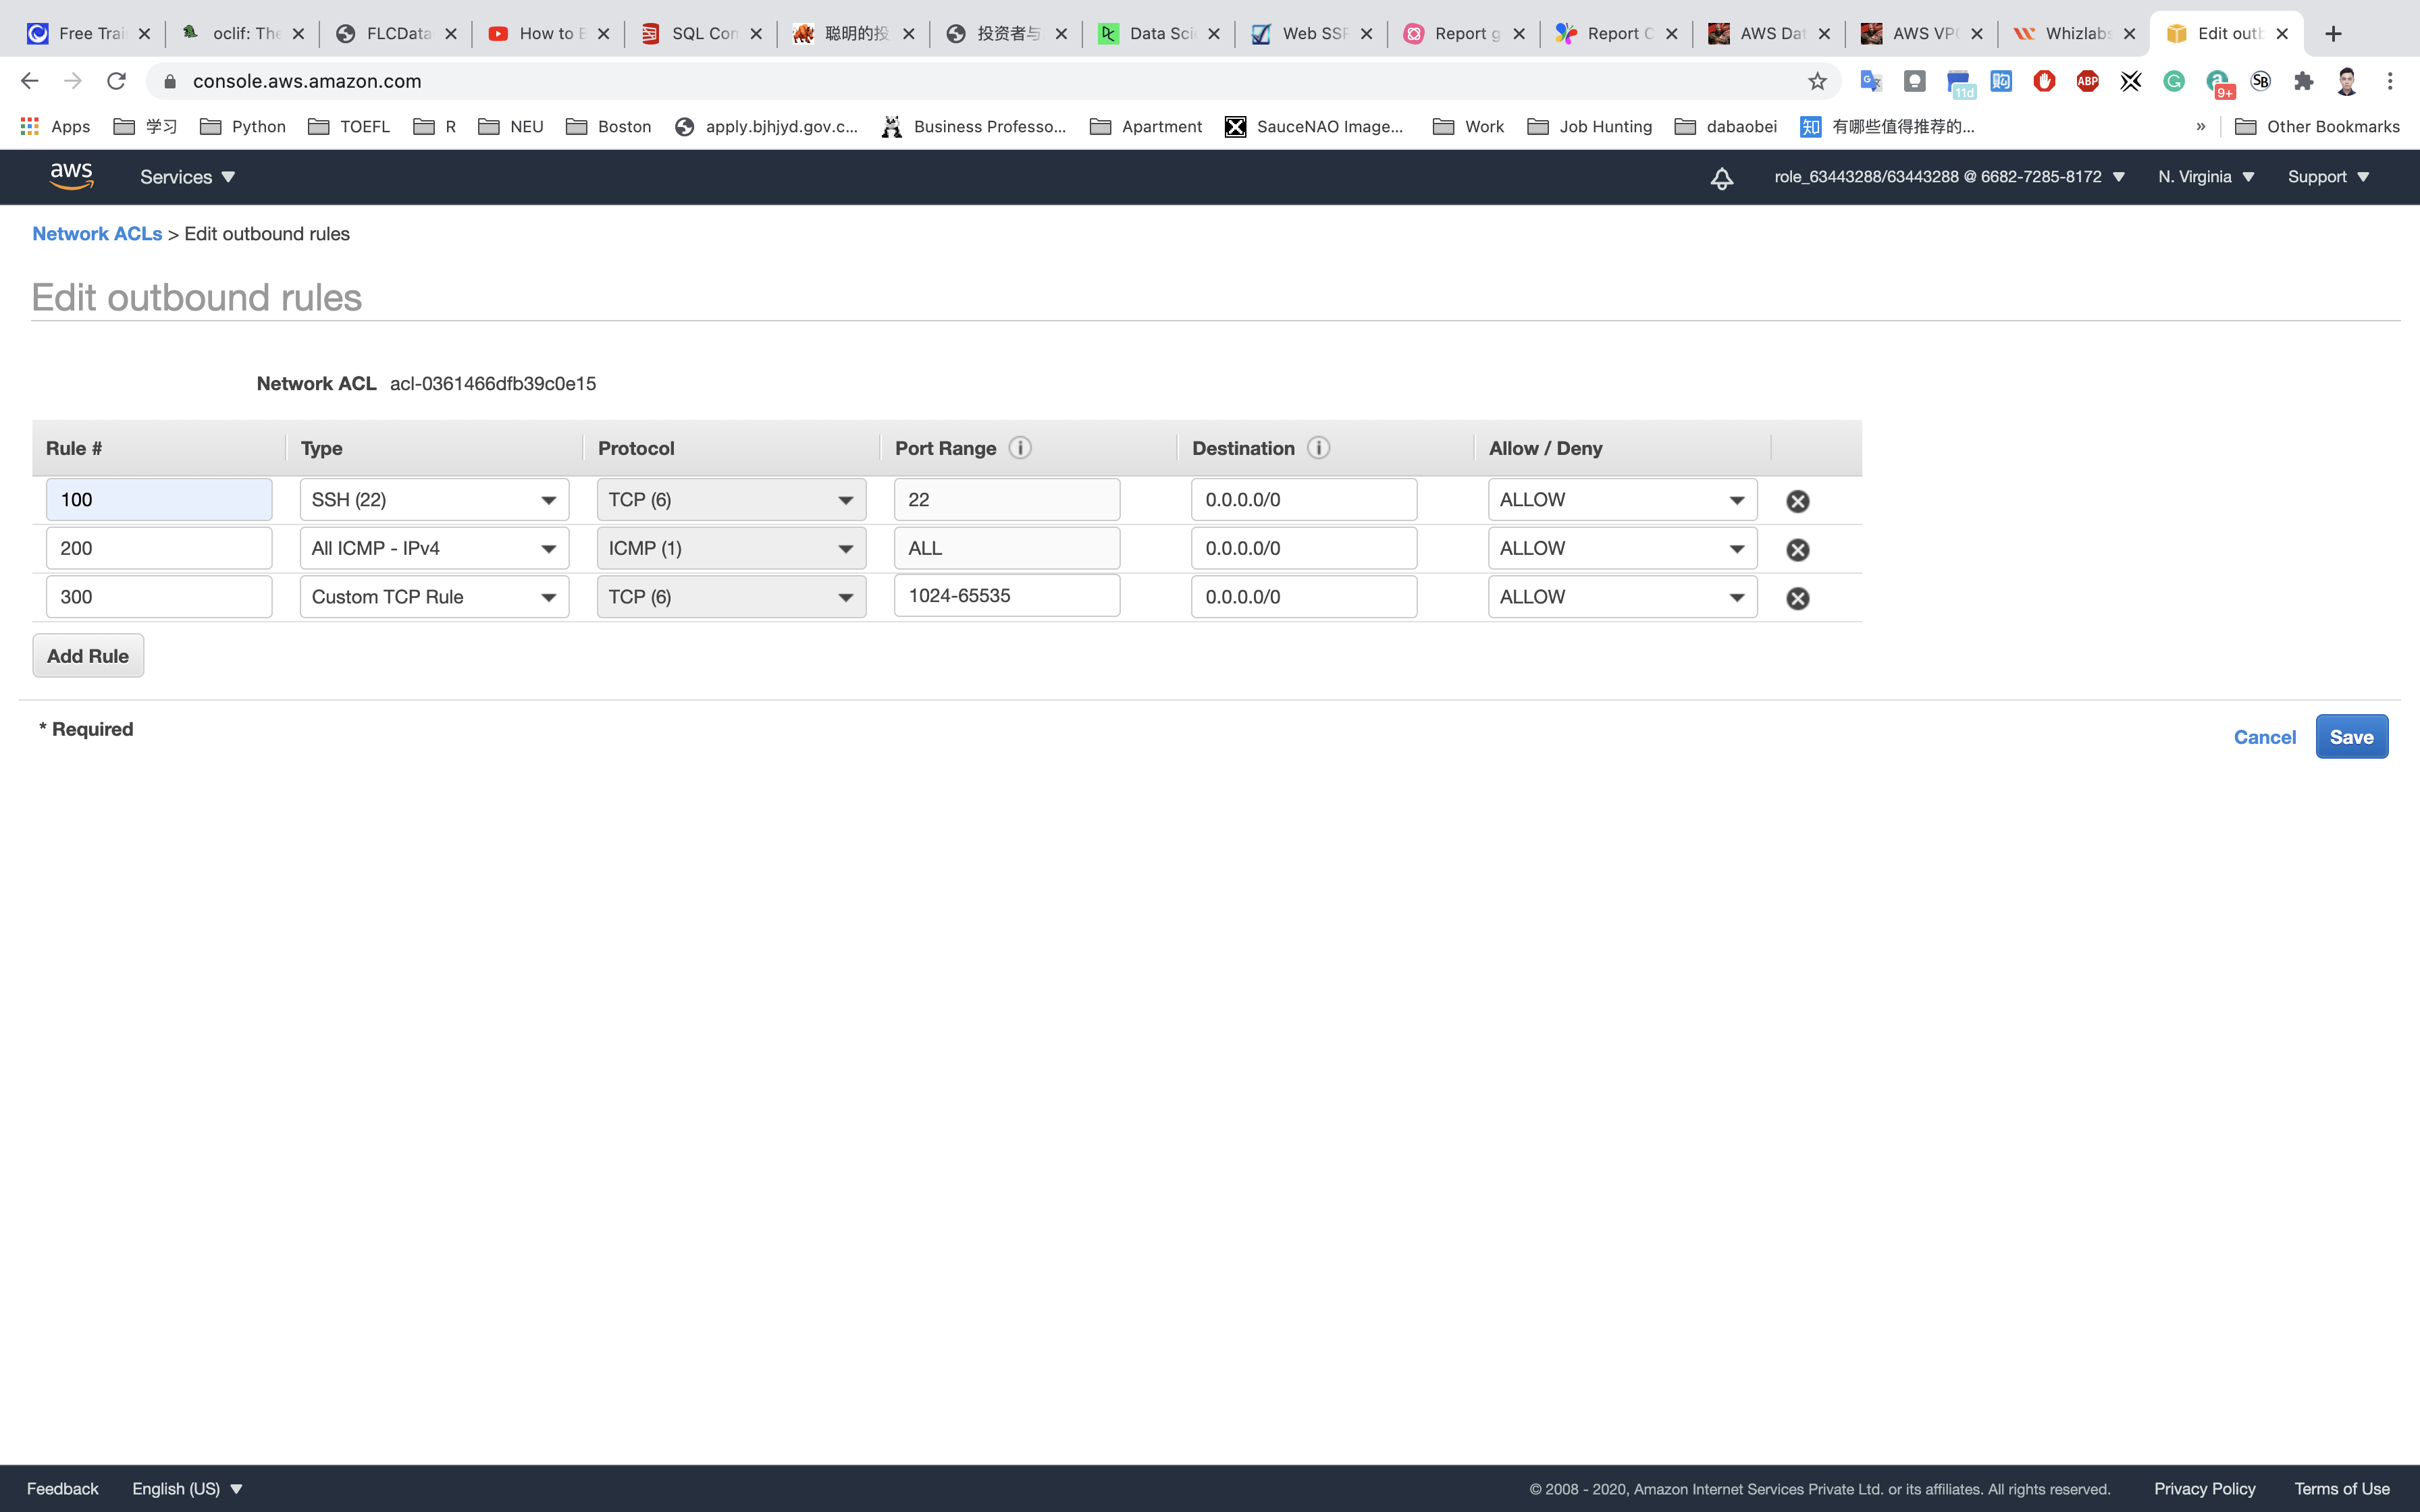
Click on Save
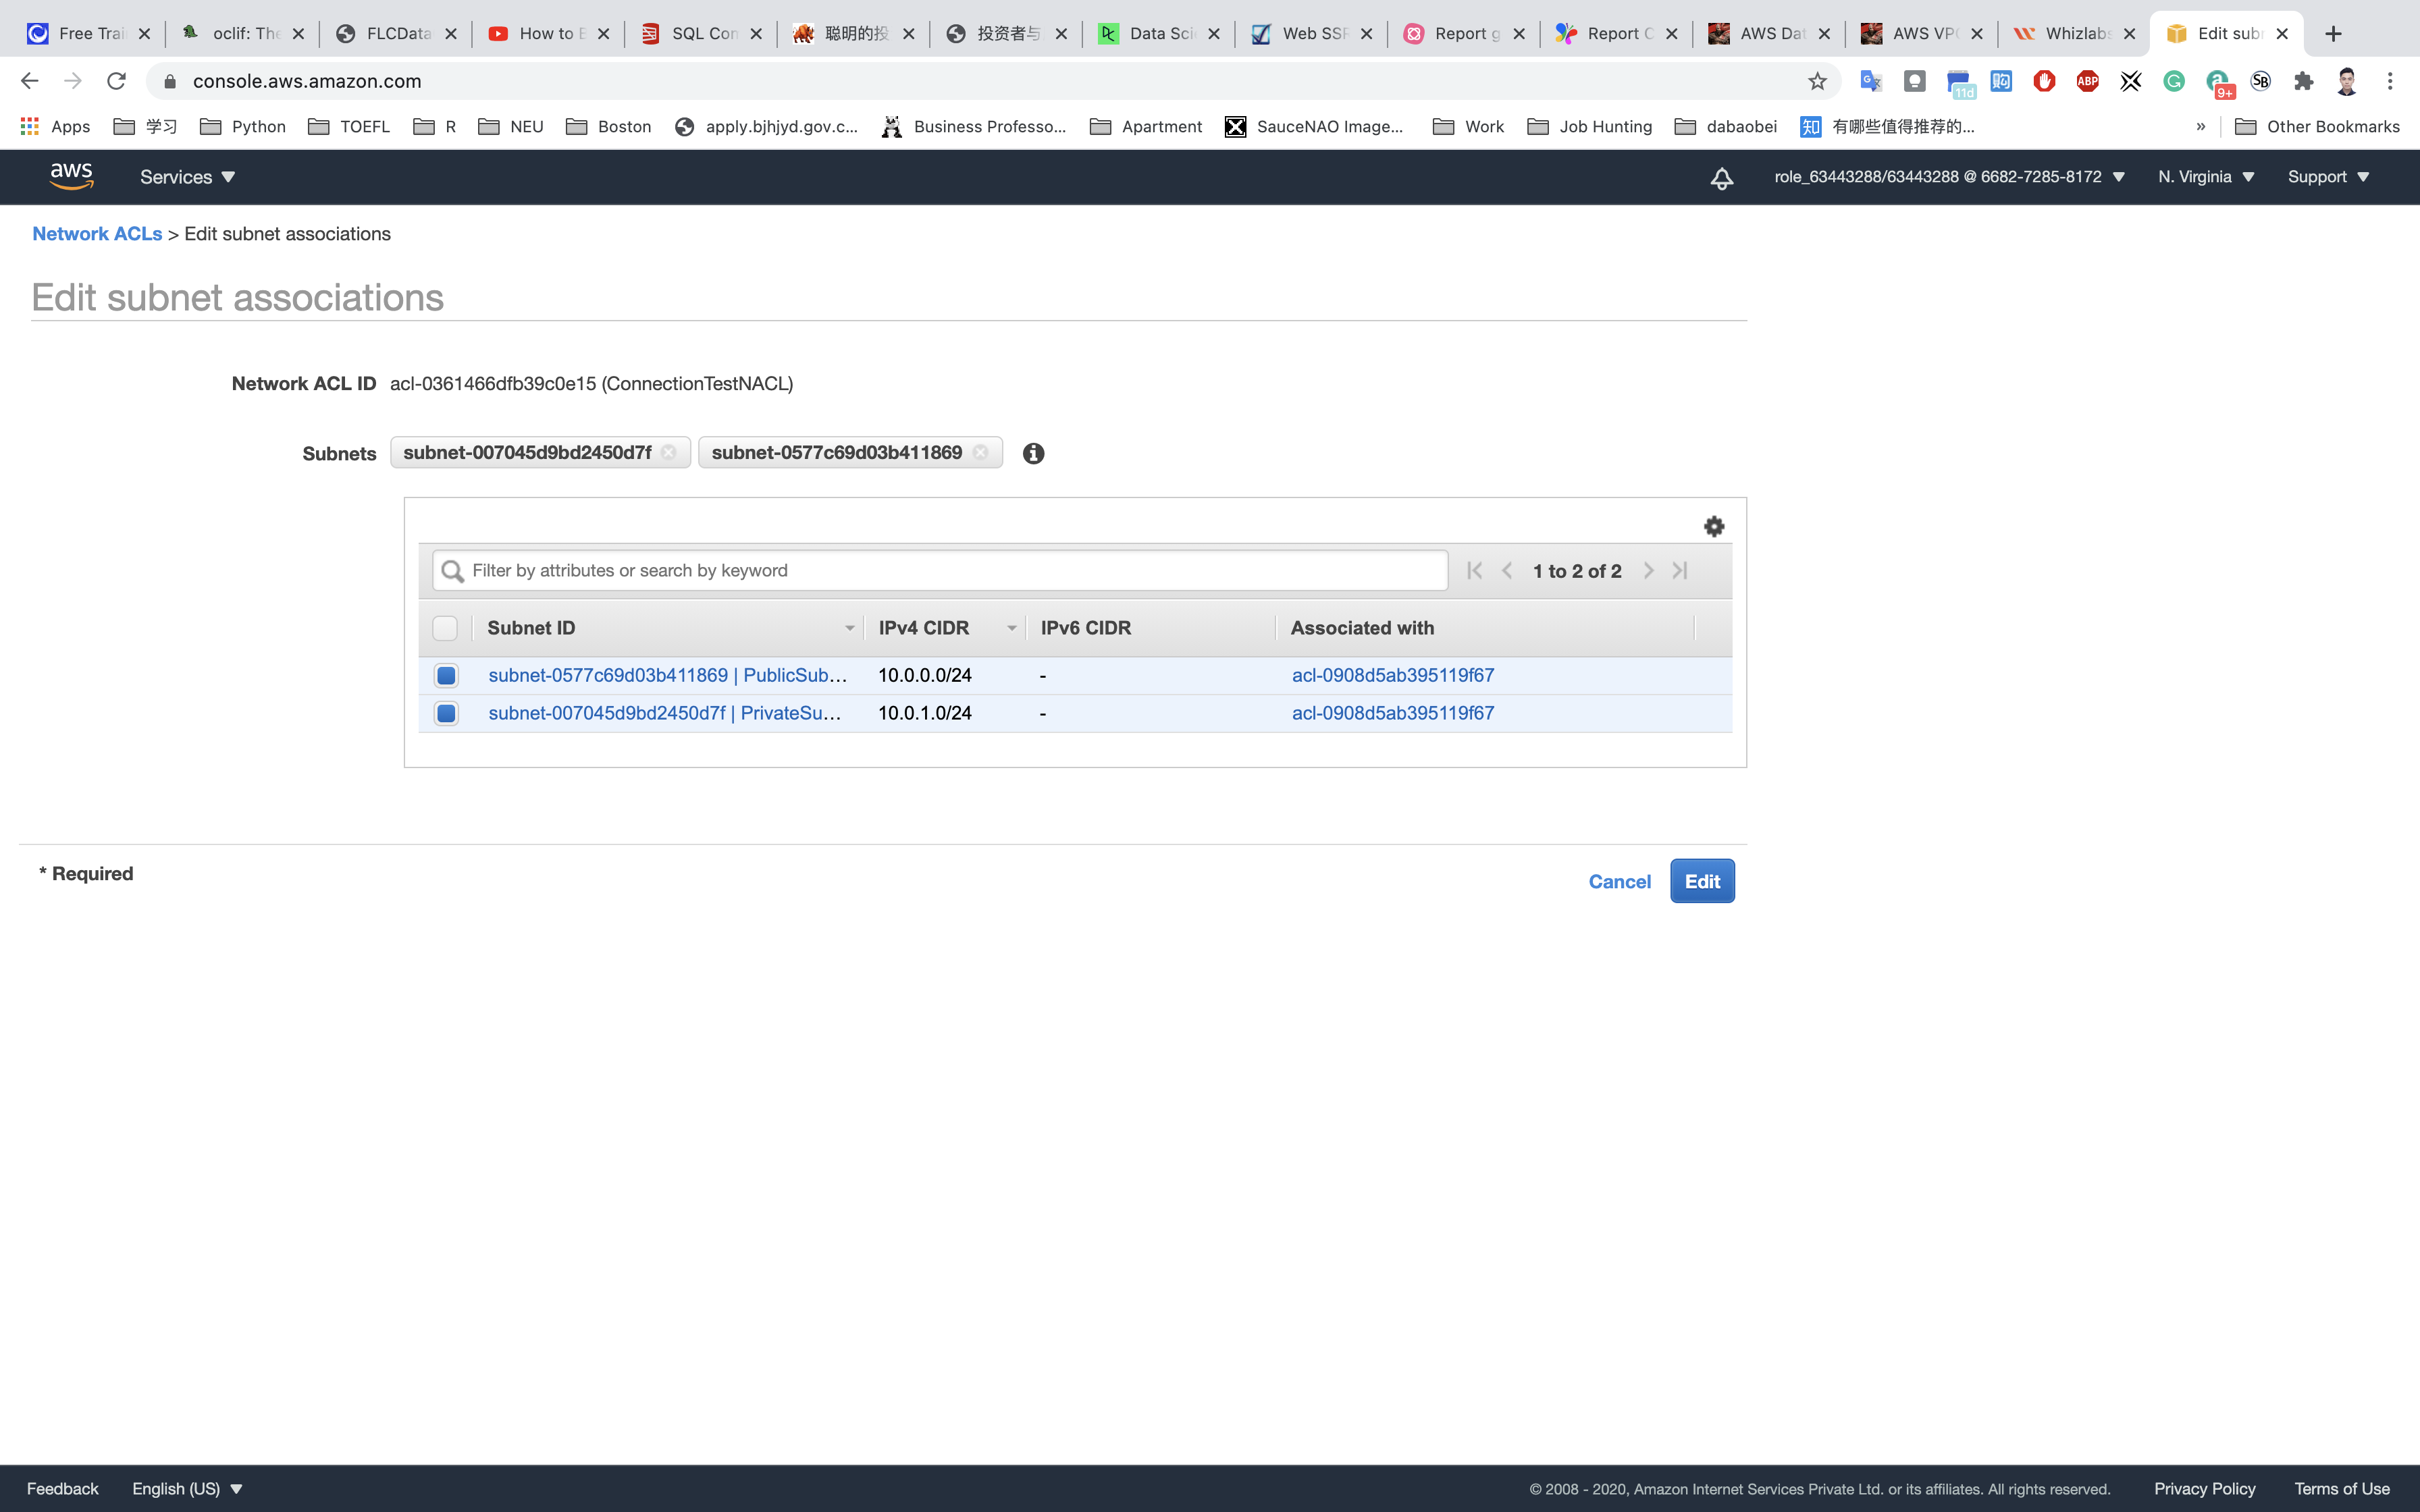
Associate both public and private subnets with this NACL. To do so, Select the ConnectionTestNACL → Click on Subnet Association in the bottom window → Edit the Subnet association → Select both subnets we created and click on Edit.
EC2 Configuration
Service -> EC2 -> Instances
Launching an EC2 Instance in Public Subnet
Click on Launch Instance.
Choose an Amazon Machine Image (AMI): Search for Amazon Linux 2 AMI in the search box and click on the select button.
Choose an Instance Type: select t2.micro and click on the Next: Configure Instance Details
Configure Instance Details:
- Network:
testVPC - Subnet:
PublicSubnet - Auto-assign Public IP:
Enable - Leave all other settings as default.
Click on Nex: Add Storage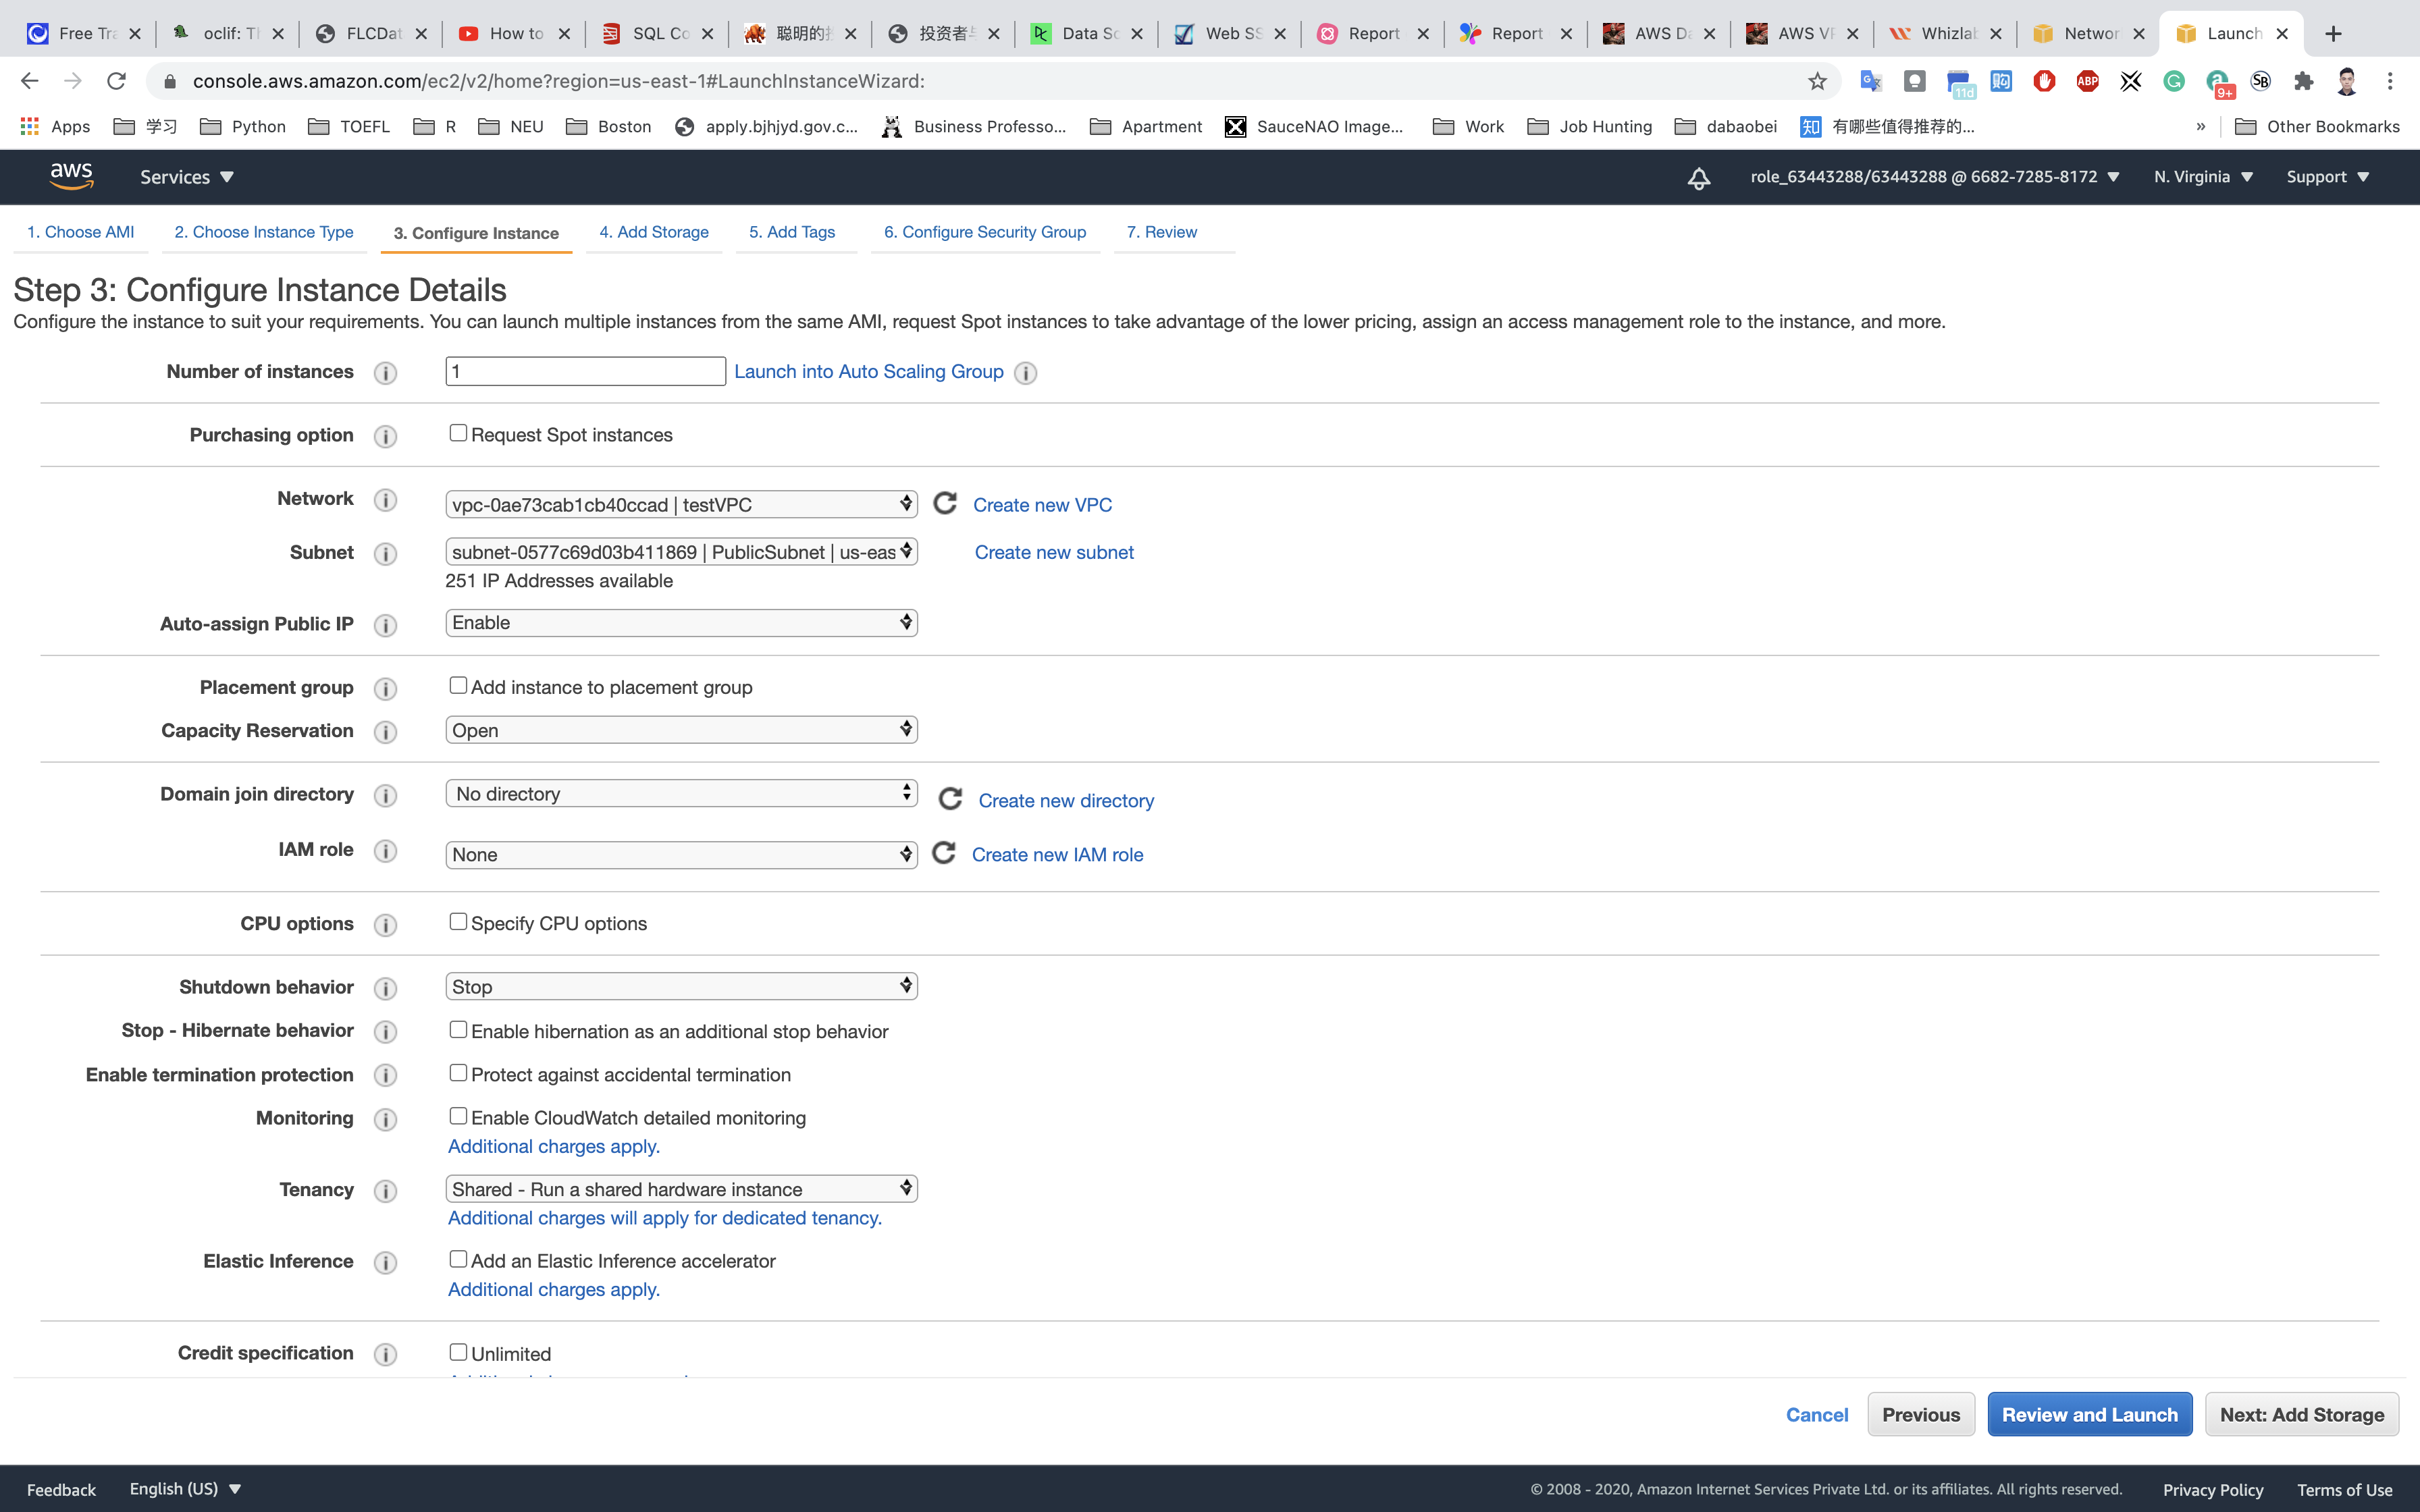
Add Storage: No need to change anything in this step. Click on Next: Add tags
Add Tags: Click on Add tag
- Key:
Name - Value:
MyPublicEC2Server
Click on Next: Configure Security Group
Configure Security Group:
Click on Select an existing security group
Click on Review and Launch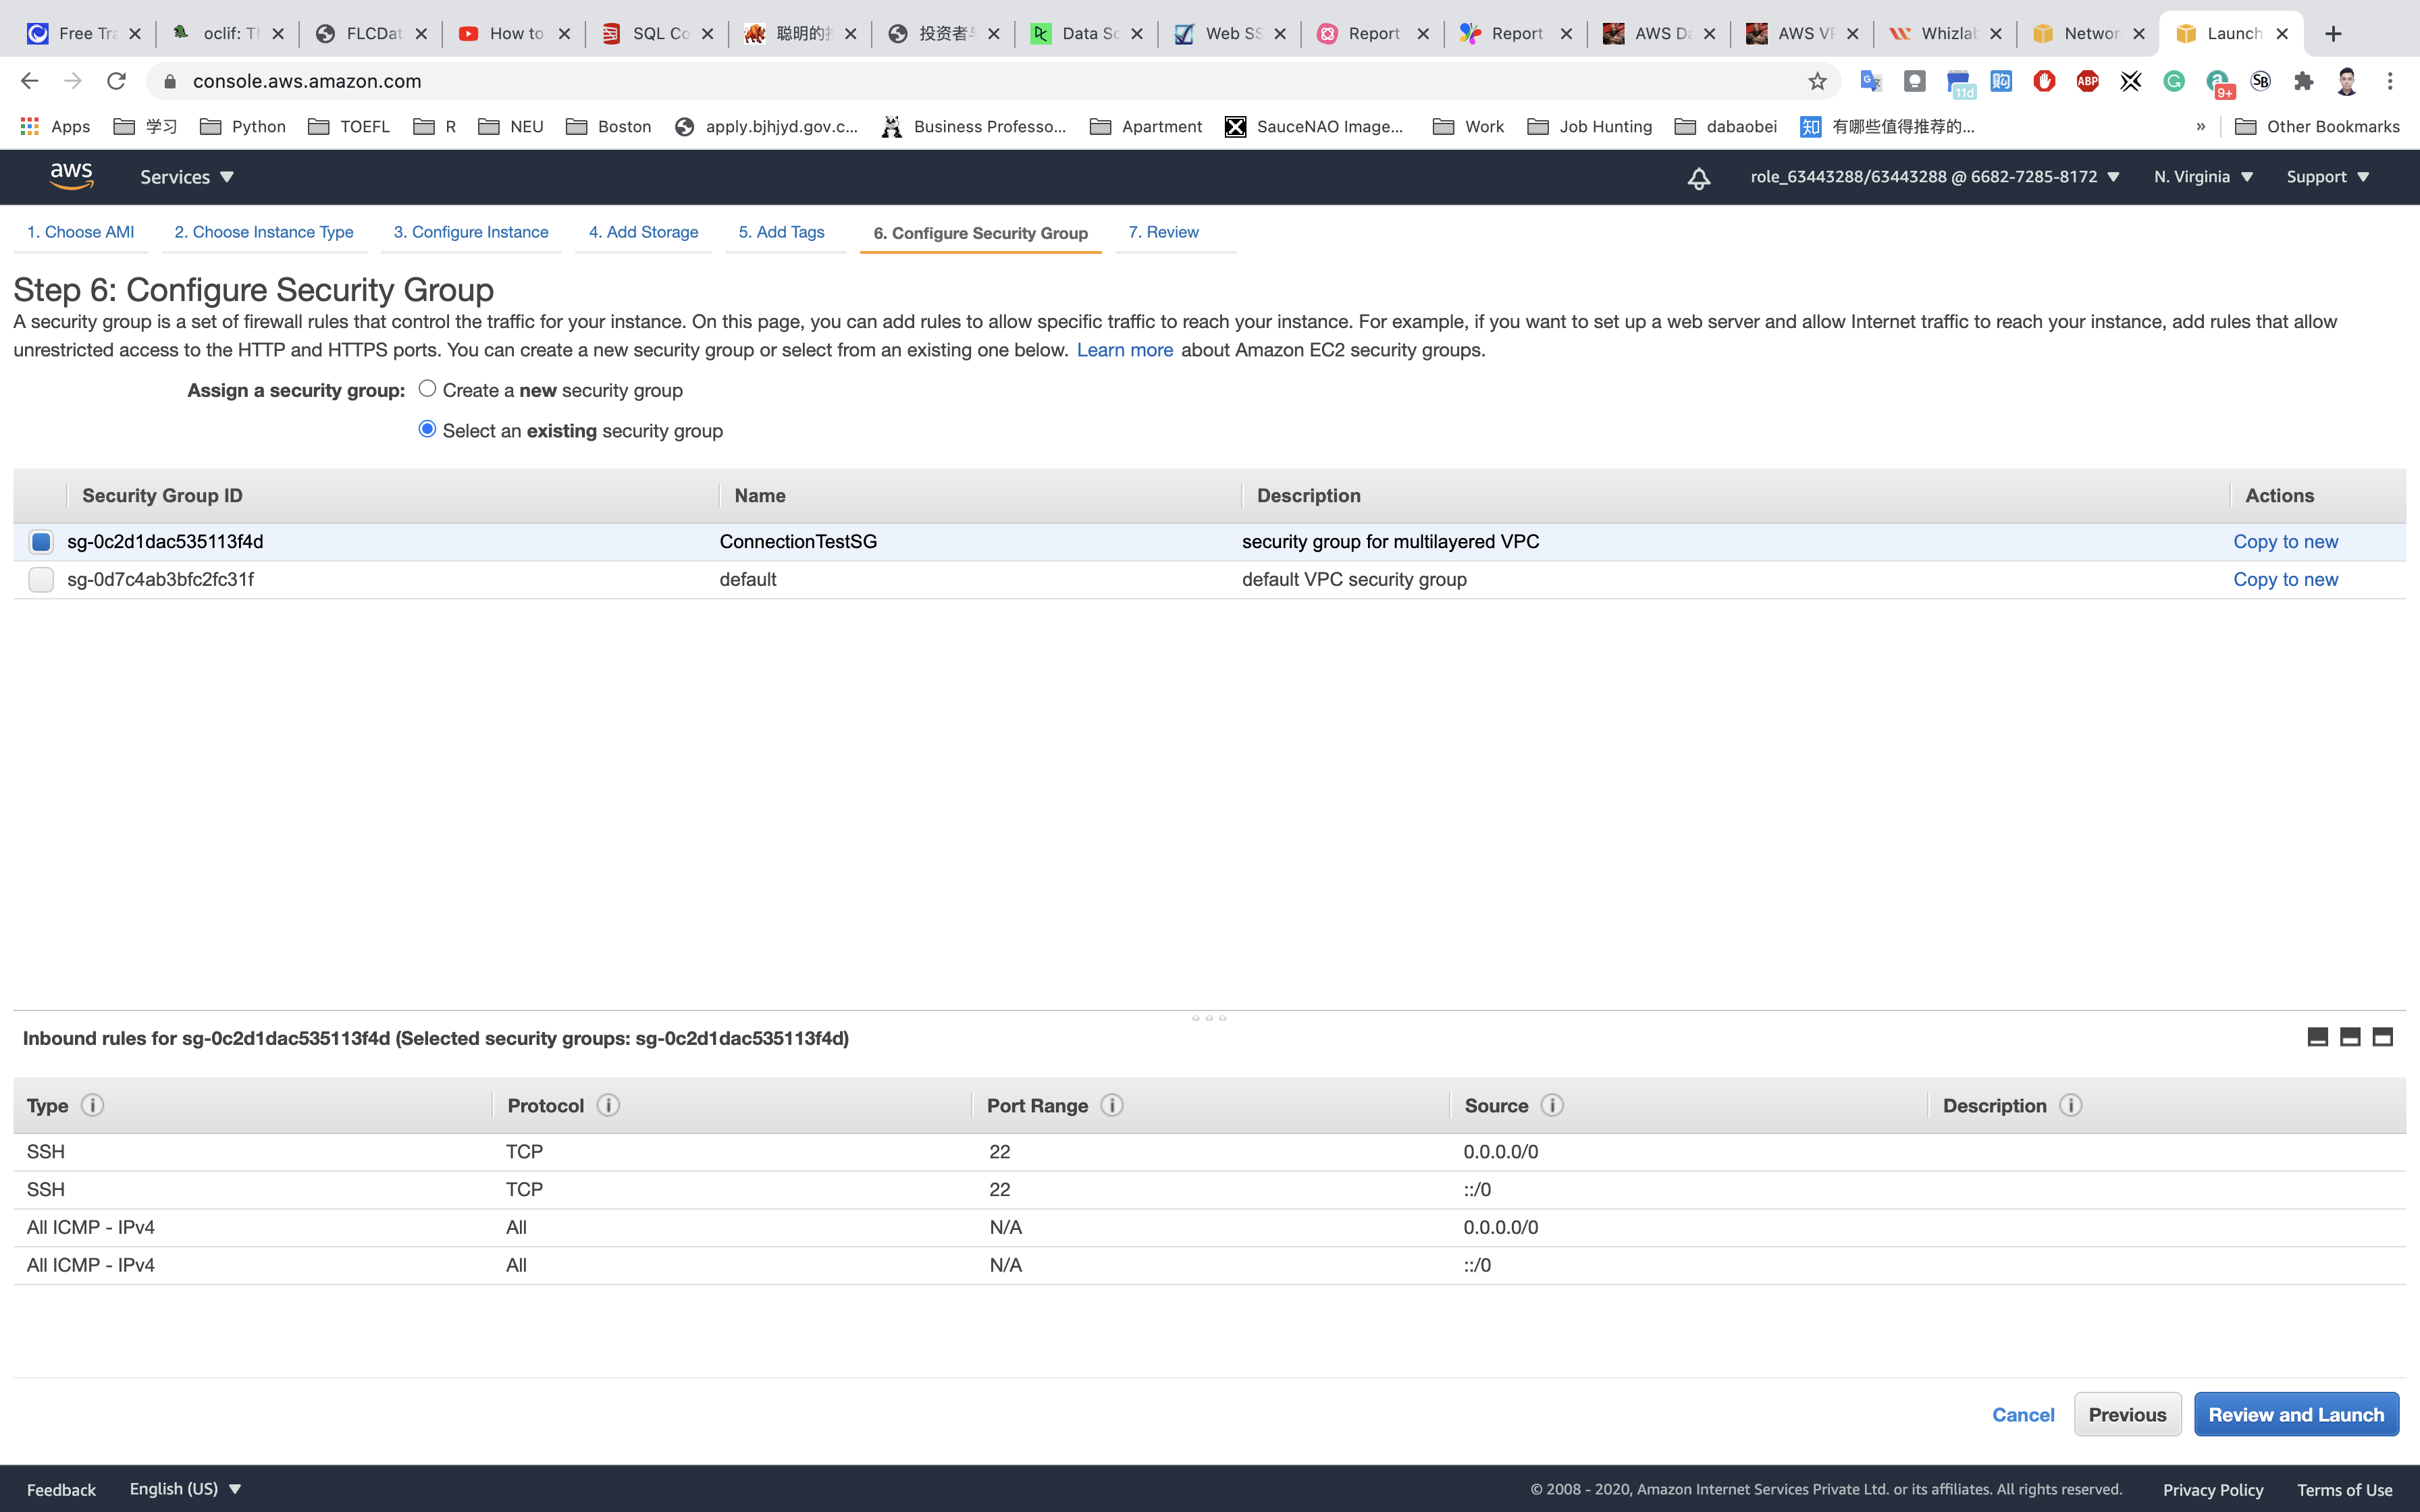
Review and Launch : Review all settings and click on Launch.
- Select
Create a new key pair - Key pair Name:
aws-ec2
Click on Download Key Pair.
Click on Launch Instances.
Launch Status: Your instance is now launching, Select the instance and wait for it to change status to running.
Note down the Public IP address of PublicEC2Server: 3.89.215.39
Launching an EC2 Instance in Private Subnet
Click on Launch Instance.
Choose an Amazon Machine Image (AMI): Search for Amazon Linux 2 AMI in the search box and click on the select button.
Choose an Instance Type: select t2.micro and click on the Next: Configure Instance Details
Configure Instance Details:
- Network:
testVPC - Subnet:
PrivateSubnet - Auto-assign Public IP:
Use Subnet Setting (Disable) - default - Leave all other settings as default.
Click on Nex: Add Storage
Add Storage: No need to change anything in this step. Click on Next: Add tags
Add Tags: Click on Add tag
- Key:
Name - Value:
MyPrivateEC2Server
Click on Next: Configure Security Group
Configure Security Group:
Click on Select an existing security group
Click on Review and Launch
Review and Launch : Review all settings and click on Launch.
- Select
Choose an existing key pair - Select a key pair:
aws-ec2
Click on Launch Instances.
Launch Status: Your instance is now launching, Select the instance and wait for it to change status to running.
Note down the Public IP address of PublicEC2Server: None
Test Connection through ICMP
Test connection to EC2 instance running on public subnet
Services -> EC2 -> Instances
copy the public IP address of the public instance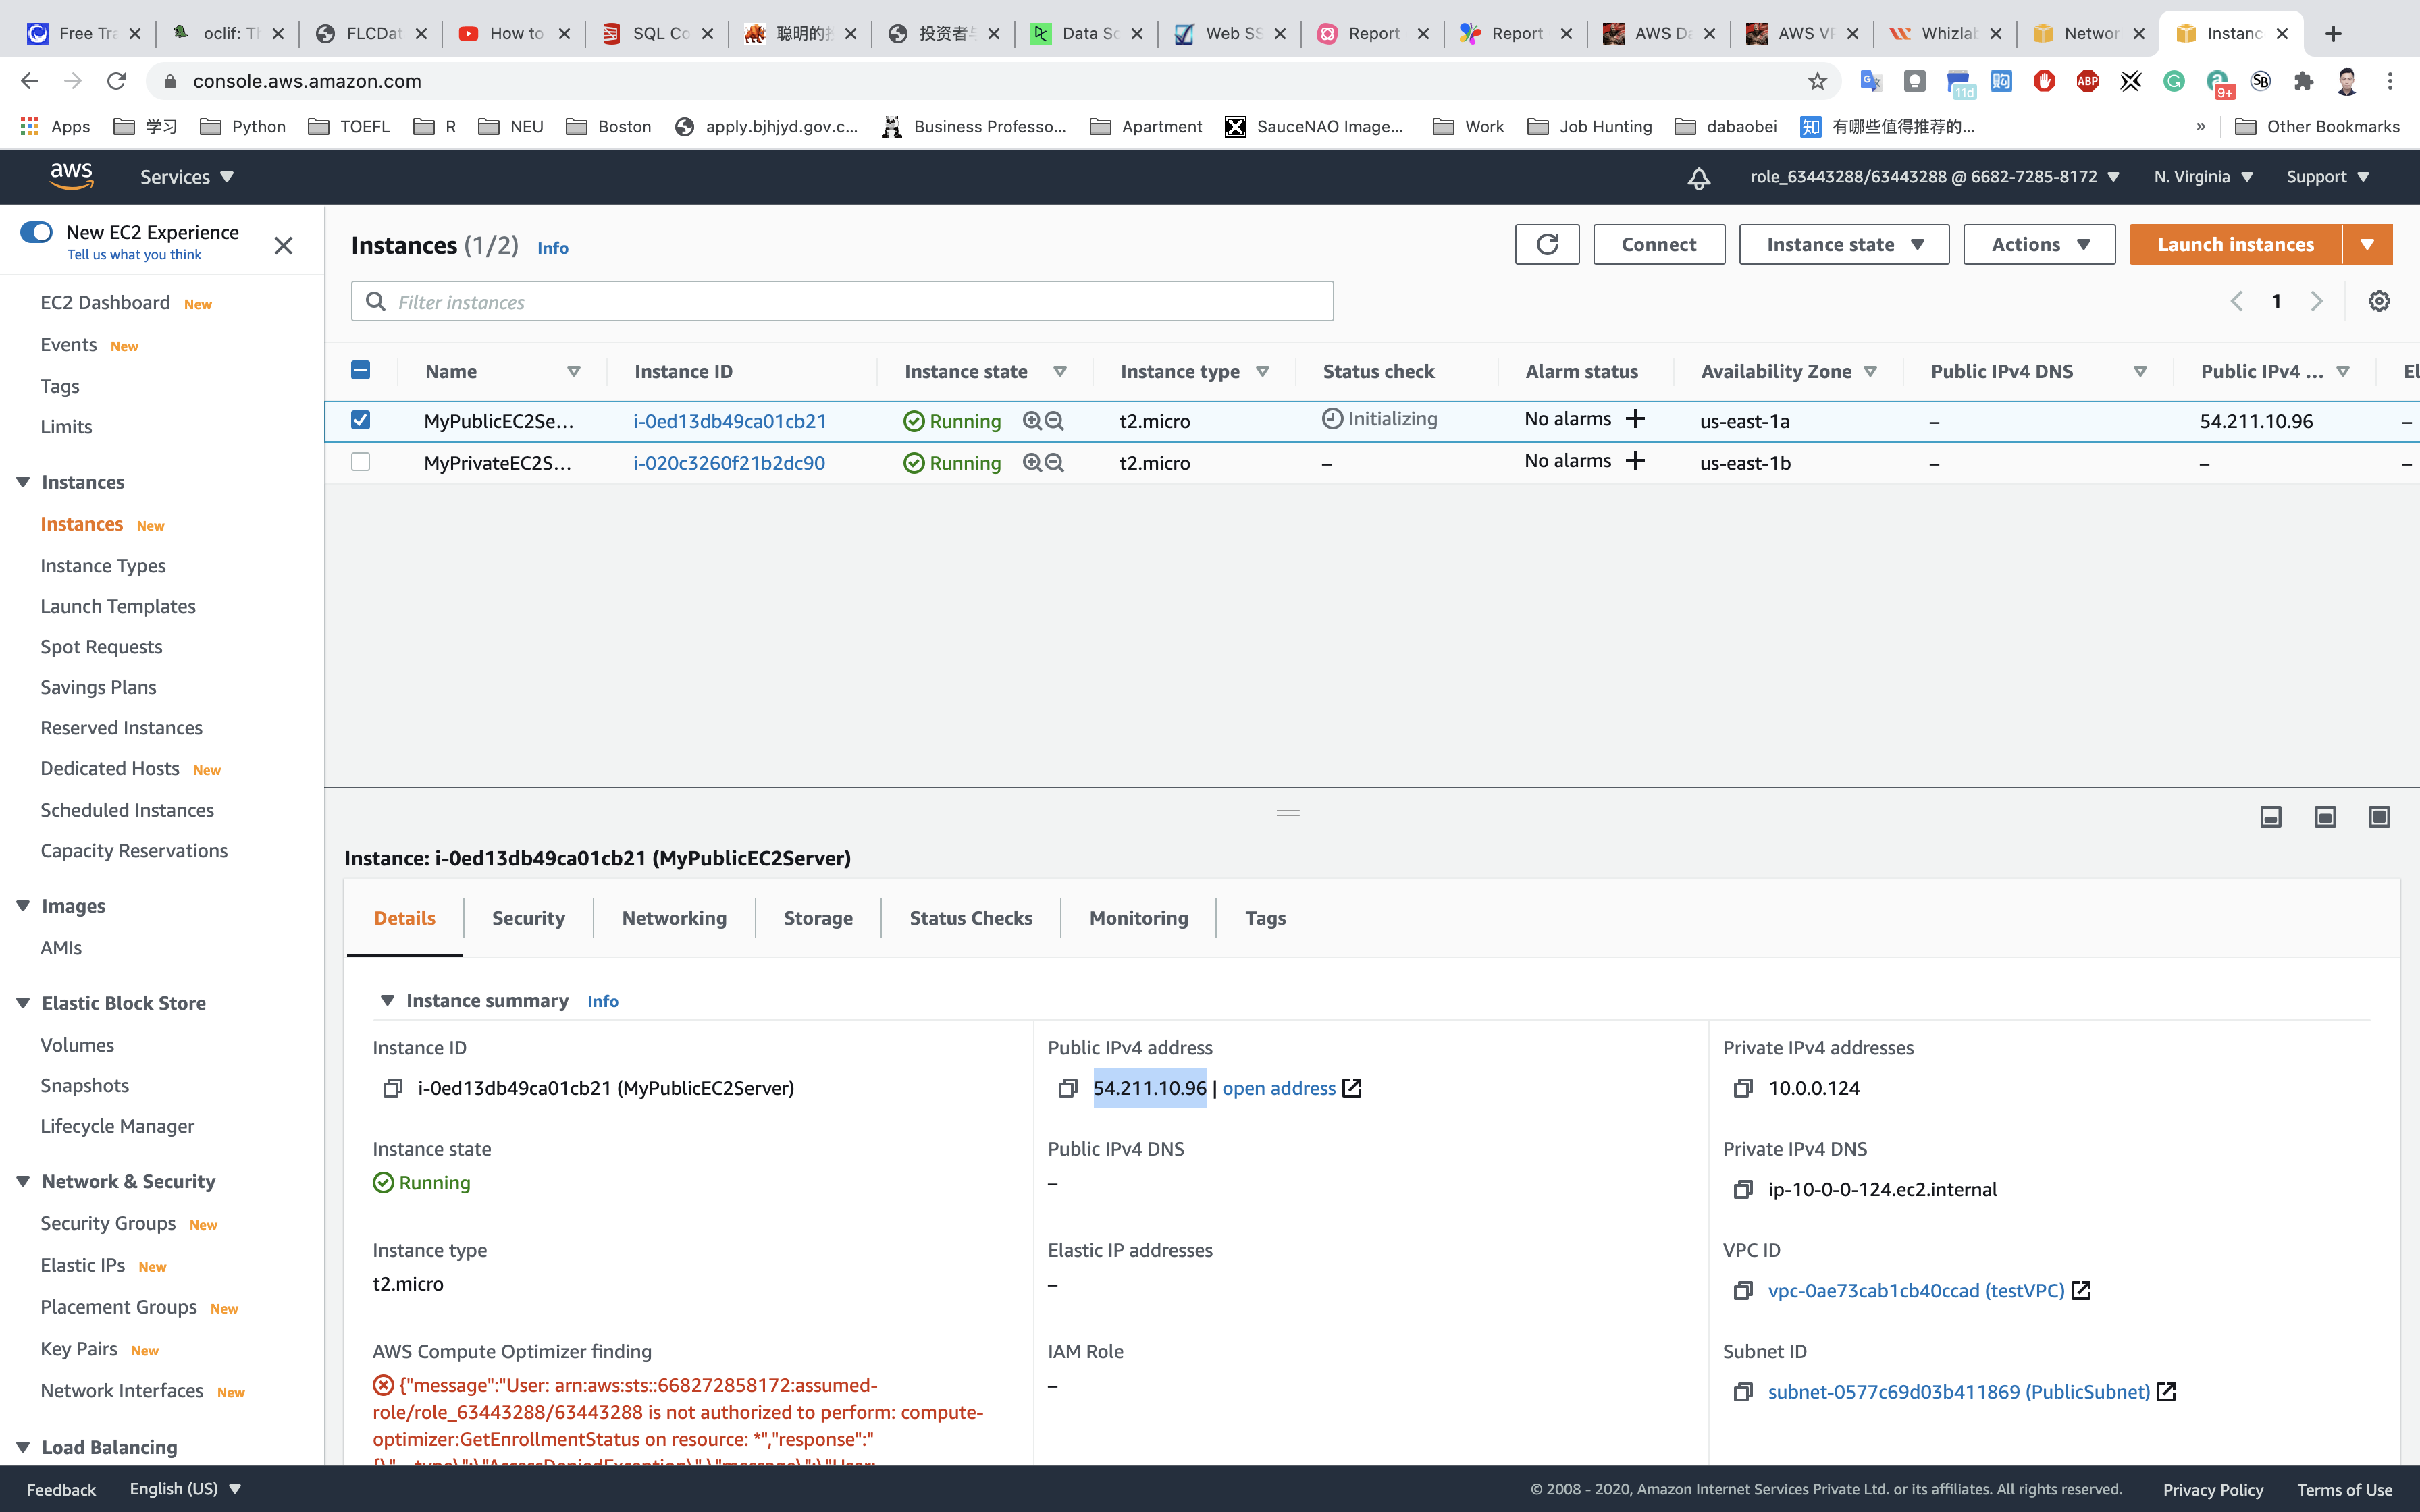
1 | ping public_IP_address |
For exit the process, press ctrl + c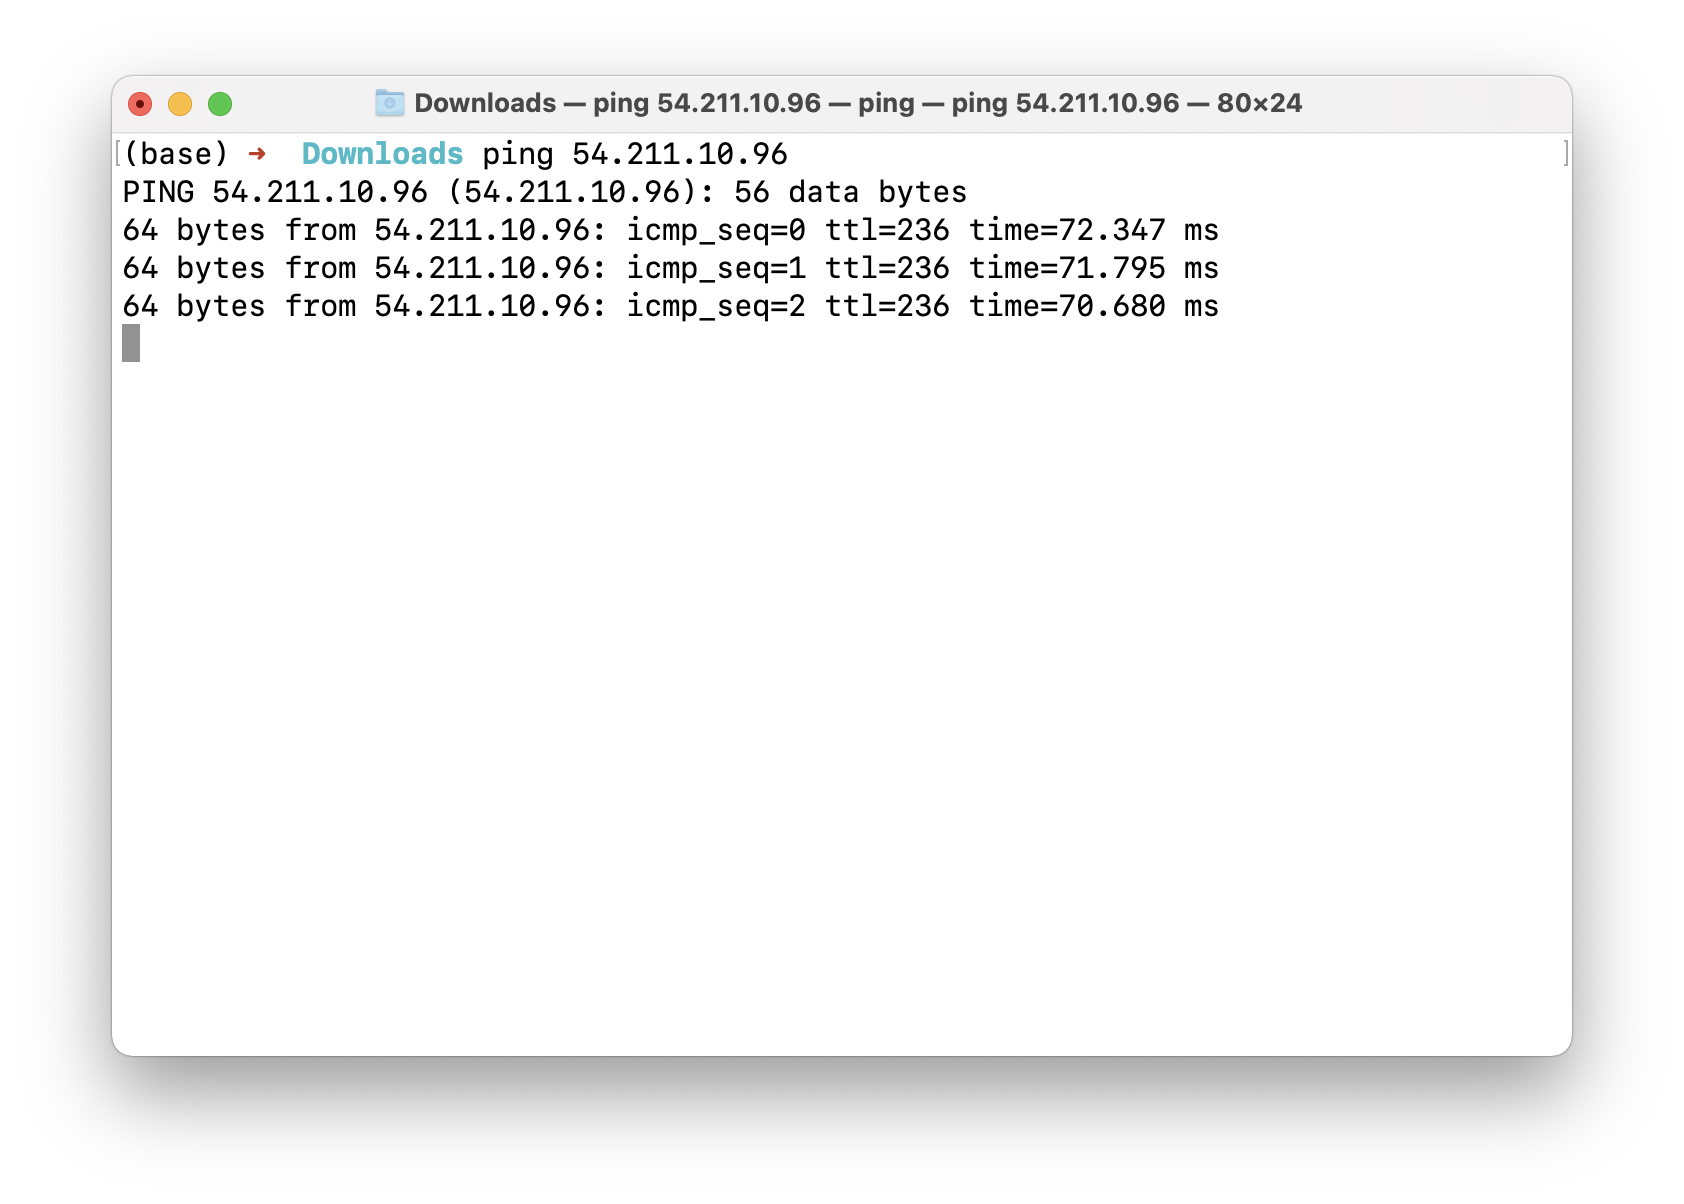
SSH into EC2 instance running on public subnet
If you cannot understand the following steps. Click on SSH into EC2 instance
Using the public IP address, SSH into PublicEC2Server.
SSH into the EC2 running on public subnet, and paste the public IP address from AWS EC2 console web page.
Test connection to EC2 instance running on private subnet
Services -> EC2 -> Instances
copy the private IP address of the private instance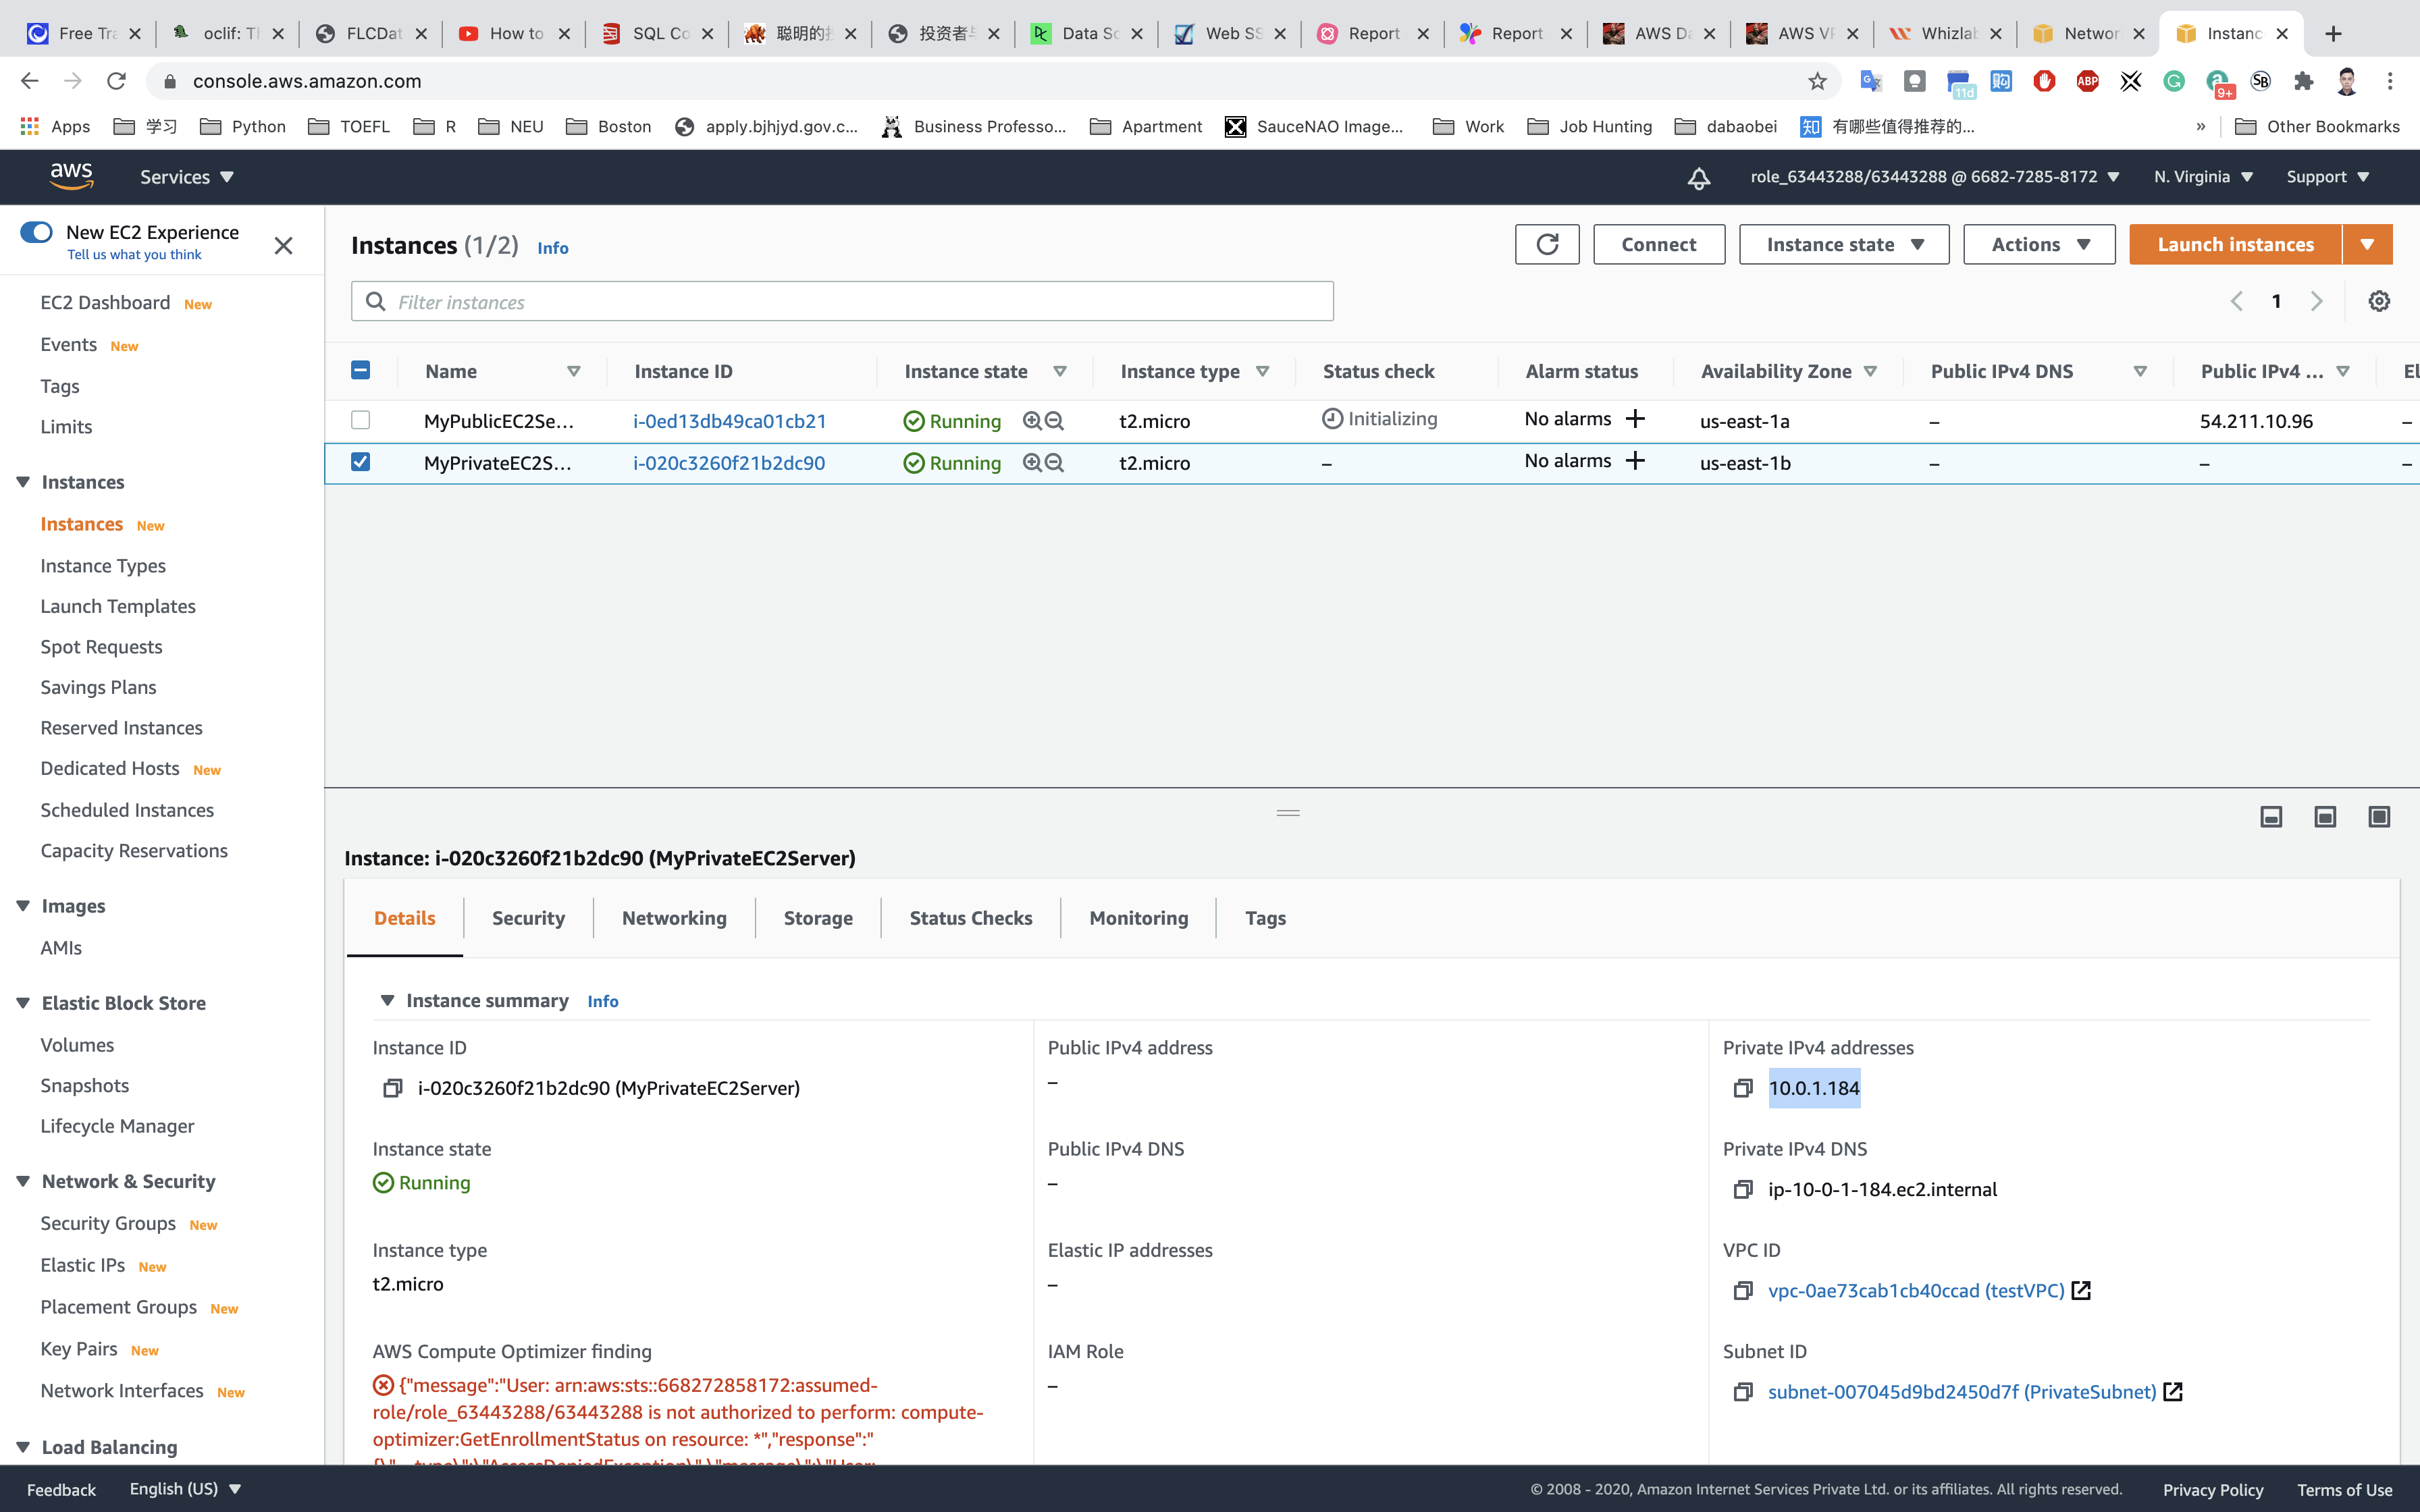
For exit the process, press ctrl + c
1 | ping private_IP_address |
Completion and Conclusion
- You have successfully used the AWS management console to Configure Multi layered VPC security.
- You have successfully created a VPC with your custom CIDR block IP range.
- You have successfully created 2 subnets for public and private AWS instances.
- You have successfully created an Internet gateway and associated it with the VPC.
- You have successfully created 2 Route tables (one public, one private), provided the routes and associated the subnets with the route tables.
- You have successfully created a Network ACL.
- You have successfully launched 2 EC2 instances (one in a public subnet and one in a private subnet)
- You have successfully tested the EC2 instance for connectivity to the outside world.
Deploying a Highly Available Web Application and Bastion Host in AWS
https://play.whizlabs.com/site/task_details?lab_type=1&task_id=42&quest_id=35
Lab Details
- This lab walks you through the steps to deploy a highly available Web application and use Bastion host to control the access to underlying private instances.
Introduction
Bastion Host
- A bastion host is a system that is exposed to the internet.
- In terms of security, Bastion is the only server that is exposed to the internet and should be highly protective to malicious attacks.
- A Bastion host is also known as a Jump Box. It is a computer that acts like a proxy server and that allows the client machine to connect to the remote server.
- It usually resides outside the firewall.
- The Bastion server filters the incoming traffic and prevents unwanted connections entering the network thus acting as a gateway to maintain the security of bastion hosts, all unnecessary software, daemons.
High Availability
- Consider your application is running on a single EC2 instance. If the traffic to your application increases and you need further resources, we can launch multiple EC2 instances from an already running server and then use Elastic Load Balancing to distribute the traffic to your application among the newly-created servers.
- We can also eliminate the Fault tolerance in your application by placing the servers ( EC2 instances) across different availability zones.
- In the event of Failure of one Availability zone, your application will serve or handle the traffic from another availability zone.
- High Availability and fault tolerance can be achieved using Elastic Load balancers (ELB).
Elastic Load Balancer (ELB)
- Load Balancer is a service that allows you to distribute the incoming application or network traffic across multiple targets (such as Amazon EC2 instances, containers, and IP addresses) in multiple Availability Zones.
- AWS currently offers three types of load balancers:
- Application Load Balancer is best suited for load balancing of HTTP and HTTPS traffic.
- Network Load Balancer is used to distribute the traffic or load using TCP/UDP protocols.
- Classic Load Balancer provides basic load balancing across multiple Amazon EC2 instances.
Task Details
- Launch a Bastion Host instance along with two web application instances, two web application instances should be launched in the private subnet.
- Set up a Load Balancer and associate the two web instances to the Load Balancer.
- SSH into the web servers via the Bastion server.
- Publish a test index.html on both of the web servers.
- Access the webpage using the load balancer’s DNS endpoint.
- Check the responses to see the Load Distribution between the 2 servers.
- Stop or Terminate one of the web servers.
- Check the responses to see how to Load Distribution changes
Architecture Diagram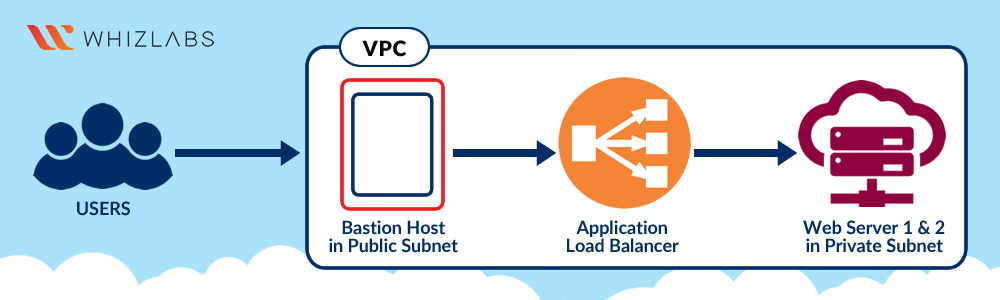
CloudFormation Configuration
Services -> CloudFormation
In this lab we will create a VPC using CloudFormation with one public and two private subnets. This VPC will be used in the lab to create resources.
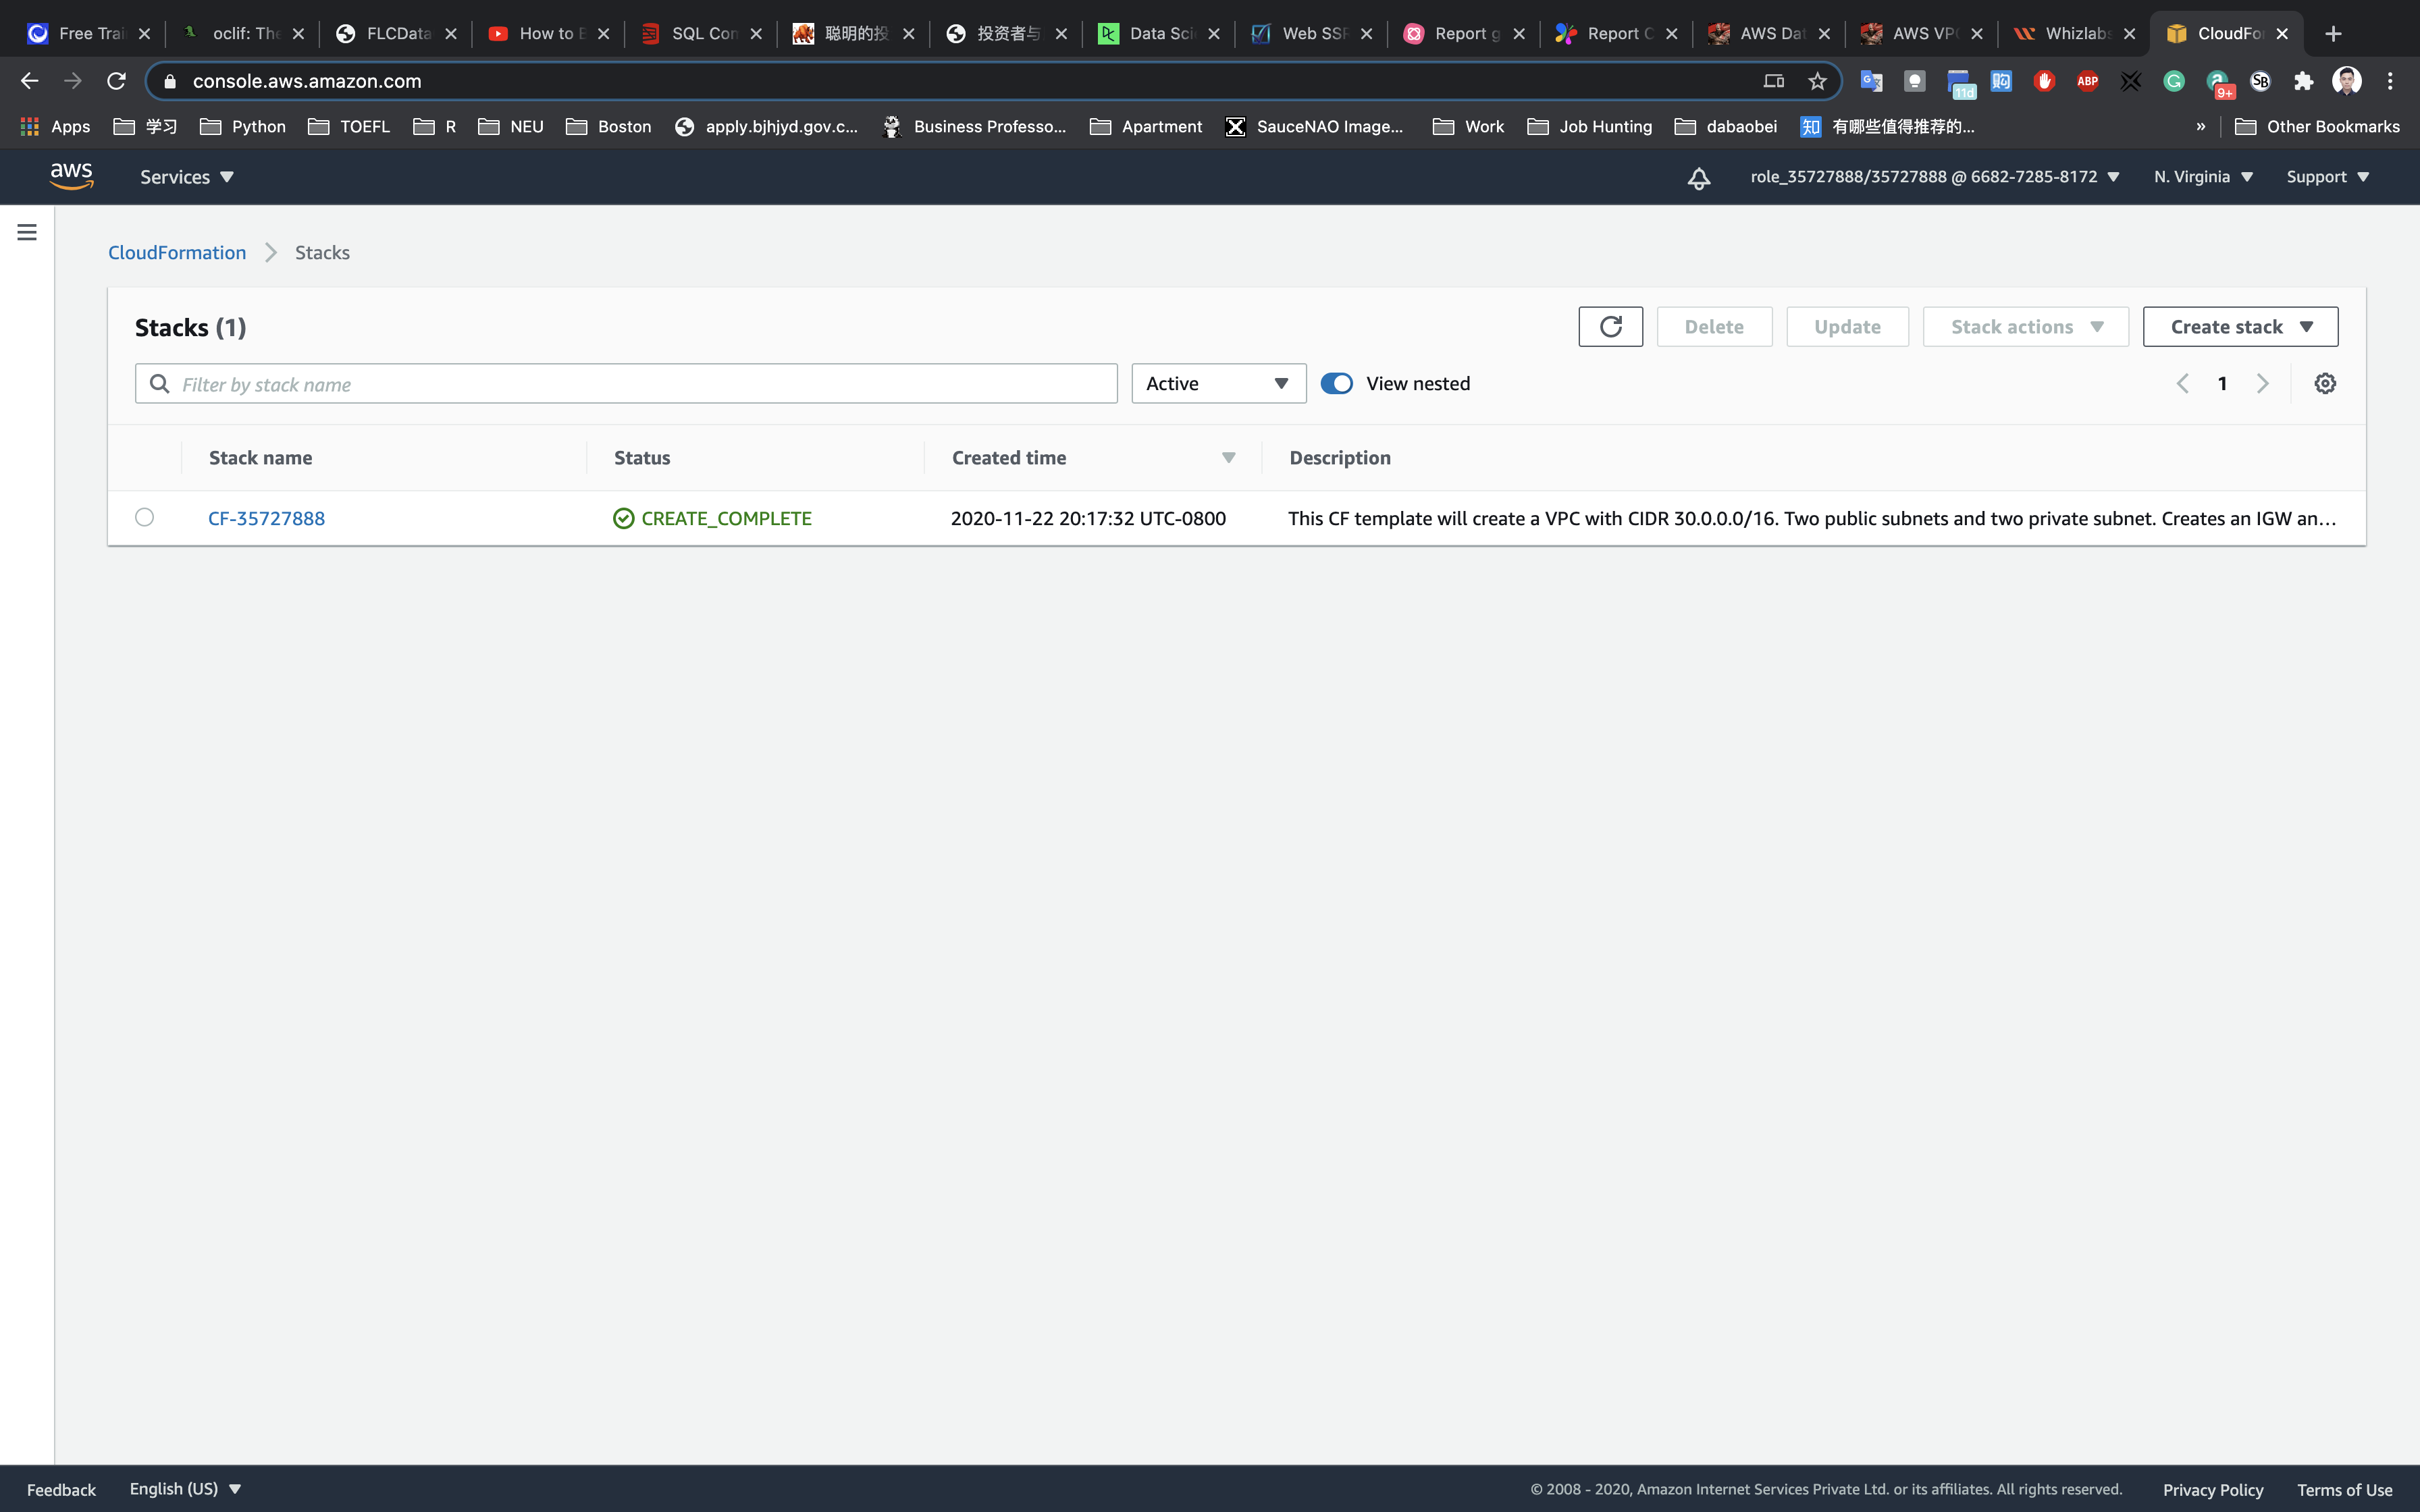
Under CloudFormation stacks, you will be able to see a stack getting created.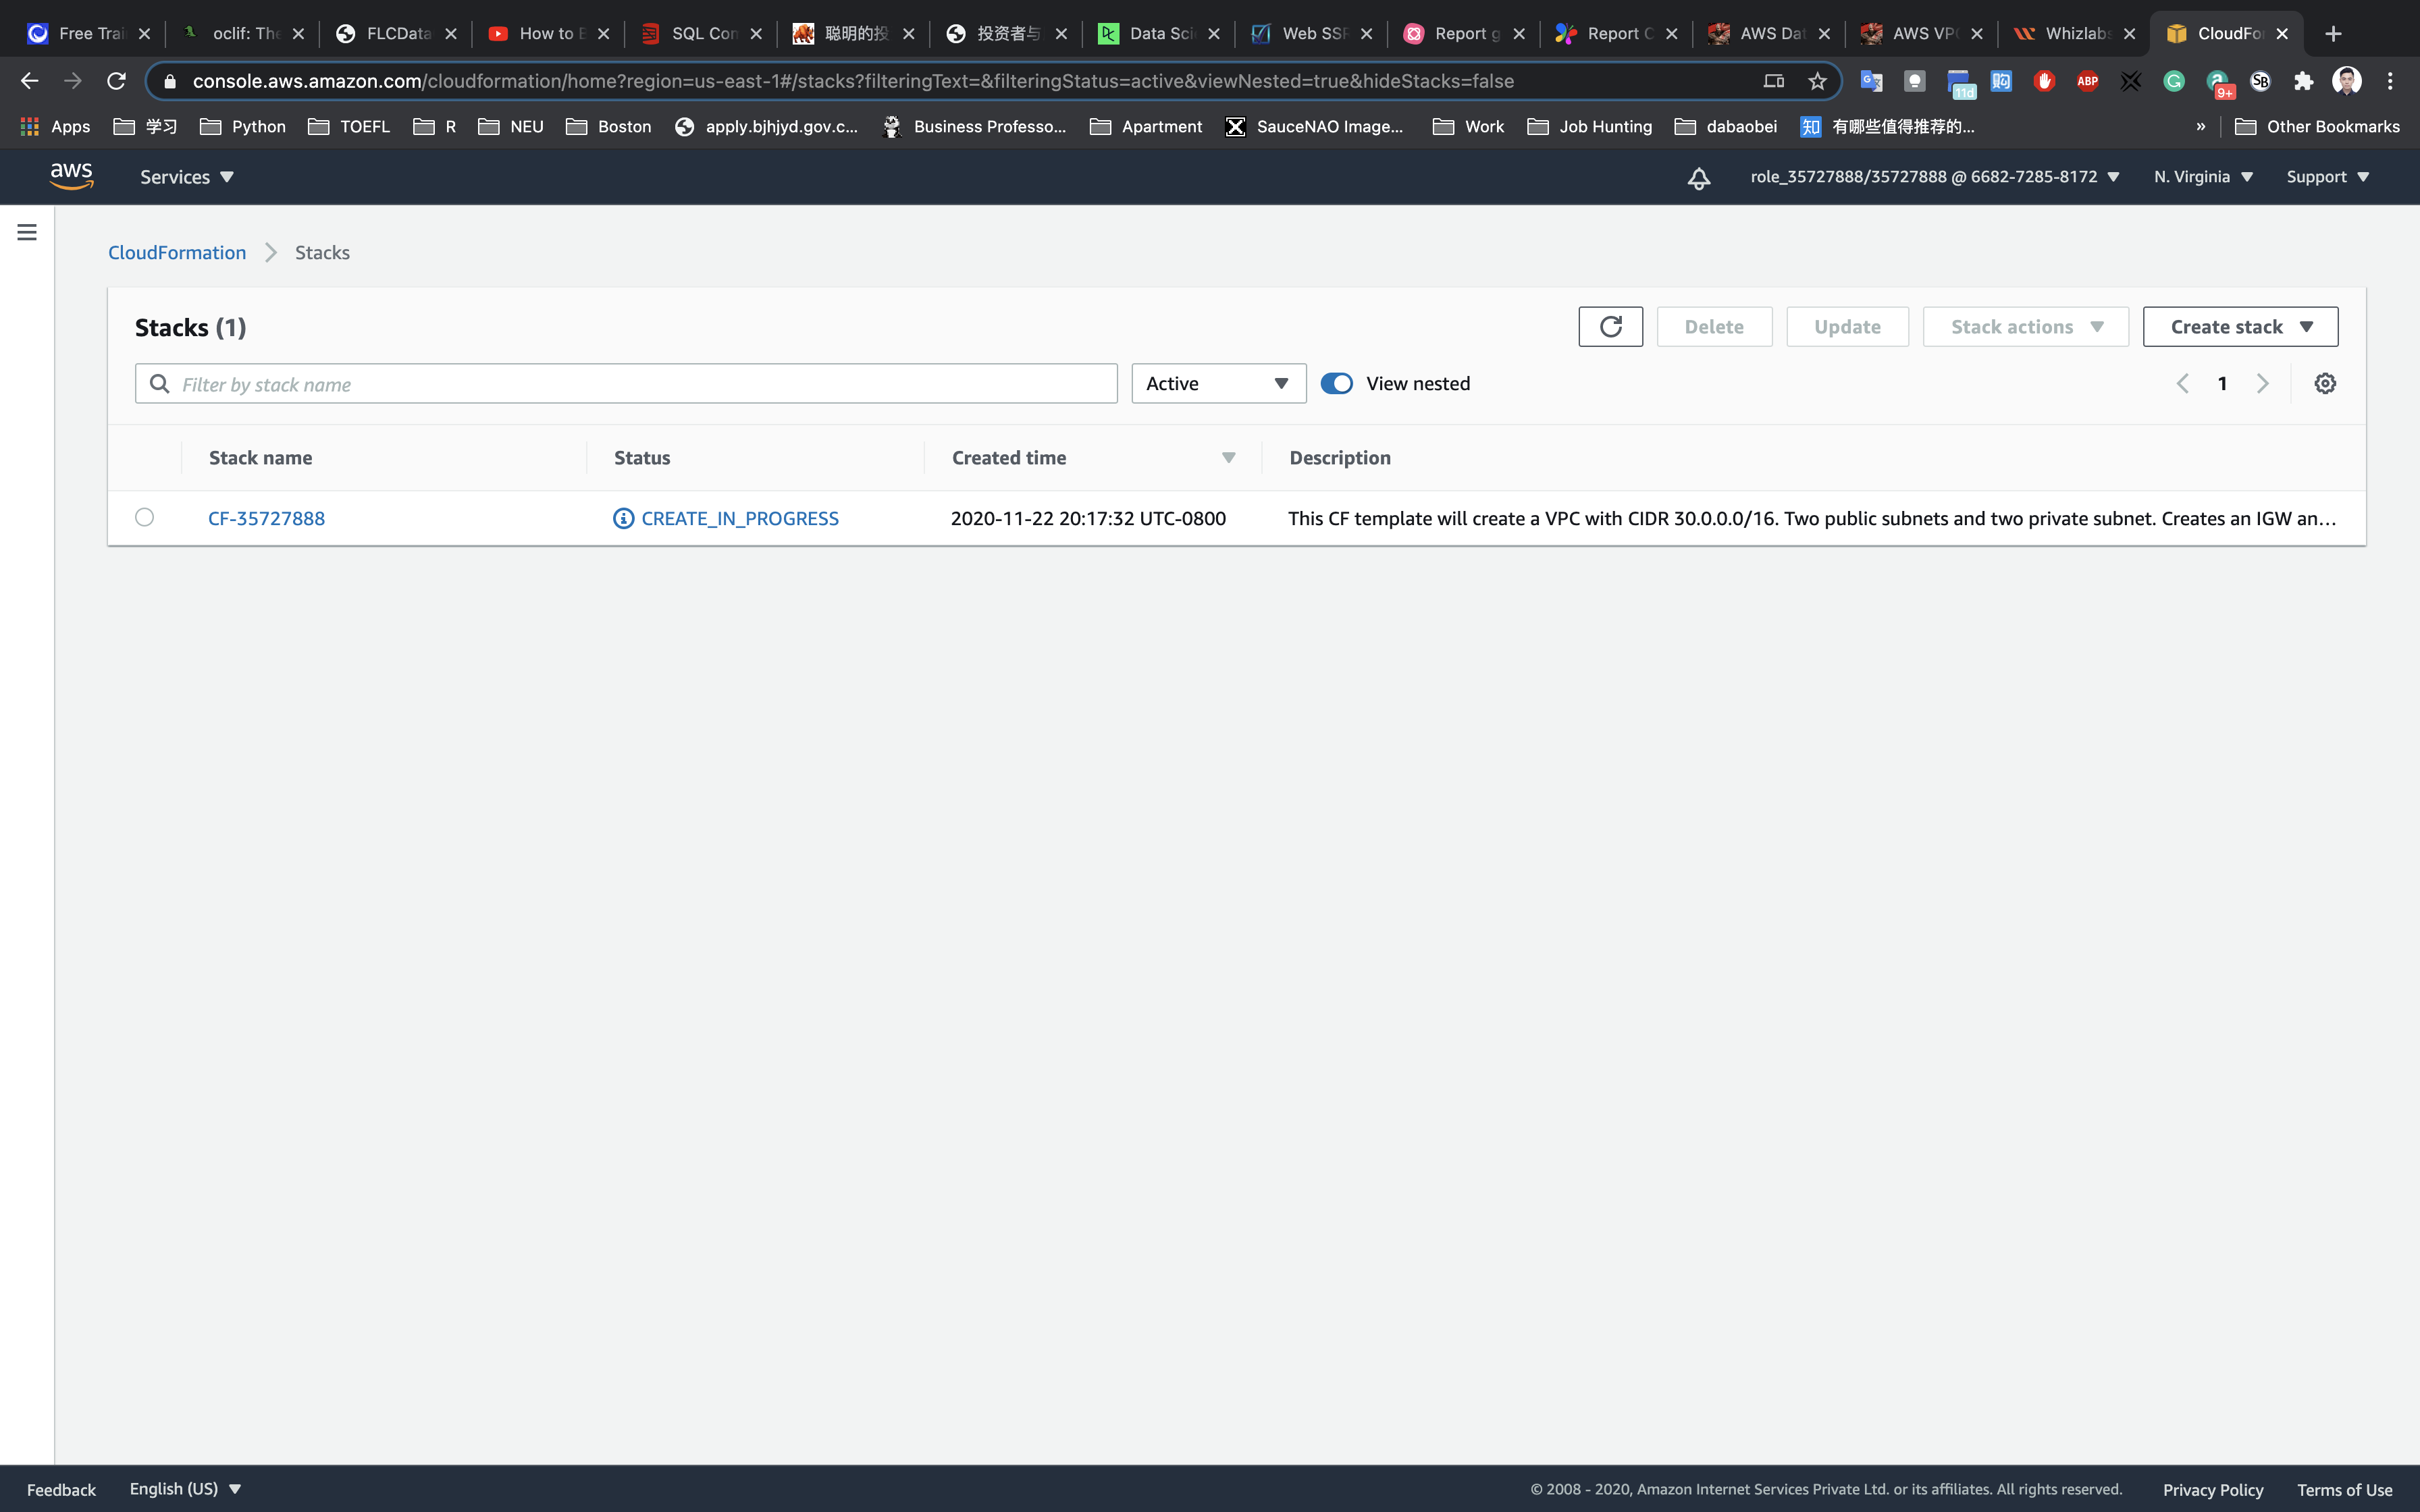
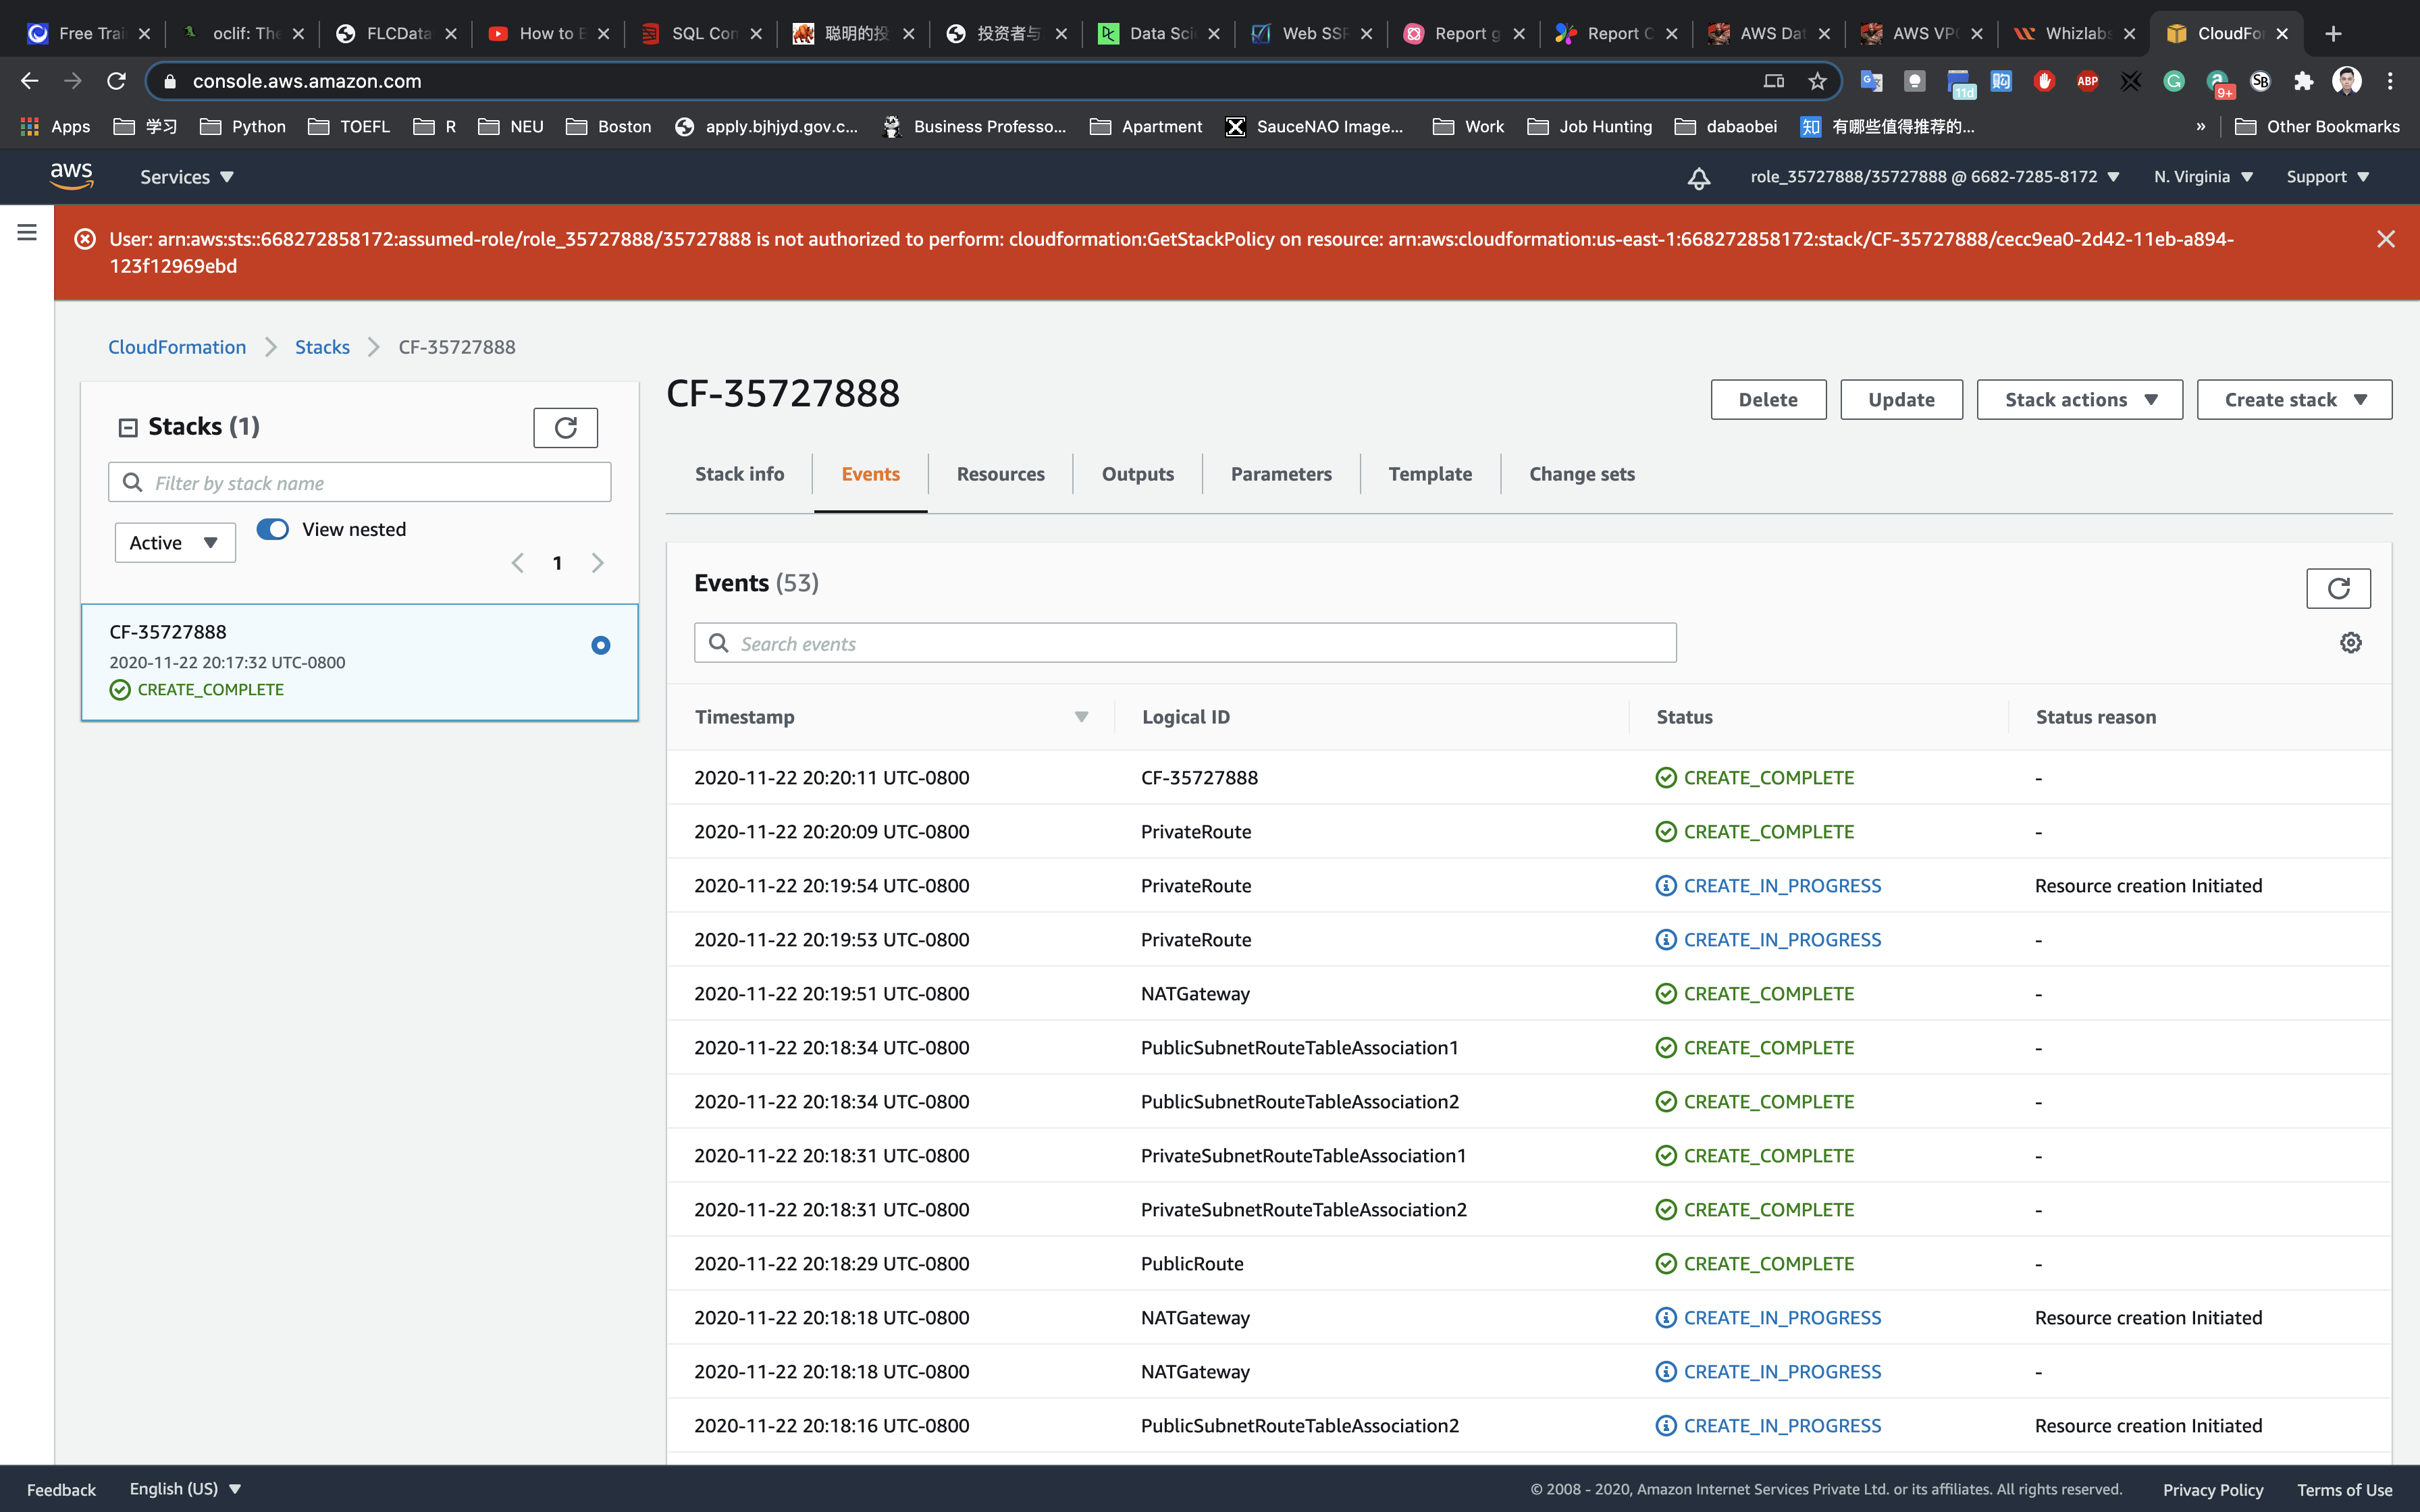
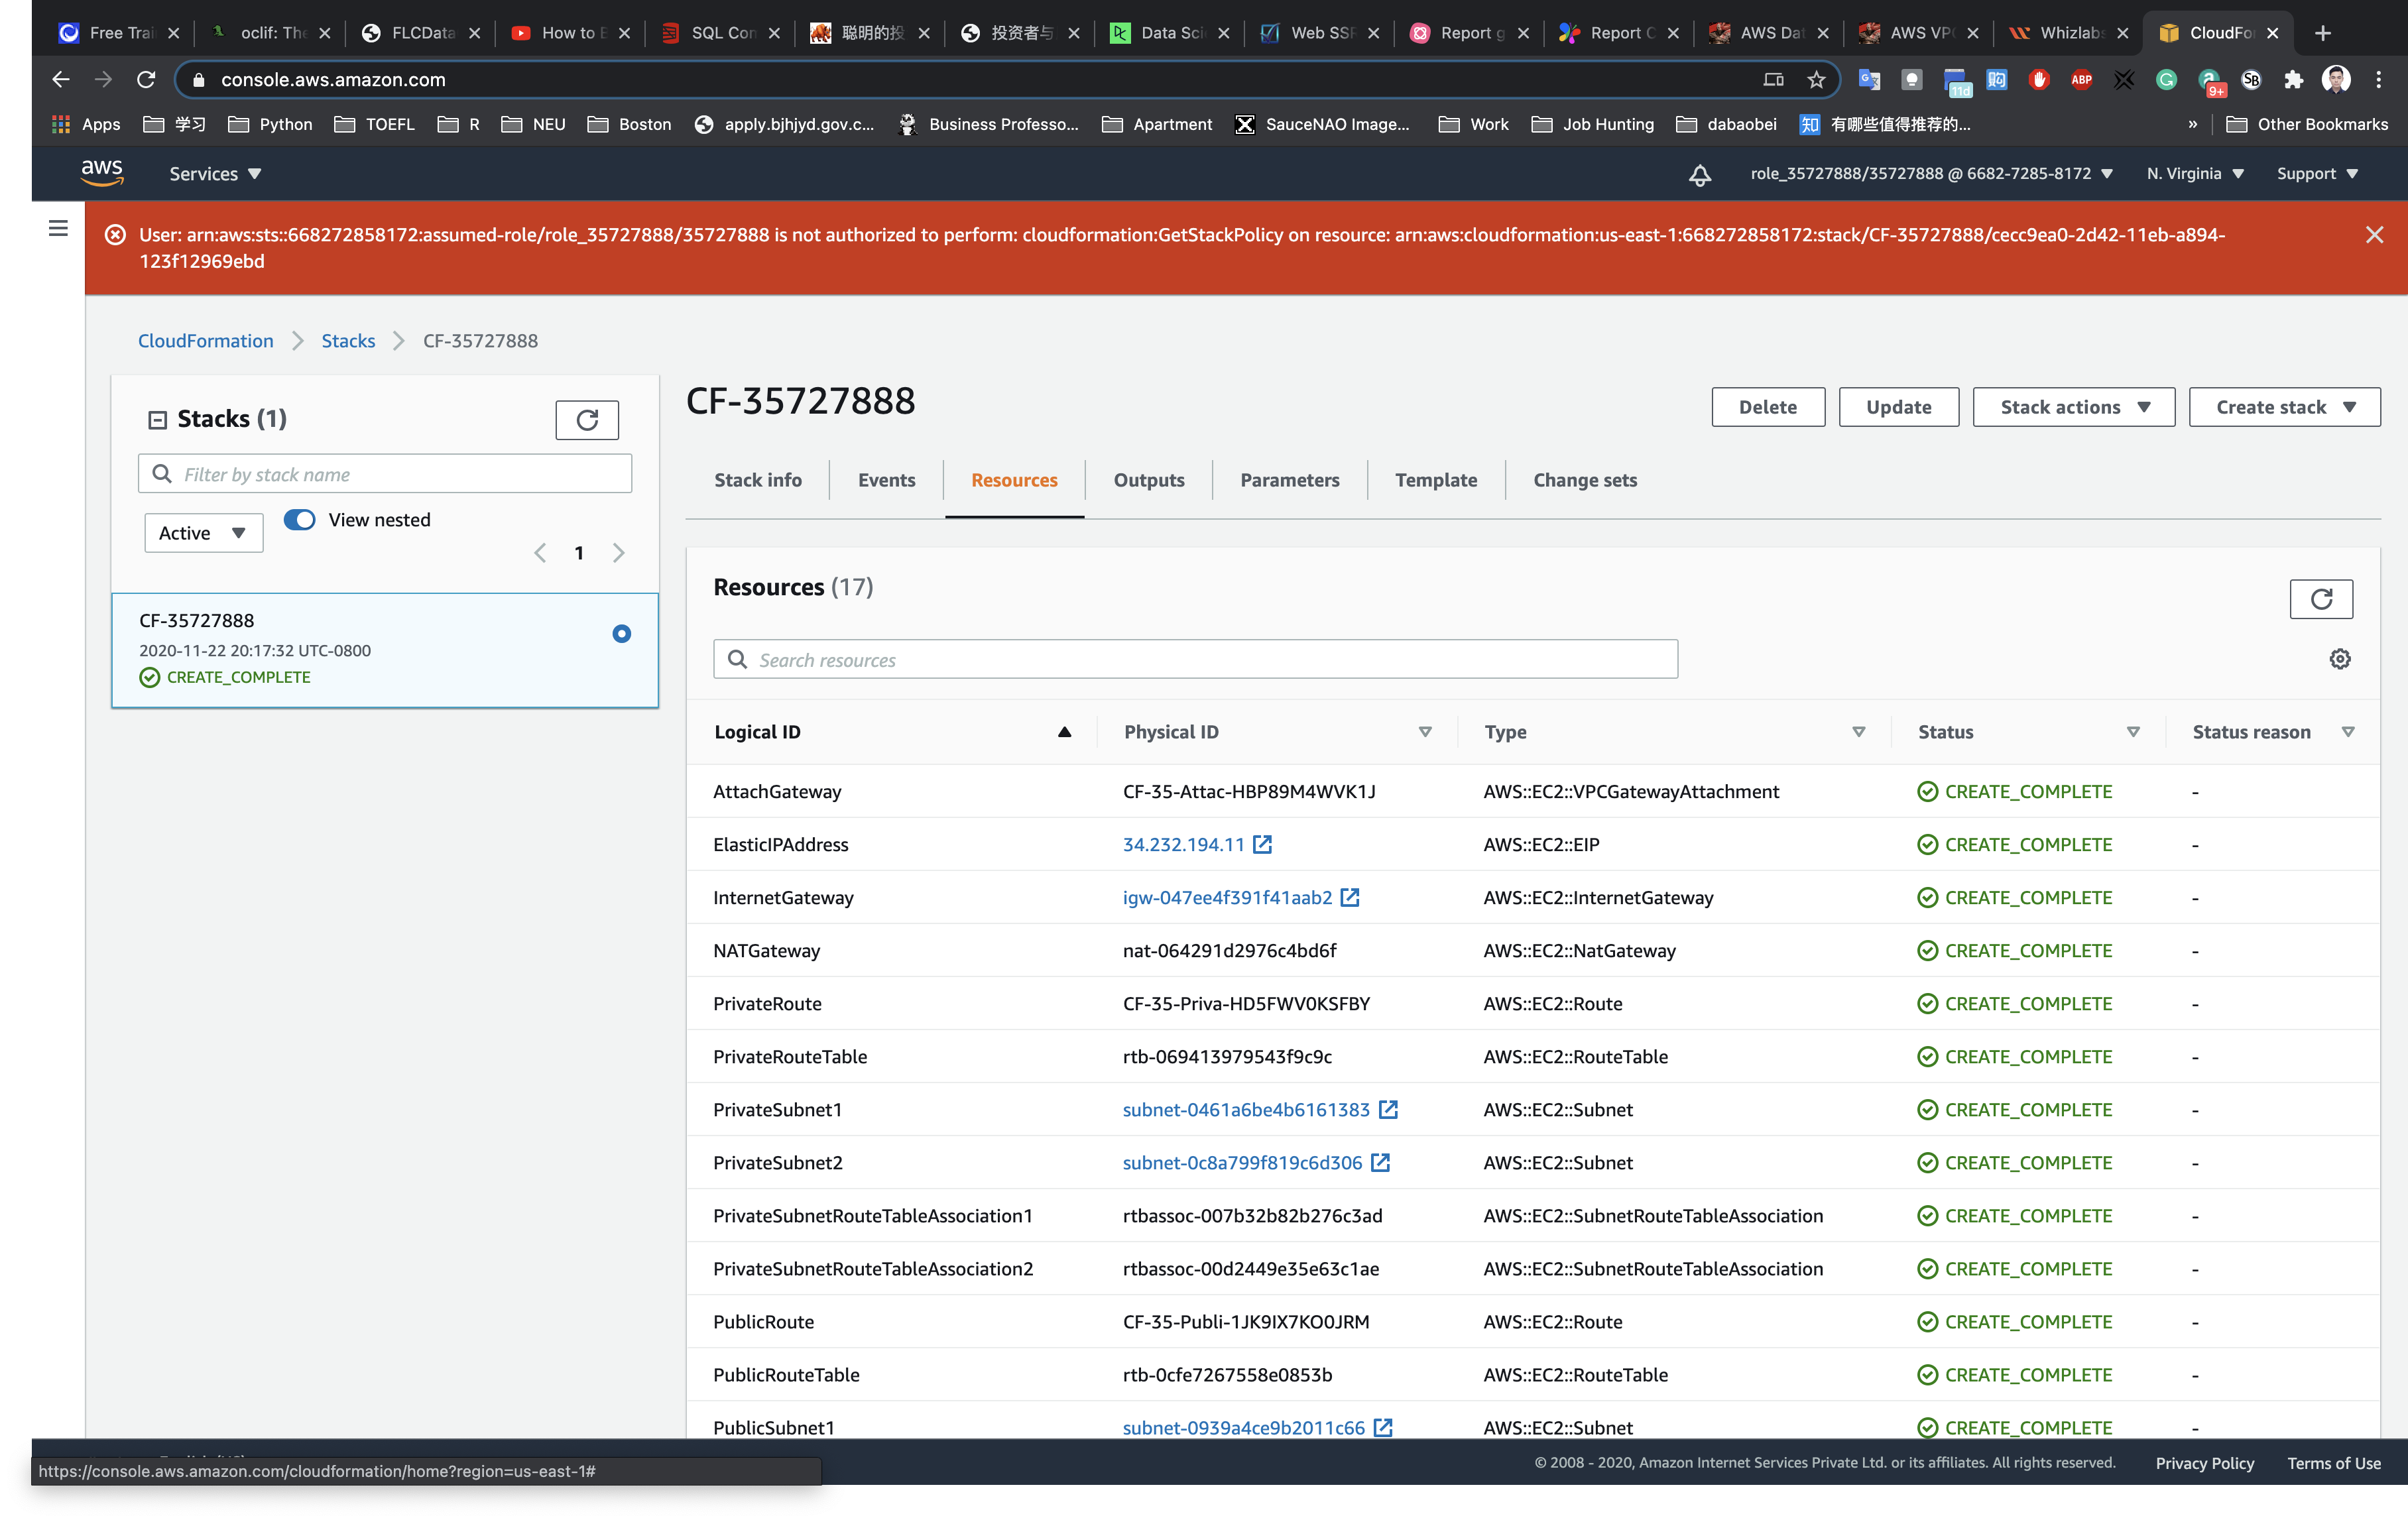
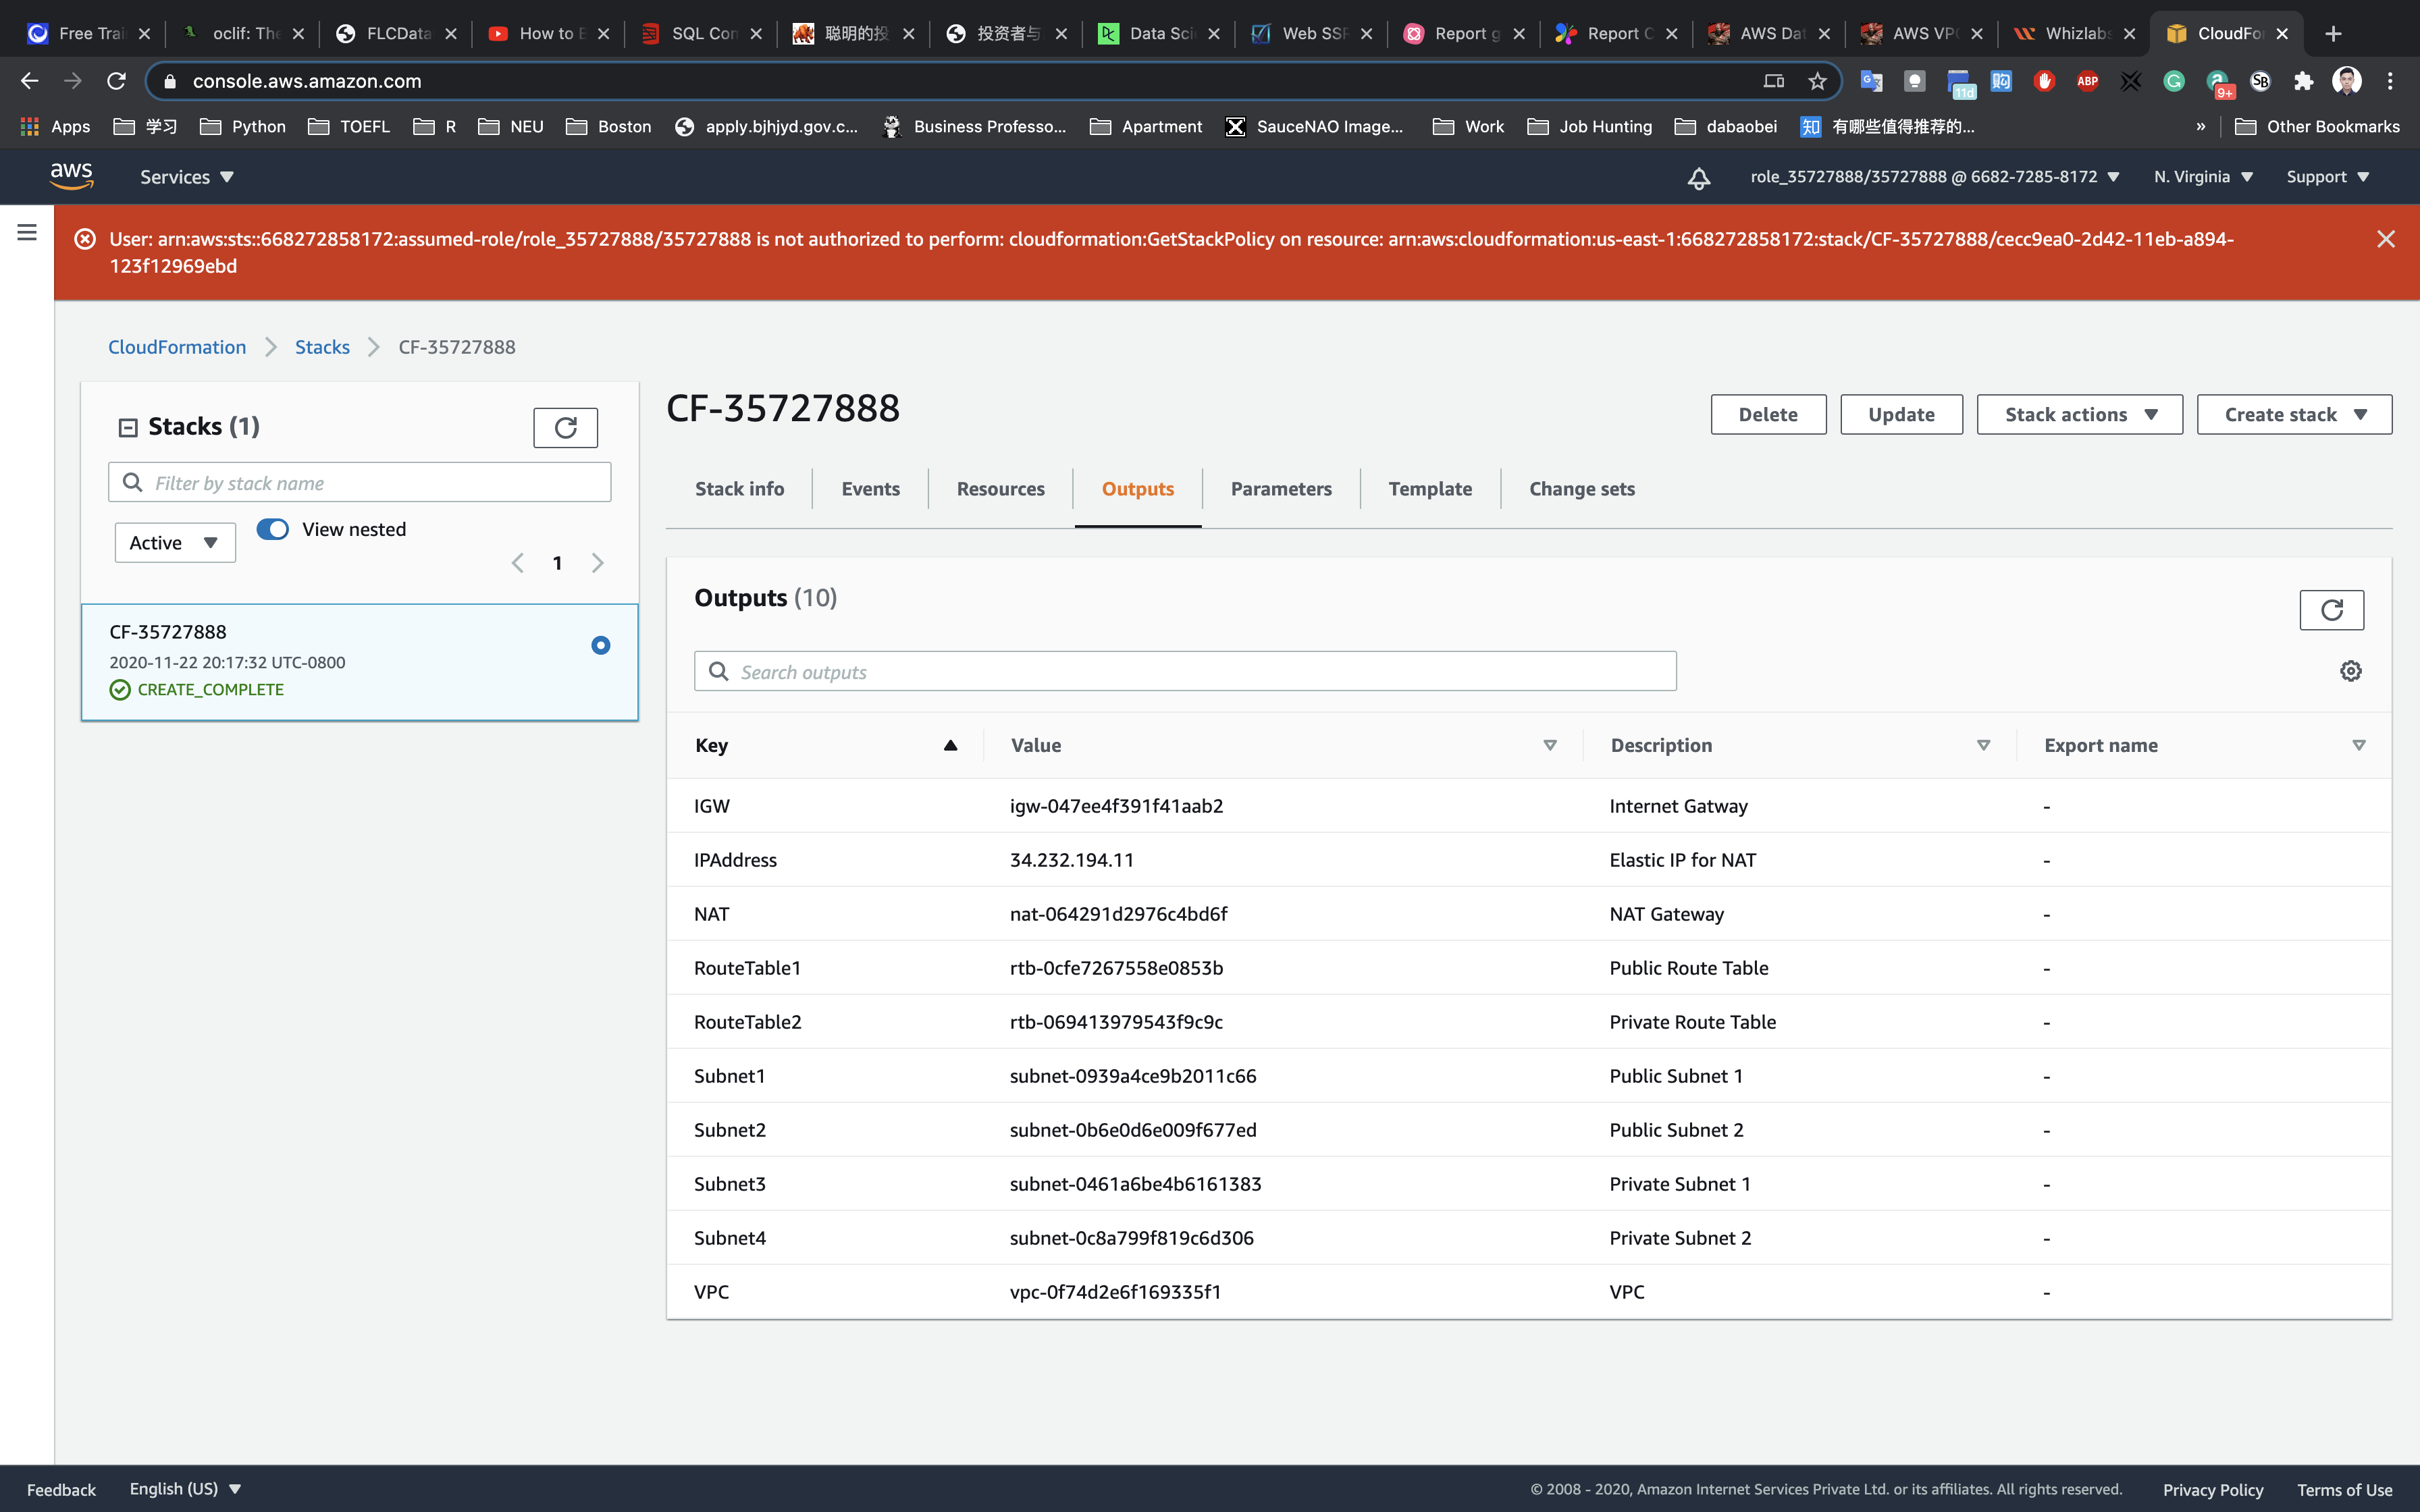
Description: This CF template will create a VPC with CIDR 30.0.0.0/16. Two public subnets and two private subnet. Creates an IGW and attach it to the Public Route table. Creates a NAT Gateway and add the Route to the private subnet.
Now wait until the Stack status changes to CREATE_COMPLETE and please refresh the stack page to view the latest status.
EC2 Configuration
Service -> EC2 -> Instances
Bastion Server Configuration
Click on Launch Instance
Choose the first Amazon Machine Image (AMI): Amazon Linux 2 AMI (HVM), SSD Volume Type click on the Select button.
Instance Type : t2.micro
In the Configure Instance Details,
- Network :
Bastion-VPC - Subnet :
Public Subnet 1 - Auto-assign Public IP :
Enabled
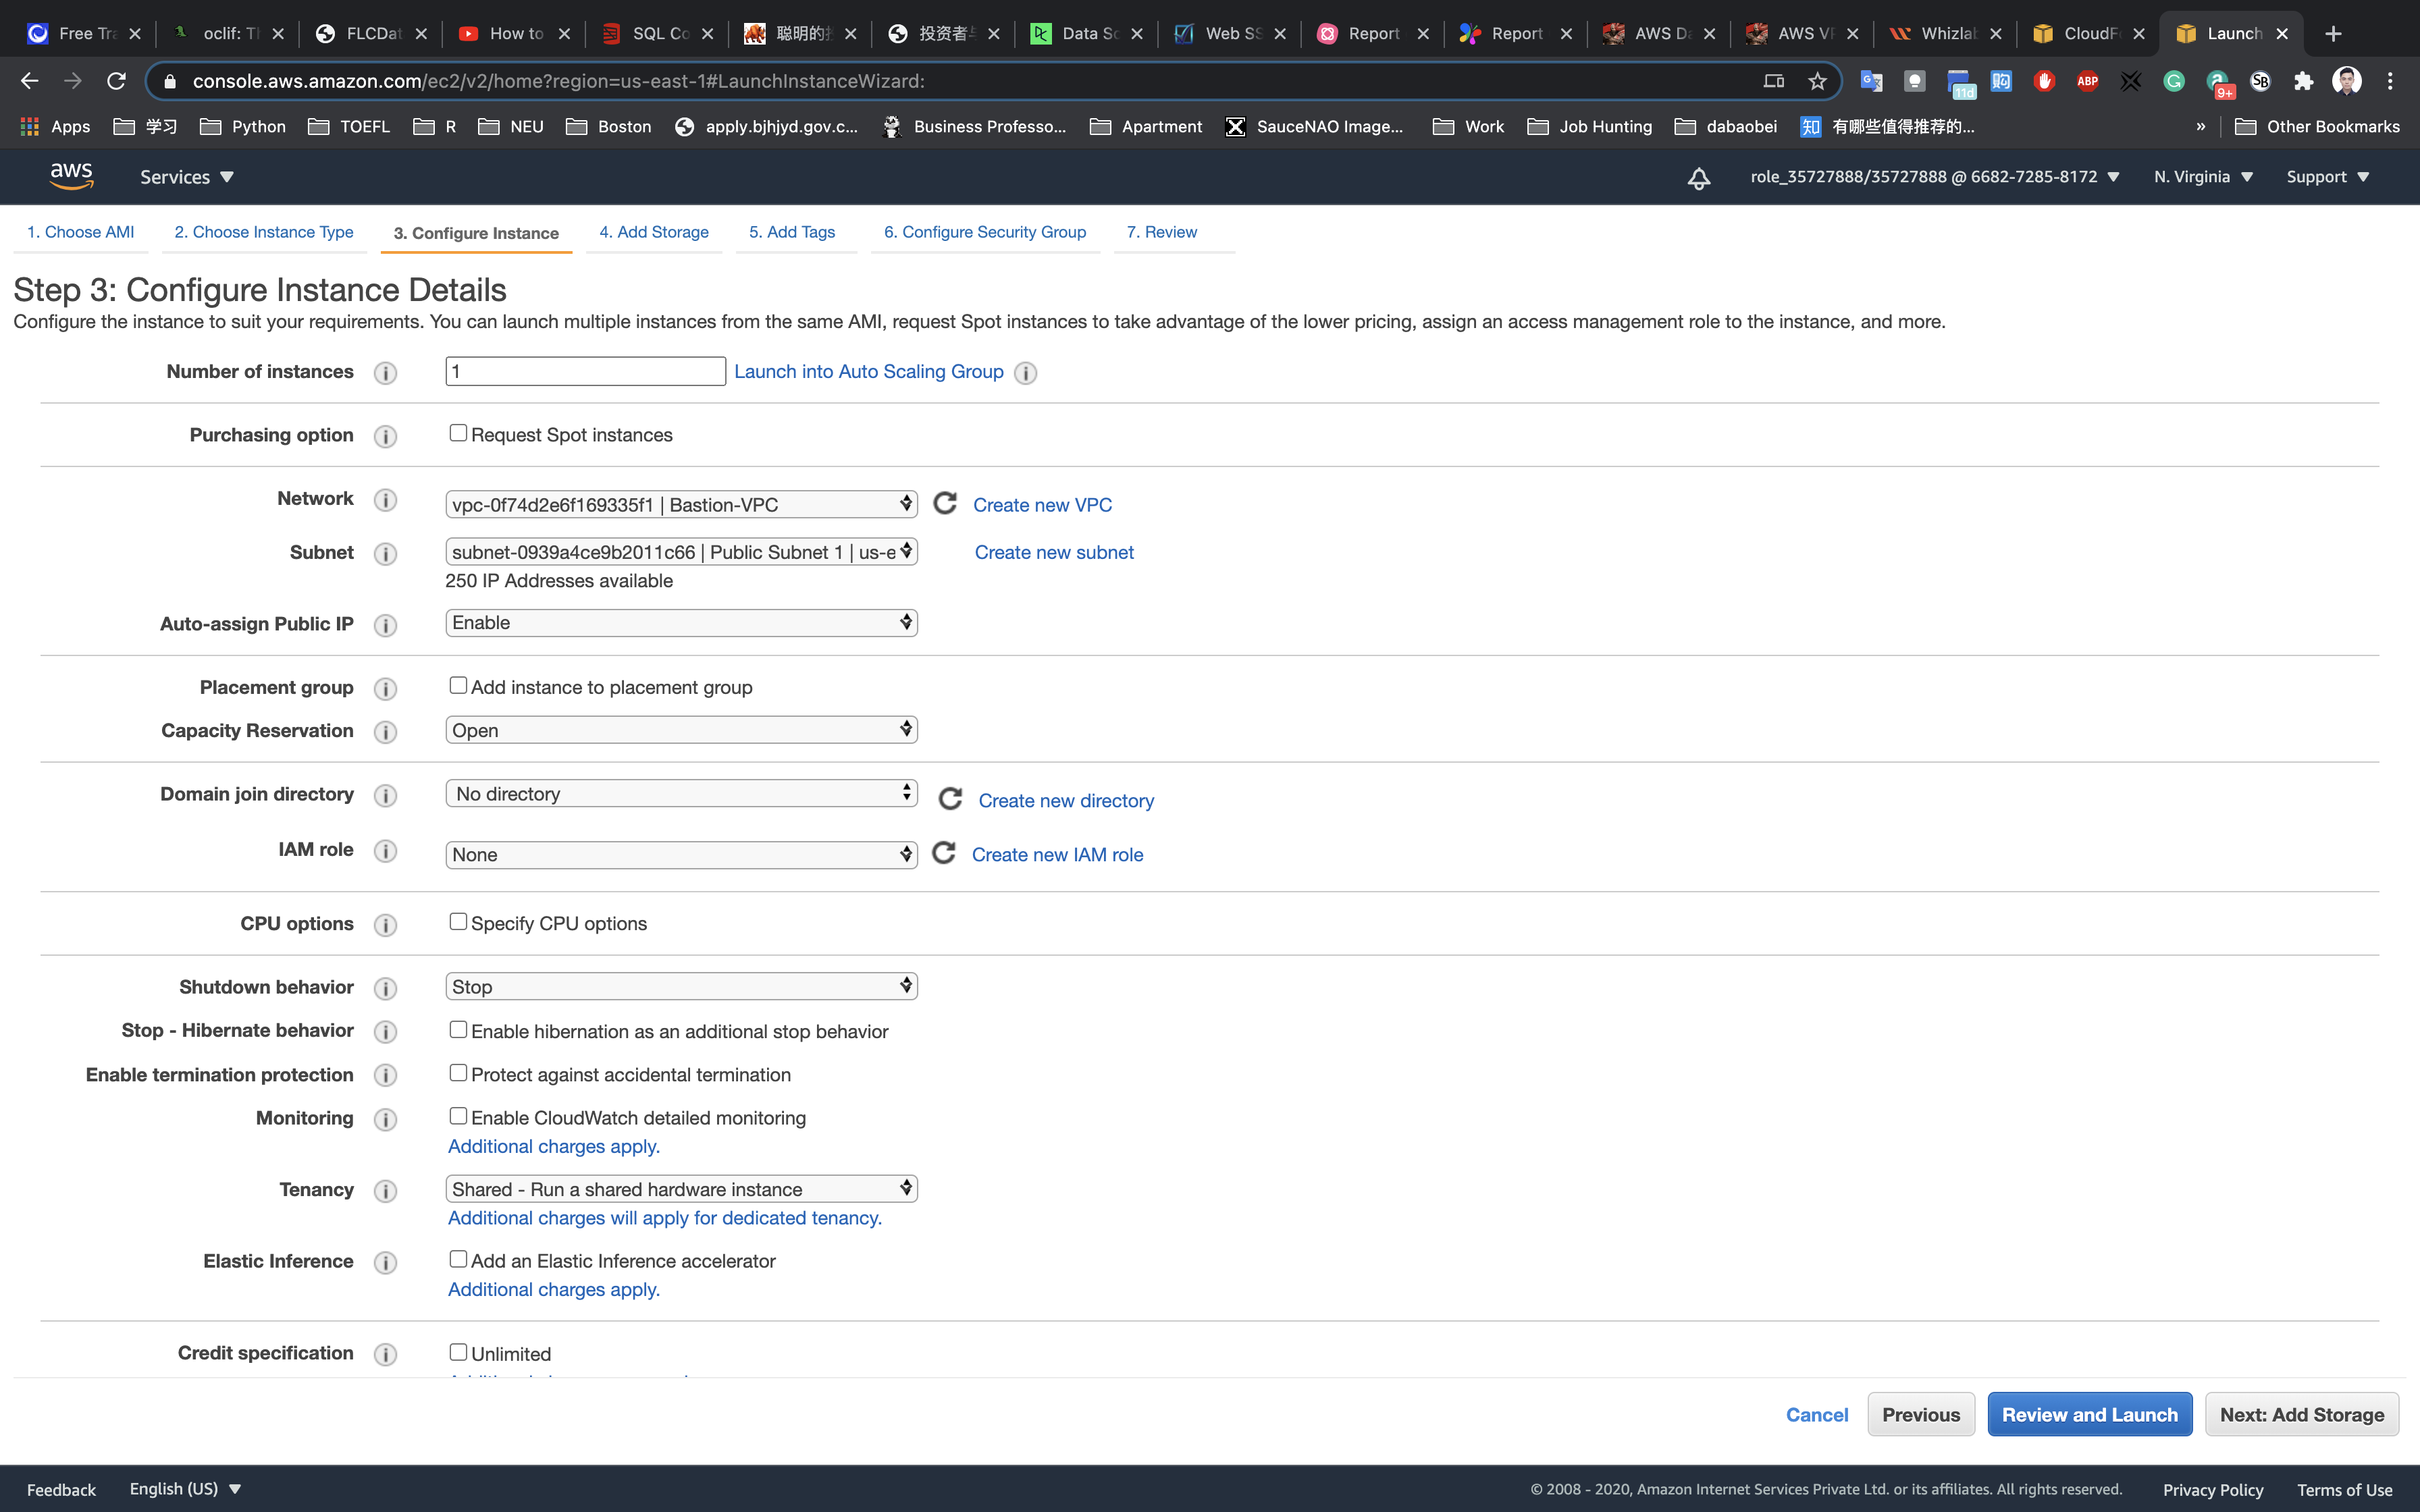
Leave all fields with the default values and then click on Next: Add Storage
No need to change anything in this step, click on Next: Add Tags
Add Tags: Click on Add Tag
- Key:
Name - Value:
Bastion-Server
Click on Next: Configure Security Group.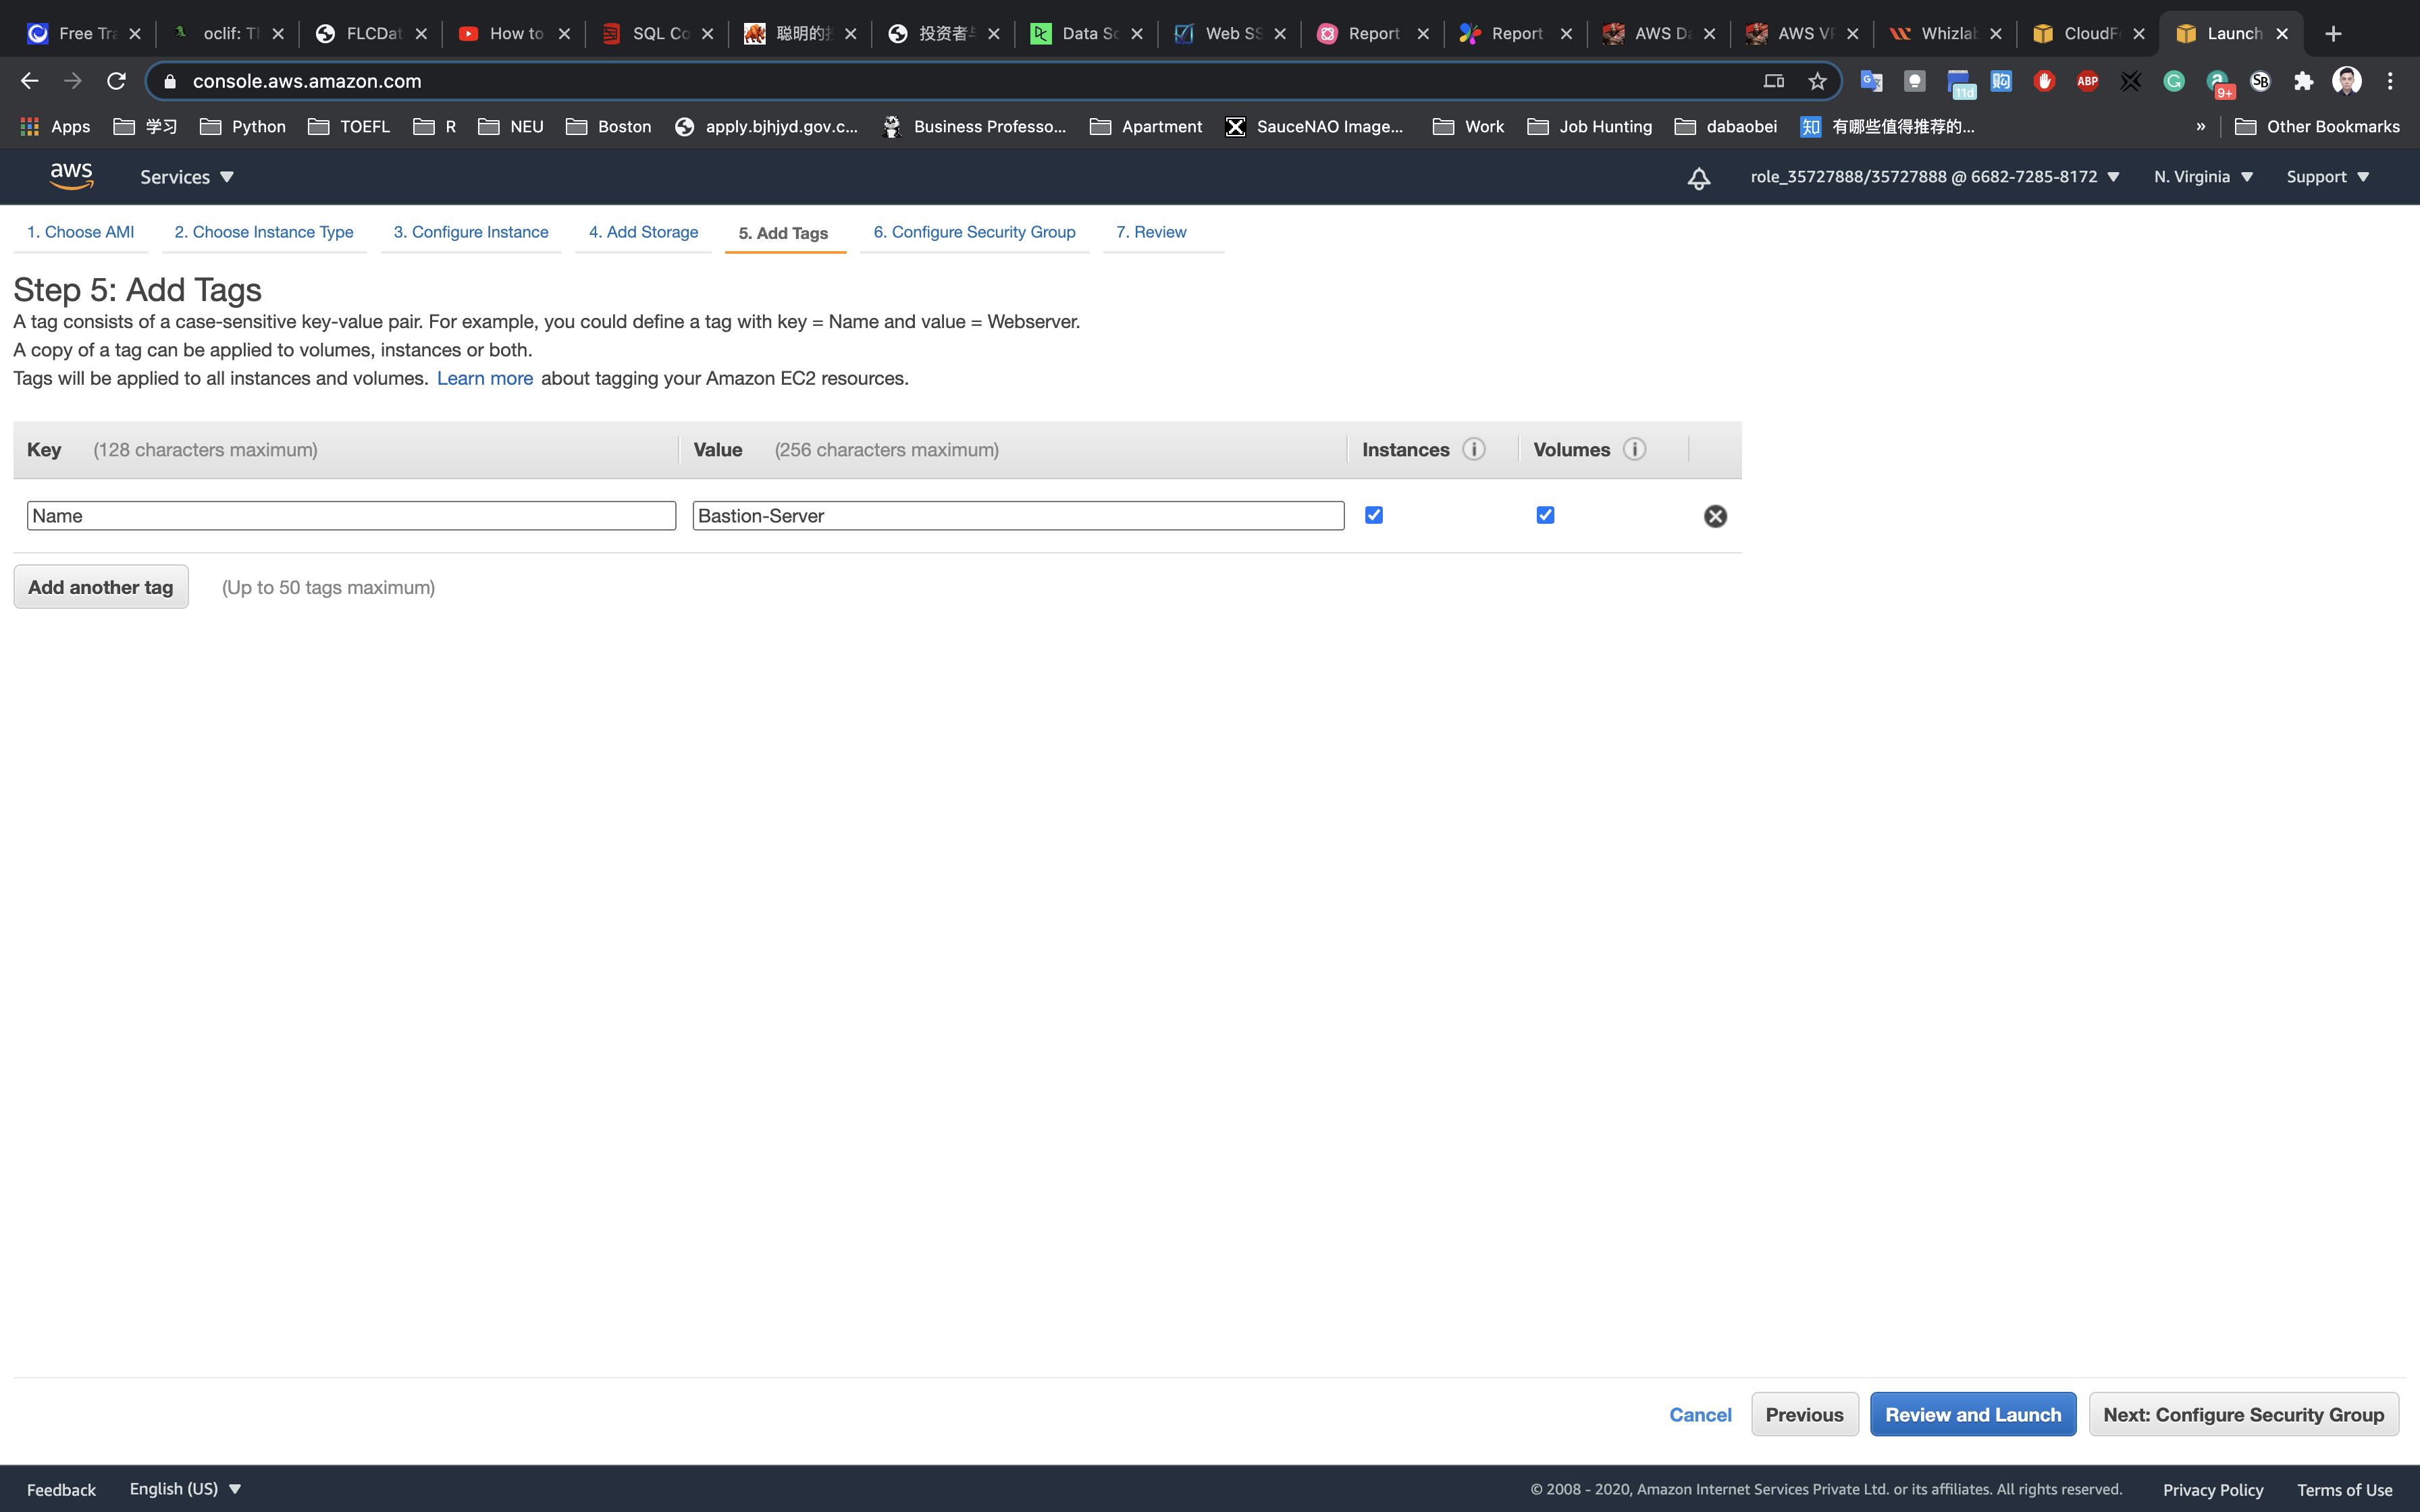
Configure Security Group:
Assign a security group: Choose to Create a new security group
- Security group name:
Bastion-SG - Description:
Security group for Bastion-server
To add SSH:
- Type:
SSH - Source: Custom(Allow specific IP address) - 0.0.0.0/0
Click on Review and Launch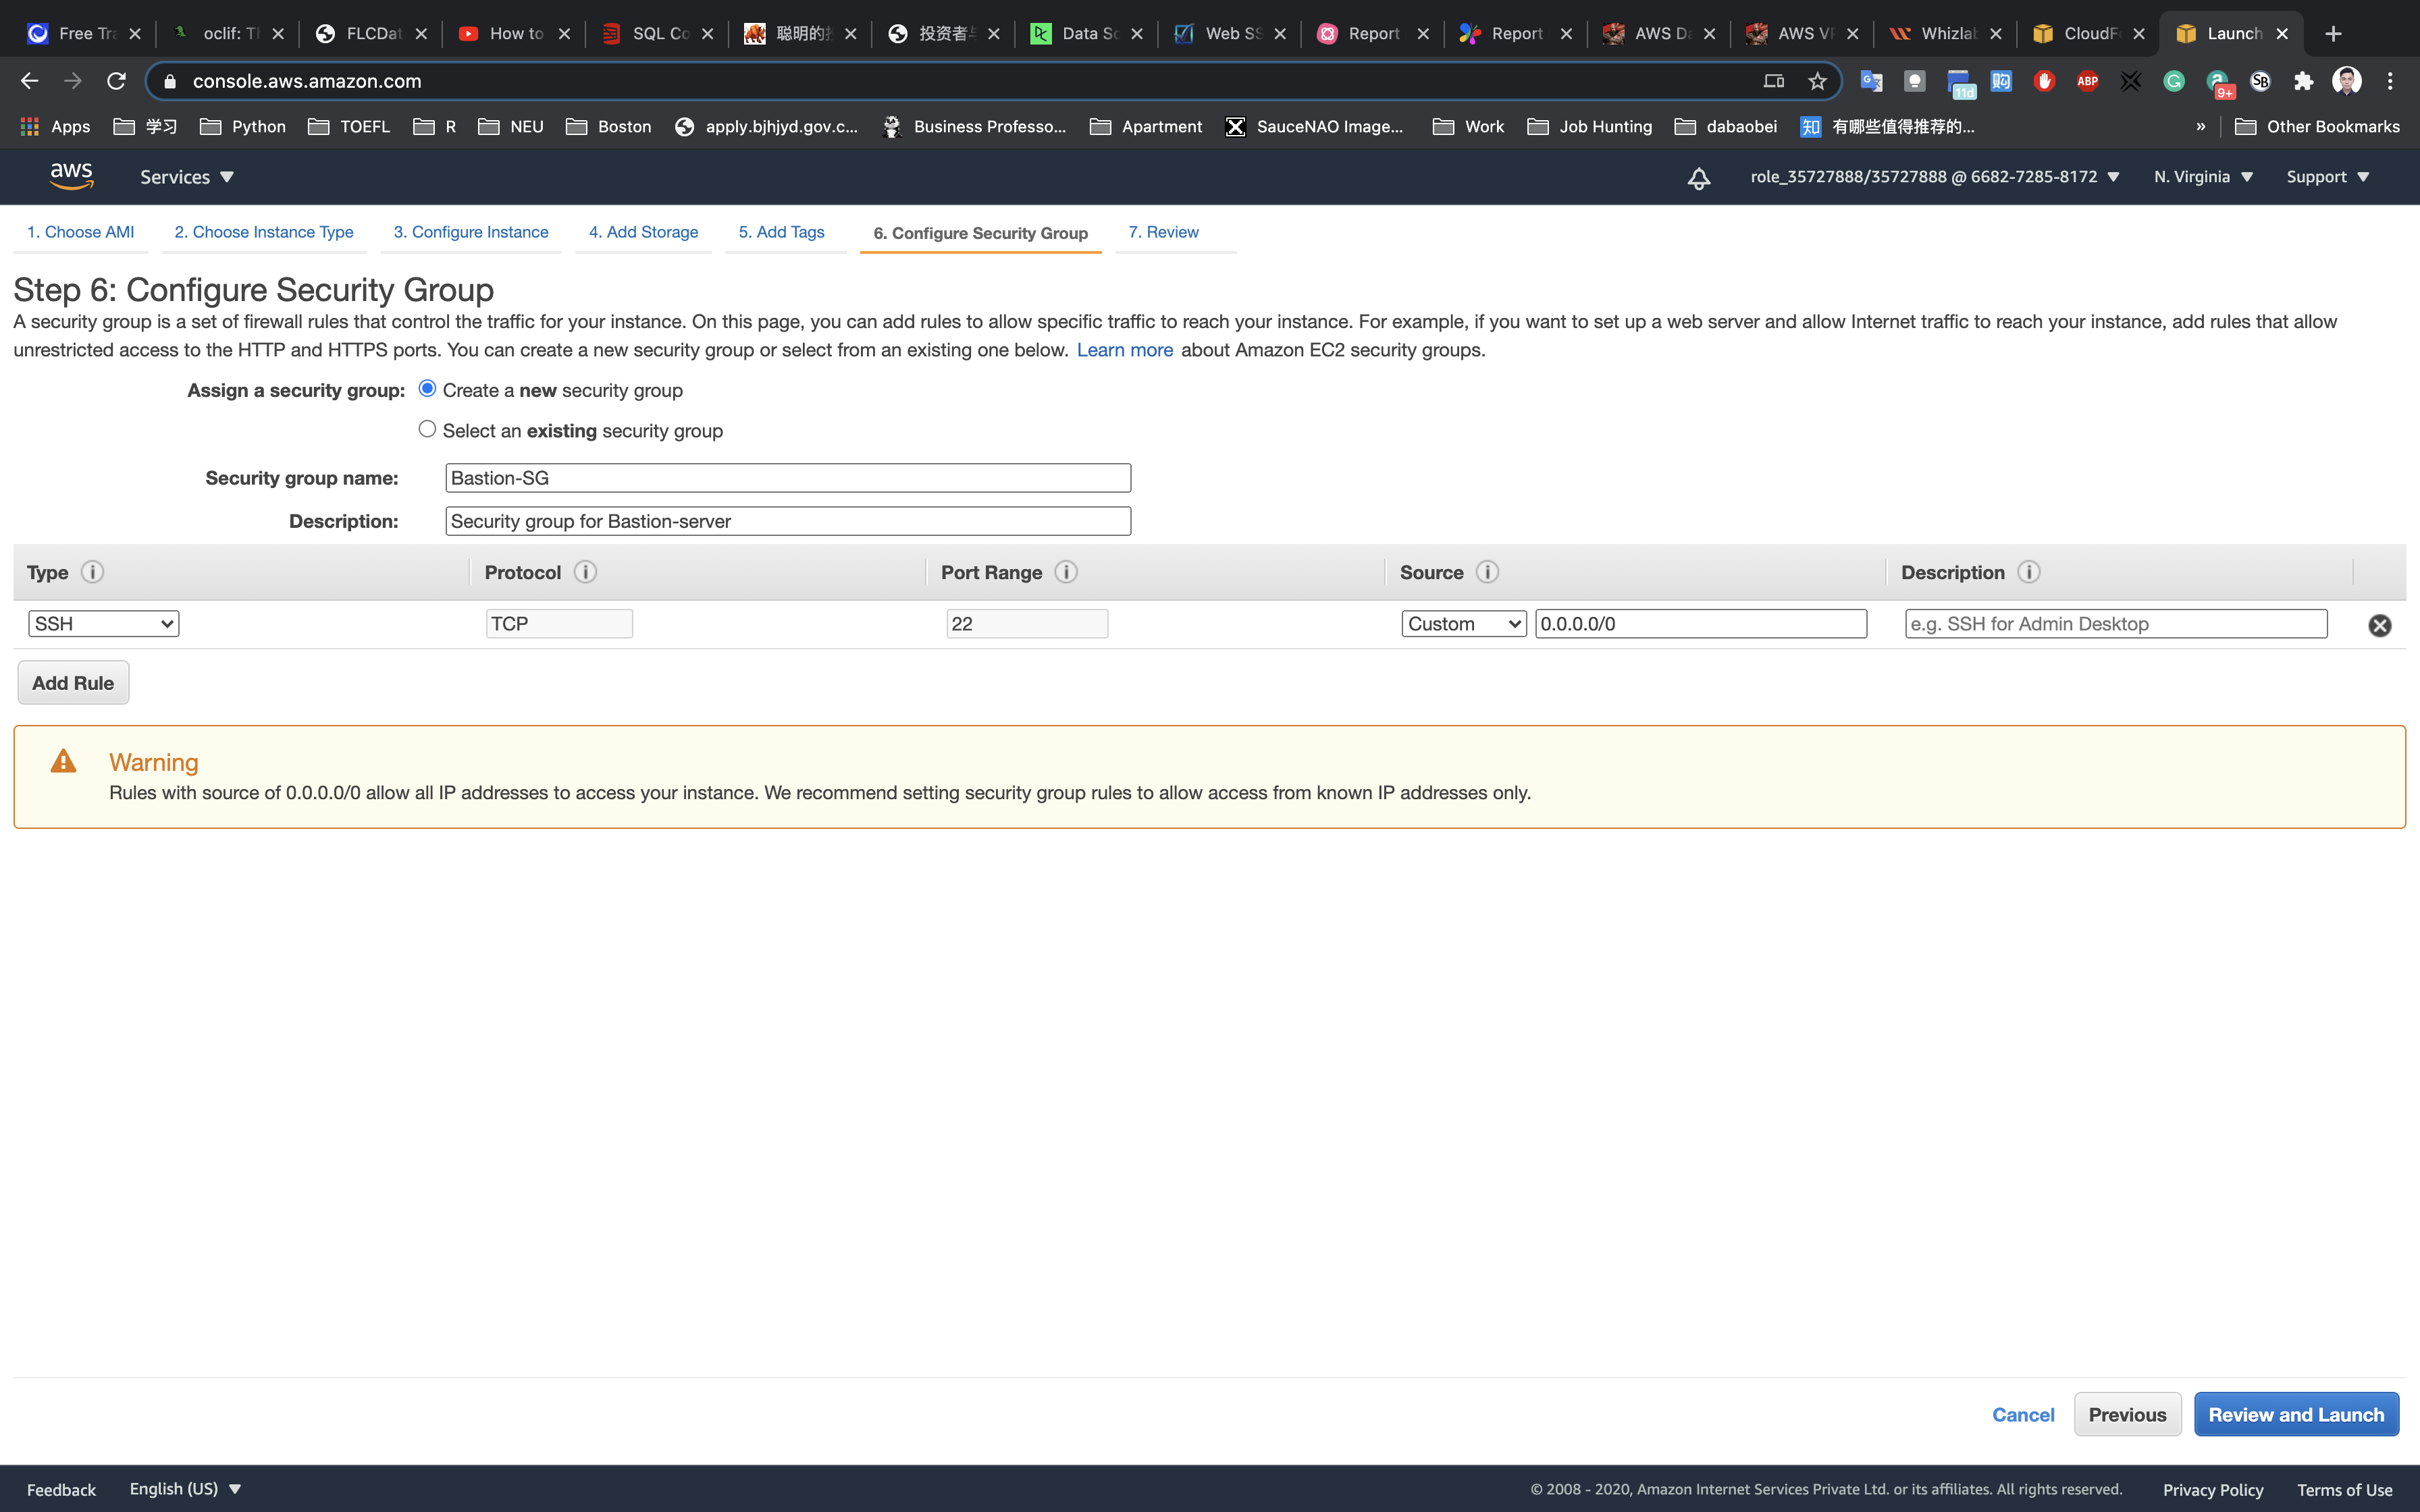
Review and Launch : Review all settings and click on Launch.
- Select
Create a new key pair - Key pair Name:
aws-ec2
Click on Download Key Pair.
Click on Launch Instances.
Security Group Configuration
Creating a Security Group for the Load Balancer
Navigate to the EC2 Dashboard, scroll down to Security Groups in left menu and click on Create security group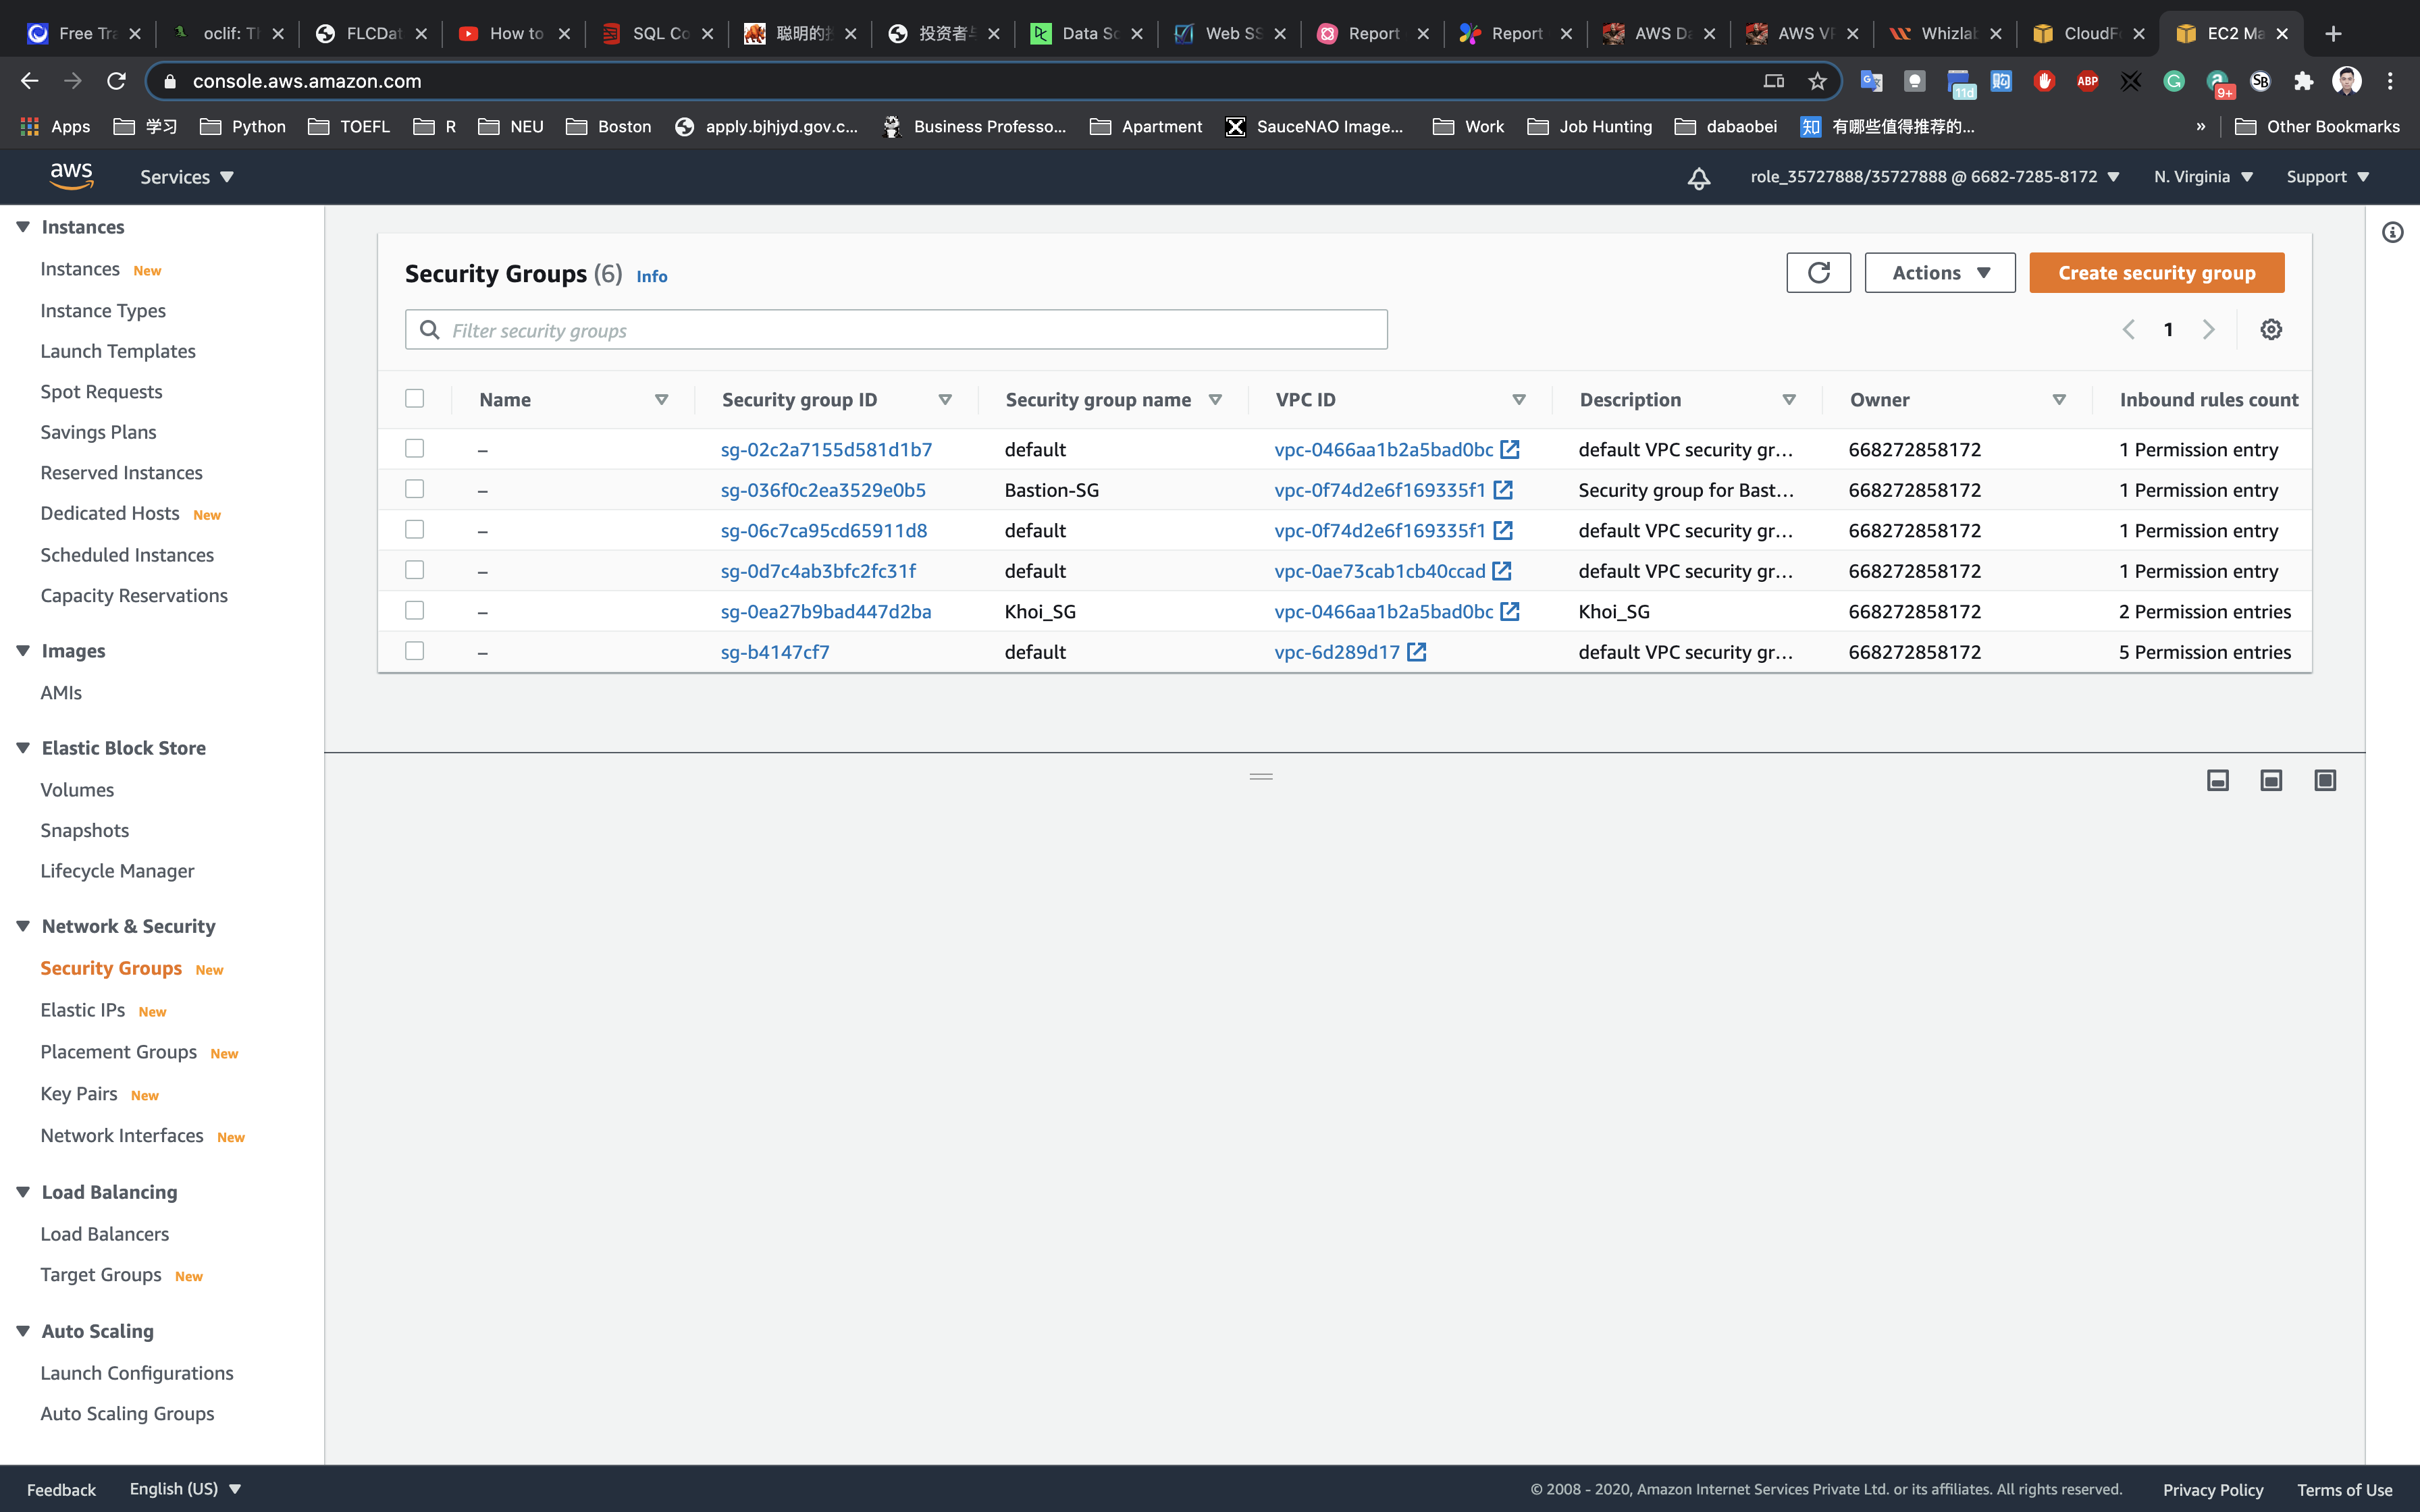
Configure the security group as follows:
- Security group name:
LoadBalancer-SG - Description:
Security group for the Load balancer - VPC:
Bastion-VPC
Click on Add rule and add the port as follows:
- Type :
HTTP - Source:
Anywhere
Leave everything by default in Outbound rules and Tags - optional
Click on Create security group.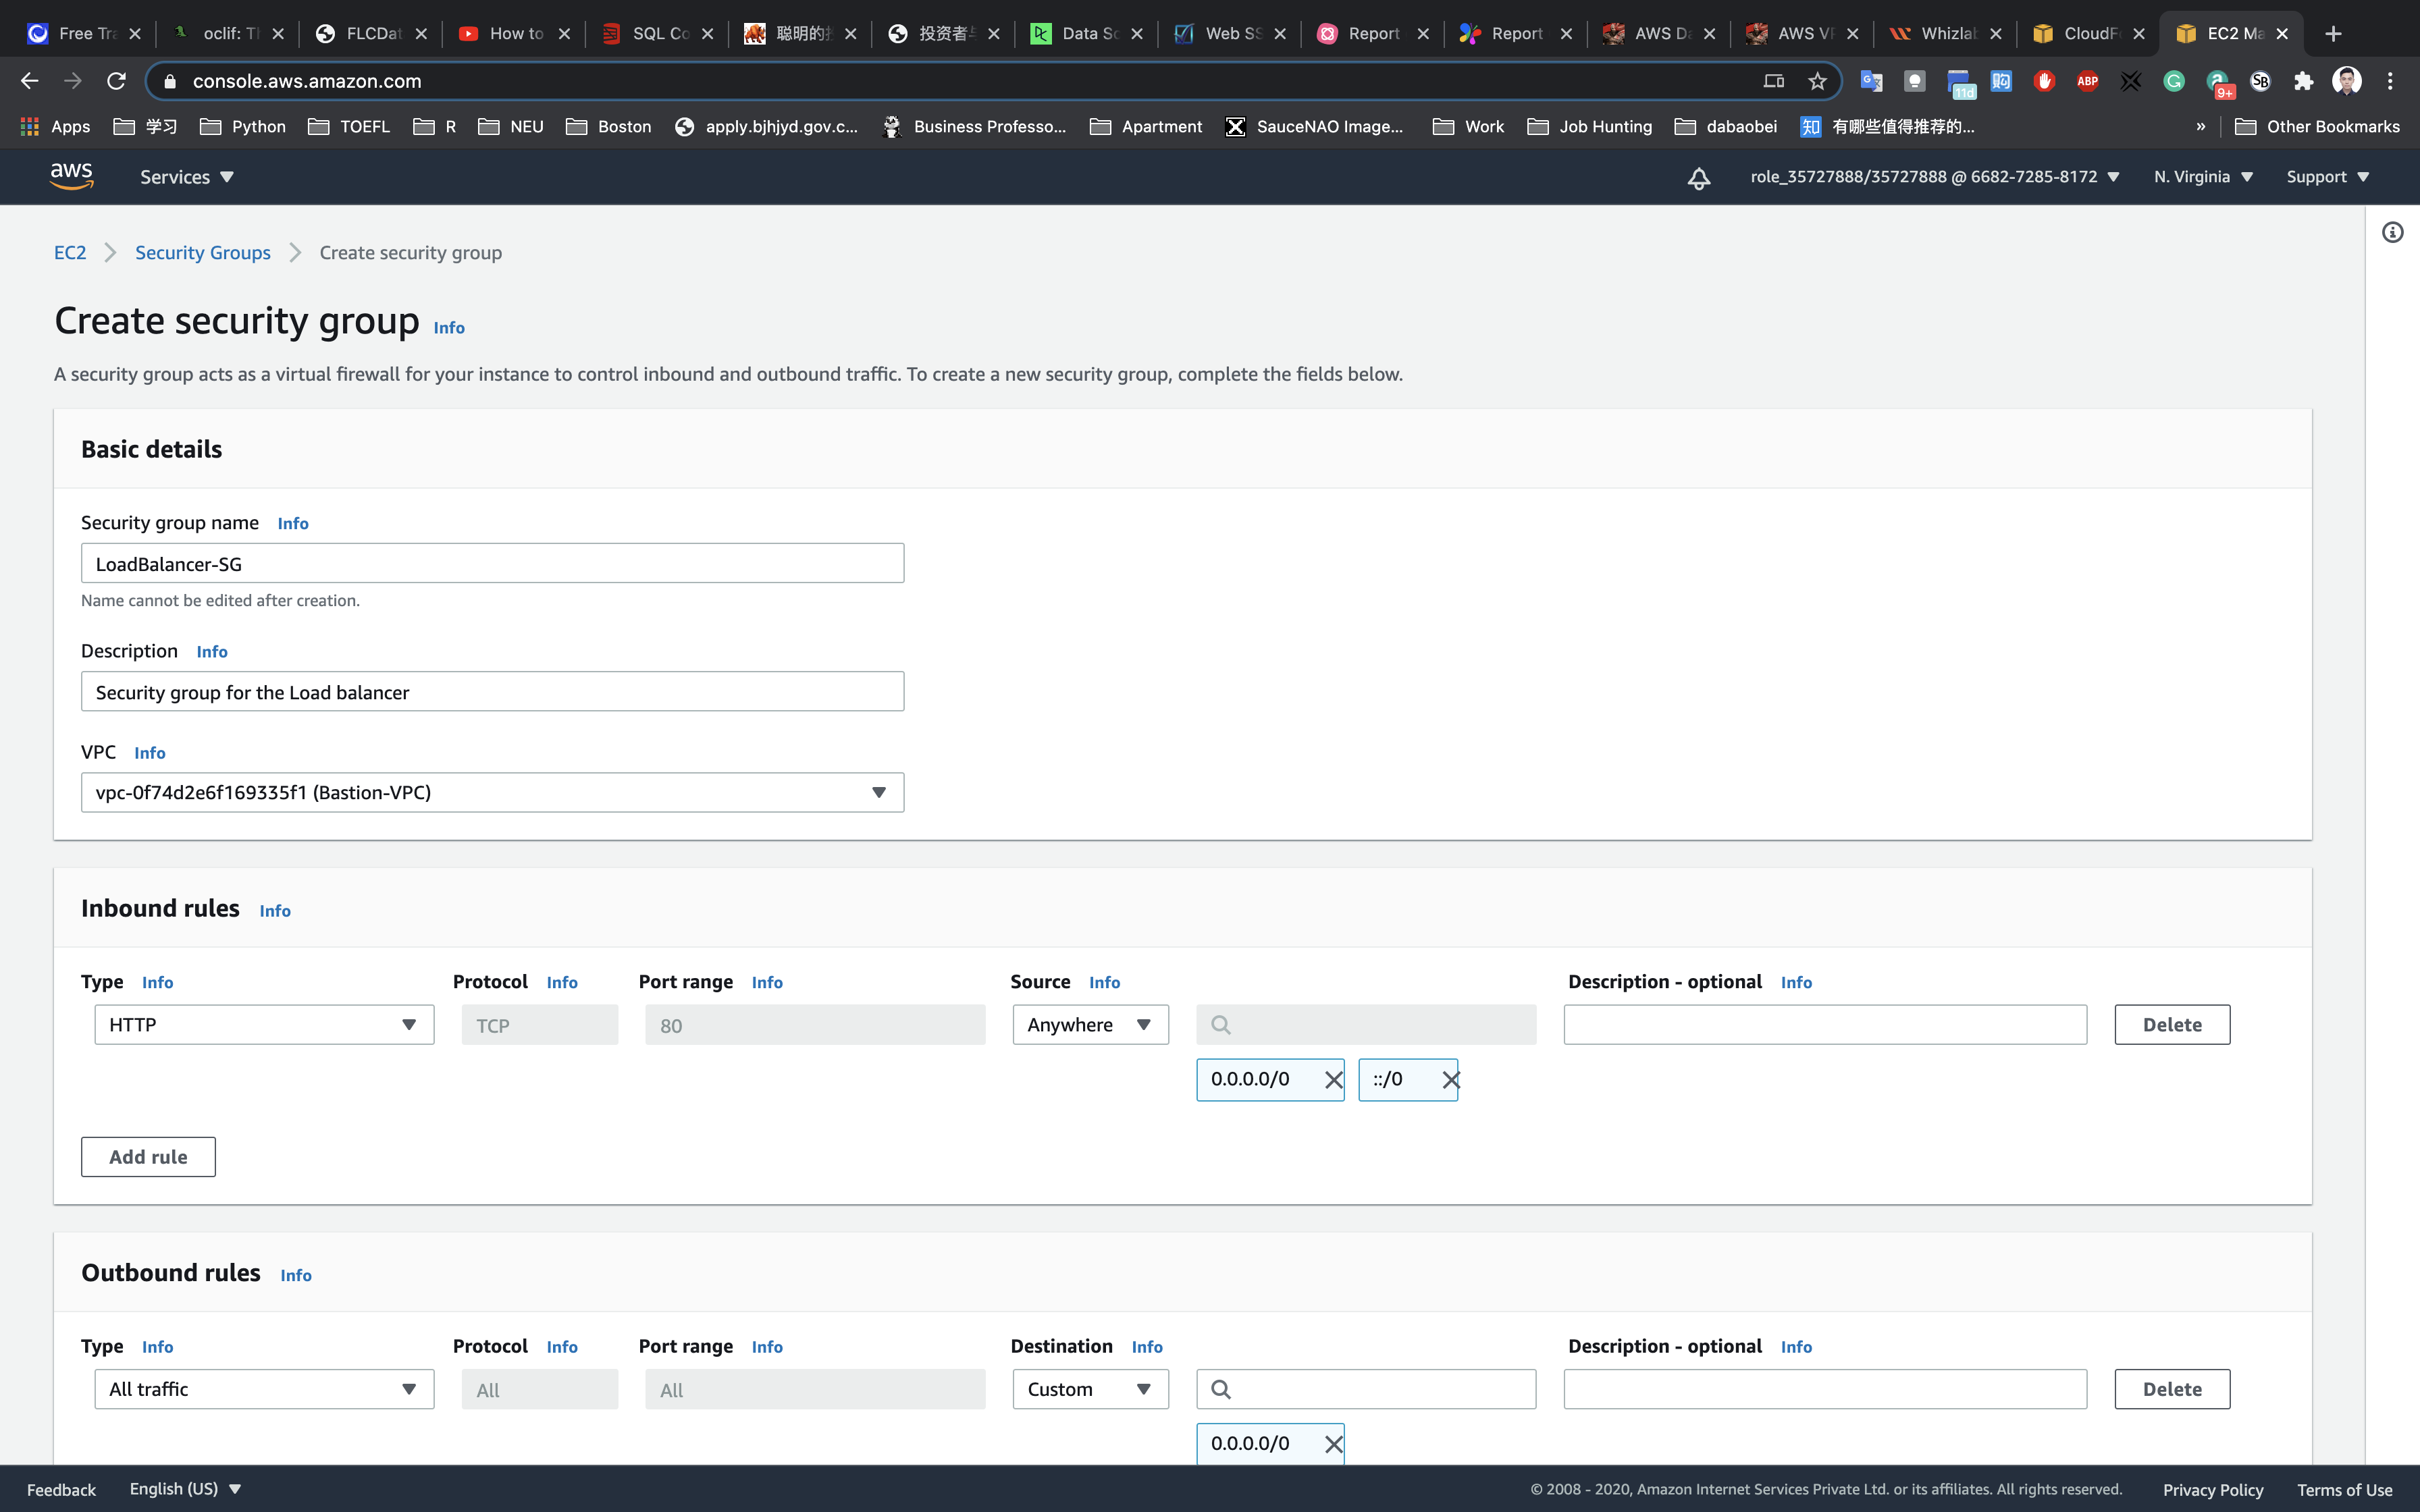
The security group for the load balancer will be created.
Web Server Configuration
Note: As part of AWS best practices, the web servers should reside in private subnets. We have created a private subnet and NAT gateway. The private subnet is attached to a route table to route traffic via NAT gateway to the internet. Please select the private subnet while launching web servers in the next section.
Web server running on Private Subnet 1
Click on Launch Instance.
Choose an Amazon Machine Image (AMI): Search for Amazon Linux 2 AMI in the search box and click on the select button.
Choose an Instance Type: select t2.micro and click on the Next: Configure Instance Details
Configure Instance Details:
- Network:
Bastion-VPC - Subnet:
Private Subnet 1 - Auto-assign Public IP:
Use Subnet Setting (Disable) - default

Now again scroll down to user Data copy and paste the below comment.
1 |
|
Click on Nex: Add Storage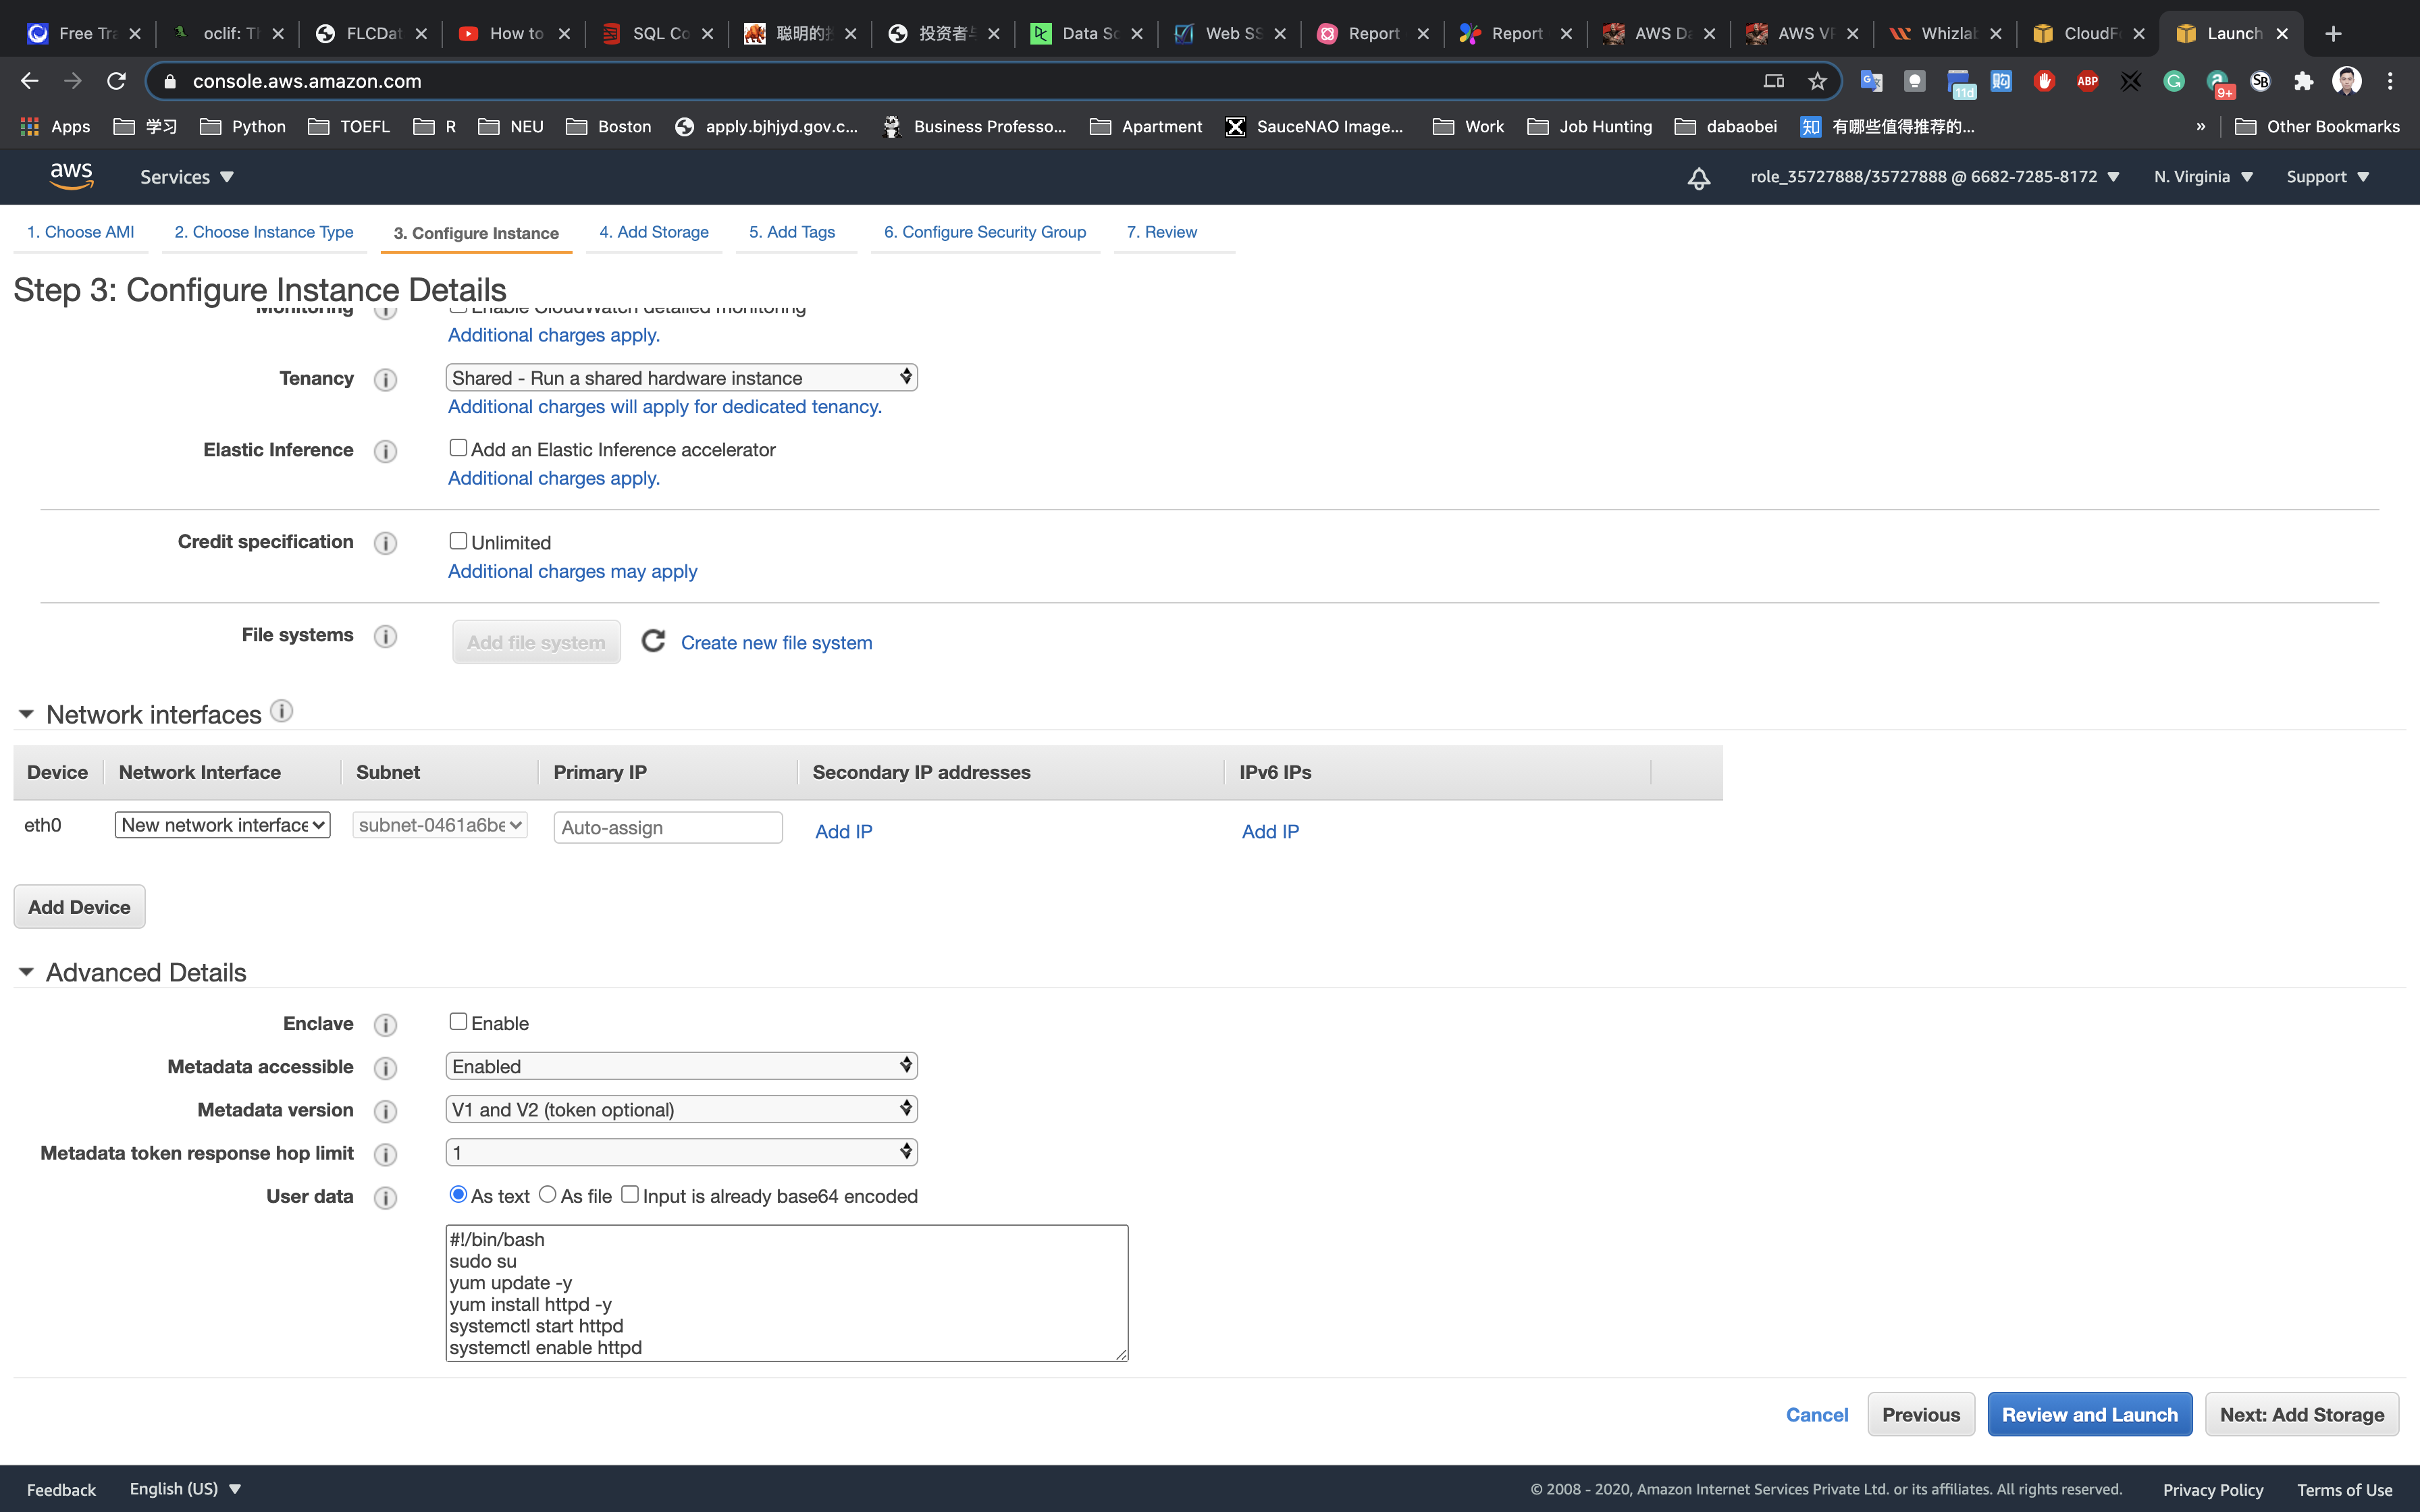
Add Storage: No need to change anything in this step. Click on Next: Add tags
Add Tags: Click on Add tag
- Key:
Name - Value:
Web-server-1
Click on Next: Configure Security Group
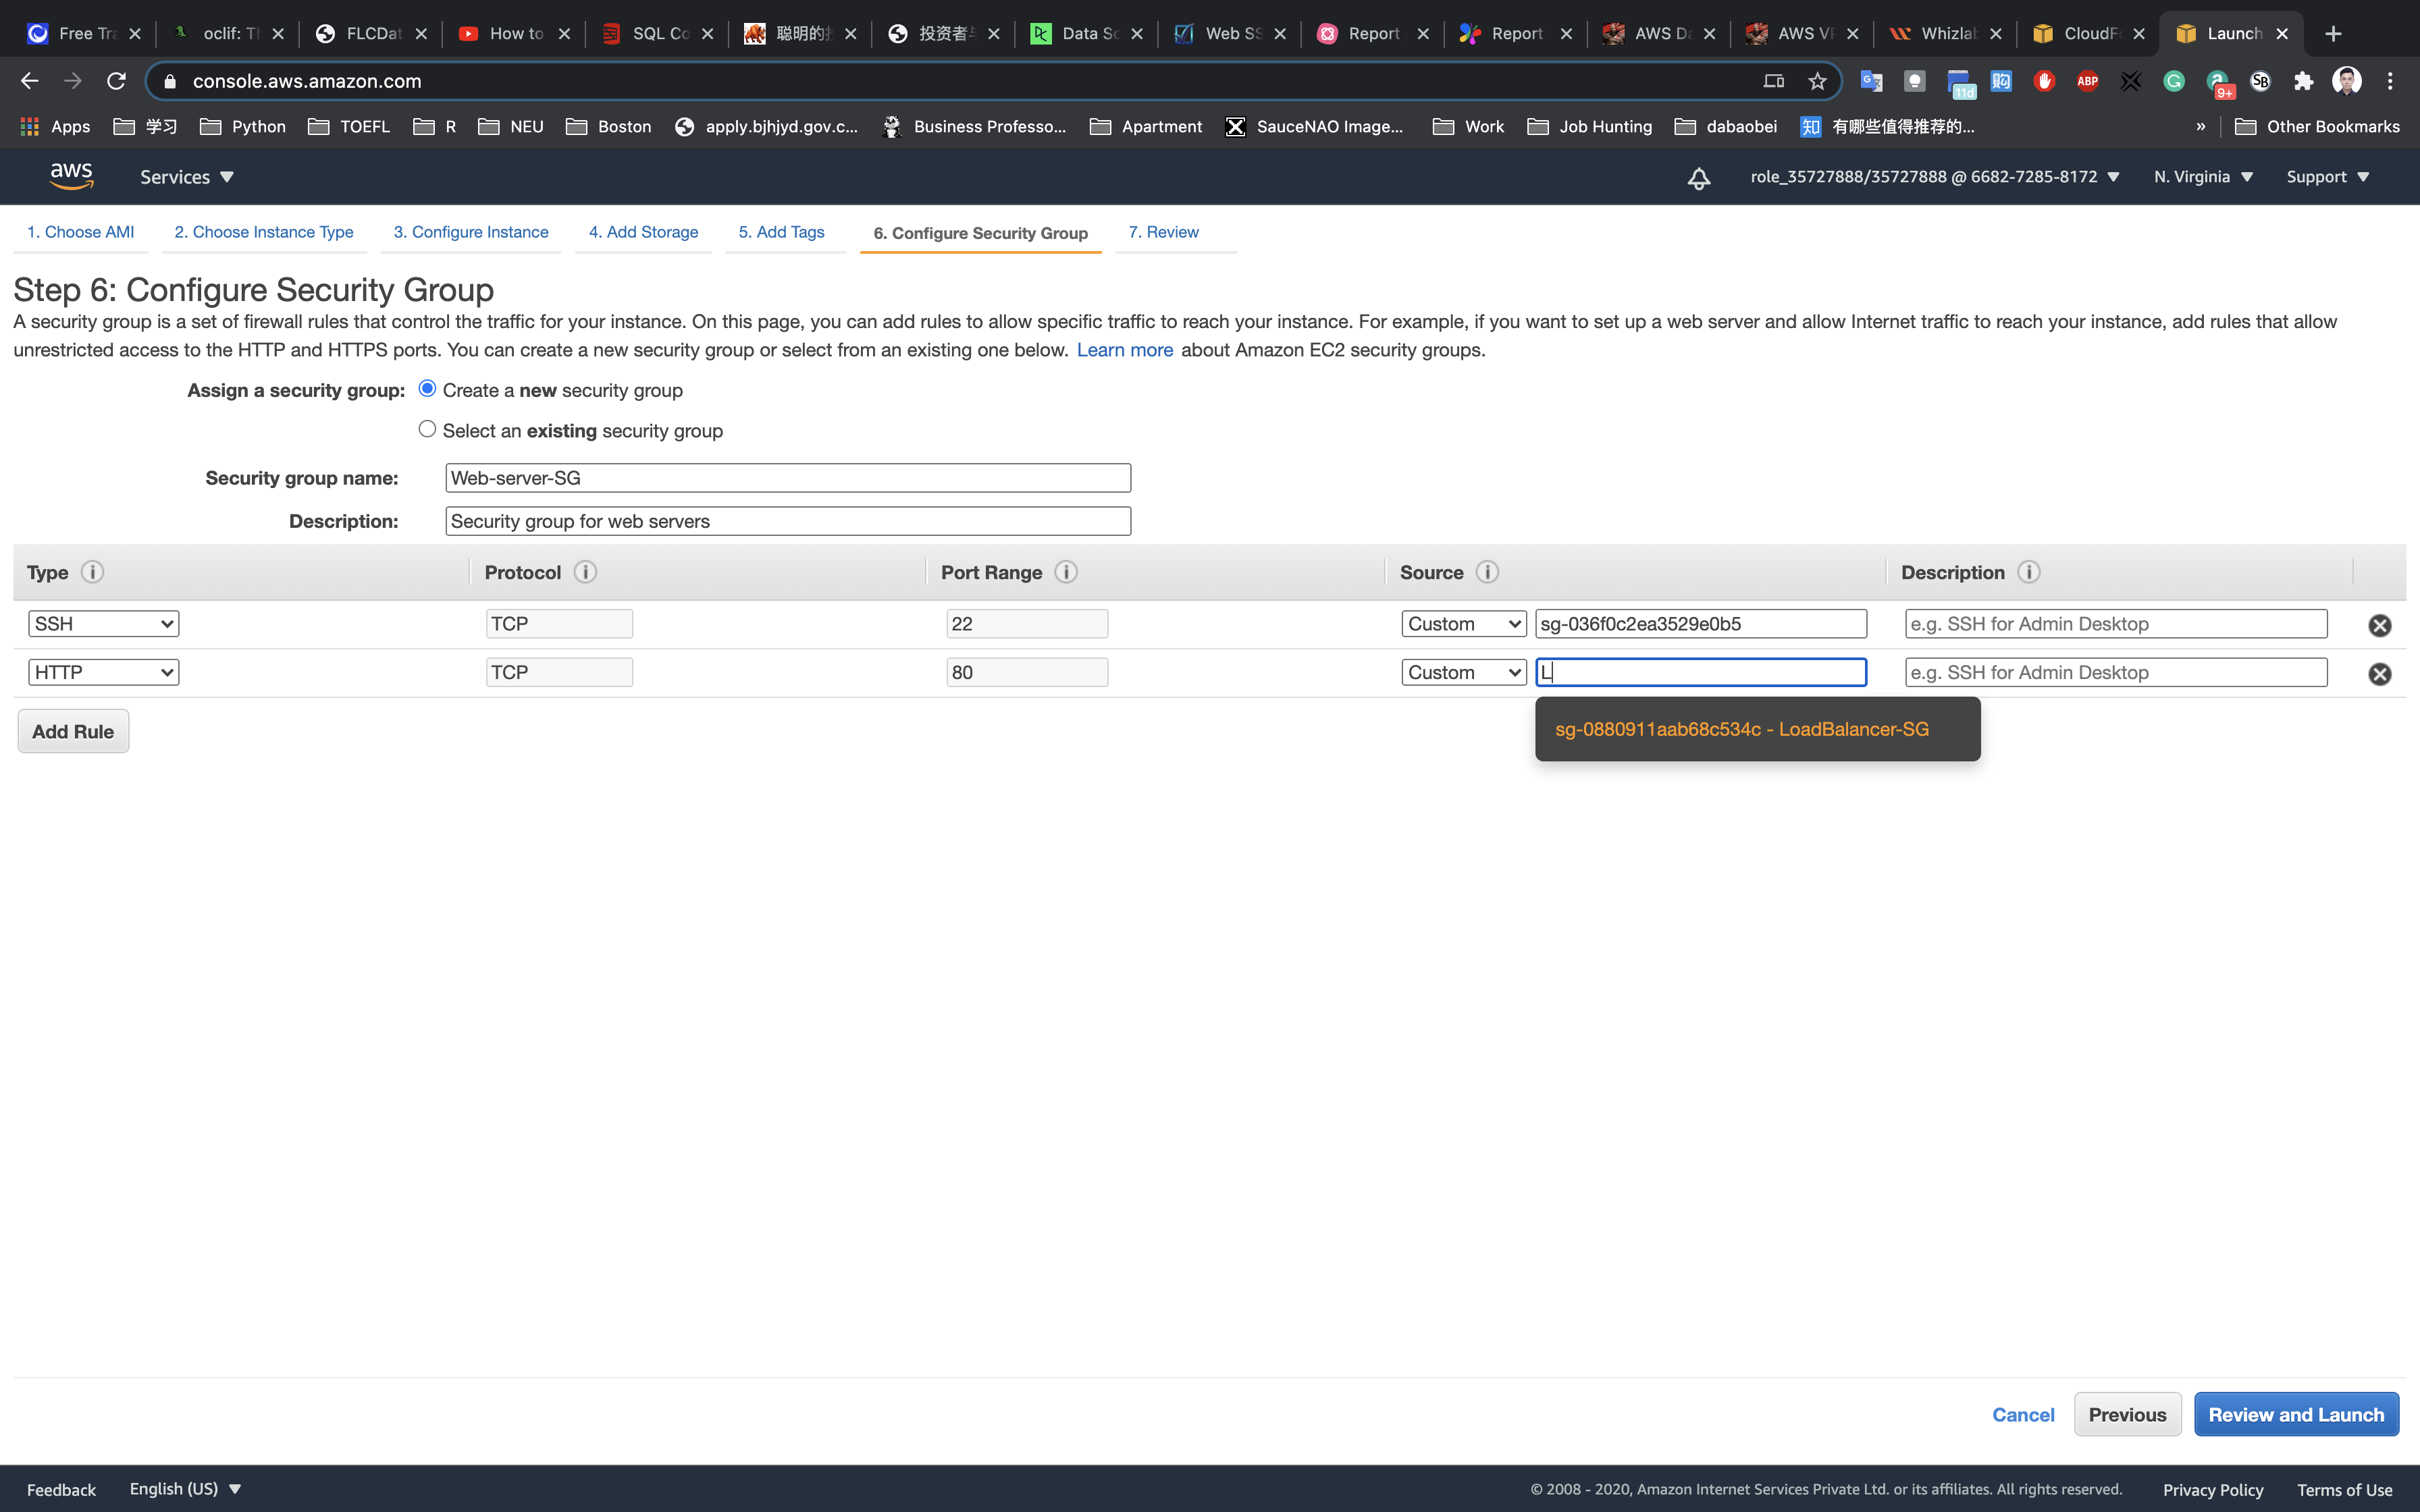
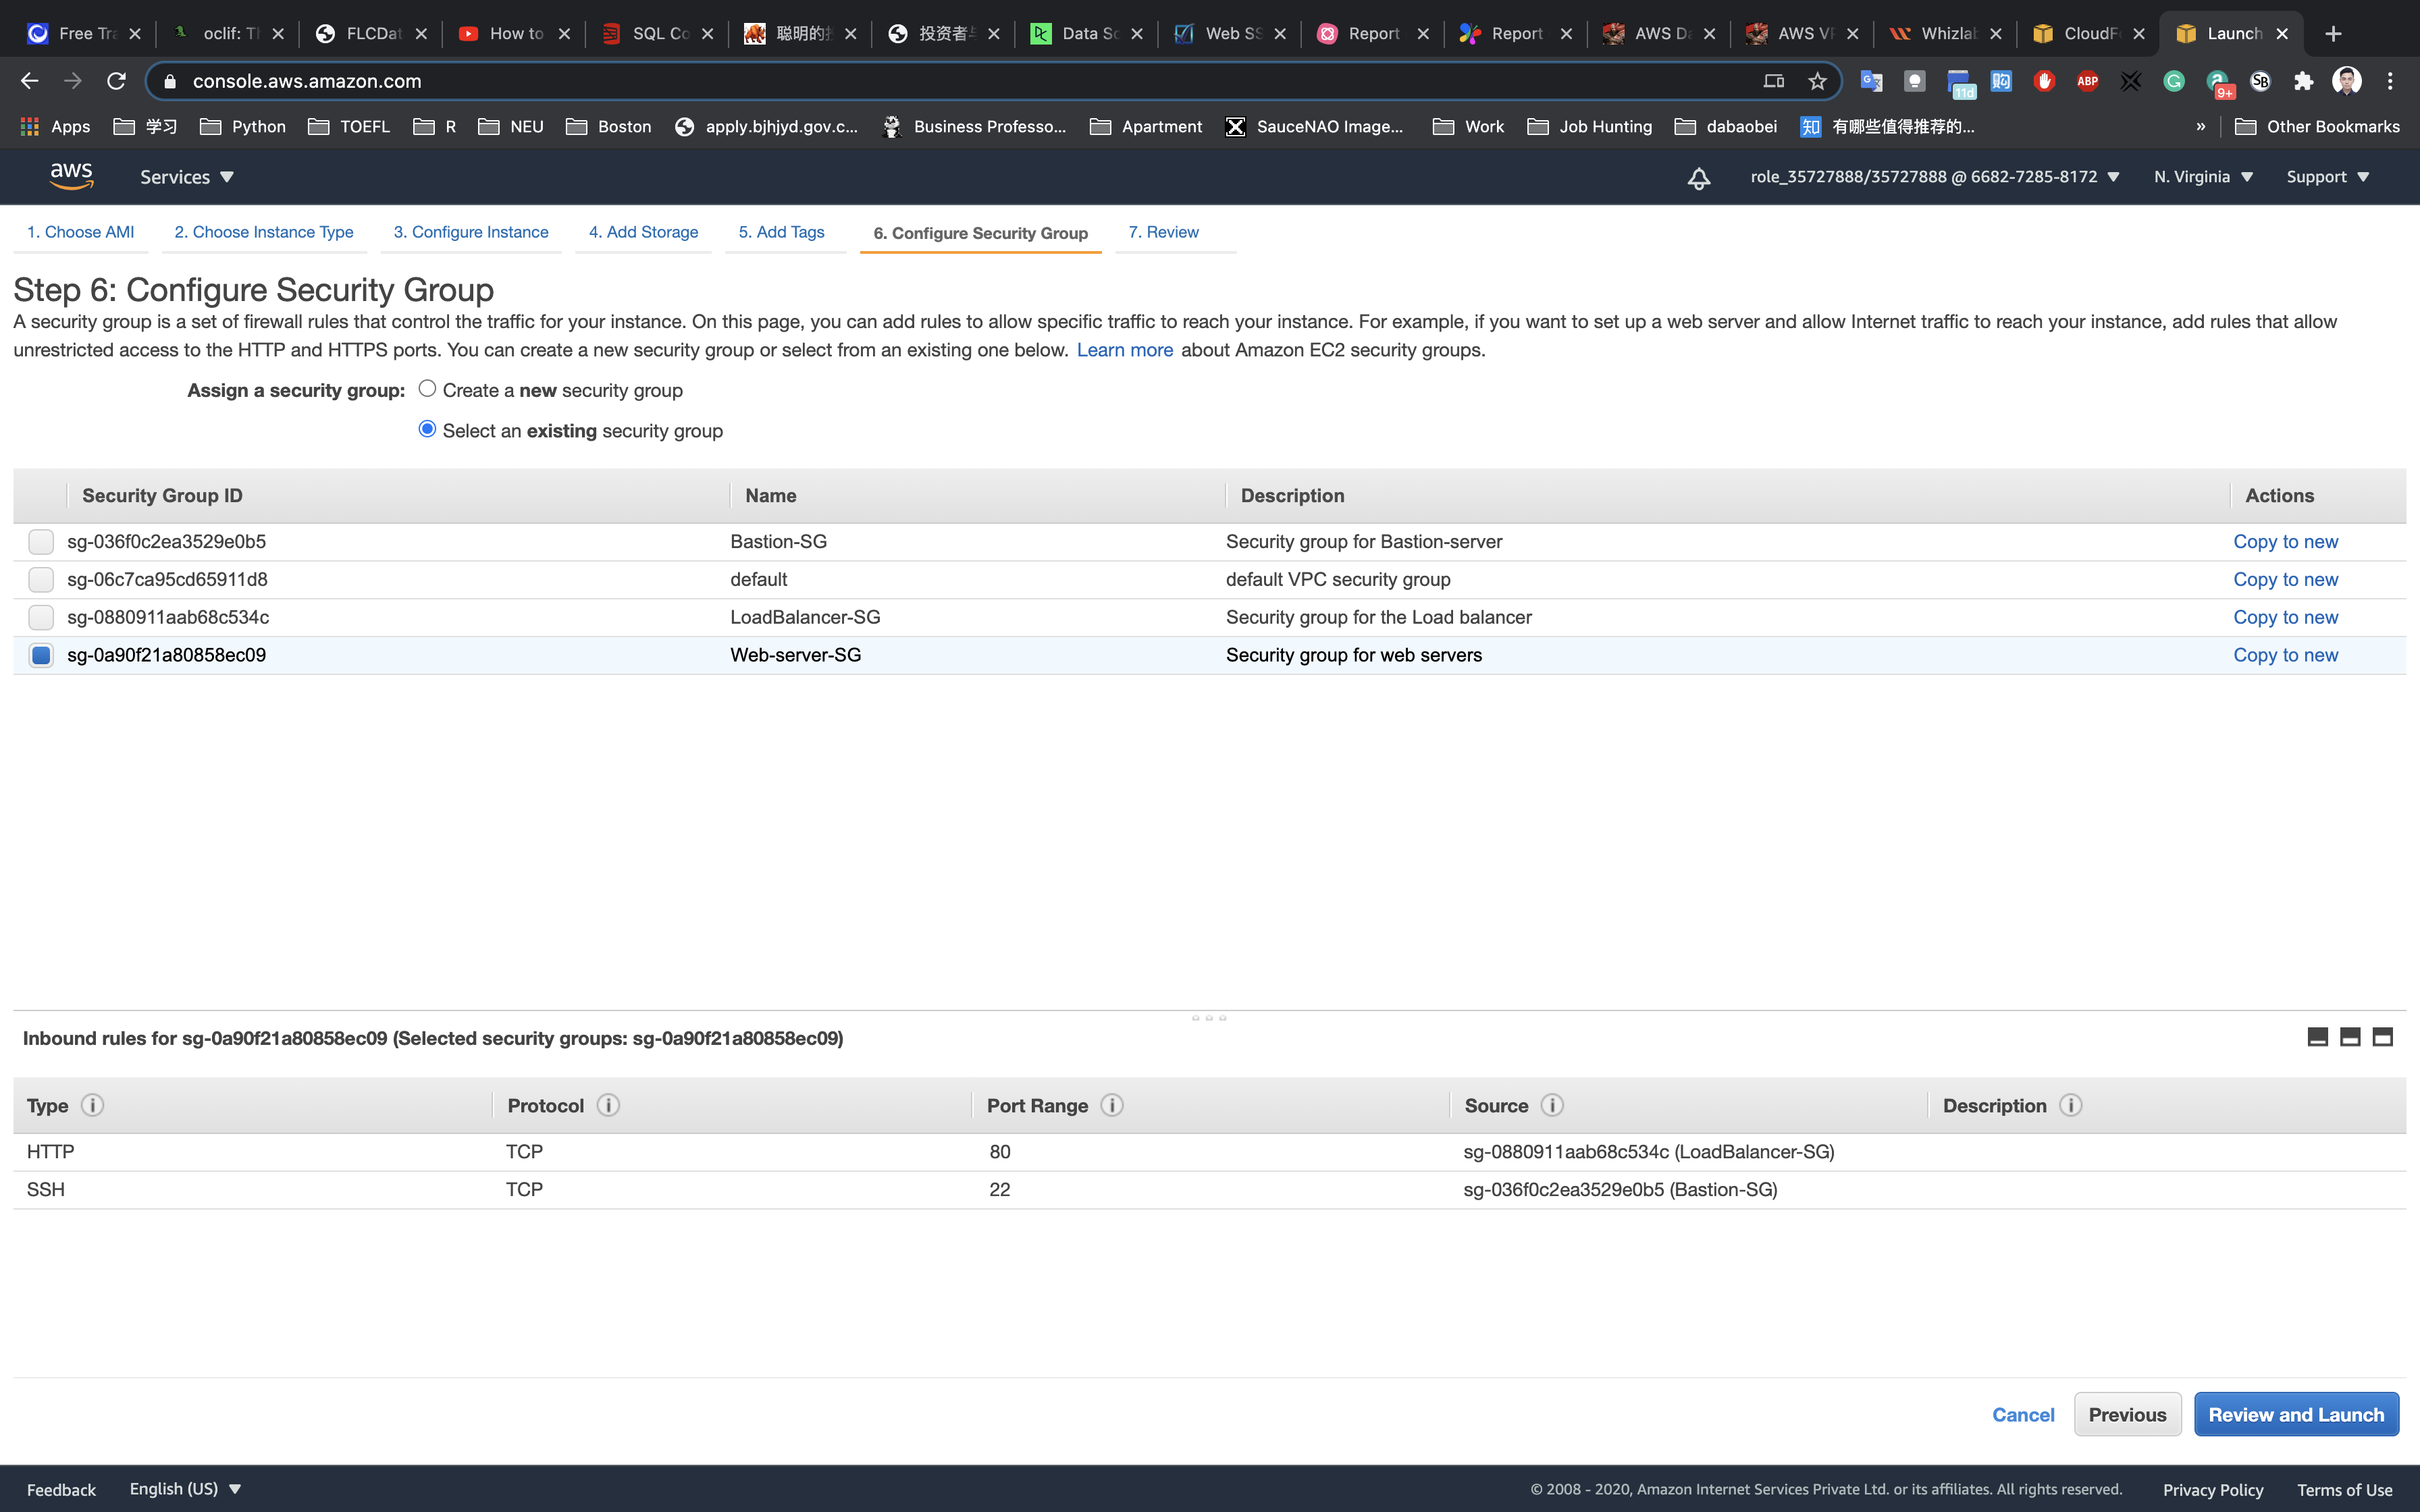
Configure Security Group:
Click on Create a new security group
- Security group name:
Web-server-SG - Description:
Security group for web servers
For SSH:
- Type:
SSH - Source: type
Band choose the Bastion server Security Group
On port 22, we choose the Bastion-SG security group as its source to allow SSH connection to web servers from only the bastion server by restricting the public SSH connection.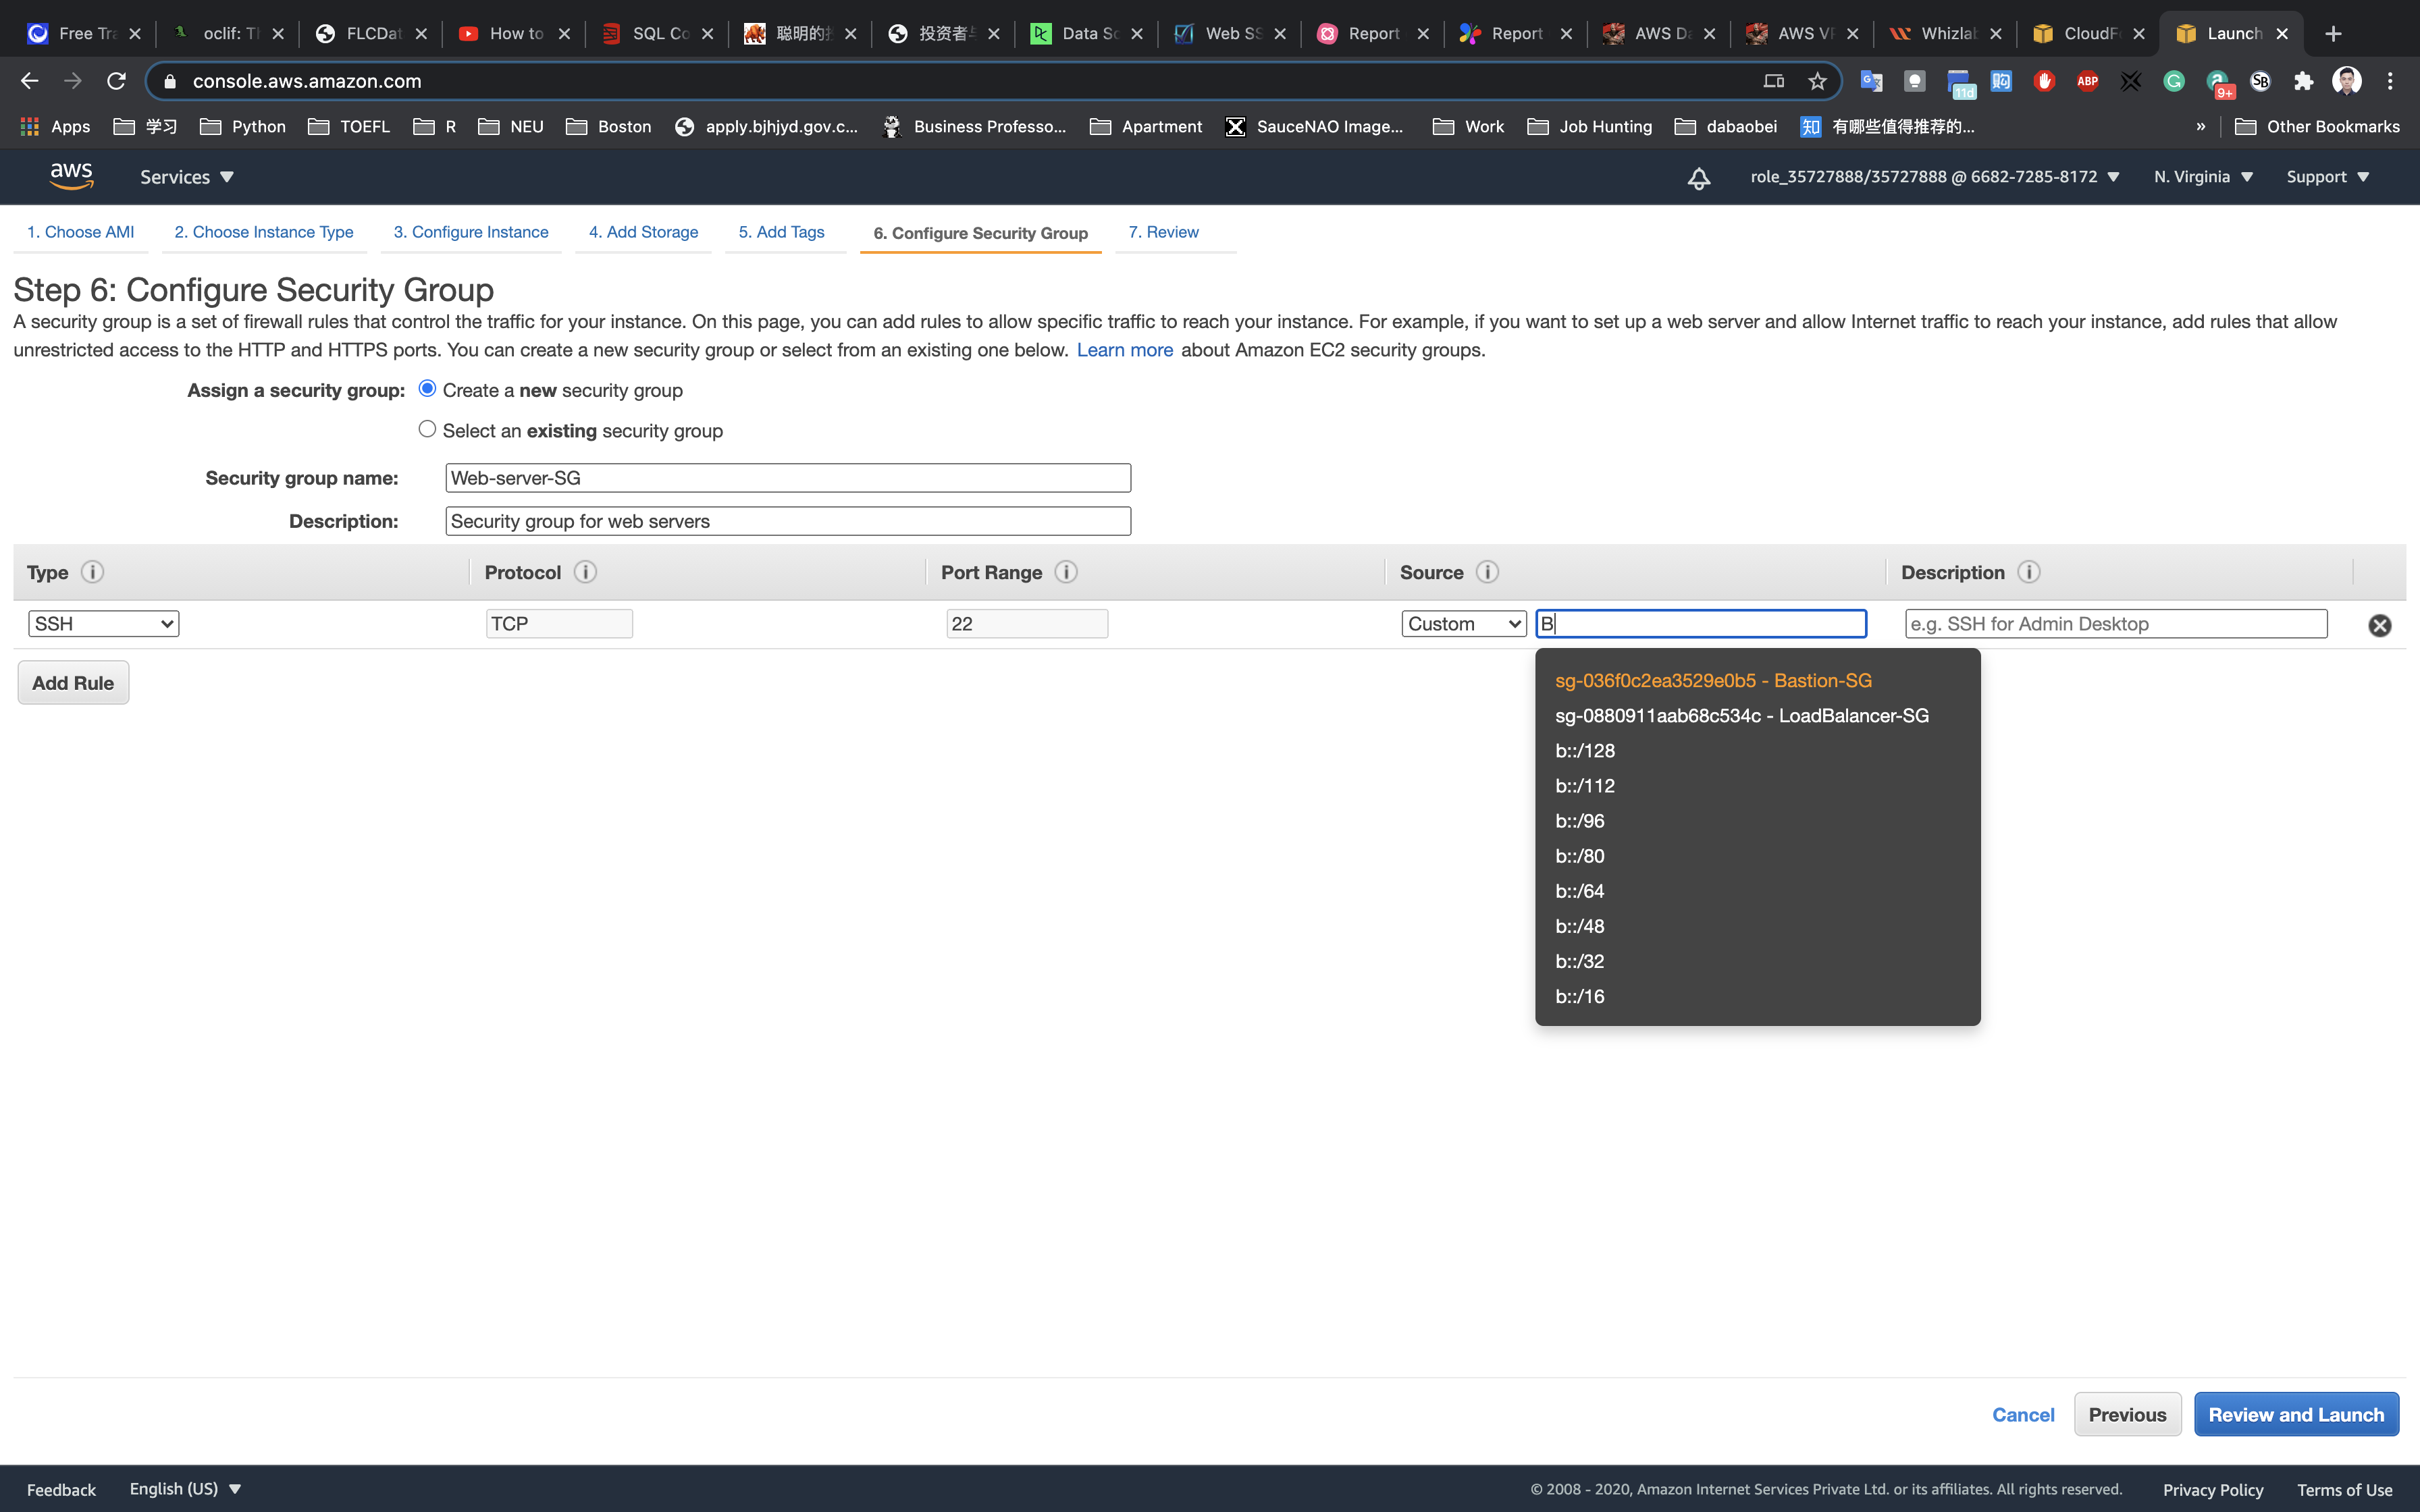
For HTTP:
Click on Add rule
- Type:
HTTP - Source: type
Land choose the Load Balancer Security Group
Click on Review and Launch
Review and Launch : Review all settings and click on Launch.
- Select
Create a new key pair - Key pair name:
aws-web
Click on Download Key Pair
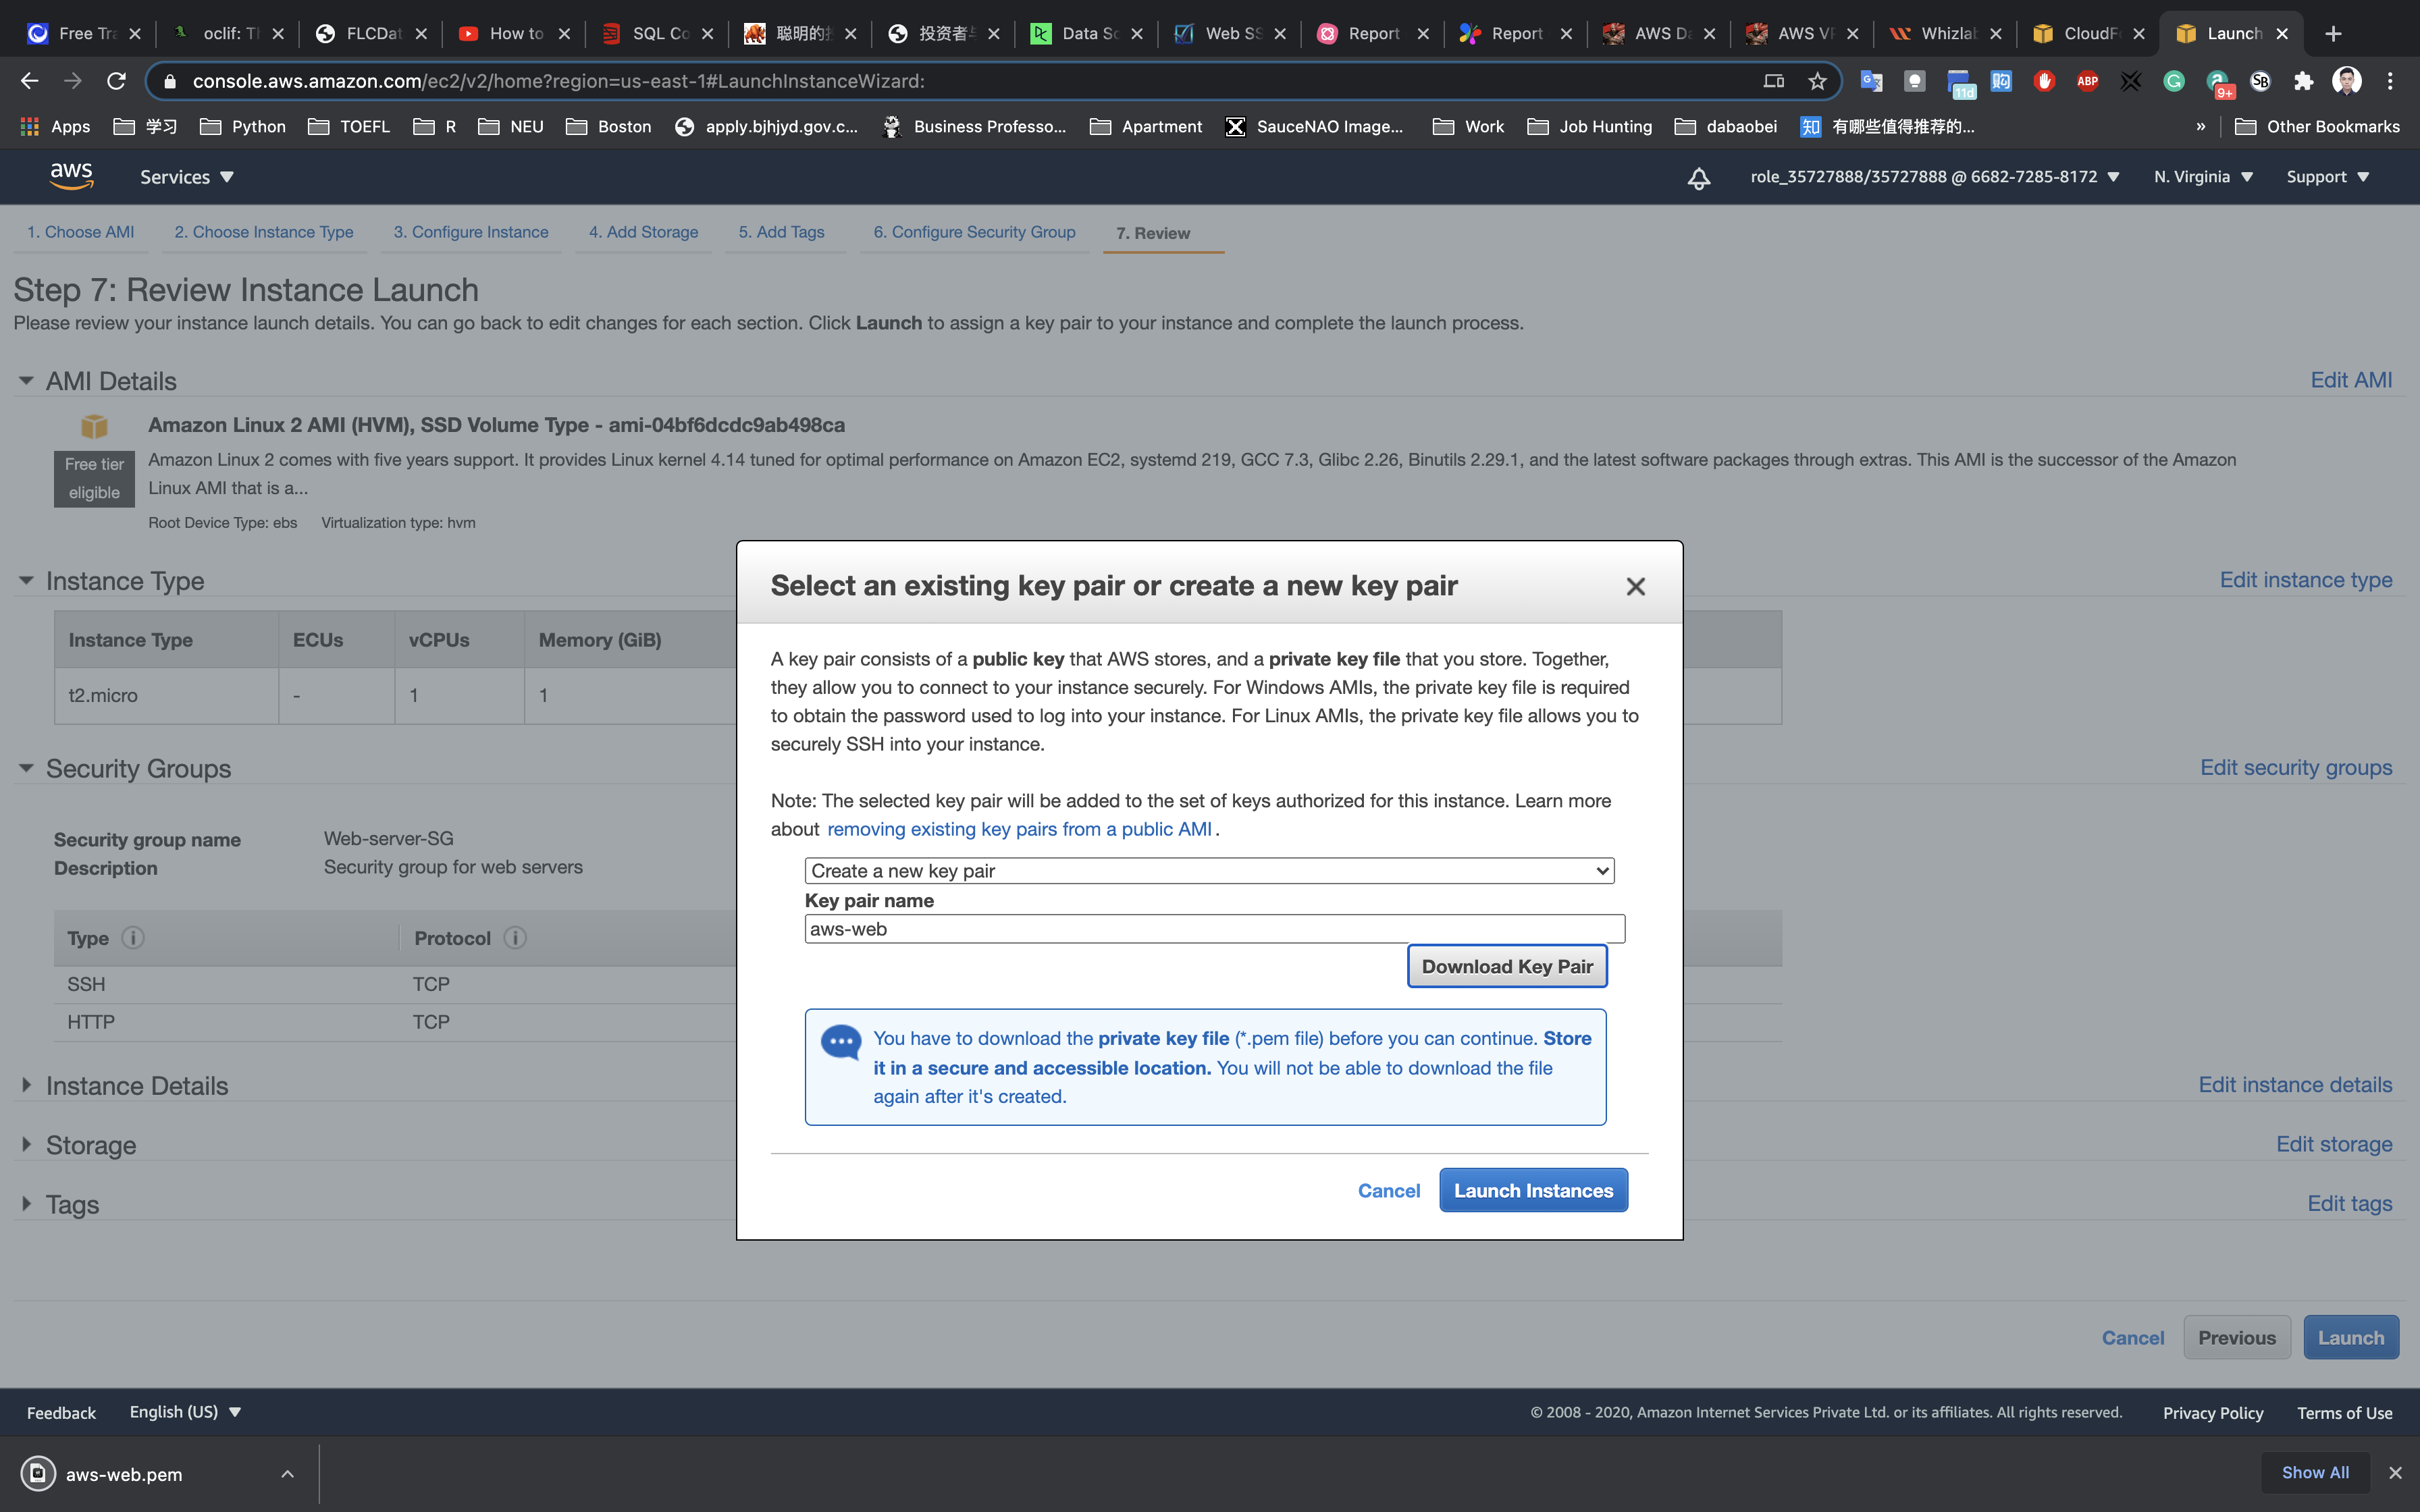
Click on Launch Instances.
Web server running on Private Subnet 2
Click on Launch Instance.
Choose an Amazon Machine Image (AMI): Search for Amazon Linux 2 AMI in the search box and click on the select button.
Choose an Instance Type: select t2.micro and click on the Next: Configure Instance Details
Configure Instance Details:
- Network:
Bastion-VPC - Subnet:
Private Subnet 2 - Auto-assign Public IP:
Use Subnet Setting (Disable) - default

Now again scroll down to user Data copy and paste the below comment.
1 |
|
Click on Nex: Add Storage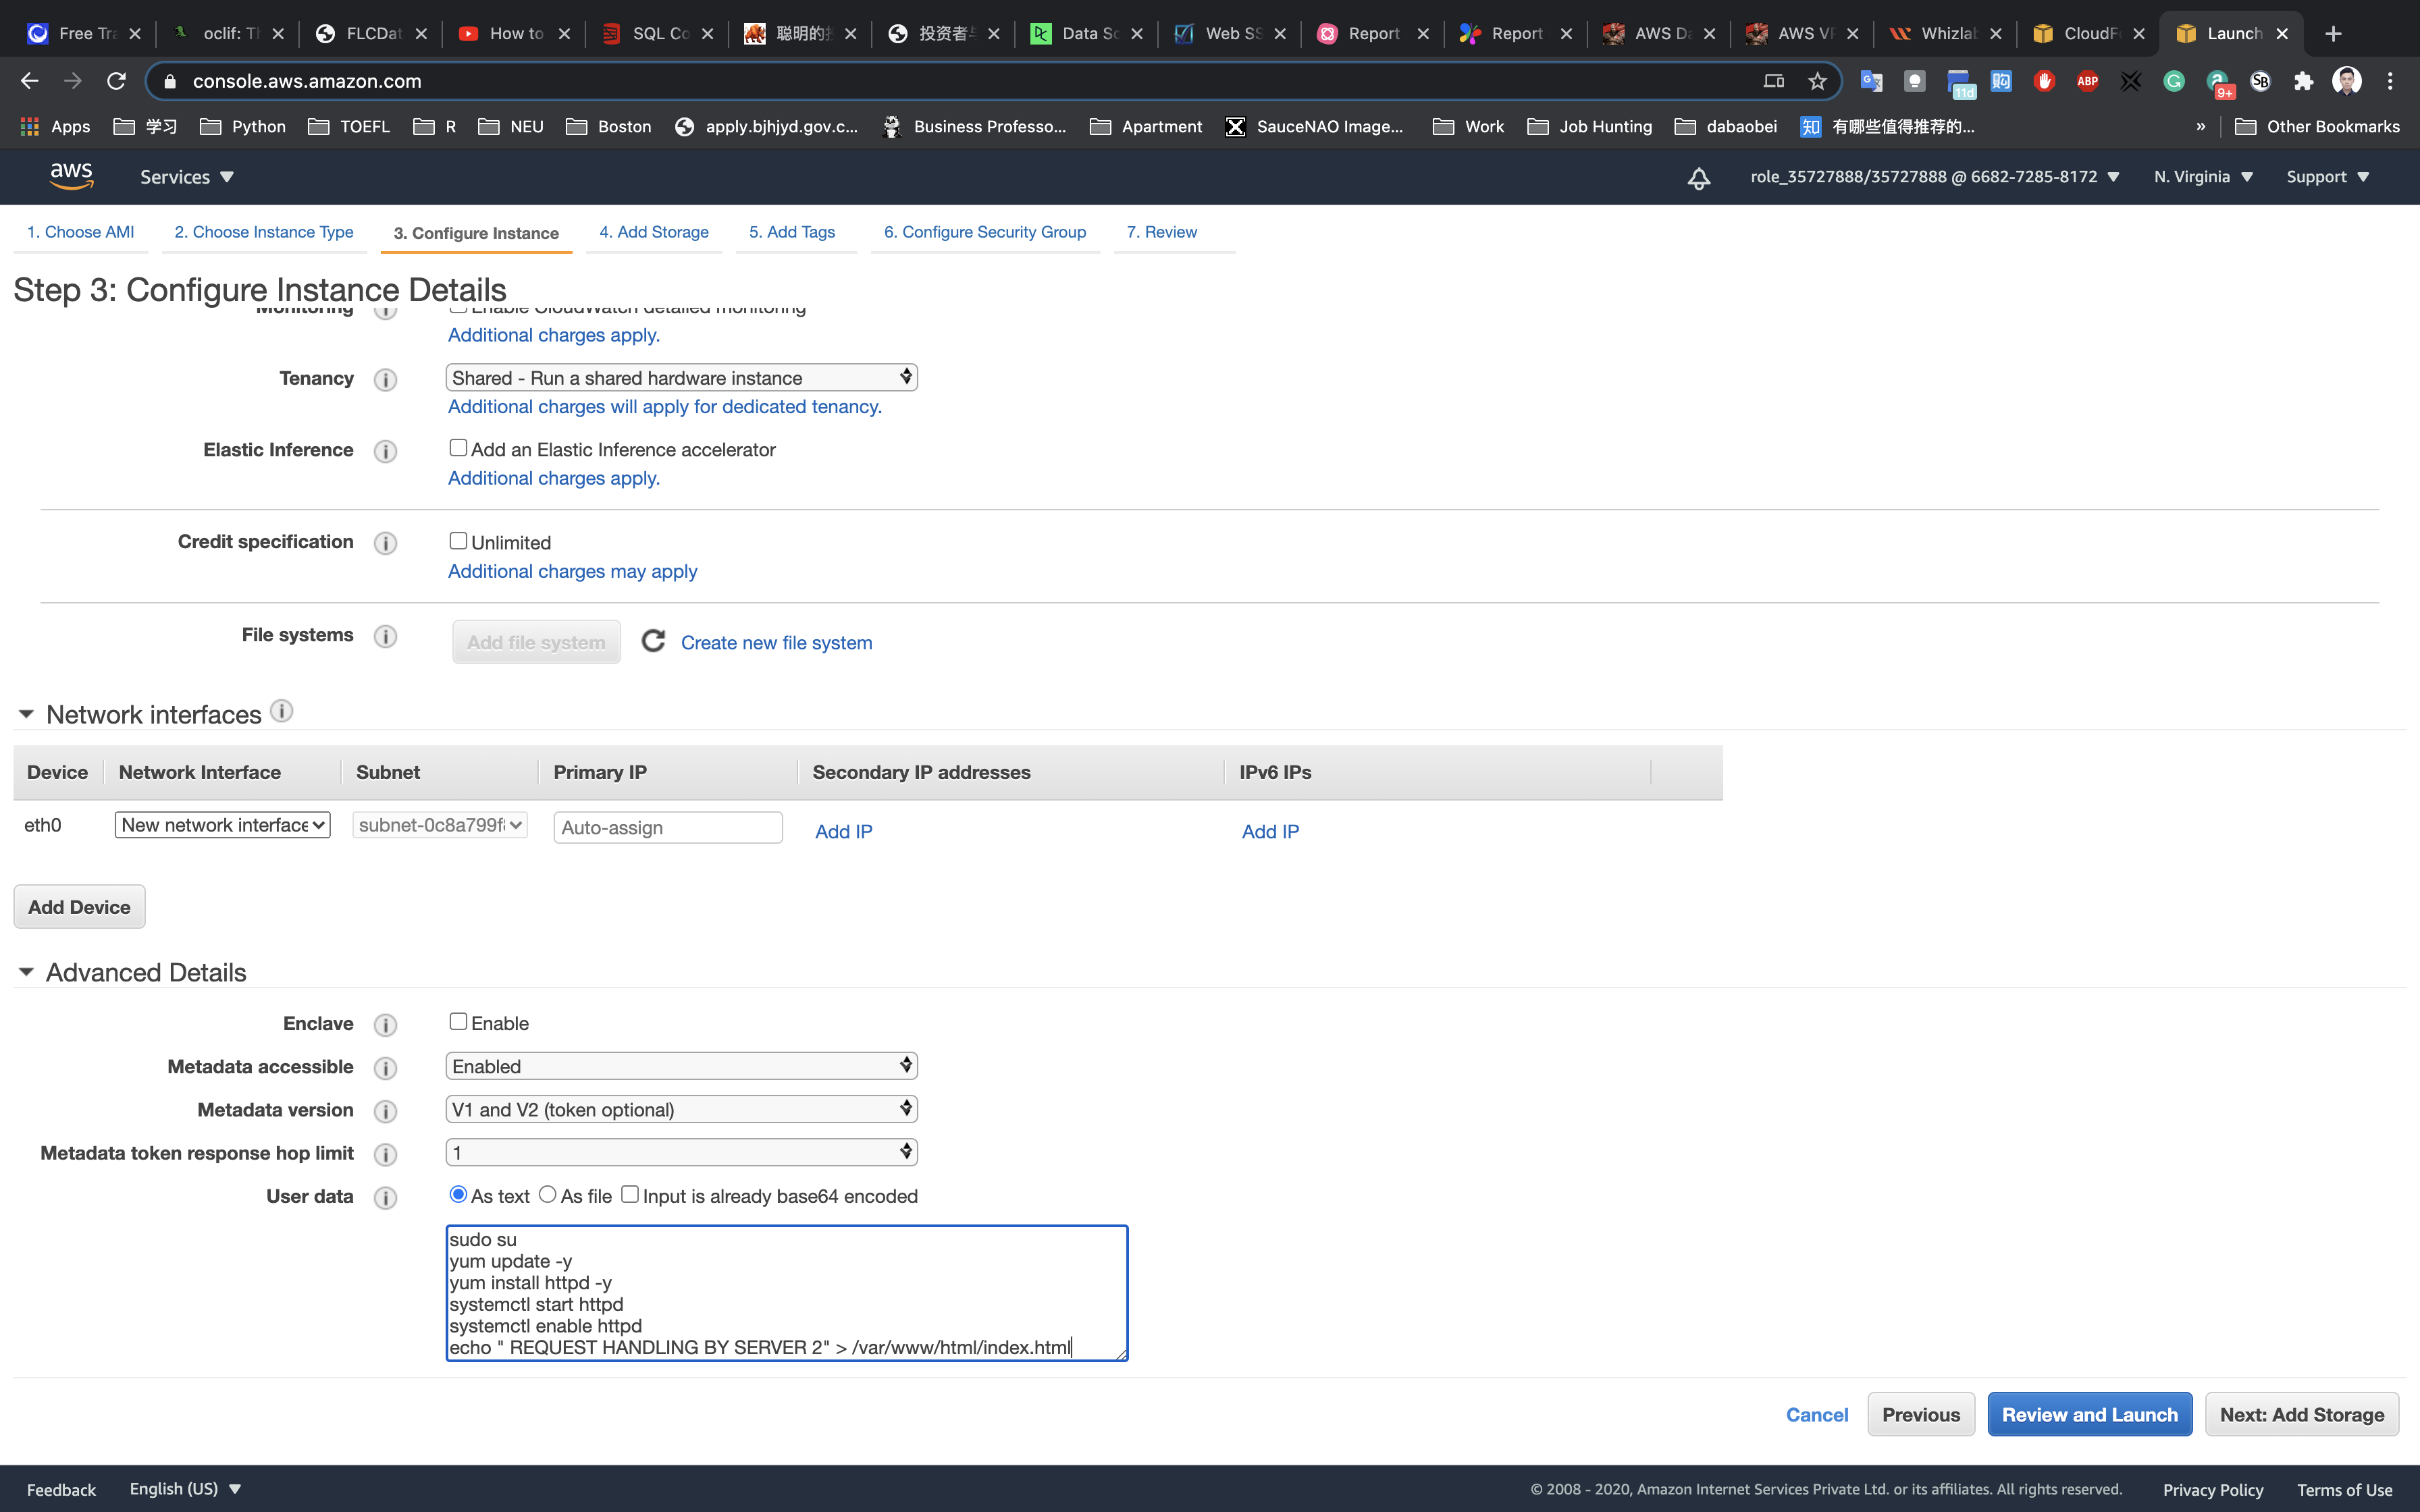
Add Storage: No need to change anything in this step. Click on Next: Add tags
Add Tags: Click on Add tag
- Key:
Name - Value:
Web-server-2
Click on Next: Configure Security Group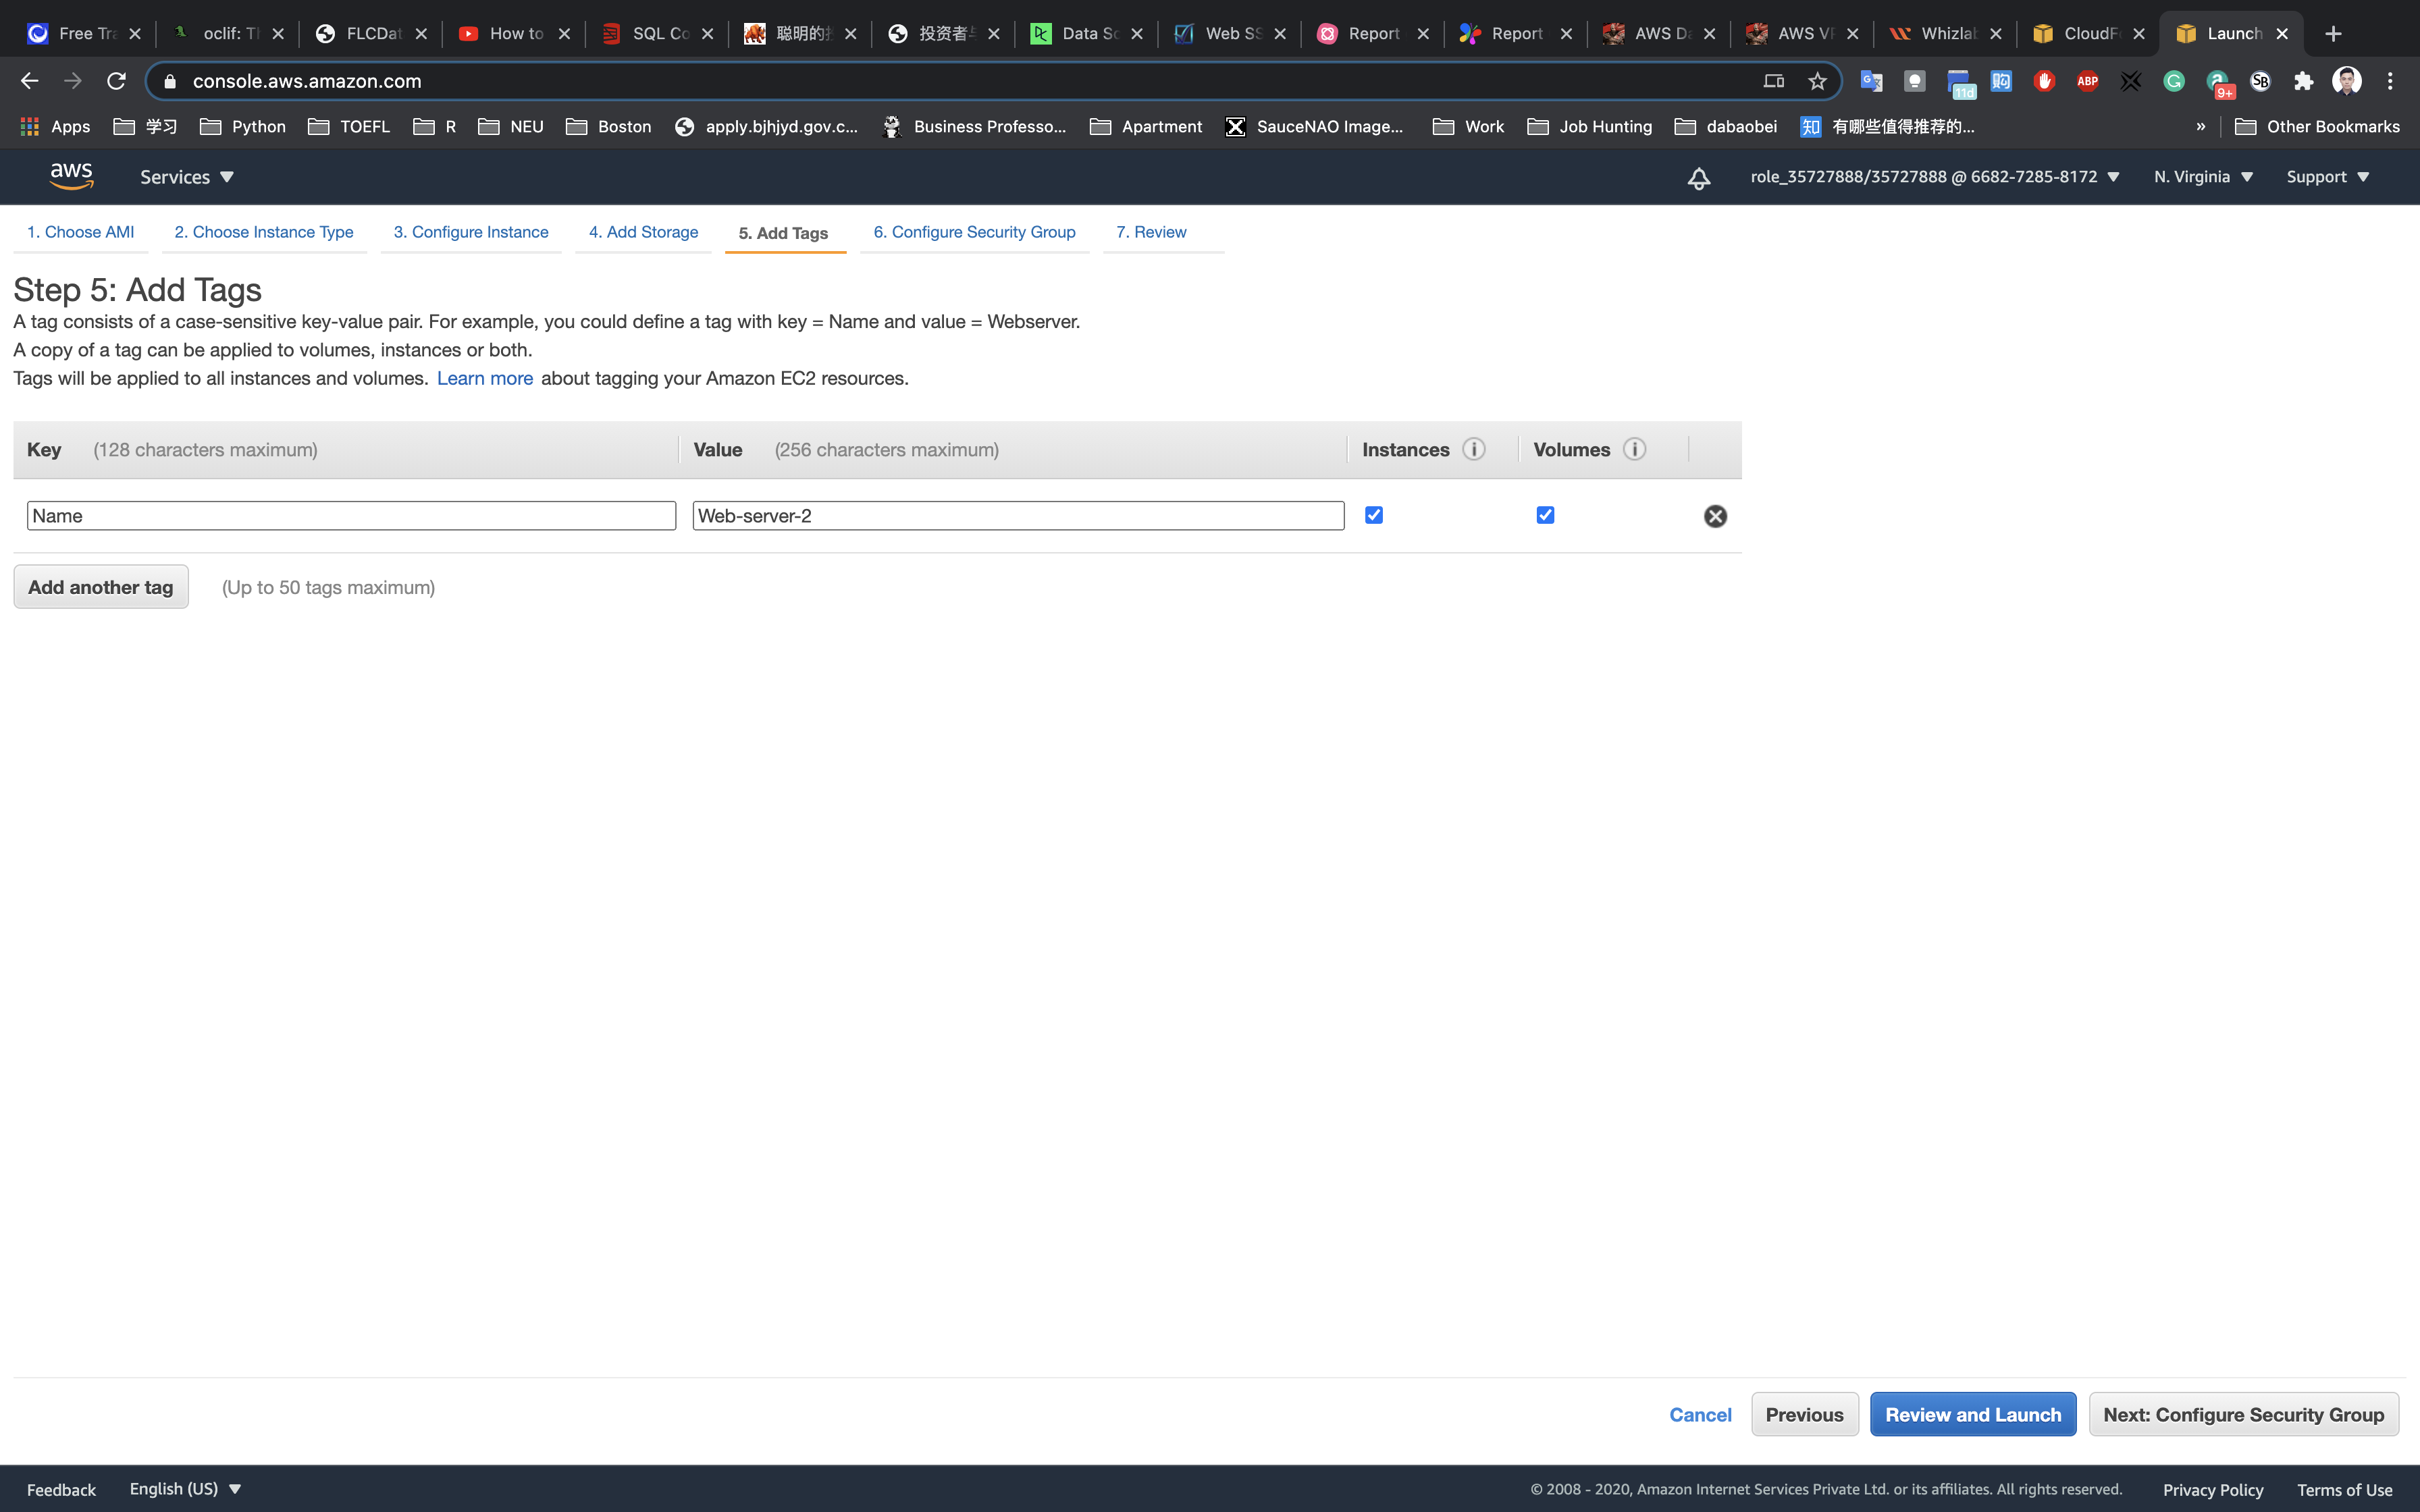
Configure Security Group:
Click on Select an existing security group
Select Web-server-SG
Click on Review and Launch
Review and Launch : Review all settings and click on Launch.
- Select
Choose an existing key pair - Key pair name:
aws-web - check
I acknowledge that I have access to the selected private key file (aws-web.pem), and that without this file, I won't be able to log into my instance.
Click on Launch Instances.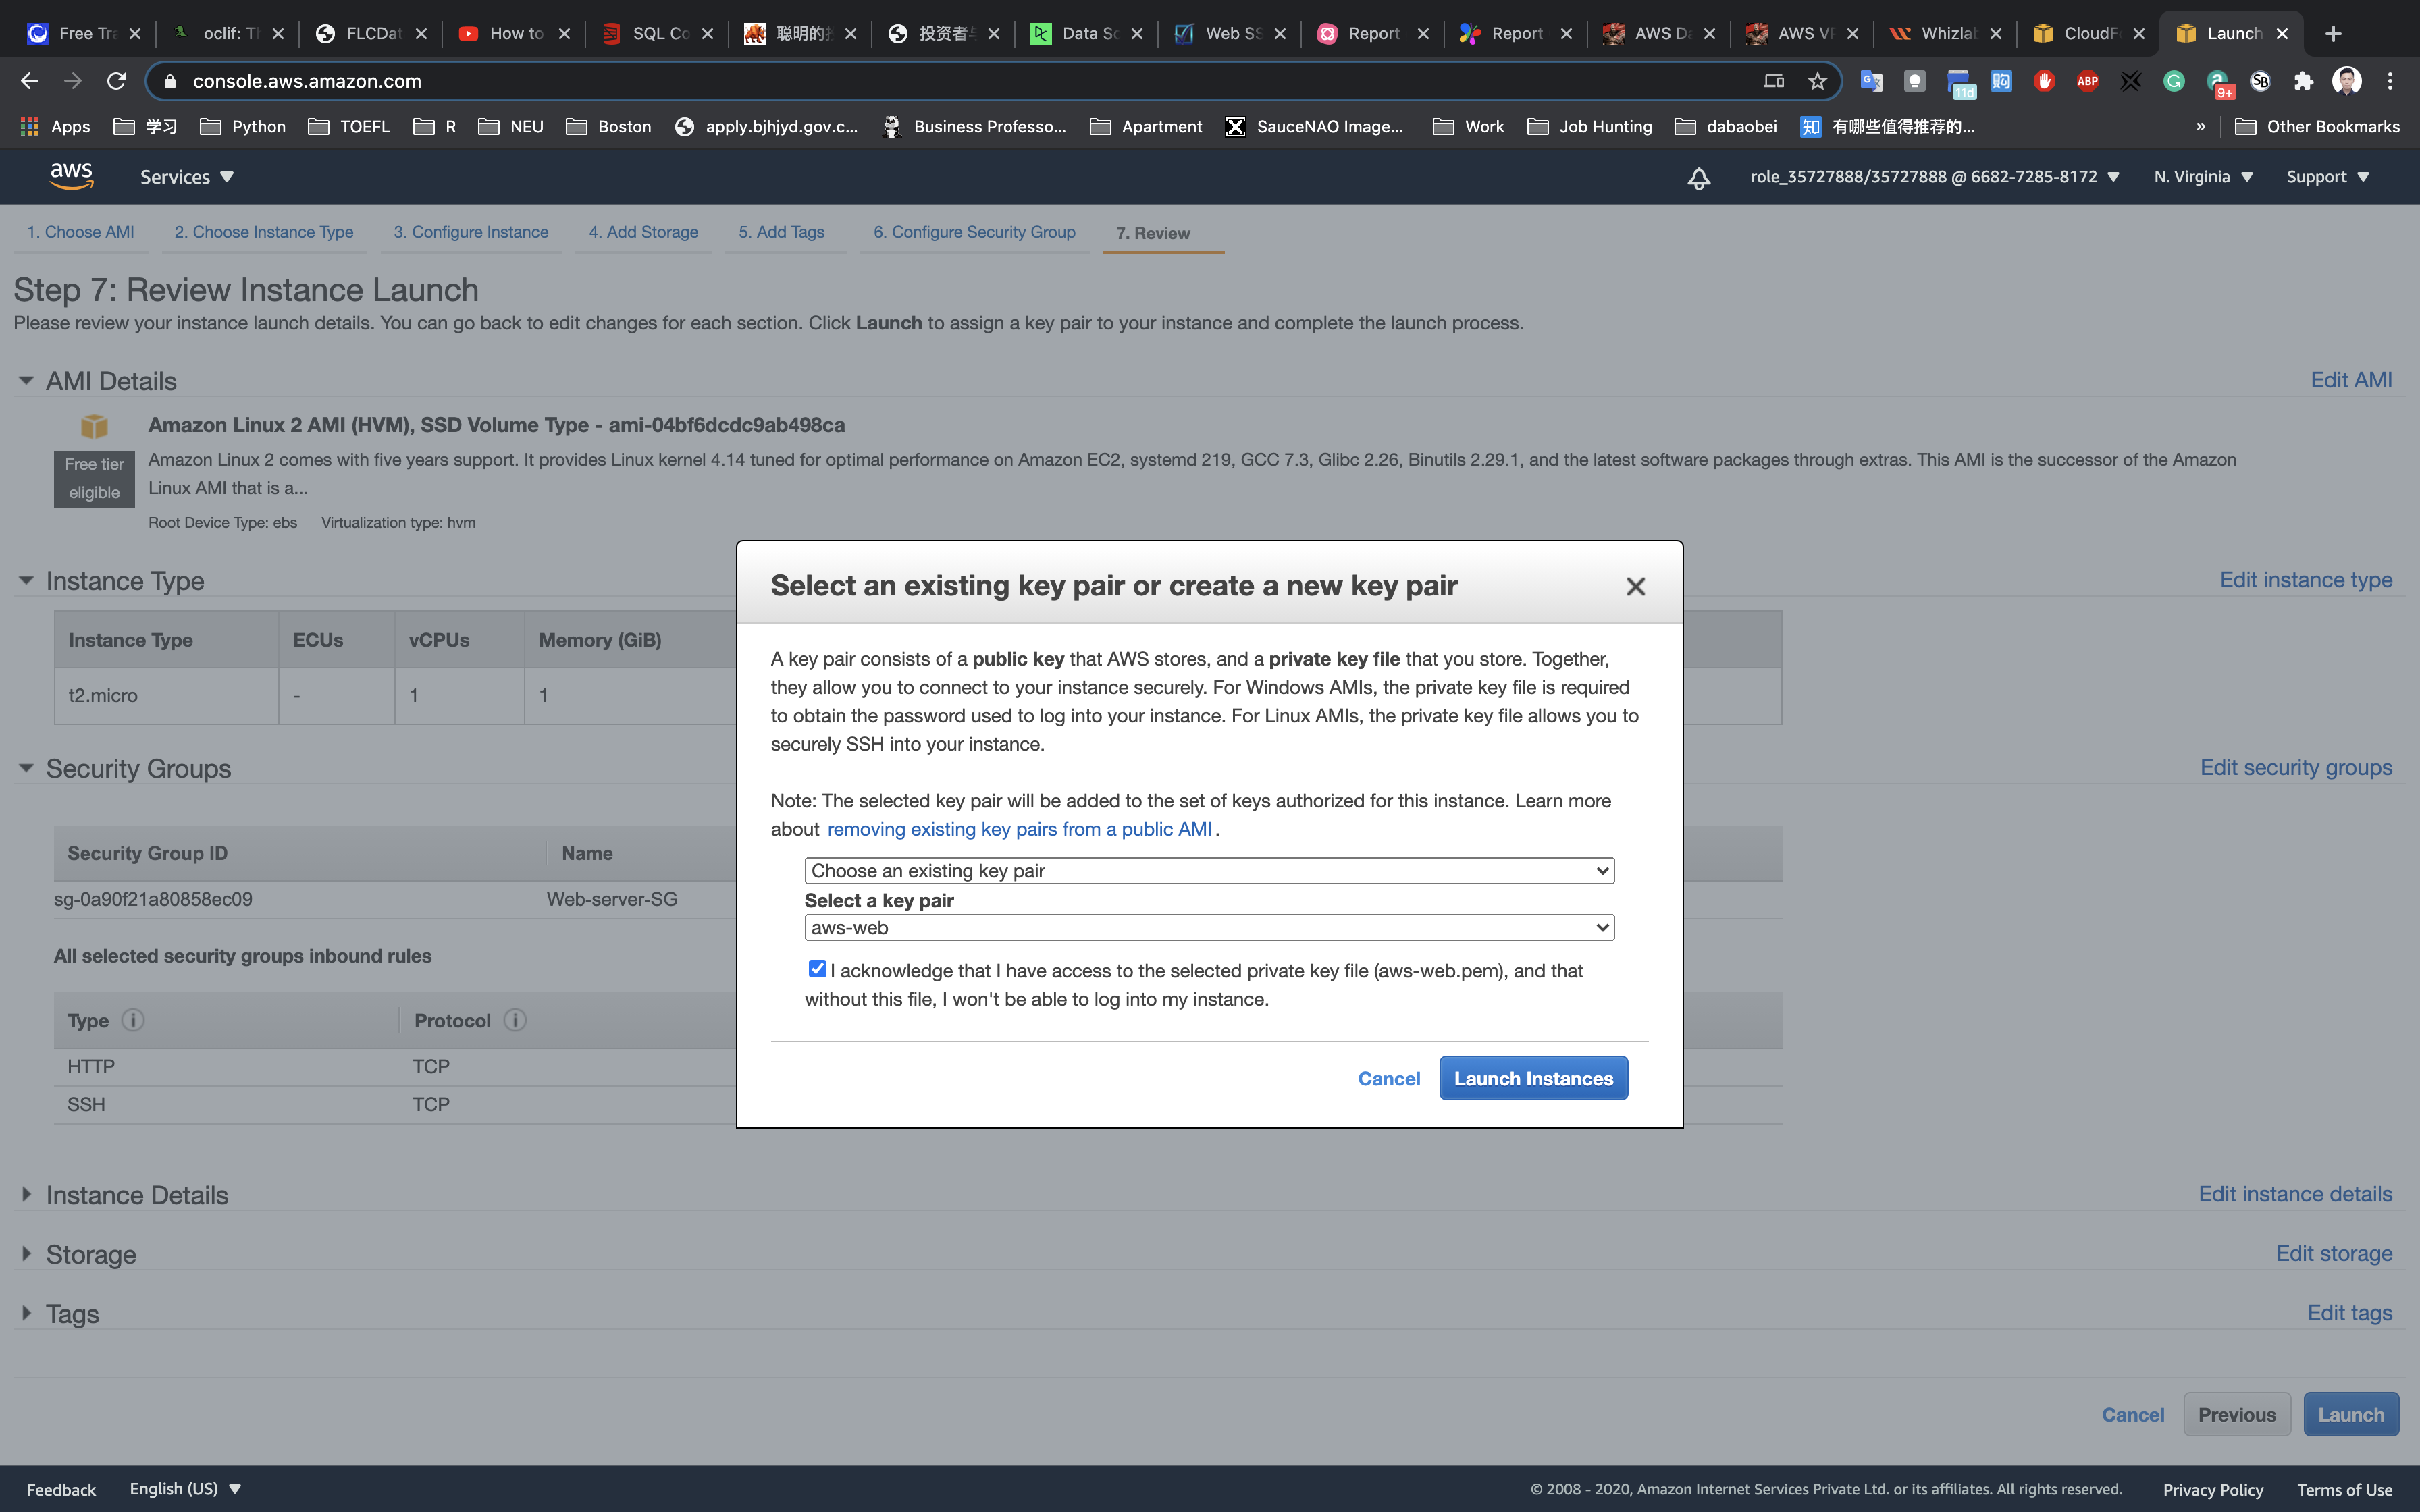
Load Balancer Configuration
In the EC2 console, navigate to Load Balancers in the left side panel.
Click on Create Load Balancer at the top left to create a new load balancer for our web servers.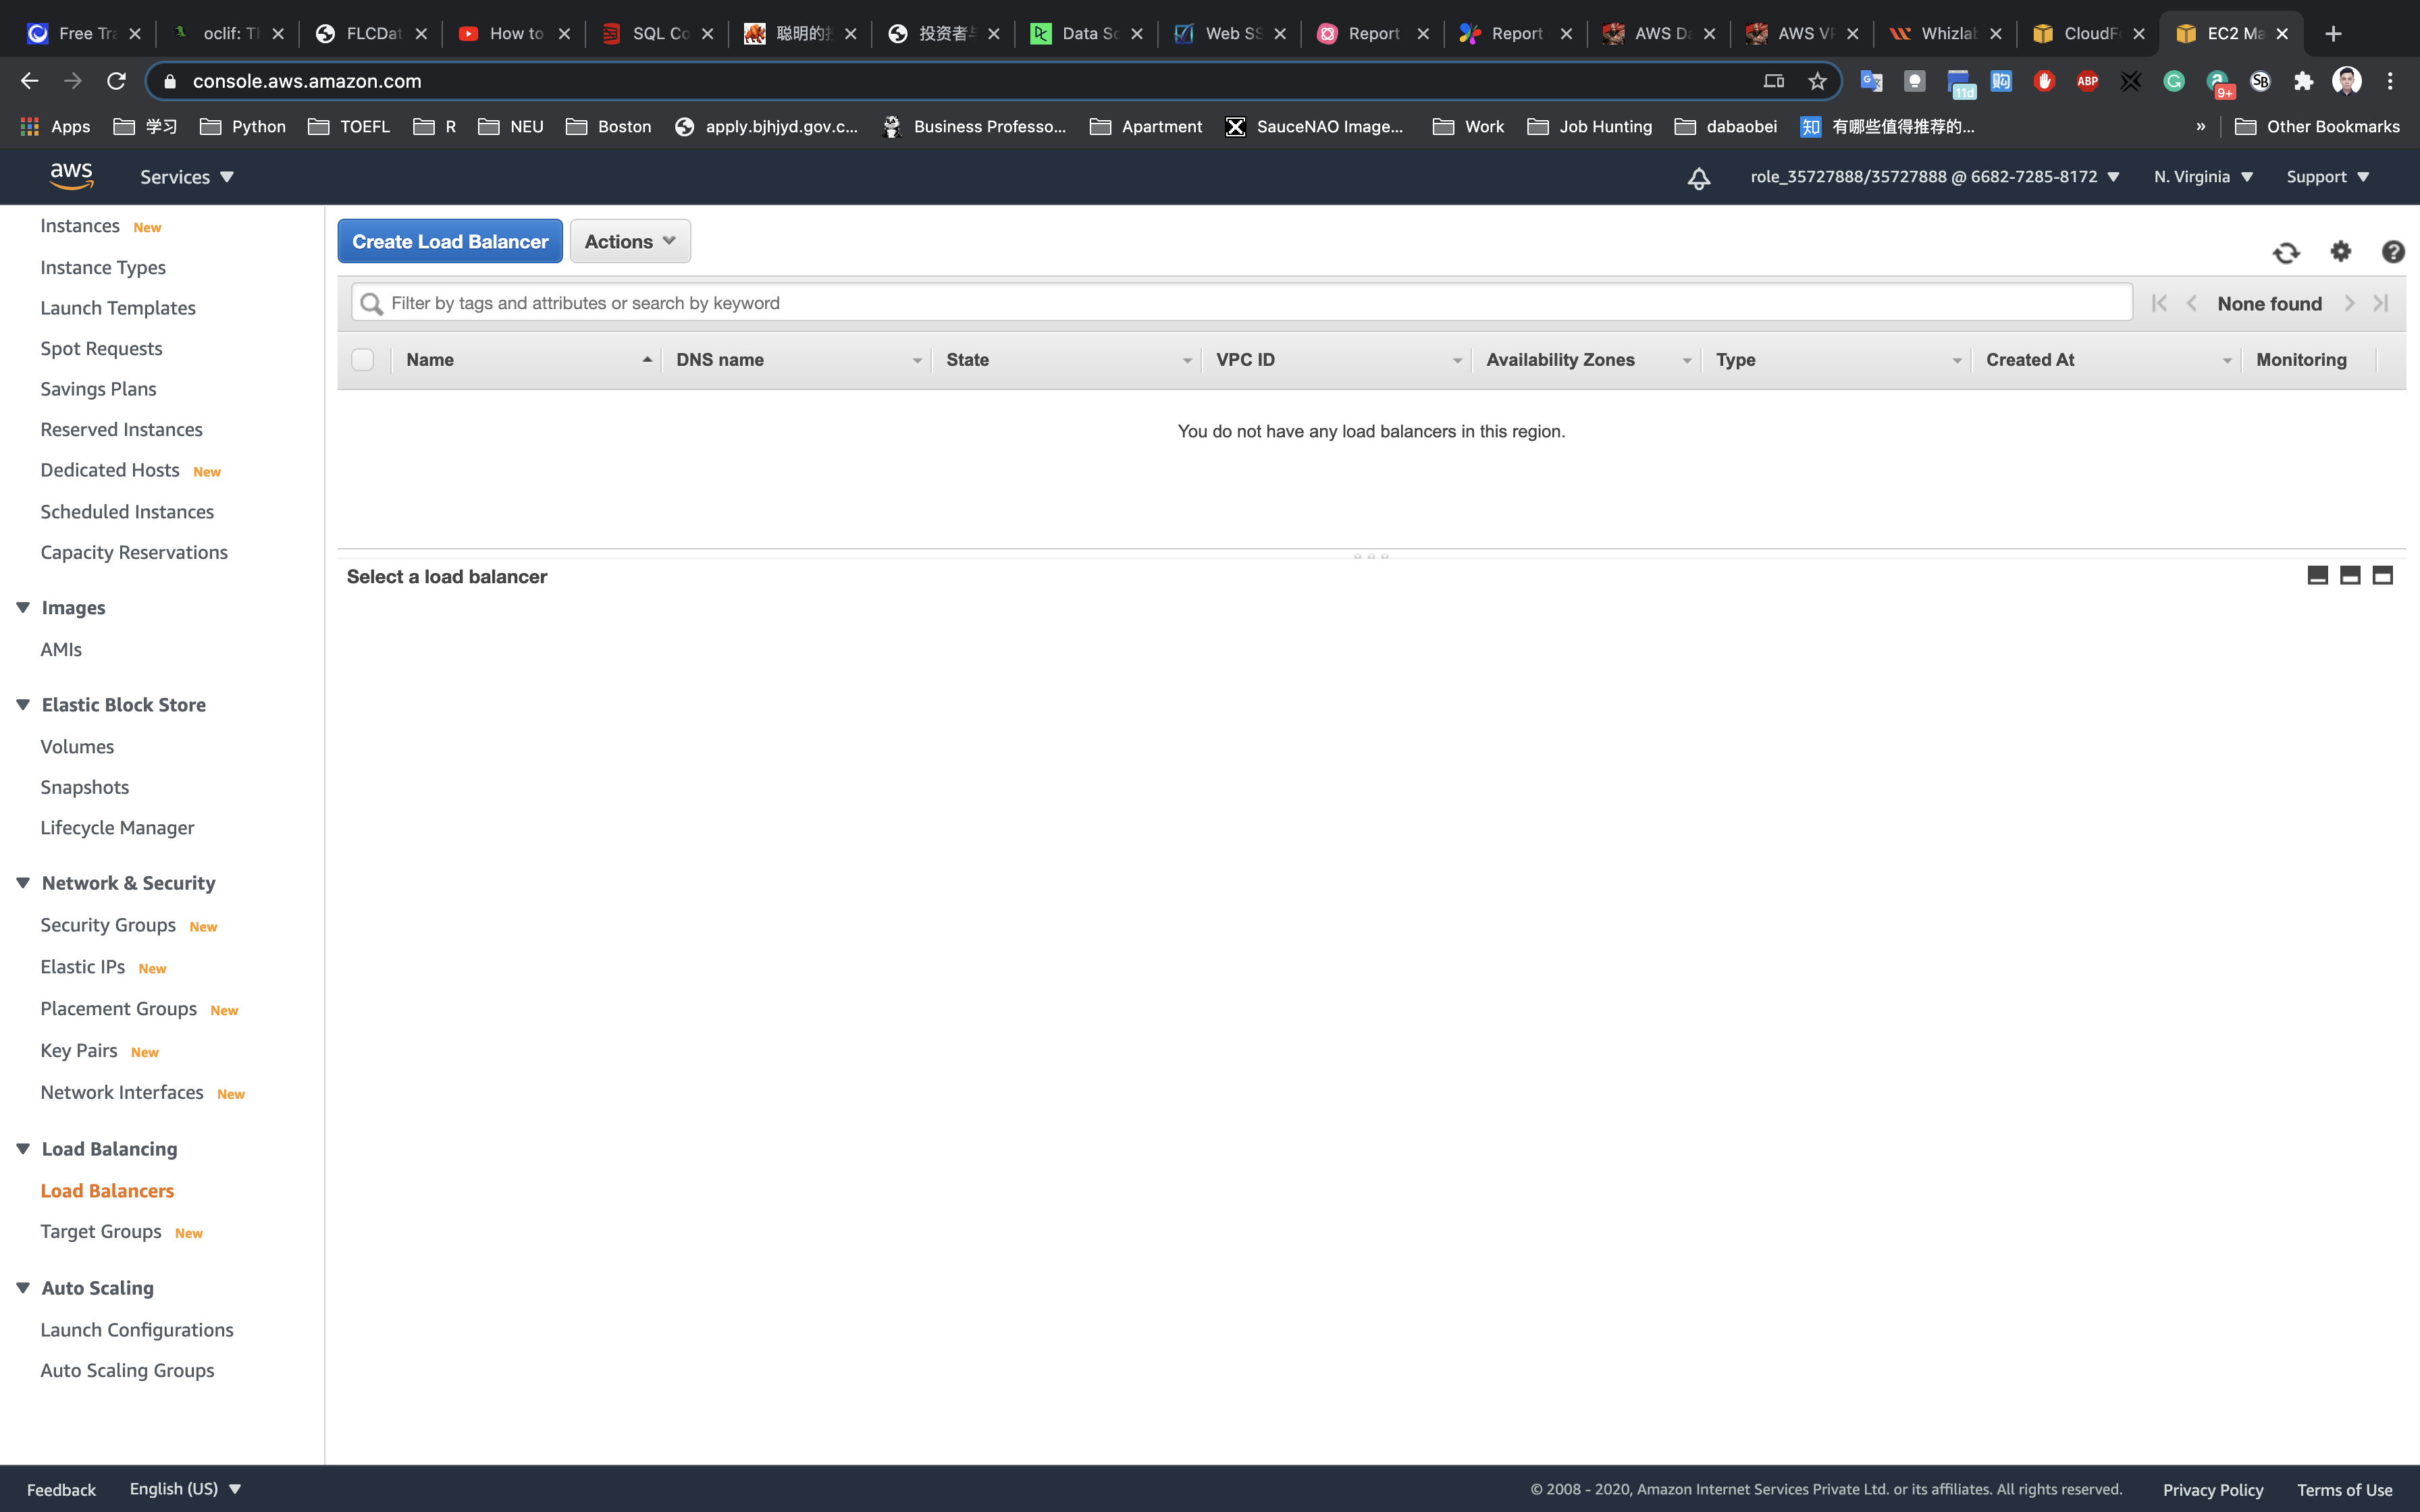
On the next screen, choose Application Load Balancer since we are testing the high availability of the web app.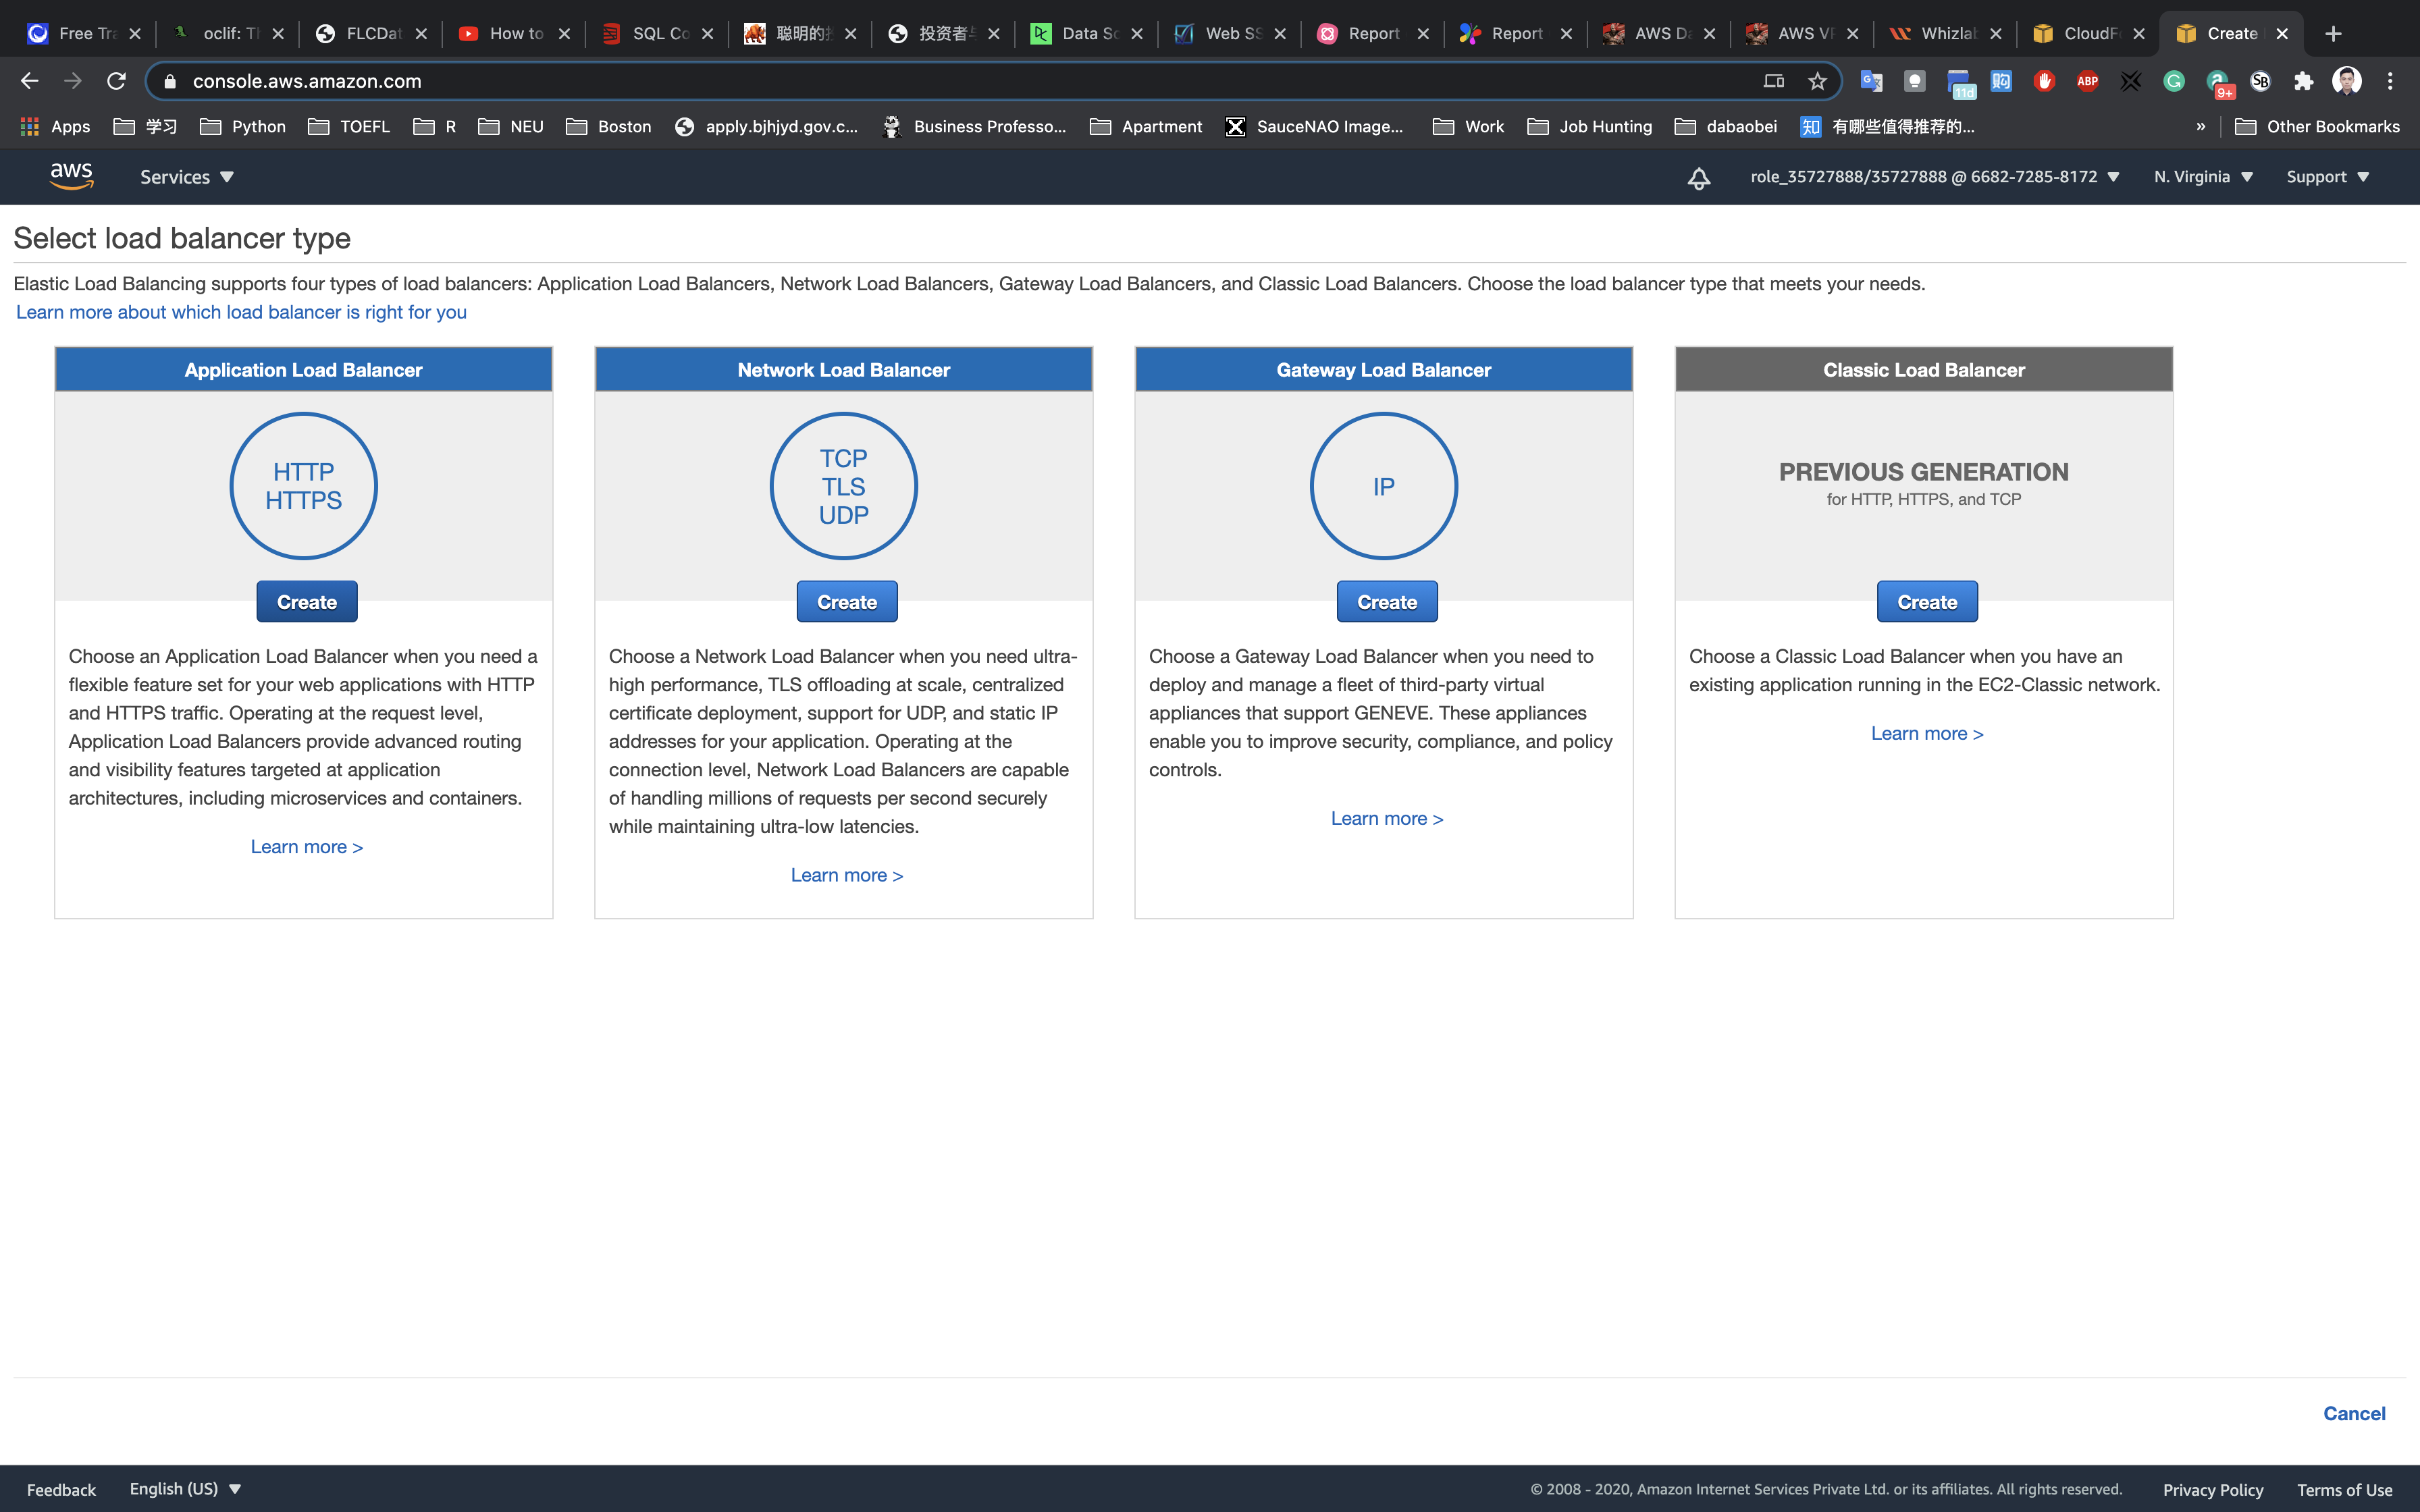
In configure the load balancer enter the details below:
- Name:
Web-application-LB - Scheme:
Internet-facing - Ip address type:
ipv4 - Listener:
Default (HTTP:80)
Availability Zones
- VPC:
Bastion-VPC
Availability Zones: Select All Availability Zones
Make sure you select the Public Subnet in the Availability zone us-east-1a and us-east-1b.
Note: we must specify the availability zones in which your load balancer needs to be enabled, making it routing the traffic only to the targets launched in those availability zones. You must include subnets from a minimum of two Availability zones to make our Load balancer Highly Available.
After filling in all the details above, click on Next: Configure Security Settings.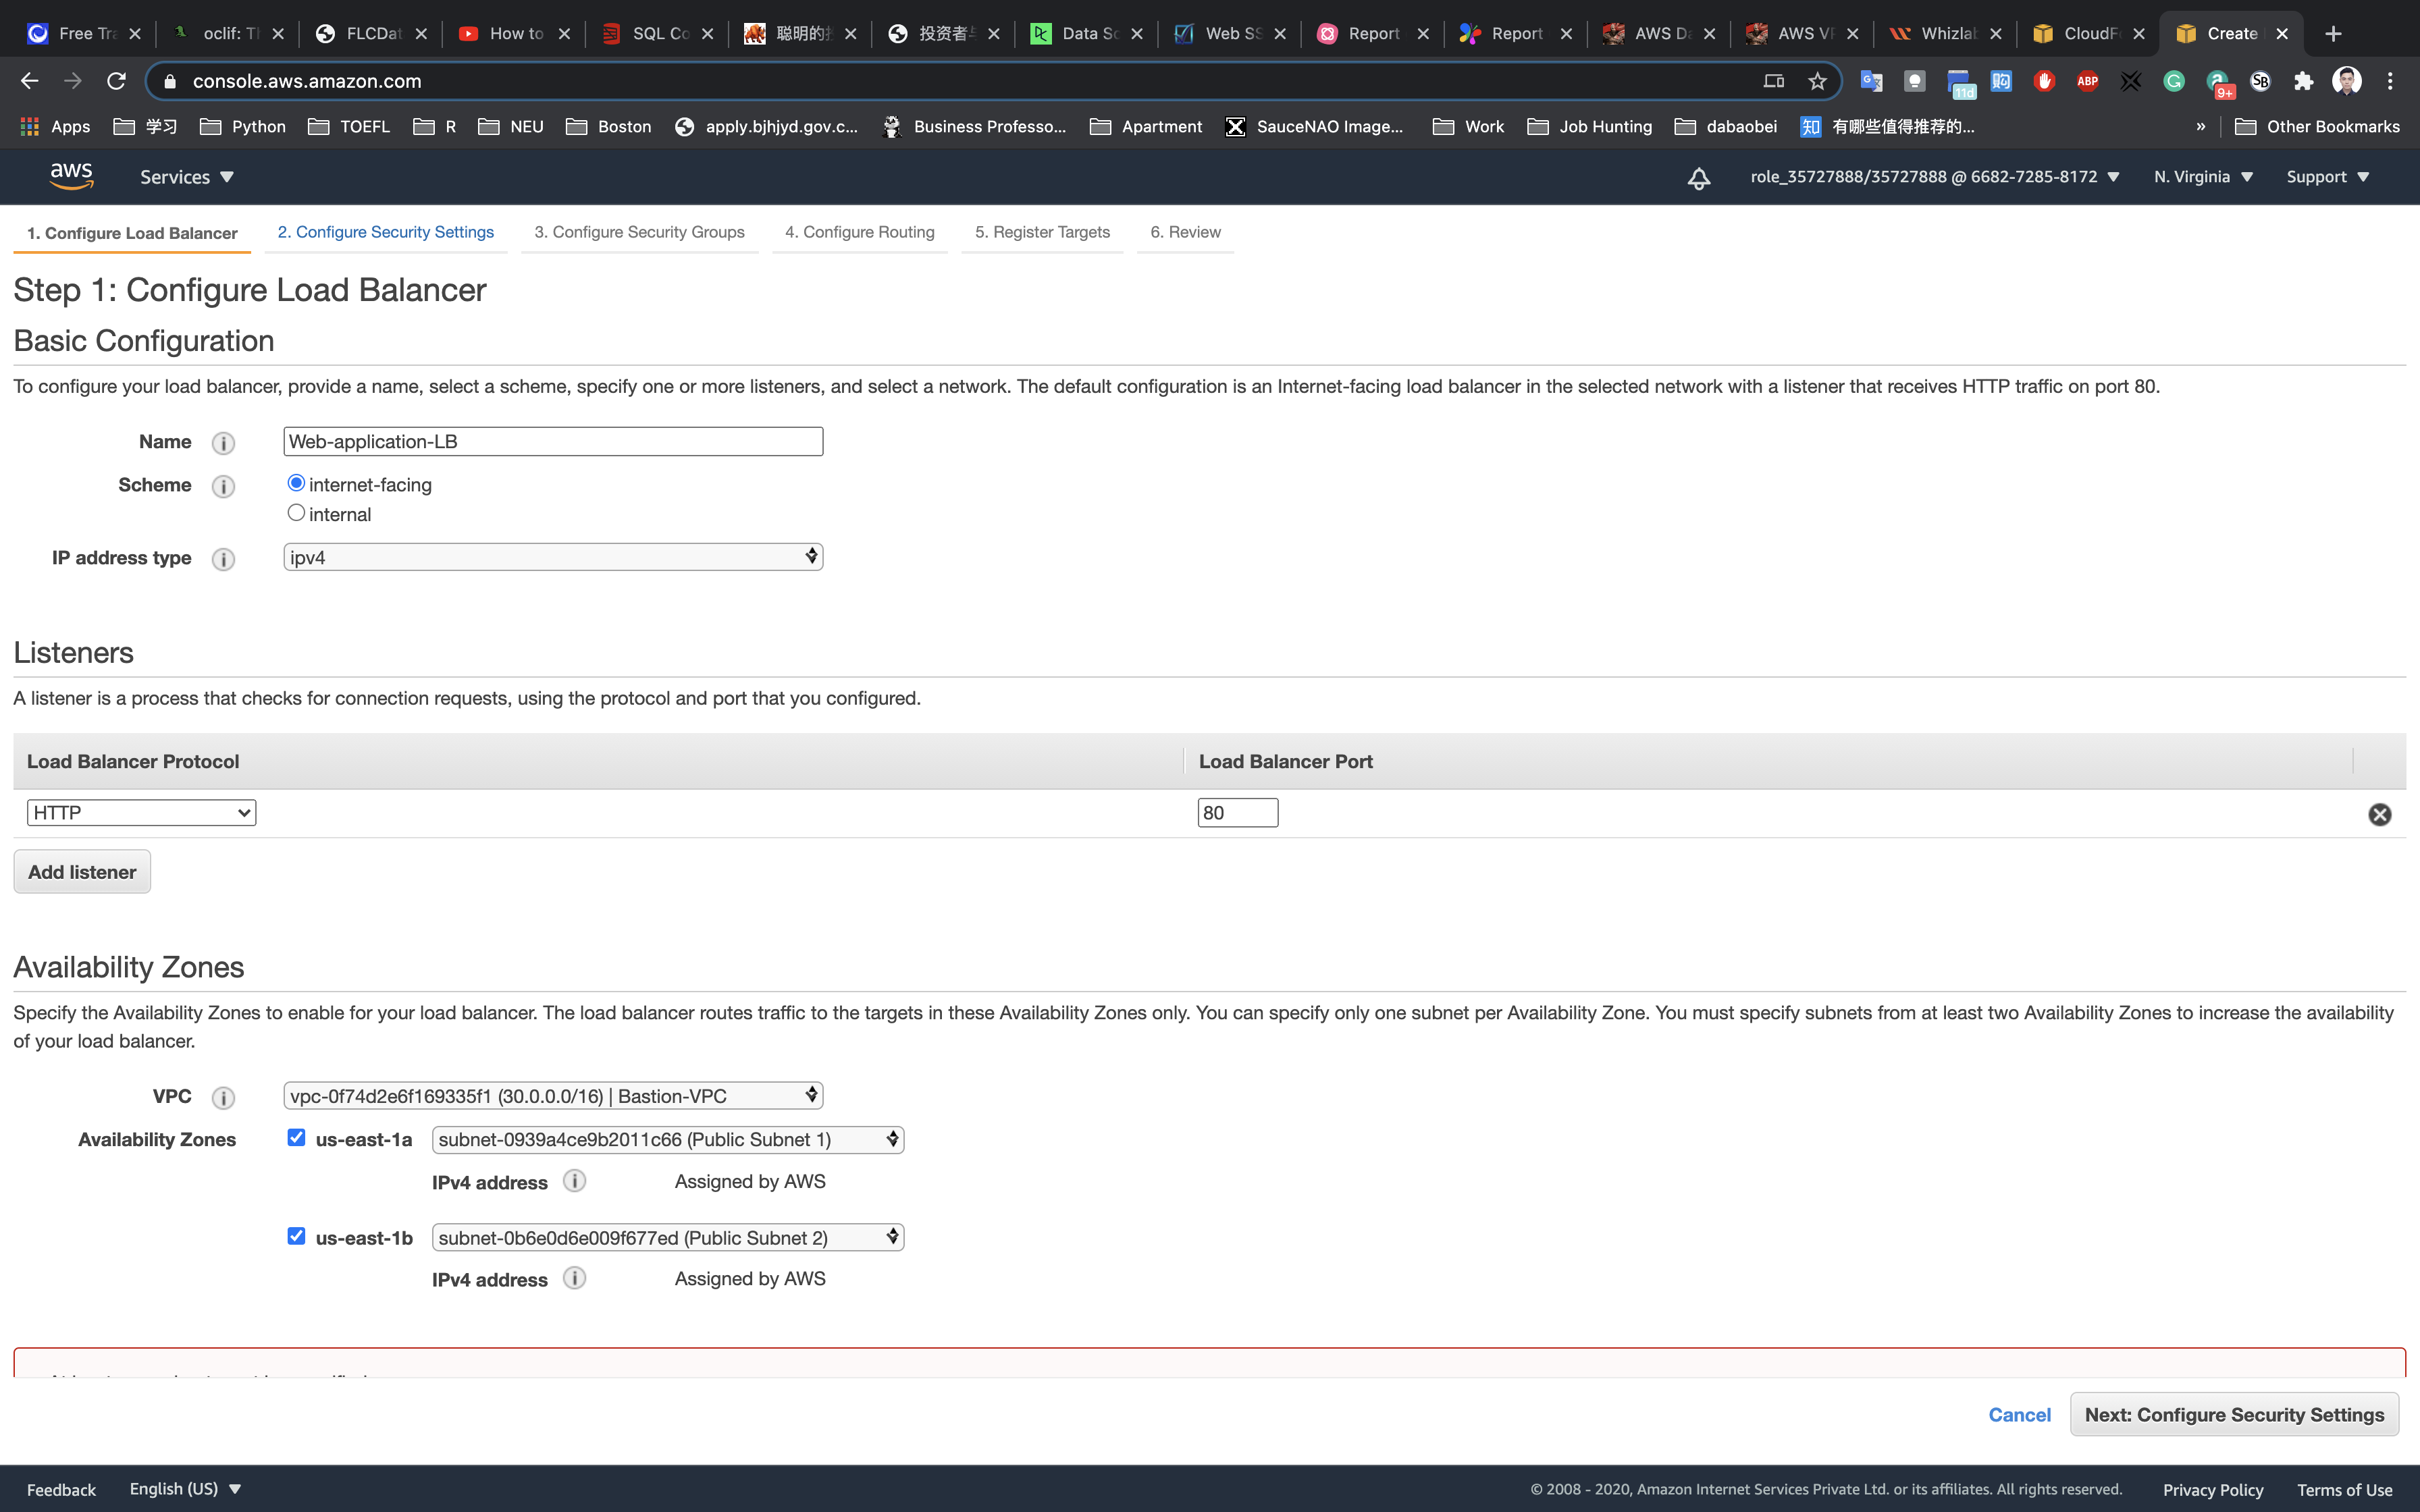
On the next page, ignore the warning and click on Next: Configure Security Settings.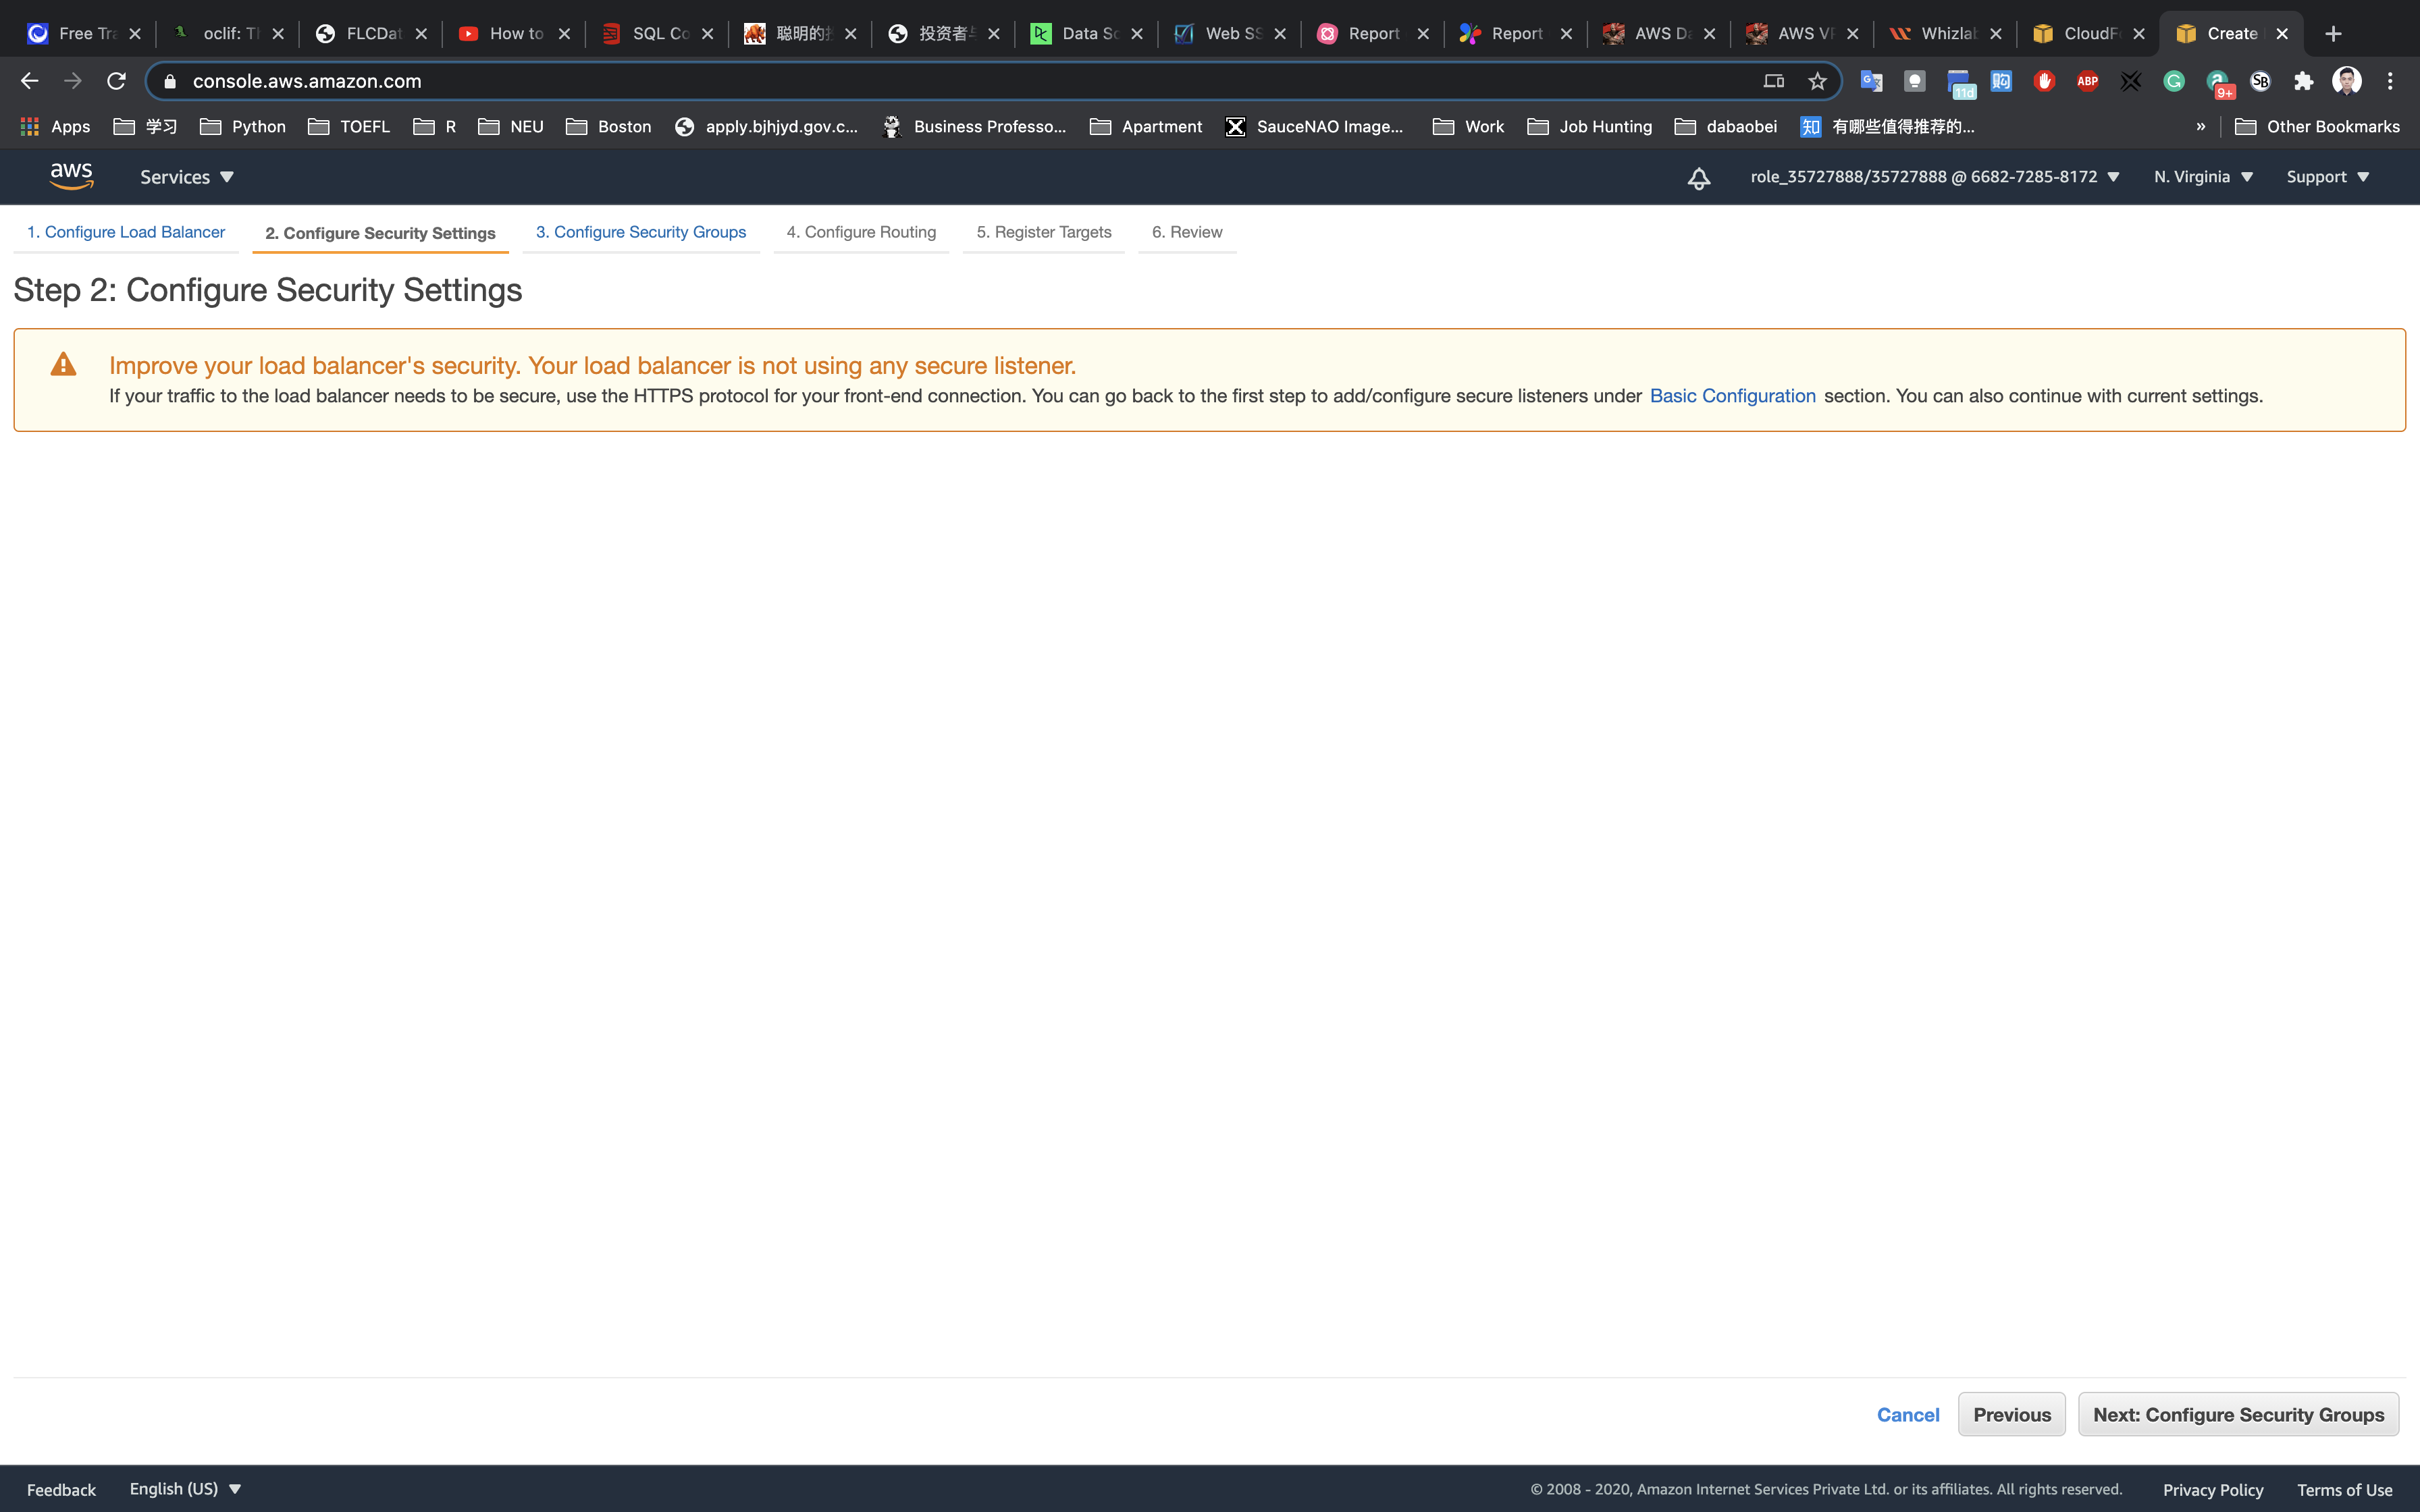
Configure Security Settings:
Select an existing security group and chose the security group LoadBalancer-SG (we created this one in the step above)
Click on Next: Configure Routing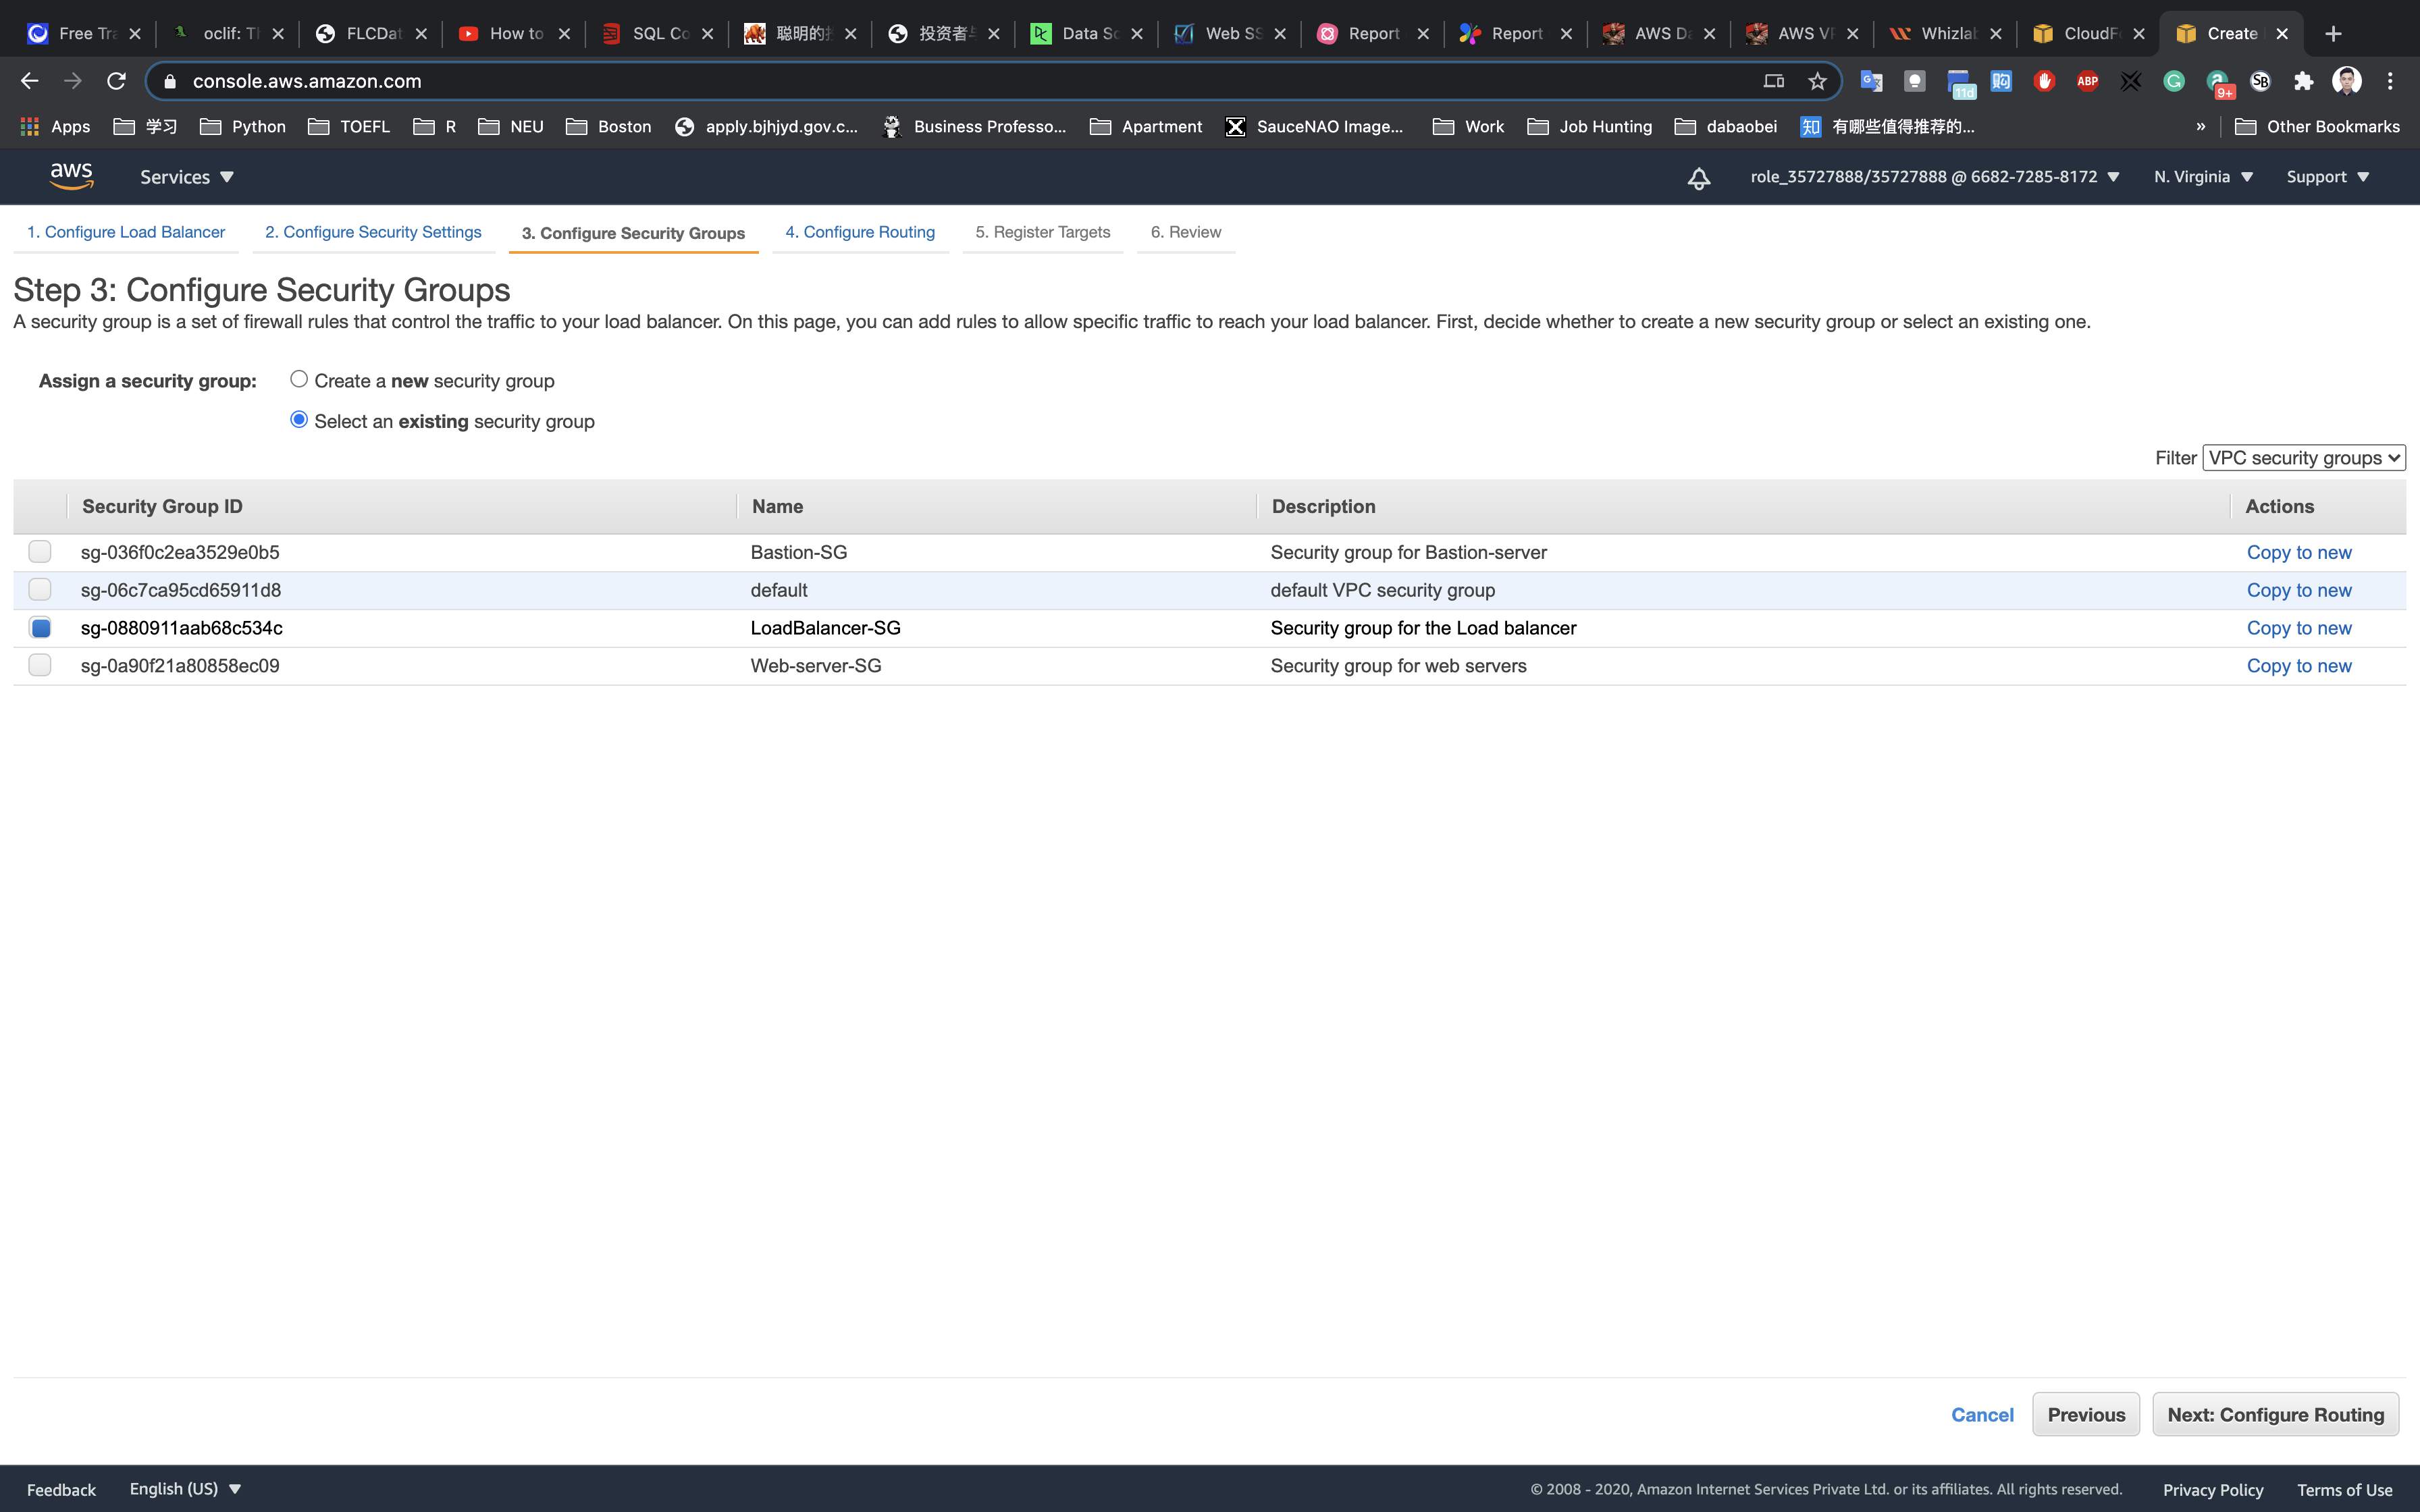
Configure Routing
- Target Group:
New target group - Name:
web-app-TG - Target Type:
Instance - Protocol:
HTTP - Port:
80
Note: The target group is used to route requests to one or more registered targets
Health check:
- Protocol:
HTTP - Path:
/index.html
Note: The load balancer periodically sends pings, attempts connections, or sends requests to test the EC2 instances. These tests are called health checks.
In the upcoming steps, we will create an index.html in the root directory of the Apache web servers (/var/www/html) to pass this health check.
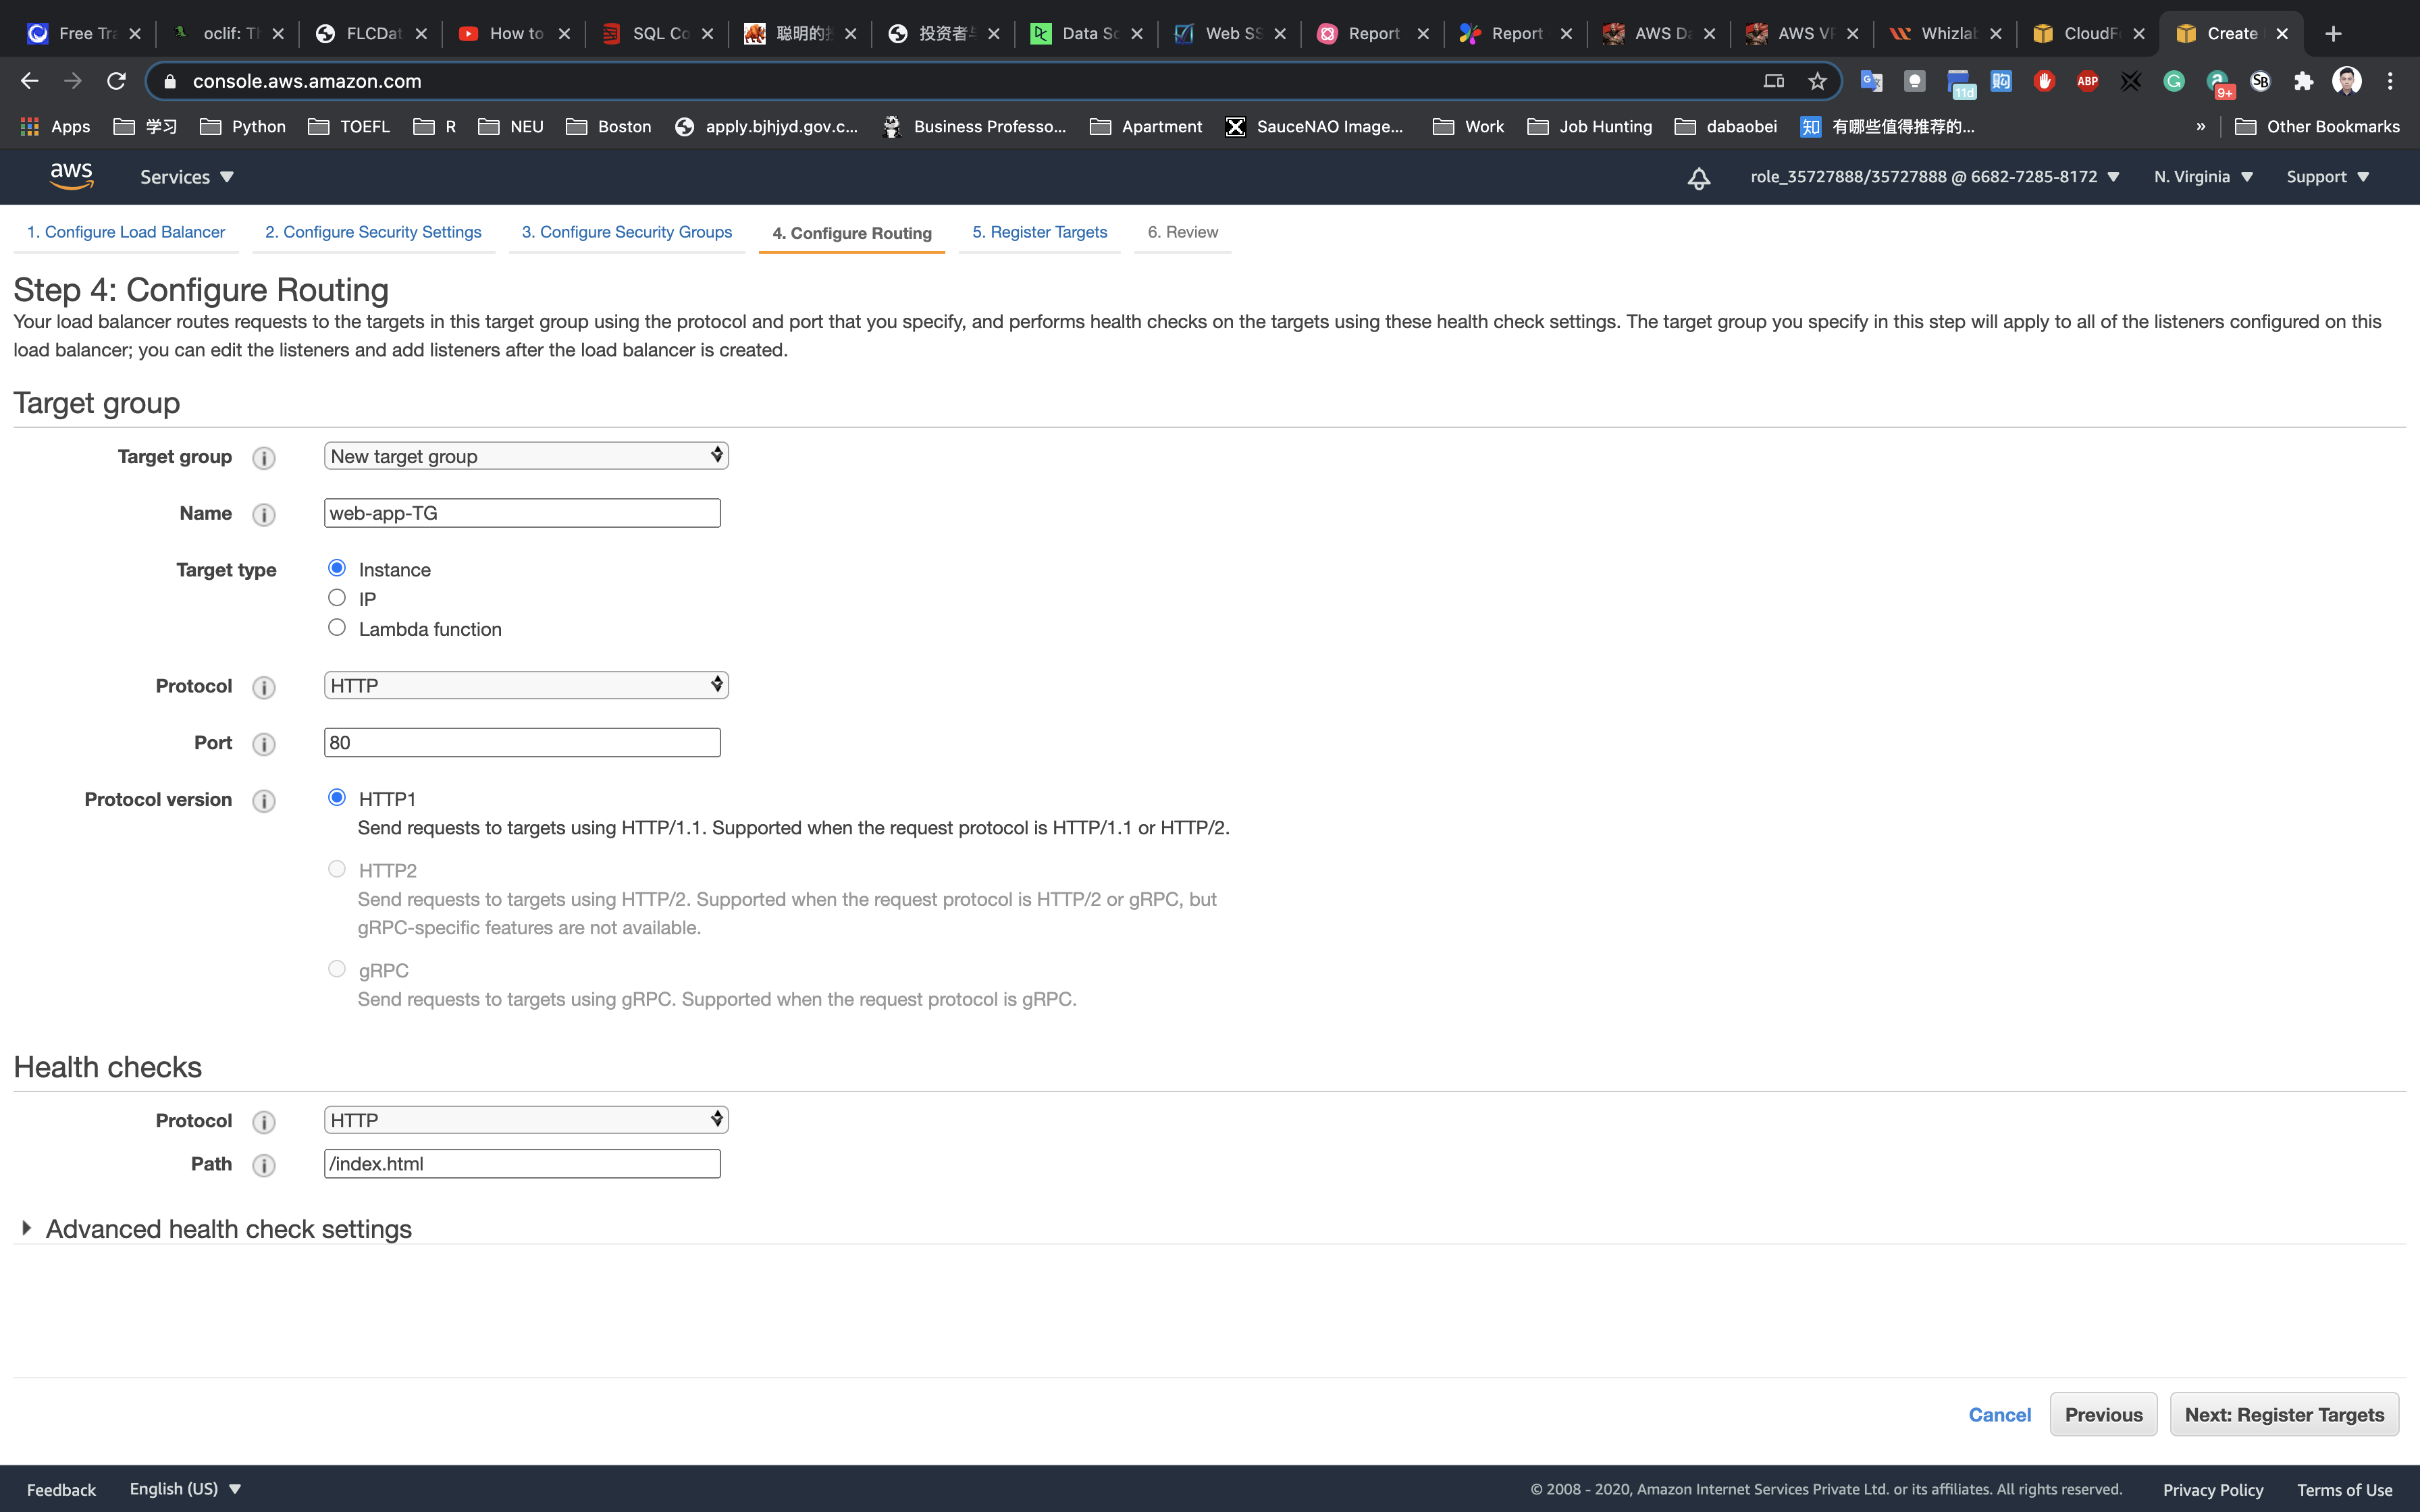
Advanced health check settings:
- Healthy threshold:
3 - Unhealthy threshold:
2 - Timeout:
5 - Interval:
10 - Success codes:
200
Click on Next: Registering Targets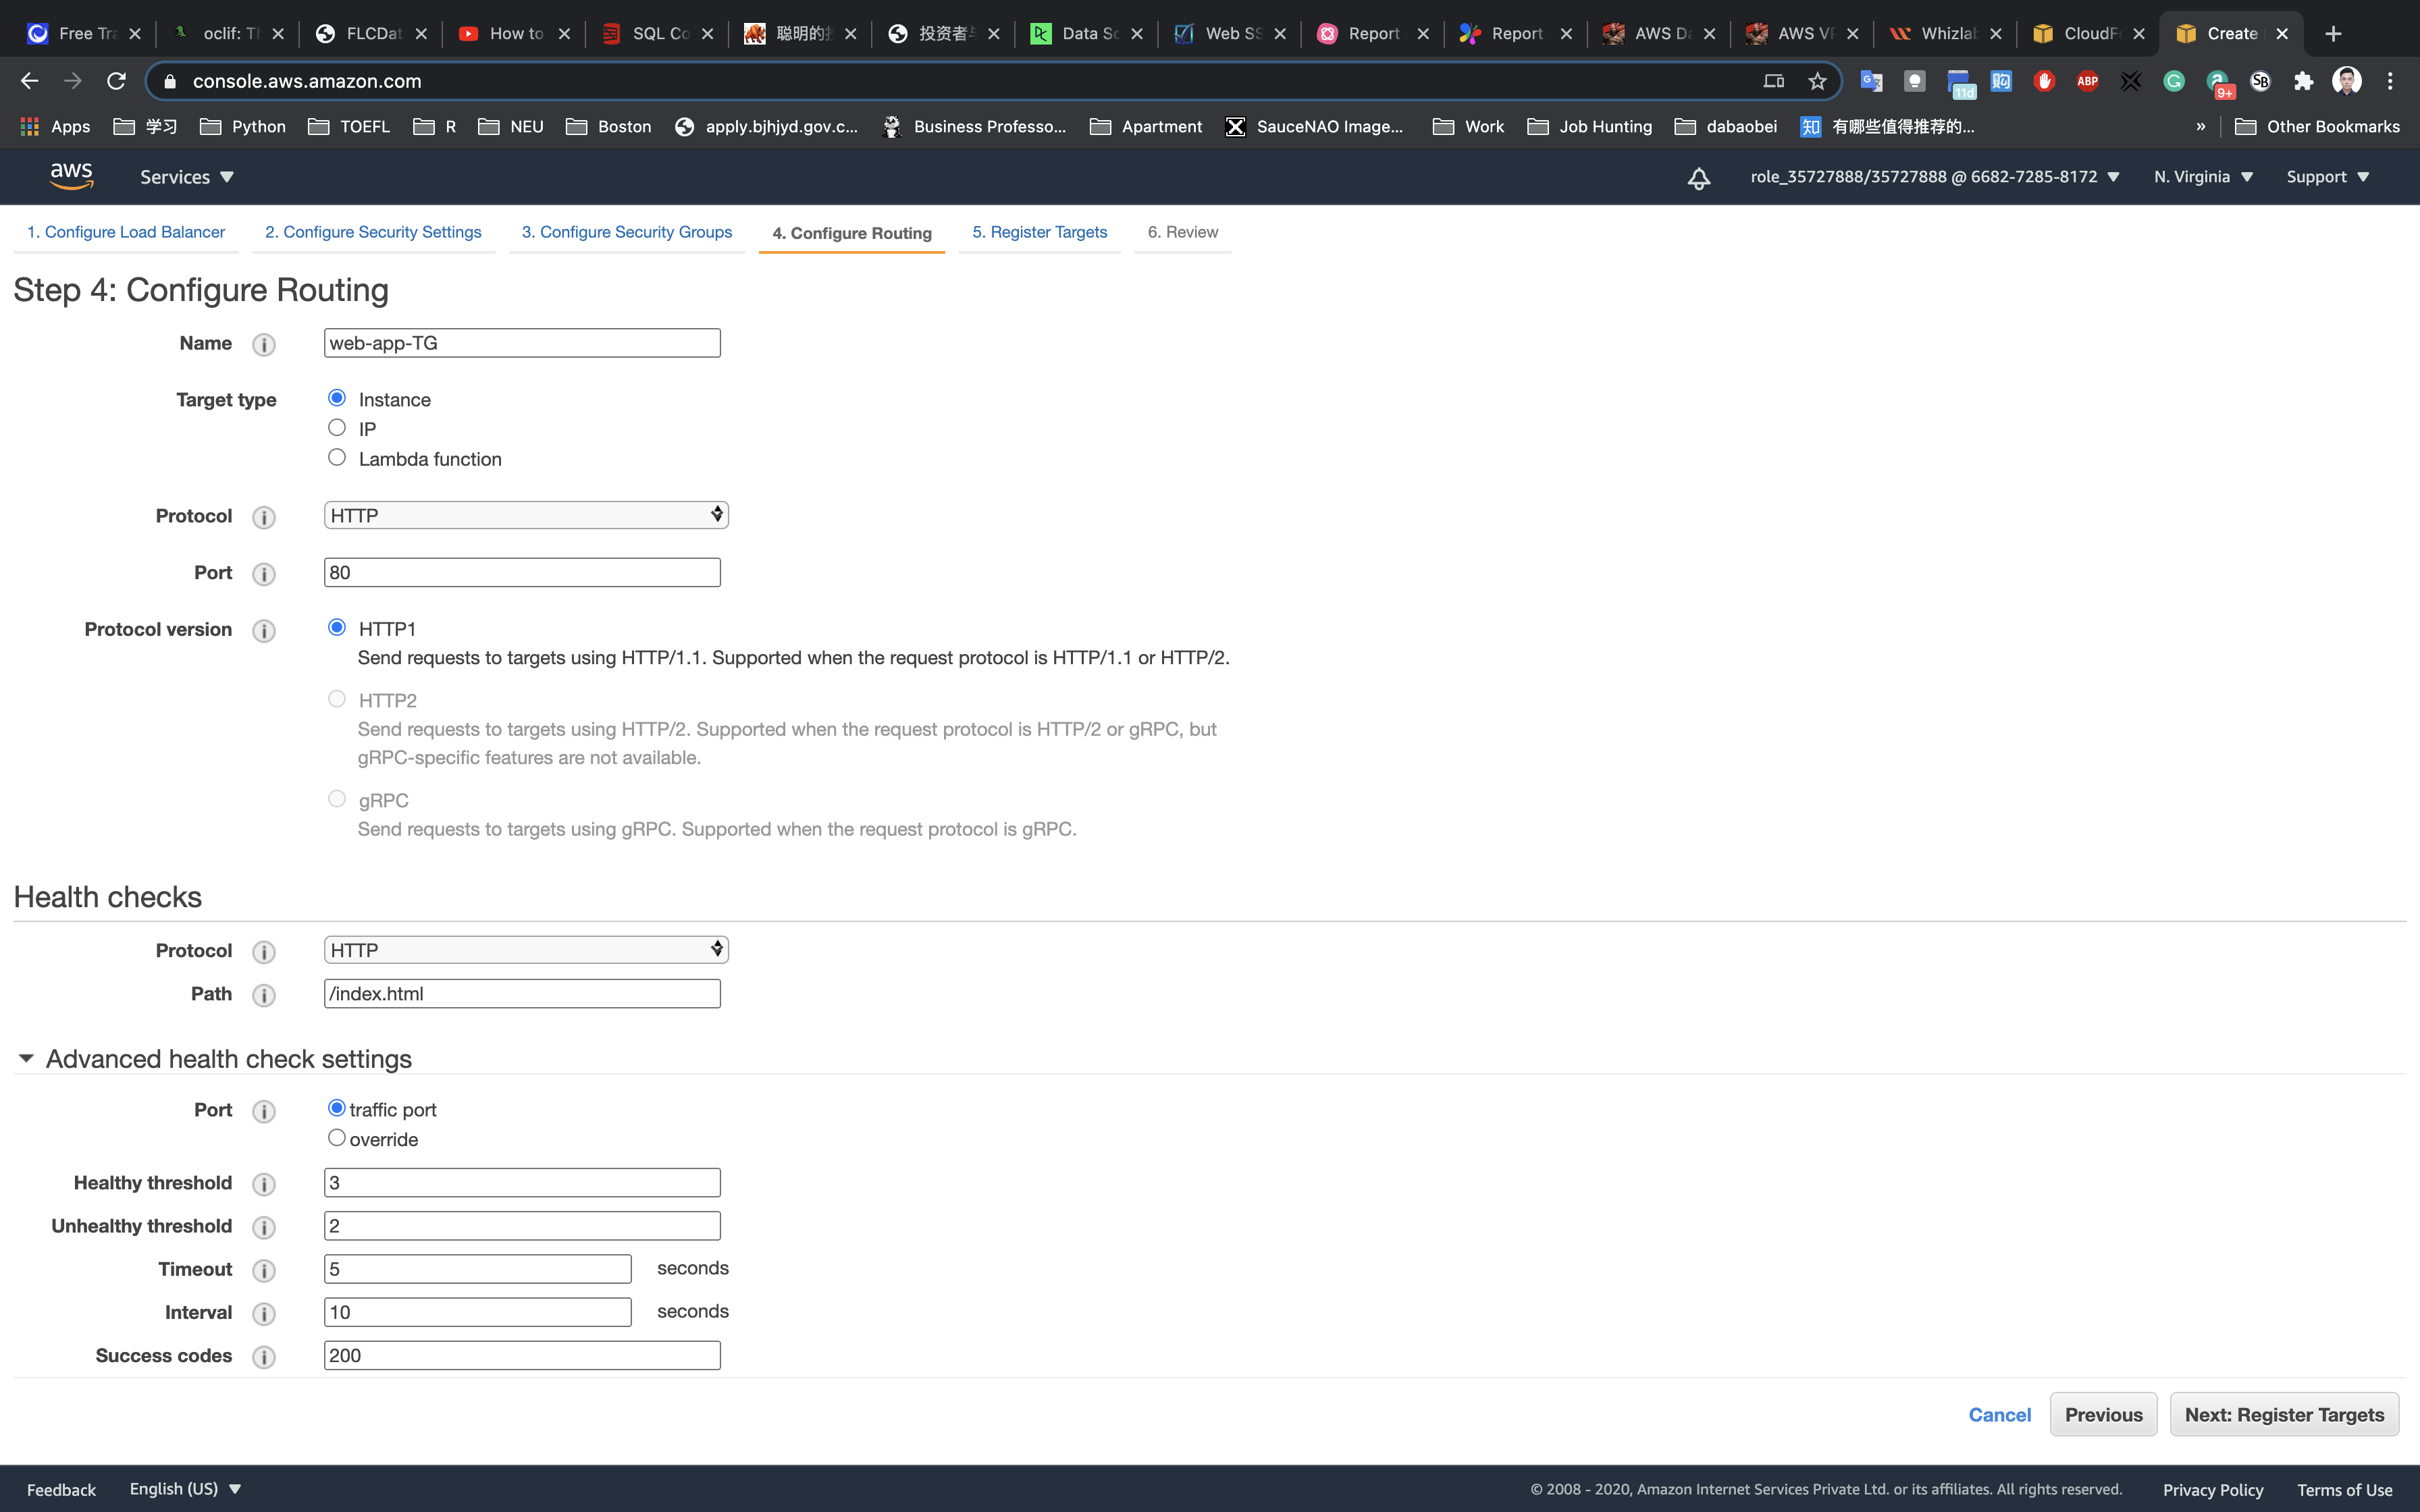
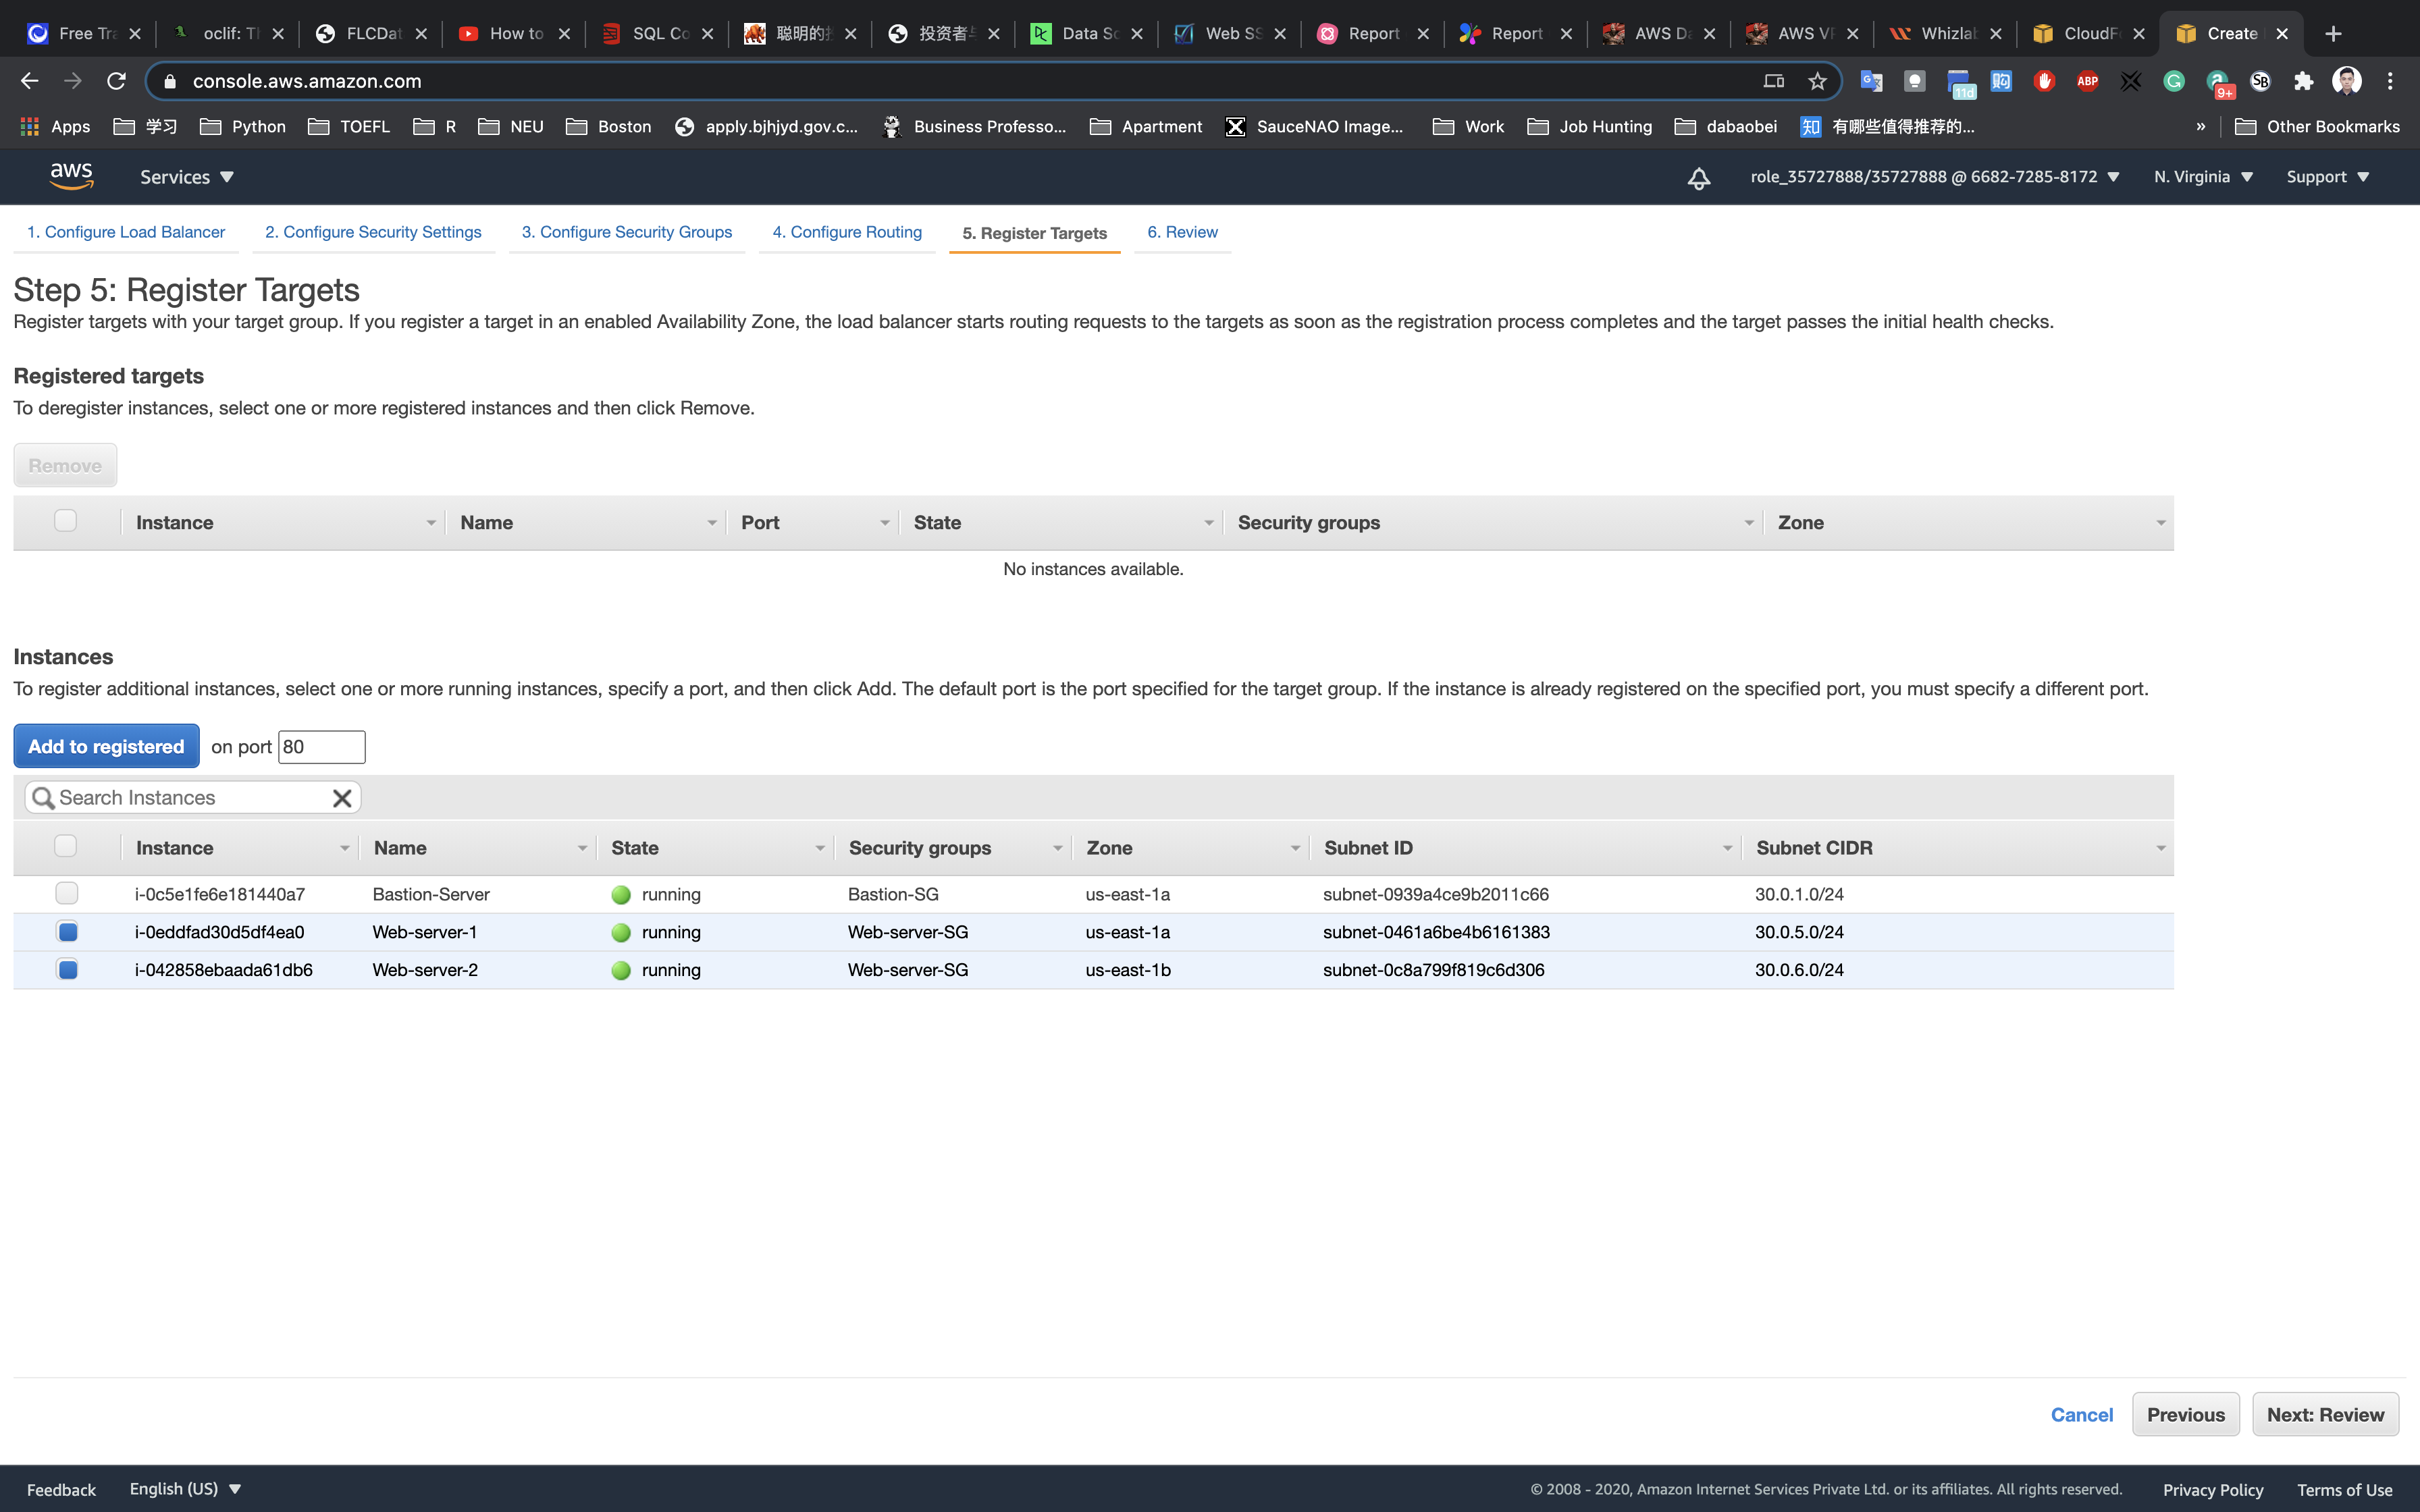
Registering Targets
Choose the two web instances and then click on Add to registered and click on Next: Review.
Once you reviewed the settings, click on Create.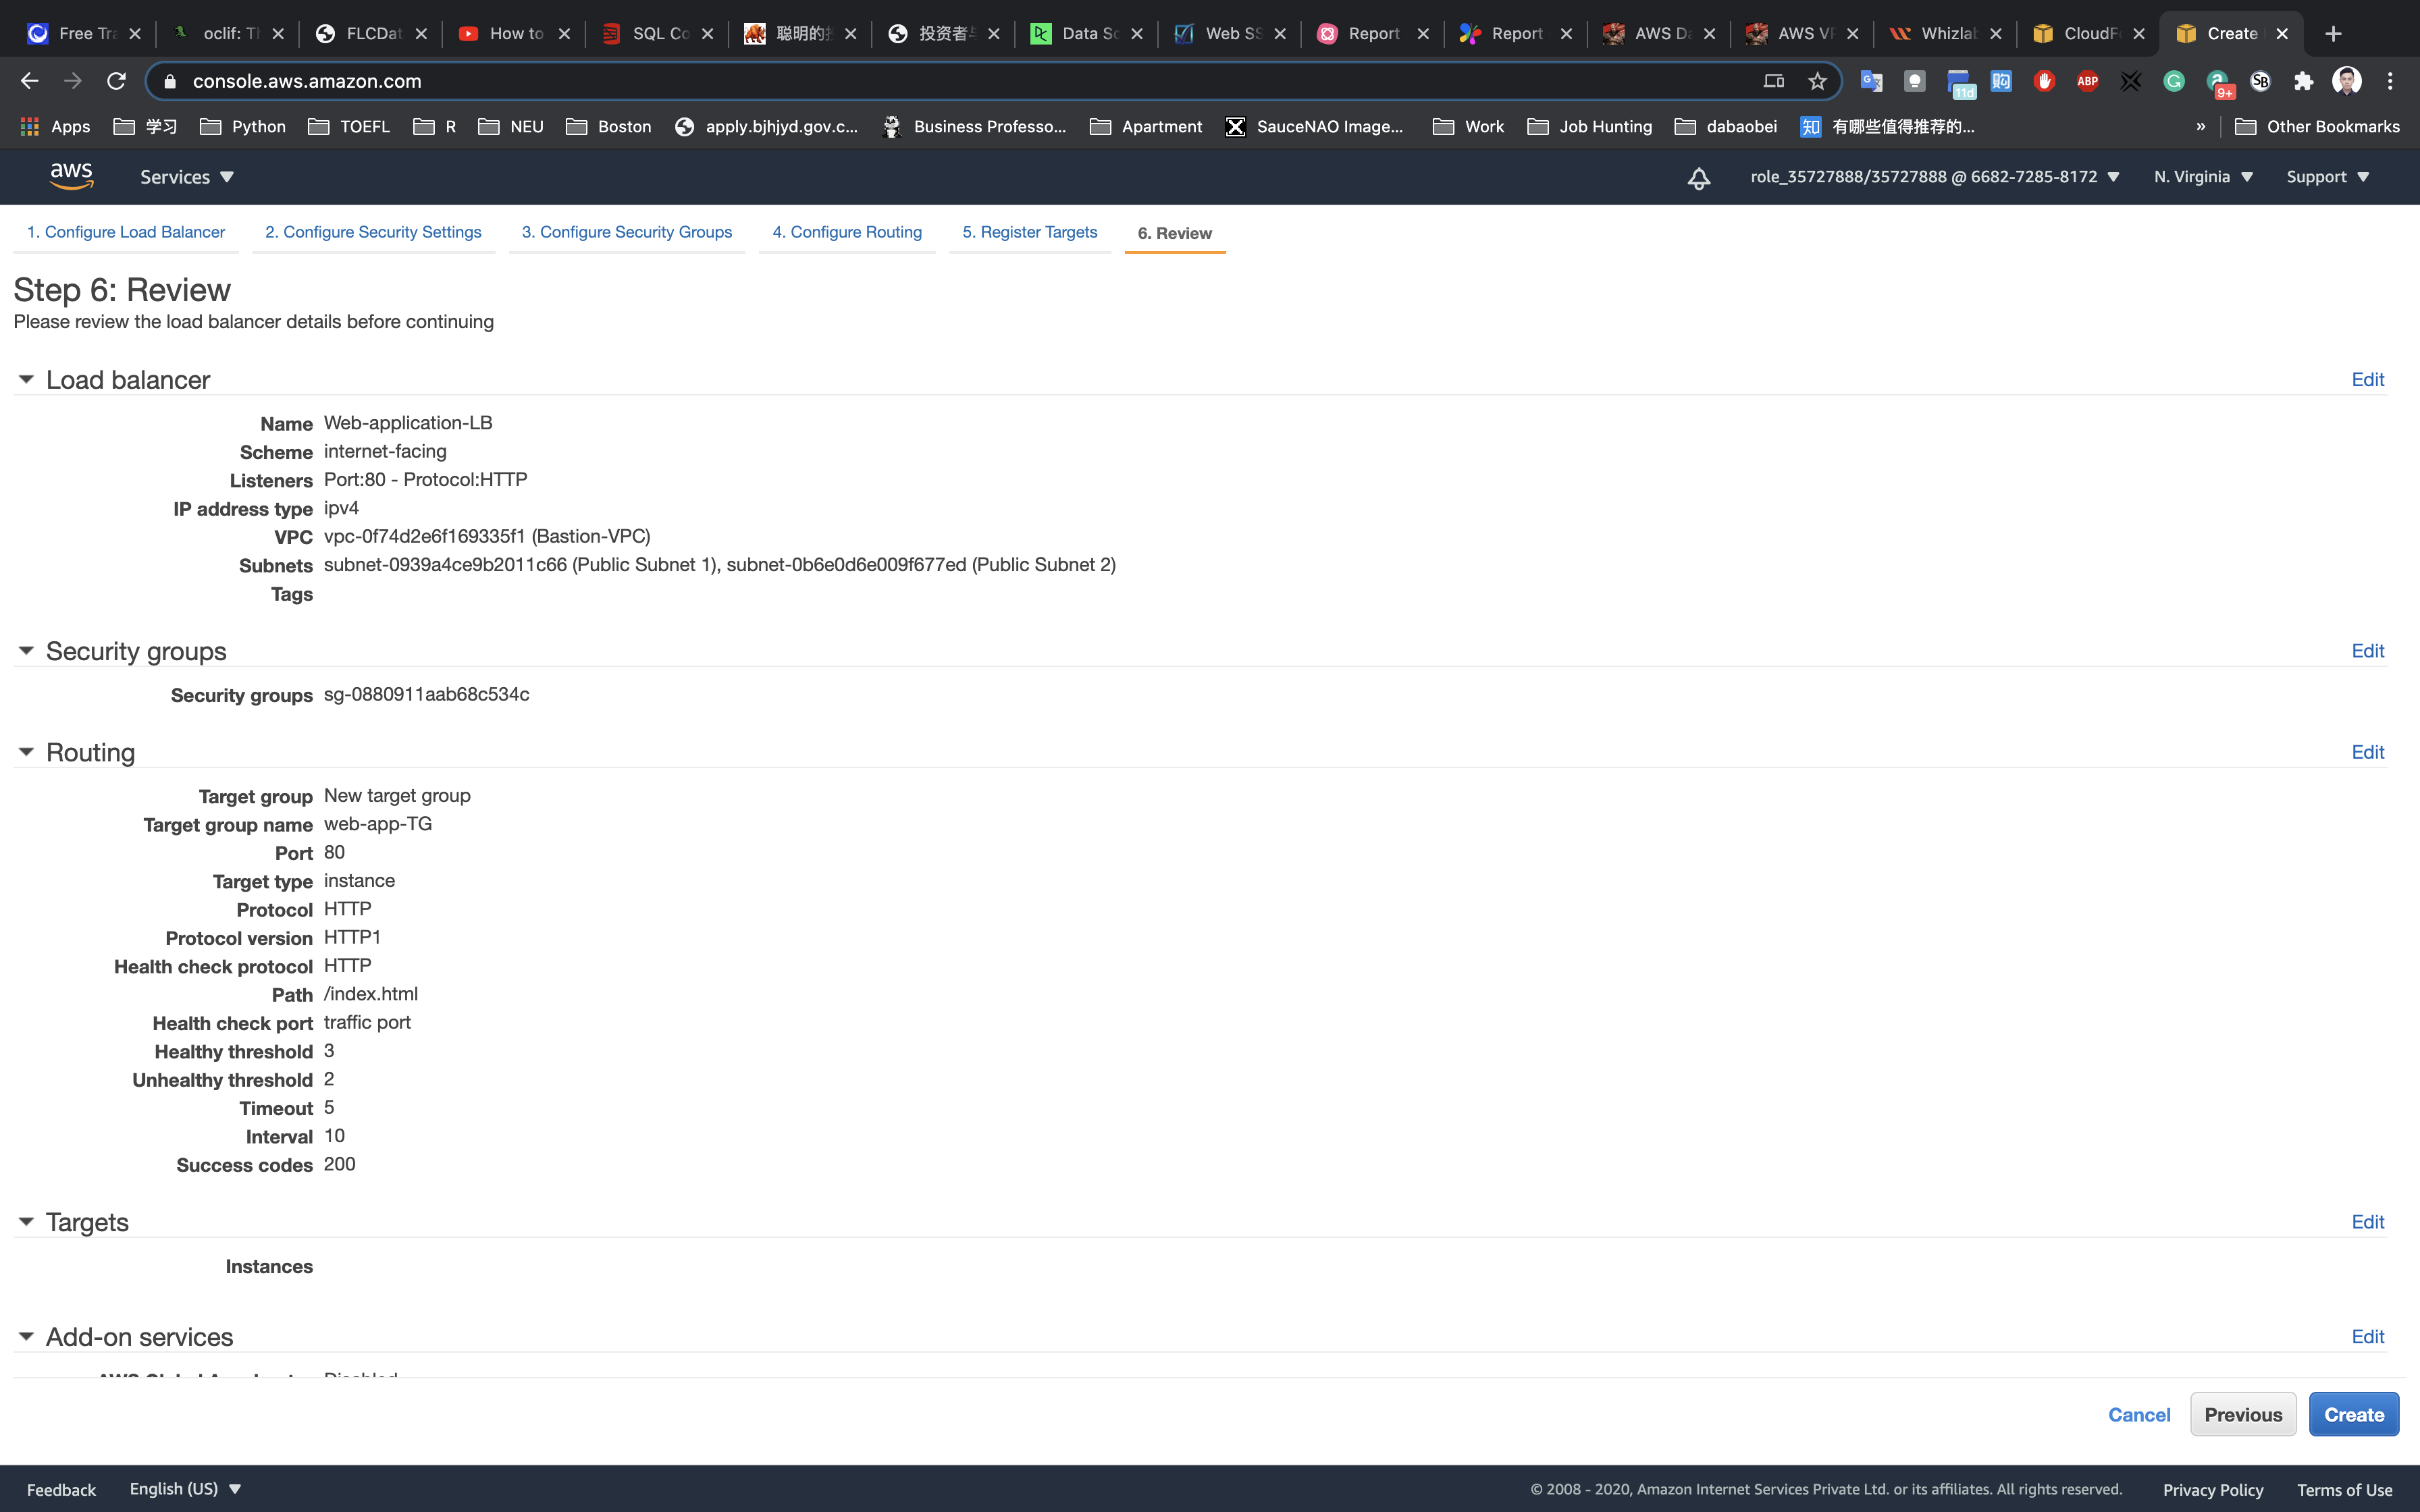
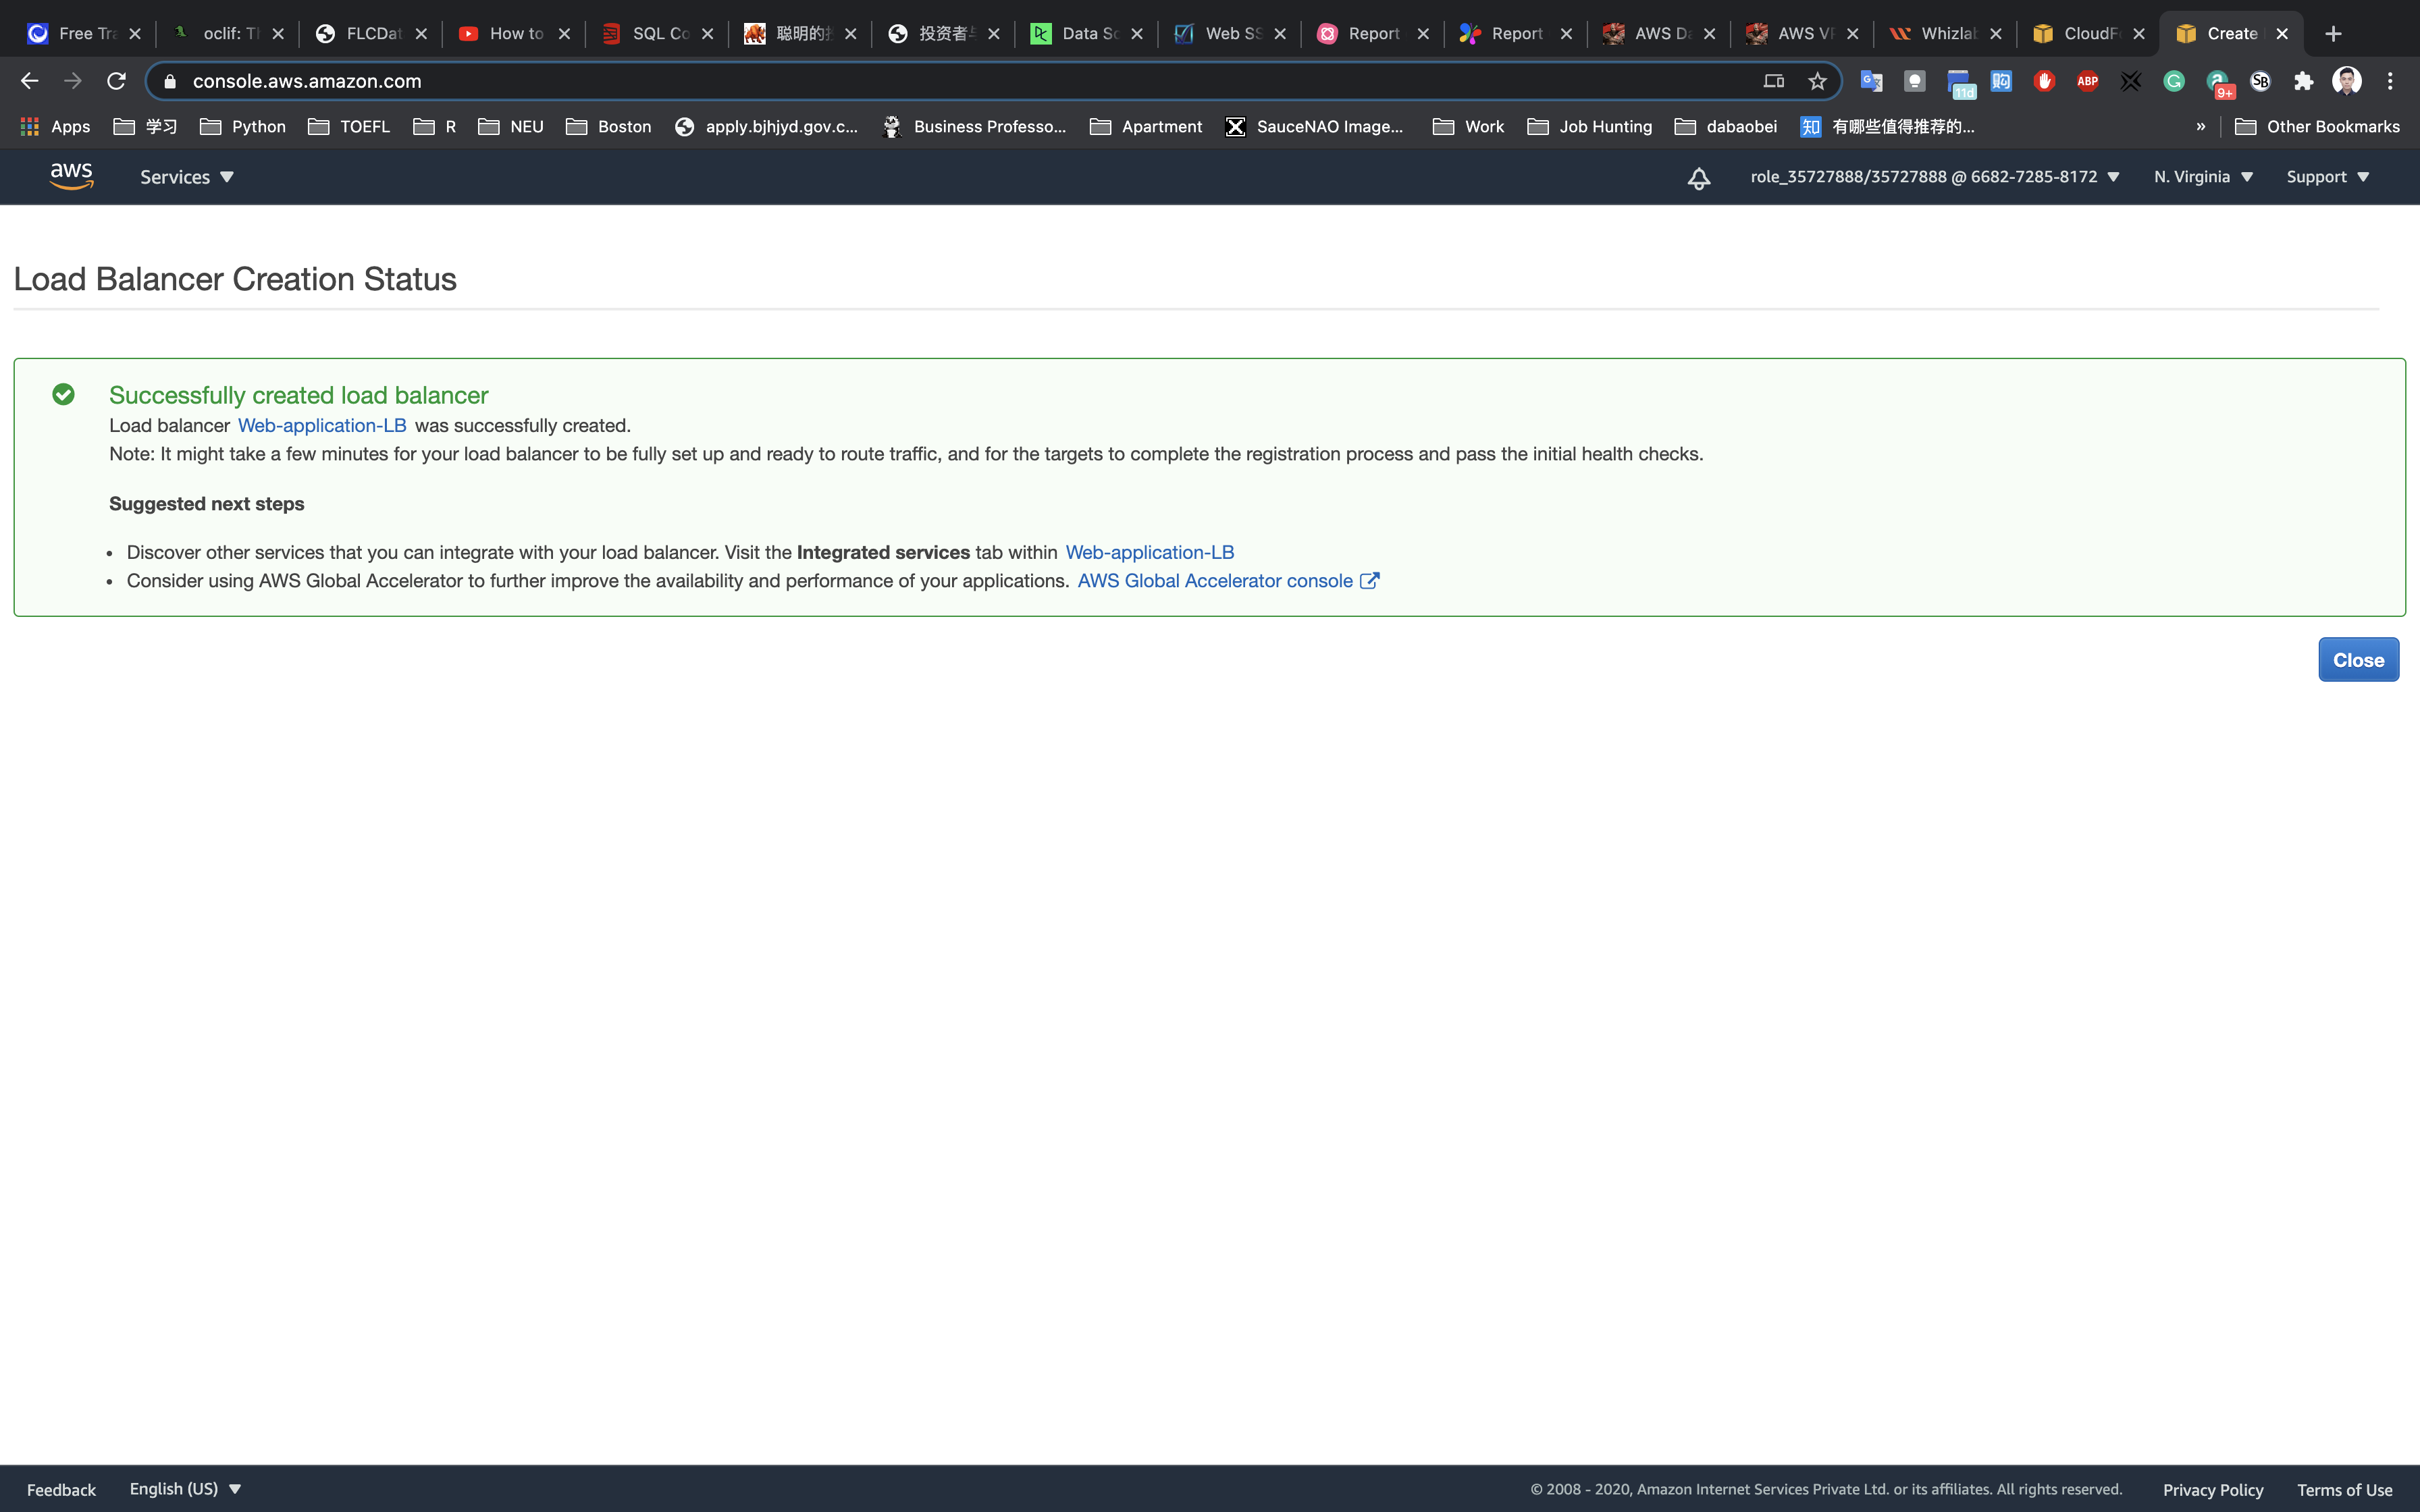
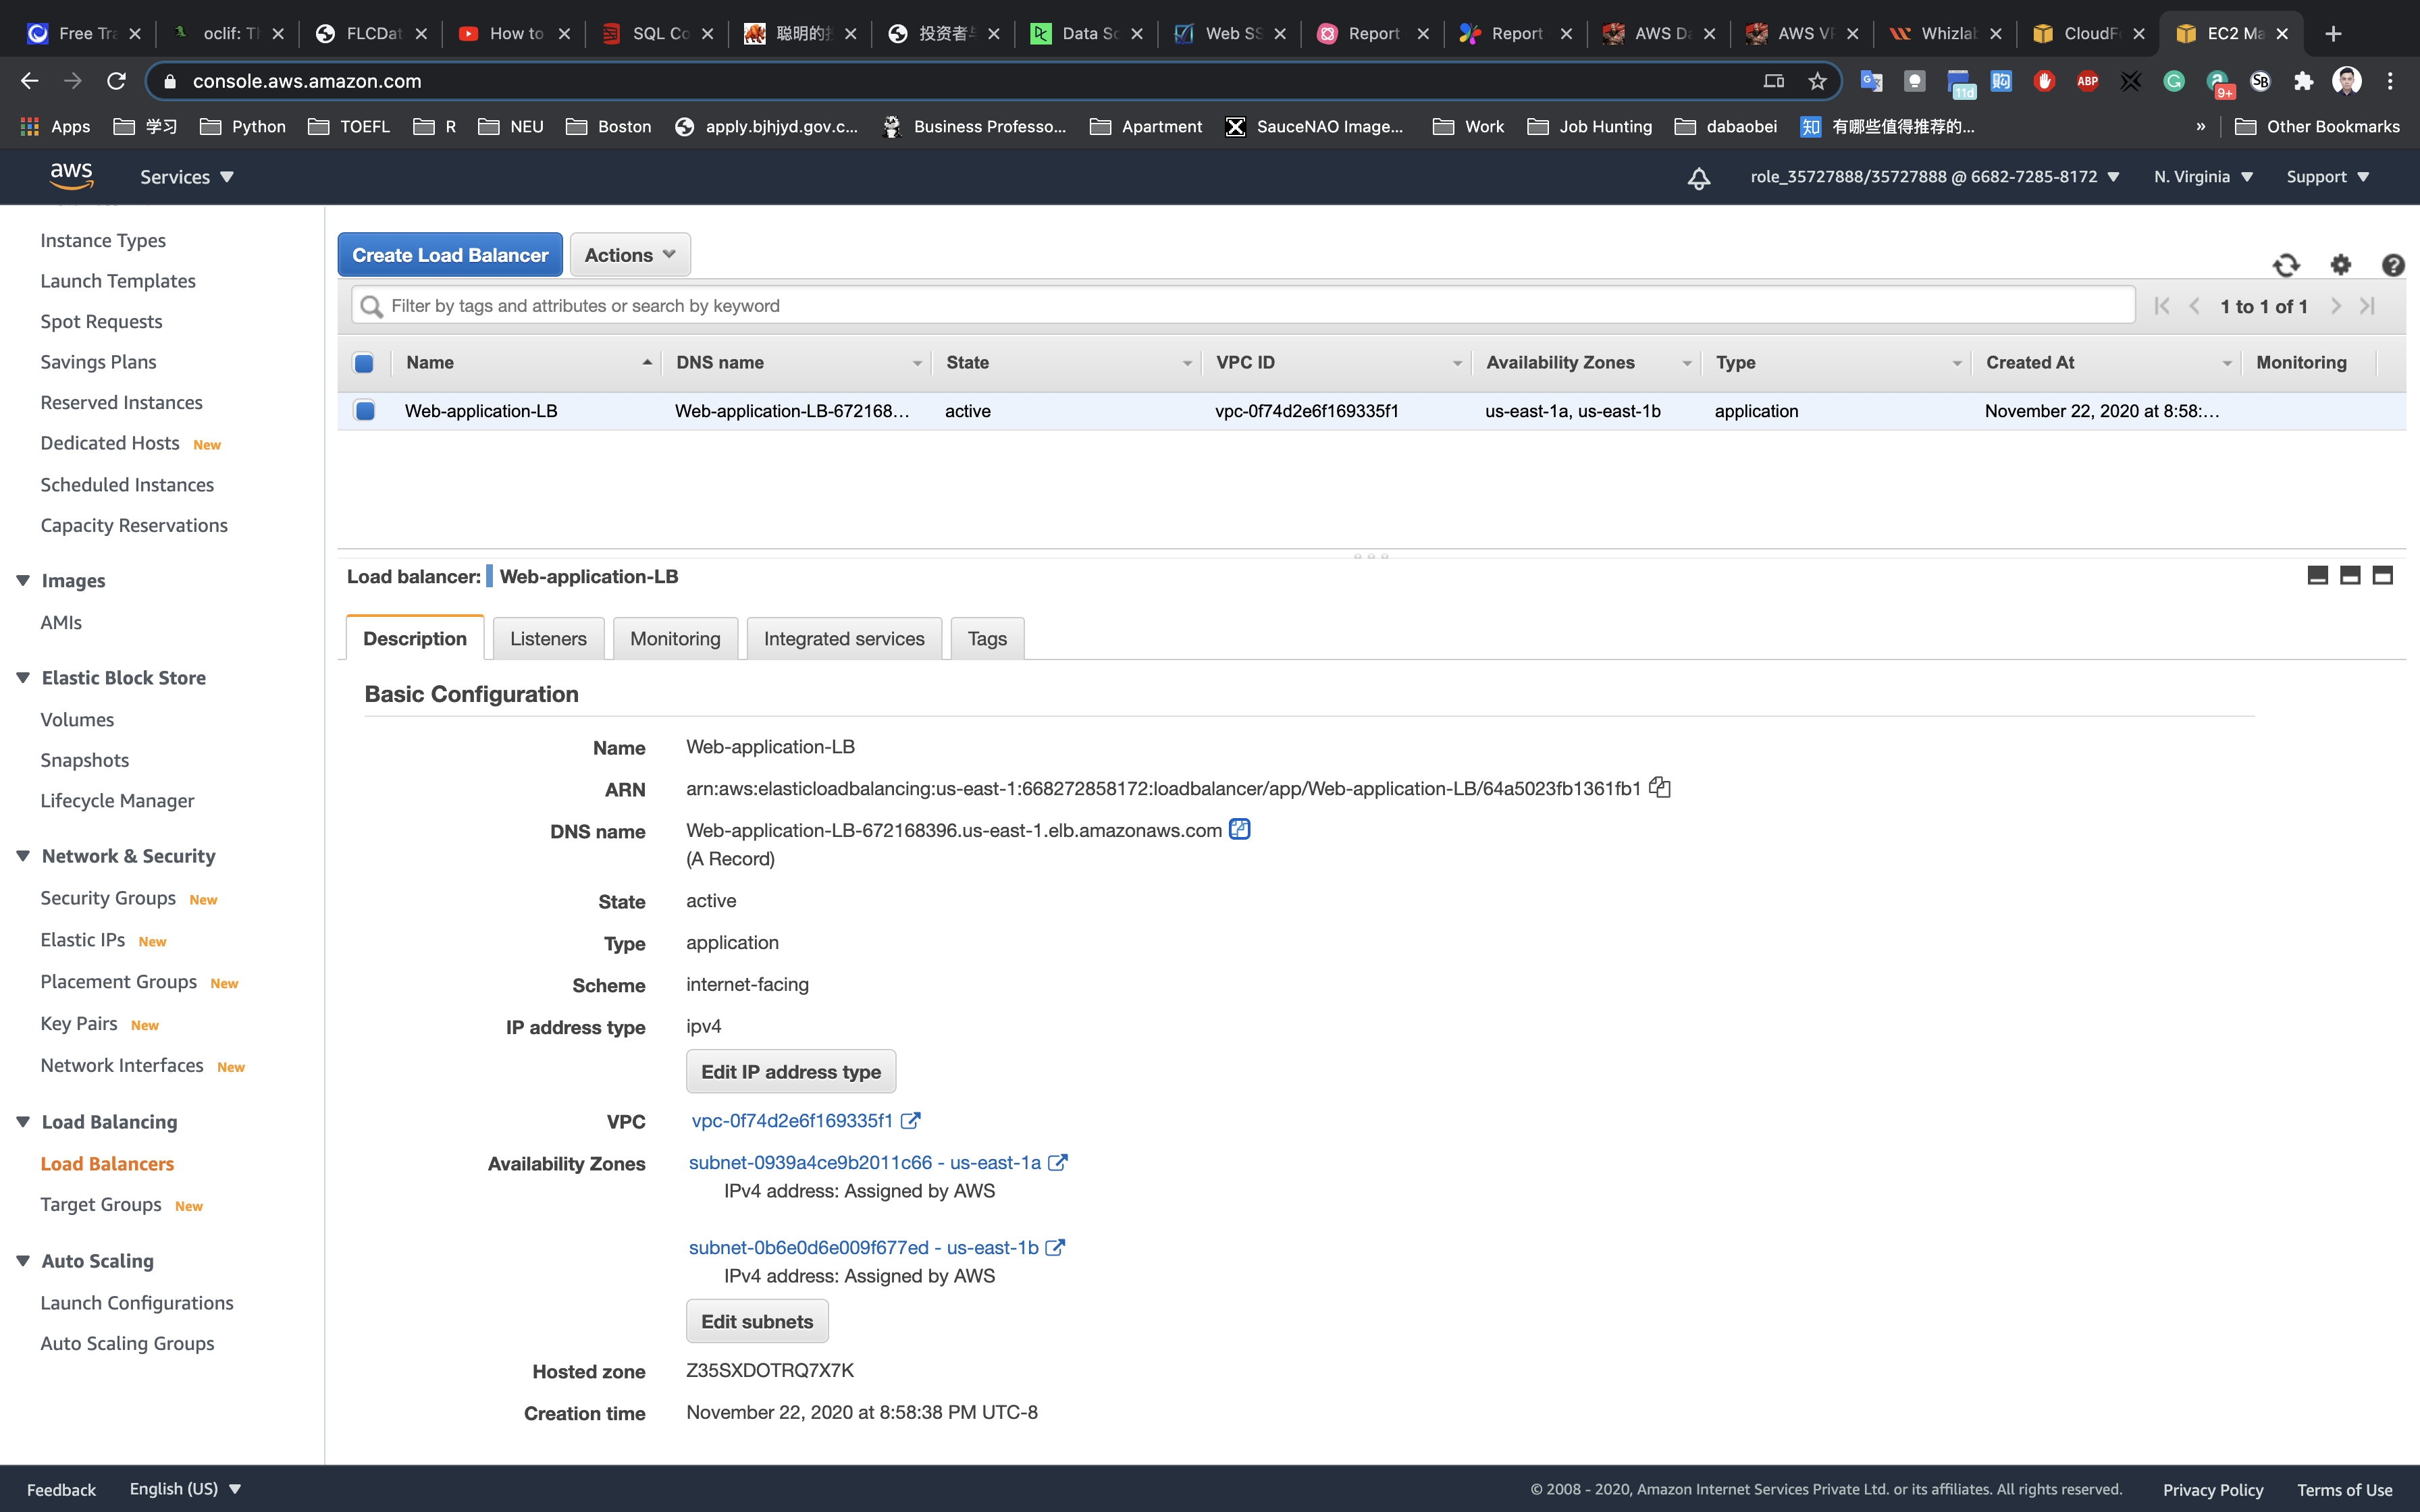
You have successfully created the Application Load balancer. Please wait for 3-4 minutes to make this ALB into Active state.
Wait until the State change to active
Validation Test
ELB health
Navigate to Target Groups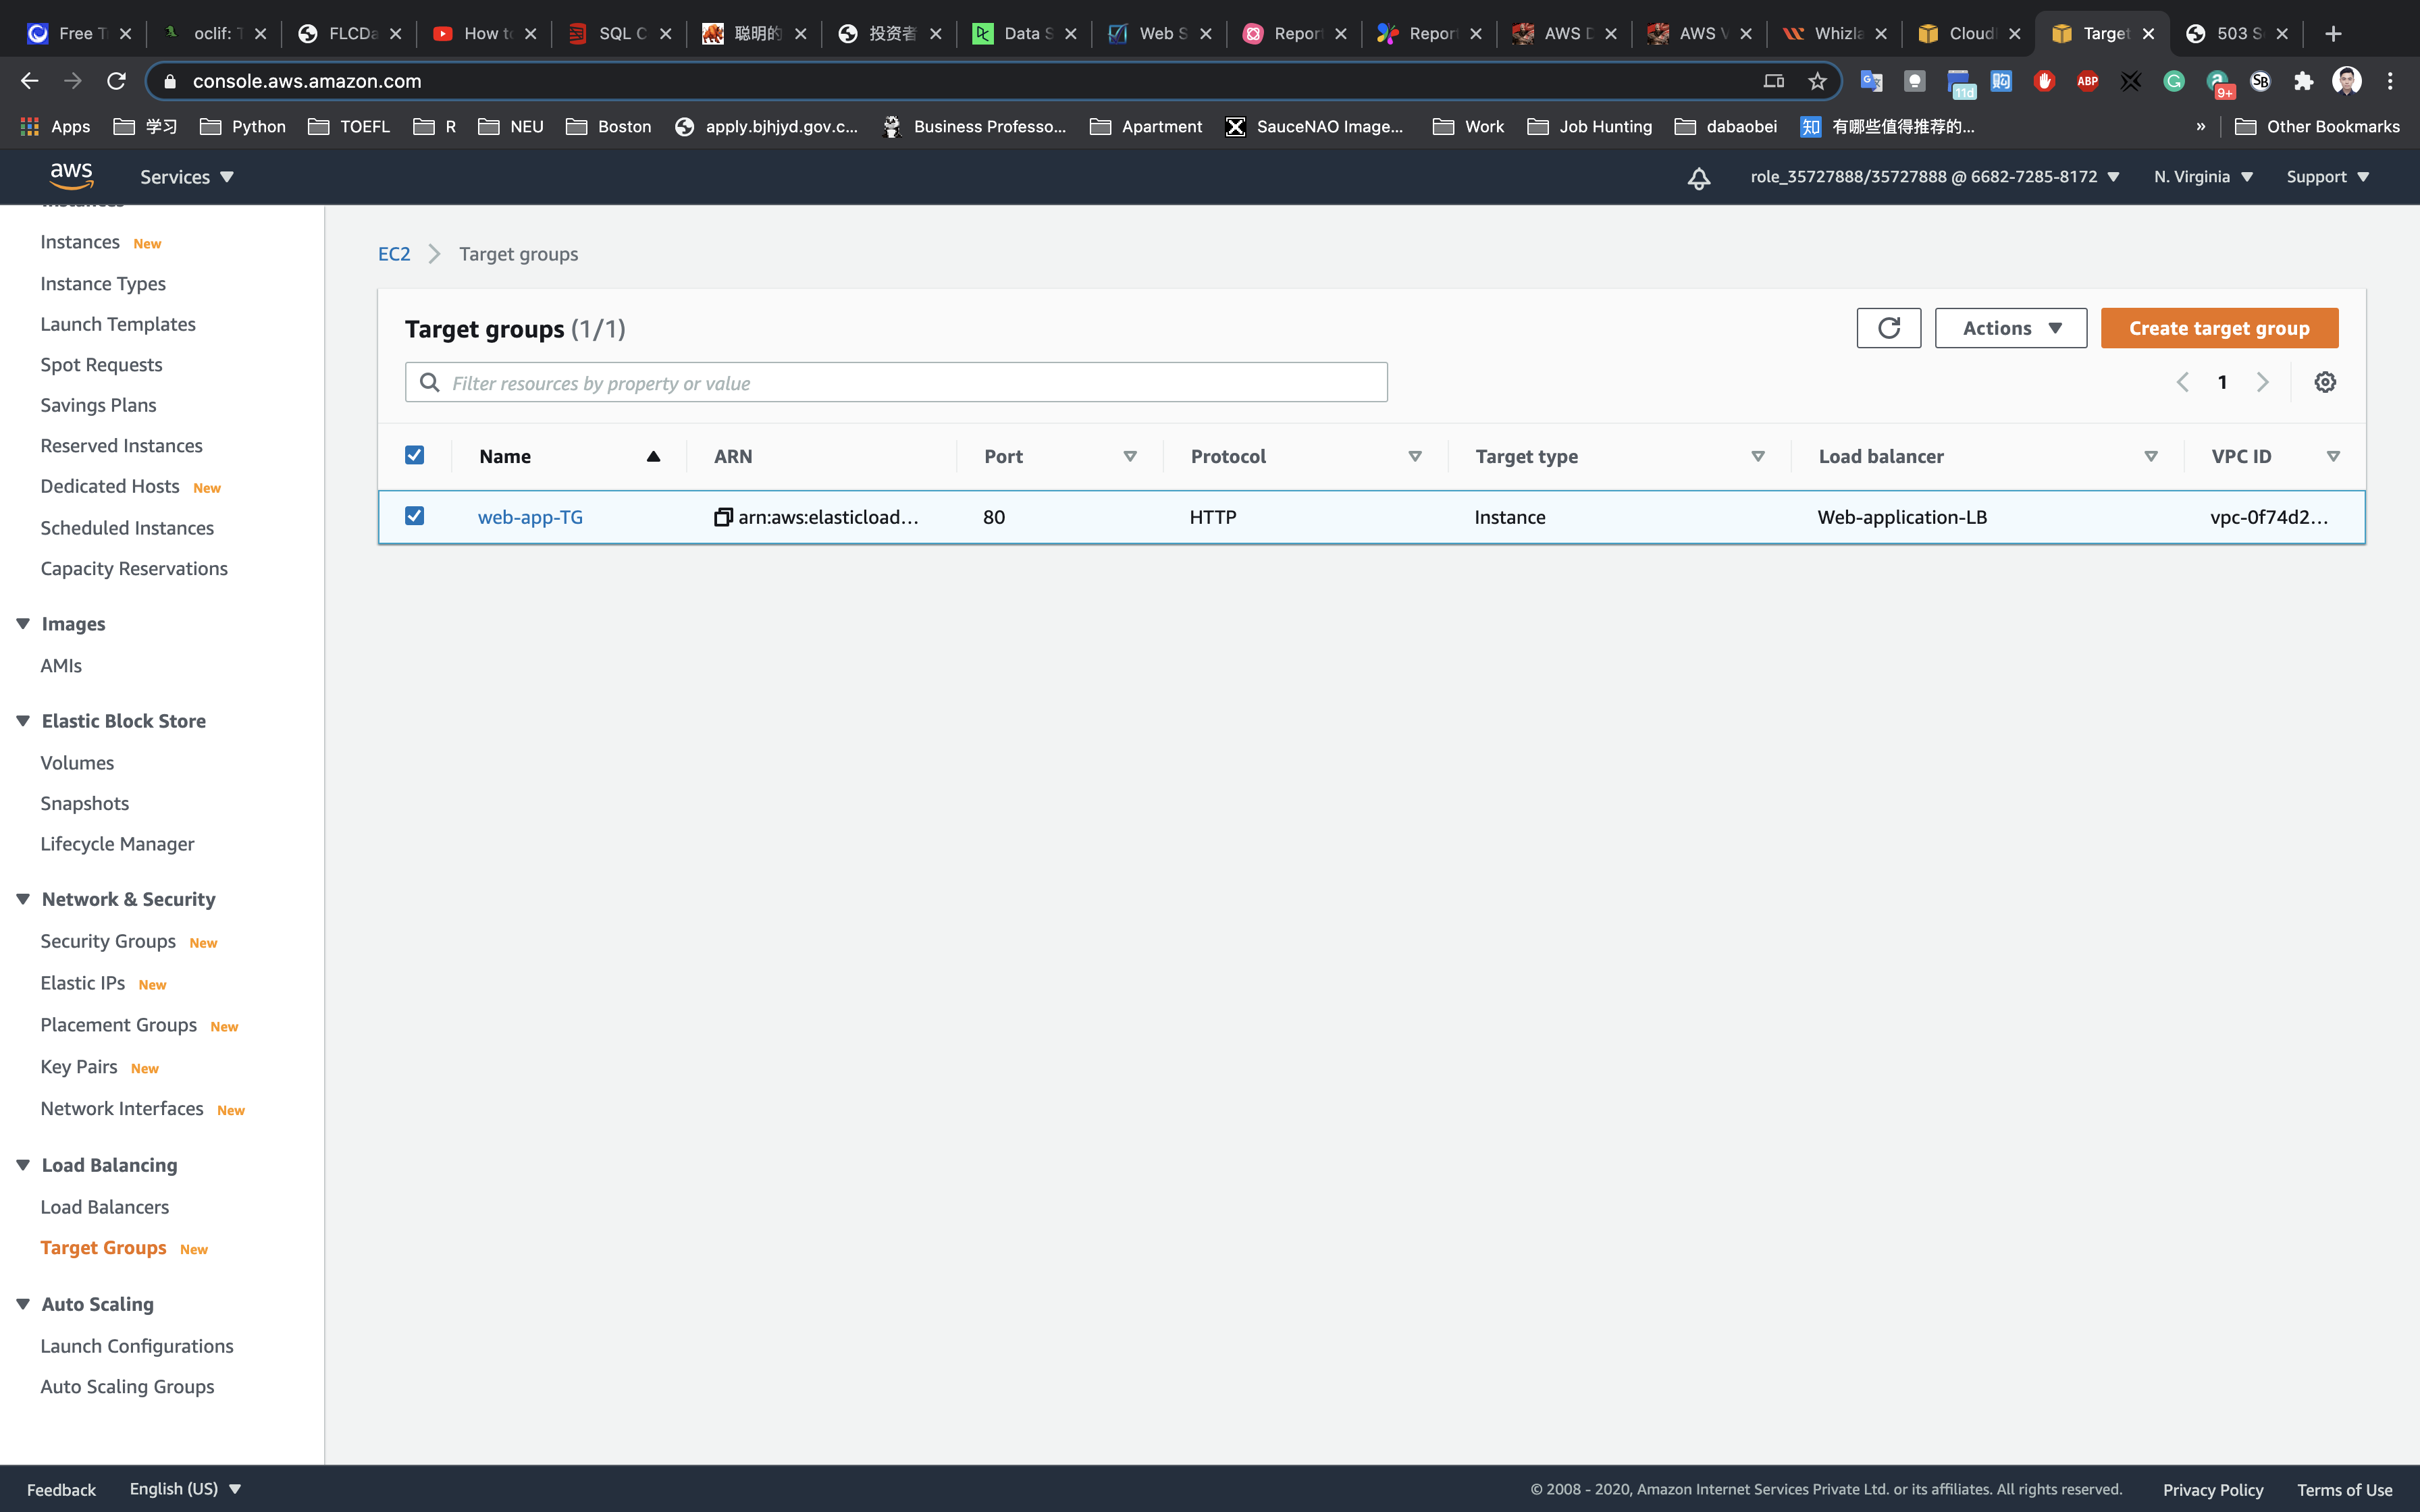
Click on Targets tab to see the Status of the attached targets.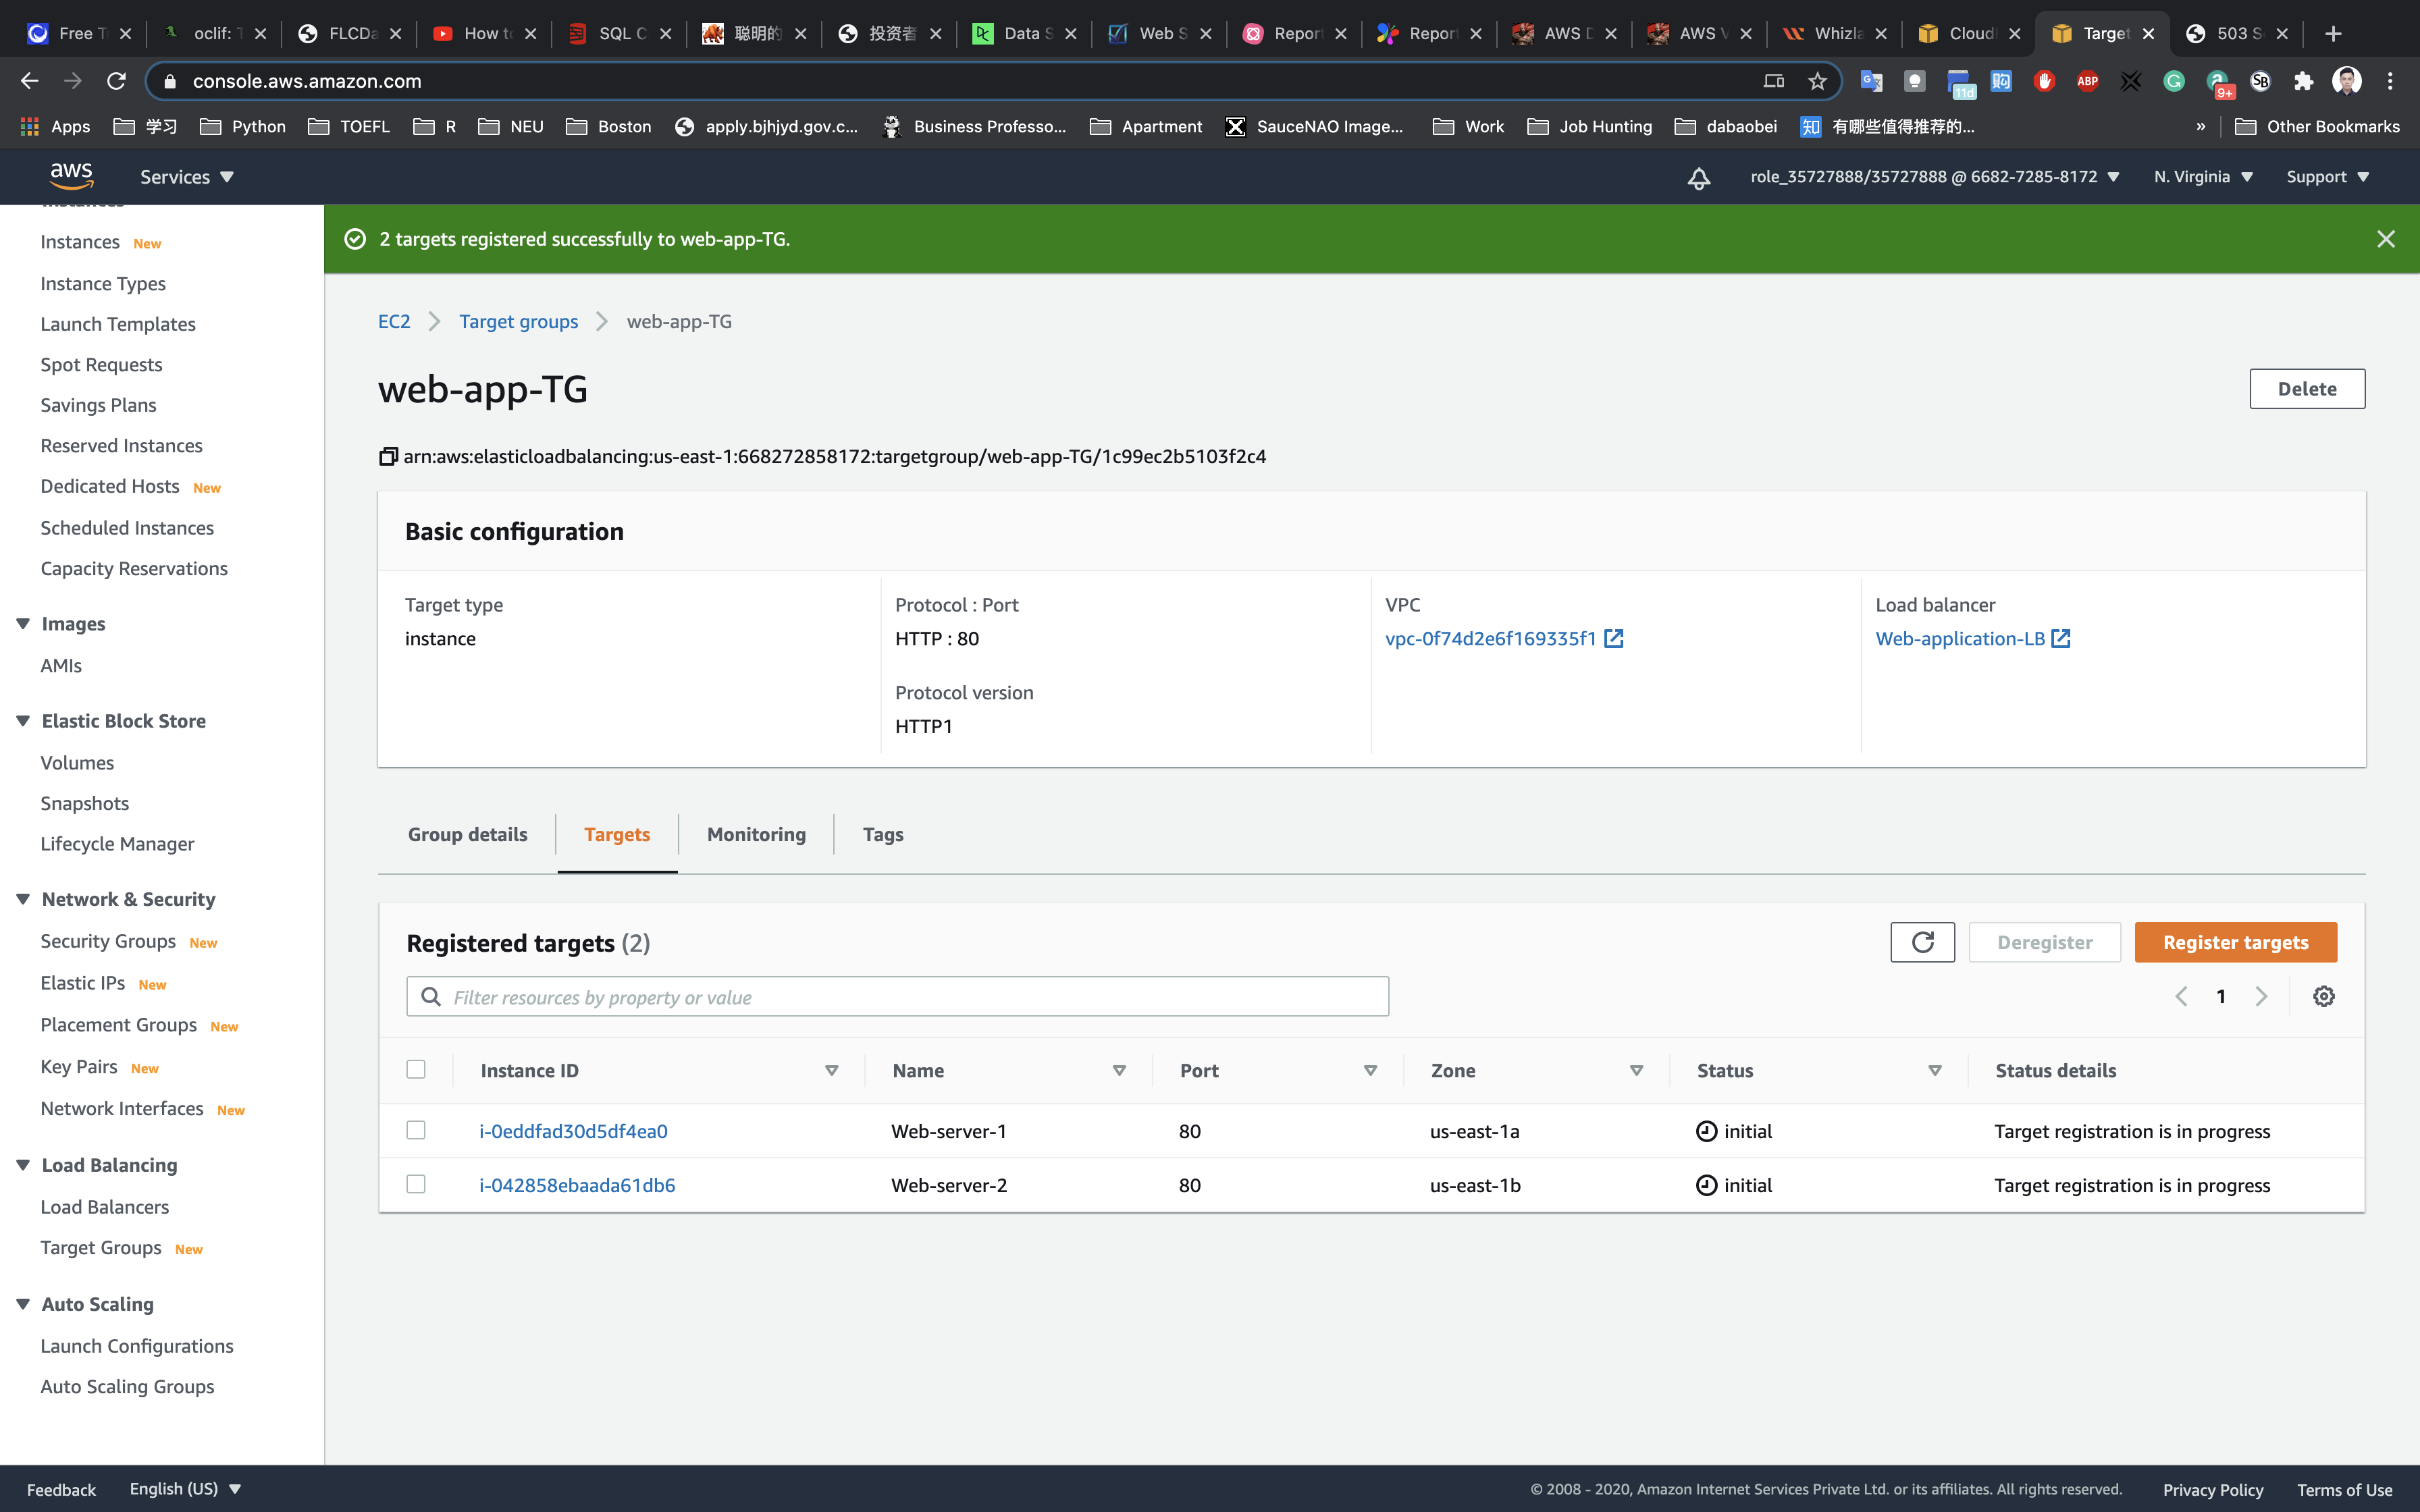
It should show Healthy for the Load Balancer to work properly. You may need to wait for 2-5 minutes before the load balancer’s status updates to “Healthy”
Now navigate to Load Balancers and select the load balancer that you created earlier. Click on Description, copy the and paste it into the browser.
- e.g: DNS URL: Web-application-LB-1853289169.us-east-1.elb.amazonaws.com
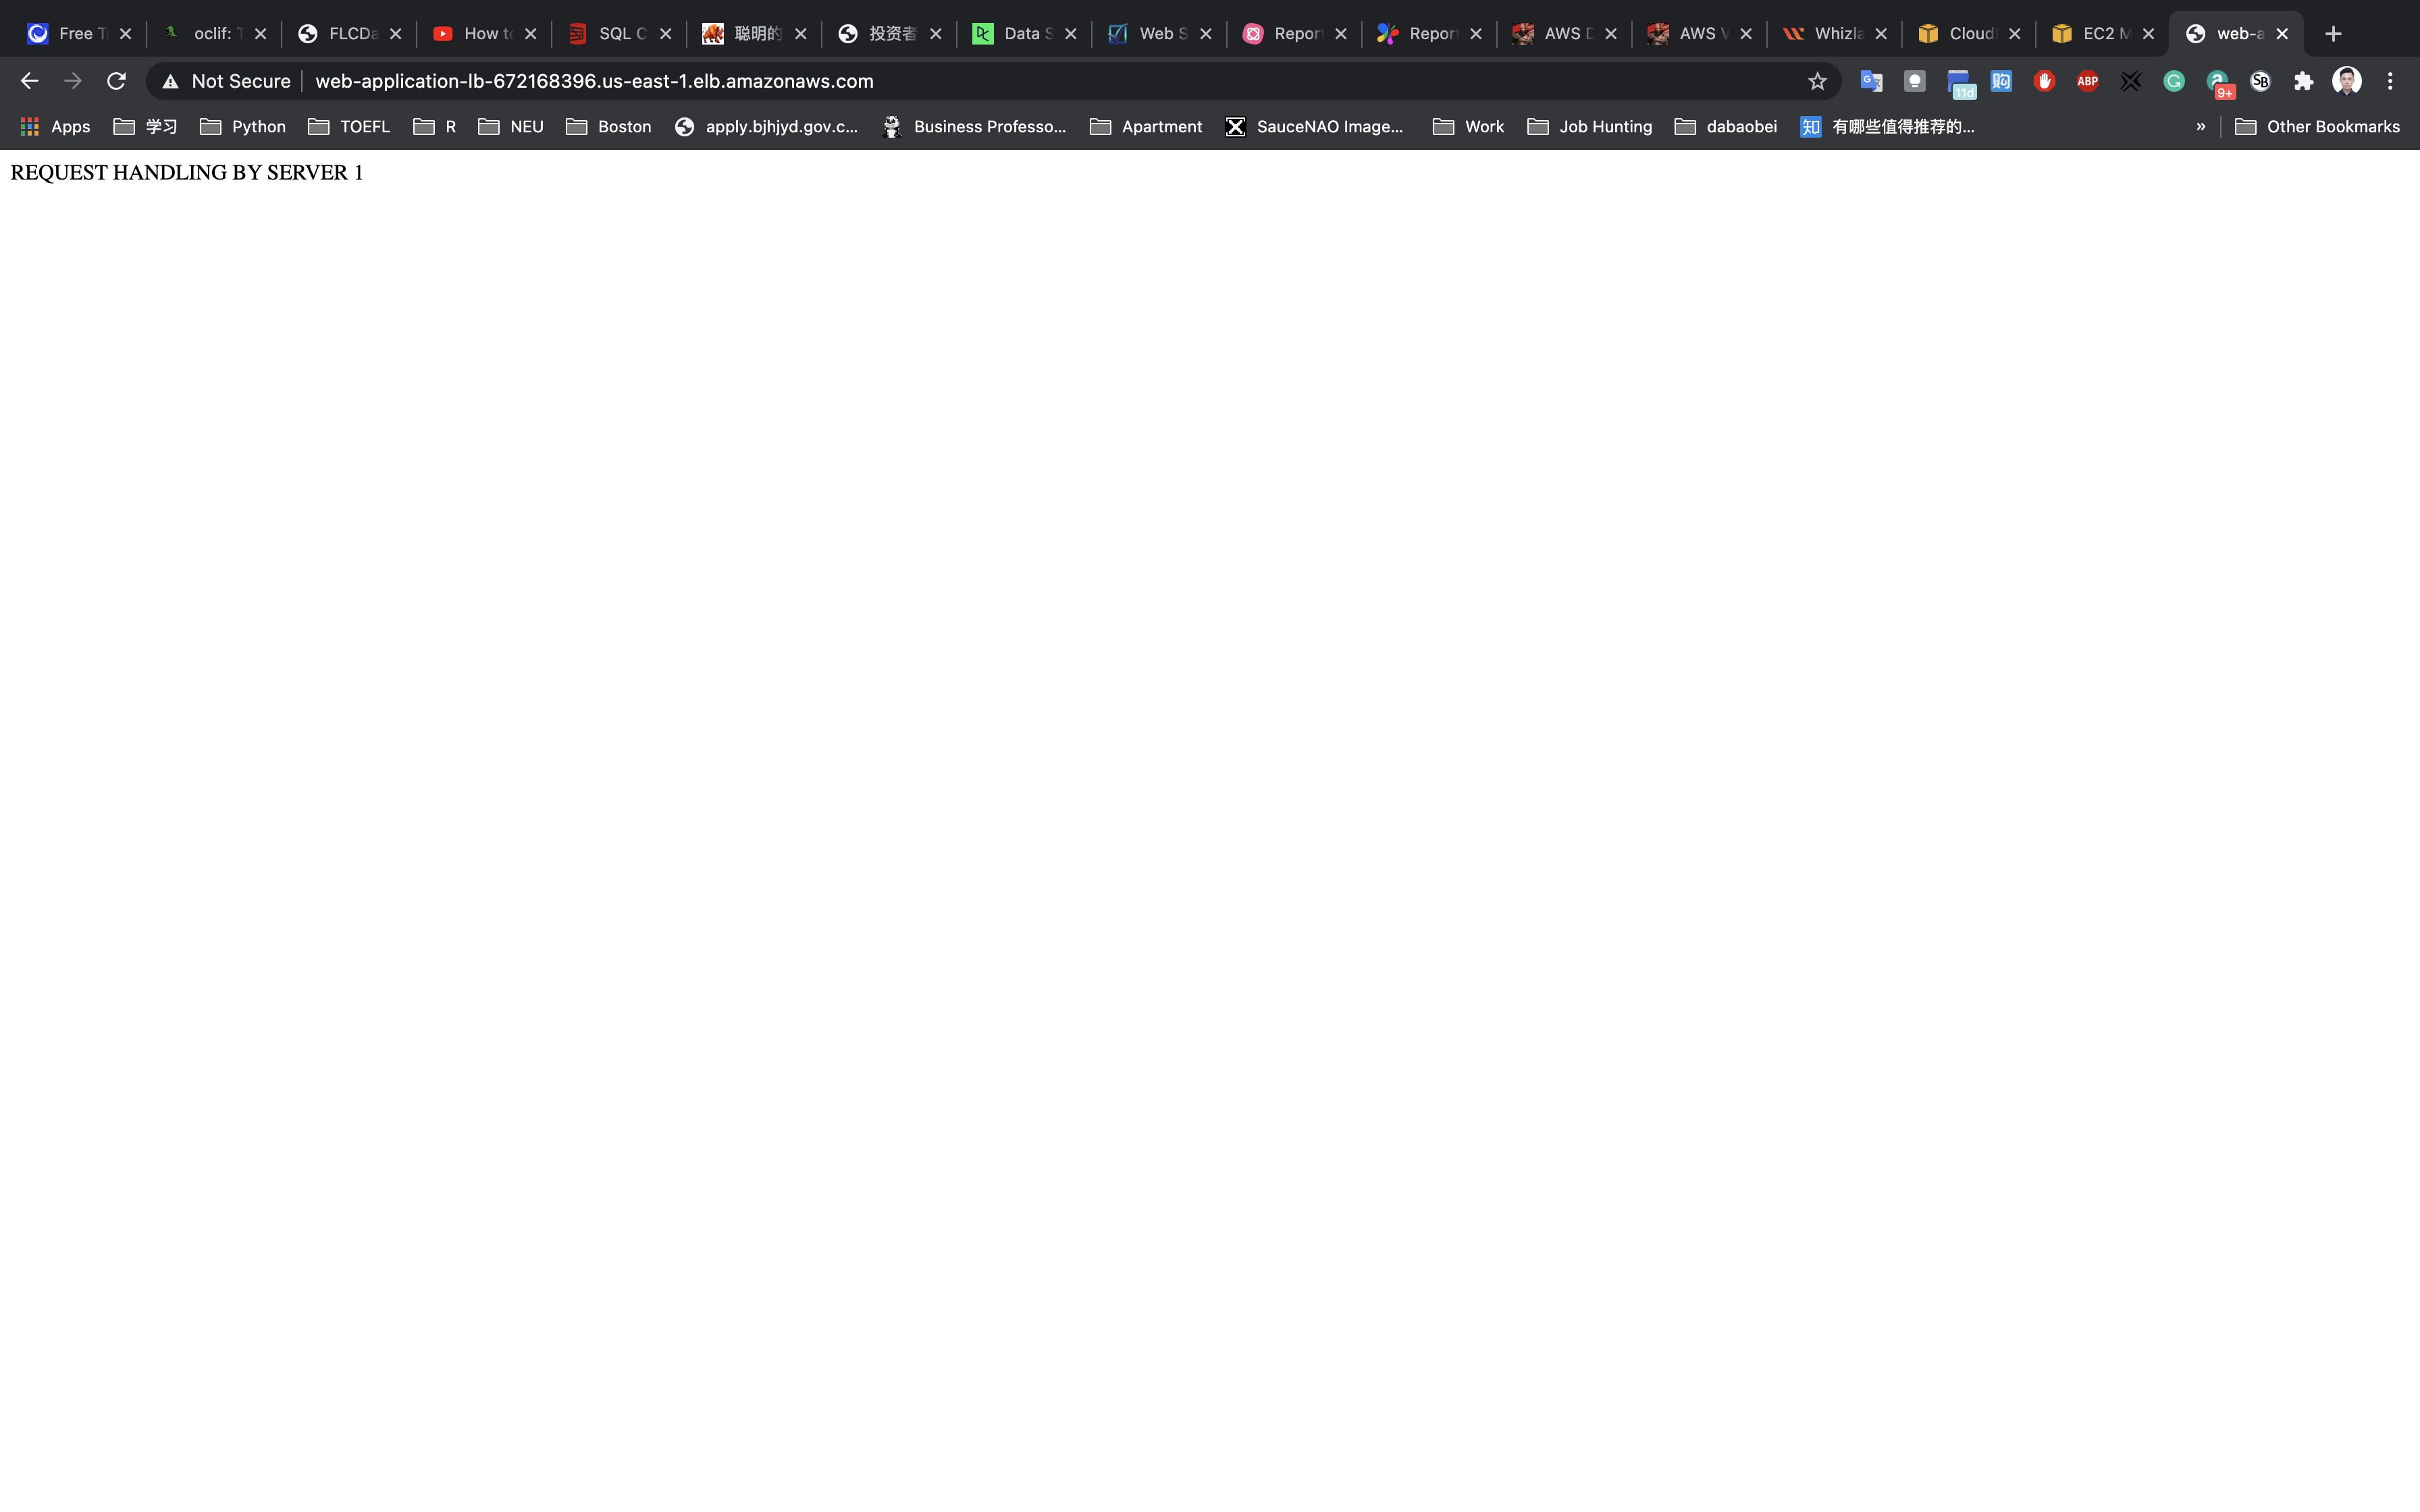
Refresh the browser a couple of times to see the requests being served from both servers. Seeing output similar to REQUEST HANDLING BY SERVER 1 & REQUEST HANDLING BY SERVER 2 implies that load is shared between the two web servers via Application Load Balancer.

Now we have successfully created a bastion server, two web servers and an Application Load balancer, registered the targets to the load balancer and tested the working of Load Balancer.
High Availability
Test case for High Availability
To check for high availability, we will make one of the instances unhealthy and test whether we get response from the other server.
If your instance is shown as Unhealthy then it’s status would be one of the following:
- stopping
- stopped
- terminating
- terminated
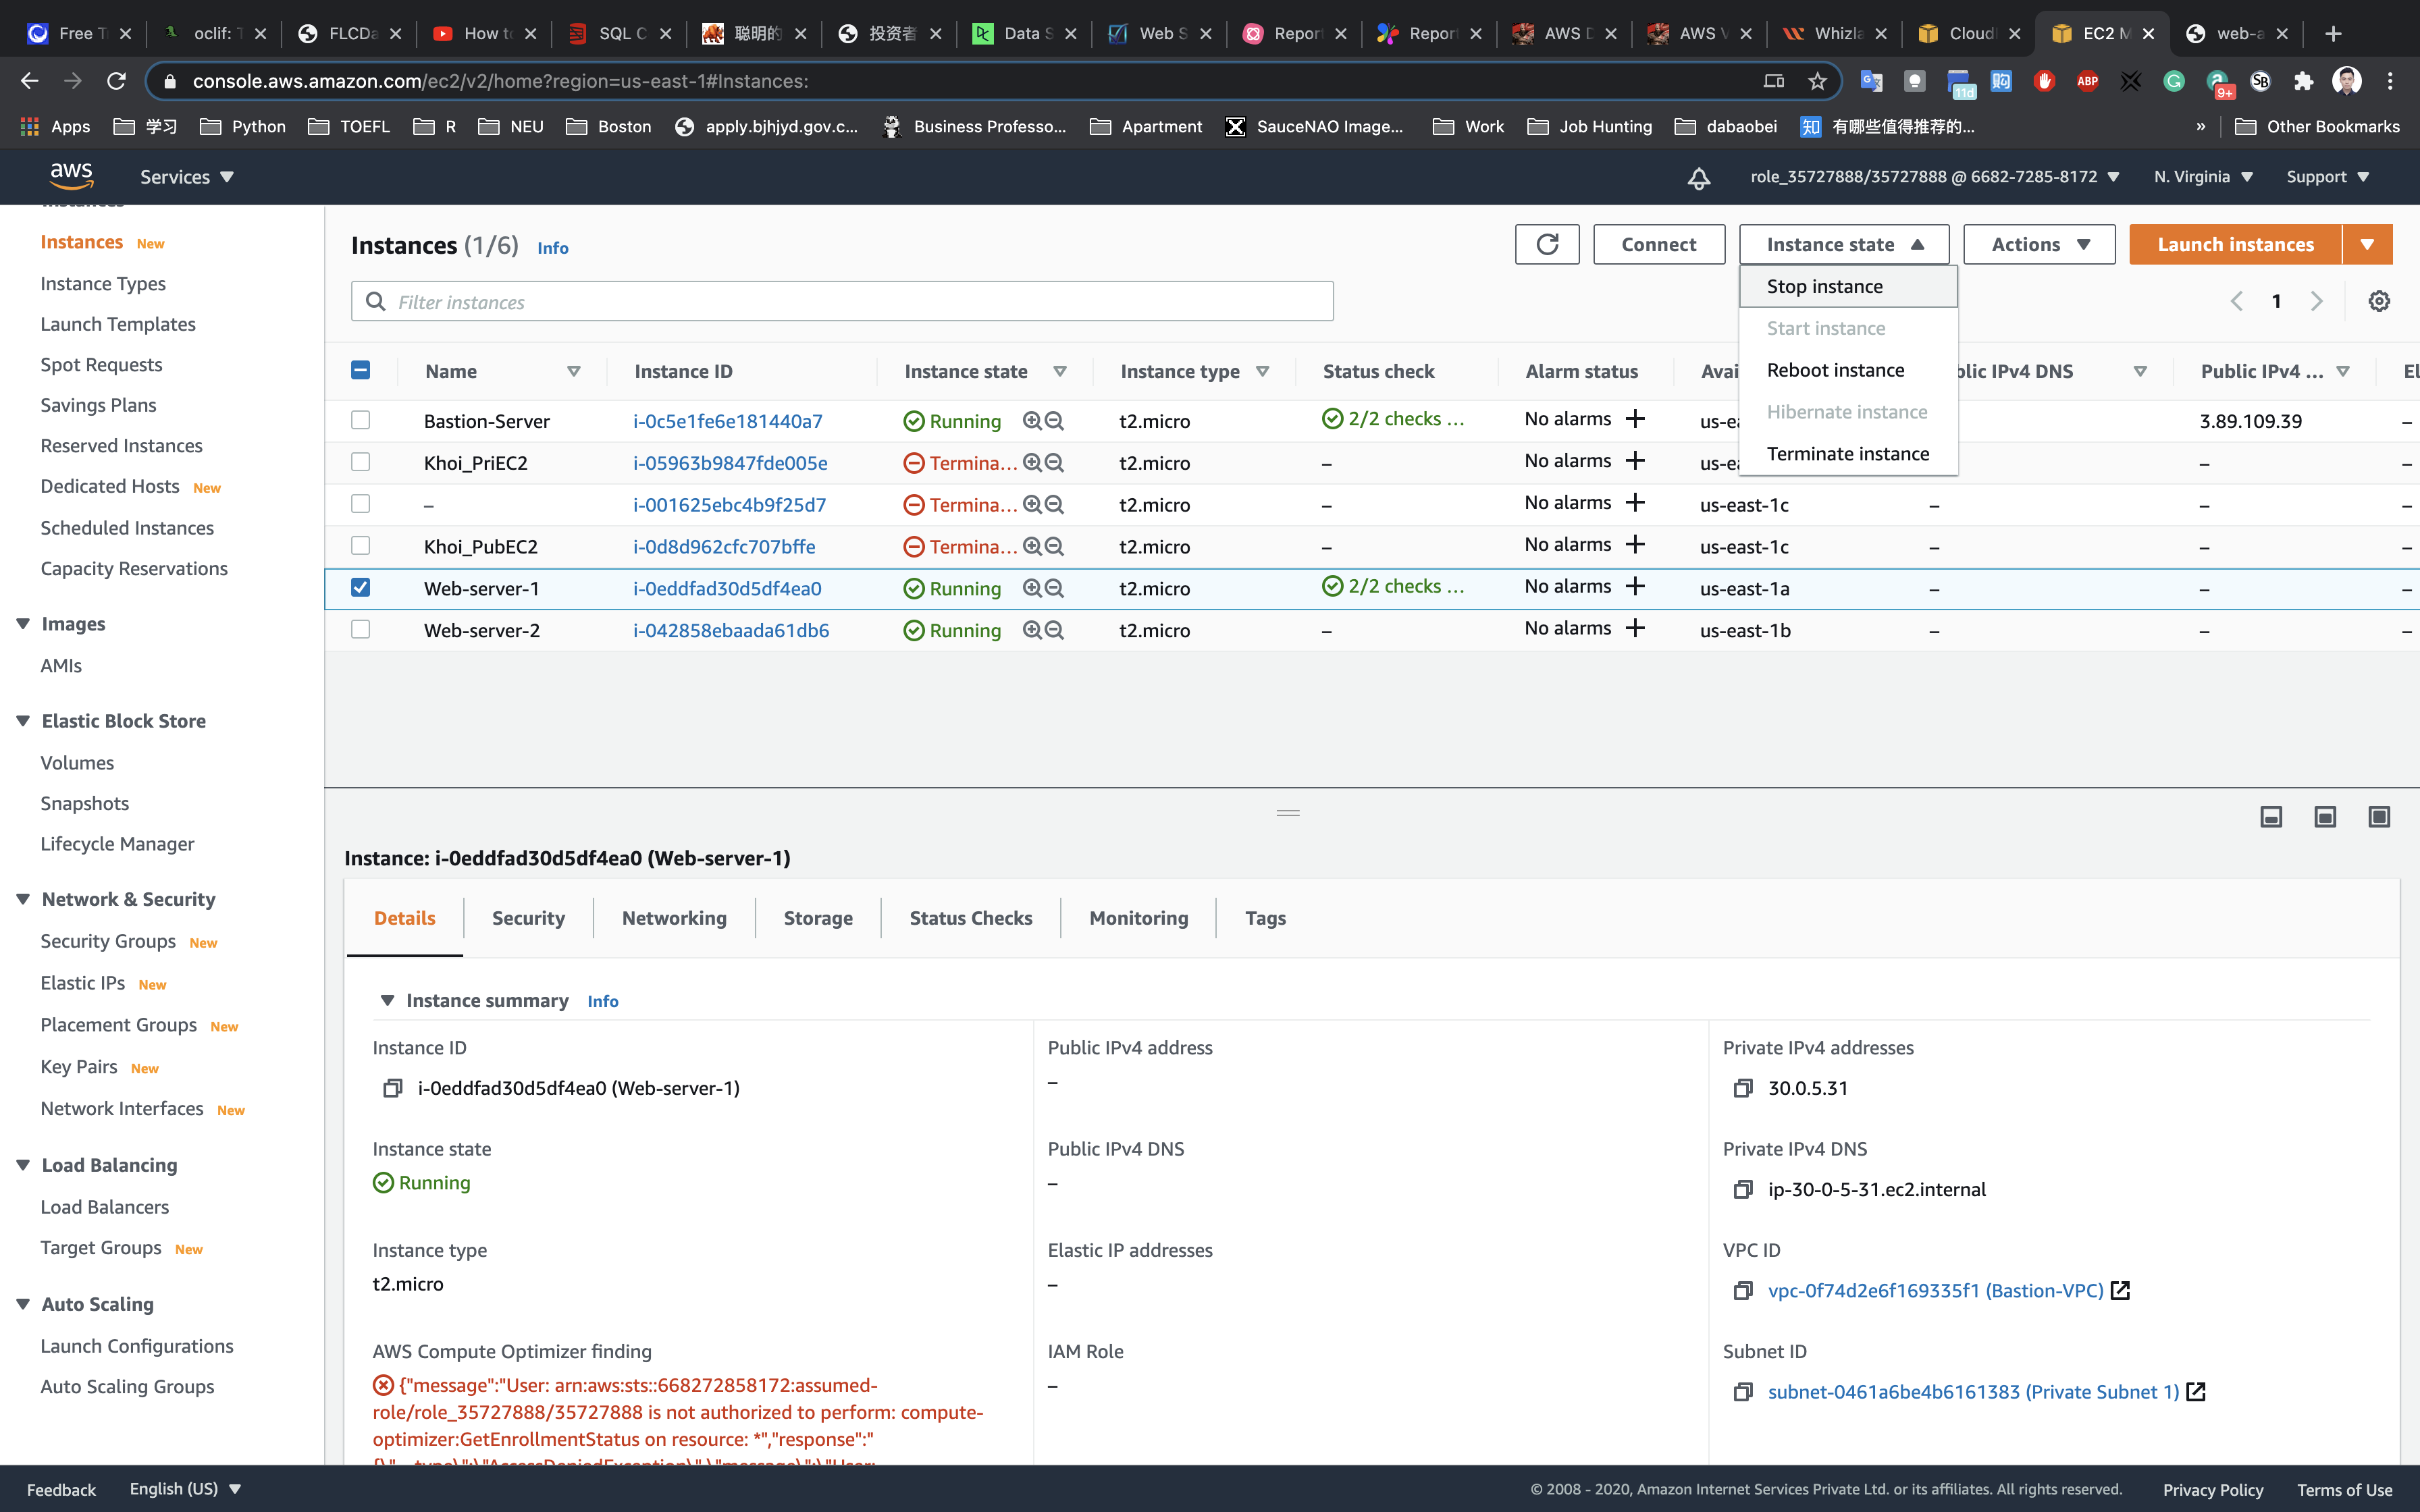
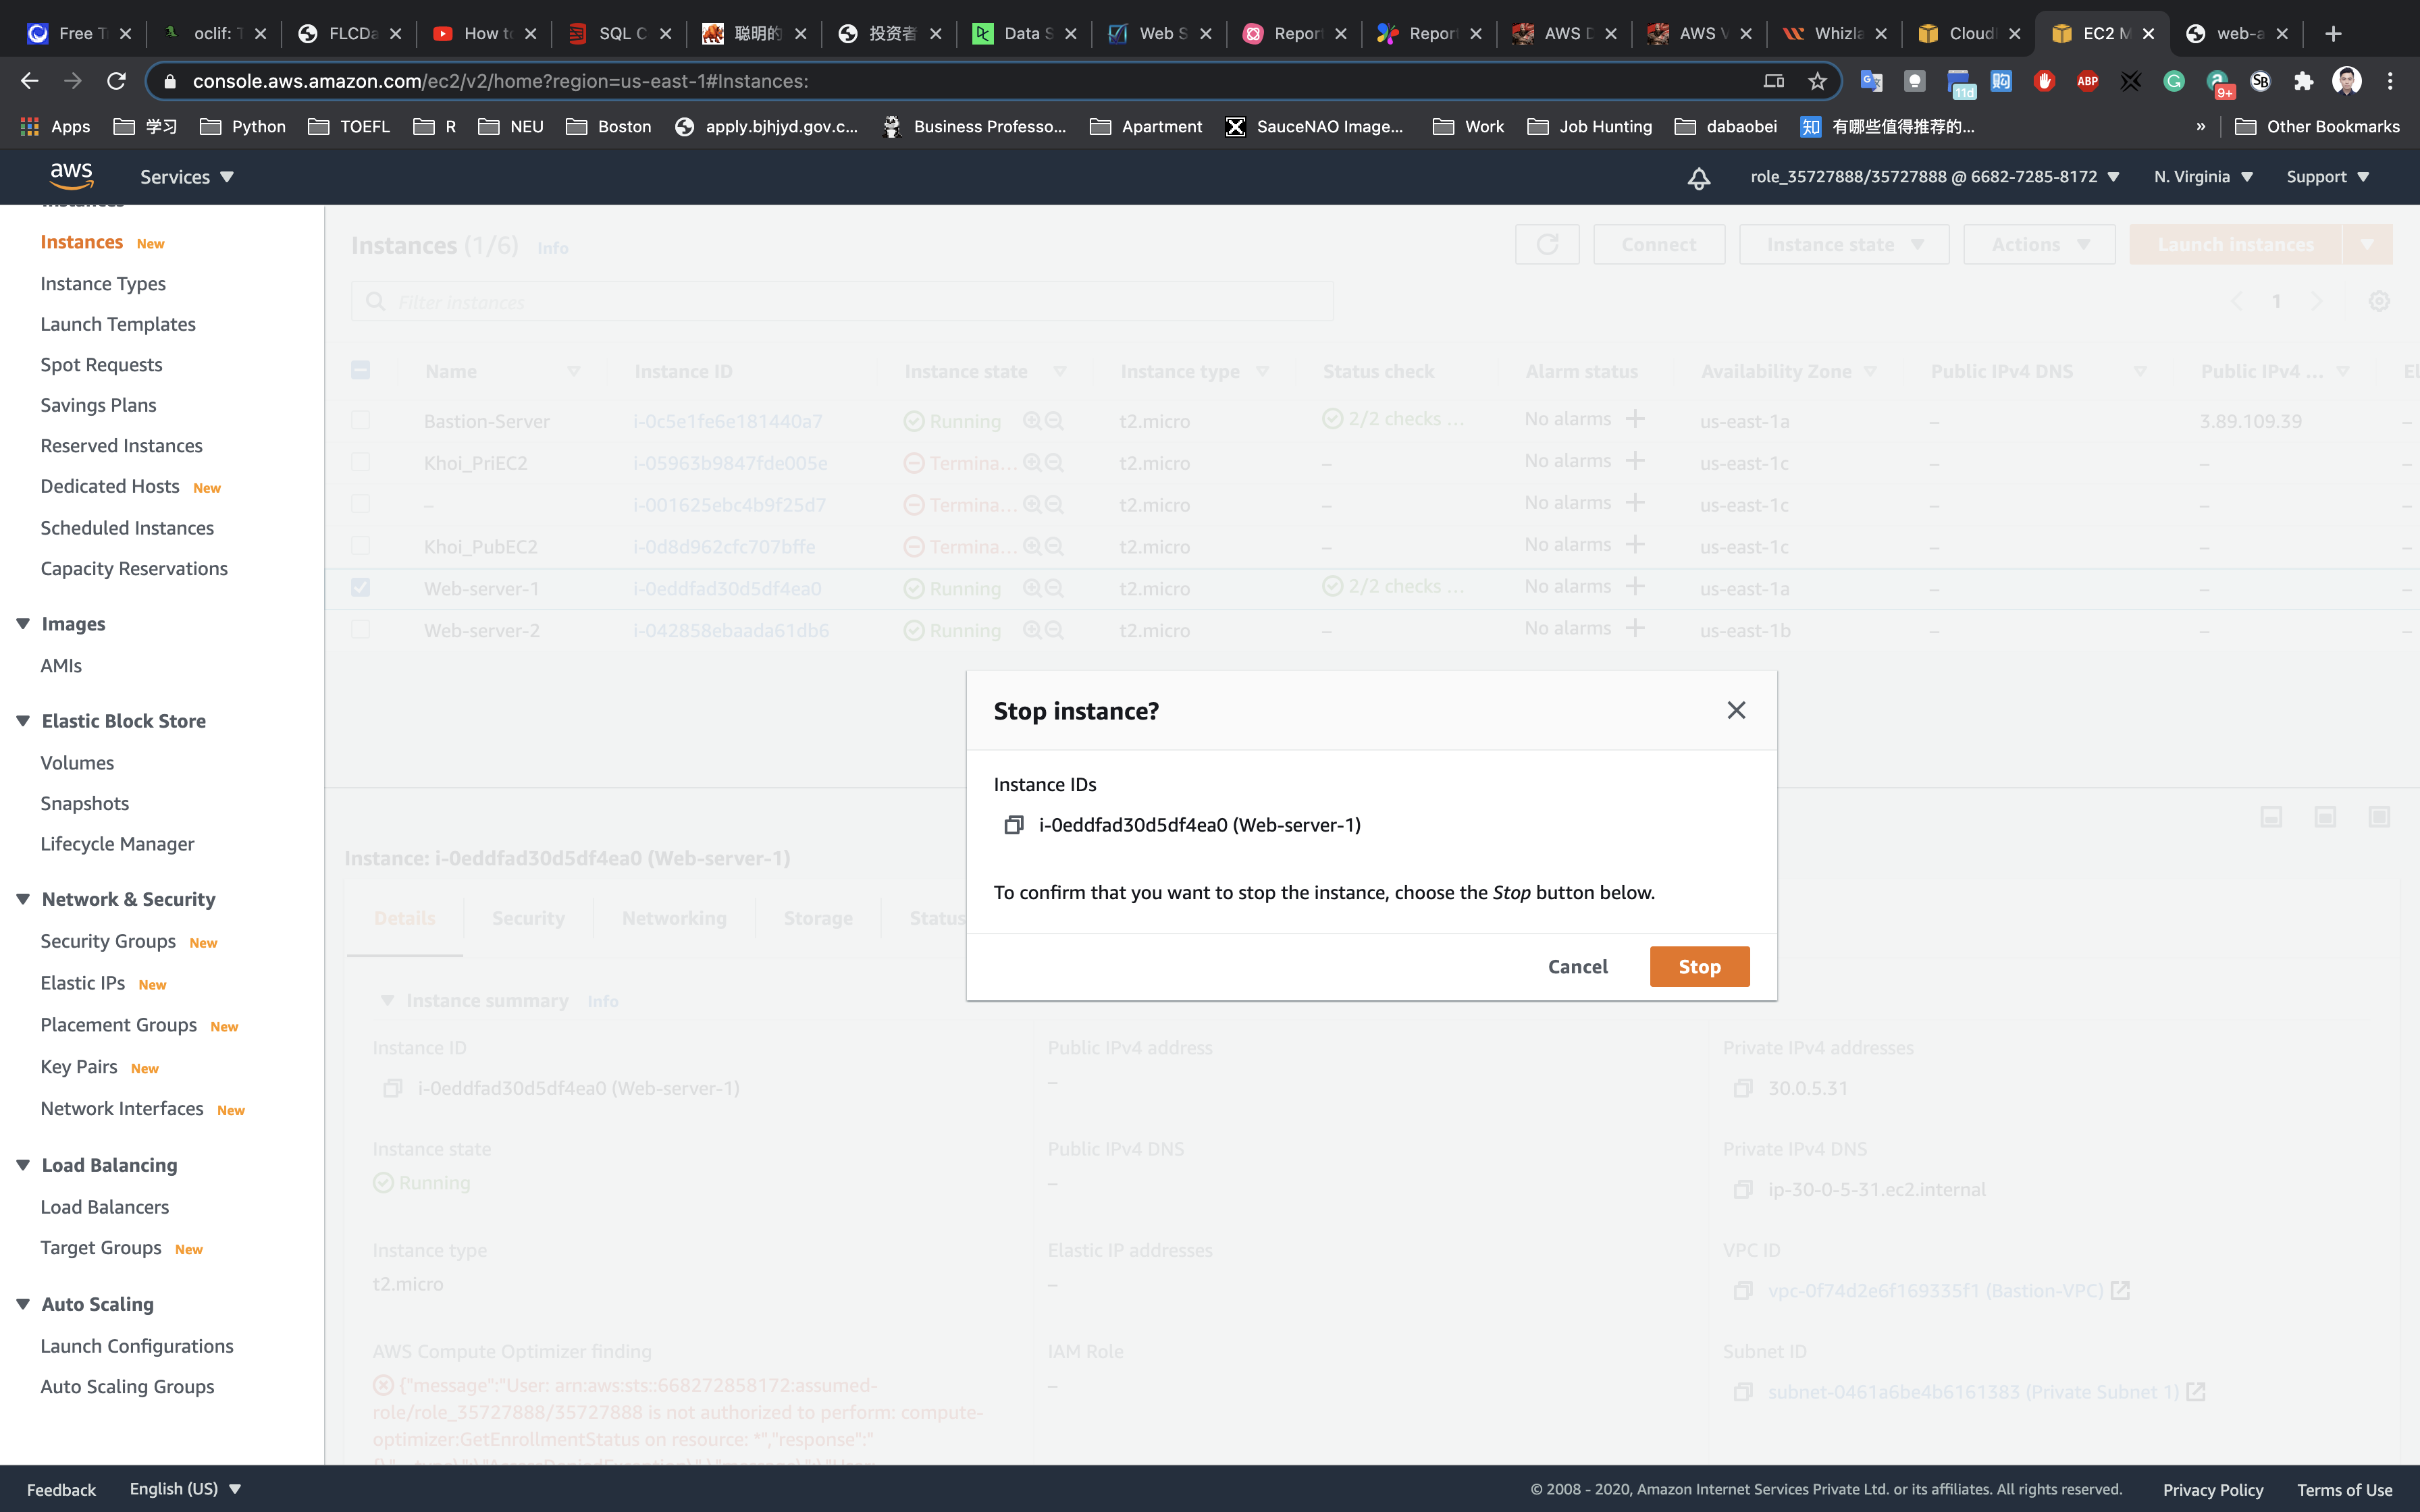
Navigate to the EC2 dashboard and select Web-server-1. Click on Actions, select Instance State and then click on stop.
Navigate to Load Balancers and click on targets. Here you will find the status of Web-server-1 (which should be unhealthy because it is unused).
Navigate to Load balancers–>Description–>DNS name. Copy the DNS name and paste it into your browser. You should see the response “REQUEST HANDLING BY SERVER 2” FROM WEB-SERVER-2.
If you refresh a few times, you will continue to see the response only from Web-server-2
Repeat step 3 by stopping Web-server-2 and starting Web-server-1 back up. This time you should see the response “REQUEST HANDLING BY SERVER” from Web-server-1.
Refresh the page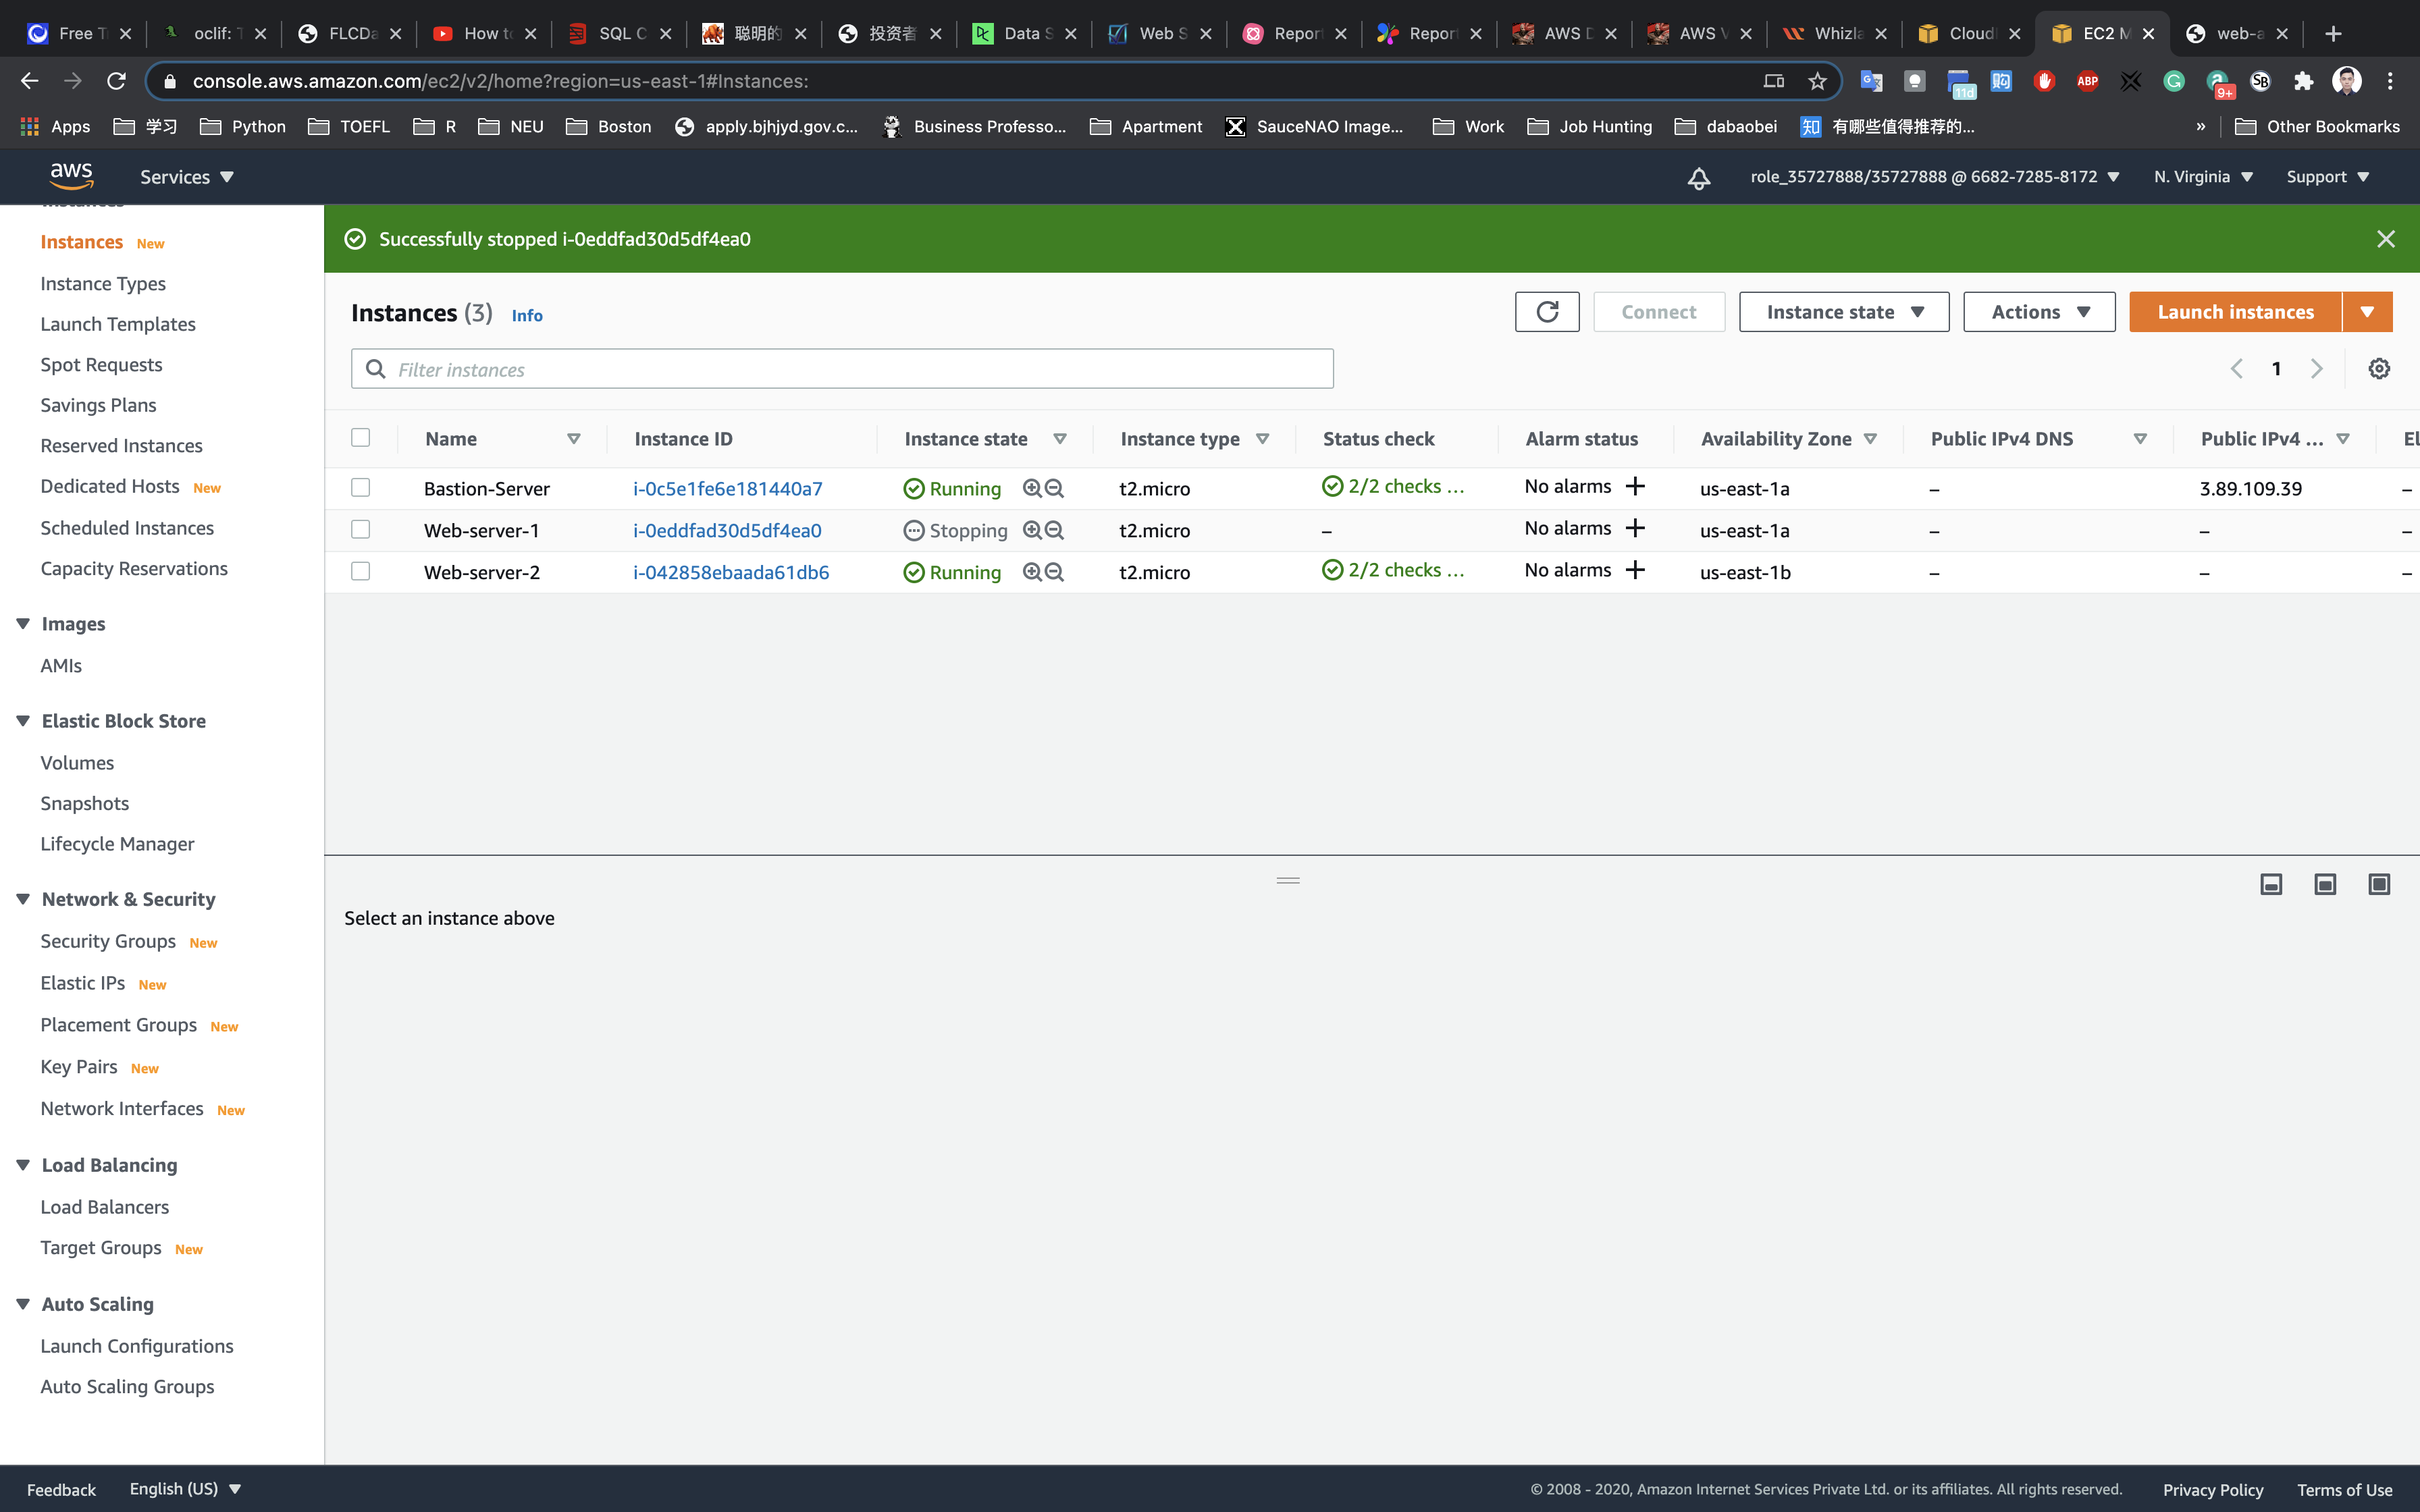

SSH into the Bastion server
If you cannot understand the following steps. Click on SSH into EC2 instance
Copy public address of Bastion server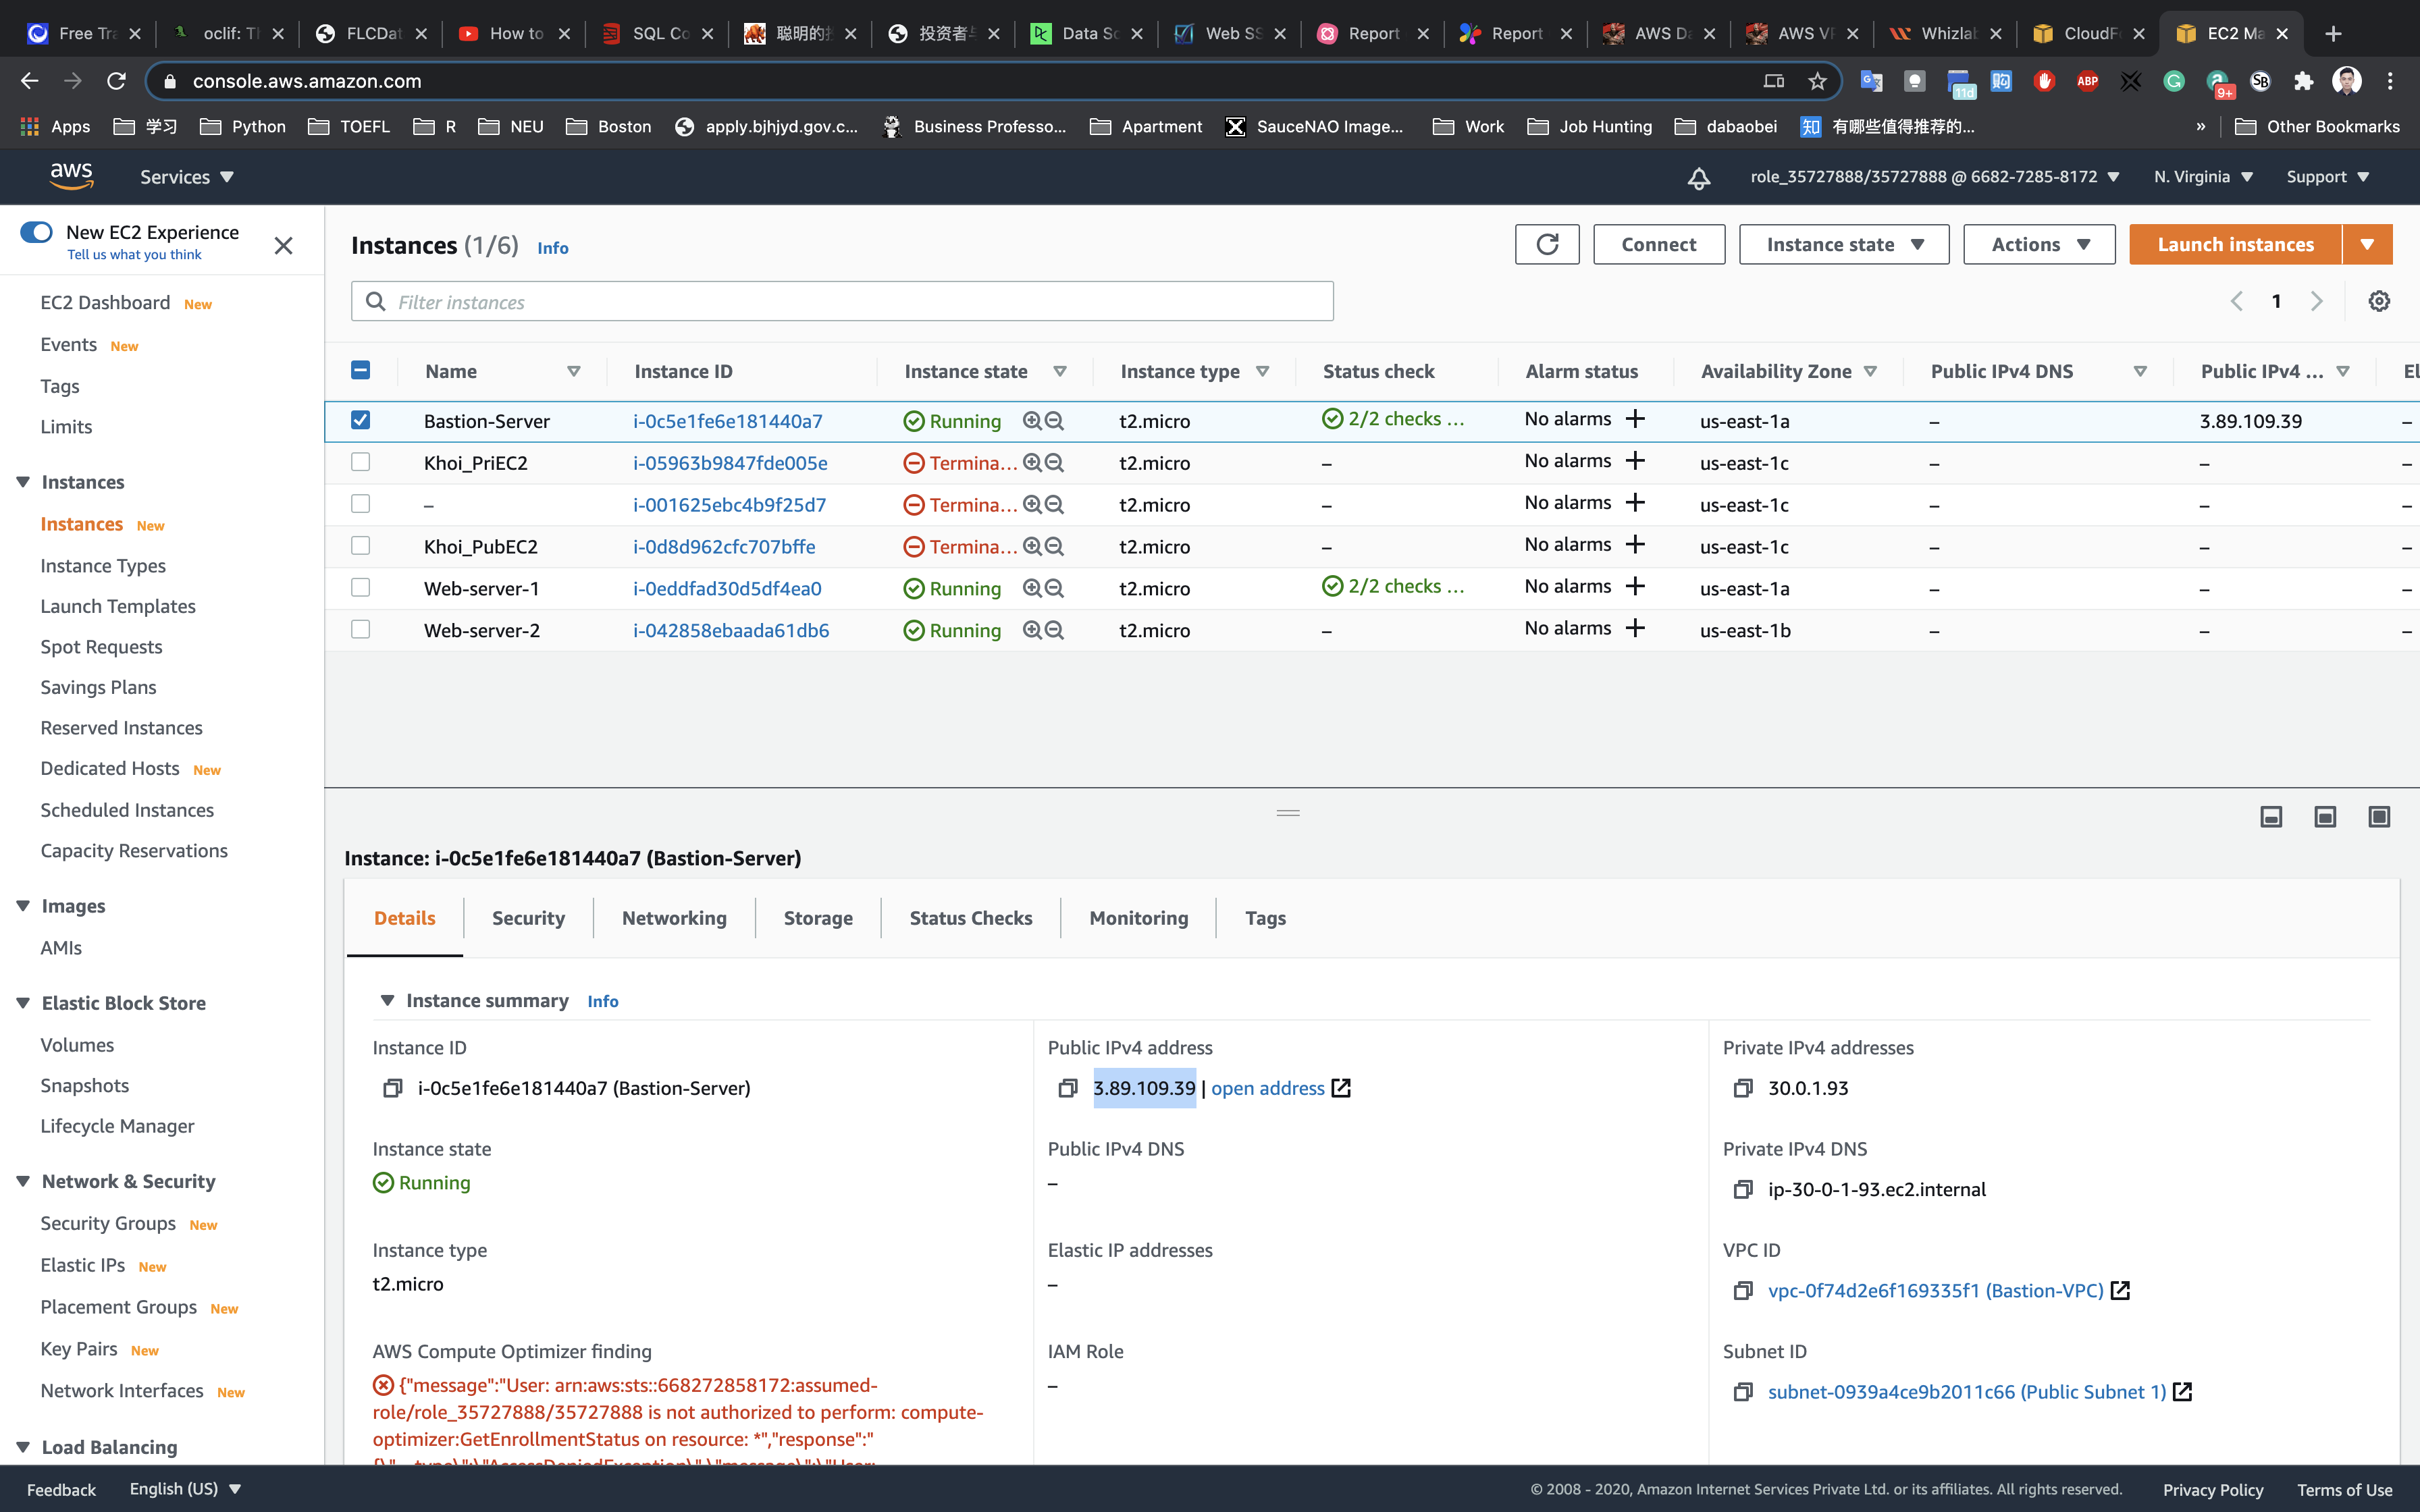
Modify the .pem file permission and connect to the Bastion server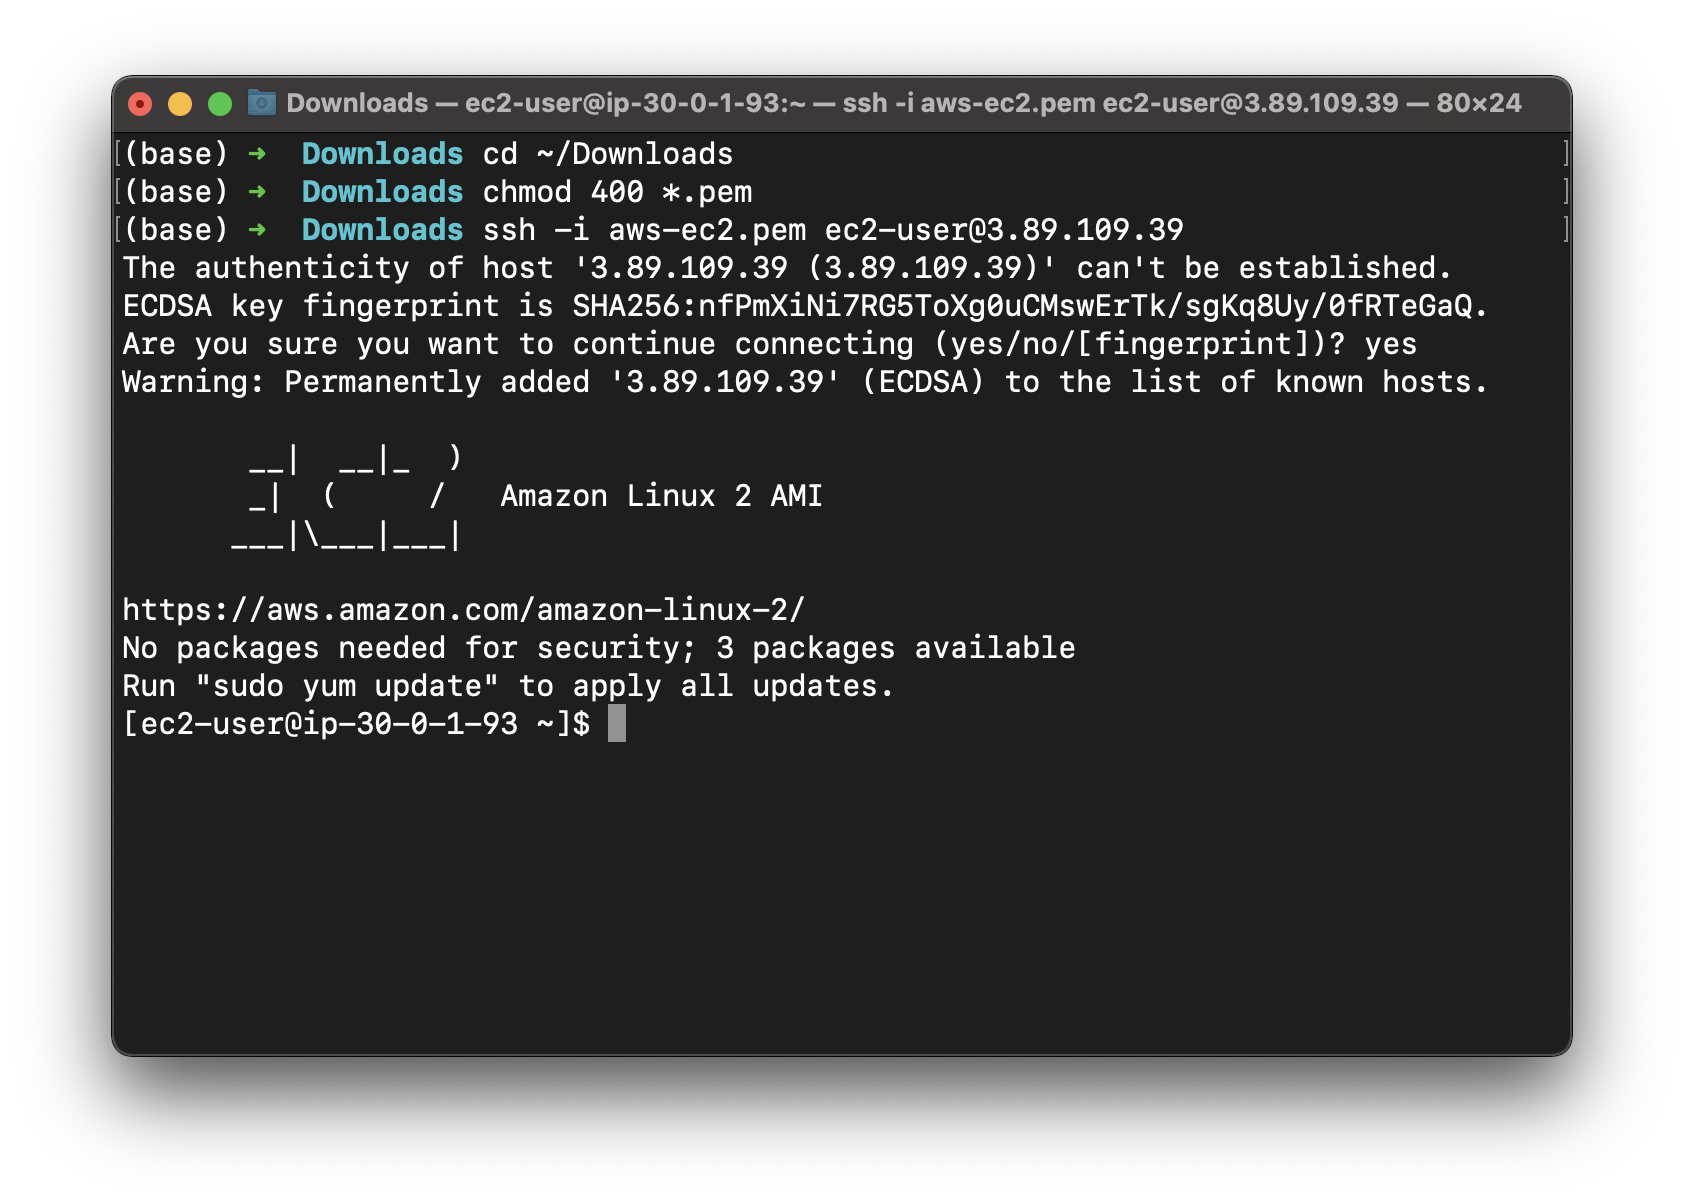
SSH from Bastion server to web servers
Upload .pem file to Bastion server
On the terminal connecting to Bastion server
Print working directory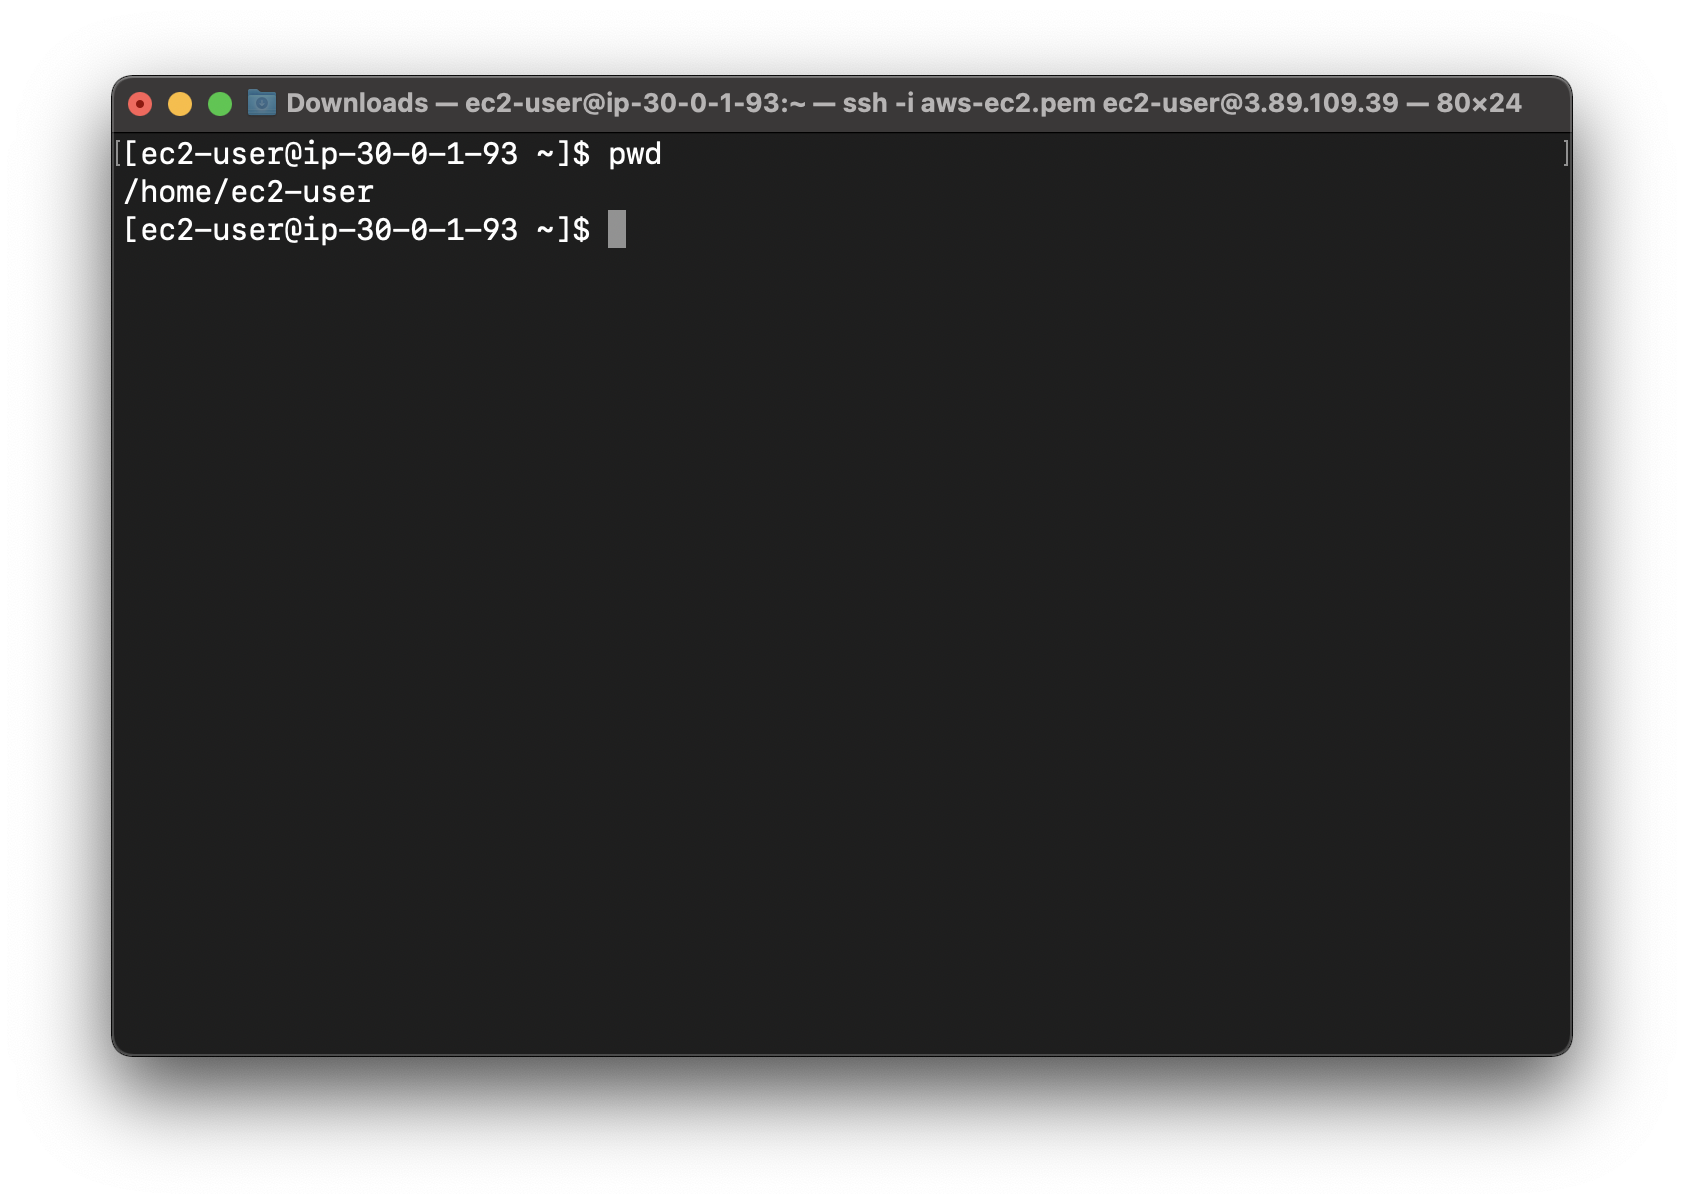
On your local terminal
Upload .pem file of the web server to Bastion server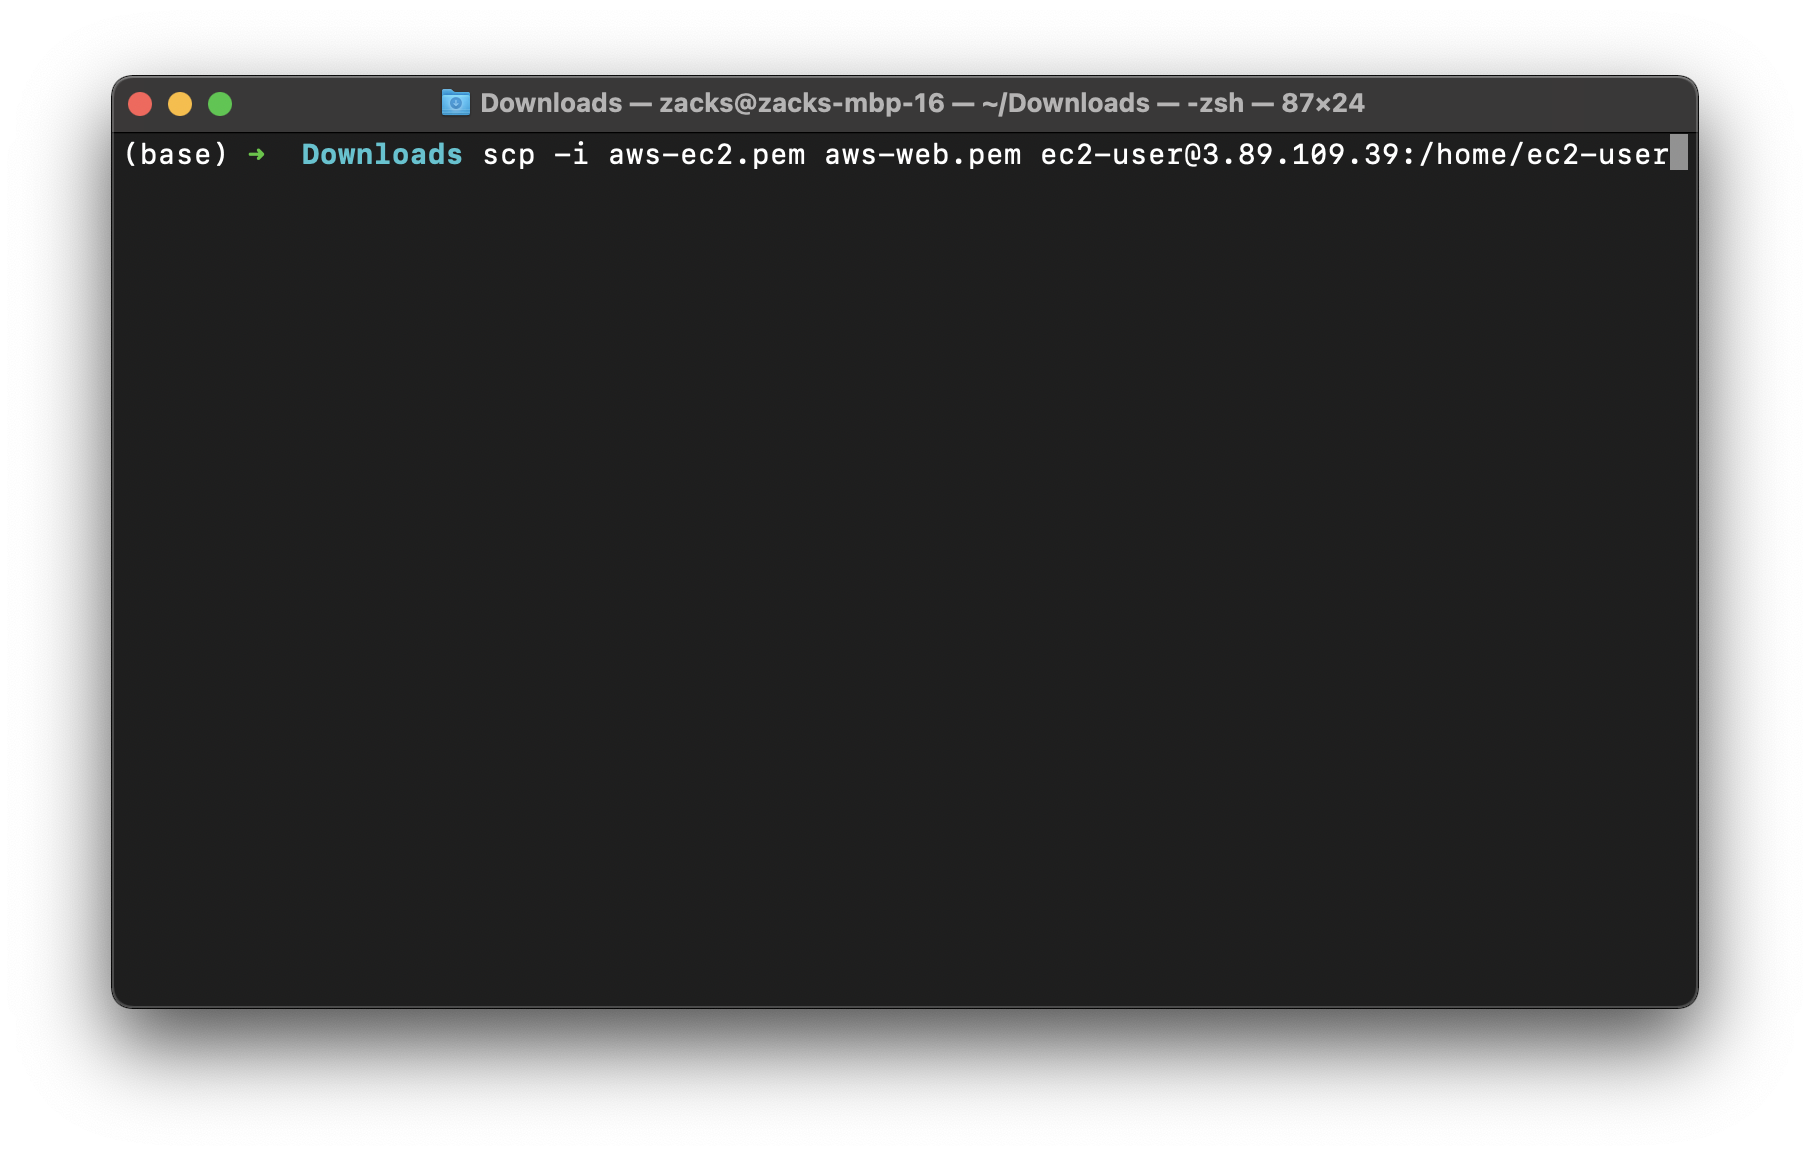
On your local terminal
Successful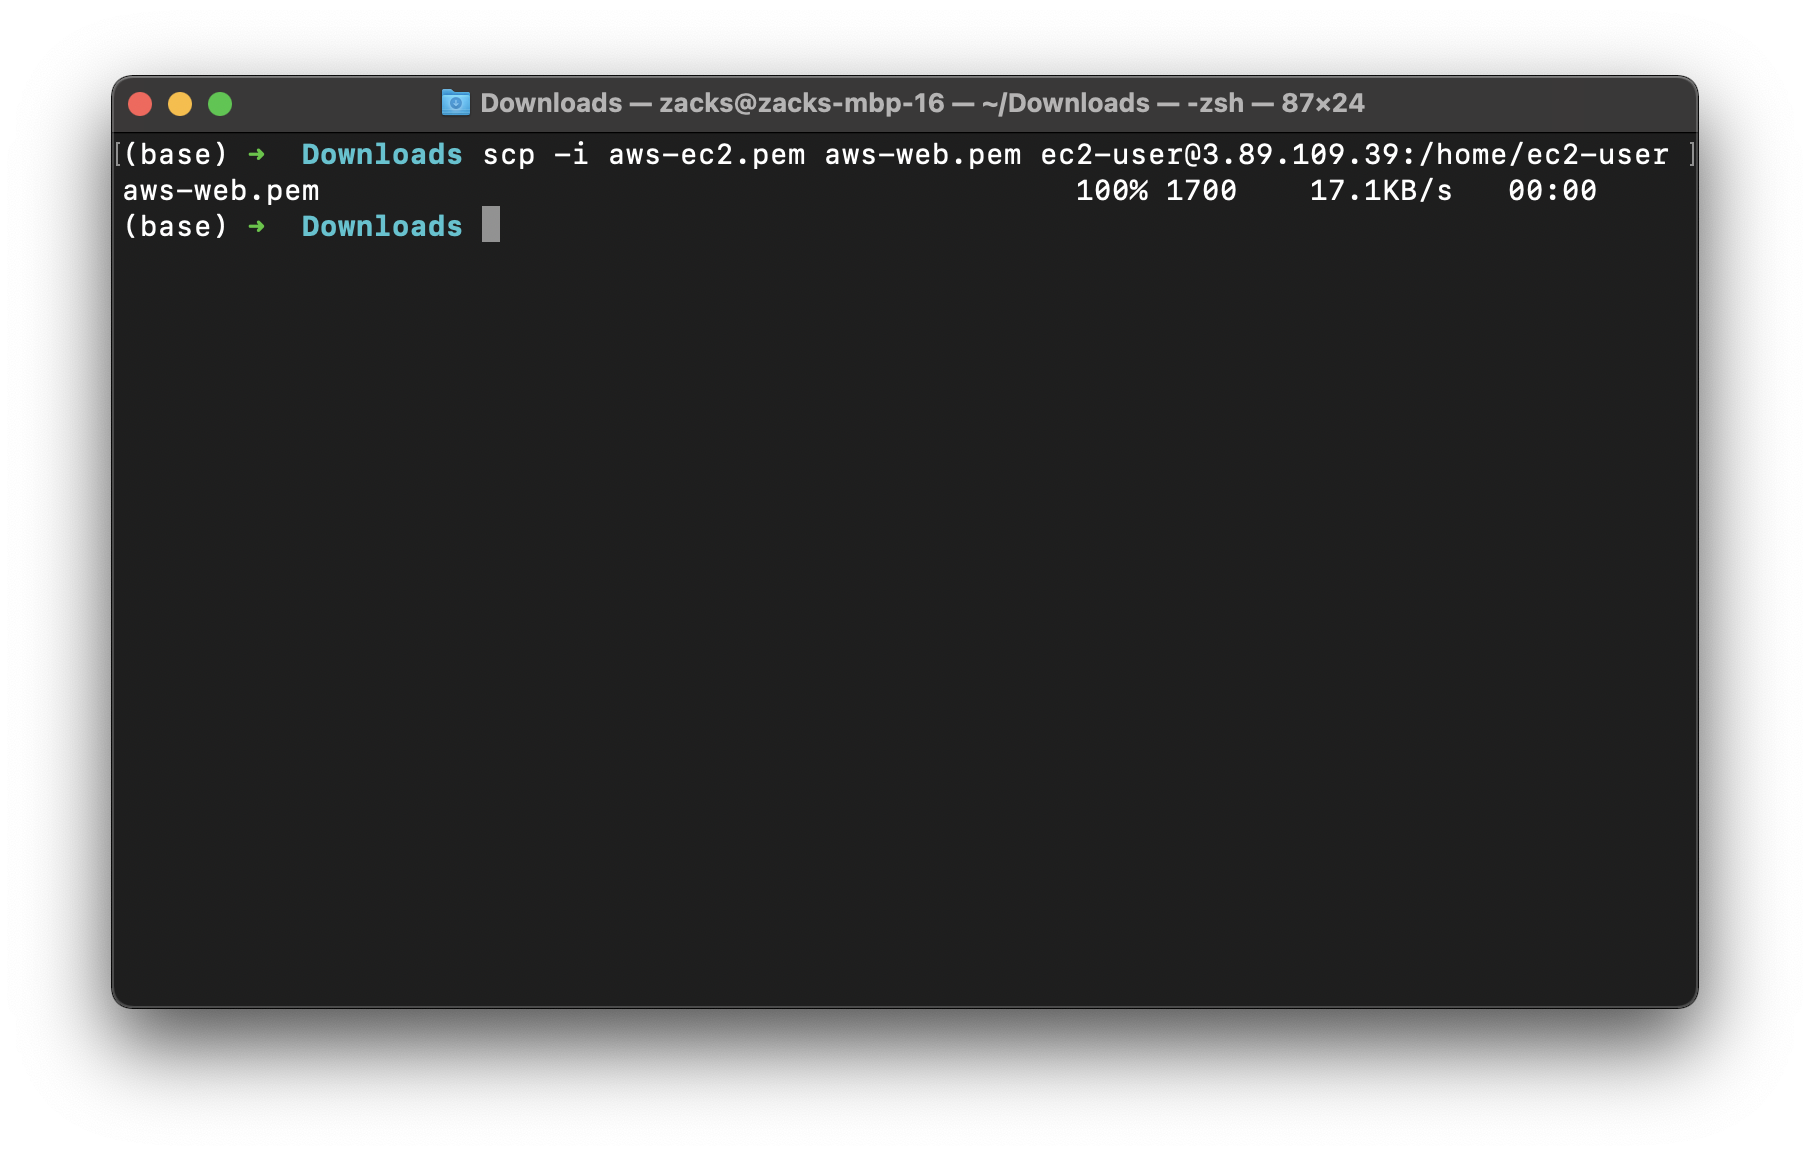
On the terminal connecting to Bastion server
List current working directory. We can see the .pem file of the web server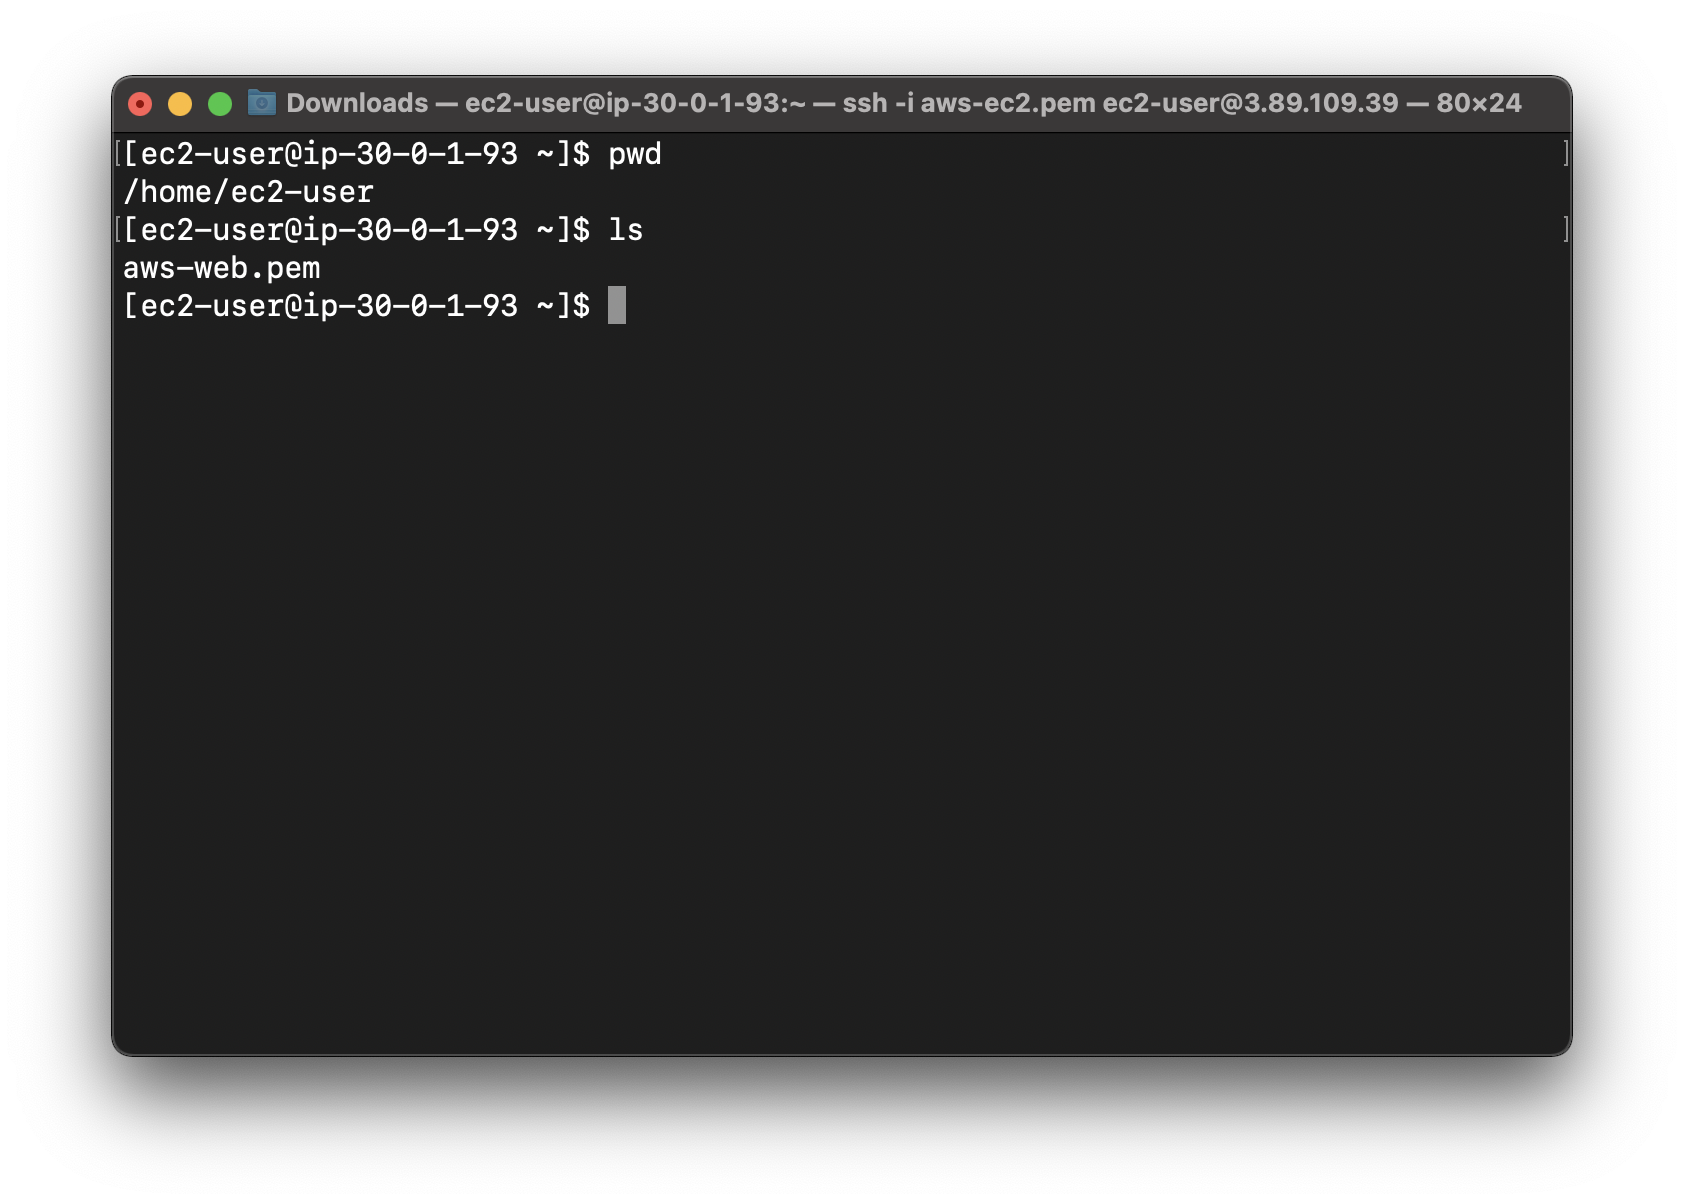
Web-server-1
Copy the private IP address of Web-server-1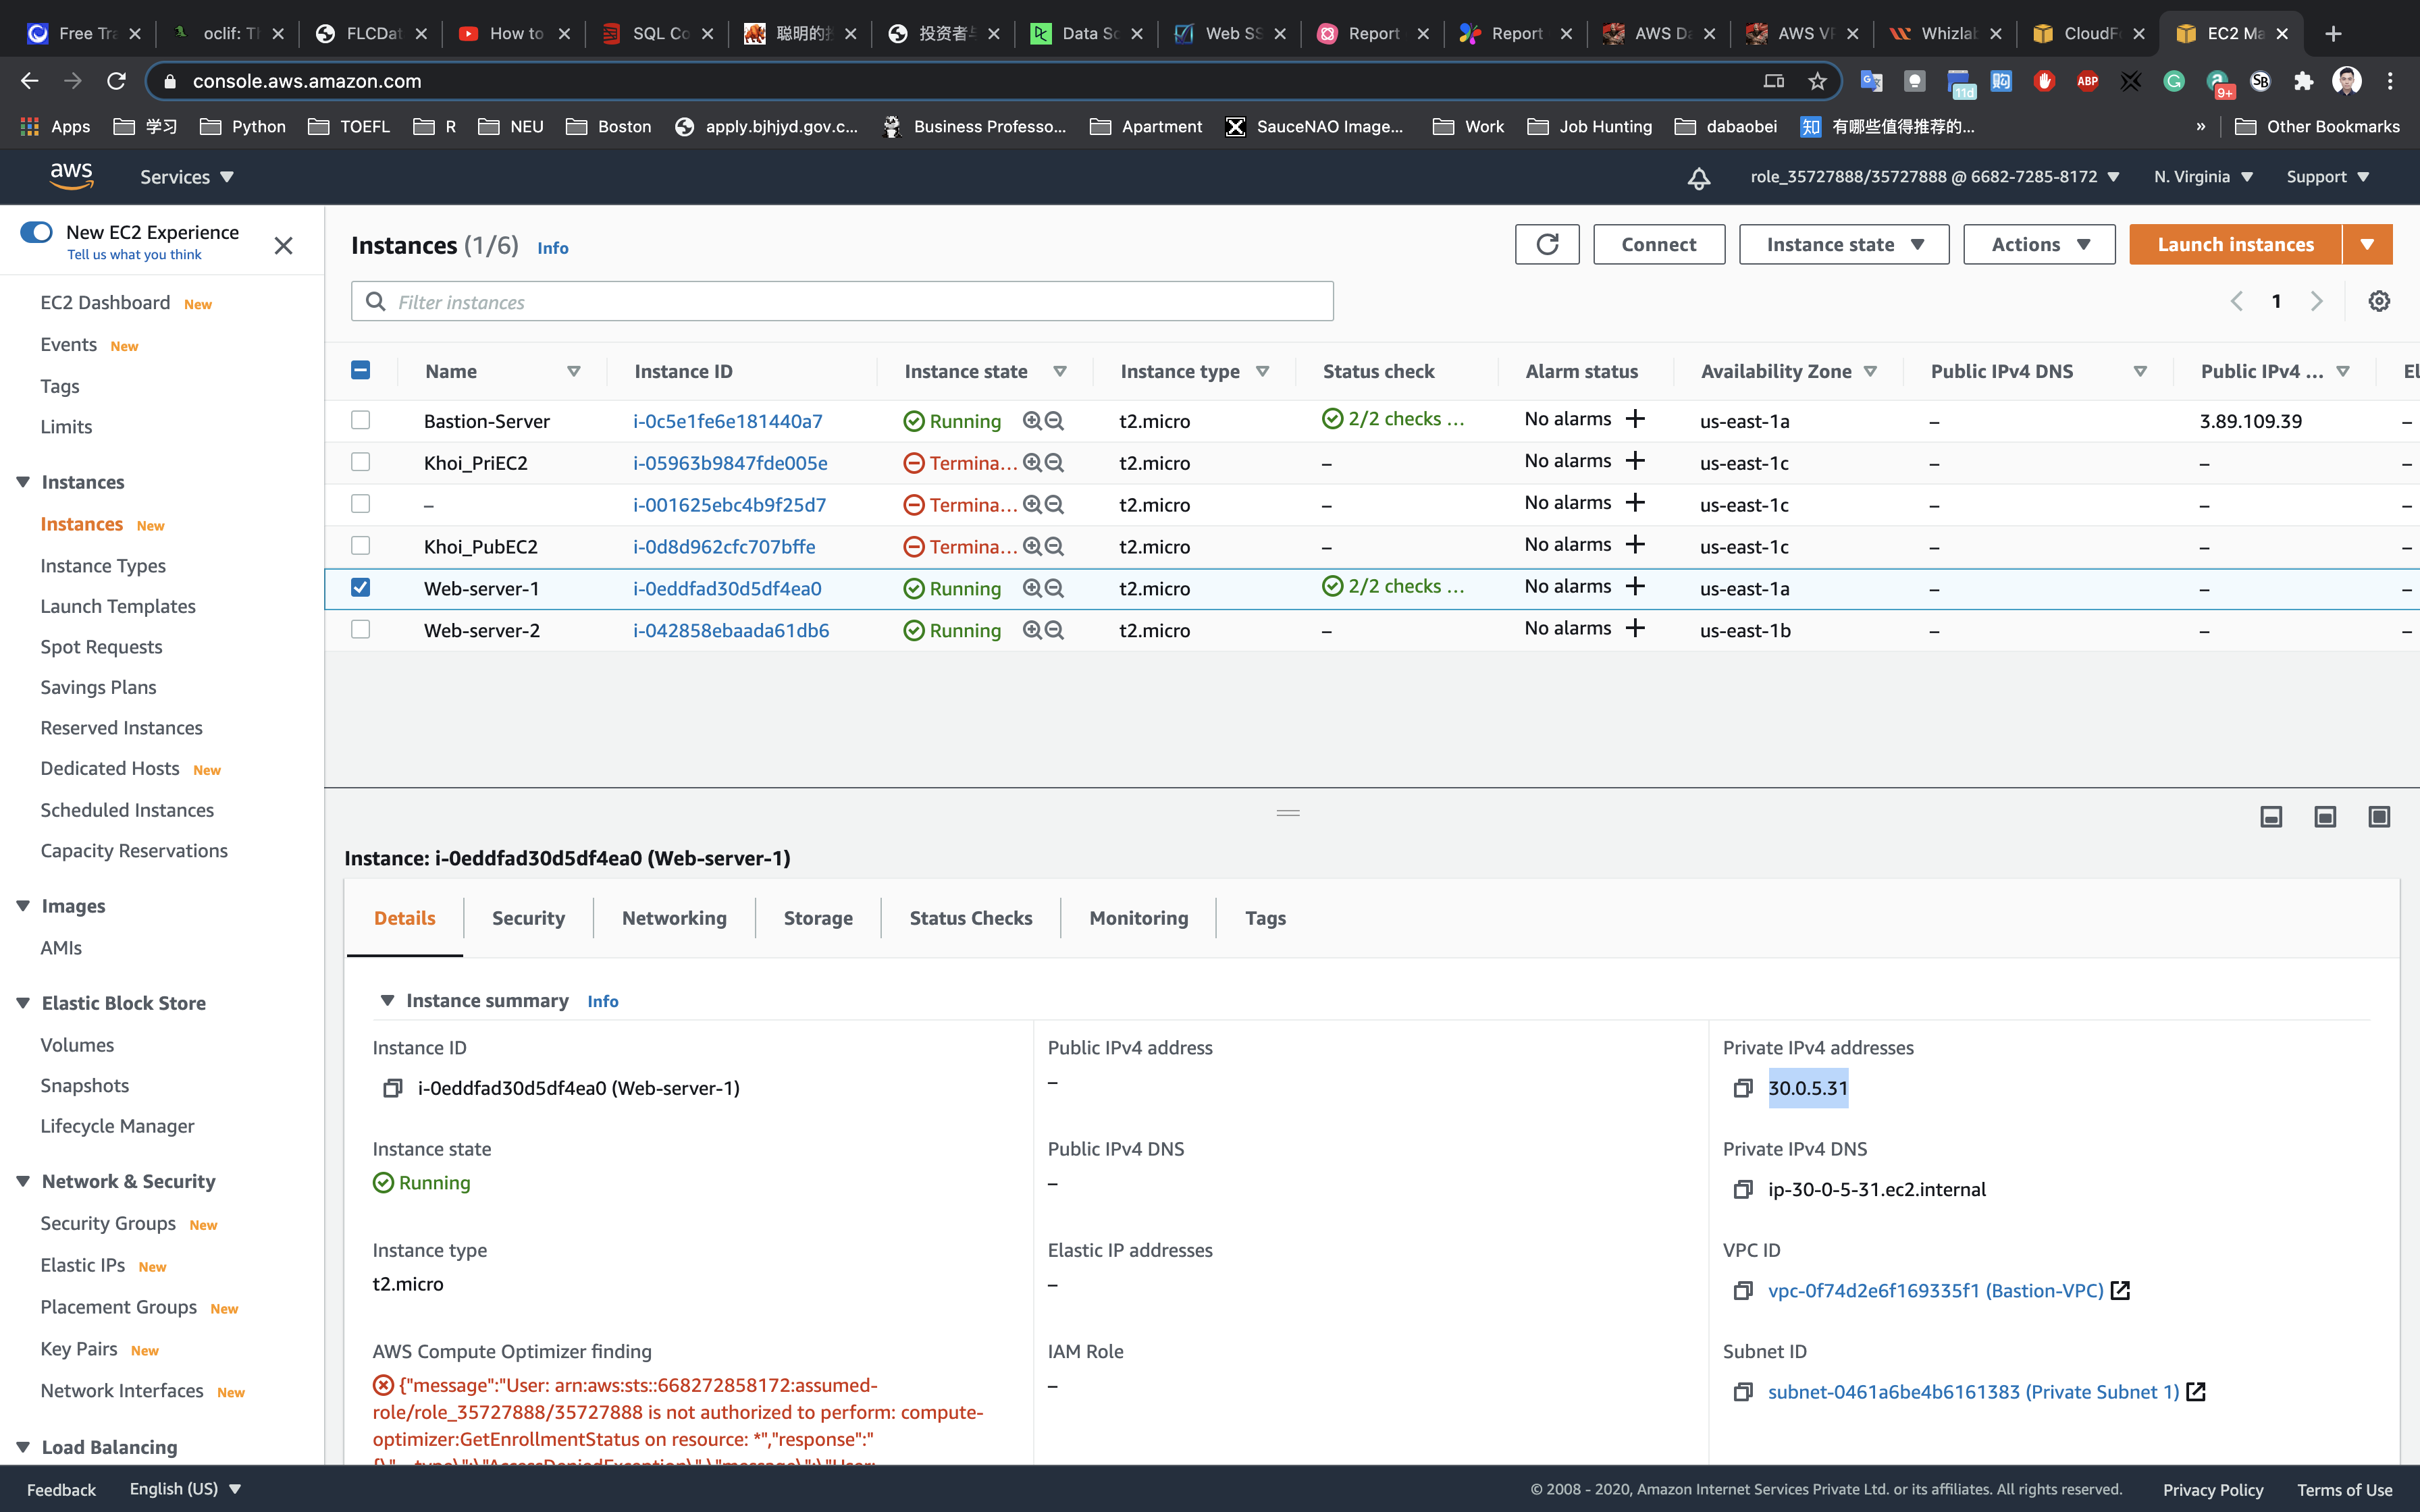
On the terminal connecting to Bastion server
Connect to Web-server-1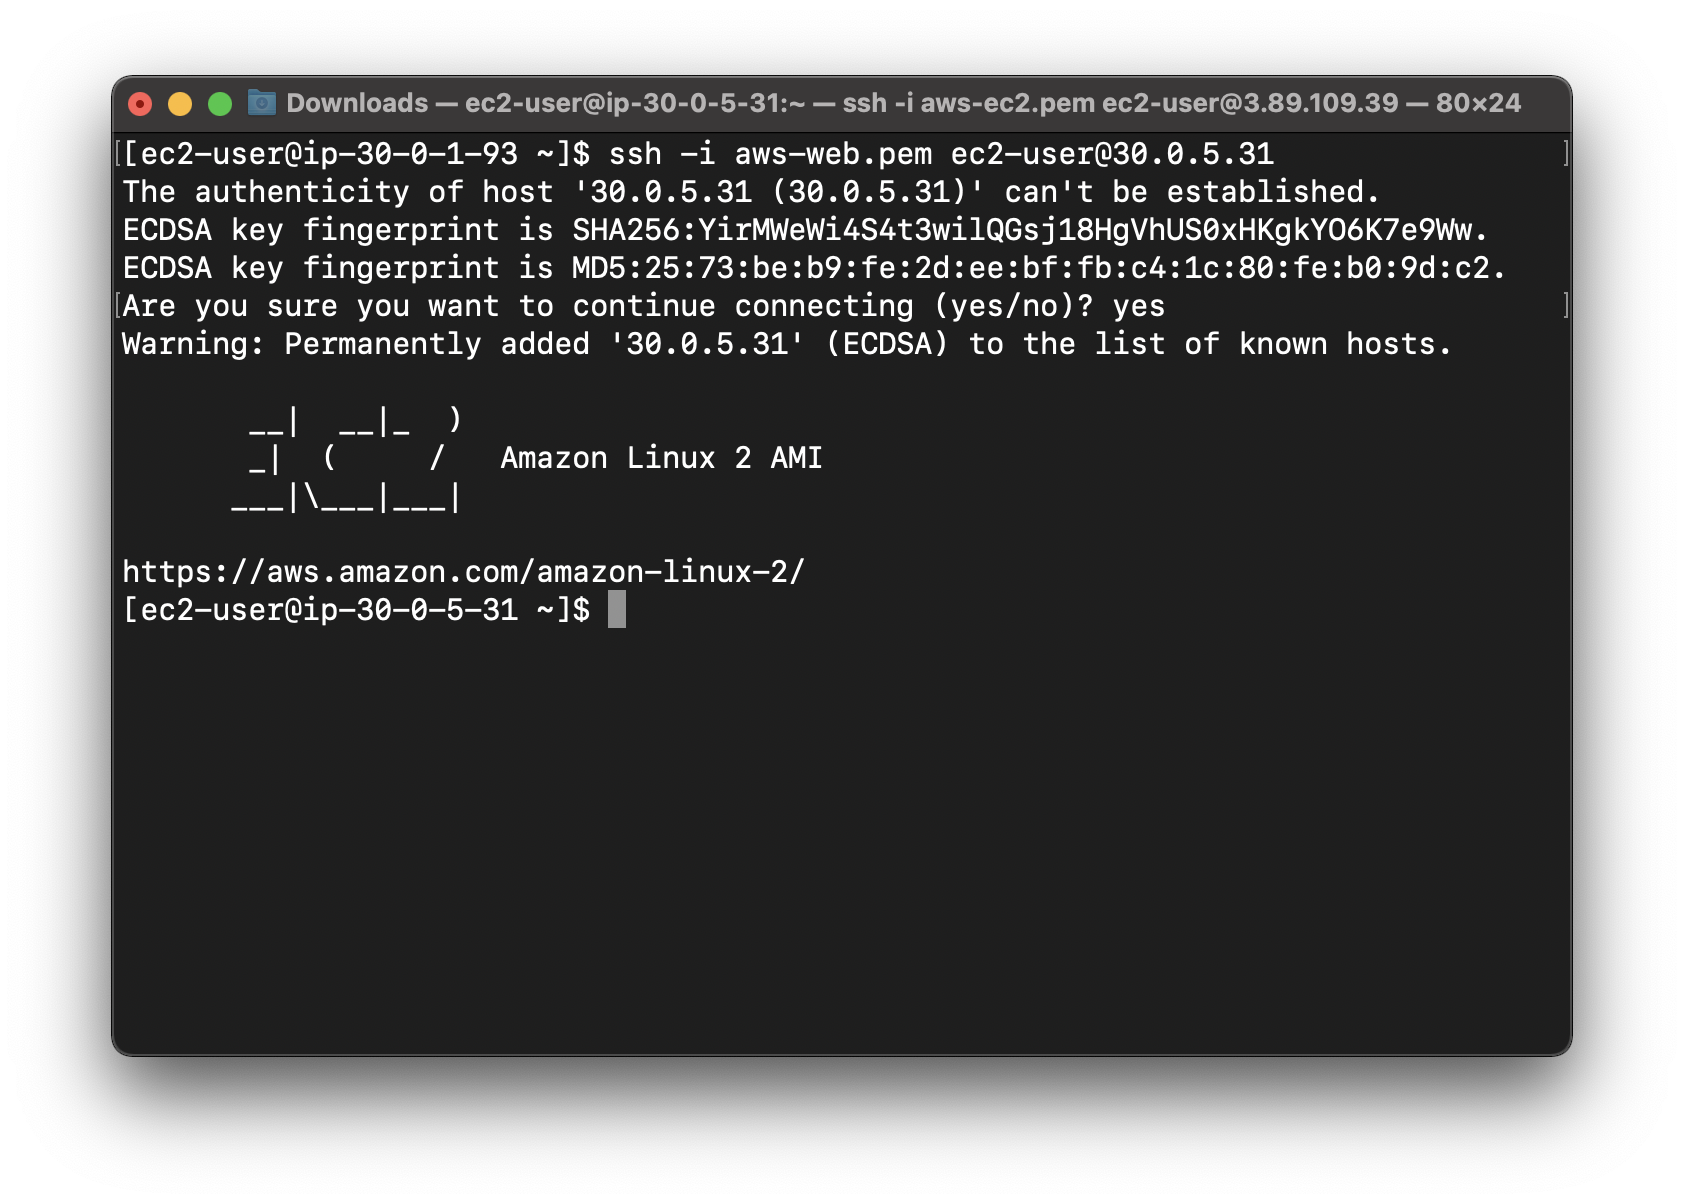
Exit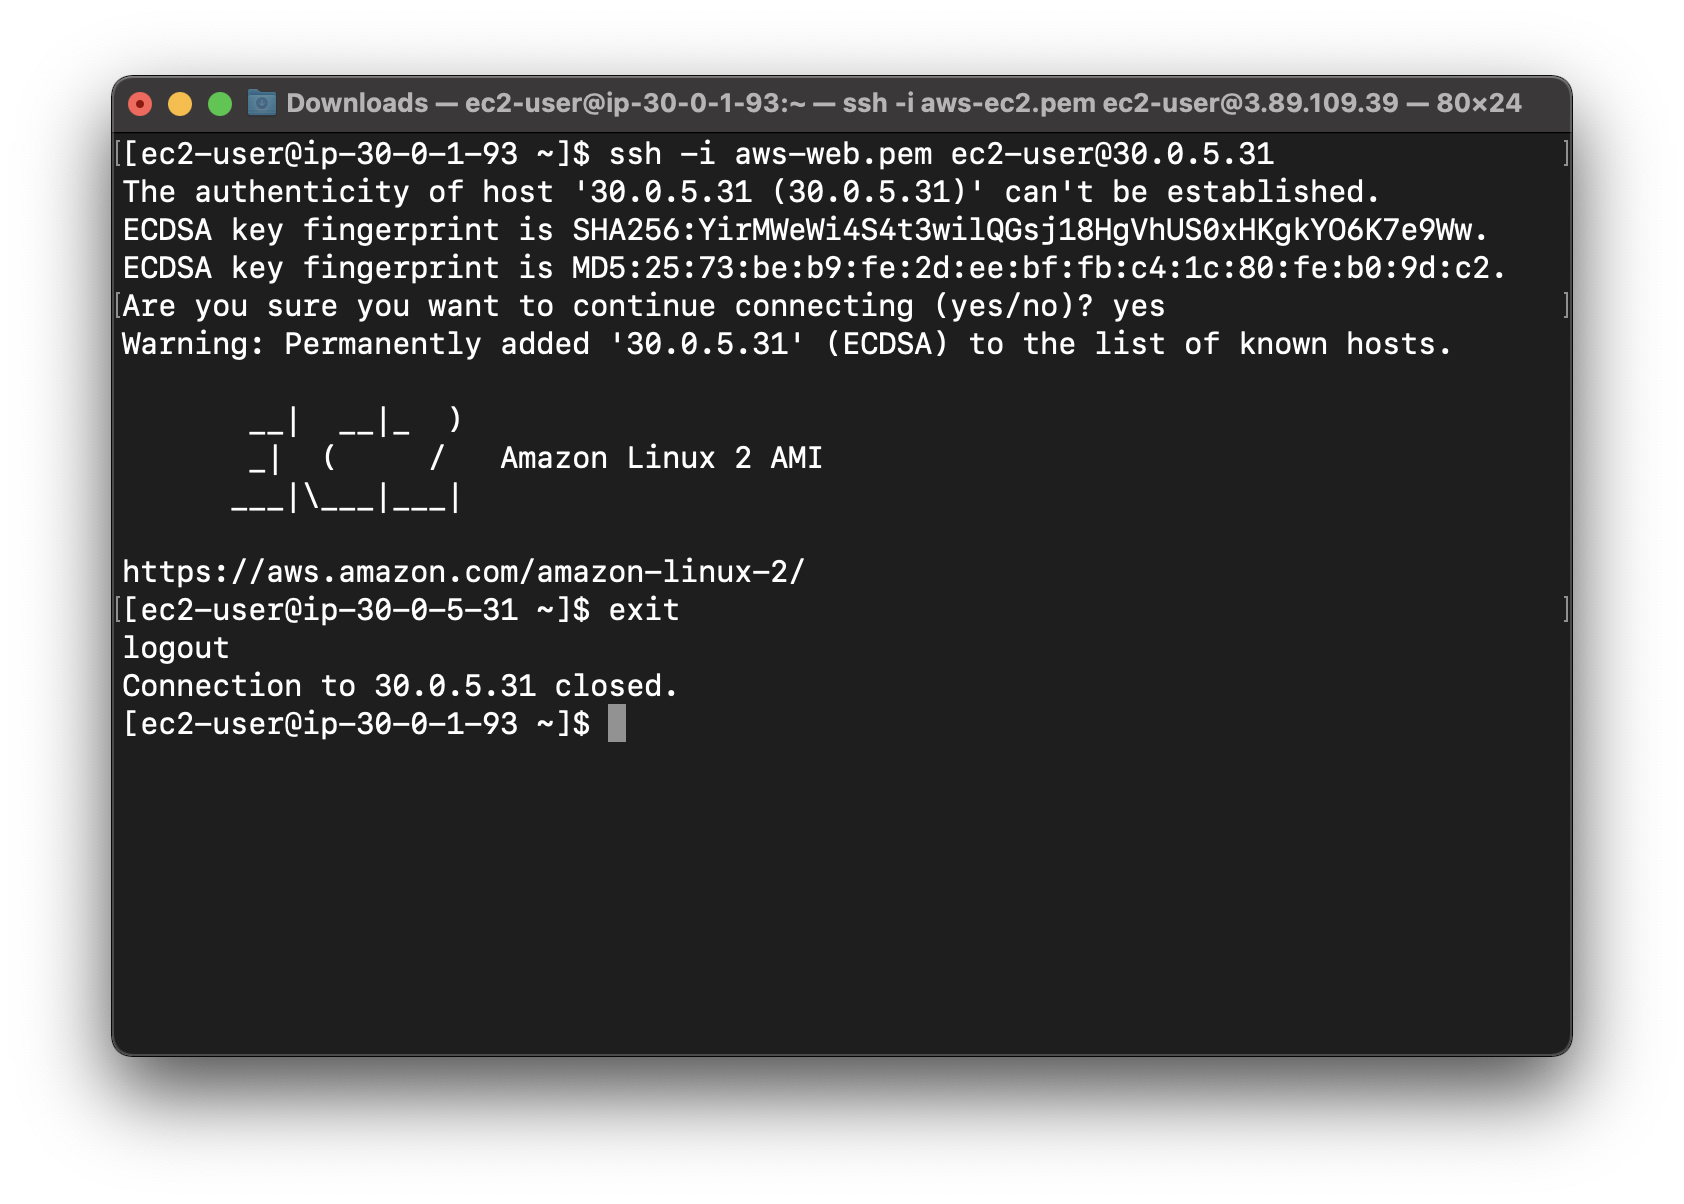
Web-server-2
Copy the private IP address of Web-server-2
On the terminal connecting to Bastion server
Connect to Web-server-2
Completion and Conclusion
- We have launched a Bastion server and two web-servers. We were able to SSH into the servers via Bastion Server successfully.
- We launched an Application Load Balancer and associated our web servers with the load balancer.
- We tested the load sharing between web servers.
- We successfully tested the high availability of the web application by making one of the web servers unhealthy.
Launch Amazon EC2 instance, Launch Amazon RDS Instance, Connecting RDS from EC2 Instance
https://play.whizlabs.com/site/task_details?lab_type=1&task_id=26&quest_id=35
Lab Details
- This lab walks you through the steps of connecting Amazon EC2 with Amazon RDS Instance.
- We will create an EC2 instance inside a public subnet and an Amazon RDS in a private subnet group.
Tasks
- Log into the AWS Management Console.
- Create an EC2 instance.
- Create an Amazon RDS instance.
- Create a connection to the Amazon RDS database on the EC2 instance.
- Create a Database and Add new tables and data to Database for testing.
Architect Diagram
EC2 Configuration
Services -> EC2 -> Instances
Web Server Configuration
Click on Launch Instance
Choose the first Amazon Machine Image (AMI): Amazon Linux 2 AMI (HVM), SSD Volume Type click on the Select button.
Instance Type : t2.micro
In the Configure Instance Details,
Leave all fields with the default values and then click on Next: Add Storage
No need to change anything in this step, click on Next: Add Tags
Add Tags: Click on Add Tag
- Key:
Name - Value:
Web Server
Click on Next: Configure Security Group.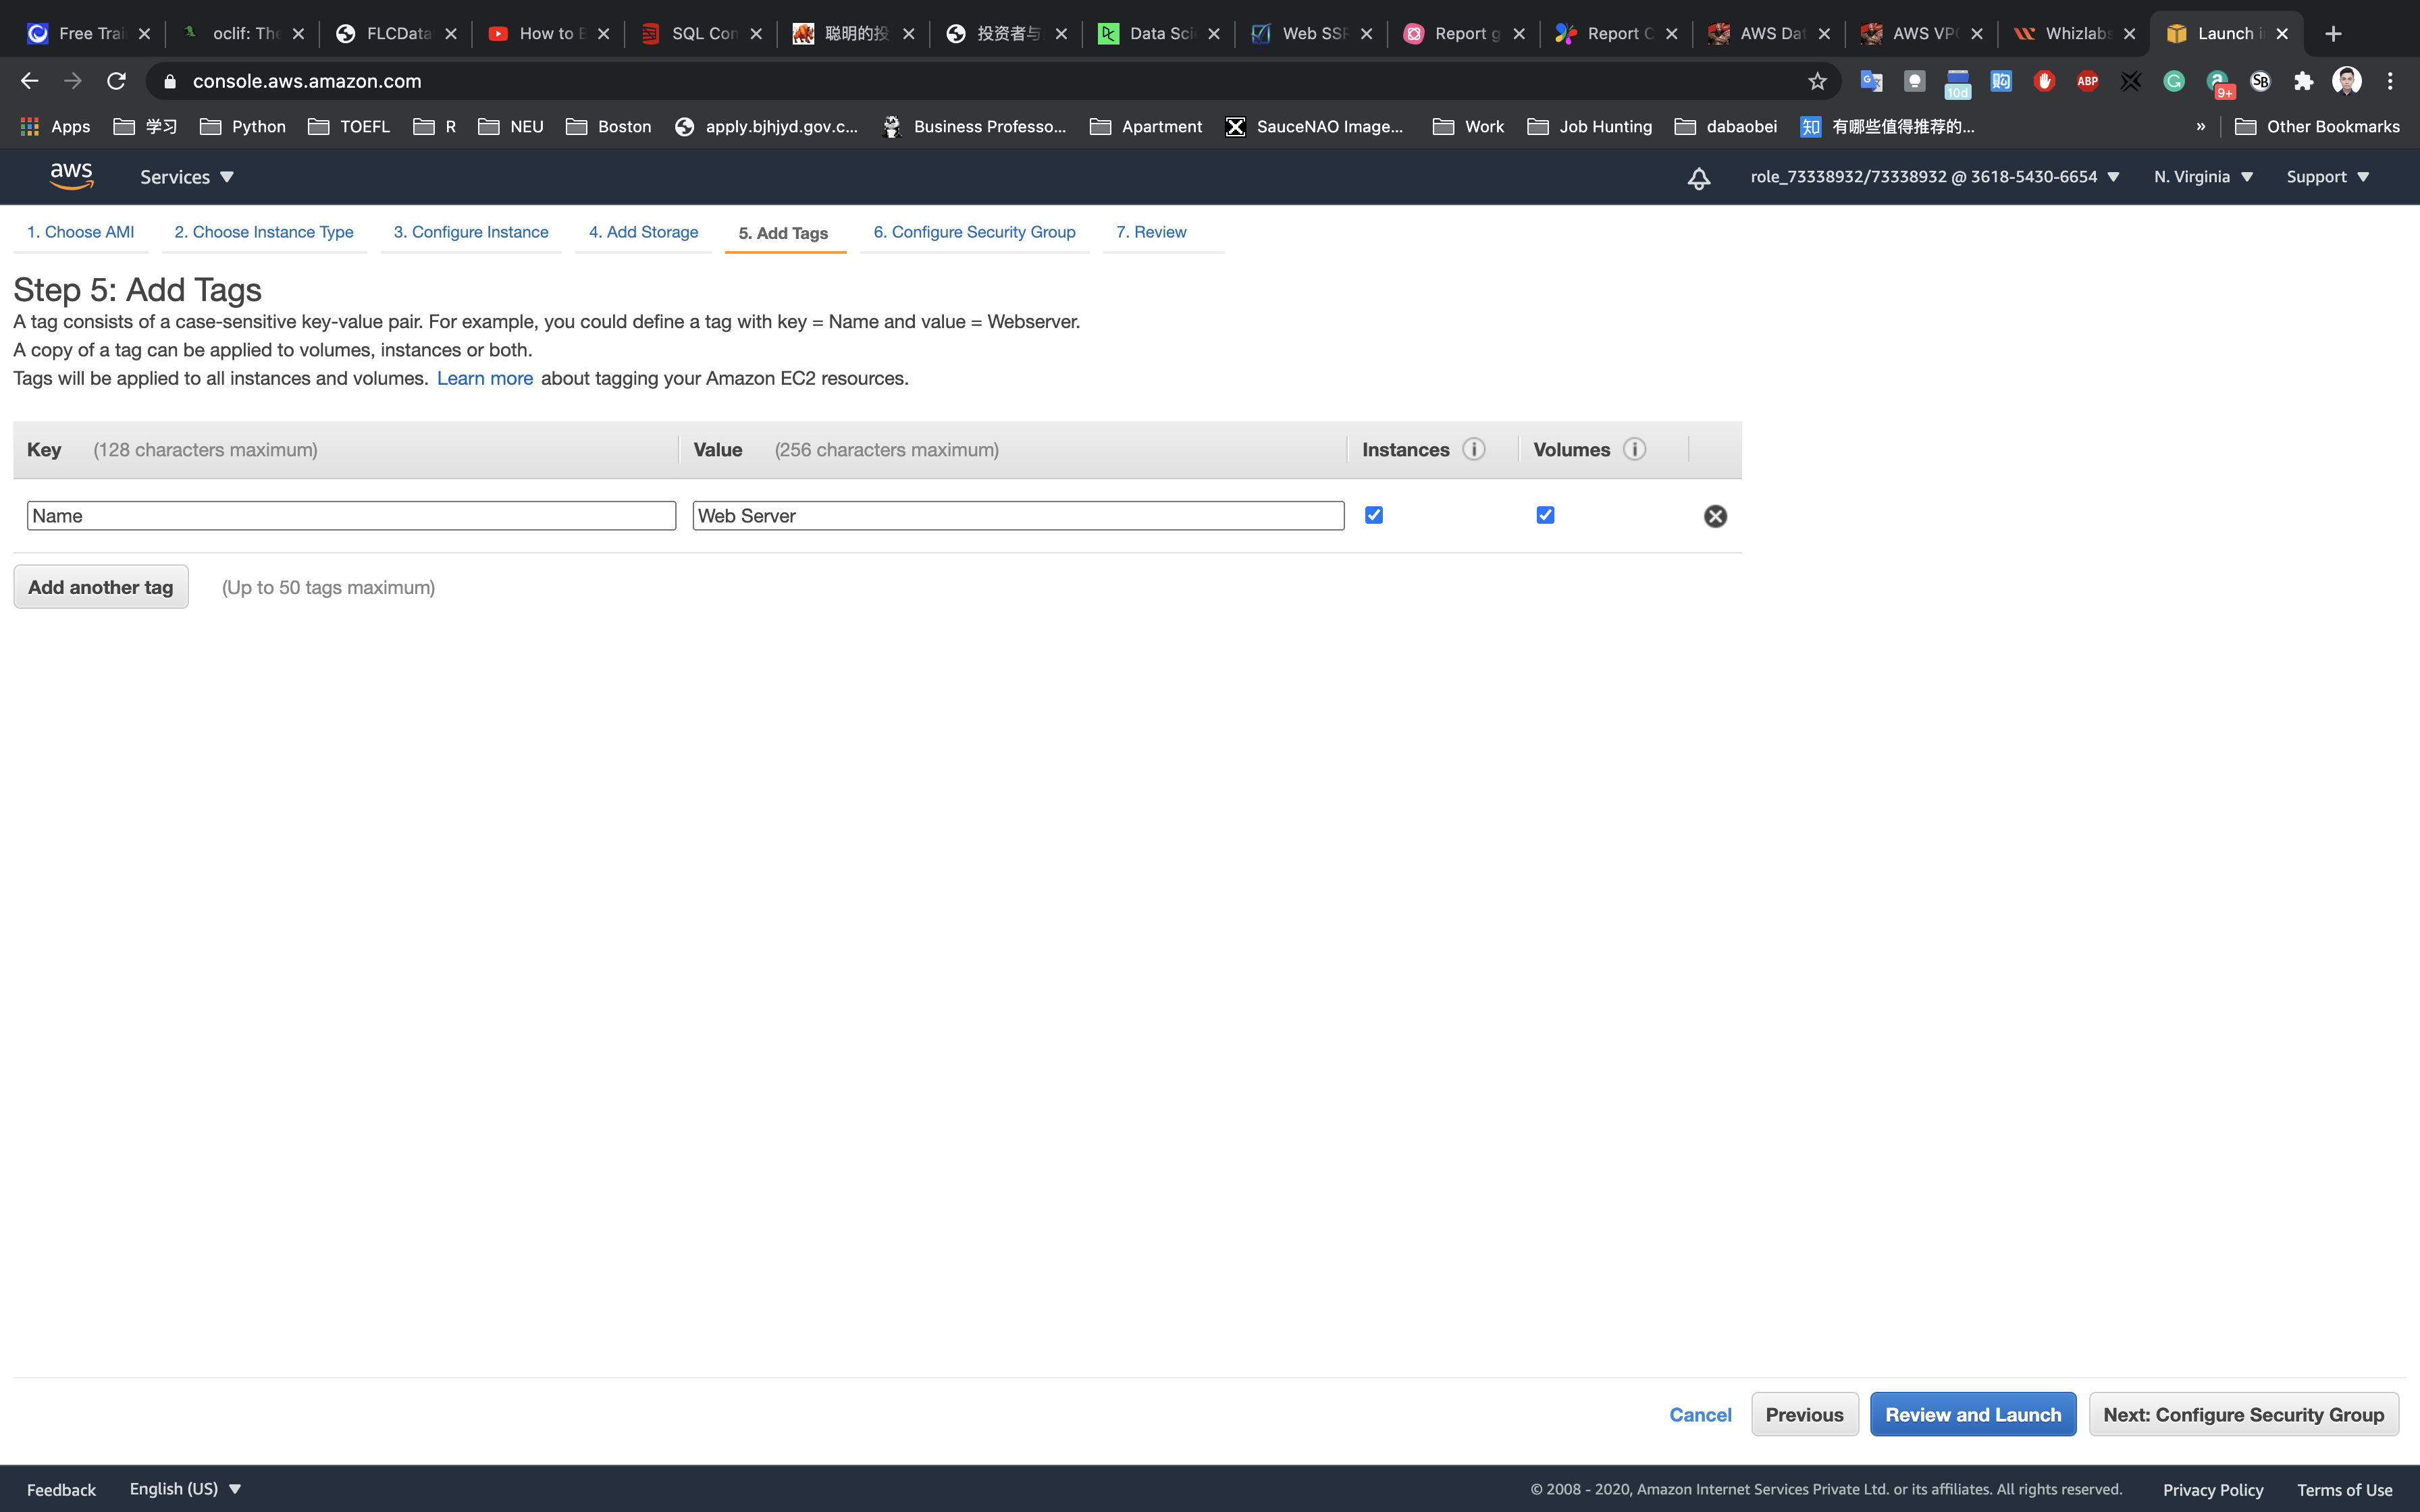
Configure Security Group:
Assign a security group: Choose to Create a new security group
- Security group name:
Web-Server-SG - Description:
Security group for Web server
For SSH:
- Type:
SSH - Source:
Anywhere
For HTTP:
- Type:
HTTP - Source:
Anywhere
For SSH:
- Type:
HTTPS - Source:
Anywhere
Click on Review and Launch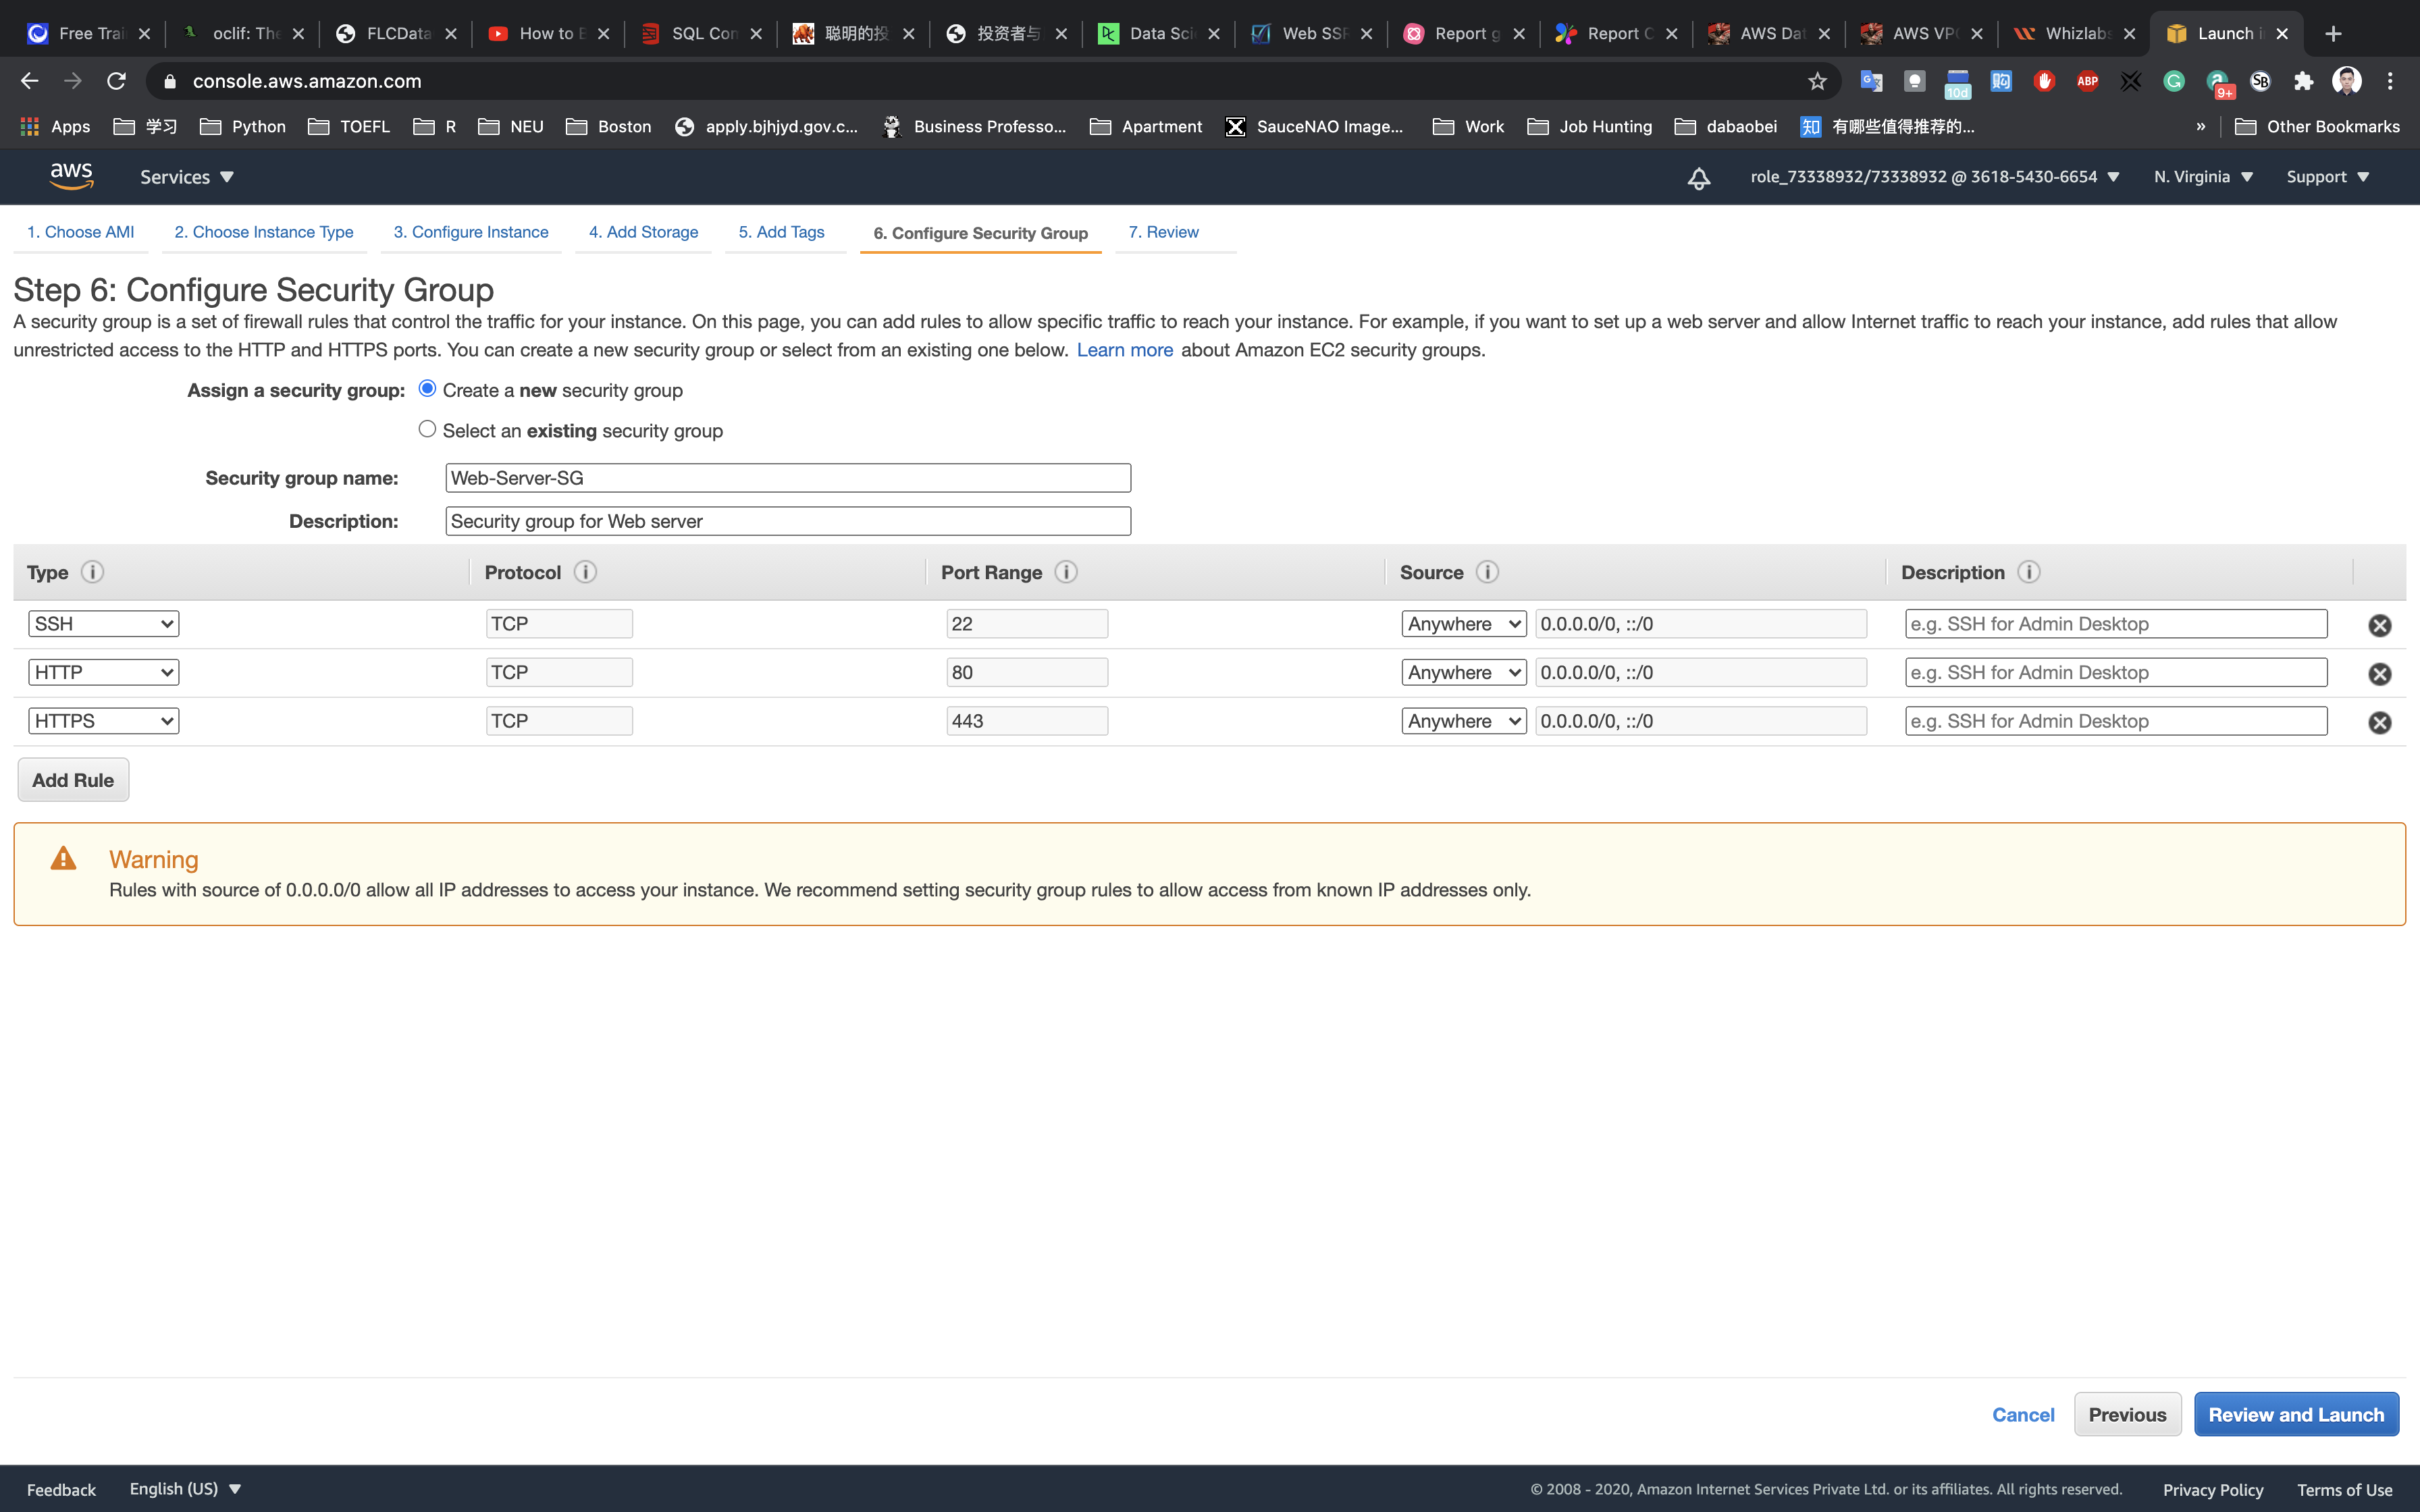
Review and Launch : Review all settings and click on Launch.
- Select
Create a new key pair - Key pair Name:
aws-web
Click on Download Key Pair.
Click on Launch Instances.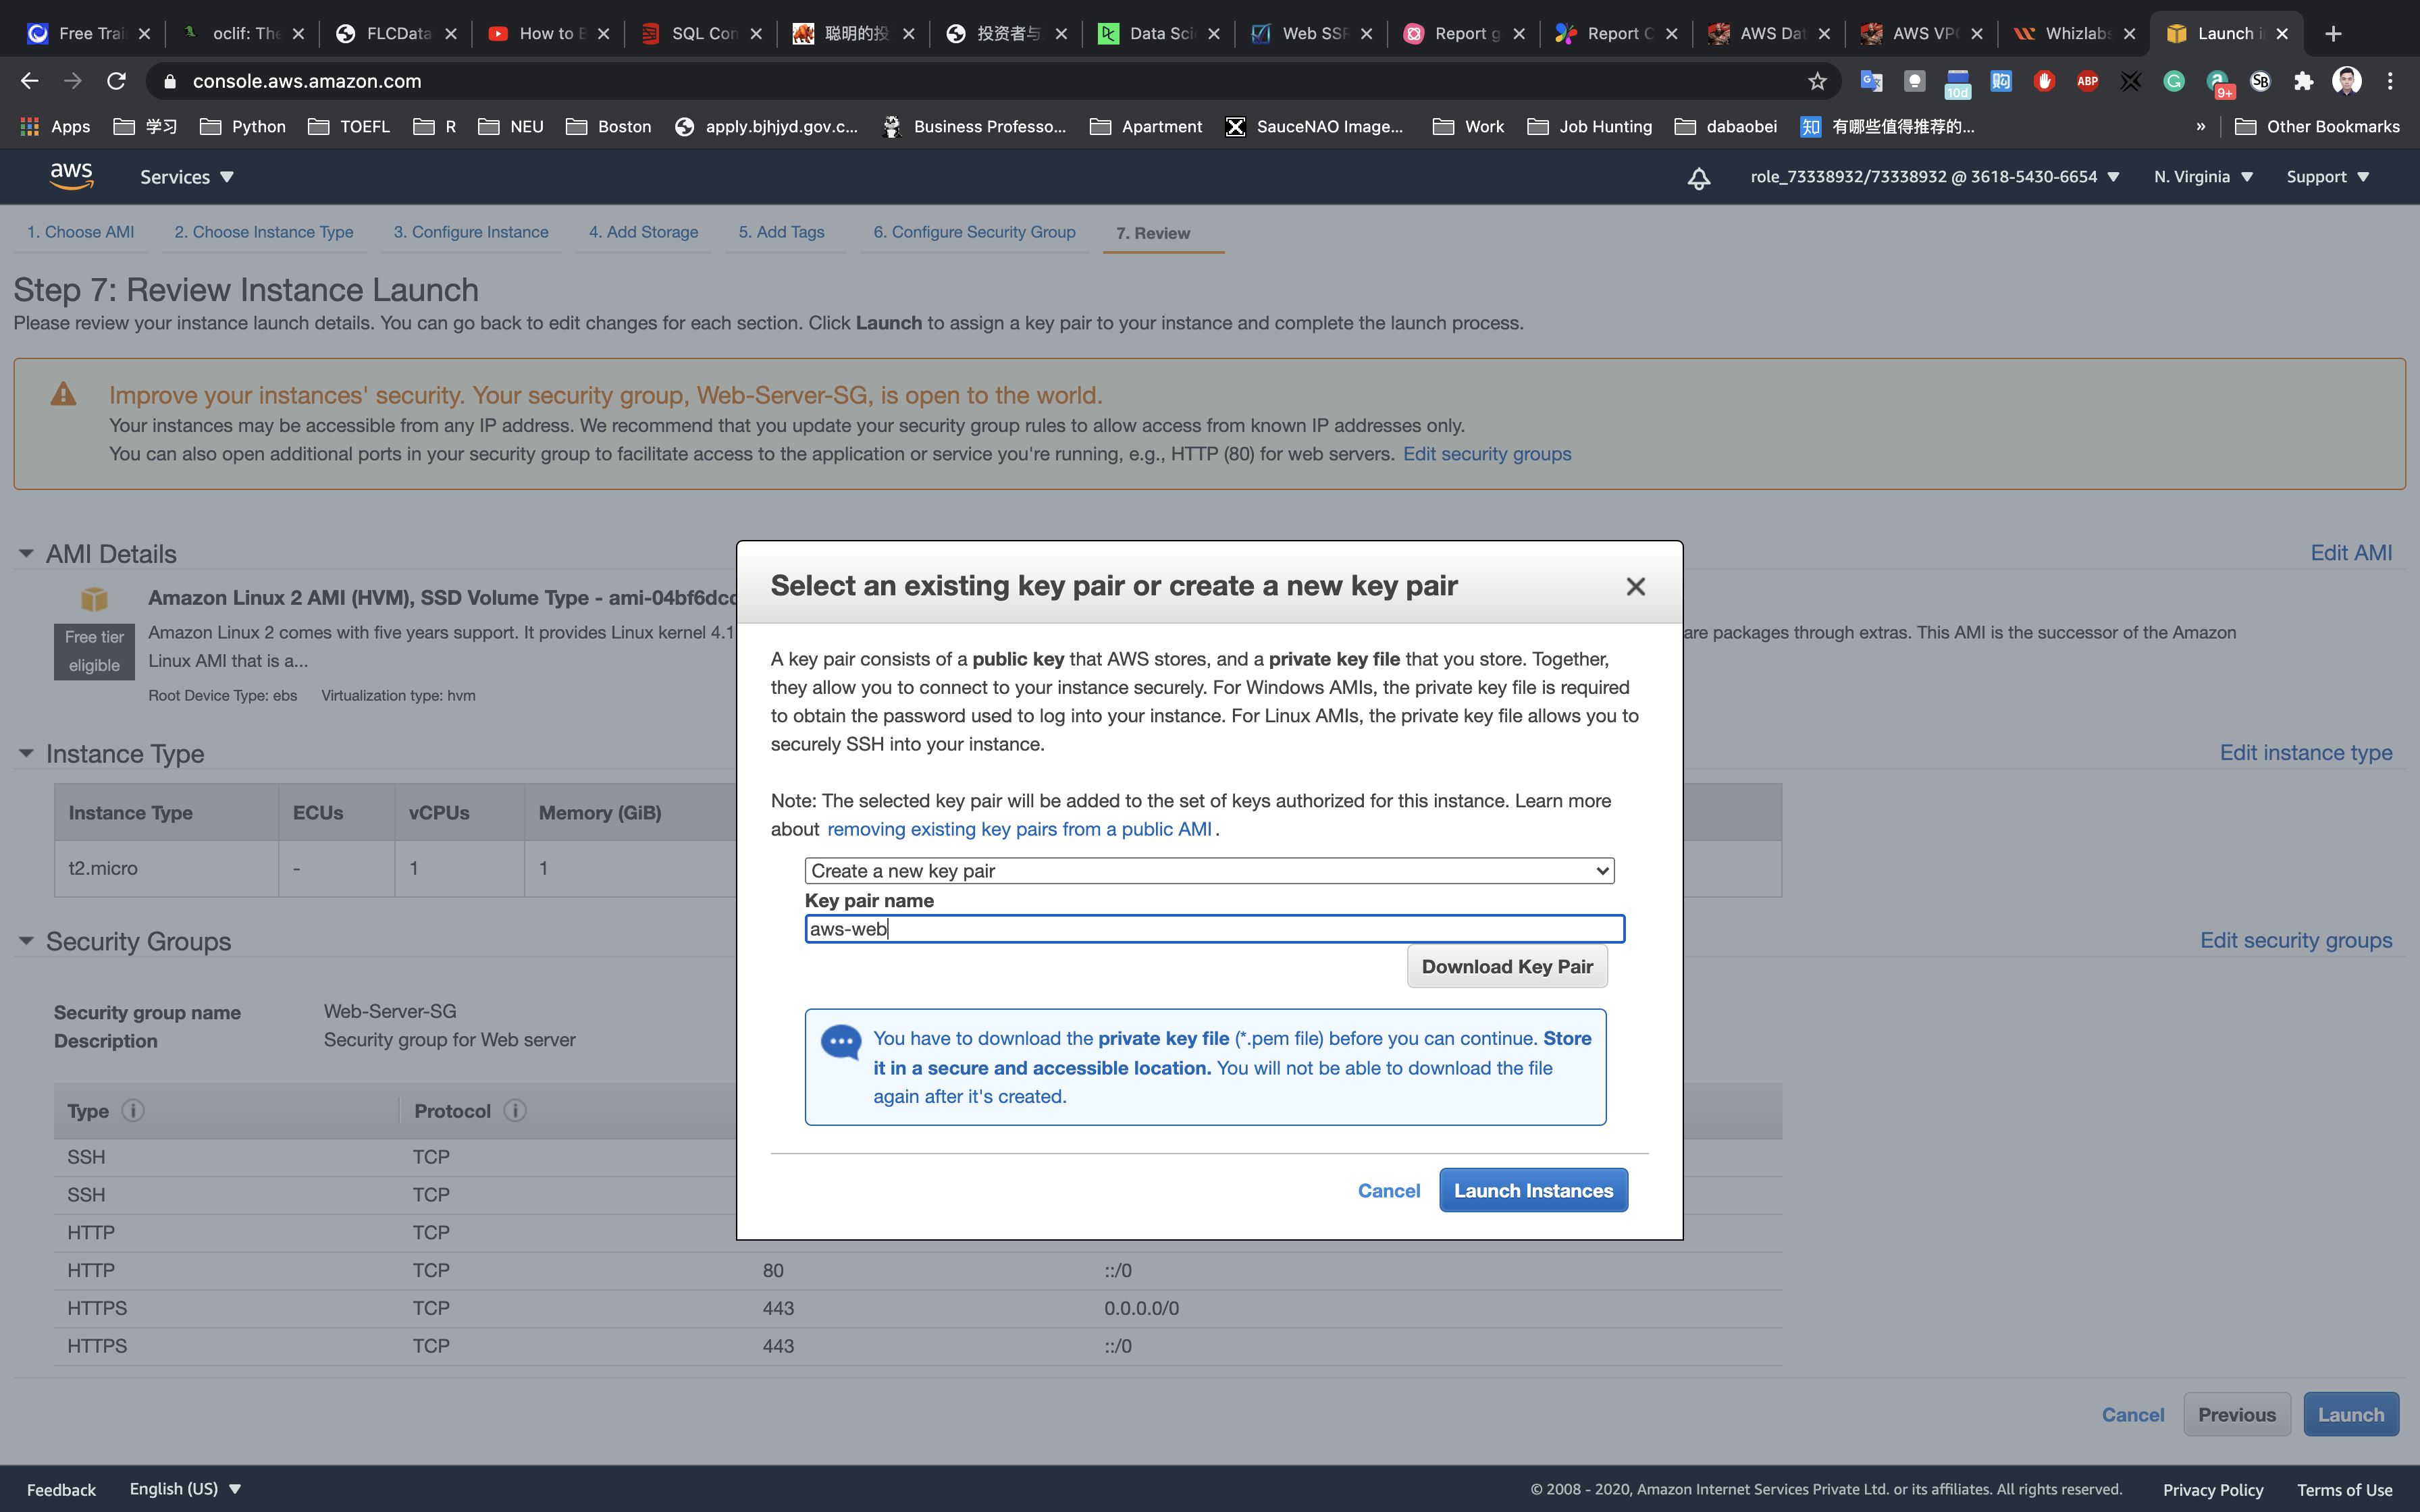
RDS Configuration
Services -> RDS -> Databases
Create an Amazon RDS Database
Click Create database.
Click on Switch to your original interface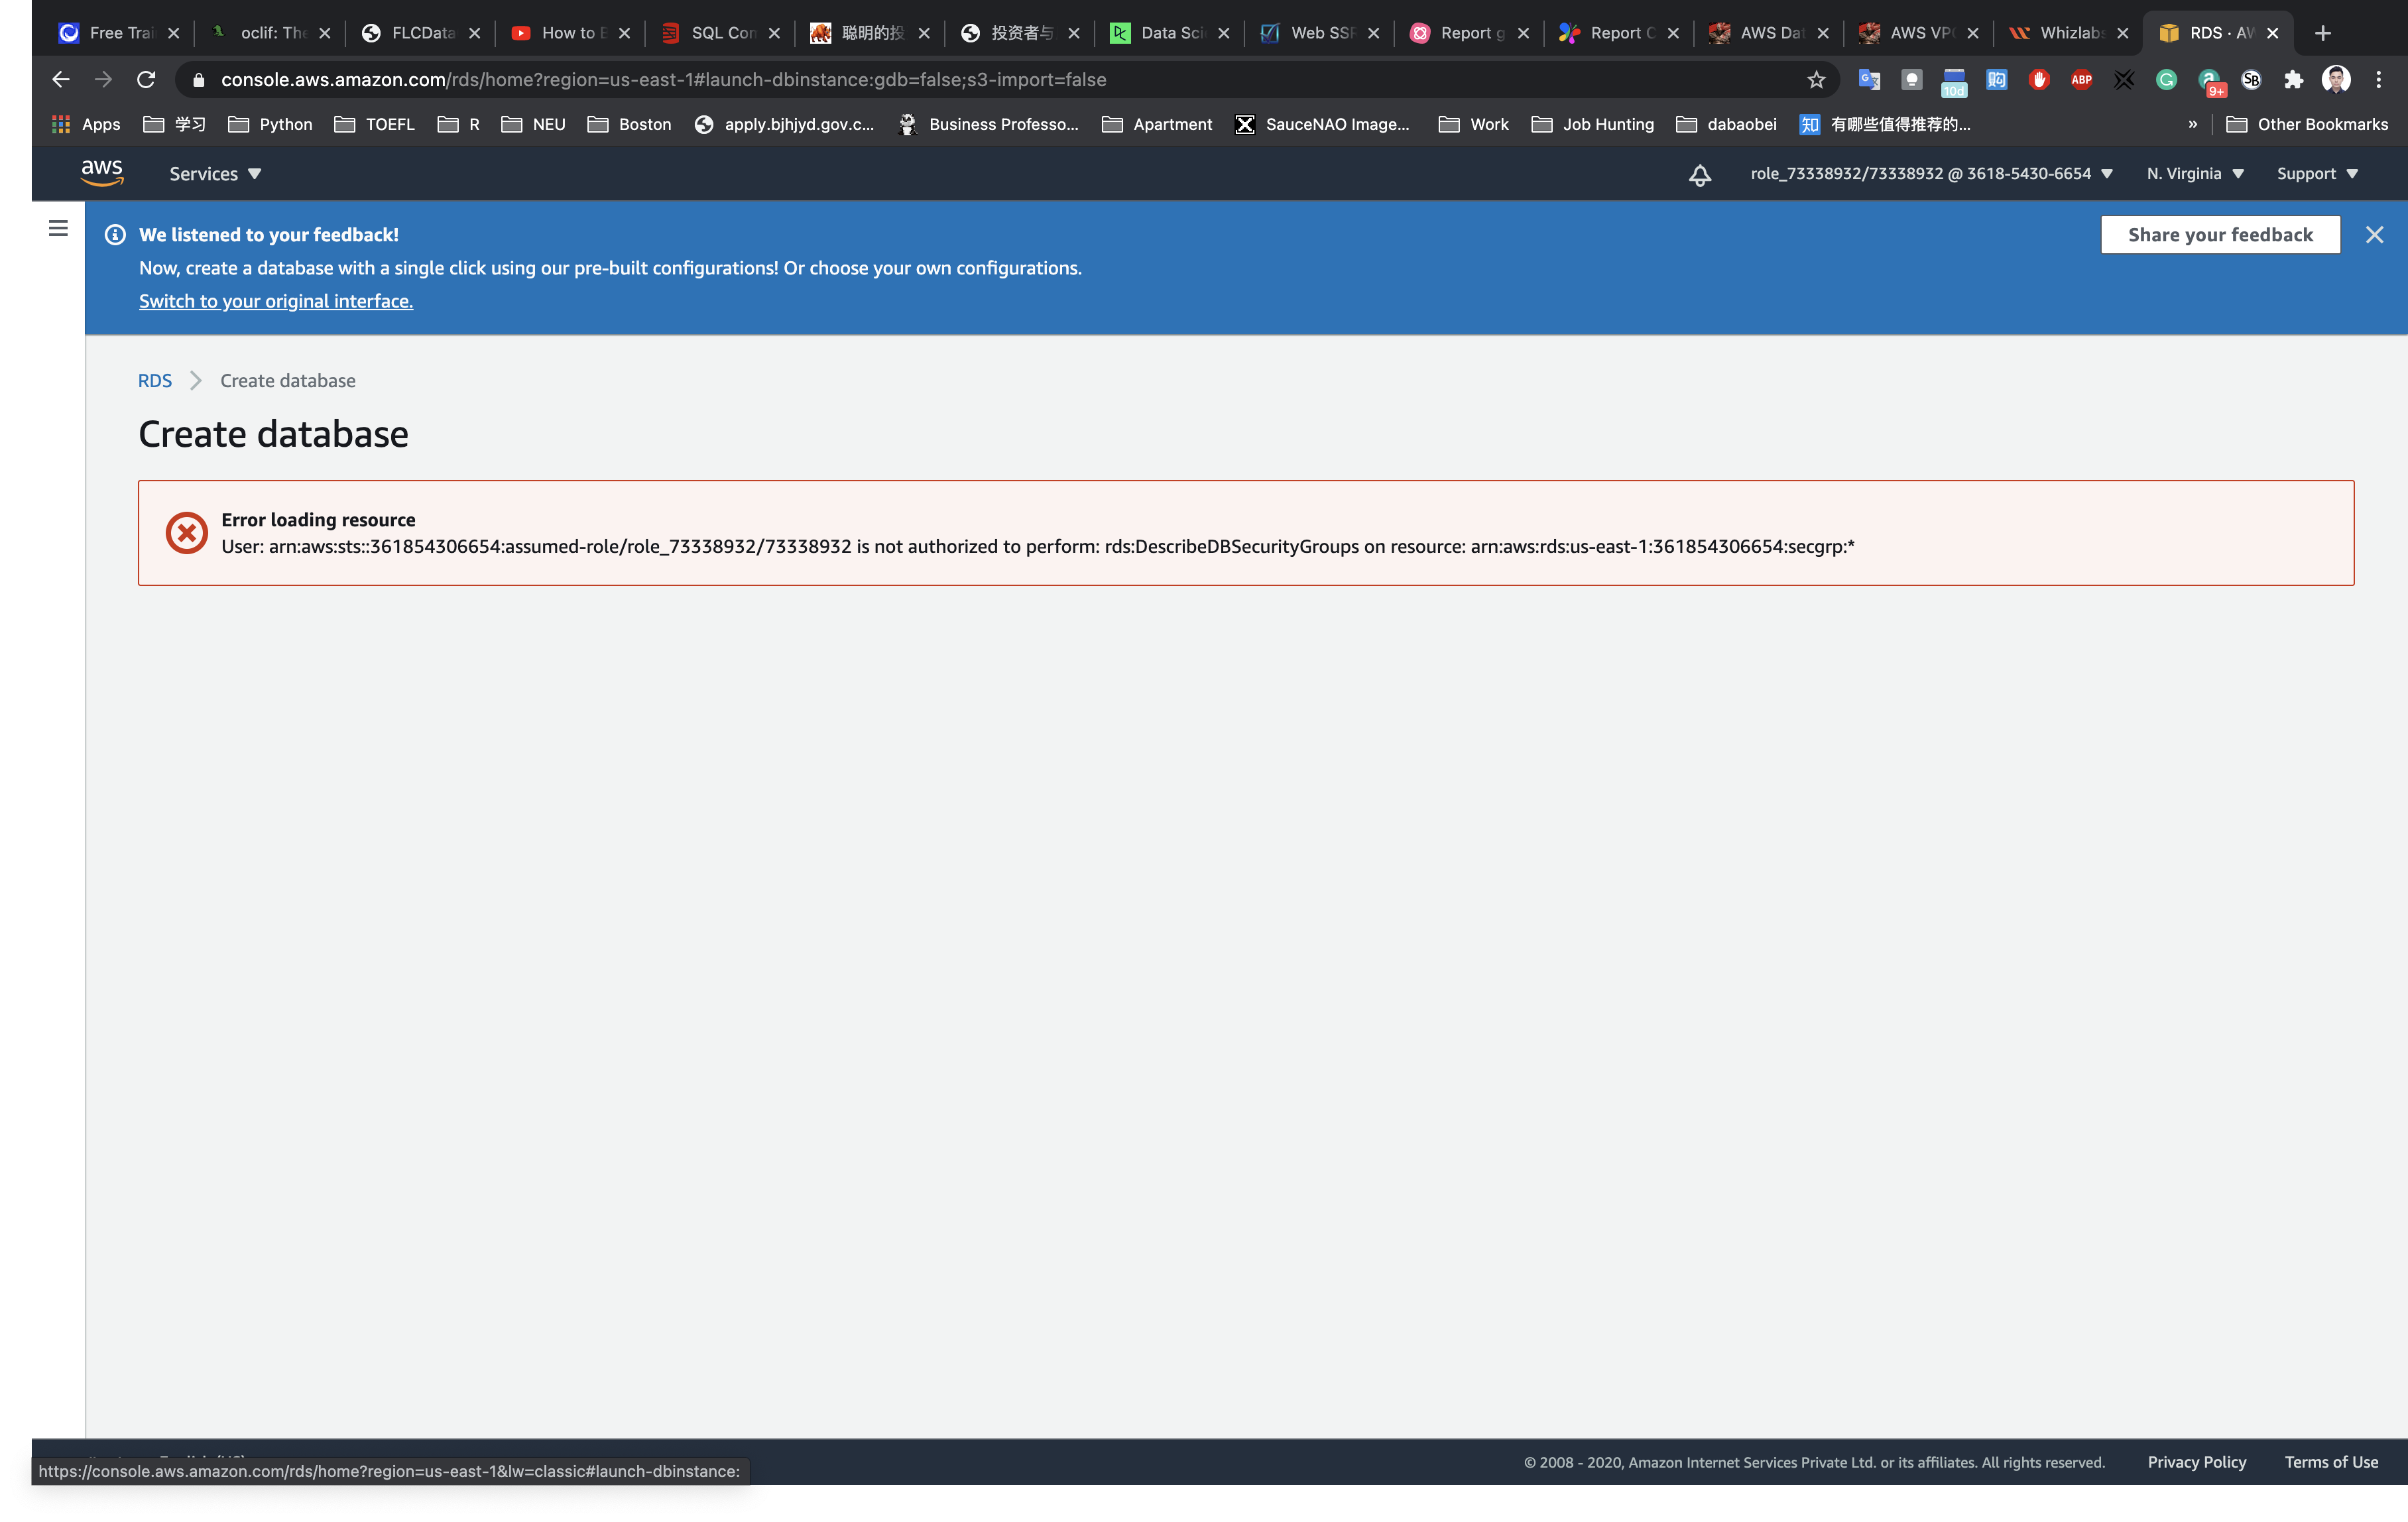
Step 1: Select engine
- Select
MySQL.
Click on Next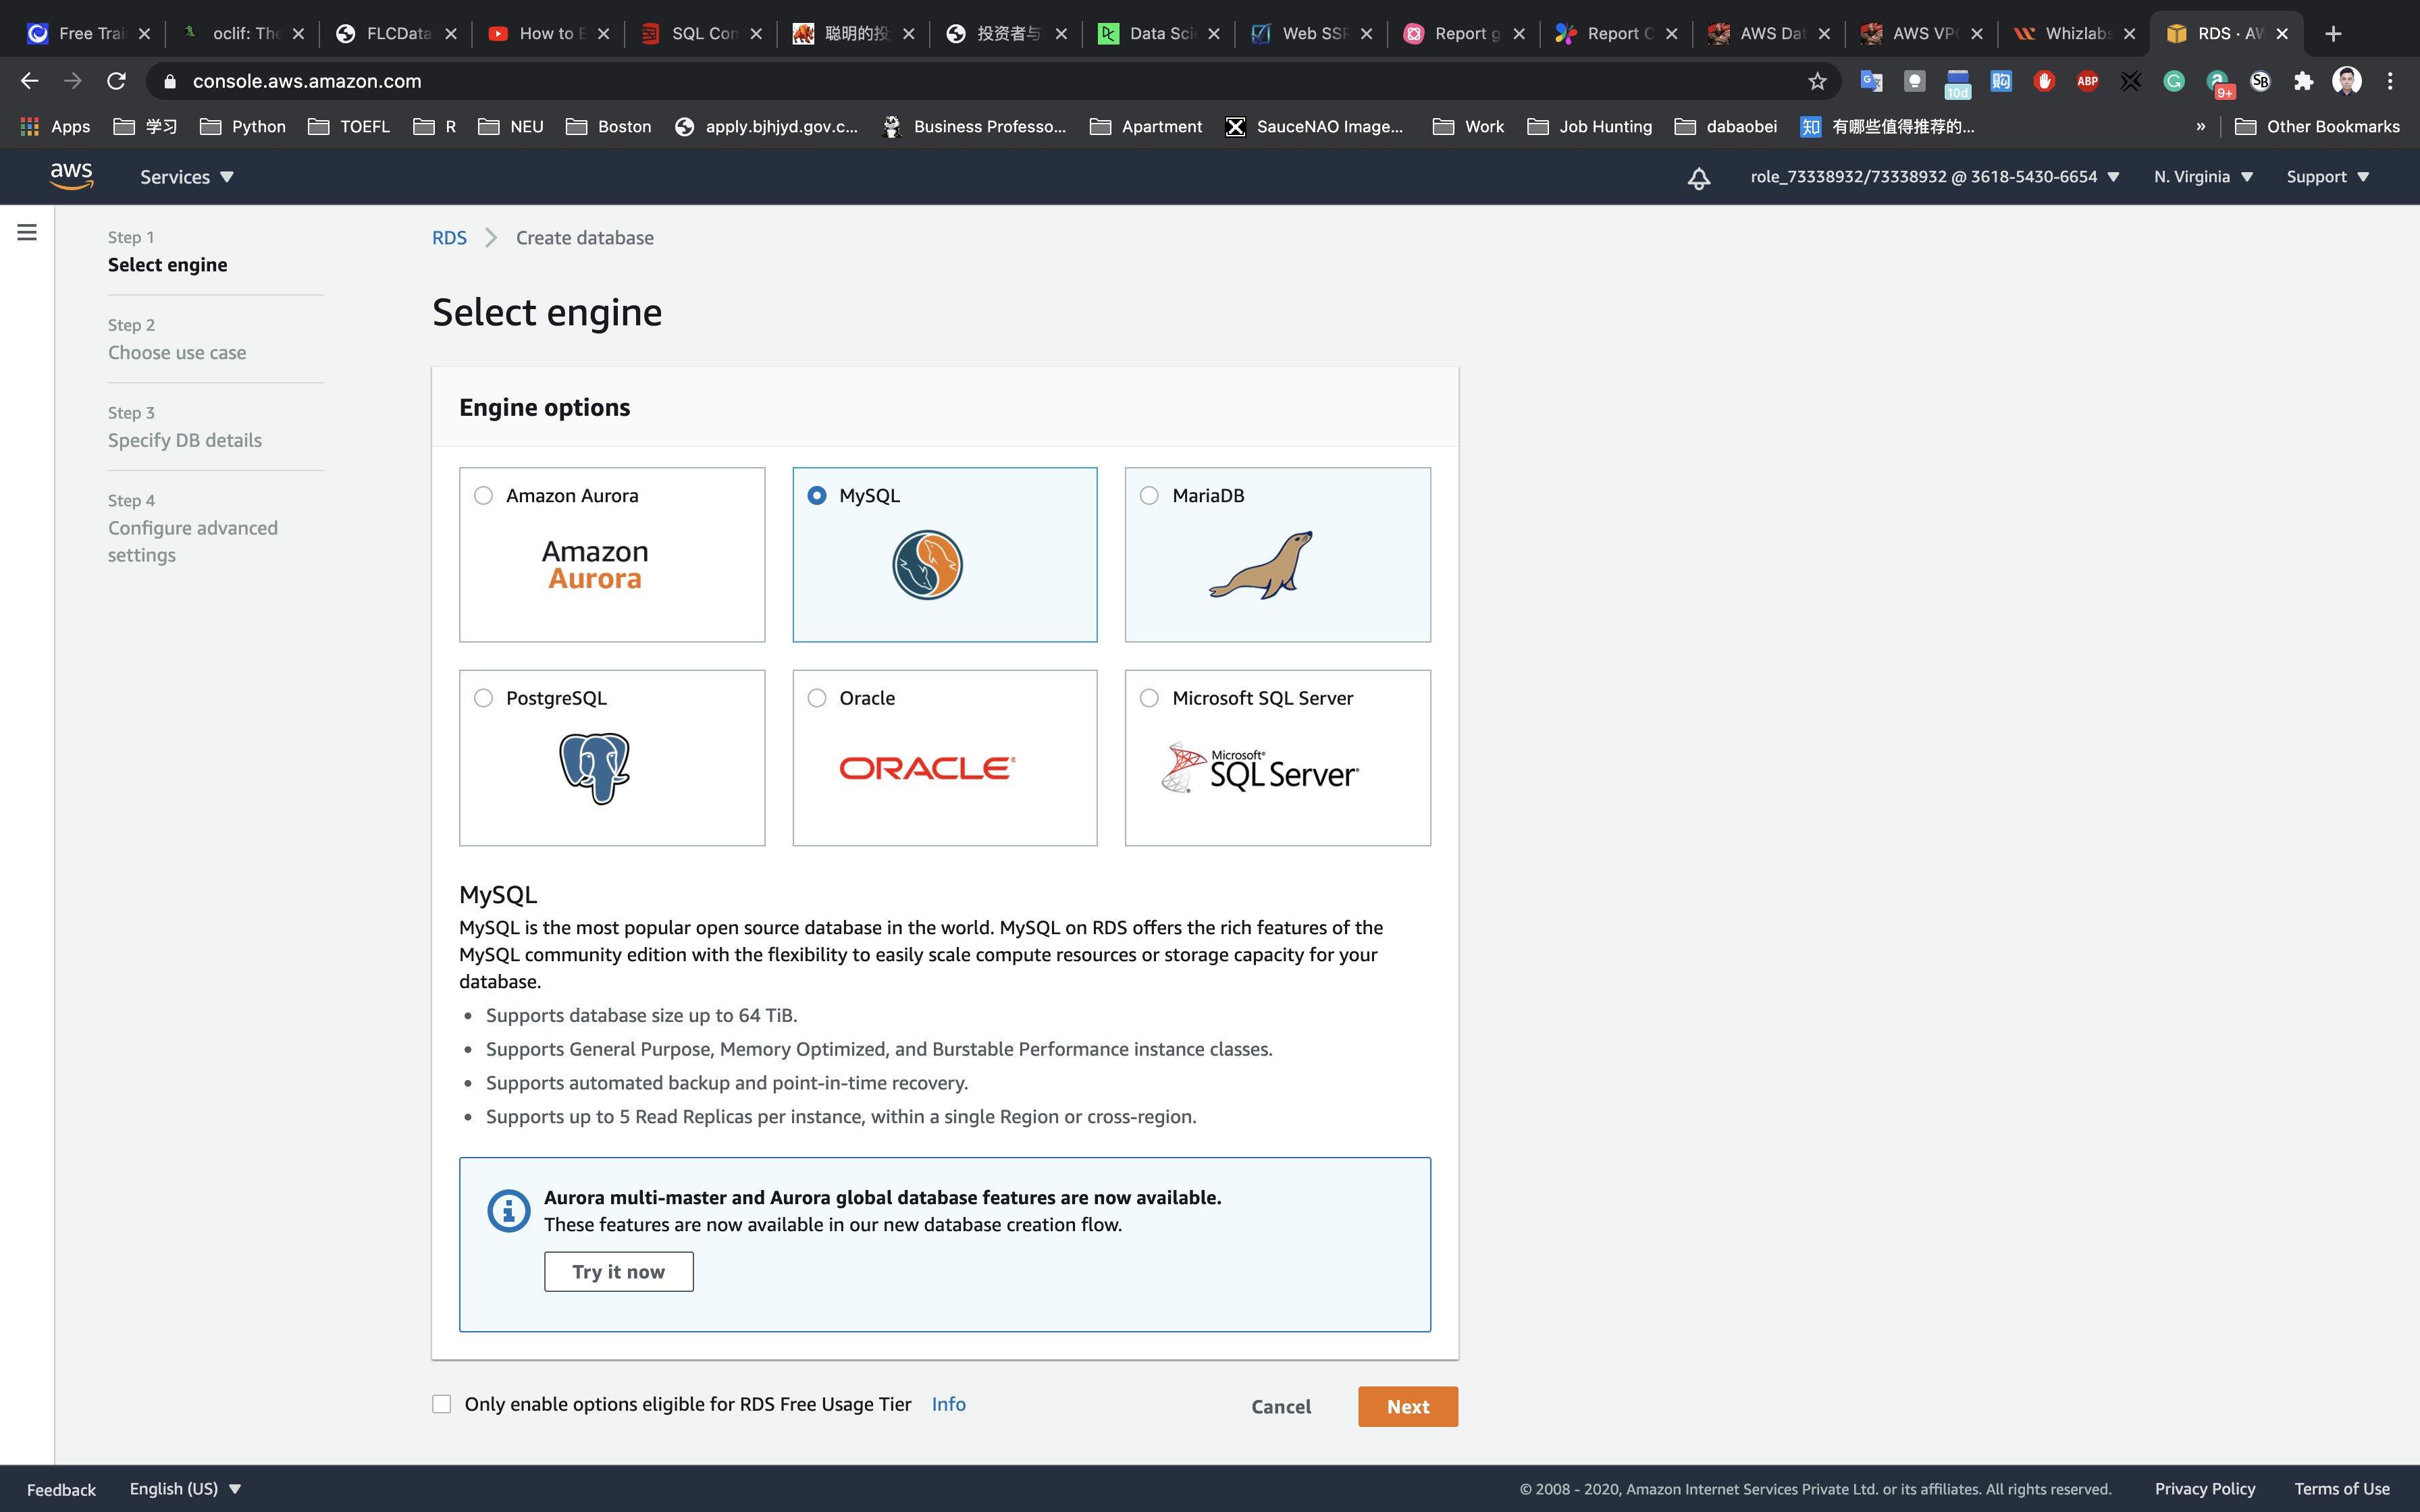
Step 2: Choose use case
- Use case:
Dev/Test - MySQL
Click on Next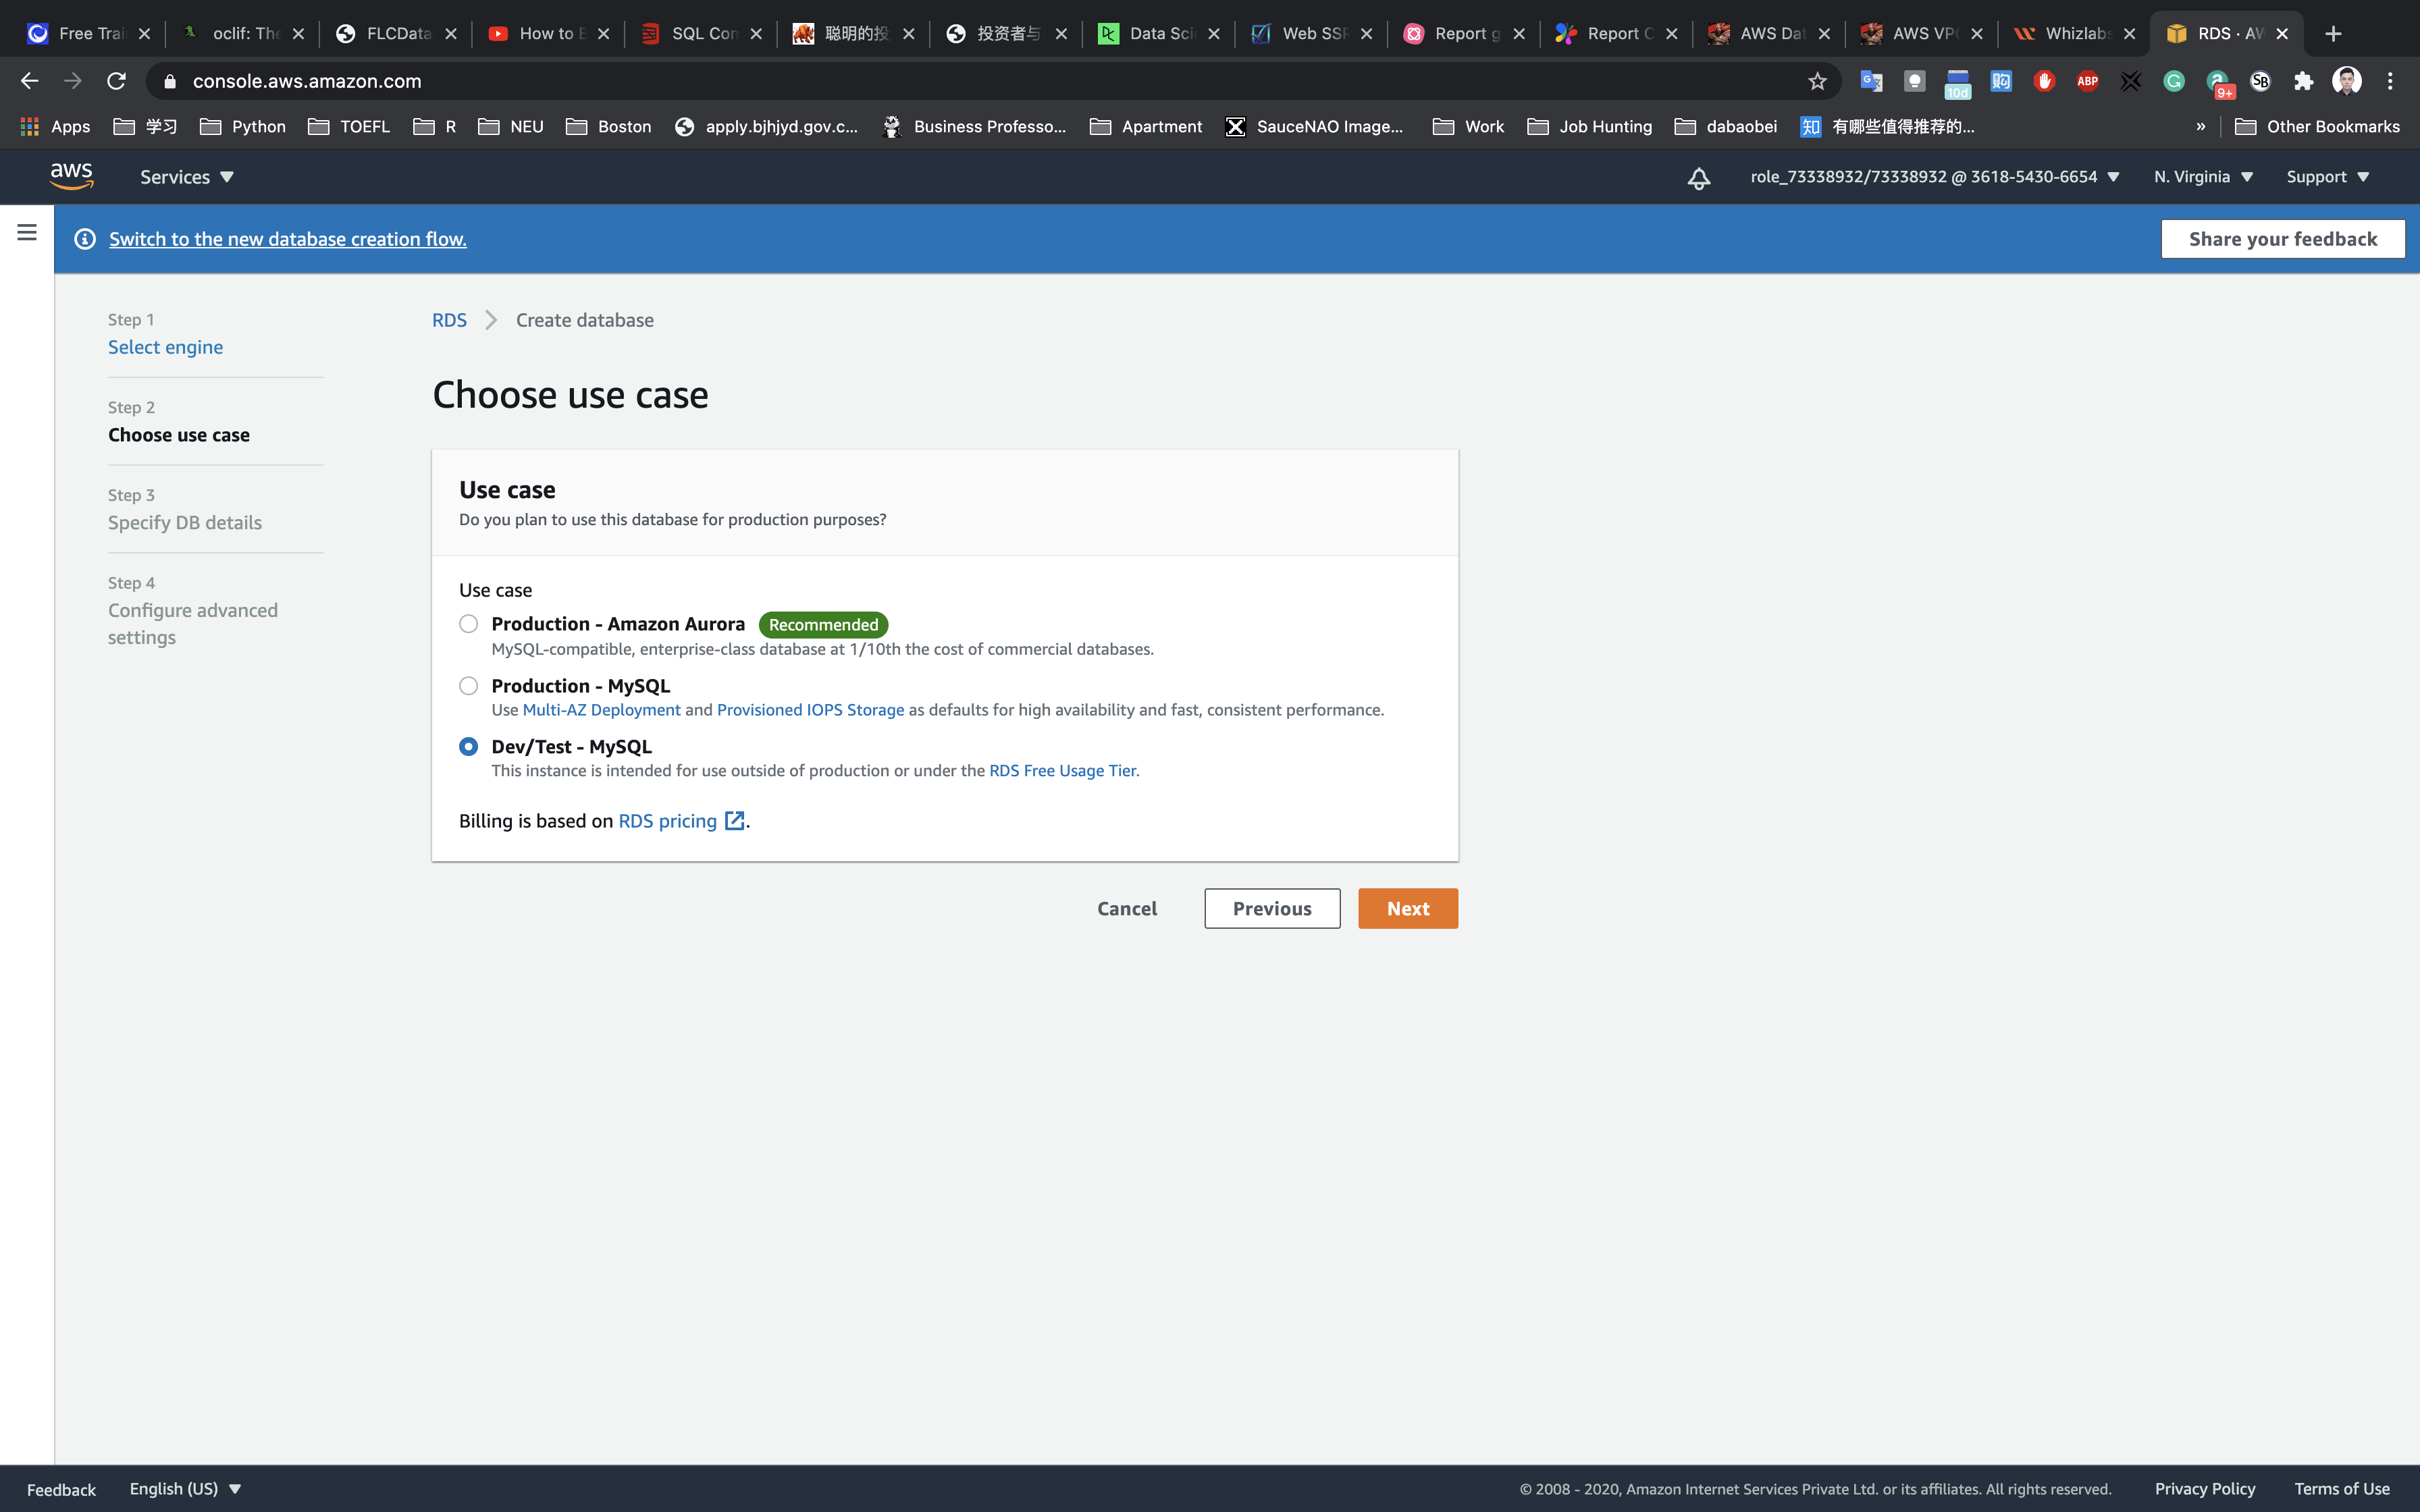
Step 3: Specify DB details
- License model:
general-public-licence - DB engine version: leave the default
- Only enable options eligible for RDS Free Usage Tier: check
- DB instance class:
db.t2.micro - 1 vCPU, 1 GiB RAM
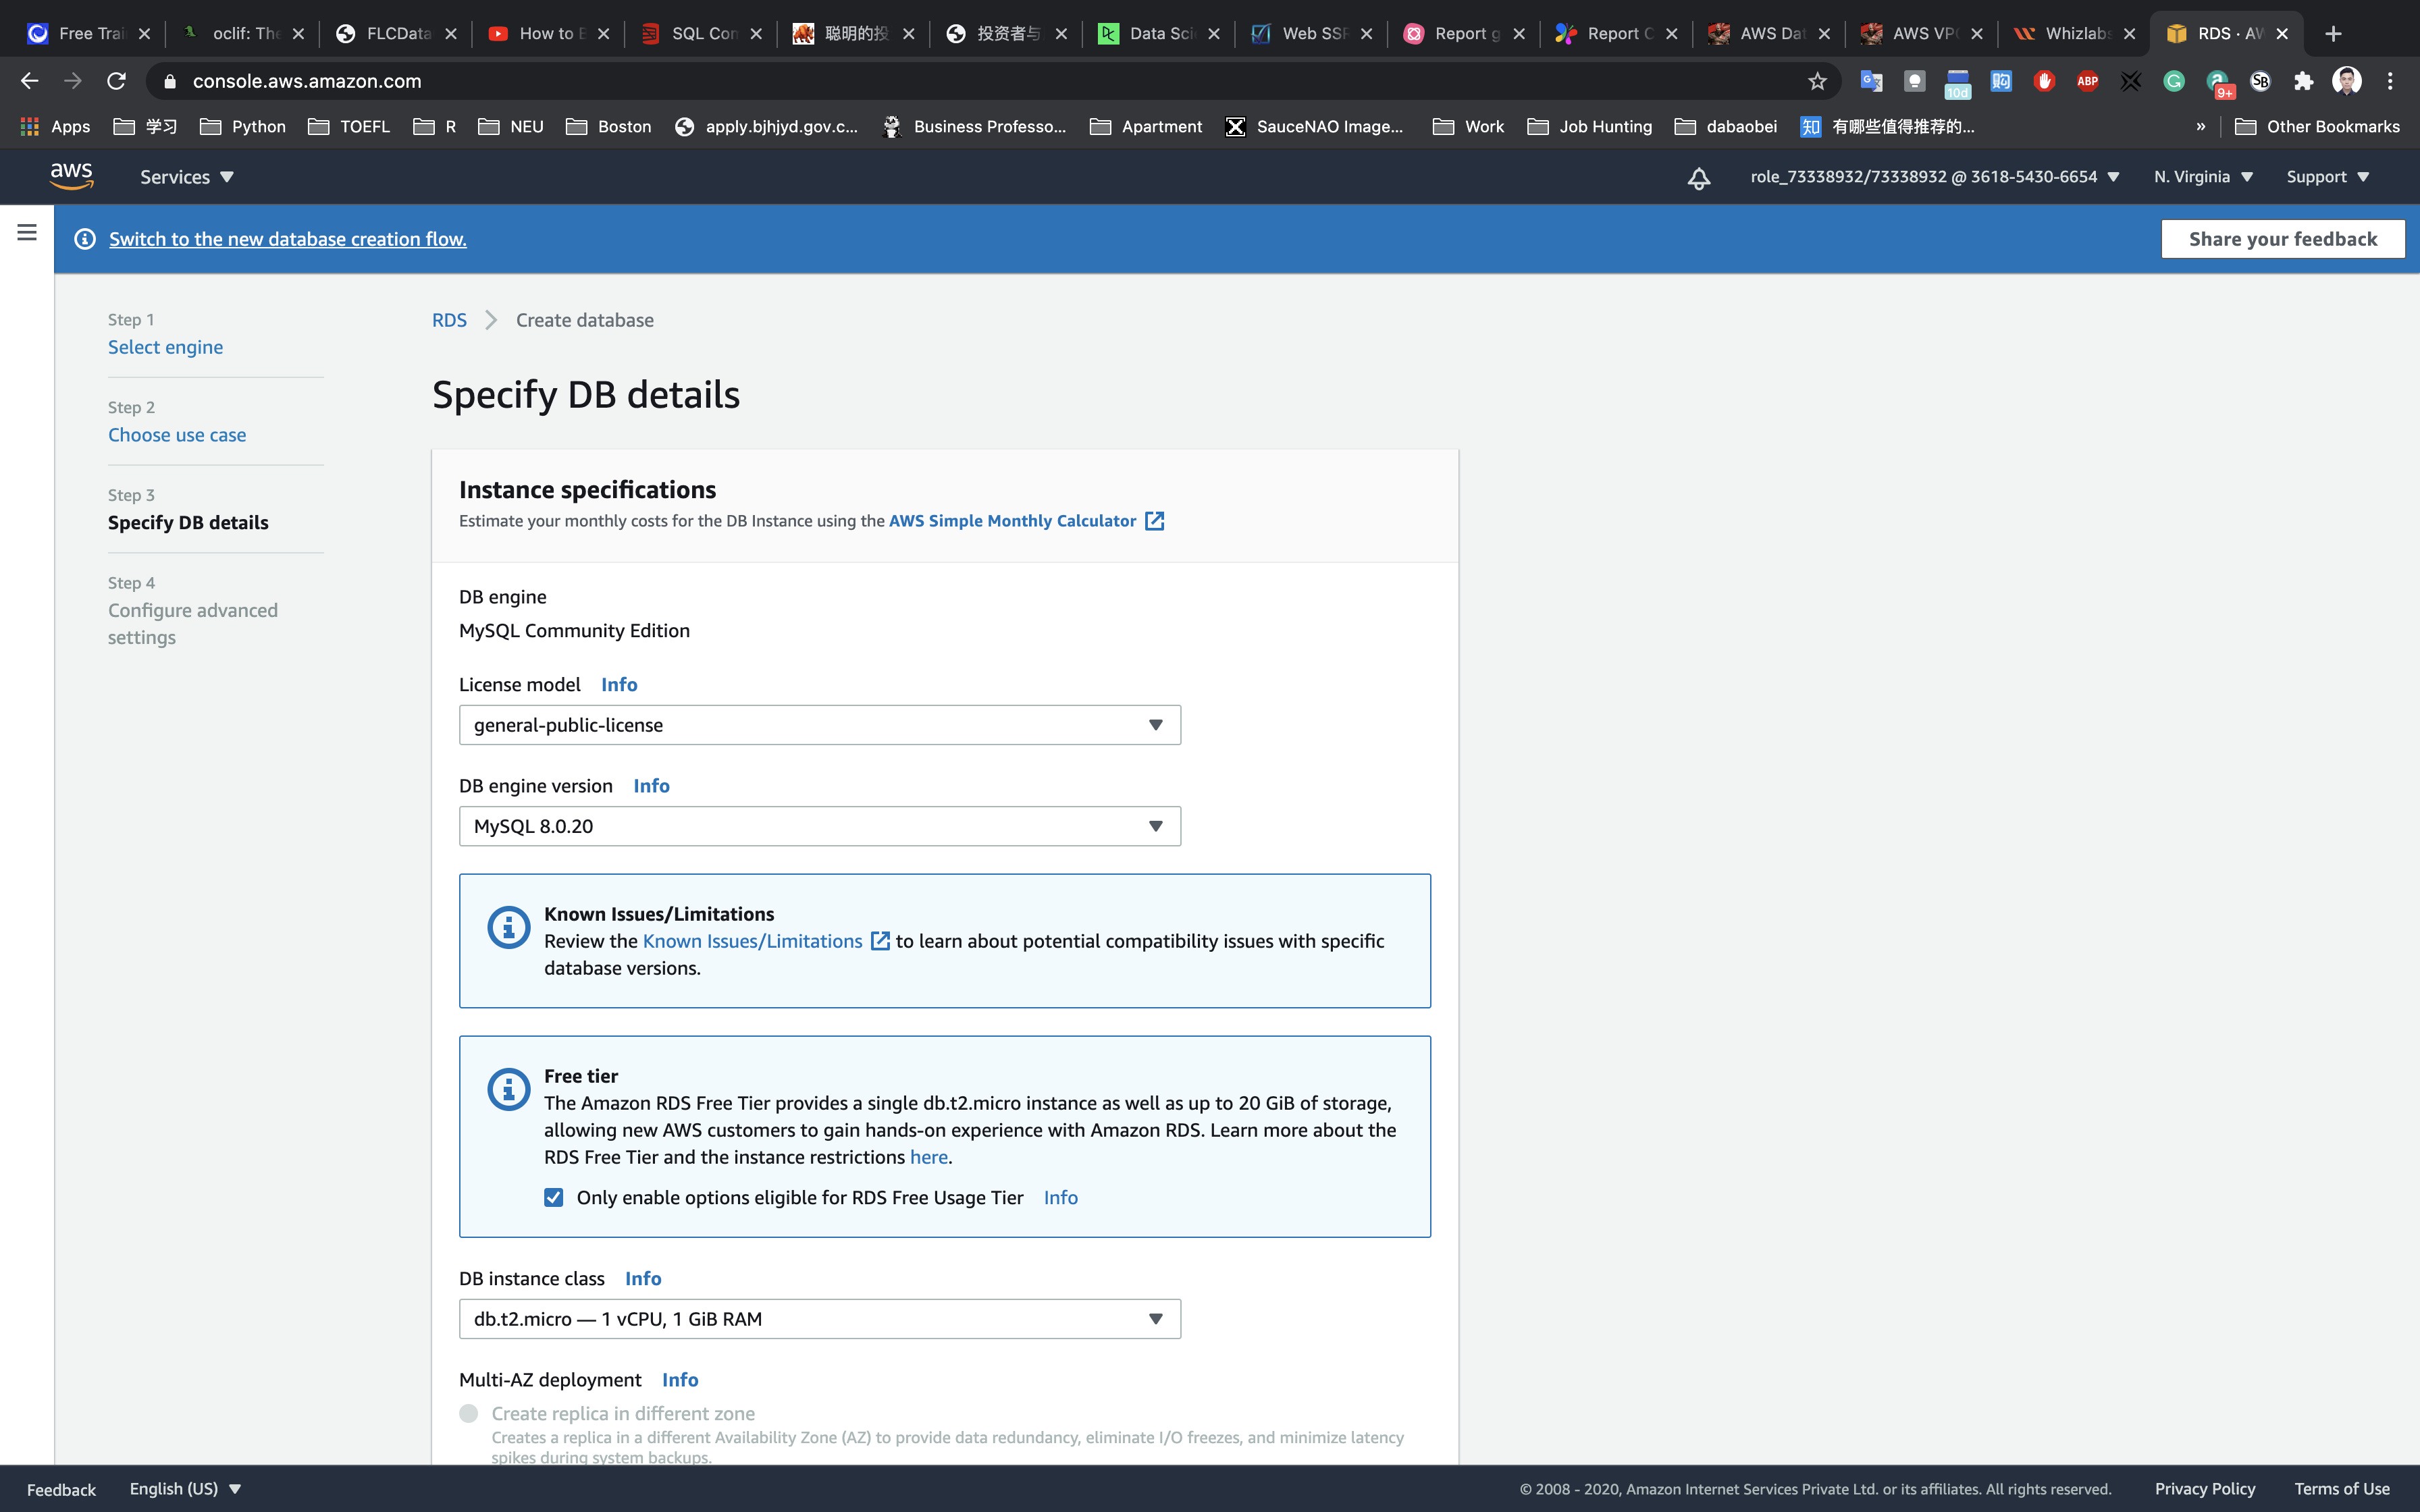
- Allocated Storage:
20 GIB - Enable storage autoscaling: uncheck
In the Settings section:
- DB instance identifier:
mydbinstance - Master username: Enter
rdsuser - Master password:
myPassWord - Confirm password: Confirm the password.
Note: Make sure you record all the details you entered , including the DB Instance Identifier, Username, Password etc.. They will be used while connecting from EC2.
Click on Next.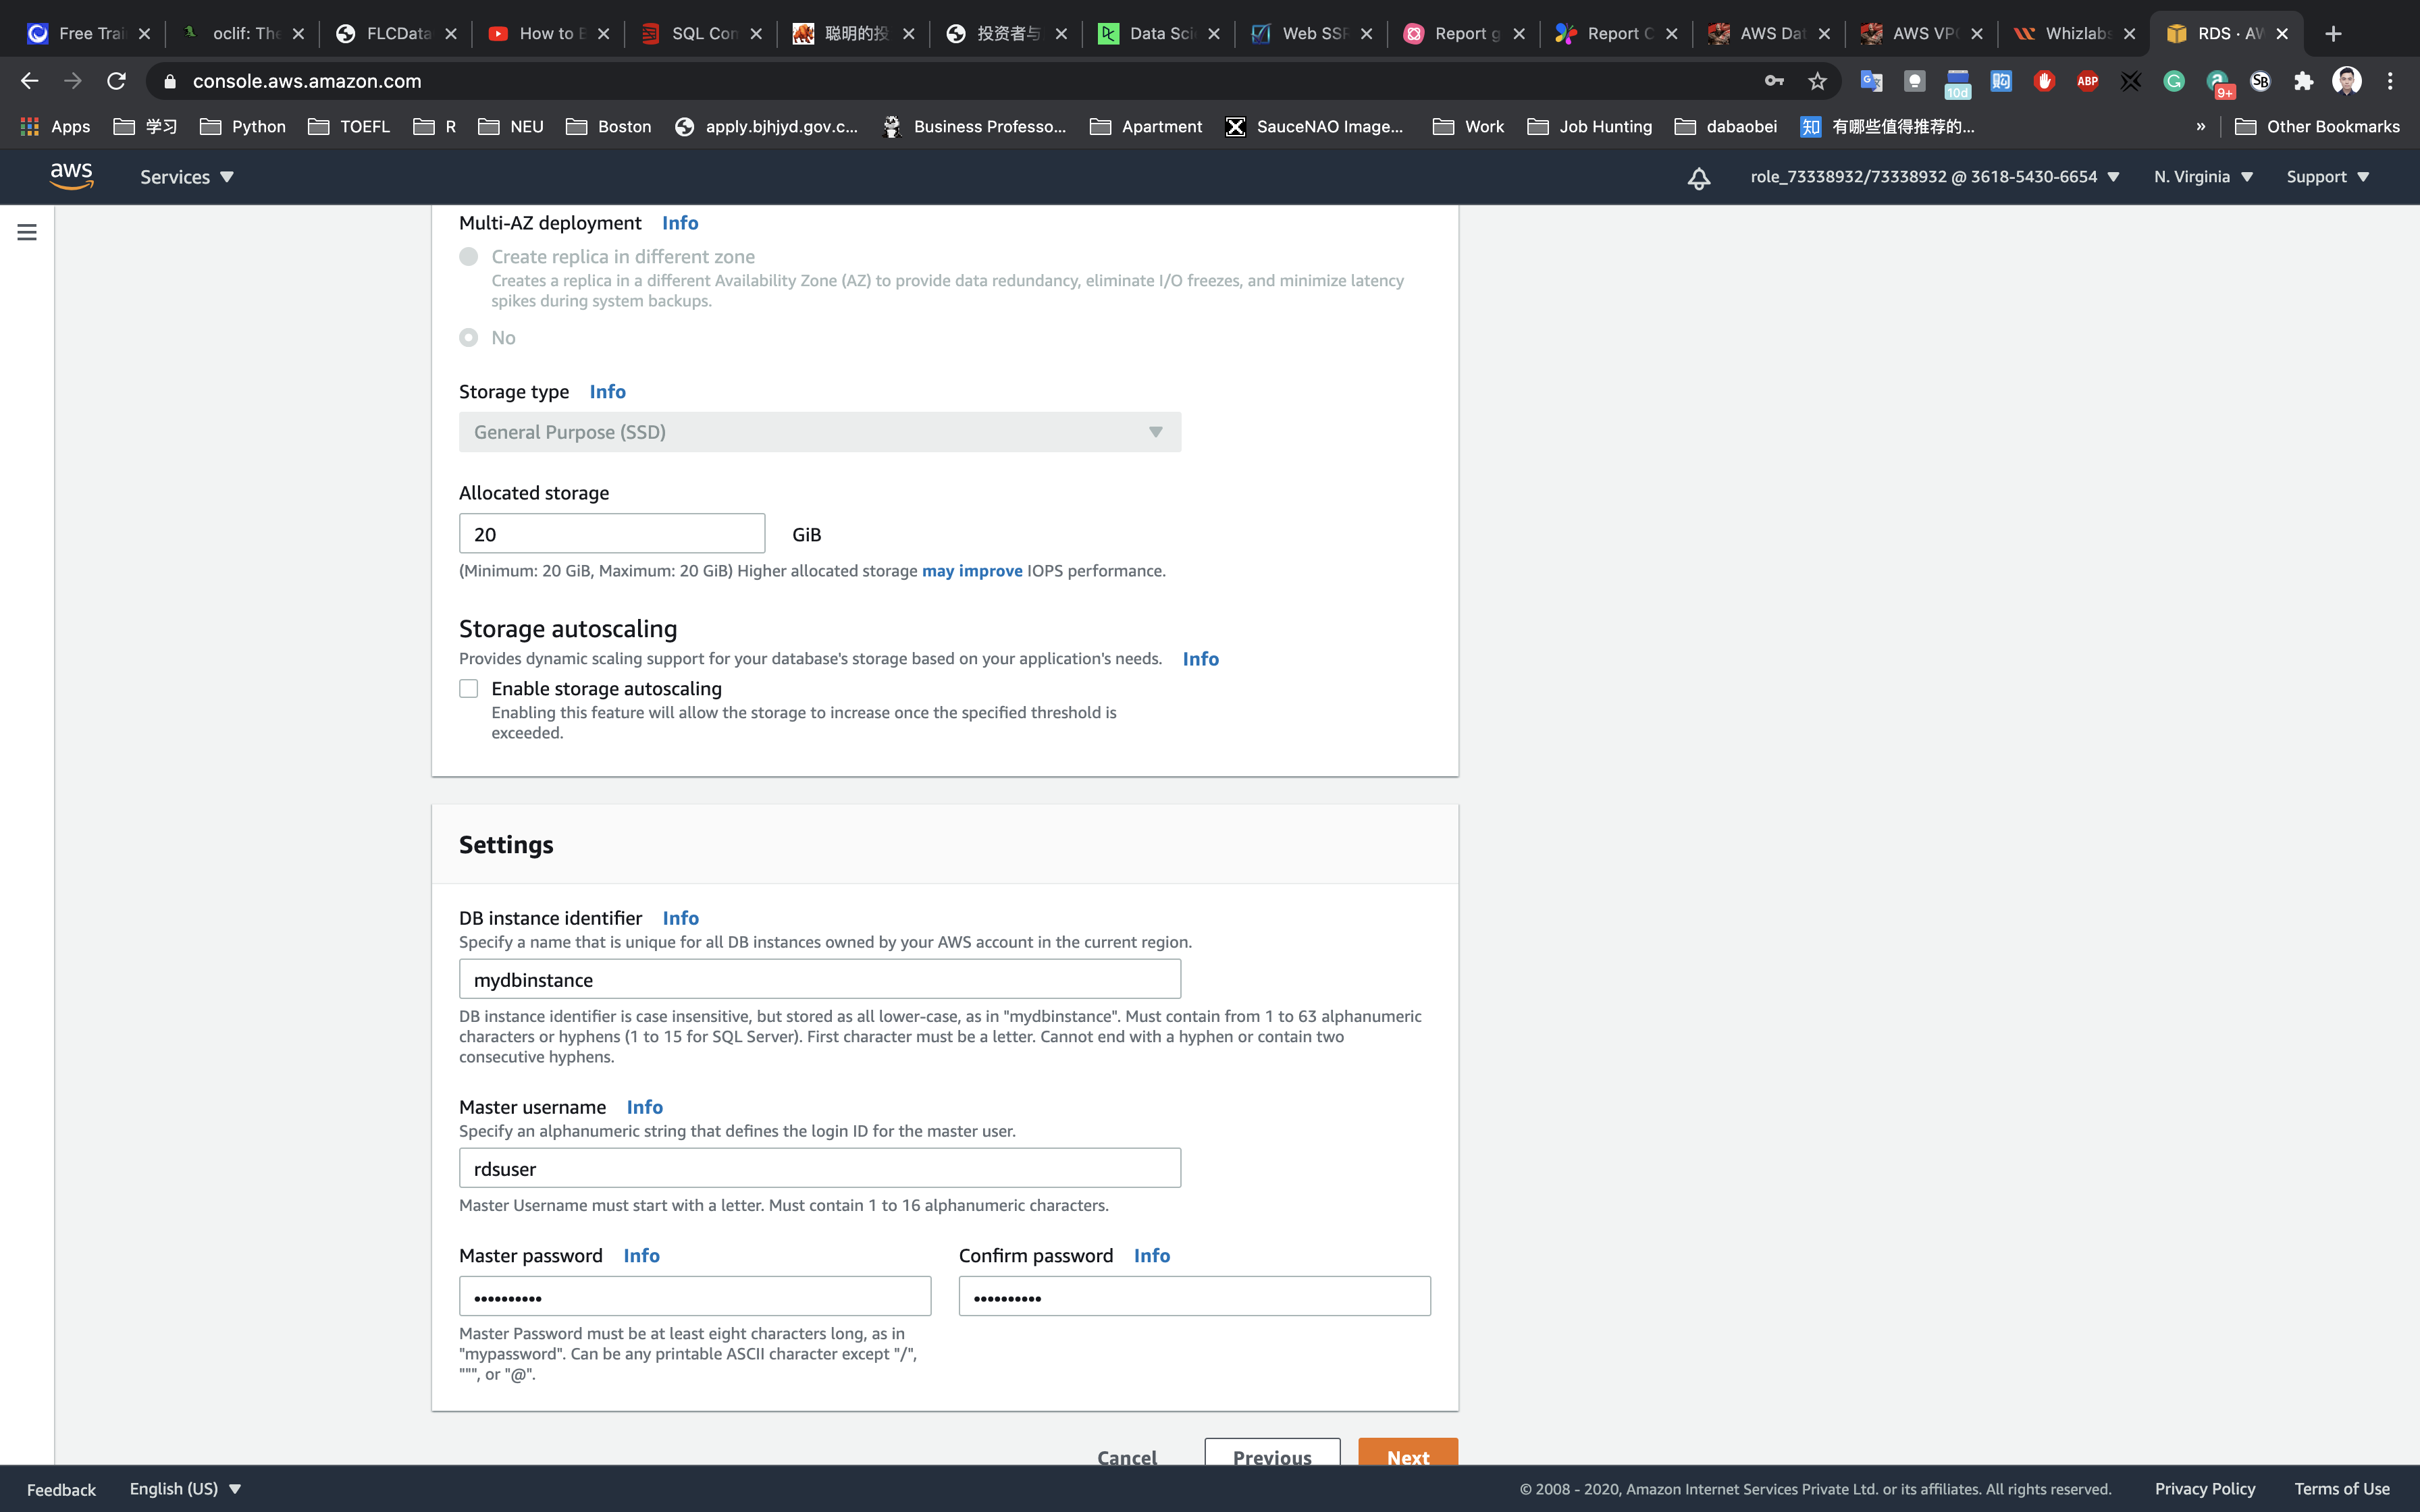
Step 4: Configure advanced settings
Under Configure advanced settings, in the Network Security section, configure the following:
- Virtual Private Cloud (VPC): Select same default VPC which was available while creating EC2
- Subnet Group:
default - Public accessibility:
No - Availability zone:
No preference - VPC security groups:
Create new VPC security group
Leave other parameters as default.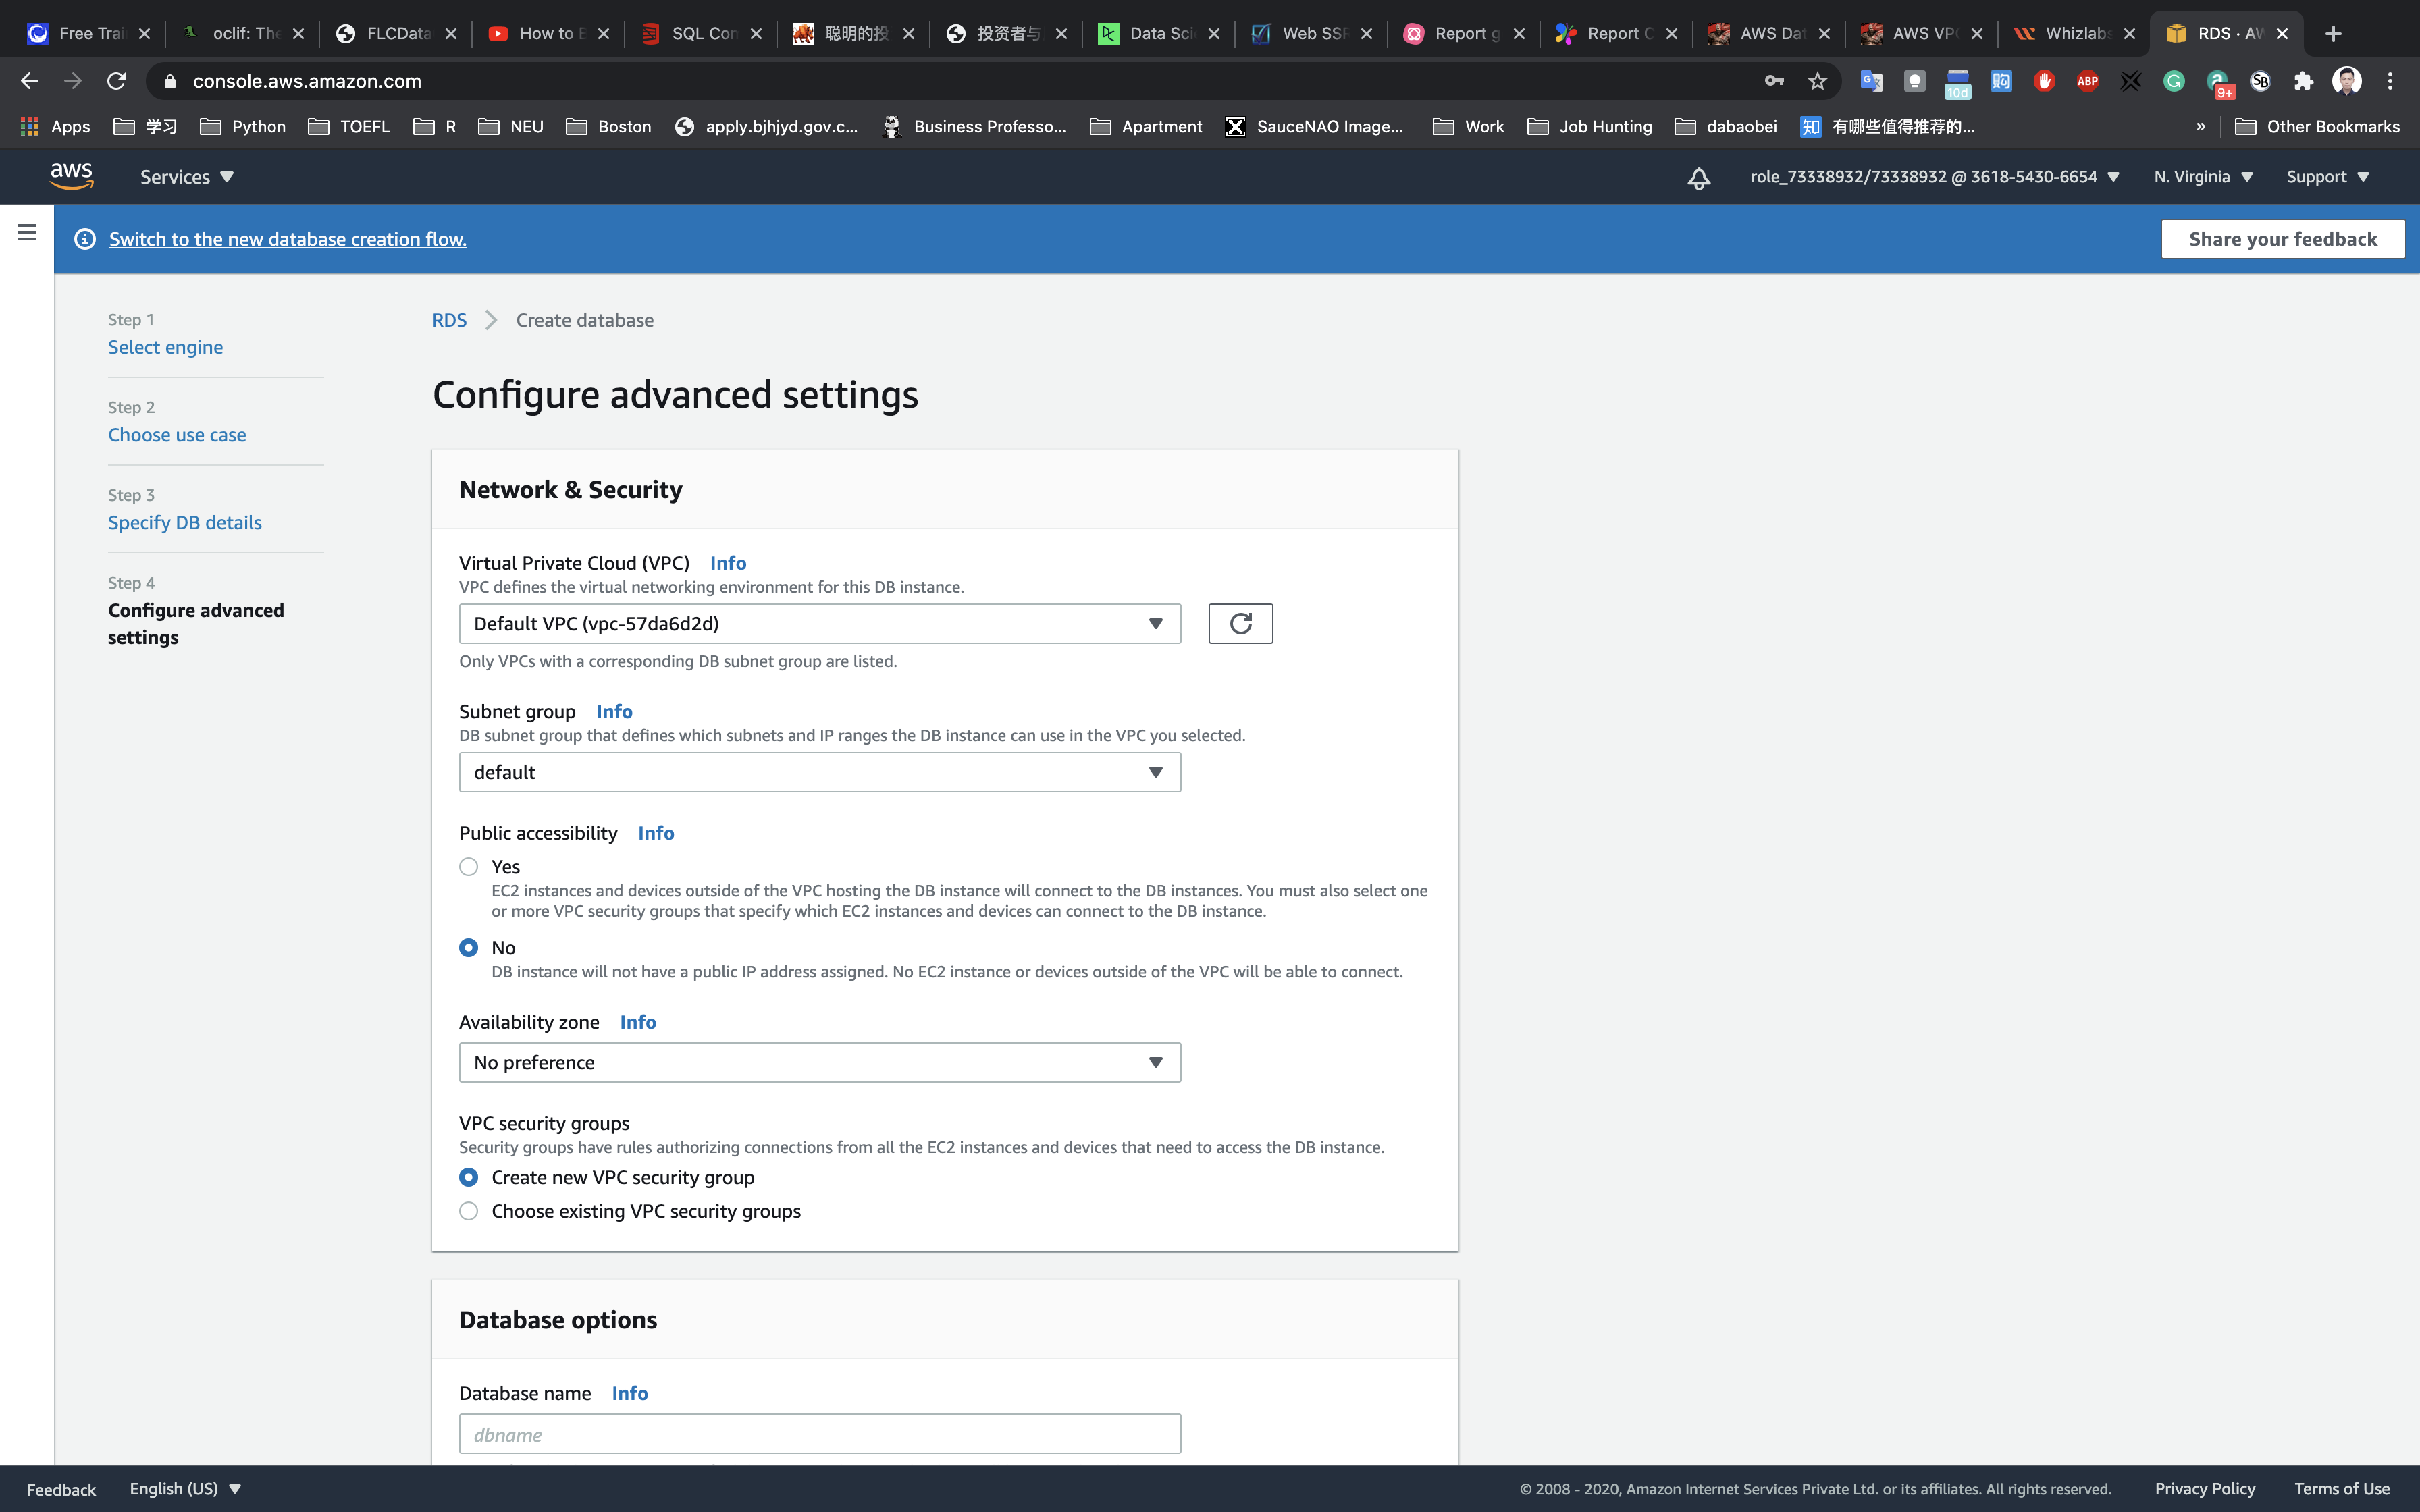
Under Database Options,
- Database name:
myrdsdatabase
Leave other parameters as default.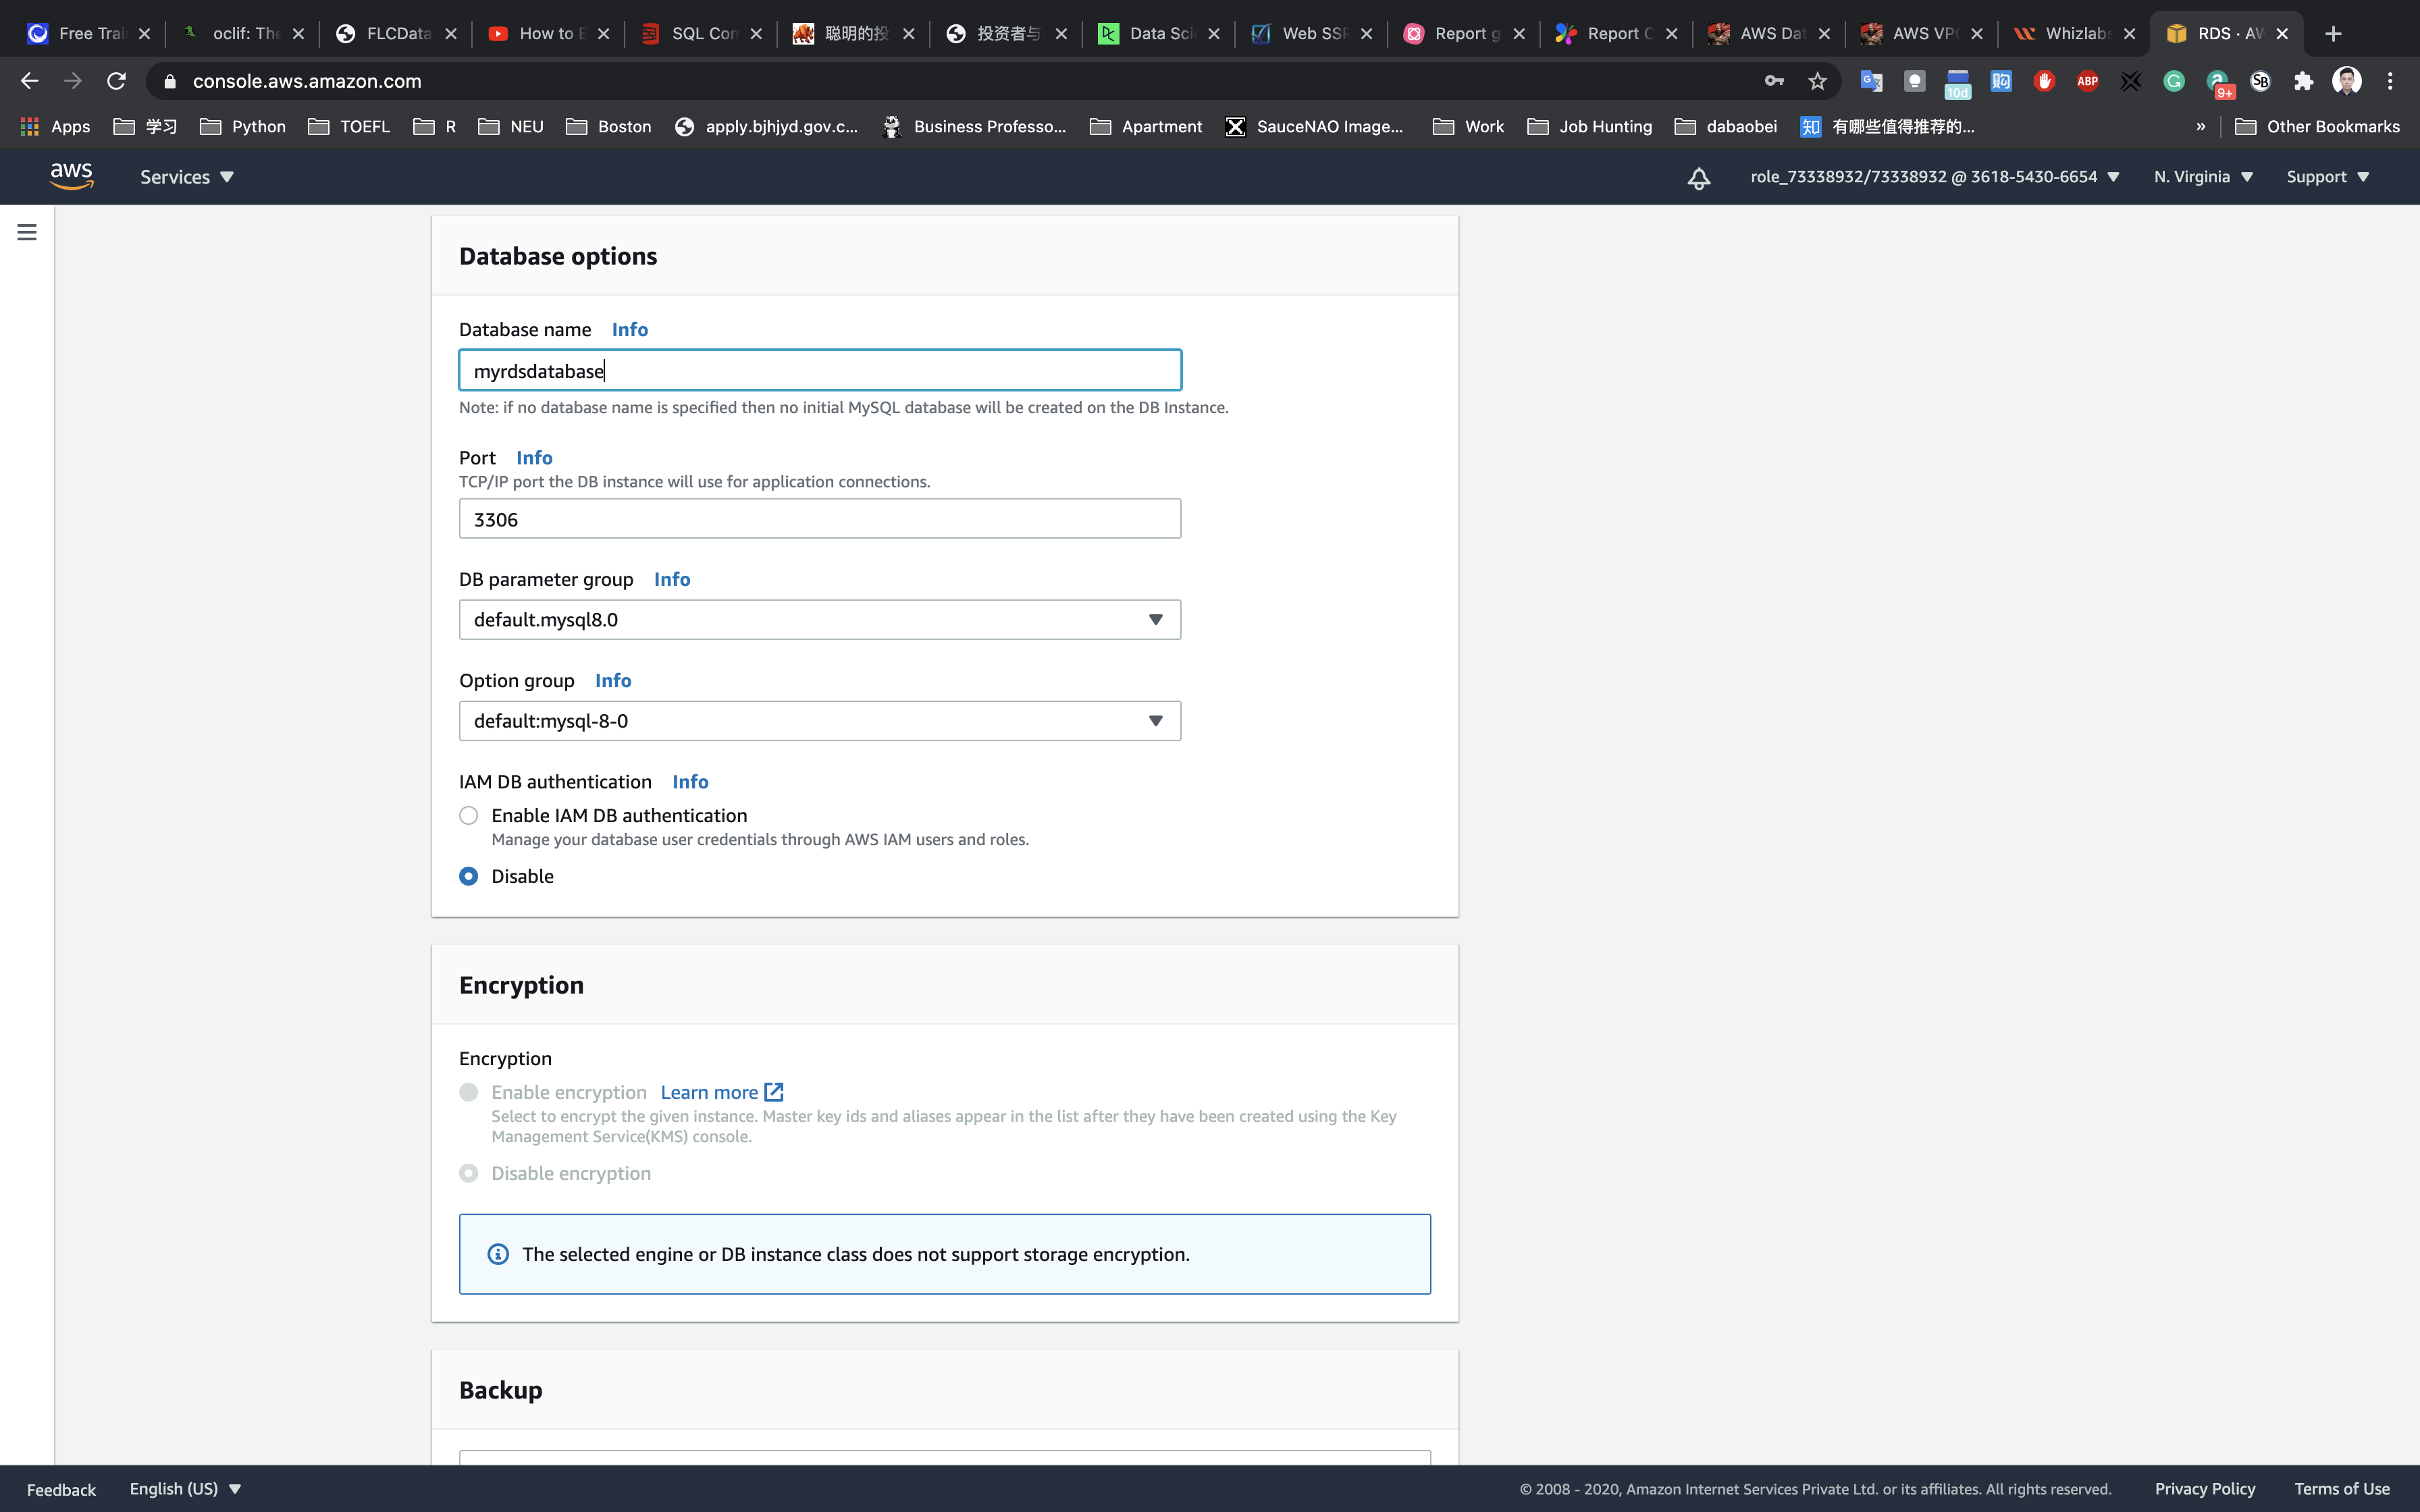
In the Backup section,
- For Backup retention period, select
0 days
Leave other parameters as default.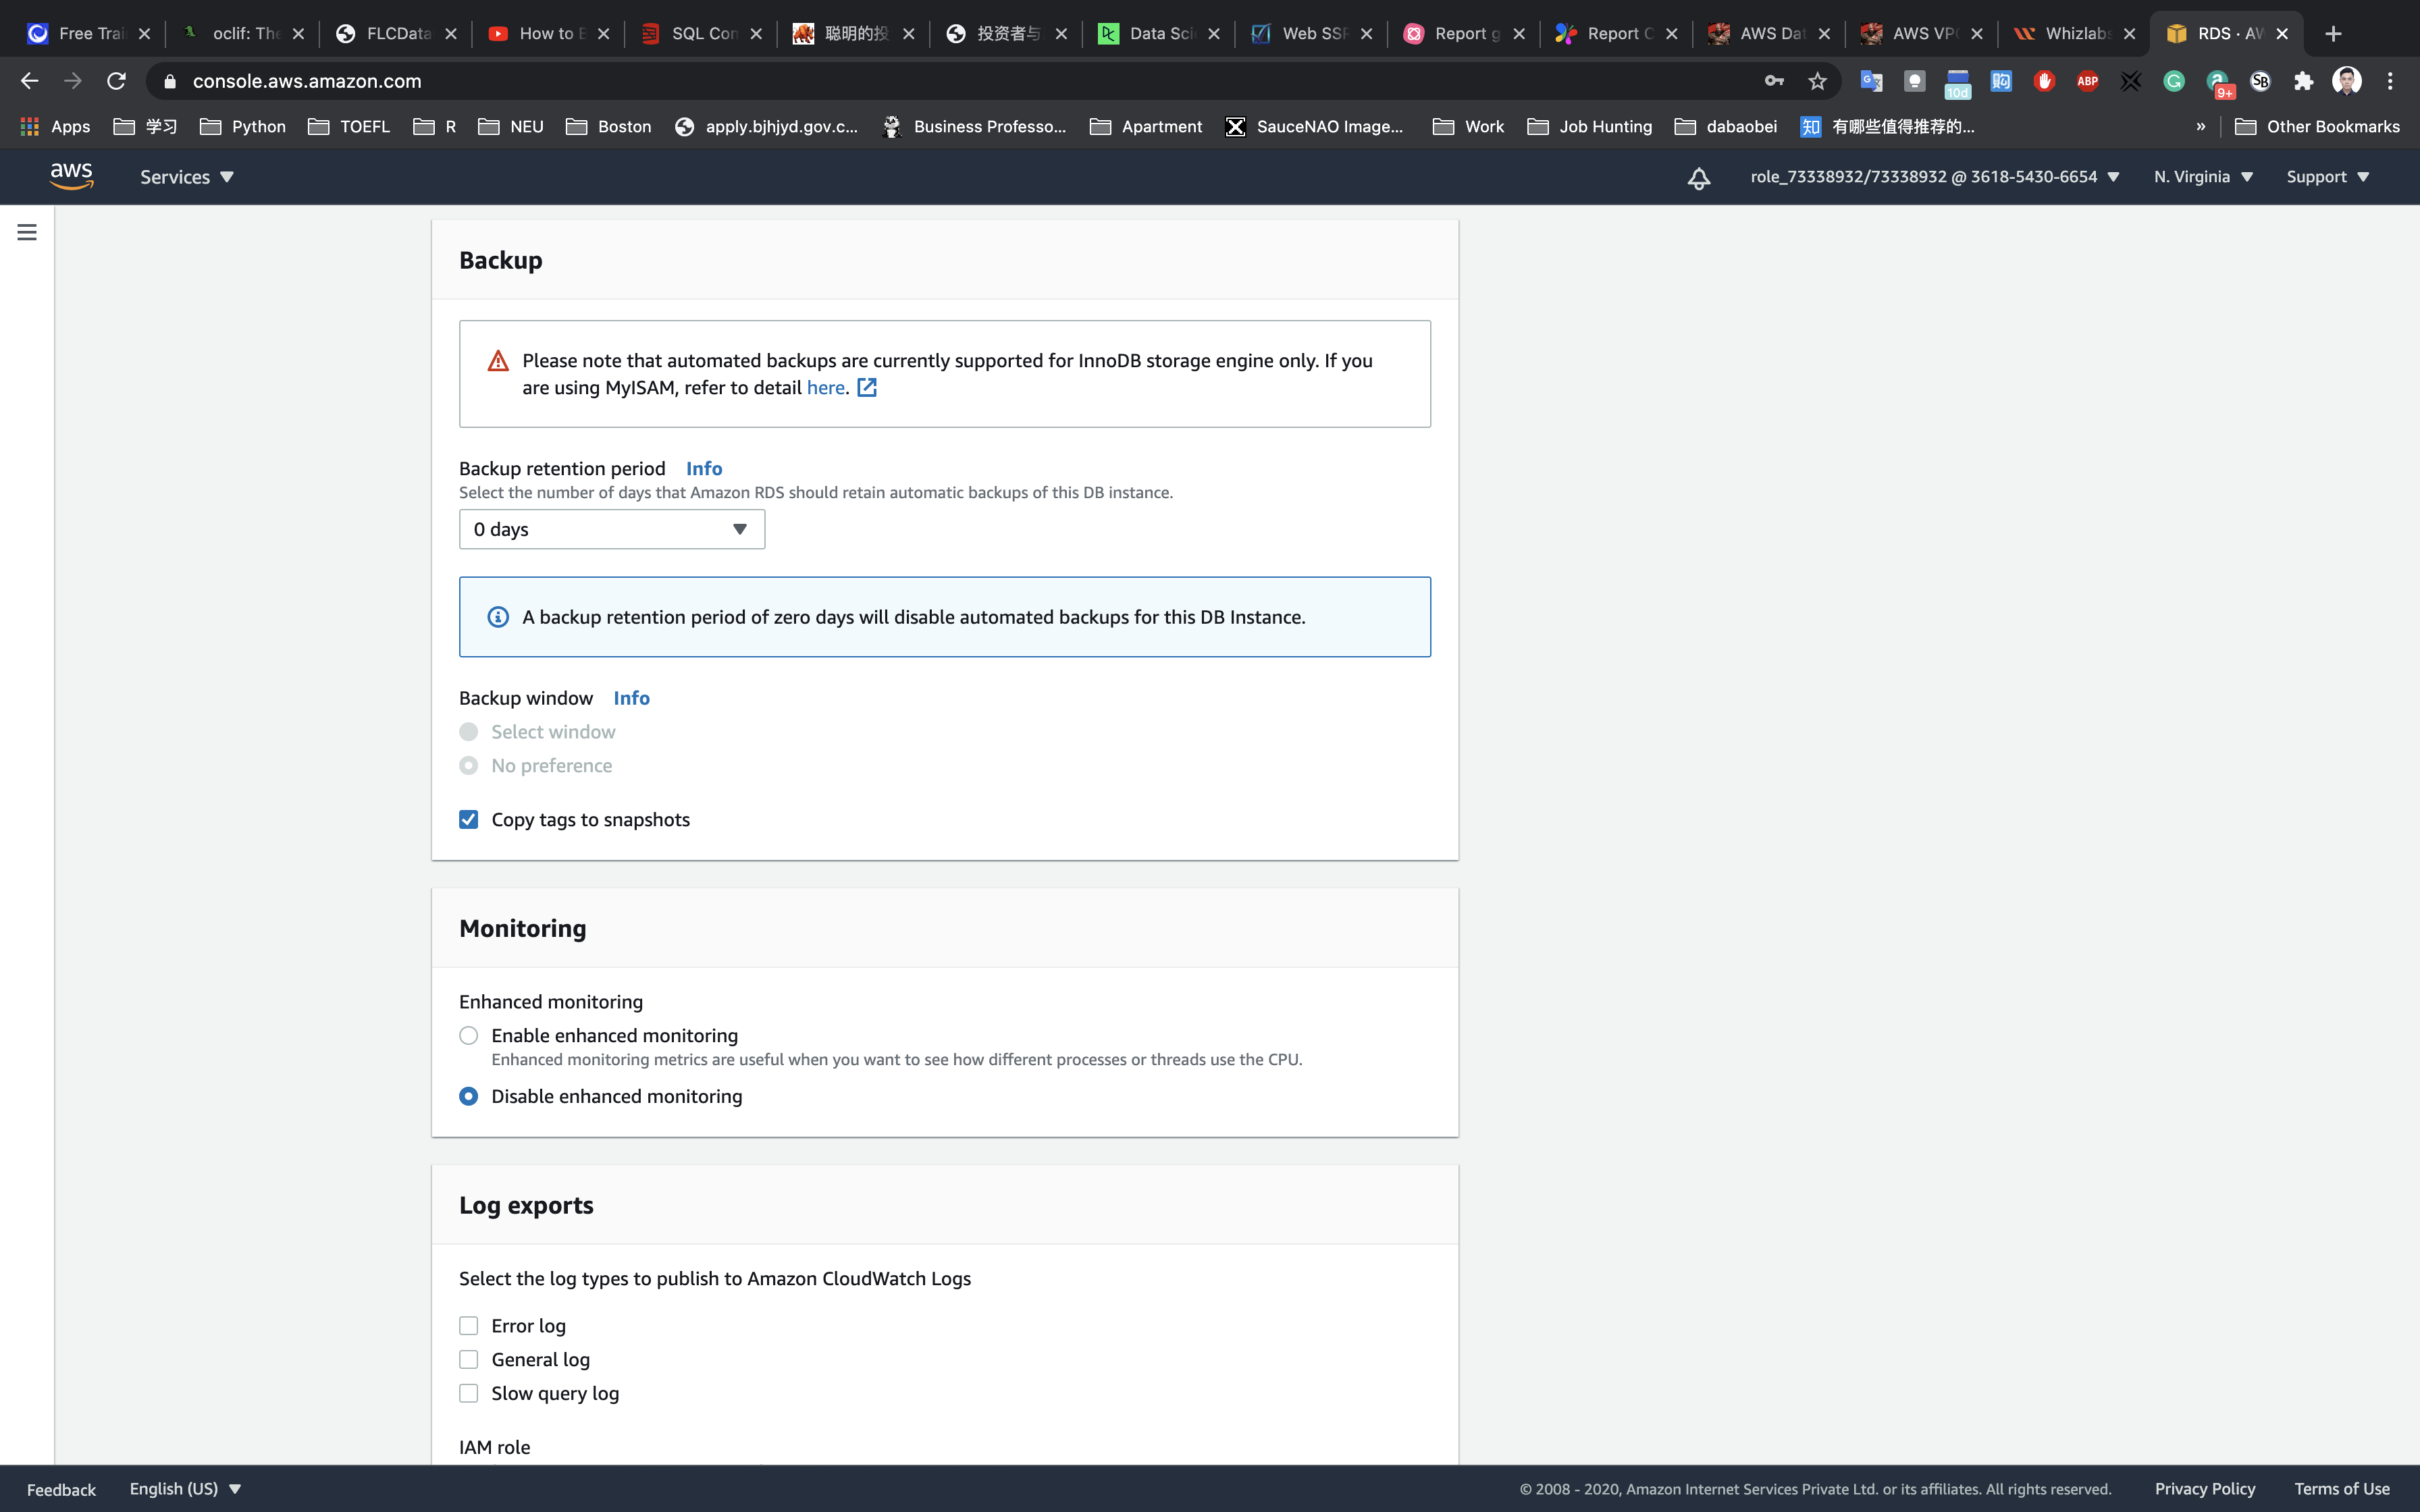
Enable deletion protection: uncheck
Leave other parameters as default.
Scroll to the bottom of the page, then click on Create database.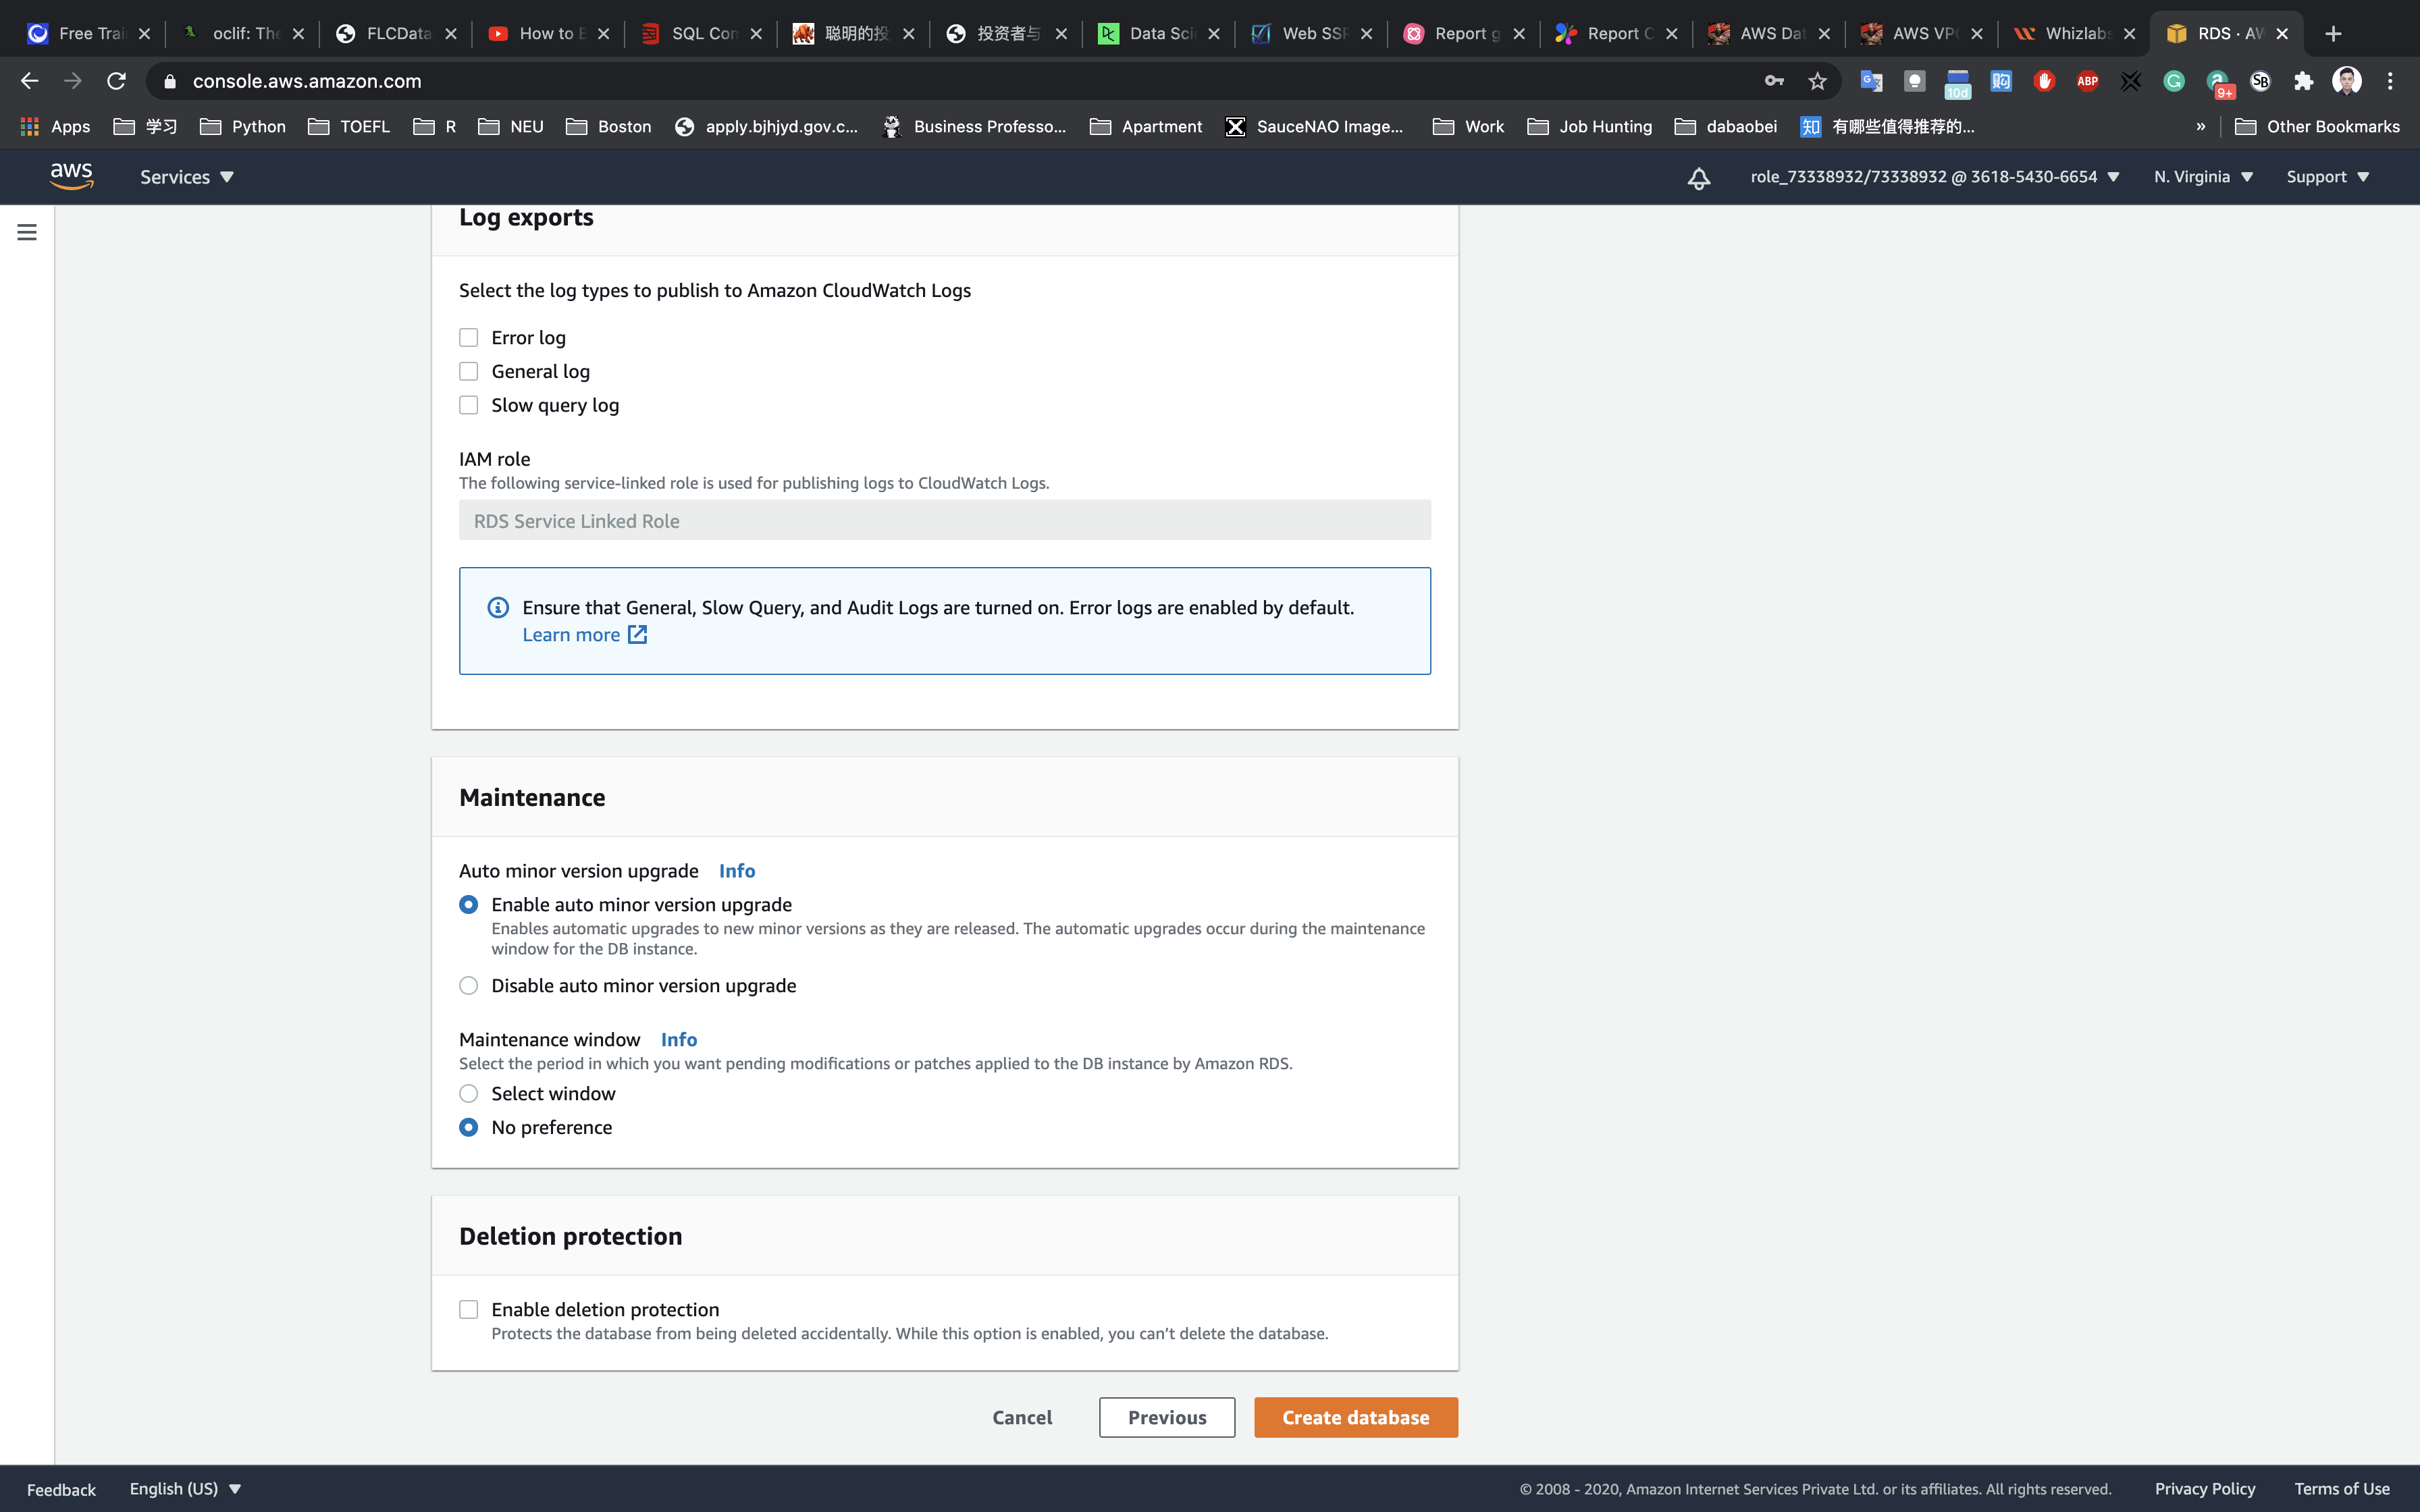
Click on View DB instance details to see the RDS Instance created.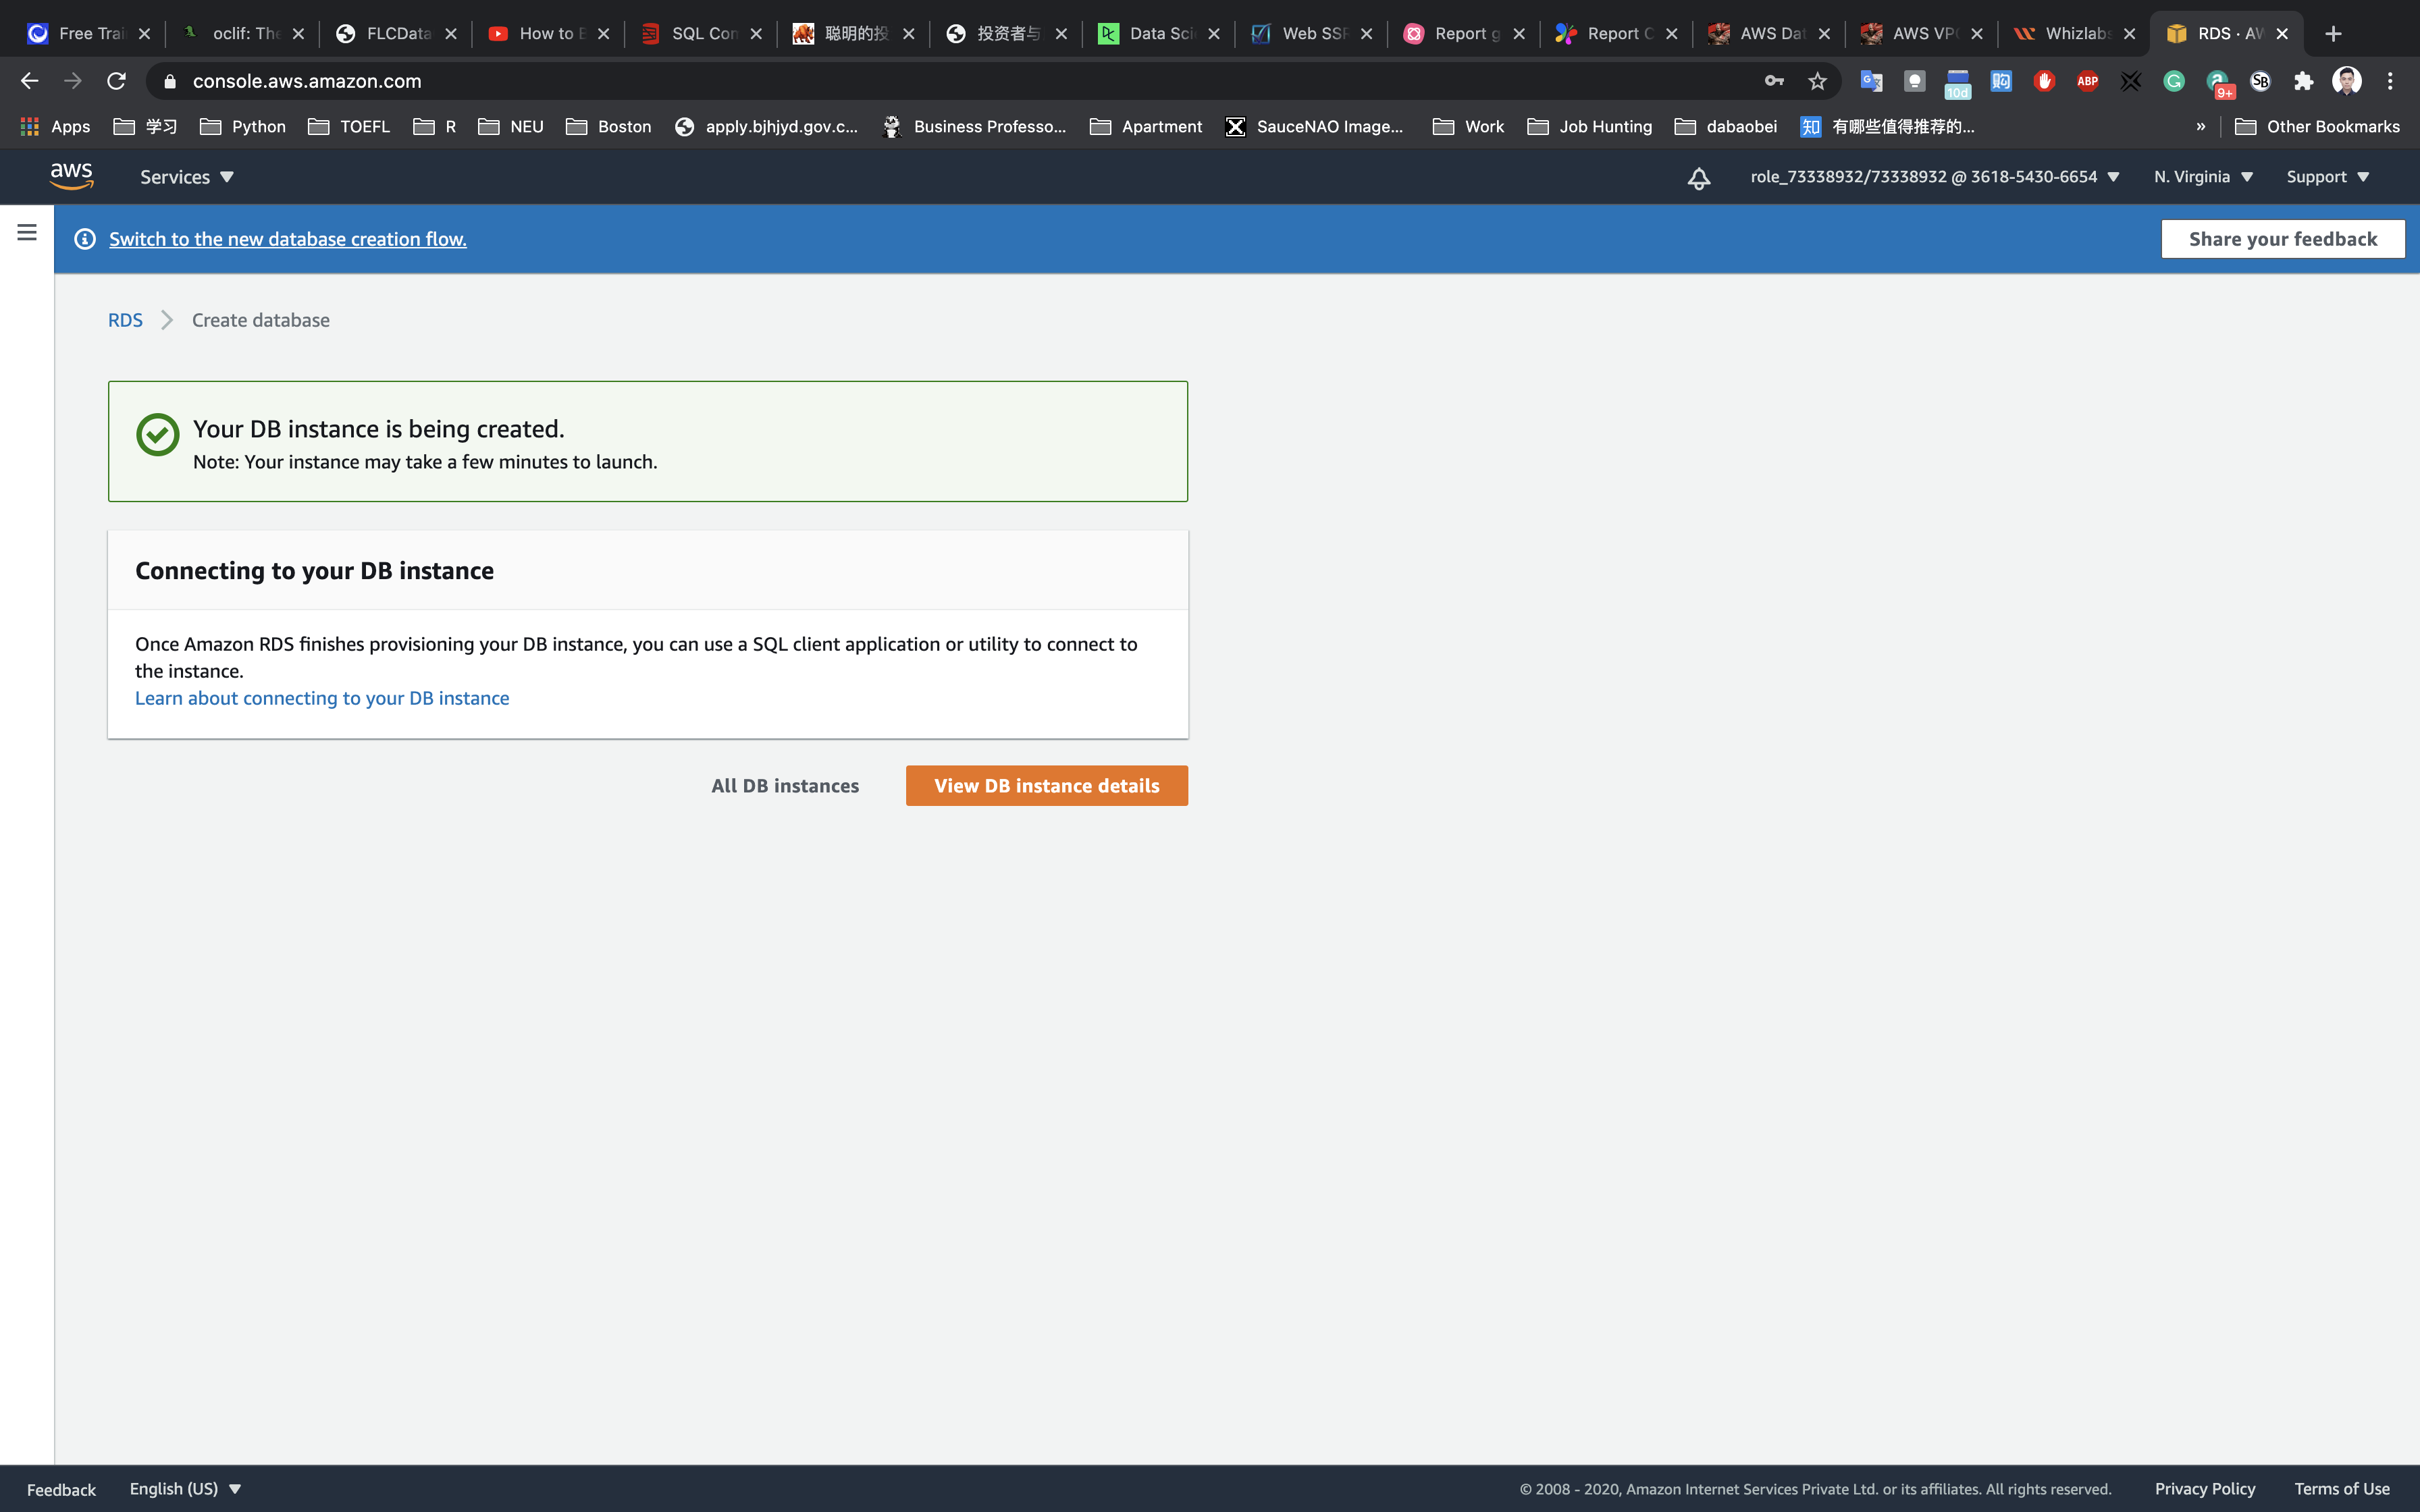
It will take a few minutes for the MySQL database to become available.
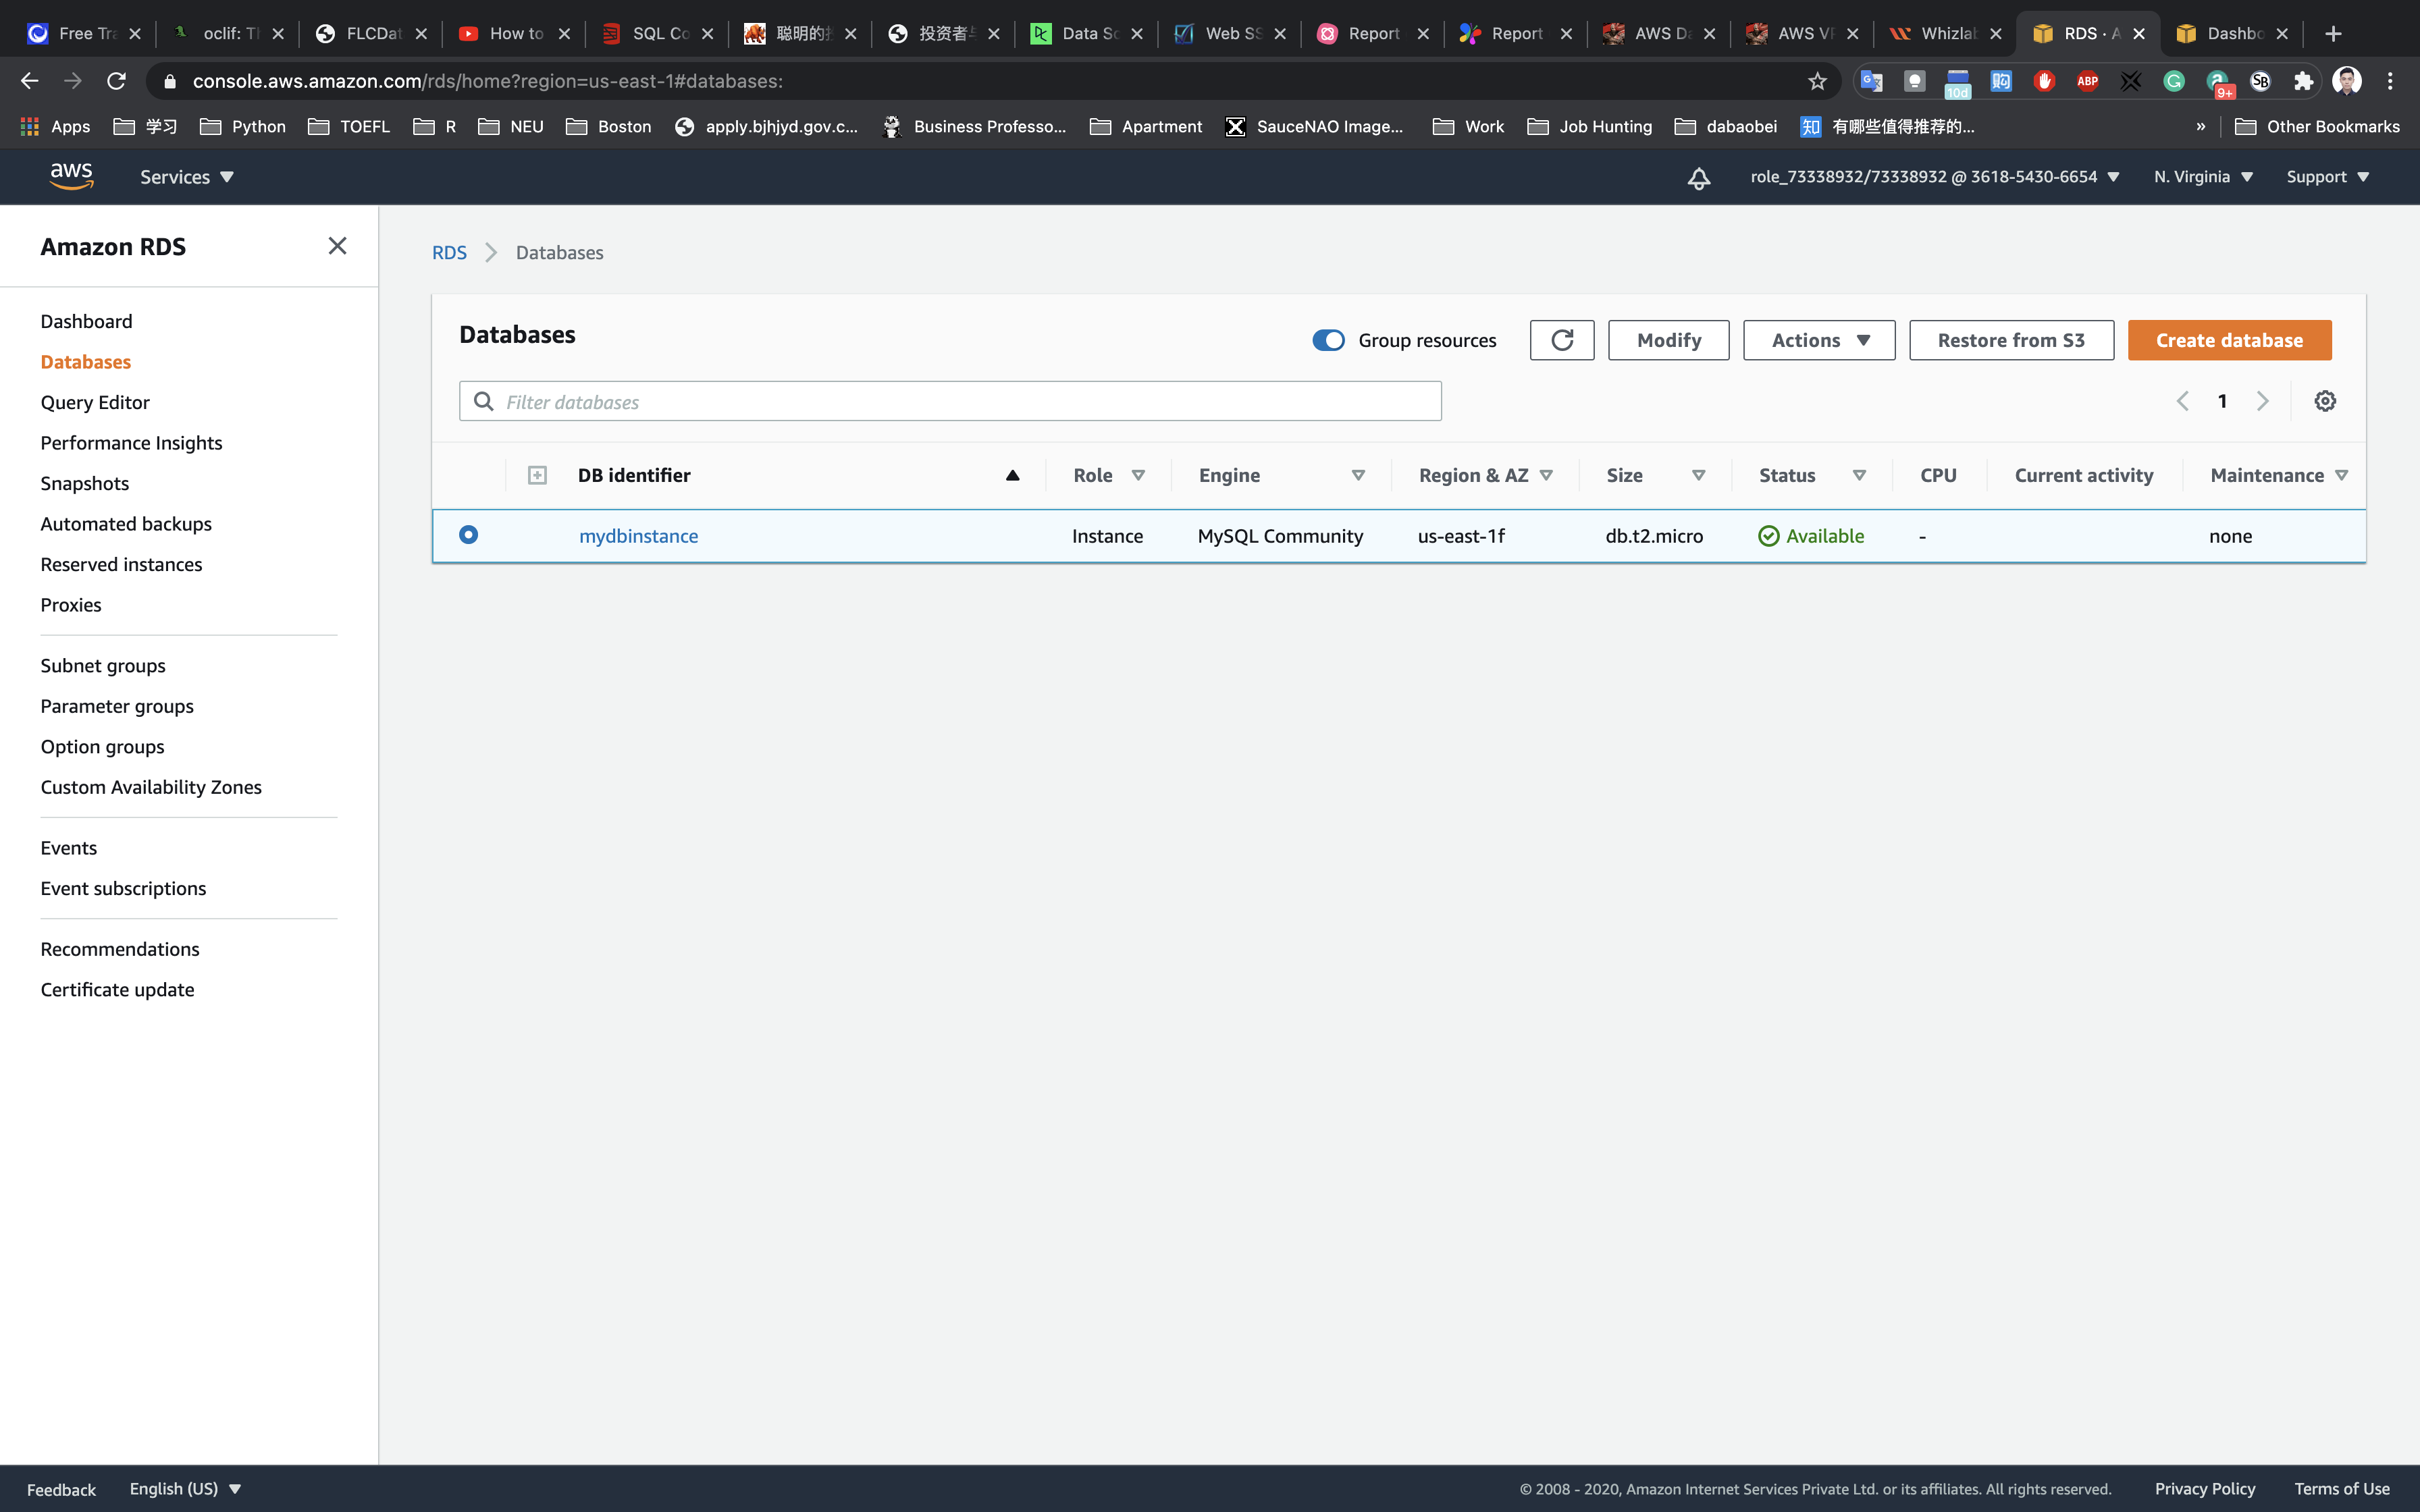
In the left navigation pane, click Databases.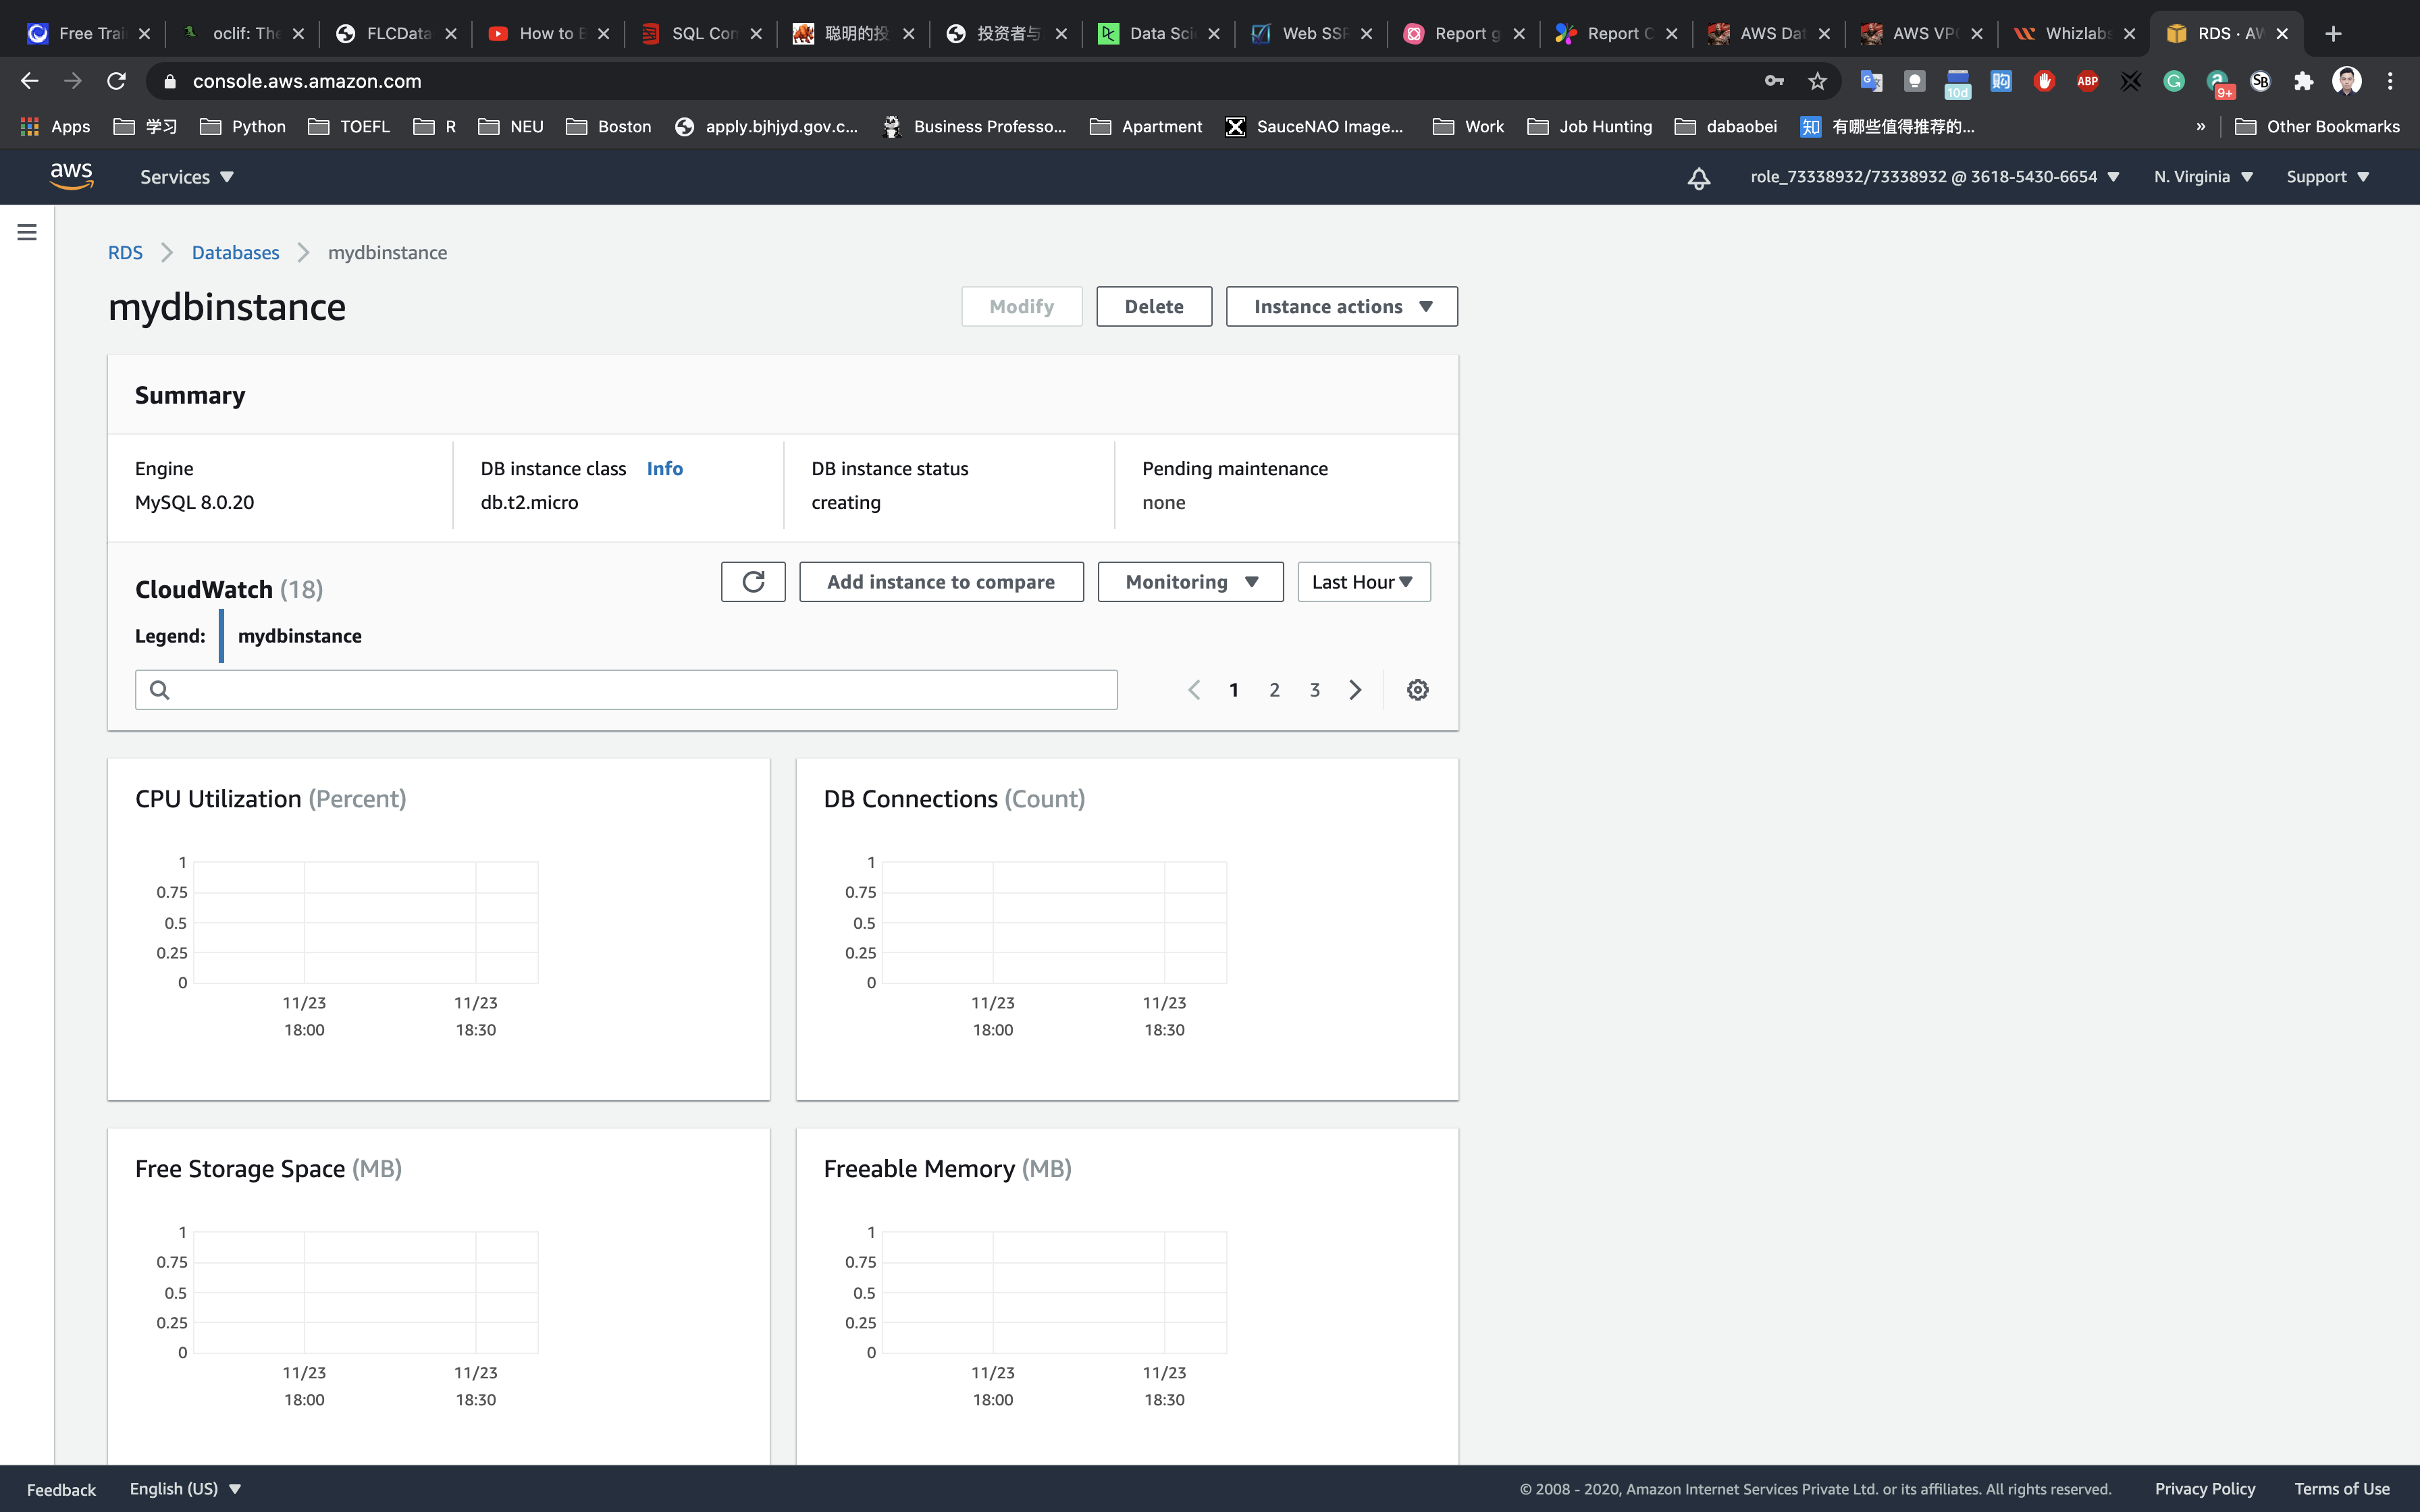
Click refresh every 60 seconds until the instance status changes to available.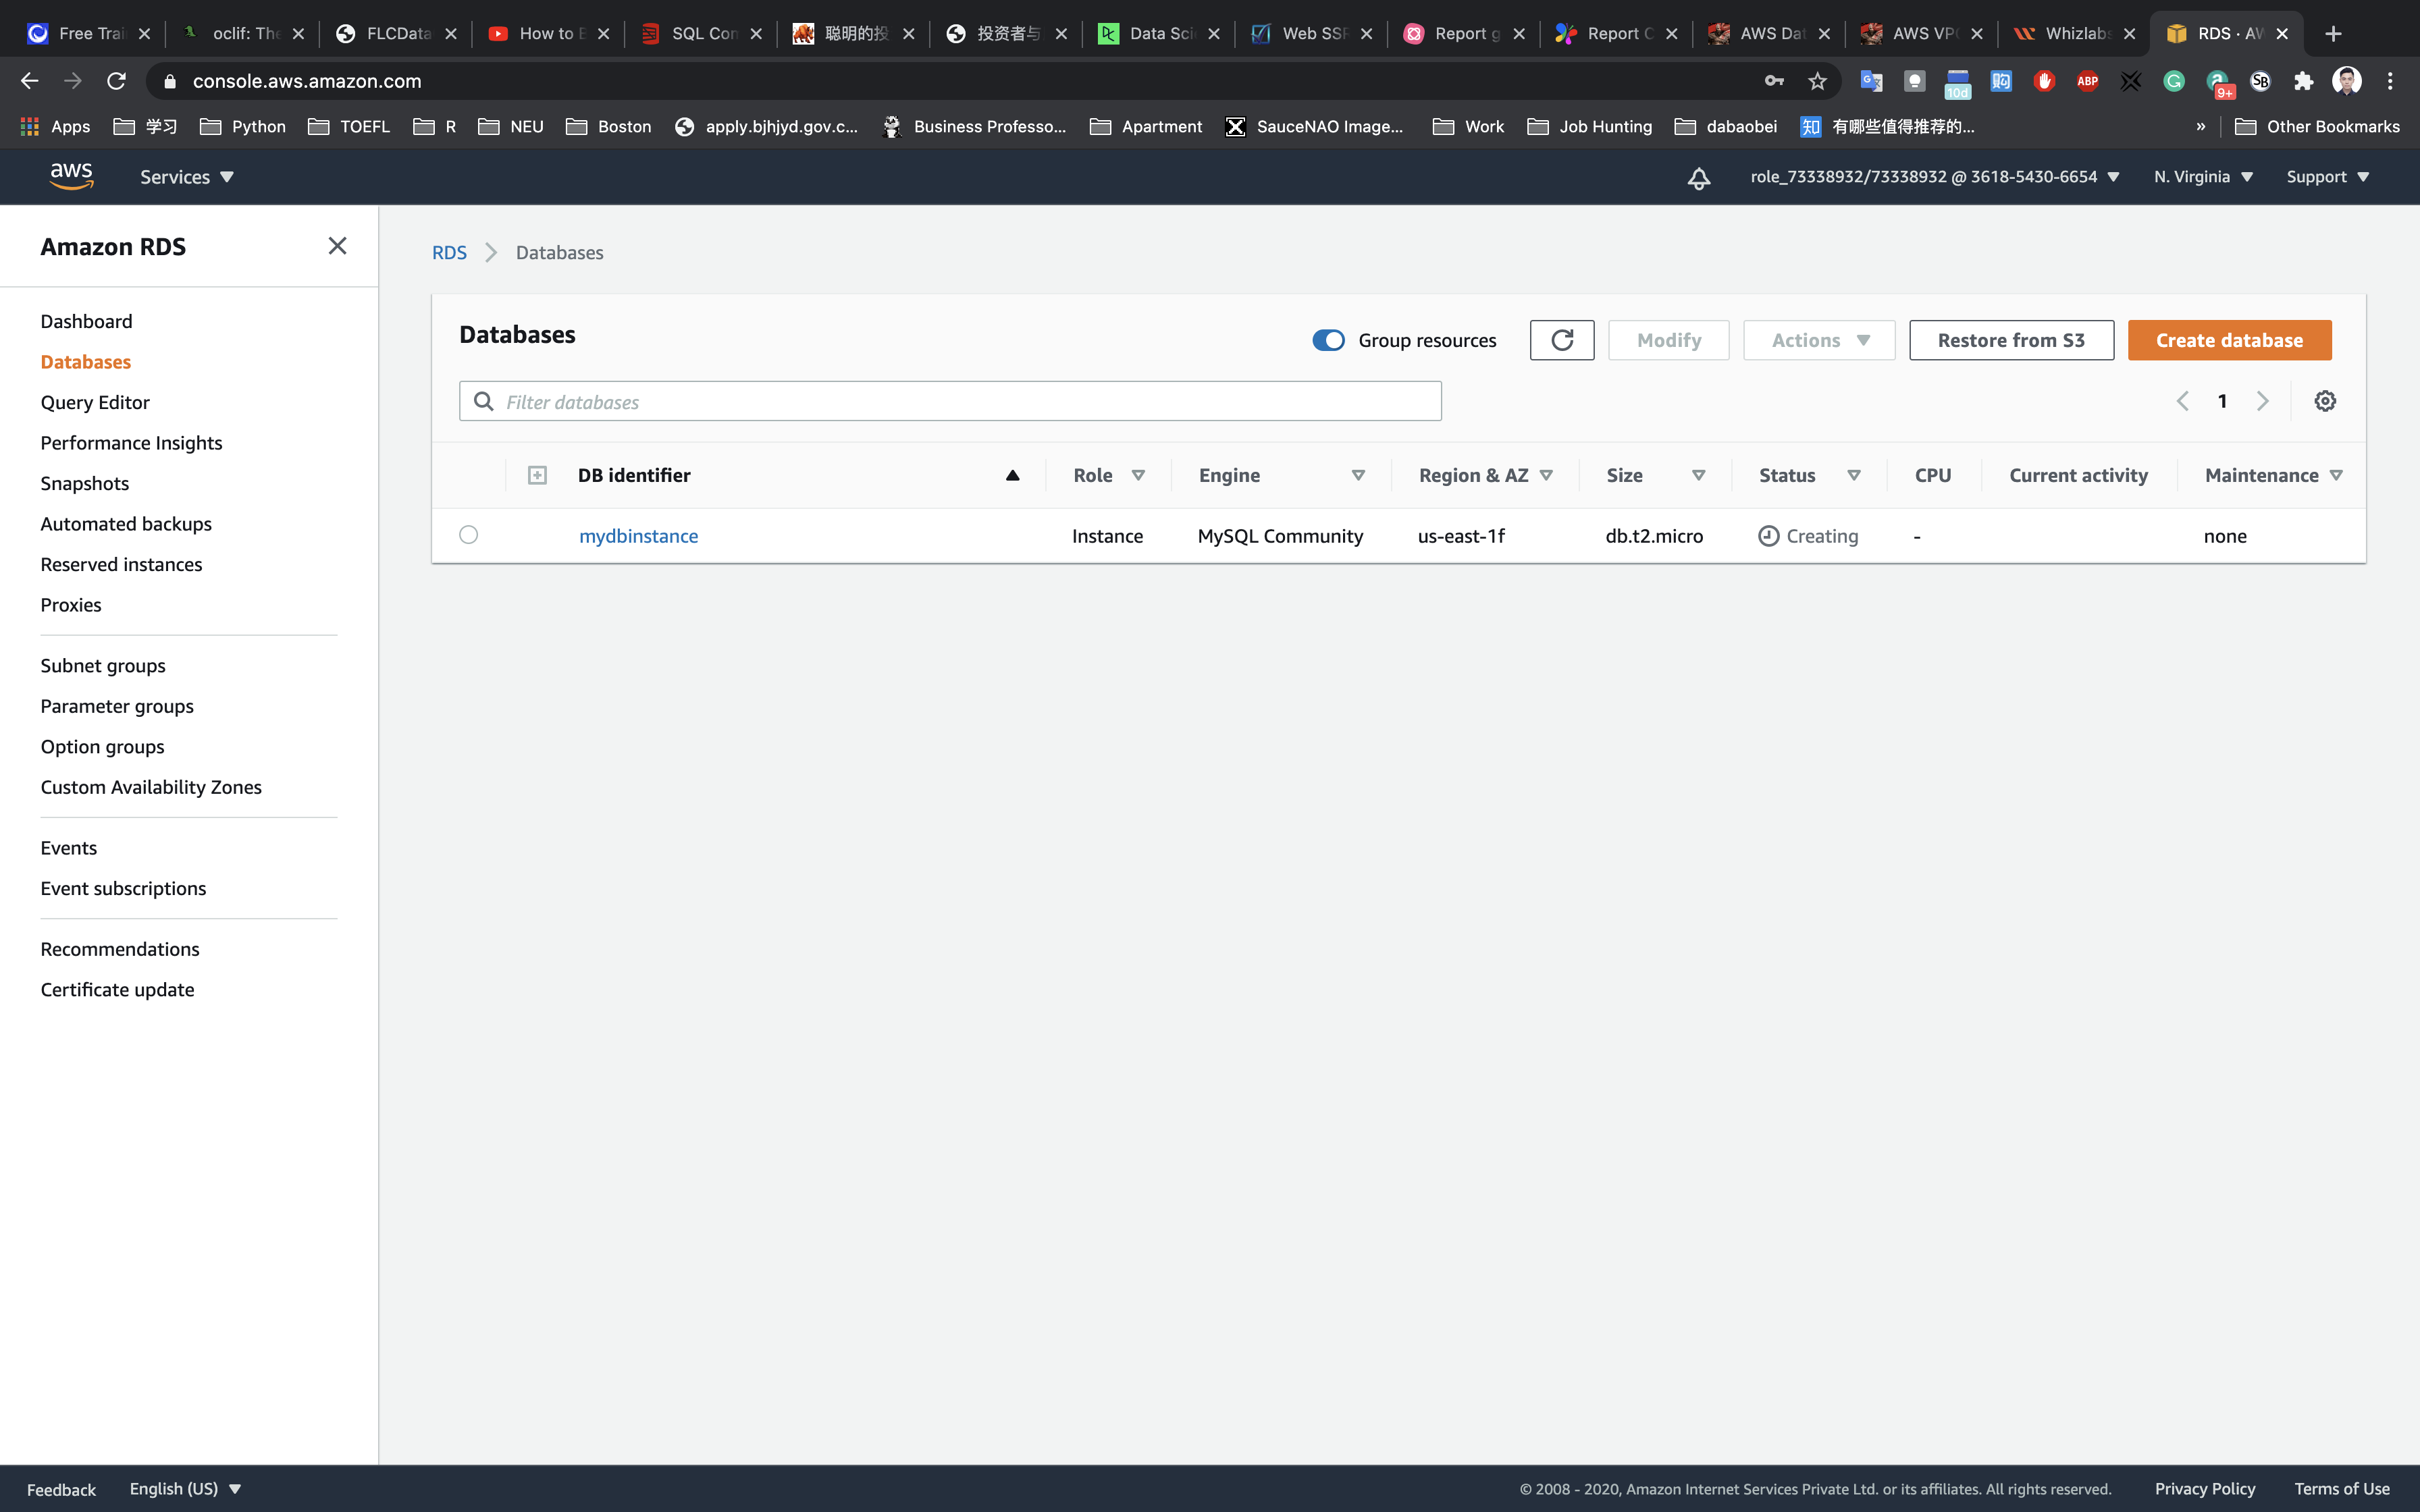
Security Group Configuration
Click on the database your just created.
Click on the next line under VPC security groups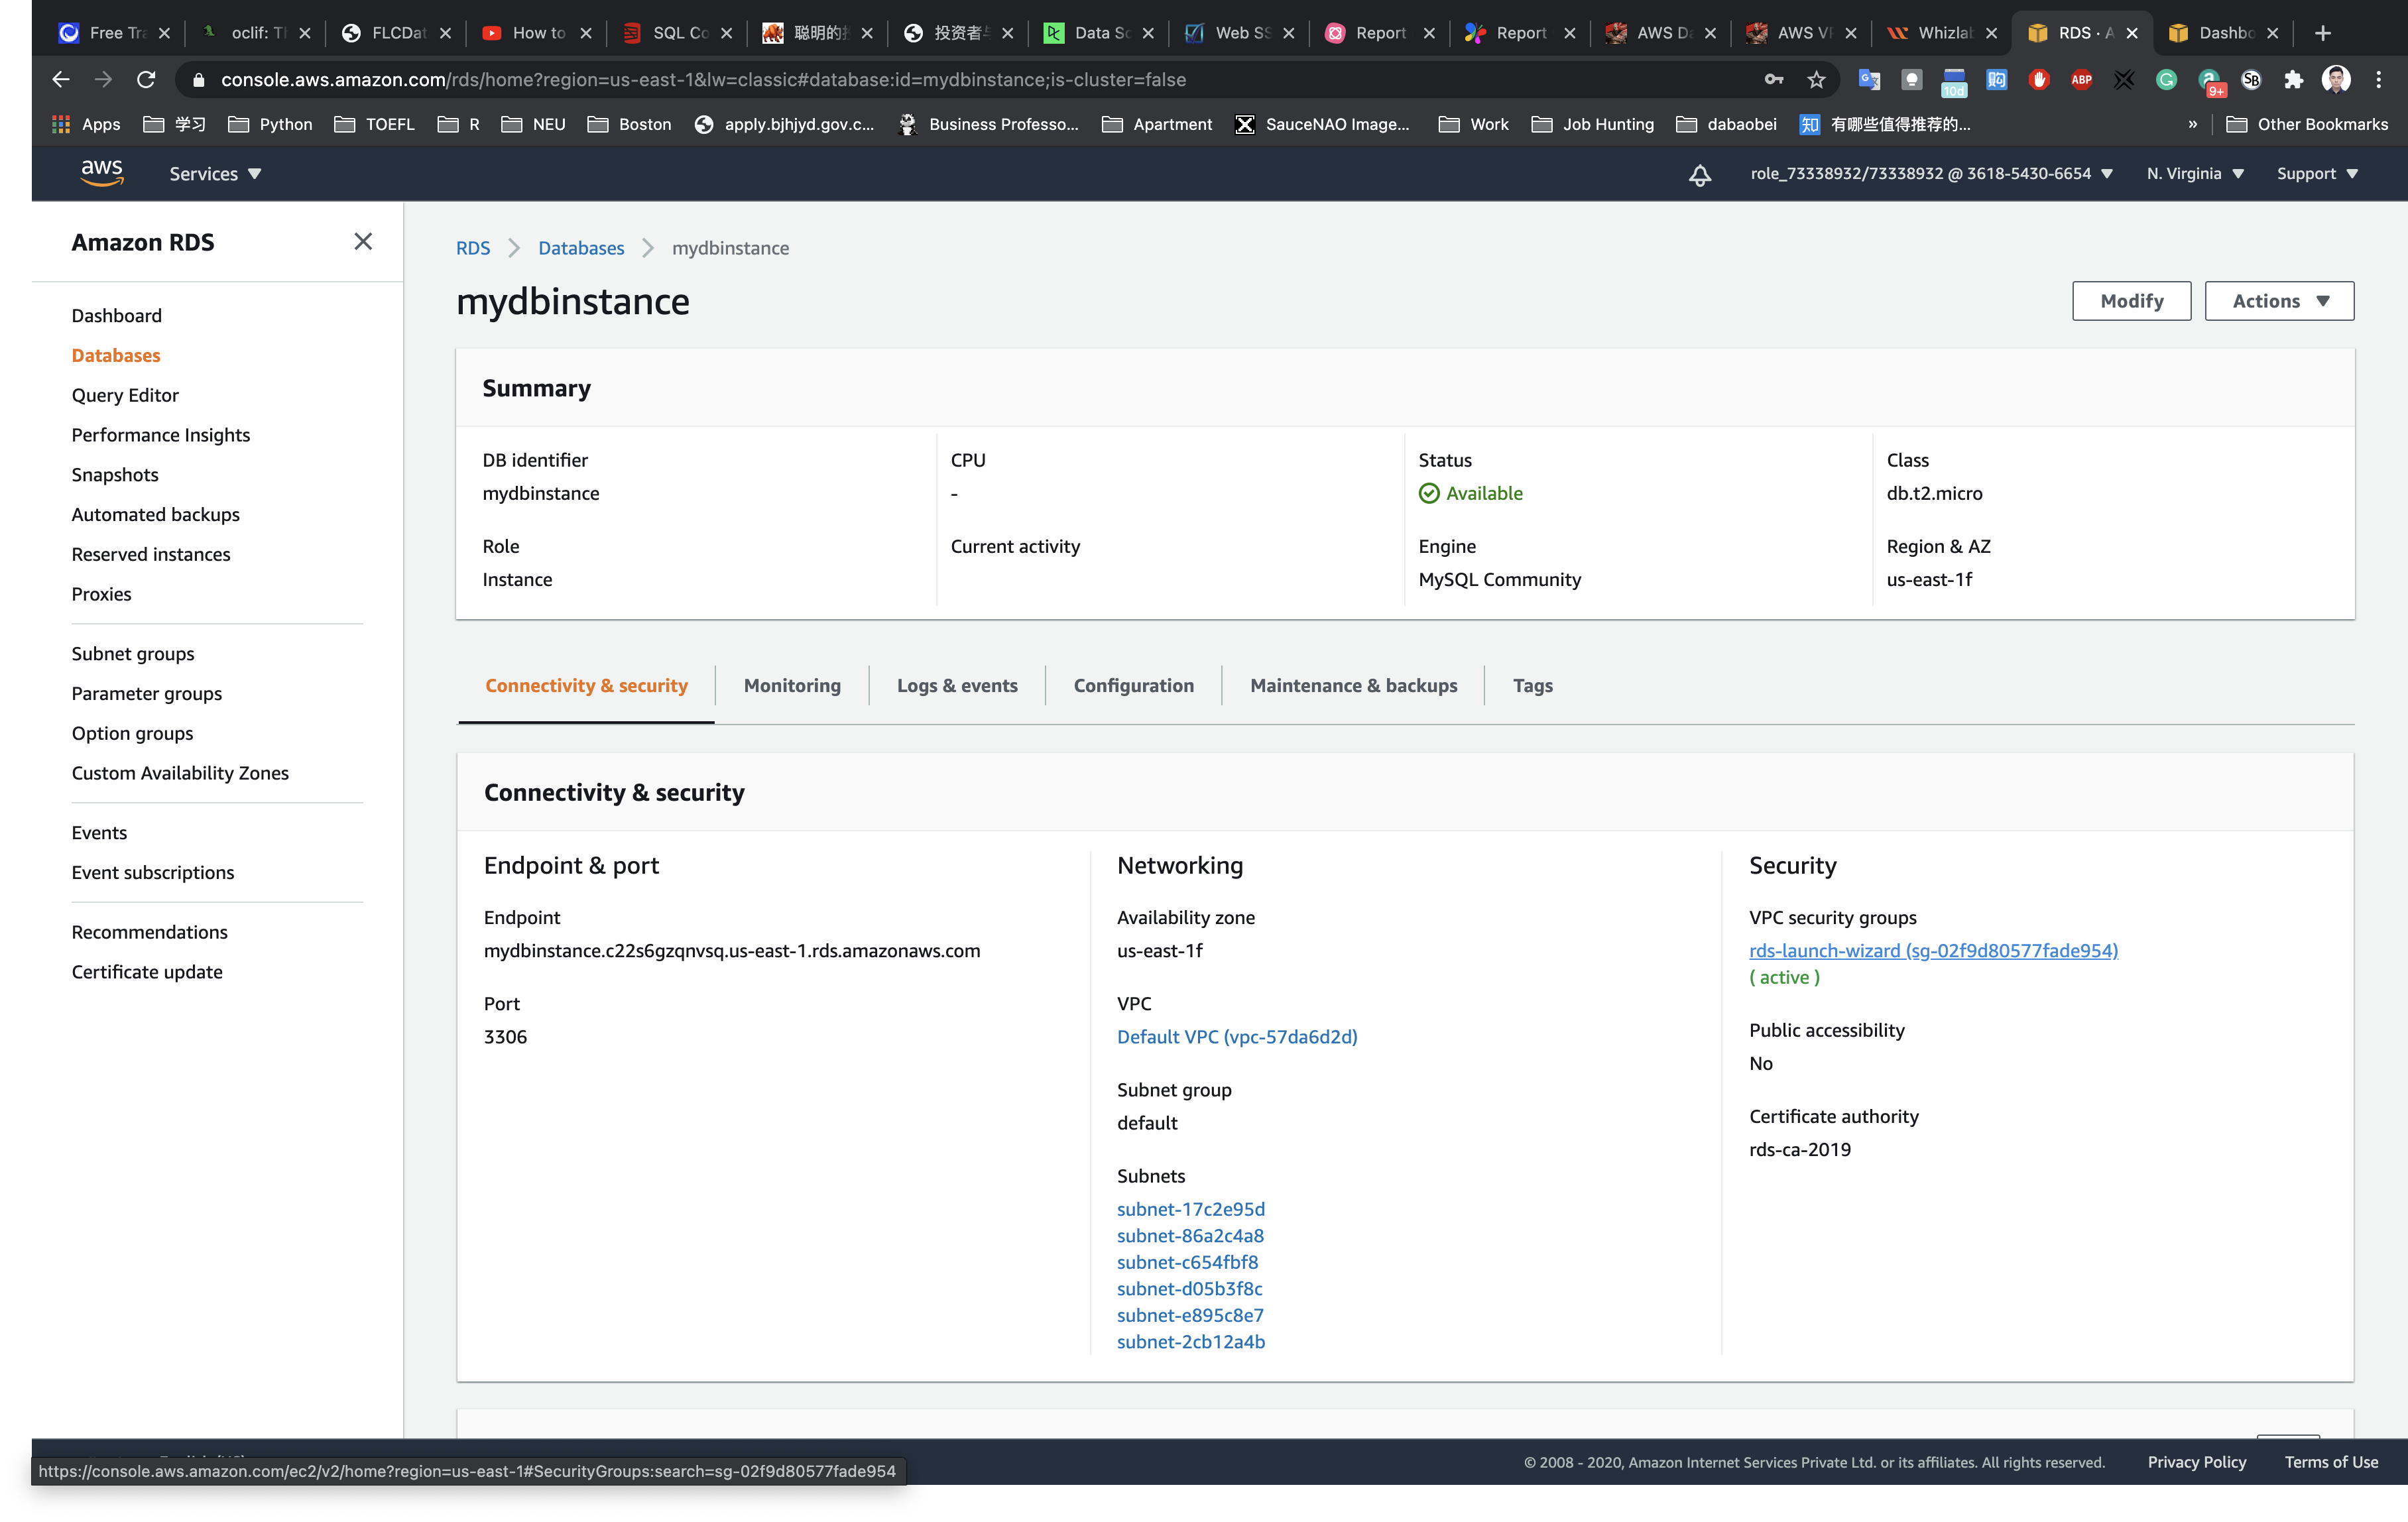
Click on Inbound rules tab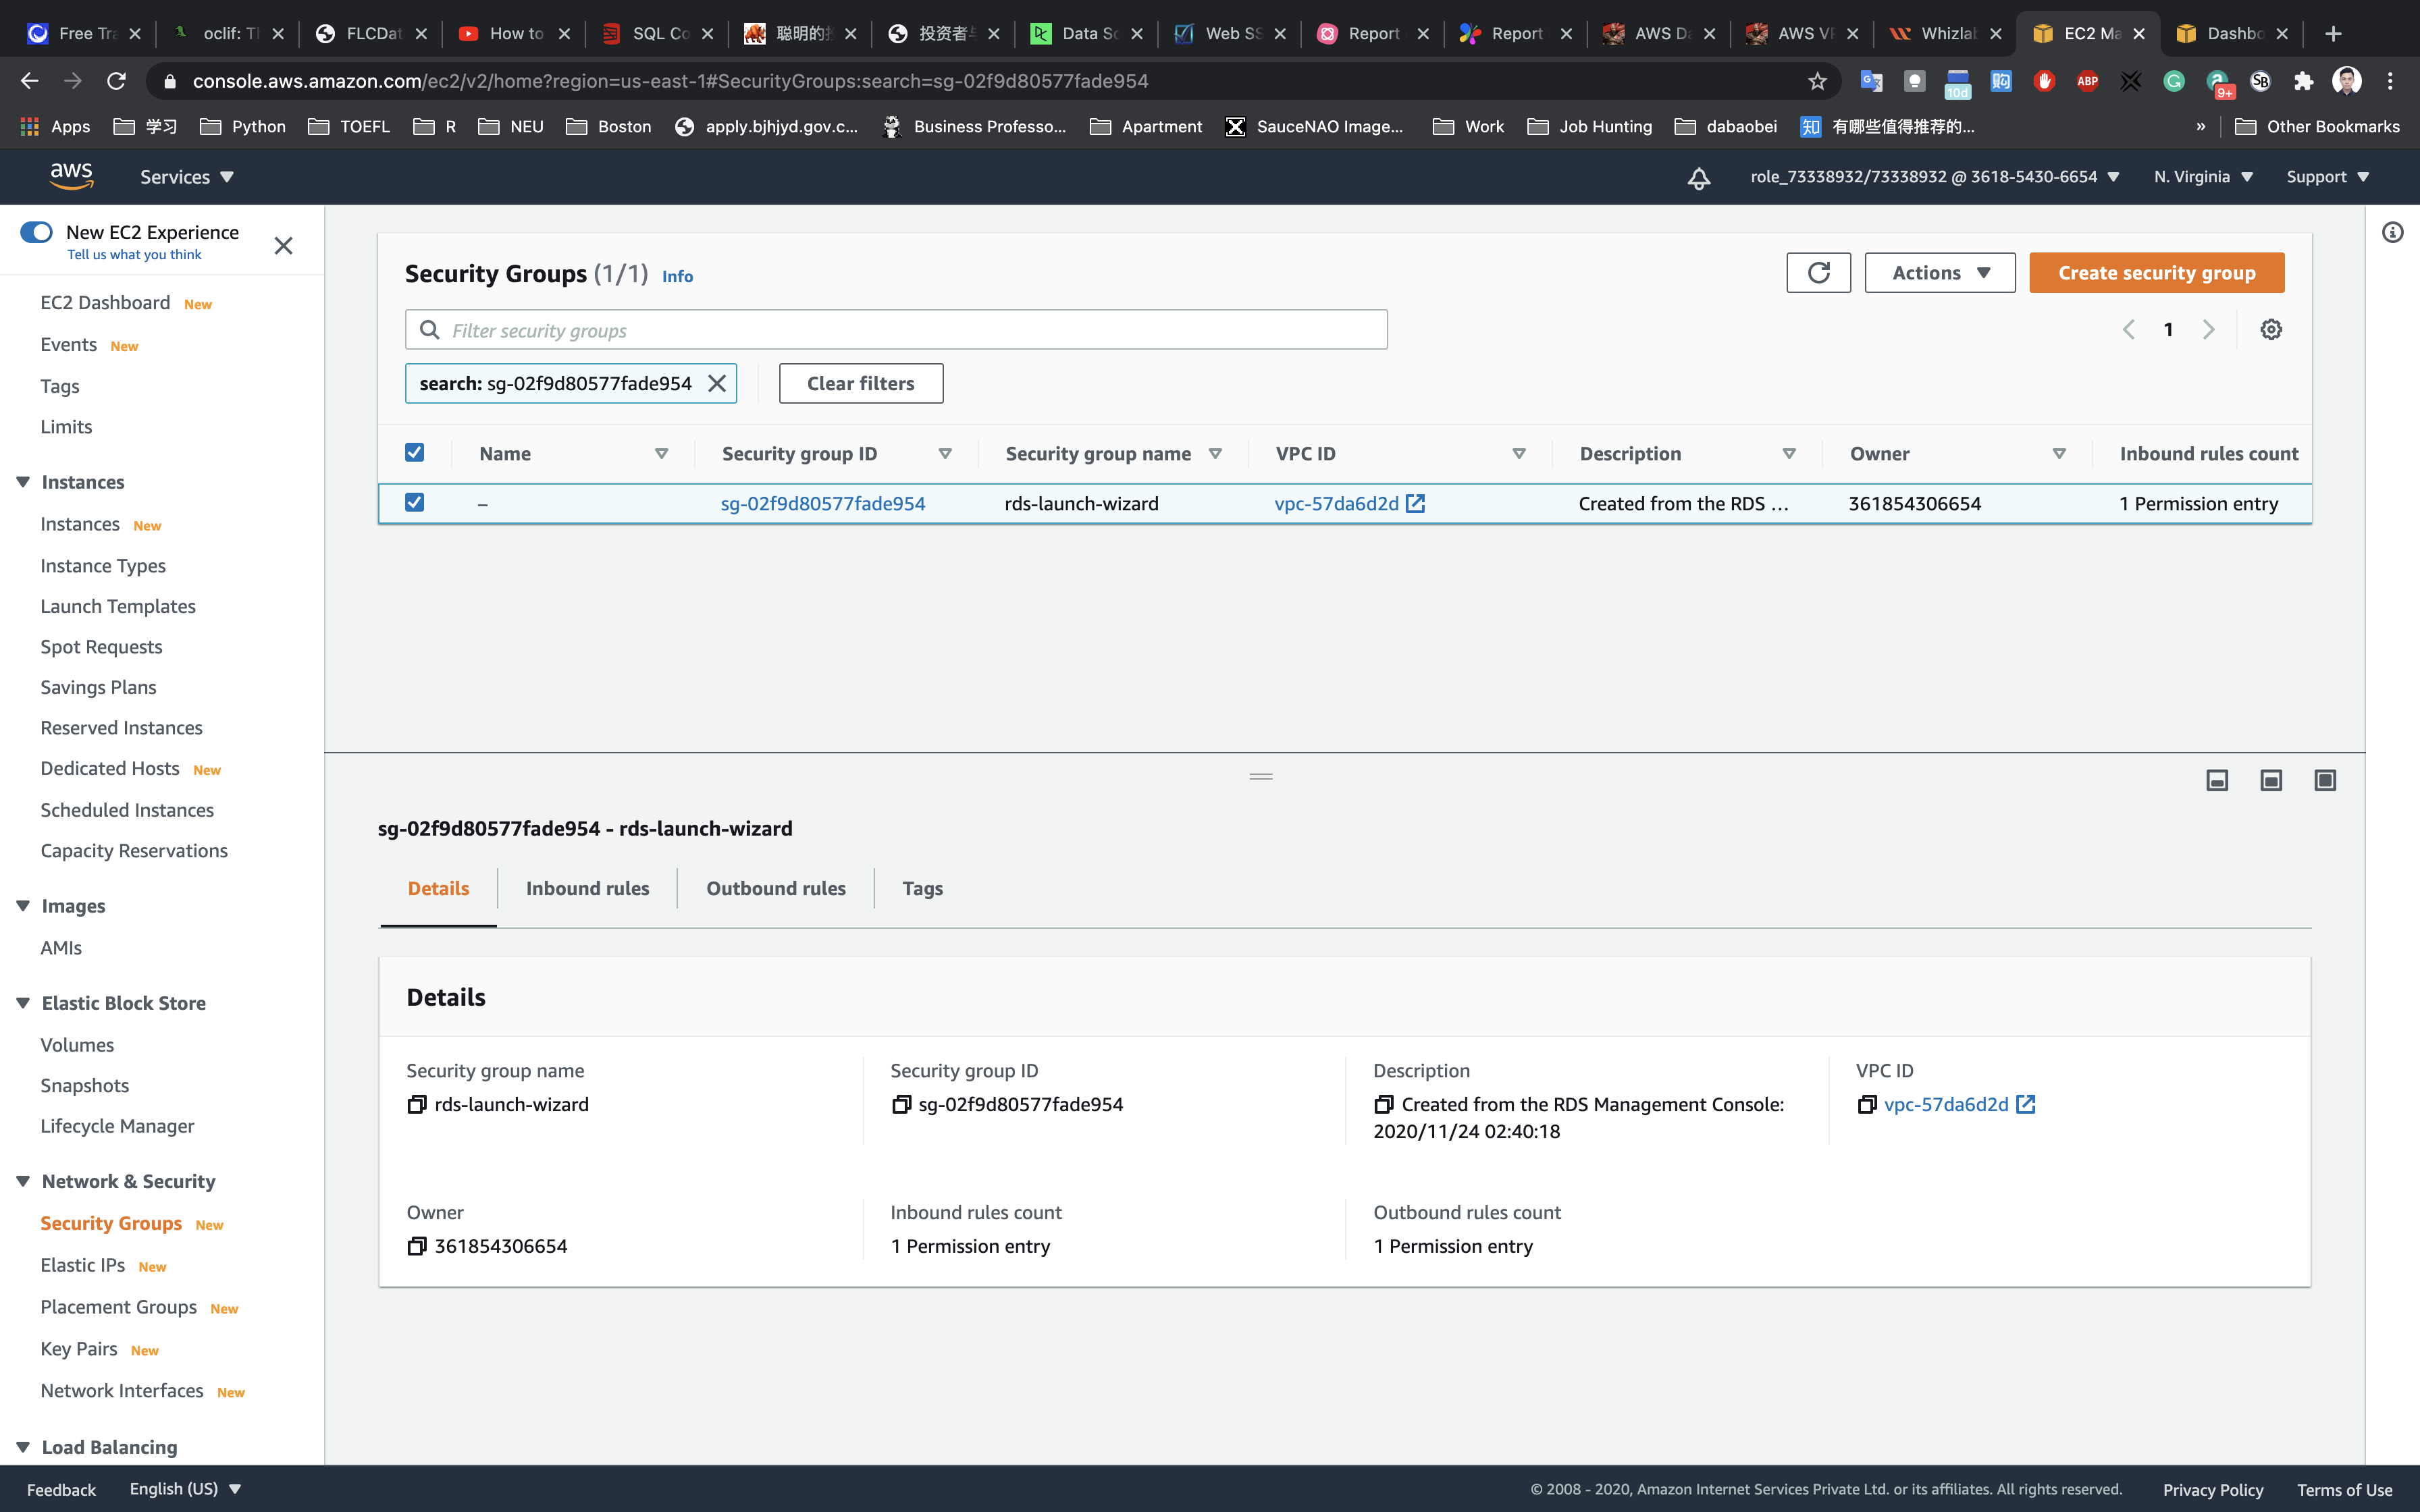
Click on Edit inbound rules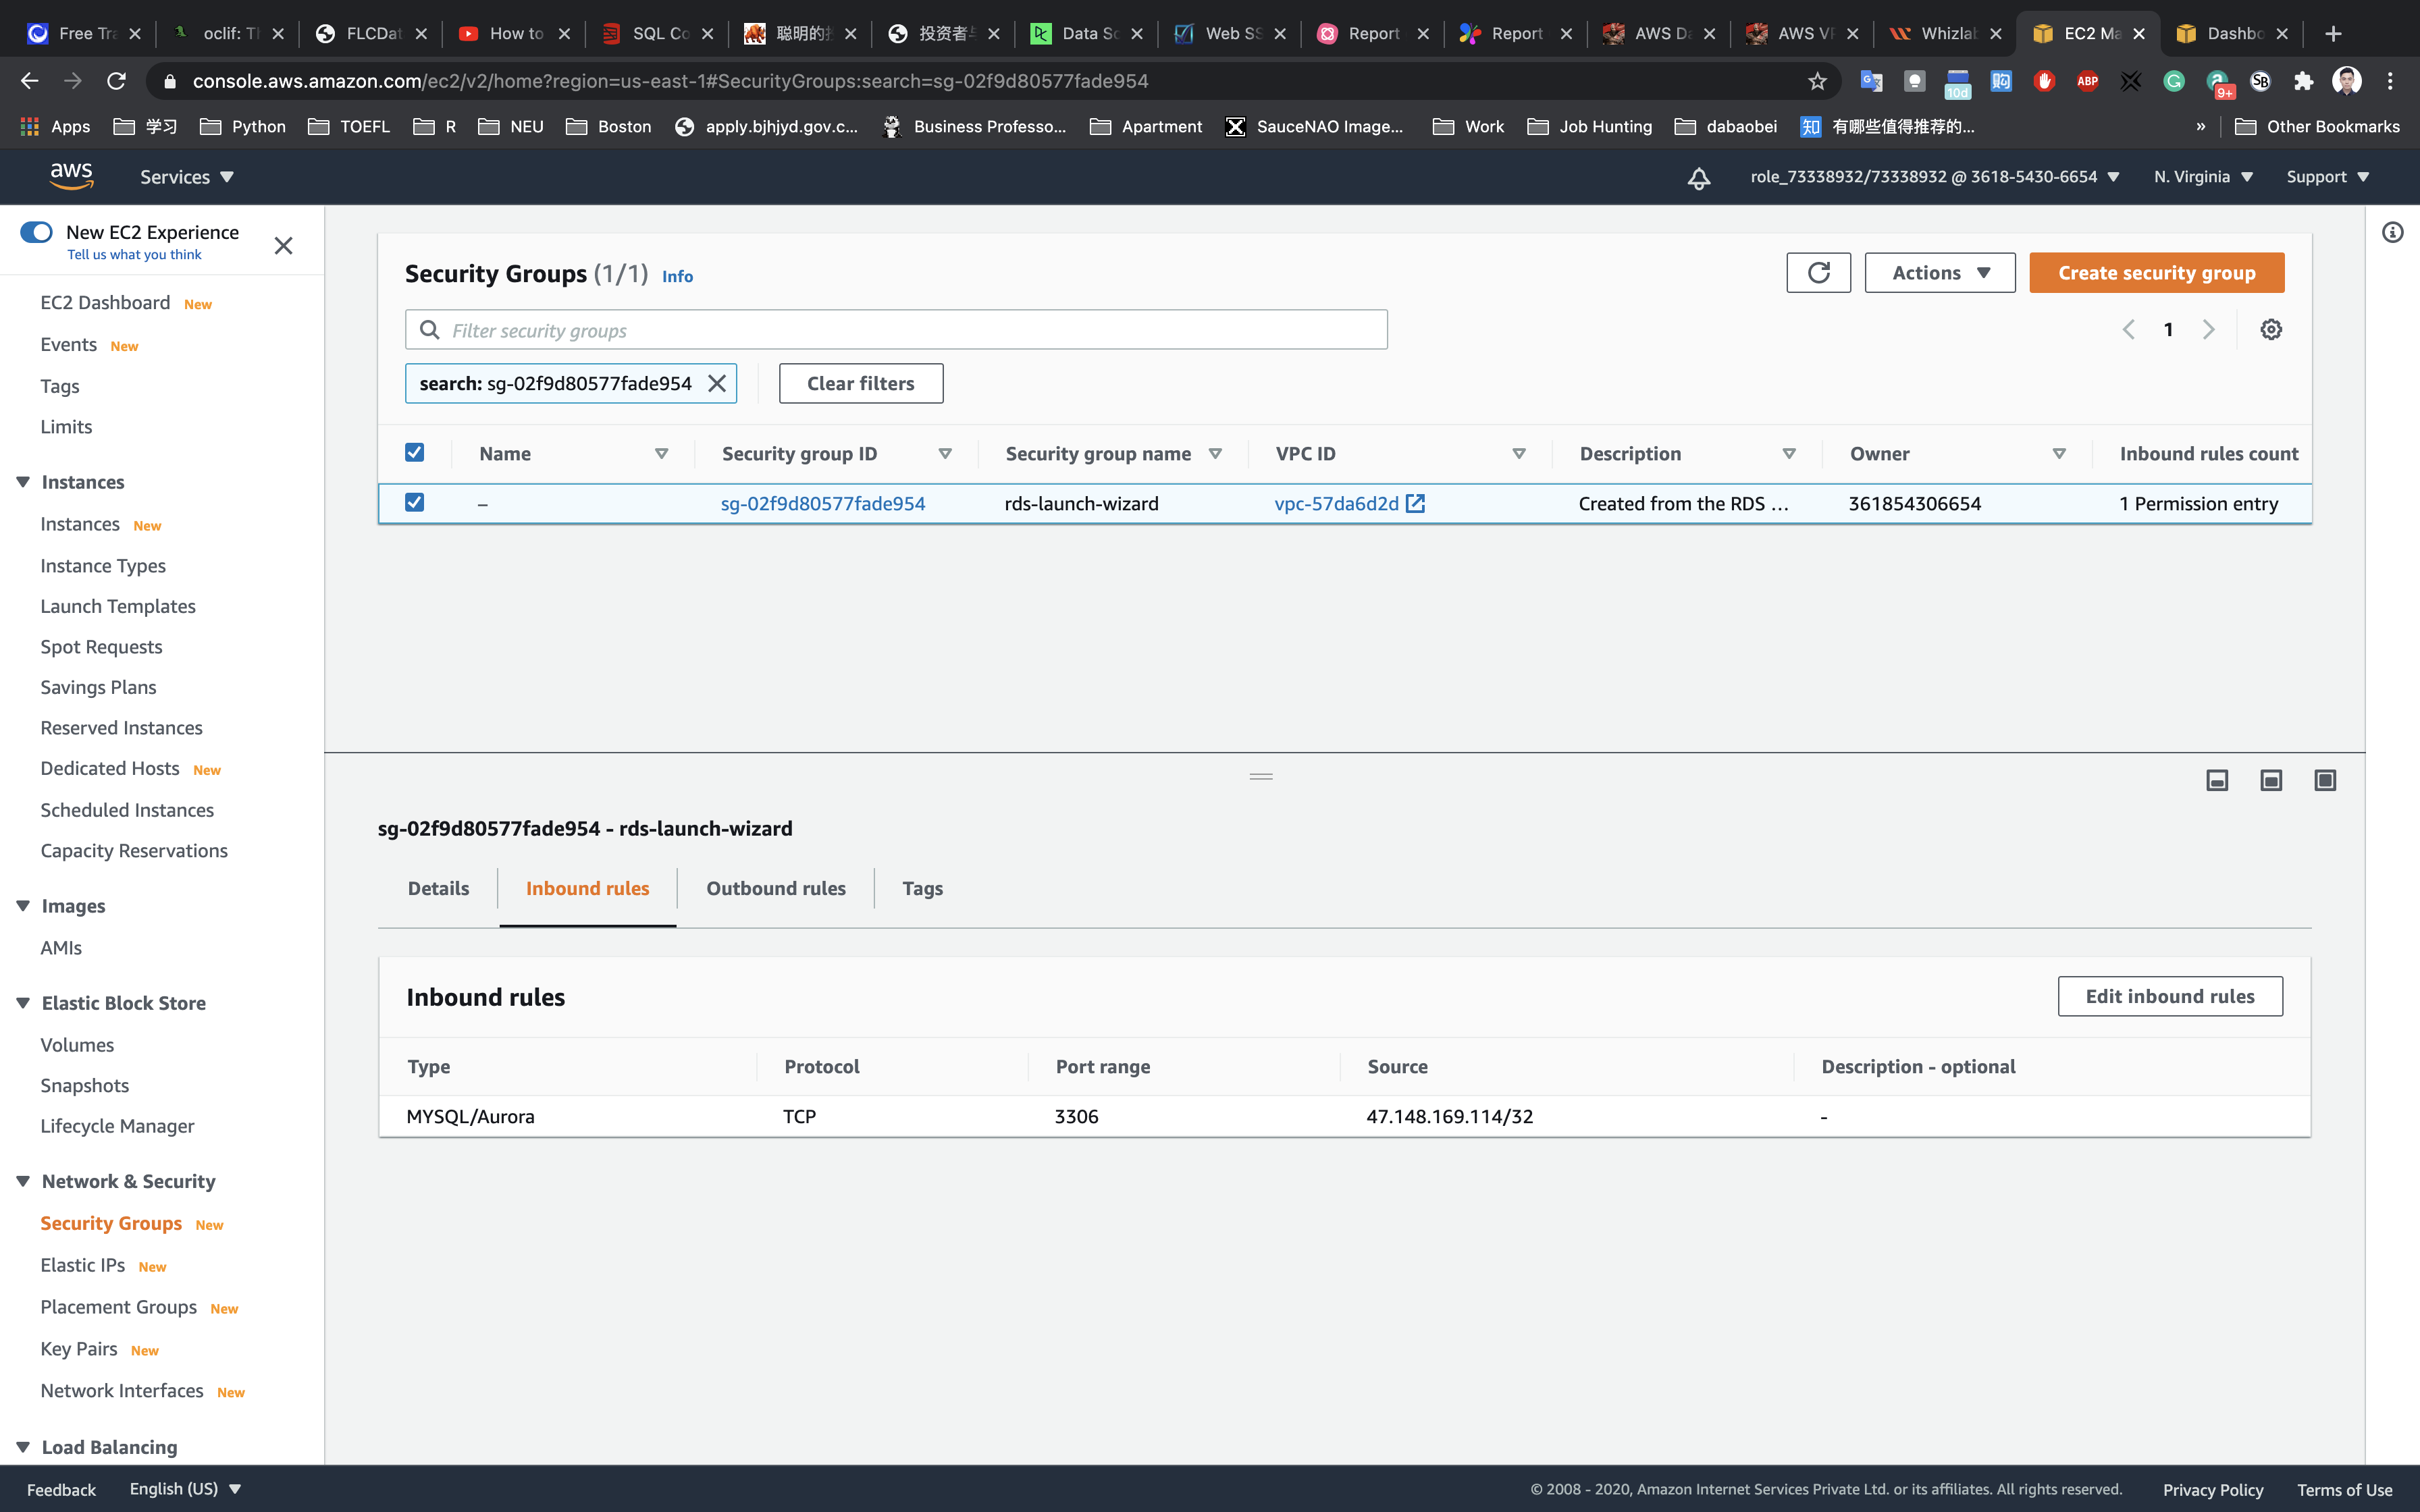
Delete the existing IP address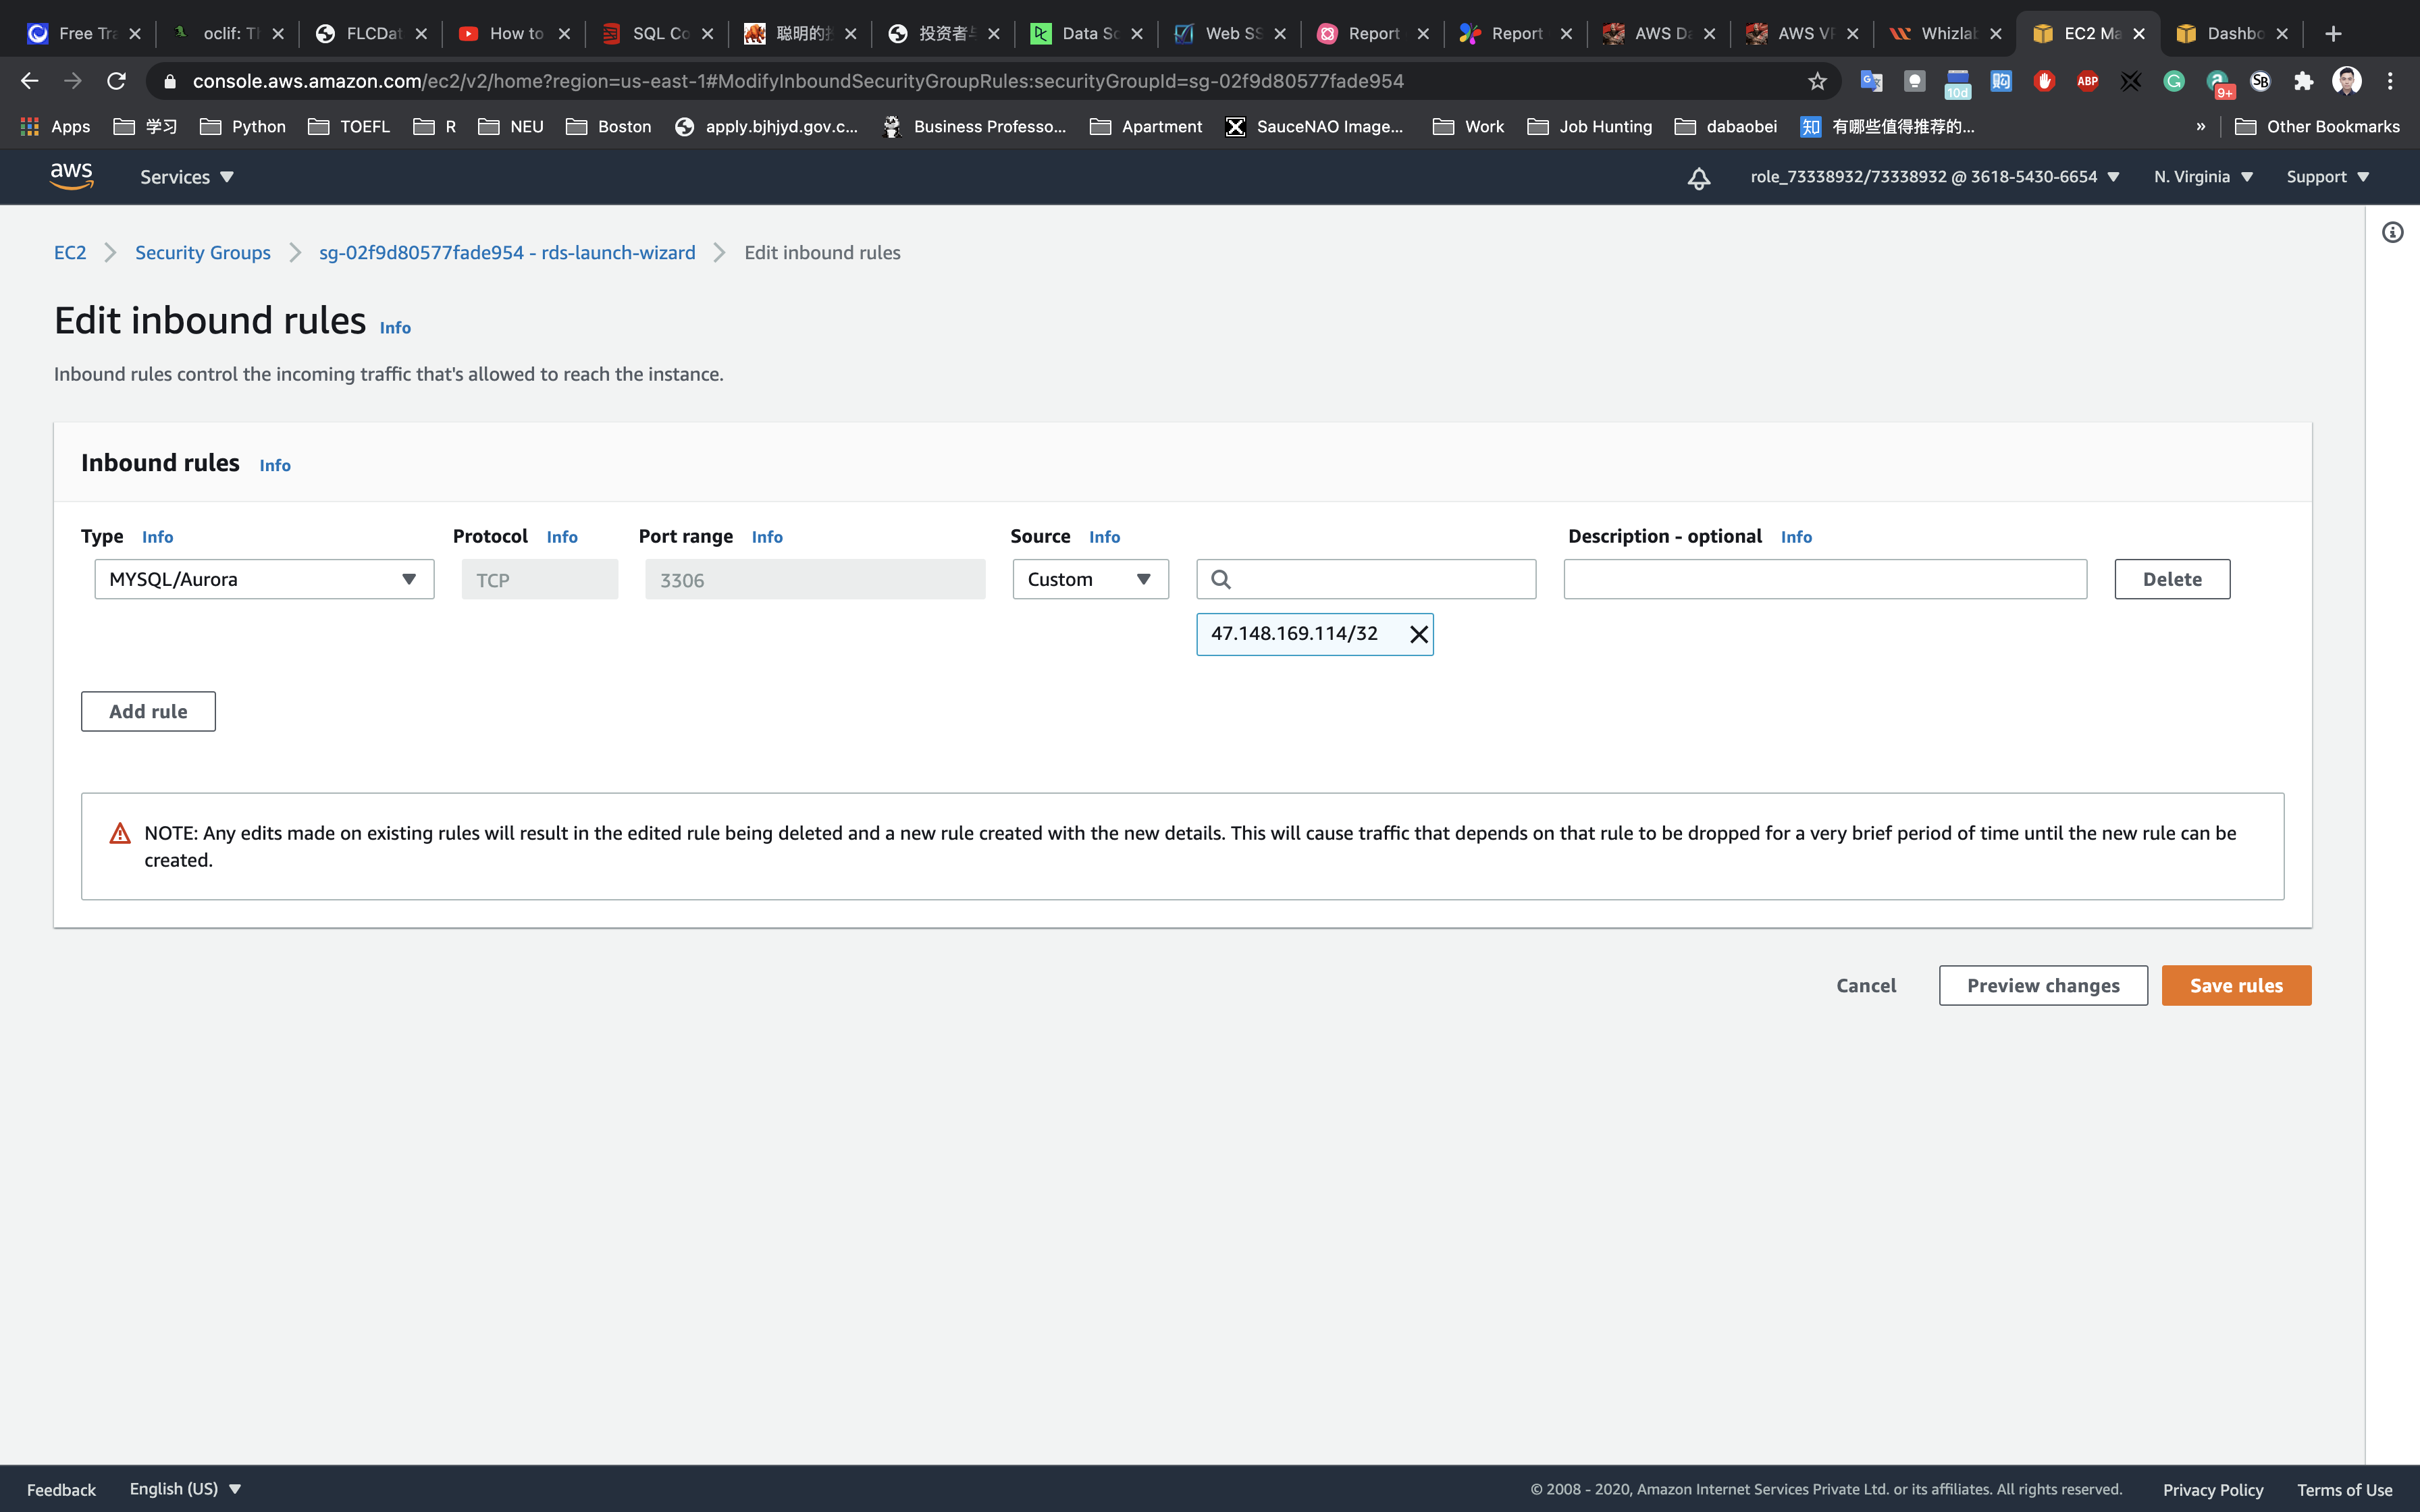
Then input sg and select the security group for your Web Server
Click on Save rules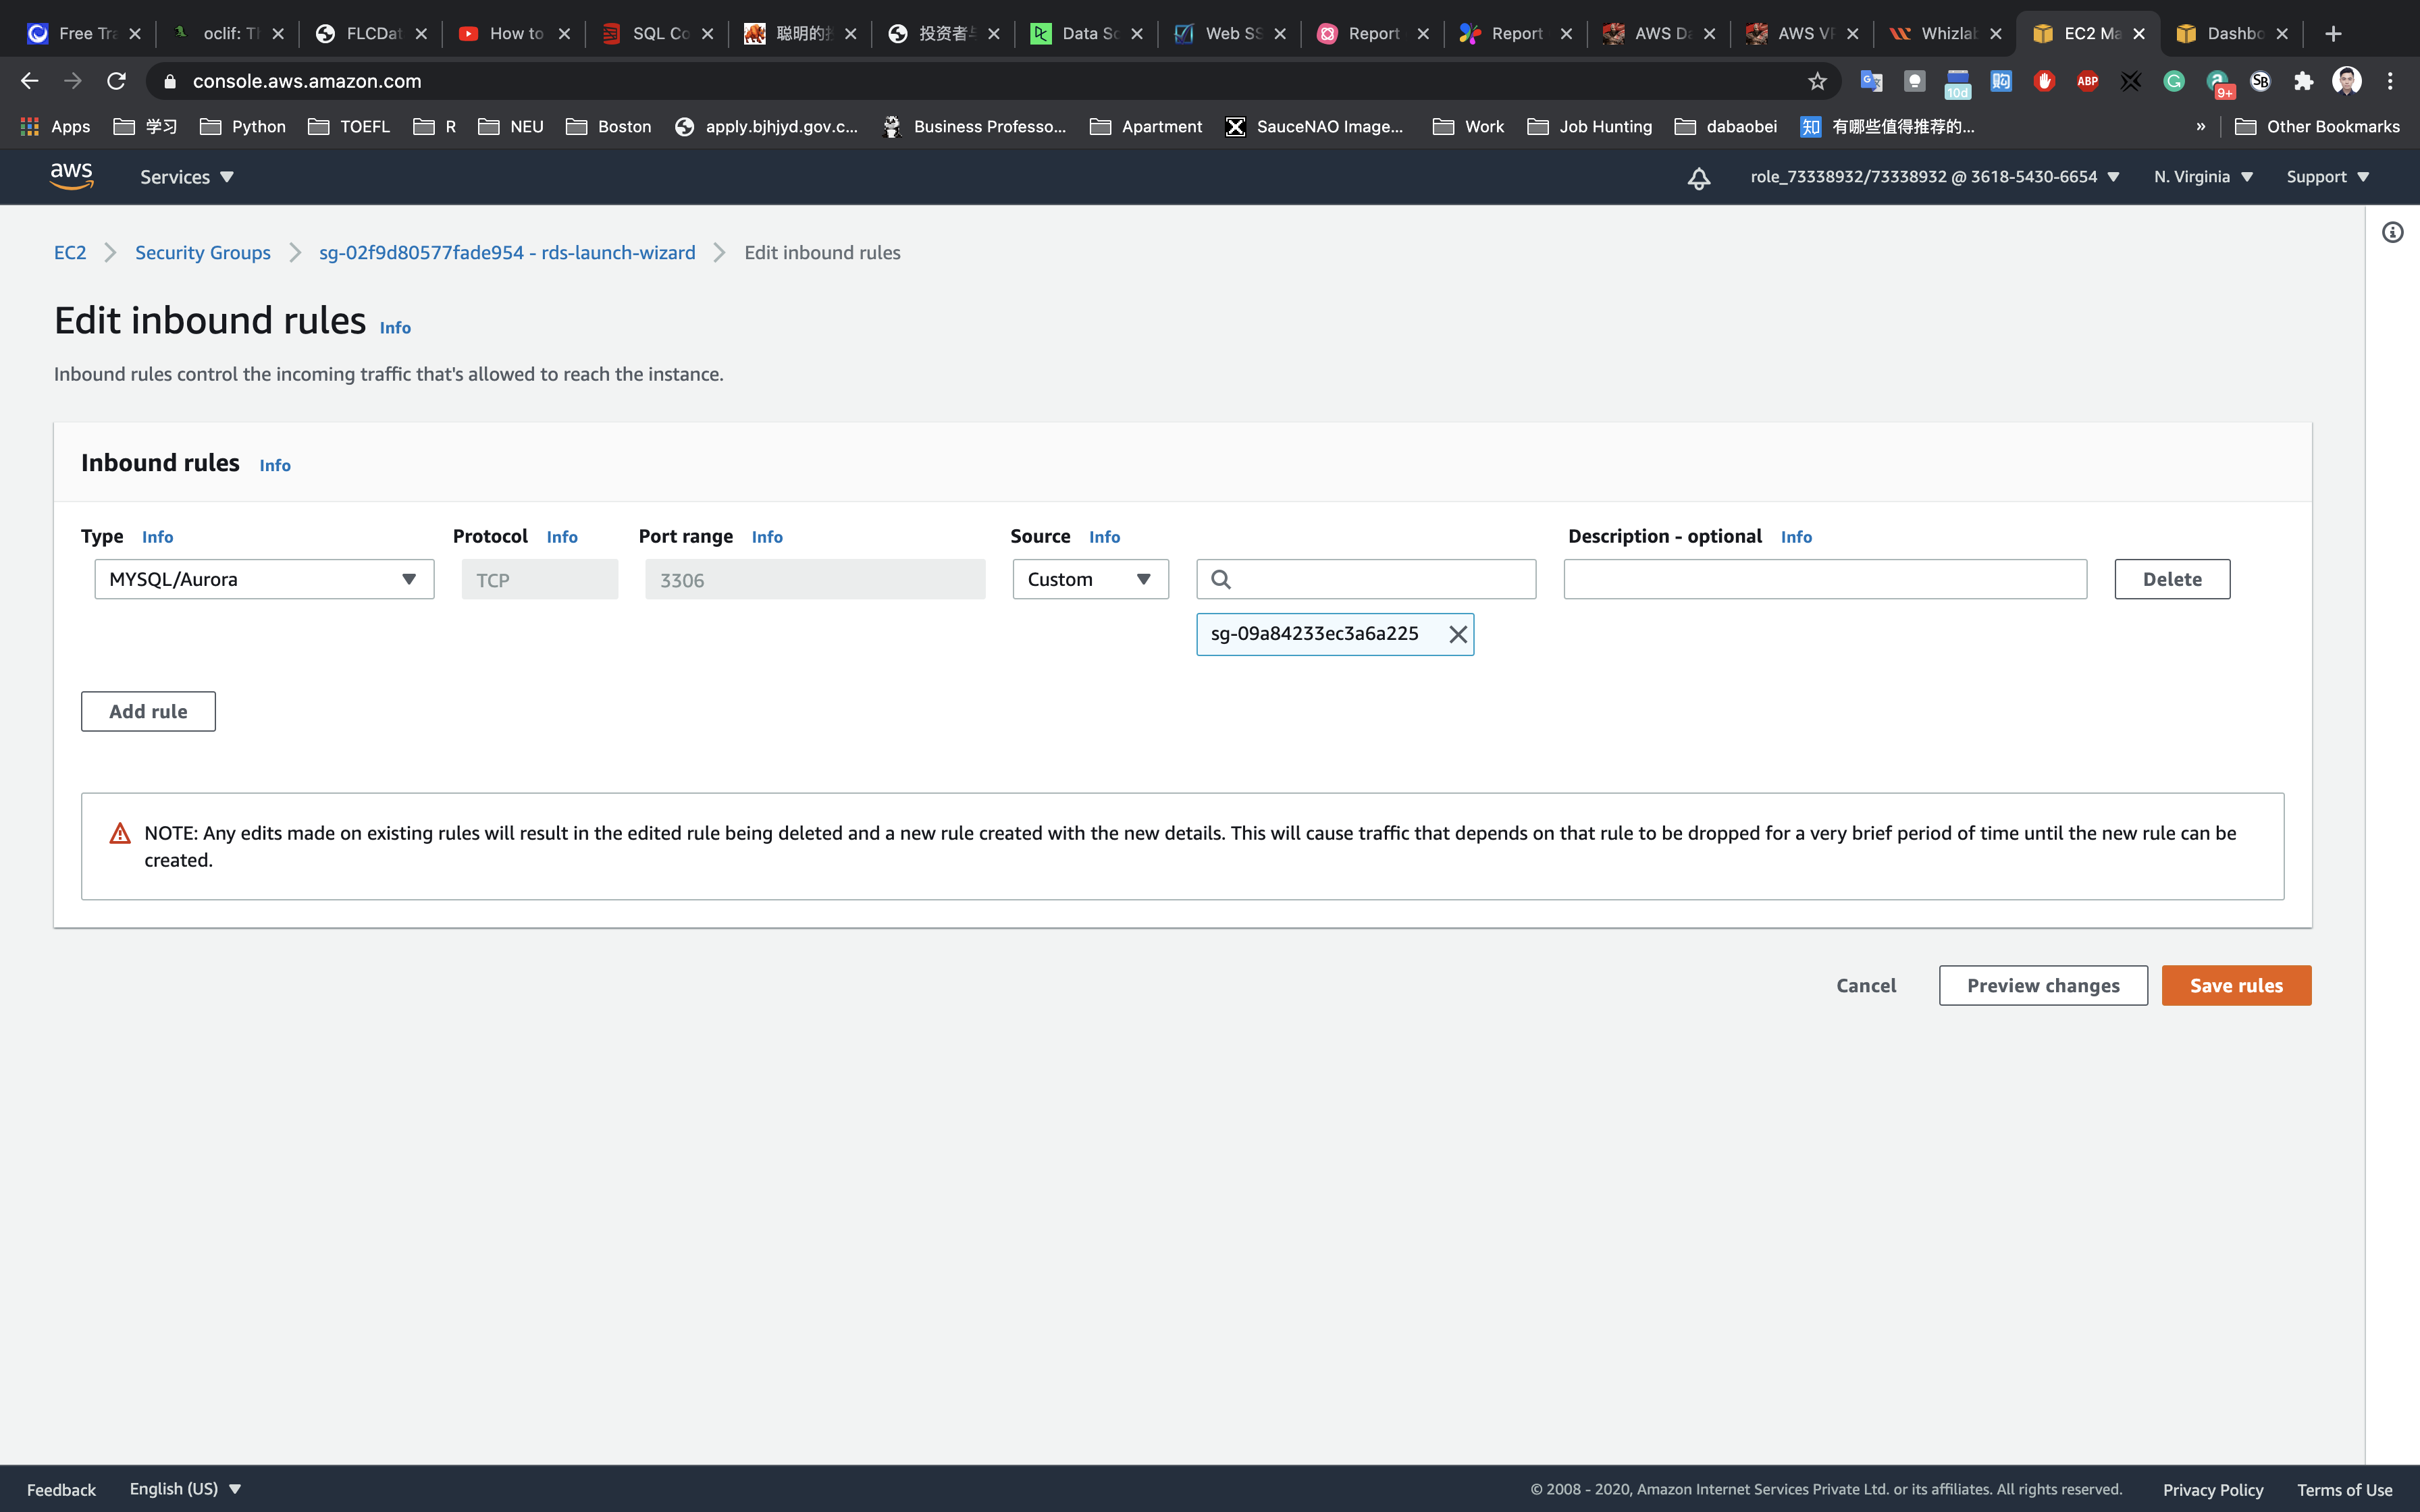
Validation Test
Services -> EC2 -> Instances
SSH into the Web Server
If you cannot understand the following steps. Click on SSH into EC2 instance
Copy public address of Web server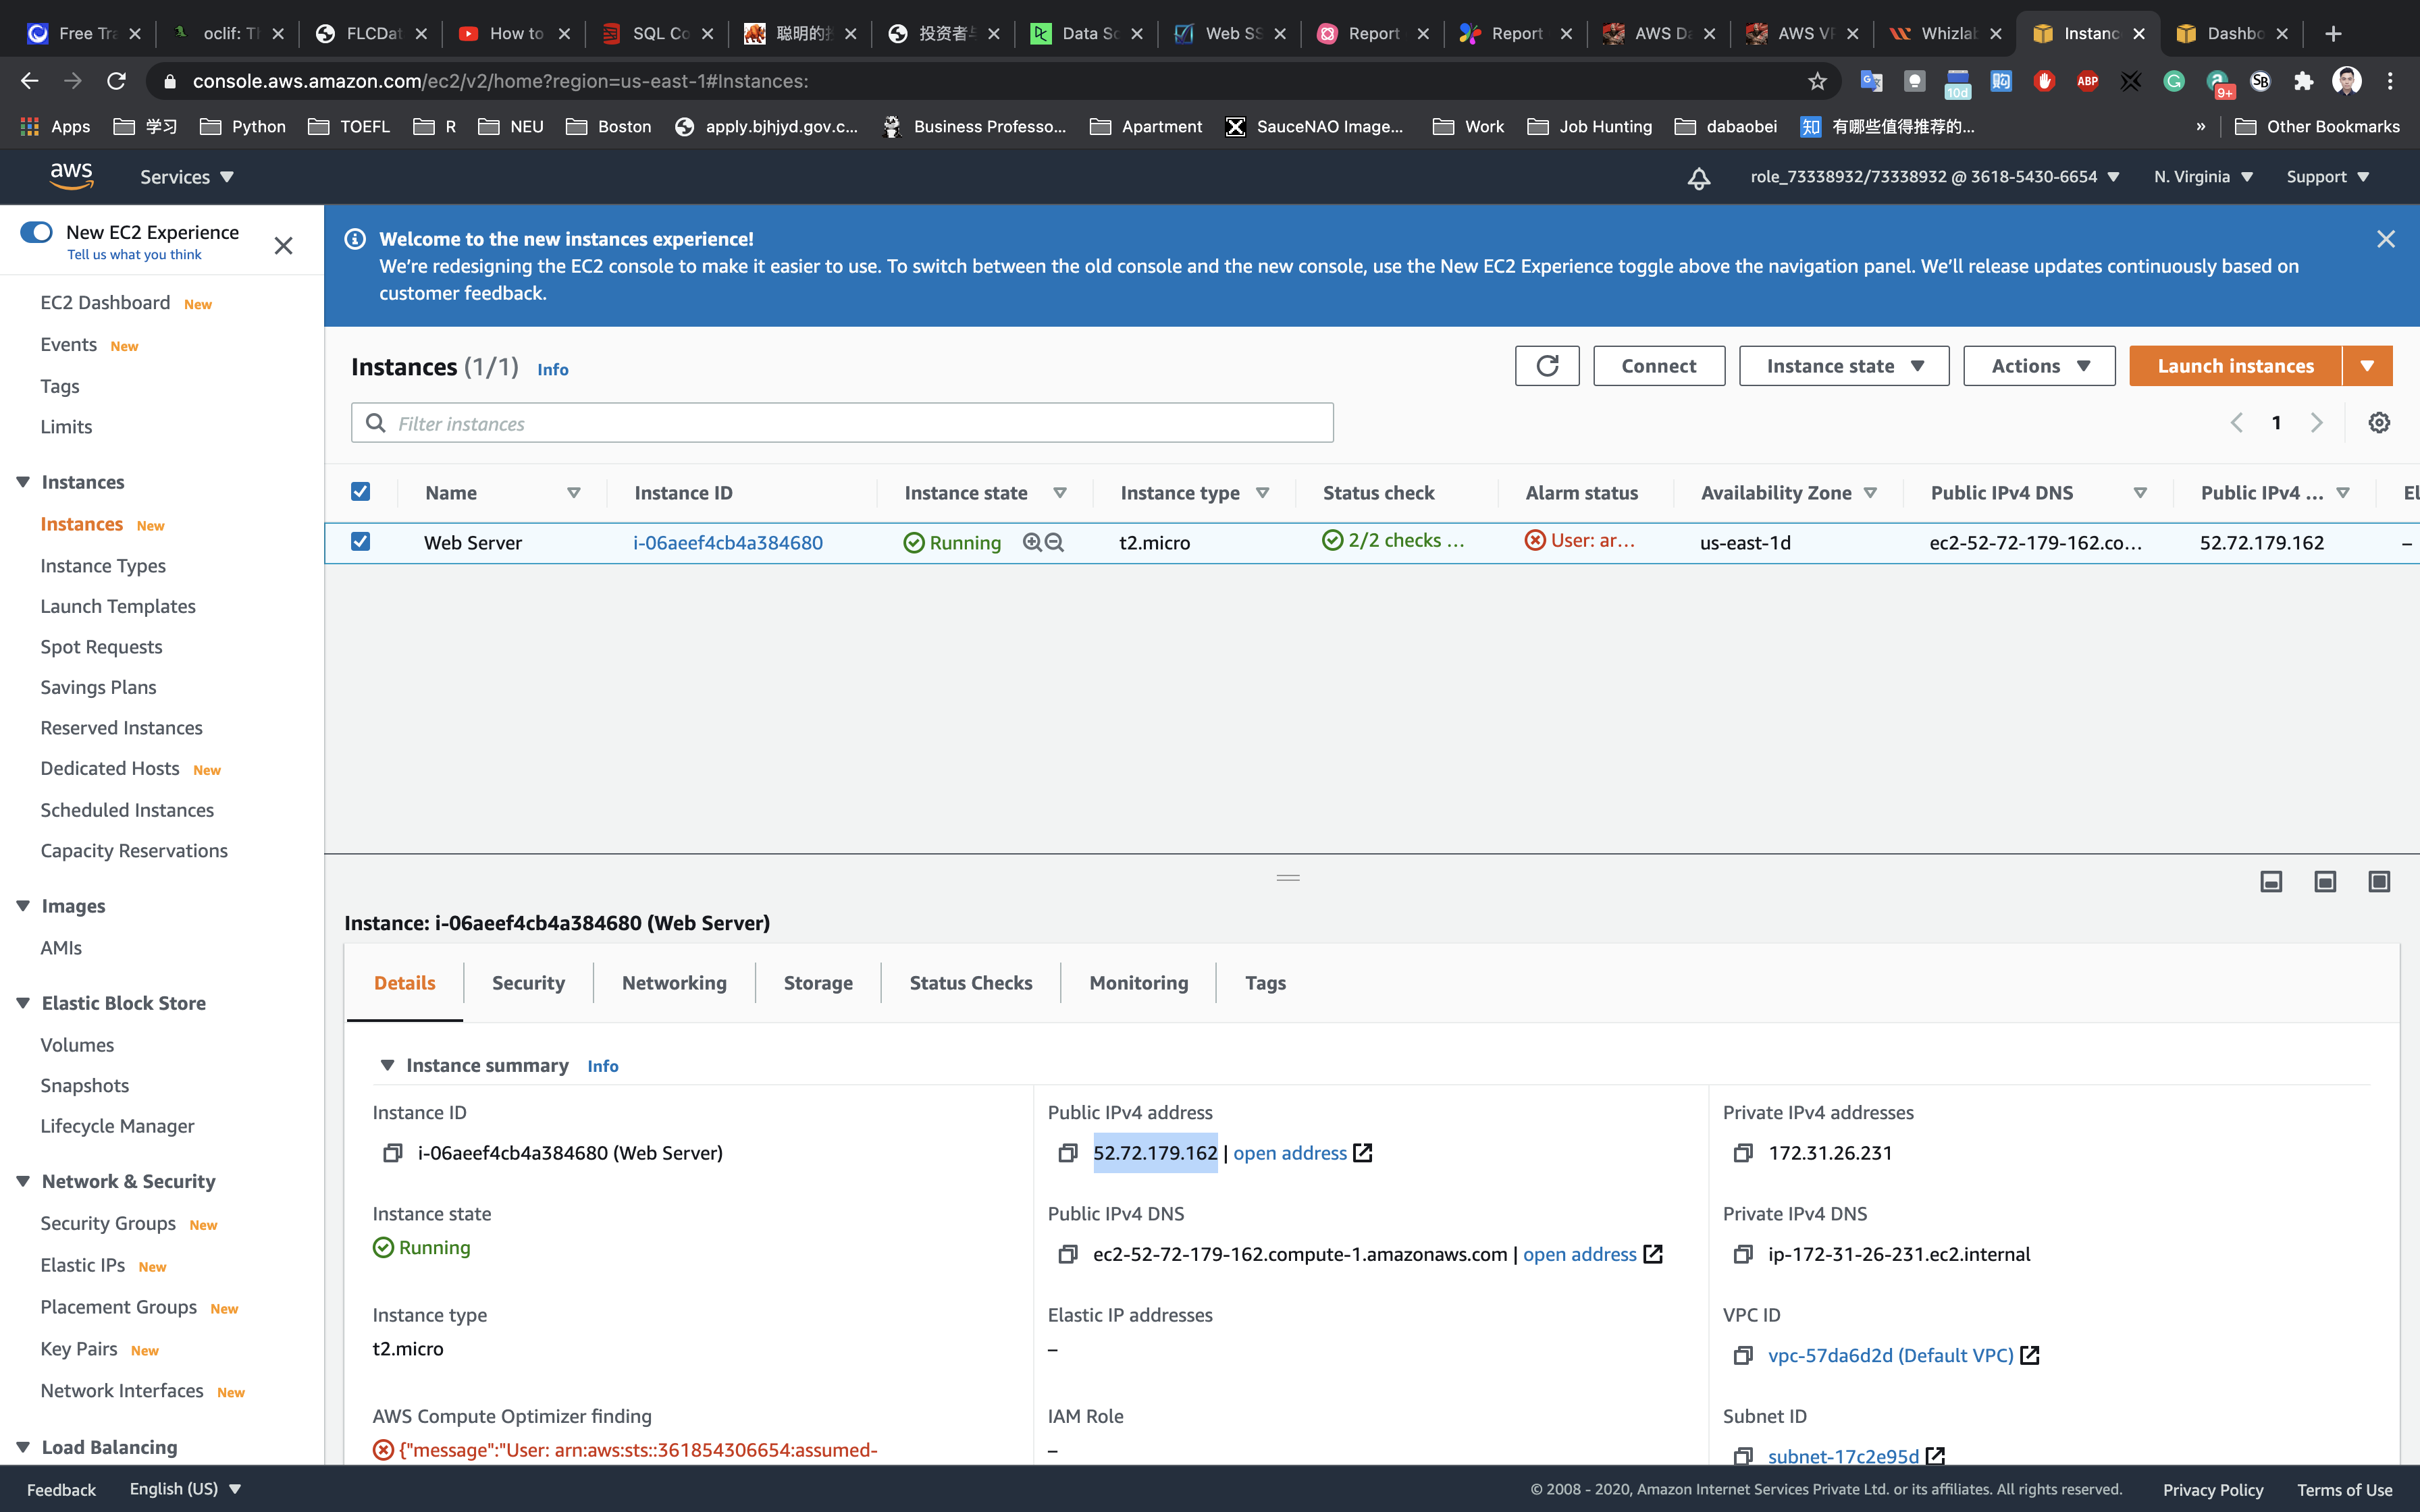
Modify the .pem file permission and connect to the Bastion server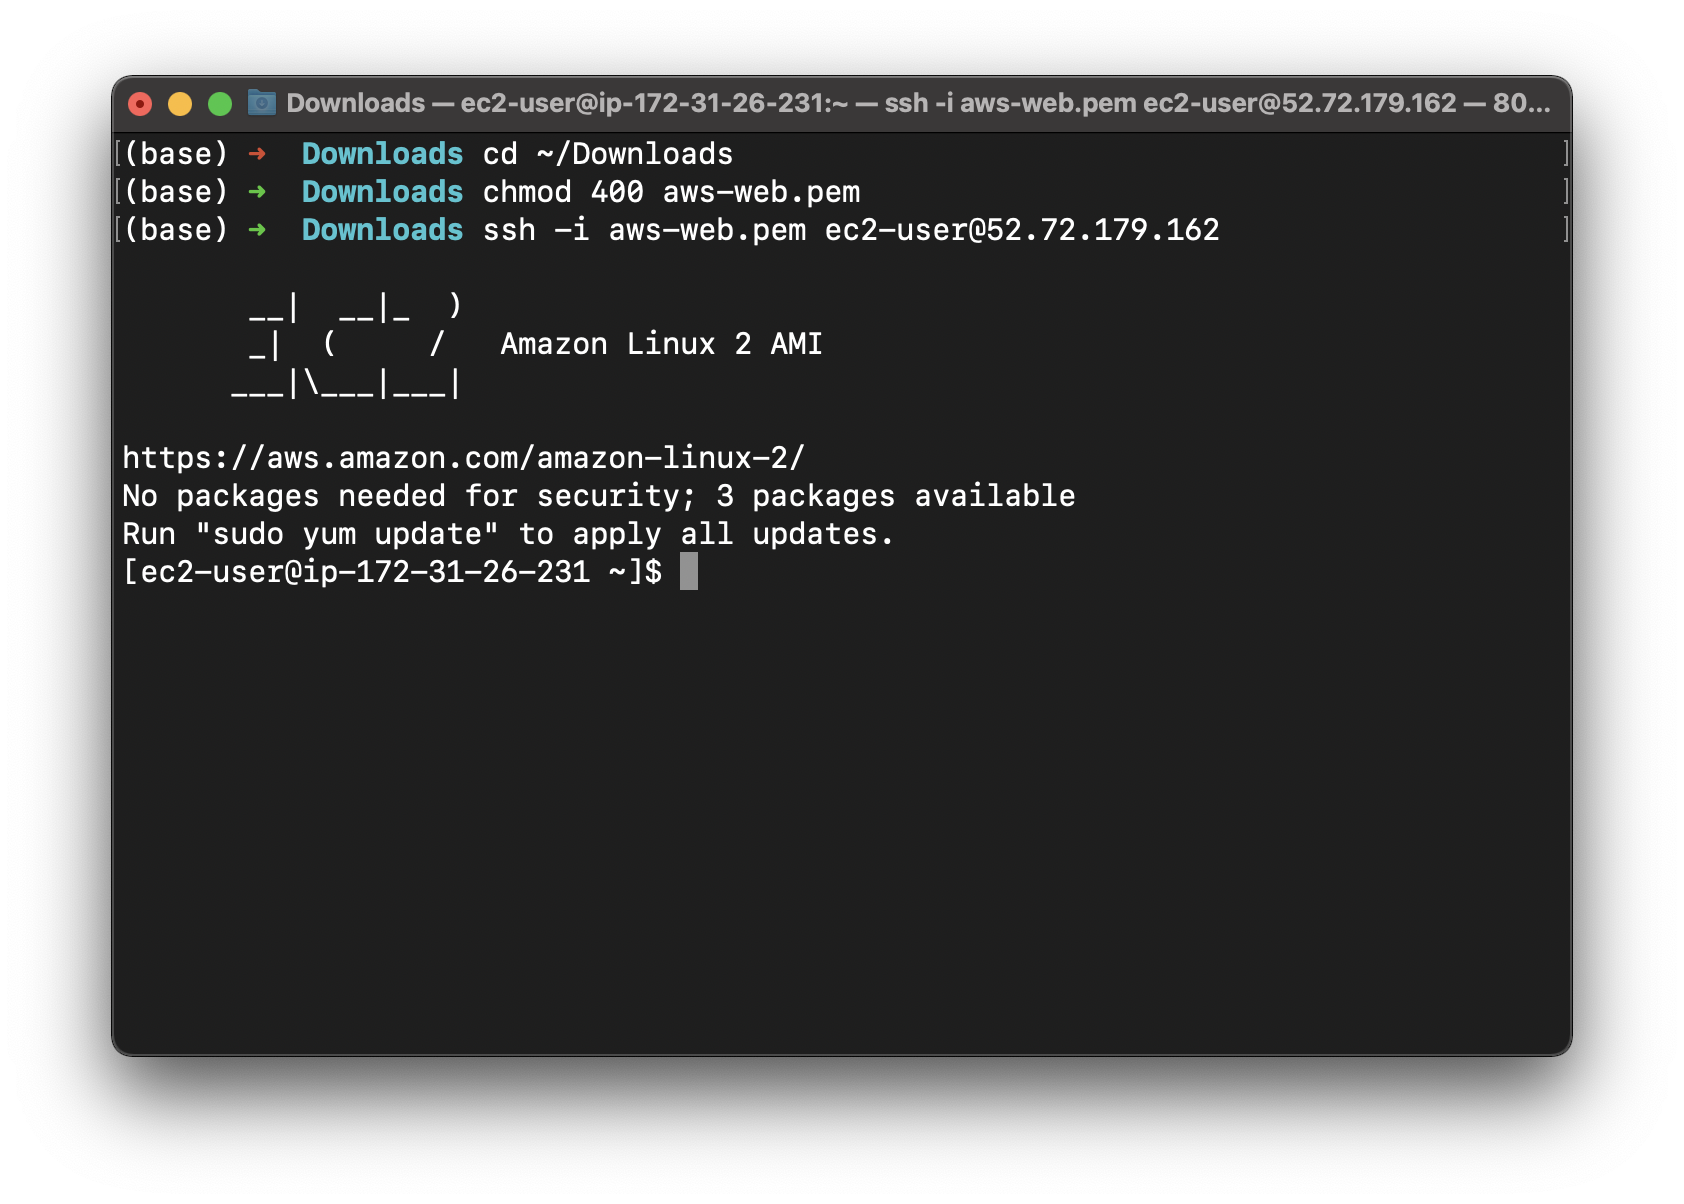
Install packages on AWS Web Server
On your terminal connecting to the AWS Web server
1 | sudo -s |
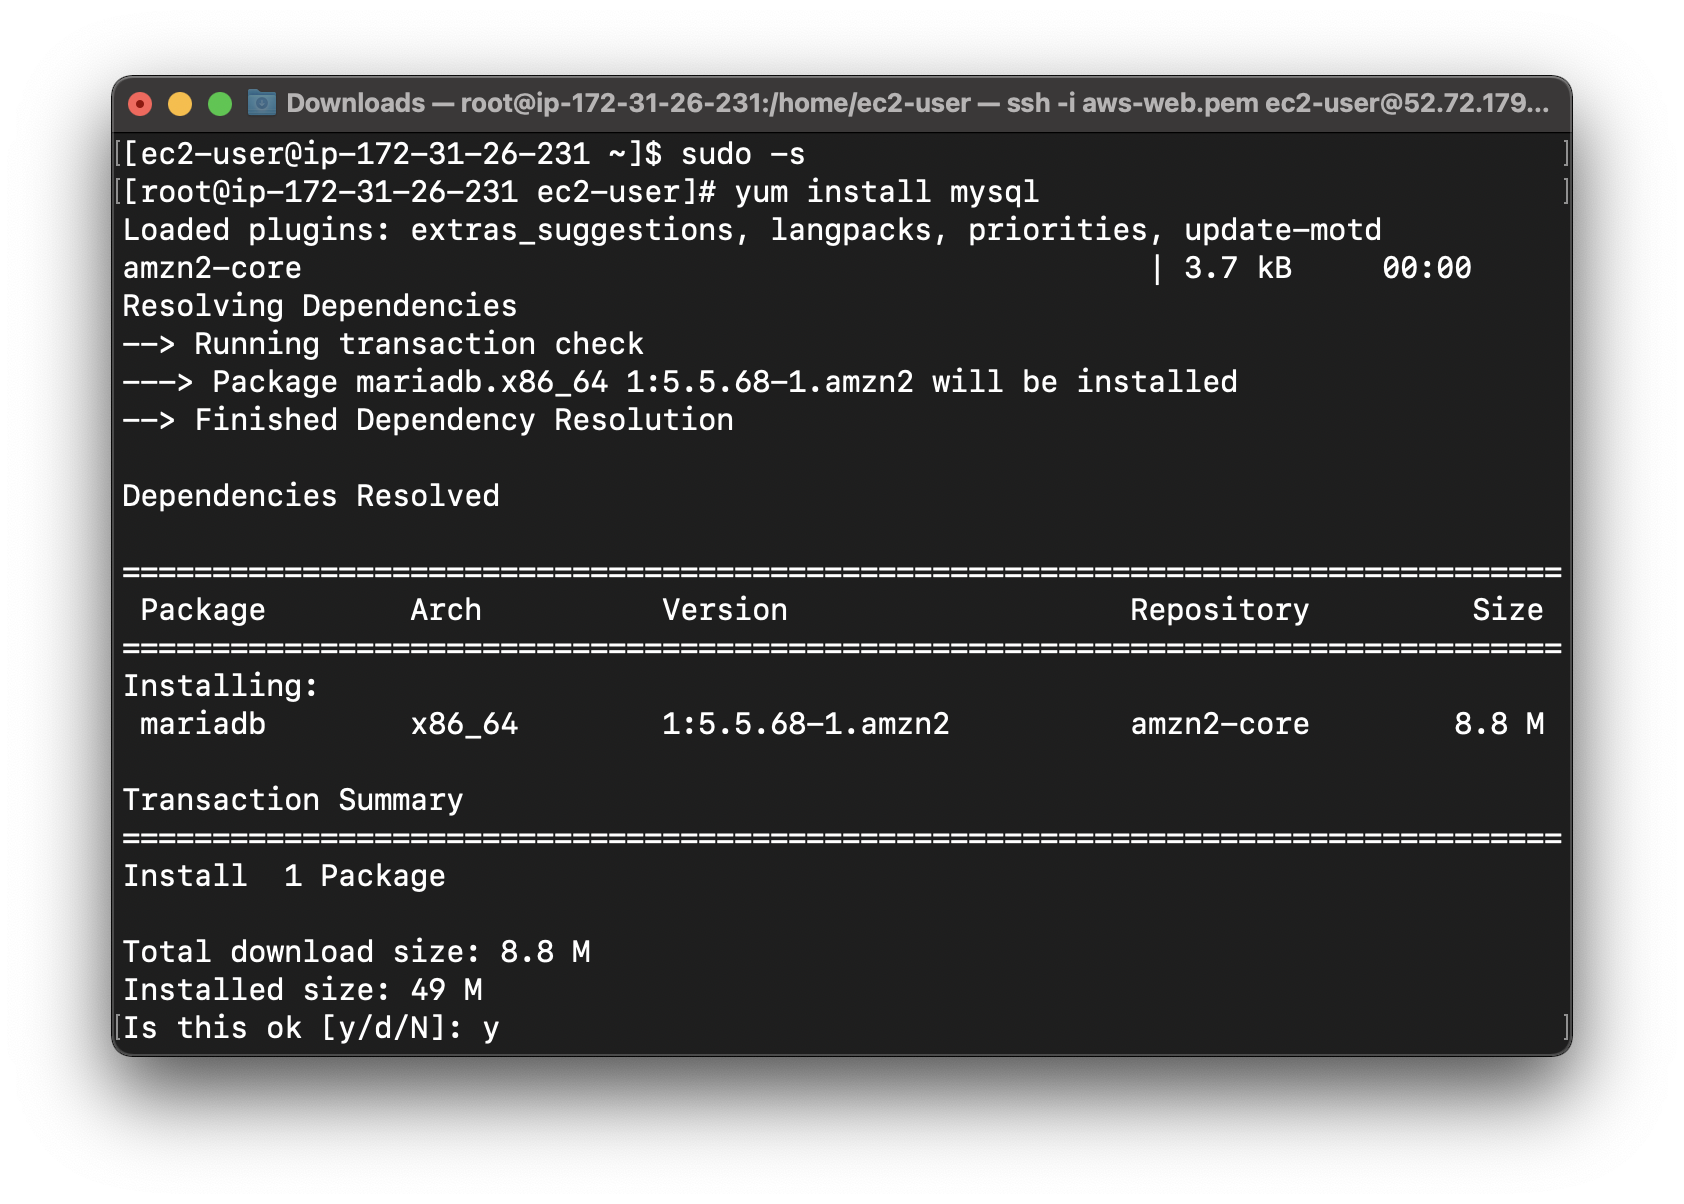
Connect to RDS database
Services -> RDS -> Databases
Click on the database you created
Copy the Endpoint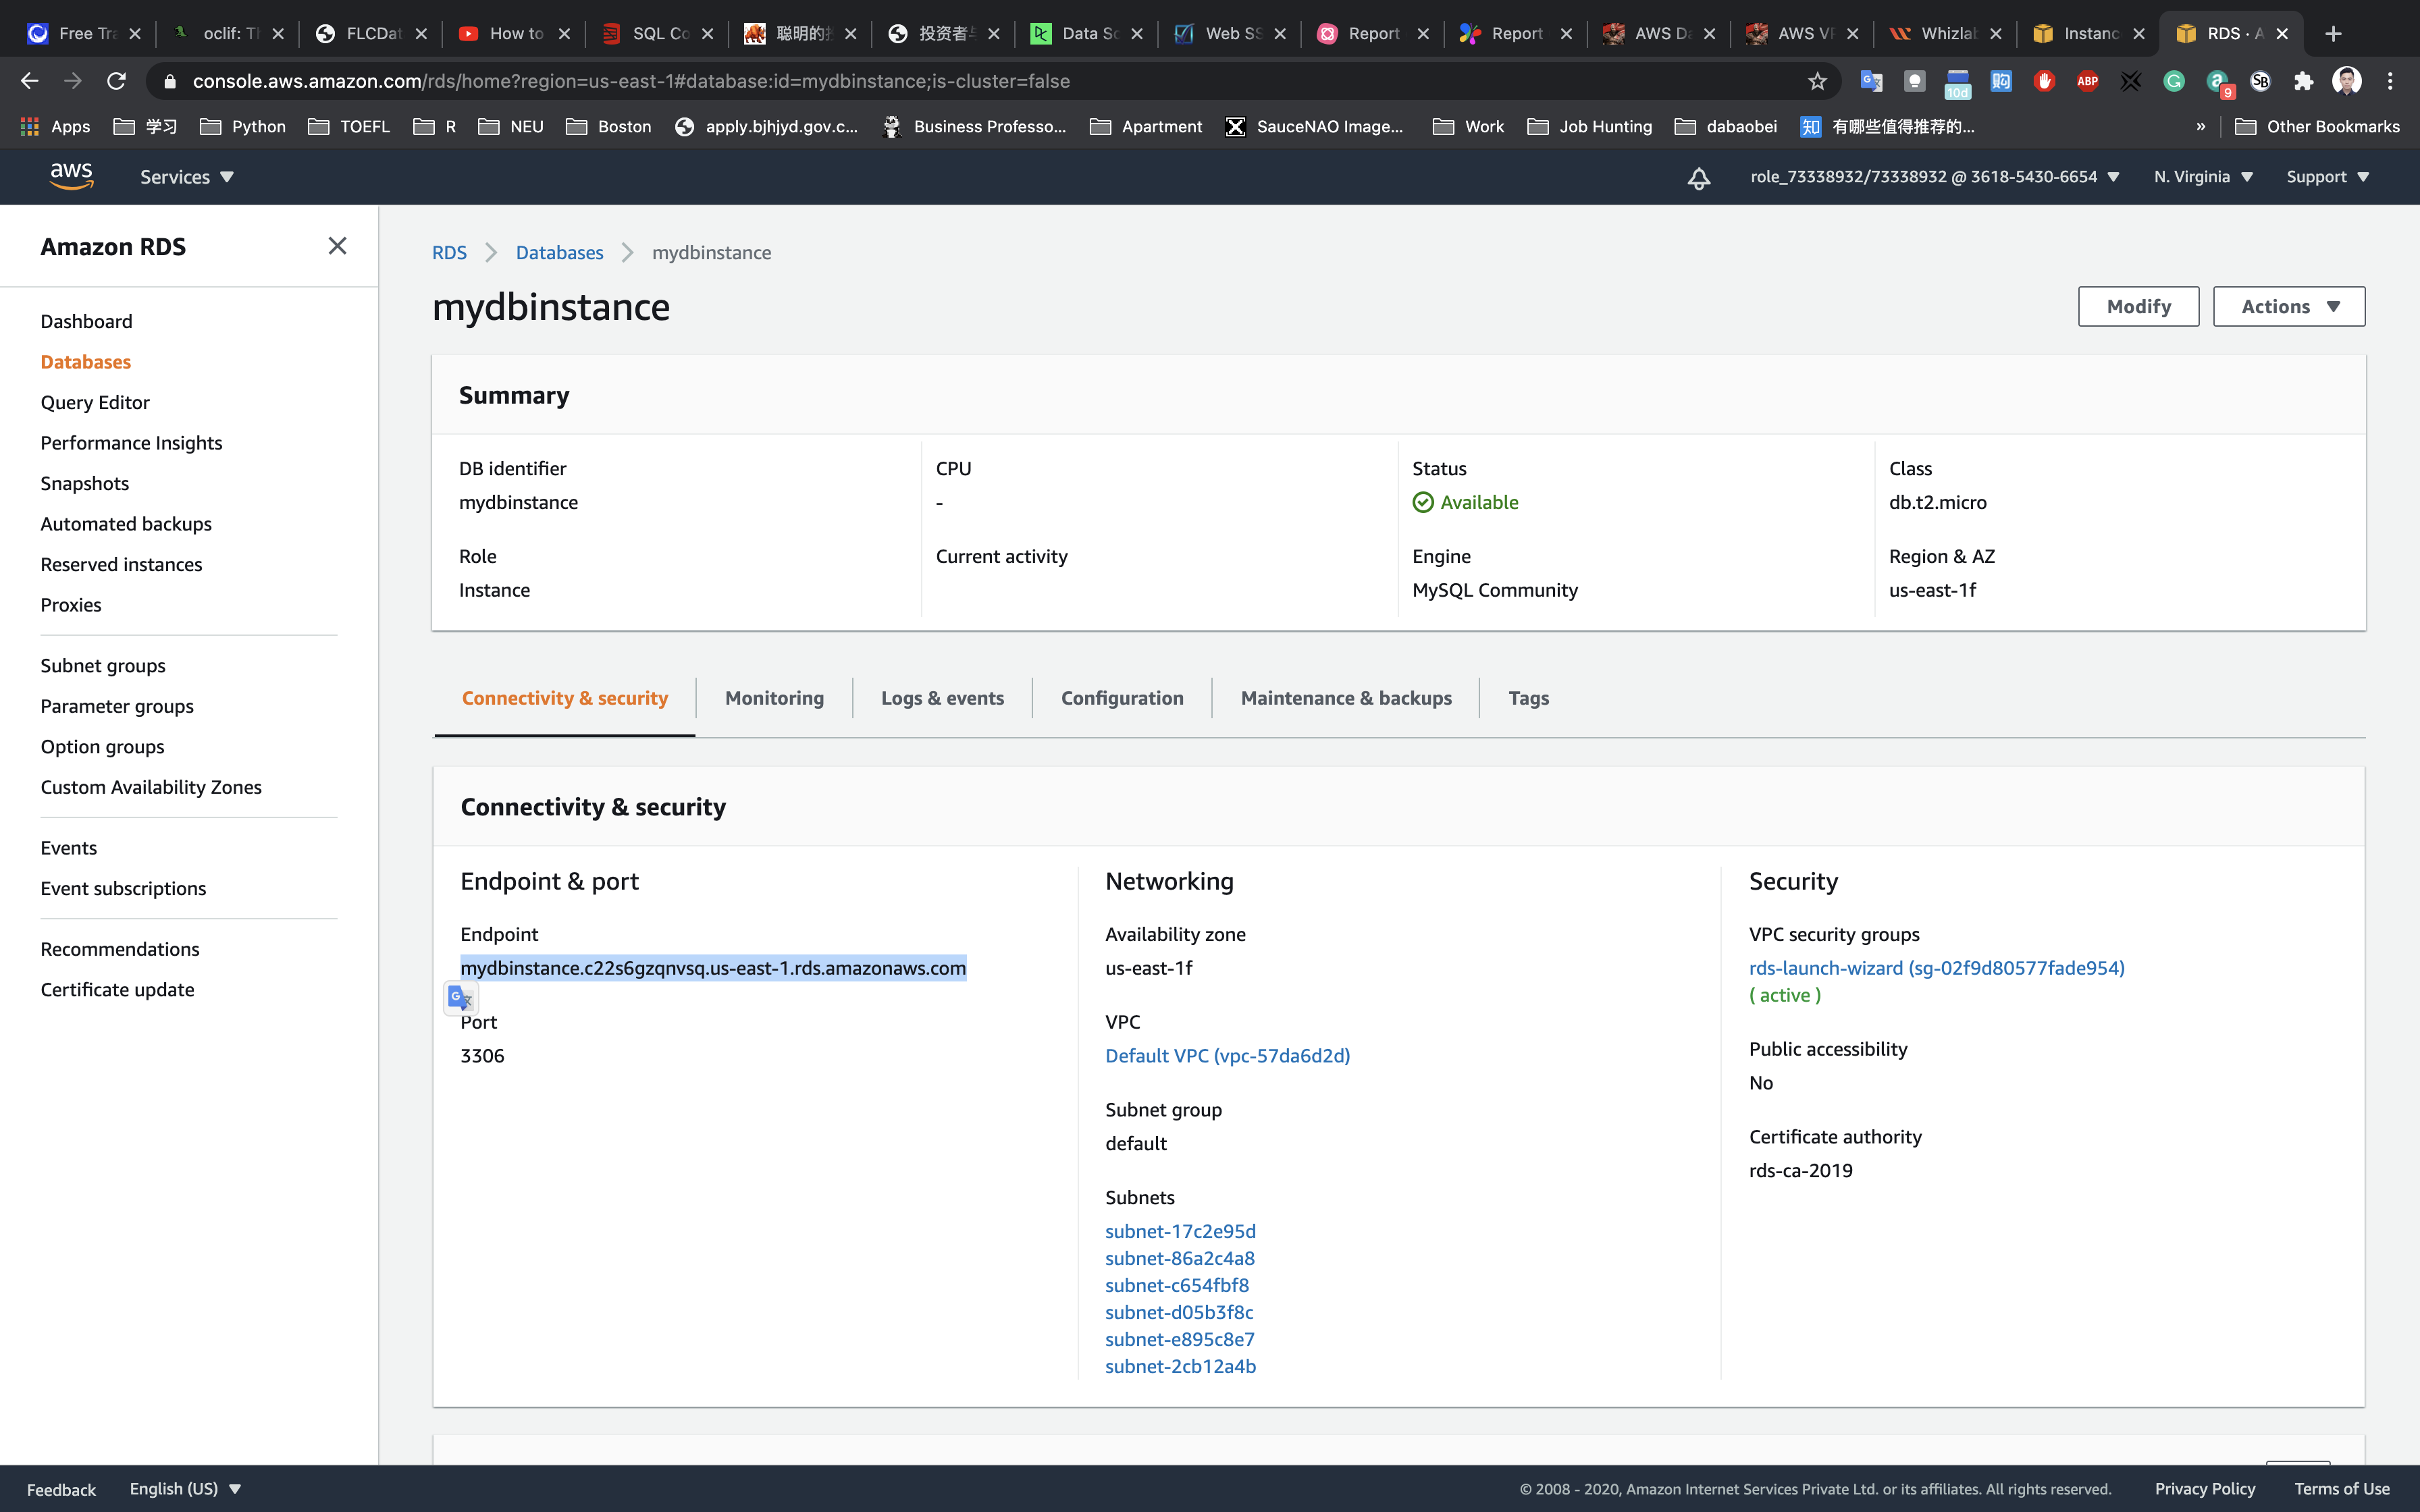
Back to the terminal connecting to the AWS Web server
1 | mysql -h [rds-endpoint] -P 3306 -u [username] -p |
Successful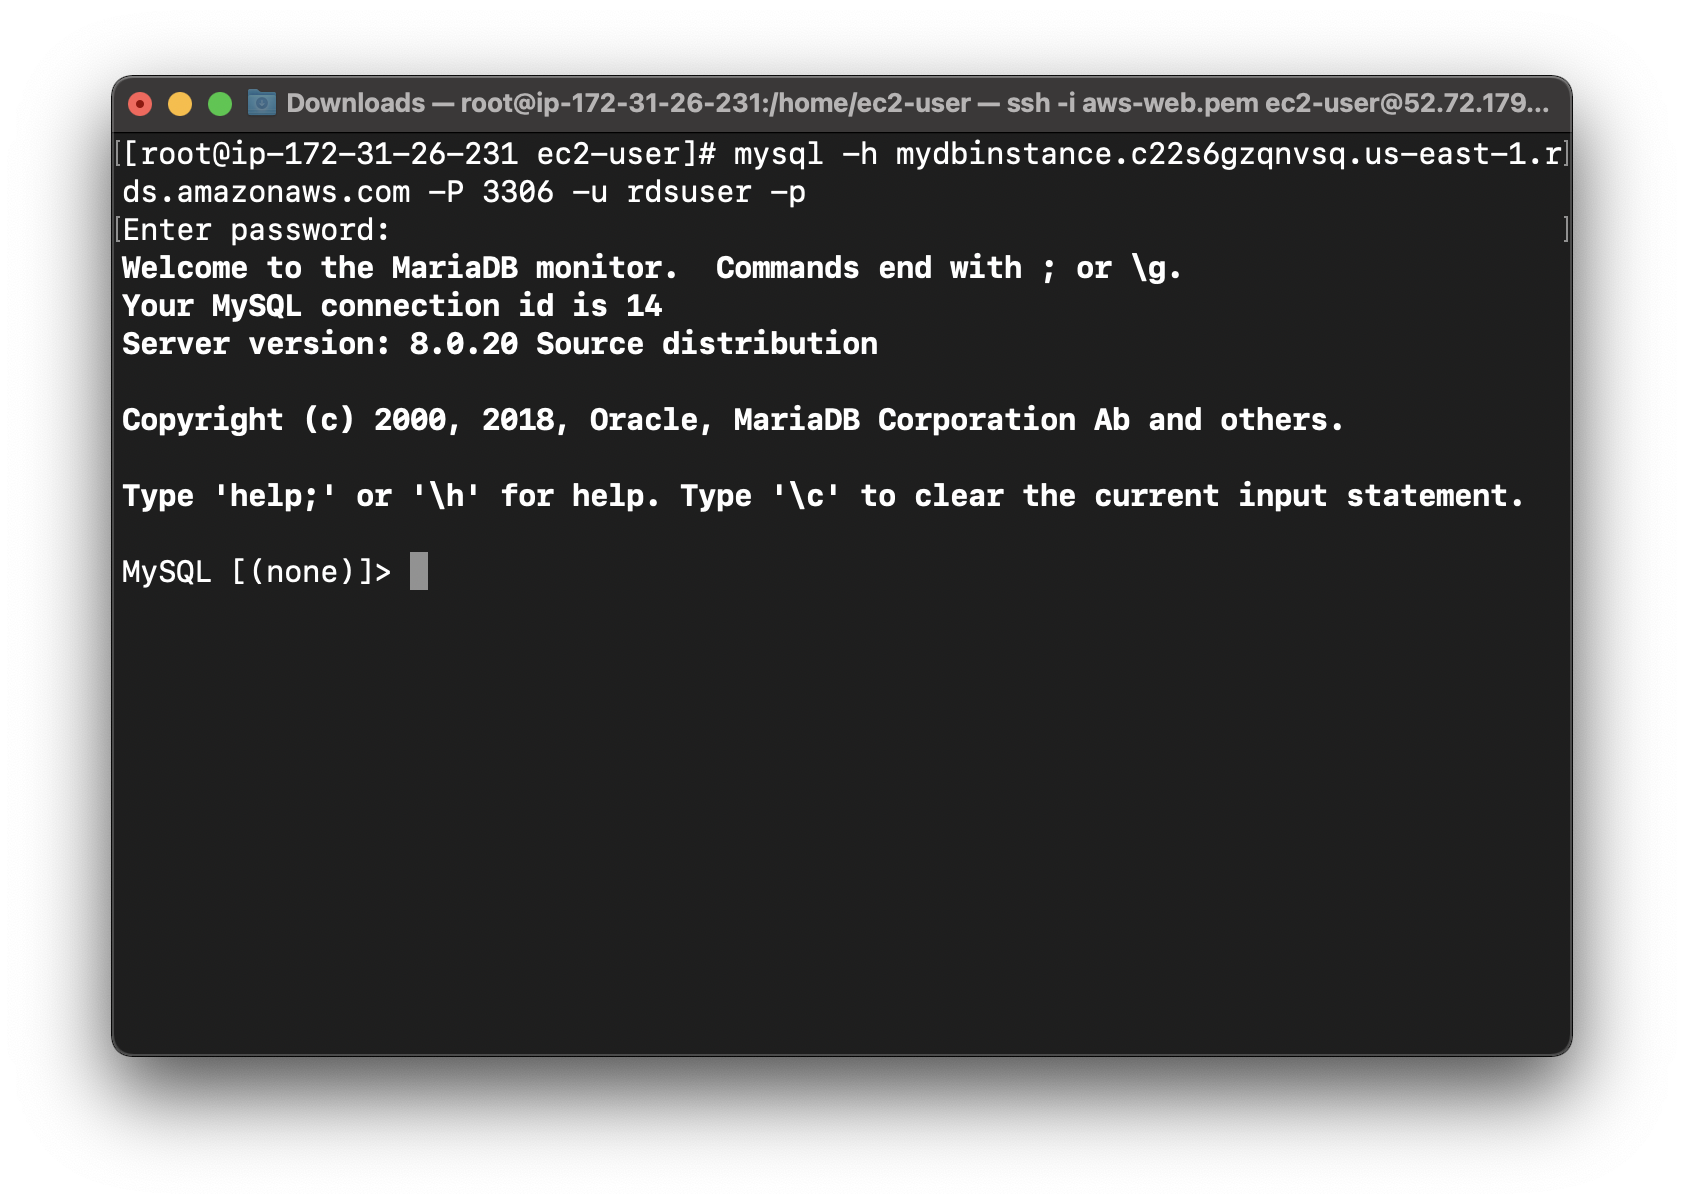
Manipulate RDS database
On your terminal connecting to the AWS Web server
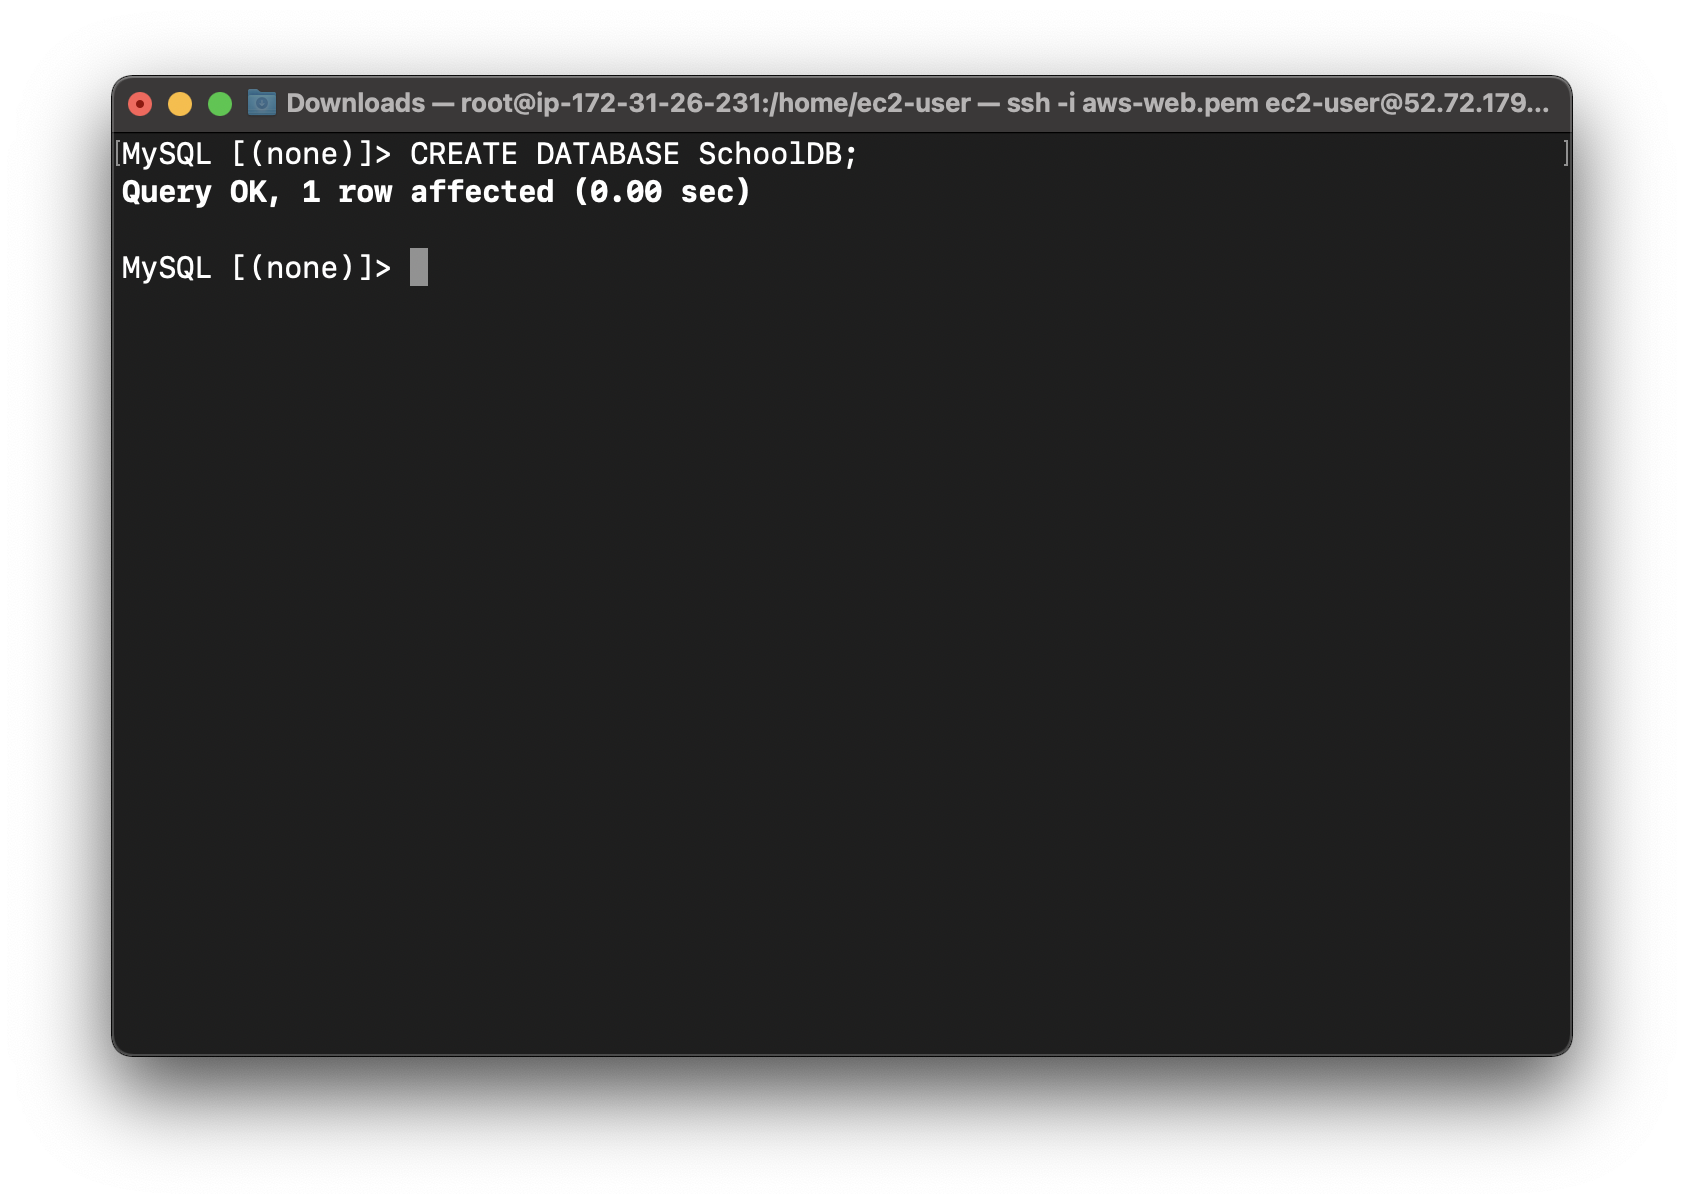
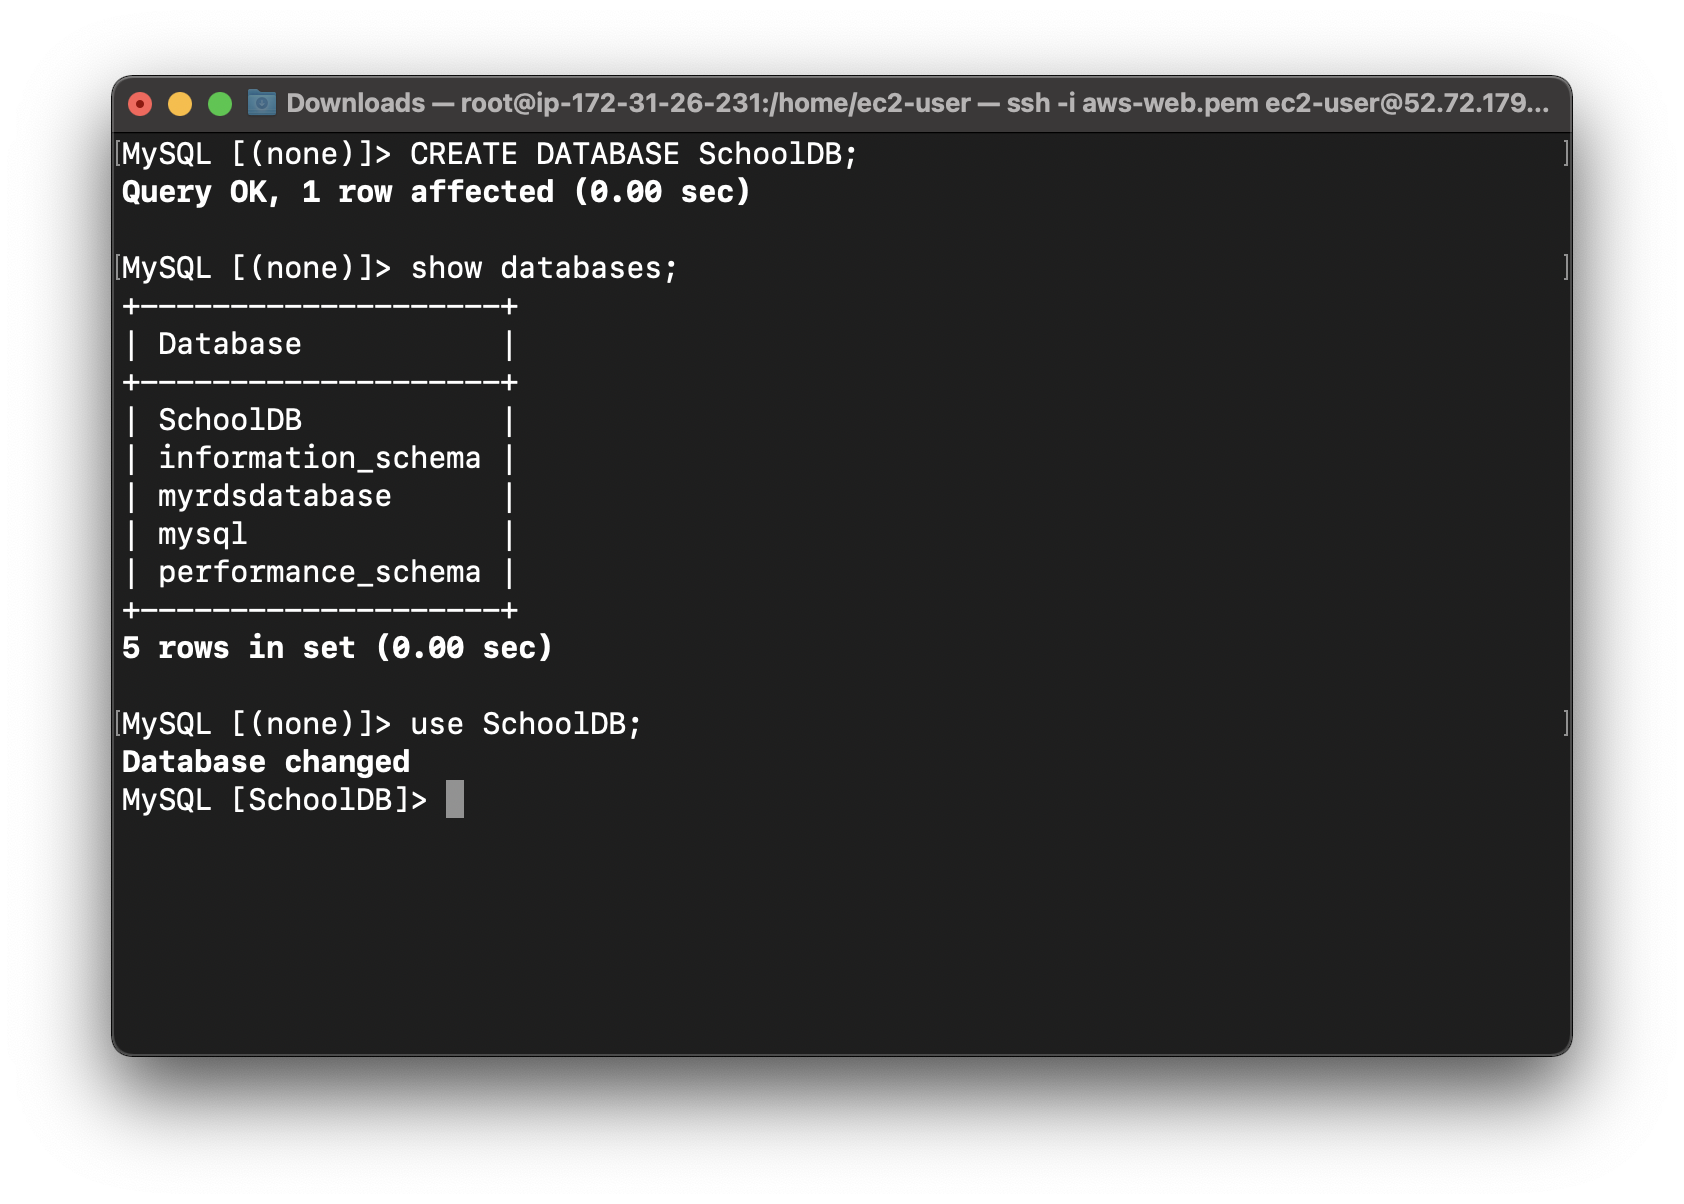
Create a database:
1 | CREATE DATABASE SchoolDB; |
You can see the created database with following command:
1 | show databases; |

Switch to the database named SchoolDB.
1 | use SchoolDB; |
Create a sample table consisting of Subjects.
1 | CREATE TABLE IF NOT EXISTS subjects ( |
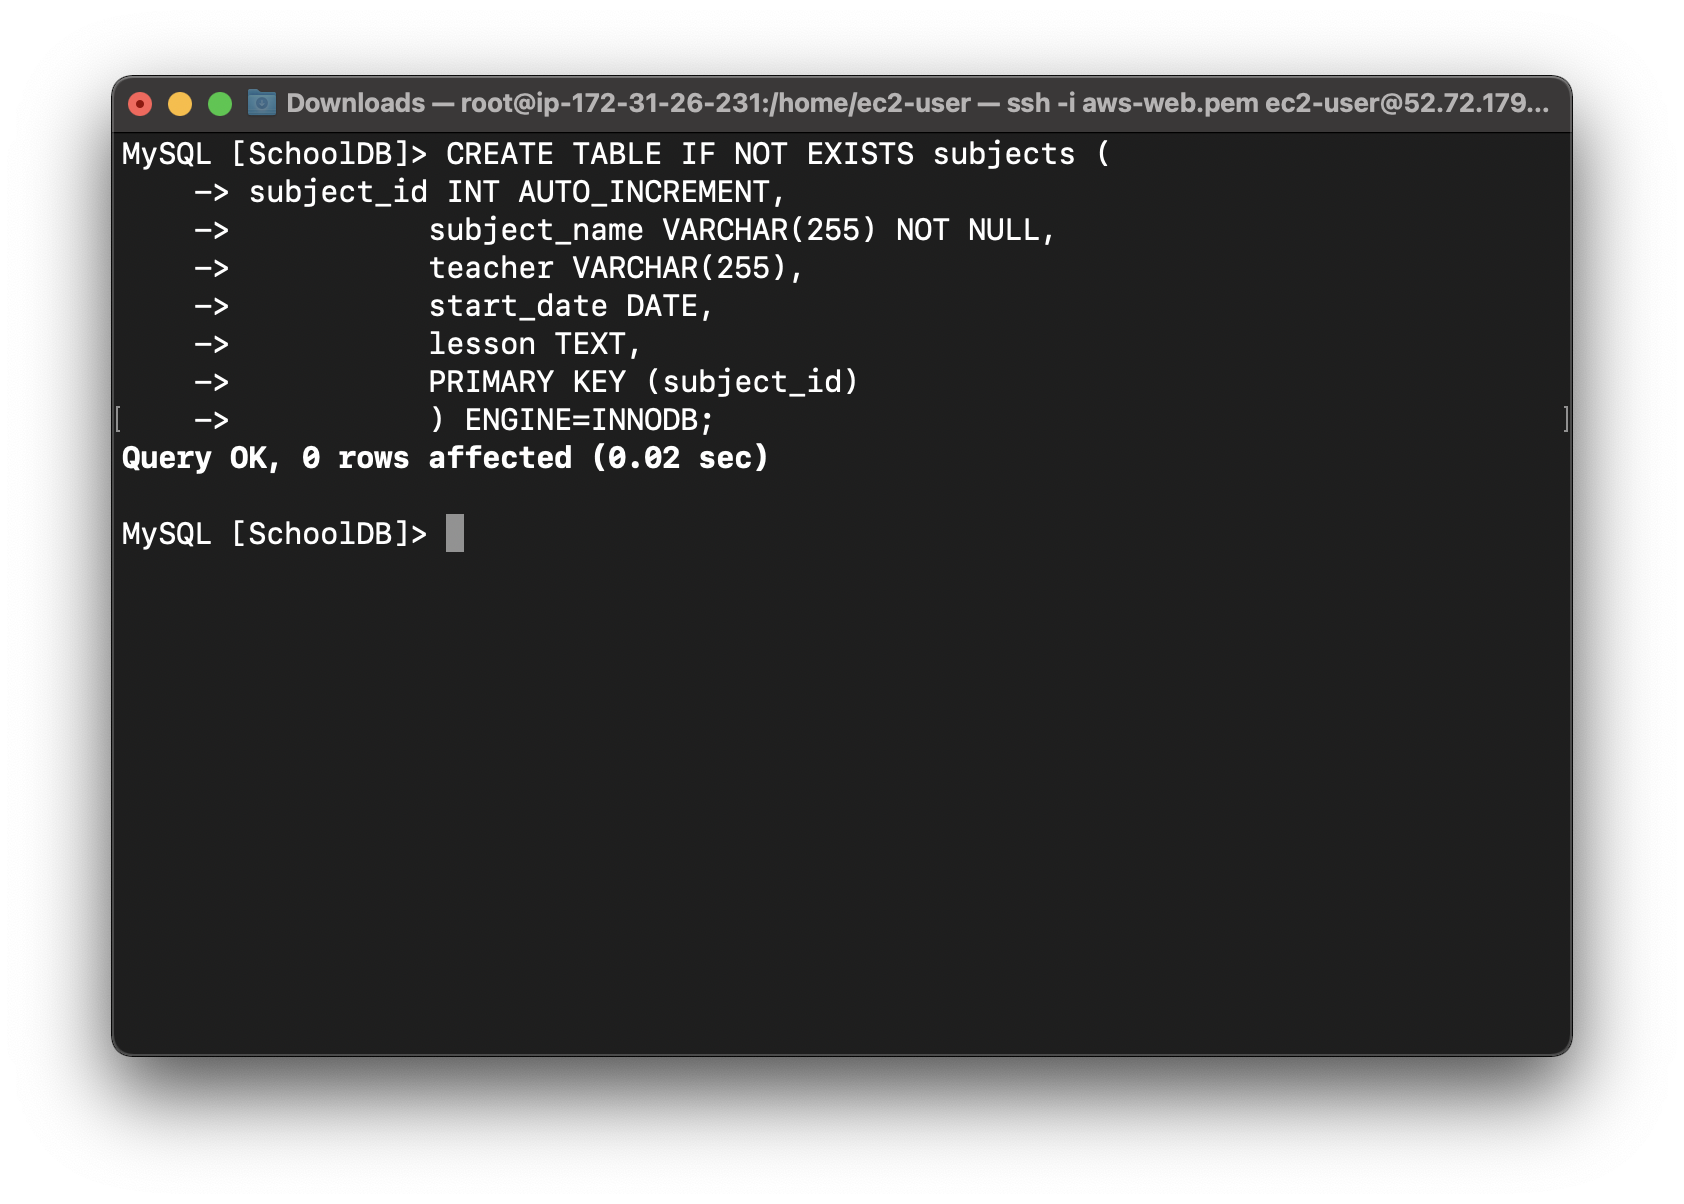
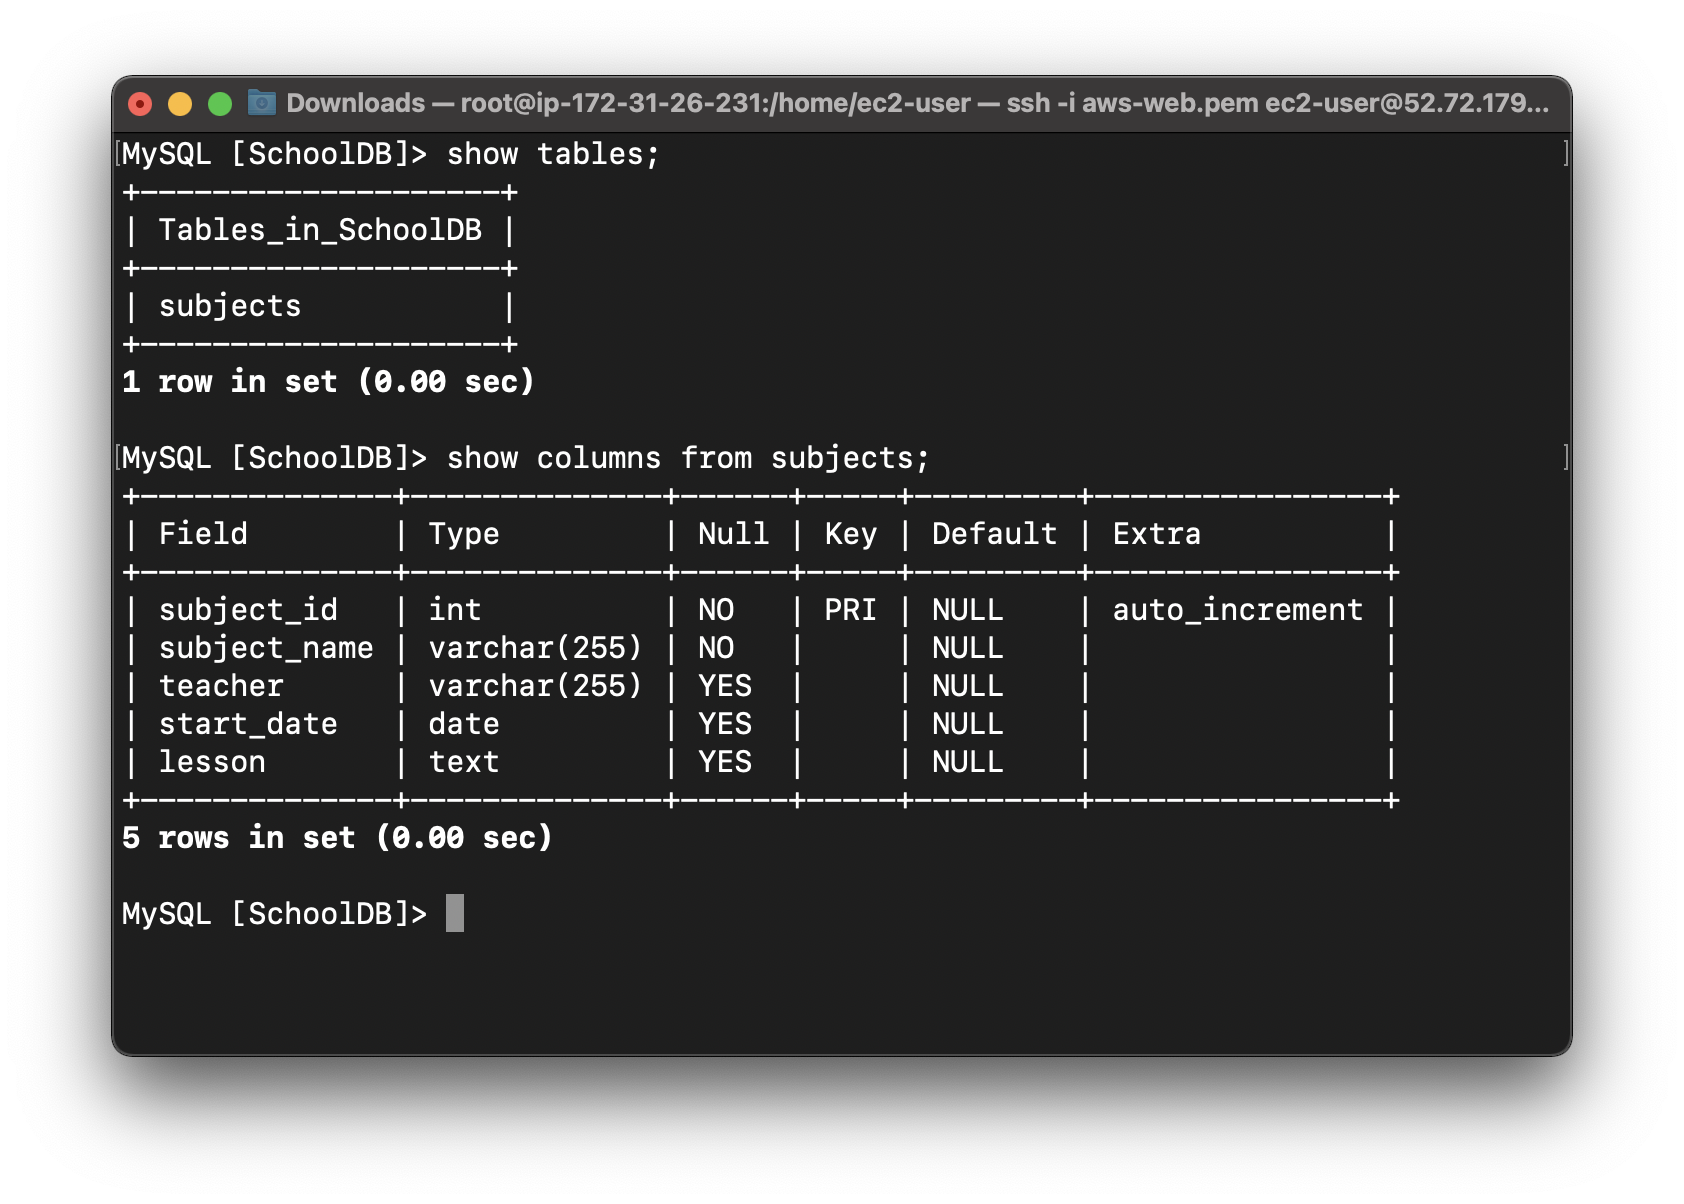
Enter show tables; to see the table you just created.
1 | show tables; |
Insert some details into the table:
1 | INSERT INTO subjects(subject_name, teacher) VALUES ('English', 'John Taylor'); |
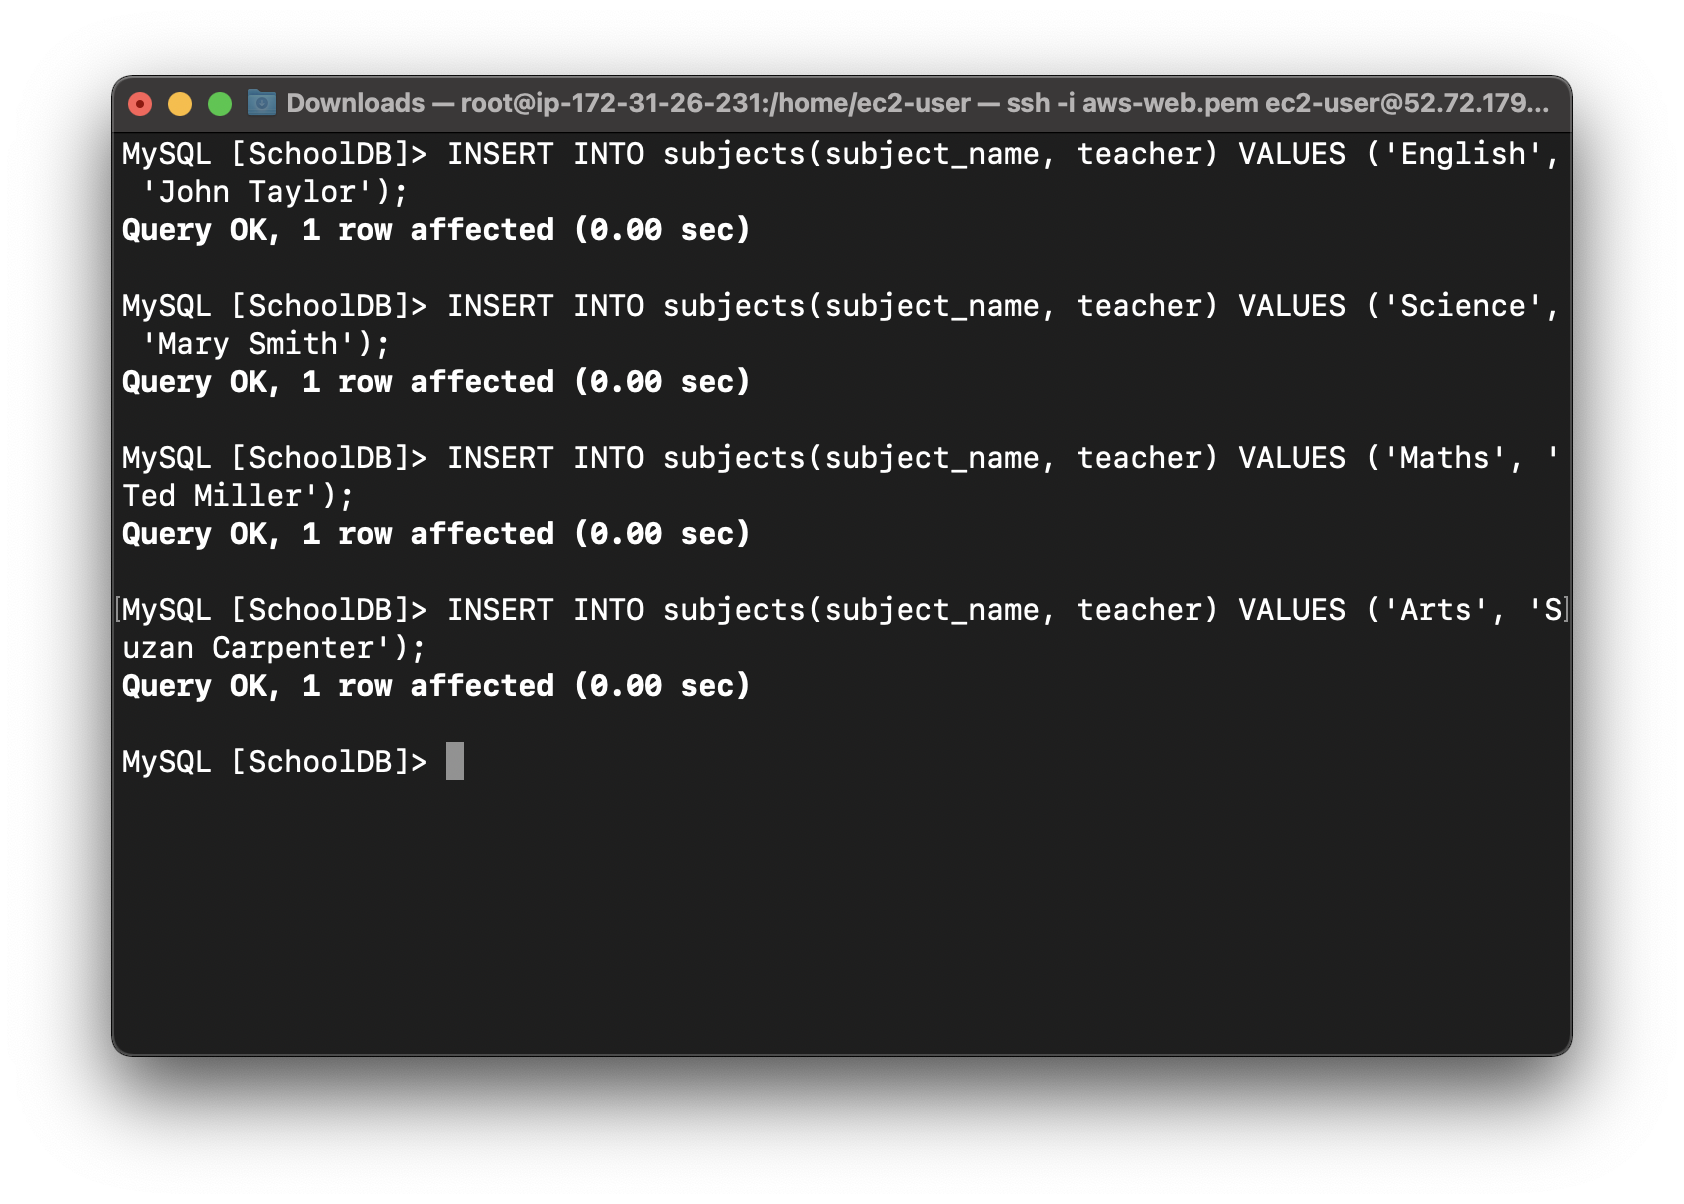
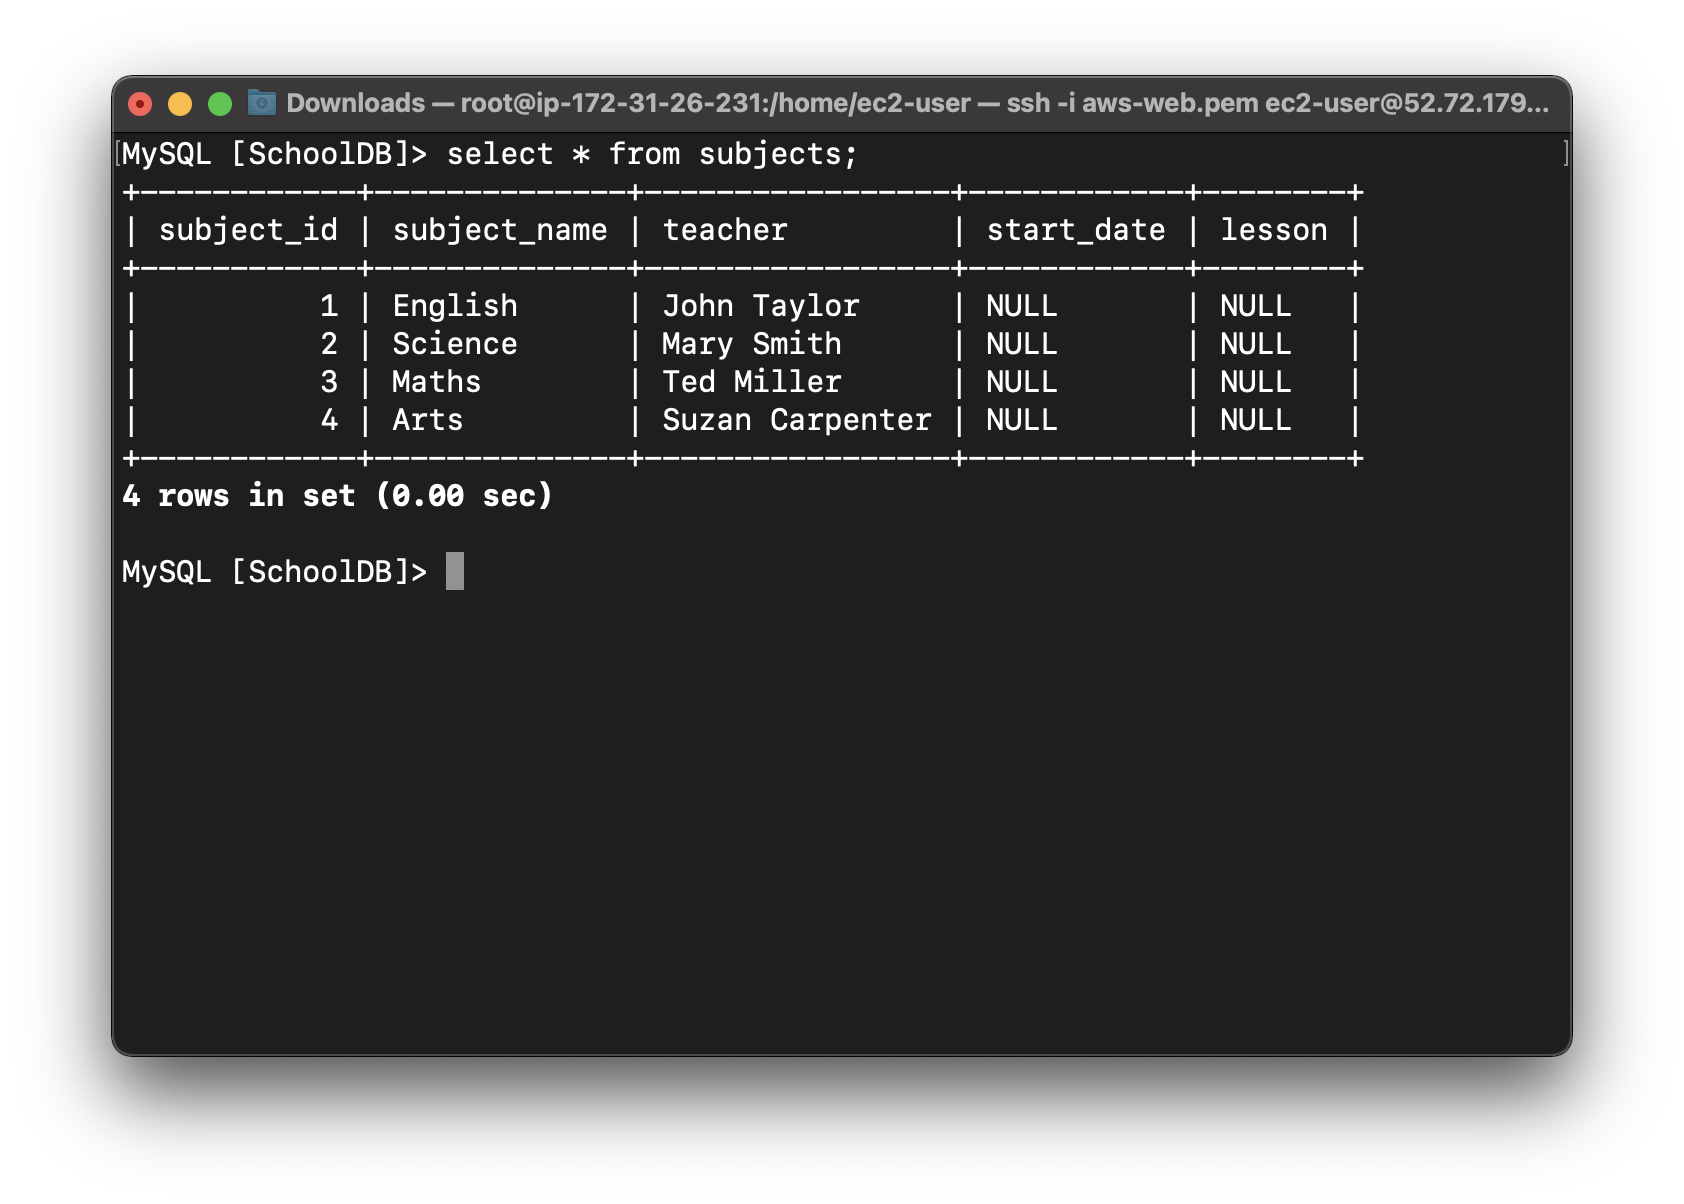
Let’s check the items we added into the table:
1 | select * from subjects; |
Try out some more SQL commands and play around with the table to strengthen your understanding.
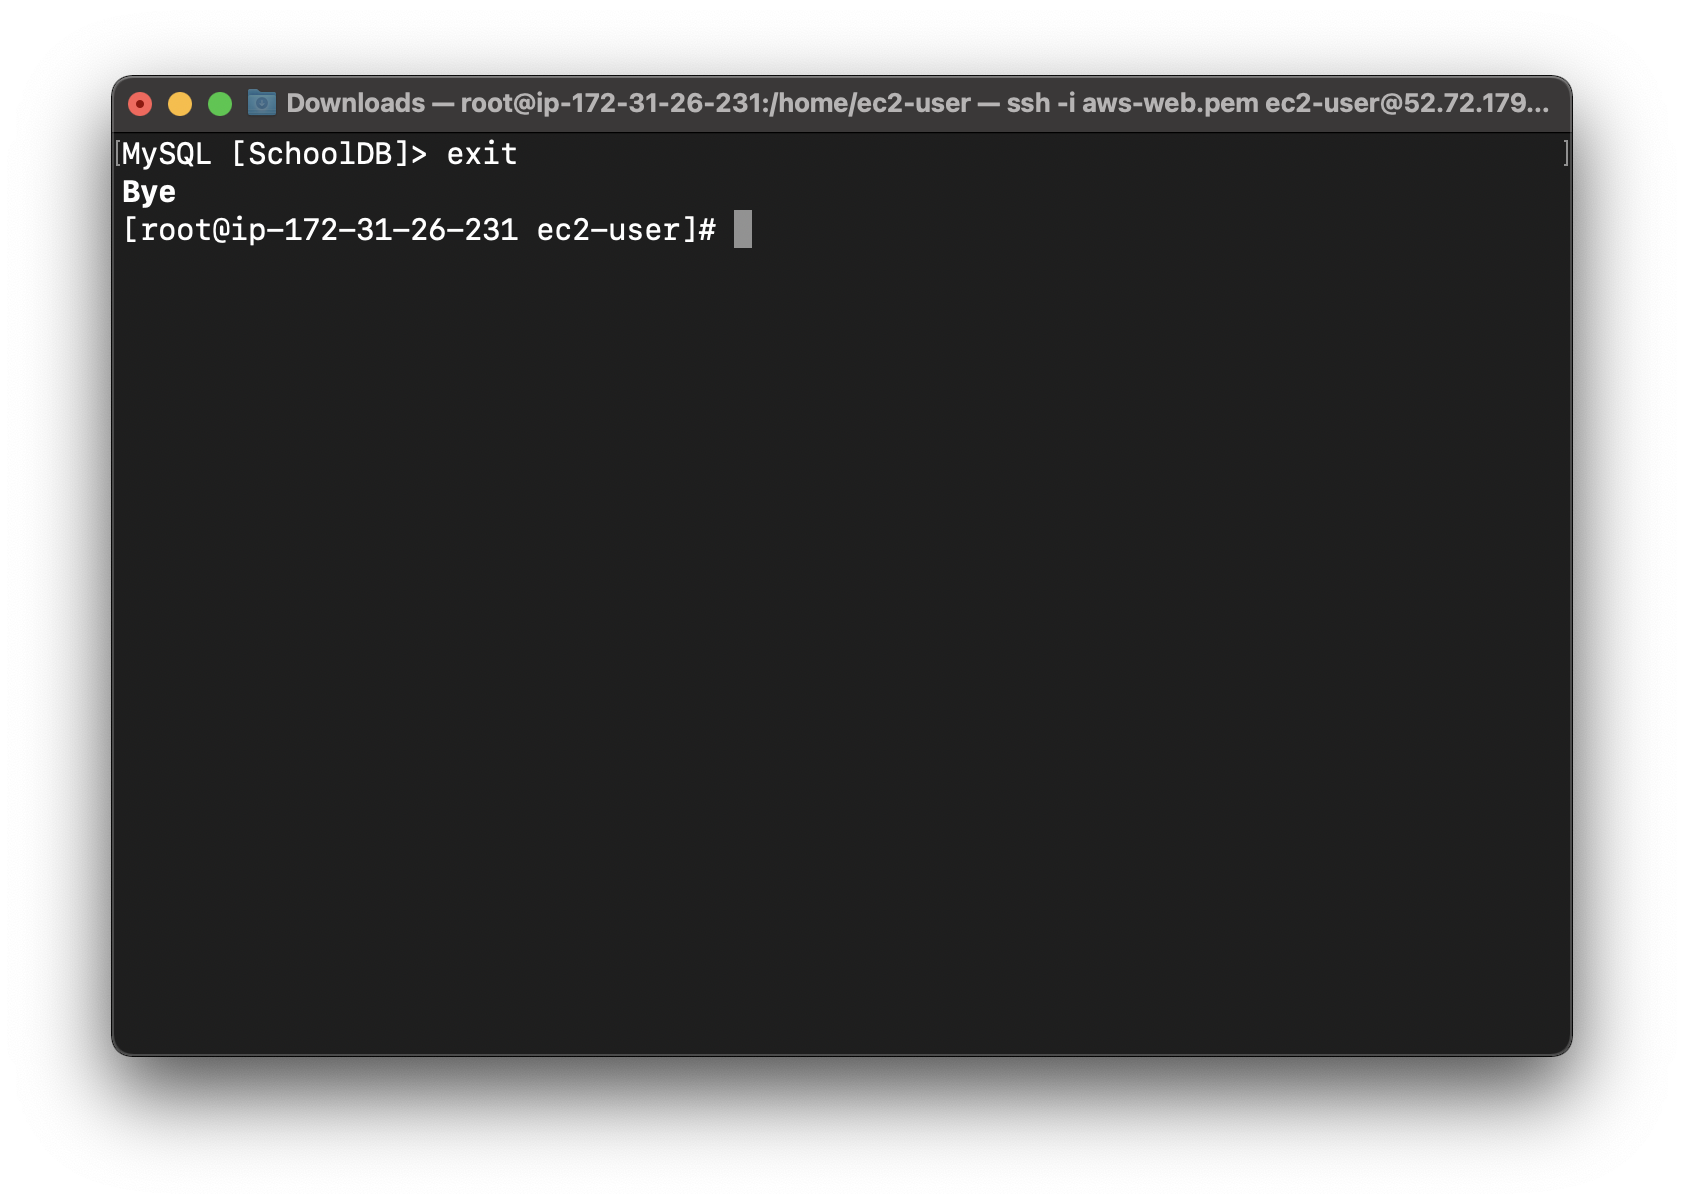
Run exit; to exit the MySQL client.
1 | exit |
Completion and Conclusion
- You have successfully launched EC2 Instance in a default VPC.
- You have successfully launched Amazon RDS and updated the security group so that the EC2 Instance can access the Amazon RDS.
- You successfully ran a MySQL command and performed operations on a database created with Amazon RDS.
Introduction to Creating AWS VPC Flow Logs
https://play.whizlabs.com/site/task_details?lab_type=1&task_id=130&quest_id=35
Lab Details
- This lab walks you through the steps to creating VPC Flow Logs.
- You will practice using VPC flow logs with AWS VPCs.
Introduction
Amazon Virtual Private Cloud
- Amazon Virtual Private Cloud (Amazon VPC) lets you provision a logically isolated section of the AWS Cloud where you can launch AWS resources in a virtual network that you define. You have complete control over your virtual networking environment, including a selection of your own IP address range, creation of subnets, and configuration of route tables and network gateways.
- You can use both IPv4 and IPv6 in your VPC for secure and easy access to resources and applications.
- You can easily customize the network configuration of your Amazon VPC. For example, you can create a public-facing subnet for your web servers that have access to the internet.
- You can also place your backend systems, such as databases or application servers, in a private-facing subnet with no internet access. You can use multiple layers of security, including security groups and network access control lists, to help control access to Amazon EC2 instances in each subnet.
Lab Tasks
- Log into the AWS Management Console.
- Create CloudWatch Logs.
- Create an IAM Role.
- Create an IAM Policy and attach it to the role.
- Create a VPC.
- Create VPC Flow Logs.
Architecture Diagram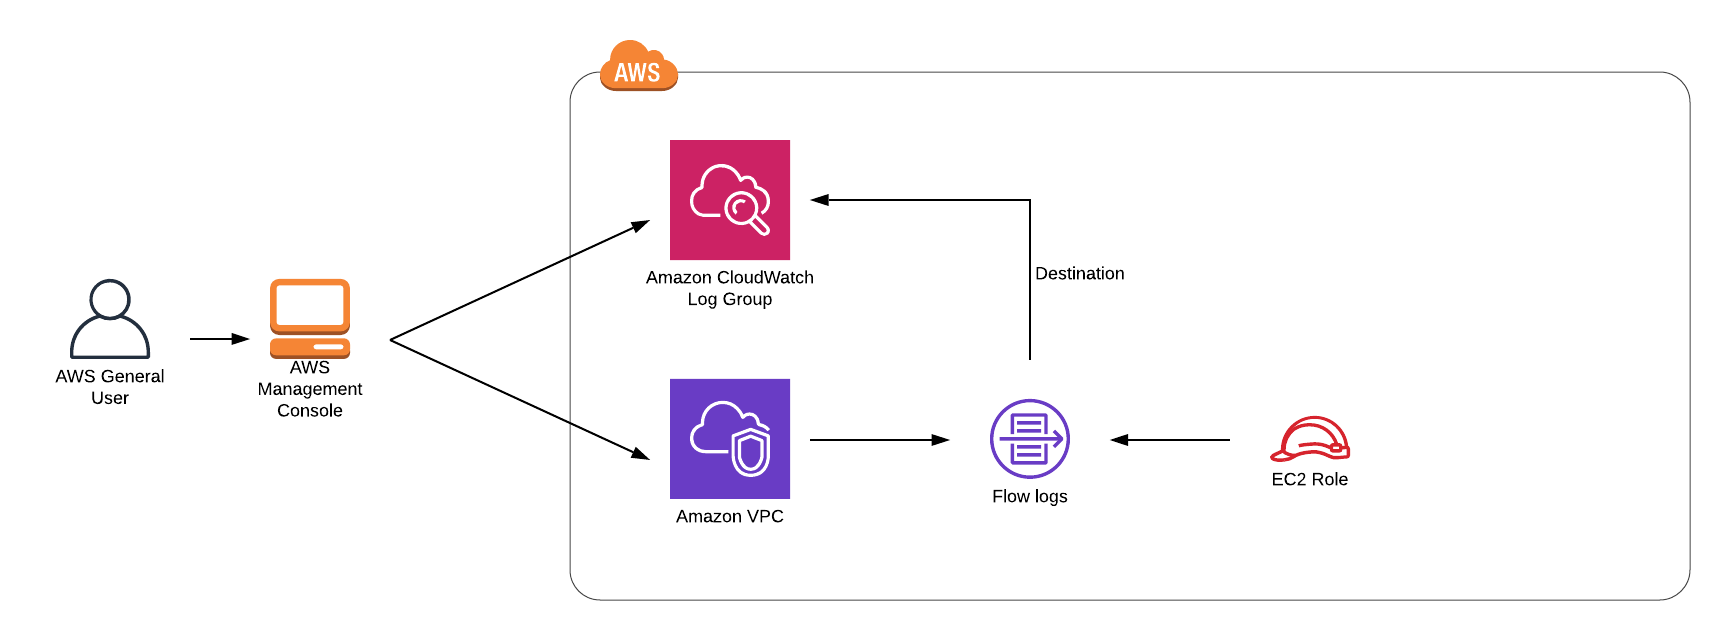
CloudWatch Configuration
Services -> CloudWatch -> Log groups
Create a CloudWatch Log
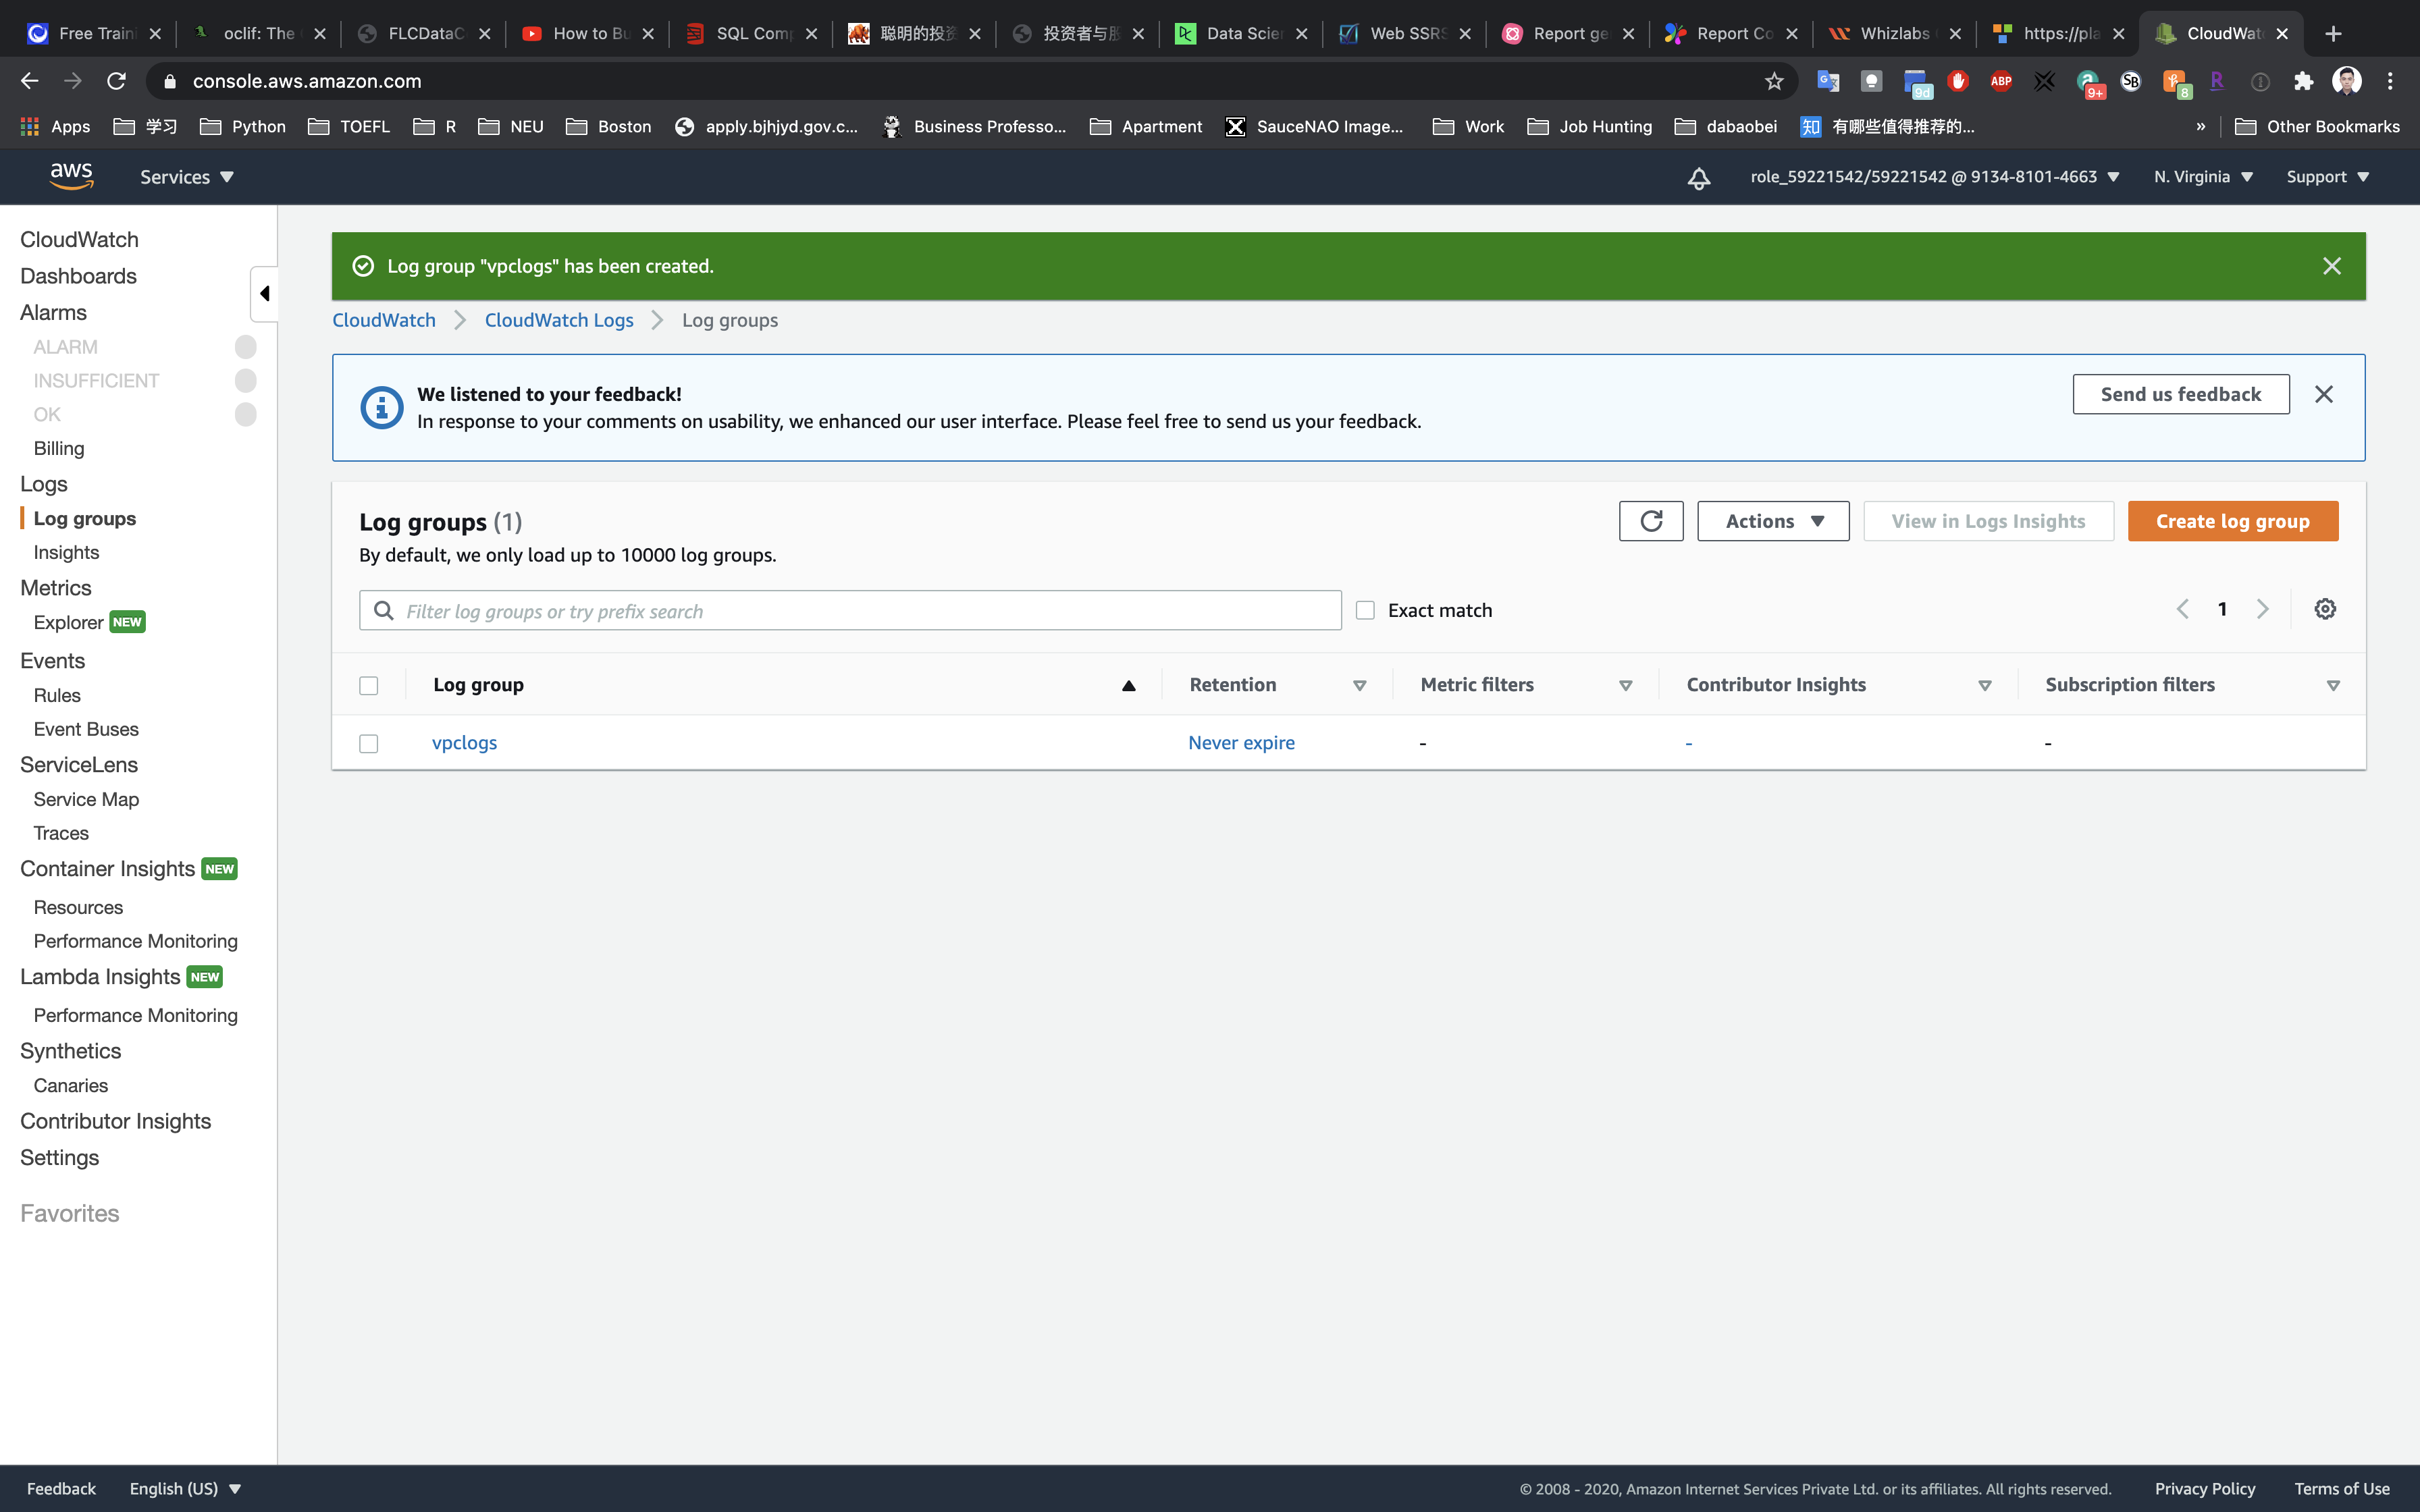
Click on Create Log Group.
Enter the Log Group Name : vpclogs and click on Create.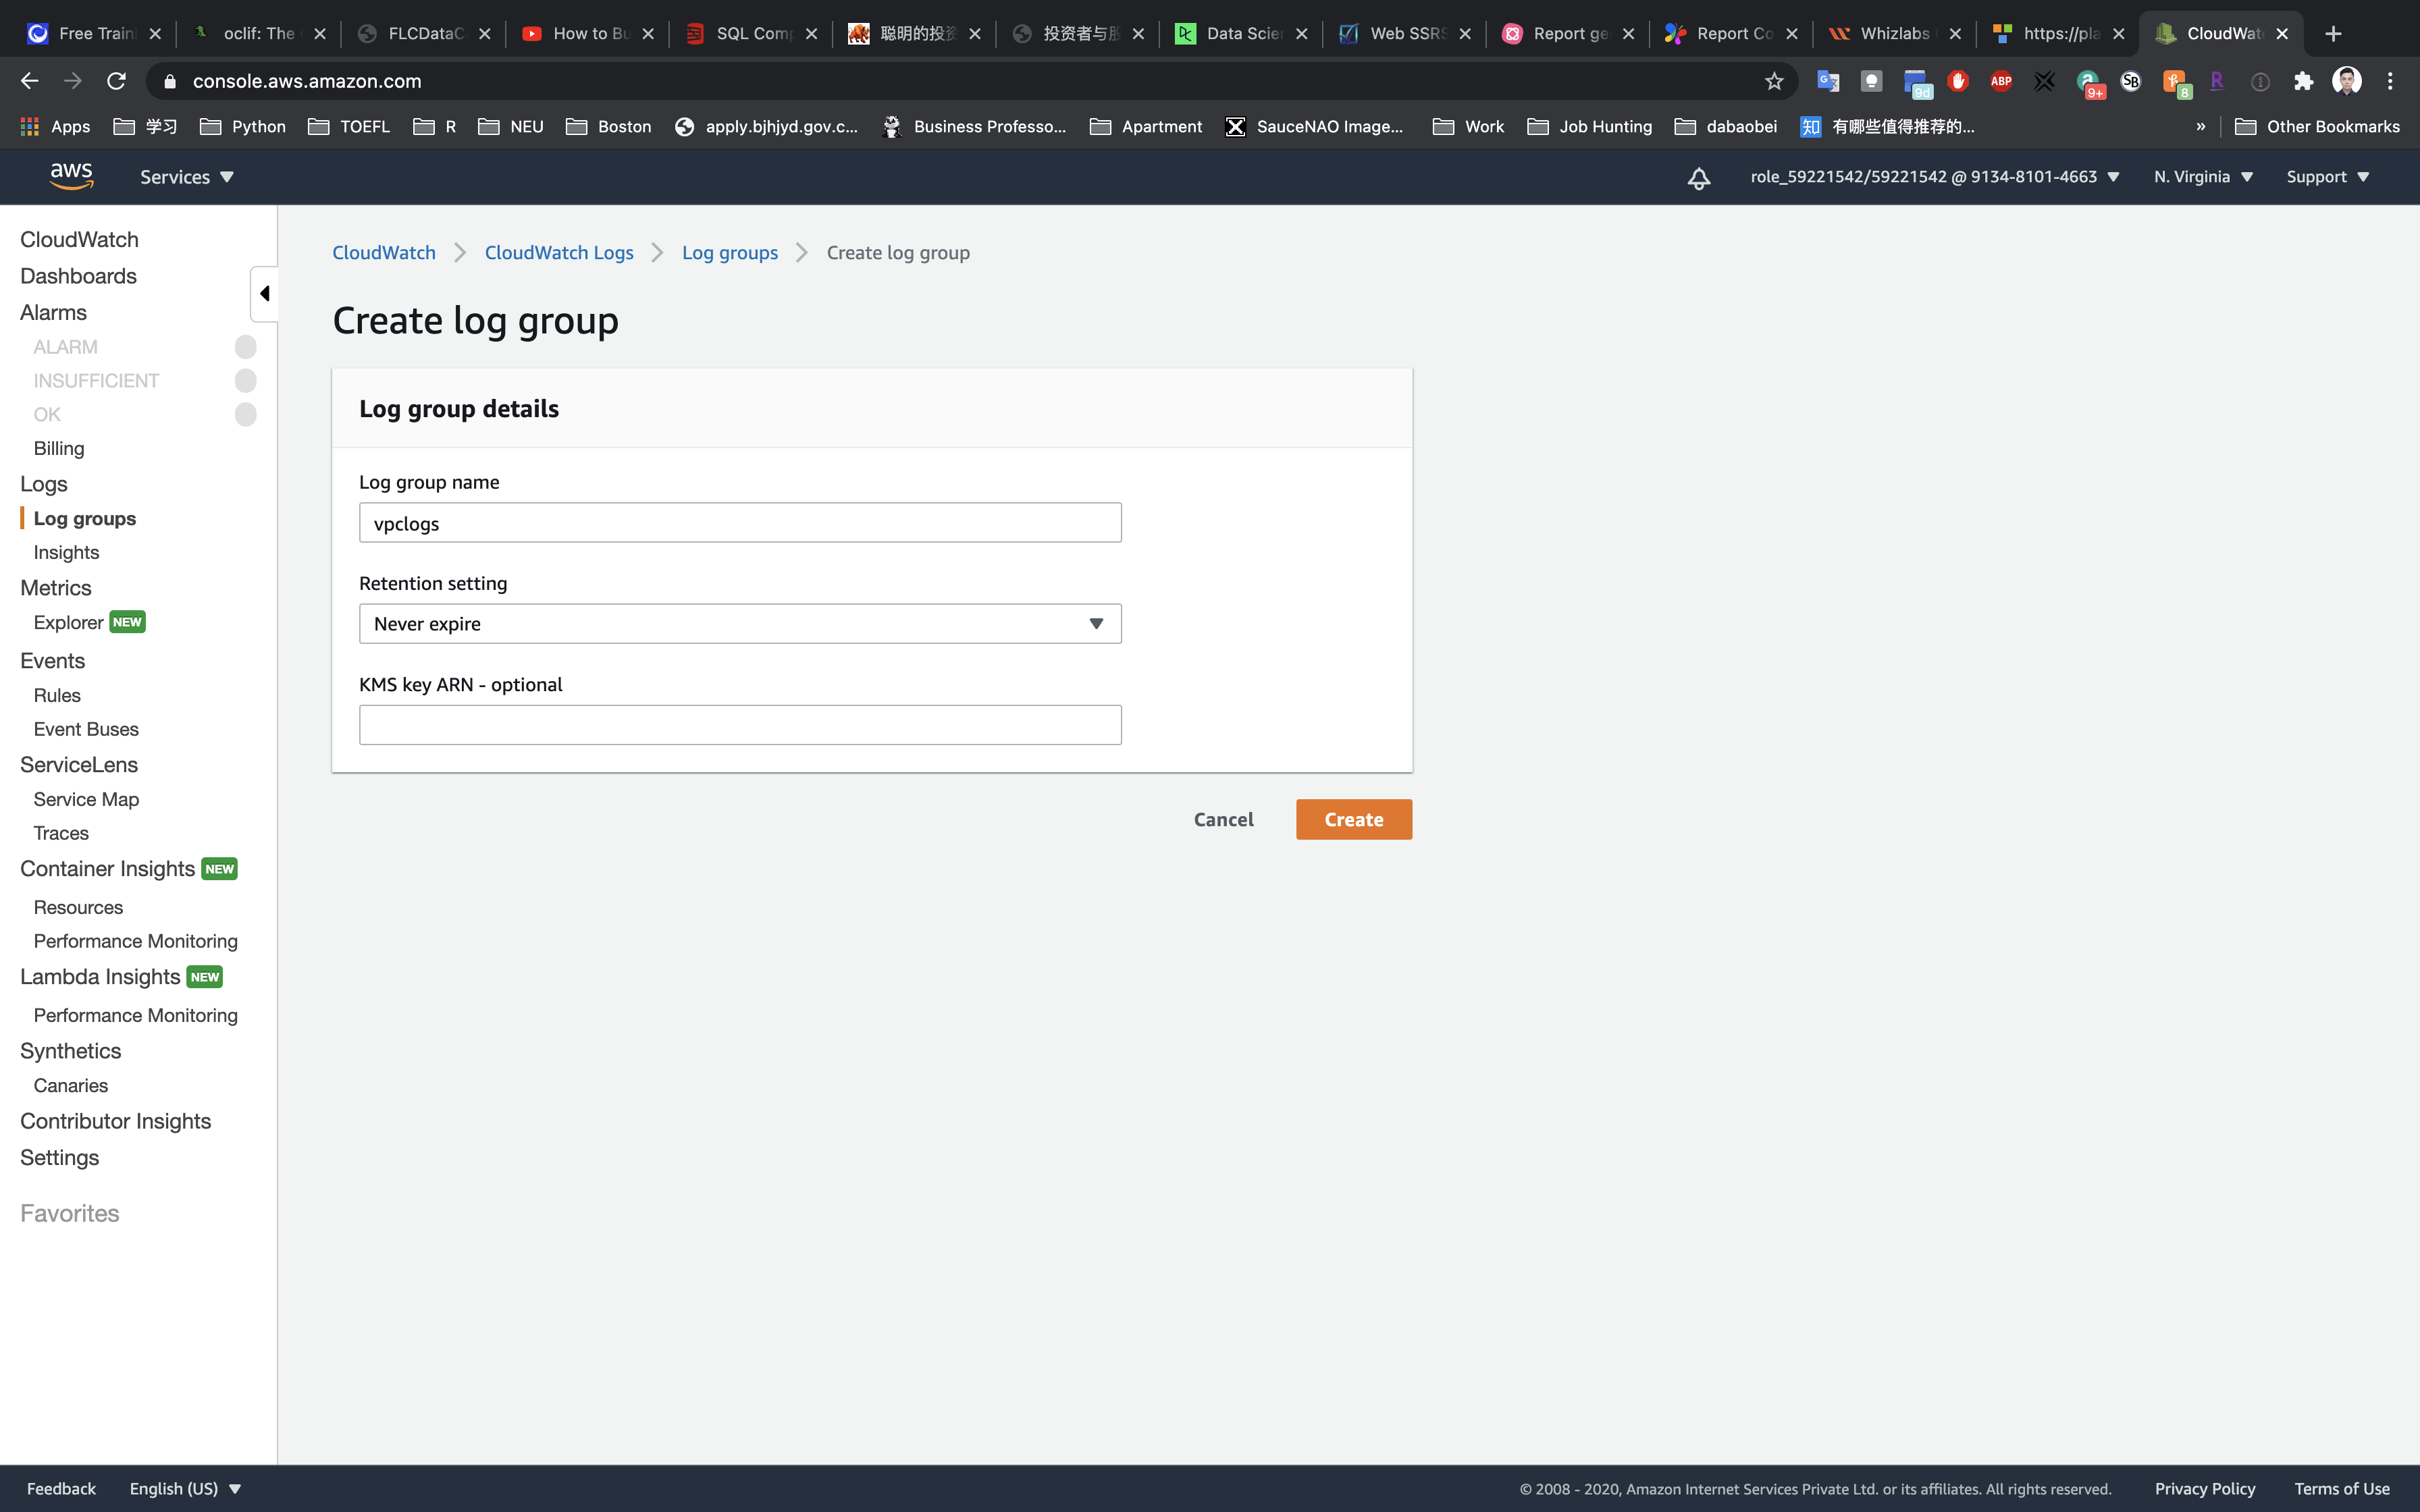
IAM Configuration
Services -> IAM -> policies
Create an IAM Policy
Click on Create policy.
Click on JSON tab.
Paste the code below.
Click on Reviwe policy
1 | { |
- Name:
vpclogs - Description:
IAM roles of CloudWatch for generating VPC logs.
Click on Create policy.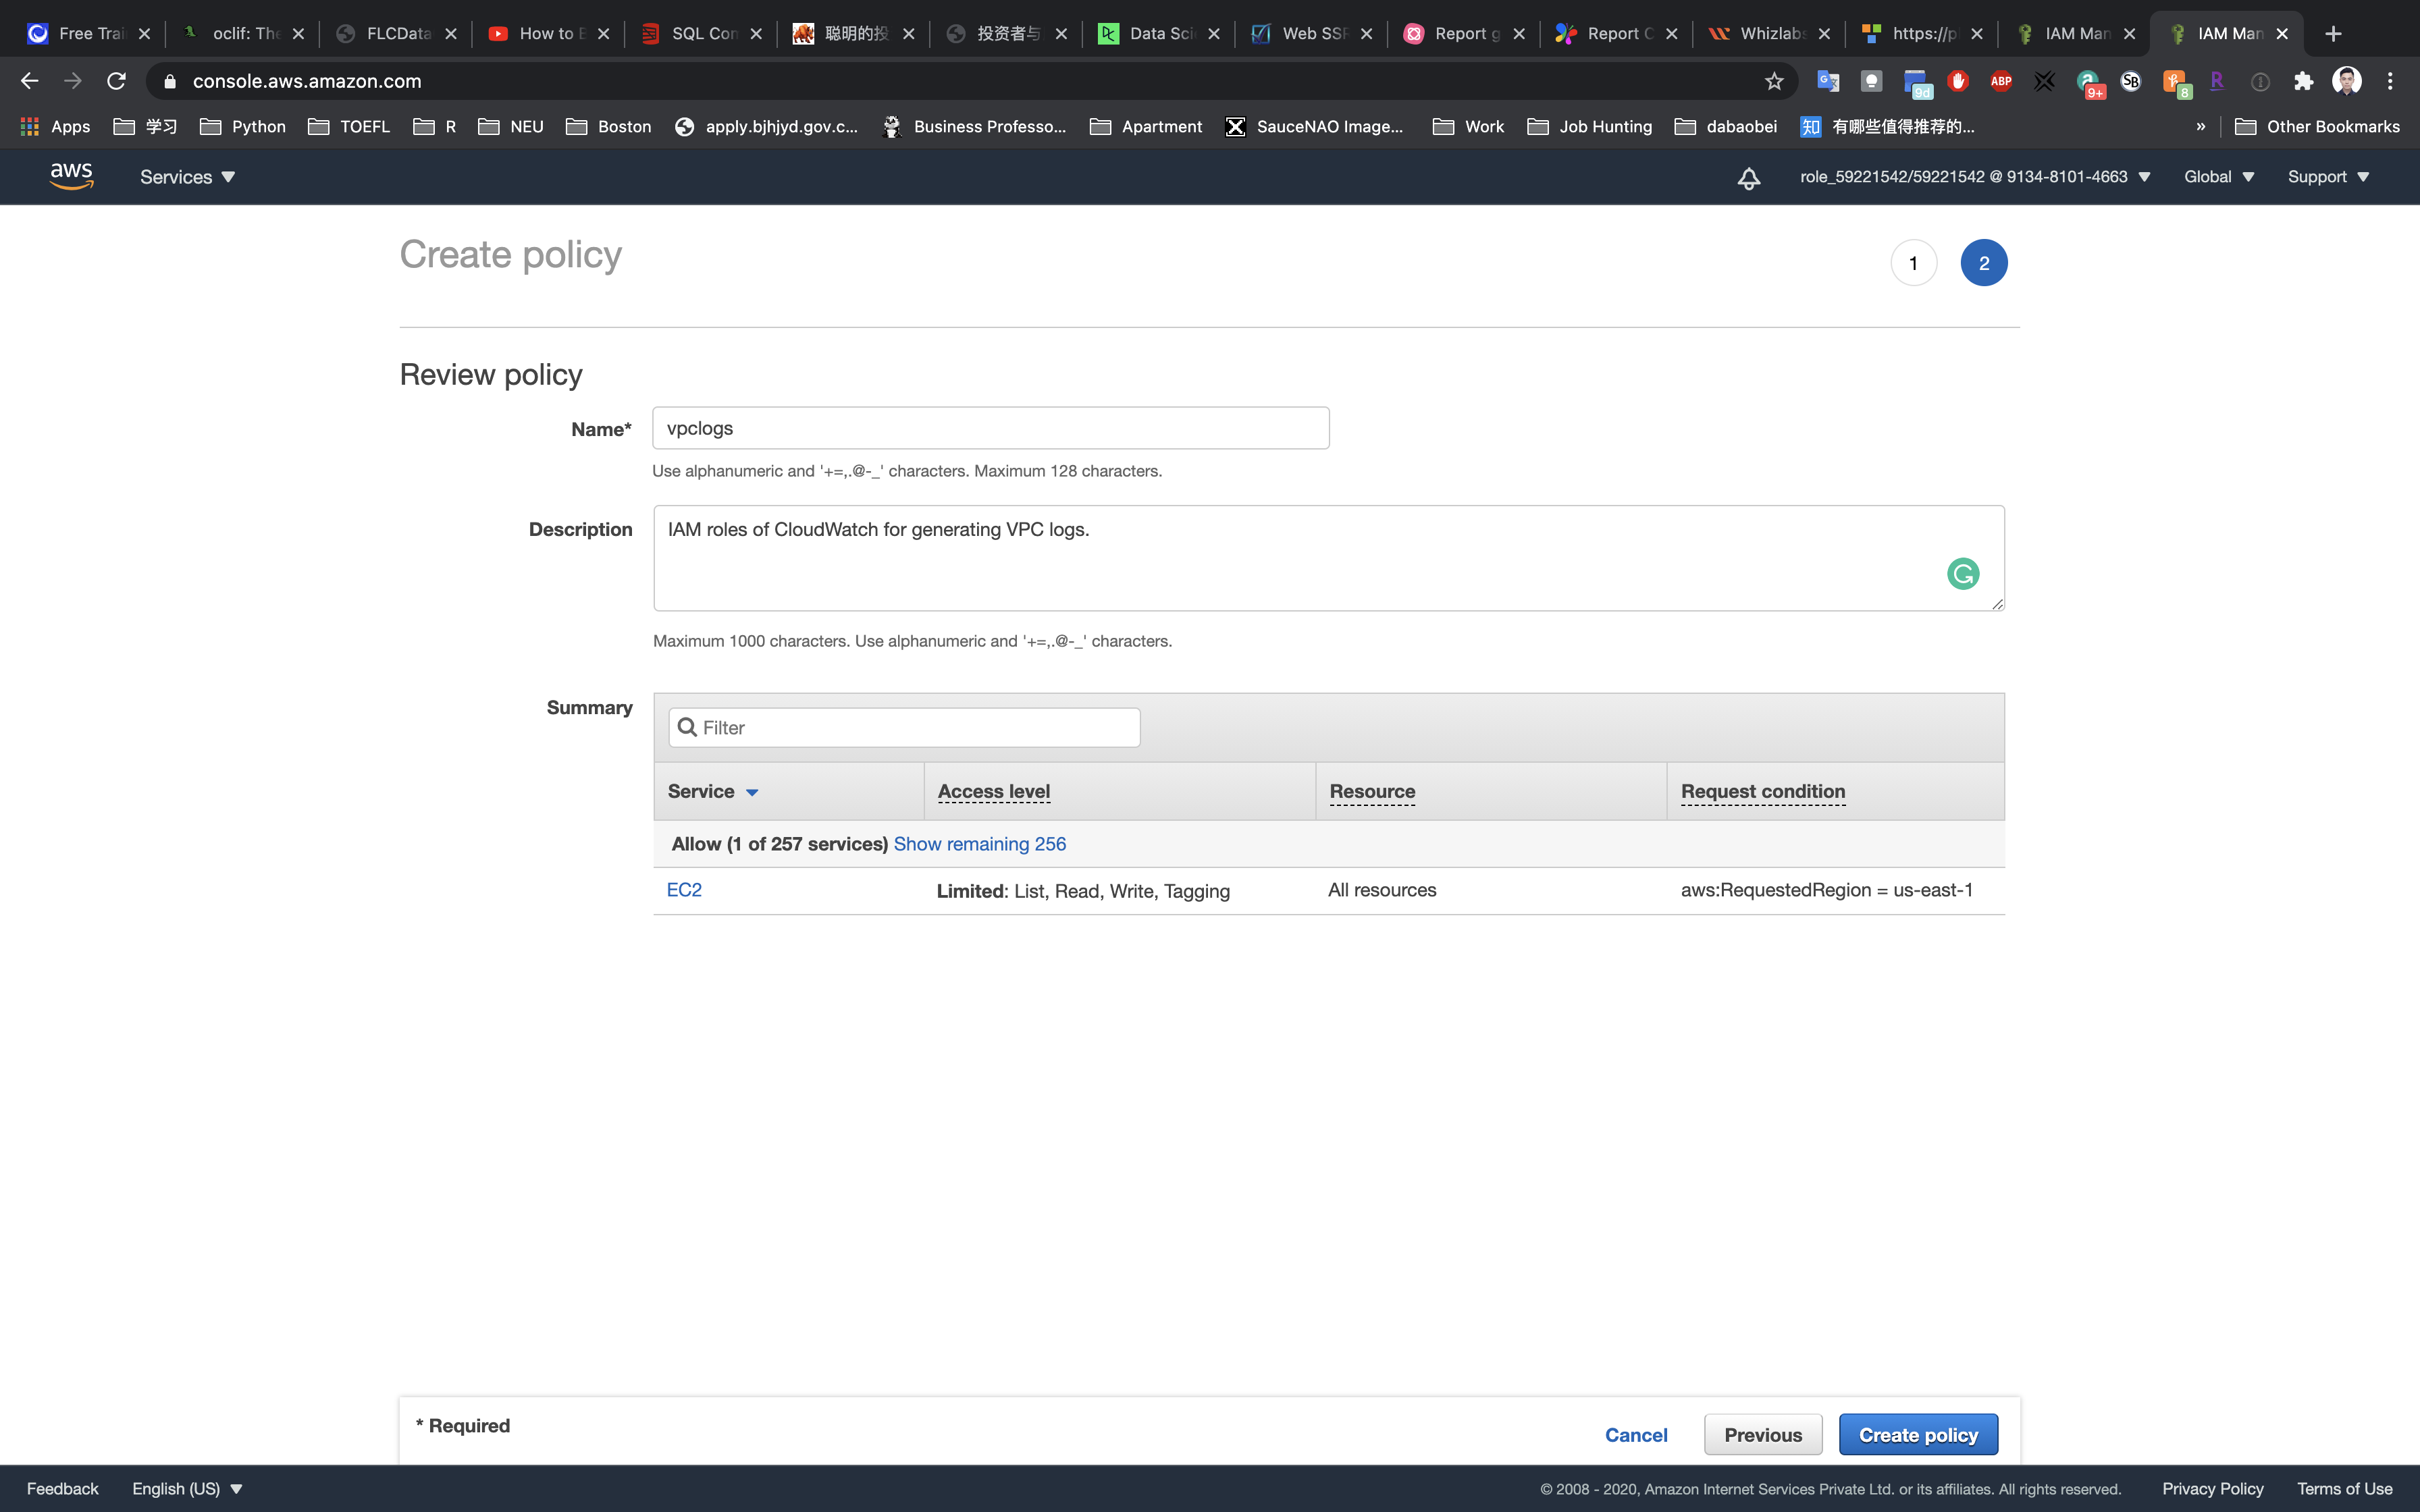
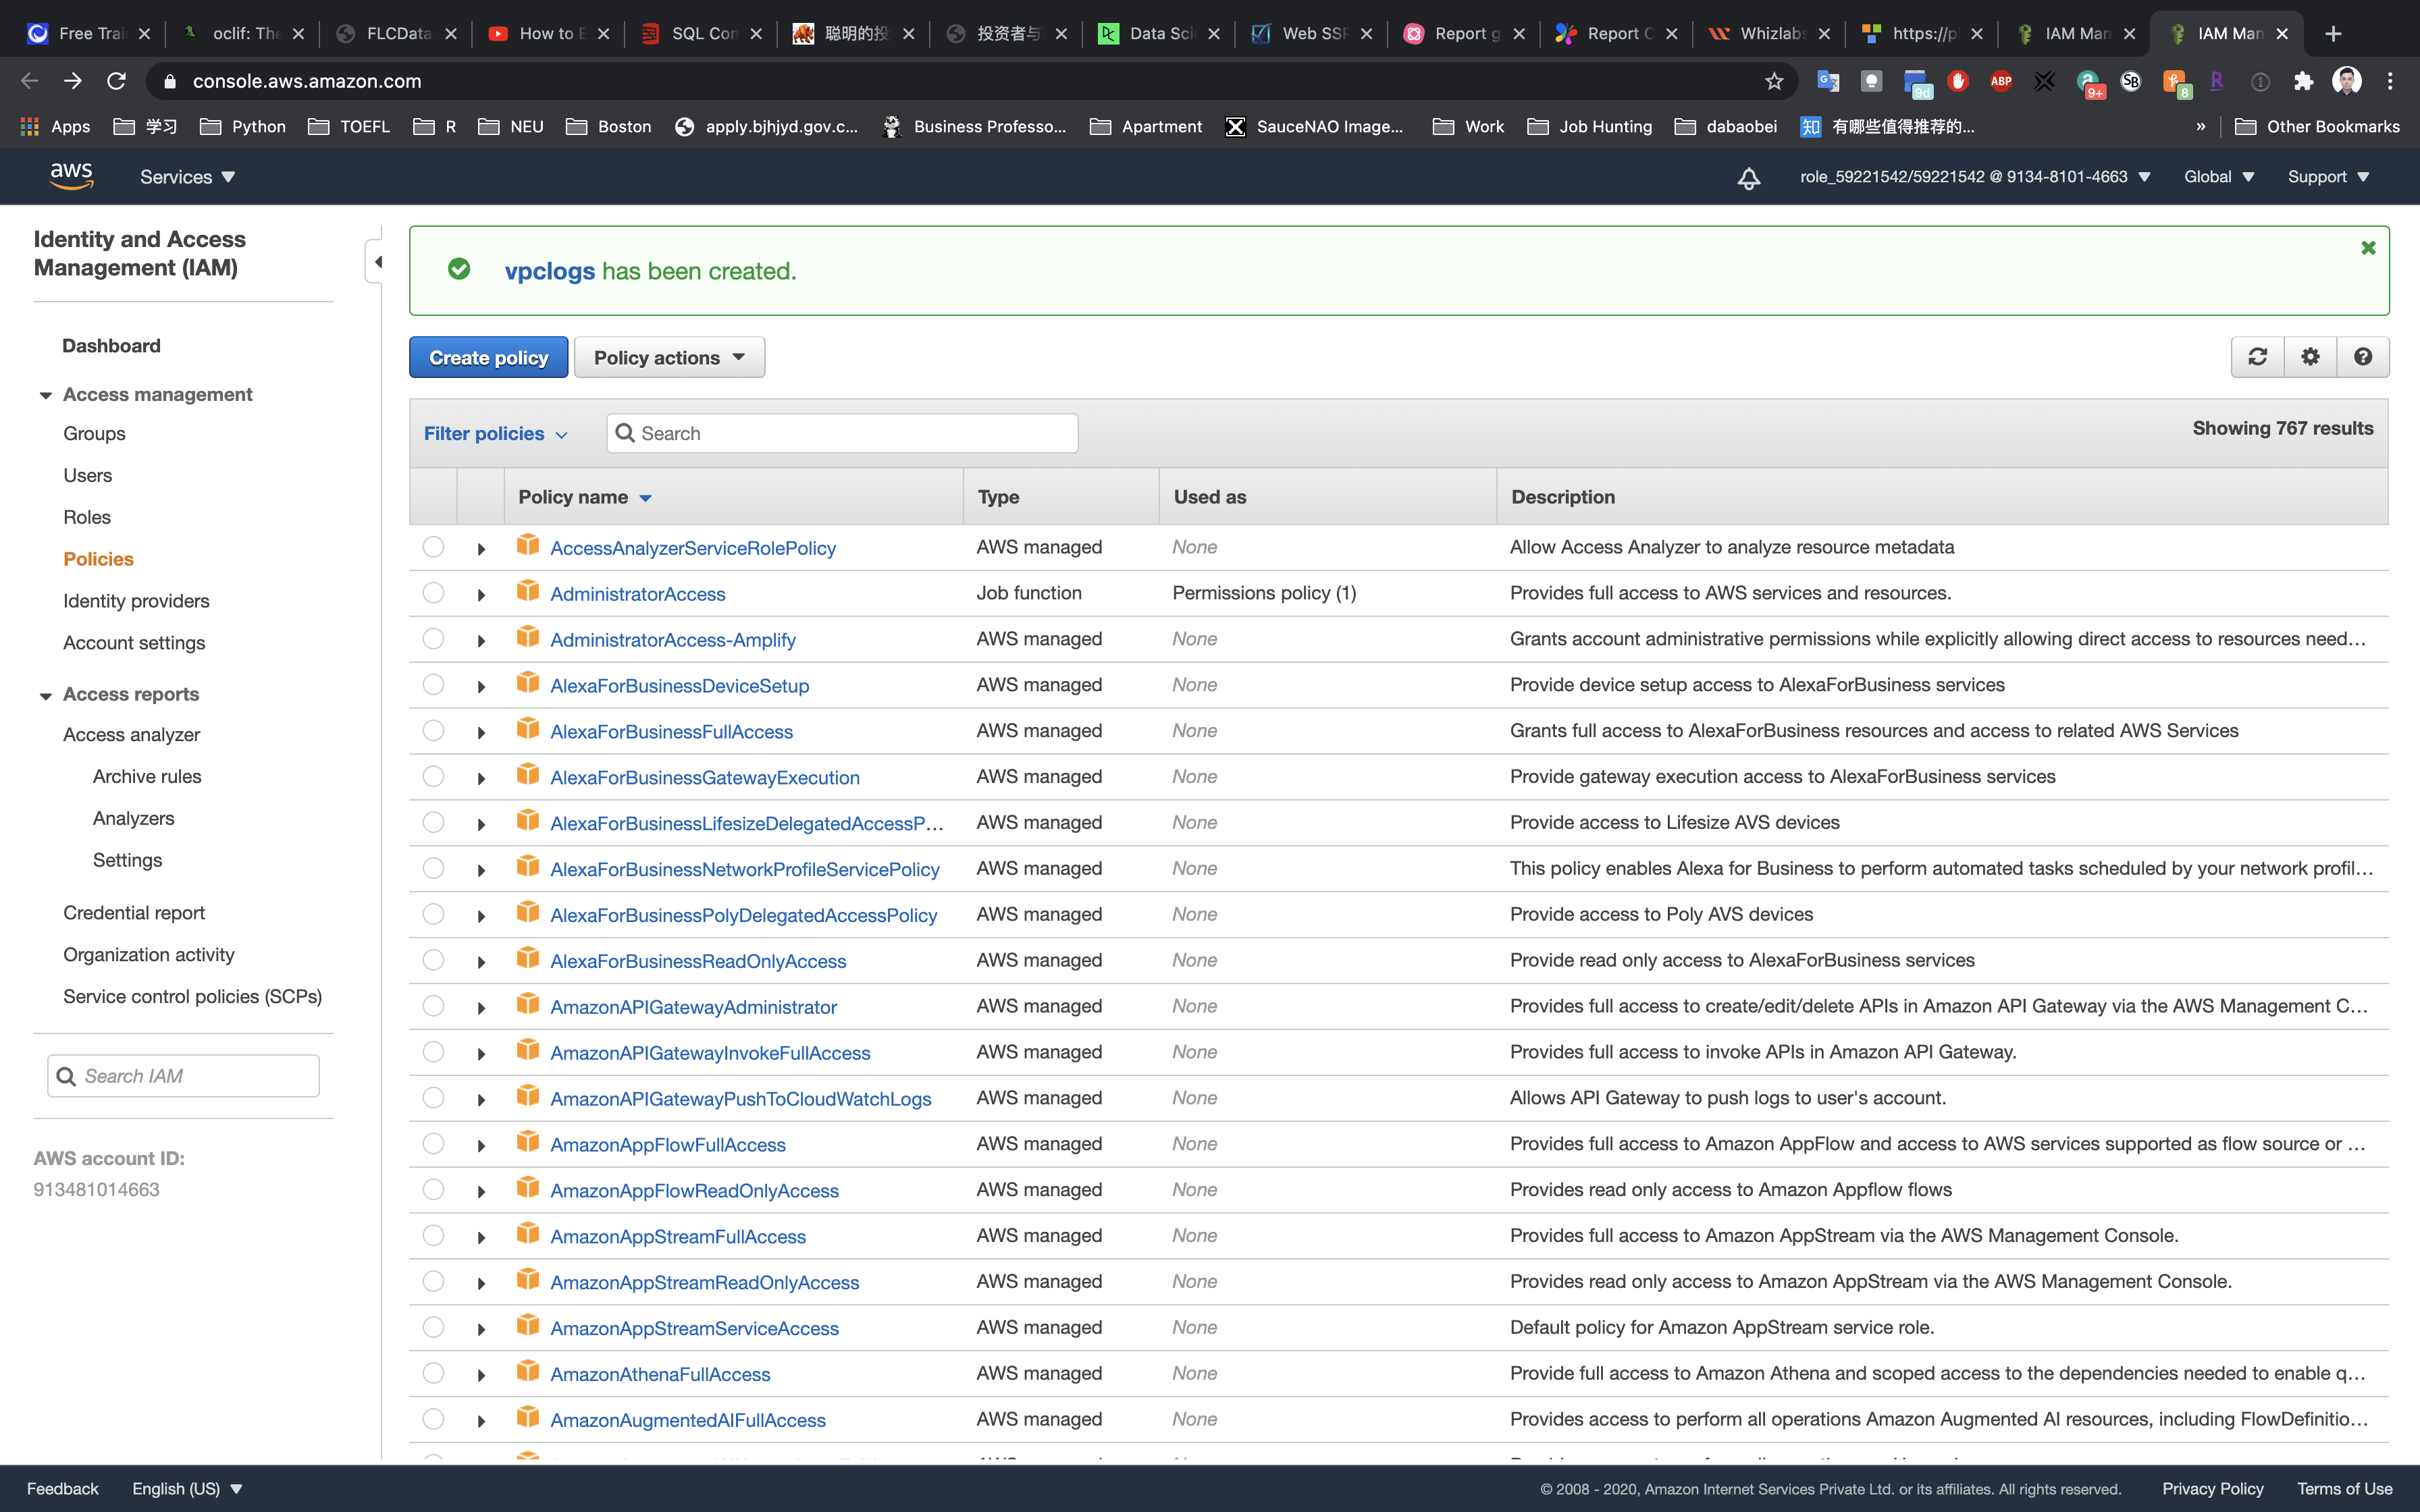
Create an IAM Policy
Click on Roles on the left navigation panel.
Click on Create role
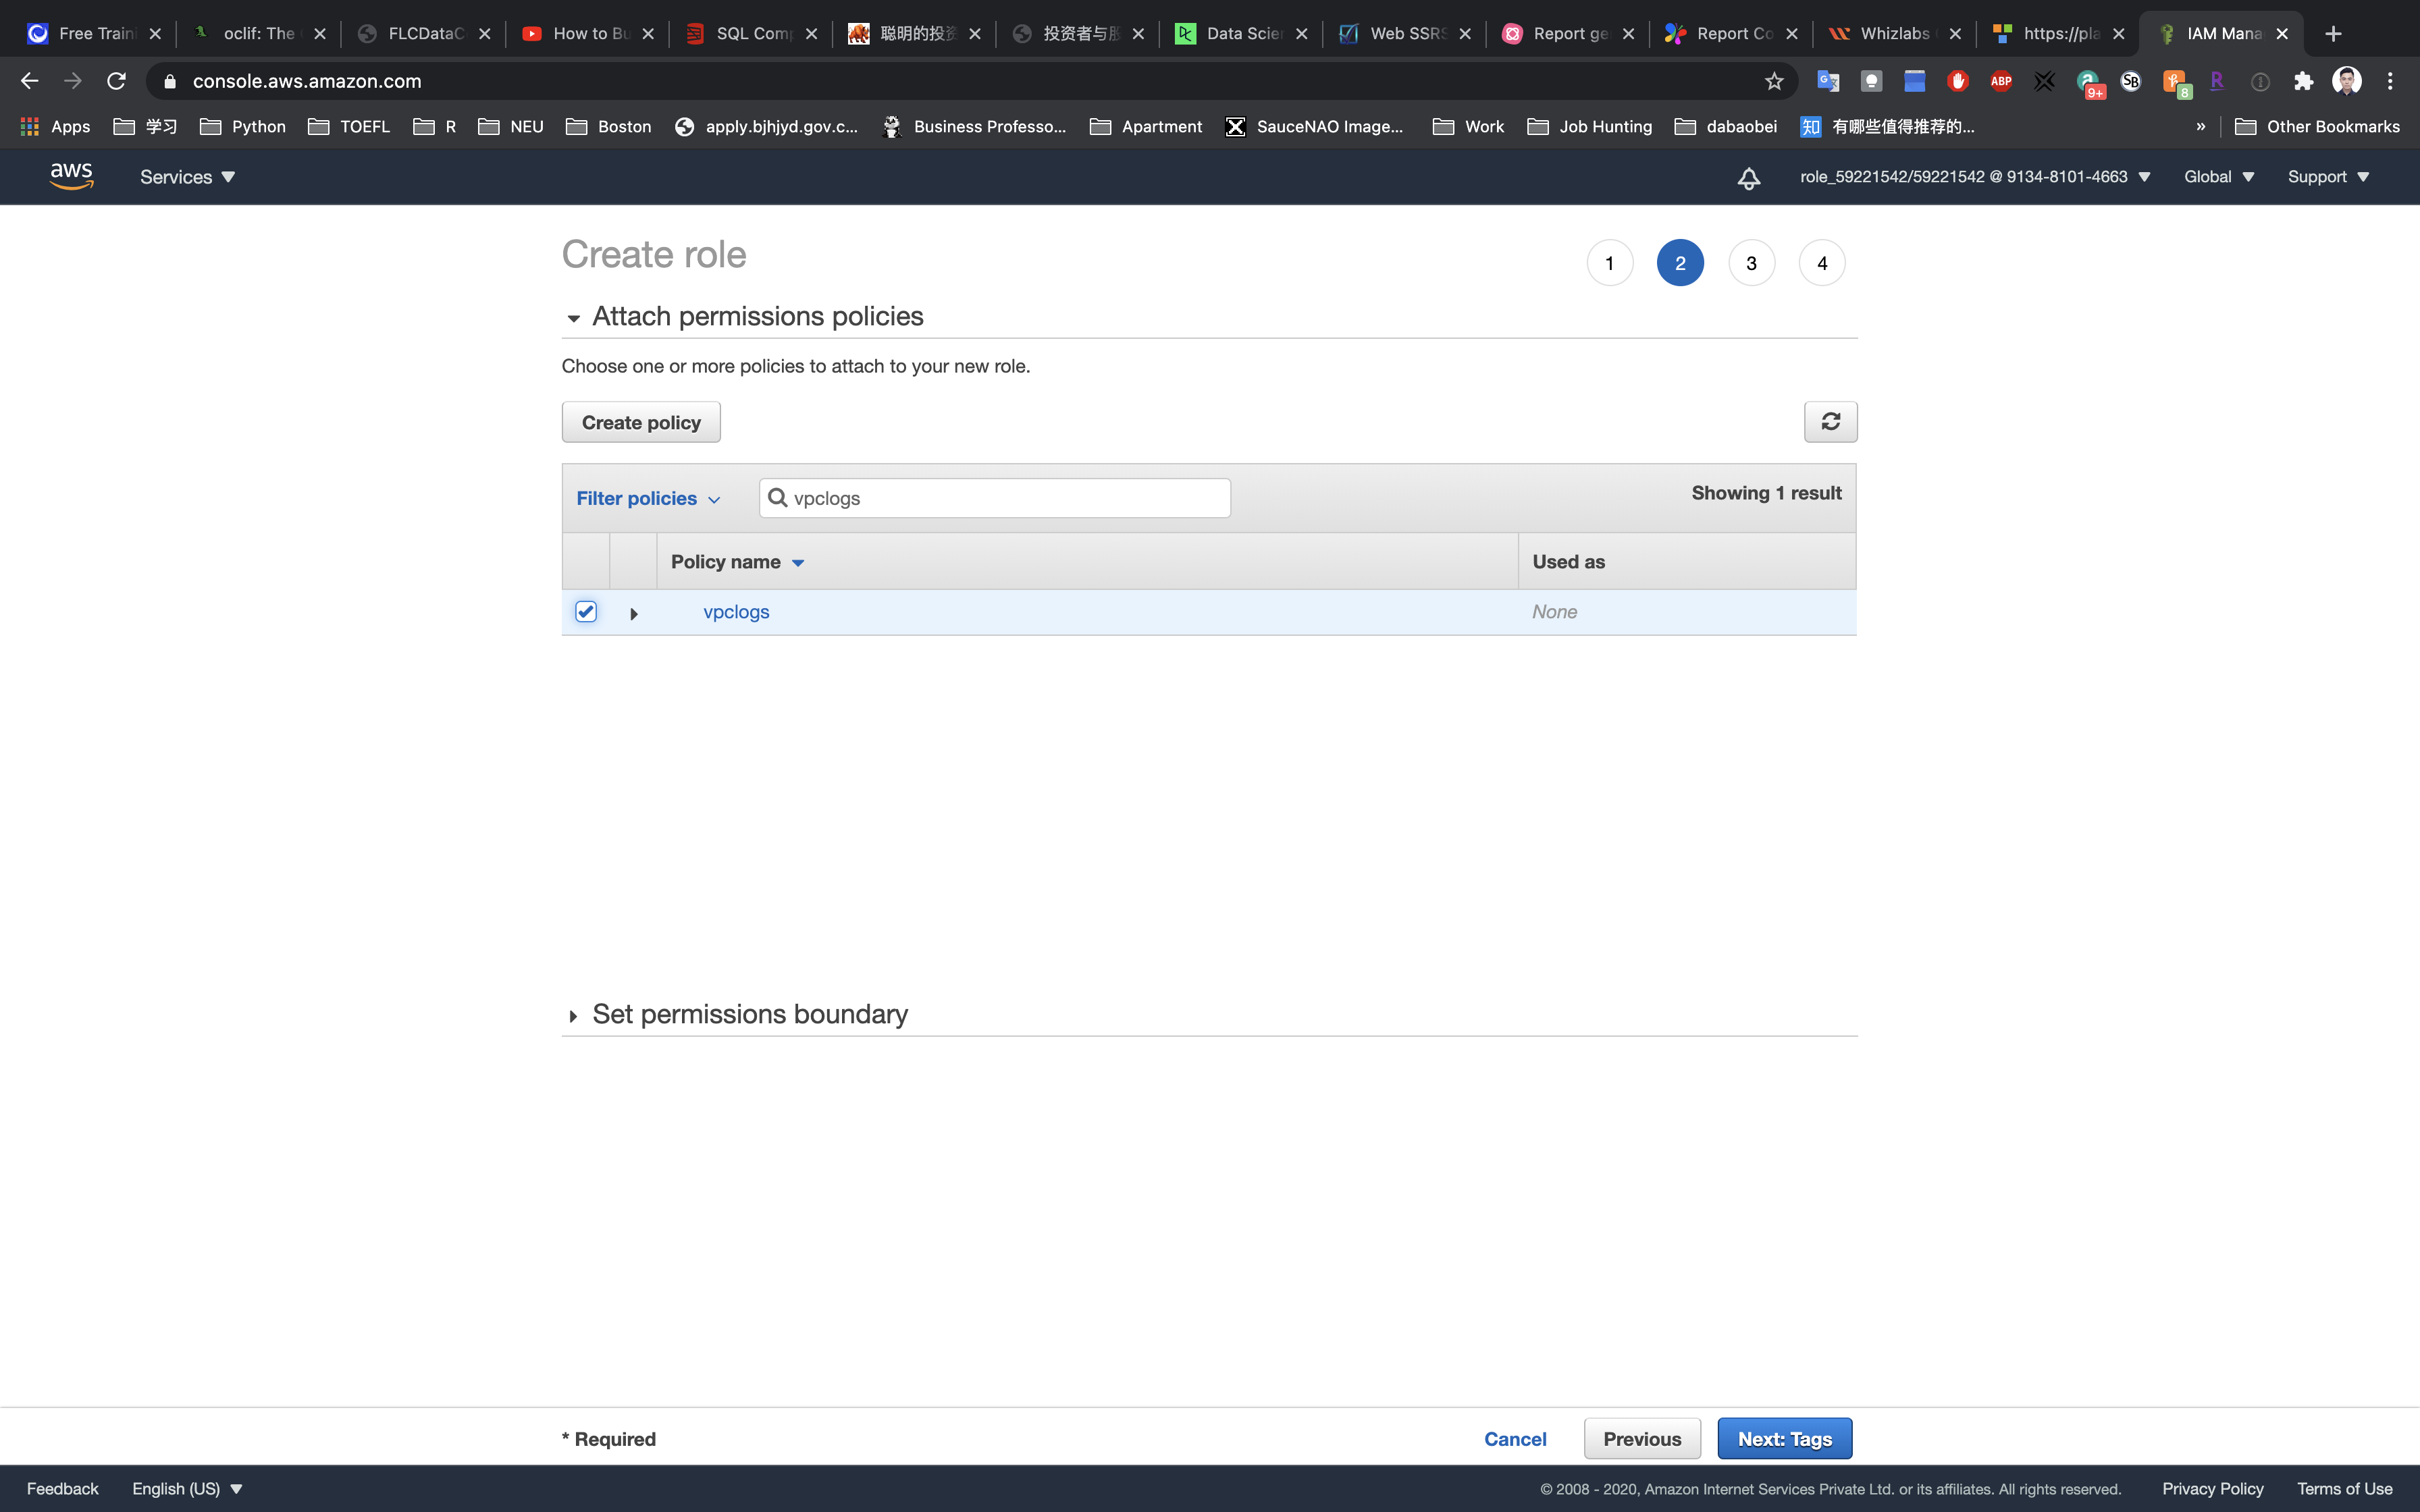
Choose AWS Service as “Security Type of Trusted Entity” and choose the use case as EC2. Click on Next: Permissions.
Search for vpclogs then select it.
Click on Next: Add Tags
- Key:
Name - Value:
vpclogsrole
Click on Next: Review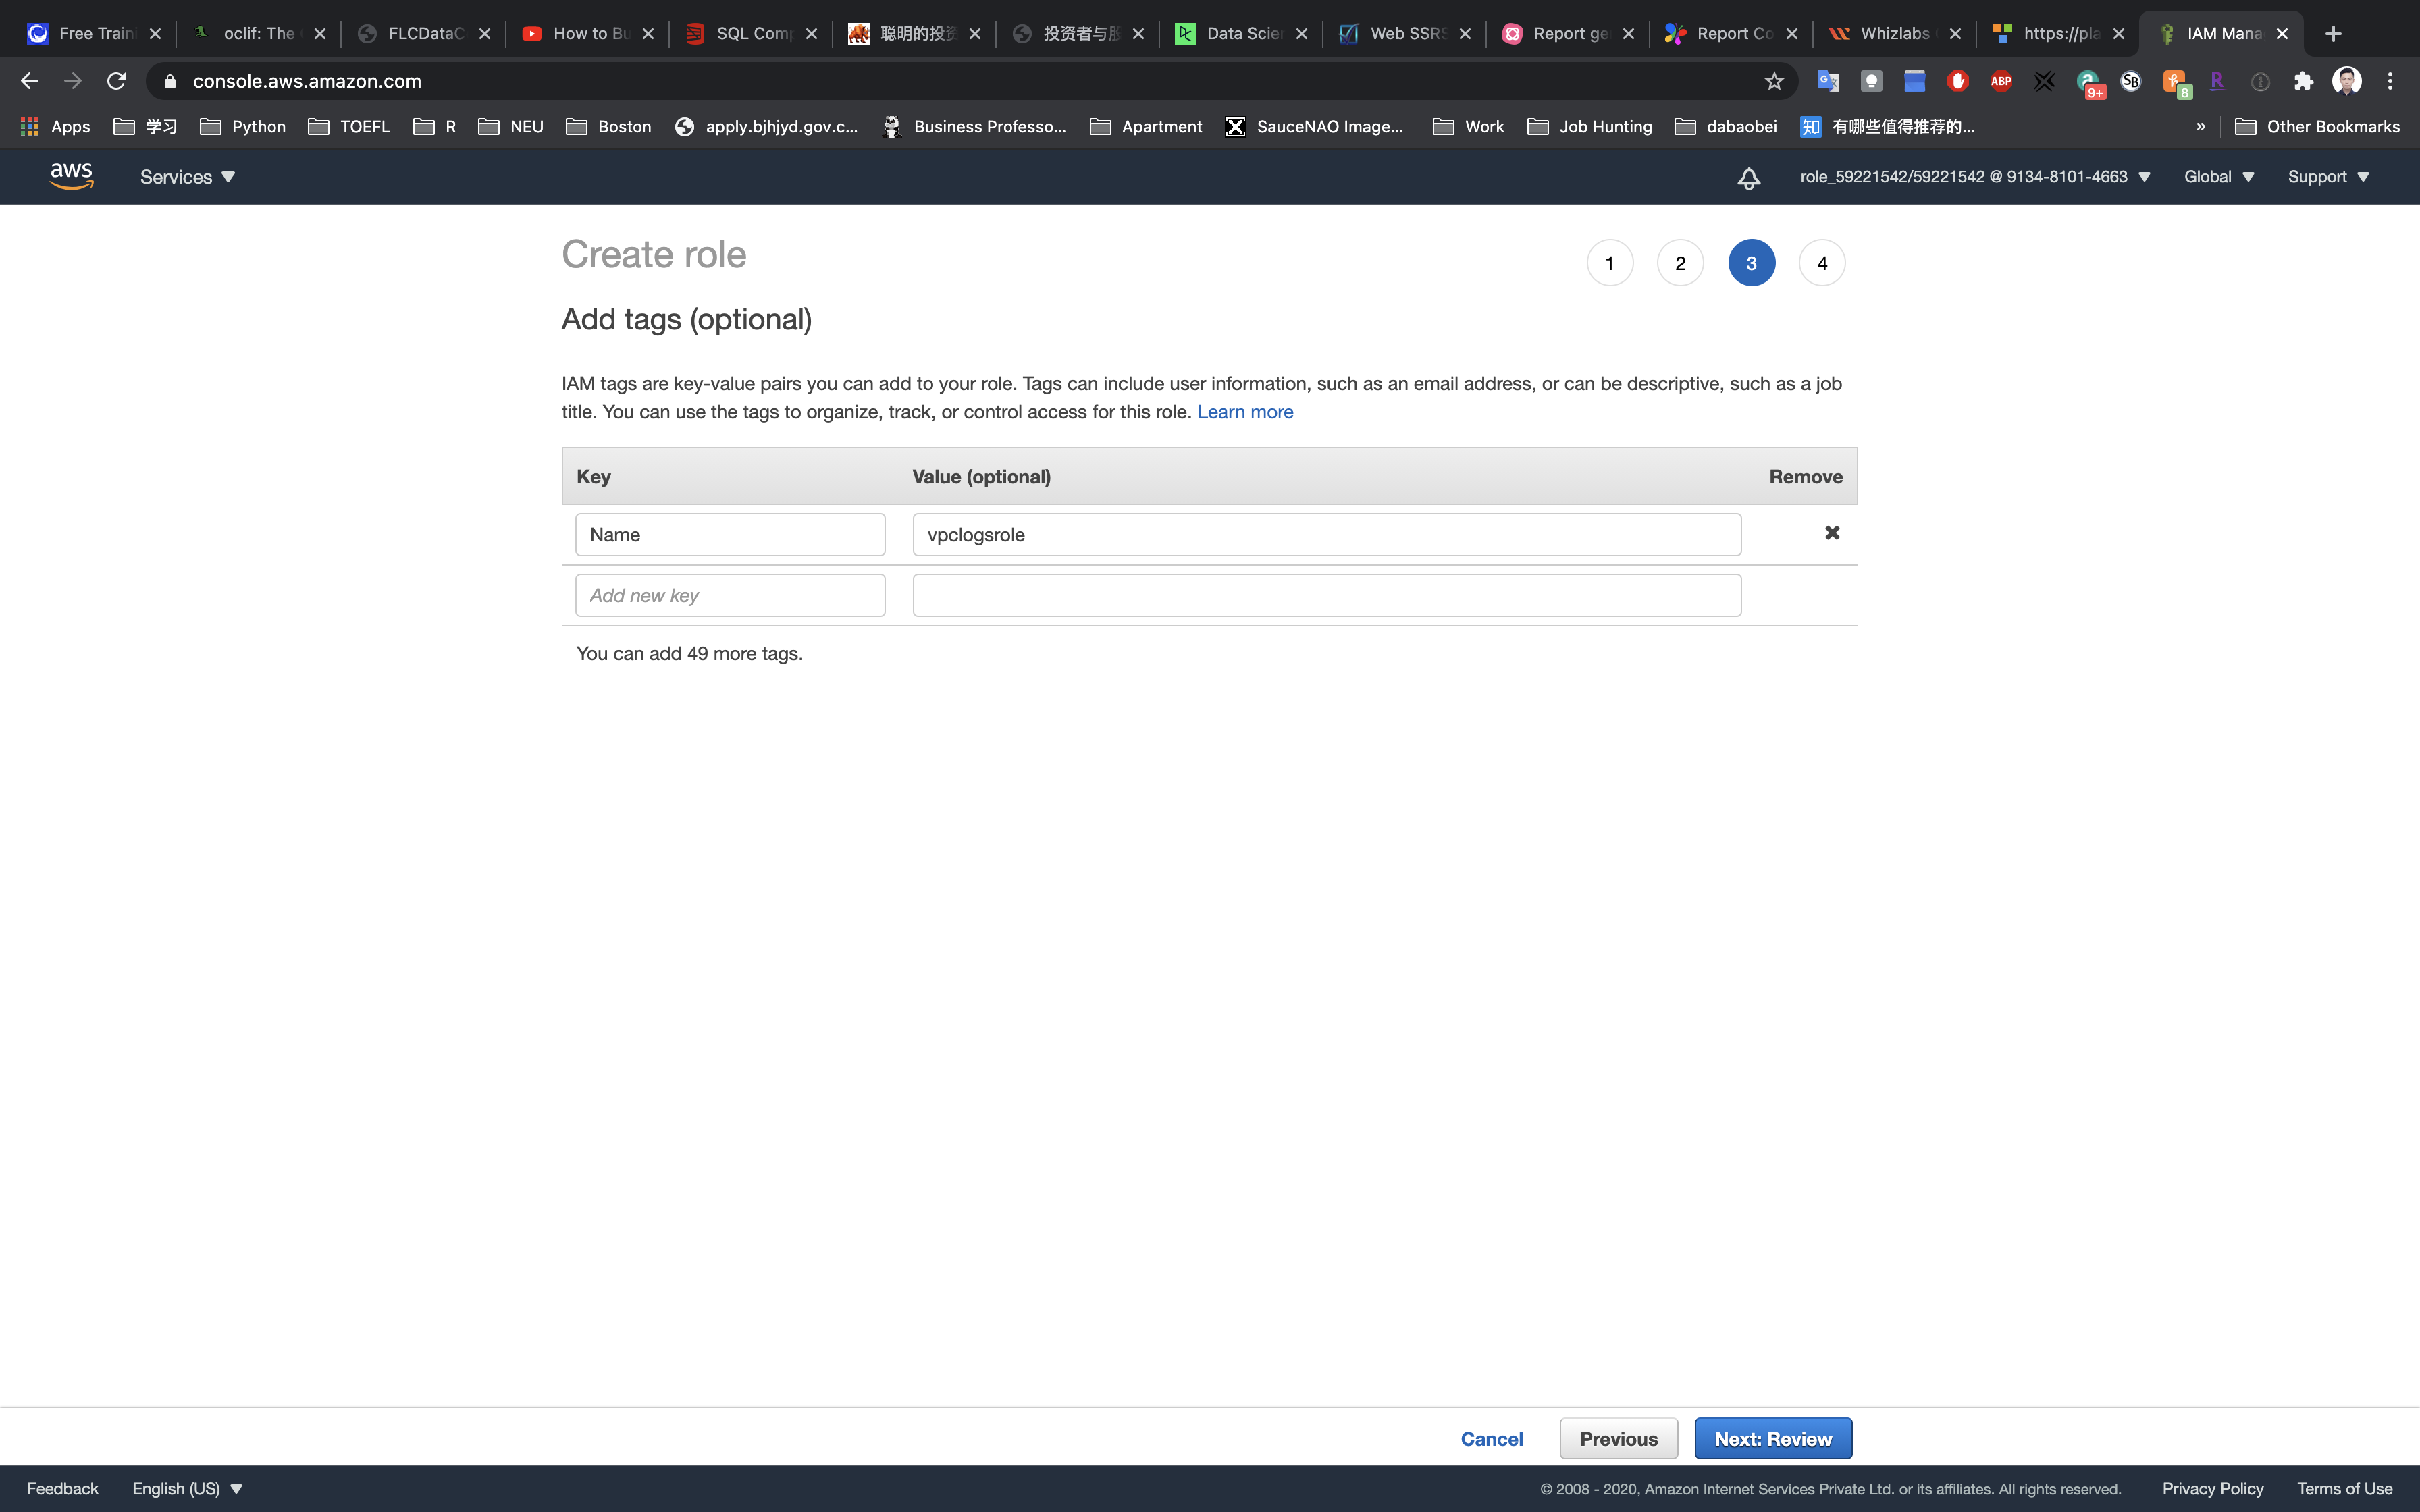
- Role name:
vpclogsrole
Click on Create role
VPC Configuration
Services -> VPC -> Your VPCs
Create a VPC
Click on Create VPC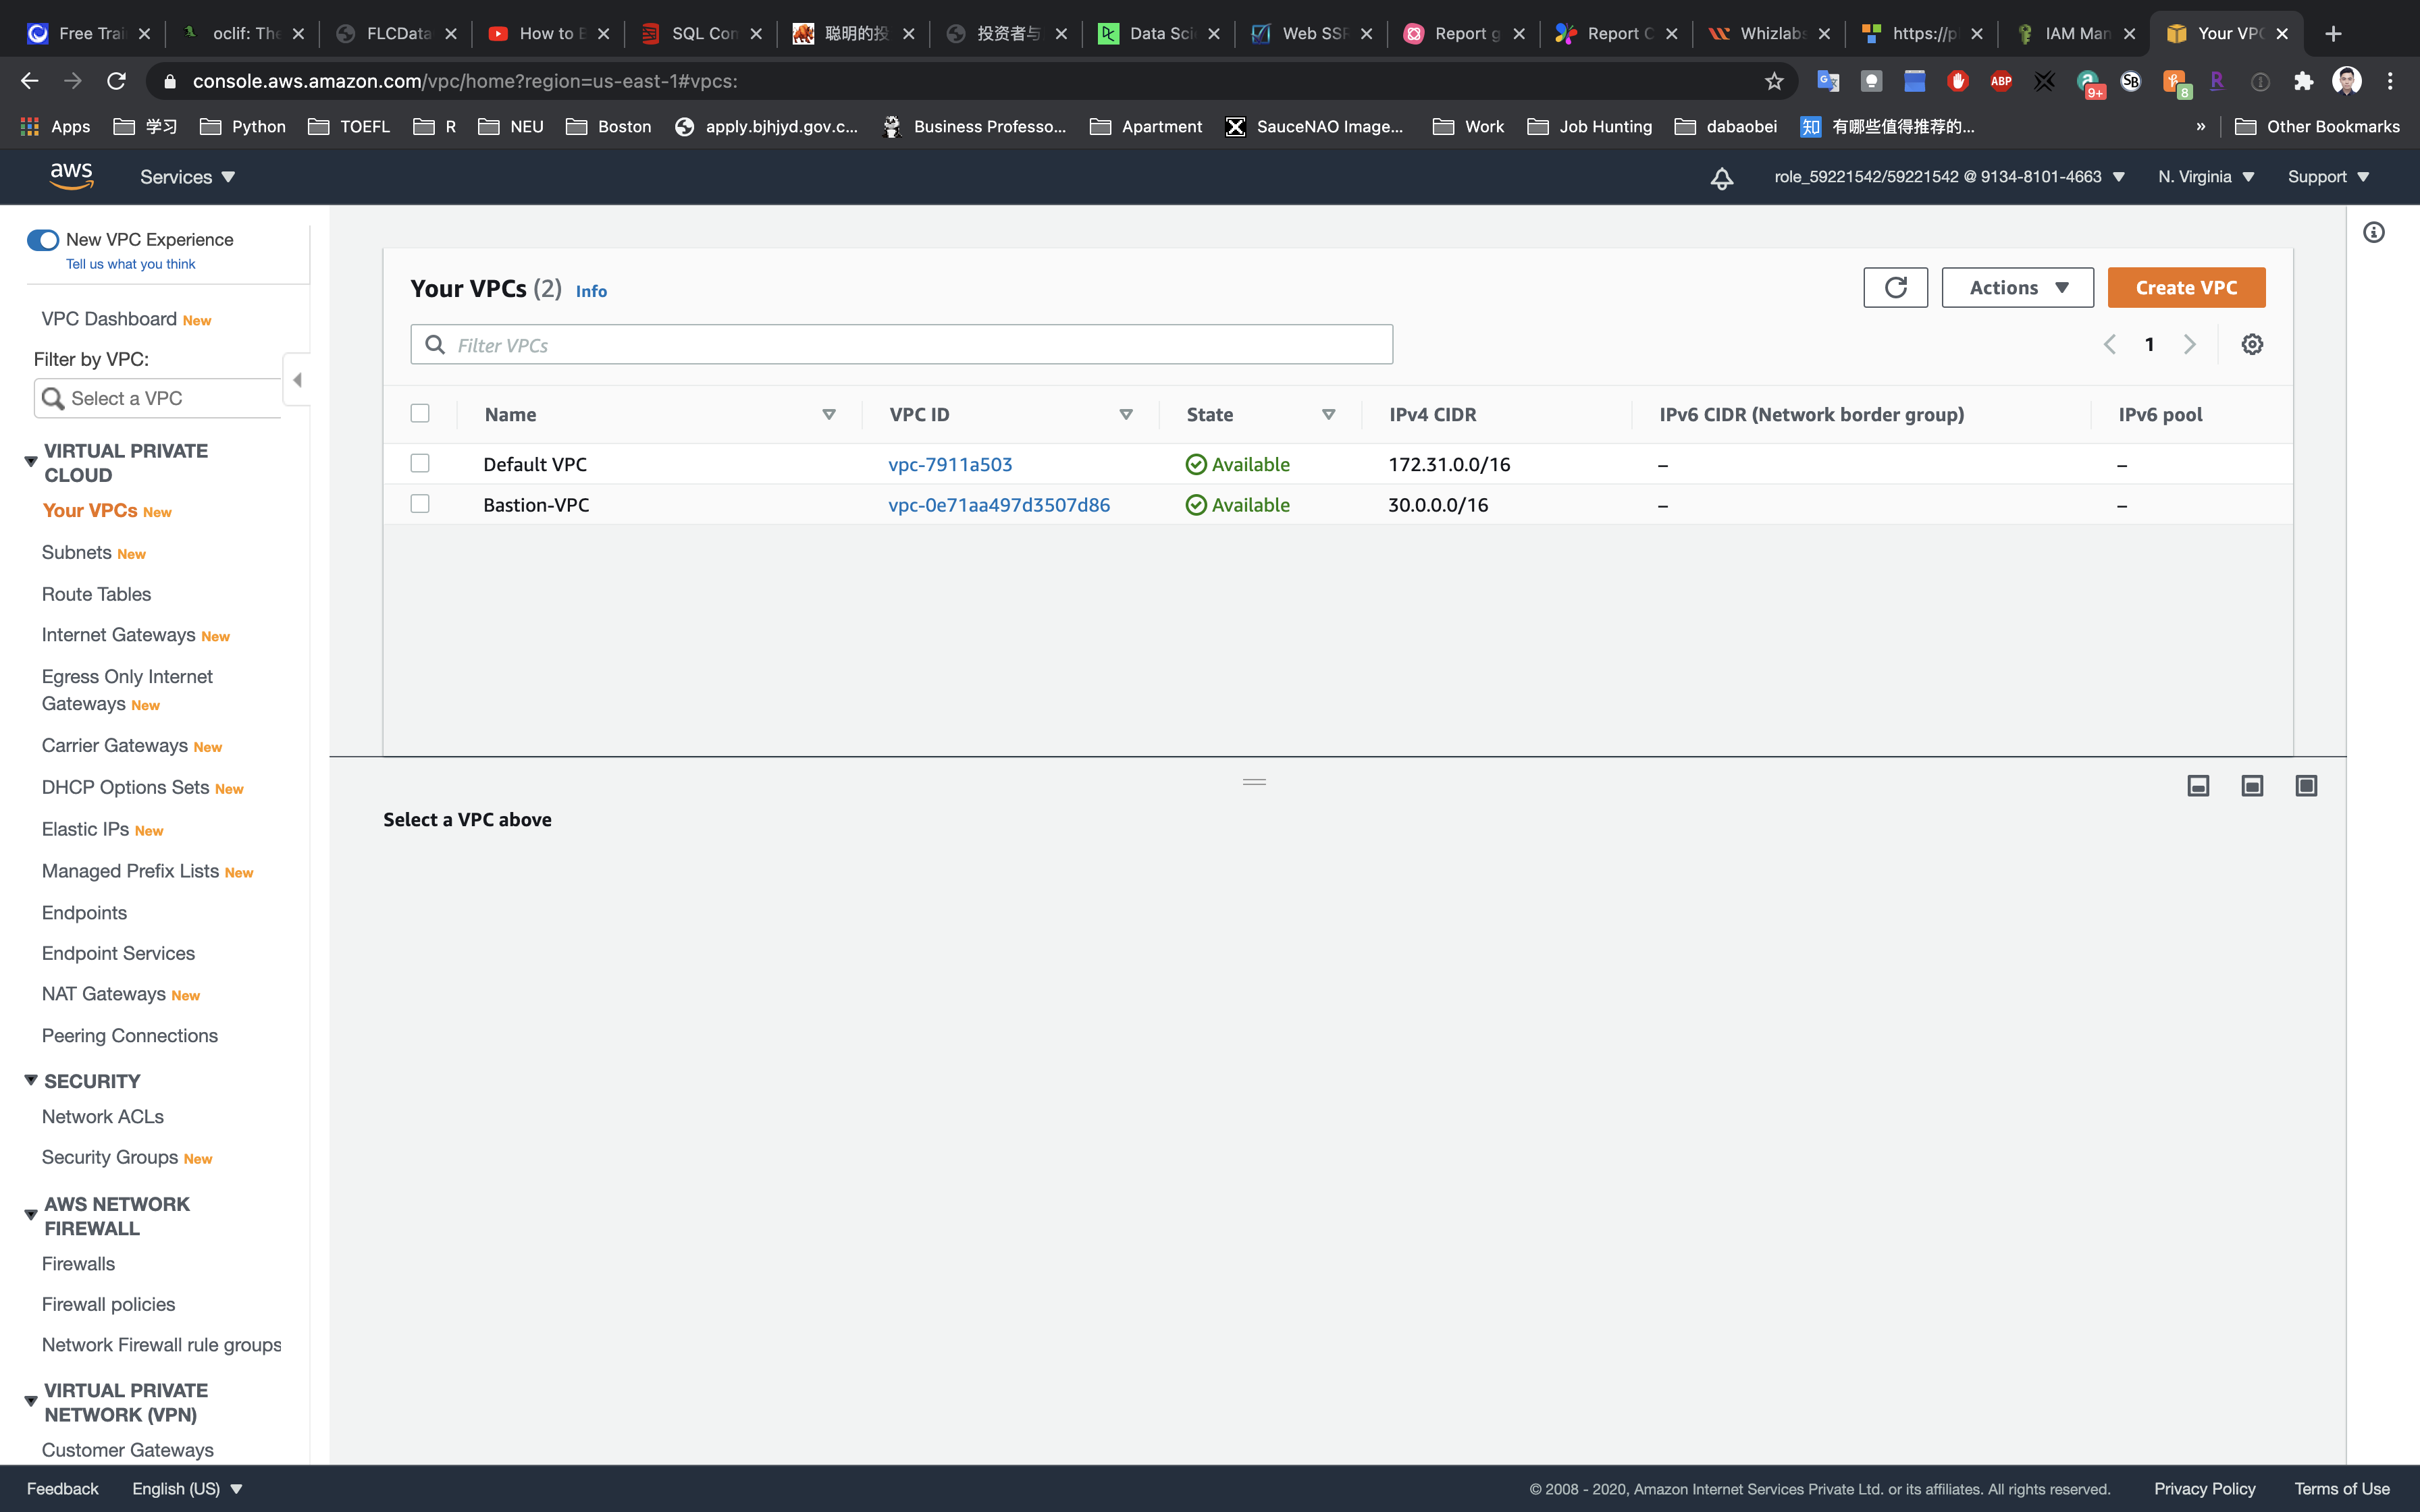
Enter the Name tag: testvpc and enter IPv4 CIDR block: 10.1.0.0/16. Leave other options as default and click on Create.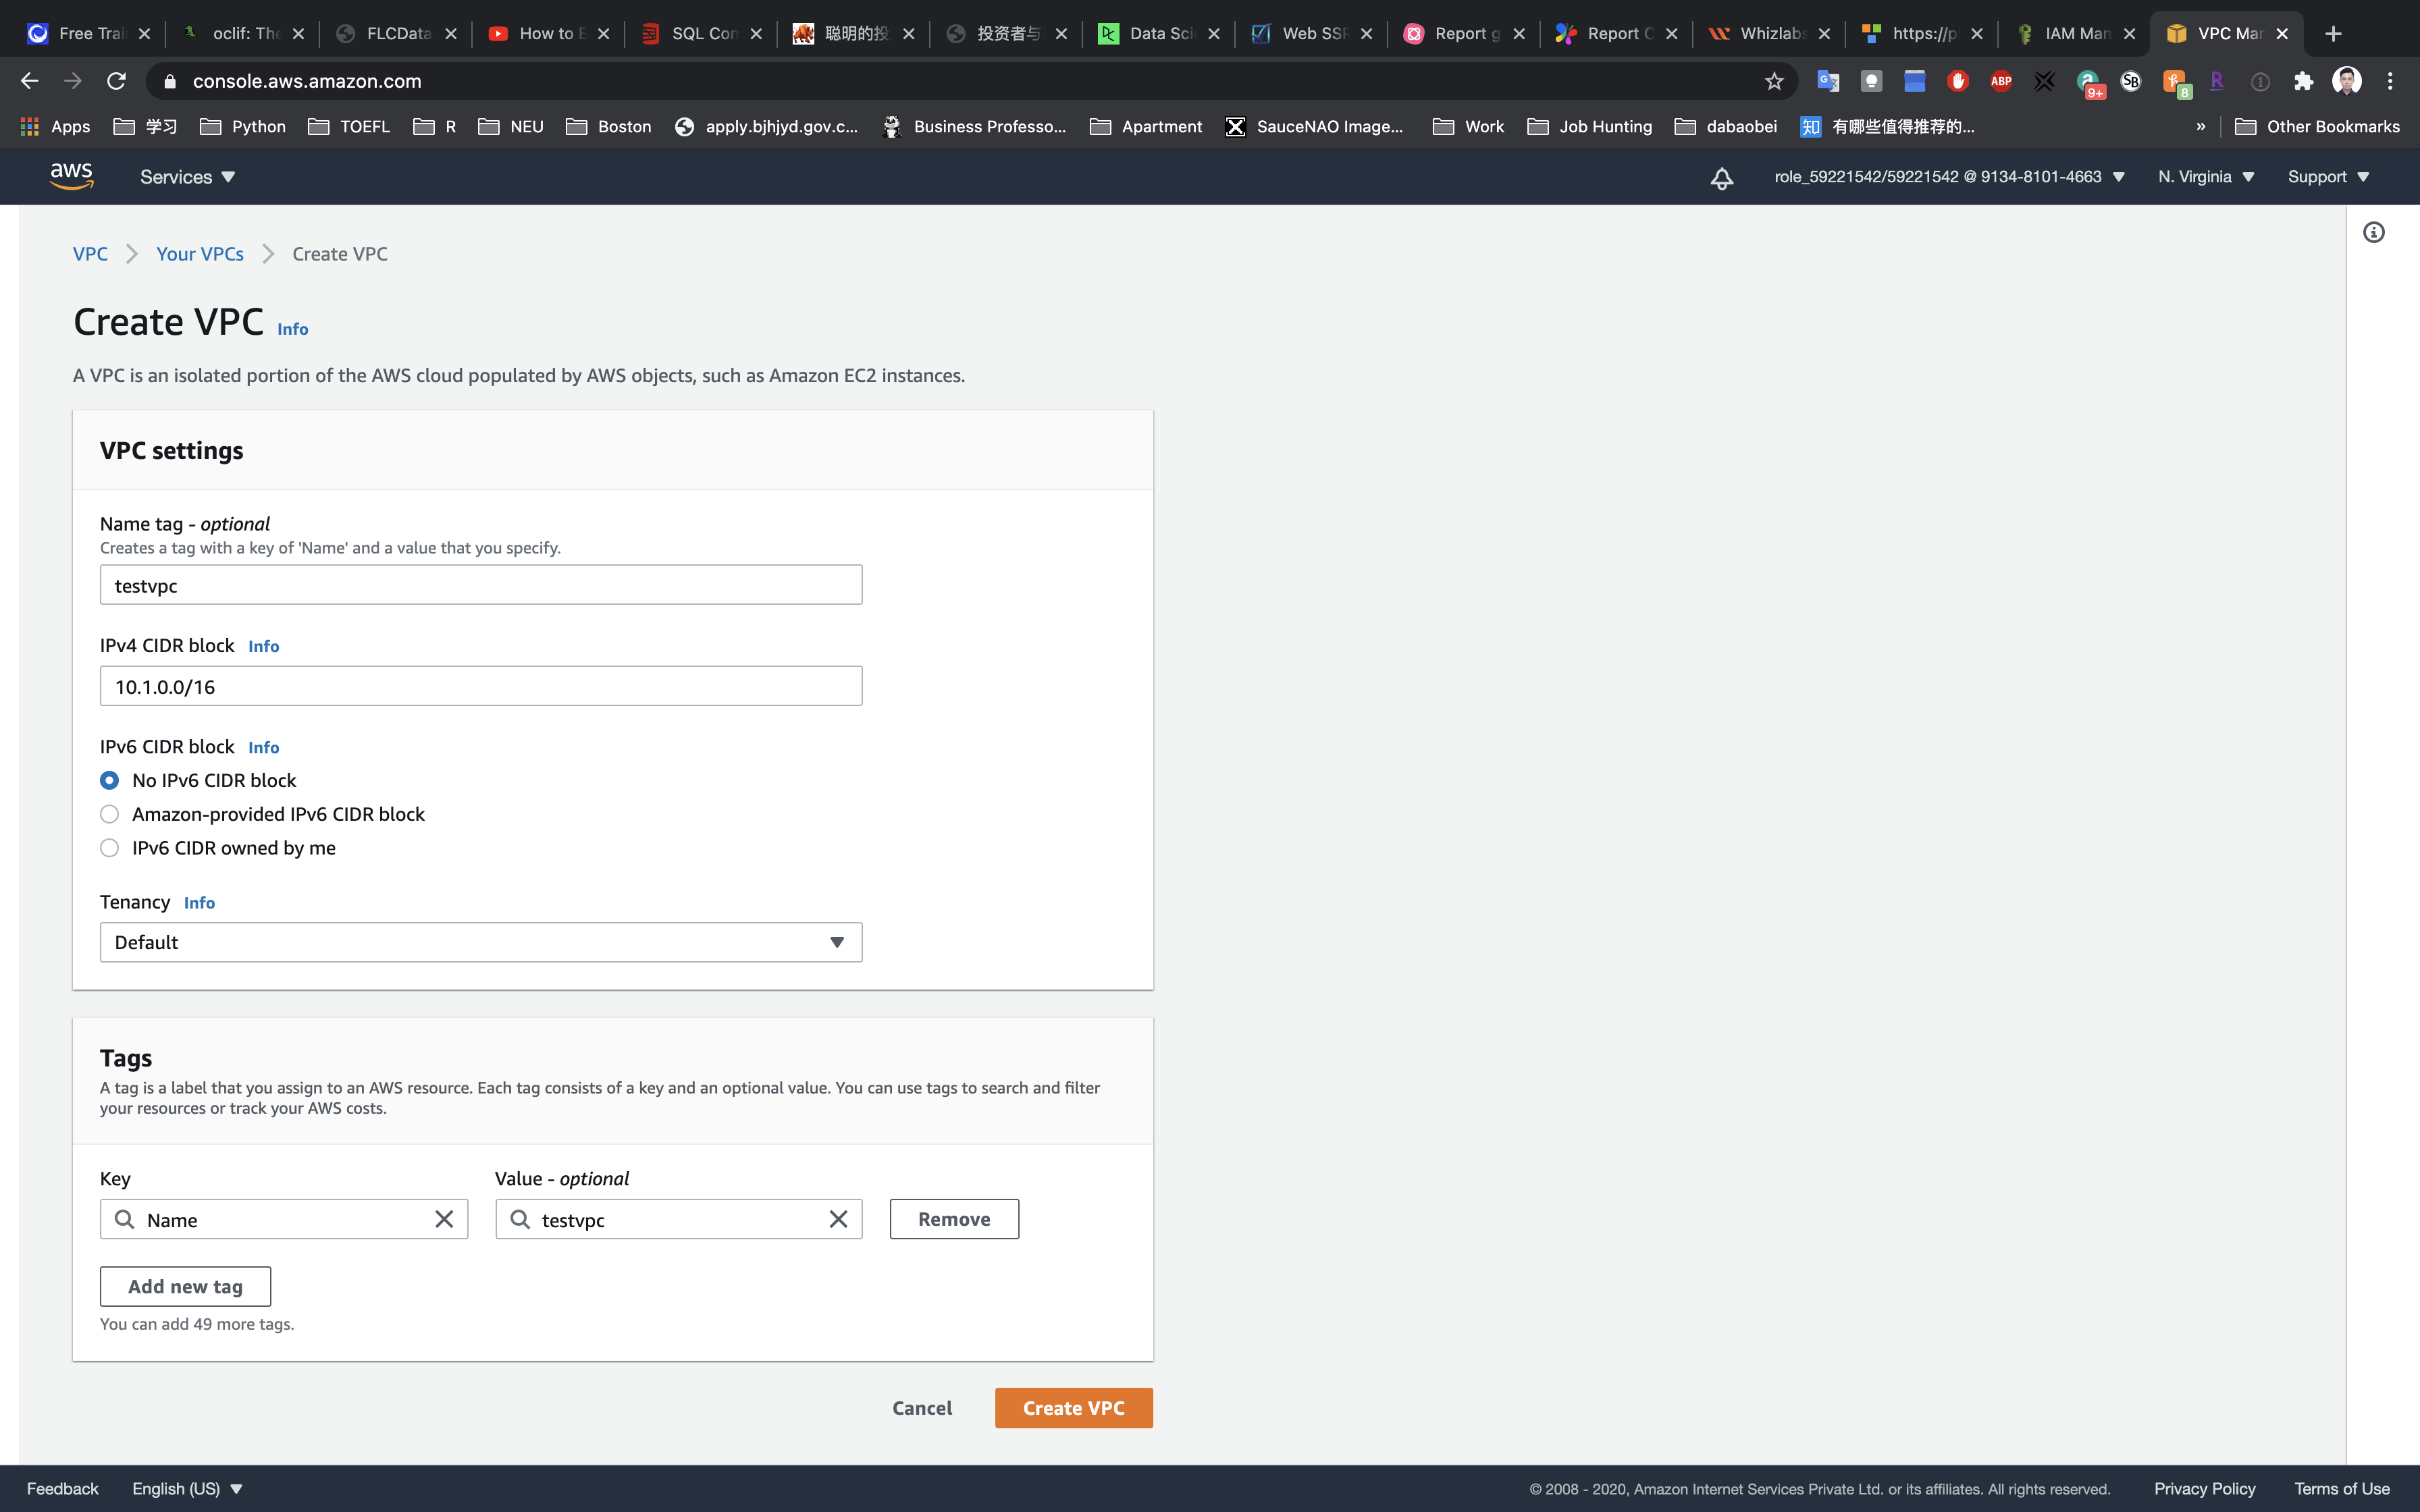
Create a VPC flow log
Click on Flow logs tab.
Click on Create flow log.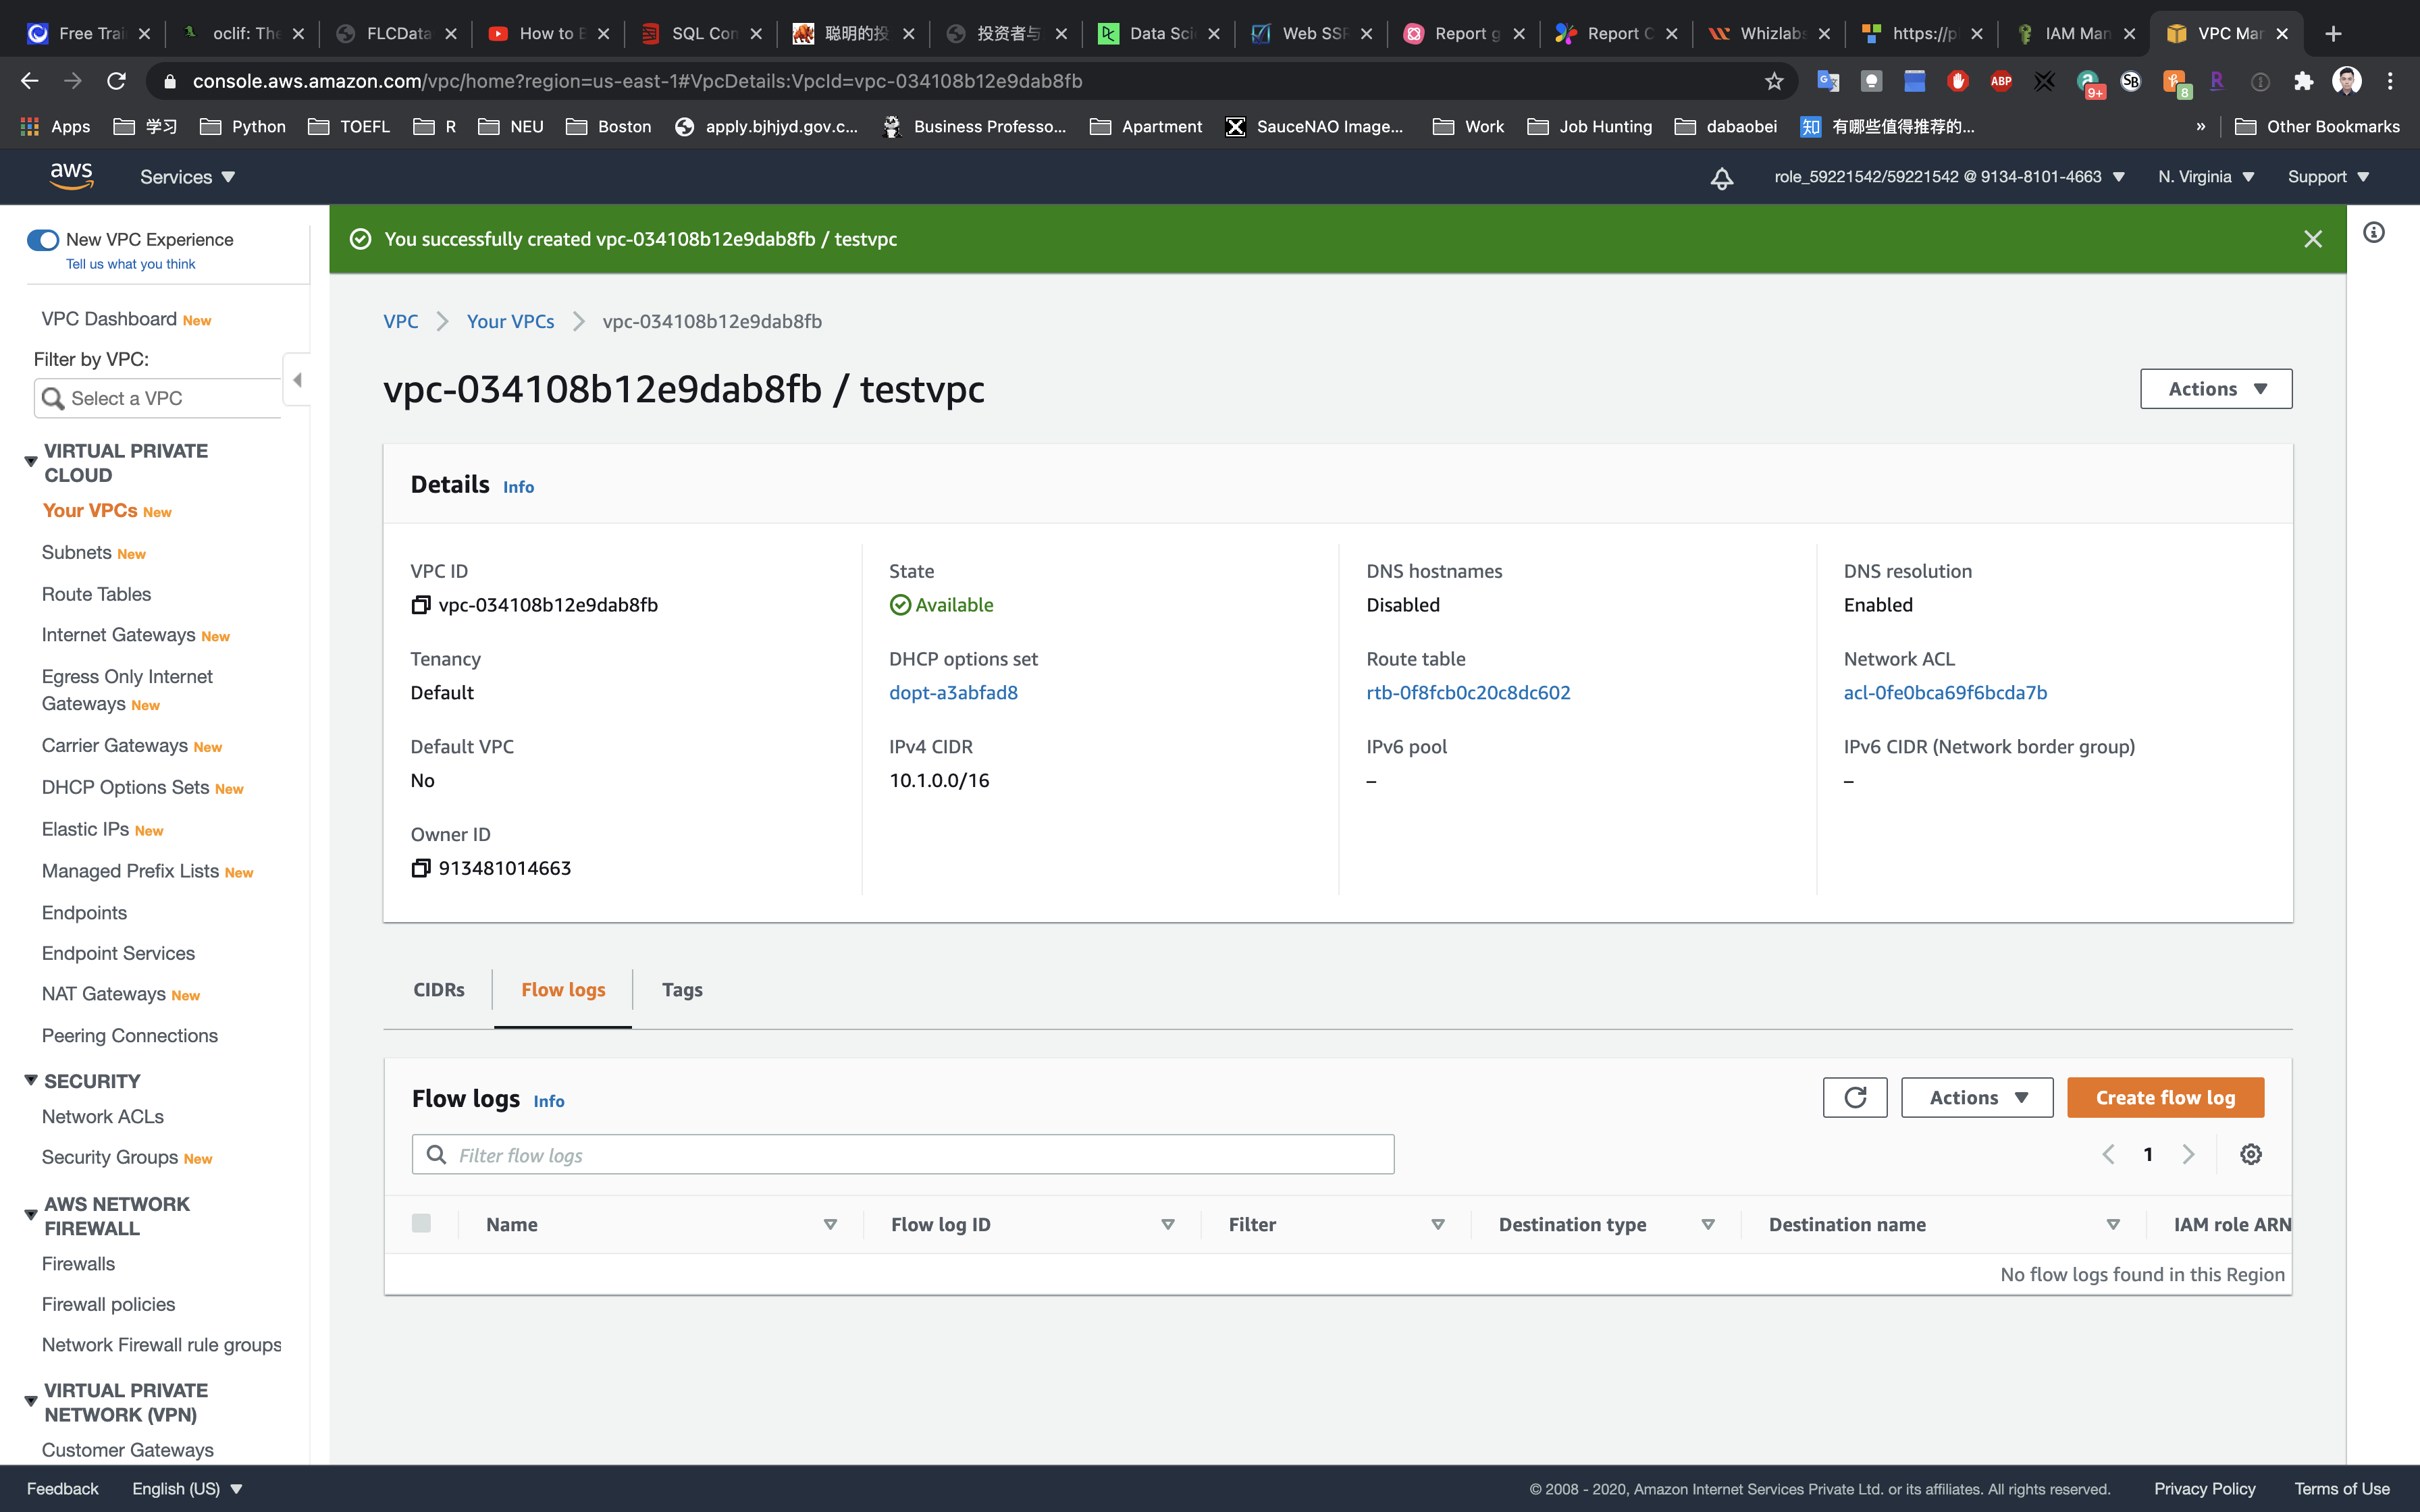
- Filter:
Accept - Destination:
Send to CloudWatch Logs - Destination log group:
vpclogs - IAM Role:
vpclogsrole

Select your VPC.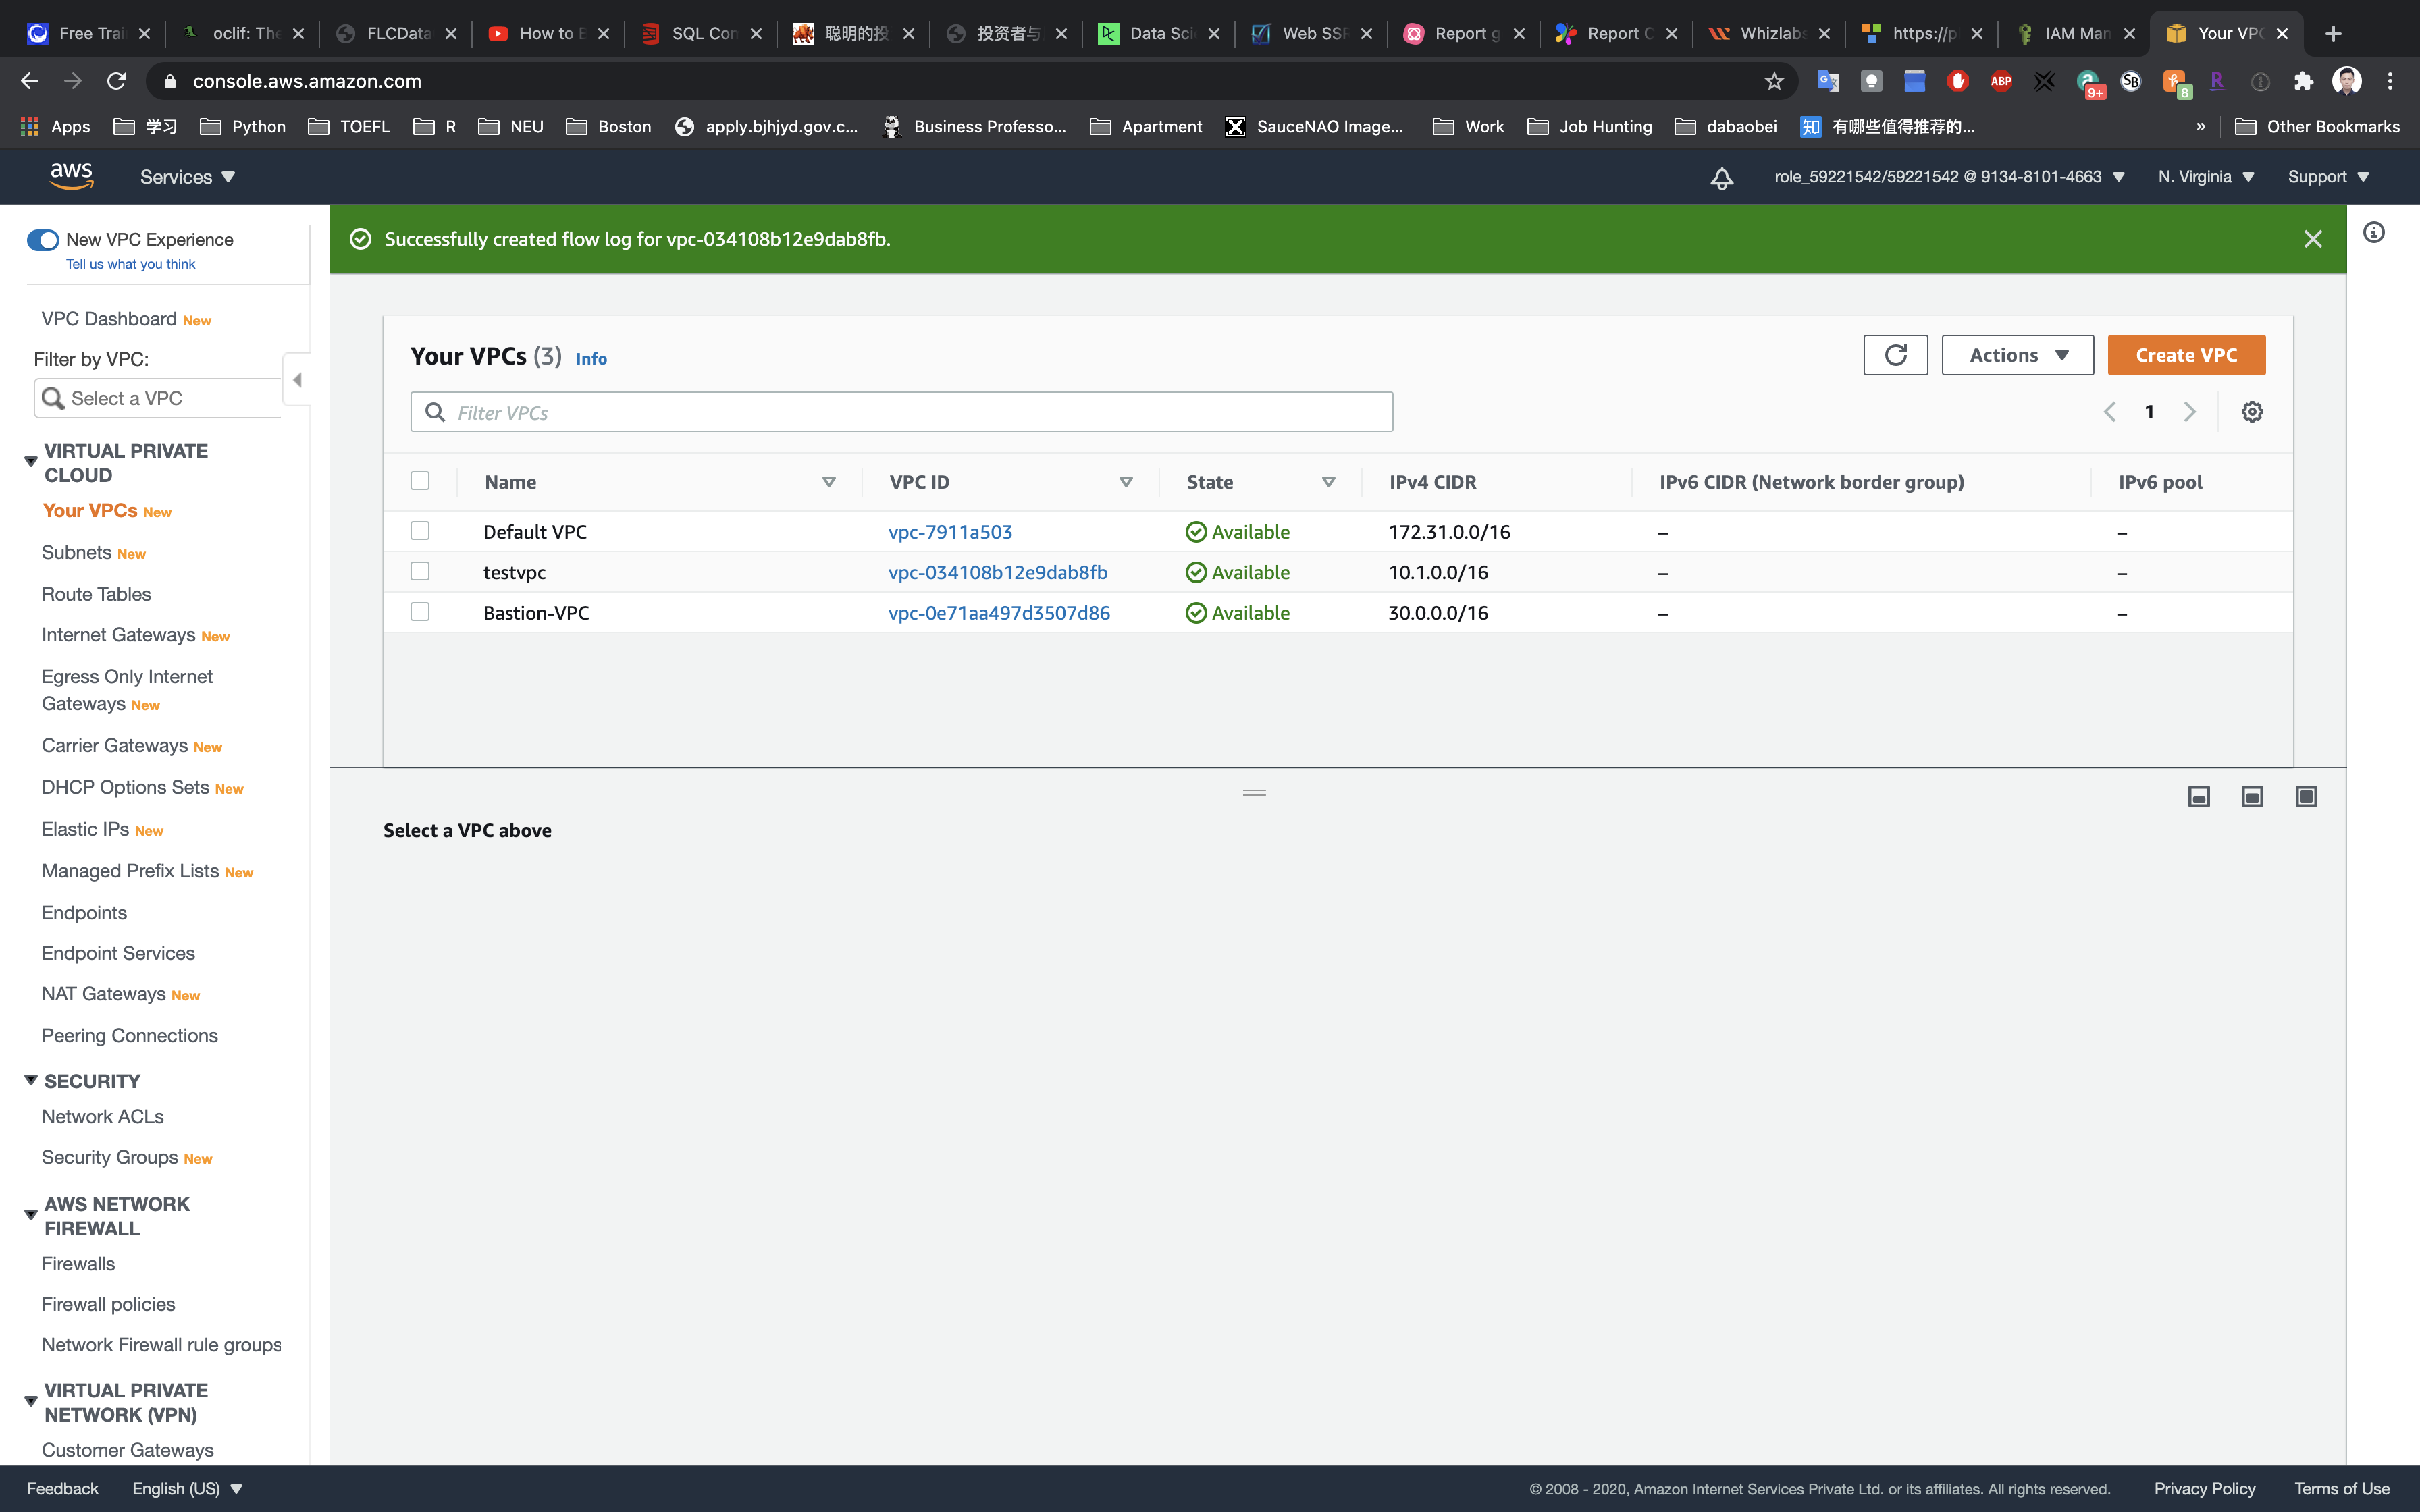
Click on Flow logs tab.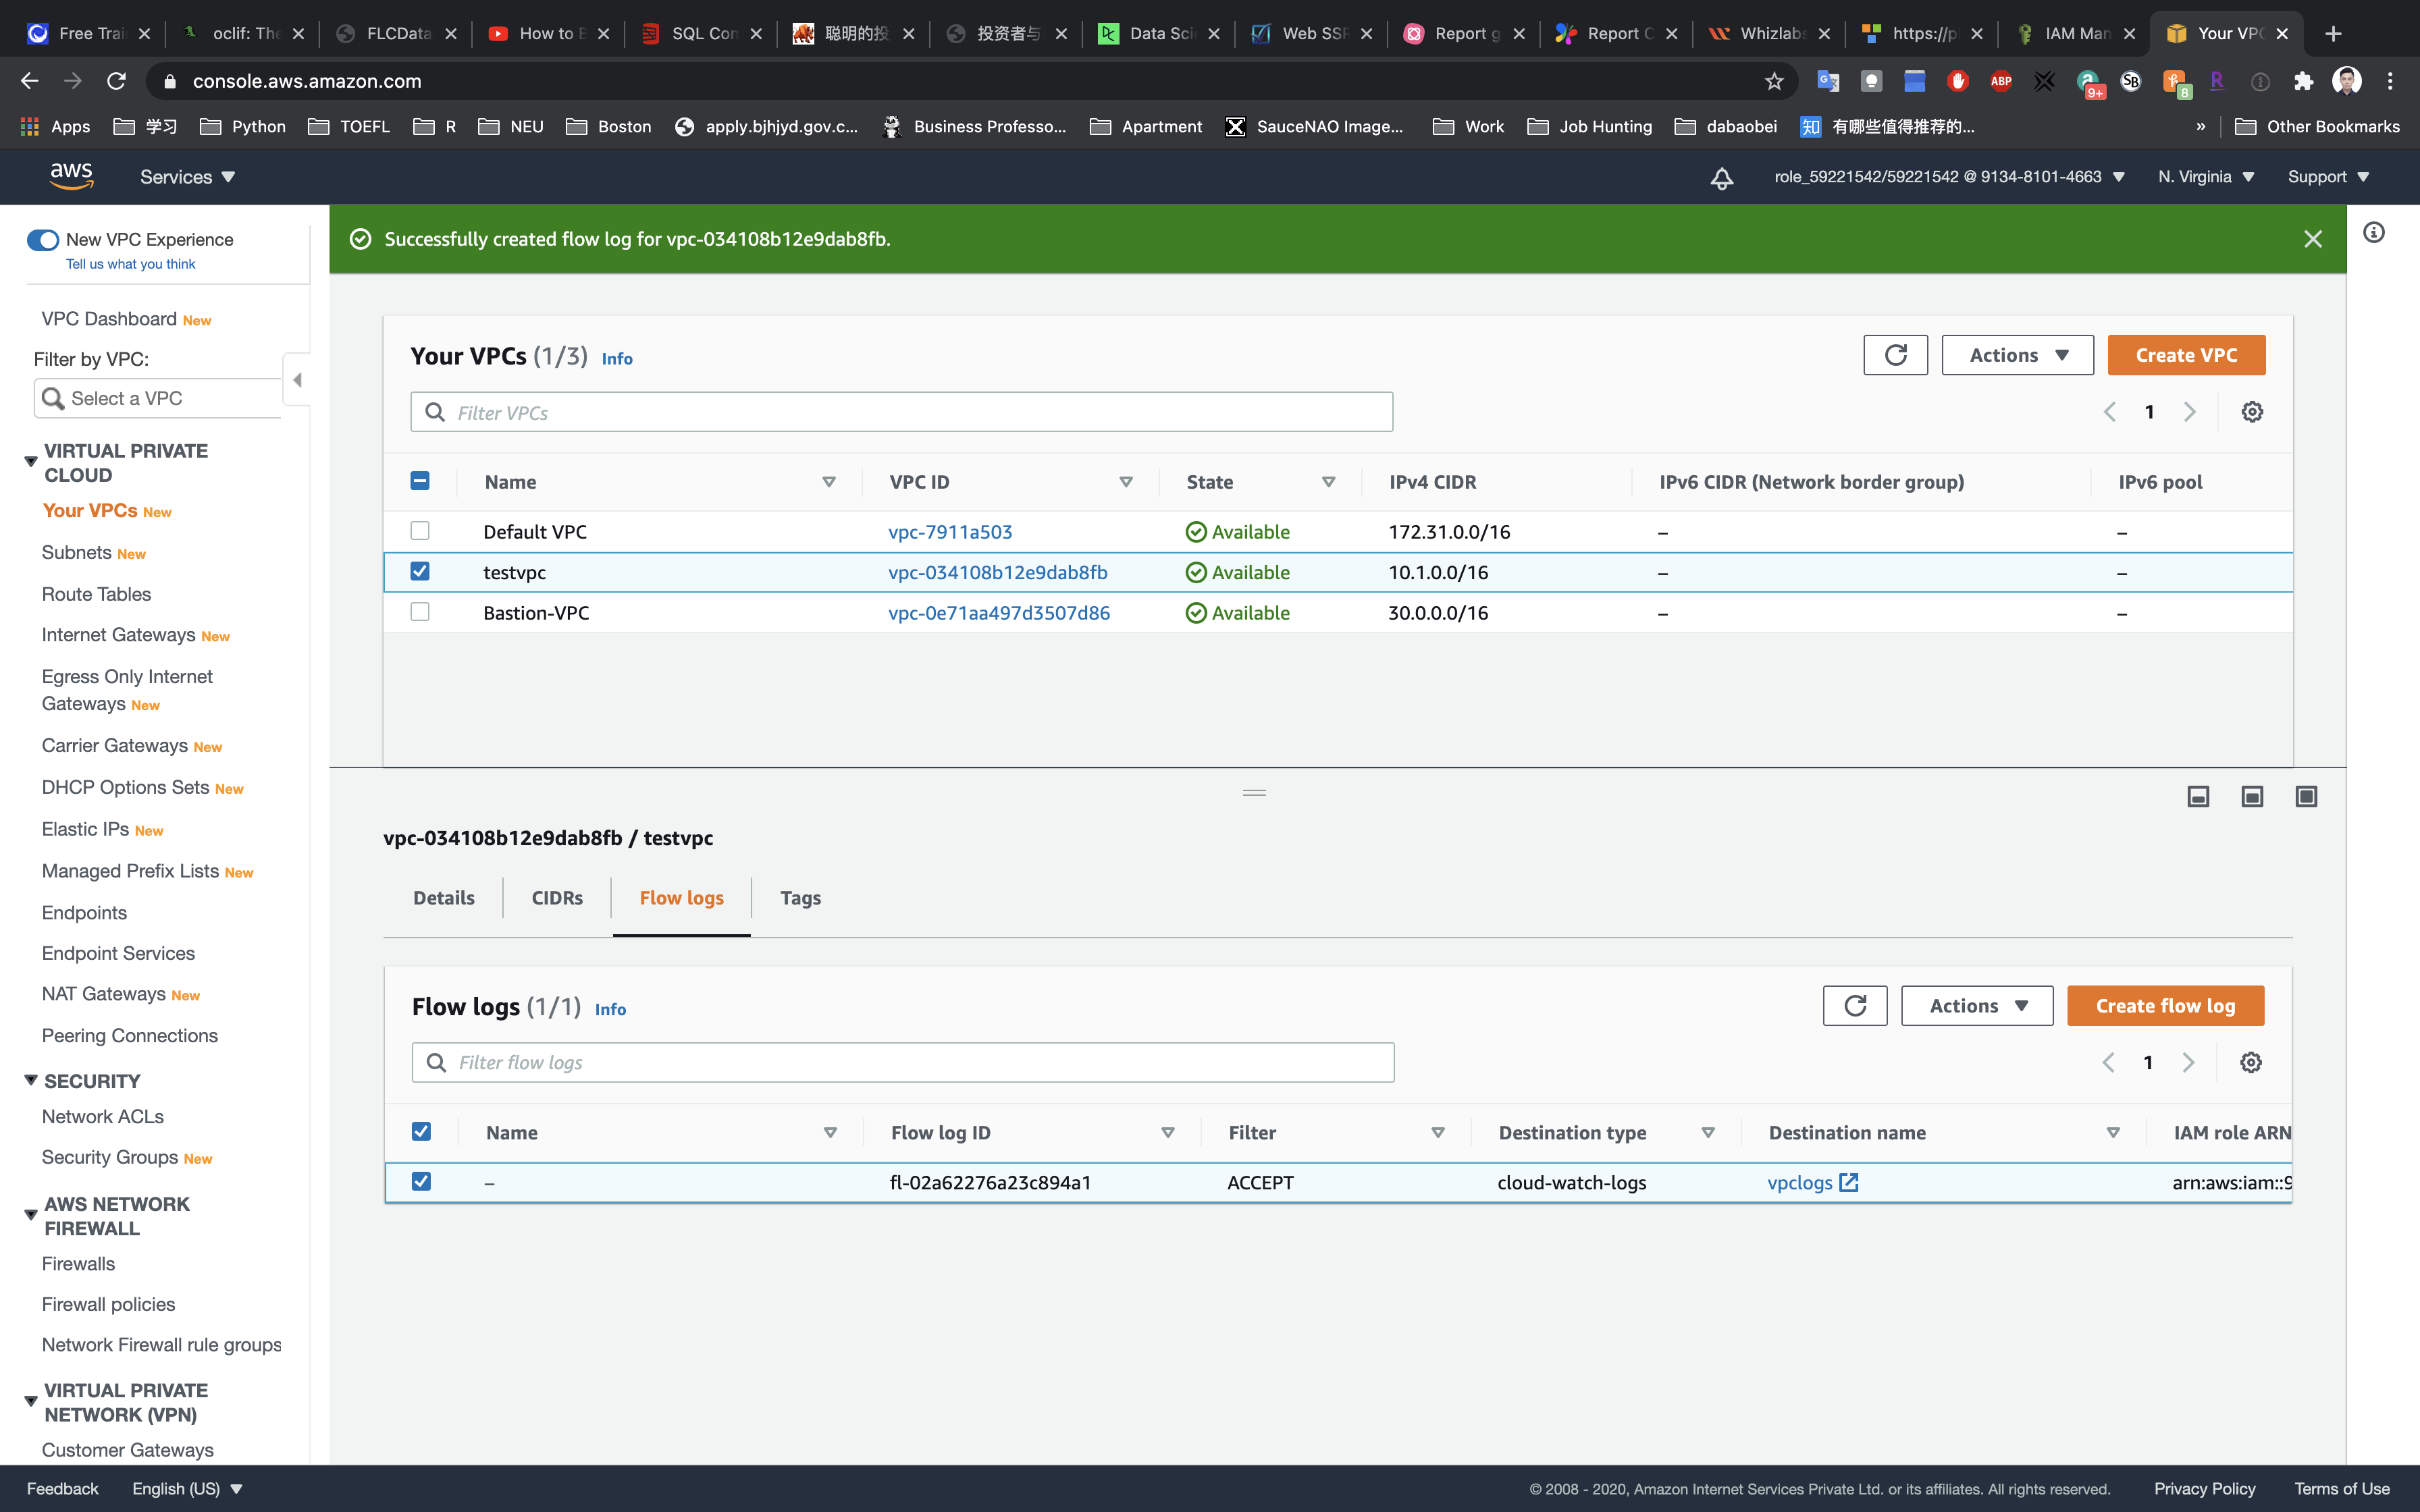
Completion and Conclusion
- You have successfully created the CloudWatch Logs.
- You have successfully created an IAM Role.
- You have successfully created an IAM Policy.
- You have successfully created the VPC.
- You have successfully created the VPC Flow Logs.