AWS EC2 Lab
EC2
Introduction to Amazon Elastic Compute Cloud (EC2)
https://play.whizlabs.com/site/task_details?lab_type=1&task_id=8&quest_id=35
Lab Details
This lab walks you through the steps to launch and configure a virtual machine in the Amazon cloud.
You will practice using Amazon Machine Images to launch Amazon EC2 Instances and use key pairs for SSH authentication to log into your instance. You will create a web page and publish it.
Duration: 30 minutes
AWS Region: US East (N. Virginia) us-east-1
Task Details
- Log into AWS Management Console.
- Create an Amazon Linux Instance from an Amazon Linux AMI
- Find your instance in the AWS Management Console.
- SSH into your instance.
- Configure our EC2 Instance to be a web server.
- Create and publish a sample test.html file.
- Test the page with the public IP address of EC2 Instance created.
Architecture Diagram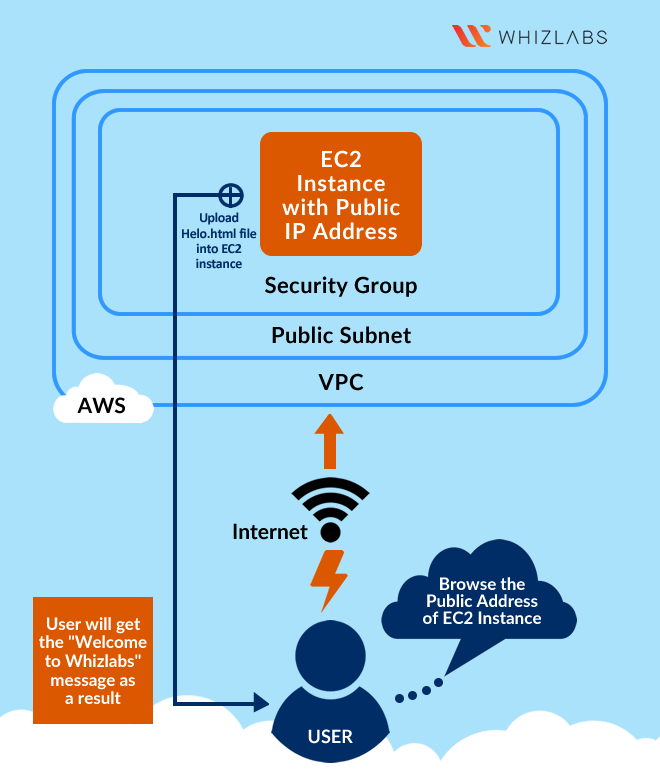
EC2 Configuration
Services -> EC2 -> Instances
Click on Launch instances
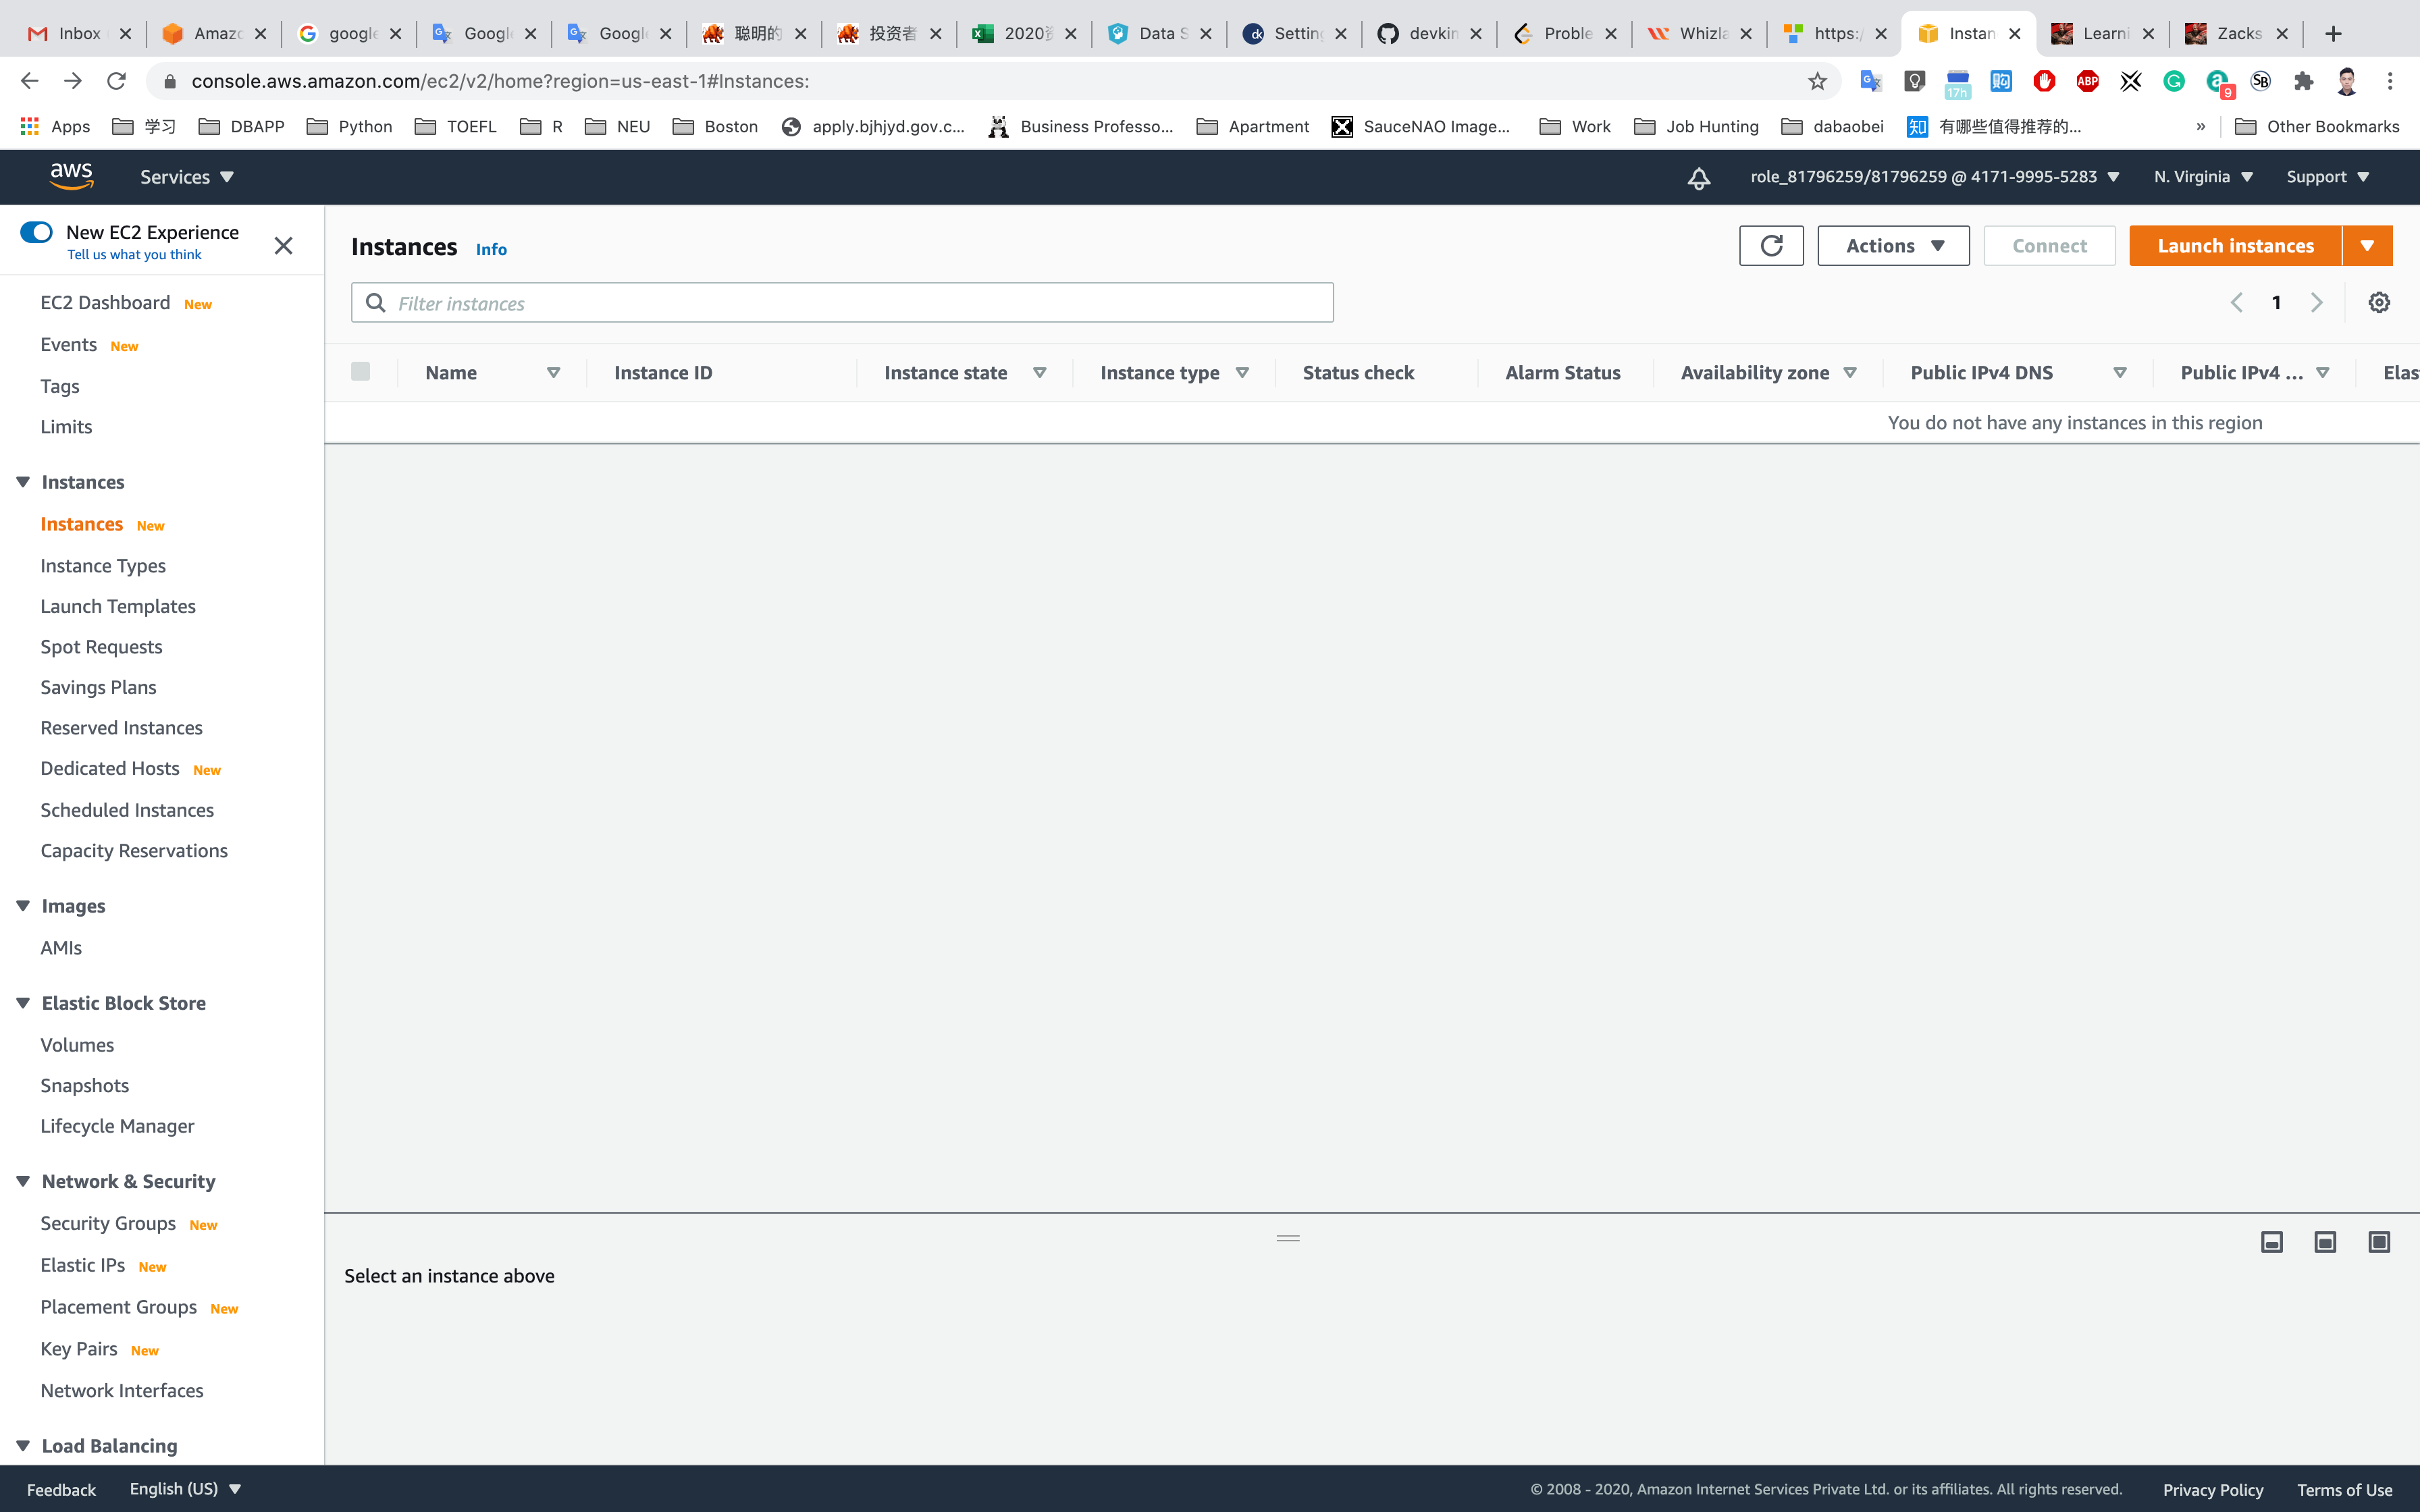
Launching EC2 Instance
Step 1: Choose an Amazon Machine Image(AMI)
Select Amazon Linux 2 AMI (HVM), SSD Volume Type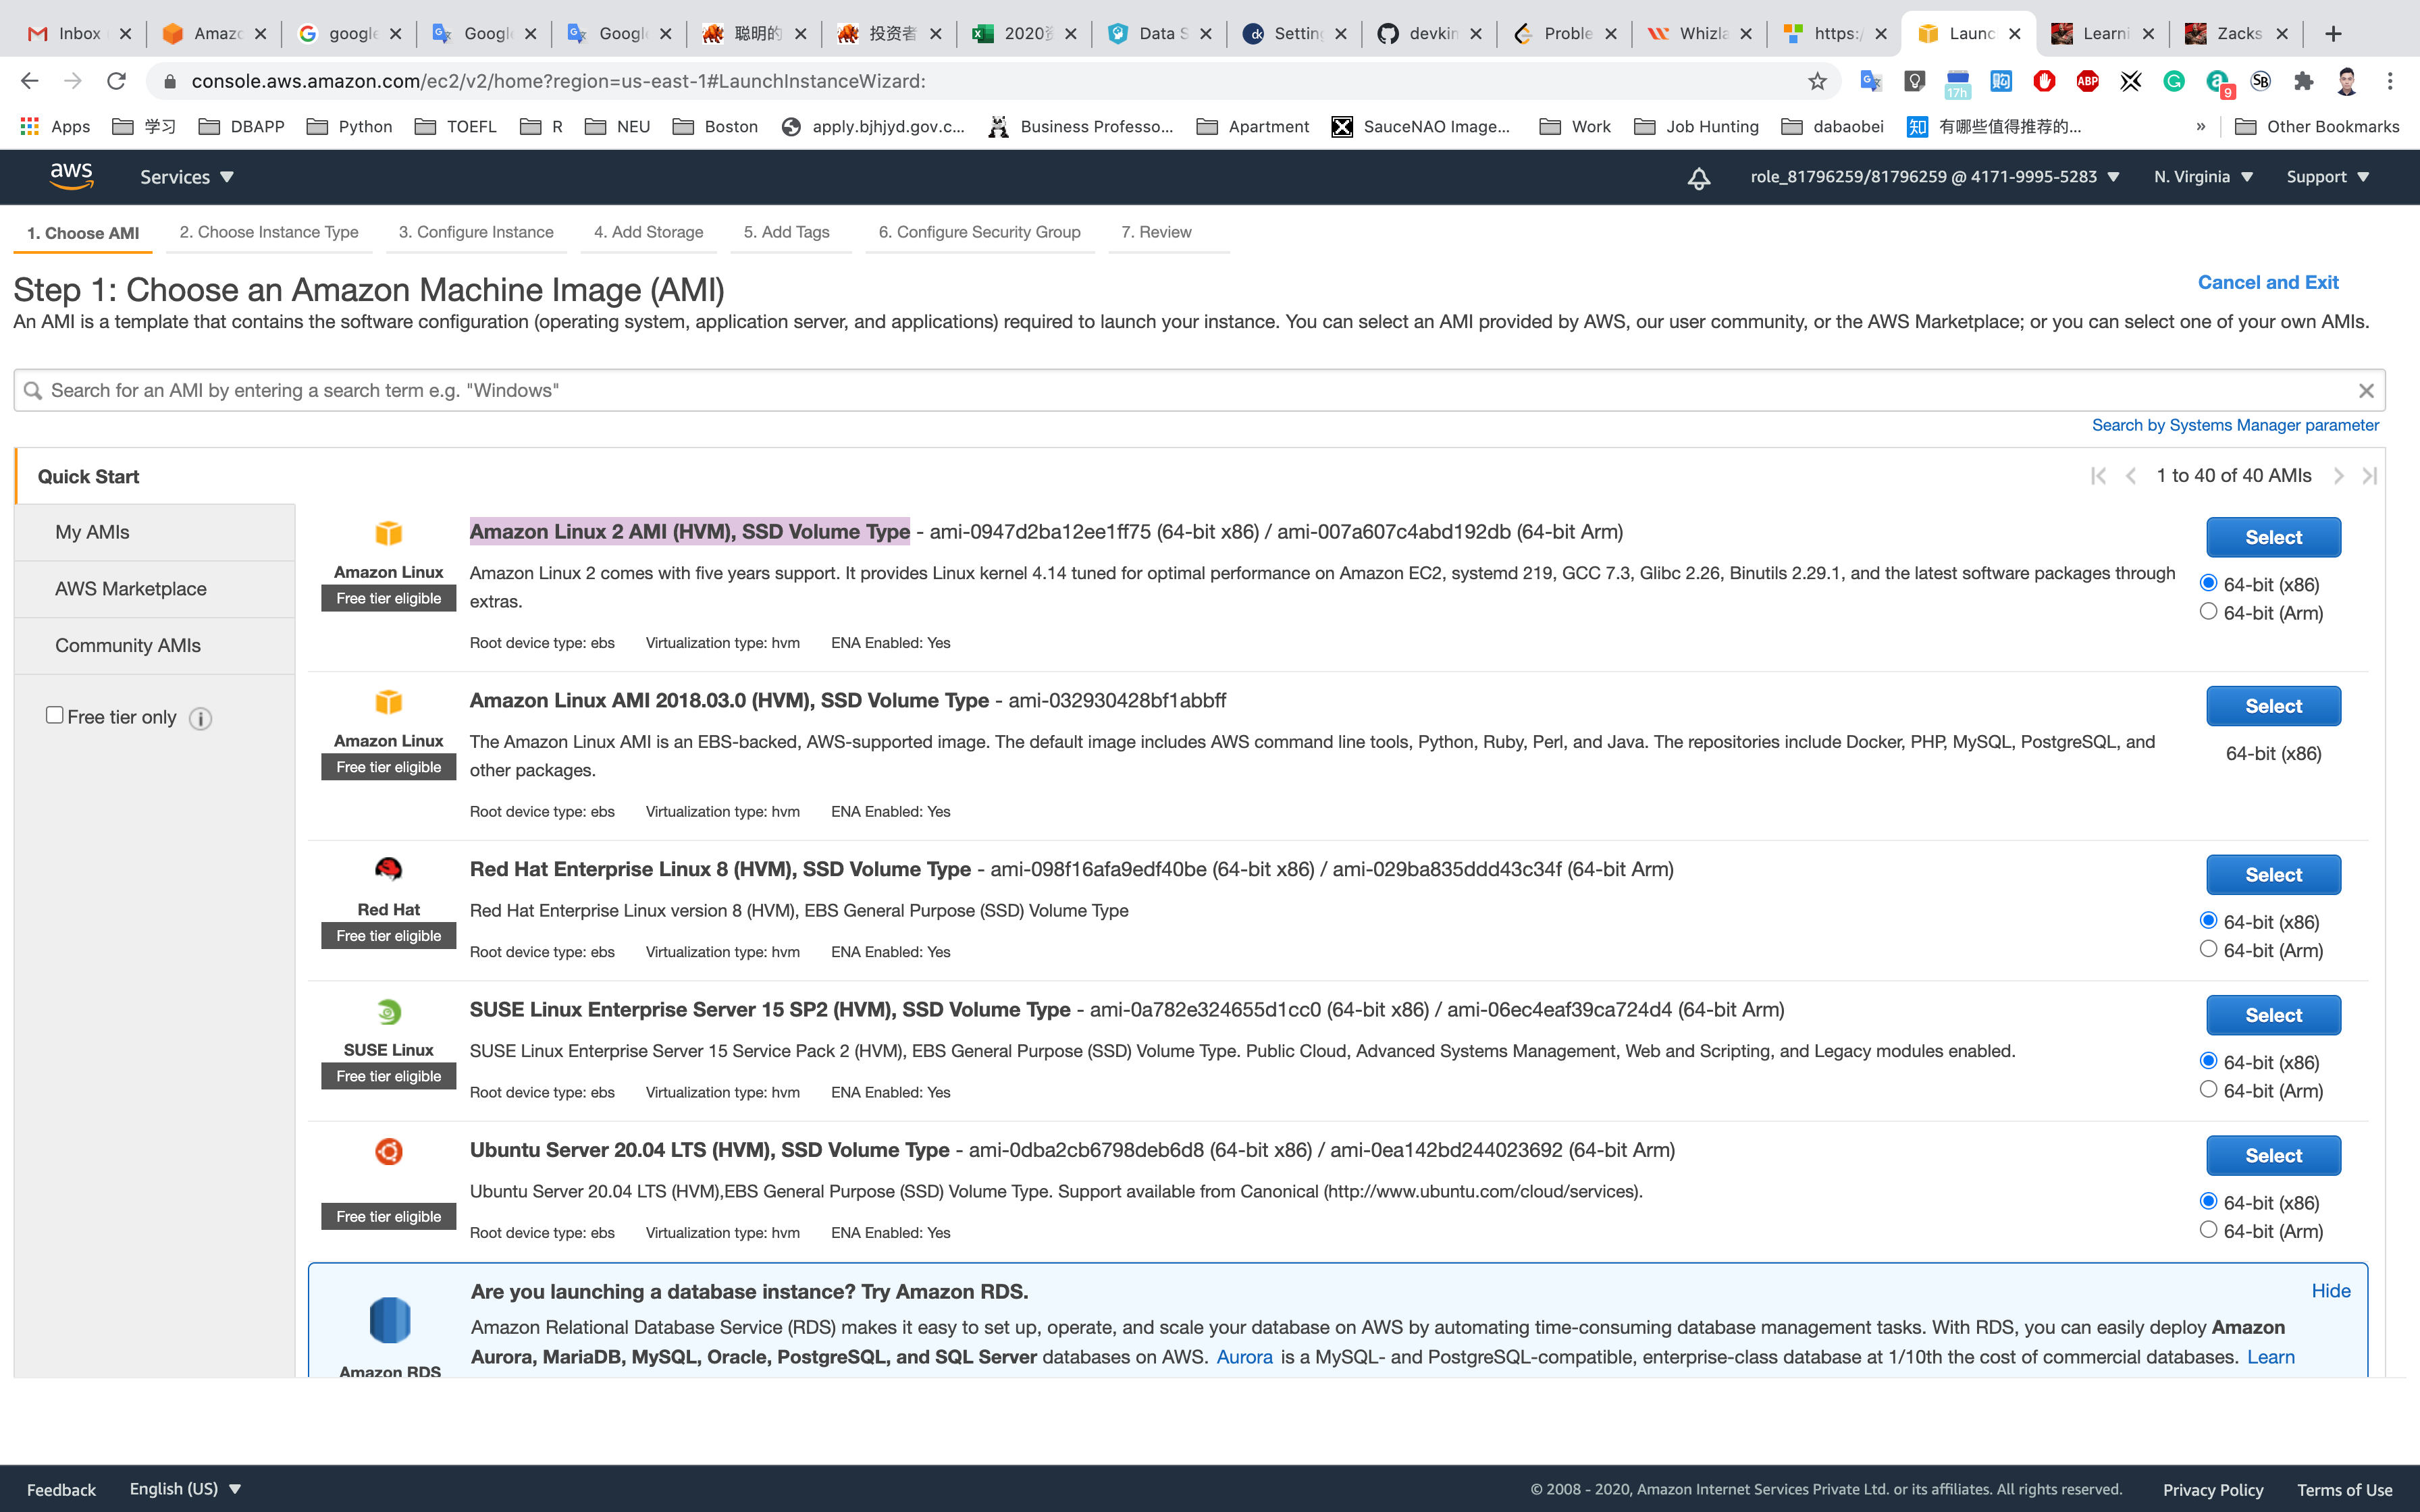
Step 2: Choose an Instance Type
Select t2.micro
Click on Next: Configure Instance Details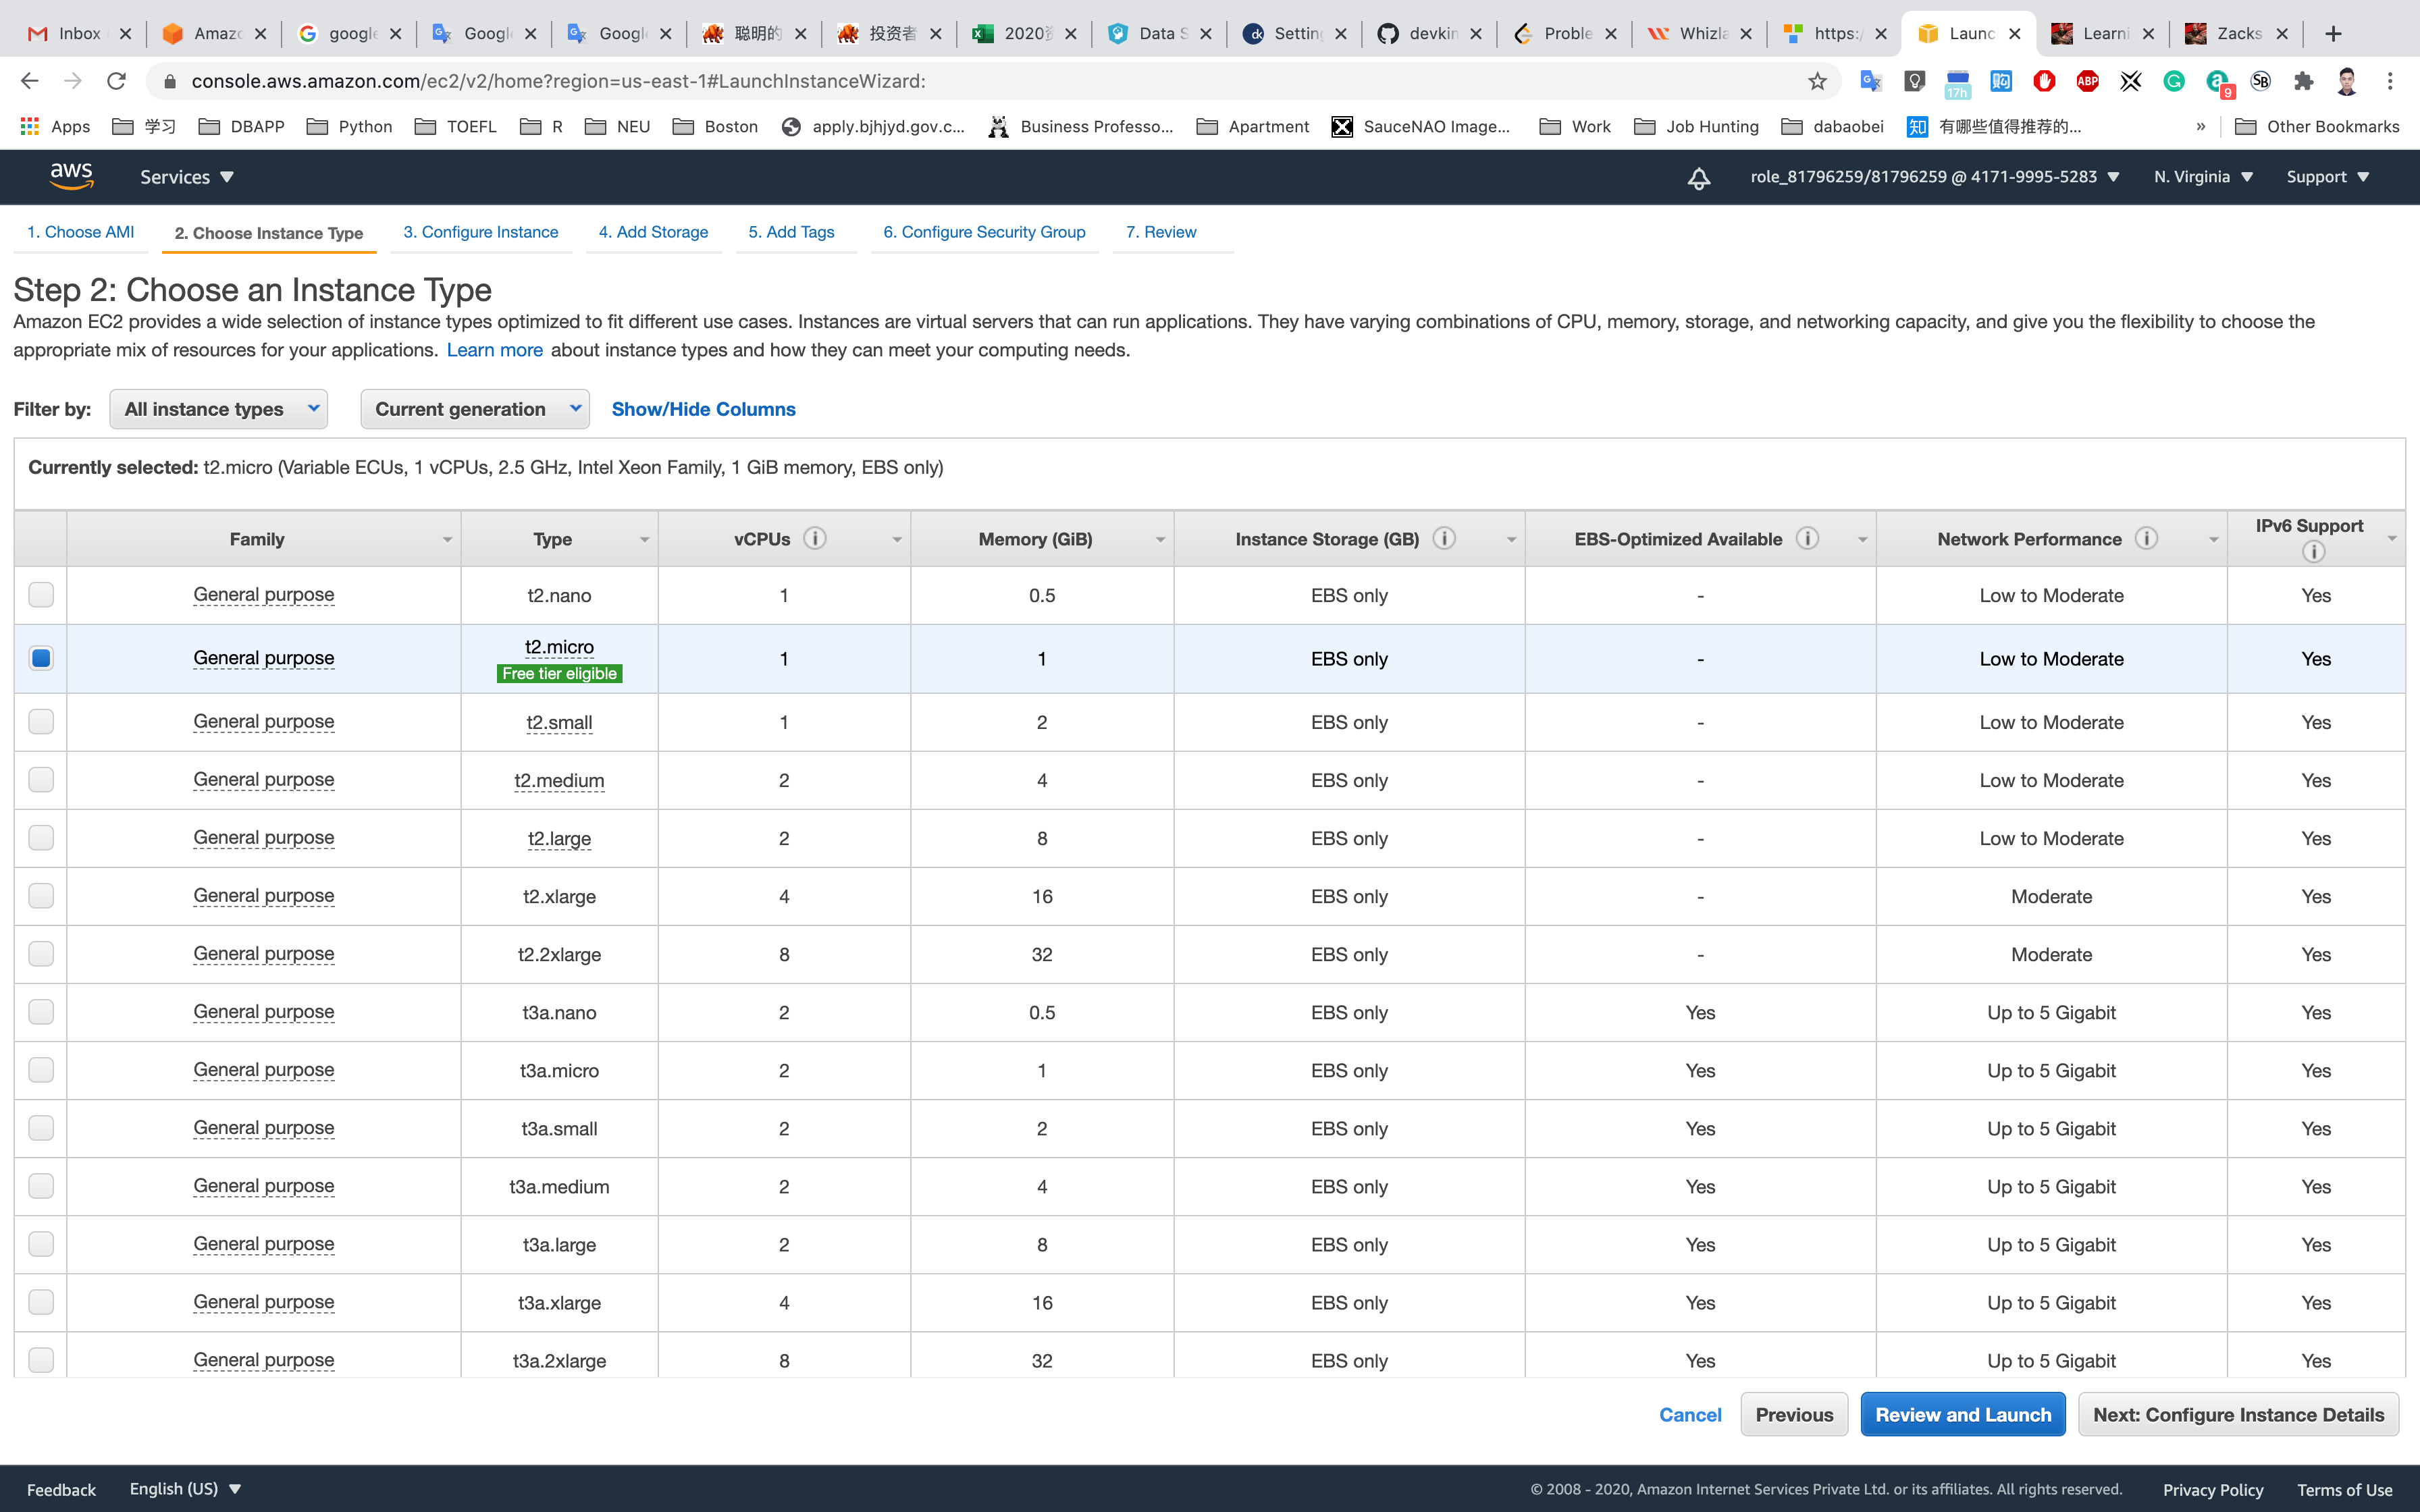
Step 3: Configure Instance Details
Leave it default settings
Click on Next: Add Storage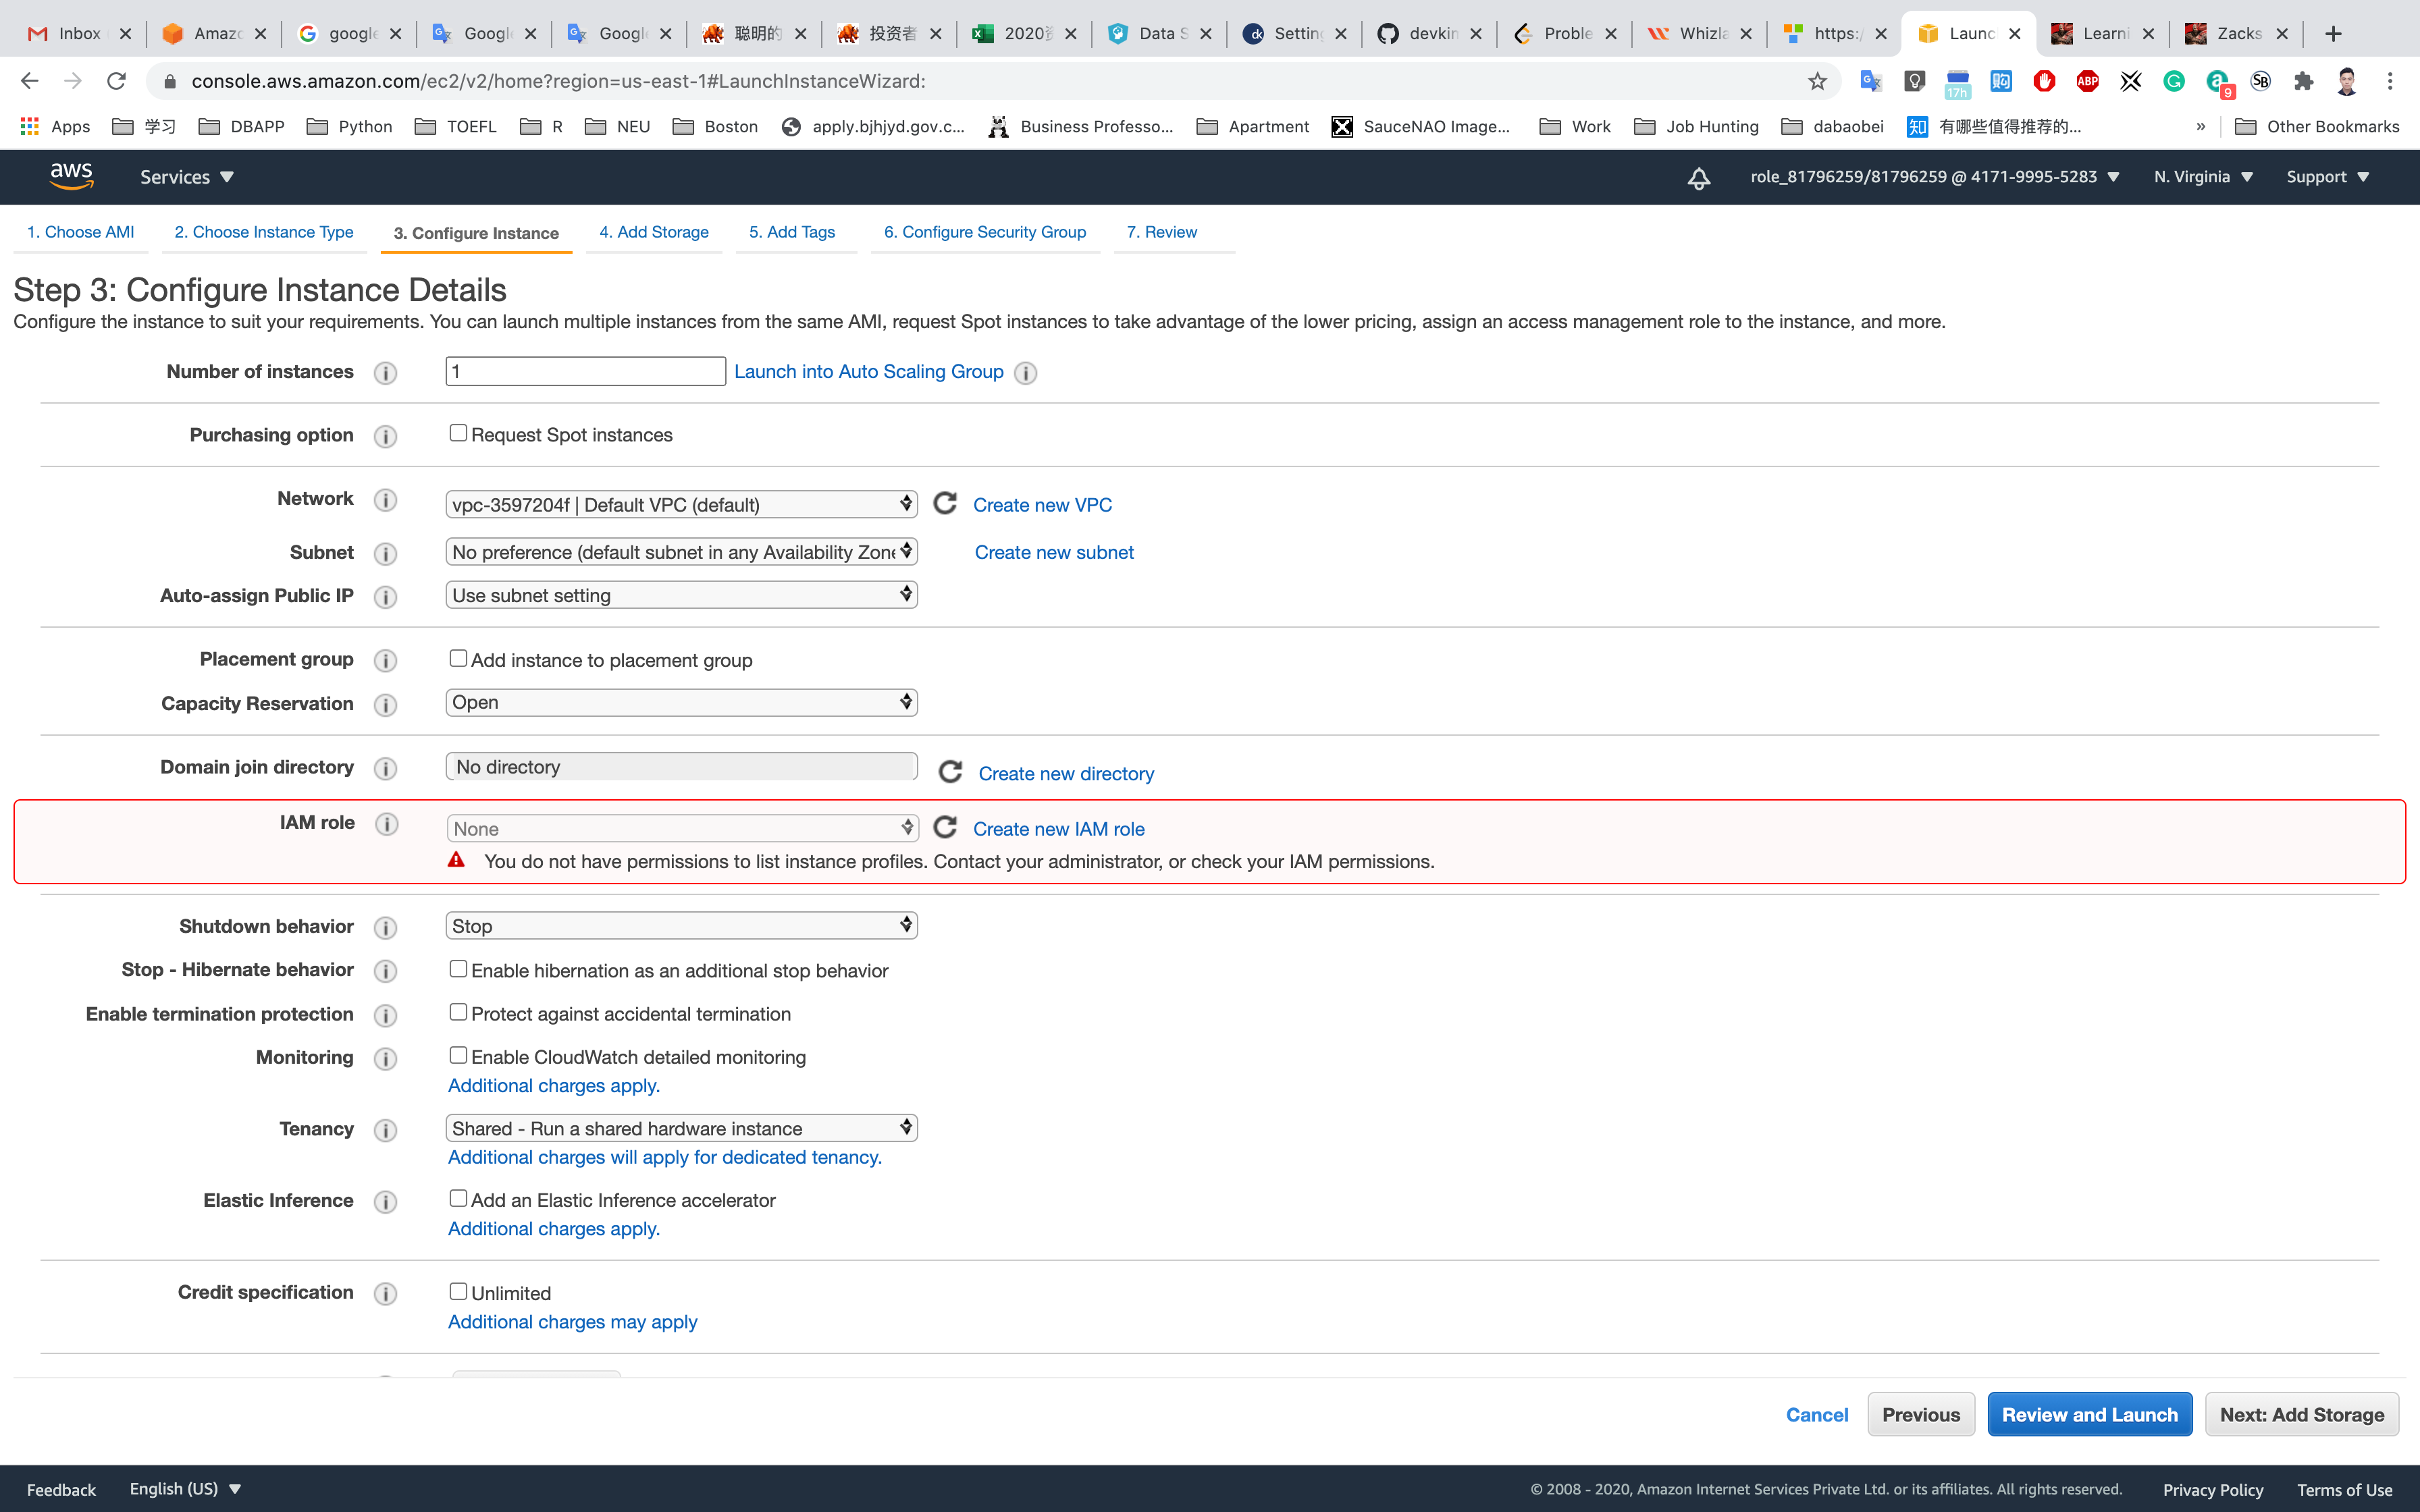
Step 4: Add Storage
Leave it default settings
Click on Next: Add Tags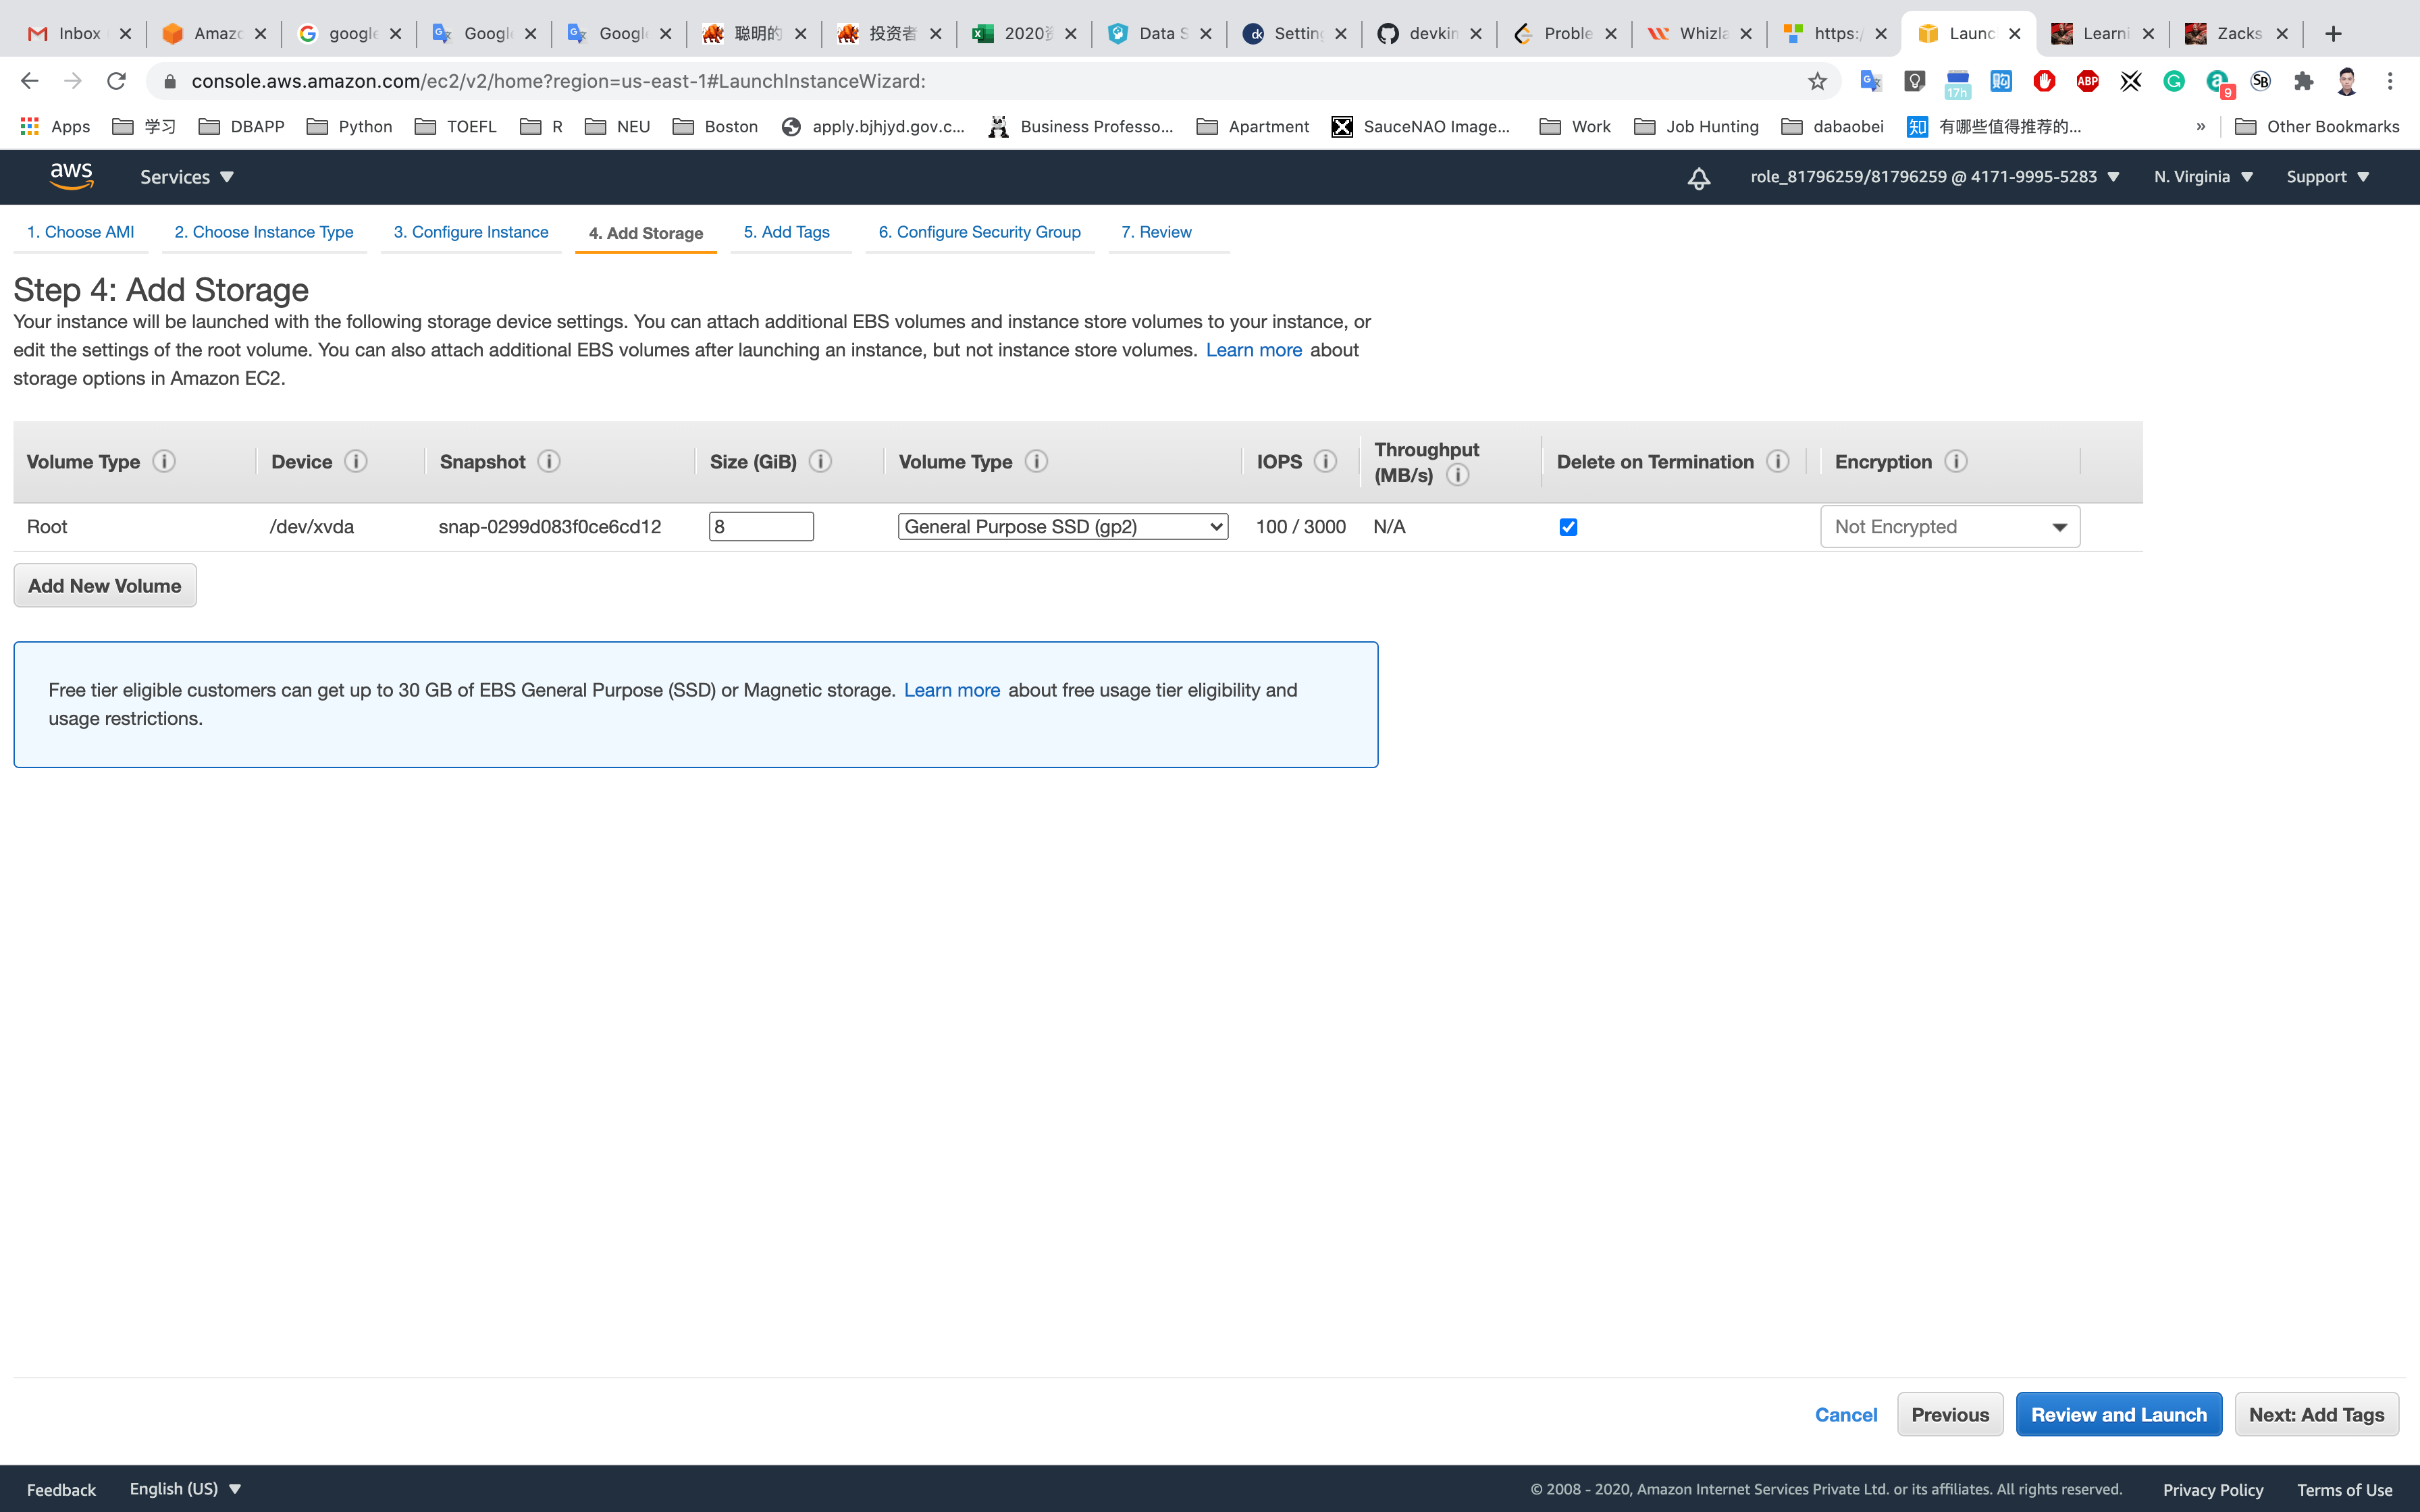
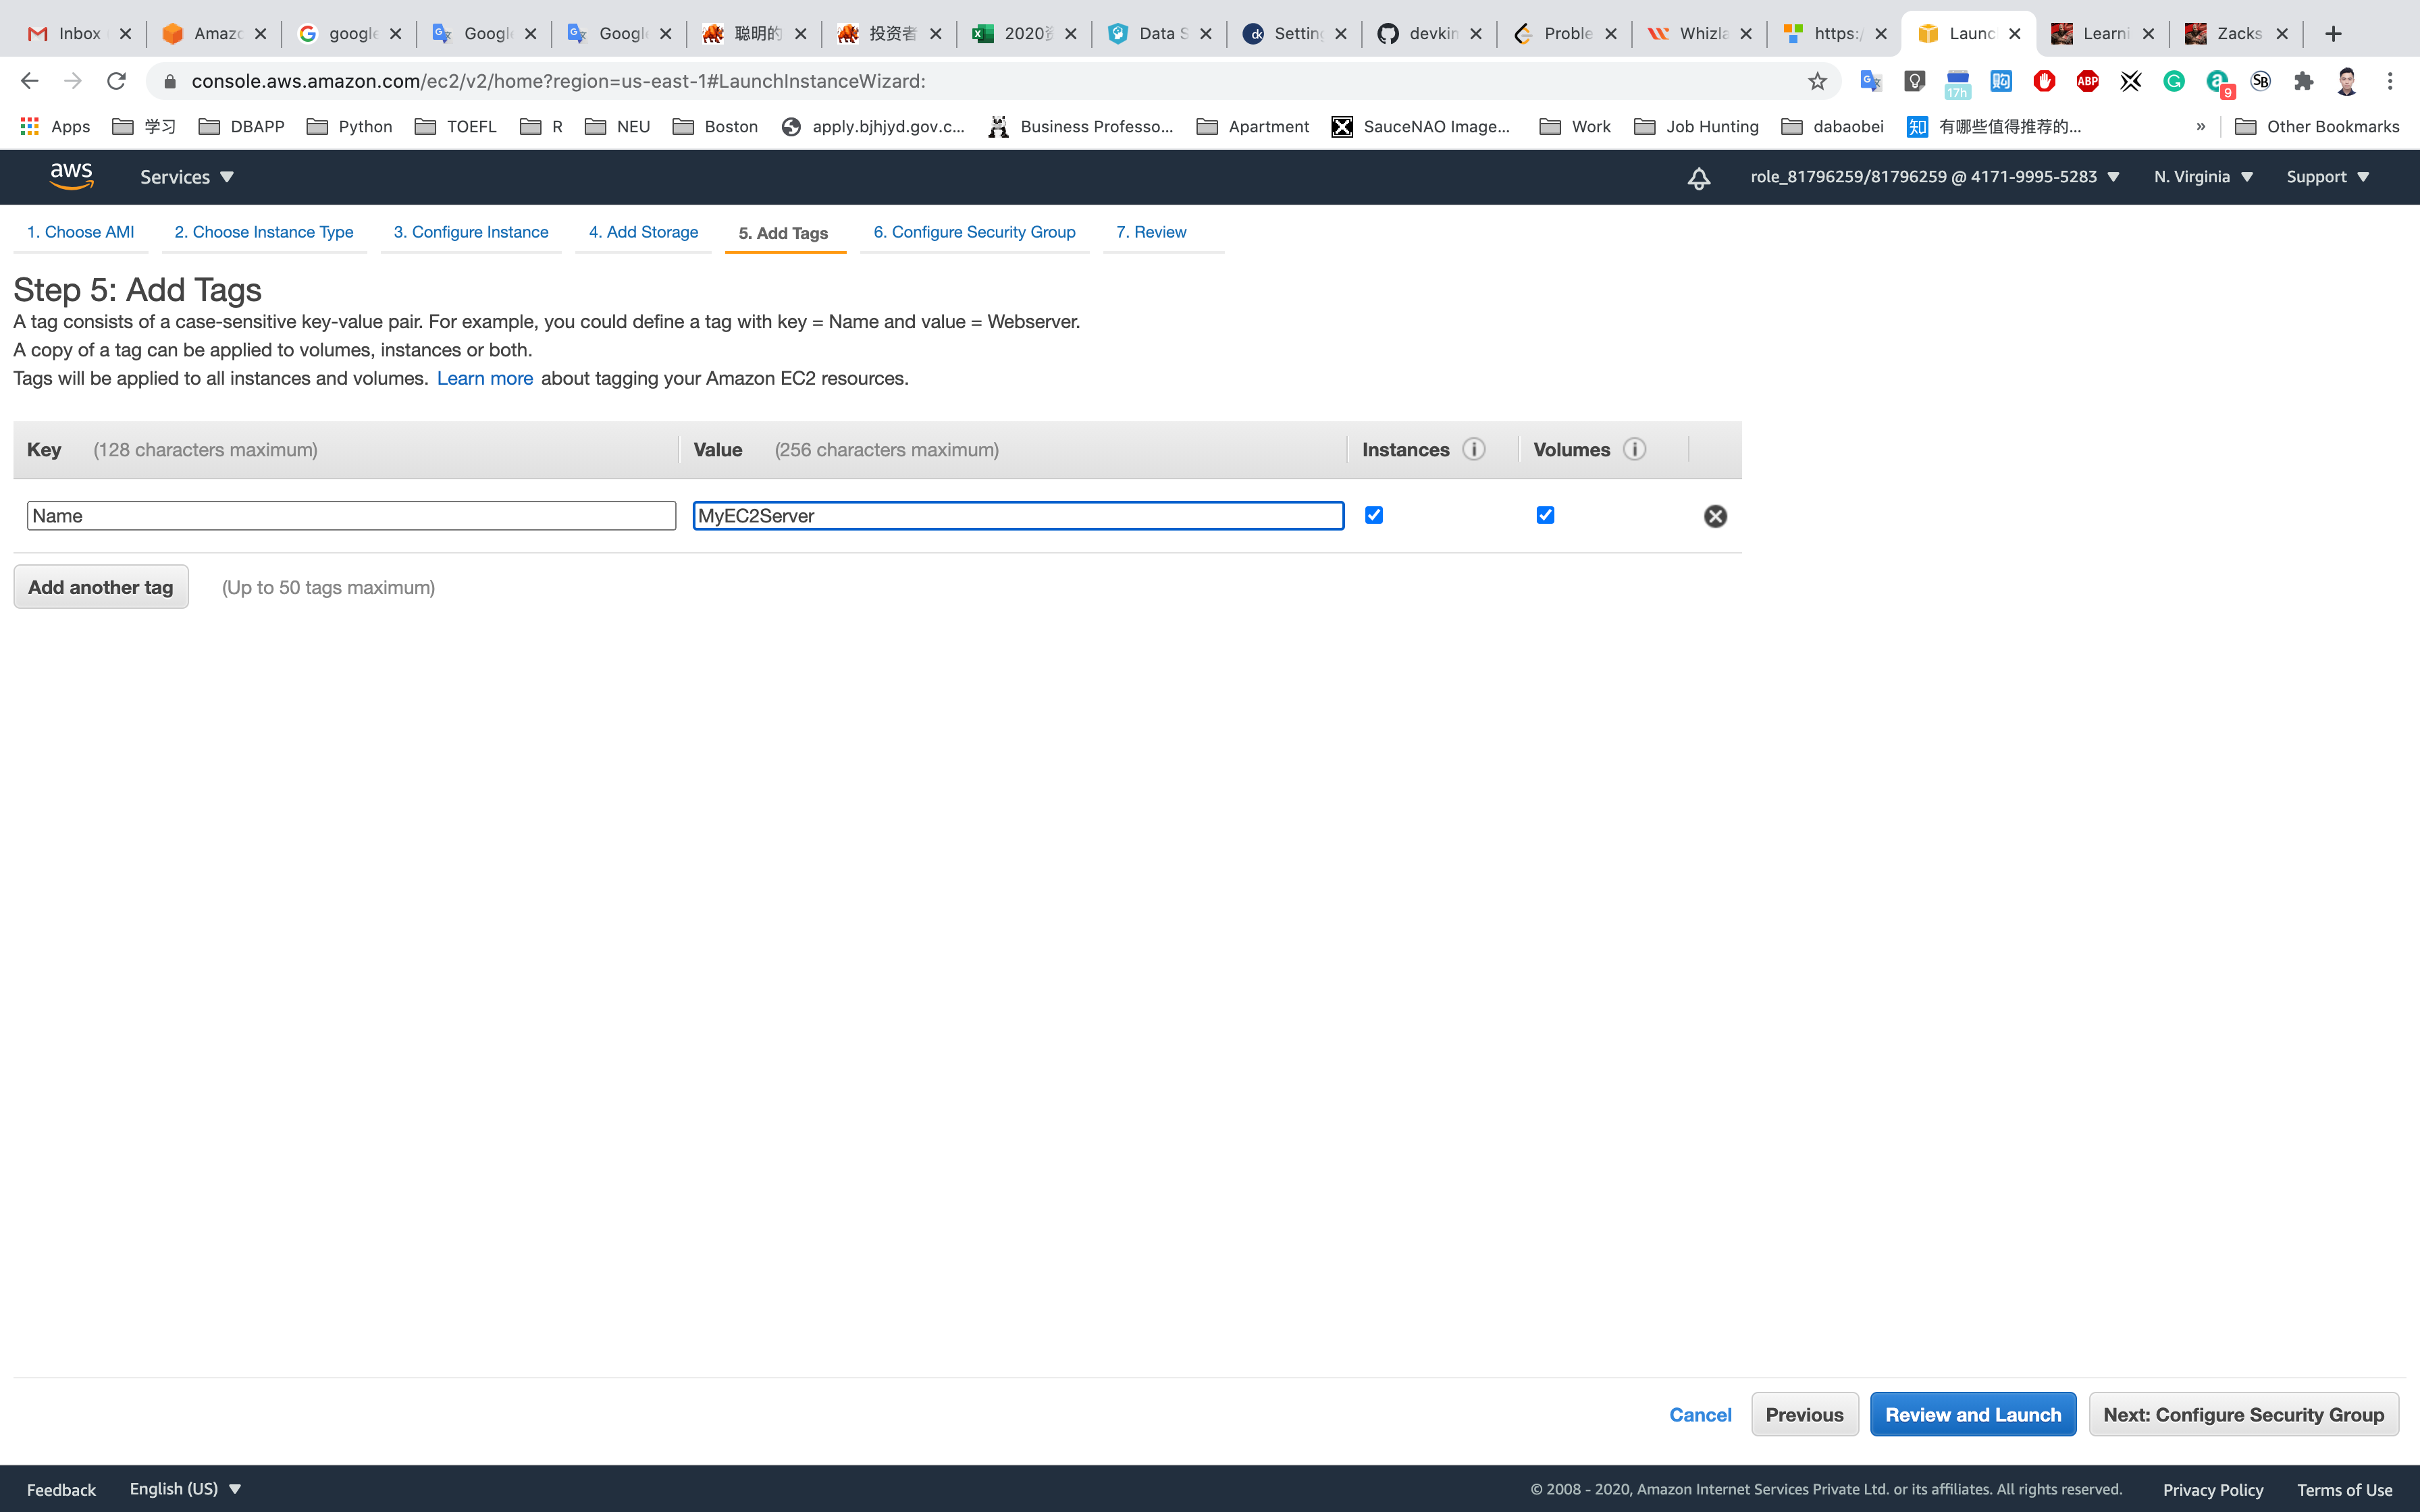
Step 5: Add Tags
Click on Add Tag
- Key:
Name - Value:
MyEC2Server
Click on Next: Configure Security Group
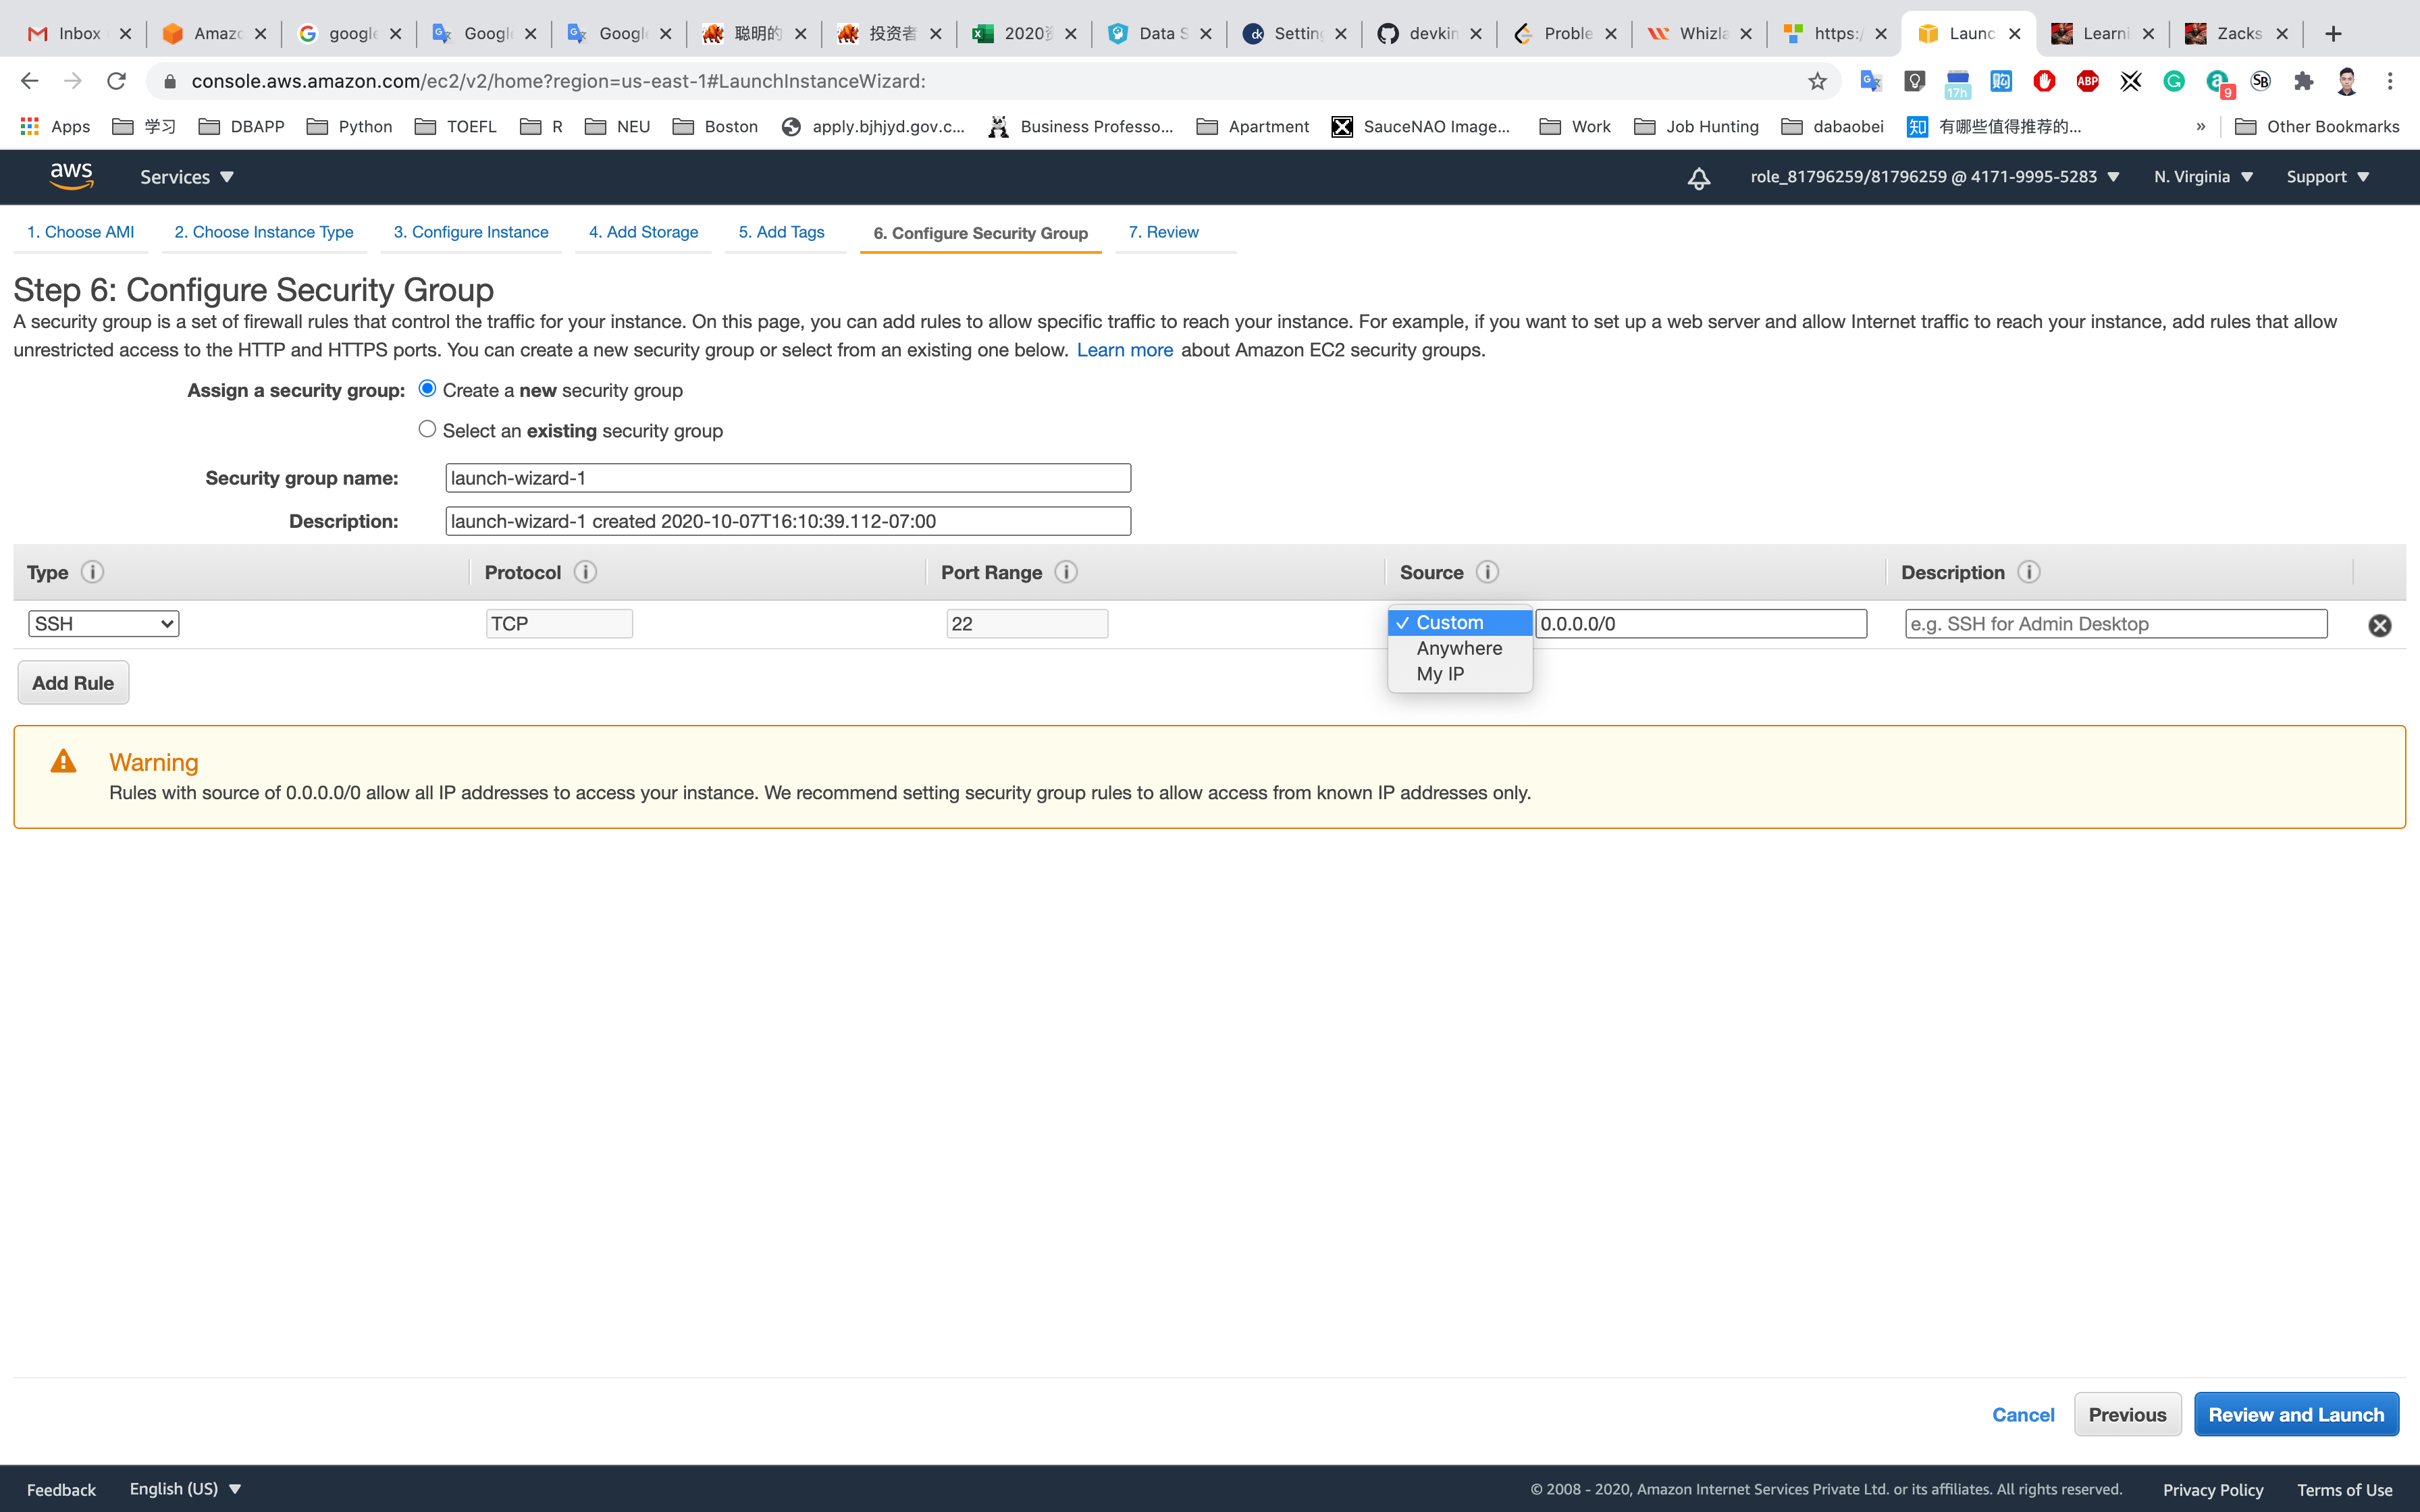
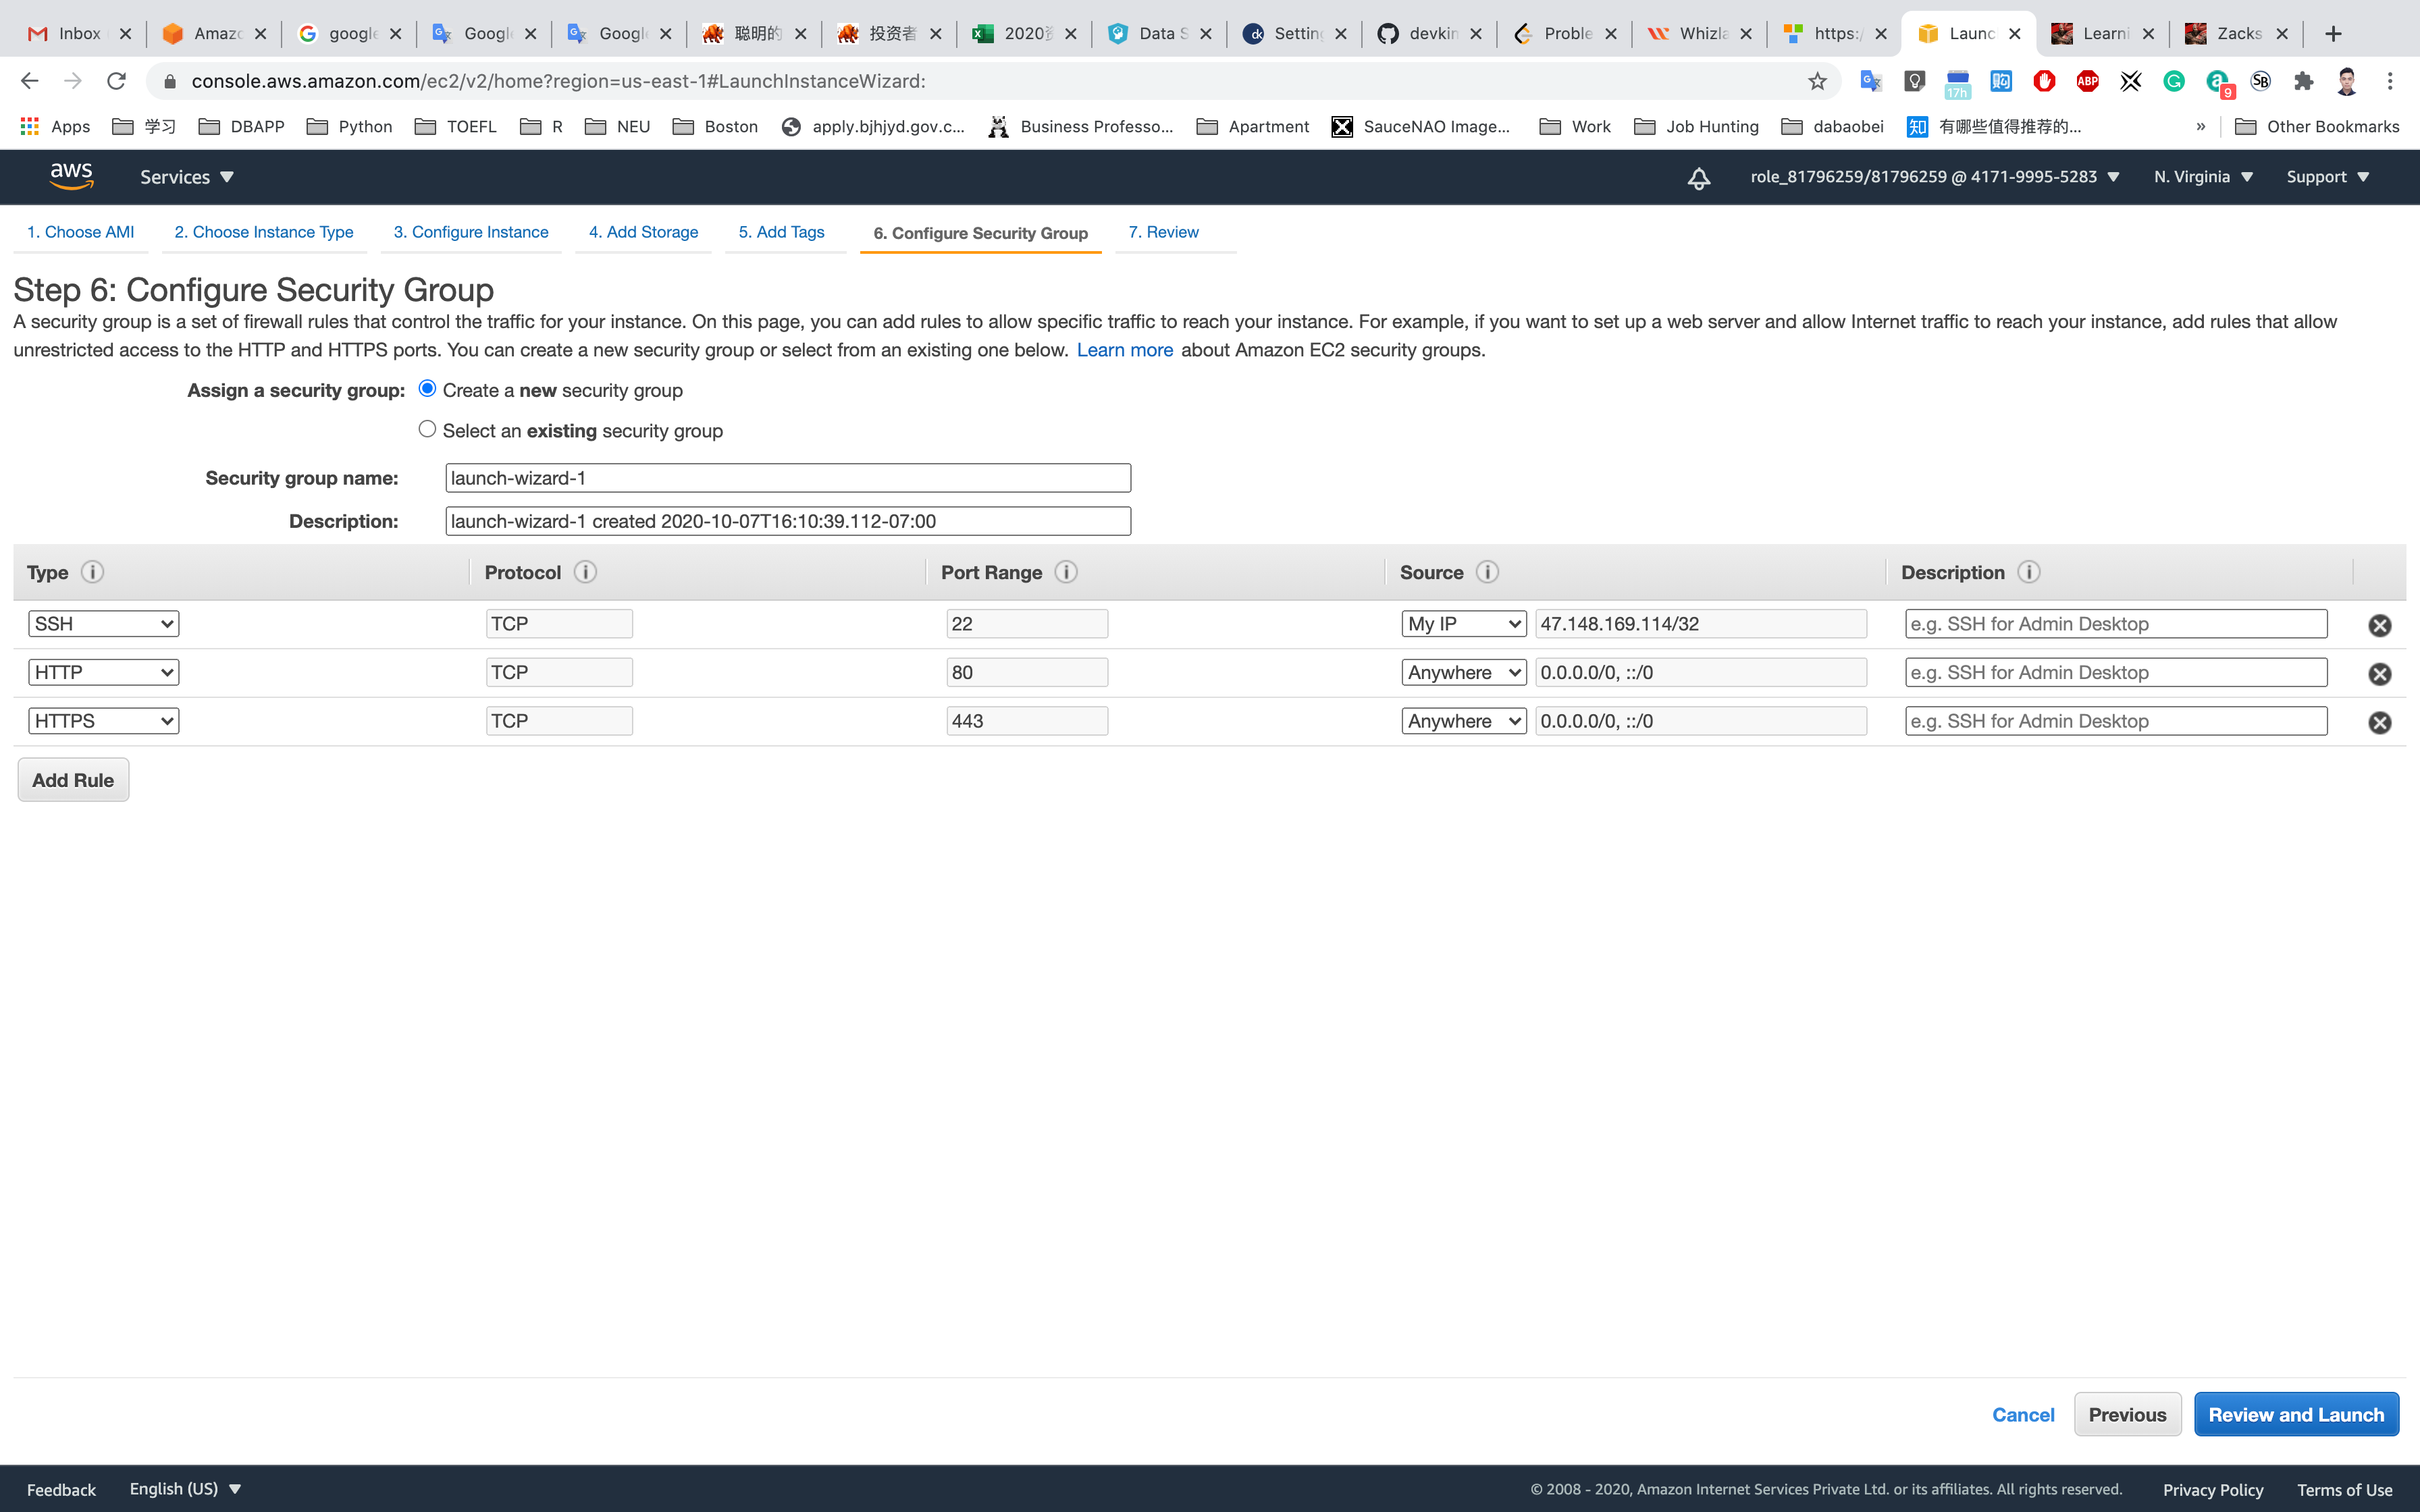
Step 6: Configure Security Group
Select Create a new security group
- Security group name:
EC2WebServerSG - Description :
Security Group for EC2 Web Server
For SSH:
- Source:
Custom(Allow specific IP address) orAnywhere(From ALL IP addresses accessible).
Click on Add Rule
For HTTP:
- Source:
Anywhere
For HTTPS:
- Source:
Anywhere
Click on Review and Launch
Step 7: Review Instance Launch
Click on Launch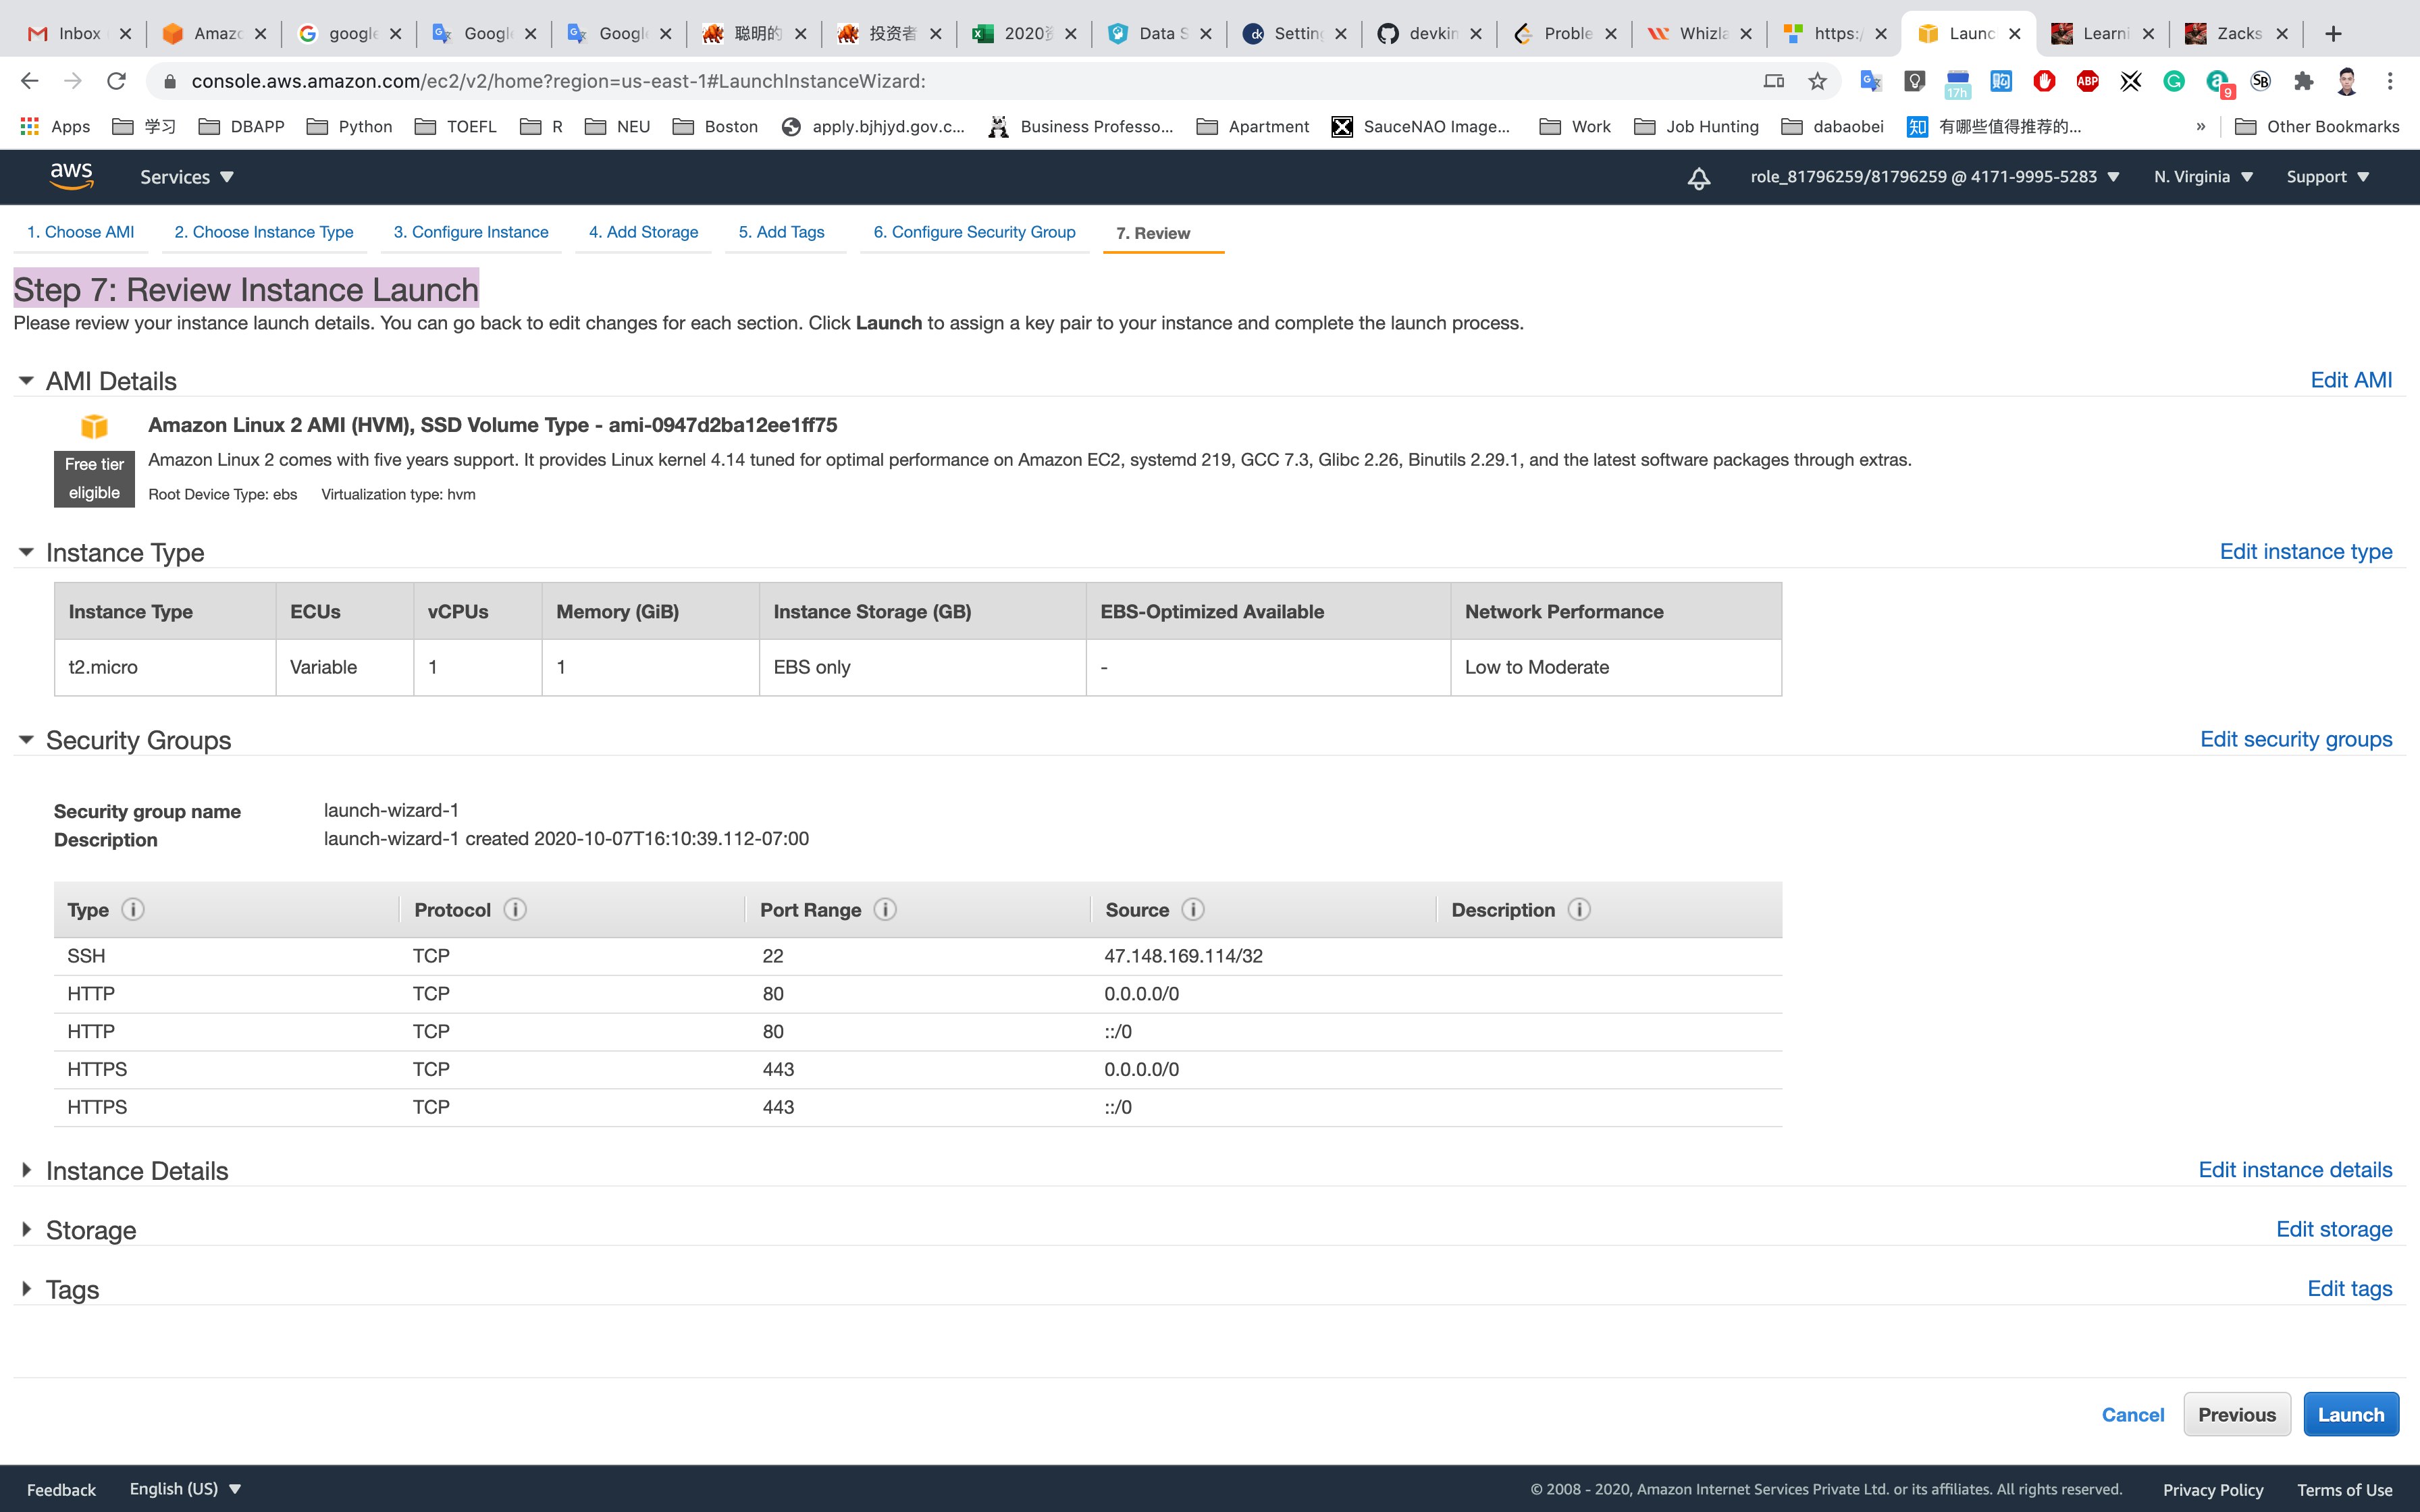
Select Create a new key pair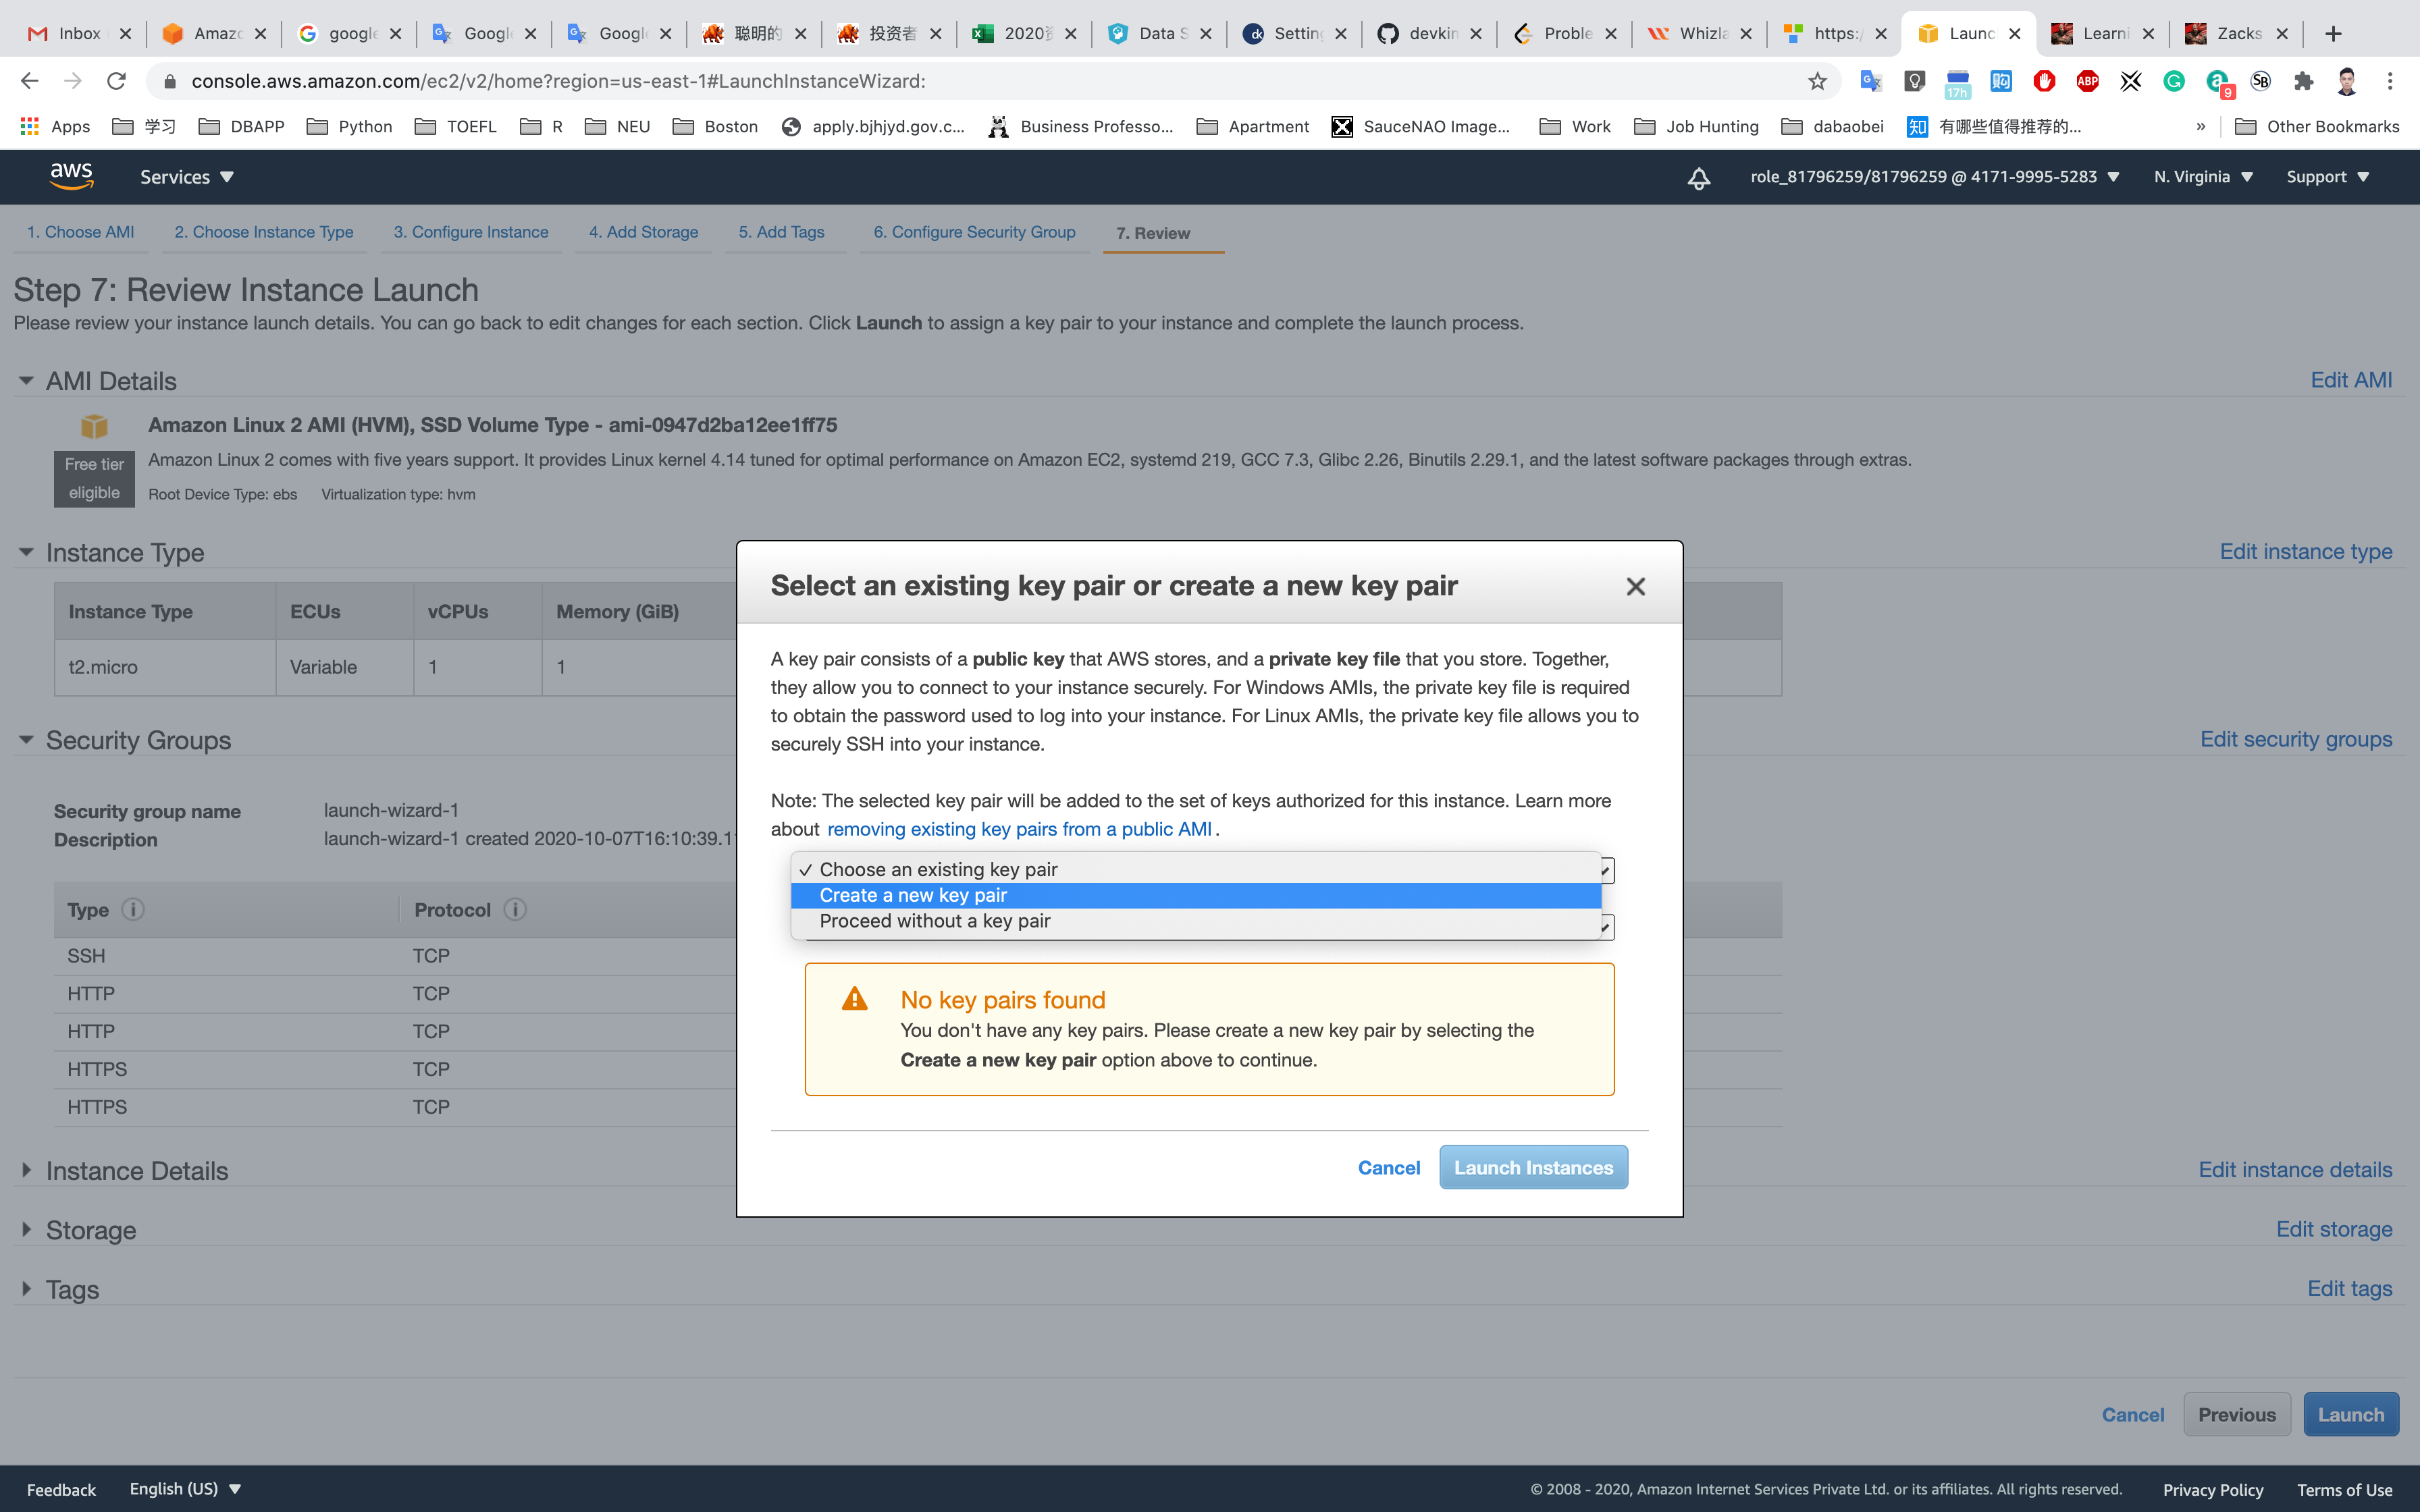
Set up the key pair name ec2
Click on Download Key Pair
See the left bottom of the screenshot, we have the file named ec2.pem
Click on Launch Instances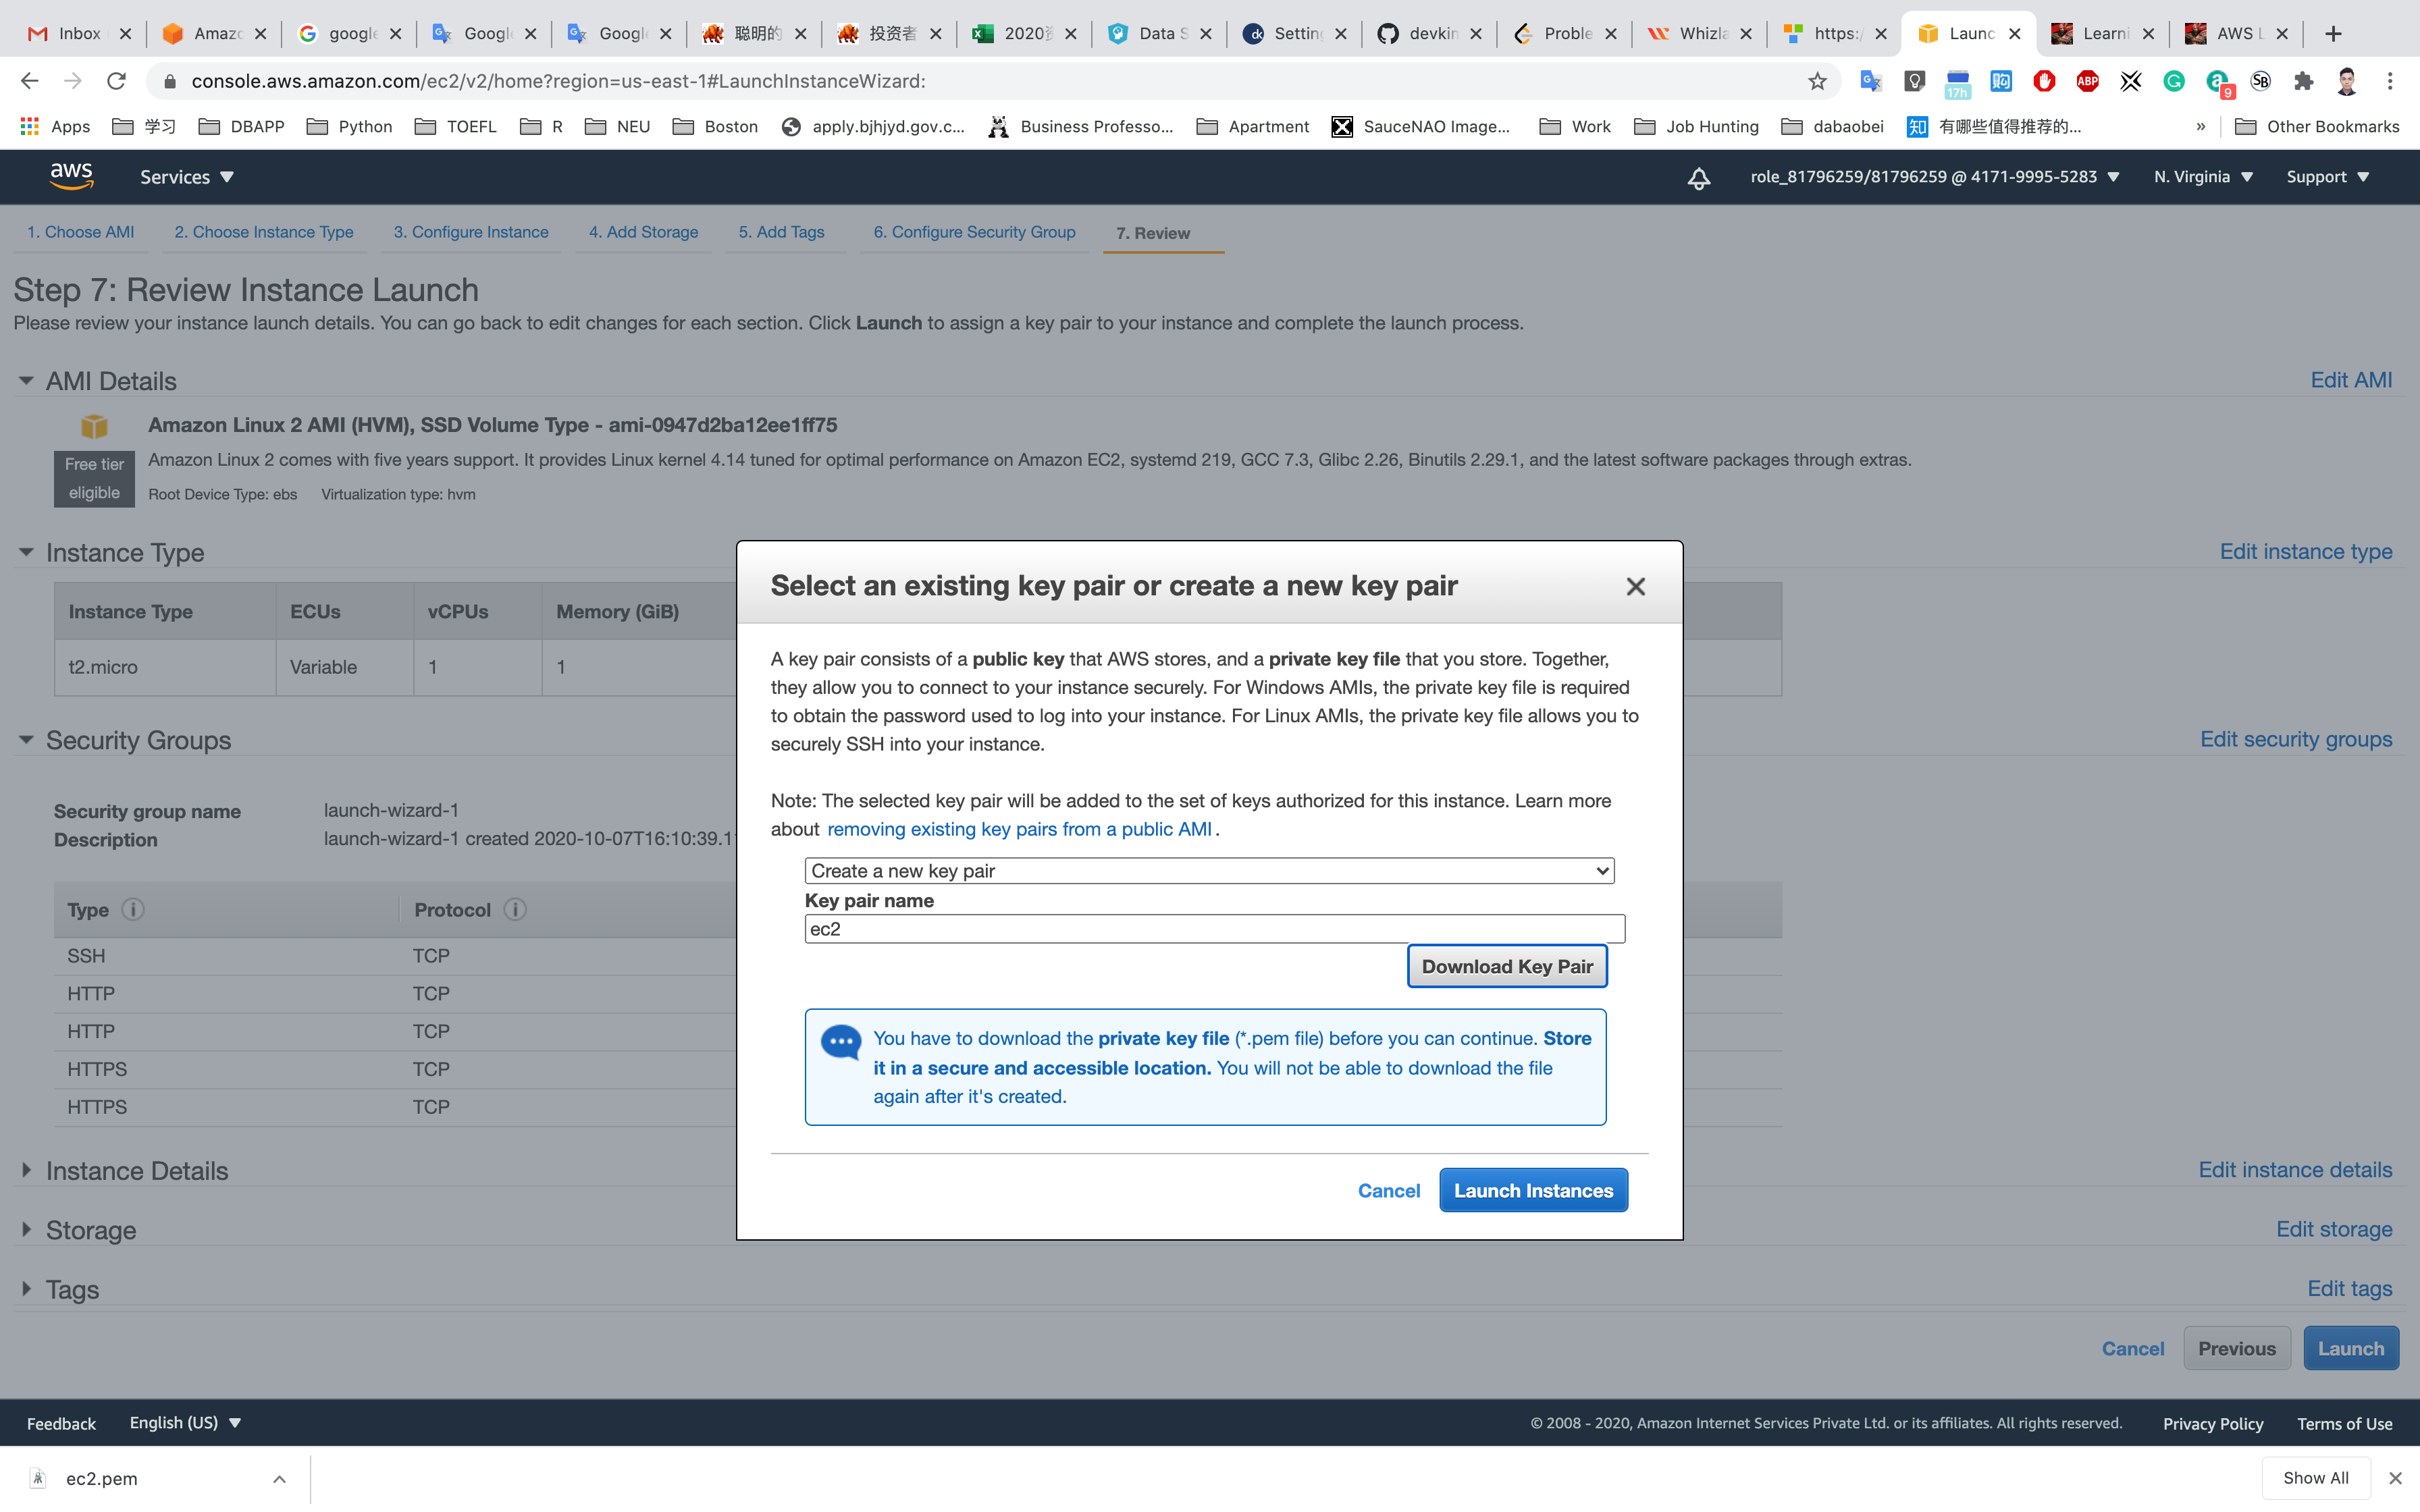
Click on View Instances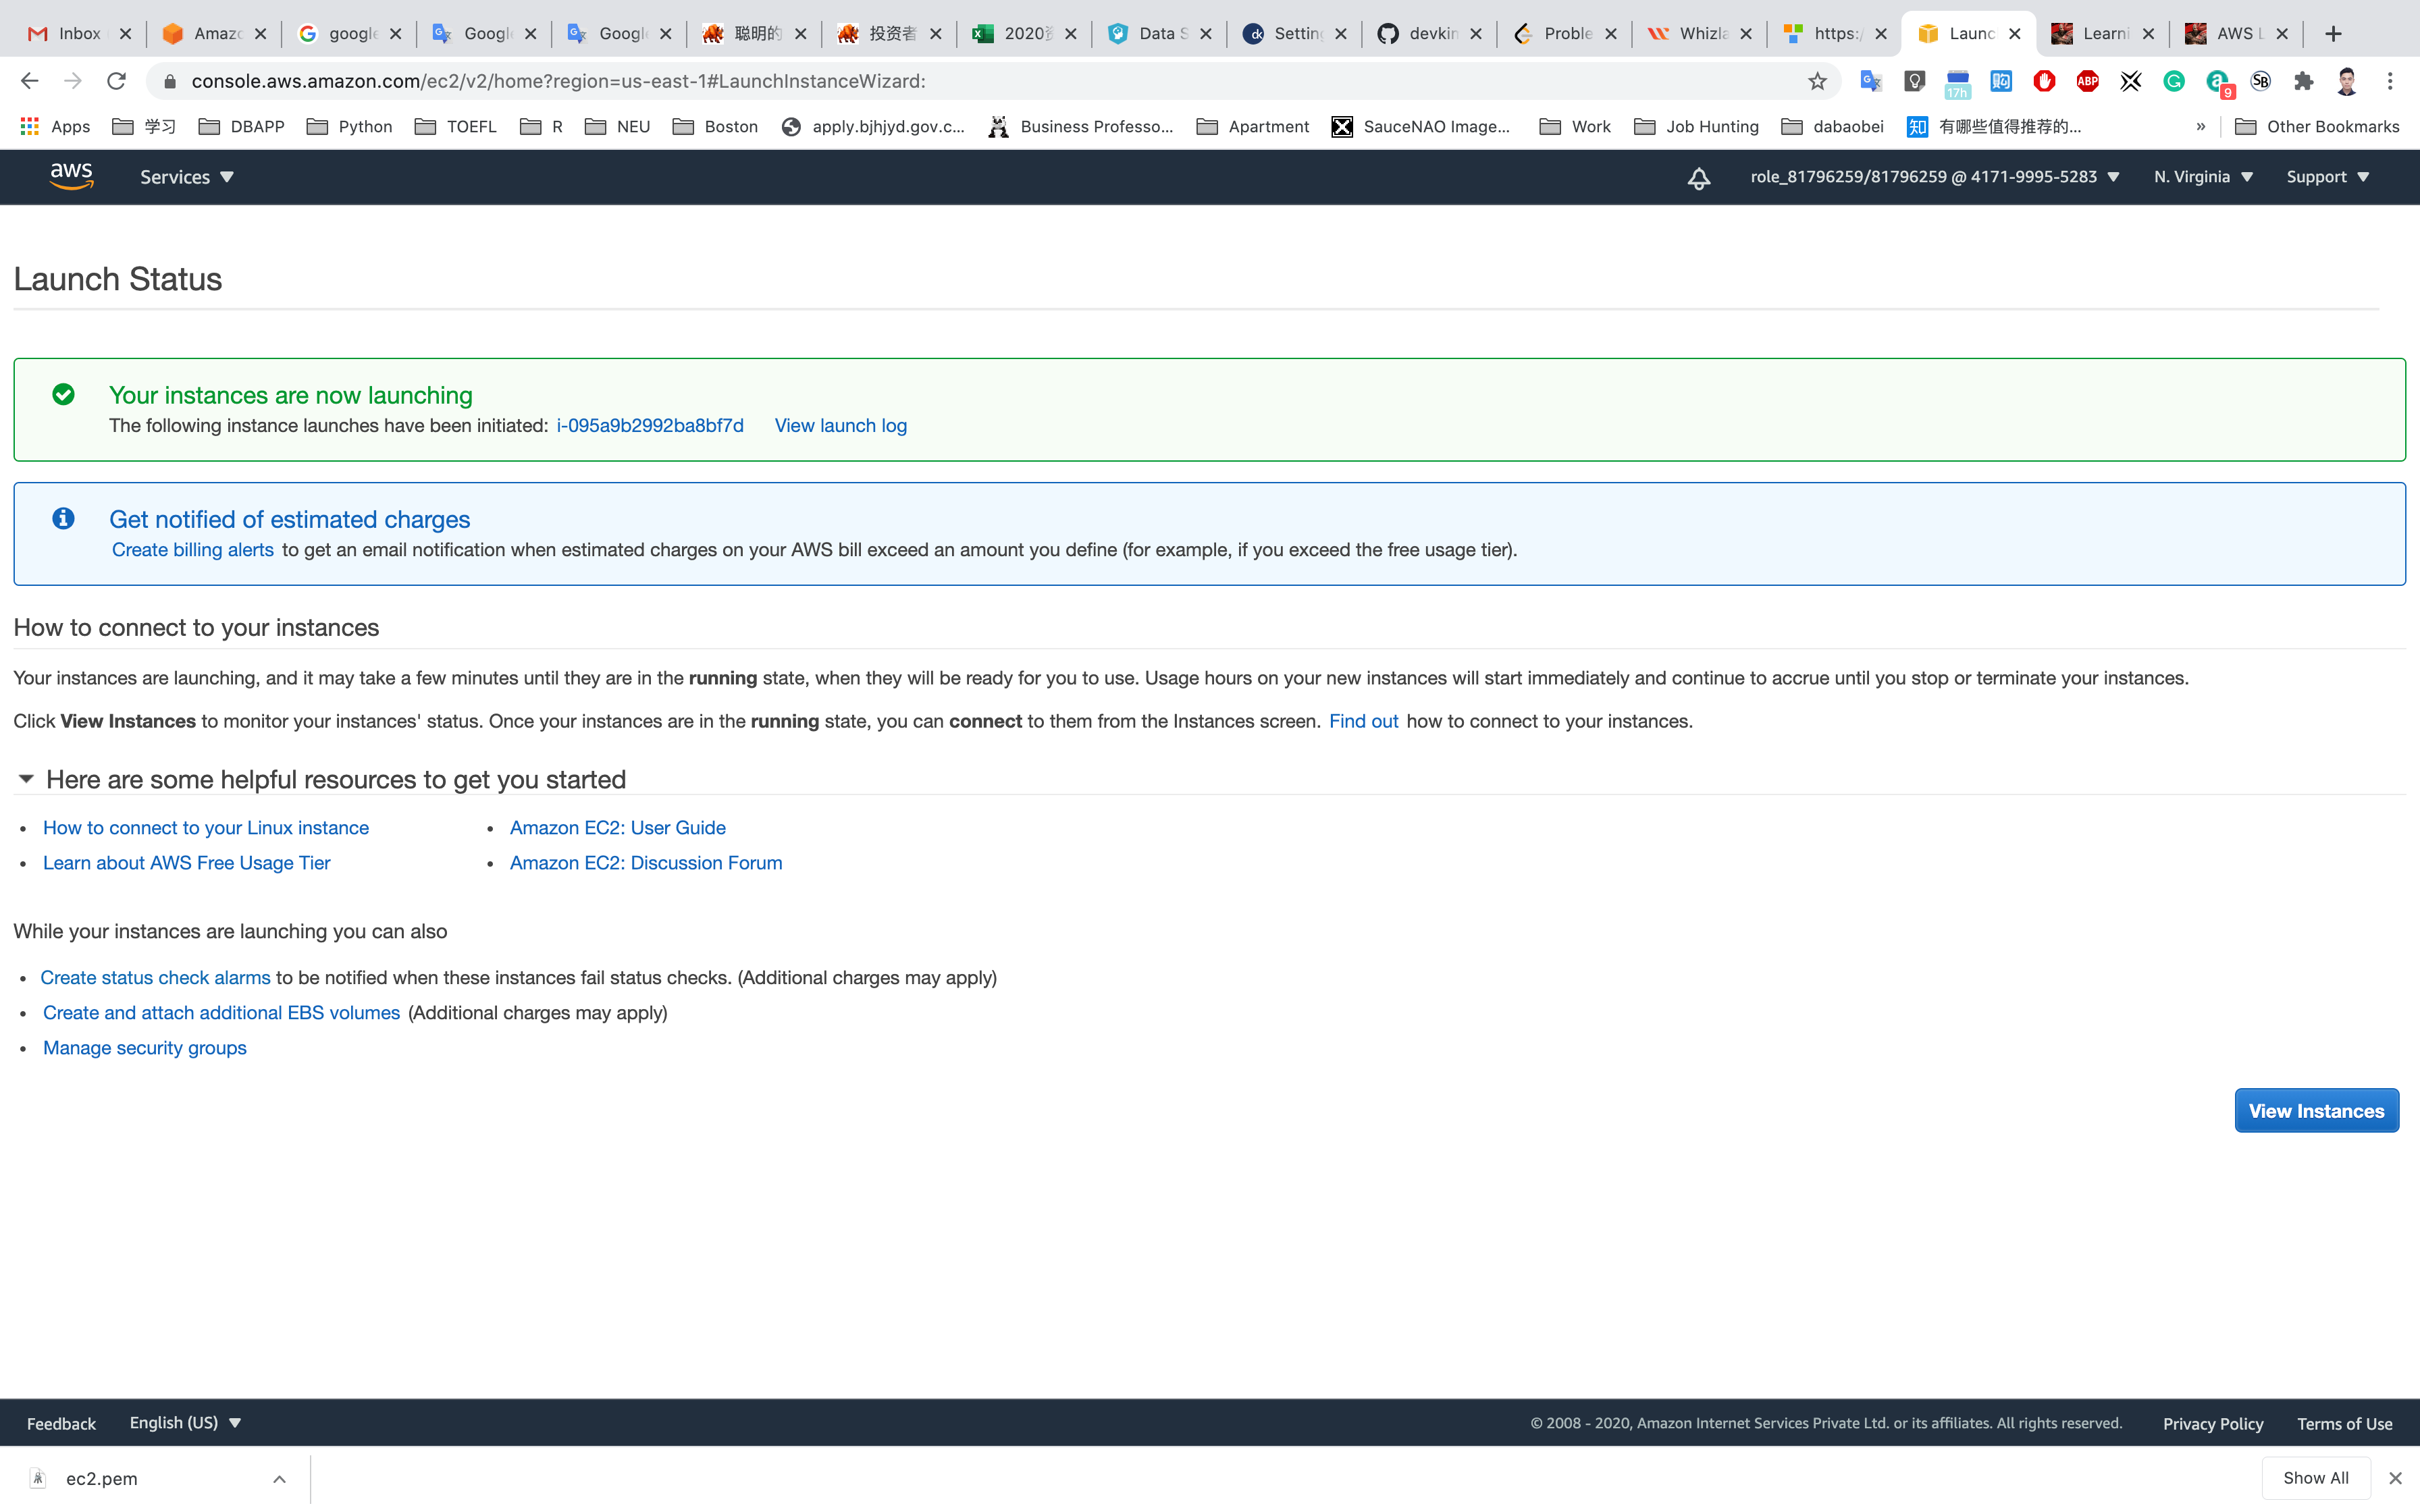
Waiting until the Instance state switch to Running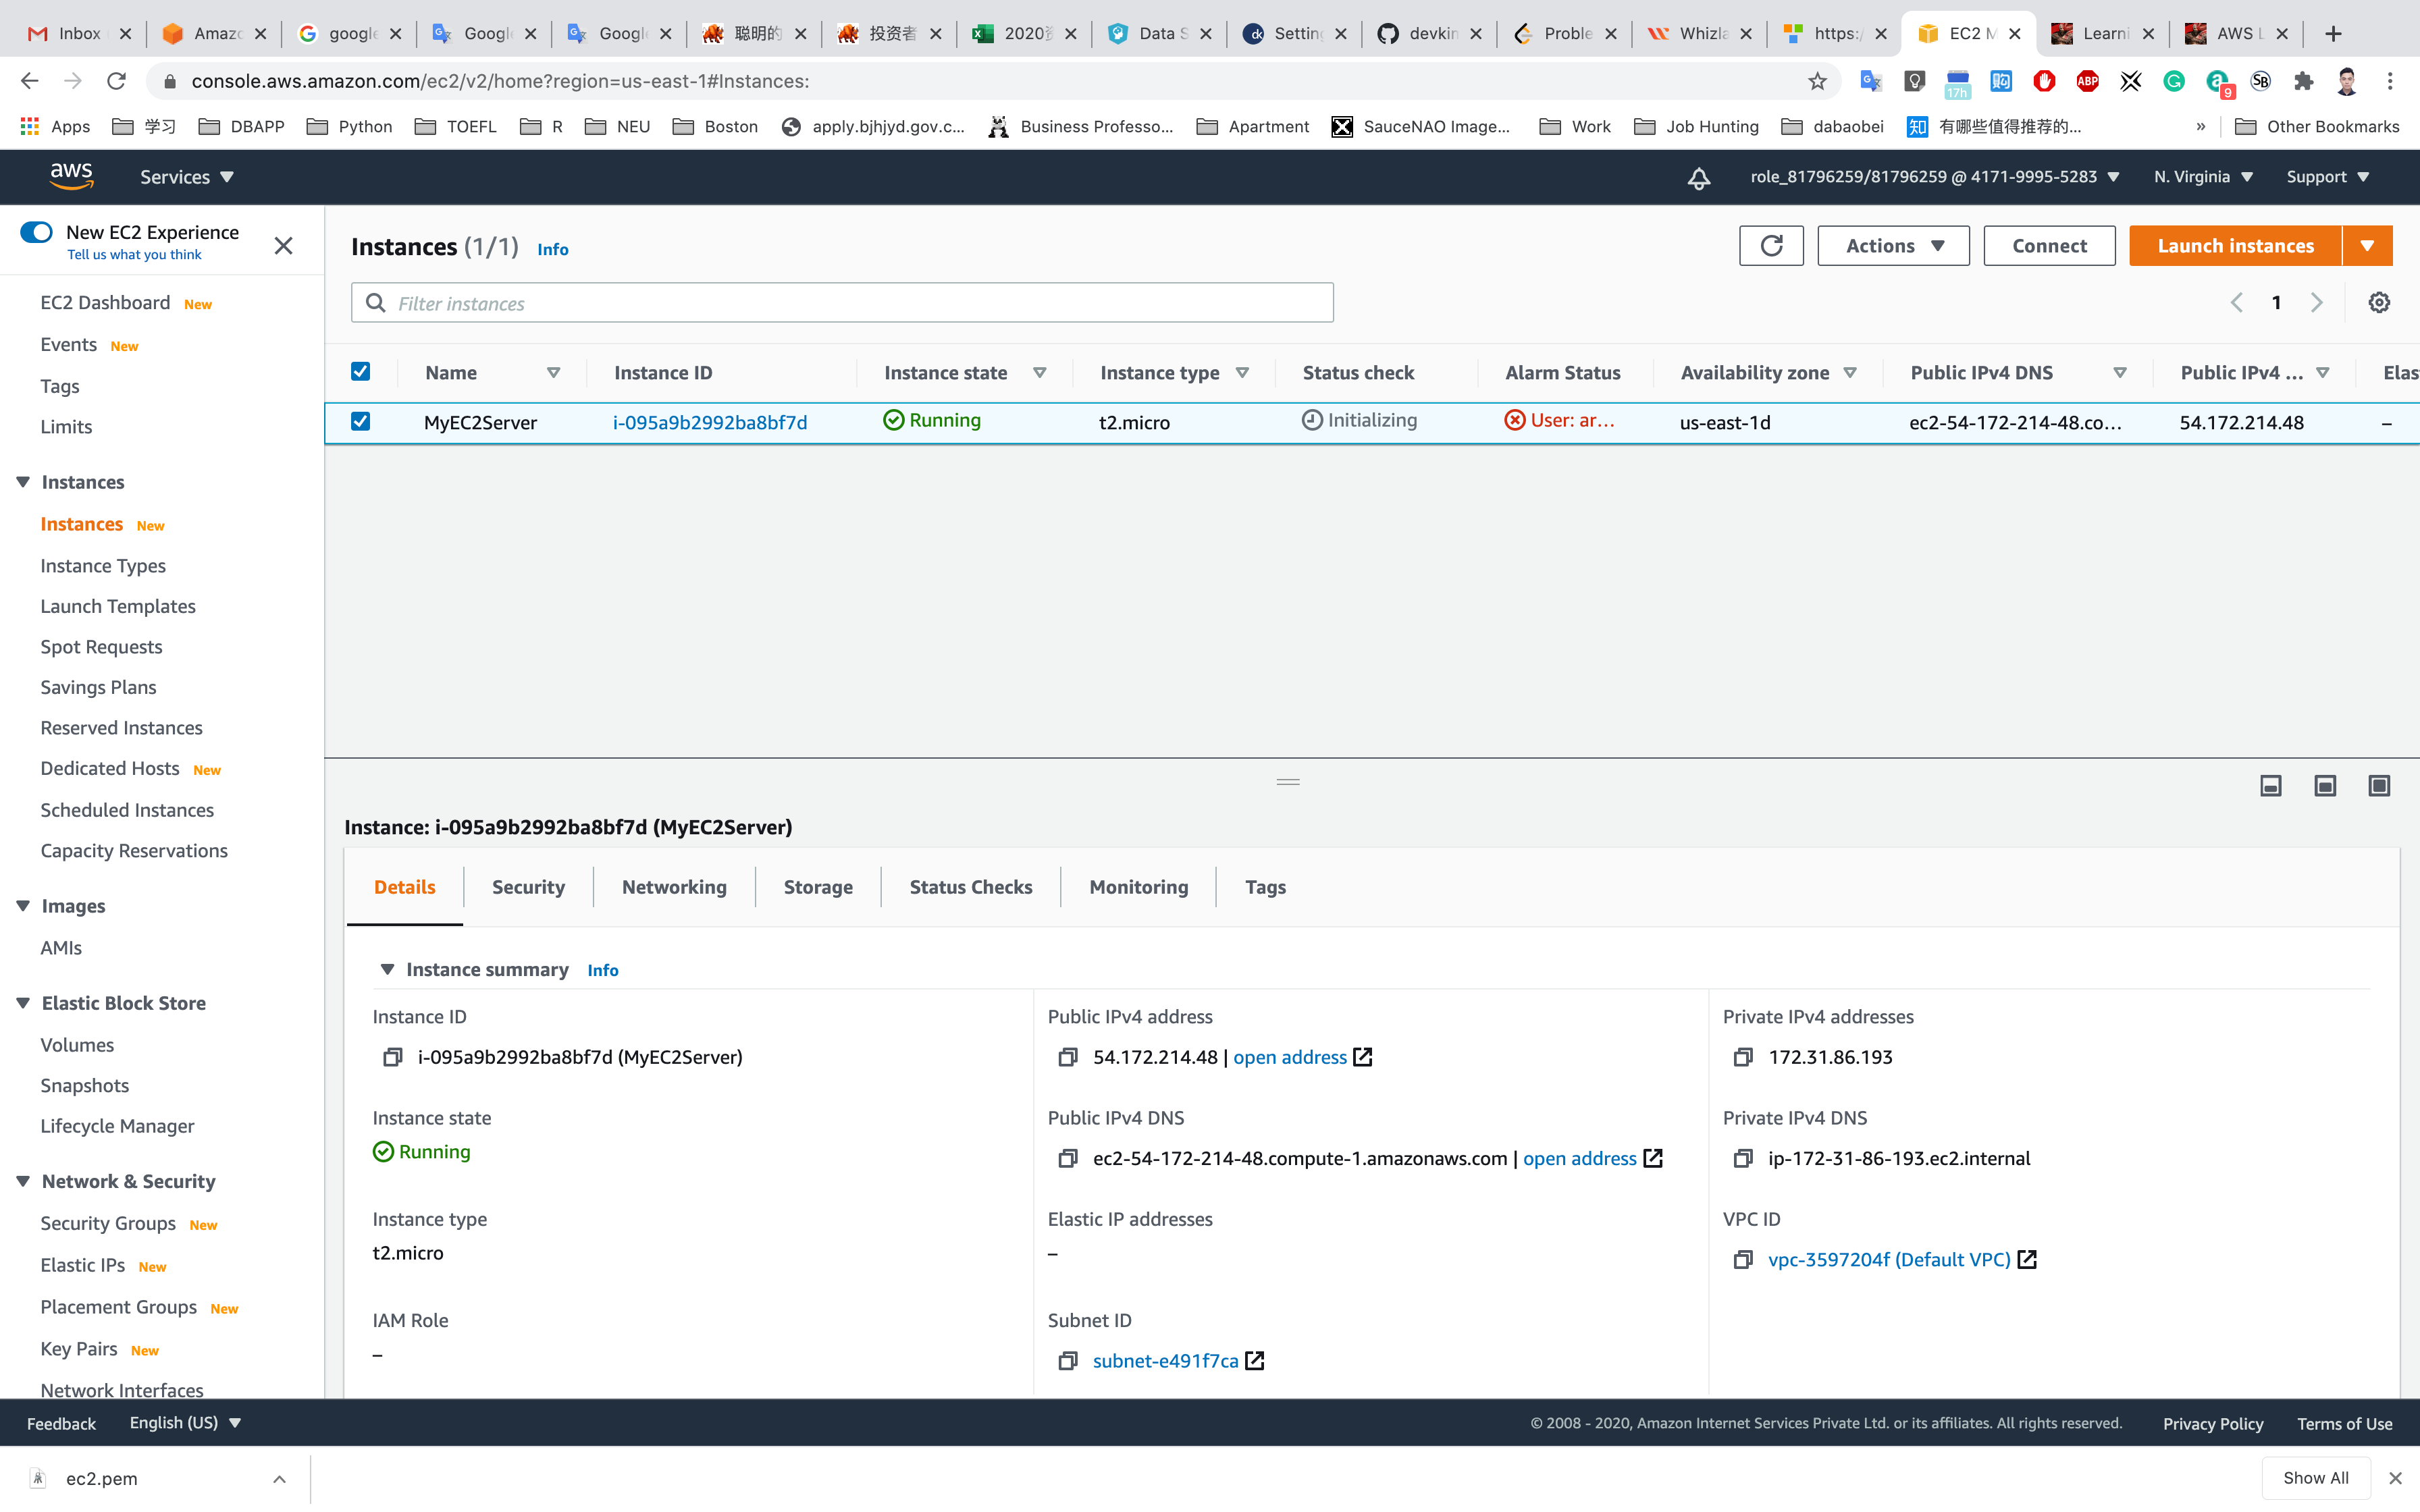
You can Click on Instance ID like i-095a9b2992ba8bf7d to see the instance detail.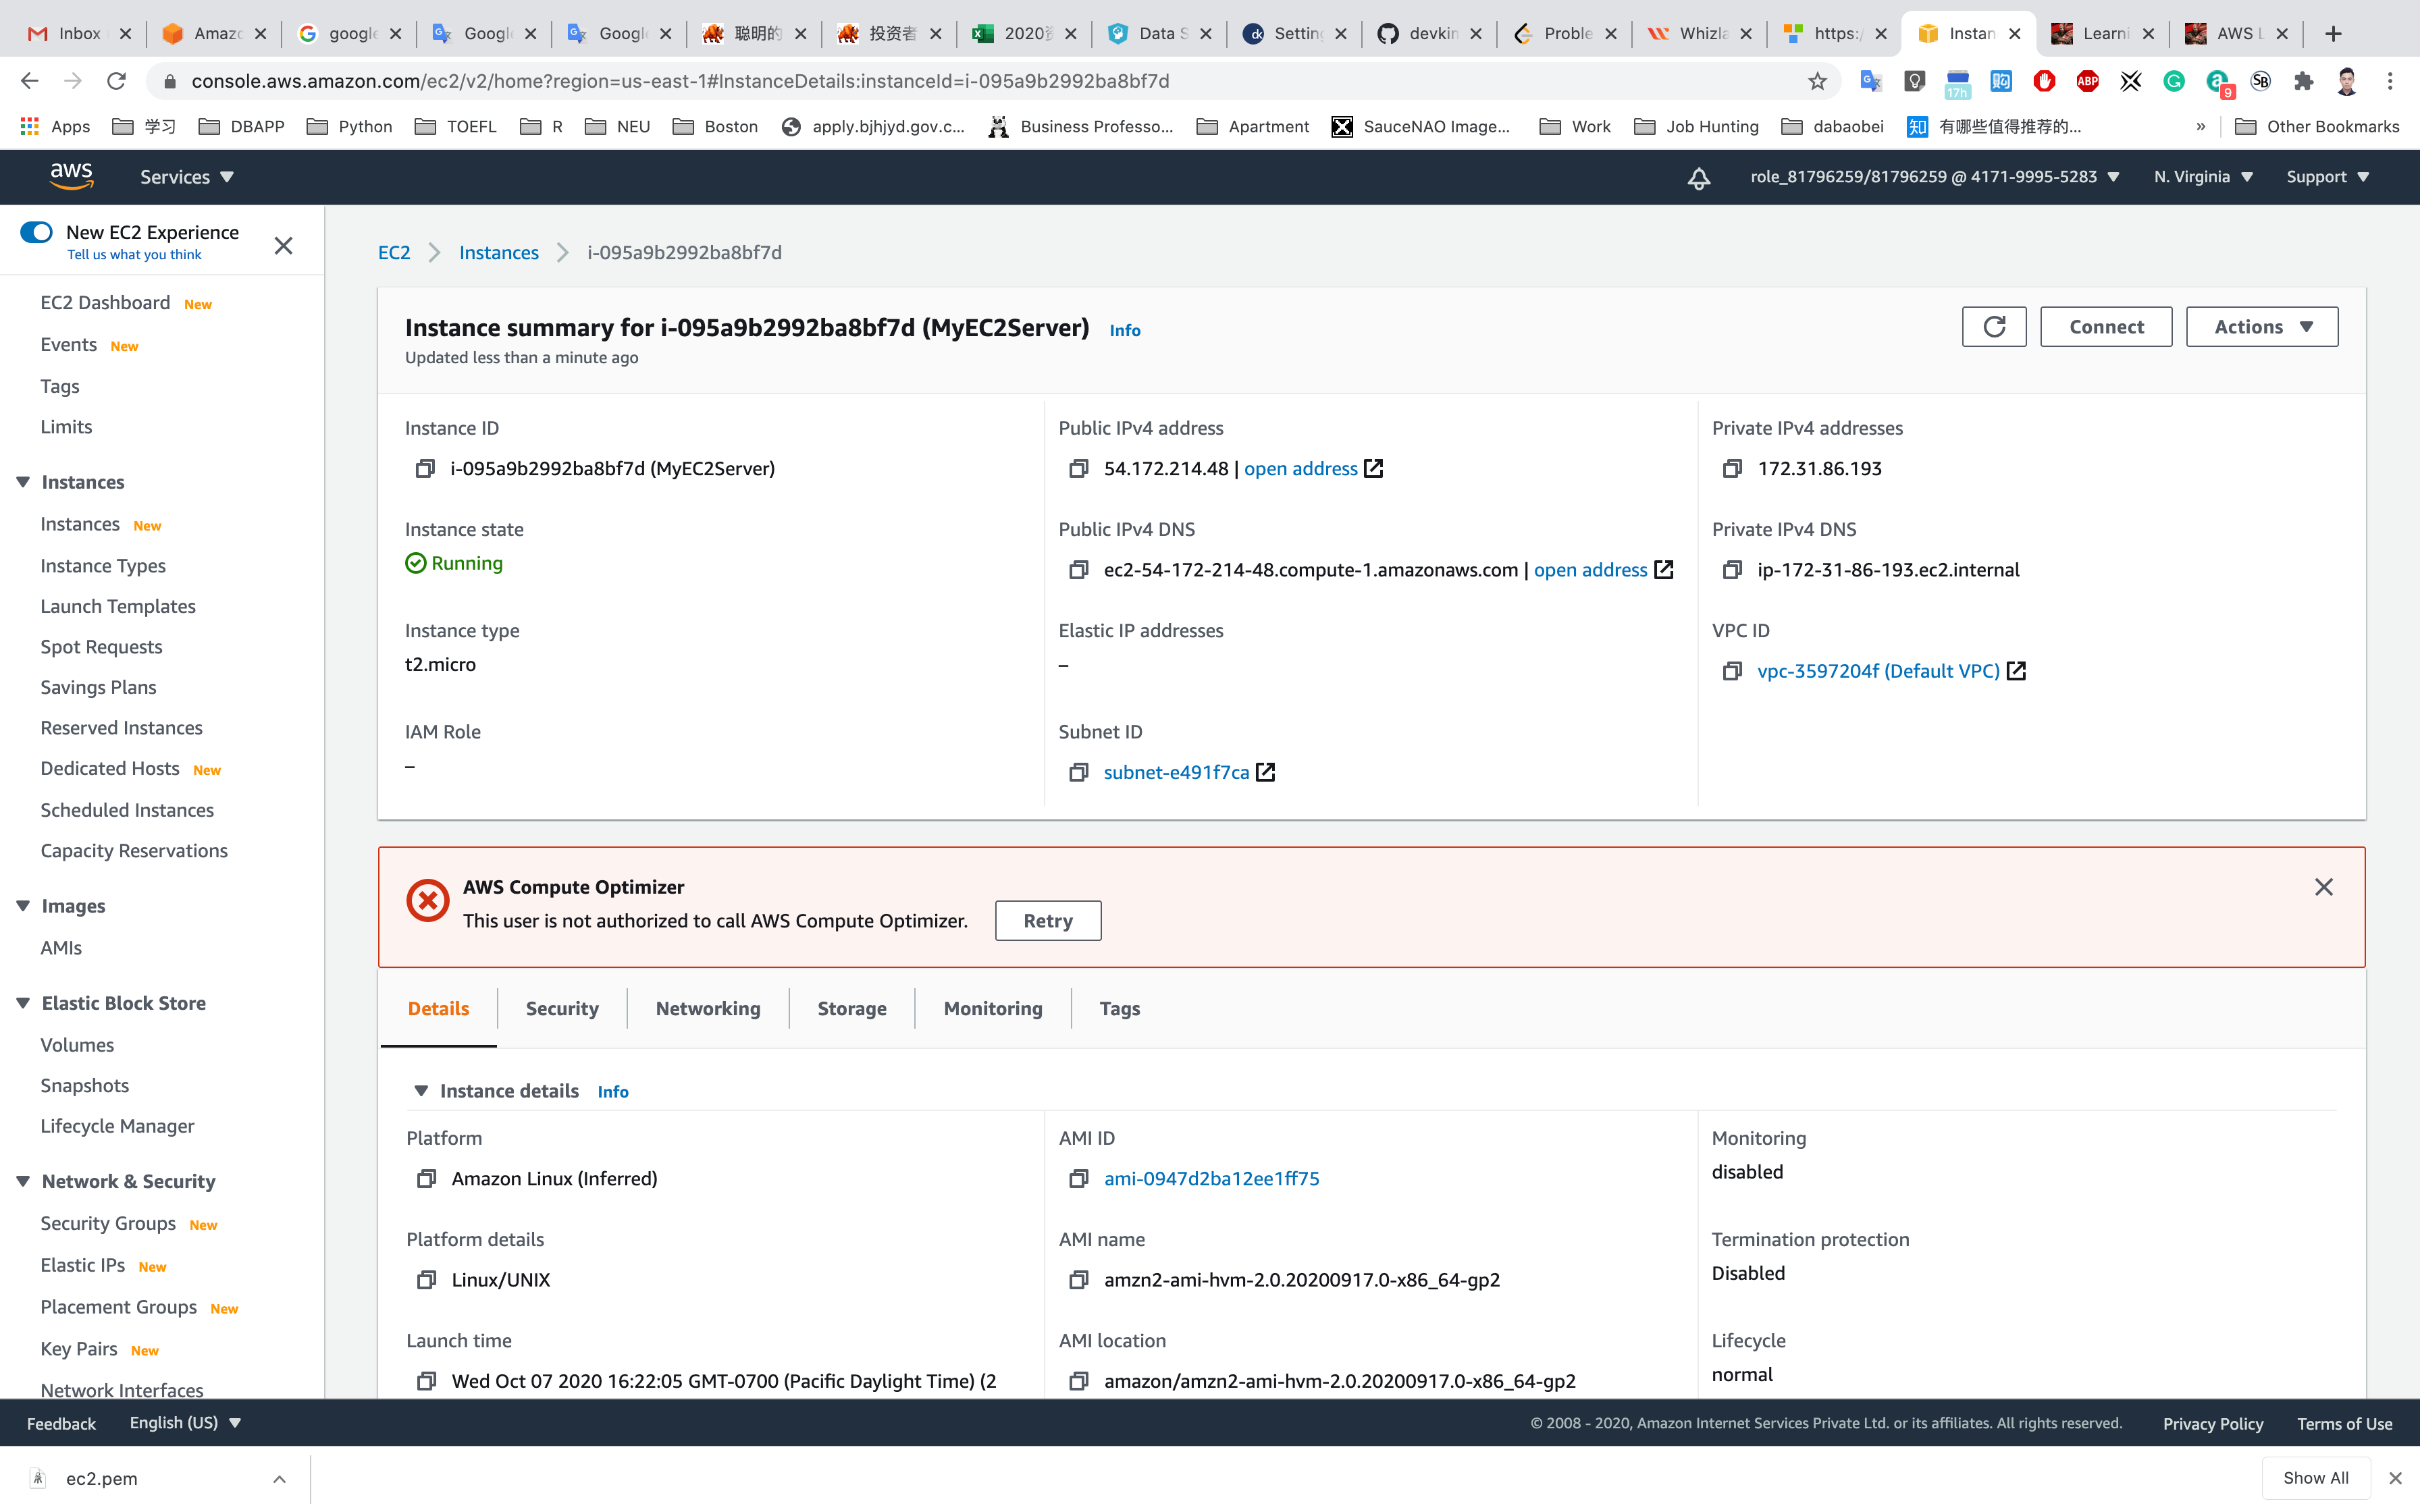
Copy the public IP address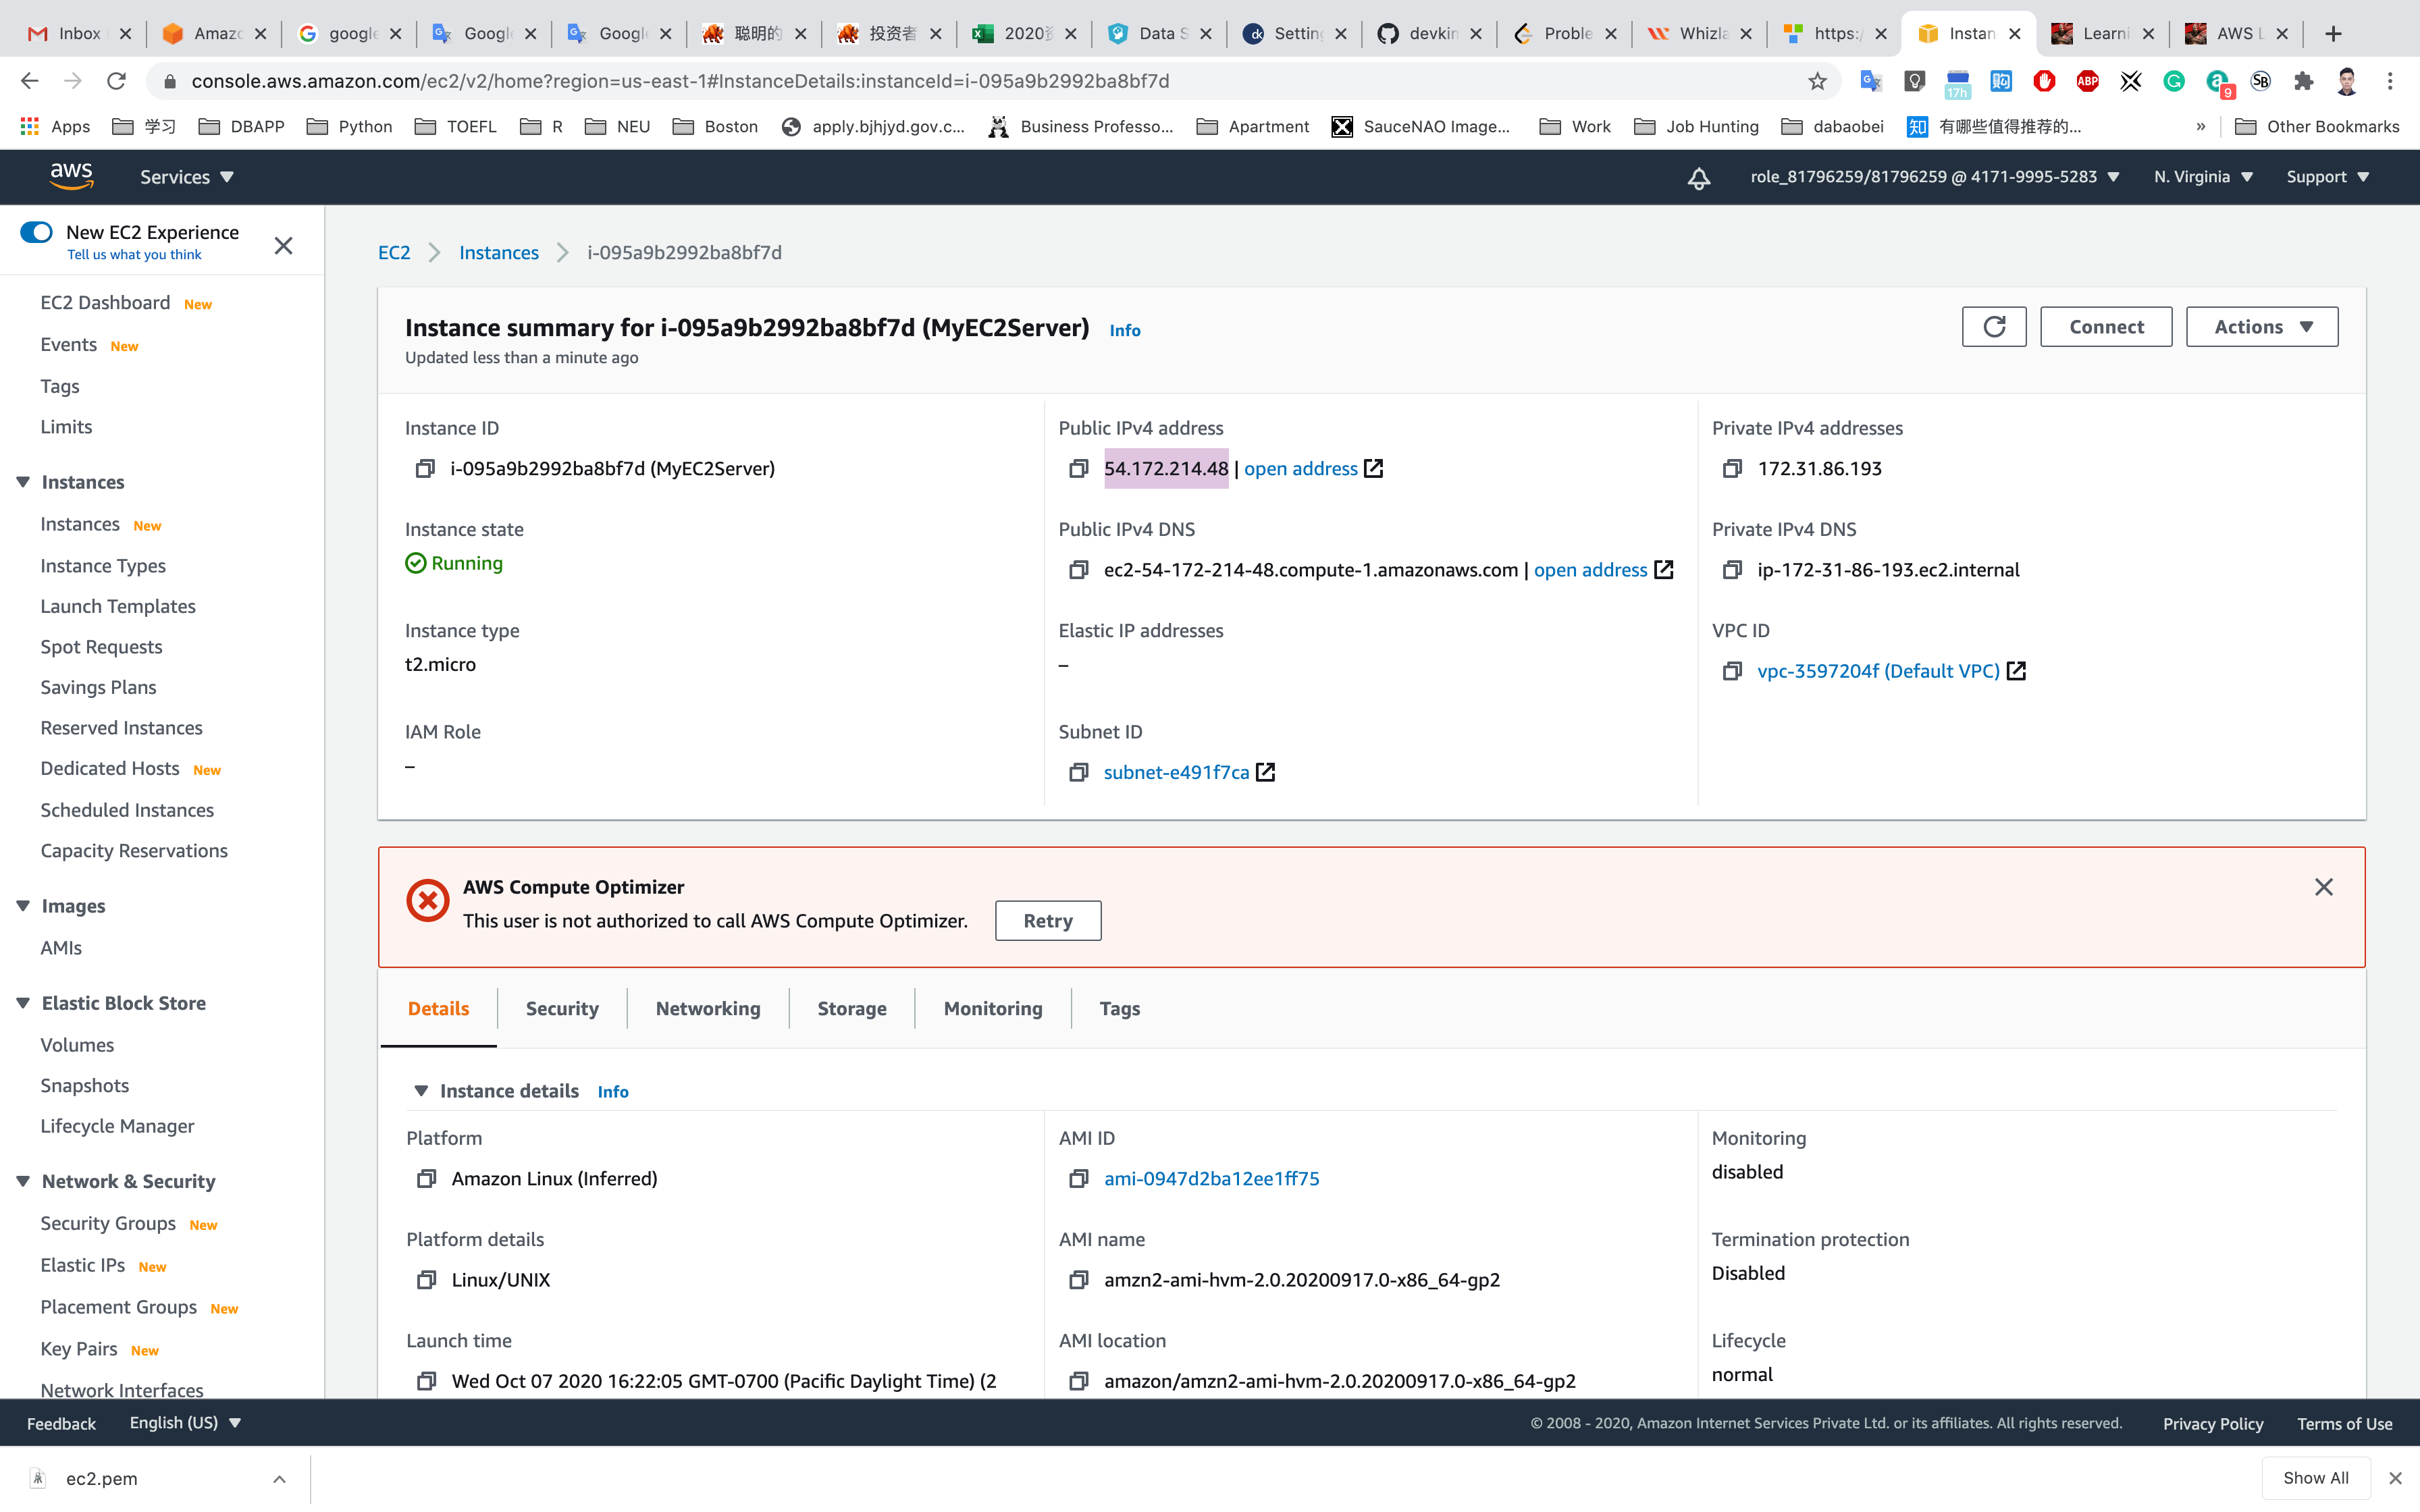
SSH into EC2 Instance
Open application Terminal on your MacBook
Go to your ec2.pem directory
e.g, my directory is ~/Downloads/cd ~/Downloads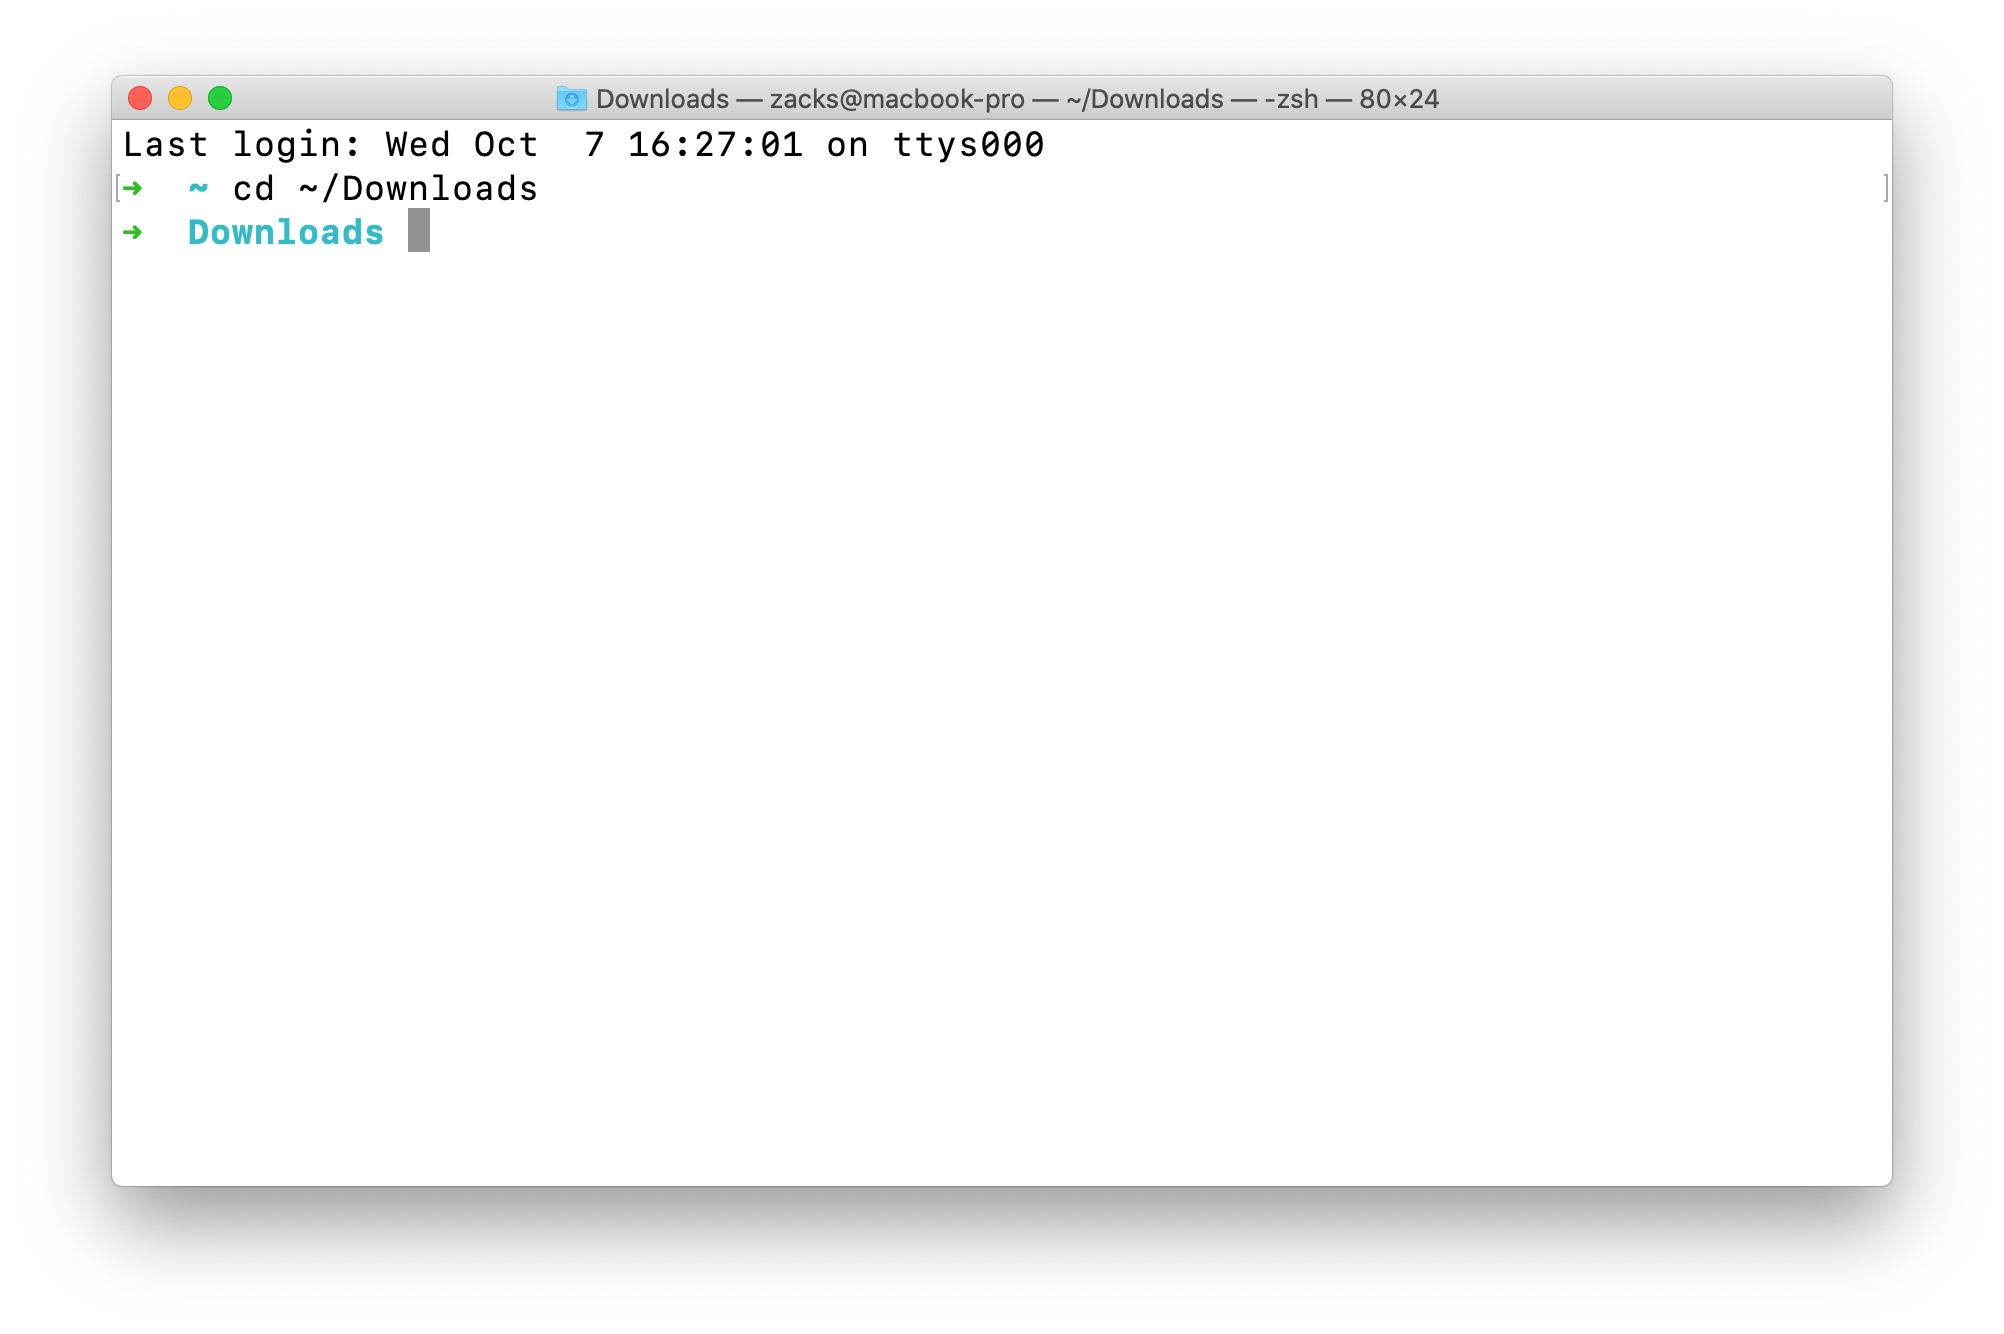
Search for ec2.pemls | grep ec2.pem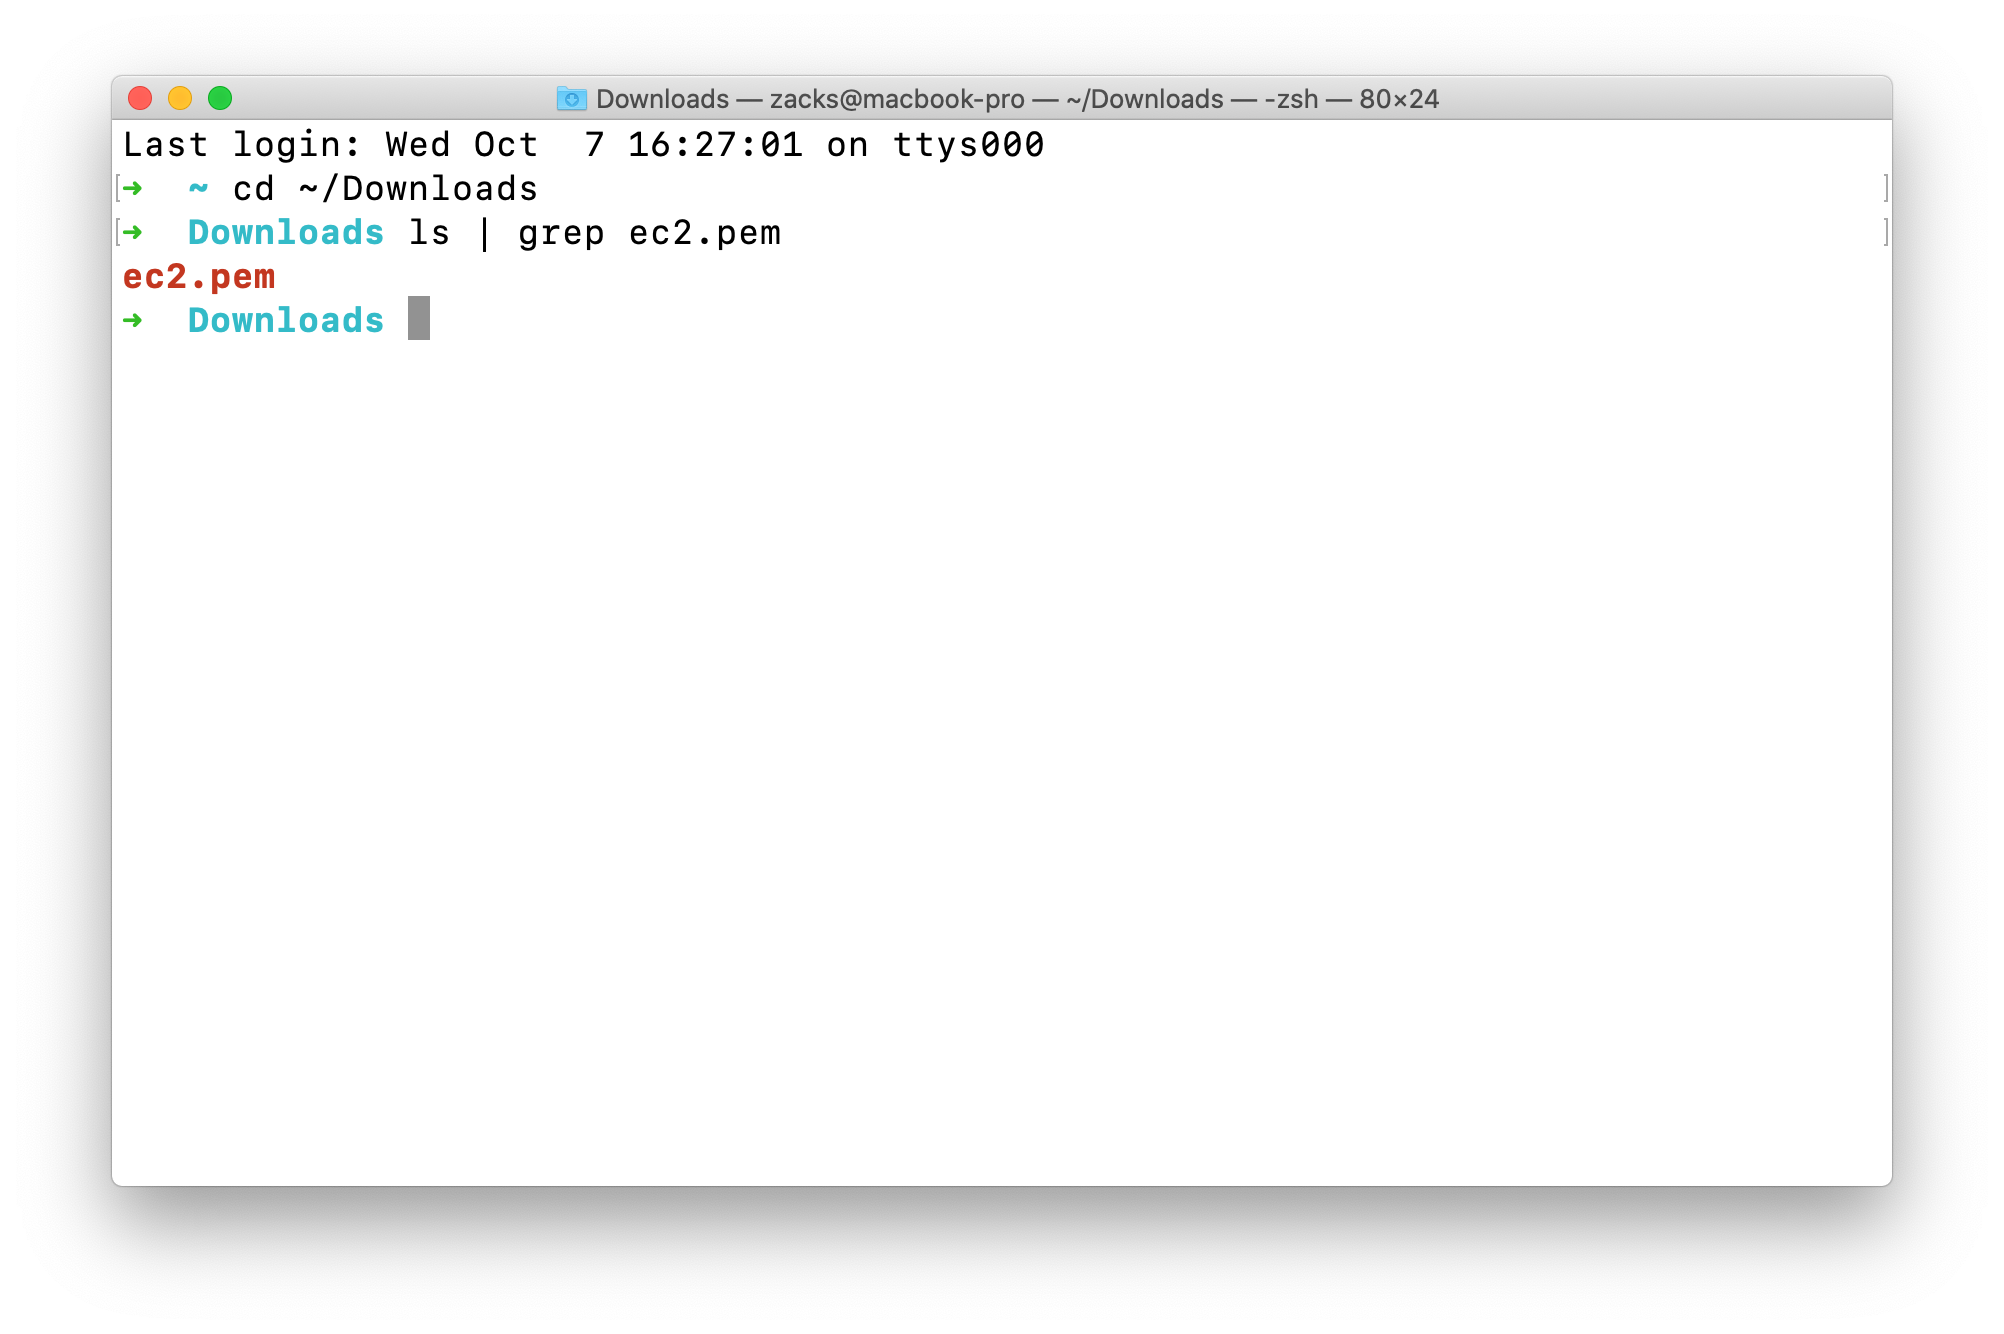
SSH into your instance
the syntax should be ssh -i yourKeyPairName ec2-user@yourInstancePublicIpAddress
Press Enter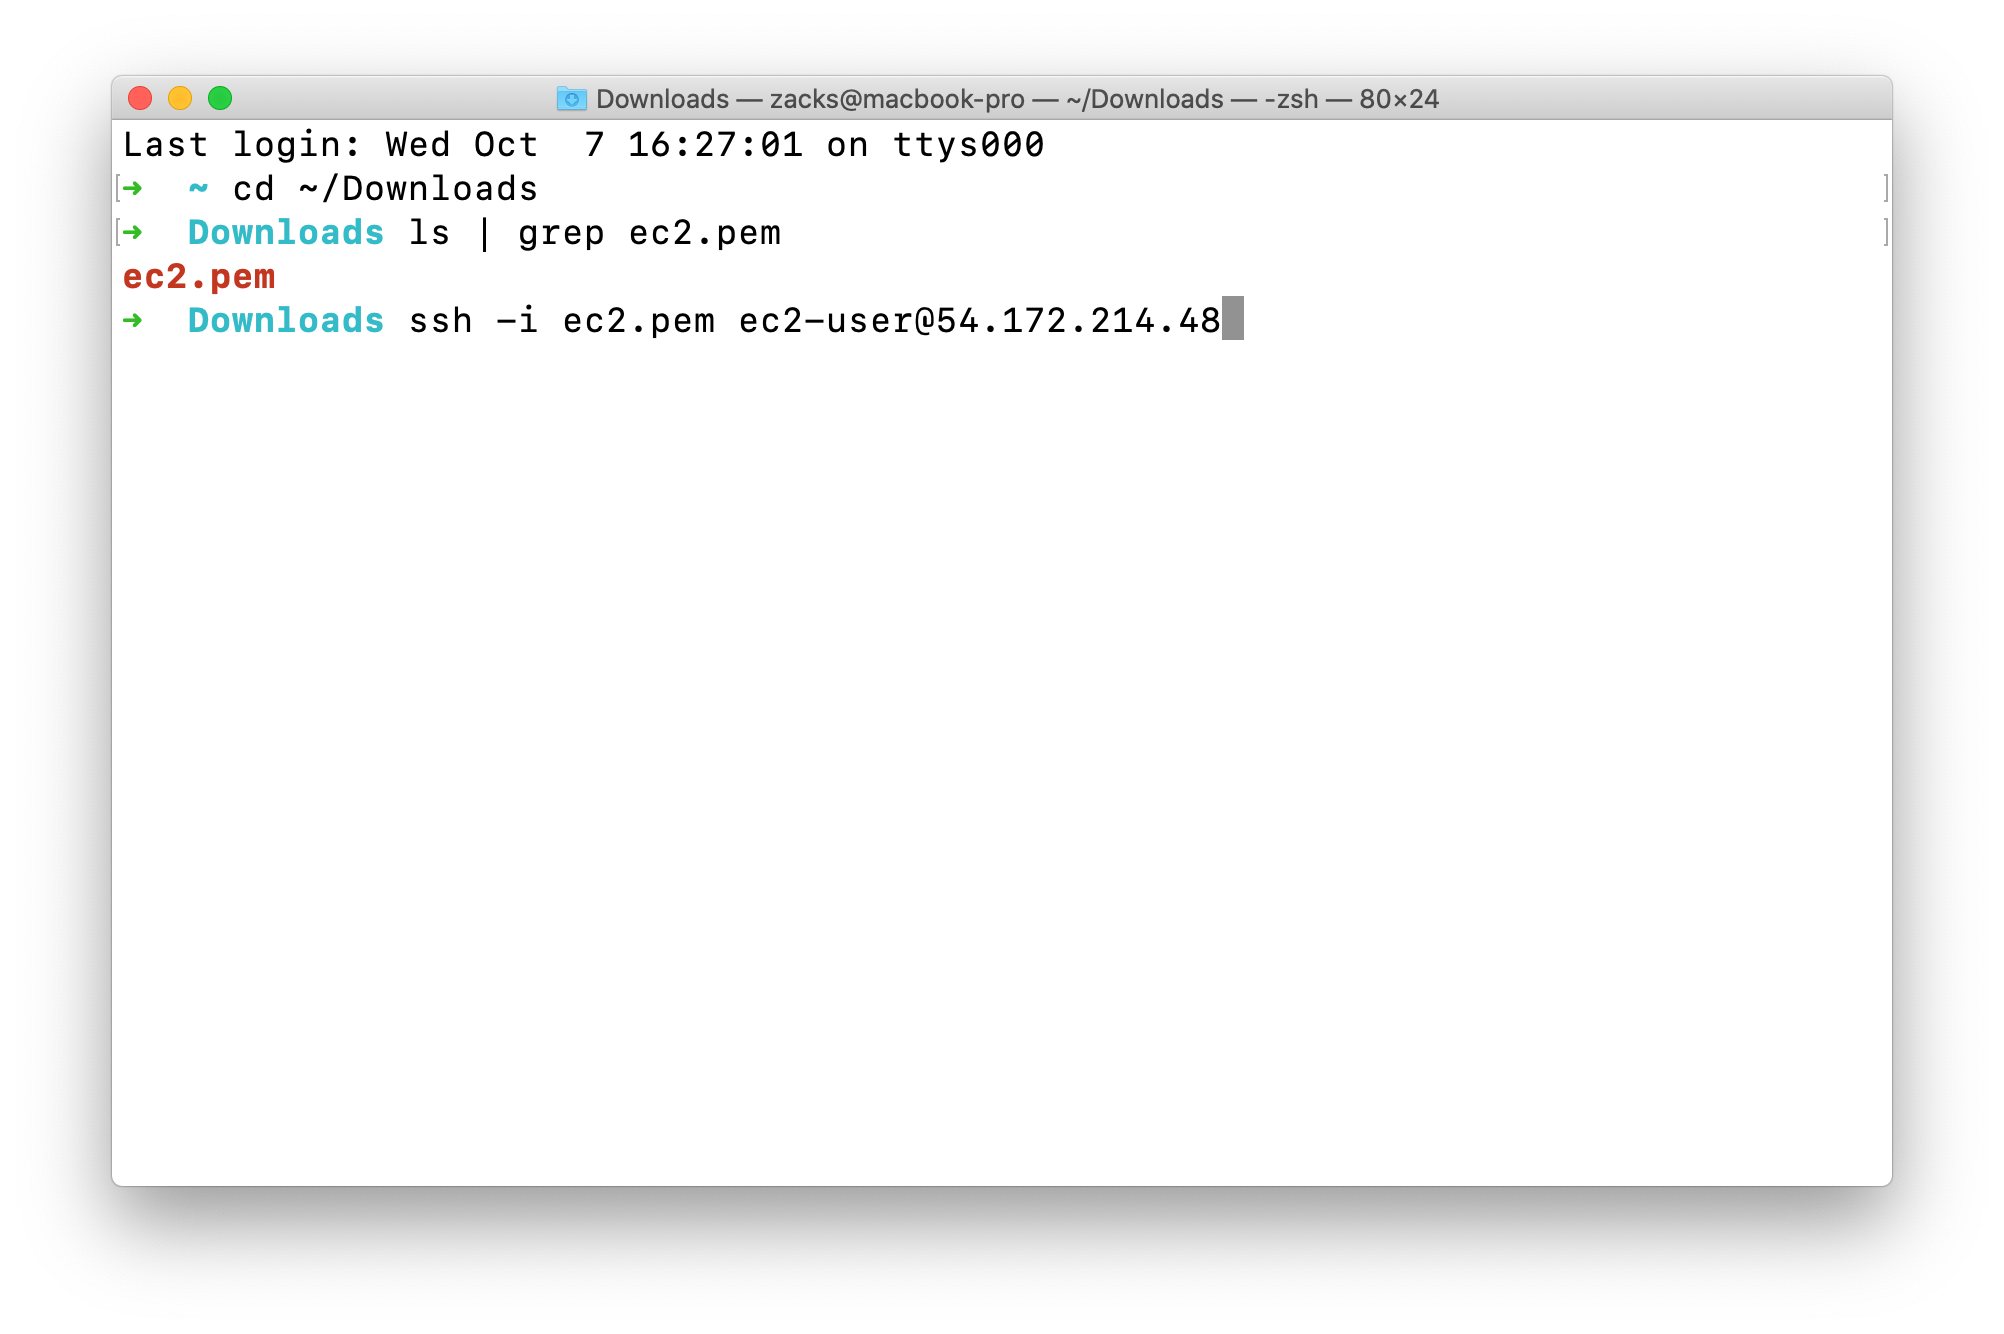
Type yes and press Enter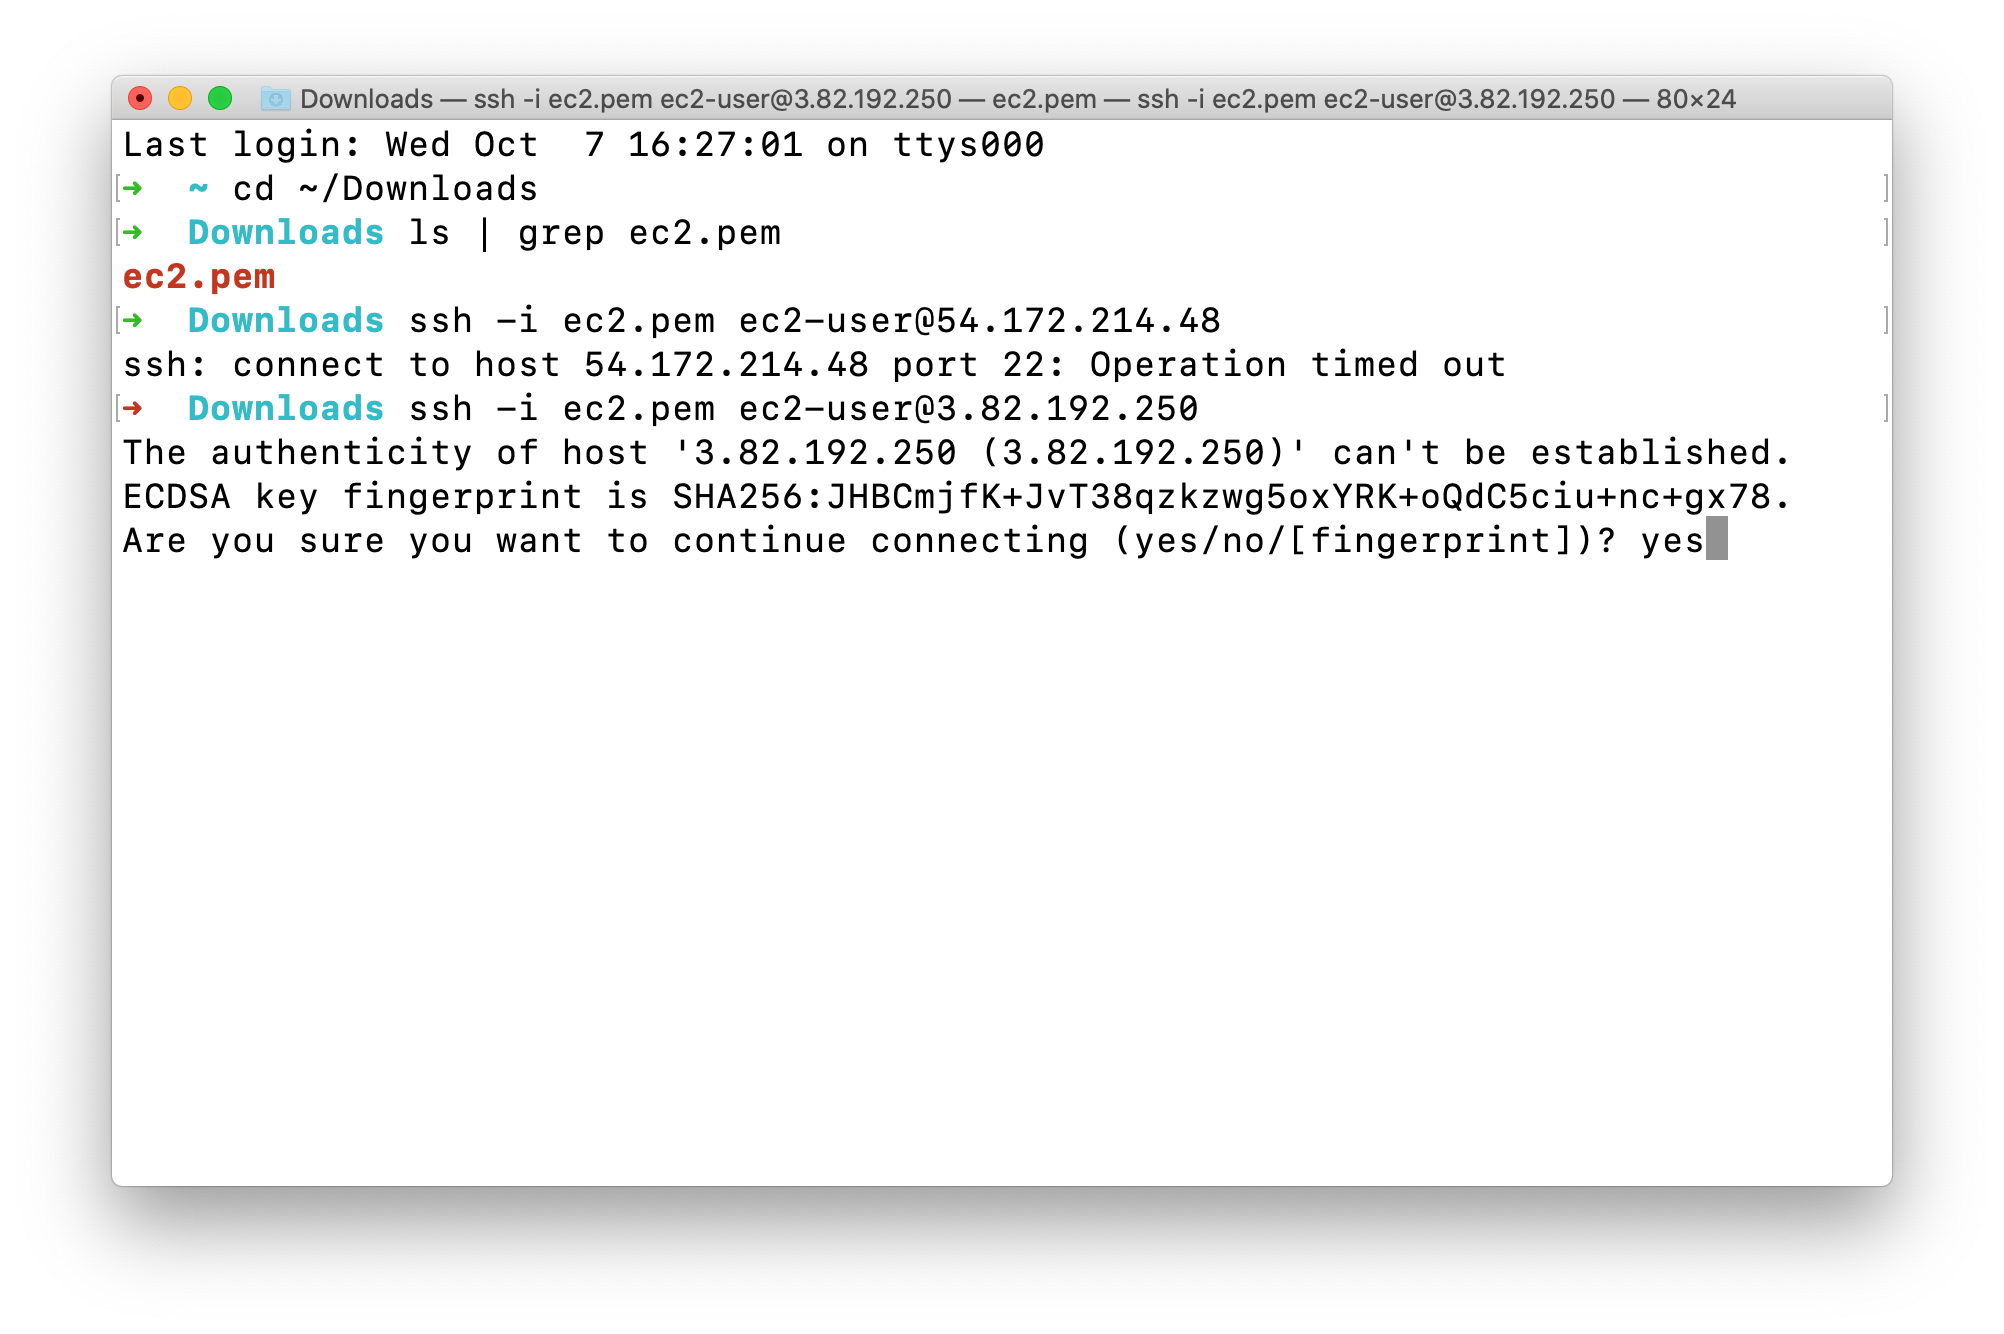
Access must be denied since the permission of ec2.pem is too open.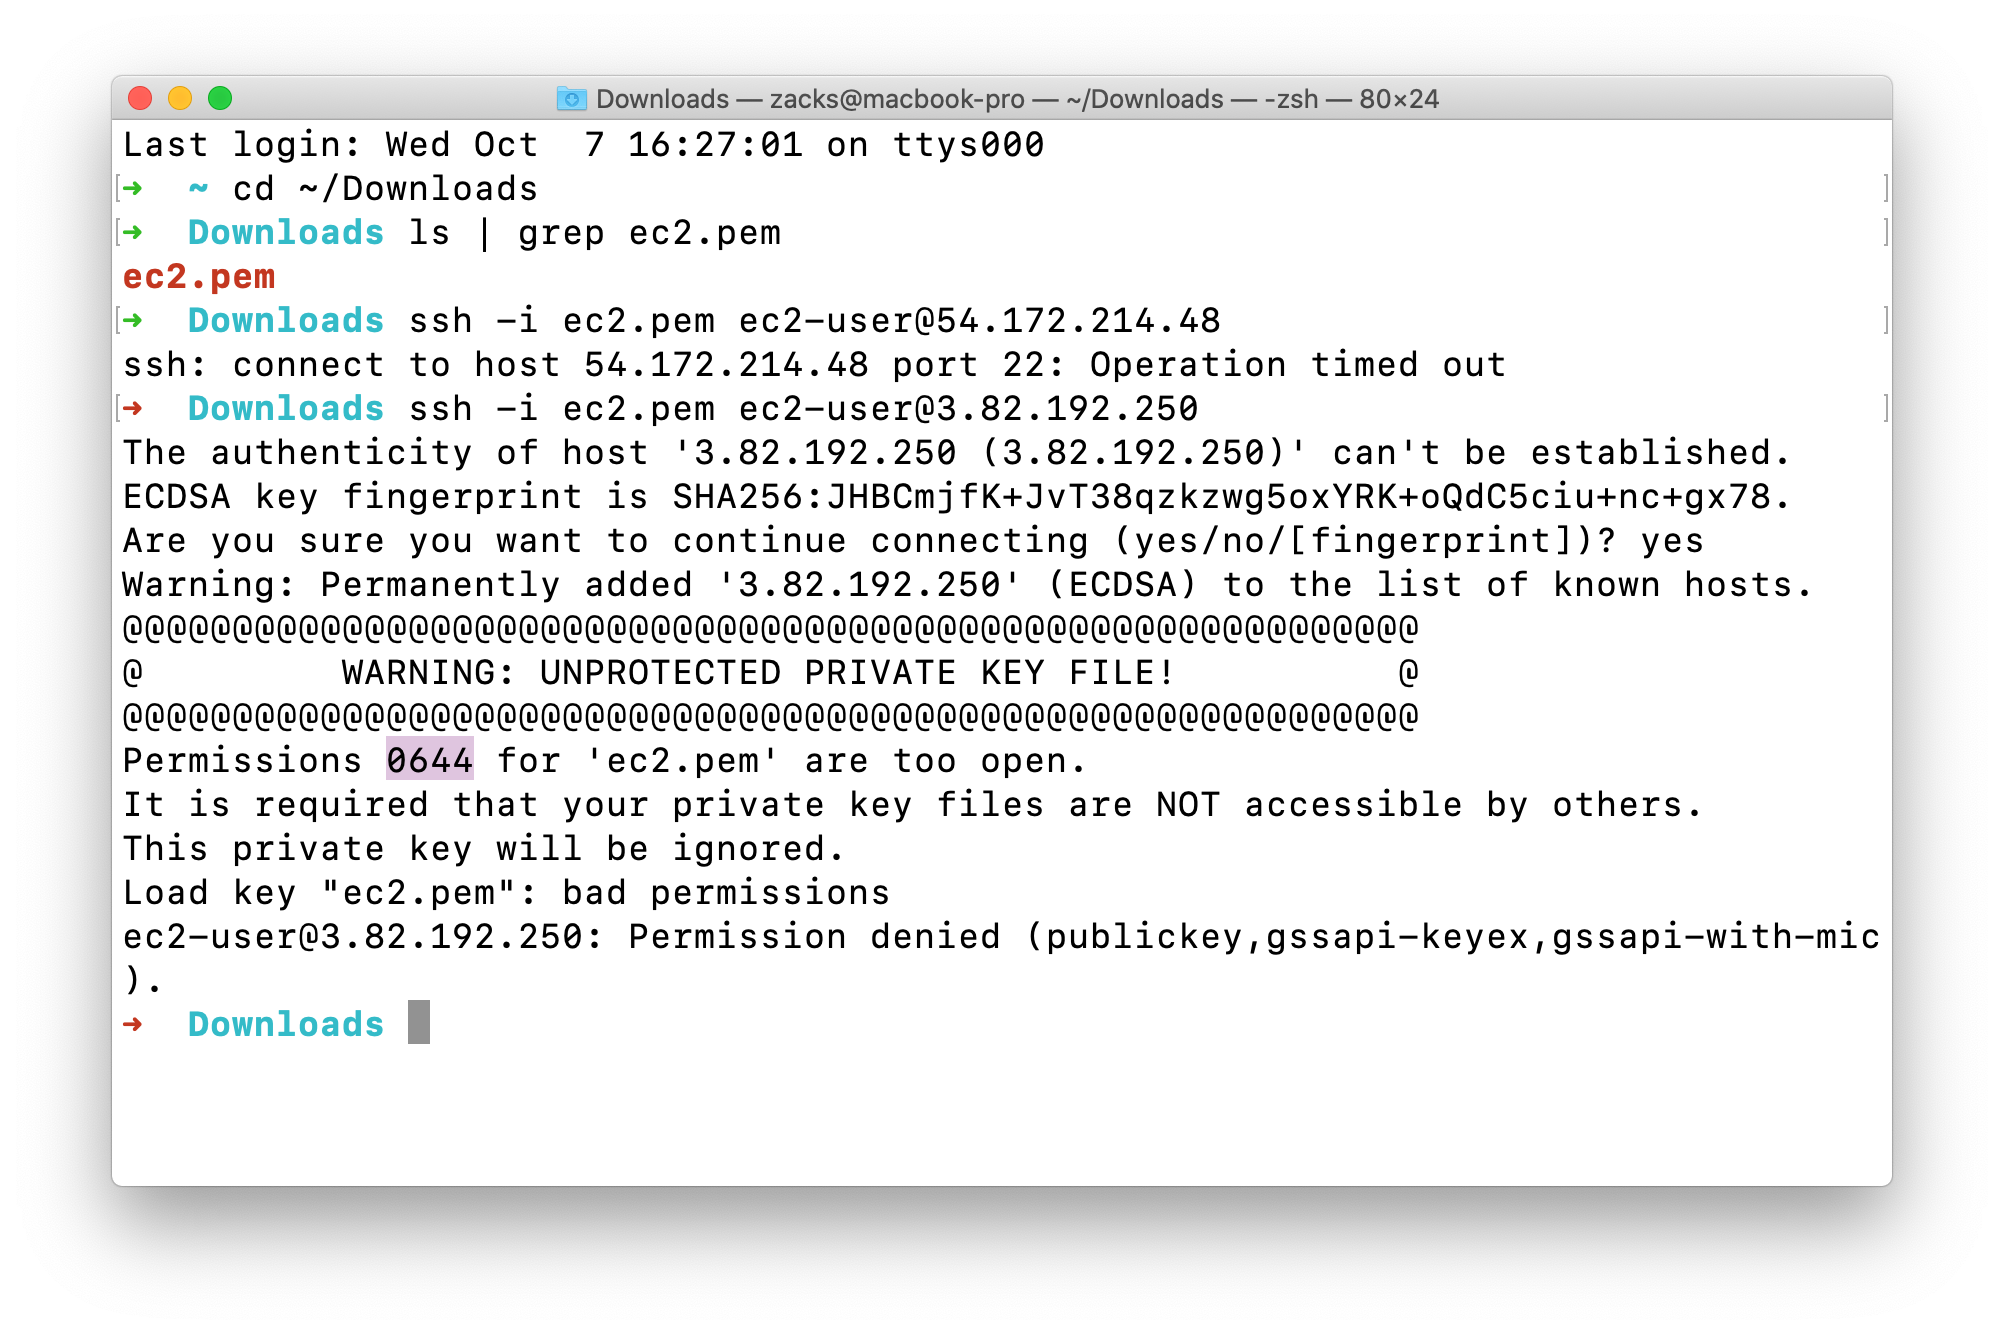
Now we need to lower the permission of ec2.pem
The current permission is -rw-r--r-- which means 0644.ls -l | grep ec2.pem
r: read - 4w: write - 2x: execute - 1 (not show on this file now)-: None - 0
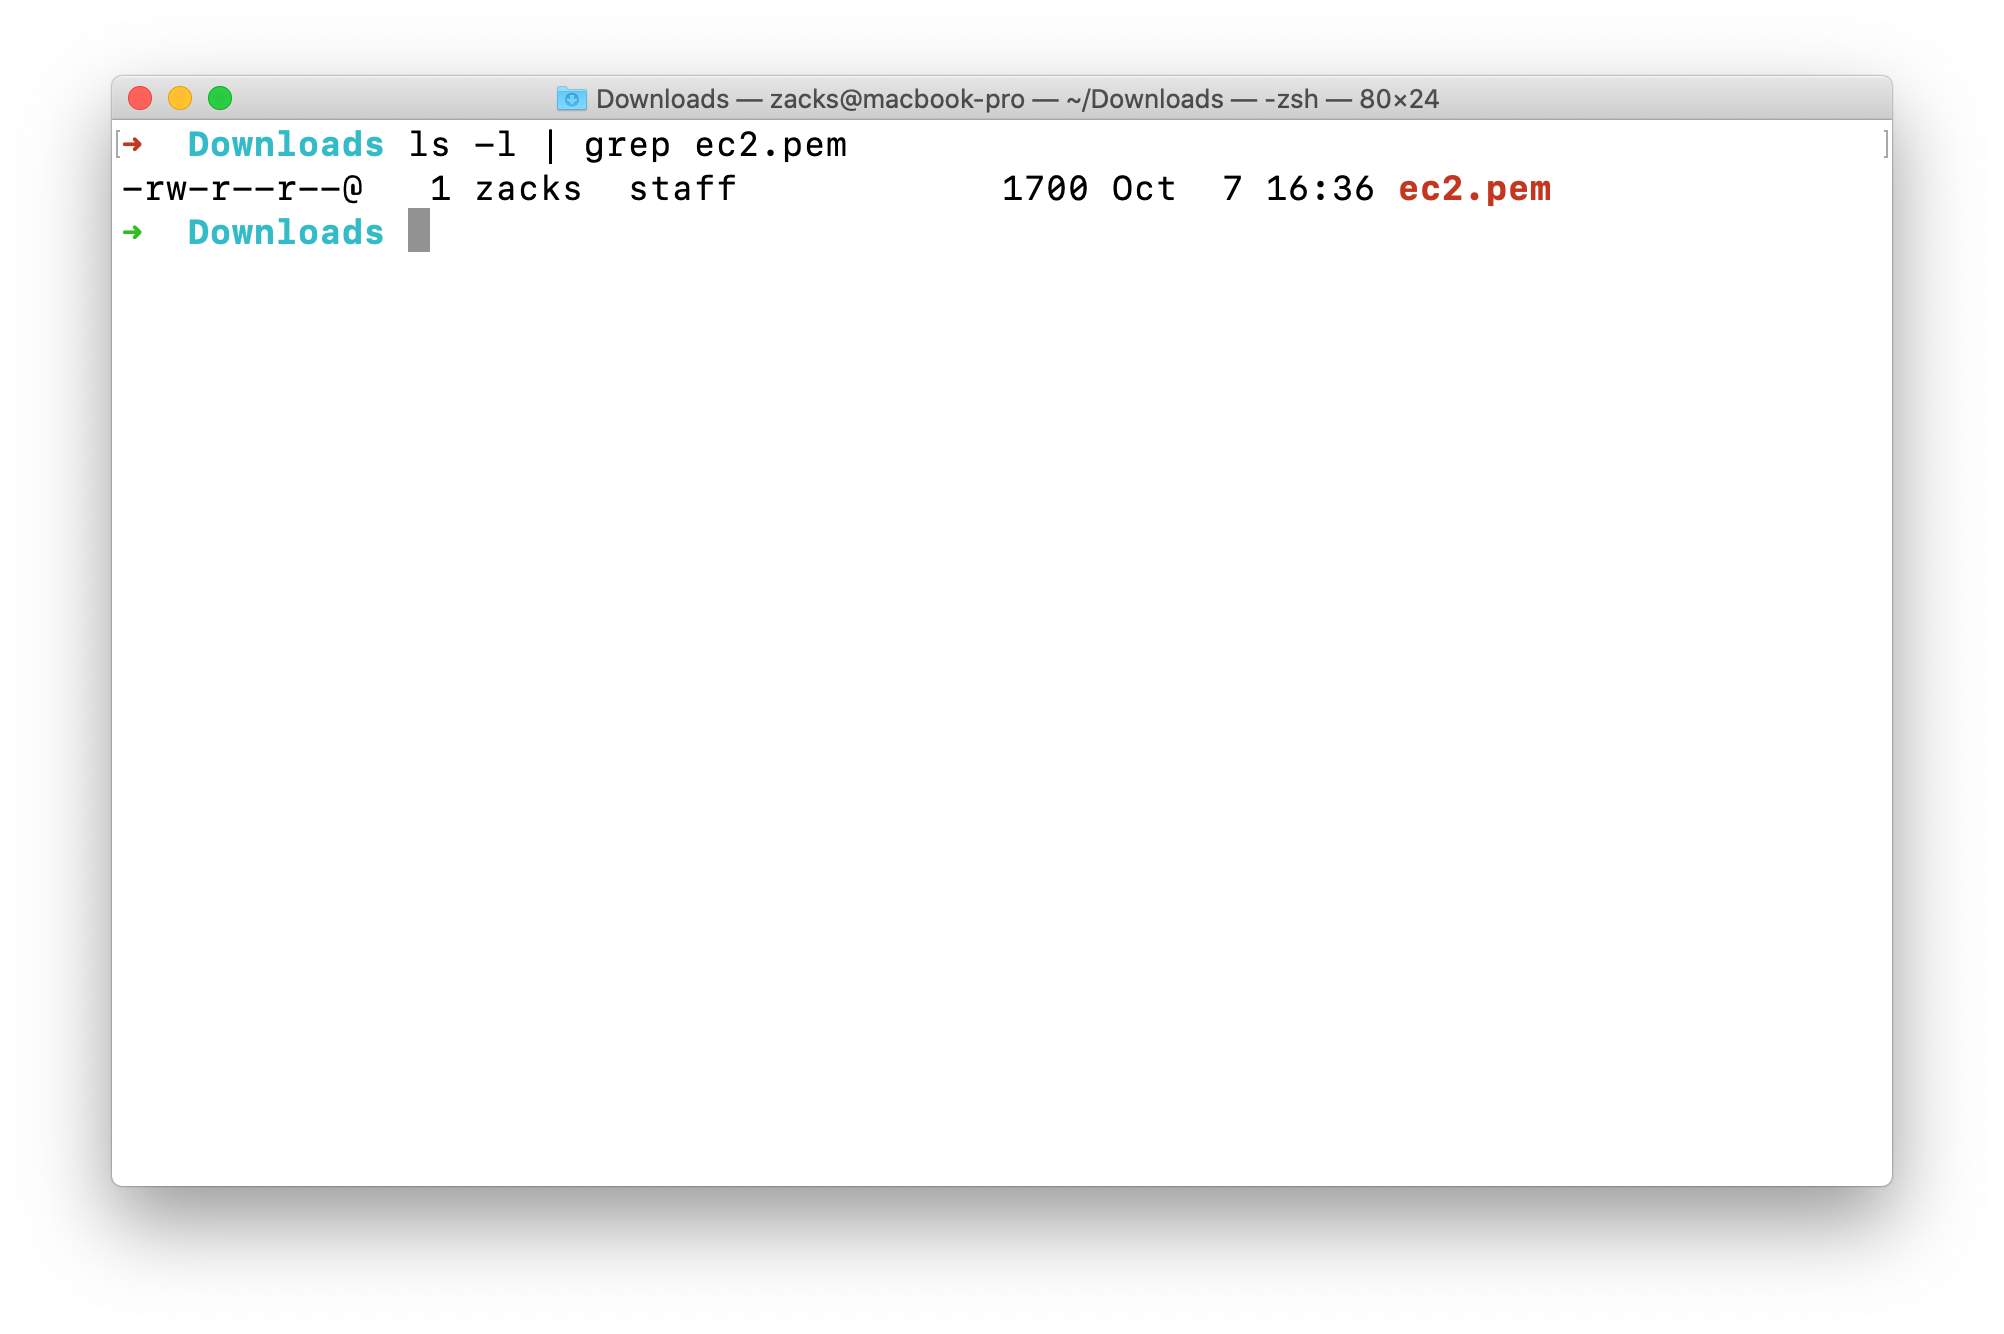
Lower it permission to 0400 which means -r--------chmod 0400 ec2.pem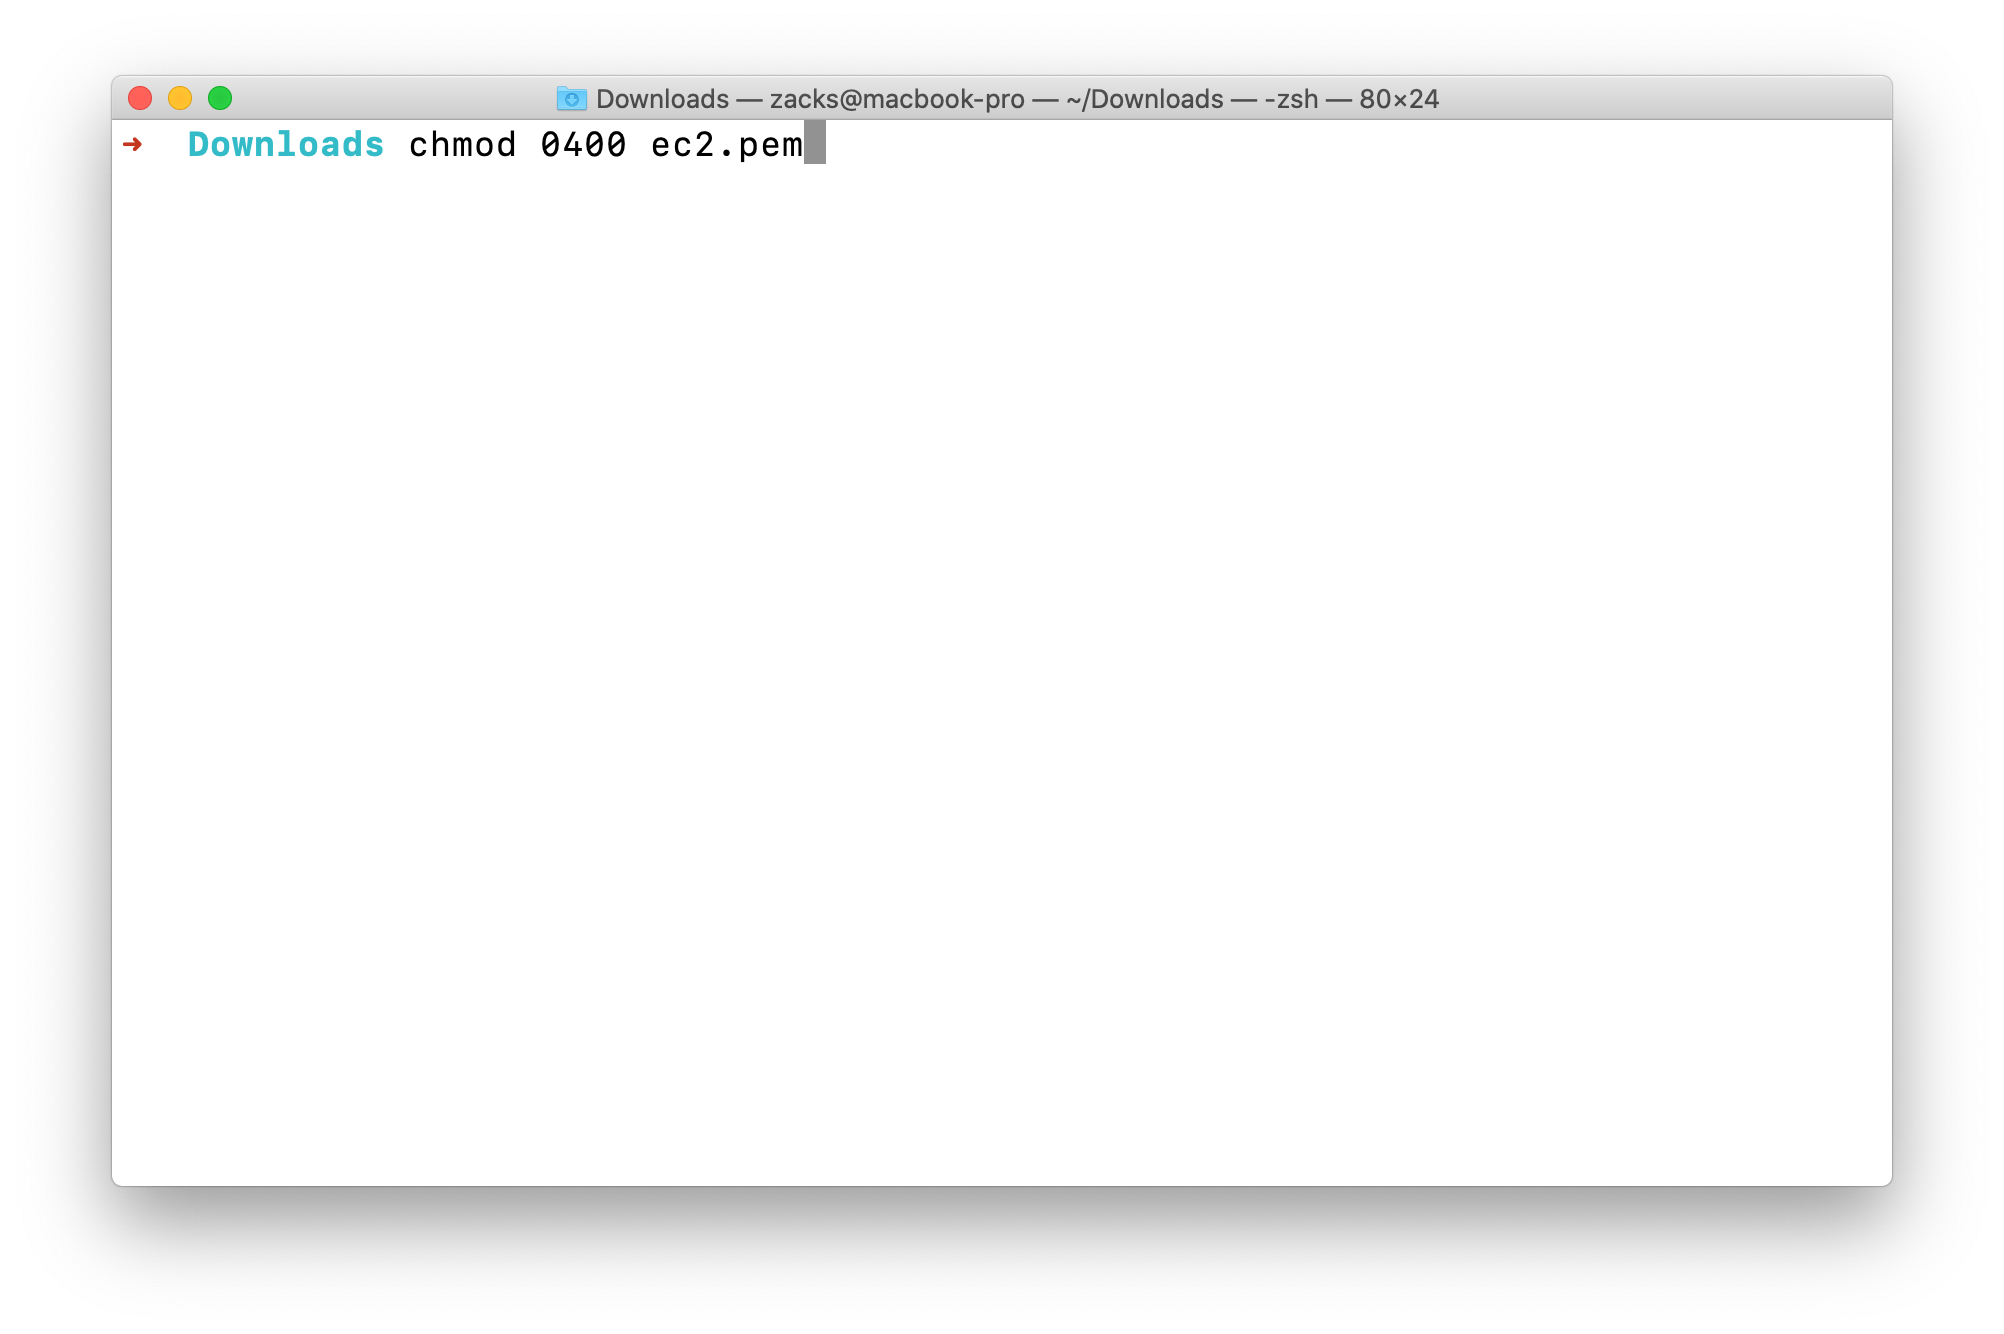
See its permission again.ls -l | grep ec2.pem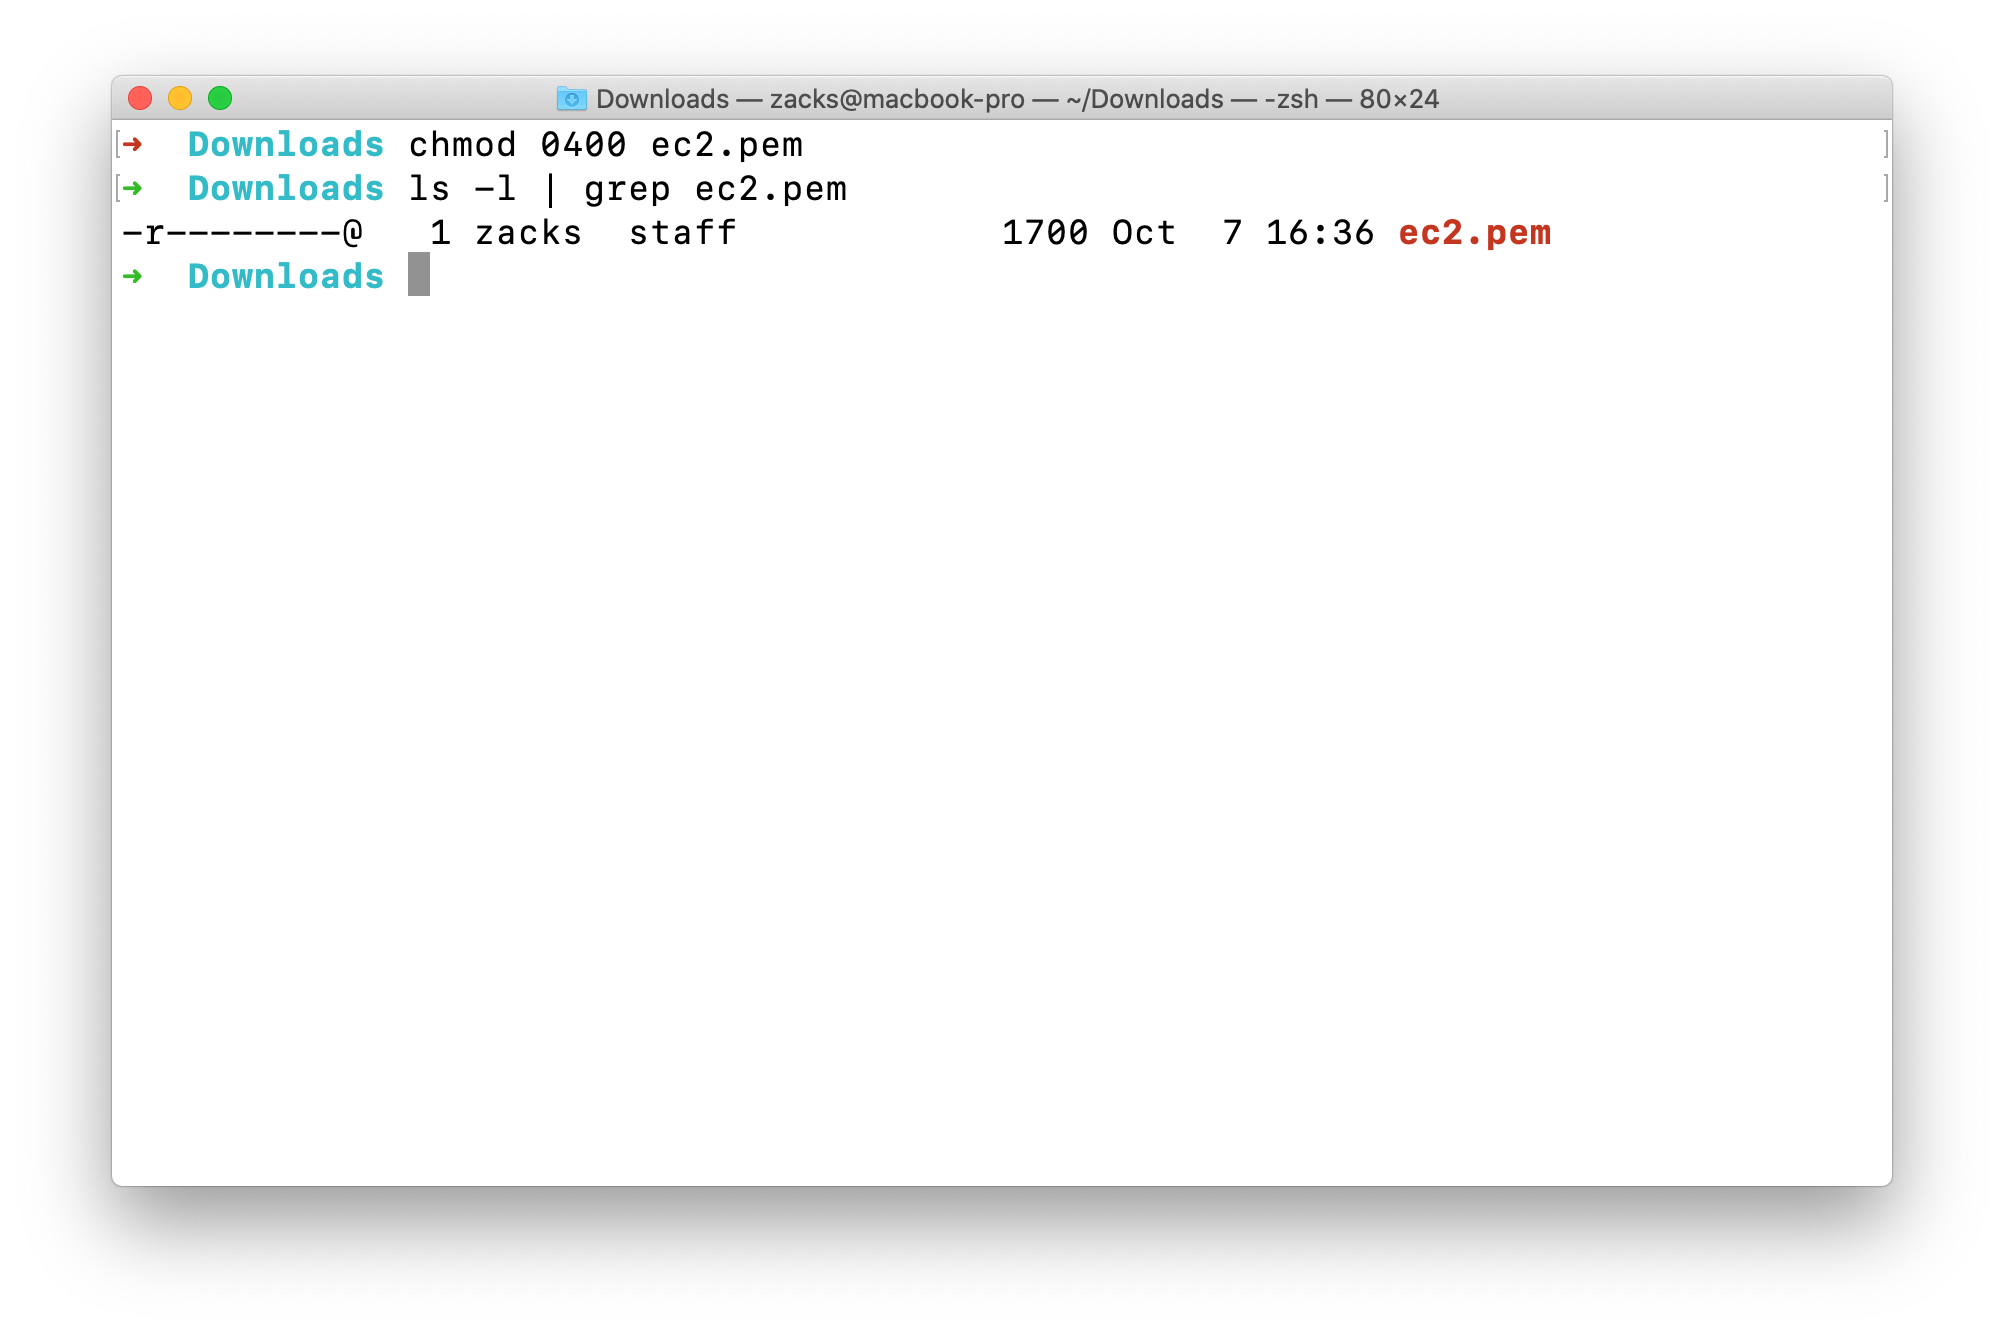
Try to SSH into your EC2 instance againssh -i yourKeyPairName ec2-user@yourInstancePublicIpAddress
Now we log into the the server.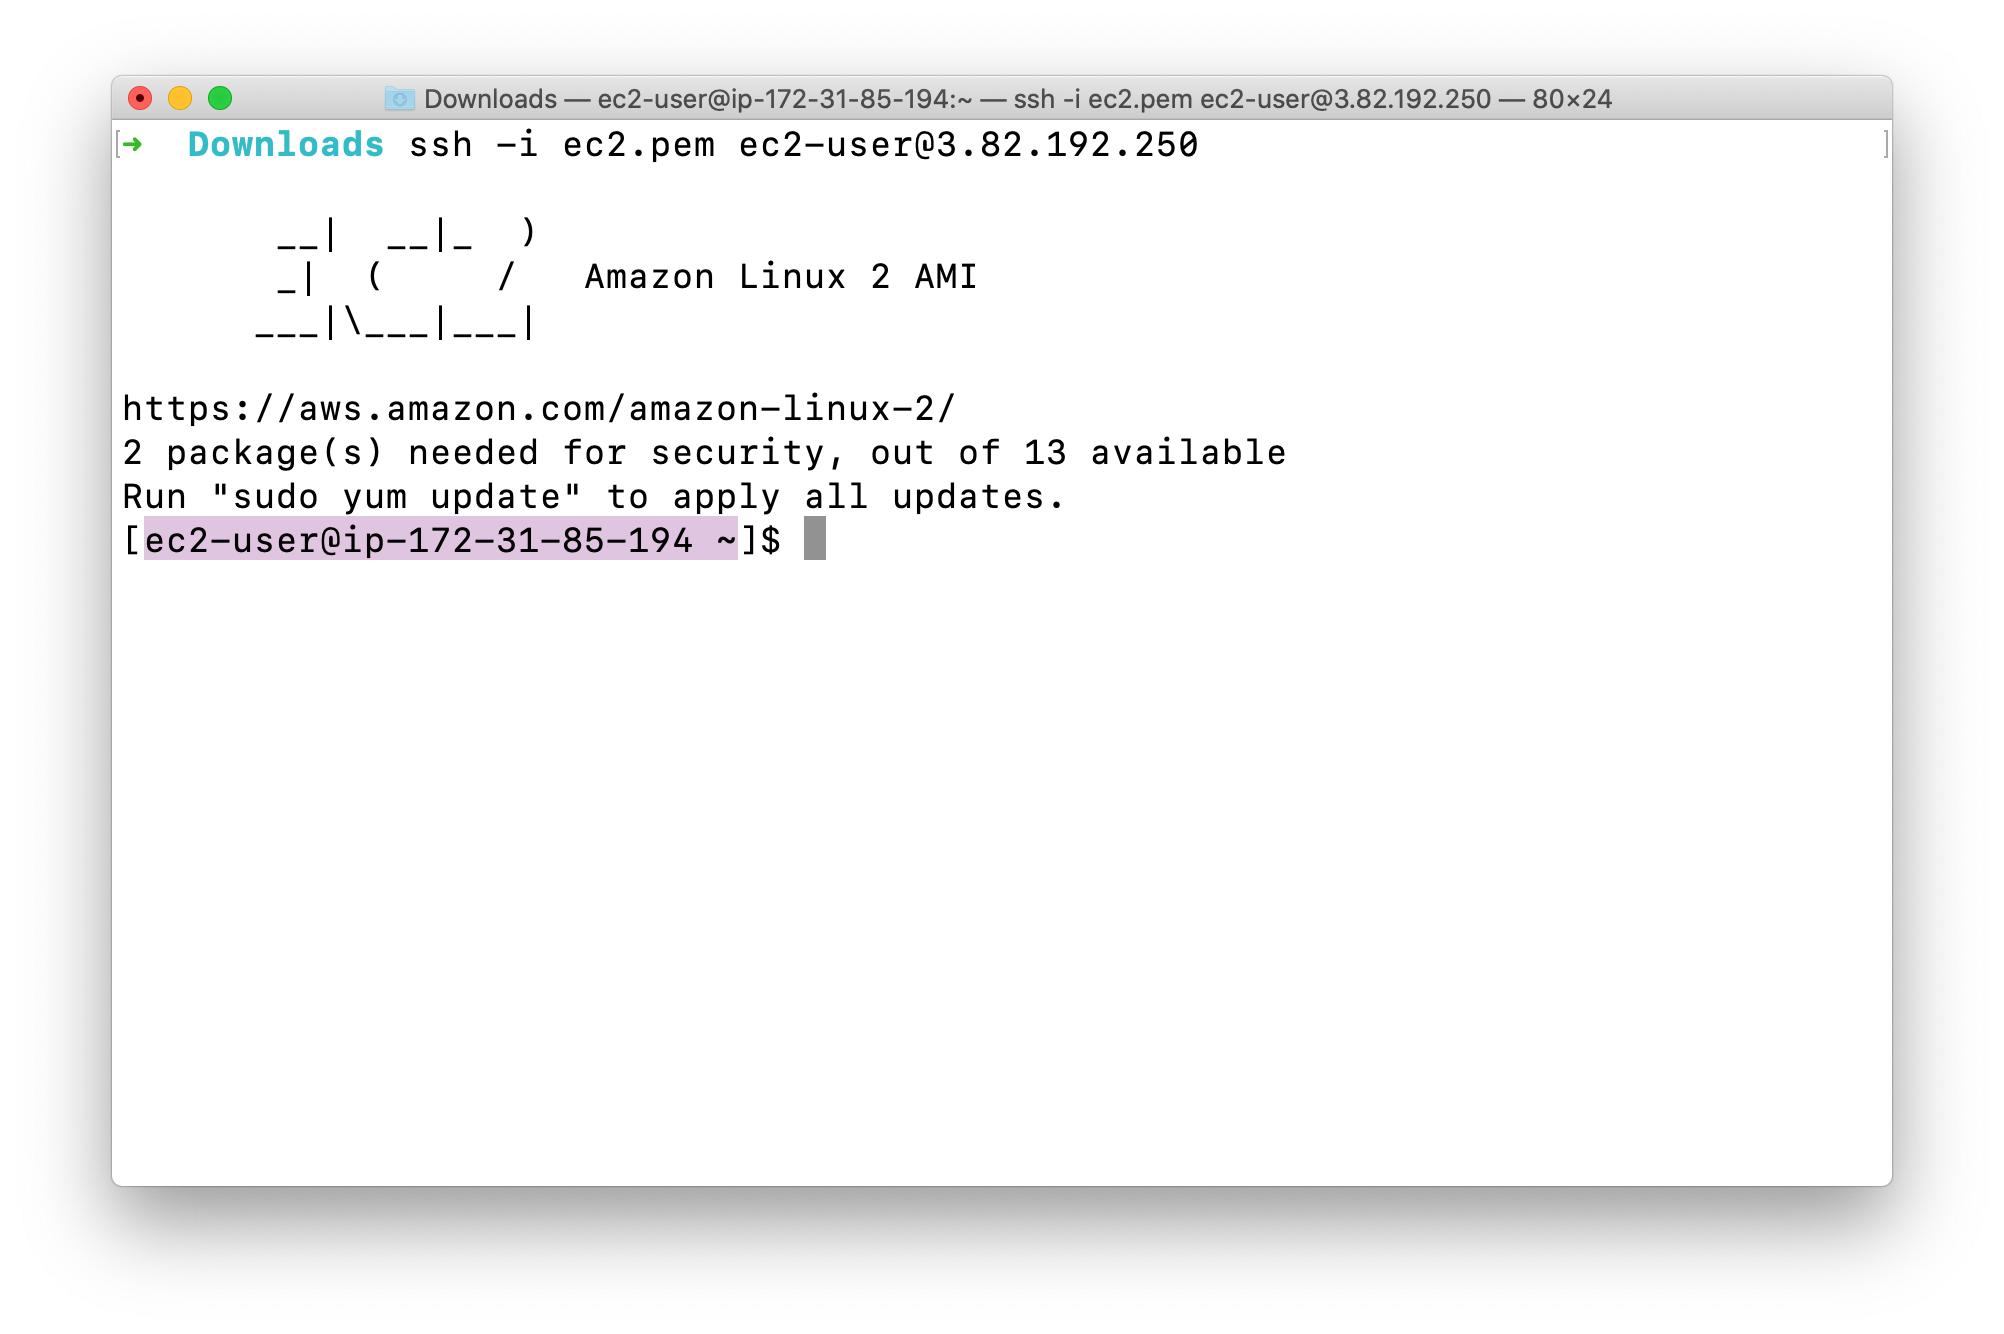
Install an Apache Server
Switch to root user: sudo -s
Notice the difference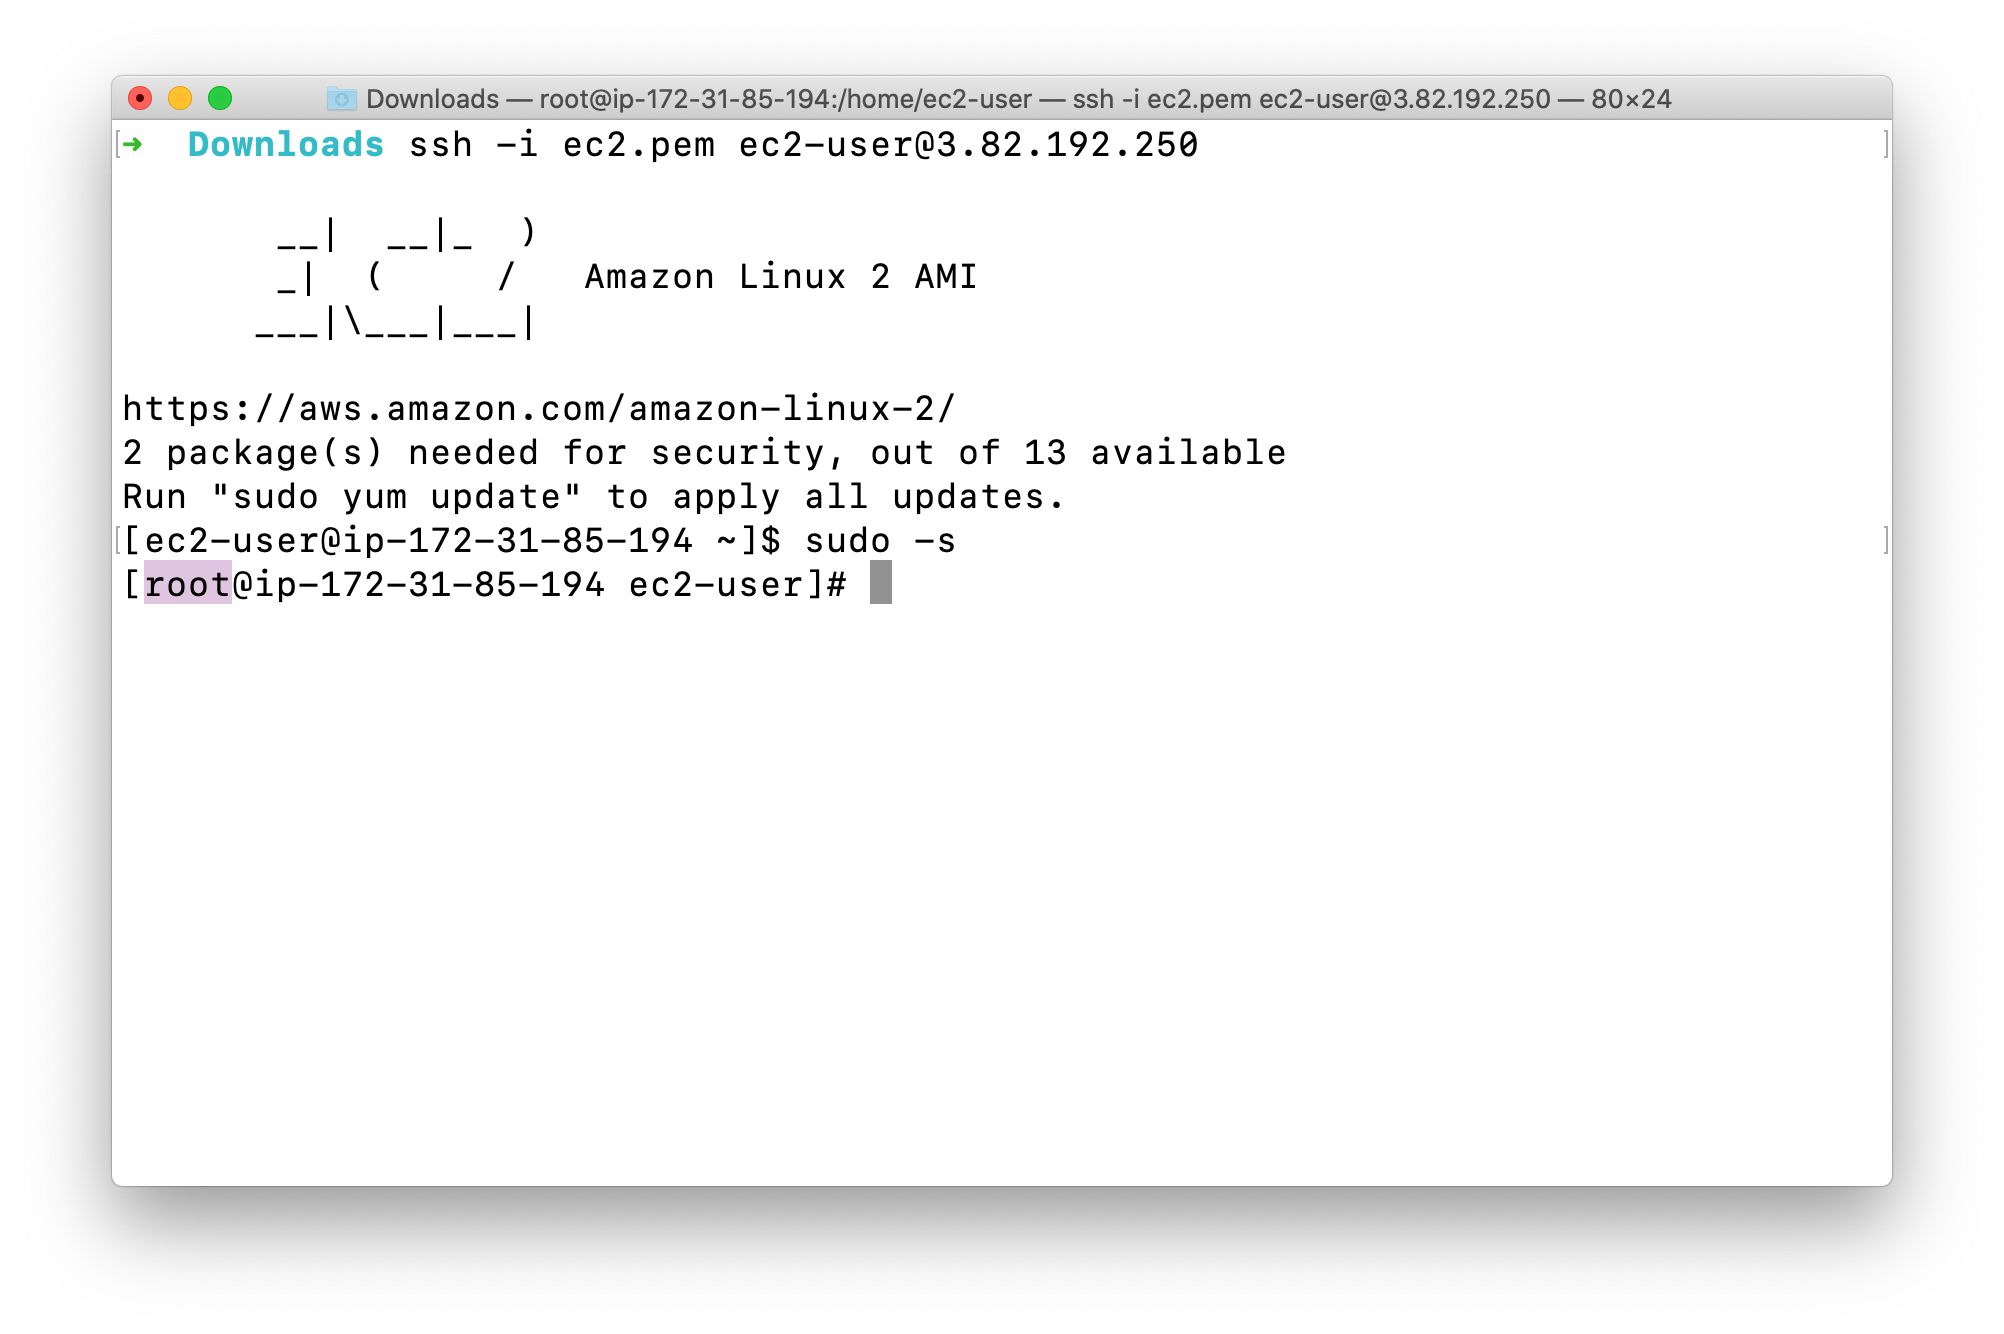
Now run the updates using the following command:yum -y update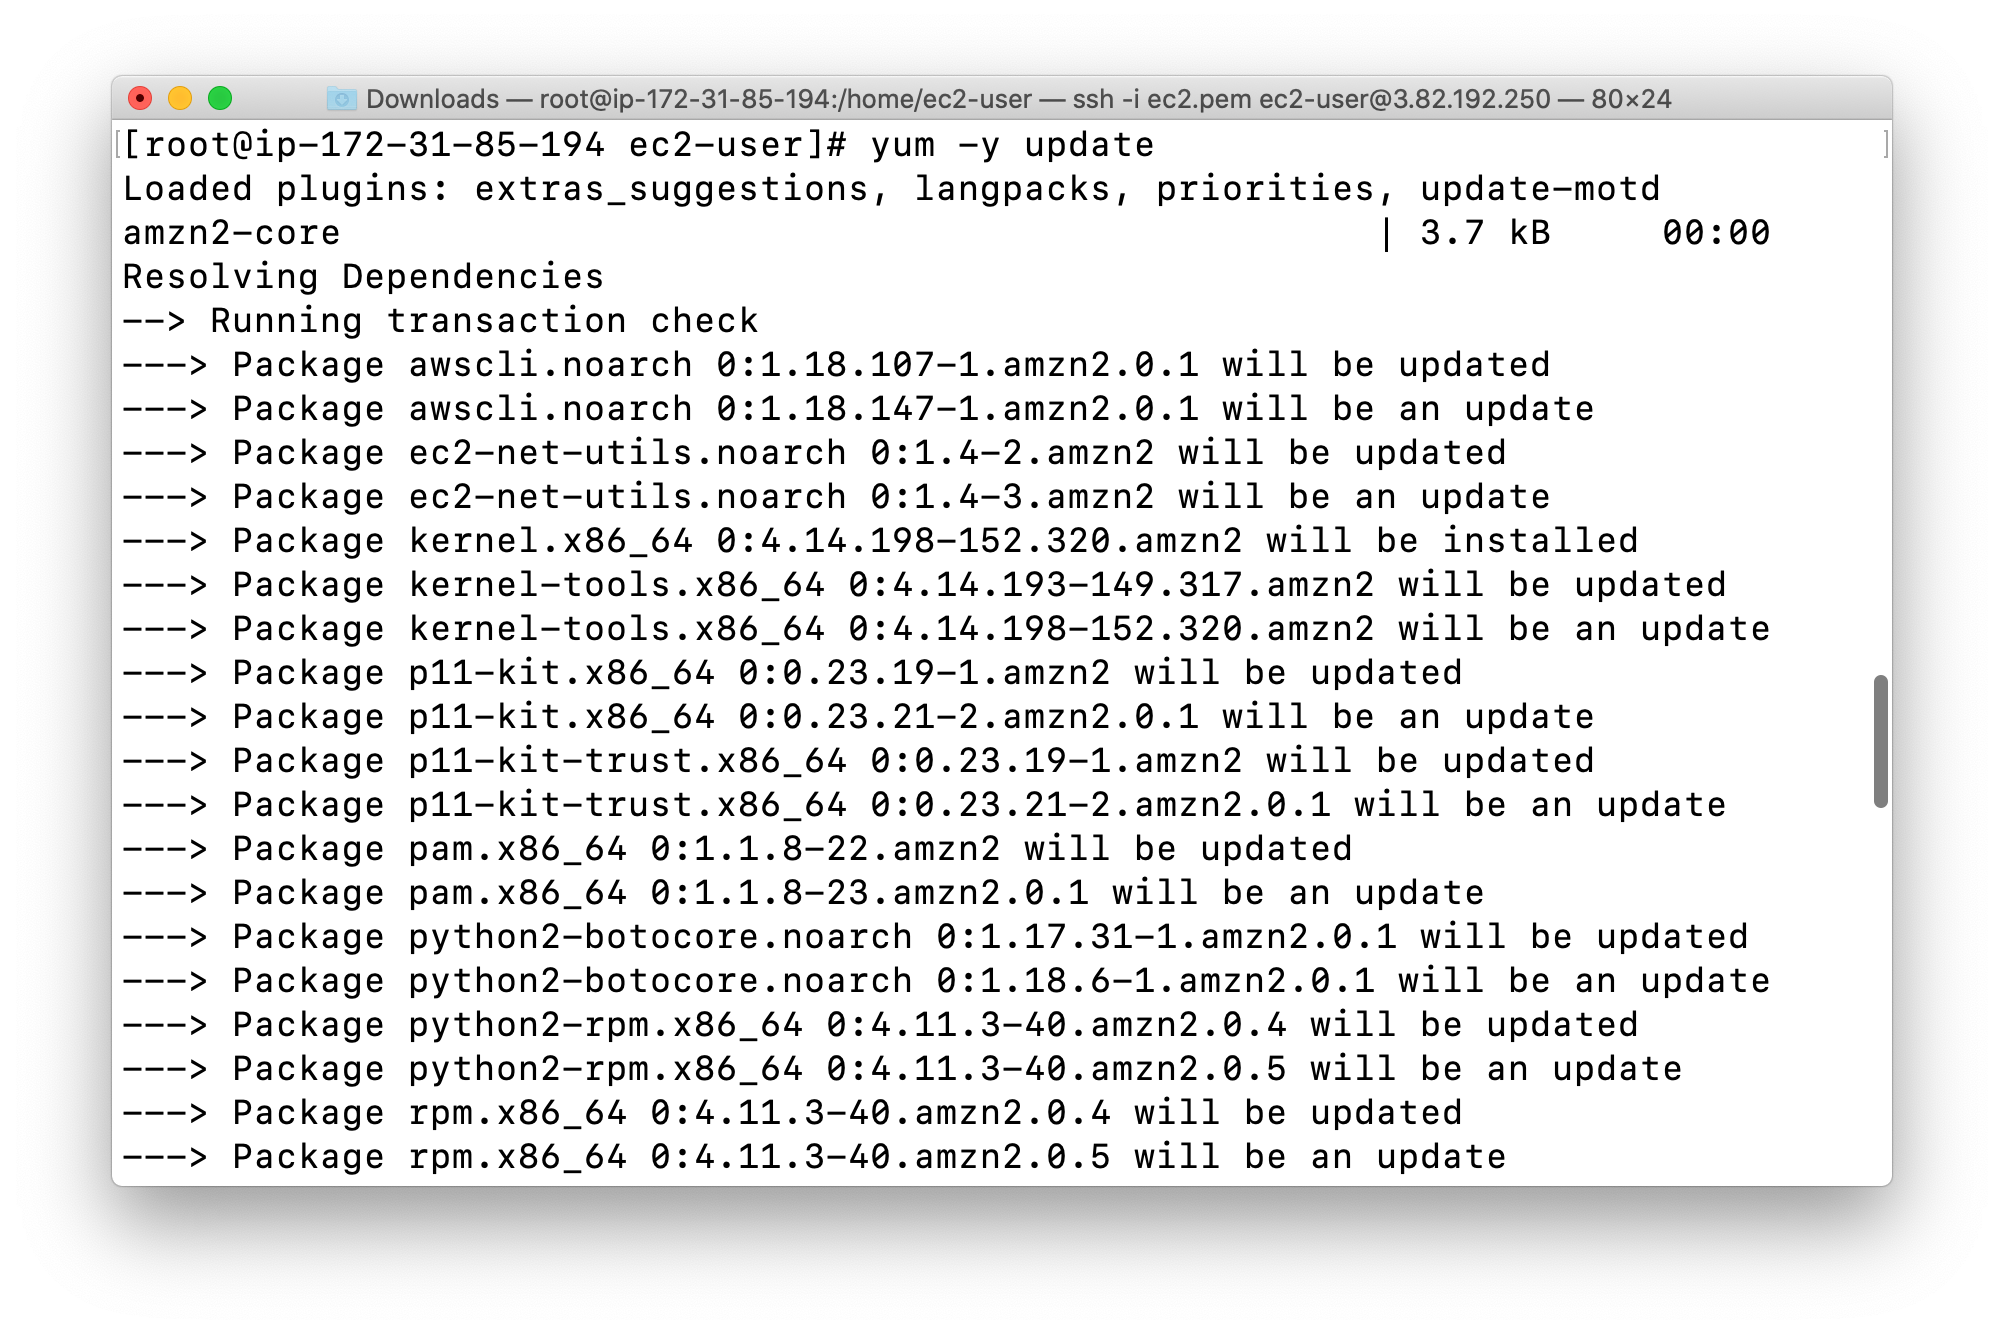
Once completed, lets install and run an apache server
Install the Apache web server:yum install httpd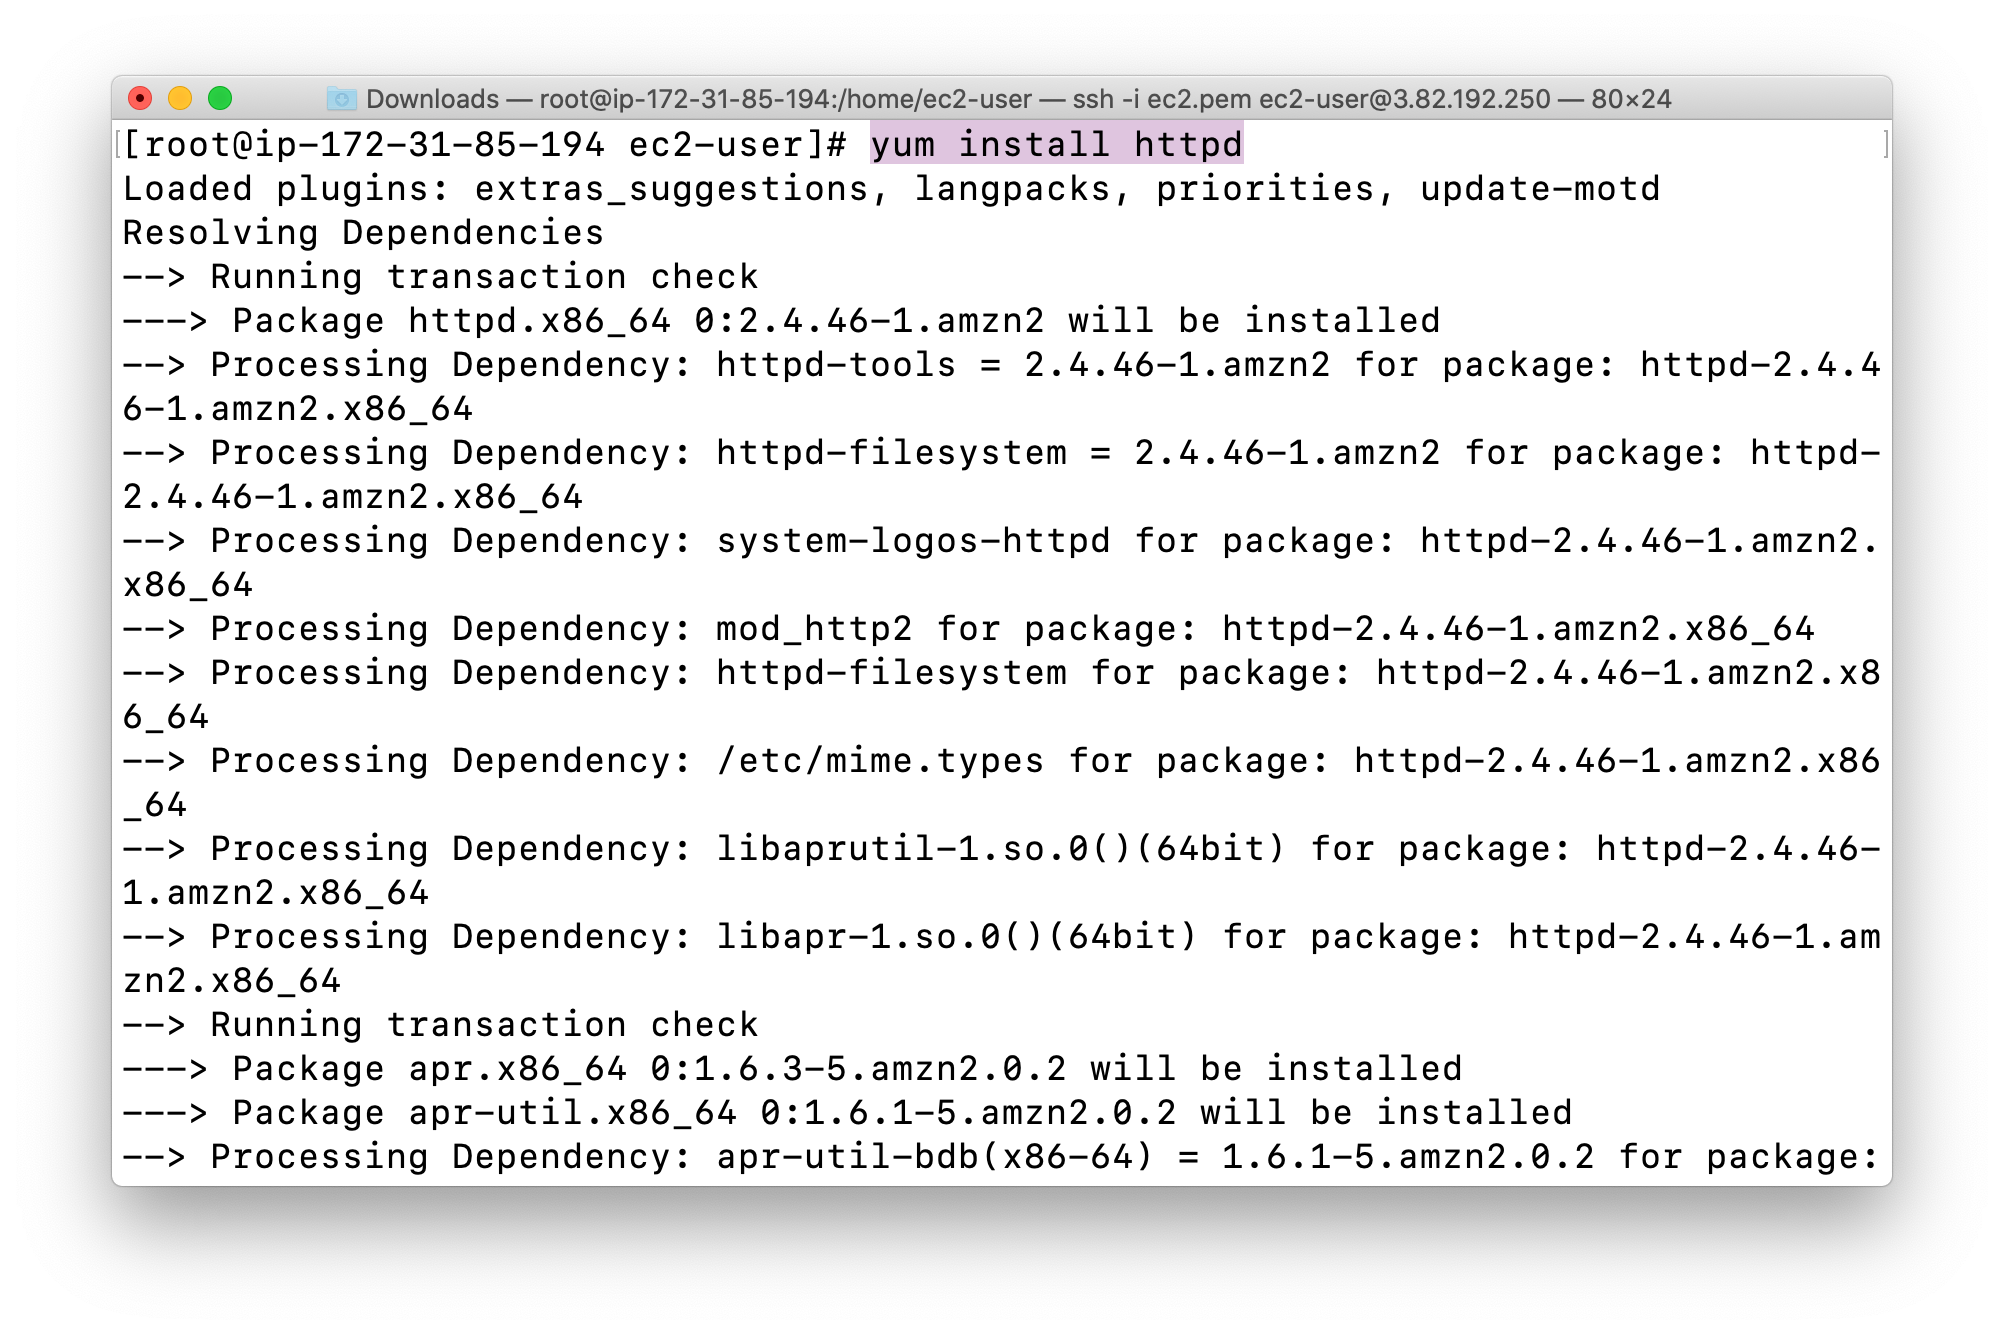
When prompted, Press “Y” to confirm.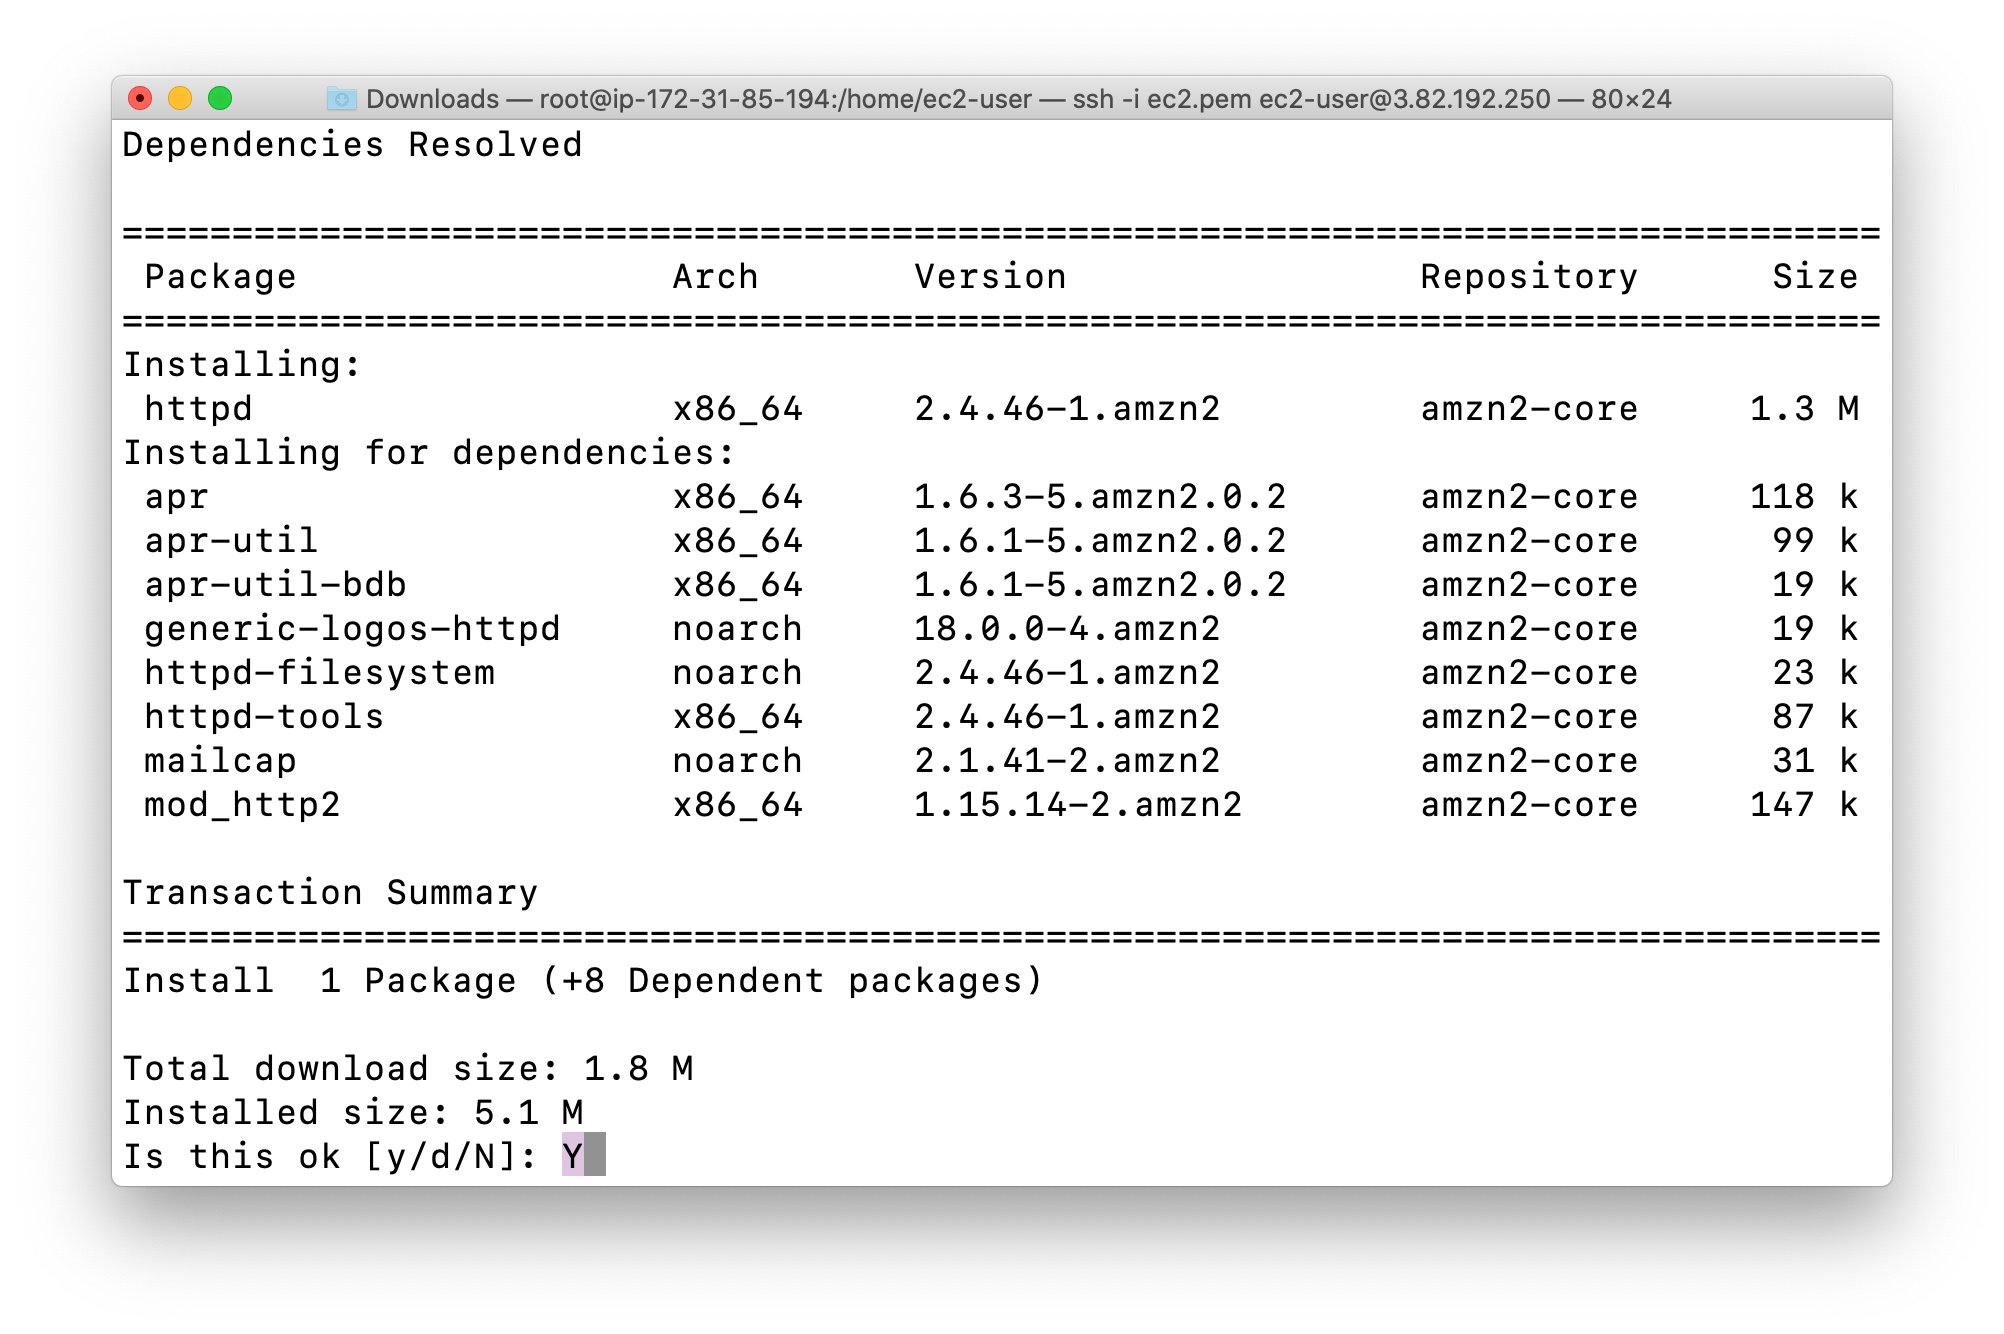
Start the web serversystemctl start httpd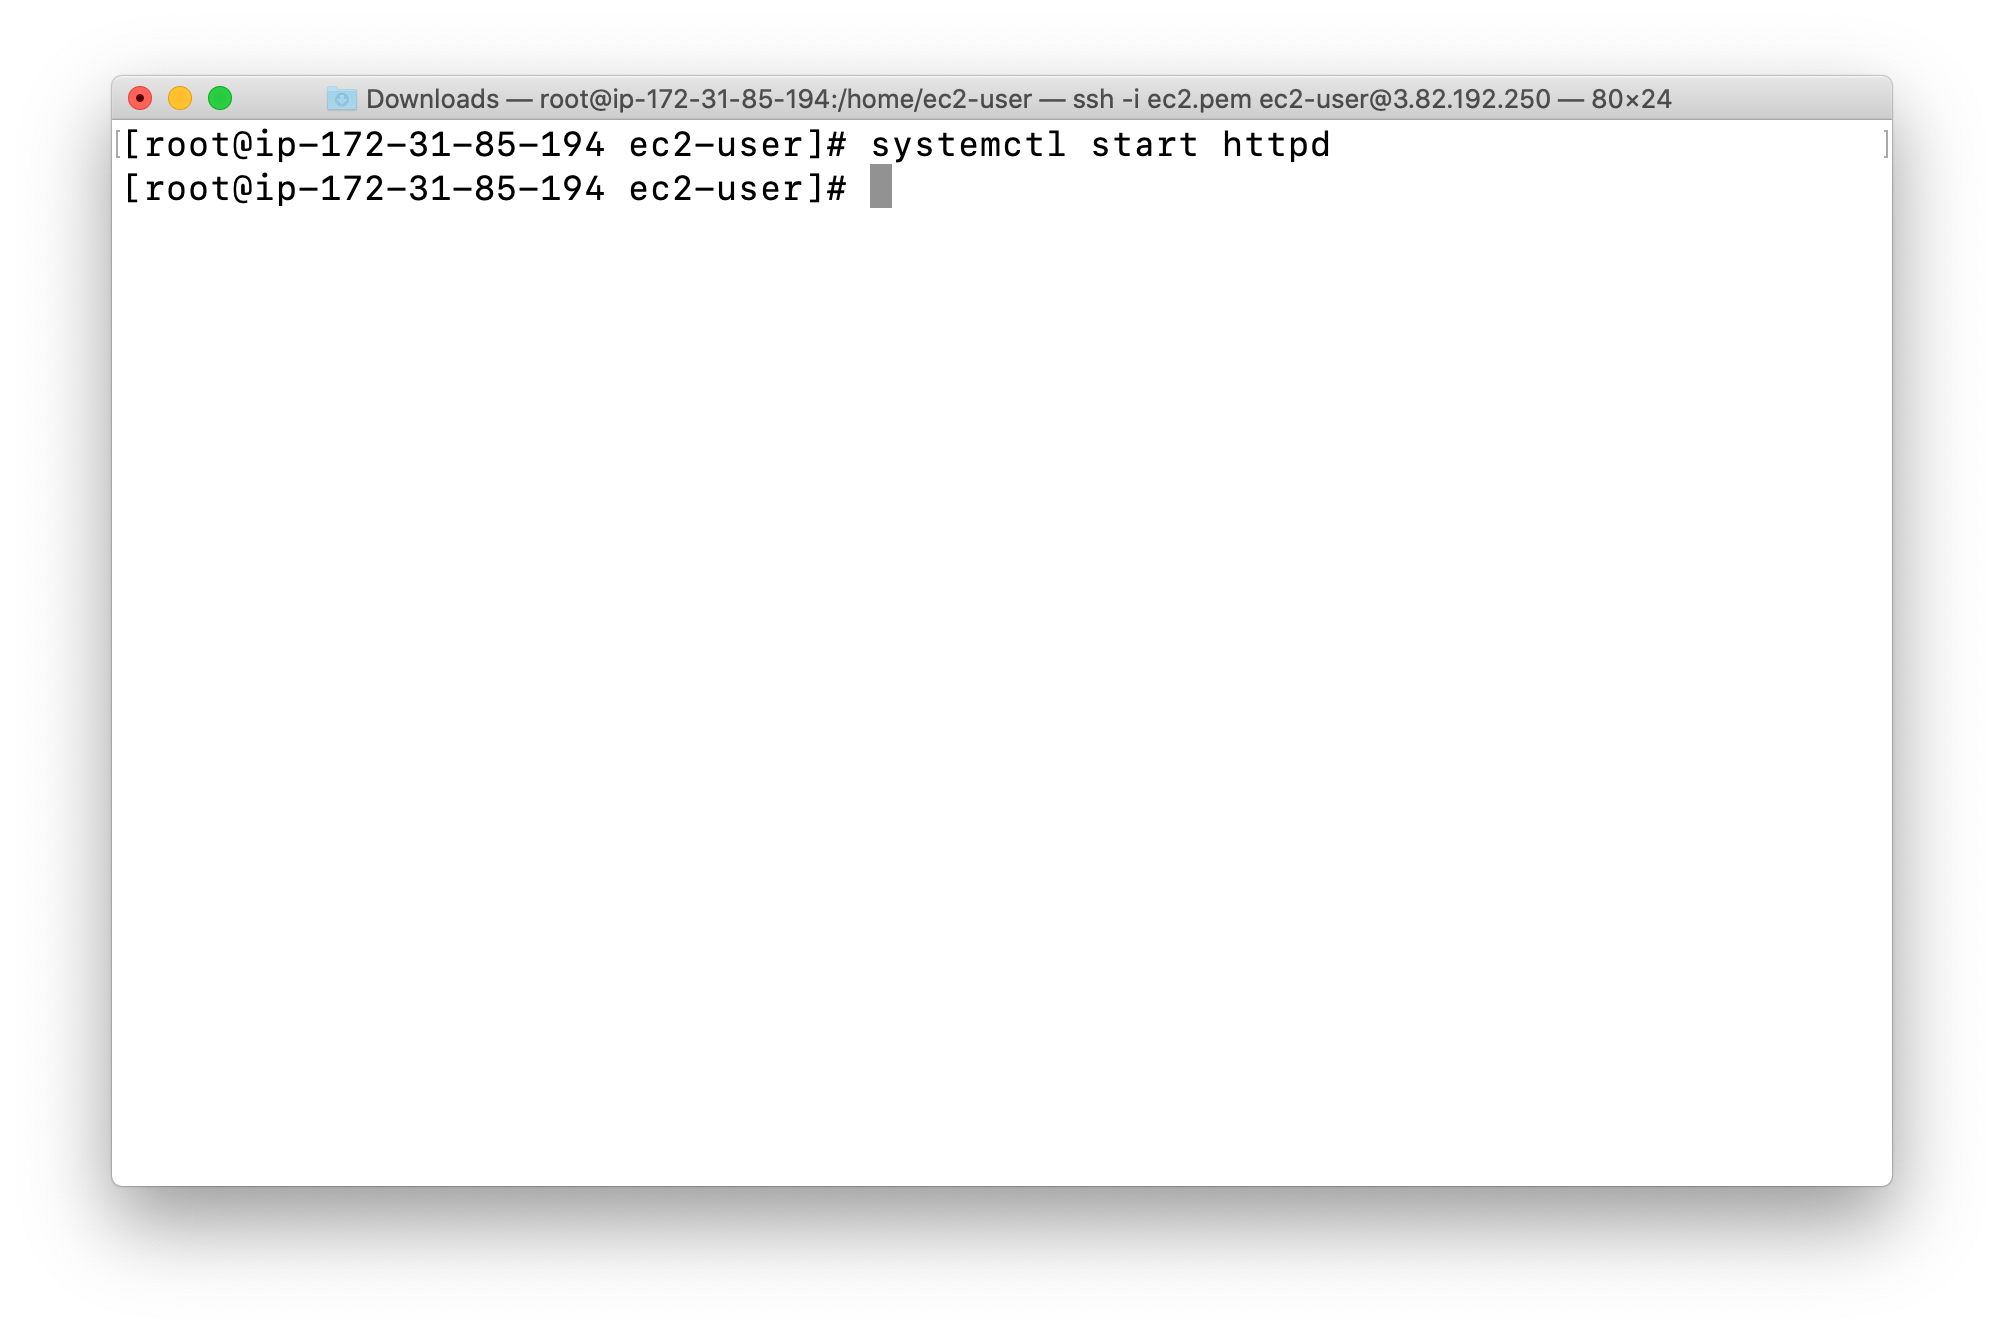
Now enable httpd:systemctl enable httpd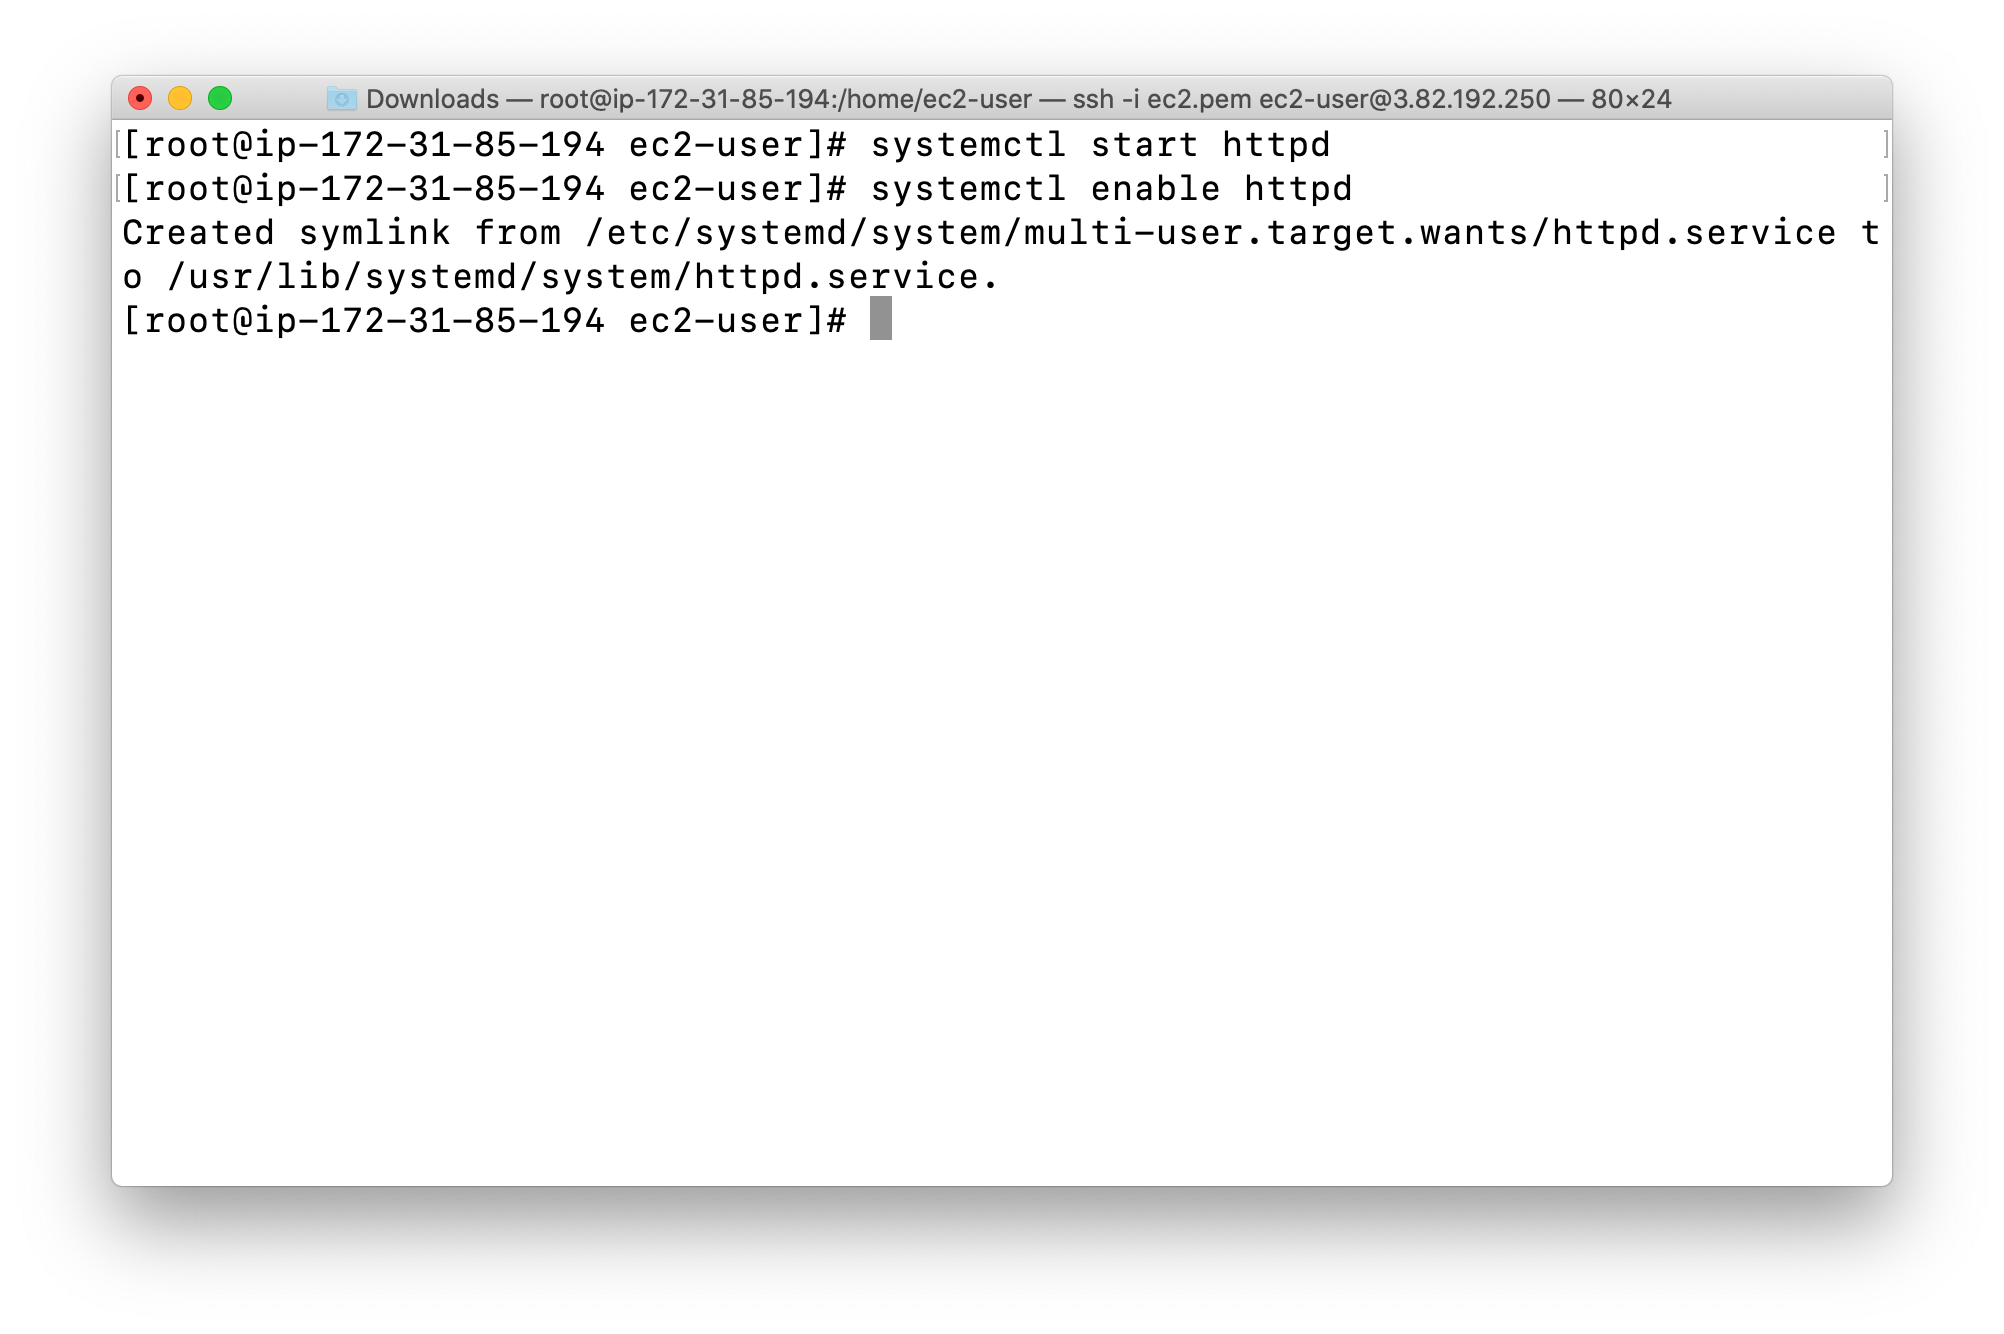
Check the webserver statussystemctl status httpd
You can see Active status is running.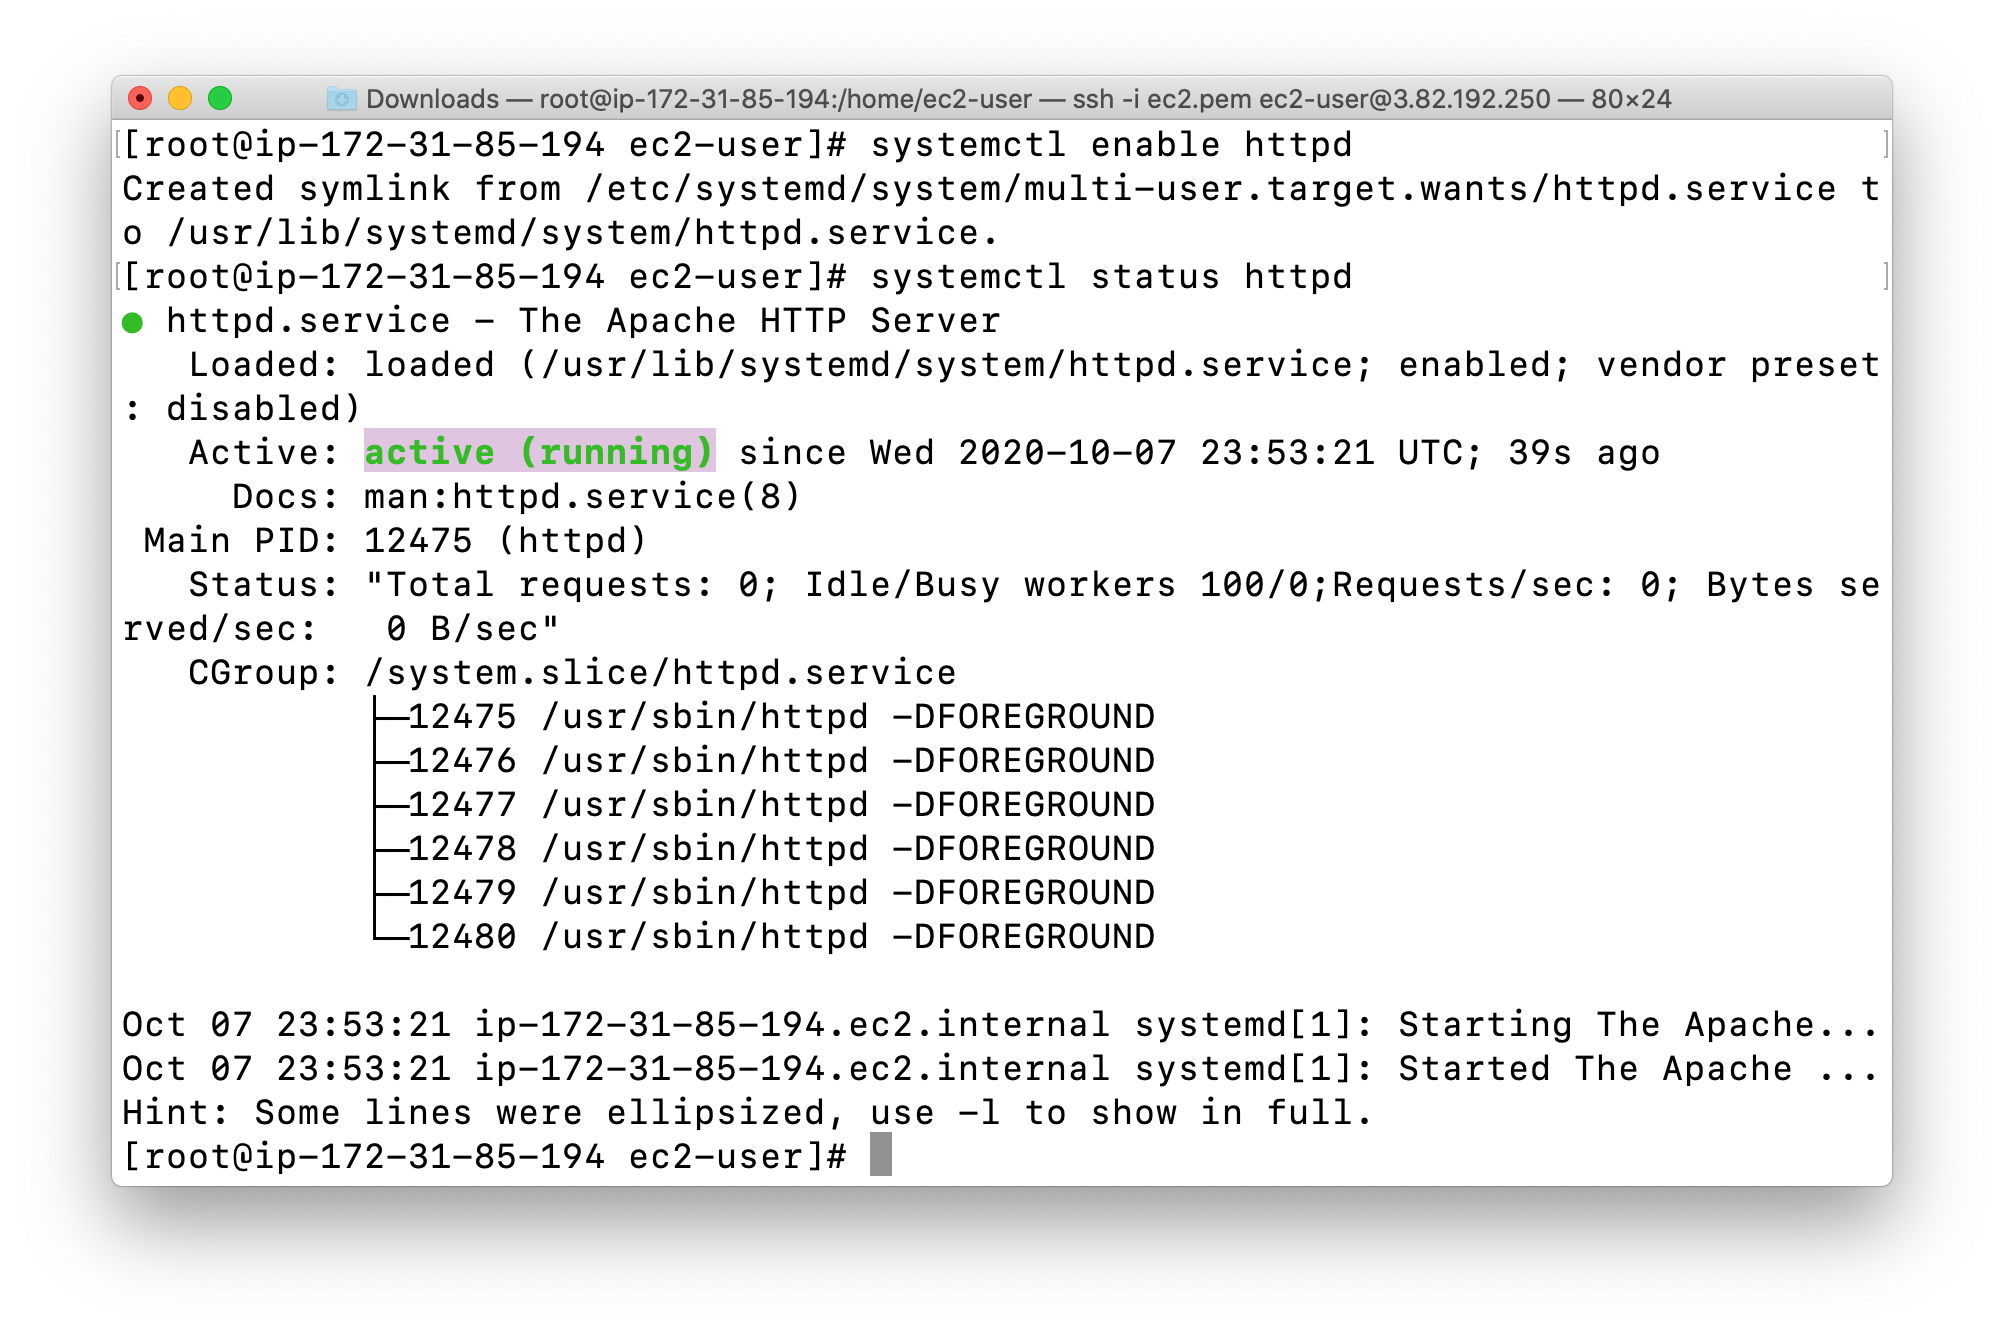
You can test that your web server is properly installed and started by entering the public IP address of your EC2 instance in the address bar of a web browser. If your web server is running, then you see the Apache test page. If you don’t see the Apache test page, then verify whether you followed the above steps properly and check your inbound rules for the security group that you created.
Create and publish page
Navigate to the html folder where we will create a HTML page to test.cd /var/www/html/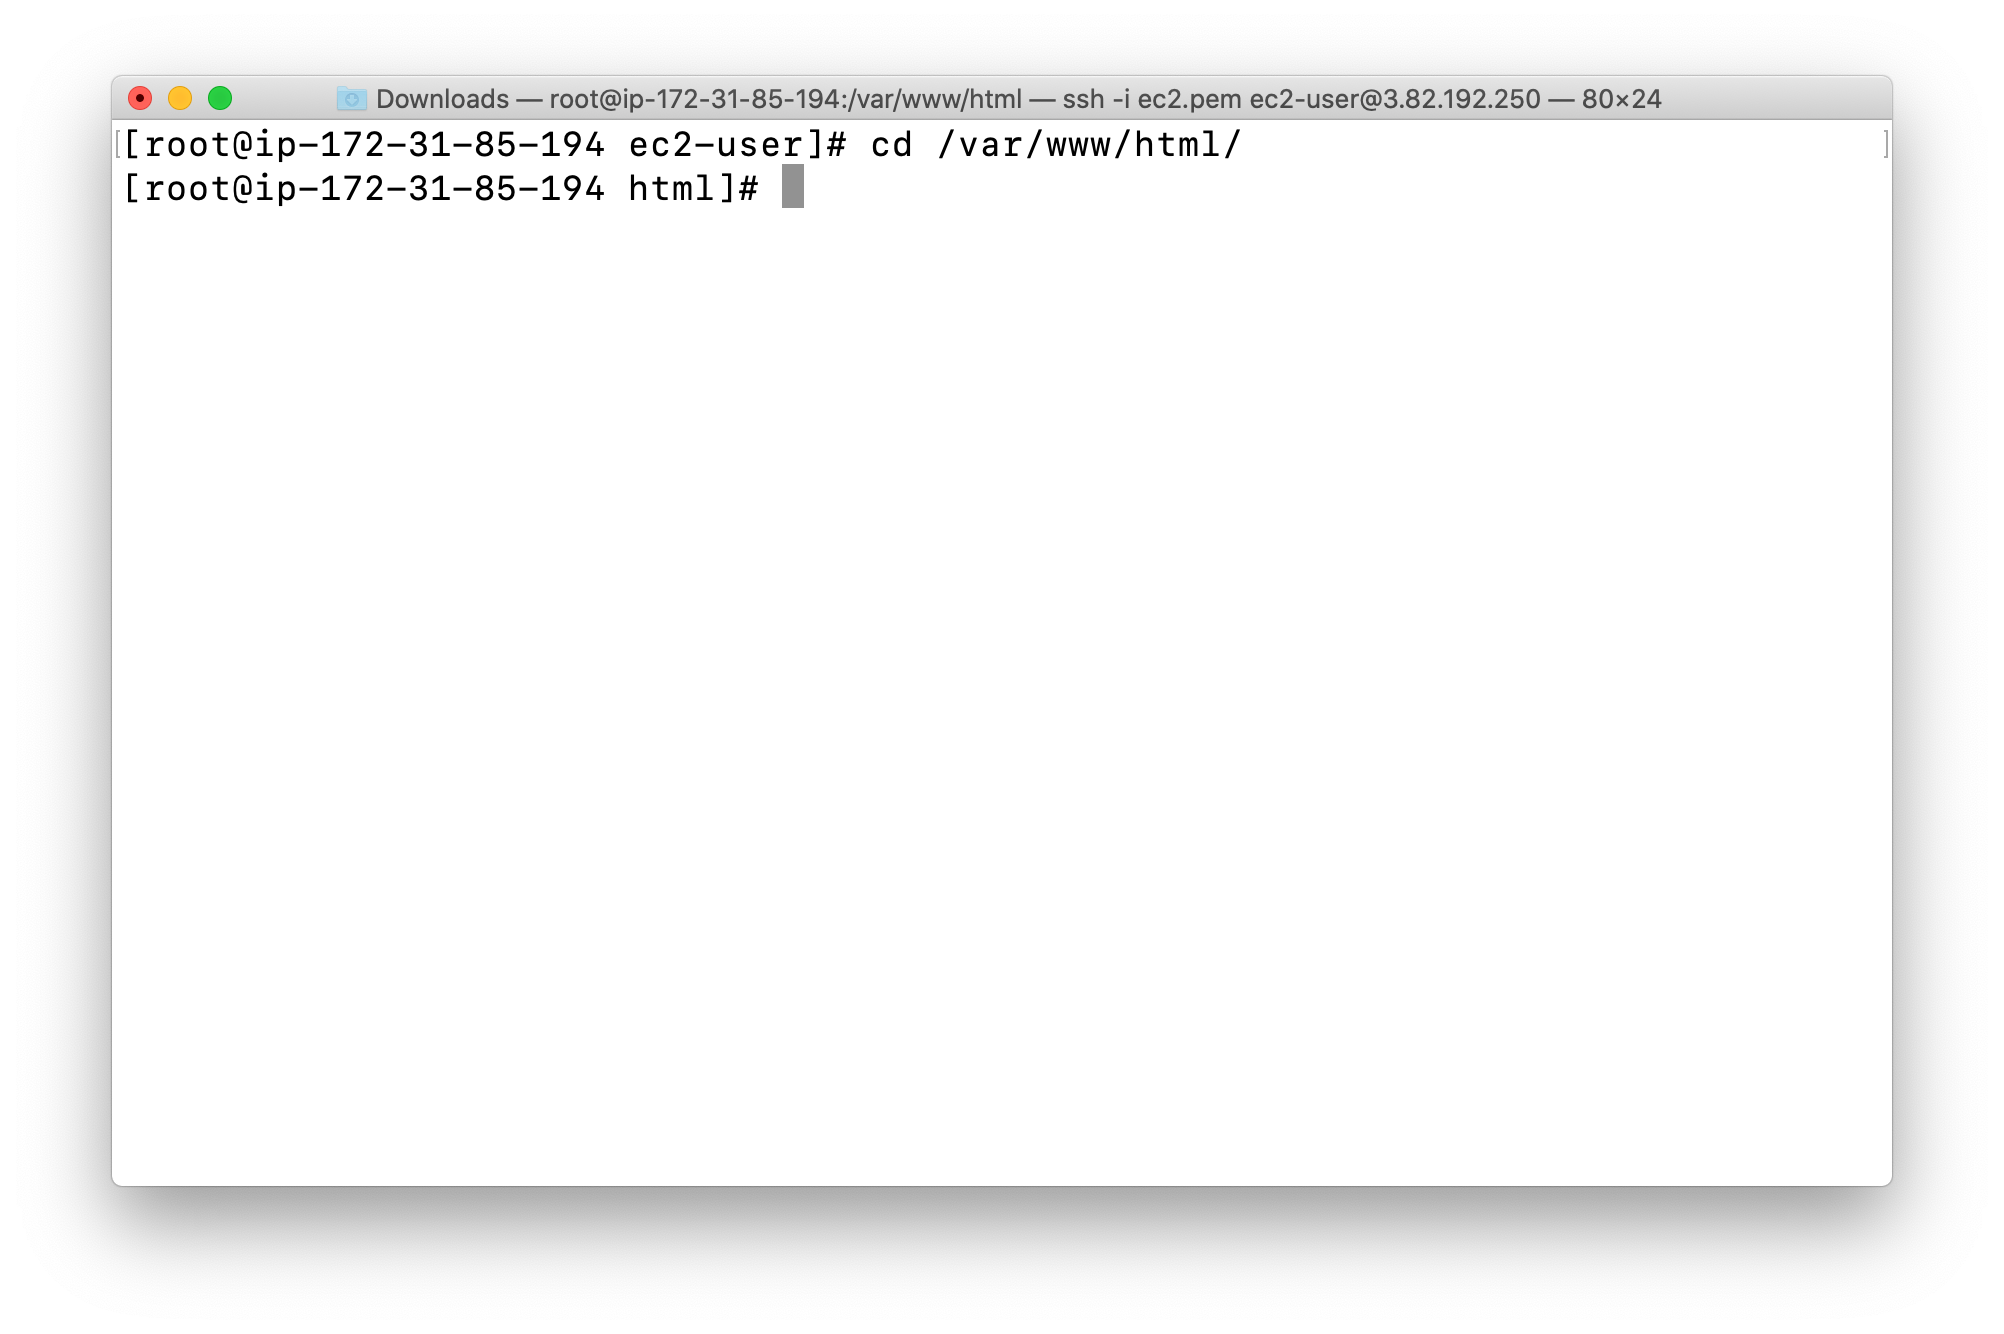
Create a sample test.html file using nano editor:
vime test.html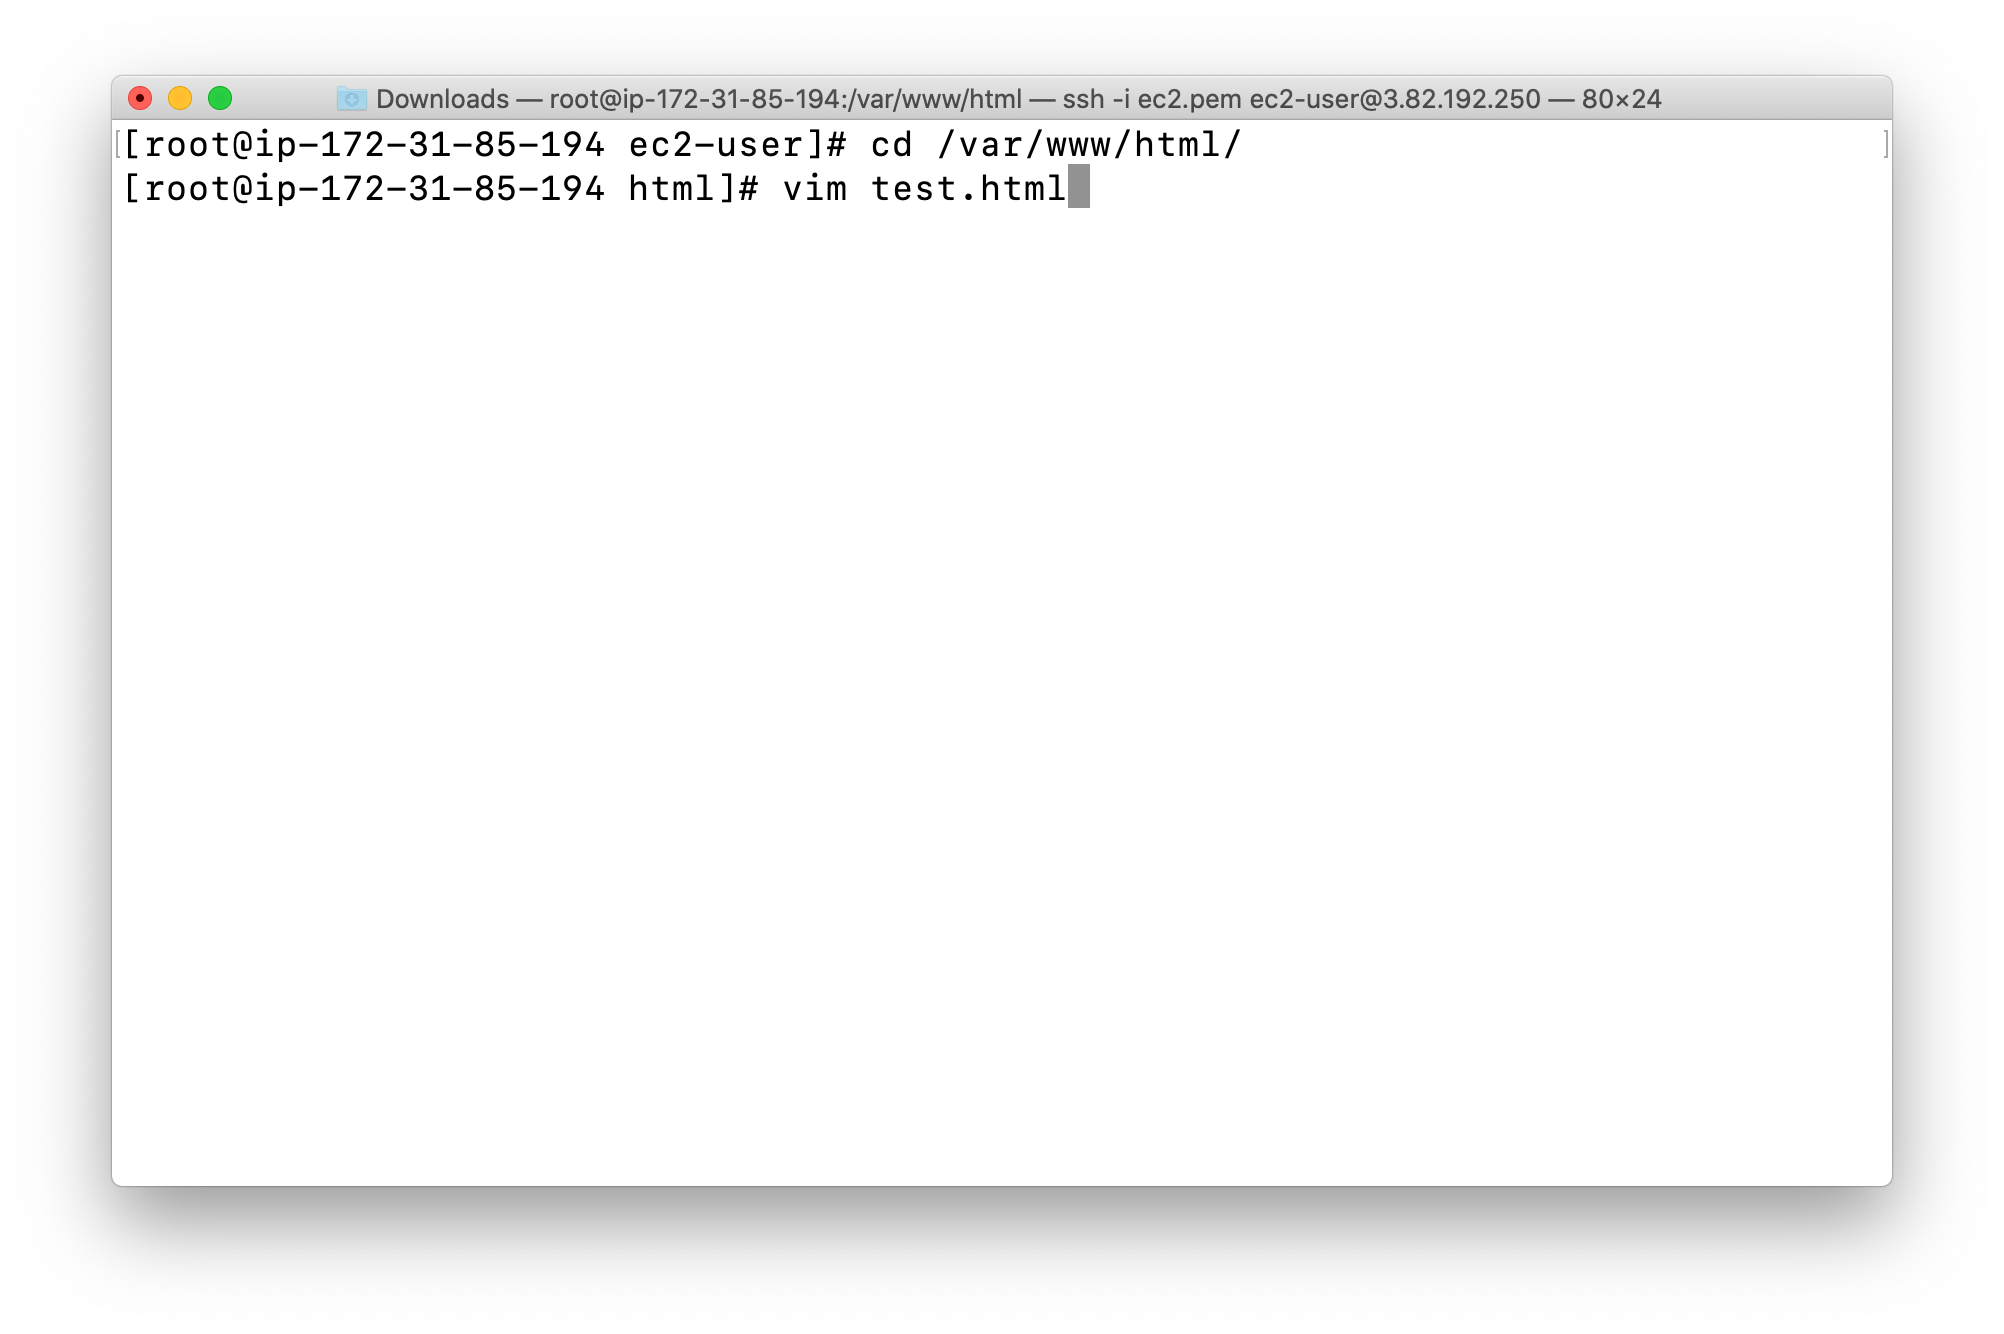
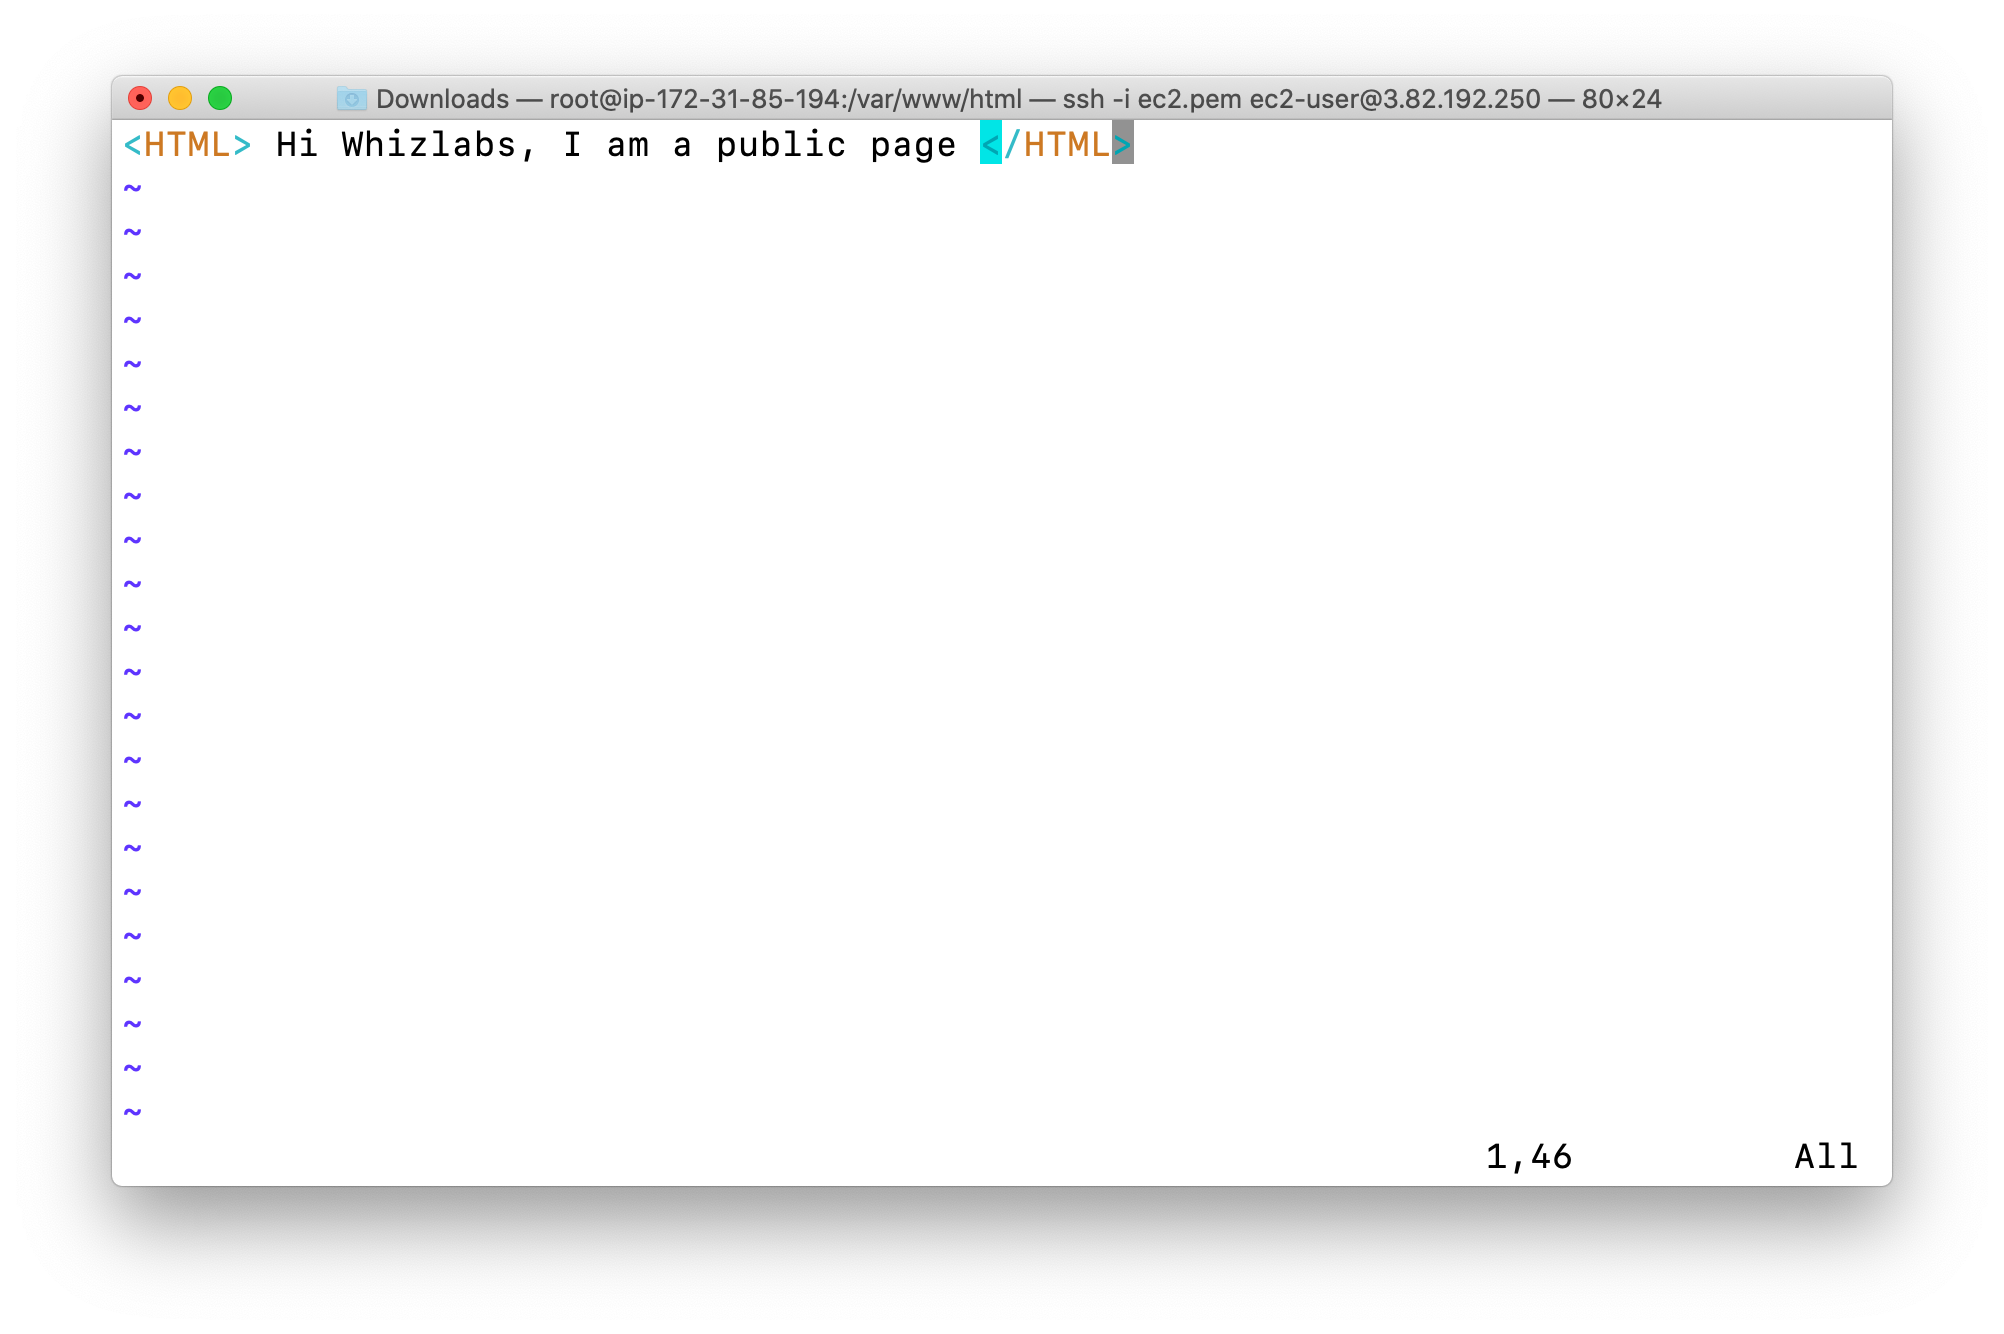
<HTML> Hi Whizlabs, I am a public page </HTML>
Restart the web server by using the following command:systemctl restart httpd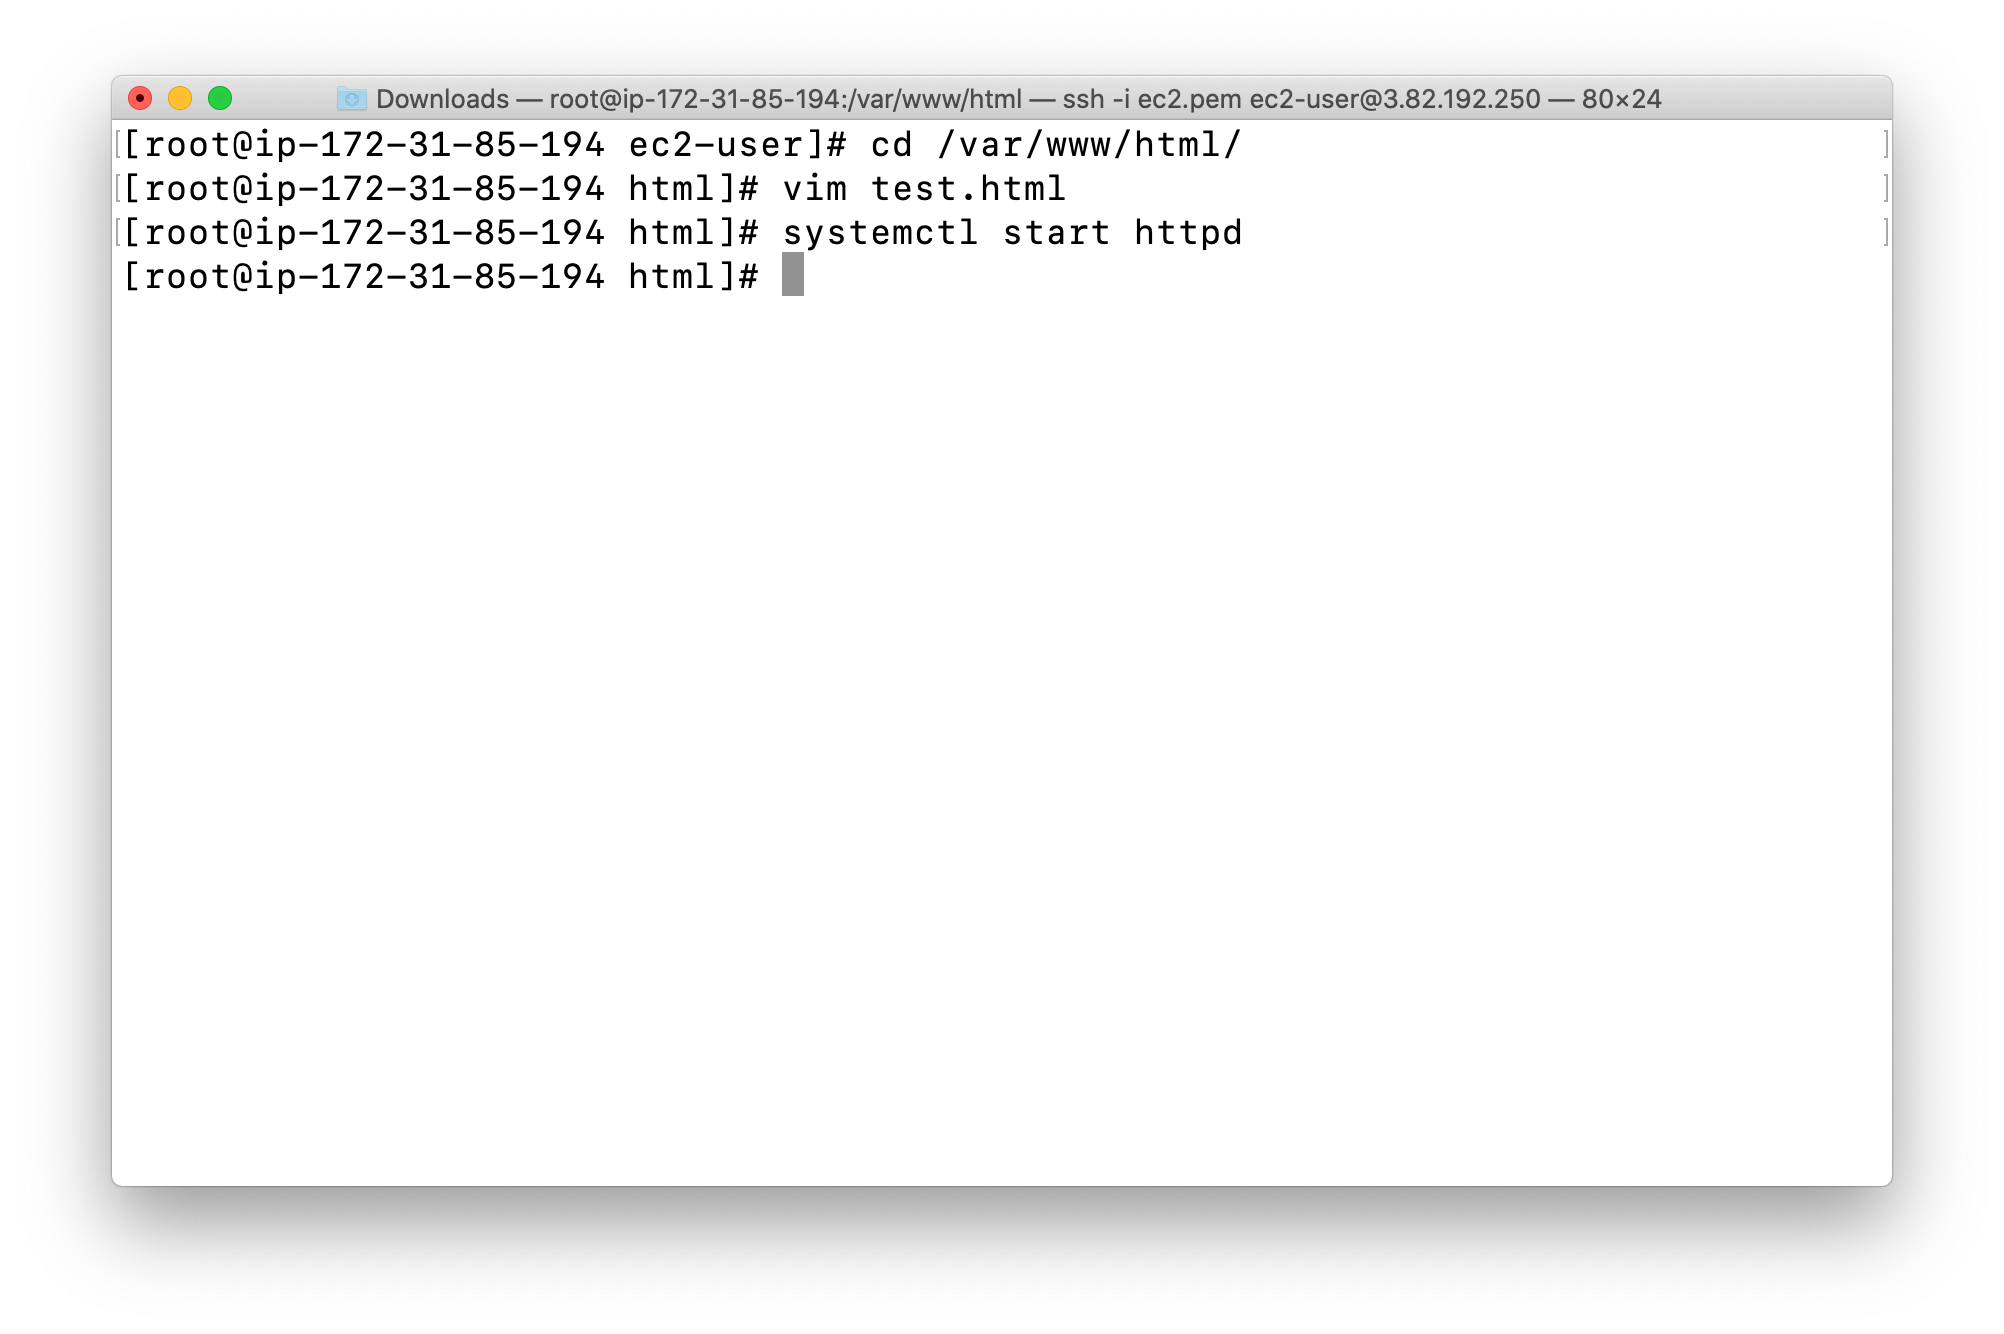
Now enter the file name after the public IP which you got when you created ec2 instance in the browser, and you can see your HTML content.
Validation Test
Input your instance public IP address with the path test.html on your browser
for example, 3.82.192.250/text.html

Completion and Conclusion
- You have successfully created and launched an EC2 Instance.
- You have logged into EC2 instance by SSH, installed Apache server and published a page.
- You have allocated an Elastic IP address and associated it to the running instance.
Launch a Spot Instance with Amazon EC2
https://play.whizlabs.com/site/task_details?lab_type=1&task_id=164&quest_id=35
Lab Details
- This lab walks you through the steps to launch an EC2 Spot Instance using the AWS Management Console. You will also learn about Saving Summary and pricing history.
- You will practice using Amazon Machine Image (AMI) to launch Amazon EC2 Spot Instance and use key pairs for SSH authentication to log into your instance.
- You will create a web page and publish it.
Introduction
What is EC2 Spot Instance
- Spot Instances are an unused part of Amazon EC2, using which you can save up to 90% on cost as compared to On-Demand cost, but AWS can interrupt your spot instances if the Current Price is higher than the Maximum Price you specified.
- Spot uses the same EC2 instances (AMI and instance type) what On-Demand and Reserved Instances use. It is the best to fit for use cases where data is reproducible and can sustain the interruption at any point in time.
- You can use Spot Instance as additional compute capacity to your On-Demand or Reserved Instances, where fault-tolerant is acceptable.
- EC2 Spot Instances can be launched the same way you launch EC2 Instance, like using Spot Fleet. Auto Scaling Groups or AWS Management Console.
- If AWS terminates or stops your Amazon EC2 Spot Instance within an hour then you will not be charged.
- However, if you choose to stop or terminate your newly launched Spot Instances by yourself, you will have to pay for the total number of seconds you have used.
Task Details
- Log into AWS Management Console.
- Select an Amazon Linux Spot Instance from an Amazon Linux AMI 2.
- Setting the price of a spot instance to Higher and lower values compared to a given value.
- Launch the Spot Instance, to understand the difference between higher and lower prices.
- Explore the Spot request, Saving Summary, and Pricing history options.
- Test HTML page is launched or not using public IP.
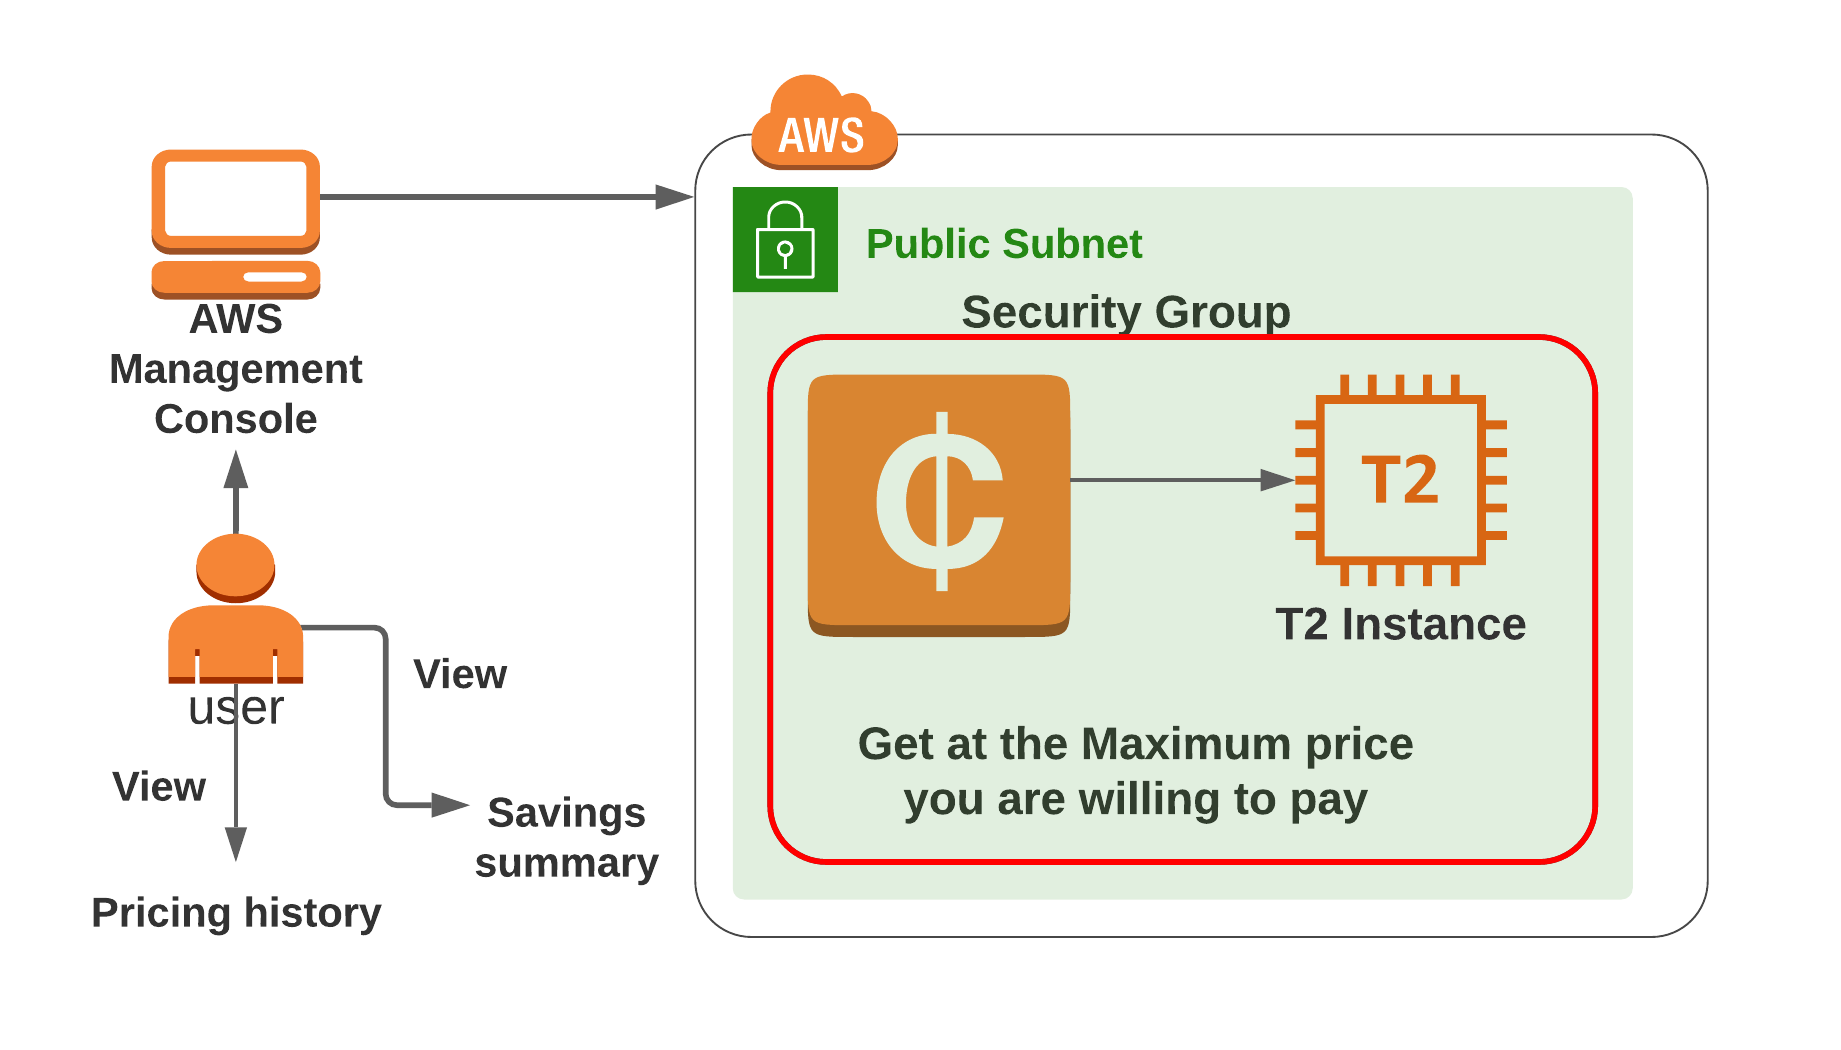
Architecture Diagram
EC2 Configuration
Services -> EC2 -> Instances
Click on Launch instances

Launching EC2 Instance
Step 1: Choose an Amazon Machine Image(AMI)
Select Amazon Linux 2 AMI (HVM), SSD Volume Type
Step 2: Choose an Instance Type
Select t2.micro
Click on Next: Configure Instance Details
Step 3: Configure Instance Details
- Number of instances:
1 - Purchasing option: Check the Request Spot instance option
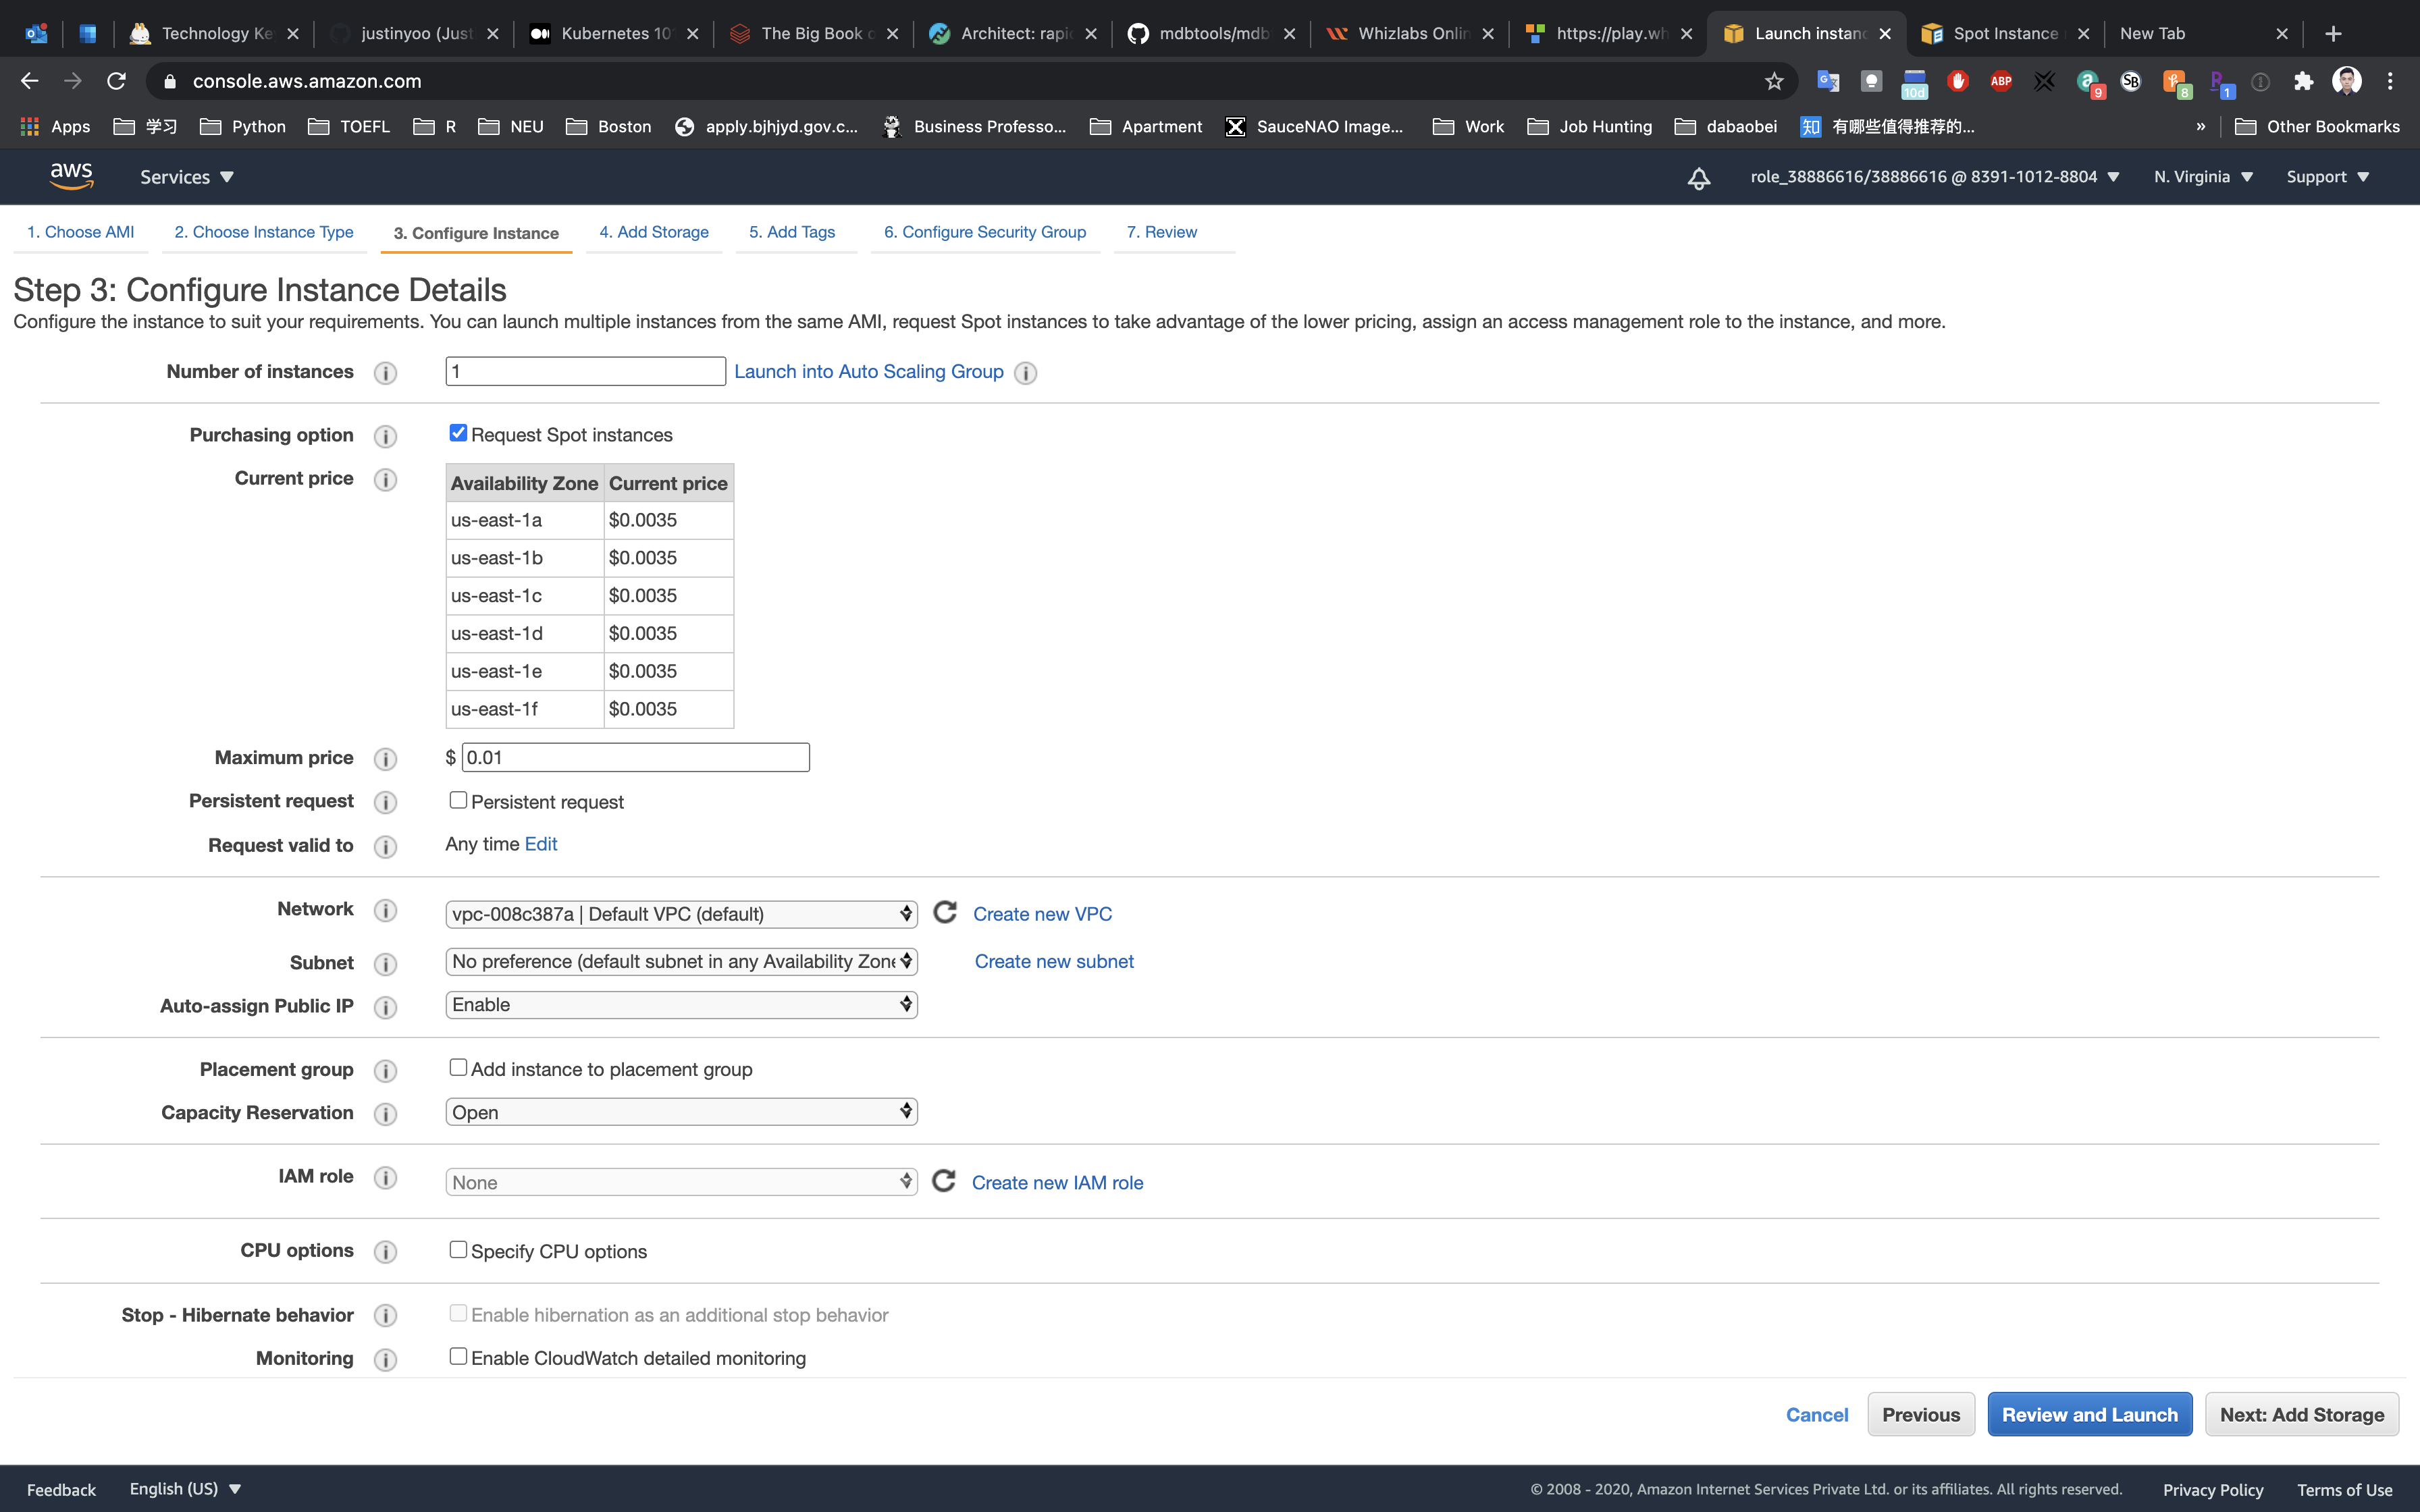
Now you will see the current price of the instance in each of the Availability Zone. In the Maximum price, enter the price lower than shown there, If it’s 0.004, enter 0.003 or less.
Persistent request: you will not check that option, but you should know what that means. Below is the explanation:
- Ensures that your request will be submitted every time your Spot Instance is terminated. For information about Persistent requests and other customization options, see Customizing Your Spot Requests.
Request valid to:
Any timeAuto-assign Public IP:
Enable
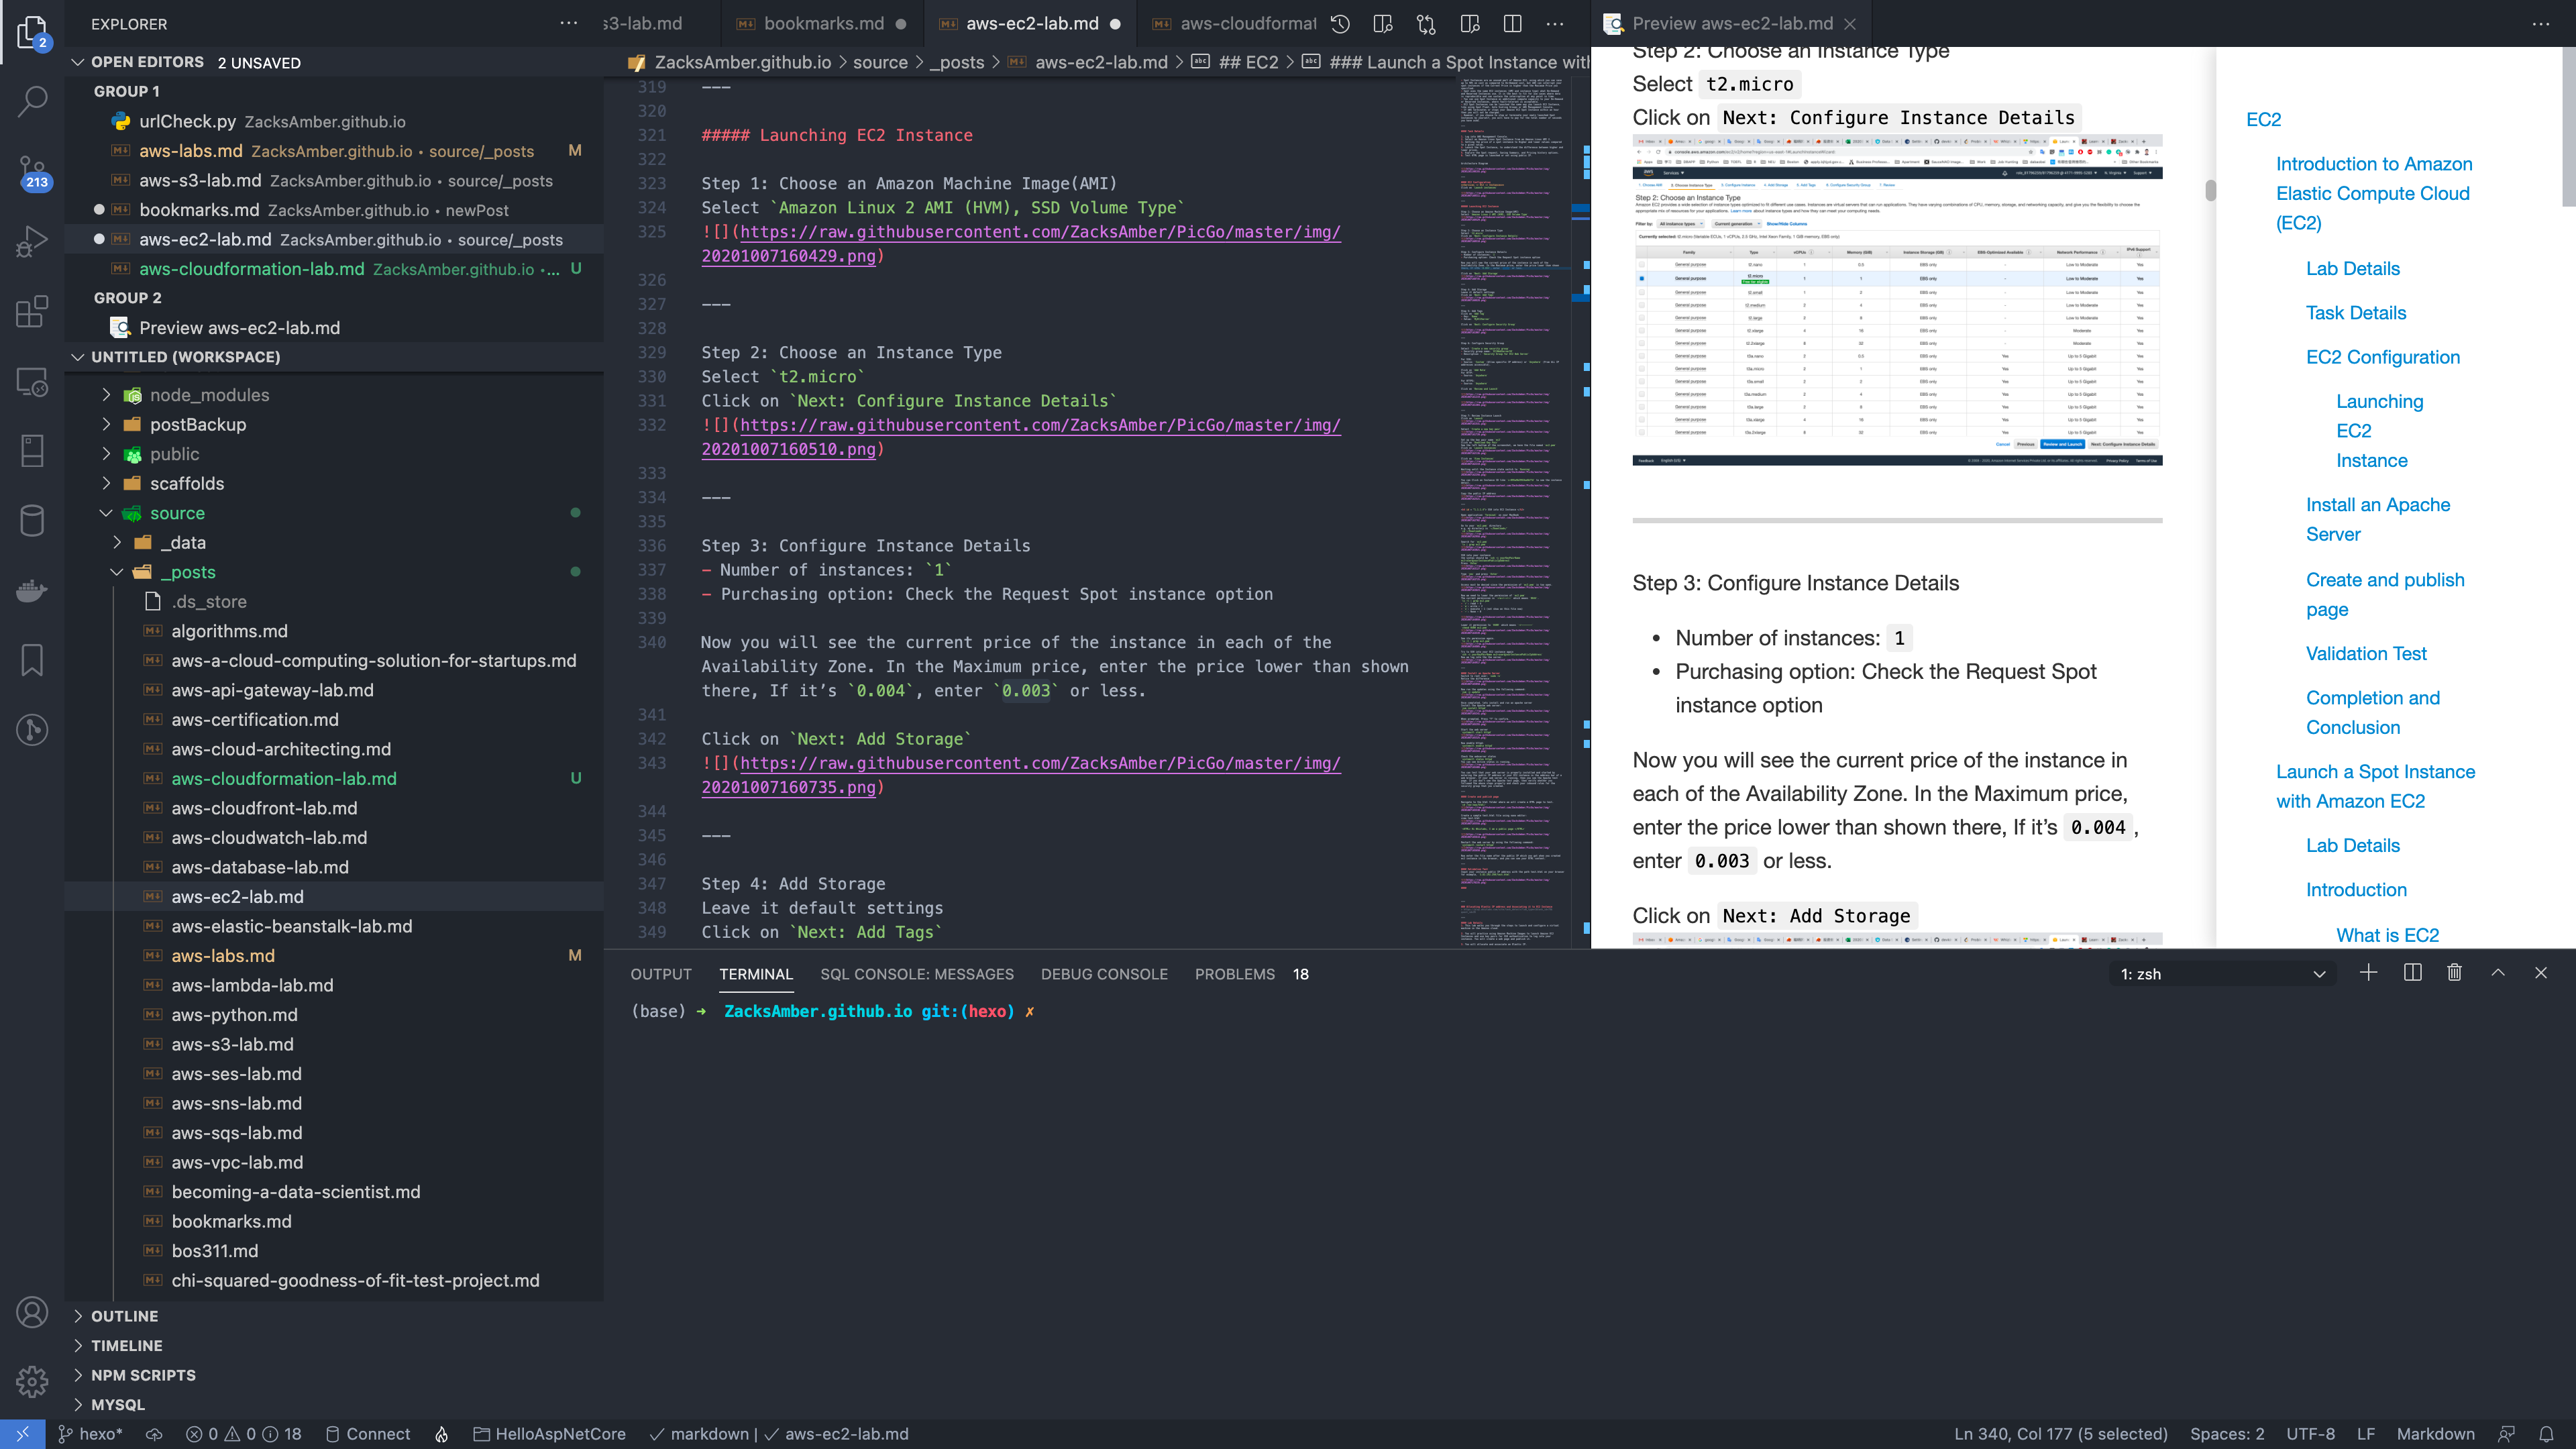
Click on Advanced Details
Under the User data section, enter the following script, (which creates an HTML page served by Apache):
1 |
|
Click on Next: Add Storage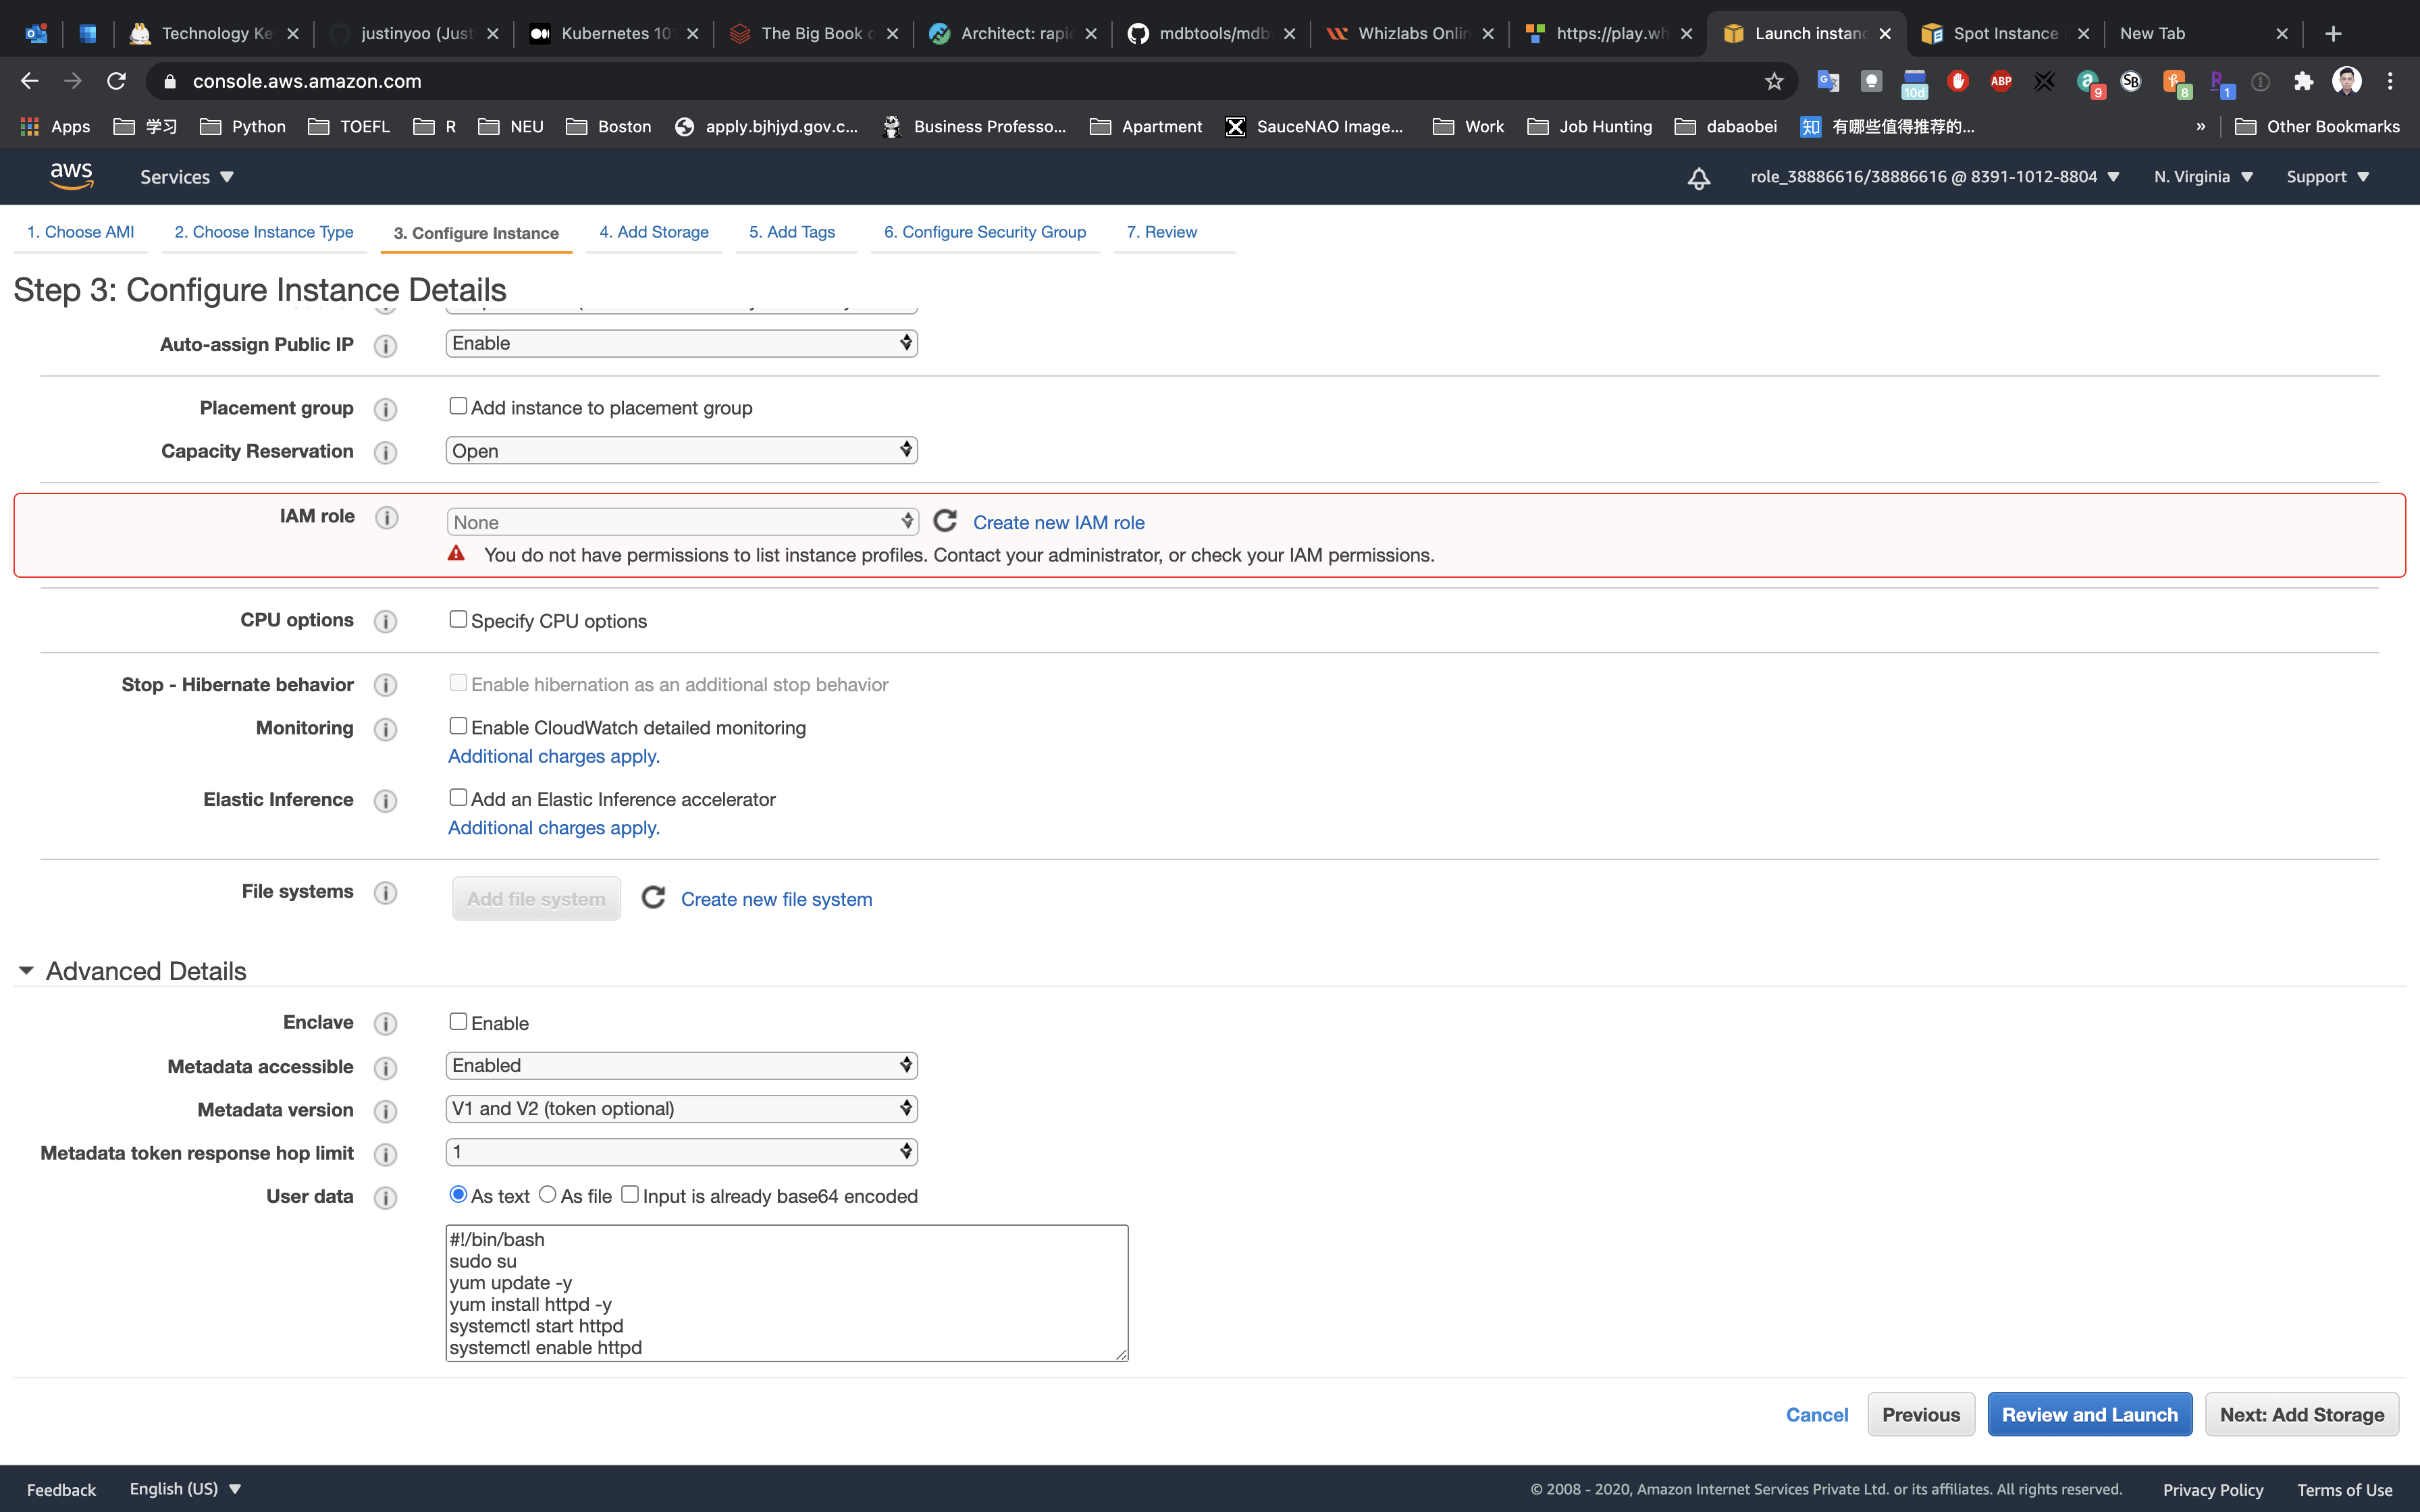
Step 4: Add Storage
Leave it default settings
Click on Next: Add Tags
Step 5: Add Tags
Click on Add Tag
- Key:
Name - Value:
MySpotInstance
Click on Next: Configure Security Group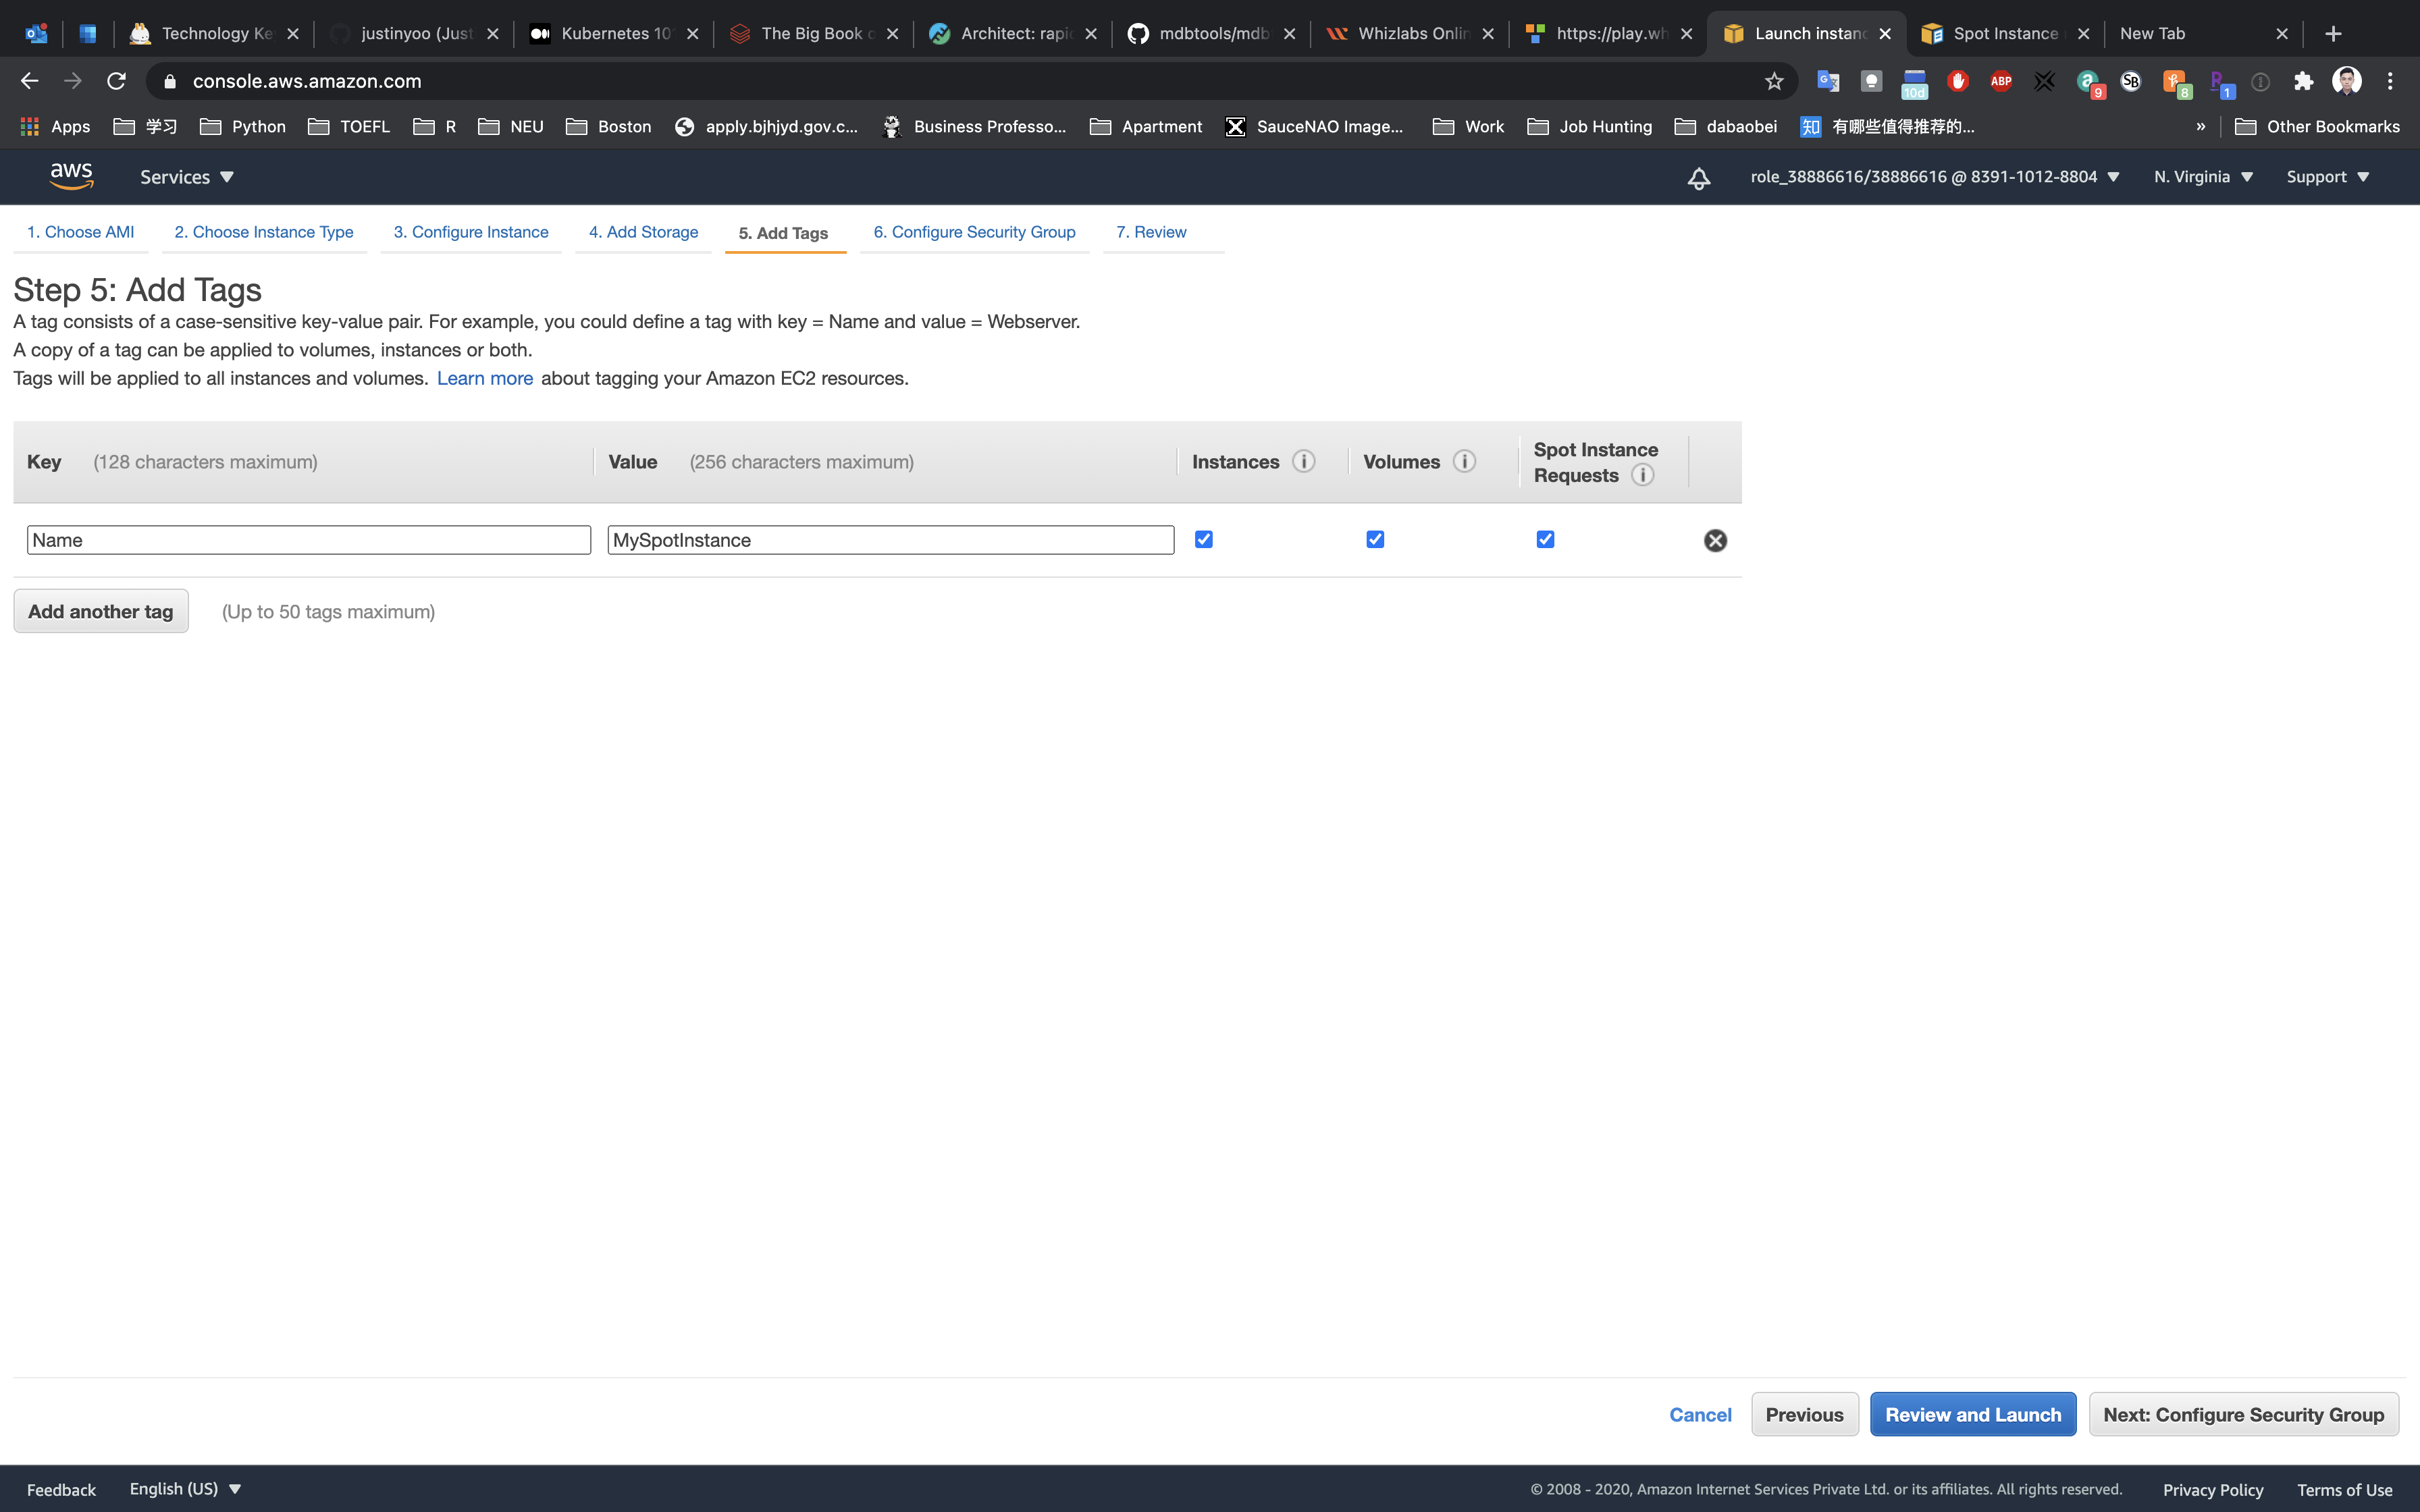
Step 6: Configure Security Group
Select Create a new security group
- Security group name:
EC2WebServerSG - Description :
Security Group for EC2 Web Server
For SSH:
- Source:
Custom(Allow specific IP address) orAnywhere(From ALL IP addresses accessible).
Click on Add Rule
For HTTP:
- Source:
Anywhere
For HTTPS:
- Source:
Anywhere
Click on Review and Launch


Step 7: Review Instance Launch
Click on Launch
Select Create a new key pair
Set up the key pair name ec2
Click on Download Key Pair
See the left bottom of the screenshot, we have the file named ec2.pem
Click on Launch Instances
You will get an error message like this if your Maximum price was less than the Current price shown in the Availability zone and Current Price table.
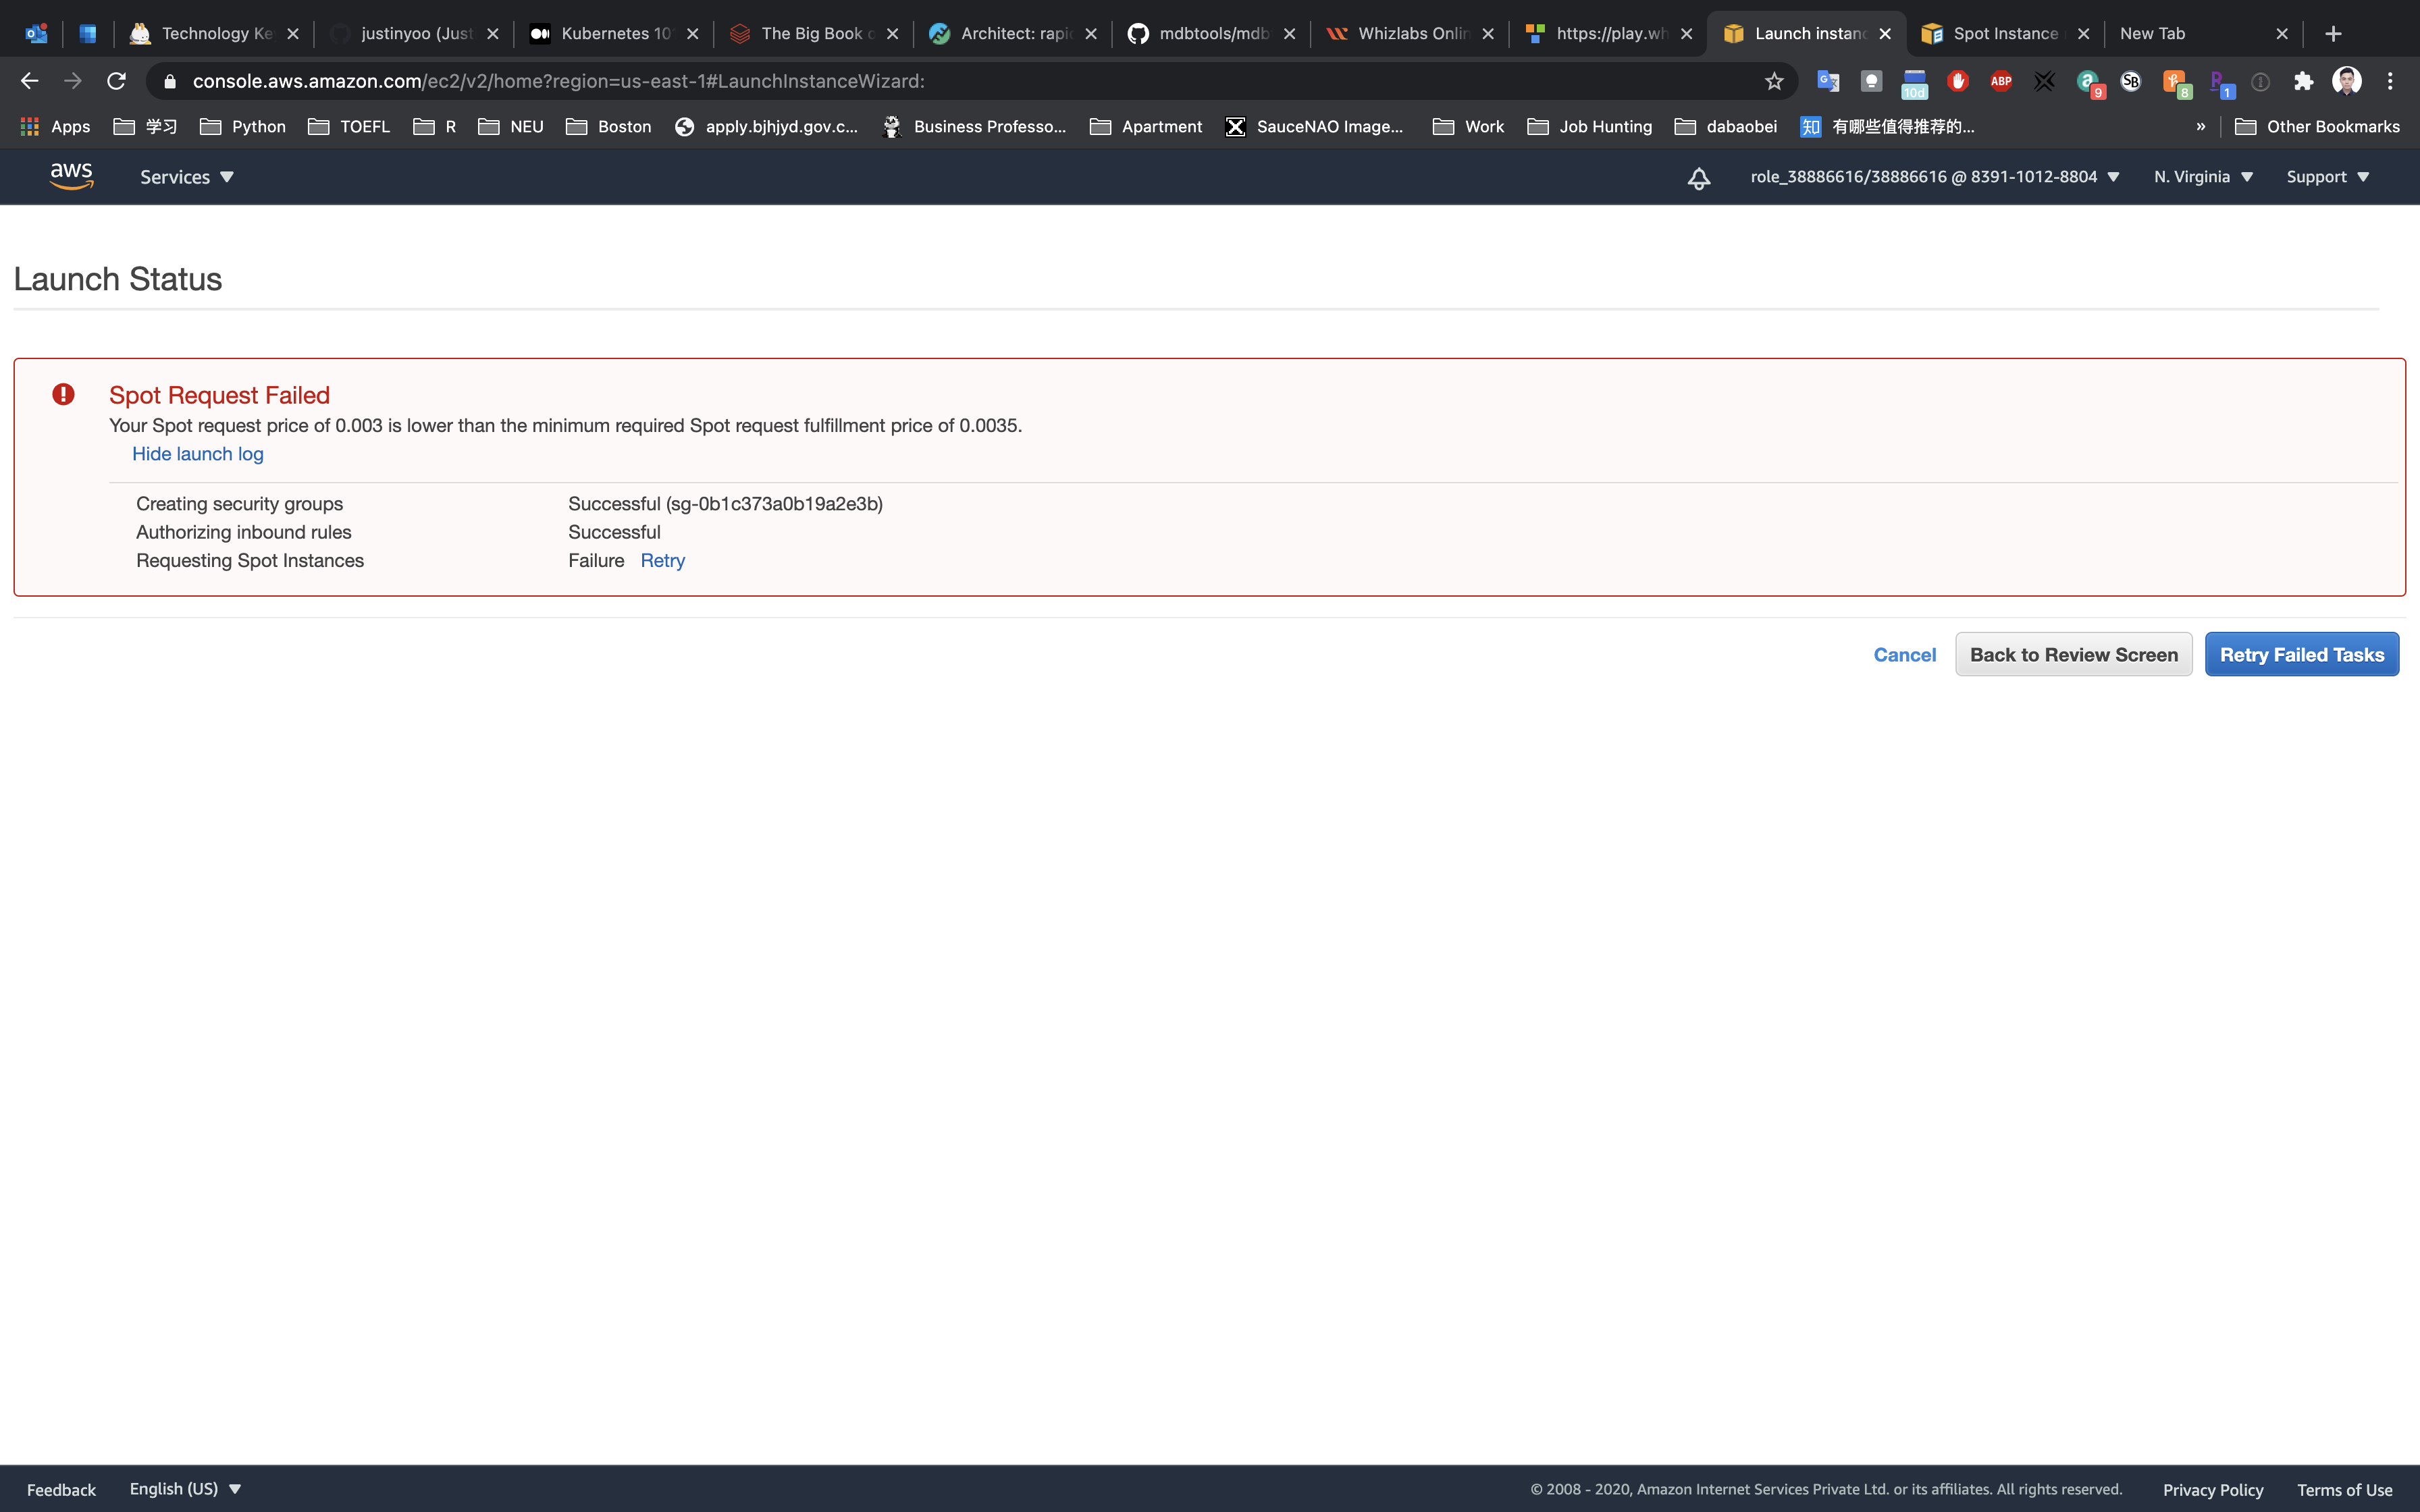
Now Click on Back to Review Screen, then click on 3. Configure Instance on the top of the screen and Edit the maximum Price, set to 0.01, and then click on Review and Launch.
Note: If by mistake you clicked on the Cancel button, you have to repeat from Step 4.
Click on View Instances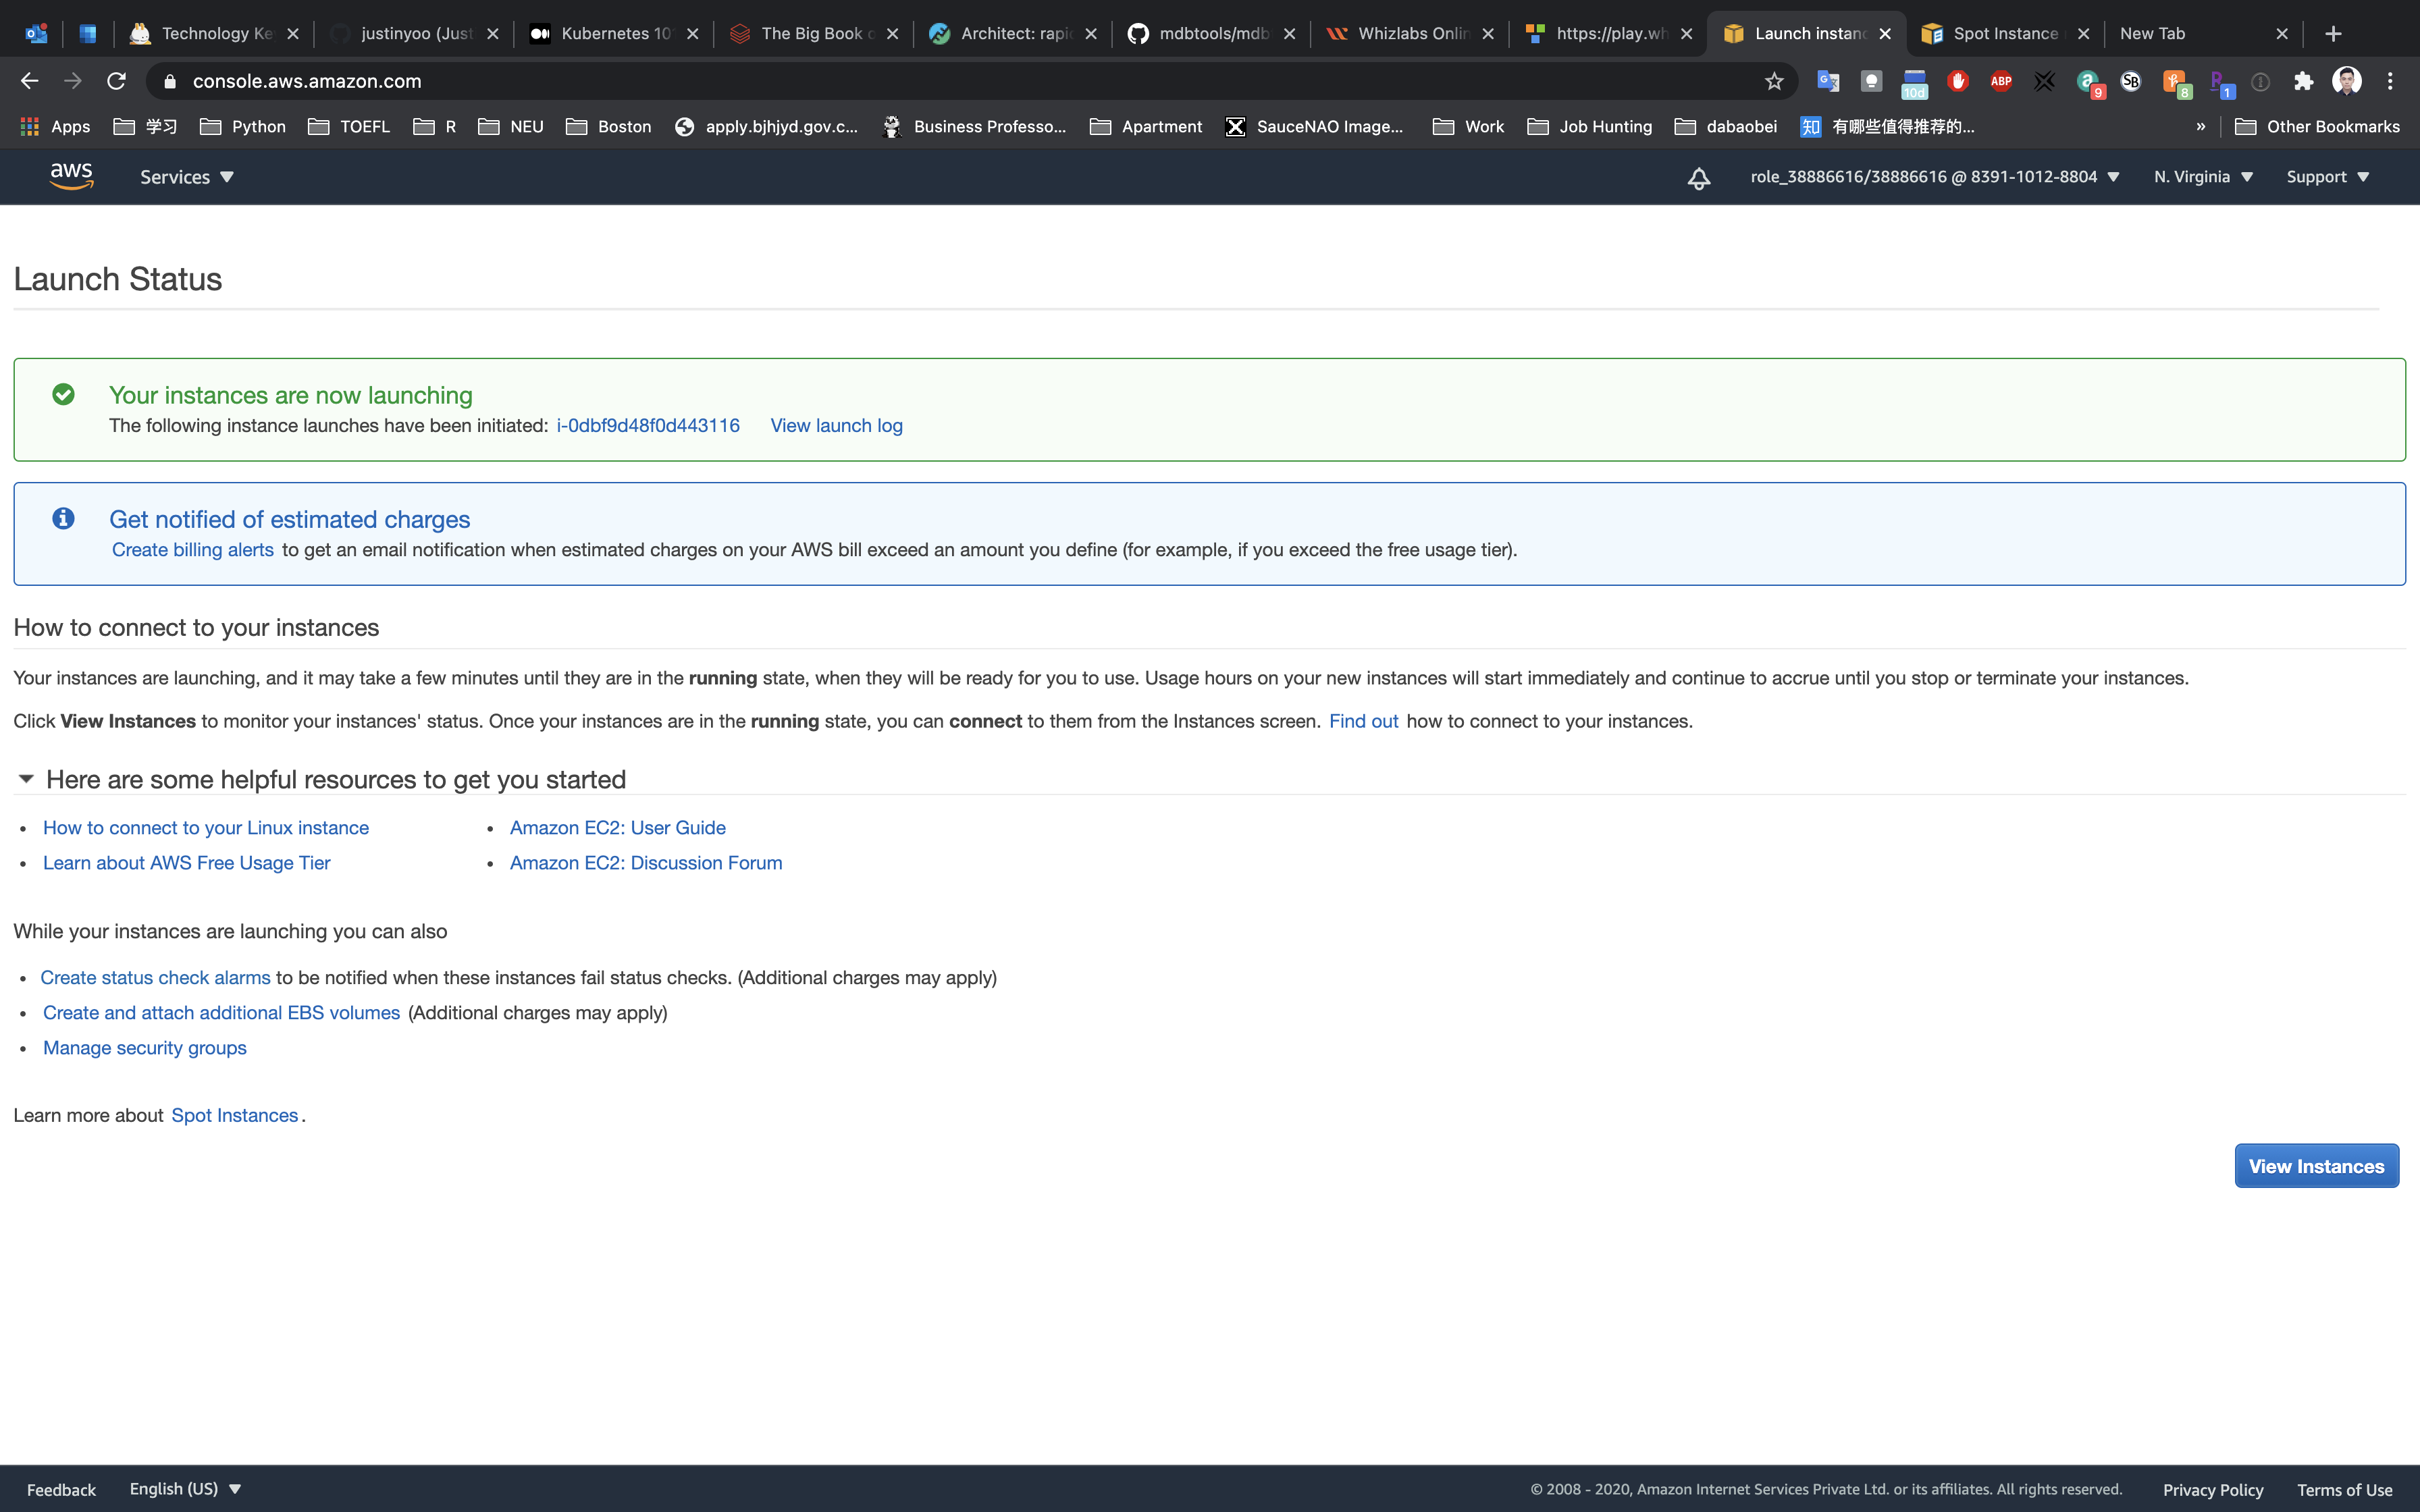
Waiting until the Instance state switch to active.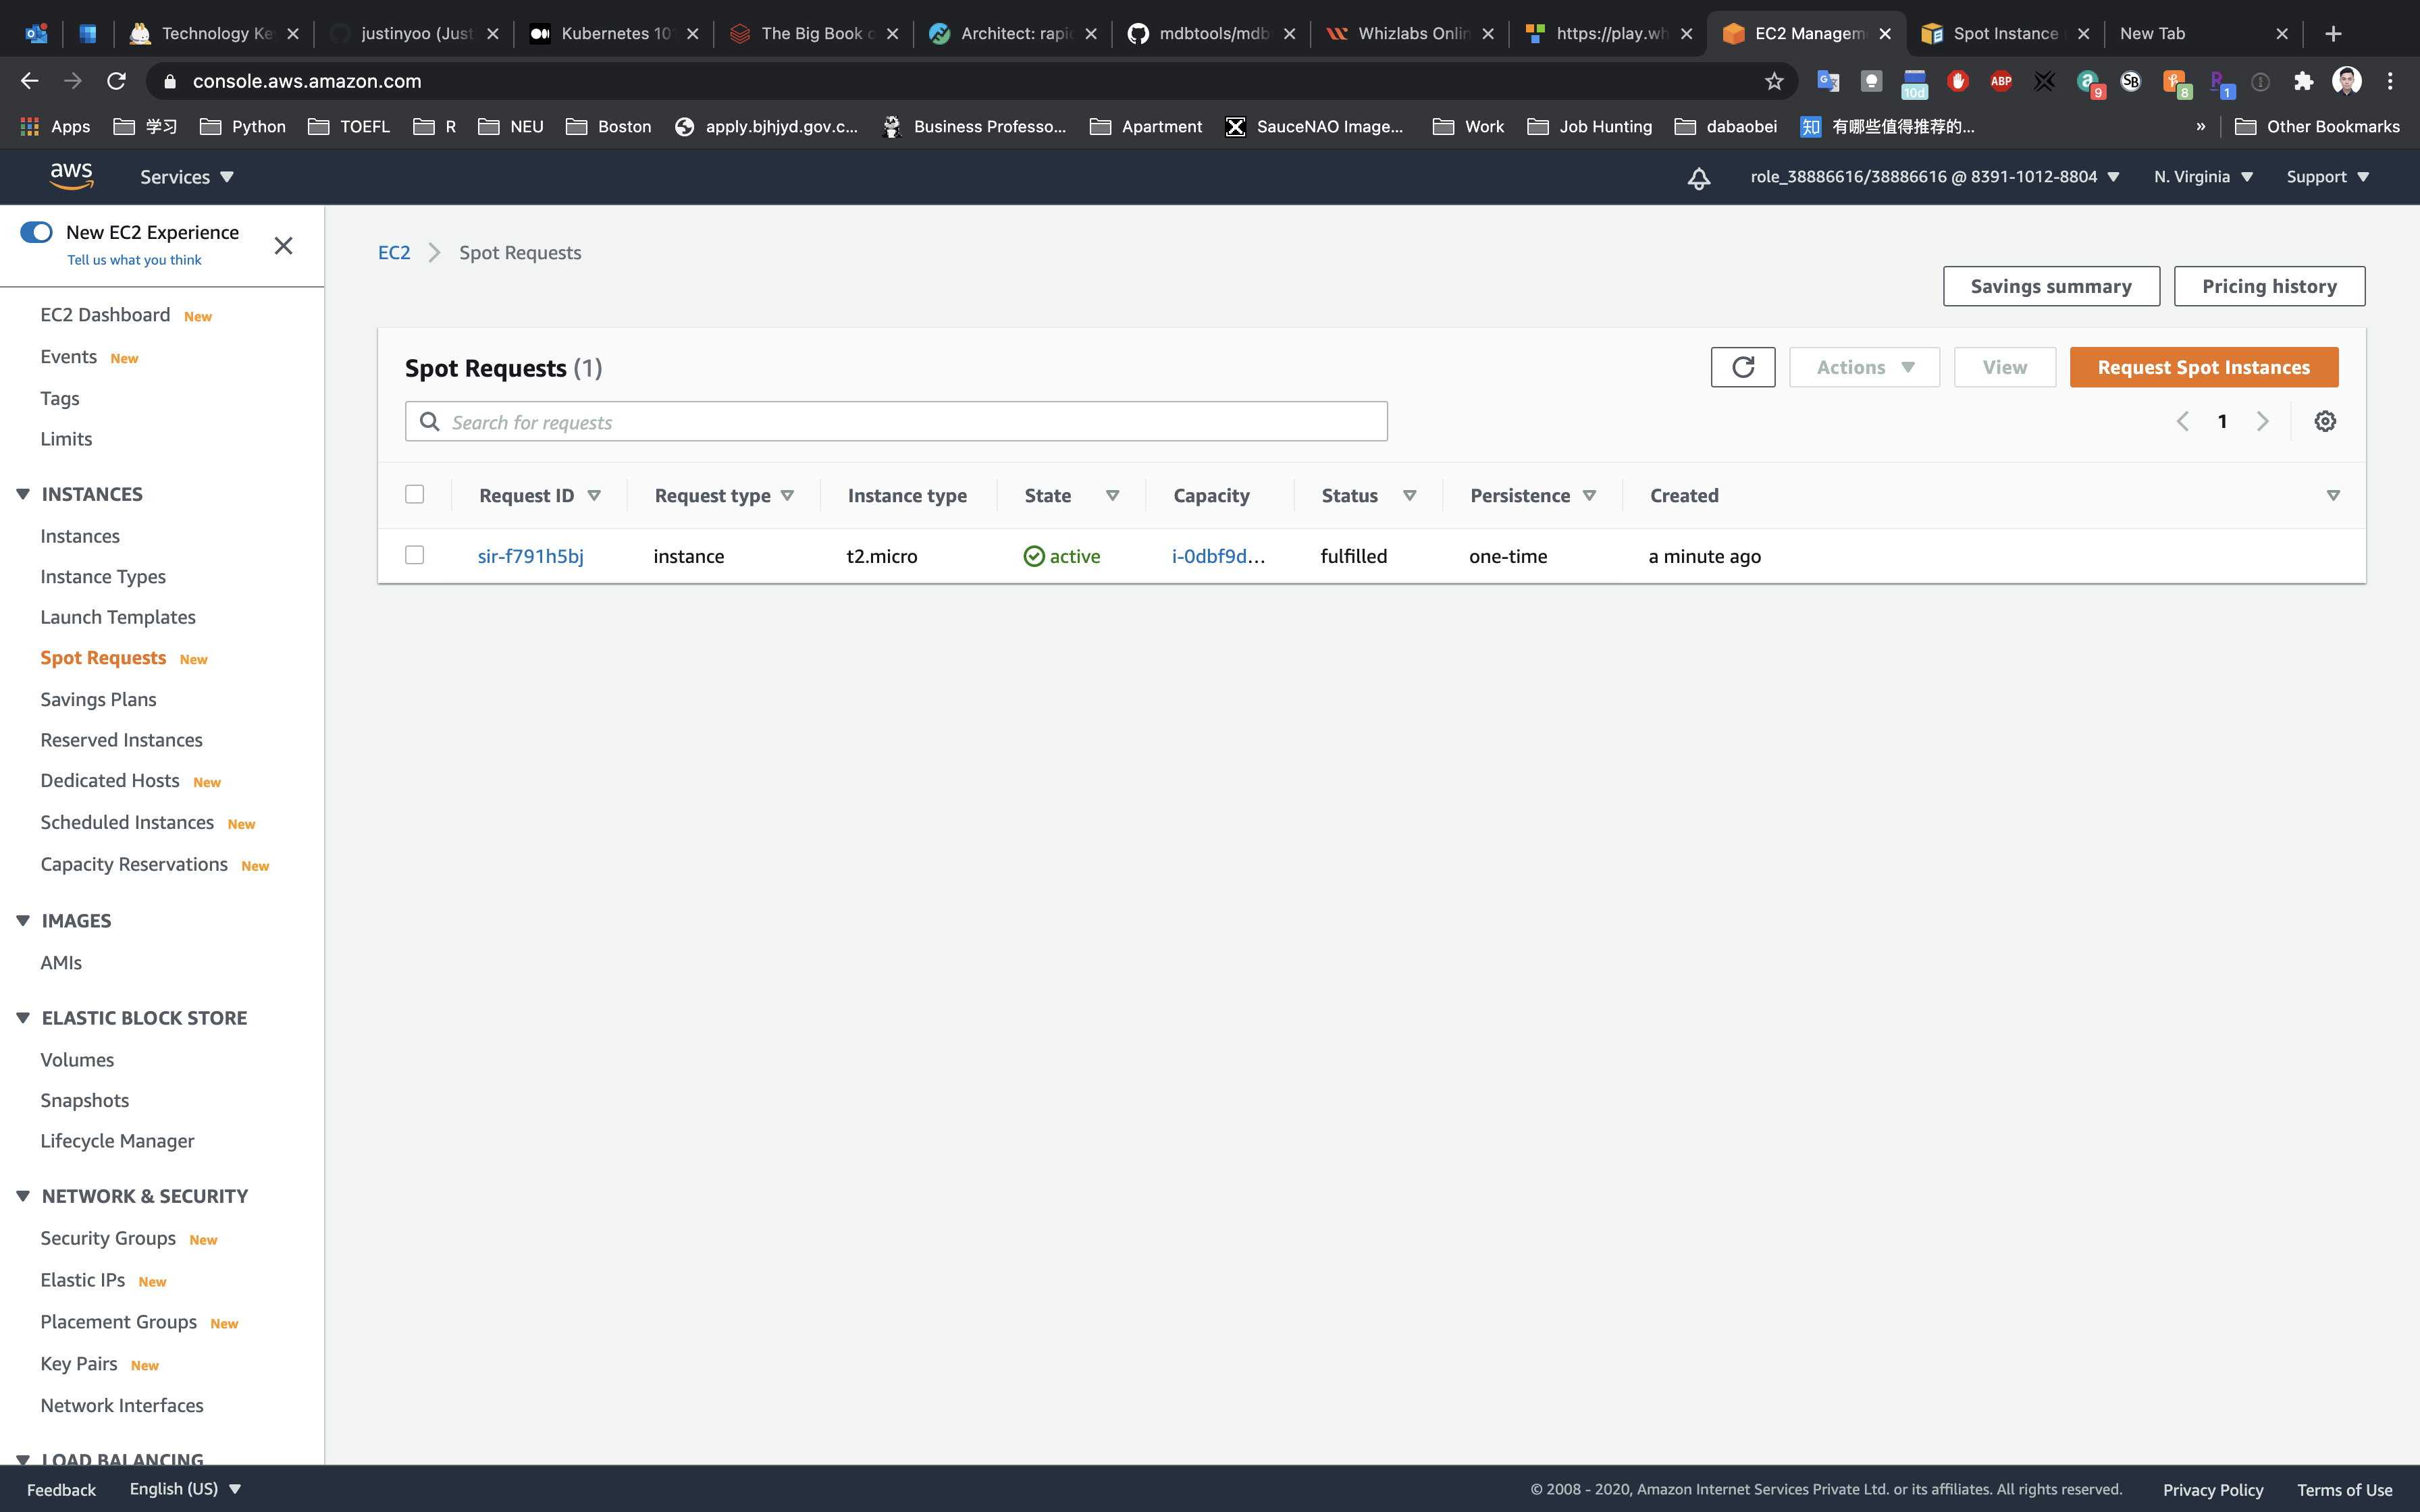
You can Click on Instance ID like sir-f791h5bj to see the instance detail.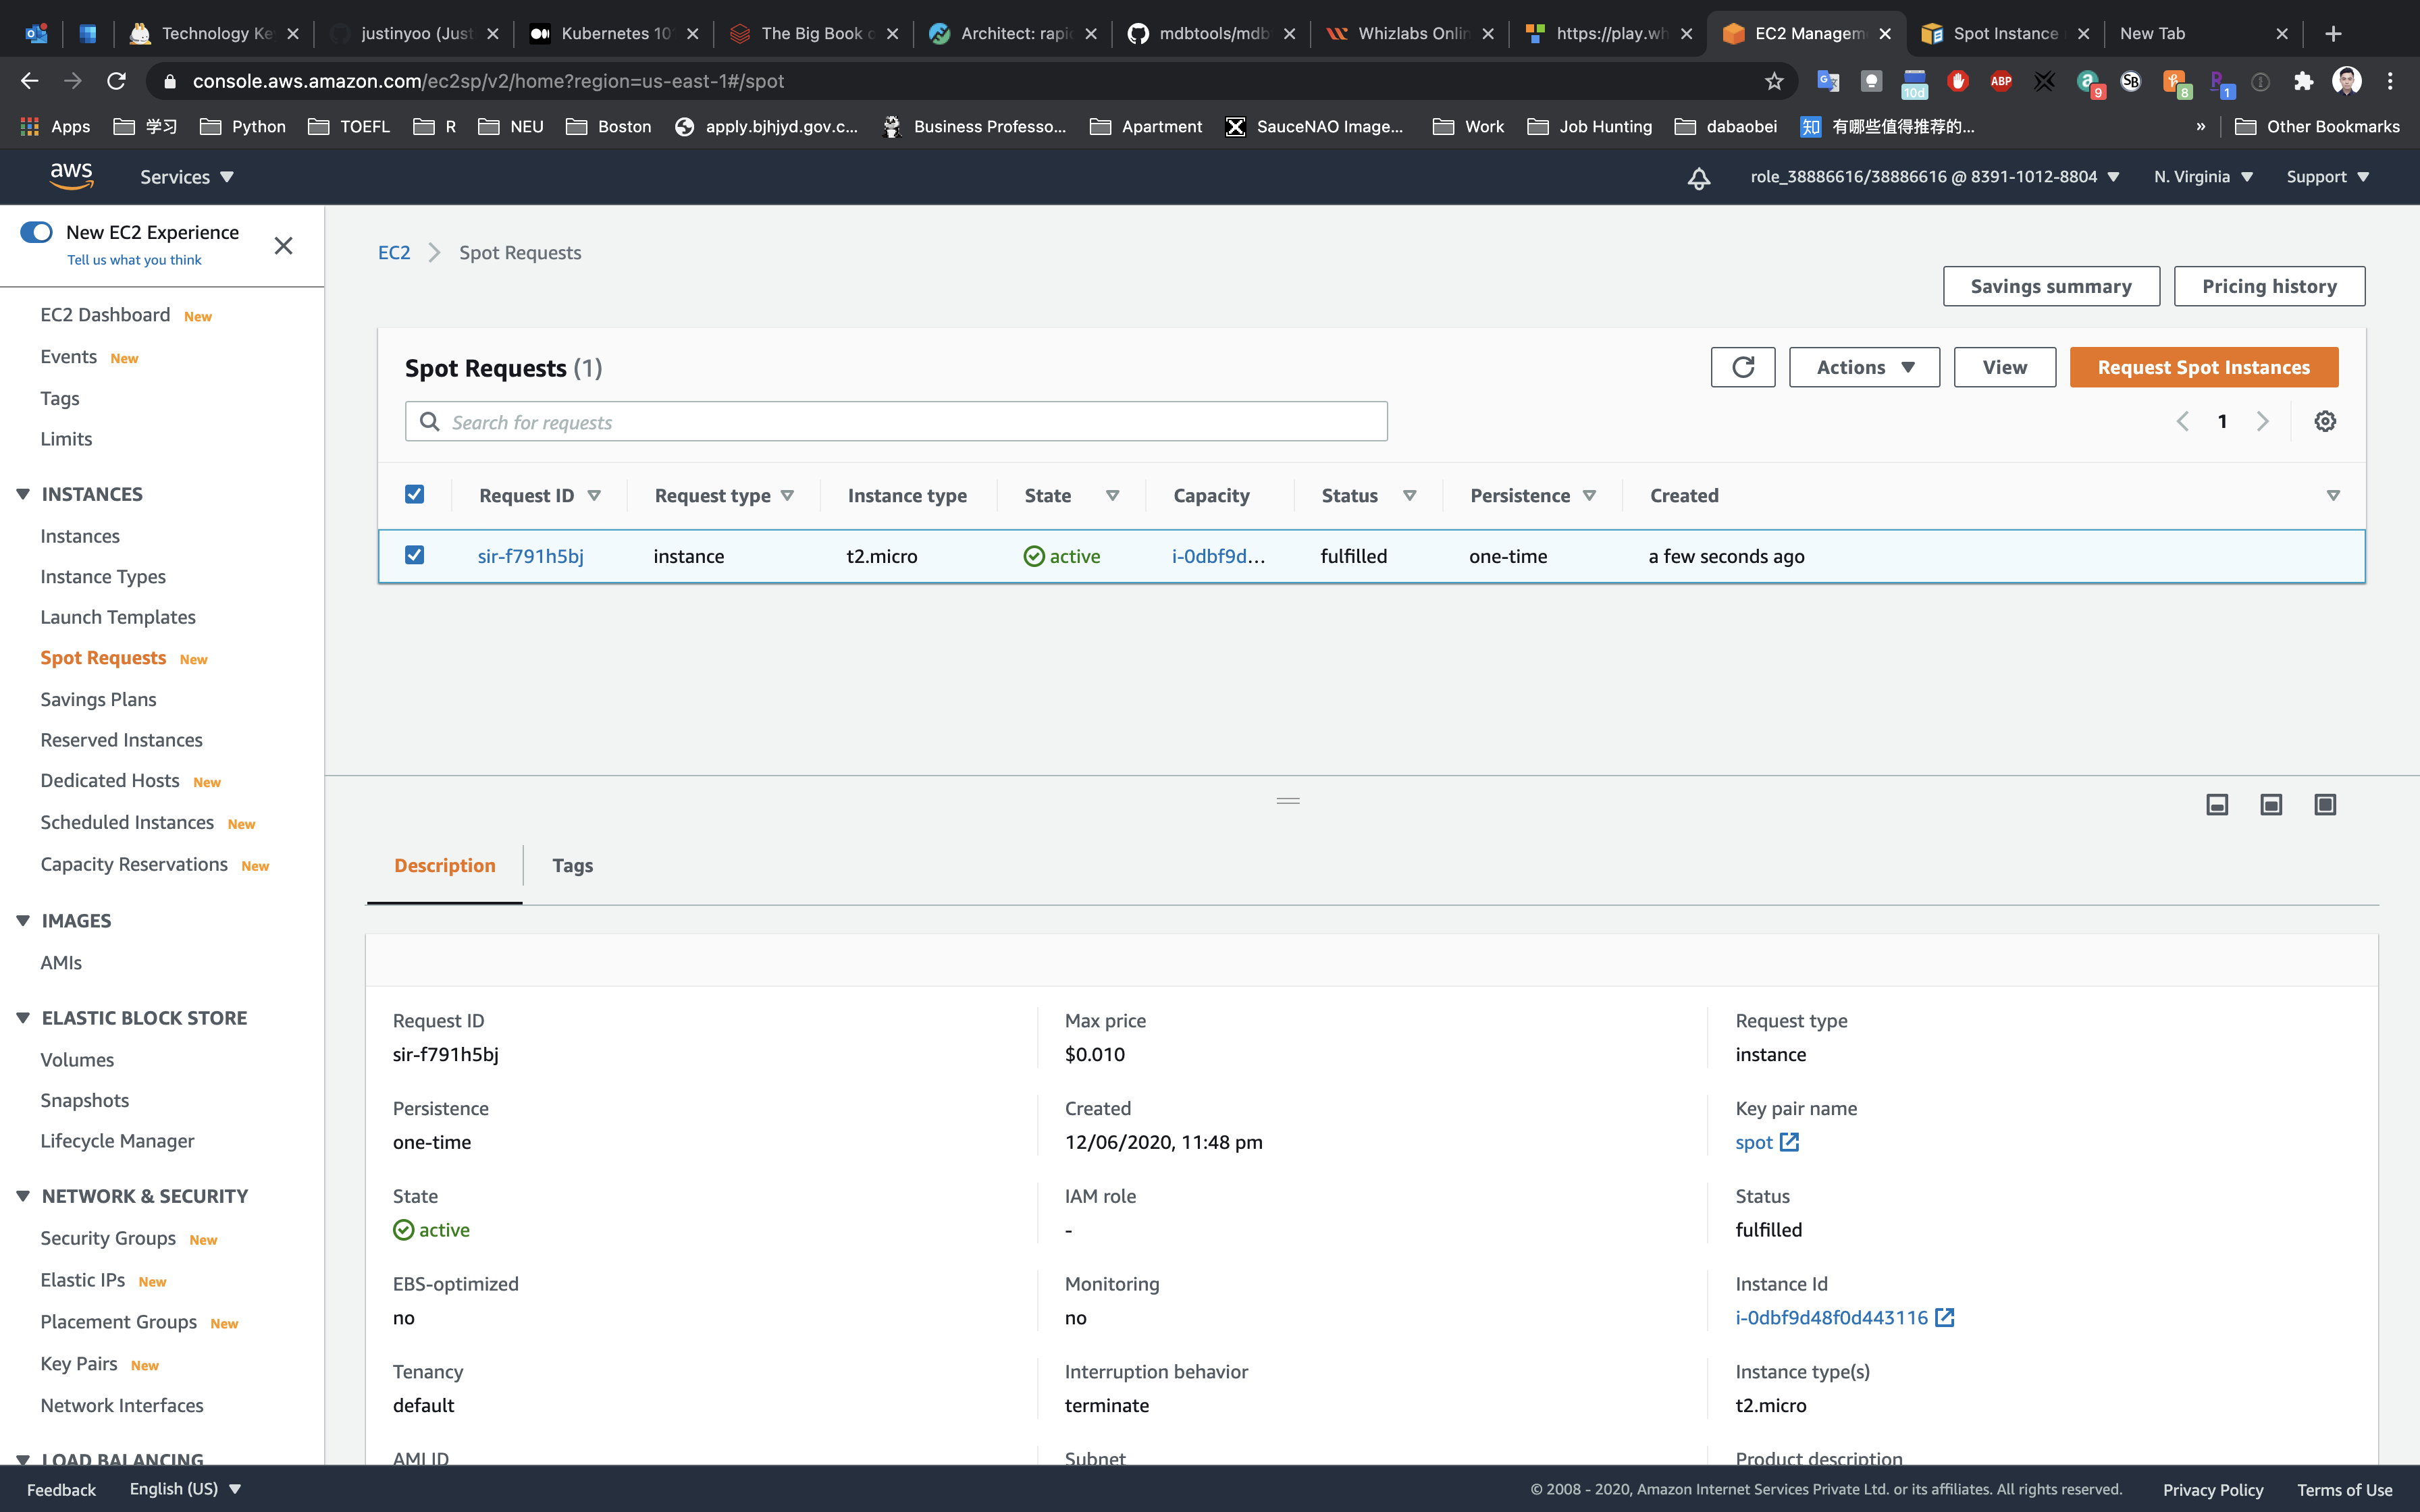
Click on the Instance ID like i-0dbf9d48f0d443116 under the Capacity.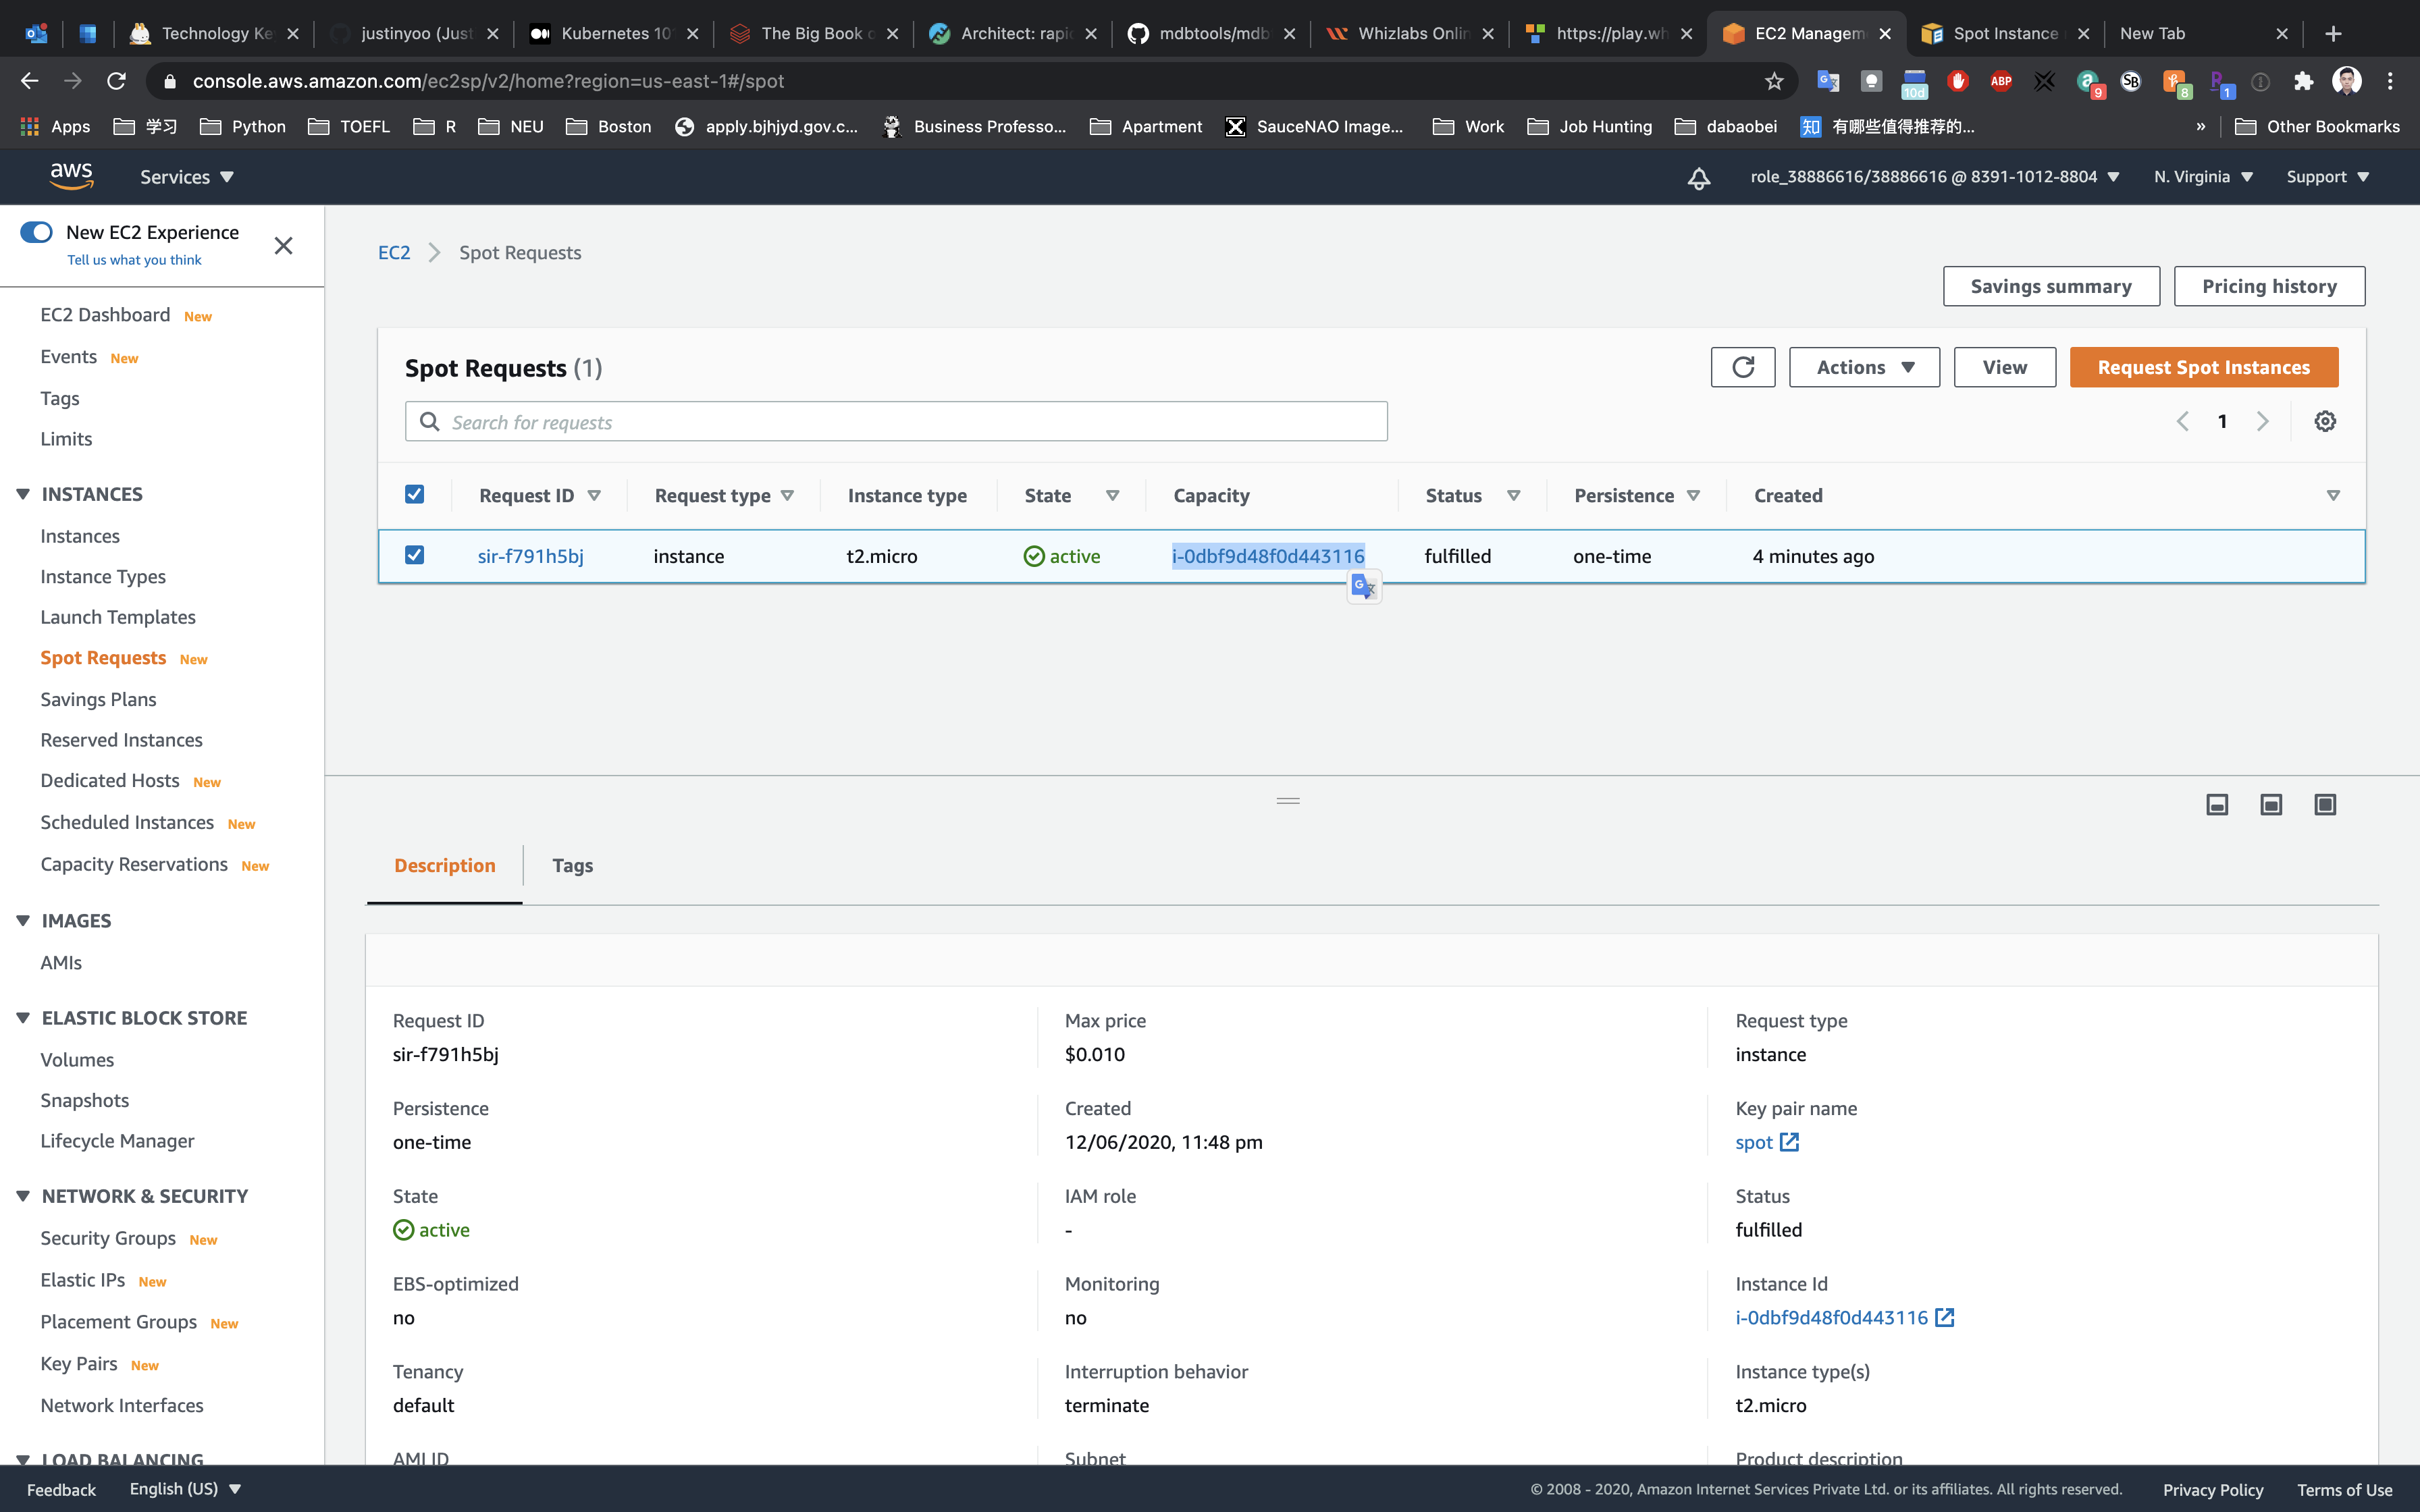
Select MySpotInstance.
Copy the public IP address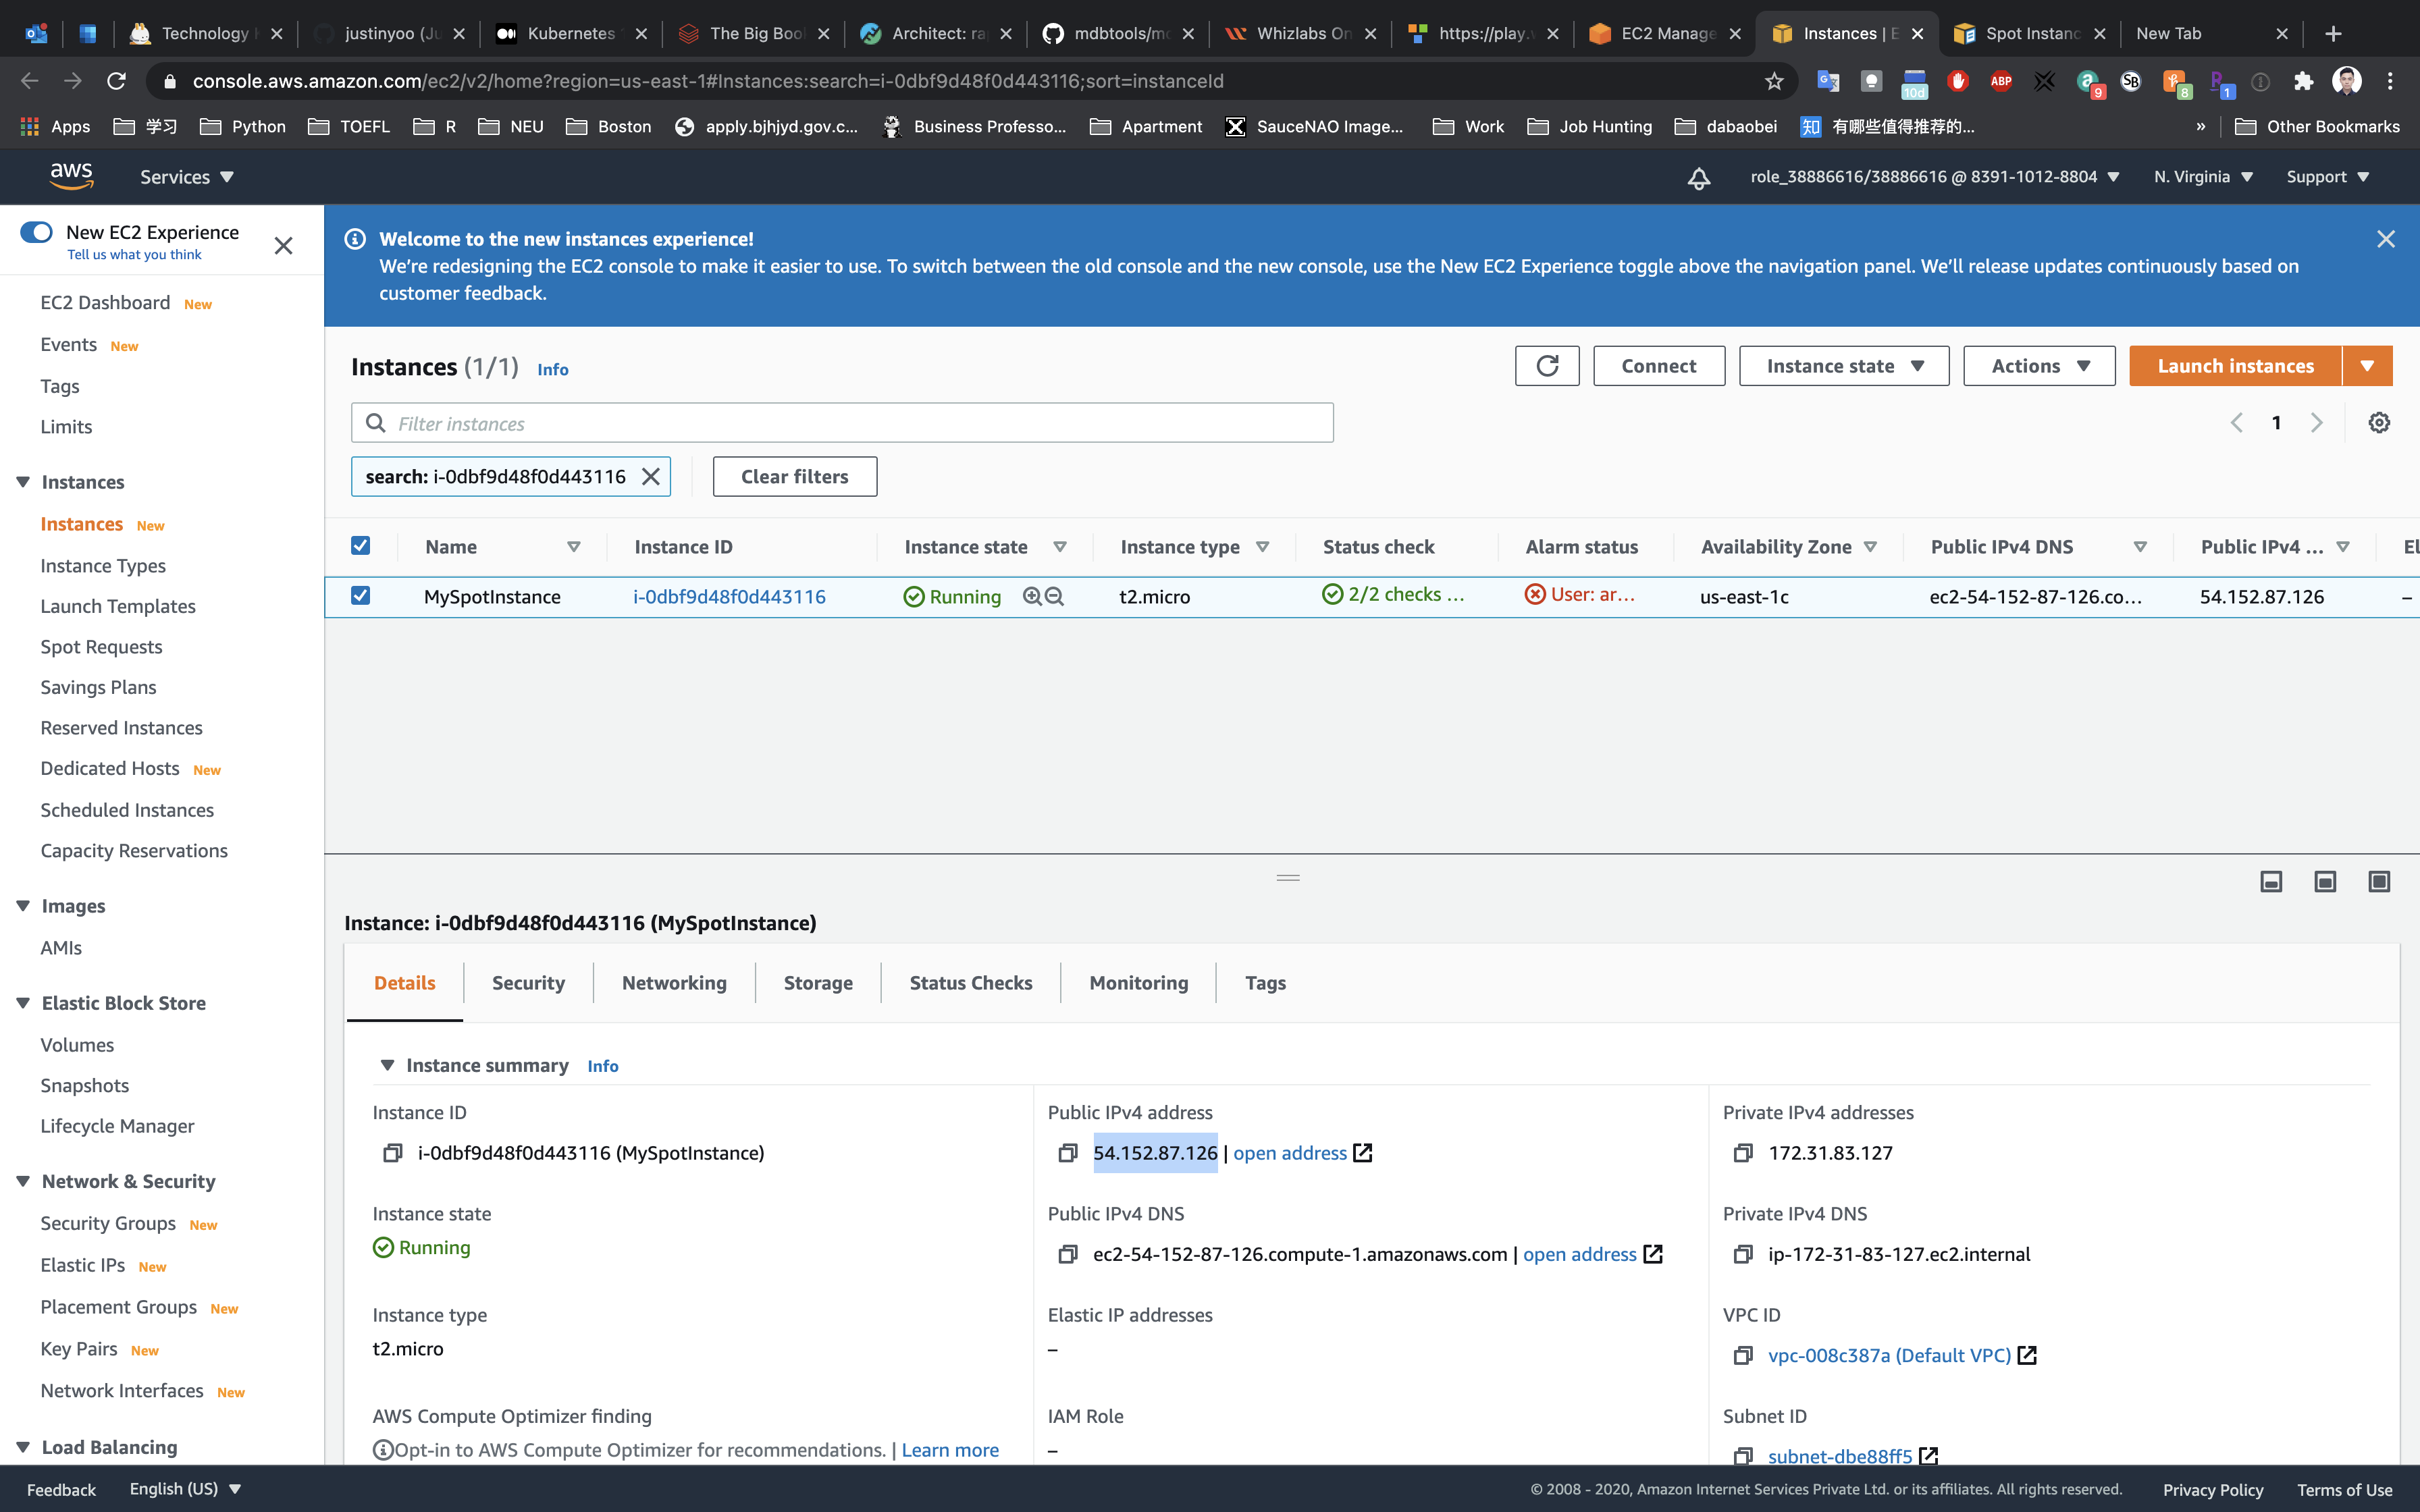
Validation Test
Paste your instance public IP address on a tab of your browser.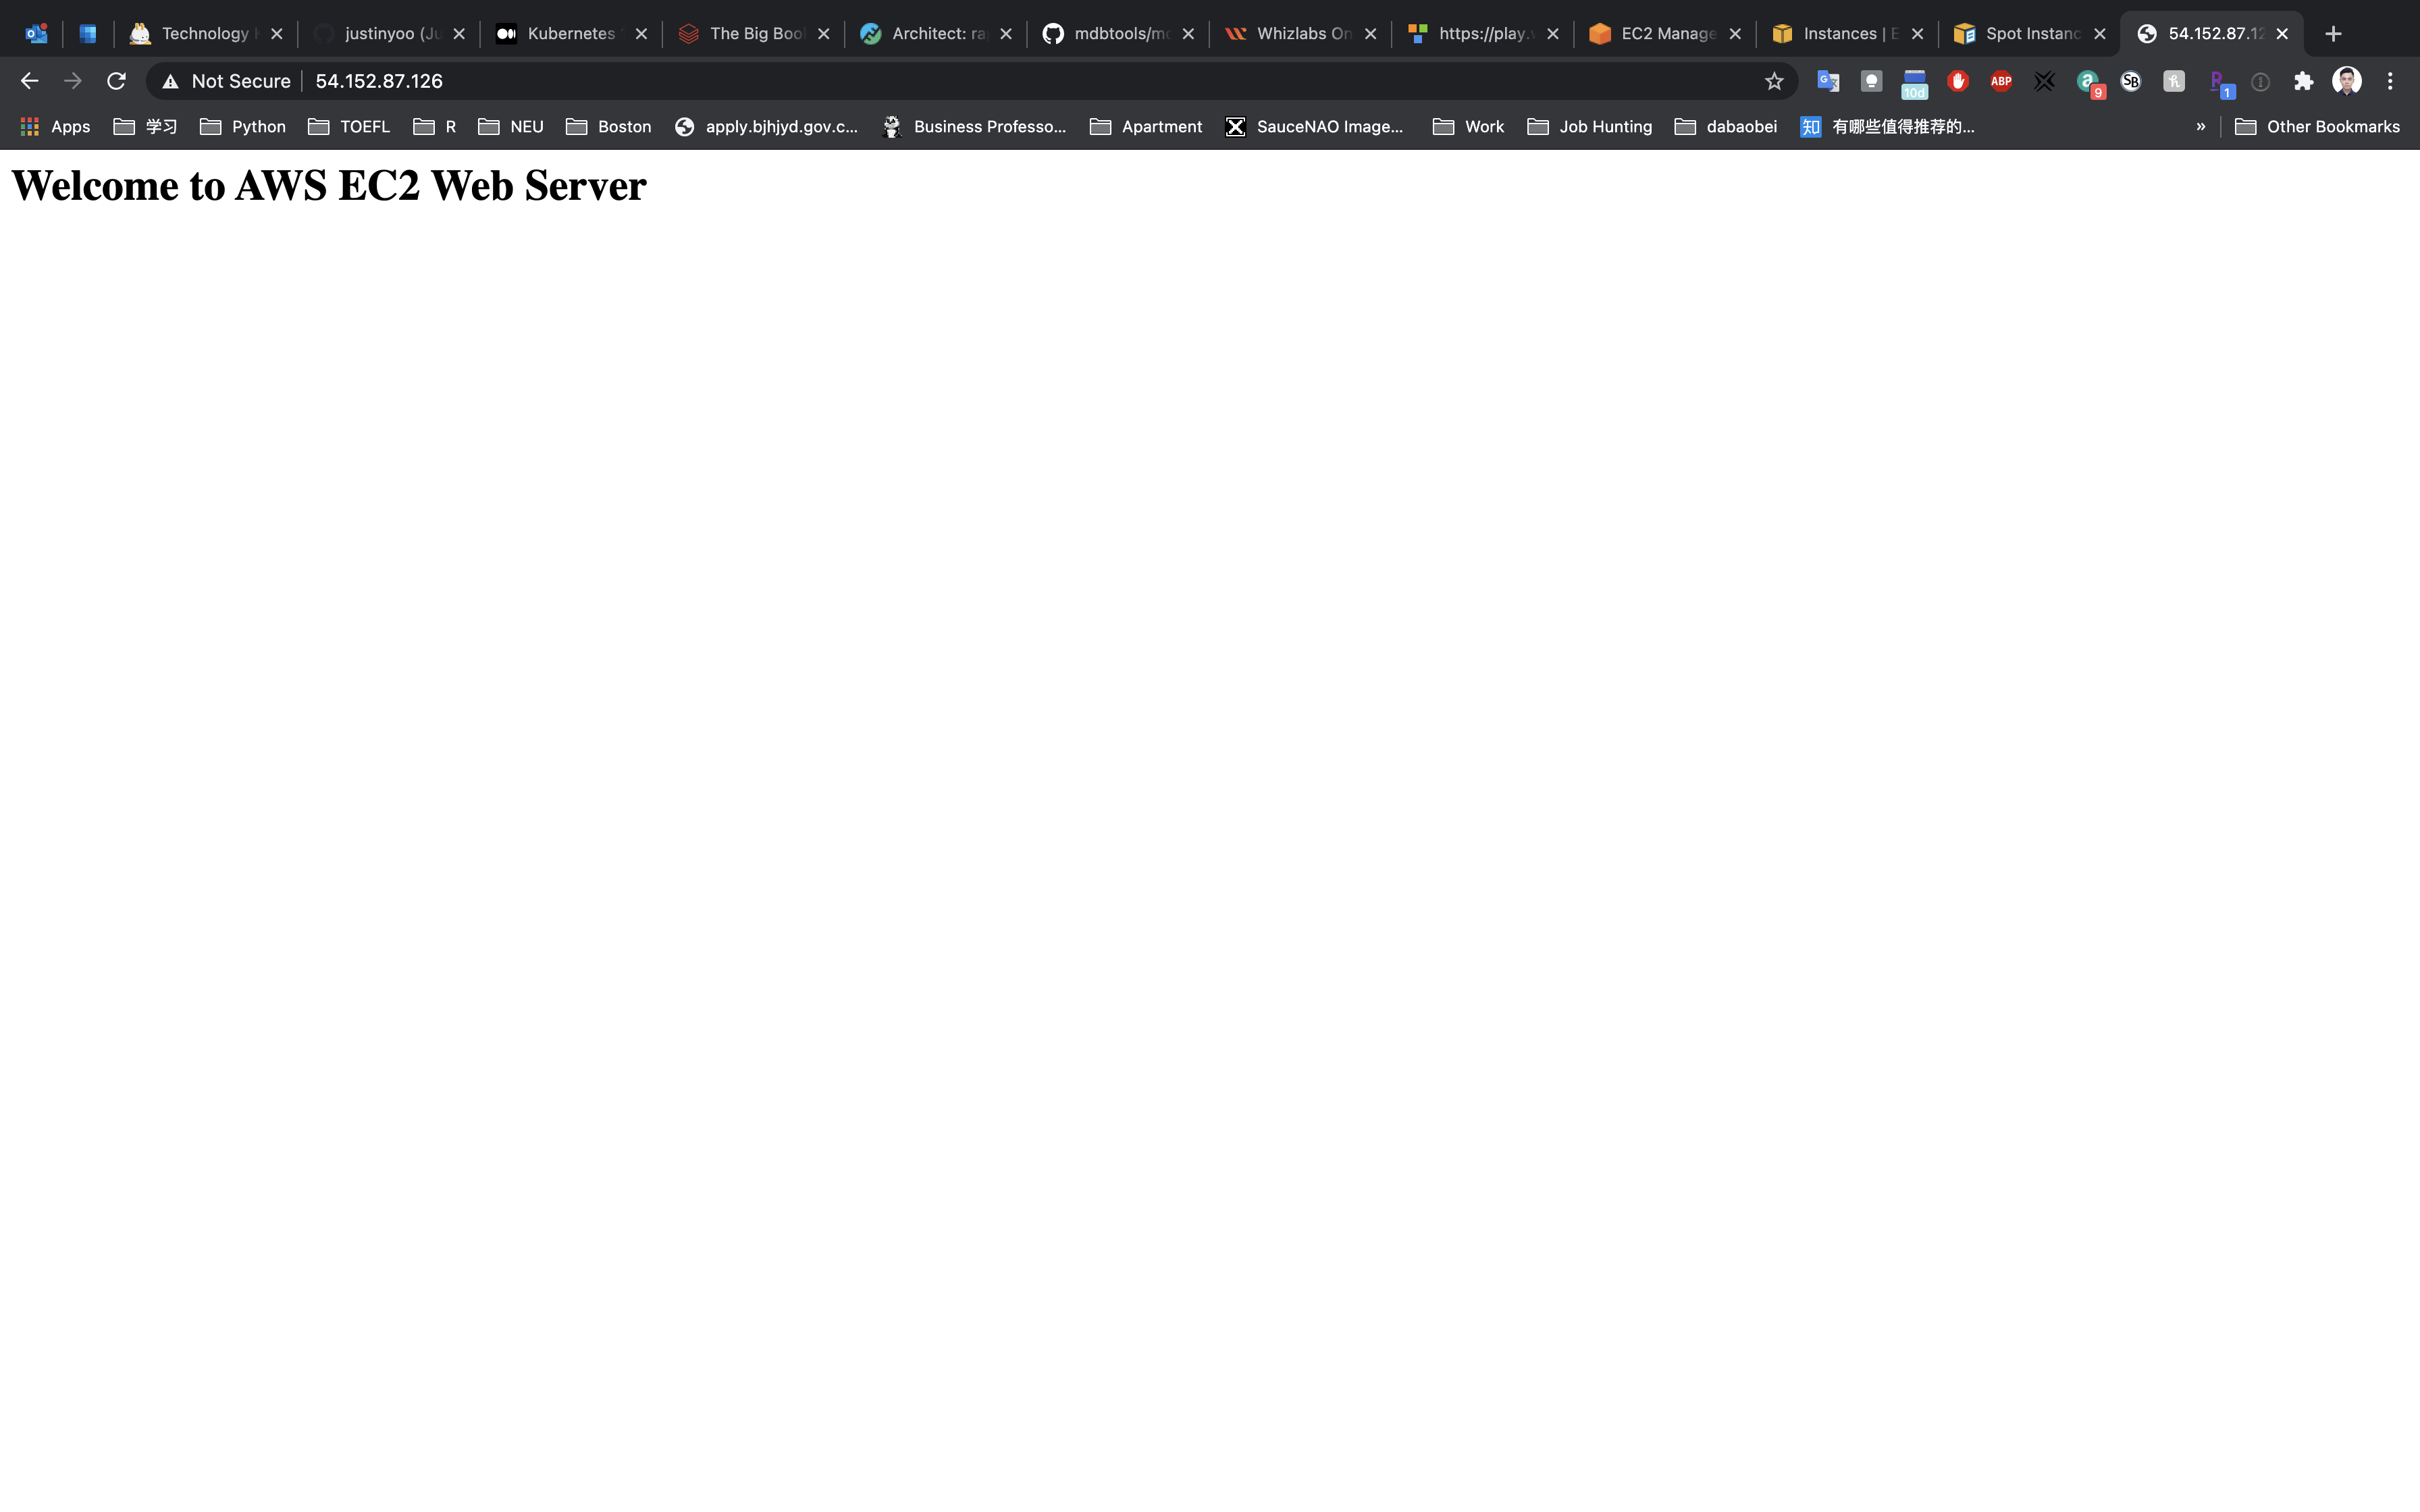
View the Spot Request
Click on Spot Requests on the navigation panel.
Select the Spot Instance.
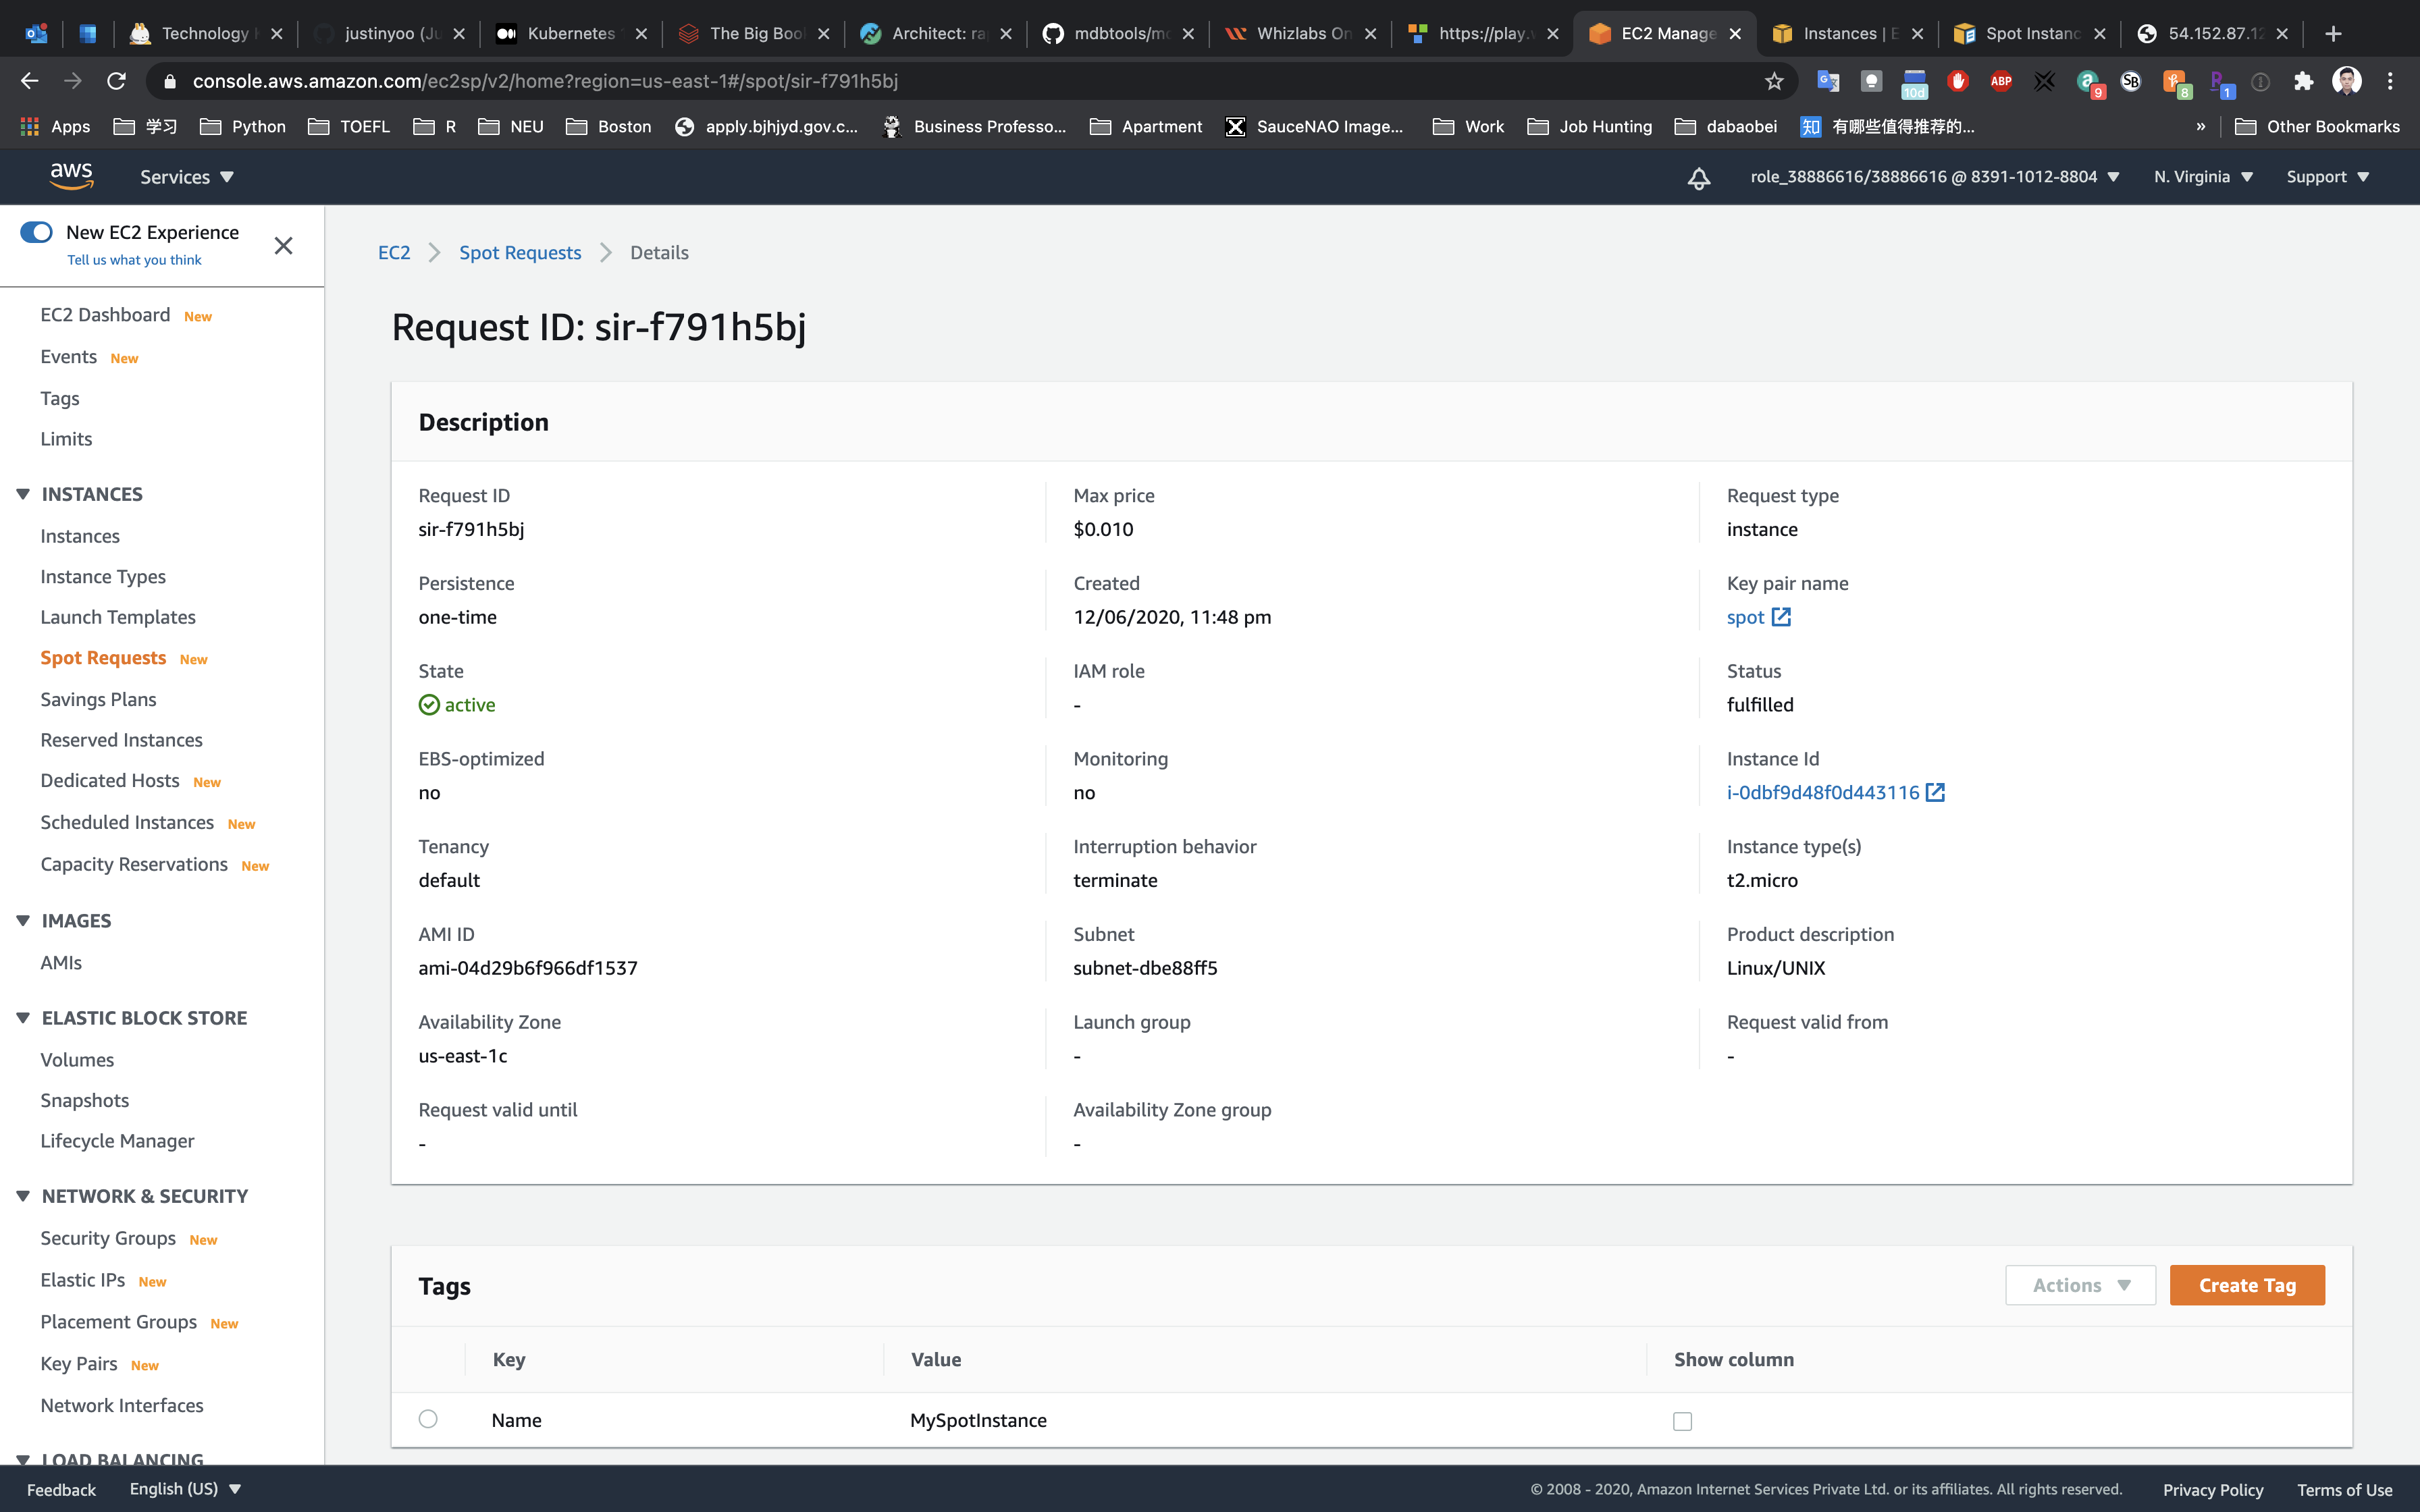
Click on the Request ID like sir-f791h5bj, to see more details about your spot request.
- Max price: The highest price you are willing to pay for this EC2 Instance.
- Instance Id: Your current EC2 Instance, associated with this Spot request.
- Interruption behavior: Terminate, if the current price of this Spot Instance goes higher than the original price, then it will be terminated automatically.
- Availability Zone: Current Price of the Spot instance varies by Availability Zone, There might be a possibility that in other AZ you can get the same instance at a lower price.
Explore the Saving Summary and Pricing history
Go back to the Spot Requests page.
Click on the Saving summary on the right and top window, below you can see, you will save a total of 70% as compared to on-demand instances. Details are also available.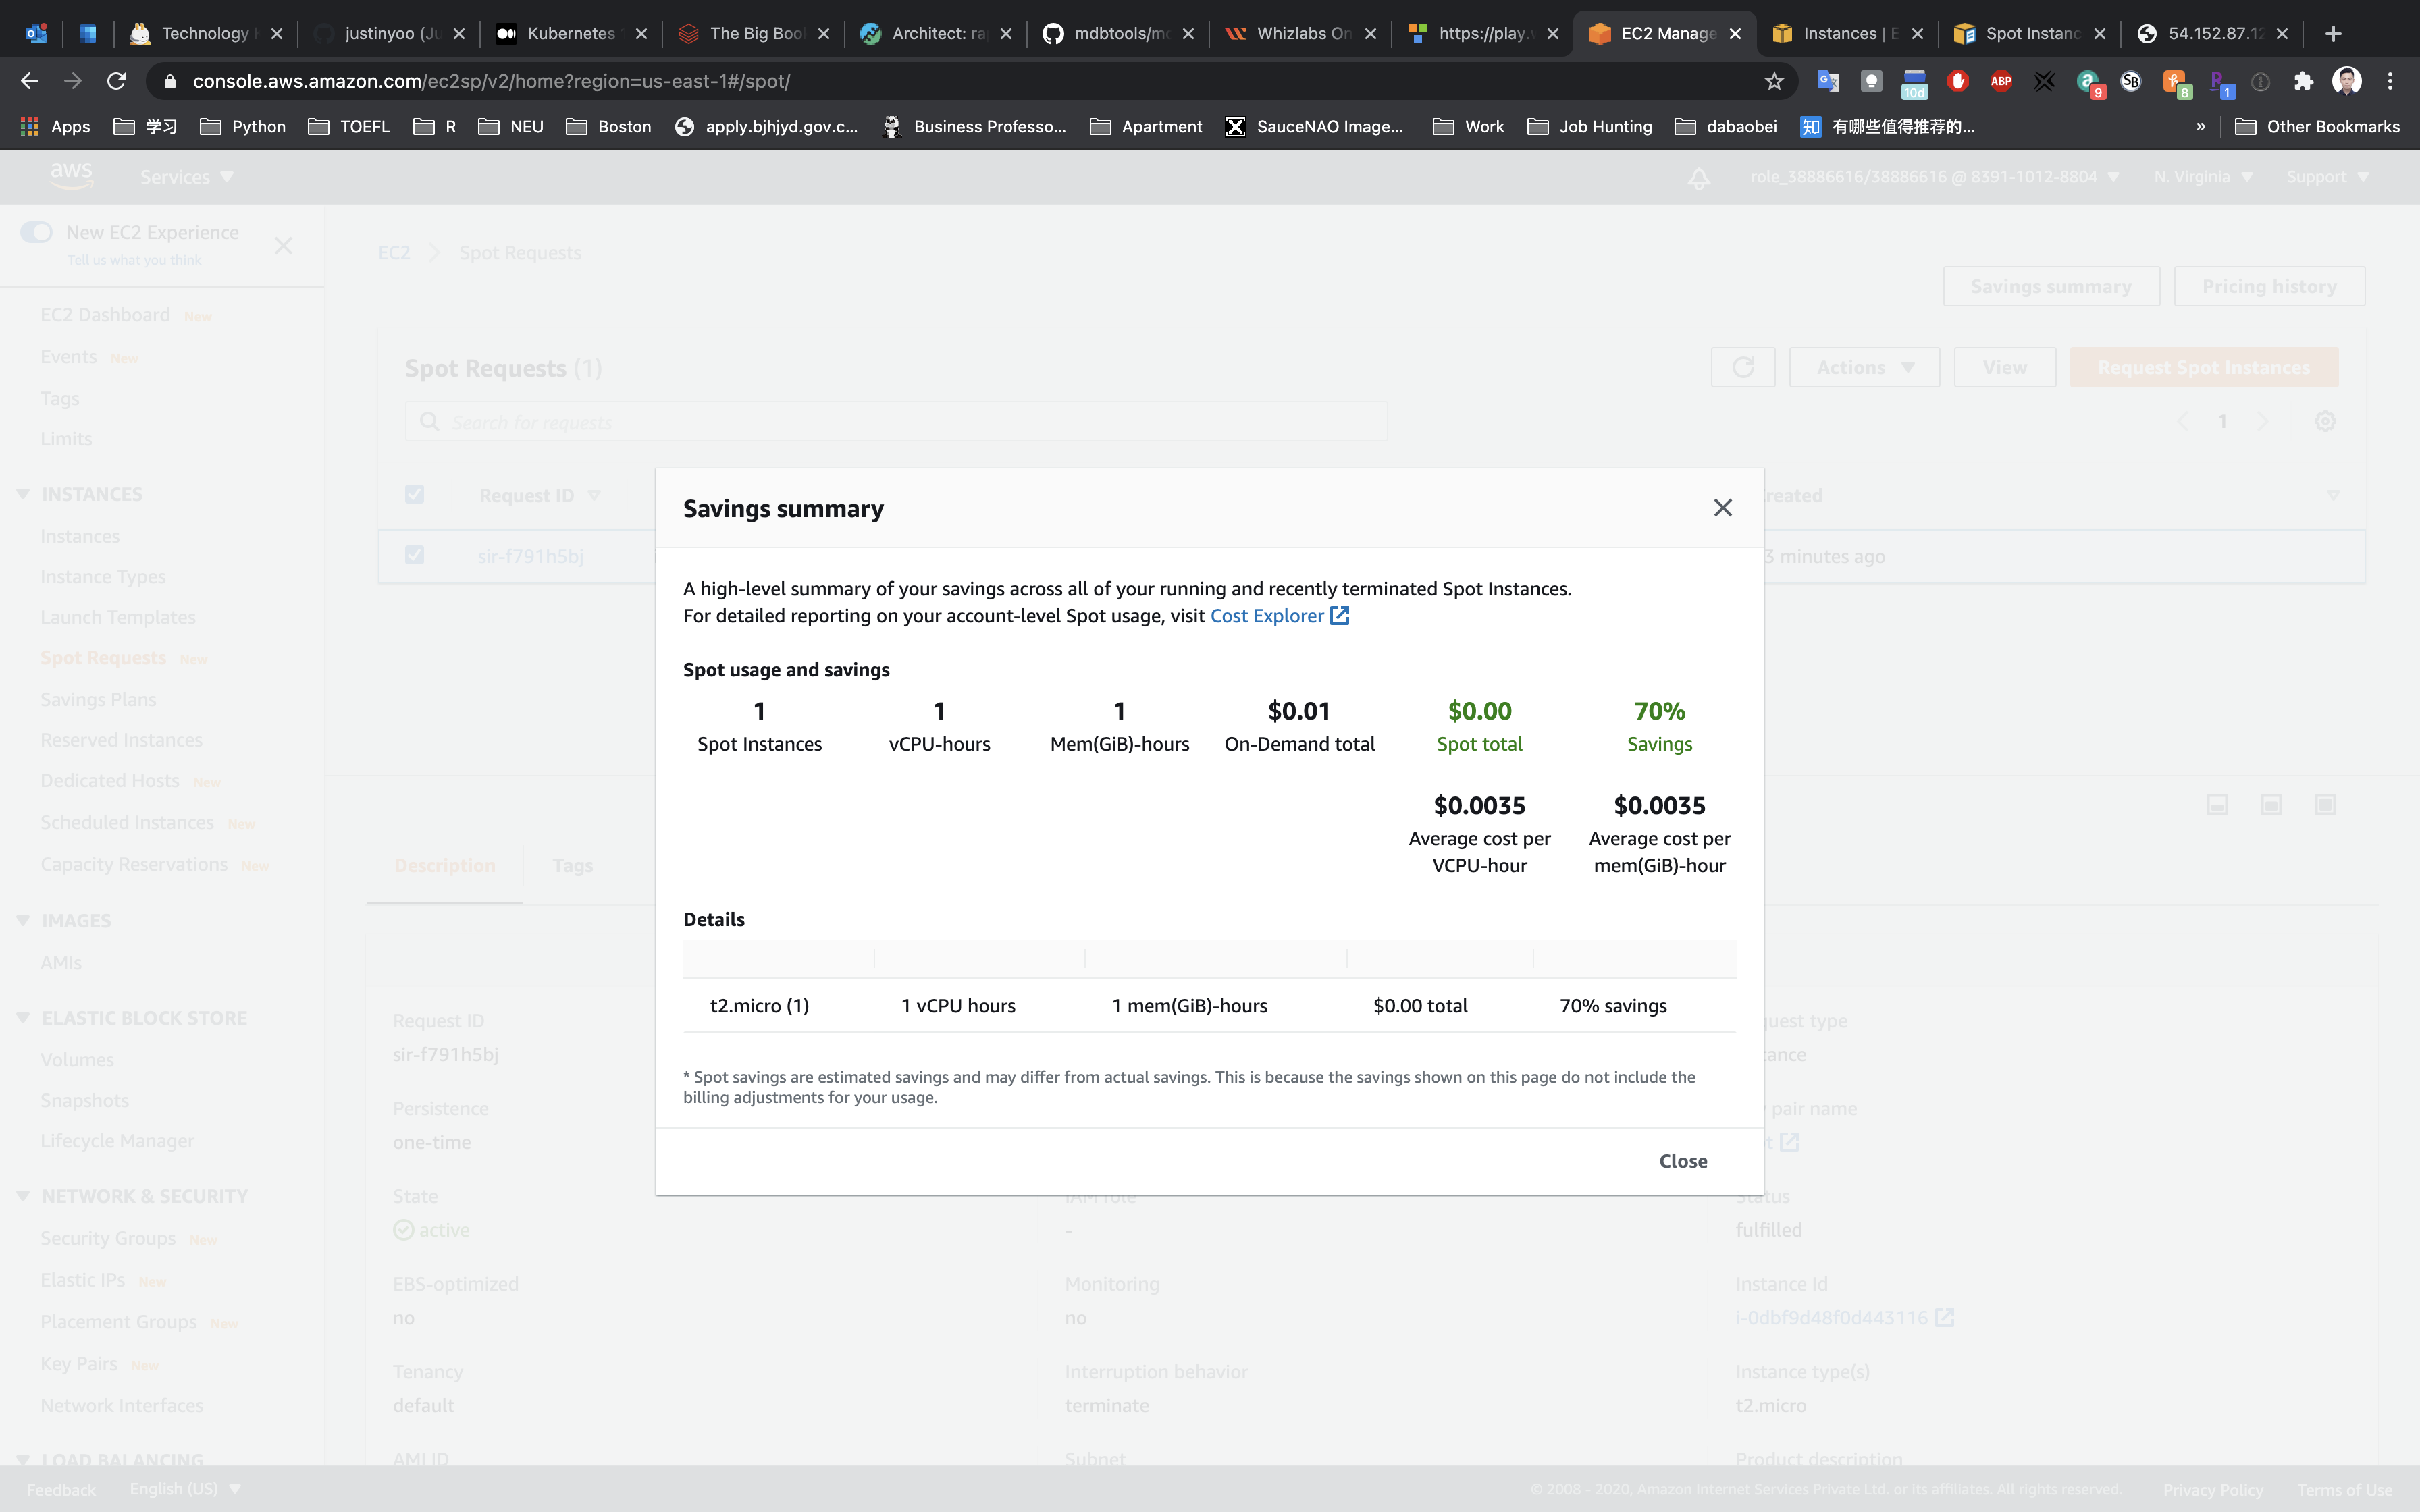
Click on the Close button, and let’s explore the Pricing history option.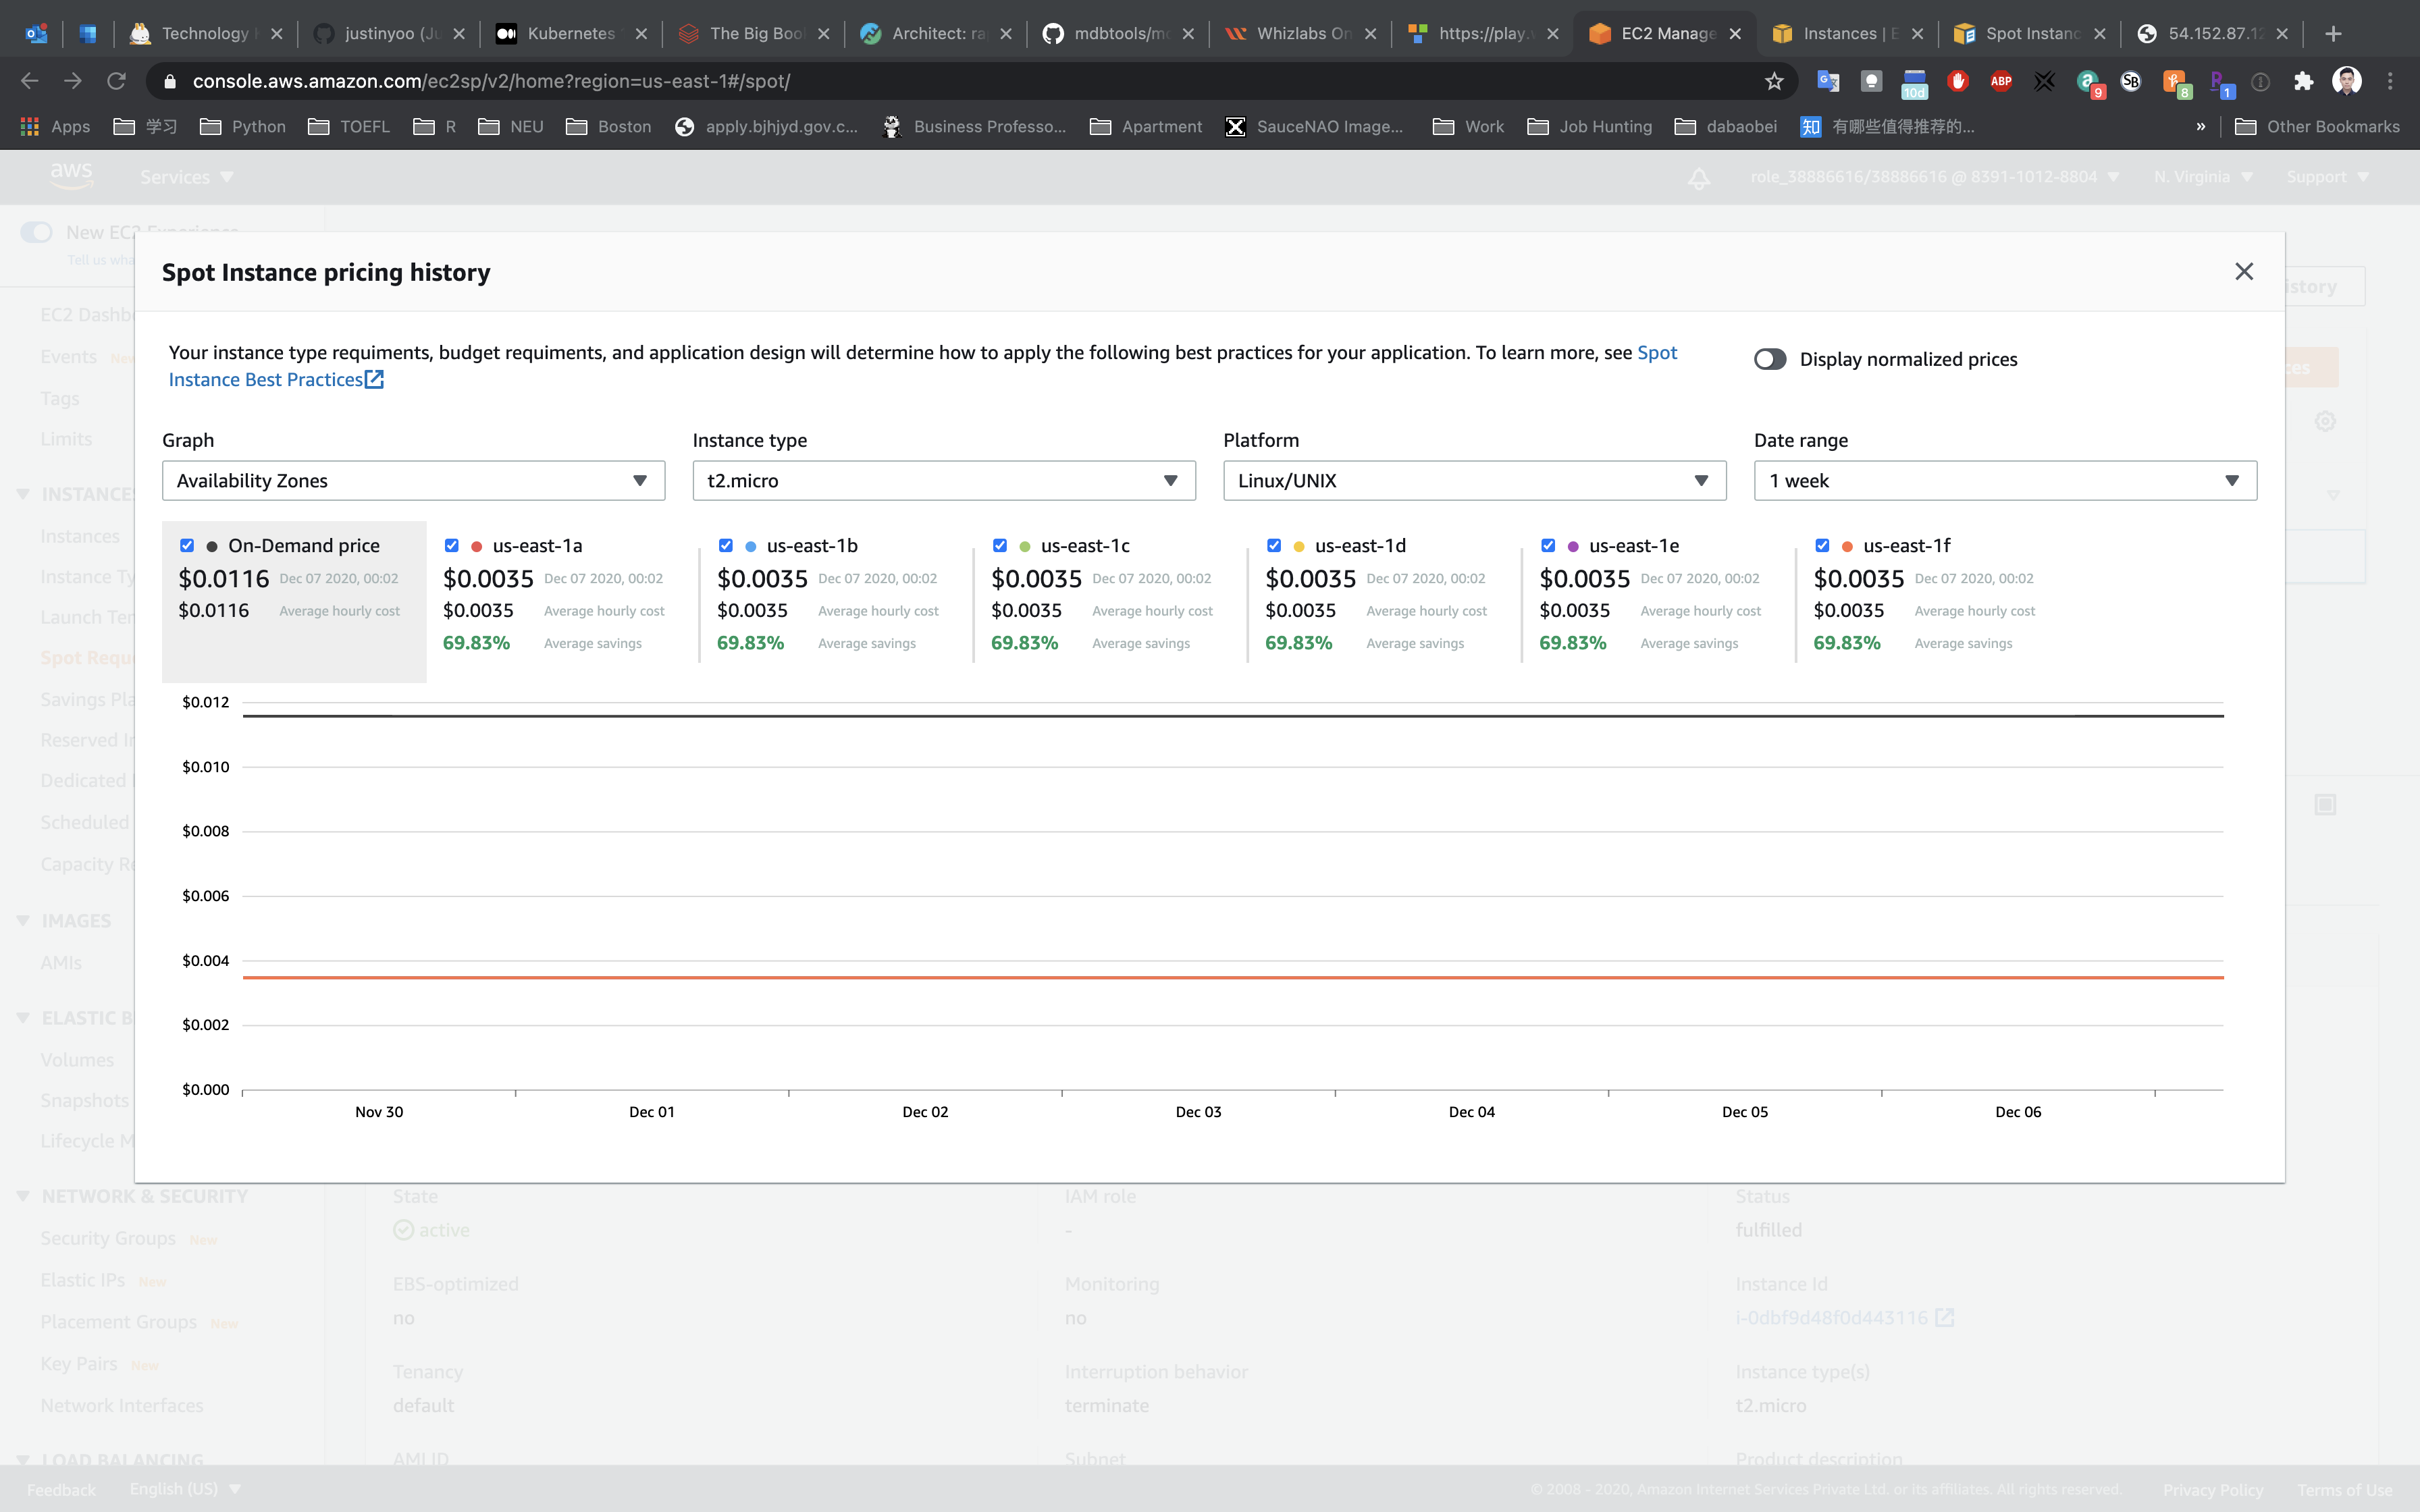
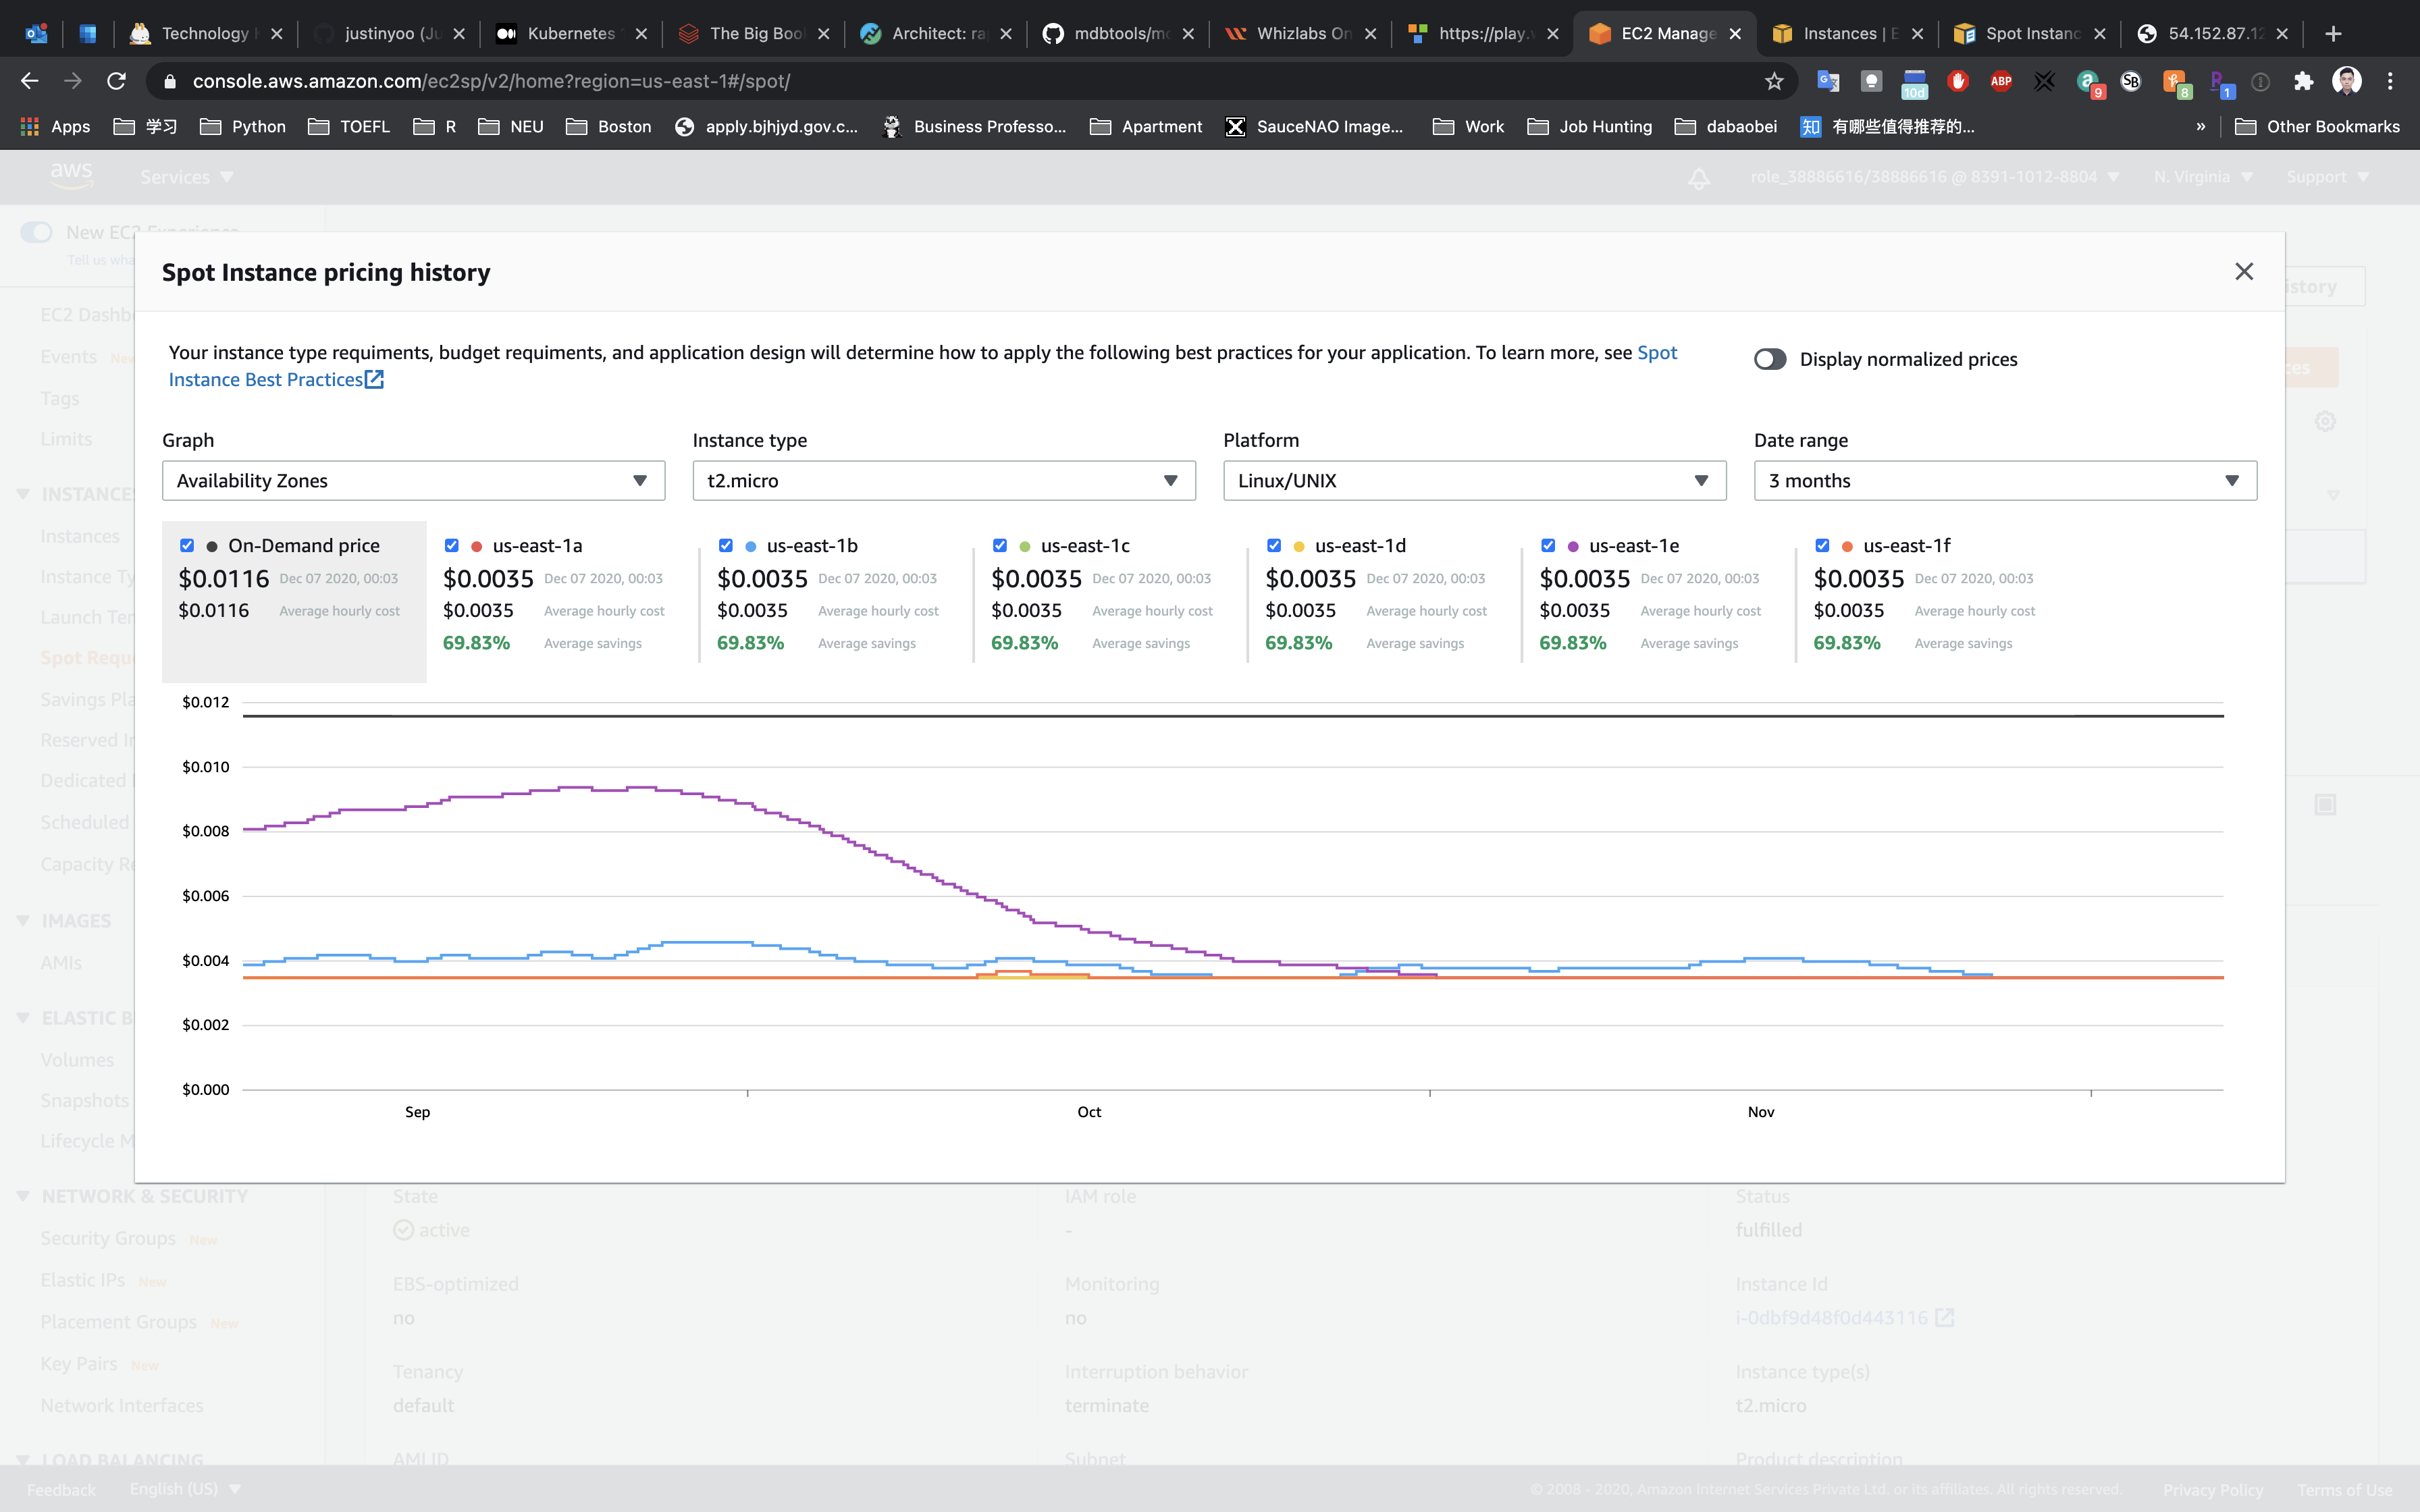
Here you will see the pricing history, but wait a minute, it’s showing for some other Instance size, let’s modify the options.
- Graph:
Availability Zones - Instance type:
t2.micro - Platform:
Linux/UNIX - Date Range:
3 months
Clean up section, terminate EC2 Spot Instance
On the Spot Requests page.
Click on Actions -> Cancel request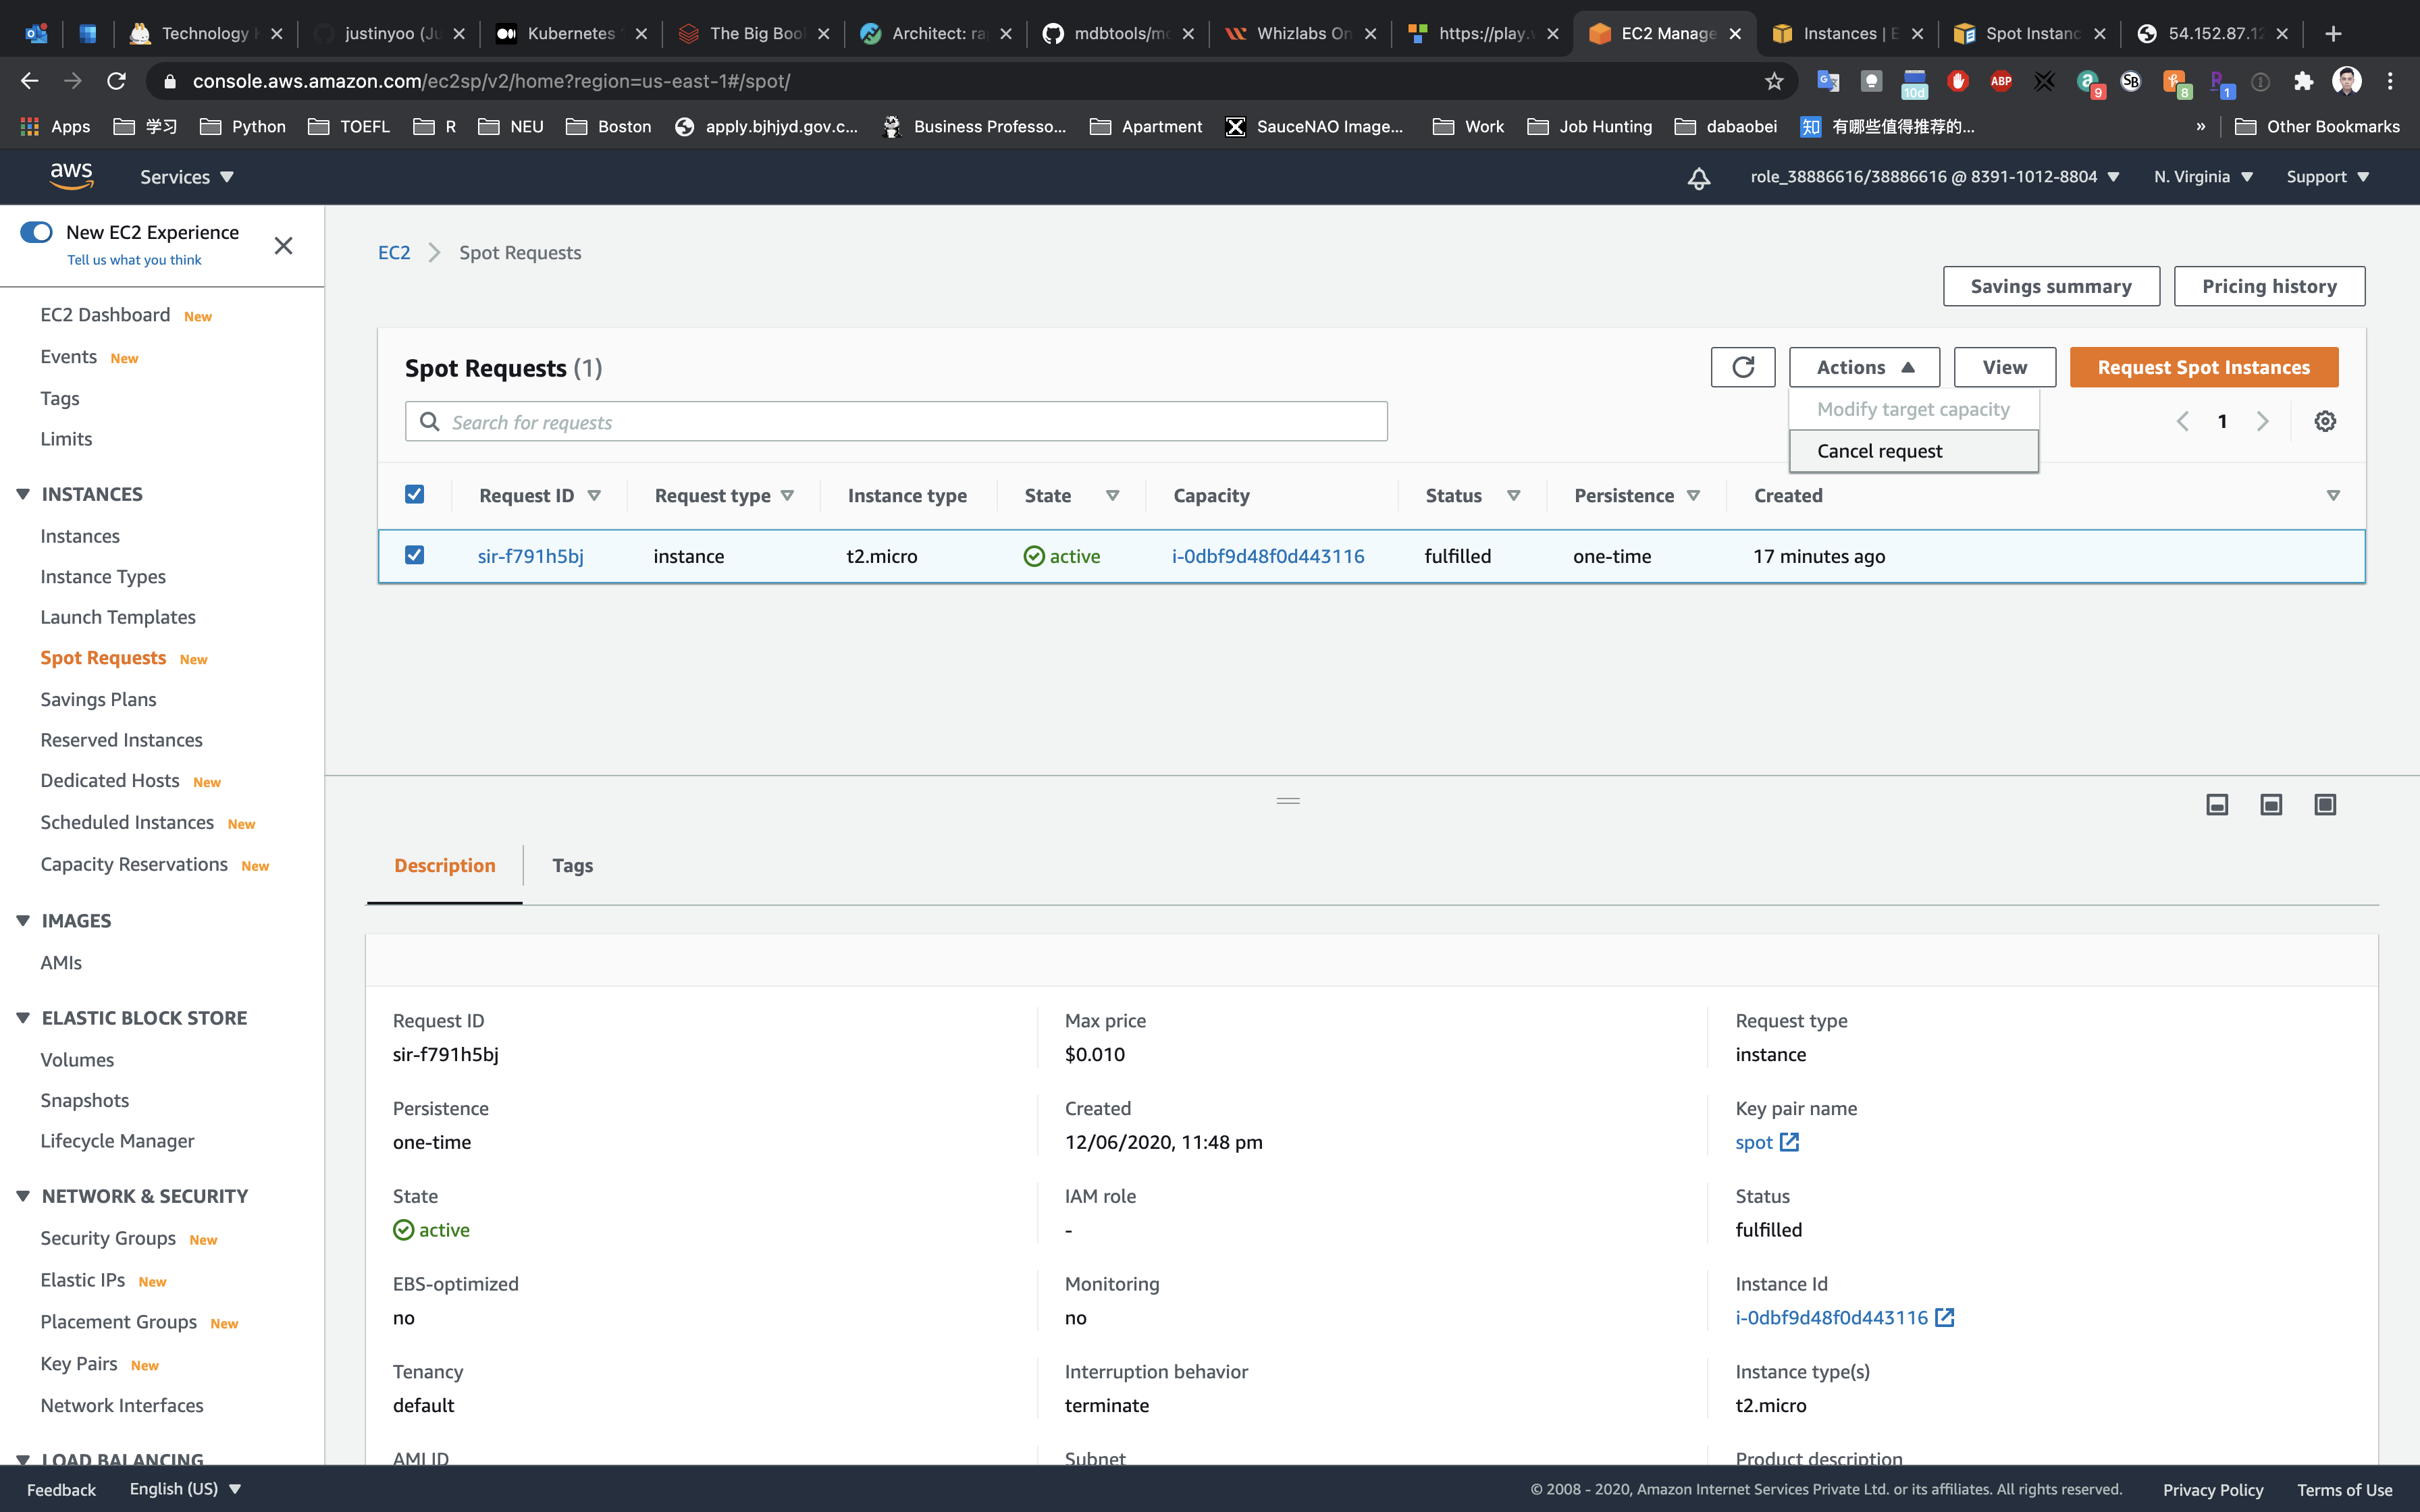
Click on Confirm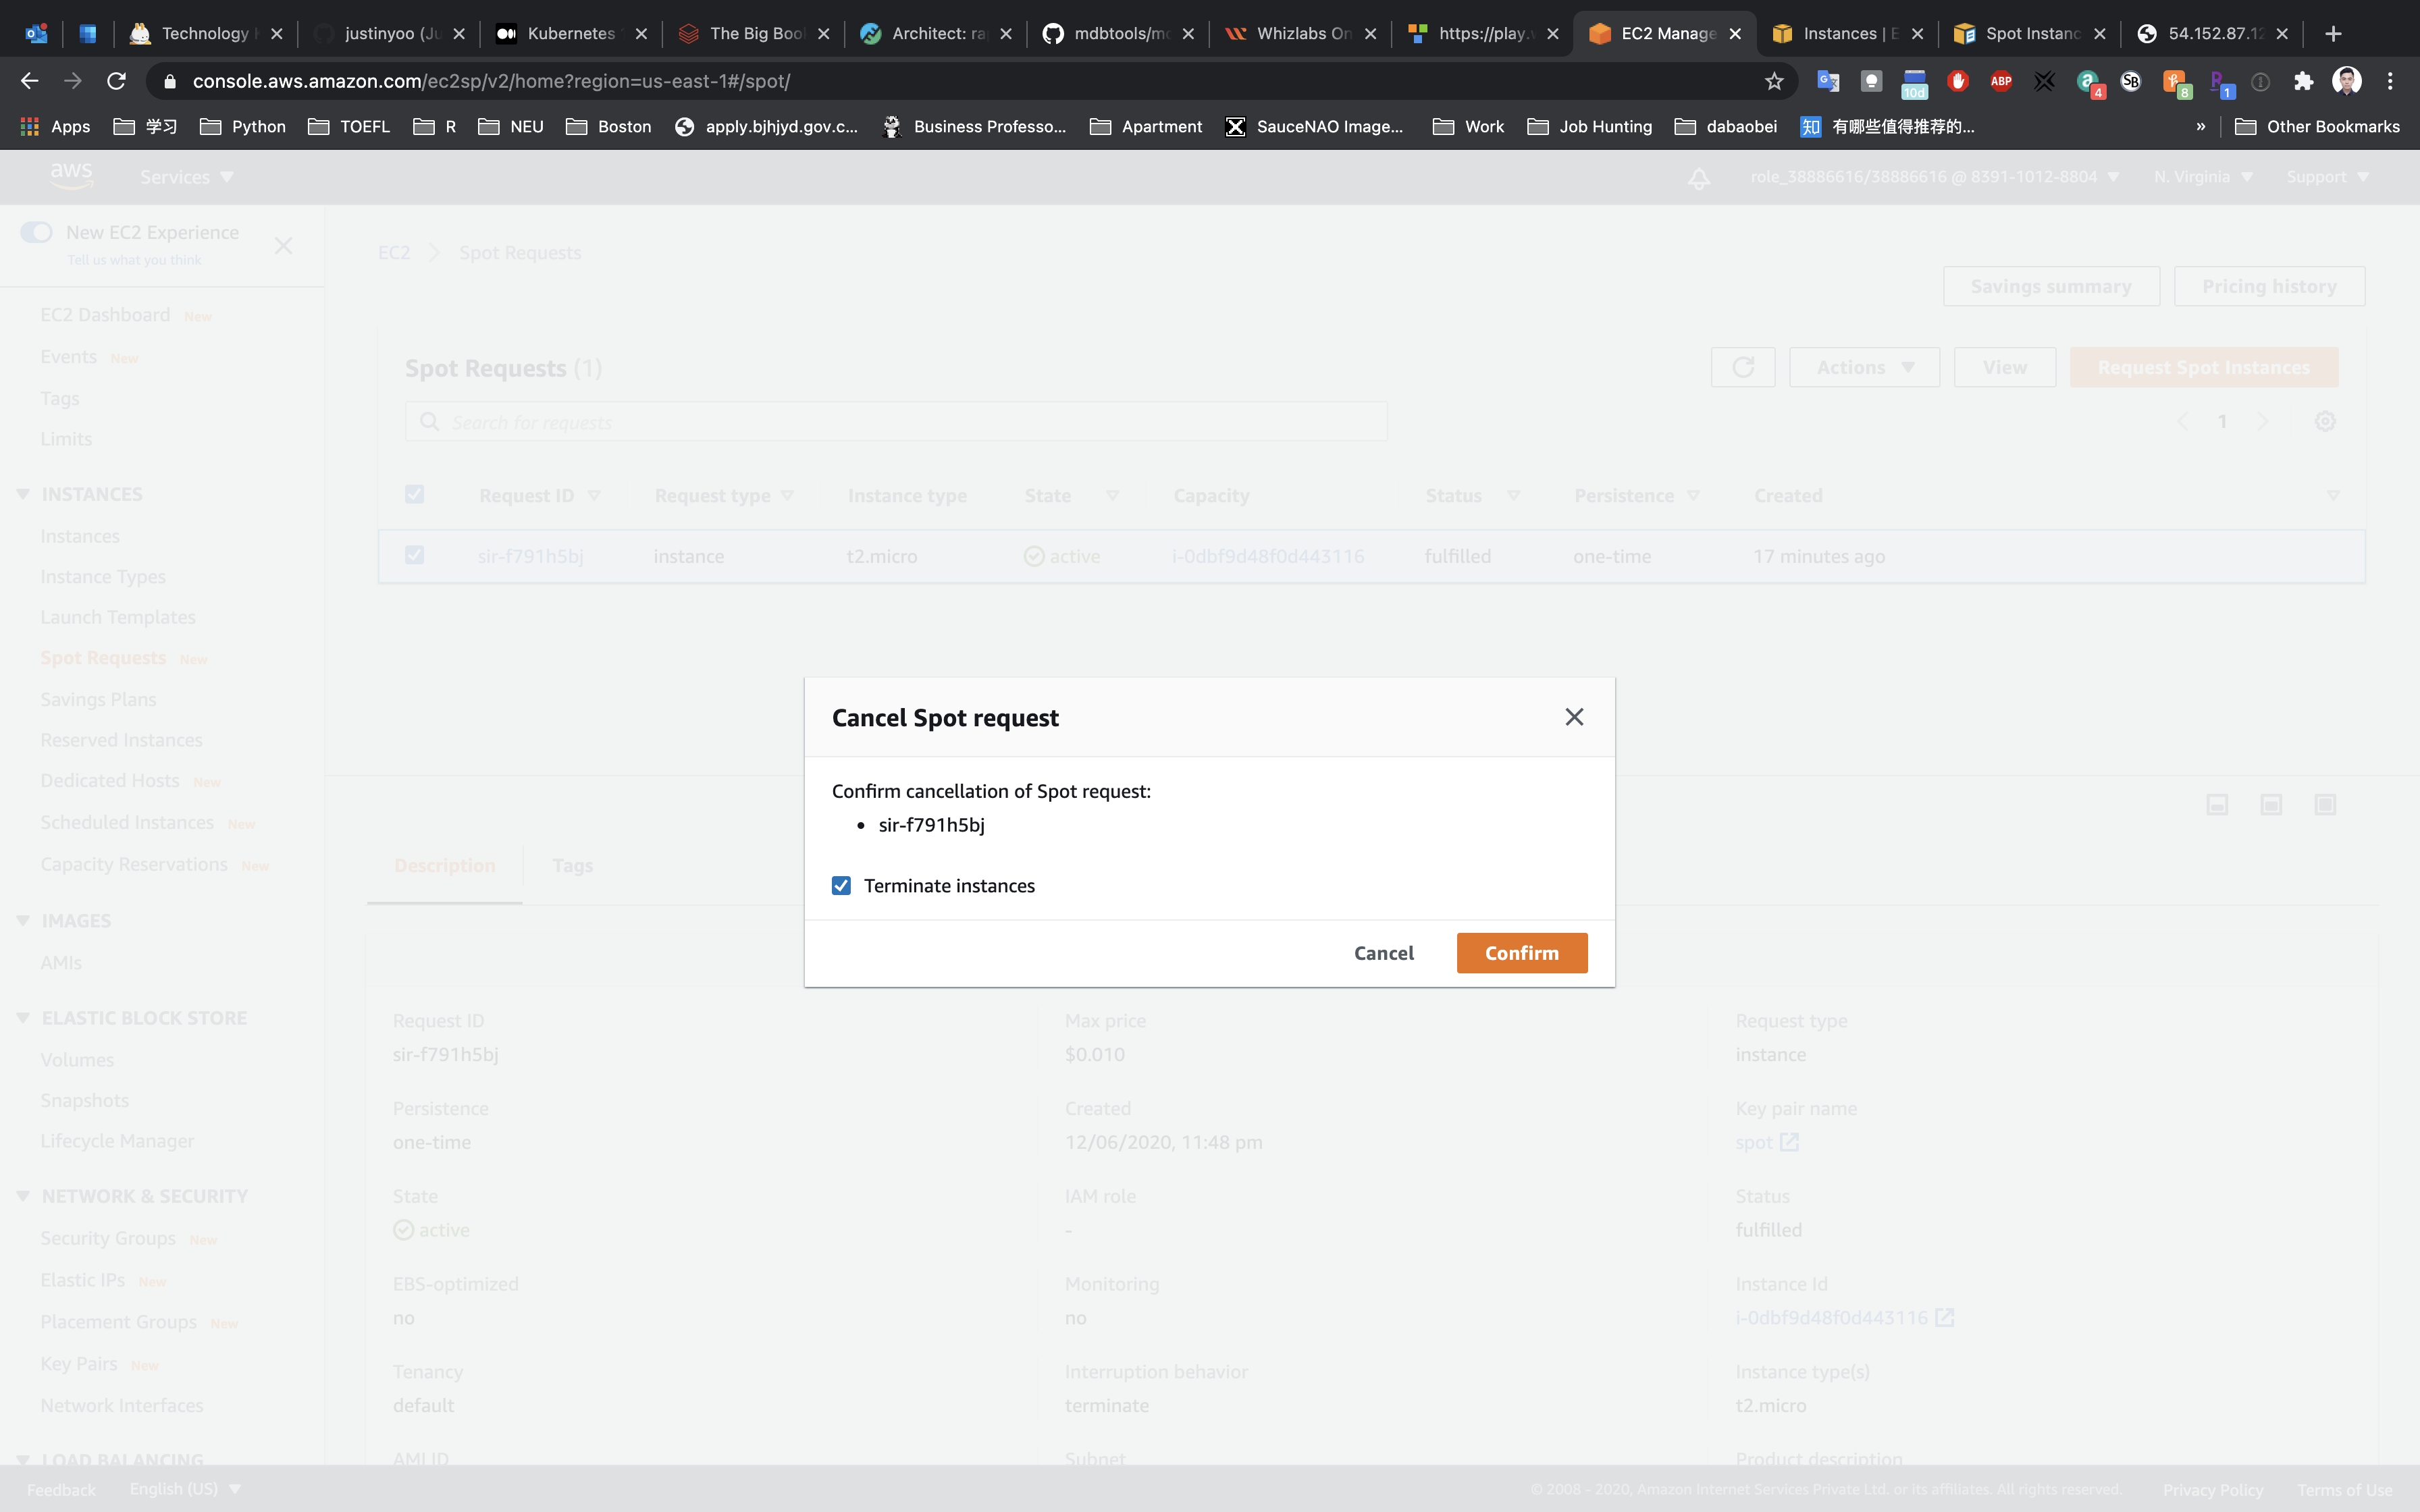
Refresh the page.
Now you will see the request, State as Cancelled and Status as instance-terminated-by-user. Which now means that clean up is done.
You can reverify the Termination state of Instance by clicking on Instances in the left sidebar, it will show the Instance state as Terminated.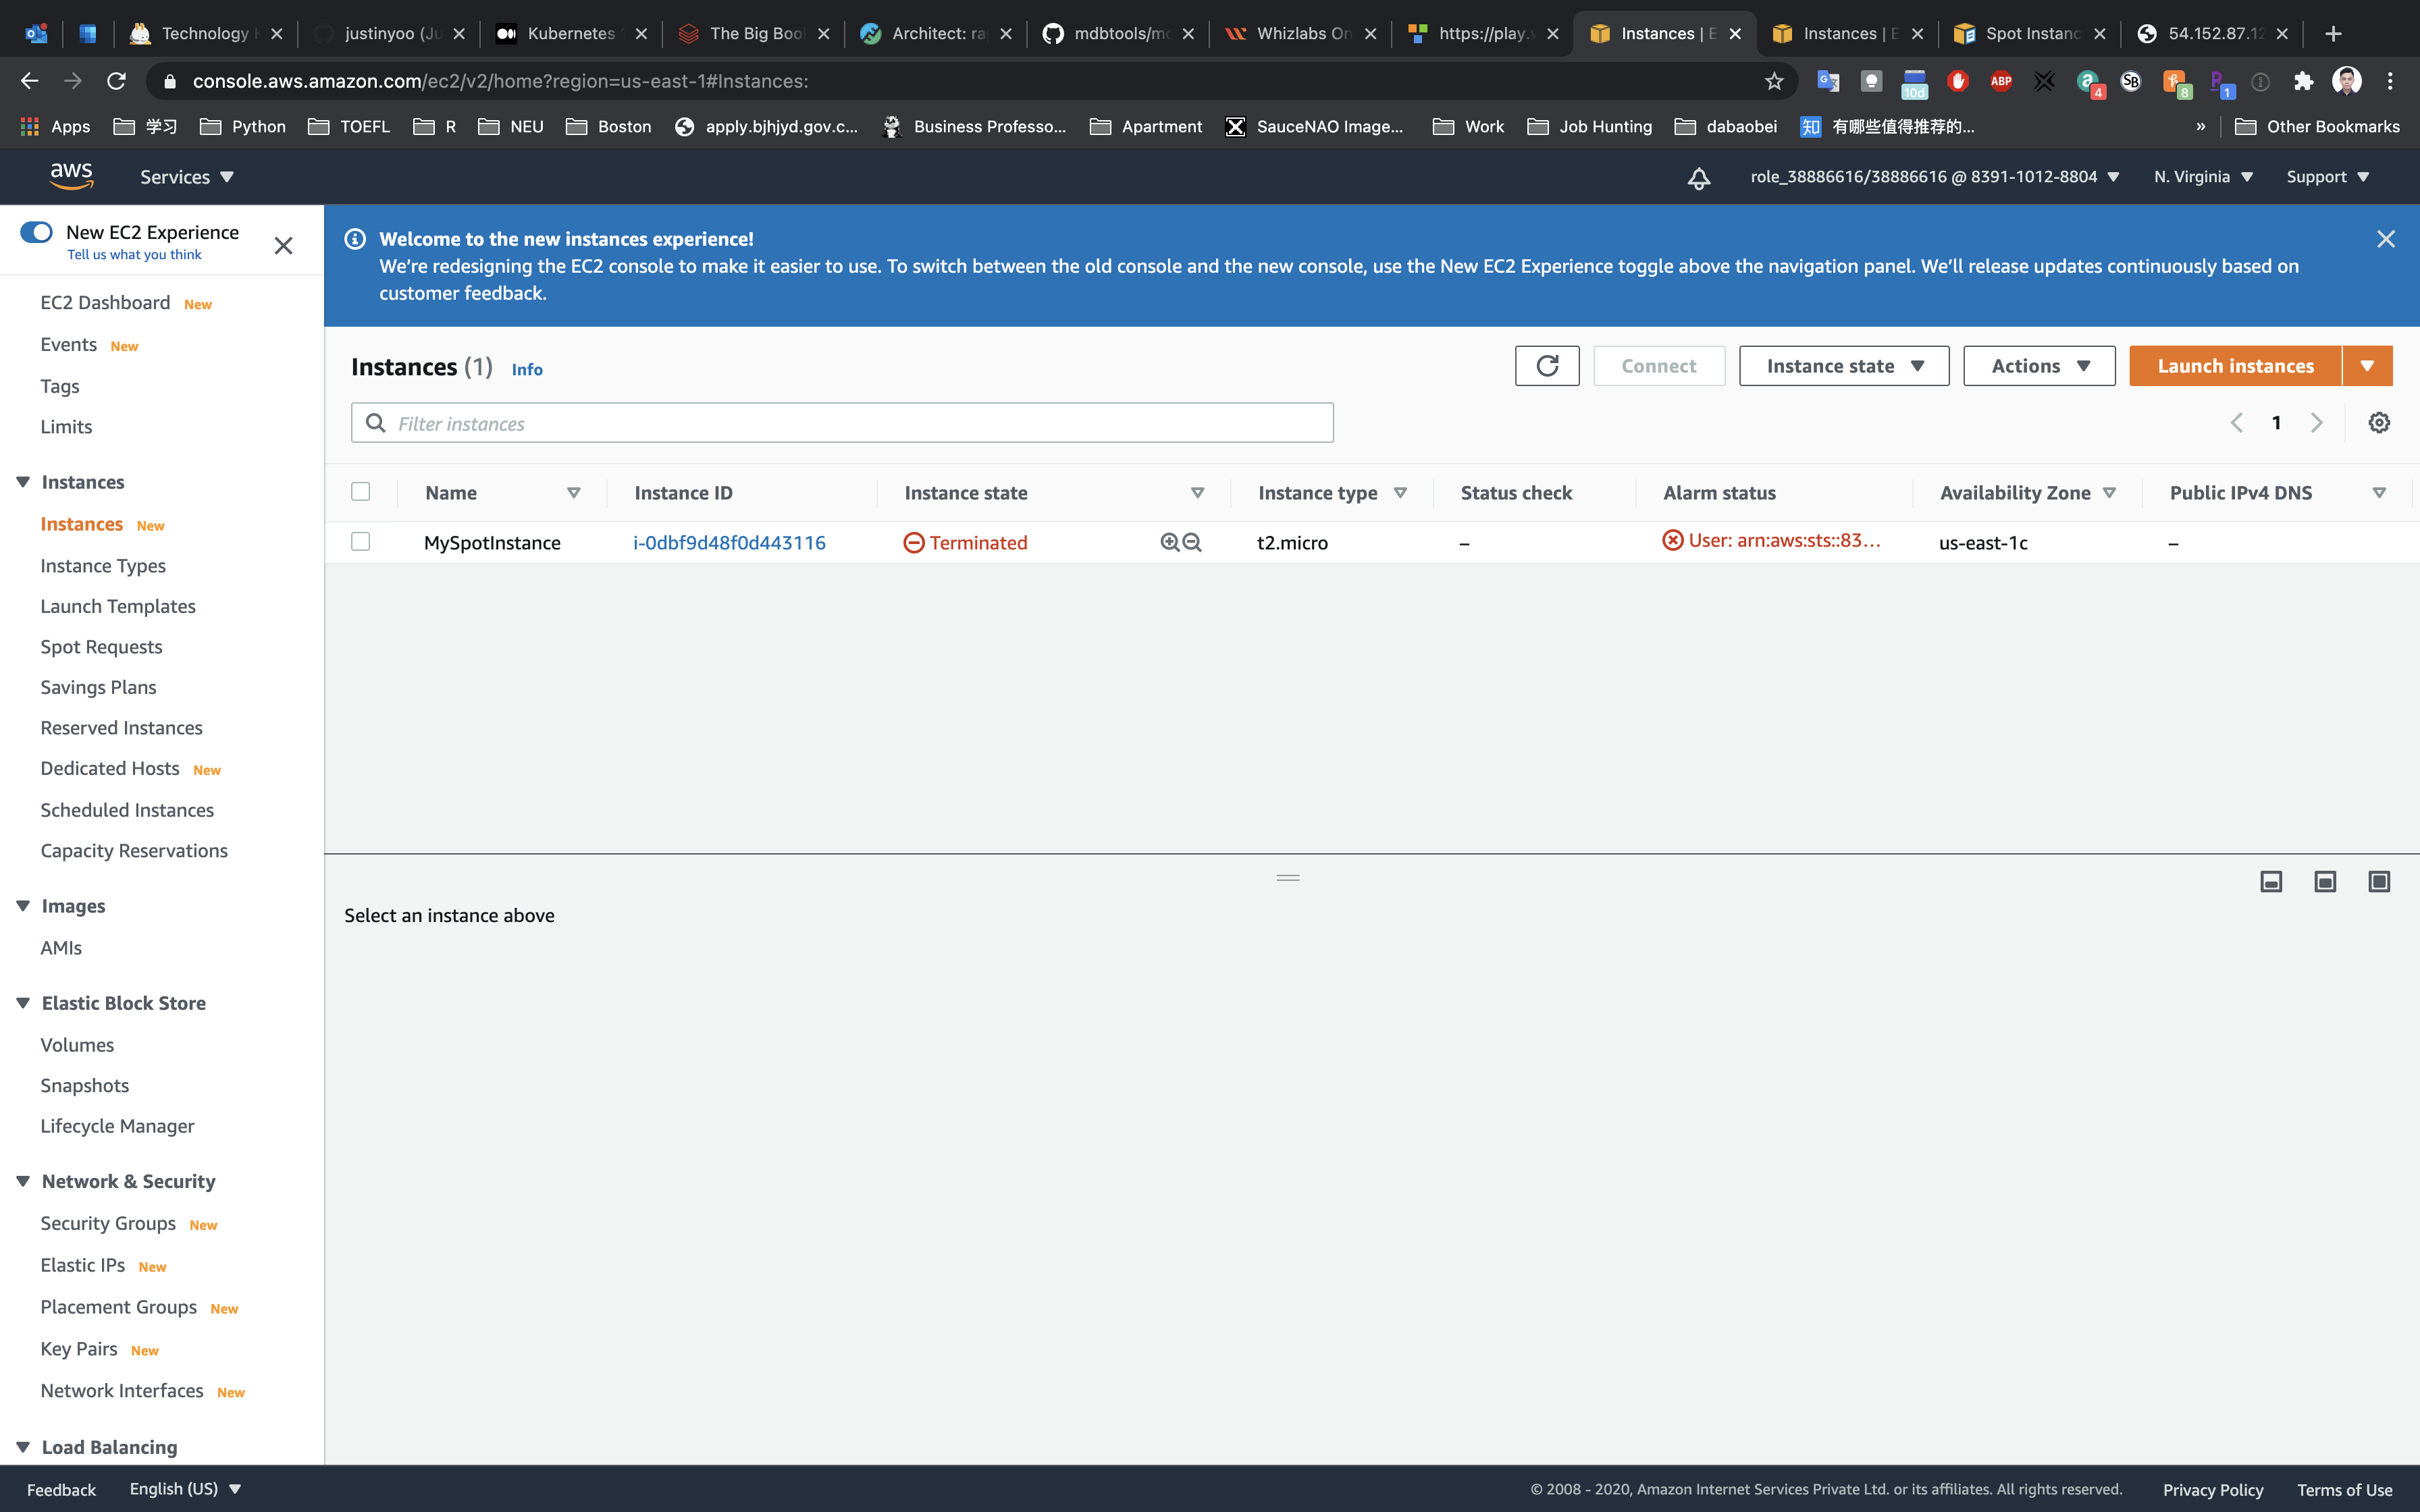
Completion and Conclusion
- You have successfully created and launched Amazon EC2 Spot Instance.
- You have successfully created a webpage and published it.
Allocating Elastic IP address and Associating it to EC2 Instance
https://play.whizlabs.com/site/task_details?lab_type=1&task_id=78&quest_id=35
Lab Details
This lab walks you through the steps to launch and configure a virtual machine in the Amazon cloud.
You will practice using Amazon Machine Images to launch Amazon EC2 Instances and use key pairs for SSH authentication to log into your instance. You will create a web page and publish it.
You will allocate and associate an Elastic IP.
Tasks
- Log into AWS Management Console.
- Create an Amazon Linux Instance from an Amazon Linux AMI
- Find your instance in the AWS Management Console.
- SSH into your instance and configure your server as a web server.
- Create and publish a sample test.html file.
- Test the page with the public IP address of EC2 Instance created.
- Allocate an Elastic IP and associate it to the EC2 Instance.
- Test the page with Elastic IP address of EC2 Instance.
Architecture Diagram: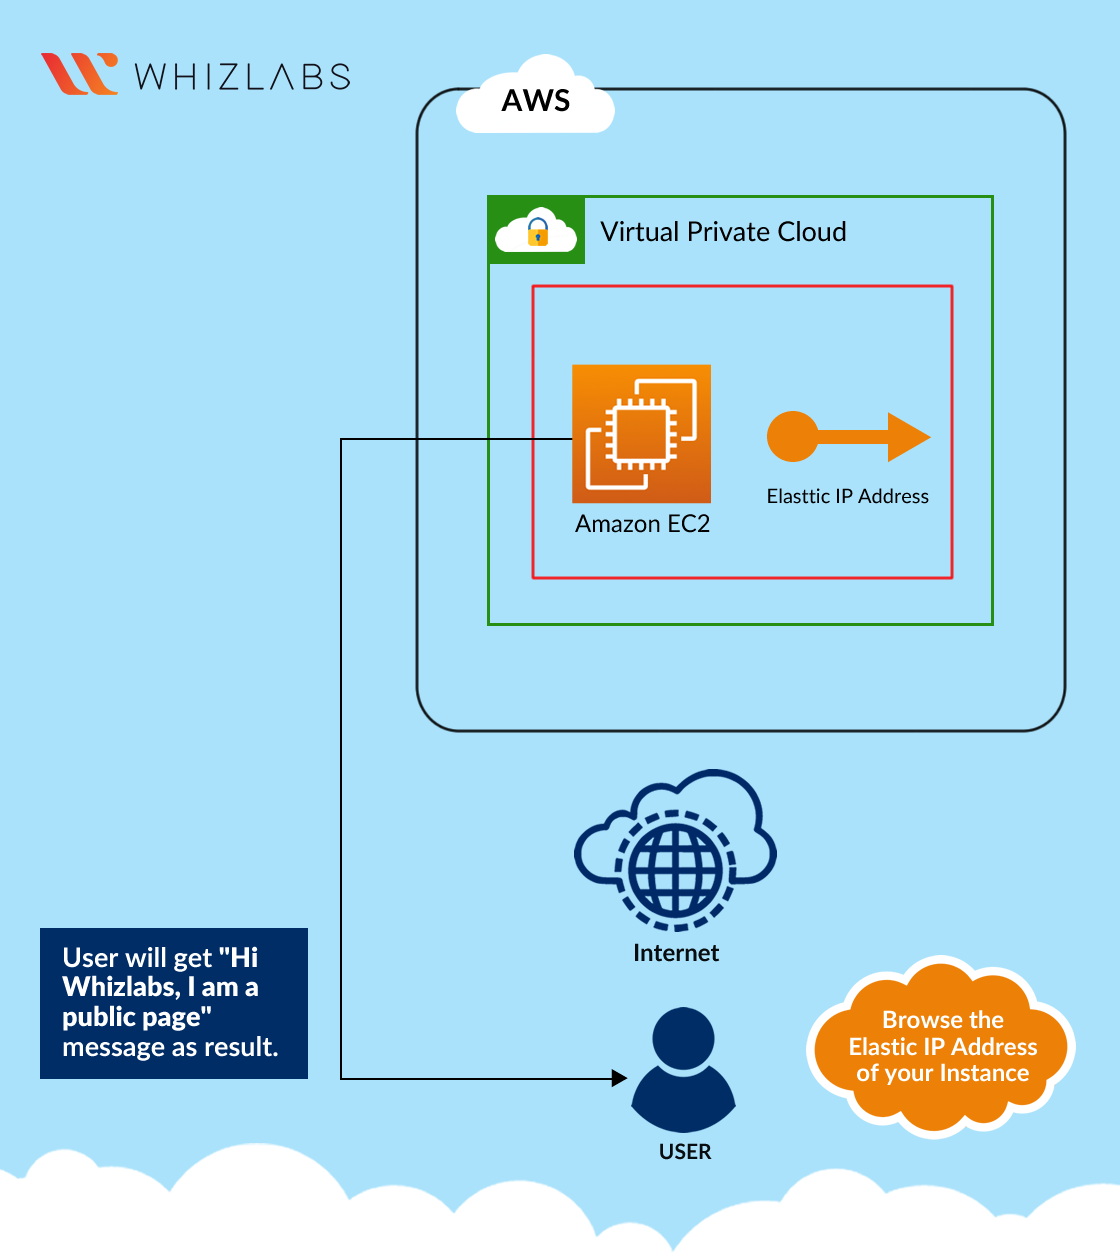
EC2 Configuration
Services -> EC2 -> Instances
Click on Launch instances

Step 1: Choose an Amazon Machine Image(AMI)
Select Amazon Linux 2 AMI (HVM), SSD Volume Type
Step 2: Choose an Instance Type
Select t2.micro
Click on Next: Configure Instance Details
Step 3: Configure Instance Details
Leave it default settings
Click on Next: Add Storage
Step 4: Add Storage
Leave it default settings
Click on Next: Add Tags
Step 5: Add Tags
Click on Add Tag
- Key:
Name - Value:
MyEC2Server
Click on Next: Configure Security Group

Step 6: Configure Security Group
Select Create a new security group
- Security group name:
EC2WebServerSG - Description :
Security Group for EC2 Web Server
For SSH:
- Source:
Custom(Allow specific IP address) orAnywhere(From ALL IP addresses accessible).
Click on Add Rule
For HTTP:
- Source:
Anywhere
For HTTPS:
- Source:
Anywhere
Click on Review and Launch


Step 7: Review Instance Launch
Click on Launch
Select Create a new key pair
Set up the key pair name ec2
Click on Download Key Pair
See the left bottom of the screenshot, we have the file named ec2.pem
Click on Launch Instances
Click on View Instances
Waiting until the Instance state switch to Running
You can Click on Instance ID like i-095a9b2992ba8bf7d to see the instance detail.
Copy the public IP address
SSH into EC2 Instance
Open application Terminal on your MacBook
Go to your ec2.pem directory
e.g, my directory is ~/Downloads/cd ~/Downloads
Search for ec2.pemls | grep ec2.pem
SSH into your instance
the syntax should be ssh -i yourKeyPairName ec2-user@yourInstancePublicIpAddress
Press Enter
Type yes and press Enter
Access must be denied since the permission of ec2.pem is too open.
Now we need to lower the permission of ec2.pem
The current permission is -rw-r--r-- which means 0644.ls -l | grep ec2.pem
r: read - 4w: write - 2x: execute - 1 (not show on this file now)-: None - 0

Lower it permission to 0400 which means -r--------chmod 0400 ec2.pem
See its permission again.ls -l | grep ec2.pem
Try to SSH into your EC2 instance againssh -i yourKeyPairName ec2-user@yourInstancePublicIpAddress
Now we log into the the server.
Install an Apache Server
Switch to root user: sudo -s
Notice the difference
Now run the updates using the following command:yum -y update
Once completed, lets install and run an apache server
Install the Apache web server:yum install httpd
When prompted, Press “Y” to confirm.
Start the web serversystemctl start httpd
Now enable httpd:systemctl enable httpd
Check the webserver statussystemctl status httpd
You can see Active status is running.
You can test that your web server is properly installed and started by entering the public IP address of your EC2 instance in the address bar of a web browser. If your web server is running, then you see the Apache test page. If you don’t see the Apache test page, then verify whether you followed the above steps properly and check your inbound rules for the security group that you created.
Create and publish page
Navigate to the html folder where we will create a HTML page to test.cd /var/www/html/
Create a sample test.html file using nano editor:
vime test.html
<HTML> Hi Whizlabs, I am a public page </HTML>

Restart the web server by using the following command:systemctl restart httpd
Now enter the file name after the public IP which you got when you created ec2 instance in the browser, and you can see your HTML content.
Input your instance public IP address with the path test.html on your browser
for example, 3.82.192.250/text.html
Allocating Elastic IP Address
Service -> EC2 -> Elastic IPs
To use an Elastic IP address, you need to allocate one to your account and then associate it with your instance or a network interface.
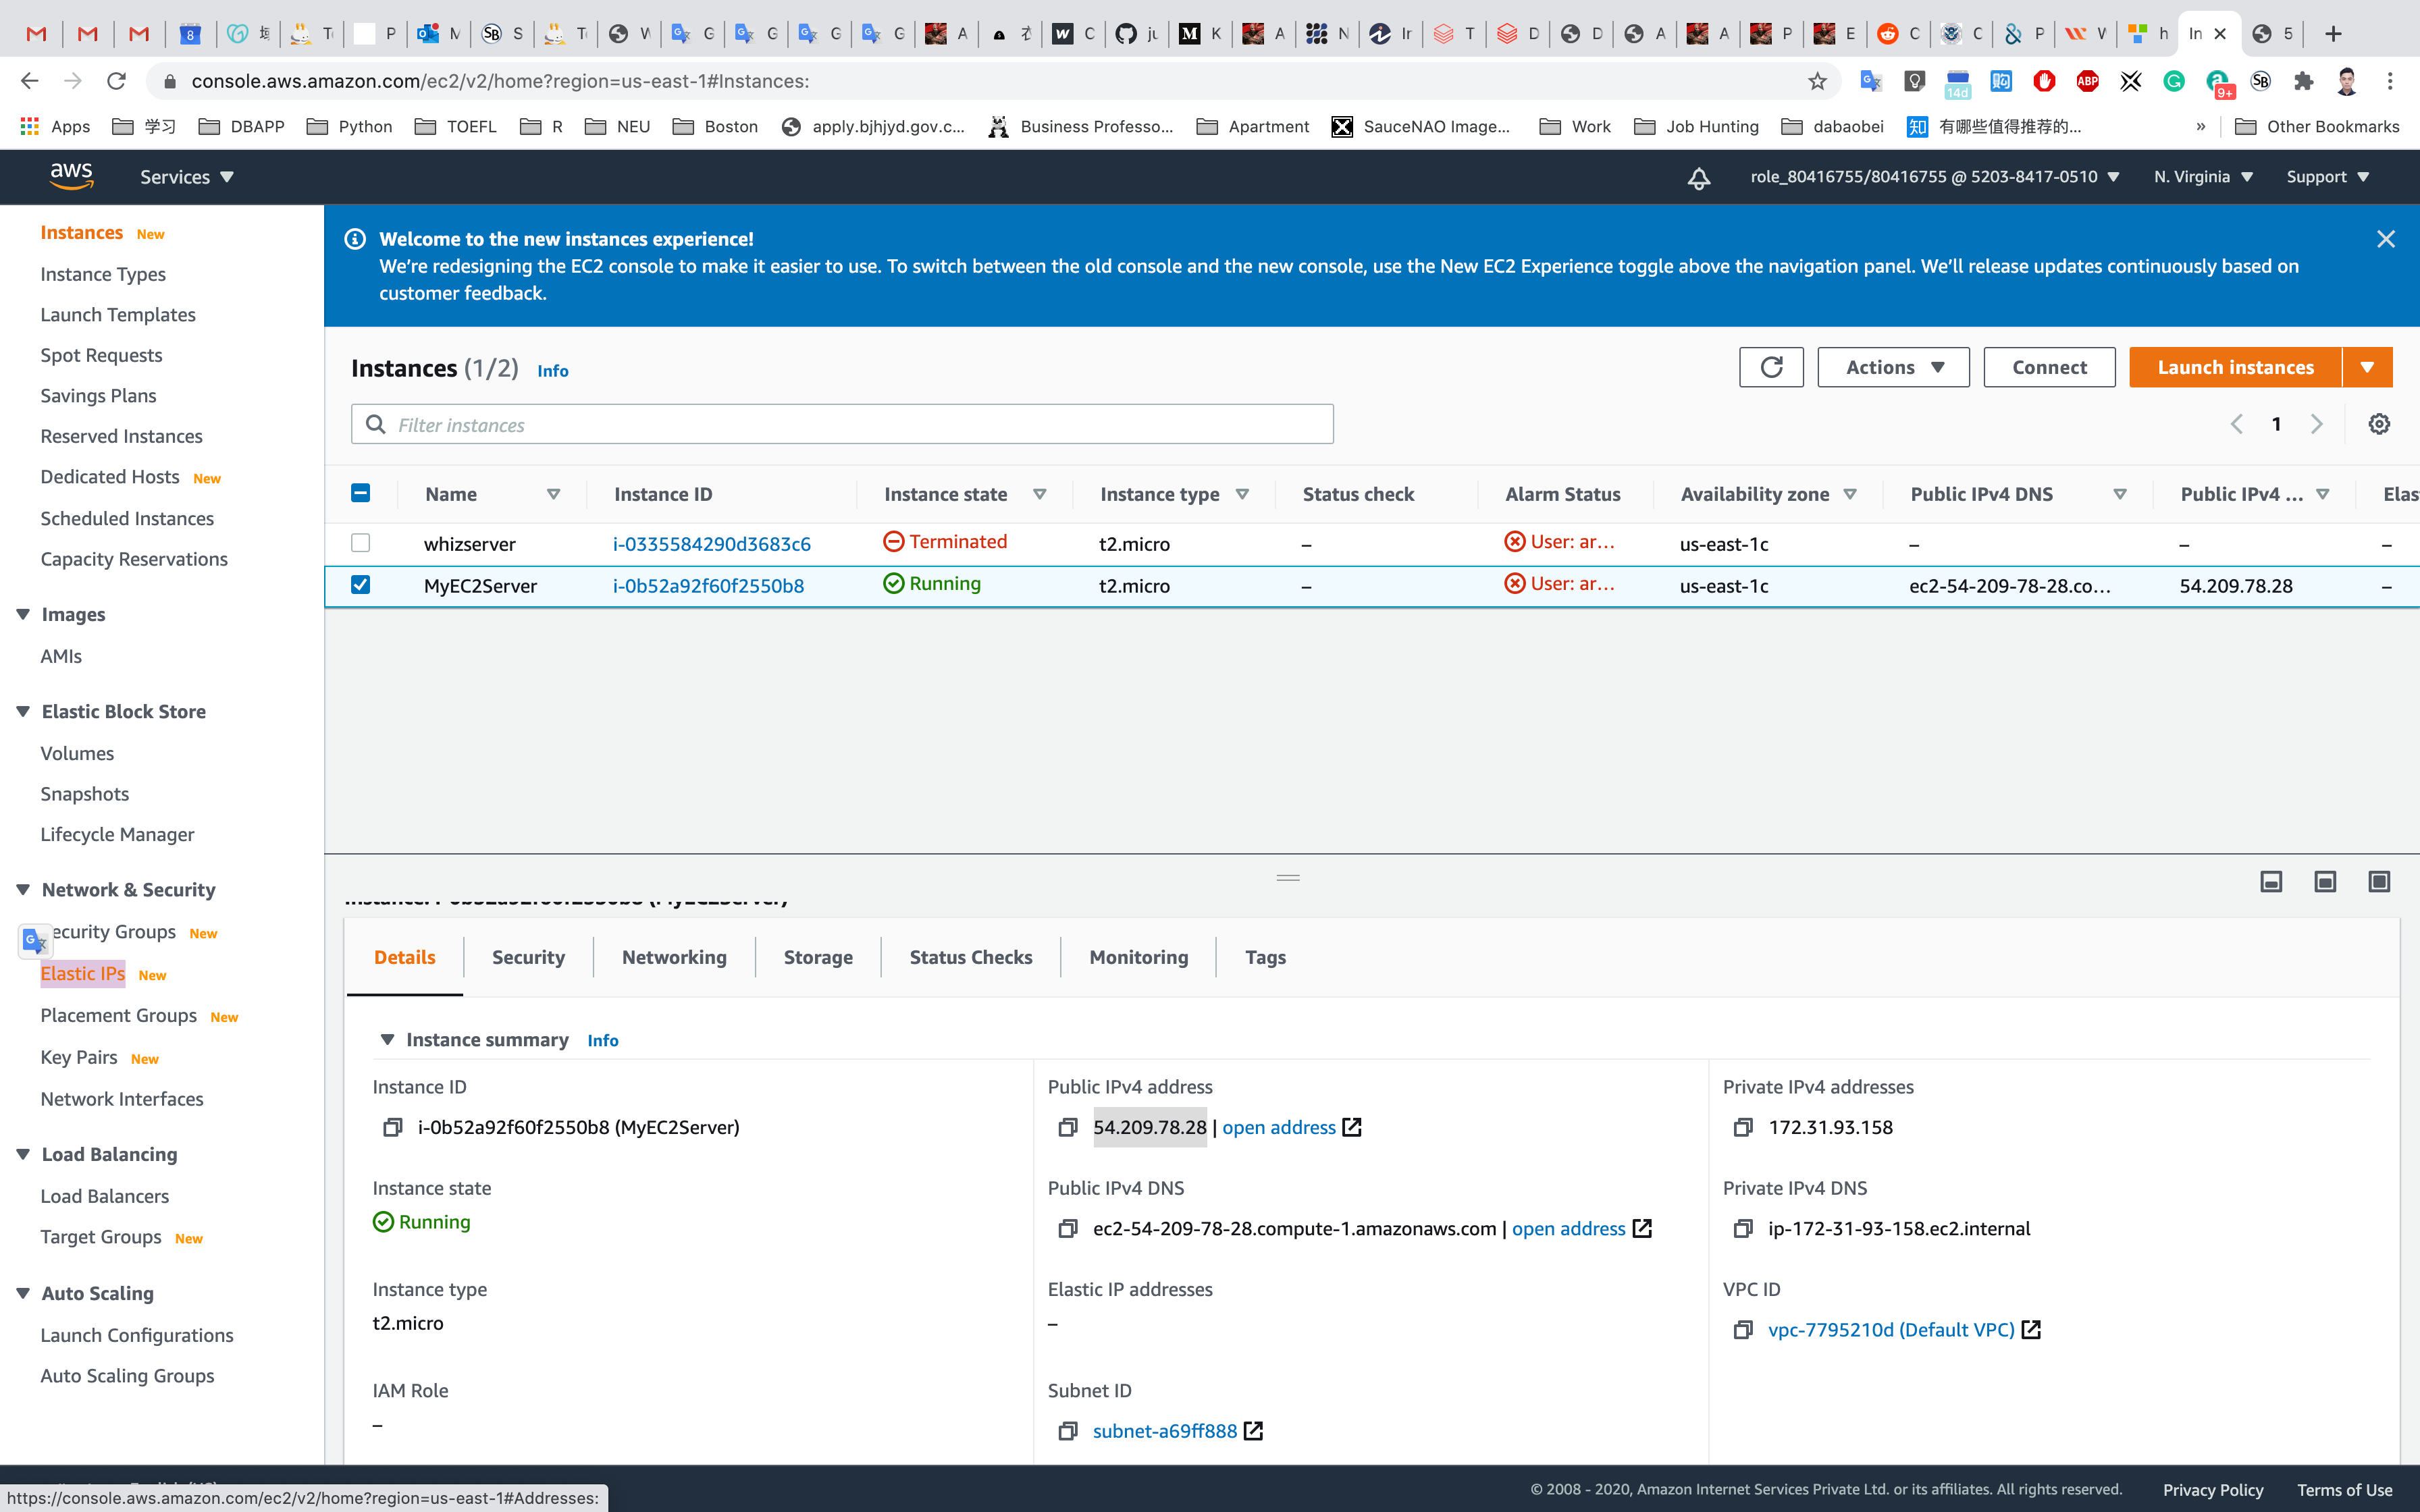
Click on Associate Elastic IP address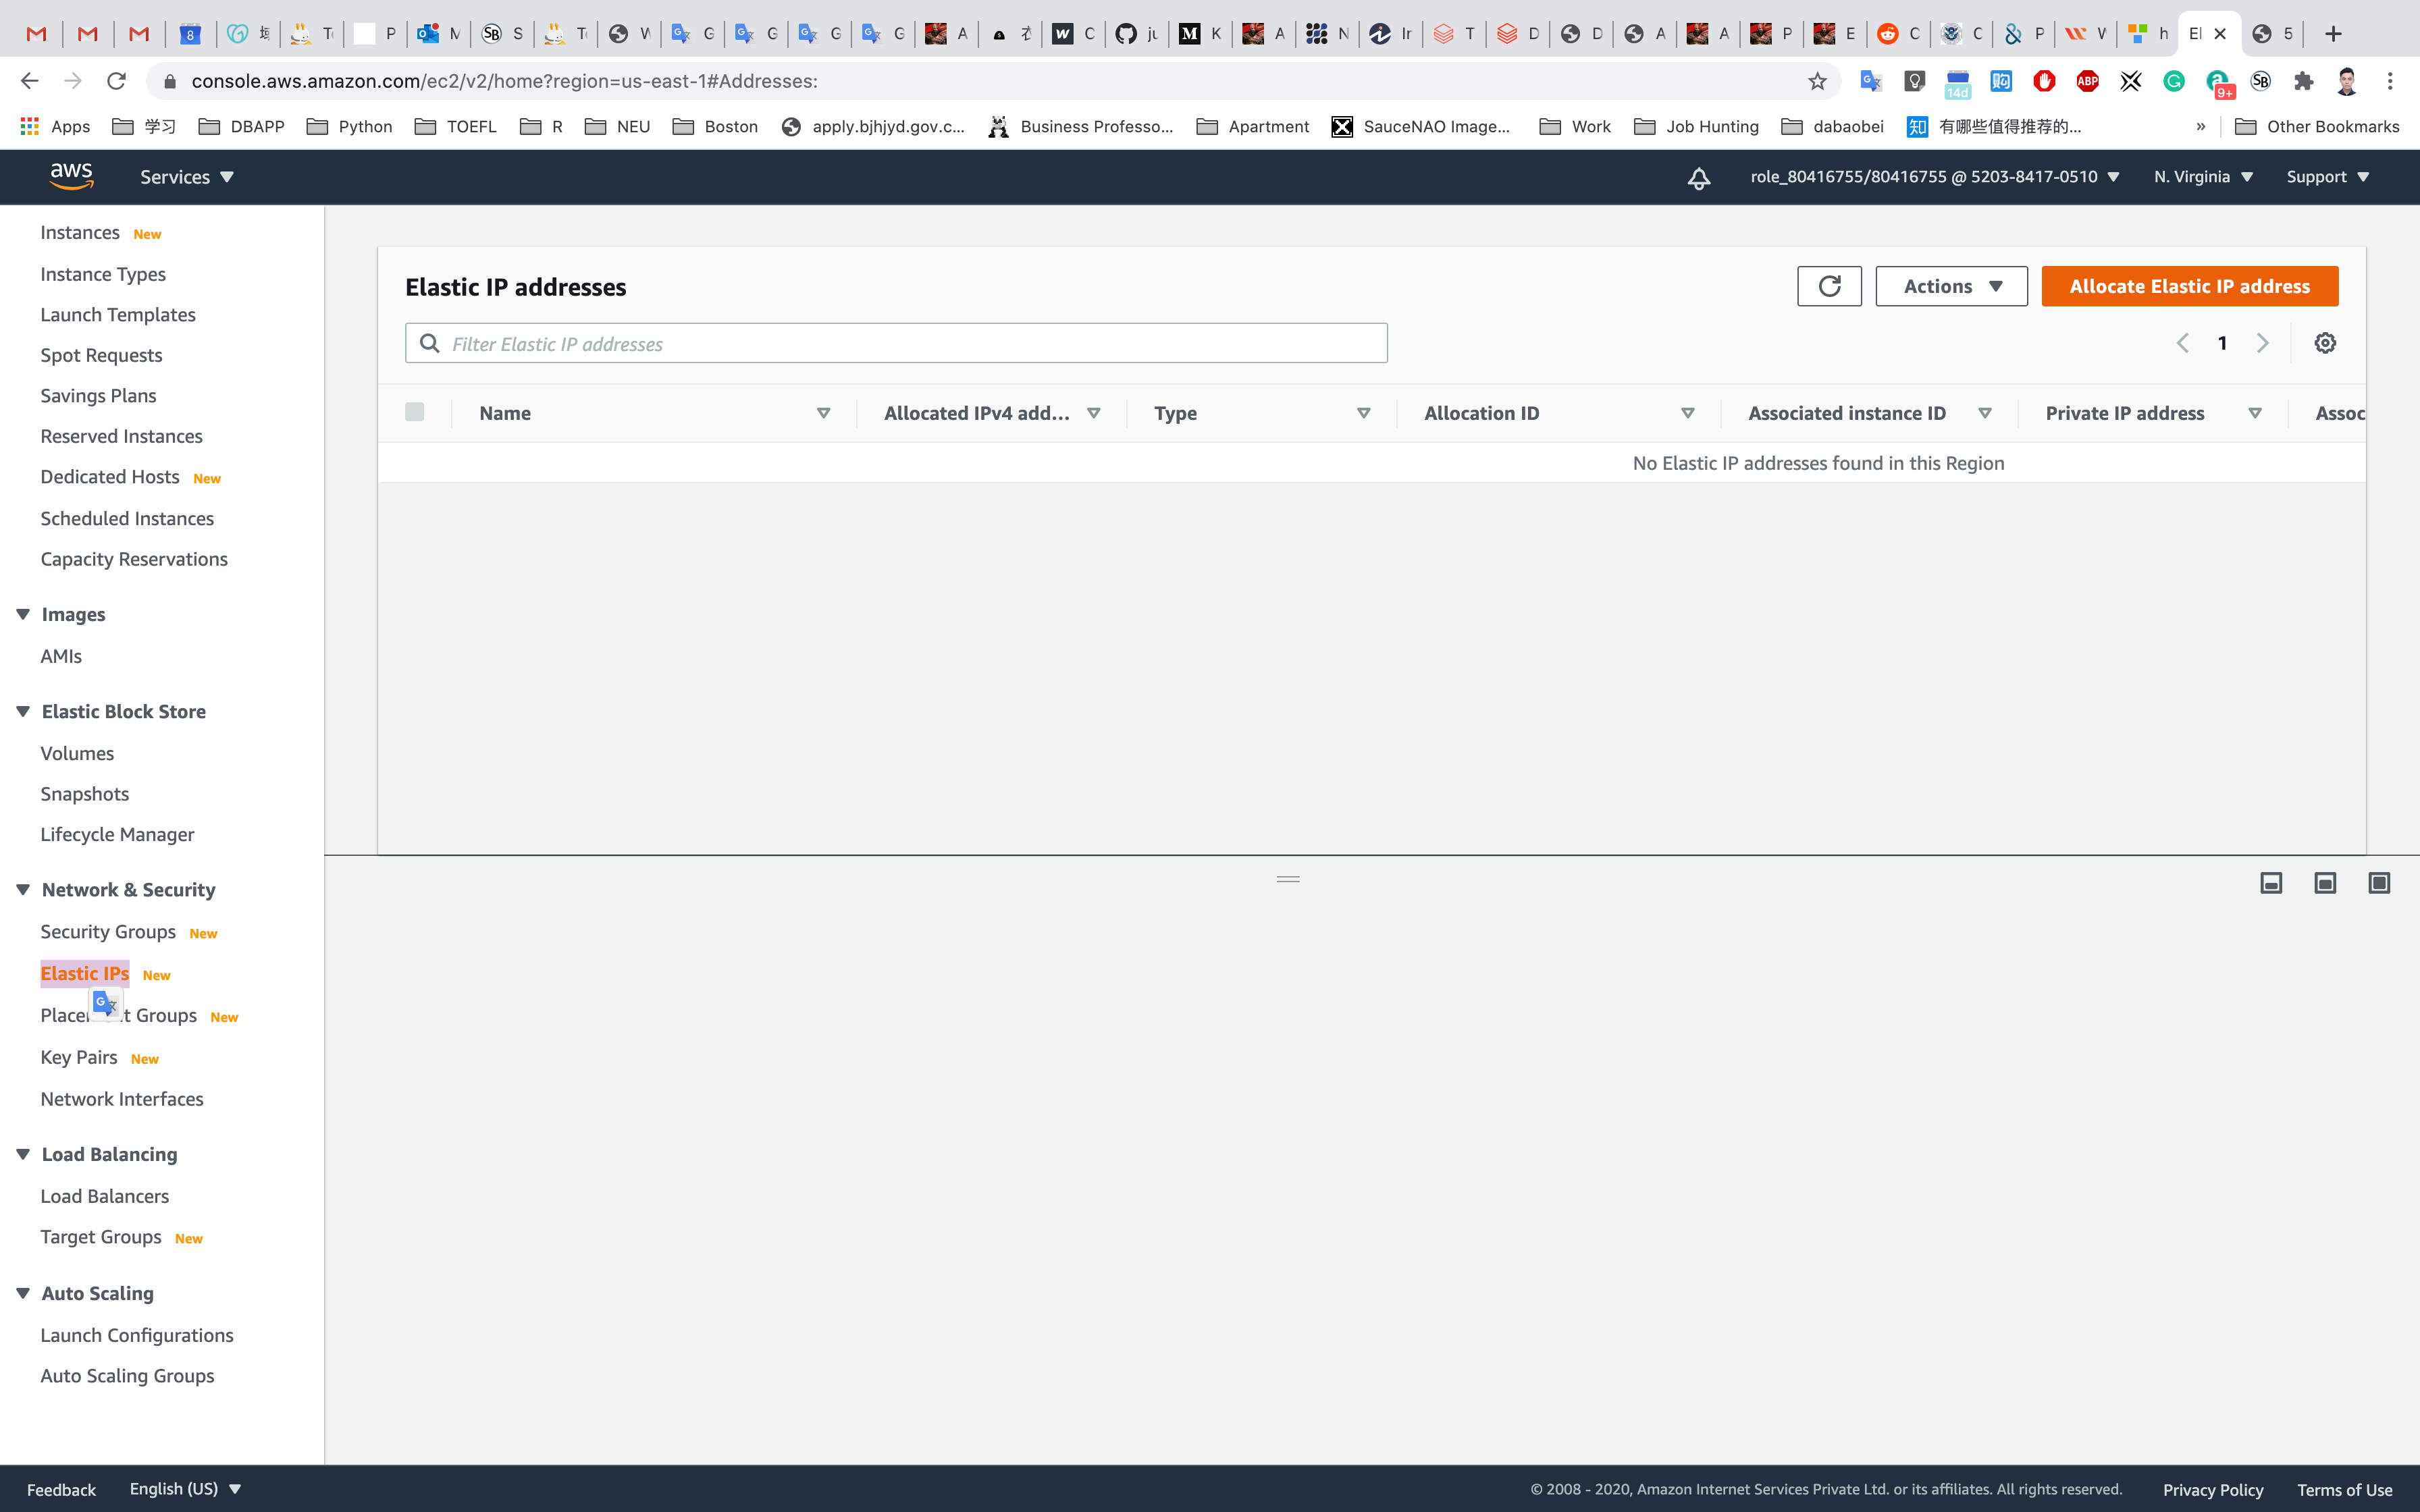
Click on Allocate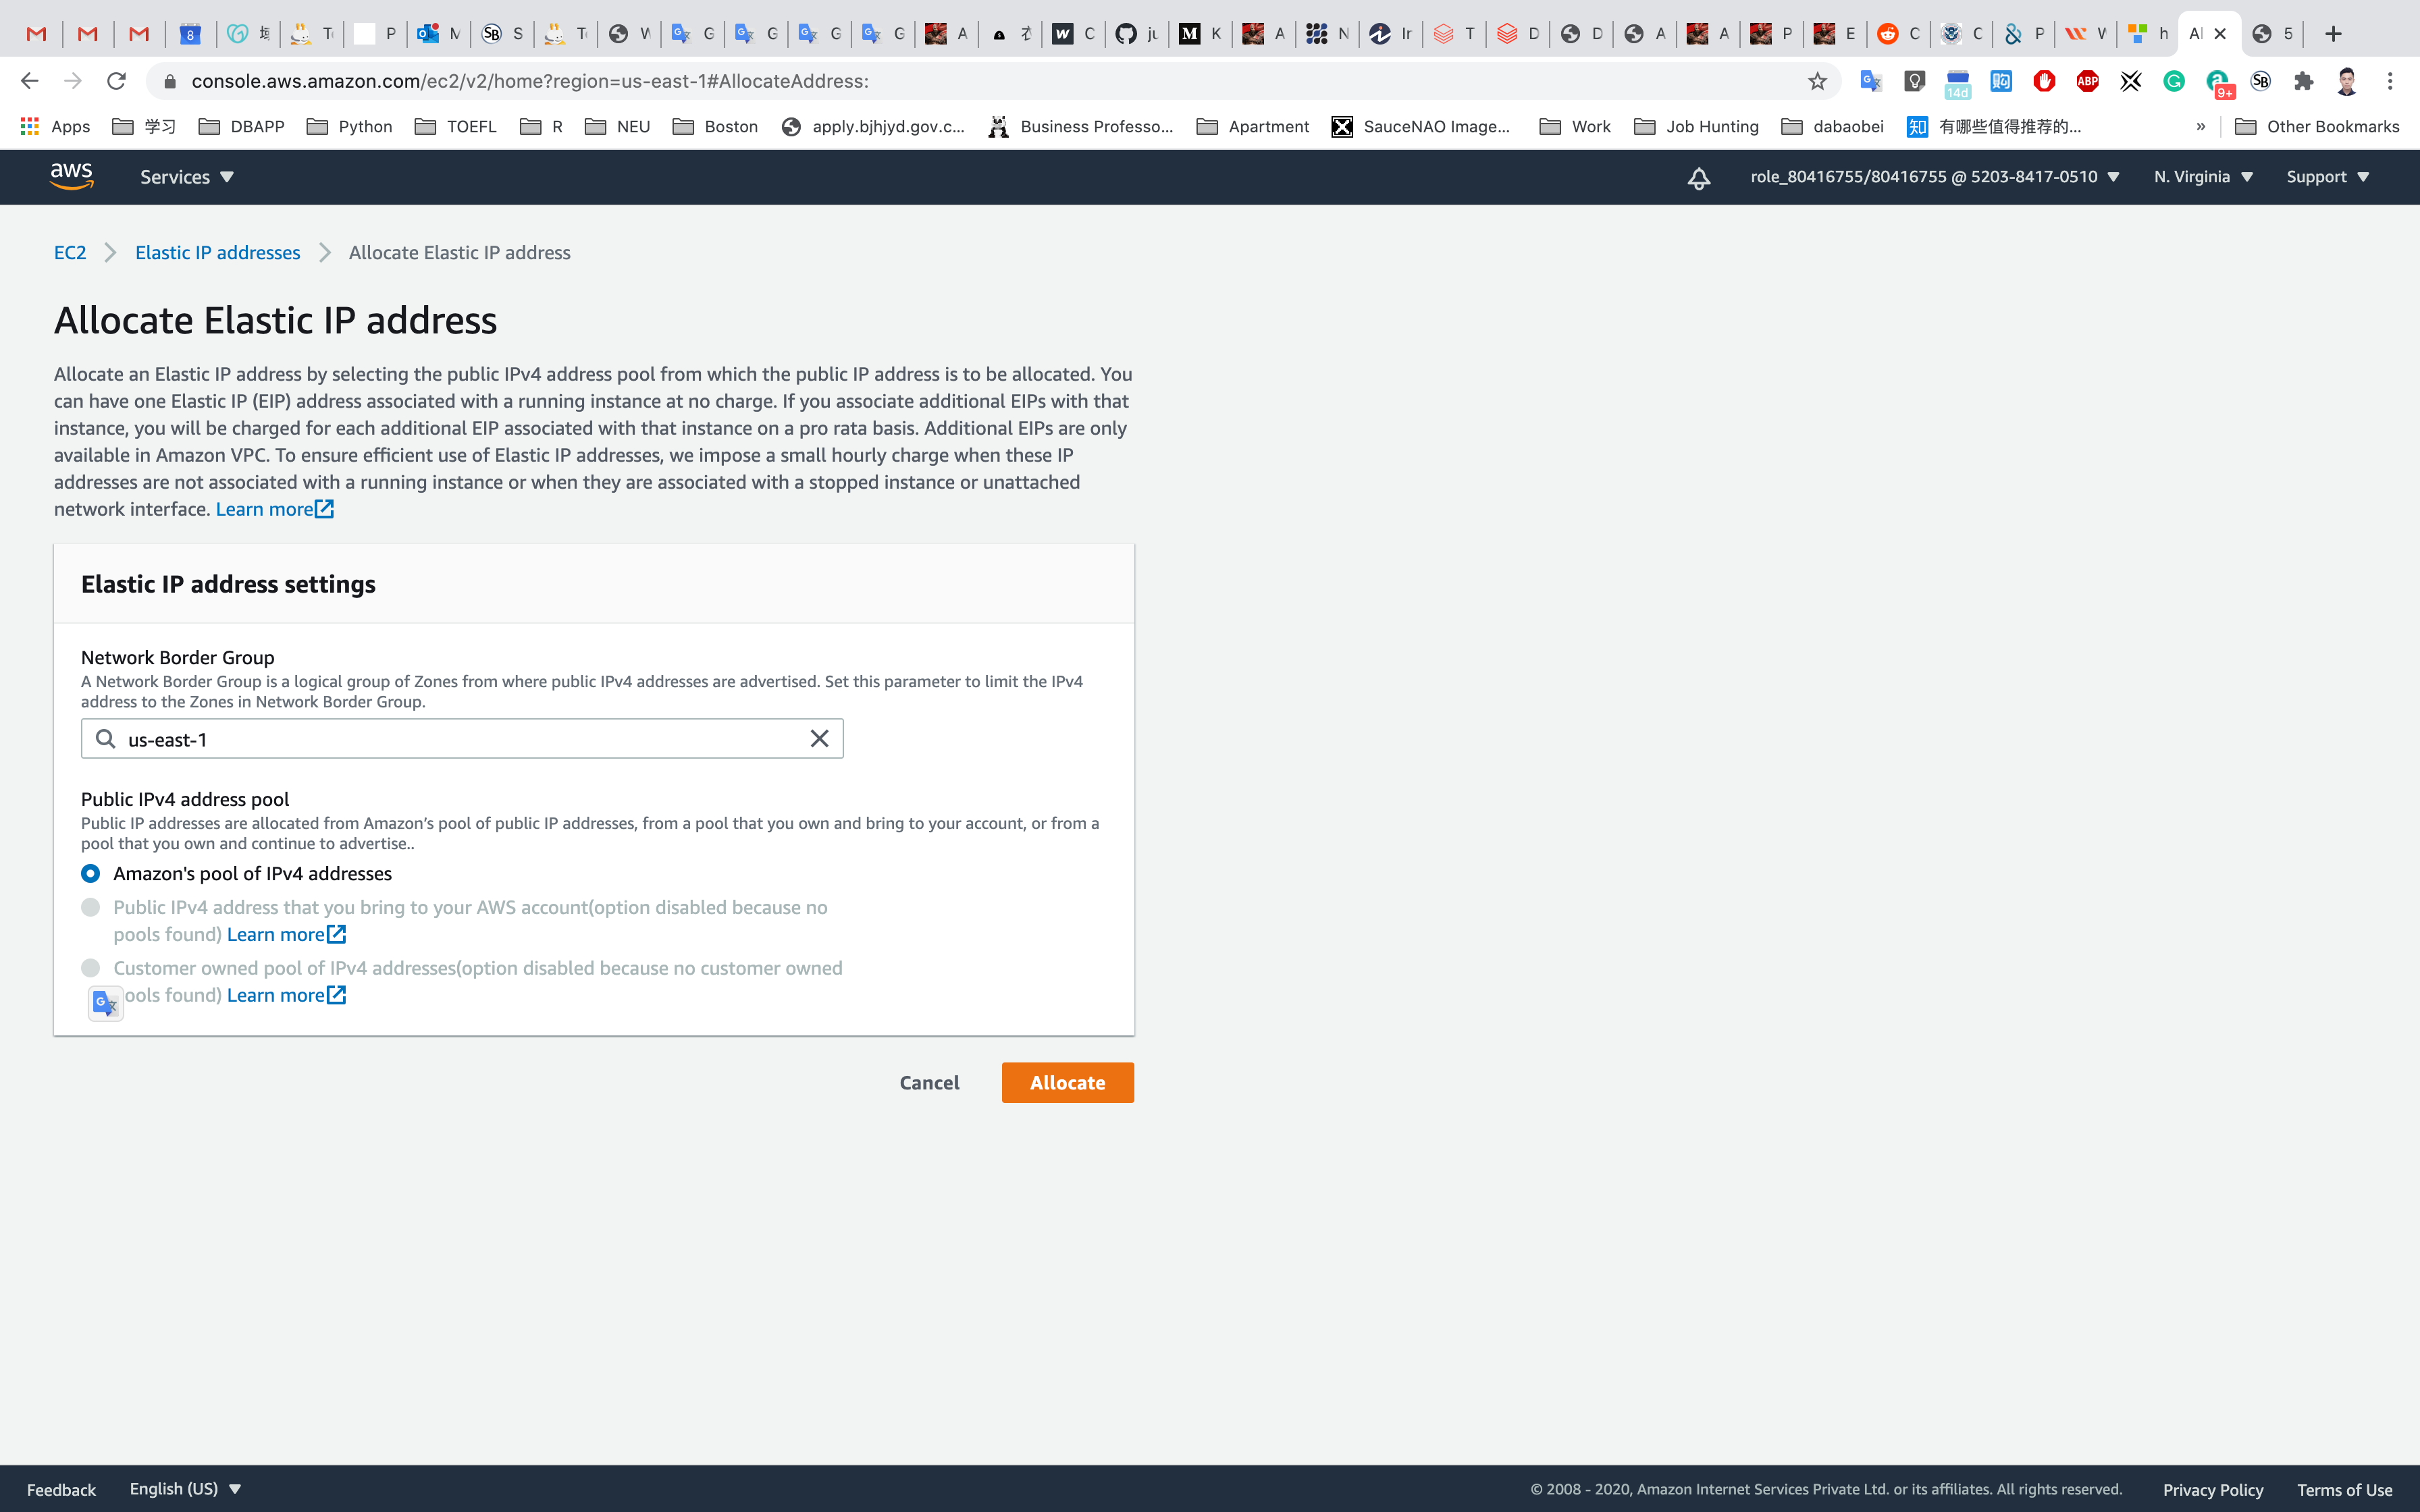
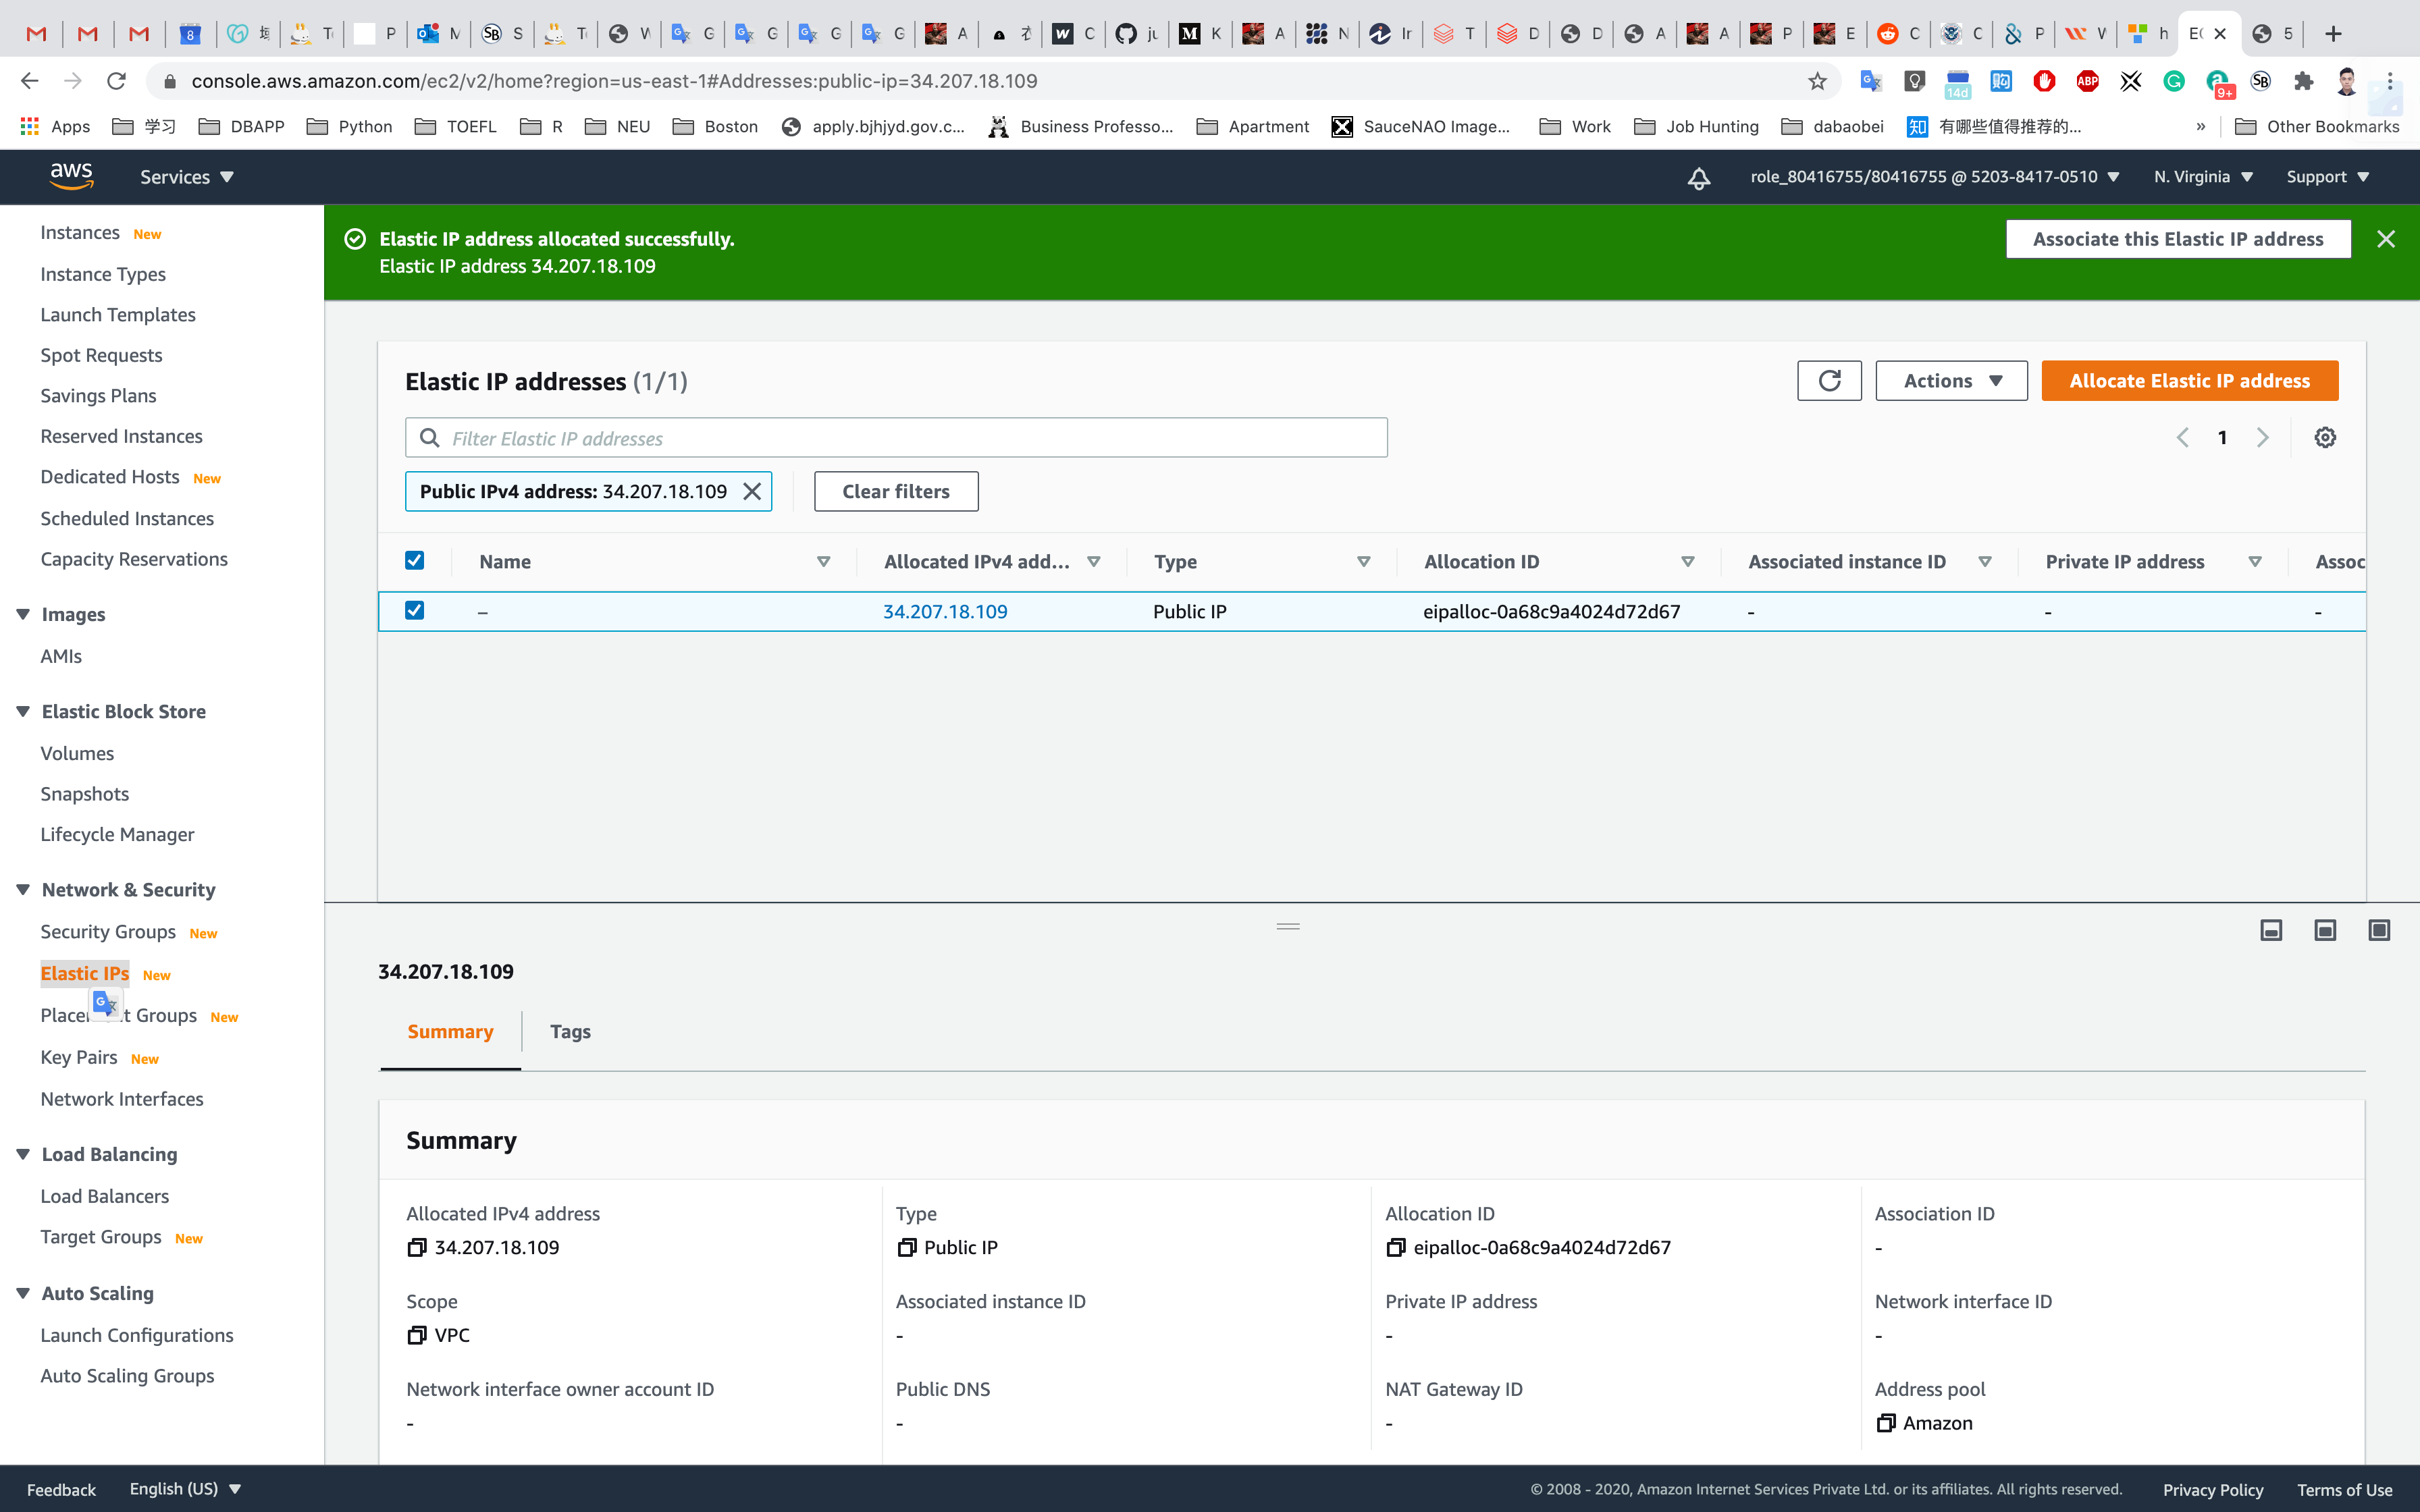
Associating an Elastic IP Address with a Running Instance
Service -> EC2 -> Elastic IPs
Select the Elastic IP address created and click on Actions. Click on Associate Elastic IP address.
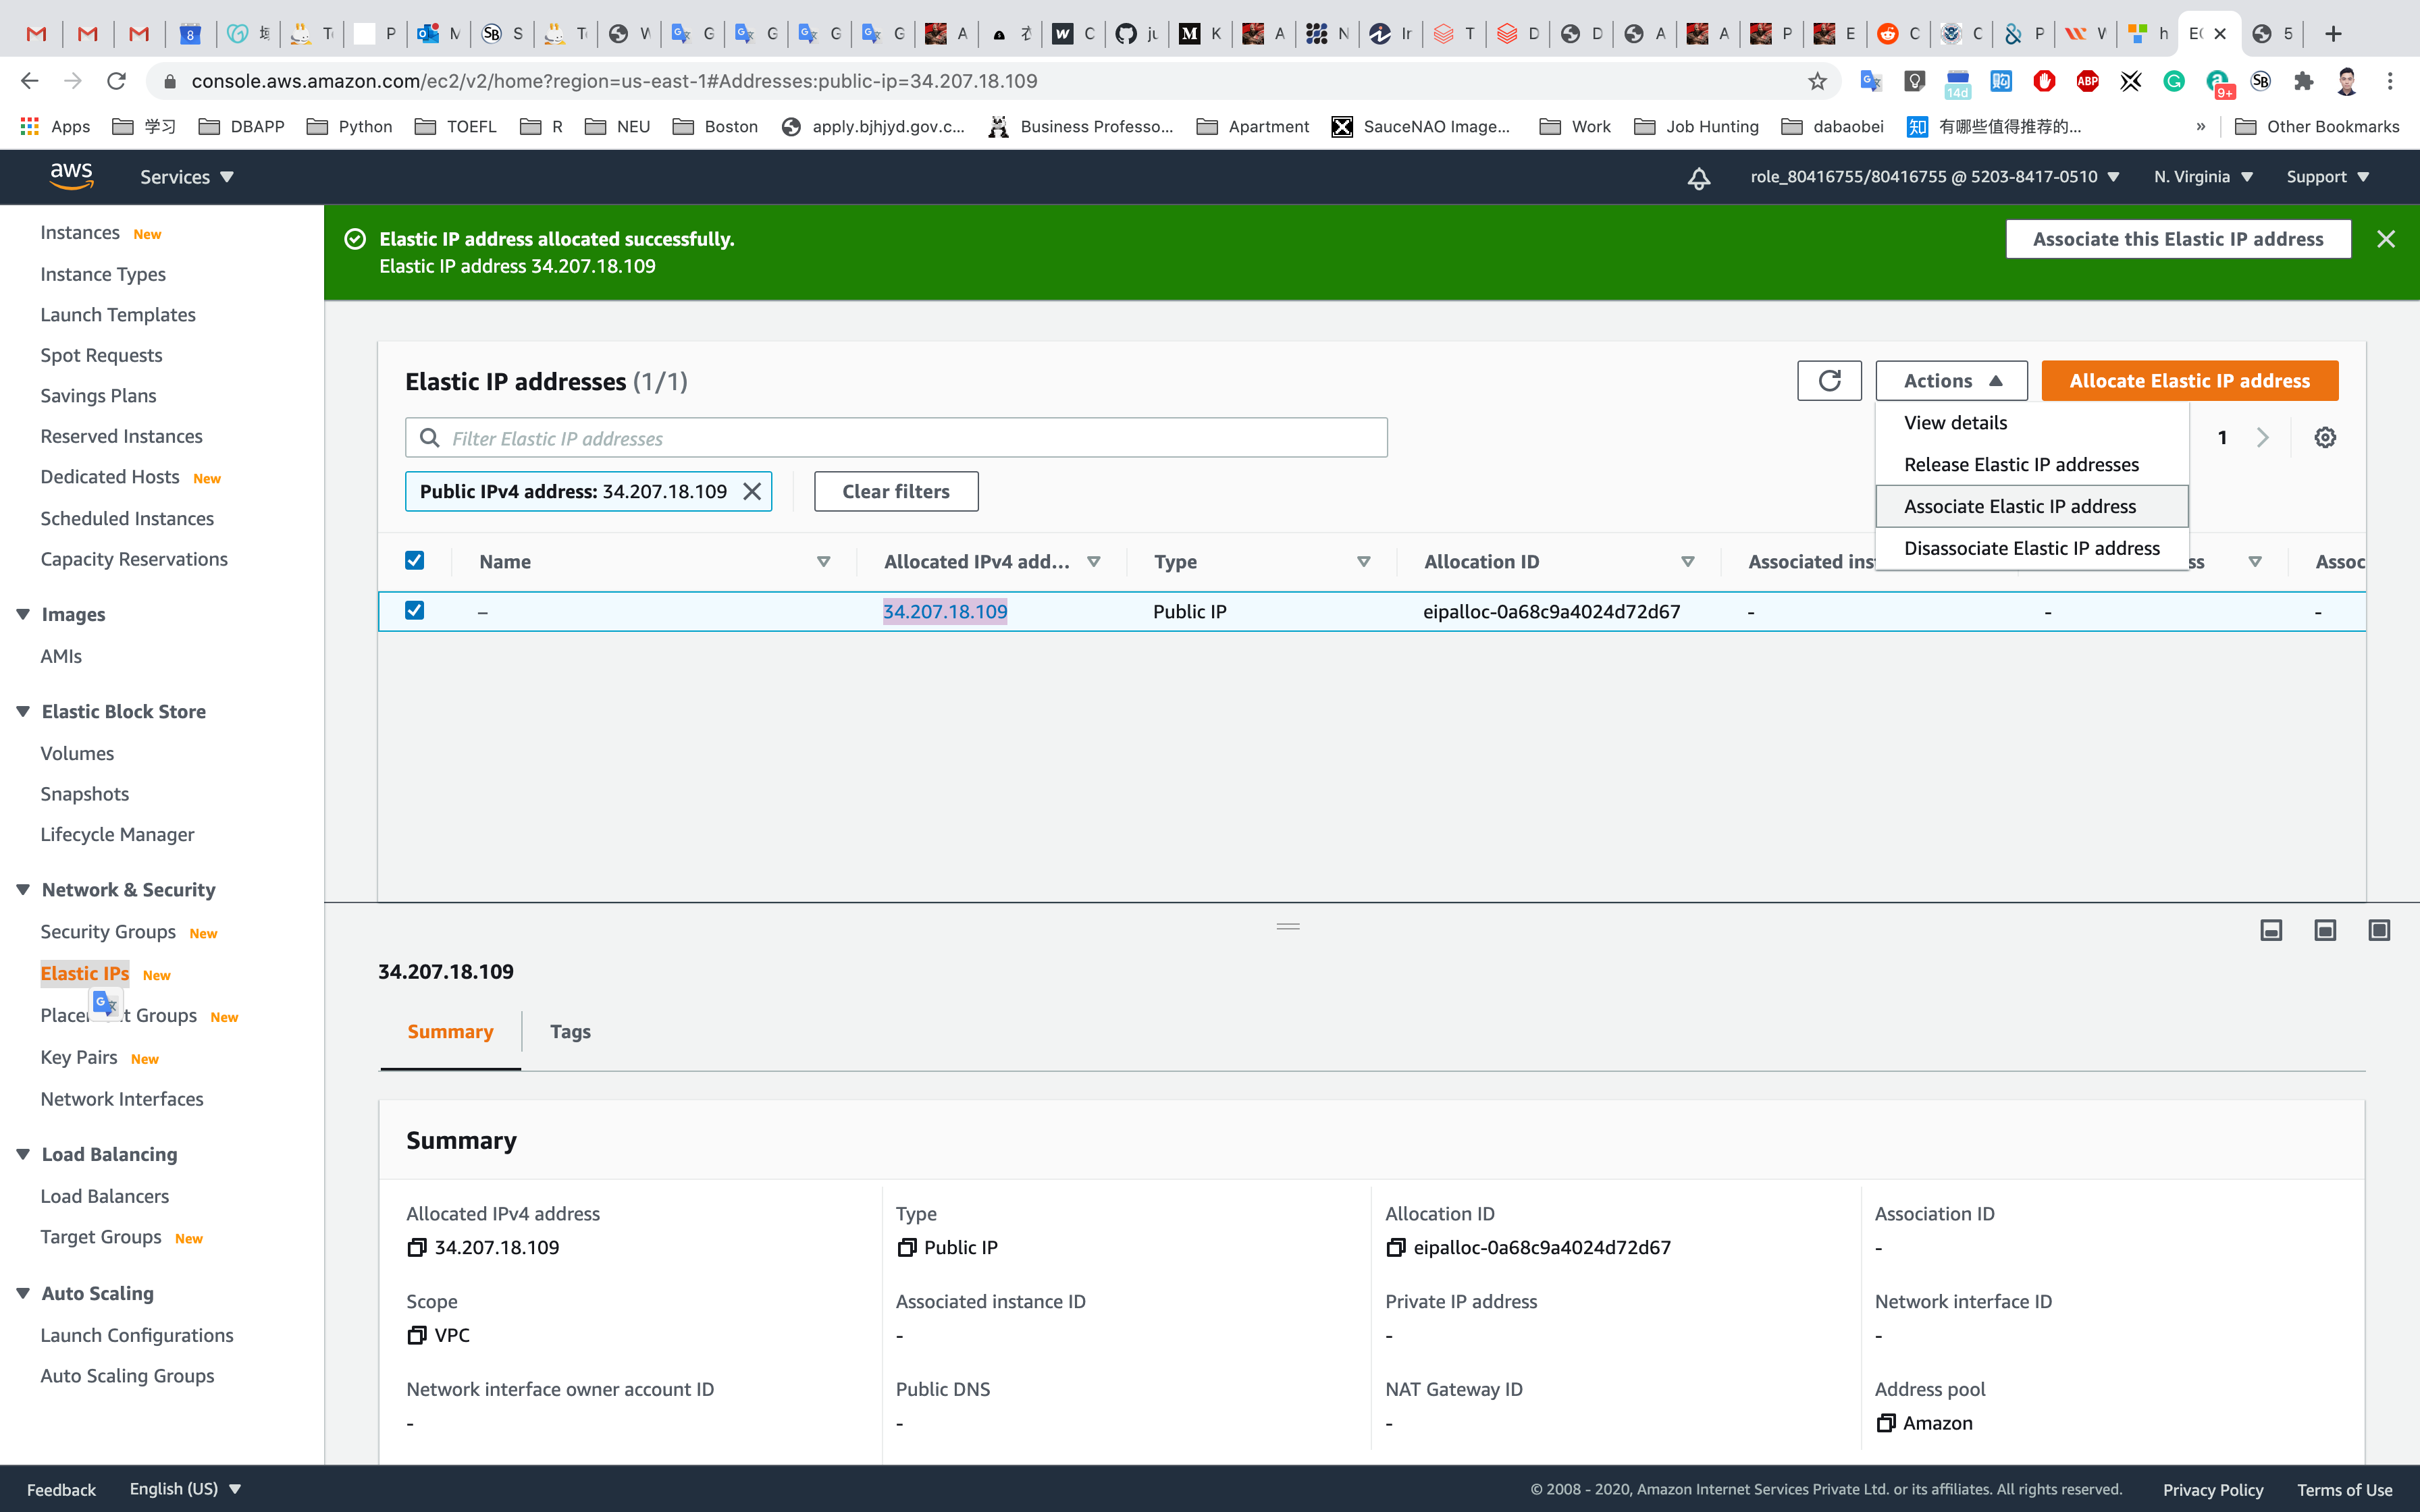
Associate Elastic IP address
- Resource Type: Click on
instance - Choose your instance in the drop down below as shown below.
- Leave default values for the remaining fields and click on Associate.
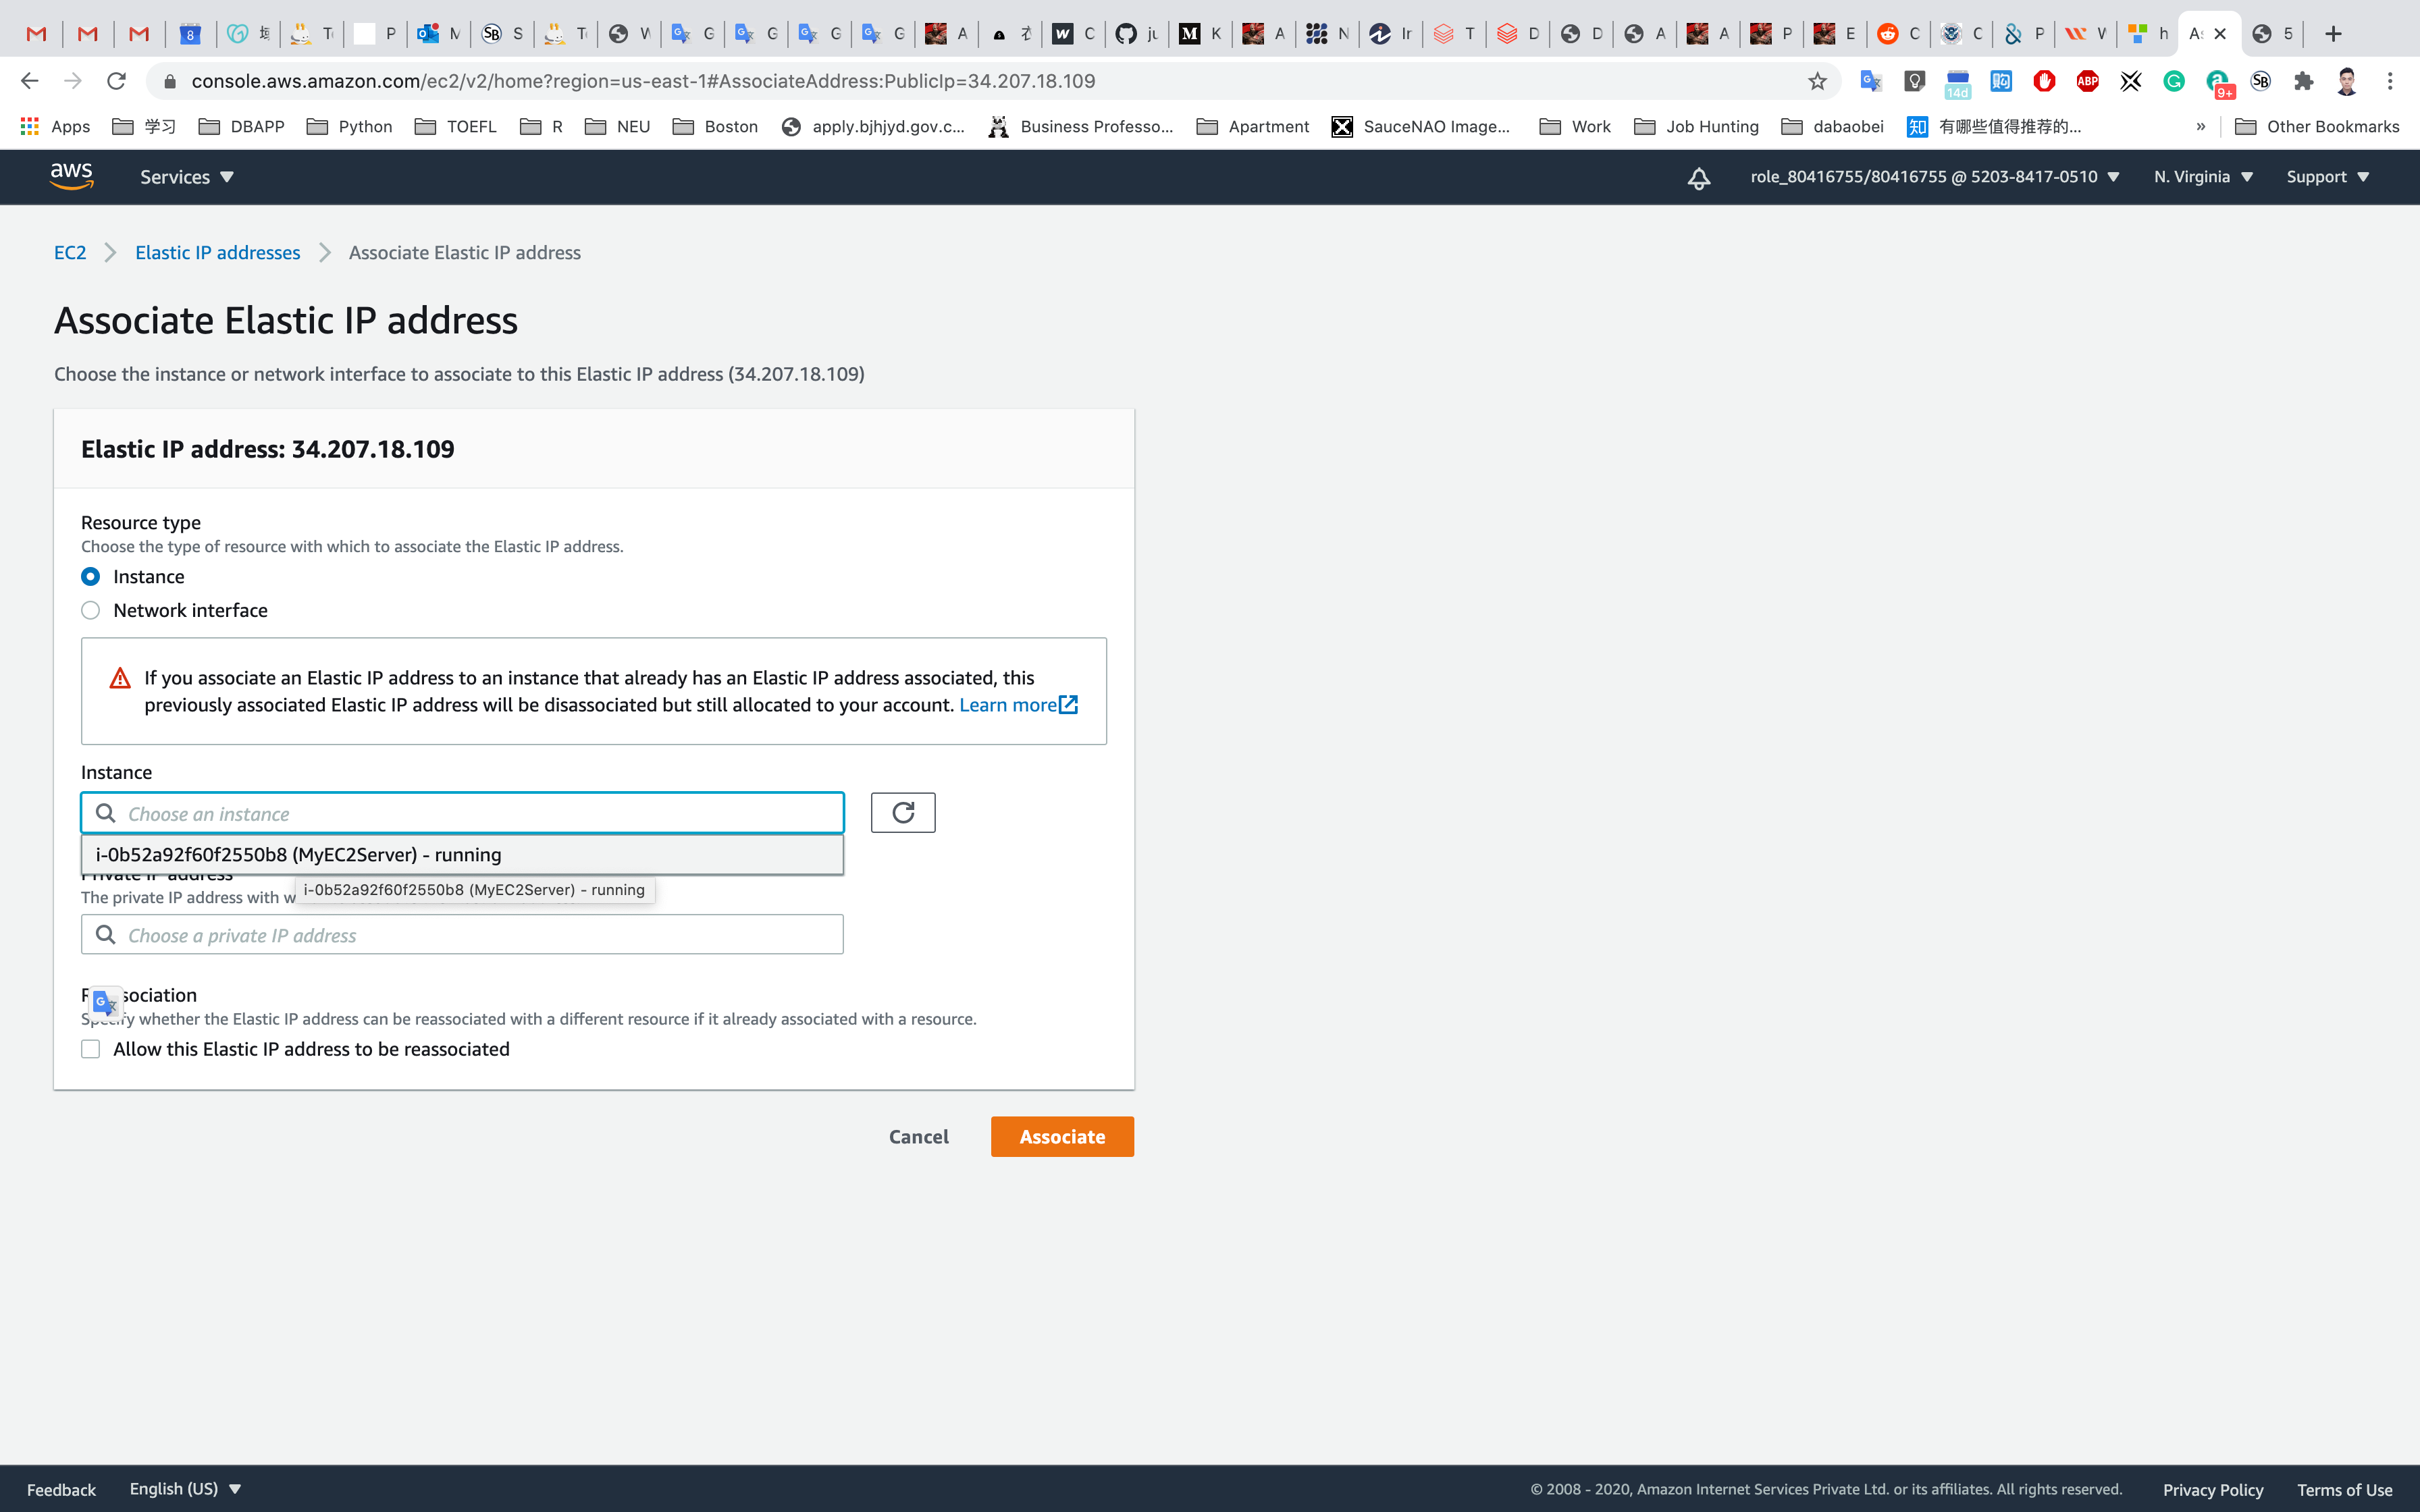
Click on Associate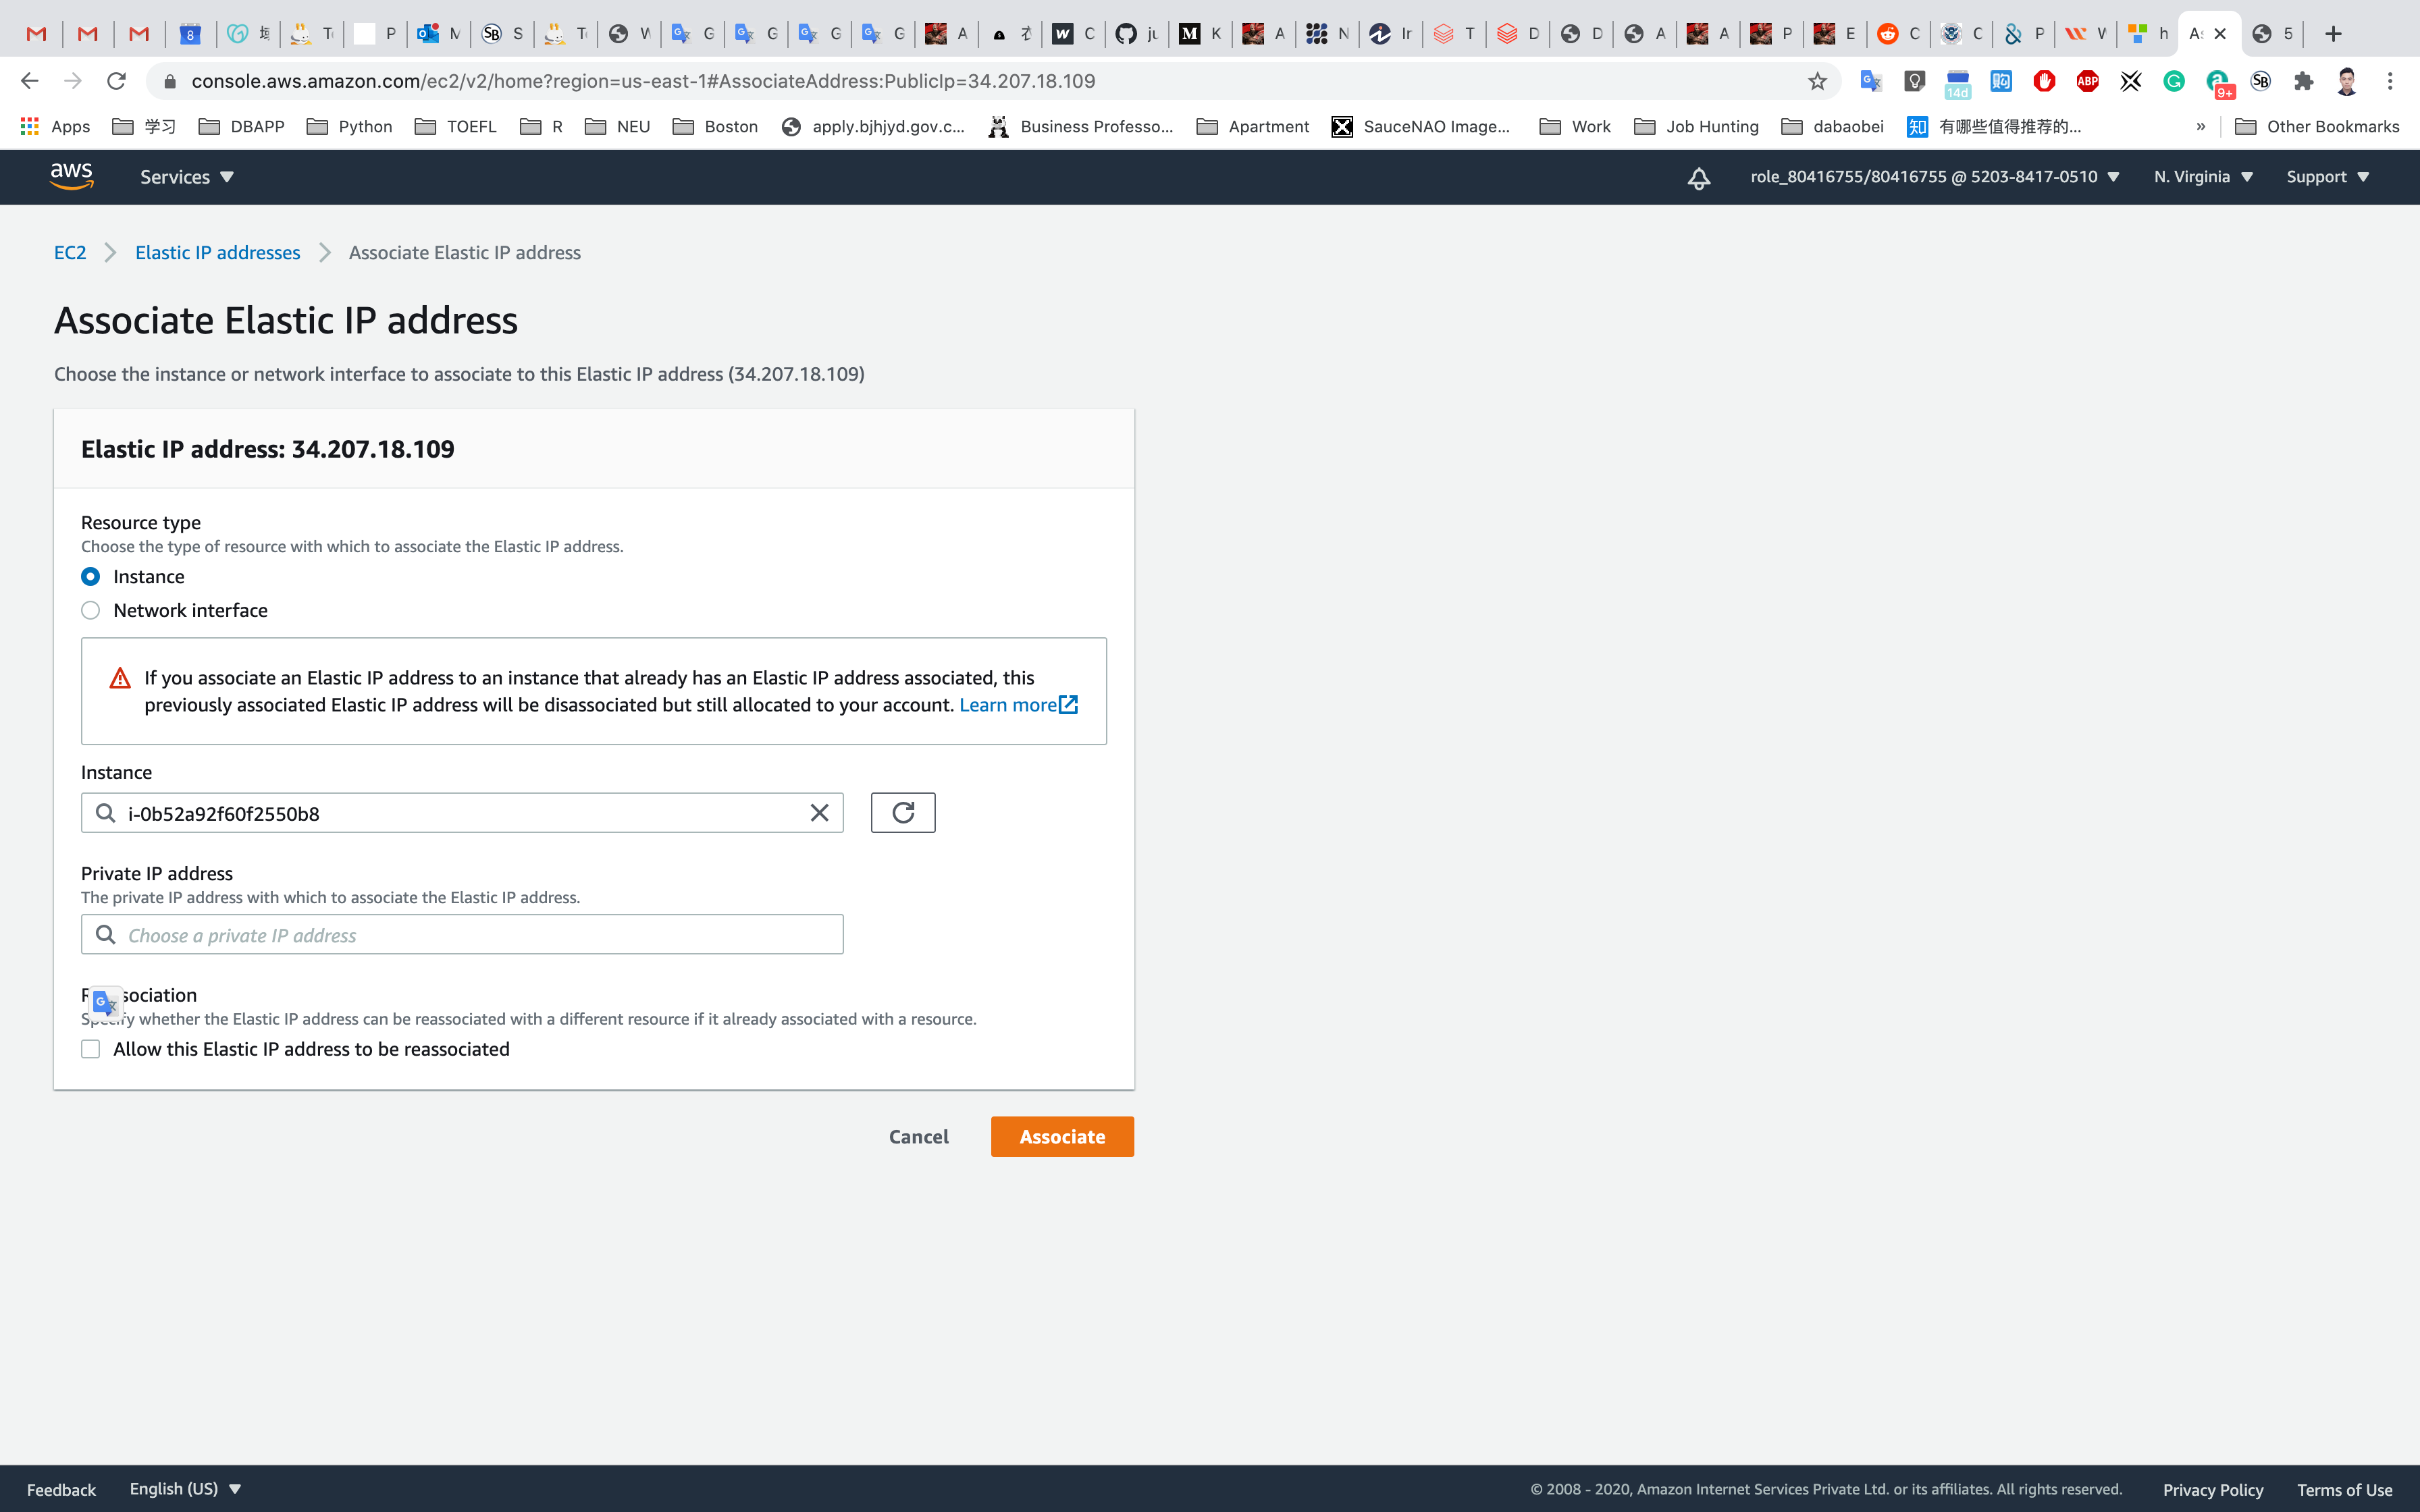
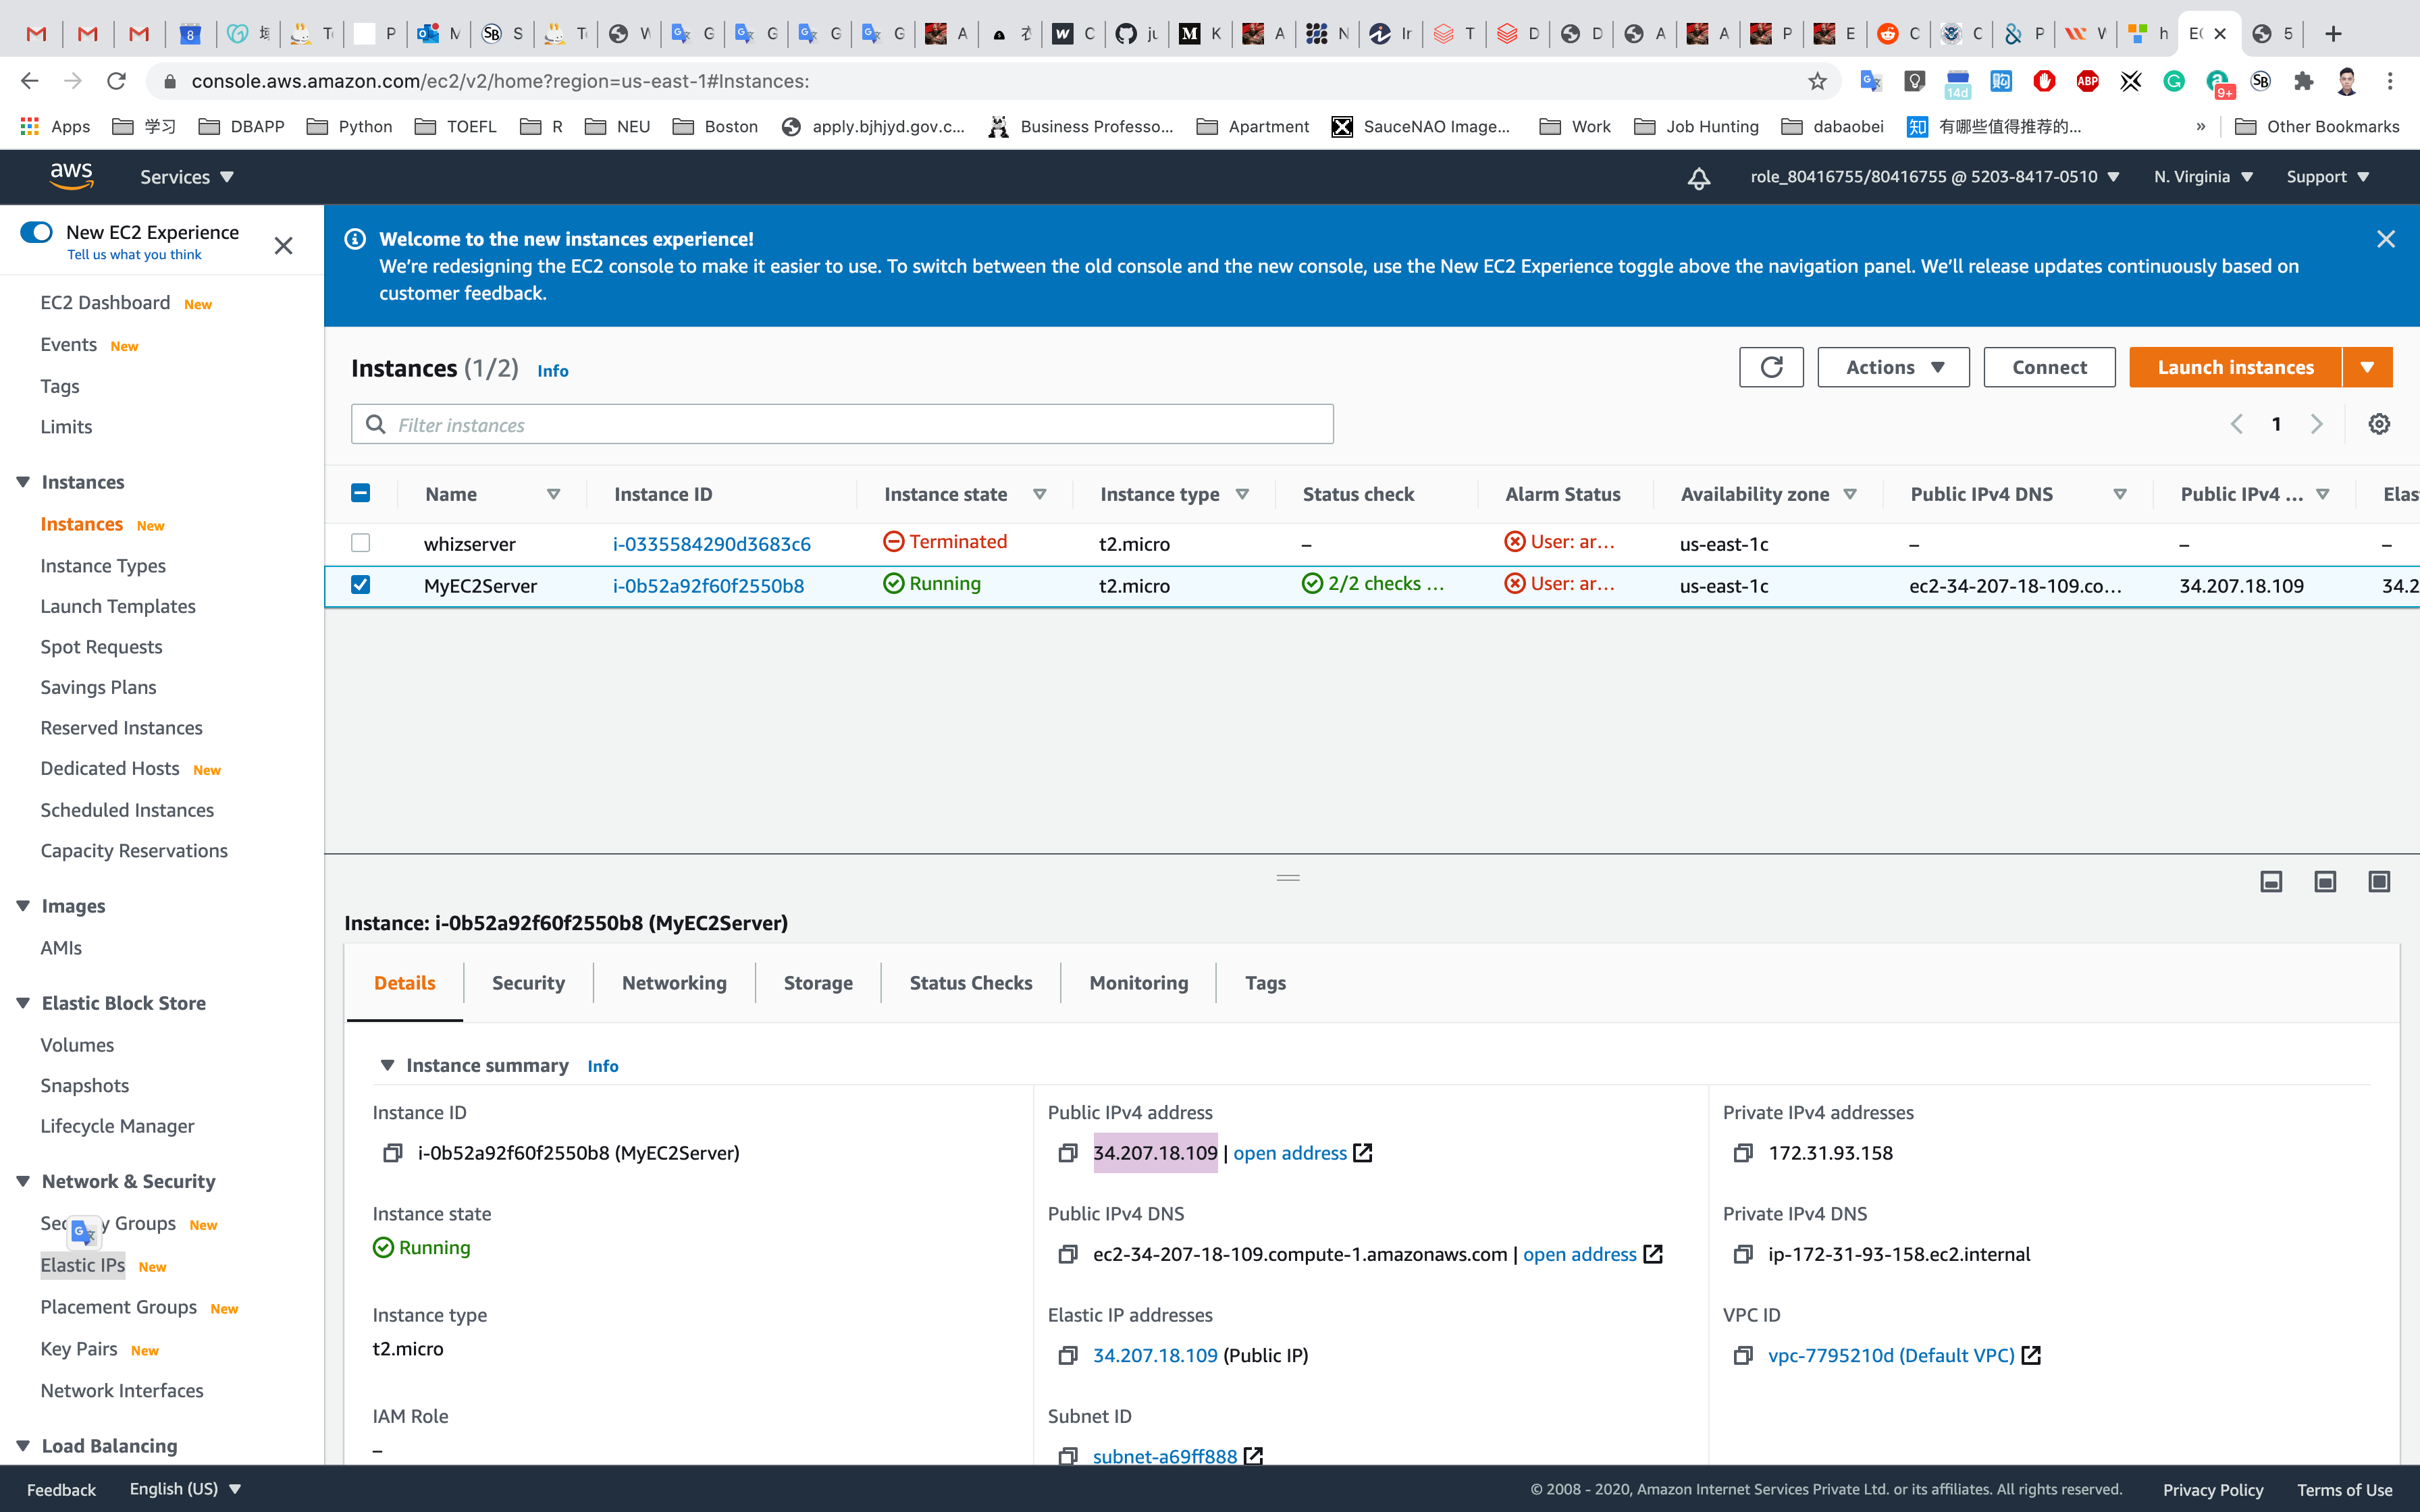
Now you can see that the instance is associated with the Elastic IP address.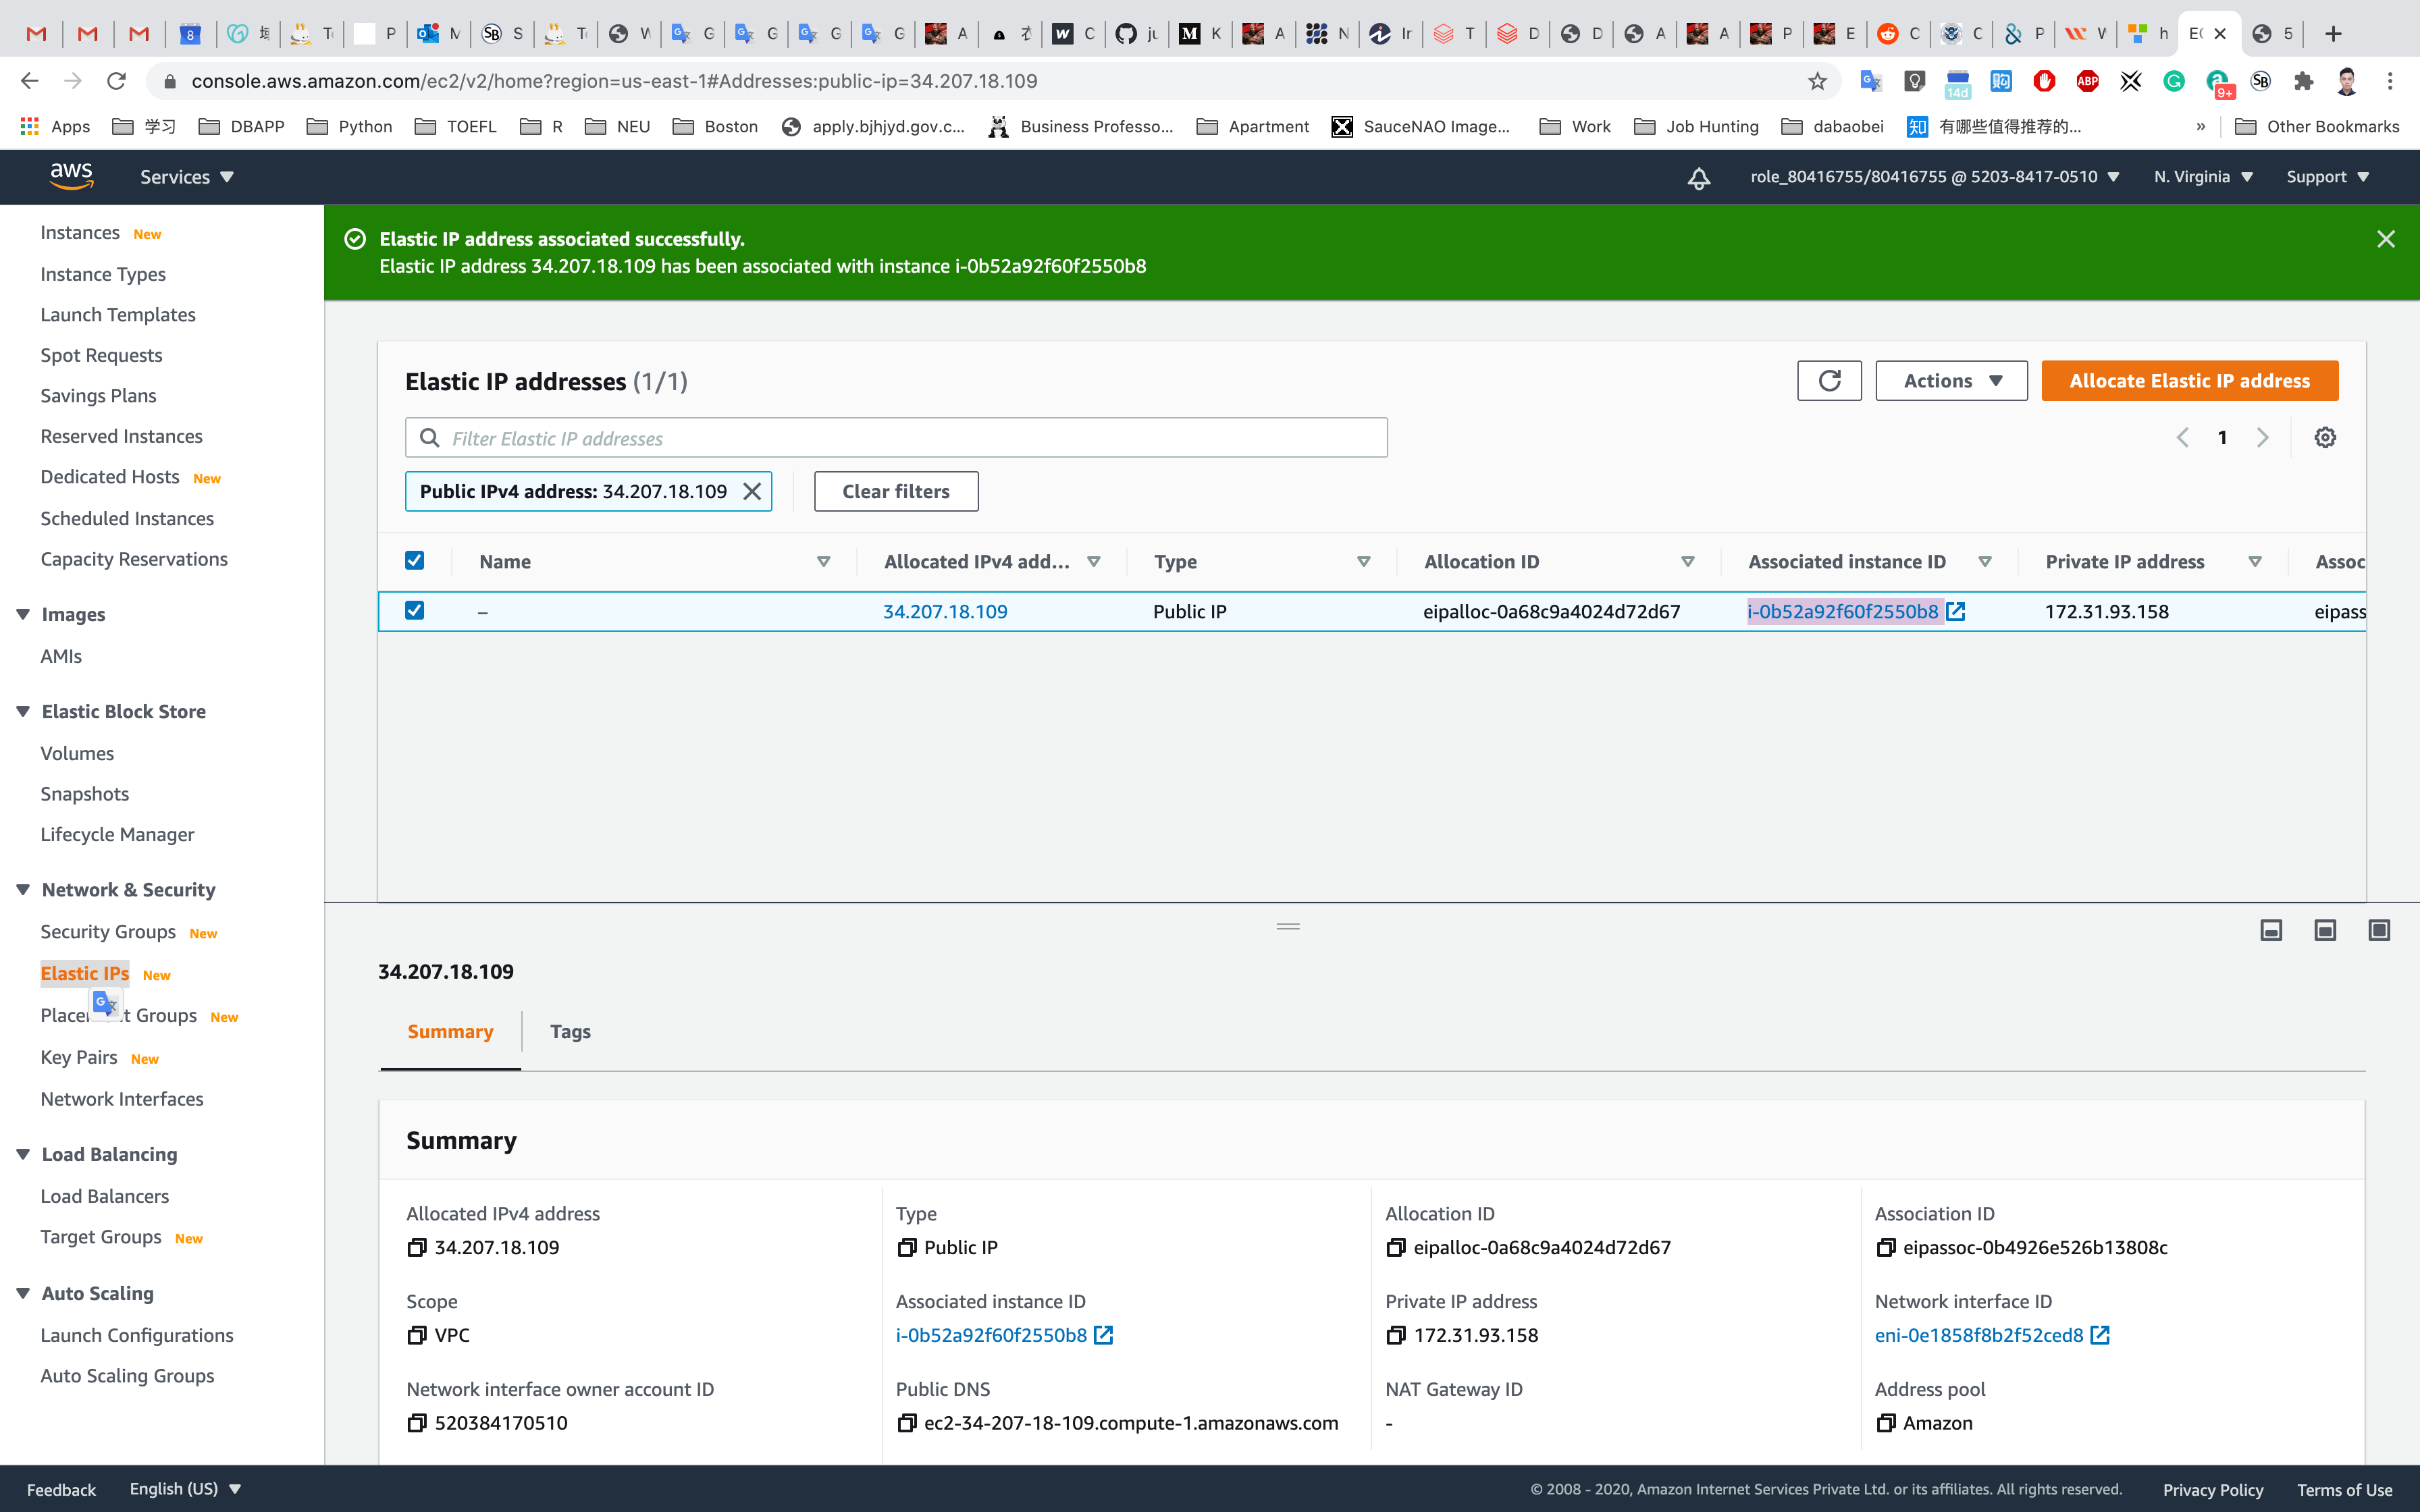
Go to the EC2 Instance and check the IPv4 Public IP and it should be the same as Elastic IP.
Validation Test
Input your instance public IP address with the path test.html on your browser
for example, 3.82.192.250/text.html
Check the website
Old IP address allocated by system when you creating a new EC2 instance, which we test before associating new website
New IP address allocated by yourself and associated by you to your EC2 instance
Completion and Conclusion
- You have successfully created and launched an EC2 Instance.
- You have logged into EC2 instance by SSH, installed Apache server and published a page.
- You have allocated an Elastic IP address and associated it to the running instance.
- You have checked the web page with Elastic IP address to make sure it works correctly.
Create EC2 Instance and Connect to a Windows machine using RDC
https://play.whizlabs.com/site/task_details?lab_type=1&task_id=80&quest_id=35
Lab Details
- This lab walks you through the steps to launch and configure a virtual machine in the Amazon cloud.
- You will practice using Amazon Machine Images to launch Windows EC2 Instance and connect it using Remote Desktop Connection(RDC)
Tasks
- Log into AWS Management Console.
- Create an Amazon Windows Instance from Microsoft Windows Server
- Find your instance in the AWS Management Console.
- Connect your EC2 Instance using Remote Desktop Connection.
Architecture Diagram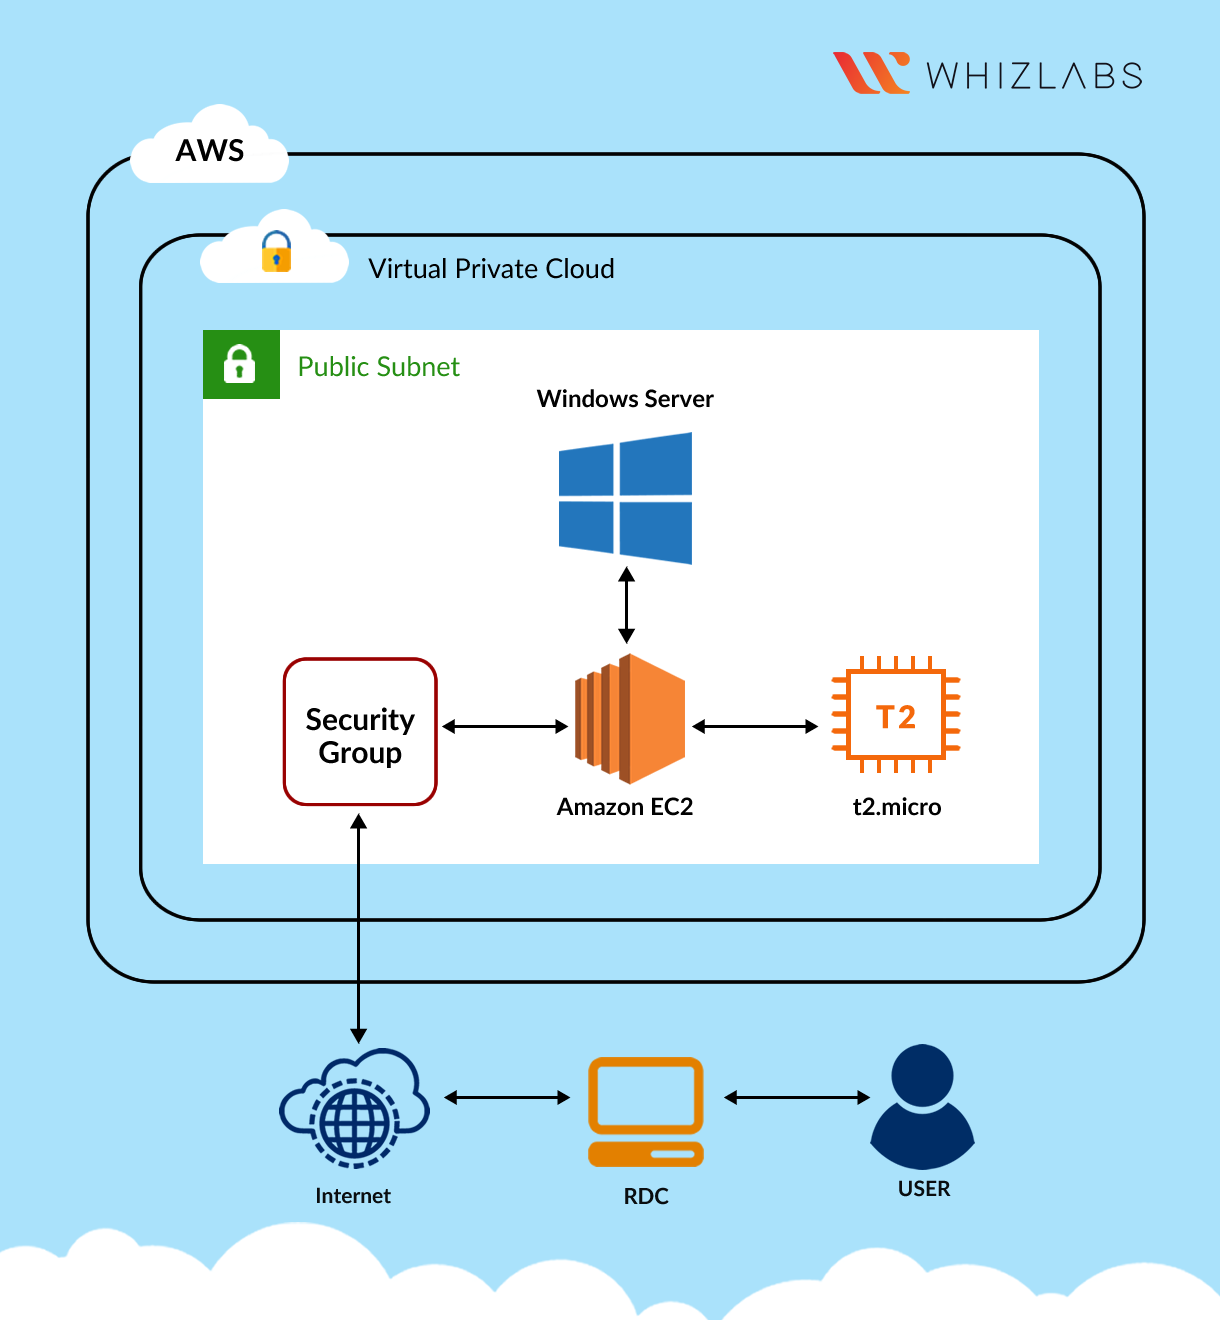
EC2 Configuration
Services -> EC2 -> Instances
Click on Launch instances

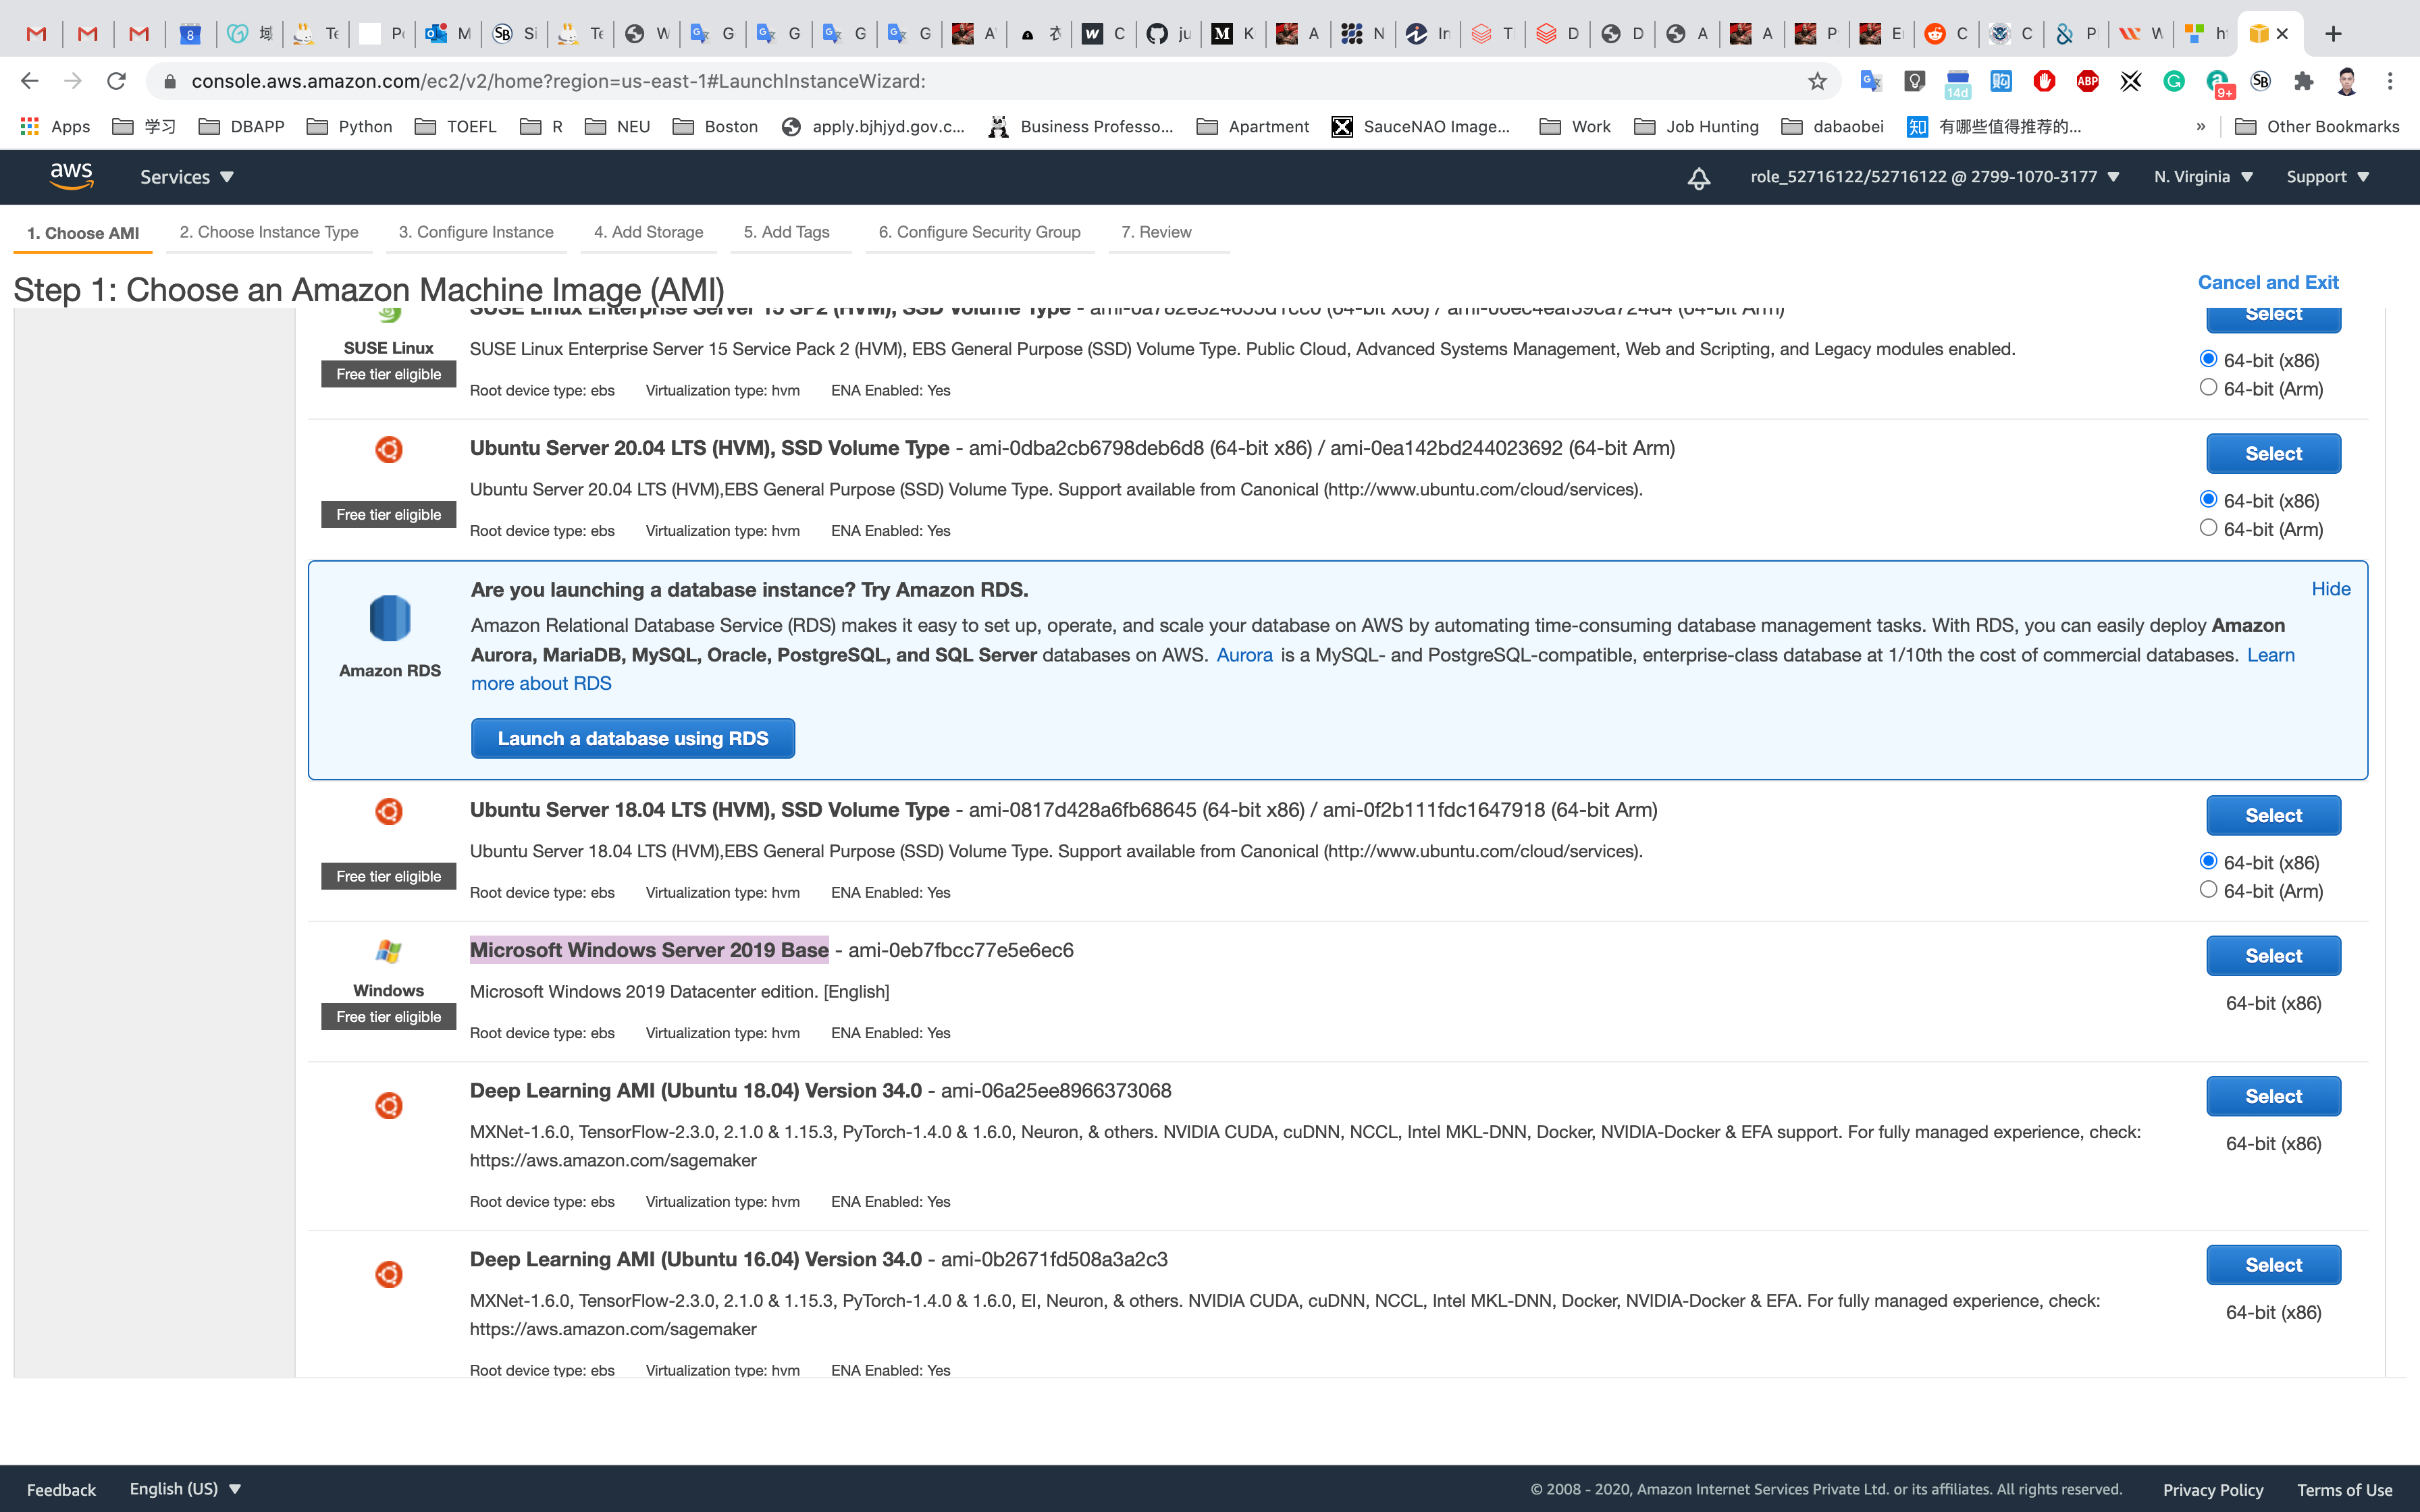
Step 1: Choose an Amazon Machine Image (AMI)
Select Microsoft Windows Server 2019 Base
Click on Next: Configure Instance Details
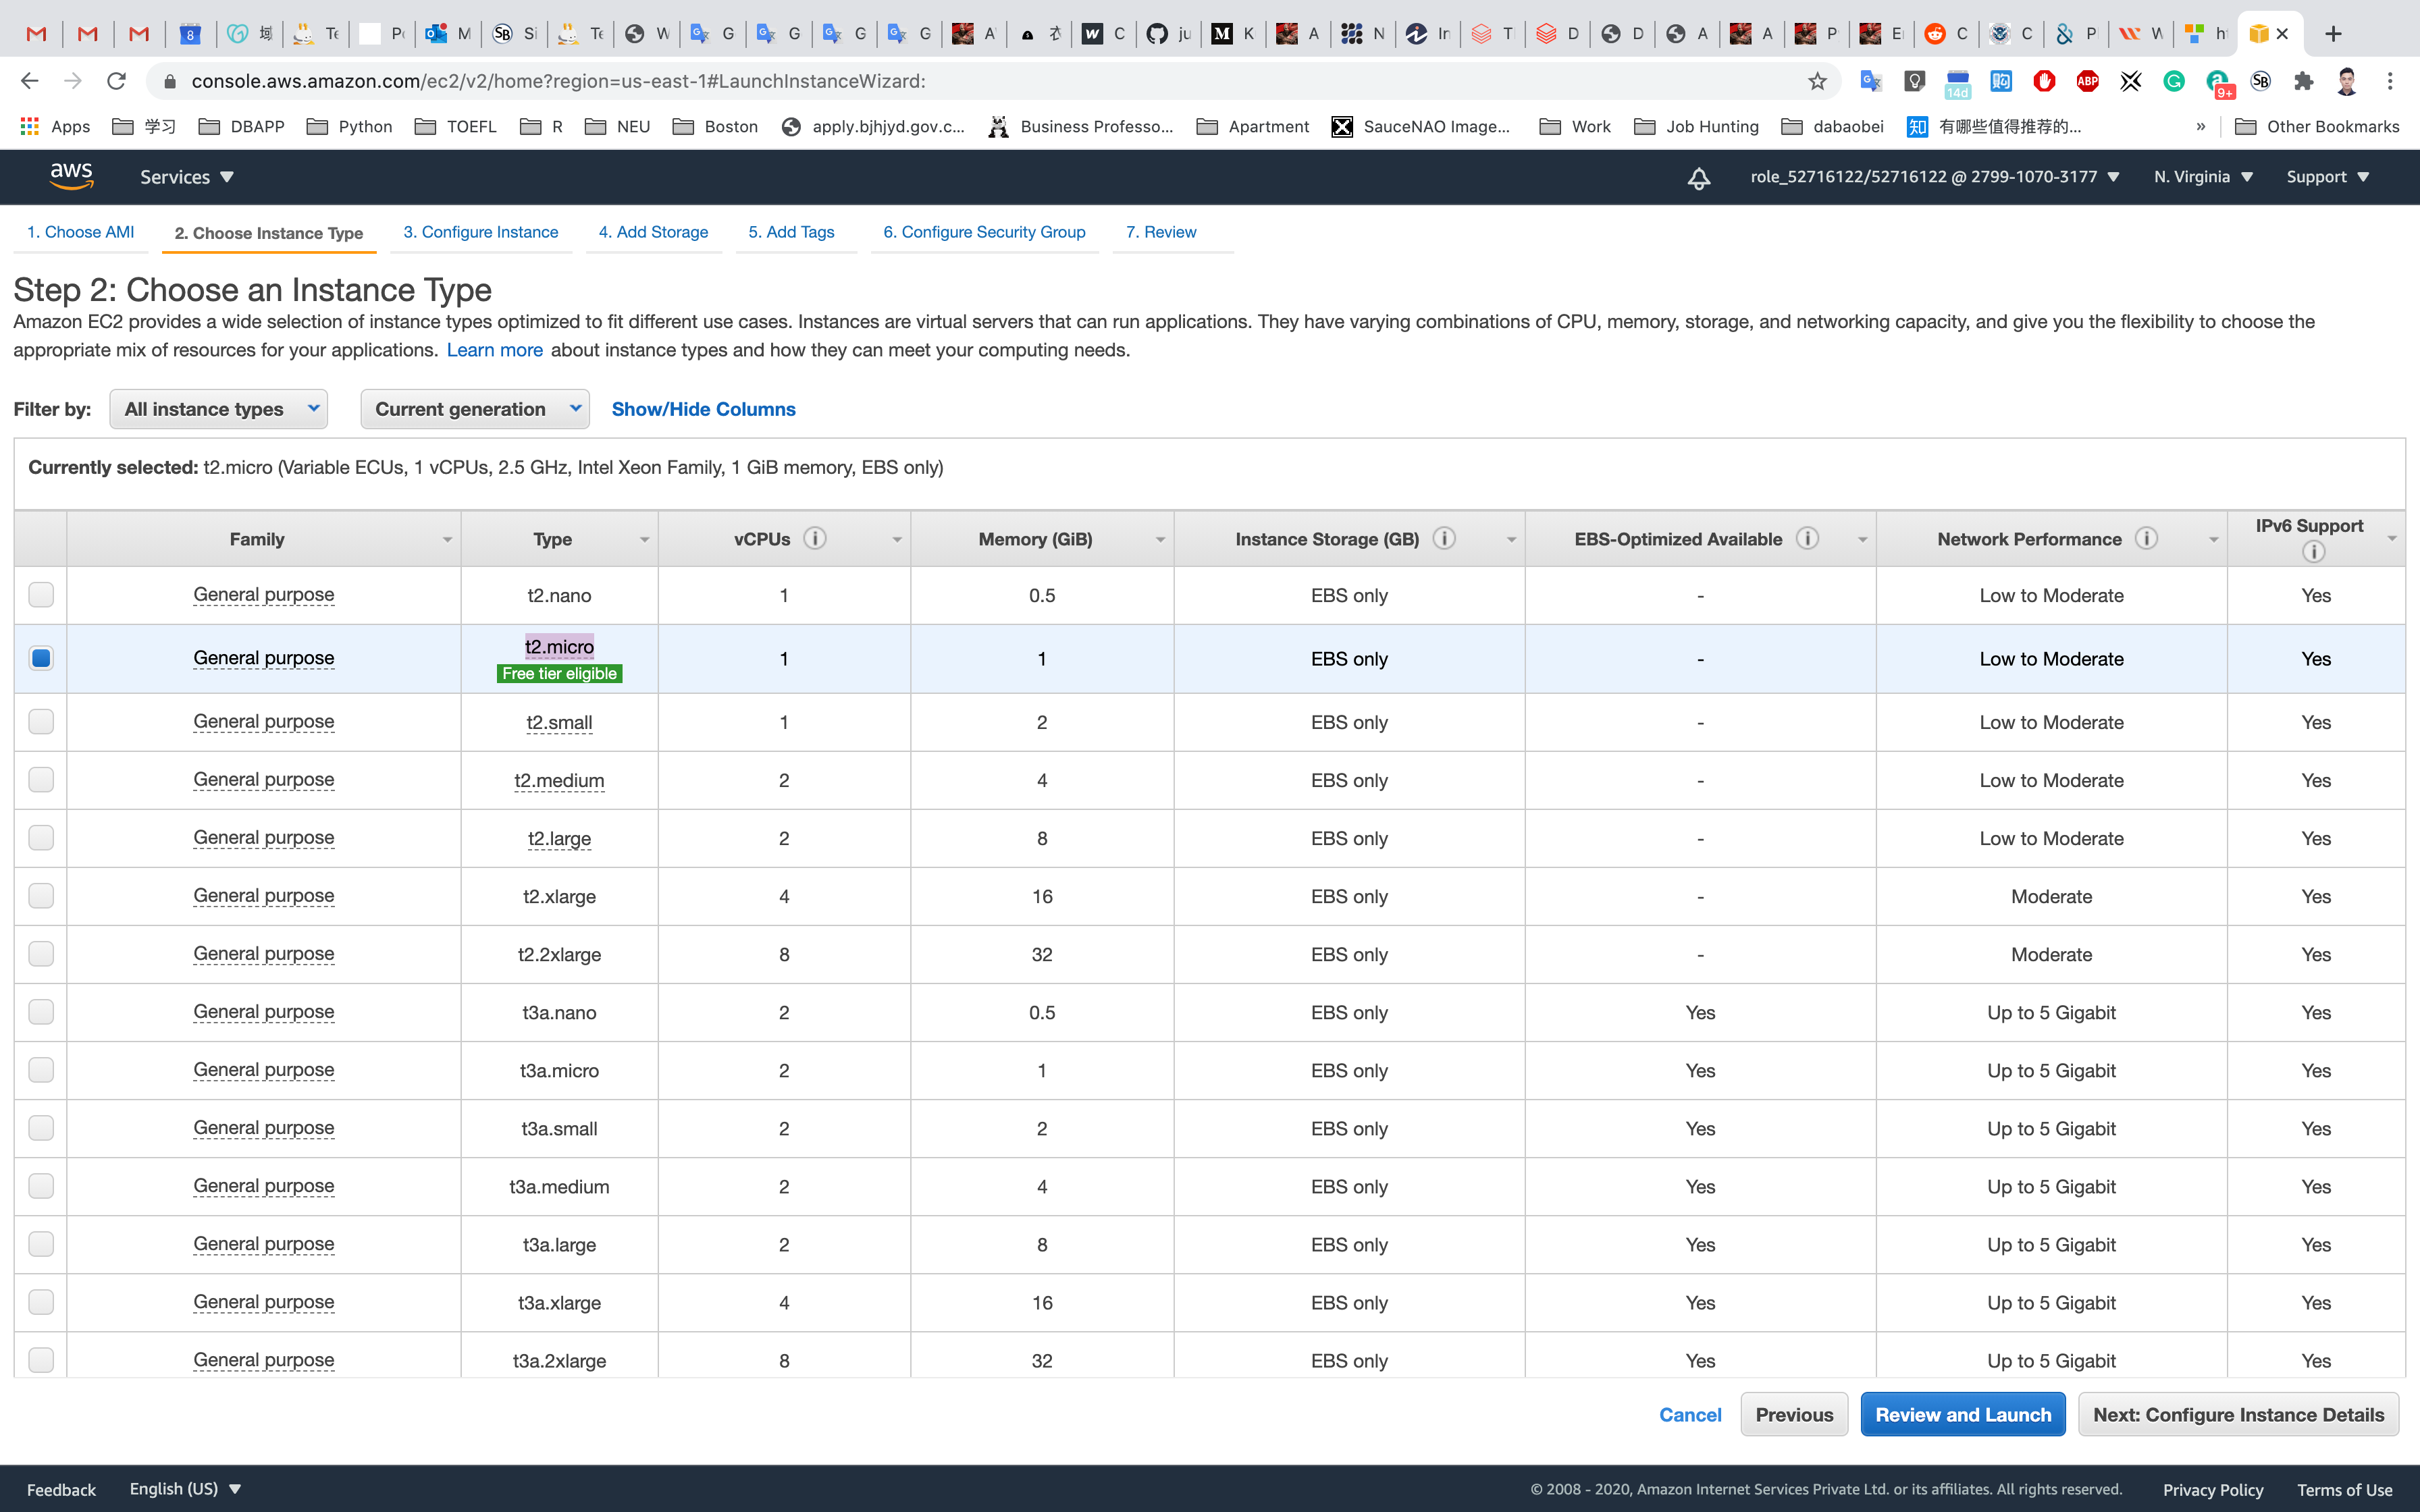
Step 2: Choose an Instance Type
Select and then click on t2.micro
Step 3: Configure Instance Details
No need to change anything in this step.
Click on Next: Add Storage
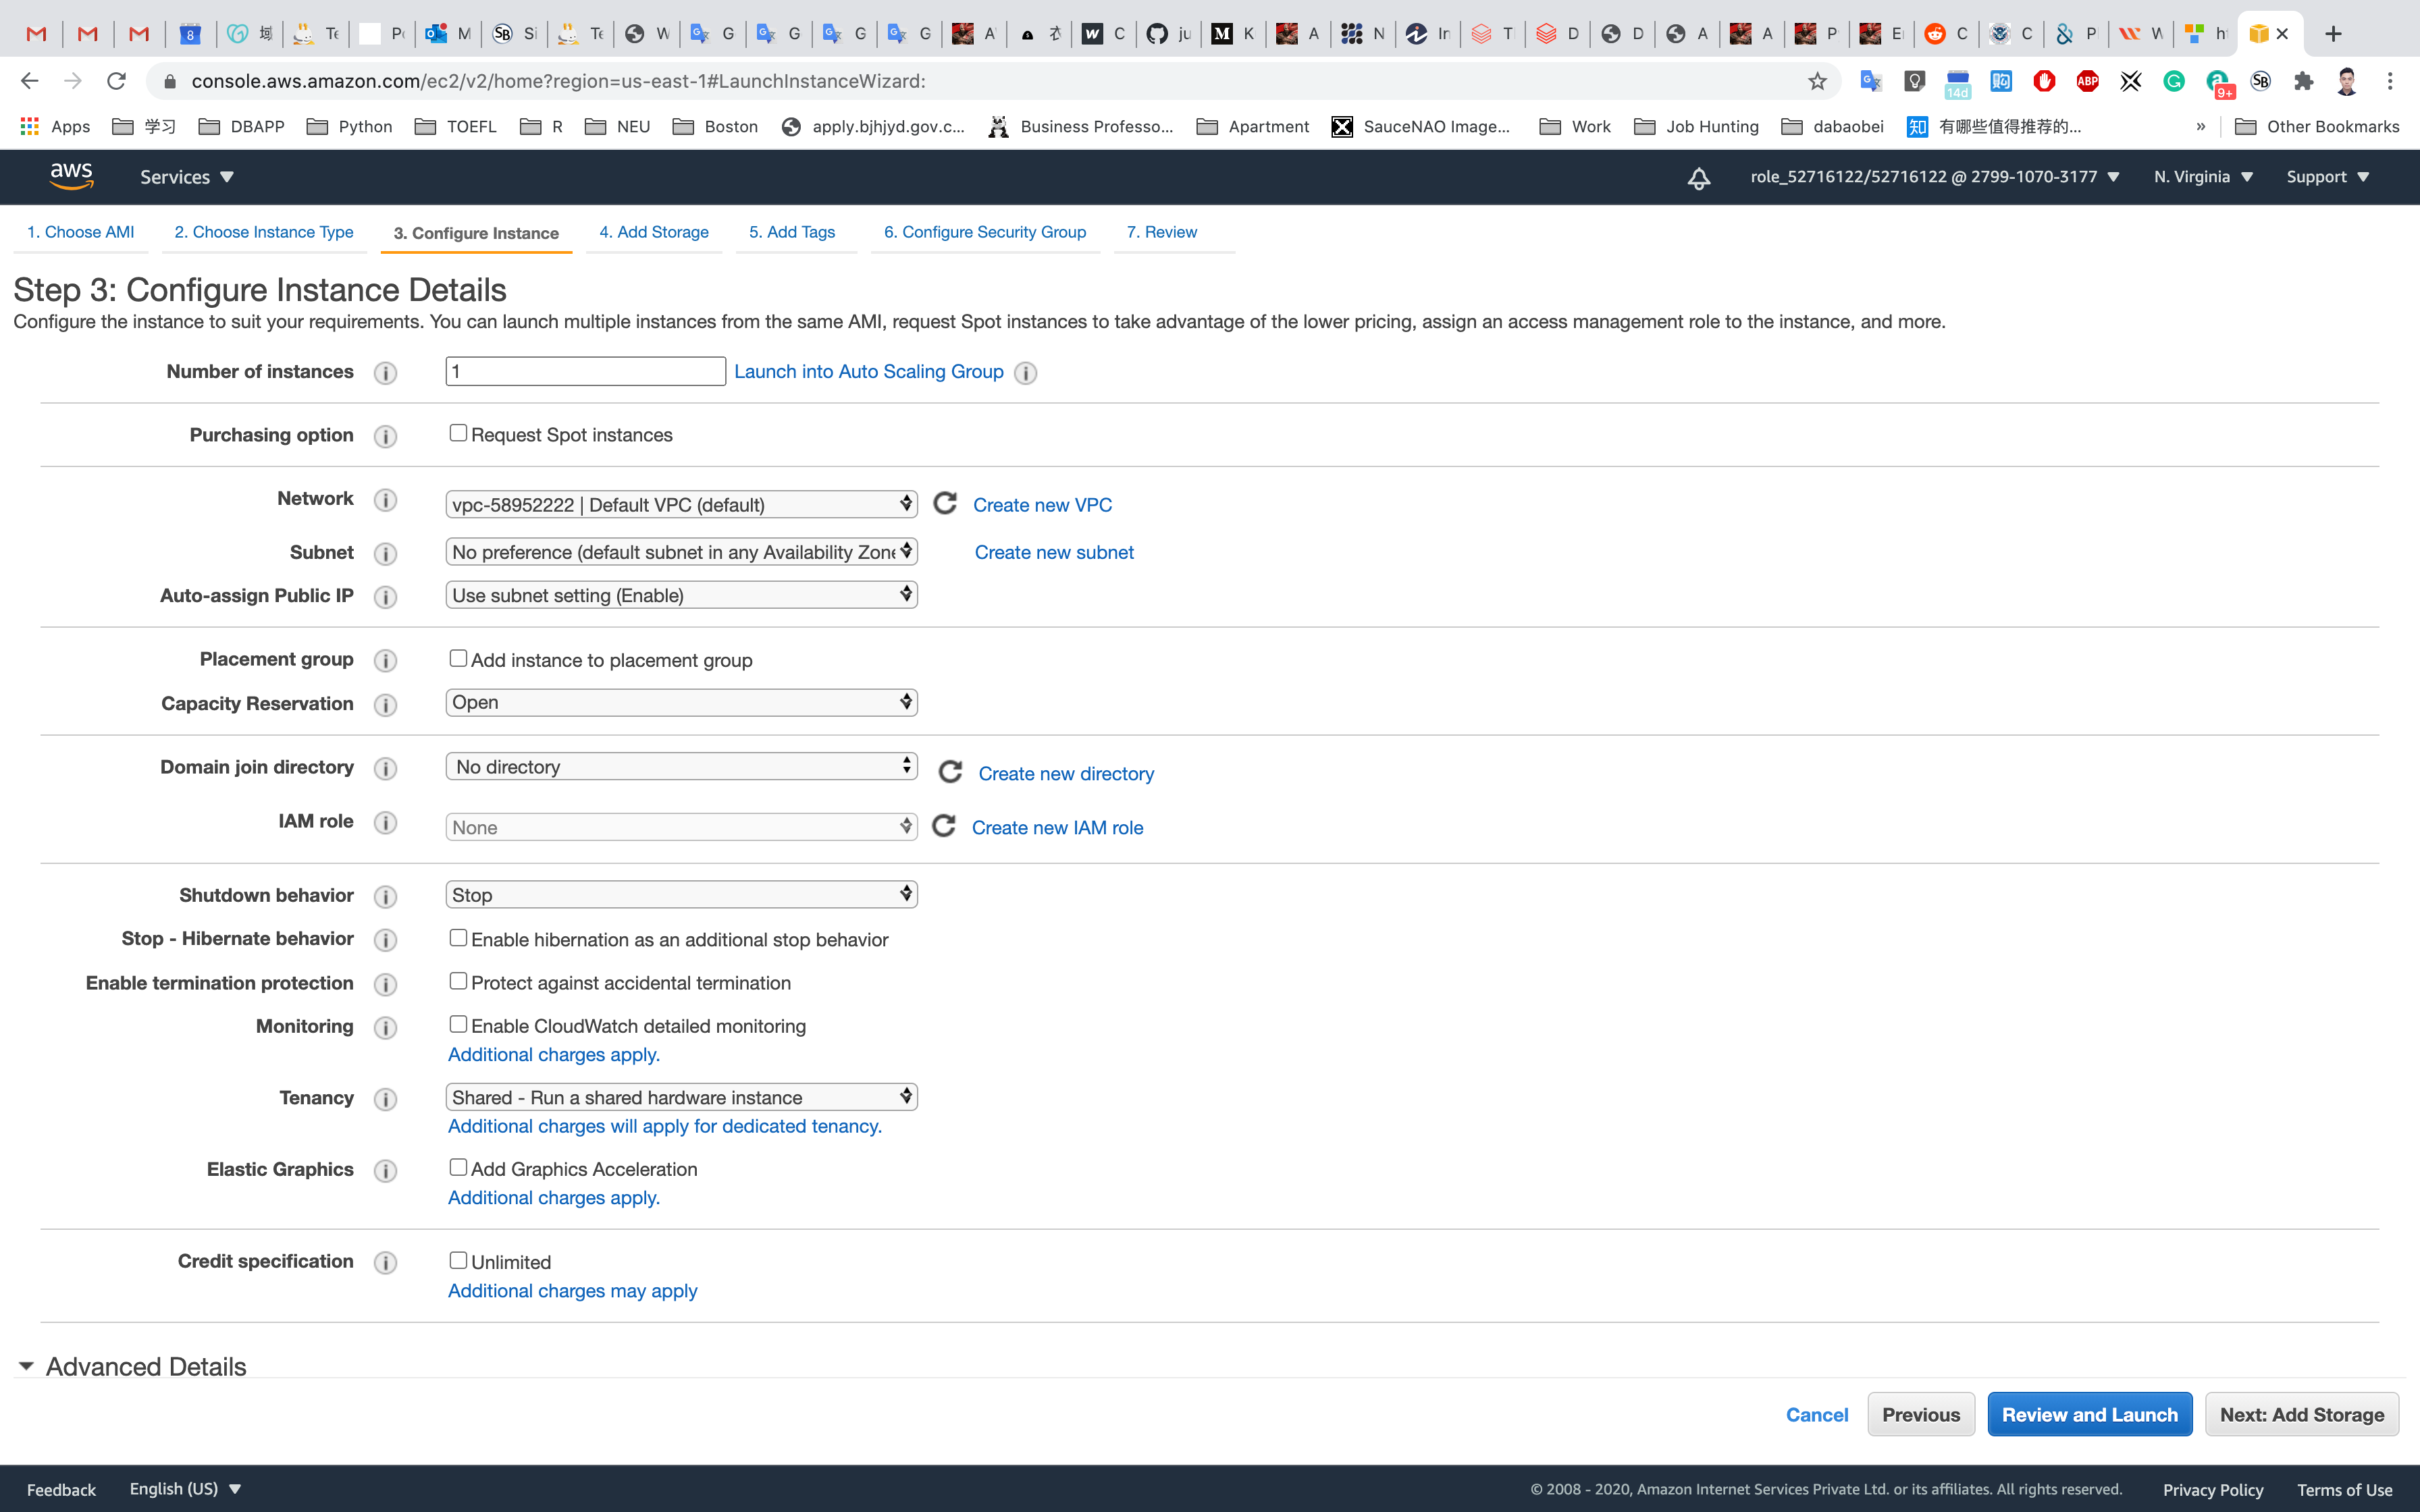
Step 4: Add Storage
No need to change anything in this step.
Click on Next: Add Tags
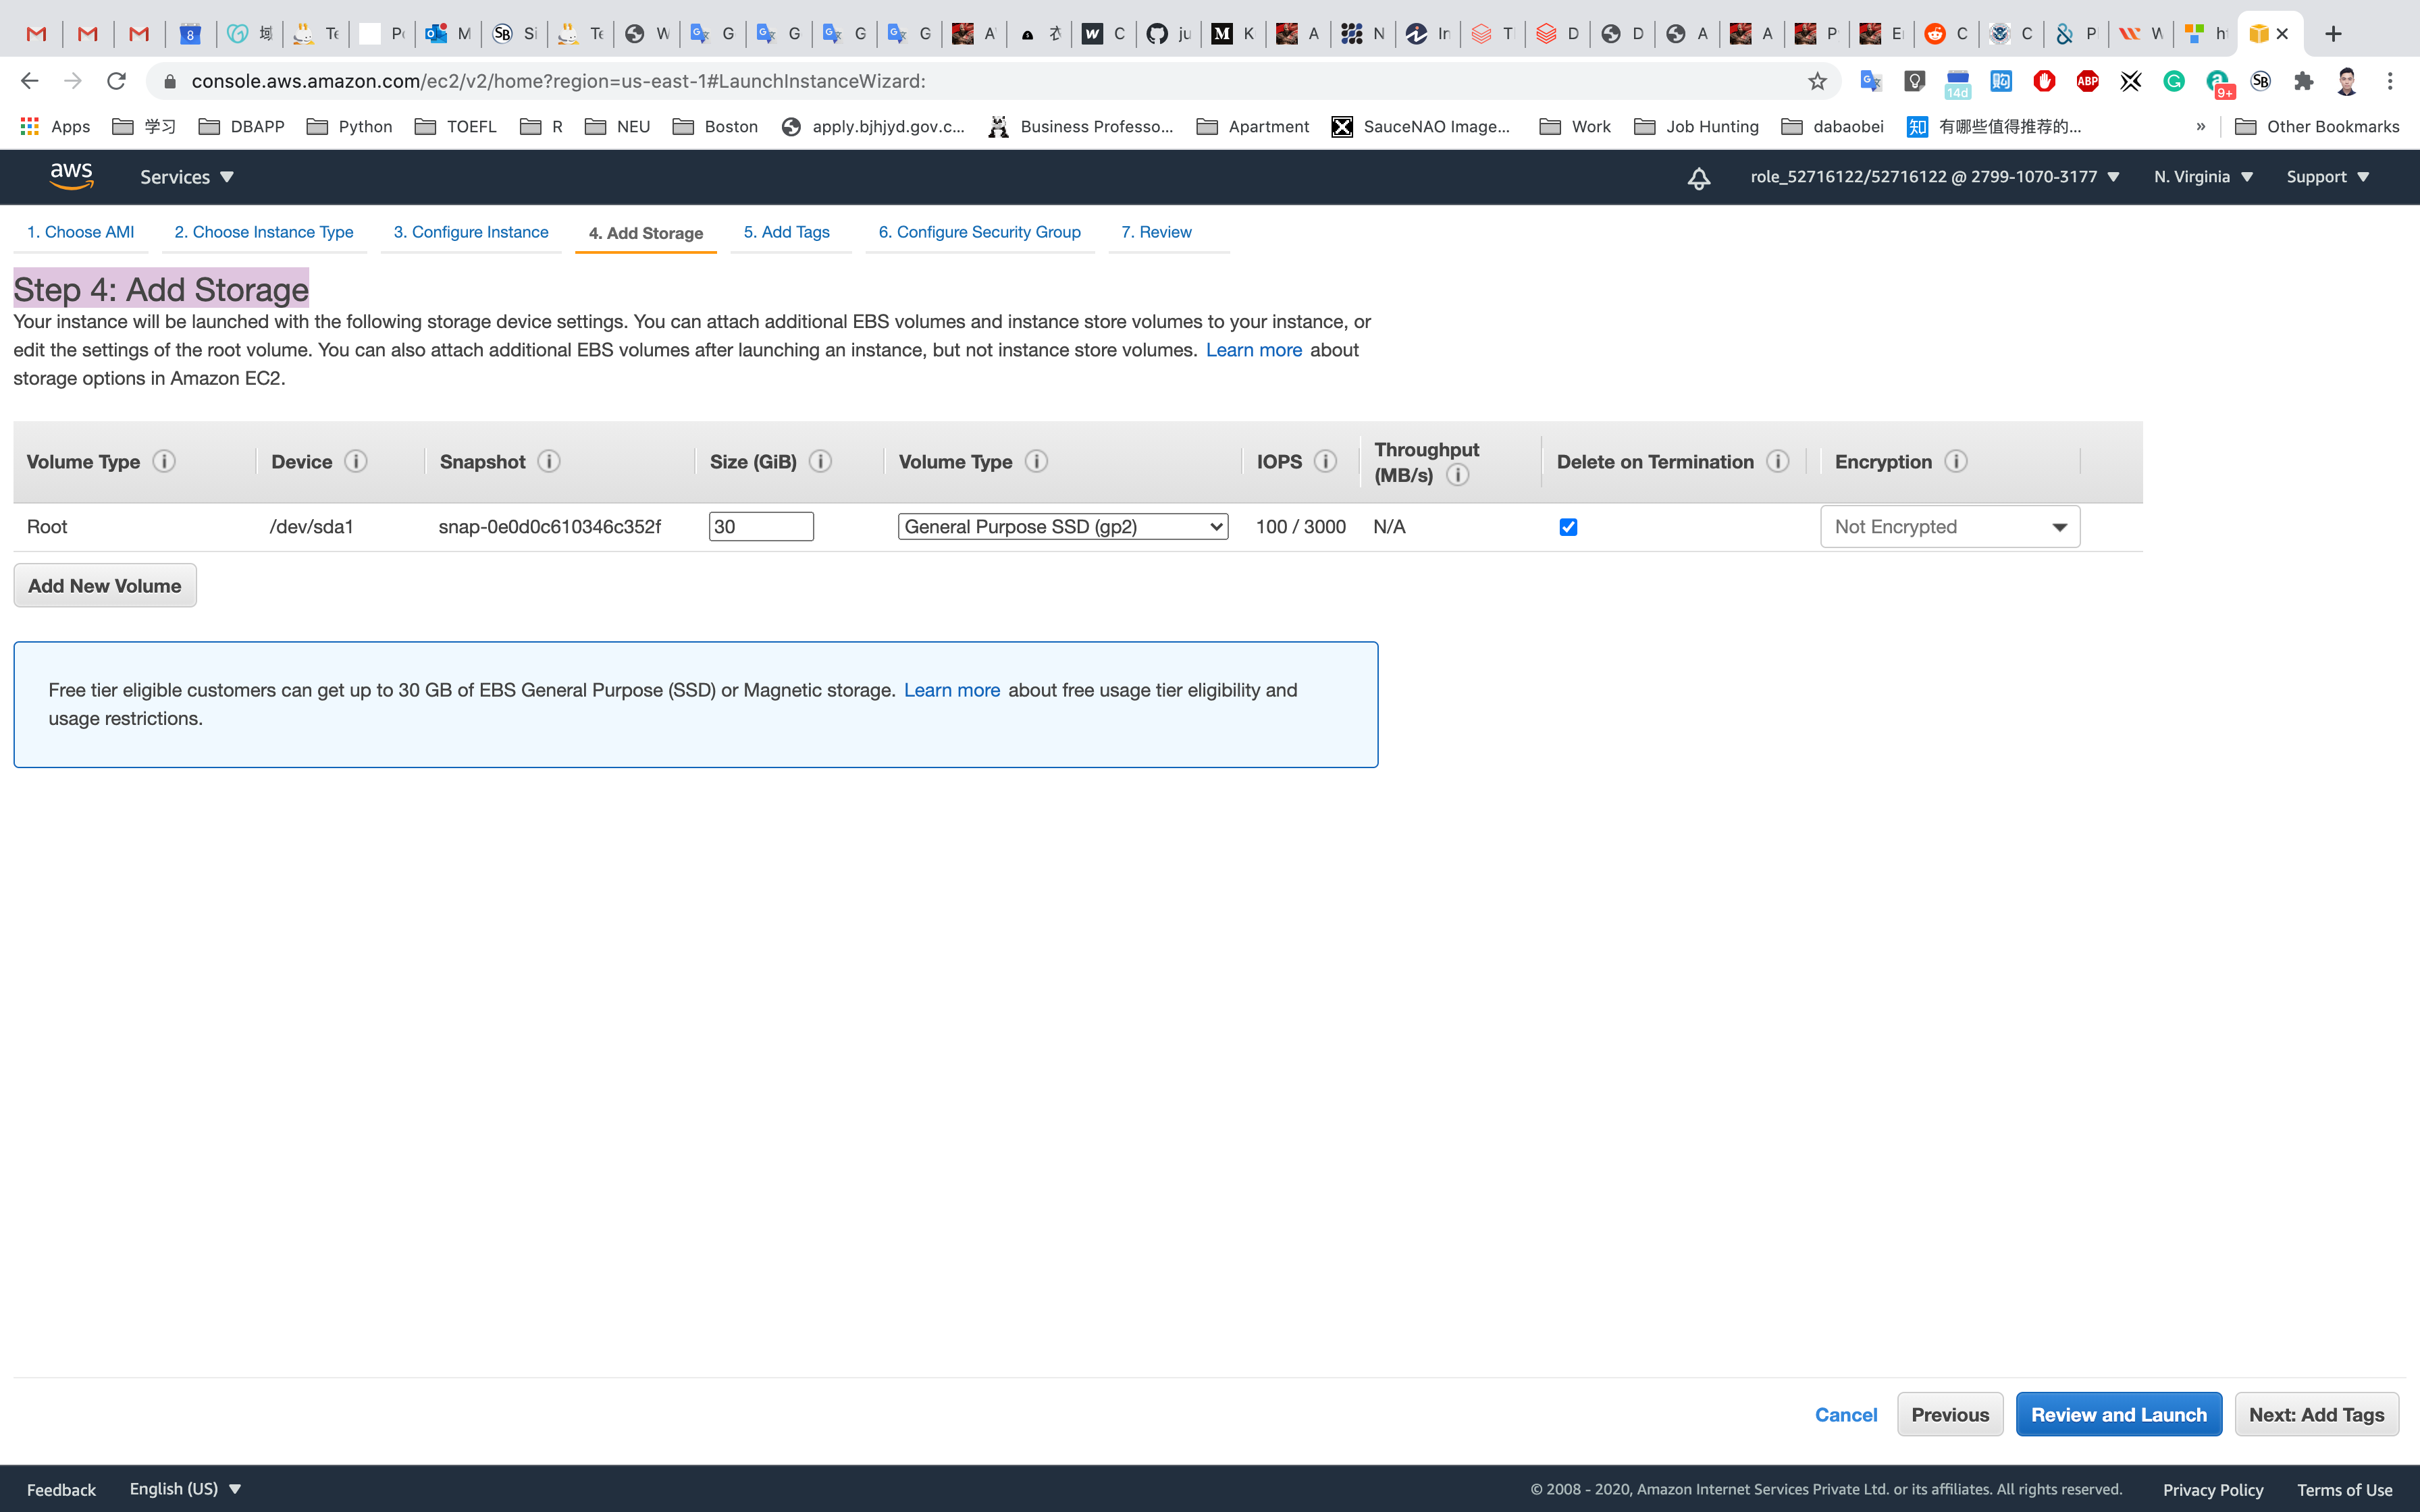
Step 5: Add Tags
Click on Add Tag
- Key:
Name - Value:
MyEC2Server
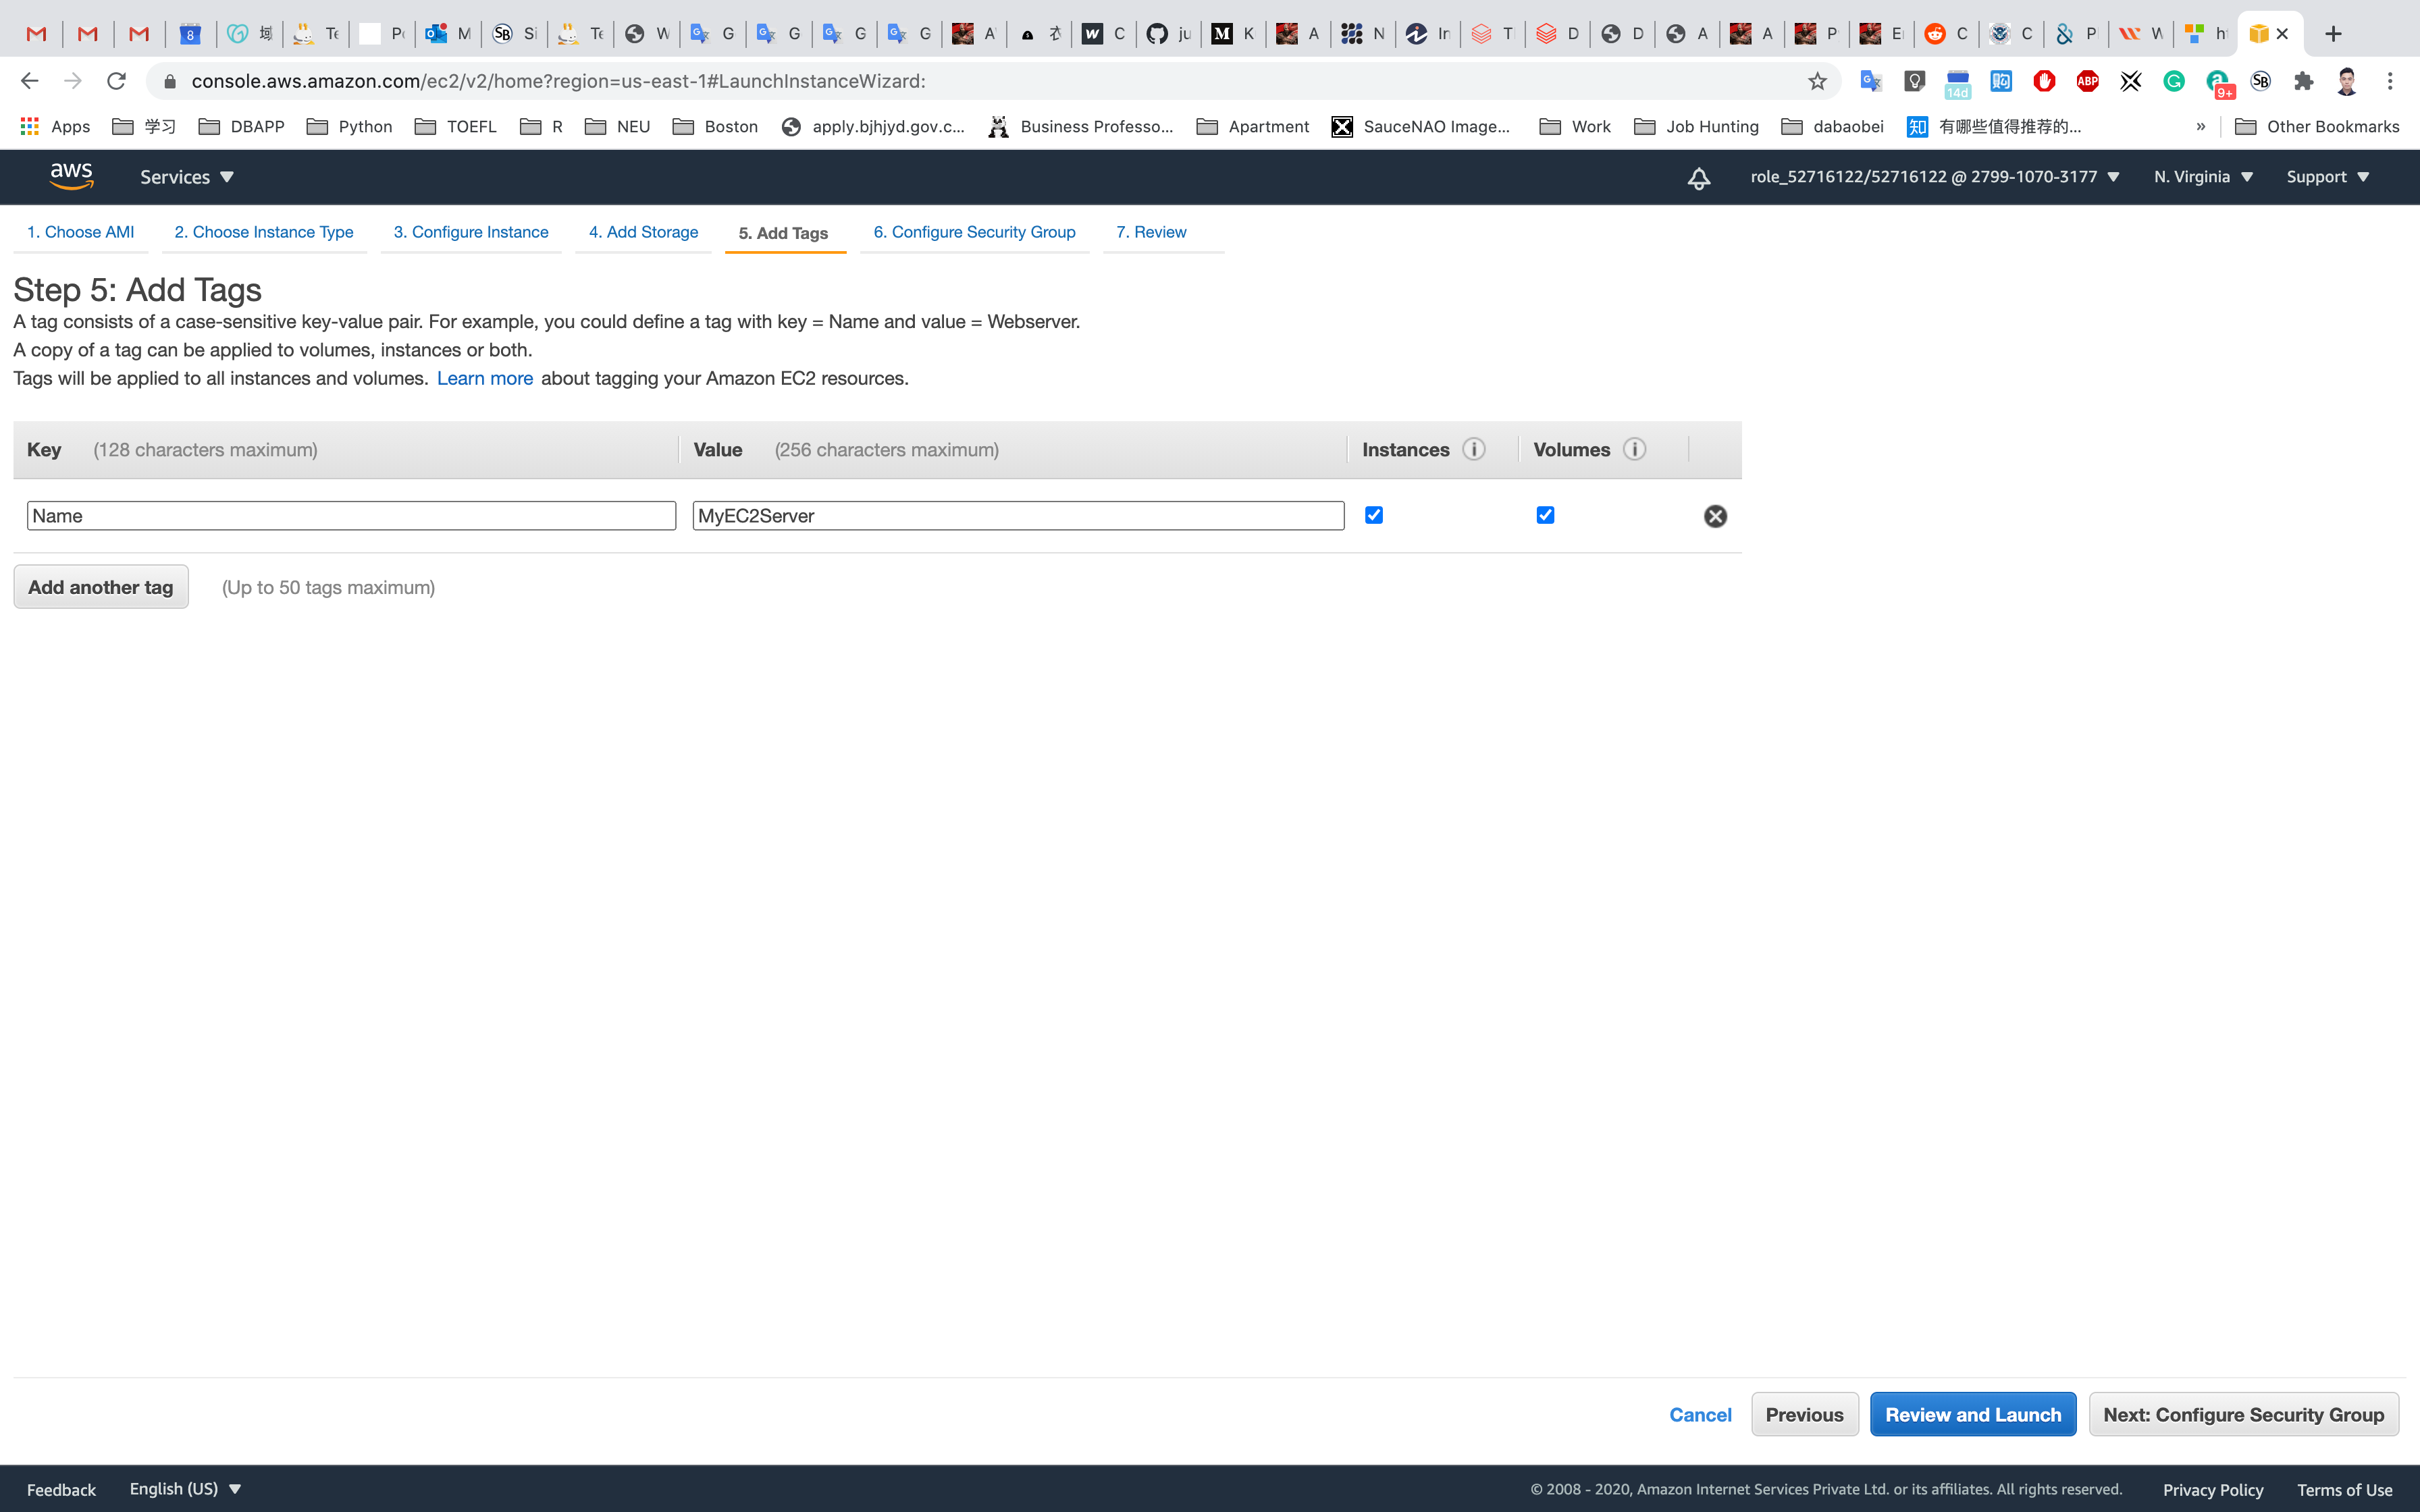
Click on Next: Configure Security Group
Step 6: Configure Security Group
Select Create a new security group
- Security group name:
EC2WindowsServerSG - Description :
Security Group for EC2 Windows Server
For Type RDP:
- Source:
Anywhere
Click on Add Rule
Select Type HTTP:
- Source:
Anywhere
Click on Add Rule
Select Type HTTPS:
- Source:
Anywhere
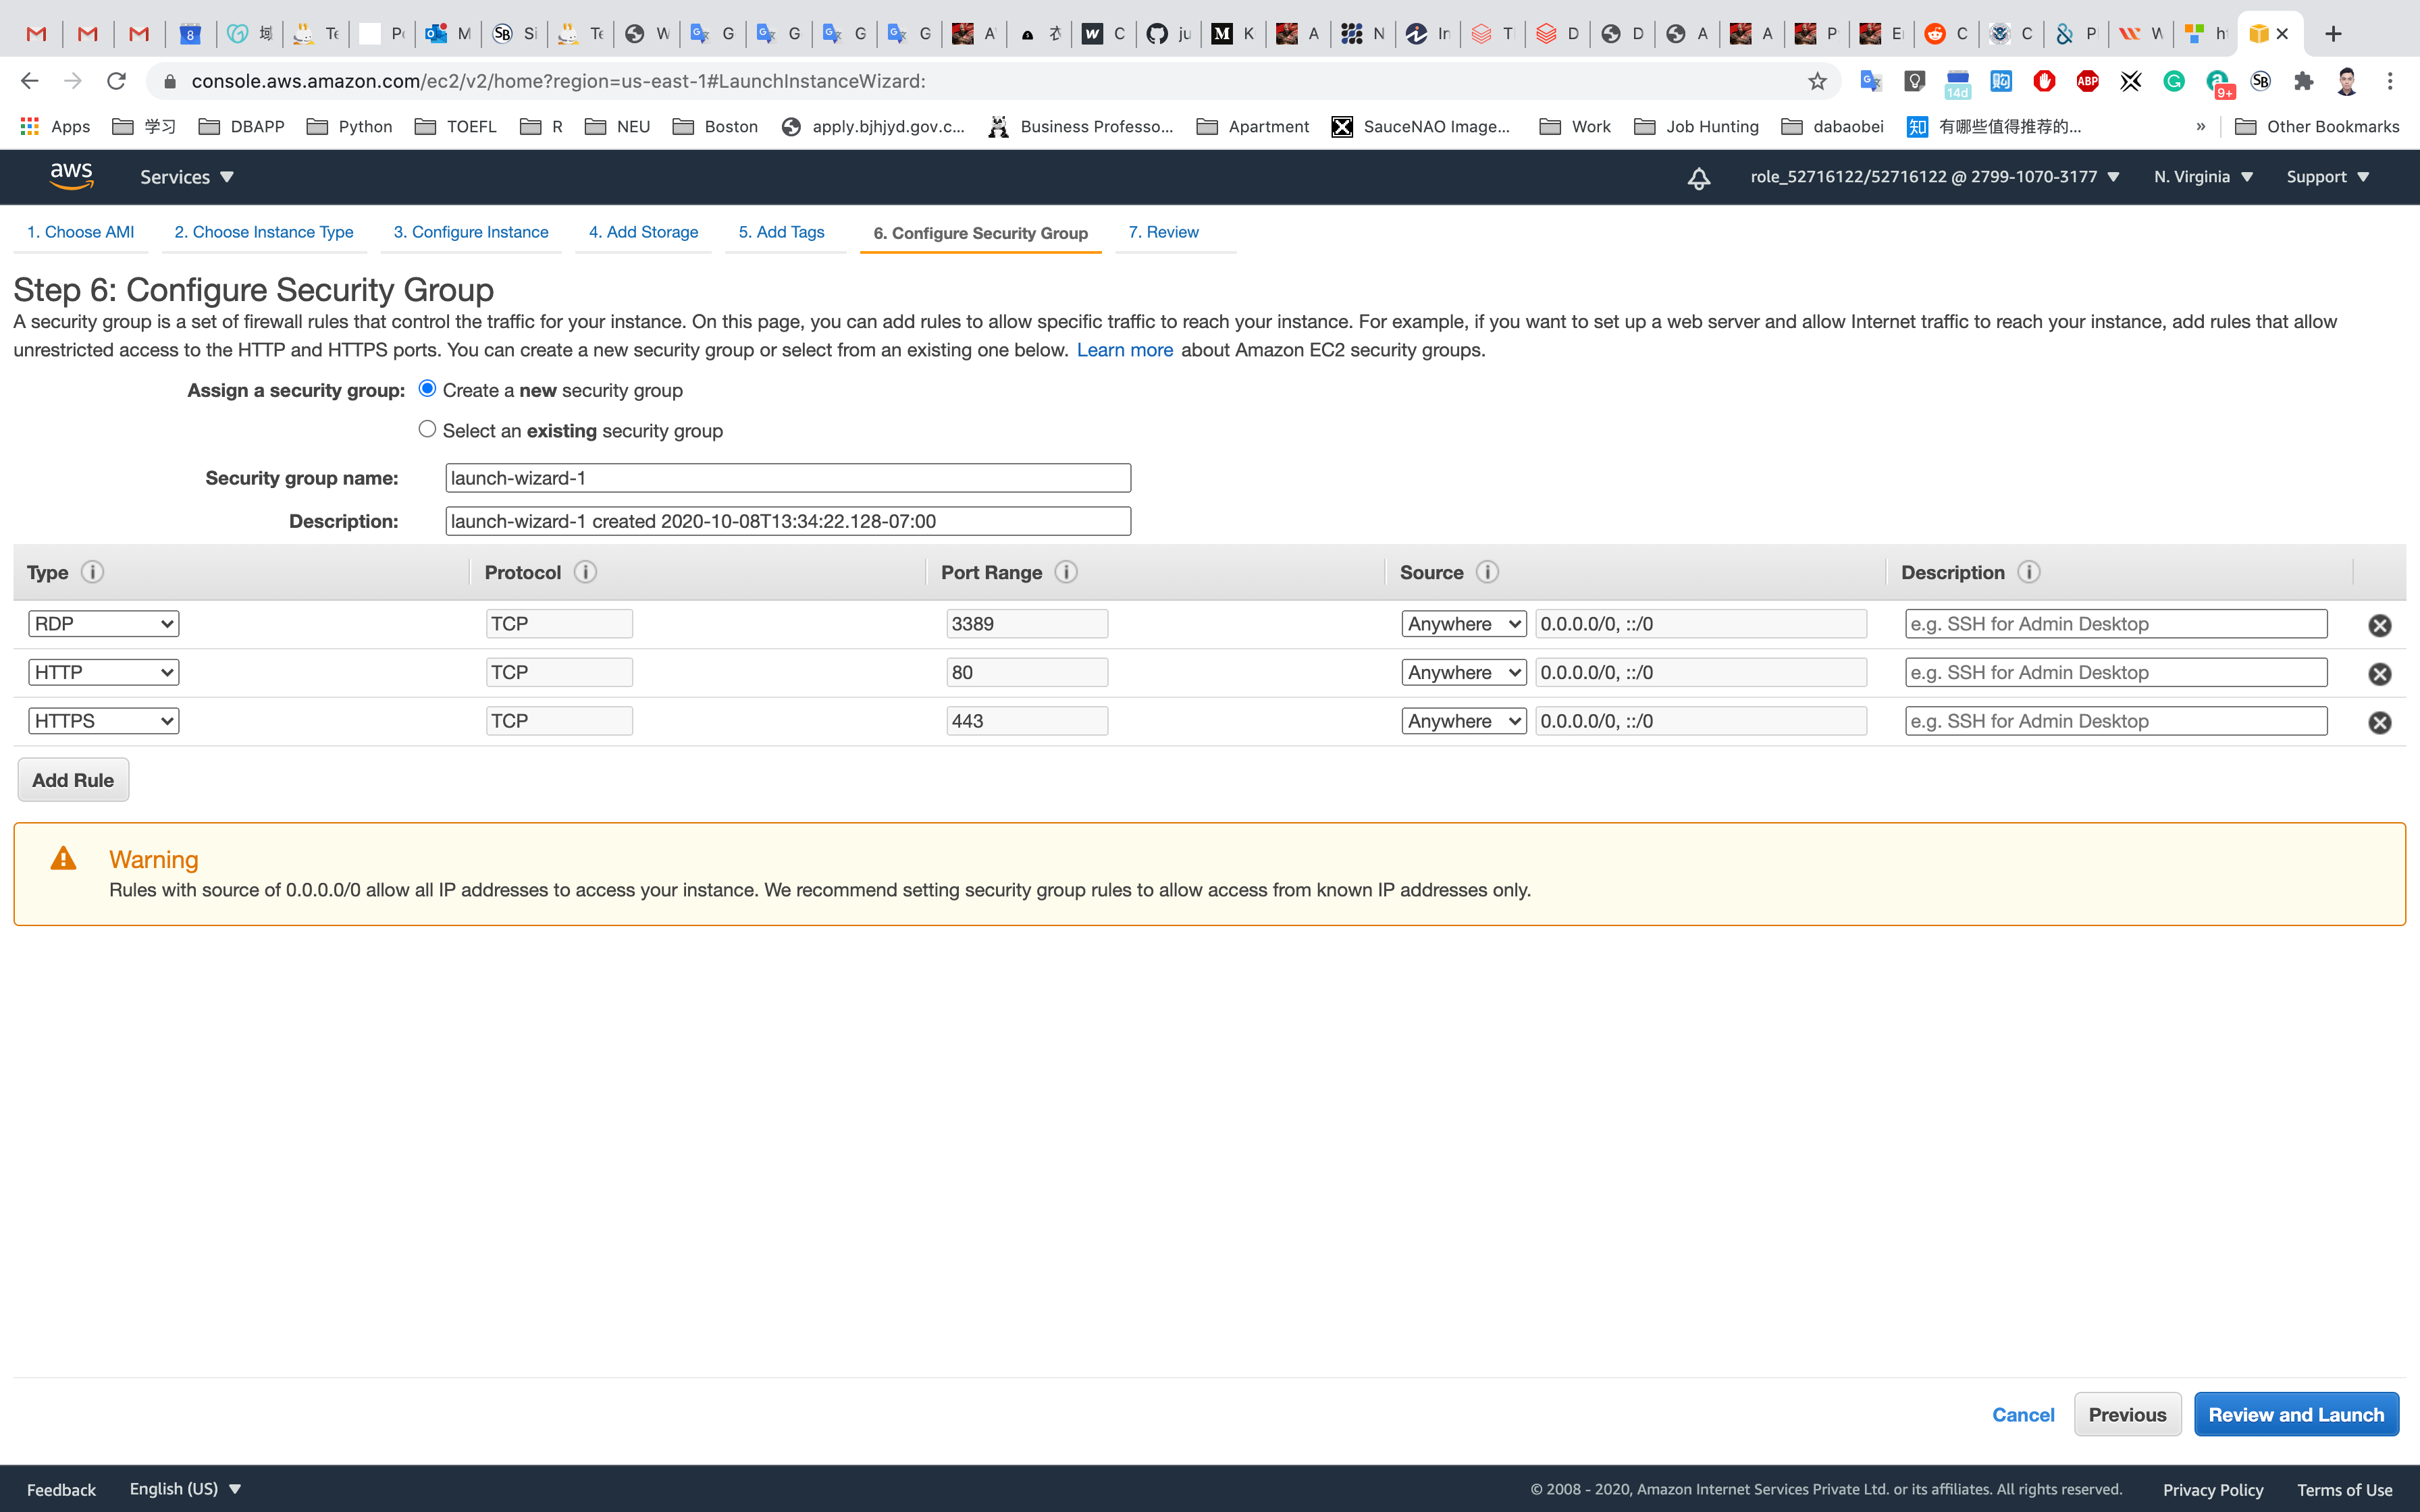
After that, click on Review Instance Launch
Step 7: Review Instance Launch
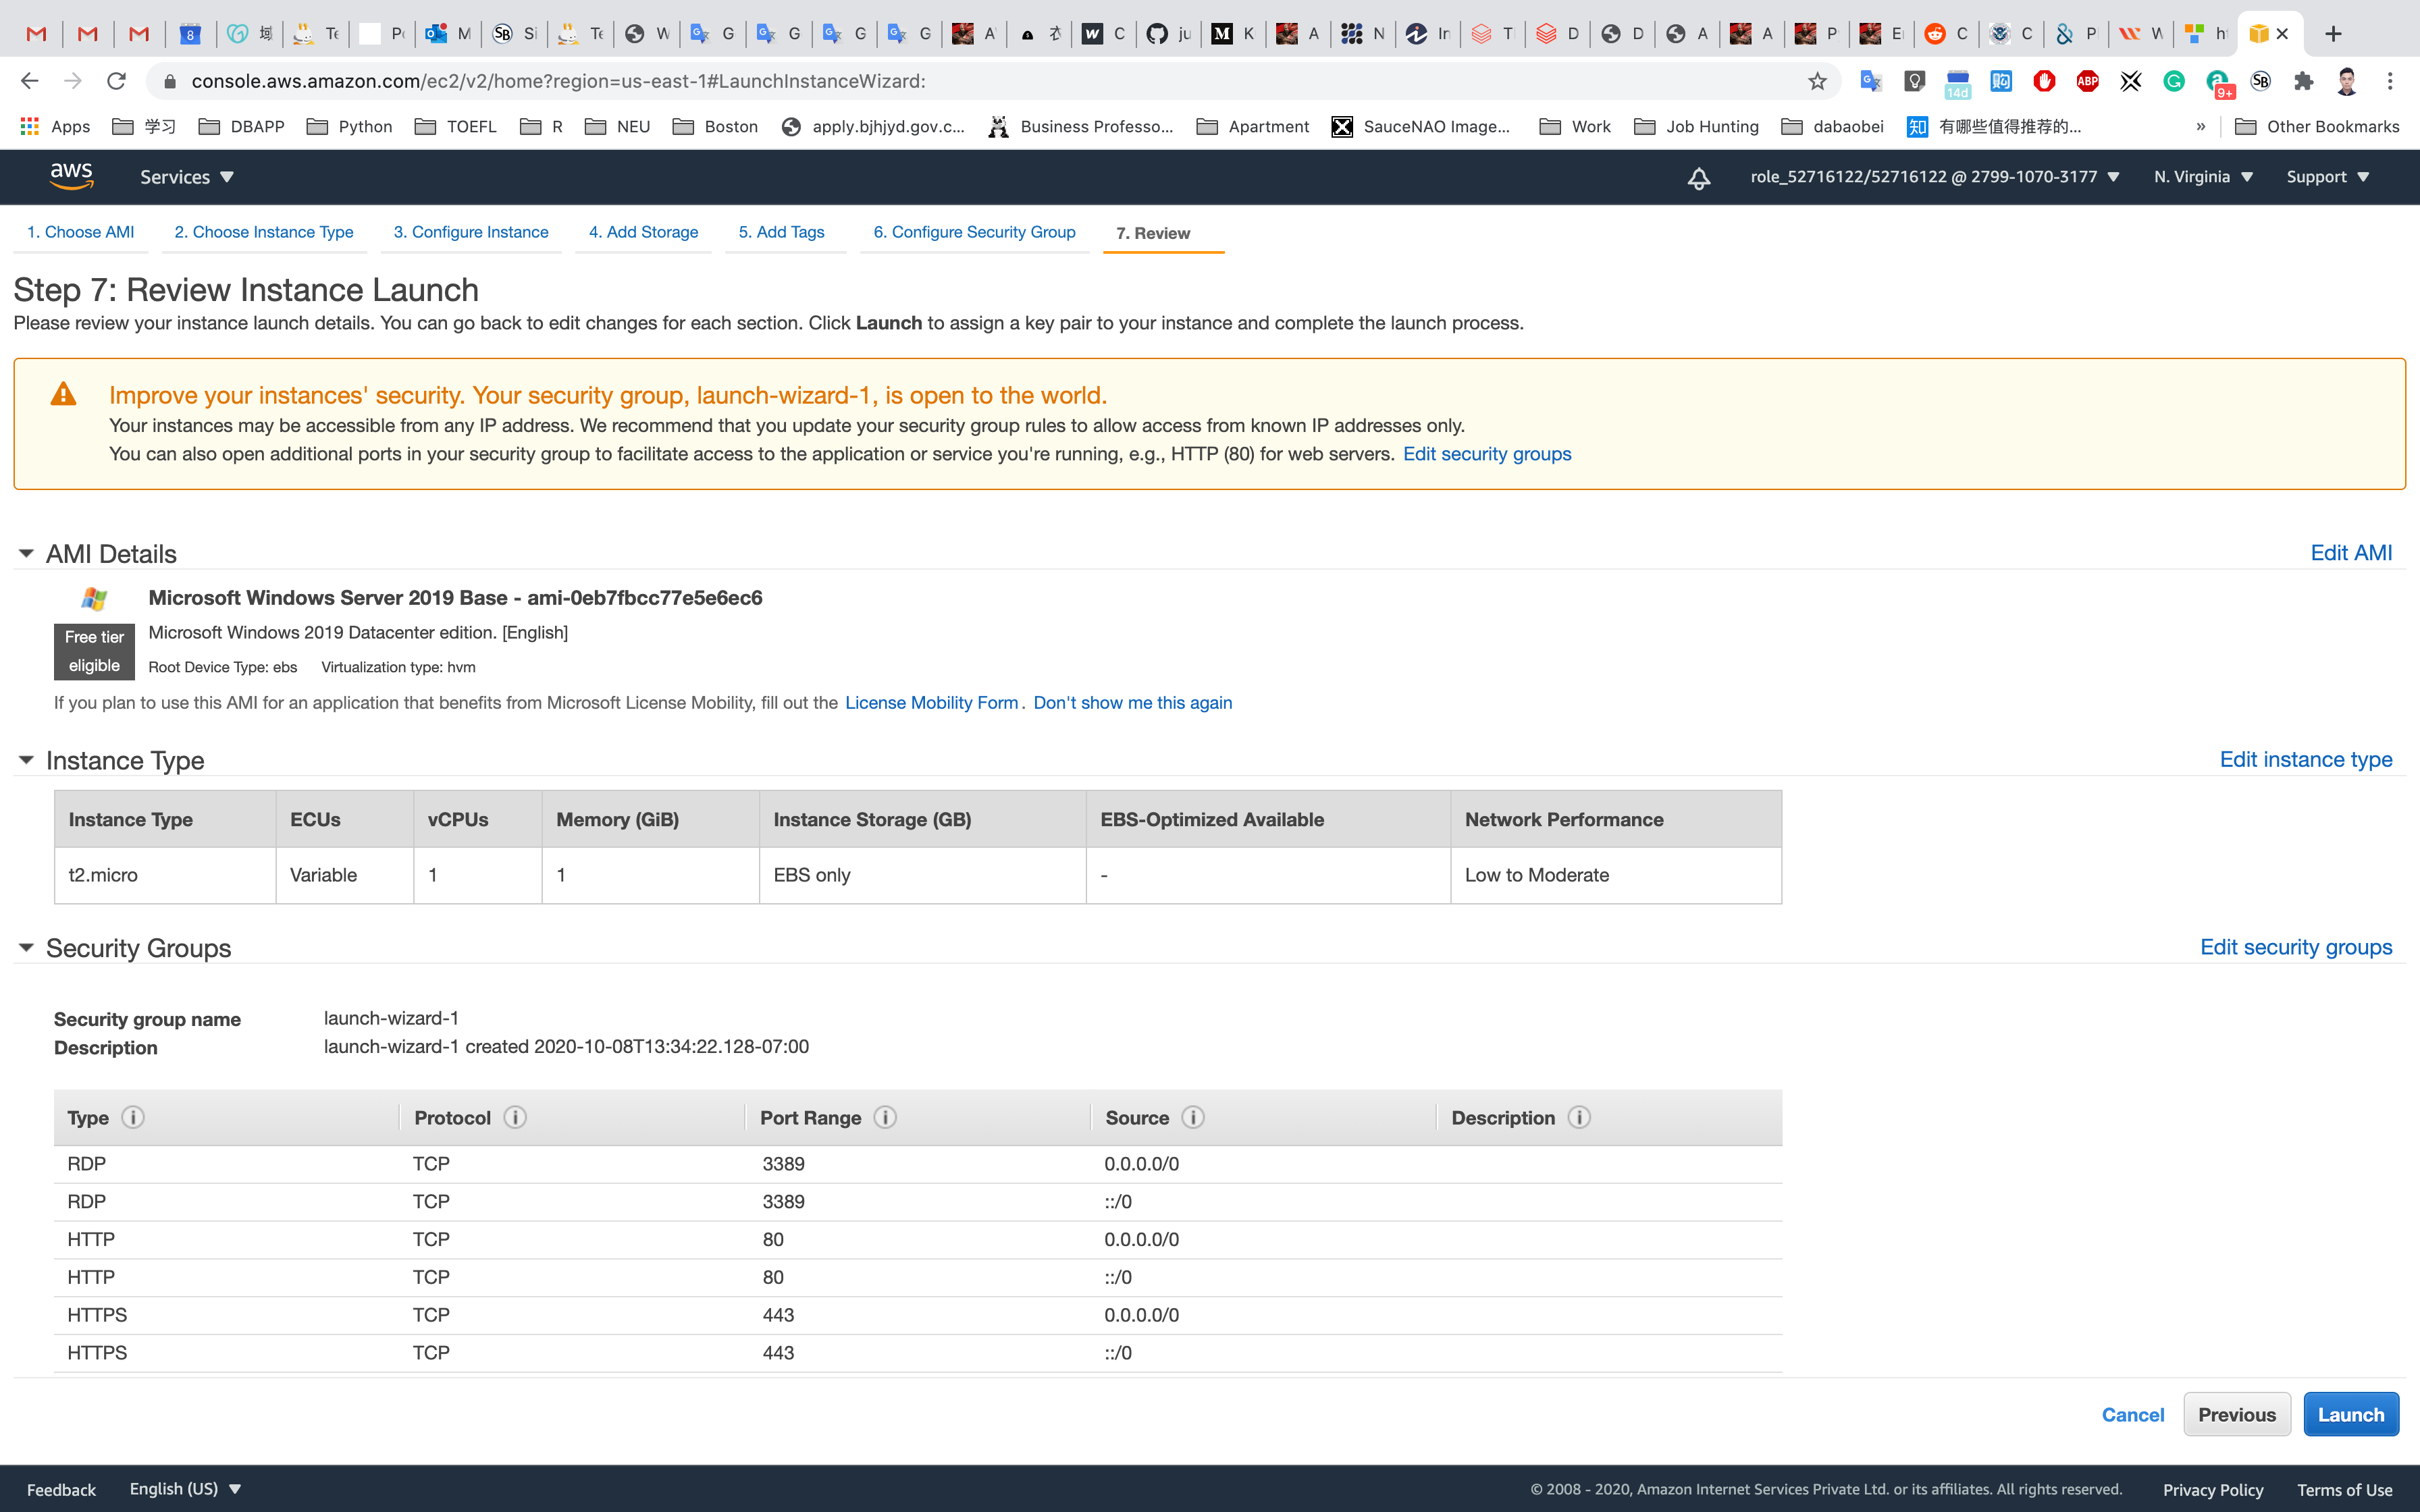
Click on Launch
Select Create a new key pair
Set up the Key pair name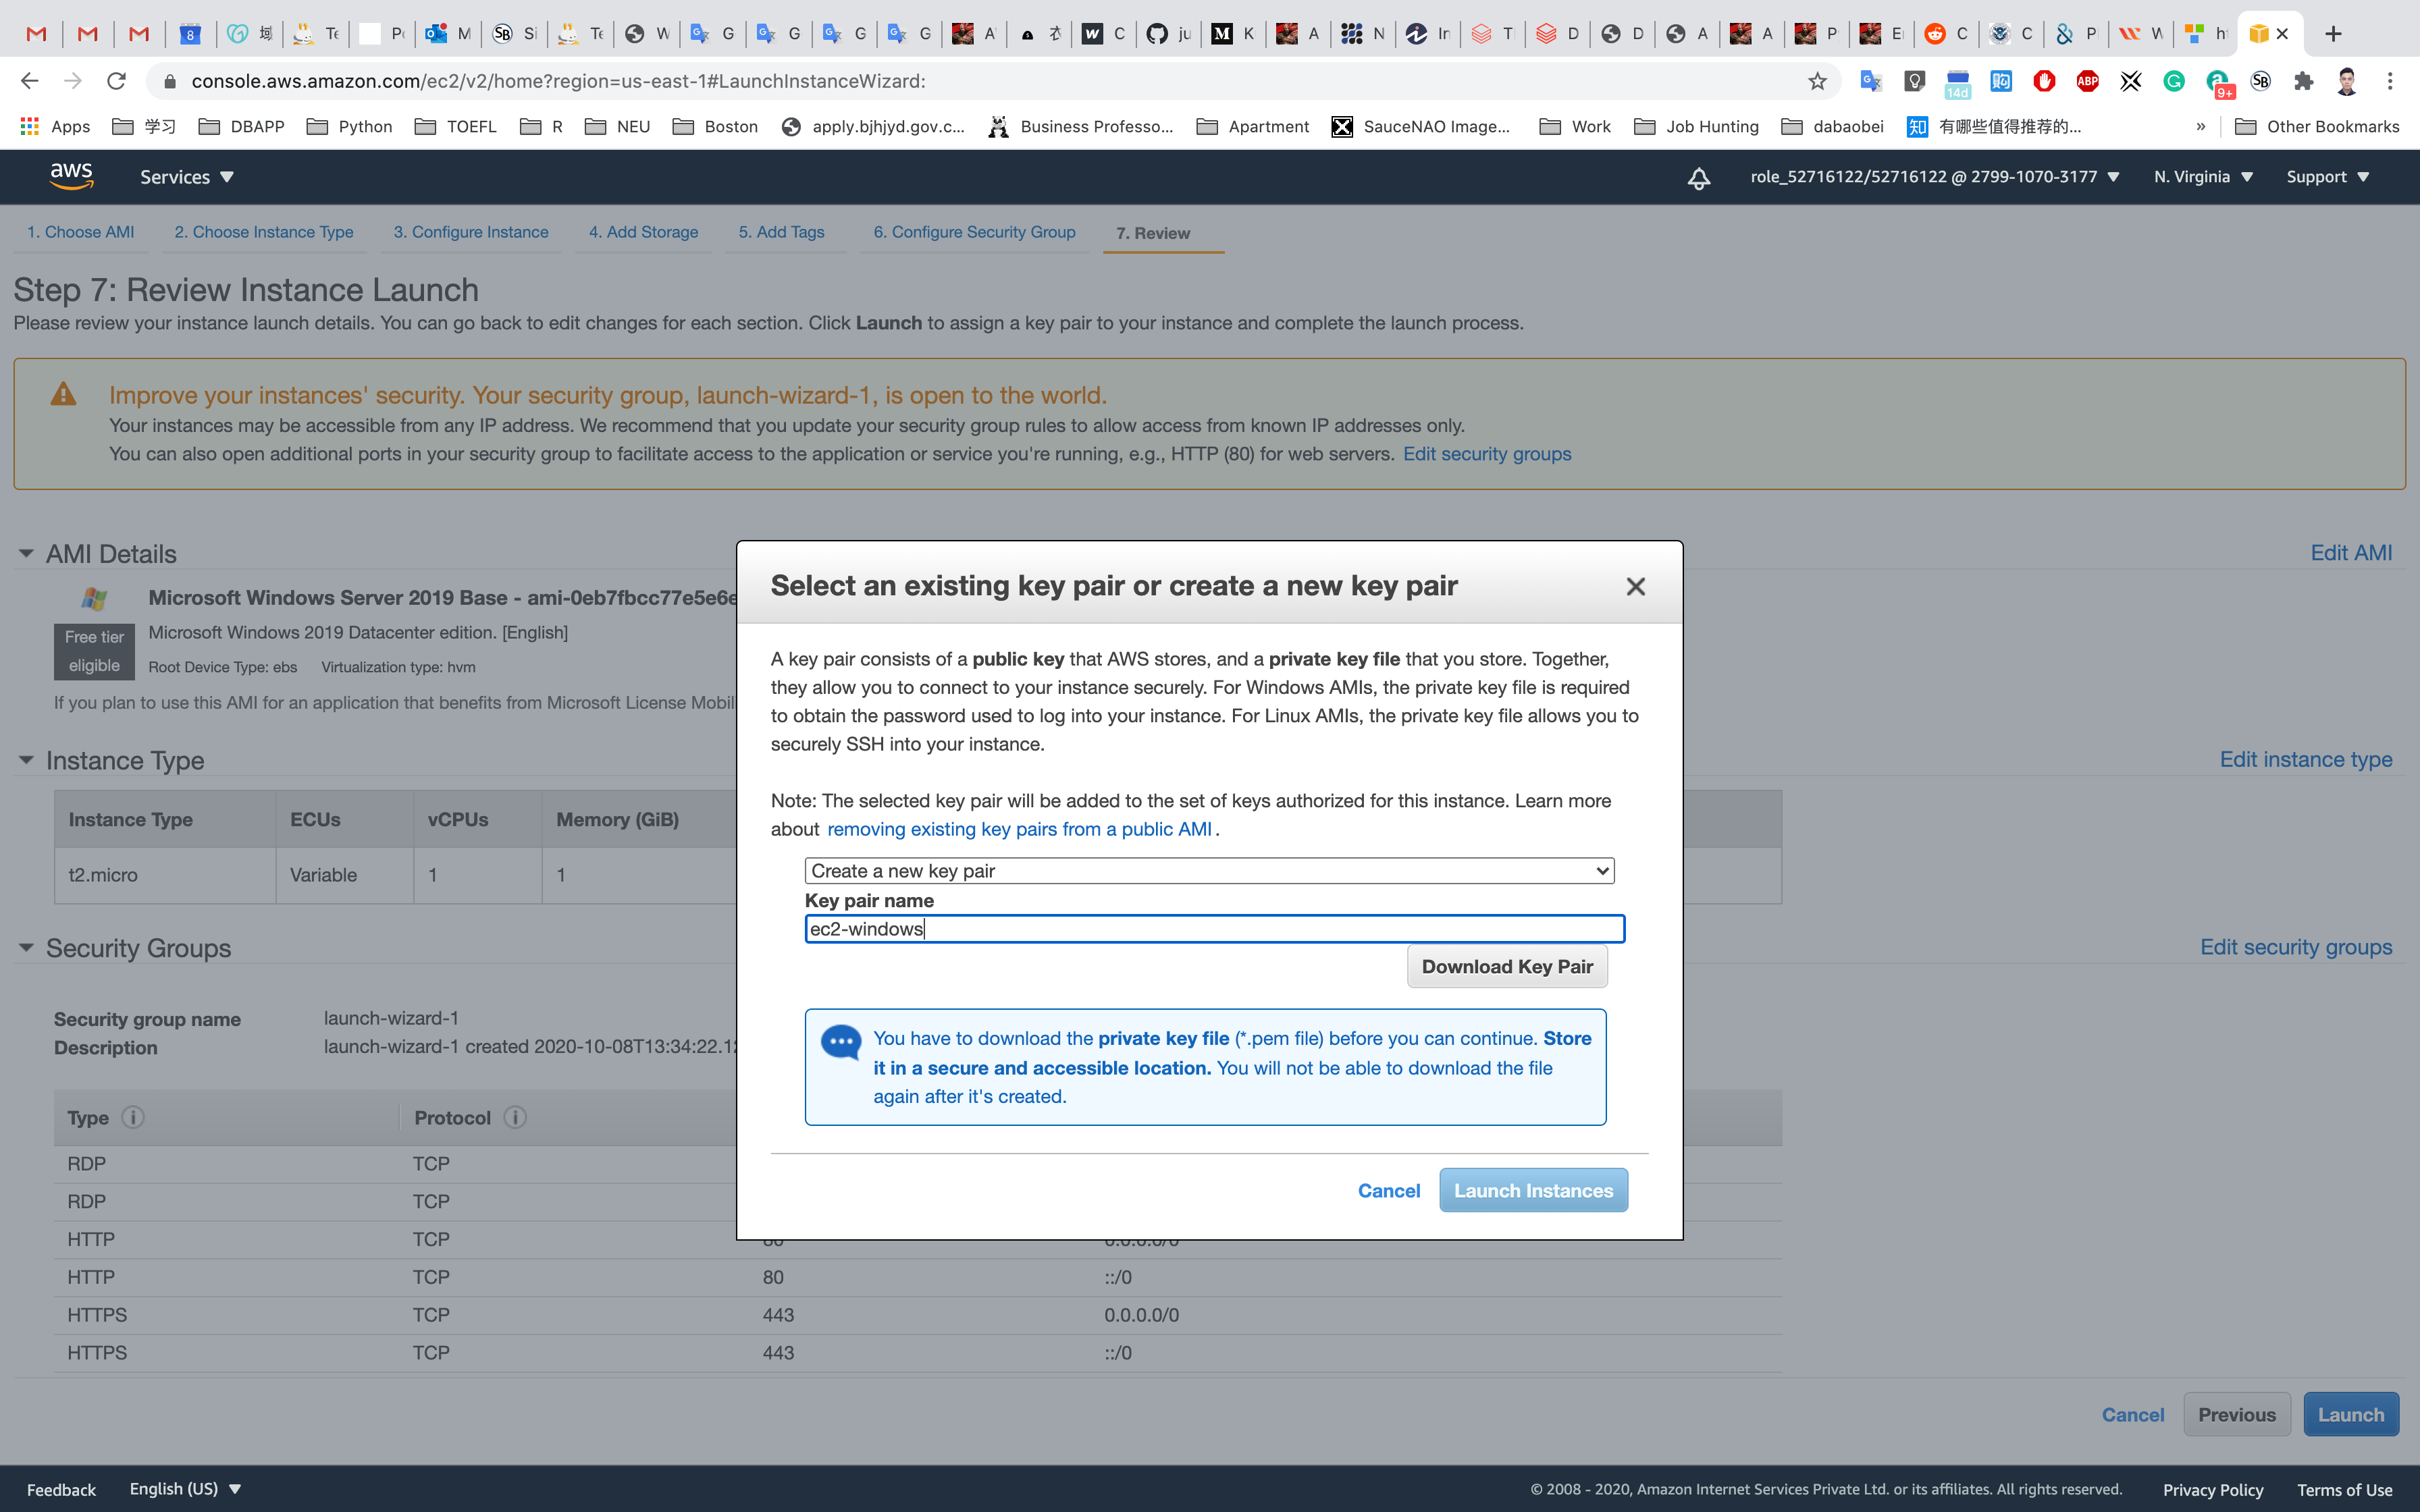
Click on Download Key Pair
Click on Launch Instances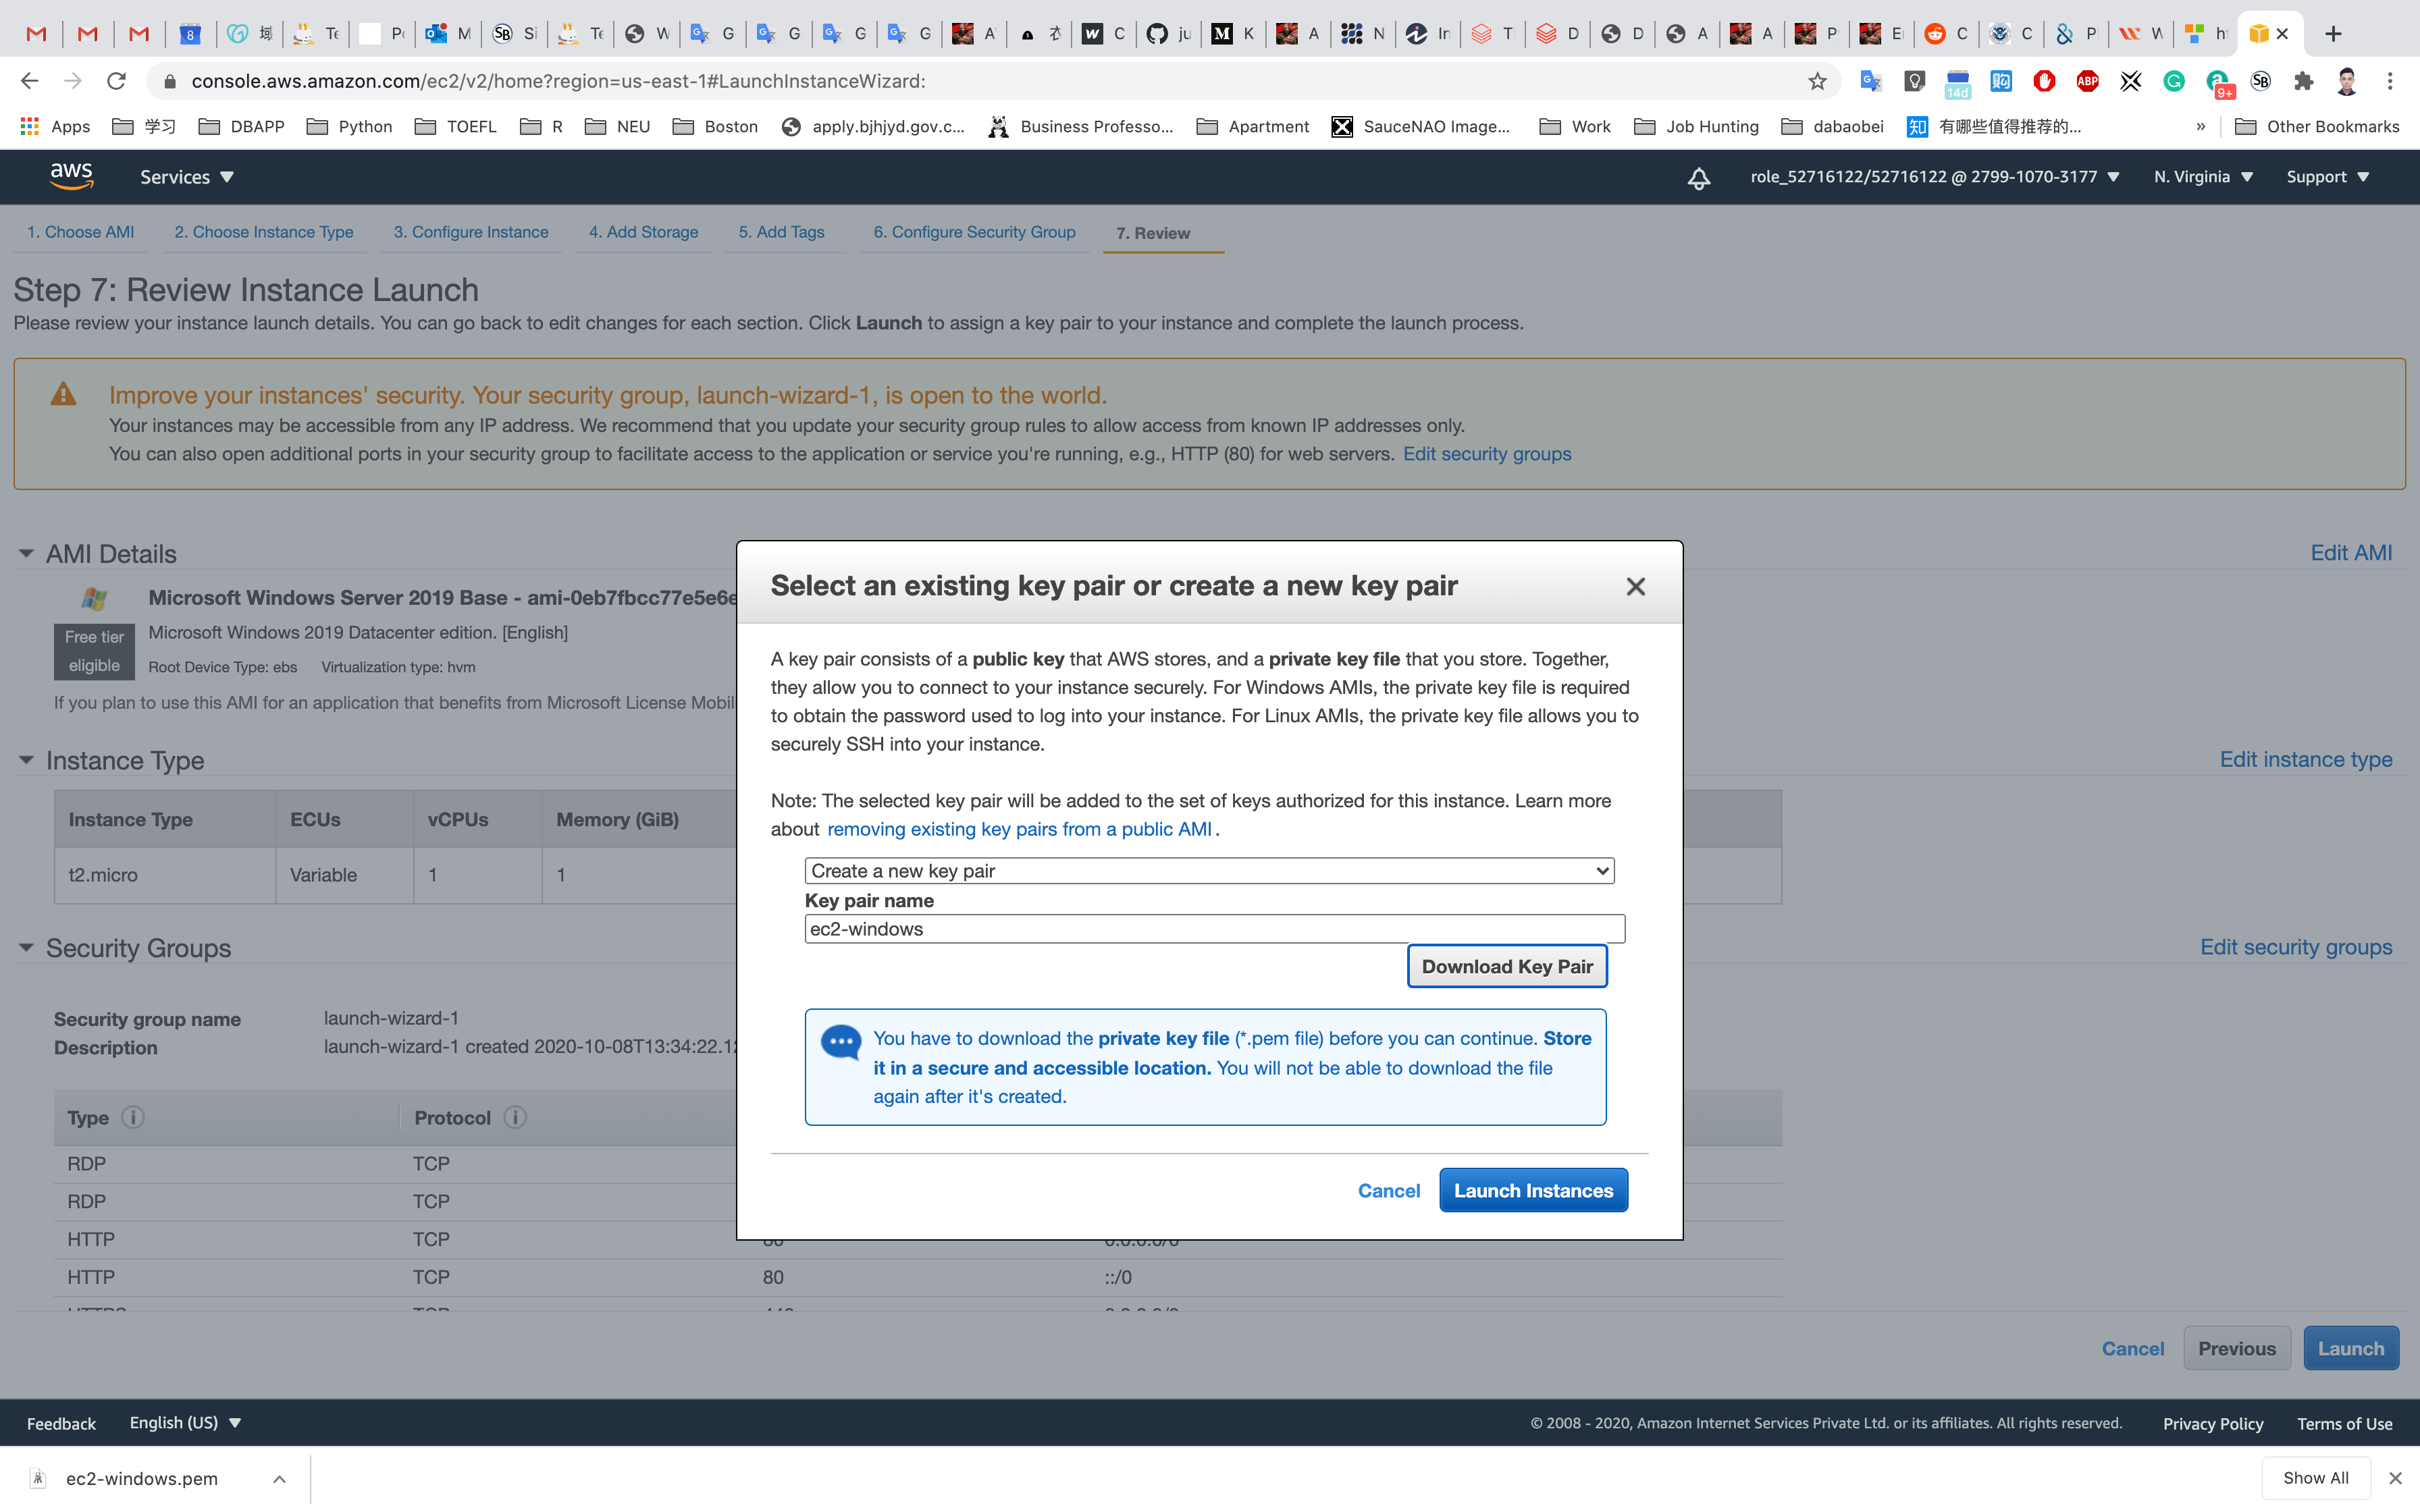
Click on View Instances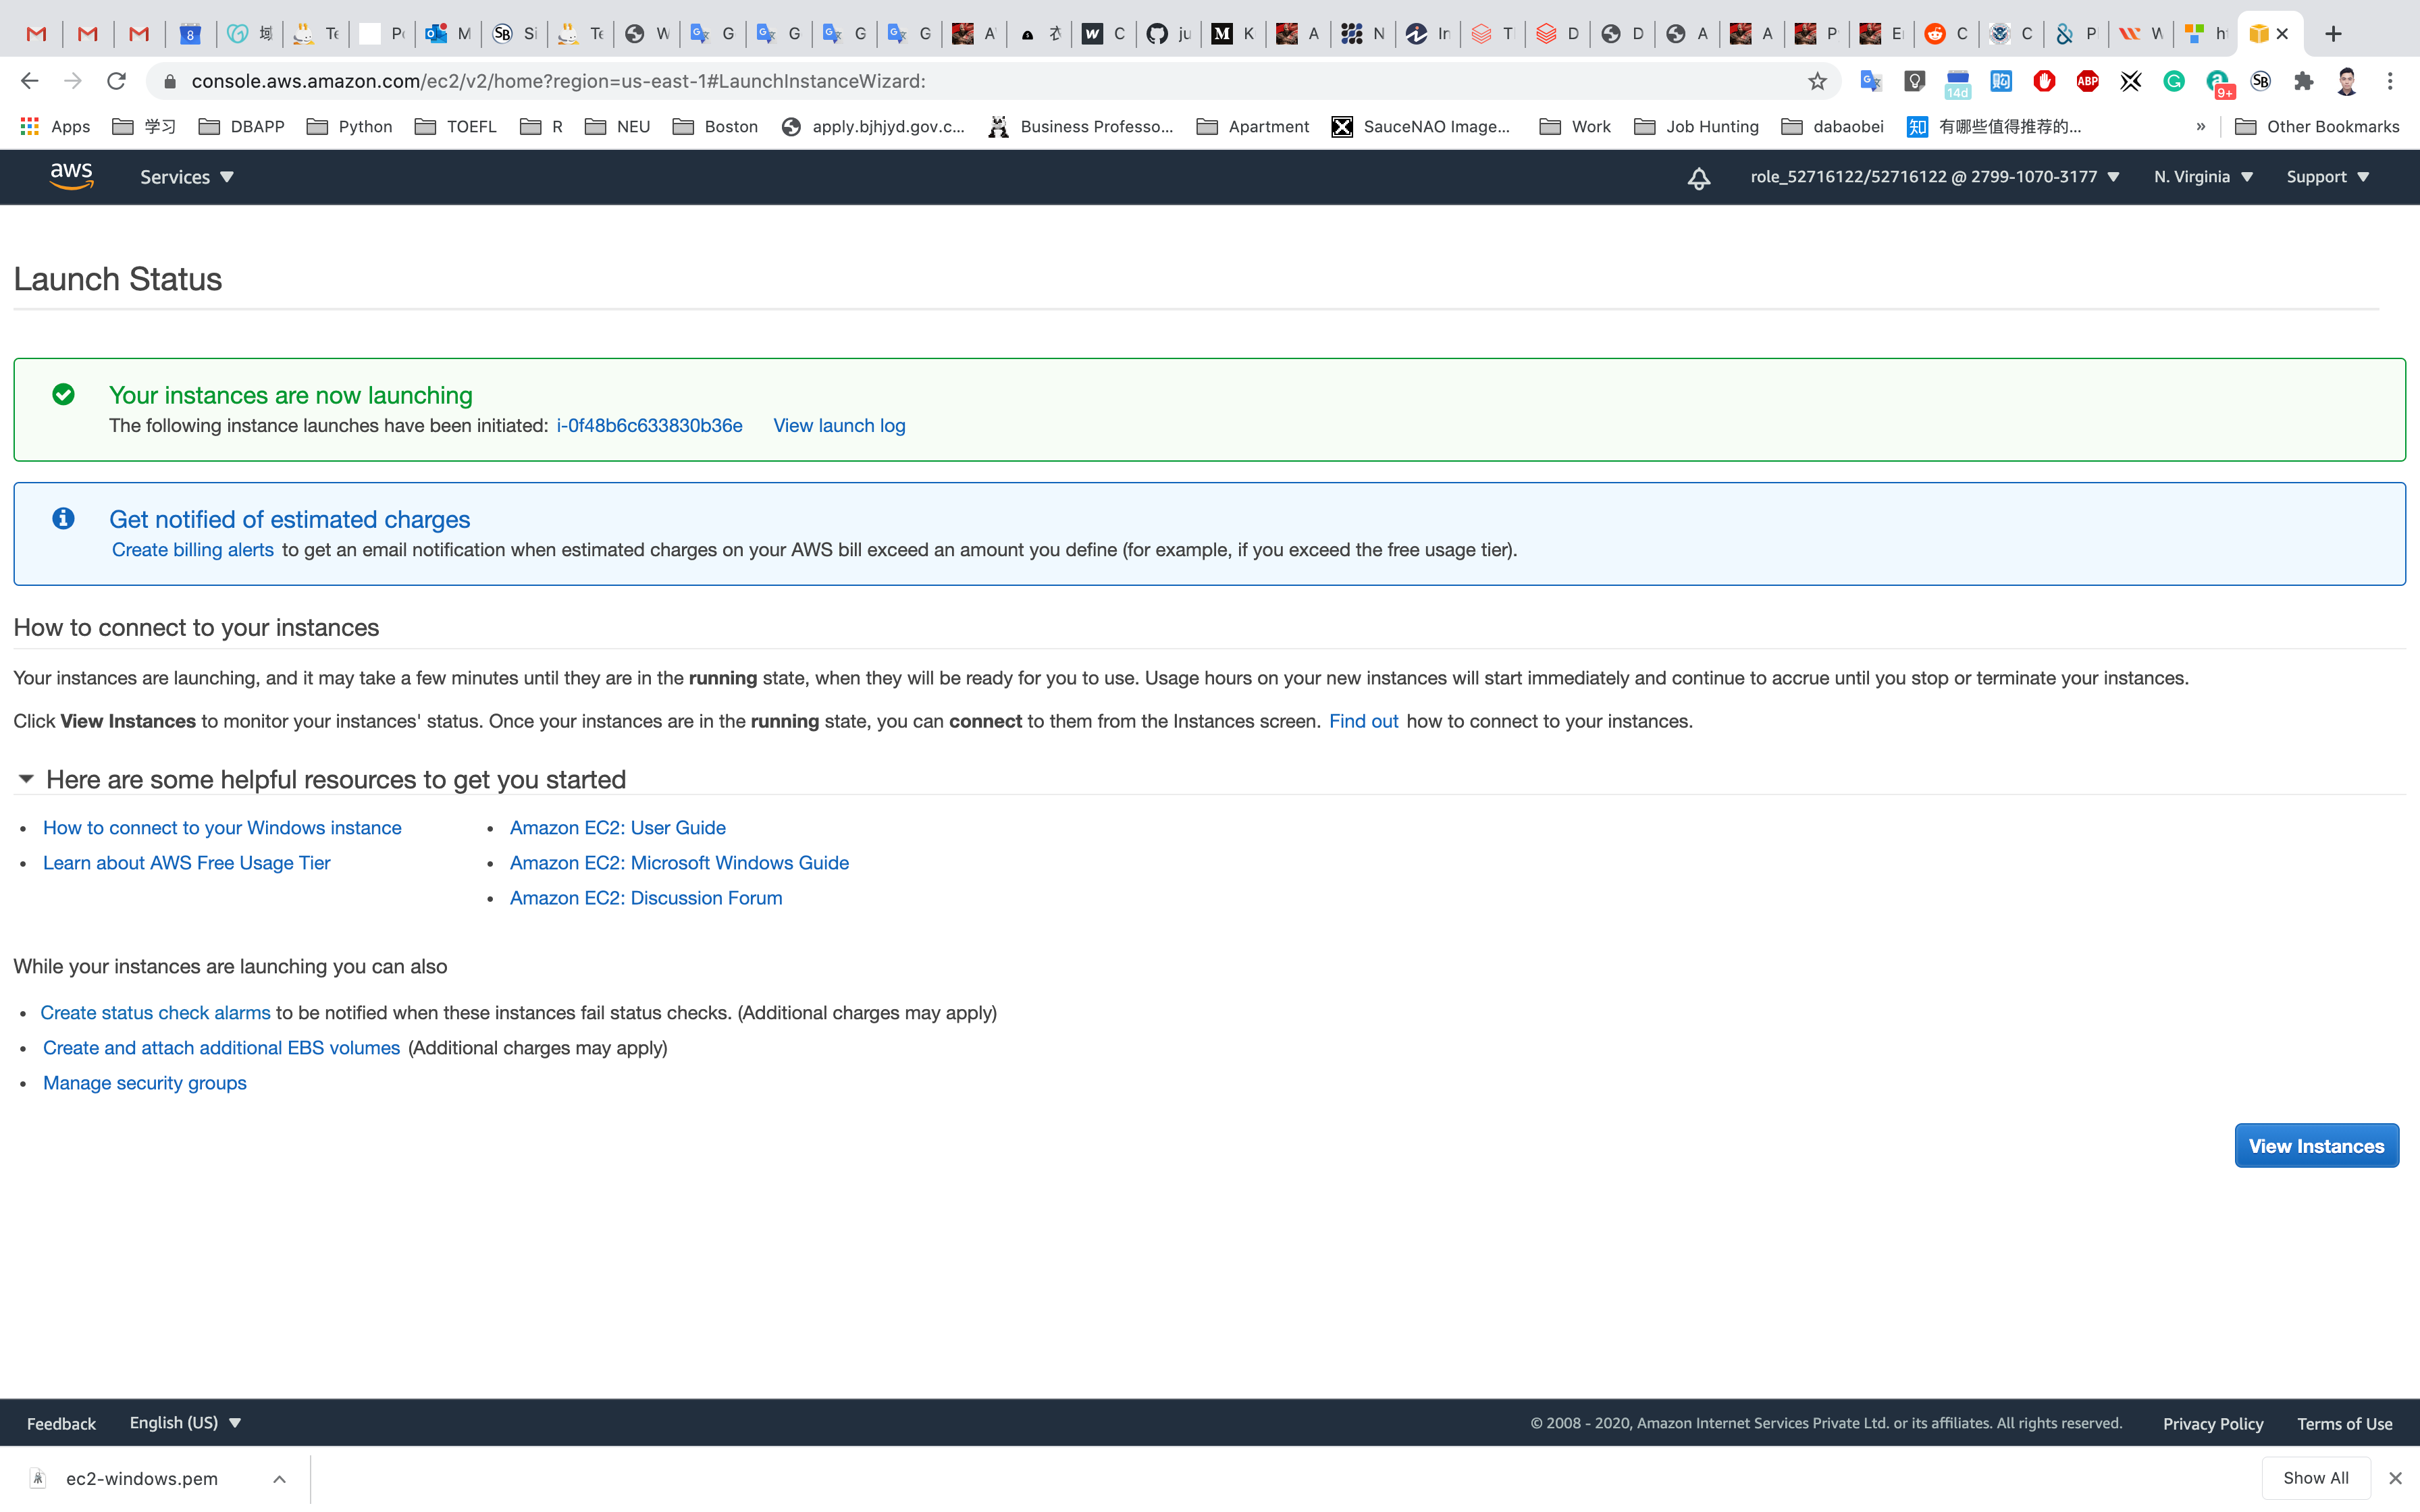
Waiting for the Instance State to switch to Running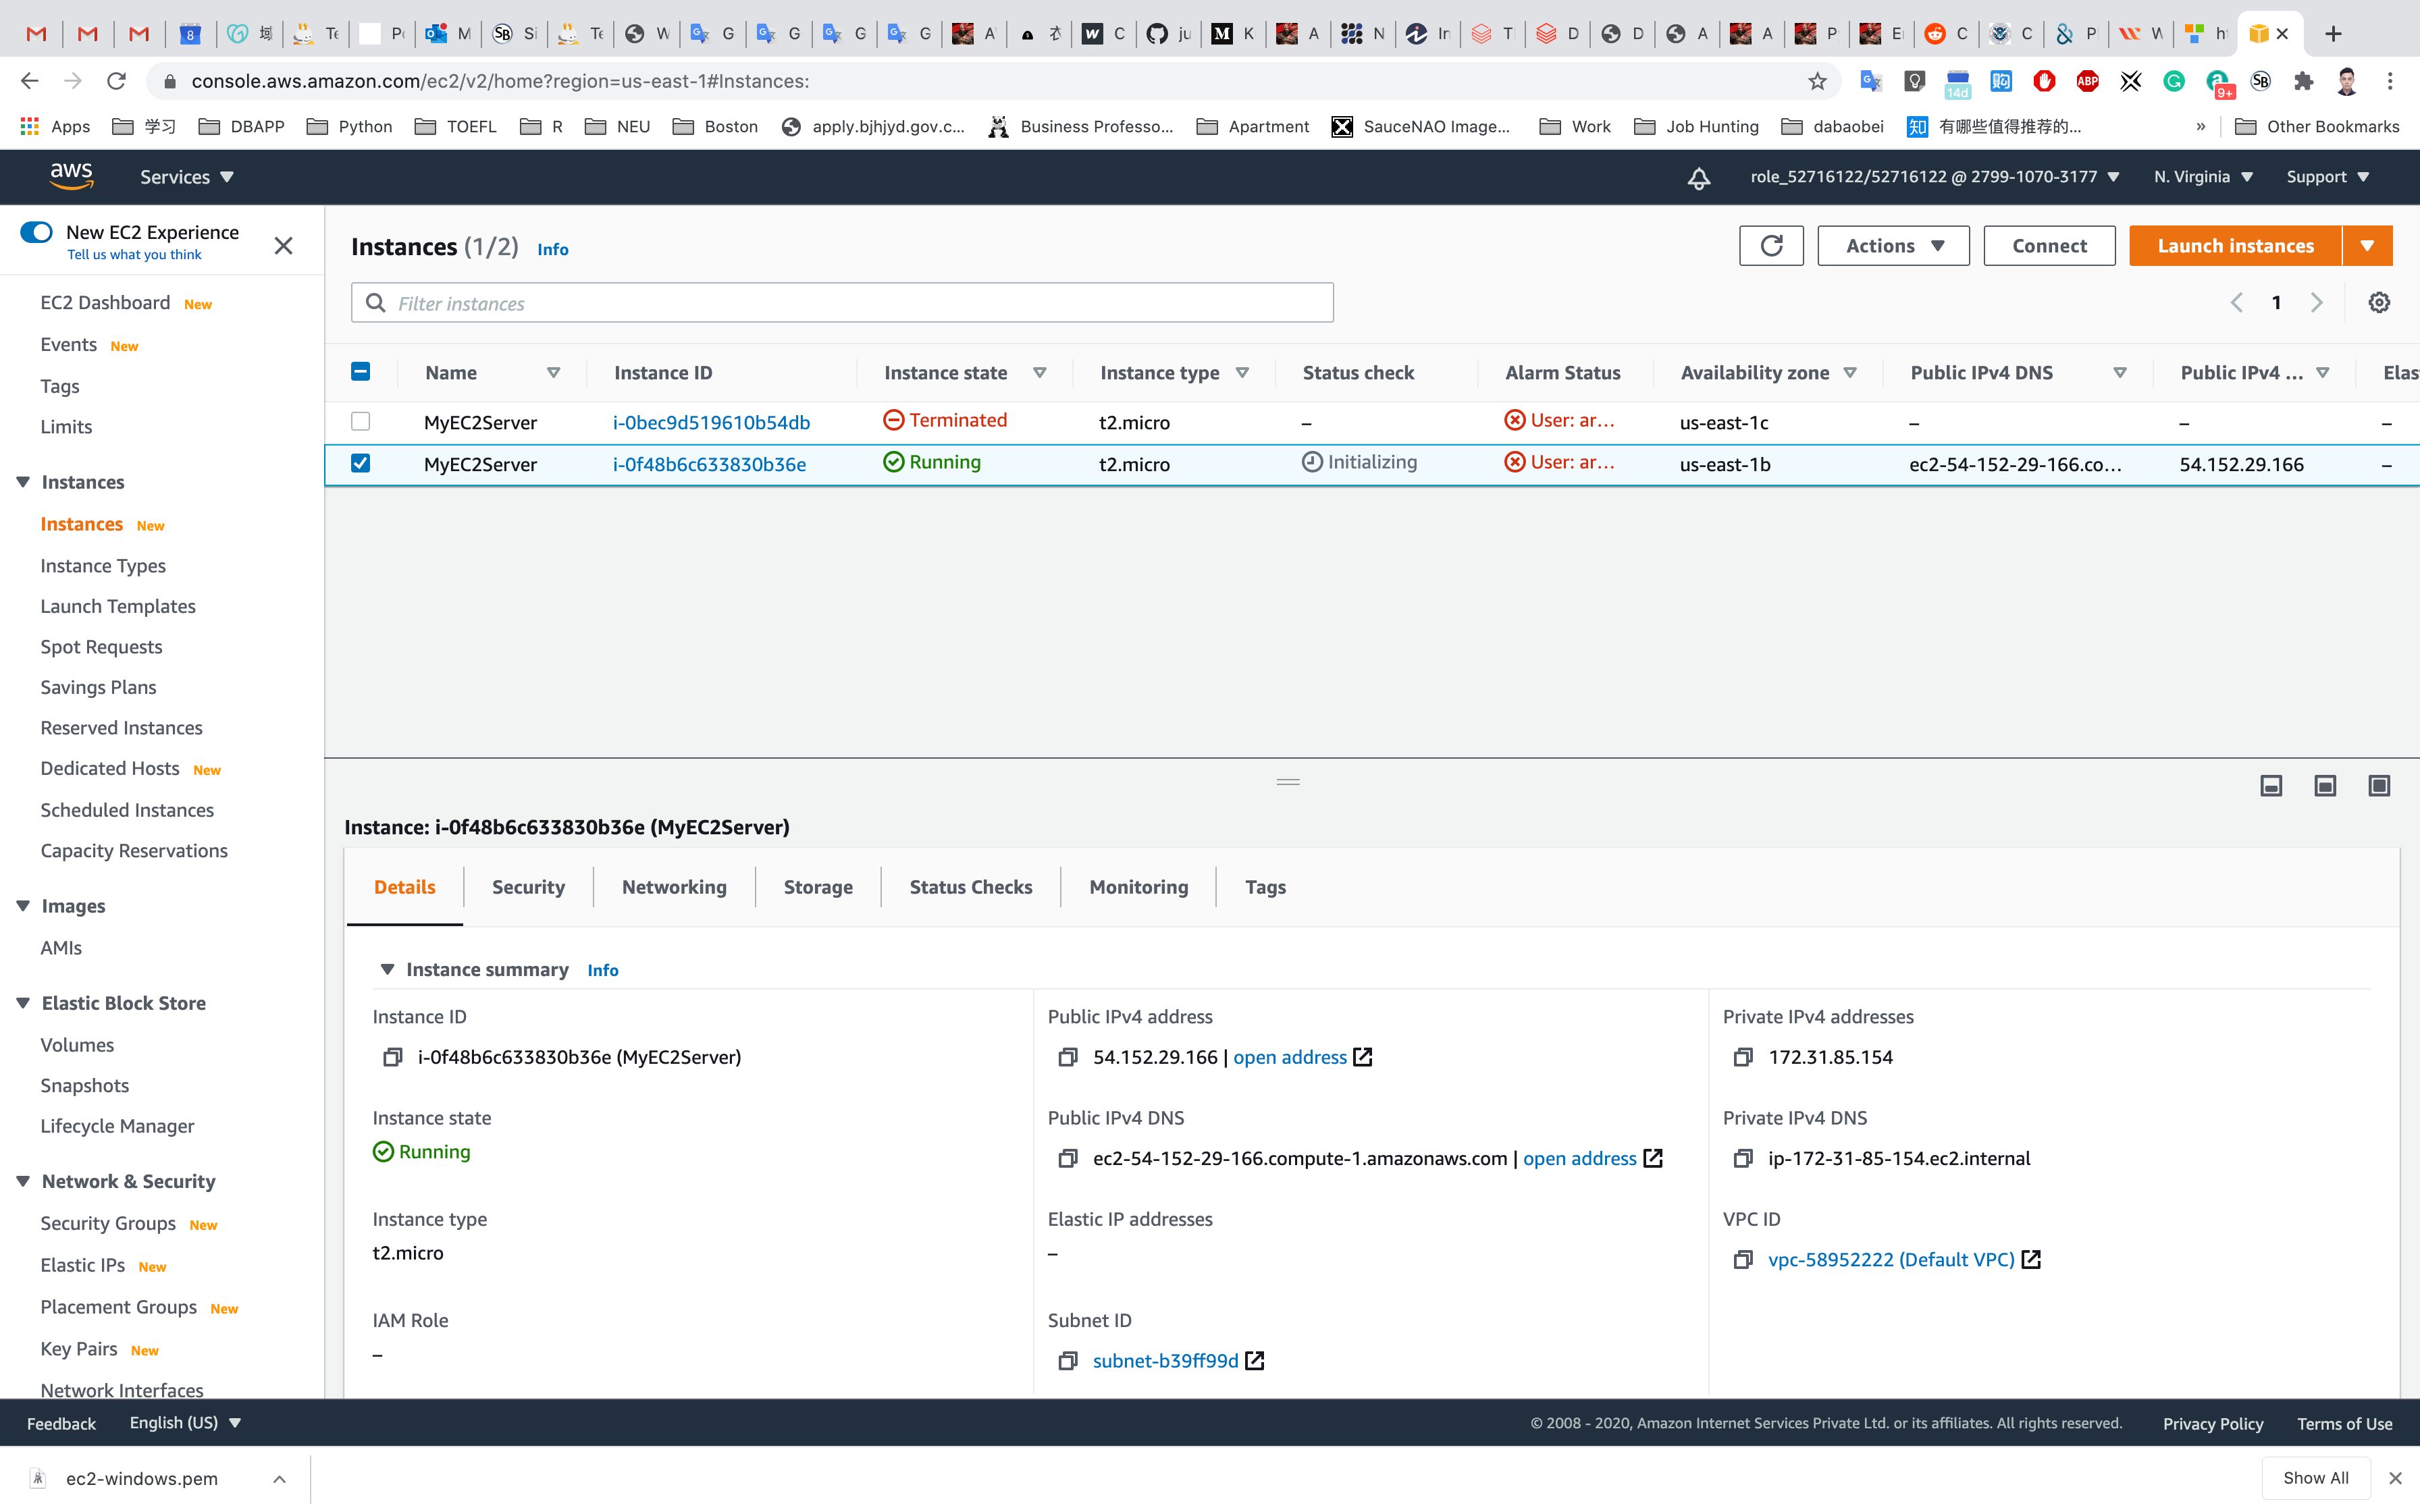
And copy the Public IPv4 address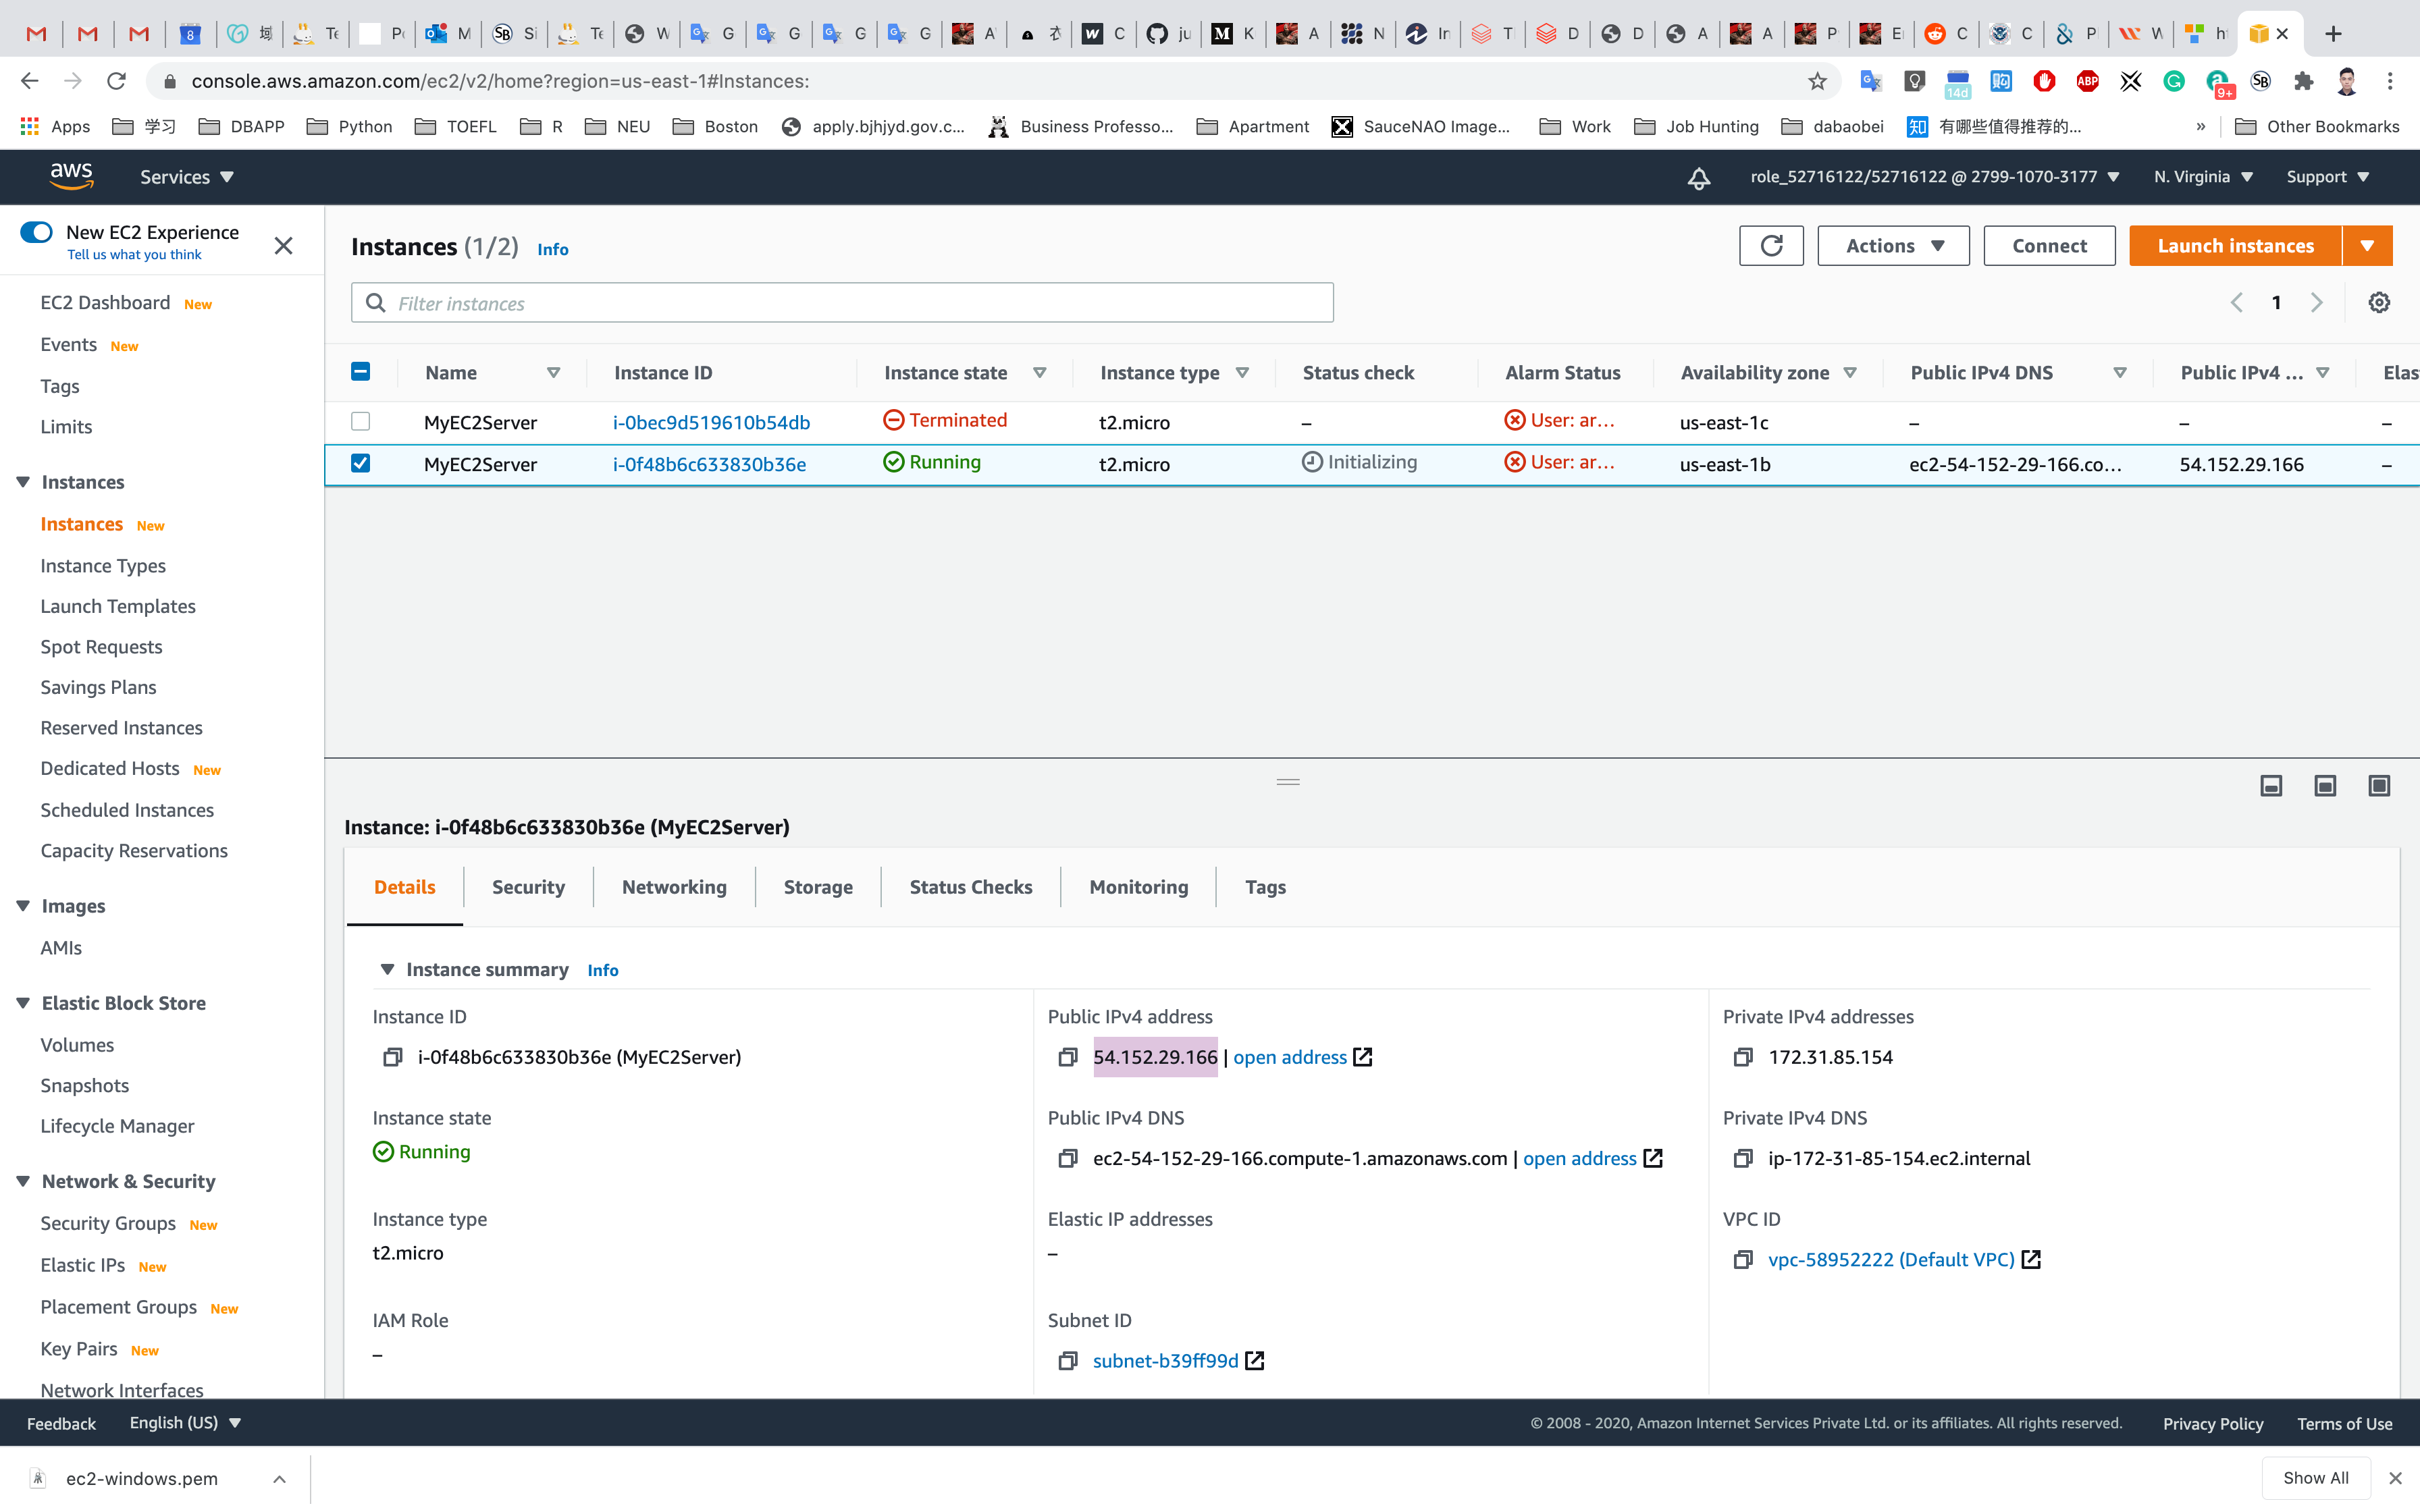
Connecting EC2 Instance with Remote Desktop Connection
Select your EC2 Instance and click on Connect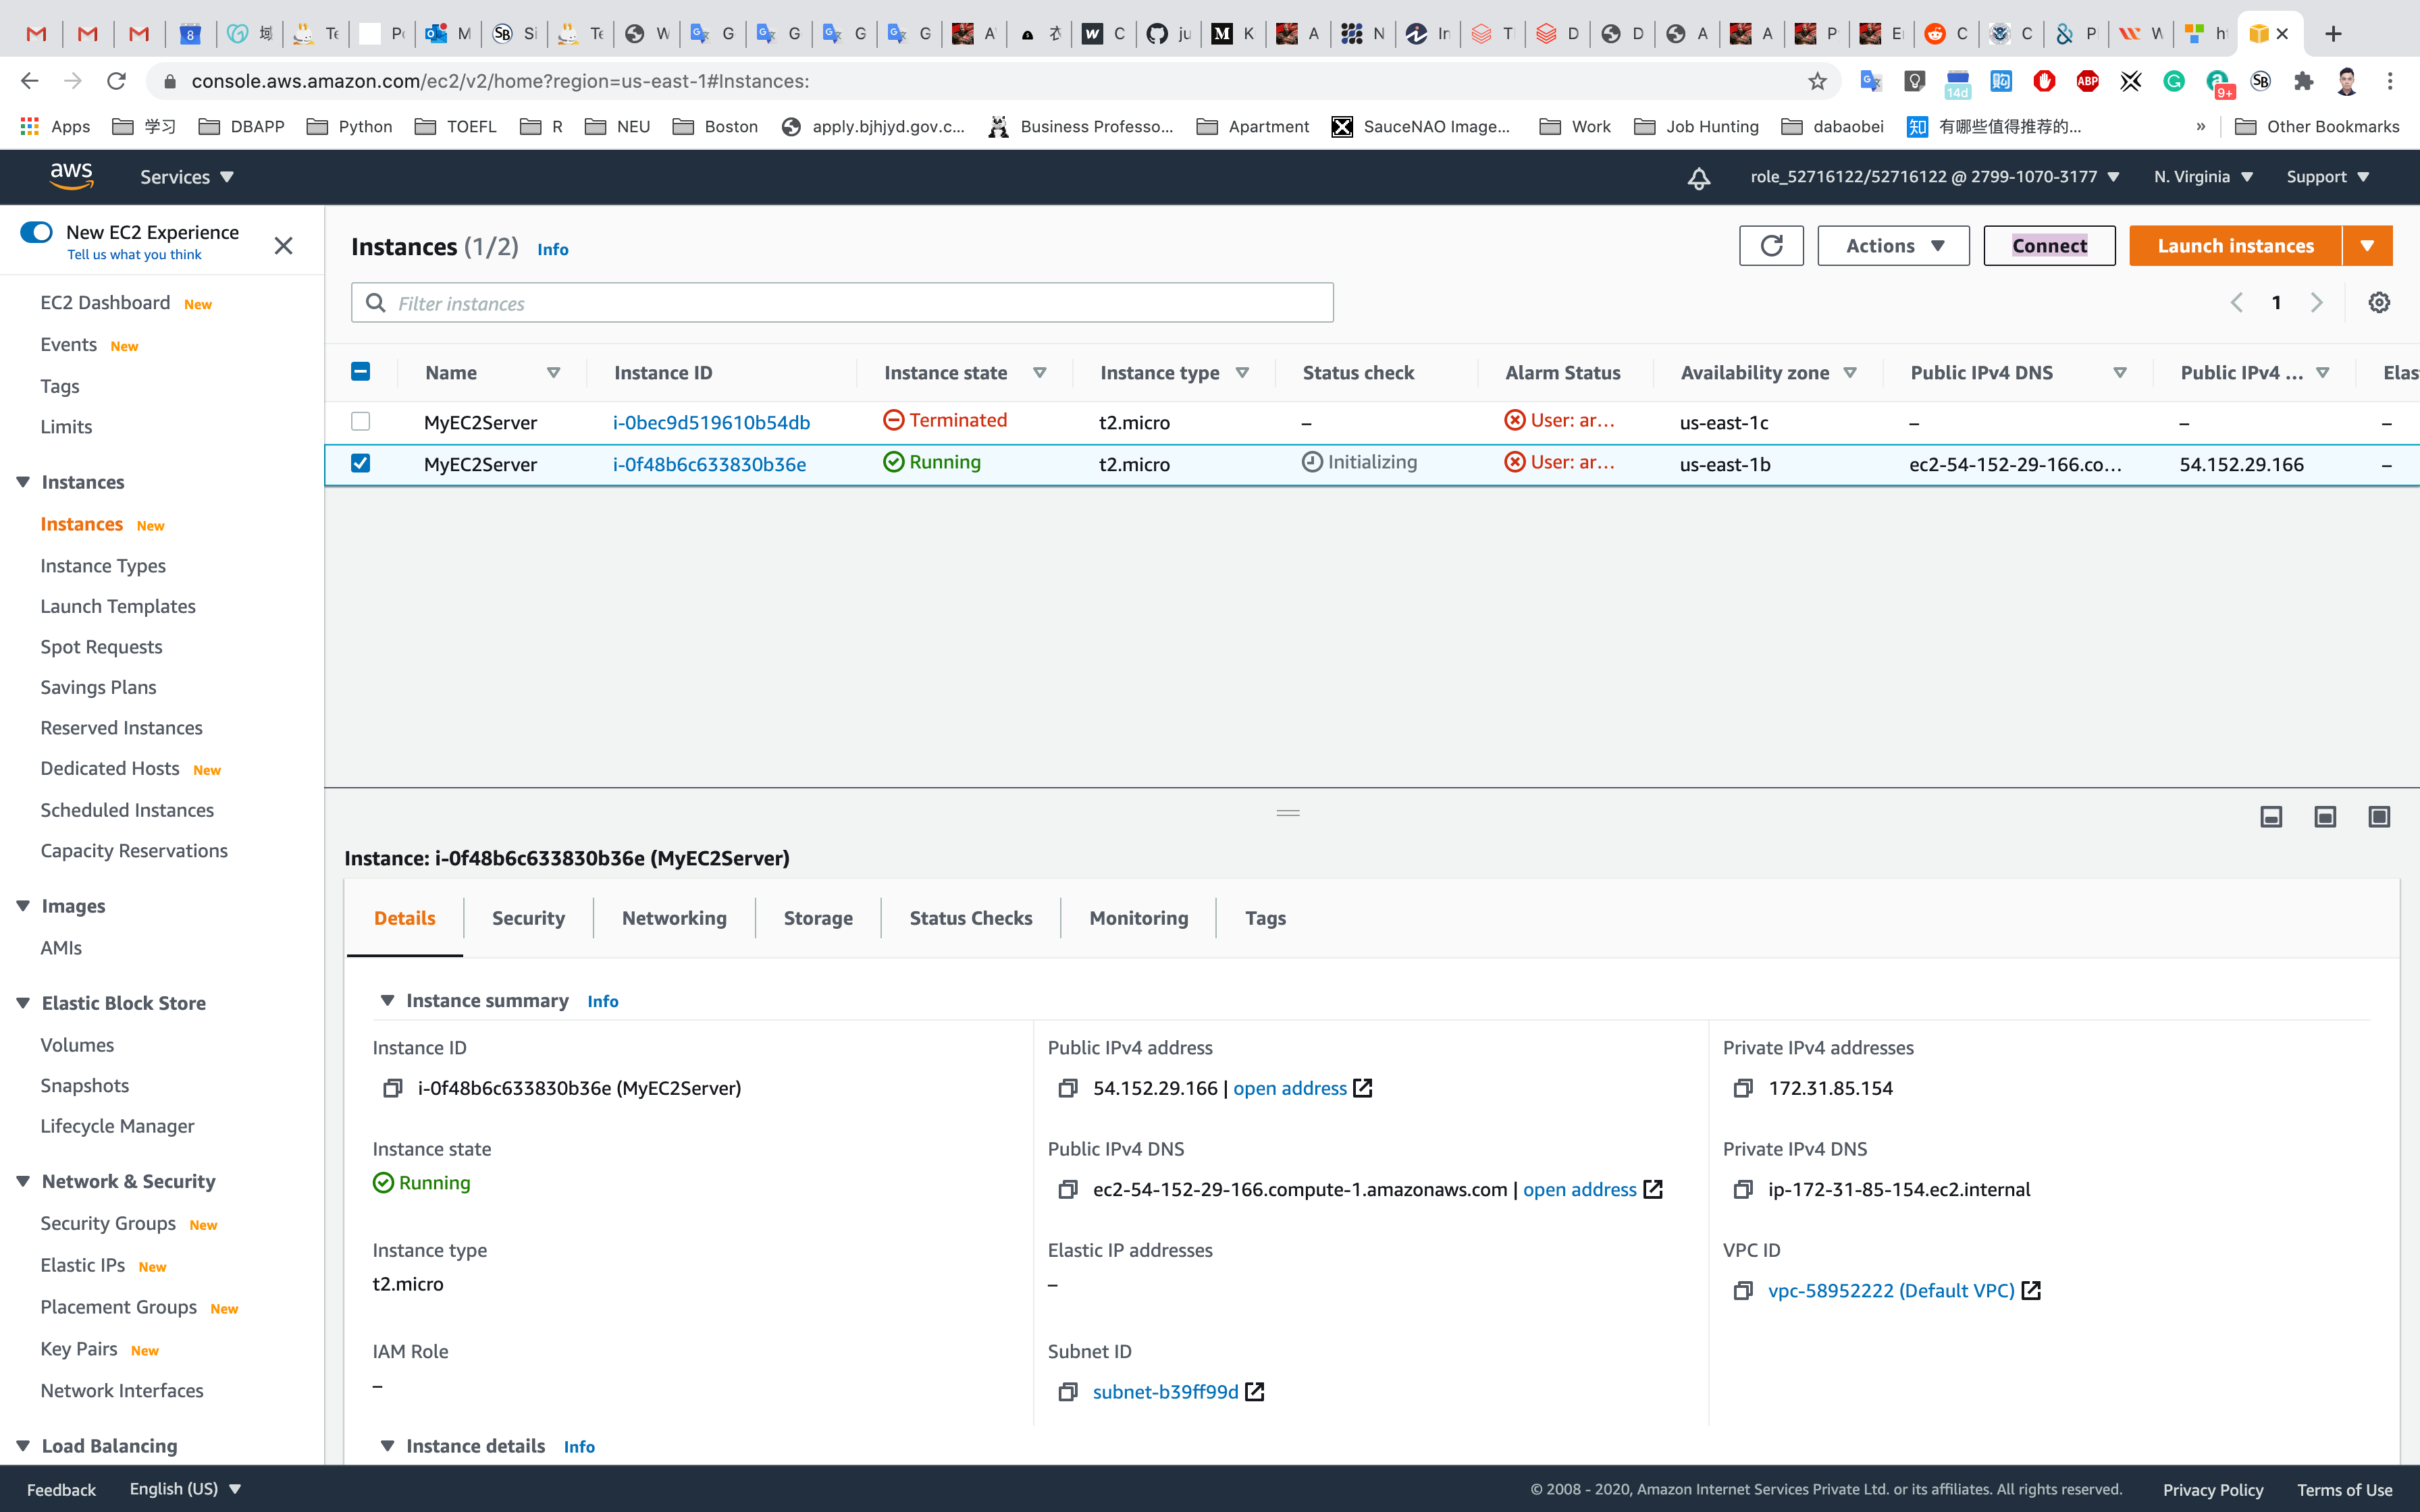
Click on RDP Client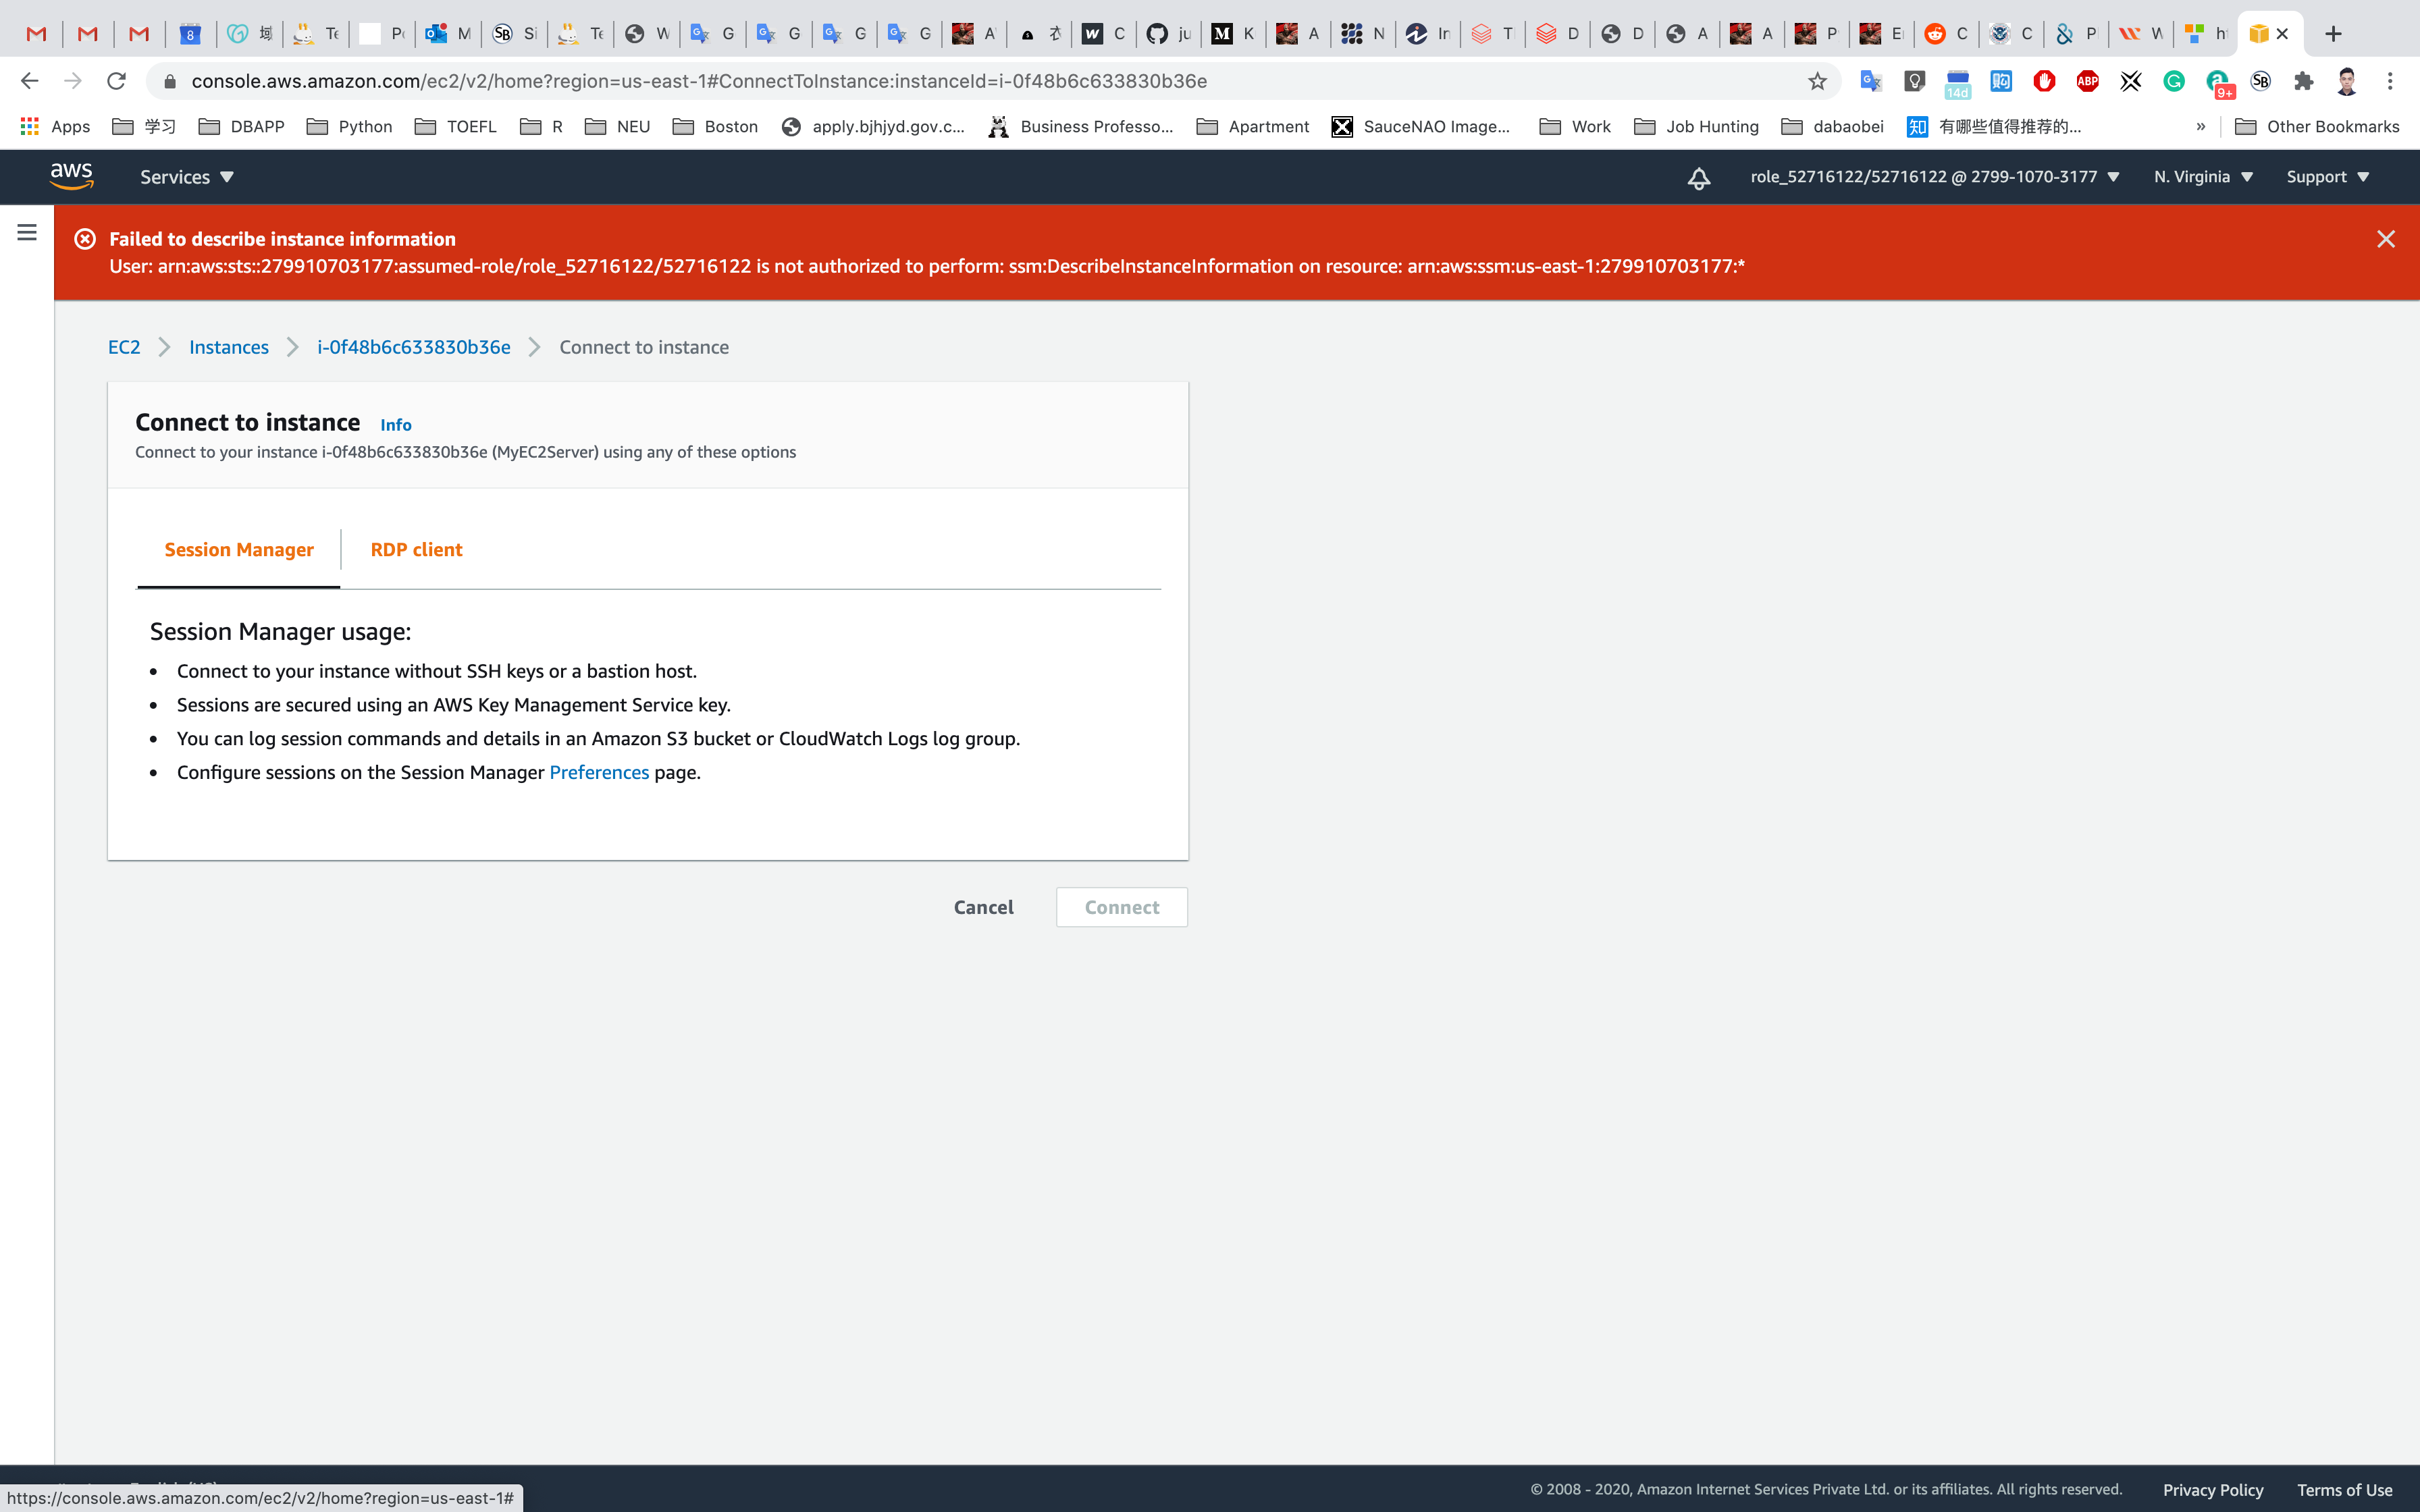
Click on Get password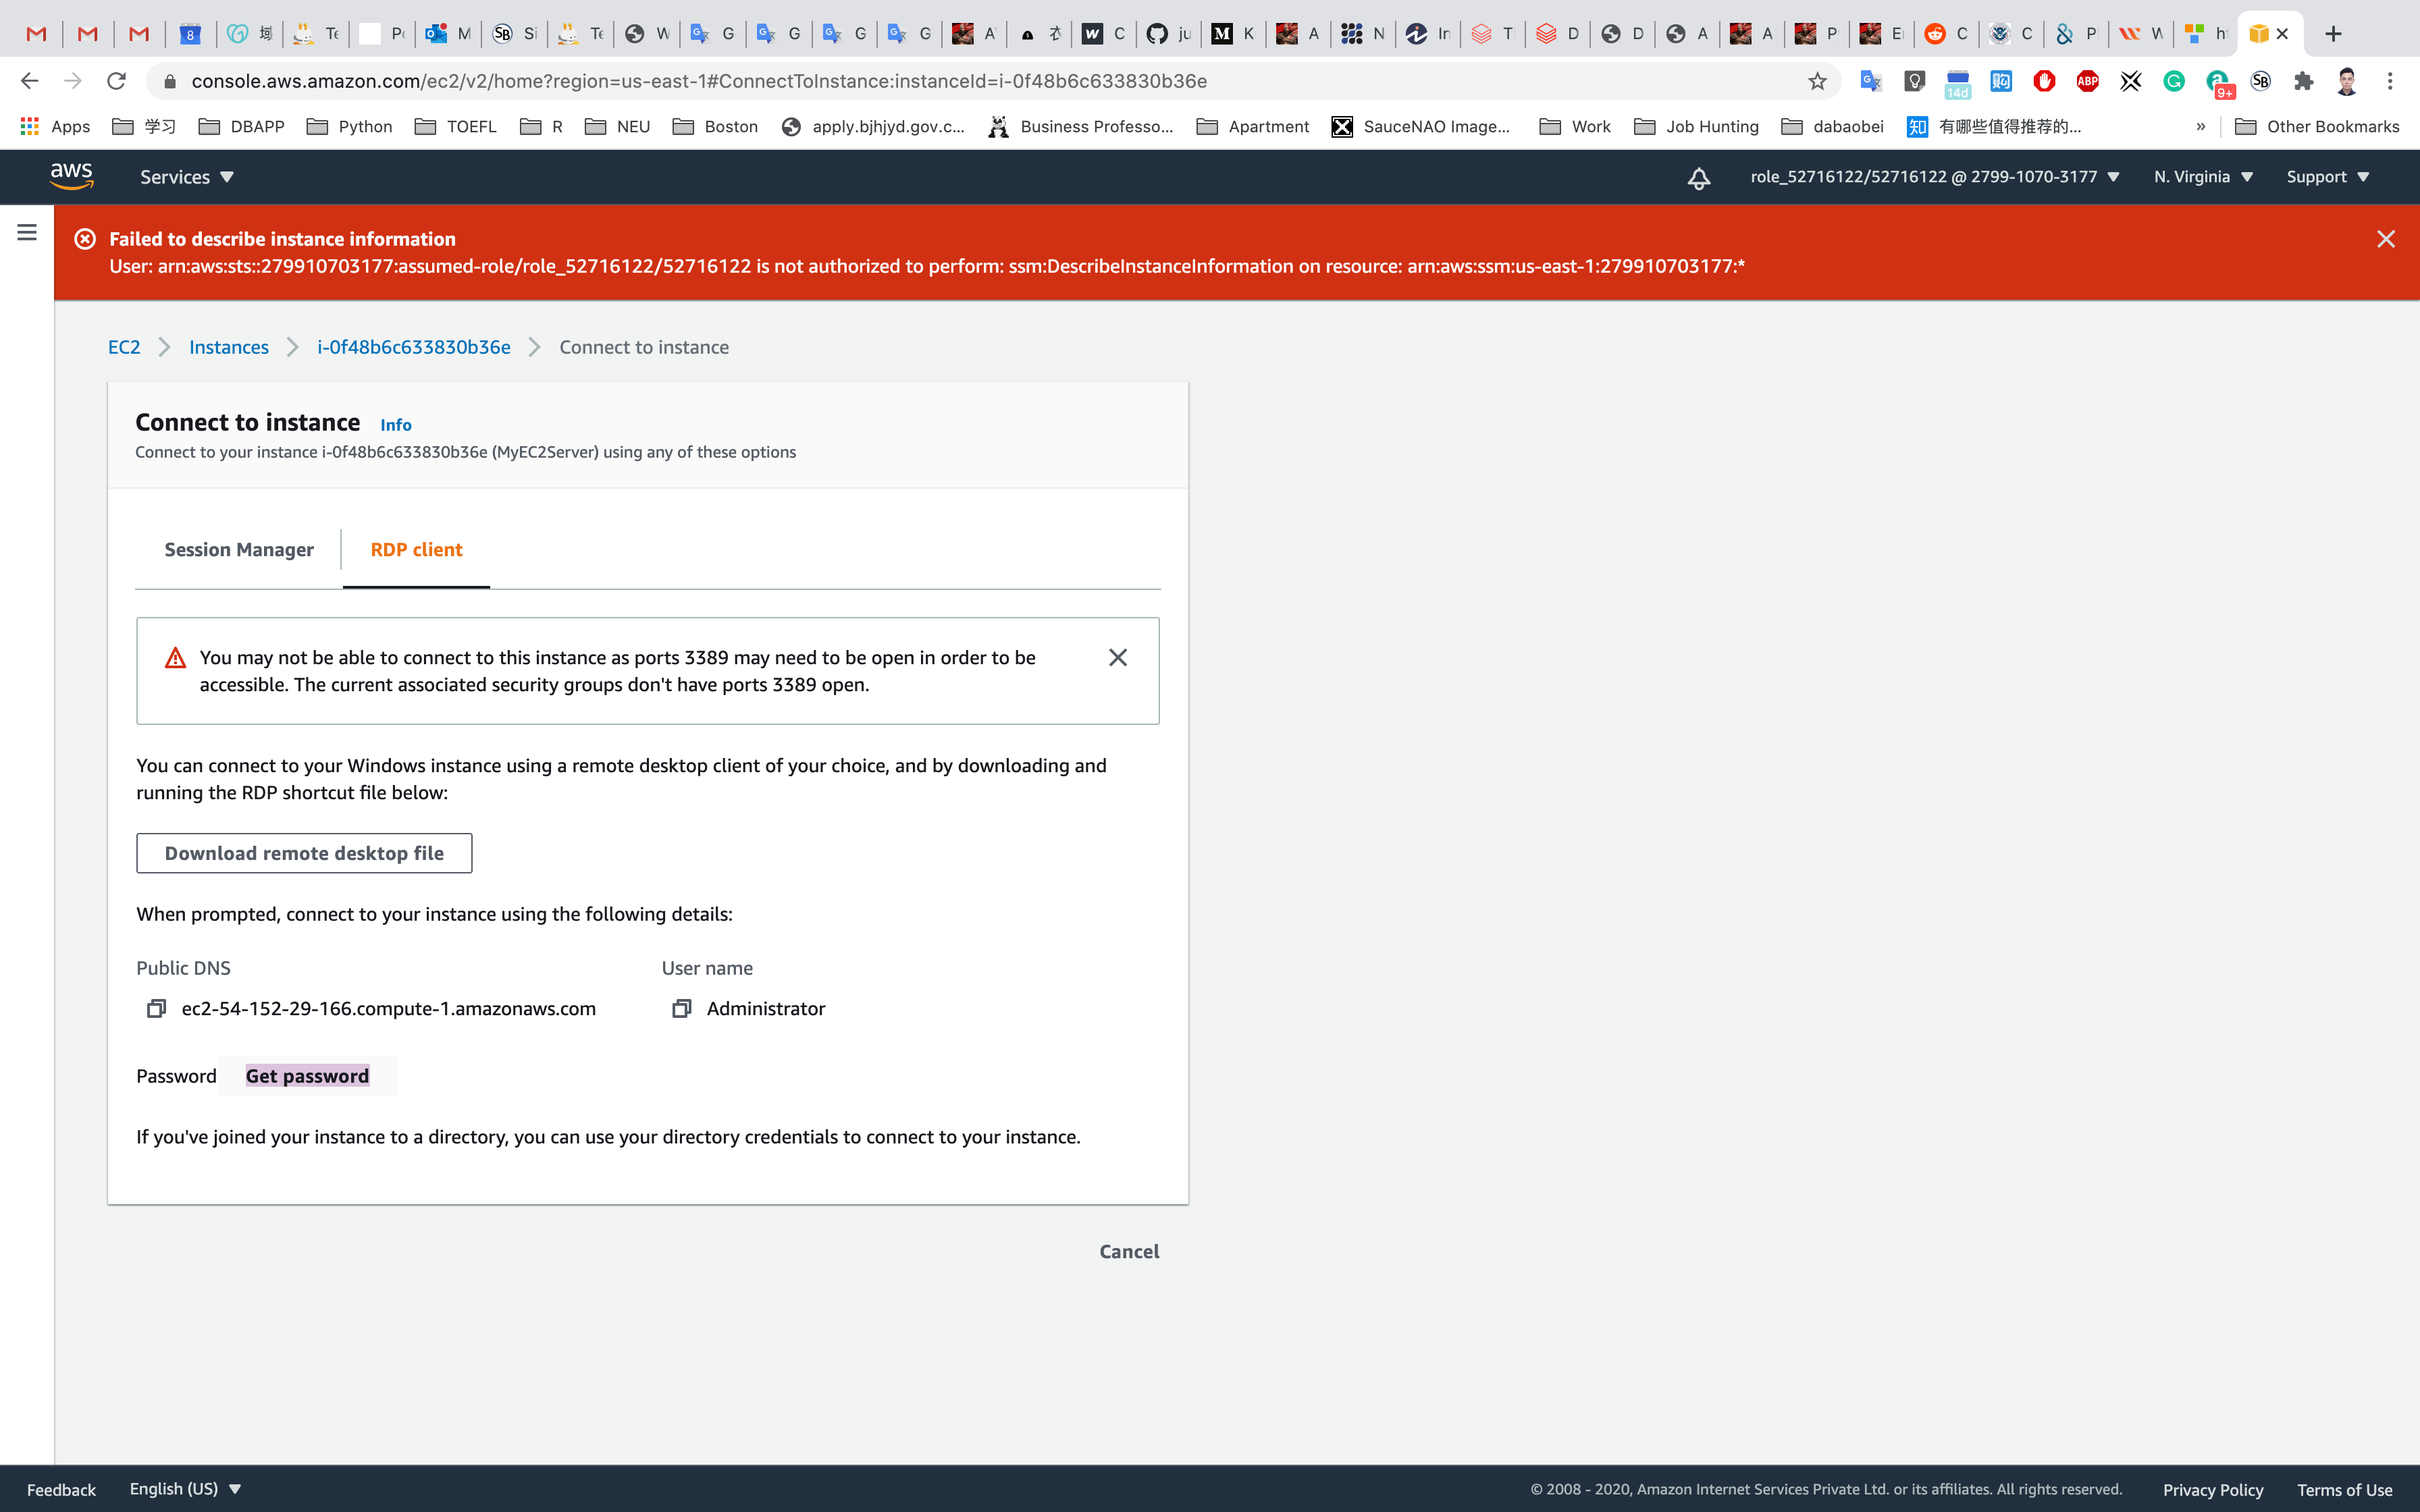
Click on Browse your key pair, in my lab, it is ec2-windows.pem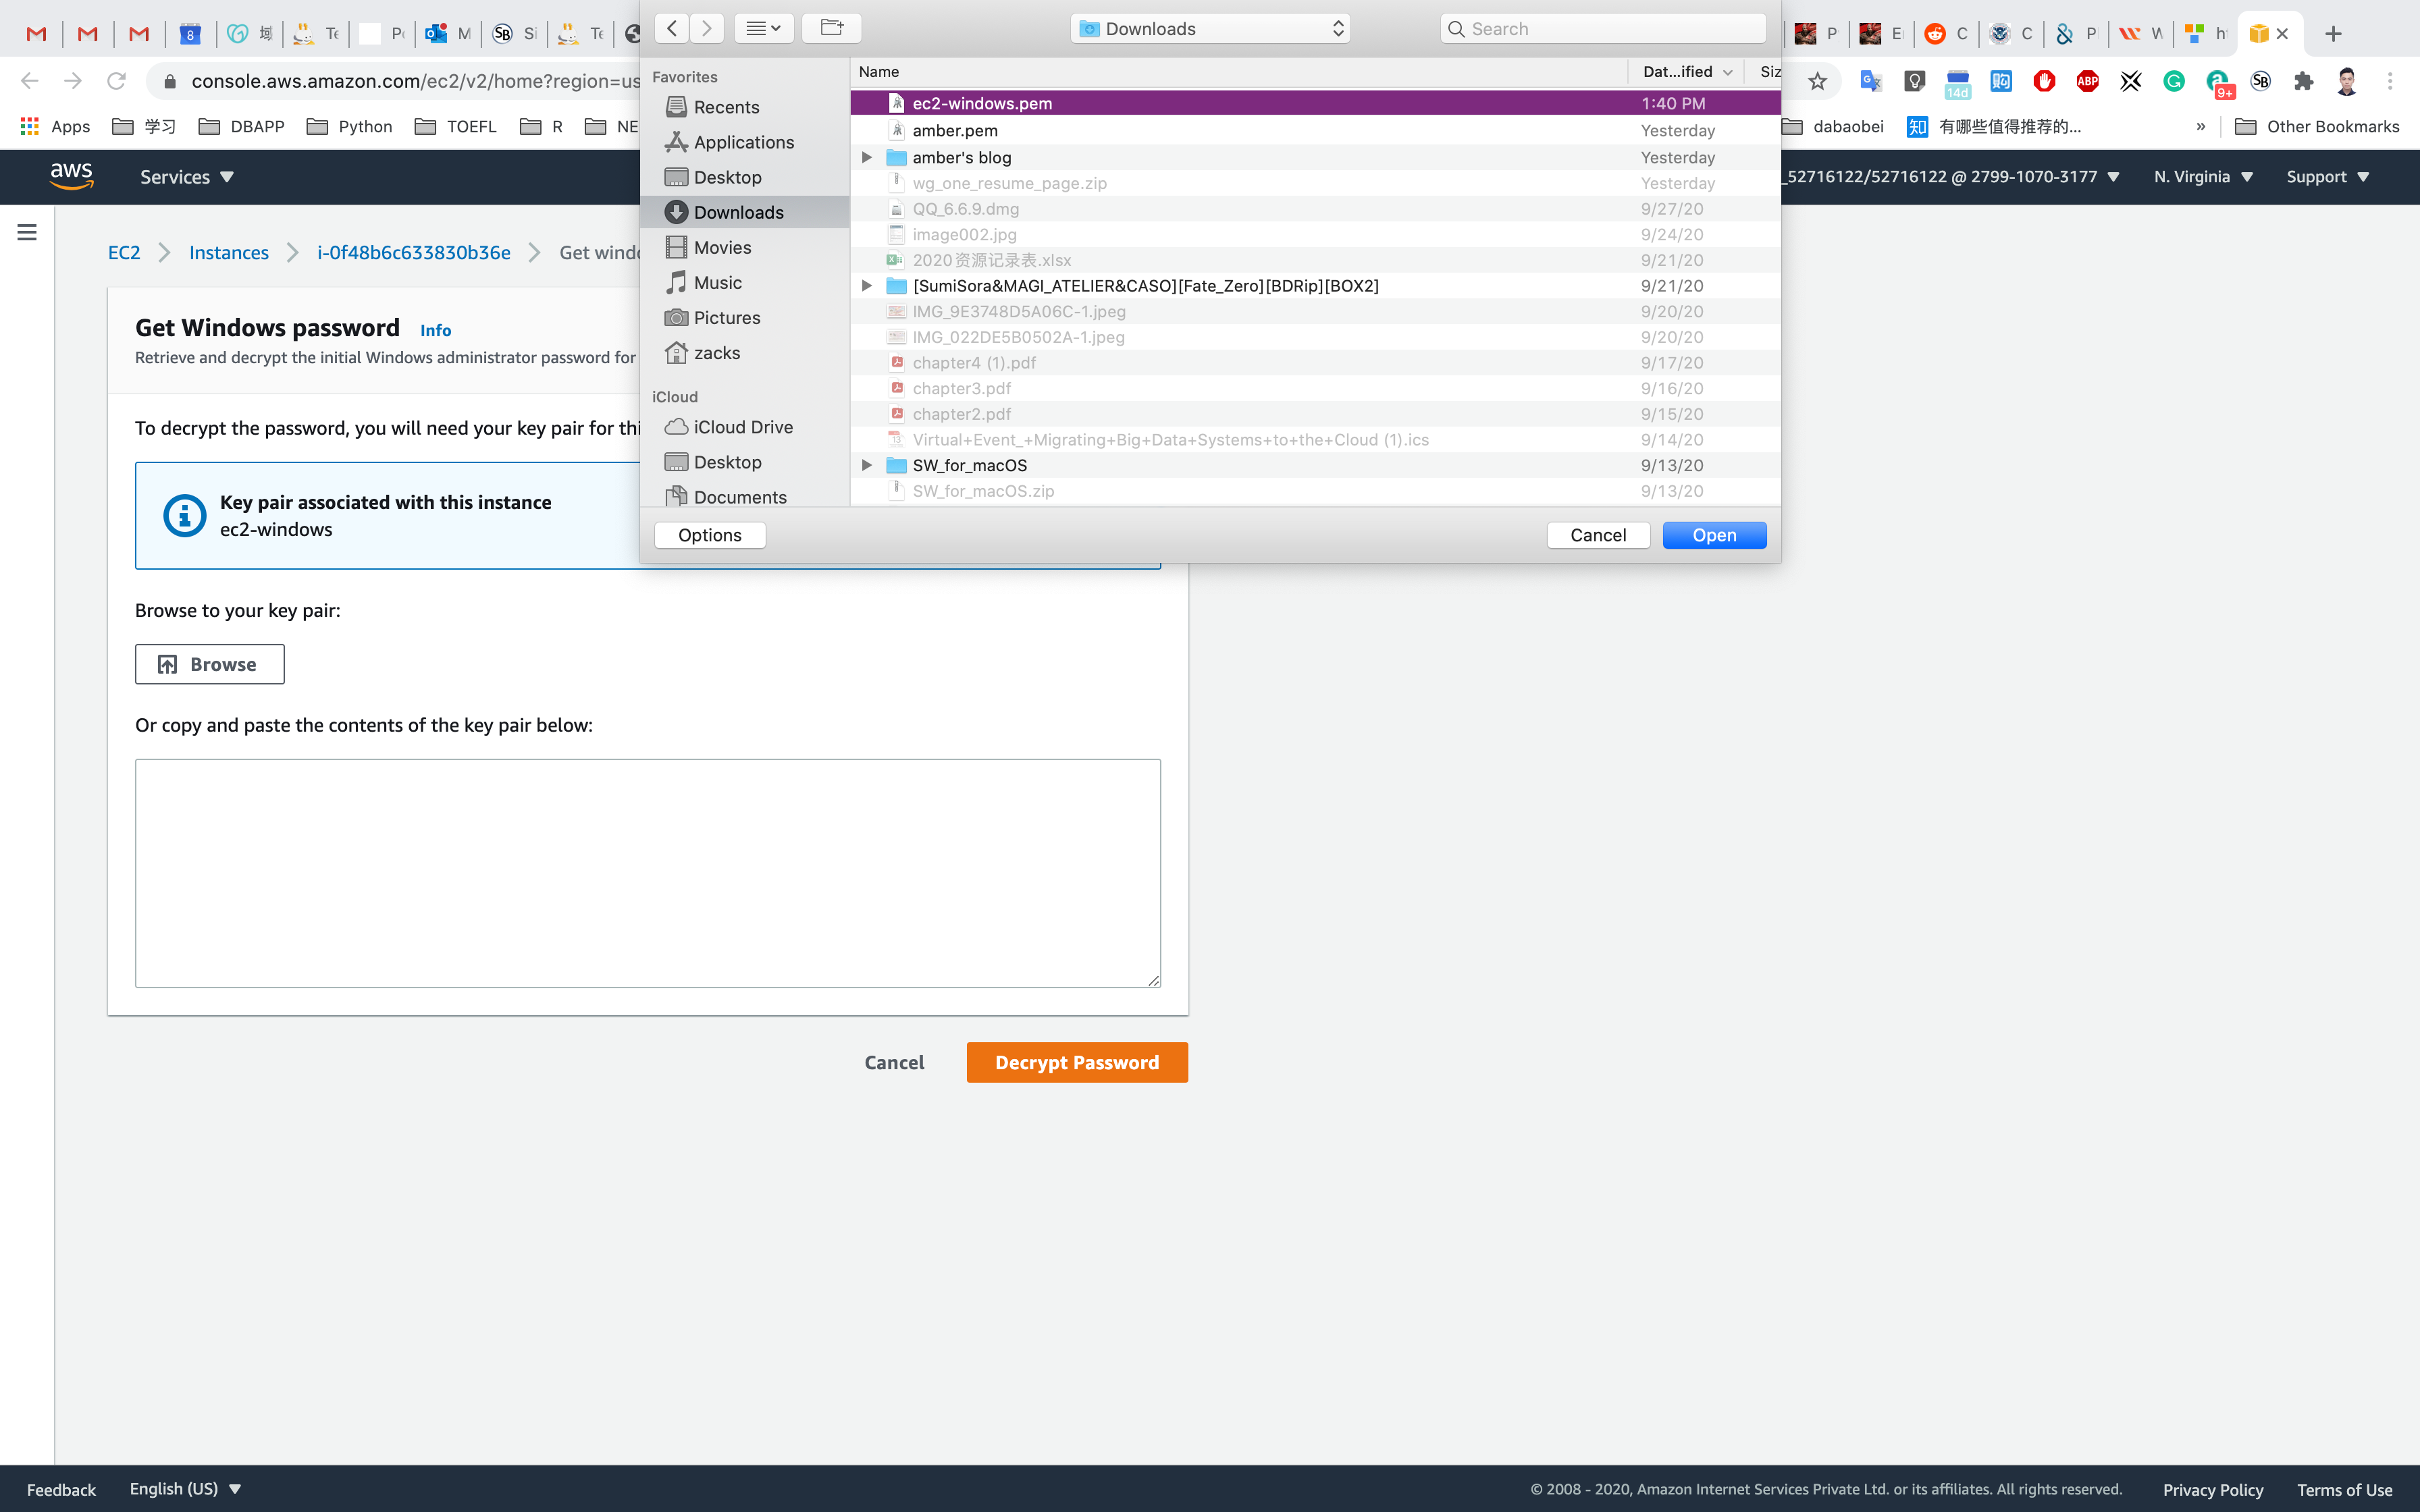
Click on Decrypt Password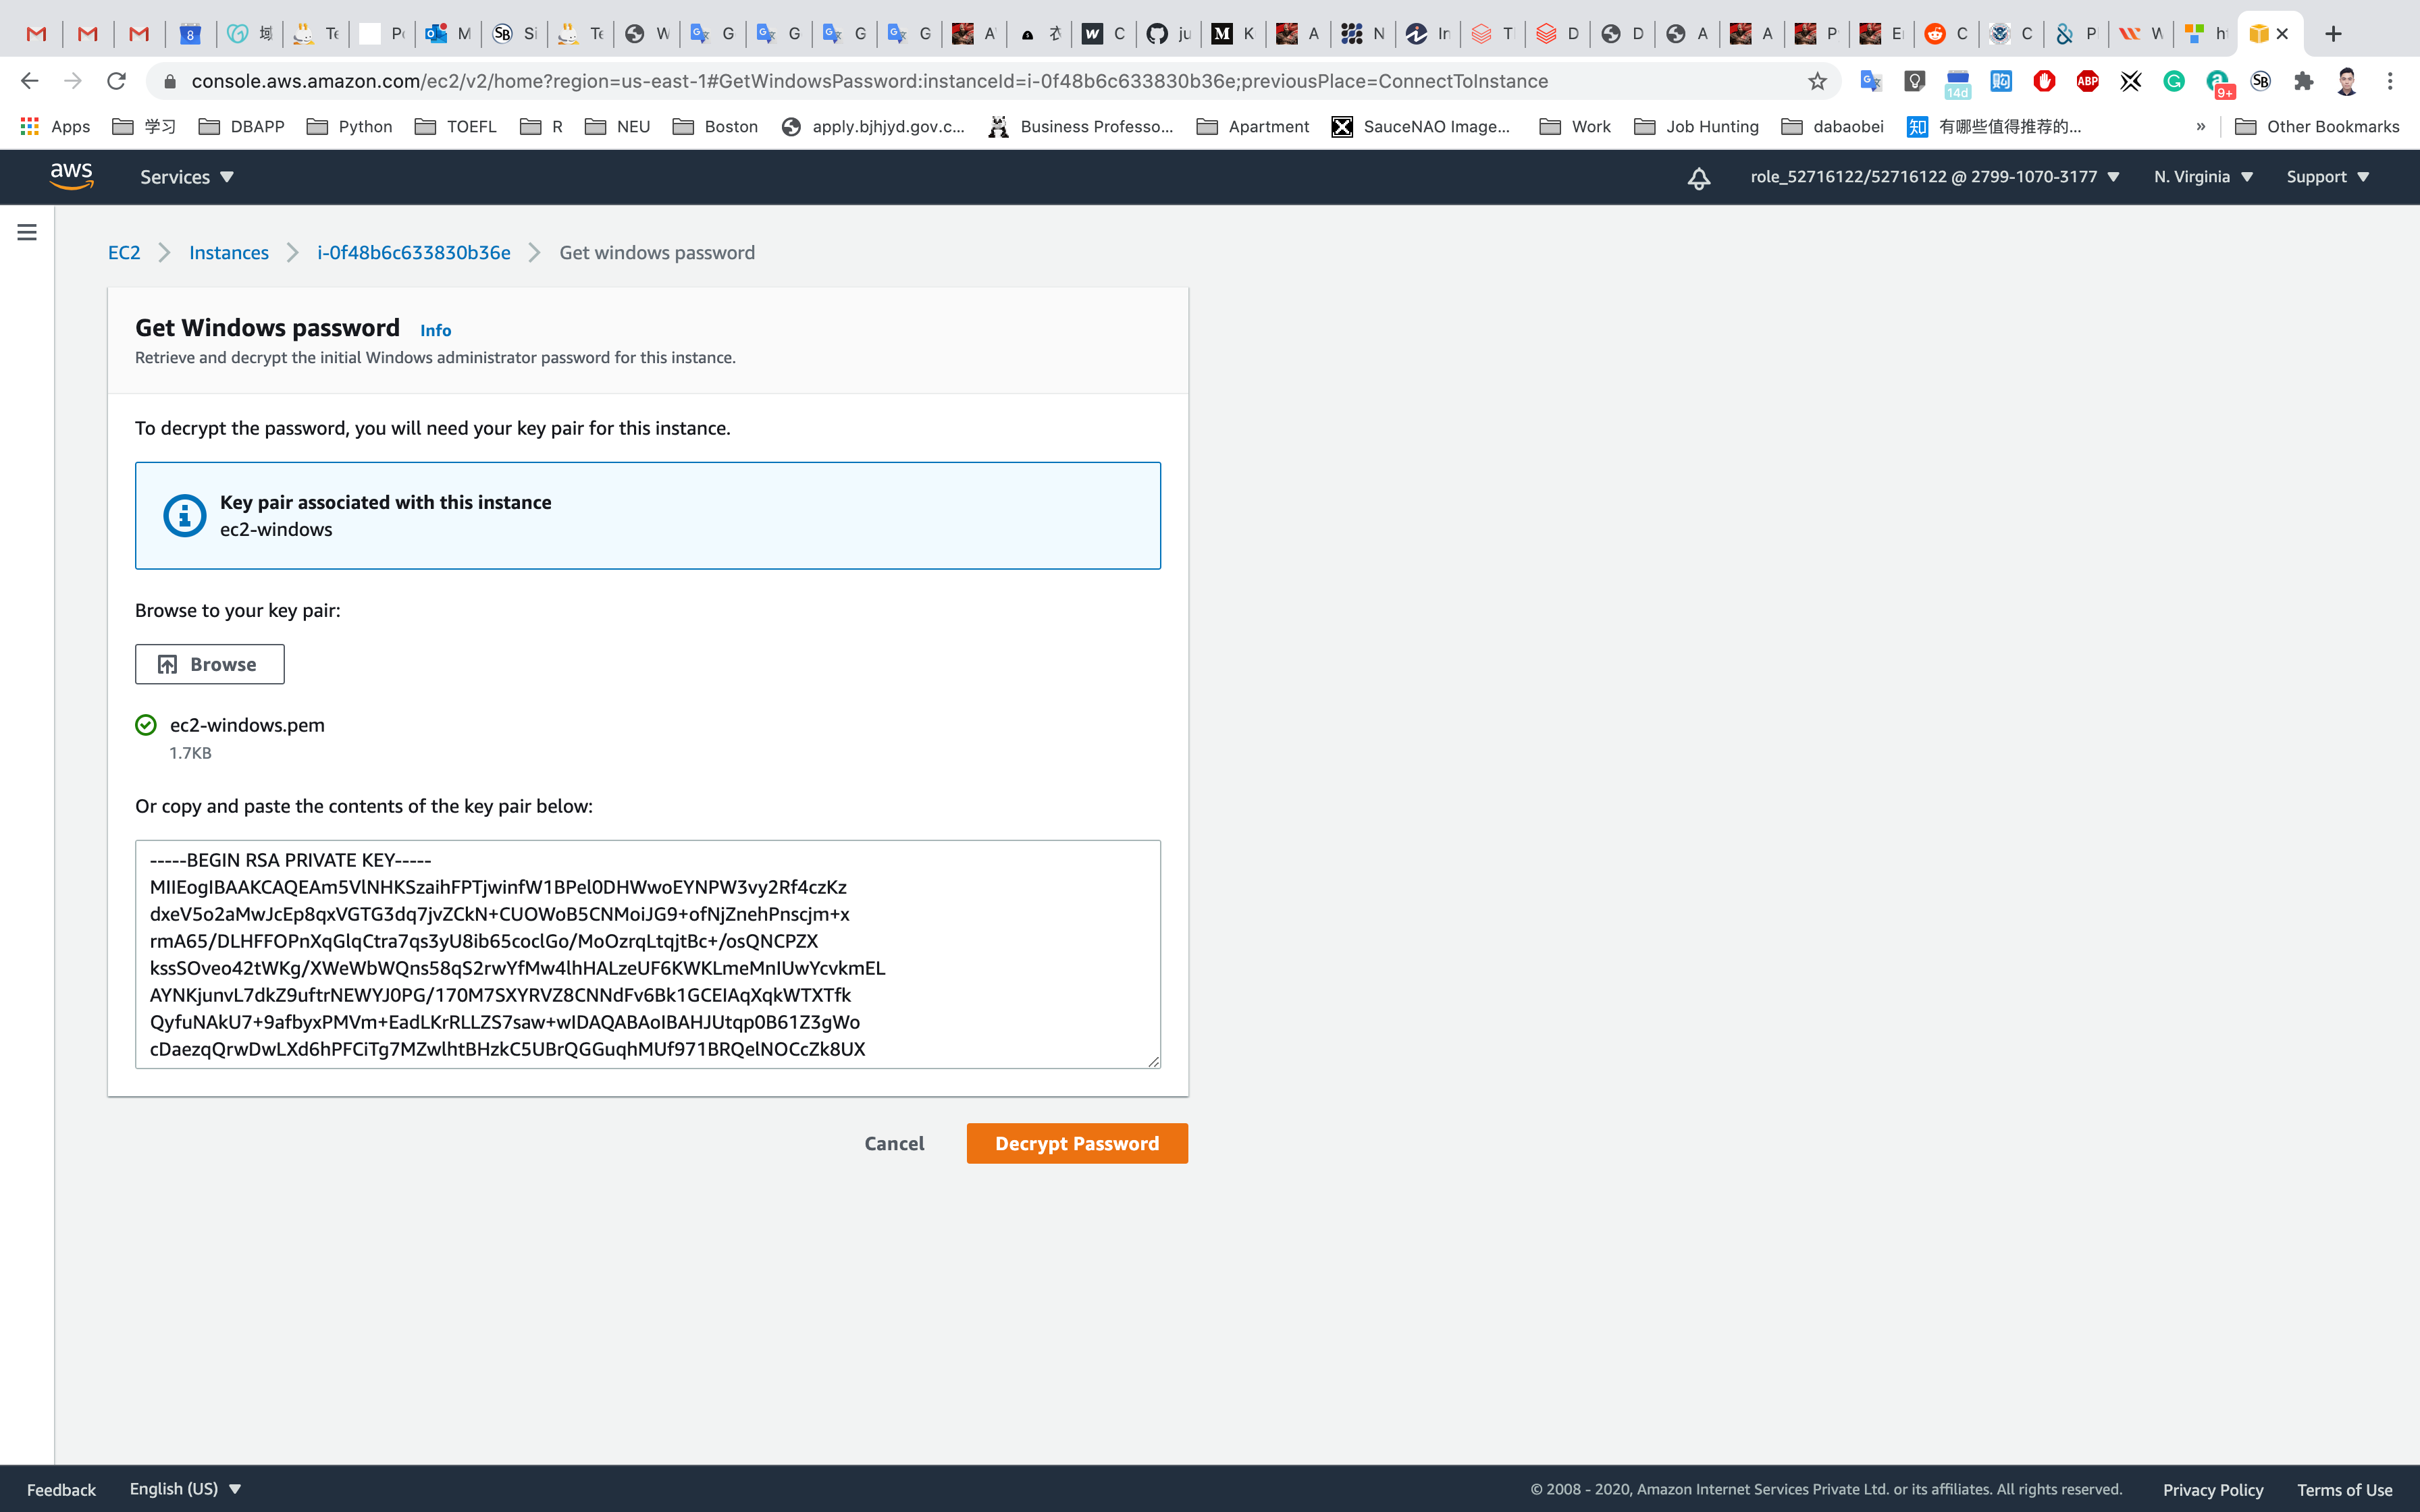
Copy the User name and Password
- User name:
Administrator - Password:
yLn4)=tGn$9K*mU%H9I=2wFAuwEDqxe?
For Mac User, you may need to install Microsoft Remote Desktop application first, https://apps.apple.com/us/app/microsoft-remote-desktop/id1295203466?mt=12
Click on Download Remote Desktop file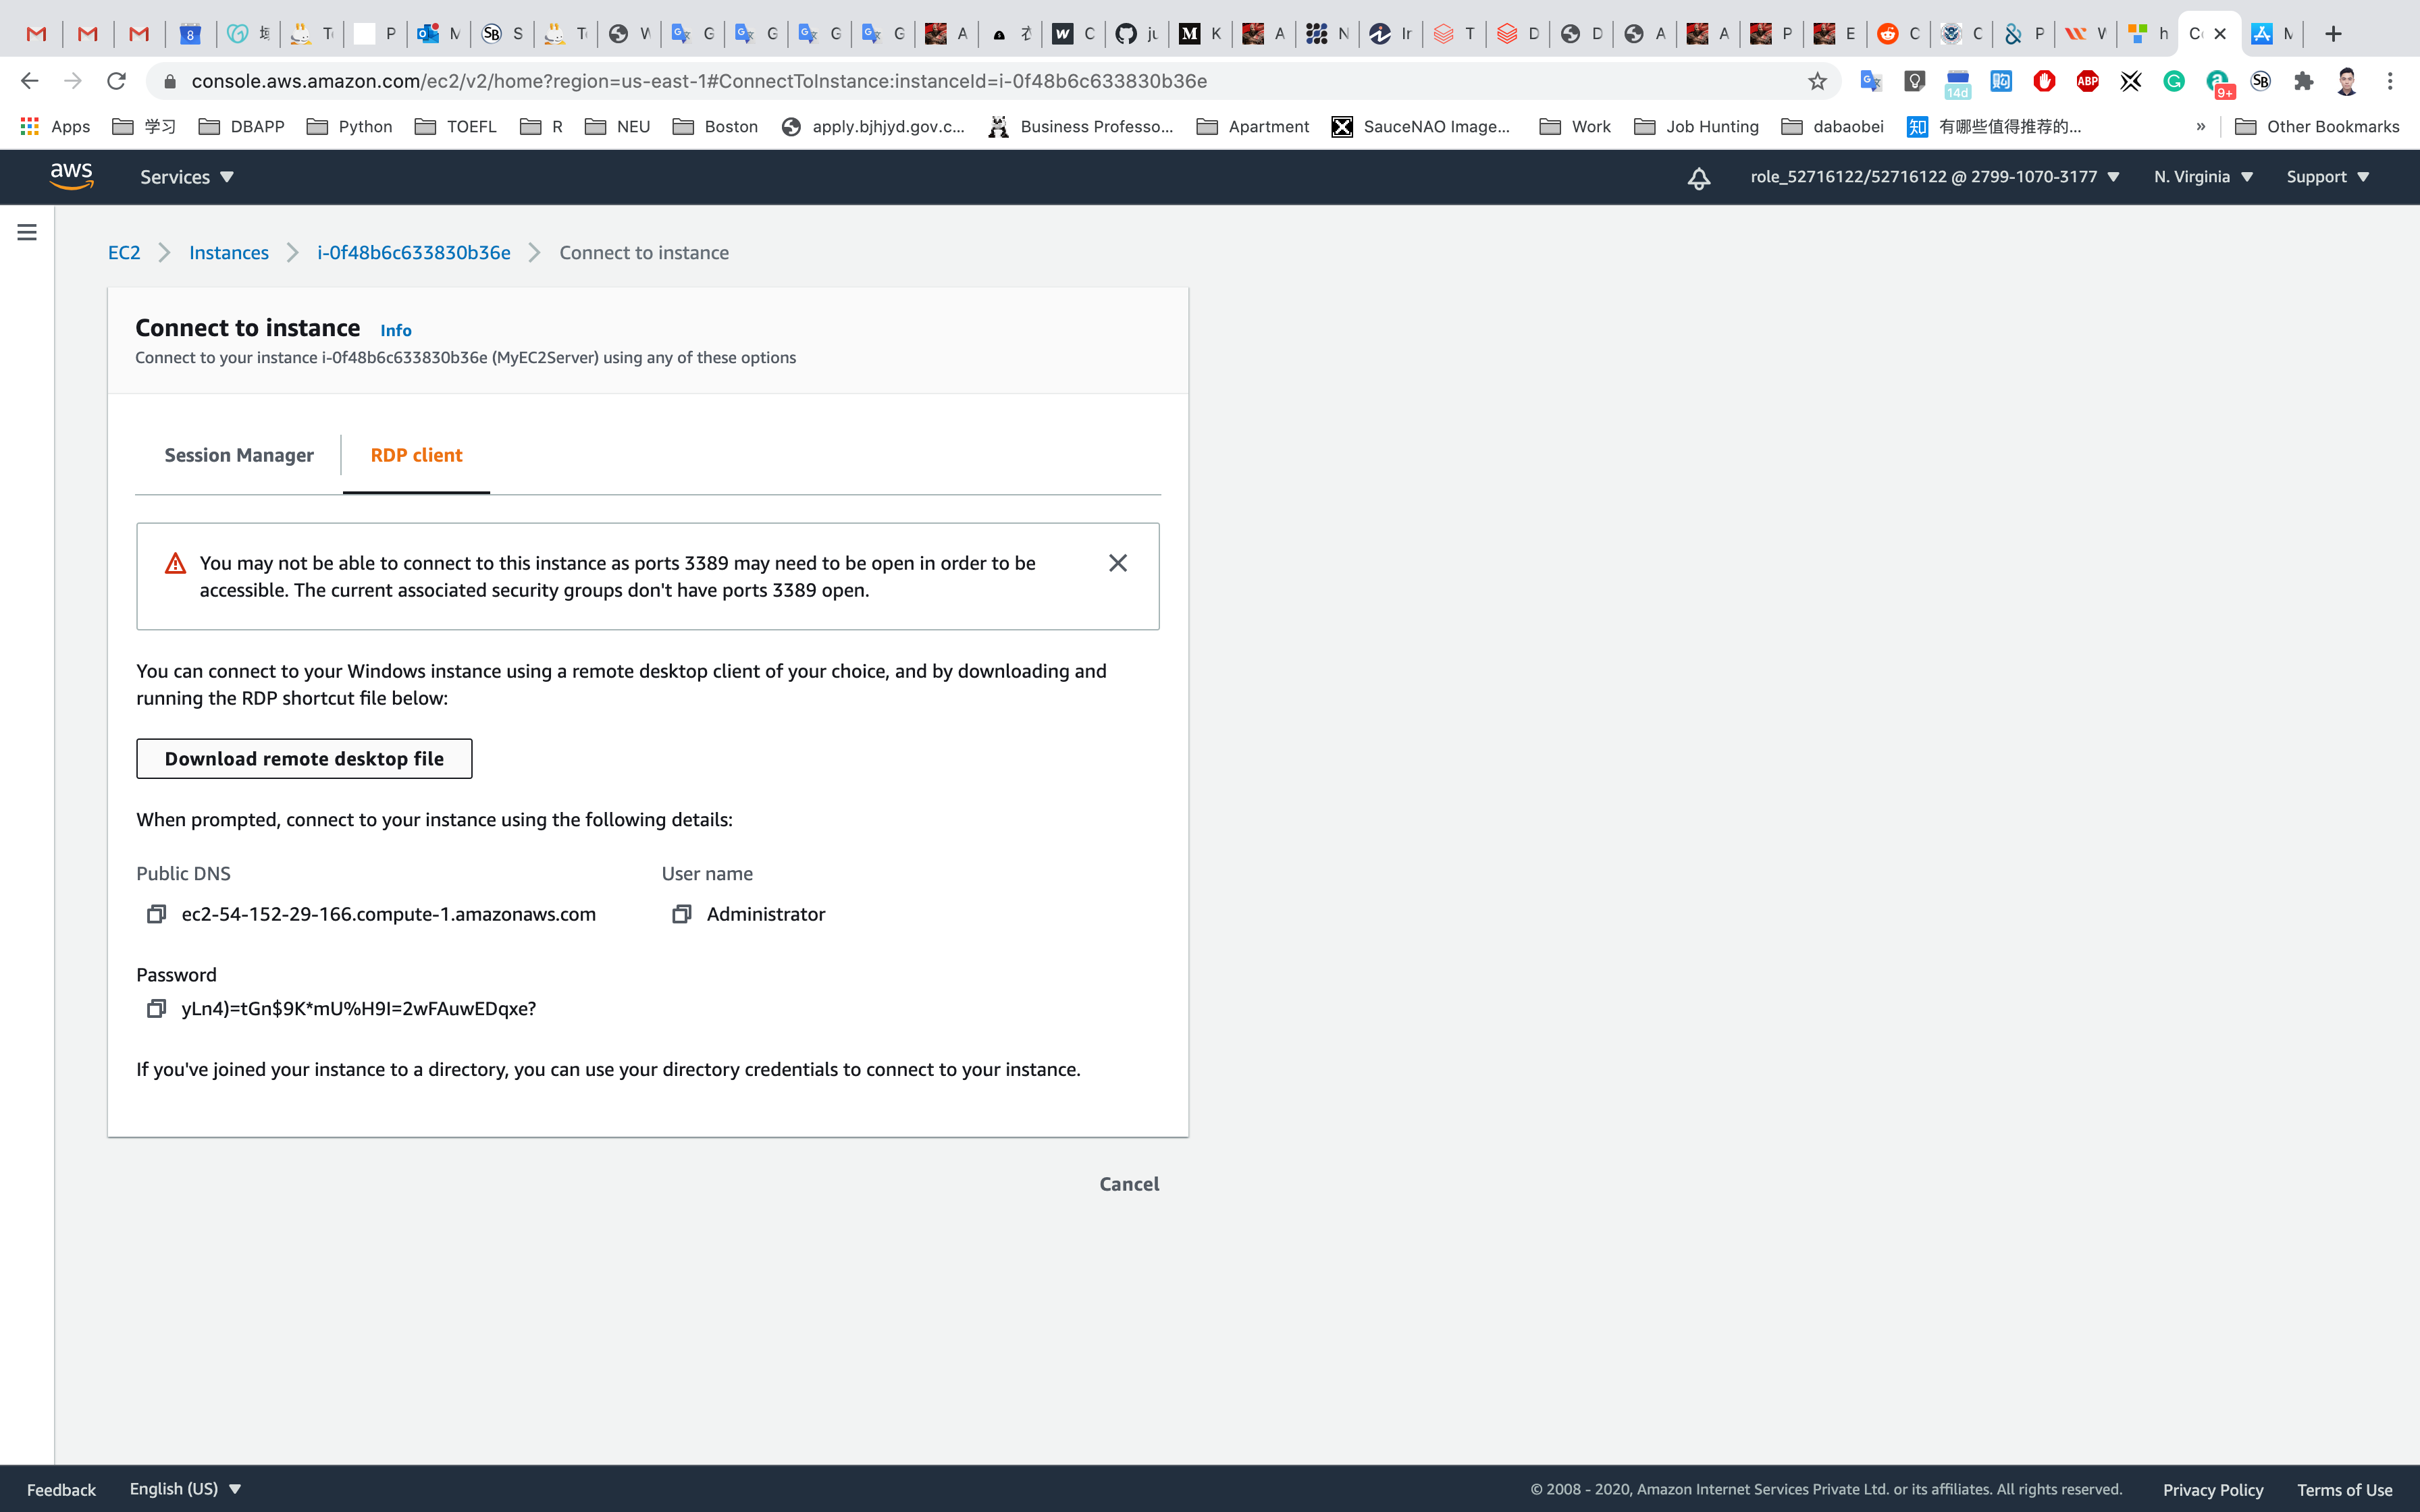
Run your Remote Desktop file
Input your password
Click on Continue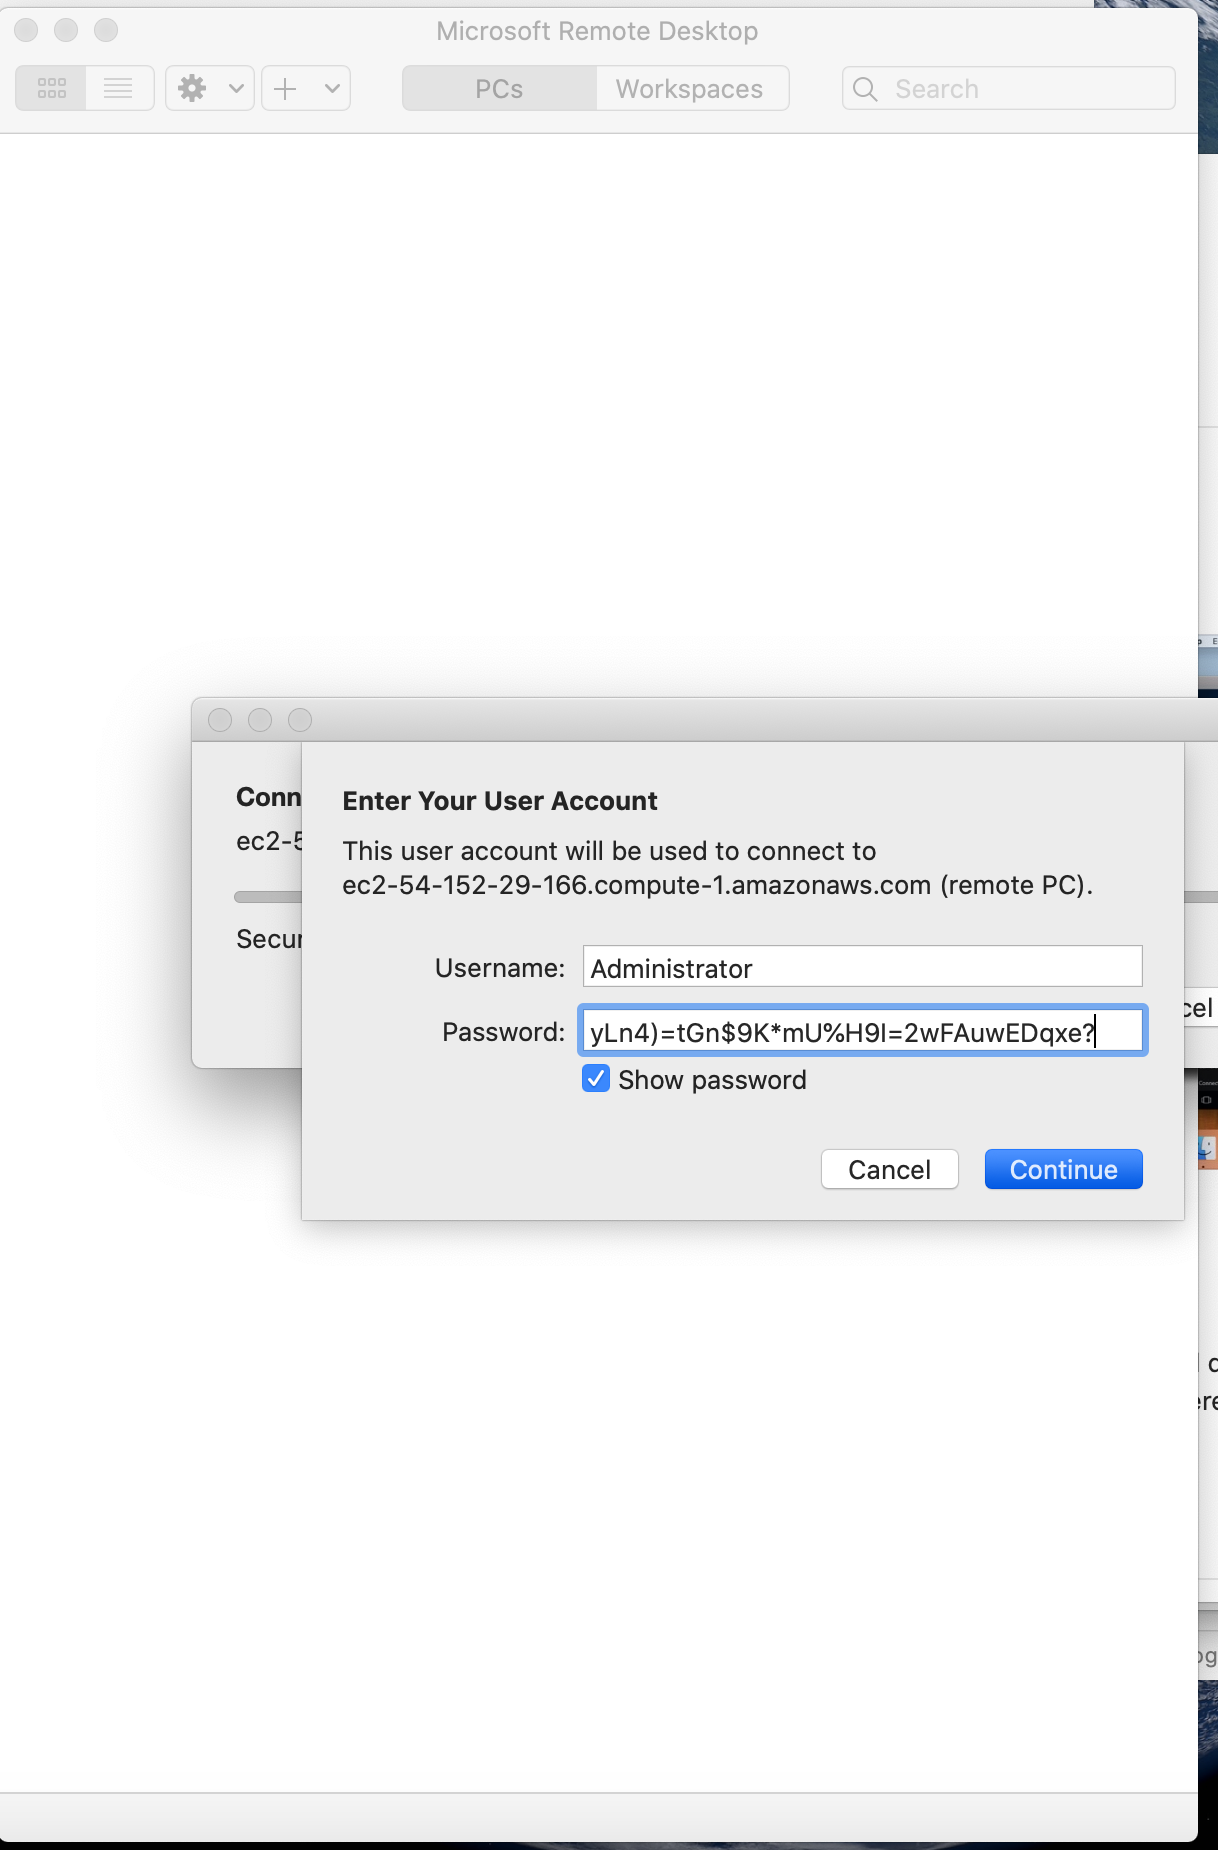
Click on Continue
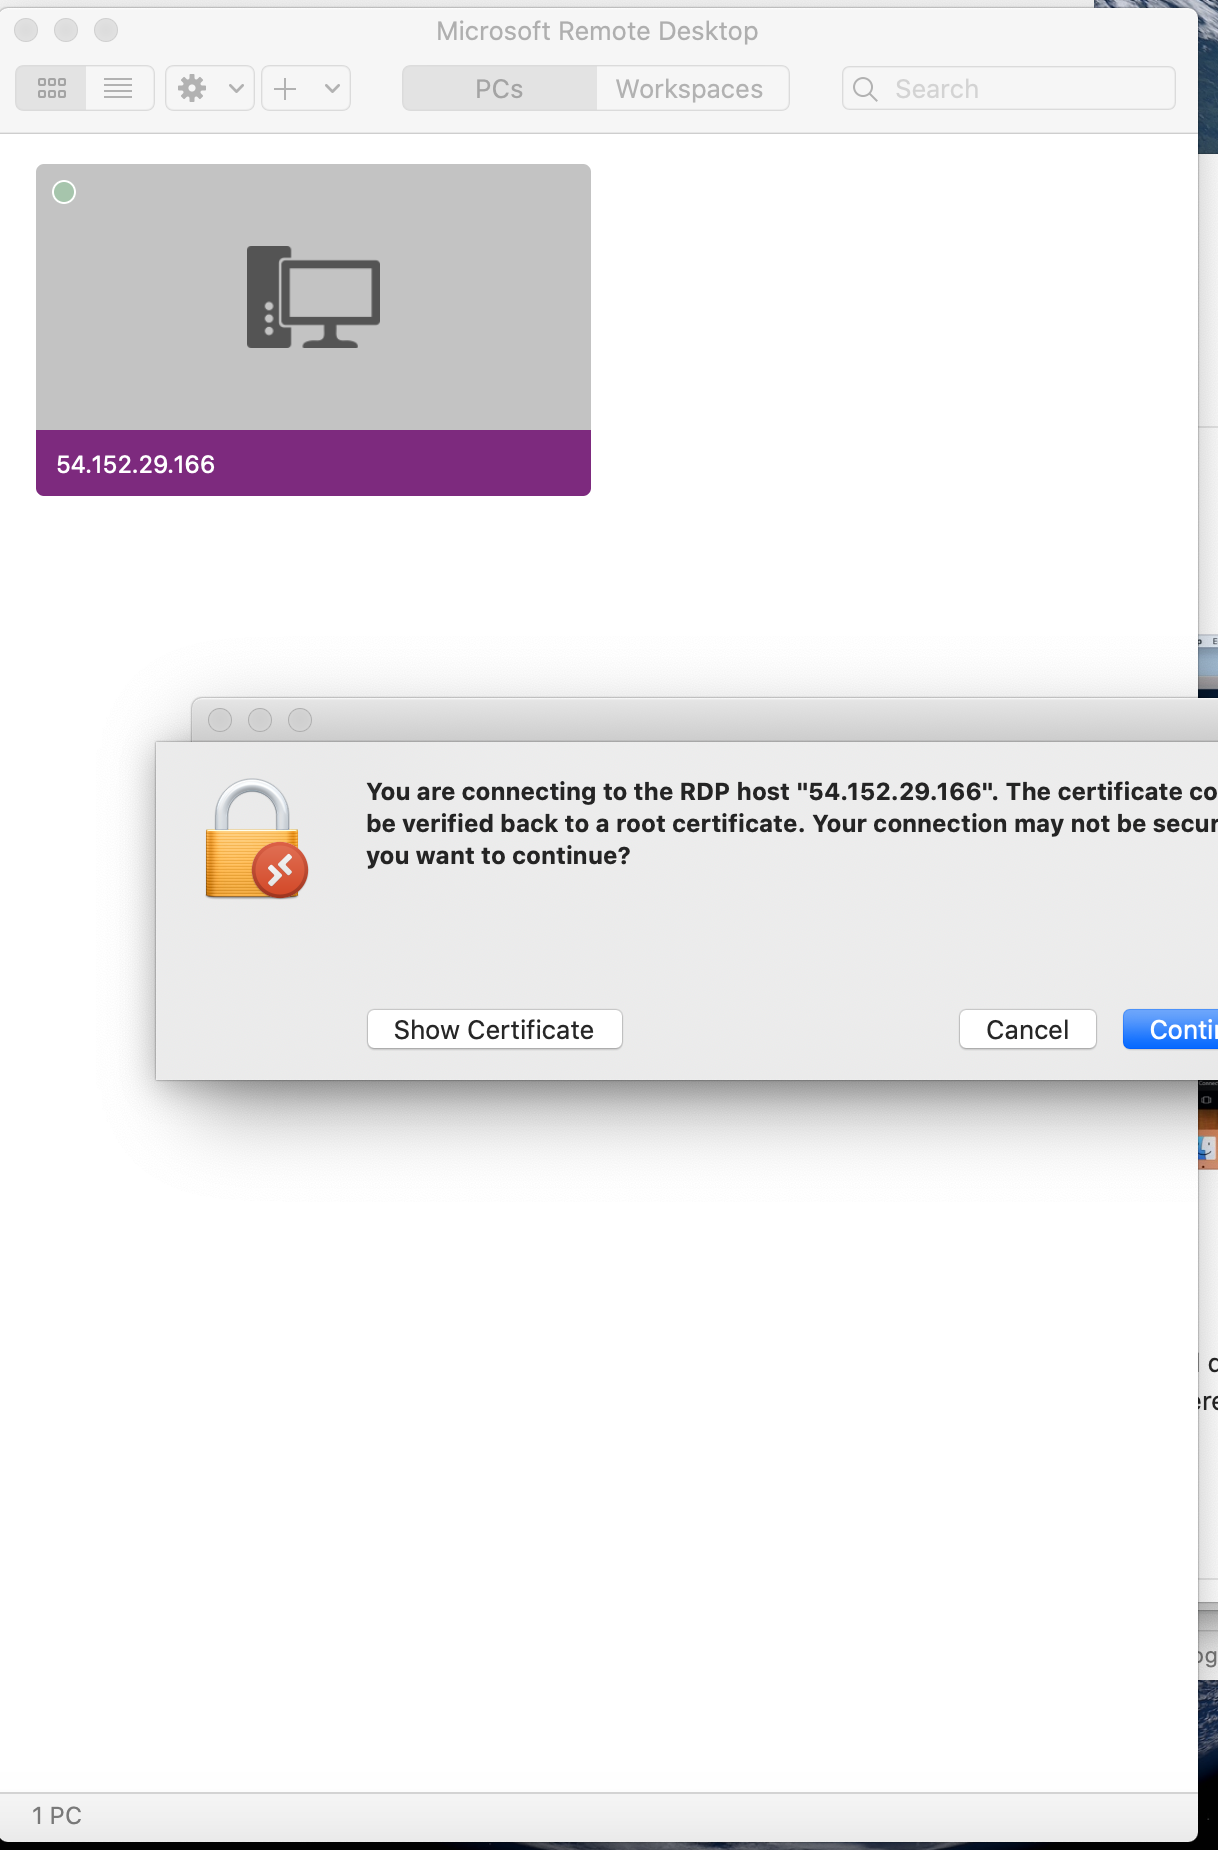
Or you could click on Add PC on Microsoft Remote Desktop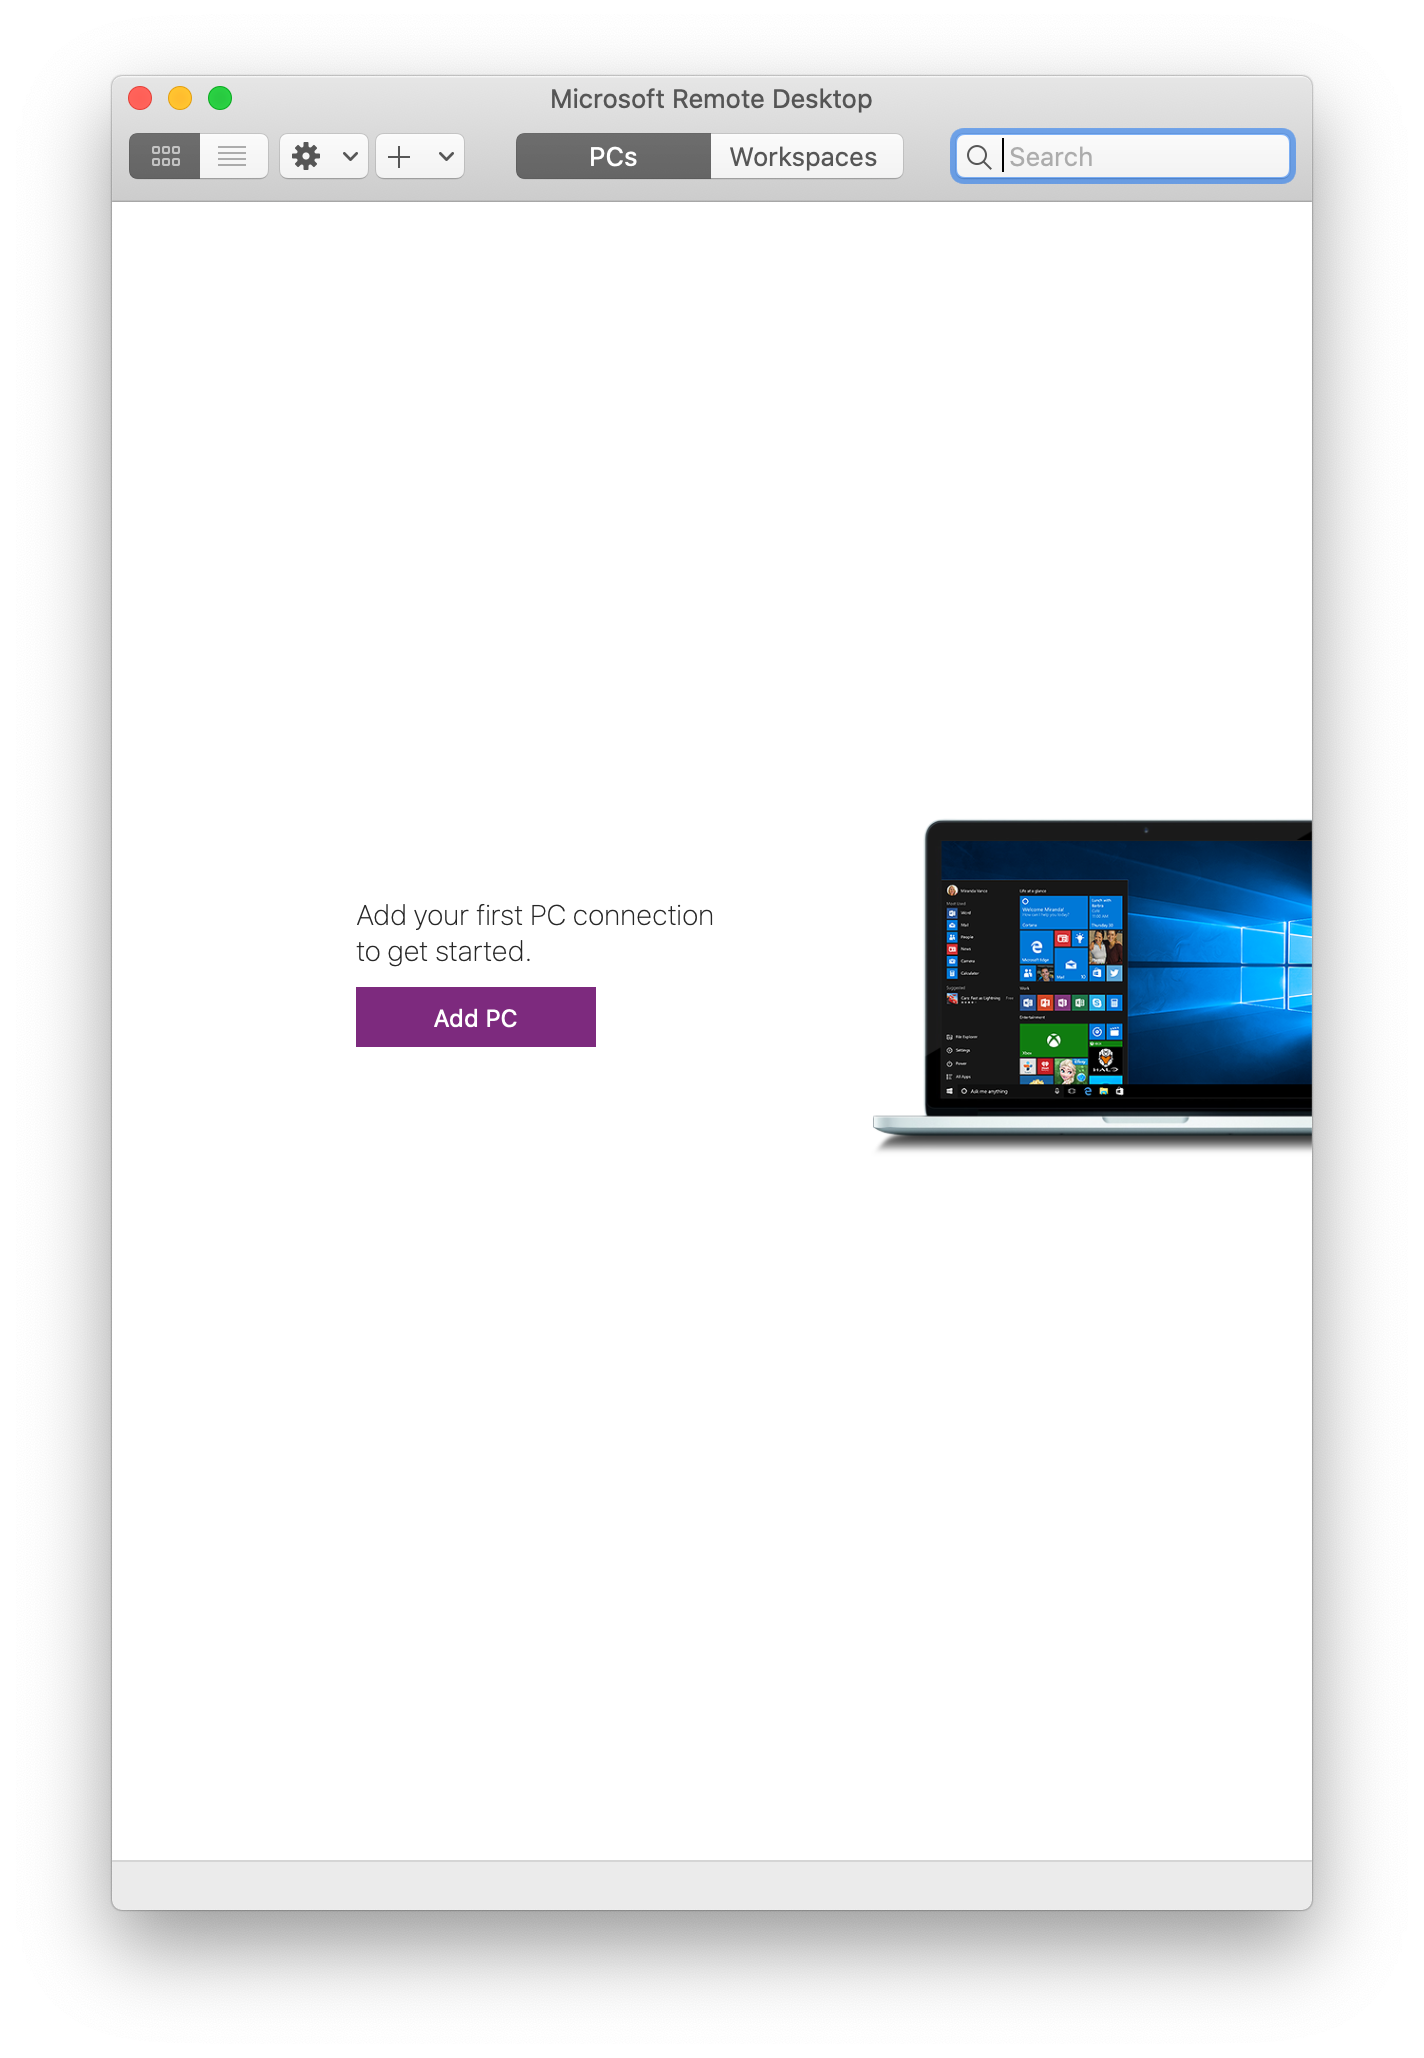
Click on Instances on the top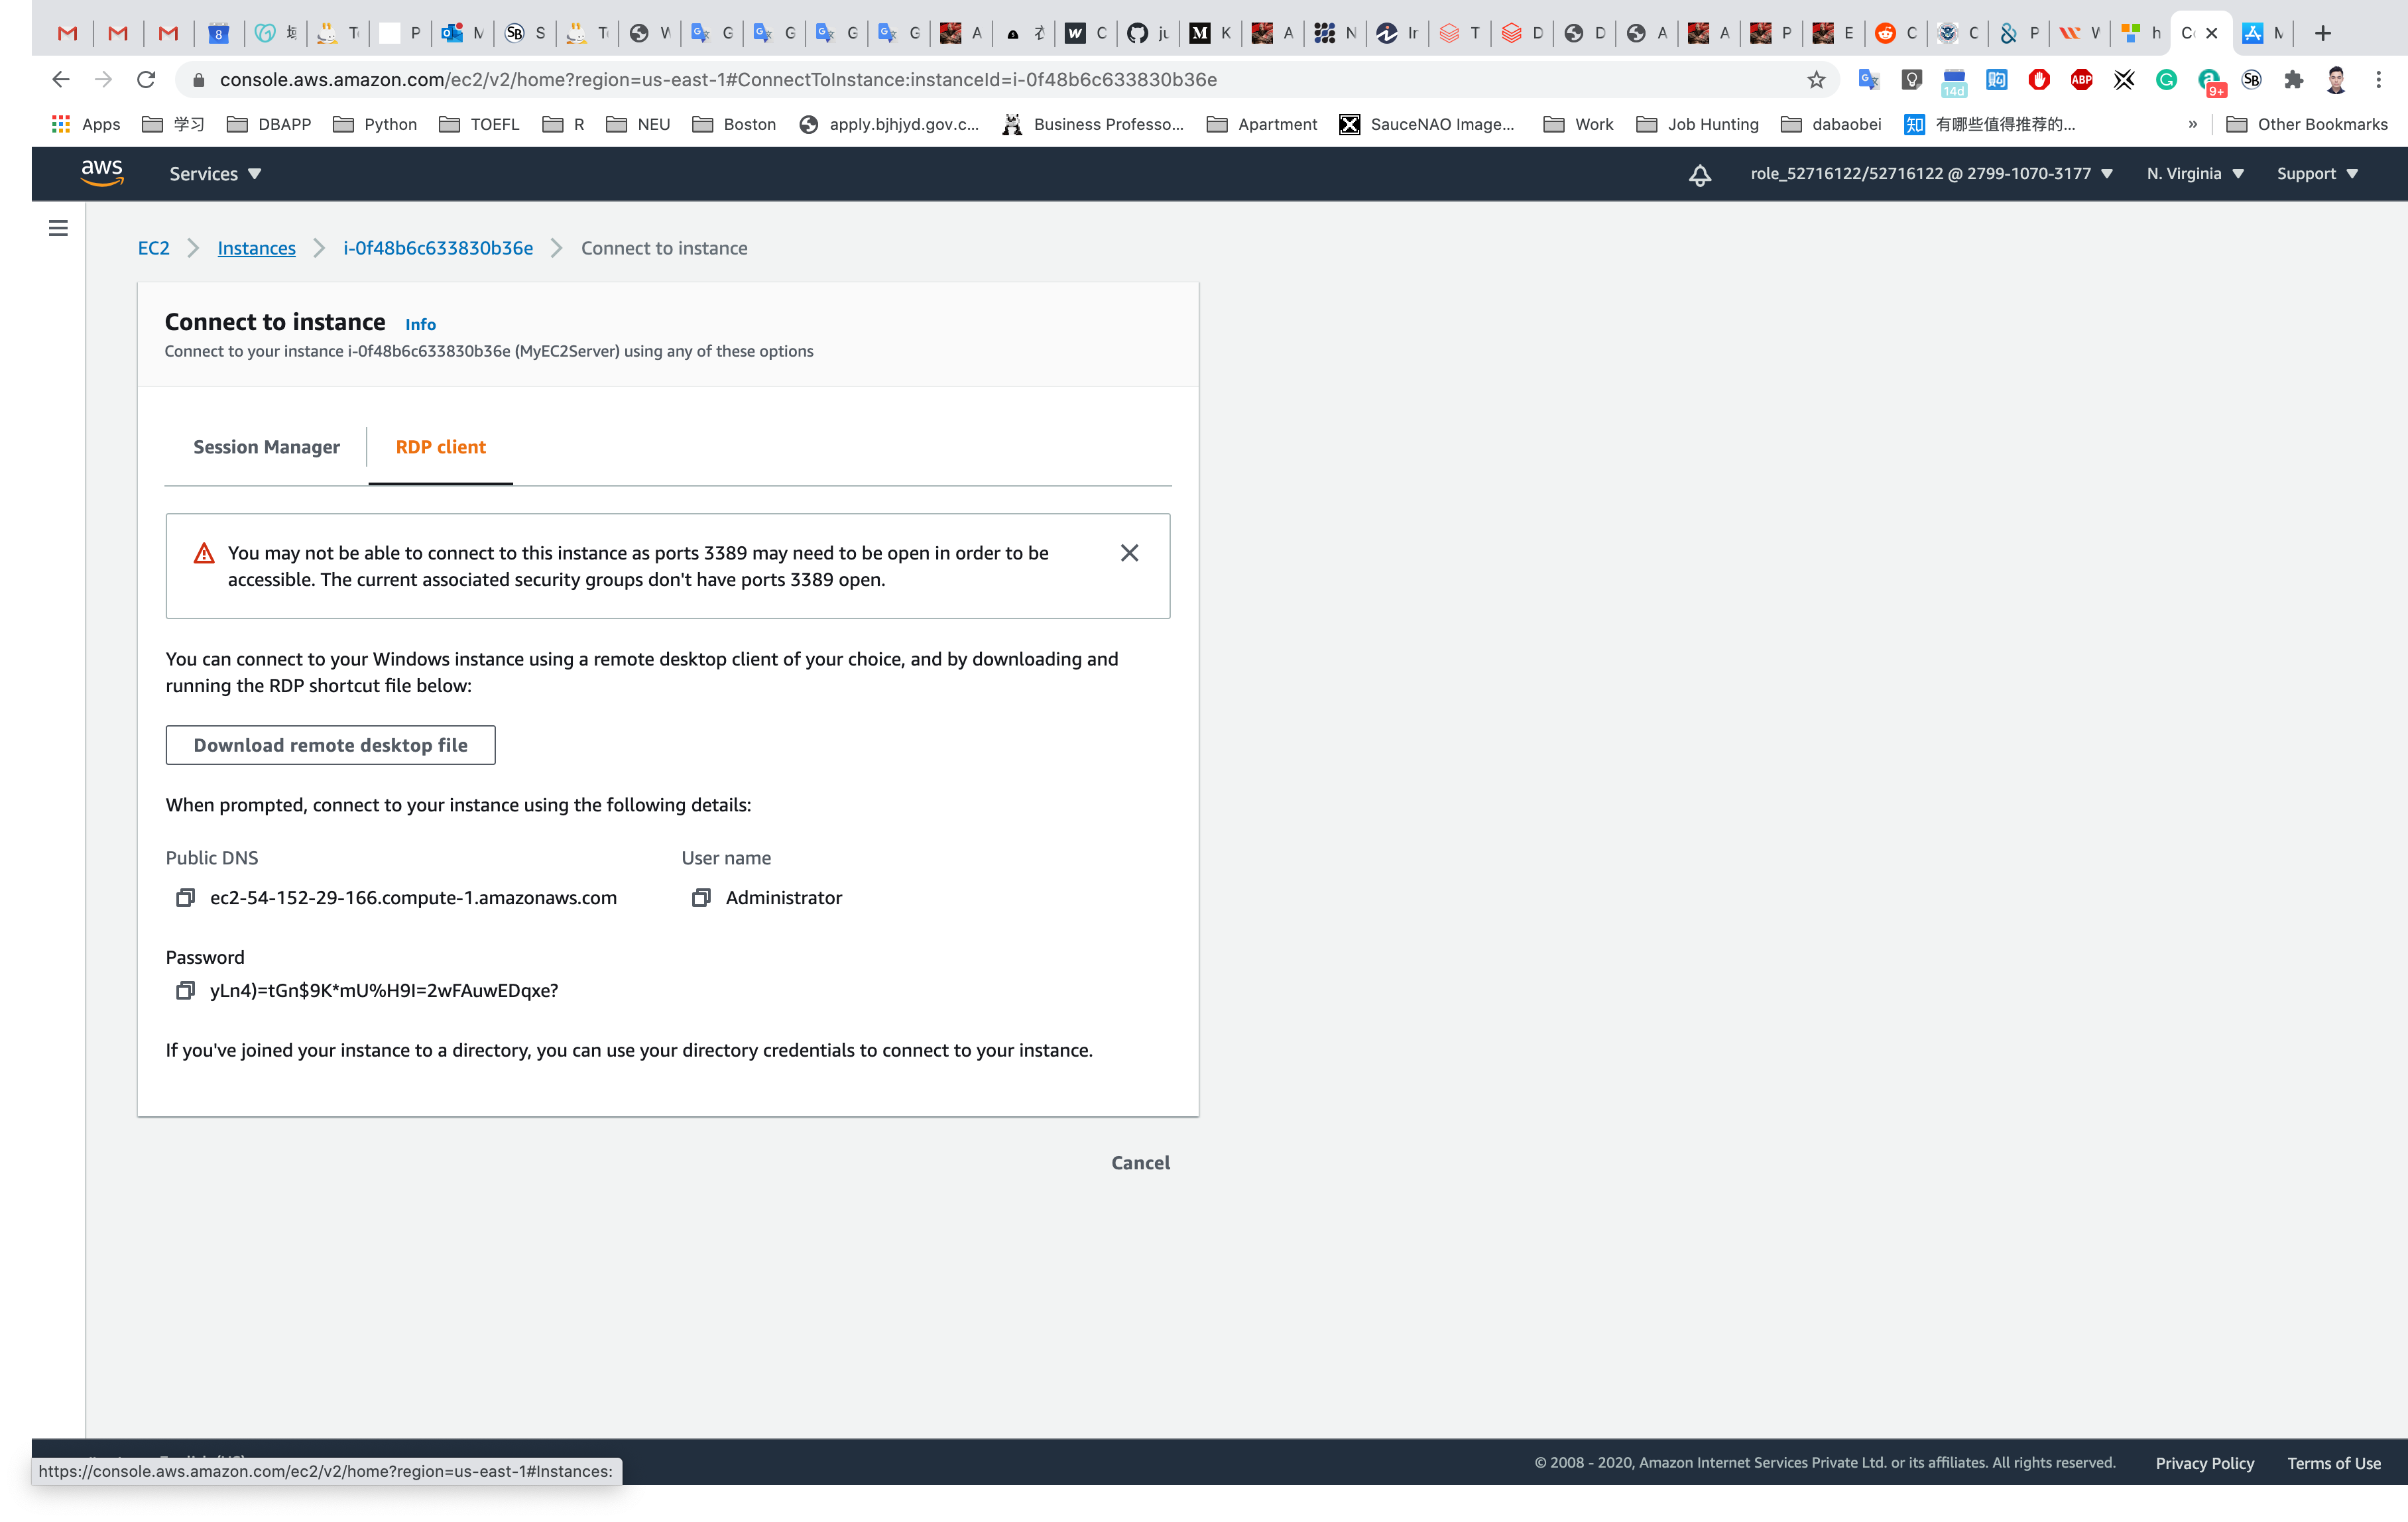
Select the windows instance and Copy Public IPv4 address
- PC name:
Your EC2 instance Public IPv4 Address
Click on Add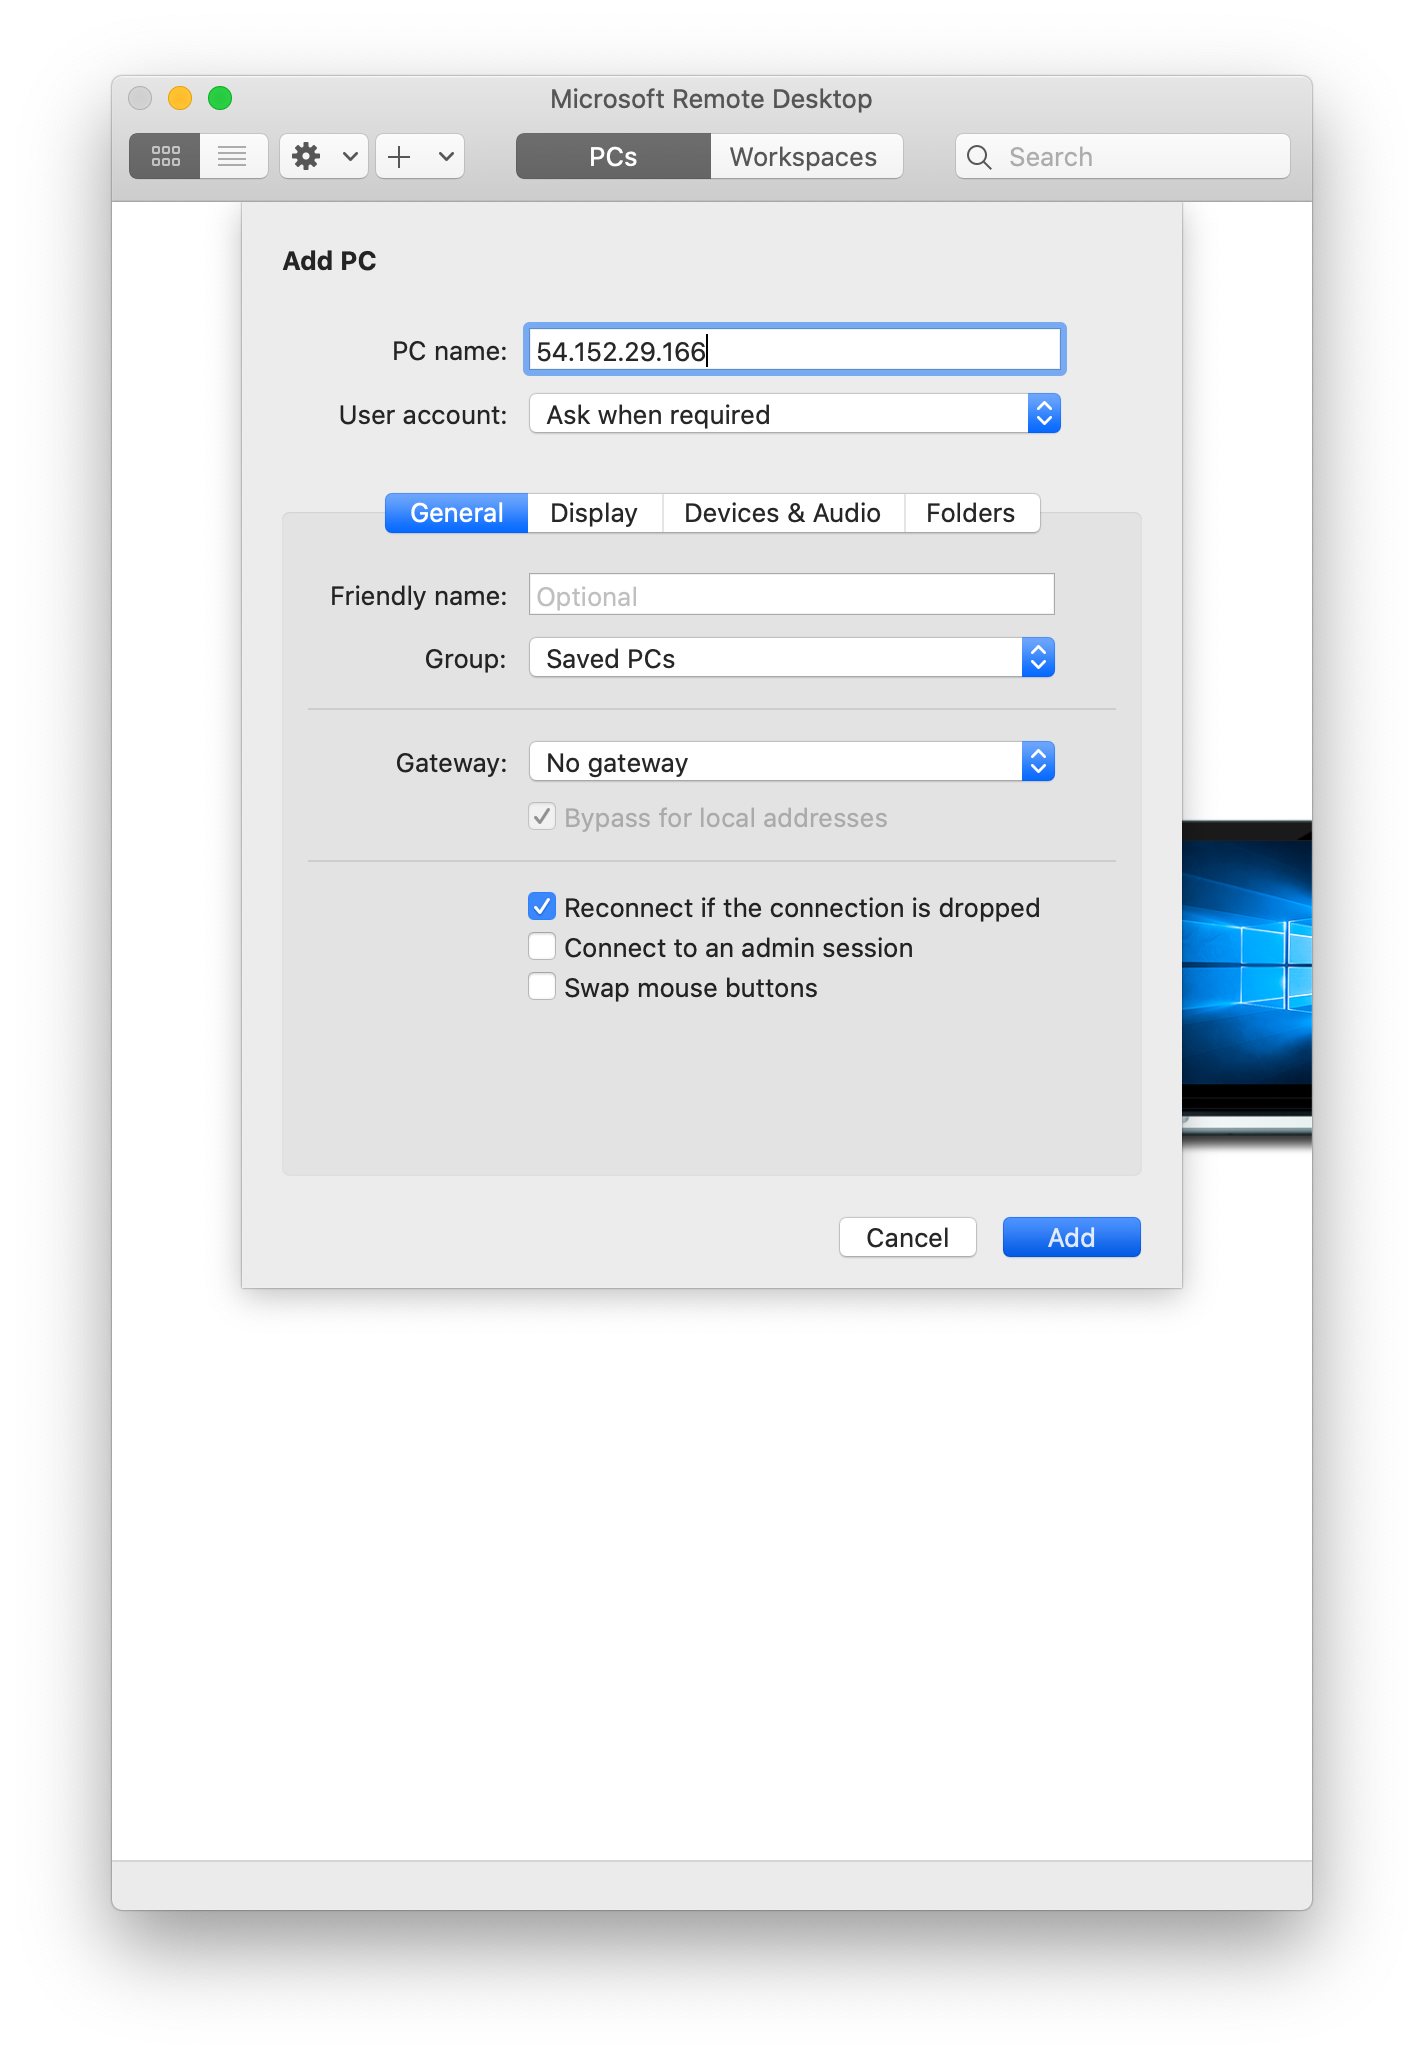
Double click on the PC icon,
then input the Username and Password
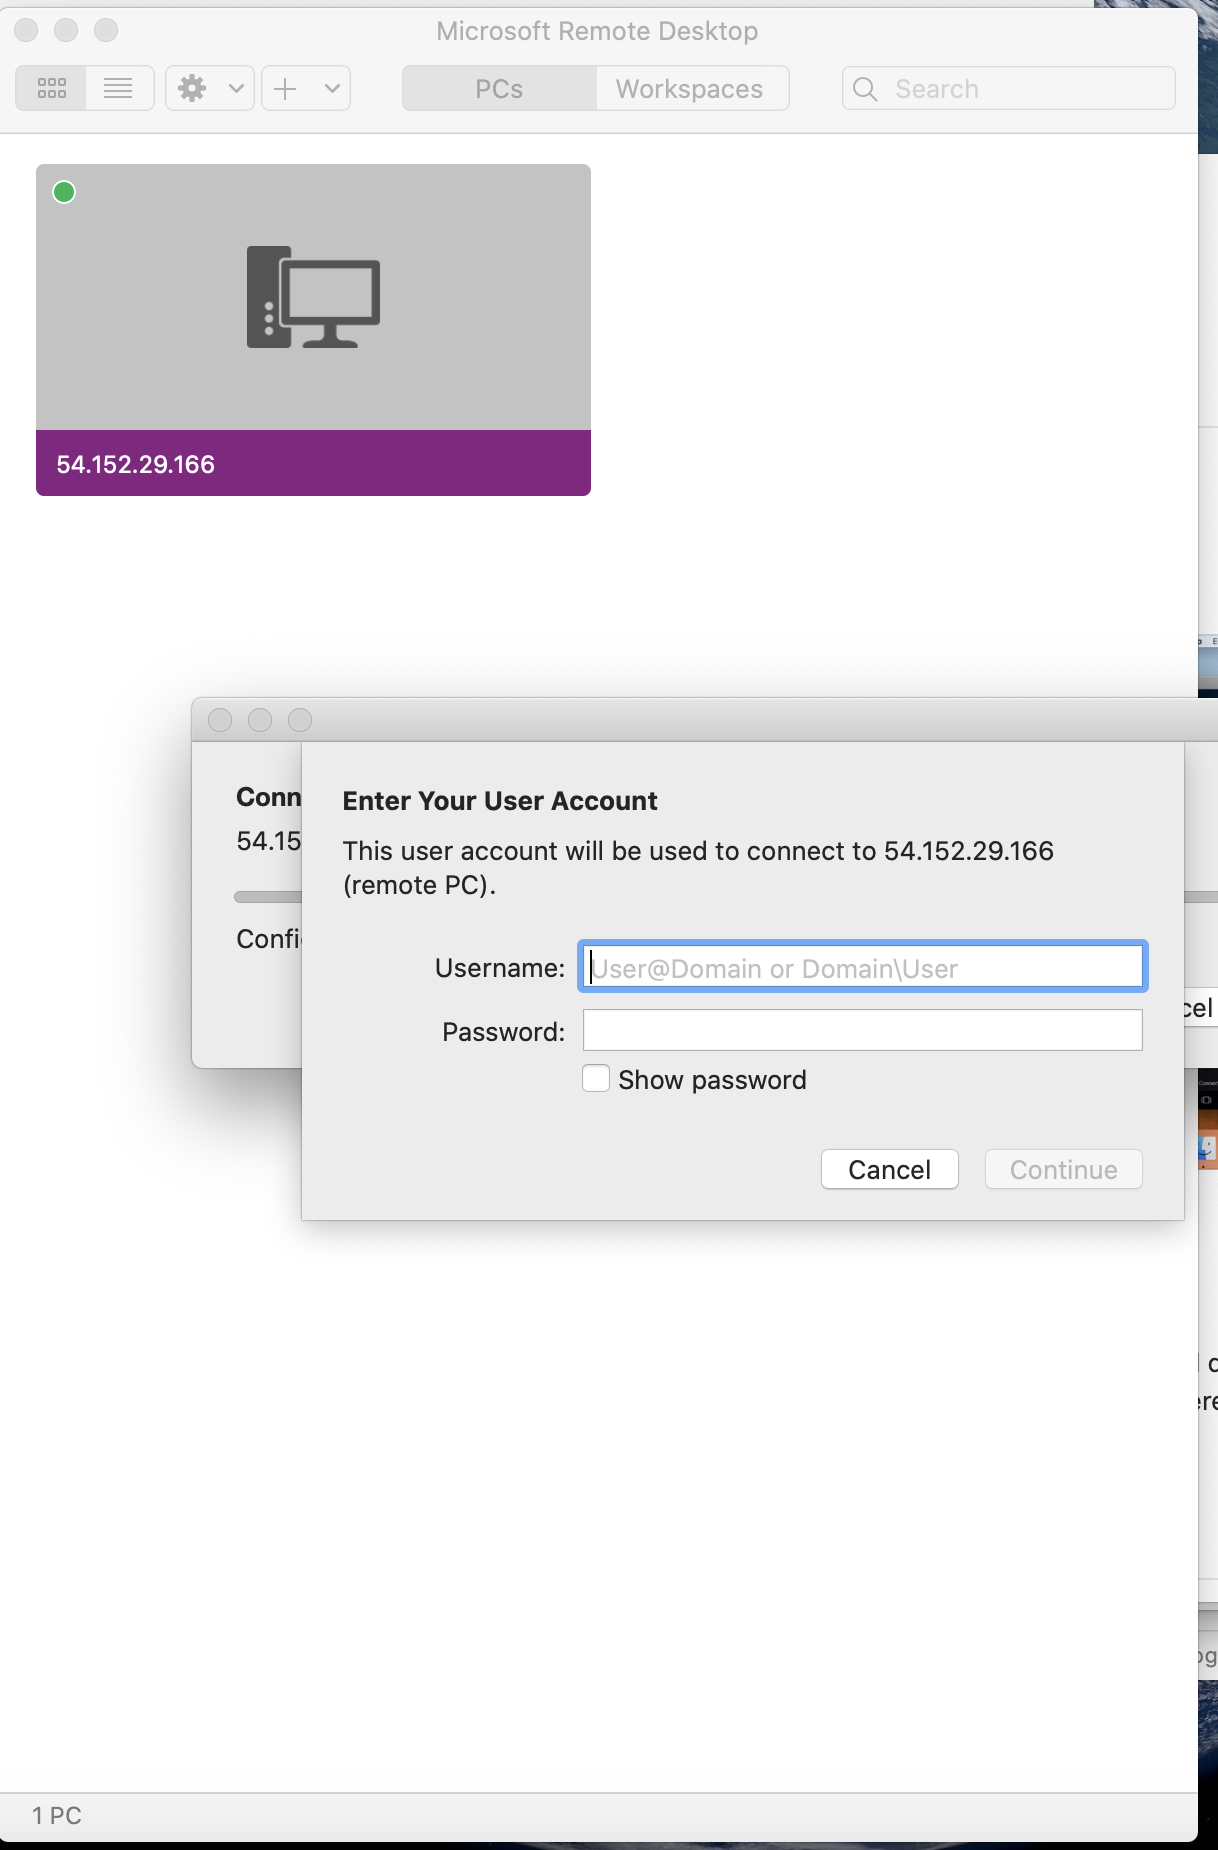
Click on Continue
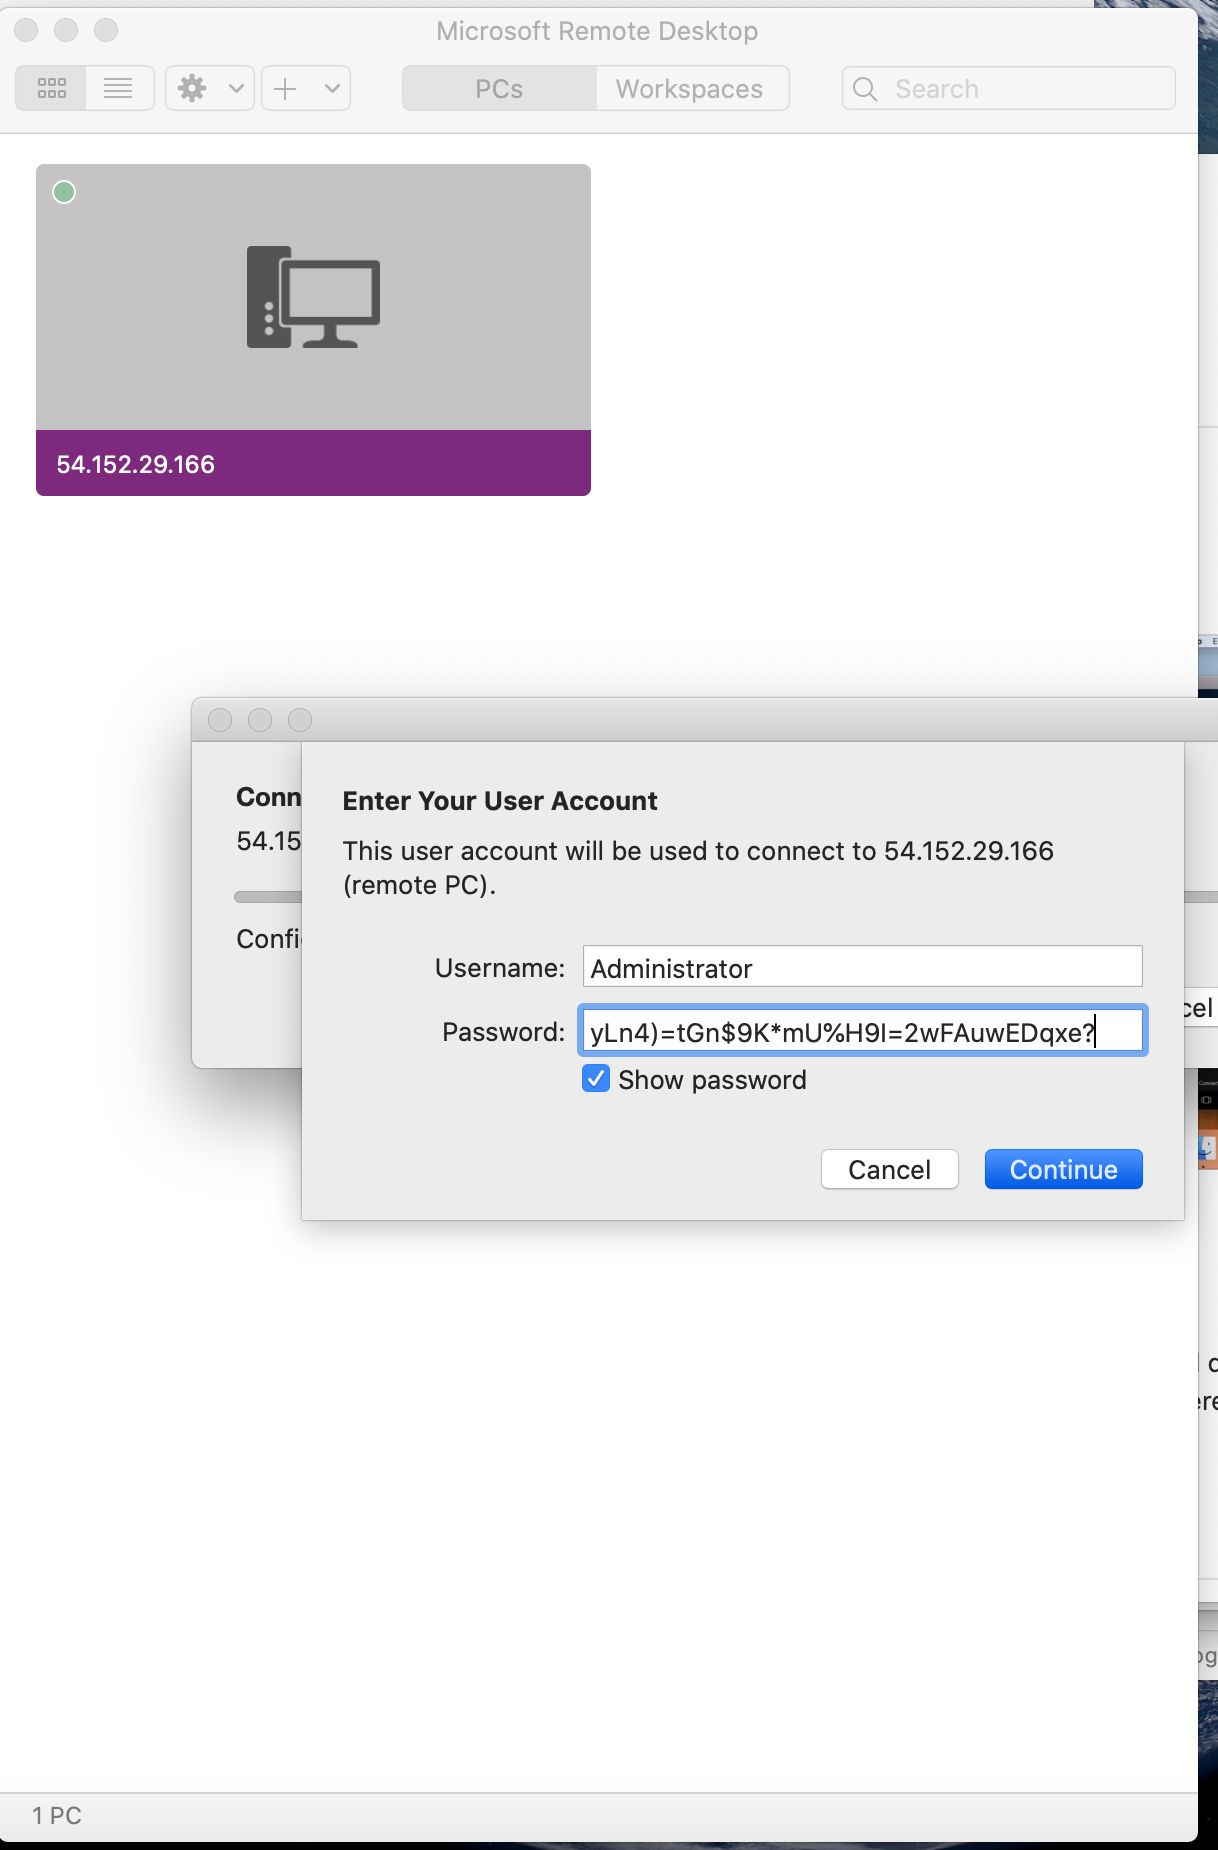
Click on Continue

Validate Test

To close the RDP, click on the escape icon on the left and top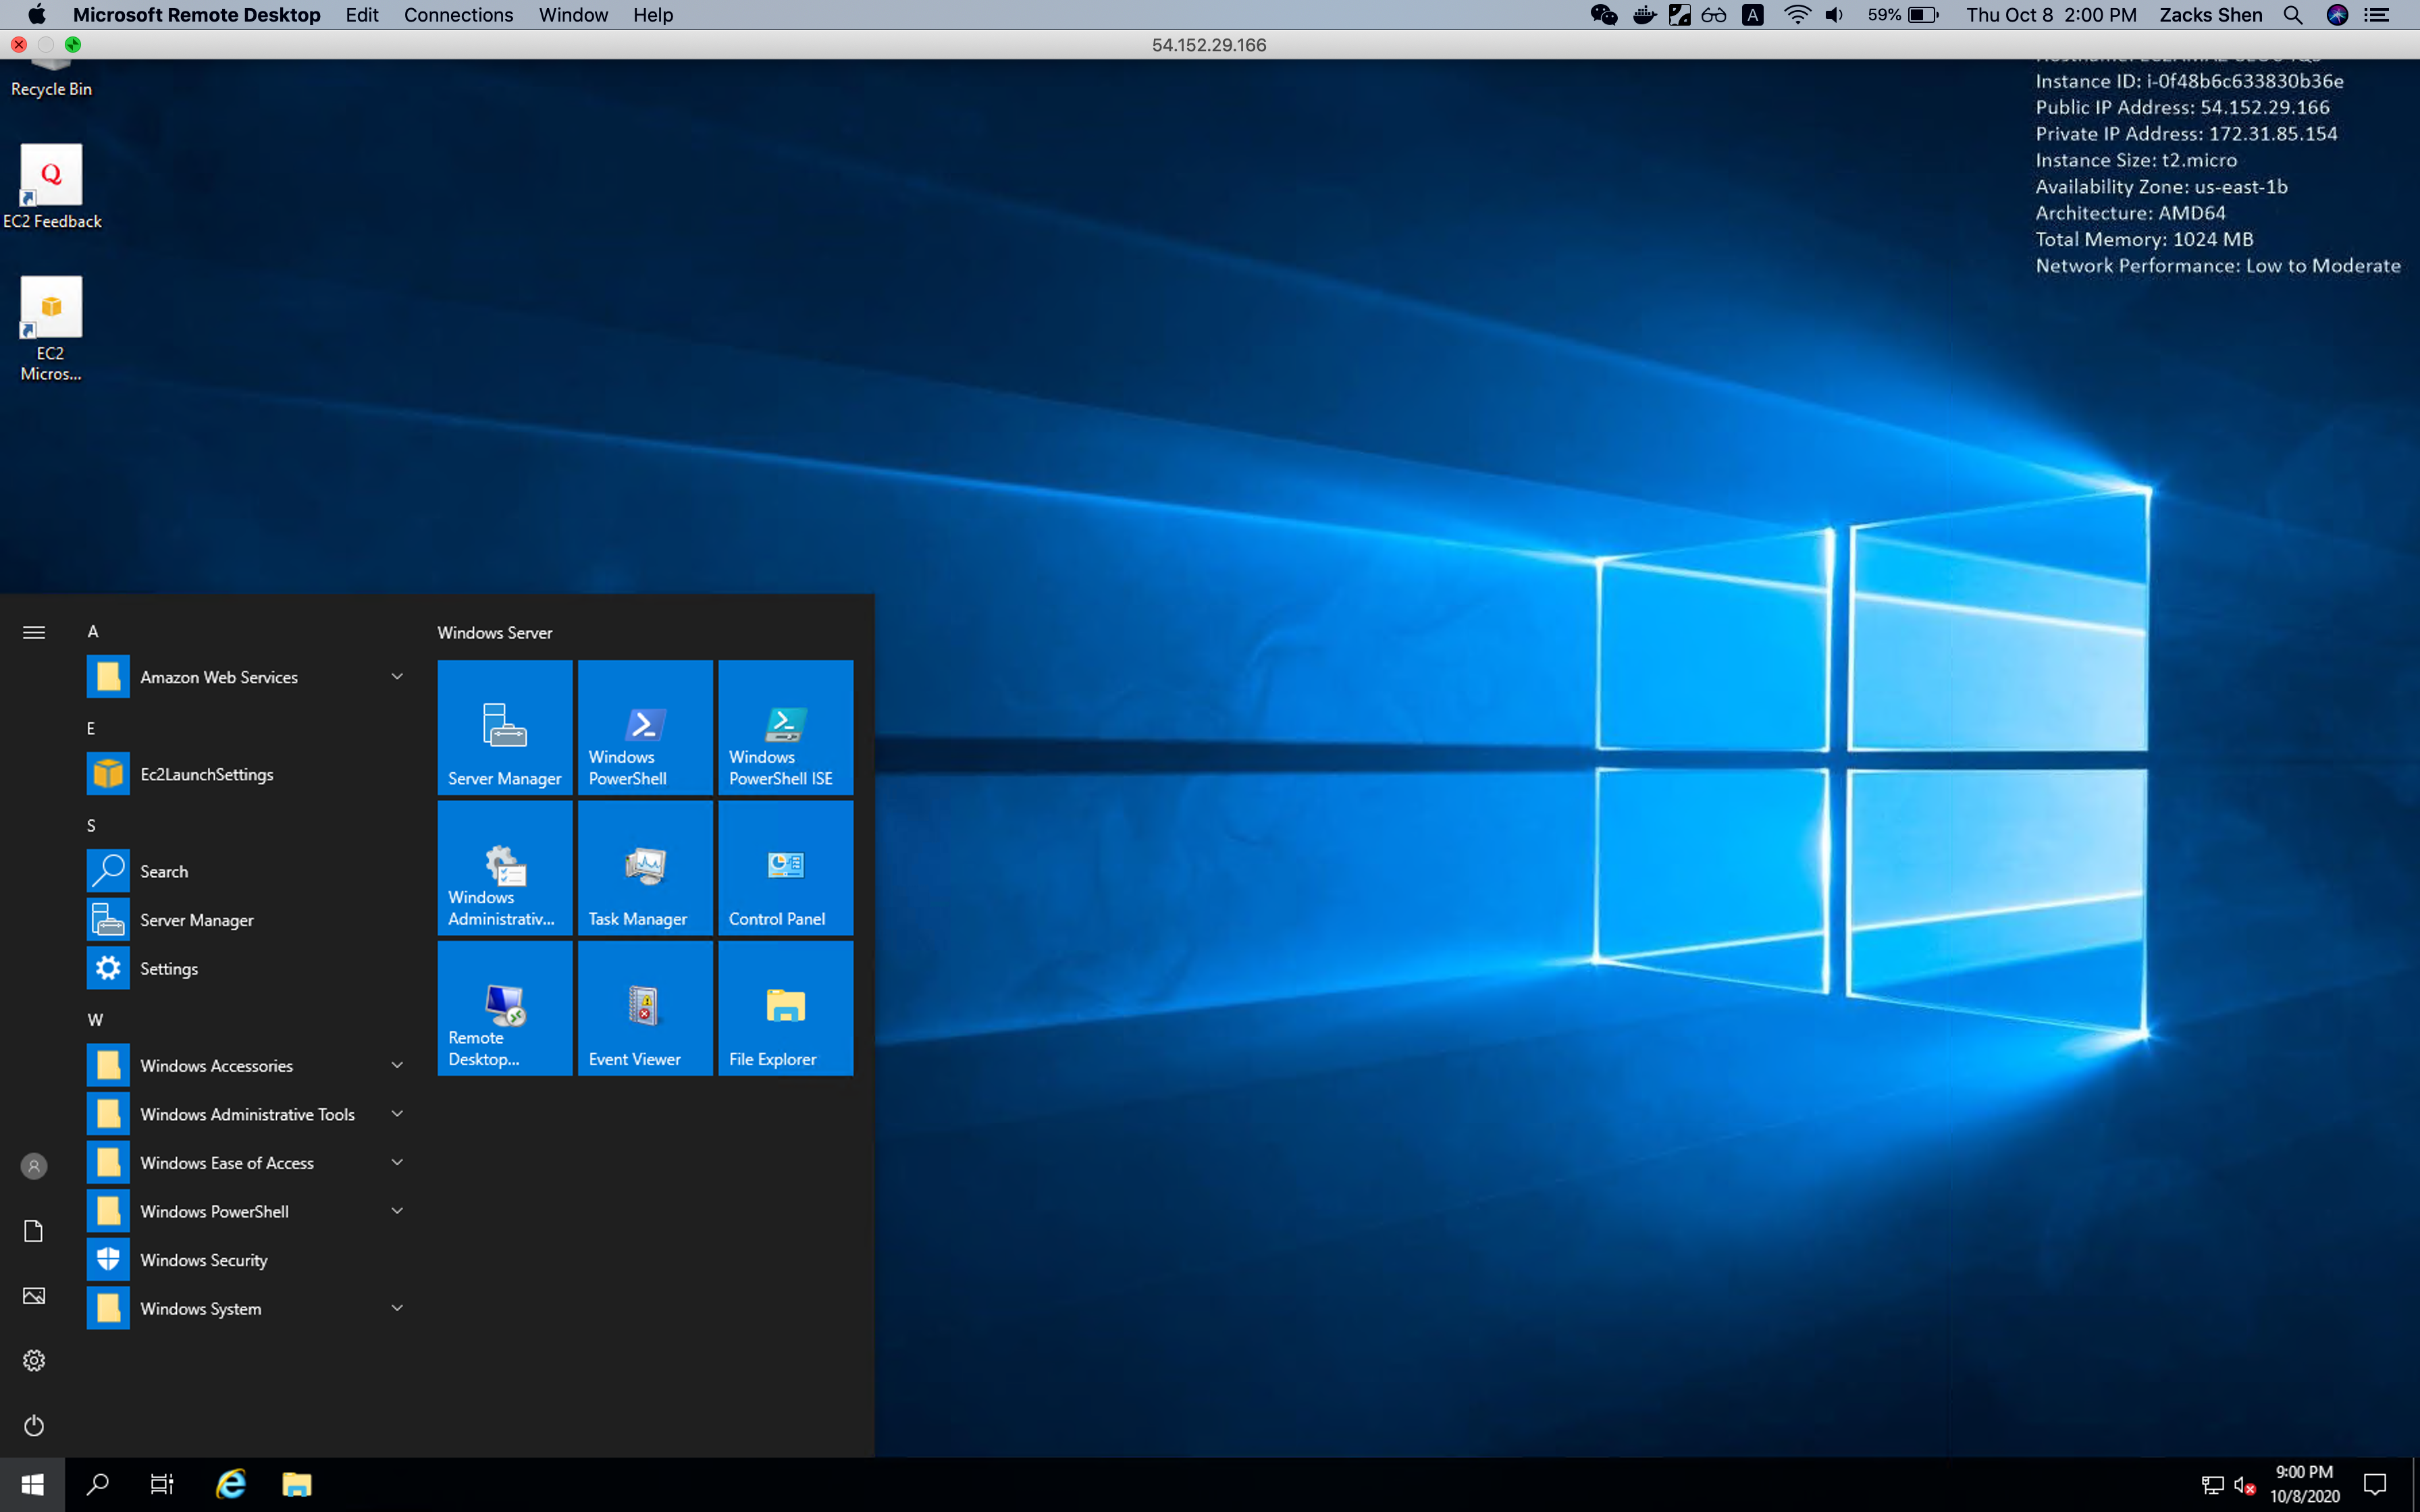
Creating AMI From EC2 Instance
https://play.whizlabs.com/site/task_details?lab_type=1&task_id=28&quest_id=35
Lab Details
- This lab walks you through the steps to create an AMI from an Amazon EC2 instance. You will practice using Amazon Machine Images to launch Amazon EC2 instances and will create an AMI of your EC2 Instance.
Tasks
- Log into the AWS Management Console.
- Create an EC2 Instance.
- Create a new AMI using the EC2 Instance.
- Checking the new EC2 Instance created with AMI.
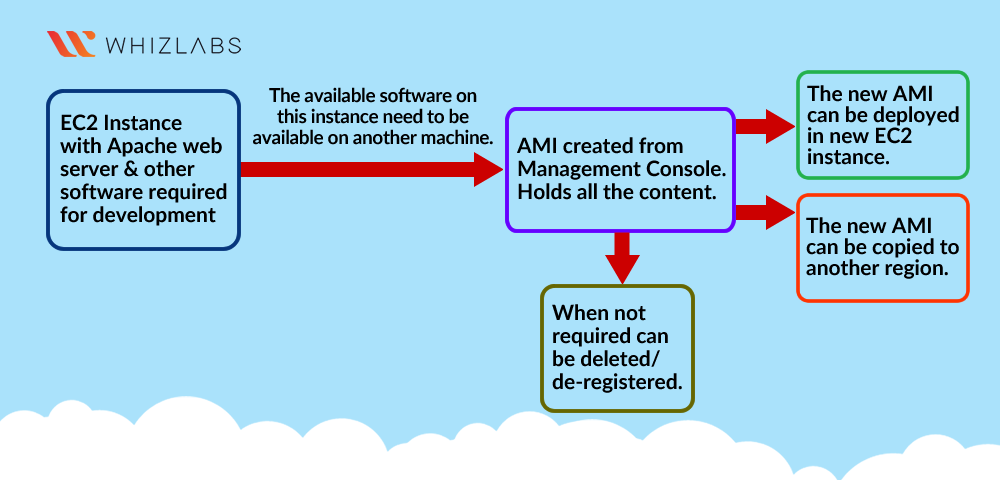
EC2 Configuration
Services -> EC2 -> Instances
Click on Launch instances
Step 1: Choose an Amazon Machine Image(AMI)
Select Amazon Linux 2 AMI (HVM), SSD Volume Type
Step 2: Choose an Instance Type
Select t2.micro
Click on Next: Configure Instance Details
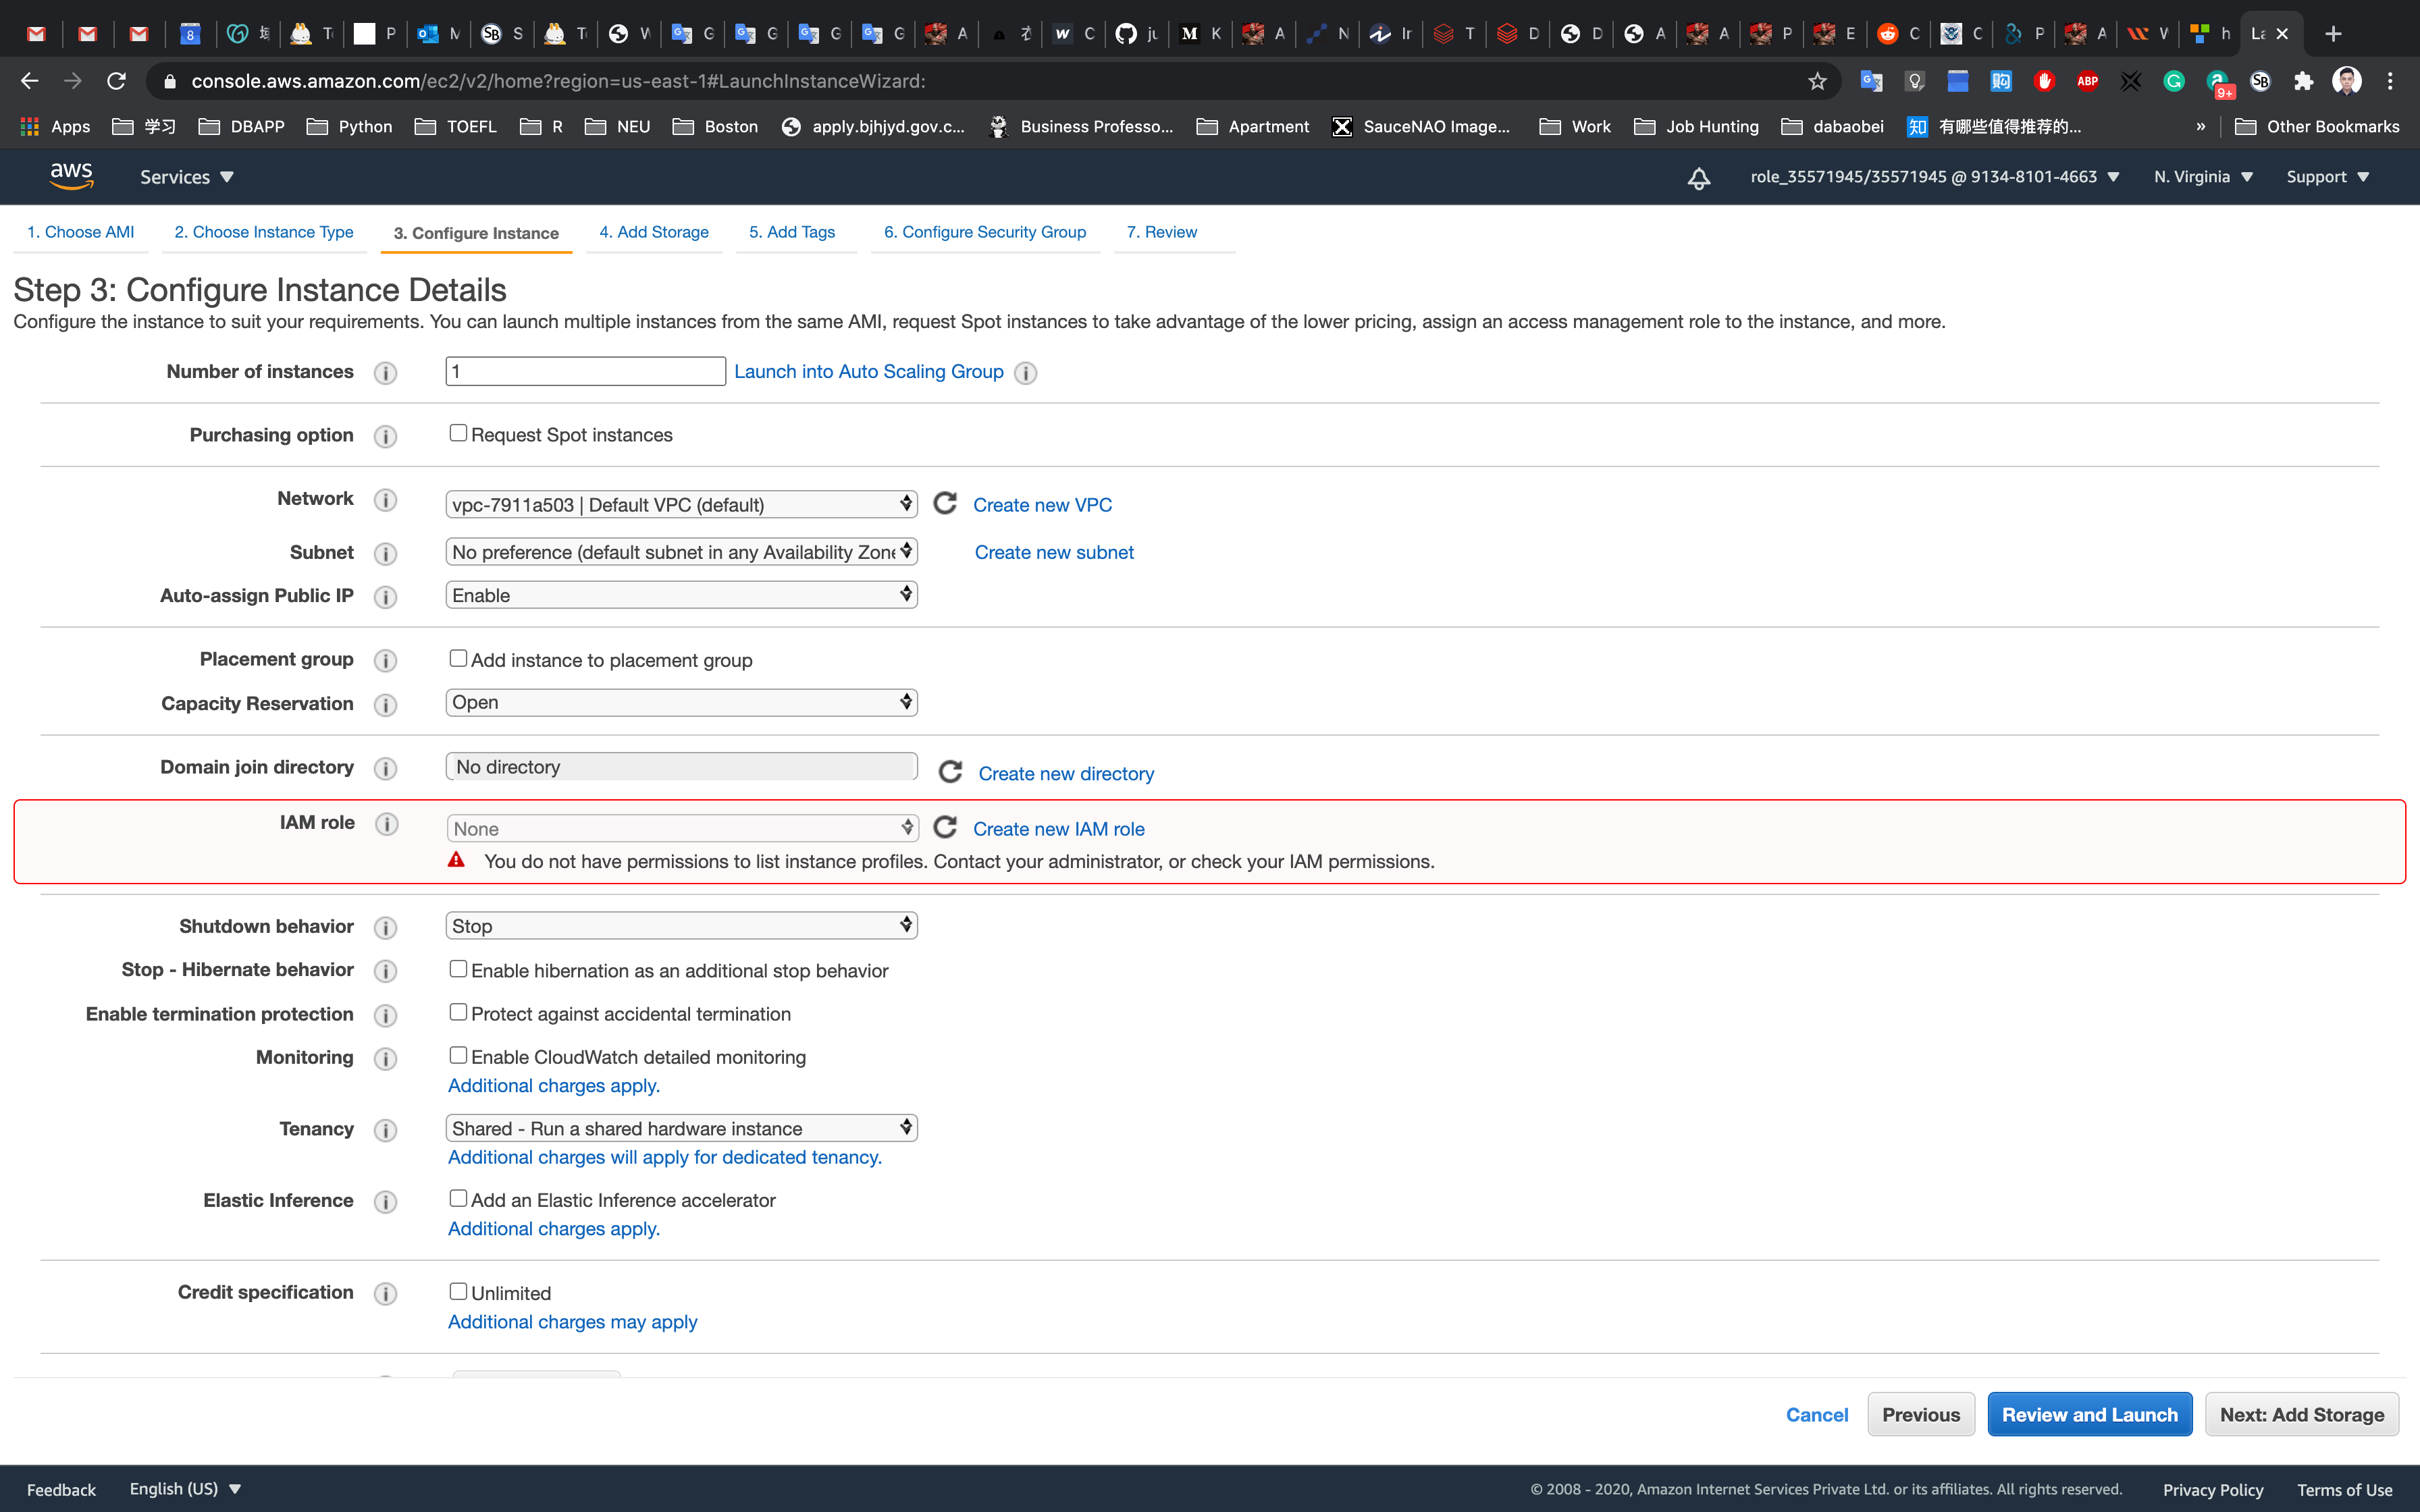
Step 3: Configure Instance Details
Configure Instance Details:
- Number of instances:
1 - Auto-assign Public IP: Select
Enable - Click on
Advanced Details
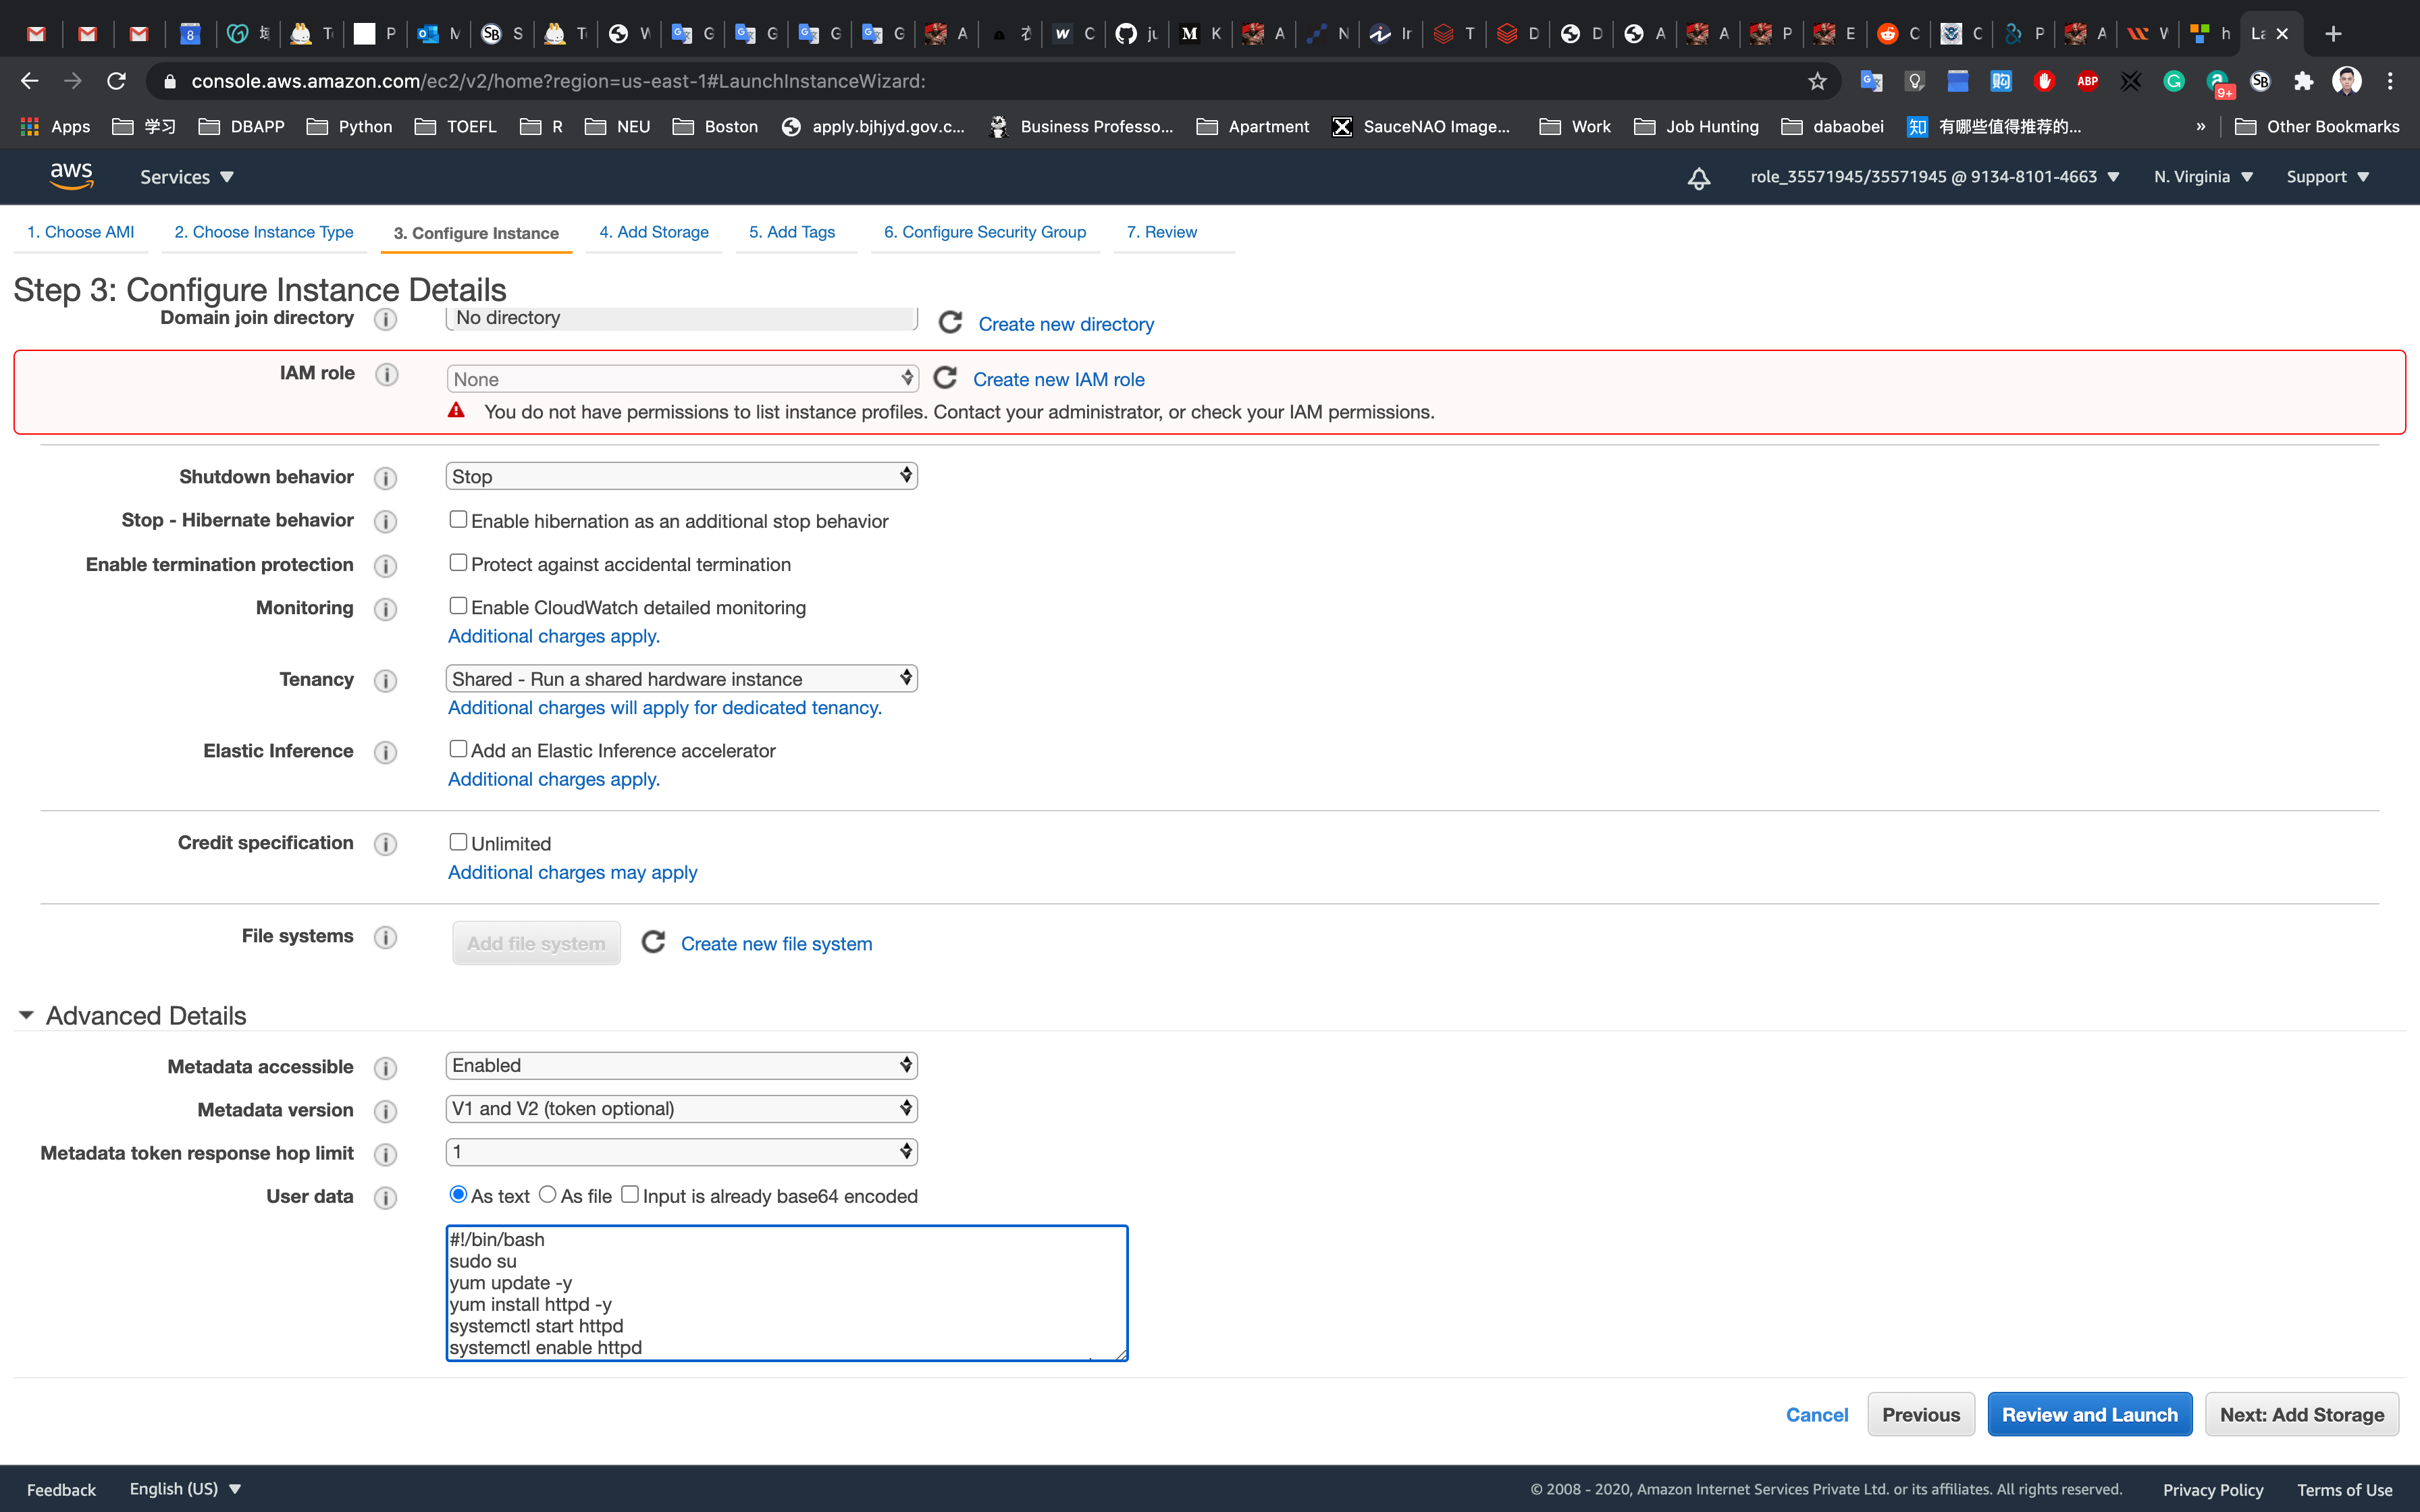
Under the User data section, enter the following script (which creates an HTML page served by an Apache httpd web server).
1 |
|
Click on Next: Add Storage
Step 4: Add Storage
Leave it default settings
Click on Next: Add Tags
Step 5: Add Tags
Click on Add Tag
- Key:
Name - Value:
MyEC2Server
Click on Next: Configure Security Group

Step 6: Configure Security Group
Select Create a new security group
- Security group name:
EC2WebServerSG - Description :
Security Group for EC2 Web Server
For SSH:
- Source:
Custom(Allow specific IP address) orAnywhere(From ALL IP addresses accessible).
Click on Add Rule
For HTTP:
- Source:
Anywhere
Click on Add Rule
For HTTPS:
- Source:
Anywhere
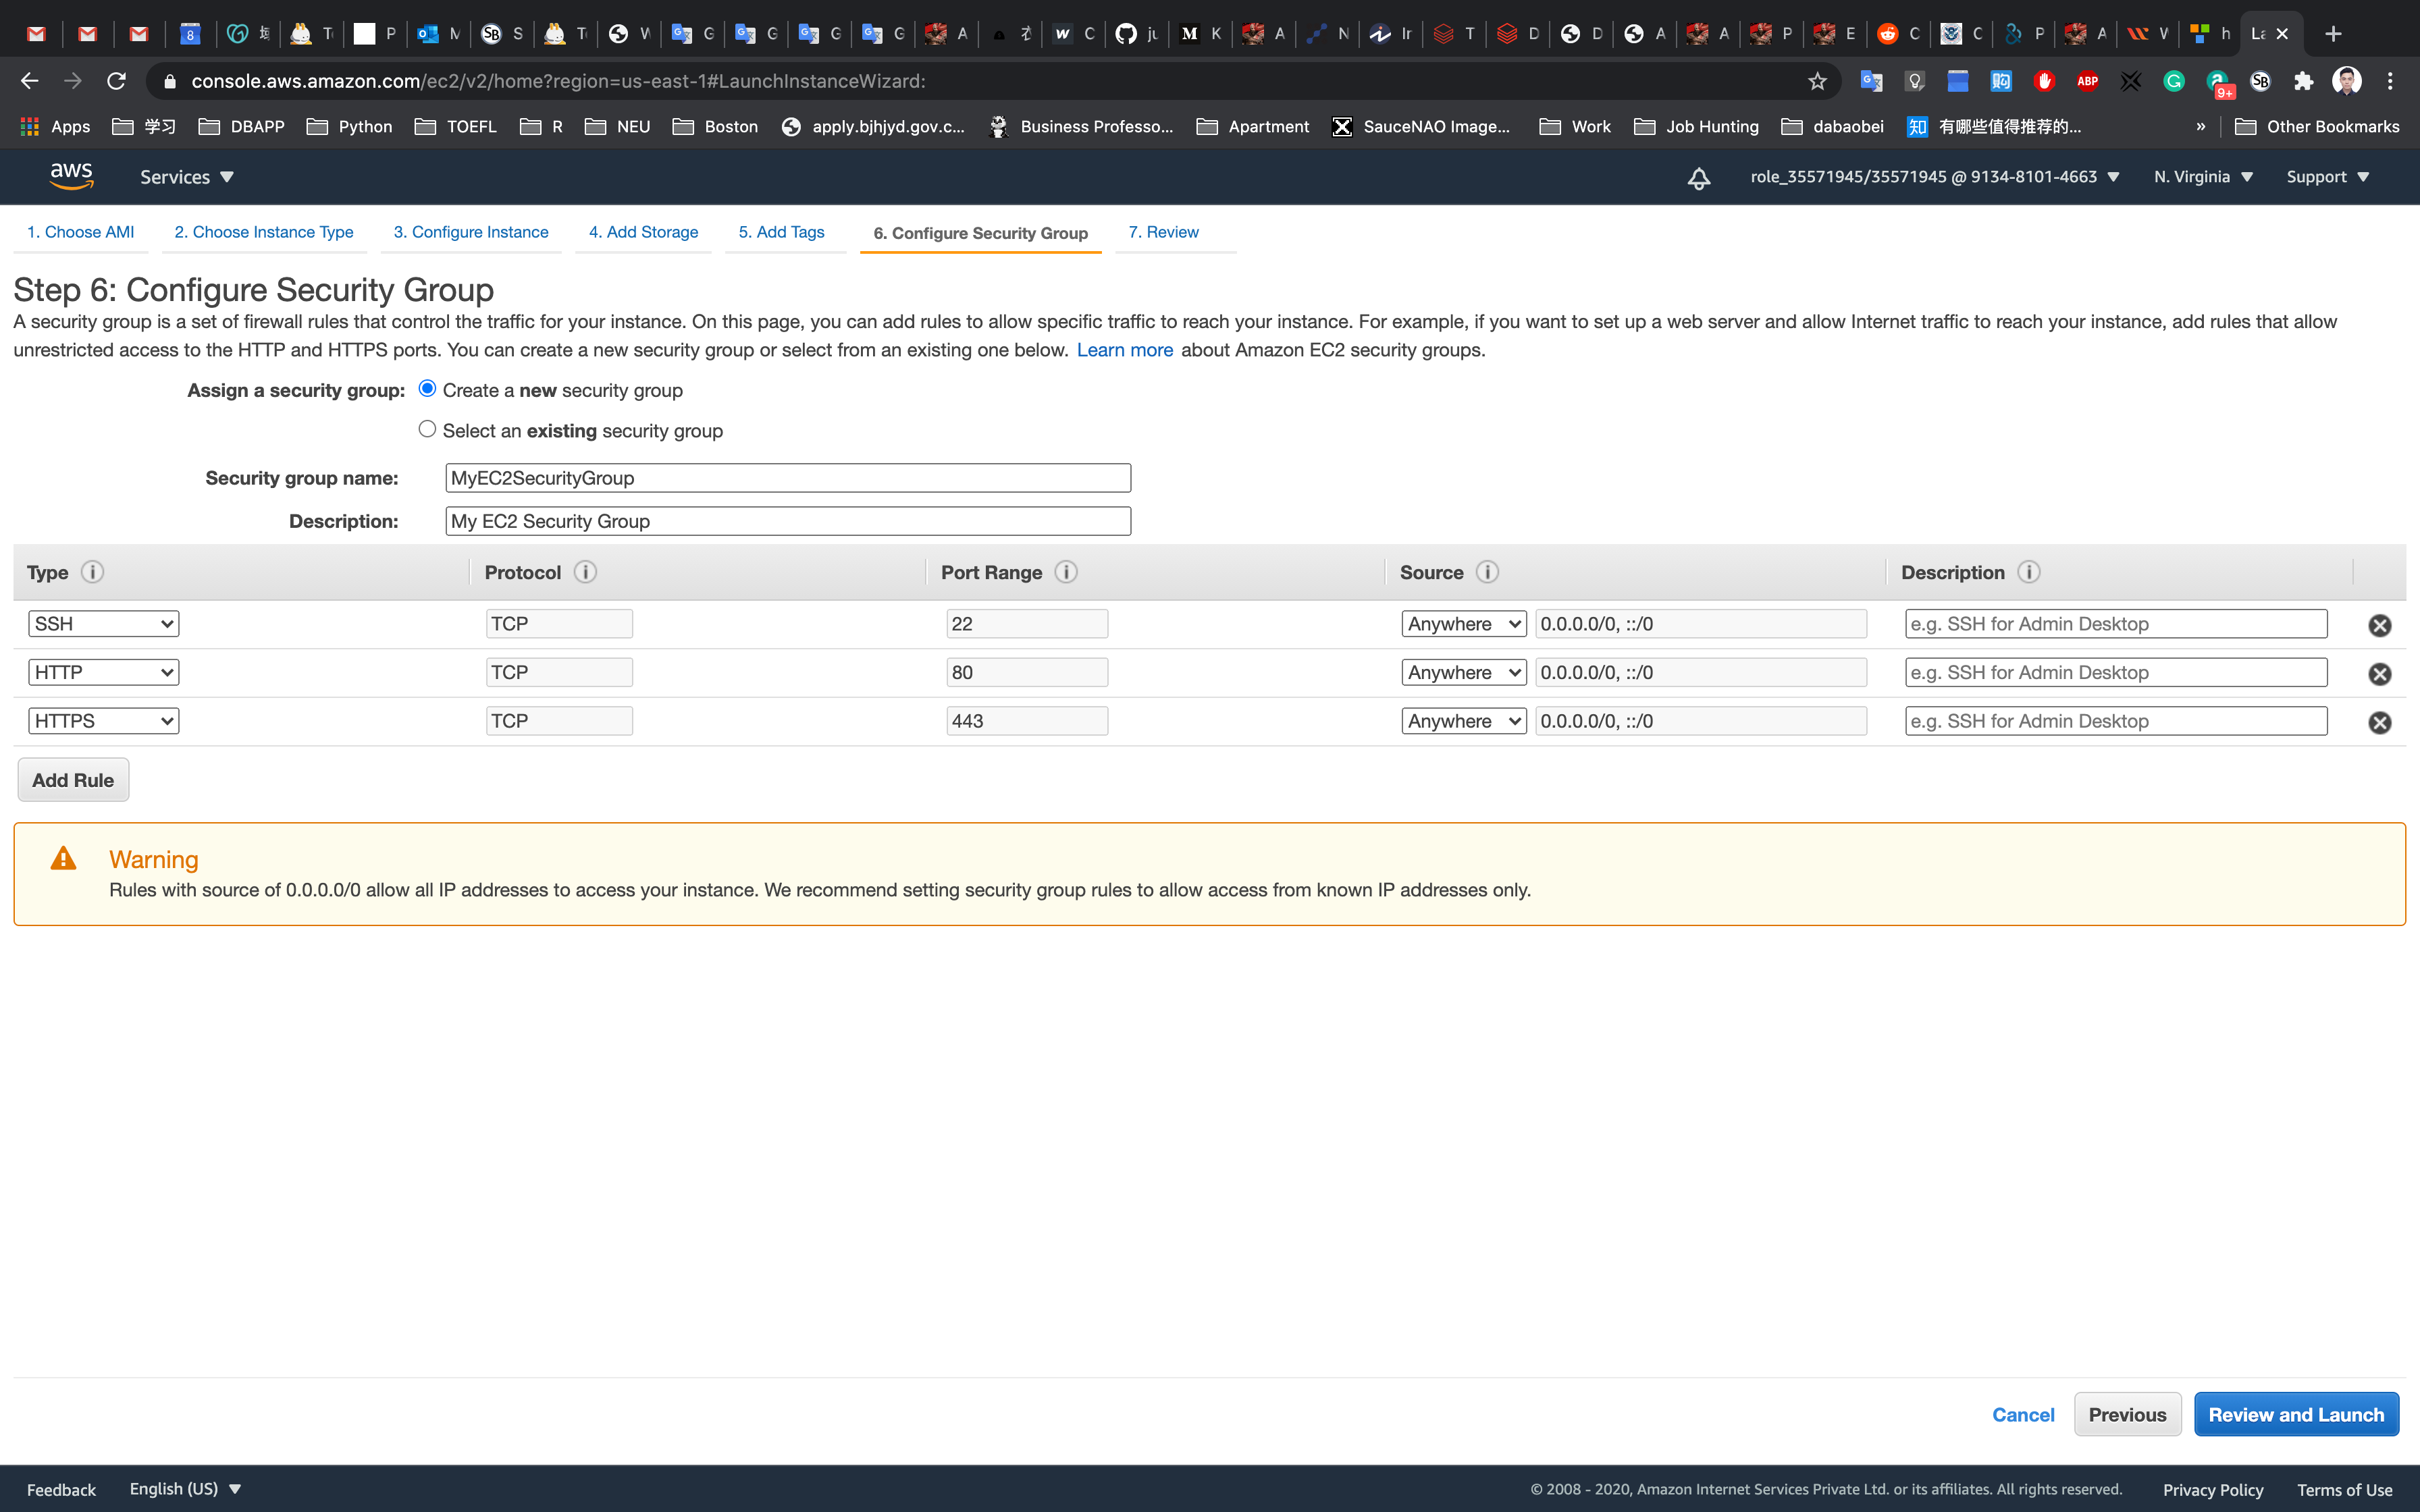
Click on Review and Launch
Step 7: Review Instance Launch
Click on Launch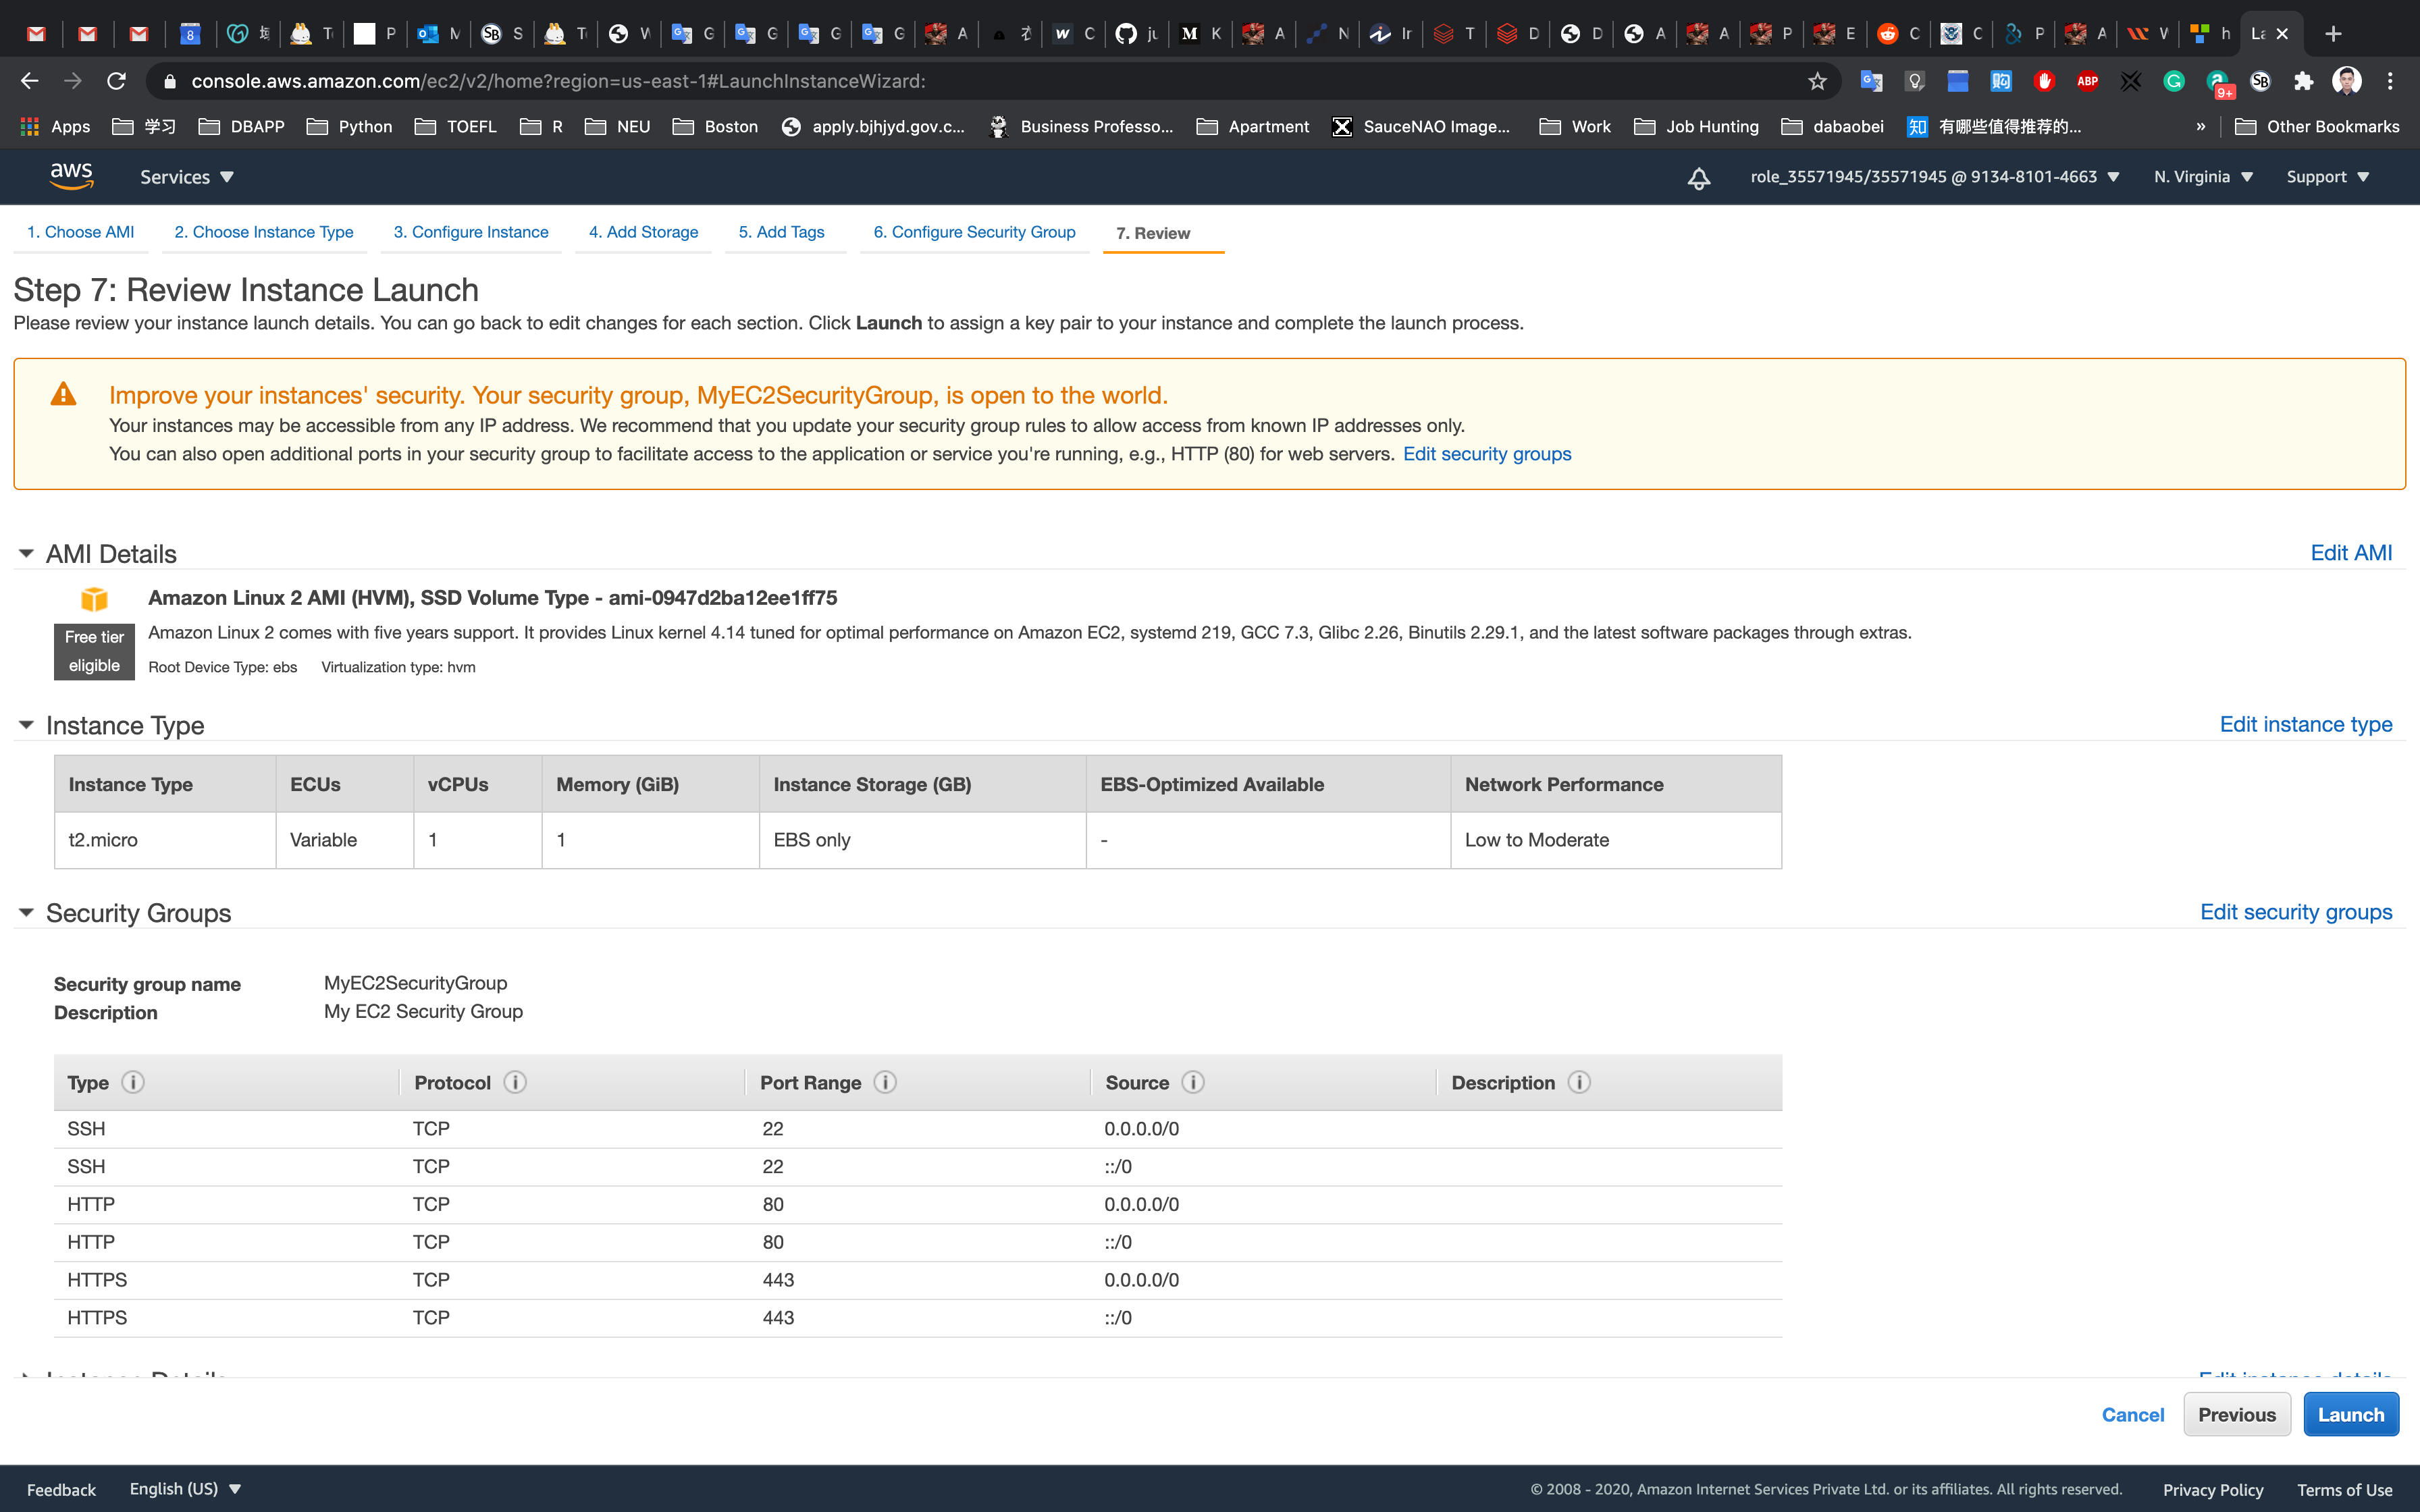
Select Create a new key pair
Set up the key pair name ec2
Click on Download Key Pair
See the left bottom of the screenshot, we have the file named ec2.pem
Click on Launch Instances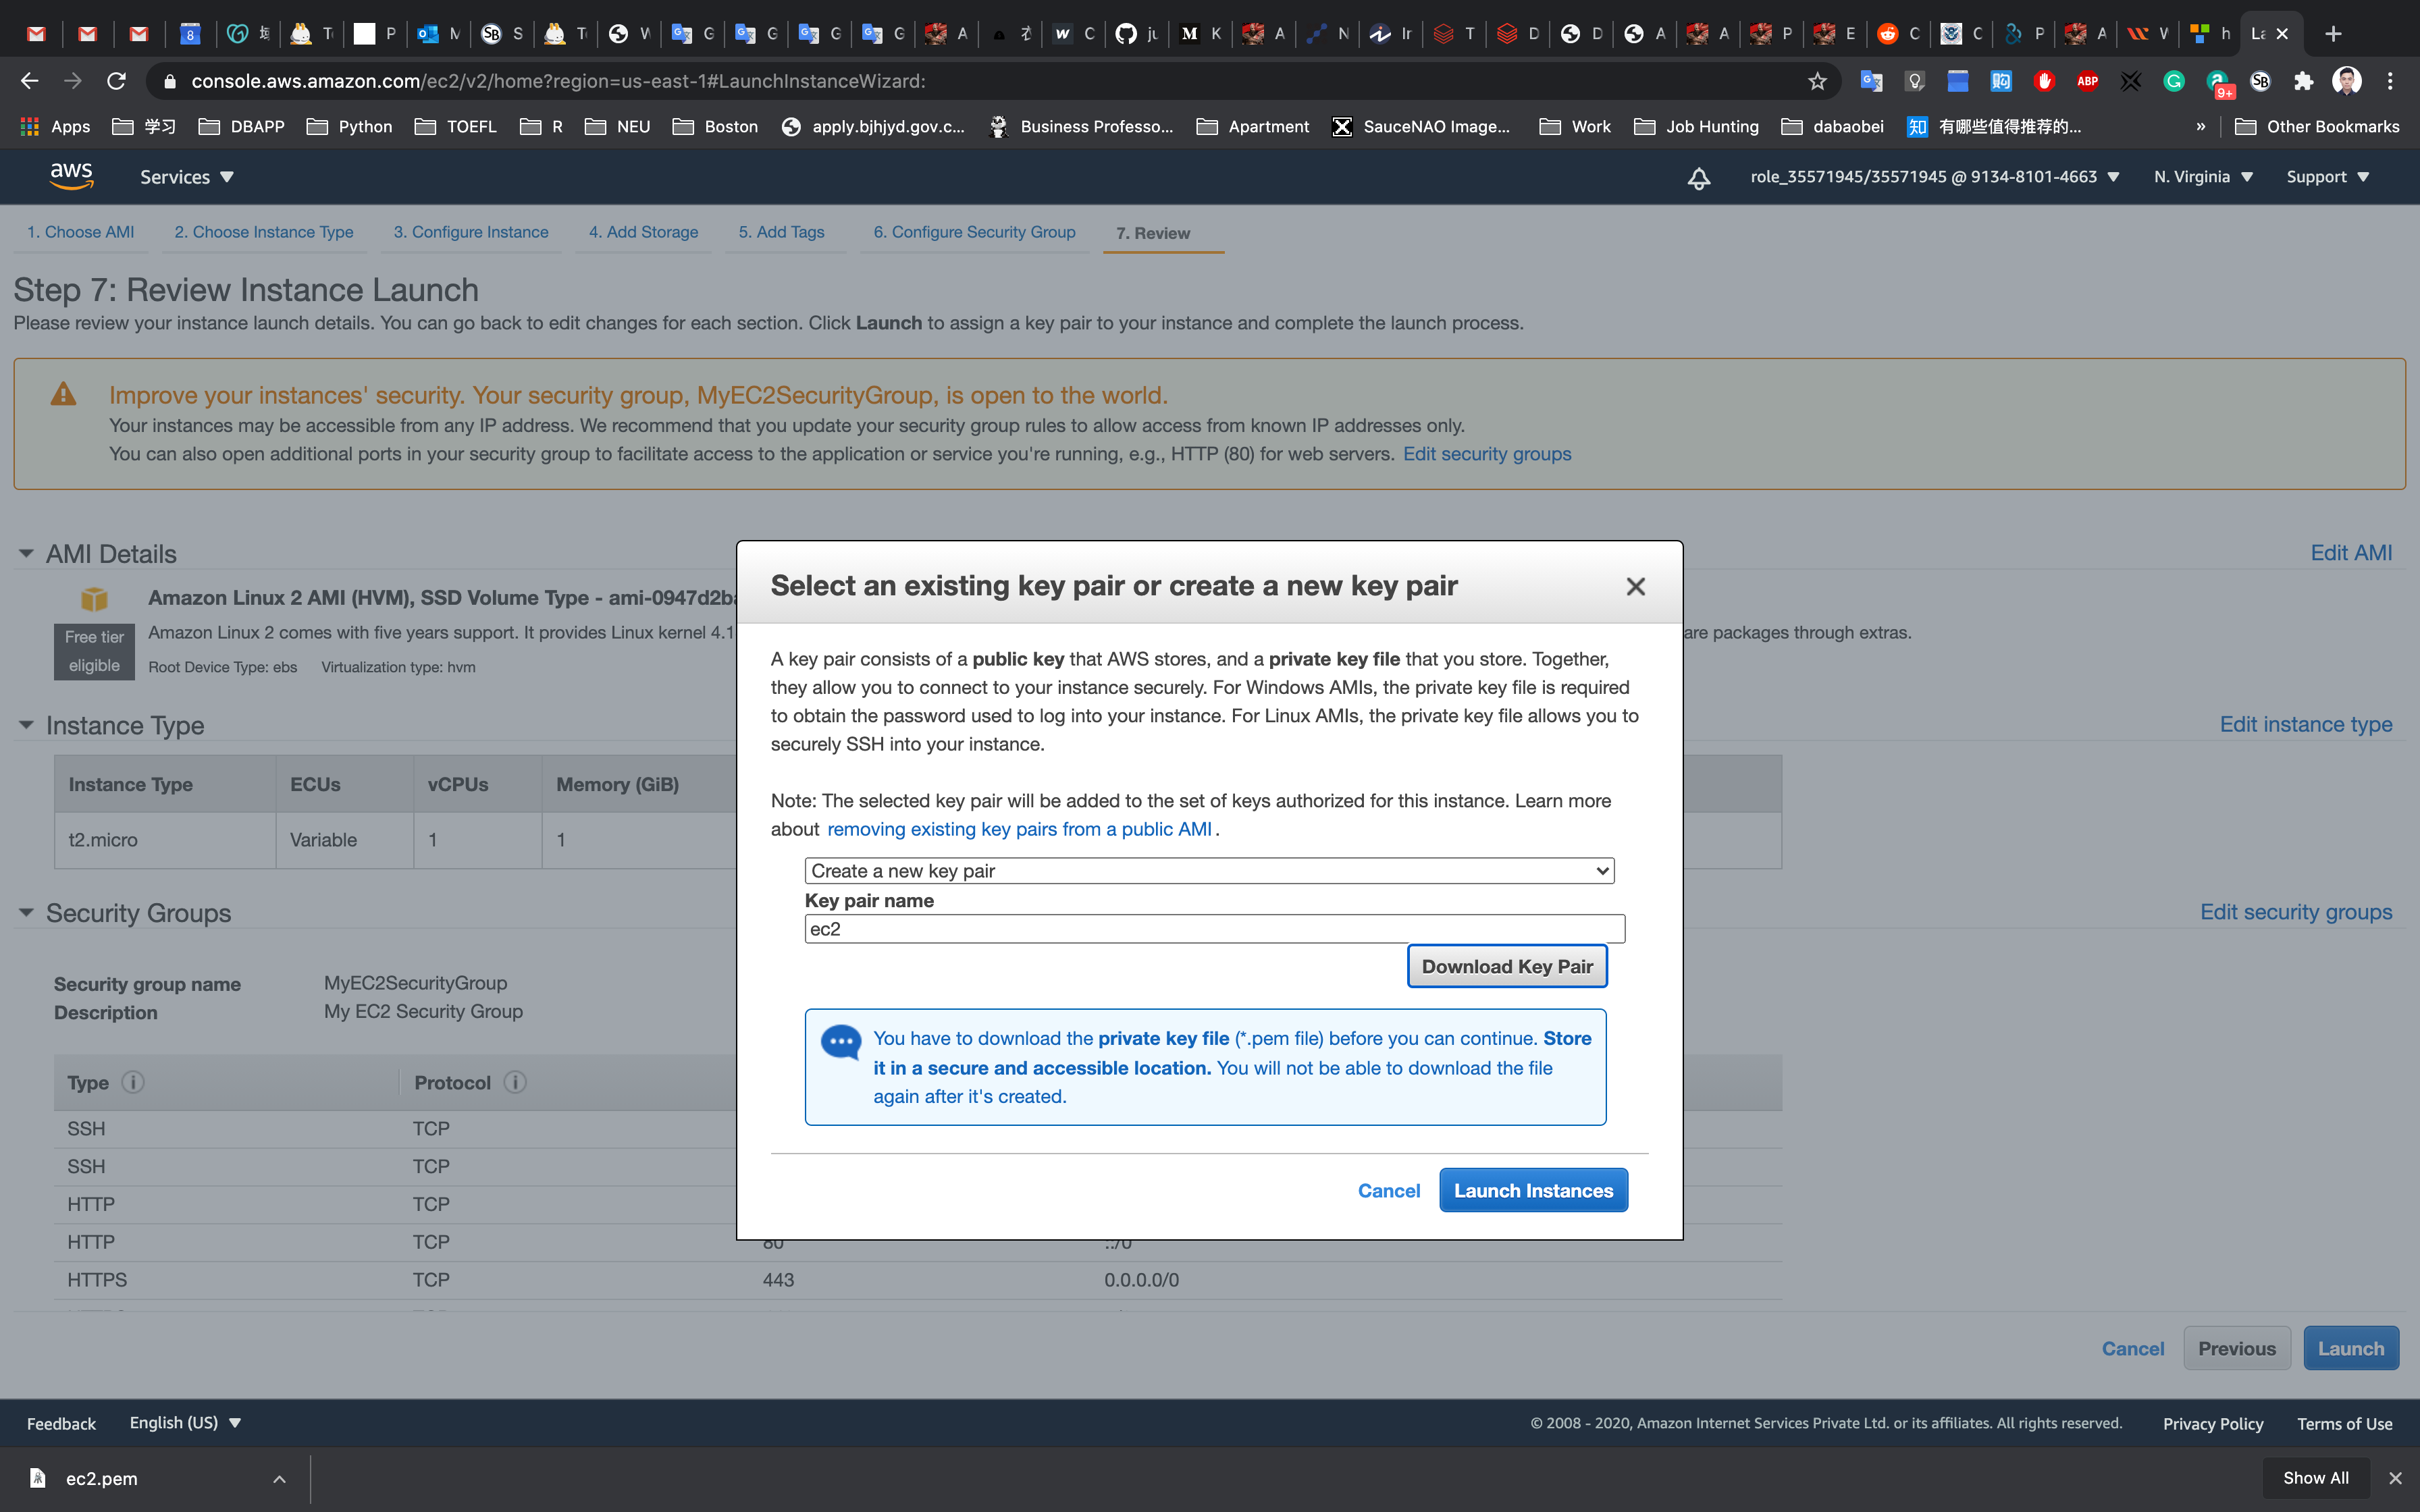
Click on View Instances
Waiting until the Instance state switch to Running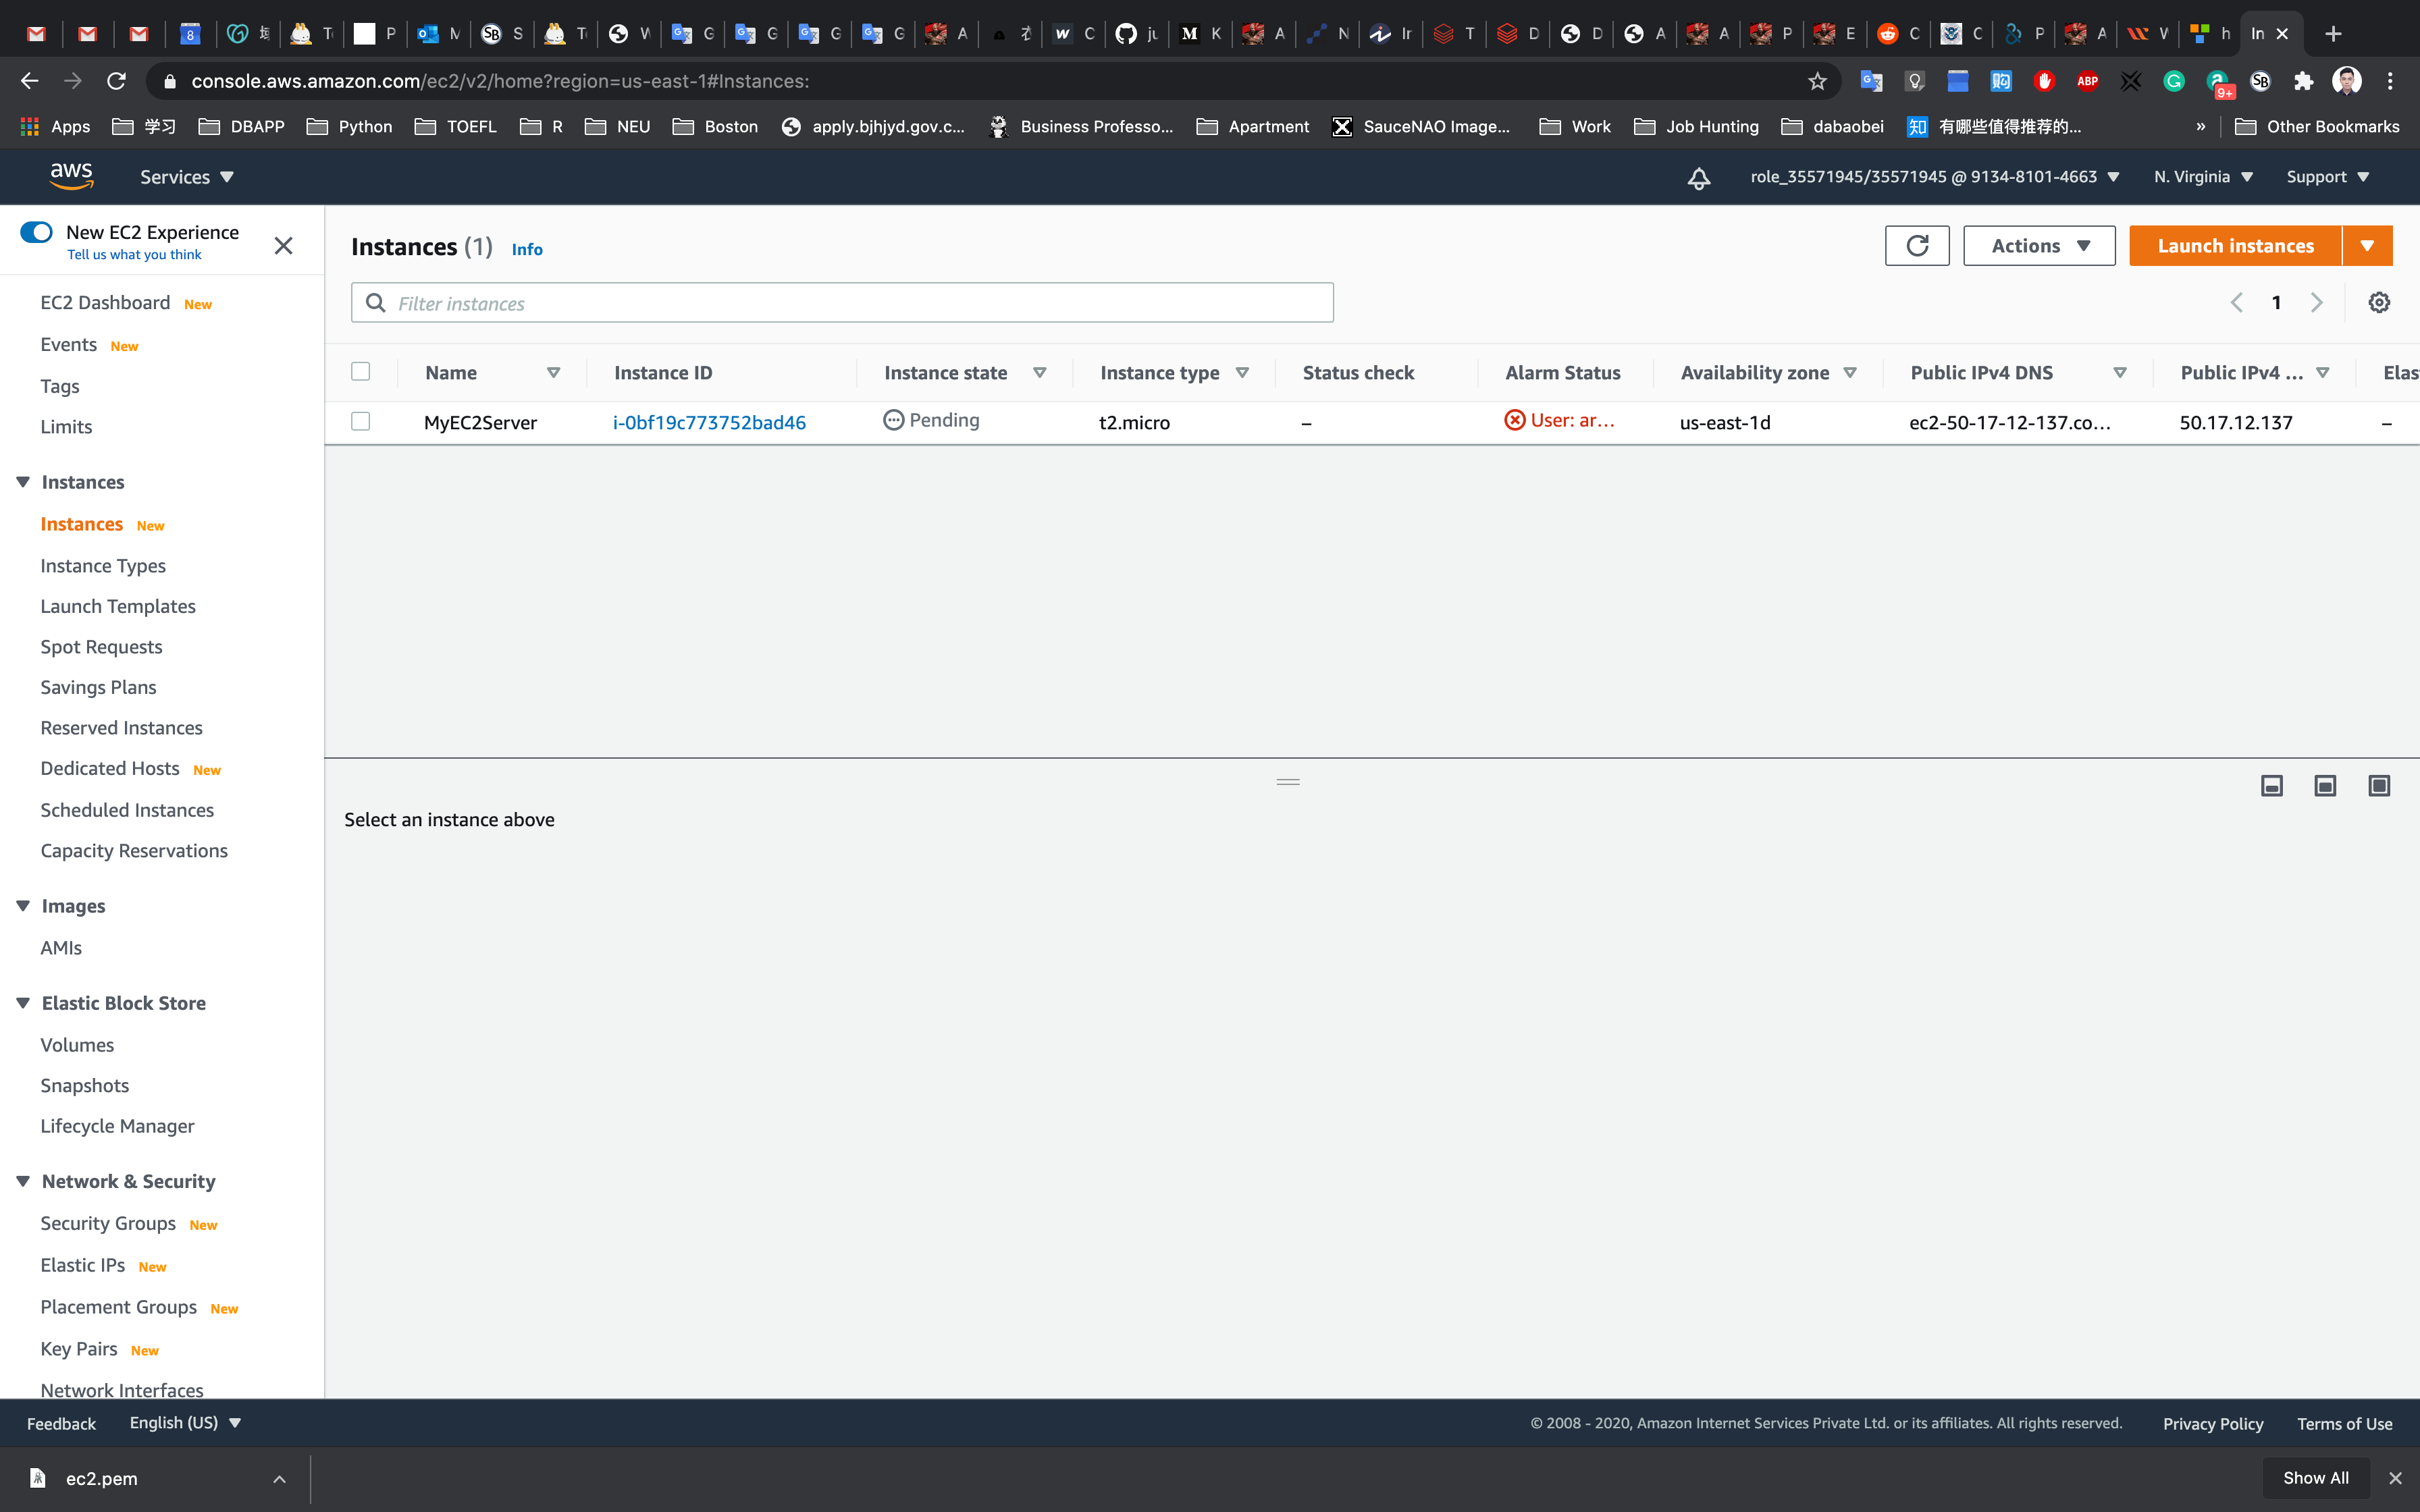
You can Click on Instance ID like i-095a9b2992ba8bf7d to see the instance detail.
Copy the Public IPv4 address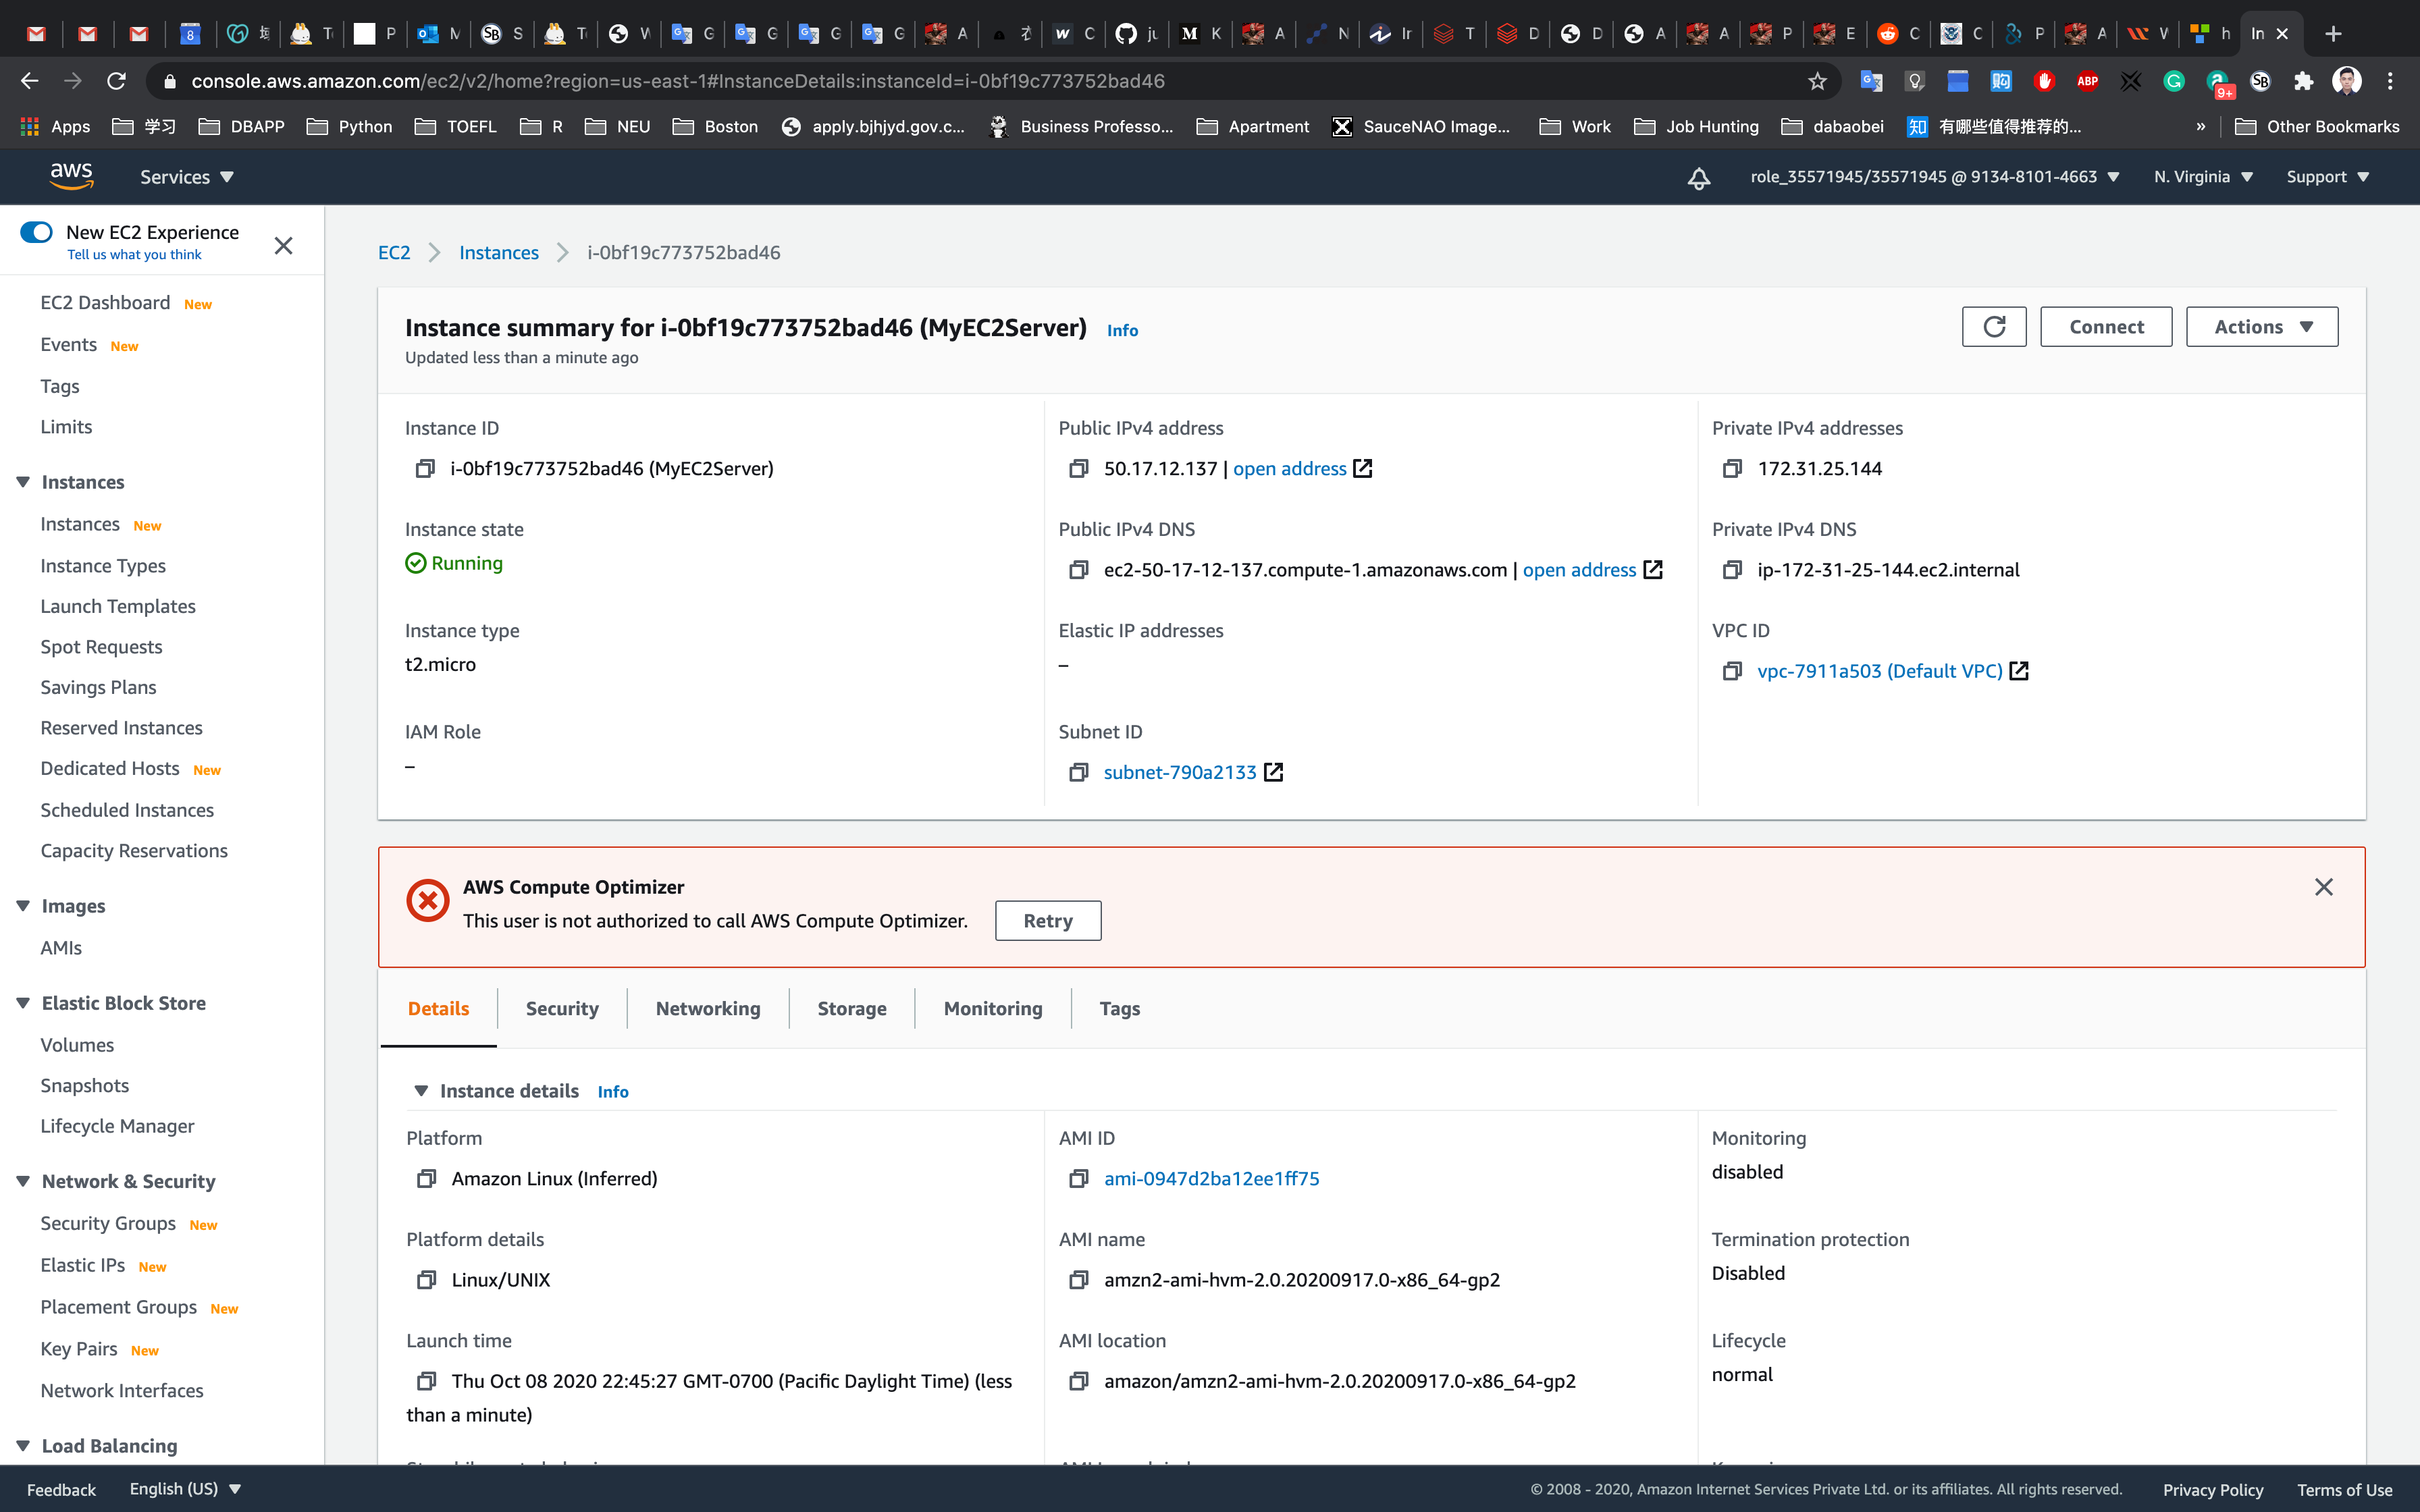
Enter the Public IPv4 address in your browser
Creating an AMI from the EC2 Instance
Go to your EC2 instances page
Click on Action -> Image -> Create image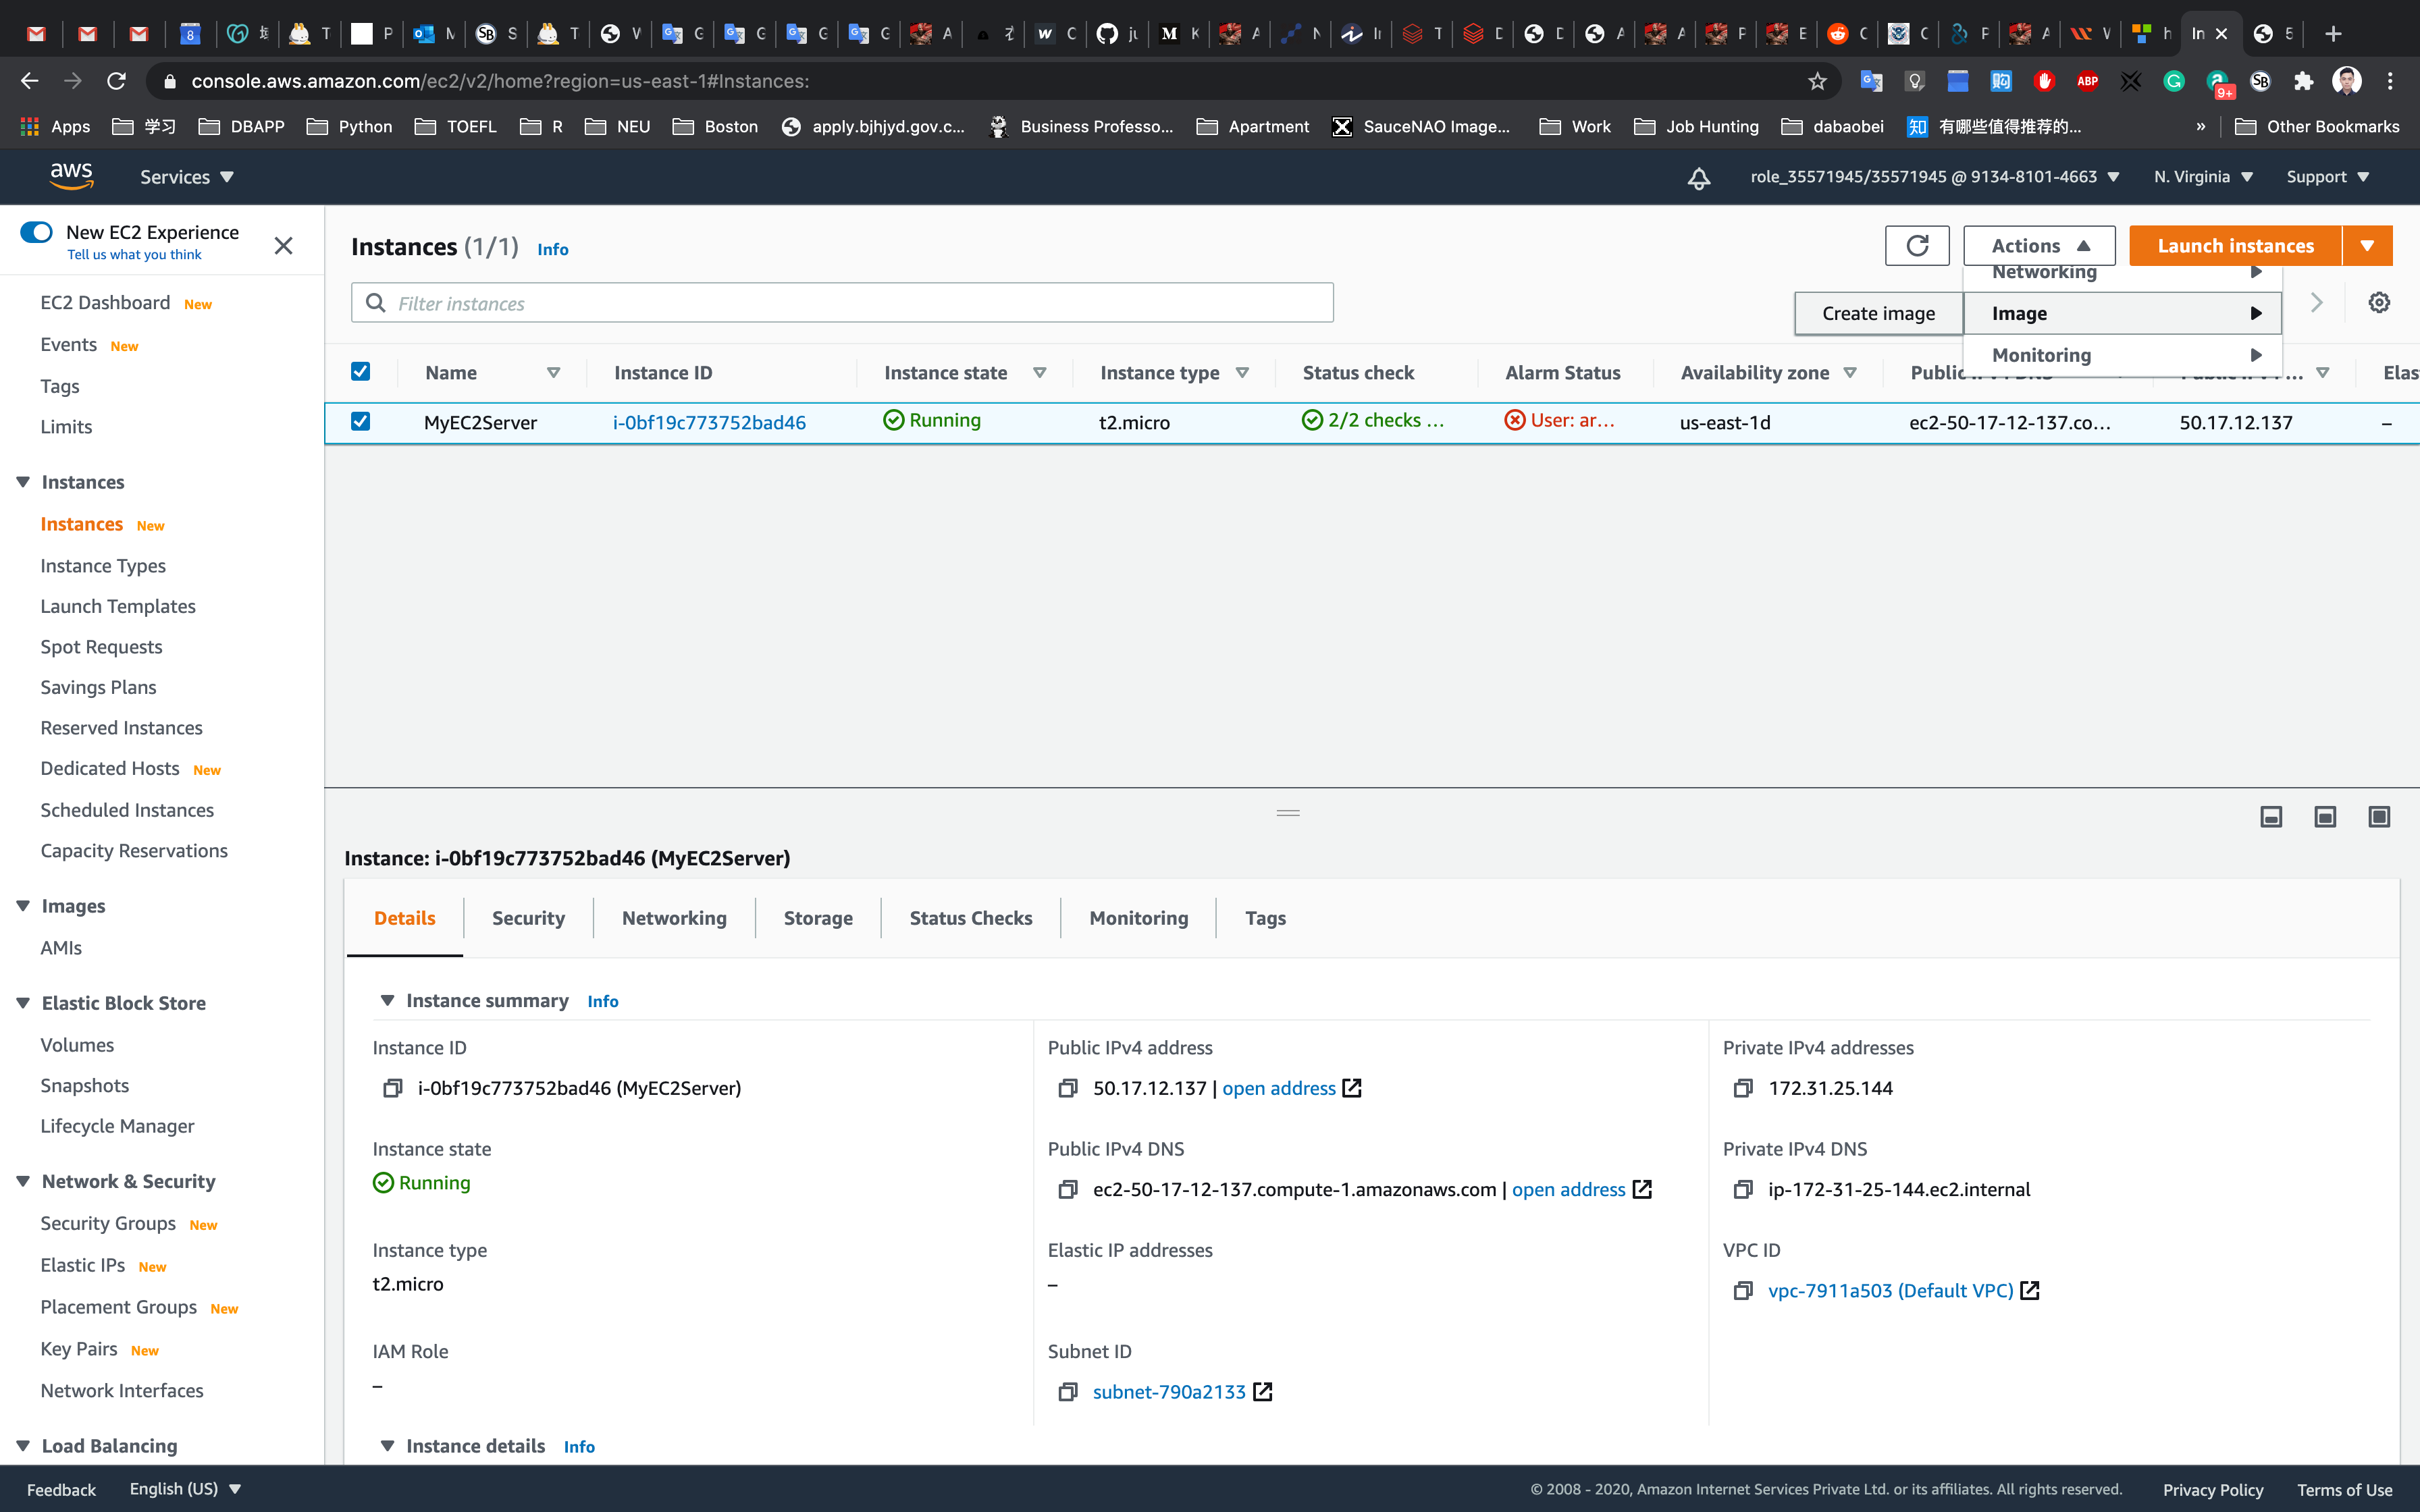
In the pop up window, enter the following details:
- Image Name:
MyEC2Image - Image Description:
My EC2 Image - Leave other details as default.
Click on Create image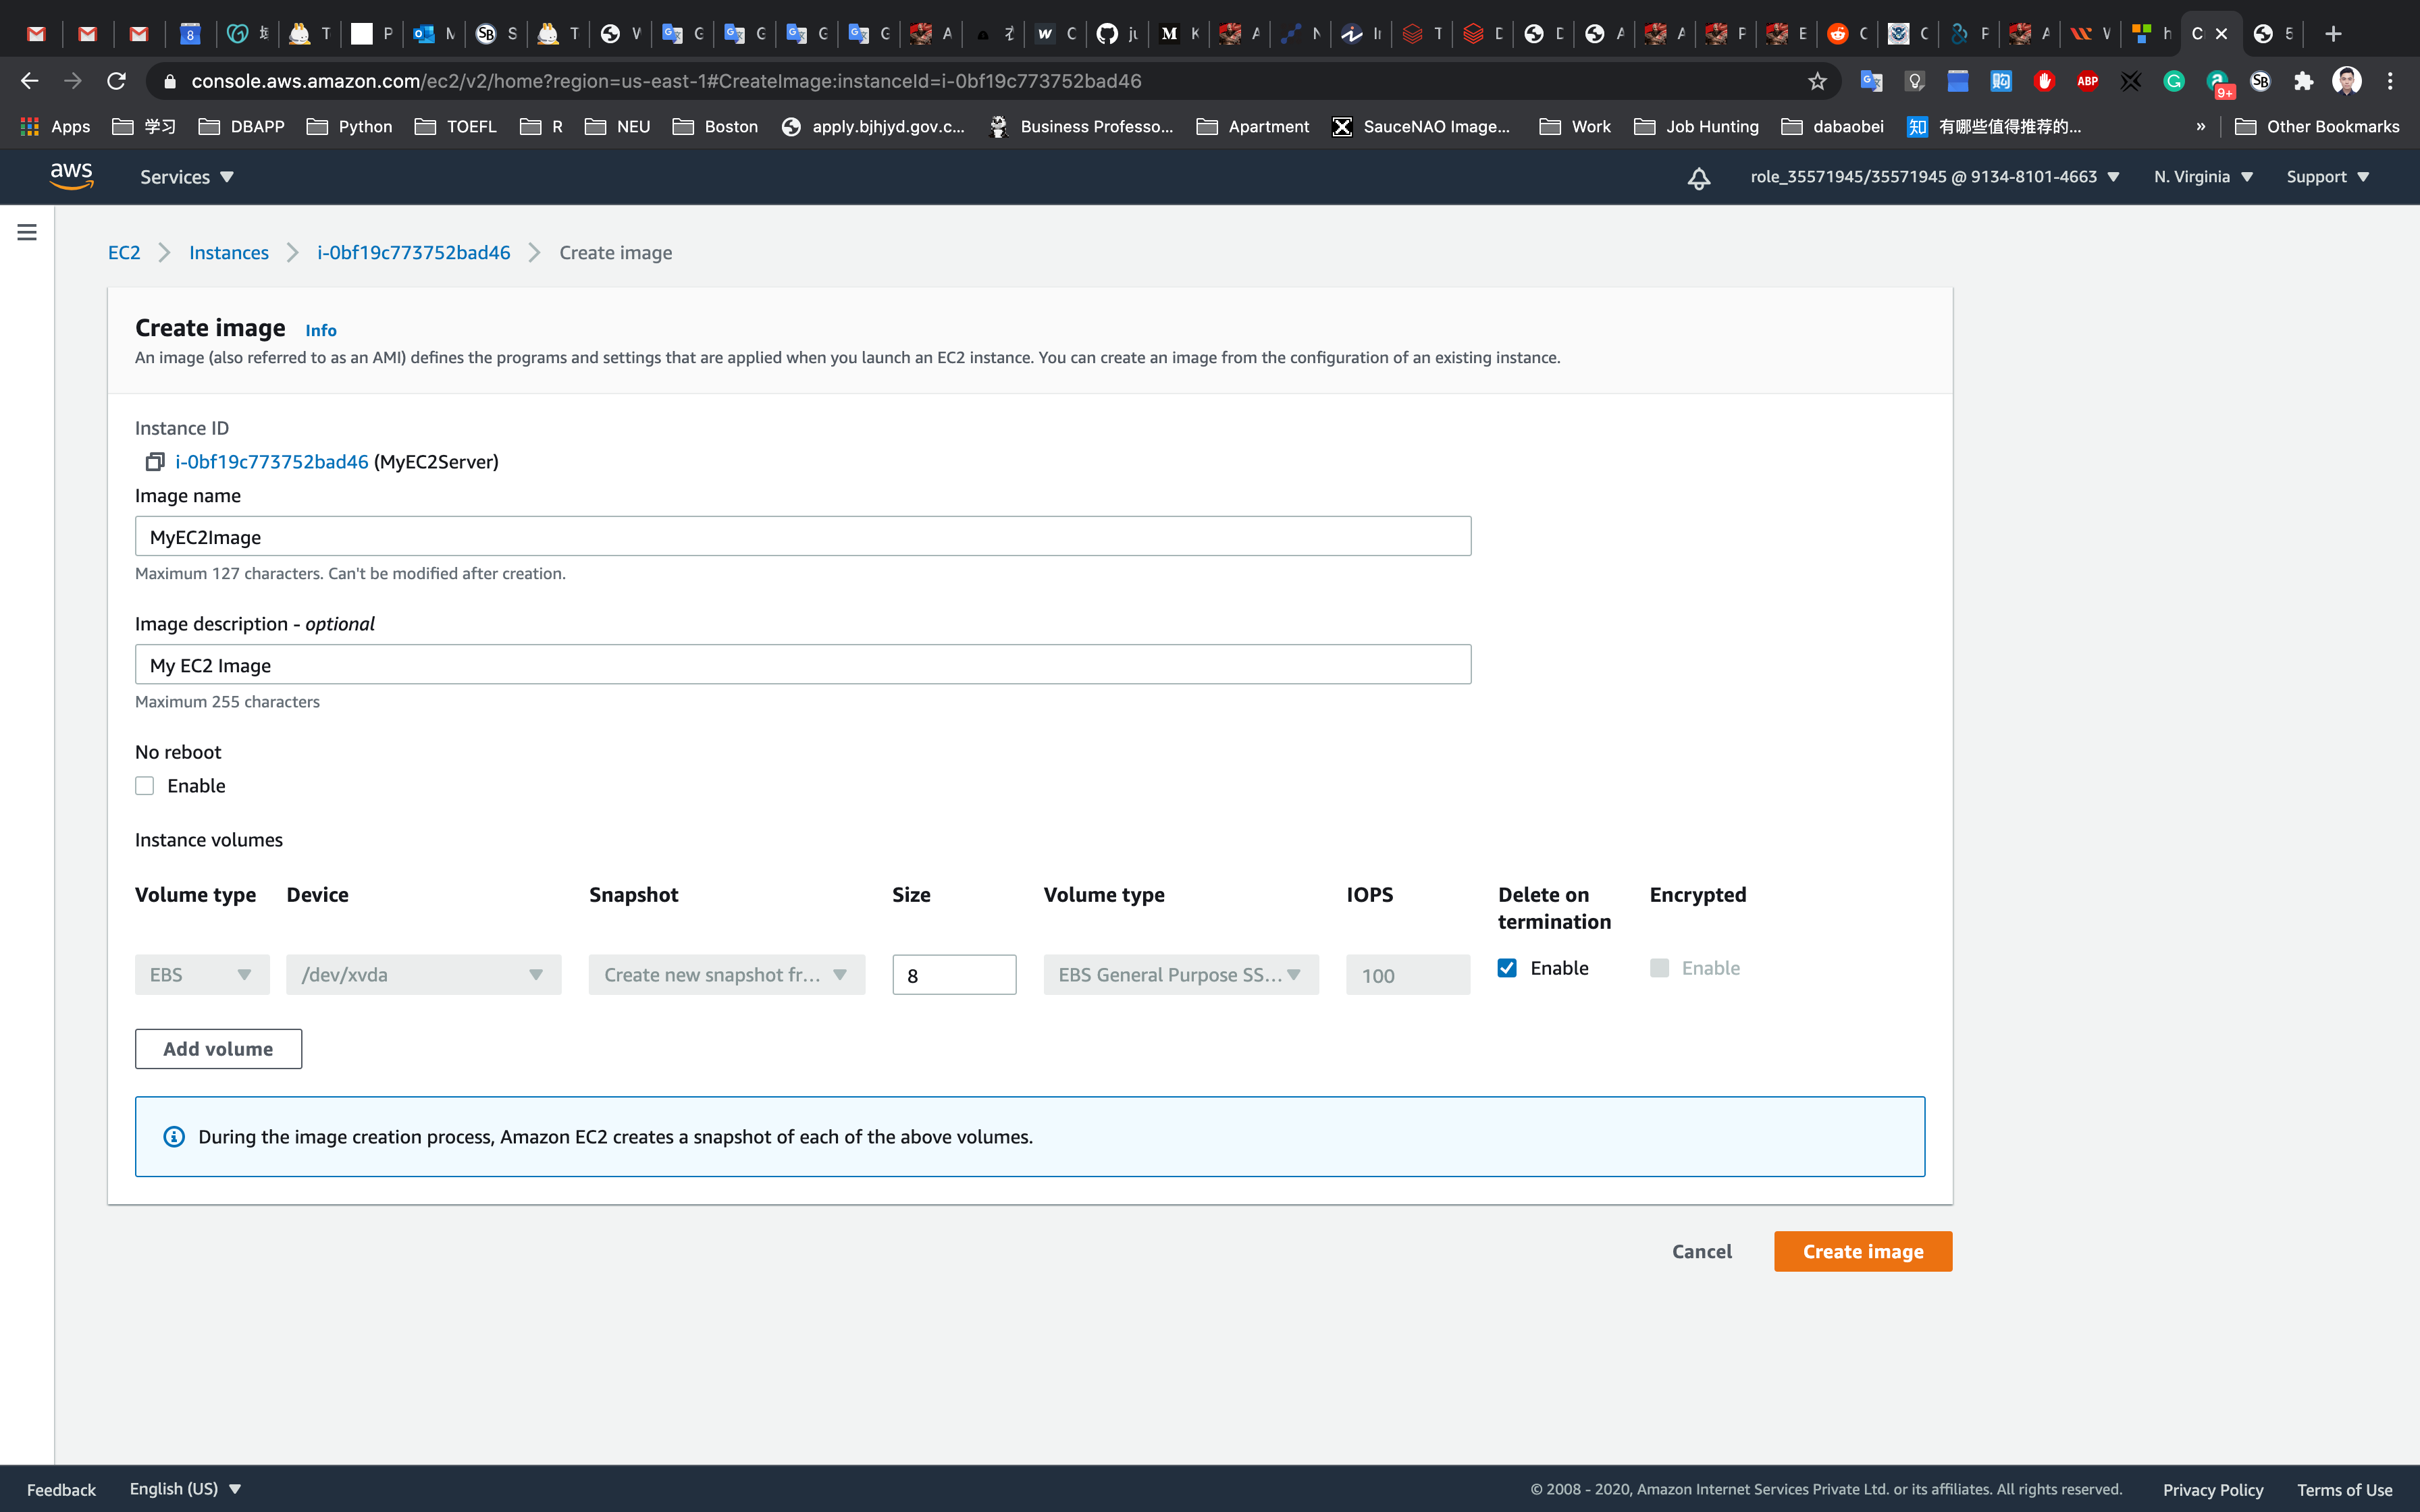
See the successful notification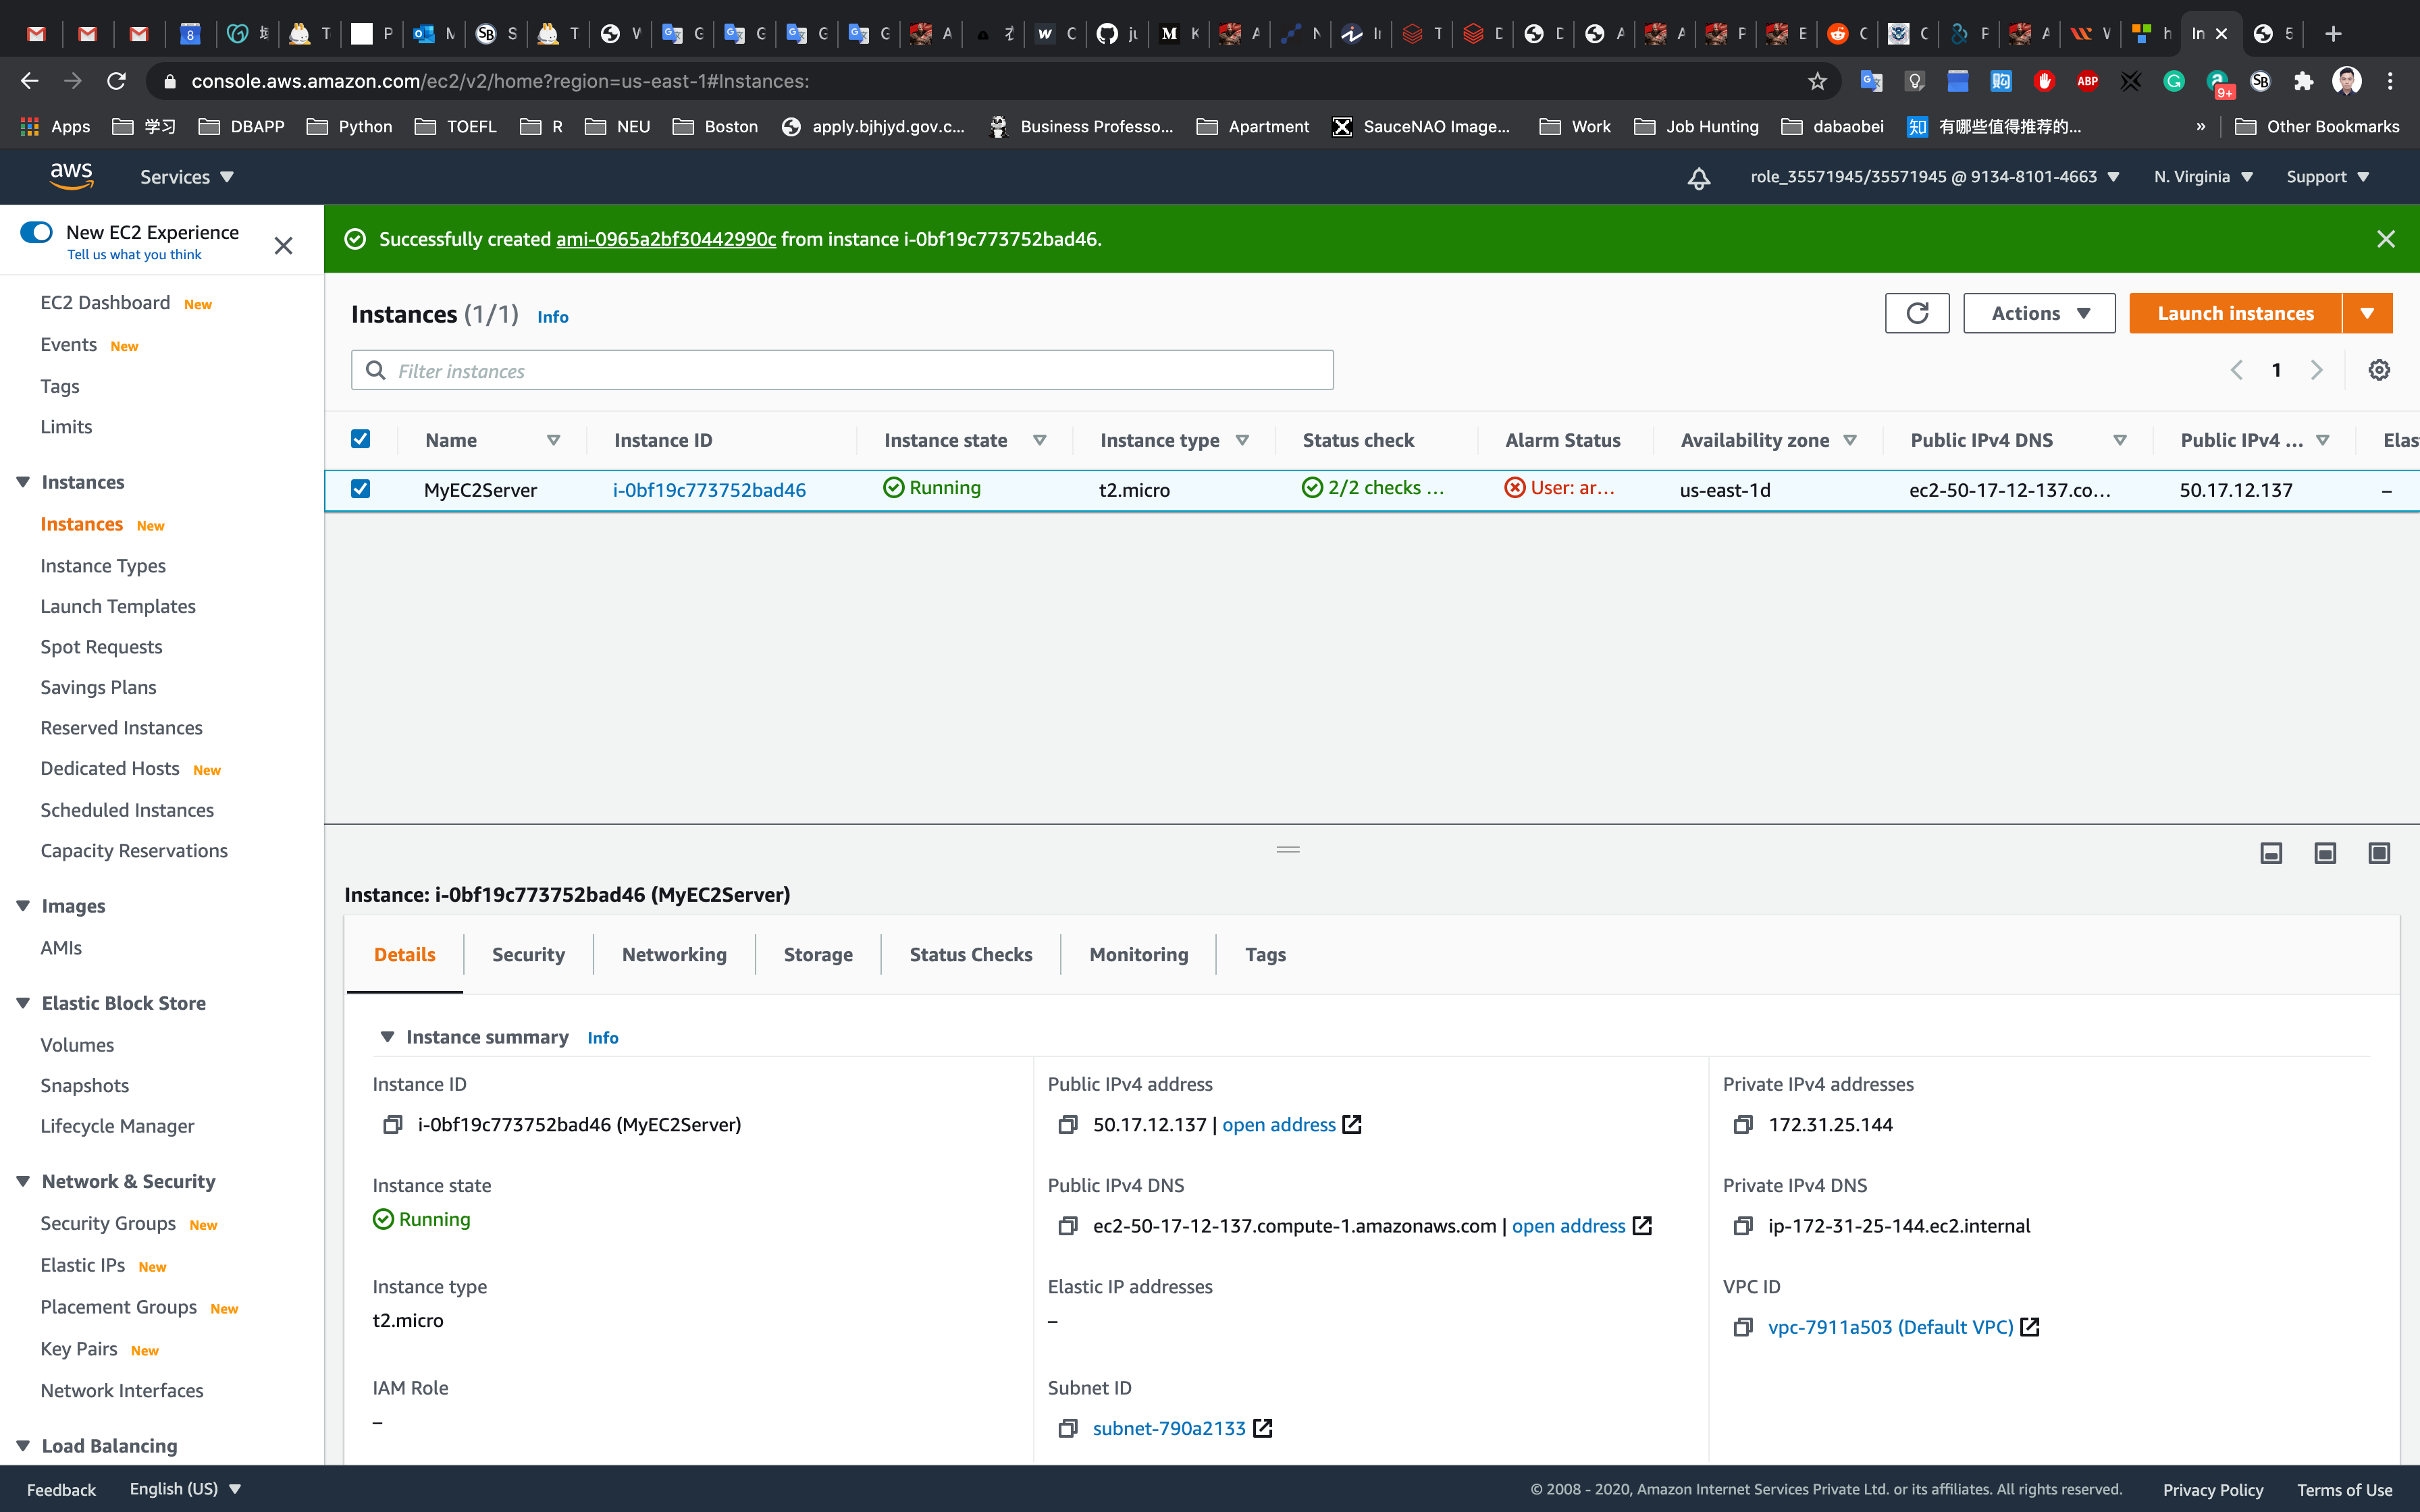
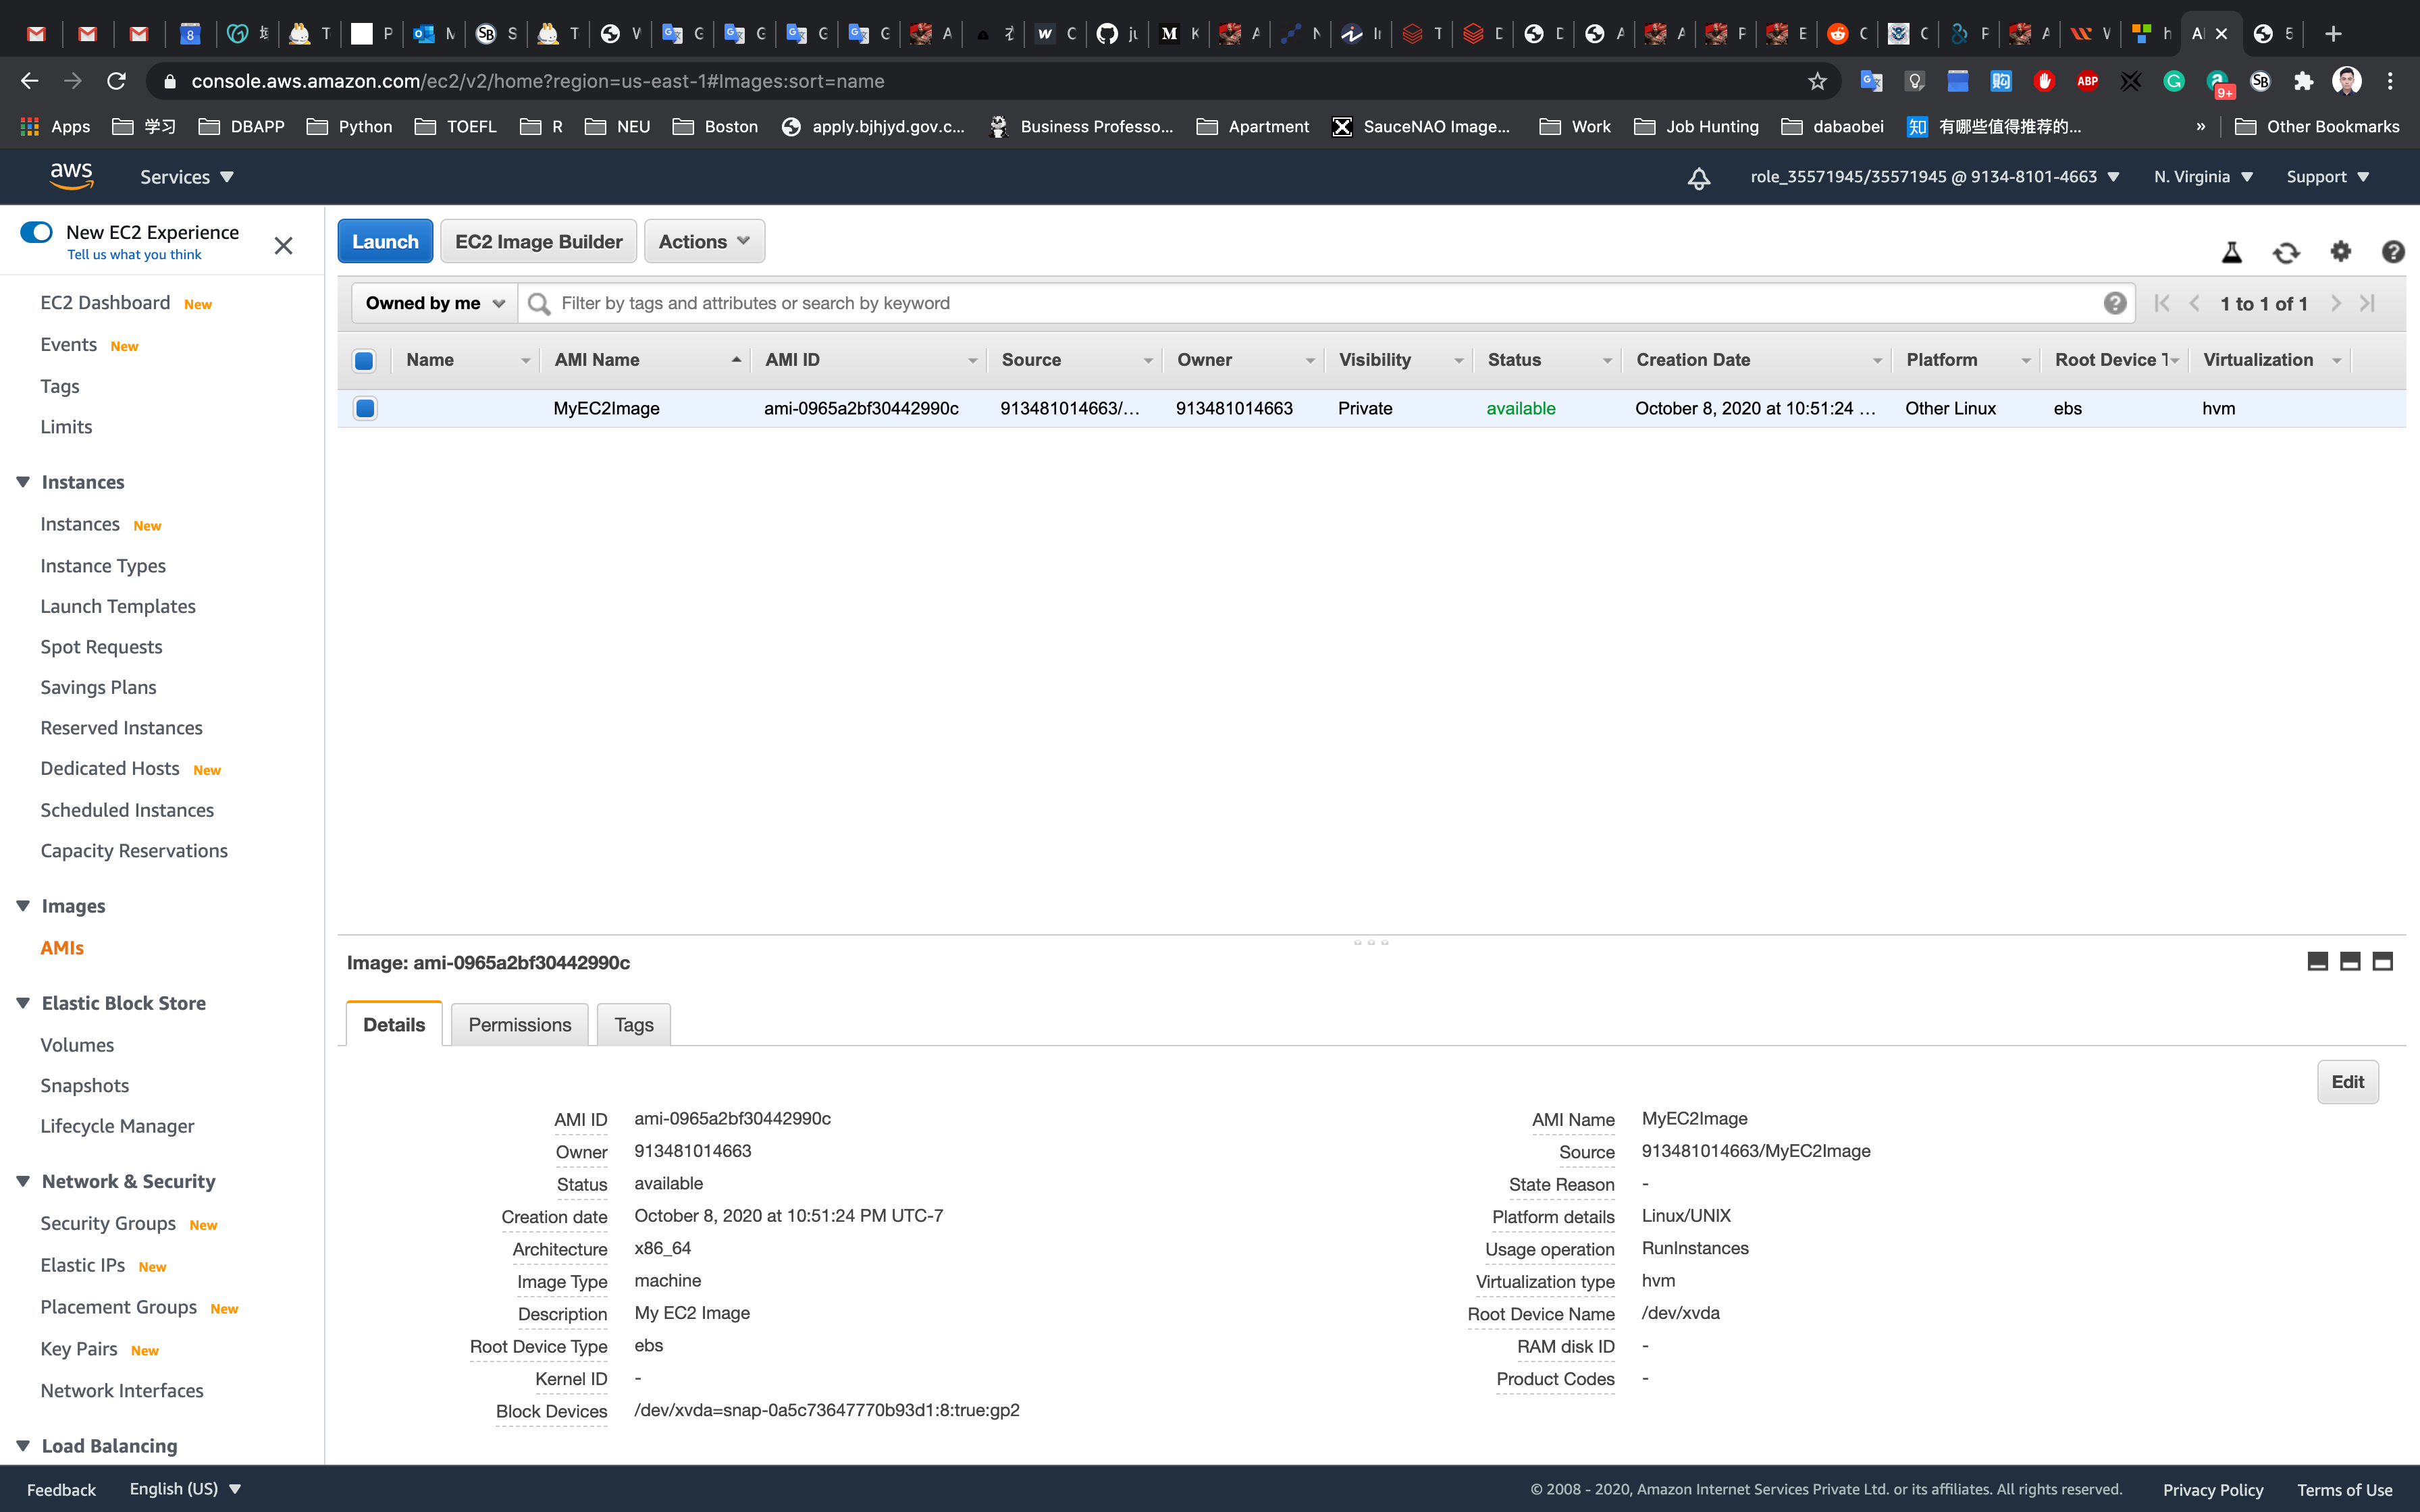
Check the newly created Image
Navigate to AMIs under Images on the left menu.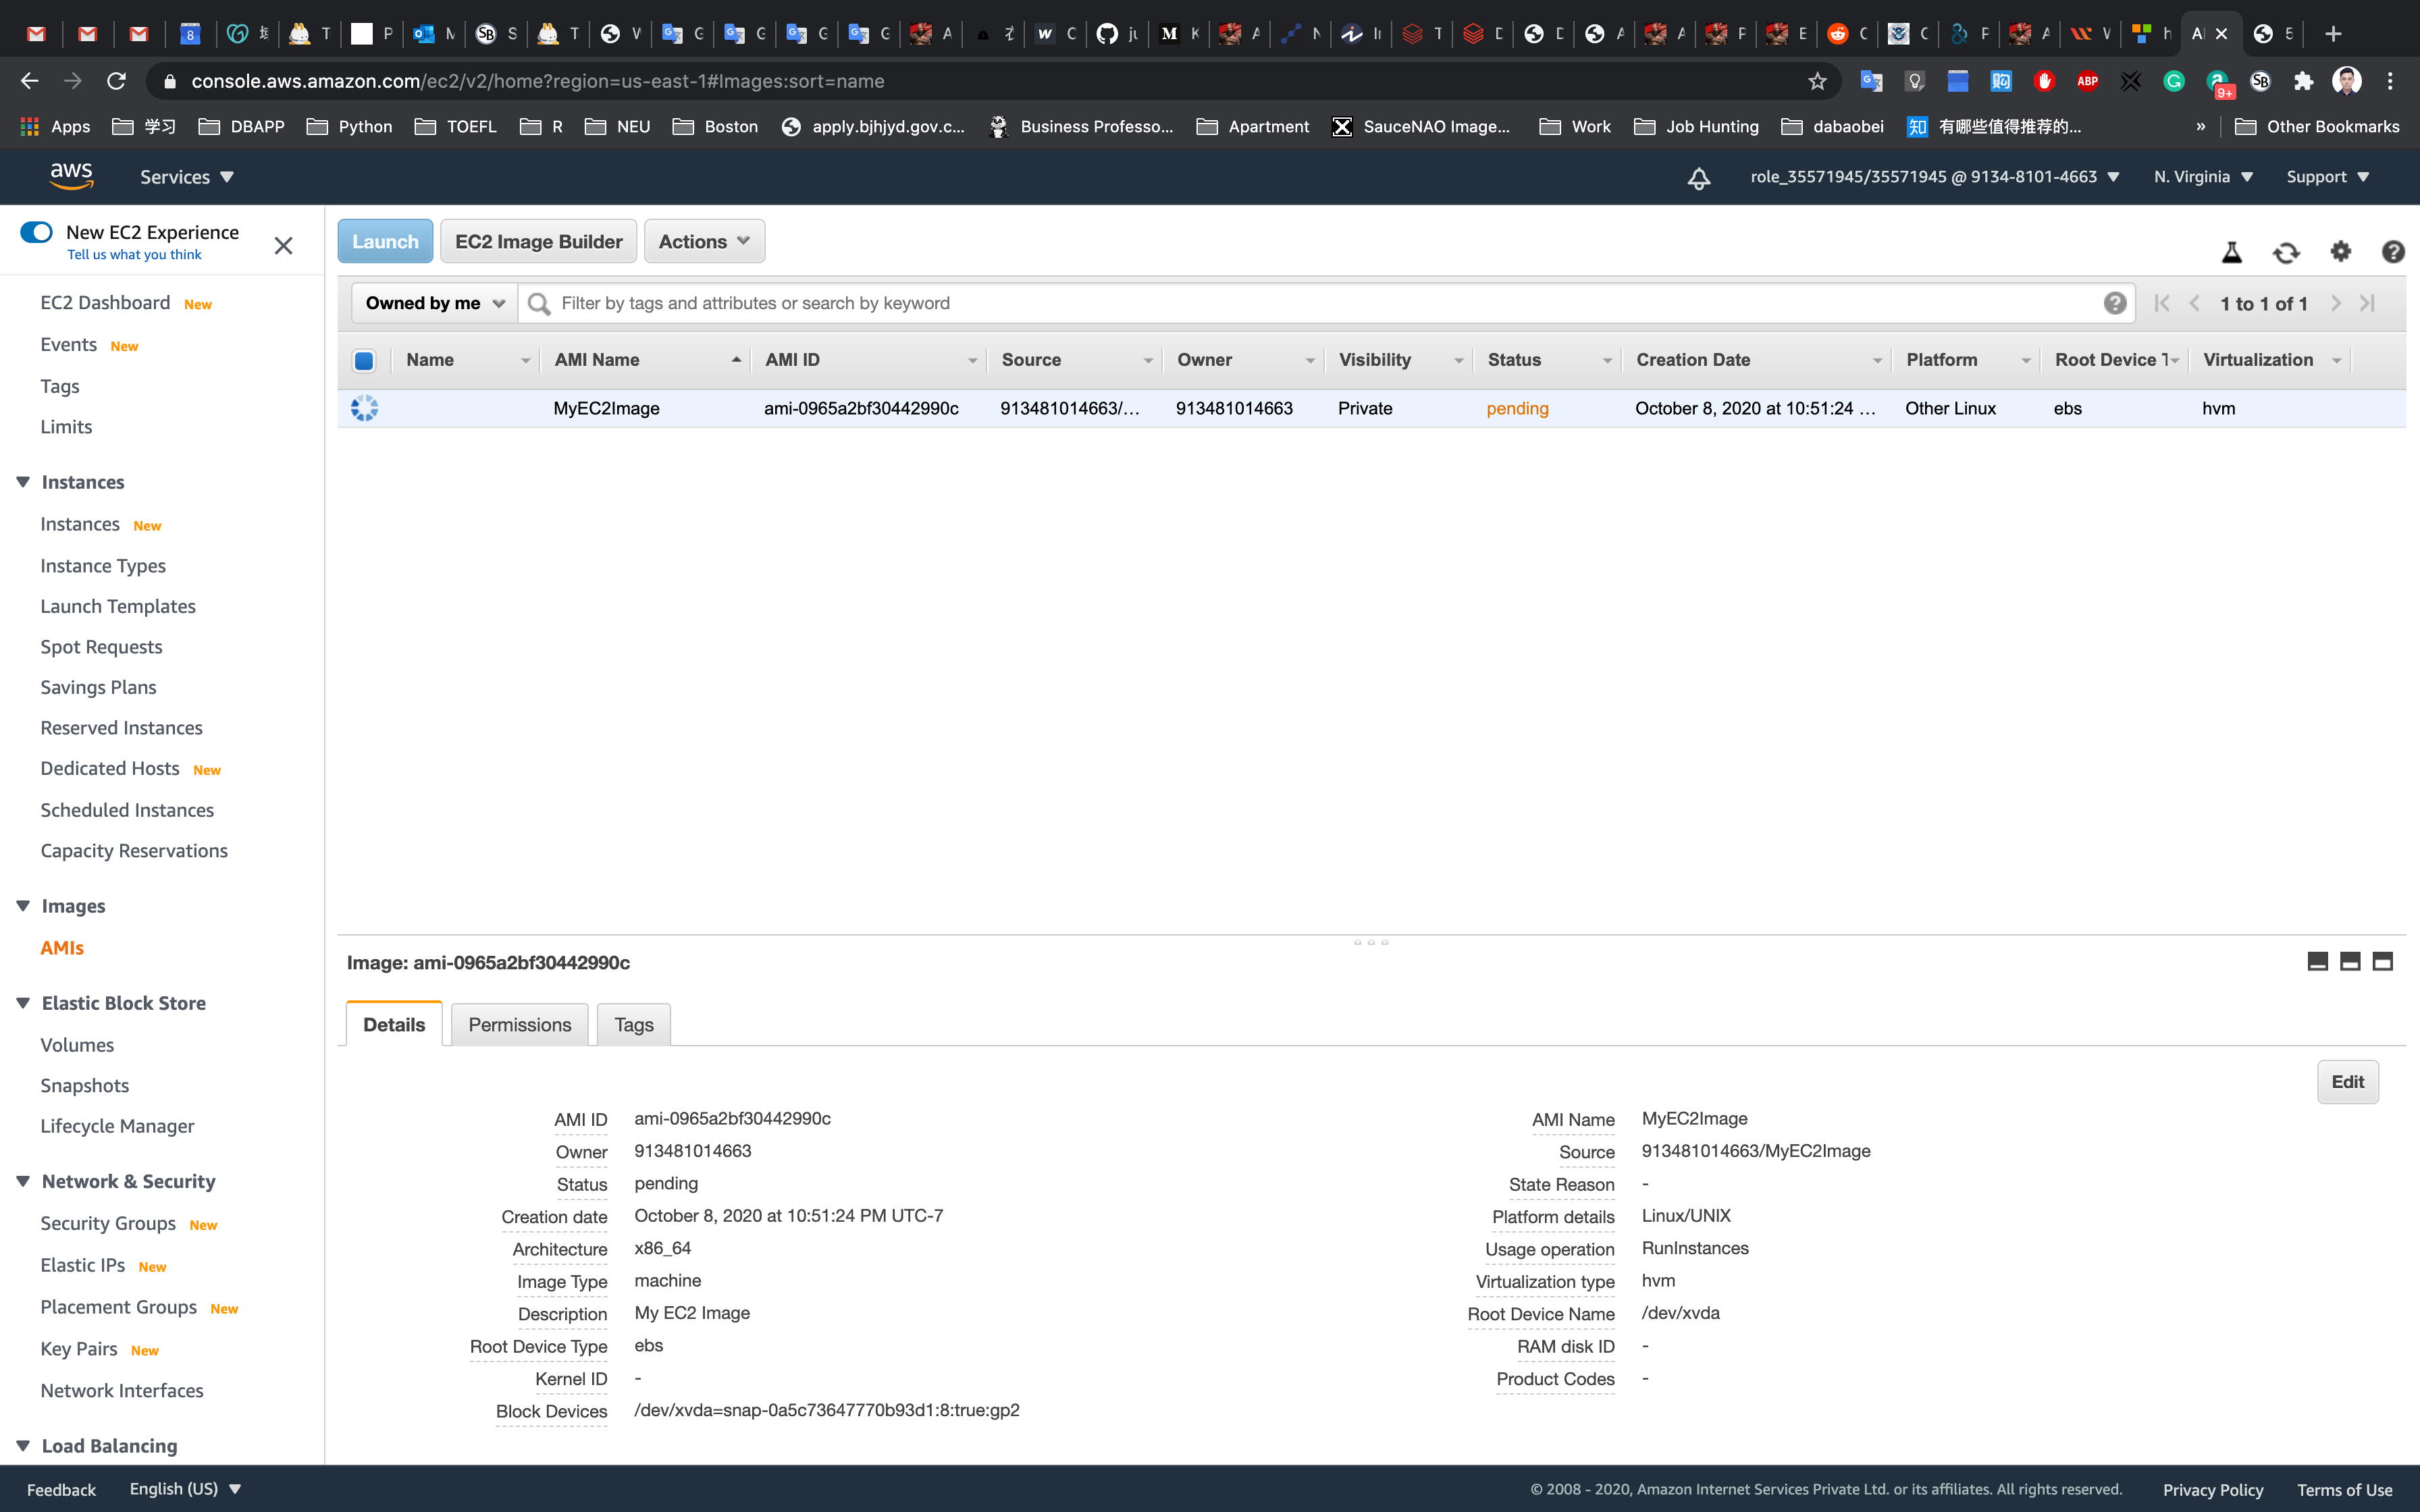
You can see that the image is getting generated and status is pending.
Once the process is completed, the status will change to available. (Try to reload the page)
Now we can use this Image AMI to create brand new instances.
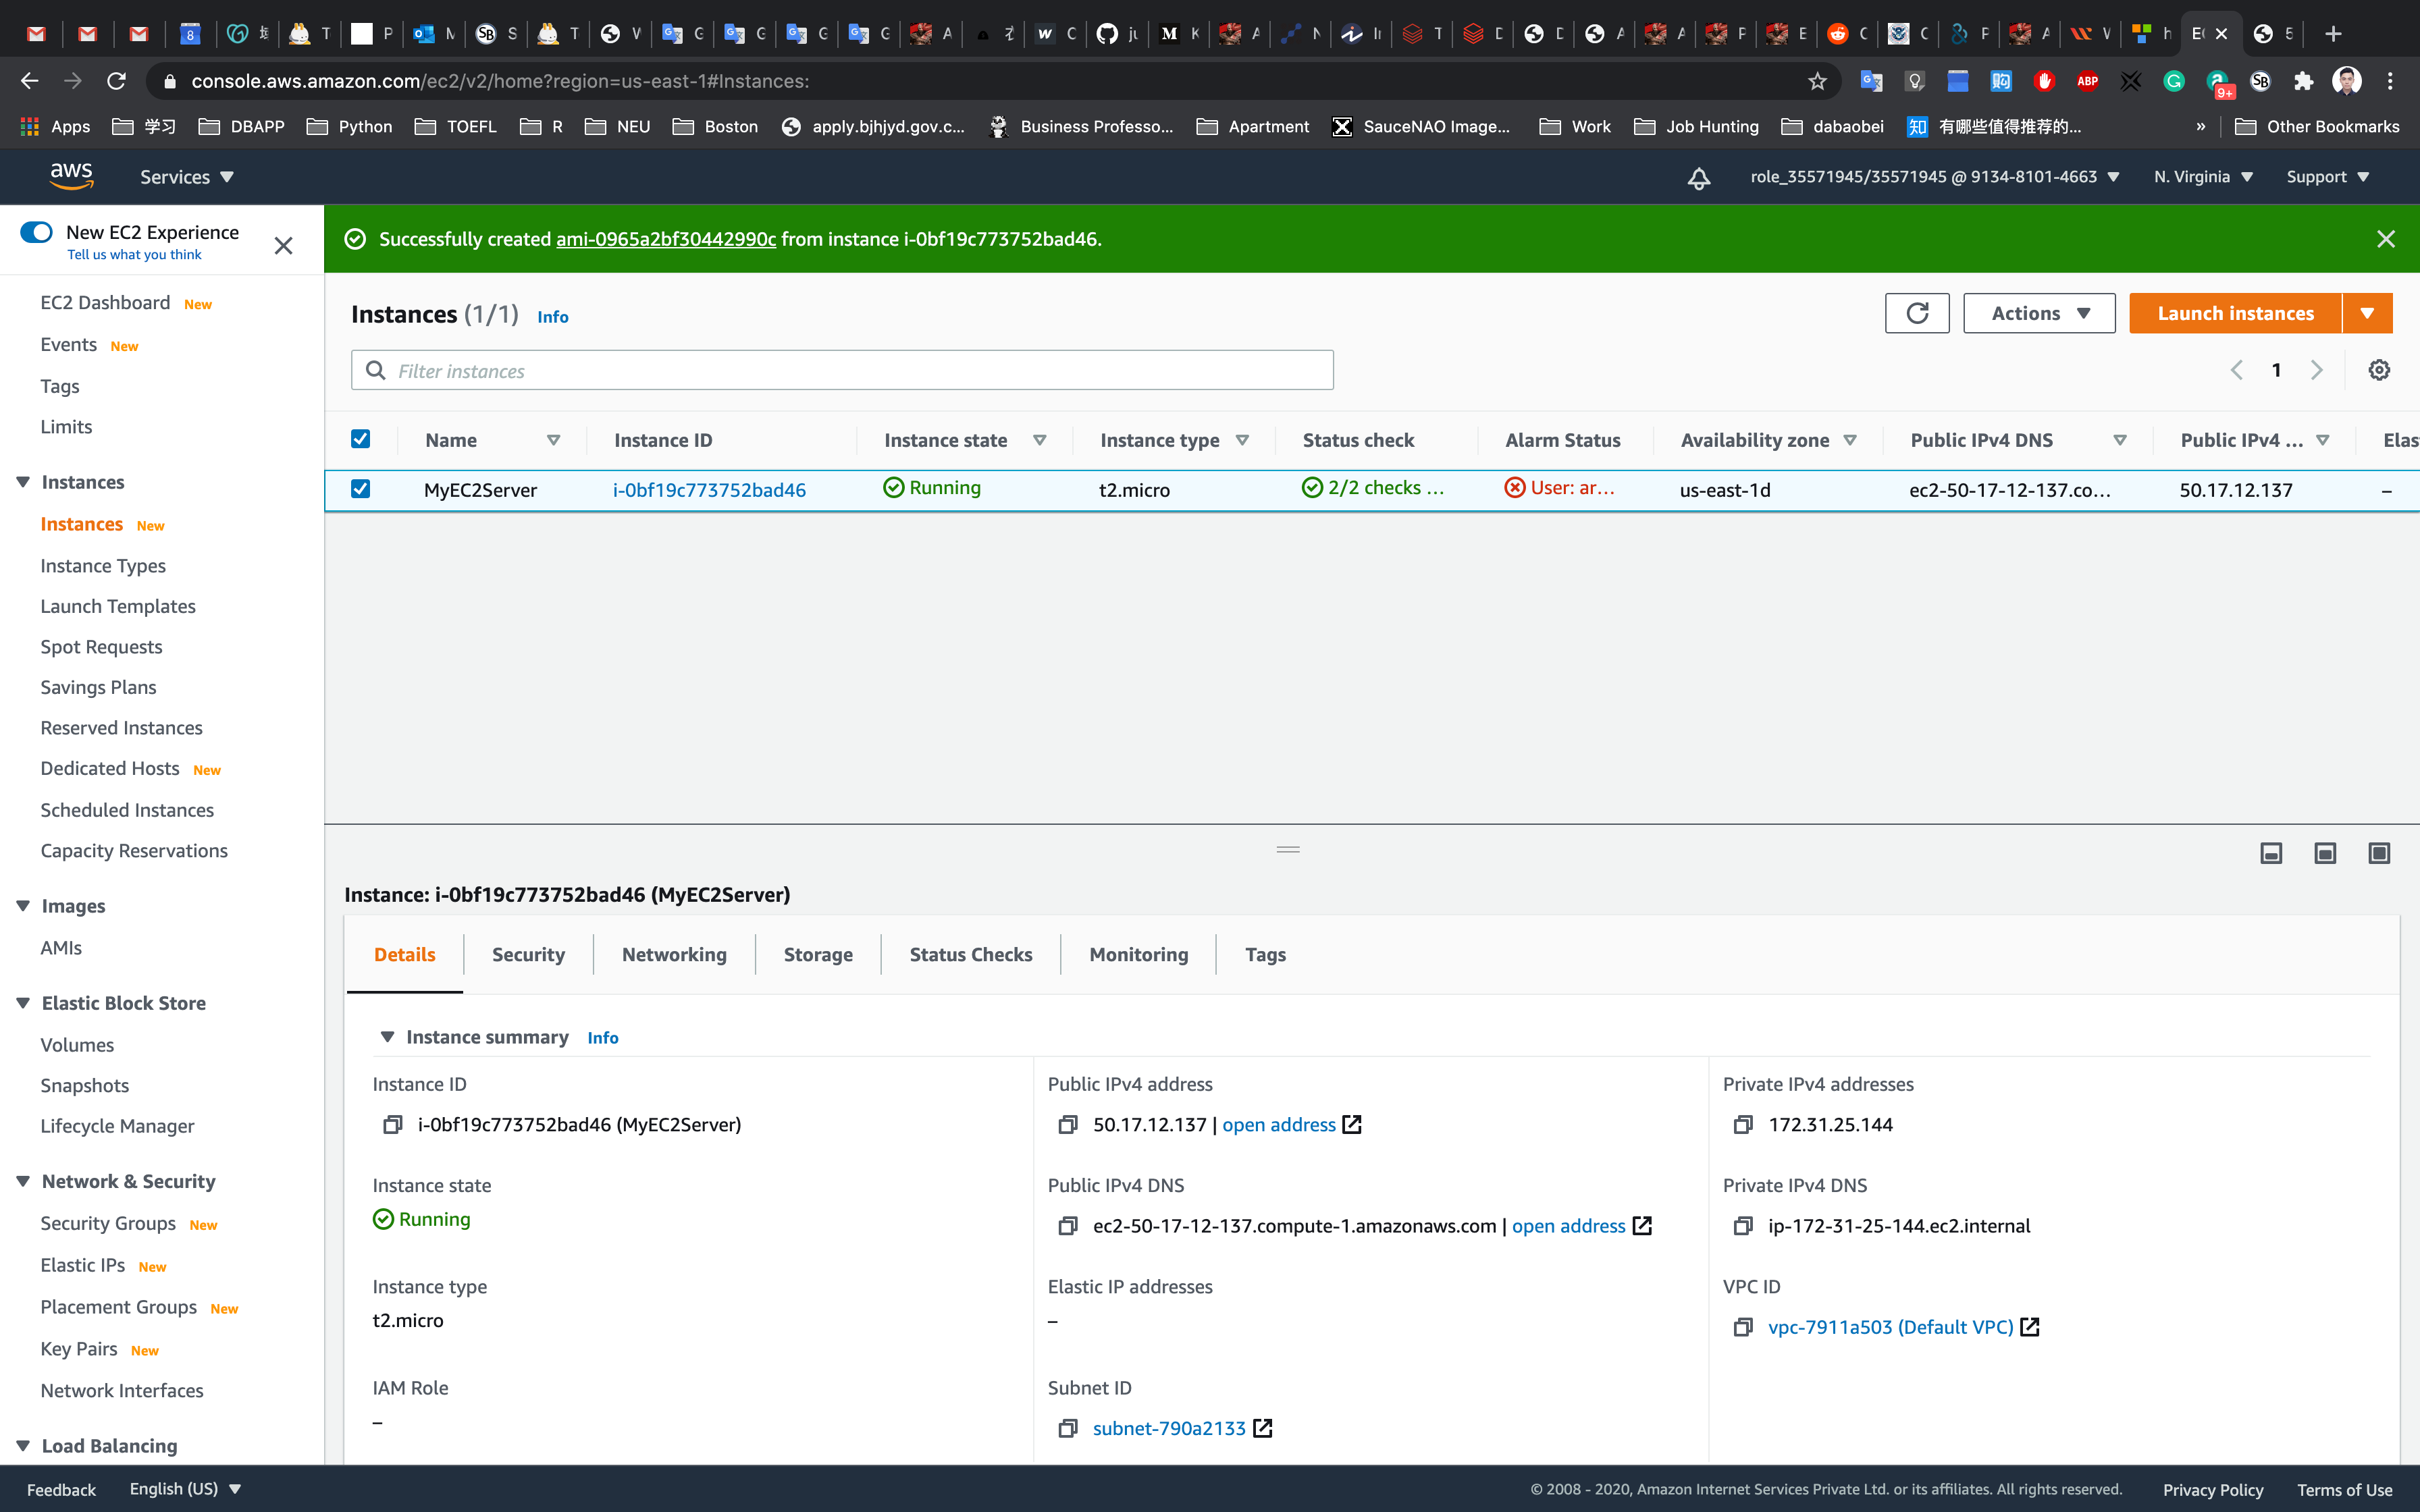
Launching an EC2 Instance with the Created AMI and Testing the AMI
Services -> EC2 -> Instances
Click on Launch instances
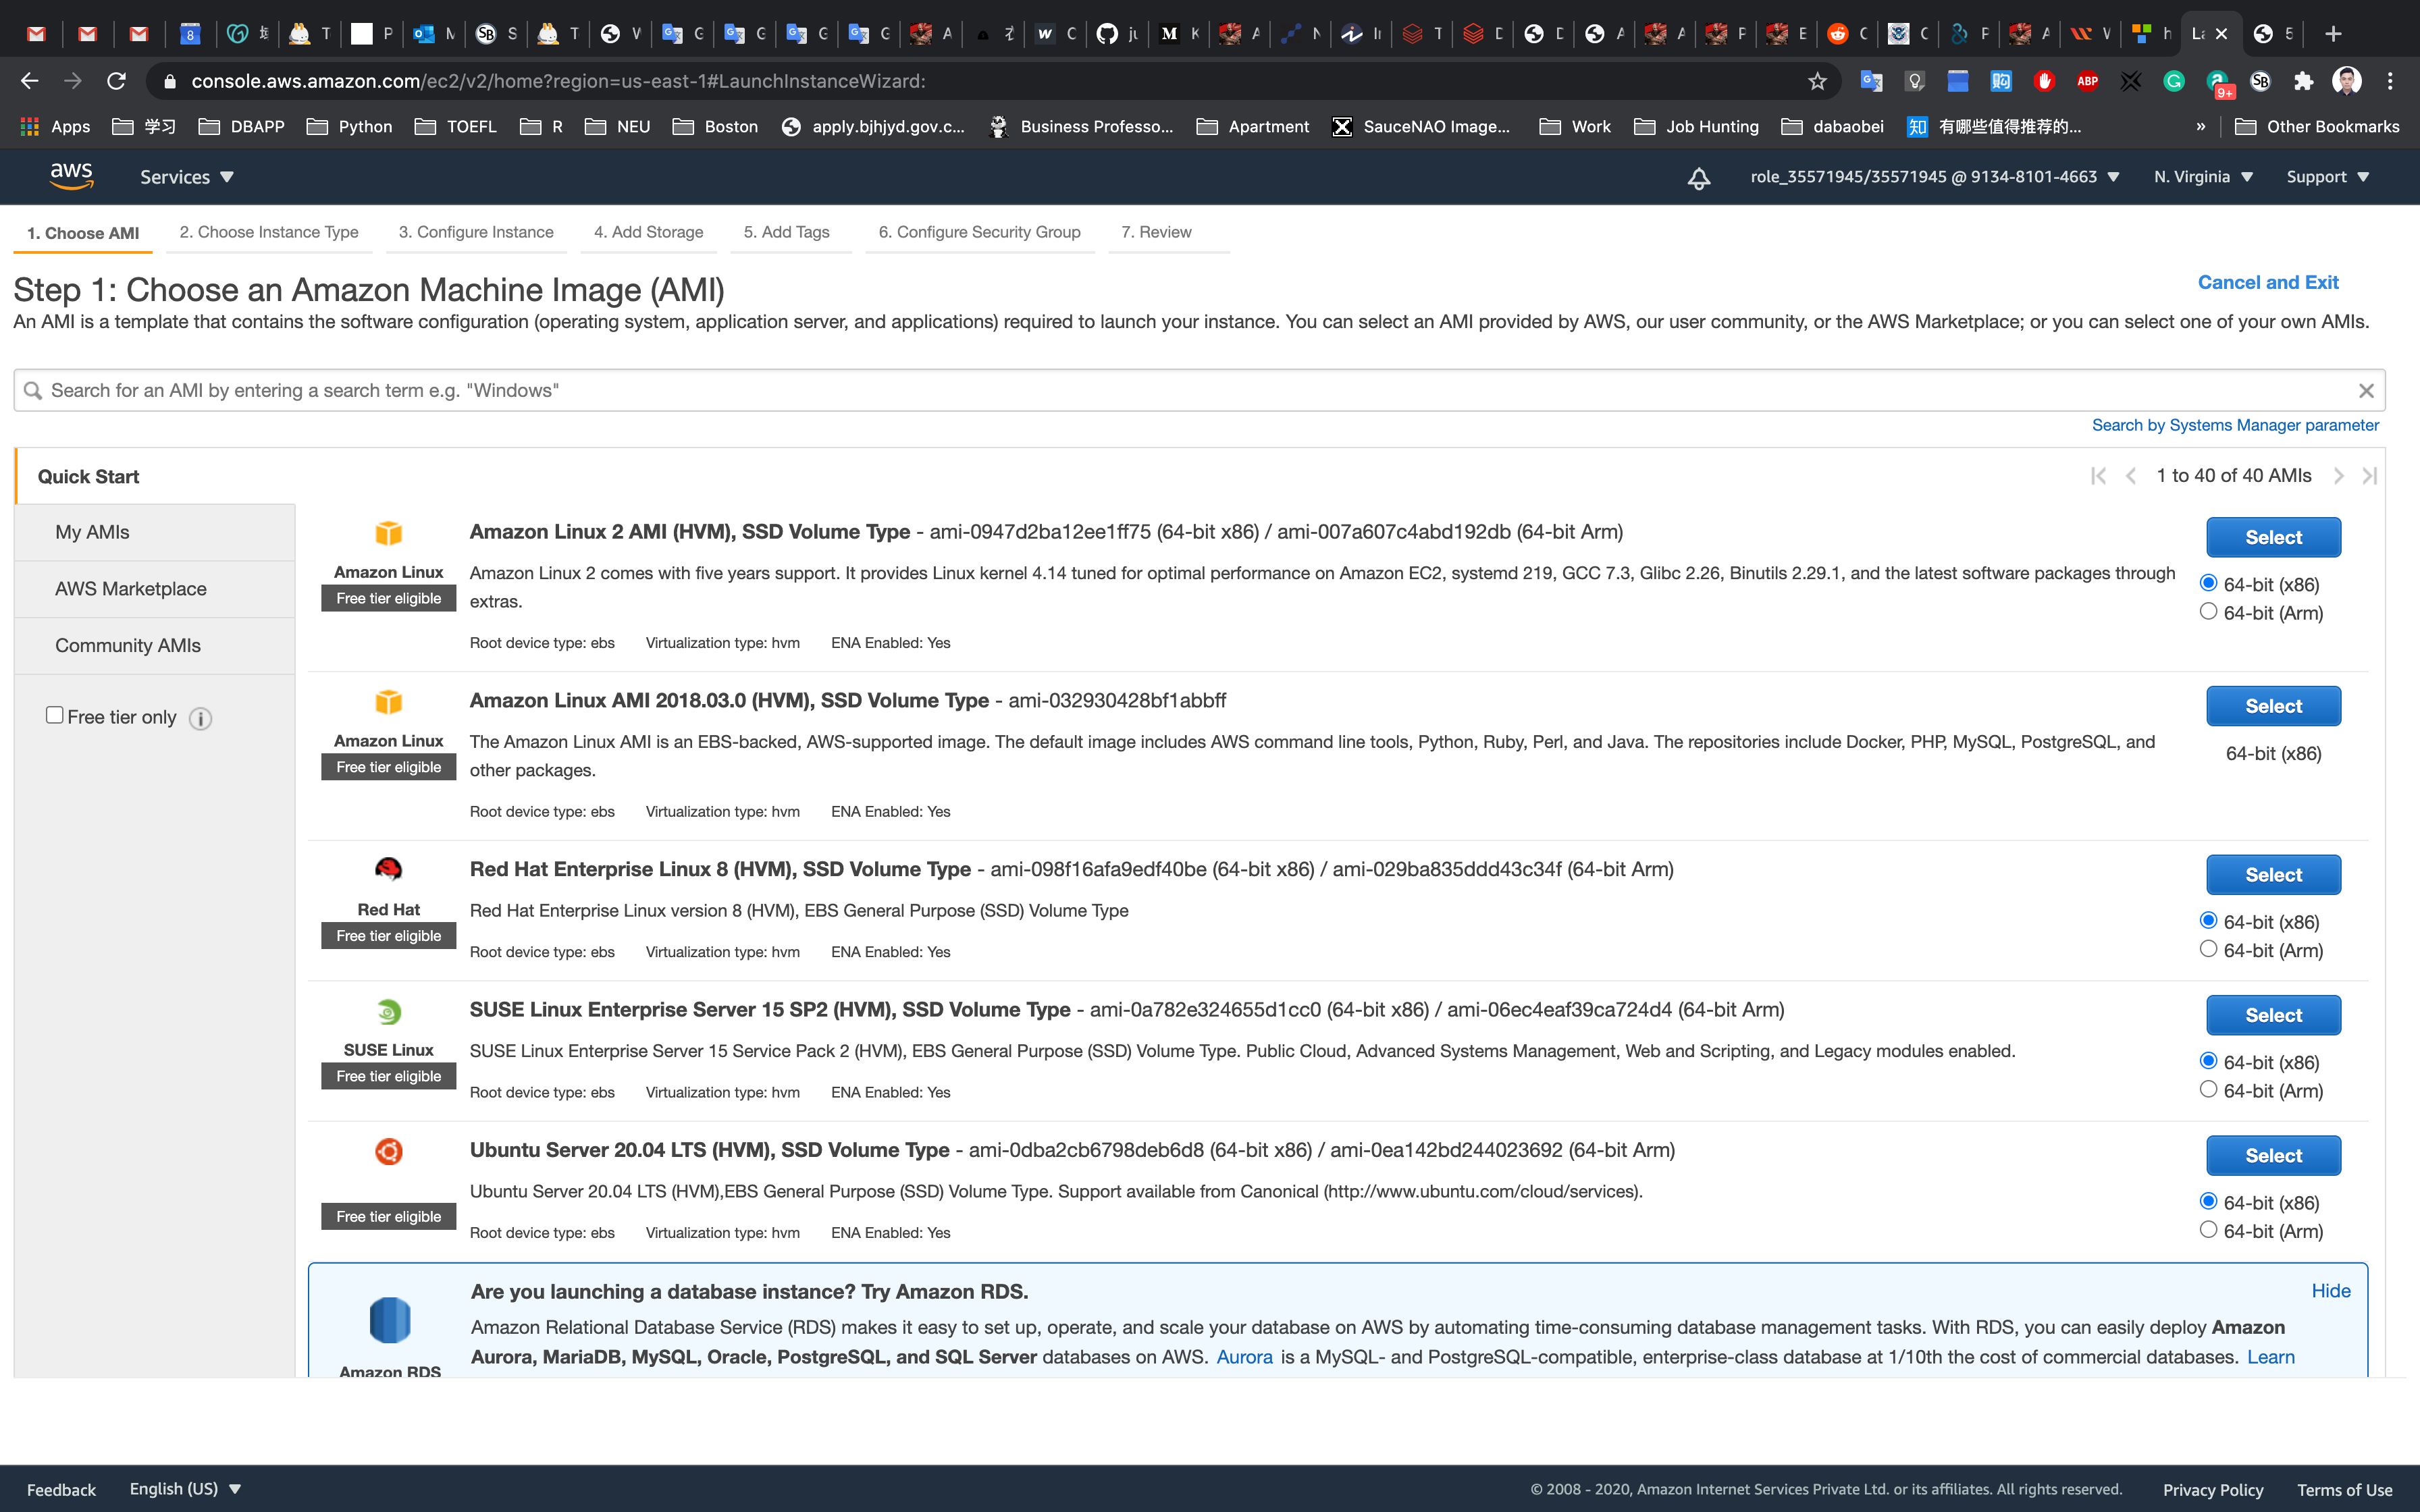
Step 1: Choose an Amazon Machine Image(AMI)
Click on My AMIs tab on the left of the page
Click on Select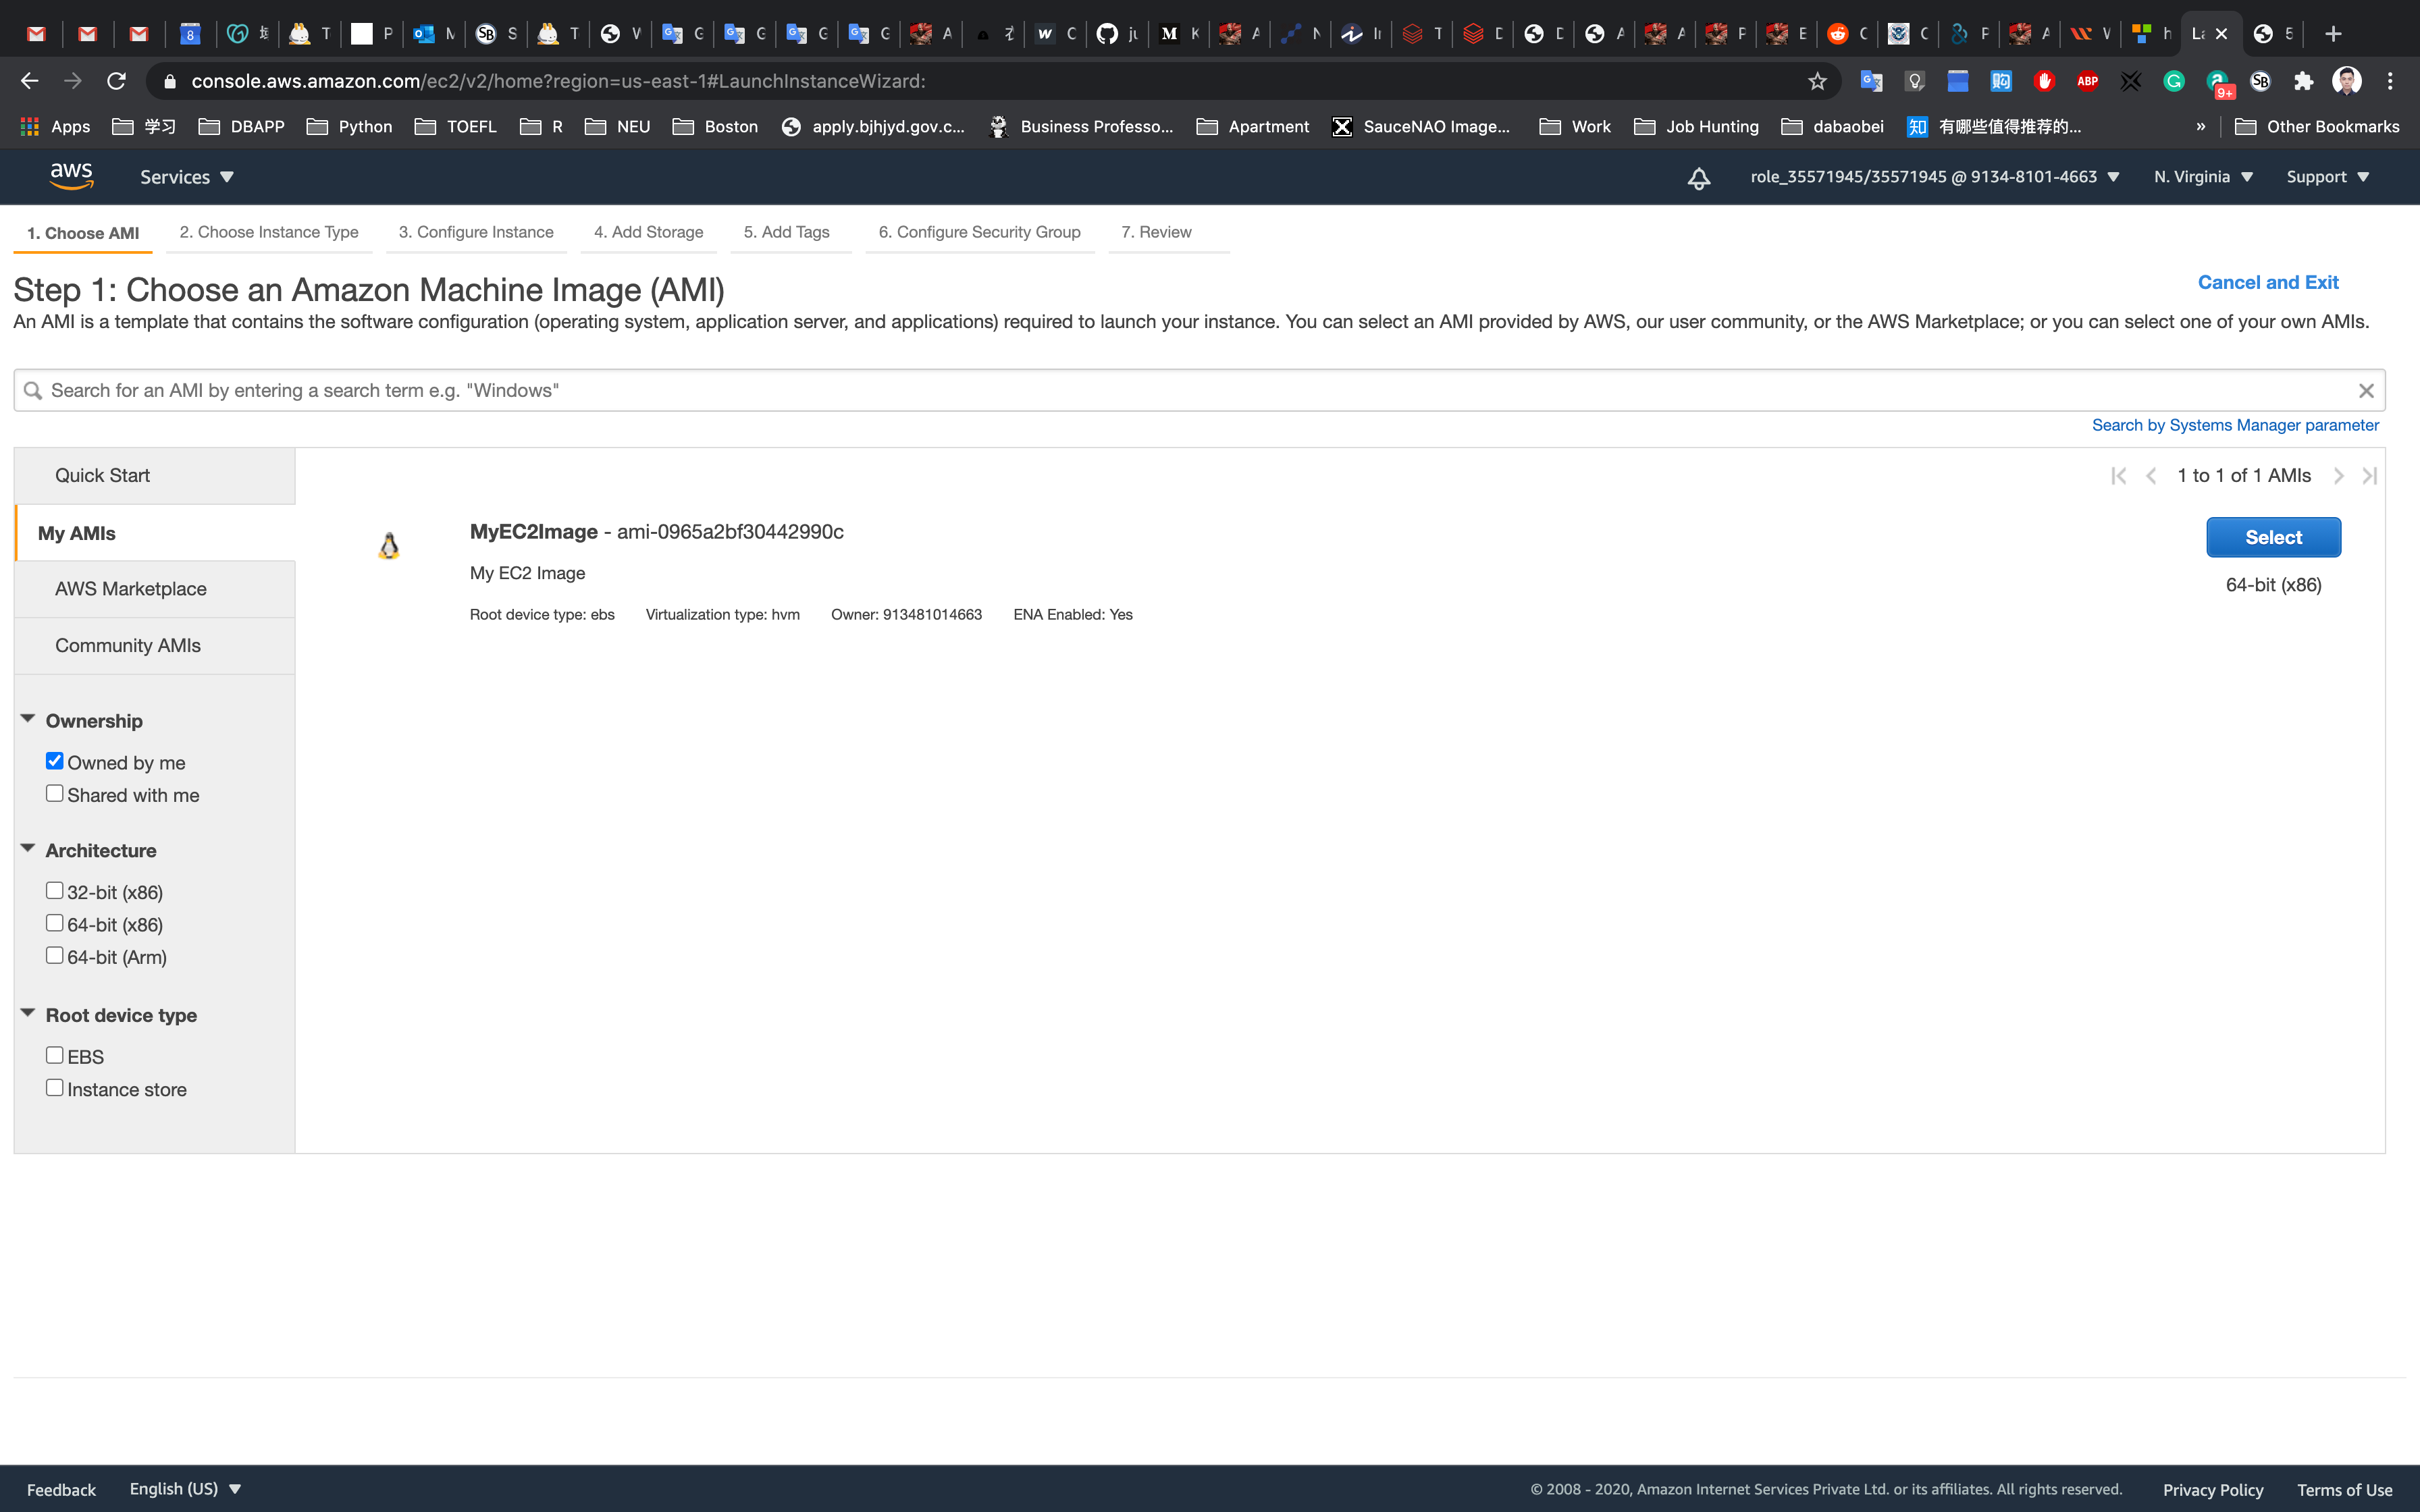
Step 2: Choose an Instance Type
Select t2.micro
Click on Next: Configure Instance Details
Step 3: Configure Instance Details
Configure Instance Details:
- Auto-assign Public IP: Select
Enable - Leave other settings as default
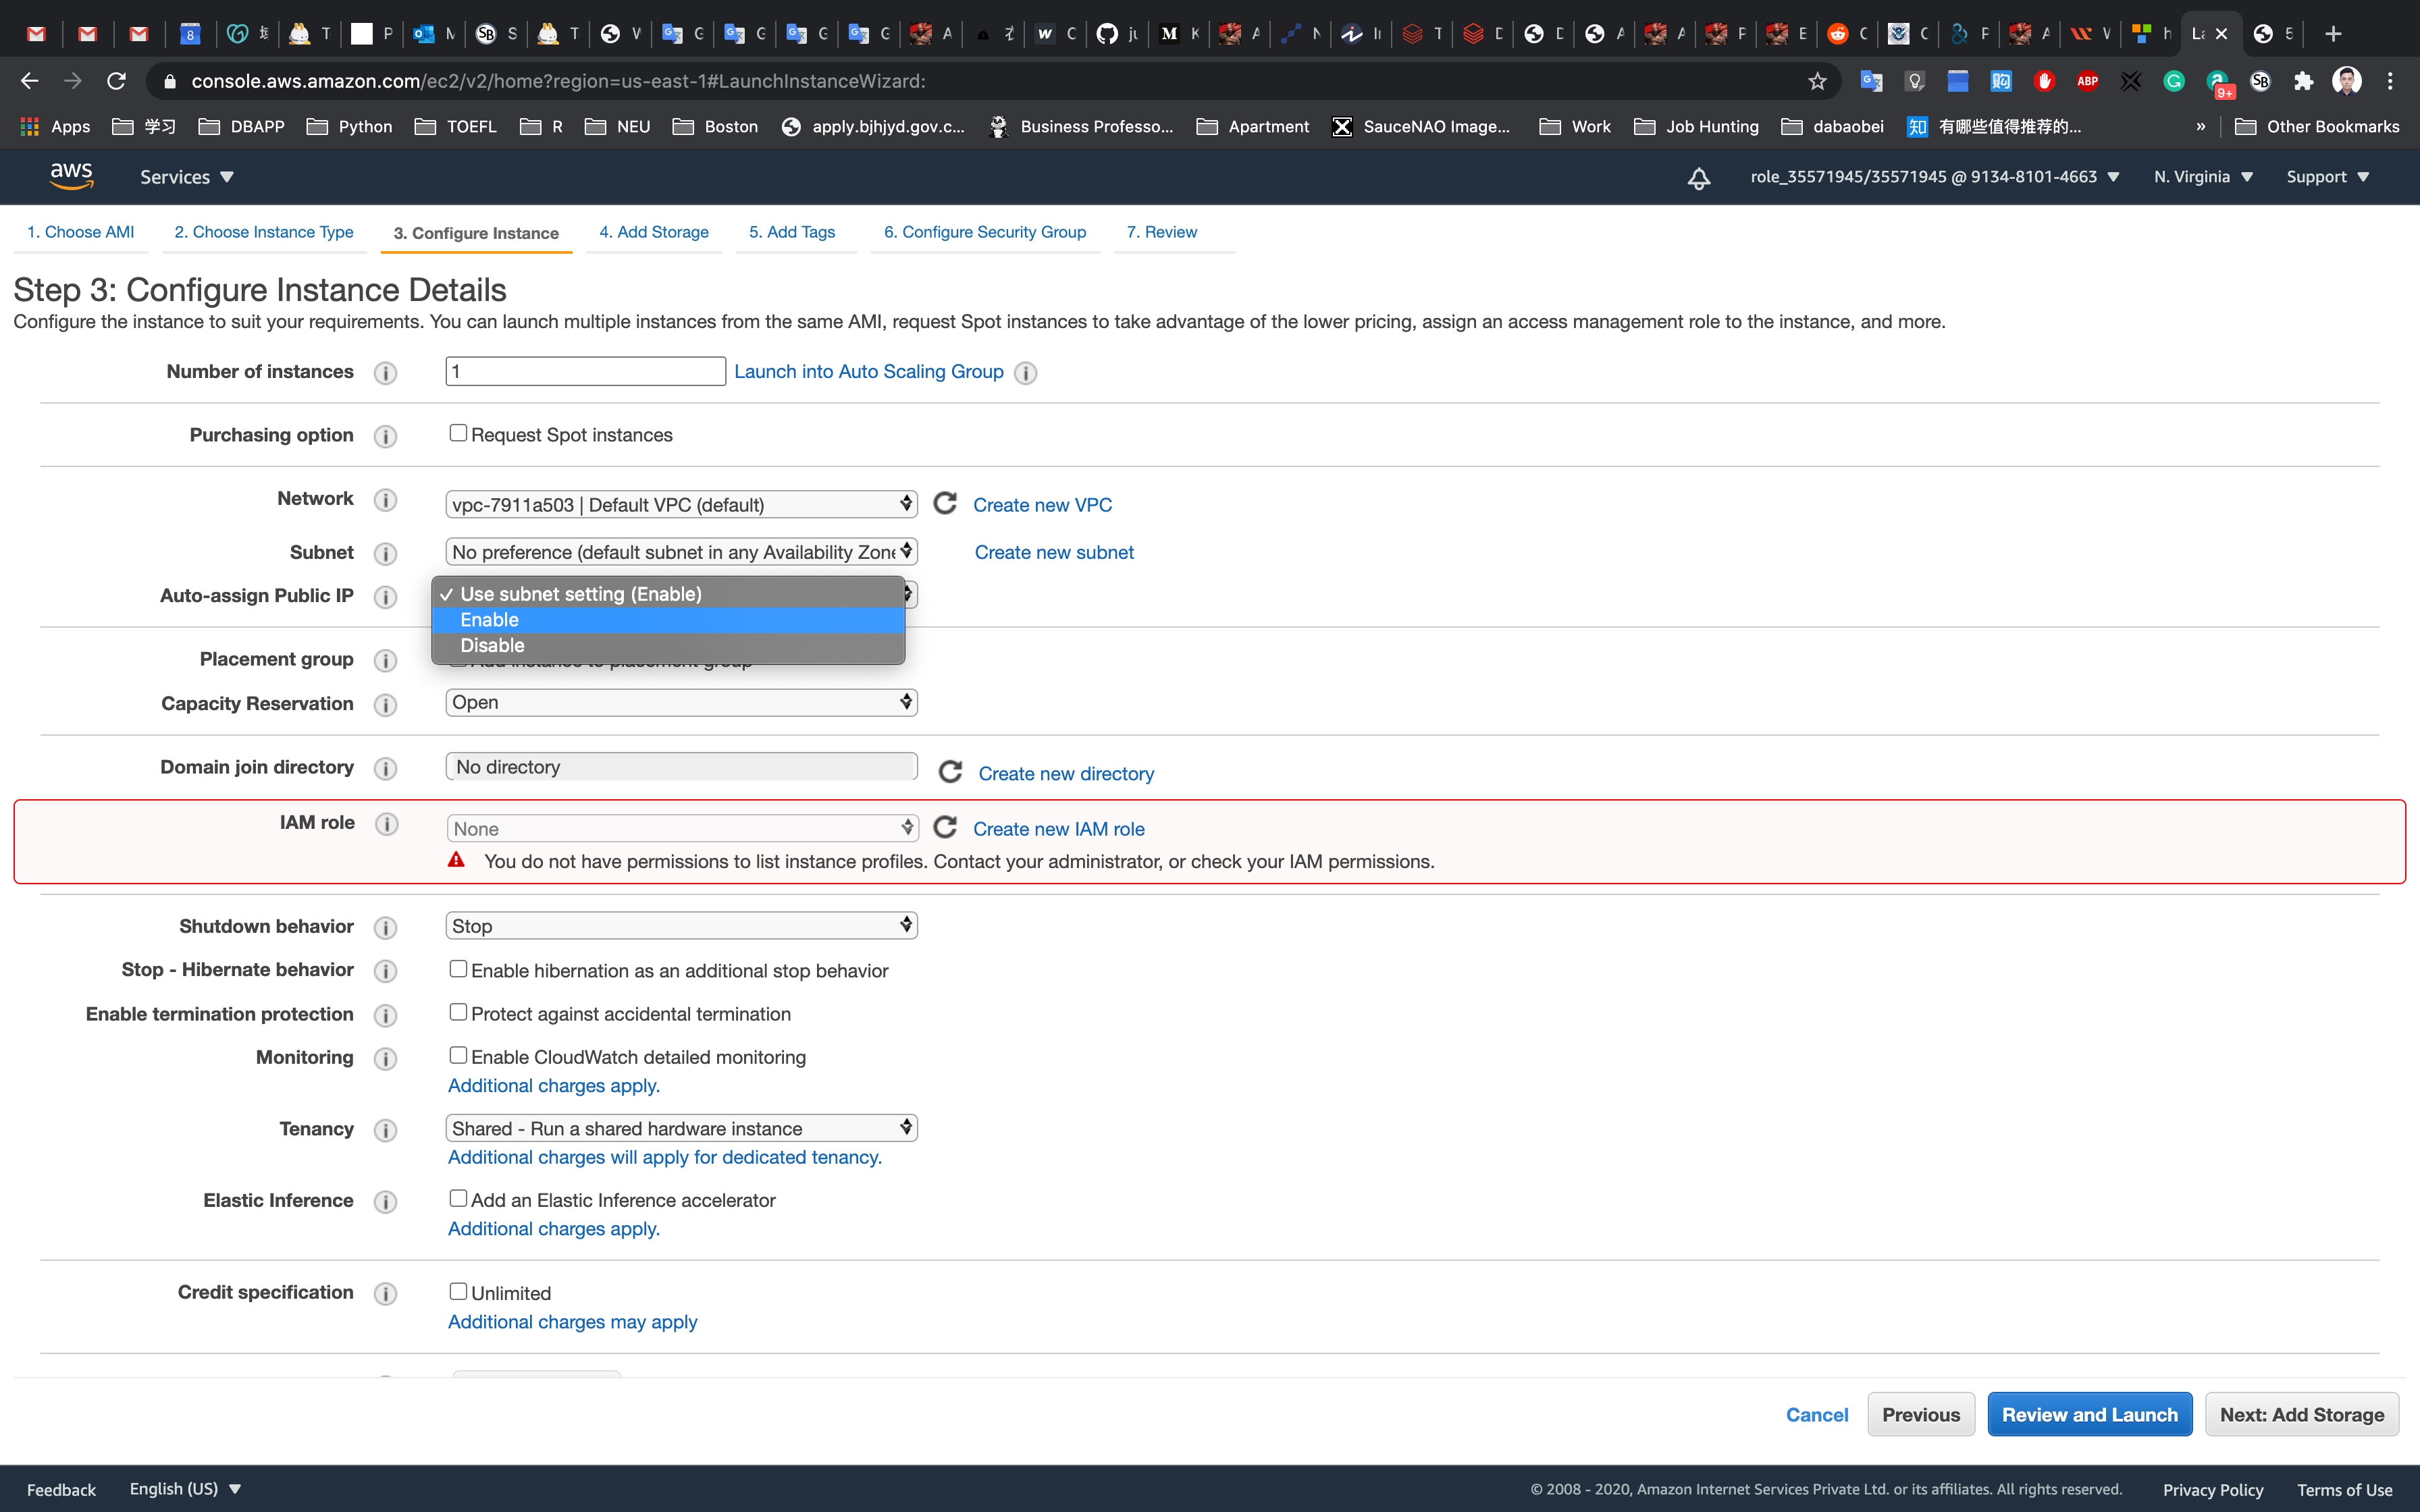
Click on Next: Add Storage
Step 4: Add Storage
Leave it default settings
Click on Next: Add Tags
Step 5: Add Tags
Click on Add Tag
- Key:
Name - Value:
MyEC2Server
Click on Next: Configure Security Group

Step 6: Configure Security Group
Click on Select an existing security group
Select MyEC2SecurityGroup
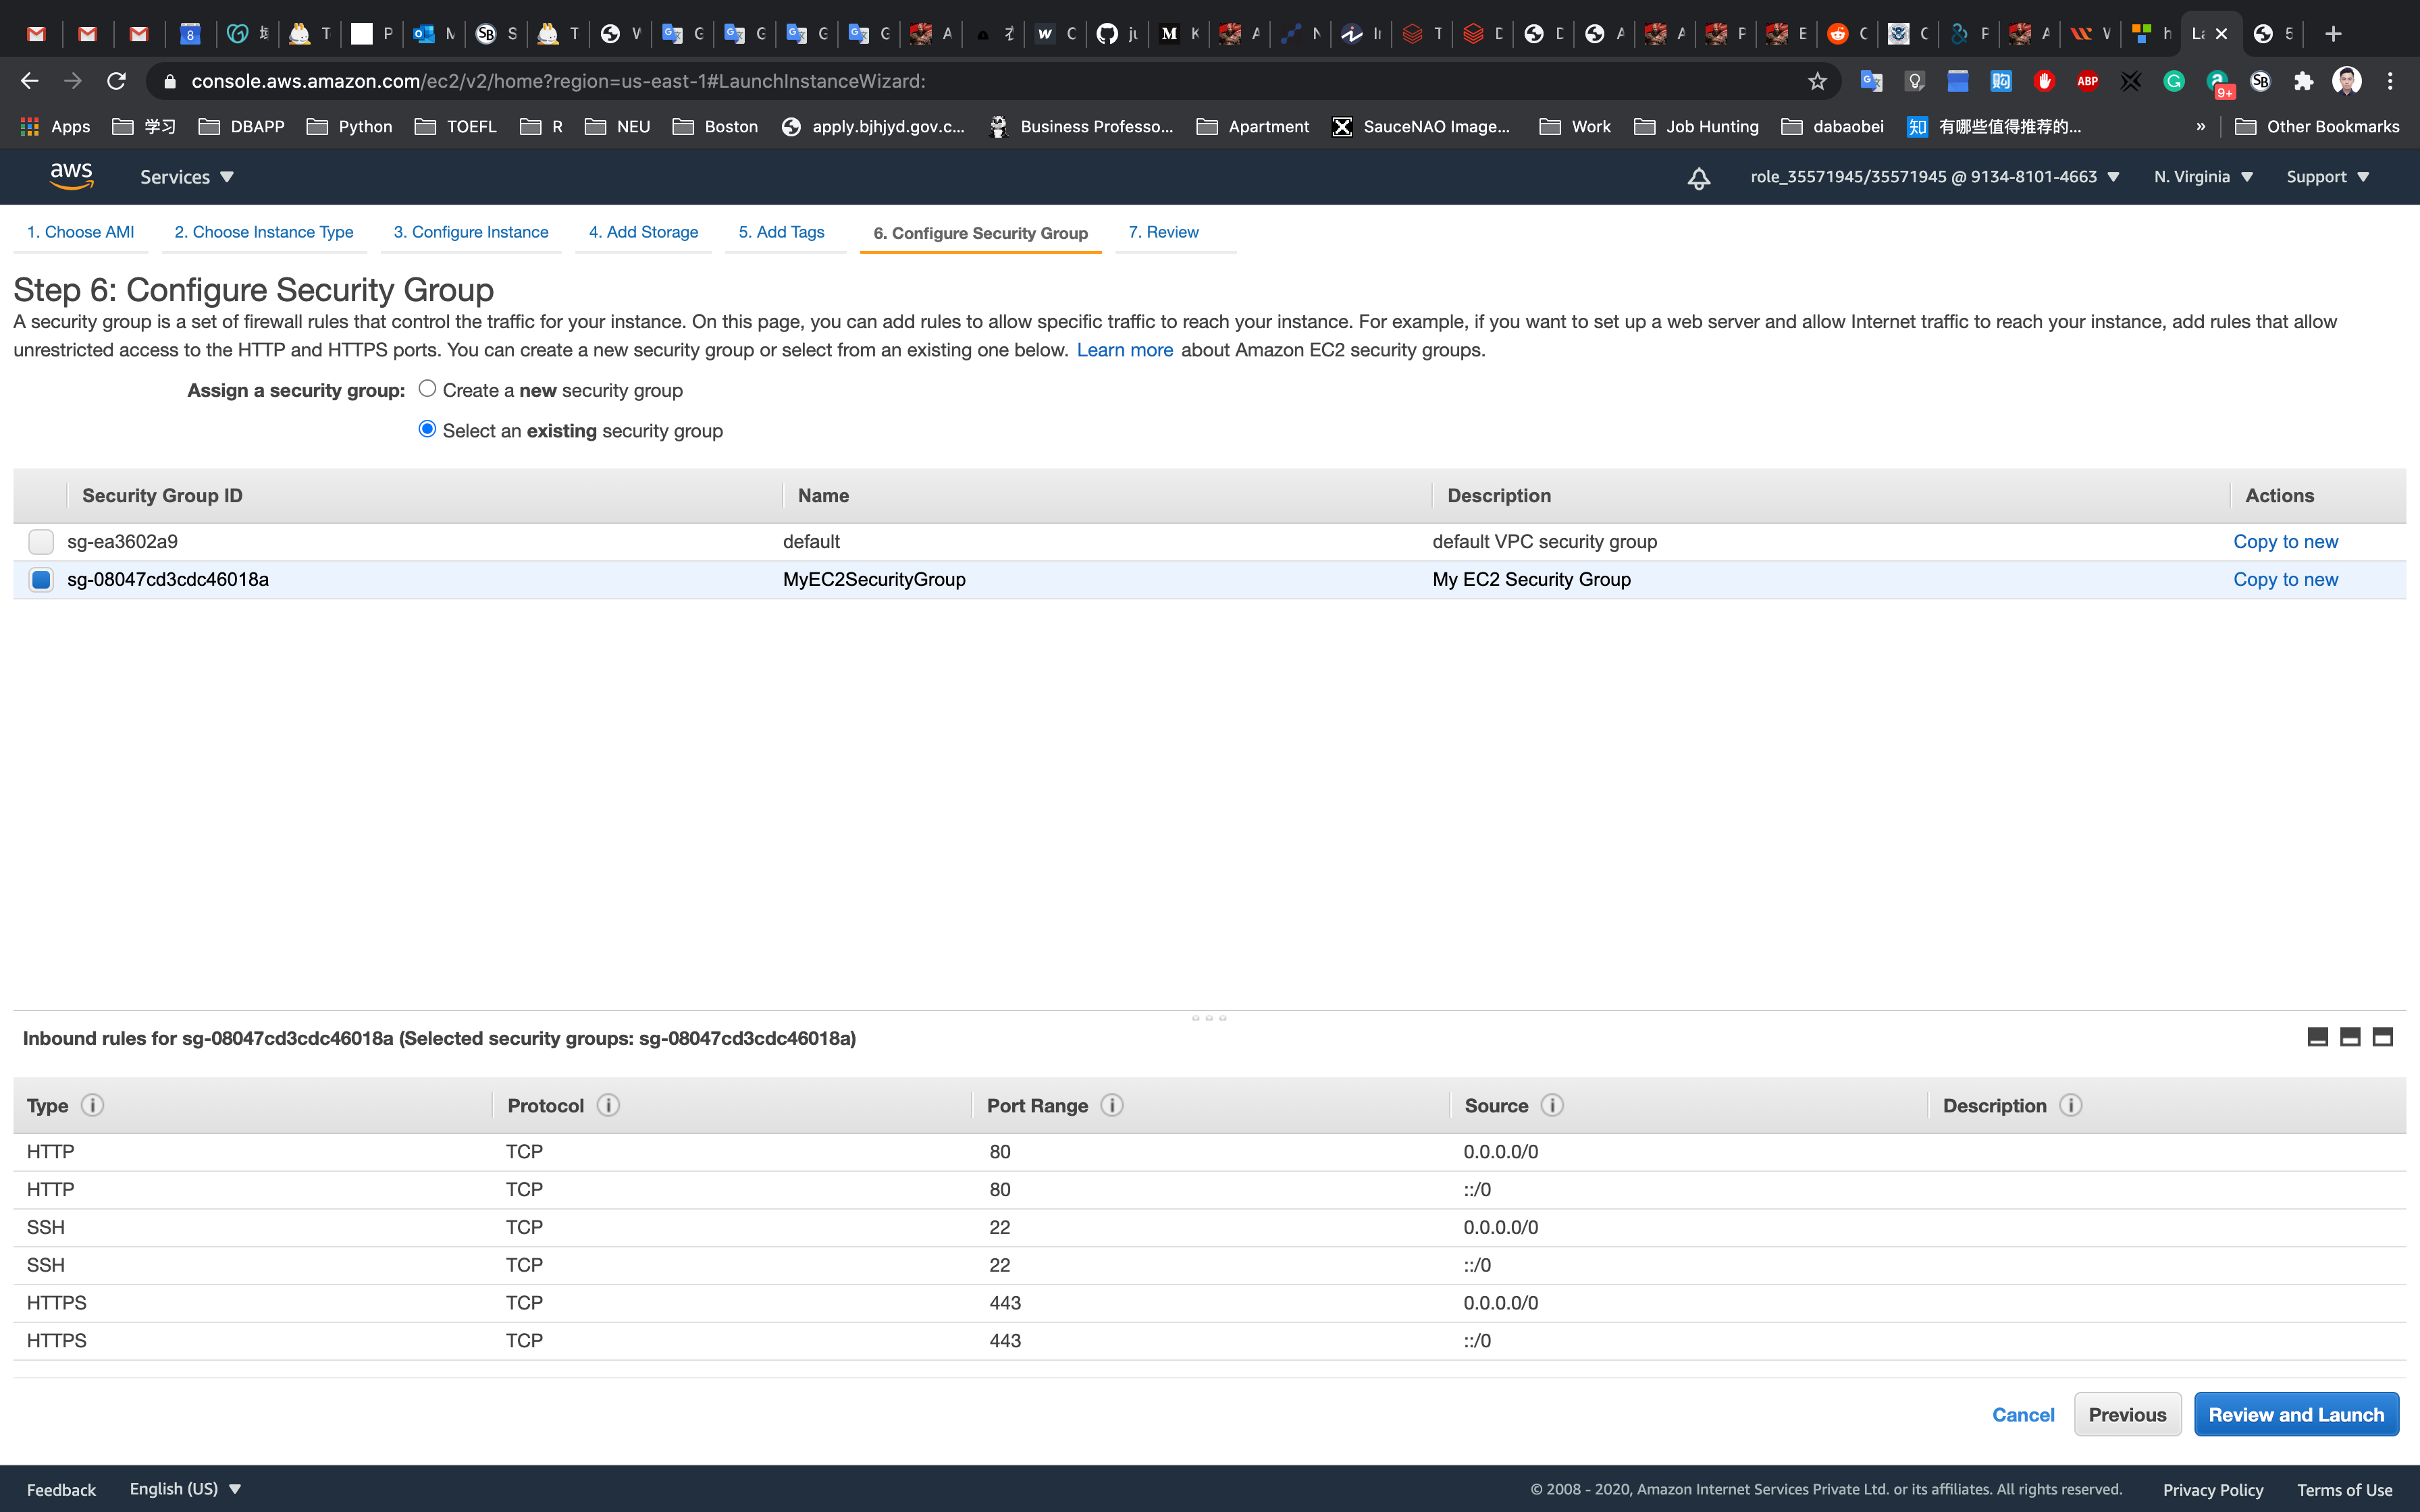
Click on Review and Launch
Step 7: Review Instance Launch
Click on Launch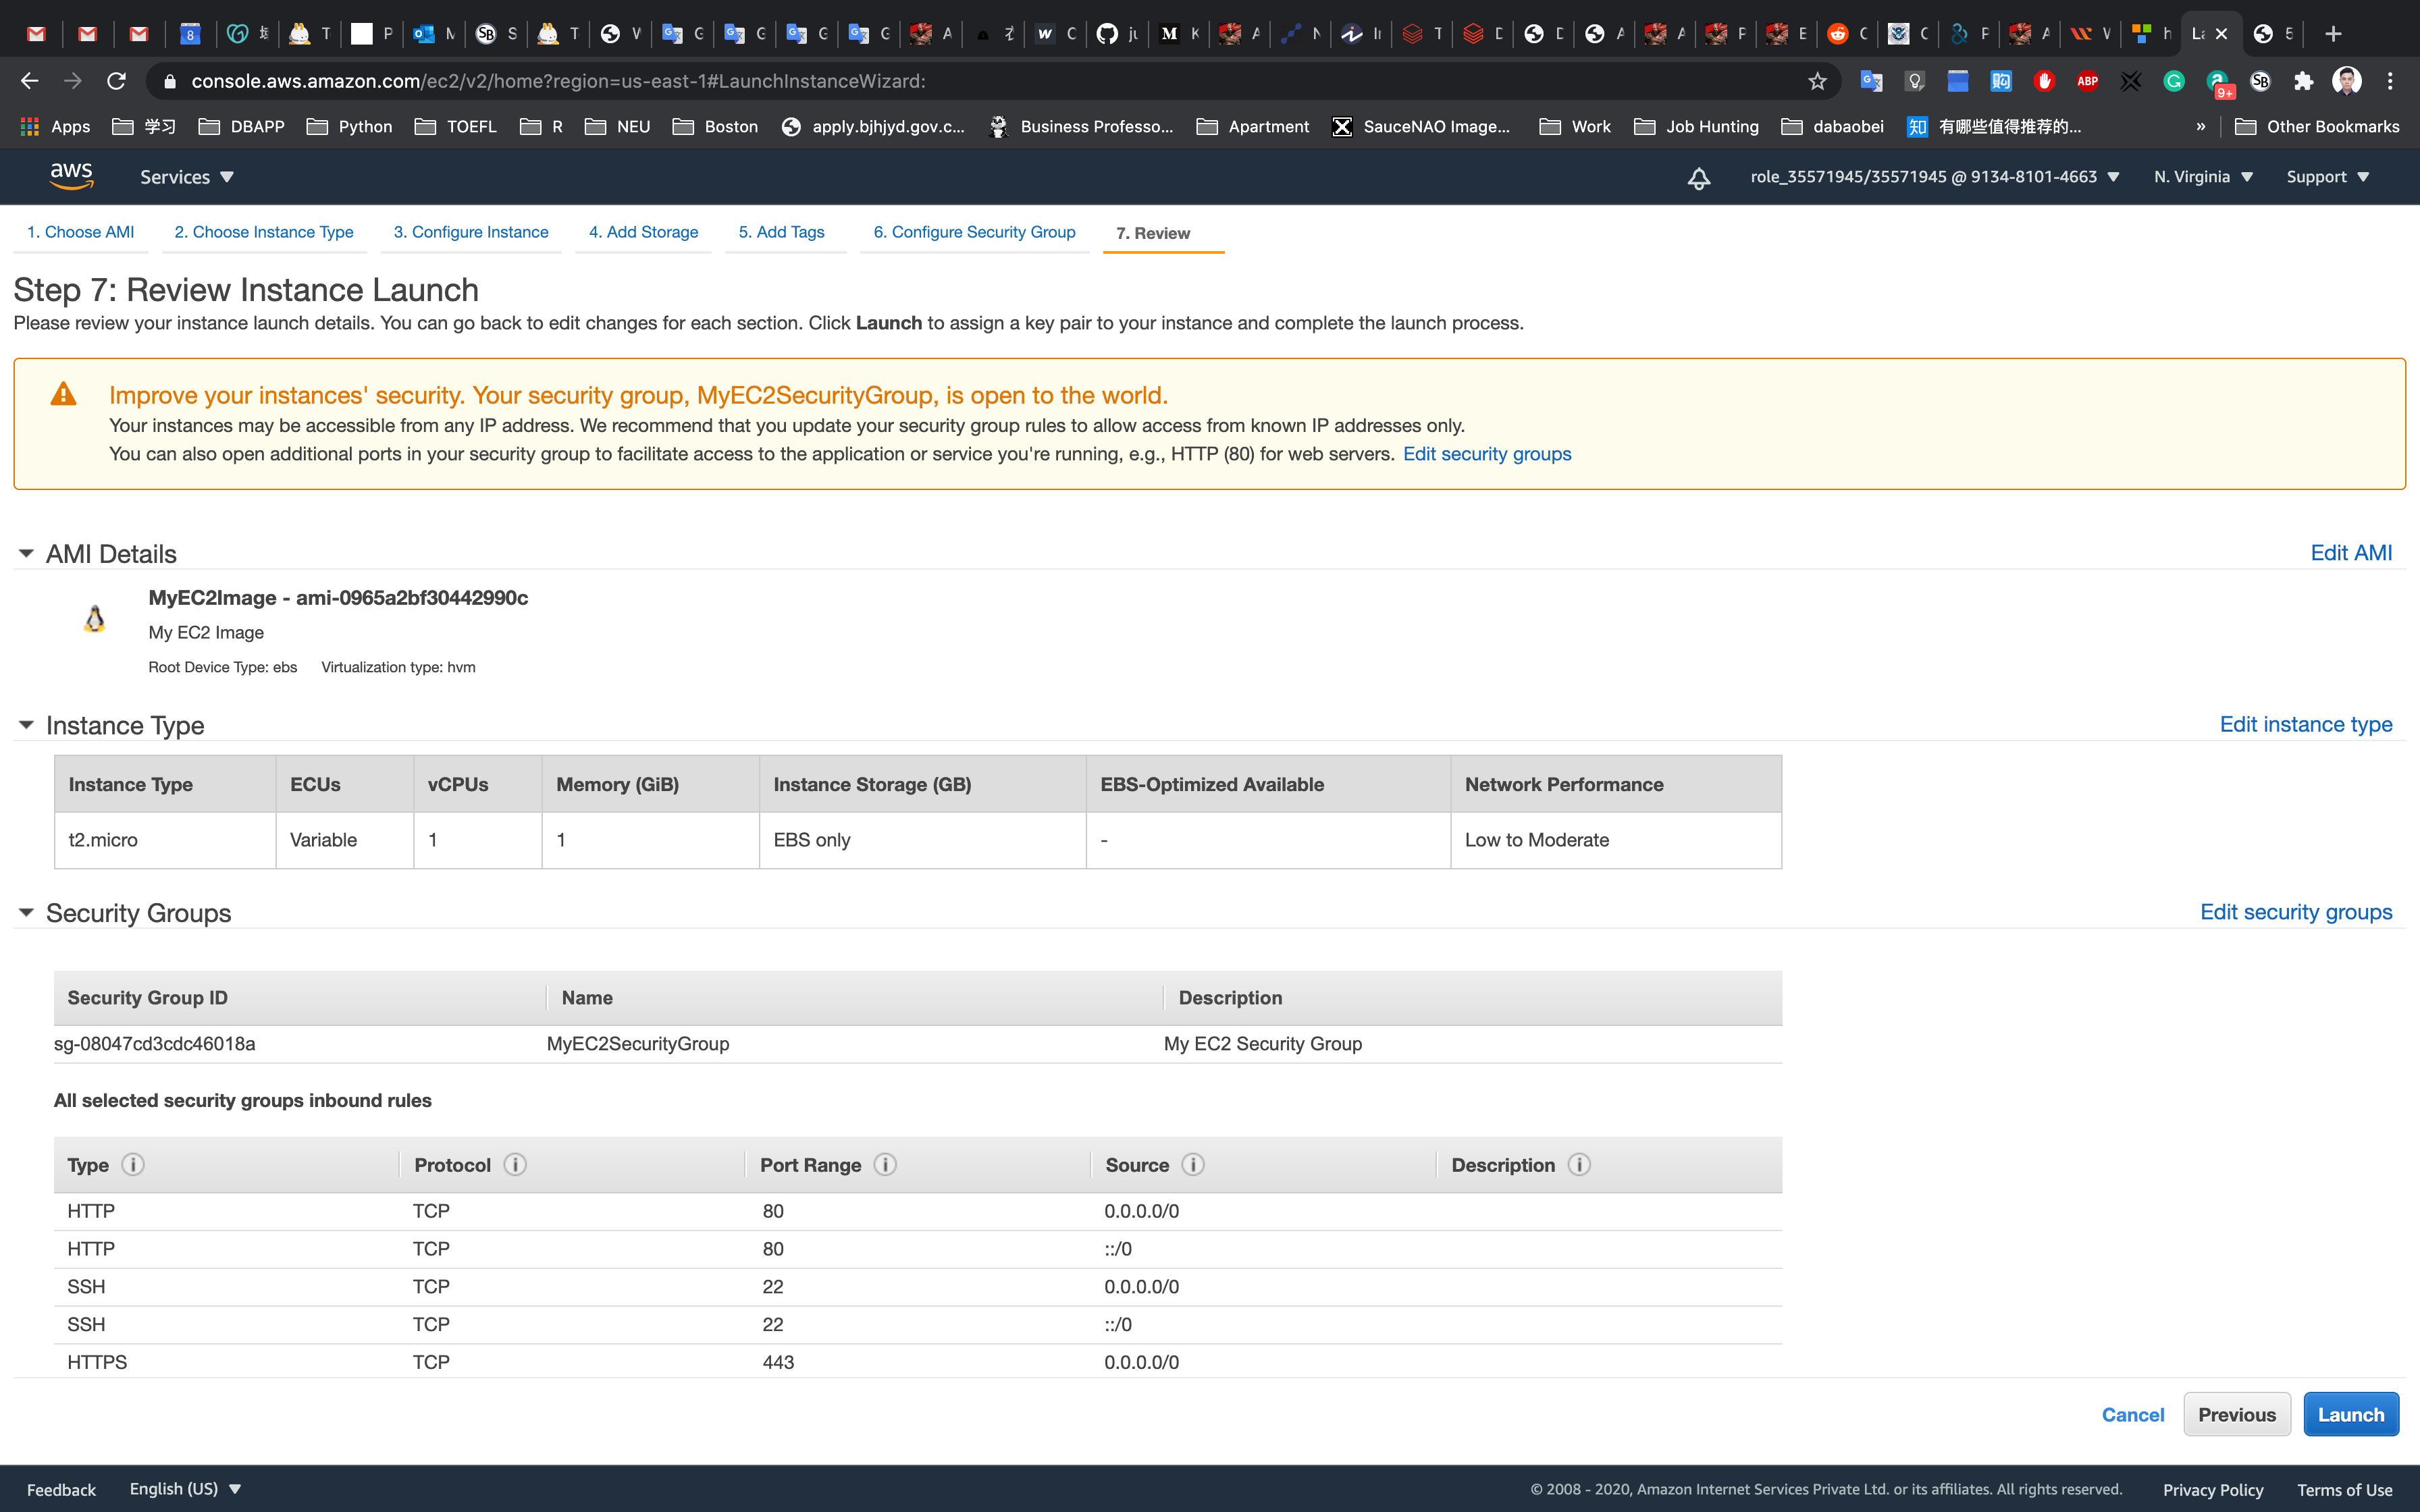
Select Choose an existing key pair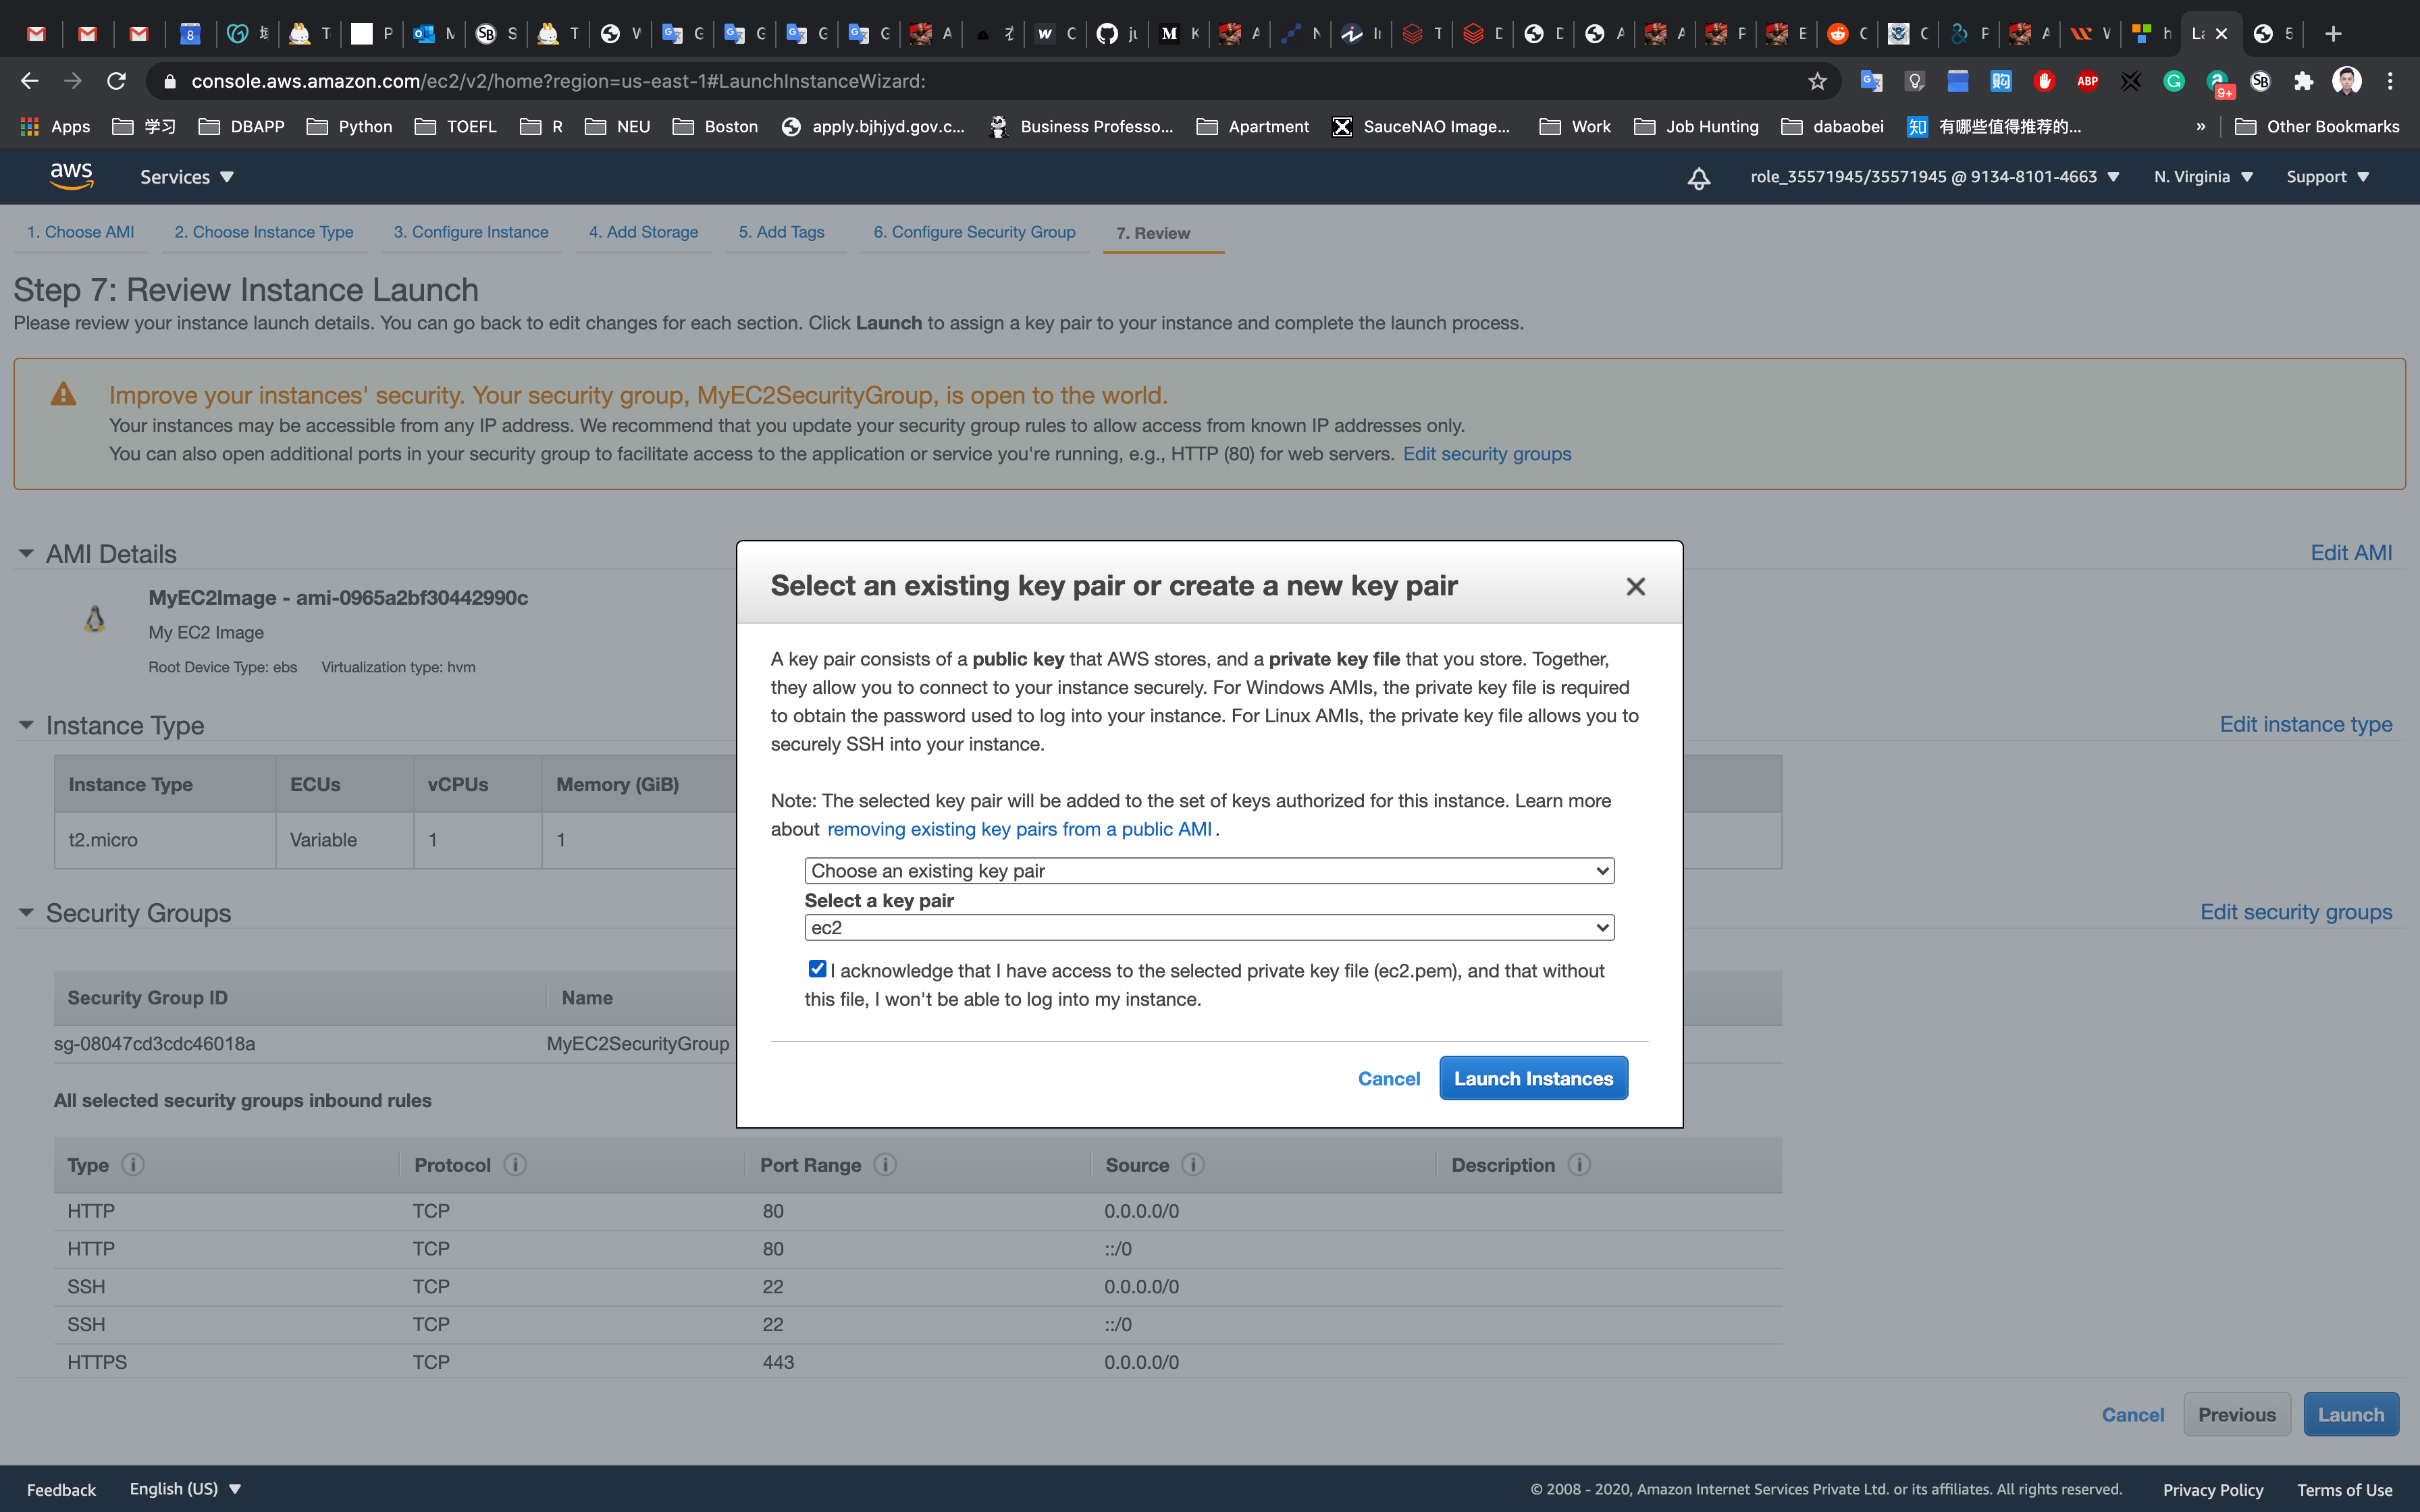
Click on Launch Instances
Click on View Instances
Waiting until the Instance state switch to Running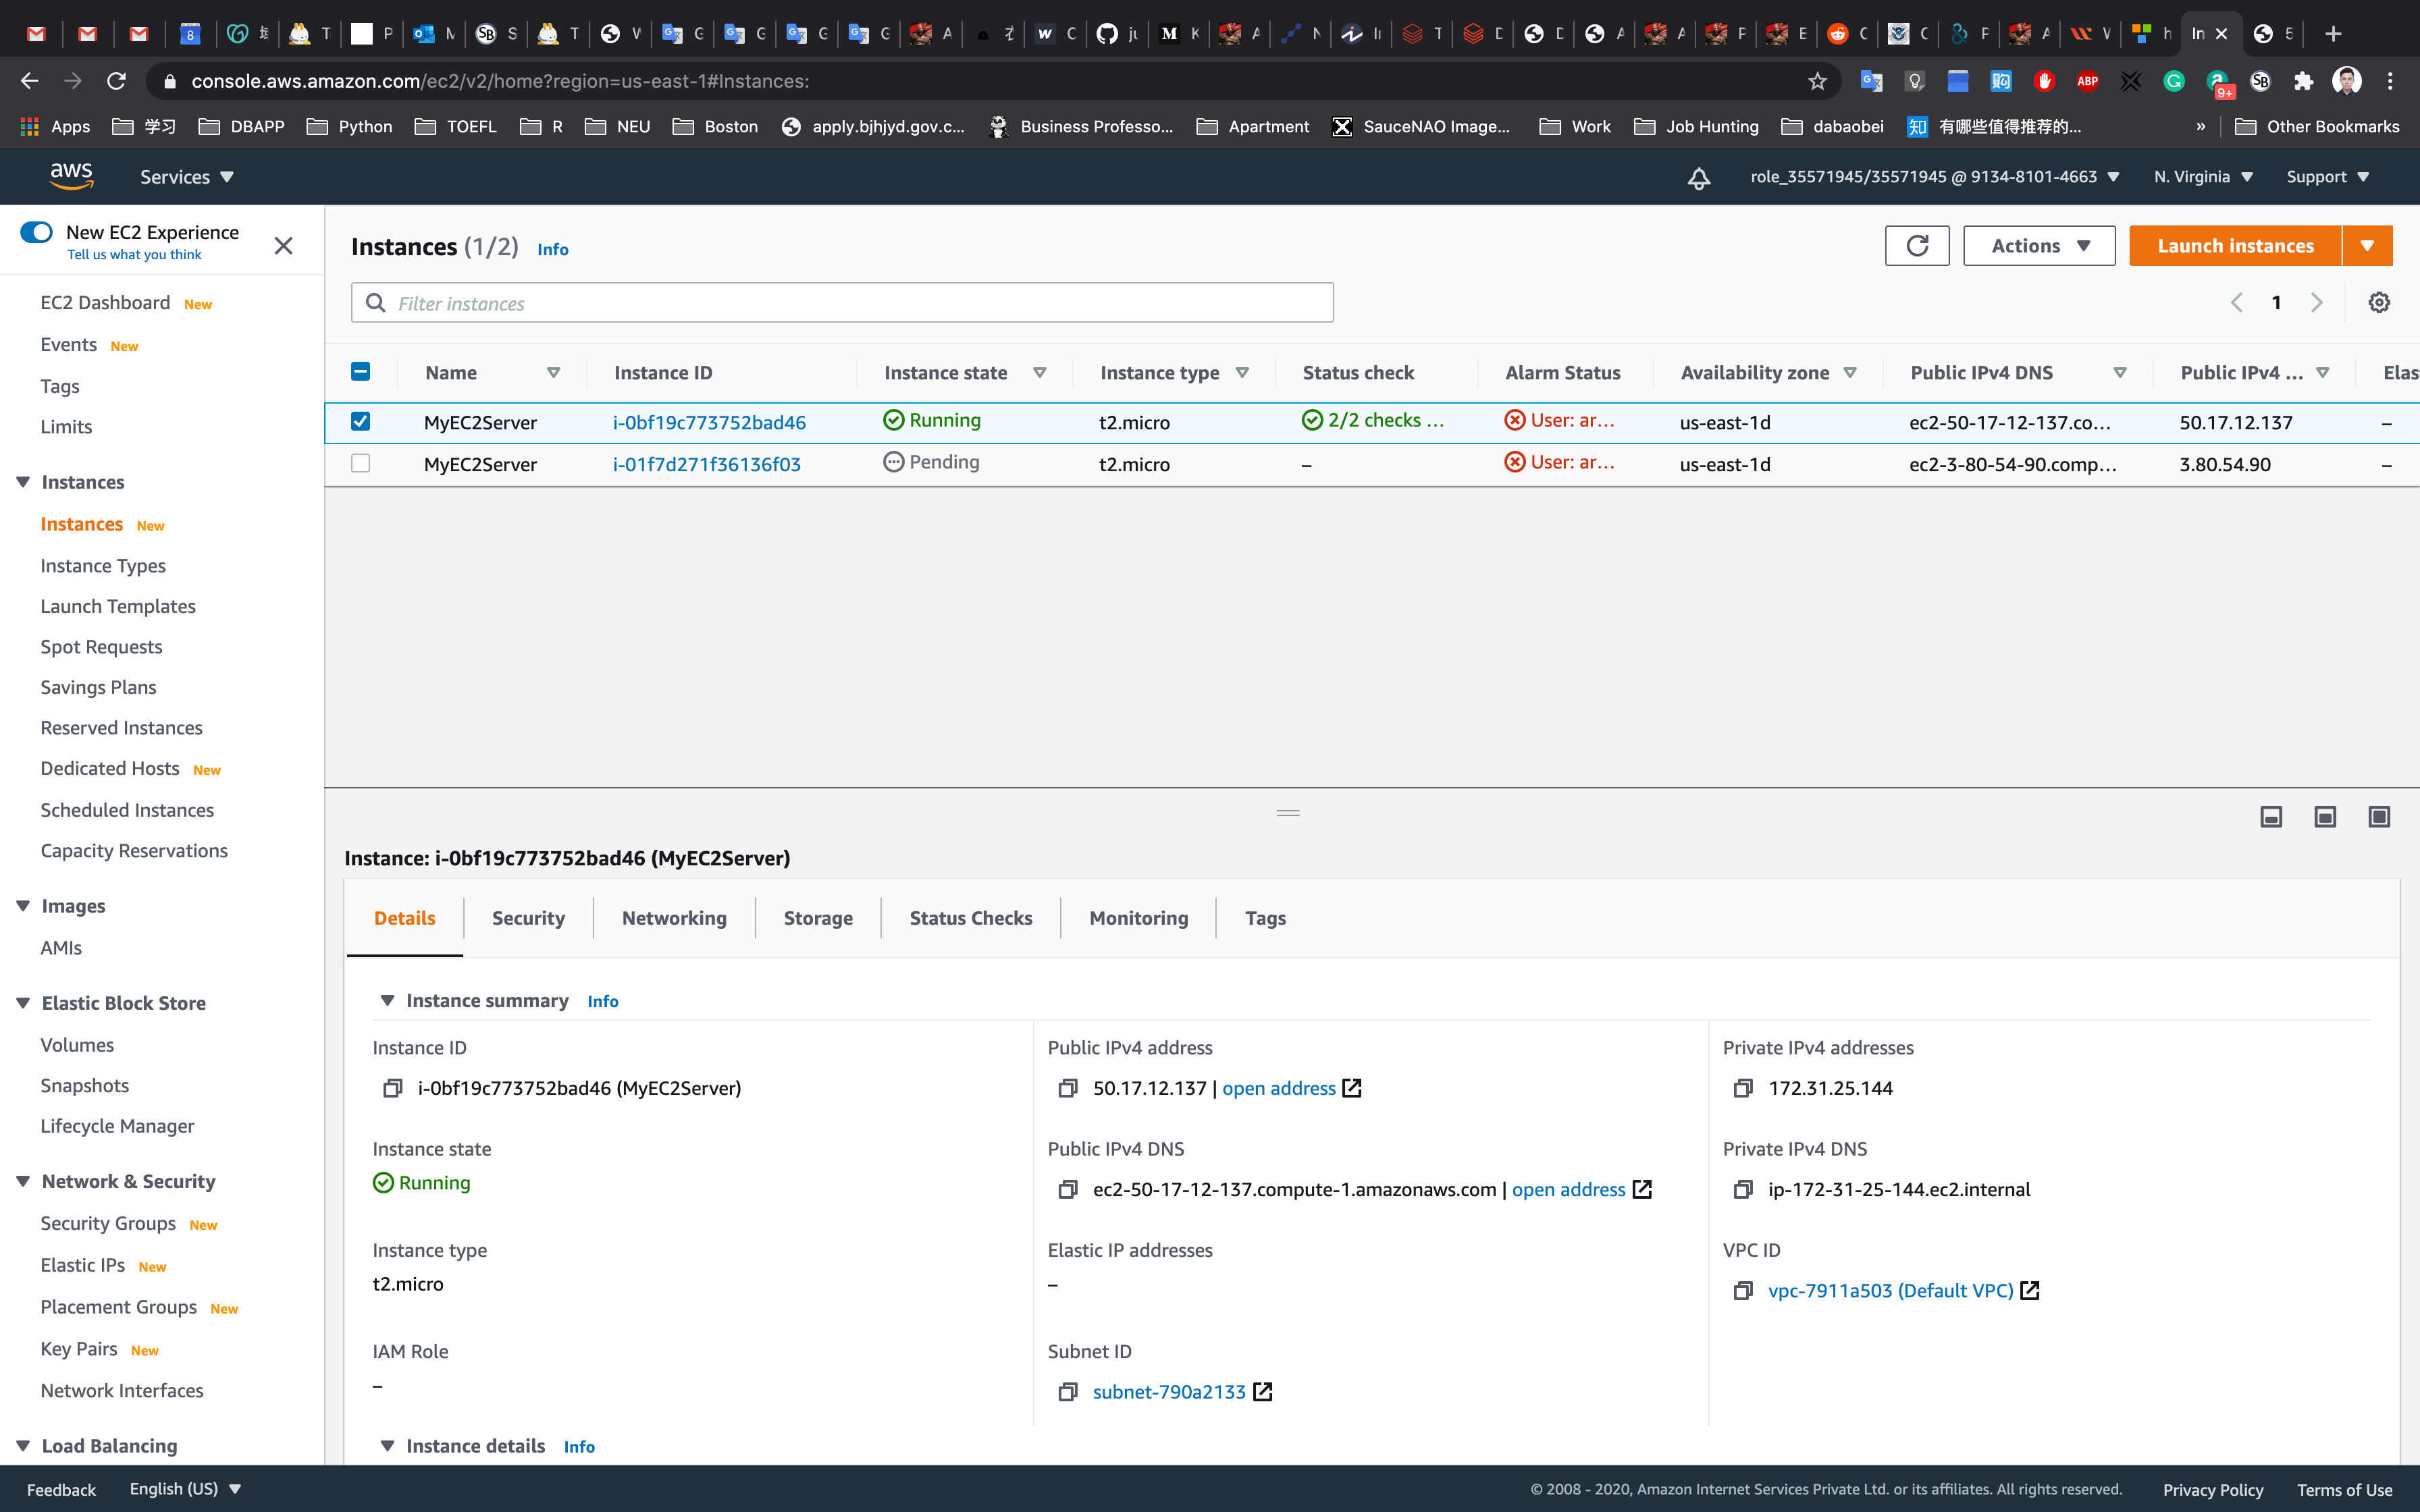
You can Click on Instance ID like i-095a9b2992ba8bf7d to see the instance detail.
Copy the Public IPv4 address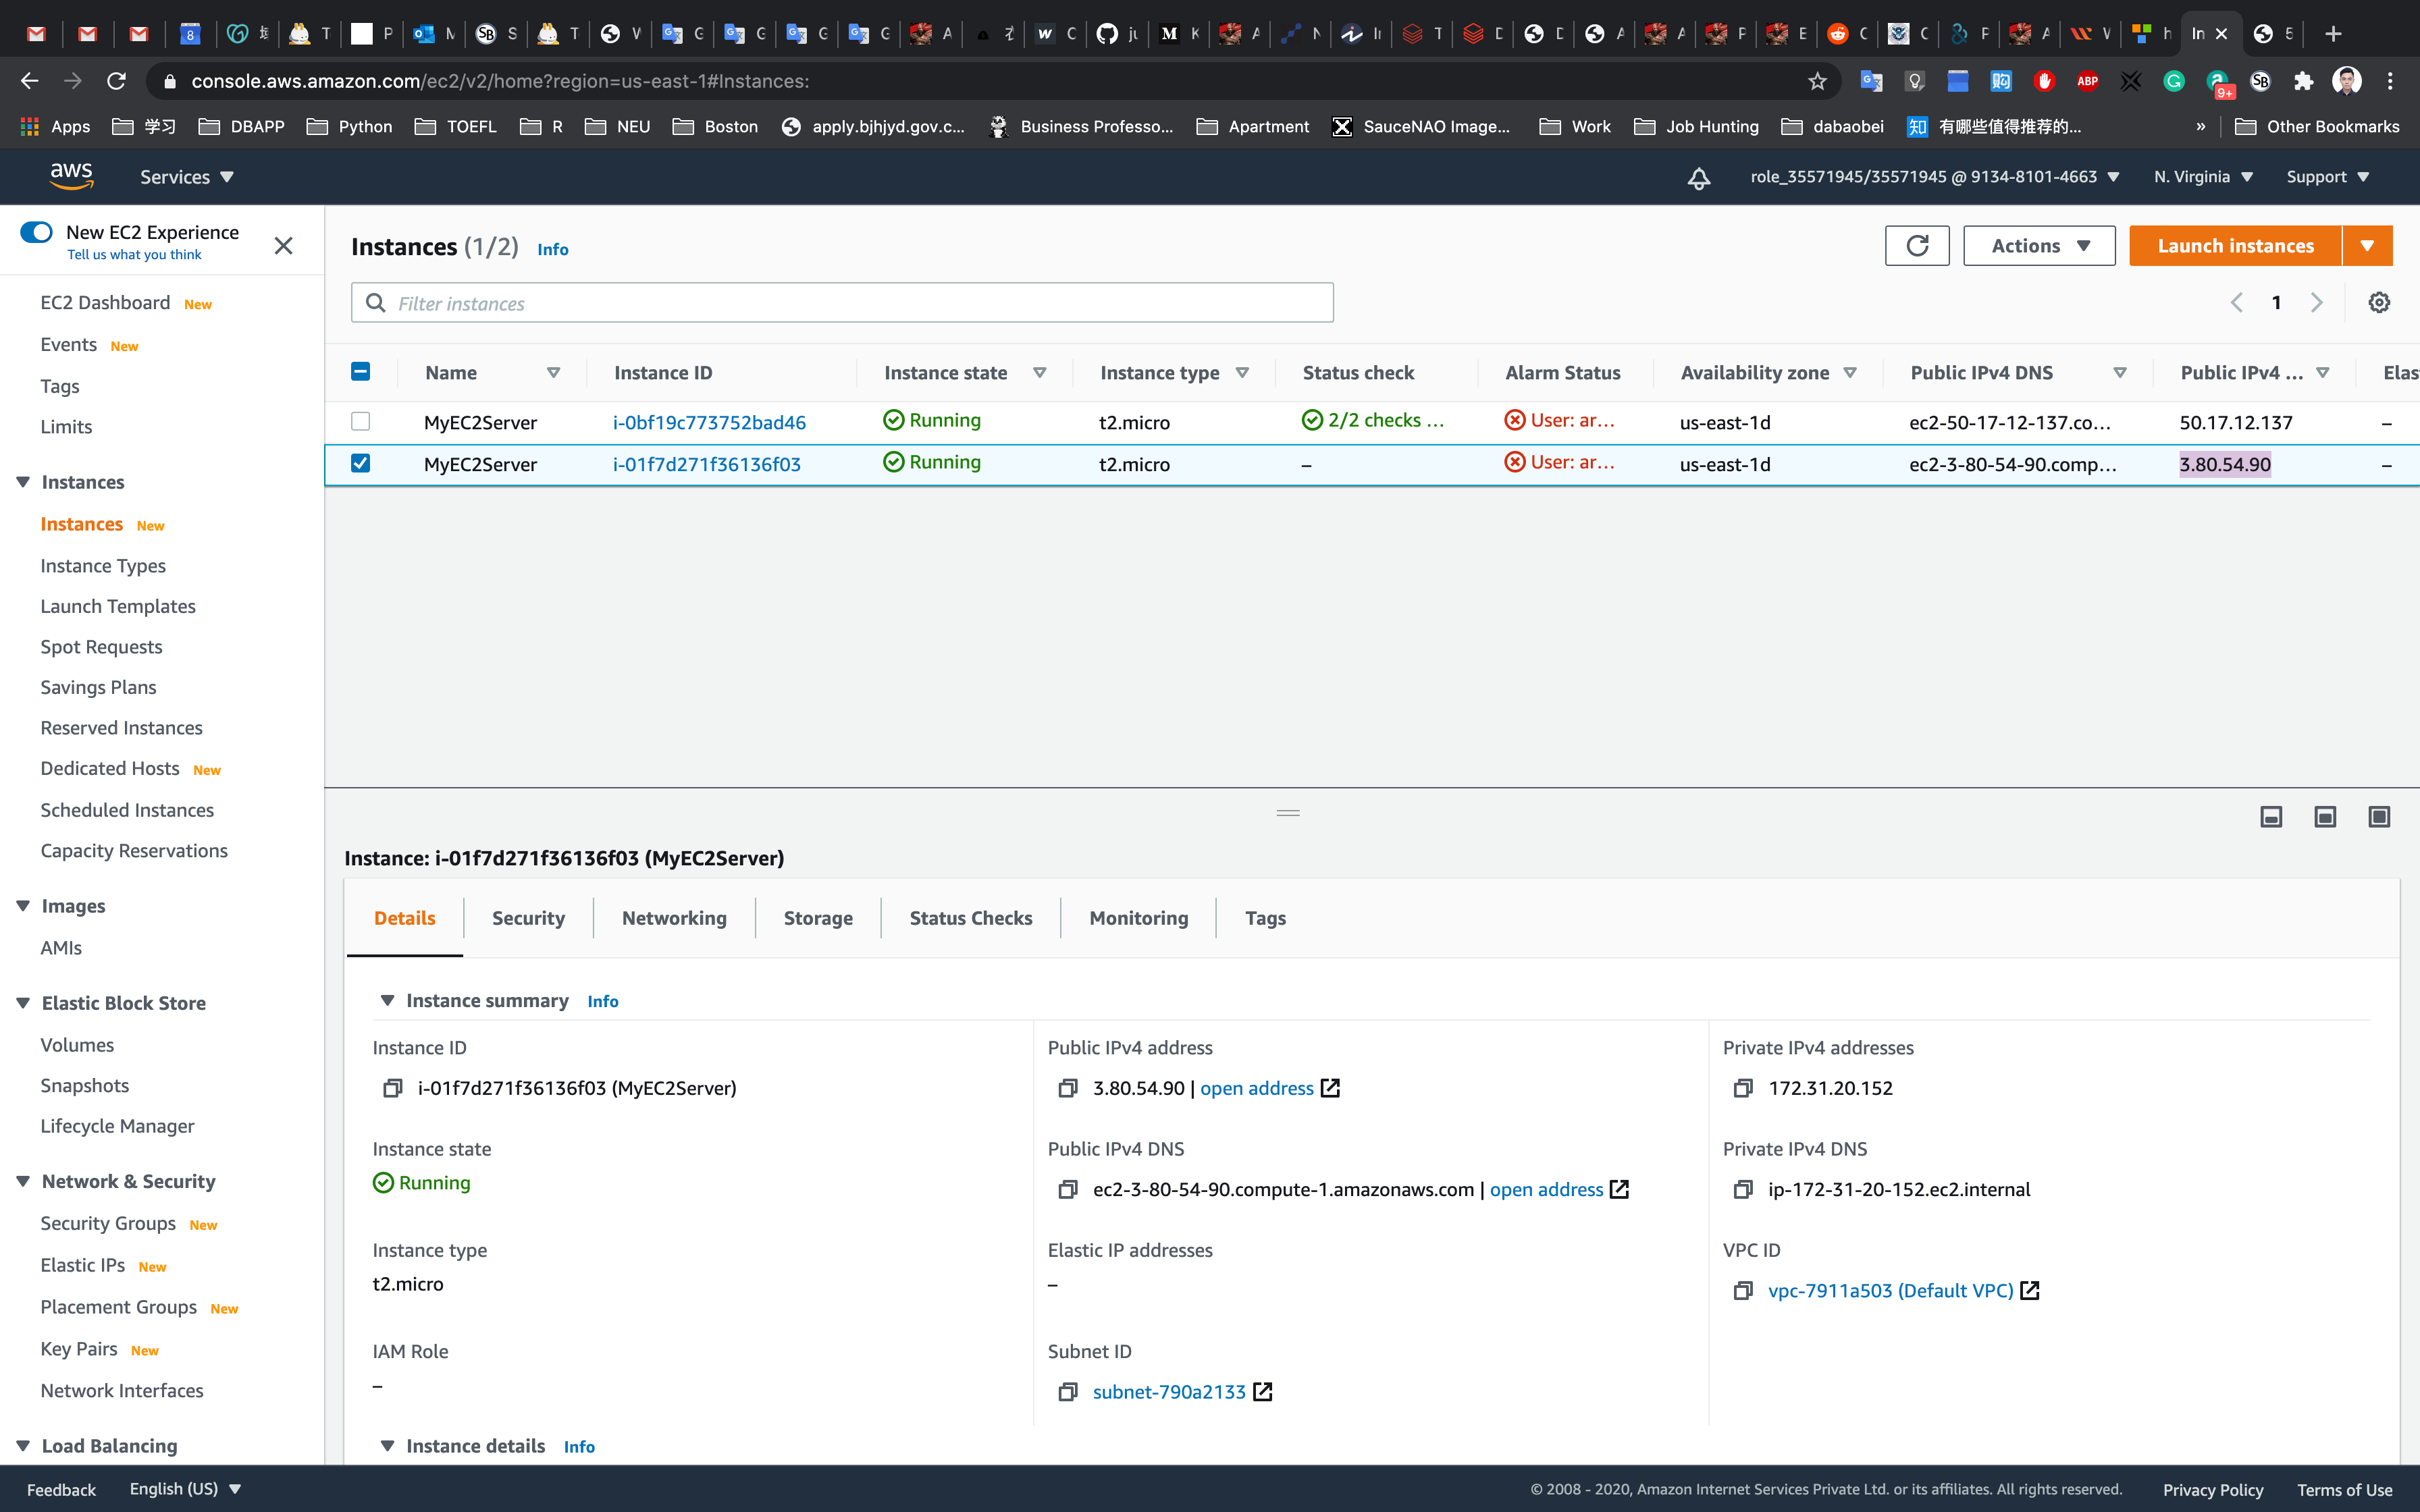
Validate Test
Enter the Public IPv4 address in your browser

Completion and Conclusion
- You have successfully created an EC2 instance.
- You have successfully created an image directly from that EC2 instance.
Introduction to AWS Elastic Load Balancing (AWS ELB)
https://play.whizlabs.com/site/task_details?lab_type=1&task_id=11&quest_id=35
Lab Details
- This lab walks you through AWS Elastic Load Balancing. Elastic Load Balancing automatically distributes incoming application traffic across multiple Amazon EC2 instances in the cloud. In this lab, we will demonstrate elastic load balancing with 2 EC2 Instances.
Task Details
- Log into AWS Management Console.
- Launch two EC2 Instances using a Bash script to install Apache httpd and publish a sample HTML page.
- Register the EC2 Instances with ELB.
- Create an application ELB with a public IP.
- Simulate an EC2 failover by using the public DNS of the ELB.
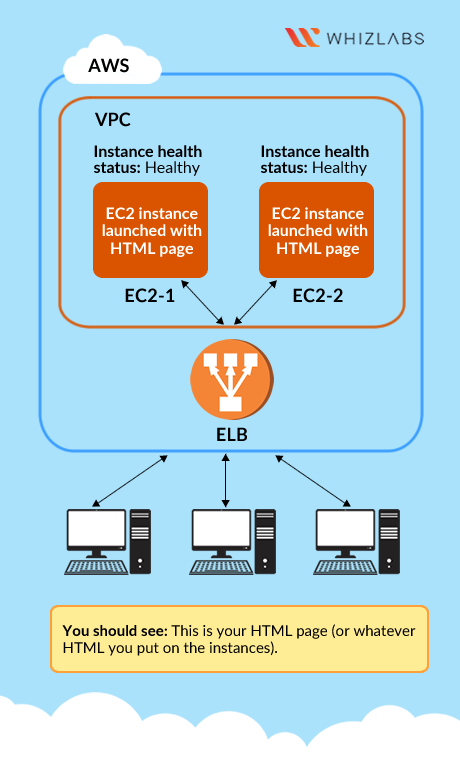
EC2 Configuration
Services -> EC2 -> Instances
Click on Launch instances

Launching First EC2 Instance
Step 1: Choose an Amazon Machine Image(AMI)
Select Amazon Linux 2 AMI (HVM), SSD Volume Type
Step 2: Choose an Instance Type
Select t2.micro
Click on Next: Configure Instance Details
Step 3: Configure Instance Details
- Auto-assign Public IP : Select
Enable

Click on Advanced Settings
Under the User data: section, enter the following script to create an HTML page served by an Apache httpd web server.
1 |
|
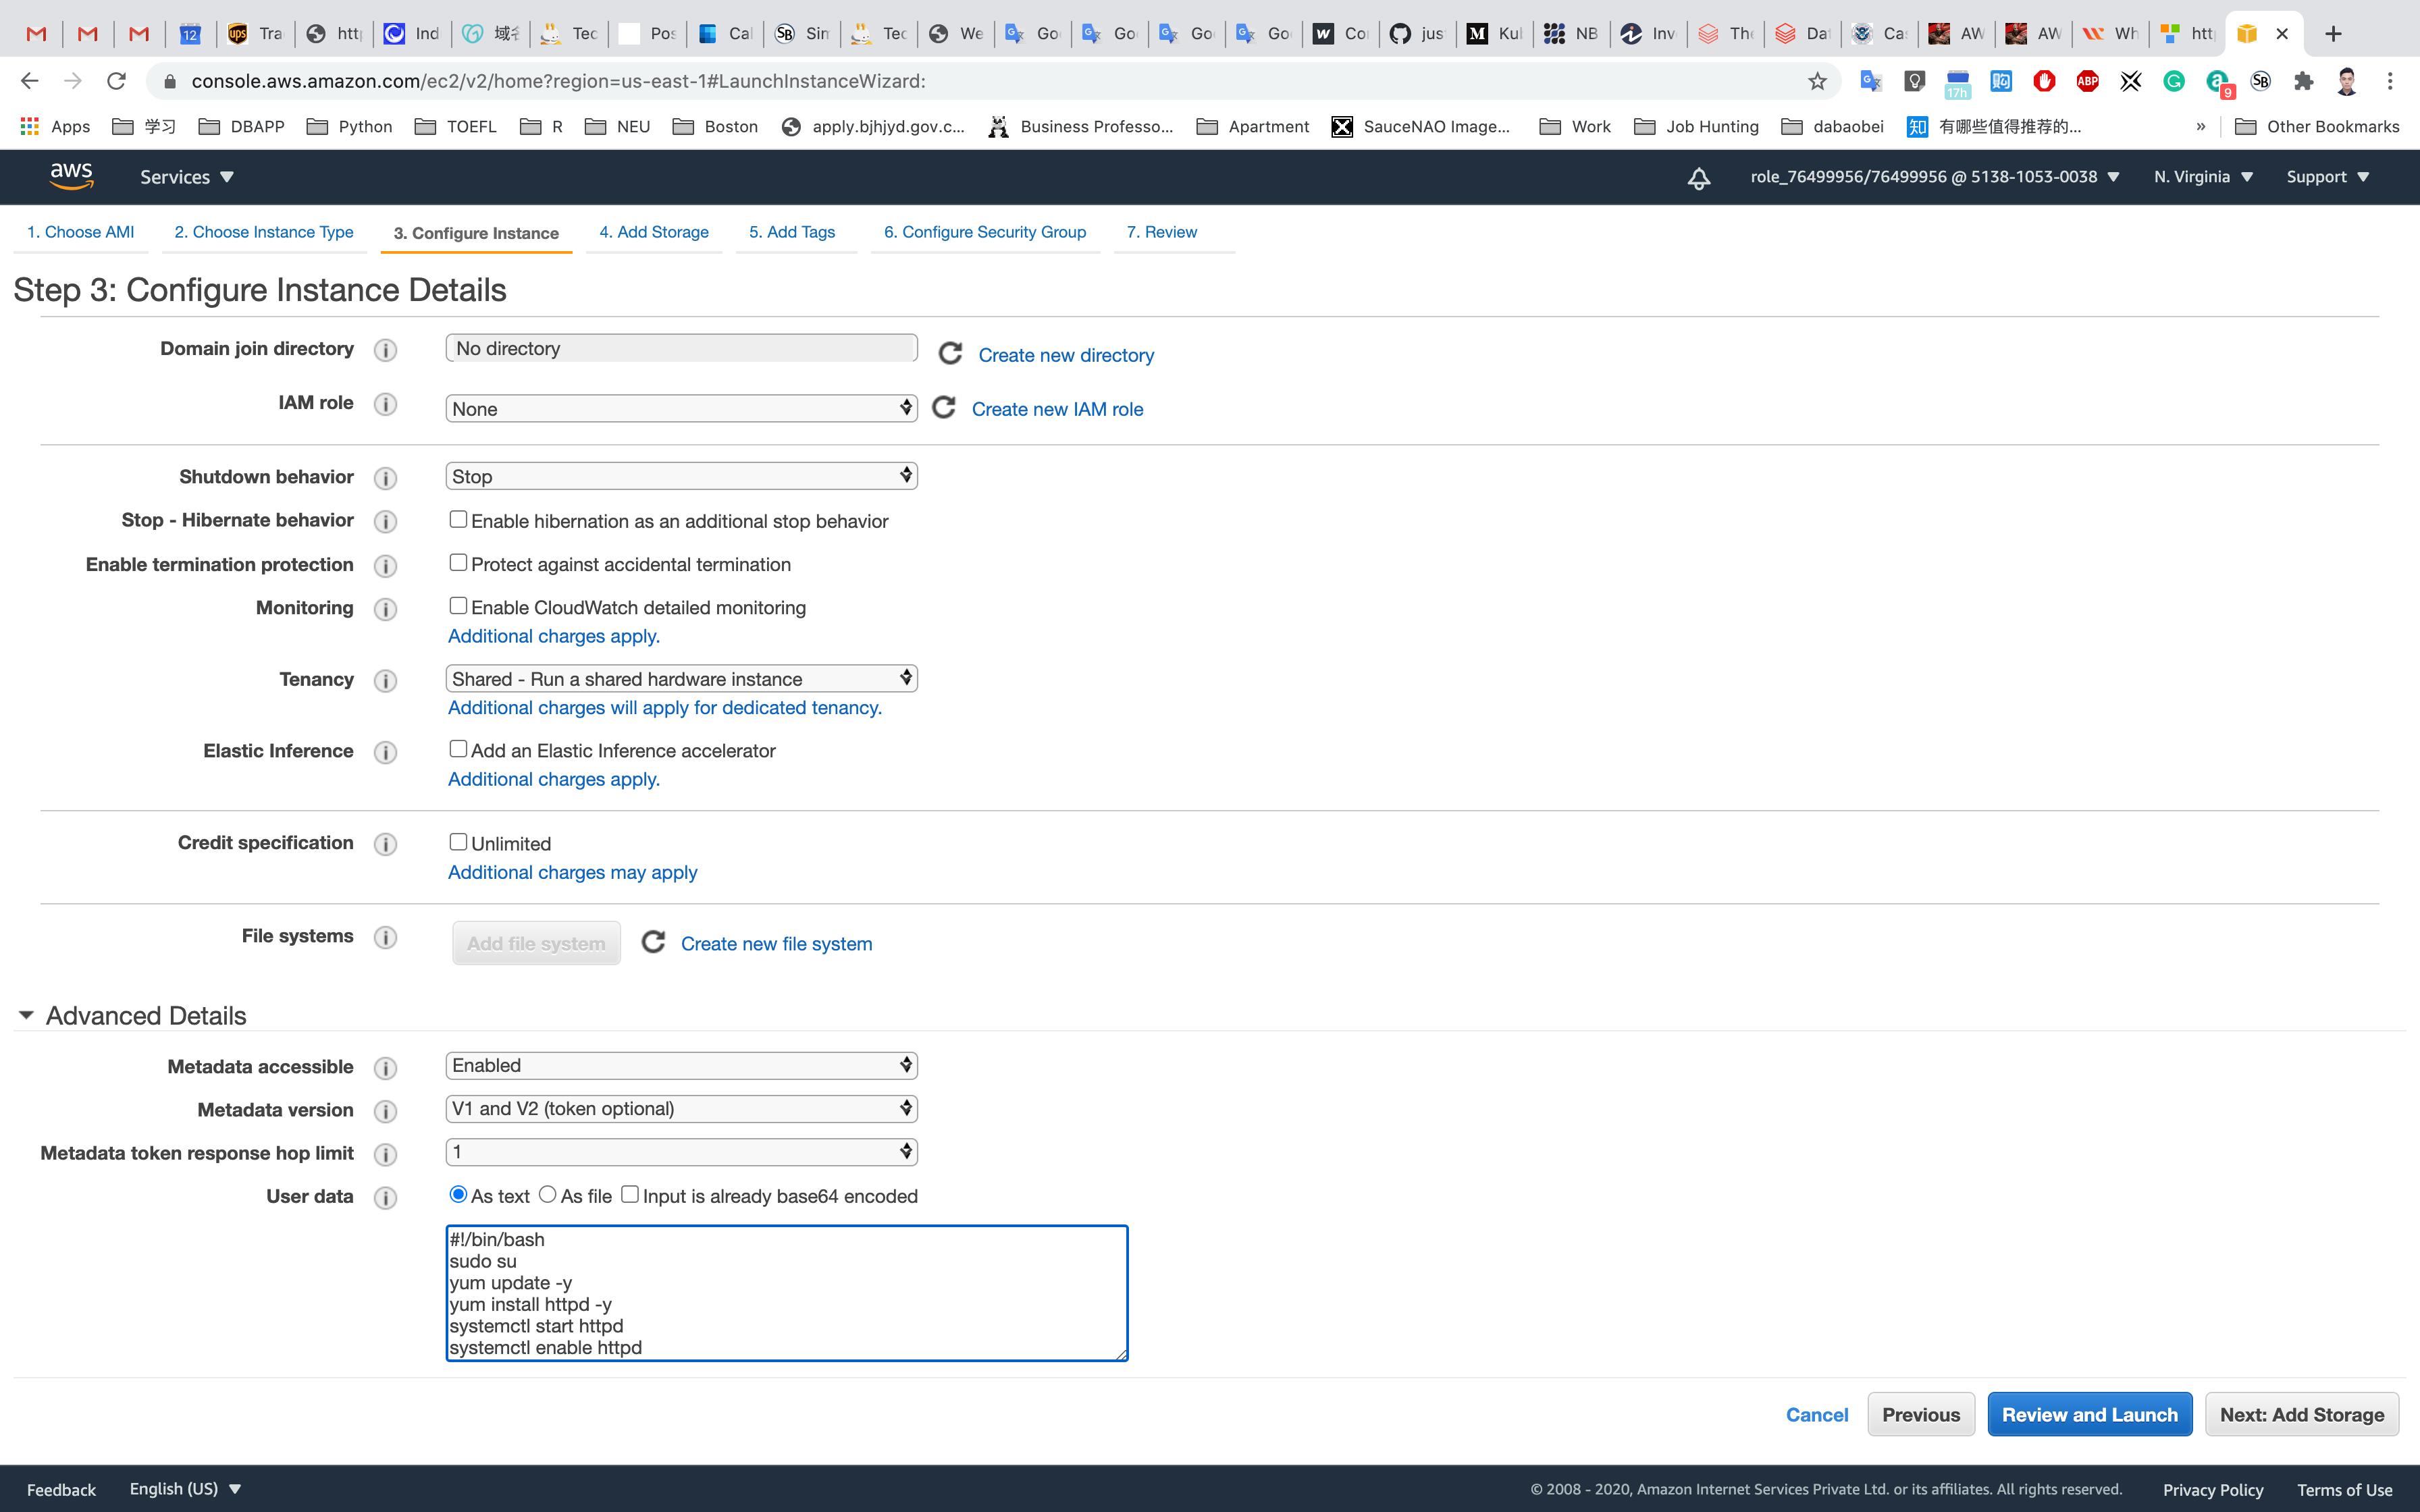
Leave the rest of the fields as default and click on Next: Add Storage
Step 4: Add Storage
Leave it default settings
Click on Next: Add Tags
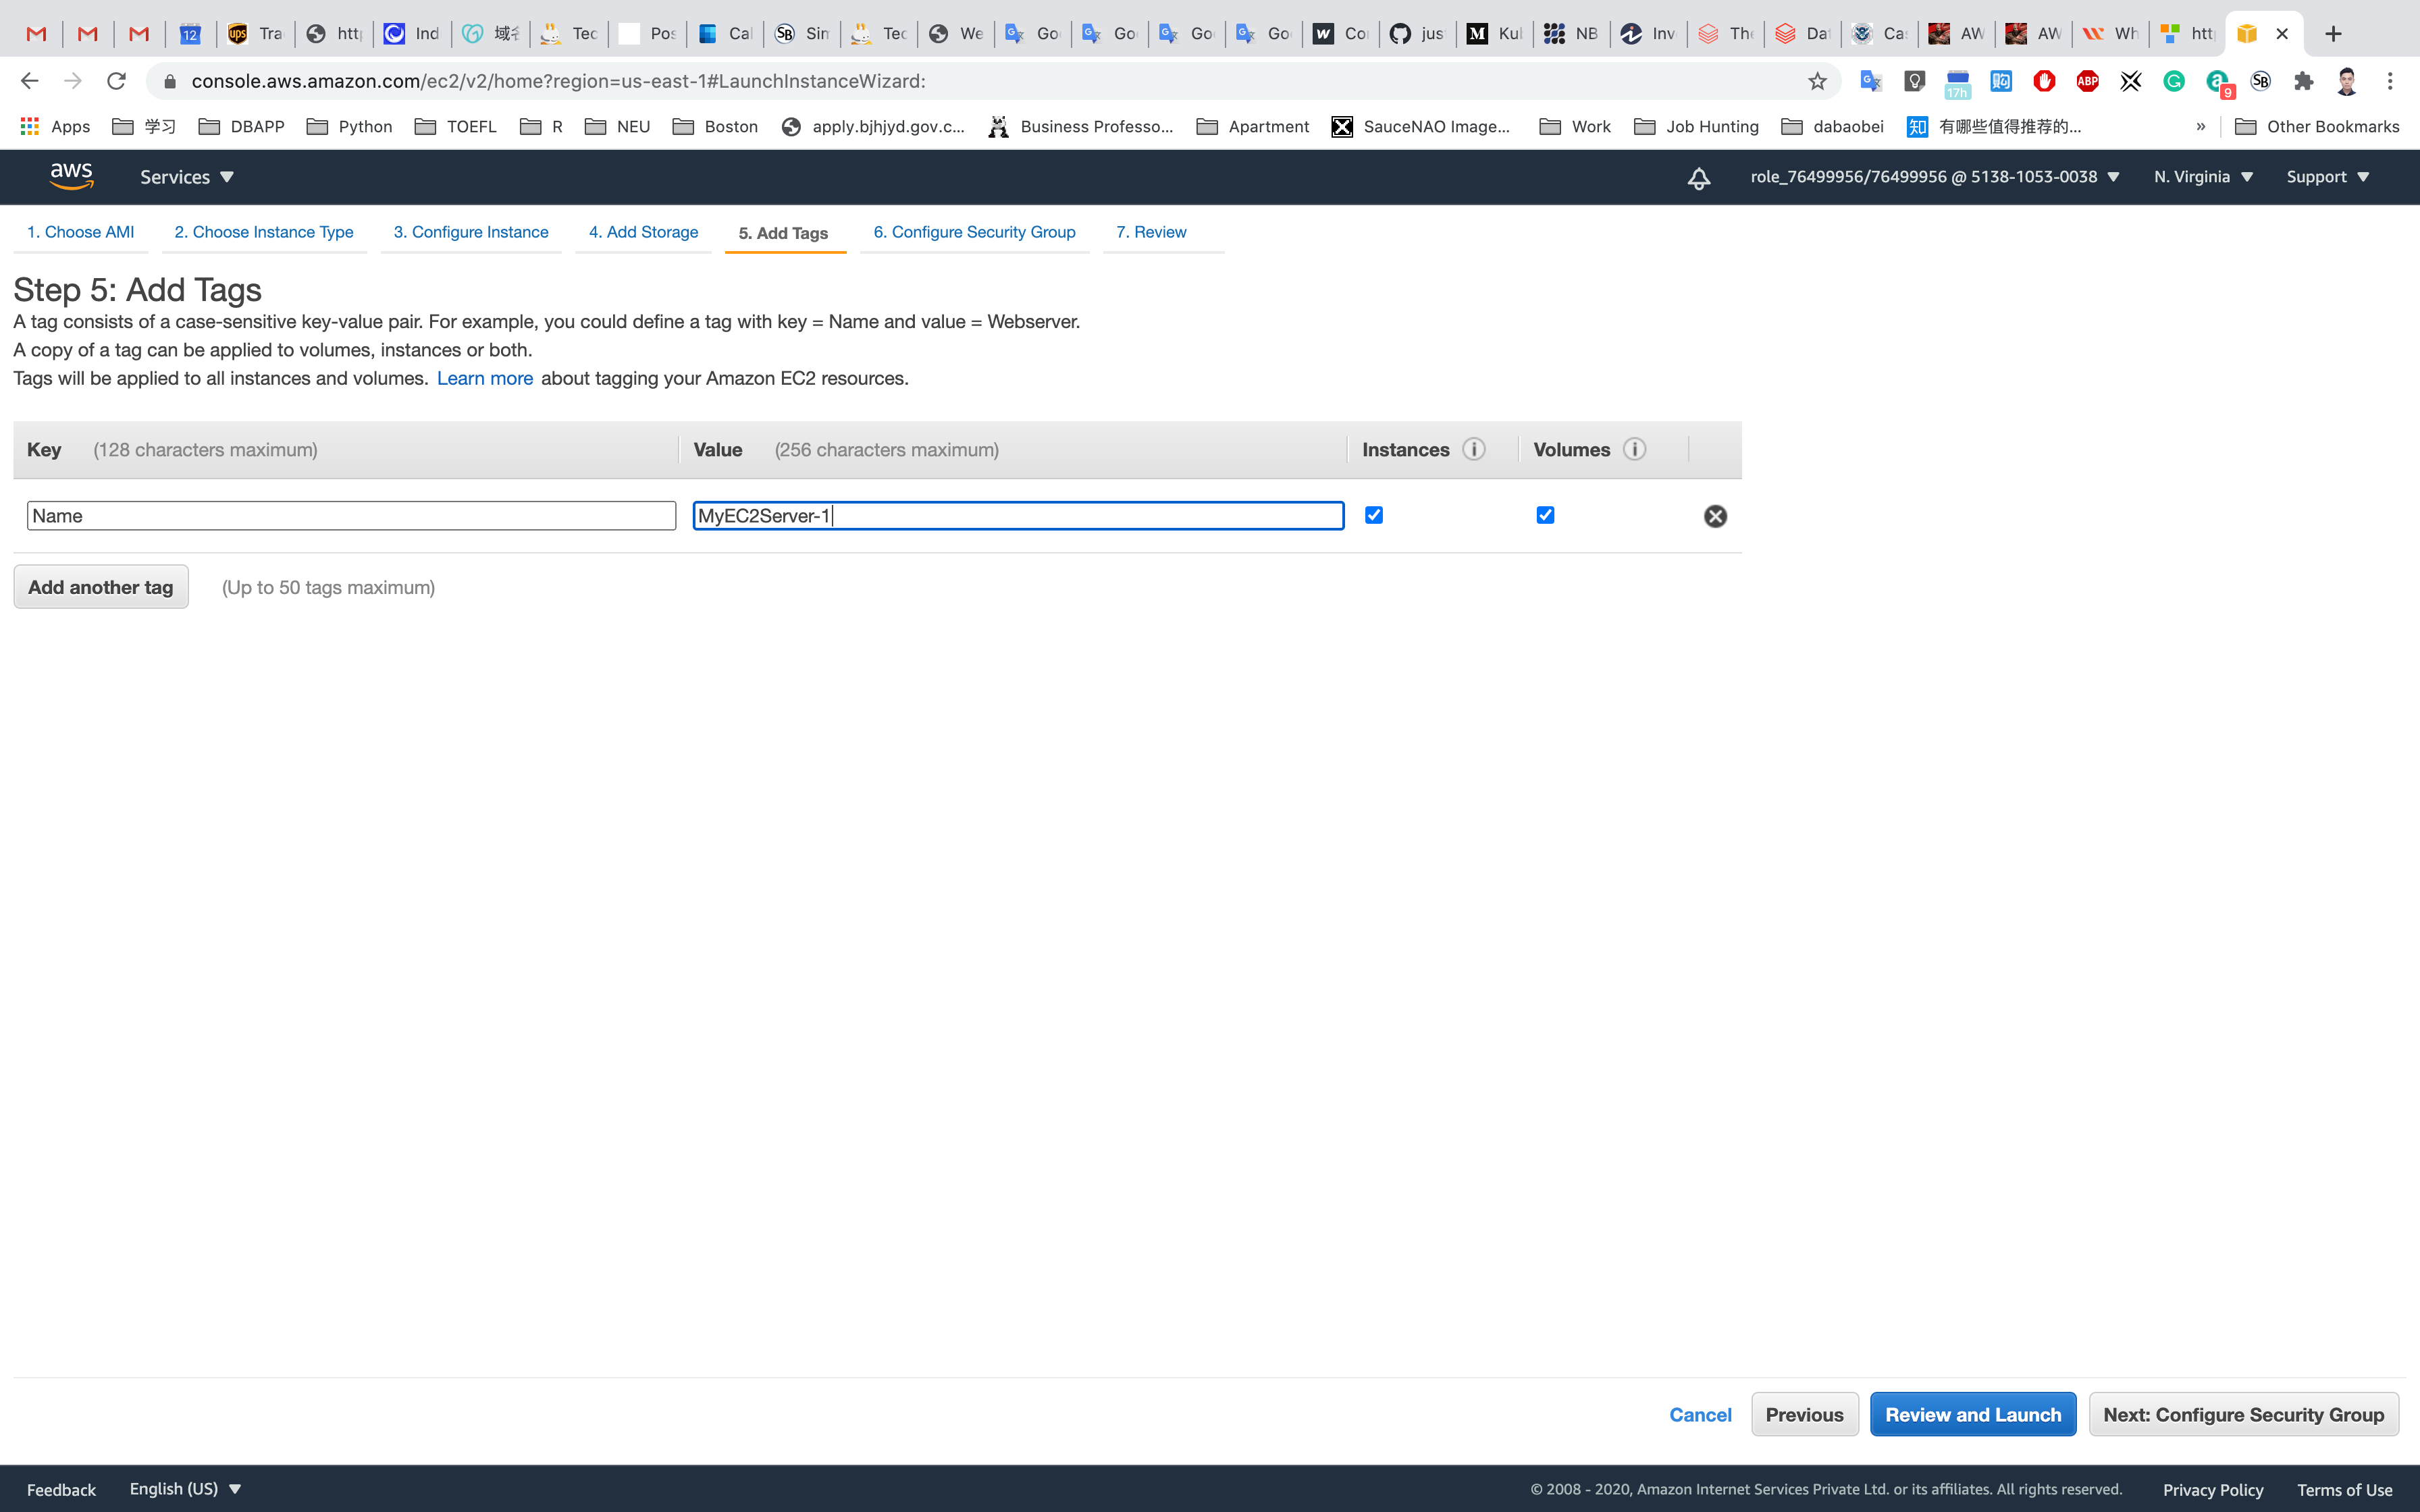
Step 5: Add Tags
Click on Add Tag
- Key:
Name - Value:
MyEC2Server-1
Click on Next: Configure Security Group
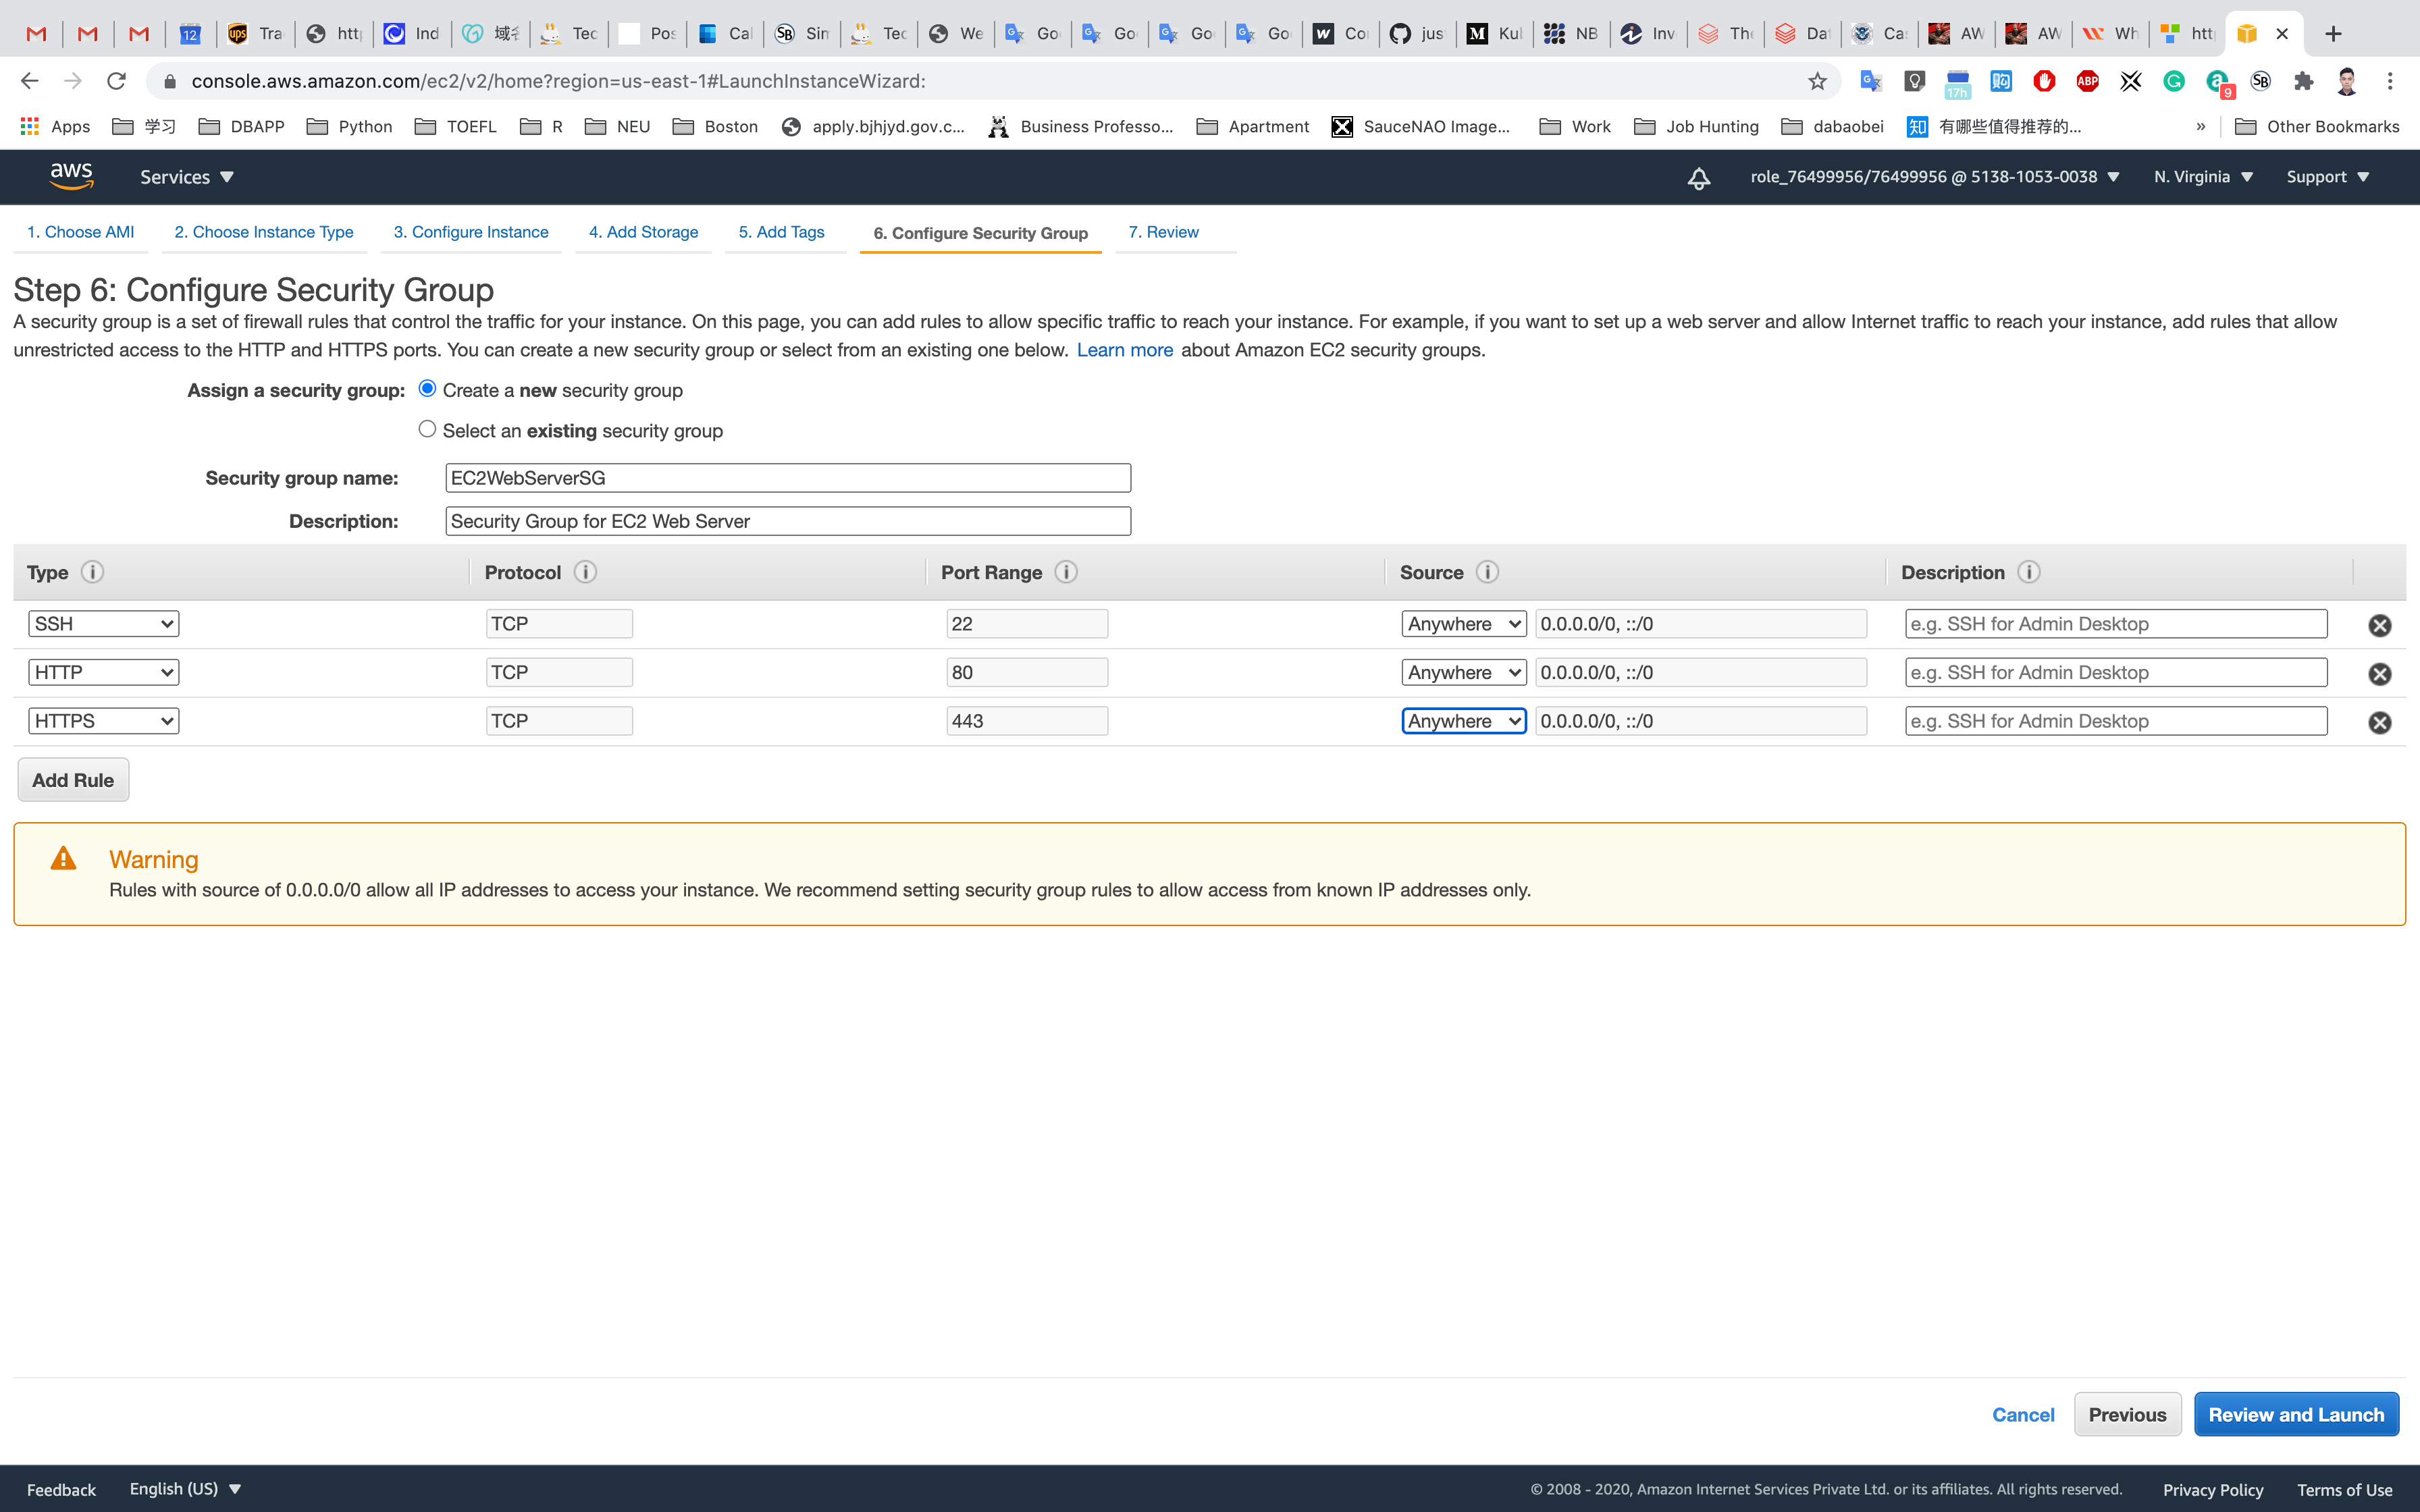
Step 6: Configure Security Group
Select Create a new security group
- Security group name:
EC2WebServerSG - Description :
Security Group for EC2 Web Server
For SSH:
- Source:
Custom(Allow specific IP address) orAnywhere(From ALL IP addresses accessible).
Click on Add Rule
For HTTP:
- Source:
Anywhere
For HTTPS:
- Source:
Anywhere
Click on Review and Launch
Step 7: Review Instance Launch
Click on Launch
Select Create a new key pair
Set up the key pair name ec2
Click on Download Key Pair
See the left bottom of the screenshot, we have the file named ec2.pem
Click on Launch Instances
Launching Second EC2 Instance
Services -> EC2 -> Instances
Click on Launch instances
Step 1: Choose an Amazon Machine Image(AMI)
Select Amazon Linux 2 AMI (HVM), SSD Volume Type
Step 2: Choose an Instance Type
Select t2.micro
Click on Next: Configure Instance Details
Step 3: Configure Instance Details
- Auto-assign Public IP : Select
Enable

Click on Advanced Settings
Under the User data: section, enter the following script to create an HTML page served by an Apache httpd web server.
1 |
|

Leave the rest of the fields as default and click on Next: Add Storage
Step 4: Add Storage
Leave it default settings
Click on Next: Add Tags
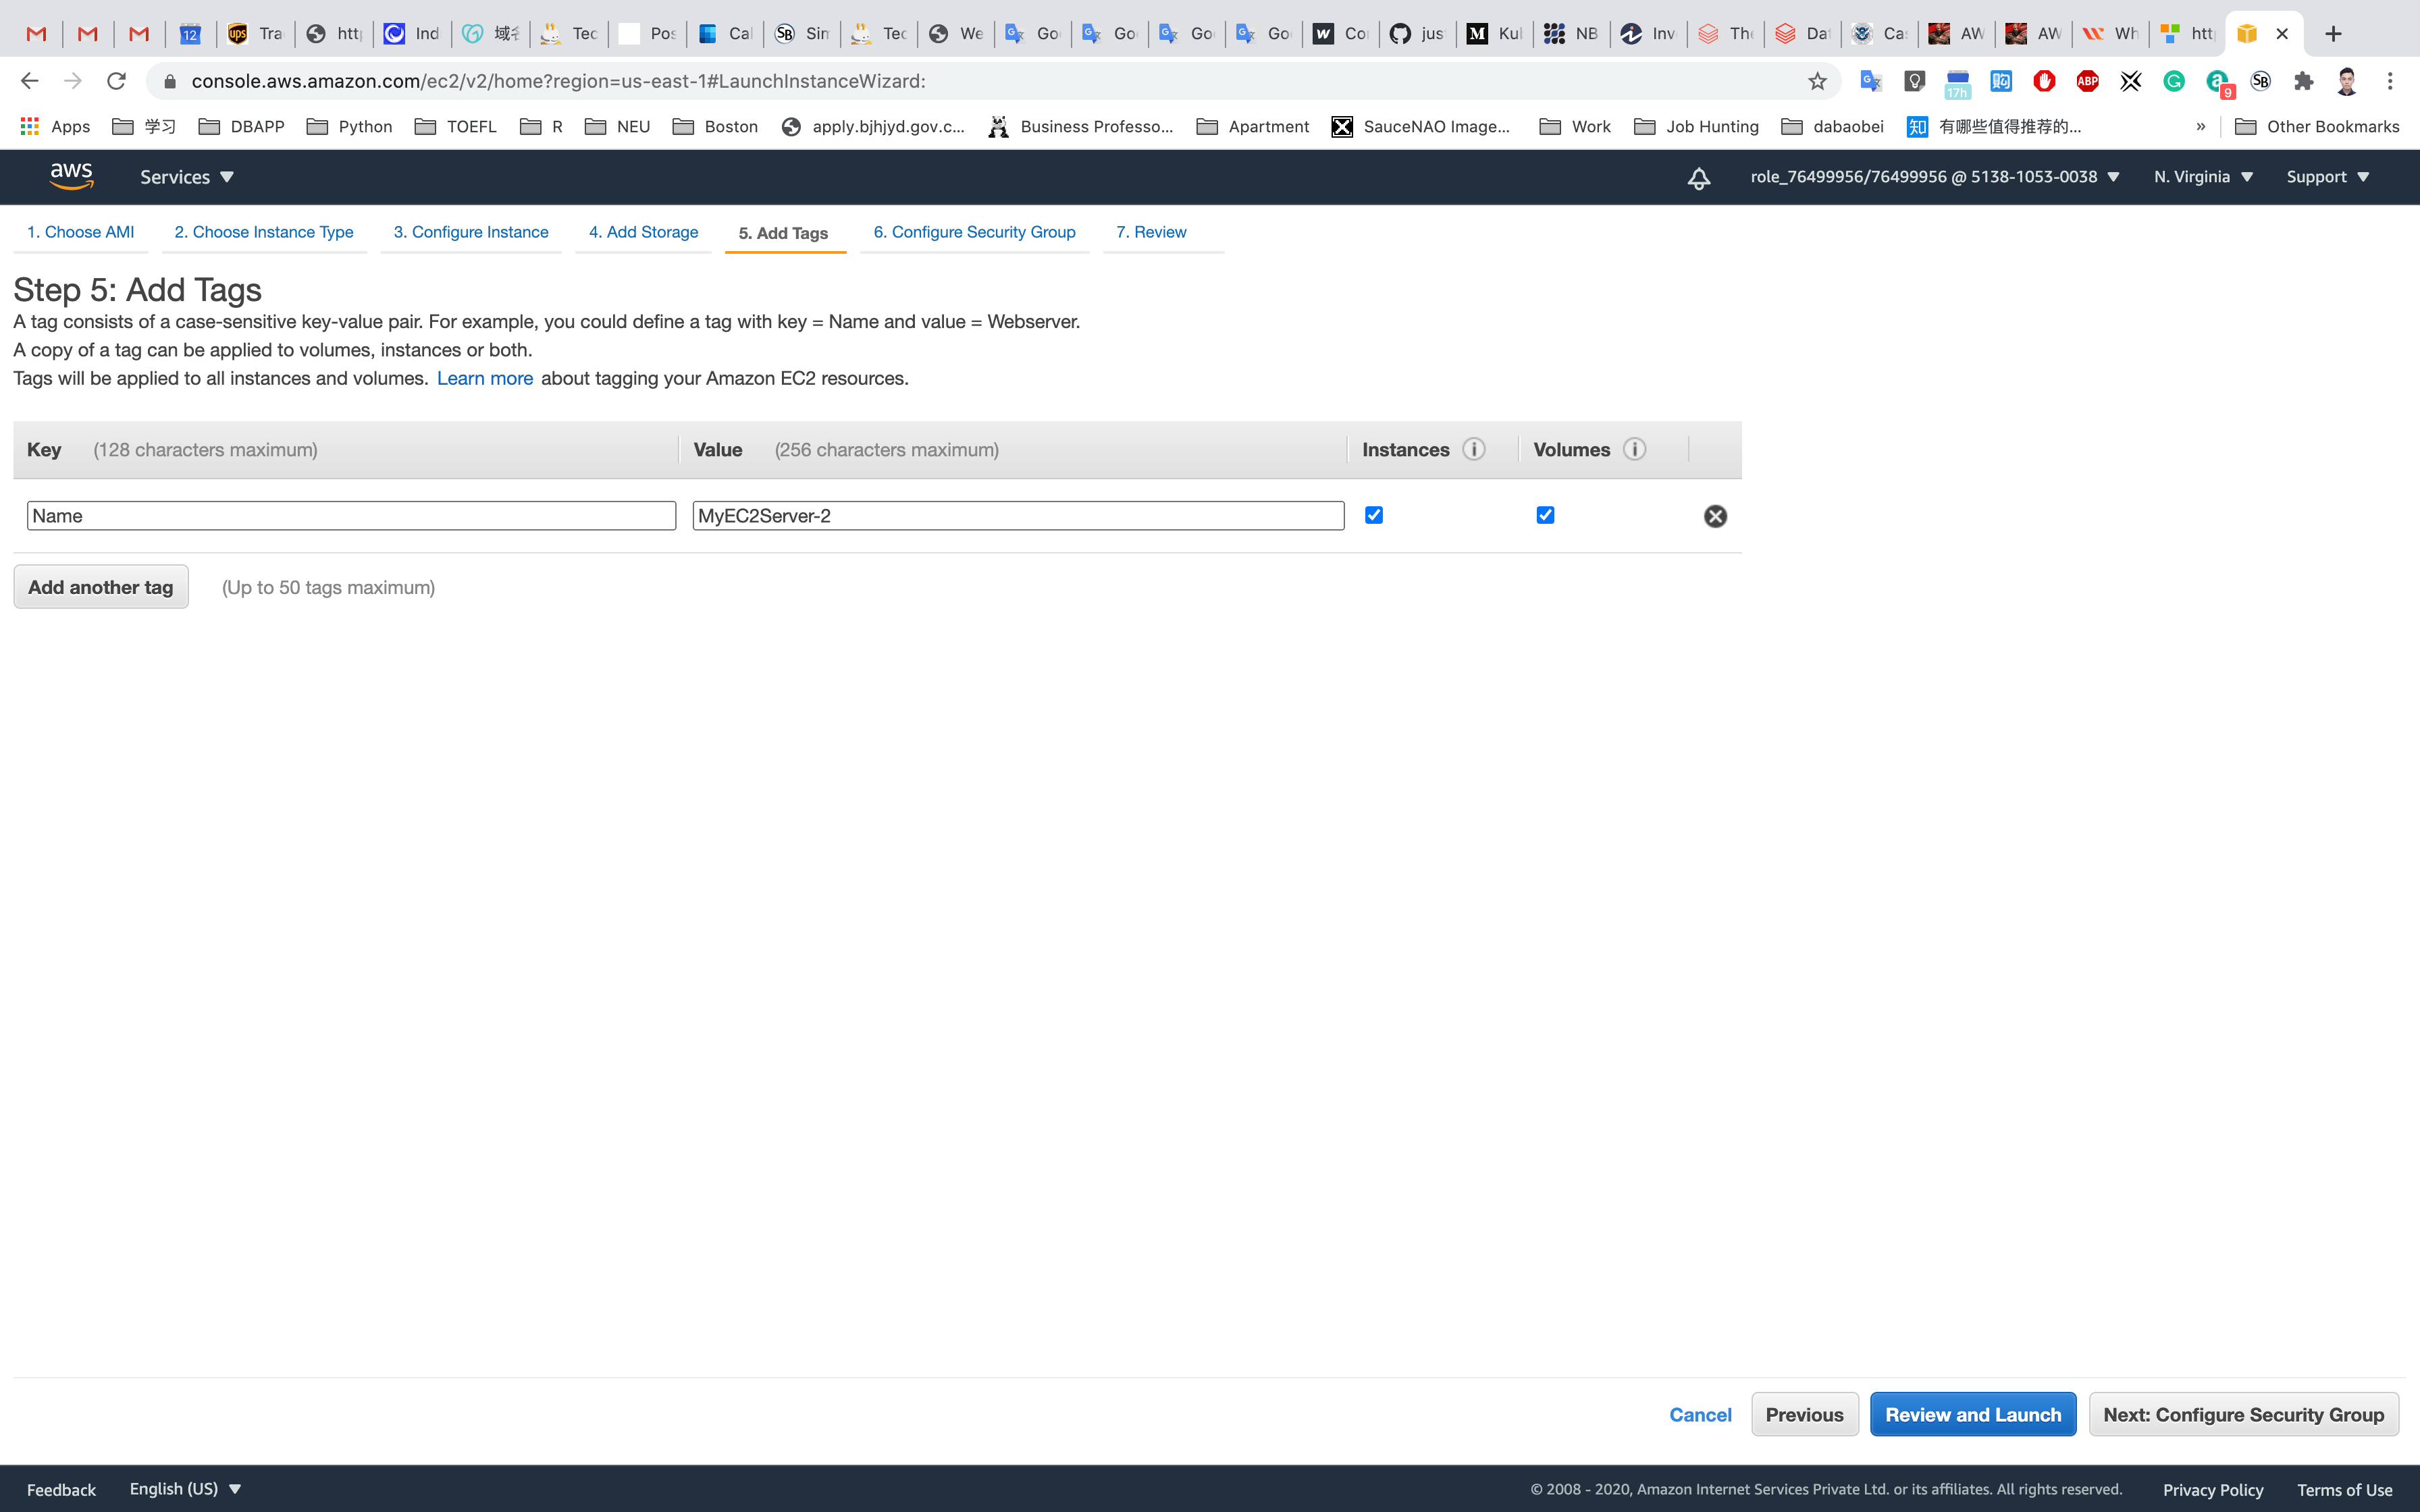
Step 5: Add Tags
Click on Add Tag
- Key:
Name - Value:
MyEC2Server-2
Click on Next: Configure Security Group
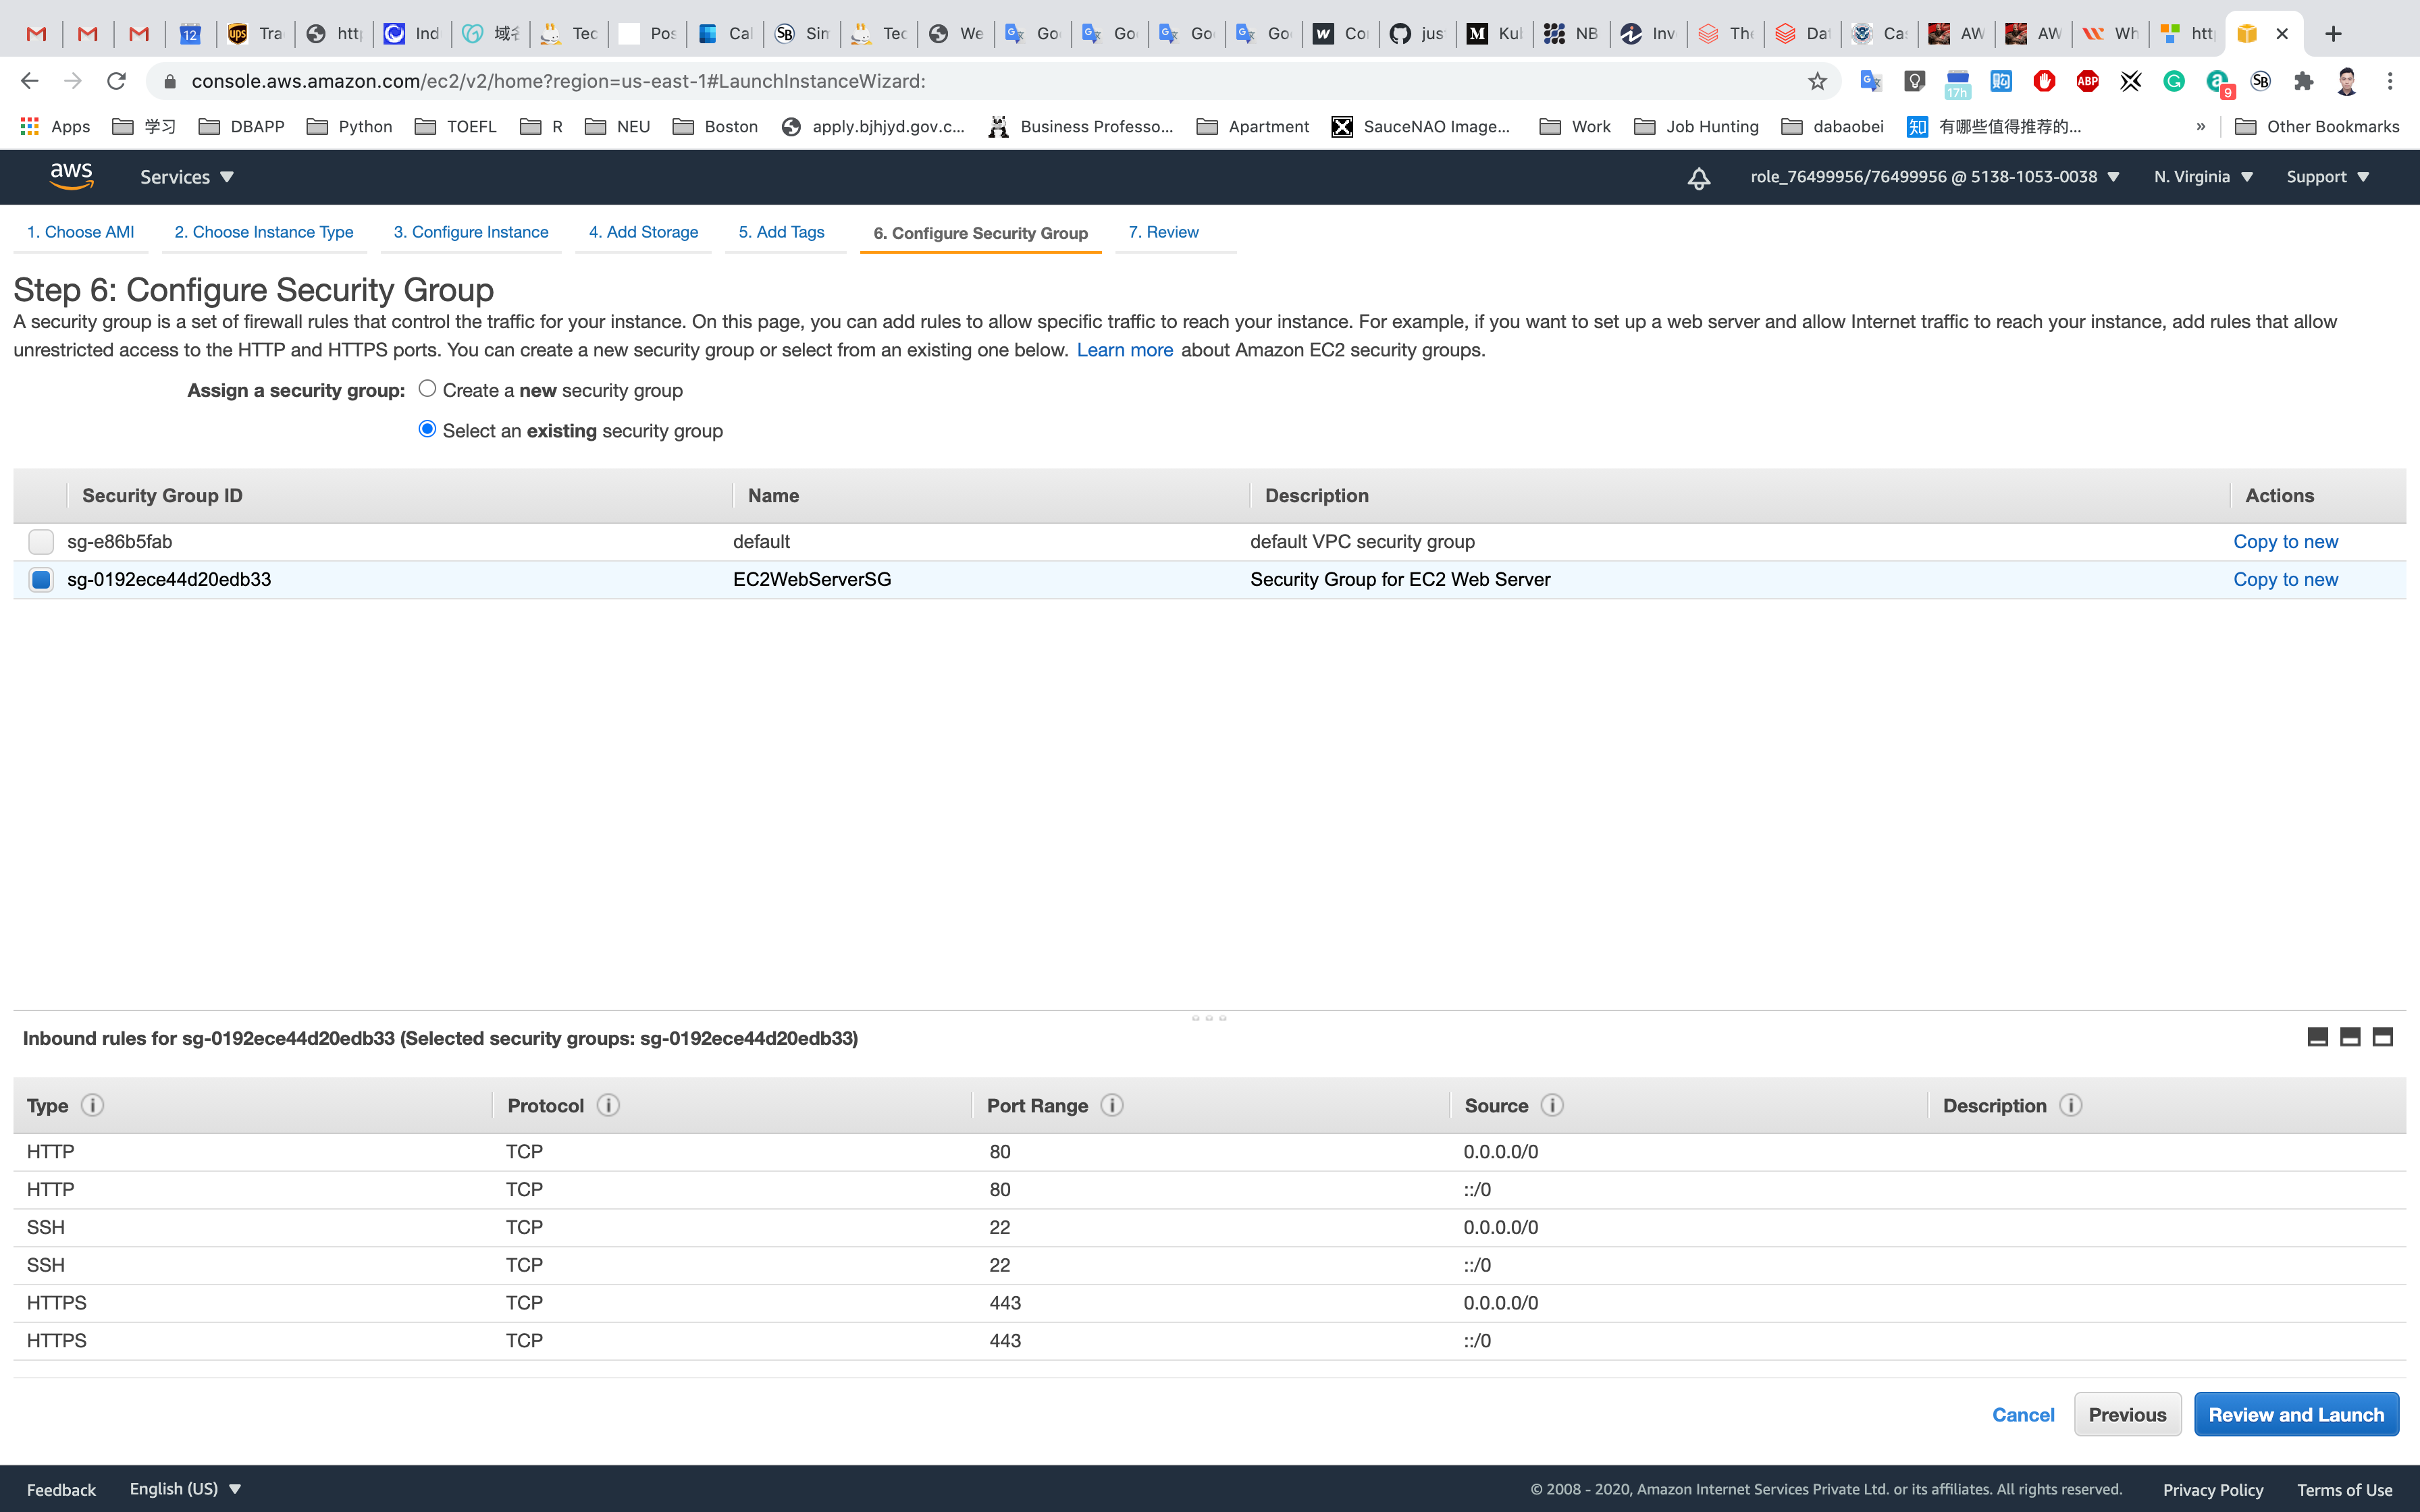
Step 6: Configure Security Group
Select Select an existing security group
- Select
EC2WebServerSG
Click on Review and Launch
Step 7: Review Instance Launch
Click on Launch
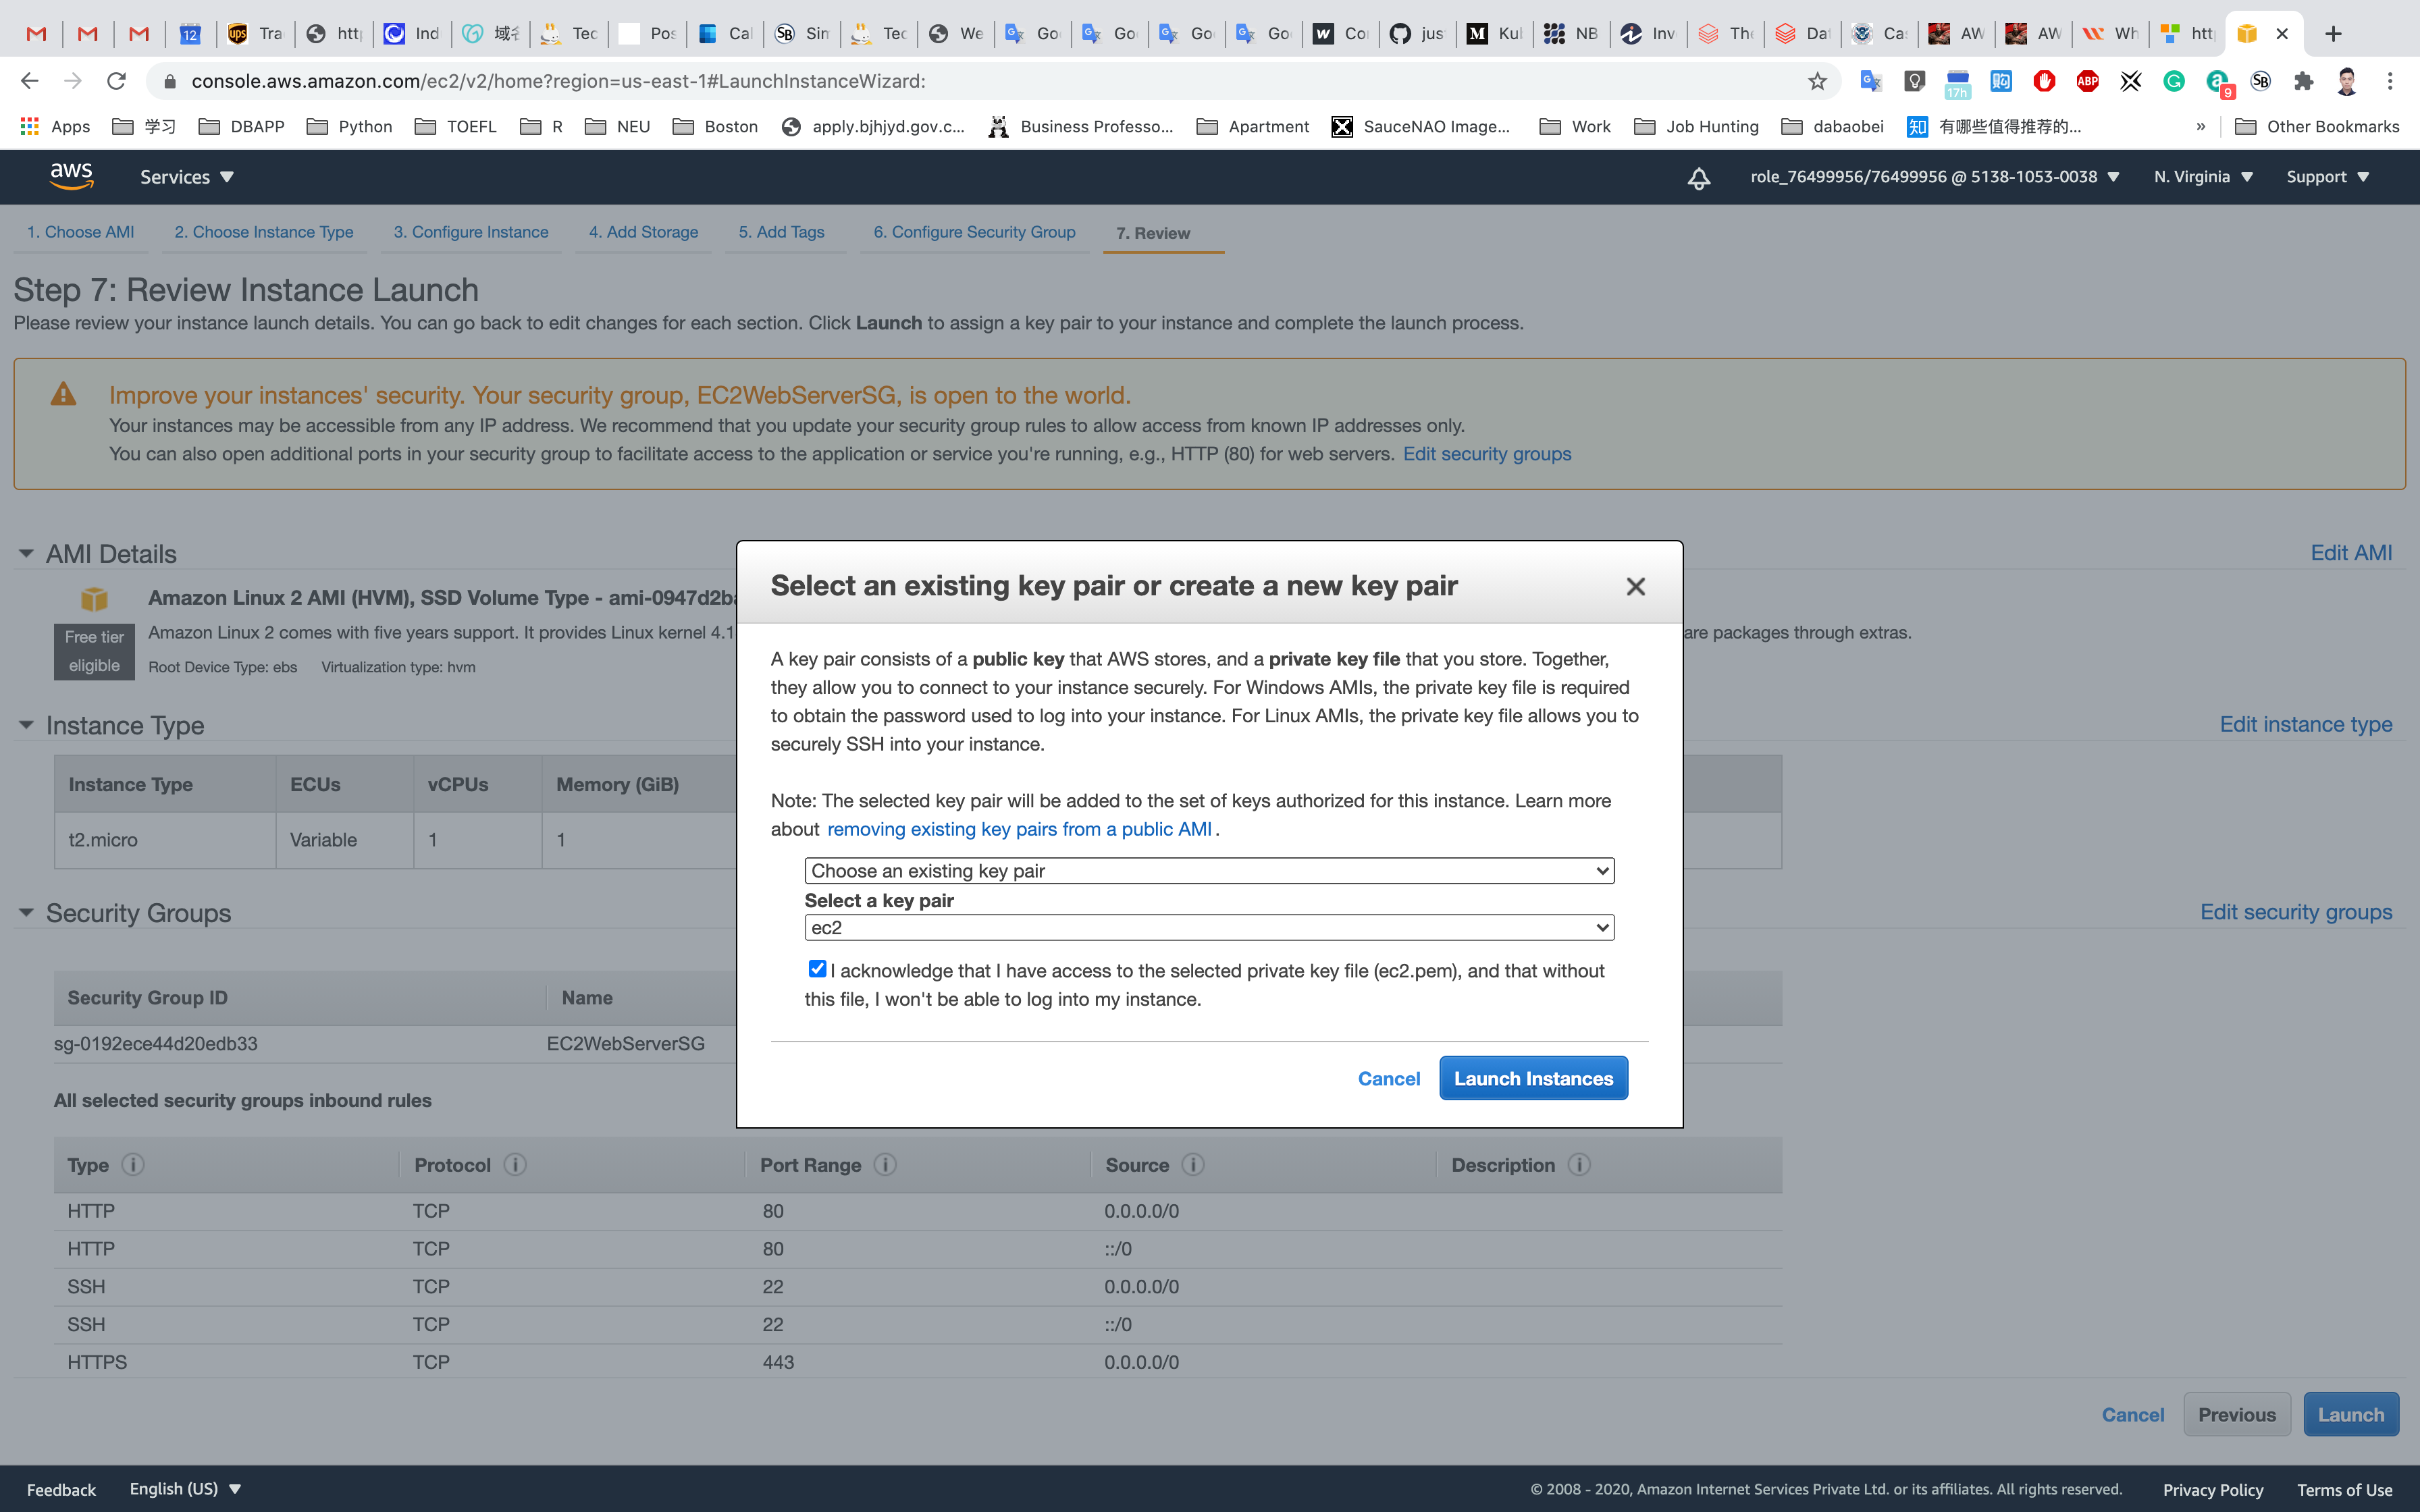
Select Choose an existing key pair
Select a key pair ec2
Check I acknowledge that I have access to the selected private key file (ec2.pem), and that without this file, I won't be able to log into my instance.
Click on Launch Instances
ELB Configuration
Creating the Load Balancer and Target Group
Services -> EC2
In the left side menu, scroll down to the bottom and select Load Balancers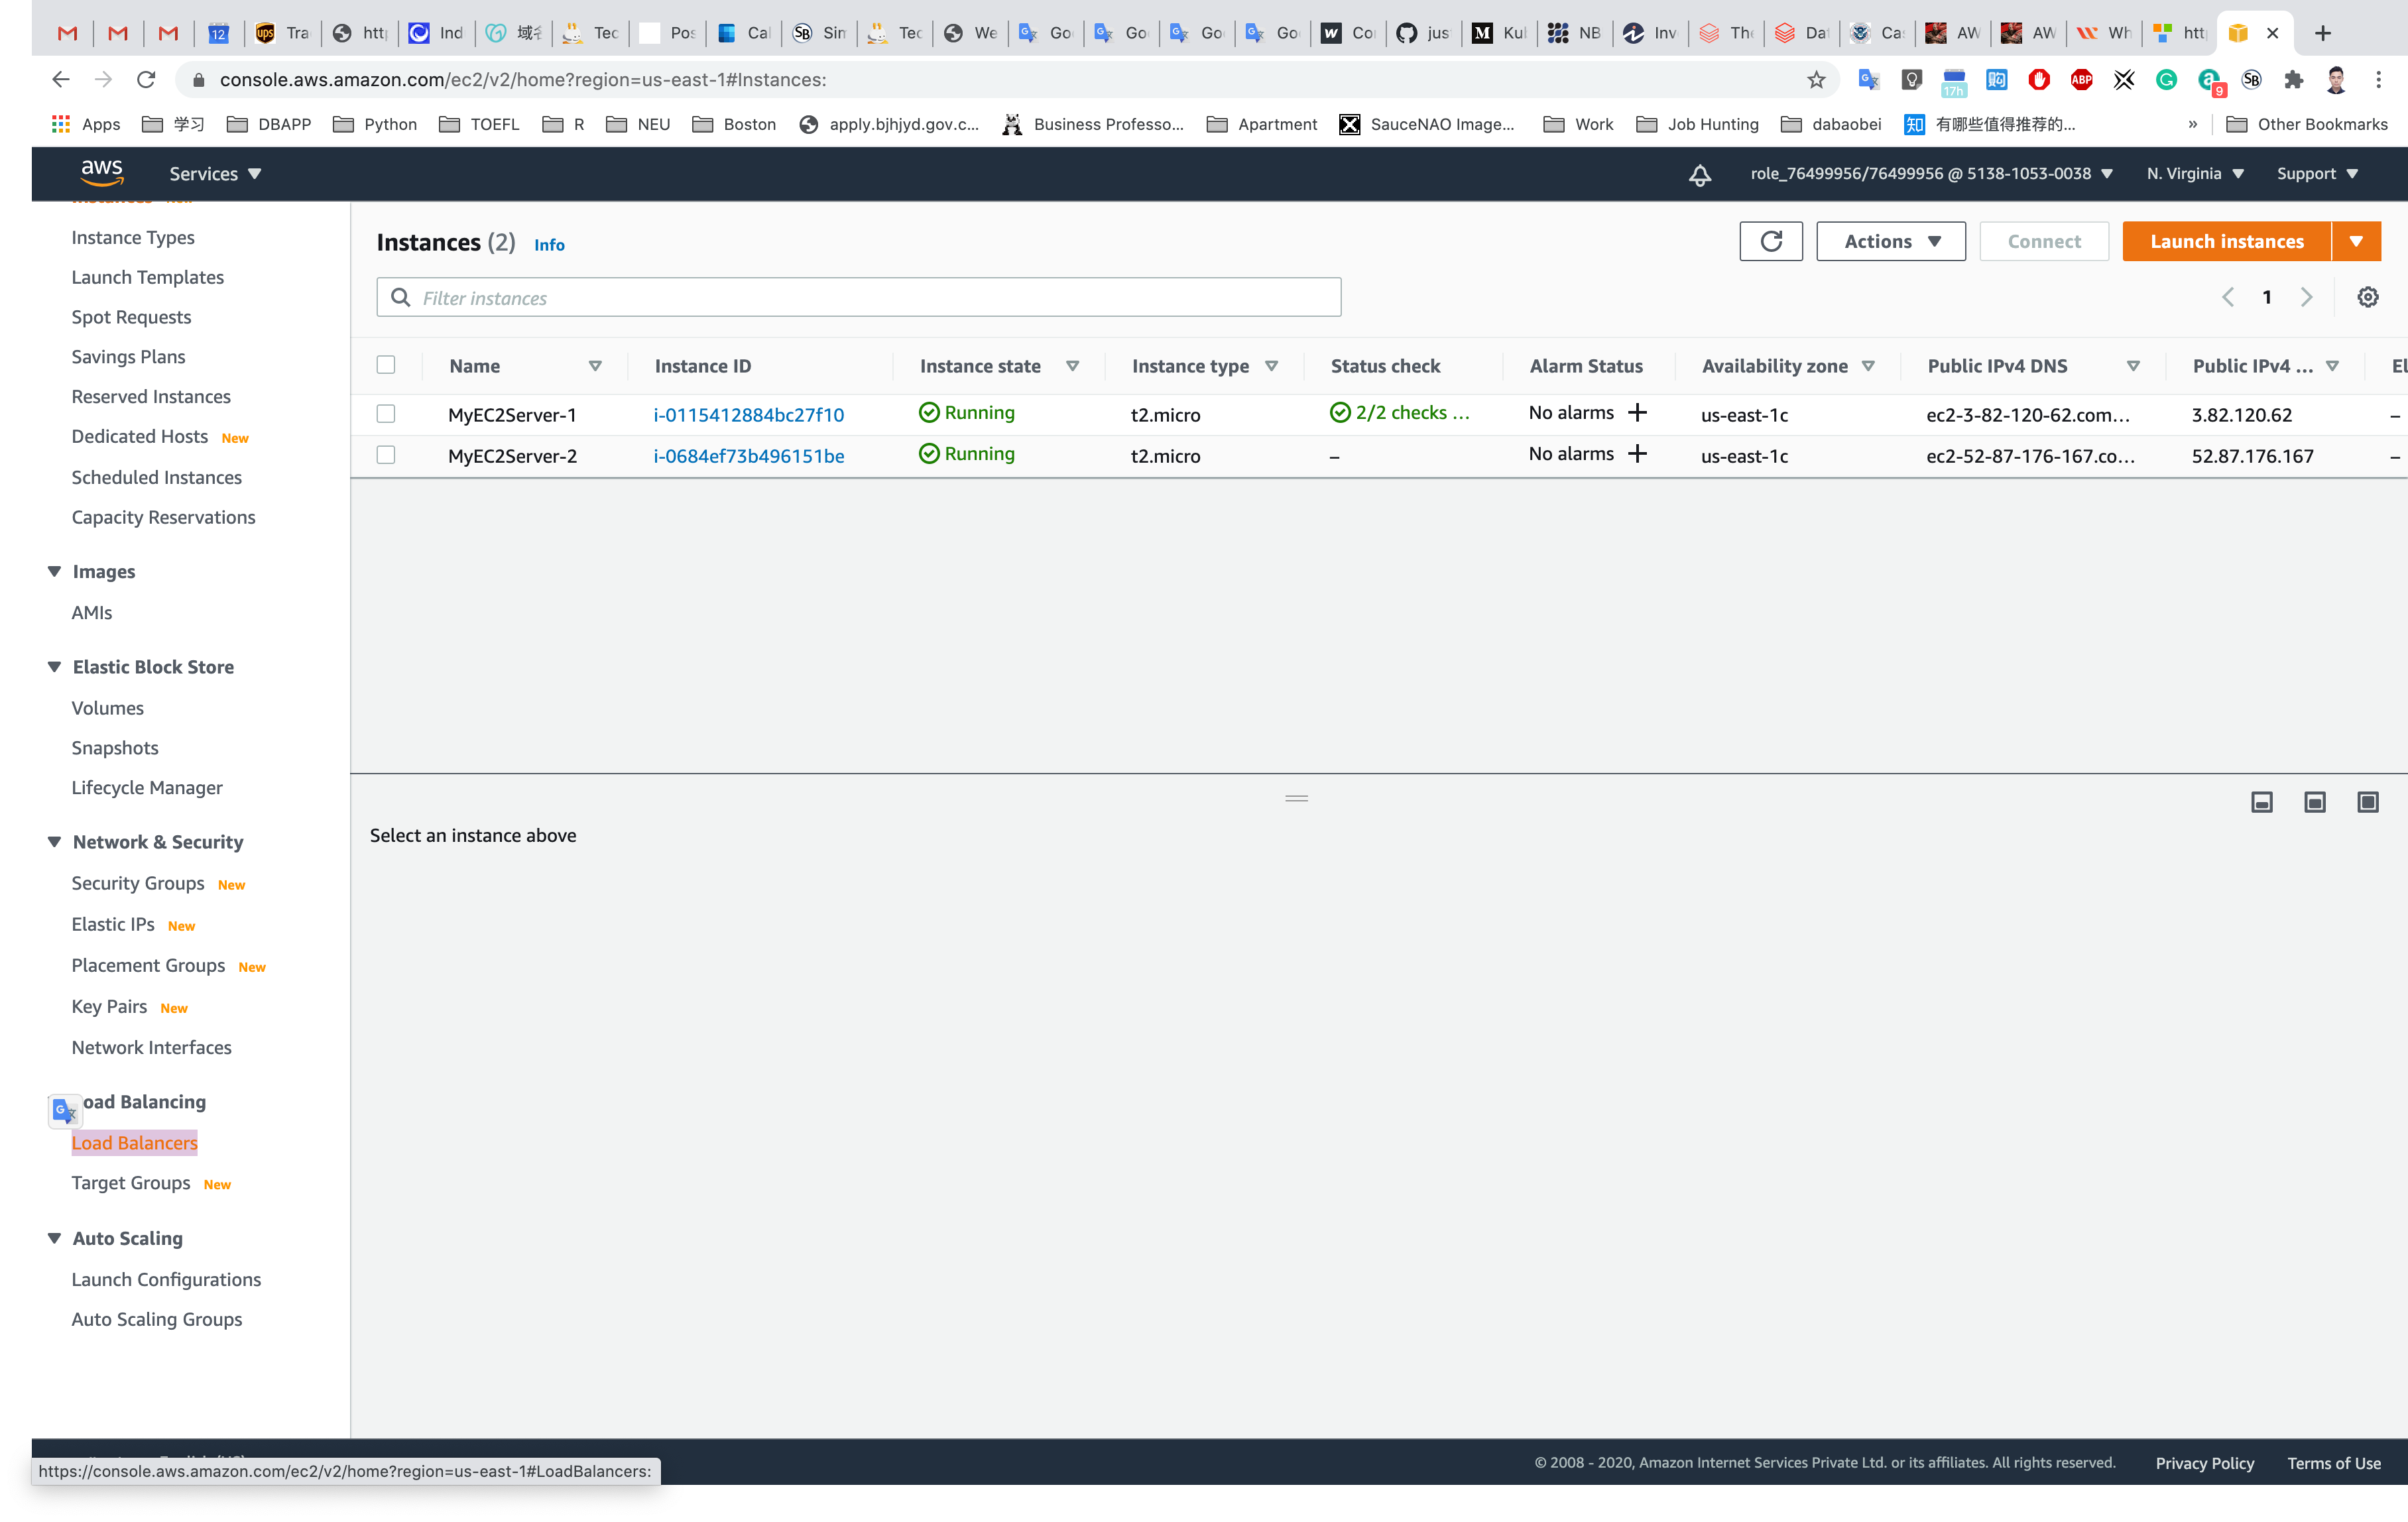
Click on Create Load Balancer.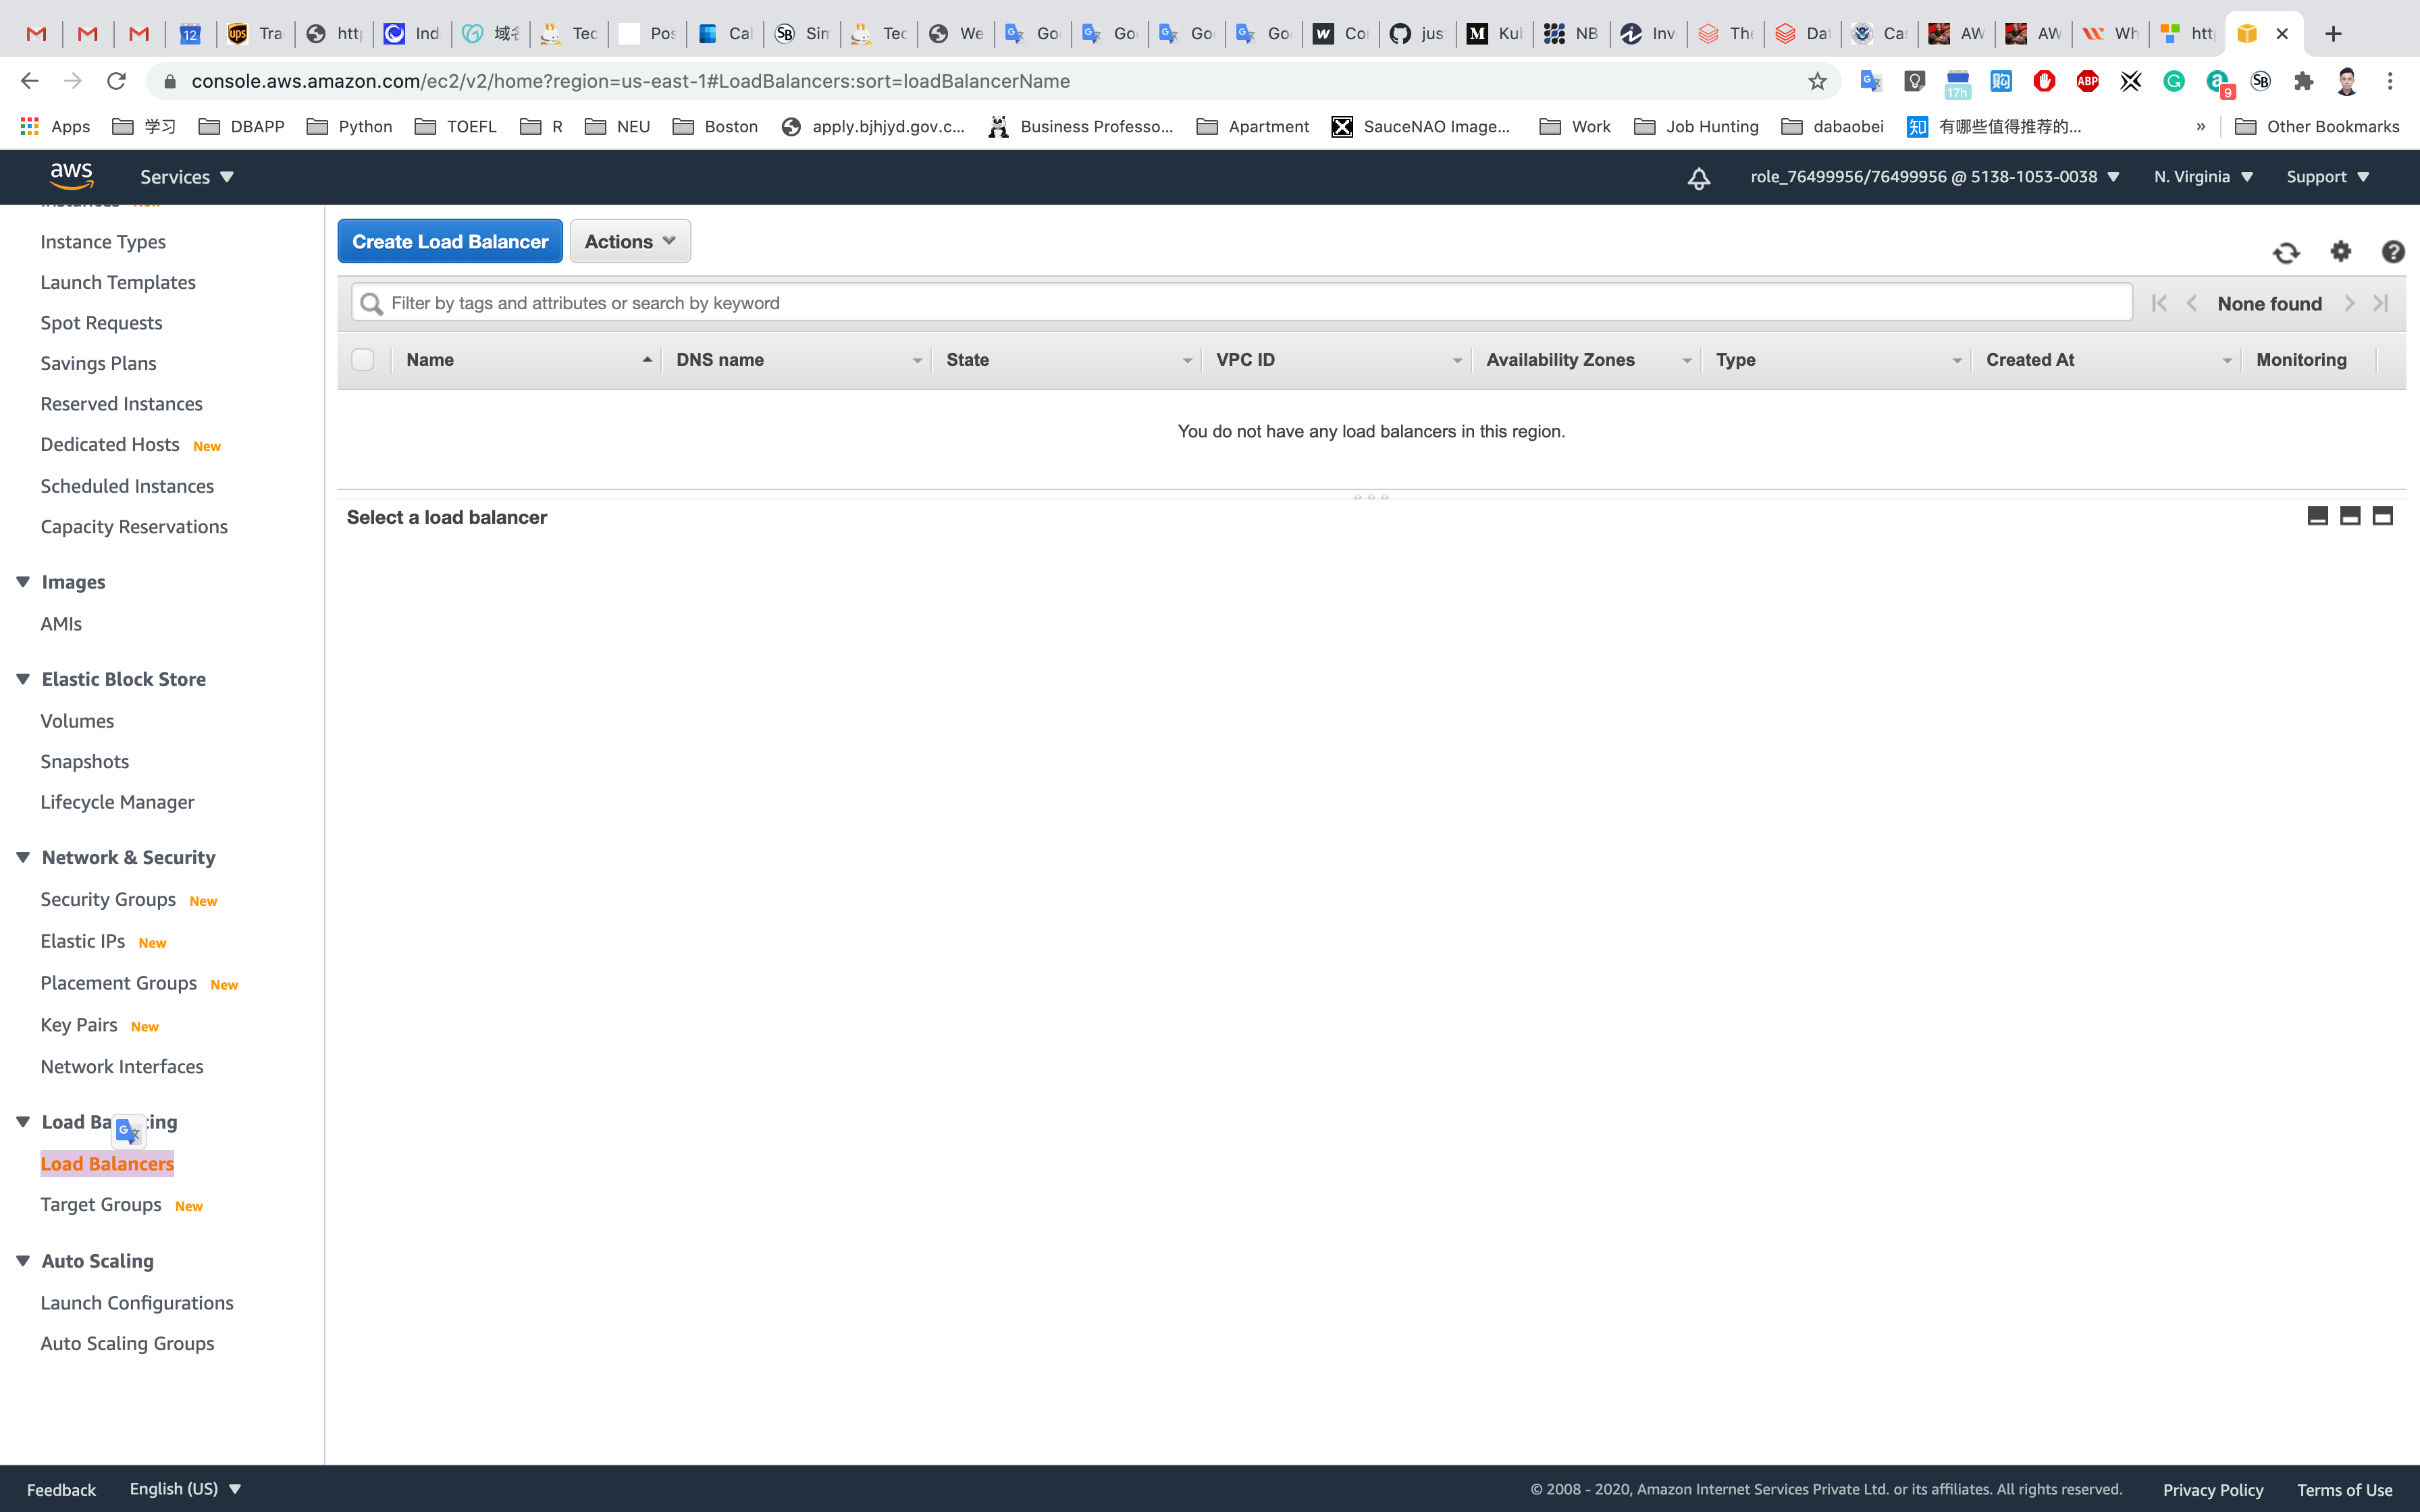
Select Load Balancer Type: Under the Application Load Balancer, click on Create.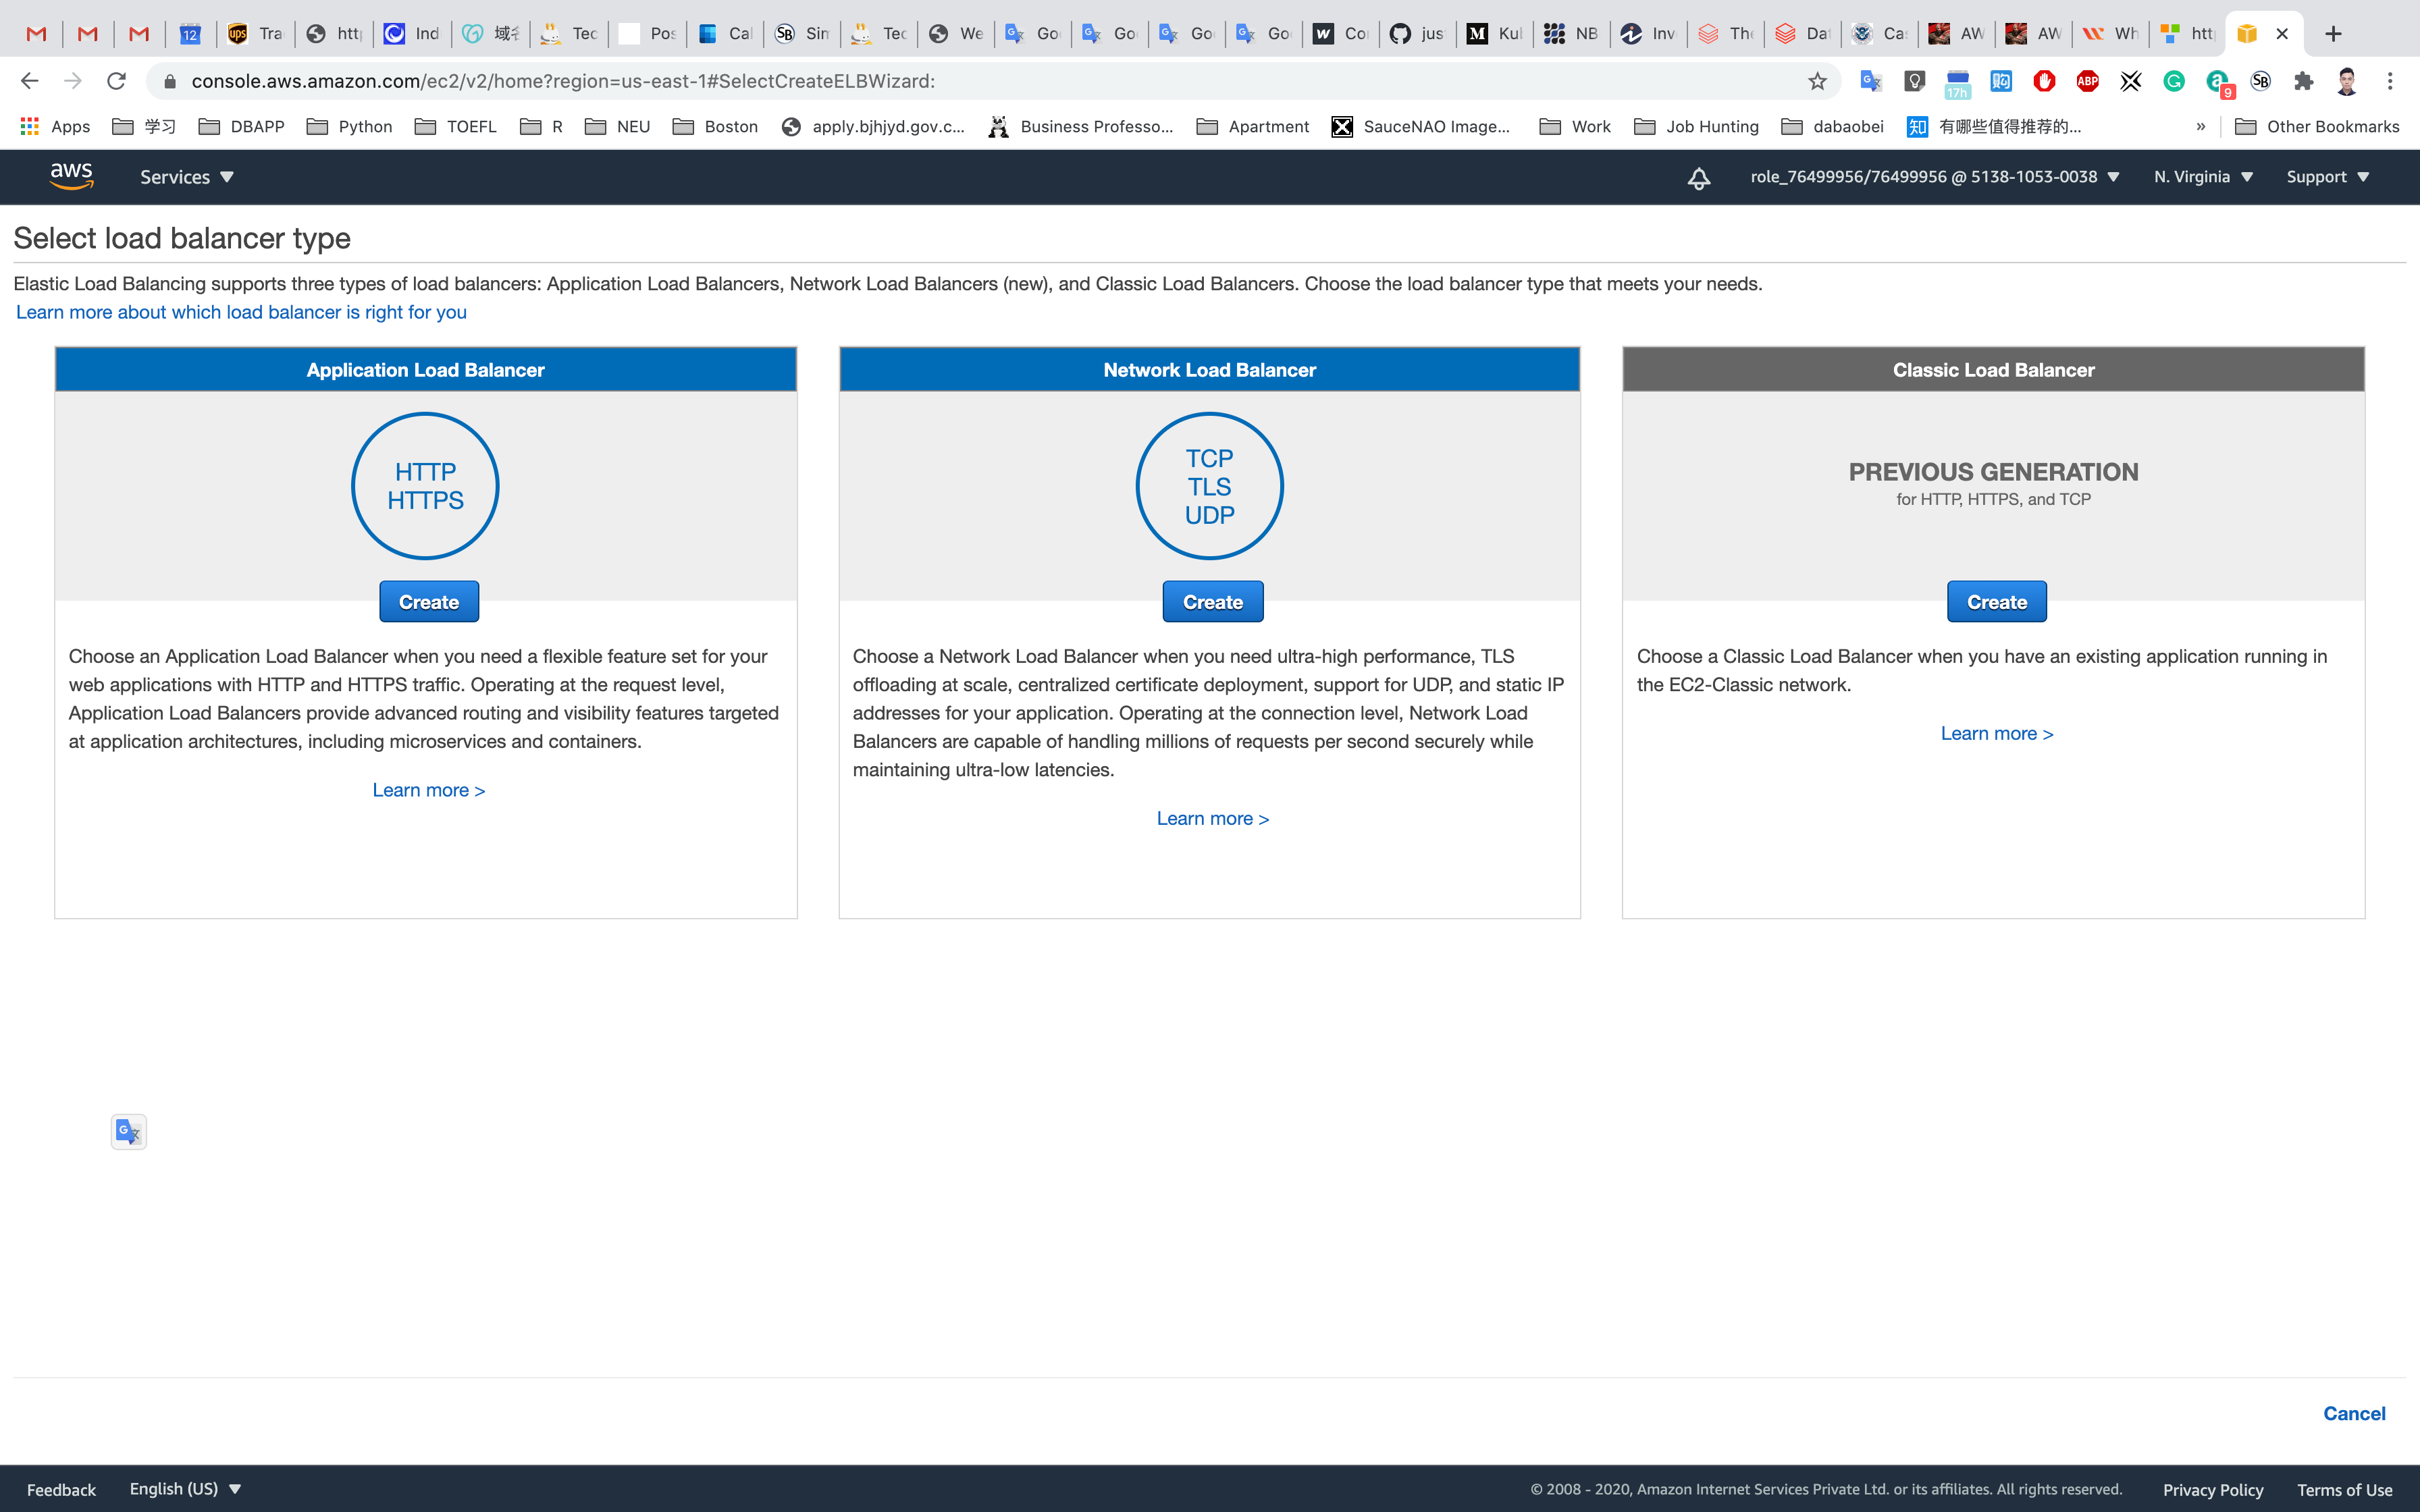
The next five screens will require some custom configurations. If a field is not mentioned, leave it as default or empty.
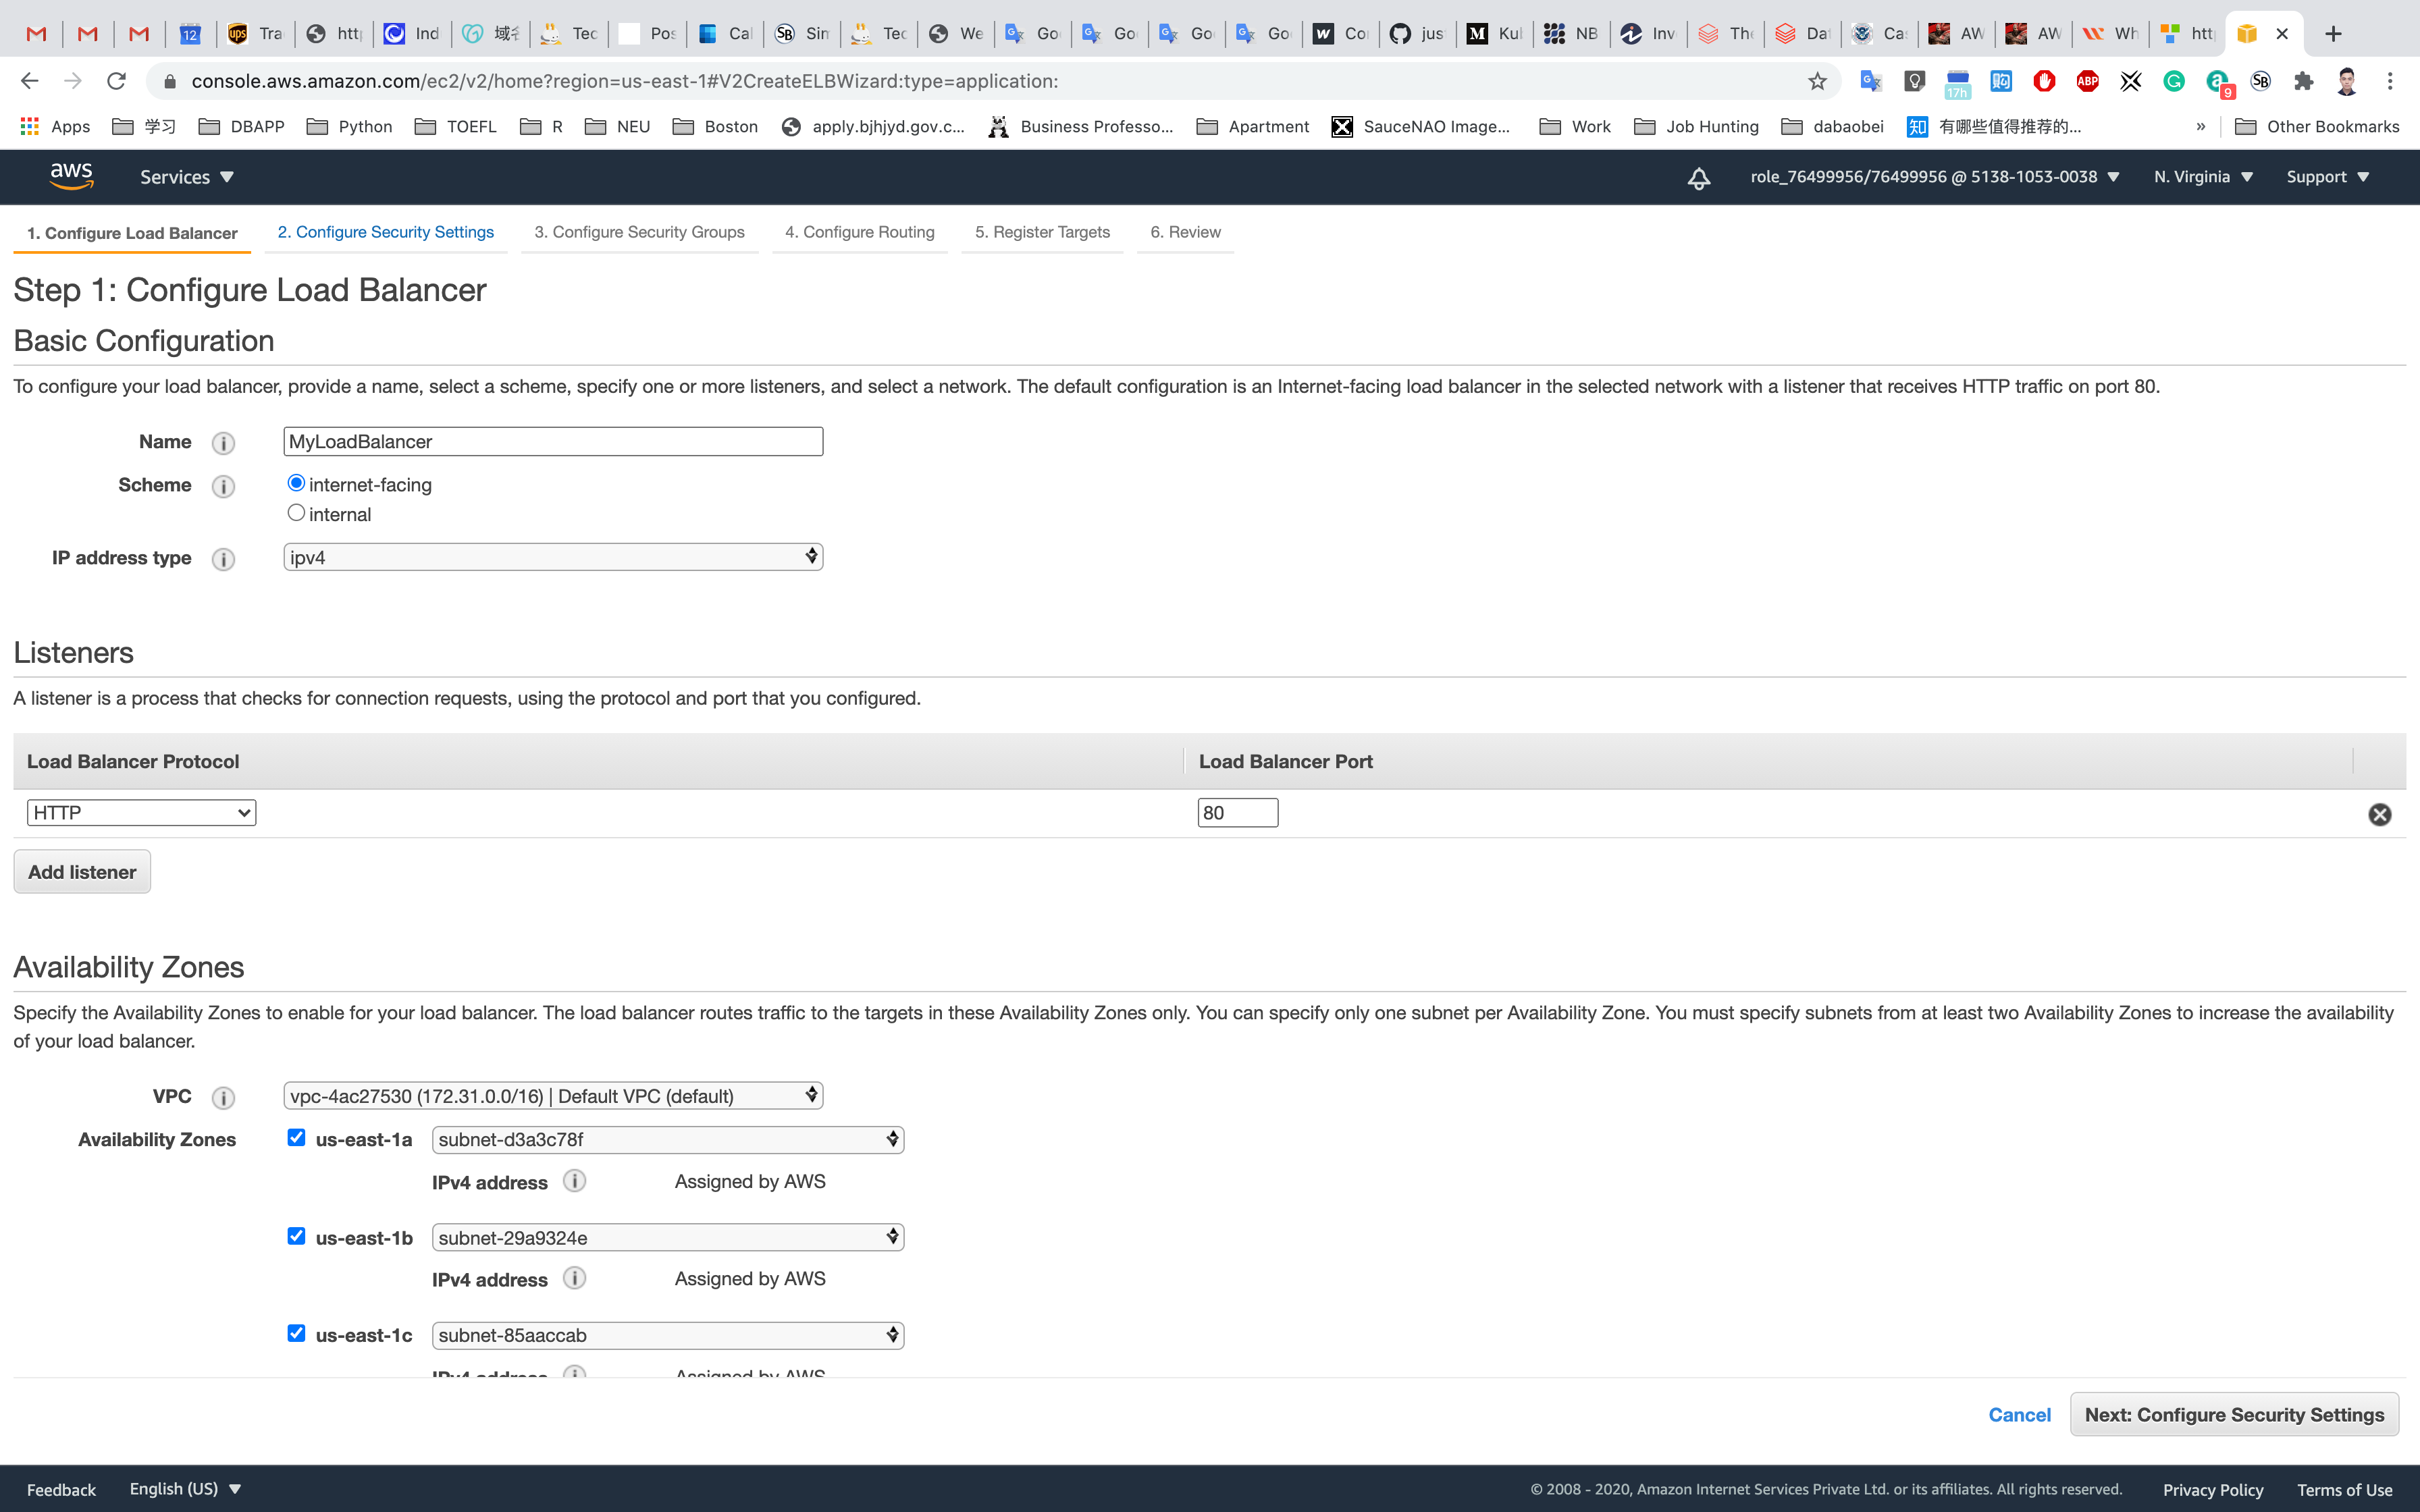
- Configure Load Balancer:
- Name:
MyLoadBalancer - Scheme: Select
internet-facing(an Internet-facing load balancer routes requests from clients over the Internet to targets). - IP address type:
IPv4 - Listeners:
- Load Balancer Protocol :
HTTP - Load Balancer Port :
80
- Load Balancer Protocol :
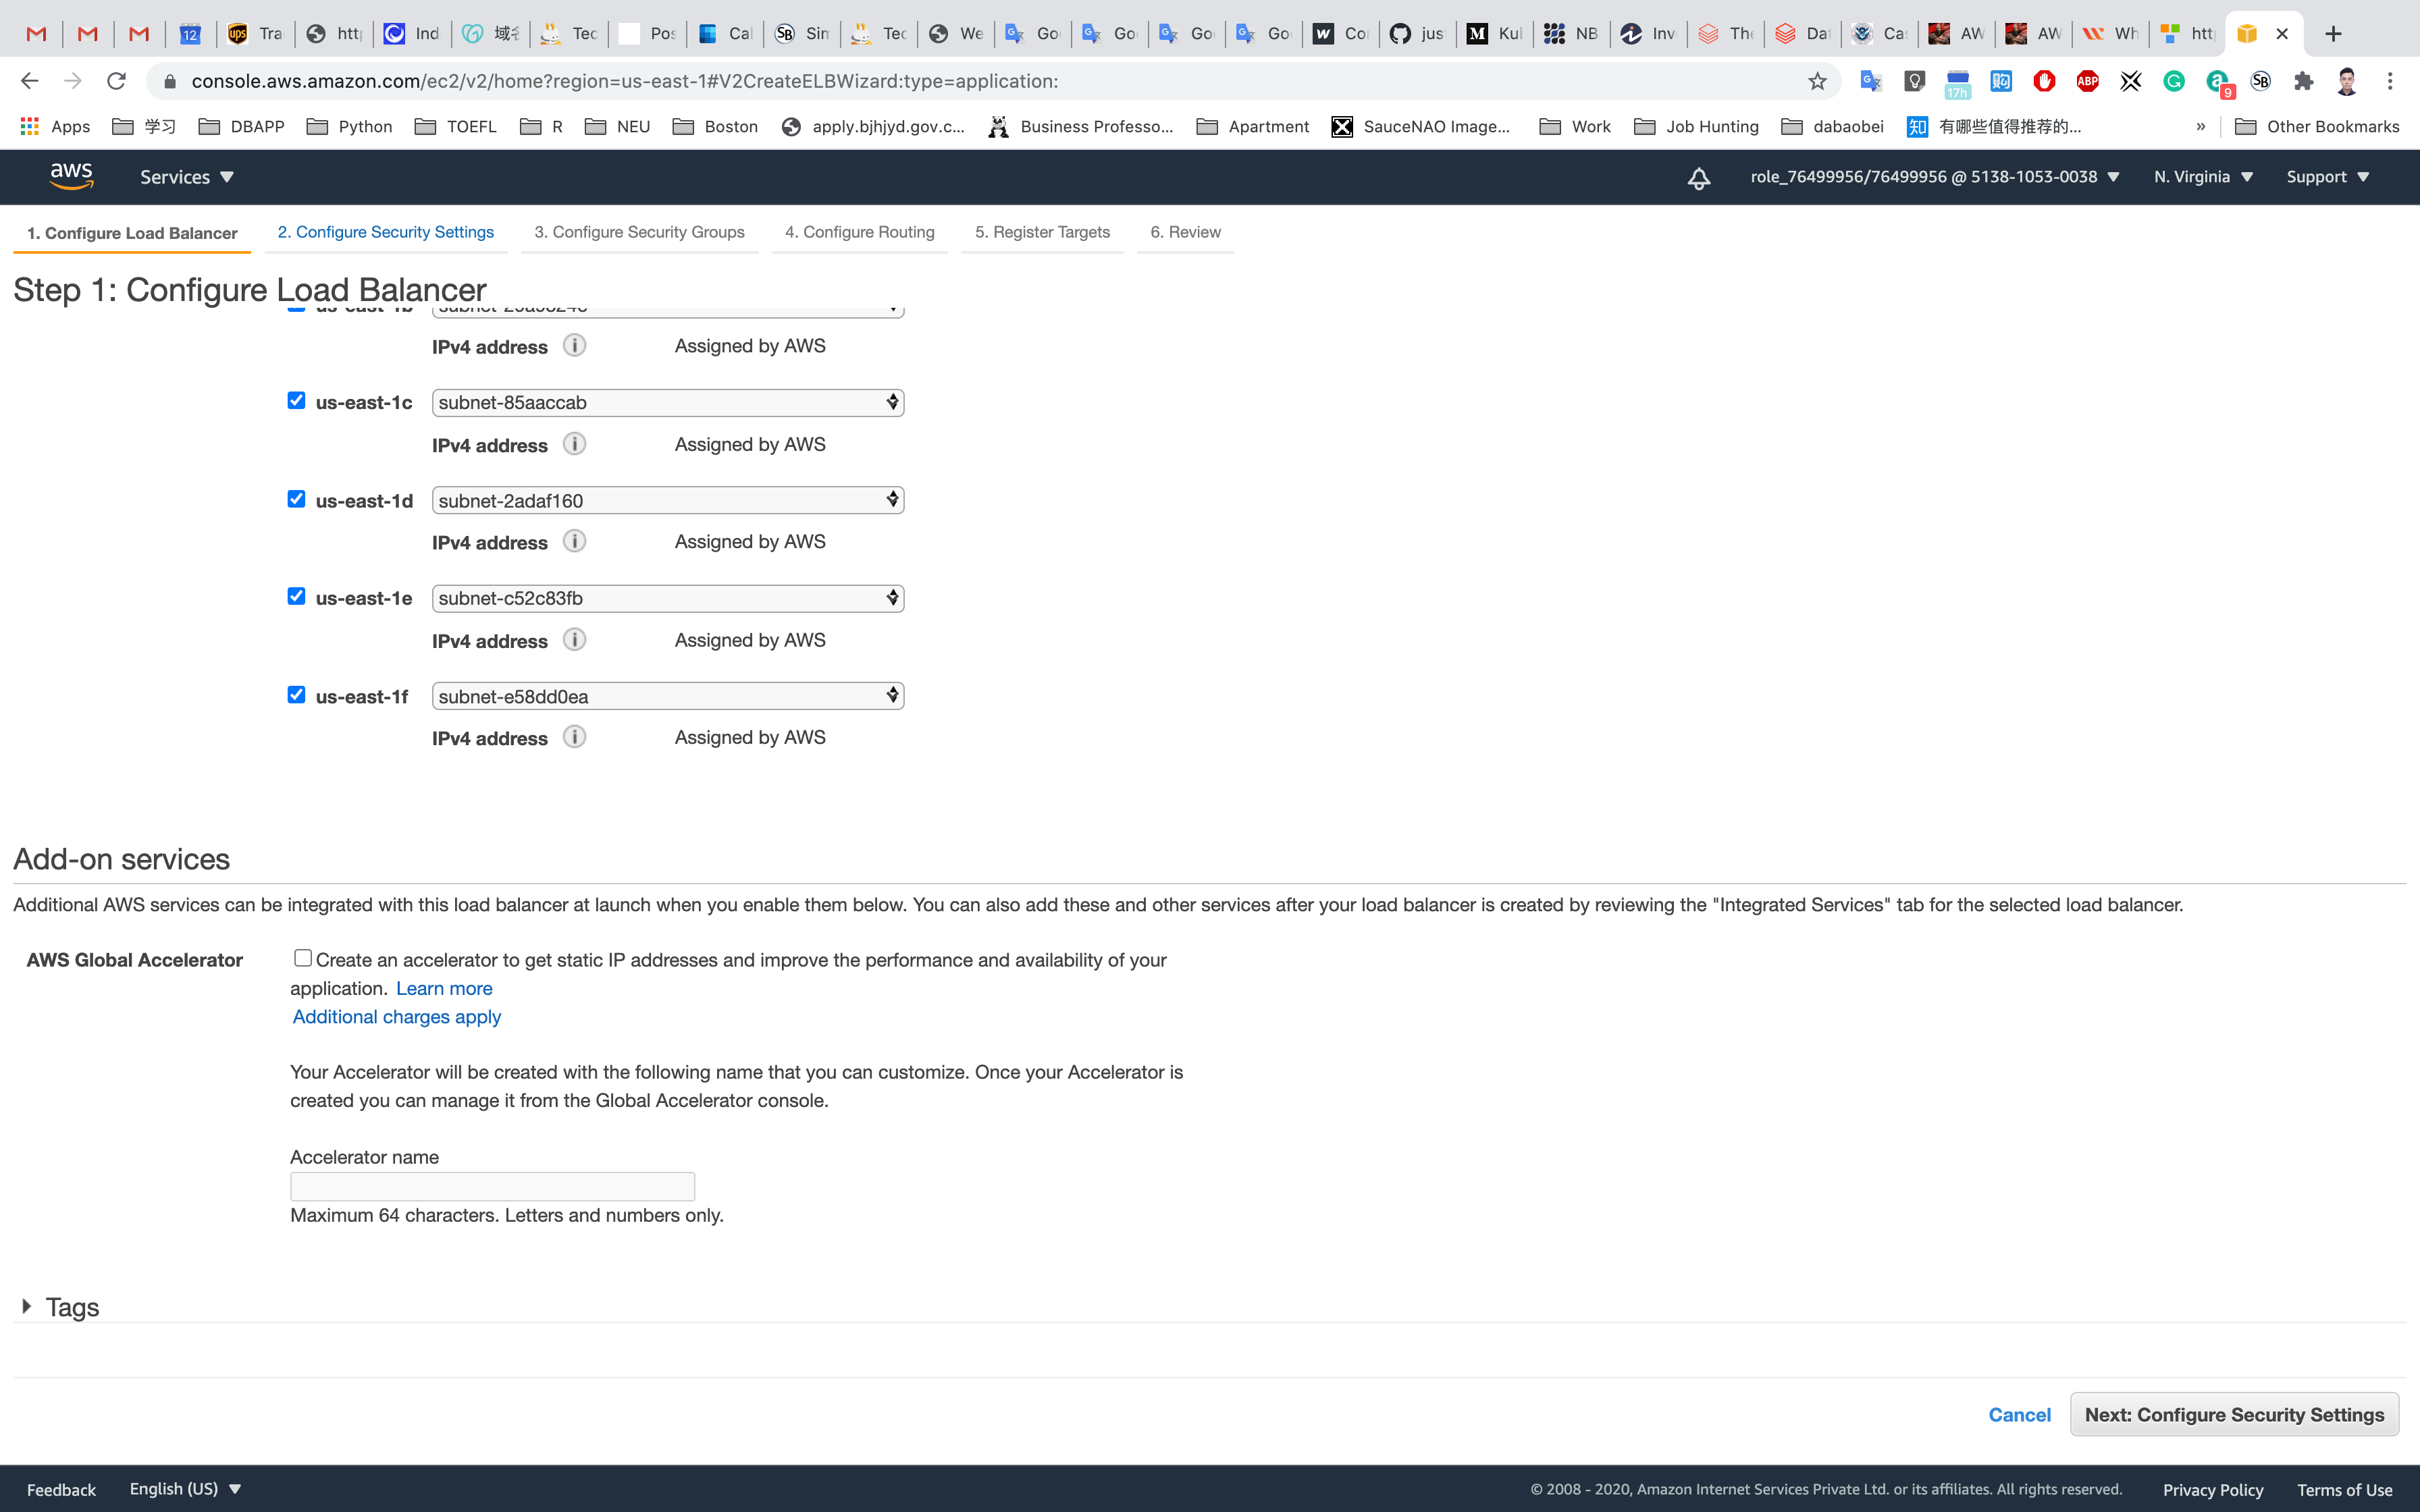
- VPC:
default VPC - Availability zones: Select all available zones using the checkbox.
- Note: Don’t forget to select the subnet and don’t select the PRIVATE subnet.
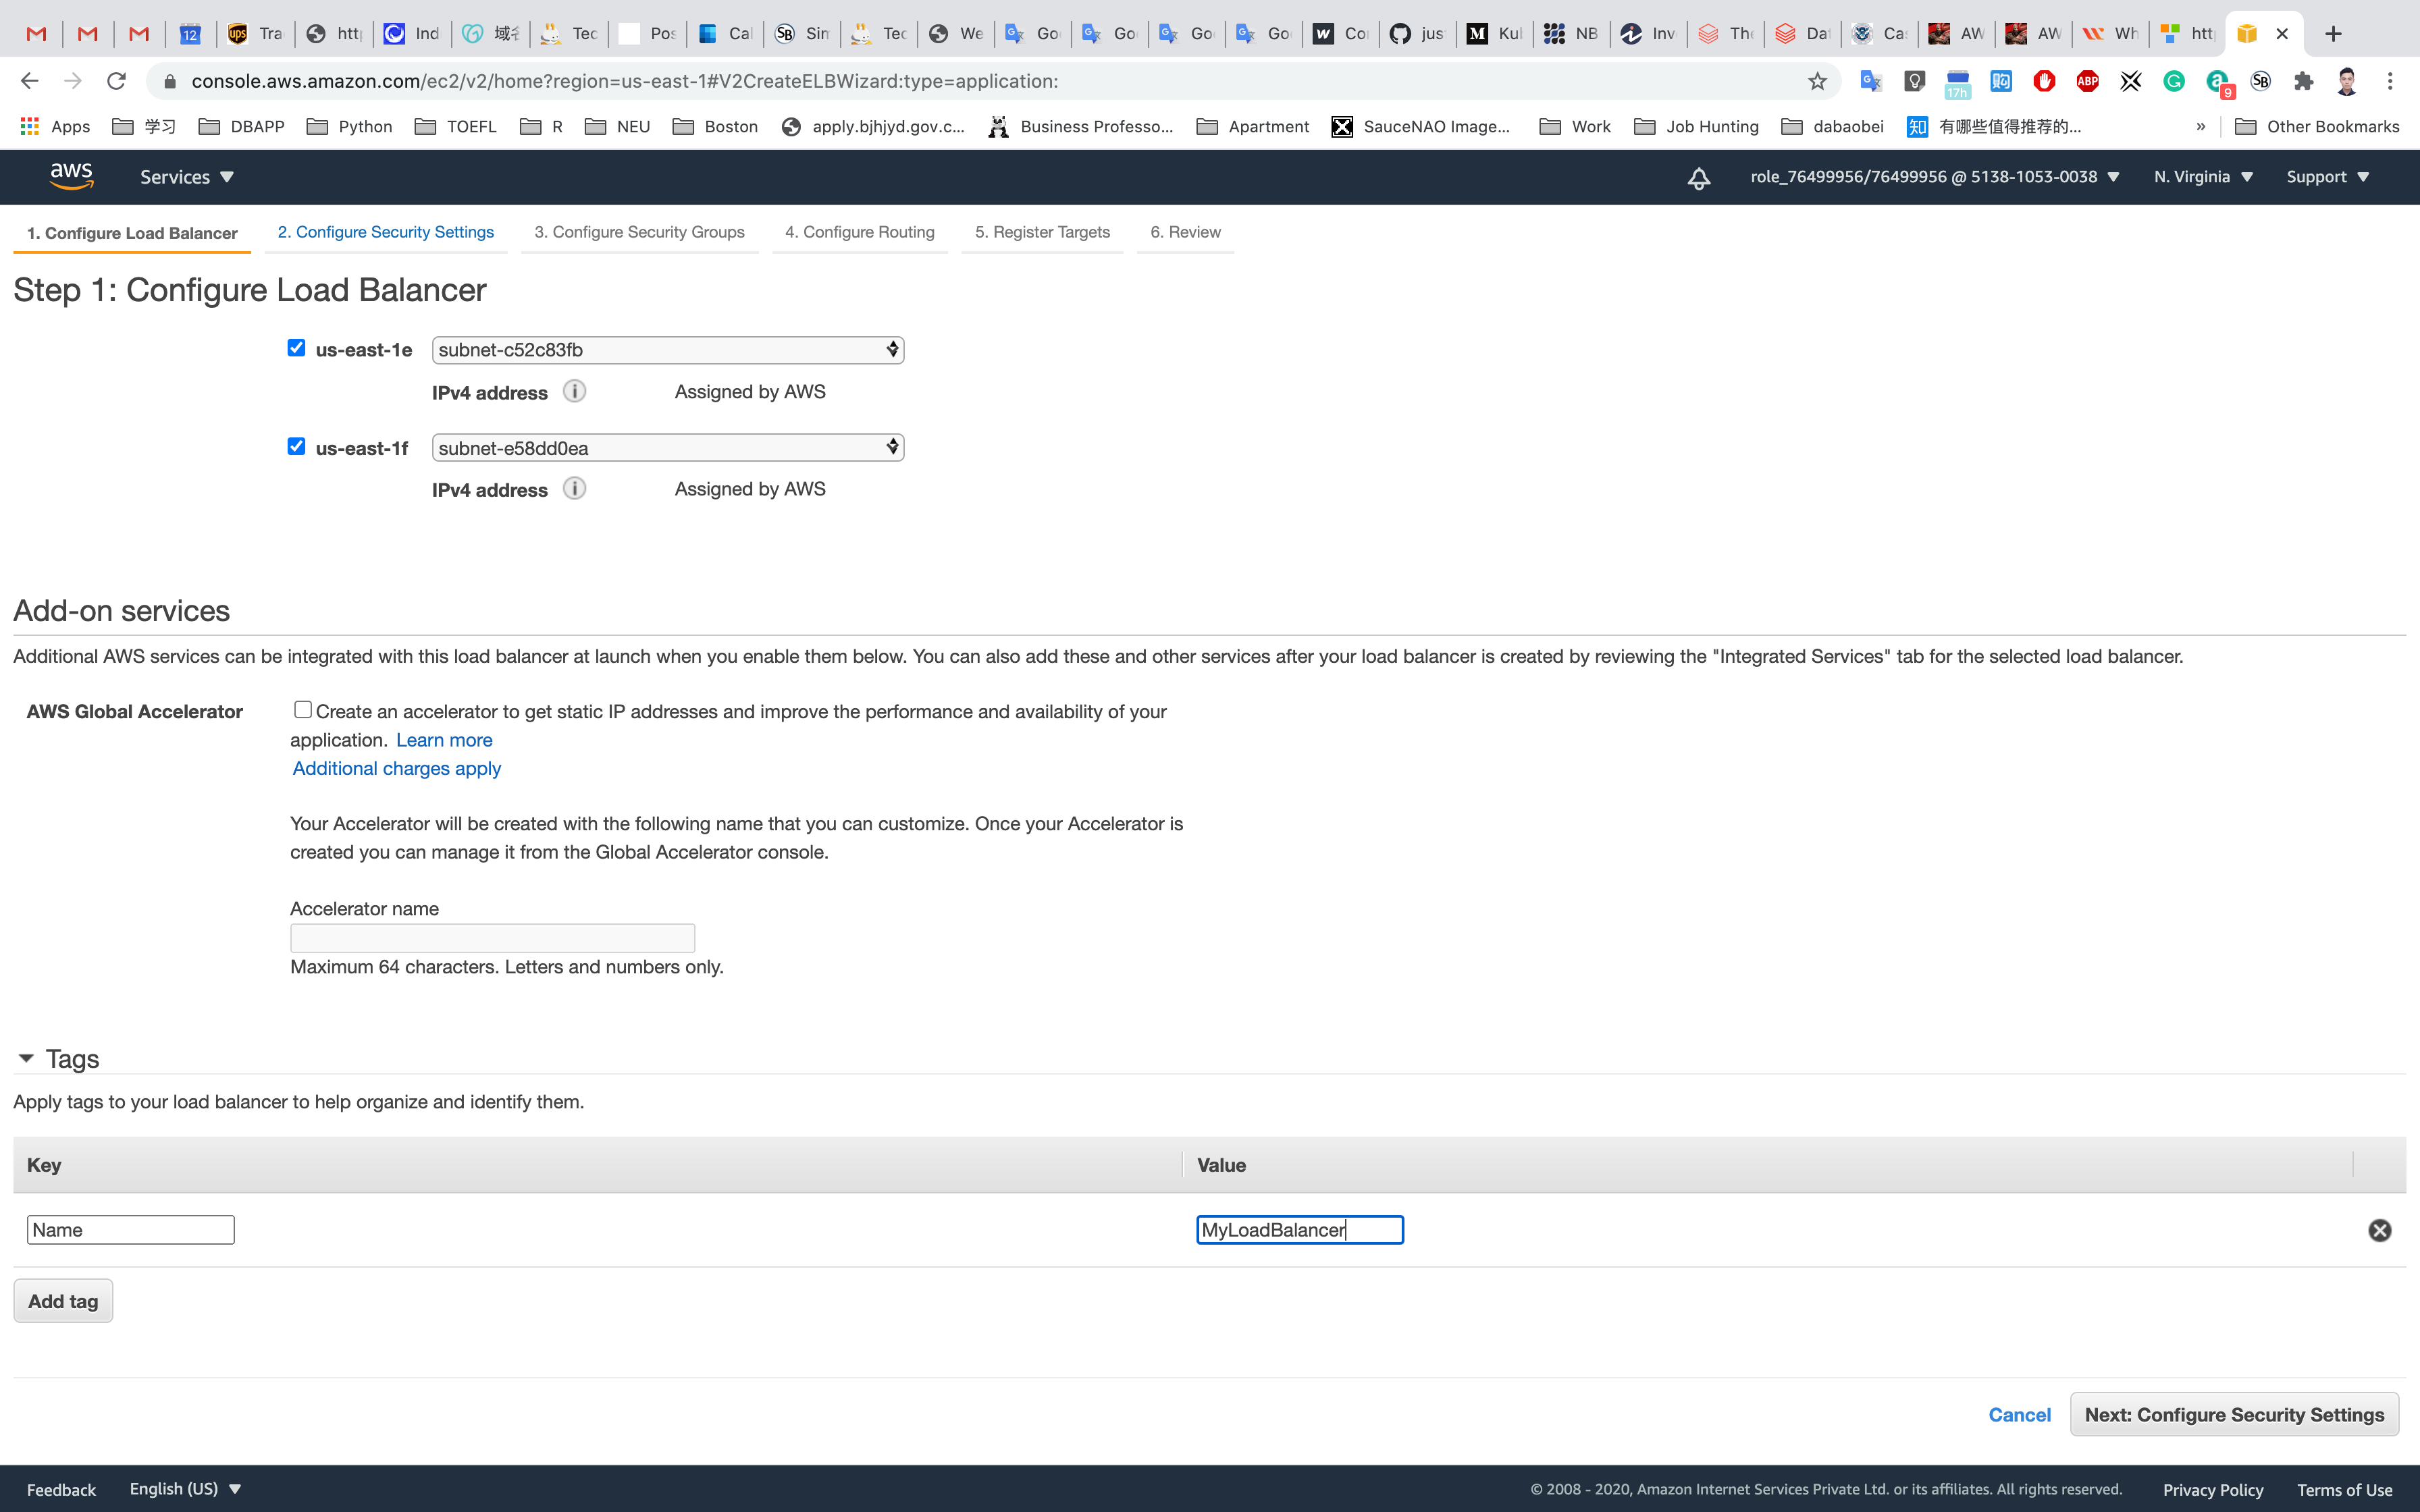
- Tags:
- Key :
Name - Value :
MyLoadBalancer
- Key :
- Name:
Select on Next: Configure Security Settings
No Changes needed, leave the warning on top. Then click on Next: Configure Security Groups.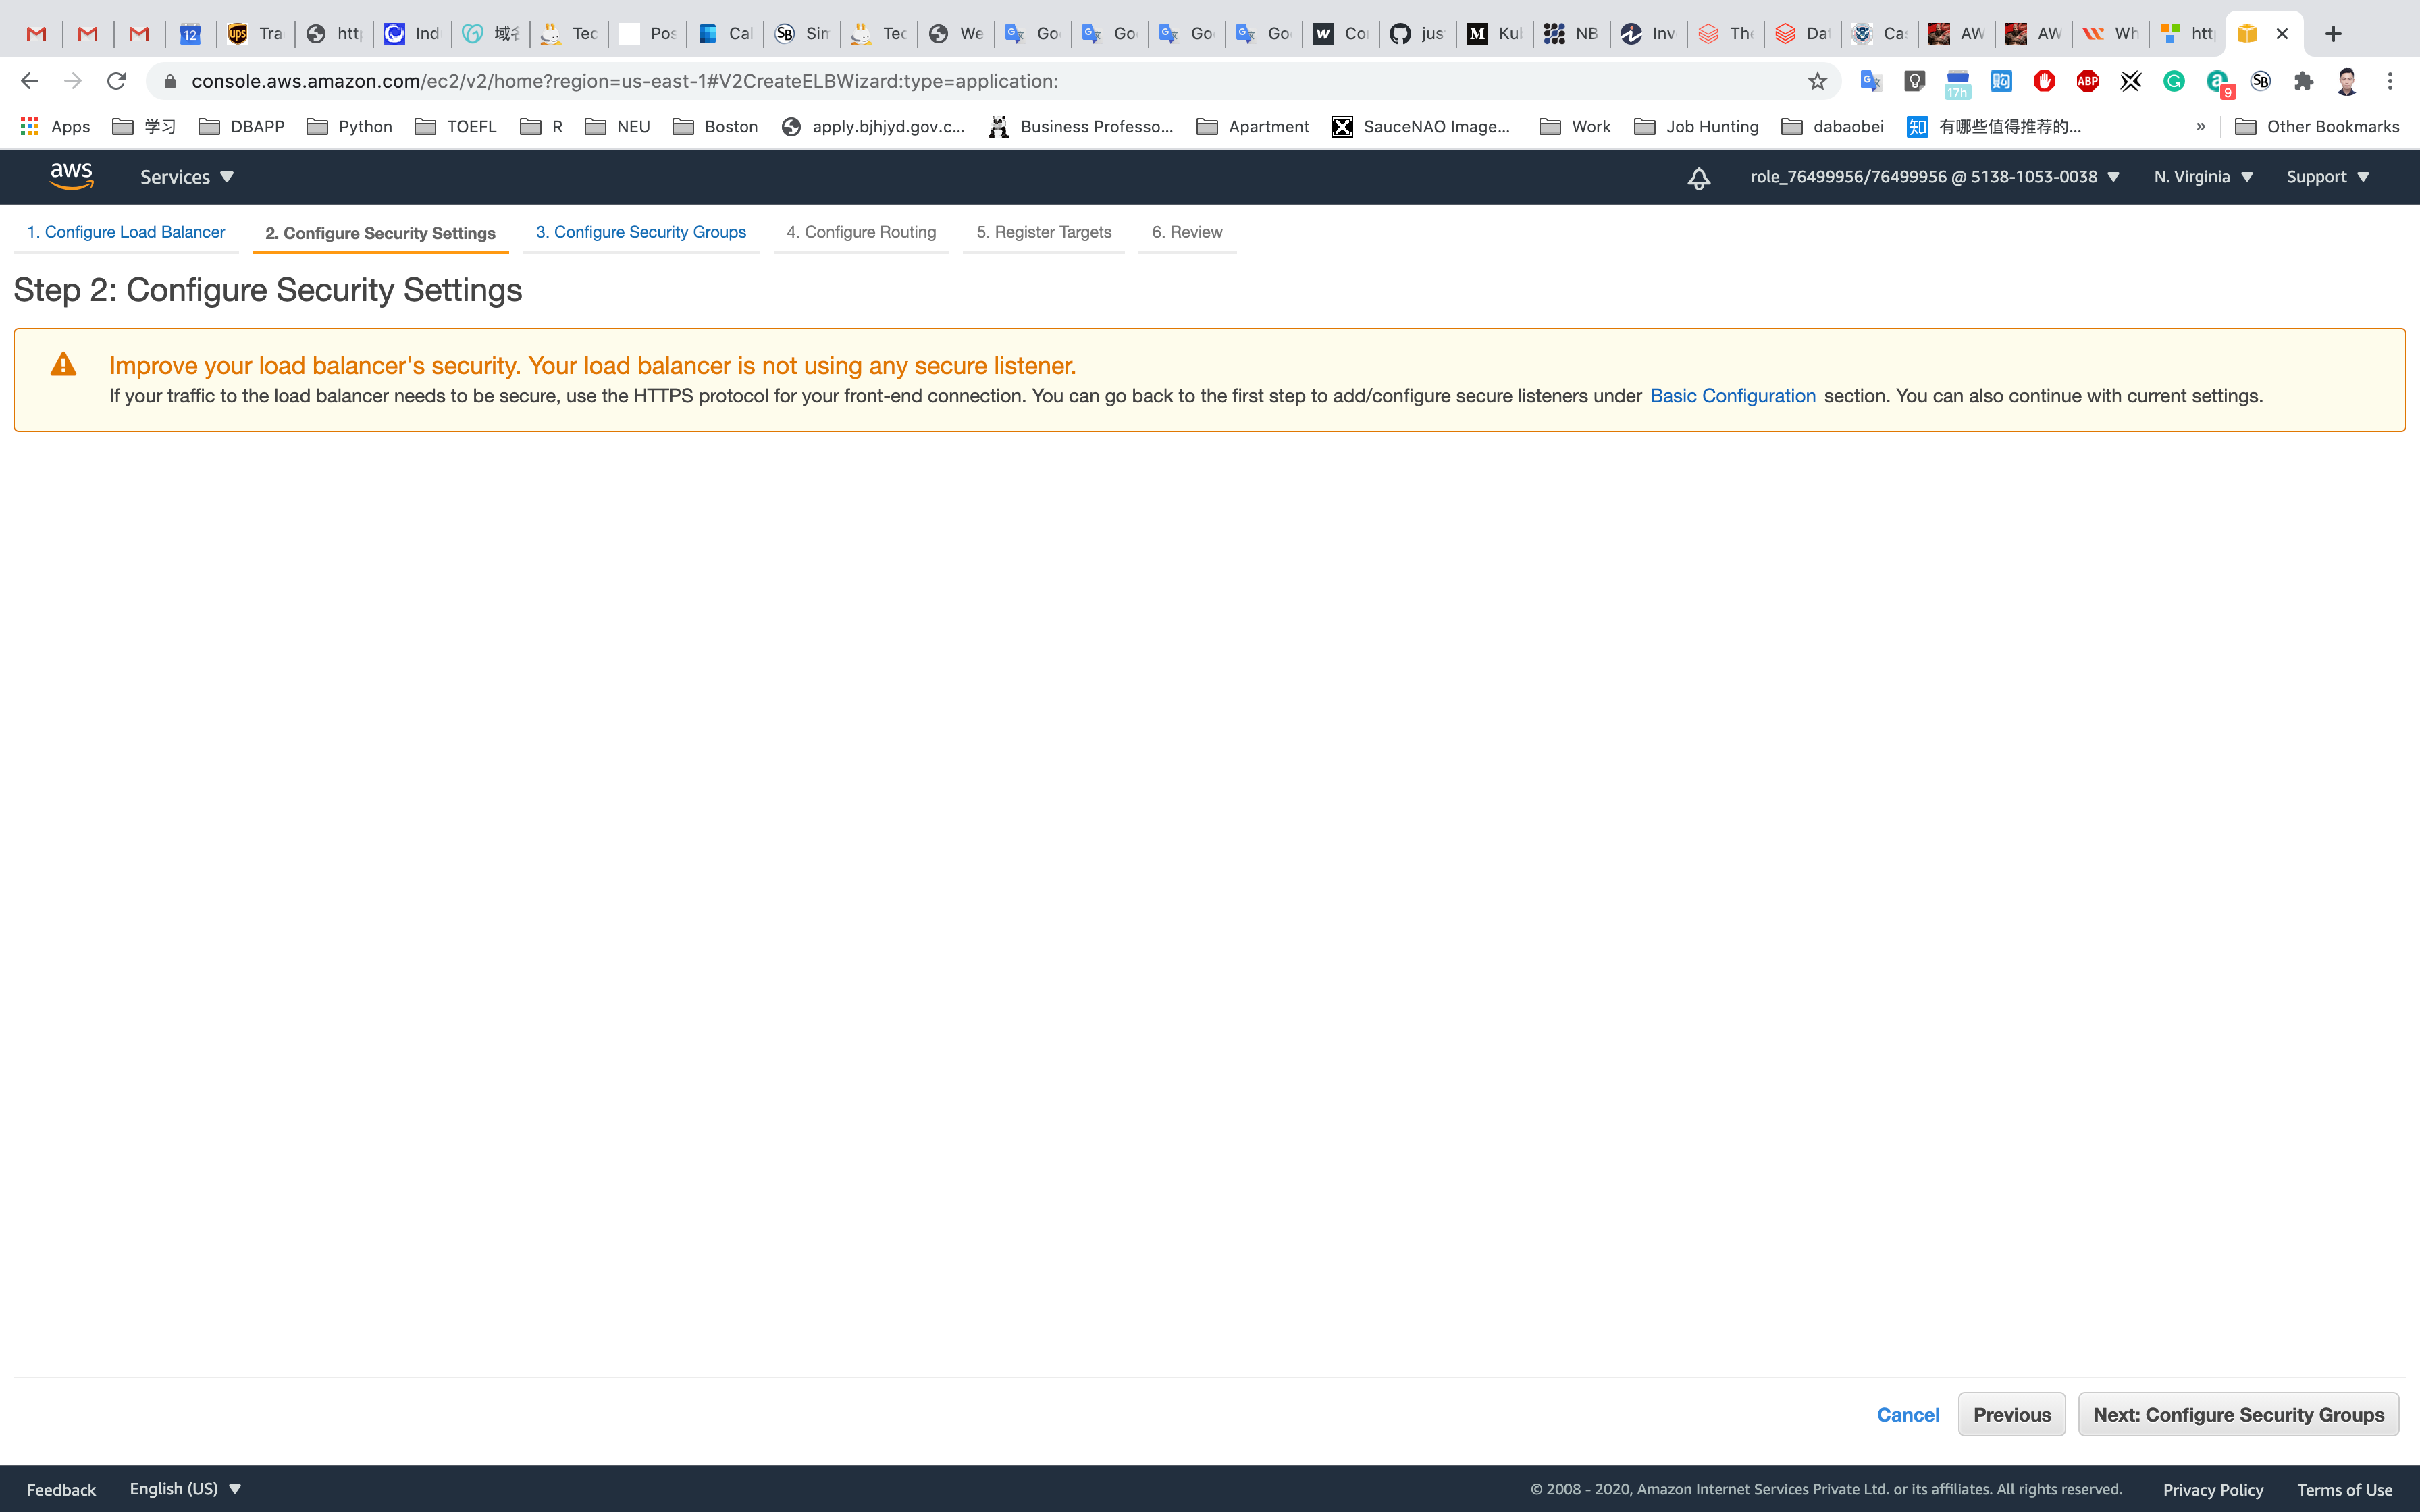
Click on Select an existing security group
Select EC2WebServerSG
Click on Next: Configure Routing
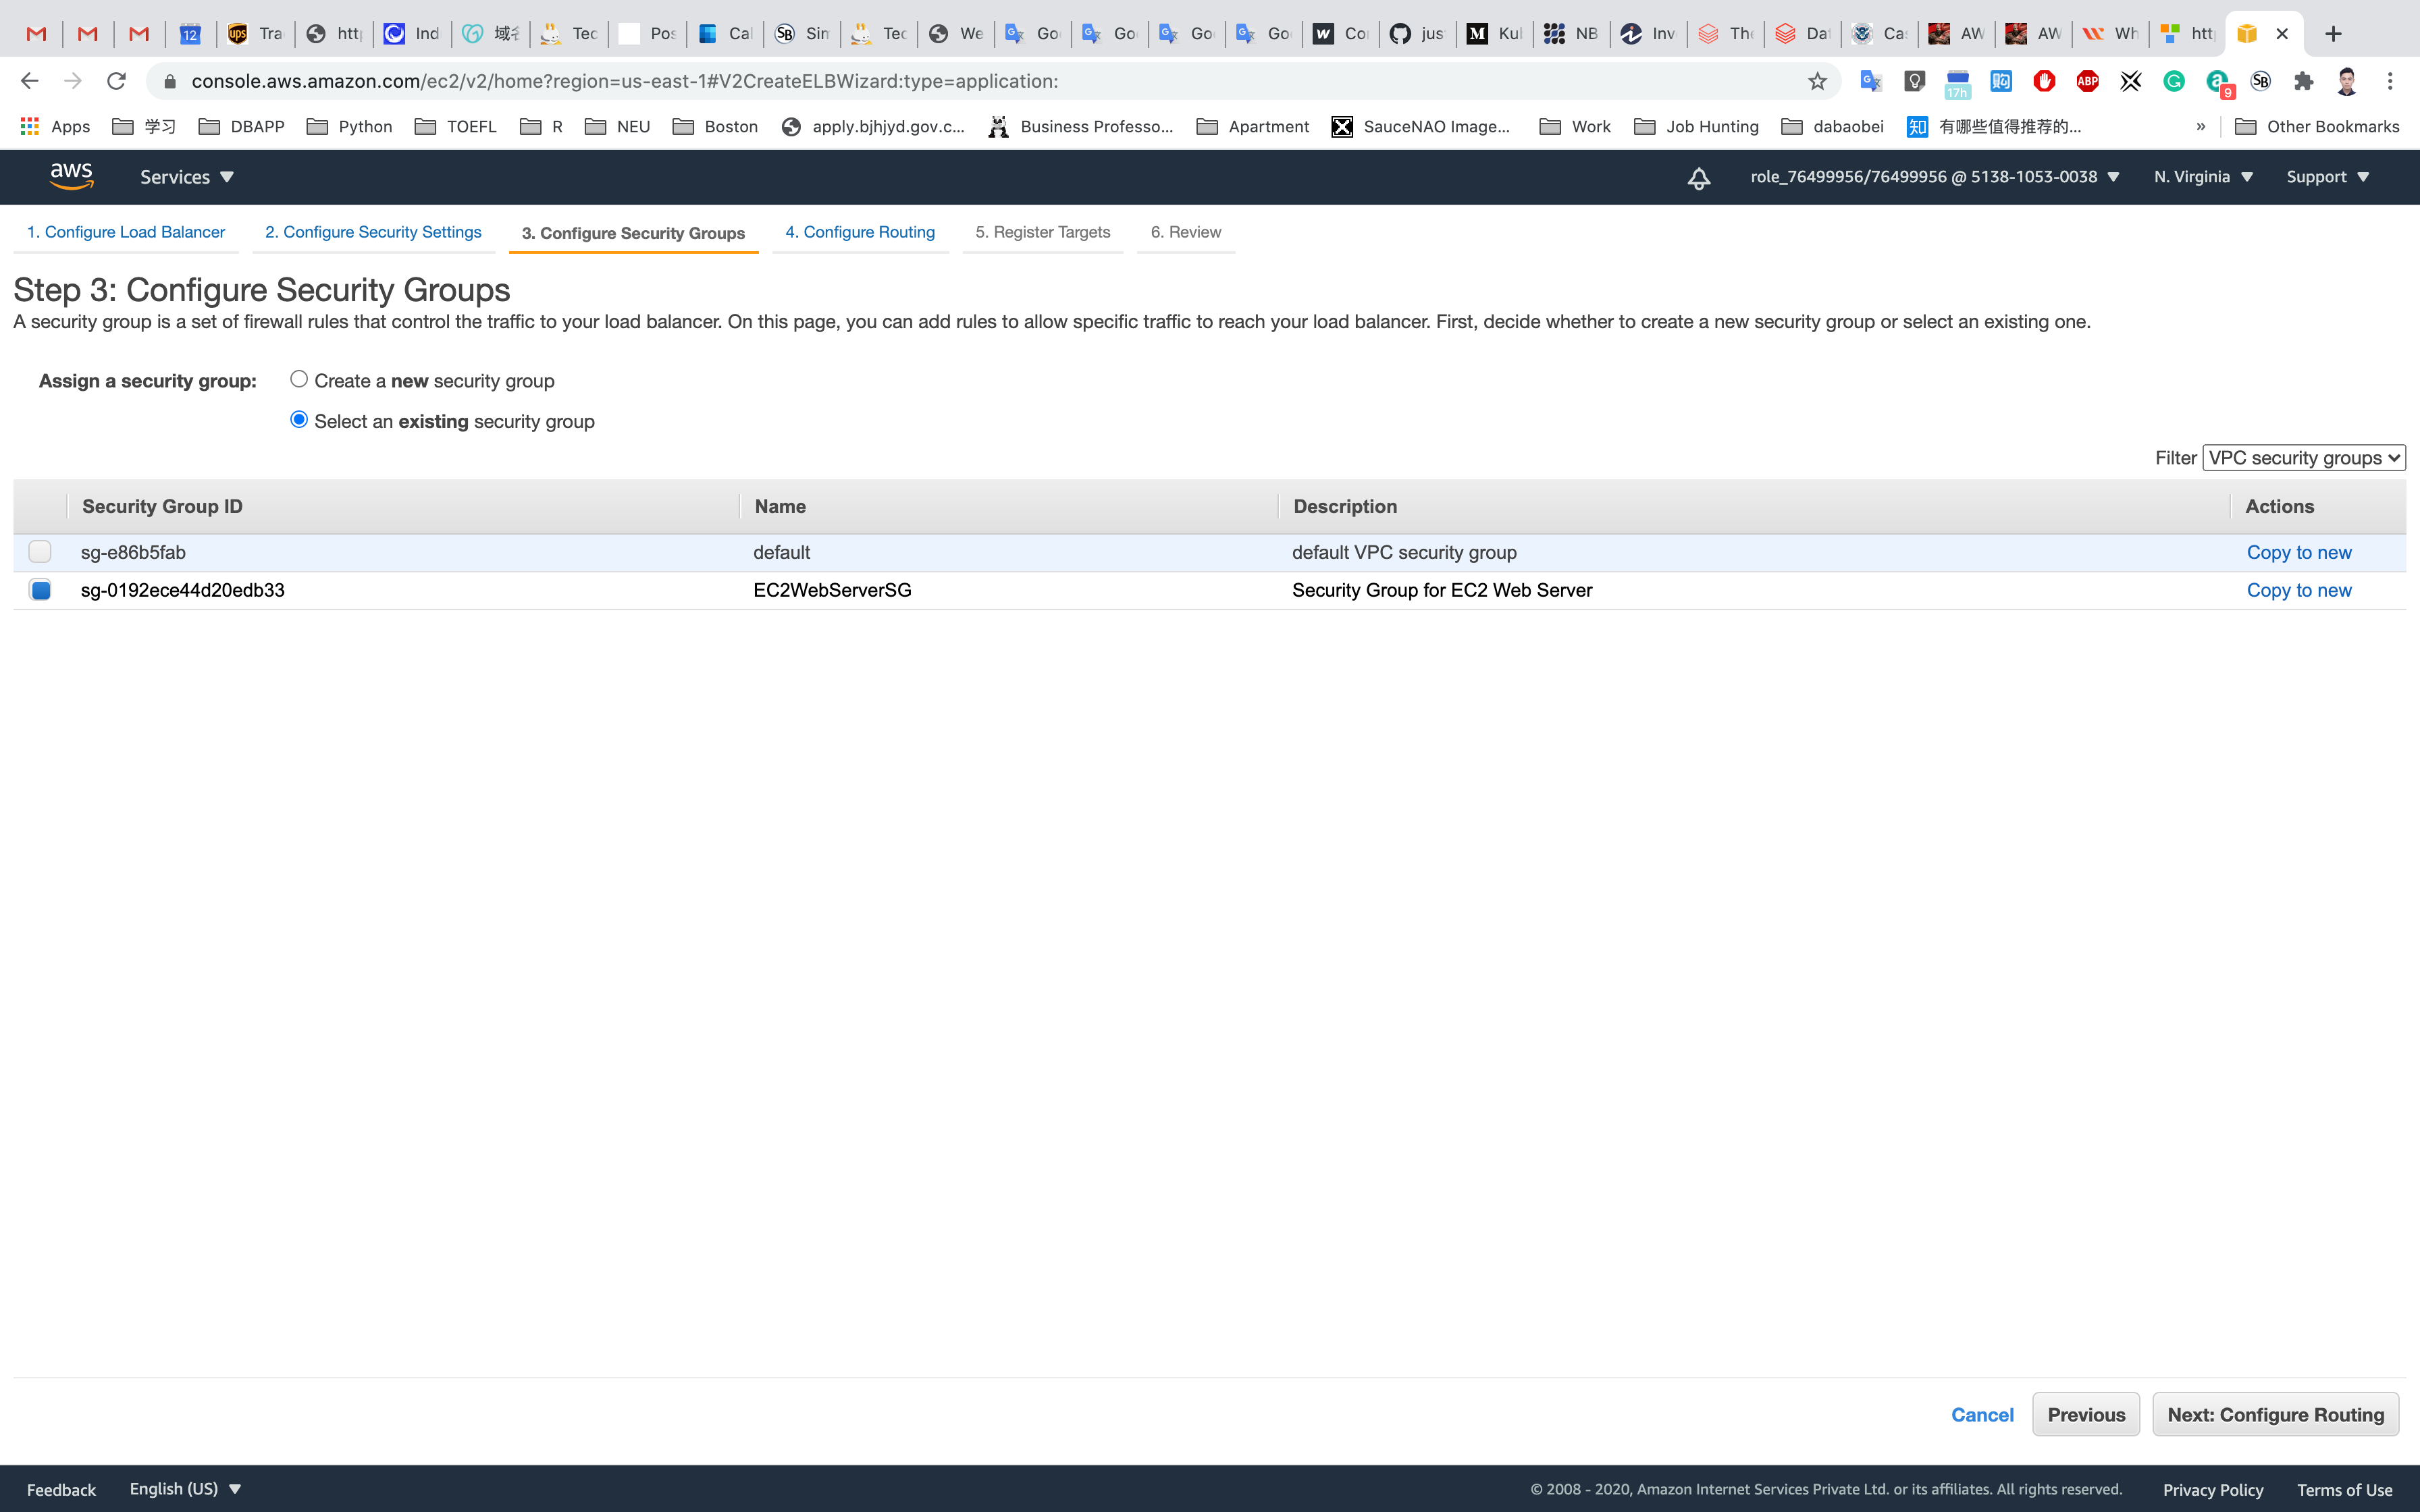
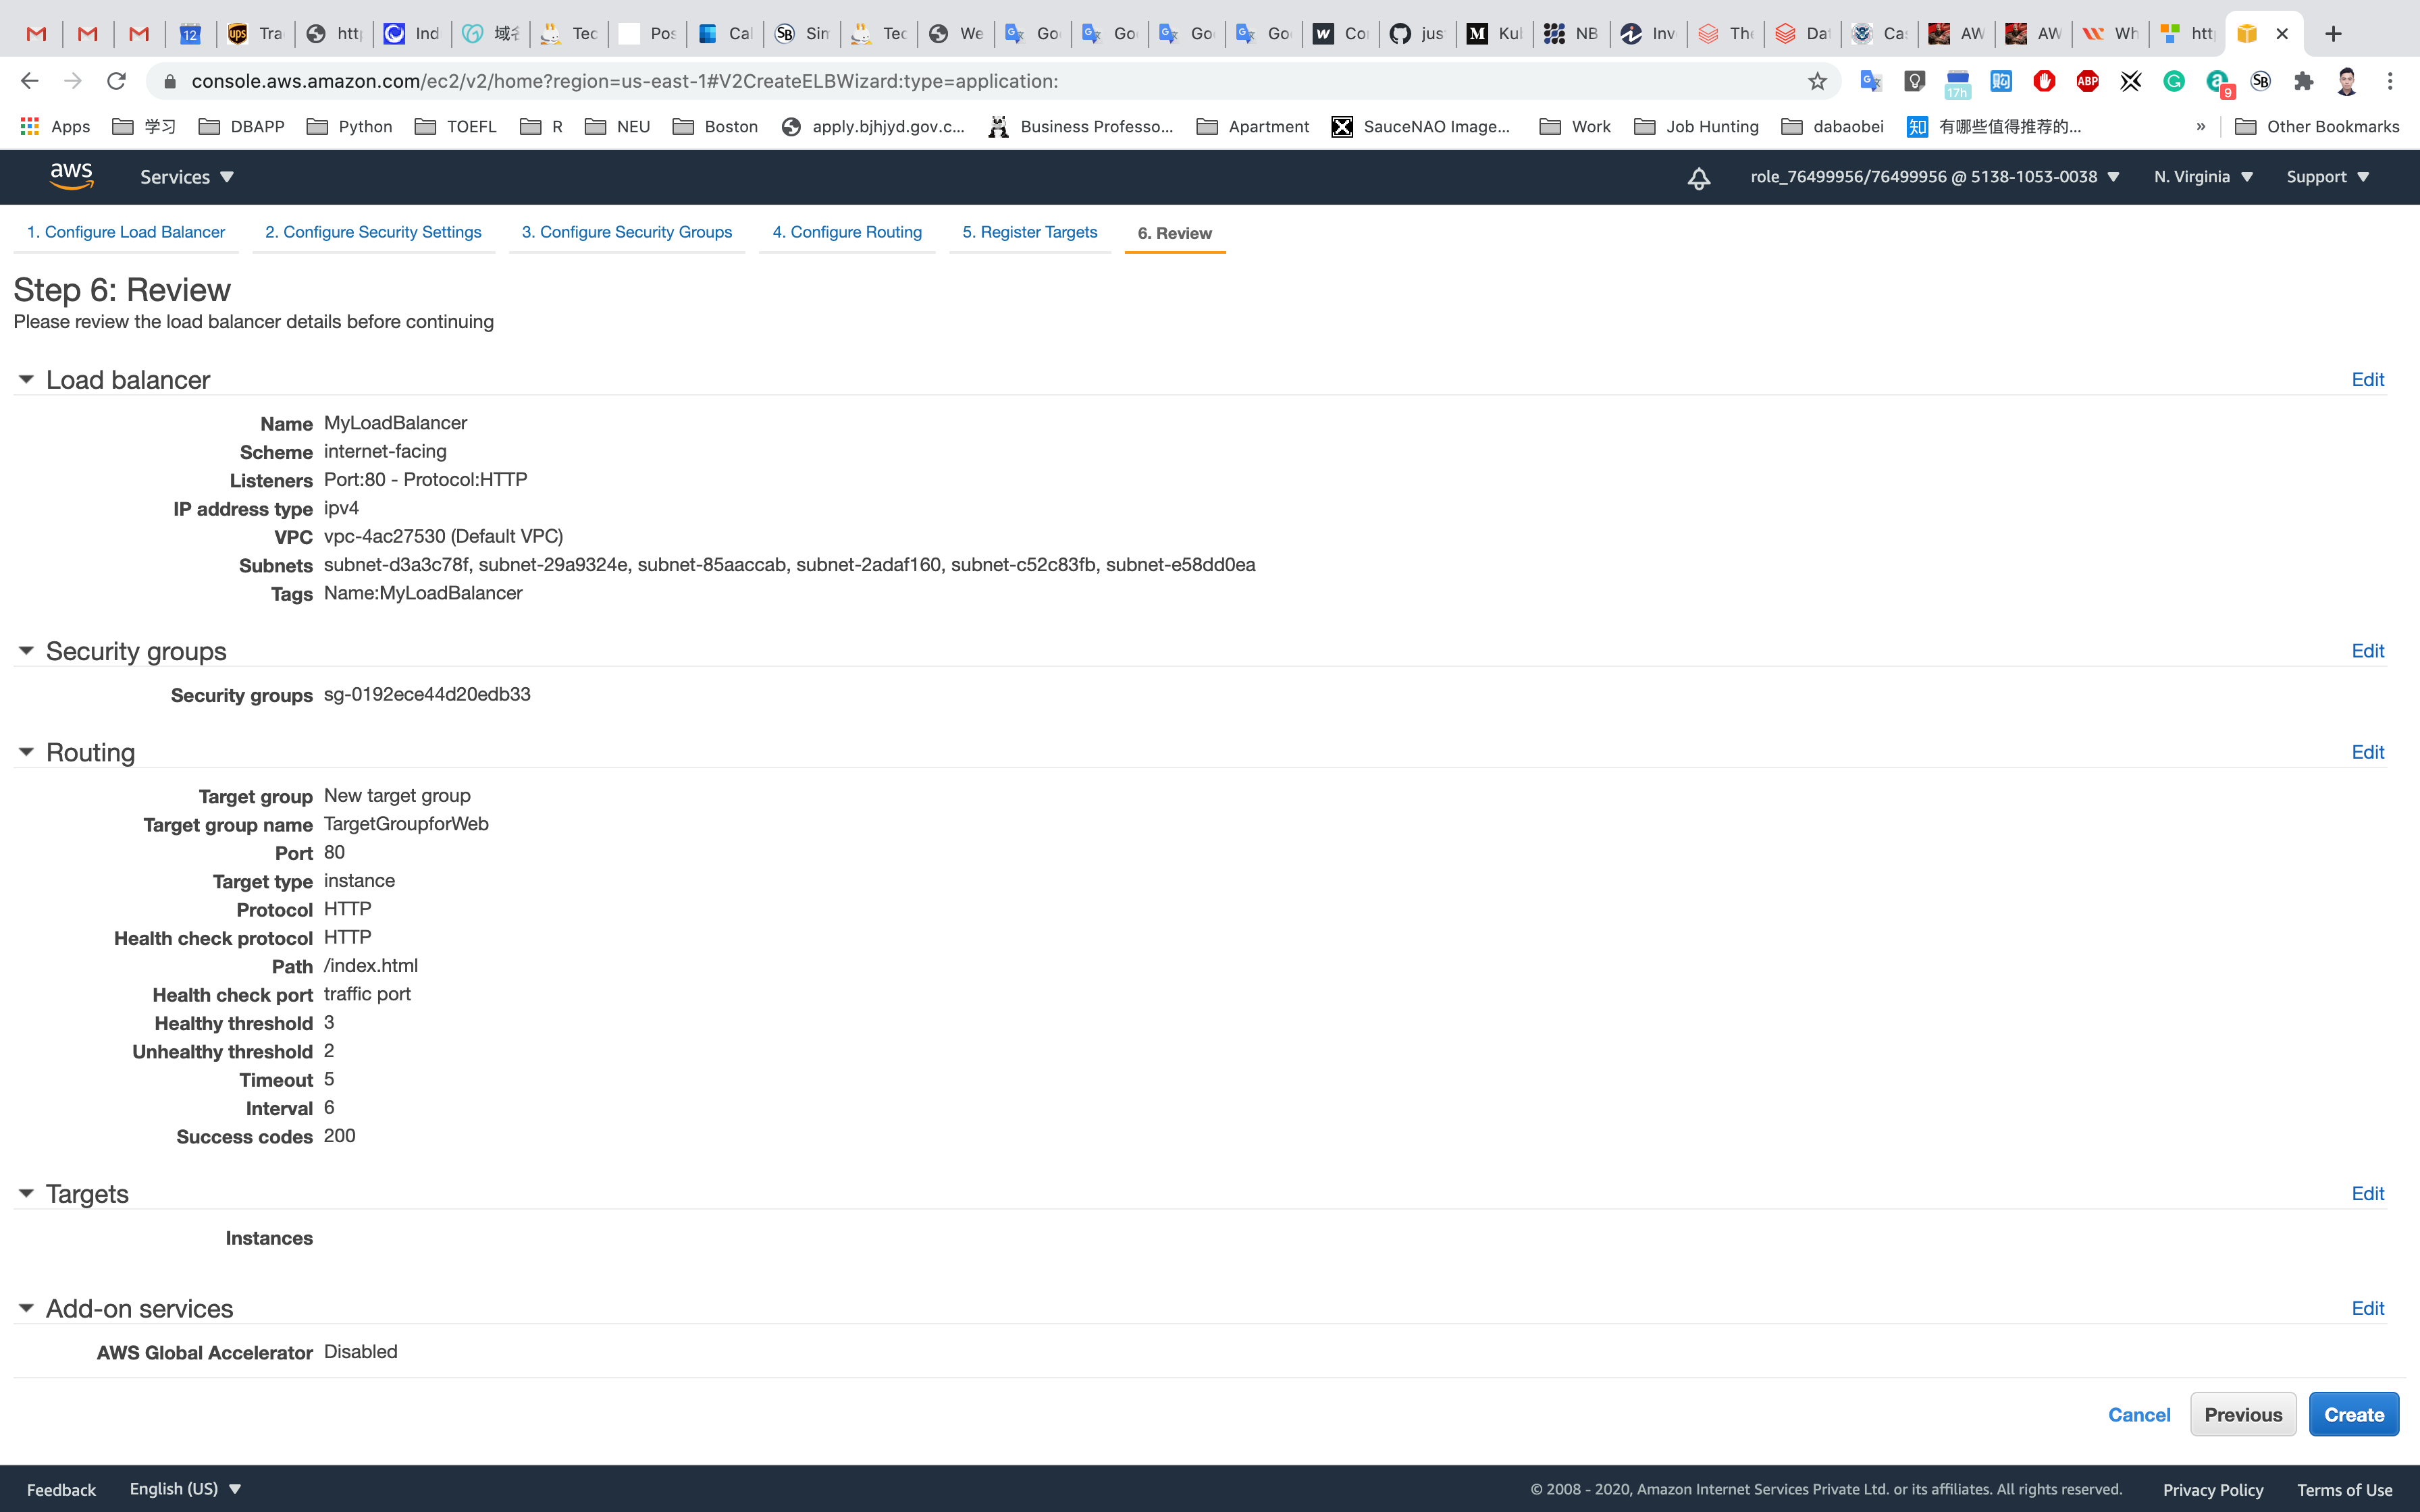
Configure Routing:
- Target group:
New Target Group - Target group name :
TargetGroupforWeb - Leave other settings as default.
- Under Health check settings :
- Path :
/index.html
- Path :
- Under Advanced health check settings:
- Healthy threshold :
3 - Unhealthy threshold:
2(Default) - Timeout:
5seconds (Default) - Interval:
6seconds - Success codes:
200(Default)
- Healthy threshold :
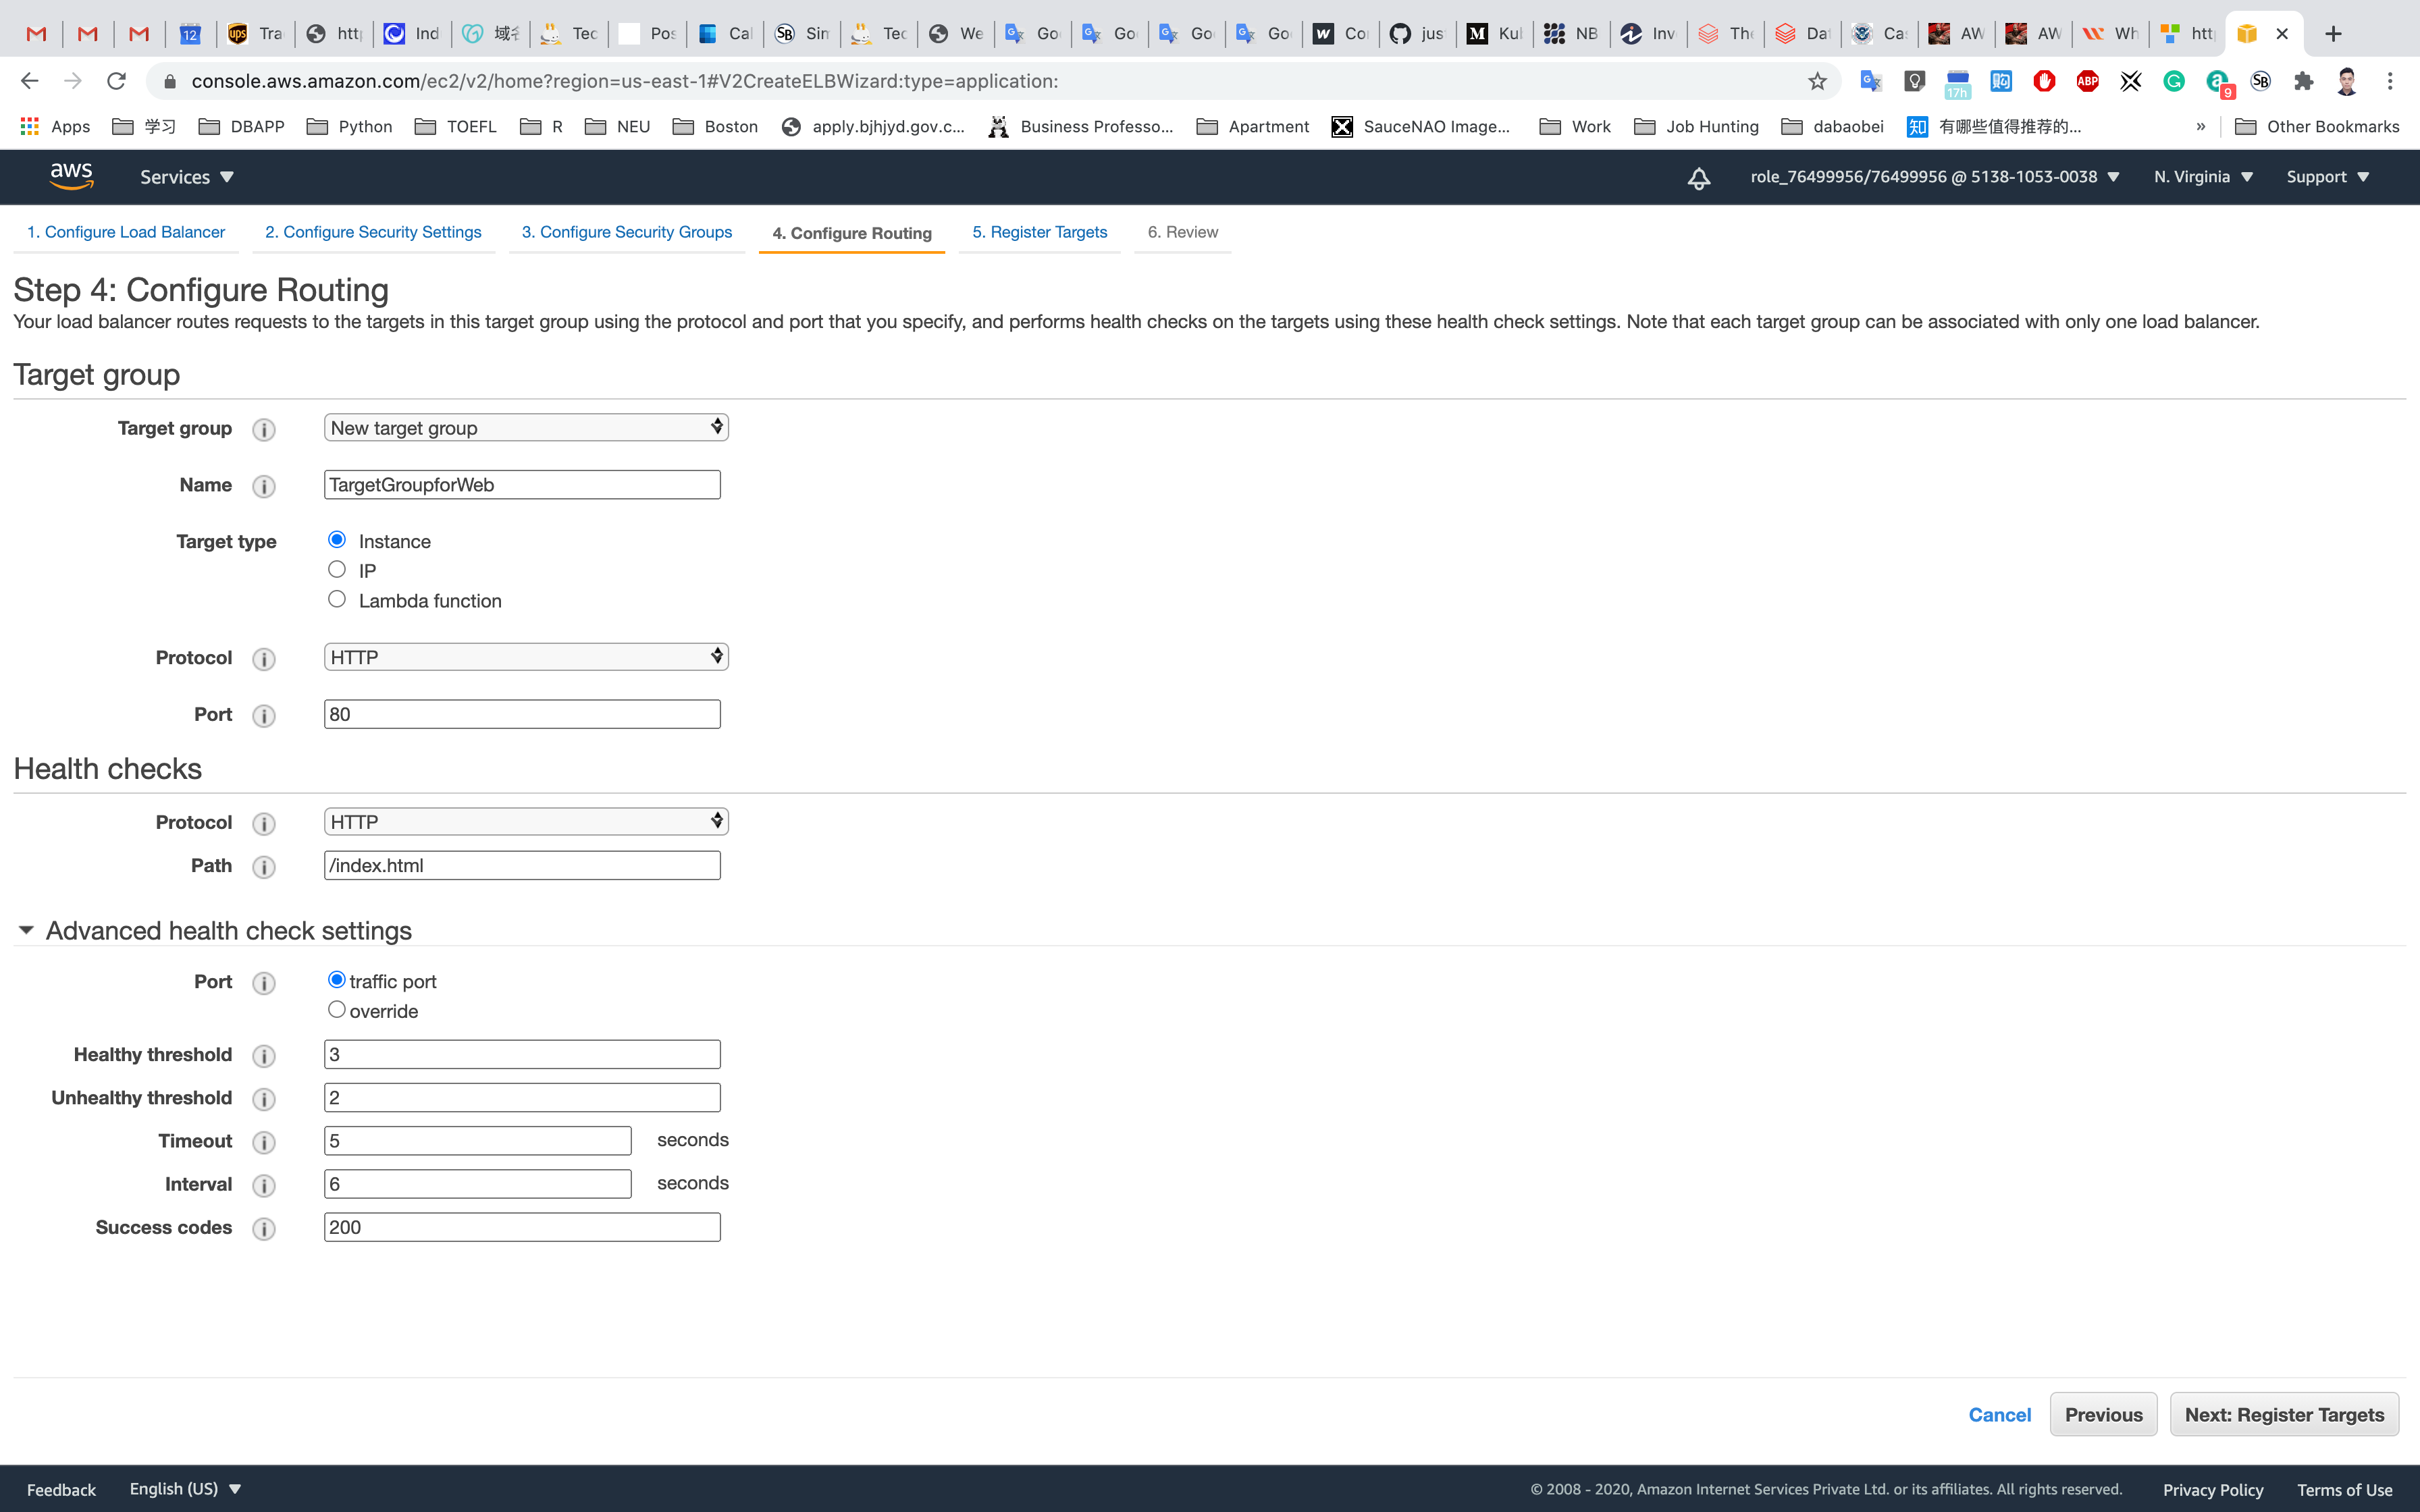
Click on Next: Register Targets
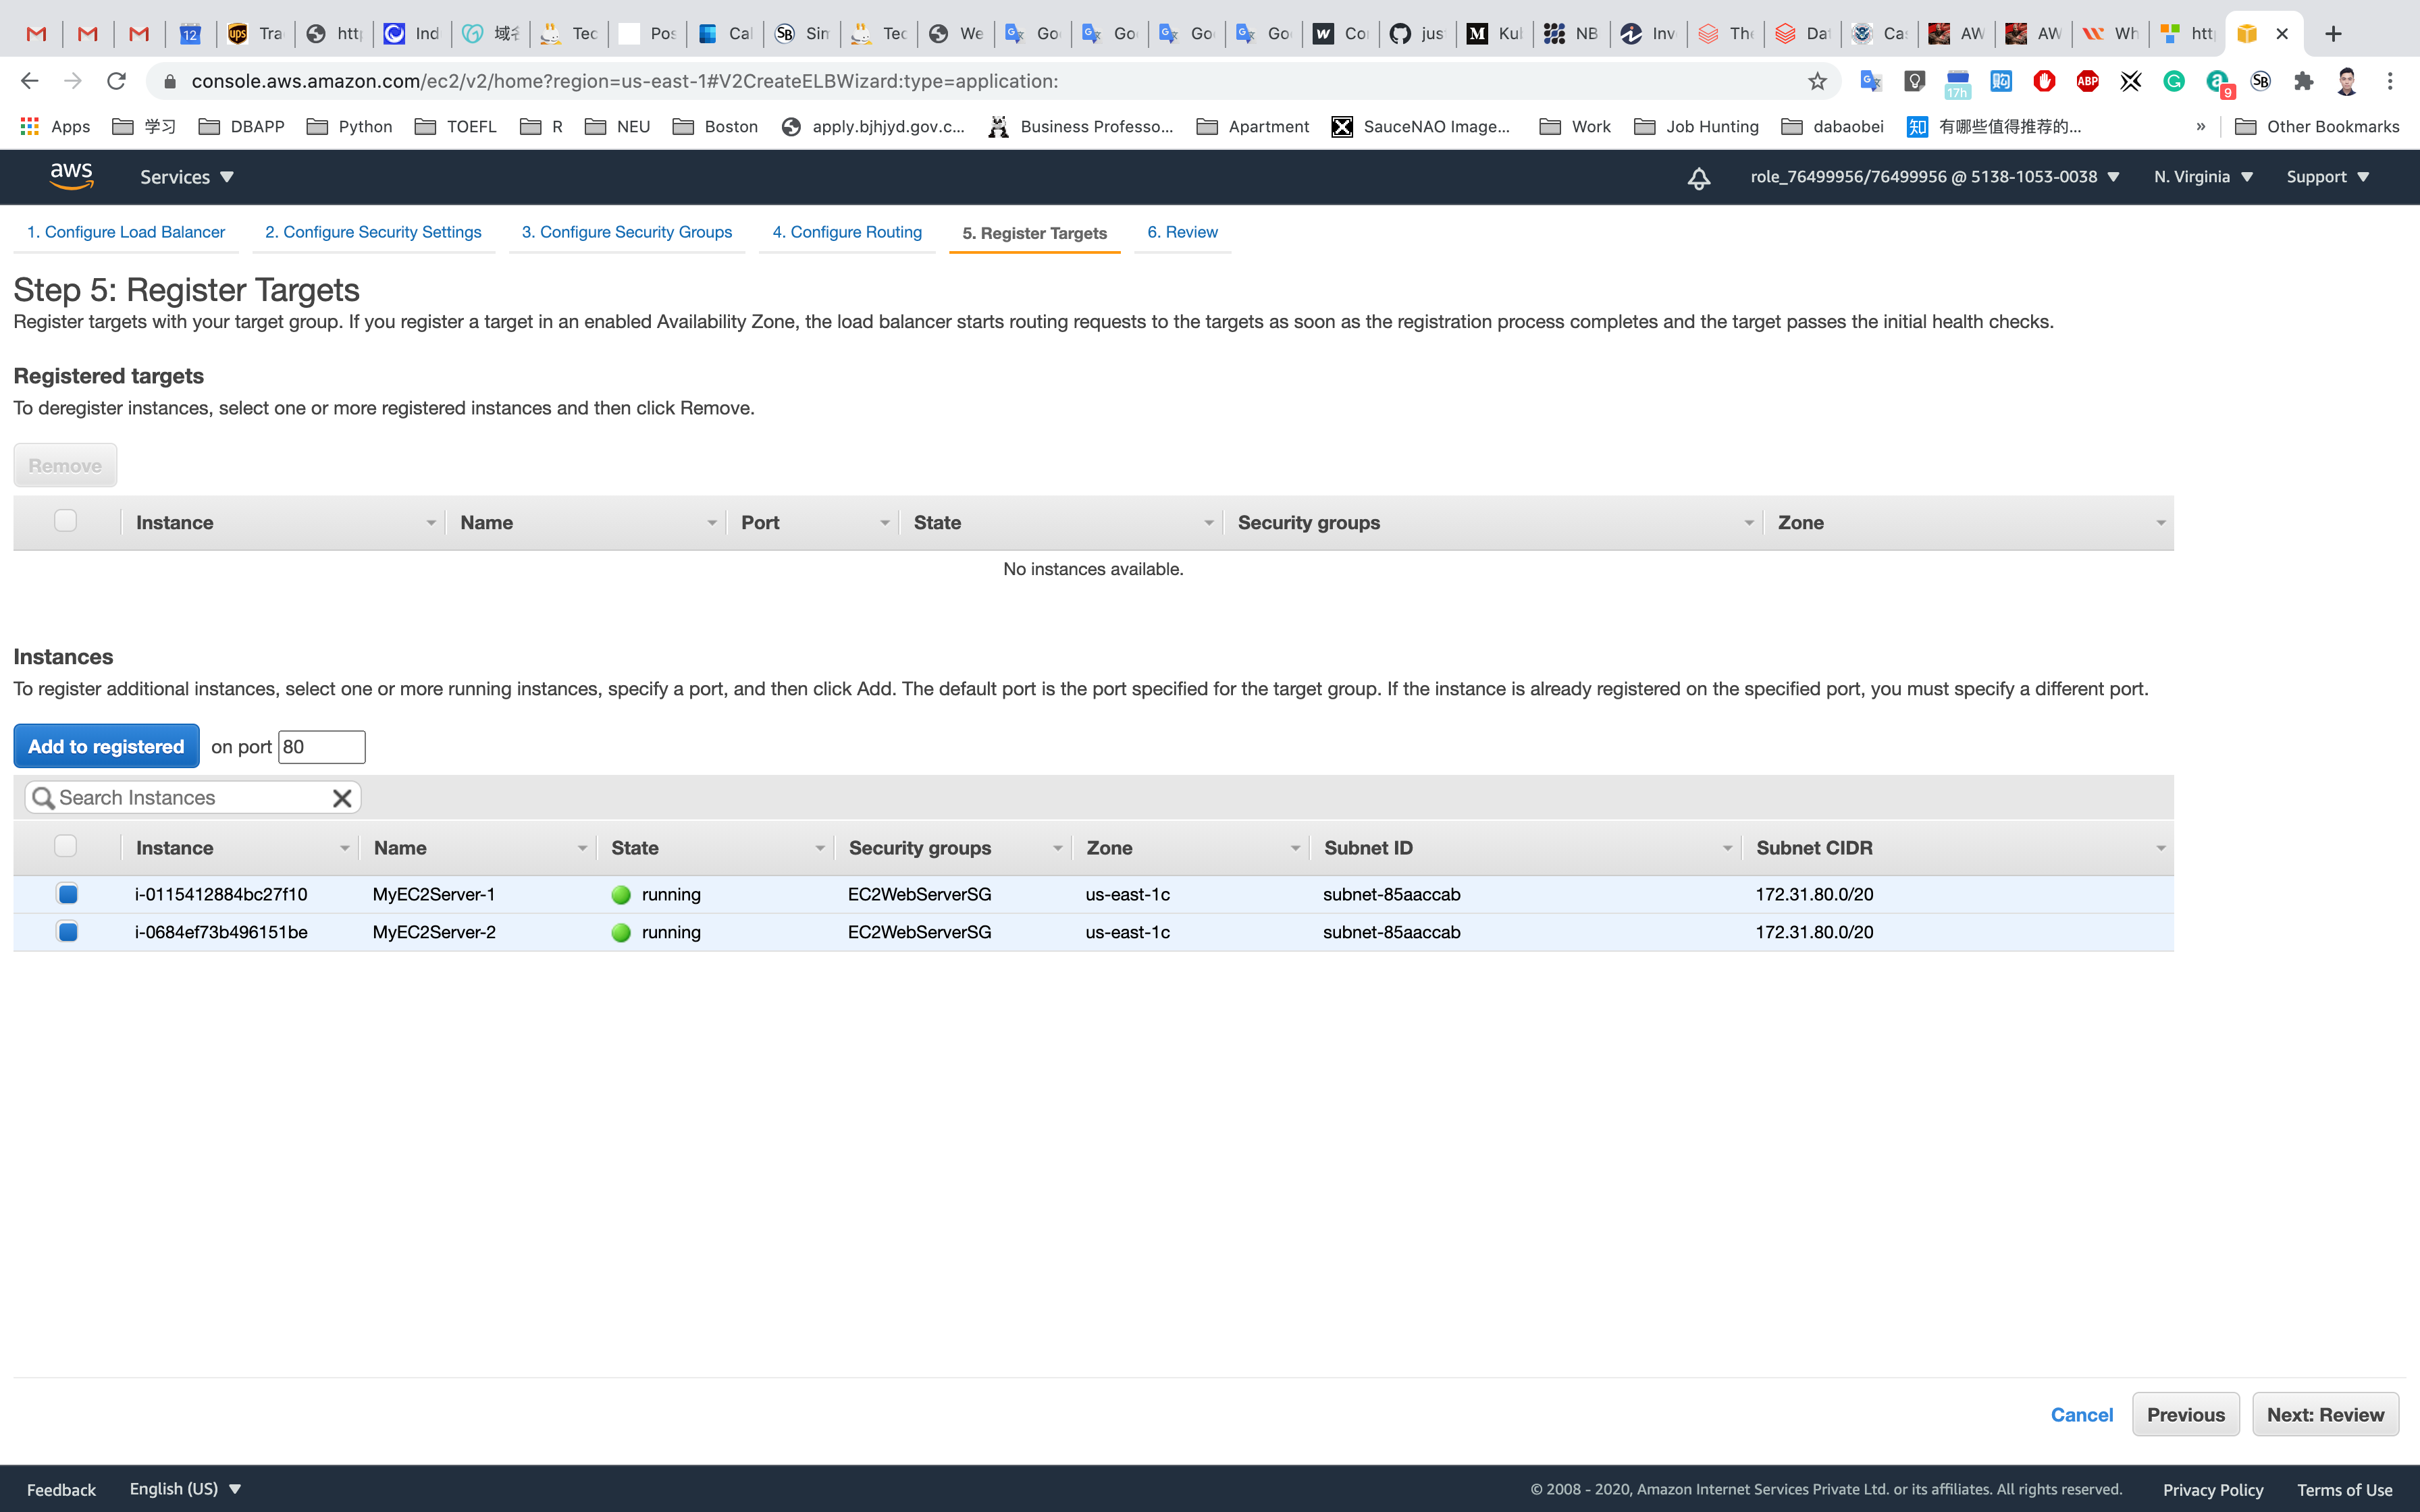
Register Targets:
We need two EC2 instances in the target group of the load balancer.
Under Instances, select the two EC2 instances (MyEC2Server-1, MyEC2Server-2) from the list.
Click on Add to registered
Both of the EC2 instances will be added under Registered Targets.
Click on Next: Review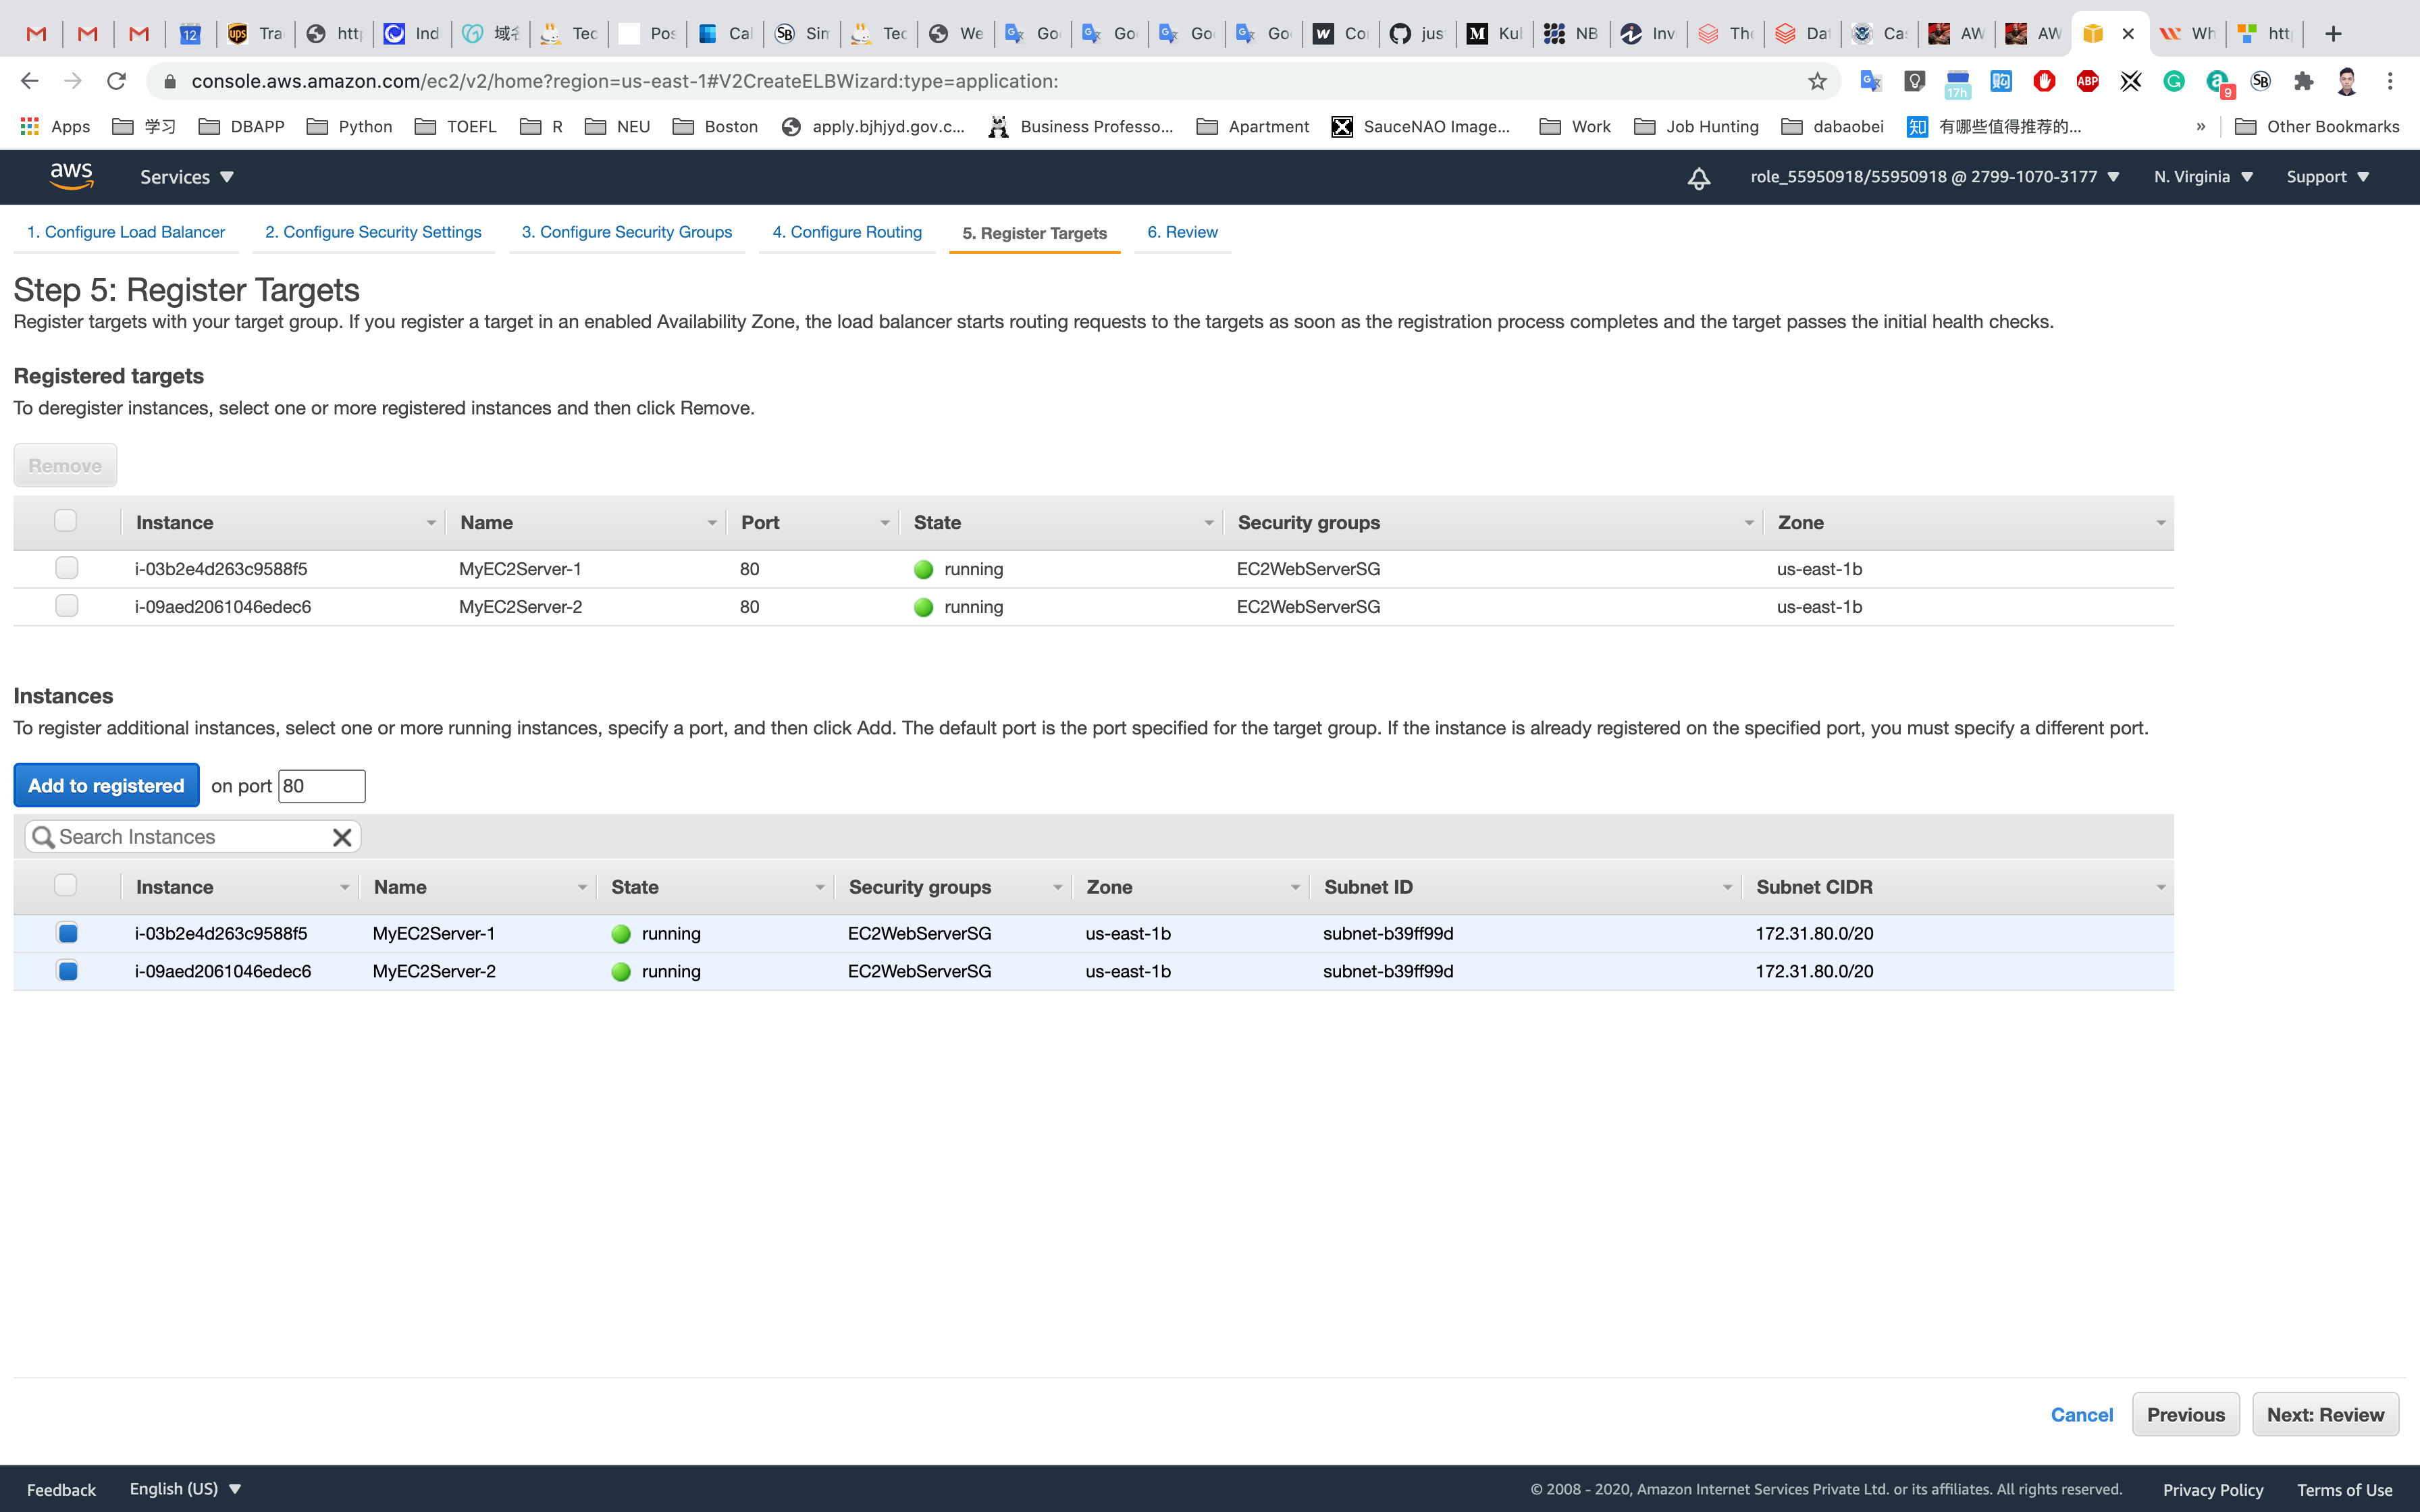
Review: Check your inputs and then click on Create
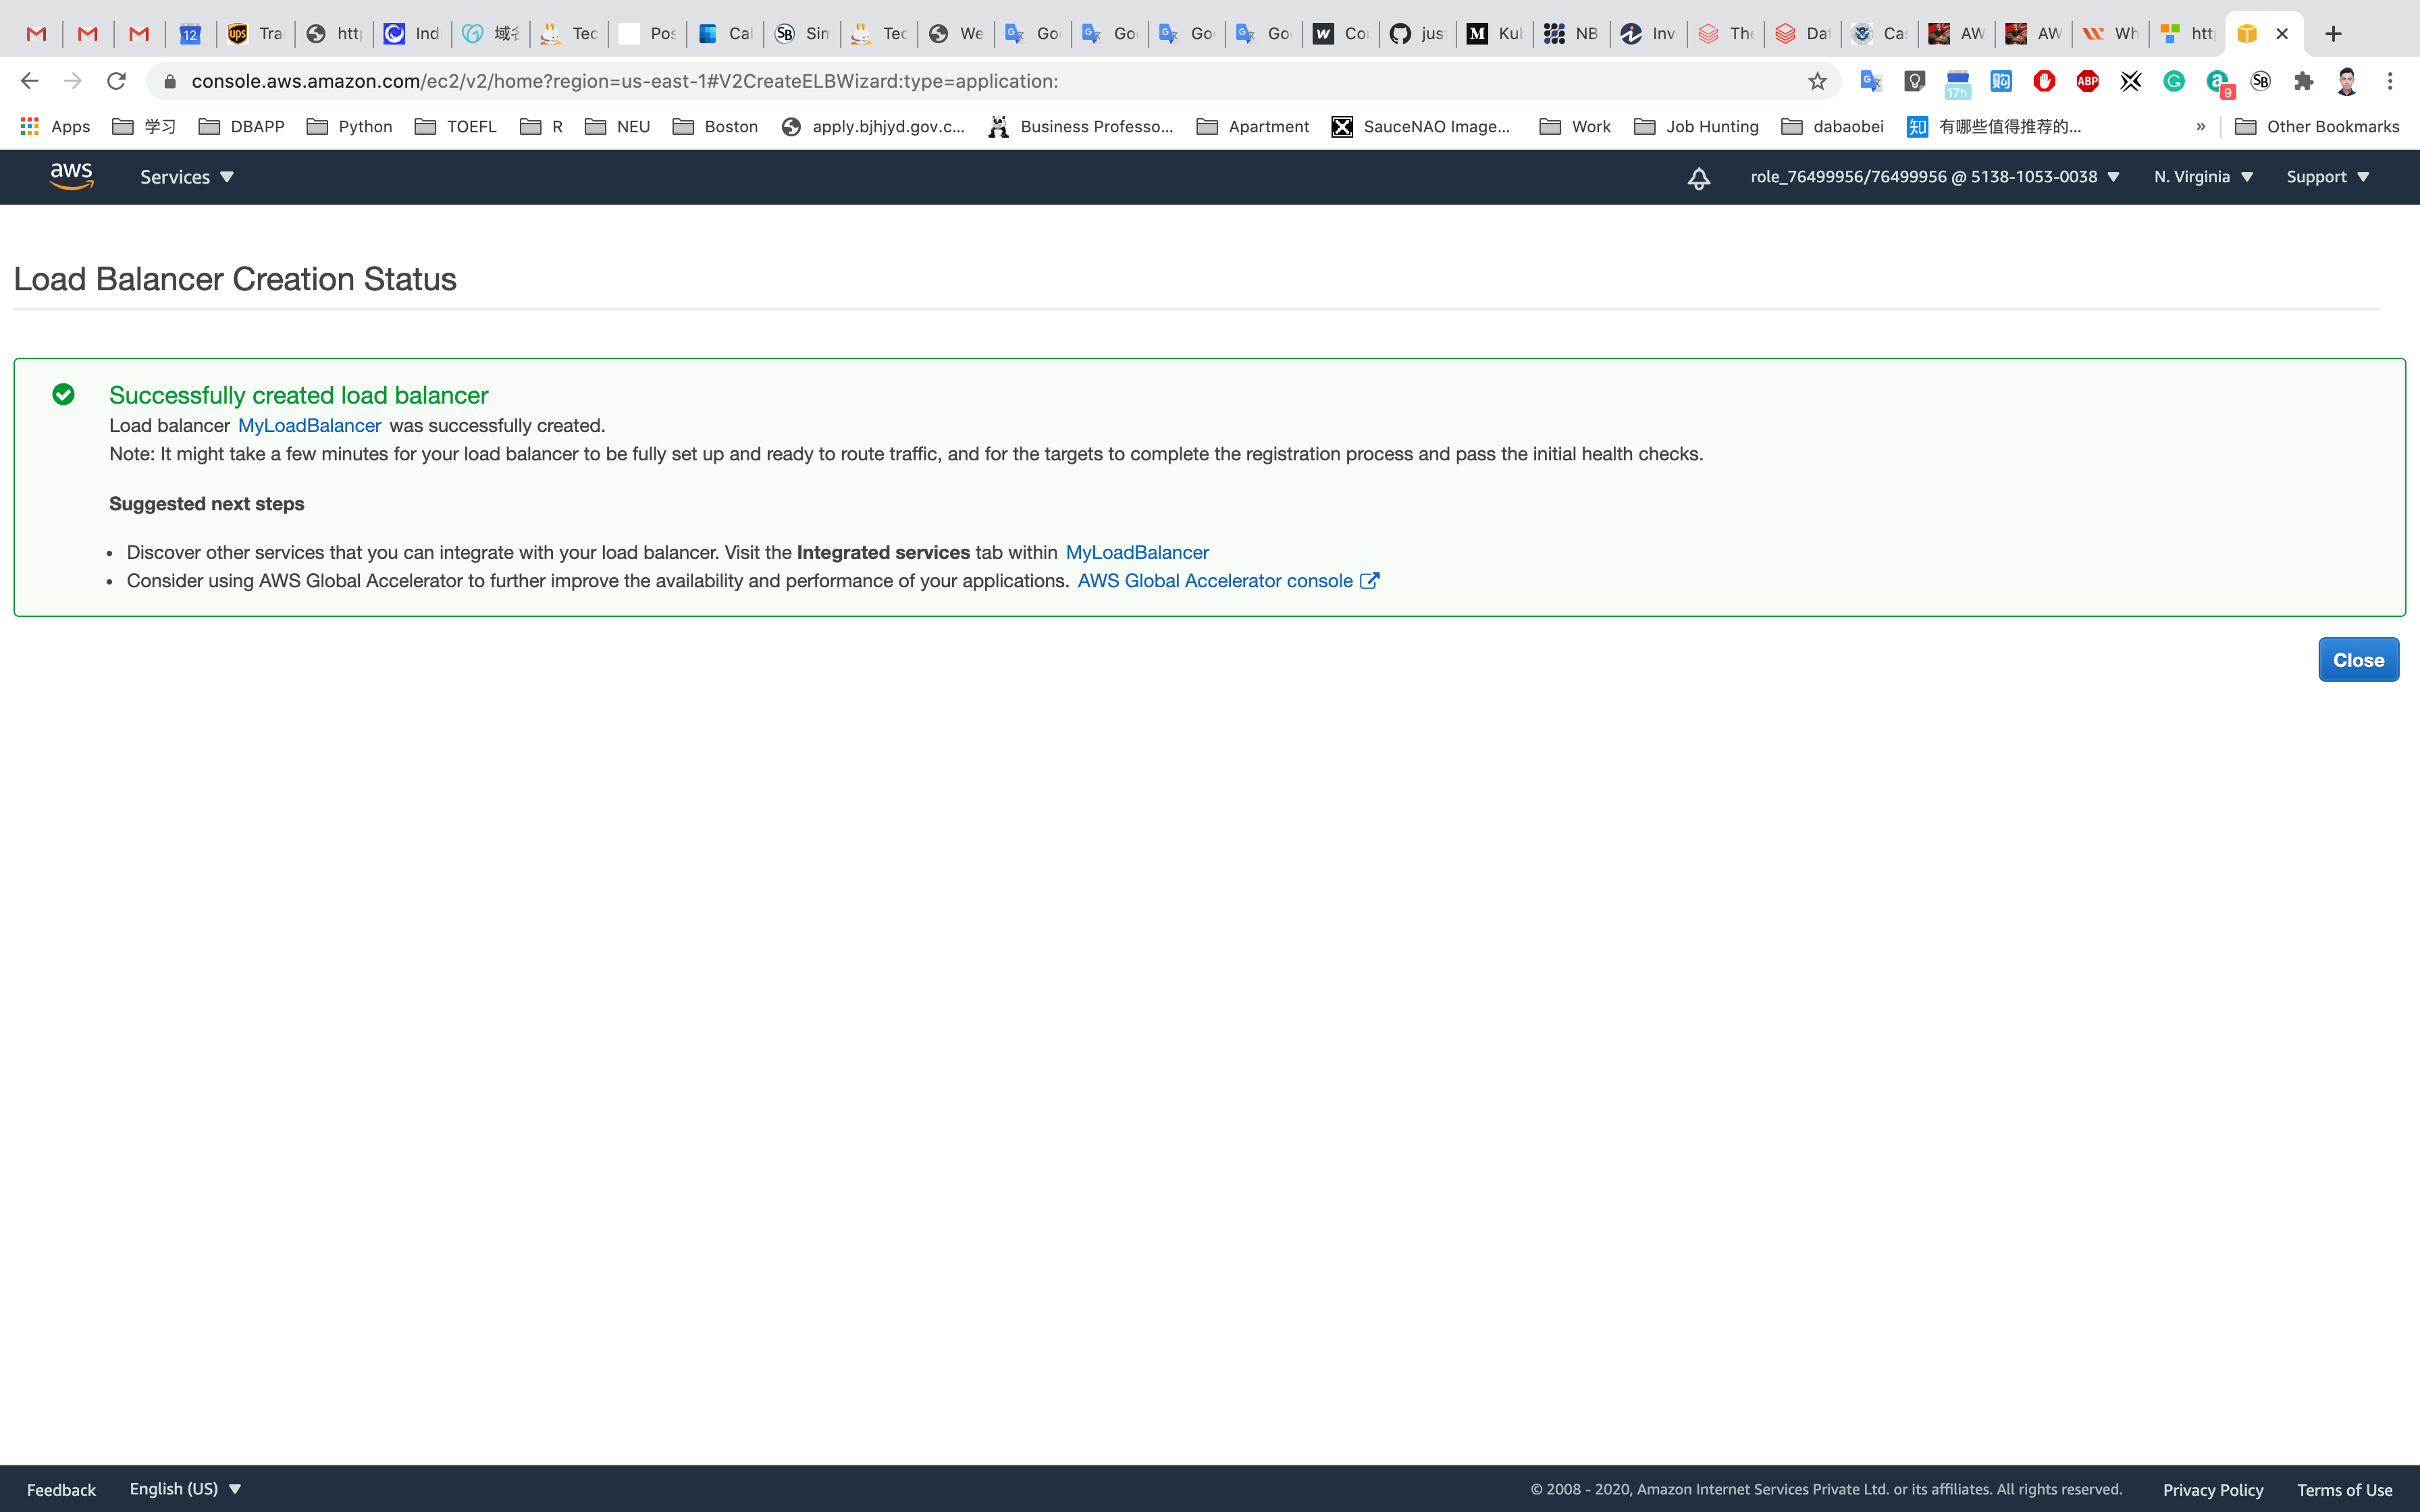
You will now see the message Successfully created load balancer. Click on Close.
Validate Test
Services -> EC2
Click on Target Groups from the left menu section.
Select TargetGroupforWeb and navigate to the Targets menu.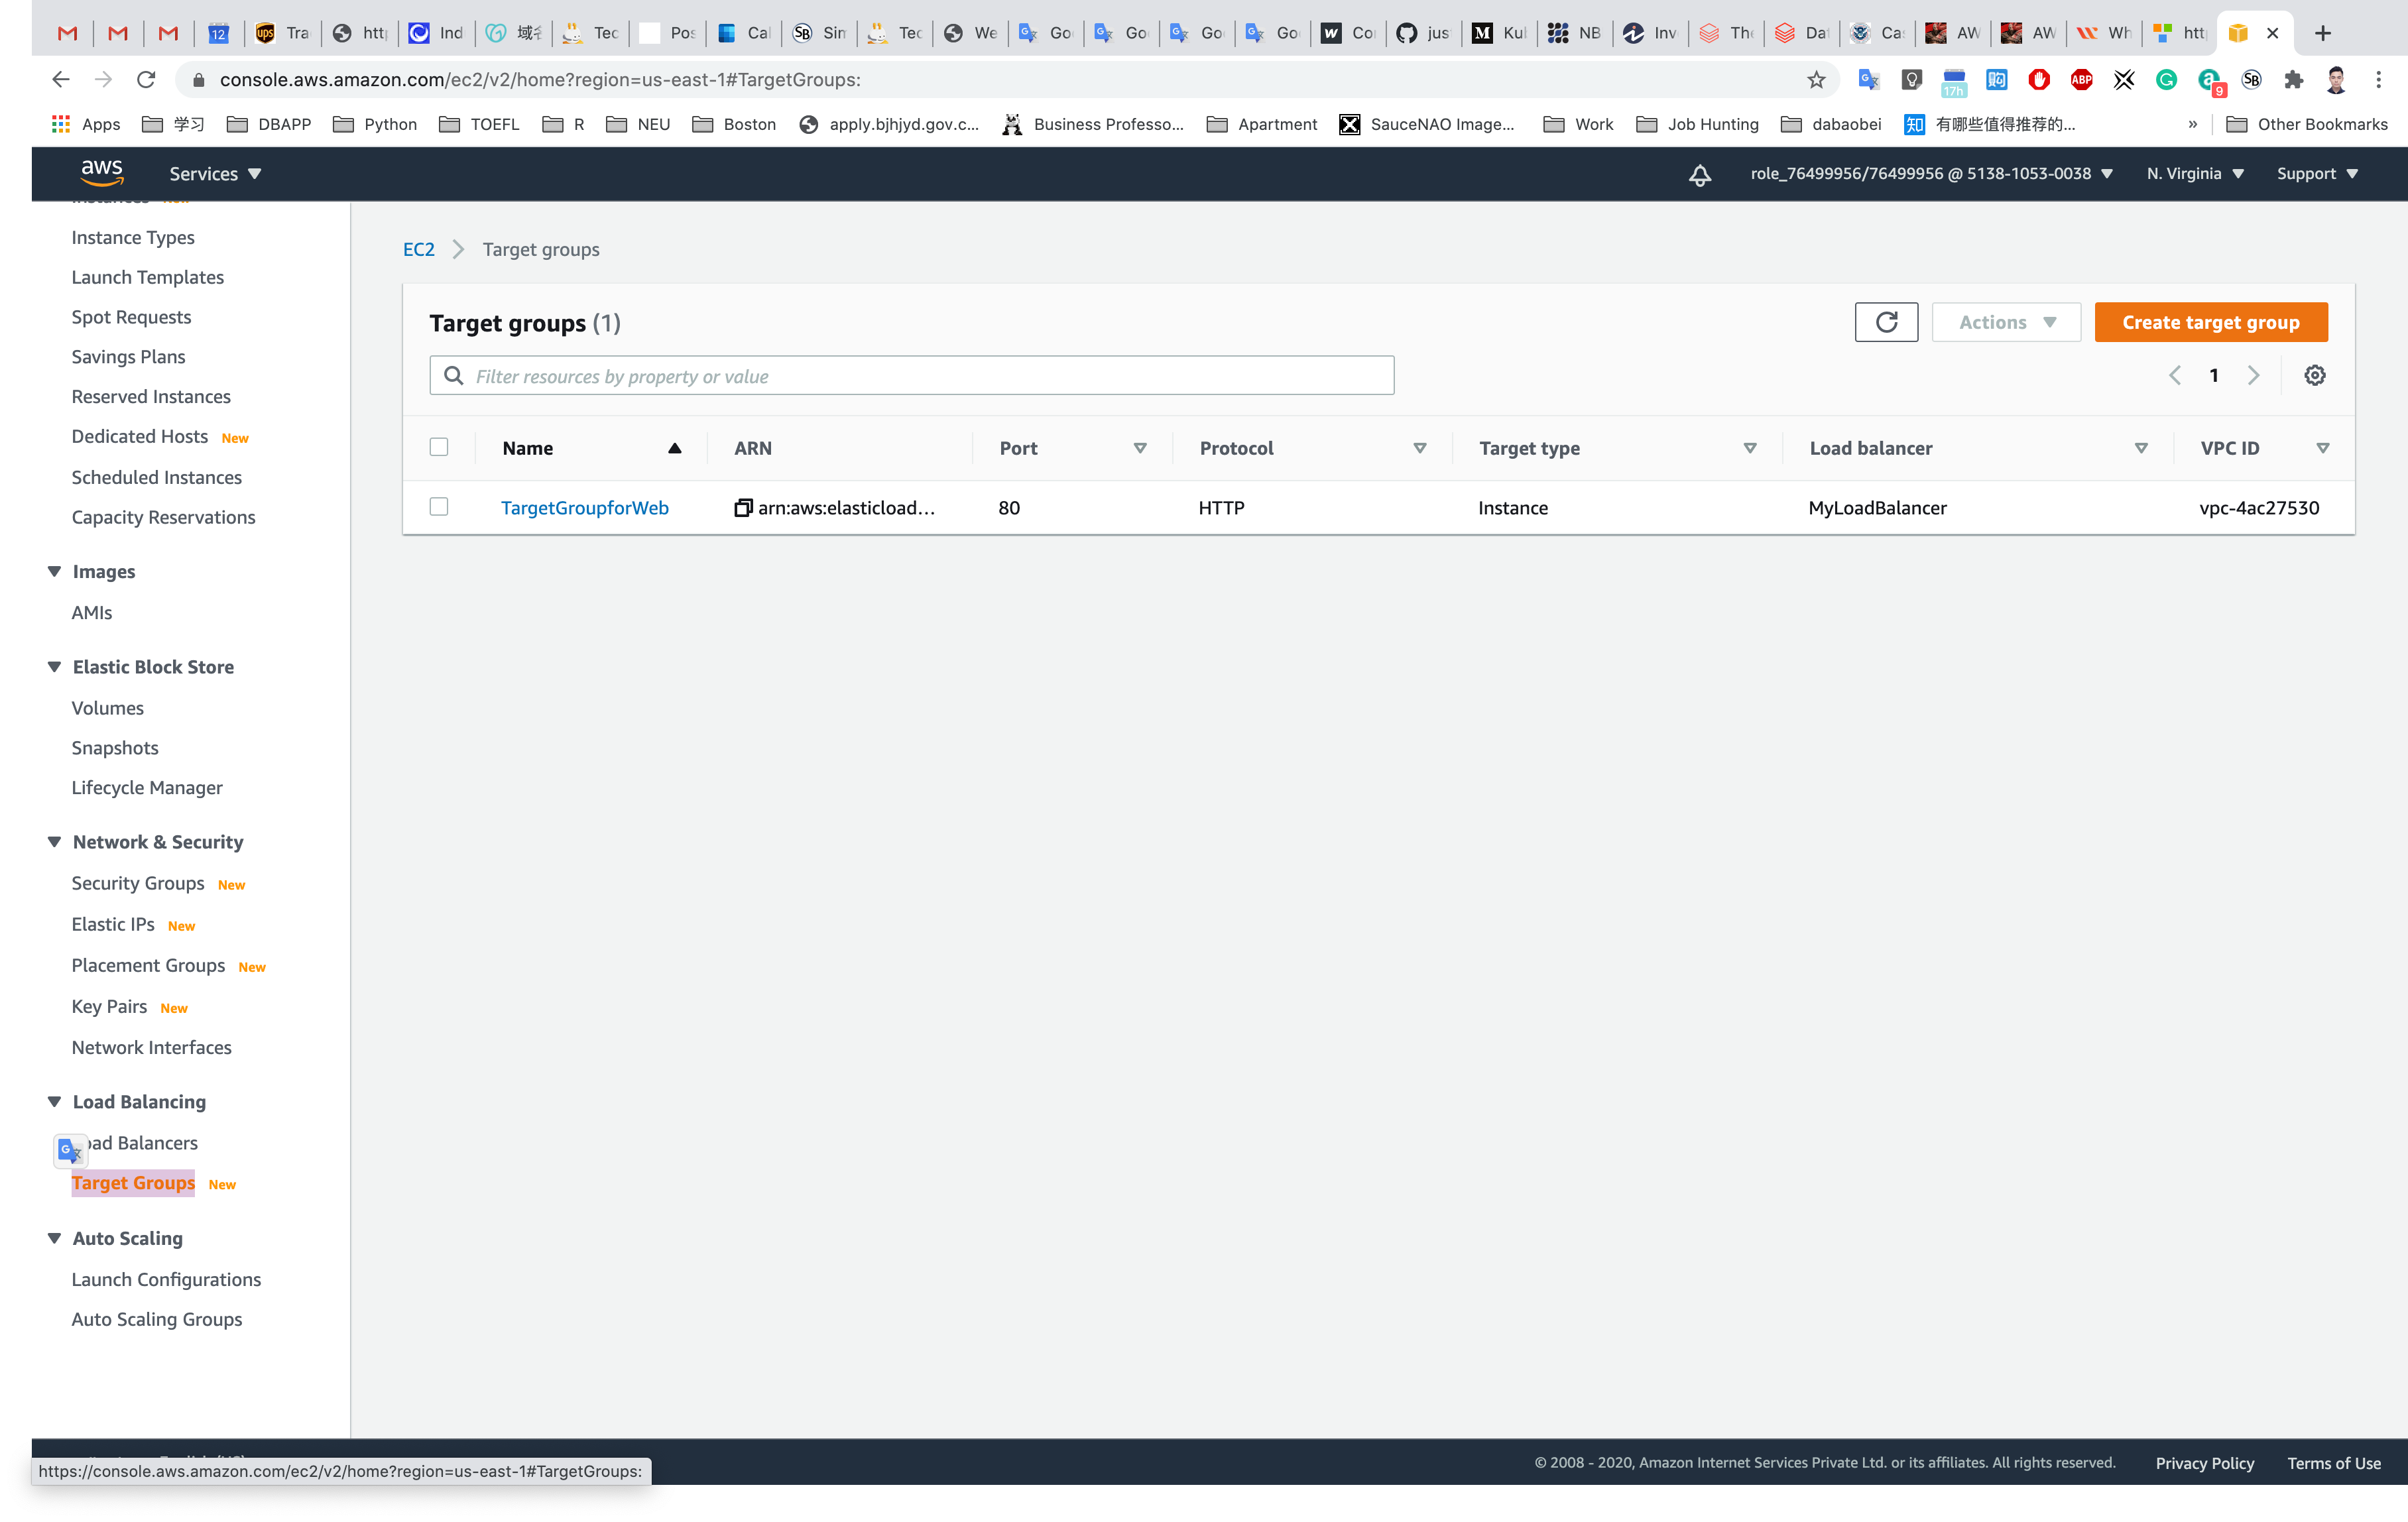
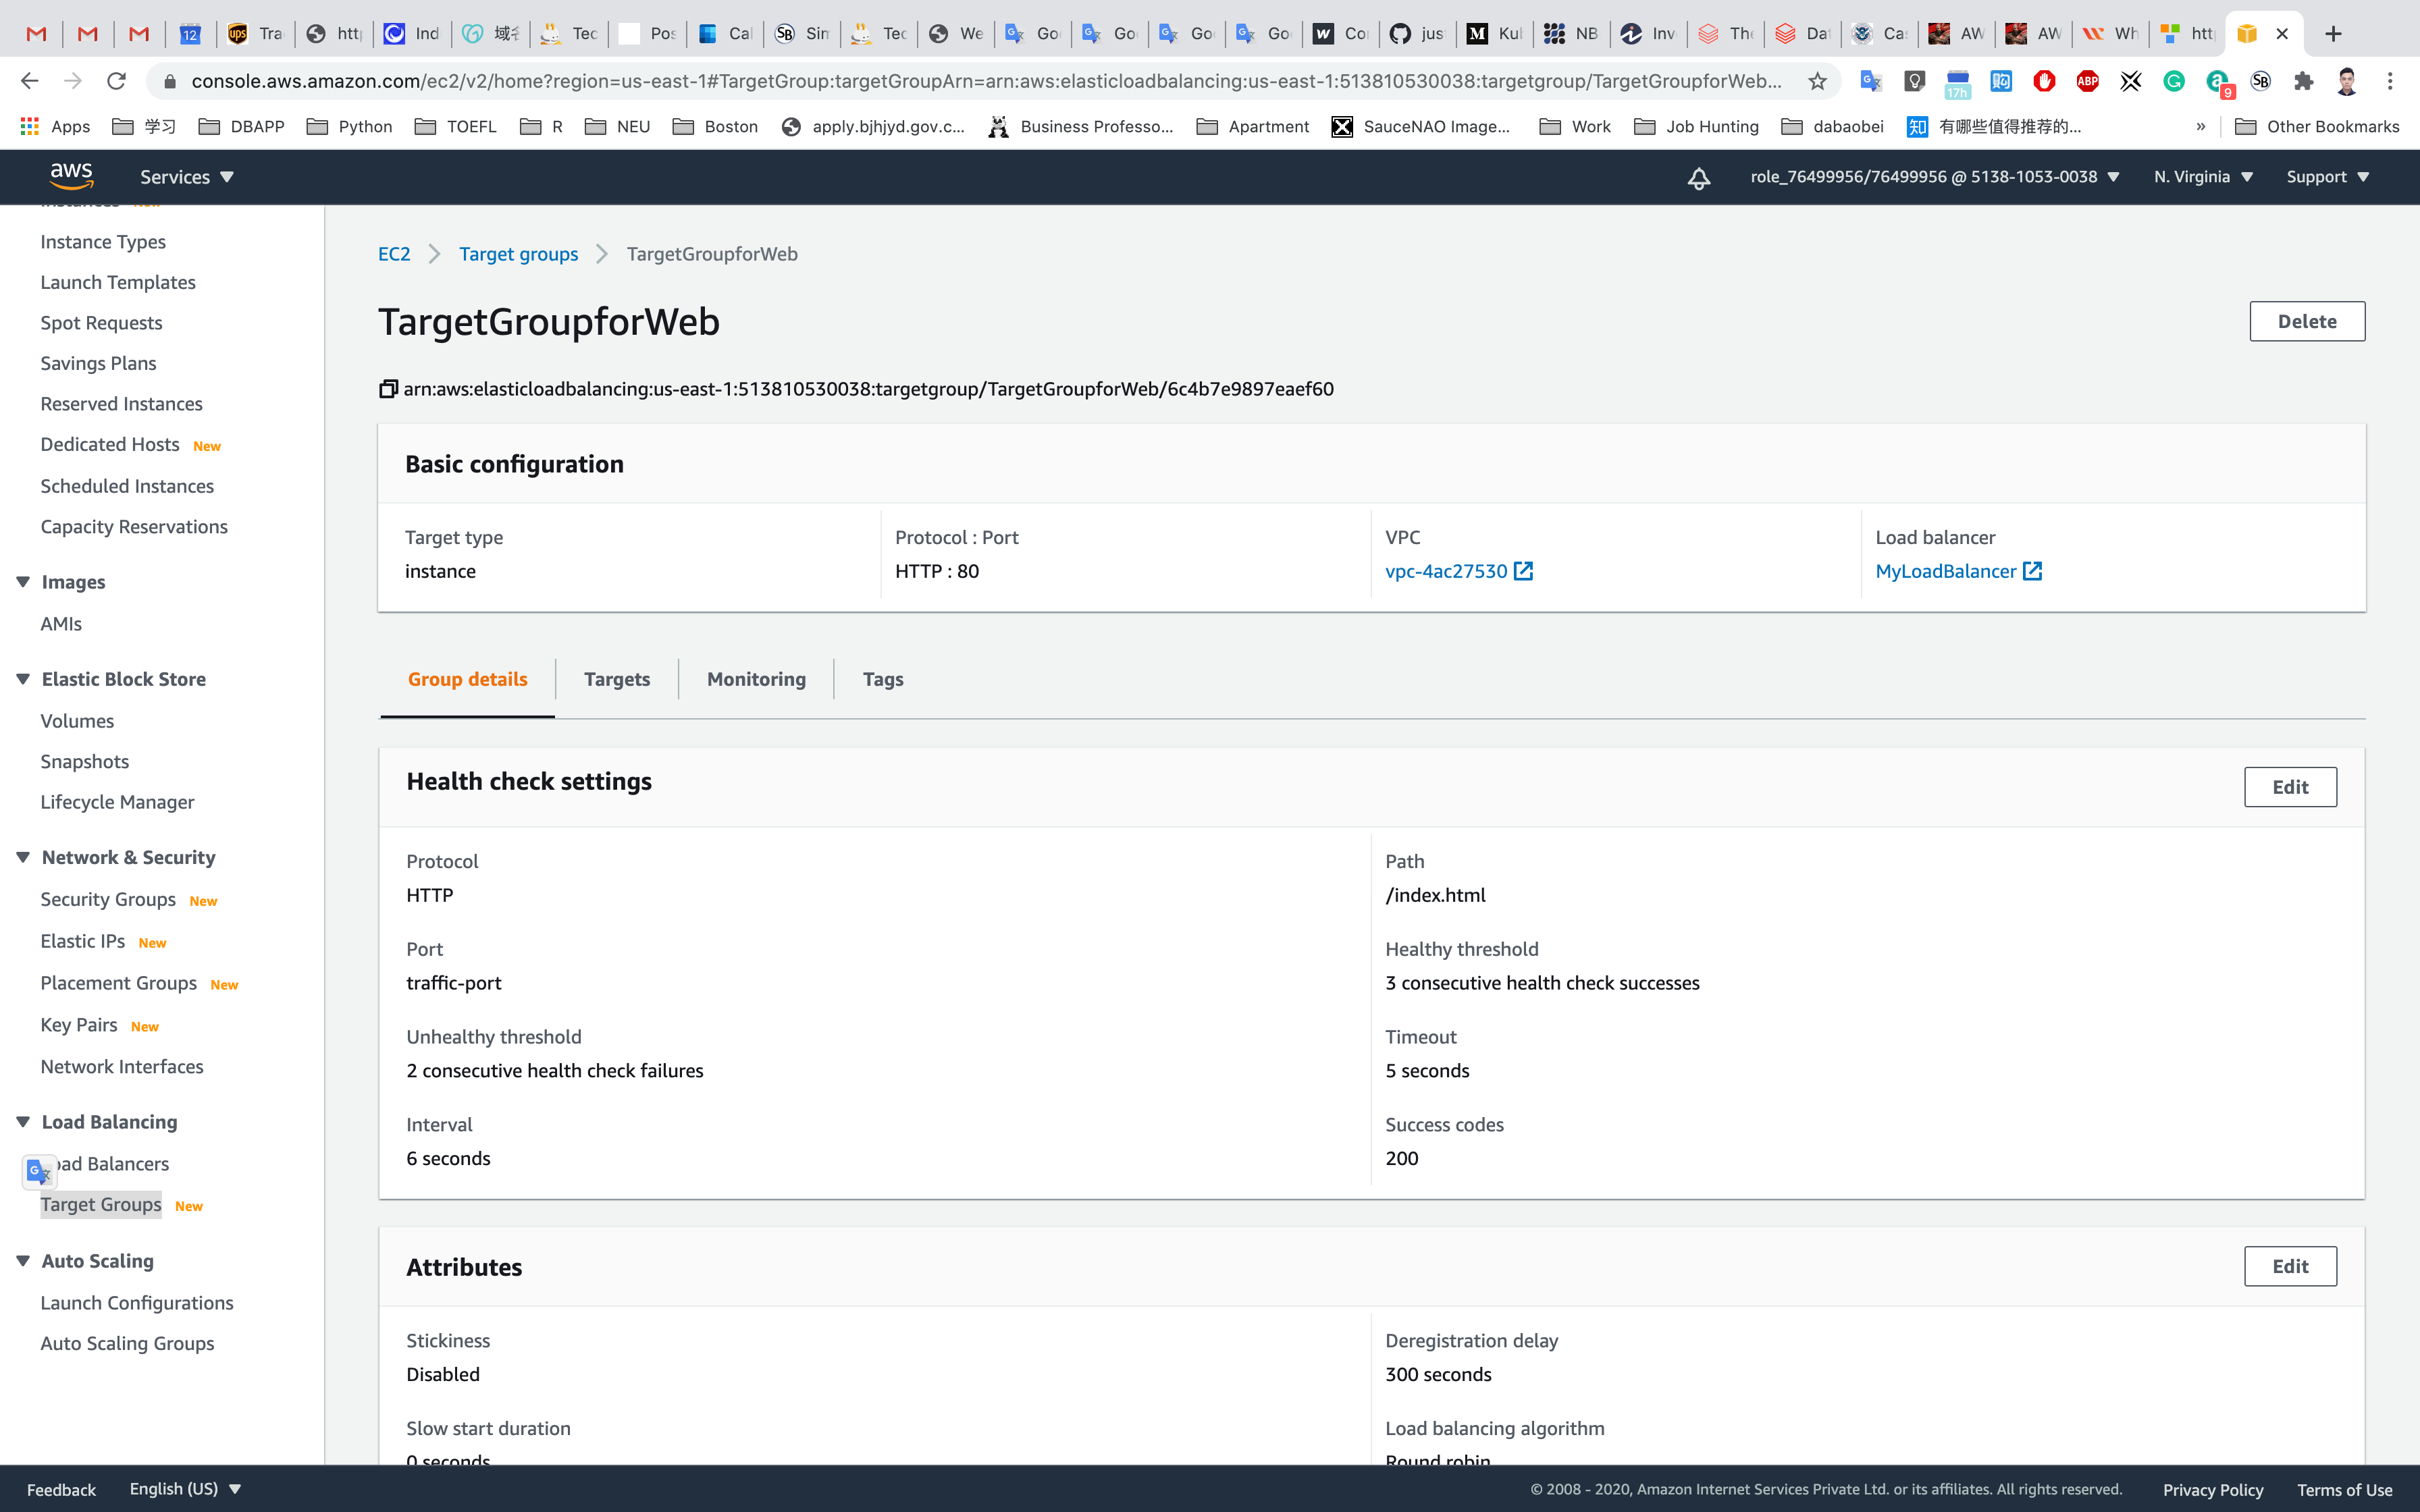
Wait until the status column of the instances changes to healthy (this means both web servers have passed ELB health check)
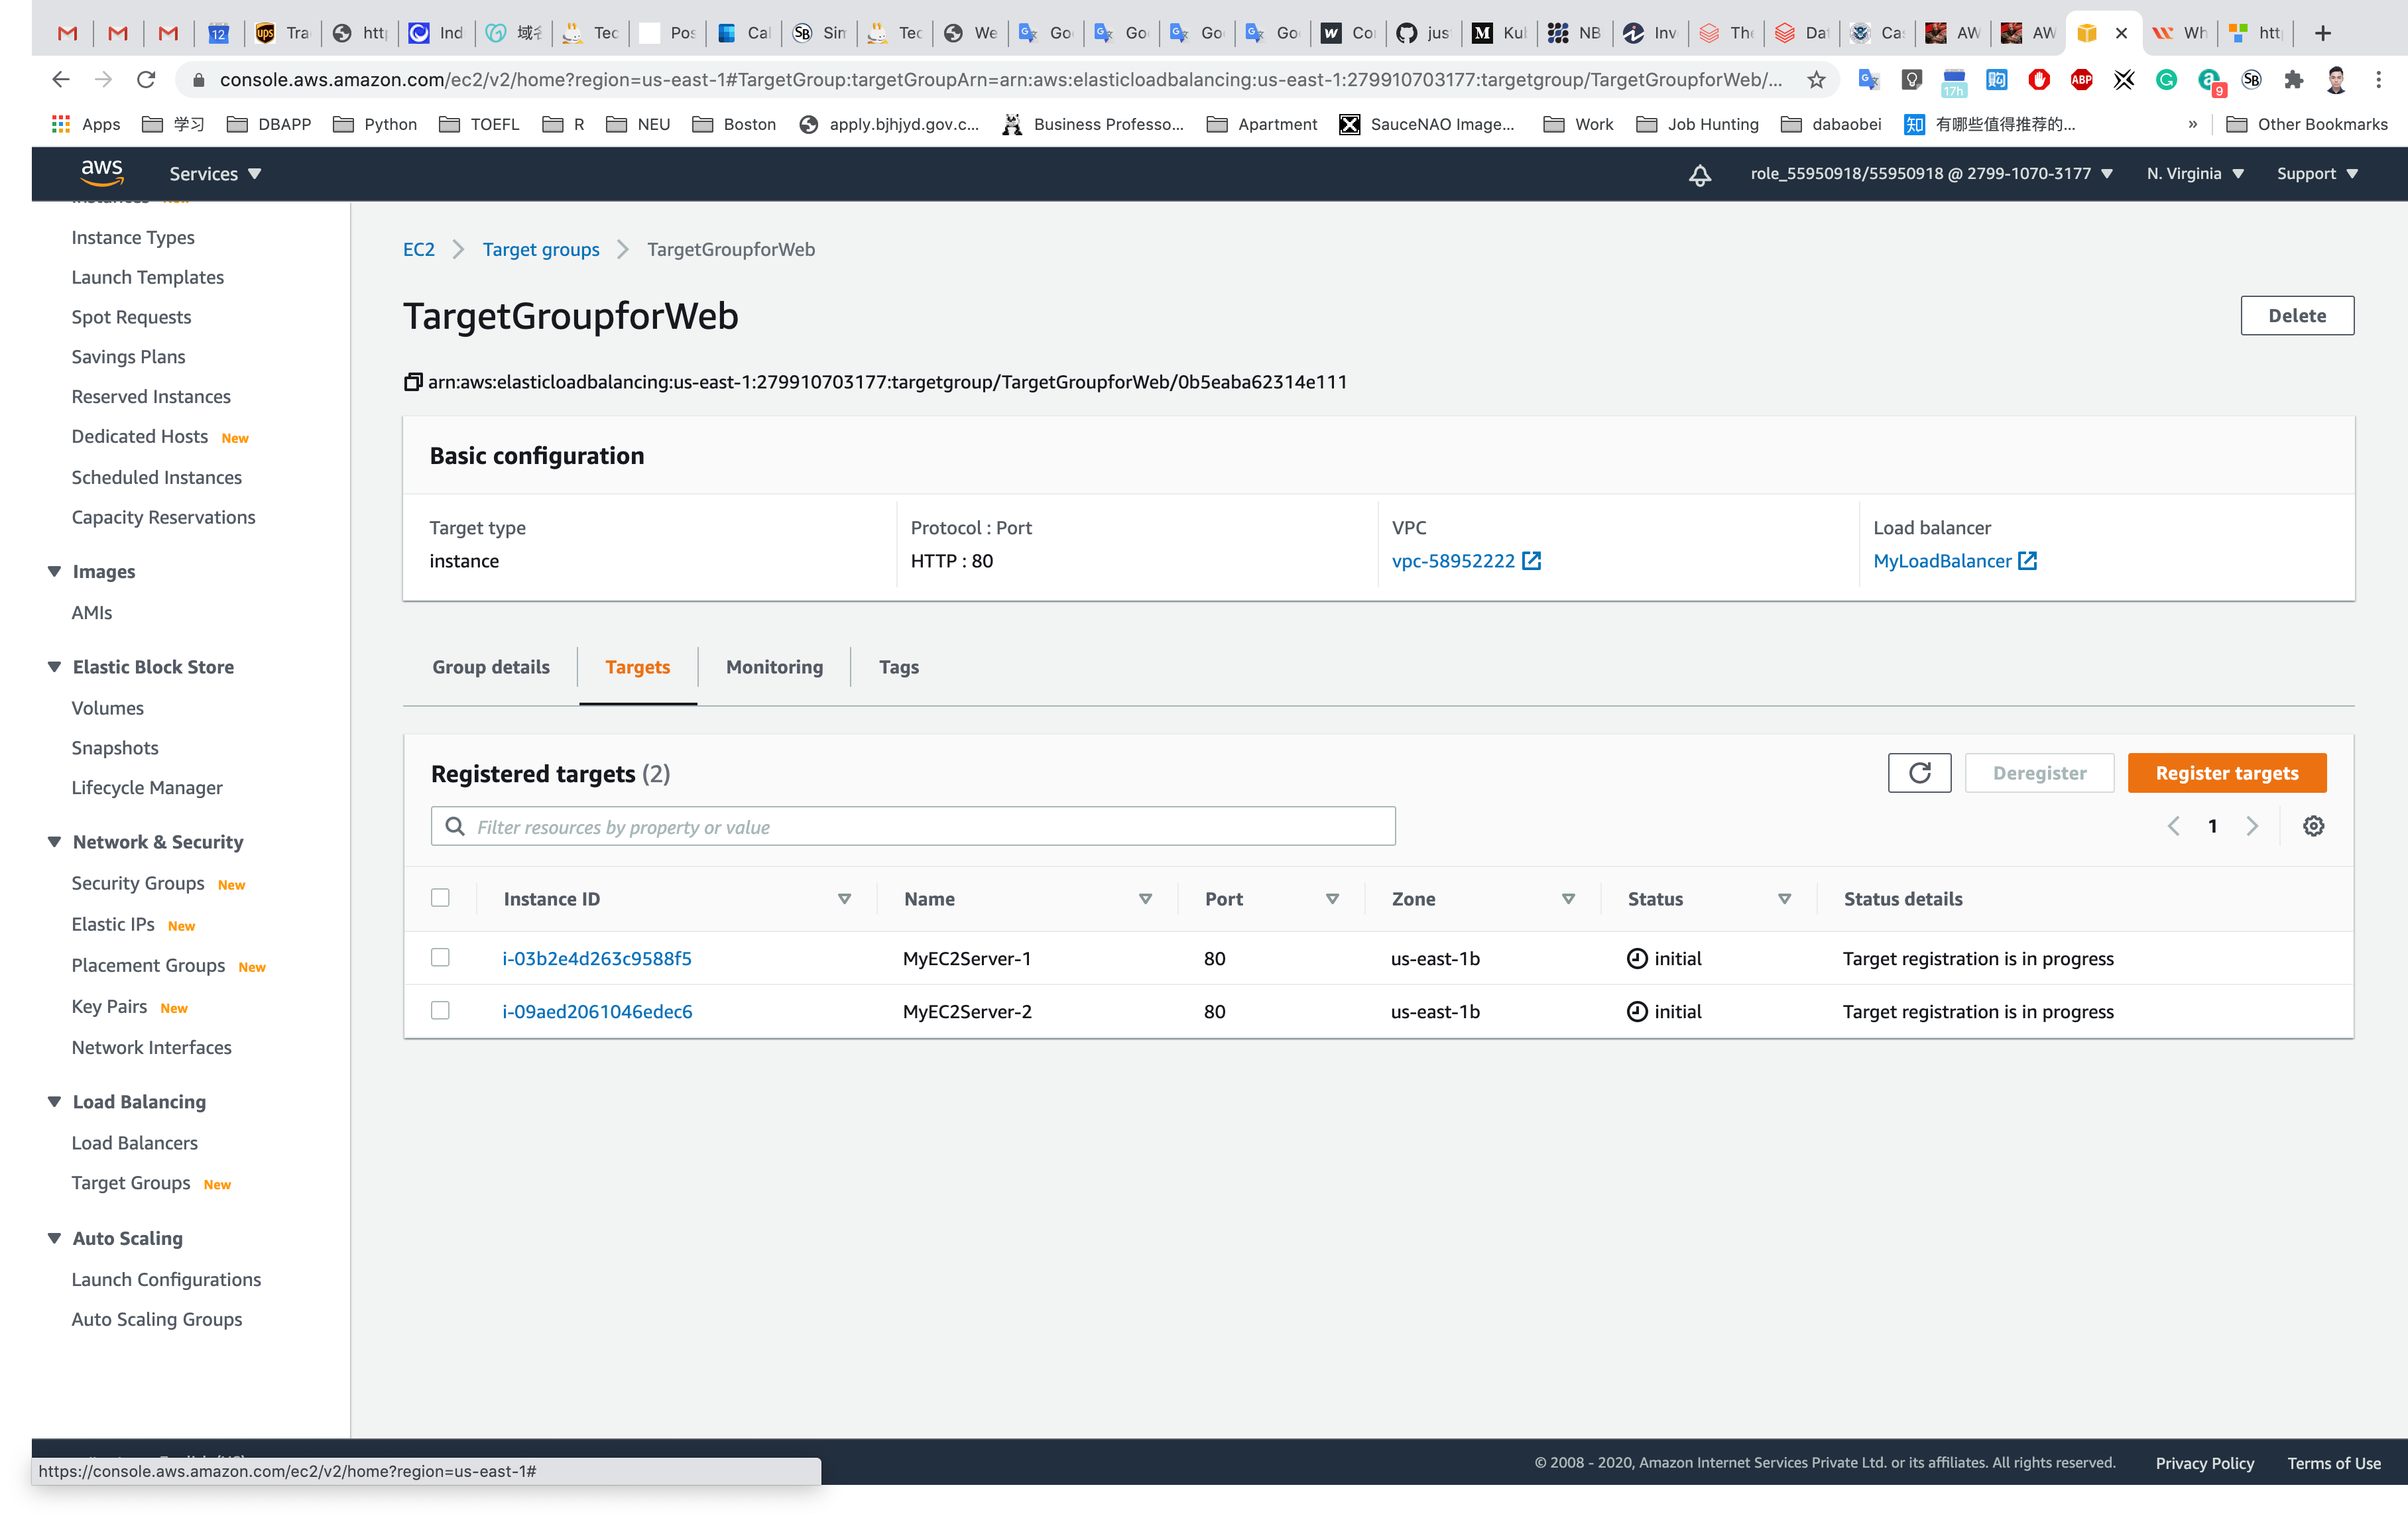
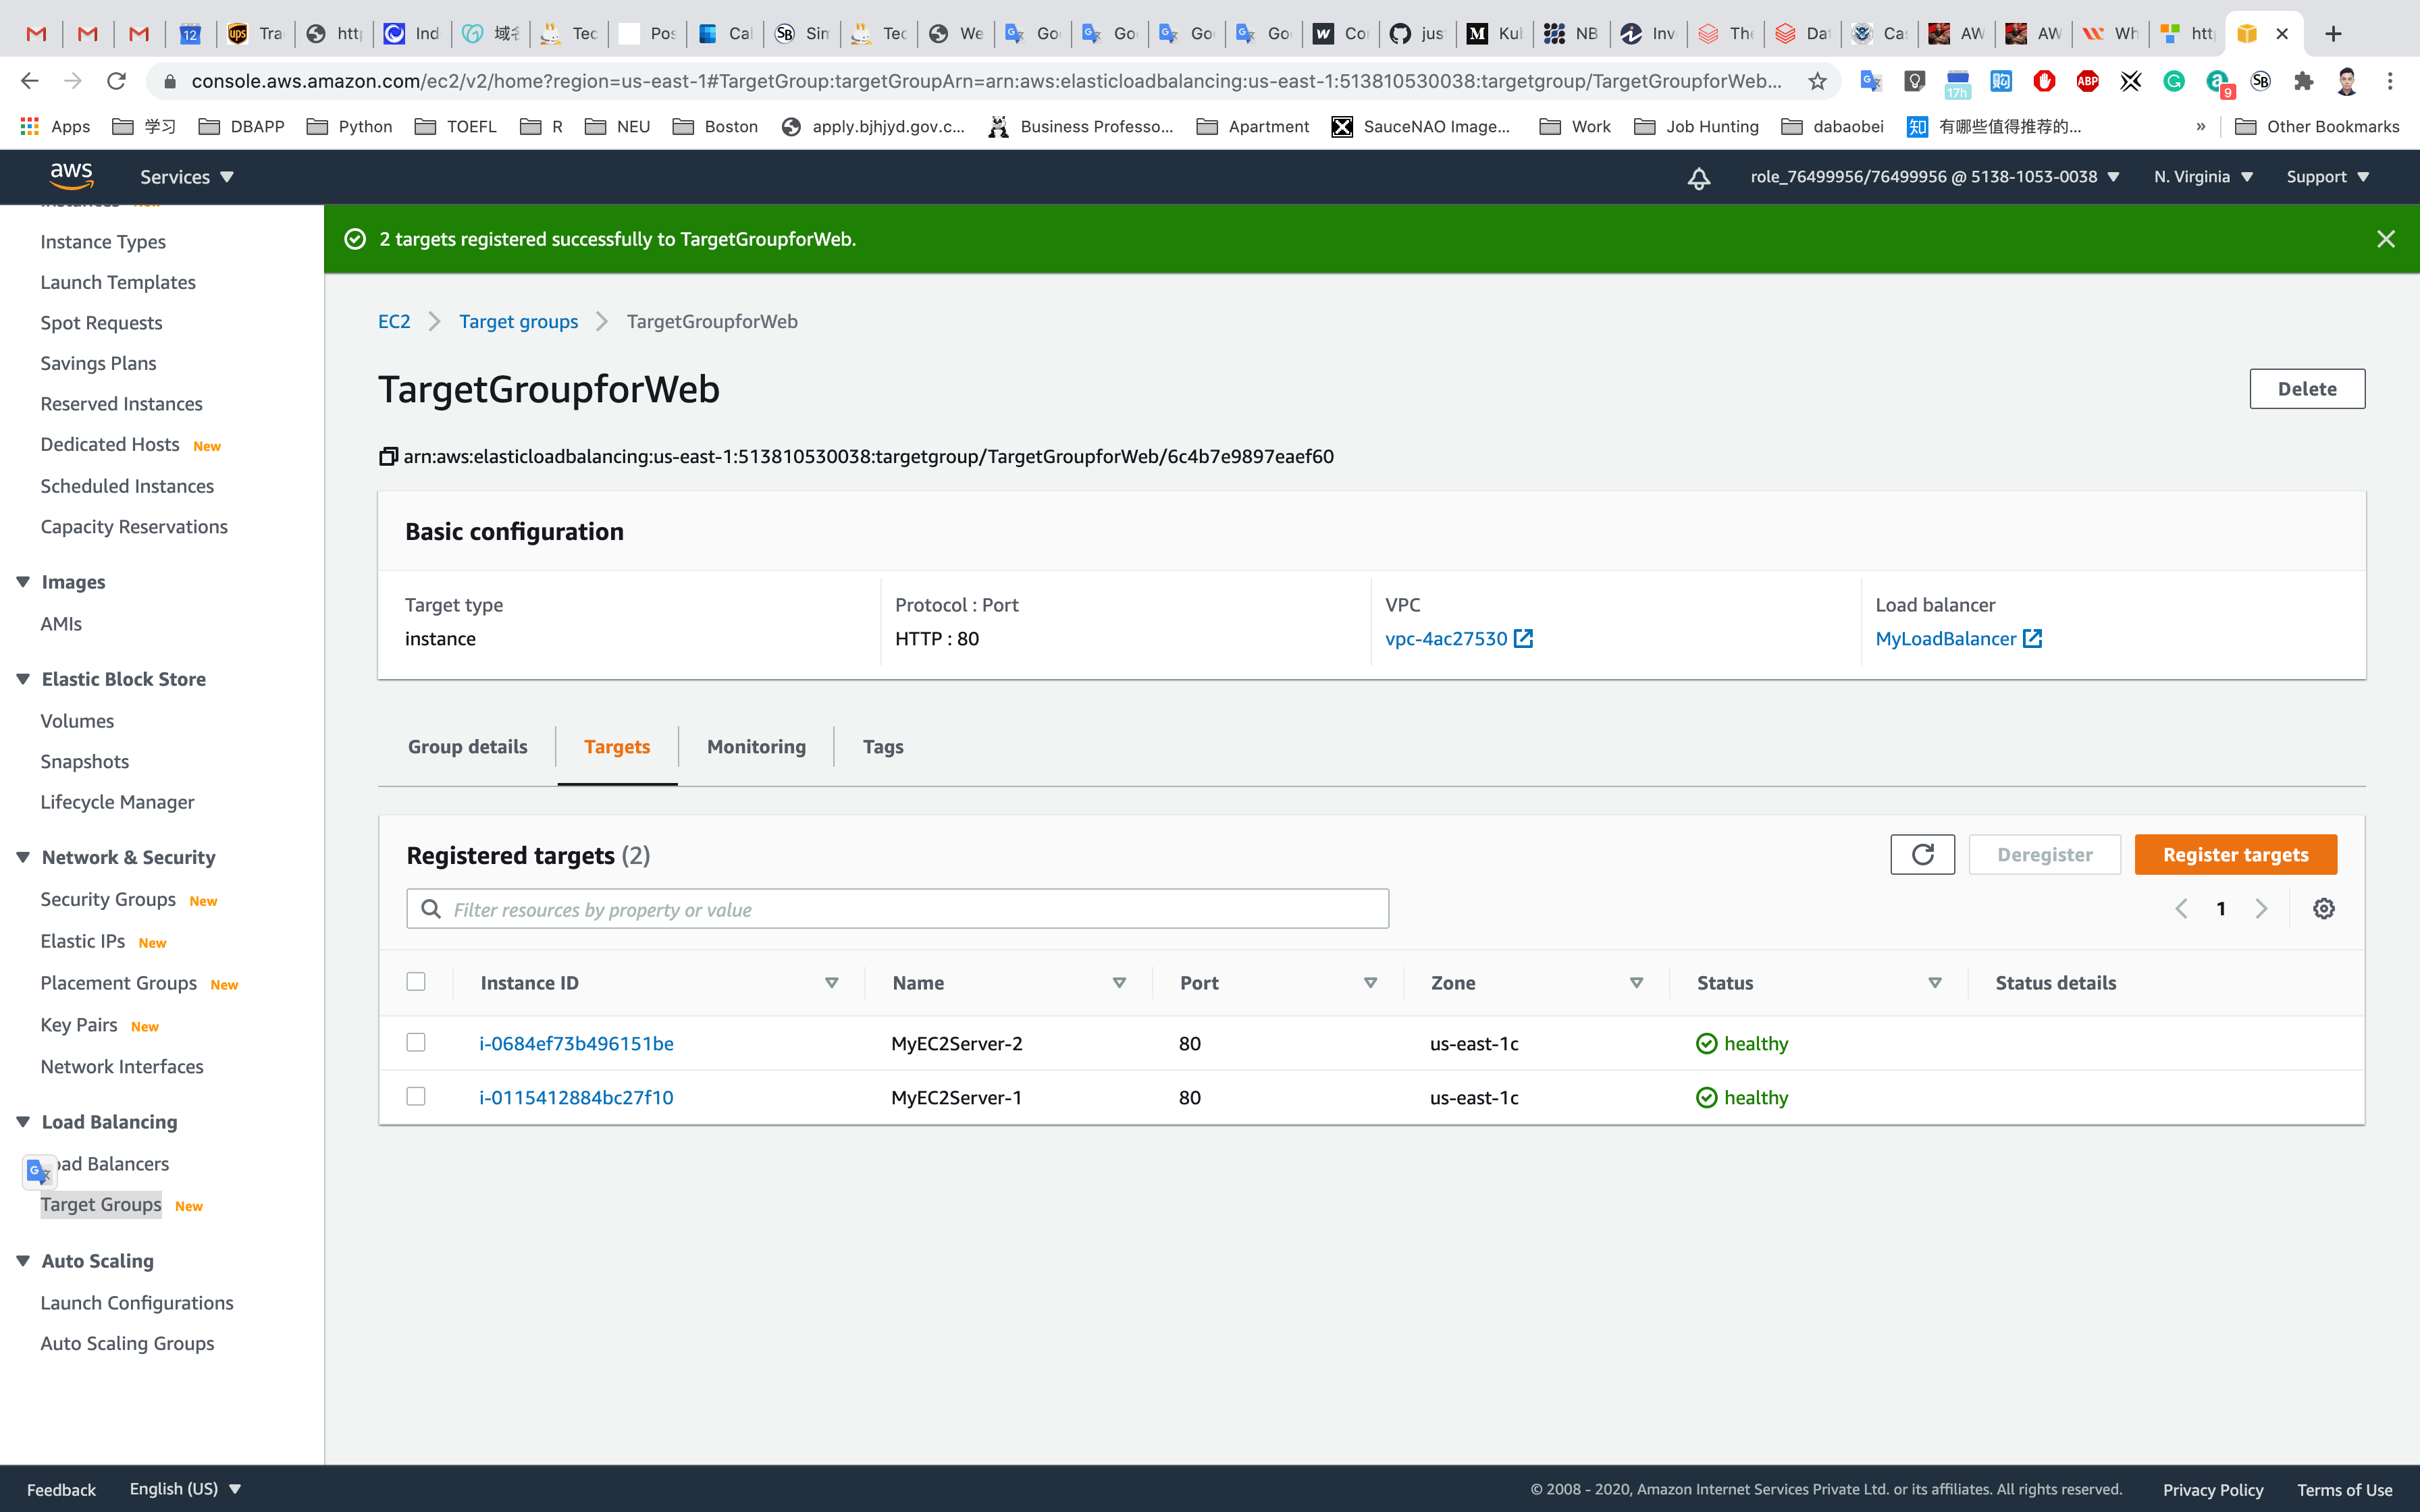
Next, navigate to and notice the state of ELB is active. Copy the DNS name of the ELB and enter the address in the browser.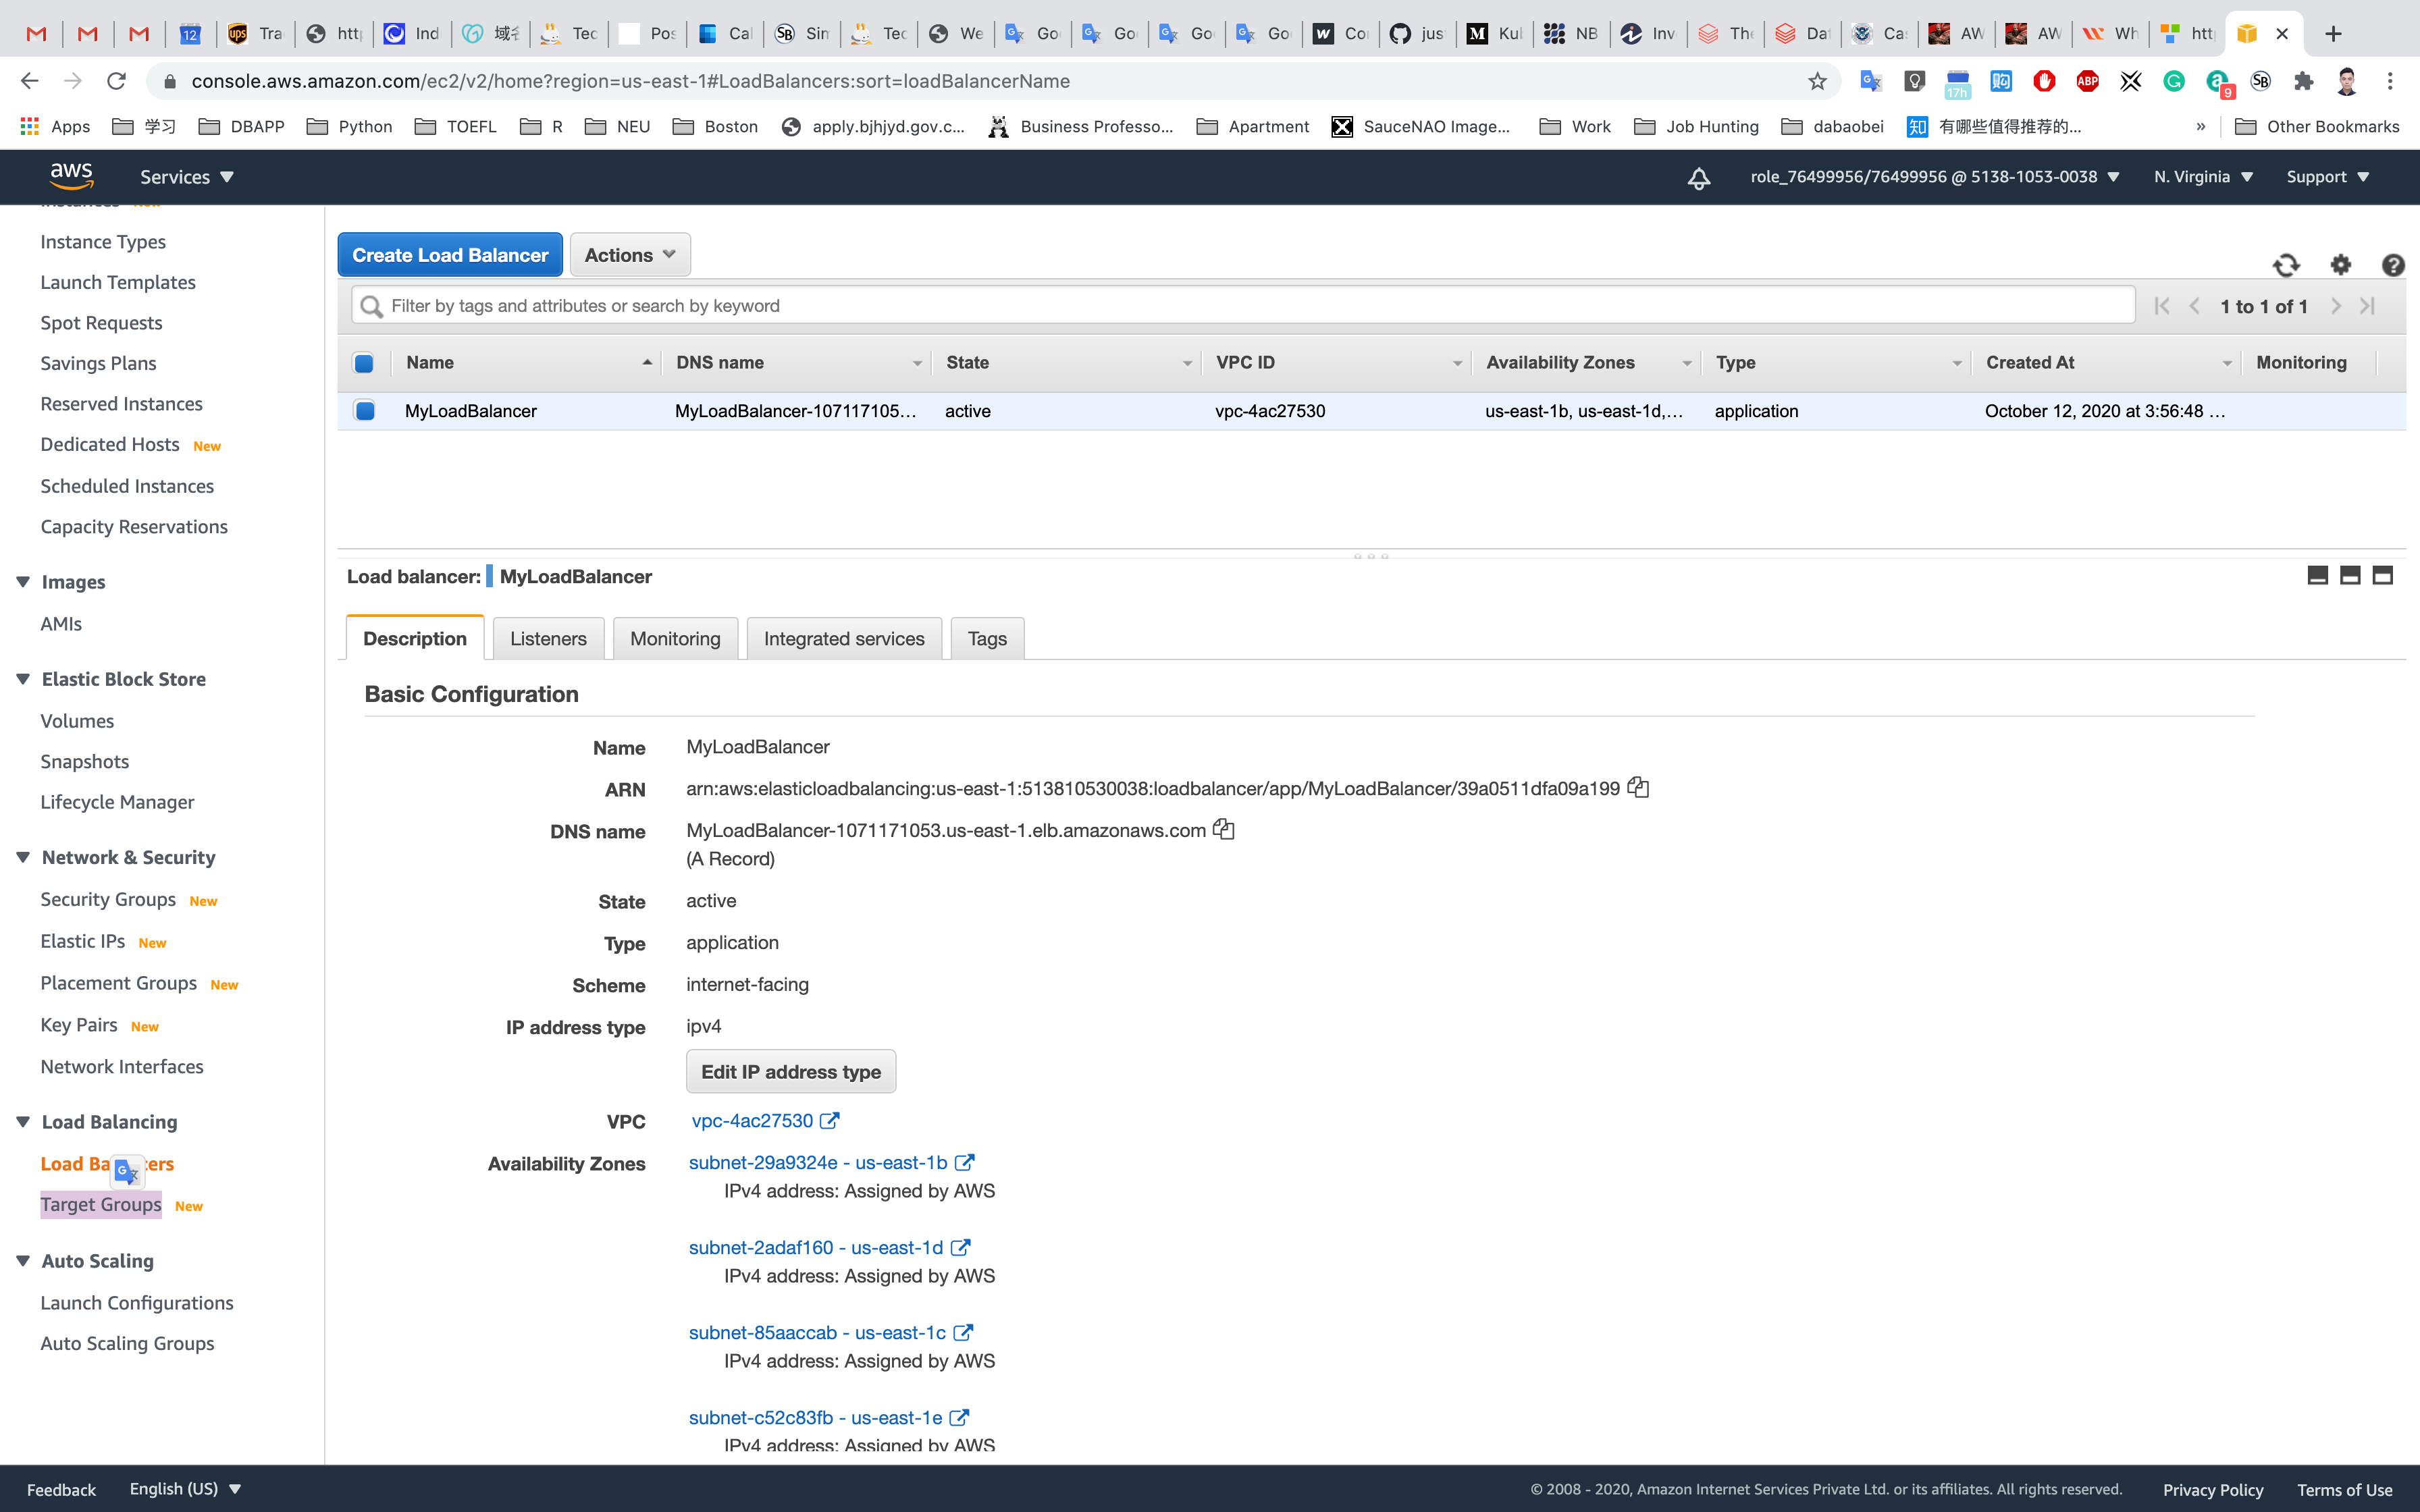
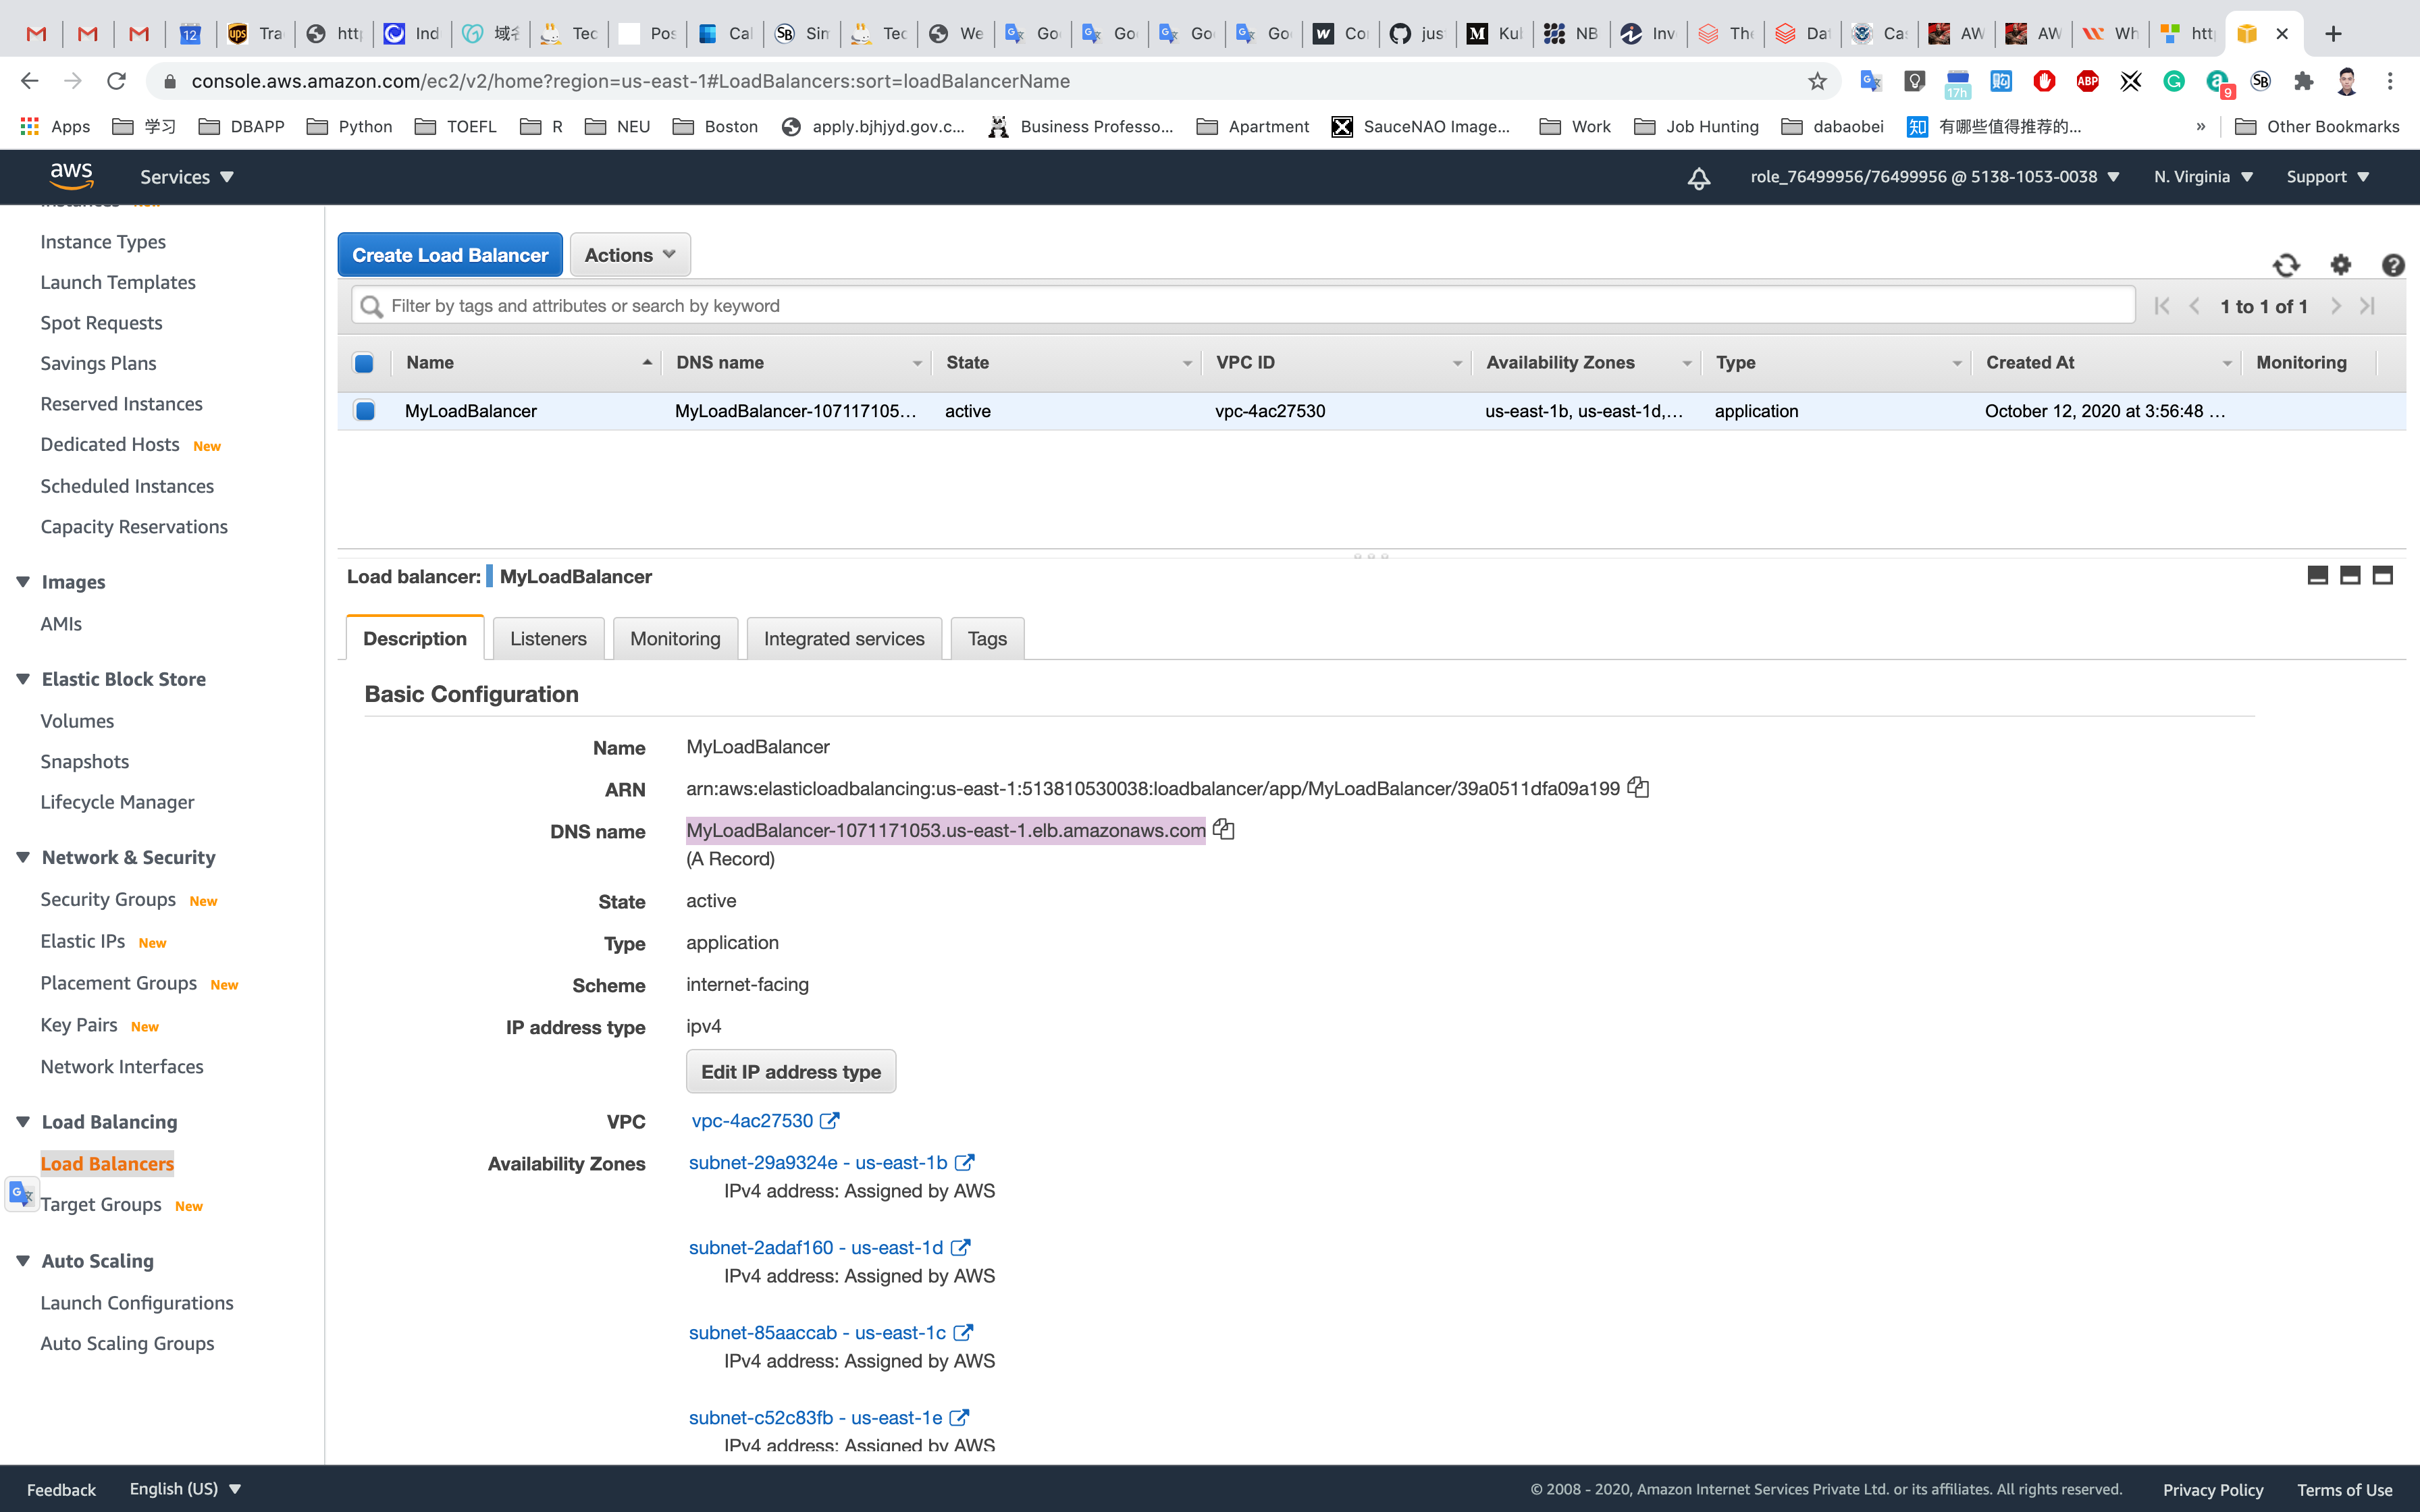
DNS Example: MyLoadBalancer-62999575.us-east-1.elb.amazonaws.com
Open a new browser tab and input your DNS name of ELB.
You should see the index.html page content of MyEC2Server-1 or MyEC2Server-2

Now Refresh the page a few times.You will observe that the index pages change each time you refresh. You can see the index.html contents updated from both MyEC2Server-1 and MyEC2Server-2.
- Note: The ELB is equally dividing the incoming traffic to both servers in a Round Robin manner.

For testing if ELB is working properly,
In the left side menu, scroll up and navigate back to the Instances page.
Select MyEC2Server-1 or MyEC2Server-2, click on Actions and Instance State, and Stop the EC2 instance.
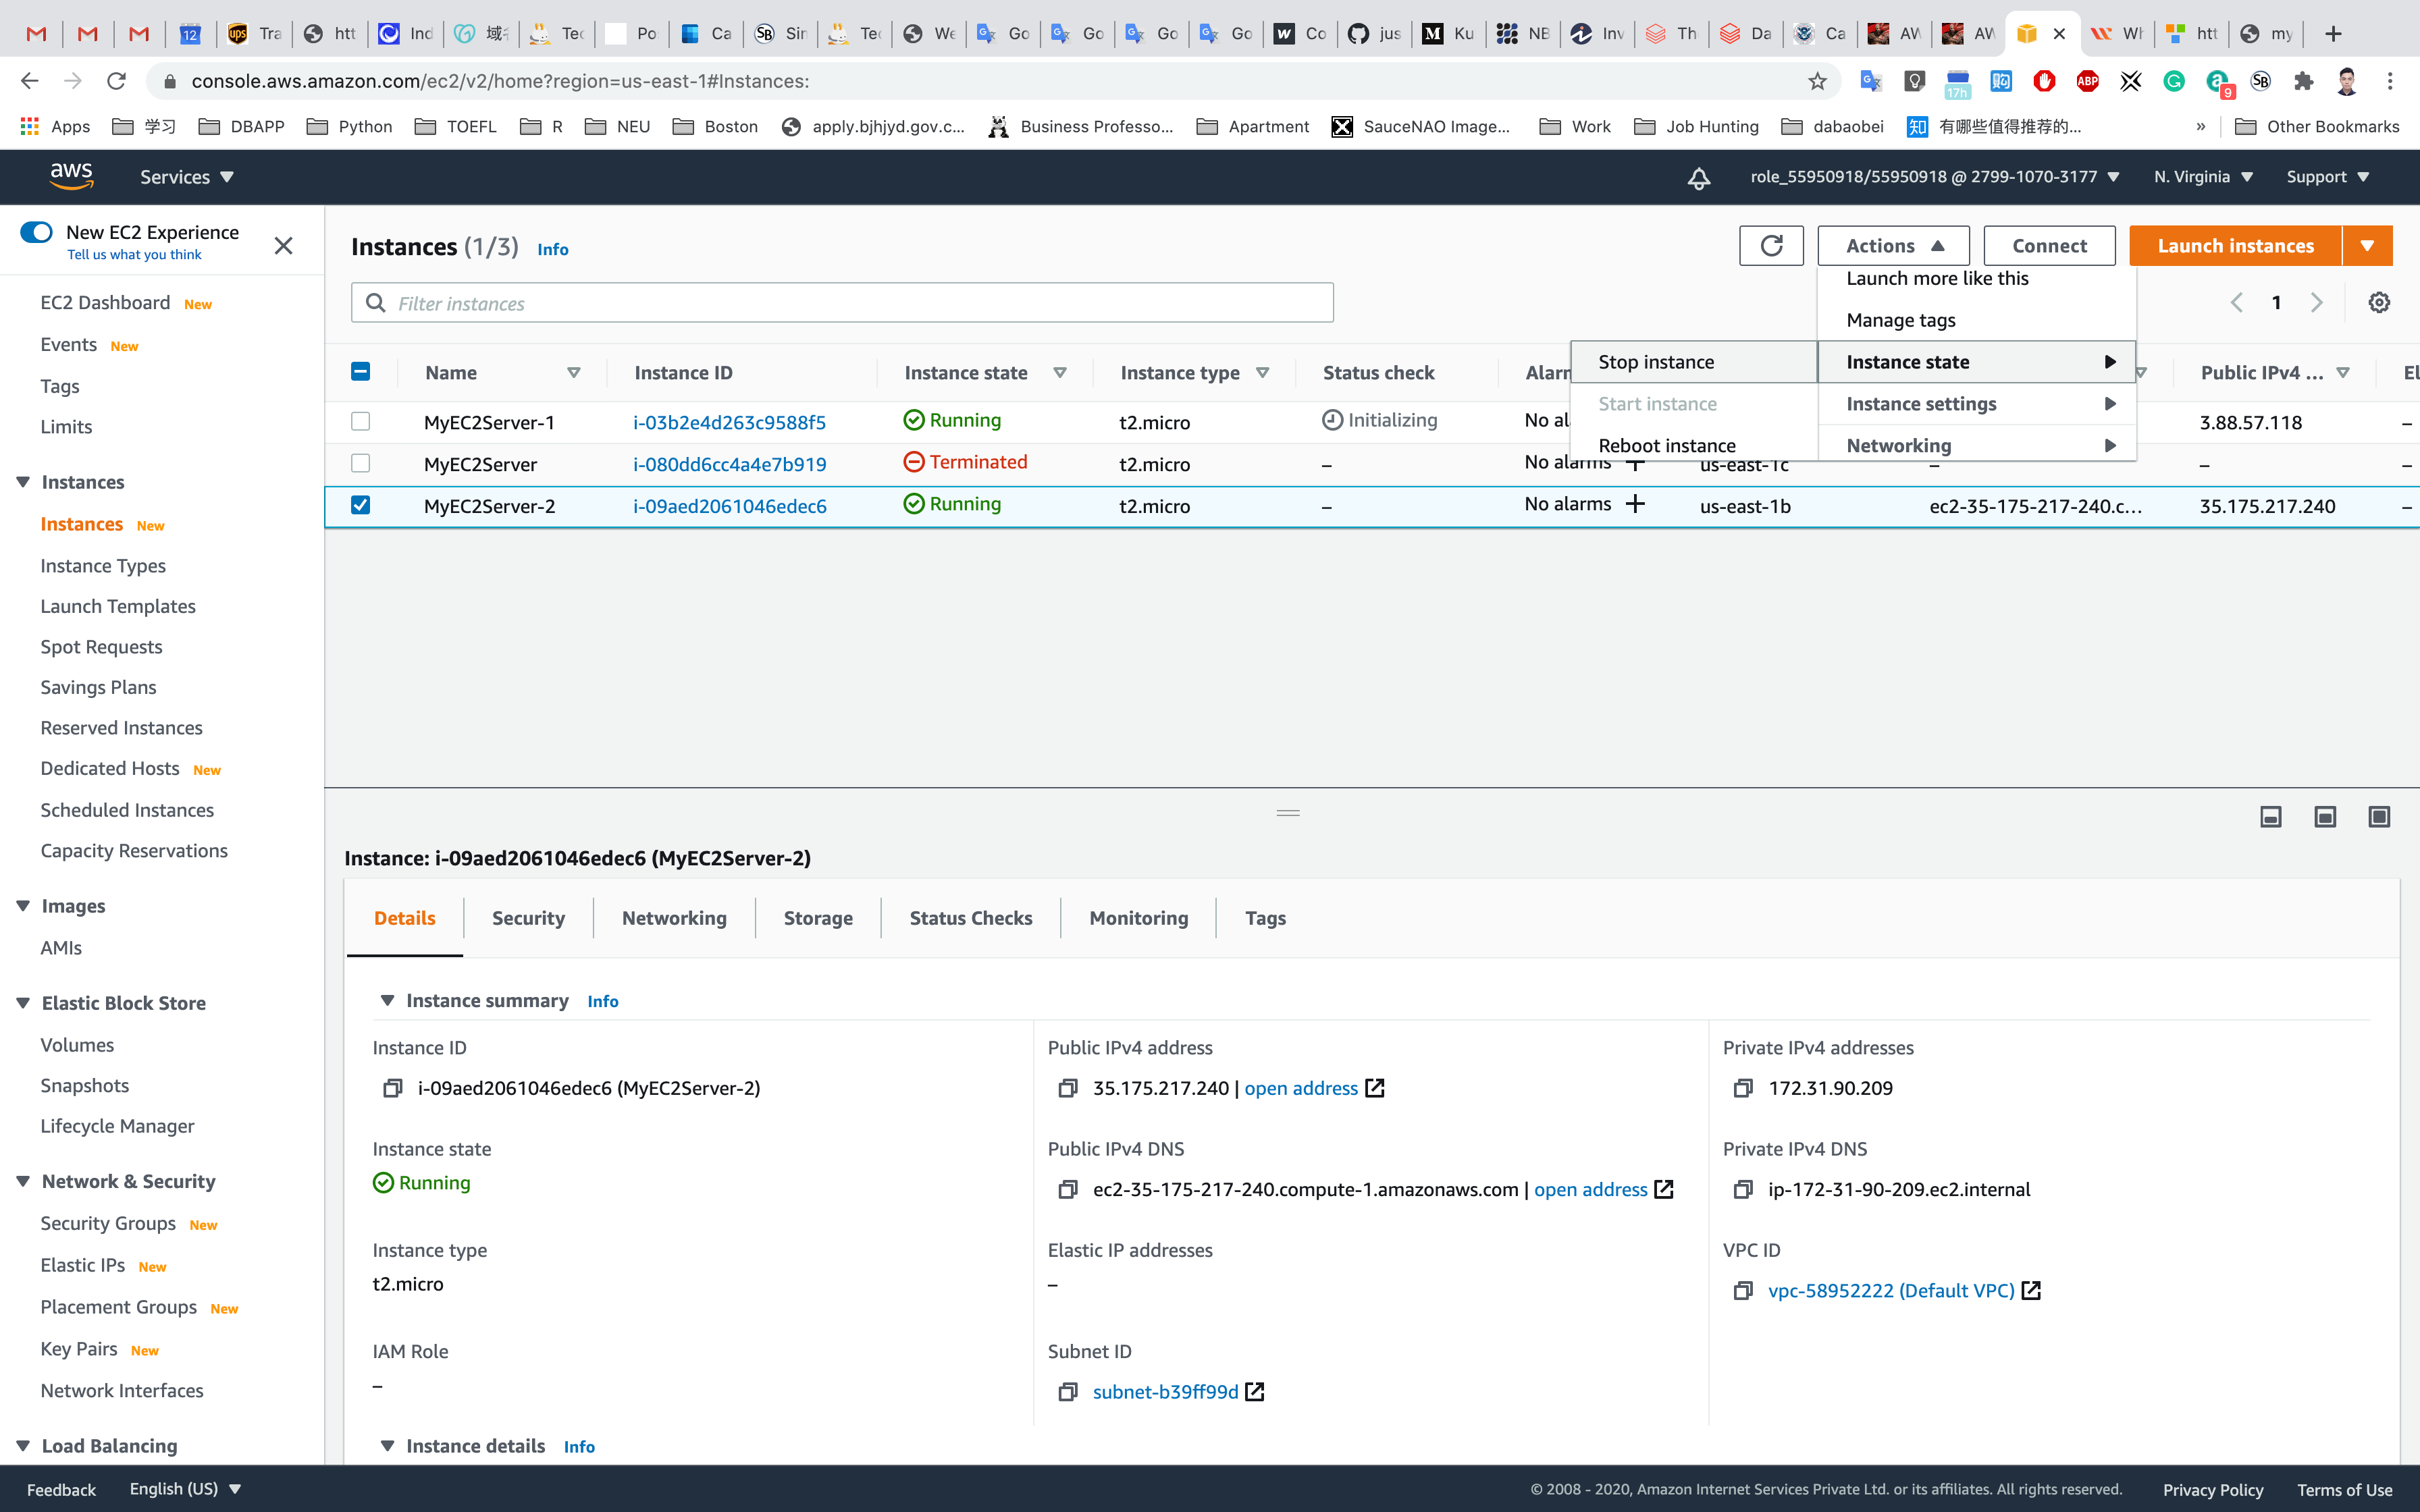
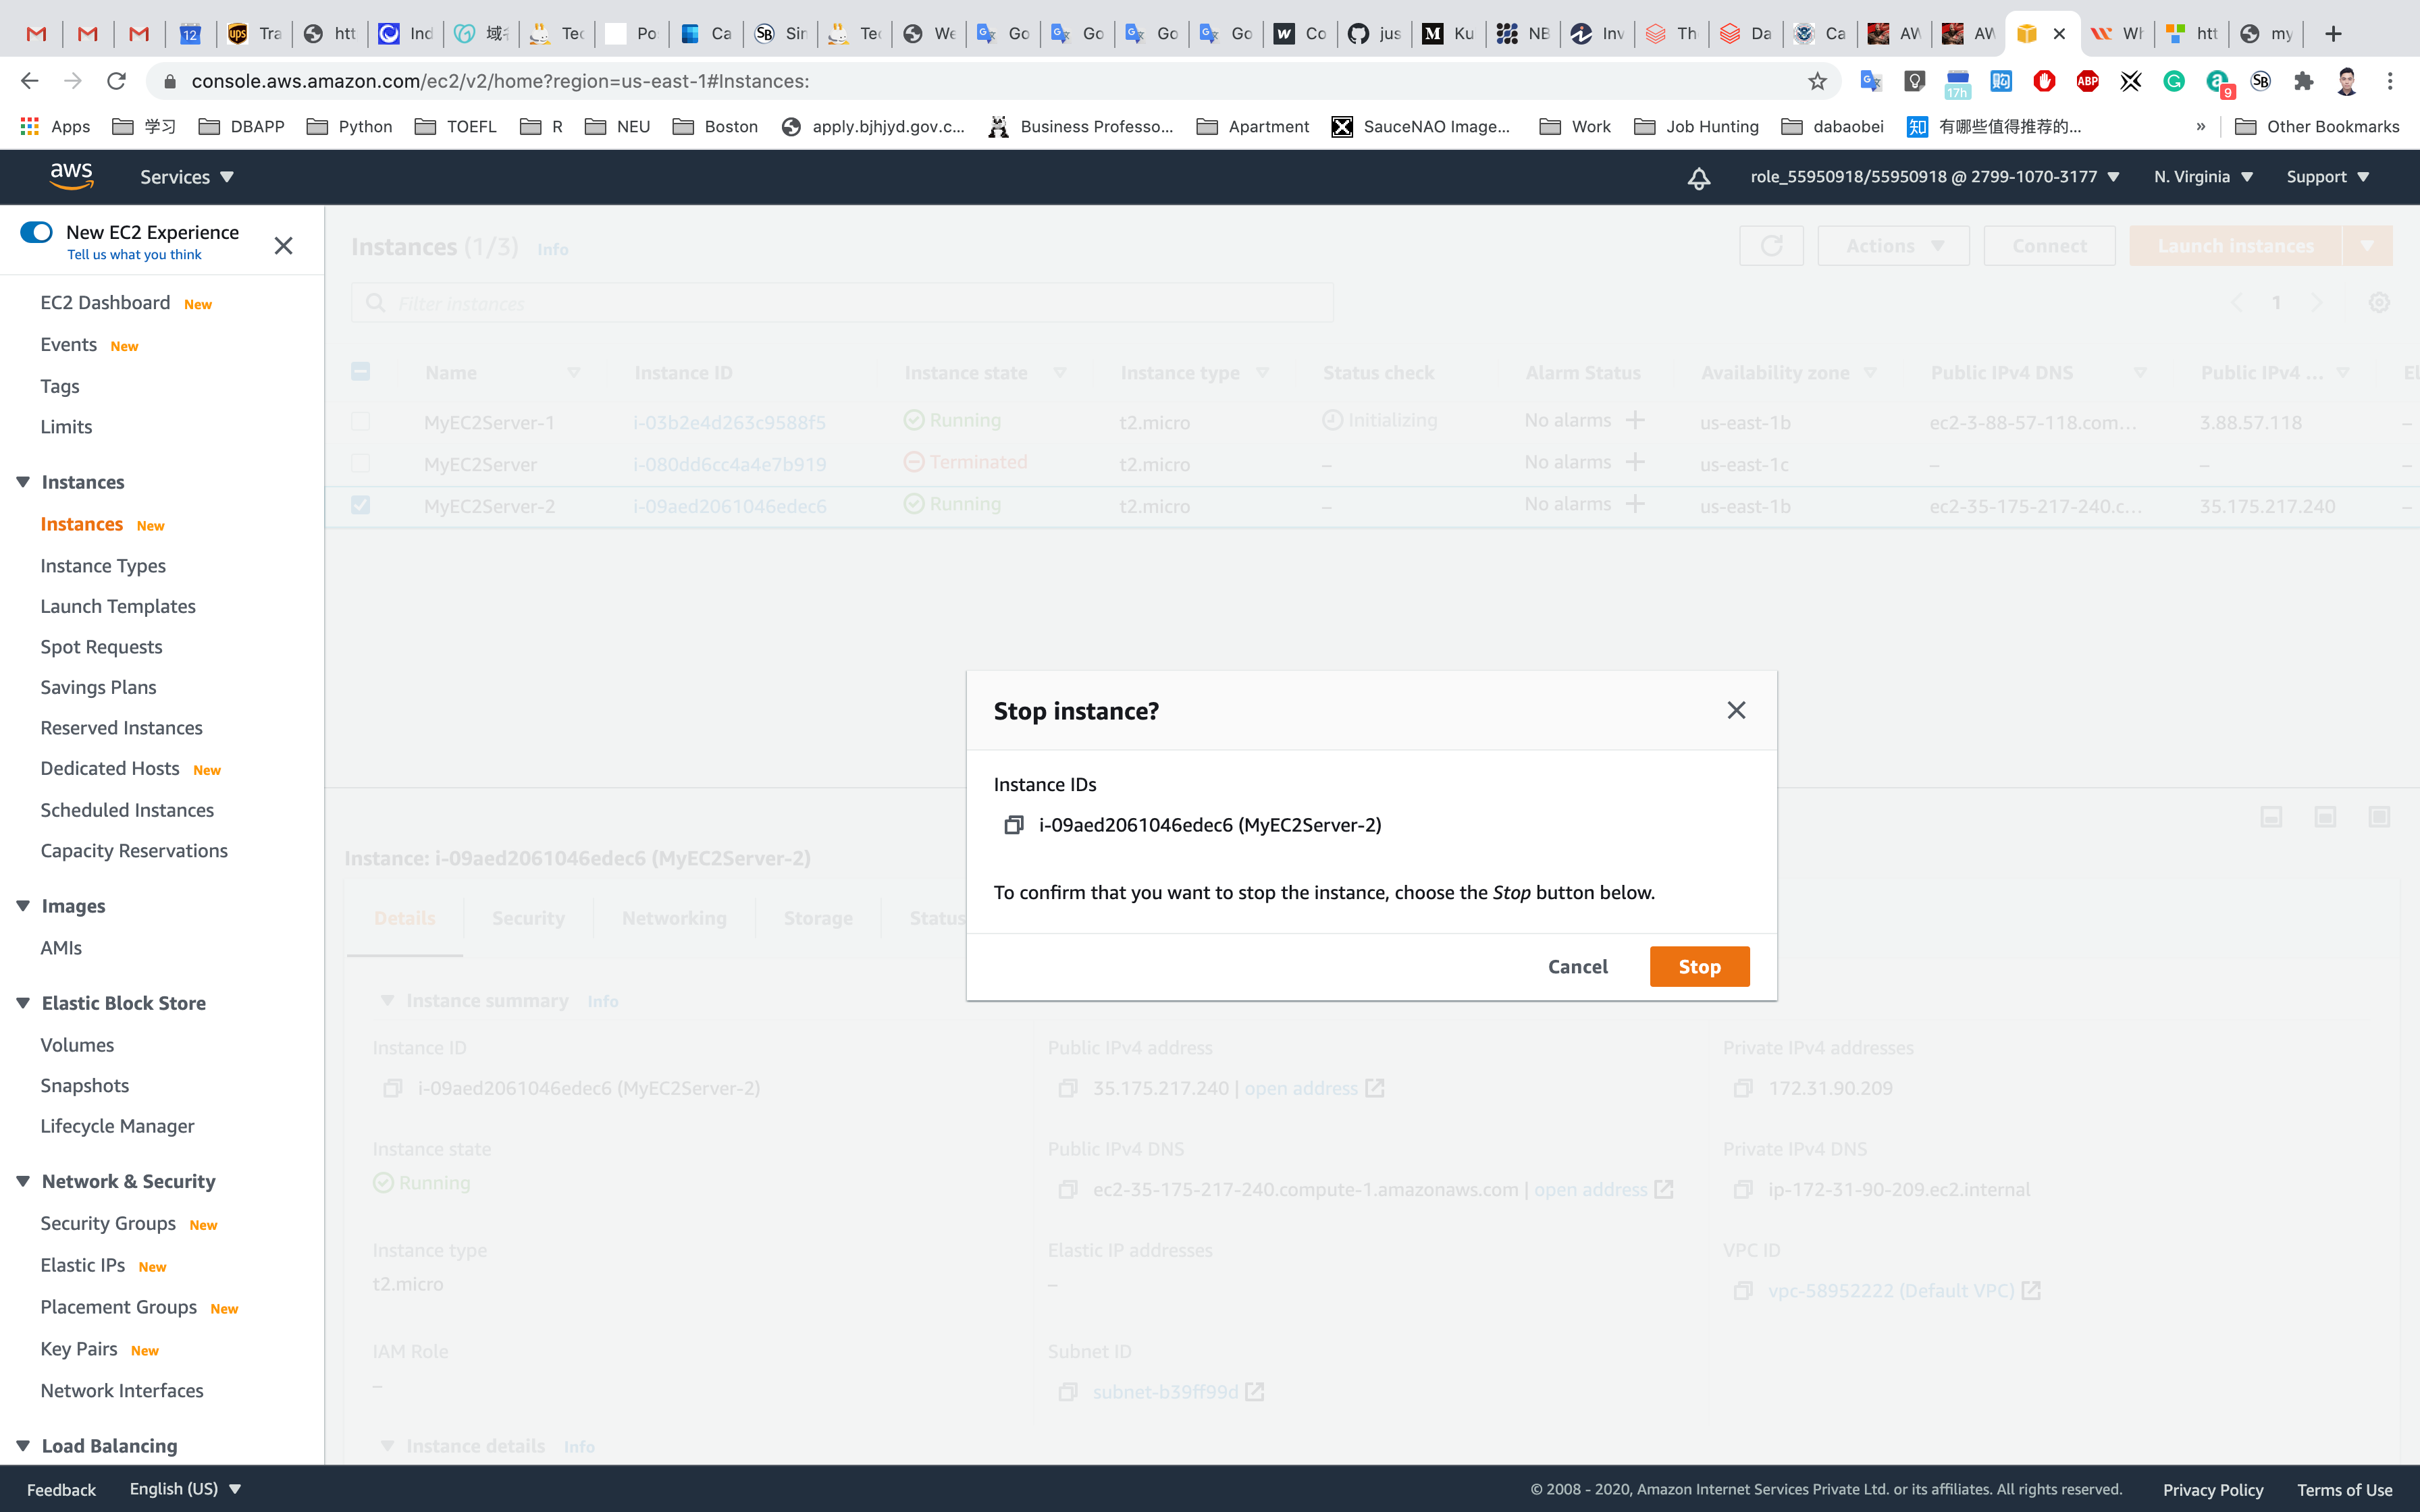
Click on Stop
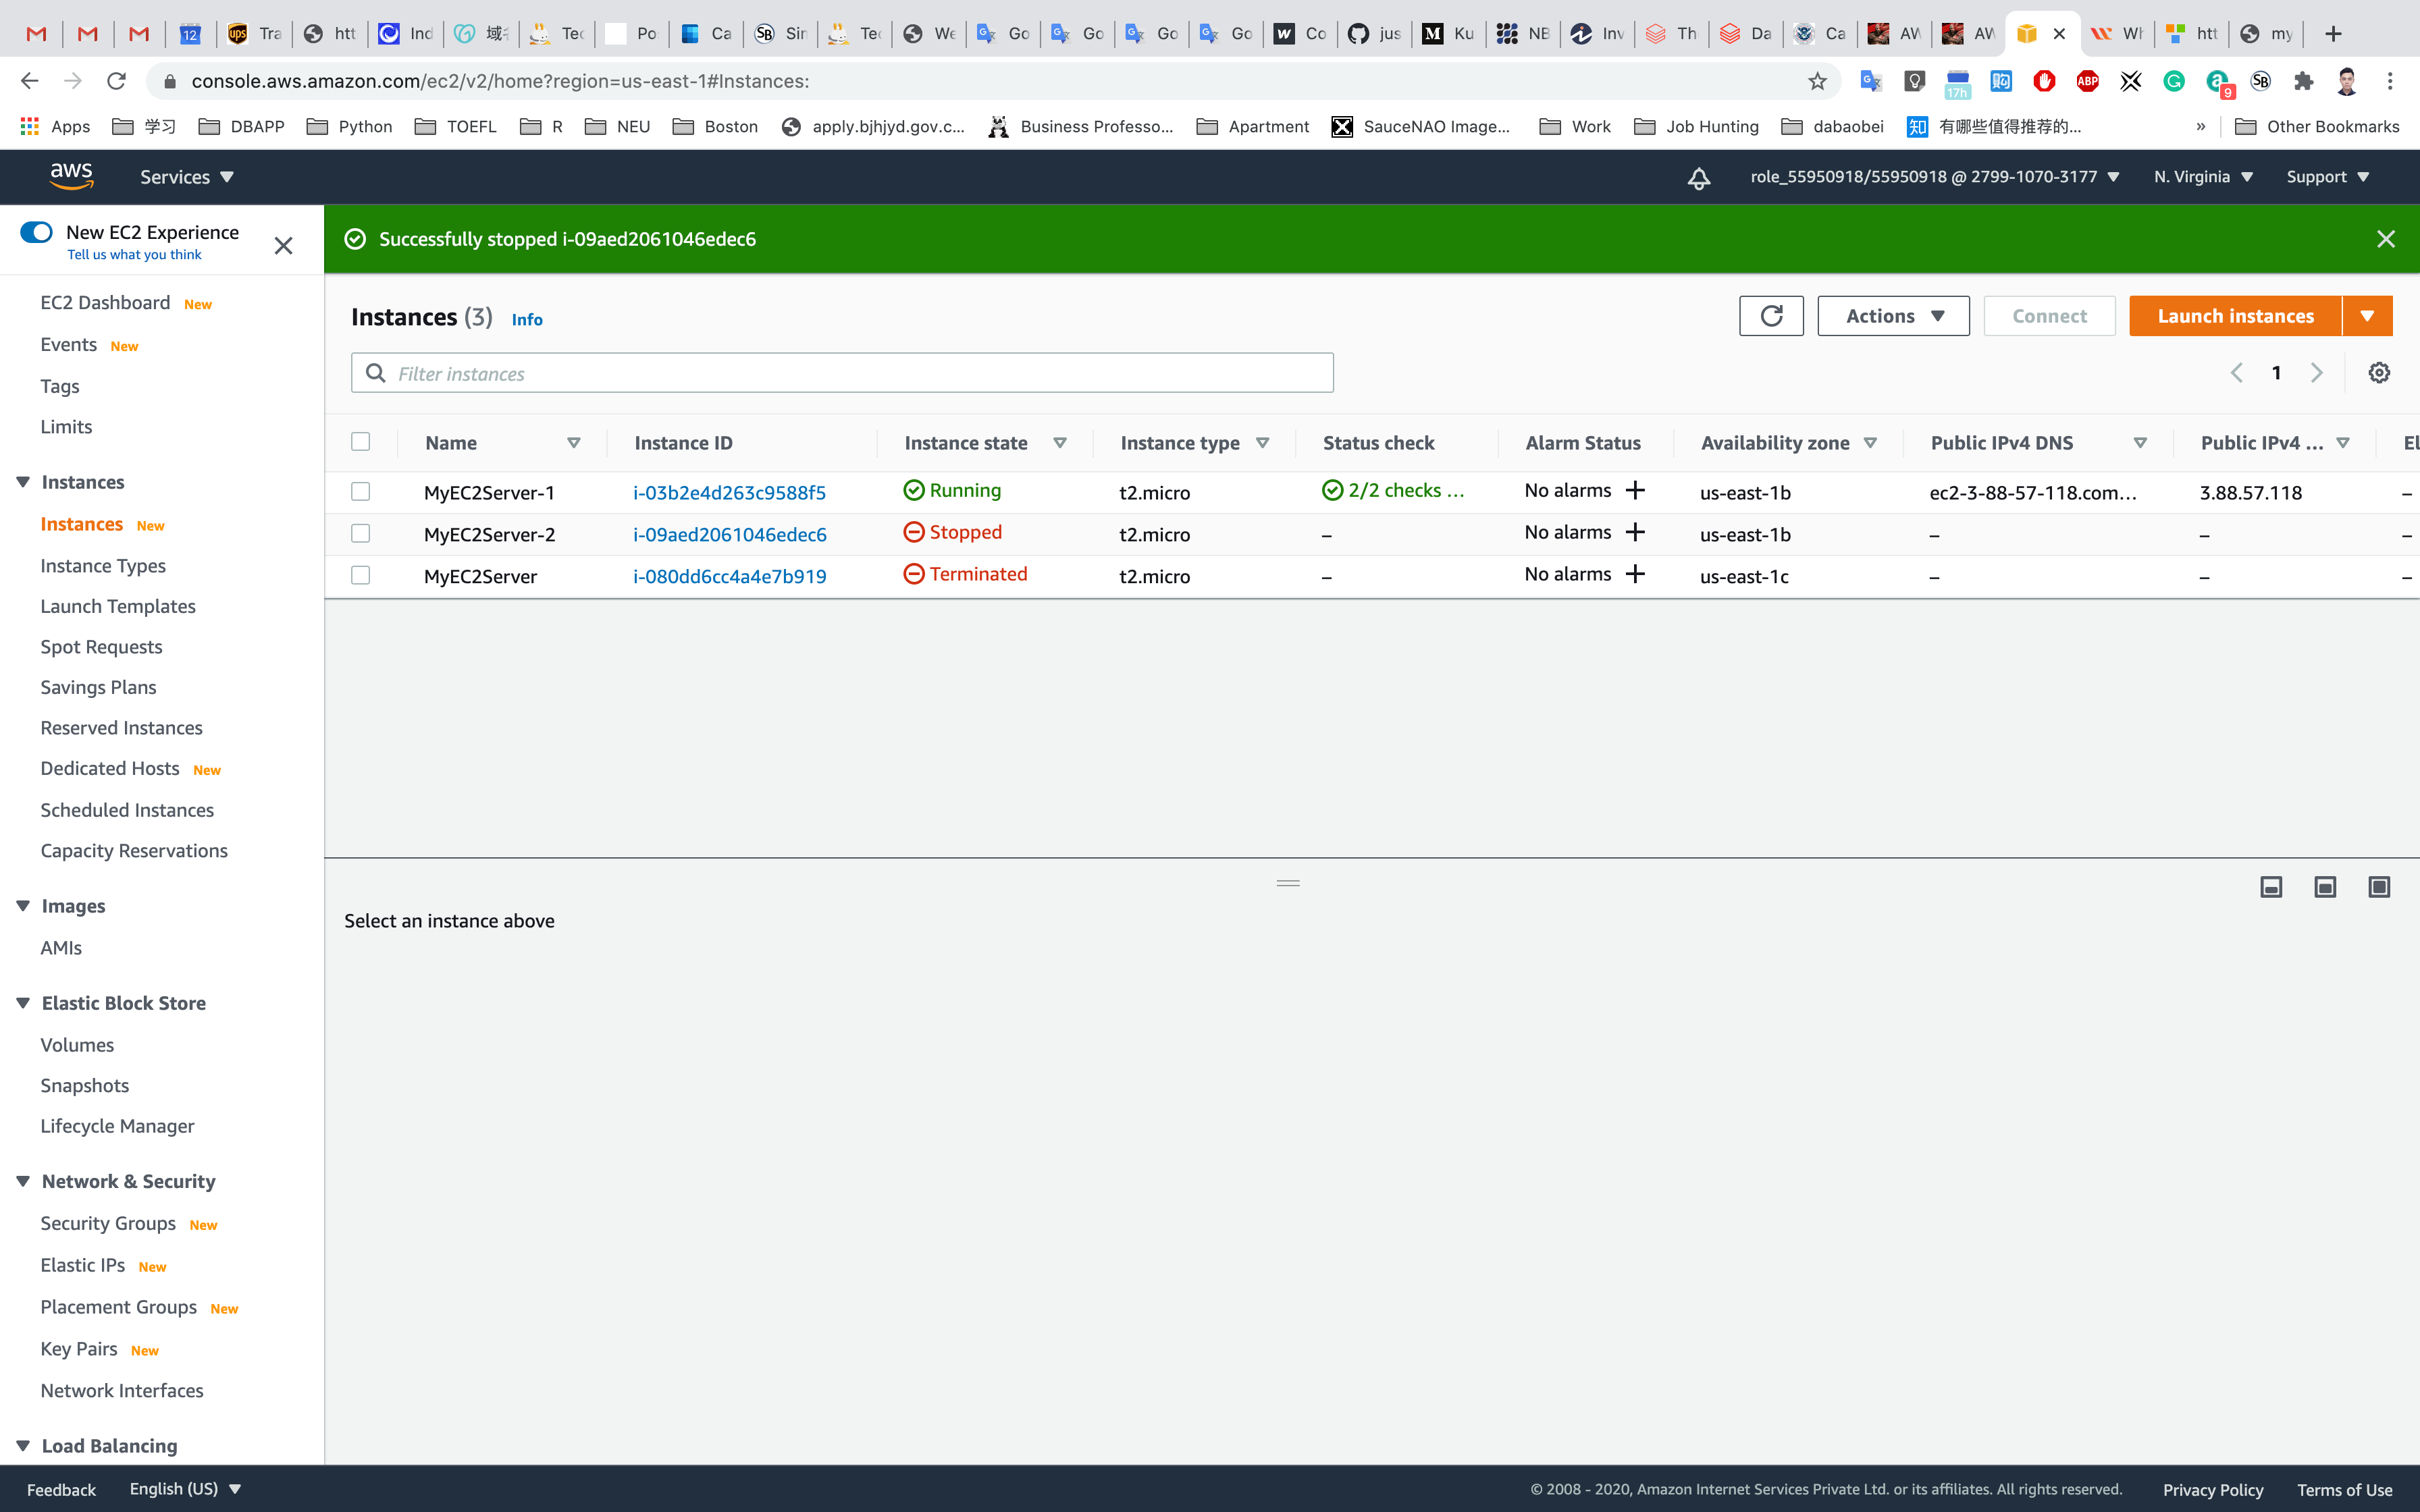
Refresh the page. Wait until the status change from Stopping to Stopped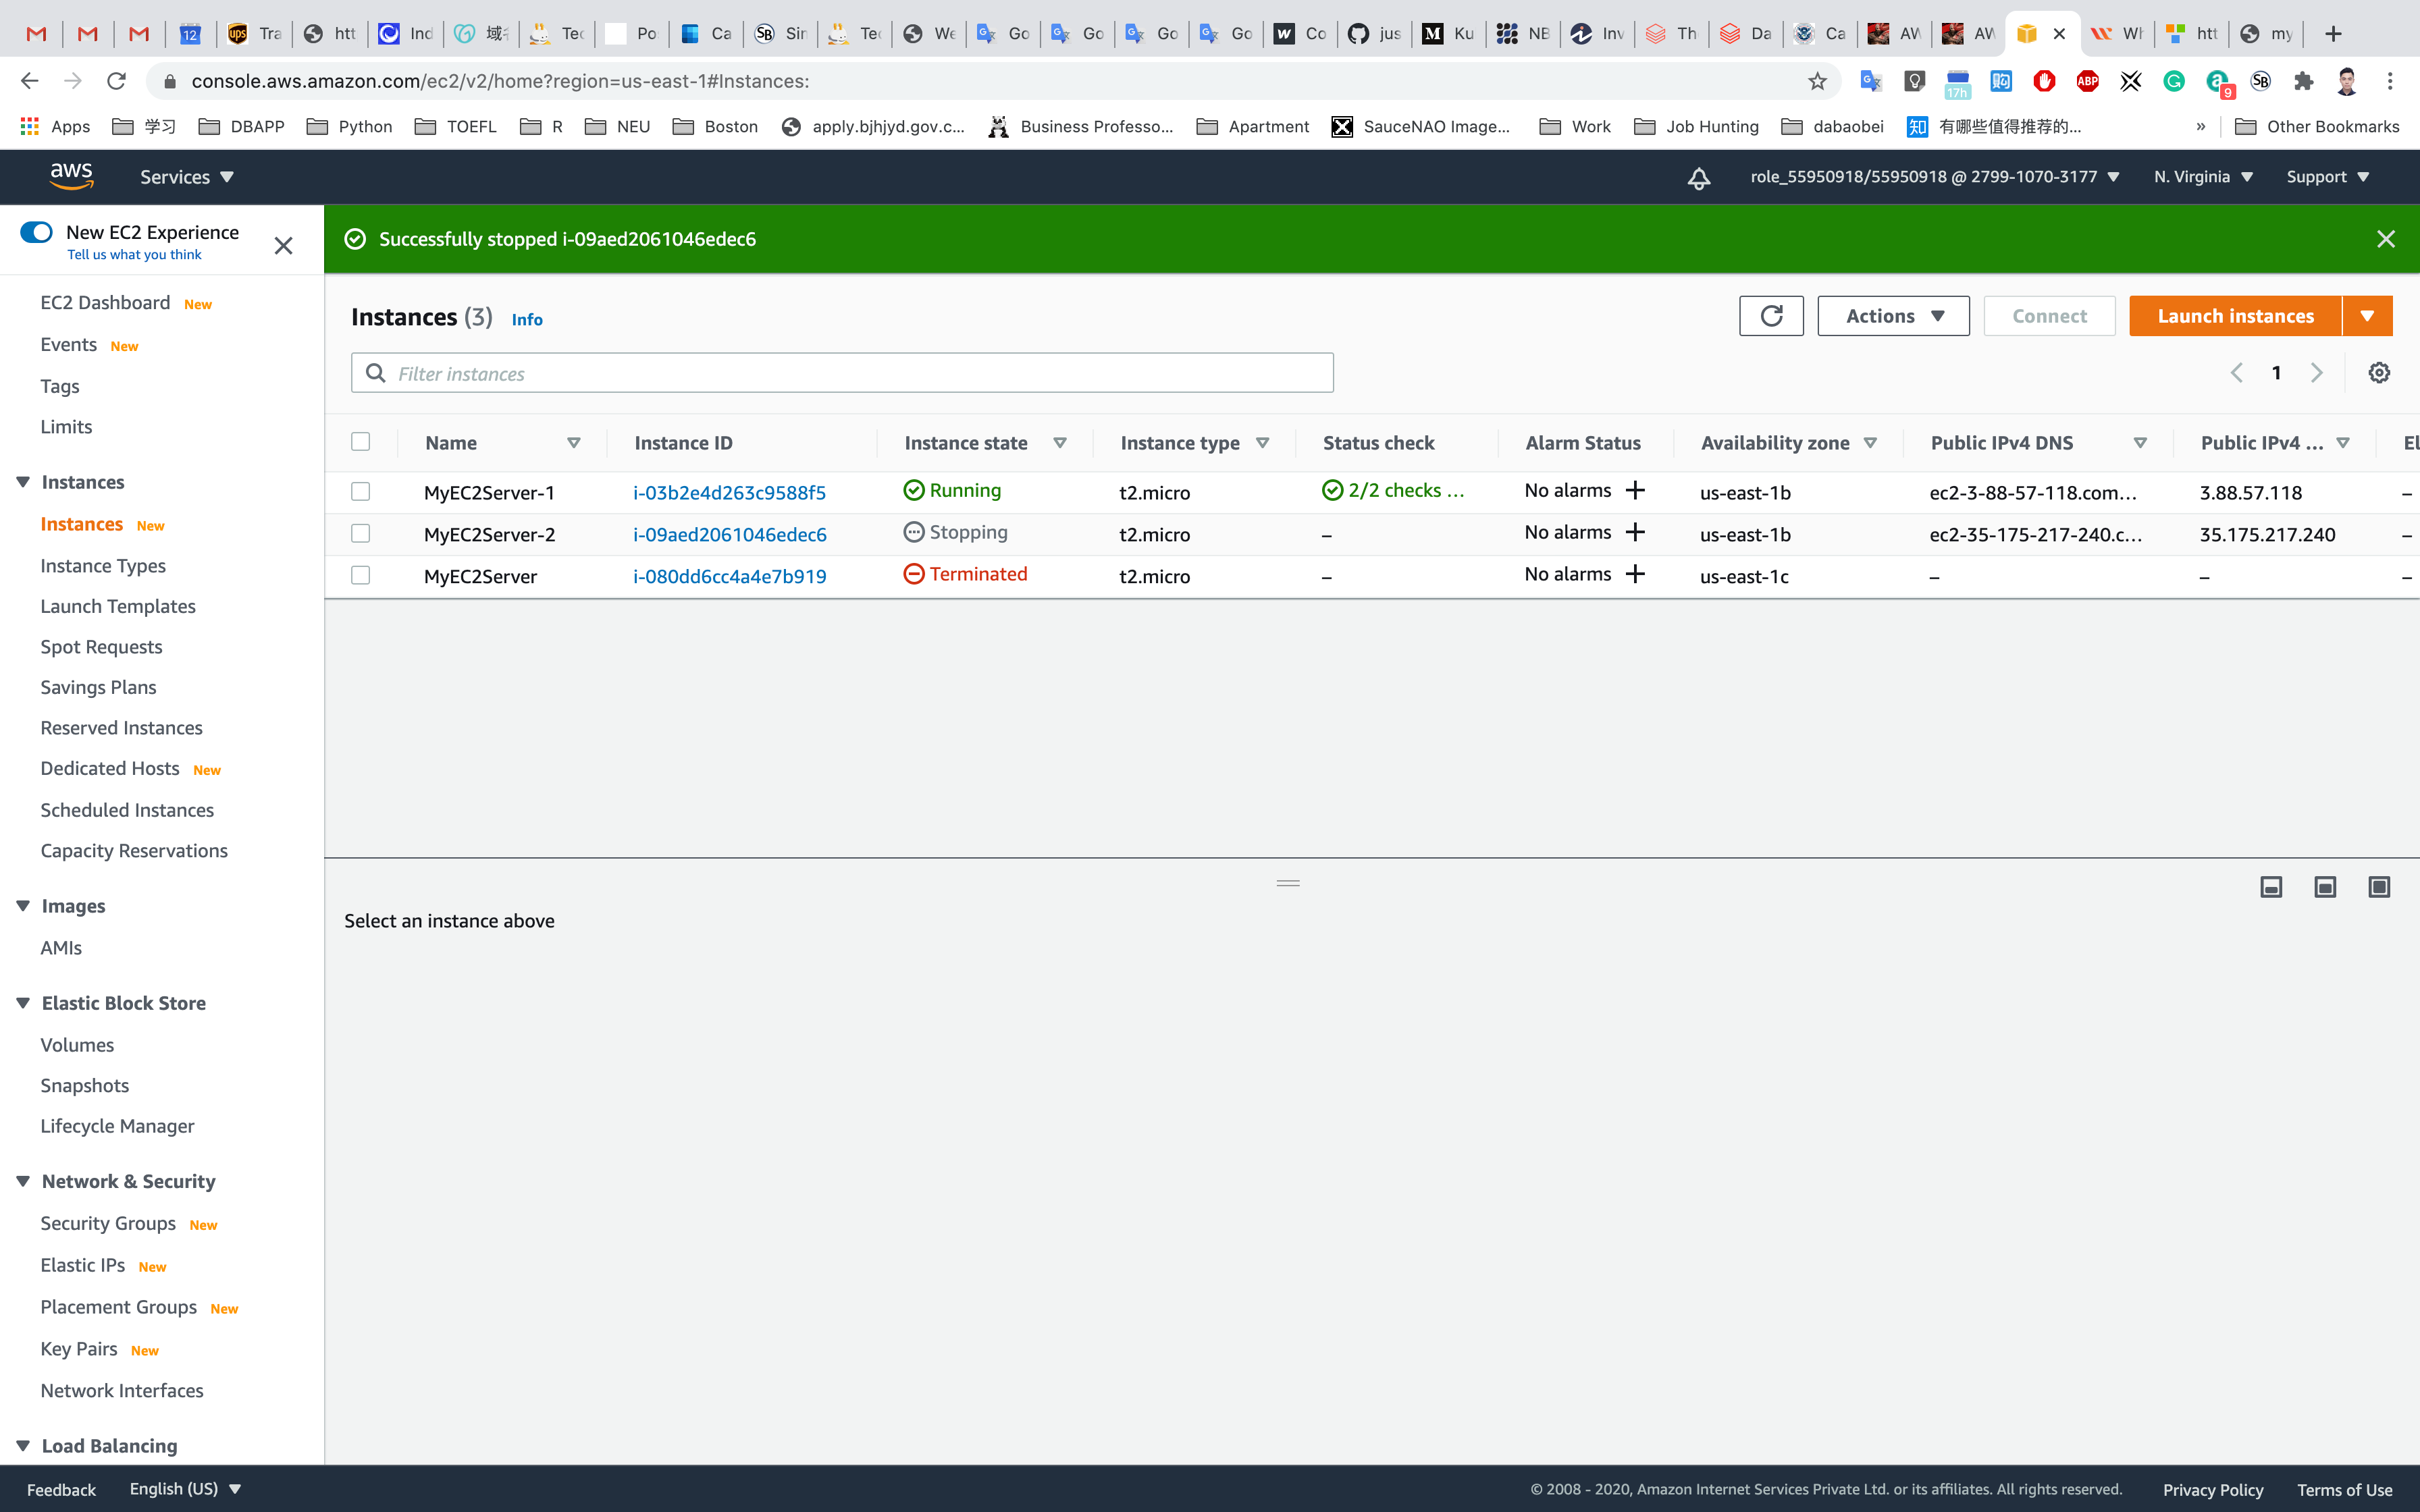
Once MyEC2Server-1 or MyEC2Server-2 is stopped, navigate to Target Groups. Select the MyTargetGroup, Click on the Targets tab.
It will say that the stopped instance MyEC2Server-1 or MyEC2Server-2 is unused.
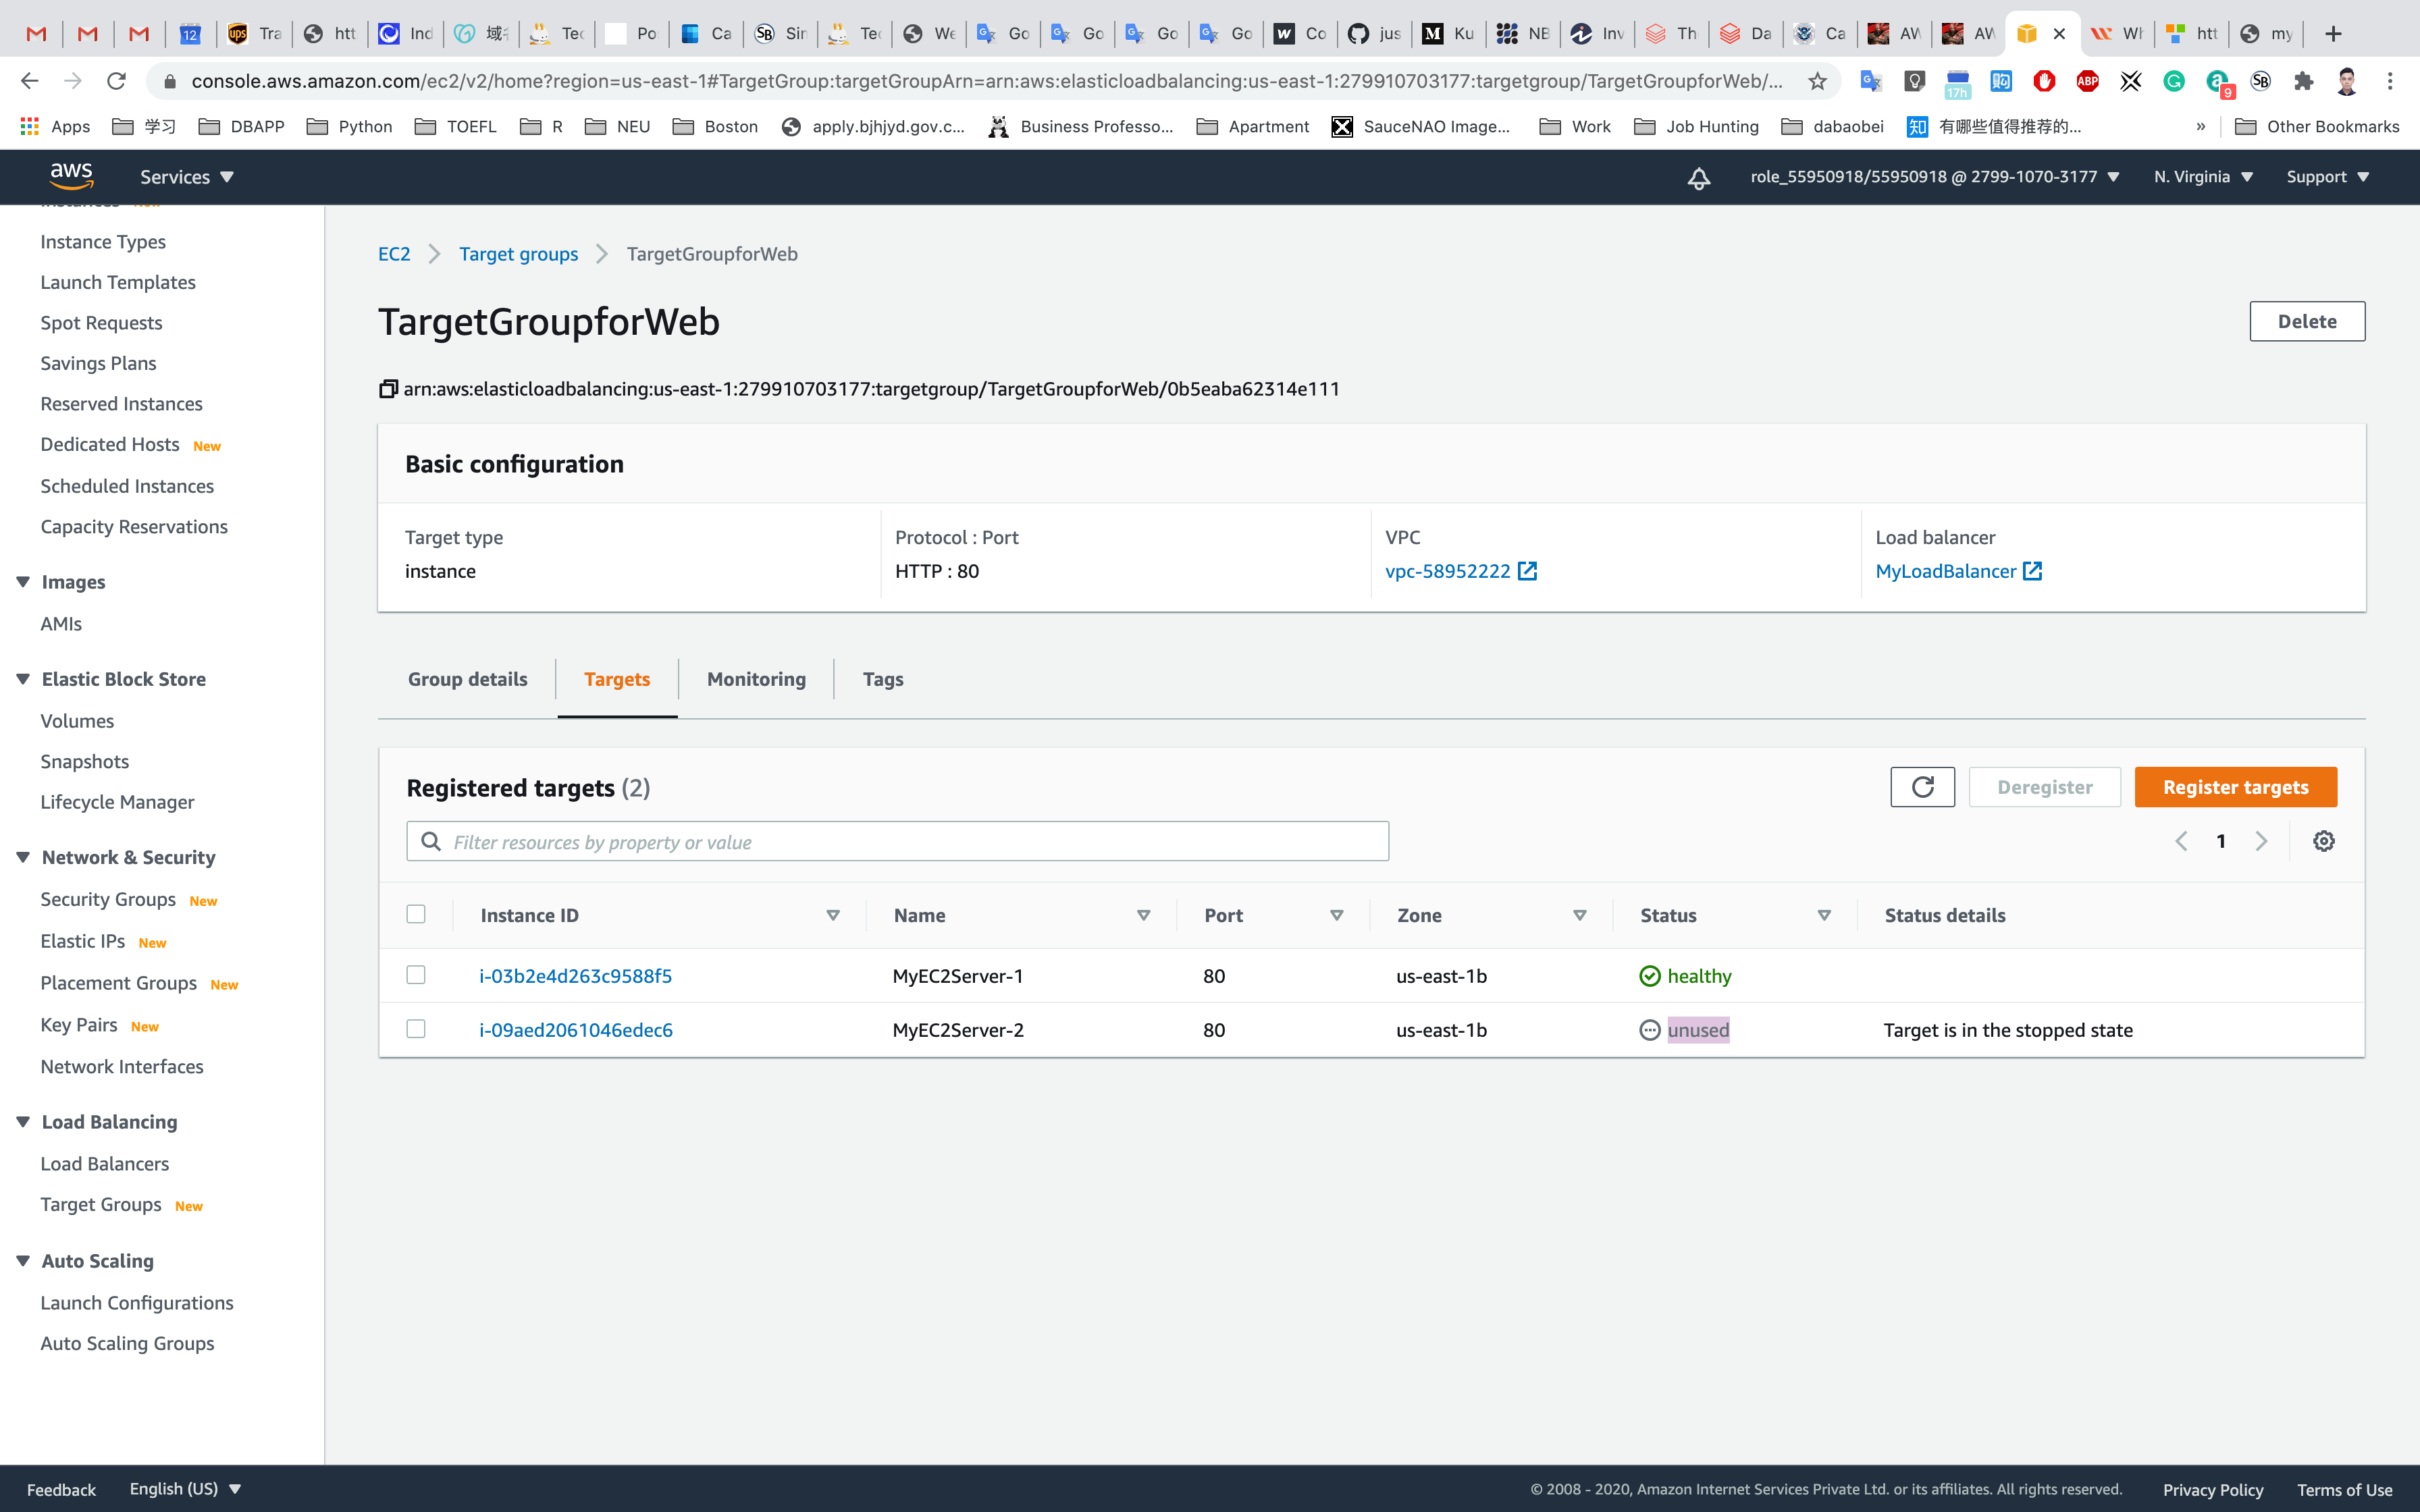
Refresh the ELB domain name URL in Browser, and notice the HTML webpage remains visible. The ELB is only rendering the HTML page from only one instance (MyEC2Server-1 or MyEC2Server-2).

Completion and Conclusion
- You have created two EC2 instances with a bash script that installed Apache servers and created sample html pages and published them.
- You created a Load Balancer and Target group.
- You added both EC2 instances in the Load balancer Target group.
- You have tested the Elastic Load Balancer by refreshing and simulating a shutdown of an EC2 Instance
Introduction to Amazon Auto Scaling
https://play.whizlabs.com/site/task_details?lab_type=1&task_id=17&quest_id=35
Lab Details
- AWS Auto Scaling will automatically scale resources as needed to align to your selected scaling strategy. This lab walks you through using Auto Scaling to automatically launch or terminate EC2 instances based on user-defined policies, schedules and health checks.
Task Details
- Login to the AWS Management Console.
- Create an Auto Scaling Launch Configuration
- Create an Auto Scaling group
- Test the Auto Scaling Infrastructure.
Architecture Diagram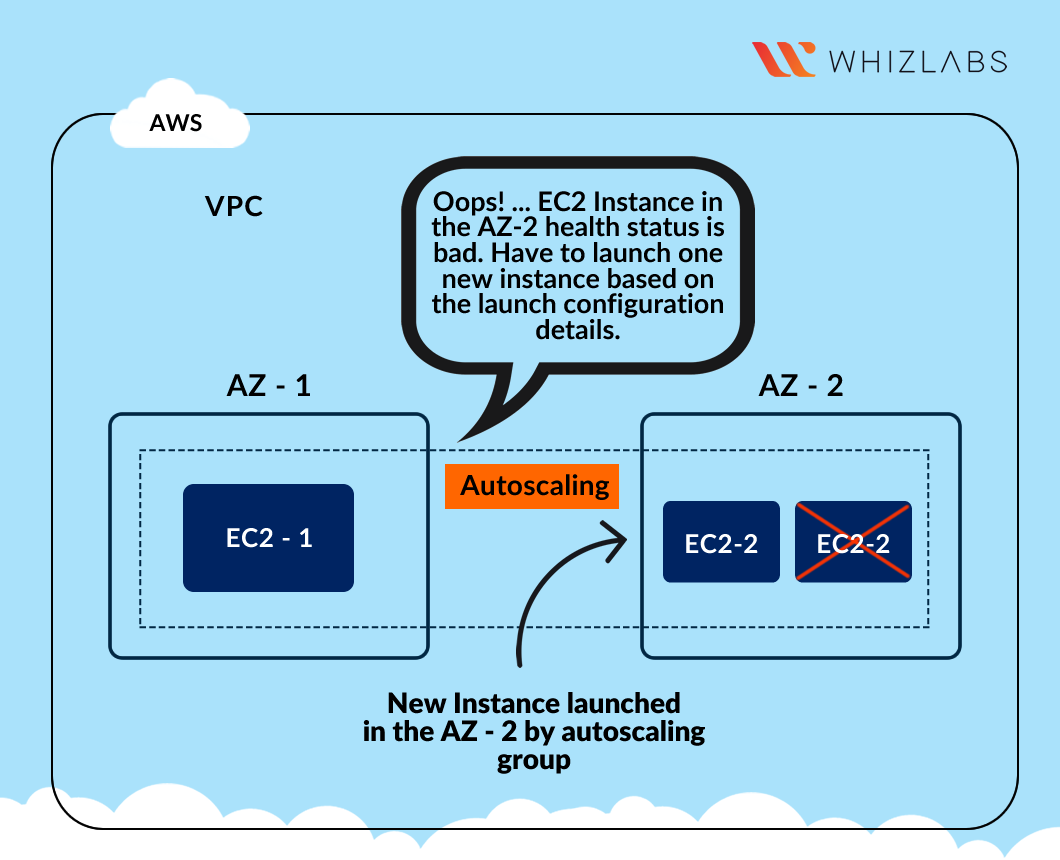
EC2 Configuration
Services -> EC2
Region: N.Virginia
Click on Launch Instances
Step 1: Choose an Amazon Machine Image(AMI)
Select Amazon Linux 2 AMI (HVM), SSD Volume Type
Step 2: Choose an Instance Type
Select t2.micro
Click on Next: Configure Instance Details
Step 3: Configure Instance Details
Configure Instance Details:
- Number of instances:
1 - Auto-assign Public IP: Select
Enable - Click on
Advanced Details

Under the User data section, enter the following script (which creates an HTML page served by an Apache httpd web server).
1 |
|

Click on Next: Add Storage
Step 4: Add Storage
Leave it default settings
Click on Next: Add Tags
Step 5: Add Tags
Click on Add Tag
- Key:
Name - Value:
MyEC2Server
Click on Next: Configure Security Group

Step 6: Configure Security Group
Select Create a new security group
- Security group name:
EC2WebServerSG - Description :
Security Group for EC2 Web Server
For SSH:
- Source:
Anywhere
Click on Add Rule
For HTTP:
- Source:
Anywhere
Click on Add Rule
For HTTPS:
- Source:
Anywhere

Click on Review and Launch
Step 7: Review Instance Launch
Click on Launch
Select Create a new key pair
Set up the key pair name ec2
Click on Download Key Pair
See the left bottom of the screenshot, we have the file named ec2.pem
Click on Launch Instances
Click on View Instances
Creating an AMI from the EC2 Instance
Go to your EC2 instances page
Click on Action -> Image -> Create image
In the pop up window, enter the following details:
- Image Name:
EC2WebServer - Image Description:
EC2 image for Web server - Leave other details as default.
Click on Create image
See the successful notification
Check the newly created Image
Navigate to AMIs under Images on the left menu.
You can see that the image is getting generated and status is pending.
Once the process is completed, the status will change to available. (Try to reload the page)
Now we can use this Image AMI to create brand new instances.

Go to the EC2 instance page, select the instance you created.
Click on Action.
Click on Instance State
Click on Terminate
Auto Scaling Configuration
Services -> EC2
Region: N.Virginia
Creating Launch Configurations
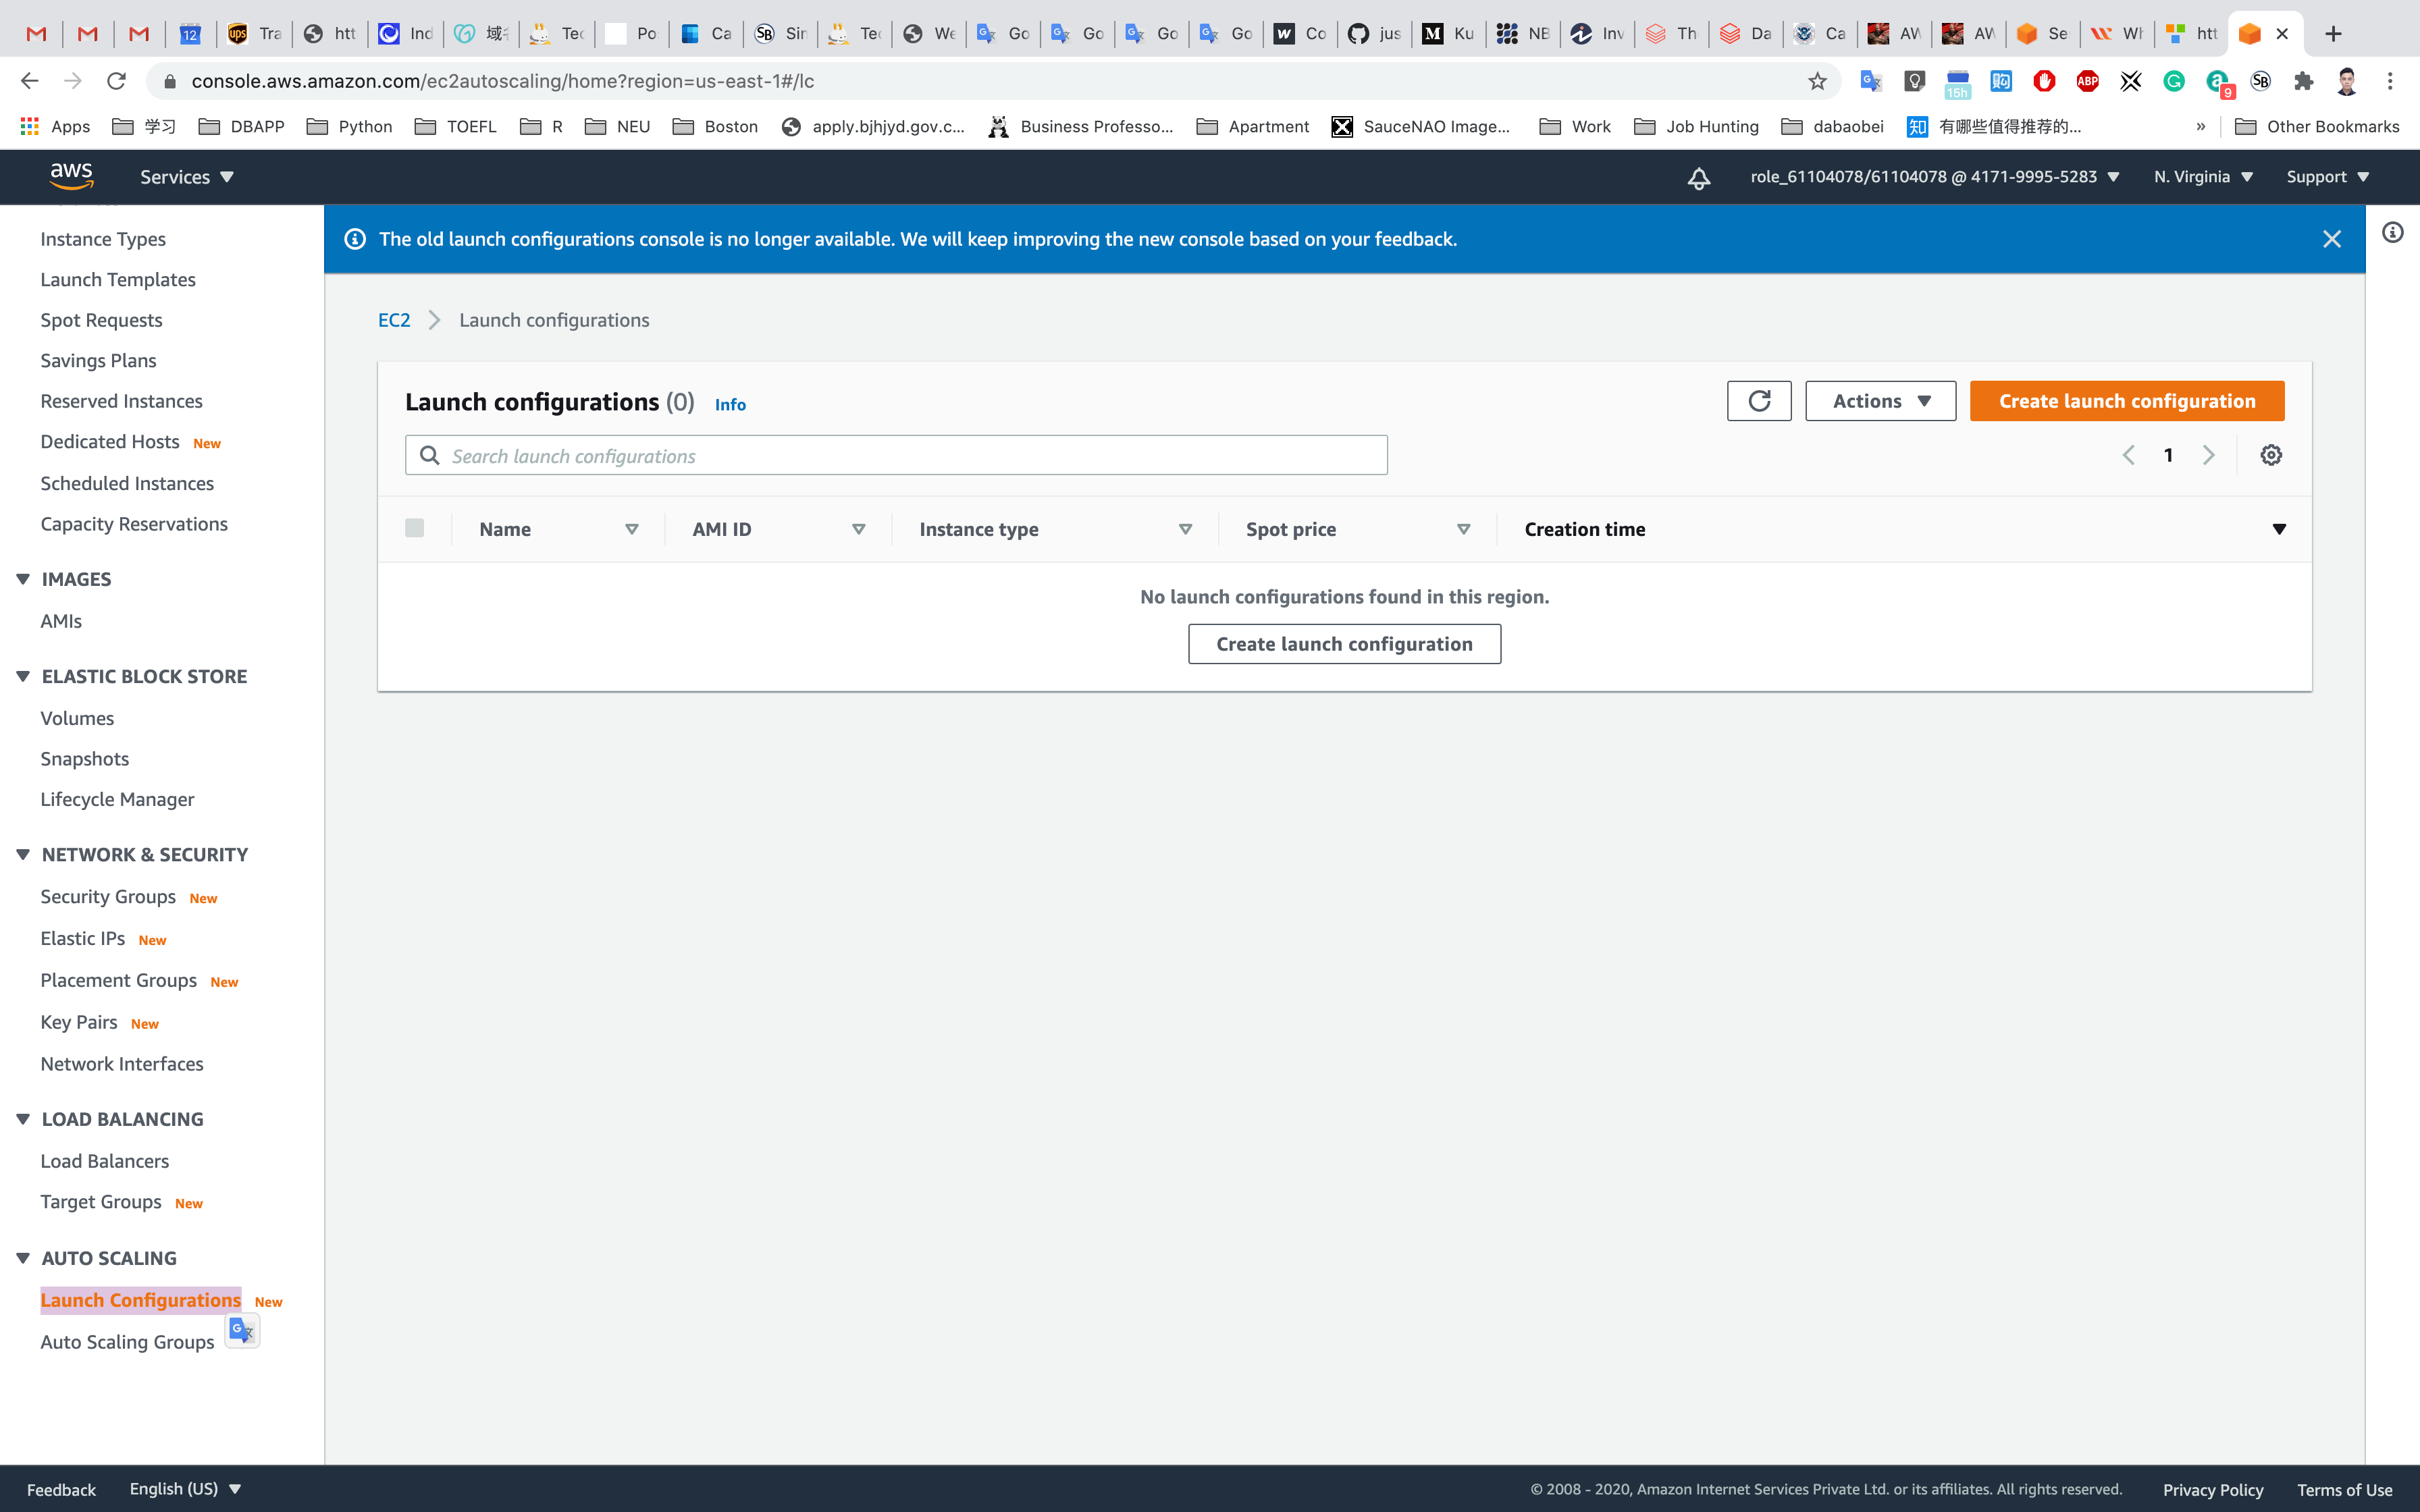
In the left navigation pane (scroll down) within AUTOSCALING, click on the Launch Configurations.
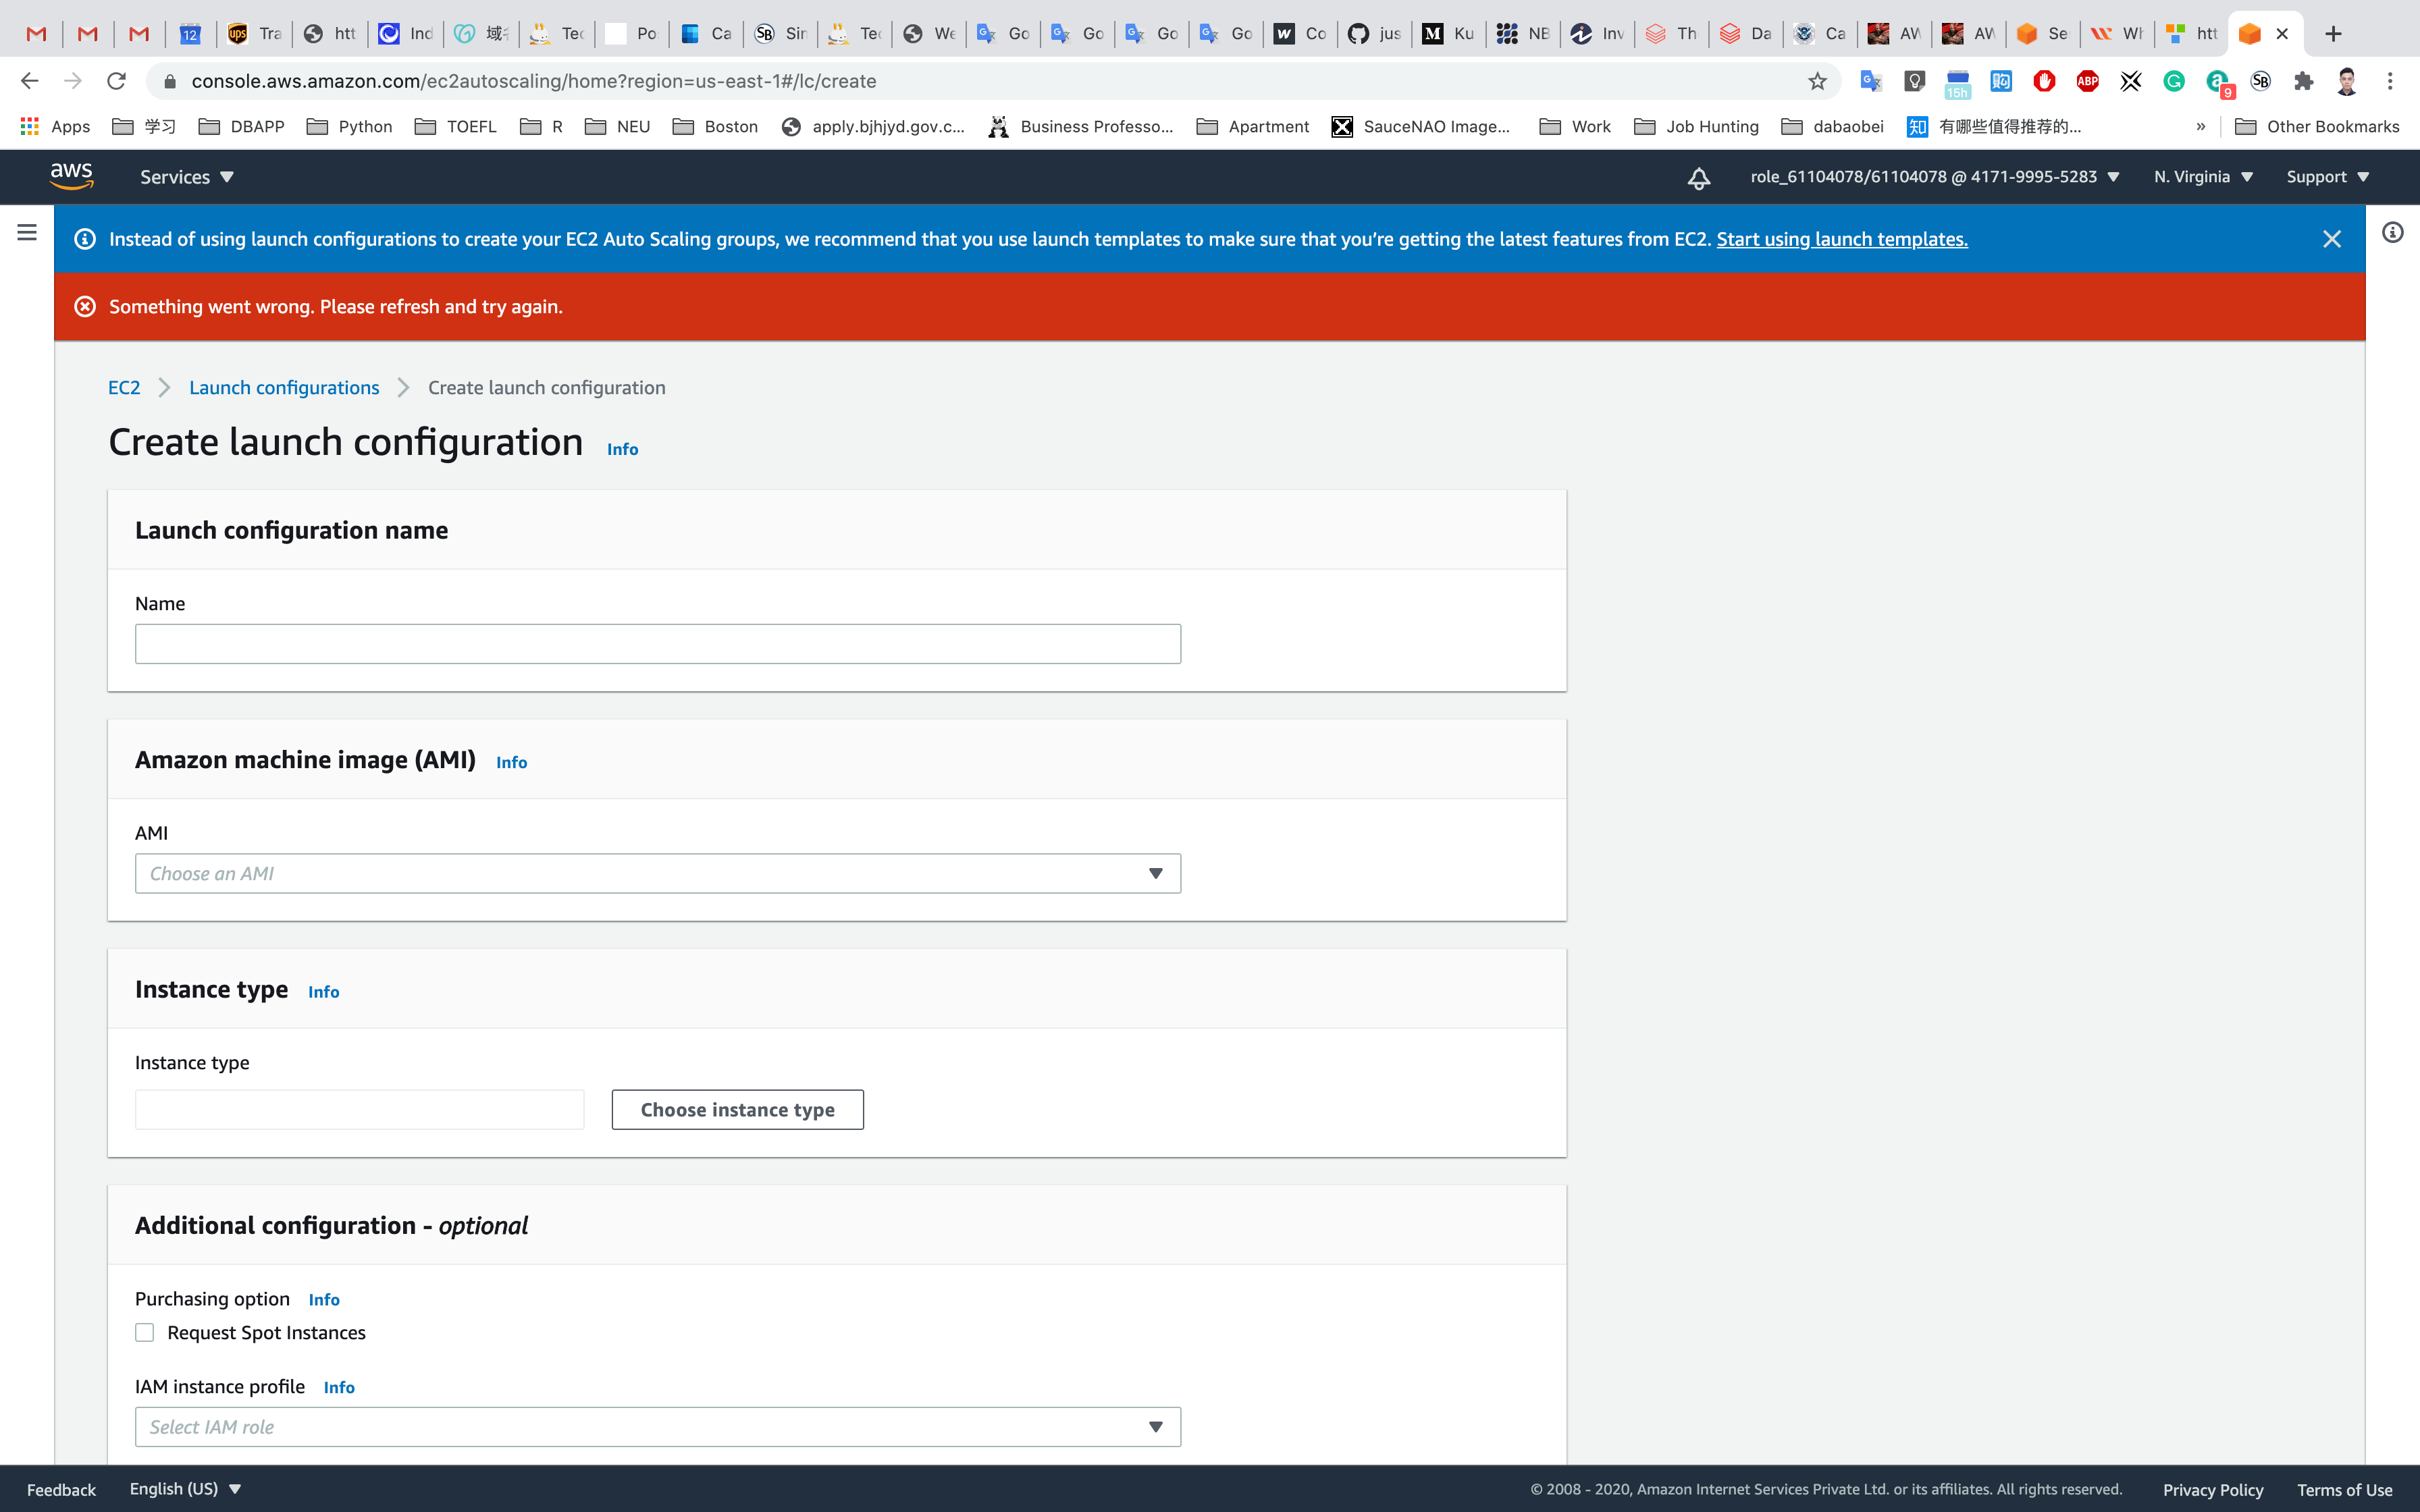
Click on Create launch configuration
- Incase if you see this error on the page, please ignore it.
- Under Launch configuration name:
- Name : Enter
EC2-Web-ASG-Configuration
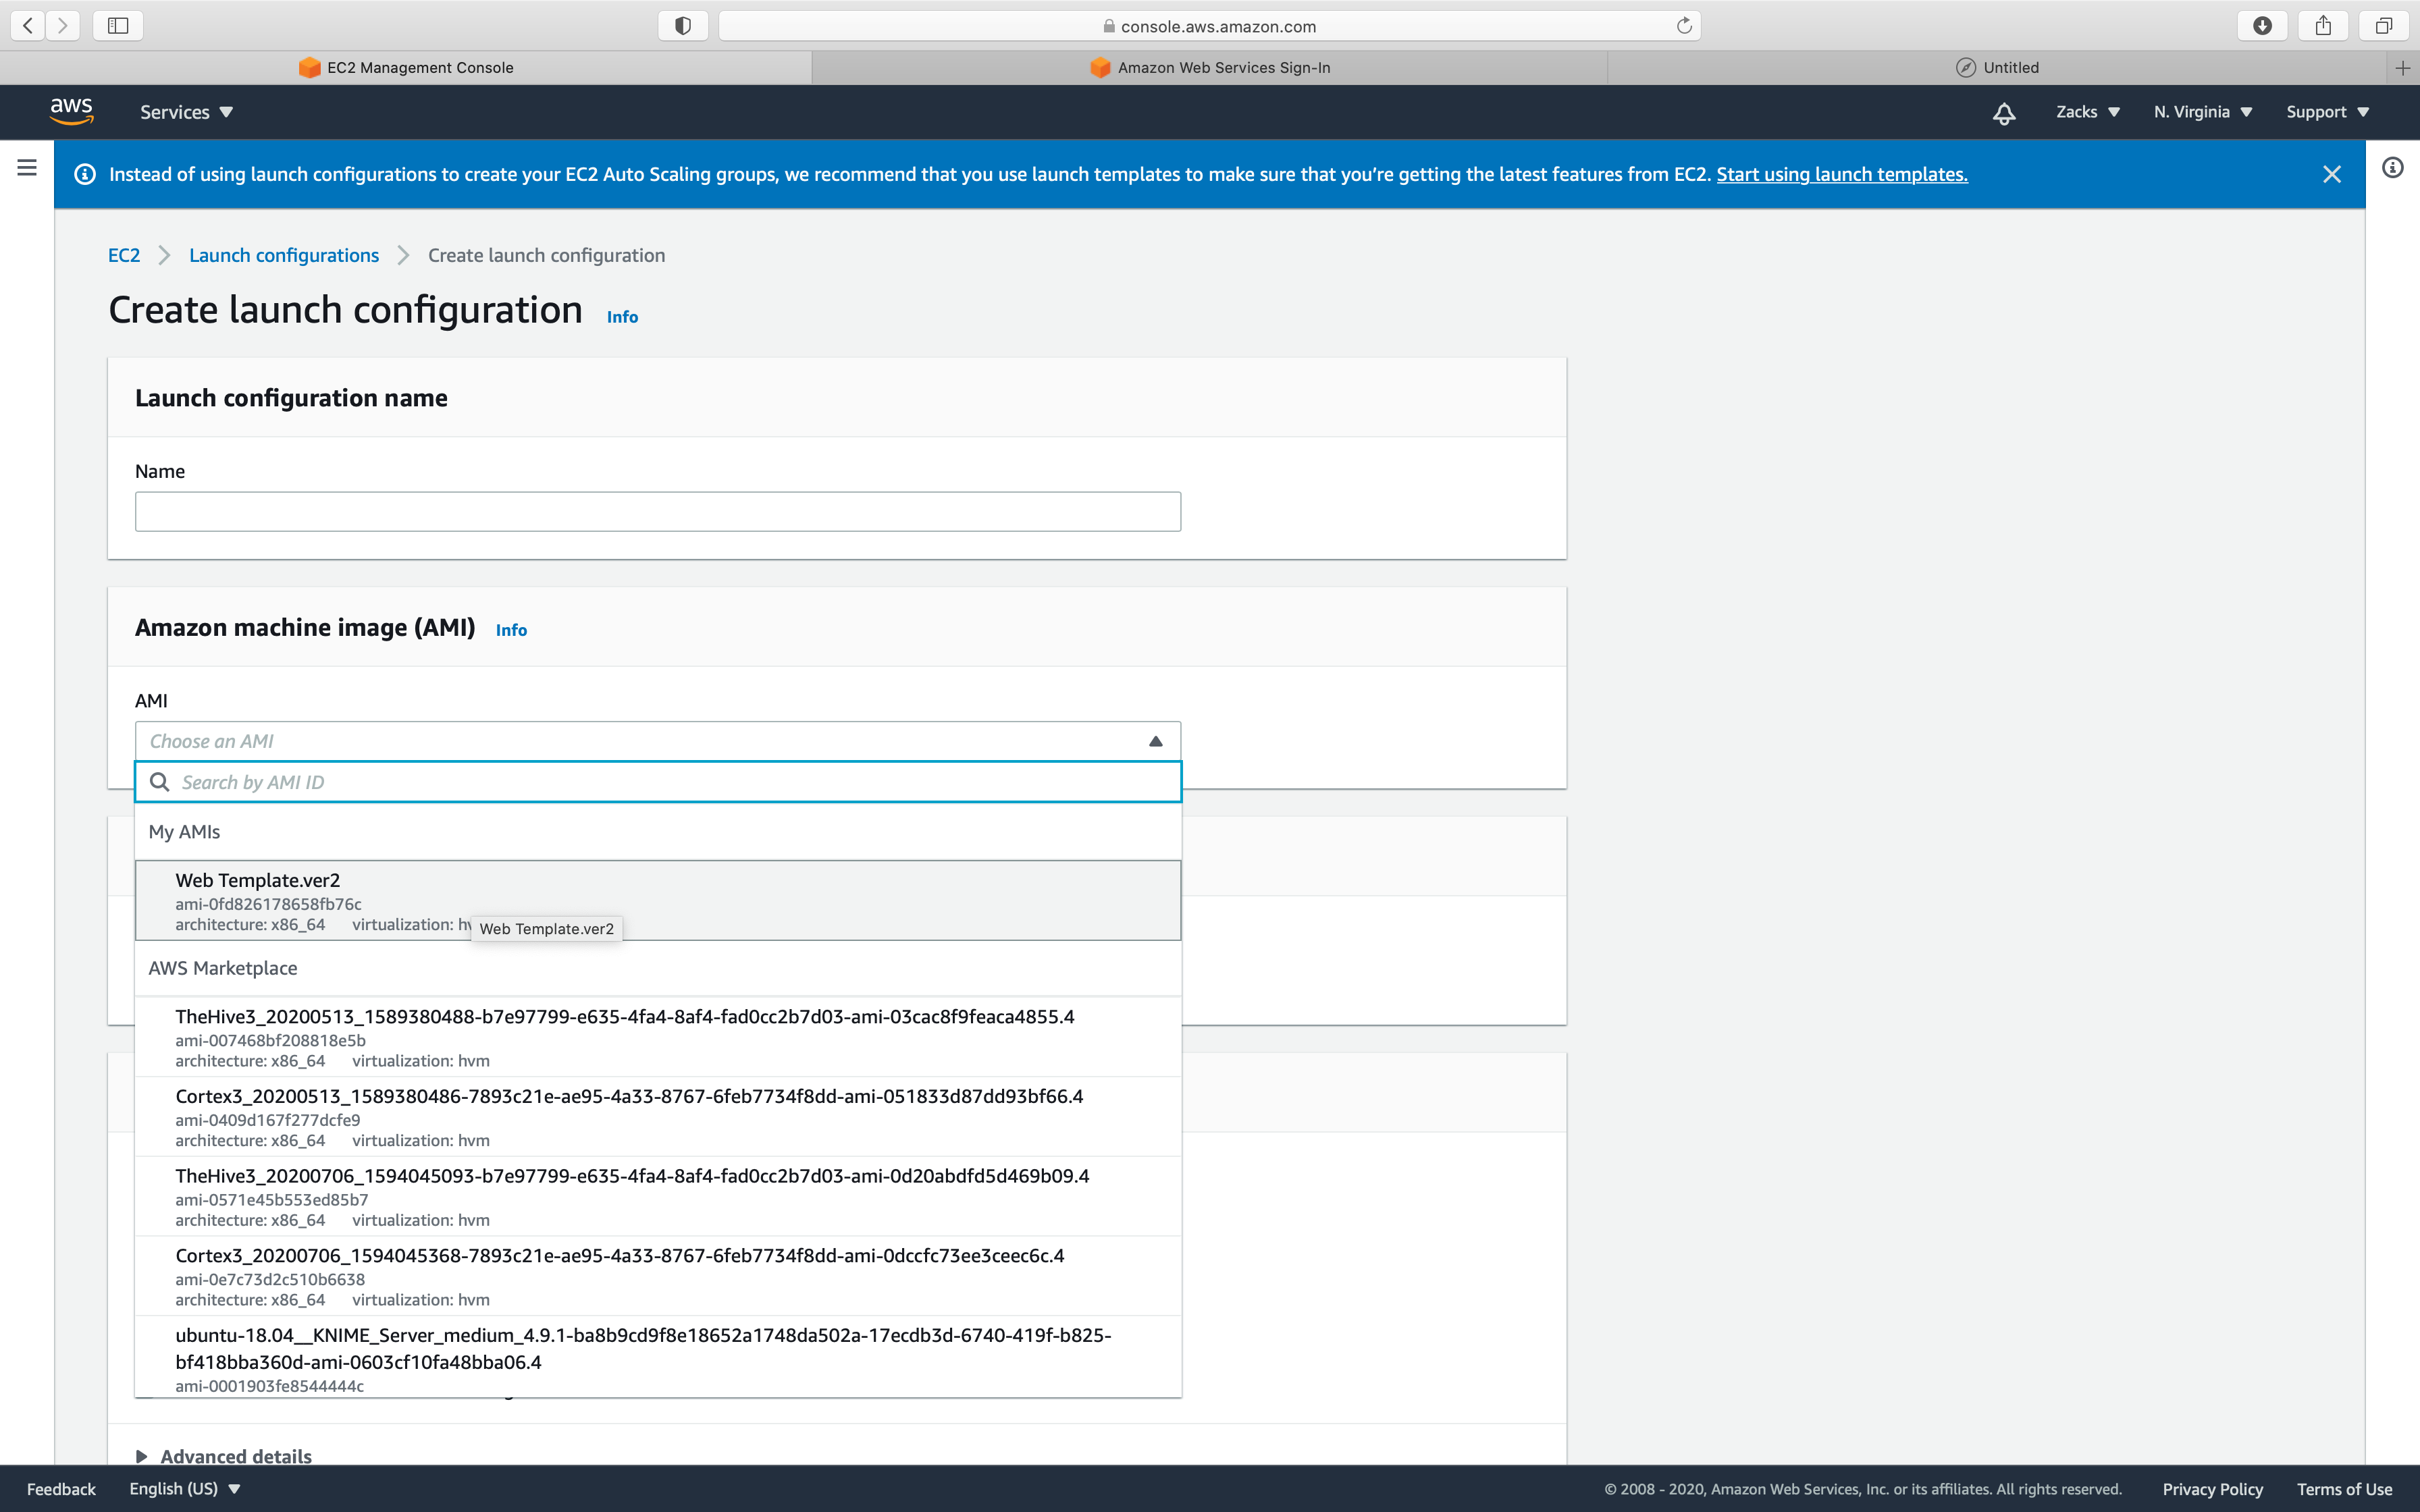
Under Amazon machine image (AMI):
- select the AMI you just created under MyAMIs
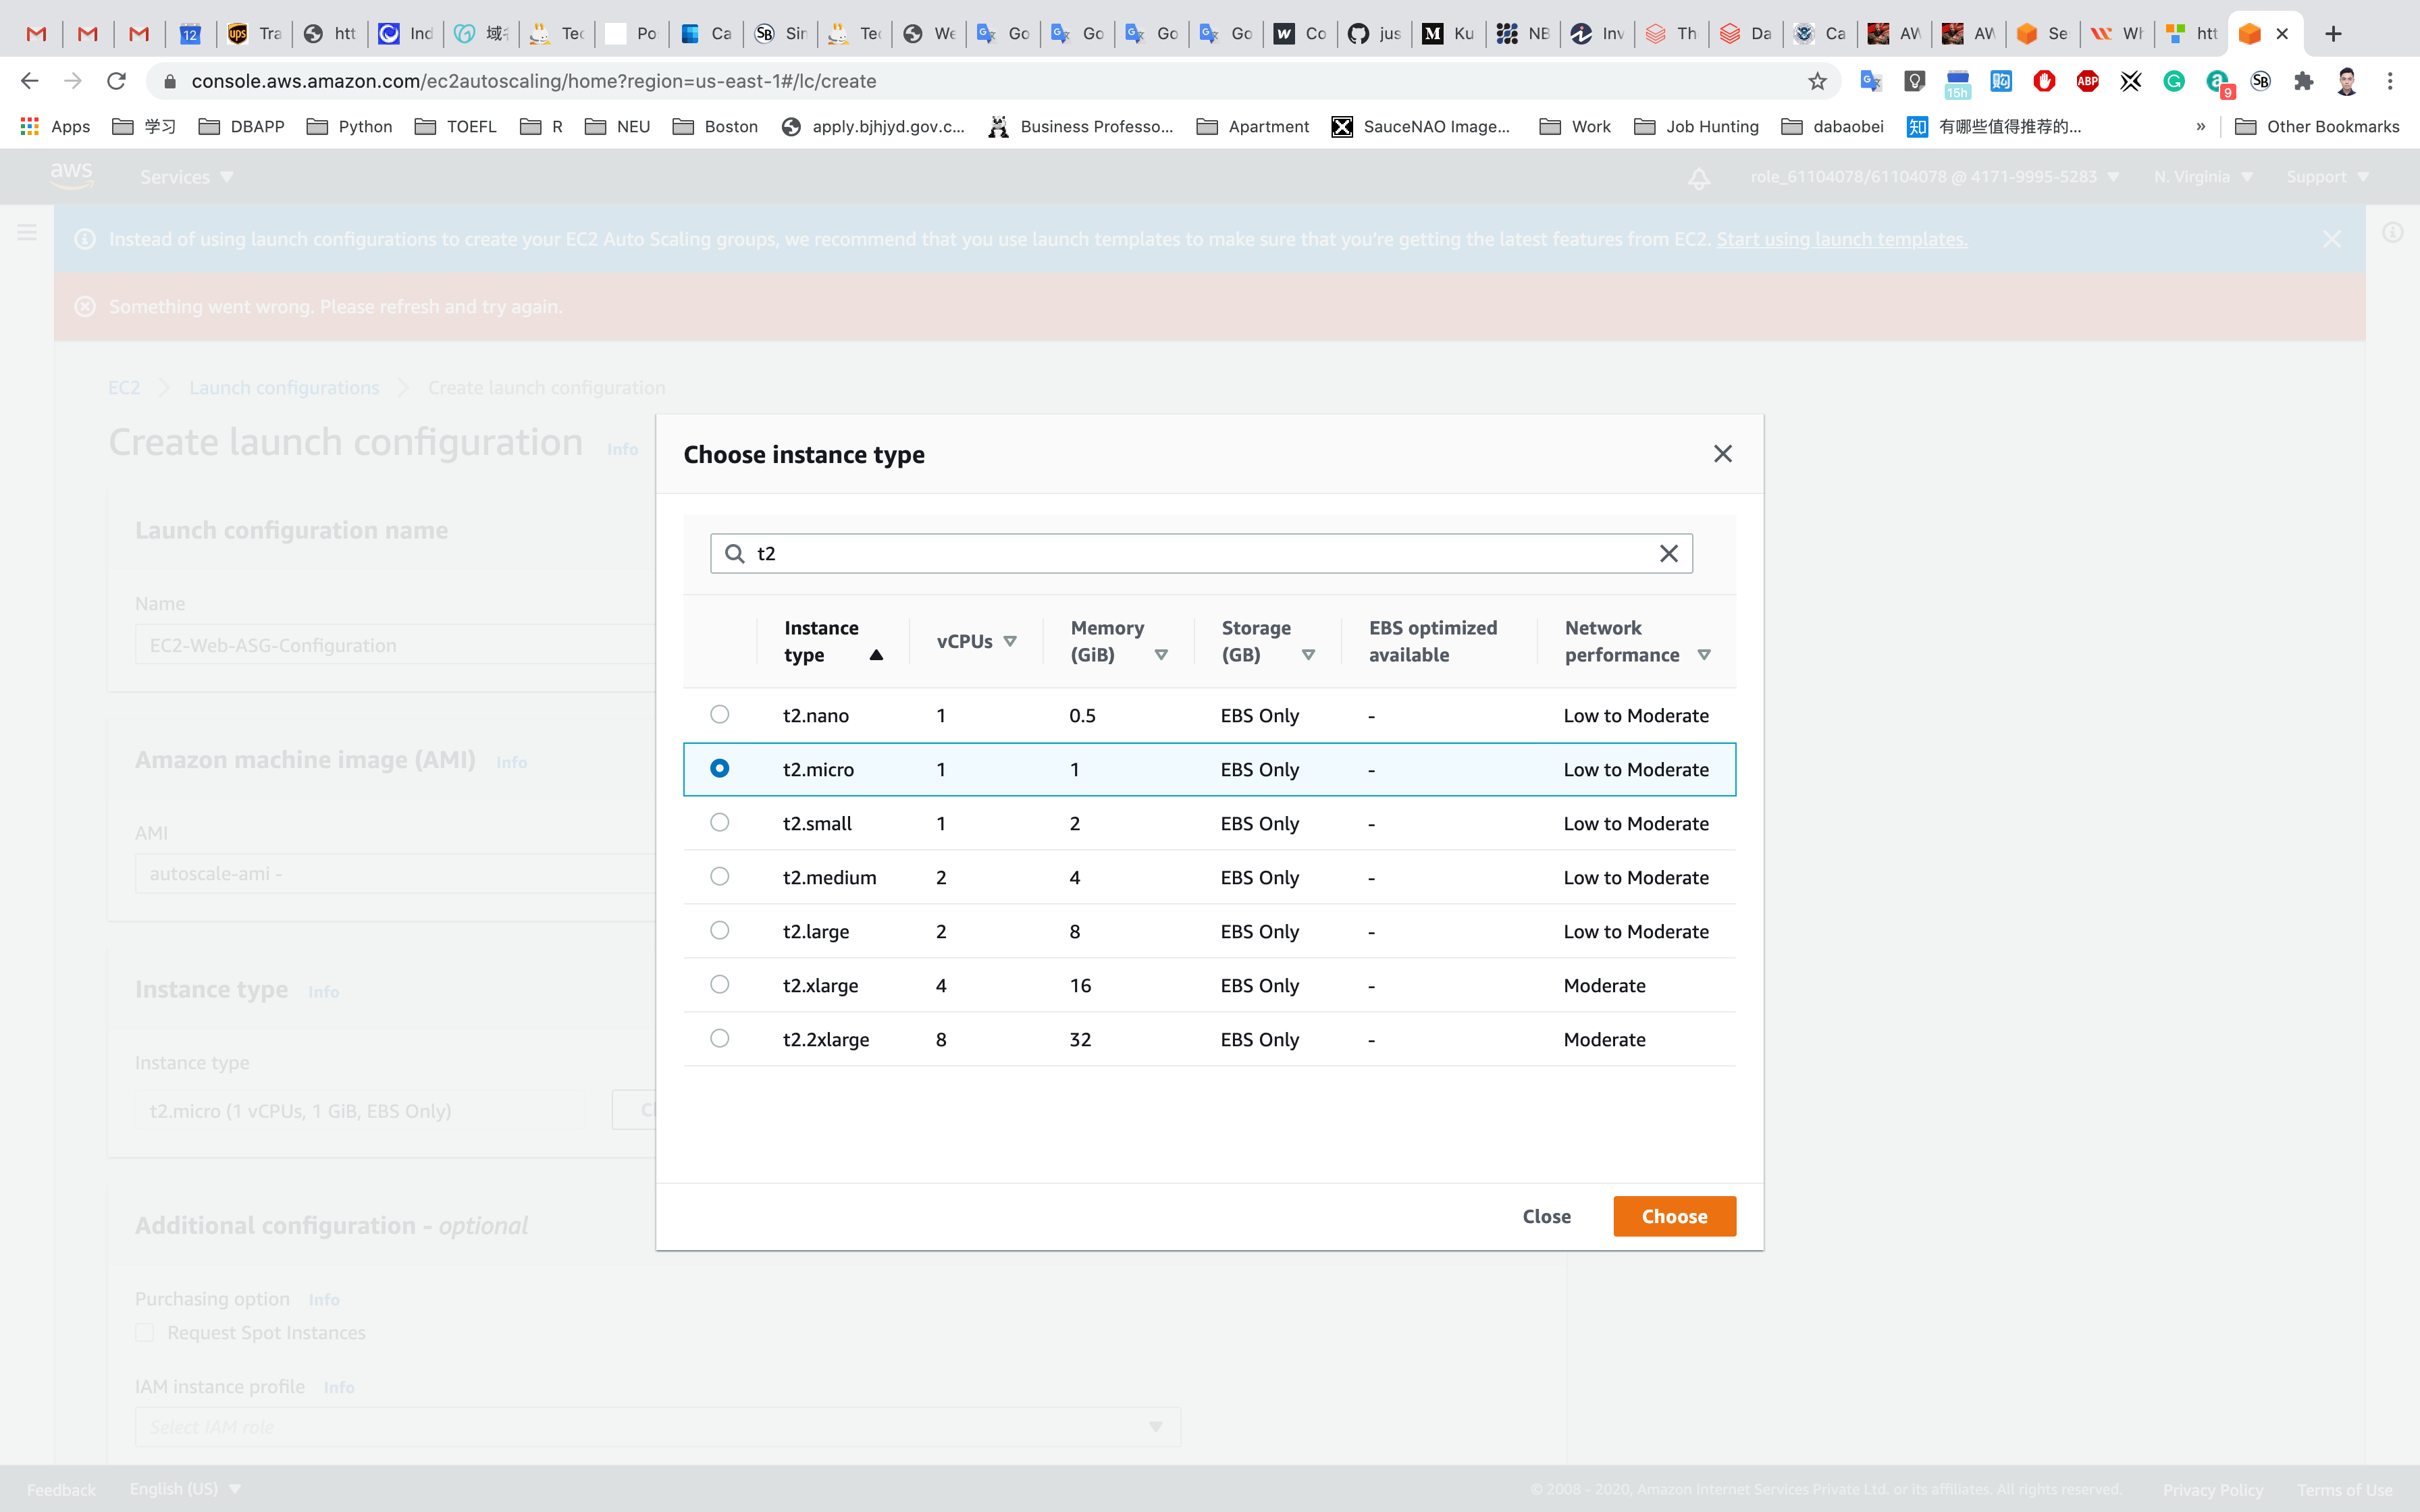
Under Instance type:
- Click on
Choose Instance Type - Search for t2 on the search box and select
t2.microfrom the below list.
Click on Choose
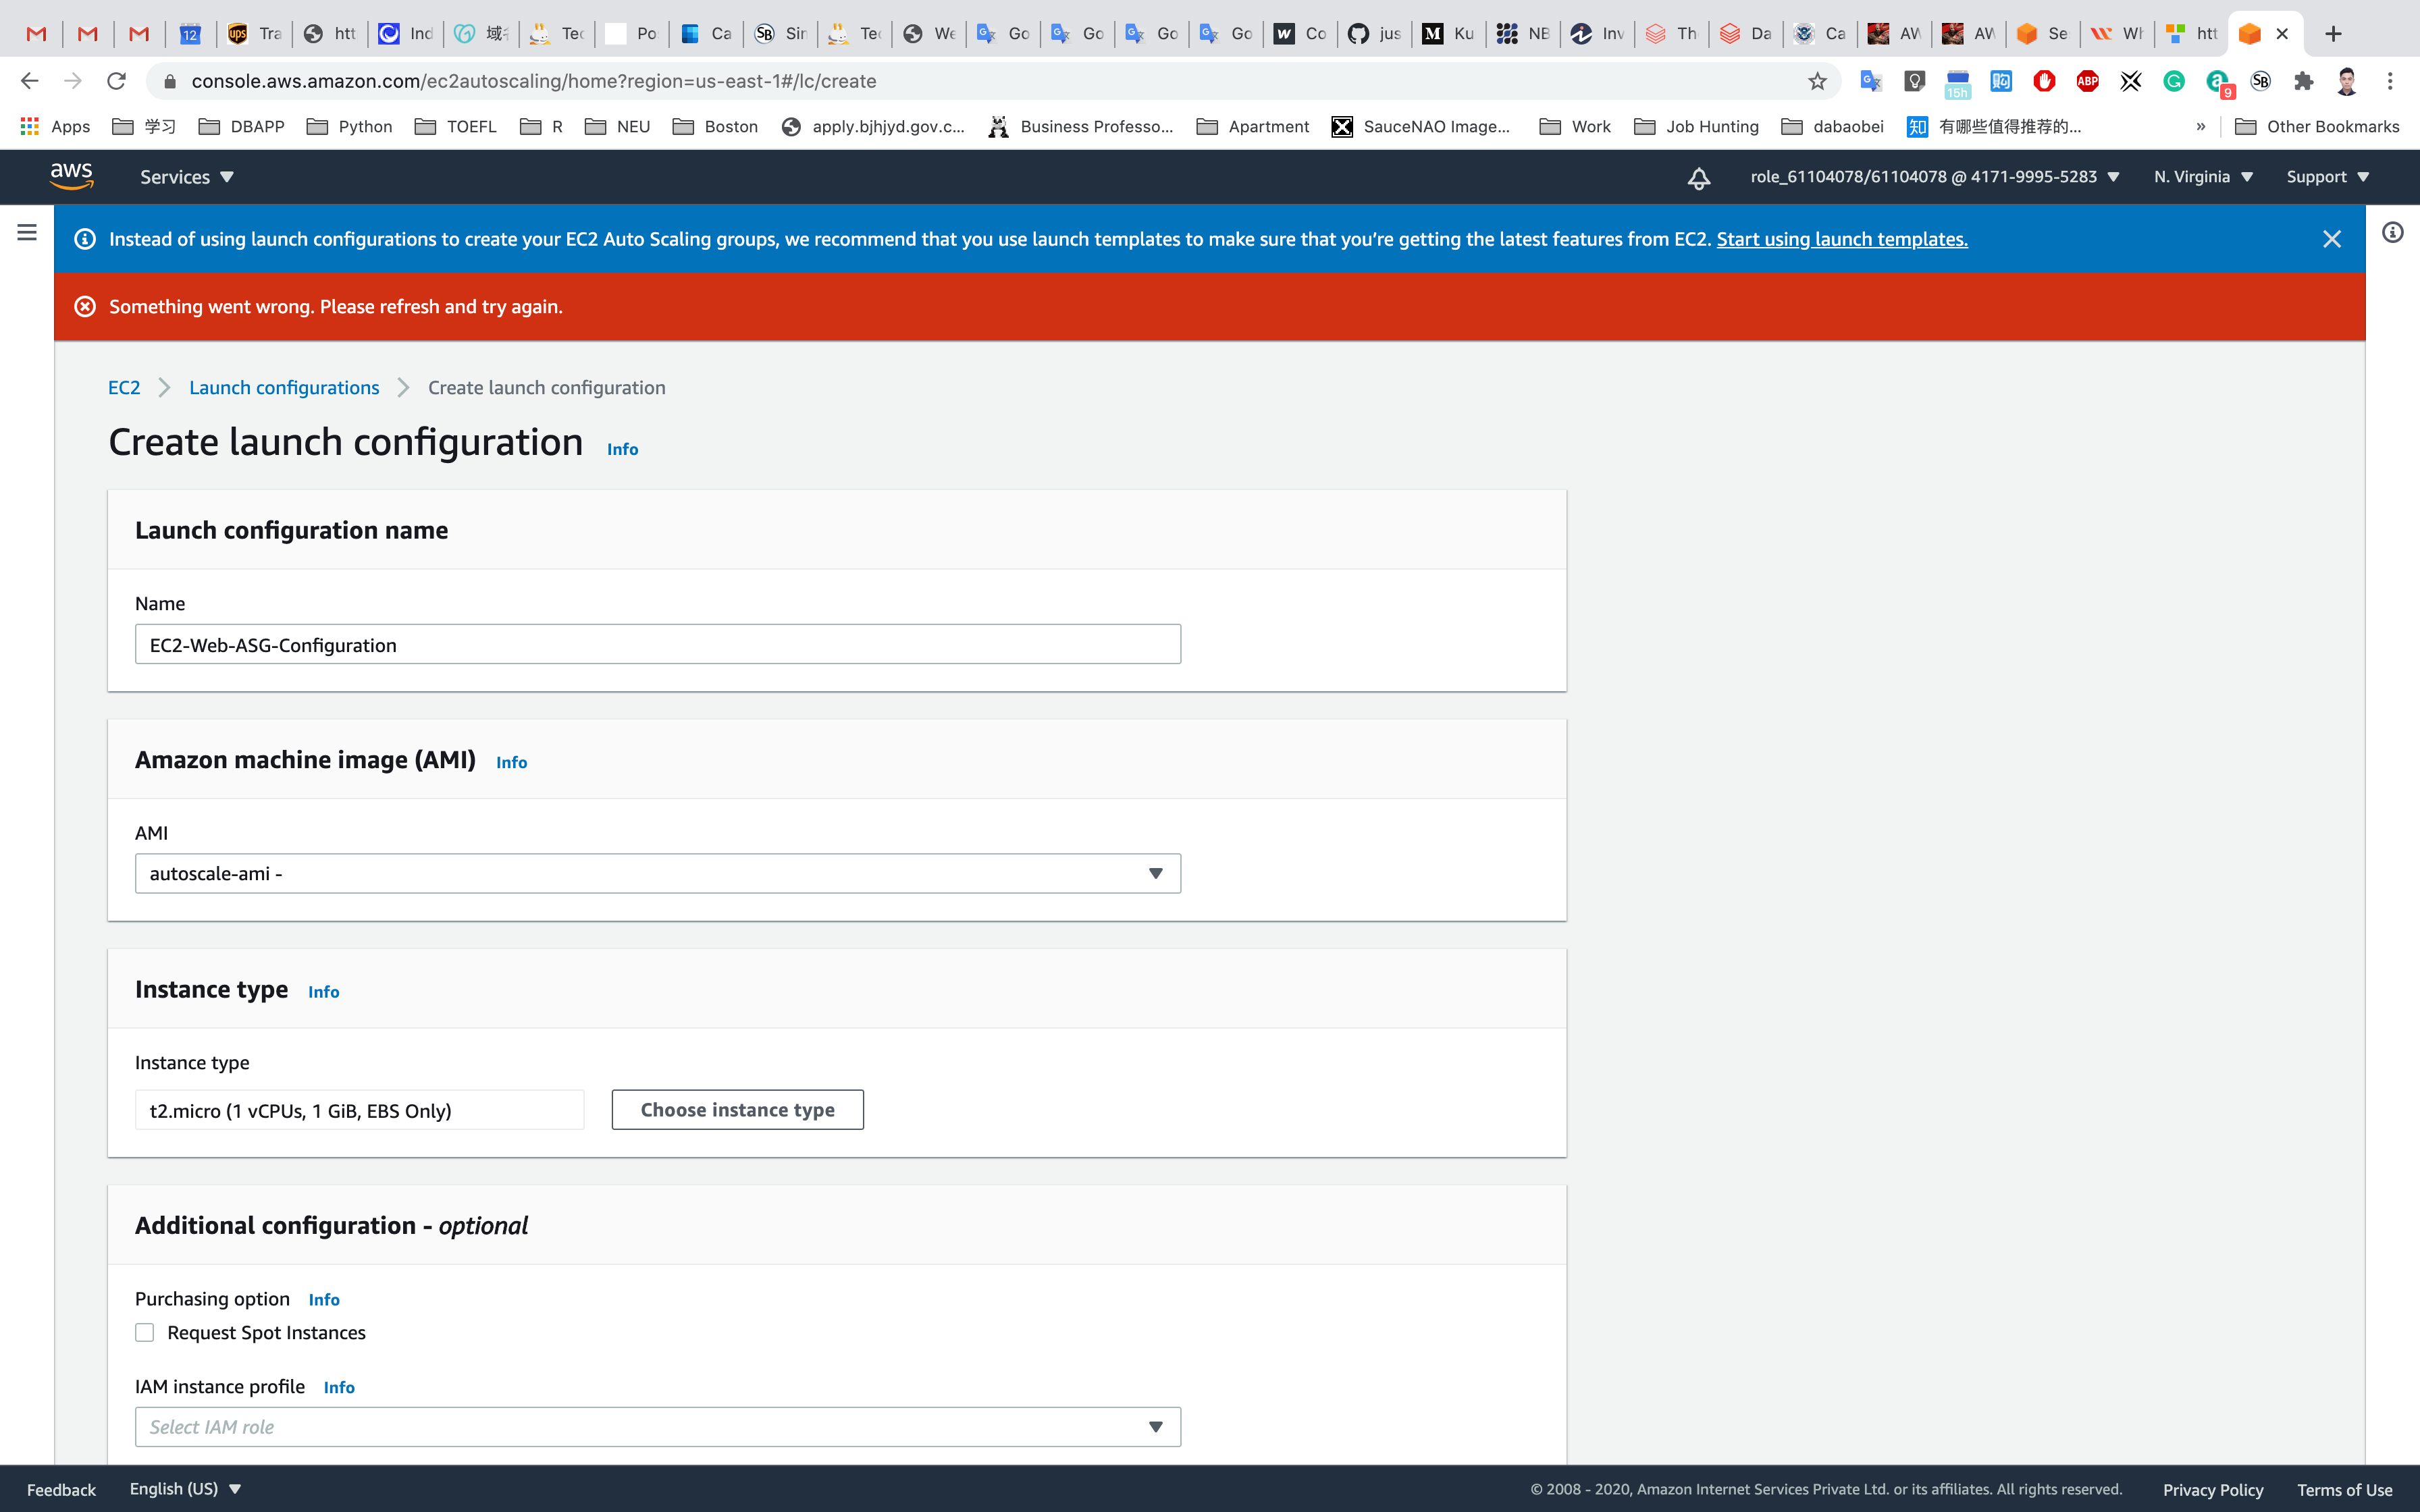
Under Additional configuration: No need to select anything.
Under Storage (volumes): No need to select anything.
Under Security groups:
- Assign a security group:
Create a new security grouporselecting a existing security groupif you have a SG with the same settings. - Security group name :
EC2WebServerSG - Description :
Security Group for EC2 Web Server
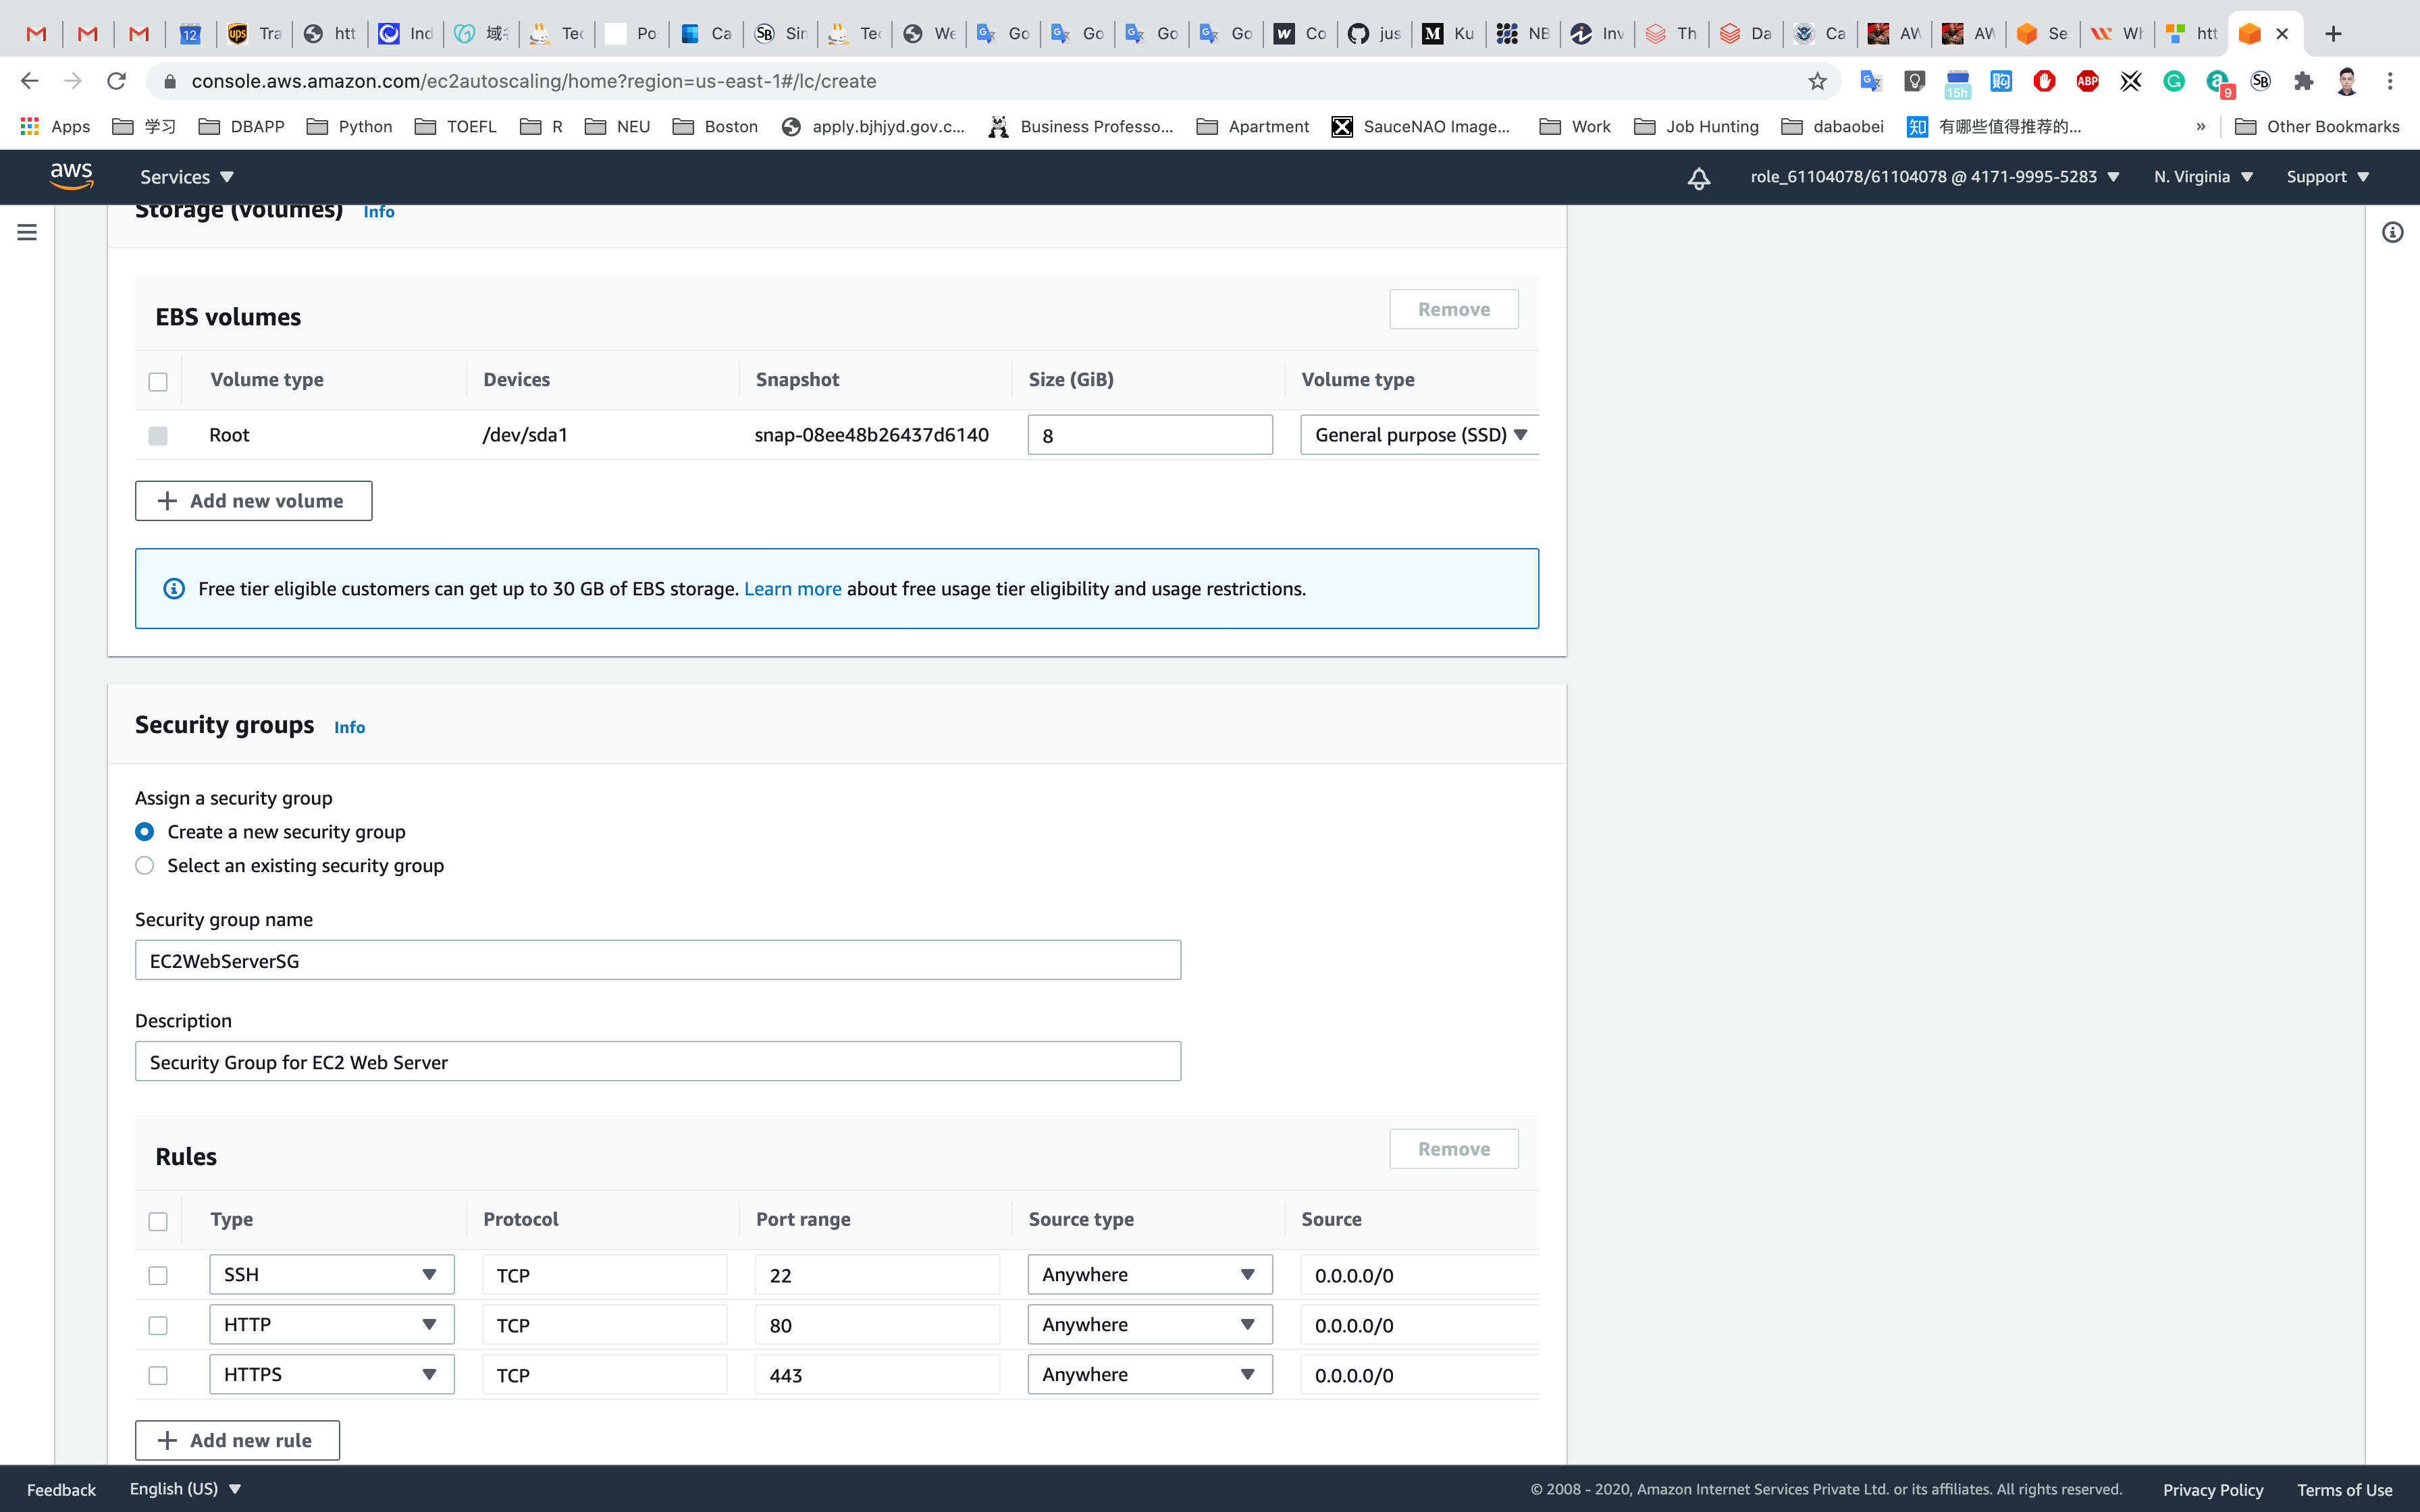
For SSH:
- Source:
Anywhere
Click on Add Rule
For HTTP:
- Source:
Anywhere
Click on Add Rule
For HTTPS:
- Source:
Anywhere
Under Key pair (login):
- Key pair options
- Select
Create a new key pairorChoose an existing key pair if you have
- Select
- key pair name
ec2
- Click on
Download key pairif you selectedCreate a new key pair.
Select theI acknowledge checkbox
Now, click on Launch configuration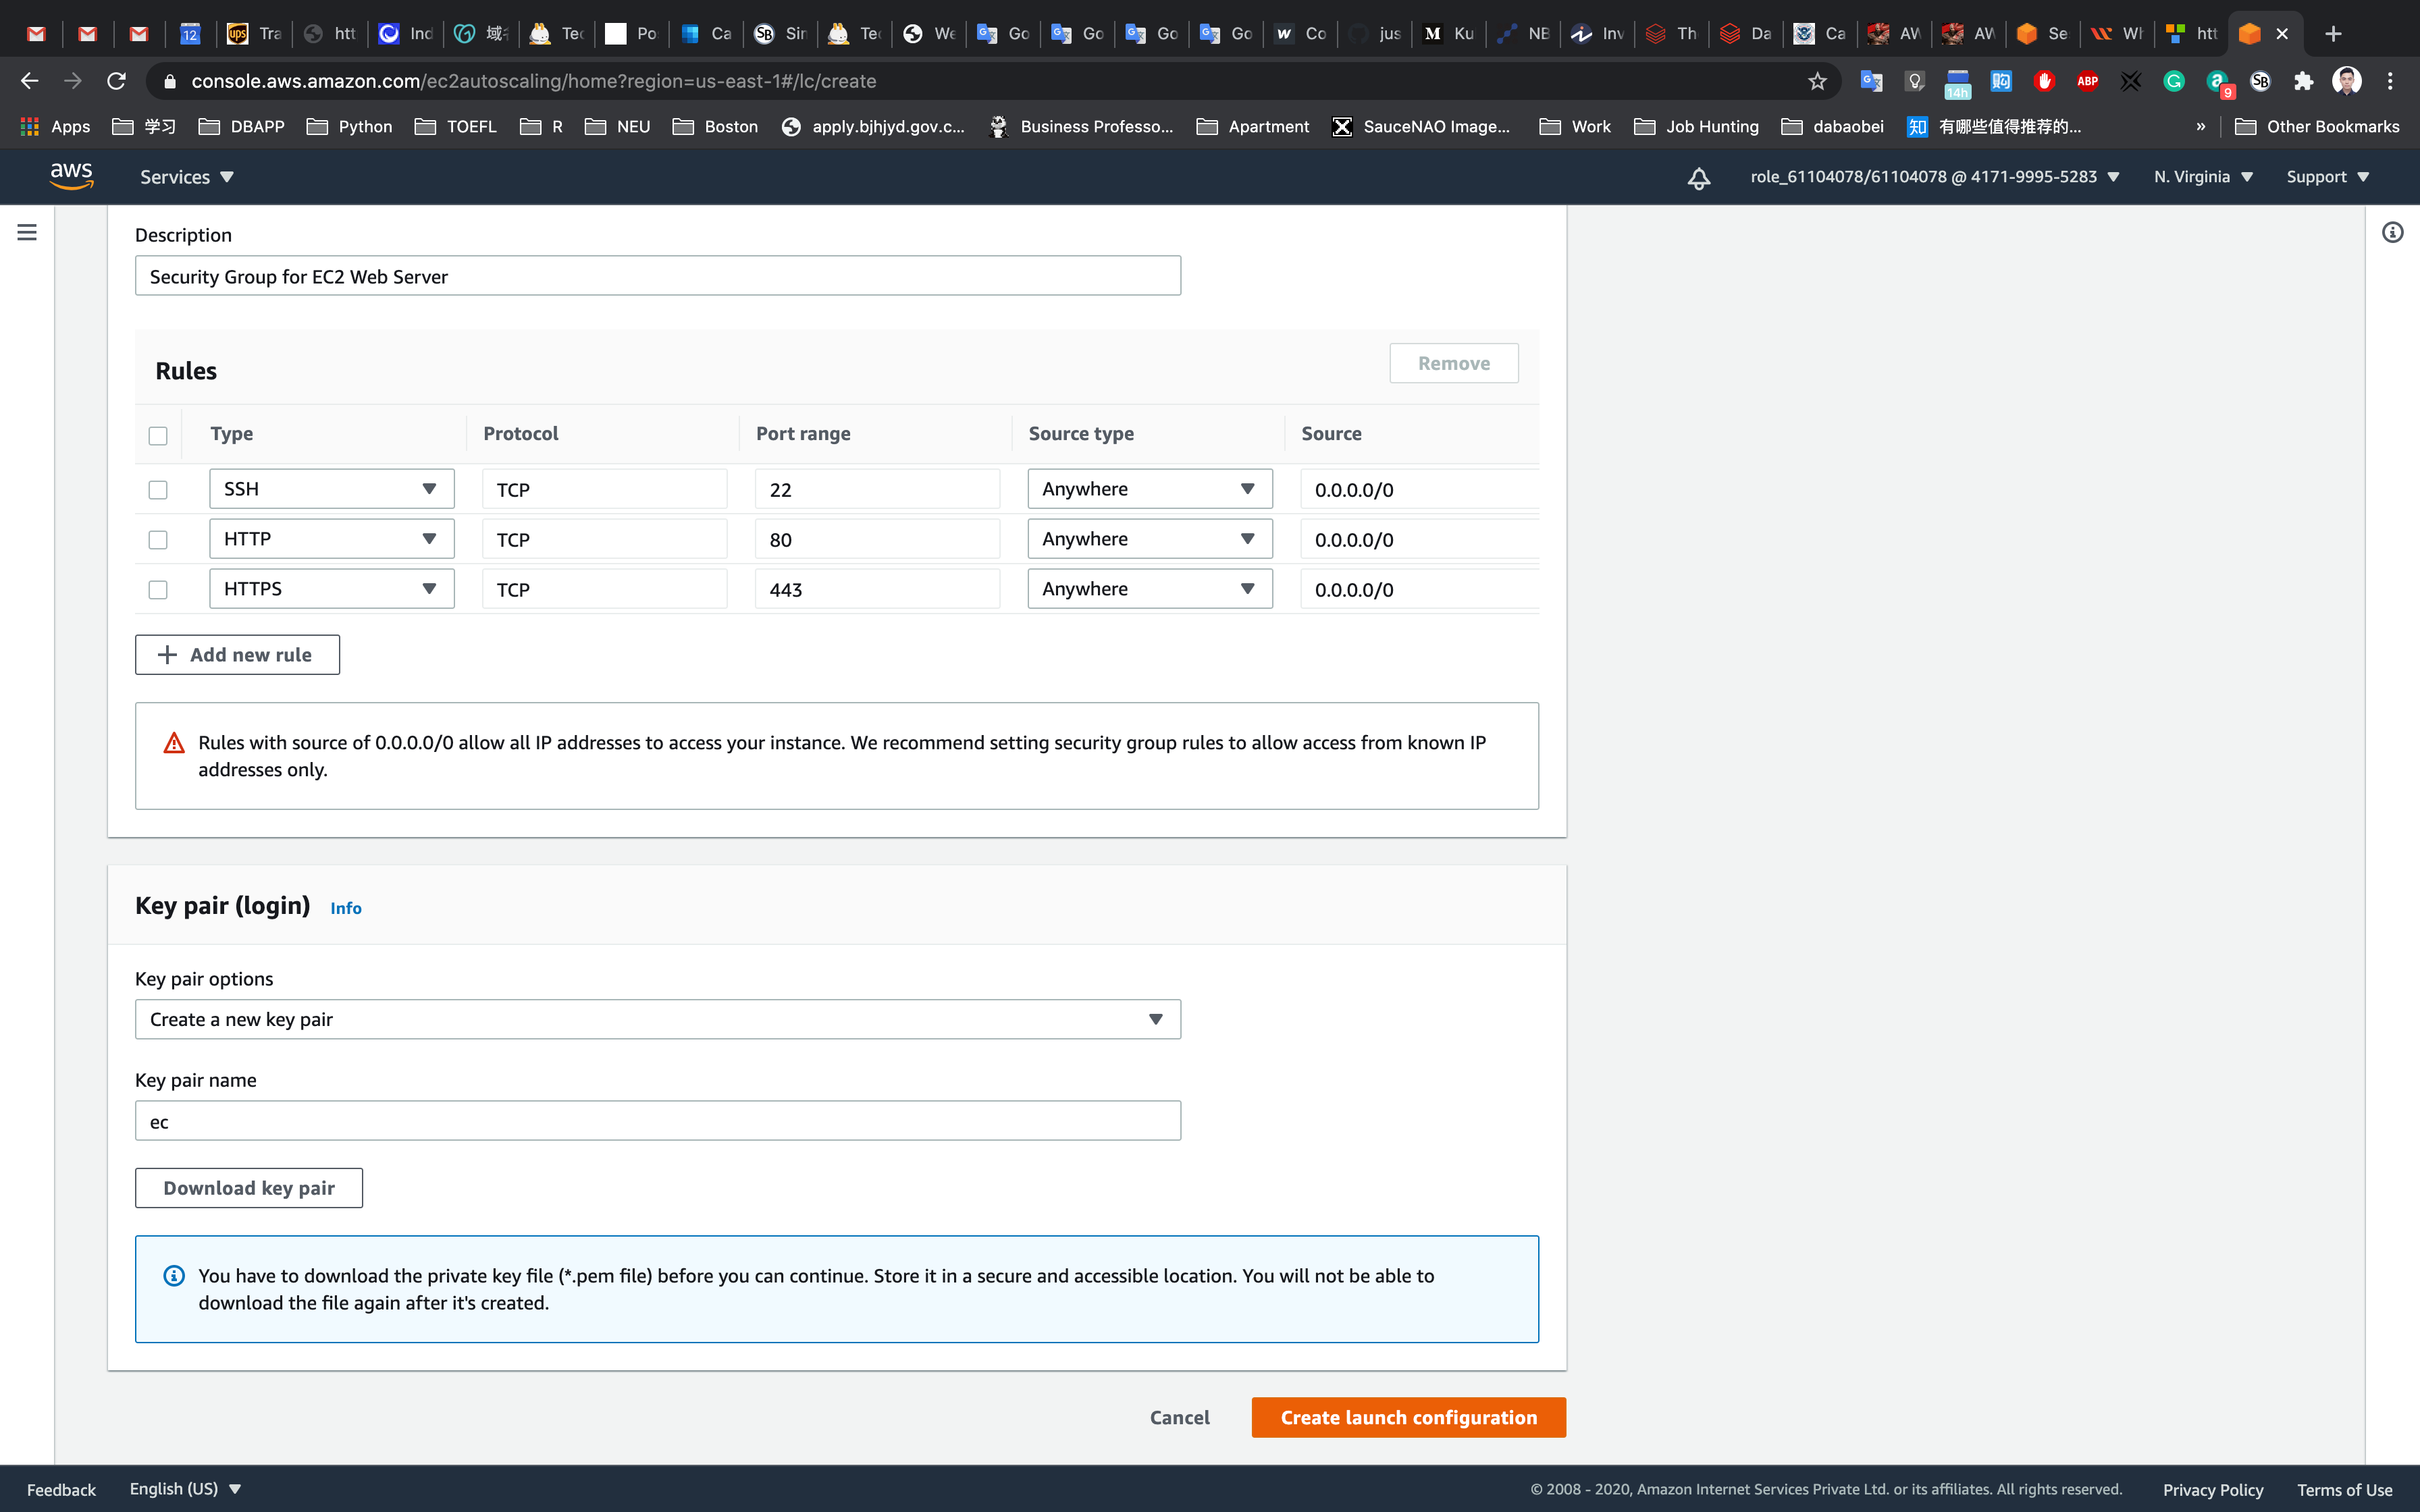
Now you will be able to see the newly created Launch Configuration in the dashboard.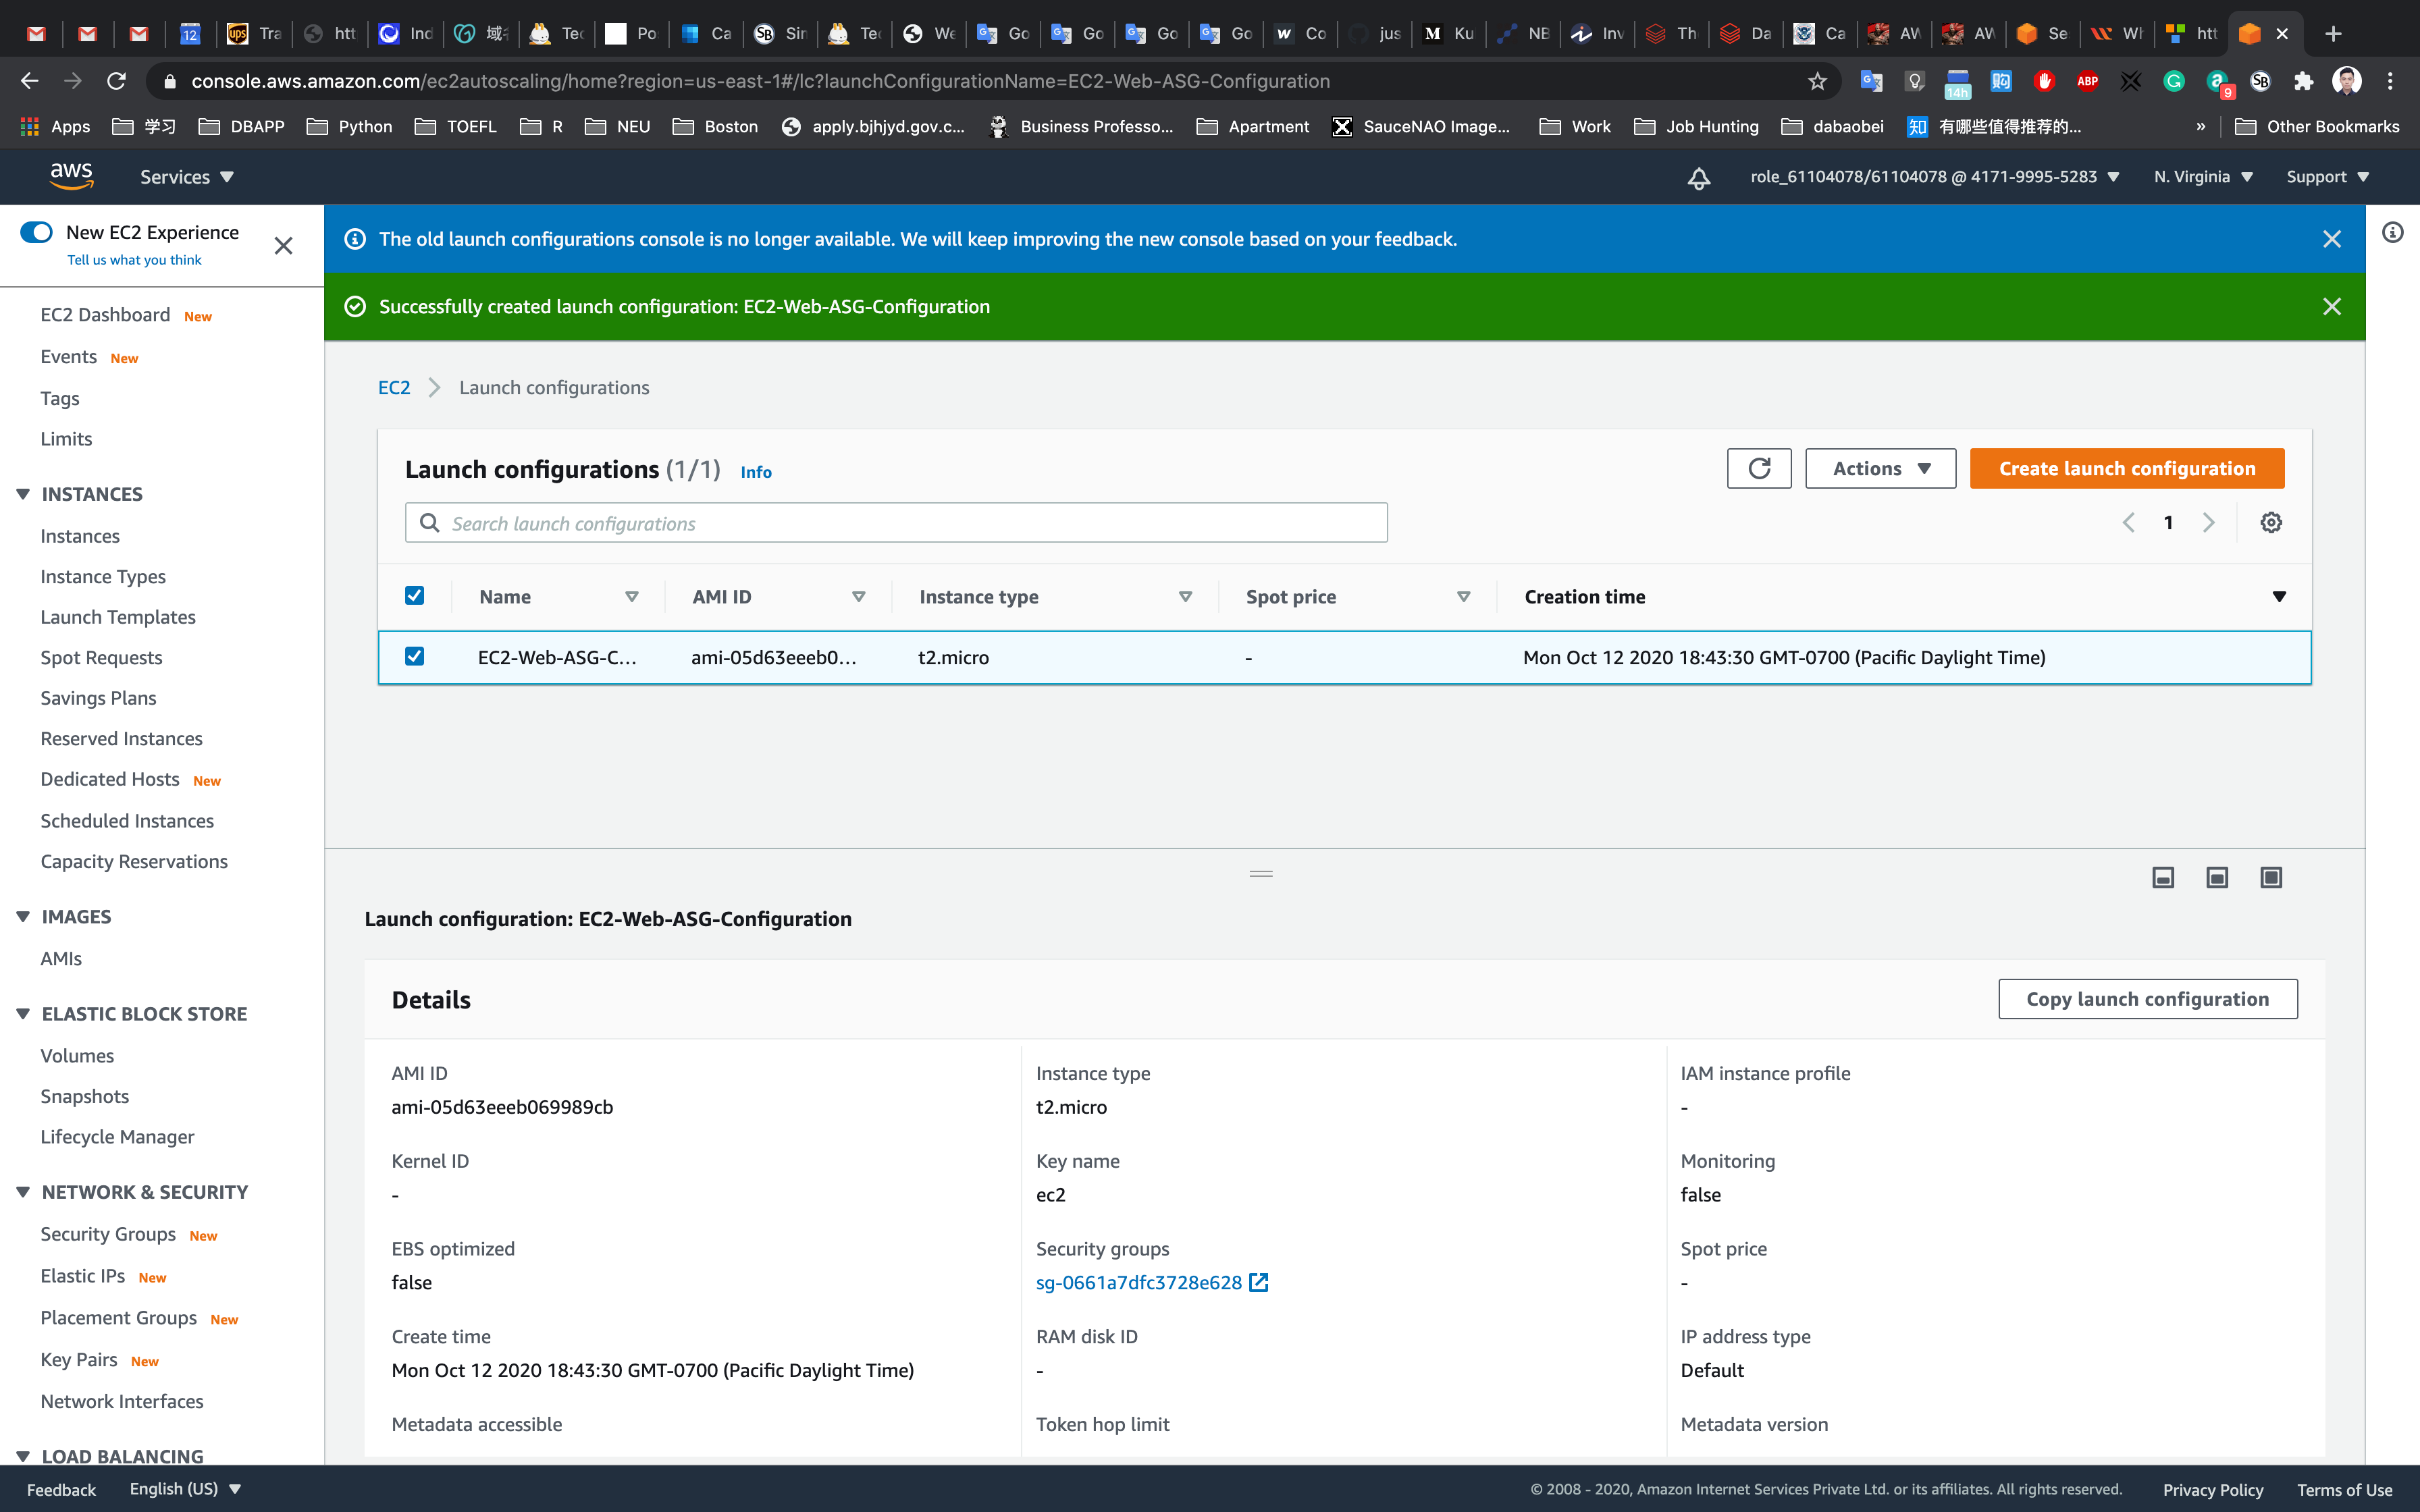
Create an Auto Scaling Group
An Auto Scaling group is a scalable collection of EC2 instances. When you create an Auto Scaling group, you include information such as the subnets for the instances and the number of instances the group must maintain at all times.
Go to the left menu under EC2 and choose Auto Scaling Groups (underneath Launch Configurations) then Launch Configurations.

Click on the Create Auto Scaling group button.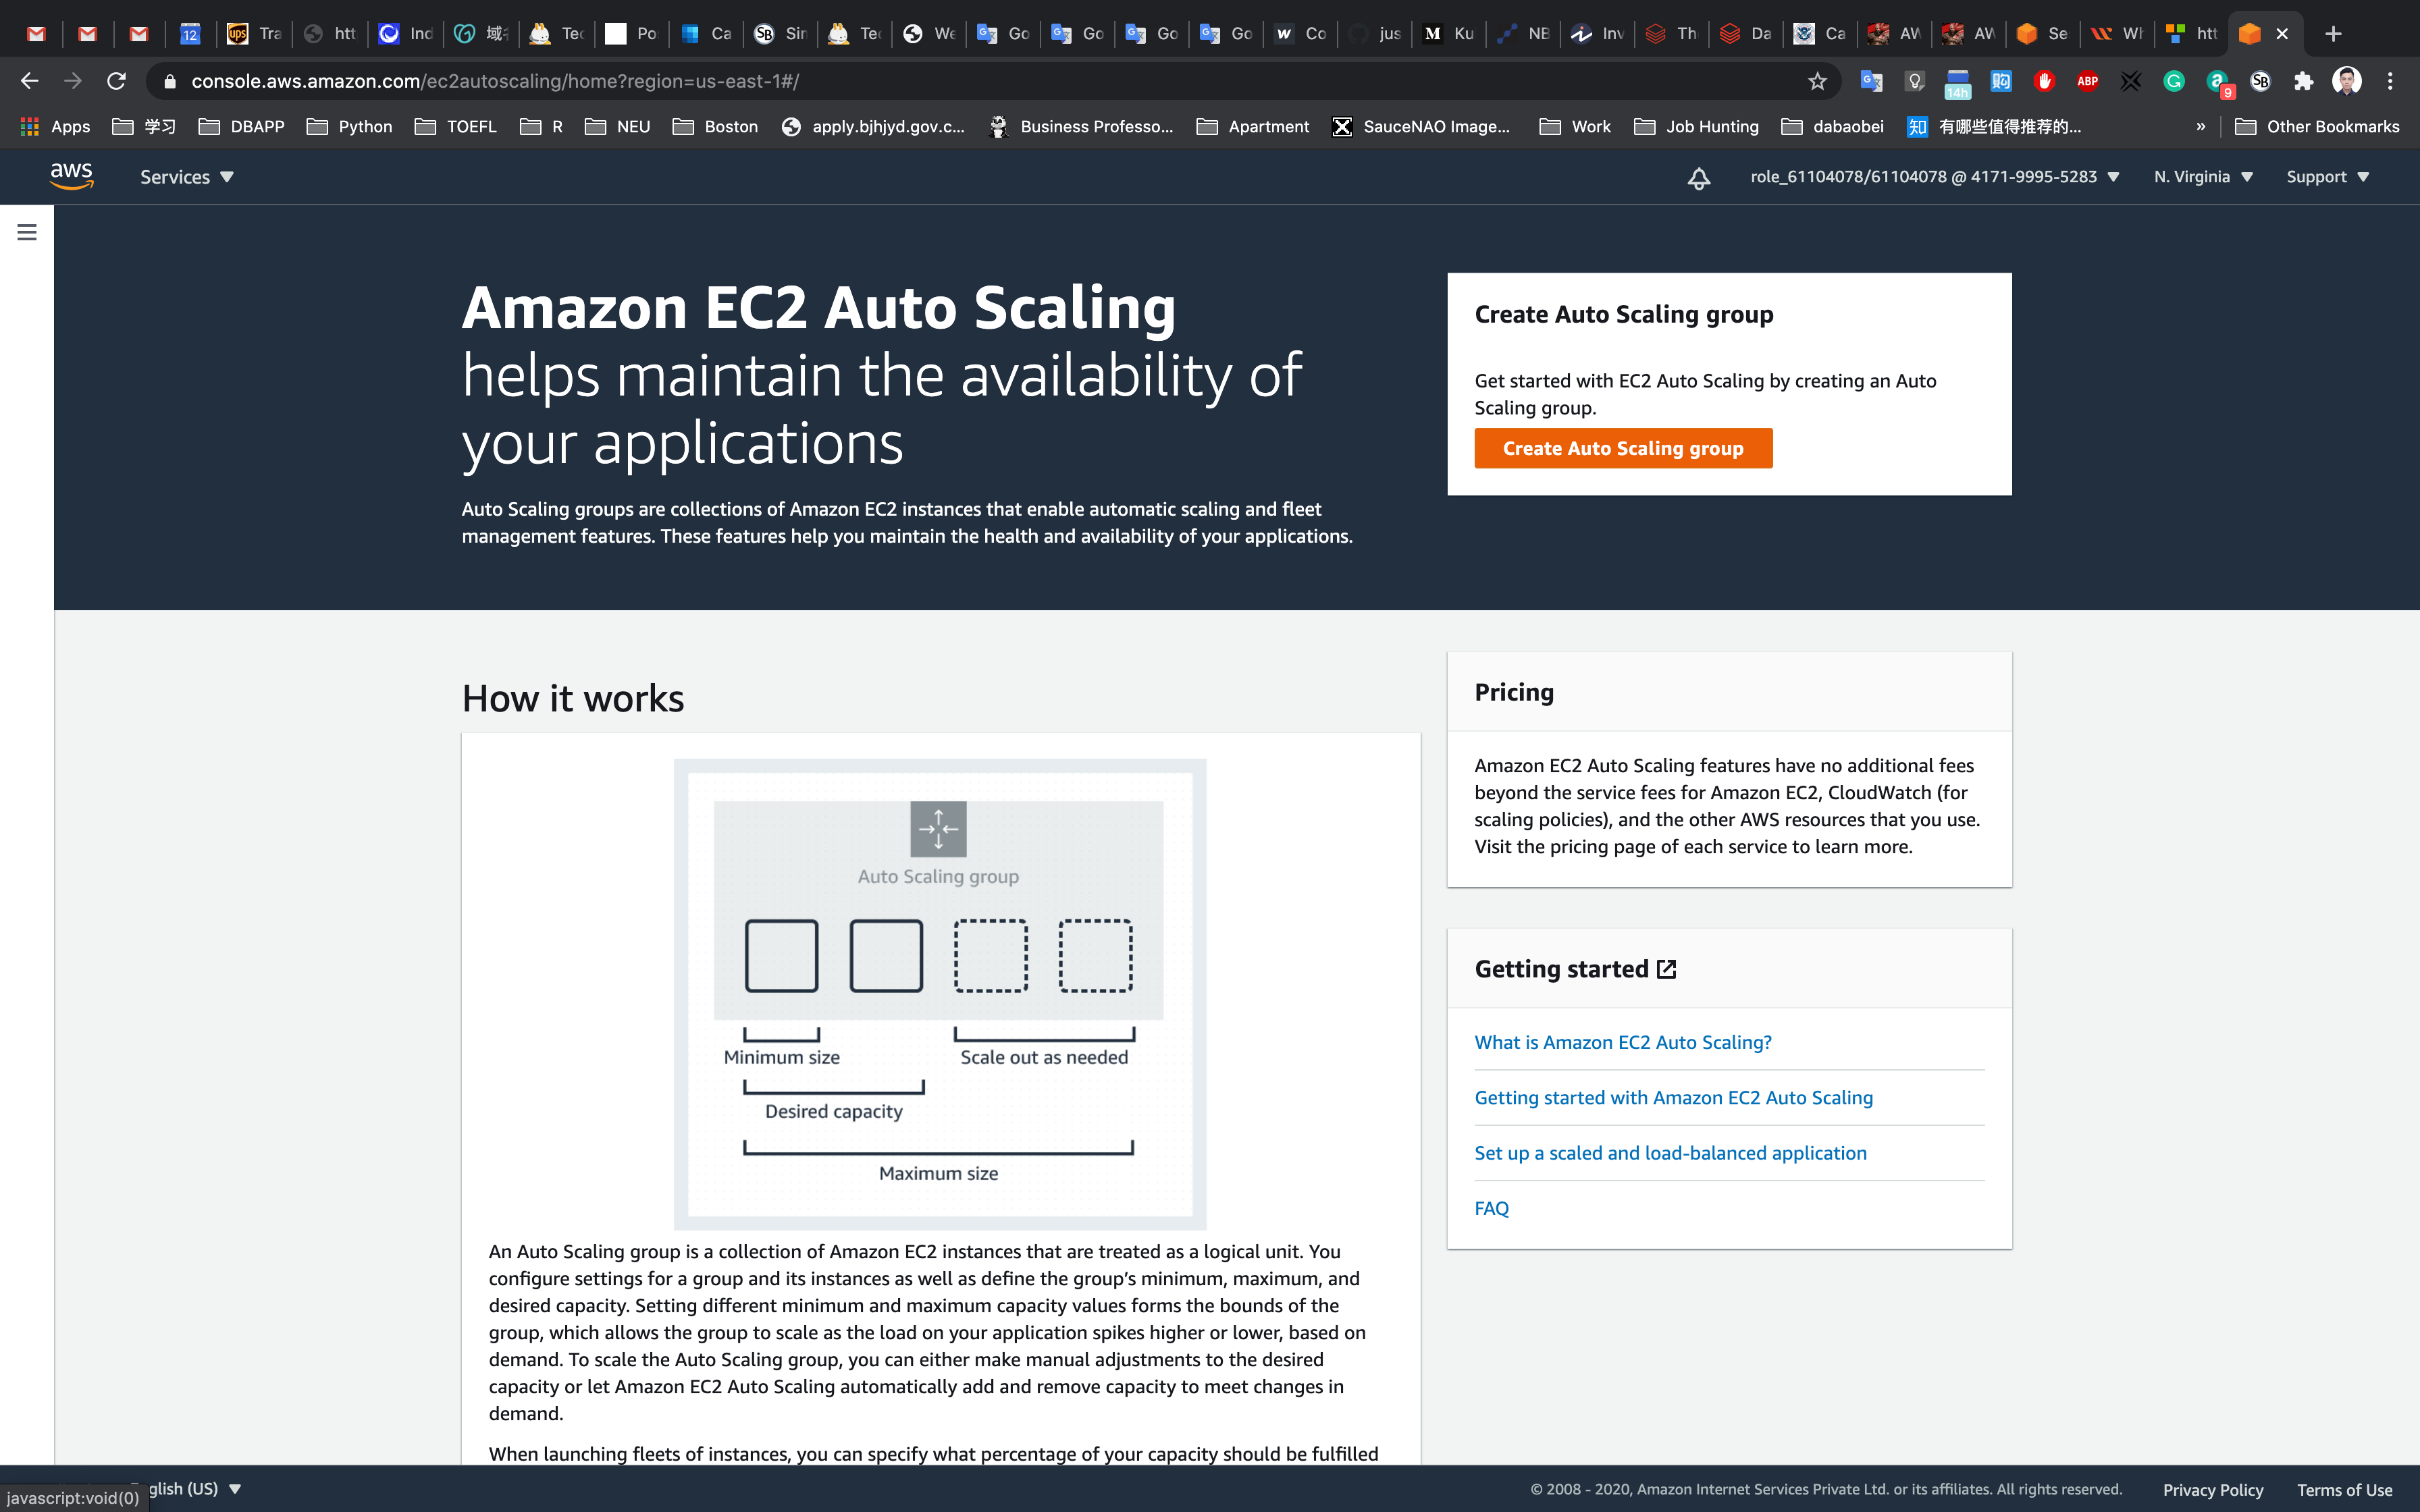
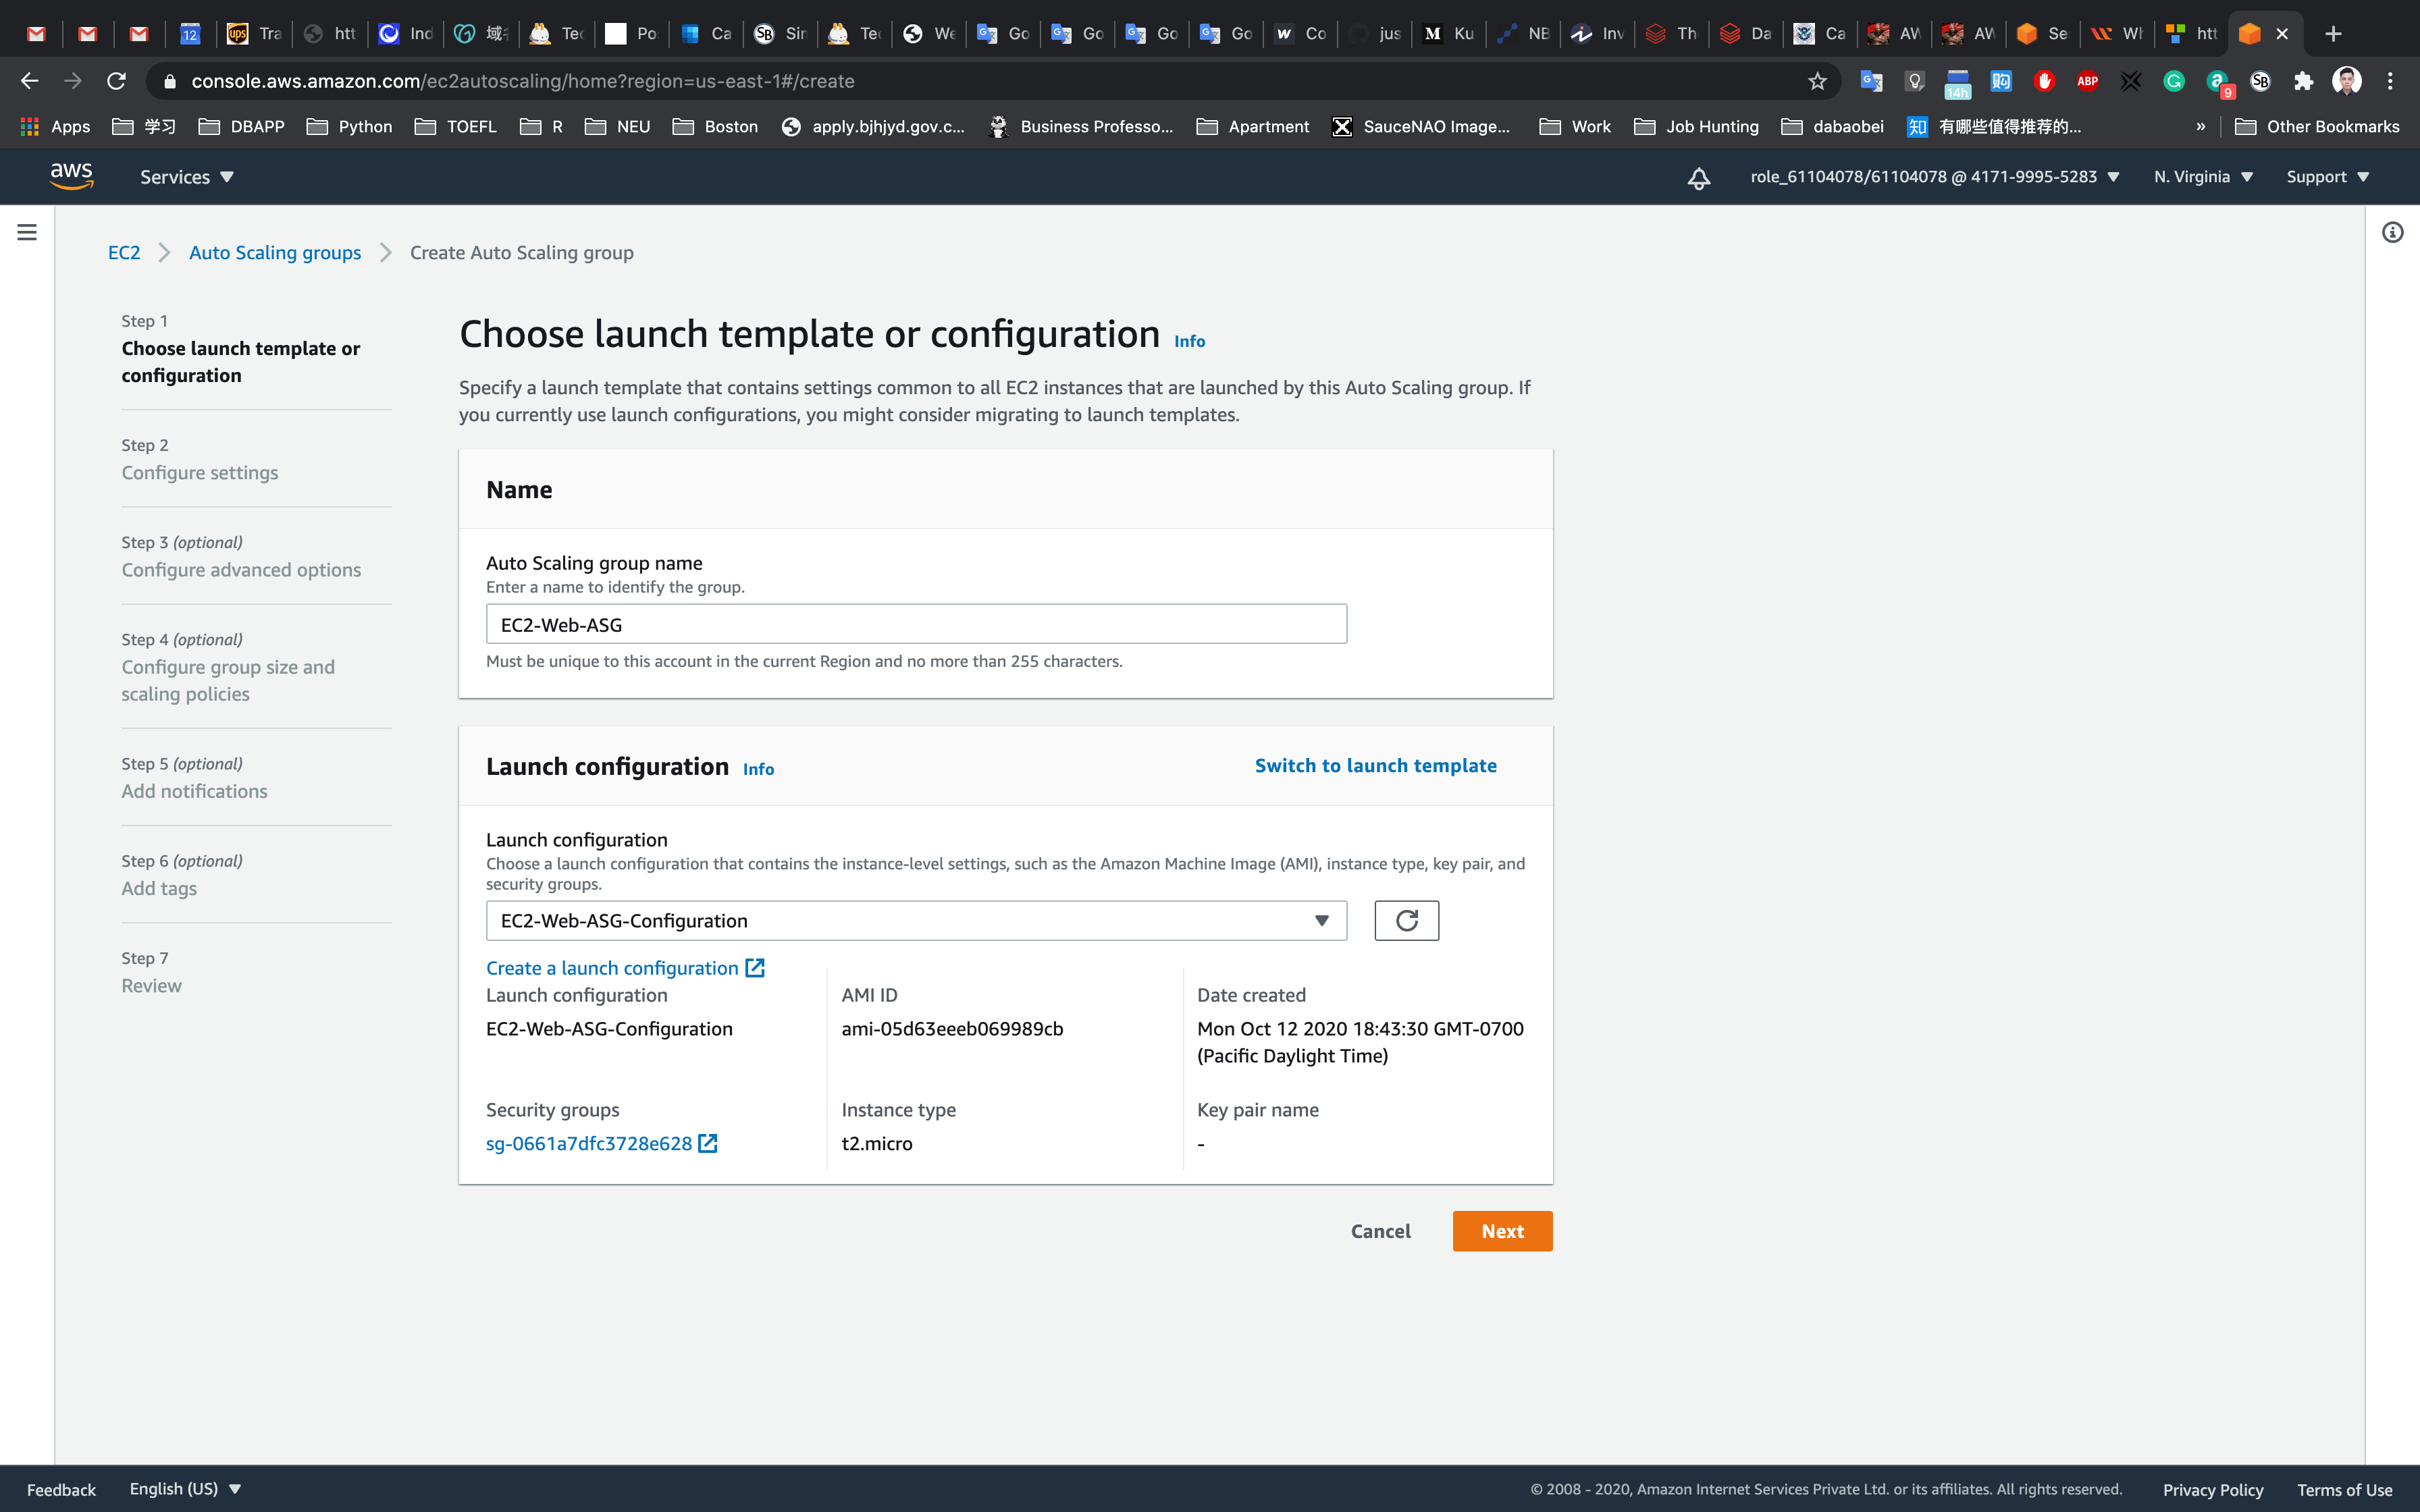
Step 1 : Choose launch template or configuration
- Auto Scaling group name : Enter
EC2-Web-ASG - In the next step, by default it will be showing the Launch template but we need Launch Configuration instead, so we need to switch the settings.
- To do that click on
Switch to launch configurationlink on the right side. - Now it will be showing Launch configuration in bold.
- Select the Launch Configuration
EC2-Web-ASG-Configurationfrom the list and click on theNextbutton.
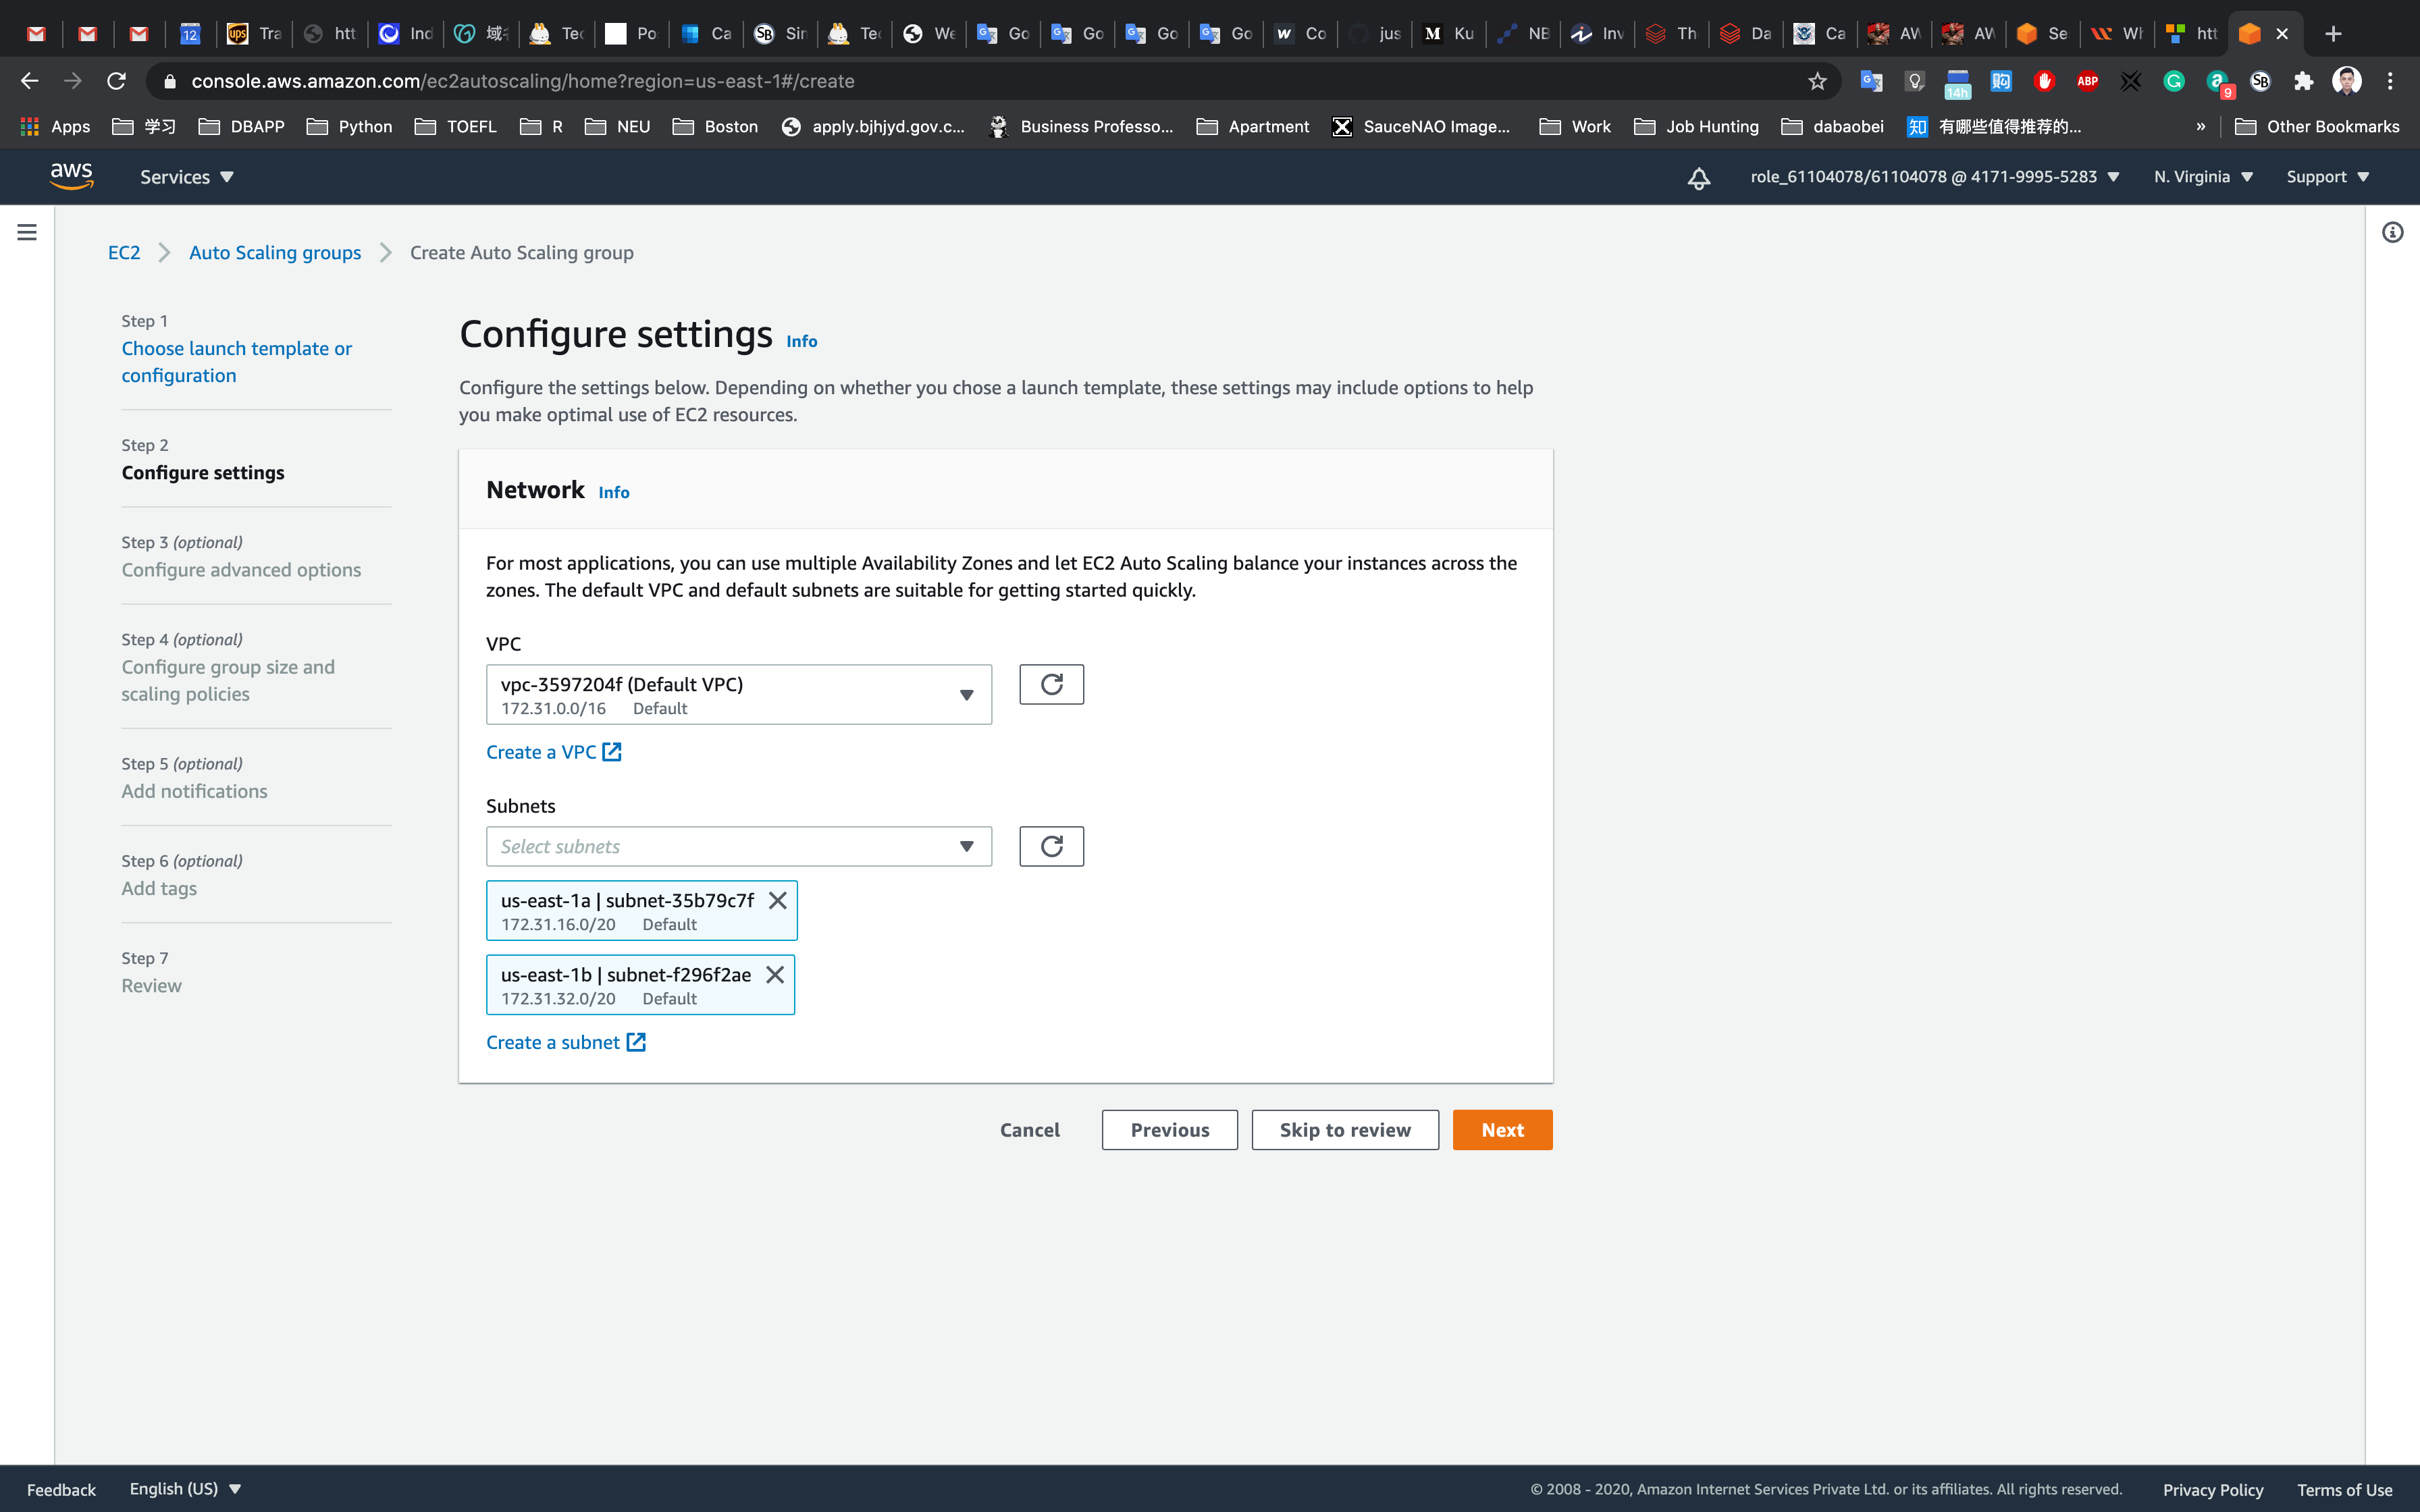
Step 2: Configure settings
- VPC: Select the Default VPC from the list.
- Subnet: Select one or more subnets for your Auto Scaling instances.
- Click on the
Nextbutton.
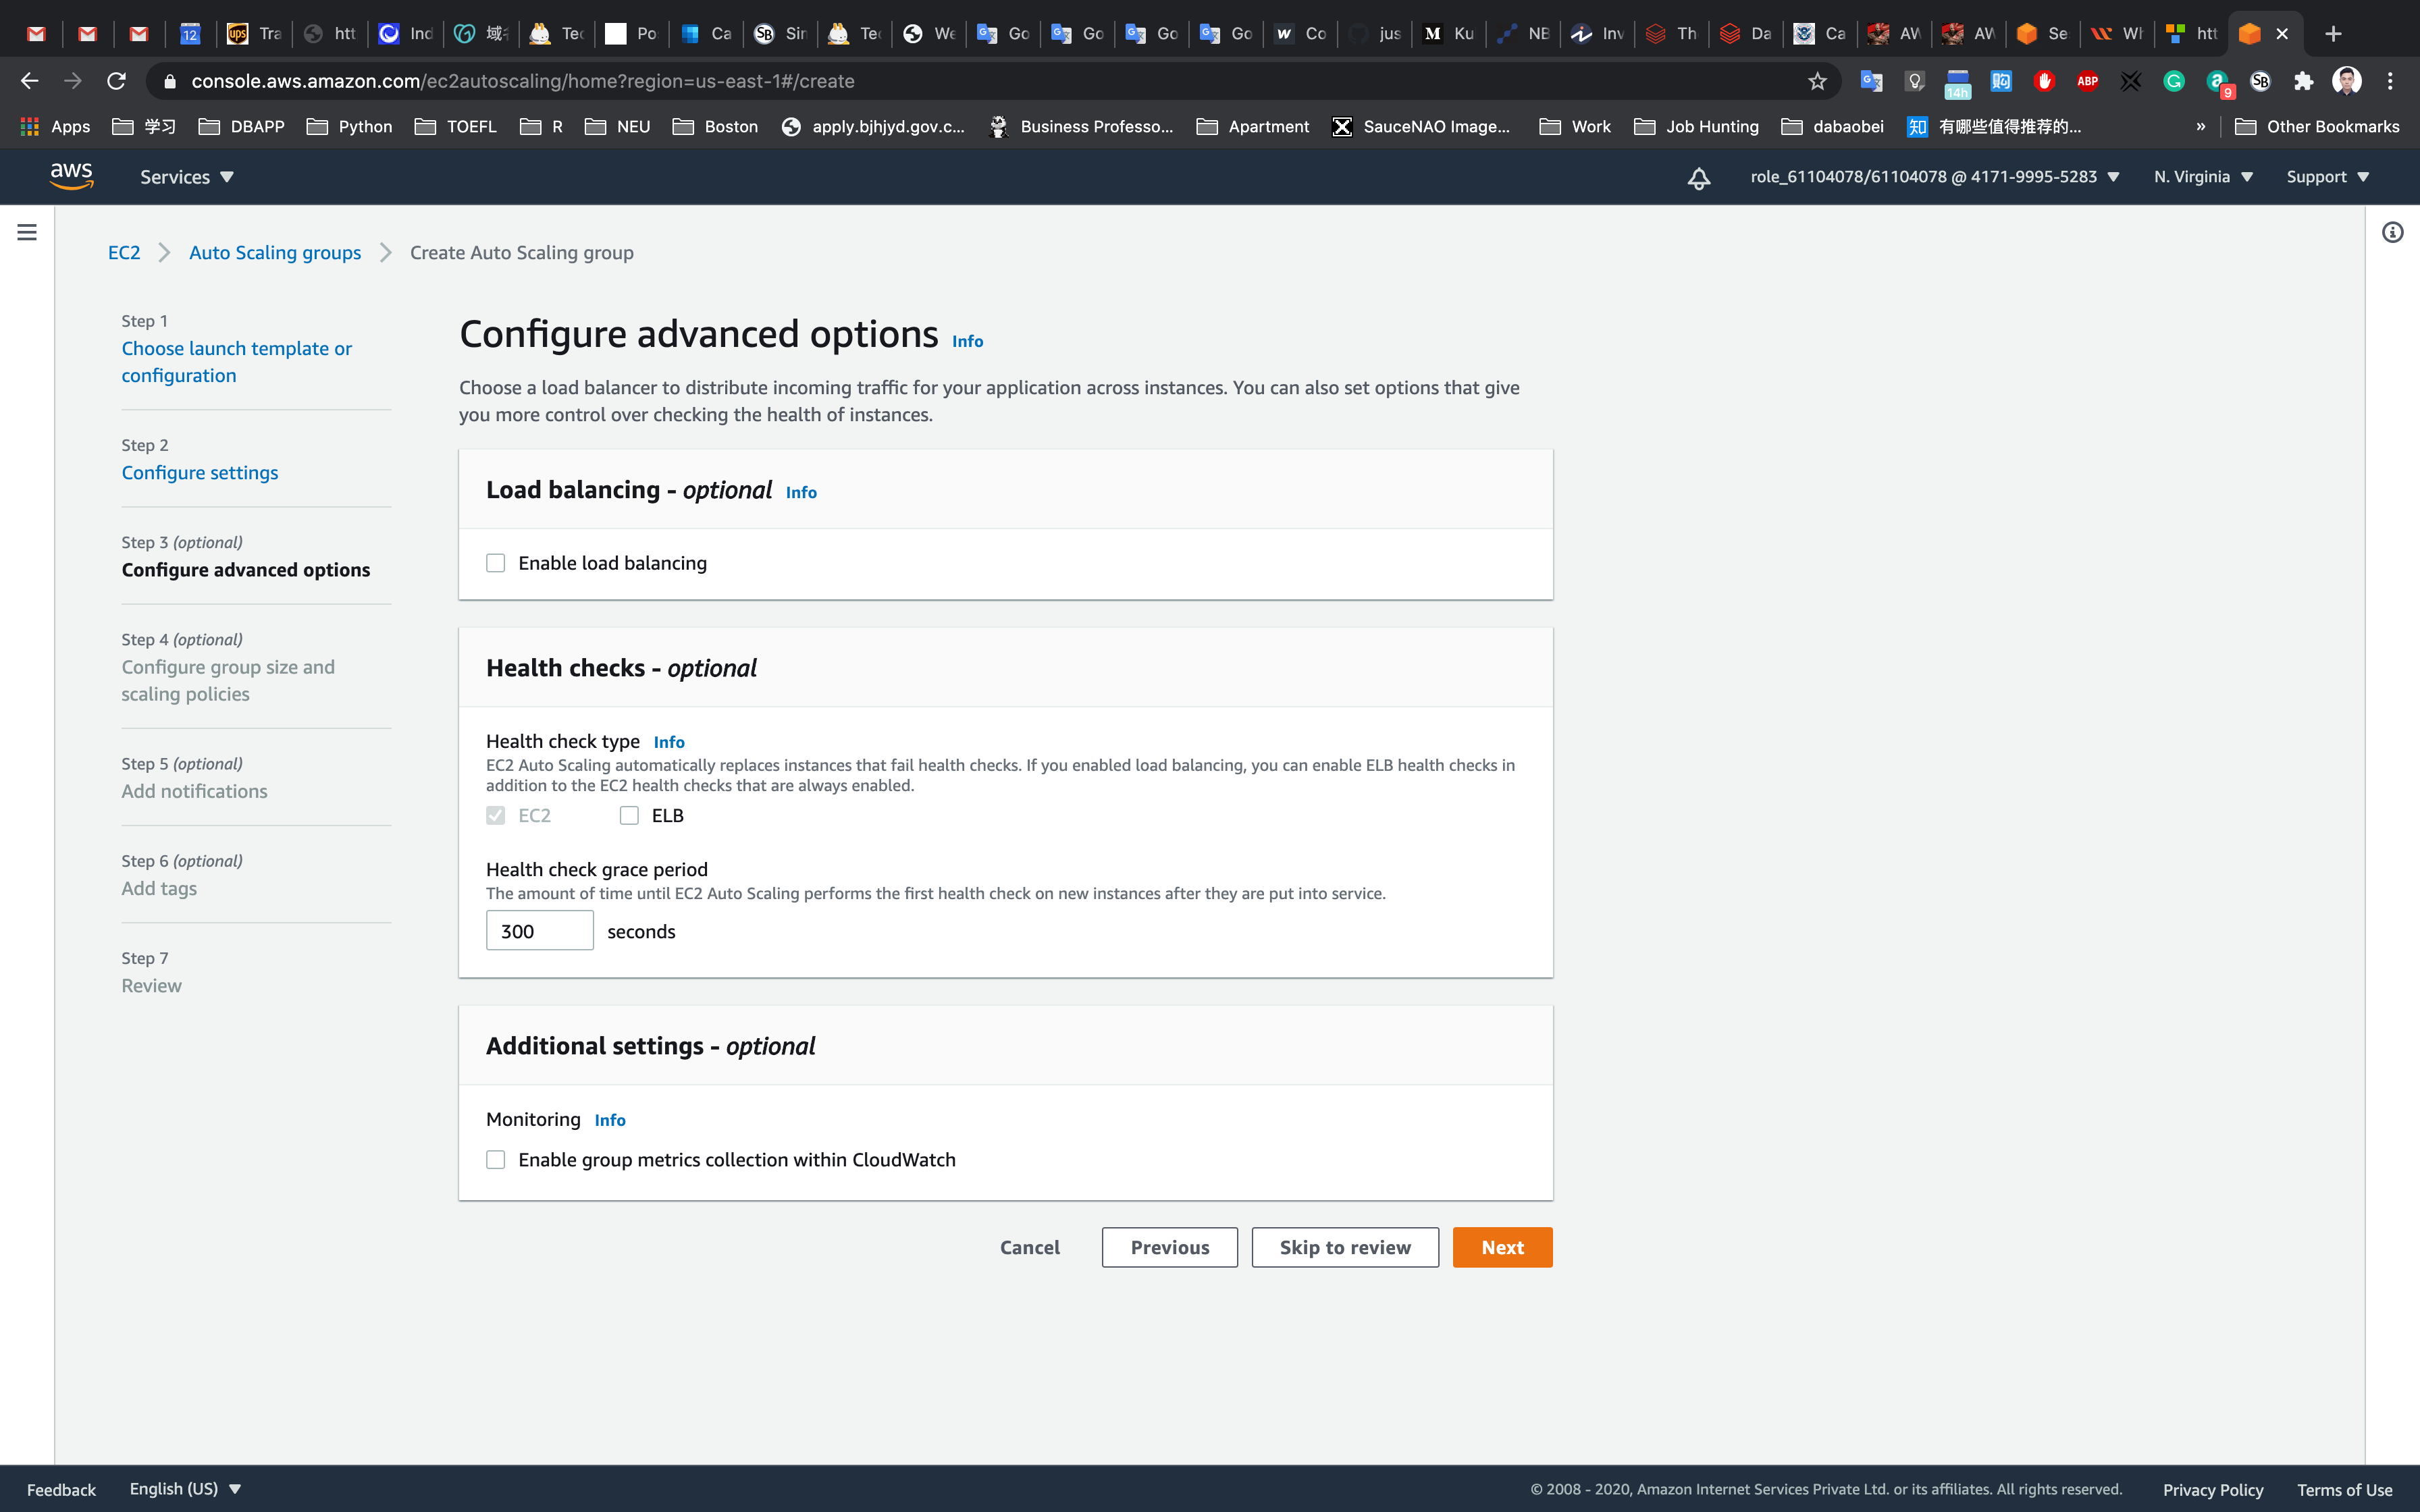
Step 3: Configure advanced options
- No changes needed in this page, click on the
Nextbutton.
Step 4: Configure group size and scaling policies
- Under Group size - optional
- Desired capacity :
2 - Minimum capacity :
2 - Maximum capacity :
2
- Desired capacity :
- Under Scaling policies - optional
- Select
None
- Select
- Under Instance scale-in protection
- No changes are needed
Click on the Next button.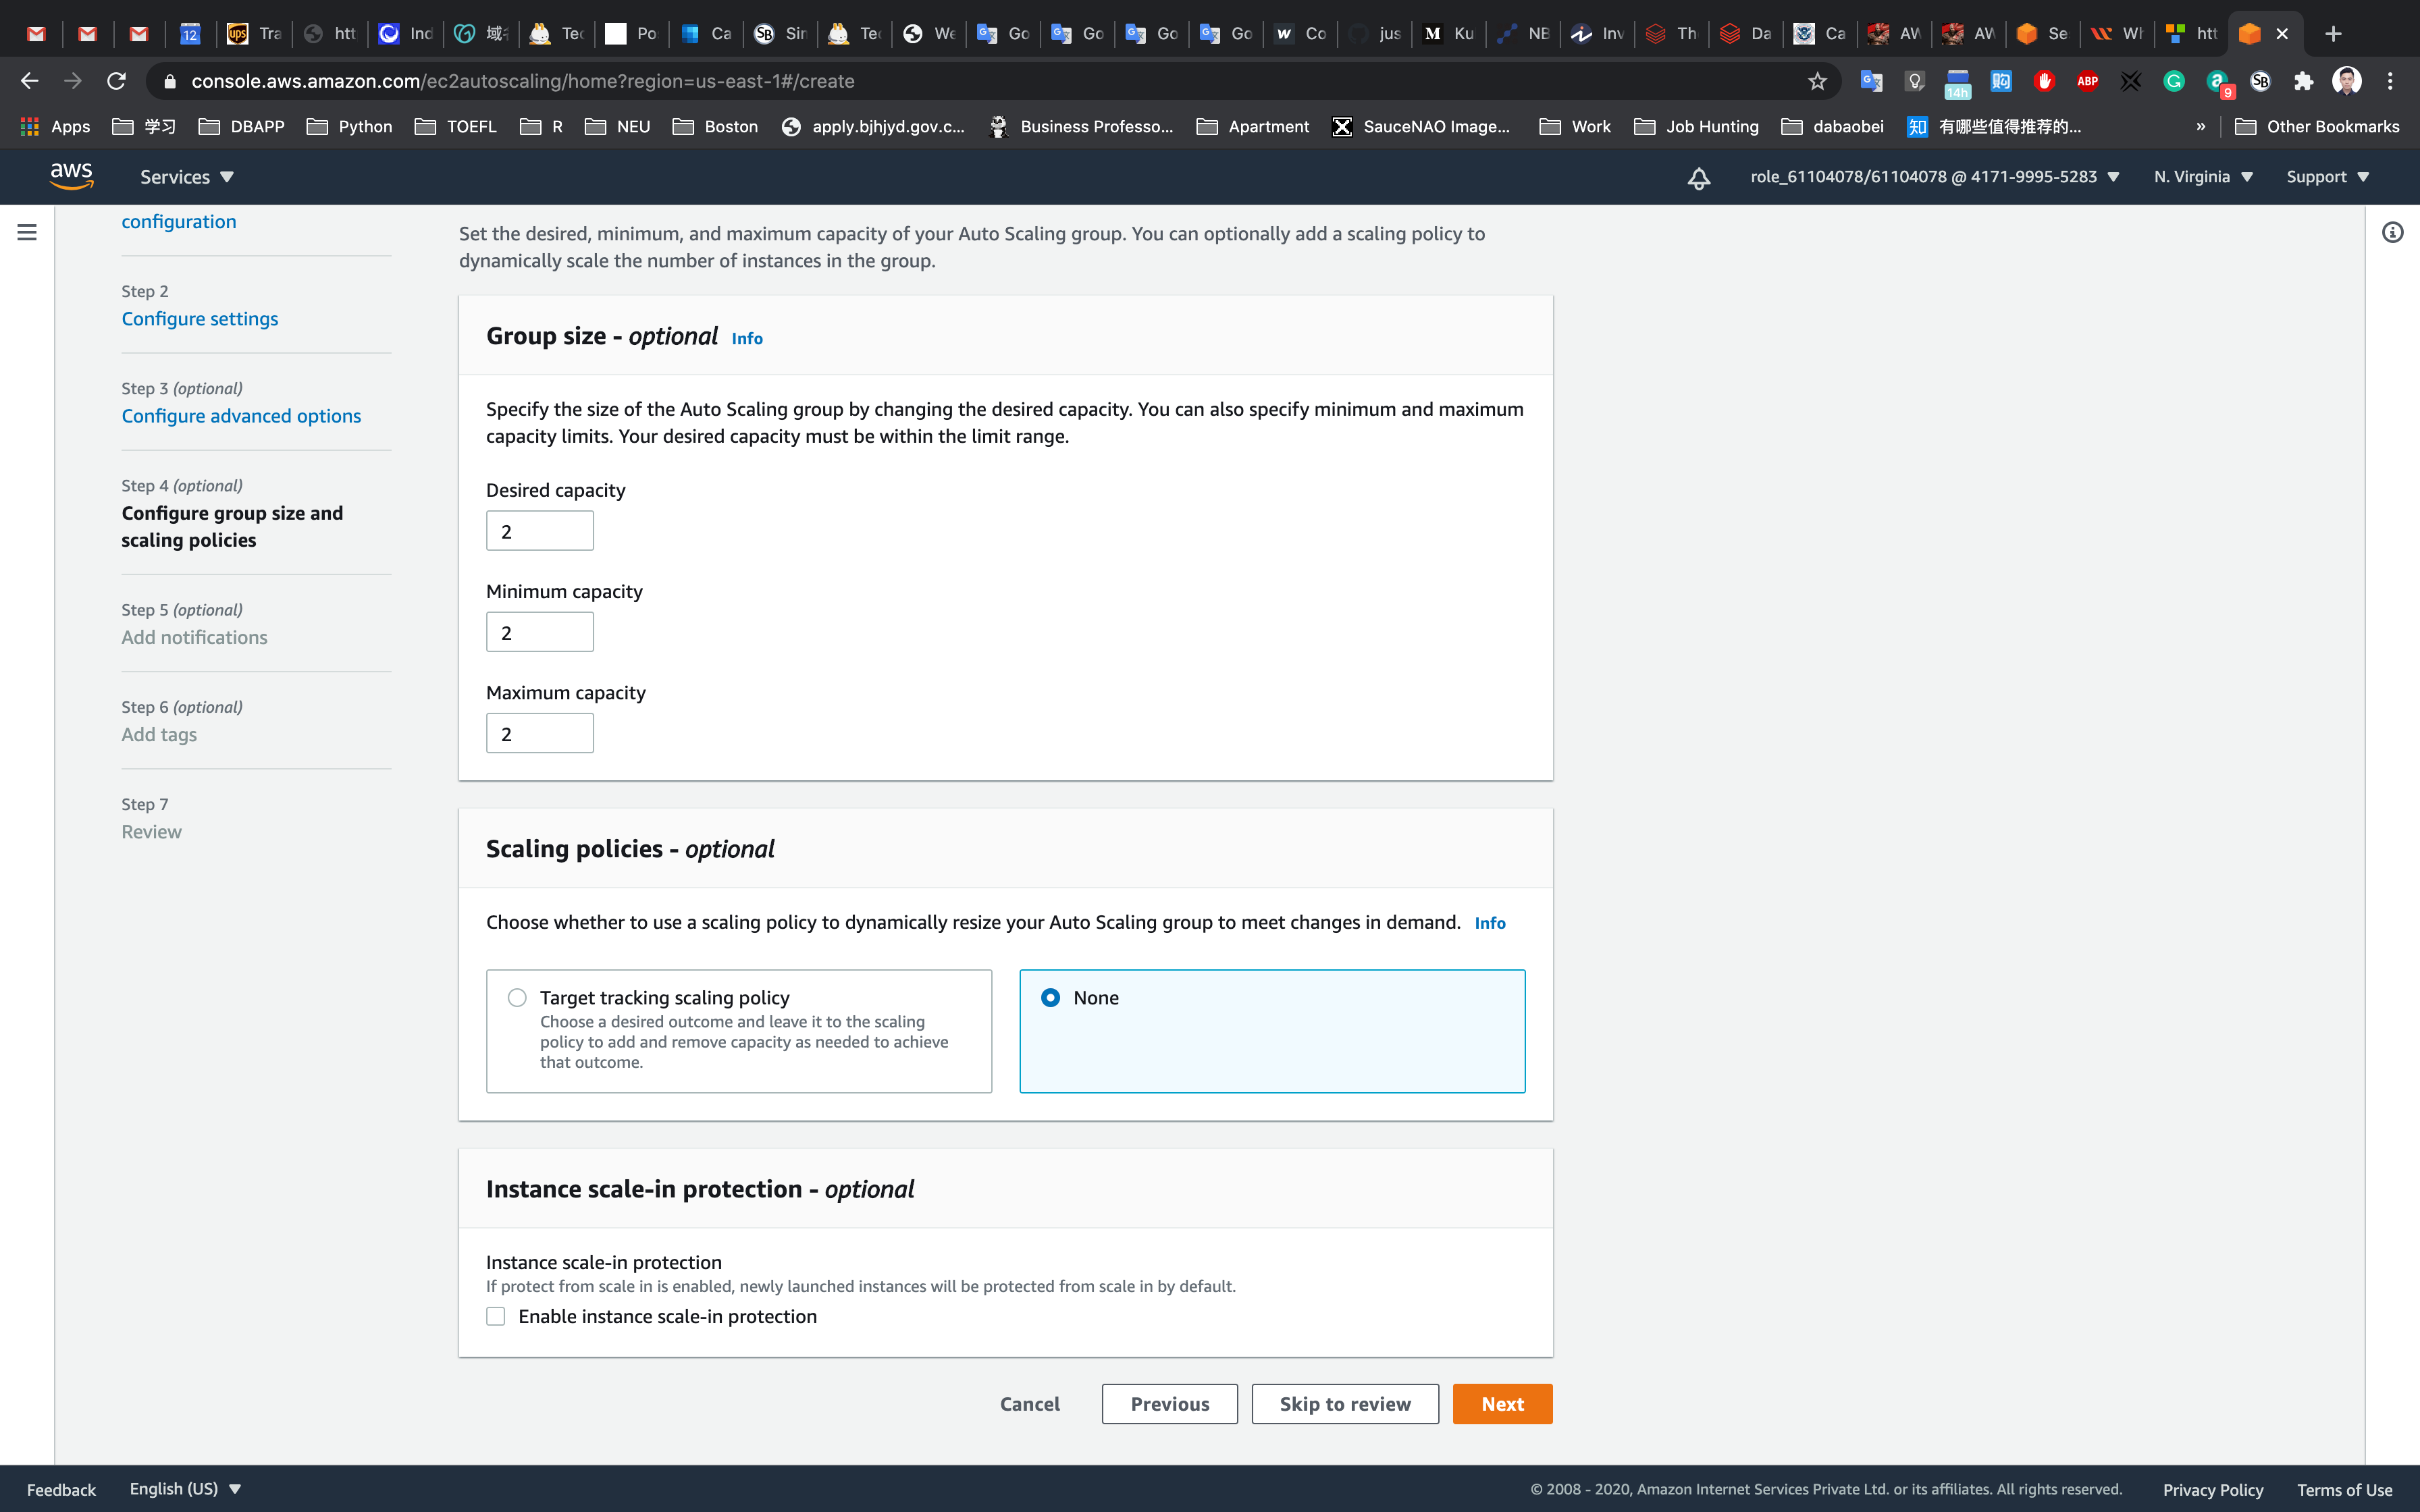
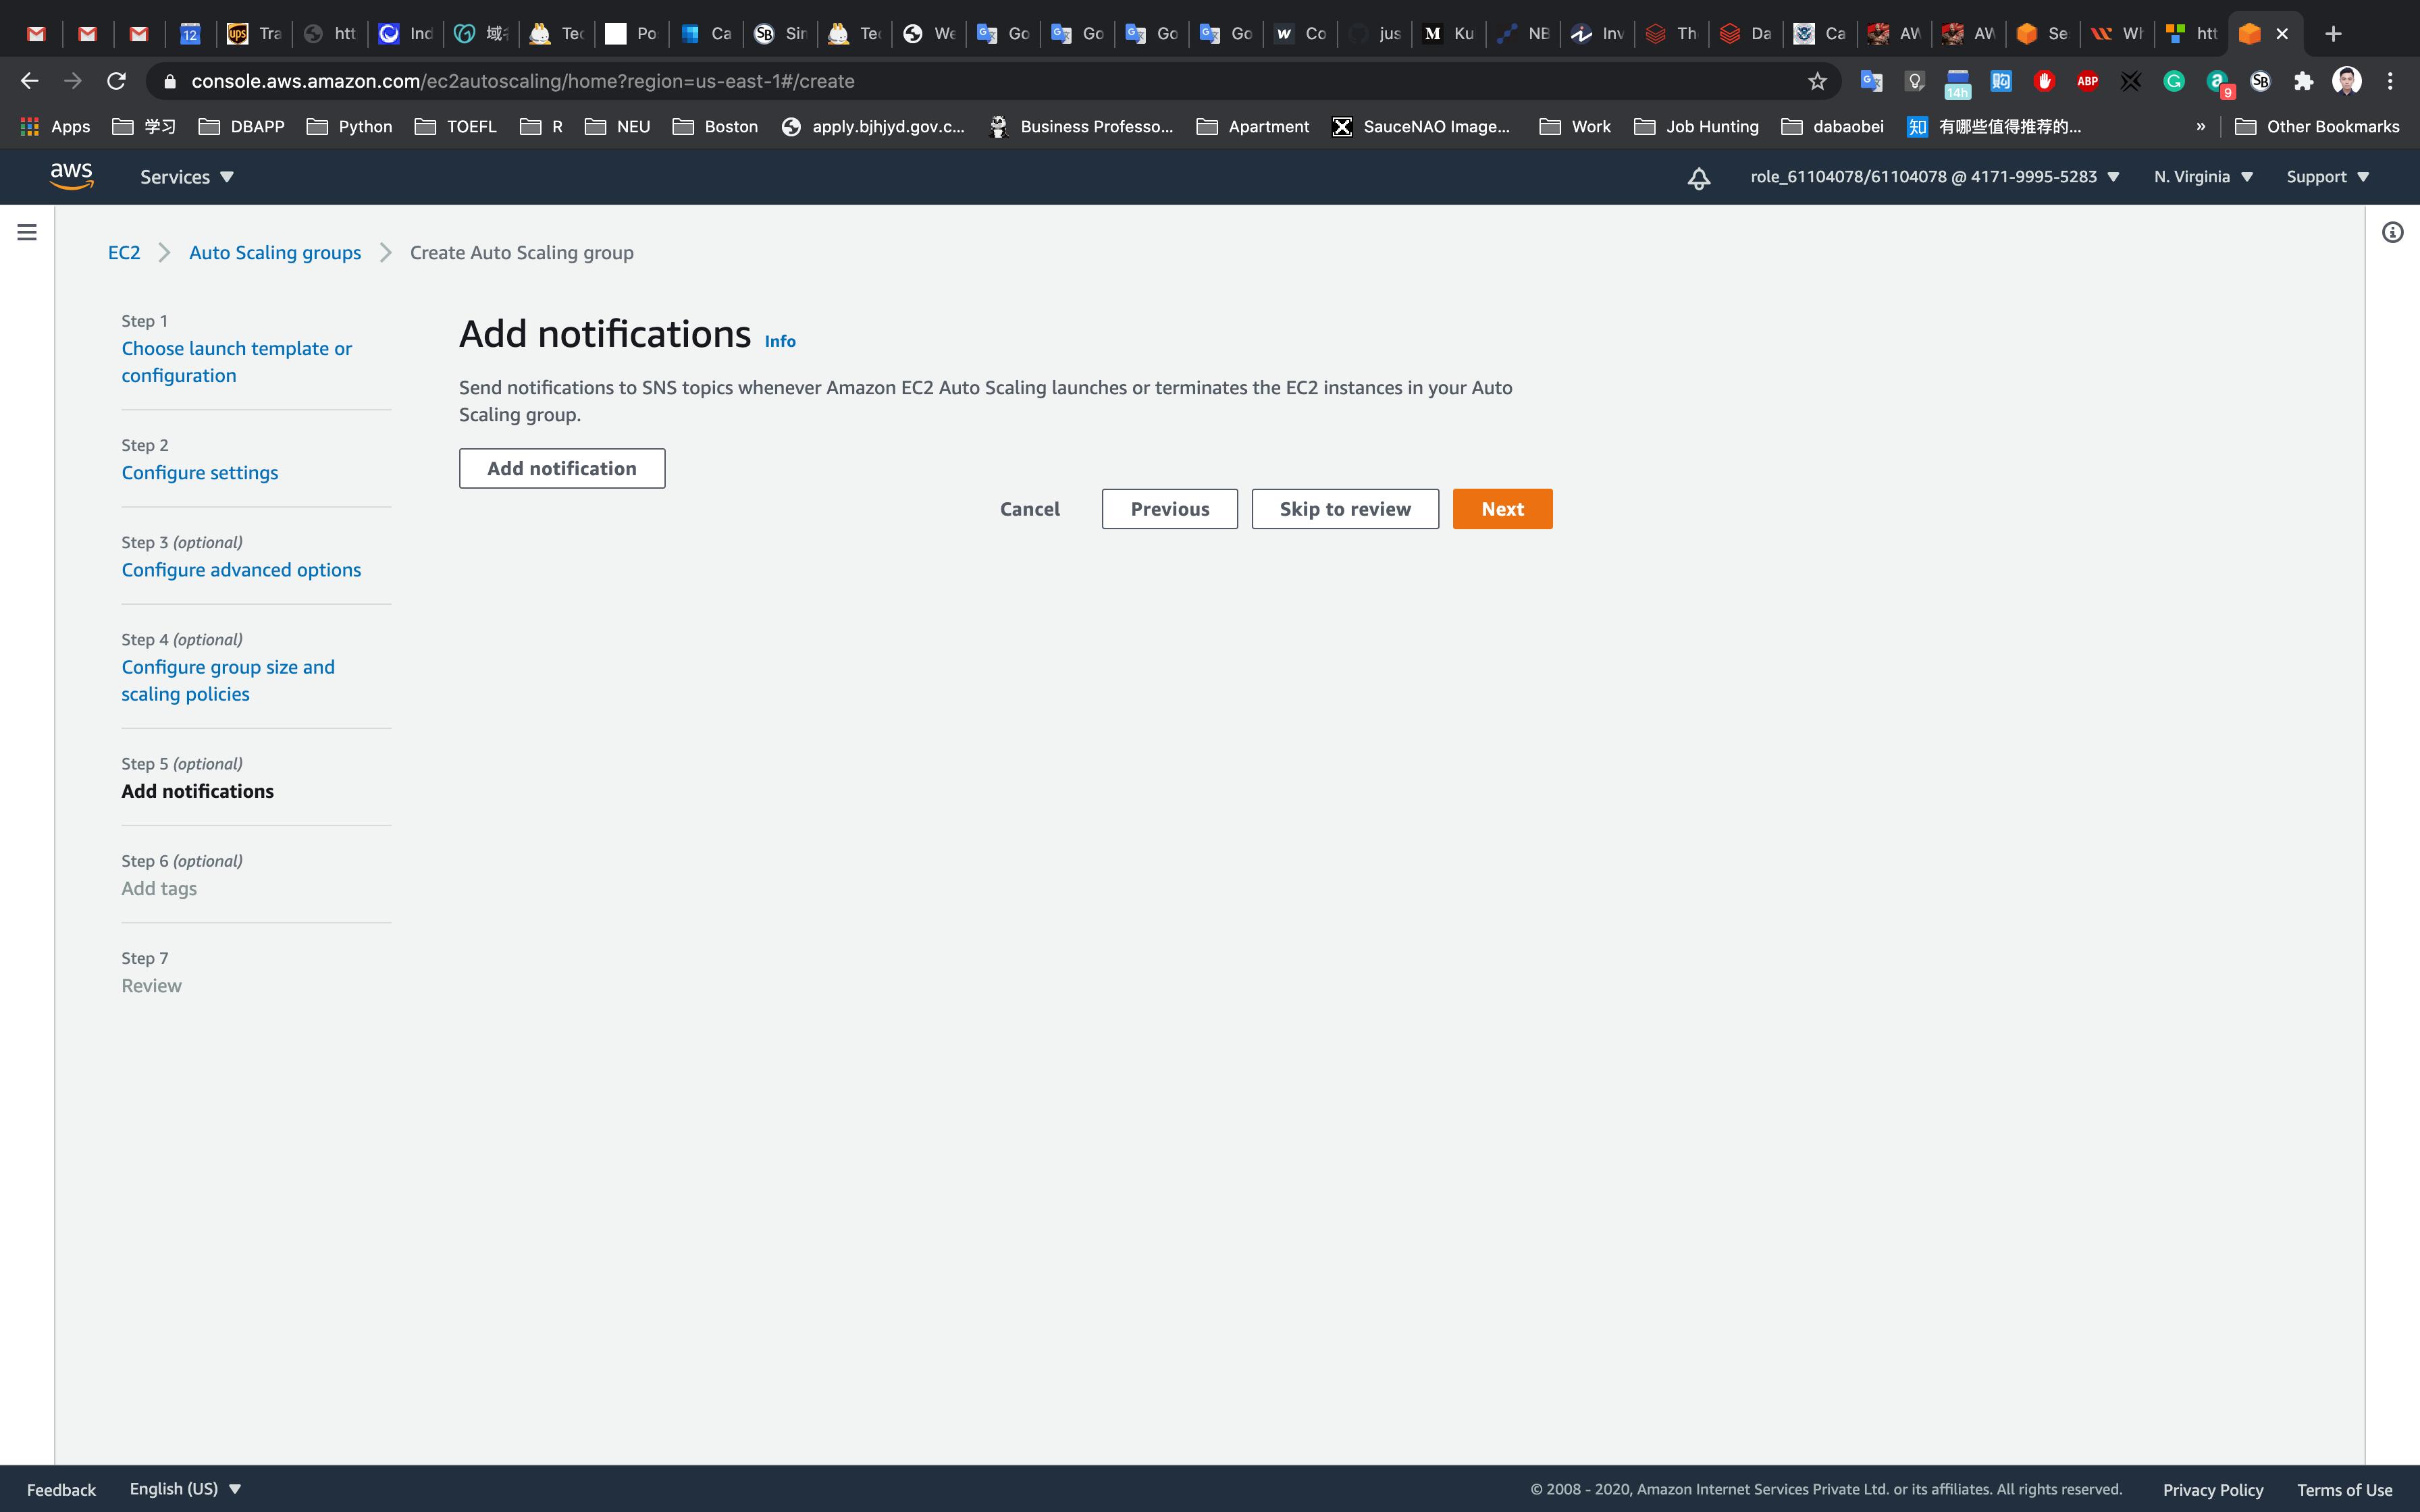
Step 5: Add notifications
- No changes are needed in this page, click on the
Nextbutton.
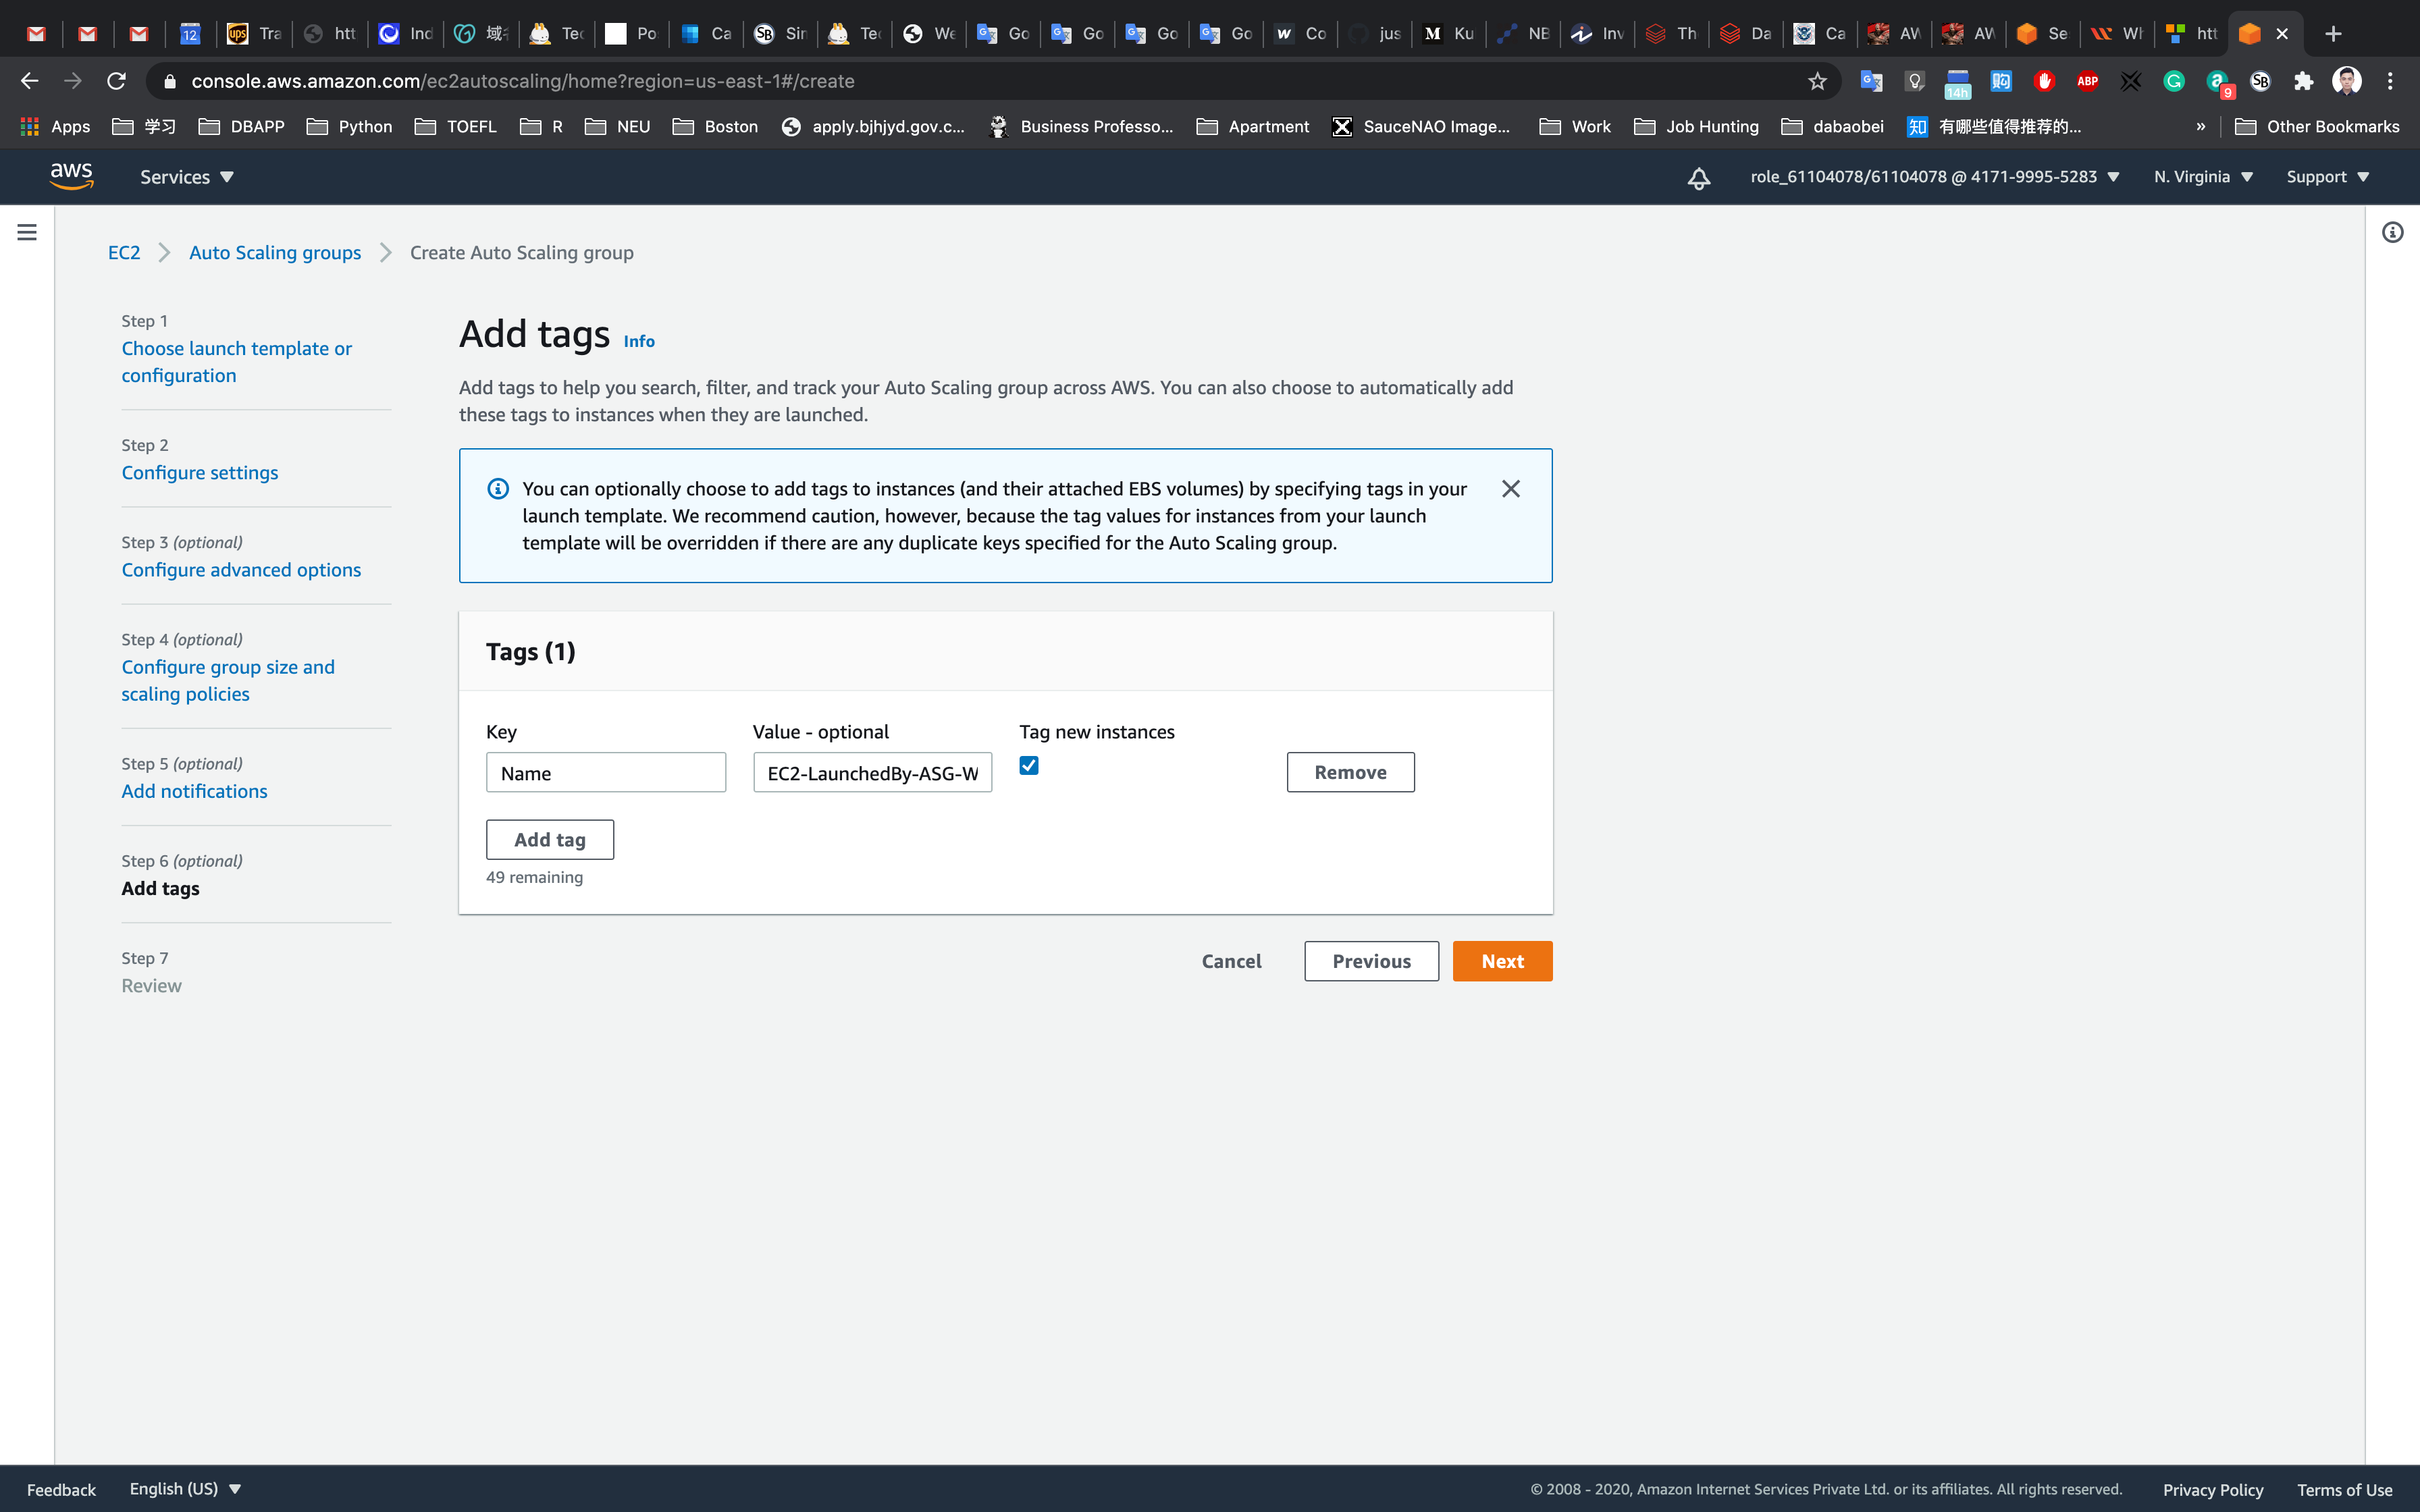
Step 6: Add tags
Enter tags in key-value pairs to identify your auto scaling group.
- Key:
Name - Value:
EC2-LaunchedBy-ASG-Web-Server
Click on the Next button.
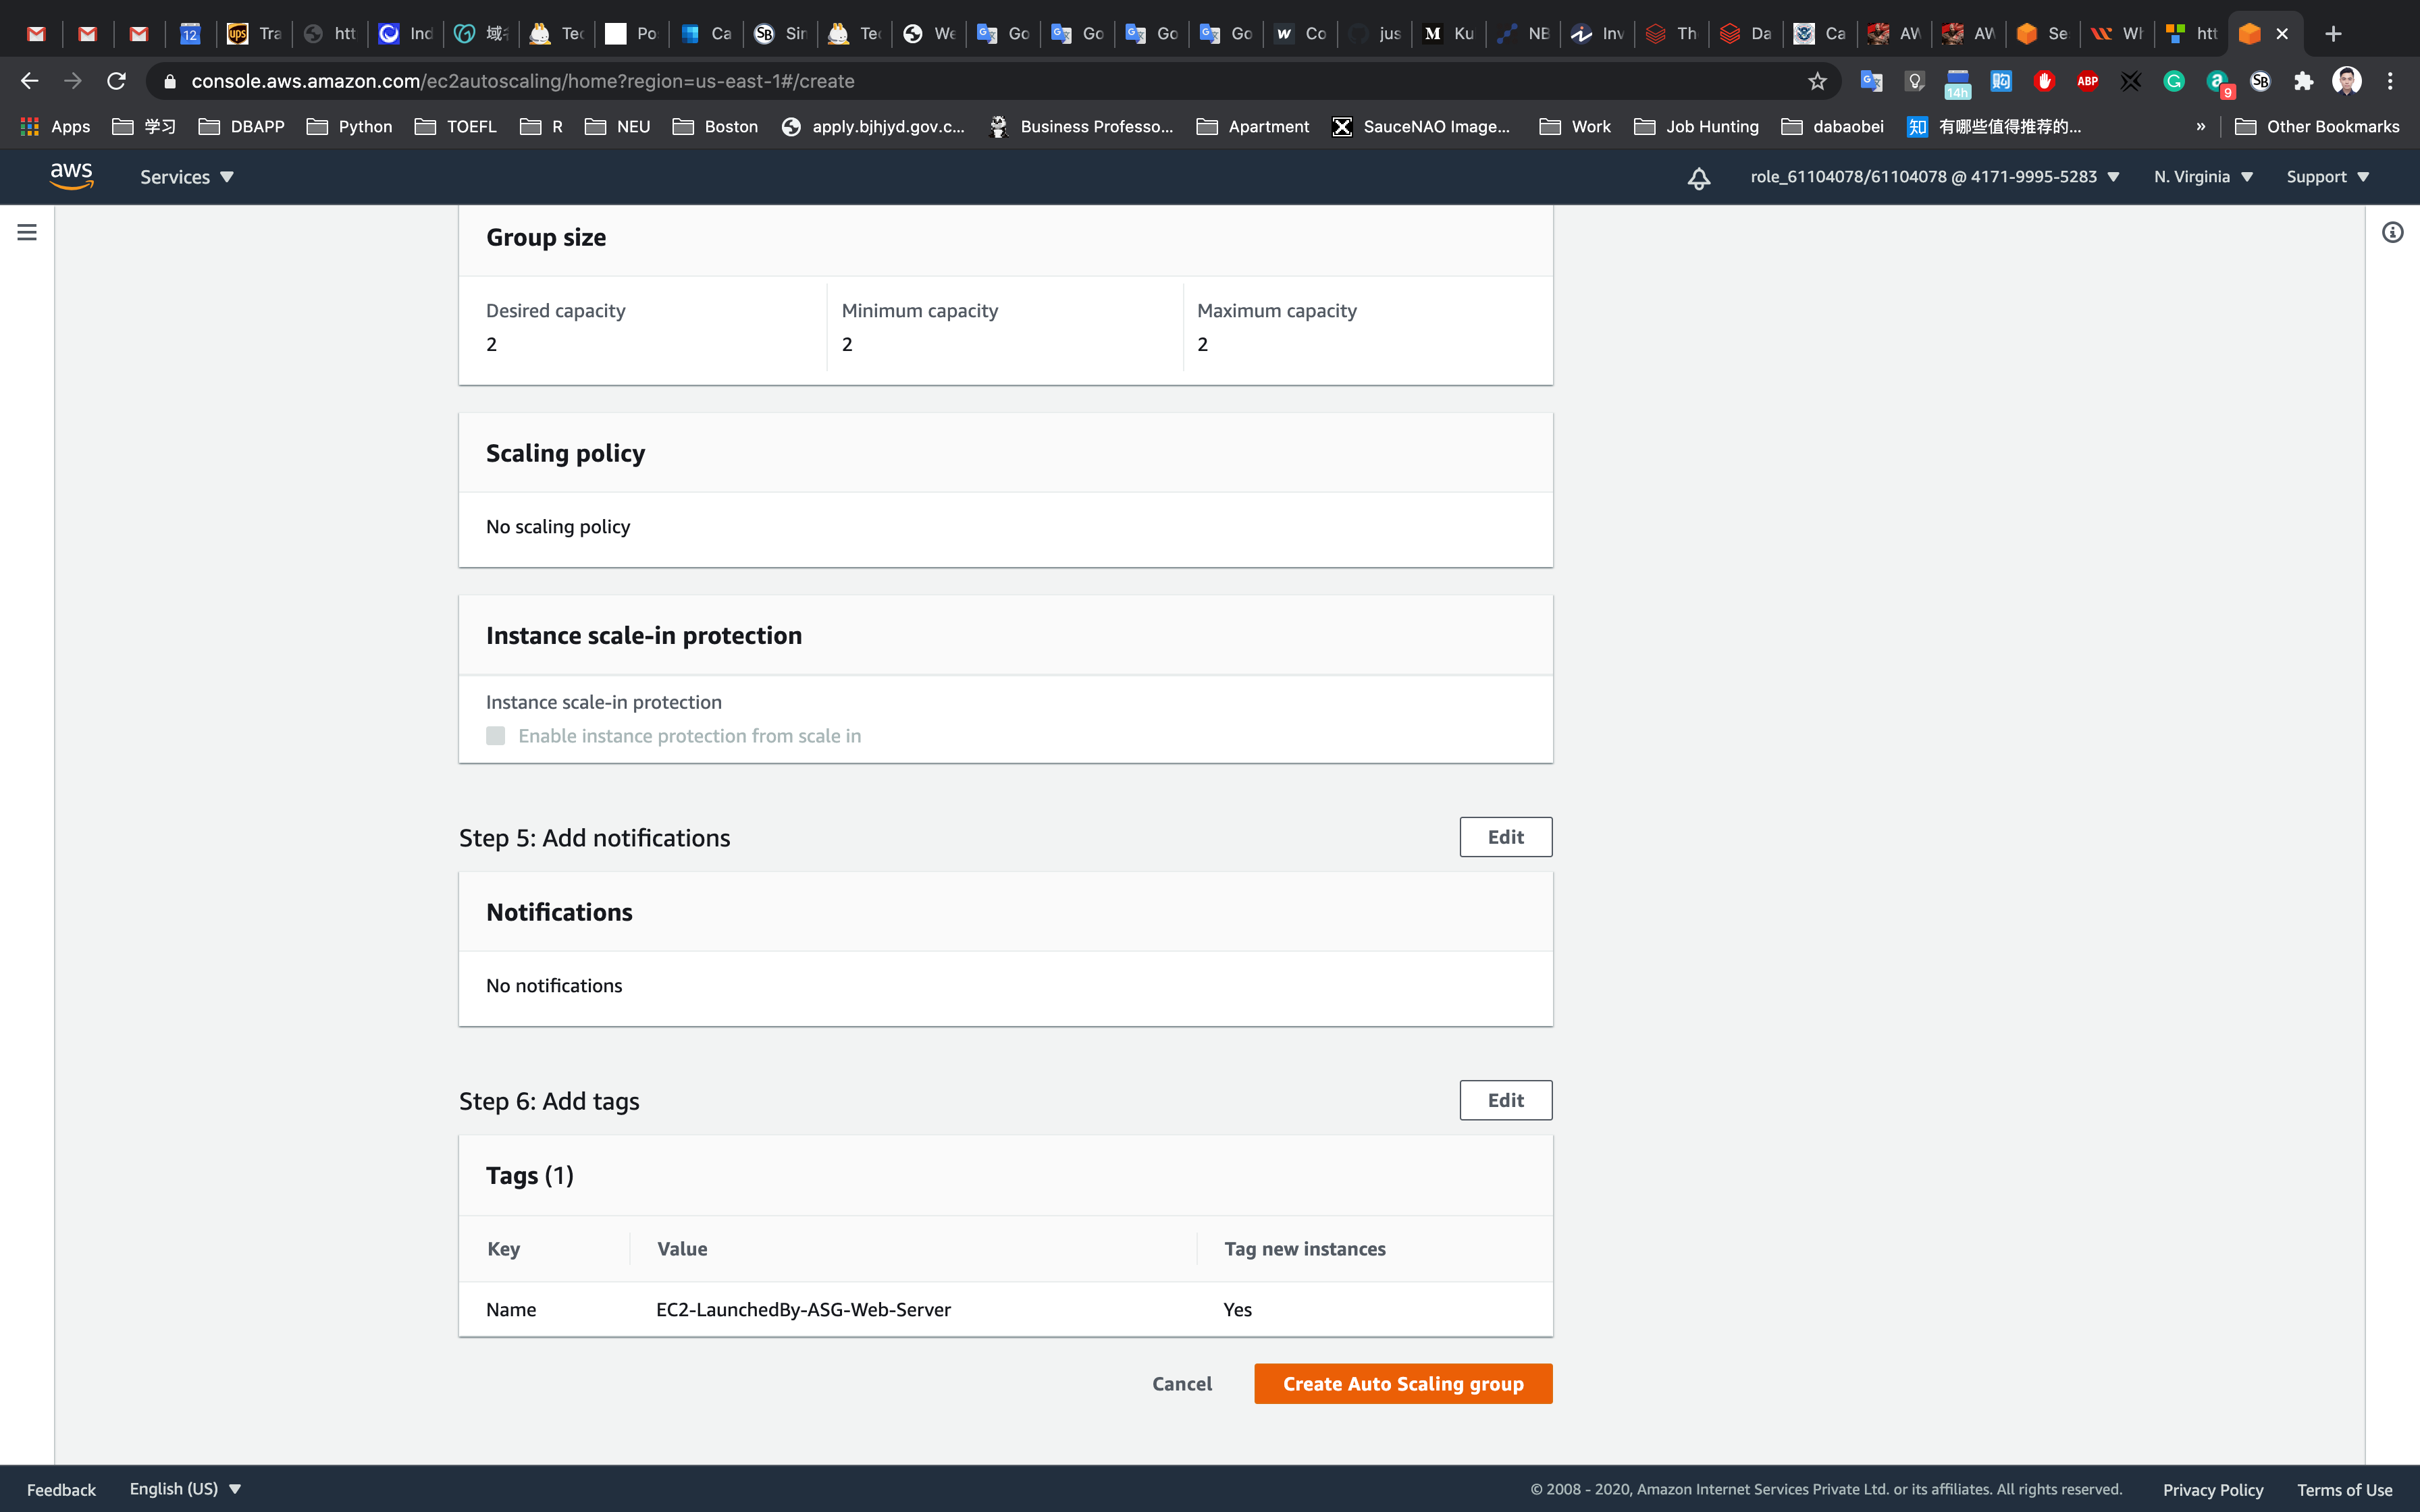
Now scroll down and click on the Create Auto Scaling group button.
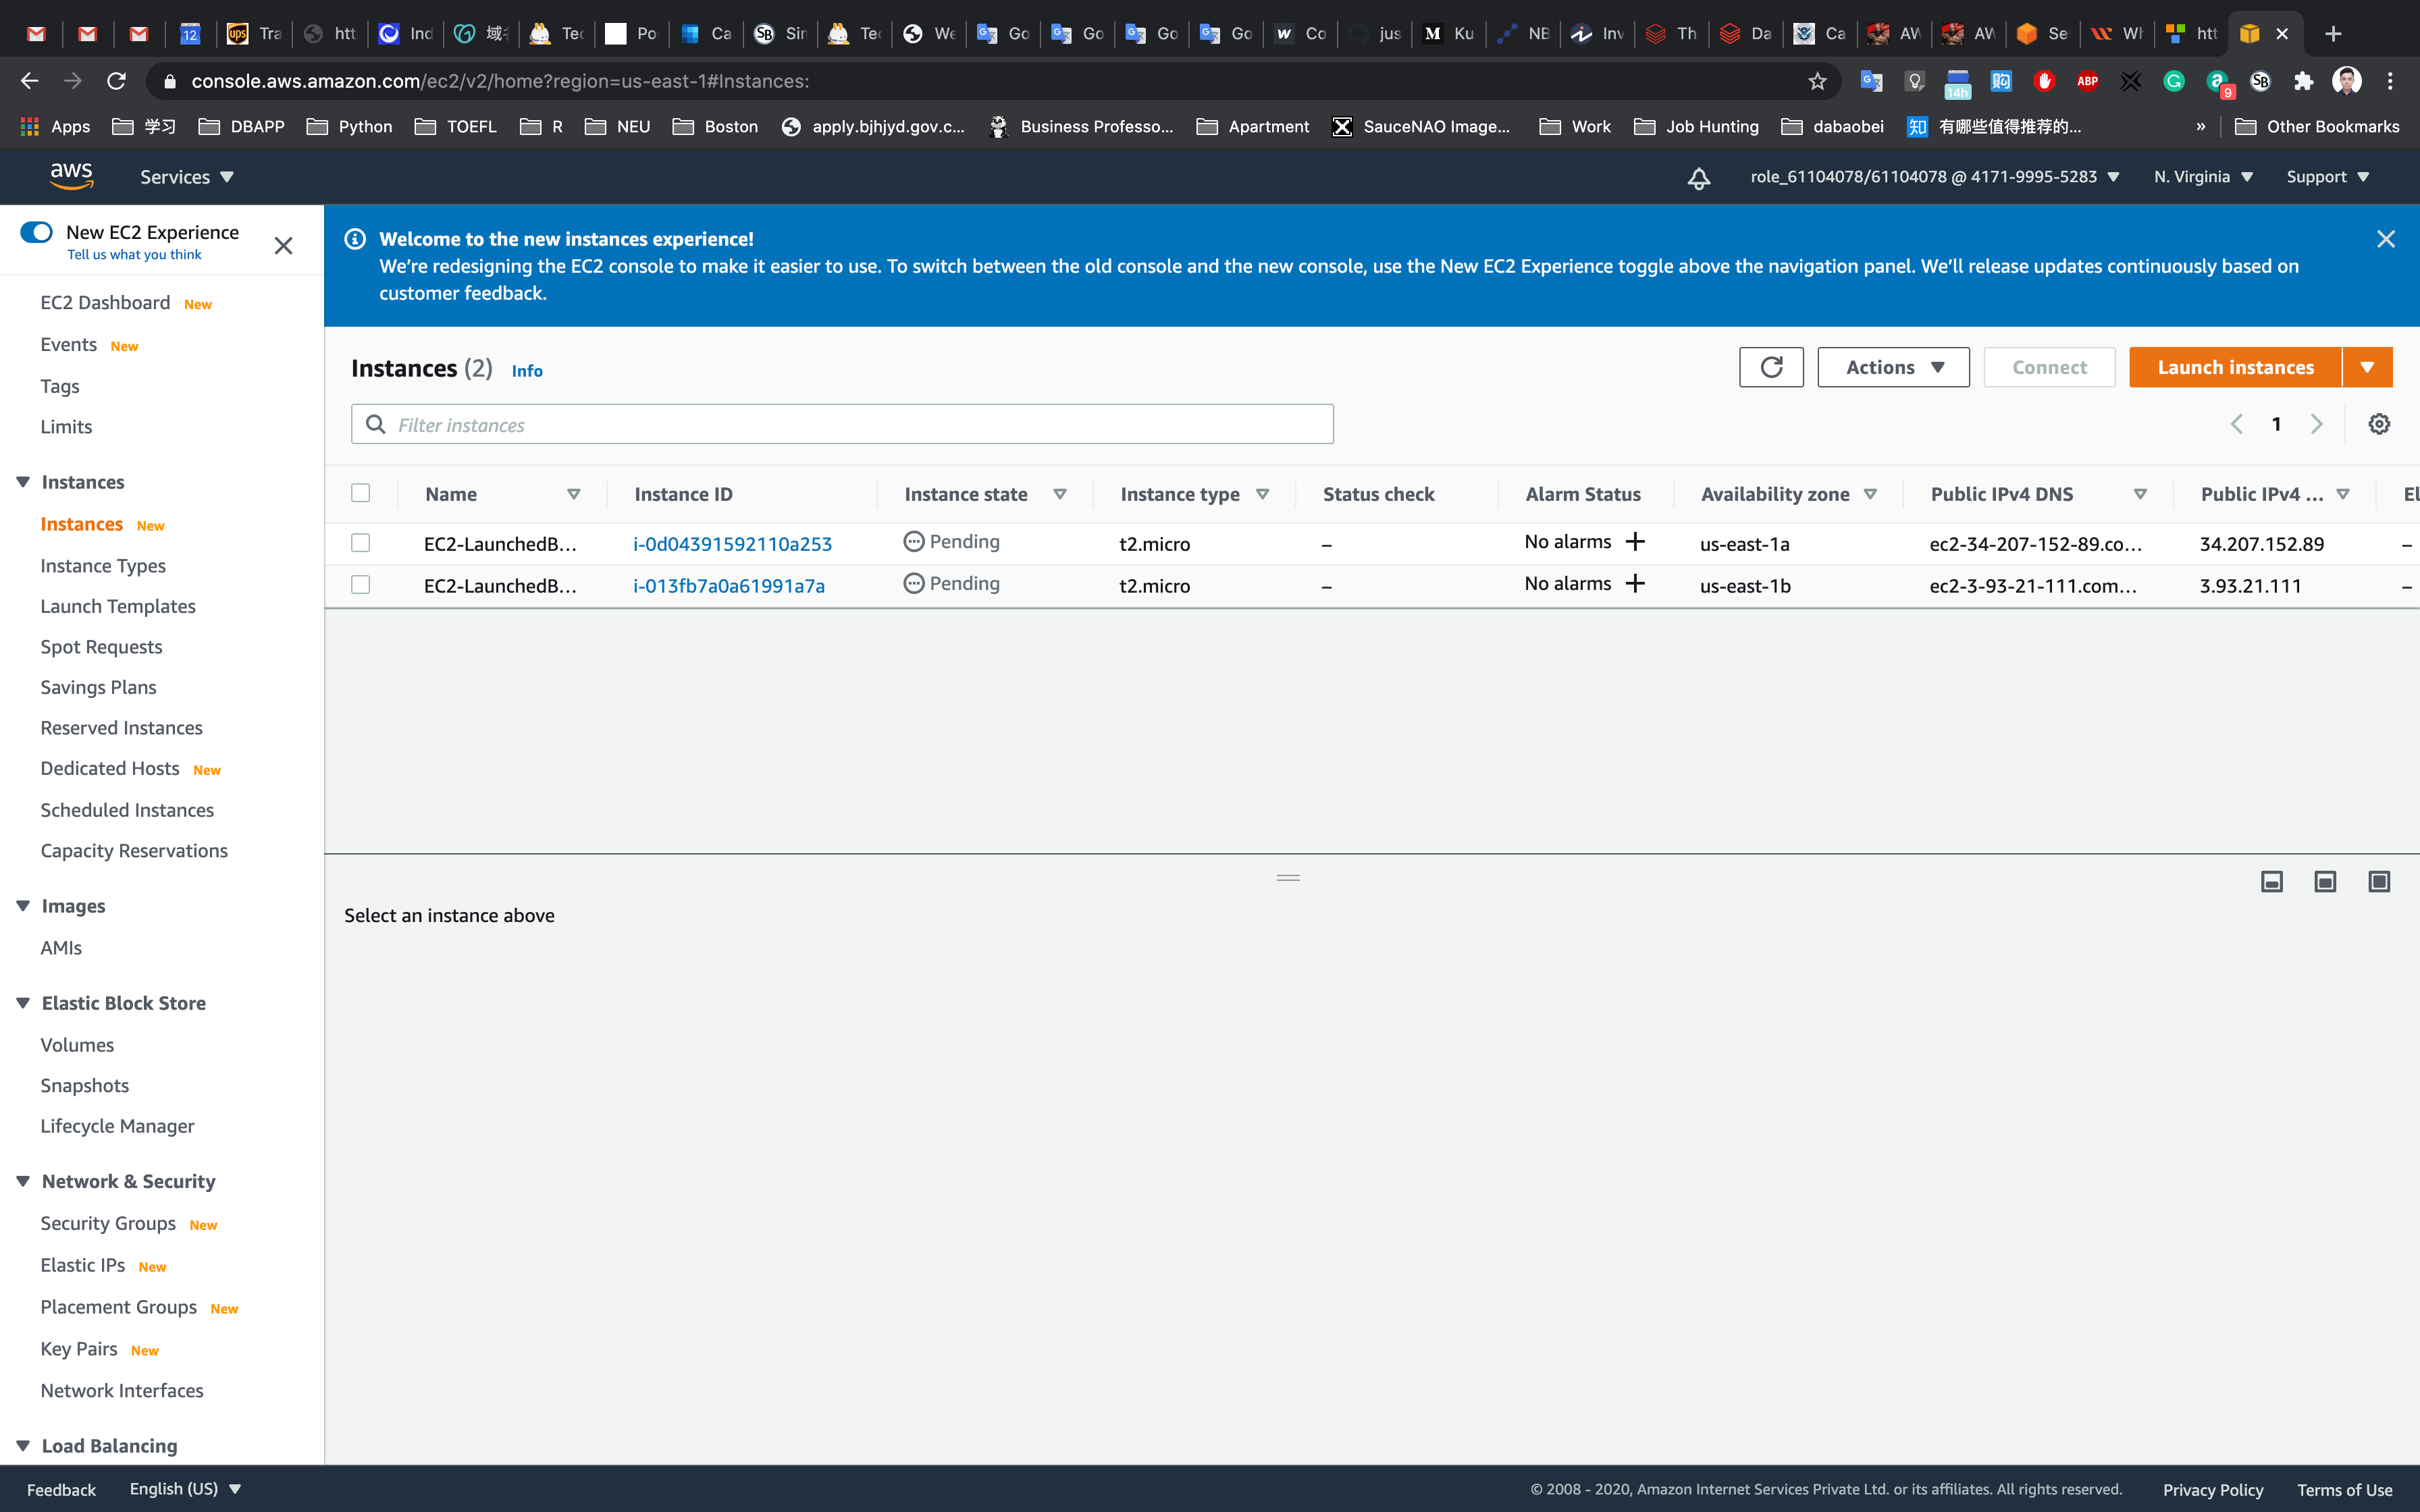
Service -> EC2 -> Instances
You will be redirected to the autoscaling group page, you will be able to see that two instances are launched by the autoscaling group.
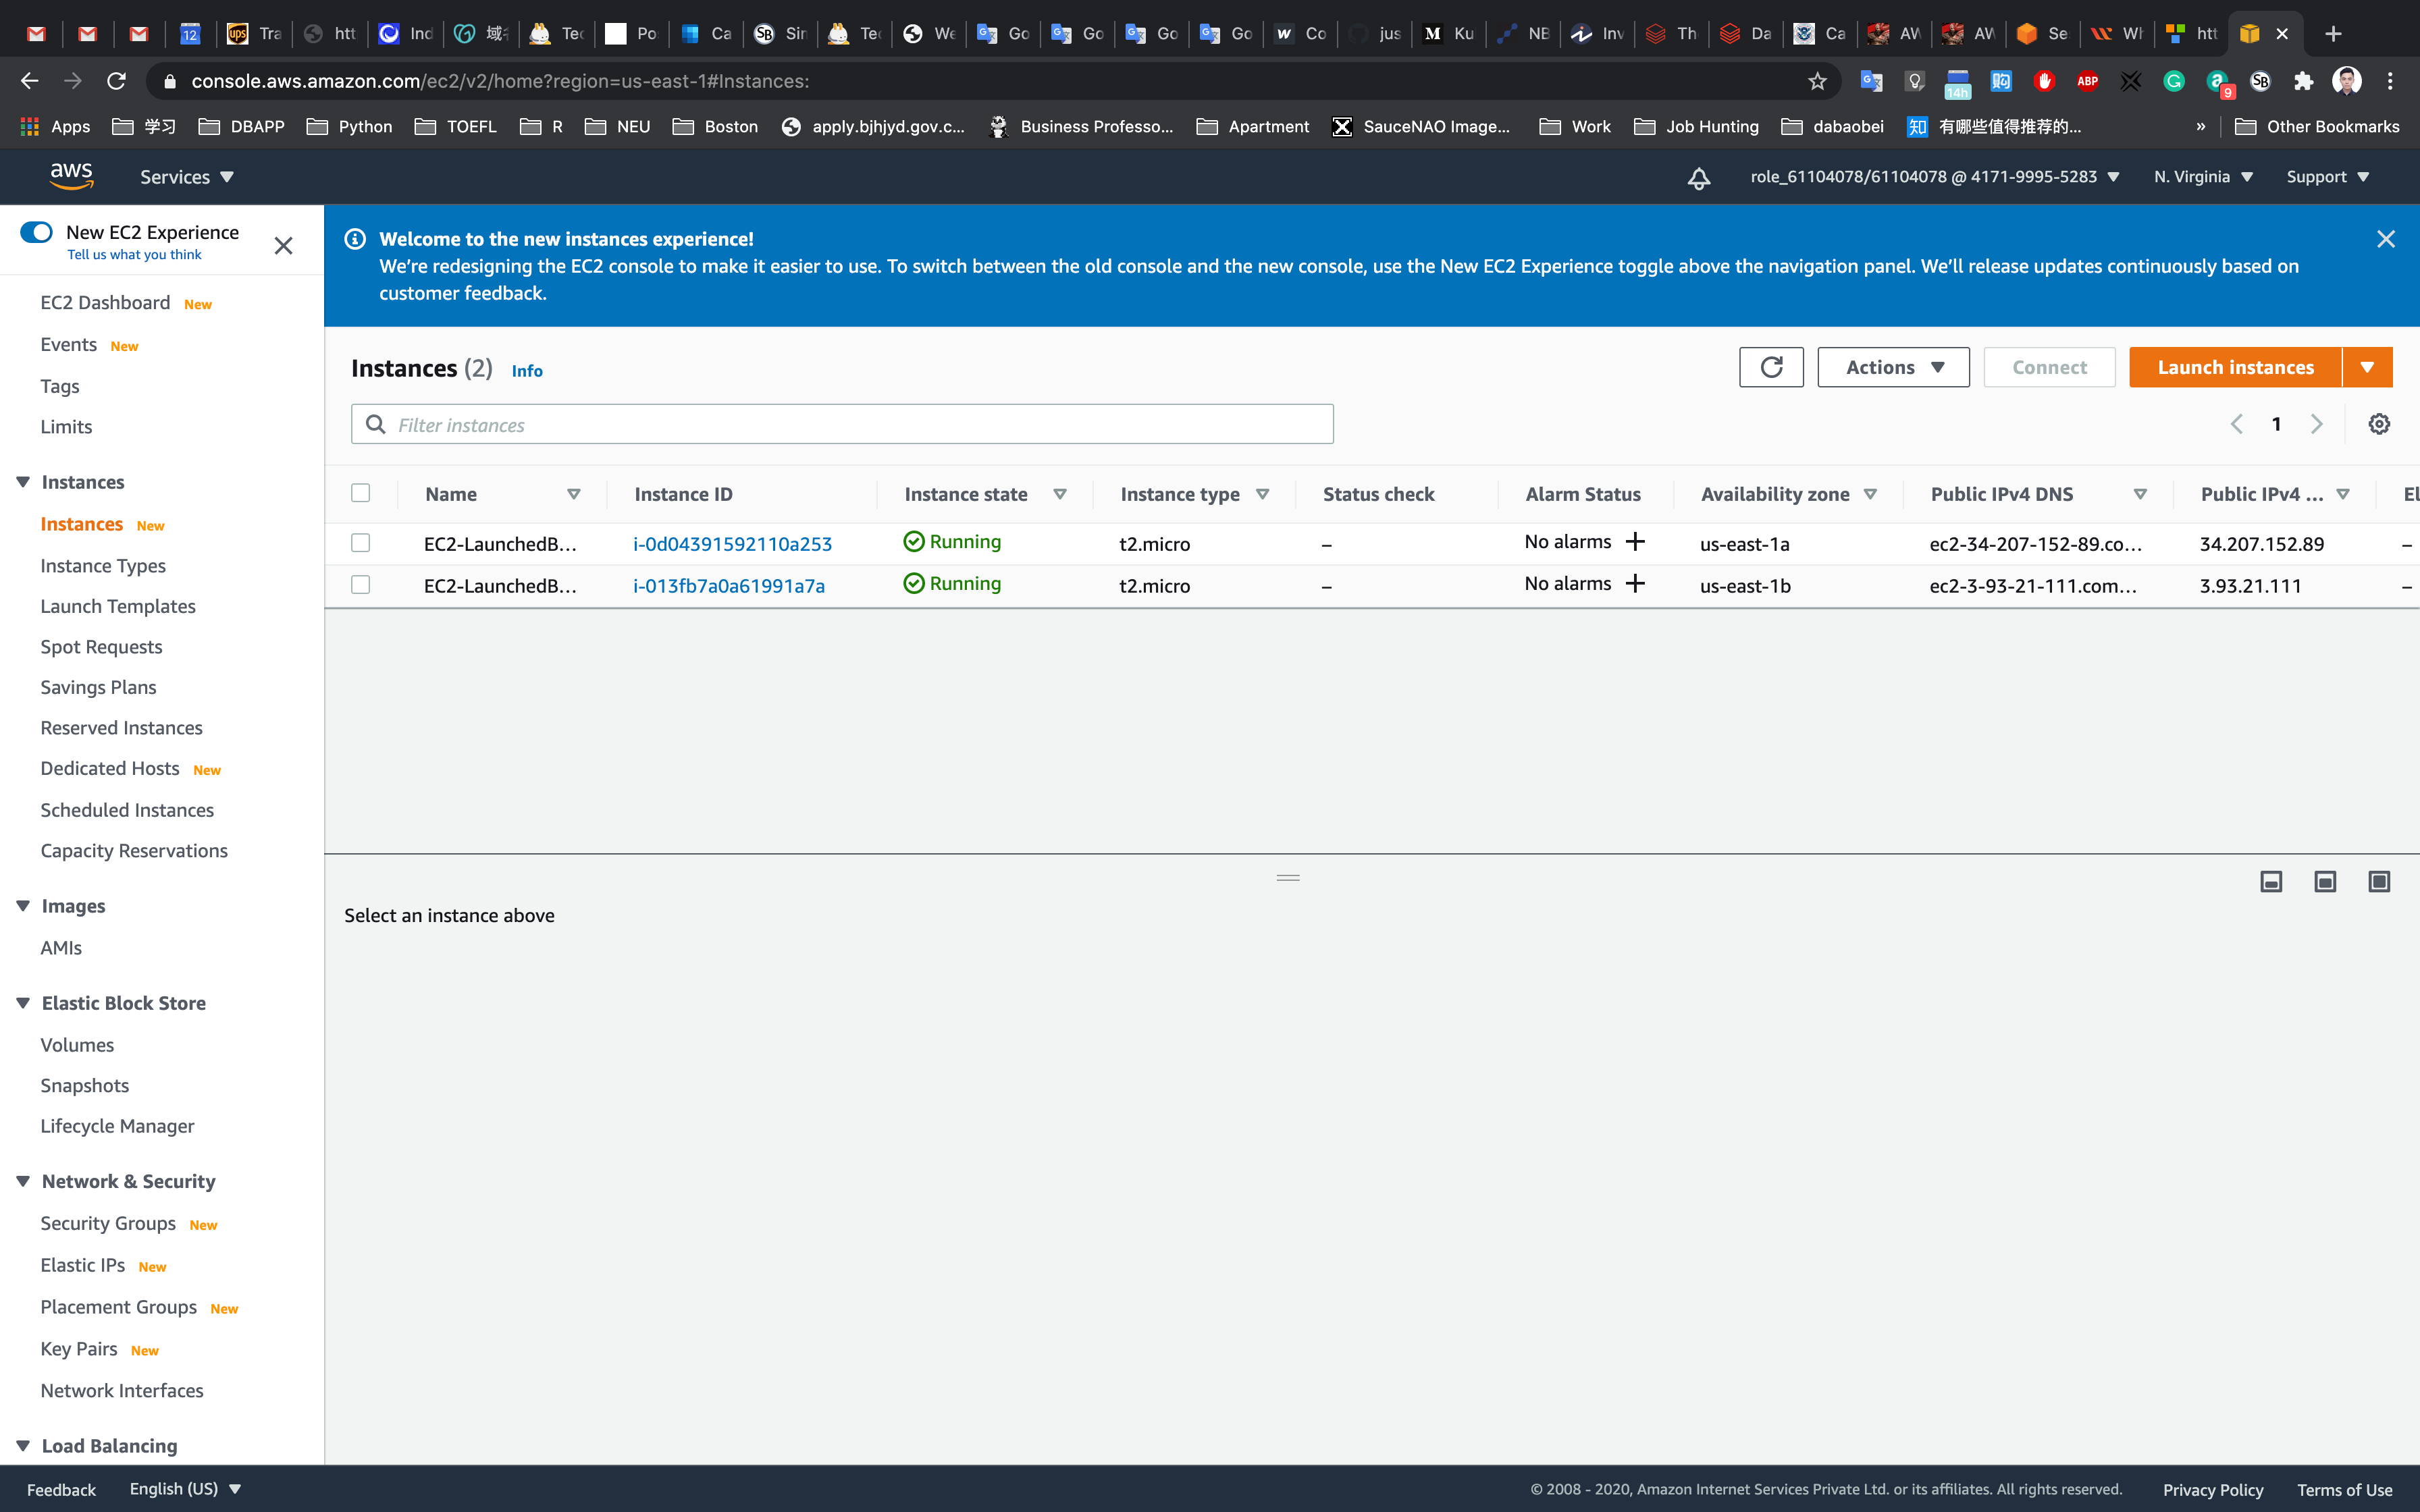
Now go to the EC2 instances list. You will see that there are two new running instances (which were created by your autoscaling group) You can confirm this from their tag name, which you gave at the time of creating the autoscaling group.
You have successfully created an autoscaling group with a policy to a minimum of 2 and maximum of 2 instances.
Validate Test
Test Auto Scaling Group
Service -> EC2
For testing the auto scaling policy, go to the EC2 instance list and select one of your instances.
Next go to the Action menu and select Instance State and select Stop.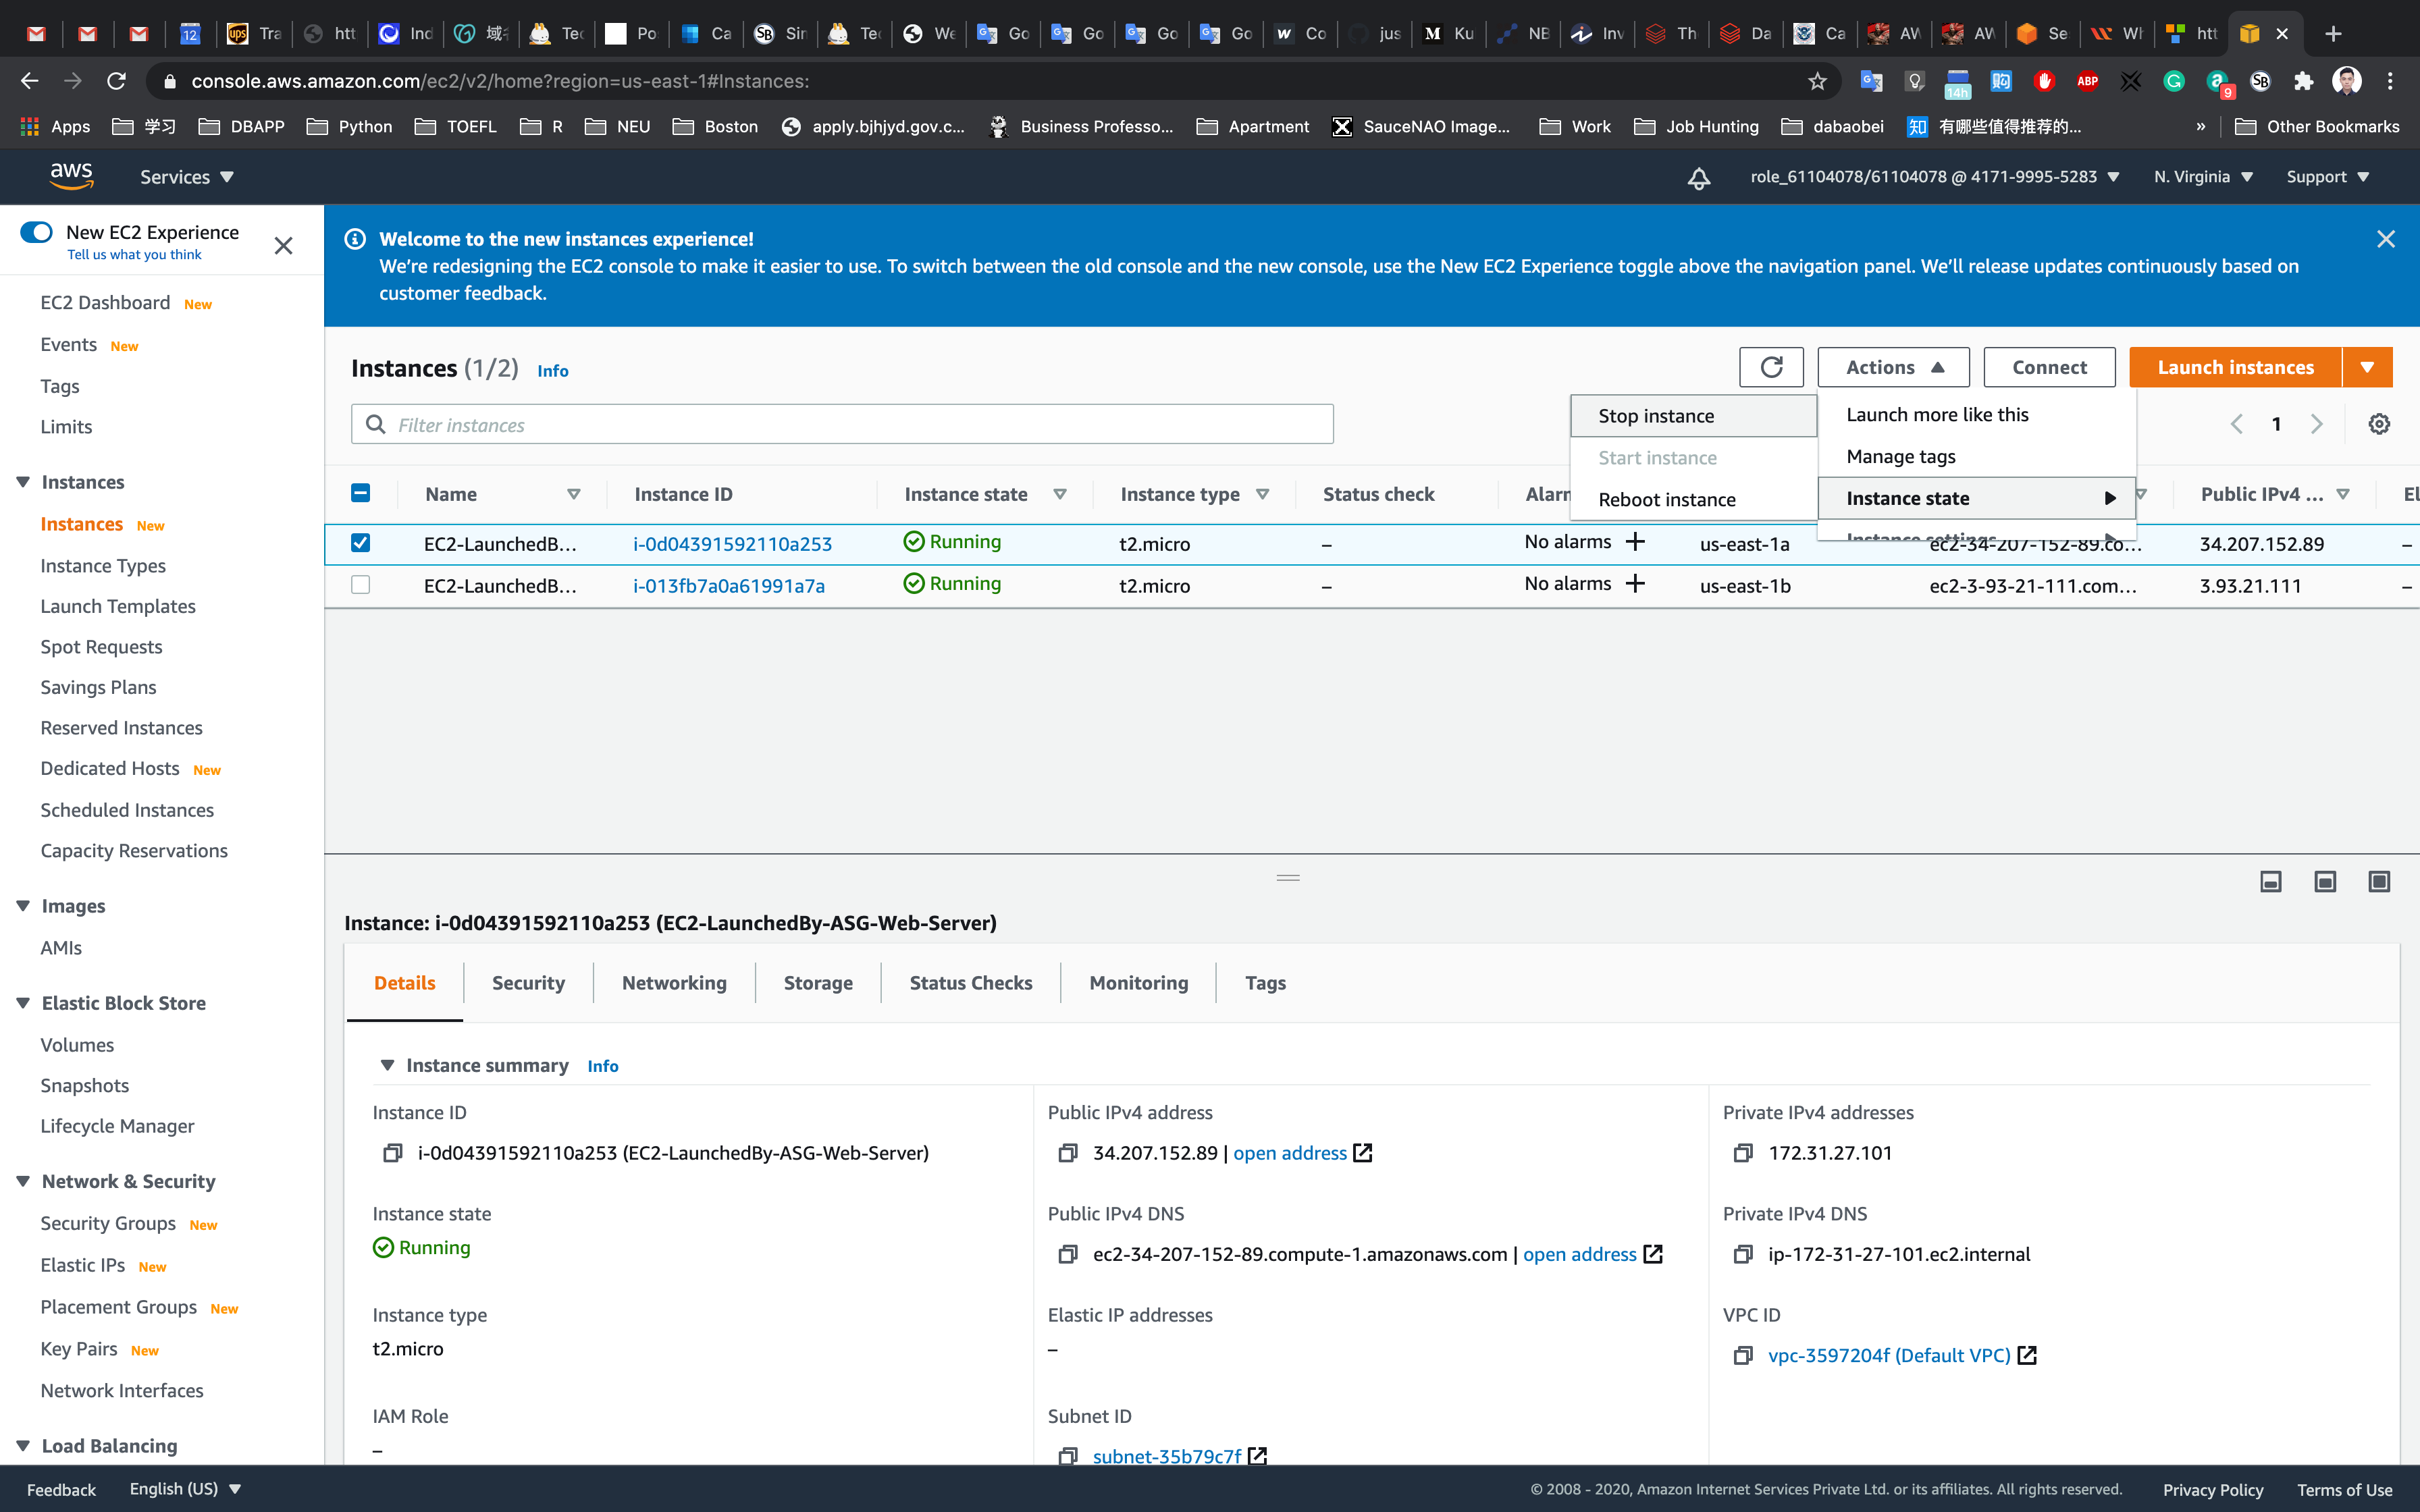
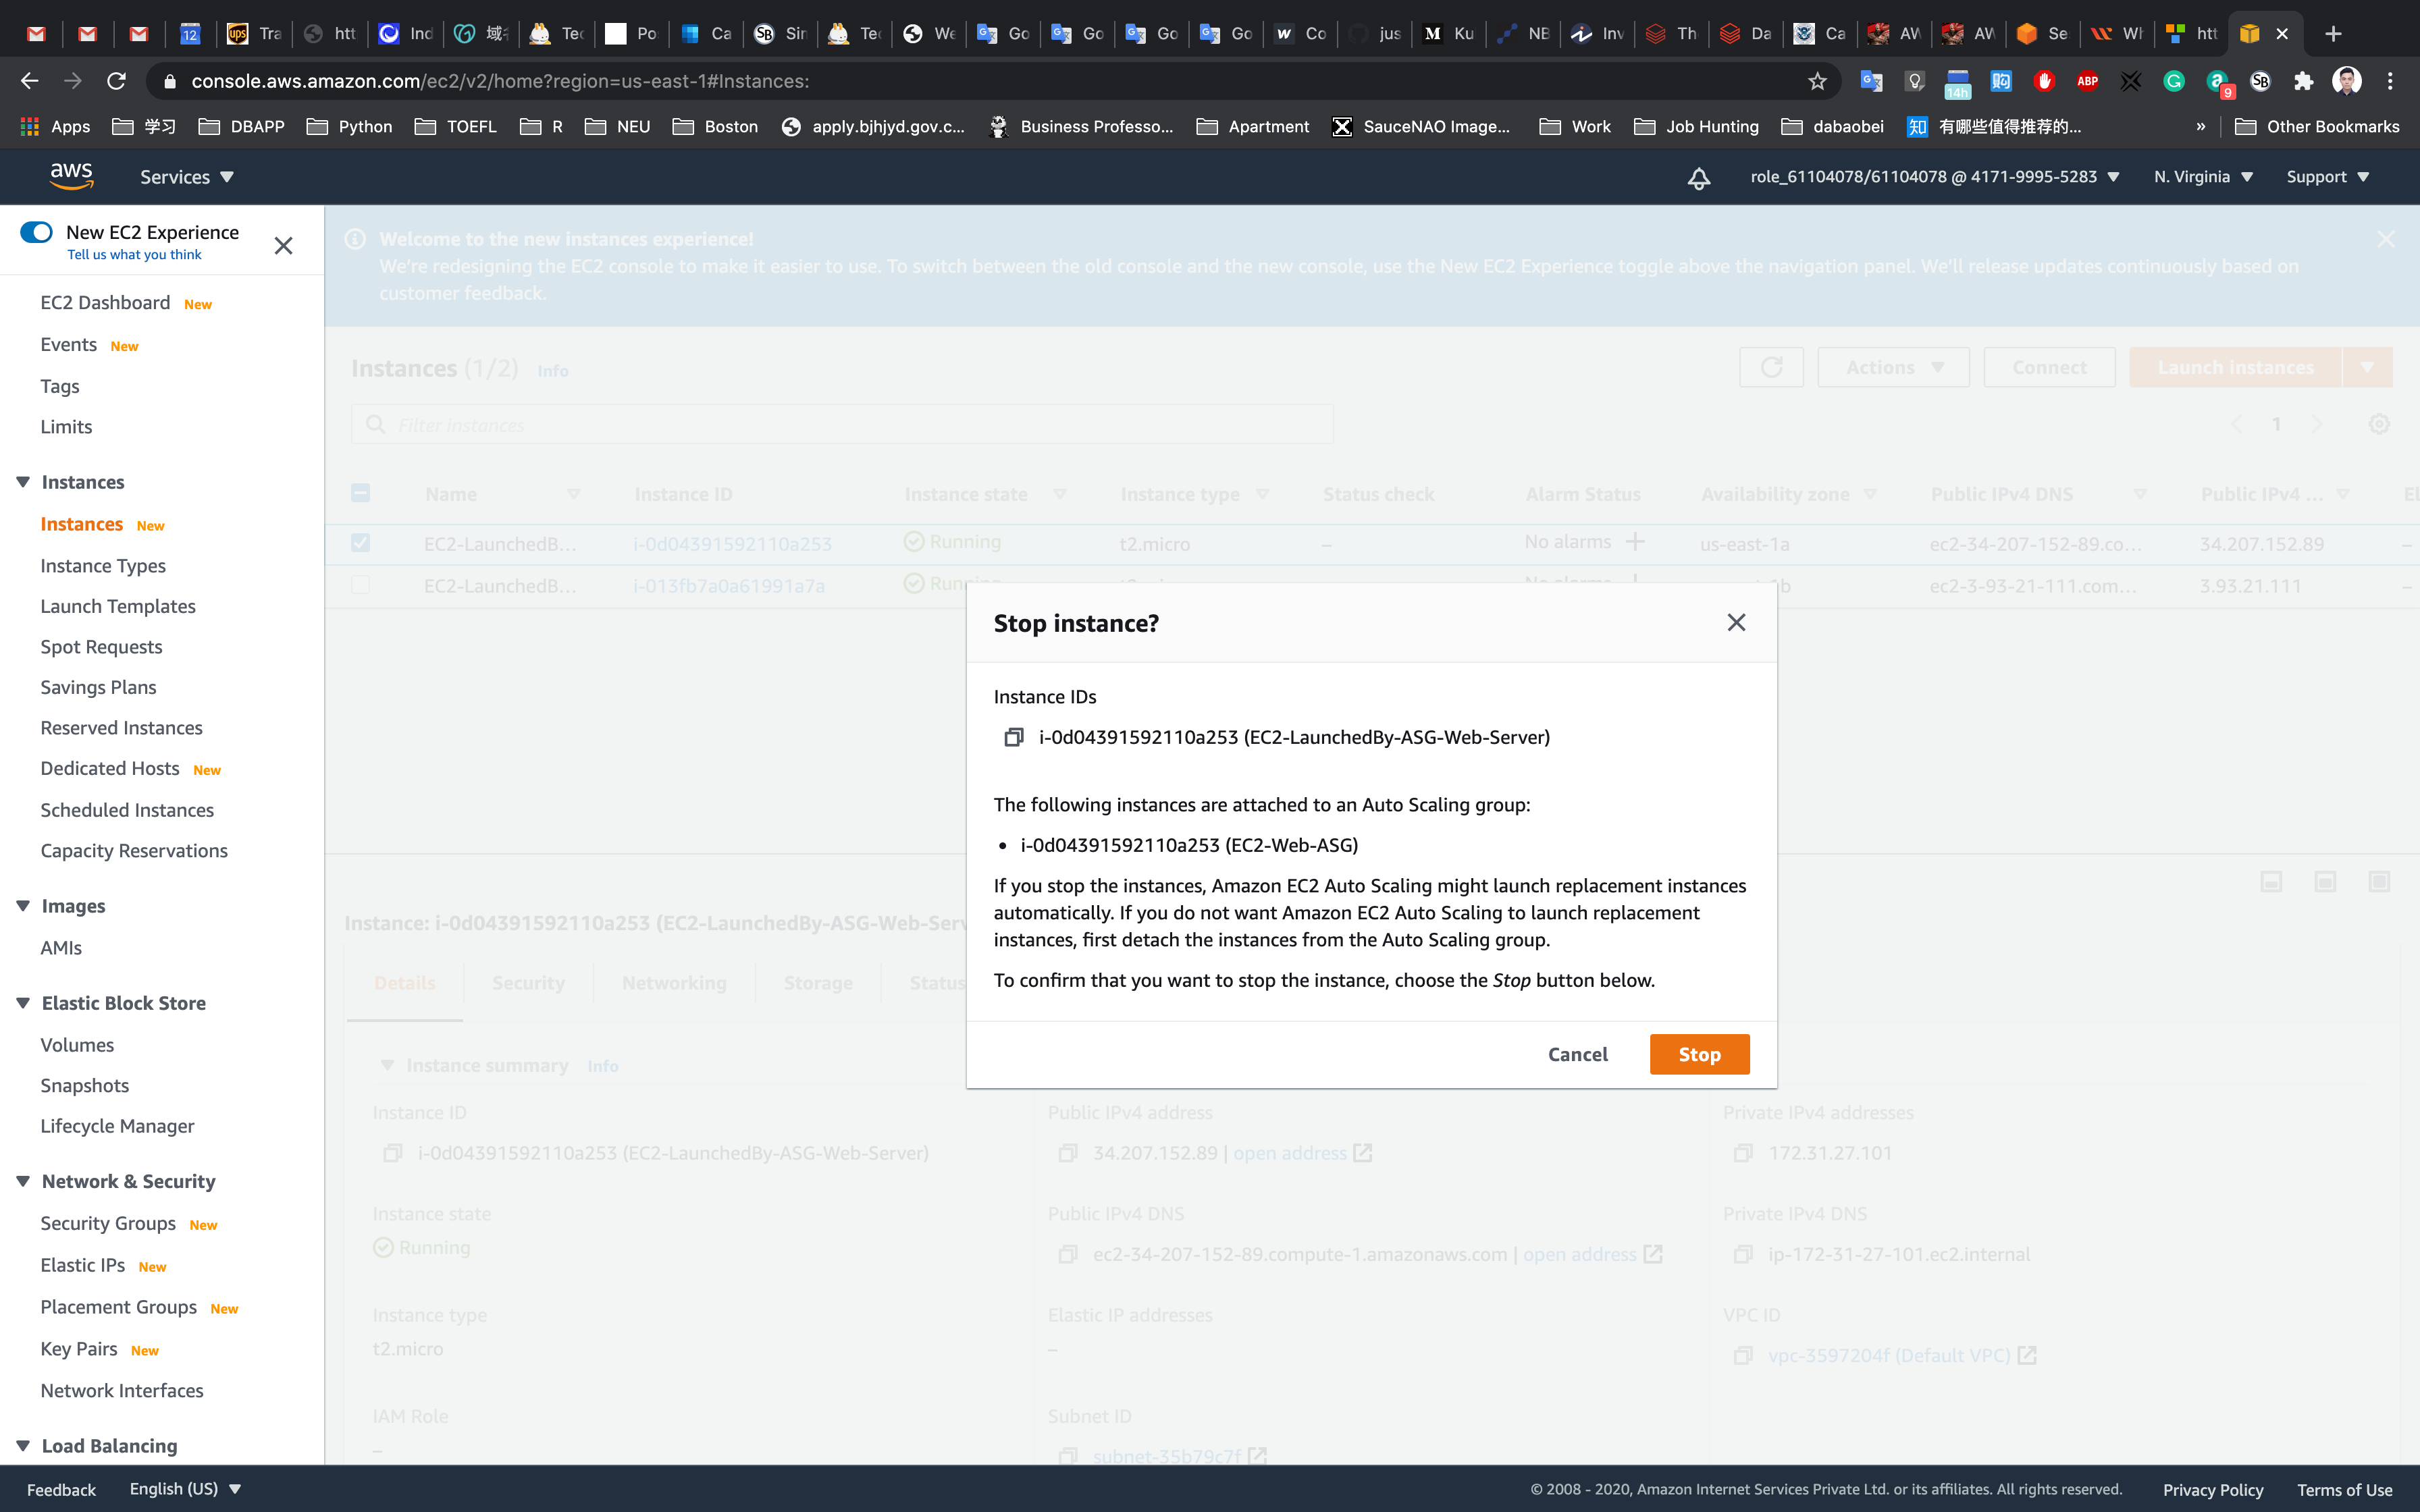
Refresh the page several times.
This will stop your instance.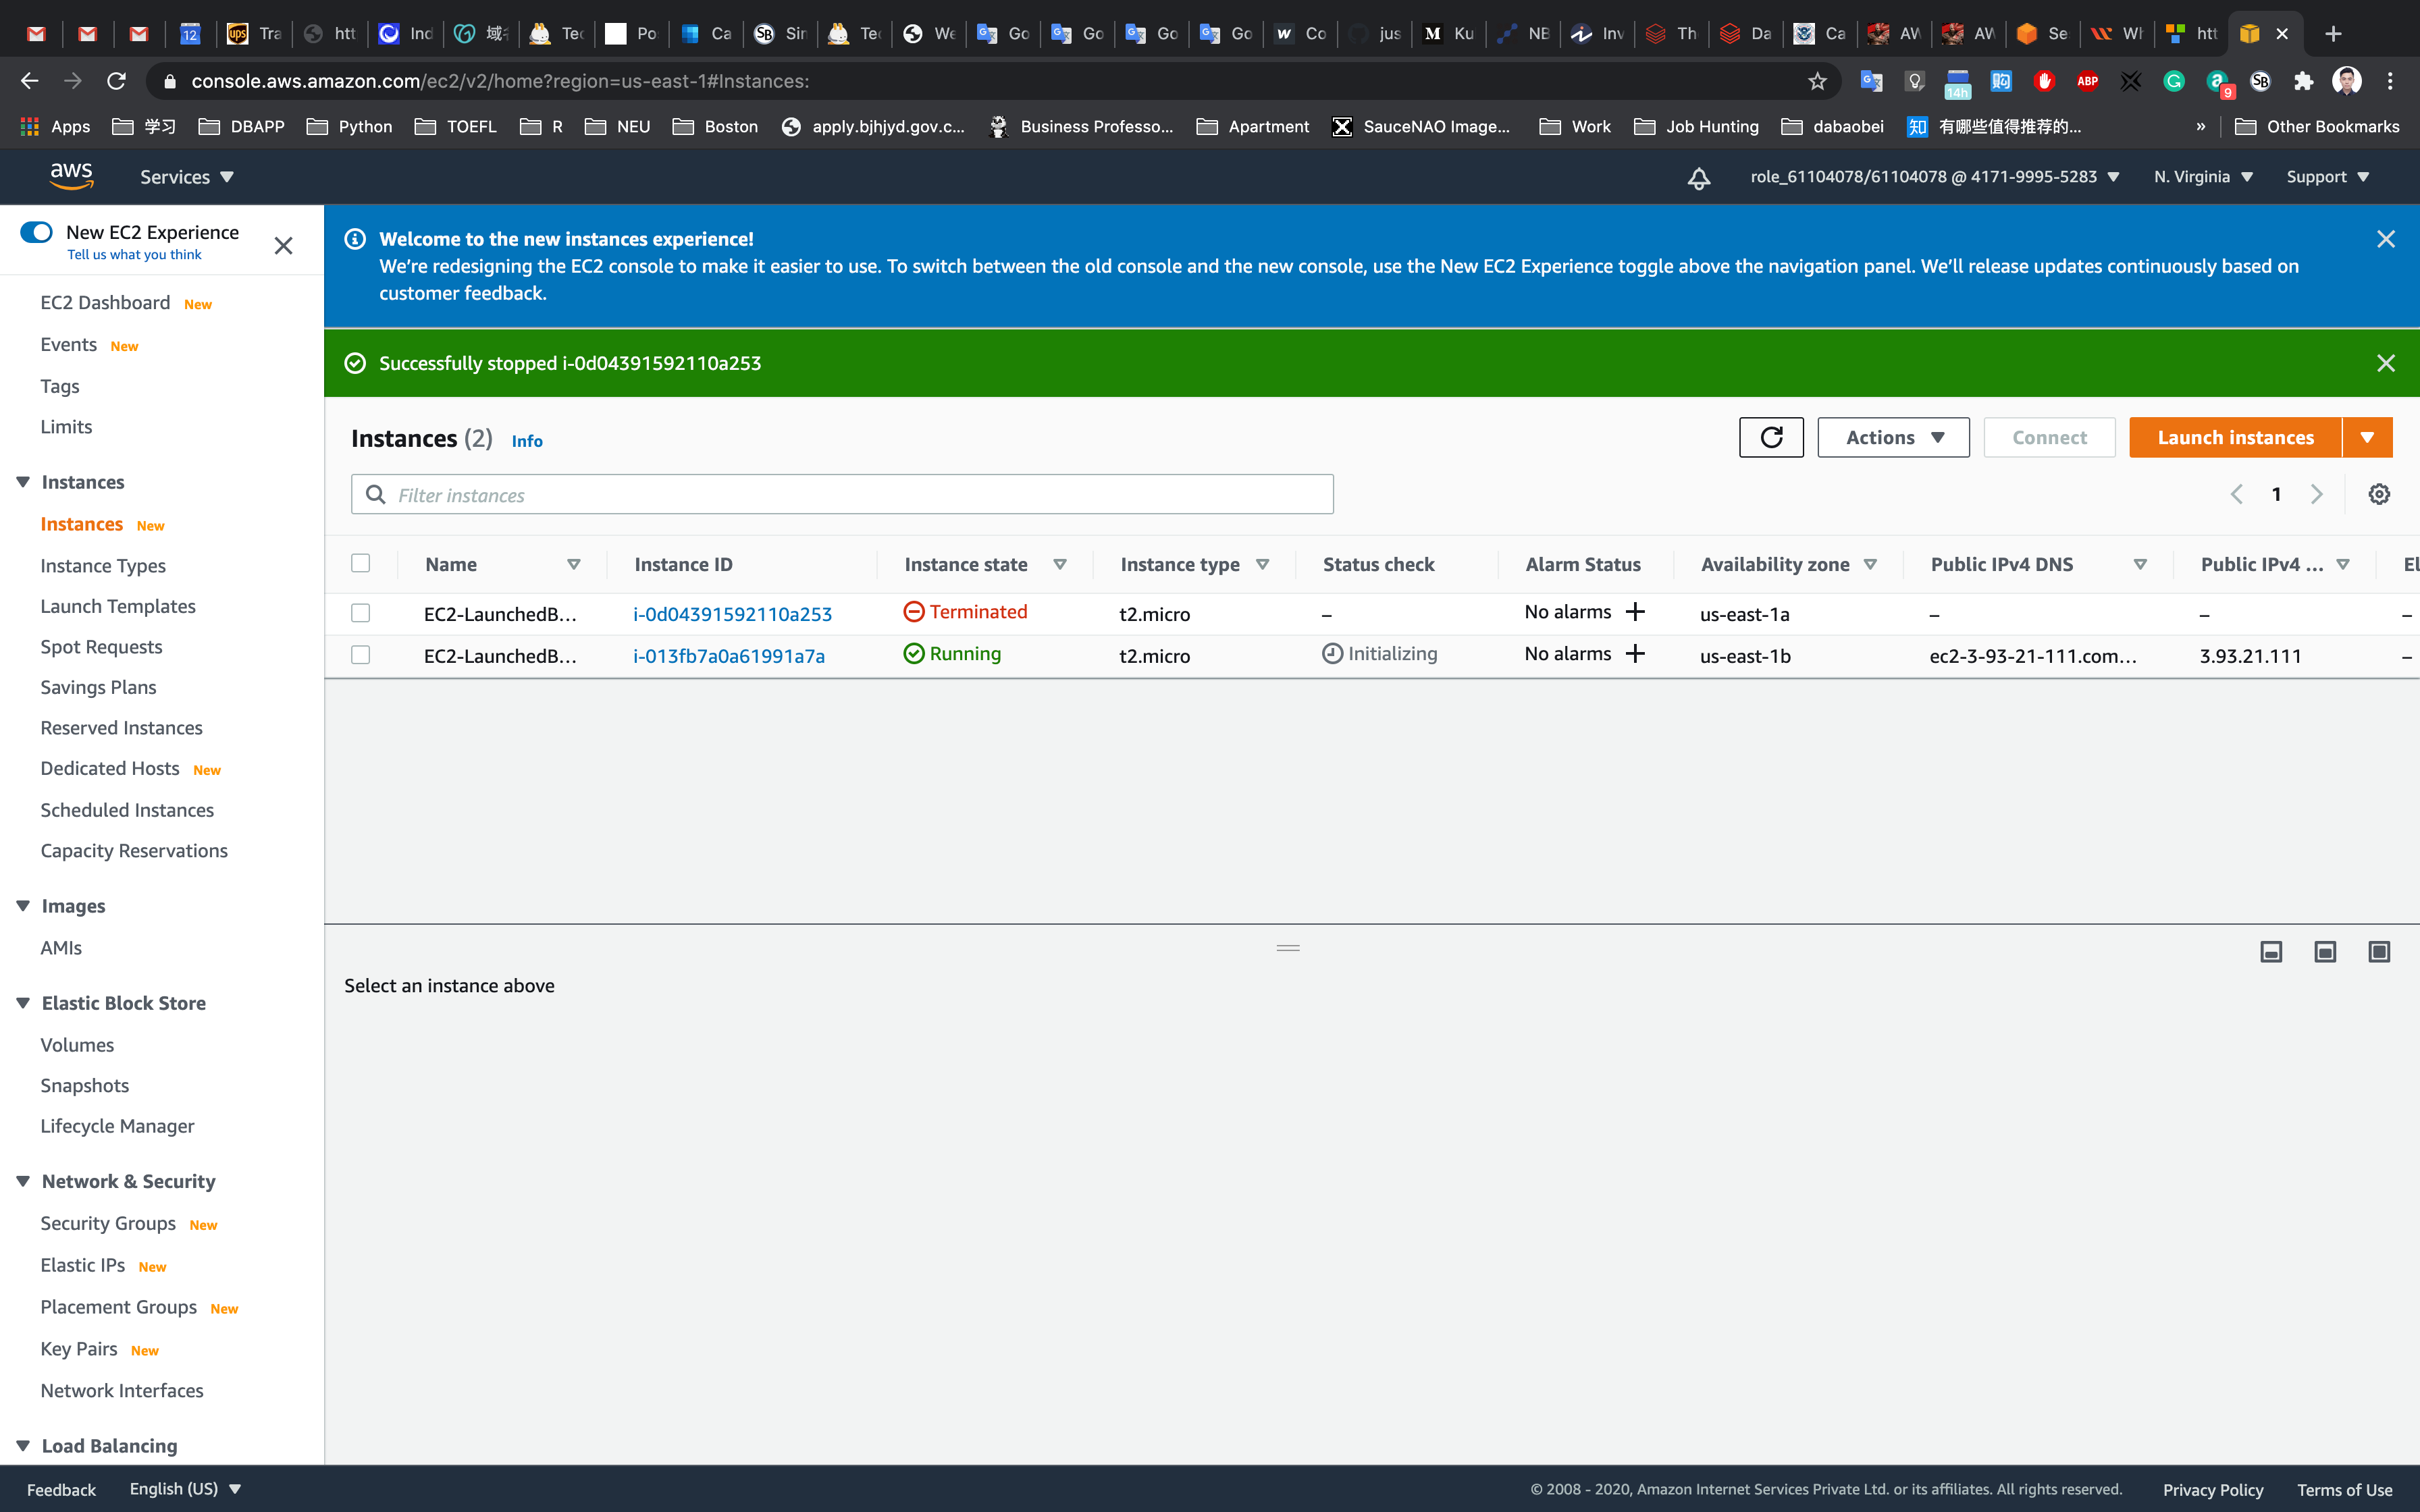
Click on Auto Scaling Groups in the left navigation pane.
Select the ASG you created.
Click on Instance Mangement, you will se one of the EC2 instance is unhealthy.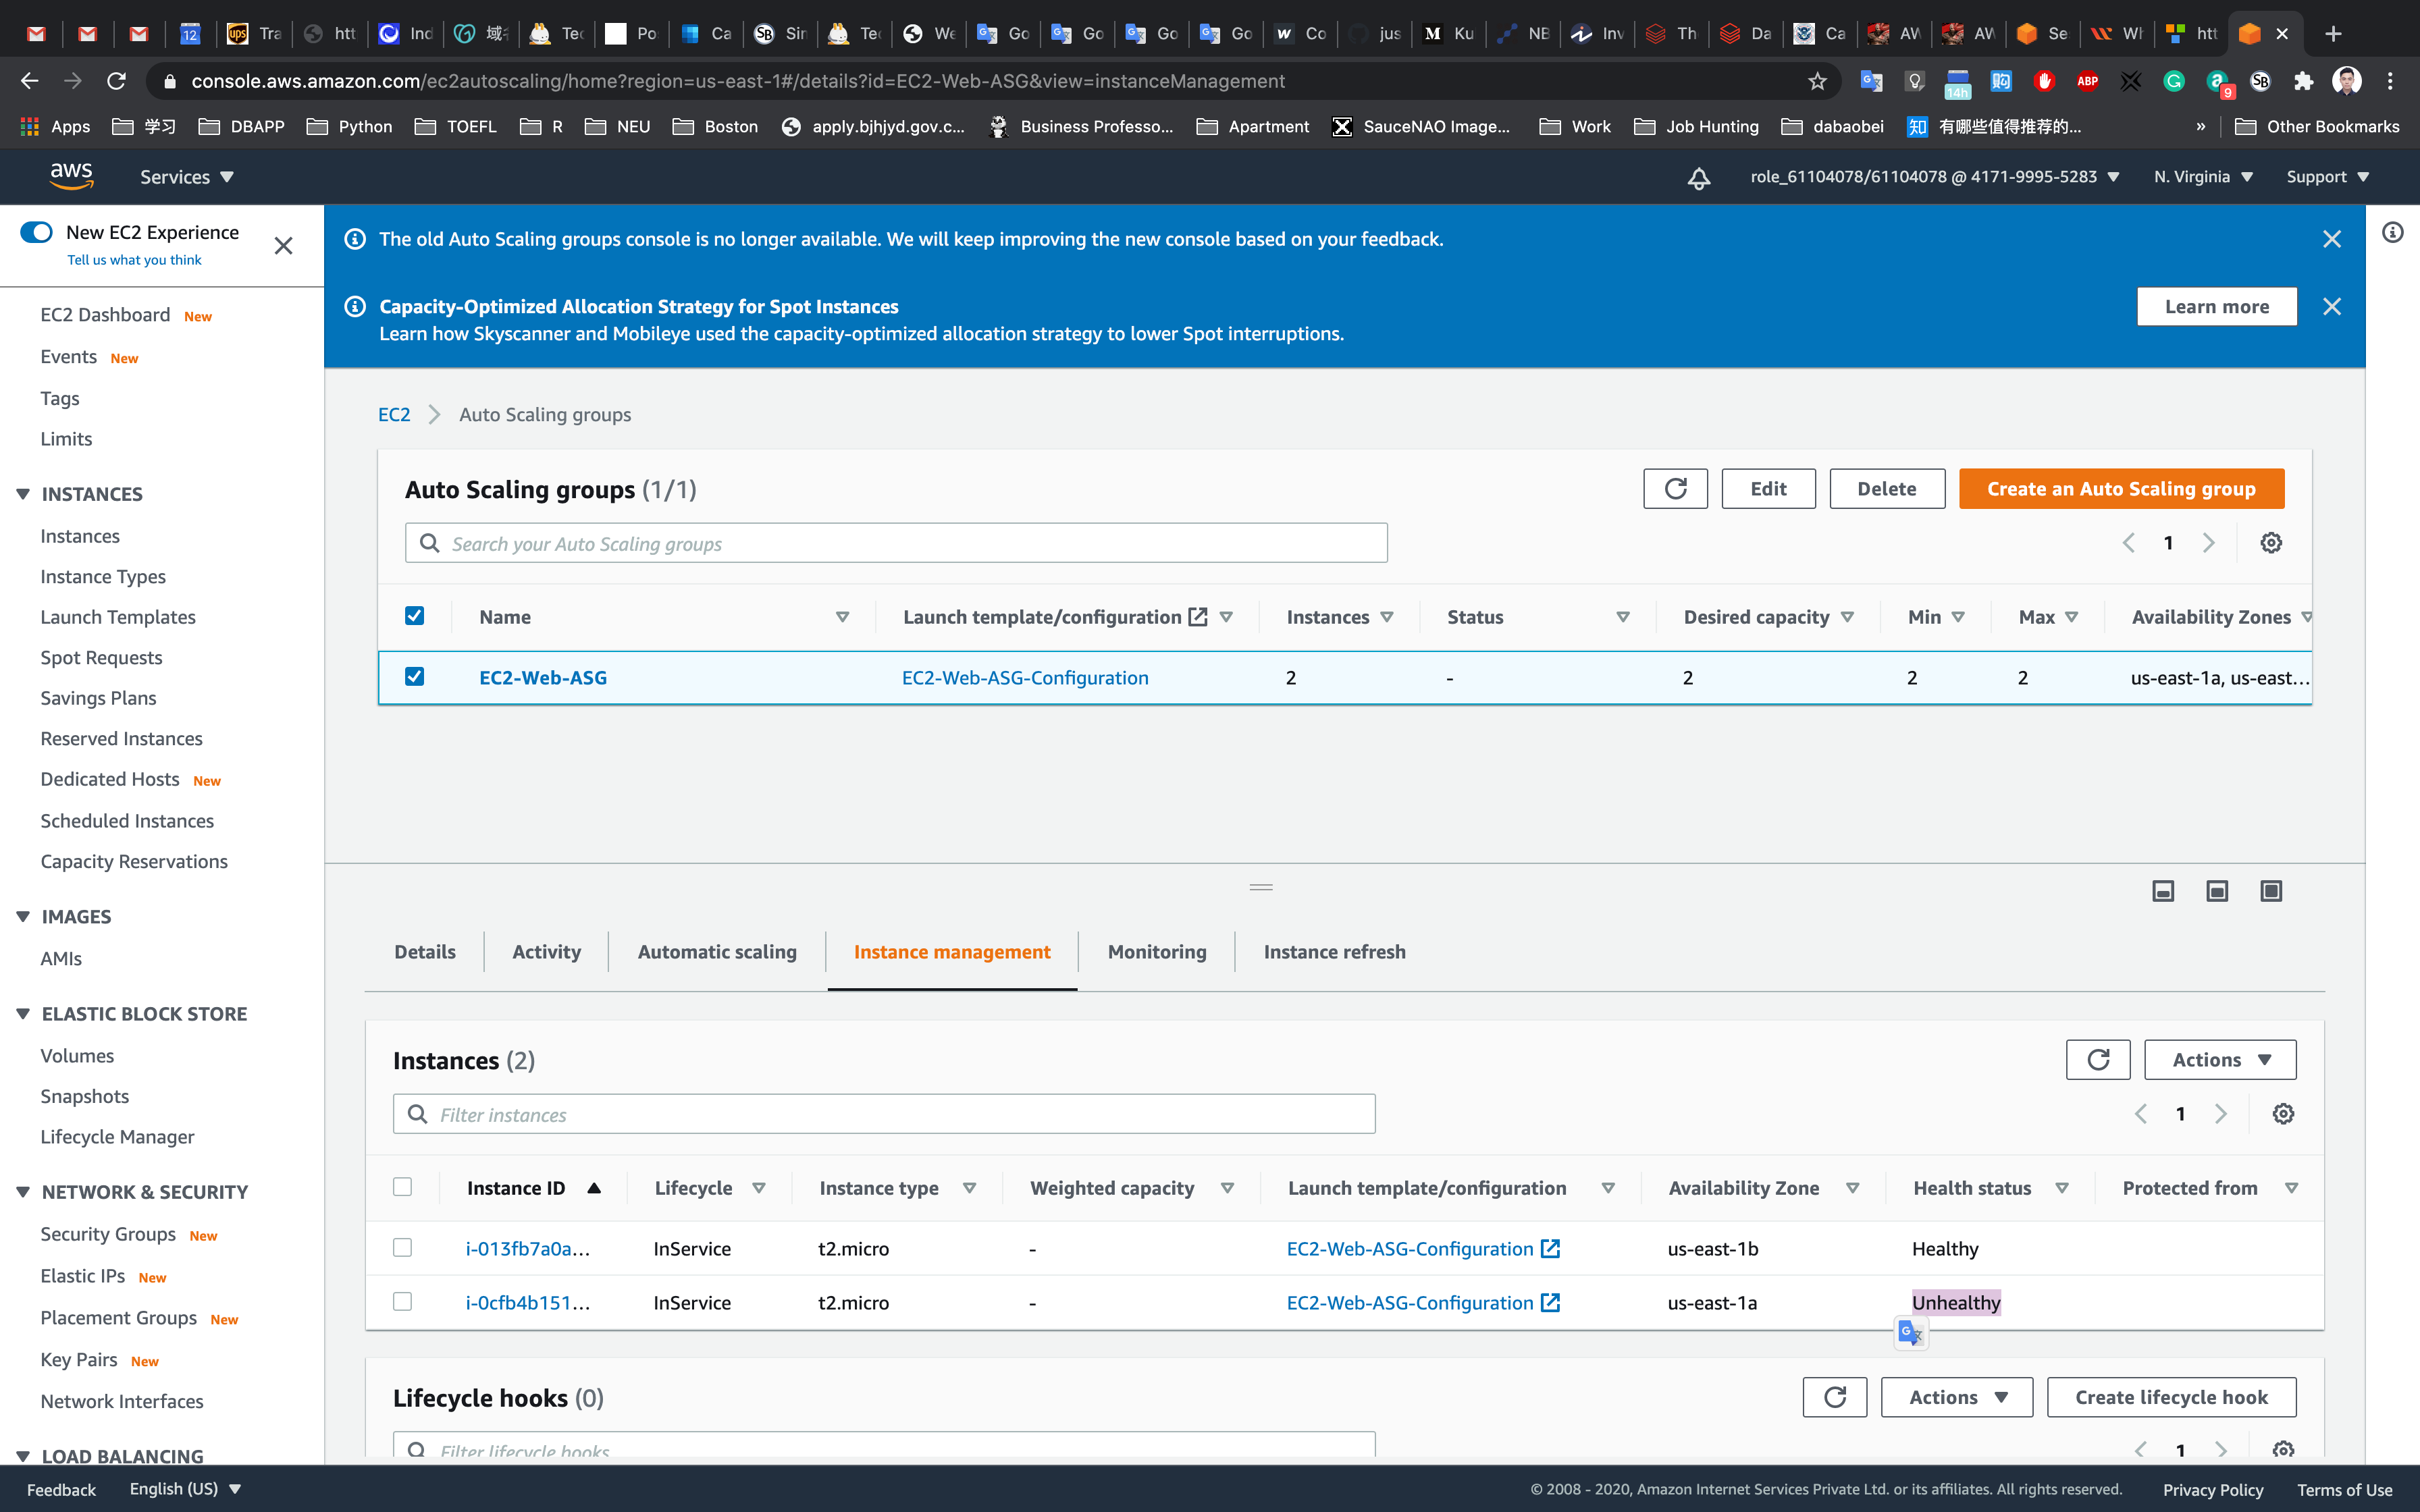
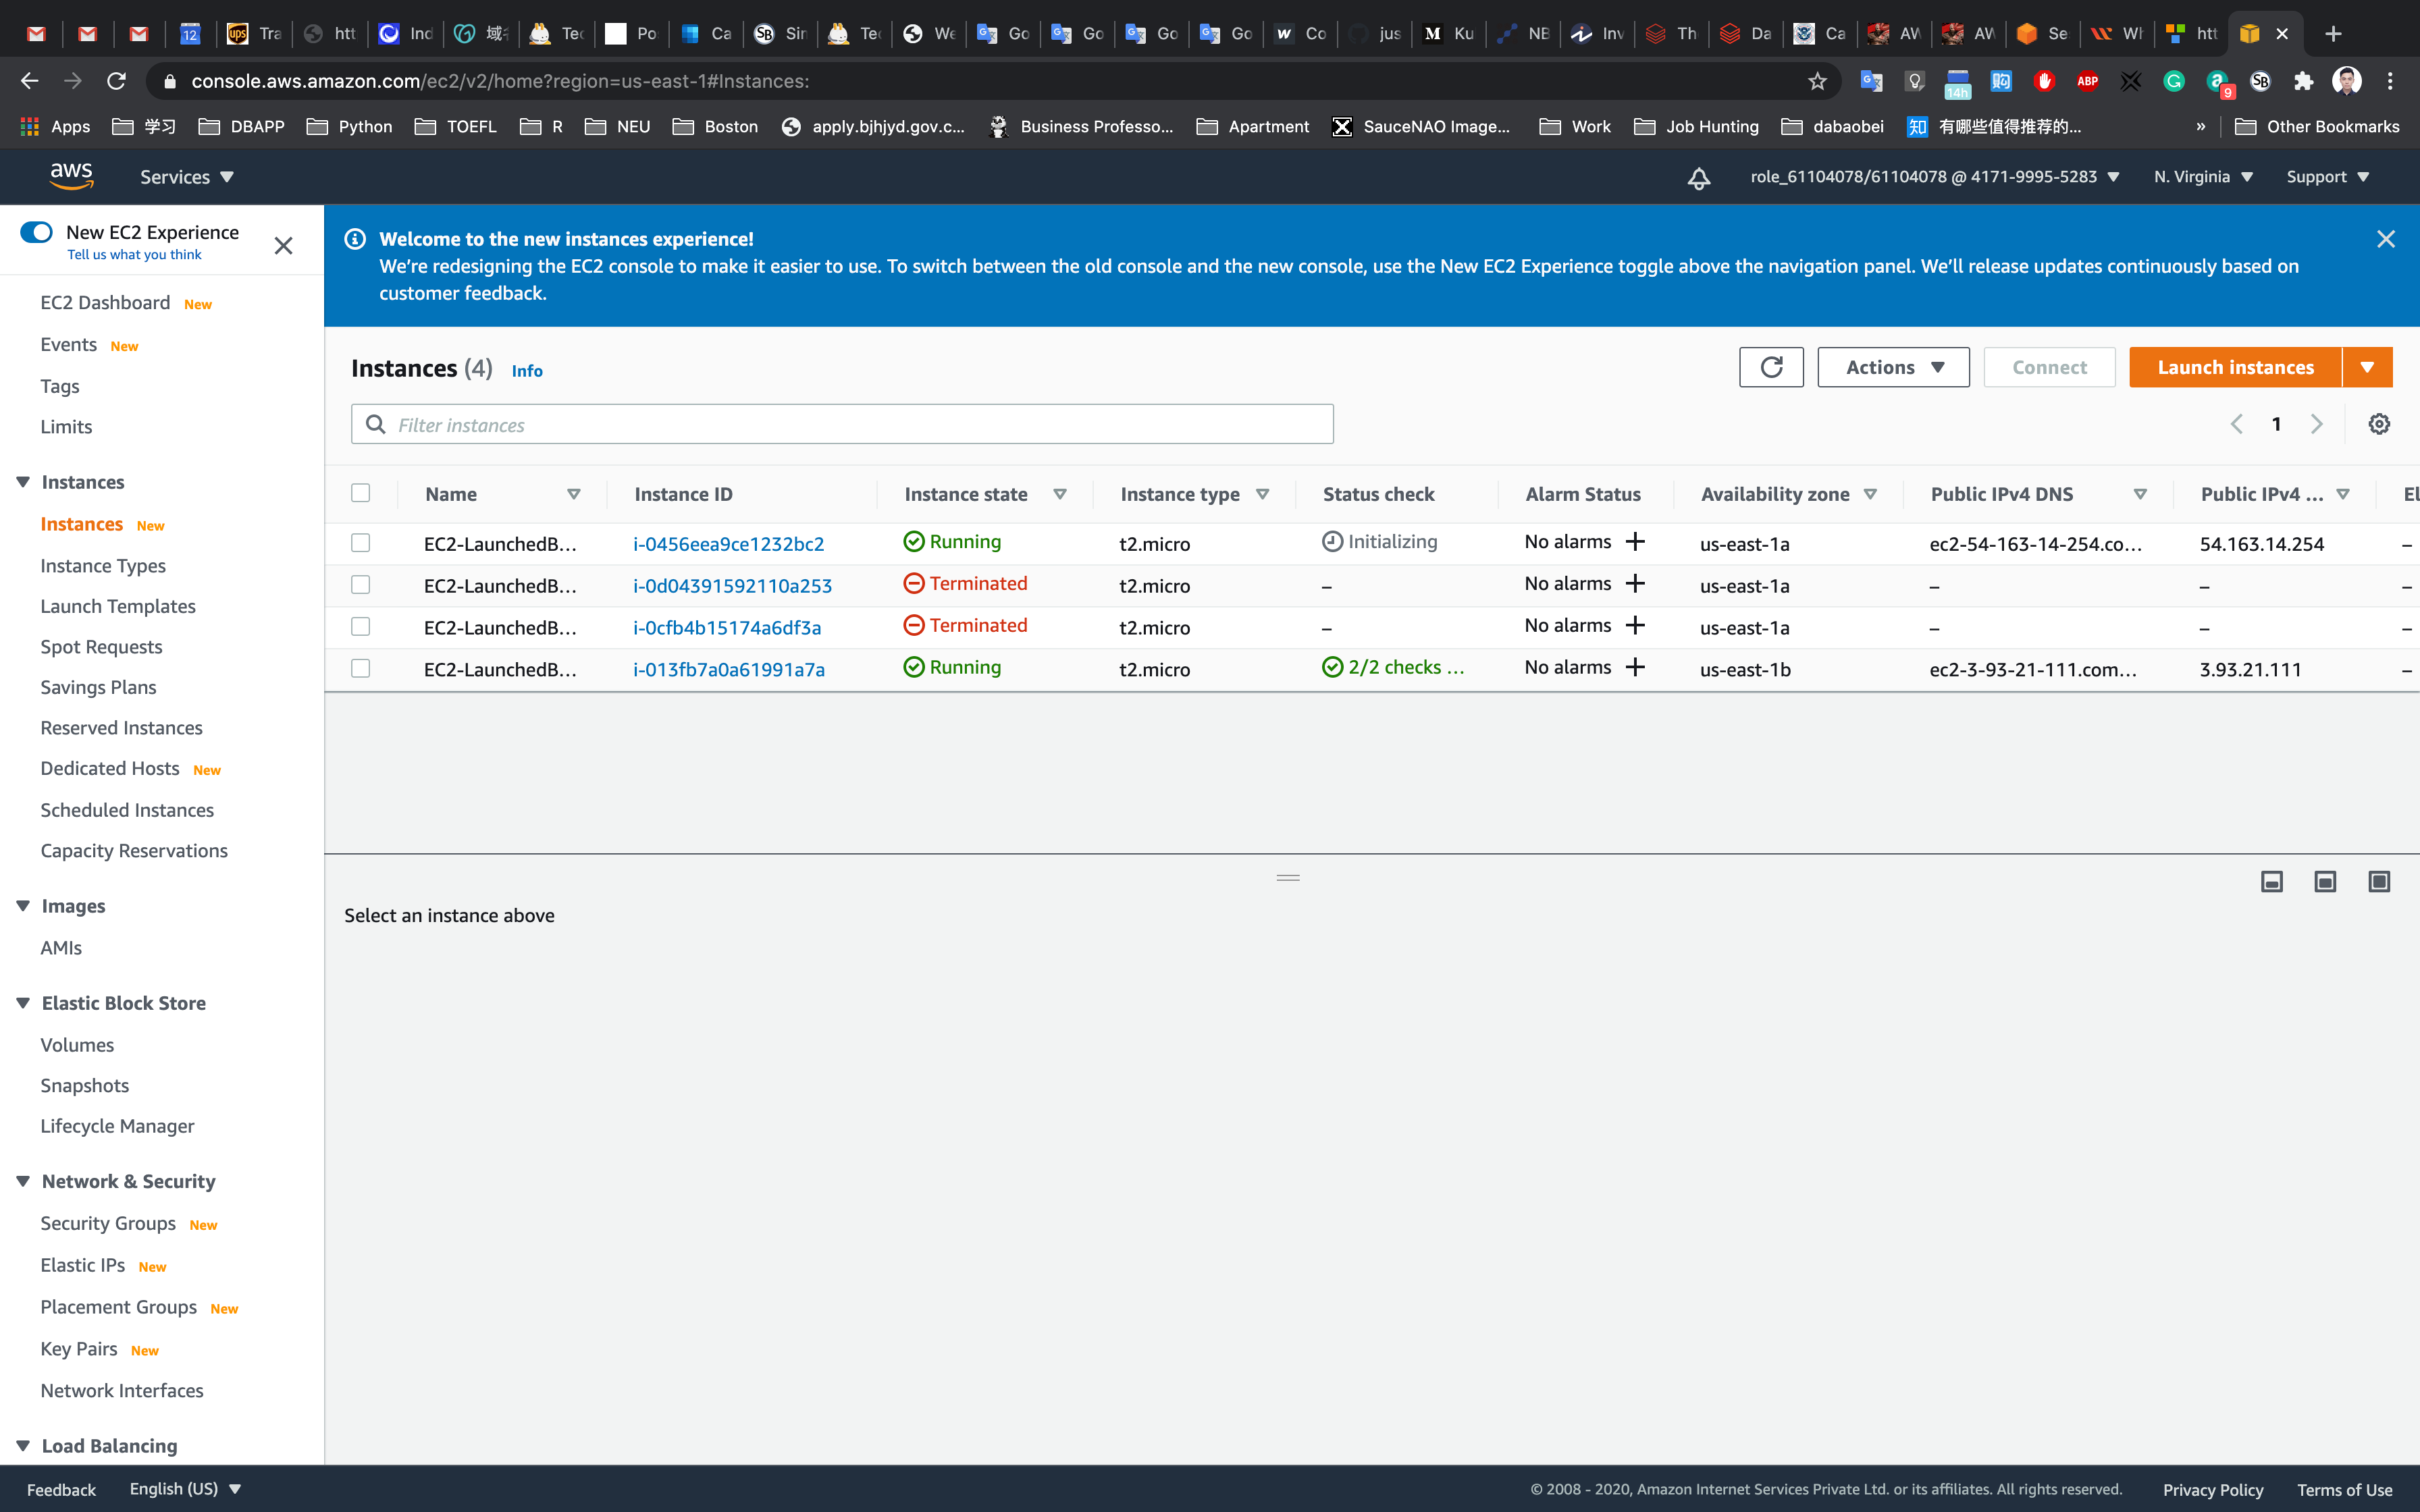
Once your instance is stopped(after 1-2 minutes) you can see that your stopped instance will be terminating automatically, and a new instance will be launched to fulfill the policy condition. A sample screenshot is provided below:
- Note: Lauching new instance may take a few minutes, you can refresh the page to view the new instance.
Completion and Conclusion
- You have successfully used the AWS management console to create Launch Configurations.
- You have configured your own details while creating an Auto Scaling Group.
- You stopped an EC2 instance to verify a replacement instance would be created, as per the requirement.