HTML Tutorial
References
HTML Introduction
- The
<!DOCTYPE html>declaration defines that this document is an HTML5 document - The
<html>element is the root element of an HTML page - The
<head>element contains meta information about the HTML page - The
<title>element specifies a title for the HTML page (which is shown in the browser’s title bar or in the page’s tab) - The
<body>element defines the document’s body, and is a container for all the visible contents, such as headings, paragraphs, images, hyperlinks, tables, lists, etc. - The
<h1>element defines a large heading - The
<p>element defines a paragraph
What is an HTML Element?
An HTML element is defined by a start tag, some content, and an end tag:
1 | <tagname>Content goes here...</tagname> |
The HTML element is everything from the start tag to the end tag:
1 | <h1>My First Heading</h1> |
Note: Some HTML elements have no content (like the <br> element). These elements are called empty elements. Empty elements do not have an end tag!
HTML Page Structure
Below is a visualization of an HTML page structure:
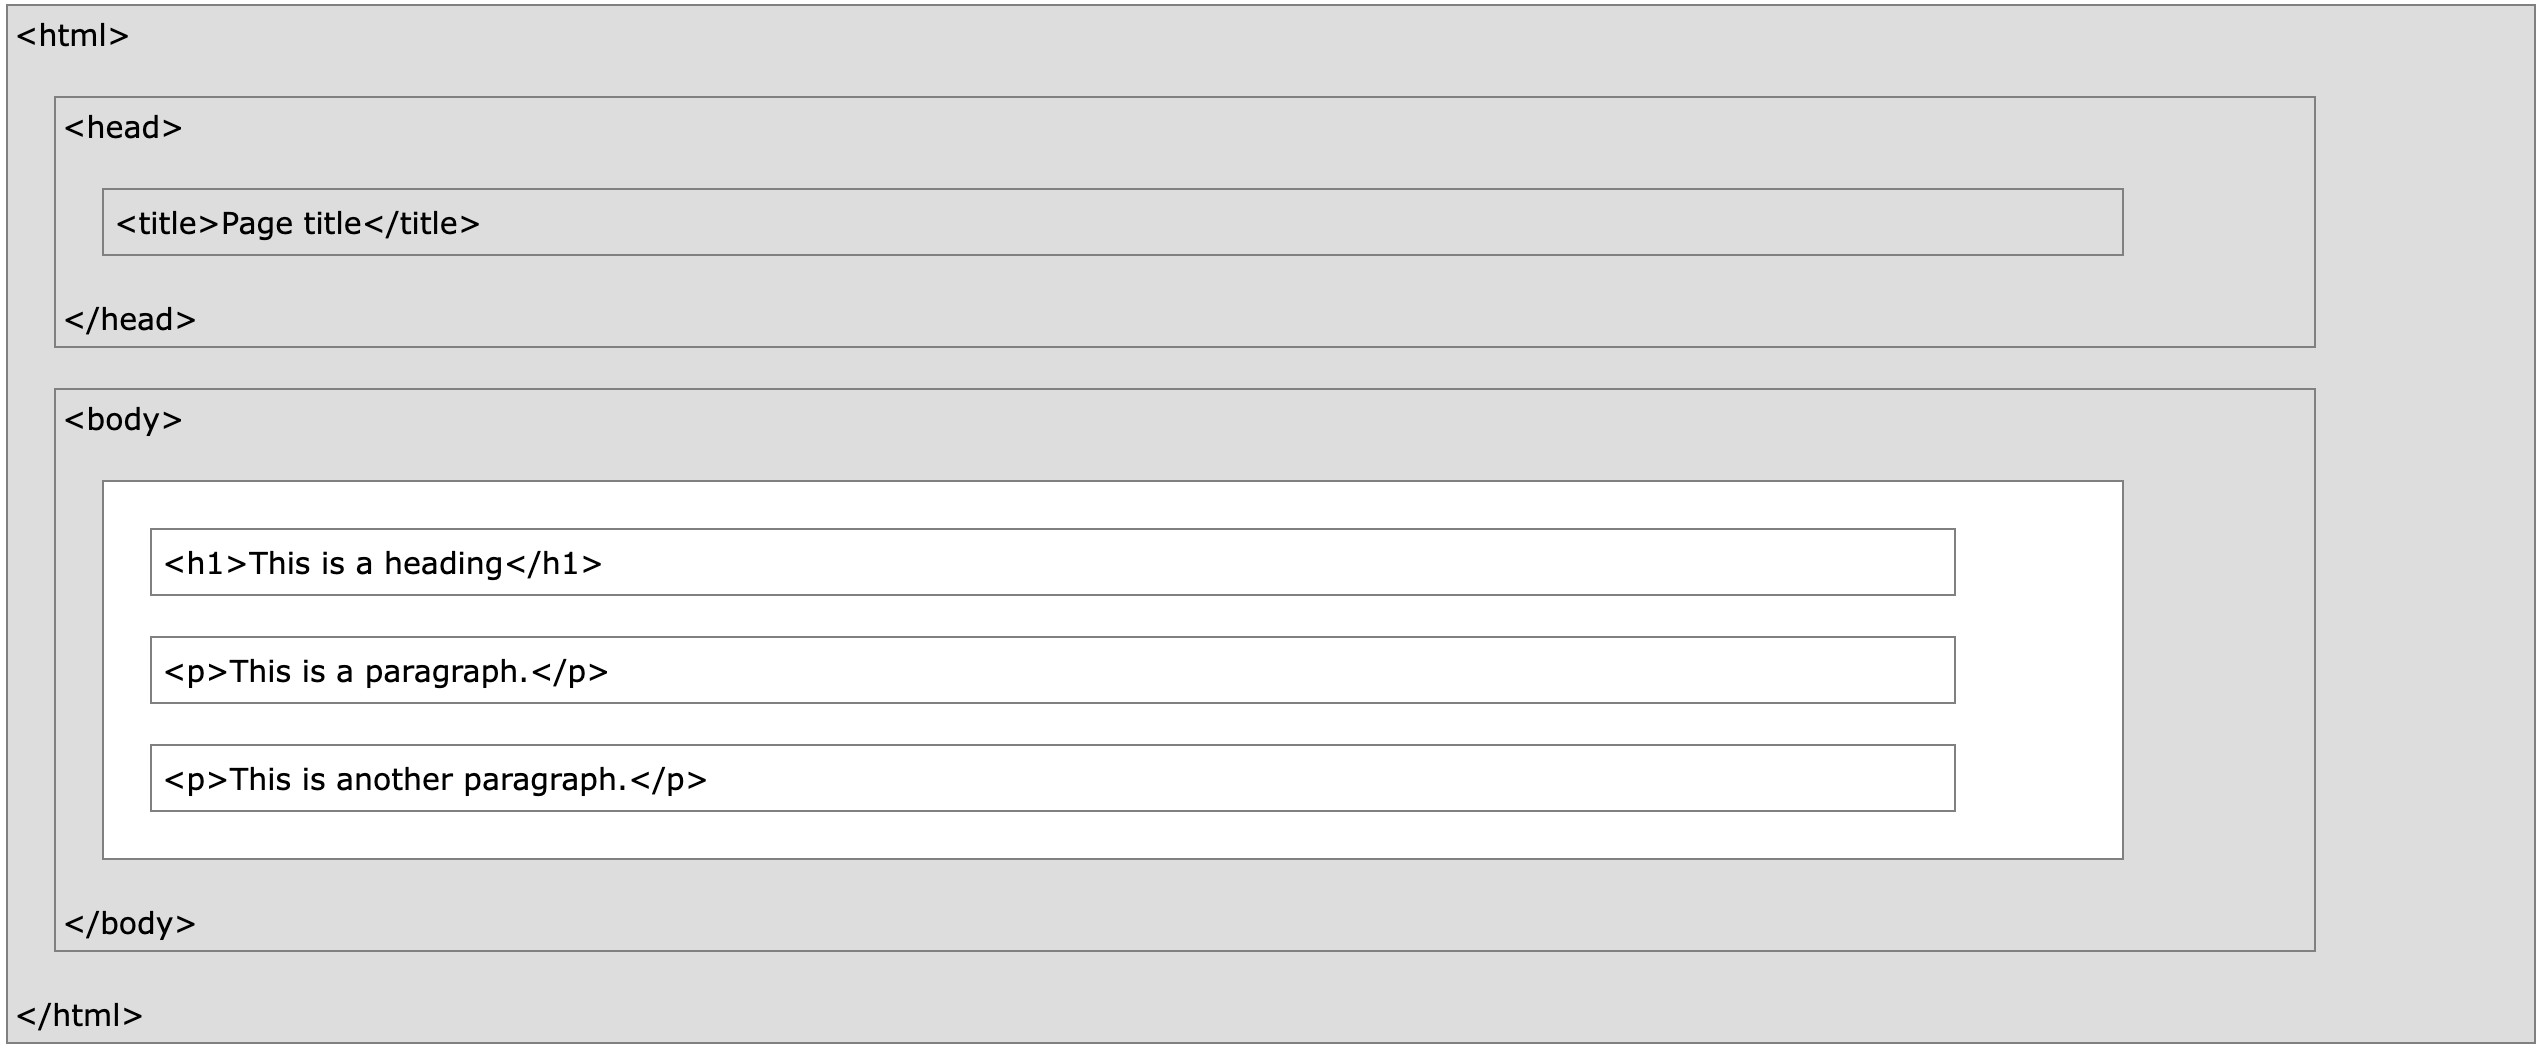
Note: The content inside the <body> section (the white area above) will be displayed in a browser. The content inside the <title> element will be shown in the browser’s title bar or in the page’s tab.
The <!DOCTYPE> Declaration
The <!DOCTYPE> declaration represents the document type, and helps browsers to display web pages correctly.
It must only appear once, at the top of the page (before any HTML tags).
The <!DOCTYPE> declaration is not case sensitive.
The <!DOCTYPE> declaration for HTML5 is:
1 |
HTML Headings
HTML headings are defined with the <h1> to <h6> tags.
<h1> defines the most important heading. <h6> defines the least important heading:
1 | <h1>This is heading 1</h1> |
HTML Paragraphs
HTML paragraphs are defined with the <p> tag:
1 | <p>This is a paragraph.</p> |
HTML Links
HTML links are defined with the <a> tag:
1 | <a href="https://www.w3schools.com">This is a link</a> |
HTML Images
HTML images are defined with the <img> tag.
The source file (src), alternative text (alt), width, and height are provided as attributes:
1 | <img src="w3schools.jpg" alt="W3Schools.com" width="104" height="142"> |
How to View HTML Source?
Have you ever seen a Web page and wondered “Hey! How did they do that?”
View HTML Source Code:
Right-click in an HTML page and select “View Page Source” (in Chrome) or “View Source” (in Edge), or similar in other browsers. This will open a window containing the HTML source code of the page.
Inspect an HTML Element:
Right-click on an element (or a blank area), and choose “Inspect” or “Inspect Element” to see what elements are made up of (you will see both the HTML and the CSS). You can also edit the HTML or CSS on-the-fly in the Elements or Styles panel that opens
HTML Elements
An HTML element is defined by a start tag, some content, and an end tag.
The HTML element is everything from the start tag to the end tag:
1 | <tagname>Content goes here...</tagname> |
Examples of some HTML elements:
1 | <h1>My First Heading</h1> |
| Start tag | Element content | End tag |
|---|---|---|
| <h1> | My First Heading | </h1> |
| <p> | My first paragraph. | </p> |
| <br> | none | none |
Note: Some HTML elements have no content (like the
element). These elements are called empty elements. Empty elements do not have an end tag!
Nested HTML Elements
HTML elements can be nested (this means that elements can contain other elements).
All HTML documents consist of nested HTML elements.
The following example contains four HTML elements (<html>, <body>, <h1> and <p>):
1 |
|
Example Explained
The <html> element is the root element and it defines the whole HTML document.
It has a start tag <html> and an end tag </html>.
Then, inside the <html> element there is a <body> element:
1 | <body> |
The <body> element defines the document’s body.
It has a start tag <body> and an end tag </body>.
Then, inside the <body> element there are two other elements: <h1> and <p>:
1 | <h1>My First Heading</h1> |
The <h1> element defines a heading.
It has a start tag <h1> and an end tag </h1>:
1 | <h1>My First Heading</h1> |
The <p> element defines a paragraph.
It has a start tag <p> and an end tag </p>:
1 | <p>My first paragraph.</p> |
Never Skip the End Tag
Some HTML elements will display correctly, even if you forget the end tag:
1 | <html> |
However, never rely on this! Unexpected results and errors may occur if you forget the end tag!
Empty HTML Elements
HTML elements with no content are called empty elements.
The <br> tag defines a line break, and is an empty element without a closing tag:
1 | <p>This is a <br> paragraph with a line break.</p> |
HTML is Not Case Sensitive
HTML tags are not case sensitive: <P> means the same as <p>.
The HTML standard does not require lowercase tags, but W3C recommends lowercase in HTML, and demands lowercase for stricter document types like XHTML.
HTML Tag Reference
W3Schools’ tag reference contains additional information about these tags and their attributes.
| Tag | Description |
|---|---|
| <html> | Defines the root of an HTML document |
| <body> | Defines the document's body |
| <h1> to <h6> | Defines HTML headings |
HTML Attributes
HTML attributes provide additional information about HTML elements.
- All HTML elements can have attributes
- Attributes provide additional information about elements
- Attributes are always specified in the start tag
- Attributes usually come in name/value pairs like: name=”value”
The href Attribute
The <a> tag defines a hyperlink. The href attribute specifies the URL of the page the link goes to:
1 | <a href="https://www.w3schools.com">Visit W3Schools</a> |
The src Attribute
The <img> tag is used to embed an image in an HTML page. The src attribute specifies the path to the image to be displayed:
1 | <img src="img_girl.jpg"> |
There are two ways to specify the URL in the src attribute:
1. Absolute URL - Links to an external image that is hosted on another website. Example: src=”https://www.w3schools.com/images/img_girl.jpg".
Notes: External images might be under copyright. If you do not get permission to use it, you may be in violation of copyright laws. In addition, you cannot control external images; it can suddenly be removed or changed.
2. Relative URL - Links to an image that is hosted within the website. Here, the URL does not include the domain name. If the URL begins without a slash, it will be relative to the current page. Example: src=”img_girl.jpg”. If the URL begins with a slash, it will be relative to the domain. Example: src=”/images/img_girl.jpg”.
Tip: It is almost always best to use relative URLs. They will not break if you change domain.
The width and height Attributes
The <img> tag should also contain the width and height attributes, which specifies the width and height of the image (in pixels):
1 | <img src="img_girl.jpg" width="500" height="600"> |
The alt Attribute
The required alt attribute for the <img> tag specifies an alternate text for an image, if the image for some reason cannot be displayed. This can be due to slow connection, or an error in the src attribute, or if the user uses a screen reader.
1 | <img src="img_girl.jpg" alt="Girl with a jacket"> |
The style Attribute
The style attribute is used to add styles to an element, such as color, font, size, and more.
1 | <p style="color:red;">This is a red paragraph.</p> |
The lang Attribute
You should always include the lang attribute inside the <html> tag, to declare the language of the Web page. This is meant to assist search engines and browsers.
The following example specifies English as the language:
1 |
|
Country codes can also be added to the language code in the lang attribute. So, the first two characters define the language of the HTML page, and the last two characters define the country.
The following example specifies English as the language and United States as the country:
1 |
|
The title Attribute
The title attribute defines some extra information about an element.
The value of the title attribute will be displayed as a tooltip when you mouse over the element:
1 | <p title="I'm a tooltip">This is a paragraph.</p> |
We Suggest: Always Use Lowercase Attributes
The HTML standard does not require lowercase attribute names.
The title attribute (and all other attributes) can be written with uppercase or lowercase like title or TITLE.
However, W3C recommends lowercase attributes in HTML, and demands lowercase attributes for stricter document types like XHTML.
At W3Schools we always use lowercase attribute names.
We Suggest: Always Quote Attribute Values
The HTML standard does not require quotes around attribute values.
However, W3C recommends quotes in HTML, and demands quotes for stricter document types like XHTML.
Good:
1 | <a href="https://www.w3schools.com/html/">Visit our HTML tutorial</a> |
Bad:
1 | <a href=https://www.w3schools.com/html/>Visit our HTML tutorial</a> |
Sometimes you have to use quotes. This example will not display the title attribute correctly, because it contains a space:
1 | <p title=About W3Schools> |
Single or Double Quotes?
Double quotes around attribute values are the most common in HTML, but single quotes can also be used.
In some situations, when the attribute value itself contains double quotes, it is necessary to use single quotes:
1 | <p title='John "ShotGun" Nelson'> |
Or vice versa:
1 | <p title="John 'ShotGun' Nelson"> |
Chapter Summary
- All HTML elements can have attributes
- The
hrefattribute of<a>specifies the URL of the page the link goes to - The
srcattribute of<img>specifies the path to the image to be displayed - The
widthandheightattributes of<img>provide size information for images - The
altattribute of<img>provides an alternate text for an image - The
styleattribute is used to add styles to an element, such as color, font, size, and more - The
langattribute of the<html>tag declares the language of the Web page - The
titleattribute defines some extra information about an element
HTML Headings
HTML headings are titles or subtitles that you want to display on a webpage.
HTML headings are defined with the <h1> to <h6> tags.
<h1> defines the most important heading. <h6> defines the least important heading.
1 | <h1>Heading 1</h1> |
Note: Browsers automatically add some white space (a margin) before and after a heading.
Headings Are Important
Search engines use the headings to index the structure and content of your web pages.
Users often skim a page by its headings. It is important to use headings to show the document structure.
<h1> headings should be used for main headings, followed by <h2> headings, then the less important <h3>, and so on.
Note: Use HTML headings for headings only. Don’t use headings to make text BIG or bold.
Bigger Headings
Each HTML heading has a default size. However, you can specify the size for any heading with the style attribute, using the CSS font-size property:
1 | <h1 style="font-size:60px;">Heading 1</h1> |
HTML Paragraphs
A paragraph always starts on a new line, and is usually a block of text.
The HTML <p> element defines a paragraph.
A paragraph always starts on a new line, and browsers automatically add some white space (a margin) before and after a paragraph.
1 | <p>This is a paragraph.</p> |
HTML Display
You cannot be sure how HTML will be displayed.
Large or small screens, and resized windows will create different results.
With HTML, you cannot change the display by adding extra spaces or extra lines in your HTML code.
The browser will automatically remove any extra spaces and lines when the page is displayed:
1 | <p> |
HTML Horizontal Rules
The <hr> tag defines a thematic break in an HTML page, and is most often displayed as a horizontal rule.
The <hr> element is used to separate content (or define a change) in an HTML page:
1 | <h1>This is heading 1</h1> |
The <hr> tag is an empty tag, which means that it has no end tag.
HTML Line Breaks
The HTML <br> element defines a line break.
Use <br> if you want a line break (a new line) without starting a new paragraph:
1 | <p>This is<br>a paragraph<br>with line breaks.</p> |
The <br> tag is an empty tag, which means that it has no end tag.
The Poem Problem
This poem will display on a single line:
1 | <p> |
 My Bonnie lies over the ocean.

 My Bonnie lies over the sea.

 My Bonnie lies over the ocean.

 Oh, bring back my Bonnie to me.
Solution - The HTML <pre> Element
The HTML <pre> element defines preformatted text.
The text inside a <pre> element is displayed in a fixed-width font (usually Courier), and it preserves both spaces and line breaks:
1 | <pre> |
My Bonnie lies over the ocean. My Bonnie lies over the sea. My Bonnie lies over the ocean. Oh, bring back my Bonnie to me.
HTML Styles
The HTML style attribute is used to add styles to an element, such as color, font, size, and more.
1 |
|
I am normal
I am red
I am blue
I am big
The HTML Style Attribute
Setting the style of an HTML element, can be done with the style attribute.
The HTML style attribute has the following syntax:
1 | <_tagname_ style="_property_:_value;_"> |
The property is a CSS property. The value is a CSS value.
Background Color
The CSS background-color property defines the background color for an HTML element.
Set the background color for a page to powderblue:
1 | <body style="background-color:powderblue;"> |
Set background color for two different elements:
1 | <body> |
Text Color
The CSS color property defines the text color for an HTML element:
1 | <h1 style="color:blue;">This is a heading</h1> |
Fonts
The CSS font-family property defines the font to be used for an HTML element:
1 | <h1 style="font-family:verdana;">This is a heading</h1> |
Text Size
The CSS font-size property defines the text size for an HTML element:
1 | <h1 style="font-size:300%;">This is a heading</h1> |
Text Alignment
The CSS text-align property defines the horizontal text alignment for an HTML element:
1 | <h1 style="text-align:center;">Centered Heading</h1> |
Chapter Summary
- Use the
styleattribute for styling HTML elements - Use
background-colorfor background color - Use
colorfor text colors - Use
font-familyfor text fonts - Use
font-sizefor text sizes - Use
text-alignfor text alignment
HTML Text Formatting
HTML contains several elements for defining text with a special meaning.
1 |
|
This text is bold
This text is italic
This is subscript and superscript
HTML Formatting Elements
Formatting elements were designed to display special types of text:
-
<b>- Bold text -
<strong>- Important text -
<i>- Italic text -
<em>- Emphasized text -
<mark>- Marked text -
<small>- Smaller text -
<del>- Deleted text -
<ins>- Inserted text -
<sub>- Subscript text -
<sup>- Superscript text
1 | <b>Bold text</b> |
Bold text
Strong text
Italic text
Emphasized text
Marked text
Smaller text
Deleted text
Inserted text
This is Subscript text and this is Superscript text. --- ### HTML Text Formatting Elements
| Tag | Description |
|---|---|
| <b> | Defines bold text |
| <em> | Defines emphasized text |
| <i> | Defines a part of text in an alternate voice or mood |
| <small> | Defines smaller text |
| <strong> | Defines important text |
| <sub> | Defines subscripted text |
| <sup> | Defines superscripted text |
| <ins> | Defines inserted text |
| <del> | Defines deleted text |
| <mark> | Defines marked/highlighted text |
HTML Quotation and Citation Elements
In this chapter we will go through the <blockquote>,<q>, <abbr>, <address>, <cite>, and <bdo> HTML elements.
HTML <blockquote> for Quotations
The HTML <blockquote> element defines a section that is quoted from another source.
Browsers usually indent <blockquote> elements.
1 | <p>Here is a quote from WWF's website:</p> |
Here is a quote from WWF's website:
For 50 years, WWF has been protecting the future of nature. The world's leading conservation organization, WWF works in 100 countries and is supported by 1.2 million members in the United States and close to 5 million globally.
HTML <q> for Short Quotations
The HTML <q> tag defines a short quotation.
Browsers normally insert quotation marks around the quotation.
1 | <p>WWF's goal is to: <q>Build a future where people live in harmony with nature.</q></p> |
WWF's goal is to: Build a future where people live in harmony with nature.
HTML <abbr> for Abbreviations
The HTML <abbr> tag defines an abbreviation or an acronym, like “HTML”, “CSS”, “Mr.”, “Dr.”, “ASAP”, “ATM”.
Marking abbreviations can give useful information to browsers, translation systems and search-engines.
Tip: Use the global title attribute to show the description for the abbreviation/acronym when you mouse over the element.
1 | <p>The <abbr title="World Health Organization">WHO</abbr> was founded in 1948.</p> |
The WHO was founded in 1948.
HTML <address> for Contact Information
The HTML <address> tag defines the contact information for the author/owner of a document or an article.
The contact information can be an email address, URL, physical address, phone number, social media handle, etc.
The text in the <address> element usually renders in italic, and browsers will always add a line break before and after the <address> element.
1 | <address> |
Visit us at:
Example.com
Box 564, Disneyland
USA
HTML <cite> for Work Title
The HTML <cite> tag defines the title of a creative work (e.g. a book, a poem, a song, a movie, a painting, a sculpture, etc.).
Note: A person’s name is not the title of a work.
The text in the <cite> element usually renders in italic.
1 | <p><cite>The Scream</cite> by Edvard Munch. Painted in 1893.</p> |
The Scream by Edvard Munch. Painted in 1893.
HTML <bdo> for Bi-Directional Override
BDO stands for Bi-Directional Override.
The HTML <bdo> tag is used to override the current text direction:
1 | <bdo dir="rtl">This text will be written from right to left</bdo> |
This text will be written from right to left
HTML Quotation and Citation Elements
| Tag | Description |
|---|---|
| <abbr> | Defines an abbreviation or acronym |
| <address> | Defines contact information for the author/owner of a document |
| <bdo> | Defines the text direction |
| <blockquote> | Defines a section that is quoted from another source |
| <cite> | Defines the title of a work |
| <q> | Defines a short inline quotation |
HTML Comments
HTML comments are not displayed in the browser, but they can help document your HTML source code.
HTML Comment Tag
You can add comments to your HTML source by using the following syntax:
1 | <!-- Write your comments here --> |
Notice that there is an exclamation point (!) in the start tag, but not in the end tag.
Note: Comments are not displayed by the browser, but they can help document your HTML source code.
Add Comments
With comments you can place notifications and reminders in your HTML code:
1 | <!-- This is a comment --> |
Hide Content
Comments can be used to hide content.
Which can be helpful if you hide content temporarily:
1 | <p>This is a paragraph.</p> |
You can also hide more than one line, everything between the <!-- and the --> will be hidden from the display.
Hide a section of HTML code:
1 | <p>This is a paragraph.</p> |
Hide Inline Content
Comments can be used to hide parts in the middle of the HTML code.
Hide a part of a paragraph:
1 | <p>This <!-- great text --> is a paragraph.</p> |
HTML Colors
HTML colors are specified with predefined color names, or with RGB, HEX, HSL, RGBA, or HSLA values.
Color Names
In HTML, a color can be specified by using a color name:
1 |
|
Tomato
Orange
DodgerBlue
MediumSeaGreen
Gray
SlateBlue
Violet
LightGray
HTML supports 140 standard color names.
Background Color
You can set the background color for HTML elements:
1 |
|
Text Color
You can set the color of text:
1 |
|
Hello World
Lorem ipsum dolor sit amet, consectetuer adipiscing elit, sed diam nonummy nibh euismod tincidunt ut laoreet dolore magna aliquam erat volutpat.
Ut wisi enim ad minim veniam, quis nostrud exerci tation ullamcorper suscipit lobortis nisl ut aliquip ex ea commodo consequat.
Border Color
You can set the color of borders:
1 |
|
Hello World
Hello World
Hello World
Color Values
In HTML, colors can also be specified using RGB values, HEX values, HSL values, RGBA values, and HSLA values.
The following three <div> elements have their background color set with RGB, HEX, and HSL values:
1 |
|
Same as color name "Tomato":
rgb(255, 99, 71)
#ff6347
hsl(9, 100%, 64%)
Same as color name "Tomato", but 50% transparent:
rgba(255, 99, 71, 0.5)
hsla(9, 100%, 64%, 0.5)
In addition to the predefined color names, colors can be specified using RGB, HEX, HSL, or even transparent colors using RGBA or HSLA color values.
HTML RGB and RGBA Colors
An RGB color value represents RED, GREEN, and BLUE light sources.
An RGBA color value is an extension of RGB with an Alpha channel (opacity).
RGB Color Values
In HTML, a color can be specified as an RGB value, using this formula:
rgb(red, green, blue)
Each parameter (red, green, and blue) defines the intensity of the color with a value between 0 and 255.
This means that there are 256 x 256 x 256 = 16777216 possible colors!
For example, rgb(255, 0, 0) is displayed as red, because red is set to its highest value (255), and the other two (green
and blue) are set to 0.
Another example, rgb(0, 255, 0) is displayed as green, because green is set to its highest value (255), and the other
two (red and blue) are set to 0.
To display black, set all color parameters to 0, like this: rgb(0, 0, 0).
To display white, set all color parameters to 255, like this: rgb(255, 255, 255).
Experiment by mixing the RGB values below:
1 |
|
<p style="background-color:rgb(255, 0, 0);">rgb(255, 0, 0)</p>
<p style="background-color:rgb(0, 0, 255);">rgb(0, 0, 255)</p>
<p style="background-color:rgb(60, 179, 113);">rgb(60, 179, 113)</p>
<p style="background-color:rgb(238, 130, 238);">rgb(238, 130, 238)</p>
<p style="background-color:rgb(255, 165, 0);">rgb(255, 165, 0)</p>
<p style="background-color:rgb(106, 90, 205);">rgb(106, 90, 205)</p>
Shades of Gray
Shades of gray are often defined using equal values for all three parameters:
<p style="background-color:rgb(60, 60, 60);">rgb(60, 60, 60)</p>
<p style="background-color:rgb(100, 100, 100);">rgb(100, 100, 100)</p>
<p style="background-color:rgb(140, 140, 140);">rgb(140, 140, 140)</p>
<p style="background-color:rgb(180, 180, 180);">rgb(180, 180, 180)</p>
<p style="background-color:rgb(200, 200, 200);">rgb(200, 200, 200)</p>
<p style="background-color:rgb(240, 240, 240);">rgb(240, 240, 240)</p>
RGBA Color Values
RGBA color values are an extension of RGB color values with an Alpha channel - which specifies the opacity for a color.
An RGBA color value is specified with:
rgba(red, green, blue, alpha)
The alpha parameter is a number between 0.0 (fully transparent) and 1.0 (not transparent at all):
Experiment by mixing the RGBA values below:
1 |
|
<p style="background-color:rgba(255, 99, 71, 0);">rgba(255, 99, 71, 0)</p>
<p style="background-color:rgba(255, 99, 71, 0.2);">rgba(255, 99, 71, 0.2)</p>
<p style="background-color:rgba(255, 99, 71, 0.4);">rgba(255, 99, 71, 0.4)</p>
<p style="background-color:rgba(255, 99, 71, 0.6);">rgba(255, 99, 71, 0.6)</p>
<p style="background-color:rgba(255, 99, 71, 0.8);">rgba(255, 99, 71, 0.8)</p>
<p style="background-color:rgba(255, 99, 71, 1);">rgba(255, 99, 71, 1)</p>
HTML HEX Colors
A hexadecimal color is specified with: #RRGGBB, where the RR (red), GG (green) and BB (blue) hexadecimal integers
specify the components of the color.
HEX Color Values
In HTML, a color can be specified using a hexadecimal value in the form:
#rrggbb
Where rr (red), gg (green) and bb (blue) are hexadecimal values between 00 and ff (same as decimal 0-255).
For example, #ff0000 is displayed as red, because red is set to its highest value (ff), and the other two (green and
blue) are set to 00.
Another example, #00ff00 is displayed as green, because green is set to its highest value (ff), and the other two (red
and blue) are set to 00.
To display black, set all color parameters to 00, like this: #000000.
To display white, set all color parameters to ff, like this: #ffffff.
Experiment by mixing the HEX values below:
1 |
|
<p style="background-color:#ff0000;">#ff0000</p>
<p style="background-color:#0000ff;">#0000ff</p>
<p style="background-color:#3cb371;">#3cb371</p>
<p style="background-color:#ee82ee;">#ee82ee</p>
<p style="background-color:#ffa500;">#ffa500</p>
<p style="background-color:#6a5acd;">#6a5acd</p>
Shades of Gray
Shades of gray are often defined using equal values for all three parameters:
1 |
|
<p style="background-color:#404040;">#404040</p>
<p style="background-color:#686868;">#686868</p>
<p style="background-color:#a0a0a0;">#a0a0a0</p>
<p style="background-color:#bebebe;">#bebebe</p>
<p style="background-color:#dcdcdc;">#dcdcdc</p>
<p style="background-color:#f8f8f8;">#f8f8f8</p>
HTML HSL and HSLA Colors
HSL stands for hue, saturation, and lightness.
HSLA color values are an extension of HSL with an Alpha channel (opacity).
HSL Color Values
In HTML, a color can be specified using hue, saturation, and lightness (HSL) in the form:
hsl(hue, saturation, lightness)
Hue is a degree on the color wheel from 0 to 360. 0 is red, 120 is green, and 240 is blue.
Saturation is a percentage value, 0% means a shade of gray, and 100% is the full color.
Lightness is also a percentage value, 0% is black, and 100% is white.
Experiment by mixing the HSL values below:
1 |
|
<p style="background-color:hsl(0, 100%, 50%);">hsl(0, 100%, 50%)</p>
<p style="background-color:hsl(240, 100%, 50%);">hsl(240, 100%, 50%)</p>
<p style="background-color:hsl(147, 50%, 47%);">hsl(147, 50%, 47%)</p>
<p style="background-color:hsl(300, 76%, 72%);">hsl(300, 76%, 72%)</p>
<p style="background-color:hsl(39, 100%, 50%);">hsl(39, 100%, 50%)</p>
<p style="background-color:hsl(248, 53%, 58%);">hsl(248, 53%, 58%)</p>
Saturation
Saturation can be described as the intensity of a color.
100% is pure color, no shades of gray
50% is 50% gray, but you can still see the color.
0% is completely gray, you can no longer see the color.
1 |
|
<p style="background-color:hsl(0, 100%, 50%);">hsl(0, 100%, 50%)</p>
<p style="background-color:hsl(0, 80%, 50%);">hsl(0, 80%, 50%)</p>
<p style="background-color:hsl(0, 60%, 50%);">hsl(0, 60%, 50%)</p>
<p style="background-color:hsl(0, 40%, 50%);">hsl(0, 40%, 50%)</p>
<p style="background-color:hsl(0, 20%, 50%);">hsl(0, 20%, 50%)</p>
<p style="background-color:hsl(0, 0%, 50%);">hsl(0, 0%, 50%)</p>

<p>With HSL colors, less saturation mean less color. 0% is completely gray.</p>
Lightness
The lightness of a color can be described as how much light you want to give the color, where 0% means no light (black),
50% means 50% light (neither dark nor light) 100% means full lightness (white).
1 |
|
<p style="background-color:hsl(0, 100%, 0%);">hsl(0, 100%, 0%)</p>
<p style="background-color:hsl(0, 100%, 25%);">hsl(0, 100%, 25%)</p>
<p style="background-color:hsl(0, 100%, 50%);">hsl(0, 100%, 50%)</p>
<p style="background-color:hsl(0, 100%, 75%);">hsl(0, 100%, 75%)</p>
<p style="background-color:hsl(0, 100%, 90%);">hsl(0, 100%, 90%)</p>
<p style="background-color:hsl(0, 100%, 100%);">hsl(0, 100%, 100%)</p>

<p>With HSL colors, 0% lightness means black, and 100 lightness means white.</p>
Shades of Gray
Shades of gray are often defined by setting the hue and saturation to 0, and adjust the lightness from 0% to 100% to get
darker/lighter shades:
1 |
|
hsl(0, 0%, 20%)
hsl(0, 0%, 30%)
hsl(0, 0%, 40%)
hsl(0, 0%, 60%)
hsl(0, 0%, 70%)
hsl(0, 0%, 90%)
HSLA Color Values
HSLA color values are an extension of HSL color values with an Alpha channel - which specifies the opacity for a color.
An HSLA color value is specified with:
hsla(hue, saturation, lightness, alpha)
The alpha parameter is a number between 0.0 (fully transparent) and 1.0 (not transparent at all):
Experiment by mixing the HSLA values below:
1 |
|
hsla(9, 100%, 64%, 0)
hsla(9, 100%, 64%, 0.2)
hsla(9, 100%, 64%, 0.4)
hsla(9, 100%, 64%, 0.6)
hsla(9, 100%, 64%, 0.8)
hsla(9, 100%, 64%, 1)
HTML Styles - CSS
CSS stands for Cascading Style Sheets.
CSS saves a lot of work. It can control the layout of multiple web pages all at once.
1 | <div style="position:relative;height:220px;margin-top:50px;"> |
What is CSS?
Cascading Style Sheets (CSS) is used to format the layout of a webpage.
With CSS, you can control the color, font, the size of text, the spacing between elements, how elements are positioned and laid out, what background images or background colors are to be used, different displays for different devices and screen sizes, and much more!
Tip: The word cascading means that a style applied to a parent element will also apply to all children elements within the parent. So, if you set the color of the body text to “blue”, all headings, paragraphs, and other text elements within the body will also get the same color (unless you specify something else)!
Using CSS
CSS can be added to HTML documents in 3 ways:
- Inline - by using the
styleattribute inside HTML elements - Internal - by using a
<style>element in the<head>section - External - by using a
<link>element to link to an external CSS file
The most common way to add CSS, is to keep the styles in external CSS files. However, in this tutorial we will use inline and internal styles, because this is easier to demonstrate, and easier for you to try it yourself.
Inline CSS
An inline CSS is used to apply a unique style to a single HTML element.
An inline CSS uses the style attribute of an HTML element.
The following example sets the text color of the <h1> element to blue, and the text color of the <p> element to red:
1 | <h1 style="color:blue;">A Blue Heading</h1> |
A red paragraph.
Internal CSS
An internal CSS is used to define a style for a single HTML page.
An internal CSS is defined in the <head> section of an HTML page, within a <style> element.
The following example sets the text color of ALL the <h1> elements (on that page) to blue, and the text color of ALL the <p> elements to red. In addition, the page will be displayed with a “powderblue” background color:
1 |
|
External CSS
An external style sheet is used to define the style for many HTML pages.
To use an external style sheet, add a link to it in the <head> section of each HTML page:
1 |
|
The external style sheet can be written in any text editor. The file must not contain any HTML code, and must be saved with a .css extension.
Here is what the “styles.css” file looks like:
1 | body { background-color: powderblue;} |
Tip: With an external style sheet, you can change the look of an entire web site, by changing one file!
Link to External CSS
External style sheets can be referenced with a full URL or with a path relative to the current web page.
This example uses a full URL to link to a style sheet:
1 | <link rel="stylesheet" href="https://www.w3schools.com/html/styles.css"> |
This example links to a style sheet located in the html folder on the current web site:
1 | <link rel="stylesheet" href="/html/styles.css"> |
This example links to a style sheet located in the same folder as the current page:
1 | <link rel="stylesheet" href="styles.css"> |
CSS Colors, Fonts and Sizes
Here, we will demonstrate some commonly used CSS properties. You will learn more about them later.
The CSS color property defines the text color to be used.
The CSS font-family property defines the font to be used.
The CSS font-size property defines the text size to be used.
Use of CSS color, font-family and font-size properties:
1 |
|
CSS Border
The CSS border property defines a border around an HTML element.
Tip: You can define a border for nearly all HTML elements.
Use of CSS border property:
1 | p { border: 2px solid powderblue;} |
1 |
|
CSS Padding
The CSS padding property defines a padding (space) between the text and the border.
Use of CSS border and padding properties:
1 | p { border: 2px solid powderblue; |
1 |
|
CSS Margin
The CSS margin property defines a margin (space) outside the border.
1 | p { border: 2px solid powderblue; |
1 |
|
Chapter Summary
- Use the HTML
styleattribute for inline styling - Use the HTML
<style>element to define internal CSS - Use the HTML
<link>element to refer to an external CSS file - Use the HTML
<head>element to store<style>and<link>elements - Use the CSS
colorproperty for text colors - Use the CSS
font-familyproperty for text fonts - Use the CSS
font-sizeproperty for text sizes - Use the CSS
borderproperty for borders - Use the CSS
paddingproperty for space inside the border - Use the CSS
marginproperty for space outside the border
Tip: You can learn much more about CSS in our CSS Tutorial.
HTML Links
Links
Links are found in nearly all web pages. Links allow users to click their way from page to page.
HTML Links - Hyperlinks
HTML links are hyperlinks.
You can click on a link and jump to another document.
When you move the mouse over a link, the mouse arrow will turn into a little hand.
Note: A link does not have to be text. A link can be an image or any other HTML element!
HTML Links - Syntax
The HTML <a> tag defines a hyperlink. It has the following syntax:
1 | <a href="_url_">_link text_</a> |
The most important attribute of the <a> element is the href attribute, which indicates the link’s destination.
The link text is the part that will be visible to the reader.
Clicking on the link text, will send the reader to the specified URL address.
This example shows how to create a link to W3Schools.com:
1 | <a href="https://www.w3schools.com/">Visit W3Schools.com!</a> |
By default, links will appear as follows in all browsers:
- An unvisited link is underlined and blue
- A visited link is underlined and purple
- An active link is underlined and red
Tip: Links can of course be styled with CSS, to get another look!
HTML Links - The target Attribute
By default, the linked page will be displayed in the current browser window. To change this, you must specify another target for the link.
The target attribute specifies where to open the linked document.
The target attribute can have one of the following values:
-
_self- Default. Opens the document in the same window/tab as it was clicked -
_blank- Opens the document in a new window or tab -
_parent- Opens the document in the parent frame -
_top- Opens the document in the full body of the window
1 | <a href="https://www.zacks.one/" target="_self">Visit My Blog!</a> |
Absolute URLs vs. Relative URLs
Both examples above are using an absolute URL (a full web address) in the href attribute.
A local link (a link to a page within the same website) is specified with a relative URL (without the “https://www" part):
1 | <h2>Absolute URLs</h2> |
HTML Links - Use an Image as a Link
To use an image as a link, just put the <img> tag inside the <a> tag:
1 | <a href="default.asp"> |
Link to an Email Address
Use mailto: inside the href attribute to create a link that opens the user’s email program (to let them send a new email):
1 | <a href="mailto:someone@example.com">Send email</a> |
Button as a Link
To use an HTML button as a link, you have to add some JavaScript code.
JavaScript allows you to specify what happens at certain events, such as a click of a button:
1 | <button onclick="document.location='default.asp'">HTML Tutorial</button> |
Link Titles
The title attribute specifies extra information about an element. The information is most often shown as a tooltip text when the mouse moves over the element.
1 | <a href="https://www.w3schools.com/html/" title="Go to W3Schools HTML section">Visit our HTML Tutorial</a> |
More on Absolute URLs and Relative URLs
Use a full URL to link to a web page:
1 | <a href="https://www.w3schools.com/html/default.asp">HTML tutorial</a> |
Link to a page located in the html folder on the current web site:
1 | <a href="/html/default.asp">HTML tutorial</a> |
Link to a page located in the same folder as the current page:
1 | <a href="default.asp">HTML tutorial</a> |
Chapter Summary
- Use the
<a>element to define a link - Use the
hrefattribute to define the link address - Use the
targetattribute to define where to open the linked document - Use the
<img>element (inside<a>) to use an image as a link - Use the
mailto:scheme inside thehrefattribute to create a link that opens the user’s email program
HTML Link Tags
| Tag | Description |
|---|---|
| <a> | Defines a hyperlink |
HTML Links - Different Colors
An HTML link is displayed in a different color depending on whether it has been visited, is unvisited, or is active.
HTML Link Colors
By default, a link will appear like this (in all browsers):
- An unvisited link is underlined and blue
- A visited link is underlined and purple
- An active link is underlined and red
You can change the link state colors, by using CSS:
Here, an unvisited link will be green with no underline. A visited link will be pink with no underline. An active link will be yellow and underlined. In addition, when mousing over a link (a:hover) it will become red and underlined:
1 | <style> |
Link Buttons
A link can also be styled as a button, by using CSS:
1 | <style> |
HTML Link Tags
| Tag | Description |
|---|---|
| <a> | Defines a hyperlink |
HTML Links - Create Bookmarks
HTML links can be used to create bookmarks, so that readers can jump to specific parts of a web page.
Create a Bookmark in HTML
Bookmarks can be useful if a web page is very long.
To create a bookmark - first create the bookmark, then add a link to it.
When the link is clicked, the page will scroll down or up to the location with the bookmark.
Example
First, use the id attribute to create a bookmark:
1 | <h2 id="C4">Chapter 4</h2> |
Then, add a link to the bookmark (“Jump to Chapter 4”), from within the same page:
1 | <a href="#C4">Jump to Chapter 4</a> |
You can also add a link to a bookmark on another page:
1 | <a href="html_demo.html#C4">Jump to Chapter 4</a> |
Chapter Summary
- Use the
idattribute (id=”value“) to define bookmarks in a page - Use the
hrefattribute (href=”#value“) to link to the bookmark
HTML Images
Images
Images can improve the design and the appearance of a web page.
HTML Images Syntax
The HTML <img> tag is used to embed an image in a web page.
Images are not technically inserted into a web page; images are linked to web pages. The <img> tag creates a holding space for the referenced image.
The <img> tag is empty, it contains attributes only, and does not have a closing tag.
The <img> tag has two required attributes:
-
src- Specifies the path to the image -
alt- Specifies an alternate text for the image
1 | <img src="https://raw.githubusercontent.com/ZacksAmber/PicGo/master/img/20211109001011.jpeg" alt="Tifa"> |

The src Attribute
The required src attribute specifies the path (URL) to the image.
Note: When a web page loads, it is the browser, at that moment, that gets the image from a web server and inserts it into the page. Therefore, make sure that the image actually stays in the same spot in relation to the web page, otherwise your visitors will get a broken link icon. The broken link icon and the alt text are shown if the browser cannot find the image.
The alt Attribute
The required alt attribute provides an alternate text for an image, if the user for some reason cannot view it (because of slow connection, an error in the src attribute, or if the user uses a screen reader).
The value of the alt attribute should describe the image.
If a browser cannot find an image, it will display the value of the alt attribute.
Tip: A screen reader is a software program that reads the HTML code, and allows the user to “listen” to the content. Screen readers are useful for people who are visually impaired or learning disabled.
Image Size - Width and Height
You can use the style attribute to specify the width and height of an image.
1 | <img src="https://raw.githubusercontent.com/ZacksAmber/PicGo/master/img/20211109001011.jpeg" alt="Tifa" style="width:400px;height:300px;"> |
Alternatively, you can use the width and height attributes:
1 | <img src="https://raw.githubusercontent.com/ZacksAmber/PicGo/master/img/20211109001011.jpeg" alt="Tifa" width="400" height="300"> |
The width and height attributes always define the width and height of the image in pixels.
Note: Always specify the width and height of an image. If width and height are not specified, the web page might flicker while the image loads.
Width and Height, or Style?
The width, height, and style attributes are all valid in HTML.
However, we suggest using the style attribute. It prevents styles sheets from changing the size of images:
1 |
|
Images in Another Folder
If you have your images in a sub-folder, you must include the folder name in the src attribute:
1 | <img src="/images/html5.gif" alt="HTML5 Icon" style="width:128px;height:128px;"> |
Images on Another Server/Website
Some web sites point to an image on another server.
To point to an image on another server, you must specify an absolute (full) URL in the src attribute:
1 | <img src="https://www.w3schools.com/images/w3schools_green.jpg" alt="W3Schools.com"> |
Notes on external images: External images might be under copyright. If you do not get permission to use it, you may be in violation of copyright laws. In addition, you cannot control external images; it can suddenly be removed or changed.
Animated Images
HTML allows animated GIFs:
1 | <img src="programming.gif" alt="Computer Man" style="width:48px;height:48px;"> |
Image as a Link
To use an image as a link, put the <img> tag inside the <a> tag:
1 | <a href="https://www.linkedin.com/in/zacks-shen/"> |
Image Floating
Use the CSS float property to let the image float to the right or to the left of a text:
1 | <p><img src="smiley.gif" alt="Smiley face" style="float:right;width:42px;height:42px;"> |
Example
1 |
|
Common Image Formats
Here are the most common image file types, which are supported in all browsers (Chrome, Edge, Firefox, Safari, Opera):
| Abbreviation | File Format | File Extension |
|---|---|---|
| APNG | Animated Portable Network Graphics | .apng |
| GIF | Graphics Interchange Format | .gif |
| ICO | Microsoft Icon | .ico, .cur |
| JPEG | Joint Photographic Expert Group image | .jpg, .jpeg, .jfif, .pjpeg, .pjp |
| PNG | Portable Network Graphics | .png |
| SVG | Scalable Vector Graphics | .svg |
Chapter Summary
- Use the HTML
<img>element to define an image - Use the HTML
srcattribute to define the URL of the image - Use the HTML
altattribute to define an alternate text for an image, if it cannot be displayed - Use the HTML
widthandheightattributes or the CSSwidthandheightproperties to define the size of the image - Use the CSS
floatproperty to let the image float to the left or to the right
Note: Loading large images takes time, and can slow down your web page. Use images carefully.
HTML Image Maps
With HTML image maps, you can create clickable areas on an image.
Image Maps
The HTML <map> tag defines an image map. An image map is an image with clickable areas. The areas are defined with one or more <area> tags.
Try to click on the computer, phone, or the cup of coffee in the image below:
1 | <img src="https://www.w3schools.com/html/workplace.jpg" alt="Workplace" usemap="#workmap"> |

How Does it Work?
The idea behind an image map is that you should be able to perform different actions depending on where in the image you click.
To create an image map you need an image, and some HTML code that describes the clickable areas.
The Image
The image is inserted using the <img> tag. The only difference from other images is that you must add a usemap attribute:
1 | <img src="https://www.w3schools.com/html/workplace.jpg" alt="Workplace" usemap="#workmap"> |
The usemap value starts with a hash tag # followed by the name of the image map, and is used to create a relationship between the image and the image map.
Tip: You can use any image as an image map!
Create Image Map
Then, add a <map> element.
The <map> element is used to create an image map, and is linked to the image by using the required name attribute:
1 | <map name="workmap"> |
The name attribute must have the same value as the <img>‘s usemap attribute .
The Areas
Then, add the clickable areas.
A clickable area is defined using an <area> element.
Shape
You must define the shape of the clickable area, and you can choose one of these values:
-
rect- defines a rectangular region -
circle- defines a circular region -
poly- defines a polygonal region -
default- defines the entire region
You must also define some coordinates to be able to place the clickable area onto the image.
Shape=”rect”
The coordinates for shape="rect" come in pairs, one for the x-axis and one for the y-axis.
So, the coordinates 34,44 is located 34 pixels from the left margin and 44 pixels from the top:
The coordinates 270,350 is located 270 pixels from the left margin and 350 pixels from the top:
Now we have enough data to create a clickable rectangular area:
1 | <area shape="rect" coords="34, 44, 270, 350" href="computer.htm"> |
This is the area that becomes clickable and will send the user to the page “computer.htm”:
Shape=”circle”
To add a circle area, first locate the coordinates of the center of the circle:
337,300
Then specify the radius of the circle:
44 pixels
Now you have enough data to create a clickable circular area:
1 | <area shape="circle" coords="337, 300, 44" href="coffee.htm"> |
This is the area that becomes clickable and will send the user to the page “coffee.htm”:
Shape=”poly”
The shape="poly" contains several coordinate points, which creates a shape formed with straight lines (a polygon).
This can be used to create any shape.
Like maybe a croissant shape!
How can we make the croissant in the image below become a clickable link?

We have to find the x and y coordinates for all edges of the croissant:
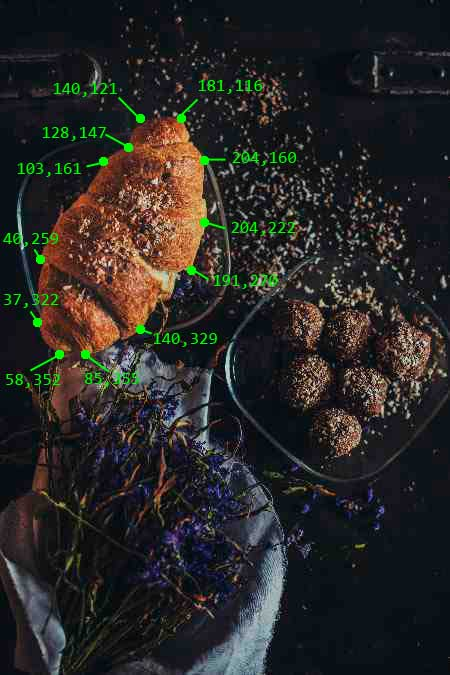
The coordinates come in pairs, one for the x-axis and one for the y-axis:
1 | <area shape="poly" coords="140,121,181,116,204,160,204,222,191,270,140,329,85,355,58,352,37,322,40,259,103,161,128,147" href="croissant.htm"> |
This is the area that becomes clickable and will send the user to the page “croissant.htm”:

Image Map and JavaScript
A clickable area can also trigger a JavaScript function.
Add a click event to the <area> element to execute a JavaScript function:
Here, we use the onclick attribute to execute a JavaScript function when the area is clicked:
1 | <map name="workmap"> |
Chapter Summary
- Use the HTML
<map>element to define an image map - Use the HTML
<area>element to define the clickable areas in the image map - Use the HTML
usemapattribute of the<img>element to point to an image map
HTML Image Tags
| Tag | Description |
|---|---|
| <img> | Defines an image |
| <map> | Defines an image map |
| <area> | Defines a clickable area inside an image map |
| <picture> | Defines a container for multiple image resources |
HTML Background Images
A background image can be specified for almost any HTML element.
Background Image on a HTML element
To add a background image on an HTML element, use the HTML style attribute and the CSS background-image property:
Add a background image on a HTML element:
1 | <div style="background-image: url('img_girl.jpg');"> |
You can also specify the background image in the <style> element, in the <head> section:
Specify the background image in the <style> element:
1 | <style> |
Background Image on a Page
If you want the entire page to have a background image, you must specify the background image on the <body> element:
Add a background image for the entire page:
1 | <style> |
Background Repeat
If the background image is smaller than the element, the image will repeat itself, horizontally and vertically, until it reaches the end of the element:
1 | <style> |
To avoid the background image from repeating itself, set the background-repeat property to no-repeat.
1 | <style> |
Background Cover
If you want the background image to cover the entire element, you can set the background-size property to cover.
Also, to make sure the entire element is always covered, set the background-attachment property to fixed:
This way, the background image will cover the entire element, with no stretching (the image will keep its original proportions):
1 | <style> |
Background Stretch
If you want the background image to stretch to fit the entire element, you can set the background-size property to 100% 100%:
Try resizing the browser window, and you will see that the image will stretch, but always cover the entire element.
1 | <style> |
Learn More CSS
From the examples above you have learned that background images can be styled by using the CSS background properties.
To learn more about CSS background properties, study our CSS Background Tutorial.
HTML <picture> Element
The HTML <picture> element allows you to display different pictures for different devices or screen sizes.

The HTML <picture> Element
The HTML <picture> element gives web developers more flexibility in specifying image resources.
The <picture> element contains one or more <source> elements, each referring to different images through the srcset attribute. This way the browser can choose the image that best fits the current view and/or device.
Each <source> element has a media attribute that defines when the image is the most suitable.
Show different images for different screen sizes:
1 | <picture> |
1 |
|
Note: Always specify an <img> element as the last child element of the <picture> element. The <img> element is used by browsers that do not support the <picture> element, or if none of the <source> tags match.
When to use the Picture Element
There are two main purposes for the <picture> element:
1. Bandwidth
If you have a small screen or device, it is not necessary to load a large image file. The browser will use the first <source> element with matching attribute values, and ignore any of the following elements.
2. Format Support
Some browsers or devices may not support all image formats. By using the <picture> element, you can add images of all formats, and the browser will use the first format it recognizes, and ignore any of the following elements.
The browser will use the first image format it recognizes:
1 | <picture> |
Note: The browser will use the first <source> element with matching attribute values, and ignore any following <source> elements.
HTML Image Tags
| Tag | Description |
|---|---|
| <img> | Defines an image |
| <map> | Defines an image map |
| <area> | Defines a clickable area inside an image map |
| <picture> | Defines a container for multiple image resources |
HTML Favicon
A favicon is a small image displayed next to the page title in the browser tab.
How To Add a Favicon in HTML
You can use any image you like as your favicon. You can also create your own favicon on sites like https://favicon.cc.
Tip: A favicon is a small image, so it should be a simple image with high contrast.
A favicon image is displayed to the left of the page title in the browser tab, like this:

To add a favicon to your website, either save your favicon image to the root directory of your webserver, or create a folder in the root directory called images, and save your favicon image in this folder. A common name for a favicon image is “favicon.ico”.
Next, add a <link> element to your “index.html” file, after the <title> element, like this:
1 |
|
Now, save the “index.html” file and reload it in your browser. Your browser tab should now display your favicon image to the left of the page title.
Favicon File Format Support
The following table shows the file format support for a favicon image:
| Browser | ICO | PNG | GIF | JPEG | SVG |
|---|---|---|---|---|---|
| Edge | Yes | Yes | Yes | Yes | Yes |
| Chrome | Yes | Yes | Yes | Yes | Yes |
| Firefox | Yes | Yes | Yes | Yes | Yes |
| Opera | Yes | Yes | Yes | Yes | Yes |
| Safari | Yes | Yes | Yes | Yes | Yes |
Chapter Summary
- Use the HTML
<link>element to insert a favicon
HTML Link Tag
| Tag | Description |
|---|---|
| <link> | Defines the relationship between a document and an external resource |
HTML Tables
Tables
HTML tables allow web developers to arrange data into rows and columns.
Example
1 |
|
| Company | Contact | Country |
|---|---|---|
| Alfreds Futterkiste | Maria Anders | Germany |
| Centro comercial Moctezuma | Francisco Chang | Mexico |
| Ernst Handel | Roland Mendel | Austria |
| Island Trading | Helen Bennett | UK |
| Laughing Bacchus Winecellars | Yoshi Tannamuri | Canada |
| Magazzini Alimentari Riuniti | Giovanni Rovelli | Italy |
Define an HTML Table
A table in HTML consists of table cells inside rows and columns
A simple HTML table:
1 | <table> |
| Company | Contact | Country |
|---|---|---|
| Alfreds Futterkiste | Maria Anders | Germany |
| Centro comercial Moctezuma | Francisco Chang | Mexico |
Table Cells
Each table cell is defined by a <td> and a </td> tag.
td stands for table data.
Everything between <td> and </td> are the content of the table cell.
1 | <table> |
| Emil | Tobias | Linus |
Note: table data elements are the data containers of the table.
They can contain all sorts of HTML elements; text, images, lists, other tables, etc.
Table Rows
Each table row starts with a <tr> and end with a </tr> tag.
tr stands for table row.
1 | <table> |
| Emil | Tobias | Linus |
| 16 | 14 | 10 |
You can have as many rows as you like in a table, just make sure that the number of cells are the same in each row.
Note: There are times where a row can have less or more cells than another. You will learn about that in a later chapter.
Table Headers
Sometimes you want your cells to be headers, in those cases use the <th> tag instead of the <td> tag:
Let the first row be table headers:
1 | <table> |
| Person 1 | Person 2 | Person 3 |
|---|---|---|
| Emil | Tobias | Linus |
| 16 | 14 | 10 |
By default, the text in <th> elements are bold and centered, but you can change that with CSS.
HTML Table Borders
HTML tables can have borders of different styles and shapes.
How To Add a Border
When you add a border to a table, you also add borders around each table cell:
To add a border, use the CSS border property on table, th, and td elements:
1 | table, th, td { border: 1px solid black;} |
1 |
|
Collapsed Table Borders
To avoid having double borders like in the example above, set the CSS border-collapse property to collapse.
This will make the borders collapse into a single border:
1 | table, th, td { border: 1px solid black; |
Style Table Borders
If you set a background color of each cell, and give the border a white color (the same as the document background), you get the impression of an invisible border:
1 | table, th, td { border: 1px solid white; |
Round Table Borders
With the border-radius property, the borders get rounded corners:
1 | table, th, td { border: 1px solid black; |
Skip the border around the table by leaving out table from the css selector:
1 | th, td { border: 1px solid black; |
Dotted Table Borders
With the border-style property, you can set the appereance of the border.
The following values are allowed:
-
dotted -
dashed -
solid -
double -
groove -
ridge -
inset -
outset -
none -
hidden
1 | th, td { border-style: dotted;} |
Border Color
With the border-color property, you can set the color of the border.
1 | th, td { border-color: #96D4D4;} |
HTML Table Sizes
HTML tables can have different sizes for each column, row or the entire table.
1 | <div style="overflow:auto;"> |
Use the style attribute with the width or height properties to specify the size of a table, row or column.
HTML Table Width
To set the width of a table, add the style attribute to the <table> element:
1 | <table style="width:100%"> |
| Firstname | Lastname | Age |
|---|---|---|
| Jill | Smith | 50 |
| Eve | Jackson | 94 |
Note: Using a percentage as the size unit for a width means how wide will this element be compared to its parent element, which in this case is the <body> element.
HTML Table Column Width
To set the size of a specific column, add the style attribute on a <th> or <td> element:
1 | <table style="width:30%;"> |
1 | <table style="width:100%"> |
| Firstname | Lastname | Age |
|---|---|---|
| Jill | Smith | 50 |
| Eve | Jackson | 94 |
HTML Table Row Height
1 | <table style="width:30%;"> |
To set the height of a specific row, add the style attribute on a table row element:
Set the height of the second row to 200 pixels:
1 | <table style="width:100%"> |
| Firstname | Lastname | Age |
|---|---|---|
| Jill | Smith | 50 |
| Eve | Jackson | 94 |
HTML Table Headers
HTML tables can have headers for each column or row, or for many columns/rows.
1 | <div id="tableborders" style="overflow:auto;"> |
| EMIL | TOBIAS | LINUS |
|---|---|---|
| 8:00 | ||
|---|---|---|
| 9:00 | ||
| 10:00 | ||
| 11:00 | ||
| 12:00 | ||
| 13:00 |
| MON | TUE | WED | THU | FRI | |
|---|---|---|---|---|---|
| 8:00 | |||||
| 9:00 | |||||
| 10:00 | |||||
| 11:00 | |||||
| 12:00 |
| DECEMBER | ||
|---|---|---|
HTML Table Headers
Table headers are defined with th elements, each th element represents a table cell.
1 | <table> |
| Firstname | Lastname | Age |
|---|---|---|
| Jill | Smith | 50 |
| Eve | Jackson | 94 |
Vertical Table Headers
To use the first column as table headers, define the first cell in each row as a th element:
1 | <table> |
| Firstname | Jill | Eve |
|---|---|---|
| Lastname | Smith | Jackson |
| Age | 94 | 50 |
Align Table Headers
By default, table headers are bold and centered:
1 | <table class="table3" style="width:50%;"> |
| Firstname | Lastname | Age |
|---|---|---|
| Jill | Smith | 50 |
| Eve | Jackson | 94 |
To left-align the table headers, use the CSS text-align property:
1 | th { text-align: left;} |
Header for Multiple Columns
You can have a header that spans over two or more columns.
To do this, use the colspan attribute on the <th> element:
1 | <table> |
| Name | Age | |
|---|---|---|
| Jill | Smith | 50 |
| Eve | Jackson | 94 |
You will learn more about colspan and rowspan in the Table colspan & rowspan chapter.
Table Caption
You can add a caption that serves as a heading for the entire table.
1 | <table style="width:100%"> |
| Month | Savings |
|---|---|
| January | $100 |
| February | $50 |
Note: The <caption> tag should be inserted immediately after the <table> tag.
HTML Table Padding & Spacing
HTML tables can adjust the padding inside the cells, and also the space between the cells.
| hello | hello | hello |
| hello | hello | hello |
| hello | hello | hello |
| hello | hello | hello |
| hello | hello | hello |
| hello | hello | hello |
HTML Table - Cell Padding
Cell padding is the space between the cell edges and the cell content.
By default the padding is set to 0.
To add padding on table cells, use the CSS padding property:
1 | th, td { padding: 15px;} |
To add padding only above the content, use the padding-top property.
And the others sides with the padding-bottom, padding-left, and padding-right properties:
1 | th, td { padding-top: 10px; |
HTML Table - Cell Spacing
Cell spacing is the space between each cell.
By default the space is set to 2 pixels.
To change the space between table cells, use the CSS border-space property on the table element:
1 | table { border-spacing: 30px;} |
HTML Table Colspan & Rowspan
HTML tables can have cells that spans over multiple rows and/or columns.
| NAME | ||
|---|---|---|
| APRIL | ||
|---|---|---|
| 2022 | ||
|---|---|---|
| FIESTA | ||
HTML Table - Colspan
To make a cell span over multiple columns, use the colspan attribute:
1 | <table> |
| Name | Age | |
|---|---|---|
| Jill | Smith | 43 |
| Eve | Jackson | 57 |
Note: The value of the colspan attribute represents the number of columns to span.
HTML Table - Rowspan
To make a cell span over multiple rows, use the rowspan attribute:
1 | <table> |
| Name | Jill |
|---|---|
| Phone | 555-1234 |
| 555-8745 |
Note: The value of the rowspan attribute represents the number of rows to span.
HTML Table Styling
Use CSS to make your tables look better.
HTML Table - Zebra Stripes
If you add a background color on every other table row, you will get a nice zebra stripes effect.
1 | <table class="table2" style="width:60%;"> |
| 1 | 2 | 3 | 4 |
| 5 | 6 | 7 | 8 |
| 9 | 10 | 11 | 12 |
| 13 | 14 | 15 | 16 |
| 17 | 18 | 19 | 20 |
To style every other table row element, use the :nth-child(even) selector like this:
1 | tr:nth-child(even) { background-color: #D6EEEE;} |
Note: If you use (odd) instead of (even), the styling will occur on row 1,3,5 etc. instead of 2,4,6 etc.
HTML Table - Vertical Zebra Stripes
To make vertical zebra stripes, style every other column, instead of every other row.
Set the :nth-child(even) for table data elements like this:
1 | td:nth-child(even), th:nth-child(even) { background-color: #D6EEEE;} |
Note: Put the :nth-child() selector on both th and td elements if you want to have the styling on both headers and regular table cells.
Combine Vertical and Horizontal Zebra Stripes
You can combine the styling from the two examples above and you will have stripes on every other row and every other column.
If you use a transparent color you will get an overlapping effect.
Use an rgba() color to specify the transparency of the color:
1 | tr:nth-child(even) { background-color: rgba(150, 212, 212, 0.4);} |
Horizontal Dividers
| First Name | Last Name | Savings |
|---|---|---|
| Peter | Griffin | $100 |
| Lois | Griffin | $150 |
| Joe | Swanson | $300 |
If you specify borders only at the bottom of each table row, you will have a table with horizontal dividers.
Add the border-bottom property to all tr elements to get horizontal dividers:
1 | tr { border-bottom: 1px solid #ddd;} |
Hoverable Table
Use the :hover selector on tr to highlight table rows on mouse over:
| First Name | Last Name | Savings |
|---|---|---|
| Peter | Griffin | $100 |
| Lois | Griffin | $150 |
| Joe | Swanson | $300 |
1 | tr:hover {background-color: #D6EEEE;} |
HTML Table Colgroup
The <colgroup> element is used to style specific columns of a table.
HTML Table Colgroup
If you want to style the two first columns of a table, use the <colgroup> and <col> elements.
1 | <table class="table2" style="width:60%;"> |
| MON | TUE | WED | THU | FRI | SAT | SUN |
|---|---|---|---|---|---|---|
| 1 | 2 | 3 | 4 | 5 | 6 | 7 |
| 8 | 9 | 10 | 11 | 12 | 13 | 14 |
| 15 | 16 | 17 | 18 | 19 | 20 | 21 |
| 22 | 23 | 24 | 25 | 26 | 27 | 28 |
The <colgroup> element should be used as a container for the column specifications.
Each group are specified with a <col> element.
The span attribute specifies how many columns that gets the style.
The style attribute specifies the style to give the columns.
Note: There is a very limited selection of legal CSS properties for colgroups.
Note: The <colgroup> tag must be a child of a <table> element and should be placed before any other table elements, like <thead>, <tr>, <td> etc., but after the <caption> element, if present.
Legal CSS Properties
There are only a very limited selection of CSS properties that are allowed to be used in the colgroup:
[width](https://www.w3schools.com/cssref/css3_pr_dim_width.asp) property[visibility](https://www.w3schools.com/cssref/css3_pr_dim_width.asp) property[background](https://www.w3schools.com/cssref/css3_pr_background.asp) properties[border](https://www.w3schools.com/cssref/css3_pr_border.asp) properties
All other CSS properties will have no effect on your tables.
Multiple Col Elements
If you want to style more columns with different styles, use more <col> elements inside the <colgroup>:
1 |
|
Add multiple col elements in the colgroup:
| MON | TUE | WED | THU | FRI | SAT | SUN |
|---|---|---|---|---|---|---|
| 1 | 2 | 3 | 4 | 5 | 6 | 7 |
| 8 | 9 | 10 | 11 | 12 | 13 | 14 |
| 15 | 16 | 17 | 18 | 19 | 20 | 21 |
| 22 | 23 | 24 | 25 | 26 | 27 | 28 |
Empty Colgroups
If you want to style columns in the middle of a table, insert a “empty” <col> element (with no styles) for the columns before:
1 |
|
Add "empty" col elements that represents the columns before the columns you want to style:
| MON | TUE | WED | THU | FRI | SAT | SUN |
|---|---|---|---|---|---|---|
| 1 | 2 | 3 | 4 | 5 | 6 | 7 |
| 8 | 9 | 10 | 11 | 12 | 13 | 14 |
| 15 | 16 | 17 | 18 | 19 | 20 | 21 |
| 22 | 23 | 24 | 25 | 26 | 27 | 28 |
Hide Columns
You can hide columns with the visibility: collapse property:
1 |
|
You can hide specific columns with the visibility property:
| MON | TUE | WED | THU | FRI | SAT | SUN |
|---|---|---|---|---|---|---|
| 1 | 2 | 3 | 4 | 5 | 6 | 7 |
| 8 | 9 | 10 | 11 | 12 | 13 | 14 |
| 15 | 16 | 17 | 18 | 19 | 20 | 21 |
| 22 | 23 | 24 | 25 | 26 | 27 | 28 |
Note: The table columns does not collapse properly in Safari browsers.
HTML Lists
Lists
HTML lists allow web developers to group a set of related items in lists.
Unordered HTML List
An unordered list starts with the <ul> tag. Each list item starts with the <li> tag.
The list items will be marked with bullets (small black circles) by default:
1 | <ul> |
- Coffee
- Tea
- Milk
Ordered HTML List
An ordered list starts with the <ol> tag. Each list item starts with the <li> tag.
The list items will be marked with numbers by default:
1 | <ol> |
- Coffee
- Tea
- Milk
HTML Description Lists
HTML also supports description lists.
A description list is a list of terms, with a description of each term.
The <dl> tag defines the description list, the <dt> tag defines the term (name), and the <dd> tag describes each term:
1 | <dl> |
- Coffee
- - black hot drink
- Milk
- - white cold drink
HTML List Tags
| Tag | Description |
|---|---|
| <ul> | Defines an unordered list |
| <ol> | Defines an ordered list |
| <li> | Defines a list item |
| <dl> | Defines a description list |
| <dt> | Defines a term in a description list |
| <dd> | Describes the term in a description list |
HTML Unordered Lists
The HTML <ul> tag defines an unordered (bulleted) list.
An unordered list starts with the <ul> tag. Each list item starts with the <li> tag.
The list items will be marked with bullets (small black circles) by default:
1 | <ul> |
- Coffee
- Tea
- Milk
Unordered HTML List - Choose List Item Marker
The CSS list-style-type property is used to define the style of the list item marker. It can have one of the following values:
| Value | Description |
|---|---|
| disc | Sets the list item marker to a bullet (default) |
| circle | Sets the list item marker to a circle |
| square | Sets the list item marker to a square |
| none | The list items will not be marked |
Example - Disc
1 | <ul style="list-style-type:disc;"> |
- Coffee
- Tea
- Milk
Example - Circle
1 | <ul style="list-style-type:circle;"> |
- Coffee
- Tea
- Milk
Example - Square
1 | <ul style="list-style-type:square;"> |
- Coffee
- Tea
- Milk
Example - None
1 | <ul style="list-style-type:none;"> |
- Coffee
- Tea
- Milk
Nested HTML Lists
Lists can be nested (list inside list):
1 | <ul> |
- Coffee
- Tea
- Black tea
- Green tea
- Milk
Note: A list item (<li>) can contain a new list, and other HTML elements, like images and links, etc.
Horizontal List with CSS
HTML lists can be styled in many different ways with CSS.
One popular way is to style a list horizontally, to create a navigation menu:
1 |
|
Chapter Summary
- Use the HTML
<ul>element to define an unordered list - Use the CSS
list-style-typeproperty to define the list item marker - Use the HTML
<li>element to define a list item - Lists can be nested
- List items can contain other HTML elements
- Use the CSS property
float:leftto display a list horizontally
HTML List Tags
| Tag | Description |
|---|---|
| <ul> | Defines an unordered list |
| <ol> | Defines an ordered list |
| <li> | Defines a list item |
| <dl> | Defines a description list |
| <dt> | Defines a term in a description list |
| <dd> | Describes the term in a description list |
HTML Ordered Lists
The HTML <ol> tag defines an ordered list. An ordered list can be numerical or alphabetical.
An ordered list starts with the <ol> tag. Each list item starts with the <li> tag.
The list items will be marked with numbers by default:
1 | <ol> |
- Coffee
- Tea
- Milk
Ordered HTML List - The Type Attribute
The type attribute of the <ol> tag, defines the type of the list item marker:
| Type | Description |
|---|---|
| type="1" | The list items will be numbered with numbers (default) |
| type="A" | The list items will be numbered with uppercase letters |
| type="a" | The list items will be numbered with lowercase letters |
| type="I" | The list items will be numbered with uppercase roman numbers |
| type="i" | The list items will be numbered with lowercase roman numbers |
Numbers
1 | <ol type="1"> |
- Coffee
- Tea
- Milk
Uppercase Letters
1 | <ol type="A"> |
- Coffee
- Tea
- Milk
Lowercase Letters
1 | <ol type="a"> |
- Coffee
- Tea
- Milk
Uppercase Roman Numbers:
1 | <ol type="I"> |
- Coffee
- Tea
- Milk
Lowercase Roman Numbers:
1 | <ol type="i"> |
- Coffee
- Tea
- Milk
Control List Counting
By default, an ordered list will start counting from 1. If you want to start counting from a specified number, you can use the start attribute:
1 | <ol start="50"> |
- Coffee
- Tea
- Milk
Nested HTML Lists
Lists can be nested (list inside list):
1 | <ol> |
- Coffee
- Tea
- Black tea
- Green tea
- Milk
Note: A list item (<li>) can contain a new list, and other HTML elements, like images and links, etc.
Chapter Summary
- Use the HTML
<ol>element to define an ordered list - Use the HTML
typeattribute to define the numbering type - Use the HTML
<li>element to define a list item - Lists can be nested
- List items can contain other HTML elements
HTML List Tags
| Tag | Description |
|---|---|
| <ul> | Defines an unordered list |
| <ol> | Defines an ordered list |
| <li> | Defines a list item |
| <dl> | Defines a description list |
| <dt> | Defines a term in a description list |
| <dd> | Describes the term in a description list |
HTML Other Lists
HTML also supports description lists.
HTML Description Lists
A description list is a list of terms, with a description of each term.
The <dl> tag defines the description list, the <dt> tag defines the term (name), and the <dd> tag describes each term:
1 | <dl> |
- Coffee
- - black hot drink
- Milk
- - white cold drink
Chapter Summary
- Use the HTML
<dl>element to define a description list - Use the HTML
<dt>element to define the description term - Use the HTML
<dd>element to describe the term in a description list
HTML List Tags
| Tag | Description |
|---|---|
| <ul> | Defines an unordered list |
| <ol> | Defines an ordered list |
| <li> | Defines a list item |
| <dl> | Defines a description list |
| <dt> | Defines a term in a description list |
| <dd> | Describes the term in a description list |
HTML Block and Inline Elements
Every HTML element has a default display value, depending on what type of element it is.
There are two display values: block and inline.
Block-level Elements
A block-level element always starts on a new line.
A block-level element always takes up the full width available (stretches out to the left and right as far as it can).
A block level element has a top and a bottom margin, whereas an inline element does not.
1 |
|
The DIV element is a block element, and will always start on a new line and take up the full width available (stretches out to the left and right as far as it can).
Here are the block-level elements in HTML:
Inline Elements
An inline element does not start on a new line.
An inline element only takes up as much width as necessary.
1 |
|
This is an inline span Hello World element inside a paragraph.
The SPAN element is an inline element, and will not start on a new line and only takes up as much width as necessary.
Note: An inline element cannot contain a block-level element!
The <div> Element
The <div> element is often used as a container for other HTML elements.
The <div> element has no required attributes, but style, class and id are common.
When used together with CSS, the <div> element can be used to style blocks of content:
1 |
|
The <span> Element
The <span> element is an inline container used to mark up a part of a text, or a part of a document.
The <span> element has no required attributes, but style, class and id are common.
When used together with CSS, the <span> element can be used to style parts of the text:
1 |
|
Chapter Summary
- There are two display values: block and inline
- A block-level element always starts on a new line and takes up the full width available
- An inline element does not start on a new line and it only takes up as much width as necessary
- The
<div>element is a block-level and is often used as a container for other HTML elements - The
<span>element is an inline container used to mark up a part of a text, or a part of a document
HTML Tags
| Tag | Description |
|---|---|
| <div> | Defines a section in a document (block-level) |
| <span> | Defines a section in a document (inline) |
HTML class Attribute
The HTML class attribute is used to specify a class for an HTML element.
Multiple HTML elements can share the same class.
Using The class Attribute
The class attribute is often used to point to a class name in a style sheet. It can also be used by a JavaScript to access and manipulate elements with the specific class name.
In the following example we have three <div> elements with a class attribute with the value of “city”. All of the three <div> elements will be styled equally according to the .city style definition in the head section:
1 |
|
In the following example we have two <span> elements with a class attribute with the value of “note”. Both <span> elements will be styled equally according to the .note style definition in the head section:
Tip: The class attribute can be used on any HTML element.
Note: The class name is case sensitive!
Tip: You can learn much more about CSS in our CSS Tutorial.
The Syntax For Class
To create a class; write a period (.) character, followed by a class name. Then, define the CSS properties within curly braces {}:
1 |
|
Multiple Classes
HTML elements can belong to more than one class.
To define multiple classes, separate the class names with a space, e.g. <div class="city main">. The element will be styled according to all the classes specified.
In the following example, the first <h2> element belongs to both the city class and also to the main class, and will get the CSS styles from both of the classes:
1 |
|
Different Elements Can Share Same Class
Different HTML elements can point to the same class name.
In the following example, both <h2> and <p> points to the “city” class and will share the same style:
1 |
|
Use of The class Attribute in JavaScript
The class name can also be used by JavaScript to perform certain tasks for specific elements.
JavaScript can access elements with a specific class name with the getElementsByClassName() method:
Click on a button to hide all elements with the class name “city”:
1 |
|
Chapter Summary
- The HTML
classattribute specifies one or more class names for an element - Classes are used by CSS and JavaScript to select and access specific elements
- The
classattribute can be used on any HTML element - The class name is case sensitive
- Different HTML elements can point to the same class name
- JavaScript can access elements with a specific class name with the
getElementsByClassName()method
HTML id Attribute
The HTML id attribute is used to specify a unique id for an HTML element.
You cannot have more than one element with the same id in an HTML document.
Using The id Attribute
The id attribute specifies a unique id for an HTML element. The value of the id attribute must be unique within the HTML document.
The id attribute is used to point to a specific style declaration in a style sheet. It is also used by JavaScript to access and manipulate the element with the specific id.
The syntax for id is: write a hash character (#), followed by an id name. Then, define the CSS properties within curly braces {}.
In the following example we have an <h1> element that points to the id name “myHeader”. This <h1> element will be styled according to the #myHeader style definition in the head section:
1 |
|
Note: The id name is case sensitive!
Note: The id name must contain at least one character, cannot start with a number, and must not contain whitespaces (spaces, tabs, etc.).
Difference Between Class and ID
A class name can be used by multiple HTML elements, while an id name must only be used by one HTML element within the page:
1 |
|
HTML Bookmarks with ID and Links
HTML bookmarks are used to allow readers to jump to specific parts of a webpage.
Bookmarks can be useful if your page is very long.
To use a bookmark, you must first create it, and then add a link to it.
Then, when the link is clicked, the page will scroll to the location with the bookmark.
Example
First, use the id attribute to create a bookmark:
1 | <h2 id="C4">Chapter 4</h2> |
Then, add a link to the bookmark (“Jump to Chapter 4”), from within the same page:
1 | <a href="#C4">Jump to Chapter 4</a> |
You can also add a link to a bookmark on another page:
1 | <a href="html_demo.html#C4">Jump to Chapter 4</a> |
Using The id Attribute in JavaScript
The id attribute can also be used by JavaScript to perform some tasks for that specific element.
JavaScript can access an element with a specific id with the getElementById() method:
Use the id attribute to manipulate text with JavaScript:
1 | <script> |
Chapter Summary
- The
idattribute is used to specify a unique id for an HTML element - The value of the
idattribute must be unique within the HTML document - The
idattribute is used by CSS and JavaScript to style/select a specific element - The value of the
idattribute is case sensitive - The
idattribute is also used to create HTML bookmarks - JavaScript can access an element with a specific id with the
getElementById()method
HTML Iframes
An HTML iframe is used to display a web page within a web page.
1 | <iframe src="https://google.com" title="search engine" width="400", height="300"></iframe> |
HTML Iframe Syntax
The HTML <iframe> tag specifies an inline frame.
An inline frame is used to embed another document within the current HTML document.
1 | <iframe src="_url_" title="_description_"></iframe> |
Iframe - Set Height and Width
Use the height and width attributes to specify the size of the iframe.
The height and width are specified in pixels by default:
1 | <iframe src="demo_iframe.htm" height="200" width="300" title="Iframe Example"></iframe> |
Or you can add the style attribute and use the CSS height and width properties:
1 | <iframe src="demo_iframe.htm" style="height:200px;width:300px;" title="Iframe Example"></iframe> |
Iframe - Remove the Border
By default, an iframe has a border around it.
To remove the border, add the style attribute and use the CSS border property:
1 | <iframe src="demo_iframe.htm" style="border:none;" title="Iframe Example"></iframe> |
With CSS, you can also change the size, style and color of the iframe’s border:
1 | <iframe src="demo_iframe.htm" style="border:2px solid red;" title="Iframe Example"></iframe> |
Iframe - Target for a Link
An iframe can be used as the target frame for a link.
The target attribute of the link must refer to the name attribute of the iframe:
1 | <iframe src="demo_iframe.htm" name="iframe_a" title="Iframe Example"></iframe> |
When the target attribute of a link matches the name of an iframe, the link will open in the iframe.
Chapter Summary
- The HTML
<iframe>tag specifies an inline frame - The
srcattribute defines the URL of the page to embed - Always include a
titleattribute (for screen readers) - The
heightandwidthattributes specifies the size of the iframe - Use
border:none;to remove the border around the iframe
HTML JavaScript
JavaScript makes HTML pages more dynamic and interactive.
1 | <!DOCTYPE html> |
The HTML <script> Tag
The HTML <script> tag is used to define a client-side script (JavaScript).
The <script> element either contains script statements, or it points to an external script file through the src attribute.
Common uses for JavaScript are image manipulation, form validation, and dynamic changes of content.
To select an HTML element, JavaScript most often uses the document.getElementById() method.
This JavaScript example writes “Hello JavaScript!” into an HTML element with id=”demo”:
1 | <script> |
A Taste of JavaScript
Here are some examples of what JavaScript can do:
JavaScript can change content:
1 | document.getElementById("demo").innerHTML = "Hello JavaScript!"; |
JavaScript can change styles:
1 | document.getElementById("demo").style.fontSize = "25px"; |
JavaScript can change attributes:
1 | document.getElementById("image").src = "picture.gif"; |
The HTML <noscript> Tag
The HTML <noscript> tag defines an alternate content to be displayed to users that have disabled scripts in their browser or have a browser that doesn’t support scripts:
1 | <script> |
HTML File Paths
A file path describes the location of a file in a web site’s folder structure.
File Path Examples
| Path | Description |
|---|---|
| <img src="picture.jpg"> | The "picture.jpg" file is located in the same folder as the current page |
| <img src="images/picture.jpg"> | The "picture.jpg" file is located in the images folder in the current folder |
| <img src="/images/picture.jpg"> | The "picture.jpg" file is located in the images folder at the root of the current web |
| <img src="../picture.jpg"> | The "picture.jpg" file is located in the folder one level up from the current folder |
HTML File Paths
A file path describes the location of a file in a web site’s folder structure.
File paths are used when linking to external files, like:
- Web pages
- Images
- Style sheets
- JavaScripts
Absolute File Paths
An absolute file path is the full URL to a file:
1 | <img src="https://www.w3schools.com/images/picture.jpg" alt="Mountain"> |
Relative File Paths
A relative file path points to a file relative to the current page.
In the following example, the file path points to a file in the images folder located at the root of the current web:
1 | <img src="/images/picture.jpg" alt="Mountain"> |
In the following example, the file path points to a file in the images folder located in the current folder:
1 | <img src="images/picture.jpg" alt="Mountain"> |
In the following example, the file path points to a file in the images folder located in the folder one level up from the current folder:
1 | <img src="../images/picture.jpg" alt="Mountain"> |
Best Practice
It is best practice to use relative file paths (if possible).
When using relative file paths, your web pages will not be bound to your current base URL. All links will work on your own computer (localhost) as well as on your current public domain and your future public domains.
HTML - The Head Element
The HTML <head> element is a container for the following elements: <title>, <style>, <meta>, <link>, <script>, and <base>.
The HTML <head> Element
The <head> element is a container for metadata (data about data) and is placed between the <html> tag and the <body> tag.
HTML metadata is data about the HTML document. Metadata is not displayed.
Metadata typically define the document title, character set, styles, scripts, and other meta information.
The HTML <title> Element
The <title> element defines the title of the document. The title must be text-only, and it is shown in the browser’s title bar or in the page’s tab.
The <title> element is required in HTML documents!
The contents of a page title is very important for search engine optimization (SEO)! The page title is used by search engine algorithms to decide the order when listing pages in search results.
The <title> element:
- defines a title in the browser toolbar
- provides a title for the page when it is added to favorites
- displays a title for the page in search engine-results
So, try to make the title as accurate and meaningful as possible!
A simple HTML document:
1 |
|
The HTML <style> Element
The <style> element is used to define style information for a single HTML page:
1 | <style> body {background-color: powderblue;} |
The HTML Element
The <link> element defines the relationship between the current document and an external resource.
The <link> tag is most often used to link to external style sheets:
1 | <link rel="stylesheet" href="mystyle.css"> |
The HTML Element
The <meta> element is typically used to specify the character set, page description, keywords, author of the document, and viewport settings.
The metadata will not be displayed on the page, but are used by browsers (how to display content or reload page), by search engines (keywords), and other web services.
Examples
Define the character set used:
1 | <meta charset="UTF-8"> |
Define keywords for search engines:
1 | <meta name="keywords" content="HTML, CSS, JavaScript"> |
Define a description of your web page:
1 | <meta name="description" content="Free Web tutorials"> |
Define the author of a page:
1 | <meta name="author" content="John Doe"> |
Refresh document every 30 seconds:
1 | <meta http-equiv="refresh" content="30"> |
Setting the viewport to make your website look good on all devices:
1 | <meta name="viewport" content="width=device-width, initial-scale=1.0"> |
Example of <meta> tags:
1 | <meta charset="UTF-8"> |
Setting The Viewport
The viewport is the user’s visible area of a web page. It varies with the device - it will be smaller on a mobile phone than on a computer screen.
You should include the following <meta> element in all your web pages:
1 | <meta name="viewport" content="width=device-width, initial-scale=1.0"> |
This gives the browser instructions on how to control the page’s dimensions and scaling.
The width=device-width part sets the width of the page to follow the screen-width of the device (which will vary depending on the device).
The initial-scale=1.0 part sets the initial zoom level when the page is first loaded by the browser.
Here is an example of a web page without the viewport meta tag, and the same web page with the viewport meta tag:
1 | <div class="w3-row" style="text-align:center;"> |
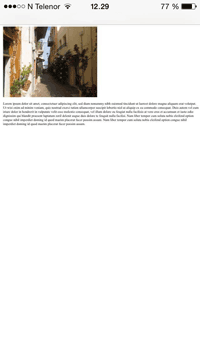
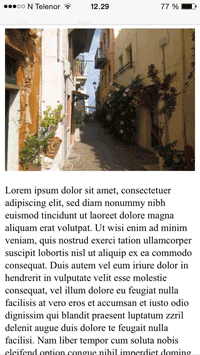
The HTML <script> Element
The <script> element is used to define client-side JavaScripts.
The following JavaScript writes “Hello JavaScript!” into an HTML element with id=”demo”:
1 | <script> |
The HTML <base> Element
The <base> element specifies the base URL and/or target for all relative URLs in a page.
The <base> tag must have either an href or a target attribute present, or both.
There can only be one single <base> element in a document!
1 | <head> |
1 |
|
Chapter Summary
- The
<head>element is a container for metadata (data about data) - The
<head>element is placed between the<html>tag and the<body>tag - The
<title>element is required and it defines the title of the document - The
<style>element is used to define style information for a single document - The
<link>tag is most often used to link to external style sheets - The
<meta>element is typically used to specify the character set, page description, keywords, author of the document, and viewport settings - The
<script>element is used to define client-side JavaScripts - The
<base>element specifies the base URL and/or target for all relative URLs in a page
HTML head Elements
| Tag | Description |
|---|---|
| <head> | Defines information about the document |
| <title> | Defines the title of a document |
| <base> | Defines a default address or a default target for all links on a page |
| <link> | Defines the relationship between a document and an external resource |
| <meta> | Defines metadata about an HTML document |
| <script> | Defines a client-side script |
| <style> | Defines style information for a document |
HTML Layout Elements and Techniques
Websites often display content in multiple columns (like a magazine or a newspaper).
1 |
|
HTML Layout Elements
HTML has several semantic elements that define the different parts of a web page:
HTML Layout Techniques
There are four different techniques to create multicolumn layouts. Each technique has its pros and cons:
- CSS framework
- CSS float property
- CSS flexbox
- CSS grid
CSS Frameworks
If you want to create your layout fast, you can use a CSS framework, like W3.CSS or Bootstrap.
CSS Float Layout
It is common to do entire web layouts using the CSS float property. Float is easy to learn - you just need to remember how the float and clear properties work. Disadvantages: Floating elements are tied to the document flow, which may harm the flexibility. Learn more about float in our CSS Float and Clear chapter.
CSS Flexbox Layout
Use of flexbox ensures that elements behave predictably when the page layout must accommodate different screen sizes and different display devices.
Learn more about flexbox in our CSS Flexbox chapter.
CSS Grid Layout
The CSS Grid Layout Module offers a grid-based layout system, with rows and columns, making it easier to design web pages without having to use floats and positioning.
Learn more about CSS grids in our CSS Grid Intro chapter.
HTML Responsive Web Design
Responsive web design is about creating web pages that look good on all devices!
A responsive web design will automatically adjust for different screen sizes and viewports.
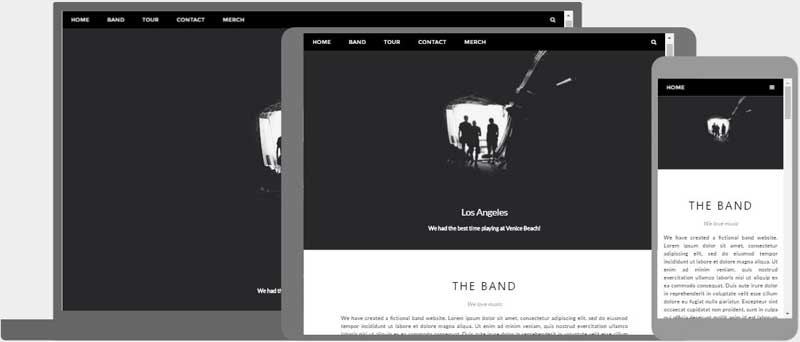
What is Responsive Web Design?
Responsive Web Design is about using HTML and CSS to automatically resize, hide, shrink, or enlarge, a website, to make it look good on all devices (desktops, tablets, and phones):
1 |
|
Setting The Viewport
To create a responsive website, add the following <meta> tag to all your web pages:
1 | <meta name="viewport" content="width=device-width, initial-scale=1.0"> |
This will set the viewport of your page, which will give the browser instructions on how to control the page’s dimensions and scaling.
Here is an example of a web page without the viewport meta tag, and the same web page with the viewport meta tag:
1 | <div class="w3-row" style="text-align:center;"> |
Tip: If you are browsing this page on a phone or a tablet, you can click on the two links above to see the difference.
Responsive Images
Responsive images are images that scale nicely to fit any browser size.
Using the width Property
If the CSS width property is set to 100%, the image will be responsive and scale up and down:
1 | <img src="img_girl.jpg" **style="width:100%;"**> |
Notice that in the example above, the image can be scaled up to be larger than its original size. A better solution, in many cases, will be to use the max-width property instead.
Using the max-width Property
If the max-width property is set to 100%, the image will scale down if it has to, but never scale up to be larger than its original size:
1 | <img src="img_girl.jpg" style="**max-width:100%;**height:auto;"> |
Show Different Images Depending on Browser Width
The HTML <picture> element allows you to define different images for different browser window sizes.
Resize the browser window to see how the image below change depending on the width:
1 | <picture> |
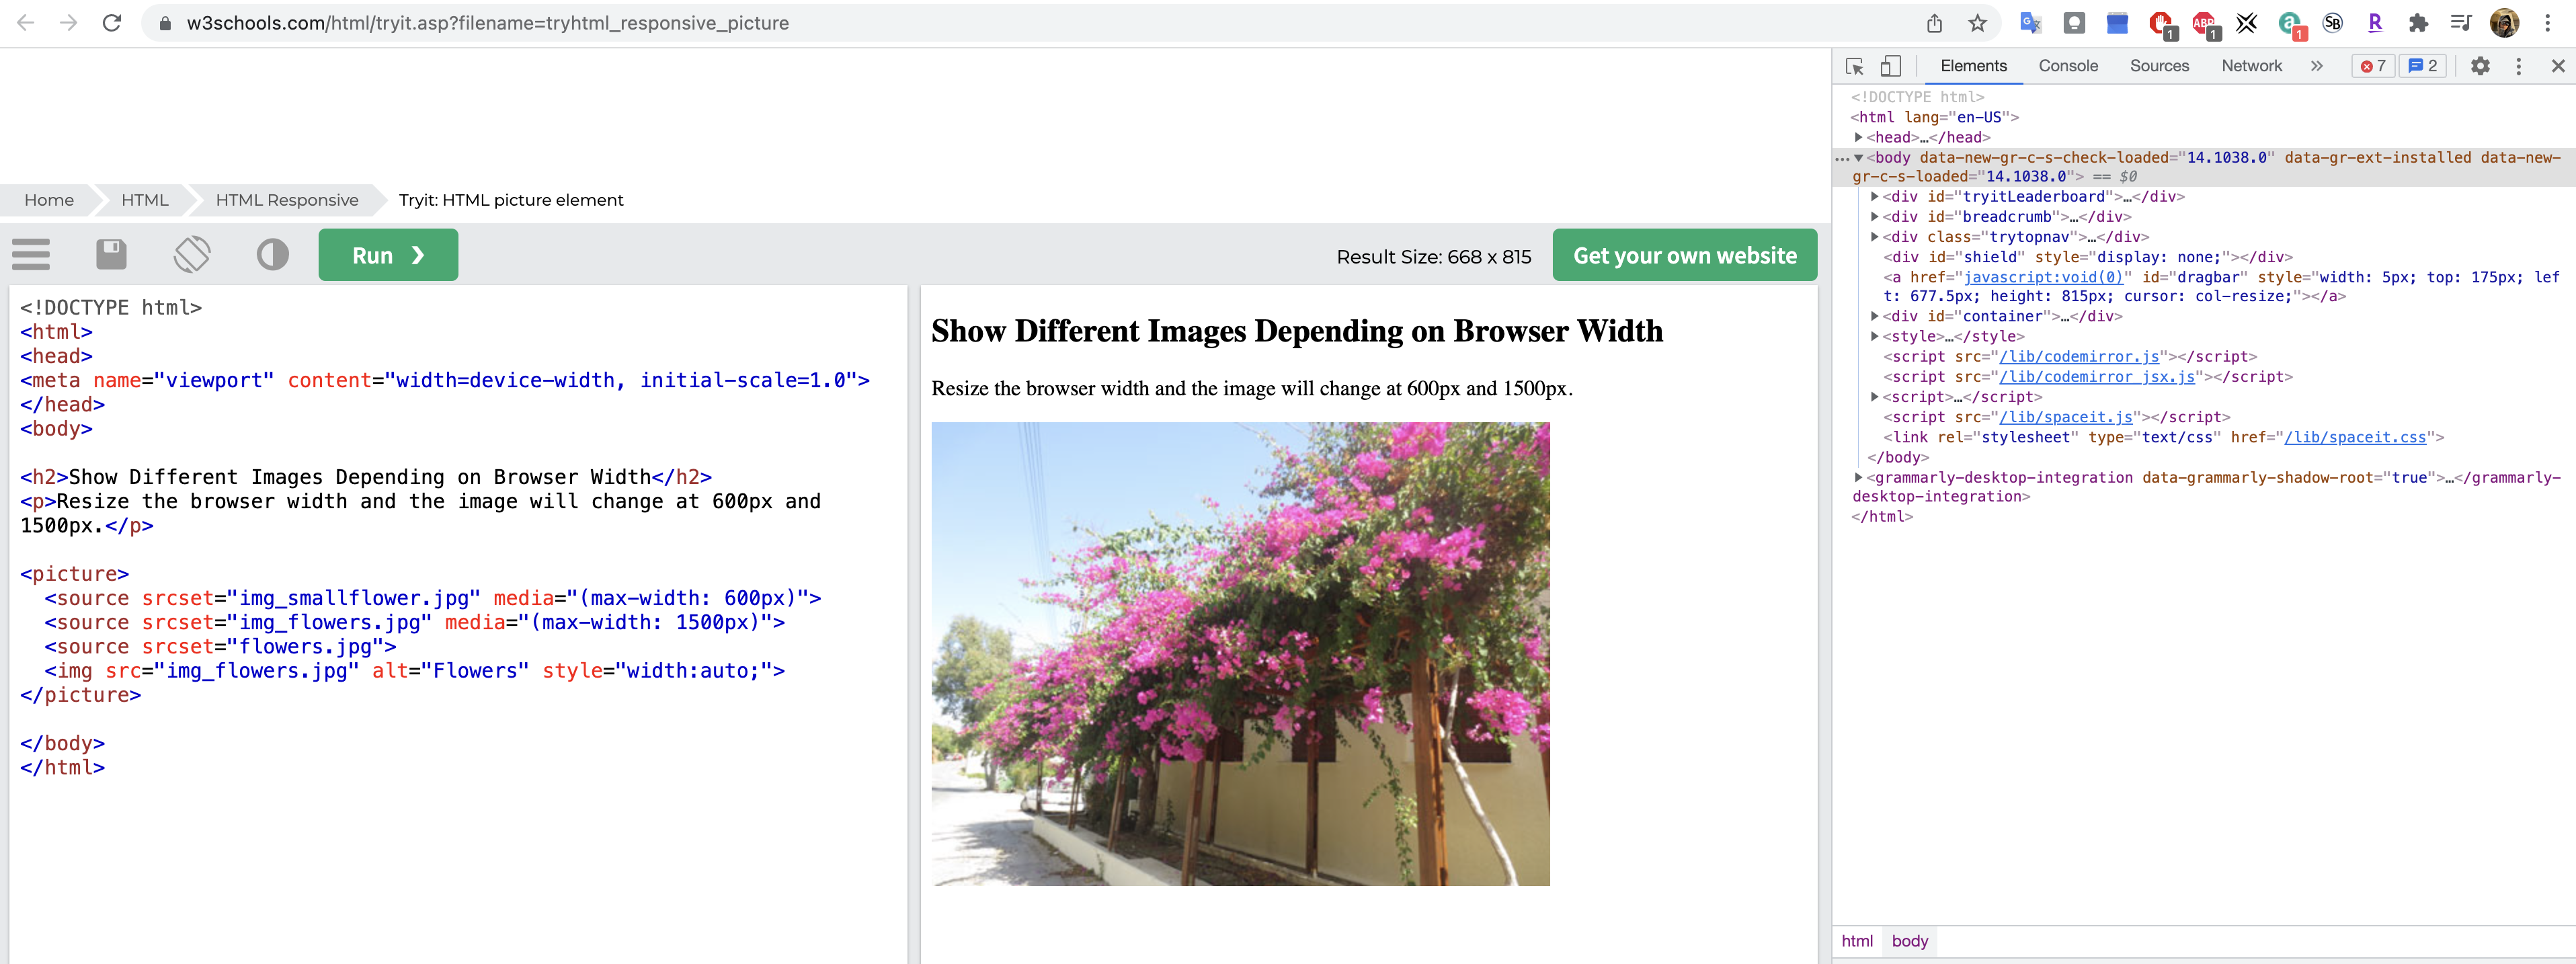
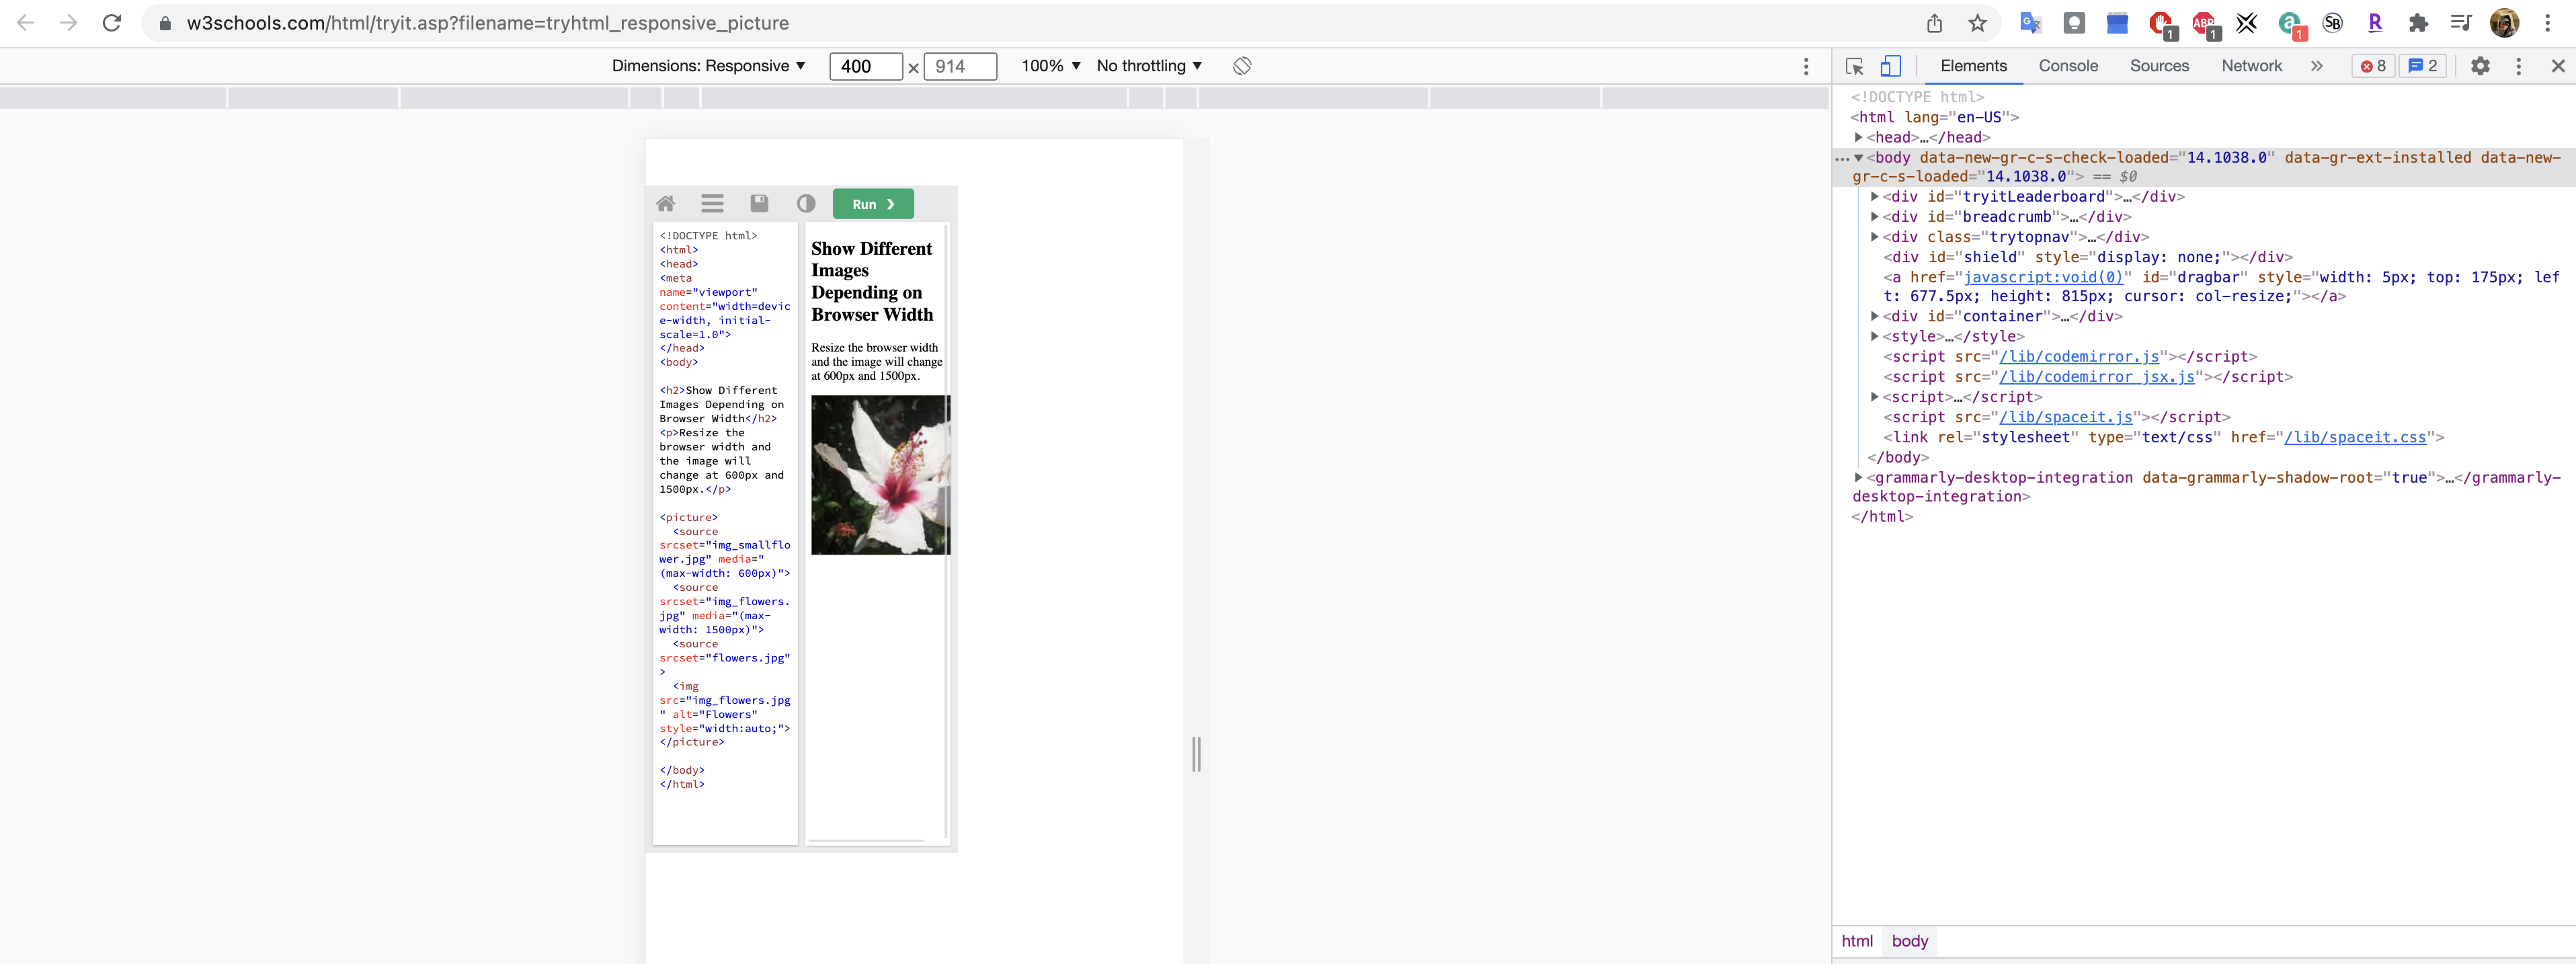
Responsive Text Size
The text size can be set with a “vw” unit, which means the “viewport width”.
That way the text size will follow the size of the browser window:
1 | <h1 style="**font-size:10vw**">Hello World</h1> |
Viewport is the browser window size. 1vw = 1% of viewport width. If the viewport is 50cm wide, 1vw is 0.5cm.
Media Queries
In addition to resize text and images, it is also common to use media queries in responsive web pages.
With media queries you can define completely different styles for different browser sizes.
Example: resize the browser window to see that the three div elements below will display horizontally on large screens and stacked vertically on small screens:
1 | <style> |
1 |
|
Tip: To learn more about Media Queries and Responsive Web Design, read our RWD Tutorial.
Responsive Web Page - Full Example
A responsive web page should look good on large desktop screens and on small mobile phones.
1 |
|
Responsive Web Design - Frameworks
All popular CSS Frameworks offer responsive design.
They are free, and easy to use.
W3.CSS
W3.CSS is a modern CSS framework with support for desktop, tablet, and mobile design by default.
W3.CSS is smaller and faster than similar CSS frameworks.
W3.CSS is designed to be a high quality alternative to Bootstrap.
W3.CSS is designed to be independent of jQuery or any other JavaScript library.
1 |
|
To learn more about W3.CSS, read our W3.CSS Tutorial.
Bootstrap
Another popular CSS framework is Bootstrap. Bootstrap uses HTML, CSS and jQuery to make responsive web pages.
1 |
|
To learn more about Bootstrap, go to our Bootstrap Tutorial.
HTML Computer Code Elements
HTML contains several elements for defining user input and computer code.
HTML <kbd> For Keyboard Input
The HTML <kbd> element is used to define keyboard input. The content inside is displayed in the browser’s default monospace font.
Define some text as keyboard input in a document:
1 | <p>Save the document by pressing <kbd>Ctrl + S</kbd></p> |
Save the document by pressing Ctrl + S
HTML <samp> For Program Output
The HTML <samp> element is used to define sample output from a computer program. The content inside is displayed in the browser’s default monospace font.
Define some text as sample output from a computer program in a document:
1 | <p>Message from my computer:</p> |
Message from my computer:
File not found.
Press F1 to continue
HTML <code> For Computer Code
The HTML <code> element is used to define a piece of computer code. The content inside is displayed in the browser’s default monospace font.
Define some text as computer code in a document:
1 | <code> |
x = 5;
y = 6;
z = x + y;
Notice that the <code> element does not preserve extra whitespace and line-breaks.
To fix this, you can put the <code> element inside a <pre> element:
1 | <pre> |
x = 5;
y = 6;
z = x + y;
HTML <var> For Variables
The HTML <var> element is used to define a variable in programming or in a mathematical expression. The content inside is typically displayed in italic.
Define some text as variables in a document:
1 | <p>The area of a triangle is: 1/2 x <var>b</var> x <var>h</var>, where <var>b</var> is the base, and <var>h</var> is the vertical height.</p> |
The area of a triangle is: 1/2 x b x h, where b is the base, and h is the vertical height.
Chapter Summary
- The
<kbd>element defines keyboard input - The
<samp>element defines sample output from a computer program - The
<code>element defines a piece of computer code - The
<var>element defines a variable in programming or in a mathematical expression - The
<pre>element defines preformatted text
HTML Semantic Elements
Semantic elements = elements with a meaning.
What are Semantic Elements?
A semantic element clearly describes its meaning to both the browser and the developer.
Examples of non-semantic elements: <div> and <span> - Tells nothing about its content.
Examples of semantic elements: <form>, <table>, and <article> - Clearly defines its content.
Semantic Elements in HTML
Many web sites contain HTML code like: <div id="nav"> <div class="header"> <div id="footer"> to indicate navigation, header, and footer.
In HTML there are some semantic elements that can be used to define different parts of a web page:
- <article>
- <aside>
- <details>
- <figcaption>
- <figure>
- <footer>
- <header>
- <main>
- <mark>
- <nav>
- <section>
- <summary>
- <time>
HTML <section> Element
The <section> element defines a section in a document.
According to W3C’s HTML documentation: “A section is a thematic grouping of content, typically with a heading.”
Examples of where a <section> element can be used:
- Chapters
- Introduction
- News items
- Contact information
A web page could normally be split into sections for introduction, content, and contact information
Two sections in a document:
1 | <section> |
HTML <article> Element
The <article> element specifies independent, self-contained content.
An article should make sense on its own, and it should be possible to distribute it independently from the rest of the web site.
Examples of where the <article> element can be used:
- Forum posts
- Blog posts
- User comments
- Product cards
- Newspaper articlesThree articles with independent, self-contained content:
1 | <article> |
Use CSS to style the <article> element:
1 | <html> |
Nesting <article> in <section> or Vice Versa?
The <article> element specifies independent, self-contained content.
The <section> element defines section in a document.
Can we use the definitions to decide how to nest those elements? No, we cannot!
So, you will find HTML pages with <section> elements containing <article> elements, and <article> elements containing <section> elements.
HTML <header> Element
The <header> element represents a container for introductory content or a set of navigational links.
A <header> element typically contains:
- one or more heading elements (
<h1>-<h6>) - logo or icon
- authorship information
Note: You can have several <header> elements in one HTML document. However, <header> cannot be placed within a <footer>, <address> or another <header> element.
A header for an <article>:
1 | <article> |
HTML <footer> Element
The <footer> element defines a footer for a document or section.
A <footer> element typically contains:
- authorship information
- copyright information
- contact information
- sitemap
- back to top links
- related documents
You can have several <footer> elements in one document.
1 | <footer> |
HTML <nav> Element
The <nav> element defines a set of navigation links.
Notice that NOT all links of a document should be inside a <nav> element. The <nav> element is intended only for major block of navigation links.
Browsers, such as screen readers for disabled users, can use this element to determine whether to omit the initial rendering of this content.
A set of navigation links:
1 | <nav> |
HTML <aside> Element
The <aside> element defines some content aside from the content it is placed in (like a sidebar).
The <aside> content should be indirectly related to the surrounding content.
Display some content aside from the content it is placed in:
1 | <p>My family and I visited The Epcot center this summer. The weather was nice, and Epcot was amazing! I had a great summer together with my family!</p> |
Use CSS to style the <aside> element:
1 | <html> |
HTML <figure> and <figcaption> Elements
The <figure> tag specifies self-contained content, like illustrations, diagrams, photos, code listings, etc.
The <figcaption> tag defines a caption for a <figure> element. The <figcaption> element can be placed as the first or as the last child of a <figure> element.
The <img> element defines the actual image/illustration.
1 | <figure> |
1 | <figure> |
Why Semantic Elements?
According to the W3C: “A semantic Web allows data to be shared and reused across applications, enterprises, and communities.”
Semantic Elements in HTML
Below is a list of some of the semantic elements in HTML.
| Tag | Description |
|---|---|
| <article> | Defines independent, self-contained content |
| <aside> | Defines content aside from the page content |
| <details> | Defines additional details that the user can view or hide |
| <figcaption> | Defines a caption for a <figure> element |
| <figure> | Specifies self-contained content, like illustrations, diagrams, photos, code listings, etc. |
| <footer> | Defines a footer for a document or section |
| <header> | Specifies a header for a document or section |
| <main> | Specifies the main content of a document |
| <mark> | Defines marked/highlighted text |
| <nav> | Defines navigation links |
| <section> | Defines a section in a document |
| <summary> | Defines a visible heading for a <details> element |
| <time> | Defines a date/time |
HTML Style Guide and Coding Conventions
A consistent, clean, and tidy HTML code makes it easier for others to read and understand your code.
Here are some guidelines and tips for creating good HTML code.
Always Declare Document Type
Always declare the document type as the first line in your document.
The correct document type for HTML is:
1 |
Use Lowercase Element Names
HTML allows mixing uppercase and lowercase letters in element names.
However, we recommend using lowercase element names, because:
- Mixing uppercase and lowercase names looks bad
- Developers normally use lowercase names
- Lowercase looks cleaner
- Lowercase is easier to write
Good:
1 | <body> |
Bad:
1 | <BODY> |
Close All HTML Elements
In HTML, you do not have to close all elements (for example the <p> element).
However, we strongly recommend closing all HTML elements, like this:
Good:
1 | <section> |
Bad:
1 | <section> |
Use Lowercase Attribute Names
HTML allows mixing uppercase and lowercase letters in attribute names.
However, we recommend using lowercase attribute names, because:
- Mixing uppercase and lowercase names looks bad
- Developers normally use lowercase names
- Lowercase look cleaner
- Lowercase are easier to write
Good:
1 | <a href="https://www.w3schools.com/html/">Visit our HTML tutorial</a> |
Bad:
1 | <a HREF="https://www.w3schools.com/html/">Visit our HTML tutorial</a> |
Always Quote Attribute Values
HTML allows attribute values without quotes.
However, we recommend quoting attribute values, because:
- Developers normally quote attribute values
- Quoted values are easier to read
- You MUST use quotes if the value contains spaces
Good:
1 | <table class="striped"> |
Bad
1 | <table class=striped> |
Very bad:
This will not work, because the value contains spaces:
1 | <table class=table striped> |
Always Specify alt, width, and height for Images
Always specify the alt attribute for images. This attribute is important if the image for some reason cannot be displayed.
Also, always define the width and height of images. This reduces flickering, because the browser can reserve space for the image before loading.
Good:
1 | <img src="html5.gif" alt="HTML5" style="width:128px;height:128px"> |
Bad:
1 | <img src="html5.gif"> |
Spaces and Equal Signs
HTML allows spaces around equal signs. But space-less is easier to read and groups entities better together.
Good:
1 | <link rel="stylesheet" href="styles.css"> |
Bad:
1 | <link rel = "stylesheet" href = "styles.css"> |
Avoid Long Code Lines
When using an HTML editor, it is NOT convenient to scroll right and left to read the HTML code.
Try to avoid too long code lines.
Blank Lines and Indentation
Do not add blank lines, spaces, or indentations without a reason.
**
**For readability, add blank lines to separate large or logical code blocks.
For readability, add two spaces of indentation. Do not use the tab key.
Good:
1 | <body> |
Bad:
1 | <body> |
Good Table Example:
1 | <table> |
Good List Example:
1 | <ul> |
Never Skip the <title> Element
The <title> element is required in HTML.
The contents of a page title is very important for search engine optimization (SEO)! The page title is used by search engine algorithms to decide the order when listing pages in search results.
The <title> element:
- defines a title in the browser toolbar
- provides a title for the page when it is added to favorites
- displays a title for the page in search-engine results
So, try to make the title as accurate and meaningful as possible:
1 | <title>HTML Style Guide and Coding Conventions</title> |
Omitting <html> and <body>?
1 |
|
However, we strongly recommend to always add the <html> and <body> tags!
Omitting <body> can produce errors in older browsers.
Omitting <html> and <body> can also crash DOM and XML software.
Omitting <head>?
The HTML <head> tag can also be omitted.
Browsers will add all elements before <body>, to a default <head> element.
1 |
|
However, we recommend using the <head> tag.
Close Empty HTML Elements?
In HTML, it is optional to close empty elements.
Allowed:
1 | <meta charset="utf-8"> |
Also Allowed:
1 | <meta charset="utf-8" /> |
If you expect XML/XHTML software to access your page, keep the closing slash (/), because it is required in XML and XHTML.
Add the lang Attribute
You should always include the lang attribute inside the <html> tag, to declare the language of the Web page. This is meant to assist search engines and browsers.
1 |
|
Meta Data
To ensure proper interpretation and correct search engine indexing, both the language and the character encoding <meta charset="_charset_"> should be defined as early as possible in an HTML document:
1 |
|
Setting The Viewport
The viewport is the user’s visible area of a web page. It varies with the device - it will be smaller on a mobile phone than on a computer screen.
You should include the following <meta> element in all your web pages:
1 | <meta name="viewport" content="width=device-width, initial-scale=1.0"> |
This gives the browser instructions on how to control the page’s dimensions and scaling.
The width=device-width part sets the width of the page to follow the screen-width of the device (which will vary depending on the device).
The initial-scale=1.0 part sets the initial zoom level when the page is first loaded by the browser.
Here is an example of a web page without the viewport meta tag, and the same web page with the viewport meta tag:
HTML Comments
Short comments should be written on one line, like this:
1 | <!-- This is a comment --> |
Comments that spans more than one line, should be written like this:
1 | <!-- |
Long comments are easier to observe if they are indented with two spaces.
Using Style Sheets
Use simple syntax for linking to style sheets (the type attribute is not necessary):
1 | <link rel="stylesheet" href="styles.css"> |
Short CSS rules can be written compressed, like this:
1 | p.intro {font-family:Verdana;font-size:16em;} |
Long CSS rules should be written over multiple lines:
1 | body { background-color: lightgrey; |
- Place the opening bracket on the same line as the selector
- Use one space before the opening bracket
- Use two spaces of indentation
- Use semicolon after each property-value pair, including the last
- Only use quotes around values if the value contains spaces
- Place the closing bracket on a new line, without leading spaces
Loading JavaScript in HTML
Use simple syntax for loading external scripts (the type attribute is not necessary):
1 | <script src="myscript.js"> |
Accessing HTML Elements with JavaScript
Using “untidy” HTML code can result in JavaScript errors.
These two JavaScript statements will produce different results:
1 | getElementById("Demo").innerHTML = "Hello"; |
Visit the JavaScript Style Guide.
Use Lower Case File Names
Some web servers (Apache, Unix) are case sensitive about file names: “london.jpg” cannot be accessed as “London.jpg”.
Other web servers (Microsoft, IIS) are not case sensitive: “london.jpg” can be accessed as “London.jpg”.
If you use a mix of uppercase and lowercase, you have to be aware of this.
If you move from a case-insensitive to a case-sensitive server, even small errors will break your web!
To avoid these problems, always use lowercase file names!
File Extensions
HTML files should have a .html extension (.htm is allowed).
CSS files should have a .css extension.
JavaScript files should have a .js extension.
Differences Between .htm and .html?
There is no difference between the .htm and .html file extensions!
Both will be treated as HTML by any web browser and web server.
Default Filenames
When a URL does not specify a filename at the end (like “https://www.w3schools.com/"), the server just adds a default filename, such as “index.html”, “index.htm”, “default.html”, or “default.htm”.
If your server is configured only with “index.html” as the default filename, your file must be named “index.html”, and not “default.html”.
However, servers can be configured with more than one default filename; usually you can set up as many default filenames as you want.
HTML Entities
Reserved characters in HTML must be replaced with character entities.
Some characters are reserved in HTML.
If you use the less than (<) or greater than (>) signs in your text, the browser might mix them with tags.
Character entities are used to display reserved characters in HTML.
A character entity looks like this:
1 | &_entity_name_; |
To display a less than sign (<) we must write: < or <
Advantage of using an entity name: An entity name is easy to remember.
Disadvantage of using an entity name: Browsers may not support all entity names, but the support for entity numbers is good.
Non-breaking Space
A commonly used entity in HTML is the non-breaking space:
A non-breaking space is a space that will not break into a new line.
Two words separated by a non-breaking space will stick together (not break into a new line). This is handy when breaking the words might be disruptive.
Examples:
- § 10
- 10 km/h
- 10 PM
Another common use of the non-breaking space is to prevent browsers from truncating spaces in HTML pages.
If you write 10 spaces in your text, the browser will remove 9 of them. To add real spaces to your text, you can use the character entity.
Tip: The non-breaking hyphen (‑) is used to define a hyphen character (‑) that does not break into a new line.
Some Useful HTML Character Entities
| Result | Description | Entity Name | Entity Number | Try it |
|---|---|---|---|---|
| non-breaking space | |   | Try it » | |
| < | less than | < | < | Try it » |
| > | greater than | > | > | Try it » |
| & | ampersand | & | & | Try it » |
| " | double quotation mark | " | " | Try it » |
| ' | single quotation mark (apostrophe) | ' | ' | Try it » |
| ¢ | cent | ¢ | ¢ | Try it » |
| £ | pound | £ | £ | Try it » |
| ¥ | yen | ¥ | ¥ | Try it » |
| € | euro | € | € | Try it » |
| © | copyright | © | © | Try it » |
| ® | registered trademark | ® | ® | Try it » |
Note: Entity names are case sensitive.
Combining Diacritical Marks
A diacritical mark is a “glyph” added to a letter.
Some diacritical marks, like grave ( ̀) and acute ( ́) are called accents.
Diacritical marks can appear both above and below a letter, inside a letter, and between two letters.
Diacritical marks can be used in combination with alphanumeric characters to produce a character that is not present in the character set (encoding) used in the page.
Here are some examples:
| Mark | Character | Construct | Result | Try it |
|---|---|---|---|---|
| ̀ | a | à | à | Try it » |
| ́ | a | á | á | Try it » |
| ̂ | a | â | â | Try it » |
| ̃ | a | ã | ã | Try it » |
| ̀ | O | Ò | Ò | Try it » |
| ́ | O | Ó | Ó | Try it » |
| ̂ | O | Ô | Ô | Try it » |
| ̃ | O | Õ | Õ | Try it » |
HTML Symbols
Symbols that are not present on your keyboard can also be added by using entities.
HTML Symbol Entities
HTML entities were described in the previous chapter.
Many mathematical, technical, and currency symbols, are not present on a normal keyboard.
To add such symbols to an HTML page, you can use the entity name or the entity number (a decimal or a hexadecimal reference) for the symbol.
Display the euro sign, €, with an entity name, a decimal, and a hexadecimal value:
1 | <p>I will display €</p> |
I will display €
I will display €
I will display €
Some Mathematical Symbols Supported by HTML
| Char | Number | Entity | Description | Try it |
|---|---|---|---|---|
| ∀ | ∀ | ∀ | FOR ALL | Try it » |
| ∂ | ∂ | ∂ | PARTIAL DIFFERENTIAL | Try it » |
| ∃ | ∃ | ∃ | THERE EXISTS | Try it » |
| ∅ | ∅ | ∅ | EMPTY SETS | Try it » |
| ∇ | ∇ | ∇ | NABLA | Try it » |
| ∈ | ∈ | ∈ | ELEMENT OF | Try it » |
| ∉ | ∉ | ∉ | NOT AN ELEMENT OF | Try it » |
| ∋ | ∋ | ∋ | CONTAINS AS MEMBER | Try it » |
| ∏ | ∏ | ∏ | N-ARY PRODUCT | Try it » |
| ∑ | ∑ | ∑ | N-ARY SUMMATION | Try it » |
Using Emojis in HTML
Emojis are characters from the UTF-8 character set: 😄 😍 💗
What are Emojis?
Emojis look like images, or icons, but they are not.
They are letters (characters) from the UTF-8 (Unicode) character set.
UTF-8 covers almost all of the characters and symbols in the world.
The HTML charset Attribute
To display an HTML page correctly, a web browser must know the character set used in the page.
This is specified in the <meta> tag:
1 | <meta charset="UTF-8"> |
If not specified, UTF-8 is the default character set in HTML.
UTF-8 Characters
Many UTF-8 characters cannot be typed on a keyboard, but they can always be displayed using numbers (called entity numbers):
- A is 65
- B is 66
- C is 67
Example
1 |
|
I will display A B C
I will display A B C
Example Explained
The <meta charset="UTF-8"> element defines the character set.
The characters A, B, and C, are displayed by the numbers 65, 66, and 67.
To let the browser understand that you are displaying a character, you must start the entity number with &# and end it with ; (semicolon).
Emoji Characters
Emojis are also characters from the UTF-8 alphabet:
- 😄 is 128516
- 😍 is 128525
- 💗 is 128151
1 |
|
😀
Since Emojis are characters, they can be copied, displayed, and sized just like any other character in HTML.
1 |
|
😀 😄 😍 💗
Some Emoji Symbols in UTF-8
| Emoji | Value | Try it |
|---|---|---|
| 🗻 | 🗻 | Try it » |
| 🗼 | 🗼 | Try it » |
| 🗽 | 🗽 | Try it » |
| 🗾 | 🗾 | Try it » |
| 🗿 | 🗿 | Try it » |
| 😀 | 😀 | Try it » |
| 😁 | 😁 | Try it » |
| 😂 | 😂 | Try it » |
| 😃 | 😃 | Try it » |
| 😄 | 😄 | Try it » |
| 😅 | 😅 | Try it » |
For a full list, please go to our HTML Emoji Reference.
HTML Encoding (Character Sets)
To display an HTML page correctly, a web browser must know which character set to use.
From ASCII to UTF-8
ASCII was the first character encoding standard. ASCII defined 128 different characters that could be used on the internet: numbers (0-9), English letters (A-Z), and some special characters like ! $ + - ( ) @ < > .
ISO-8859-1 was the default character set for HTML 4. This character set supported 256 different character codes. HTML 4 also supported UTF-8.
ANSI (Windows-1252) was the original Windows character set. ANSI is identical to ISO-8859-1, except that ANSI has 32 extra characters.
The HTML5 specification encourages web developers to use the UTF-8 character set, which covers almost all of the characters and symbols in the world!
The HTML charset Attribute
To display an HTML page correctly, a web browser must know the character set used in the page.
This is specified in the <meta> tag:
1 | <meta charset="UTF-8"> |
Differences Between Character Sets
The following table displays the differences between the character sets described above:
| Numb | ASCII | ANSI | 8859 | UTF-8 | Description |
|---|---|---|---|---|---|
| 32 | space | ||||
| 33 | ! | ! | ! | ! | exclamation mark |
| 34 | " | " | " | " | quotation mark |
| 35 | # | # | # | # | number sign |
| 36 | $ | $ | $ | $ | dollar sign |
| 37 | % | % | % | % | percent sign |
| 38 | & | & | & | & | ampersand |
| 39 | ' | ' | ' | ' | apostrophe |
| 40 | ( | ( | ( | ( | left parenthesis |
| 41 | ) | ) | ) | ) | right parenthesis |
| 42 | * | * | * | * | asterisk |
| 43 | + | + | + | + | plus sign |
| 44 | , | , | , | , | comma |
| 45 | - | - | - | - | hyphen-minus |
| 46 | . | . | . | . | full stop |
| 47 | / | / | / | / | solidus |
| 48 | 0 | 0 | 0 | 0 | digit zero |
| 49 | 1 | 1 | 1 | 1 | digit one |
| 50 | 2 | 2 | 2 | 2 | digit two |
| 51 | 3 | 3 | 3 | 3 | digit three |
| 52 | 4 | 4 | 4 | 4 | digit four |
| 53 | 5 | 5 | 5 | 5 | digit five |
| 54 | 6 | 6 | 6 | 6 | digit six |
| 55 | 7 | 7 | 7 | 7 | digit seven |
| 56 | 8 | 8 | 8 | 8 | digit eight |
| 57 | 9 | 9 | 9 | 9 | digit nine |
| 58 | : | : | : | : | colon |
| 59 | ; | ; | ; | ; | semicolon |
| 60 | < | < | < | < | less-than sign |
| 61 | = | = | = | = | equals sign |
| 62 | > | > | > | > | greater-than sign |
| 63 | ? | ? | ? | ? | question mark |
| 64 | @ | @ | @ | @ | commercial at |
| 65 | A | A | A | A | Latin capital letter A |
| 66 | B | B | B | B | Latin capital letter B |
| 67 | C | C | C | C | Latin capital letter C |
| 68 | D | D | D | D | Latin capital letter D |
| 69 | E | E | E | E | Latin capital letter E |
| 70 | F | F | F | F | Latin capital letter F |
| 71 | G | G | G | G | Latin capital letter G |
| 72 | H | H | H | H | Latin capital letter H |
| 73 | I | I | I | I | Latin capital letter I |
| 74 | J | J | J | J | Latin capital letter J |
| 75 | K | K | K | K | Latin capital letter K |
| 76 | L | L | L | L | Latin capital letter L |
| 77 | M | M | M | M | Latin capital letter M |
| 78 | N | N | N | N | Latin capital letter N |
| 79 | O | O | O | O | Latin capital letter O |
| 80 | P | P | P | P | Latin capital letter P |
| 81 | Q | Q | Q | Q | Latin capital letter Q |
| 82 | R | R | R | R | Latin capital letter R |
| 83 | S | S | S | S | Latin capital letter S |
| 84 | T | T | T | T | Latin capital letter T |
| 85 | U | U | U | U | Latin capital letter U |
| 86 | V | V | V | V | Latin capital letter V |
| 87 | W | W | W | W | Latin capital letter W |
| 88 | X | X | X | X | Latin capital letter X |
| 89 | Y | Y | Y | Y | Latin capital letter Y |
| 90 | Z | Z | Z | Z | Latin capital letter Z |
| 91 | [ | [ | [ | [ | left square bracket |
| 92 | \ | \ | \ | \ | reverse solidus |
| 93 | ] | ] | ] | ] | right square bracket |
| 94 | ^ | ^ | ^ | ^ | circumflex accent |
| 95 | _ | _ | _ | _ | low line |
| 96 | ` | ` | ` | ` | grave accent |
| 97 | a | a | a | a | Latin small letter a |
| 98 | b | b | b | b | Latin small letter b |
| 99 | c | c | c | c | Latin small letter c |
| 100 | d | d | d | d | Latin small letter d |
| 101 | e | e | e | e | Latin small letter e |
| 102 | f | f | f | f | Latin small letter f |
| 103 | g | g | g | g | Latin small letter g |
| 104 | h | h | h | h | Latin small letter h |
| 105 | i | i | i | i | Latin small letter i |
| 106 | j | j | j | j | Latin small letter j |
| 107 | k | k | k | k | Latin small letter k |
| 108 | l | l | l | l | Latin small letter l |
| 109 | m | m | m | m | Latin small letter m |
| 110 | n | n | n | n | Latin small letter n |
| 111 | o | o | o | o | Latin small letter o |
| 112 | p | p | p | p | Latin small letter p |
| 113 | q | q | q | q | Latin small letter q |
| 114 | r | r | r | r | Latin small letter r |
| 115 | s | s | s | s | Latin small letter s |
| 116 | t | t | t | t | Latin small letter t |
| 117 | u | u | u | u | Latin small letter u |
| 118 | v | v | v | v | Latin small letter v |
| 119 | w | w | w | w | Latin small letter w |
| 120 | x | x | x | x | Latin small letter x |
| 121 | y | y | y | y | Latin small letter y |
| 122 | z | z | z | z | Latin small letter z |
| 123 | { | { | { | { | left curly bracket |
| 124 | | | | | | | | | vertical line |
| 125 | } | } | } | } | right curly bracket |
| 126 | ~ | ~ | ~ | ~ | tilde |
| 127 | DEL | ||||
| 128 | € | euro sign | |||
| 129 | | | | NOT USED | |
| 130 | ‚ | single low-9 quotation mark | |||
| 131 | ƒ | Latin small letter f with hook | |||
| 132 | „ | double low-9 quotation mark | |||
| 133 | … | horizontal ellipsis | |||
| 134 | † | dagger | |||
| 135 | ‡ | double dagger | |||
| 136 | ˆ | modifier letter circumflex accent | |||
| 137 | ‰ | per mille sign | |||
| 138 | Š | Latin capital letter S with caron | |||
| 139 | ‹ | single left-pointing angle quotation mark | |||
| 140 | Π| Latin capital ligature OE | |||
| 141 | | | | NOT USED | |
| 142 | Ž | Latin capital letter Z with caron | |||
| 143 | | | | NOT USED | |
| 144 | | | | NOT USED | |
| 145 | ‘ | left single quotation mark | |||
| 146 | ’ | right single quotation mark | |||
| 147 | “ | left double quotation mark | |||
| 148 | ” | right double quotation mark | |||
| 149 | • | bullet | |||
| 150 | – | en dash | |||
| 151 | — | em dash | |||
| 152 | ˜ | small tilde | |||
| 153 | ™ | trade mark sign | |||
| 154 | š | Latin small letter s with caron | |||
| 155 | › | single right-pointing angle quotation mark | |||
| 156 | œ | Latin small ligature oe | |||
| 157 | | | | NOT USED | |
| 158 | ž | Latin small letter z with caron | |||
| 159 | Ÿ | Latin capital letter Y with diaeresis | |||
| 160 | no-break space | ||||
| 161 | ¡ | ¡ | ¡ | inverted exclamation mark | |
| 162 | ¢ | ¢ | ¢ | cent sign | |
| 163 | £ | £ | £ | pound sign | |
| 164 | ¤ | ¤ | ¤ | currency sign | |
| 165 | ¥ | ¥ | ¥ | yen sign | |
| 166 | ¦ | ¦ | ¦ | broken bar | |
| 167 | § | § | § | section sign | |
| 168 | ¨ | ¨ | ¨ | diaeresis | |
| 169 | © | © | © | copyright sign | |
| 170 | ª | ª | ª | feminine ordinal indicator | |
| 171 | « | « | « | left-pointing double angle quotation mark | |
| 172 | ¬ | ¬ | ¬ | not sign | |
| 173 | | | | soft hyphen | |
| 174 | ® | ® | ® | registered sign | |
| 175 | ¯ | ¯ | ¯ | macron | |
| 176 | ° | ° | ° | degree sign | |
| 177 | ± | ± | ± | plus-minus sign | |
| 178 | ² | ² | ² | superscript two | |
| 179 | ³ | ³ | ³ | superscript three | |
| 180 | ´ | ´ | ´ | acute accent | |
| 181 | µ | µ | µ | micro sign | |
| 182 | ¶ | ¶ | ¶ | pilcrow sign | |
| 183 | · | · | · | middle dot | |
| 184 | ¸ | ¸ | ¸ | cedilla | |
| 185 | ¹ | ¹ | ¹ | superscript one | |
| 186 | º | º | º | masculine ordinal indicator | |
| 187 | » | » | » | right-pointing double angle quotation mark | |
| 188 | ¼ | ¼ | ¼ | vulgar fraction one quarter | |
| 189 | ½ | ½ | ½ | vulgar fraction one half | |
| 190 | ¾ | ¾ | ¾ | vulgar fraction three quarters | |
| 191 | ¿ | ¿ | ¿ | inverted question mark | |
| 192 | À | À | À | Latin capital letter A with grave | |
| 193 | Á | Á | Á | Latin capital letter A with acute | |
| 194 | Â | Â | Â | Latin capital letter A with circumflex | |
| 195 | Ã | Ã | Ã | Latin capital letter A with tilde | |
| 196 | Ä | Ä | Ä | Latin capital letter A with diaeresis | |
| 197 | Å | Å | Å | Latin capital letter A with ring above | |
| 198 | Æ | Æ | Æ | Latin capital letter AE | |
| 199 | Ç | Ç | Ç | Latin capital letter C with cedilla | |
| 200 | È | È | È | Latin capital letter E with grave | |
| 201 | É | É | É | Latin capital letter E with acute | |
| 202 | Ê | Ê | Ê | Latin capital letter E with circumflex | |
| 203 | Ë | Ë | Ë | Latin capital letter E with diaeresis | |
| 204 | Ì | Ì | Ì | Latin capital letter I with grave | |
| 205 | Í | Í | Í | Latin capital letter I with acute | |
| 206 | Î | Î | Î | Latin capital letter I with circumflex | |
| 207 | Ï | Ï | Ï | Latin capital letter I with diaeresis | |
| 208 | Ð | Ð | Ð | Latin capital letter Eth | |
| 209 | Ñ | Ñ | Ñ | Latin capital letter N with tilde | |
| 210 | Ò | Ò | Ò | Latin capital letter O with grave | |
| 211 | Ó | Ó | Ó | Latin capital letter O with acute | |
| 212 | Ô | Ô | Ô | Latin capital letter O with circumflex | |
| 213 | Õ | Õ | Õ | Latin capital letter O with tilde | |
| 214 | Ö | Ö | Ö | Latin capital letter O with diaeresis | |
| 215 | × | × | × | multiplication sign | |
| 216 | Ø | Ø | Ø | Latin capital letter O with stroke | |
| 217 | Ù | Ù | Ù | Latin capital letter U with grave | |
| 218 | Ú | Ú | Ú | Latin capital letter U with acute | |
| 219 | Û | Û | Û | Latin capital letter U with circumflex | |
| 220 | Ü | Ü | Ü | Latin capital letter U with diaeresis | |
| 221 | Ý | Ý | Ý | Latin capital letter Y with acute | |
| 222 | Þ | Þ | Þ | Latin capital letter Thorn | |
| 223 | ß | ß | ß | Latin small letter sharp s | |
| 224 | à | à | à | Latin small letter a with grave | |
| 225 | á | á | á | Latin small letter a with acute | |
| 226 | â | â | â | Latin small letter a with circumflex | |
| 227 | ã | ã | ã | Latin small letter a with tilde | |
| 228 | ä | ä | ä | Latin small letter a with diaeresis | |
| 229 | å | å | å | Latin small letter a with ring above | |
| 230 | æ | æ | æ | Latin small letter ae | |
| 231 | ç | ç | ç | Latin small letter c with cedilla | |
| 232 | è | è | è | Latin small letter e with grave | |
| 233 | é | é | é | Latin small letter e with acute | |
| 234 | ê | ê | ê | Latin small letter e with circumflex | |
| 235 | ë | ë | ë | Latin small letter e with diaeresis | |
| 236 | ì | ì | ì | Latin small letter i with grave | |
| 237 | í | í | í | Latin small letter i with acute | |
| 238 | î | î | î | Latin small letter i with circumflex | |
| 239 | ï | ï | ï | Latin small letter i with diaeresis | |
| 240 | ð | ð | ð | Latin small letter eth | |
| 241 | ñ | ñ | ñ | Latin small letter n with tilde | |
| 242 | ò | ò | ò | Latin small letter o with grave | |
| 243 | ó | ó | ó | Latin small letter o with acute | |
| 244 | ô | ô | ô | Latin small letter o with circumflex | |
| 245 | õ | õ | õ | Latin small letter o with tilde | |
| 246 | ö | ö | ö | Latin small letter o with diaeresis | |
| 247 | ÷ | ÷ | ÷ | division sign | |
| 248 | ø | ø | ø | Latin small letter o with stroke | |
| 249 | ù | ù | ù | Latin small letter u with grave | |
| 250 | ú | ú | ú | Latin small letter u with acute | |
| 251 | û | û | û | Latin small letter with circumflex | |
| 252 | ü | ü | ü | Latin small letter u with diaeresis | |
| 253 | ý | ý | ý | Latin small letter y with acute | |
| 254 | þ | þ | þ | Latin small letter thorn | |
| 255 | ÿ | ÿ | ÿ | Latin small letter y with diaeresis |
The ASCII Character Set
ASCII uses the values from 0 to 31 (and 127) for control characters.
ASCII uses the values from 32 to 126 for letters, digits, and symbols.
ASCII does not use the values from 128 to 255.
The ANSI Character Set (Windows-1252)
ANSI is identical to ASCII for the values from 0 to 127.
ANSI has a proprietary set of characters for the values from 128 to 159.
ANSI is identical to UTF-8 for the values from 160 to 255.
The ISO-8859-1 Character Set
ISO-8859-1 is identical to ASCII for the values from 0 to 127.
ISO-8859-1 does not use the values from 128 to 159.
ISO-8859-1 is identical to UTF-8 for the values from 160 to 255.
The UTF-8 Character Set
UTF-8 is identical to ASCII for the values from 0 to 127.
UTF-8 does not use the values from 128 to 159.
UTF-8 is identical to both ANSI and 8859-1 for the values from 160 to 255.
UTF-8 continues from the value 256 with more than 10 000 different characters.
For a closer look, study our Complete HTML Character Set Reference.
HTML Uniform Resource Locators
A URL is another word for a web address.
A URL can be composed of words (e.g. w3schools.com), or an Internet Protocol (IP) address (e.g. 192.68.20.50).
Most people enter the name when surfing, because names are easier to remember than numbers.
URL - Uniform Resource Locator
Web browsers request pages from web servers by using a URL.
A Uniform Resource Locator (URL) is used to address a document (or other data) on the web.
A web address like https://www.w3schools.com/html/default.asp follows these syntax rules:
1 | scheme://prefix.domain:port/path/filename |
Explanation:
- scheme - defines the type of Internet service (most common is http or https)
- prefix - defines a domain prefix (default for http is www)
- domain - defines the Internet domain name (like w3schools.com)
- port - defines the port number at the host (default for http is 80)
- path - defines a path at the server (If omitted: the root directory of the site)
- filename - defines the name of a document or resource
Common URL Schemes
The table below lists some common schemes:
| Scheme | Short for | Used for |
|---|---|---|
| http | HyperText Transfer Protocol | Common web pages. Not encrypted |
| https | Secure HyperText Transfer Protocol | Secure web pages. Encrypted |
| ftp | File Transfer Protocol | Downloading or uploading files |
| file | A file on your computer |
URL Encoding
URLs can only be sent over the Internet using the ASCII character-set. If a URL contains characters outside the ASCII set, the URL has to be converted.
URL encoding converts non-ASCII characters into a format that can be transmitted over the Internet.
URL encoding replaces non-ASCII characters with a “%” followed by hexadecimal digits.
URLs cannot contain spaces. URL encoding normally replaces a space with a plus (+) sign, or %20.
ASCII Encoding Examples
Your browser will encode input, according to the character-set used in your page.
The default character-set in HTML5 is UTF-8.
| Character | From Windows-1252 | From UTF-8 |
|---|---|---|
| € | %80 | %E2%82%AC |
| £ | %A3 | %C2%A3 |
| © | %A9 | %C2%A9 |
| ® | %AE | %C2%AE |
| À | %C0 | %C3%80 |
| Á | %C1 | %C3%81 |
| Â | %C2 | %C3%82 |
| Ã | %C3 | %C3%83 |
| Ä | %C4 | %C3%84 |
| Å | %C5 | %C3%85 |
HTML Versus XHTML
XHTML is a stricter, more XML-based version of HTML.
What is XHTML?
- XHTML stands for EXtensible HyperText Markup Language
- XHTML is a stricter, more XML-based version of HTML
- XHTML is HTML defined as an XML application
- XHTML is supported by all major browsers
Why XHTML?
XML is a markup language where all documents must be marked up correctly (be “well-formed”).
XHTML was developed to make HTML more extensible and flexible to work with other data formats (such as XML). In addition, browsers ignore errors in HTML pages, and try to display the website even if it has some errors in the markup. So XHTML comes with a much stricter error handling.
If you want to study XML, please read our XML Tutorial.
The Most Important Differences from HTML
- is mandatory
- The xmlns attribute in
<html>is mandatory -
<html>,<head>,<title>, and<body>are mandatory - Elements must always be properly nested
- Elements must always be closed
- Elements must always be in lowercase
- Attribute names must always be in lowercase
- Attribute values must always be quoted
- Attribute minimization is forbidden
XHTML - <!DOCTYPE ....> Is Mandatory
An XHTML document must have an XHTML <!DOCTYPE> declaration.
The <html>, <head>, <title>, and <body> elements must also be present, and the xmlns attribute in <html> must specify the xml namespace for the document.
1 | Here is an XHTML document with a minimum of required tags: |
XHTML Elements Must be Properly Nested
In XHTML, elements must always be properly nested within each other, like this:
Correct:
1 | <b><i>Some text</i></b> |
Wrong:
1 | <b><i>Some text</b></i> |
XHTML Elements Must Always be Closed
In XHTML, elements must always be closed, like this:
Correct:
1 | <p>This is a paragraph</p> |
Wrong:
1 | <p>This is a paragraph |
XHTML Empty Elements Must Always be Closed
In XHTML, empty elements must always be closed, like this:
Correct:
1 | A break: <br /> |
Wrong:
1 | A break: <br> |
XHTML Elements Must be in Lowercase
In XHTML, element names must always be in lowercase, like this:
Correct:
1 | <body> |
Wrong:
1 | <BODY> |
XHTML Attribute Names Must be in Lowercase
In XHTML, attribute names must always be in lowercase, like this:
Correct:
1 | <a href="https://www.w3schools.com/html/">Visit our HTML tutorial</a> |
Wrong:
1 | <a HREF="https://www.w3schools.com/html/">Visit our HTML tutorial</a> |
XHTML Attribute Values Must be Quoted
In XHTML, attribute values must always be quoted, like this:
Correct:
1 | <a href="https://www.w3schools.com/html/">Visit our HTML tutorial</a> |
Wrong:
1 | <a href=https://www.w3schools.com/html/>Visit our HTML tutorial</a> |
XHTML Attribute Minimization is Forbidden
In XHTML, attribute minimization is forbidden:
Correct:
1 | <input type="checkbox" name="vehicle" value="car" checked="checked" /> |
Wrong:
1 | <input type="checkbox" name="vehicle" value="car" checked /> |