AWS Kinesis Lab
Introduction Prerequisite
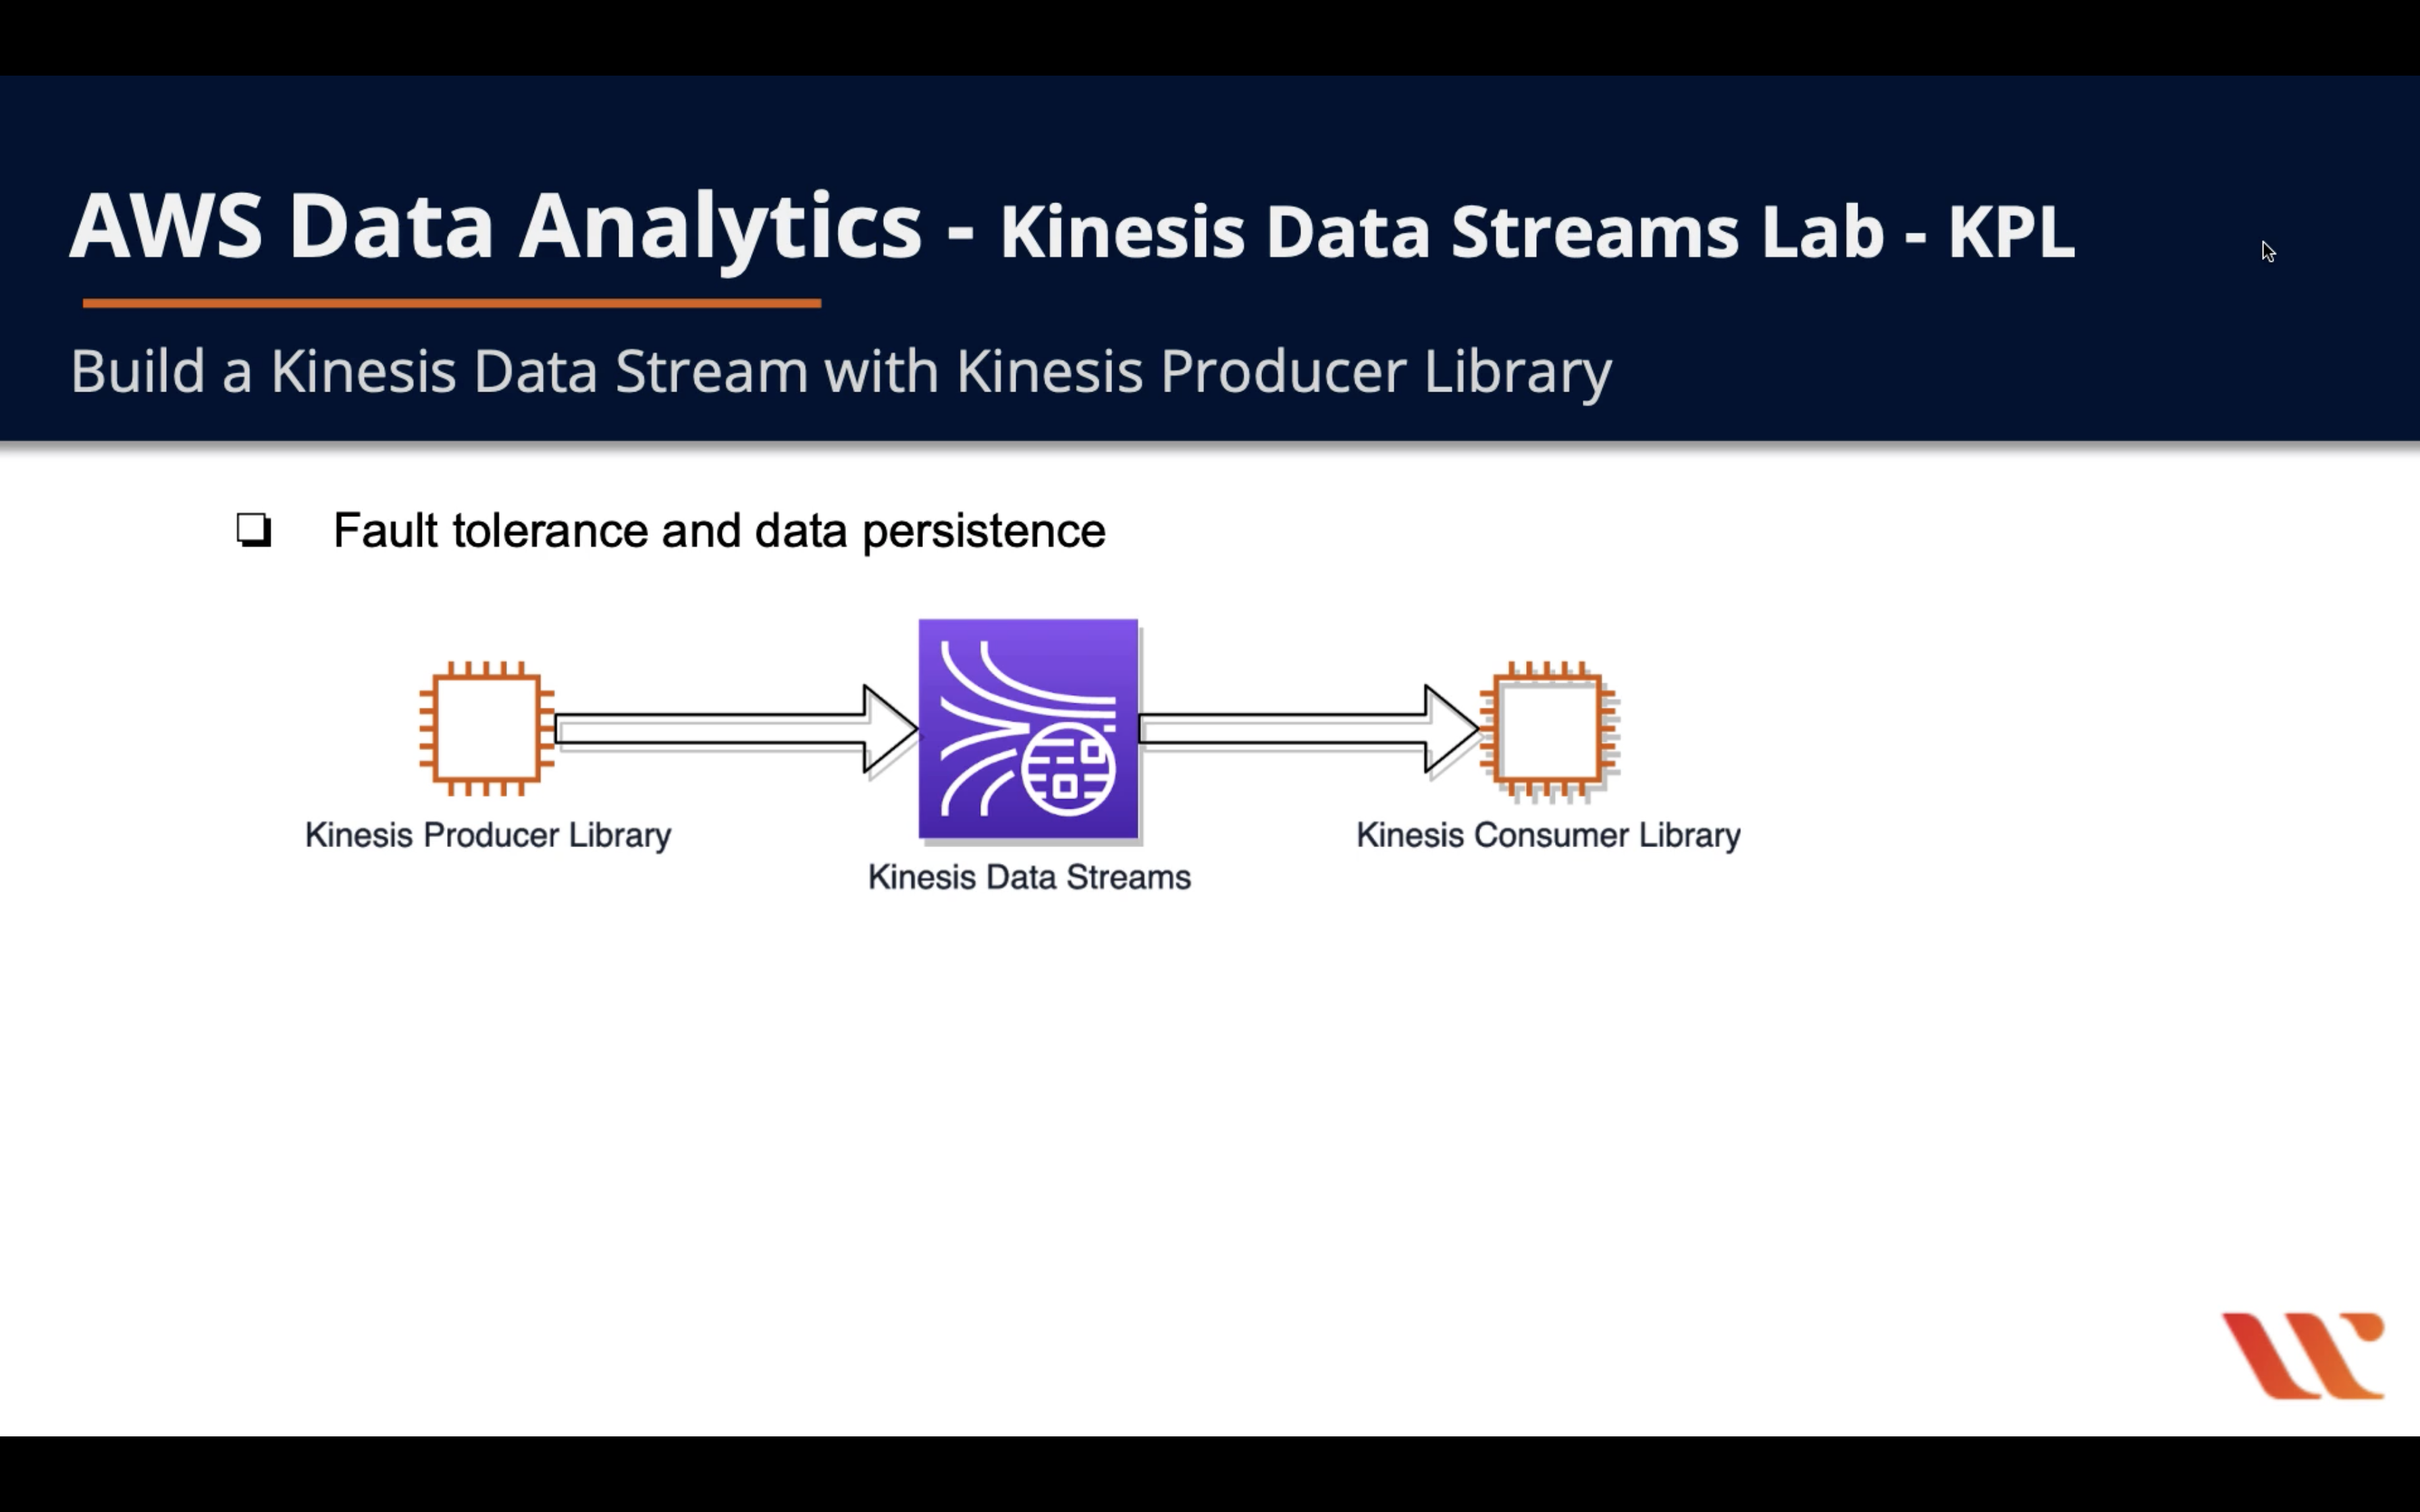
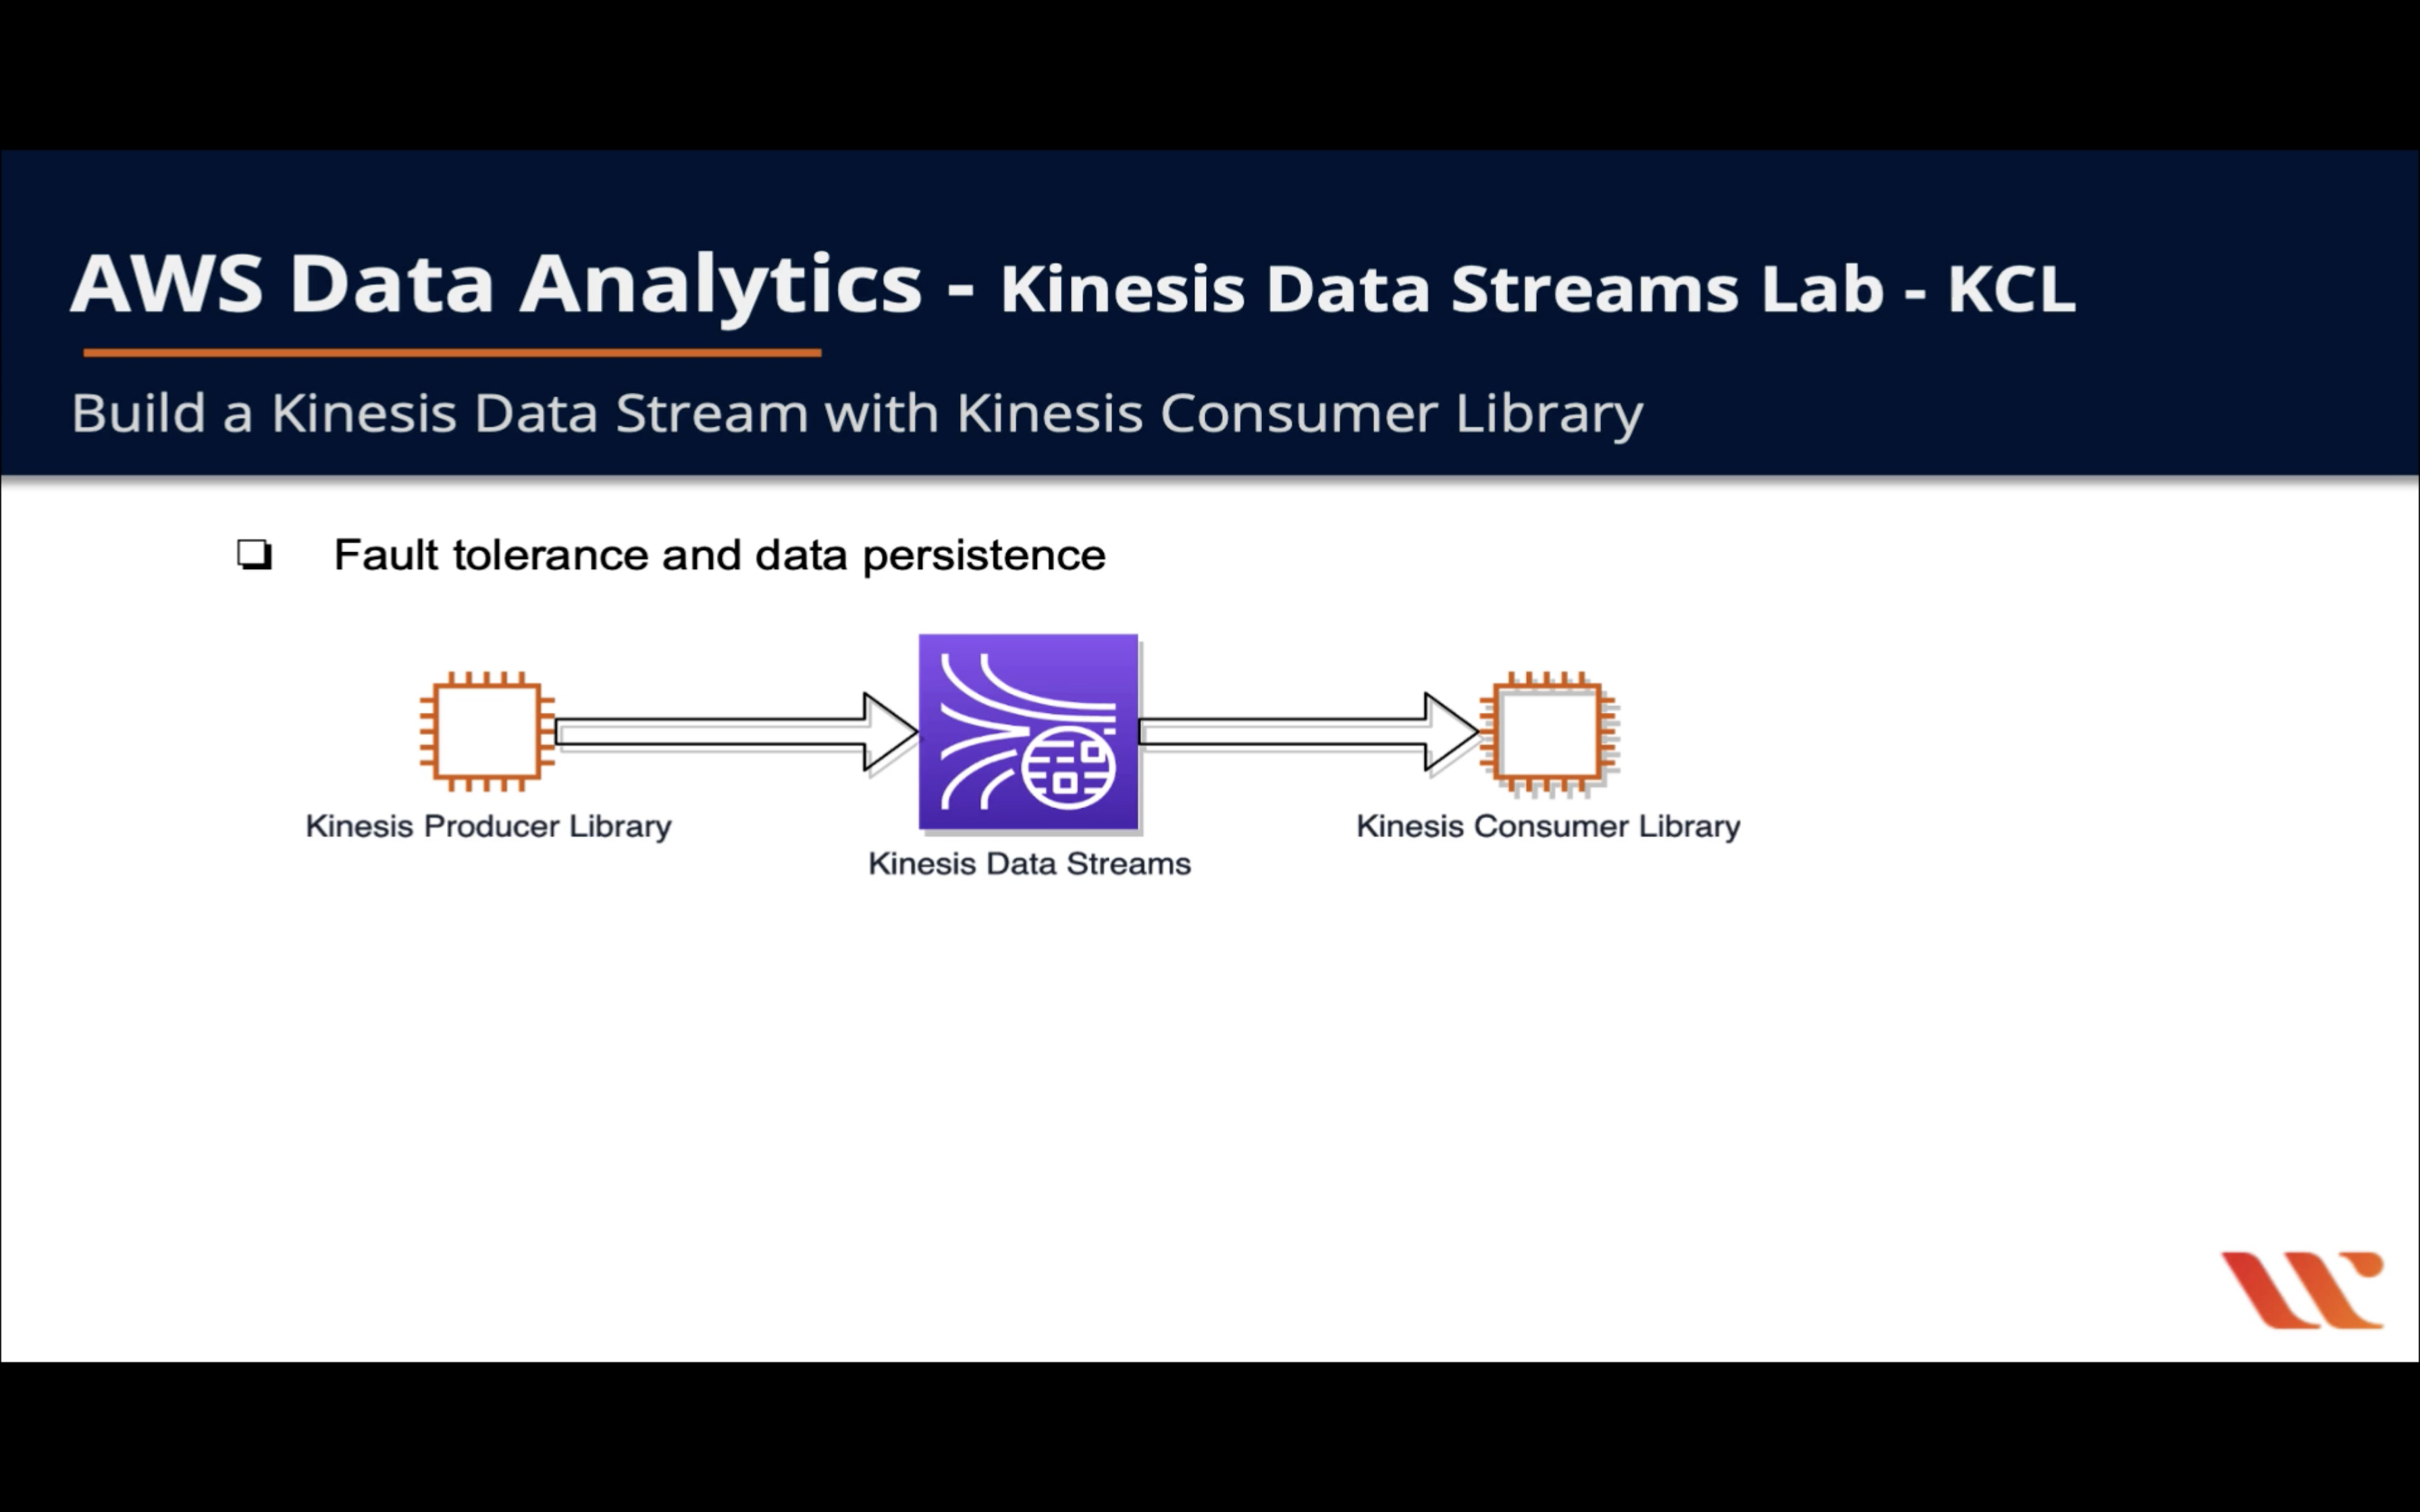
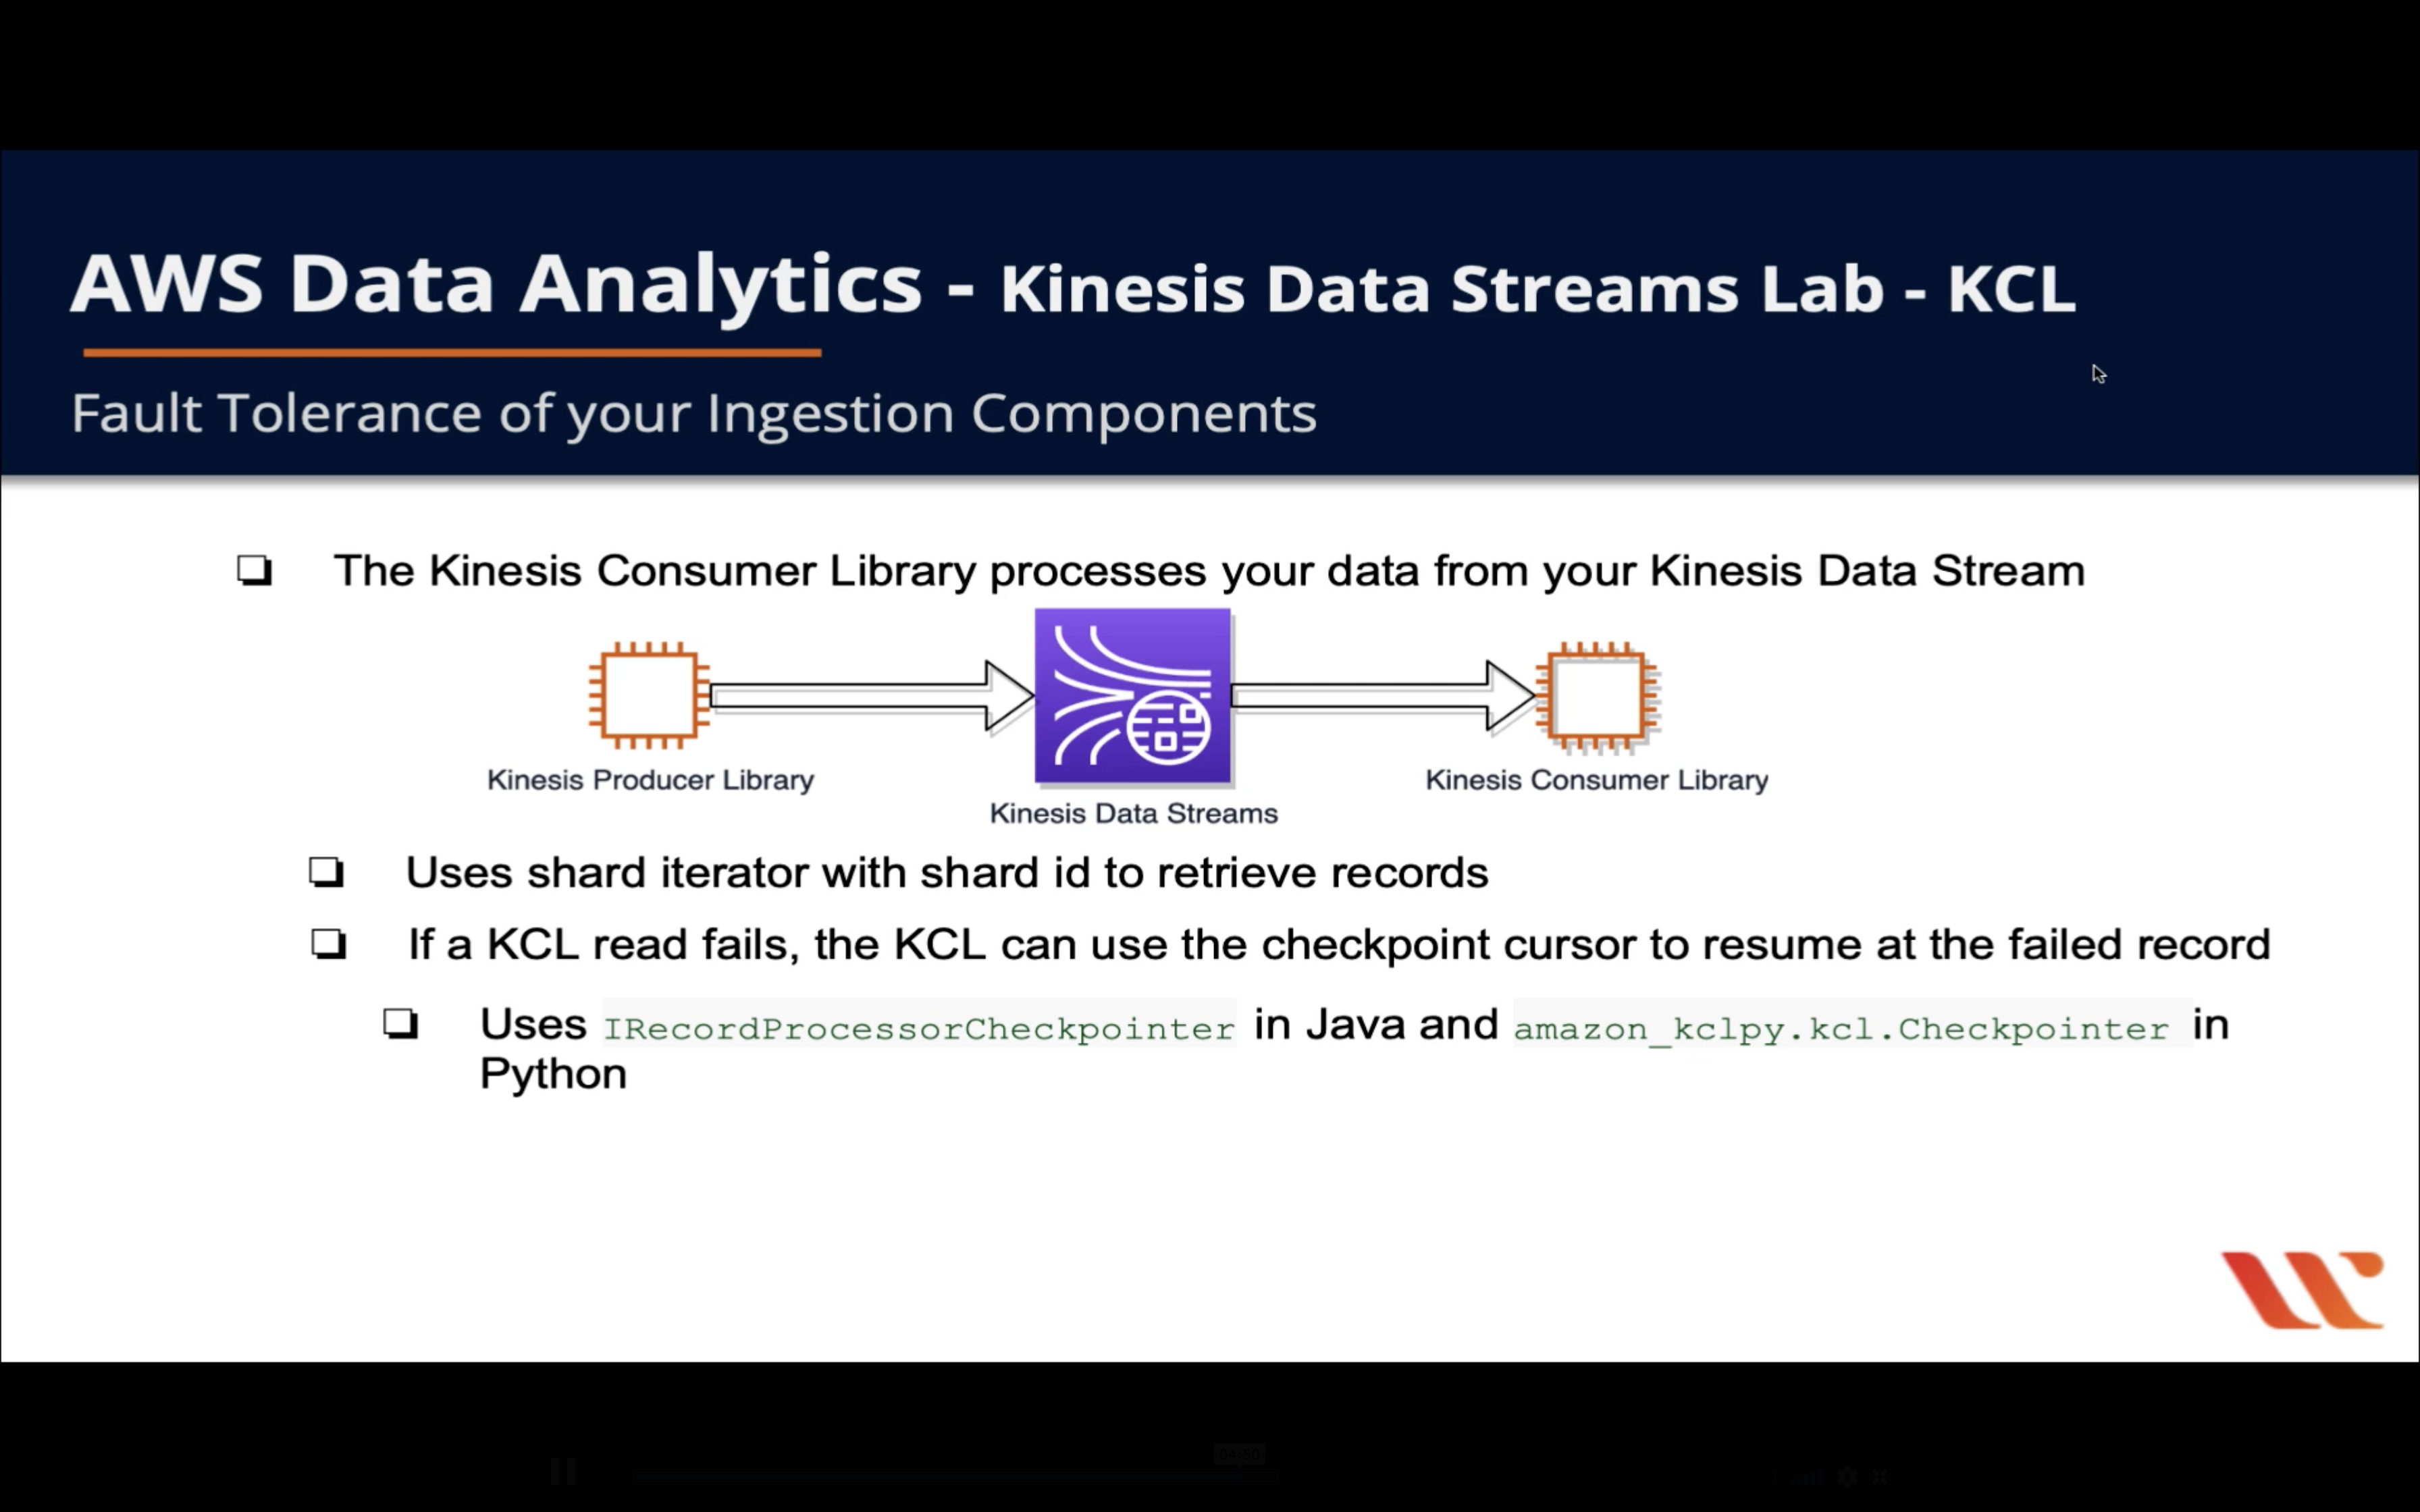
Kinesis Data Streams
KPL Setup Lab
Reference
https://www.whizlabs.com/learn/course/aws-certified-data-analytics-specialty/video/5274
https://zacks.one/aws-certified-data-analytics/#2.3.2.4
Amazon Kinesis Data Streams FAQs
Introduction
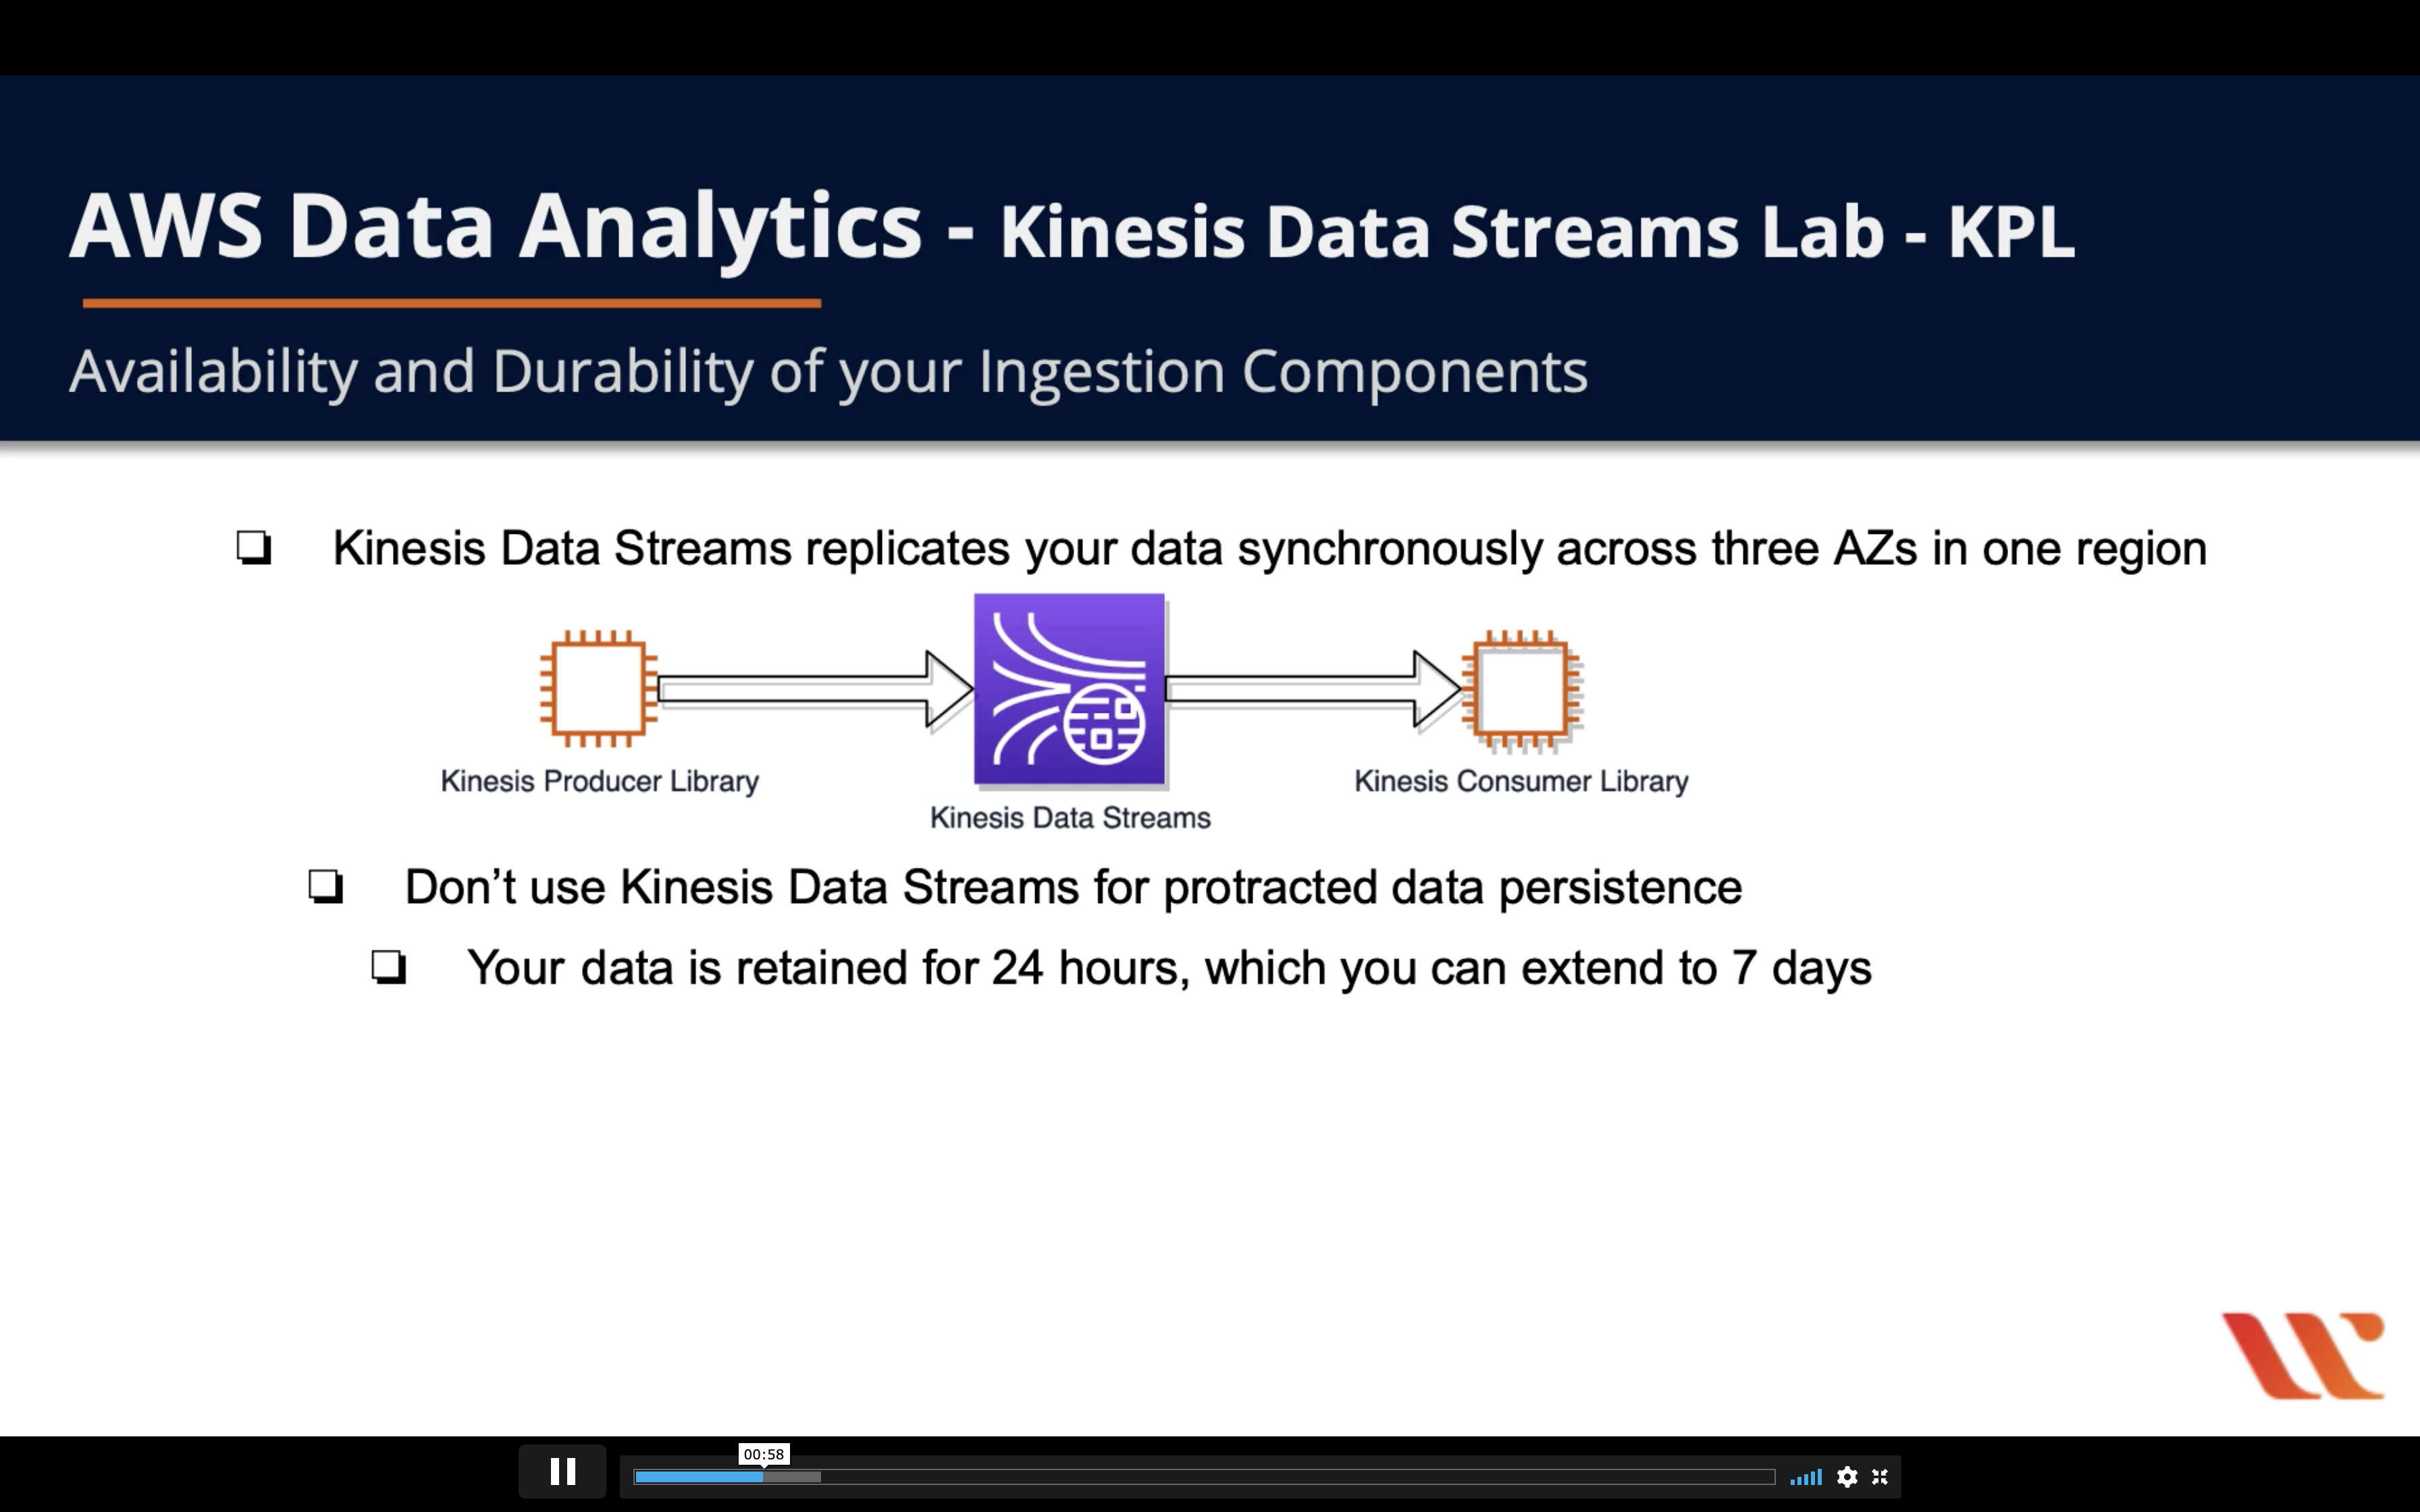

Kinesis Configuration
Services -> Kinesis
Select Kinesis Data Streams
Click on Create data stream
Data stream name
kinesis-kpl-demo
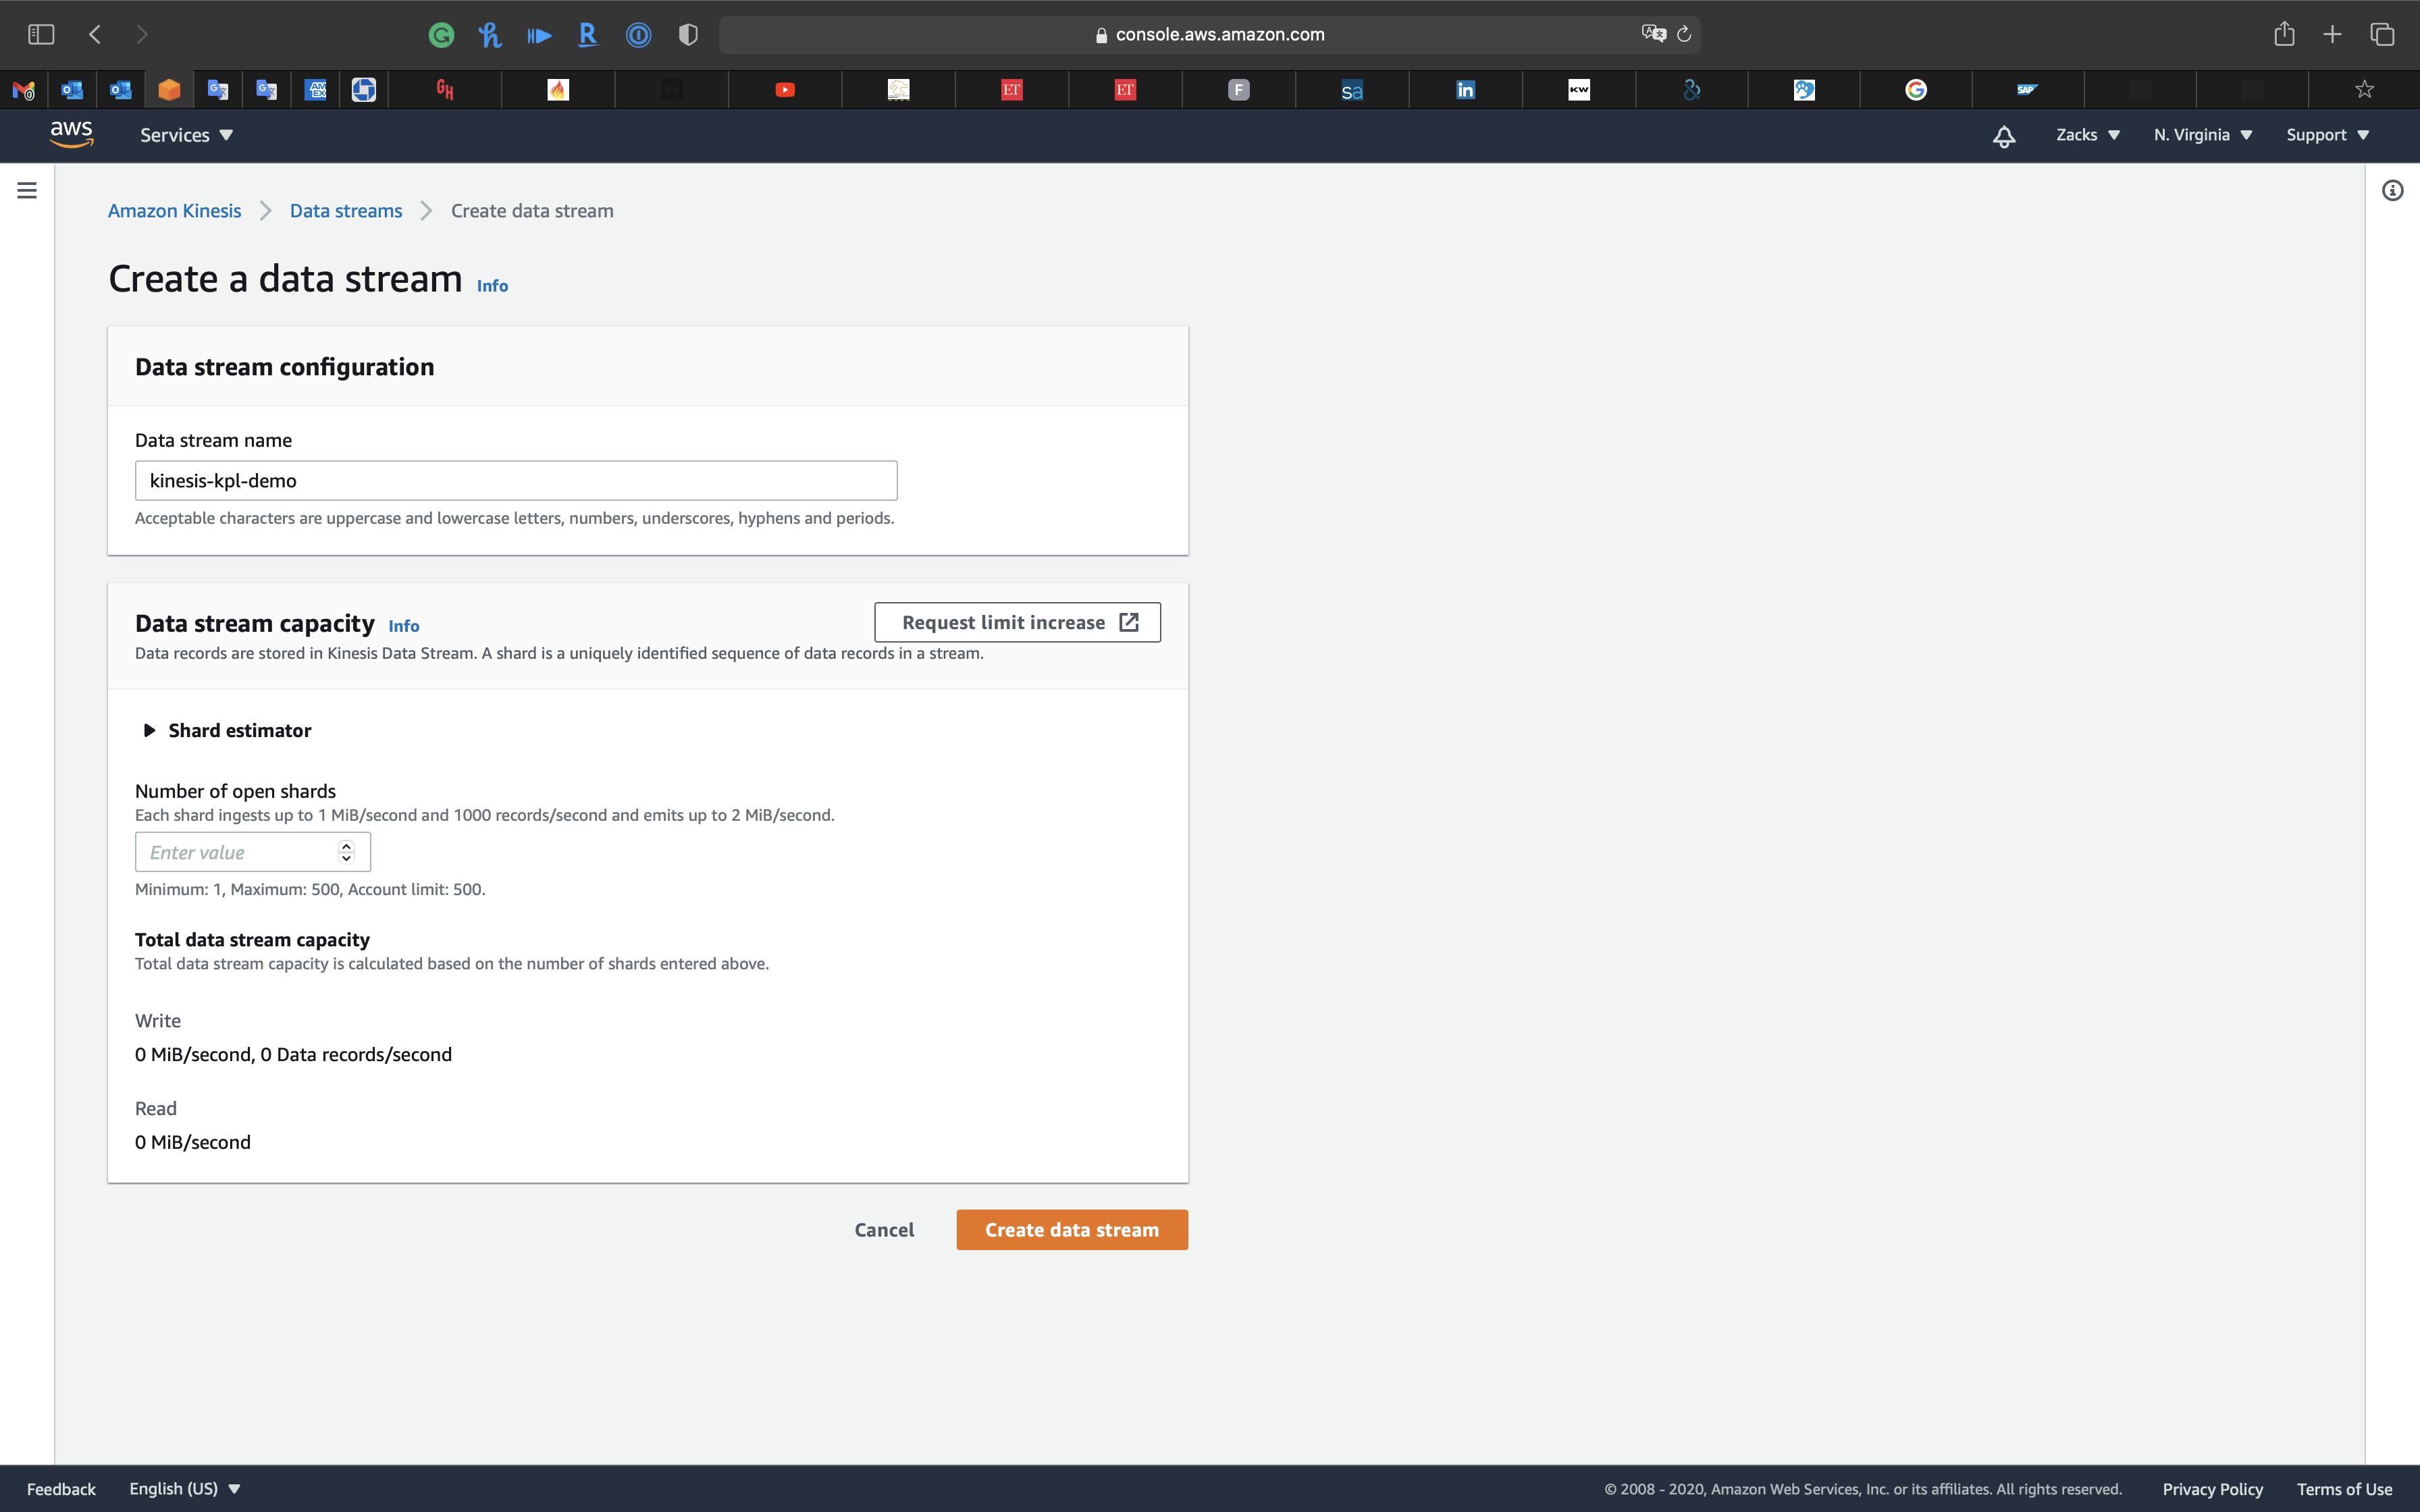
Under Data stream capacity, expand Shard estimator.
If consumers are more than 2.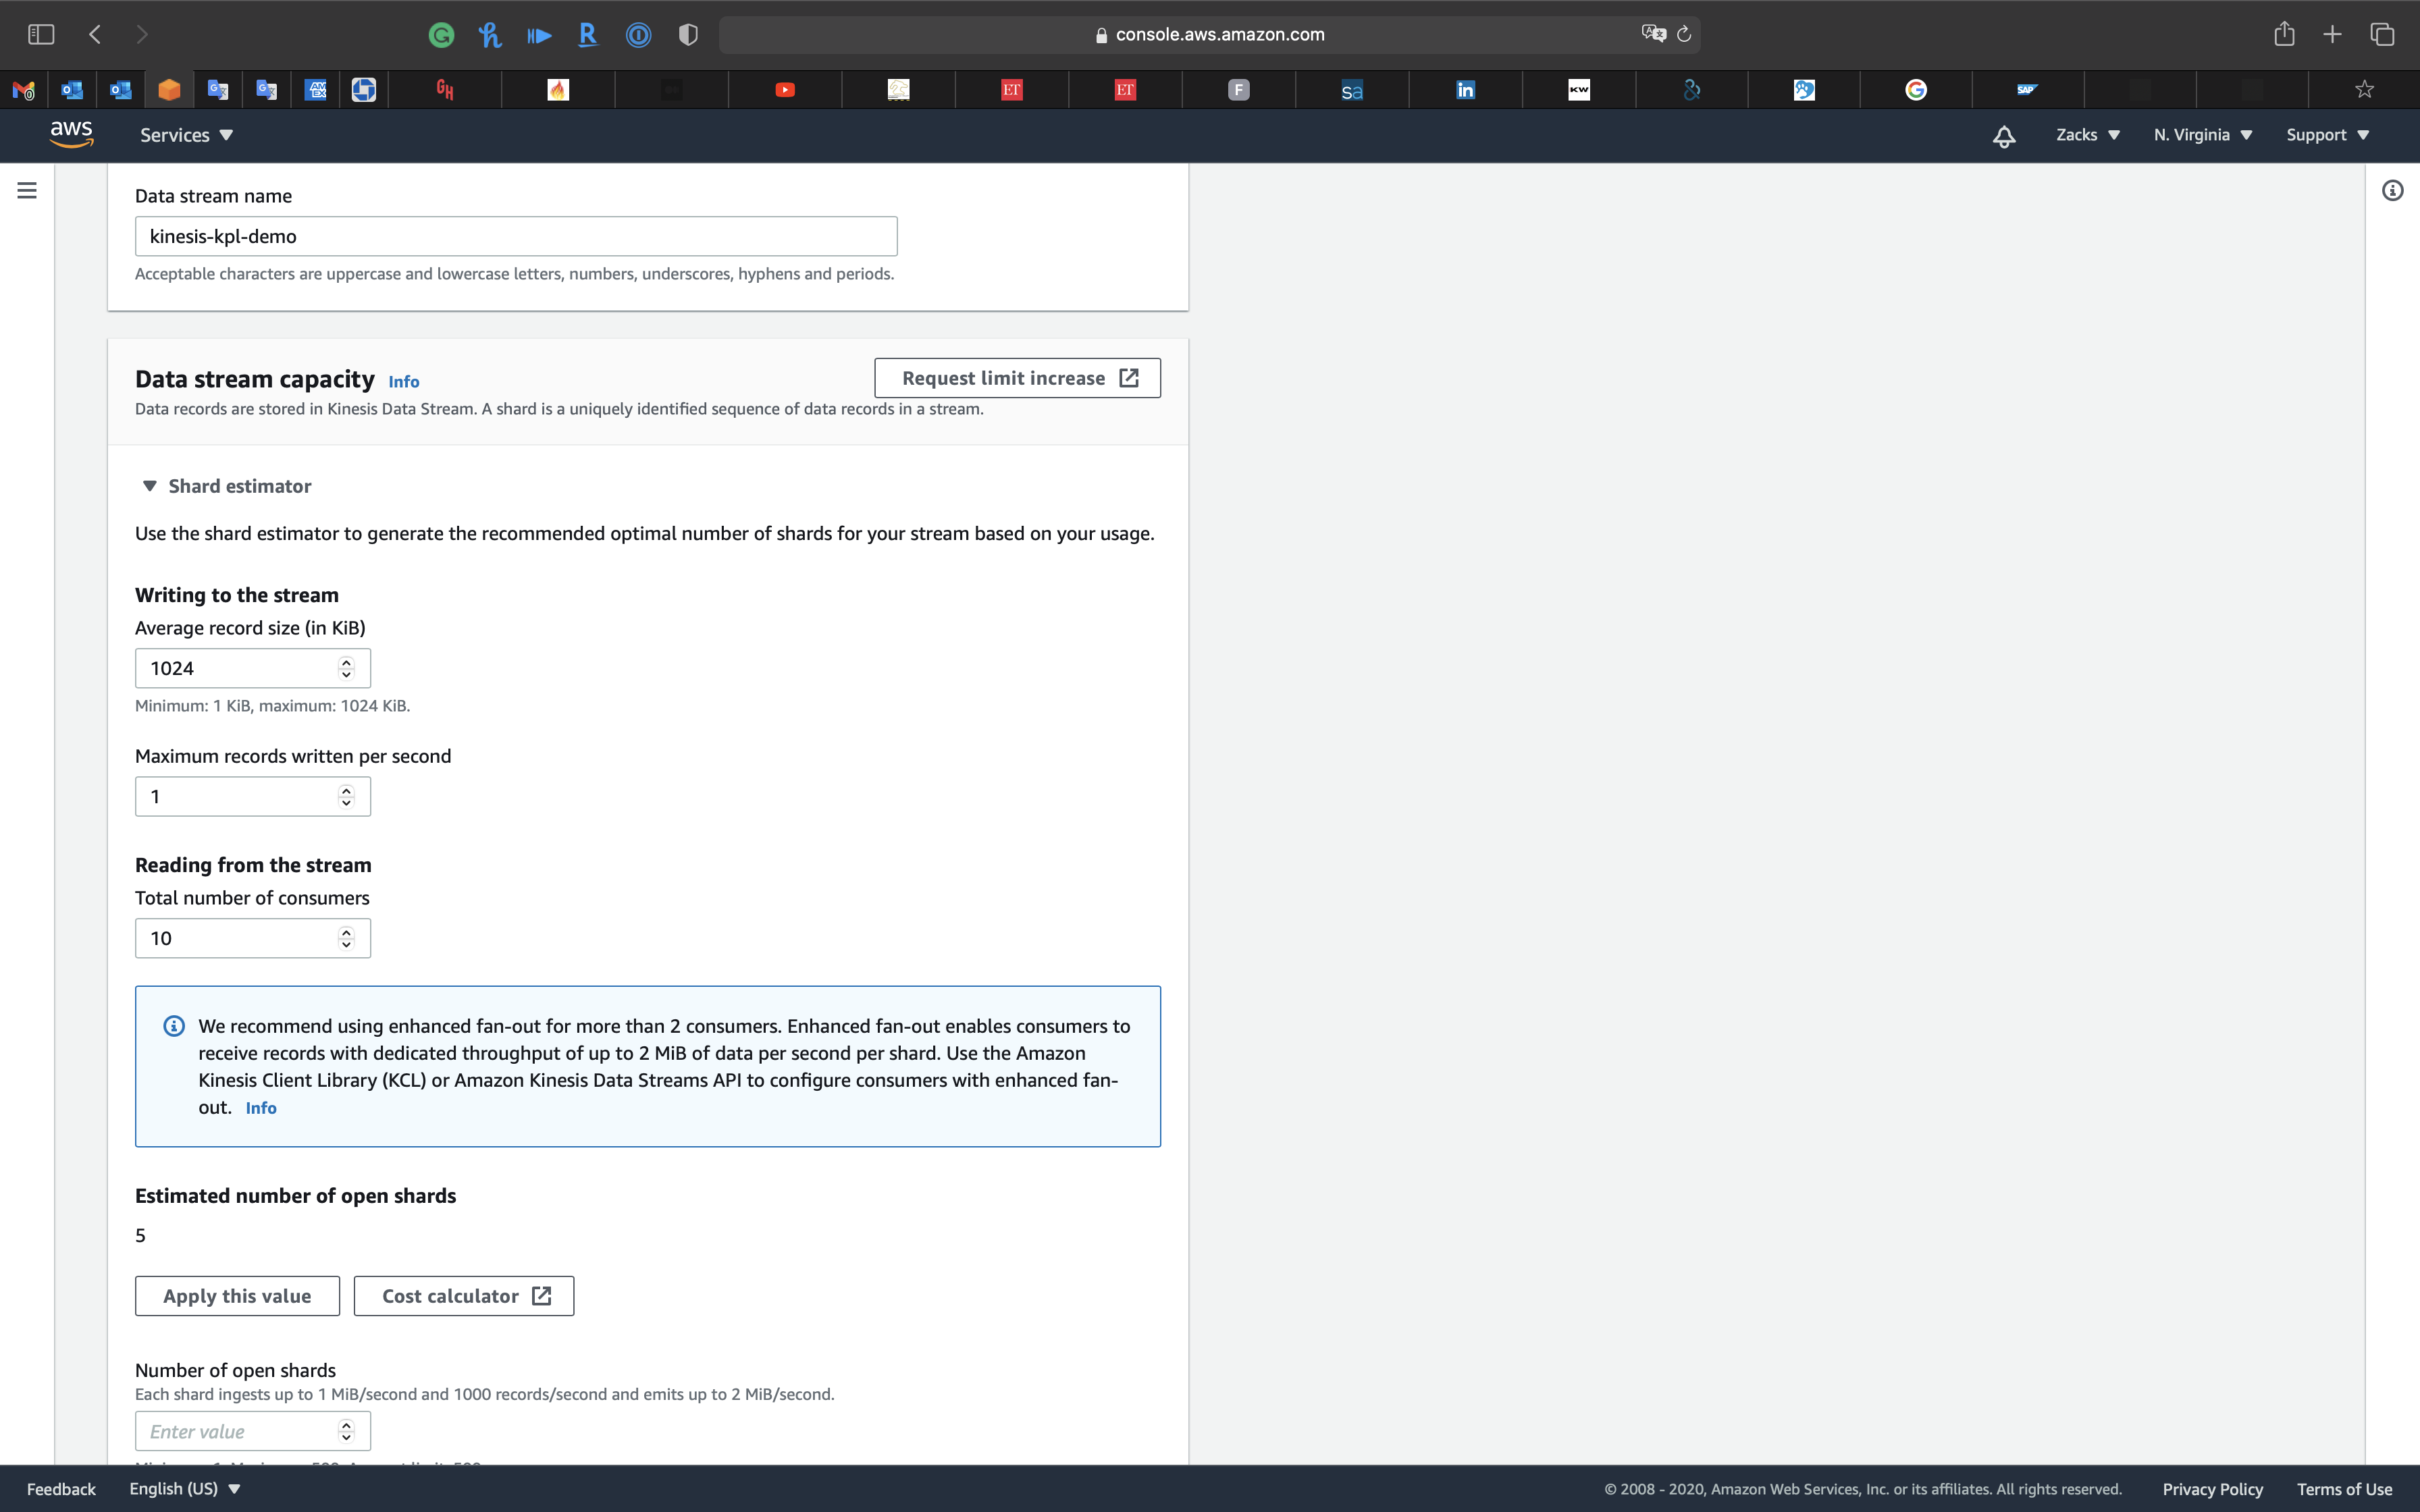
Writing to the stream (Inbound Stream)
- Average record size (in KiB):
1024 - Maximum records written per second:
2
Reading from the stream (Outbound Stream)
- Total number of consumers:
1
Click on Apply this value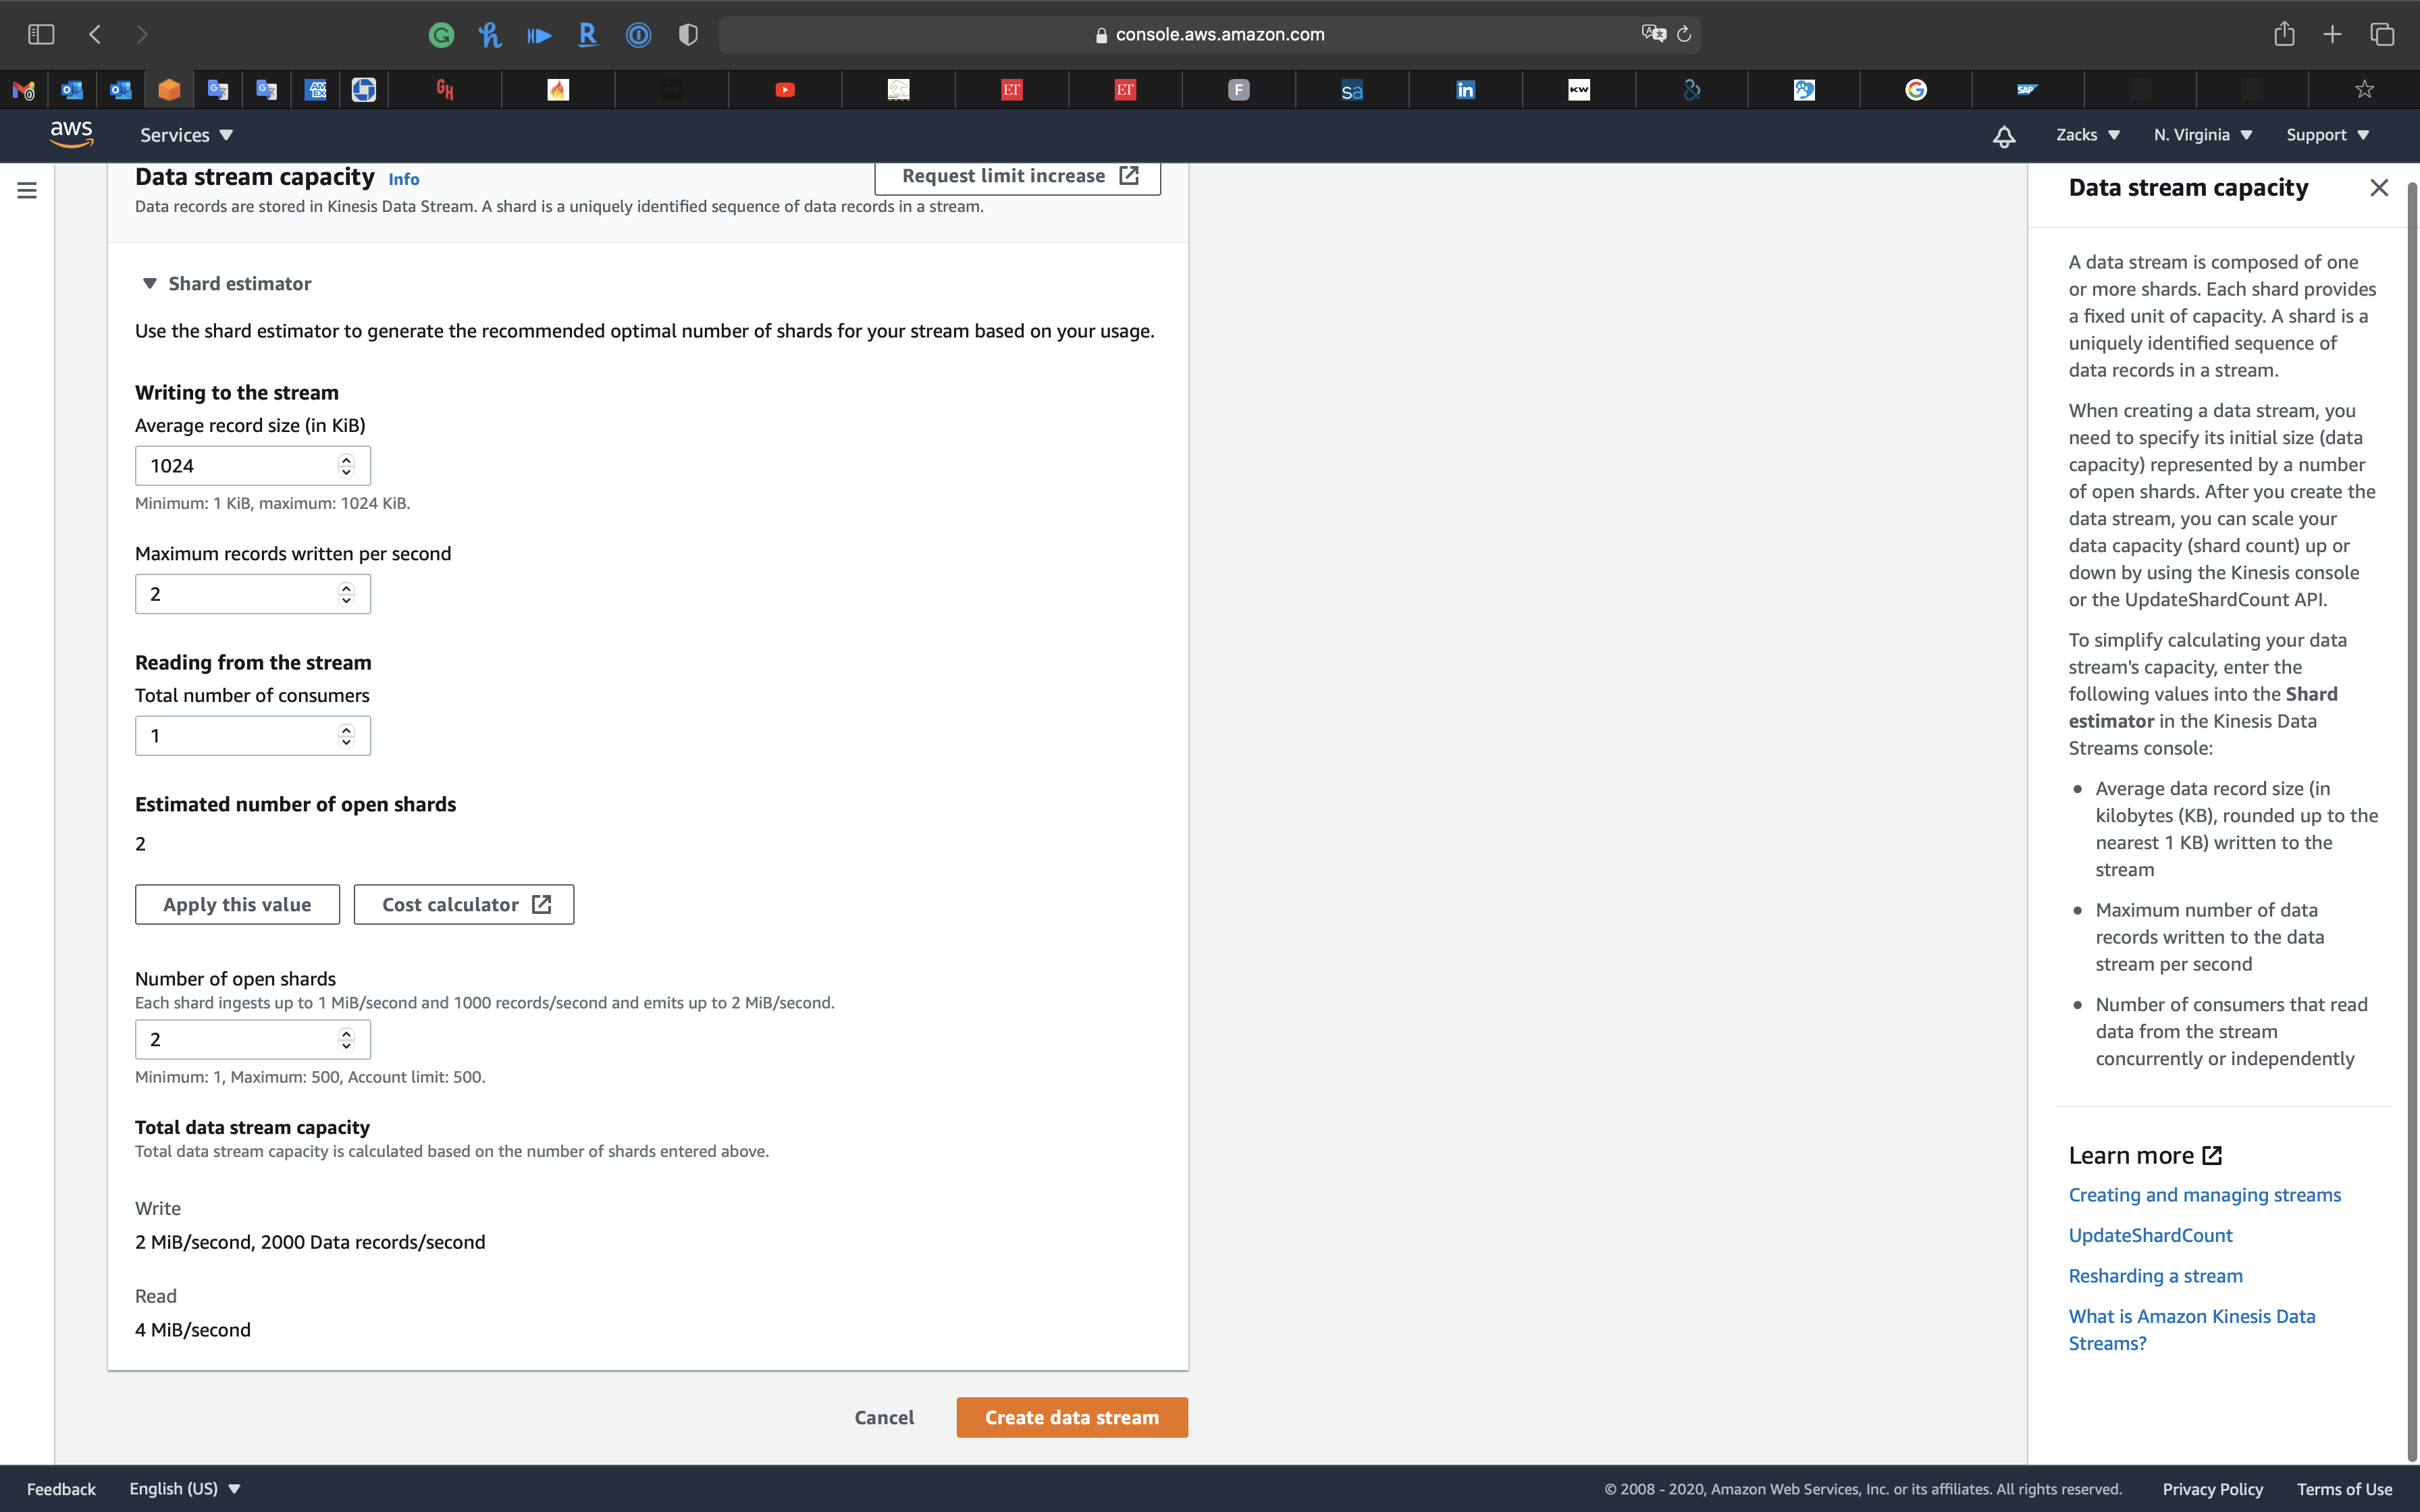
Click on Create data stream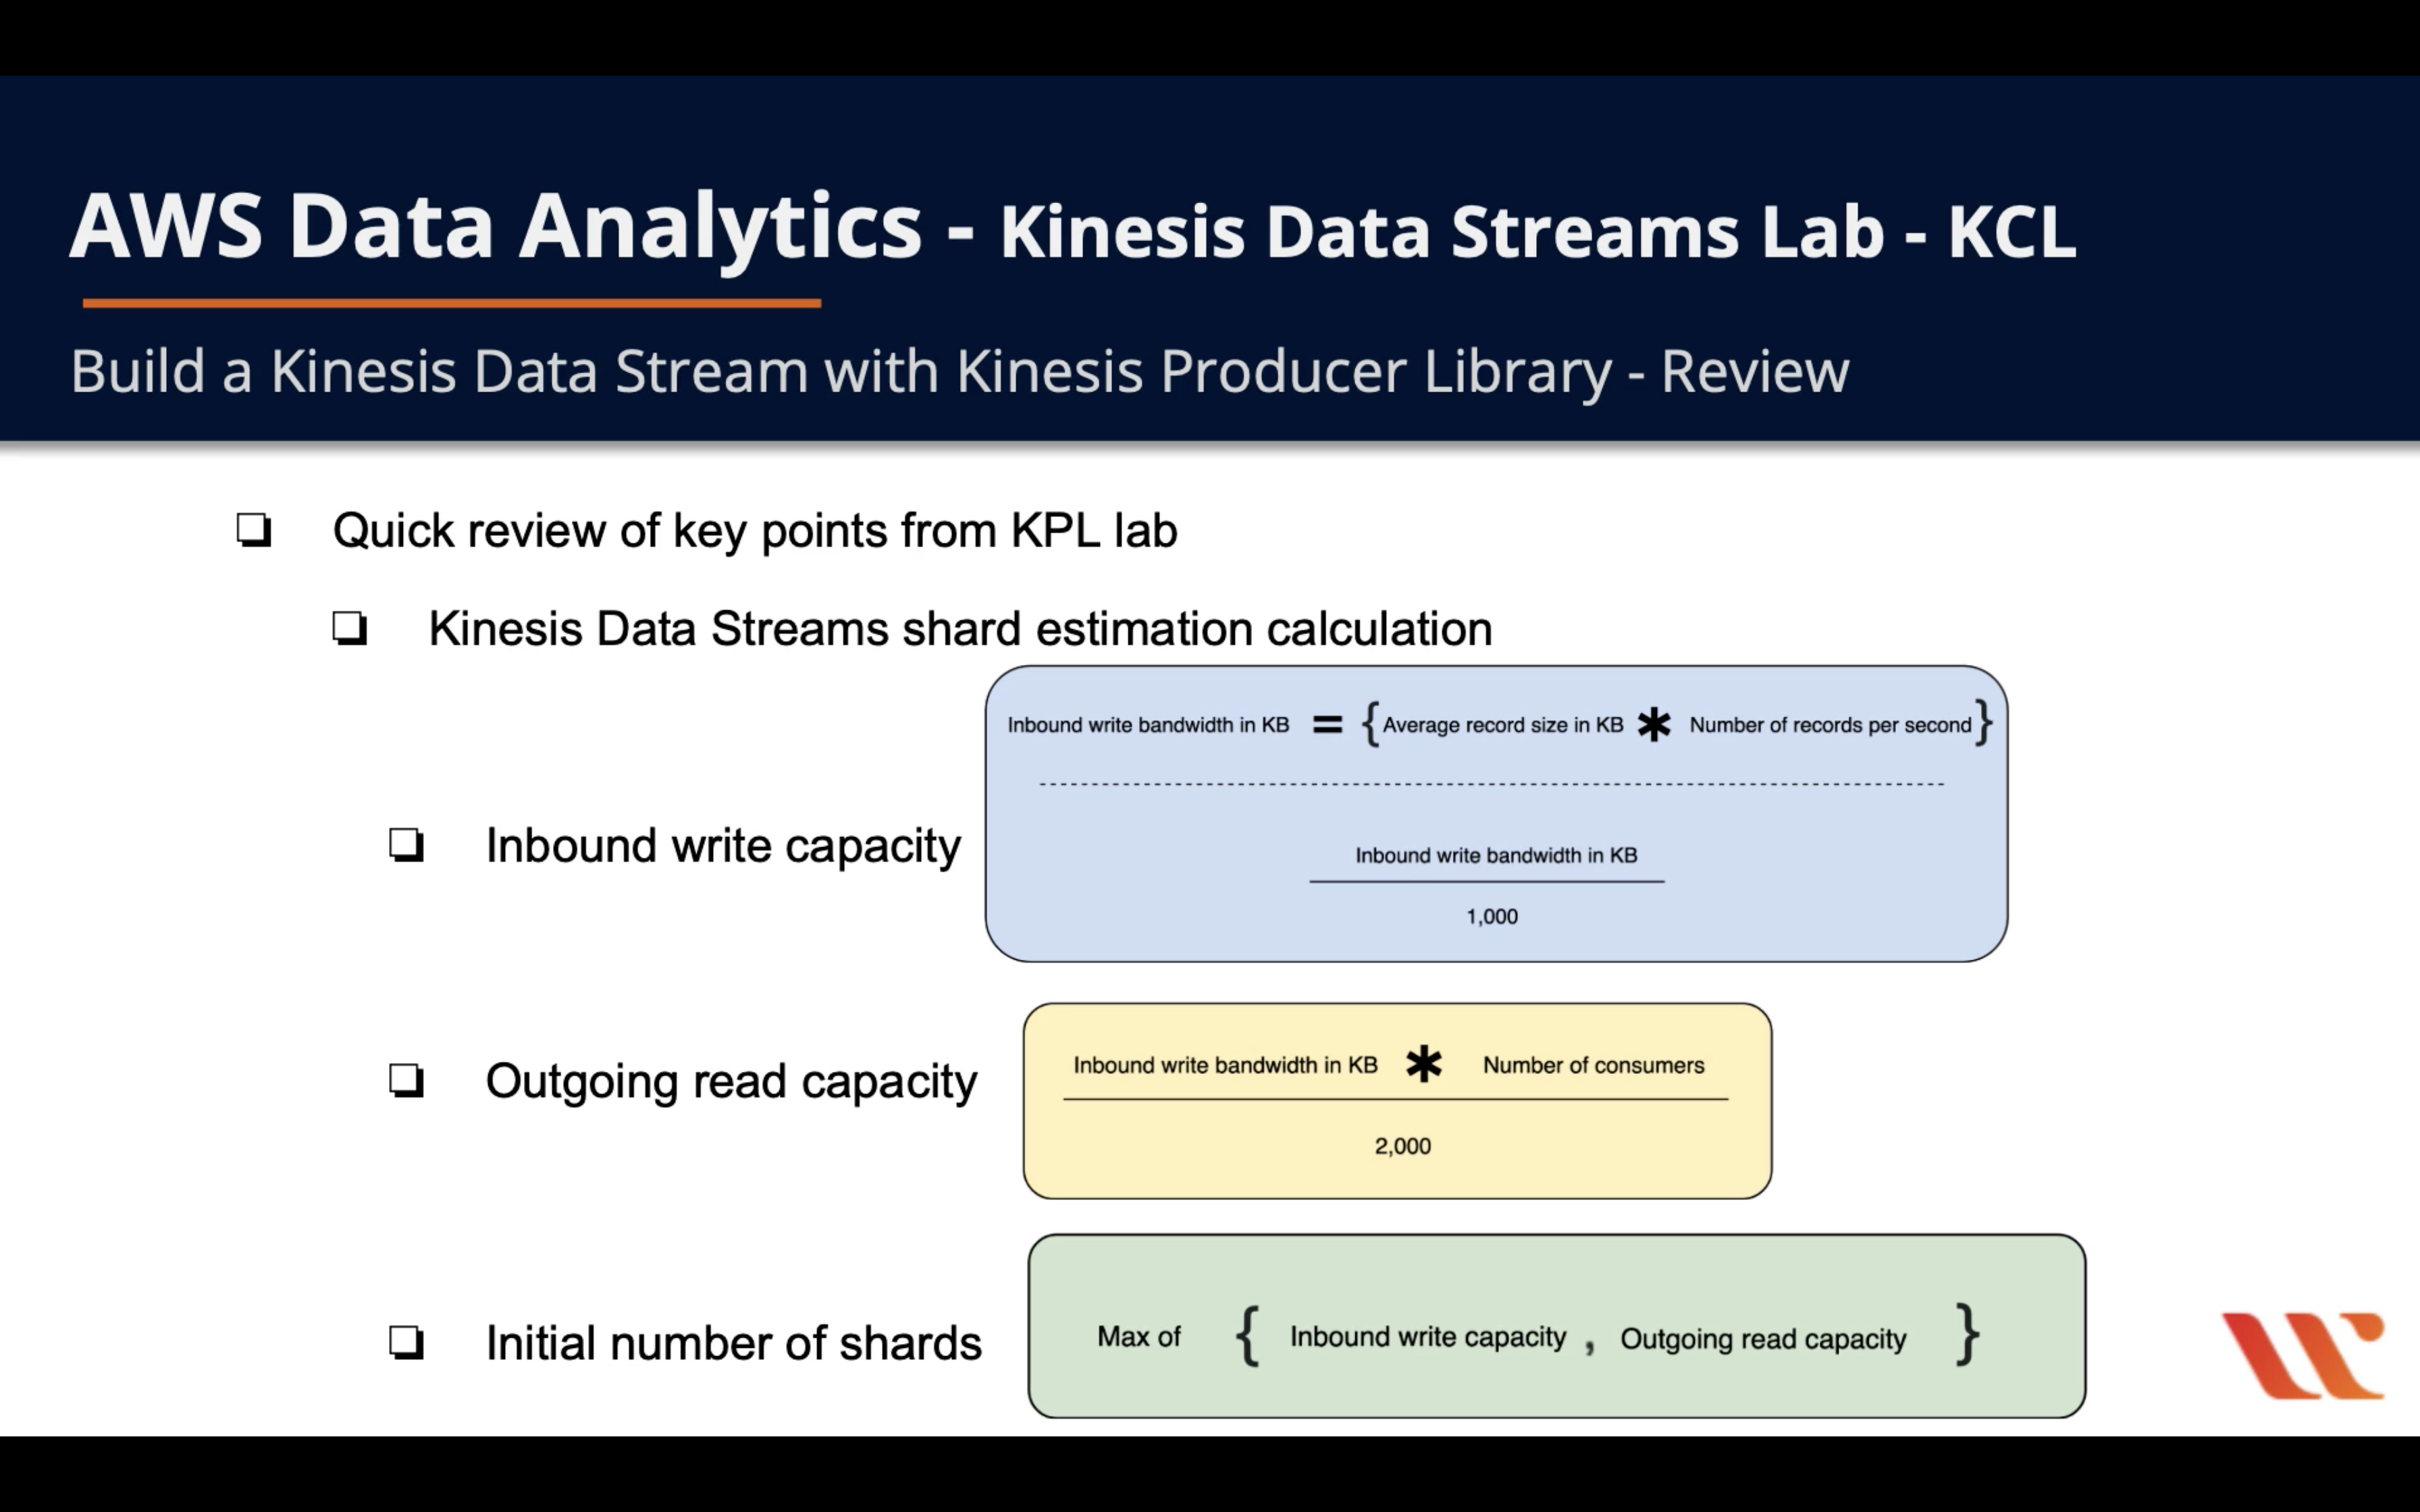
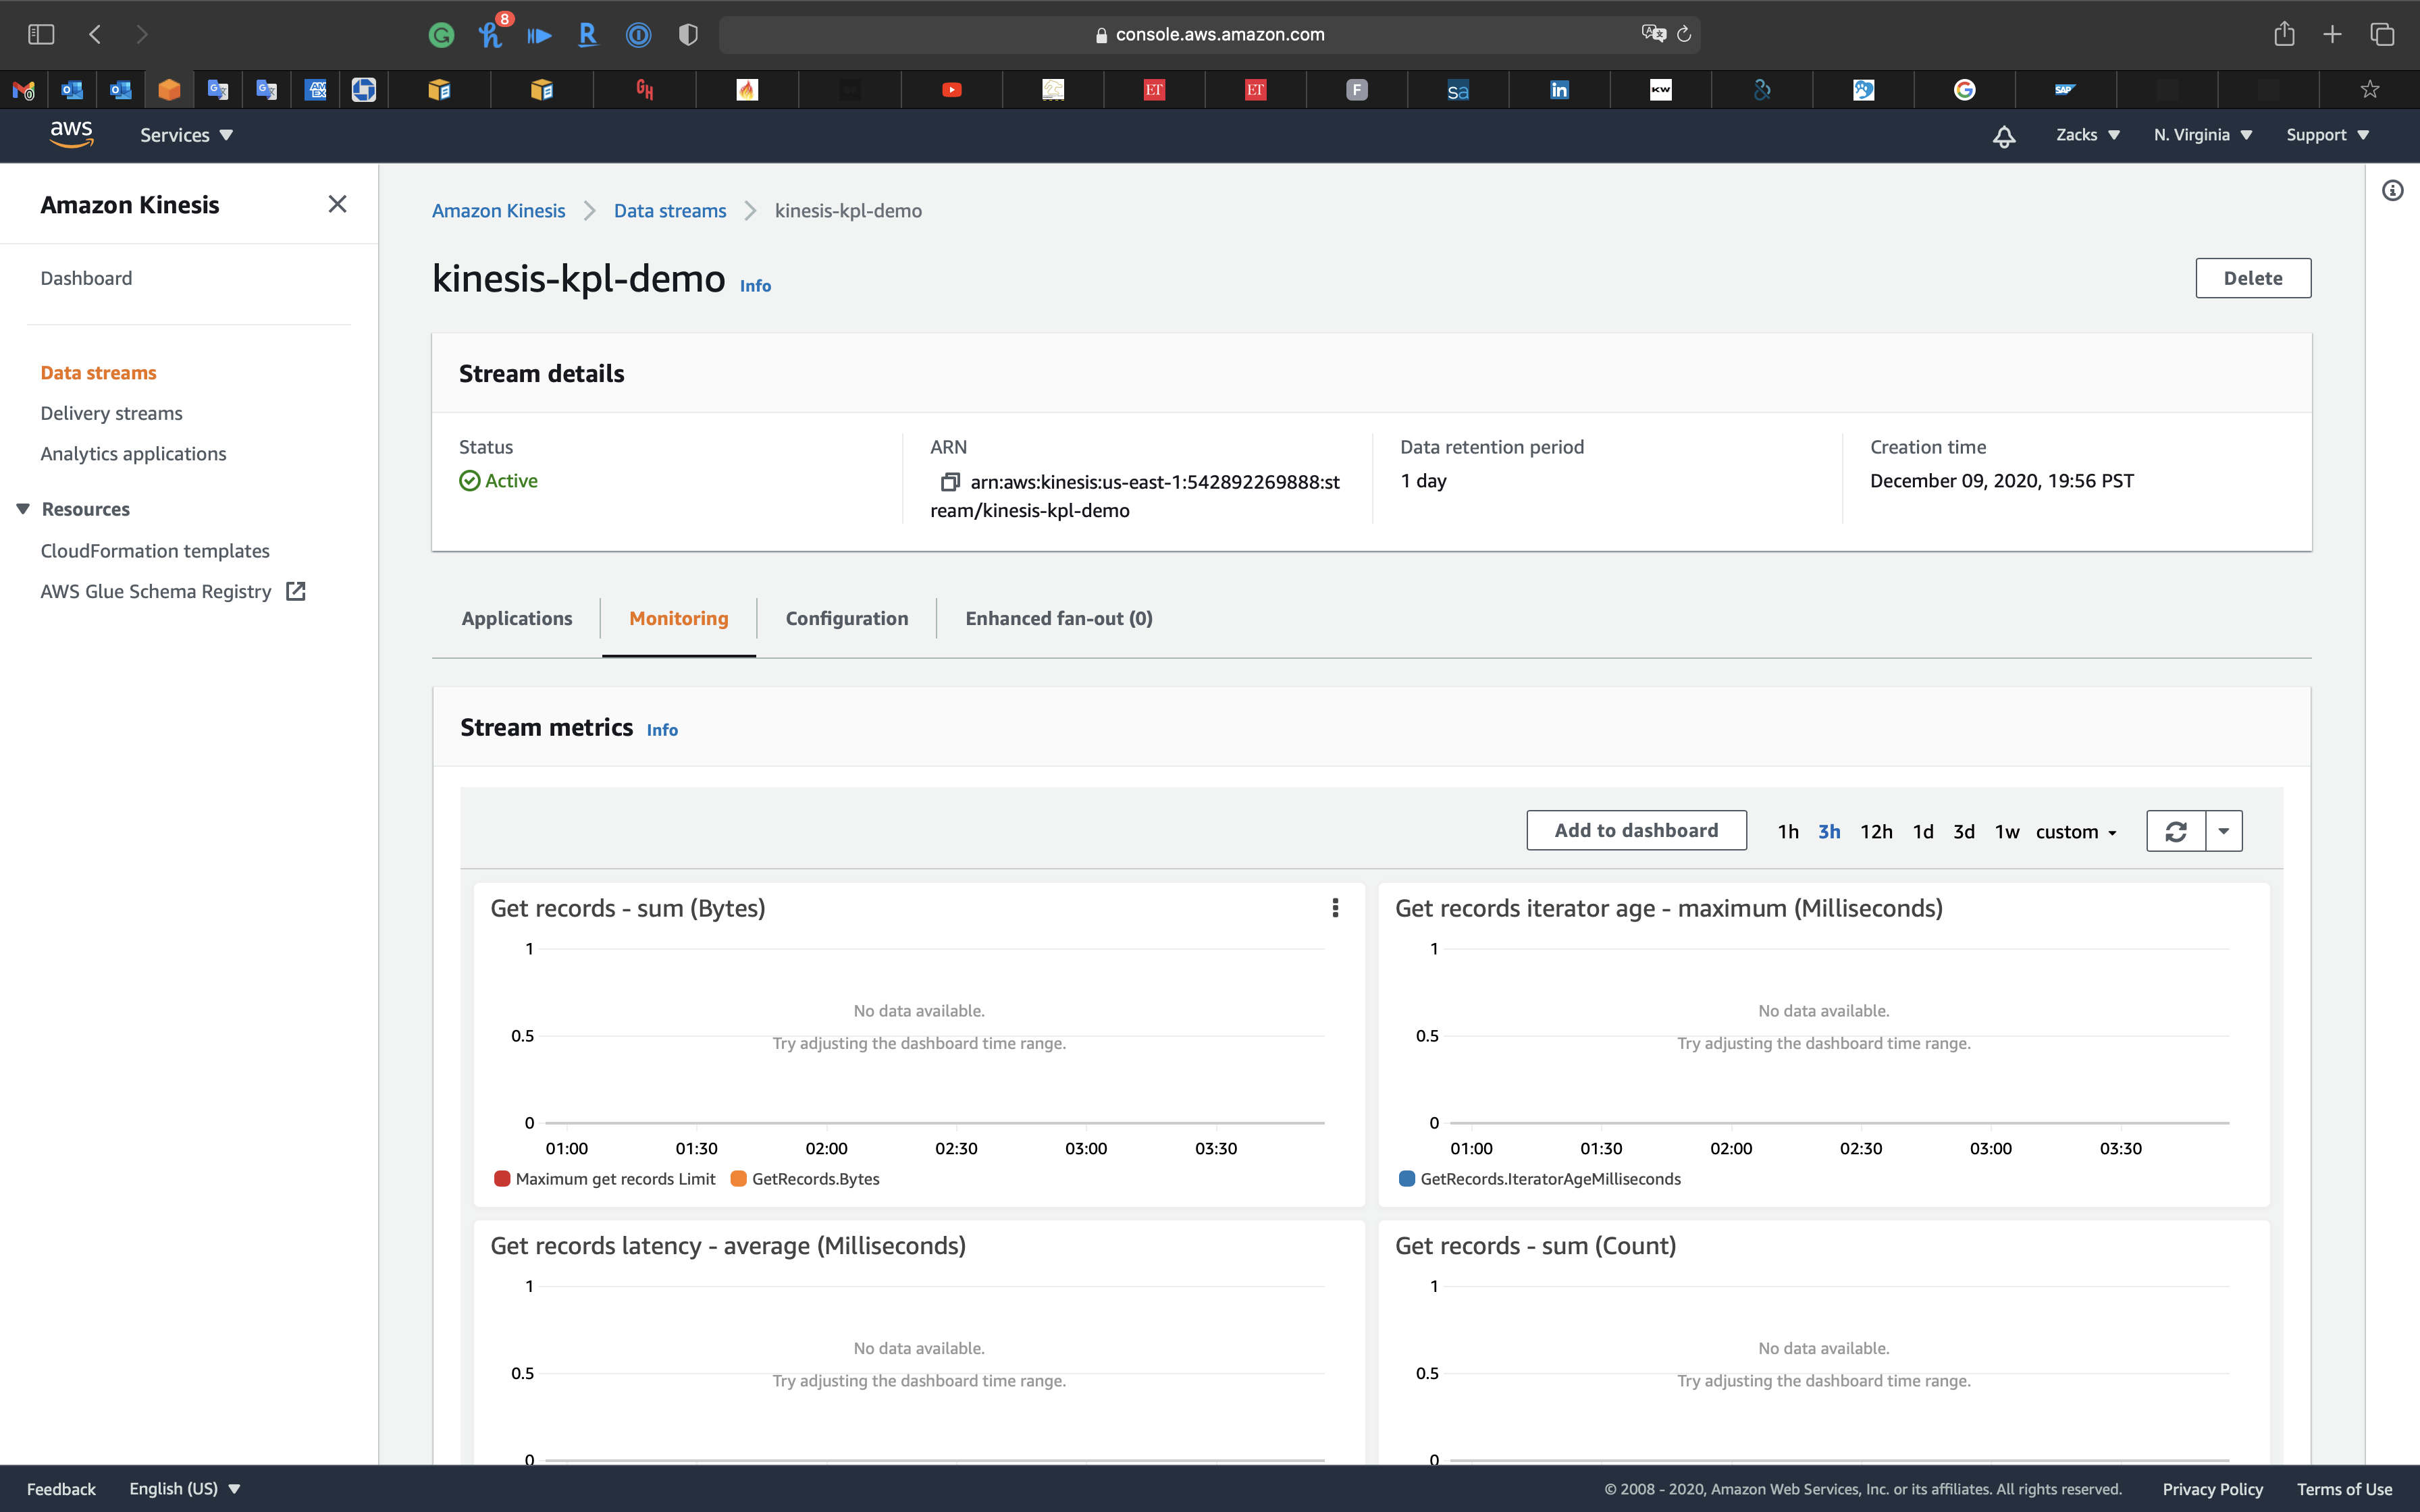
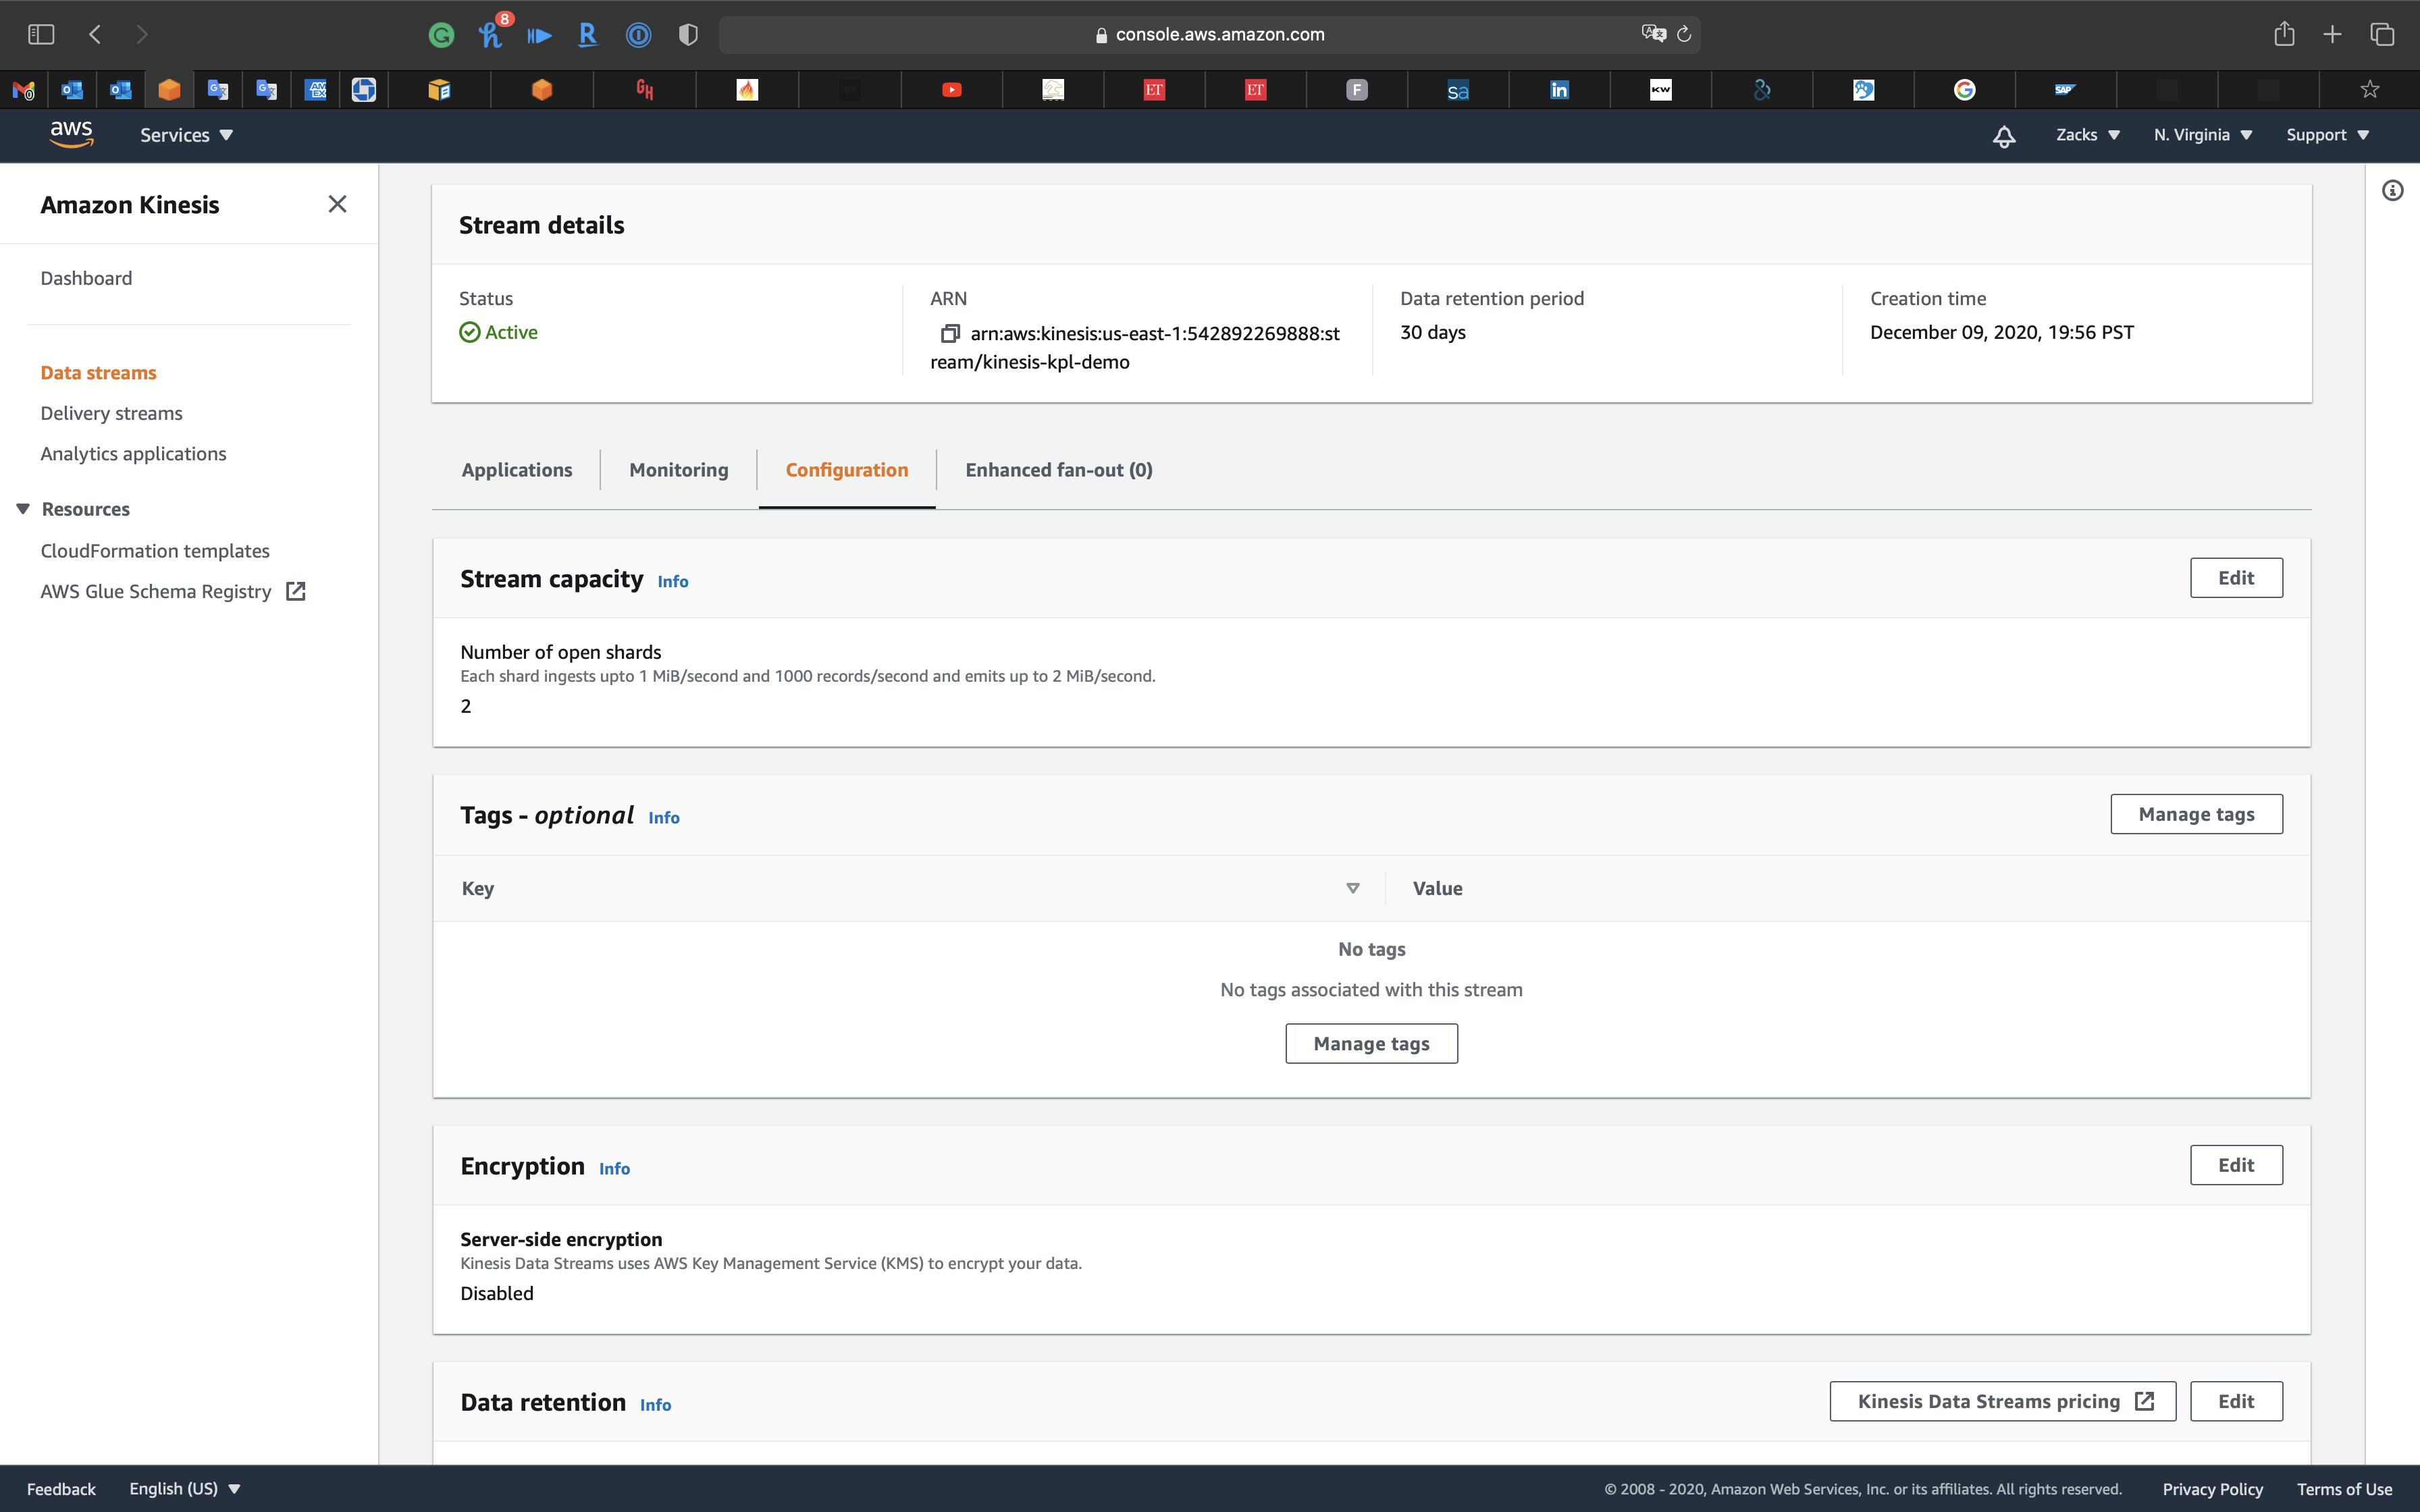
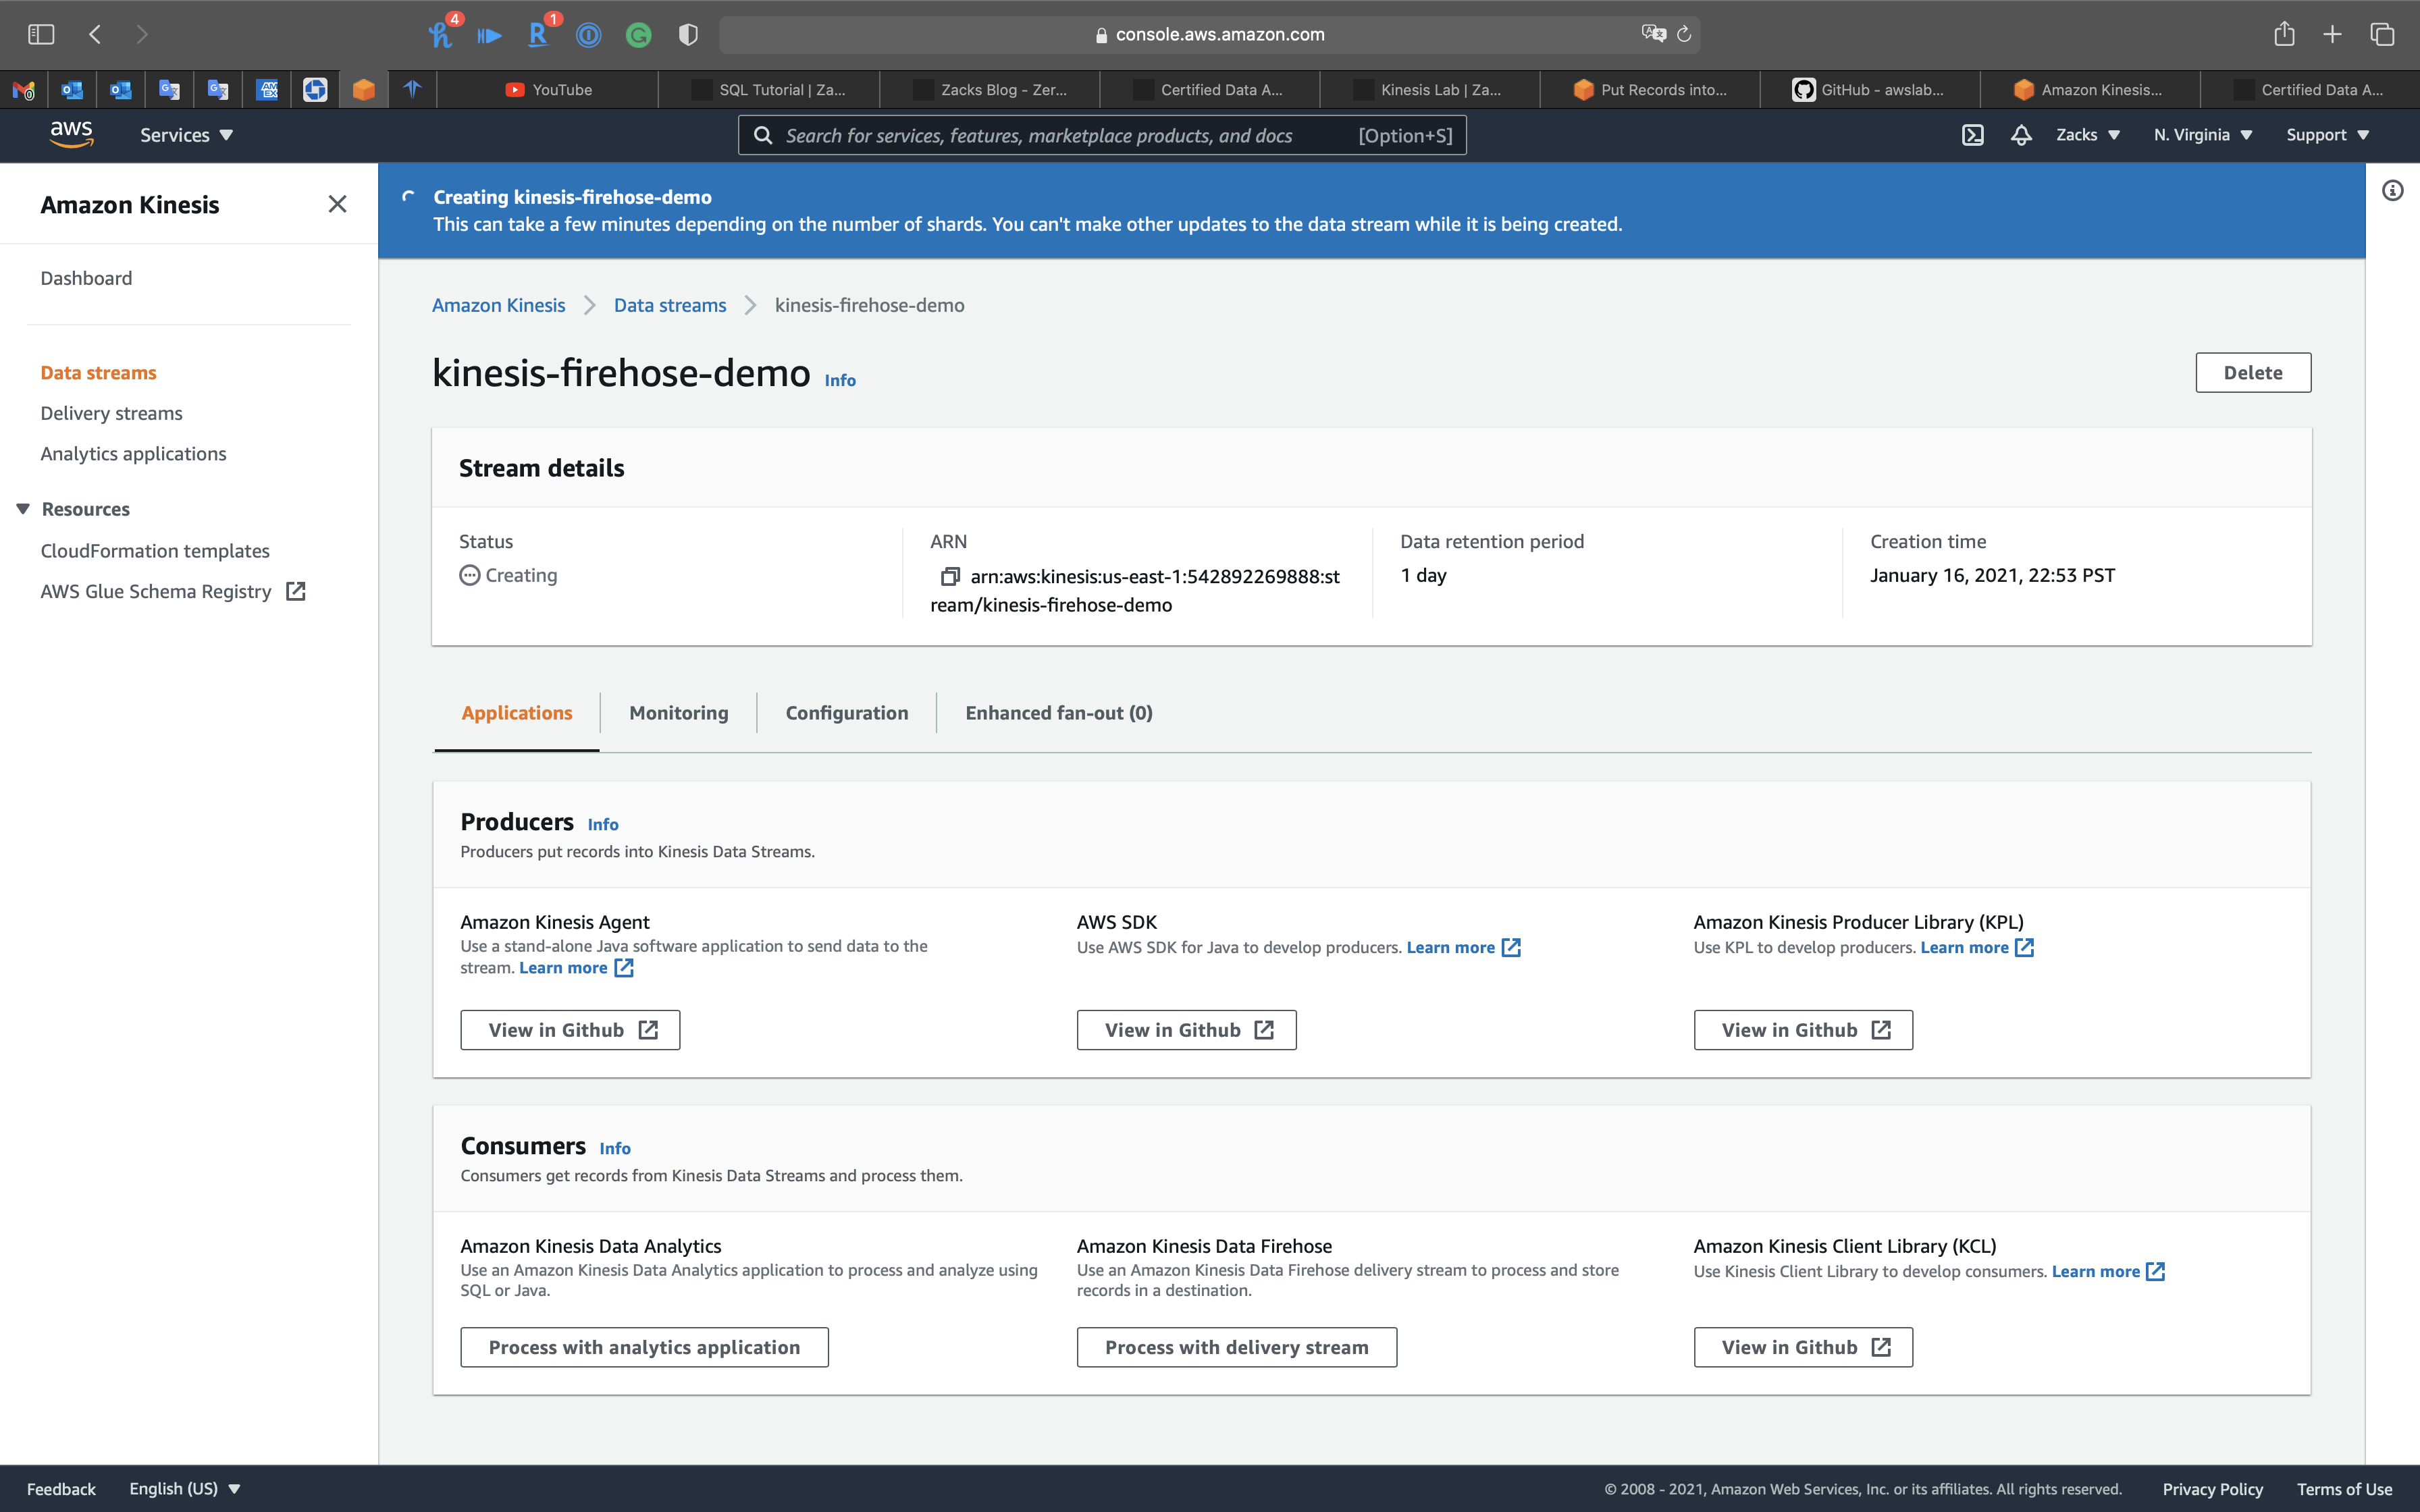
Once the Status change to Active.
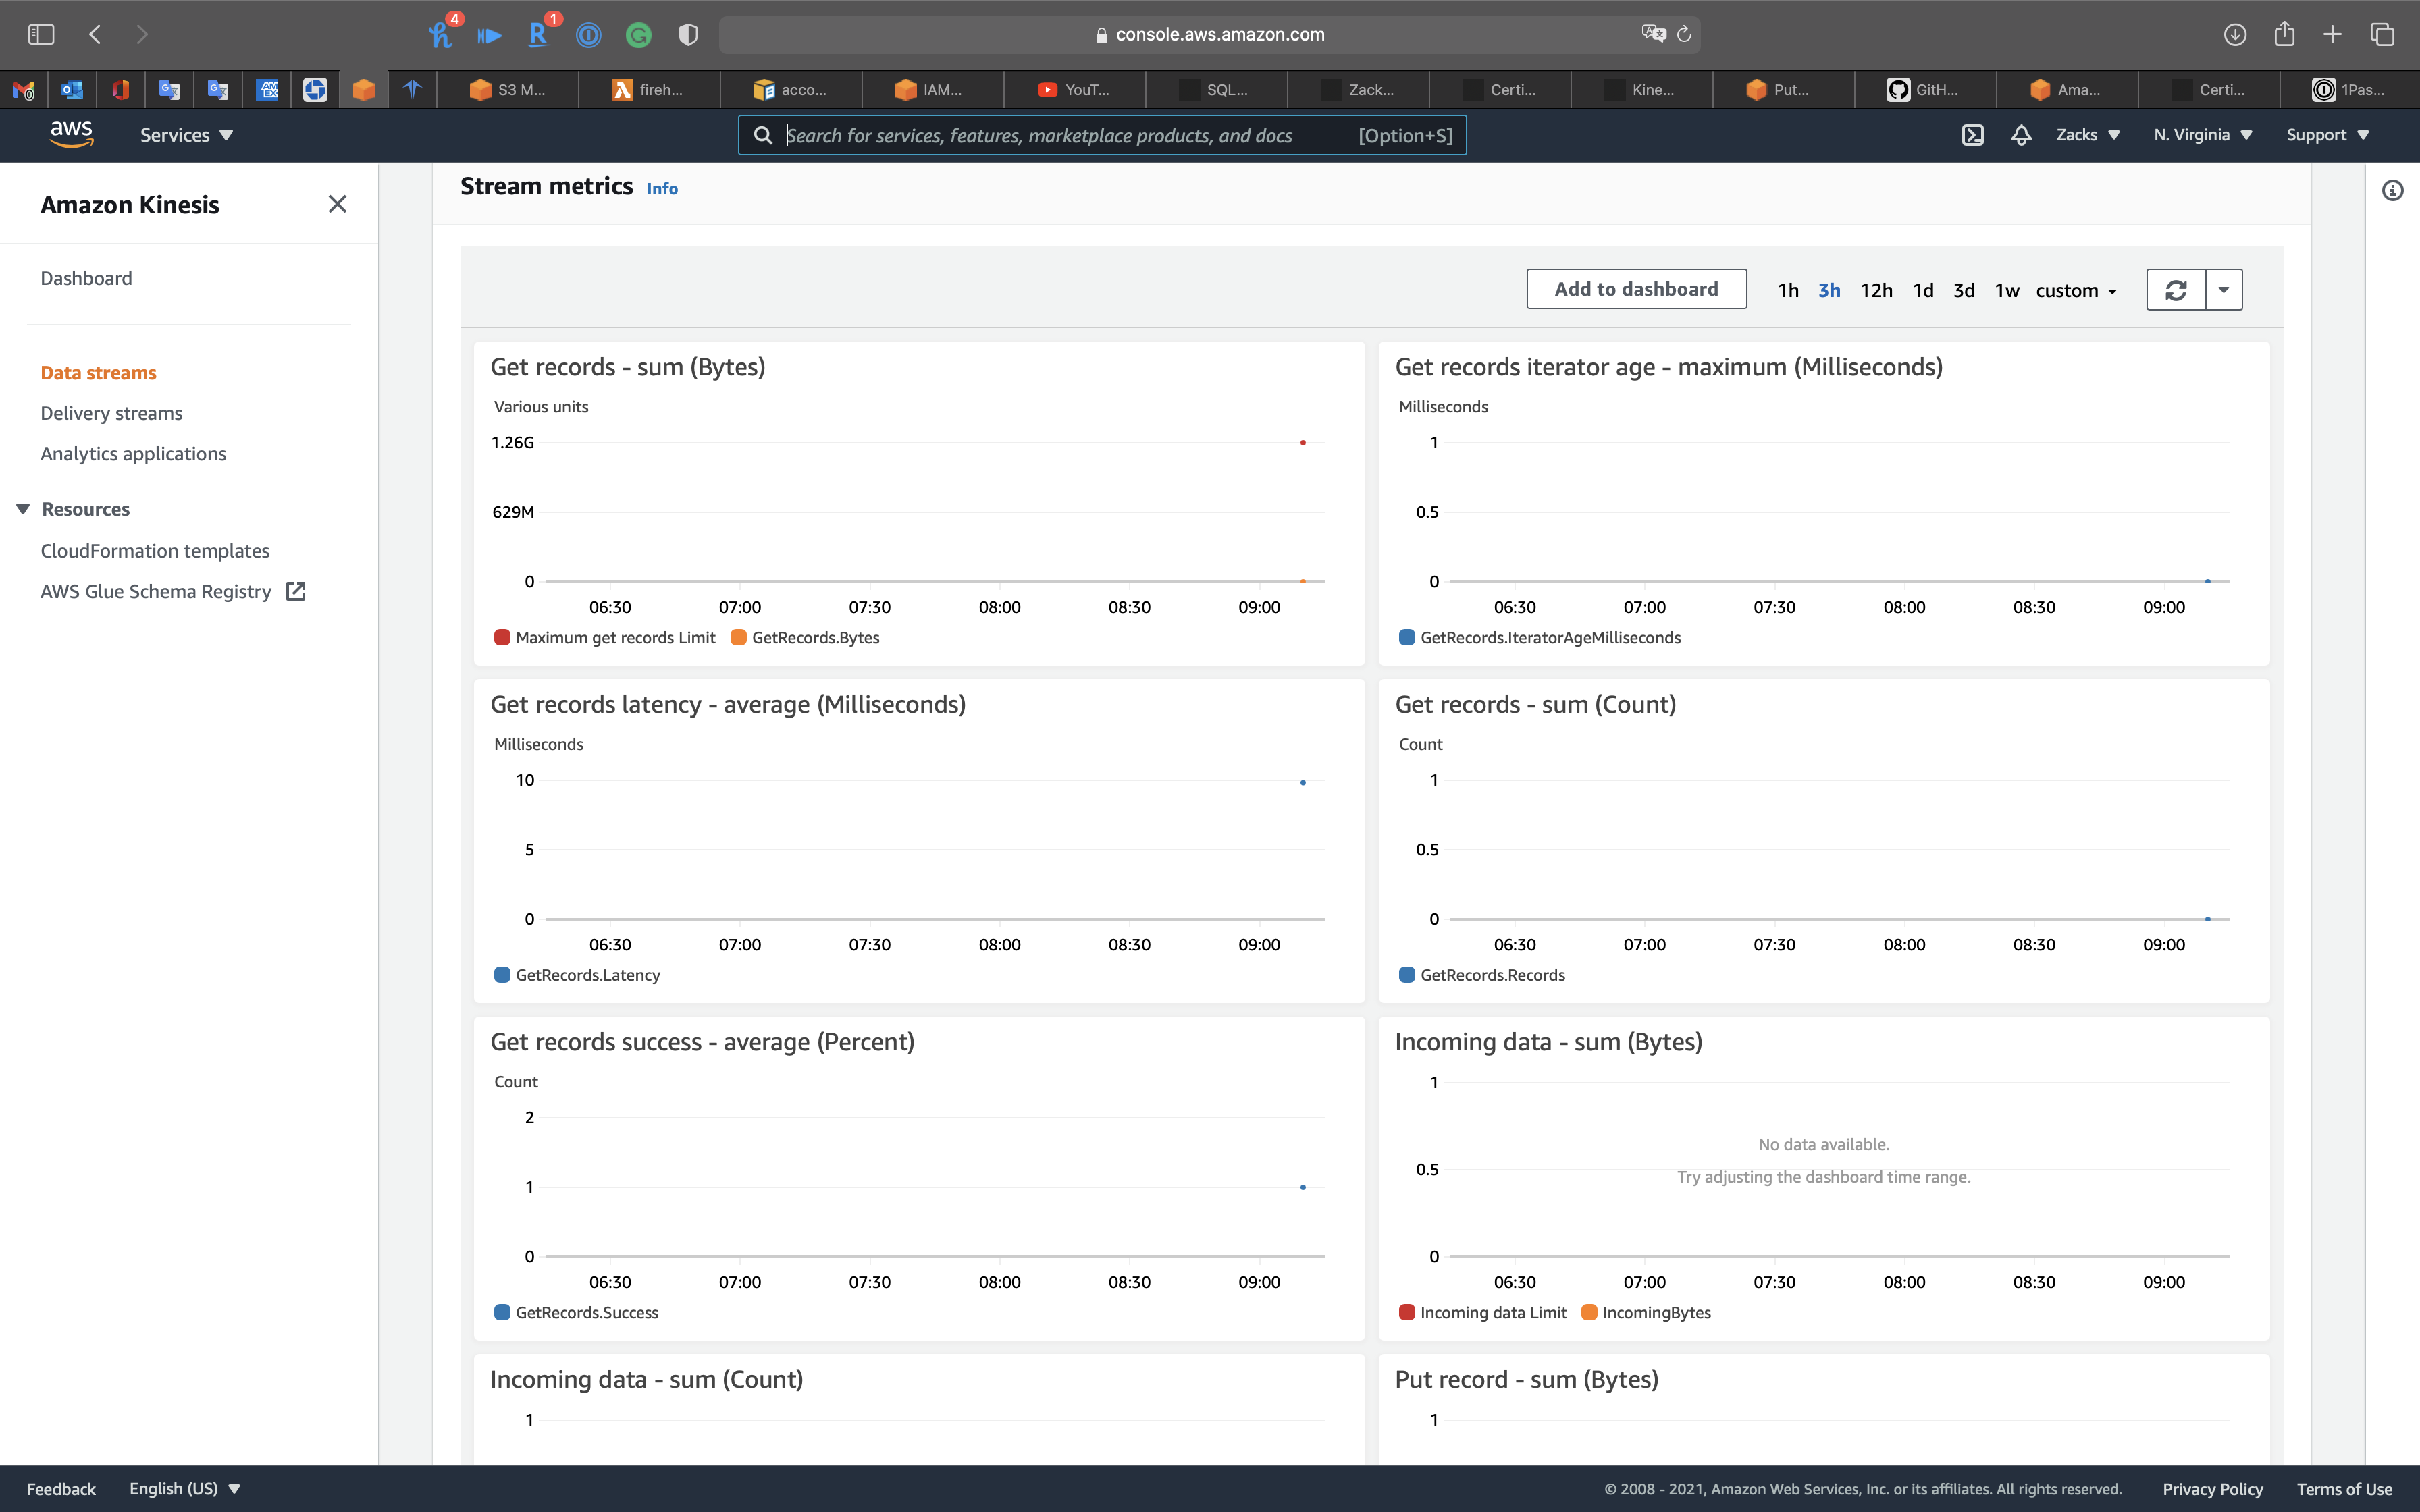
Click on Monitoring tab.
Configuration
Click on Configuration tab.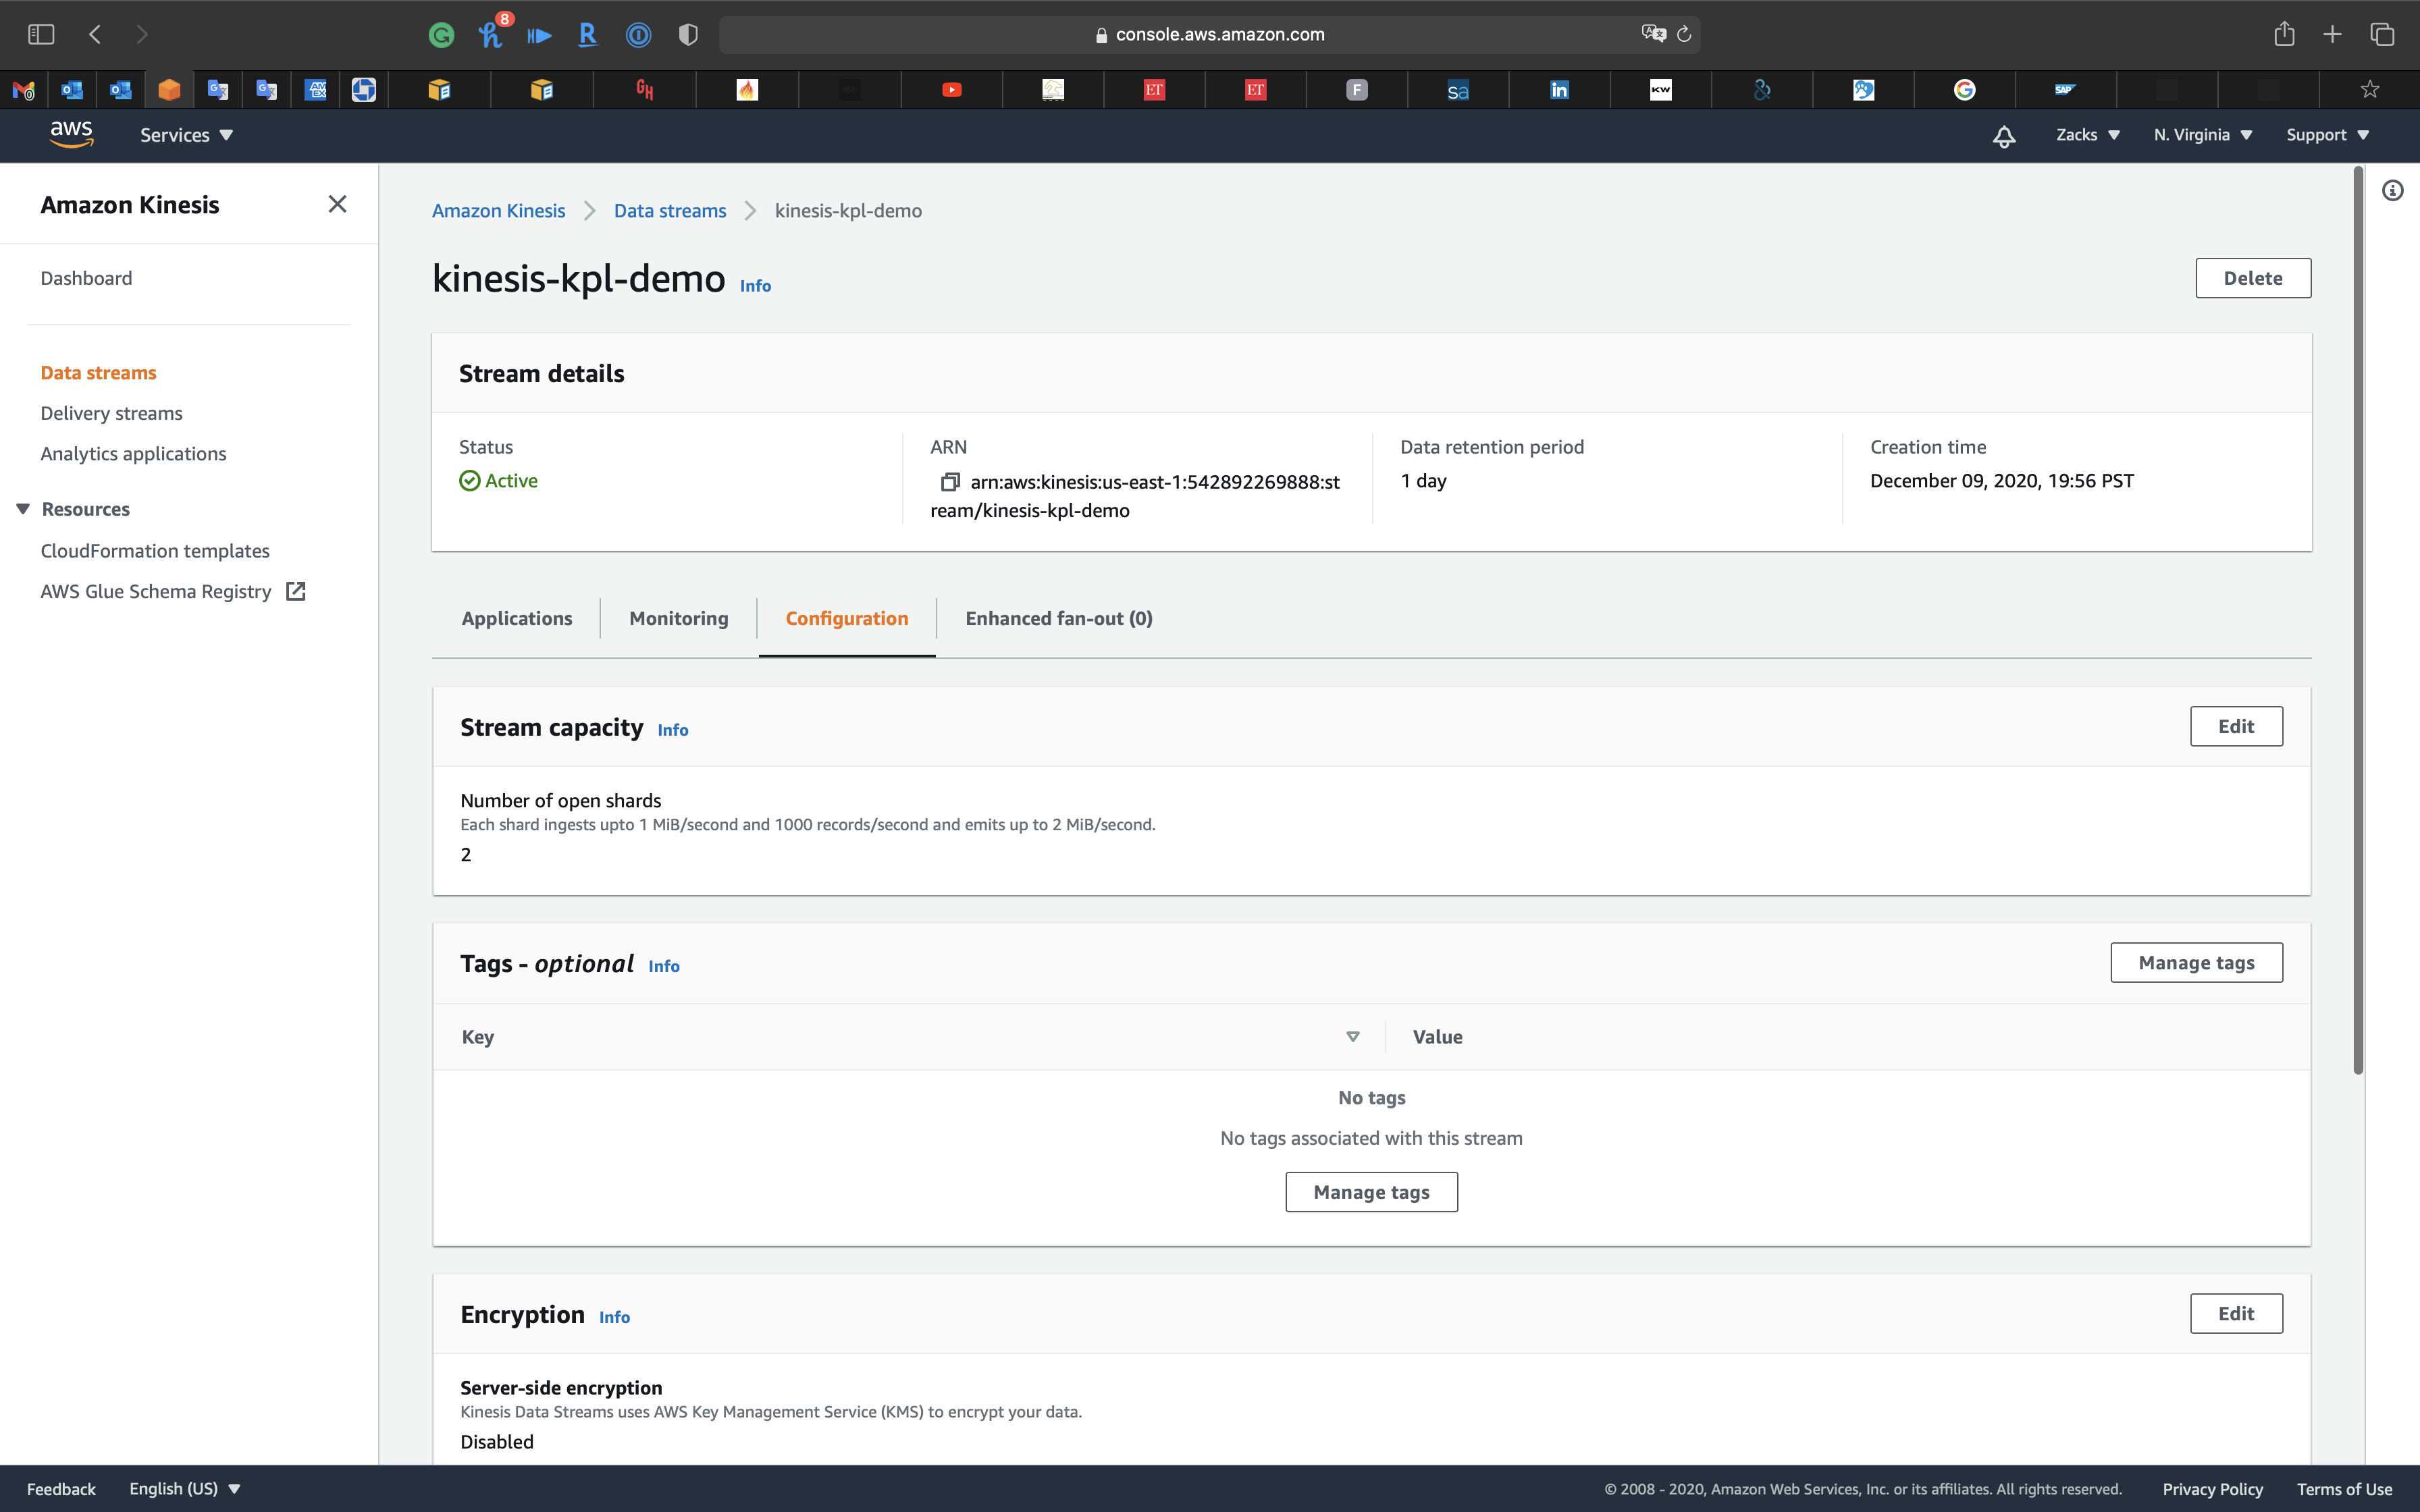
Configure Data retention
Default Data retention is 24 hours.
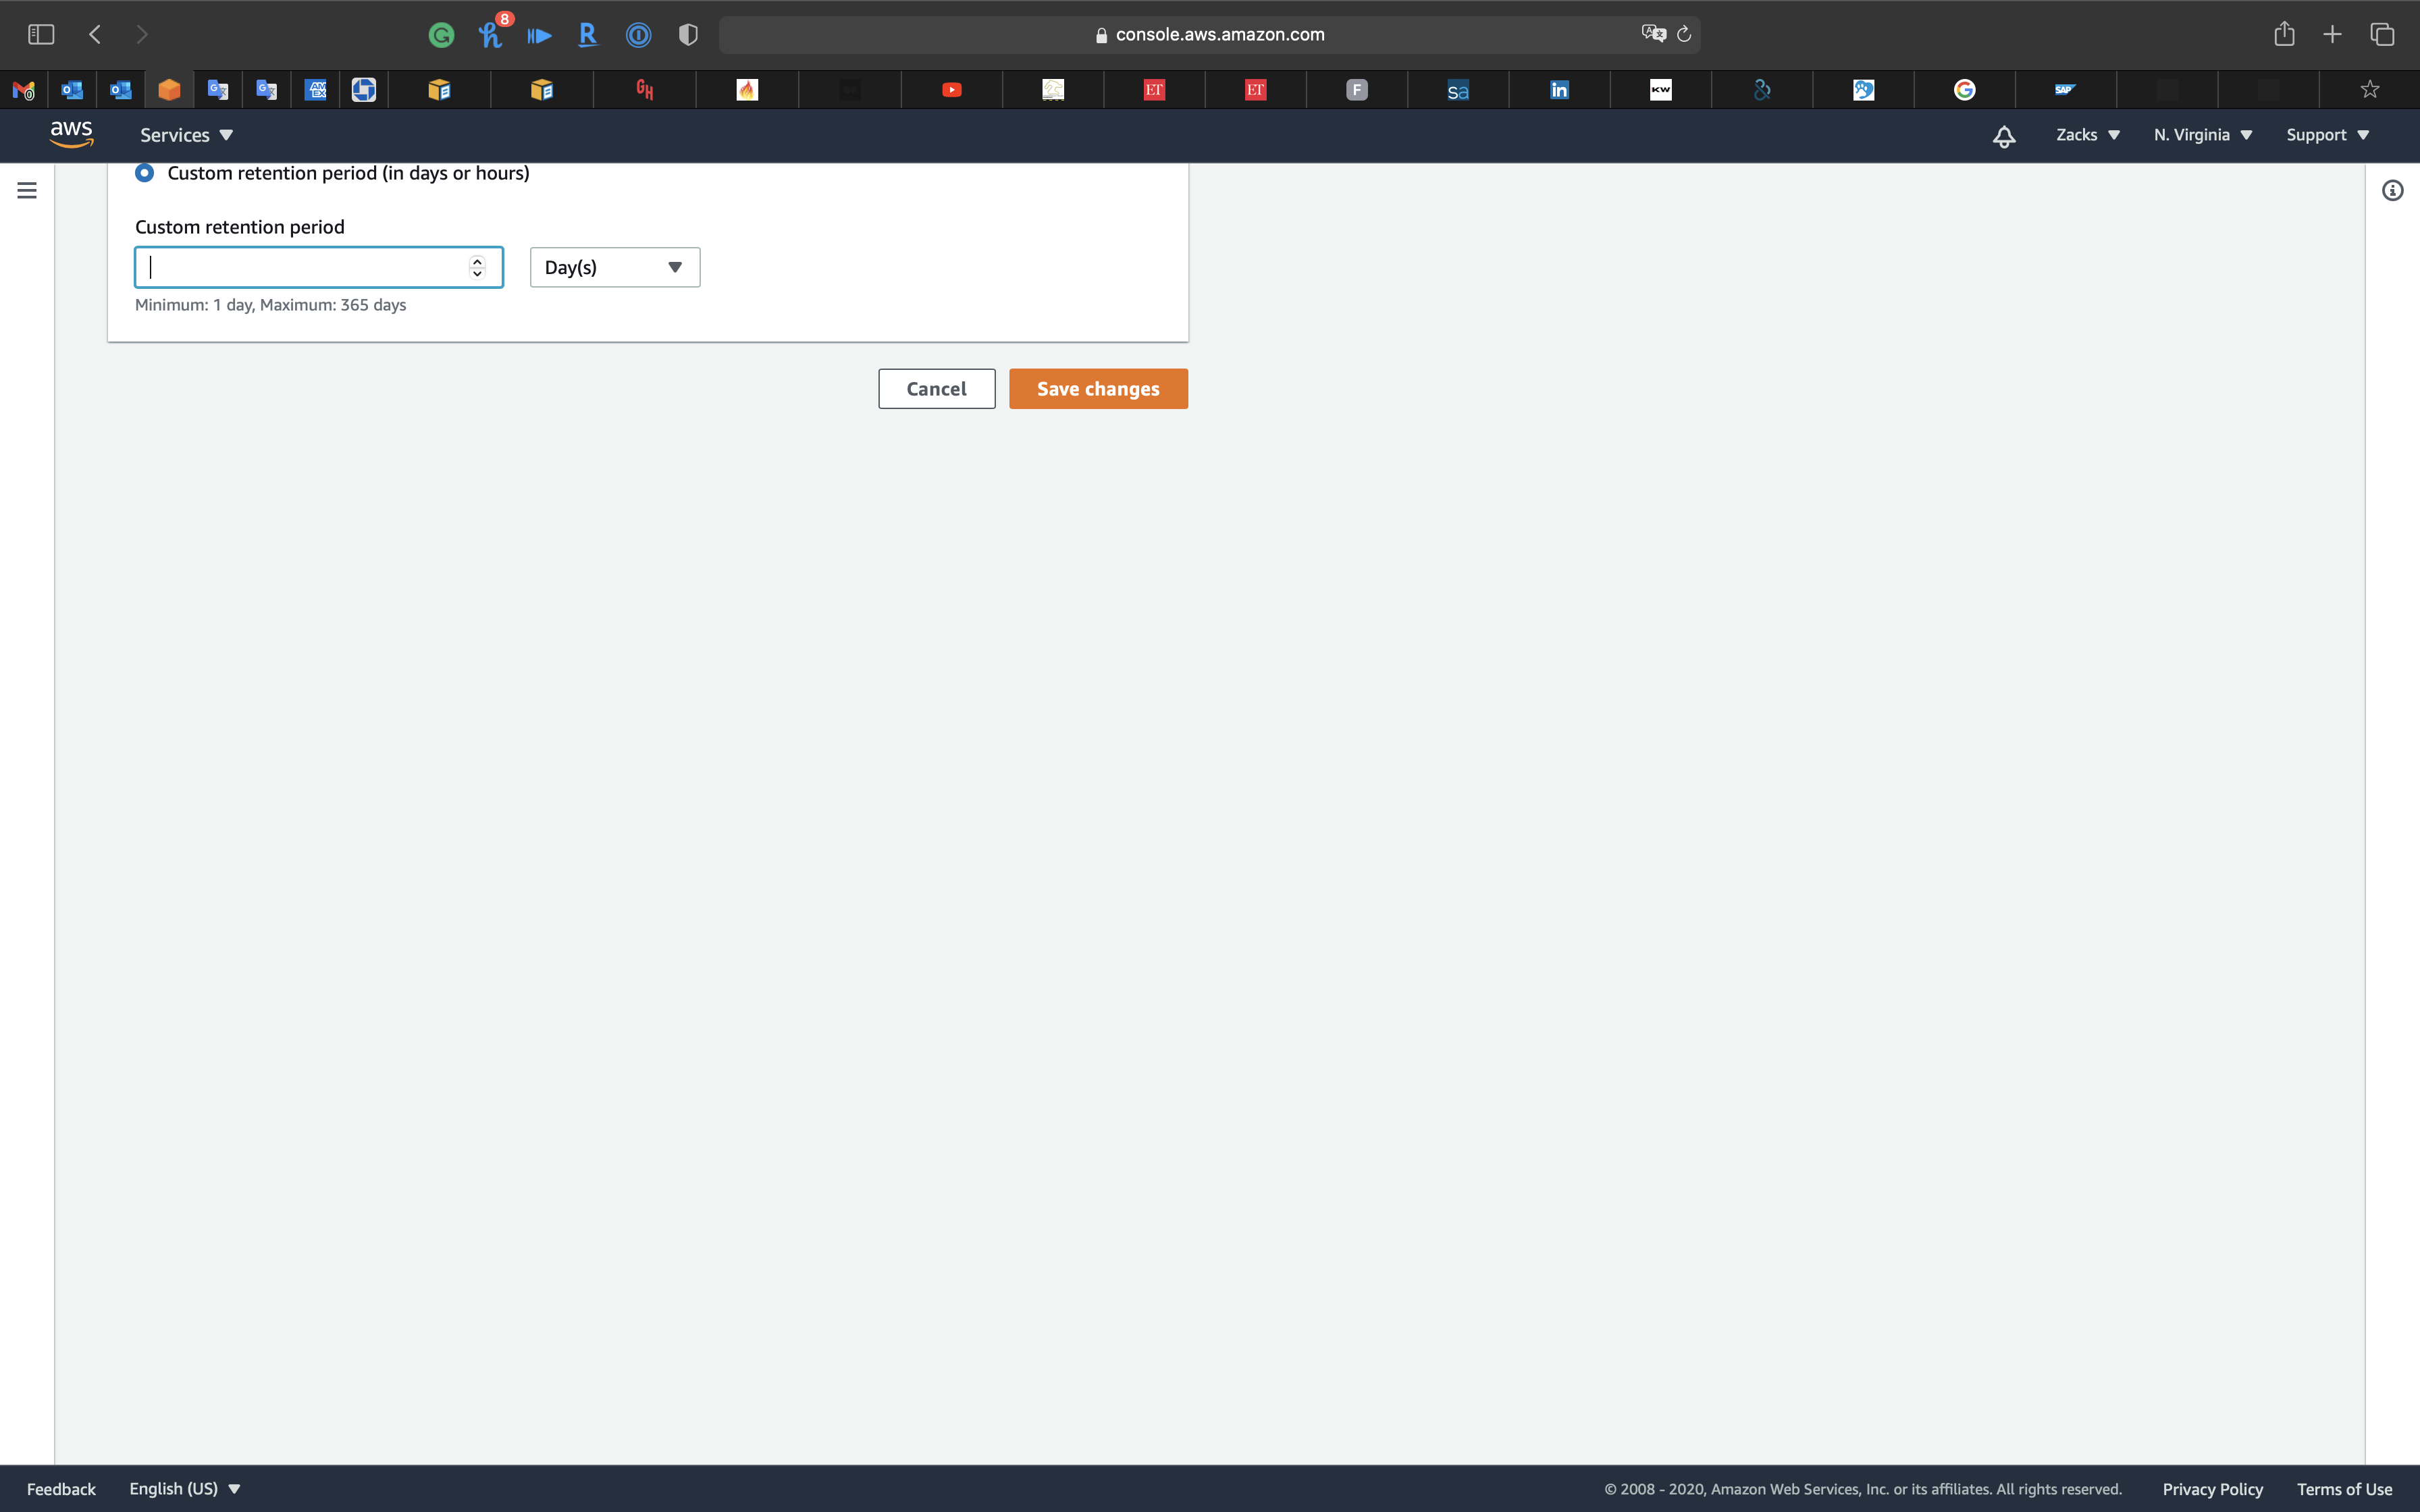
- Maximum: 365 days
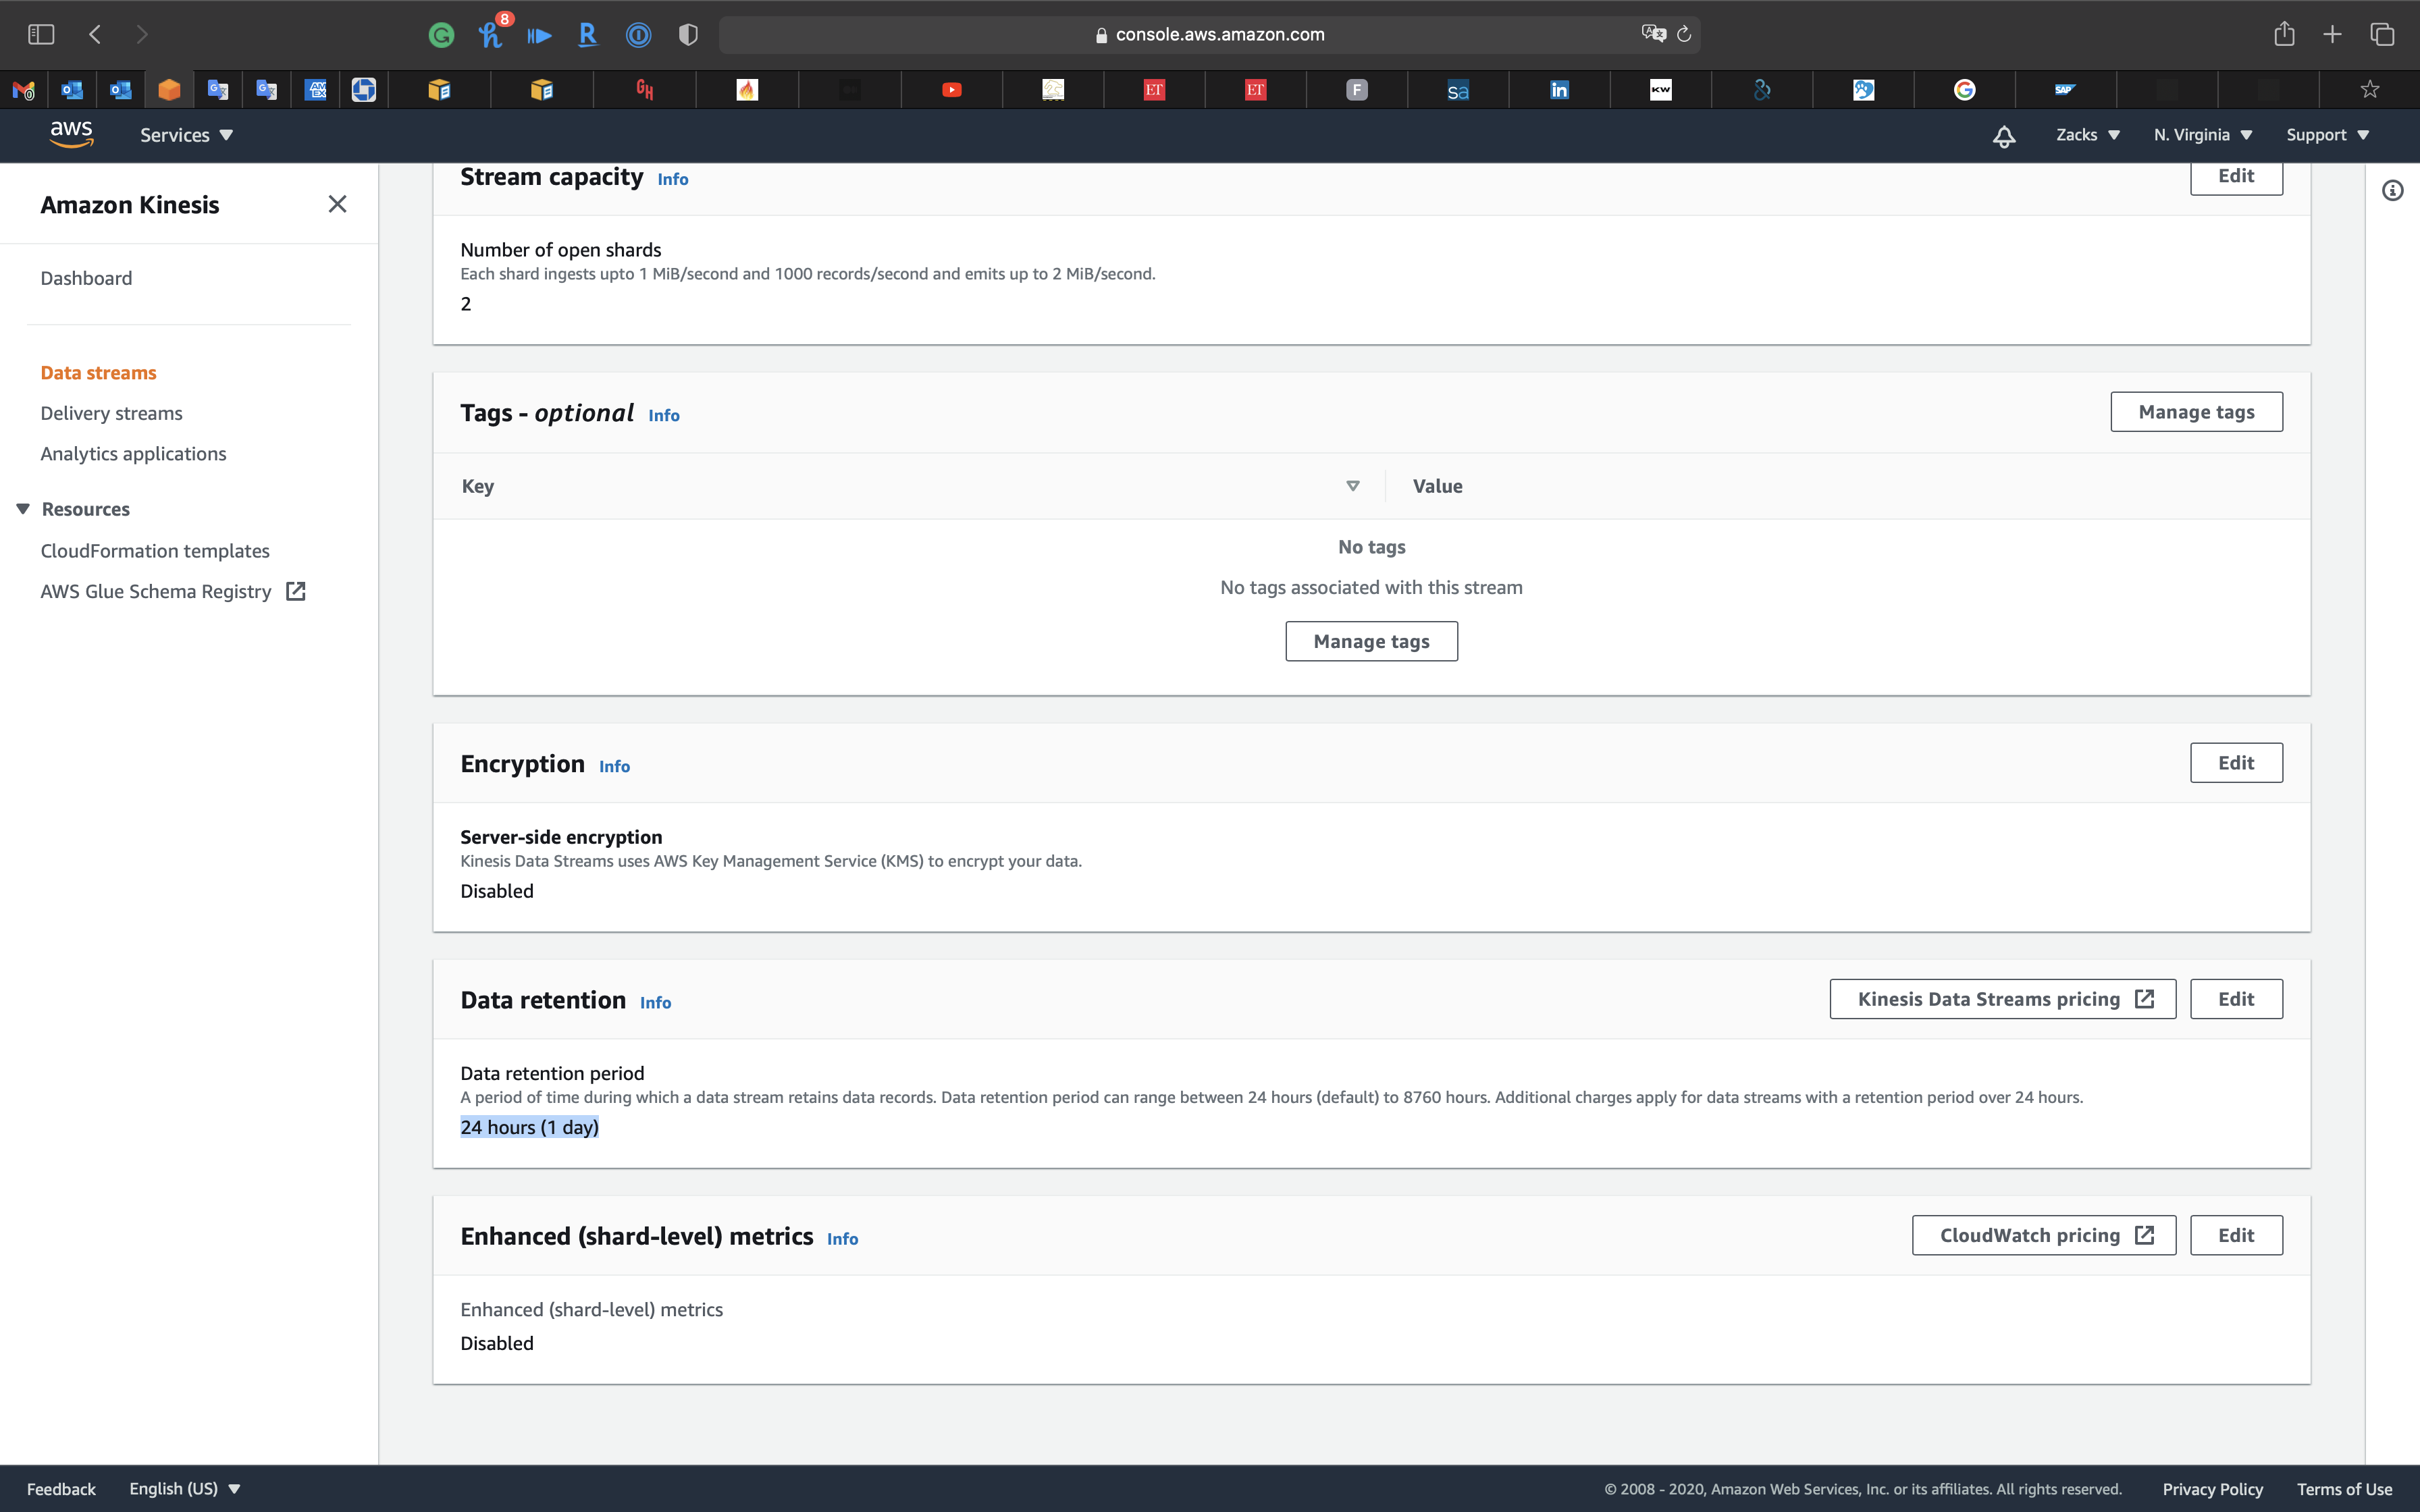
Under Data retention
Click on Edit for extending Data retention.
See Amazon Kinesis Data Streams pricing
Give it 30 days retention.
Click on Save changes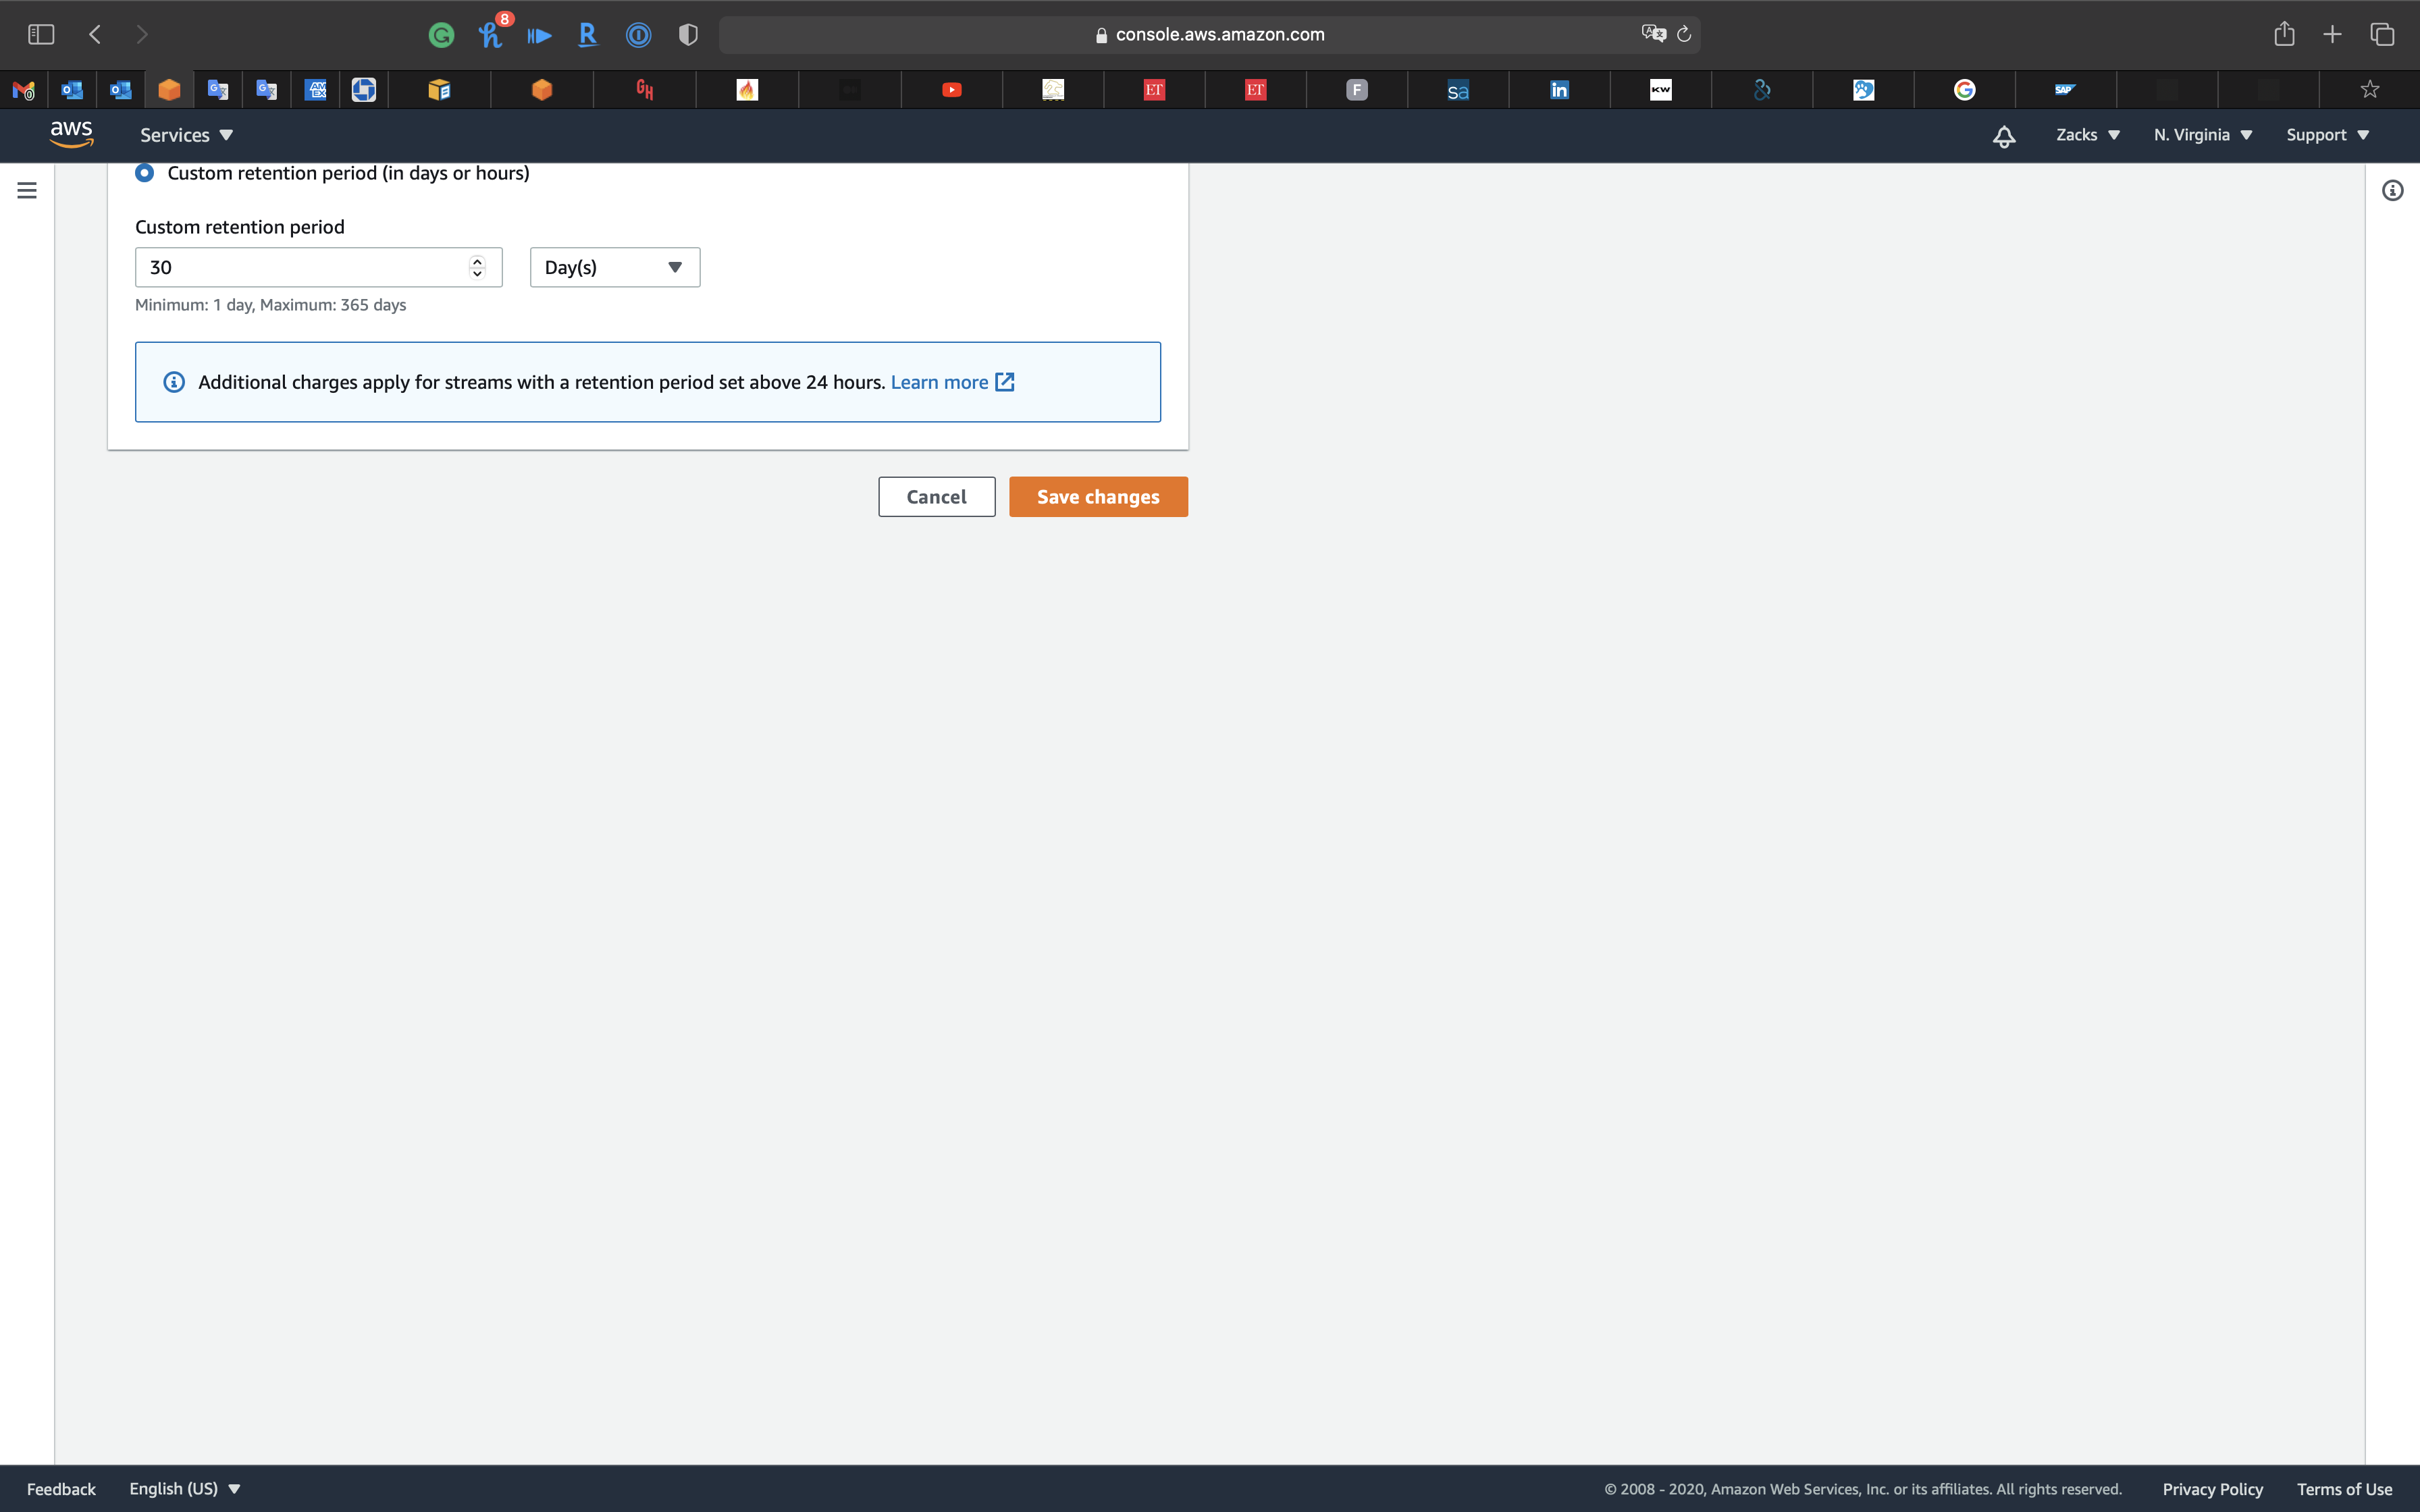
Configure Encryption
Under Encryption
Click on Edit
Check Enable server-side encryption
Click on Cancel
Enhanced (shard-level) metrics
Under Enhanced (shard-level) metrics
Click on Edit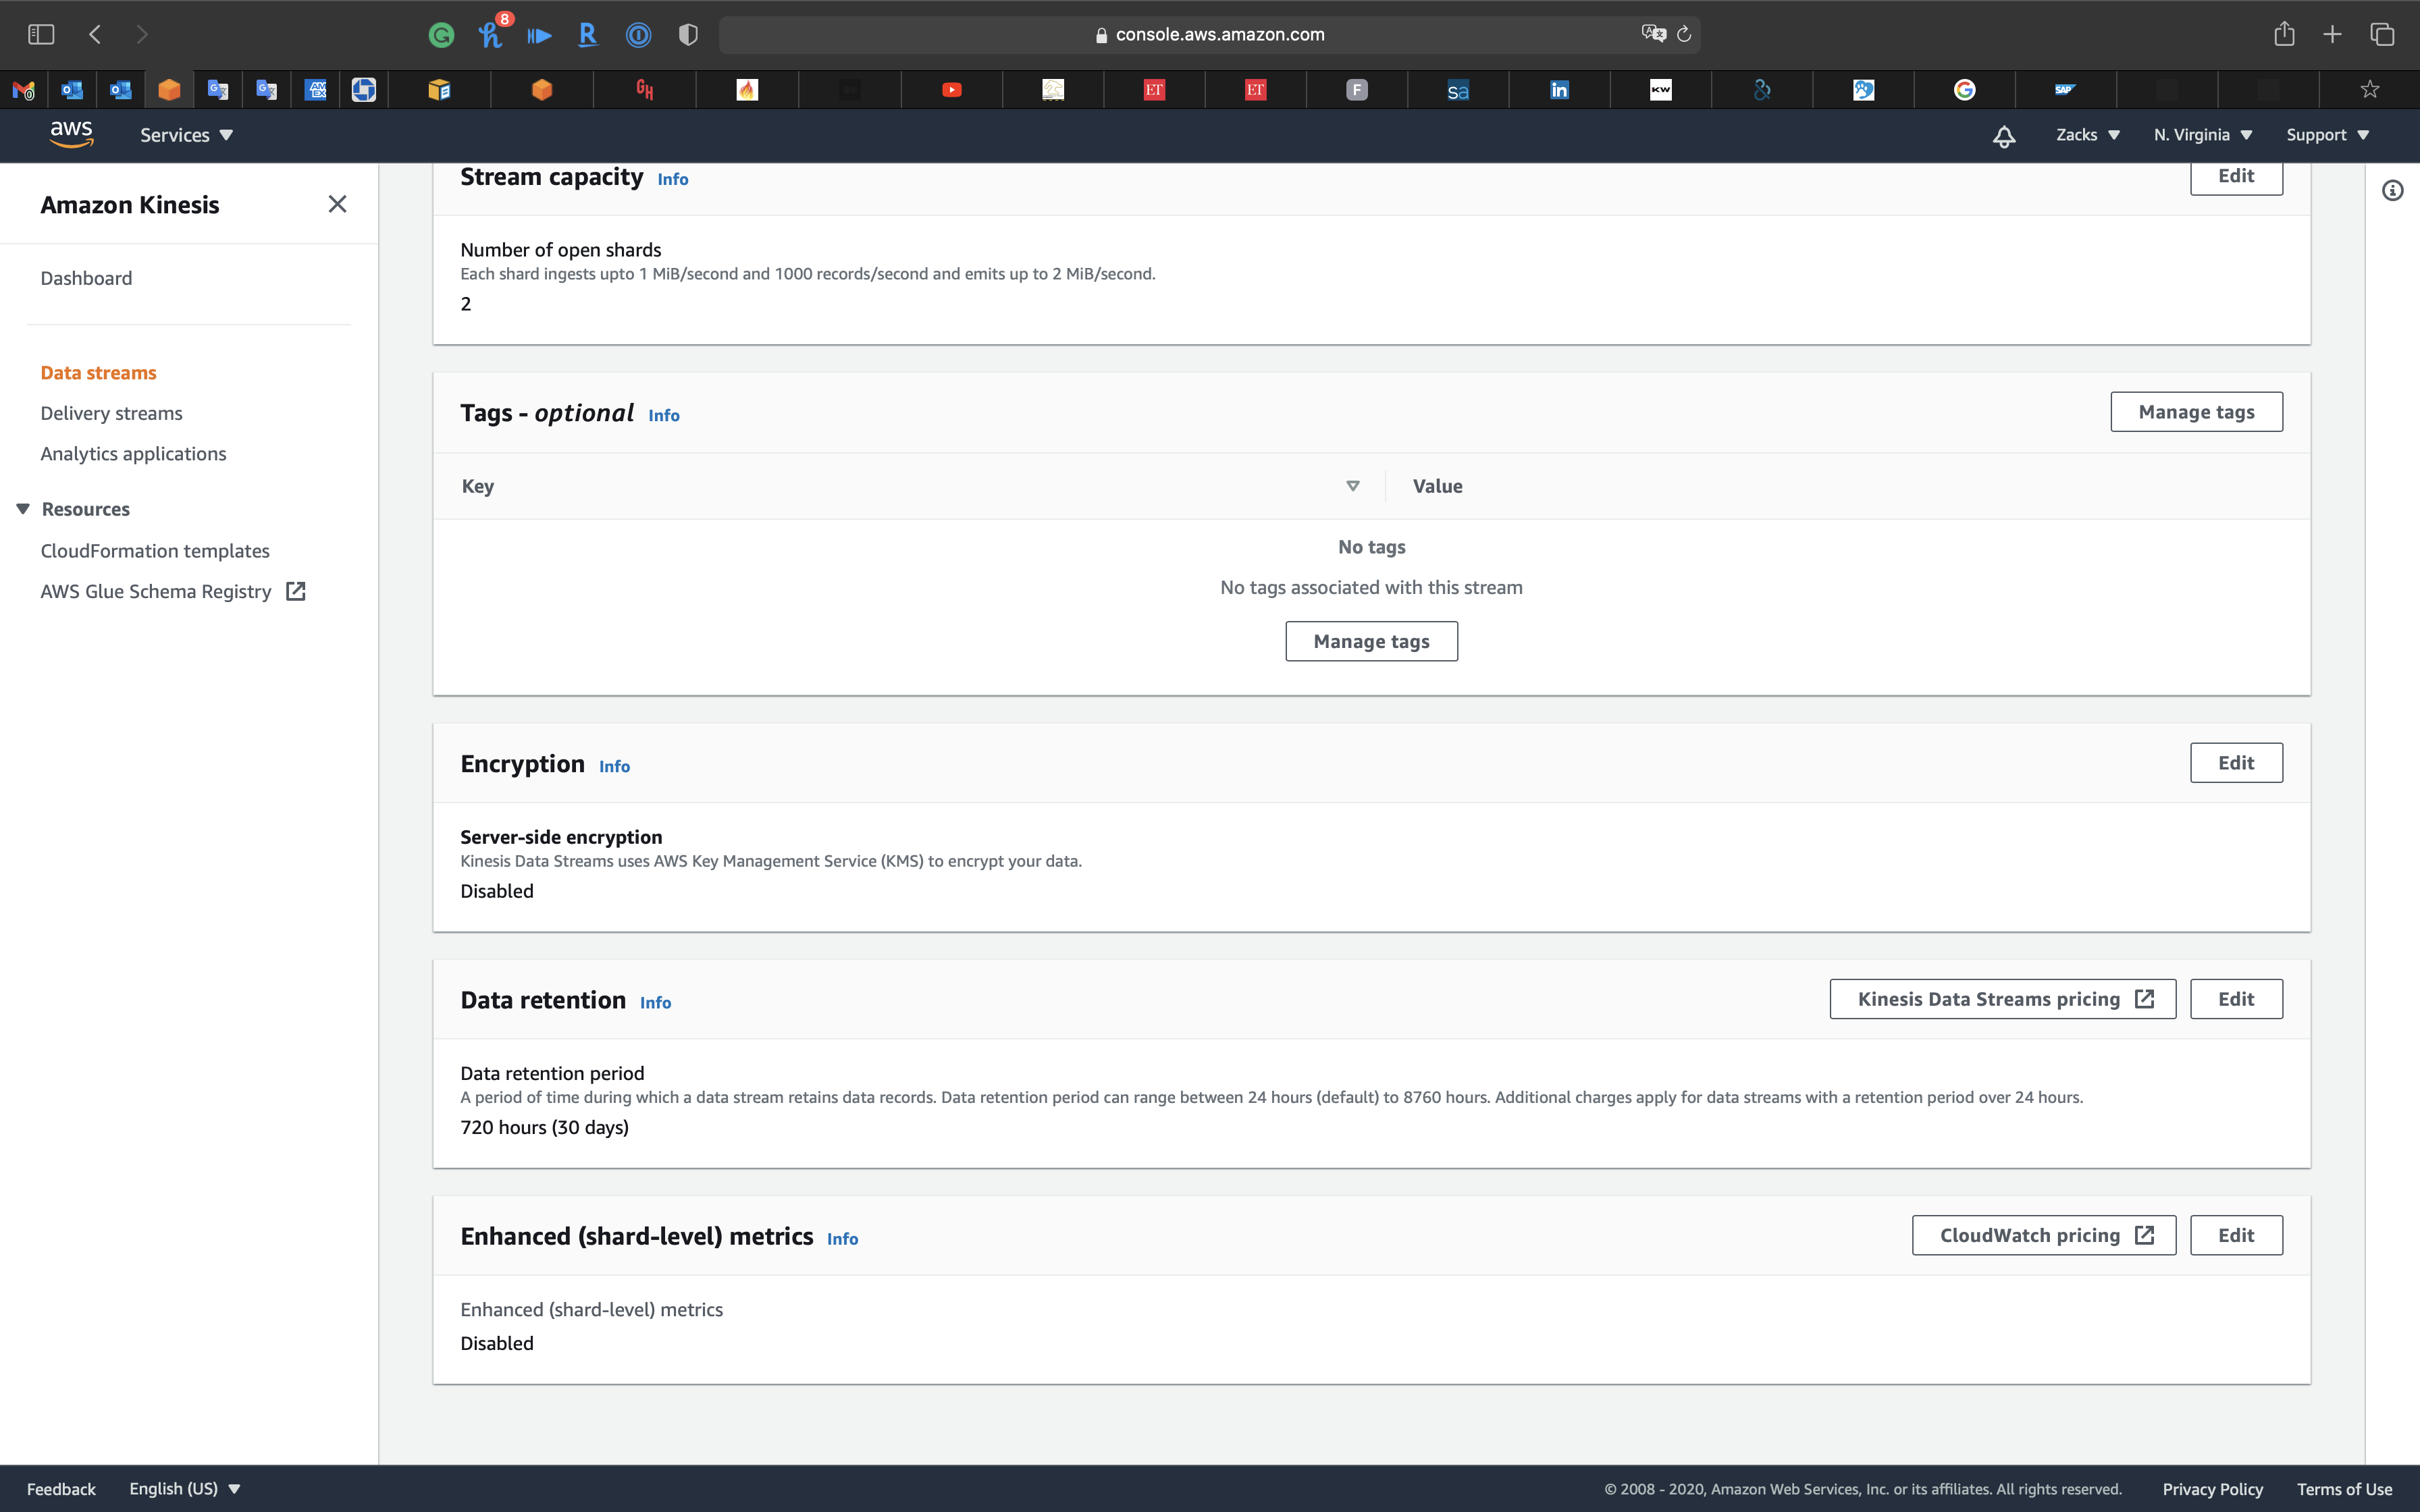
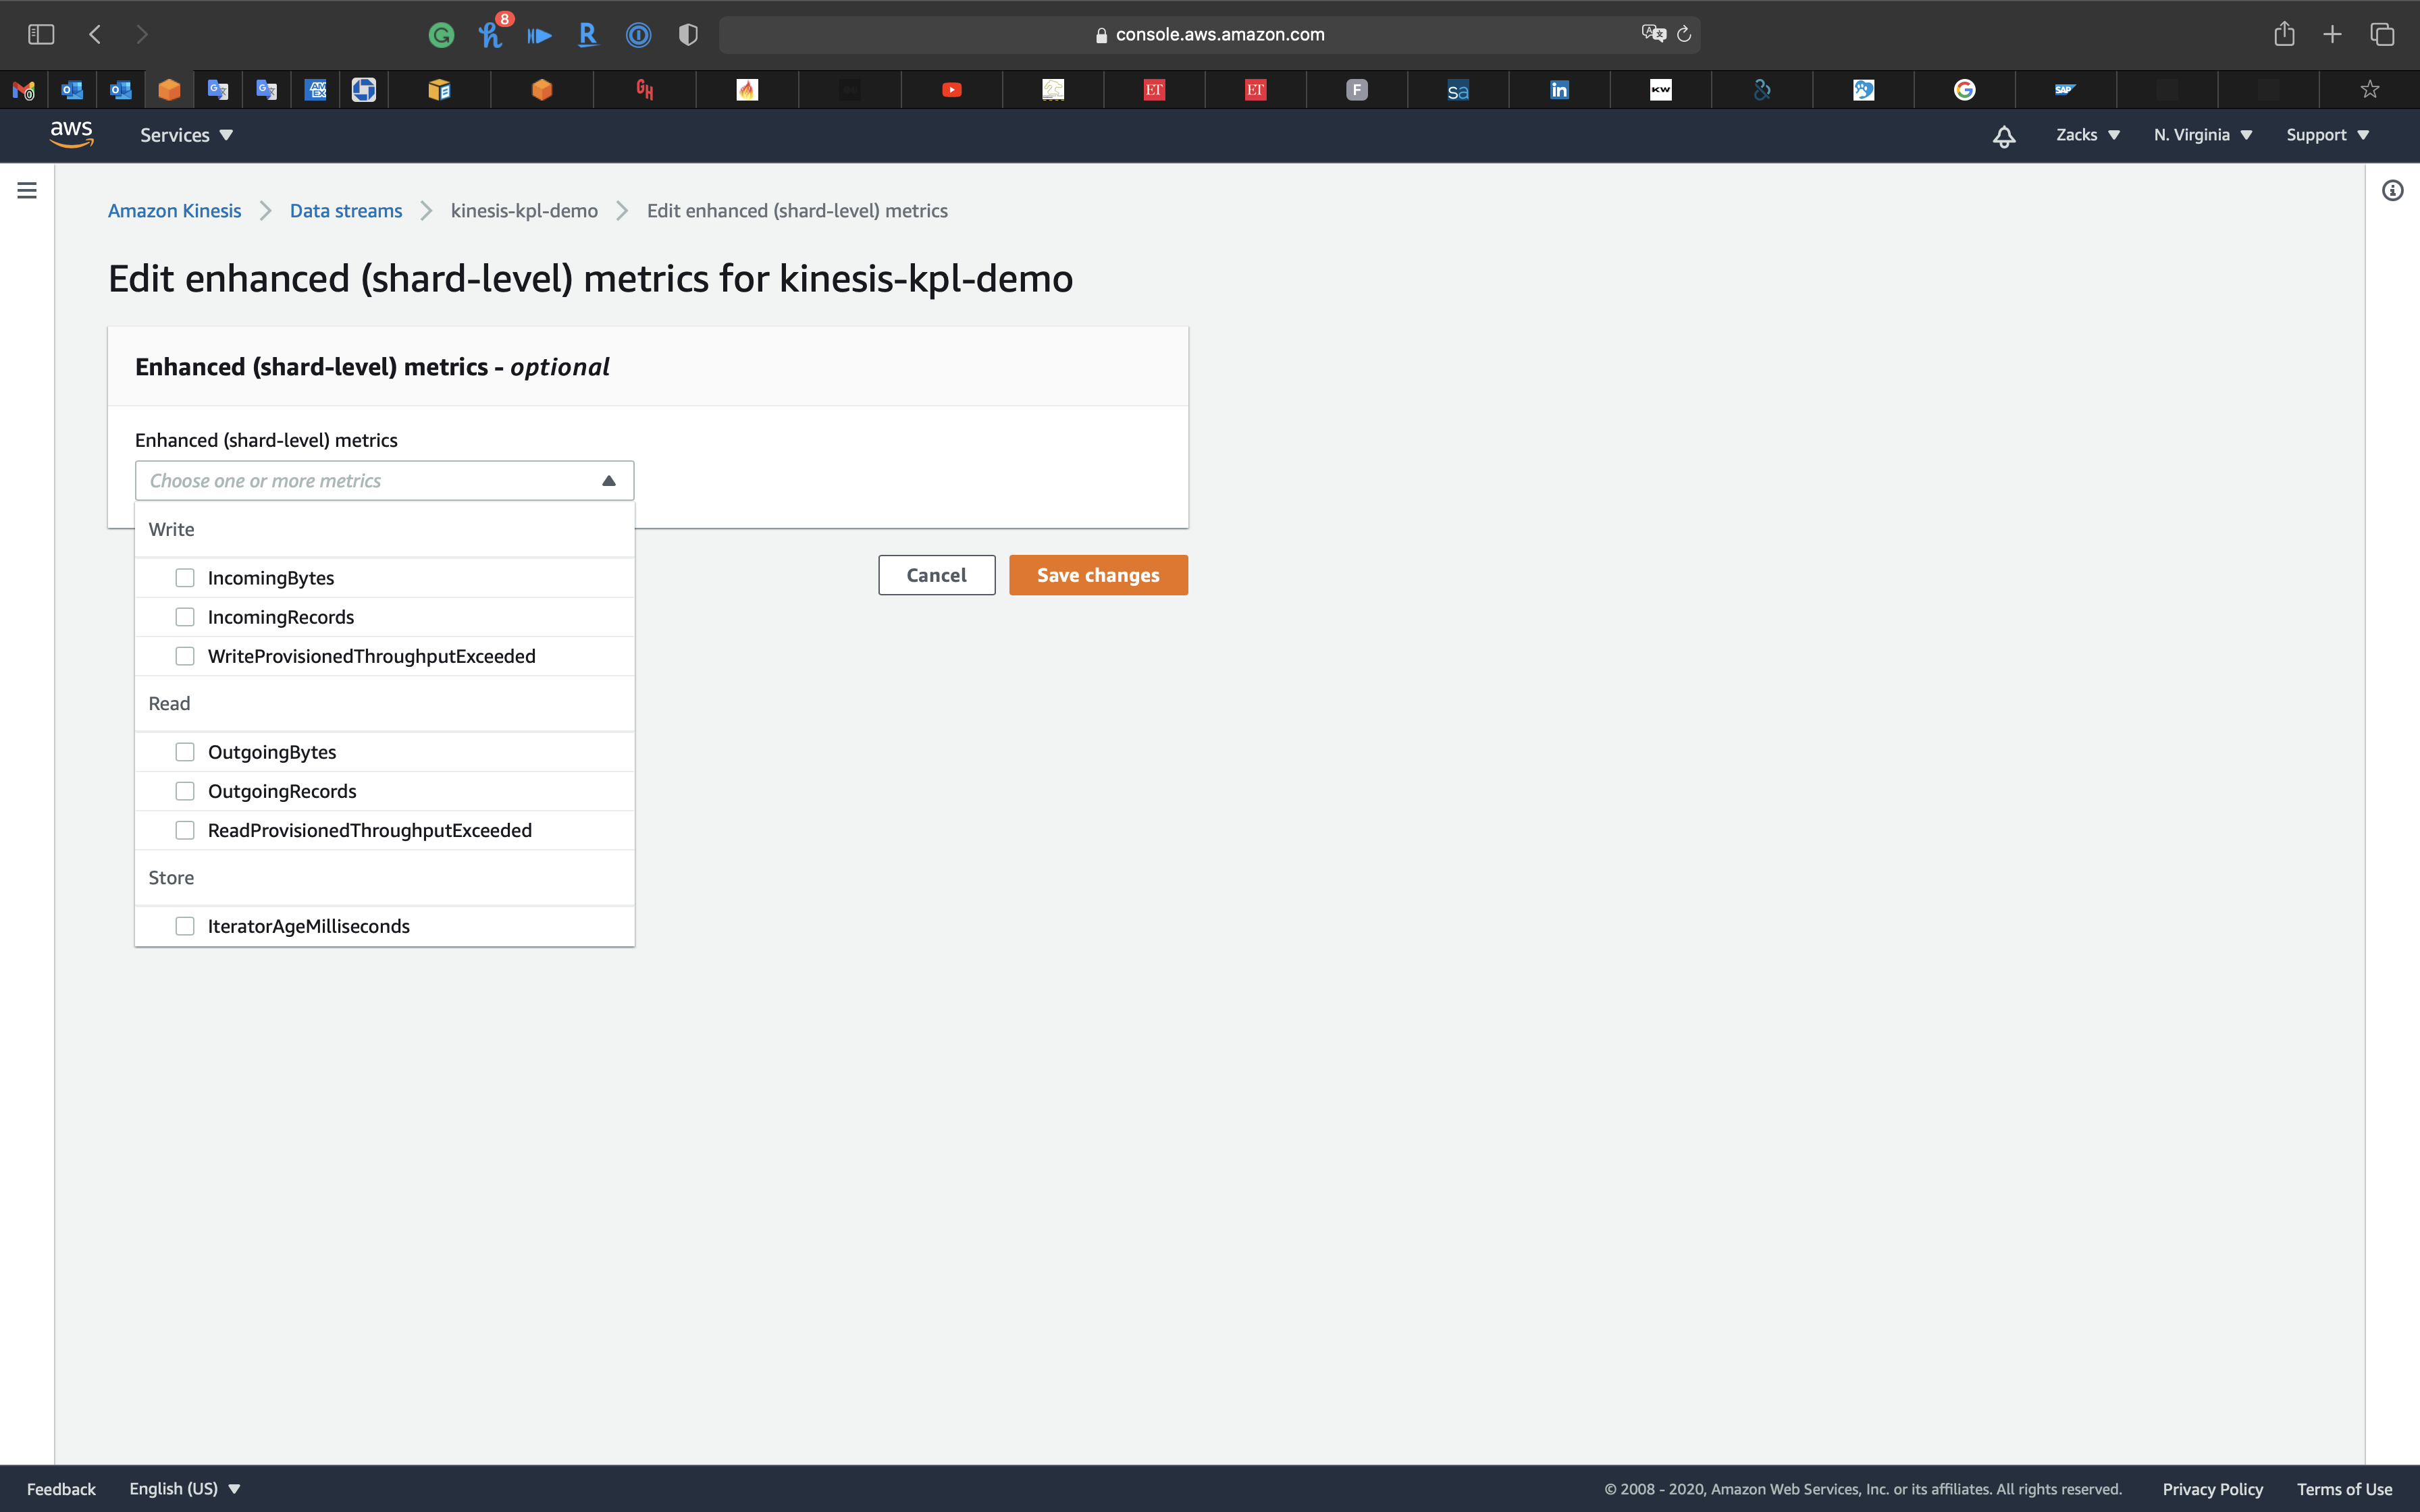
Click on Cancel
Enhanced fan-out (0)
Click on Enhanced fan-out (0) tab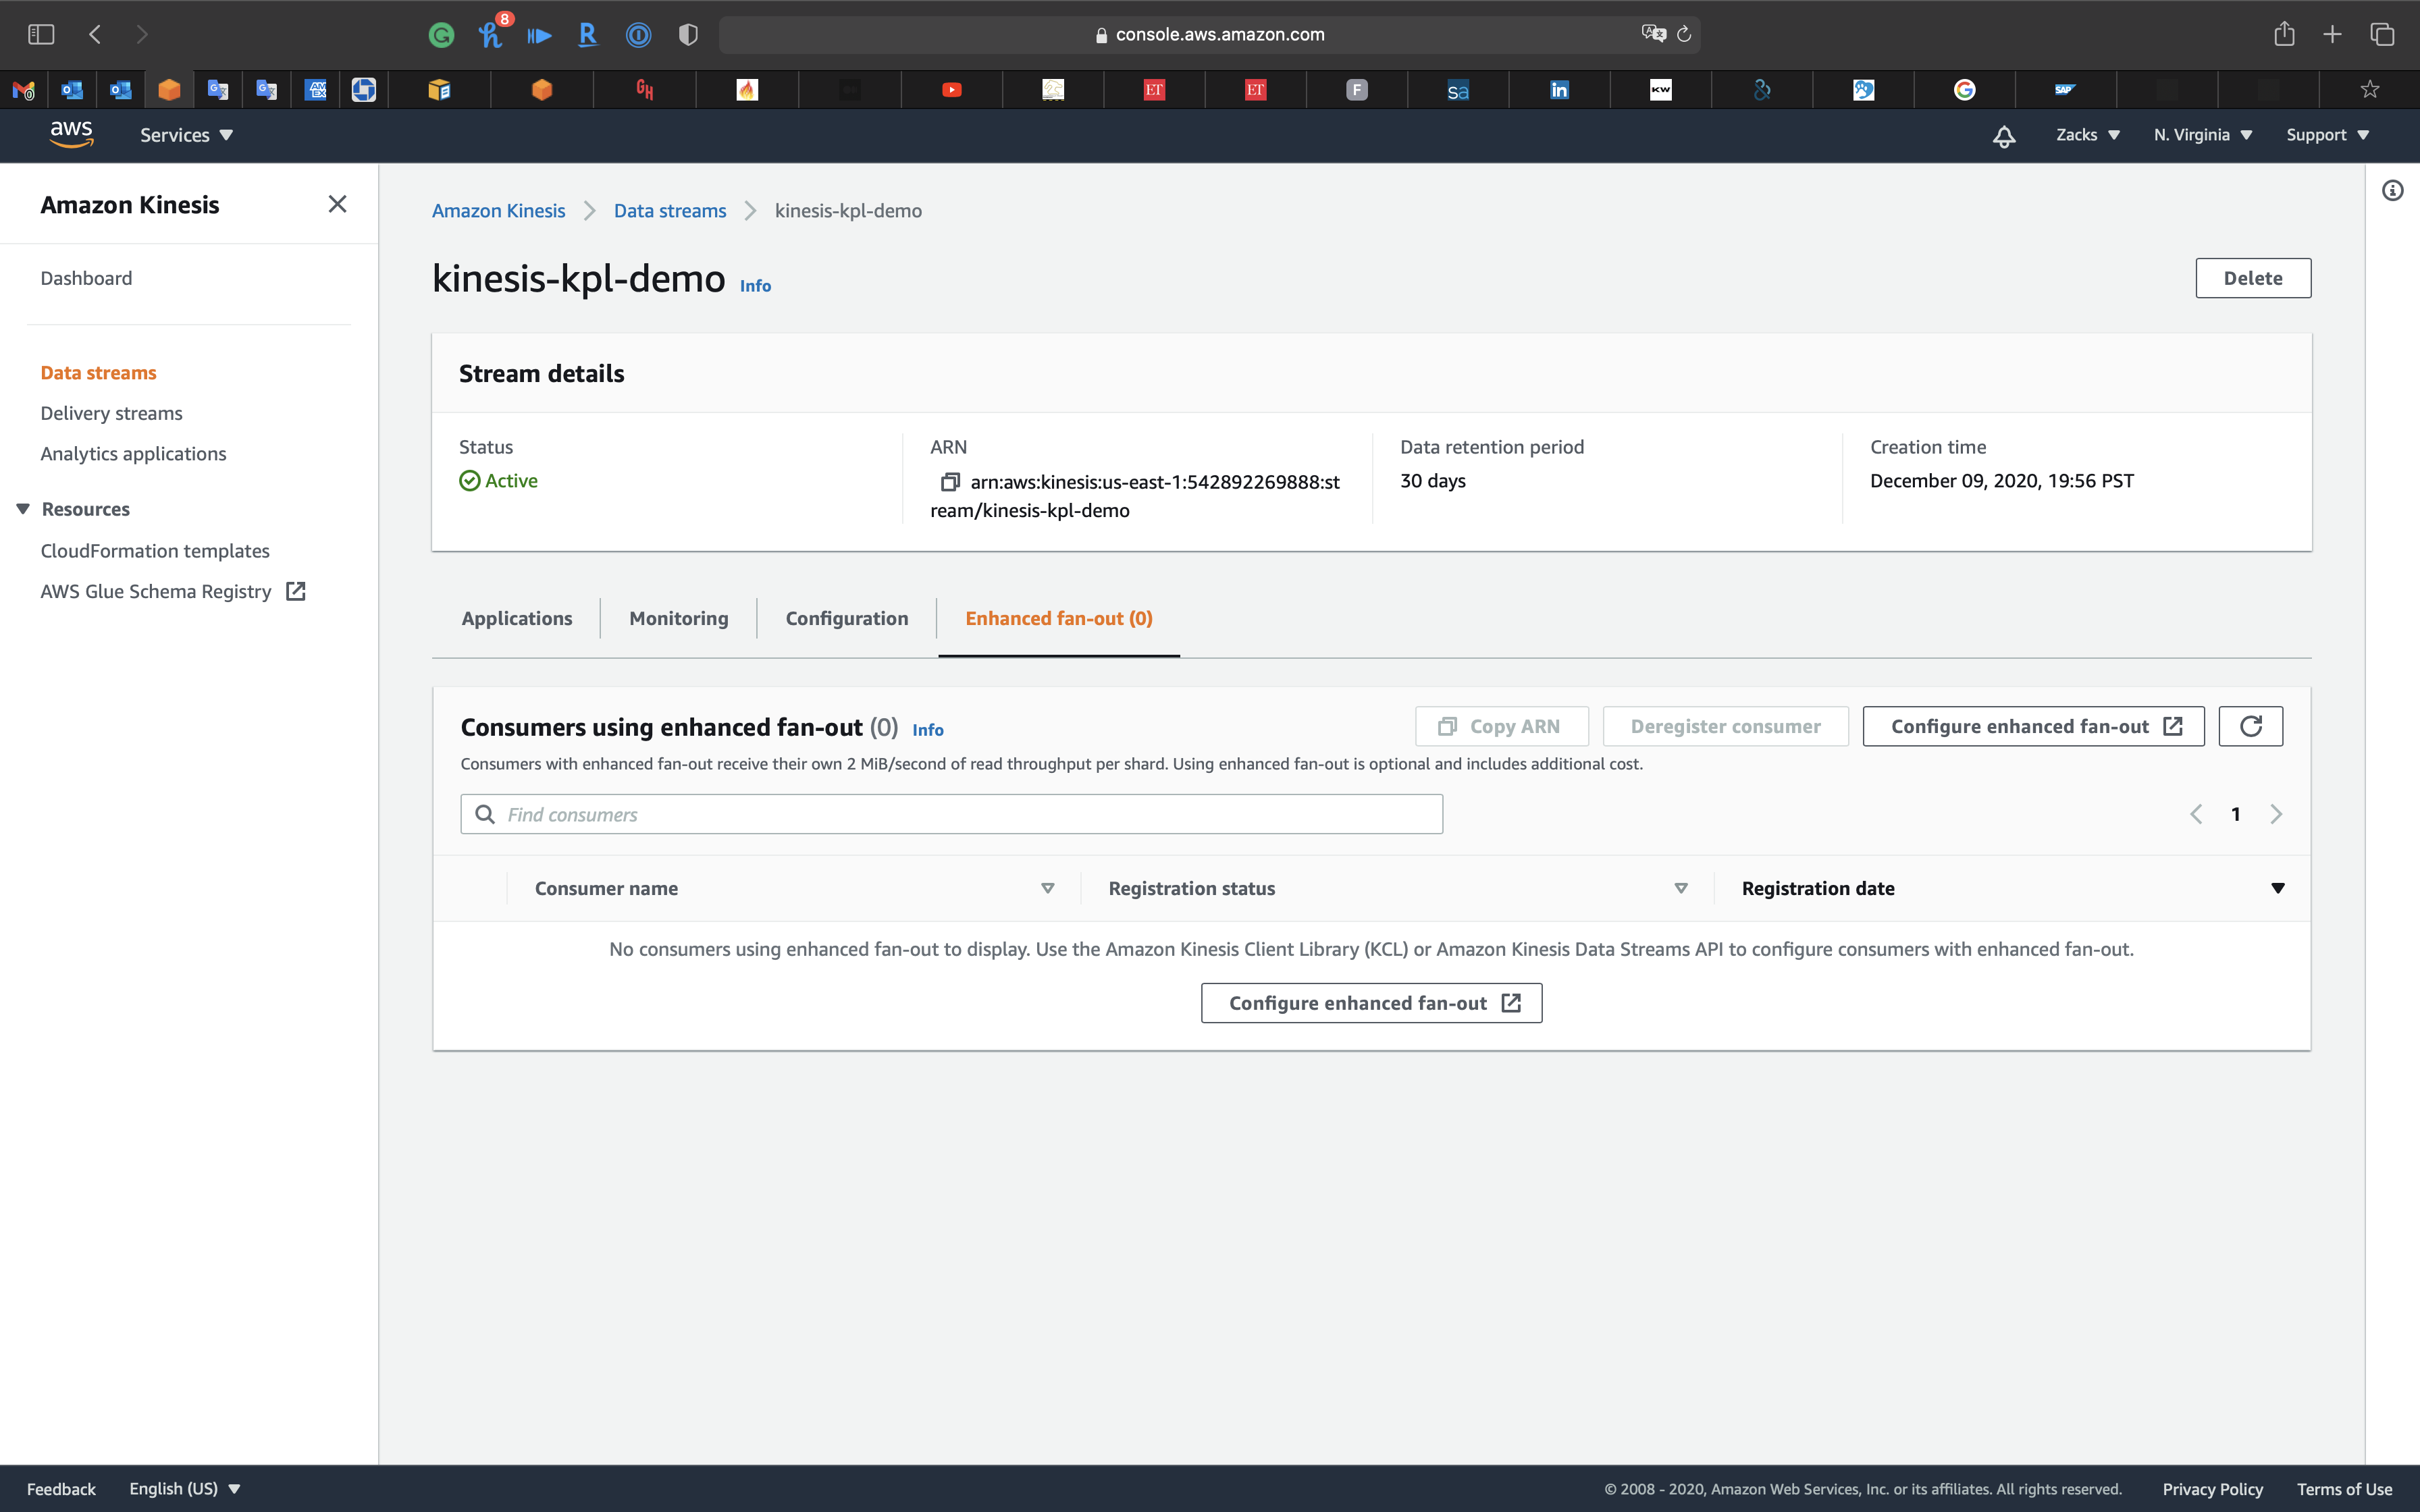
Consumers with enhanced fan-out receive their own 2 MiB/second of read throughput per shard. Using enhanced fan-out is optional and includes additional cost.
KPL Lab
https://www.whizlabs.com/learn/course/aws-certified-data-analytics-specialty/video/5275
Introduction
How can I put data records into a Kinesis data stream using the KPL?
Short description
To put a record into a Kinesis data stream using the KPL, you must meet the following requirements:
- You have a running Amazon Elastic Compute Cloud (Amazon EC2) Linux instance.
- An AWS Identity and Access Management (IAM) role is attached to your instance.
- The KinesisFullAccess policy is attached to the instance’s IAM role.
EC2 Configuration
Prerequisite
Launch a new EC2 instance with free tier settings and SSH security group. Then SSH into your EC2 instance.
- Key:
Name - Value:
Kinesis-Instance
Java ENV
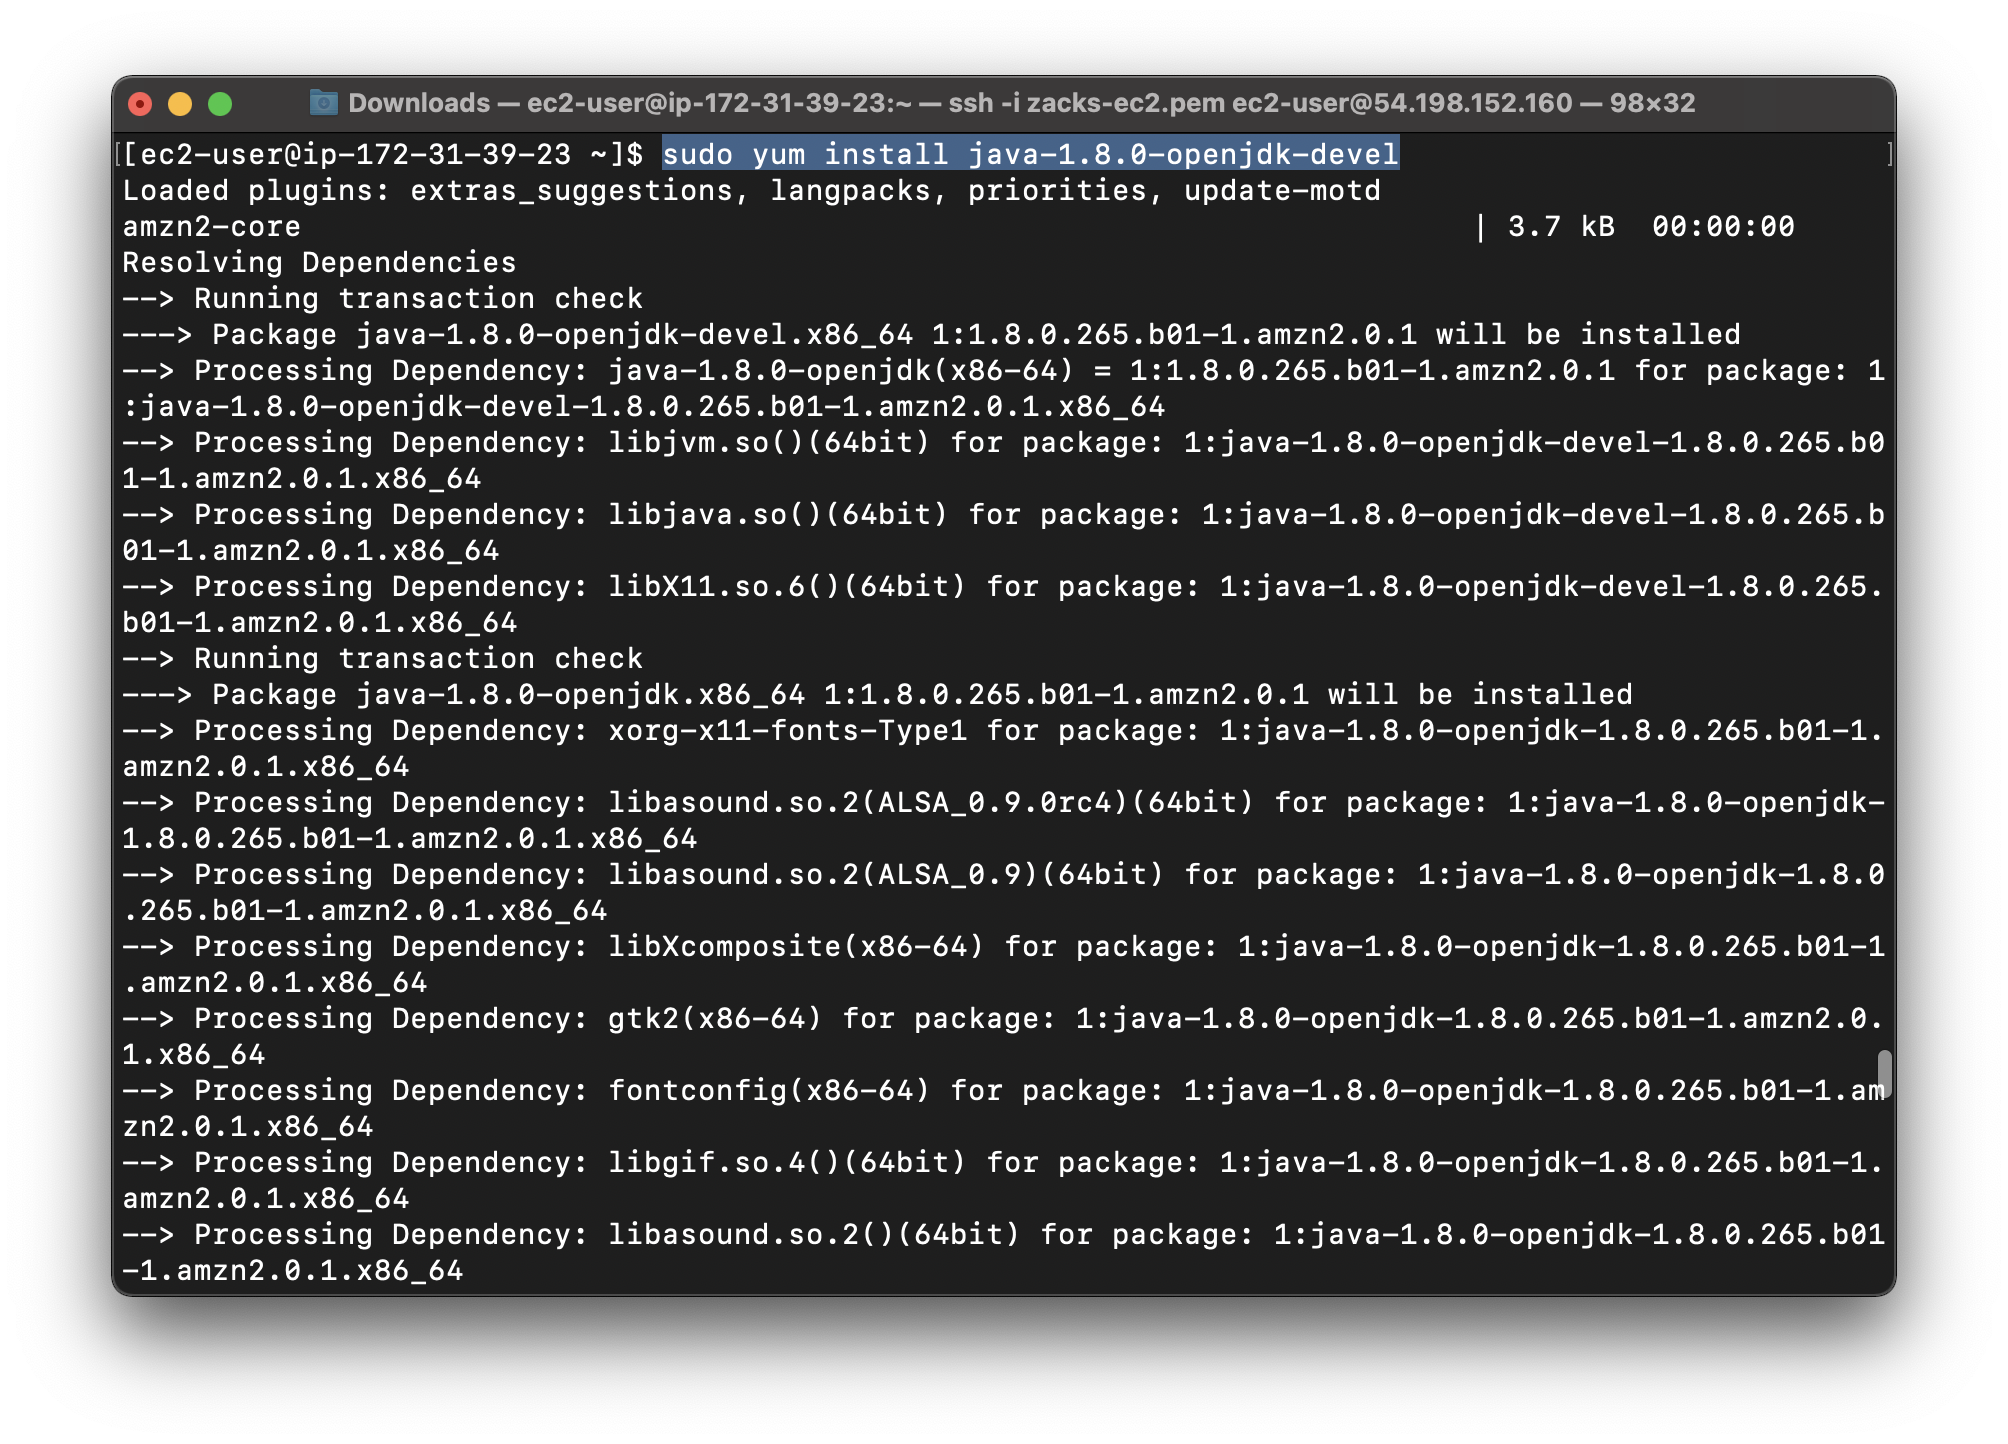
Install the latest version of the OpenJDK 8 developer package:
1 | sudo yum install java-1.8.0-openjdk-devel |
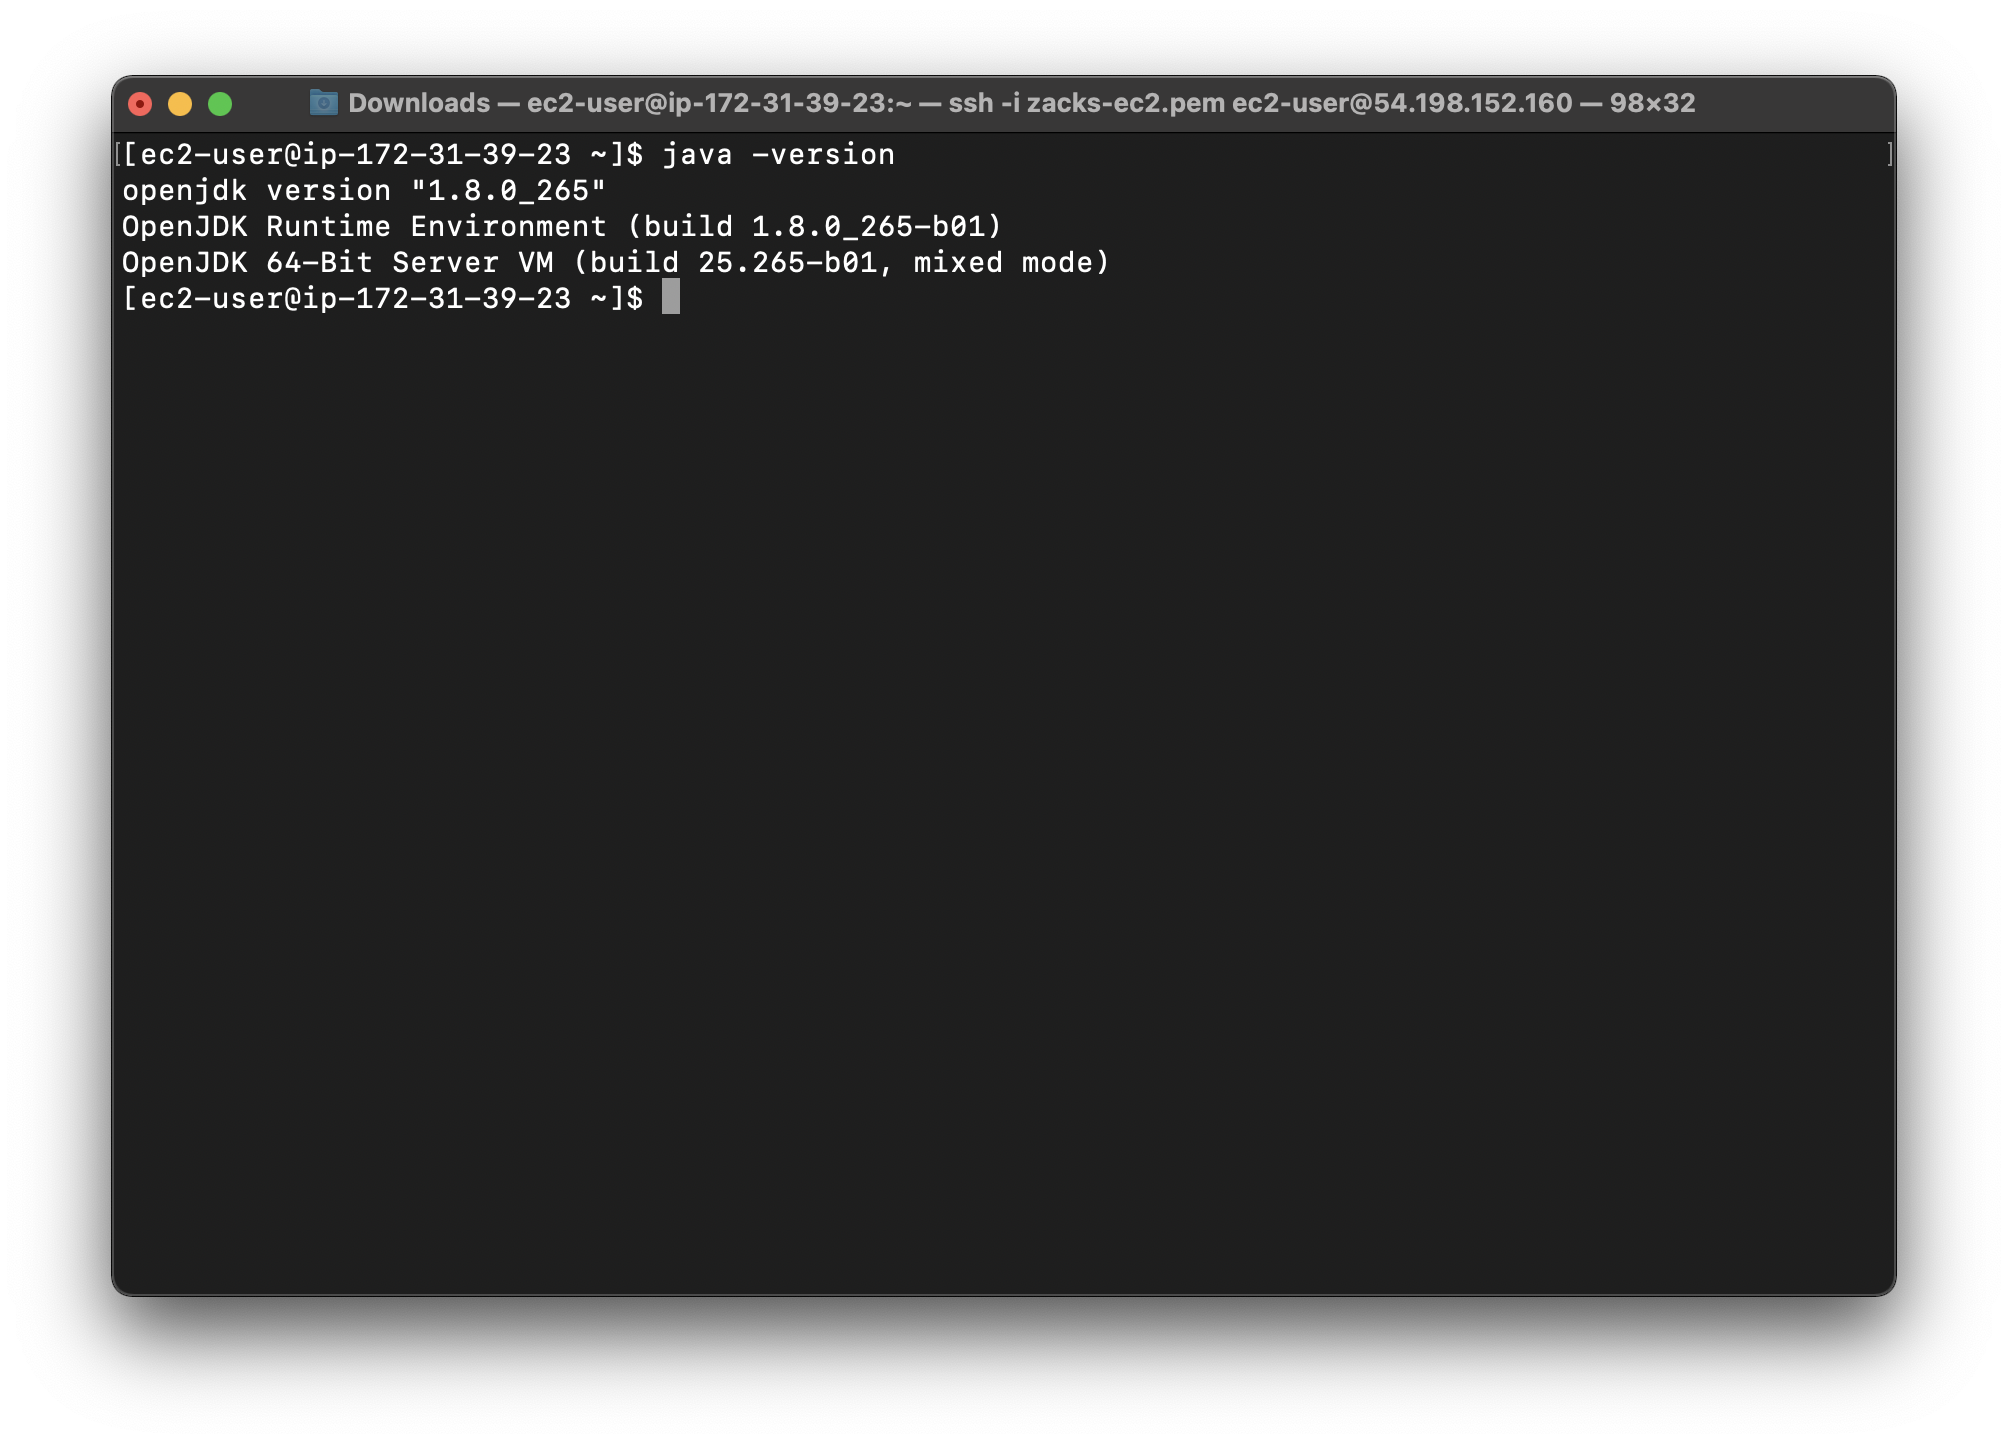
Confirm that Java is installed:
1 | java -version |
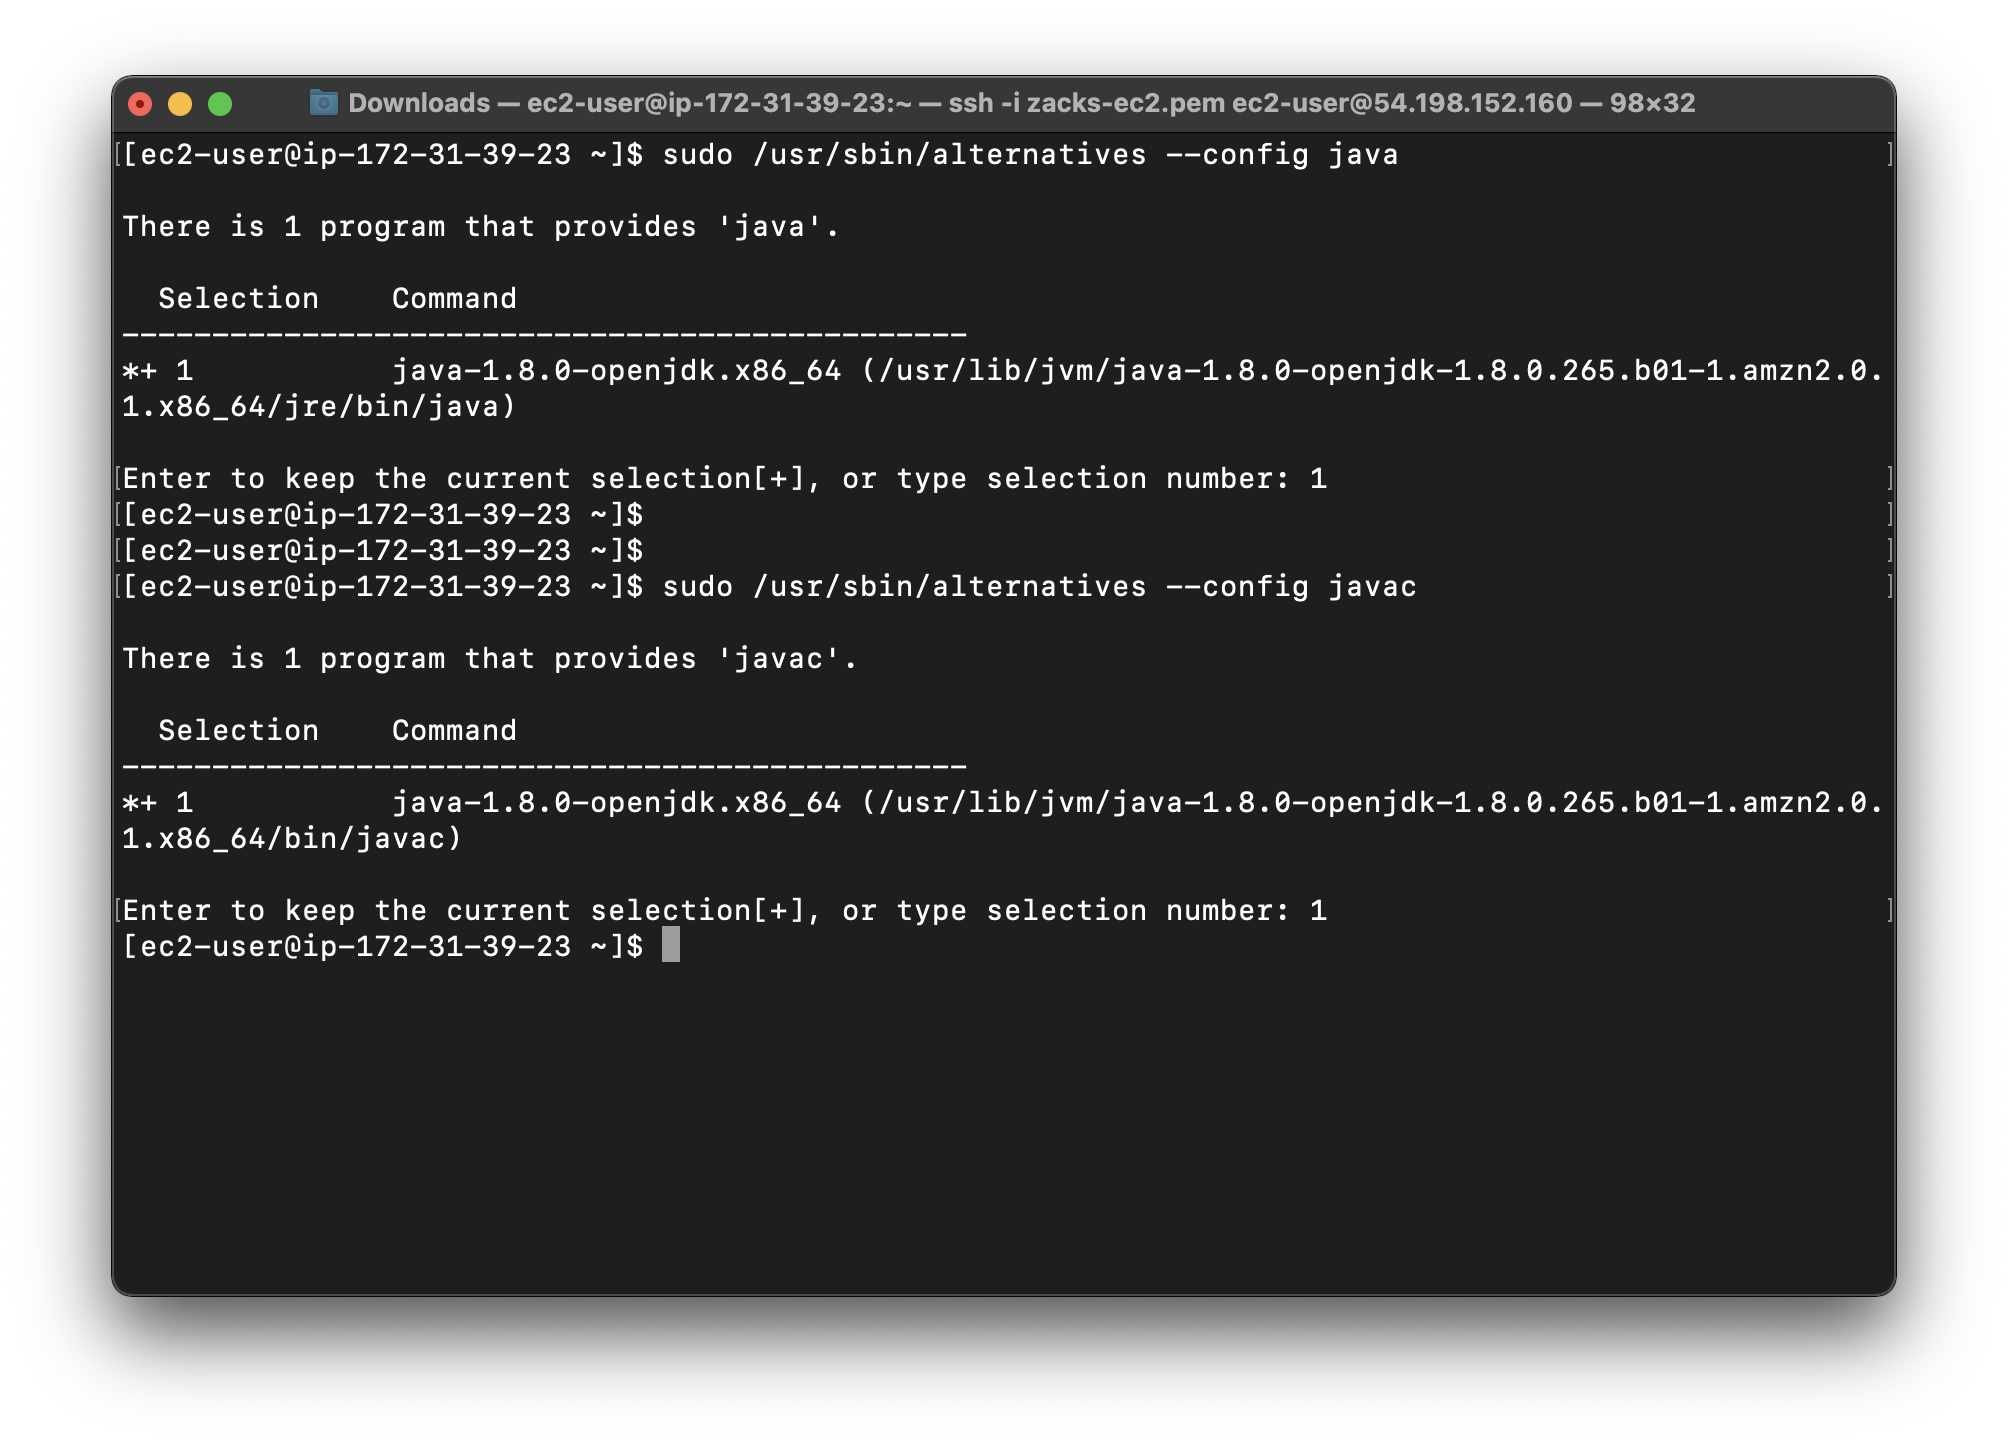
Run the following commands to set Java 1.8 as the default java and javac providers:
1 | sudo /usr/sbin/alternatives --config java |
Apache Maven ENV
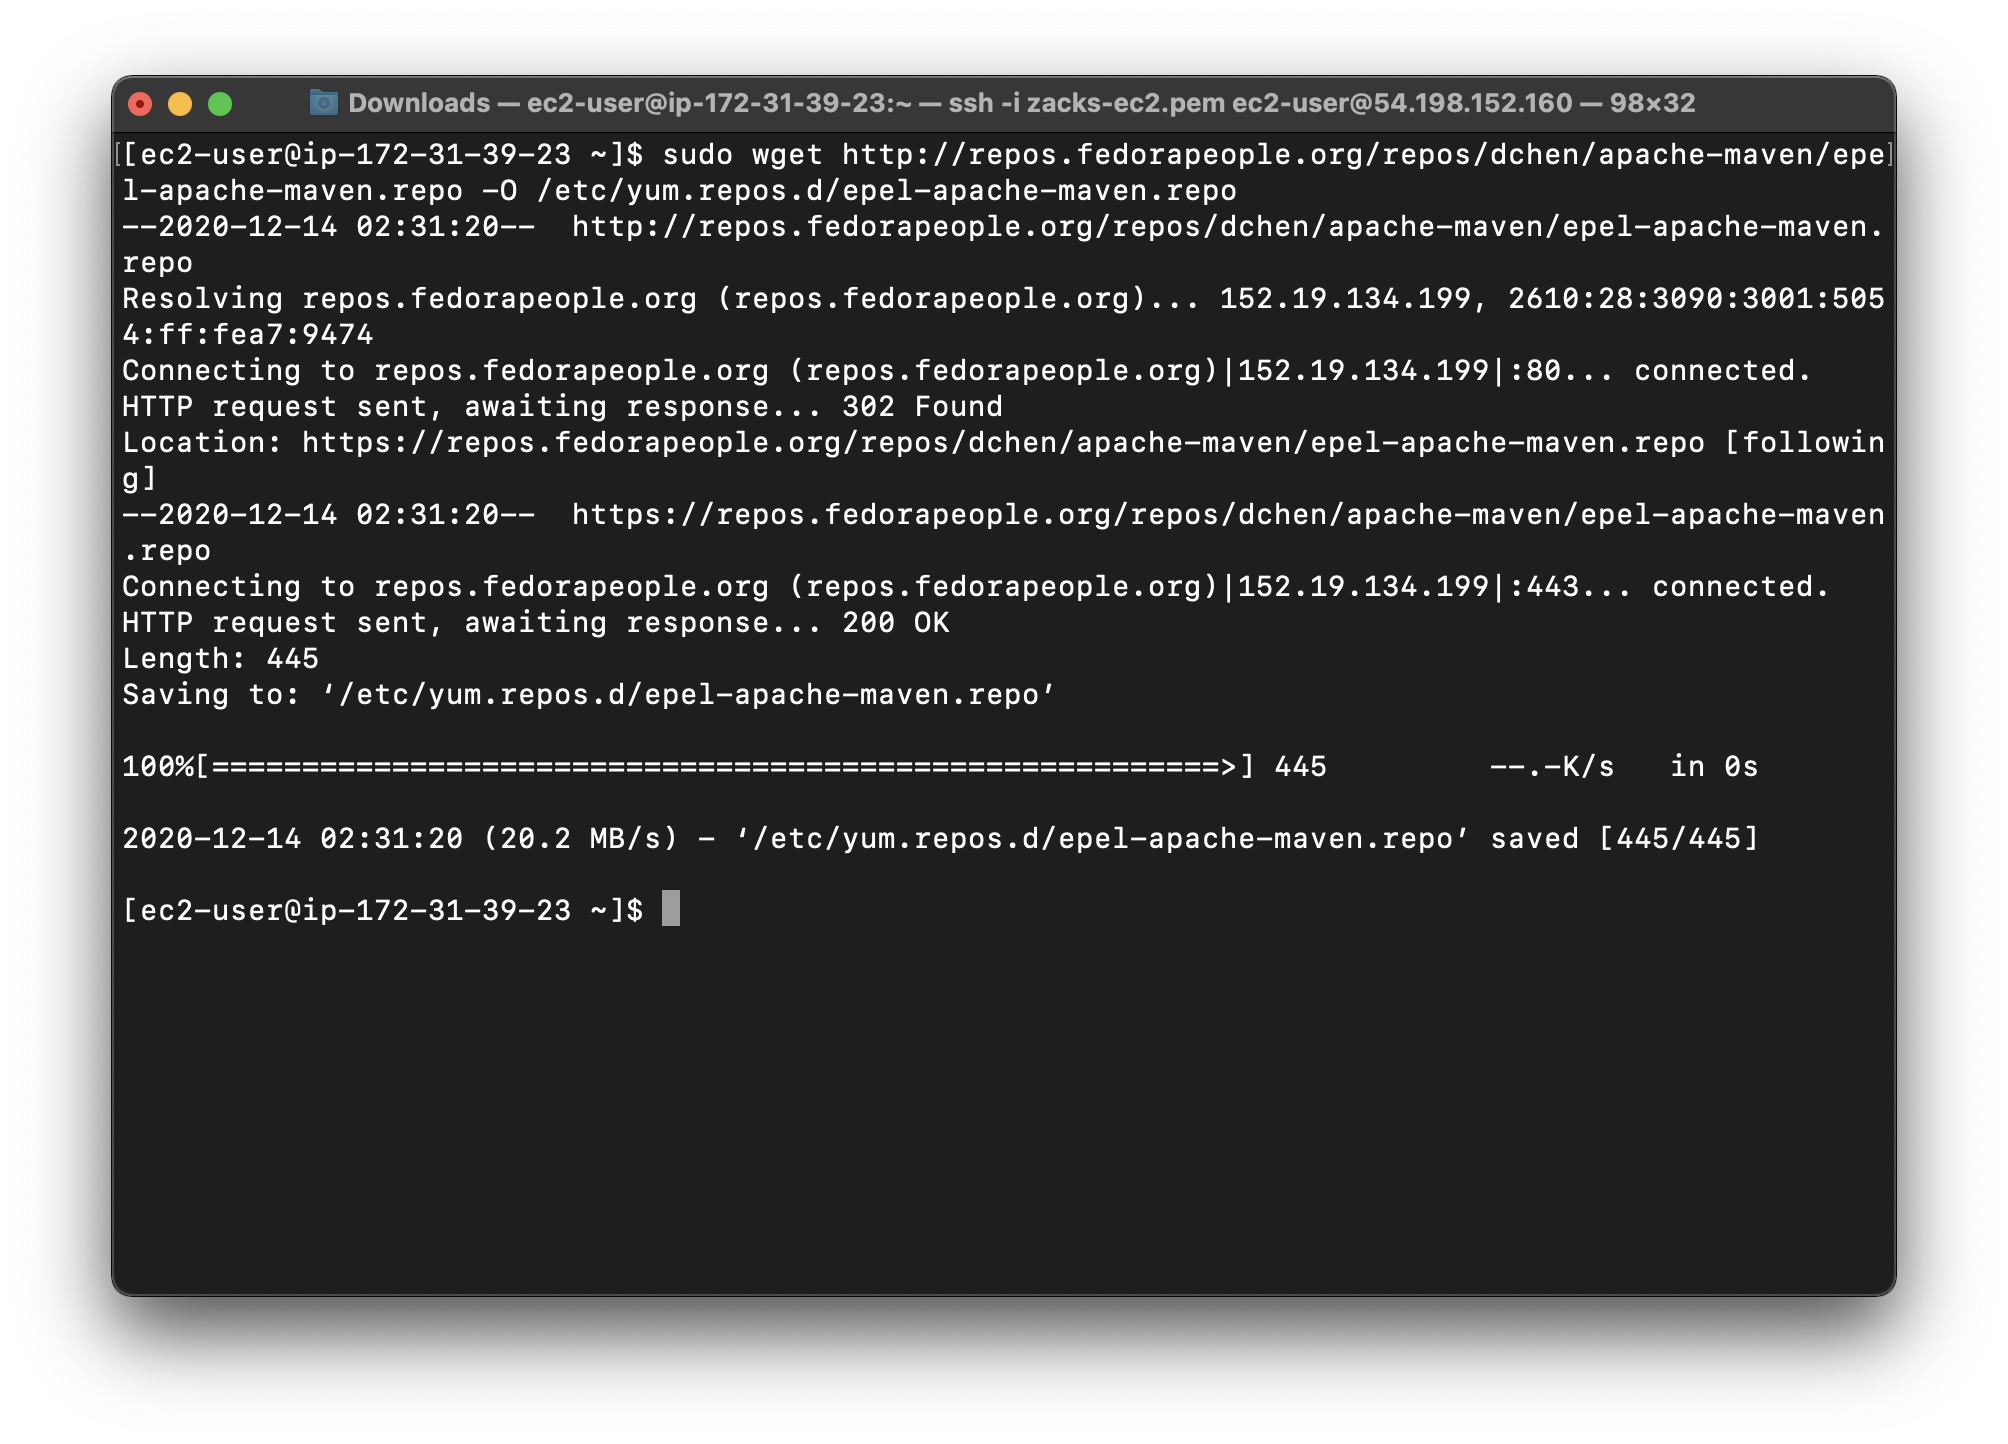
Add a repository with an Apache Maven package:
1 | sudo wget http://repos.fedorapeople.org/repos/dchen/apache-maven/epel-apache-maven.repo -O /etc/yum.repos.d/epel-apache-maven.repo |
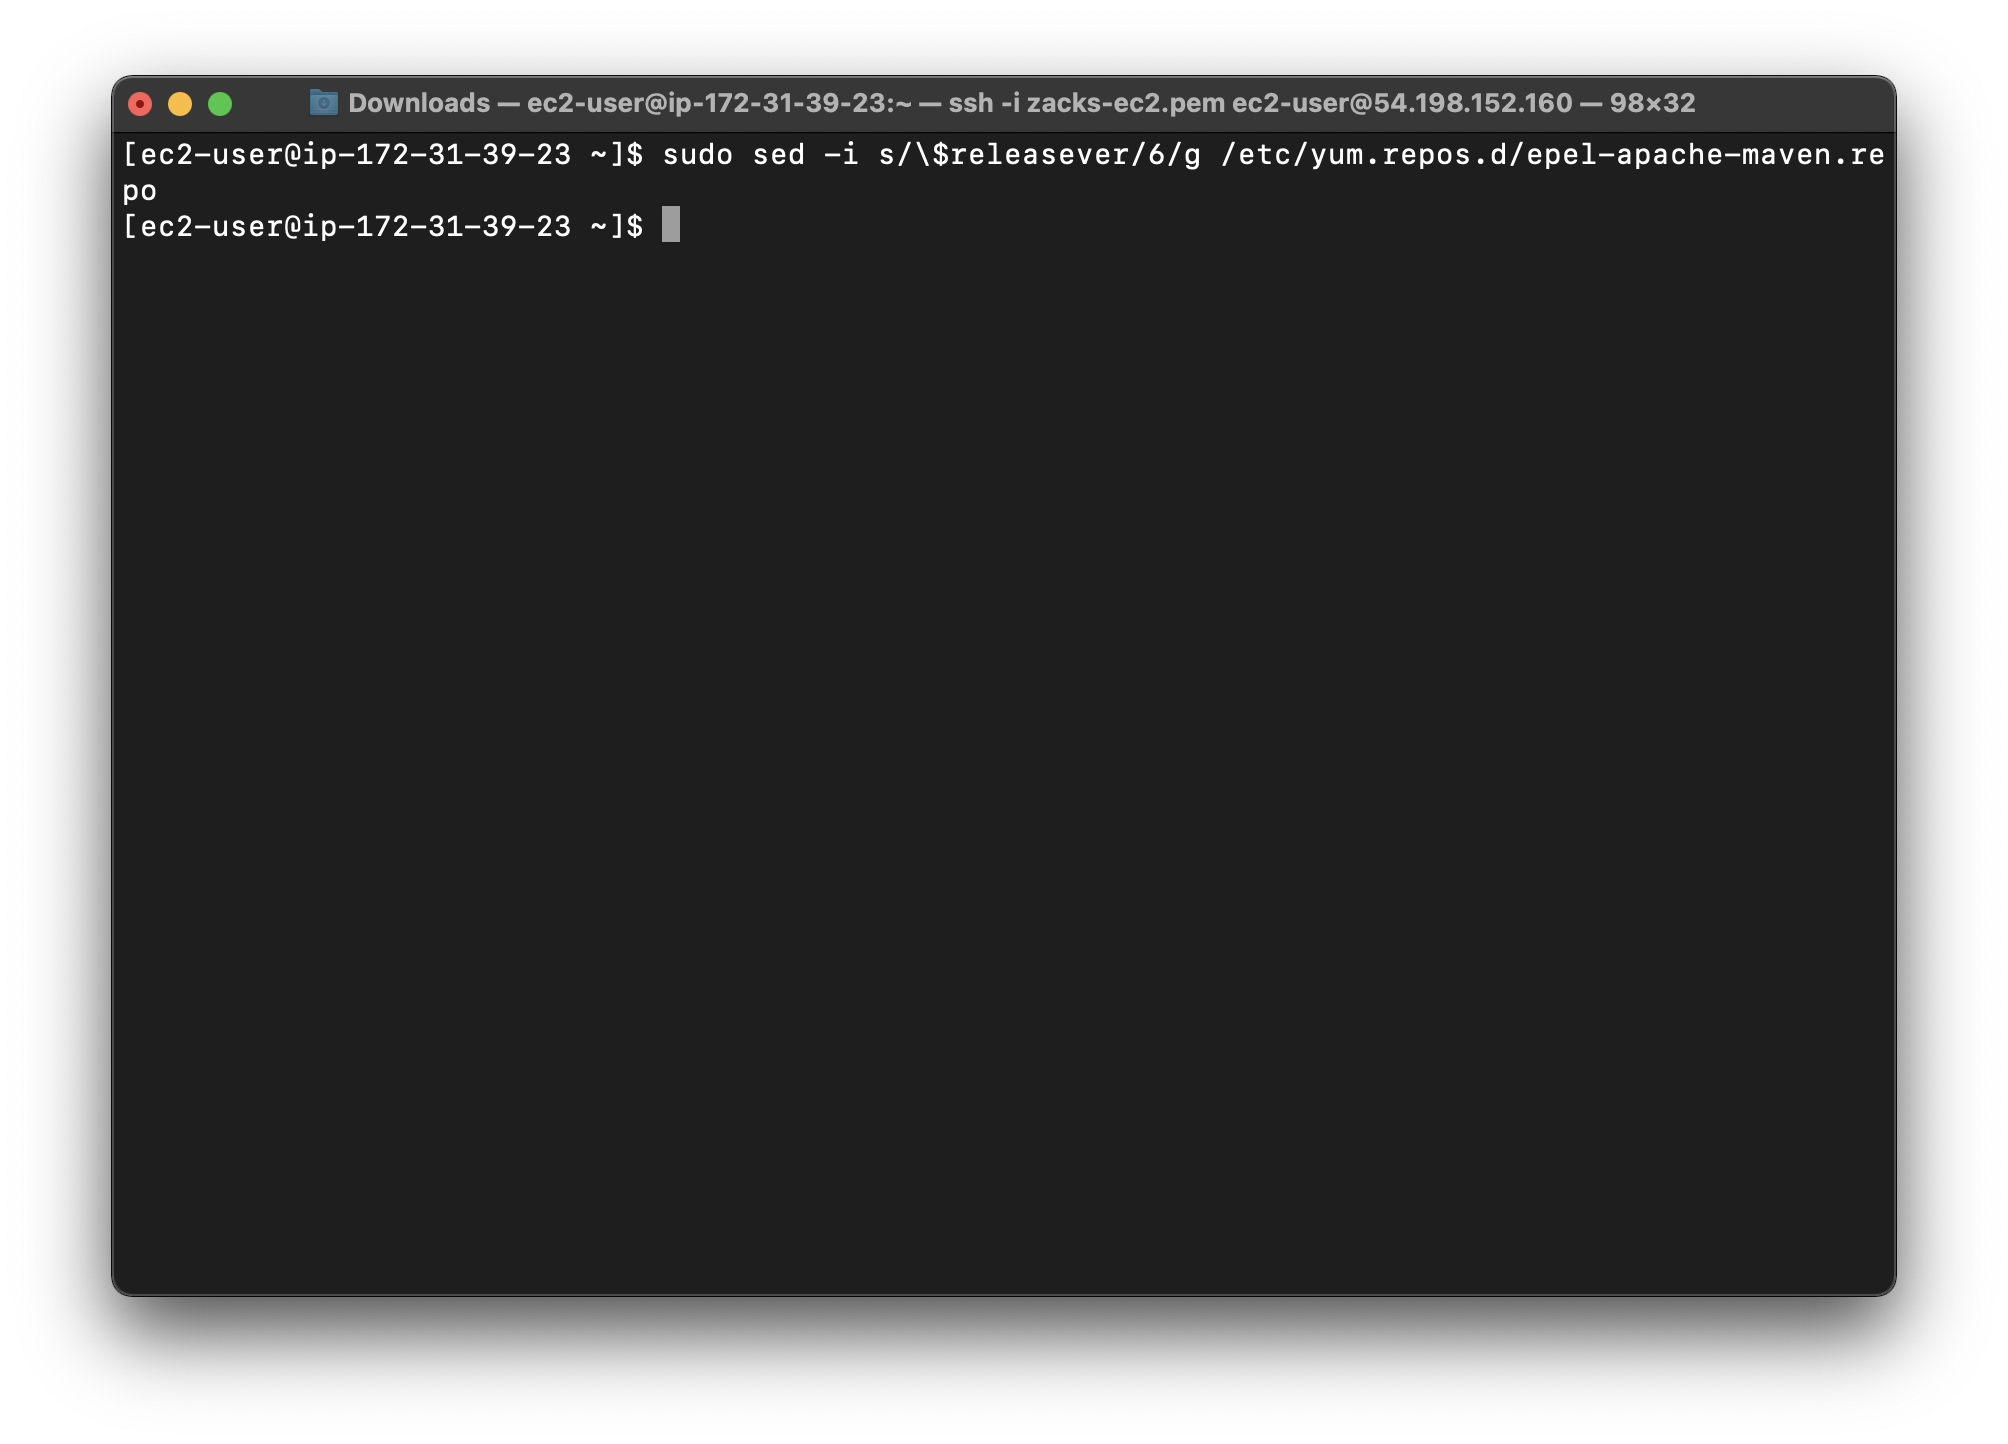
Set the version number for the Maven packages:
1 | sudo sed -i s/\$releasever/6/g /etc/yum.repos.d/epel-apache-maven.repo |
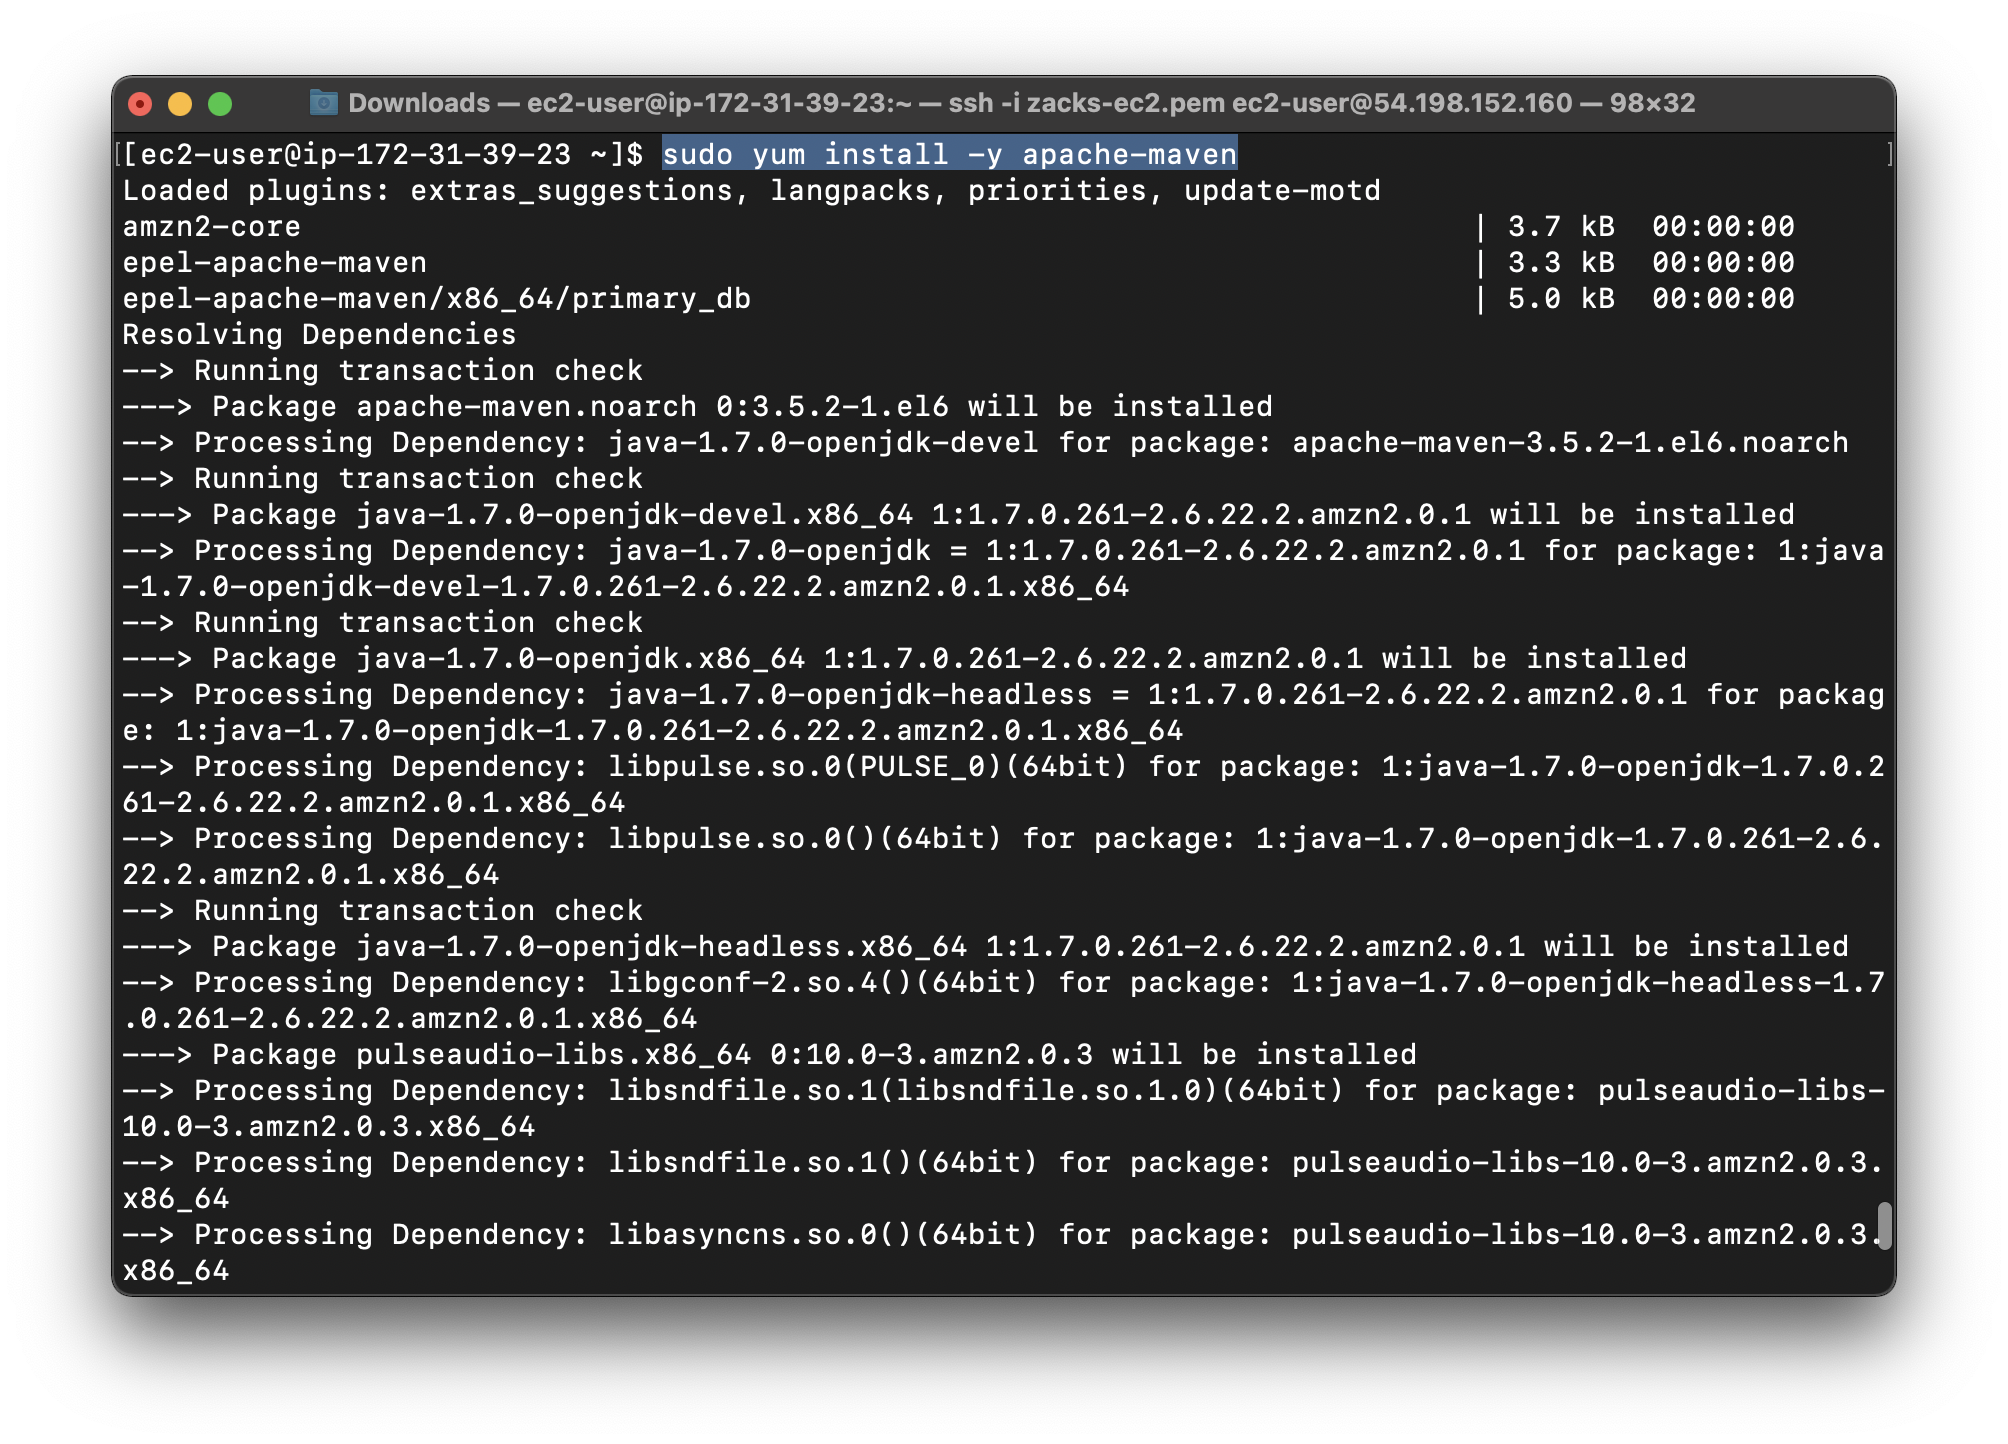
Use yum to install Maven:
1 | sudo yum install -y apache-maven |
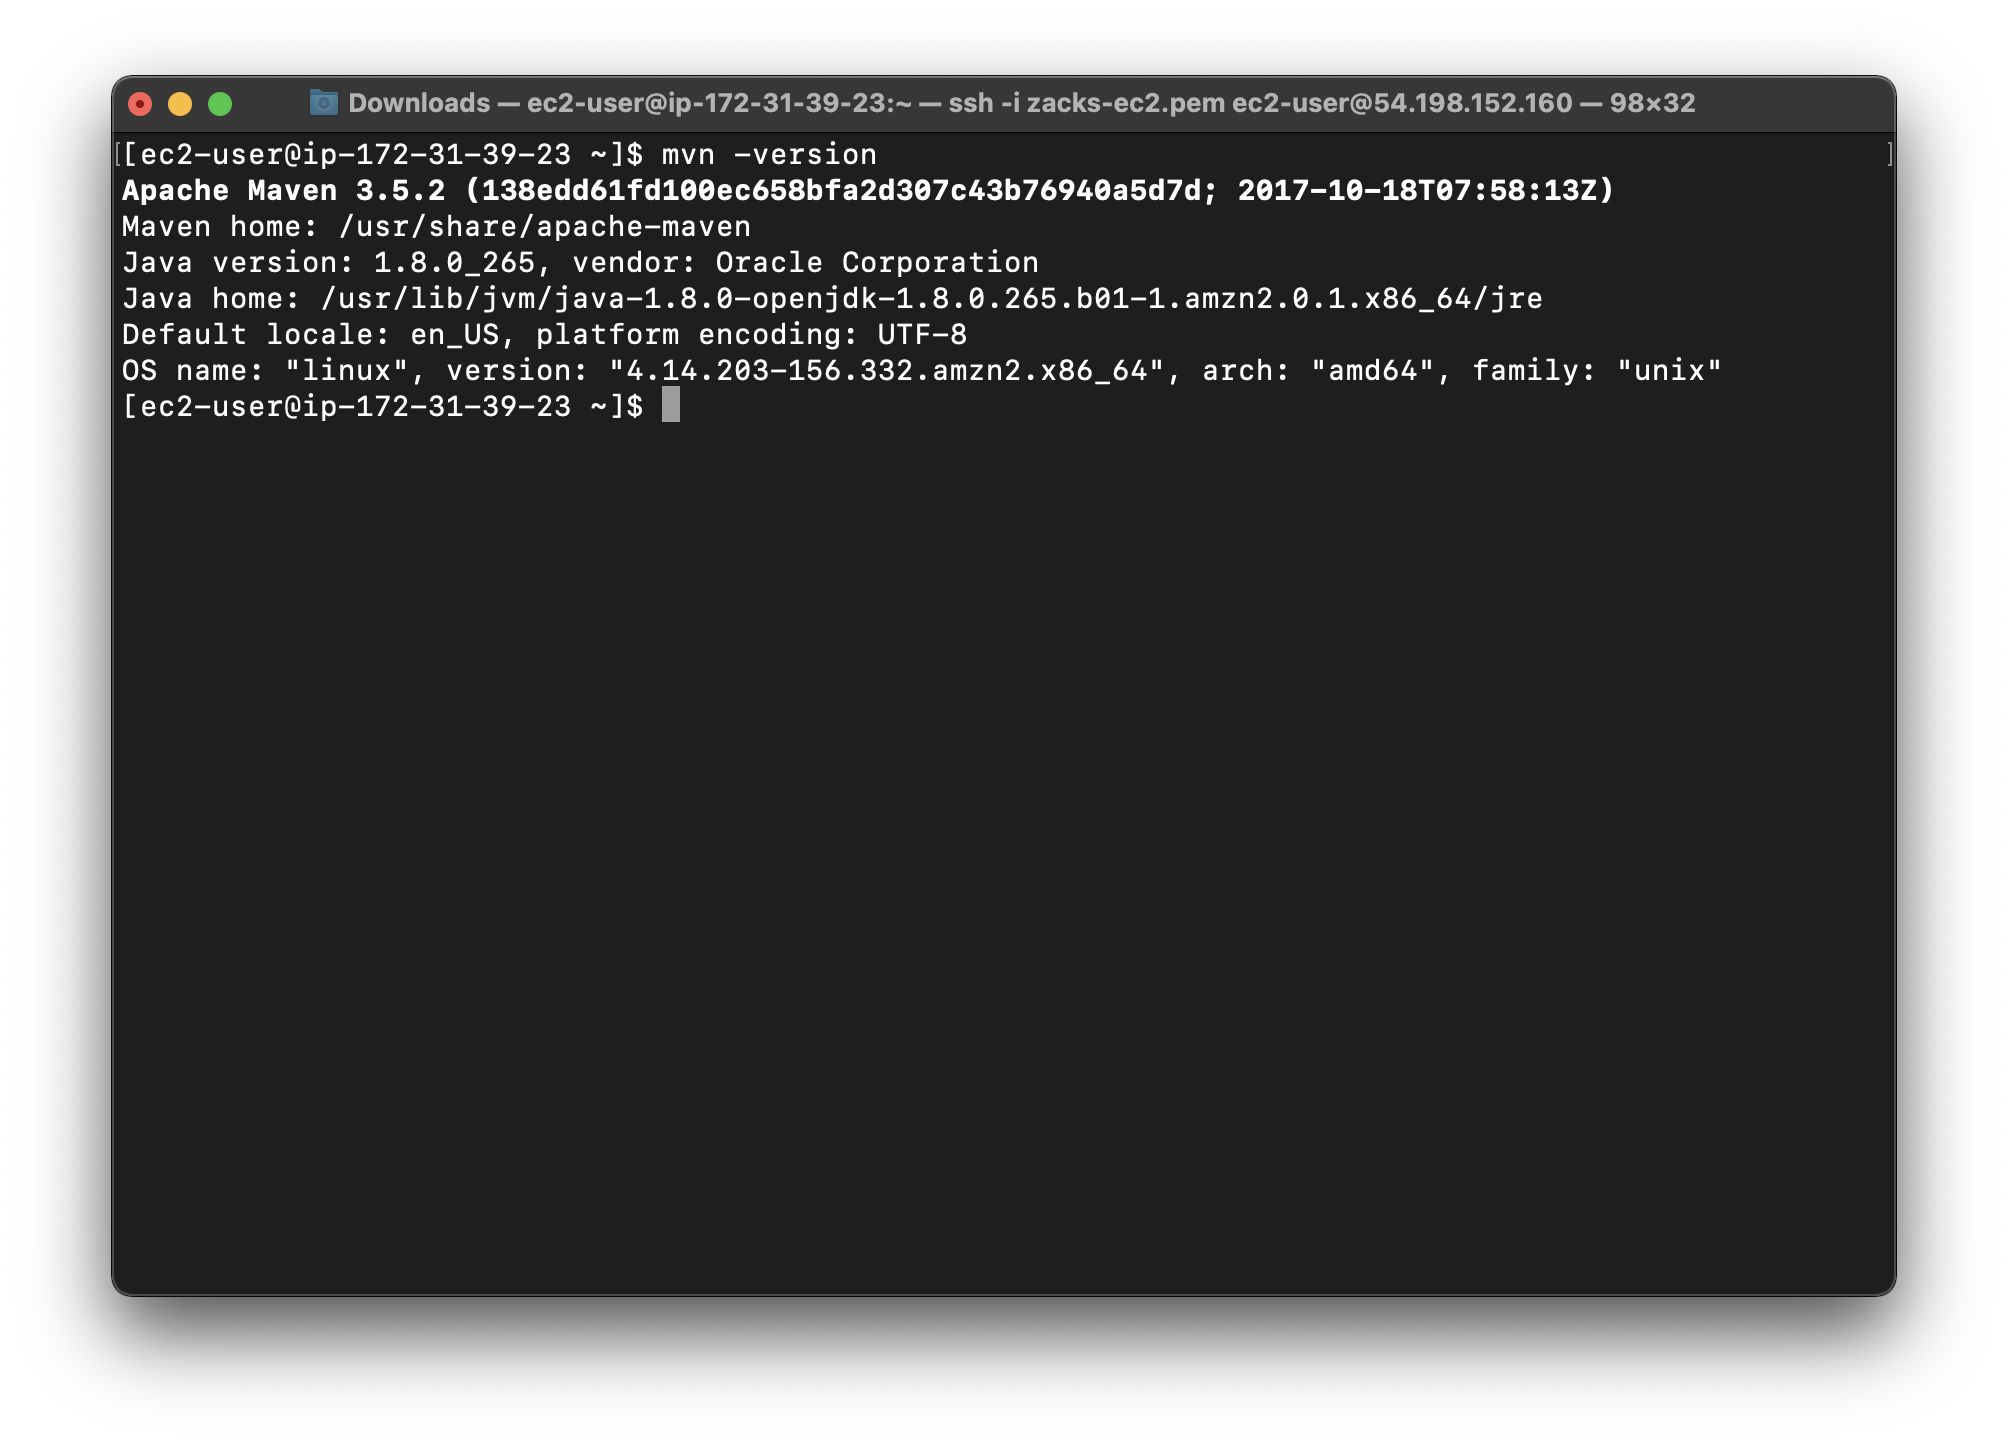
Confirm that Maven is installed properly:
1 | mvn -version |
Git ENV
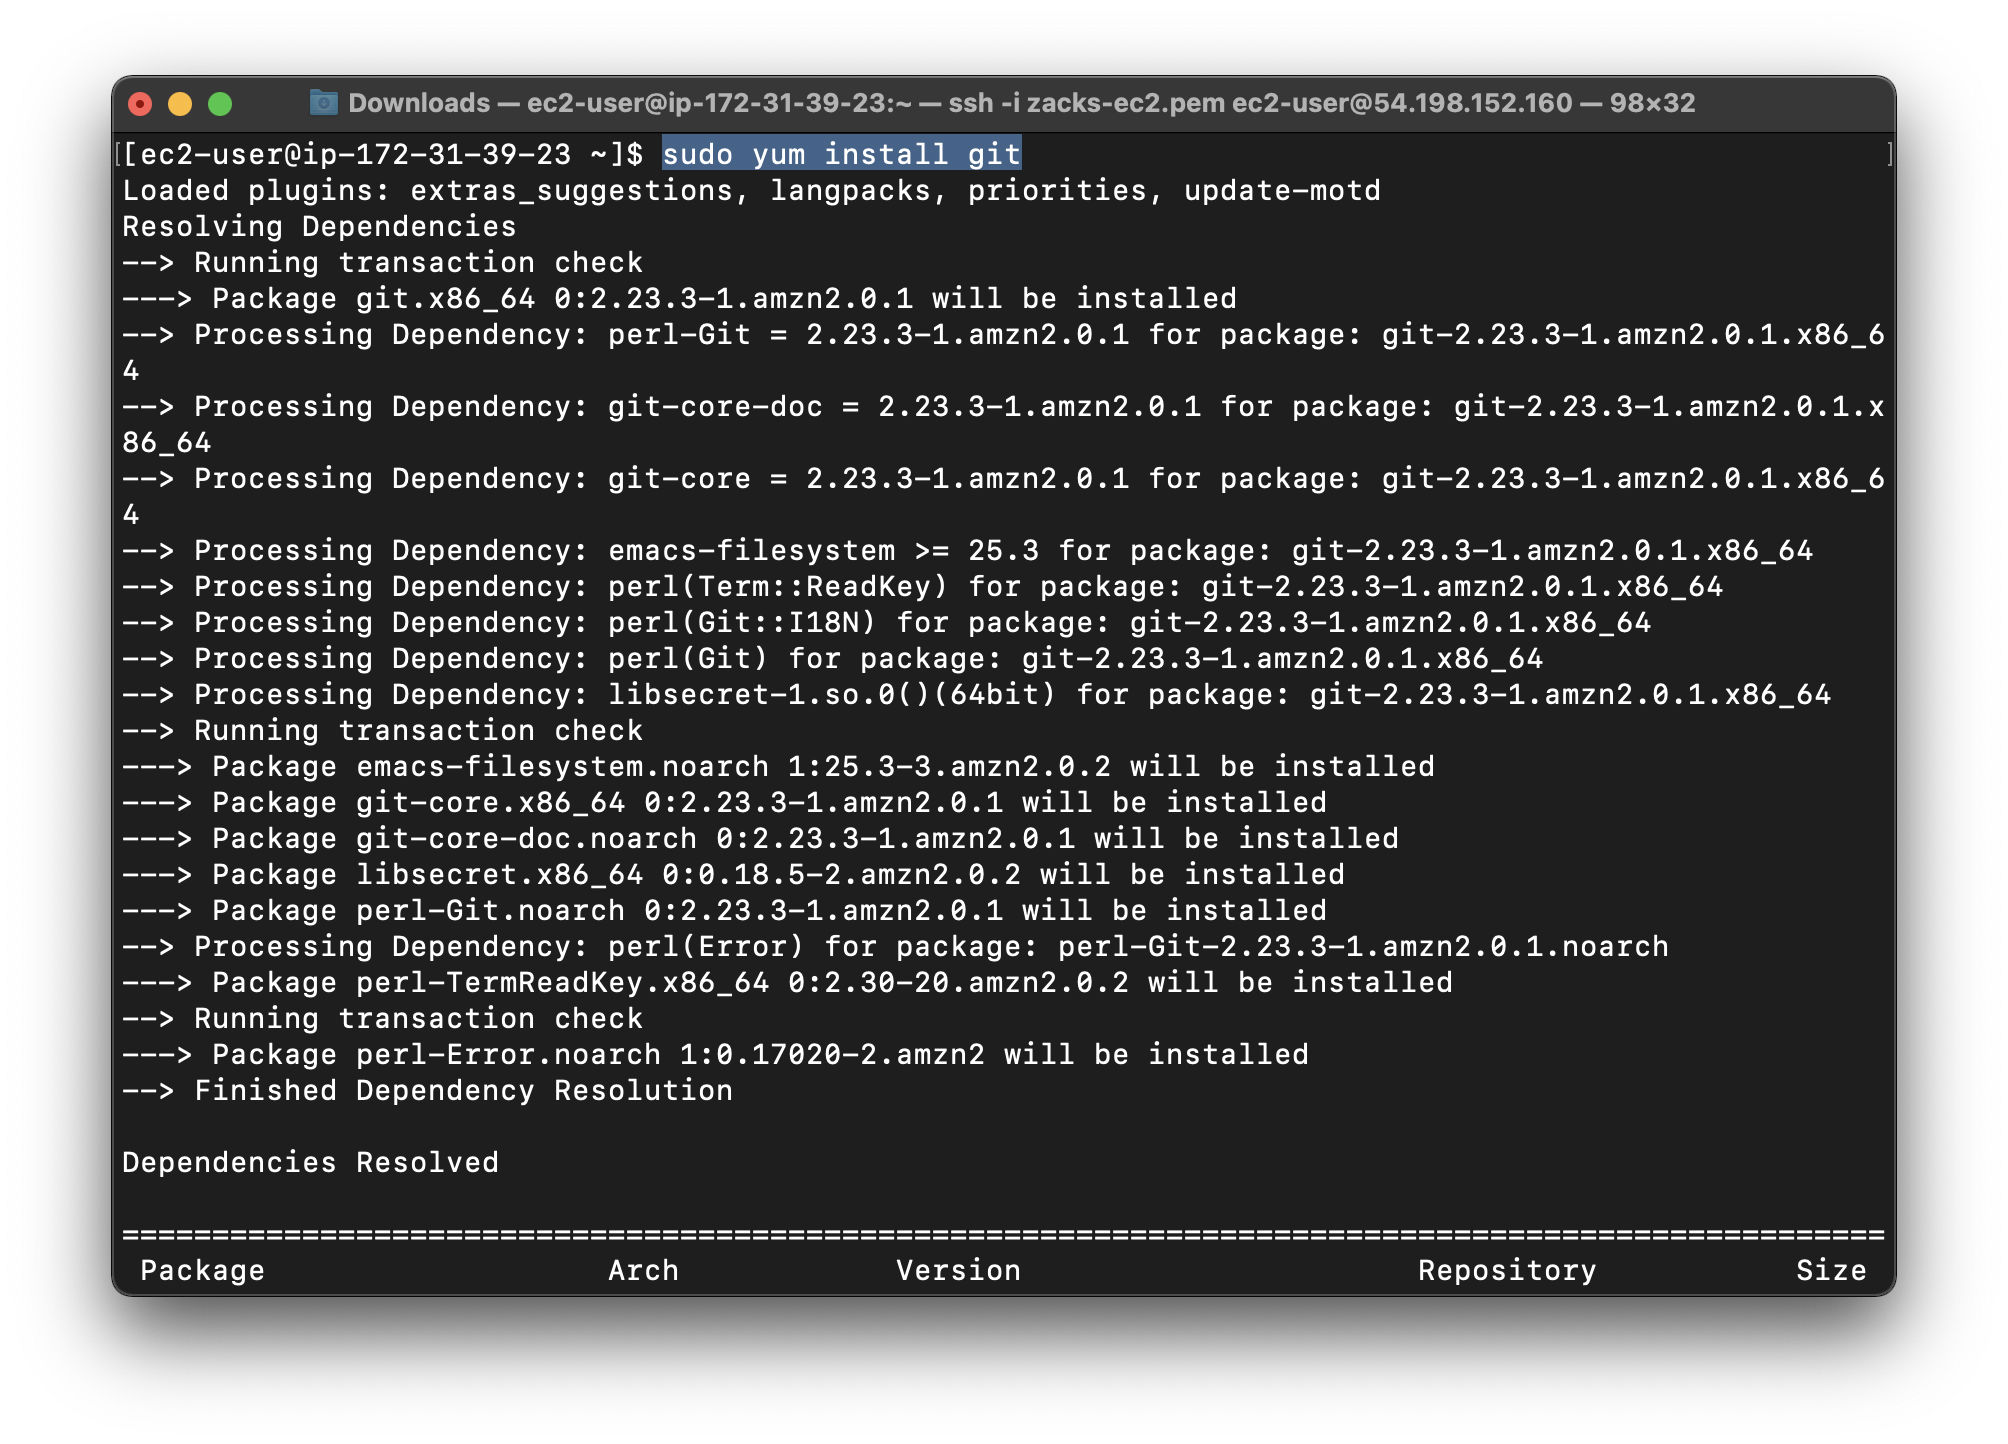
Install git, and then download the KPL from Amazon Web Services - Labs:
1 | sudo yum install git |
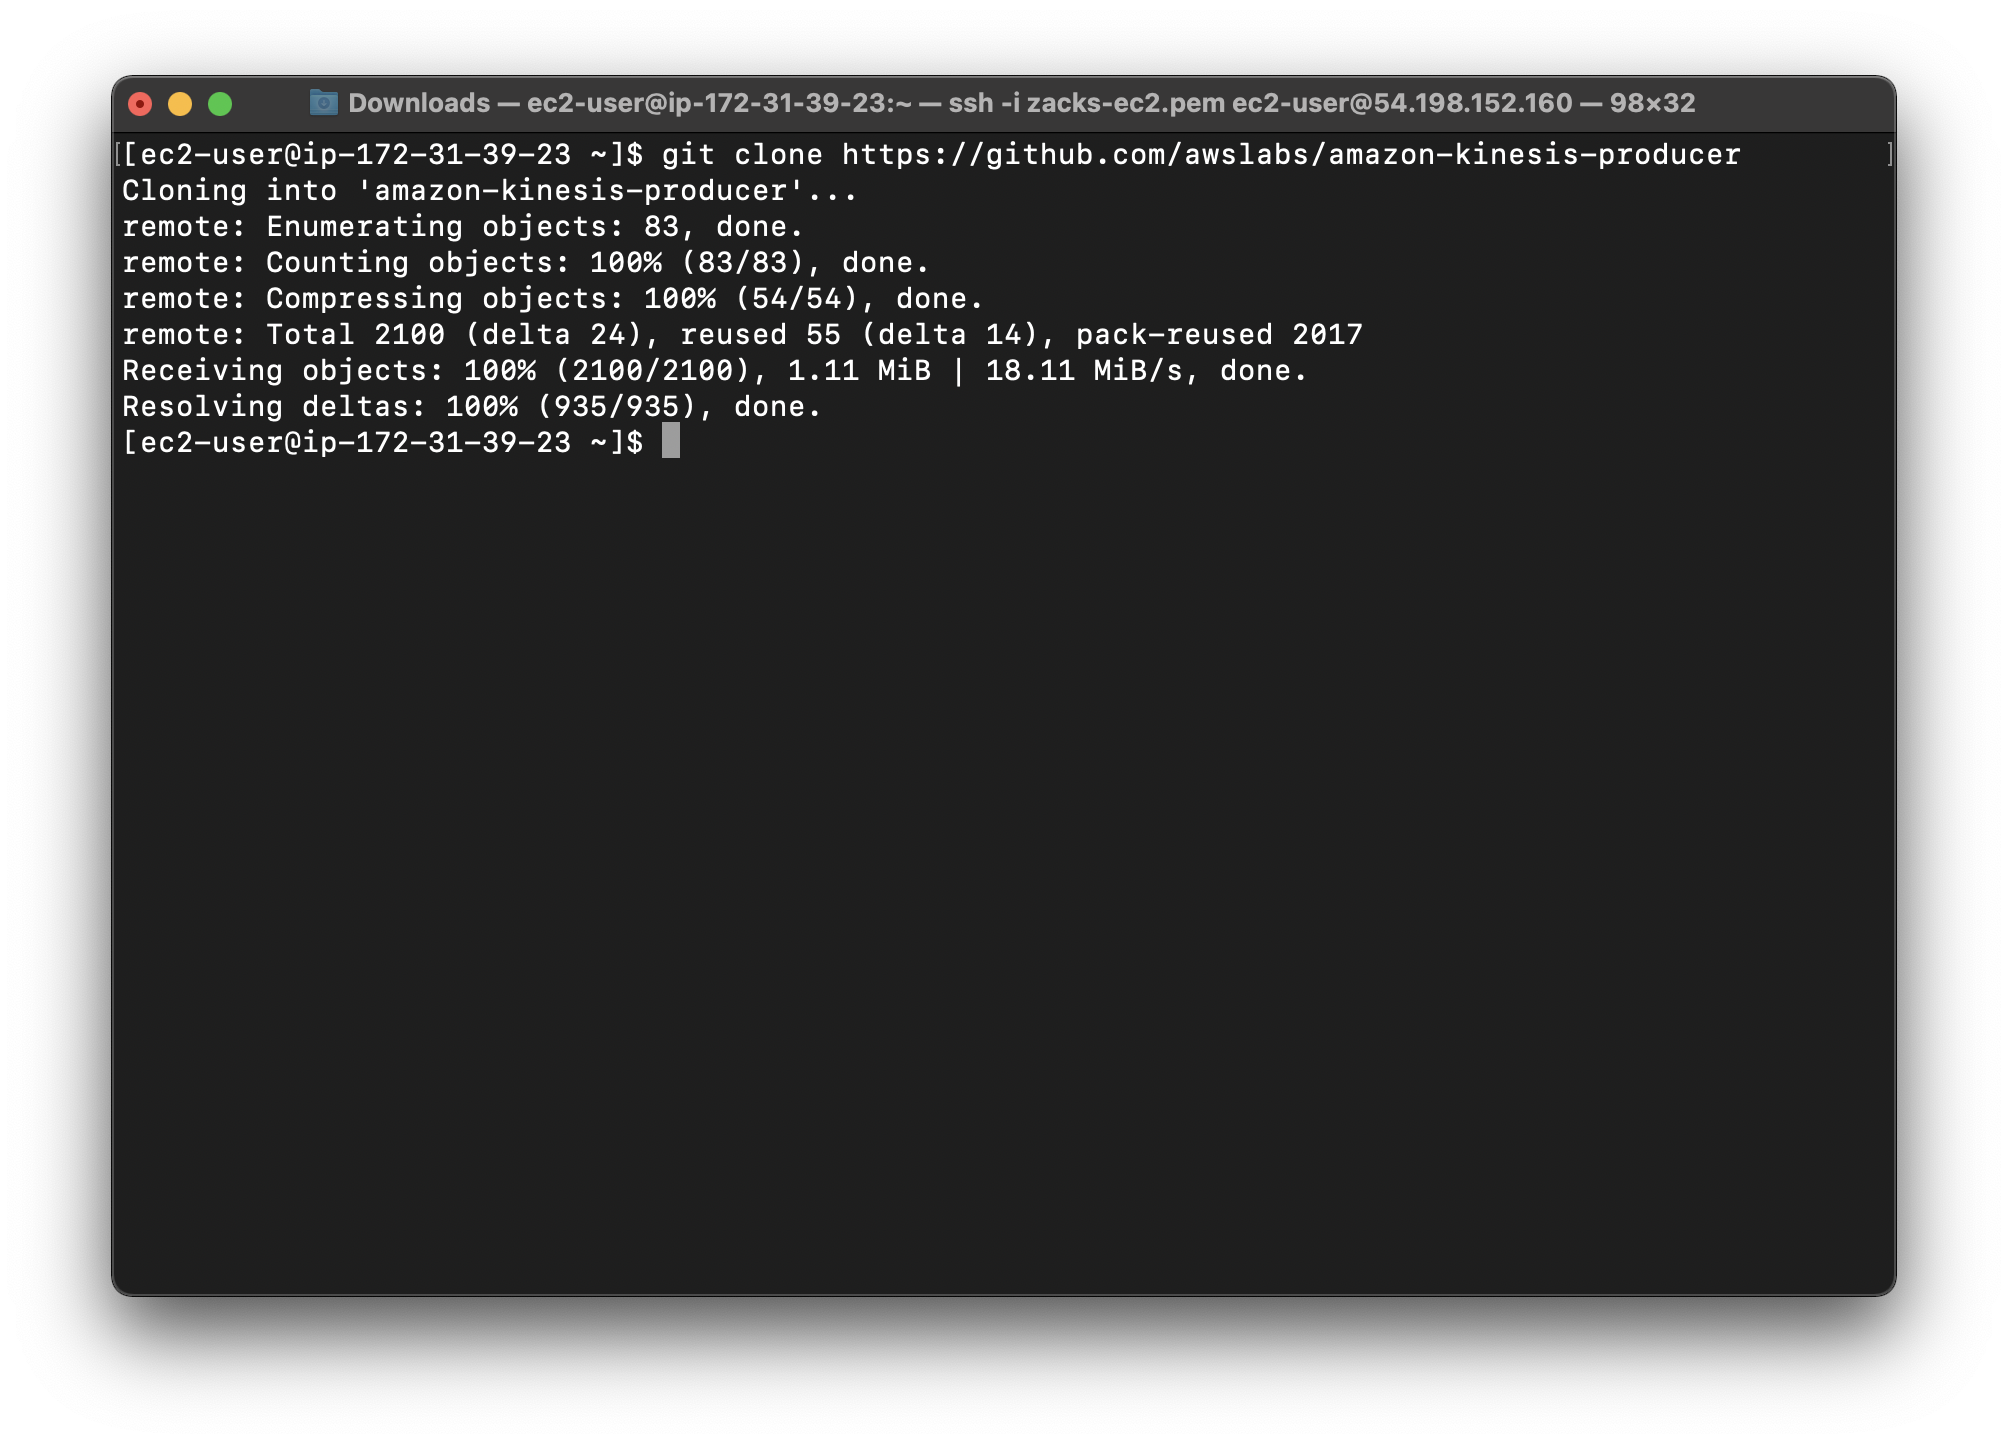
Check file
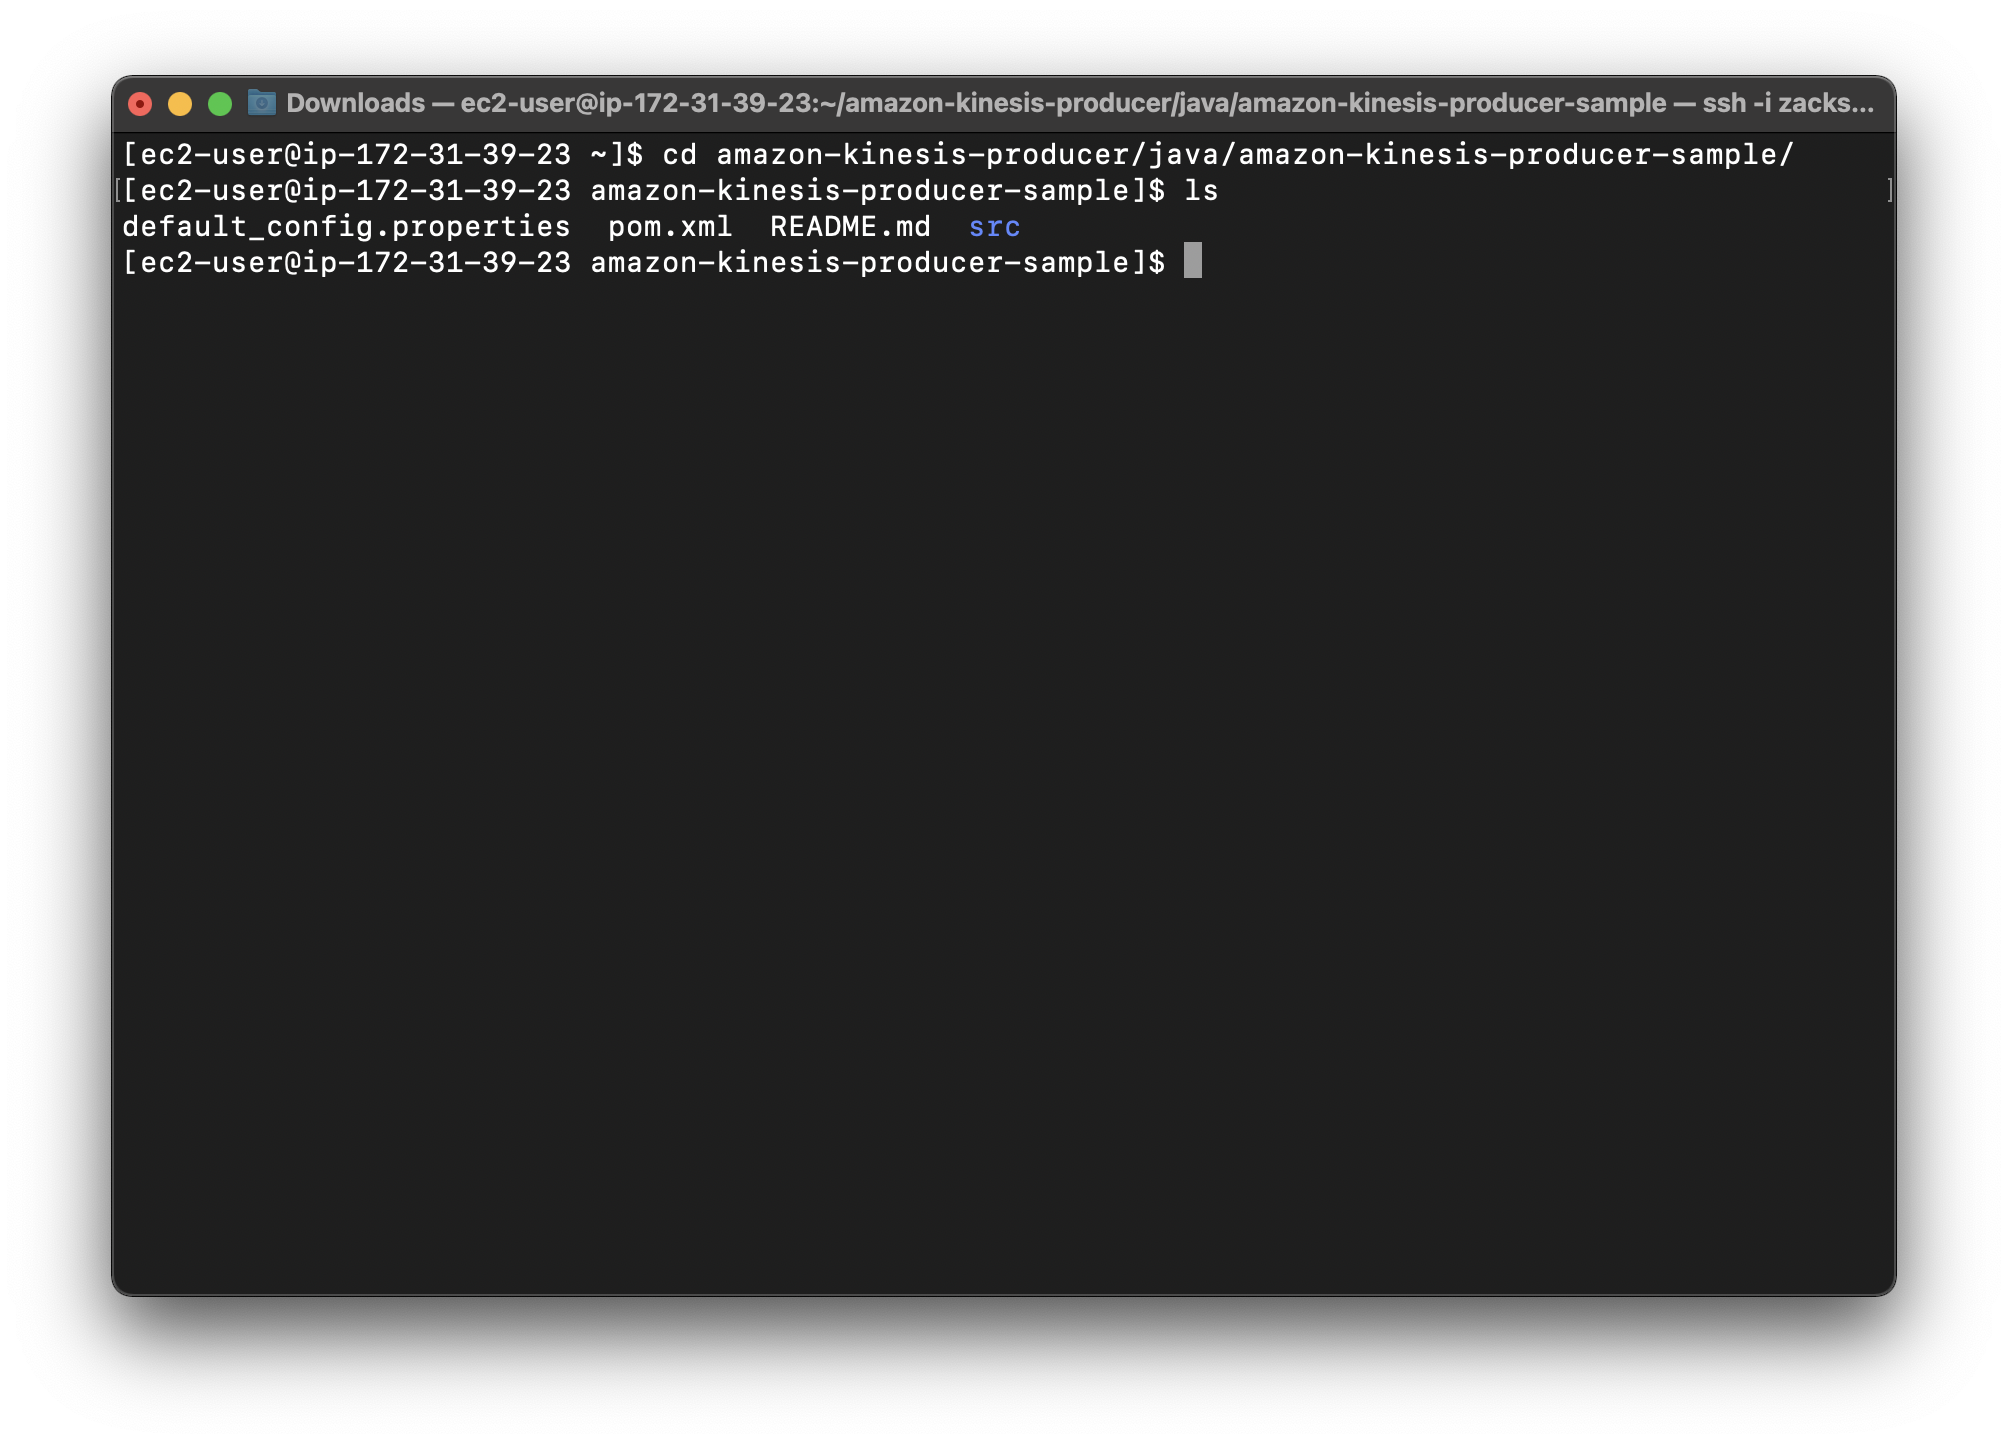
Open the amazon-kinesis-producer/java/amazon-kinesis-producer-sample/ directory, and then list the files:
1 | cd amazon-kinesis-producer/java/amazon-kinesis-producer-sample/ |
IAM Configuration
Services -> EC2 -> Instances
Select the Instance you created for Kinesis. See the IAM Role should be -.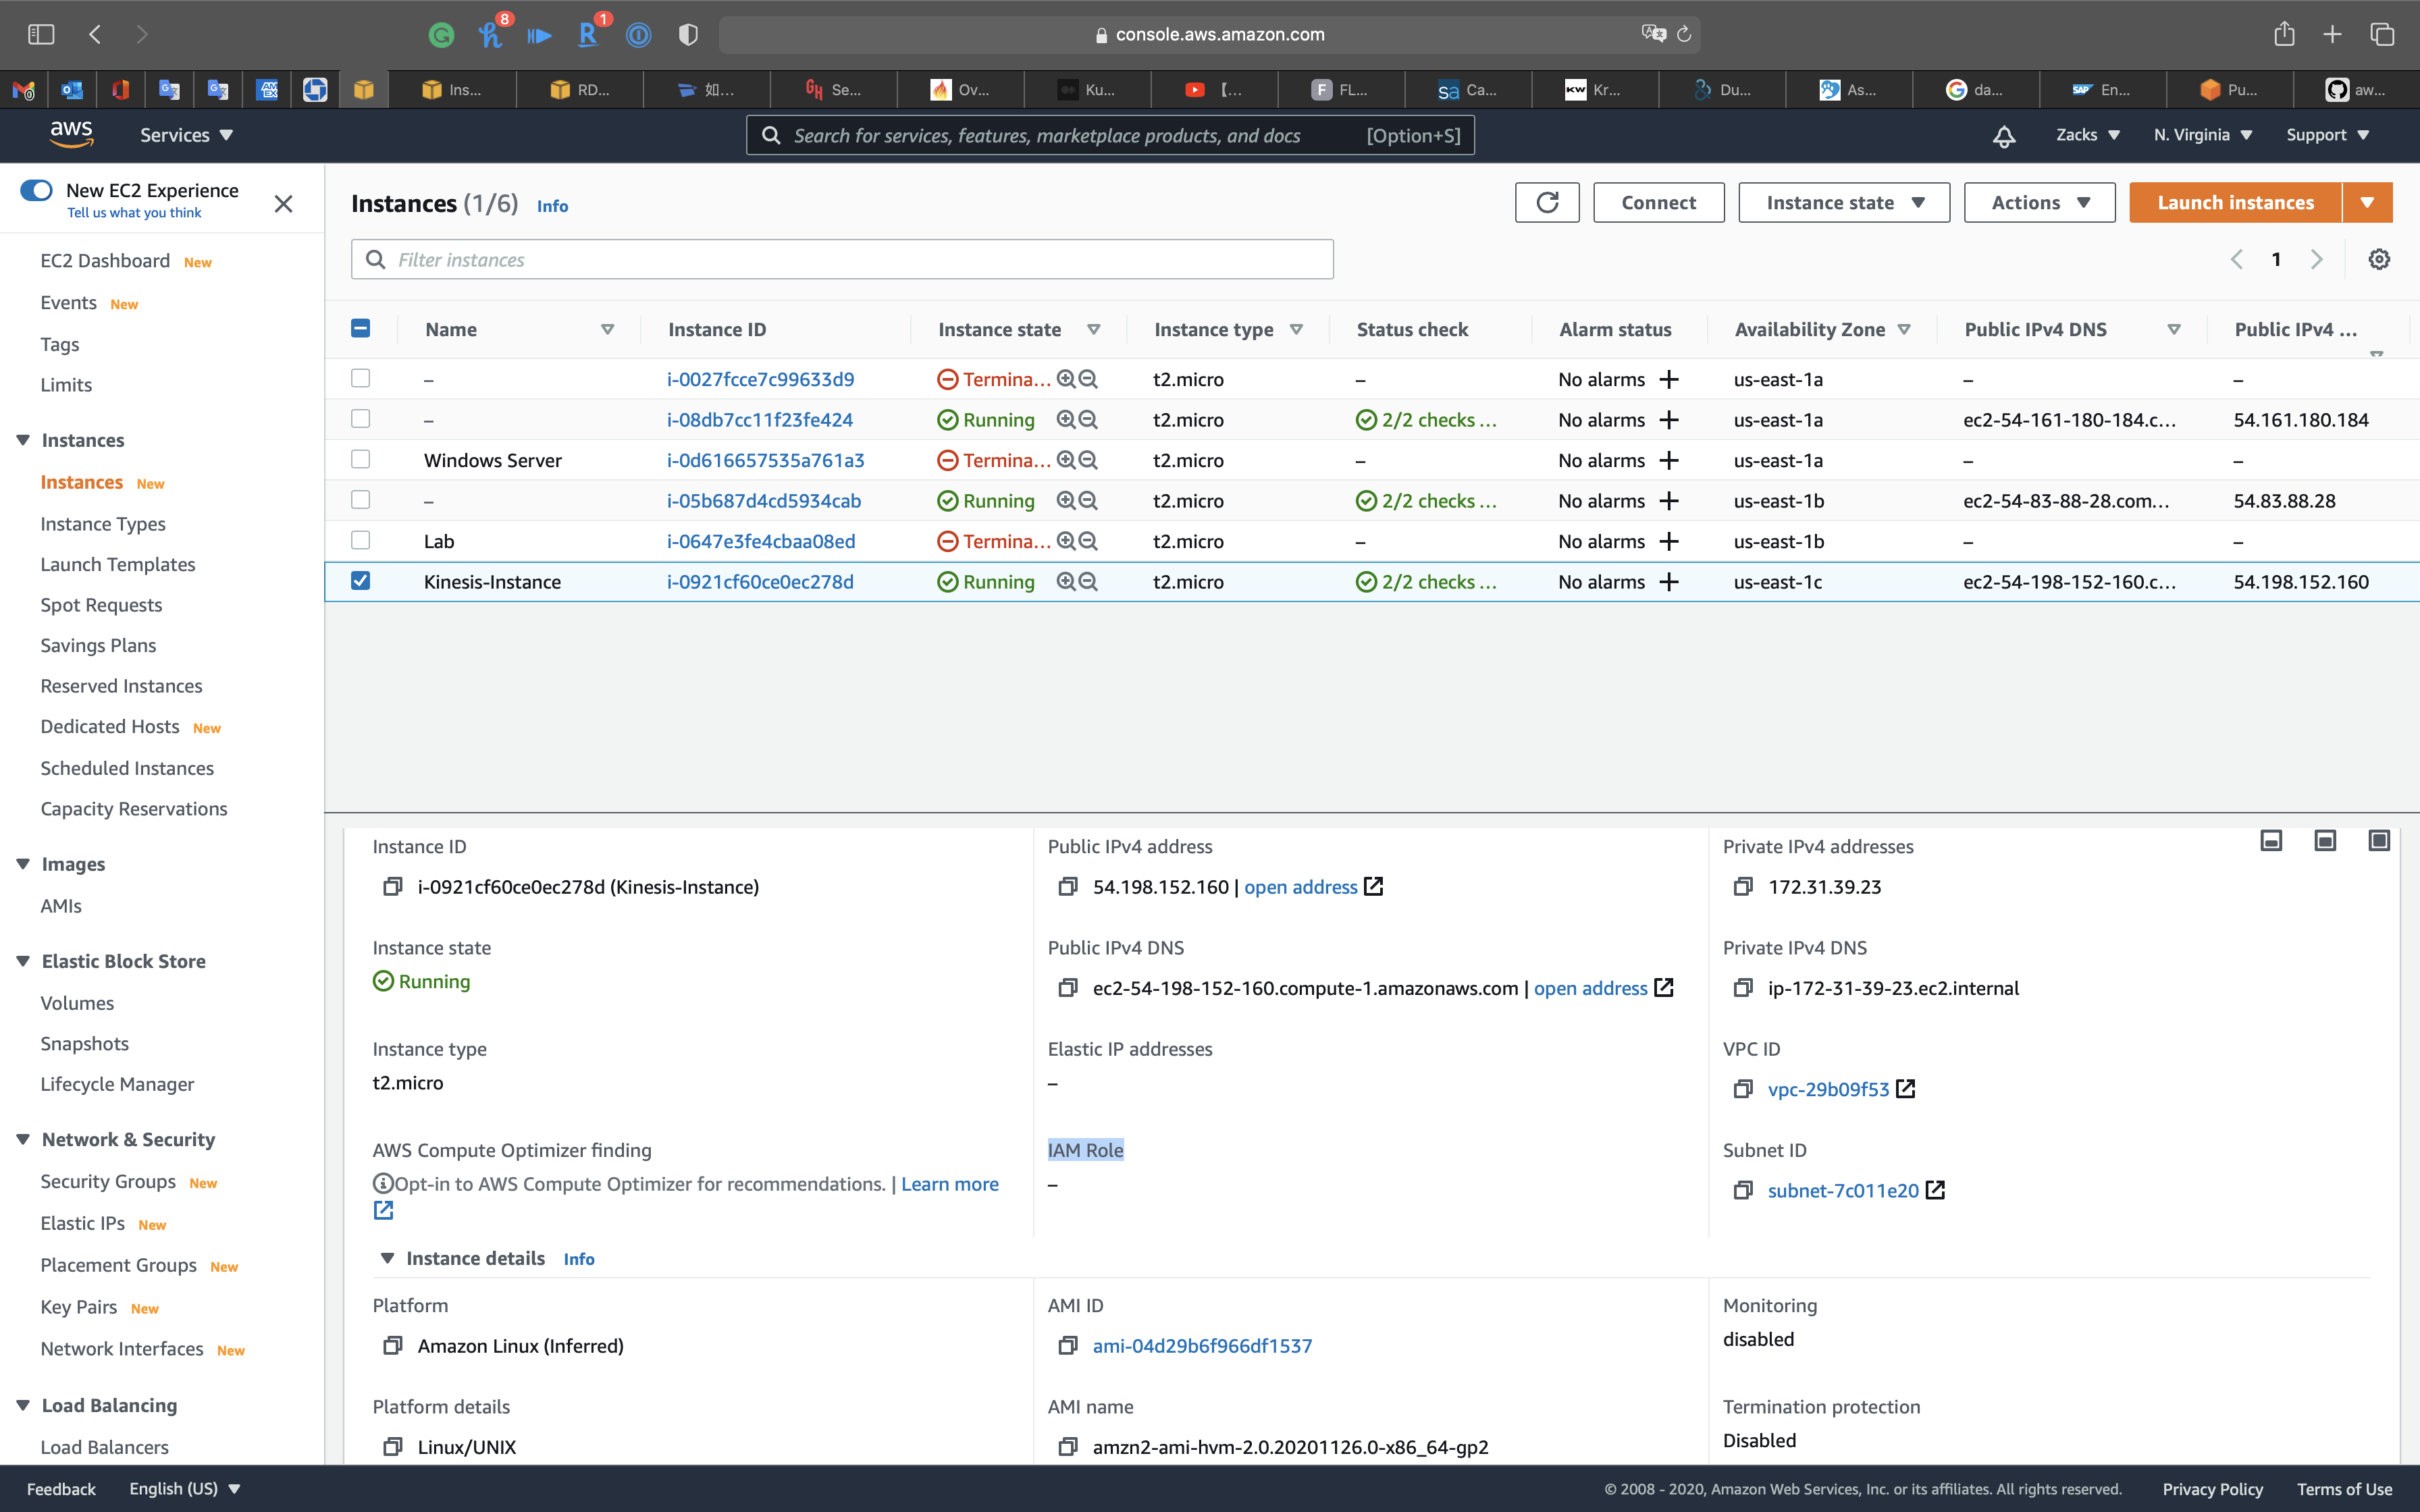
Create a IAM Role for EC2 instance
Services -> IAM -> Roles
Click on Create role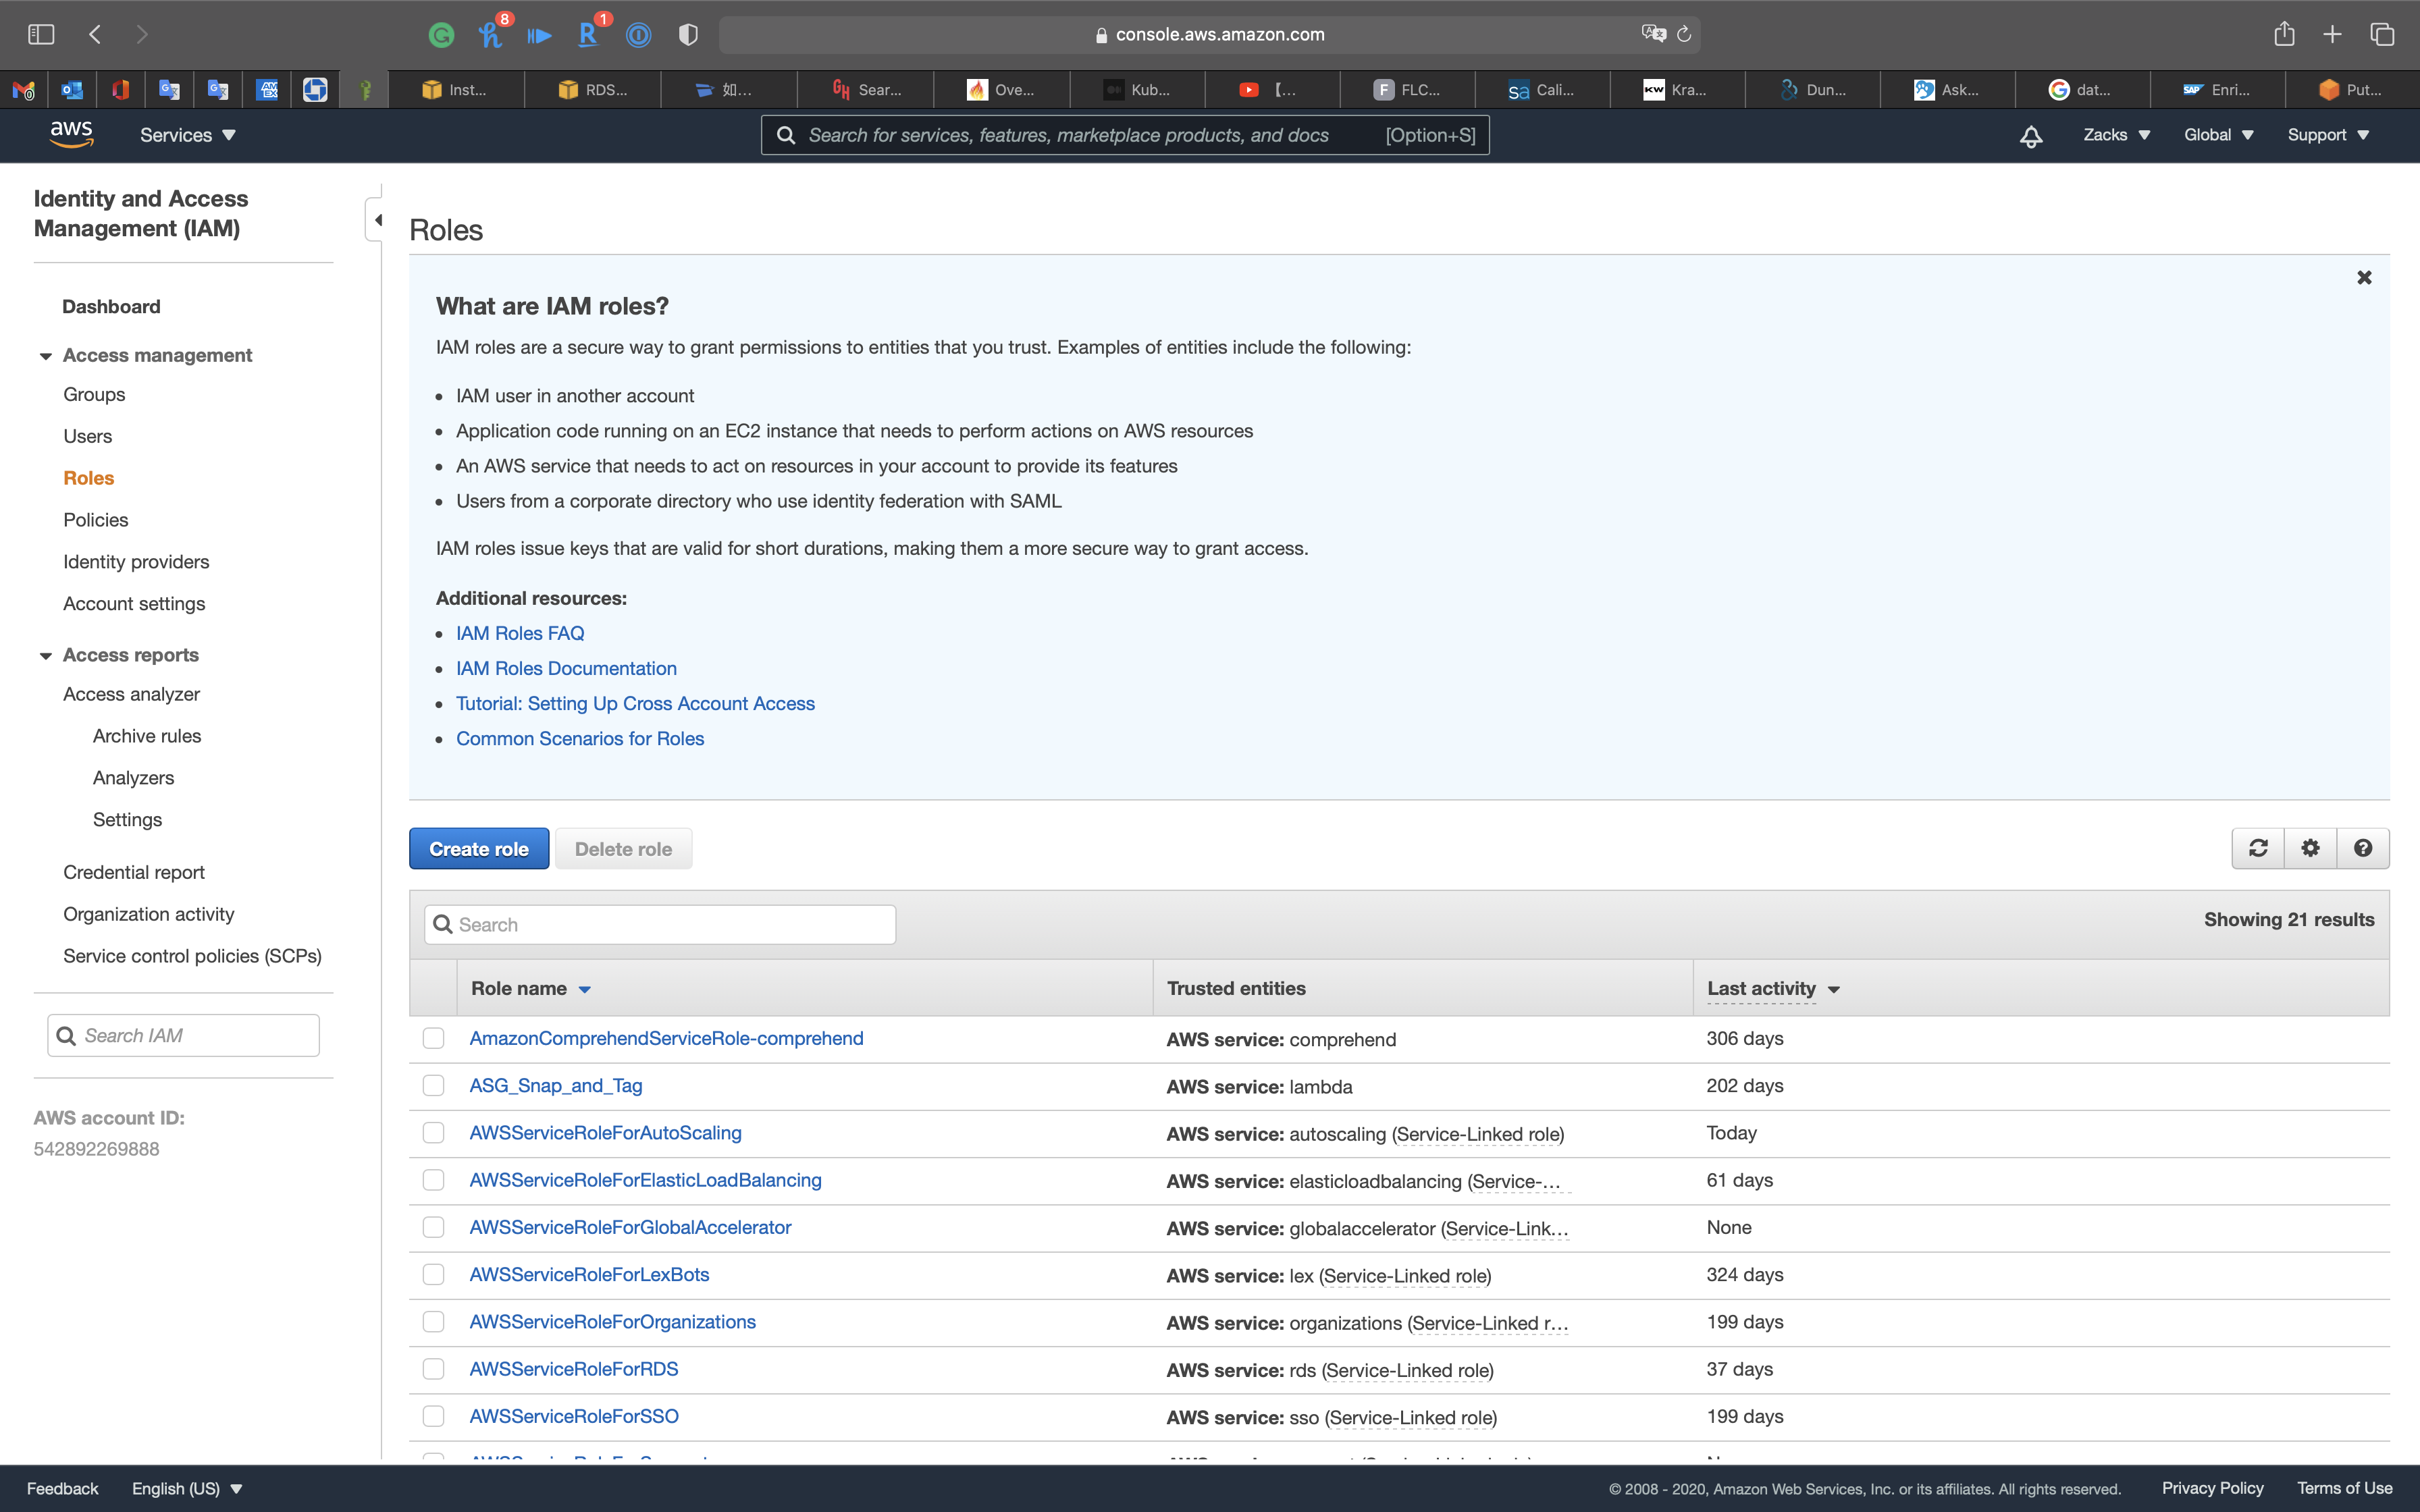
Select EC2.
Click on Next: Permissions
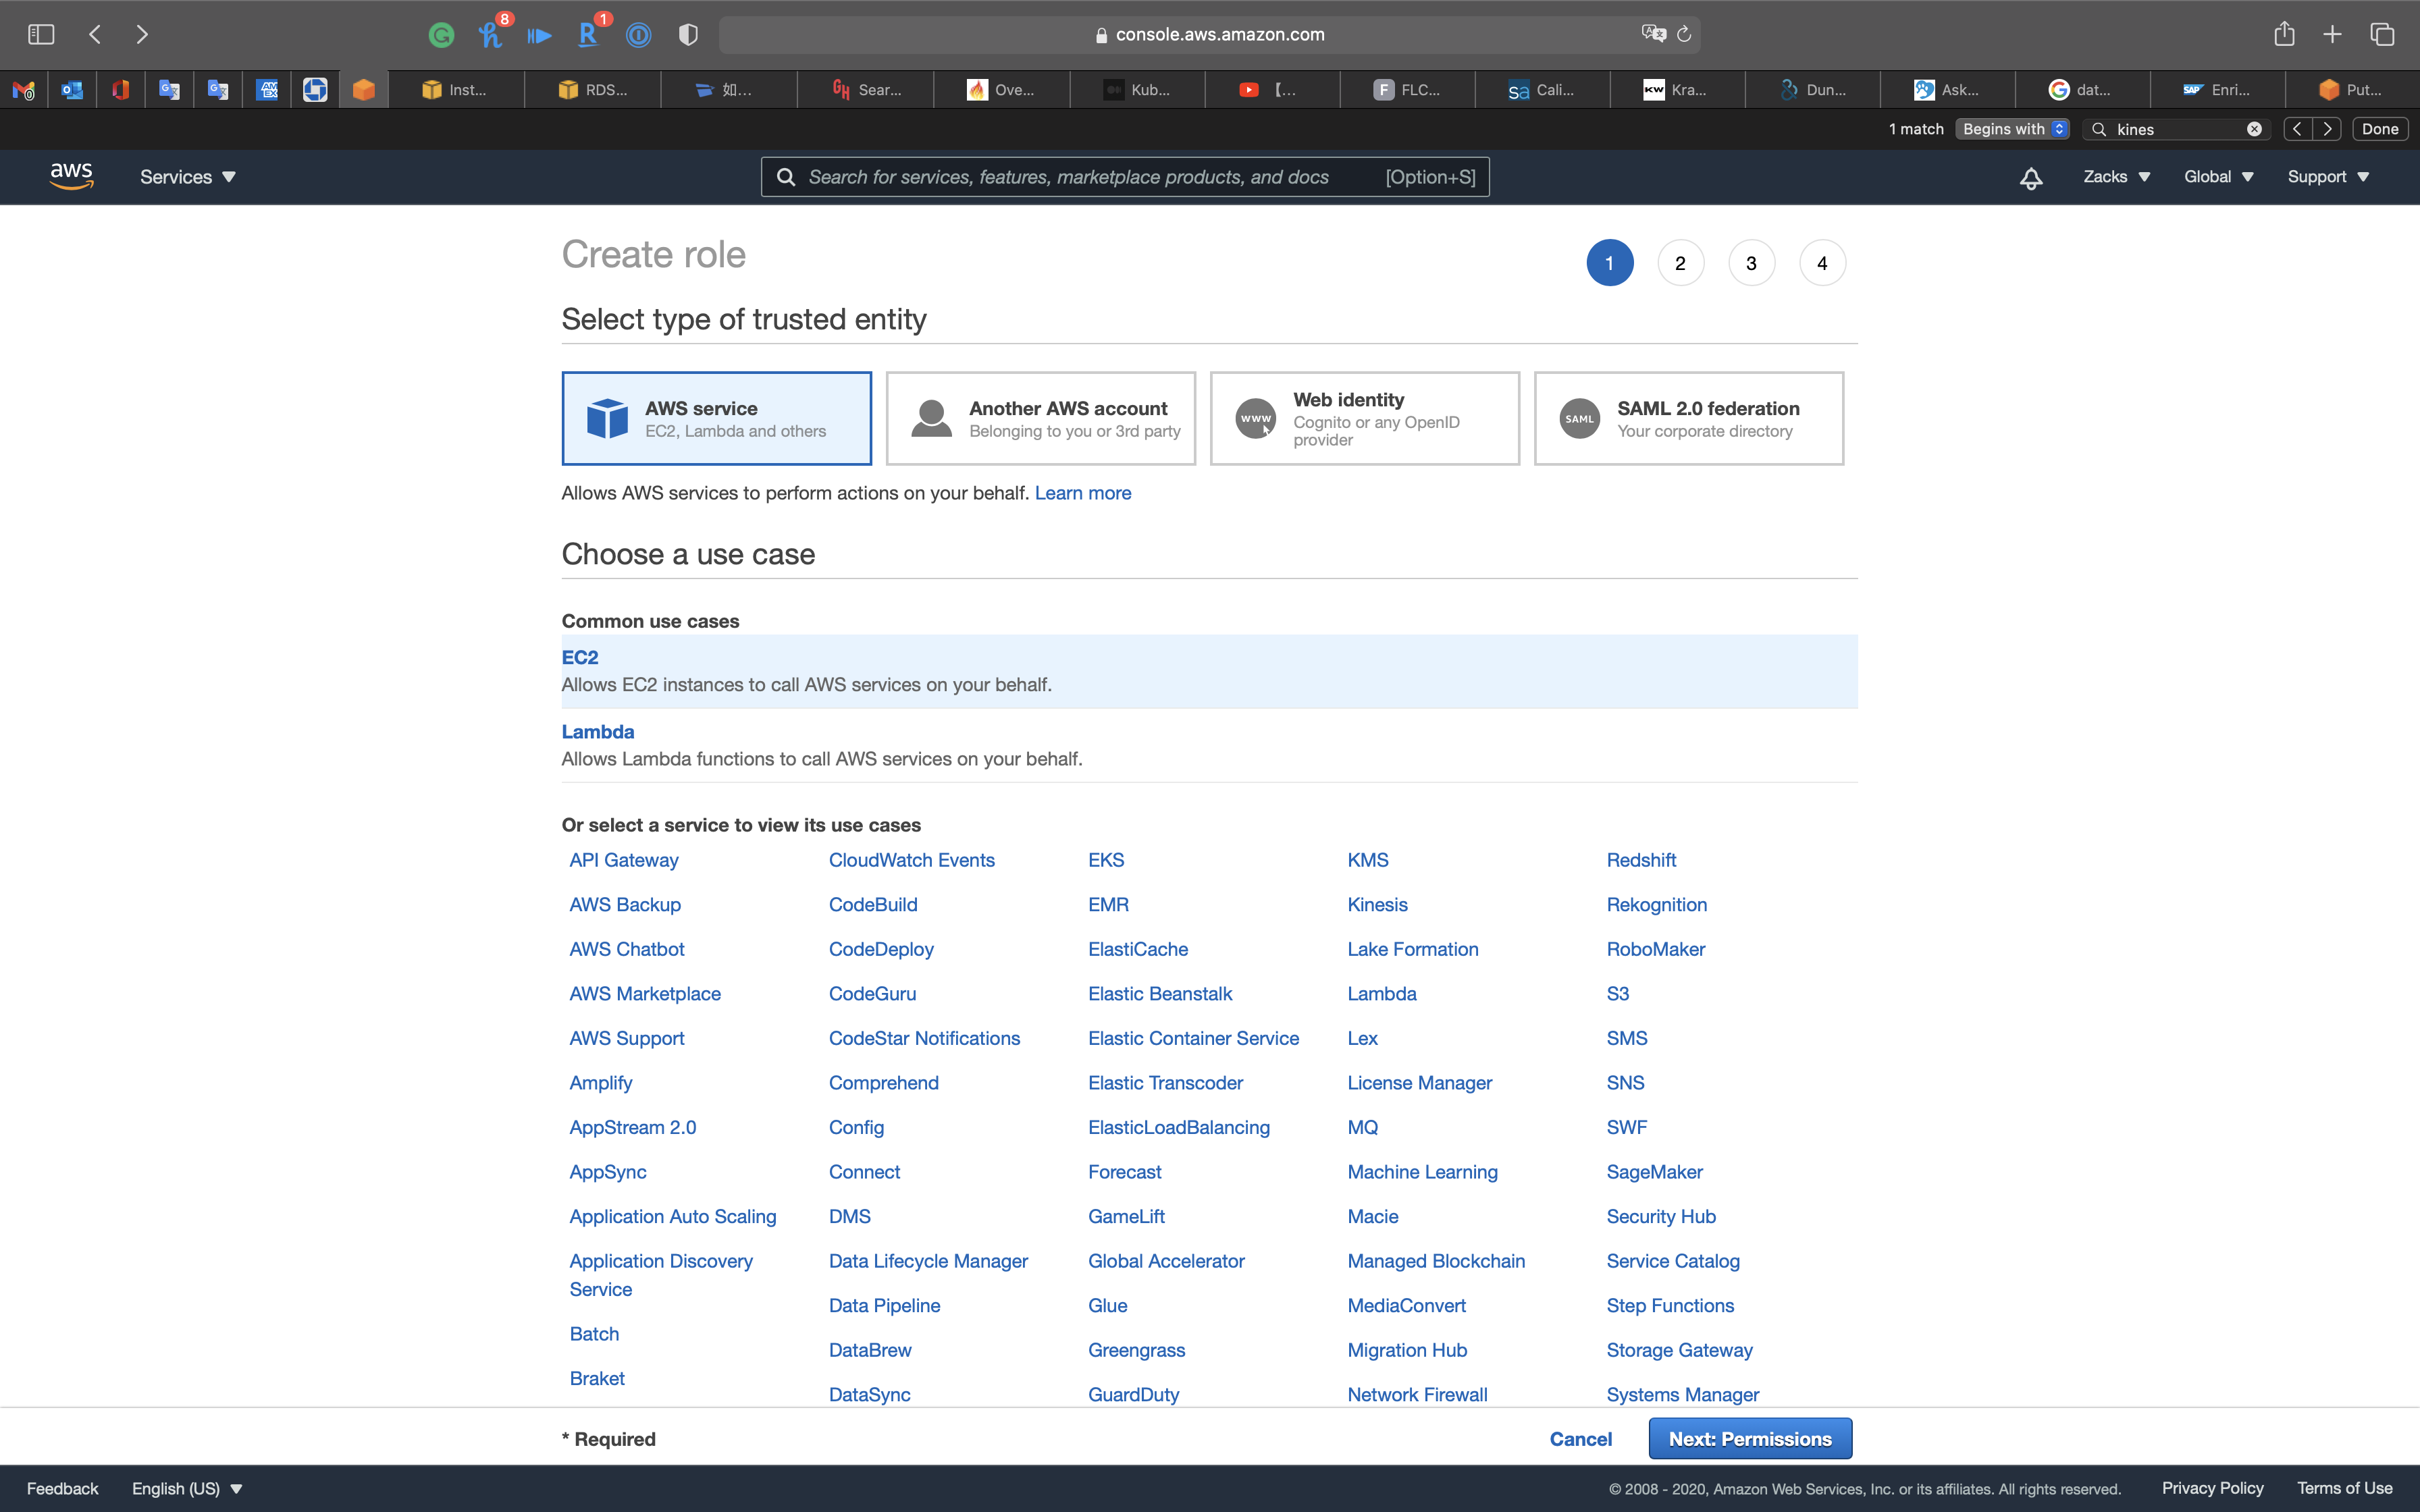
Search for AmazonKinesisFullAccess.
Select it.
Then Click on Next: Tags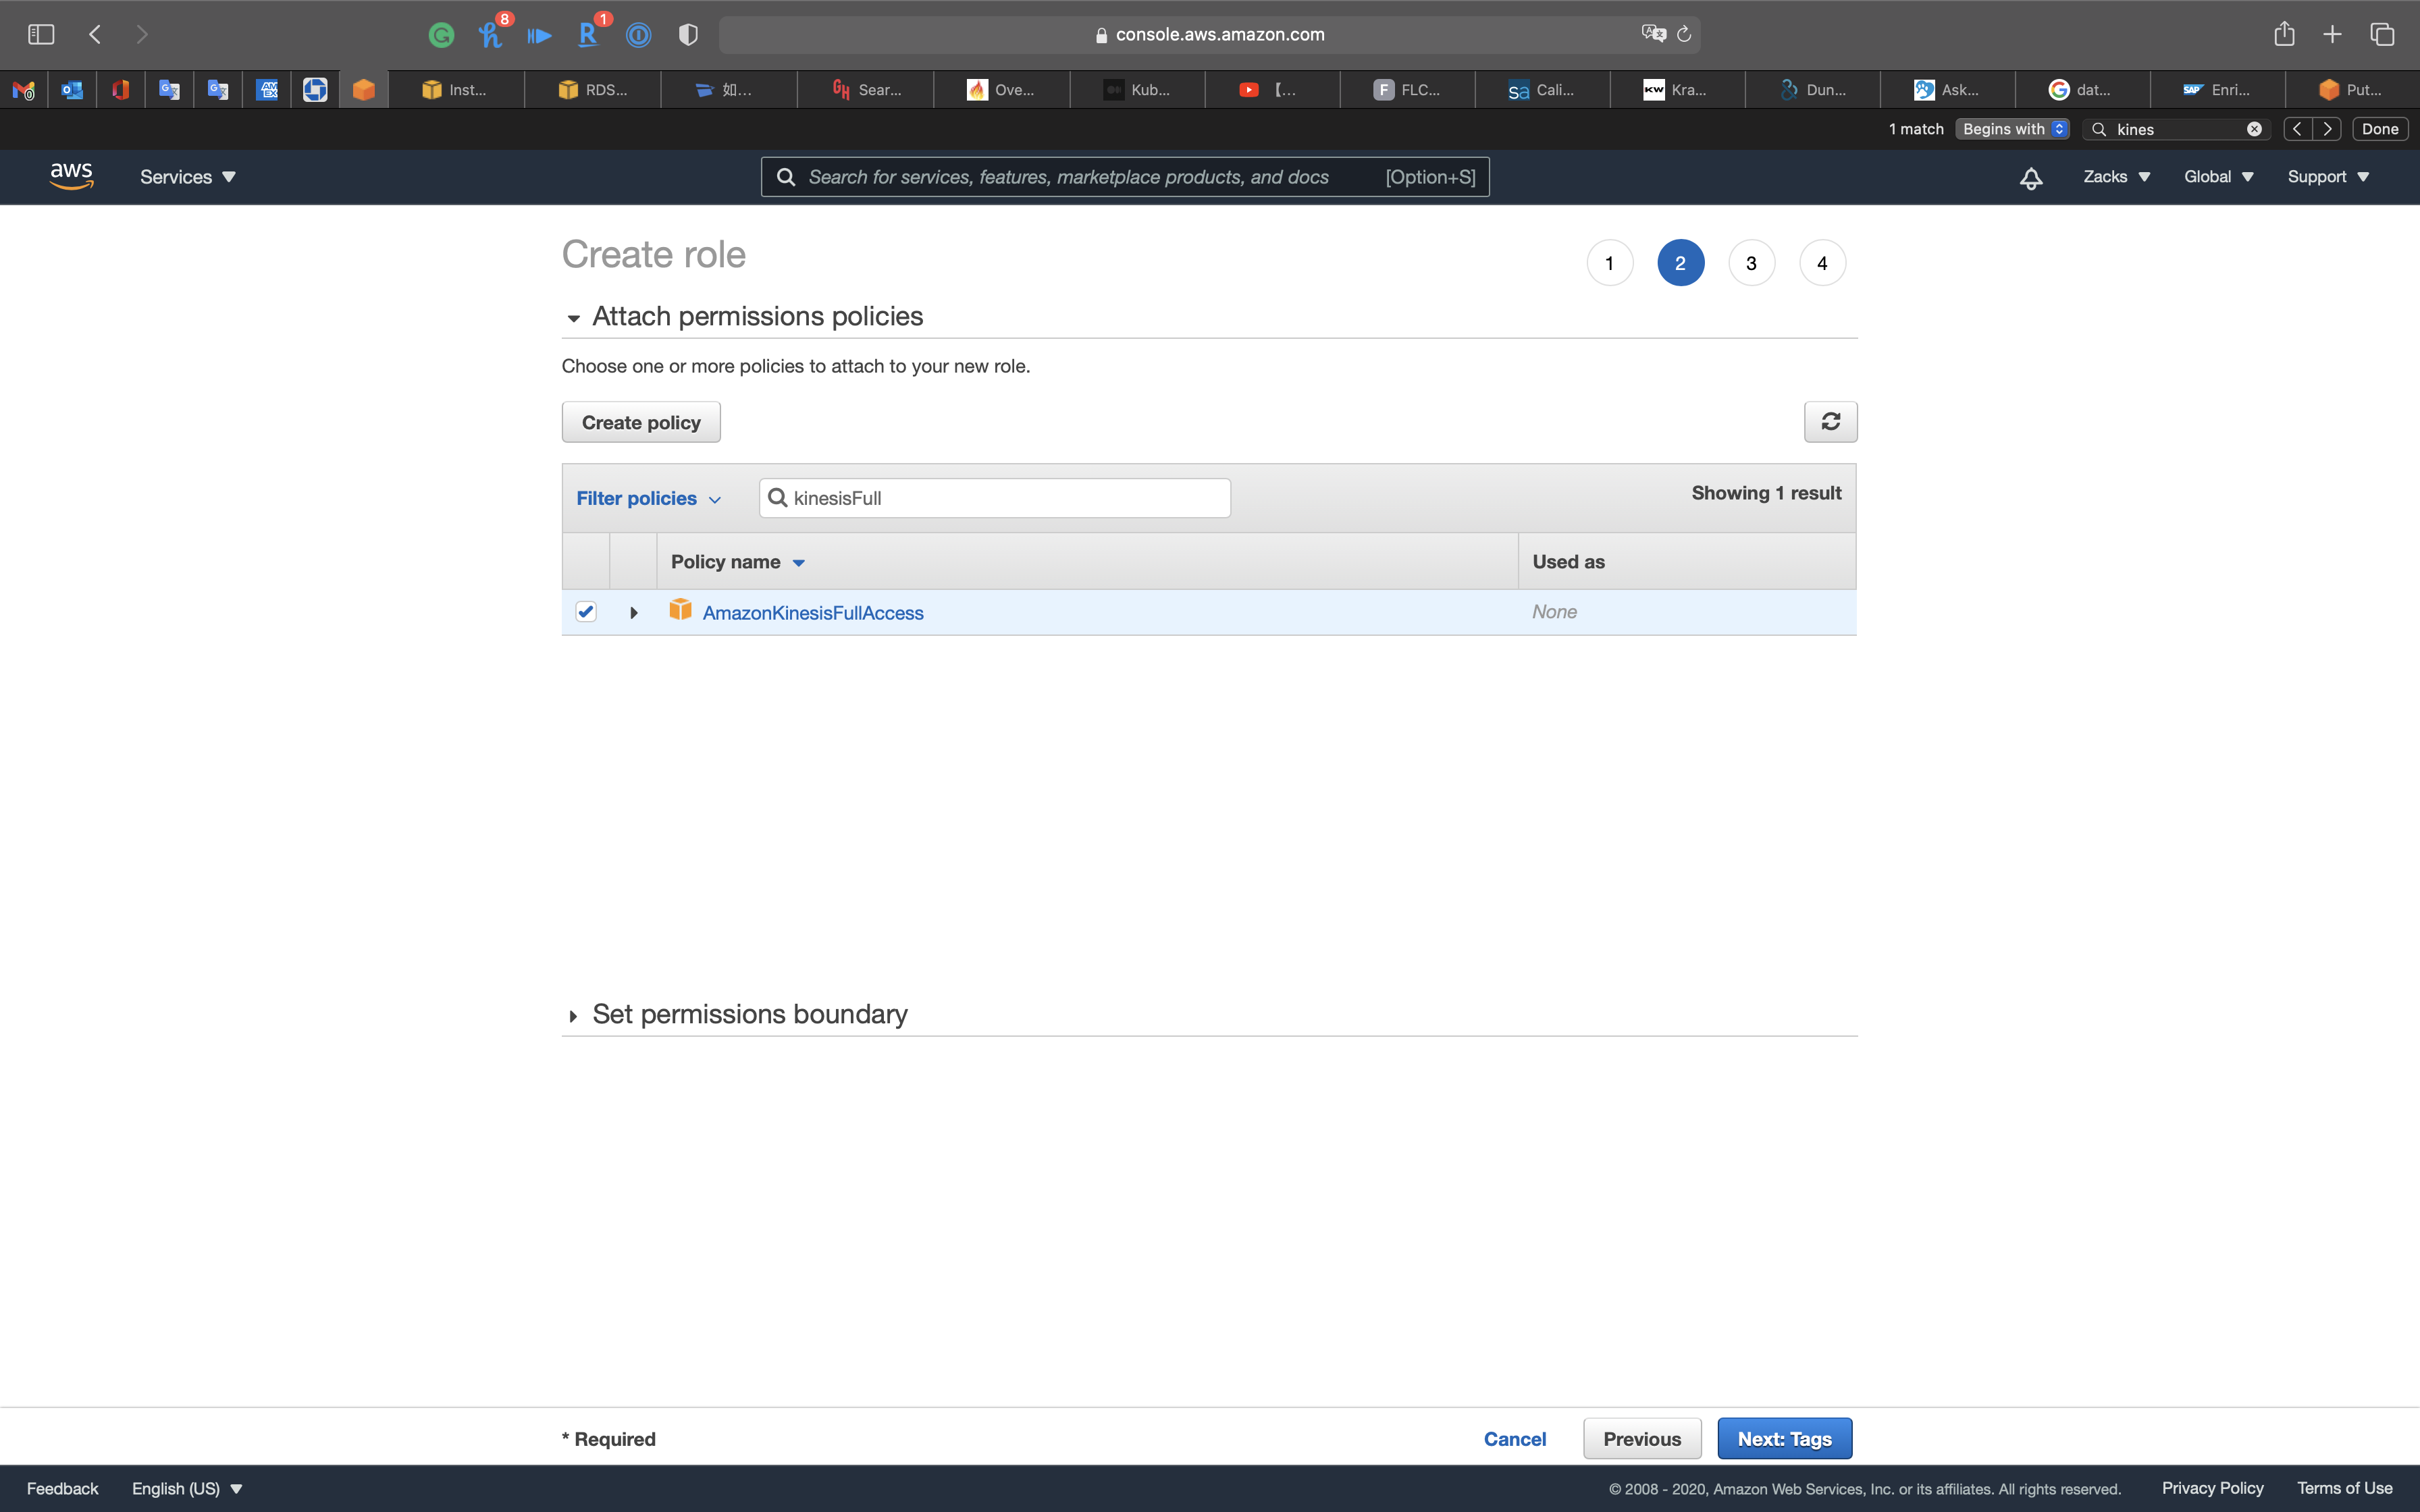
- Key:
Name - Value:
Kinesis-KPL
Click on Next: Review
- Role name:
Kinesis-KPL
Click on Create role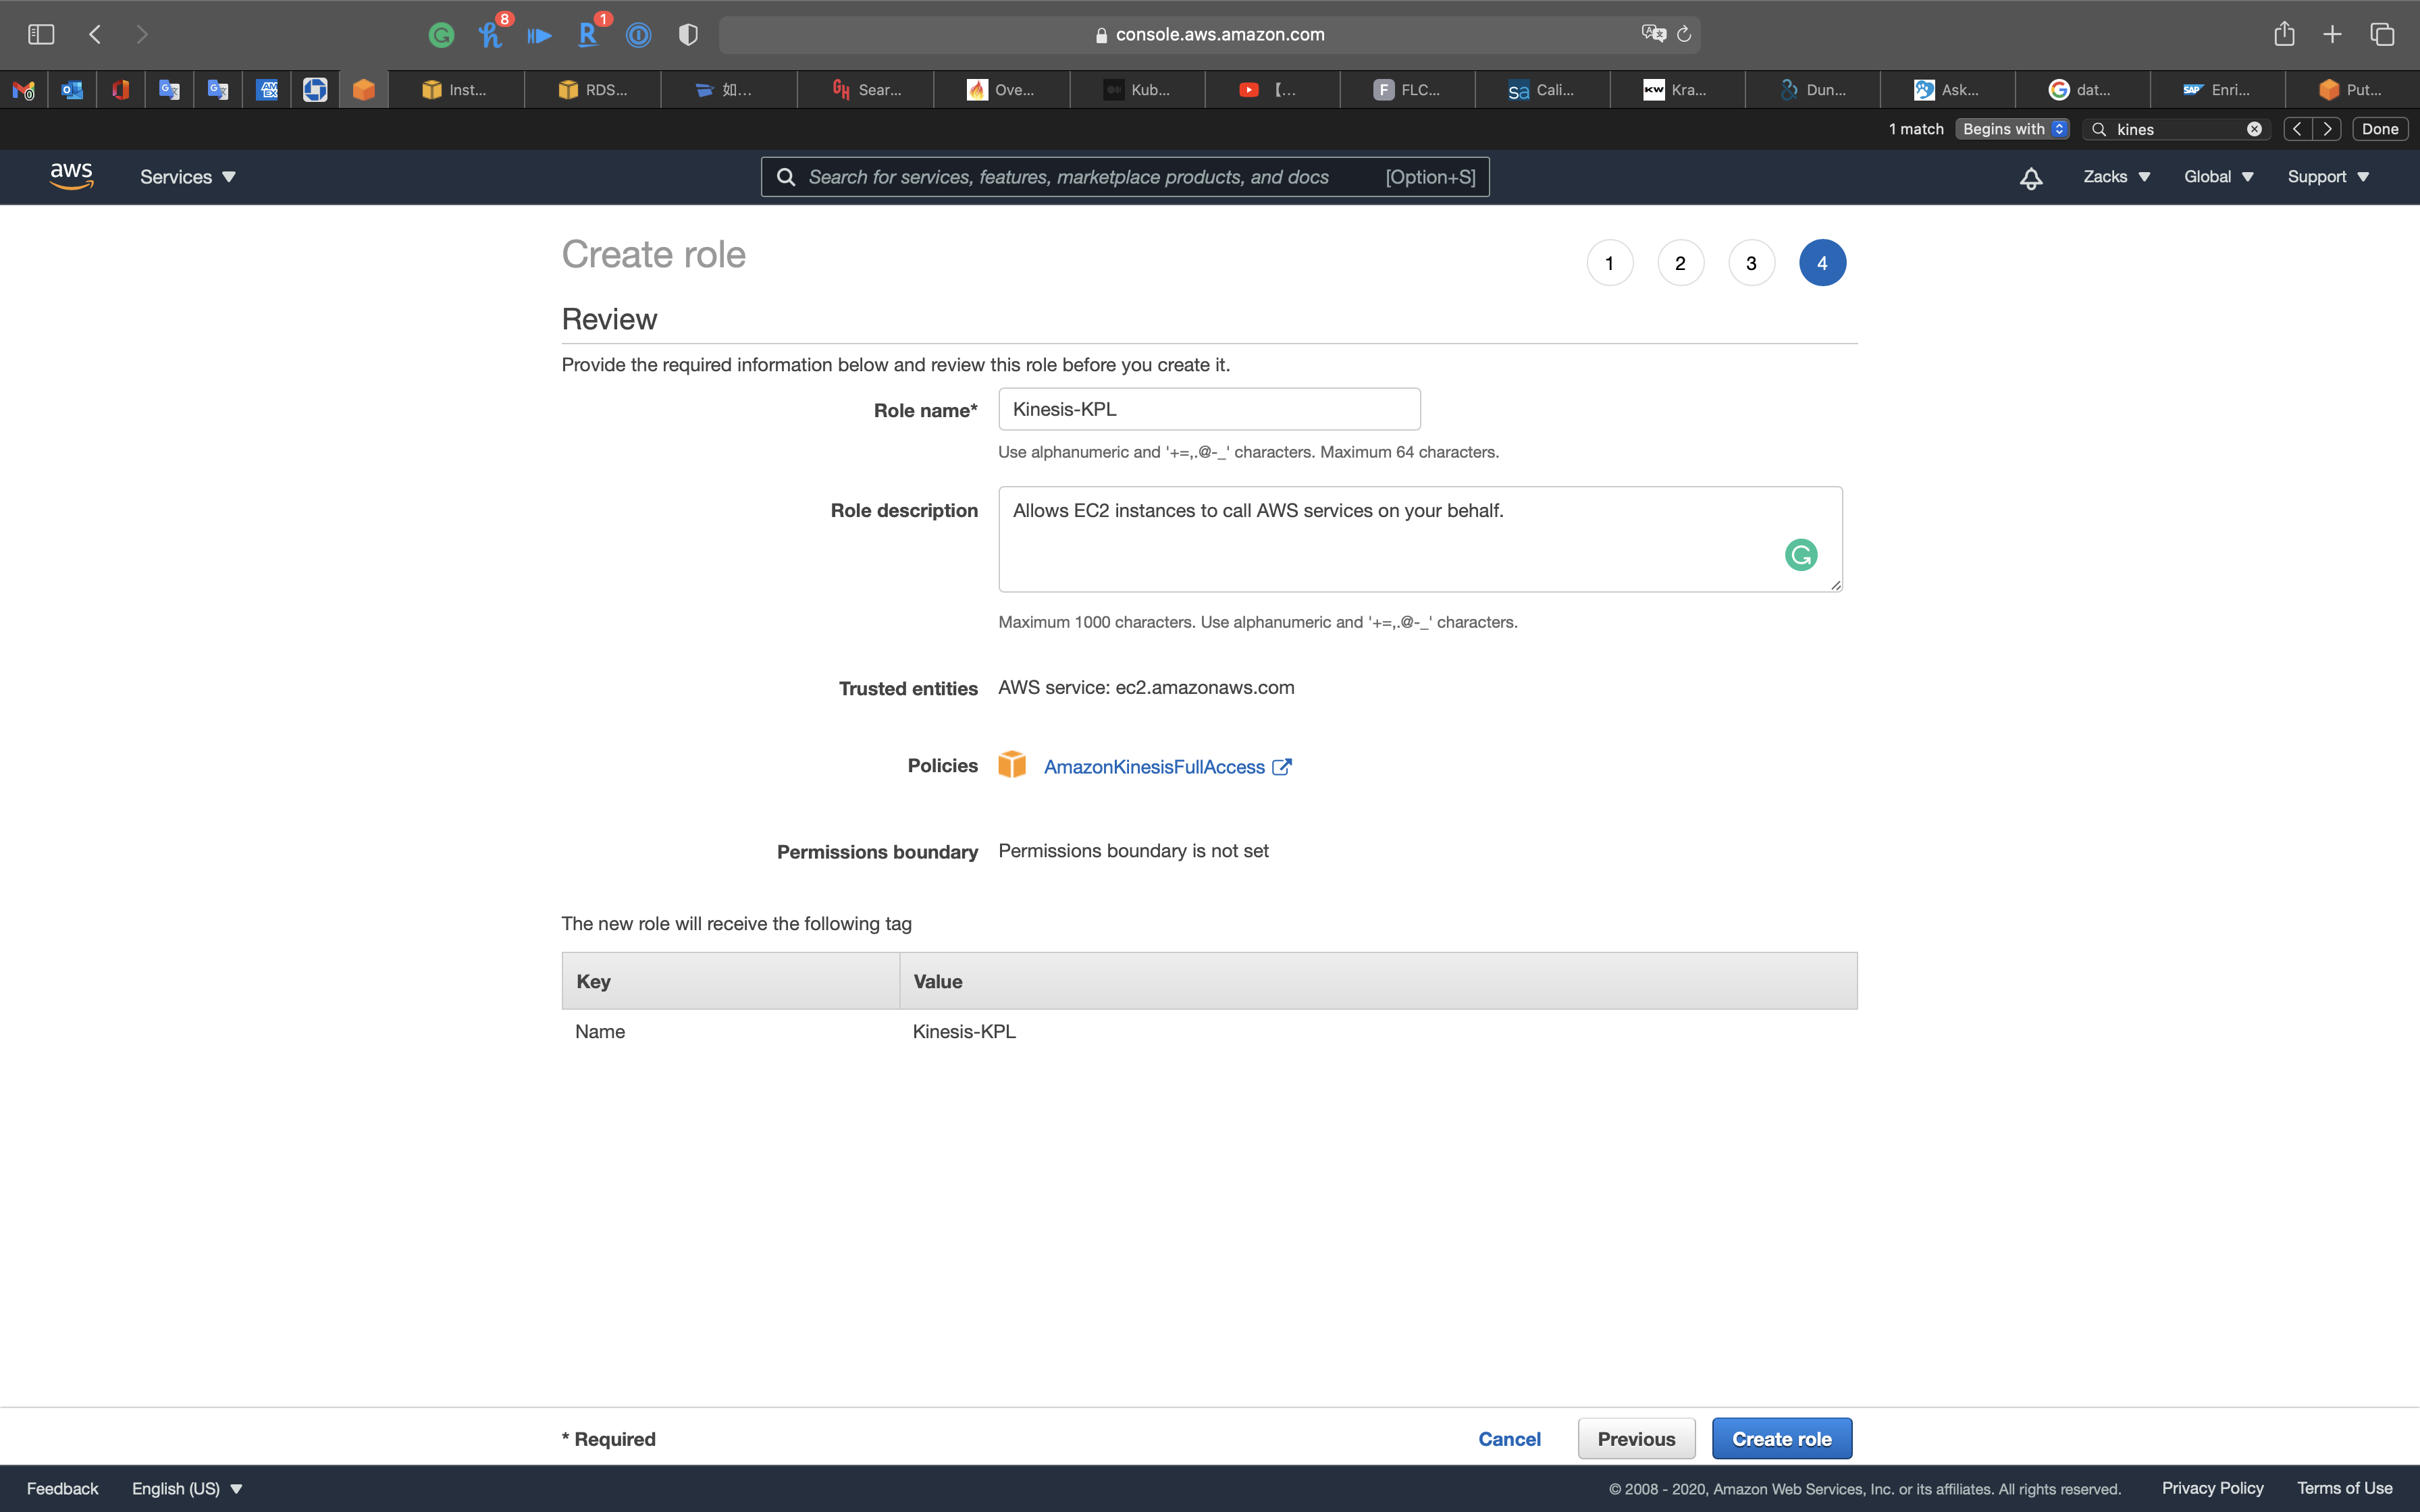
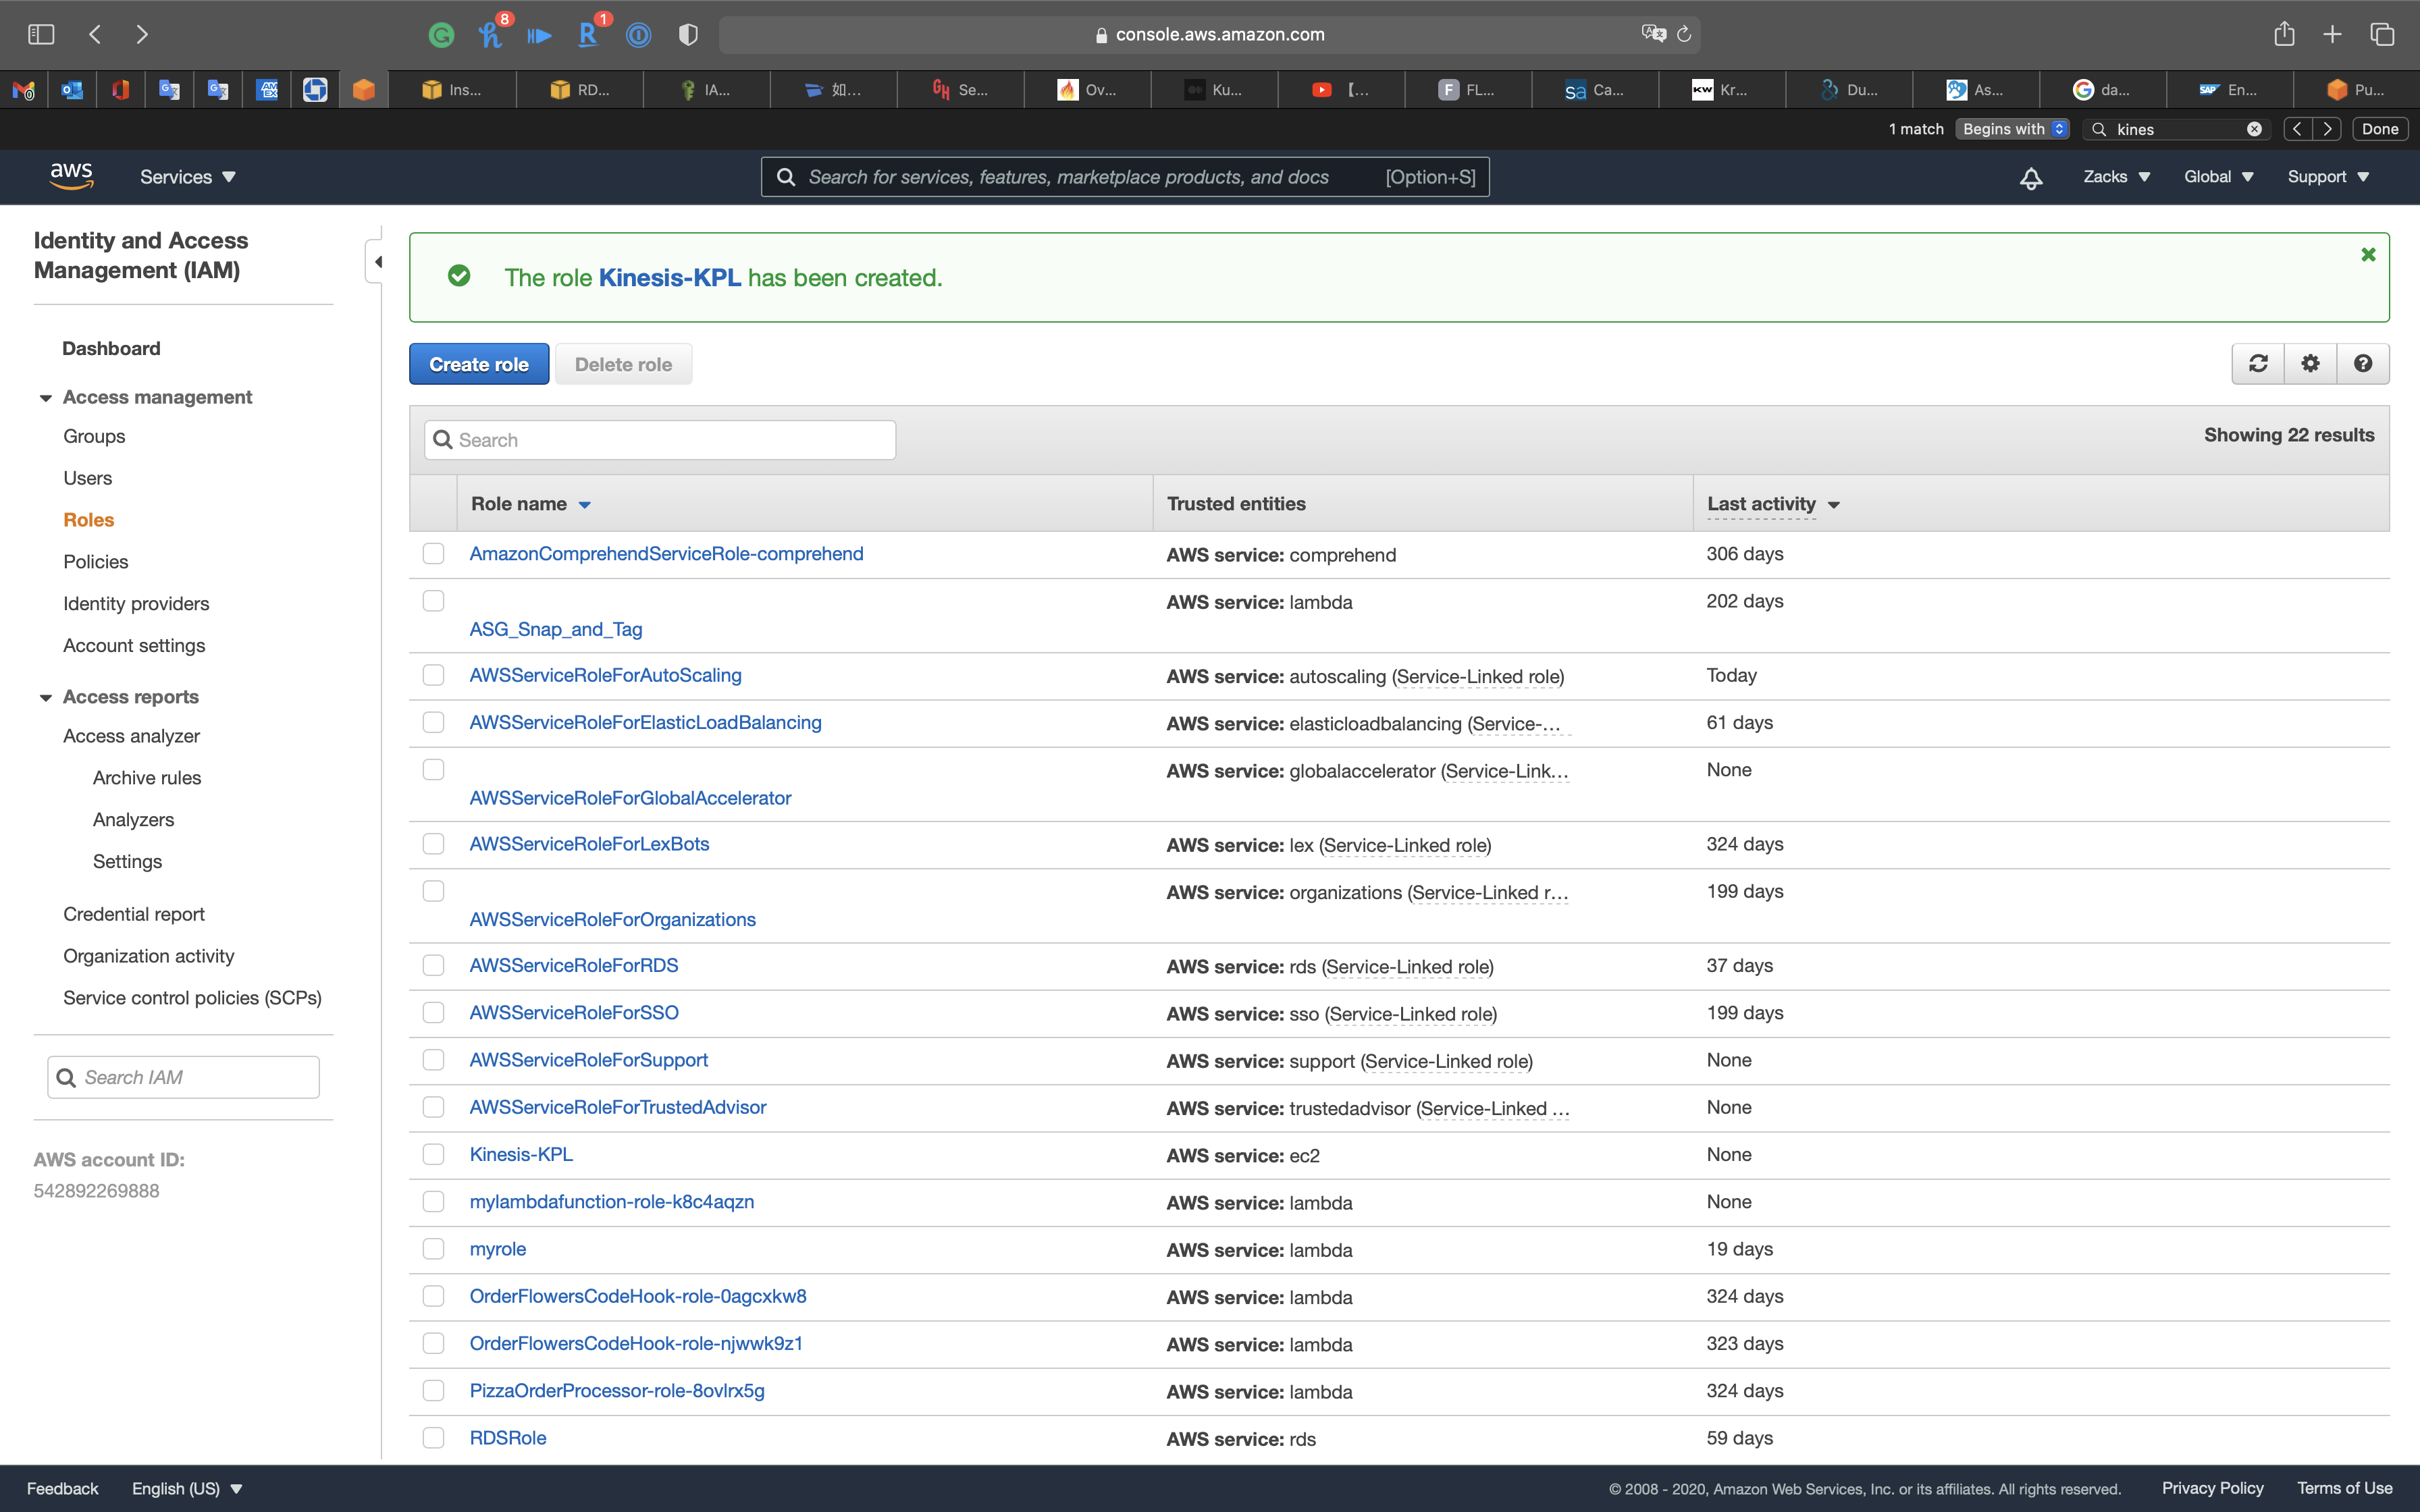
Attach the IAM Role to EC2 instance
Services -> EC2 -> Instances
Select the Kinesis instance and Click on Action -> Security -> Modify IAM role
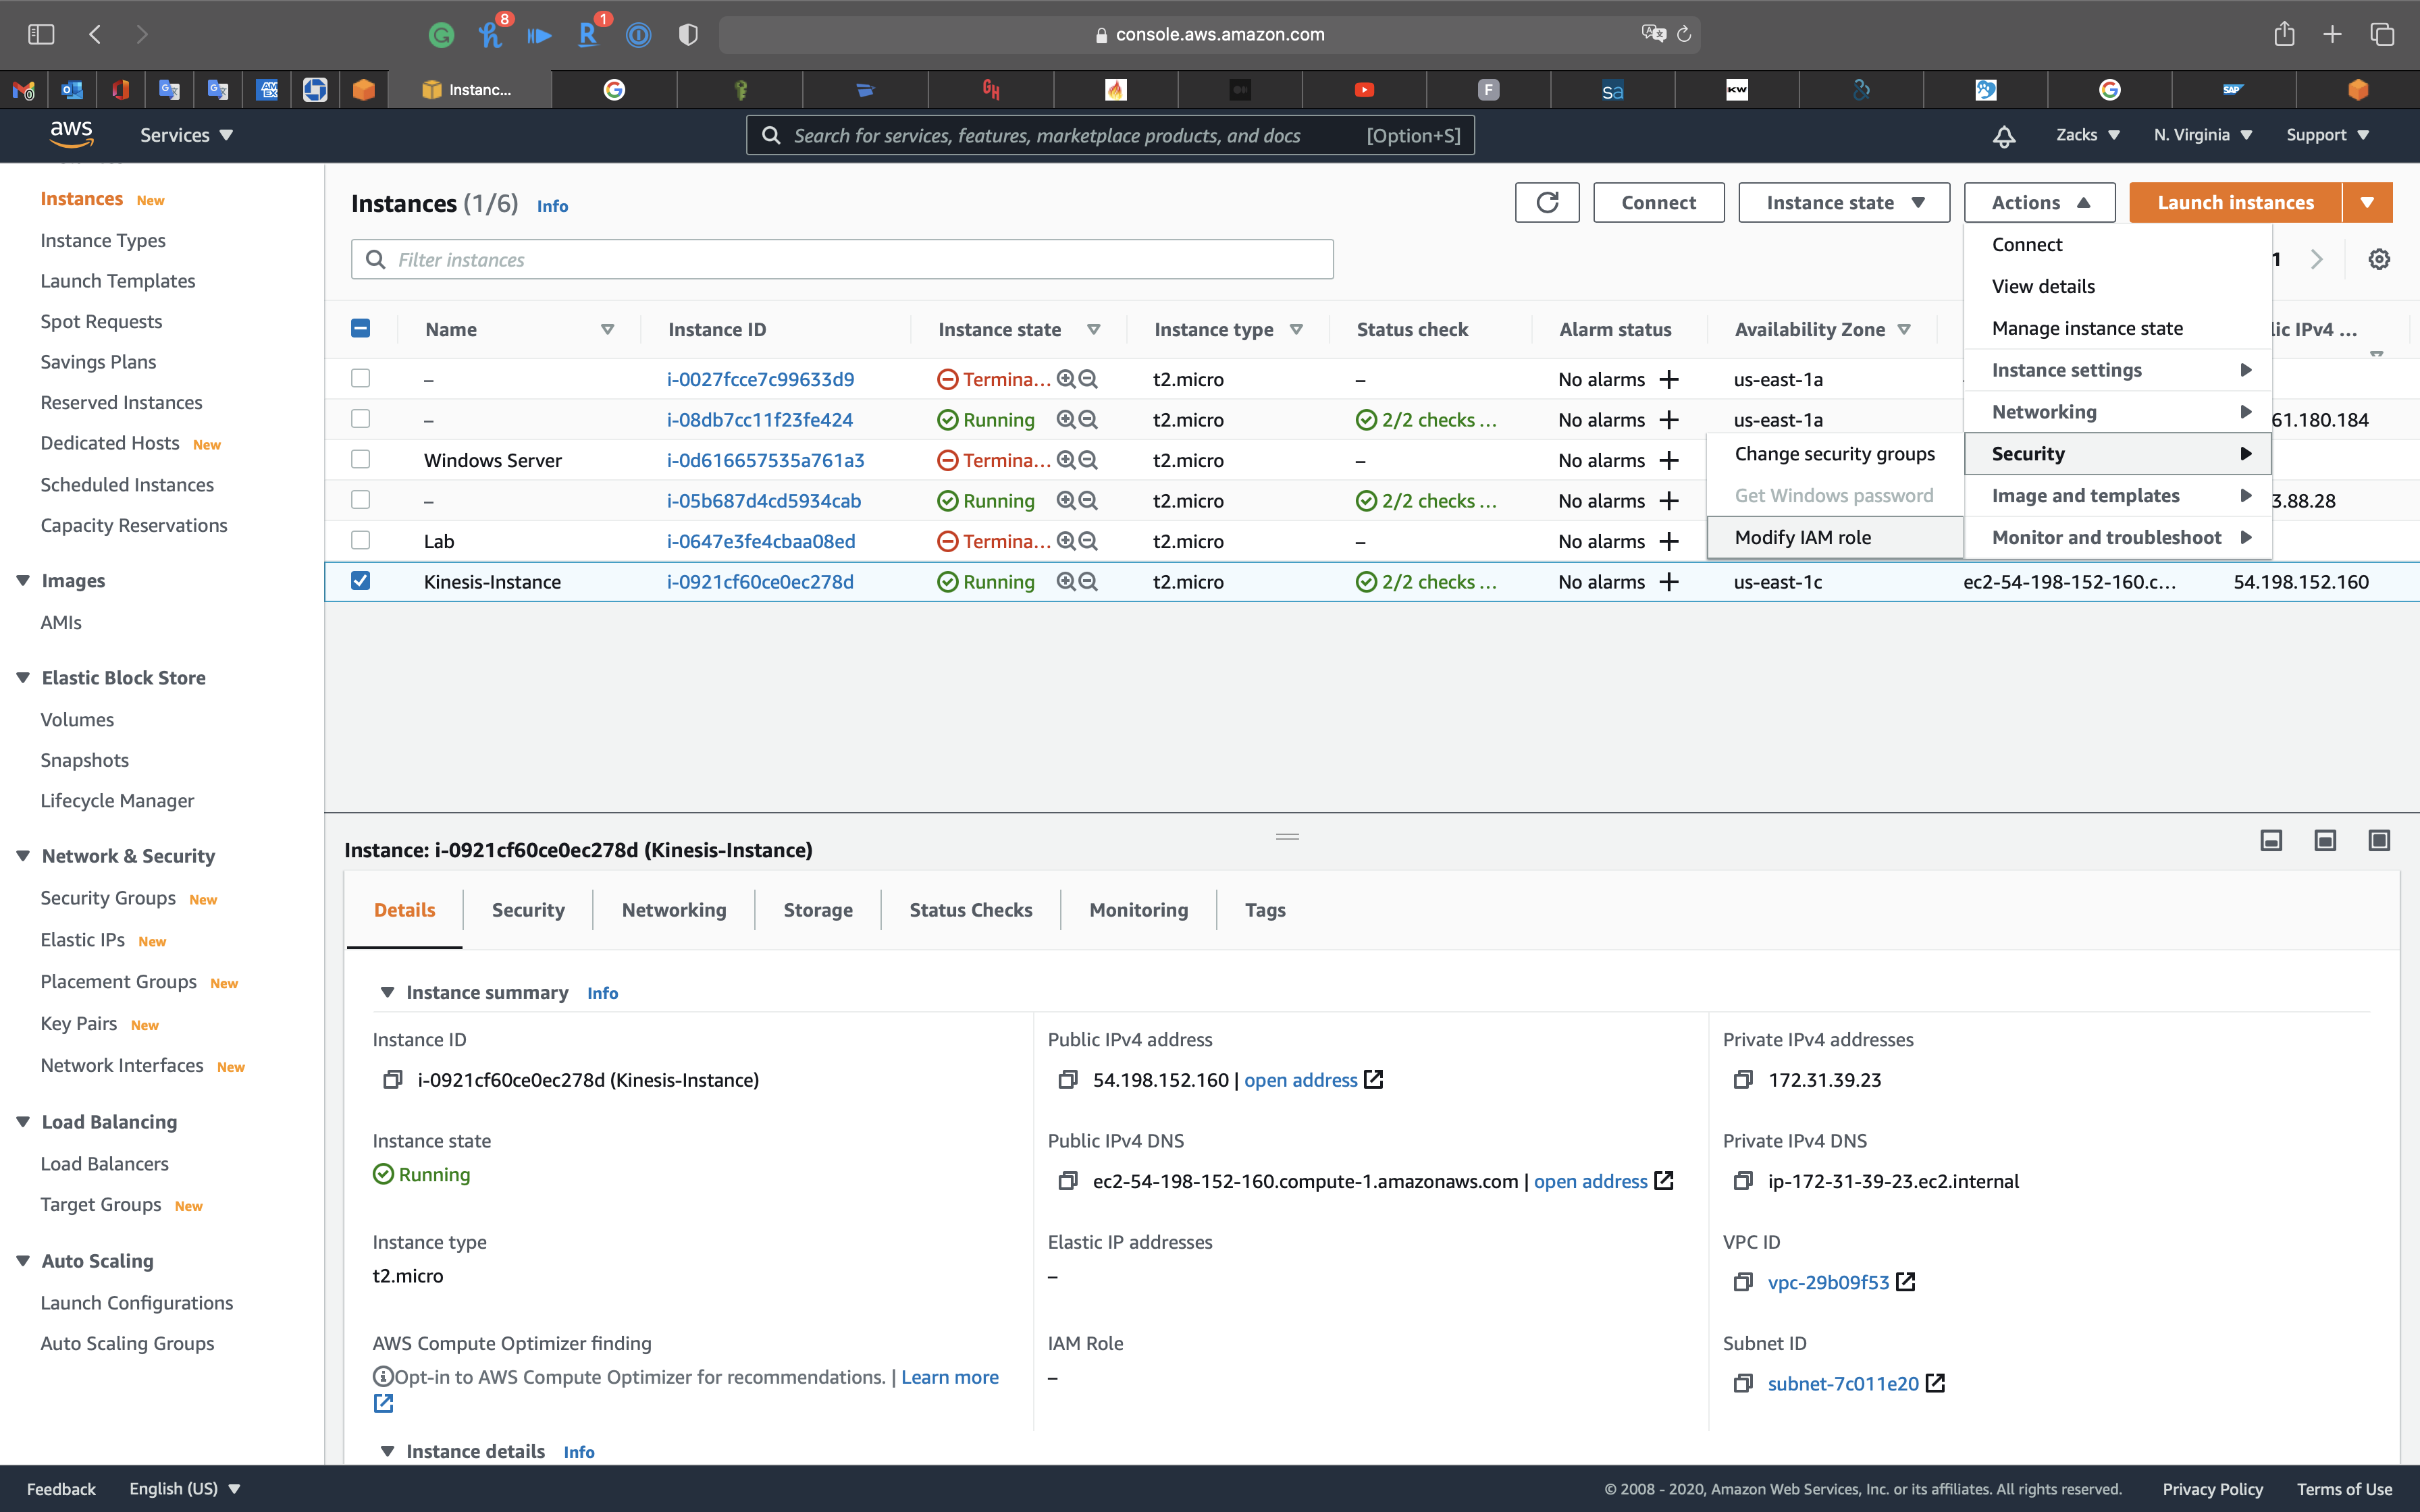
Select Kinesis-KPL then click on Save.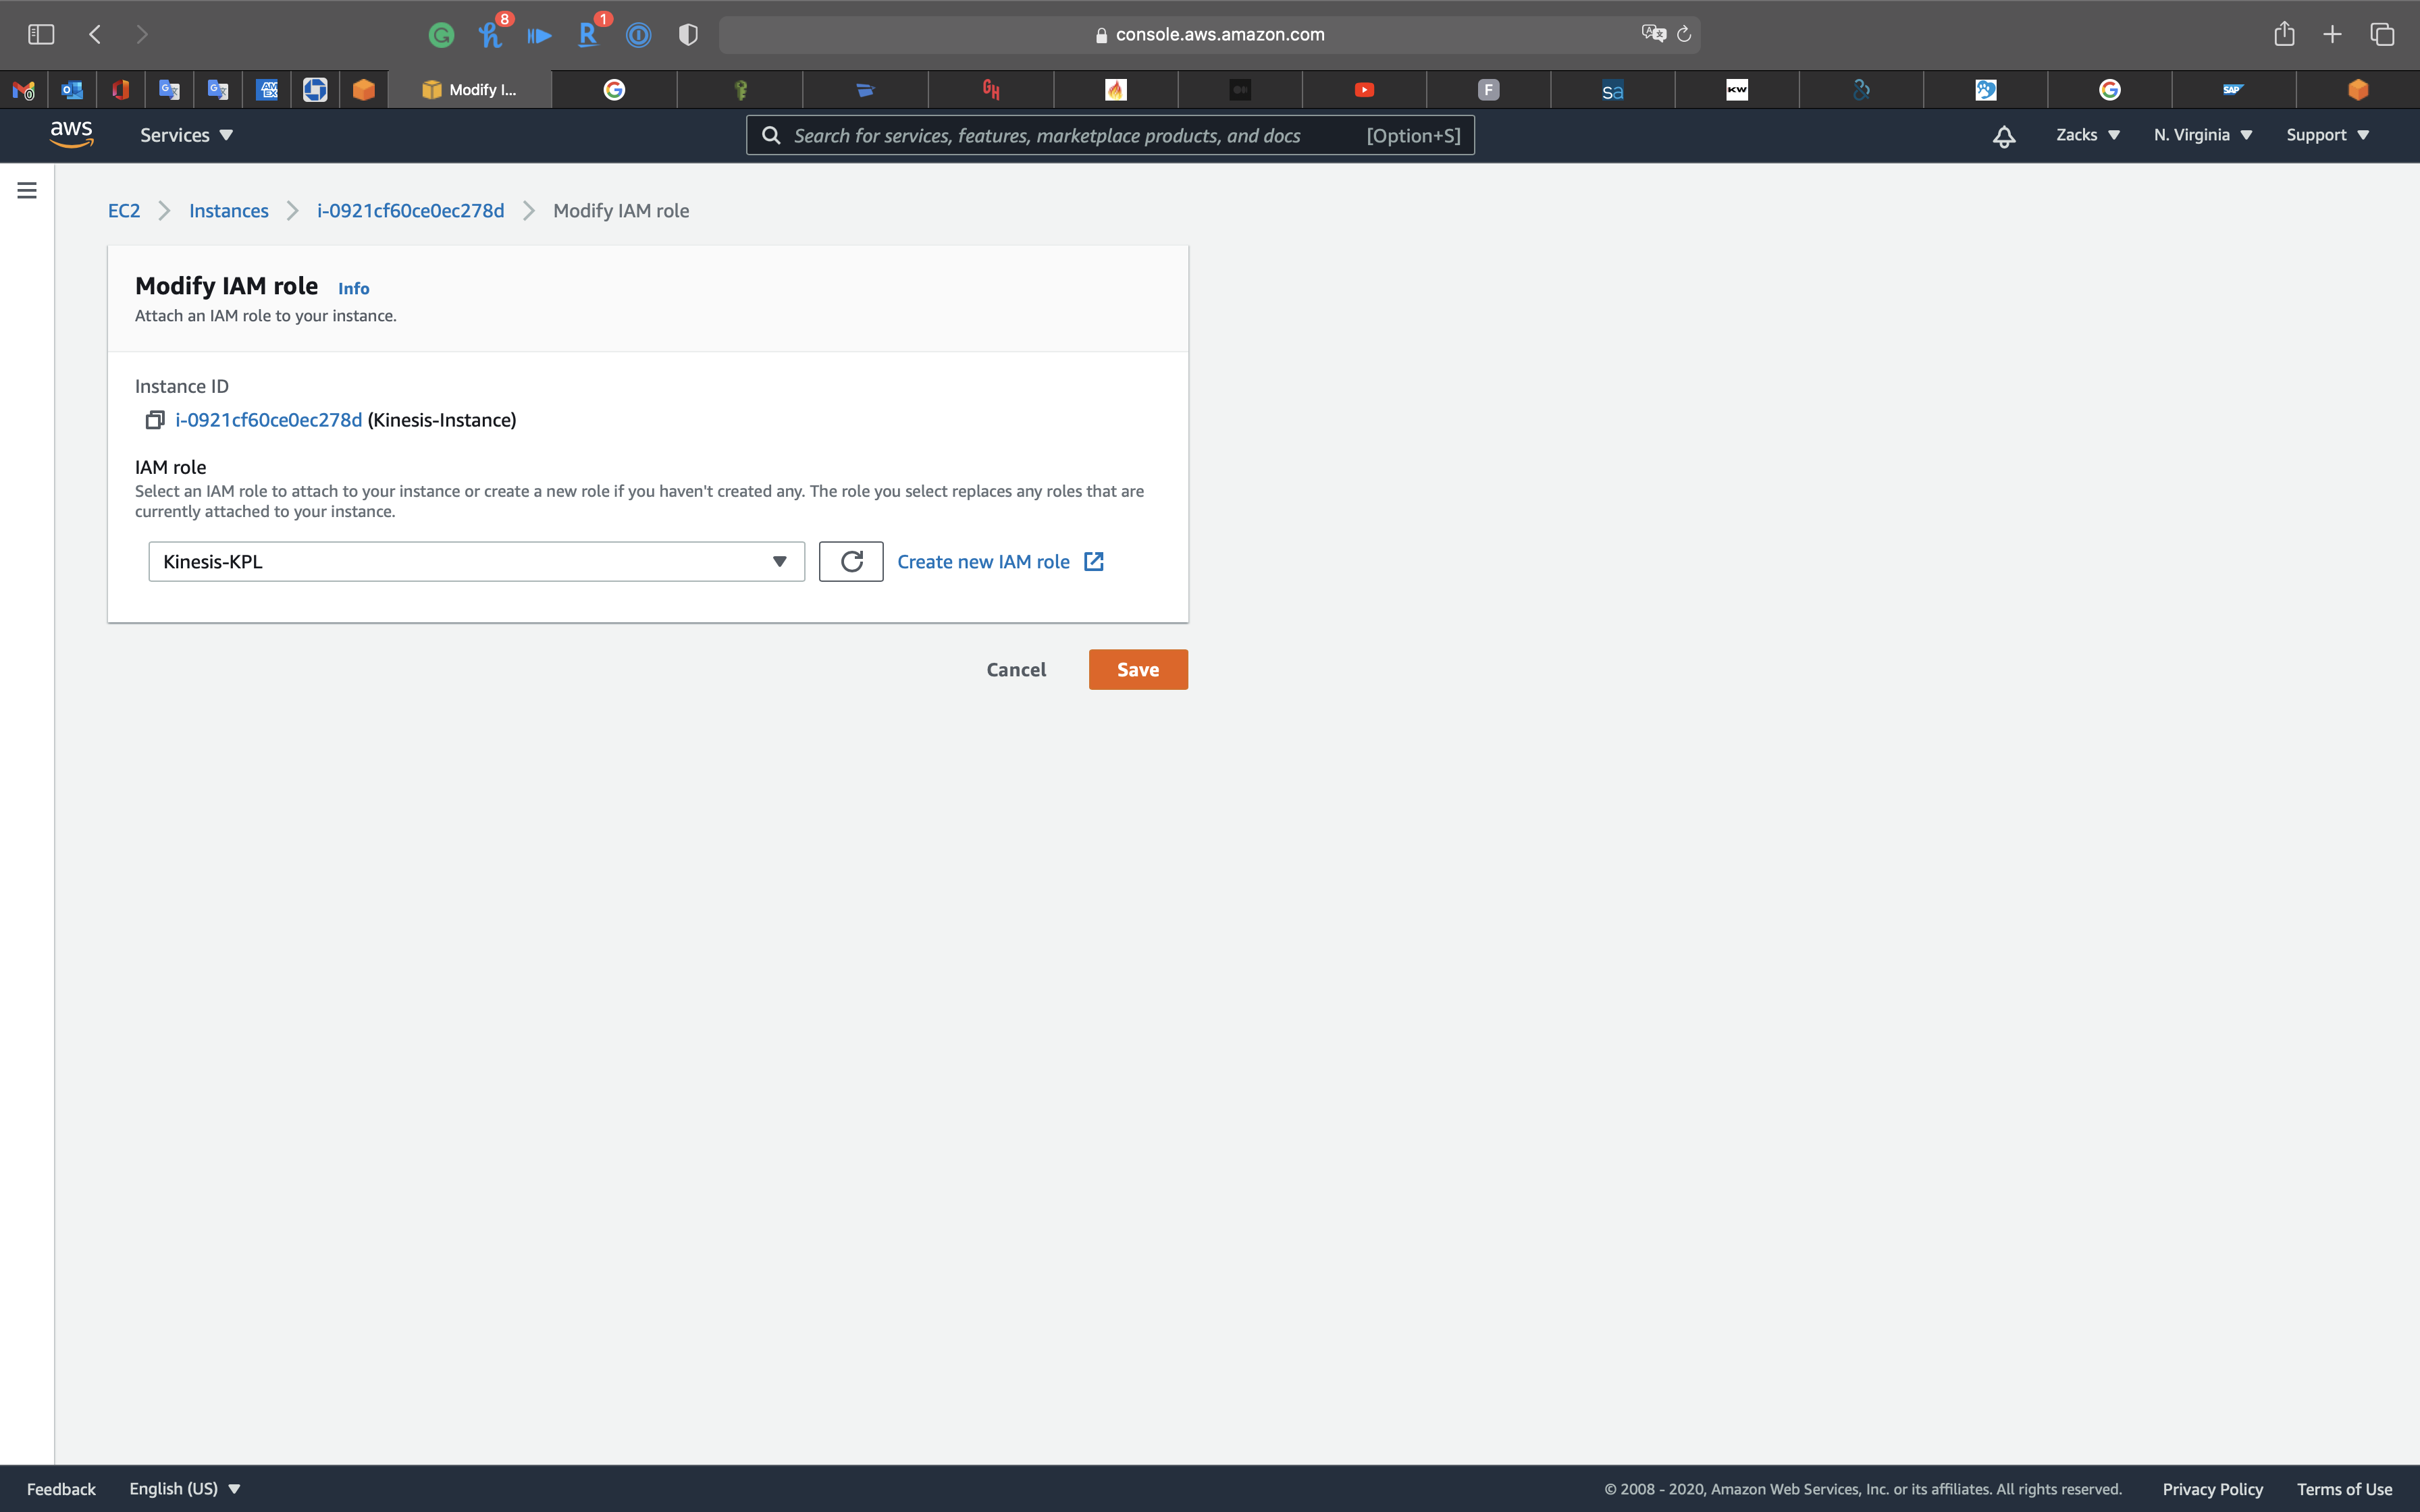
Refresh the page and see the latest Instance details.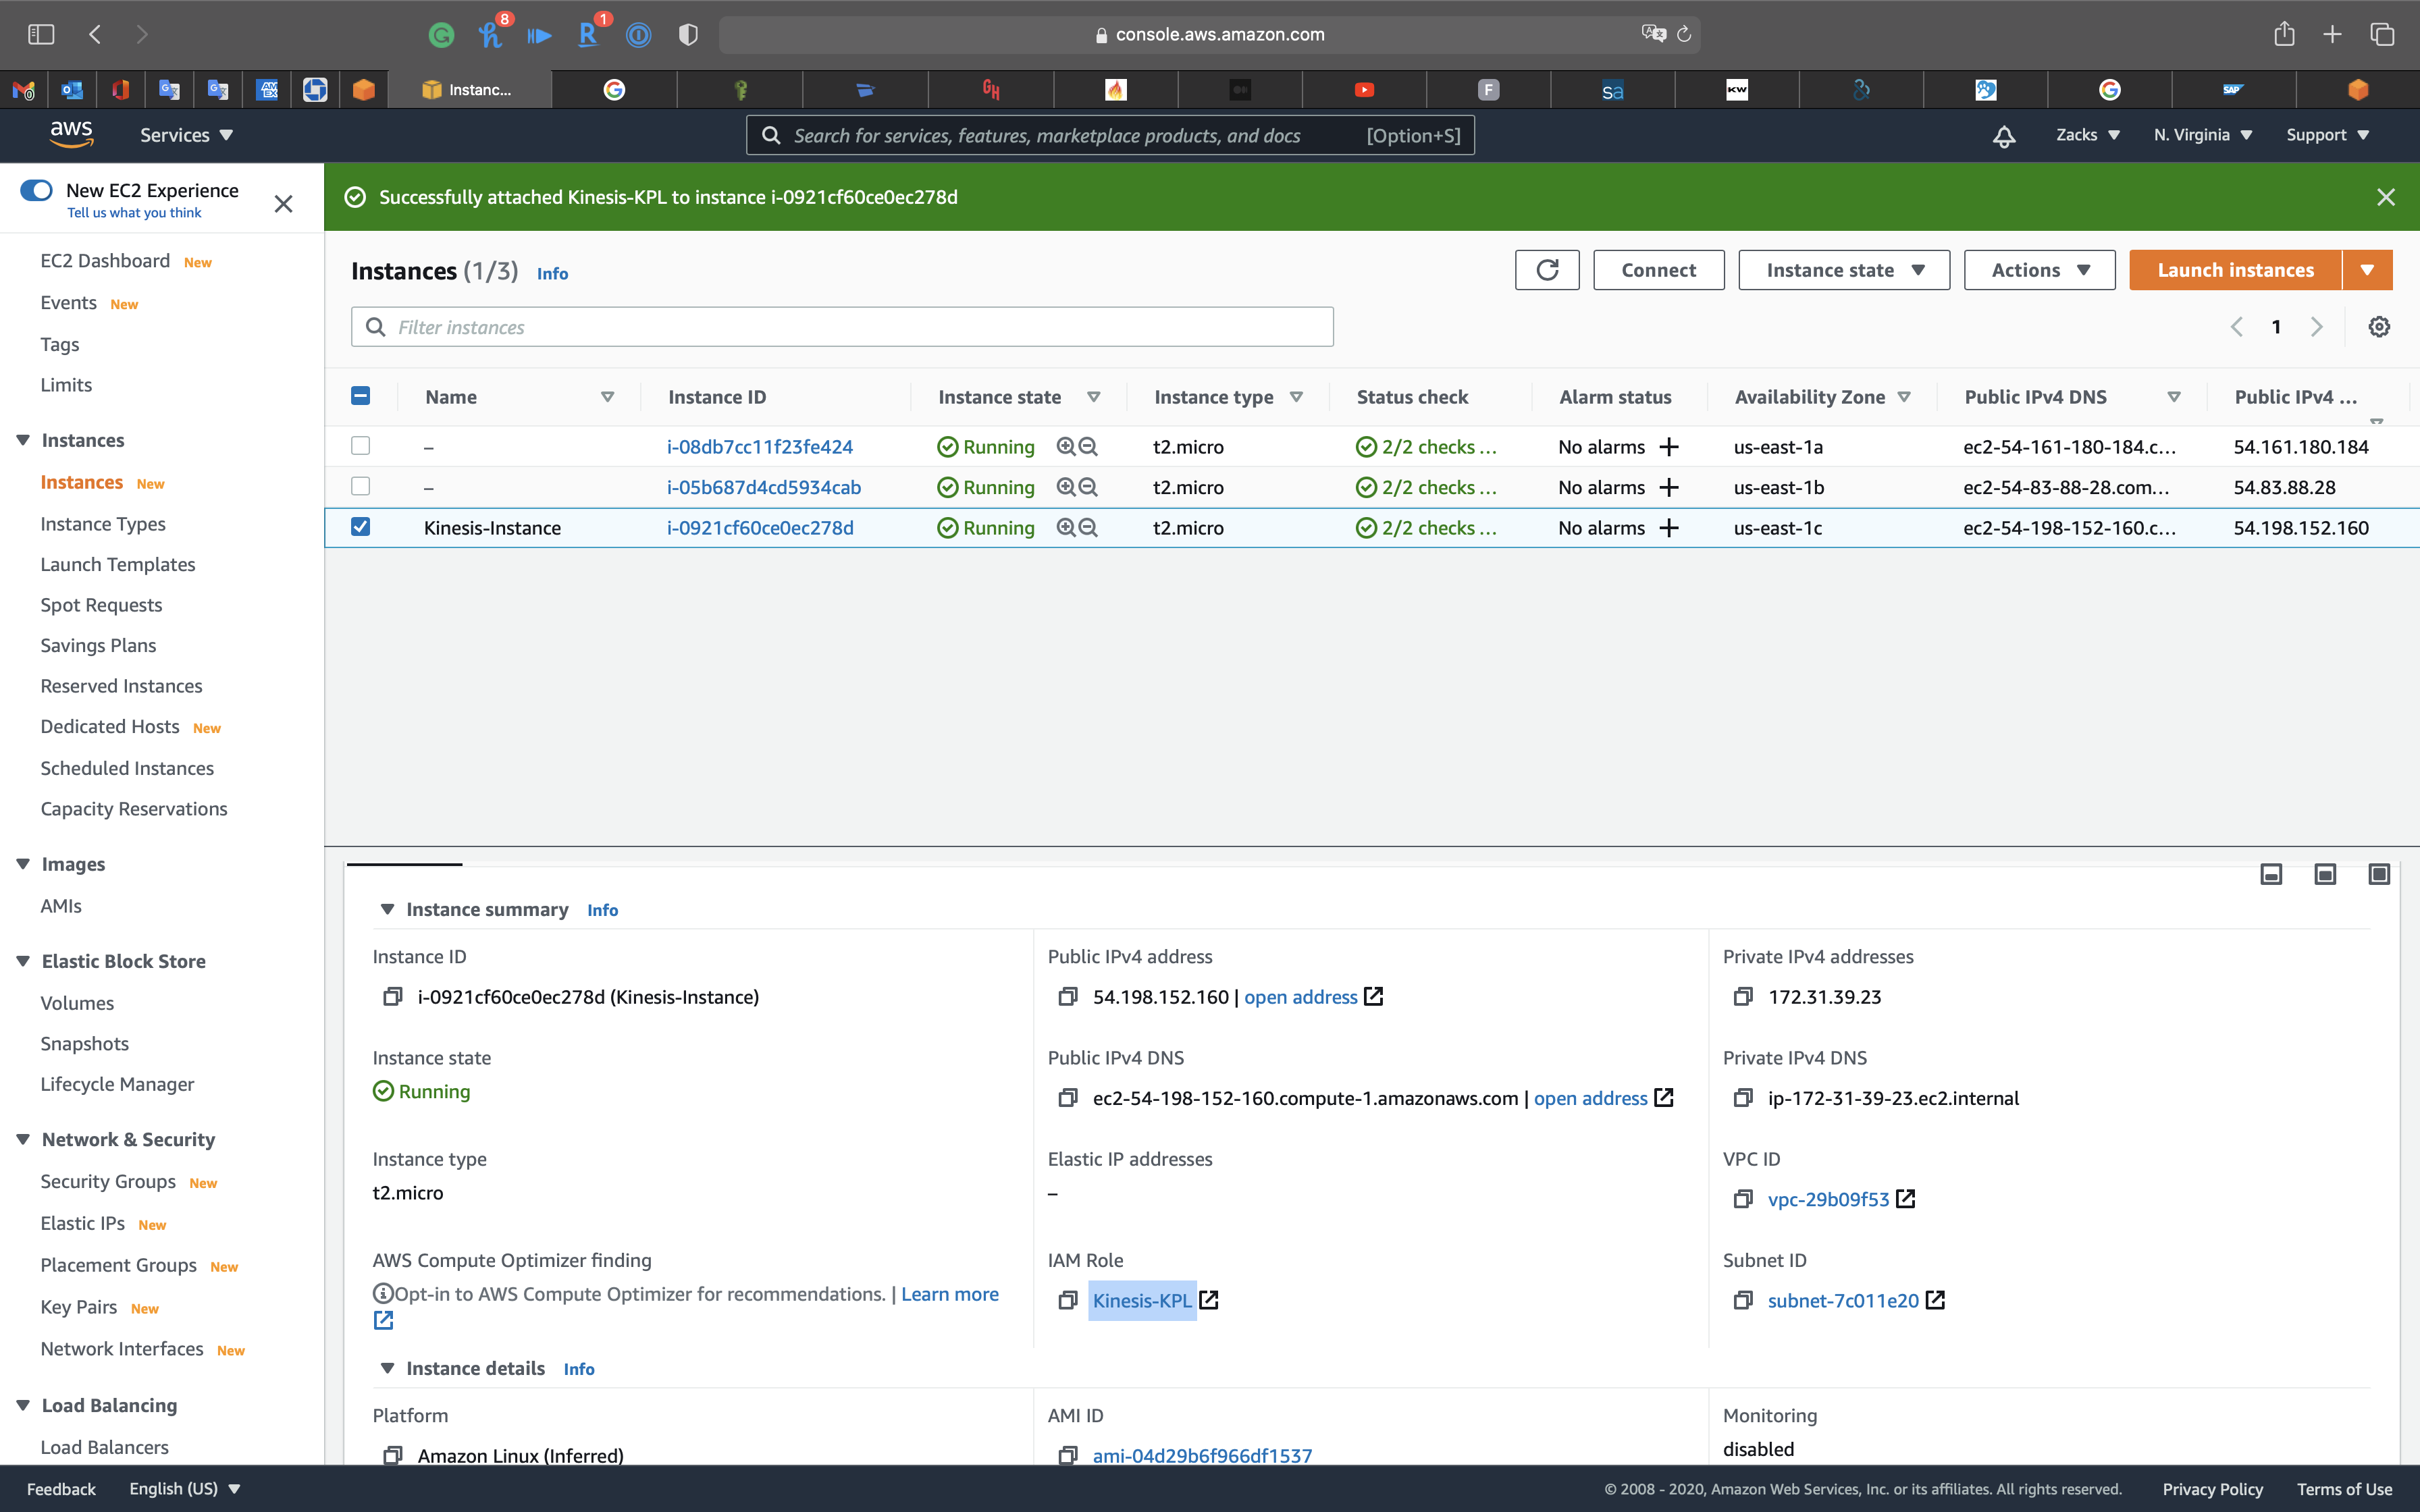
KPL Configuration
Setup AWS Region
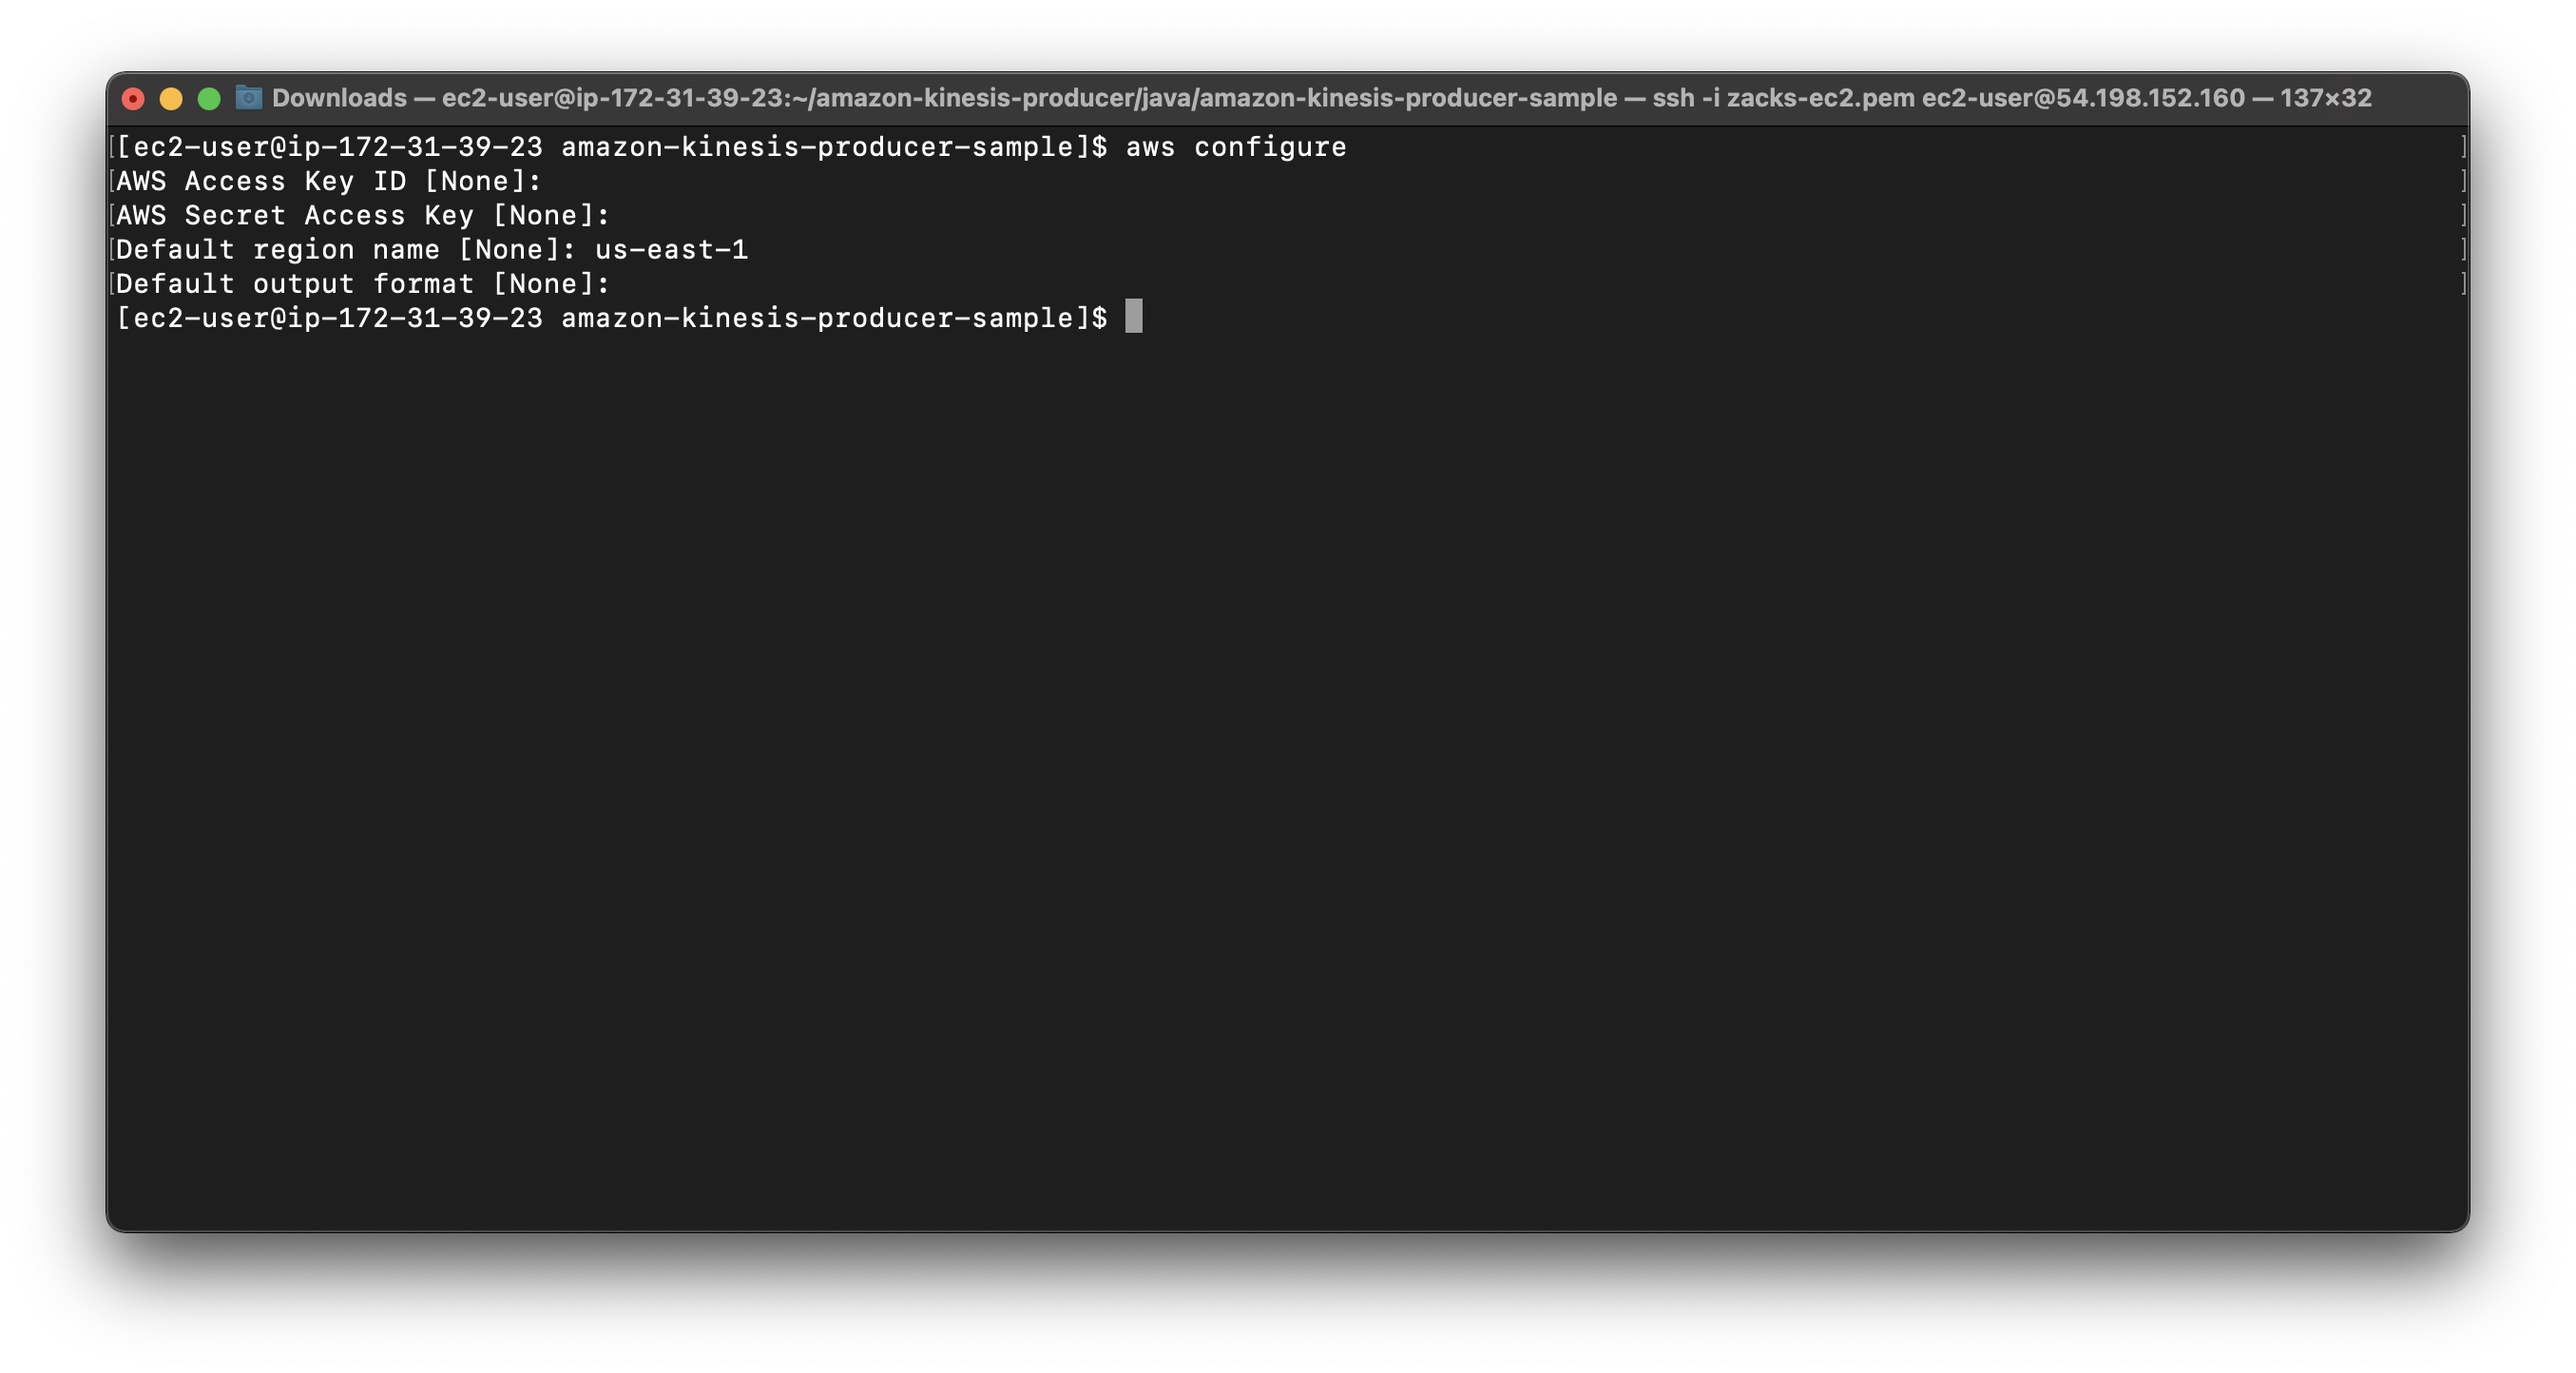
Run the following command and input us-east-1 for Default region name.
1 | aws configure |
Create Kinesis Data Stream
Run a command similar to the following to create a Kinesis data stream:
If you do not did the previous lab KPL Setup Lab, run the following command.
1 | aws kinesis create-stream --stream-name kinesis-kpl-demo --shard-count 2 |
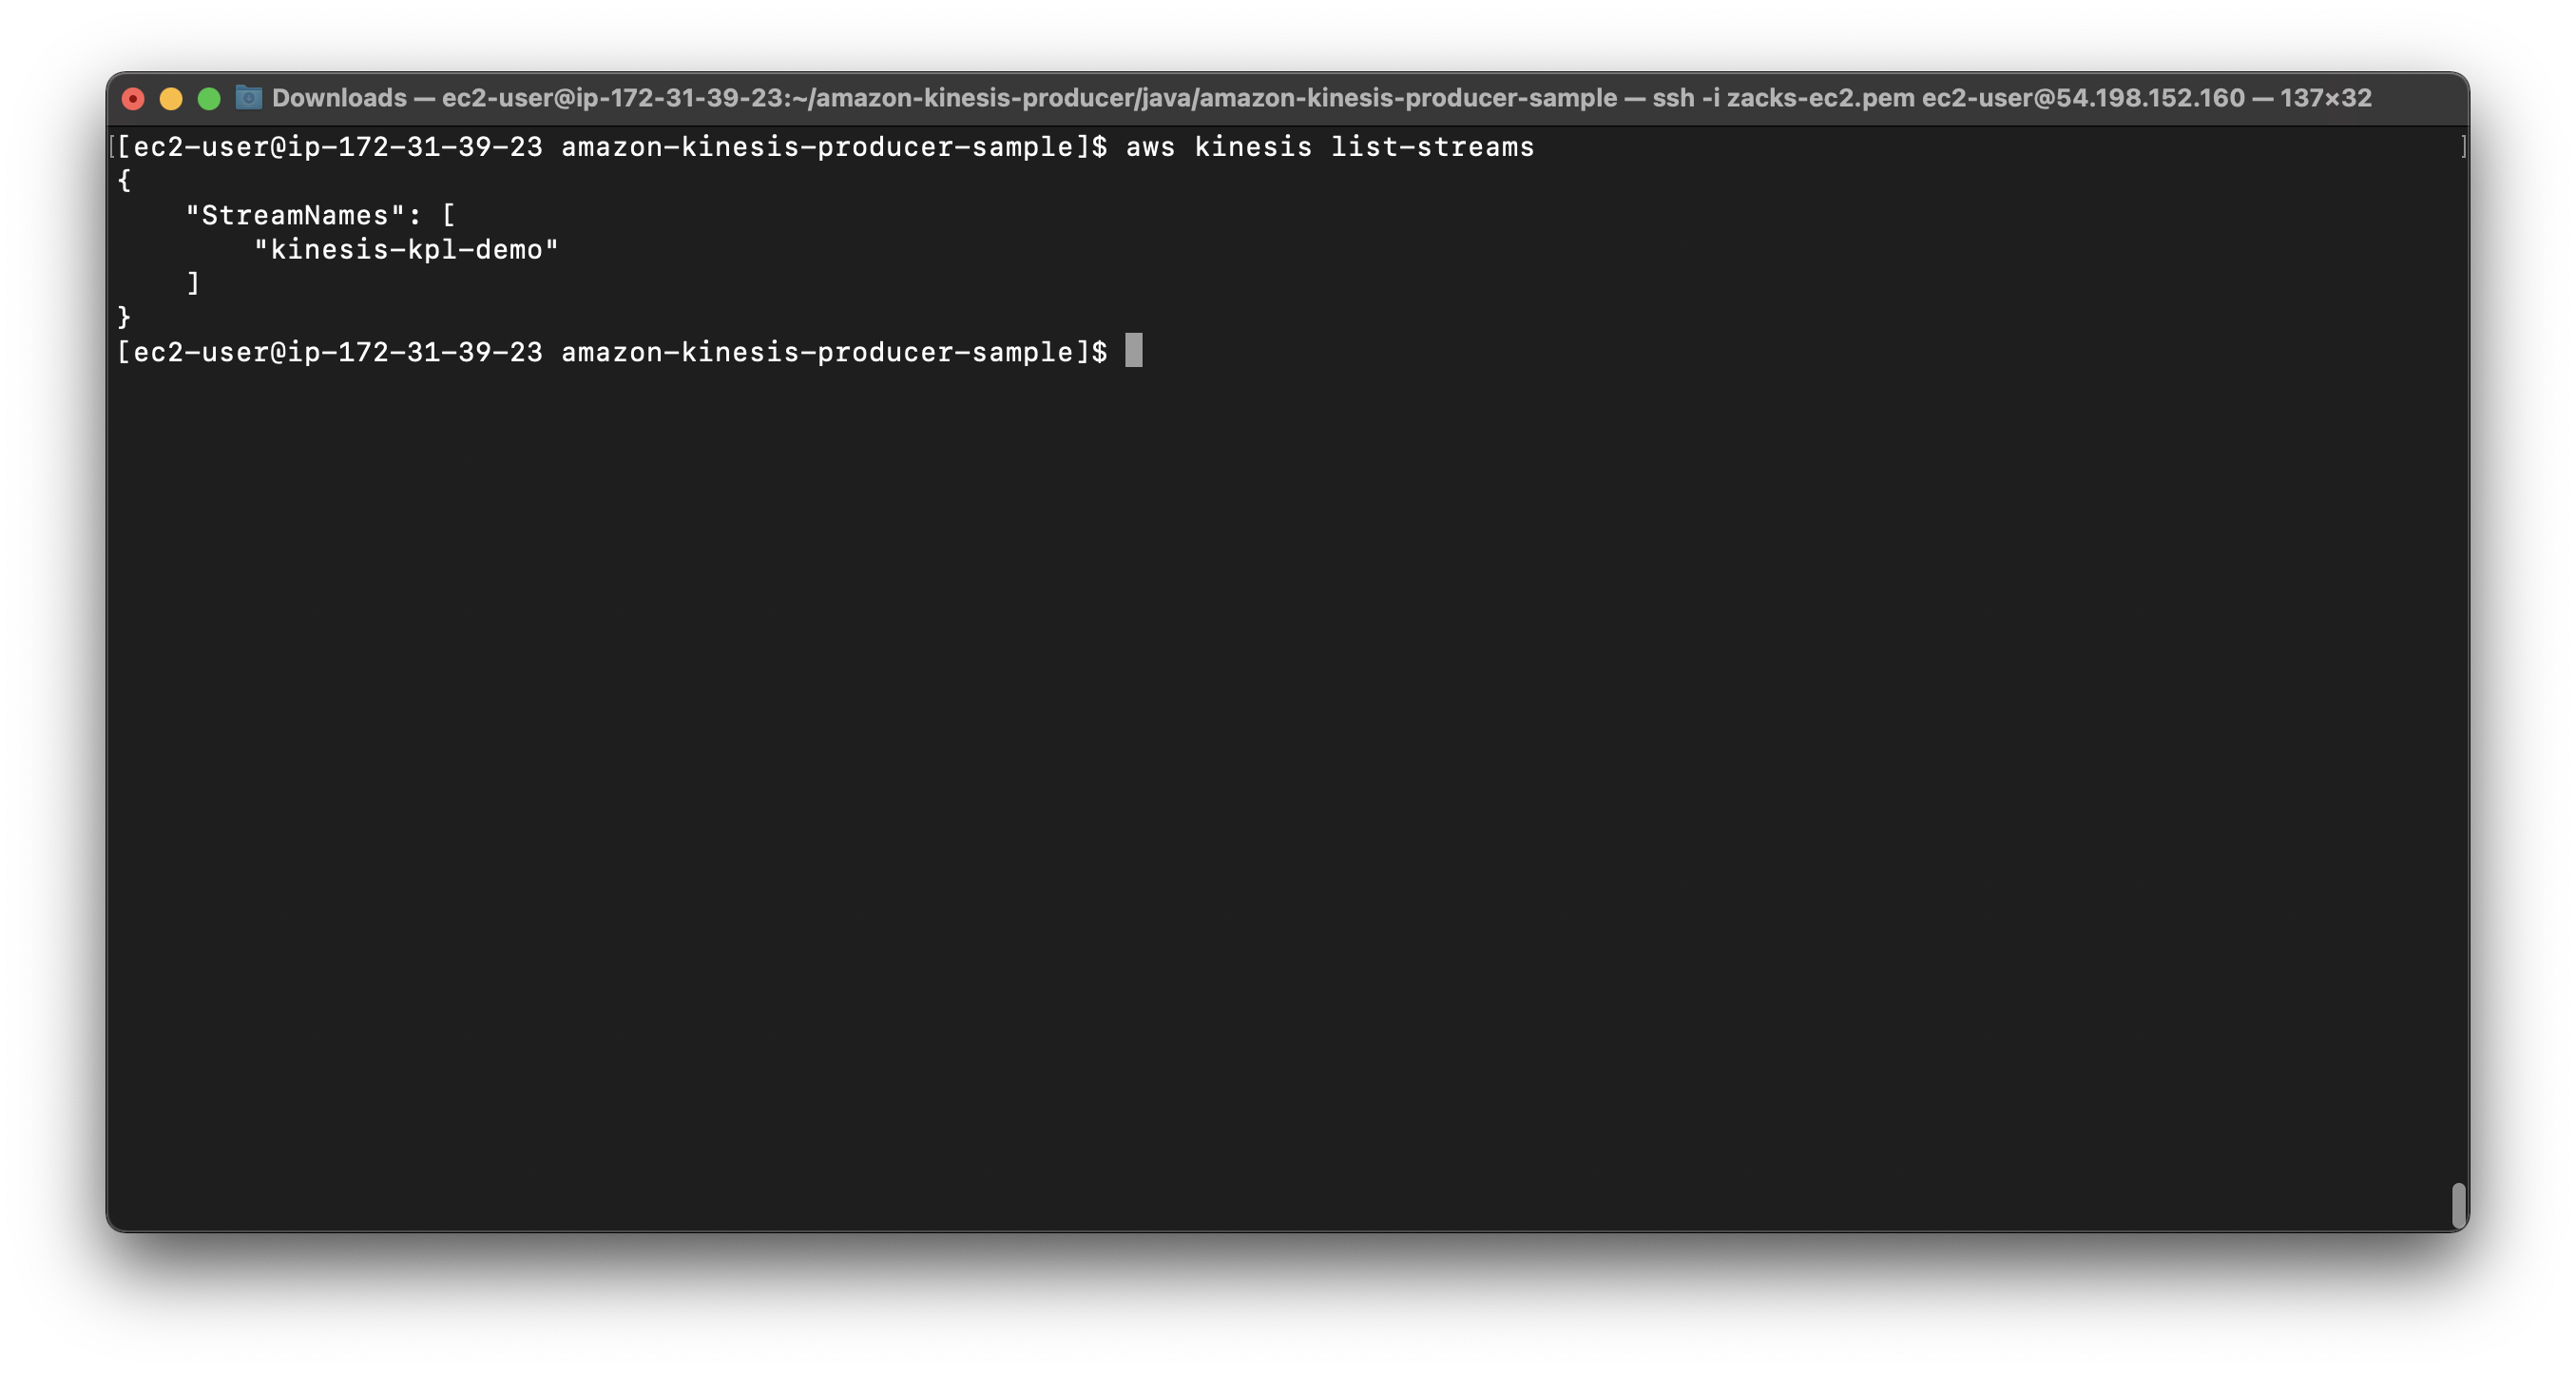
If you did the previous lab (KPL Setup Lab), which means you have created kinesis stream, run the following command.
1 | aws kinesis list-streams |
For more information about the number of shards needed, see Resharding, scaling, and parallel processing.
Modify demo file
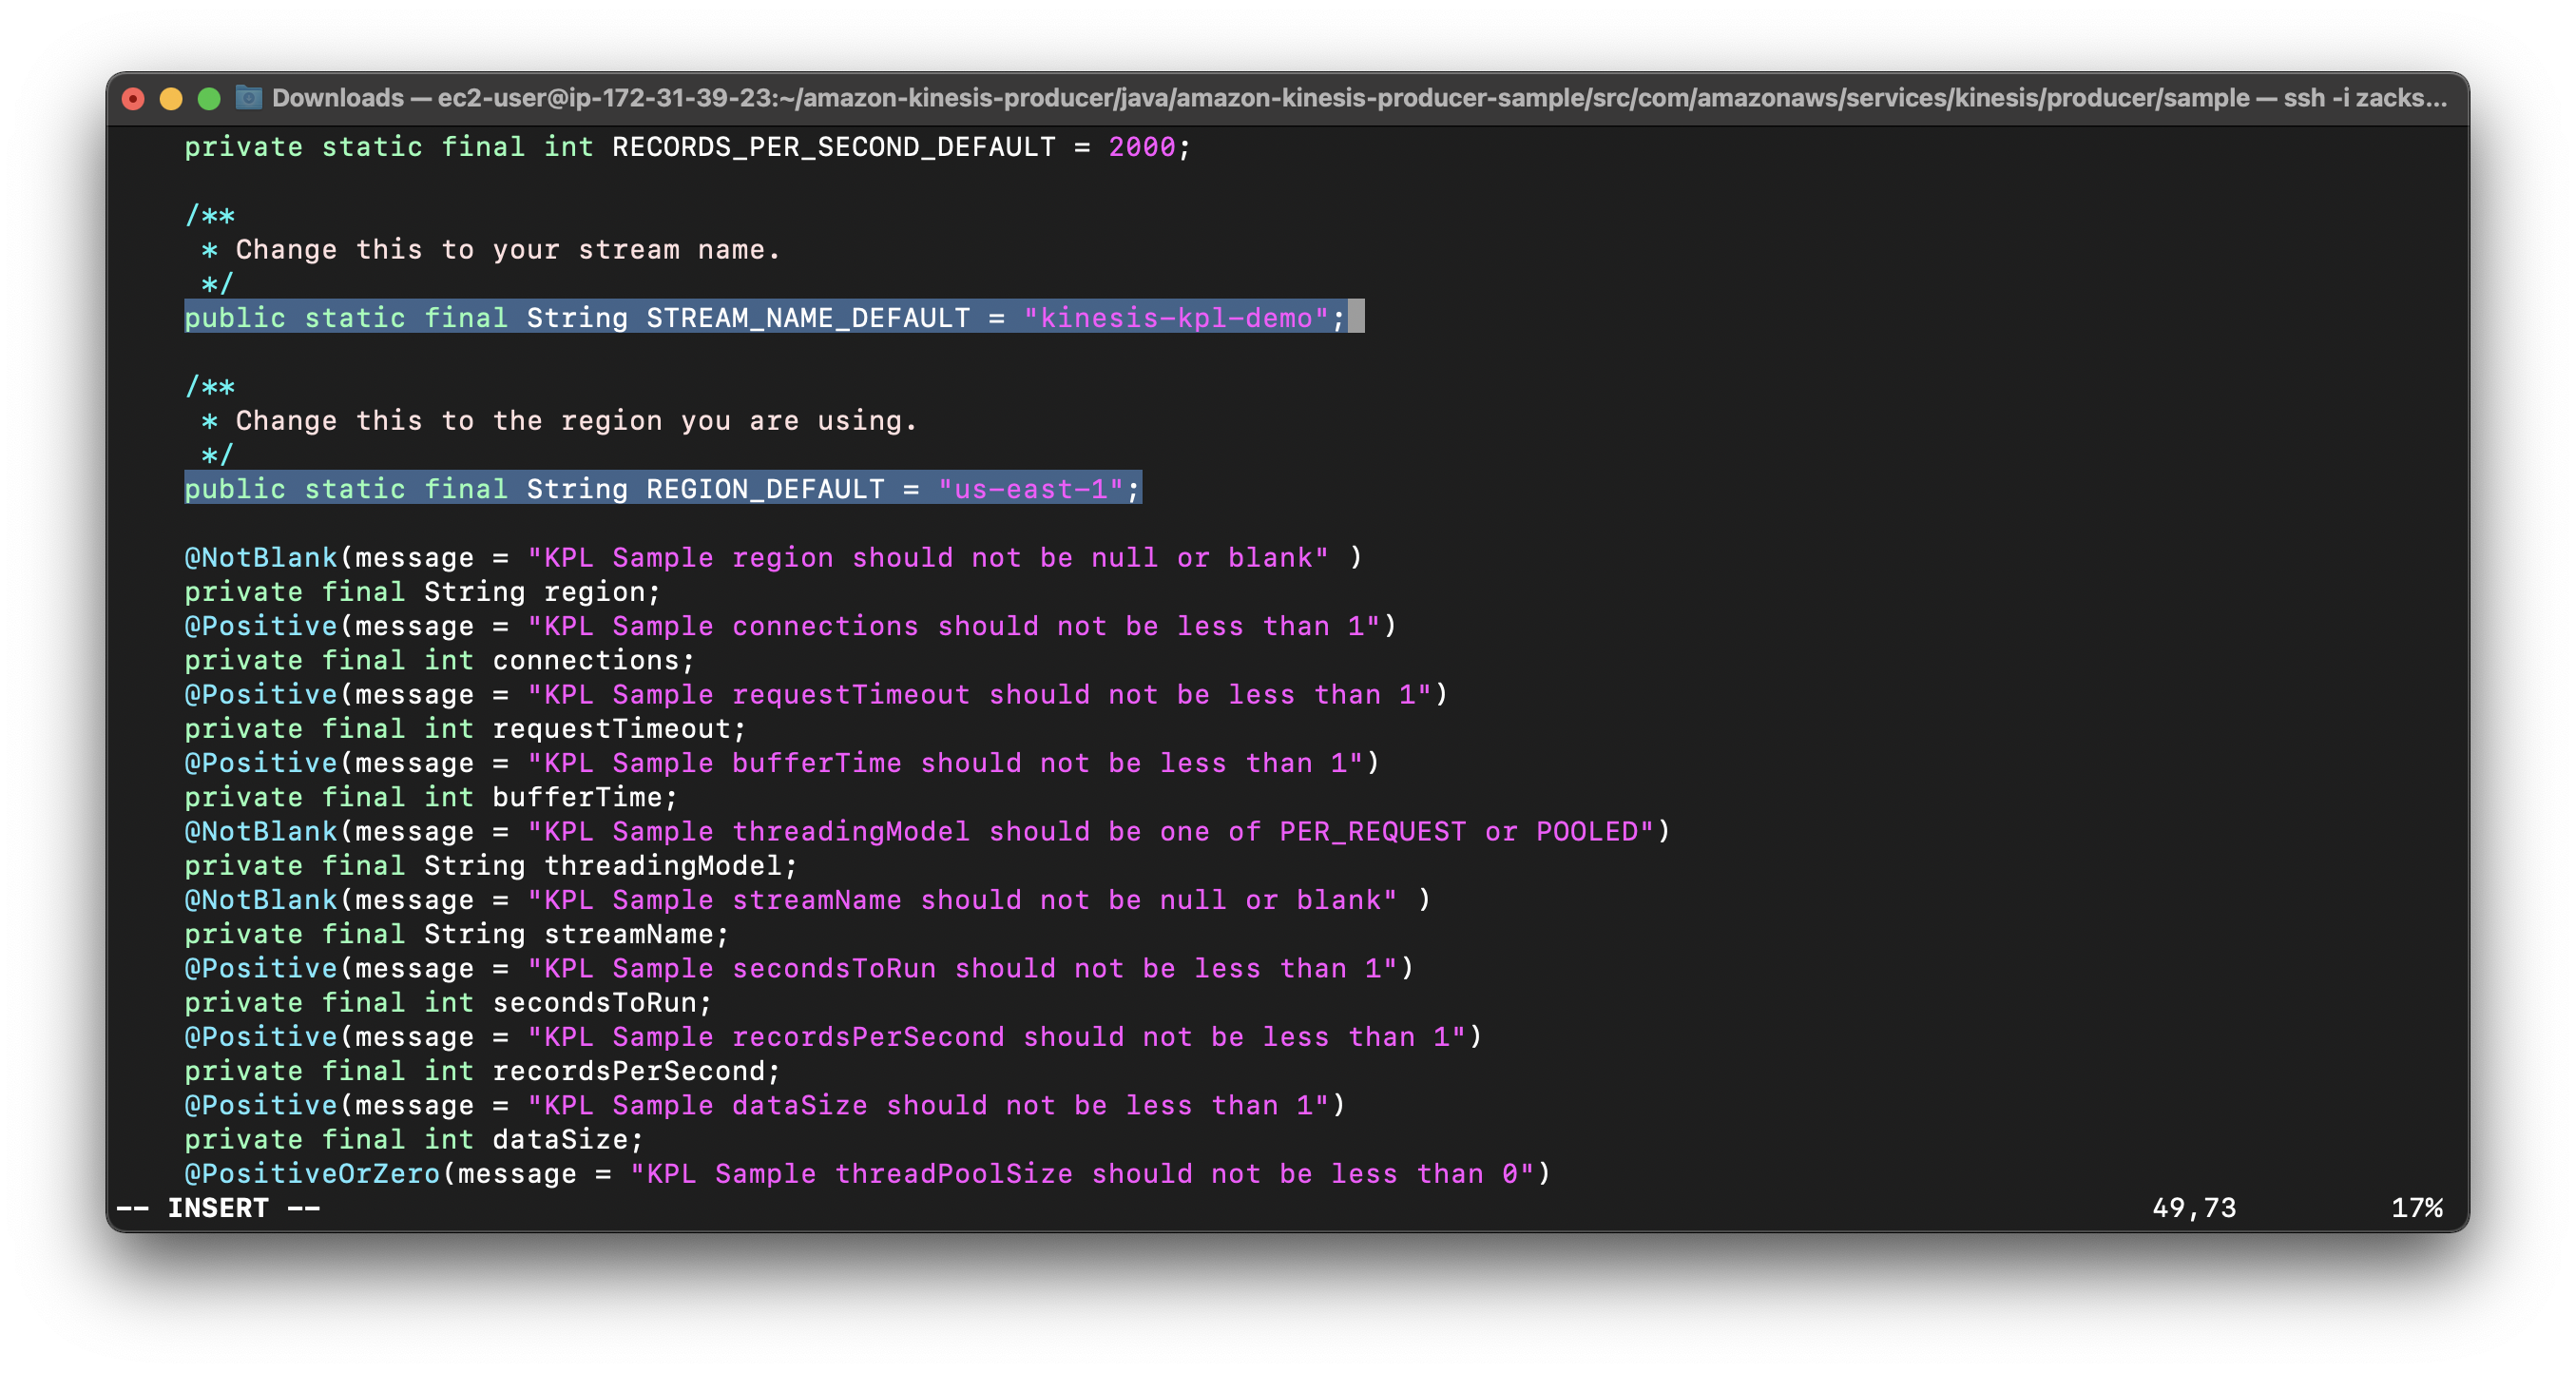
Open the SampleProducer.java file on the Amazon Web Services - Labs GitHub repository, and then modify the following fields:
For public static final String STREAM_NAME_DEFAULT, enter the name of the Kinesis data stream that you previously created.
For public static final String REGION_DEFAULT, enter the Region that you’re using.
Example:
1 | cd src/com/amazonaws/services/kinesis/producer/sample |
Run kinesis demo
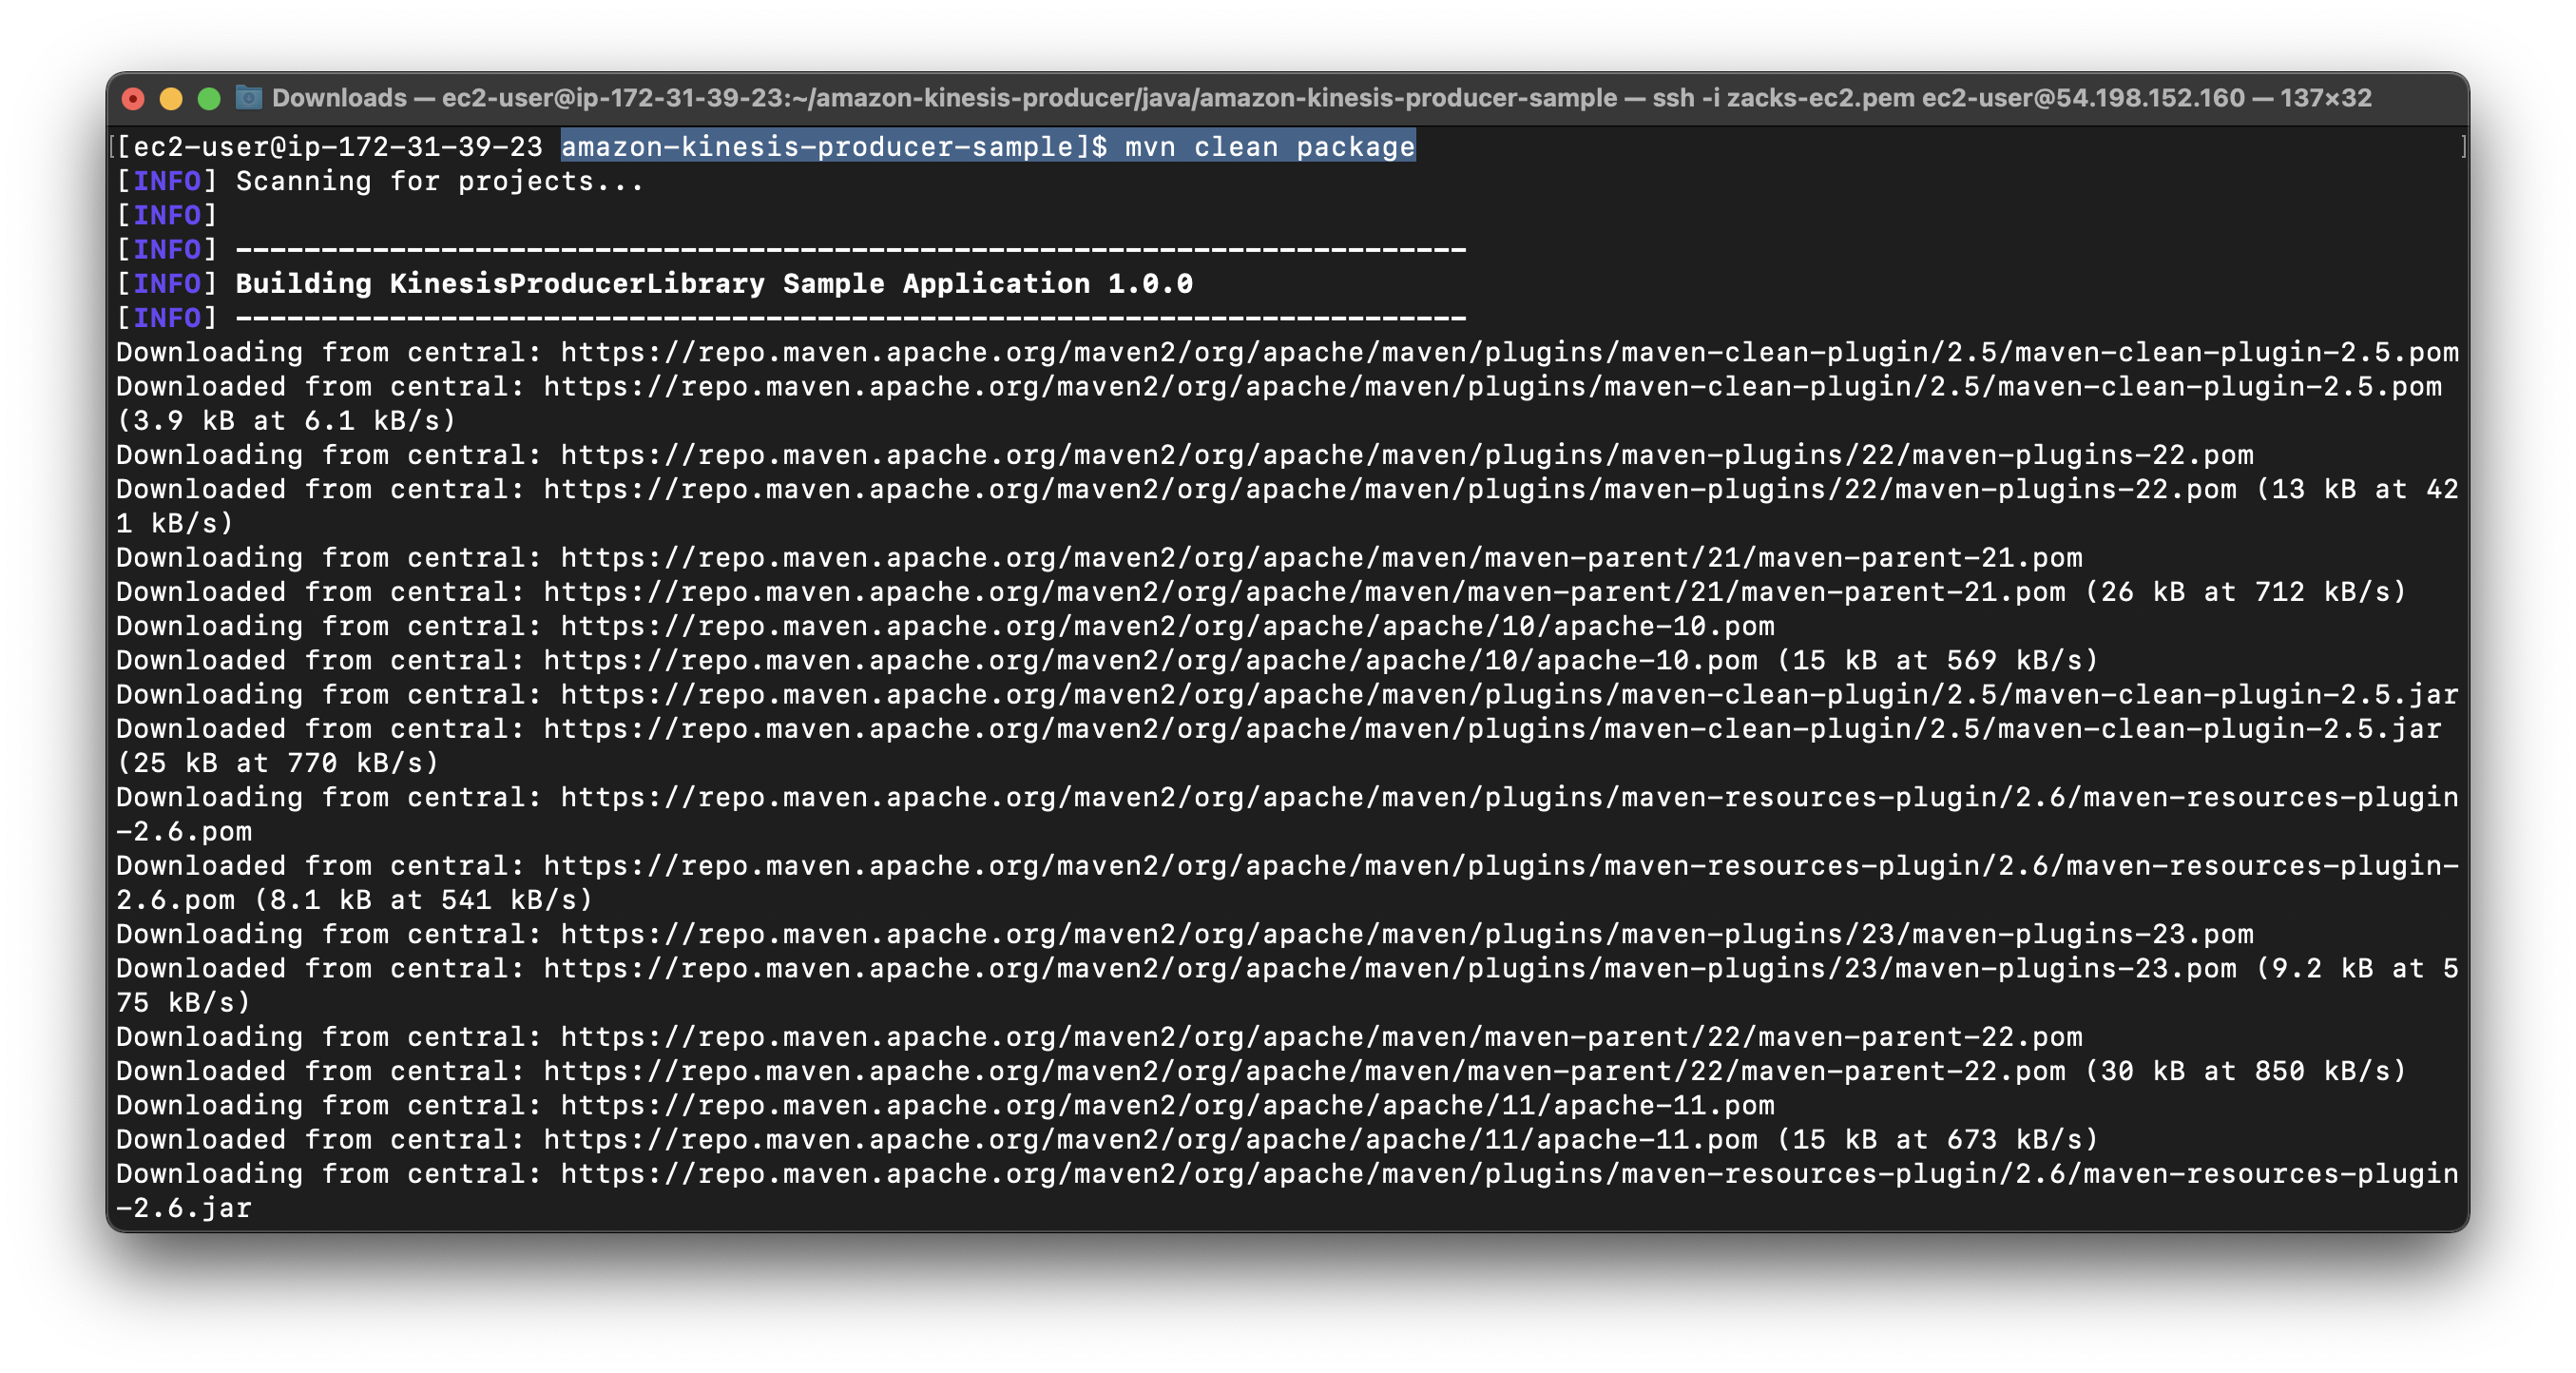
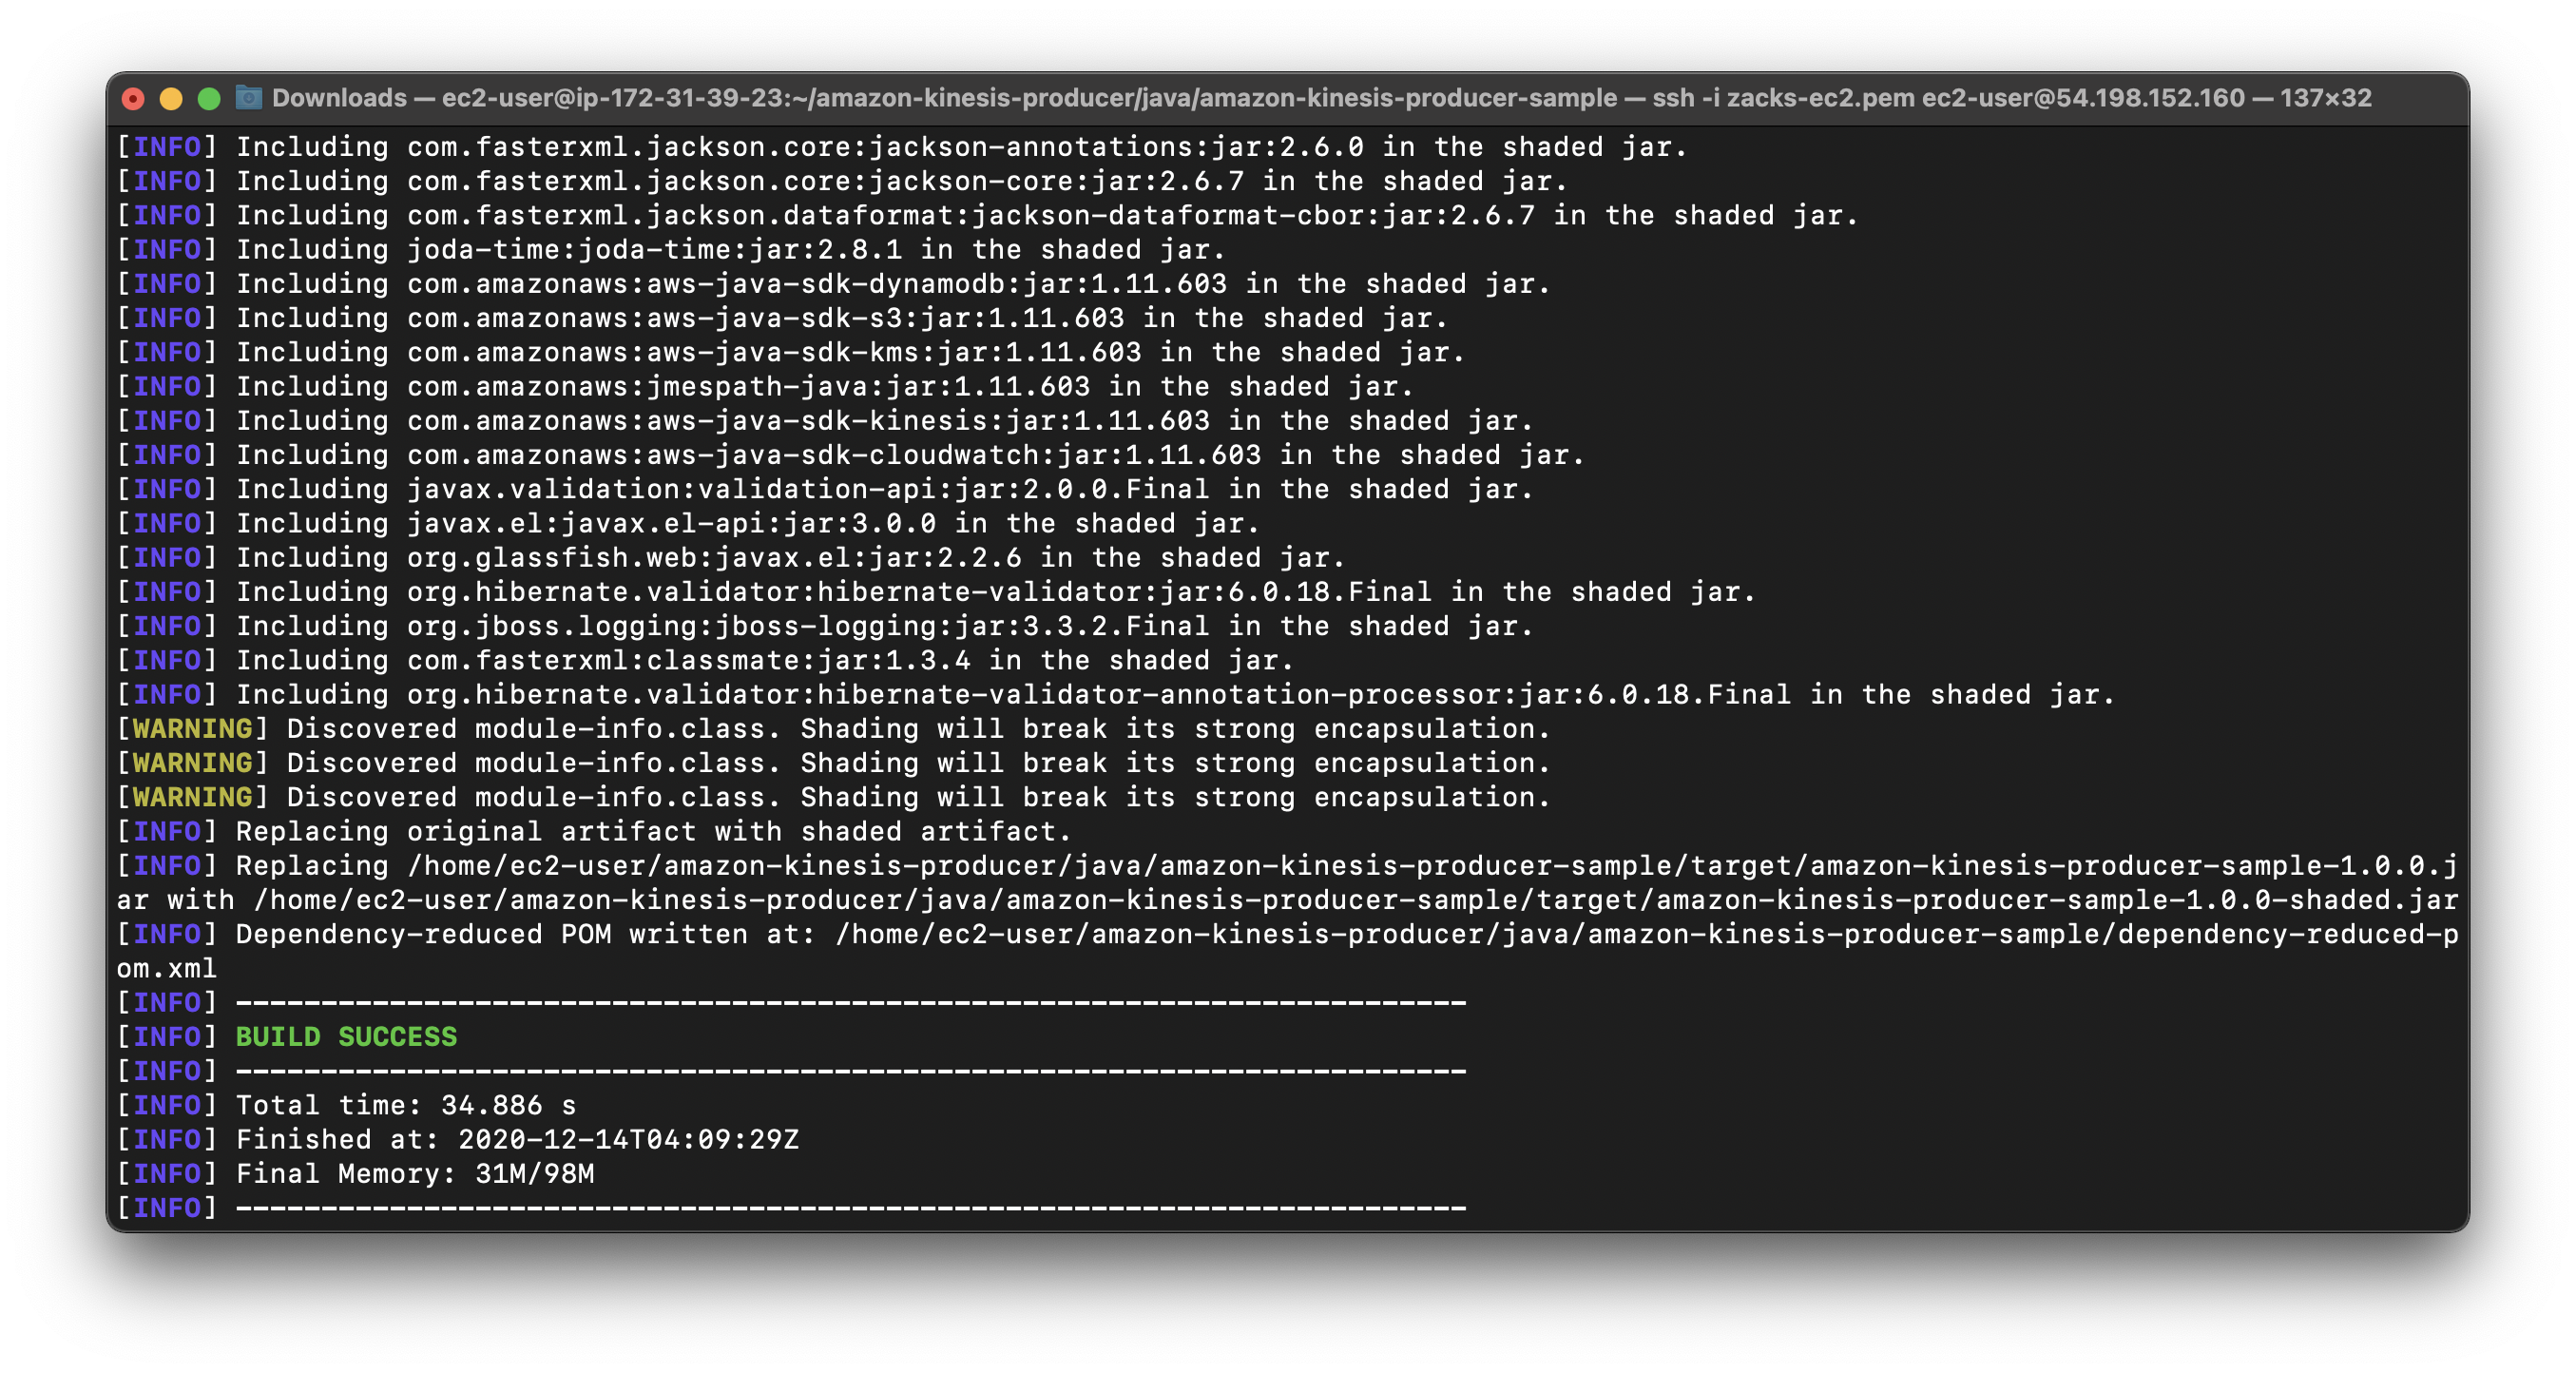
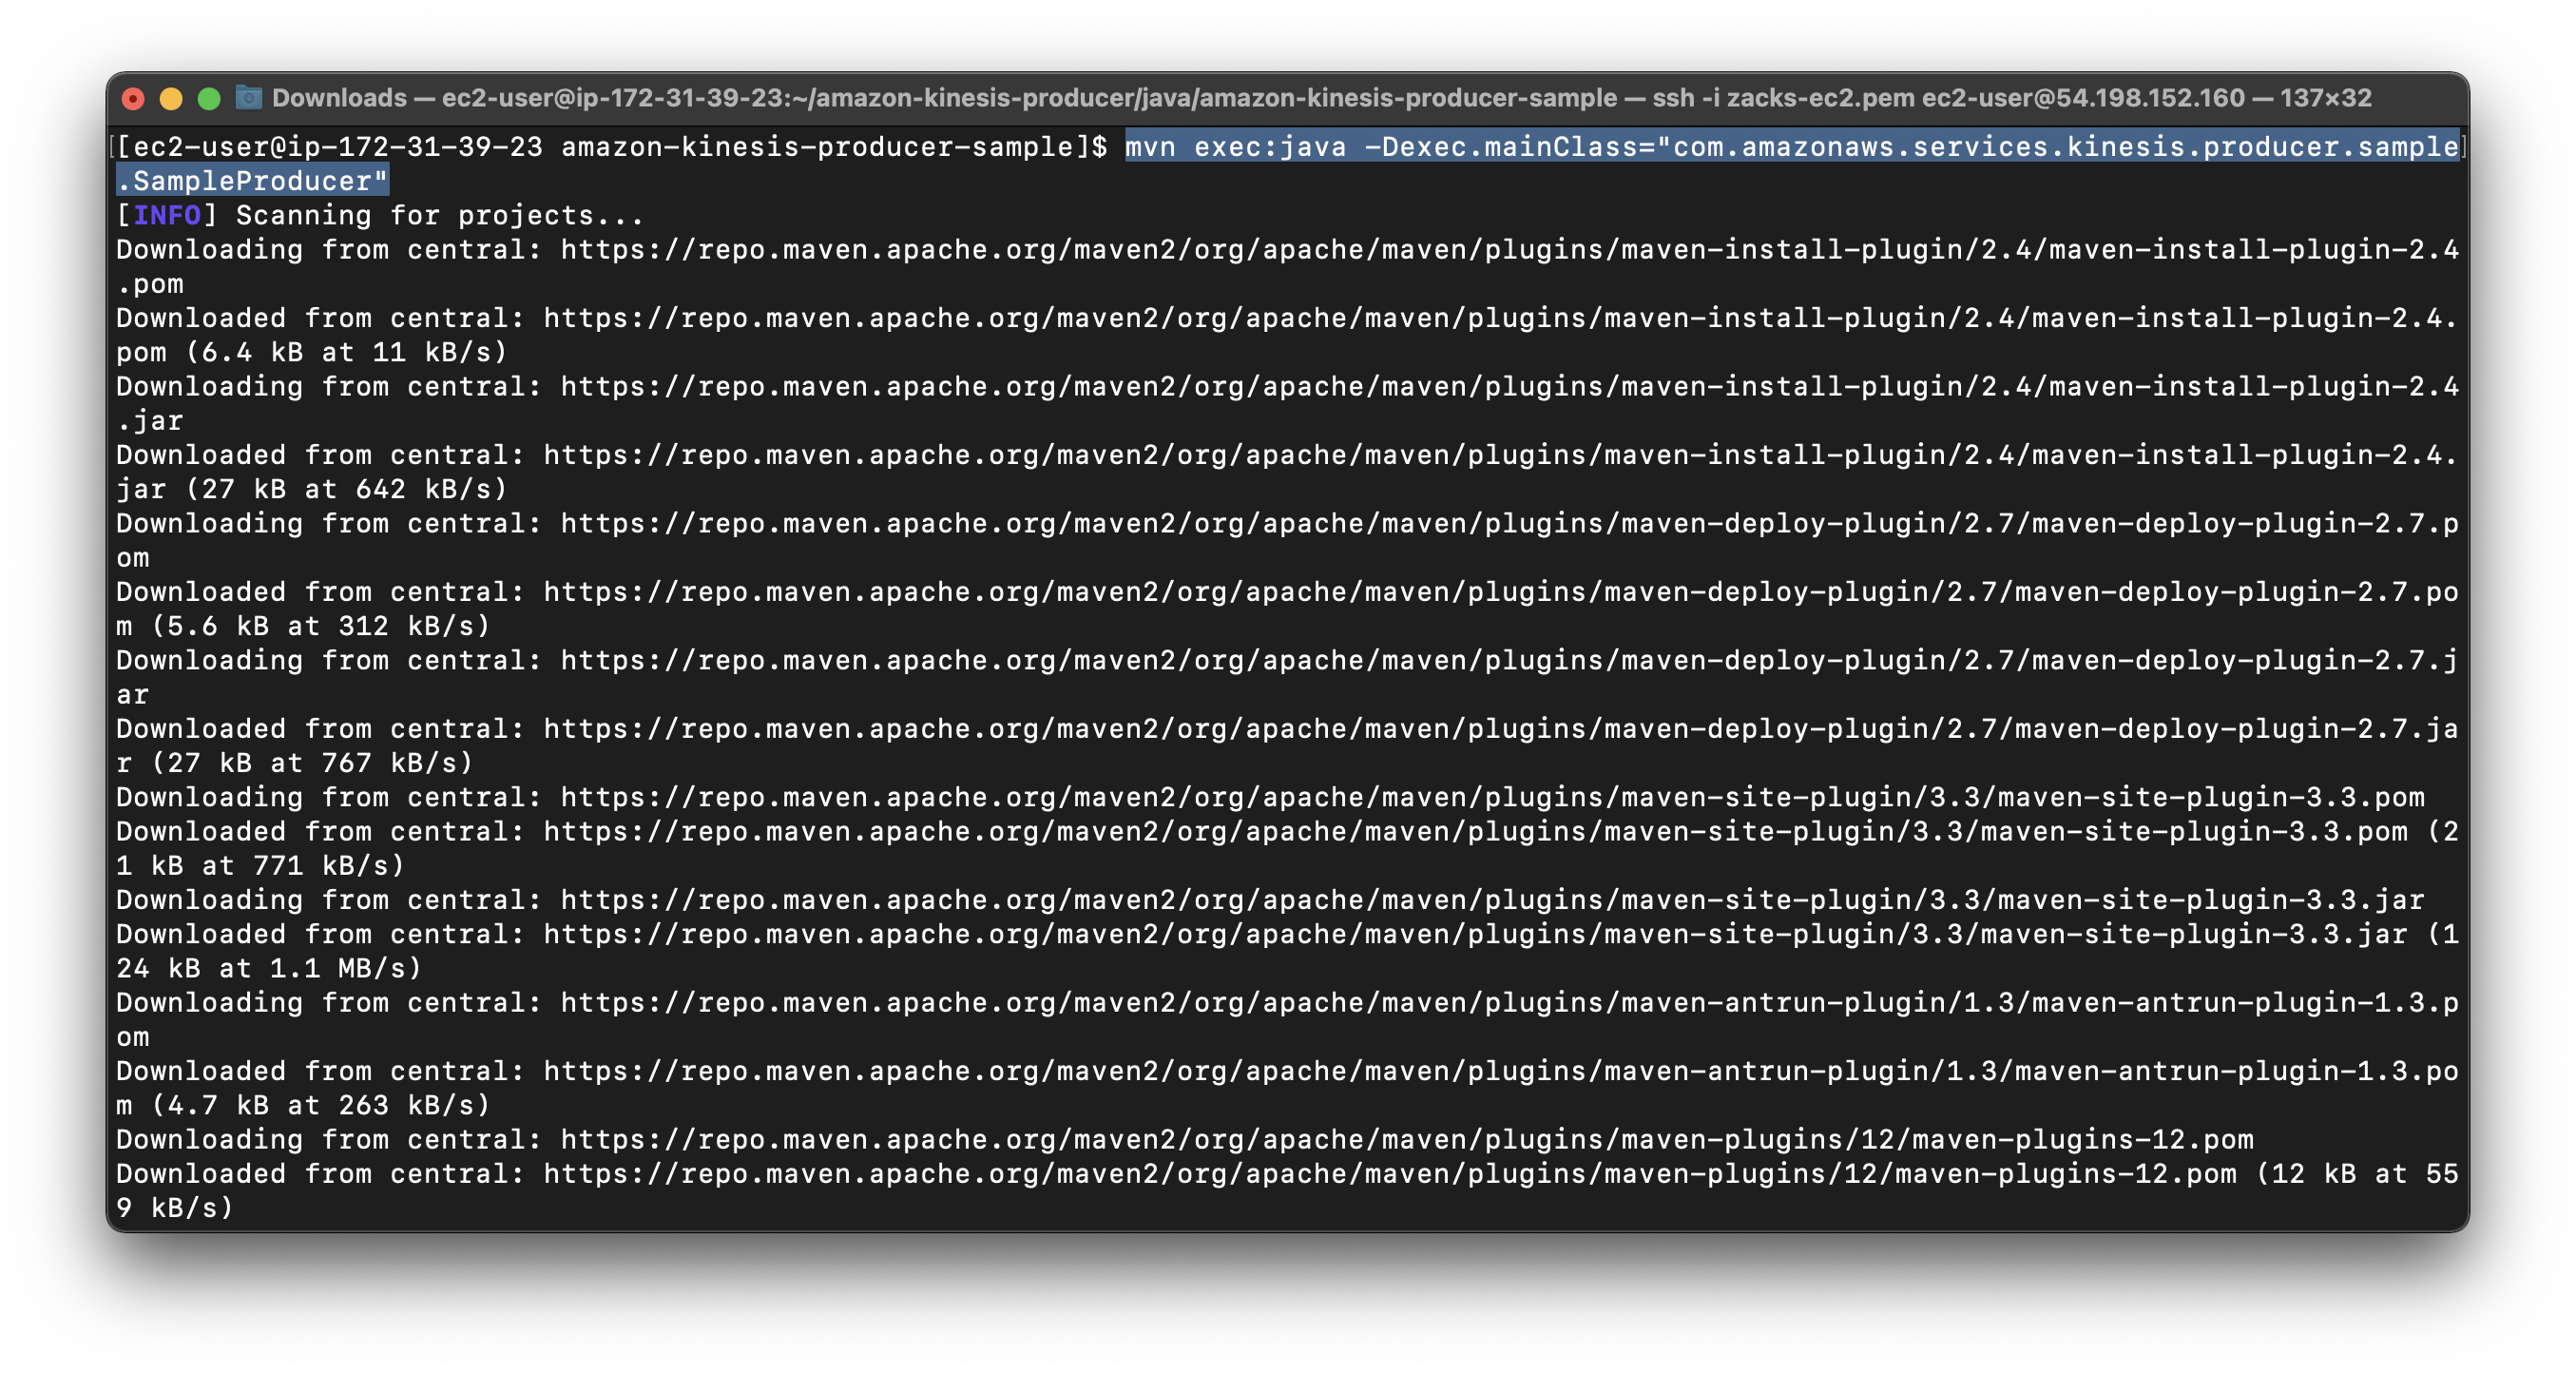
Run the following command in the amazon-kinesis-producer-sample directory to allow Maven to download all of the directory’s dependencies:
1 | cd /home/ec2-user/amazon-kinesis-producer/java/amazon-kinesis-producer-sample |
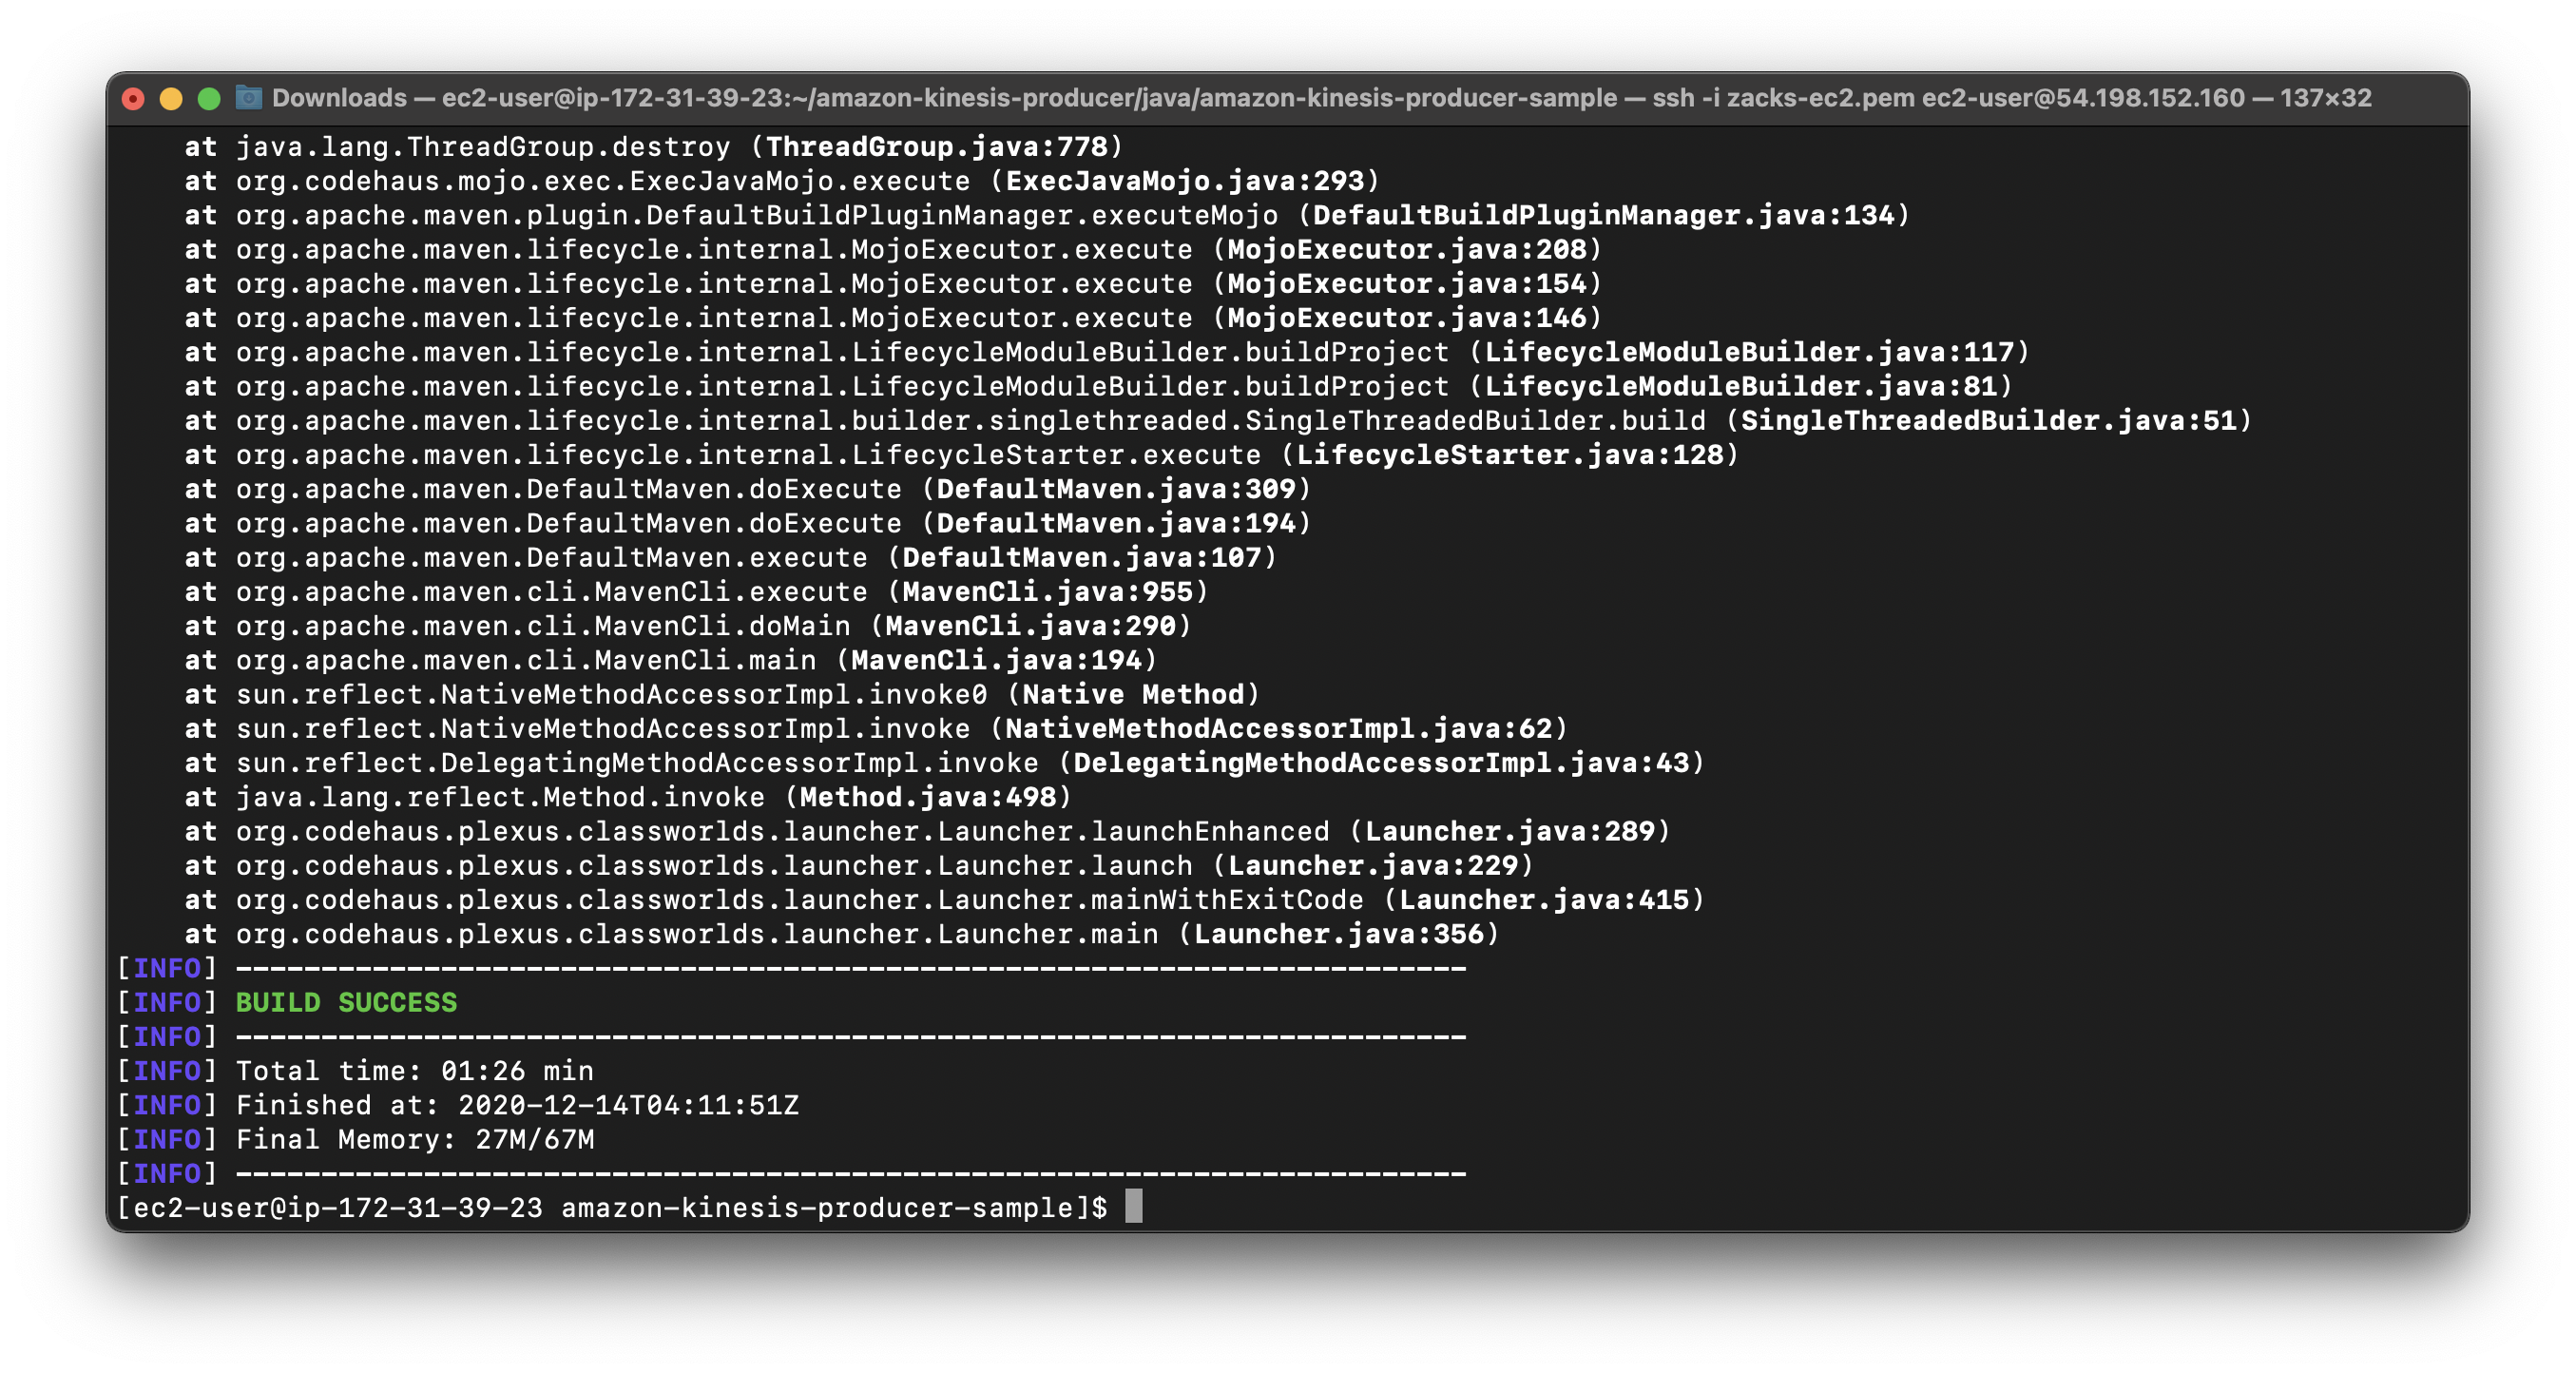
Run the following command in the amazon-kinesis-producer-sample directory to run the producer and to send data into the Kinesis data stream:
1 | mvn exec:java -Dexec.mainClass="com.amazonaws.services.kinesis.producer.sample.SampleProducer" |

Validation Test
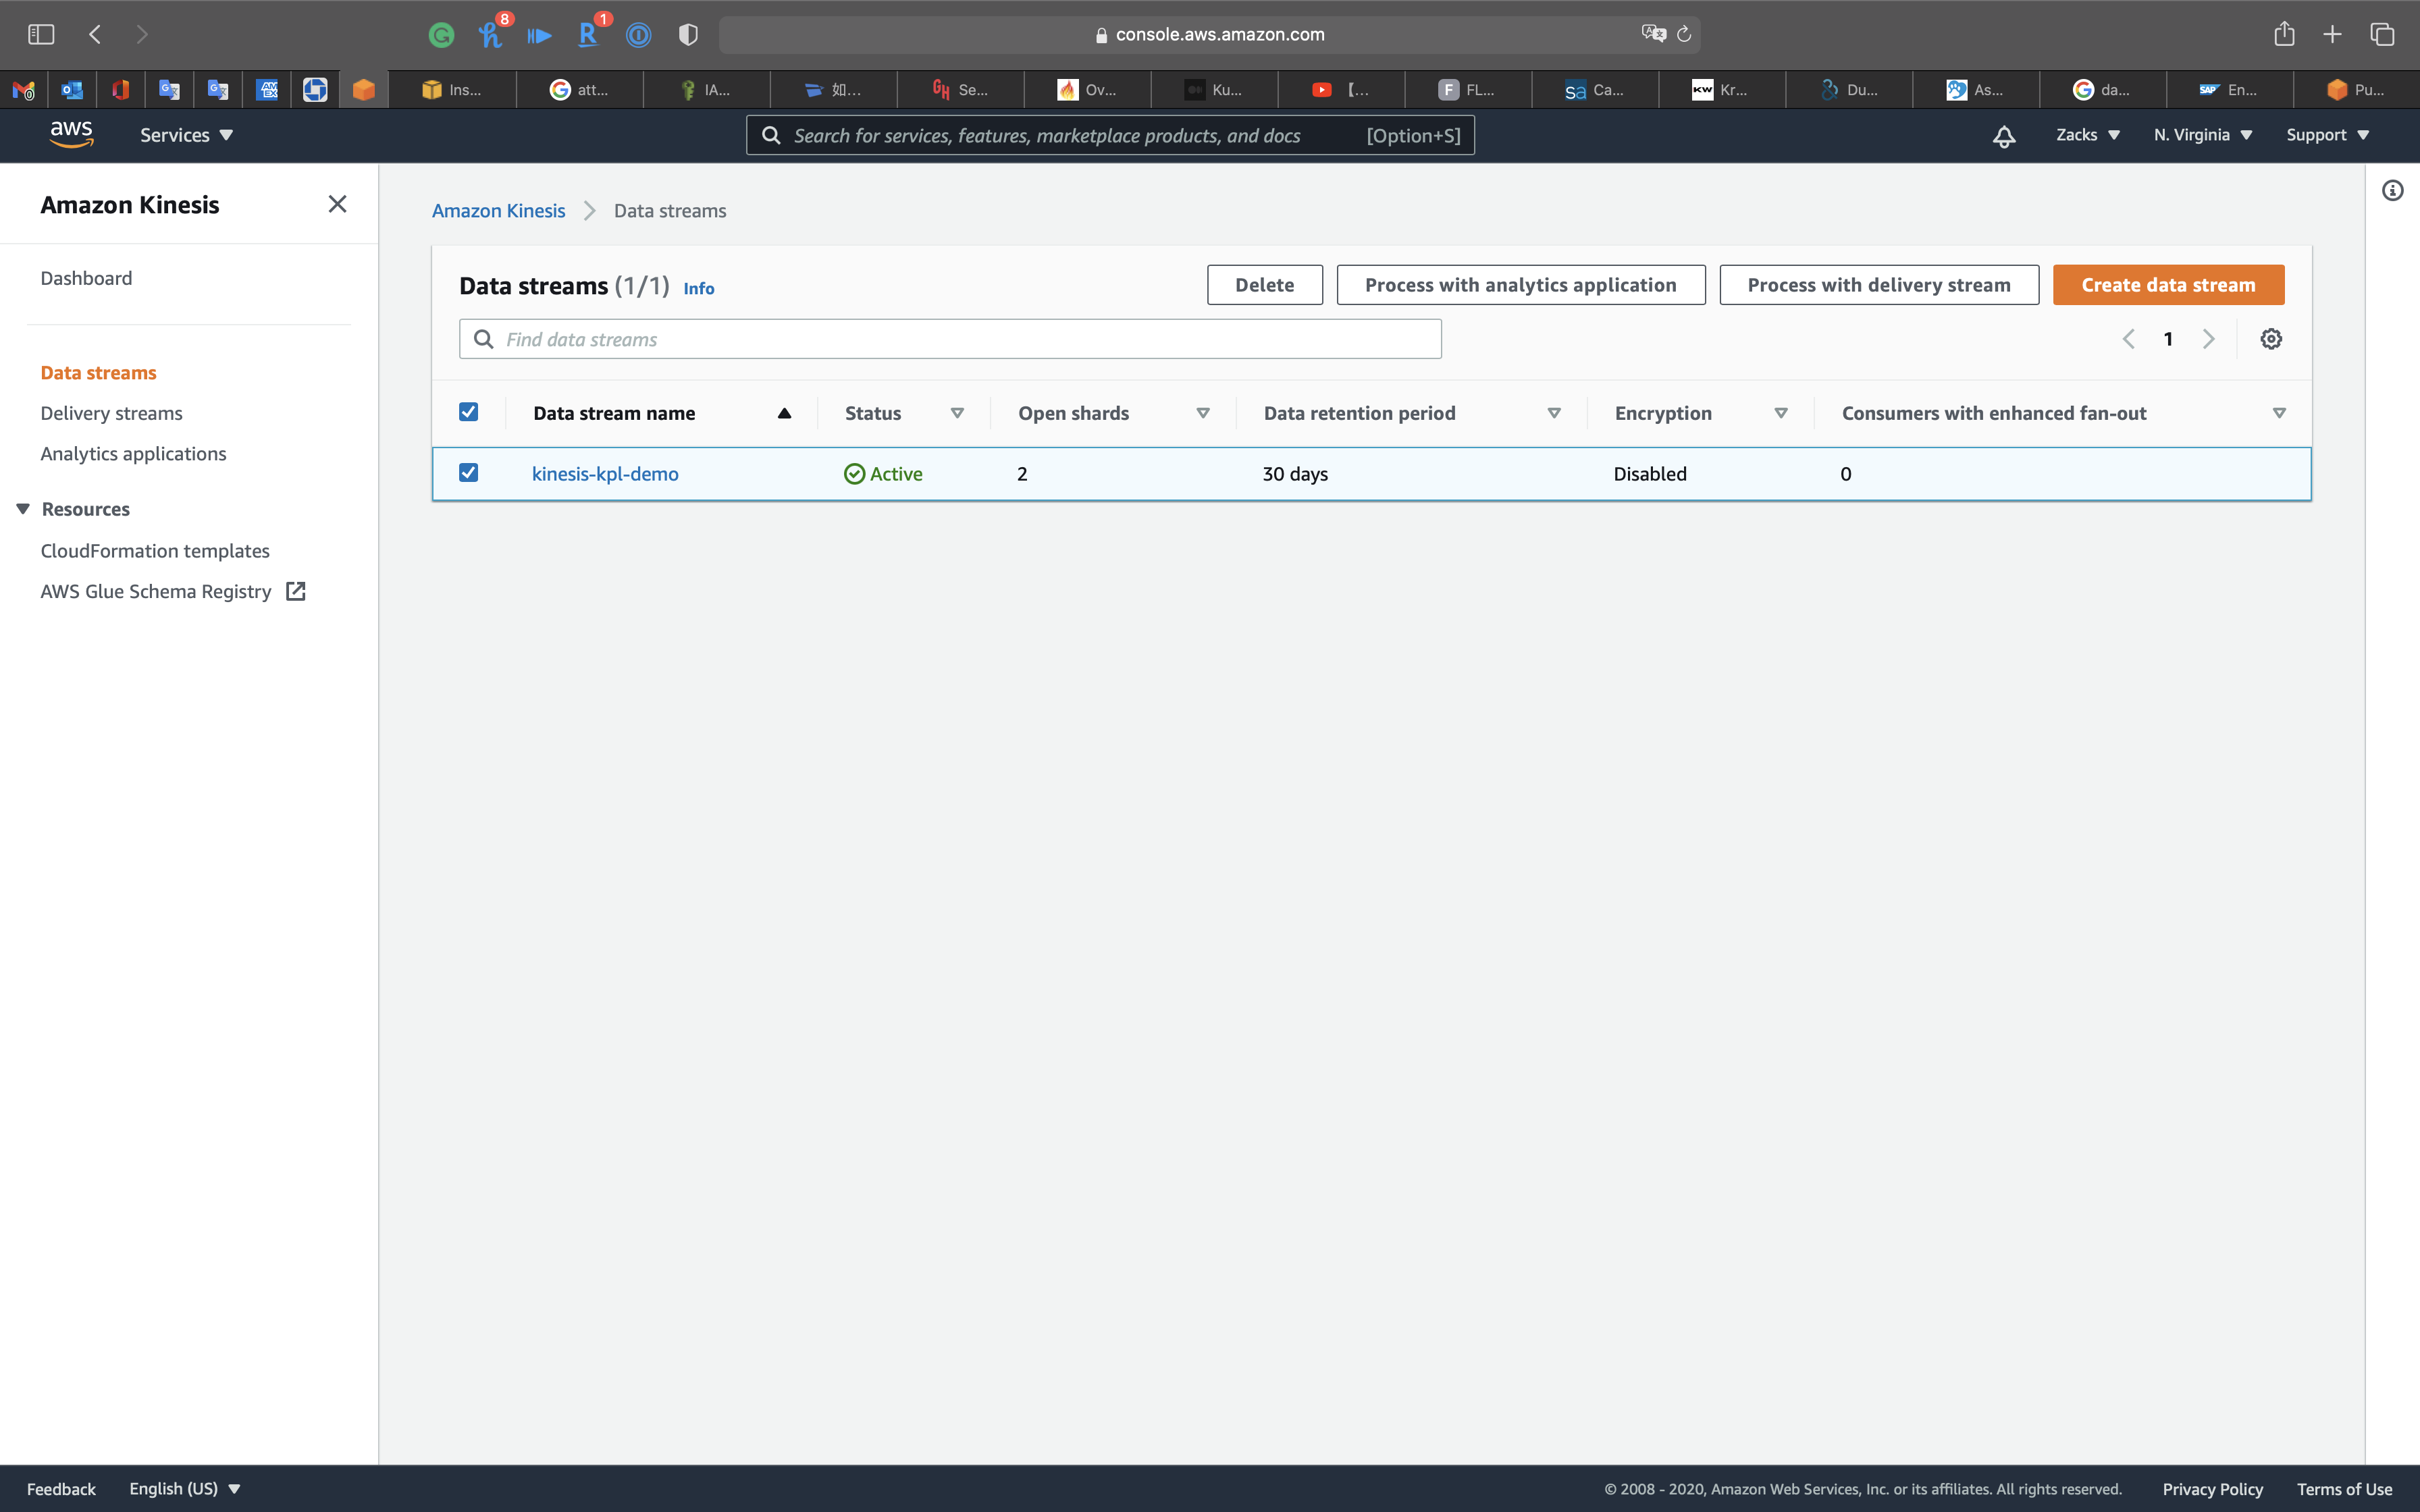
Services -> Kinesis -> Data streams
Check the Incoming Data (Count) graph on the Monitoring tab of the Kinesis console to verify the number of records sent to the stream.
Note: The record count might be lower than the number of records sent to the data stream. This lower record count can occur because the KPL uses aggregation.
Click on the kinesis-kpl-demo
See Incoming data chart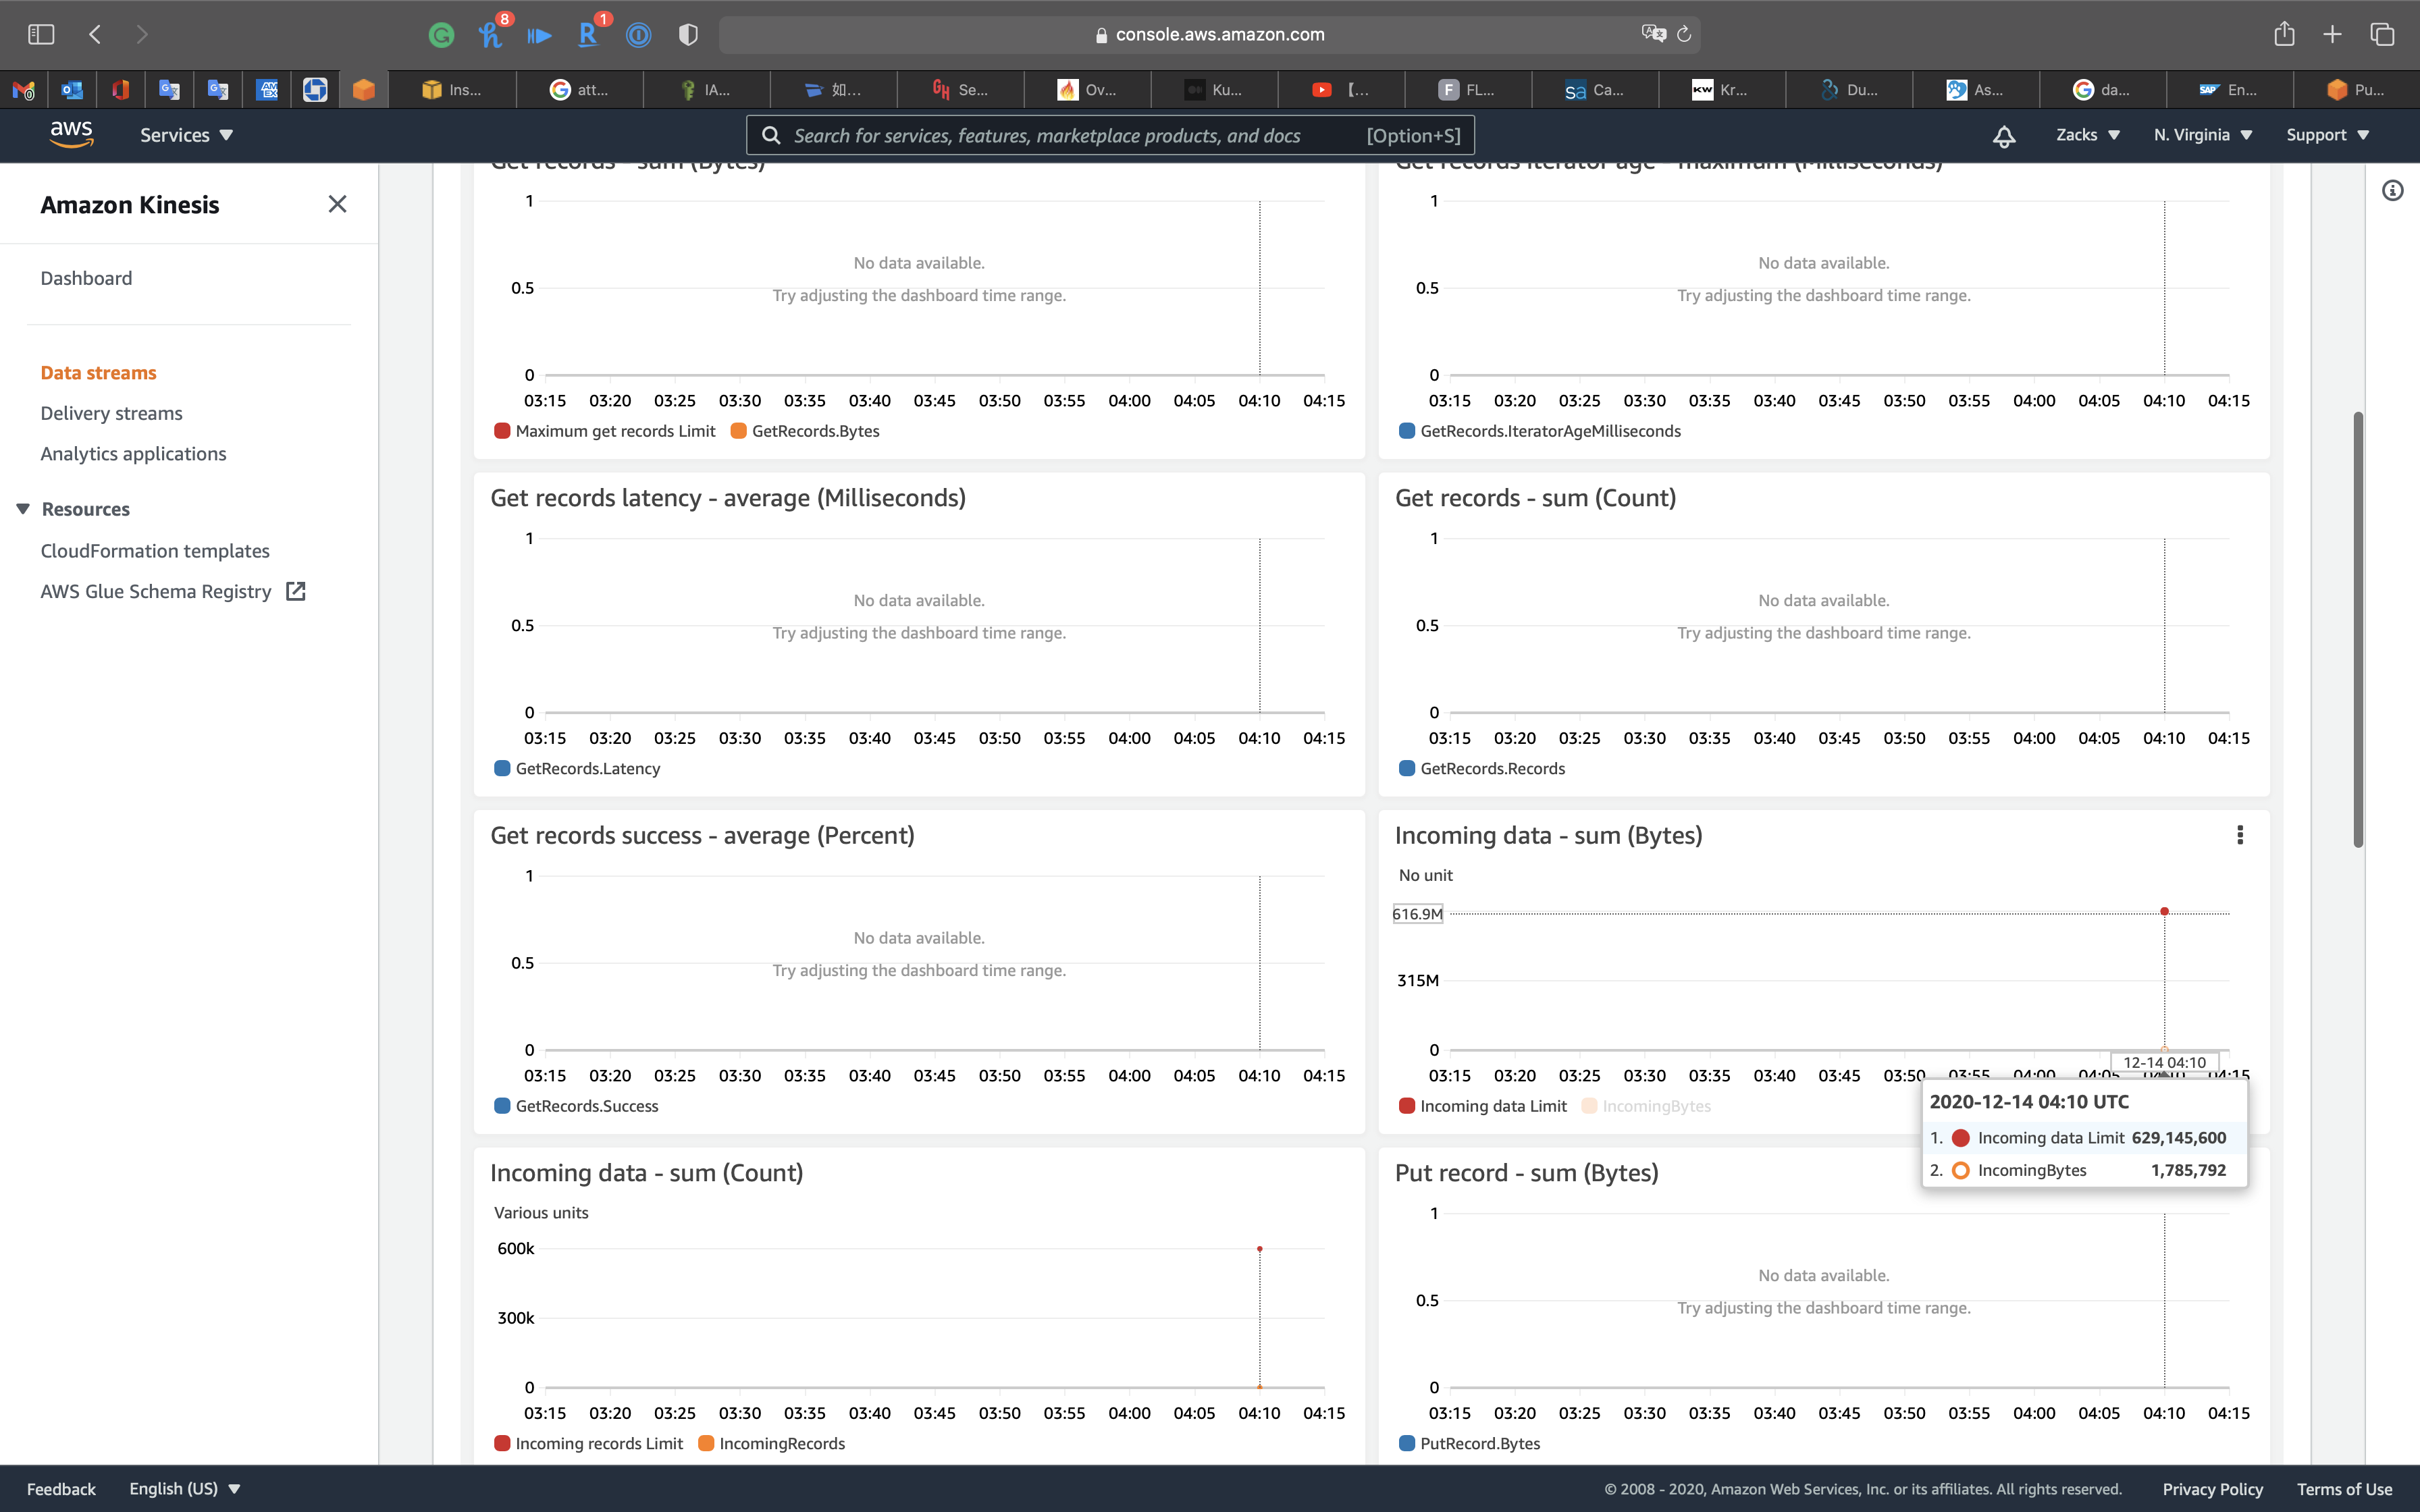
Put Records latency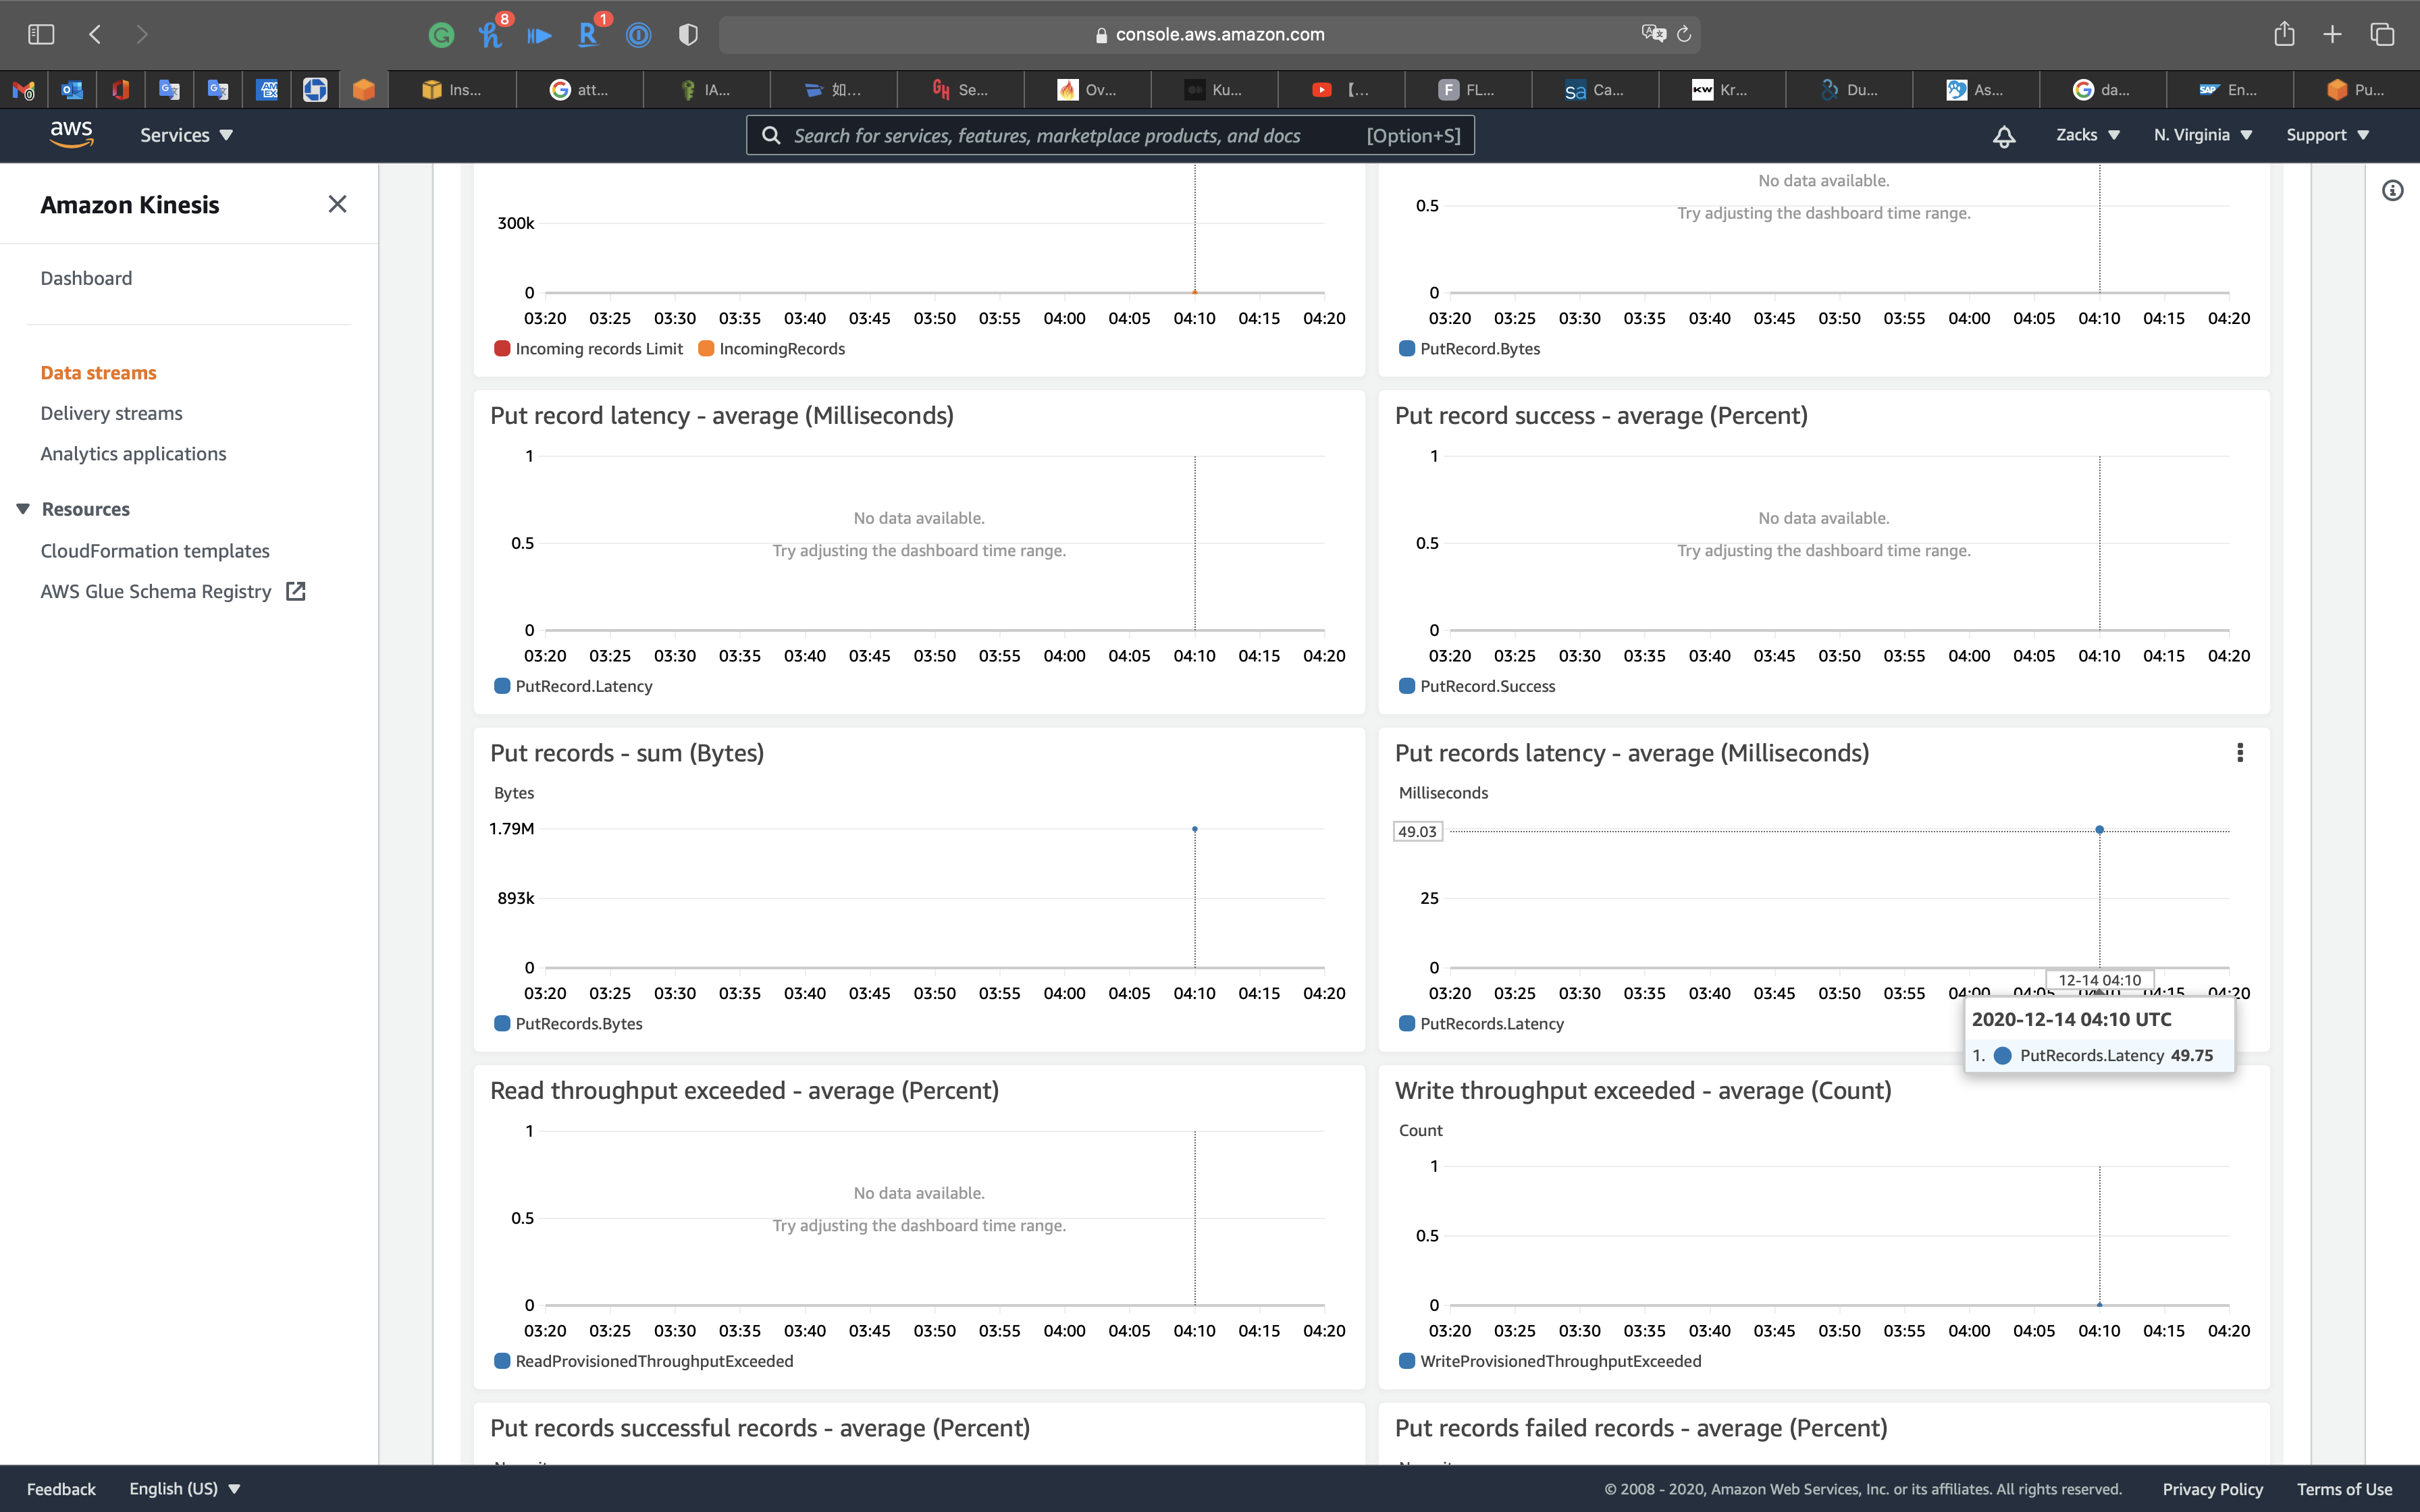
One more thing
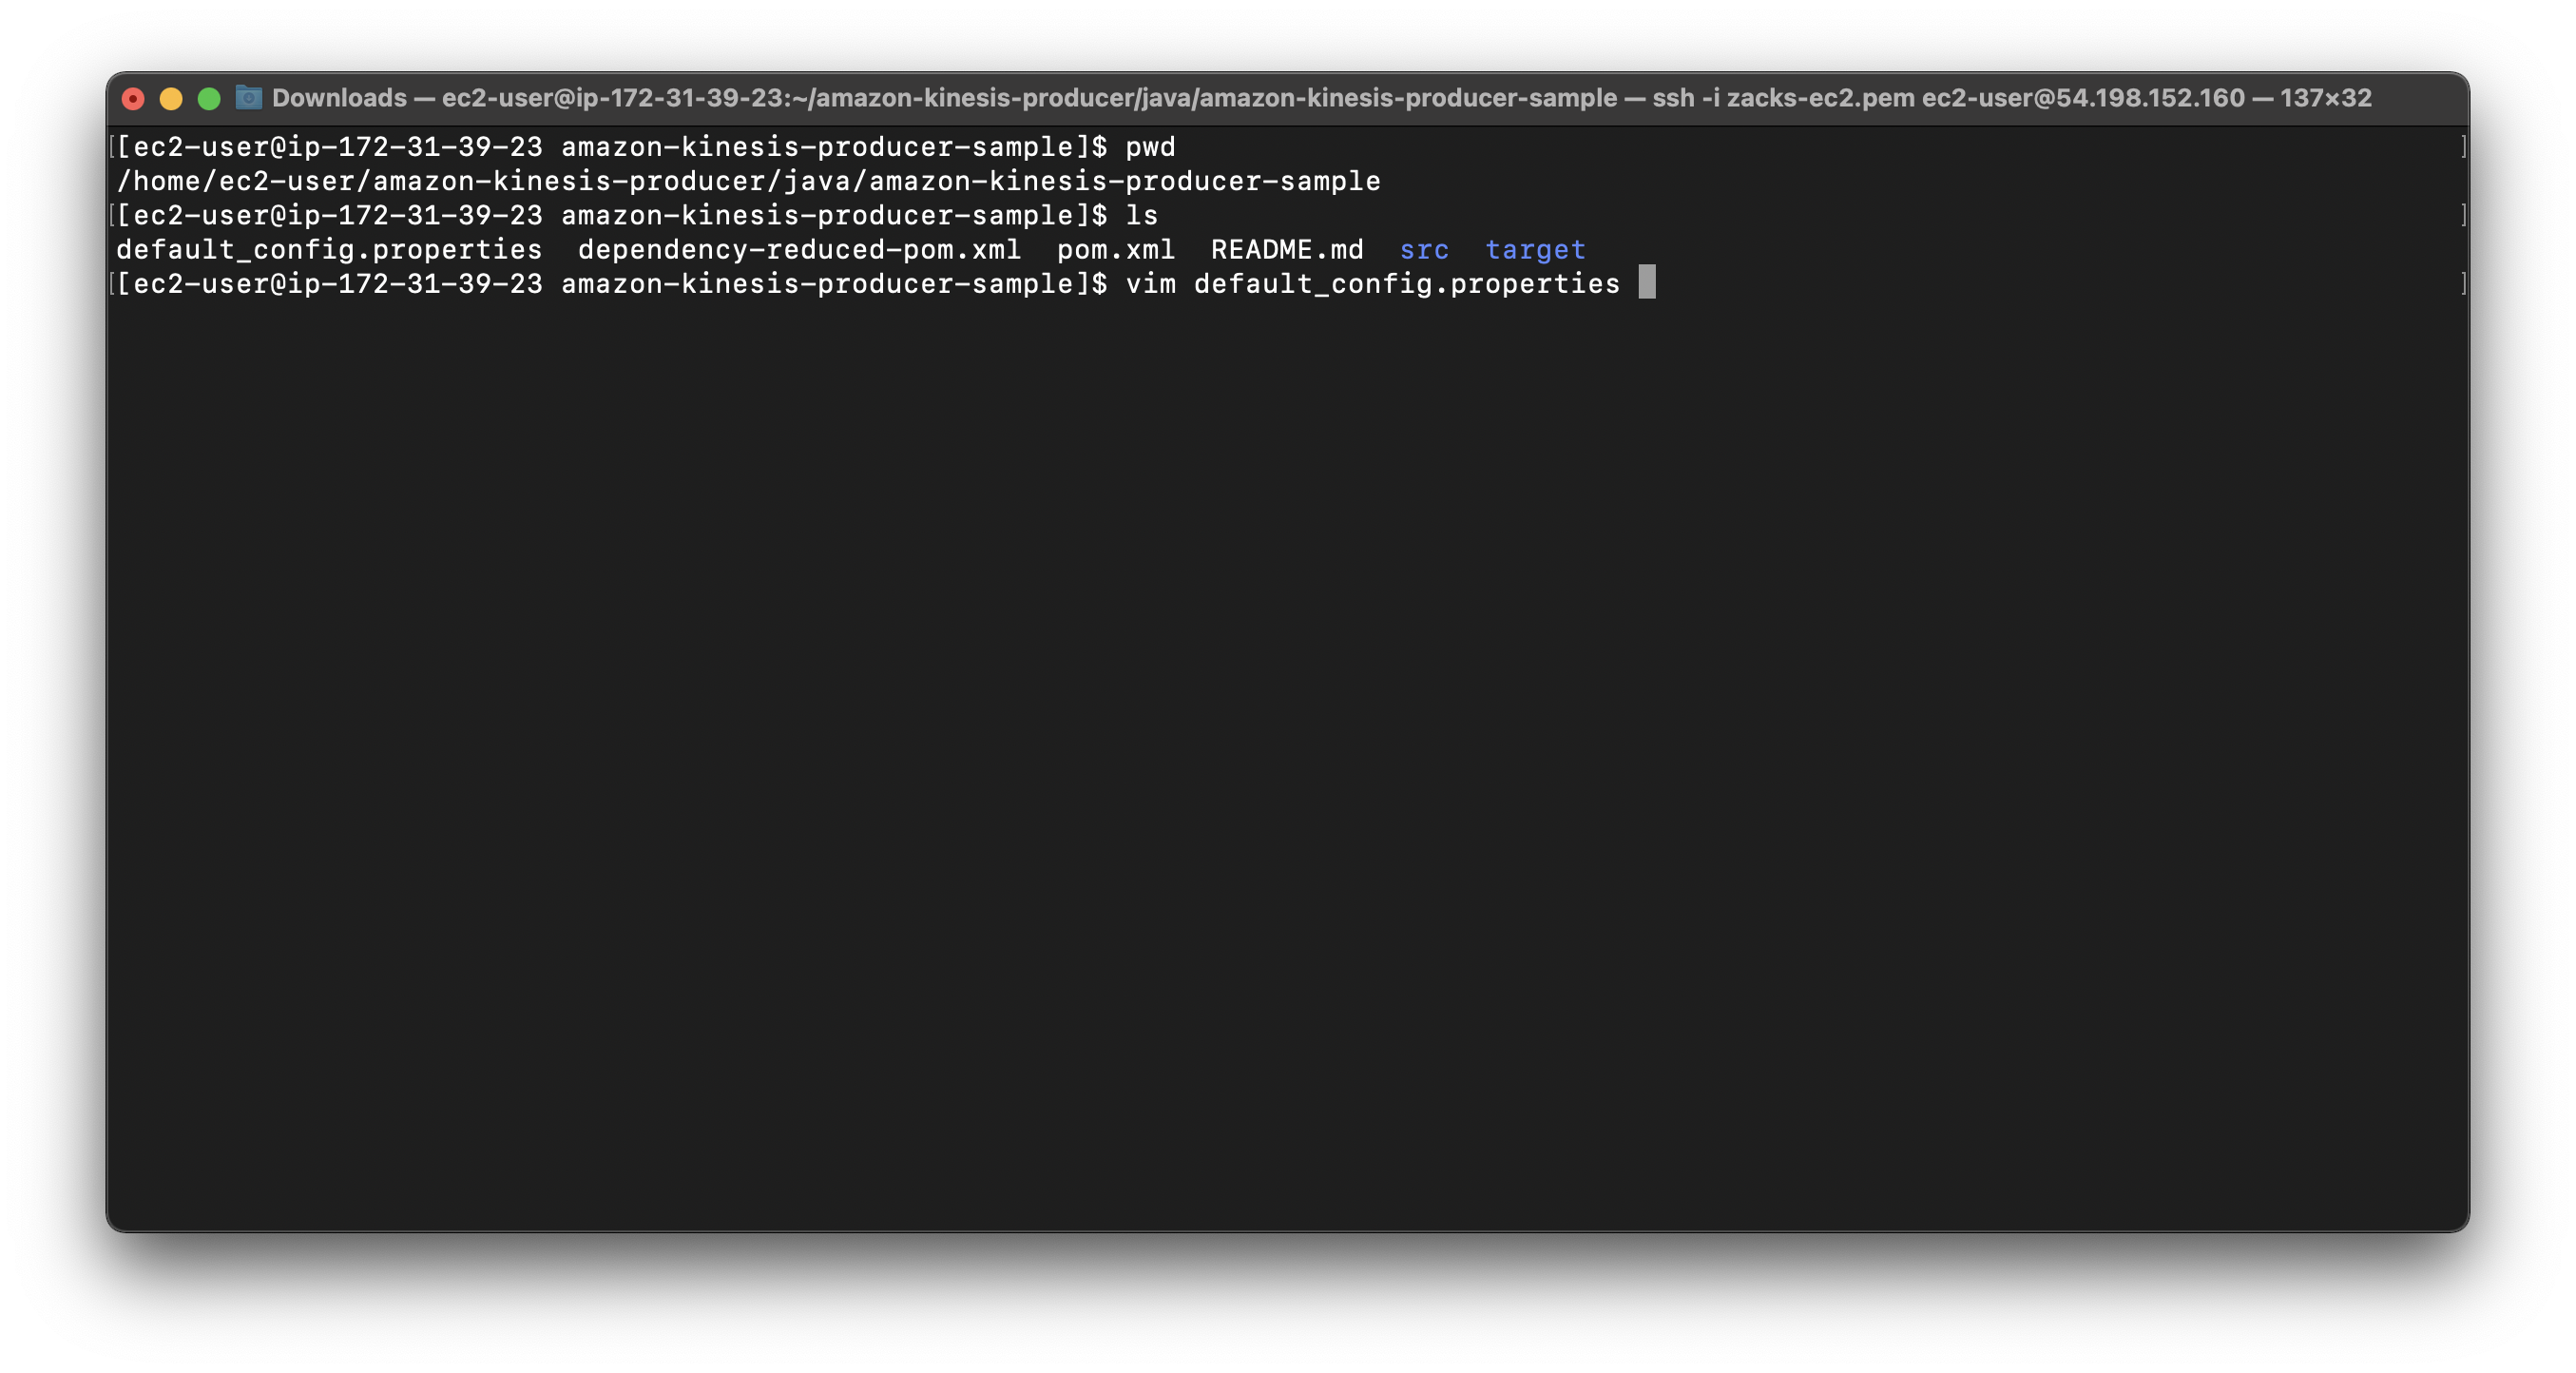
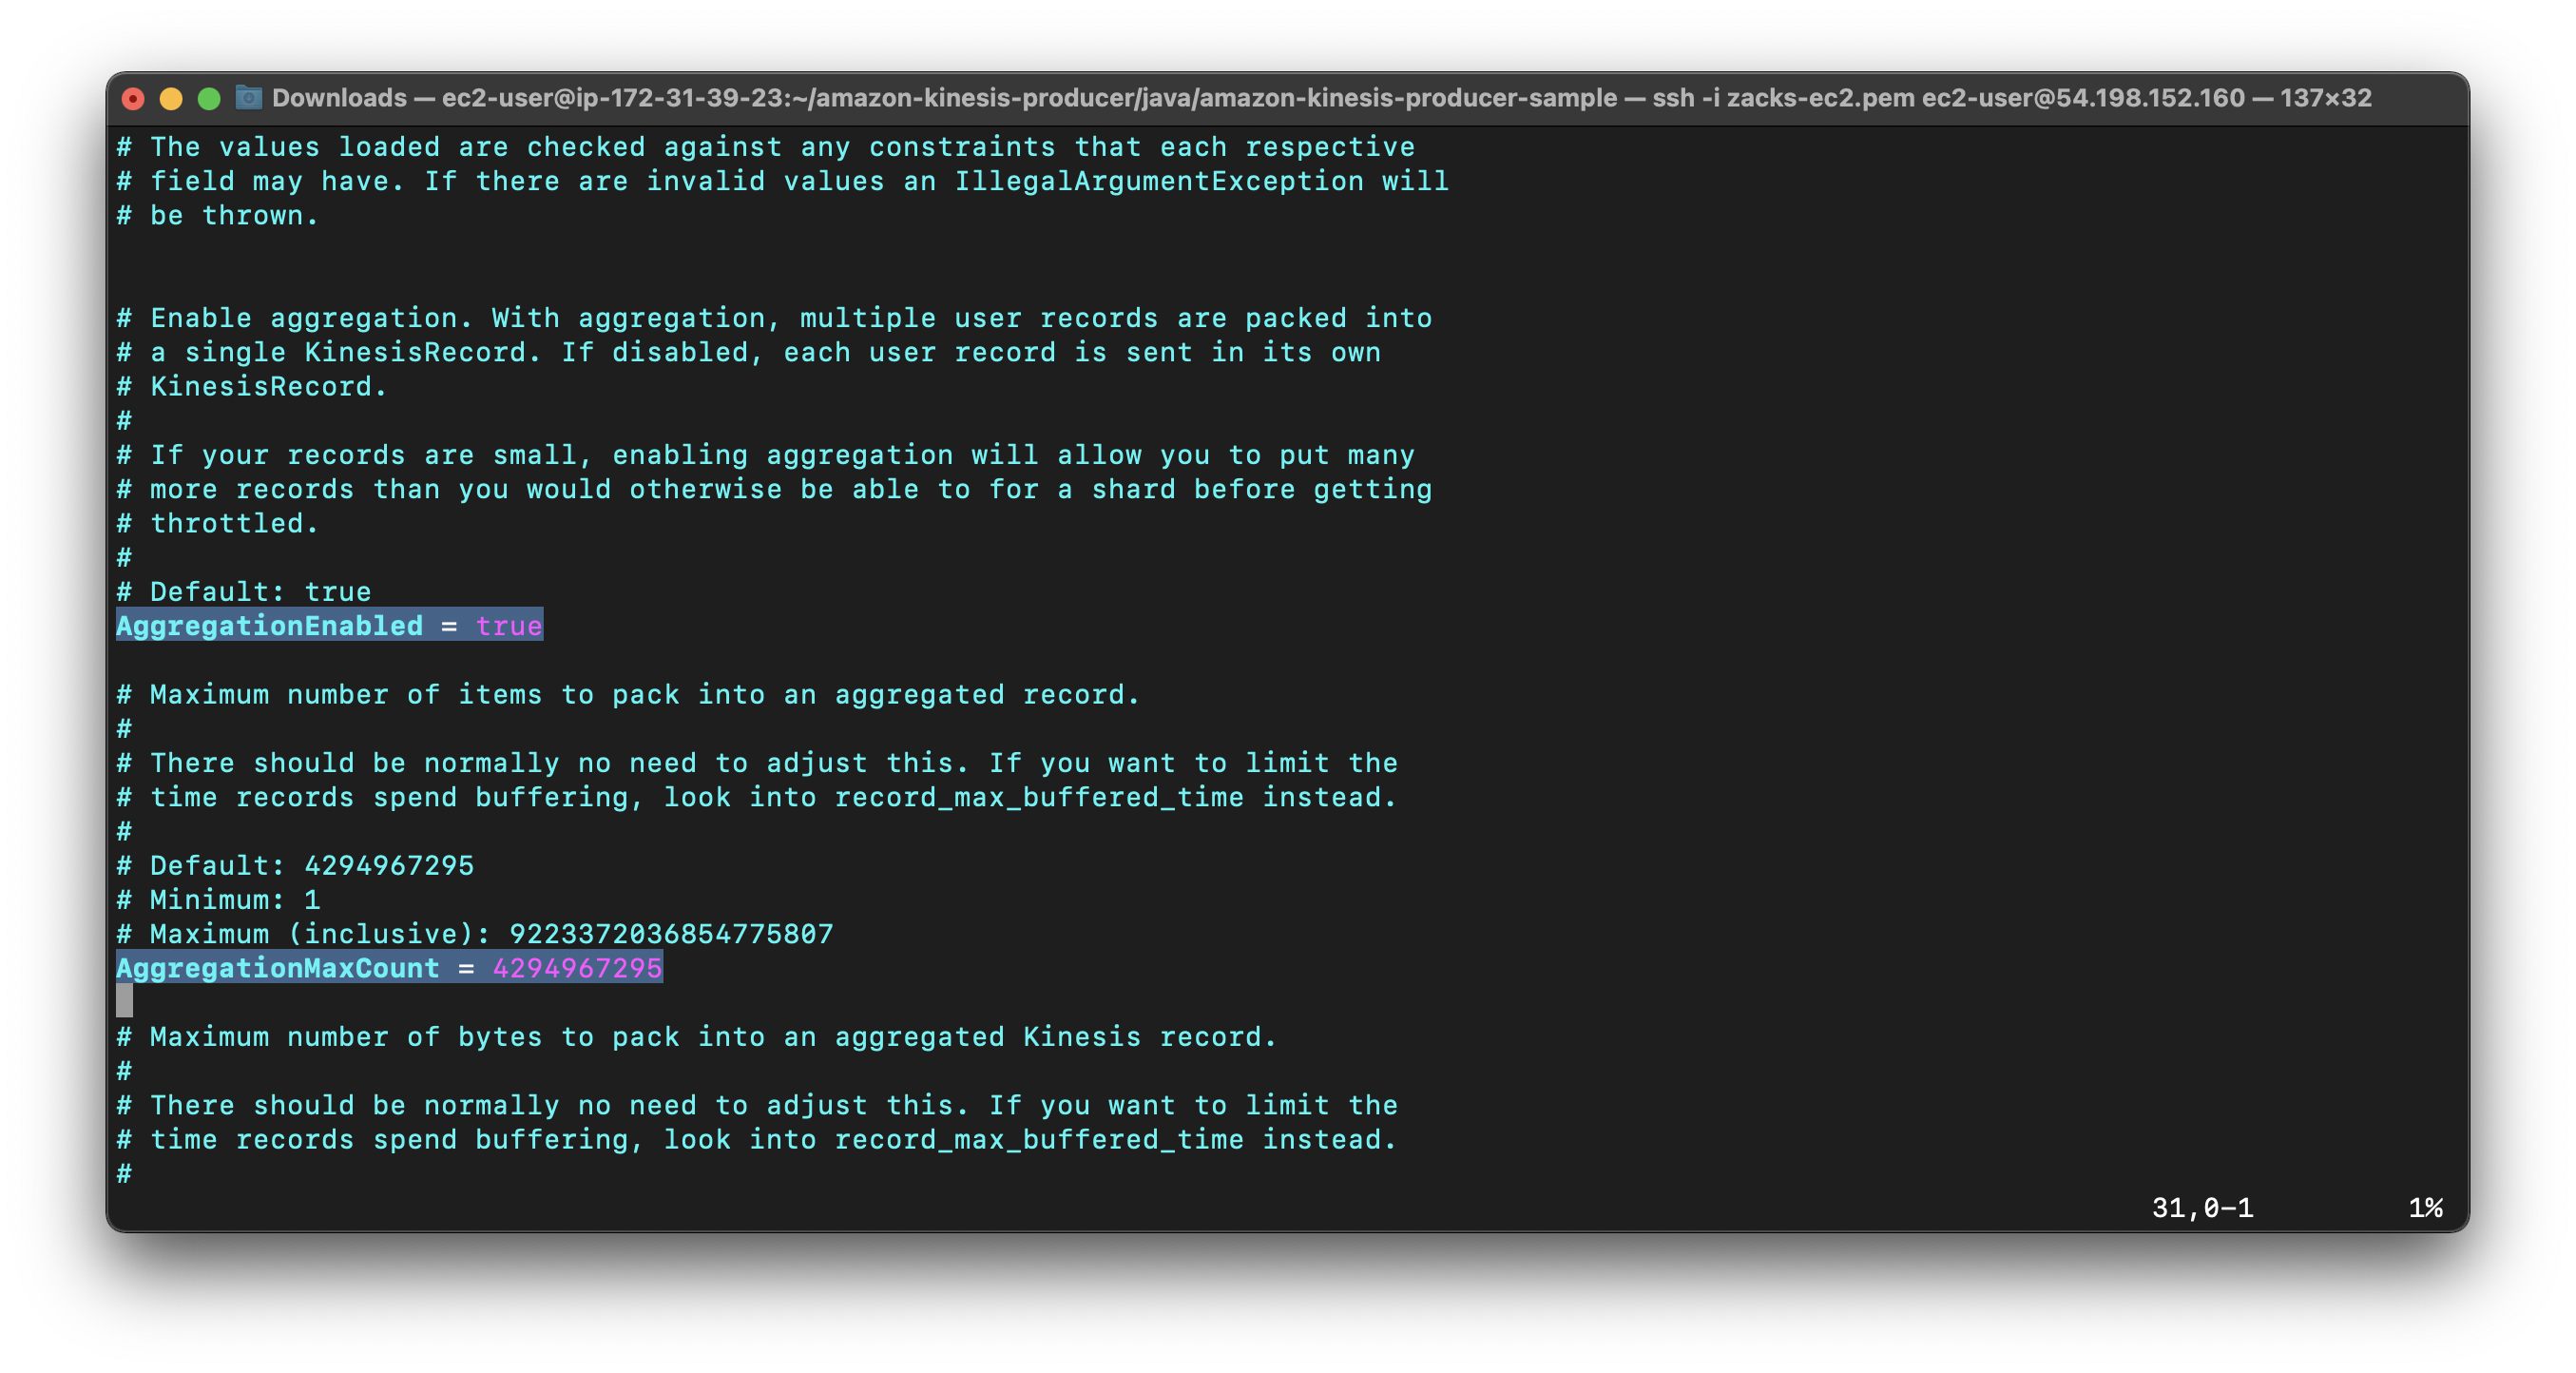
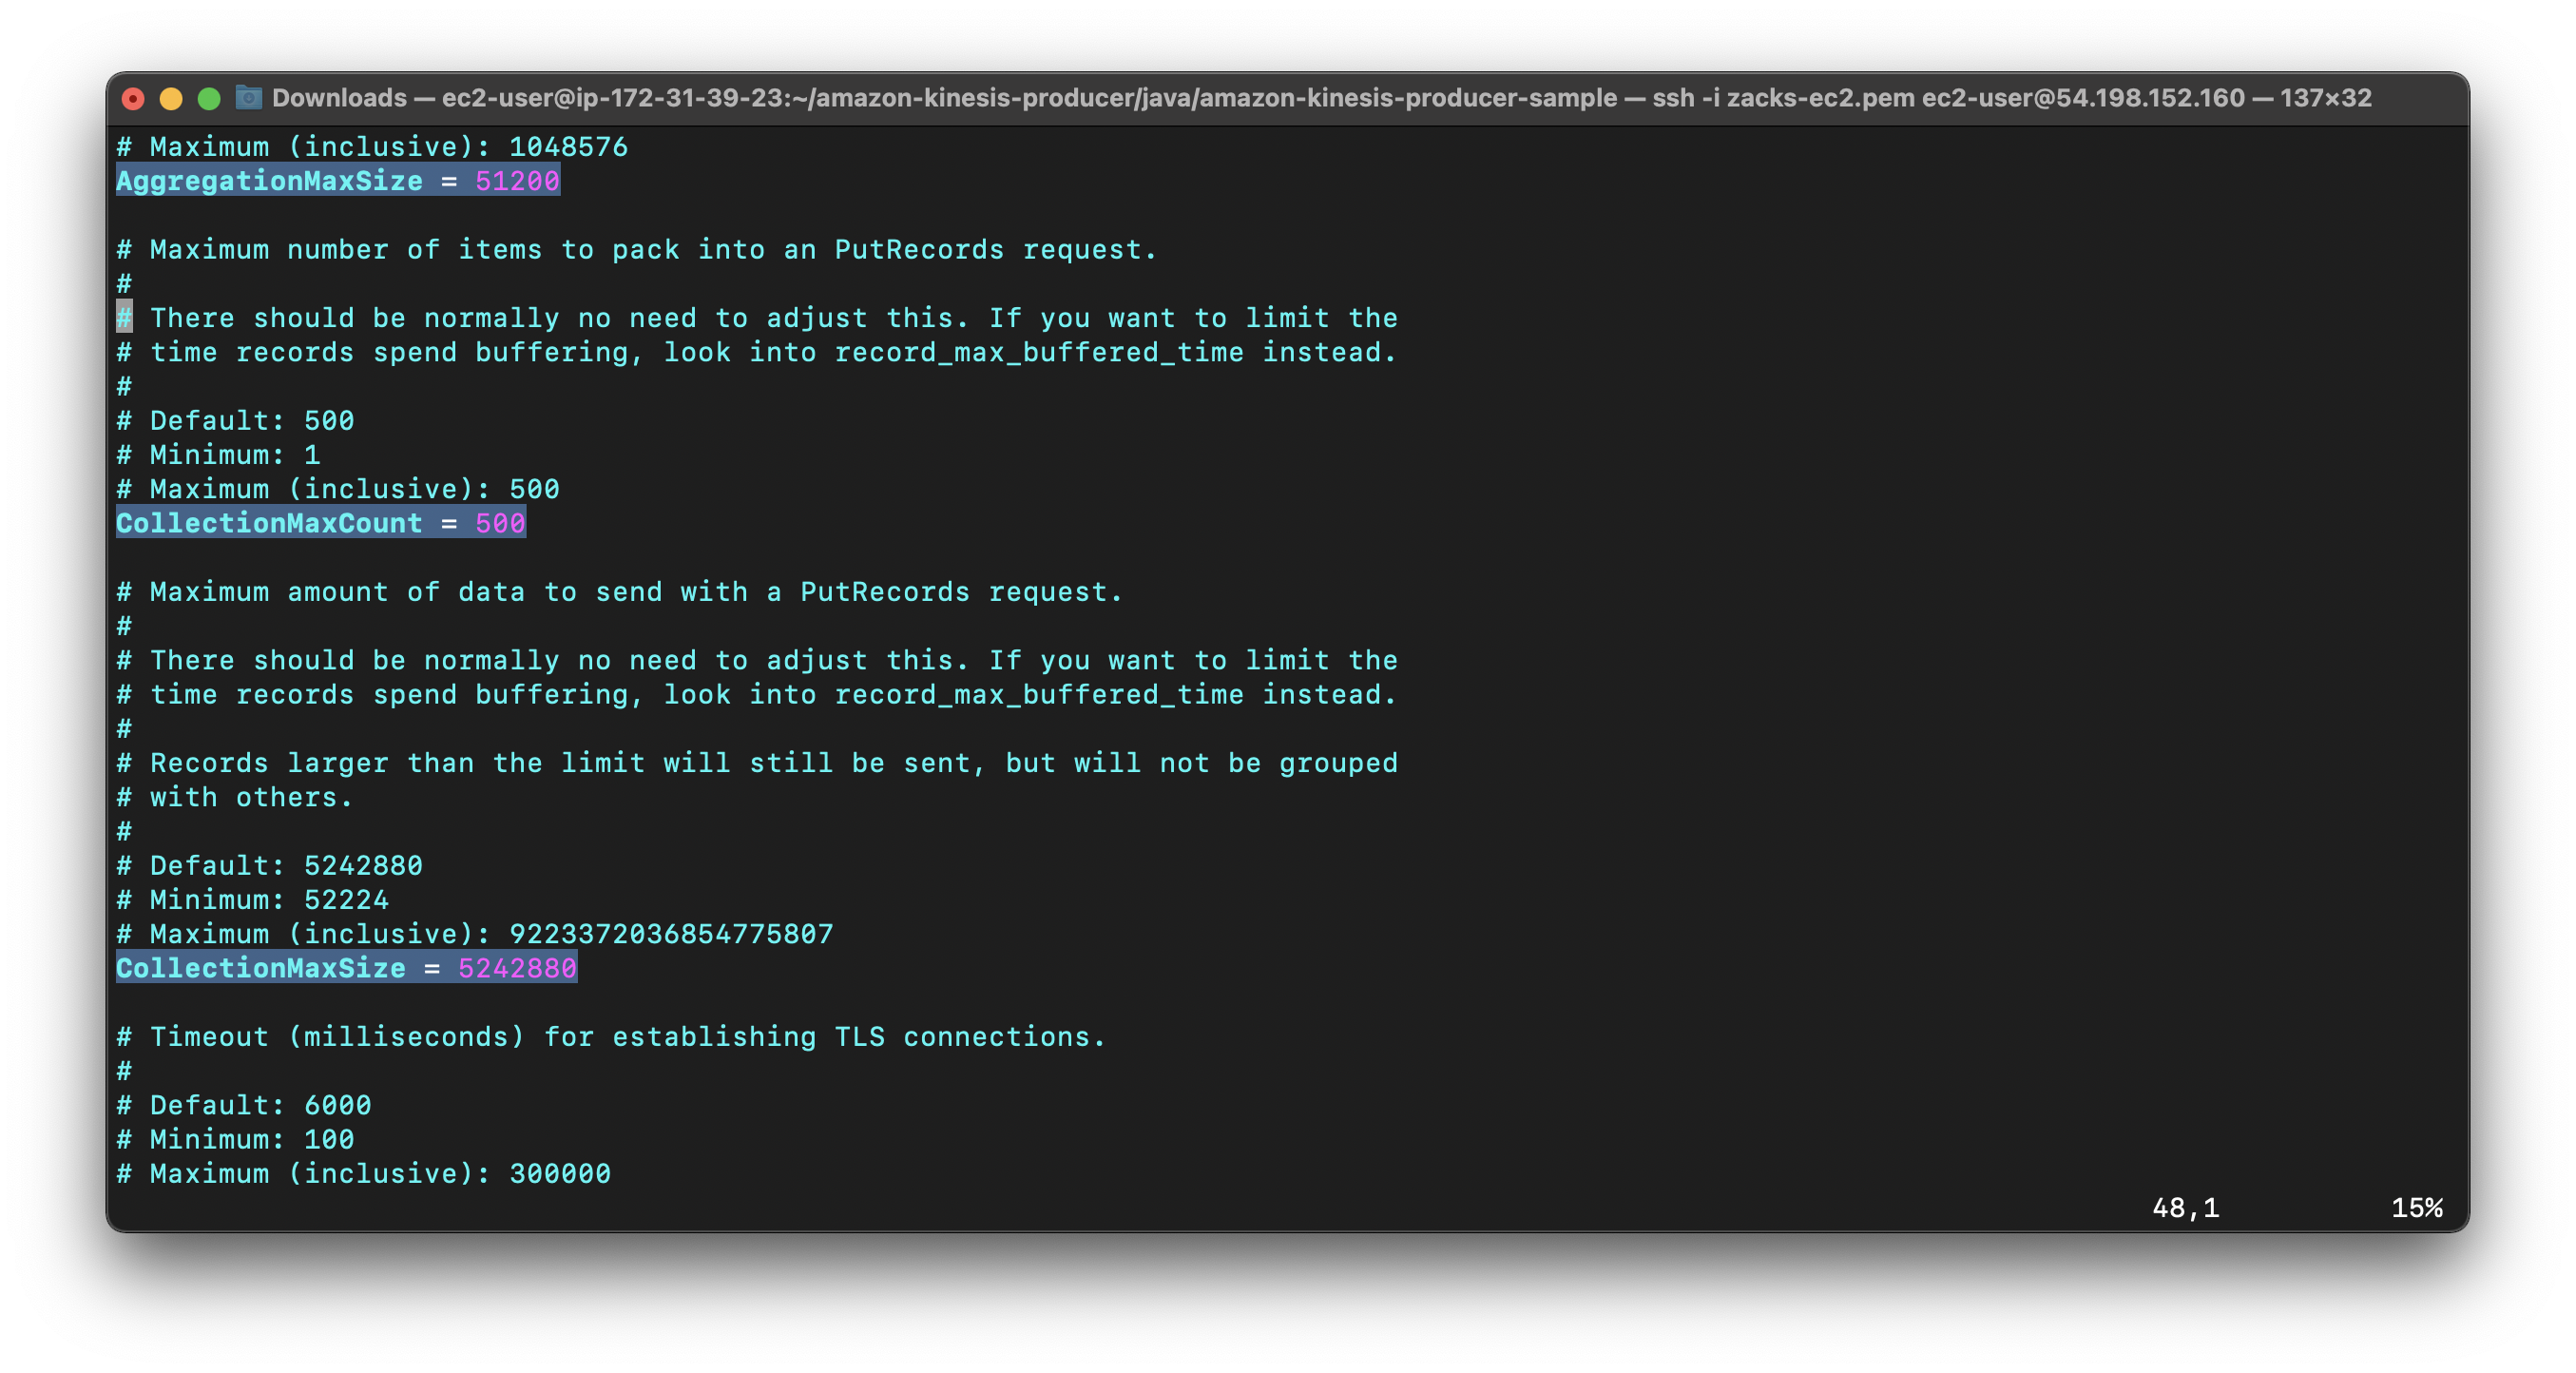
In the default_config.properties file read the descriptions of these critical properties: AggregationEnabled, AggregationMaxCount, AggregationMaxSize, RecordMaxBufferedTime, RecordTtl, and RequestTimeout
1 | pwd |

KCL Lab
Review
Write
$Inbound \space Write \space Bandwidth \space in \space KB = Average \space record \space size \space (in \space KiB) \times Maximum \space records \space written \space per \space second$
$Inbound \space Write \space Capacity = \frac{Inbound \space Write \space Bandwidth \space in \space KB}{1000}$
Read
$Outgoing \space Read \space Bandwidth \space in \space KB = Inbound \space Write \space Bandwidth \space in \space KB \times number \space of \space consumers$
$Outgoing \space Read \space Capacity = \frac{Outgoing \space Read \space Bandwidth \space in \space KB}{2000}$
Number of Shards
$Number \space of \space Shards = Max (Inbound \space Write \space Capacity, Outgoing \space Read \space Capacity)$
Total Data Stream Capacity
- 1 Shard = 1 MB/s Write Capacity = 2 MB/s Read Capacity
- Total Read Capacity = Number of Shards * 1
- Total Write Capacity = Number of Shards * 2
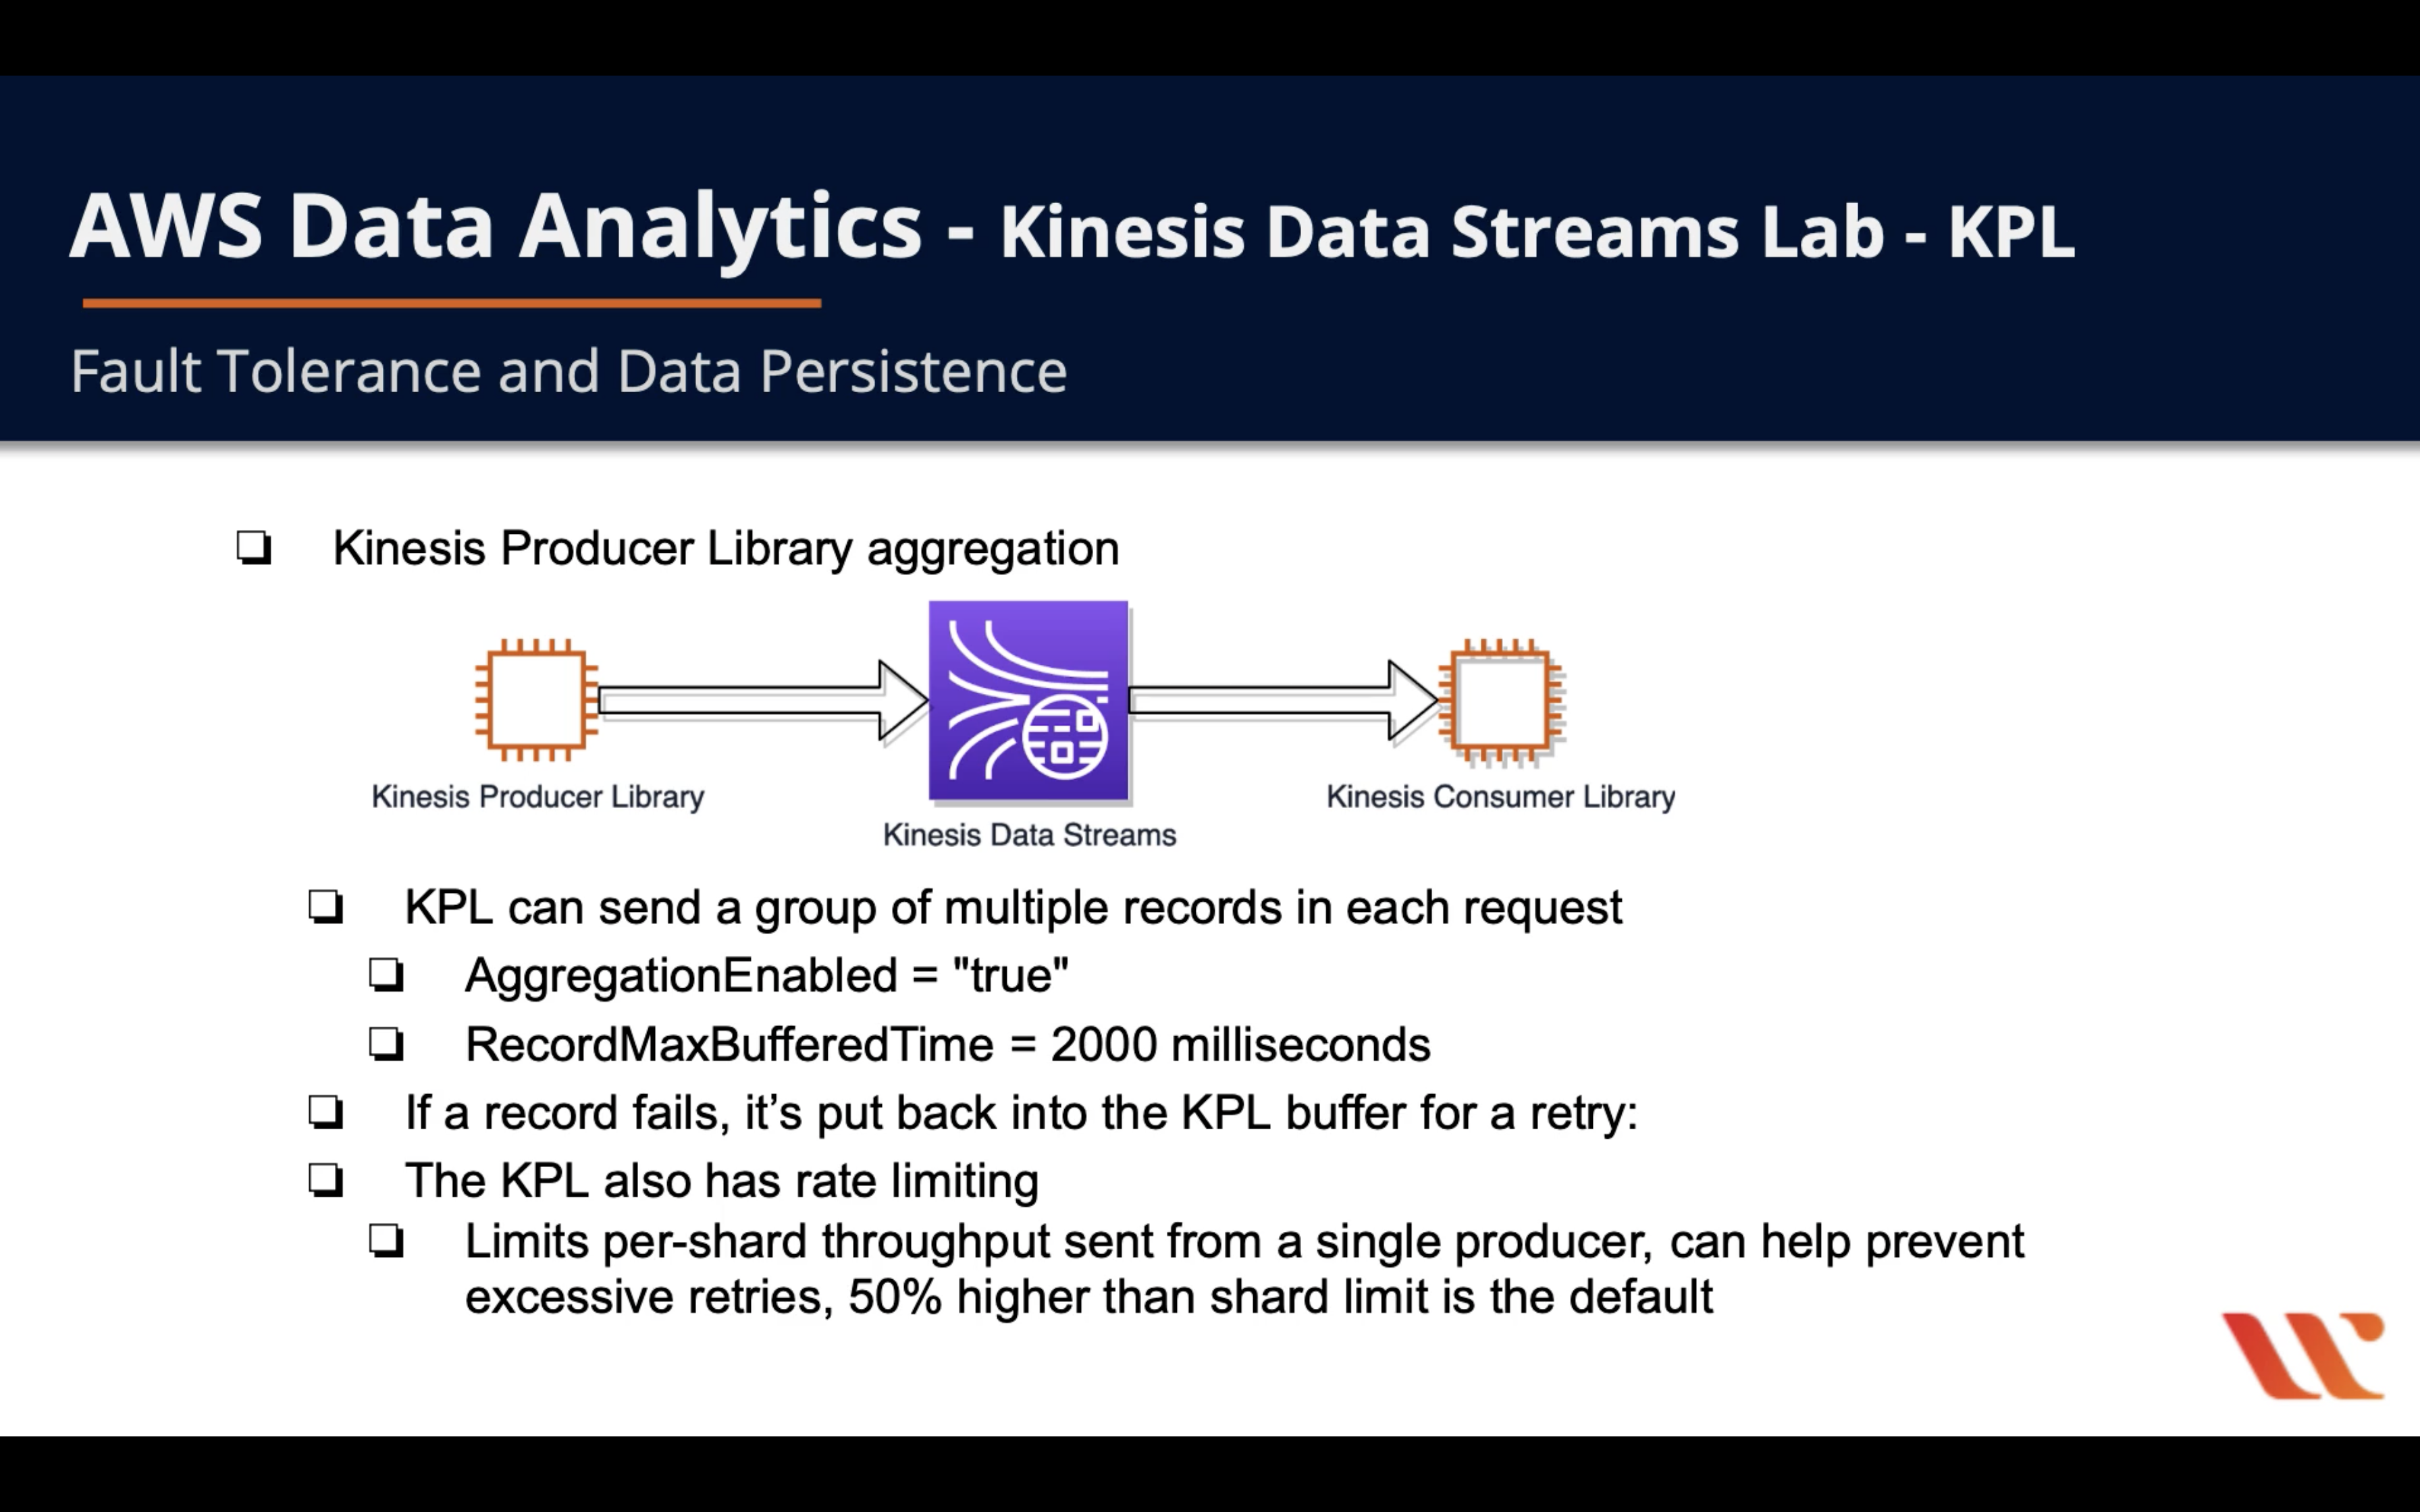
KPL aggregate our records.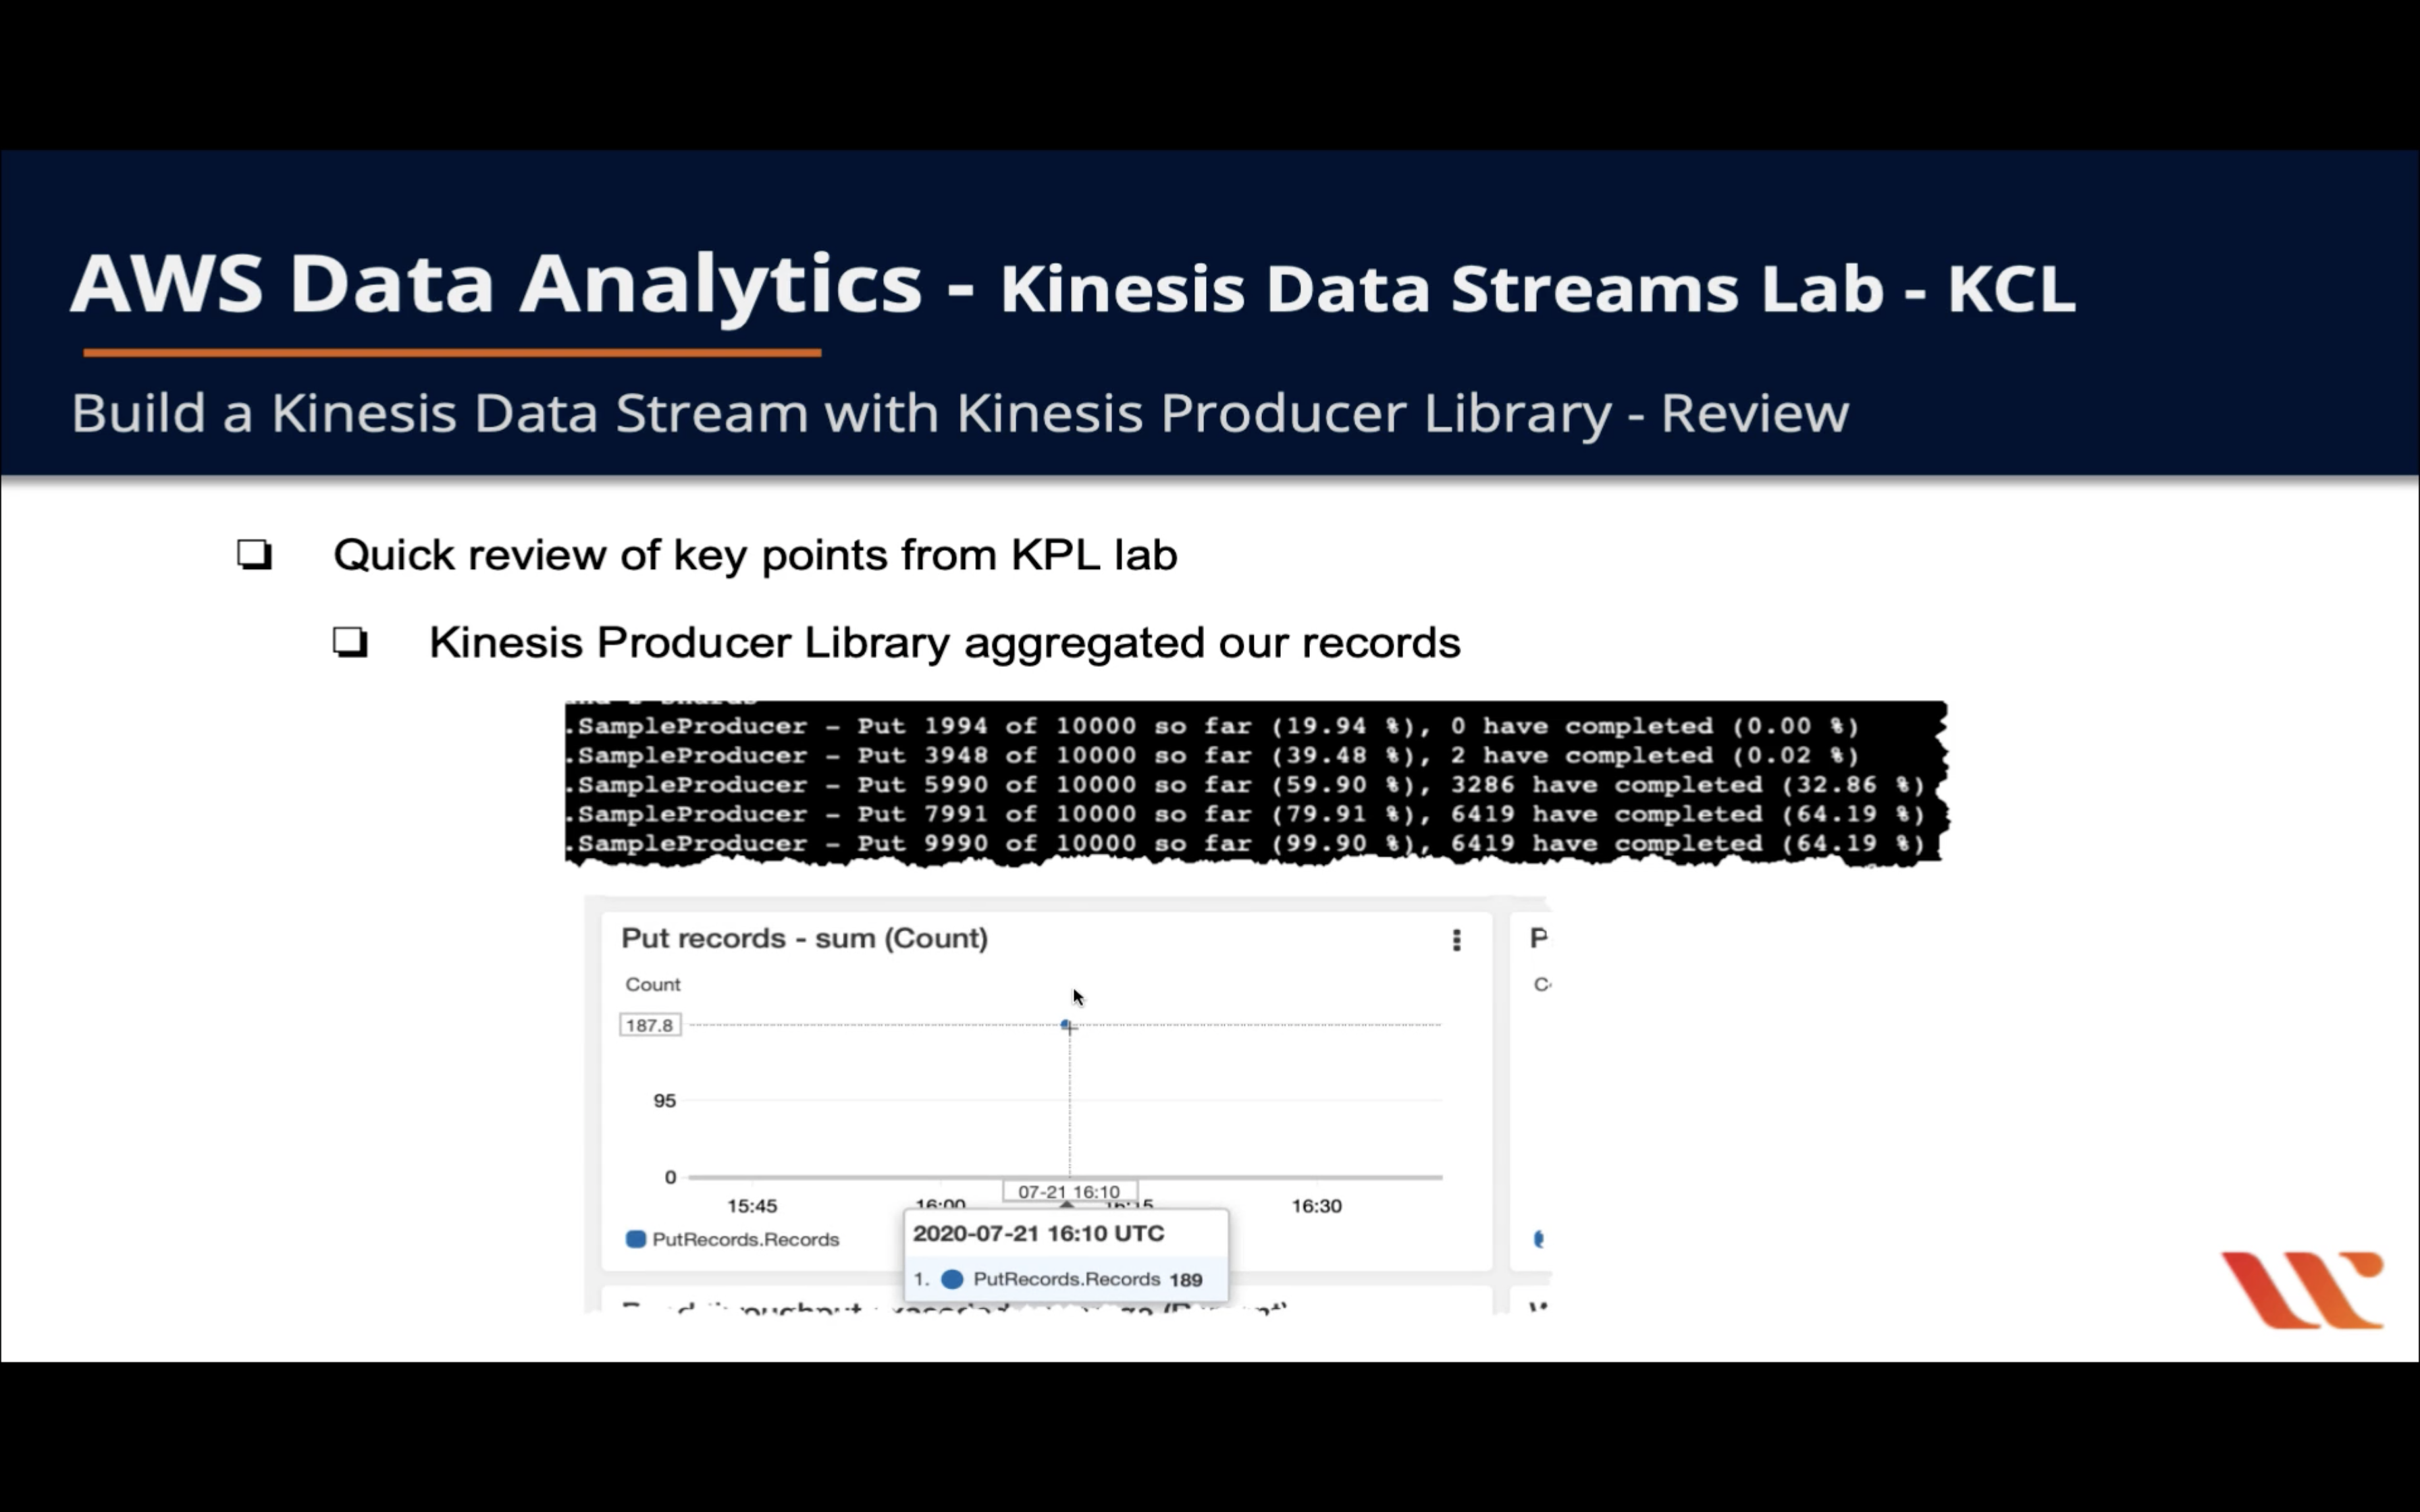
KCL Configuration
1 | import boto3 |
Validation Test
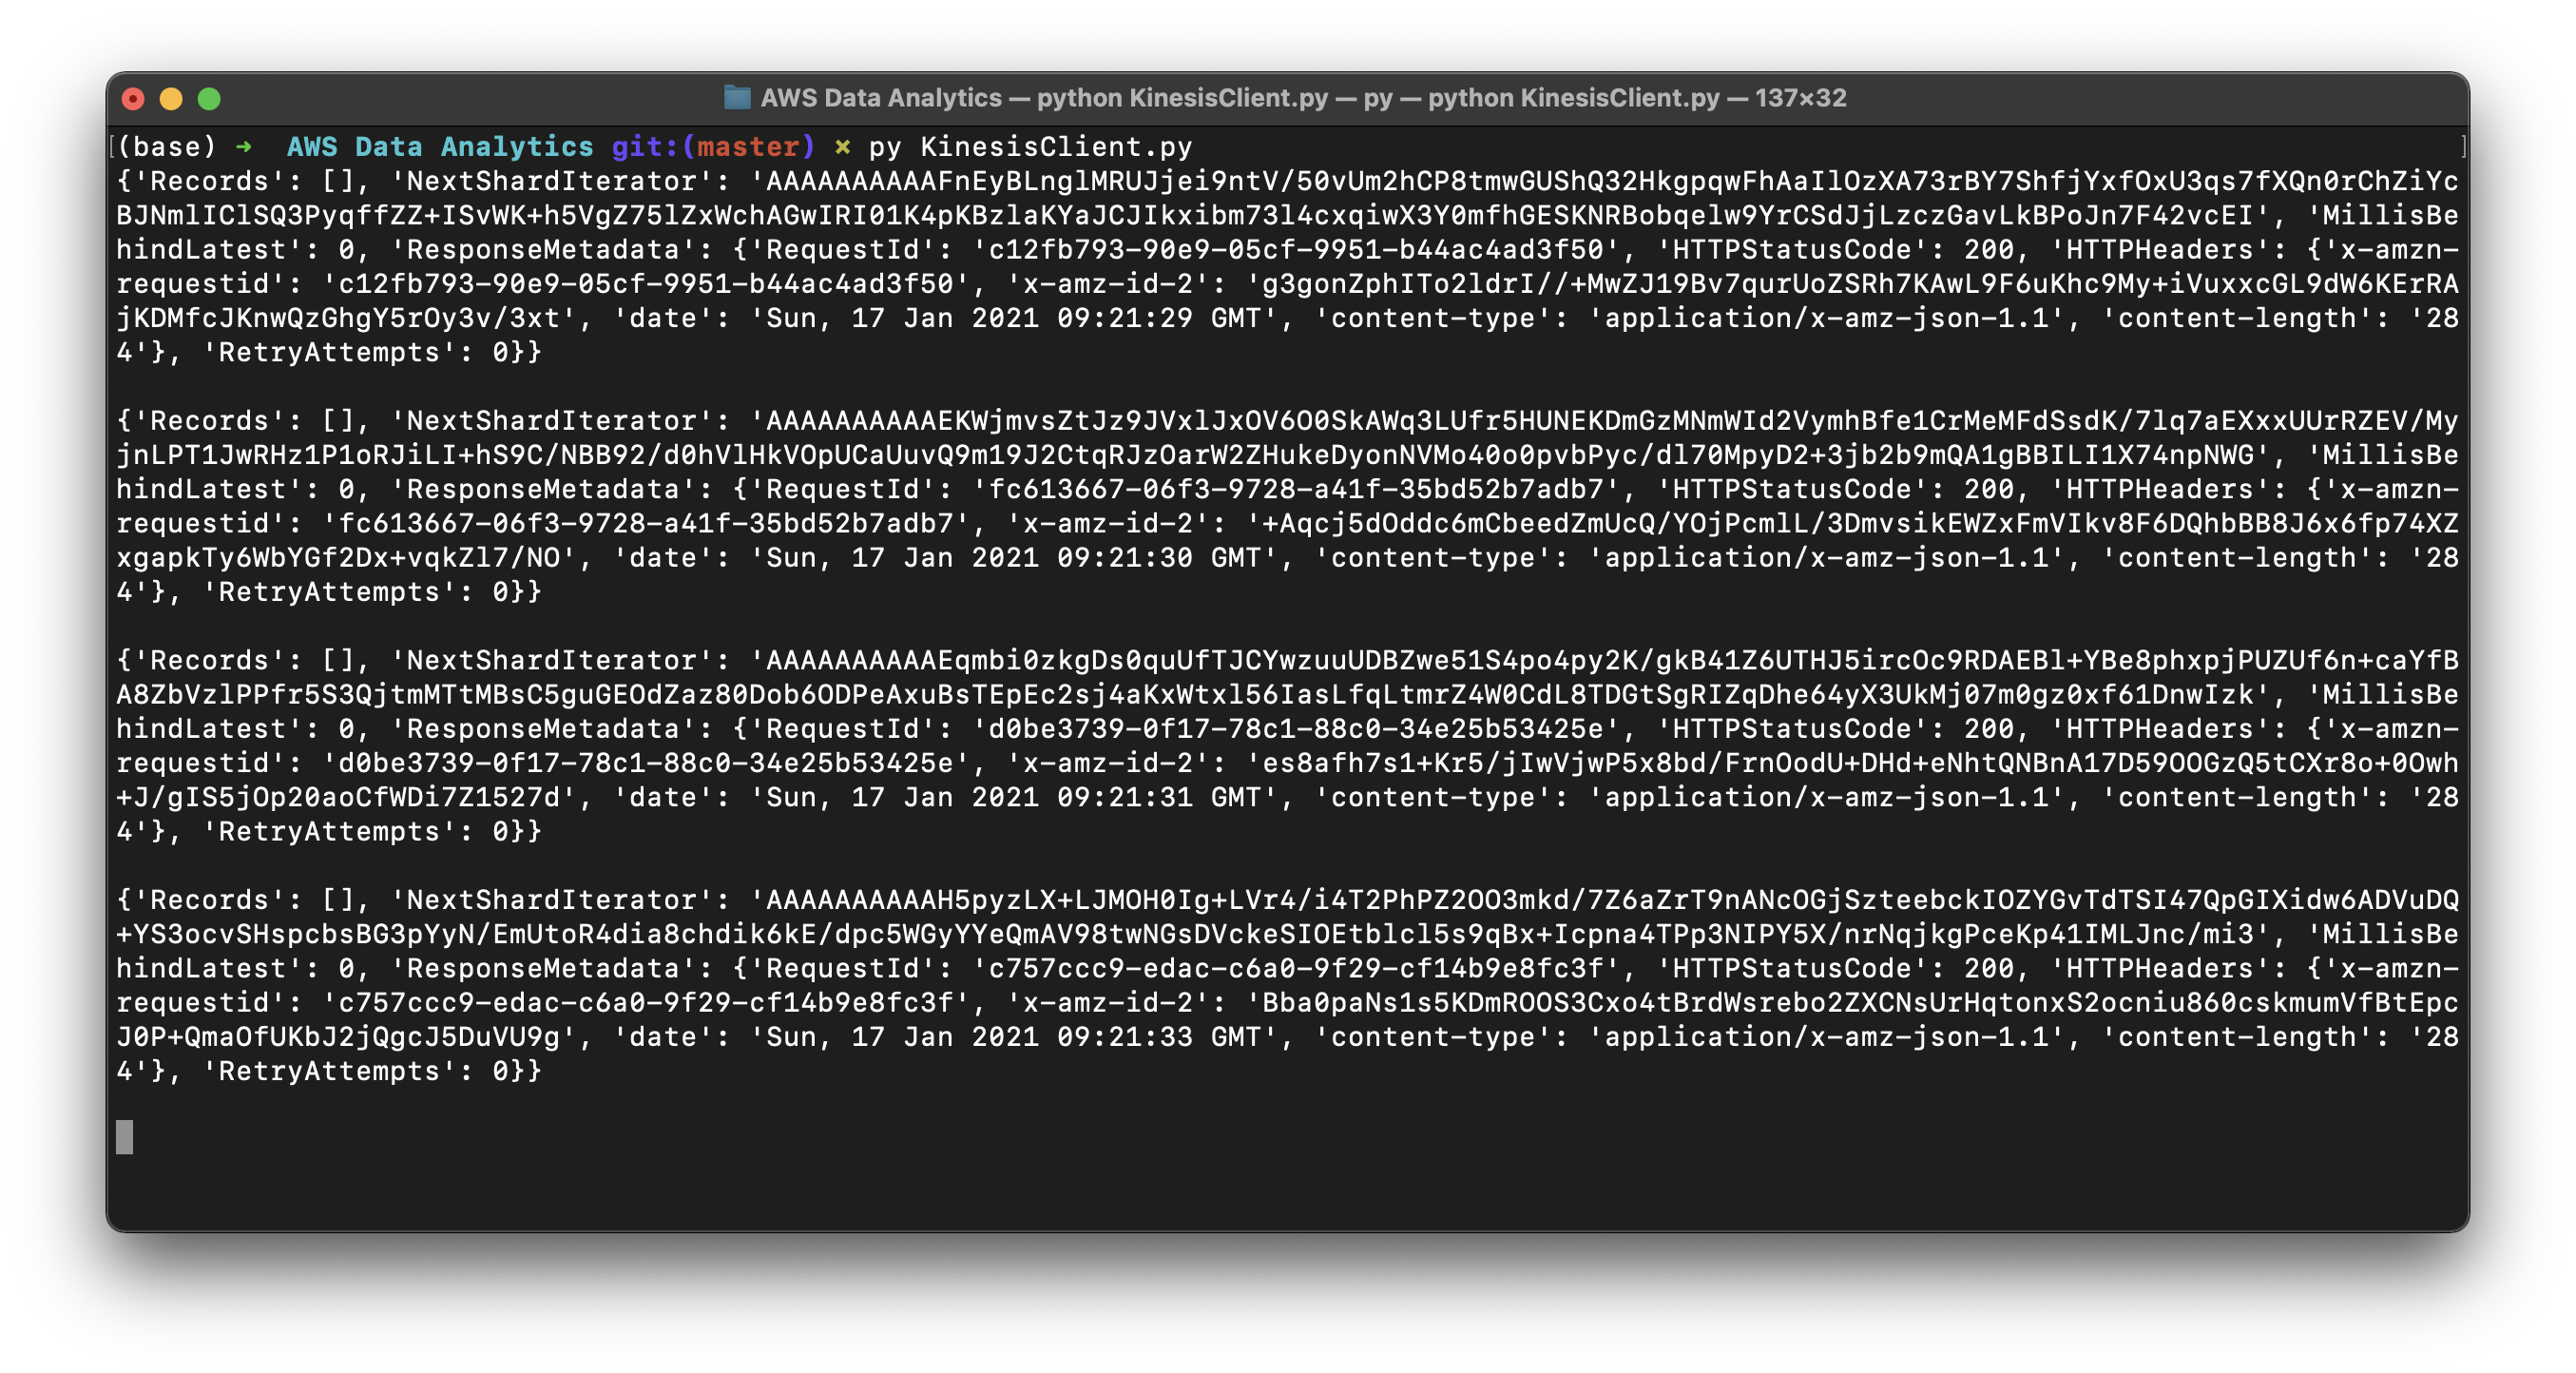
Run KinesisClient.py.
We can see that the data is uploading to Kinesis.
Go to Kinesis Data Streams -> Monitoring to see the data stream.
Kinesis Data Firehose
Firehose basic lab
Kinesis Data Streams Configuration
Services -> Kinesis -> Data Streams
Click on Create data stream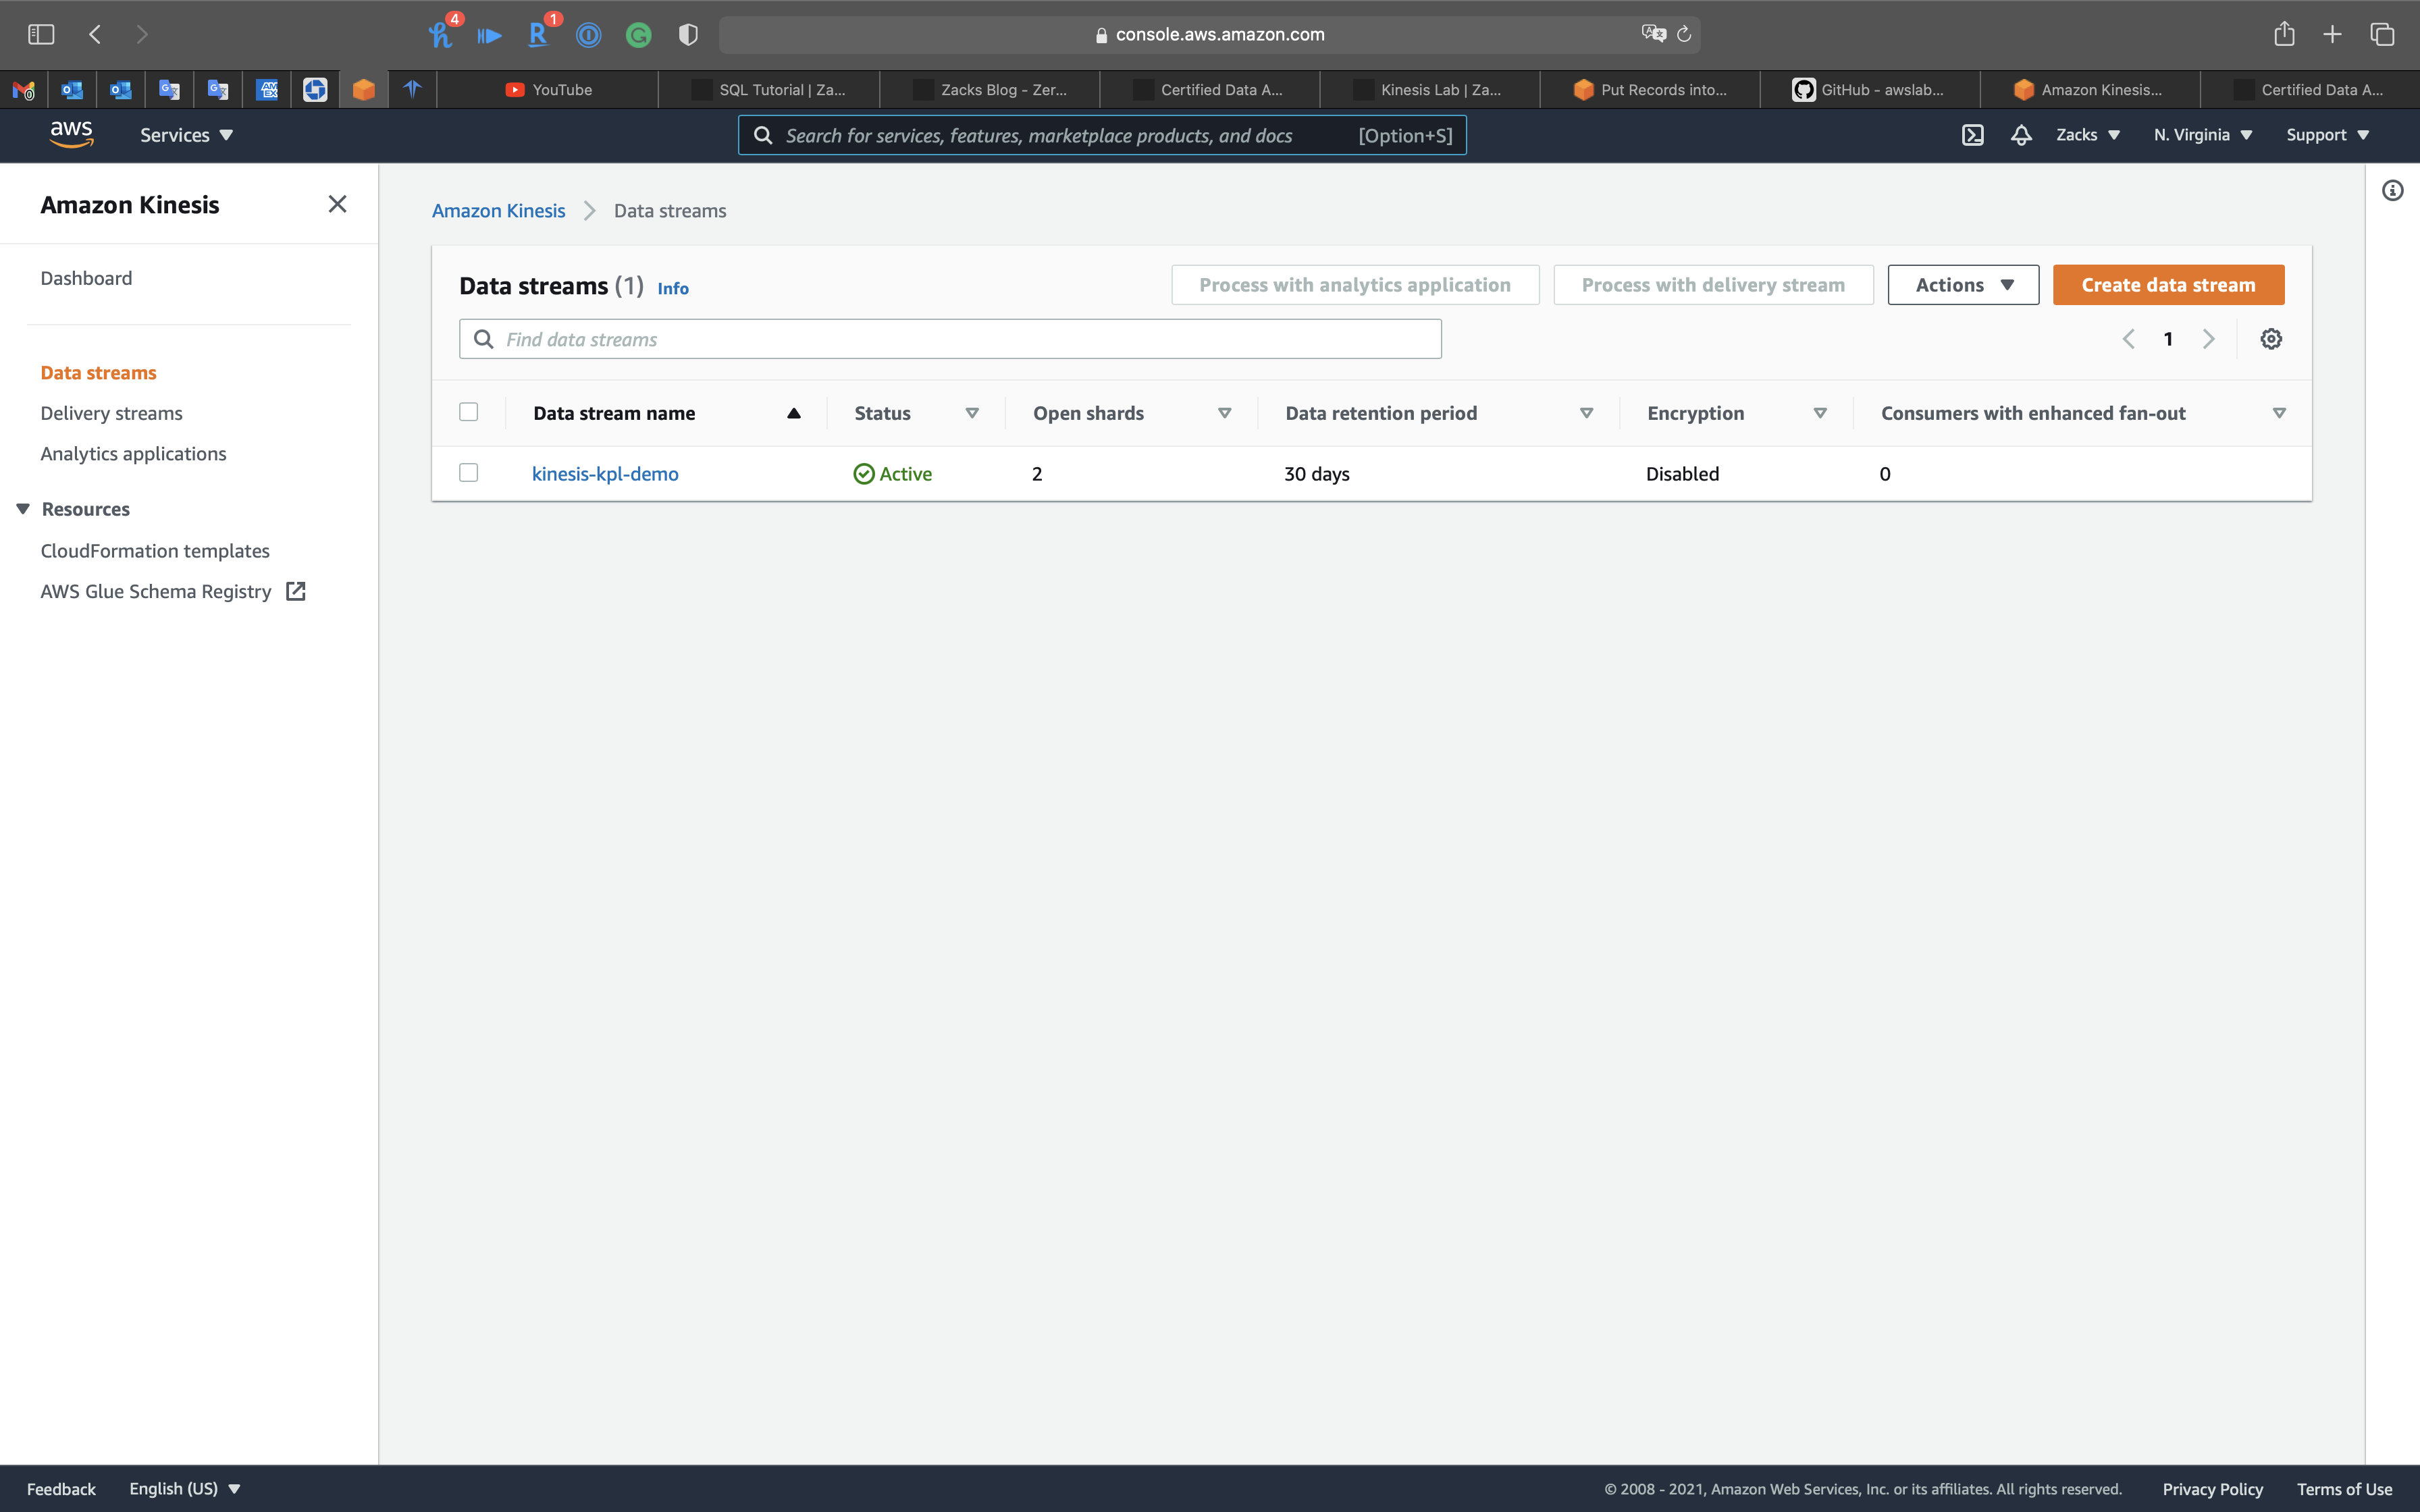
- Data stream name:
kinesis-firehose-demo - Number of open shards:
2
Click on Create data stream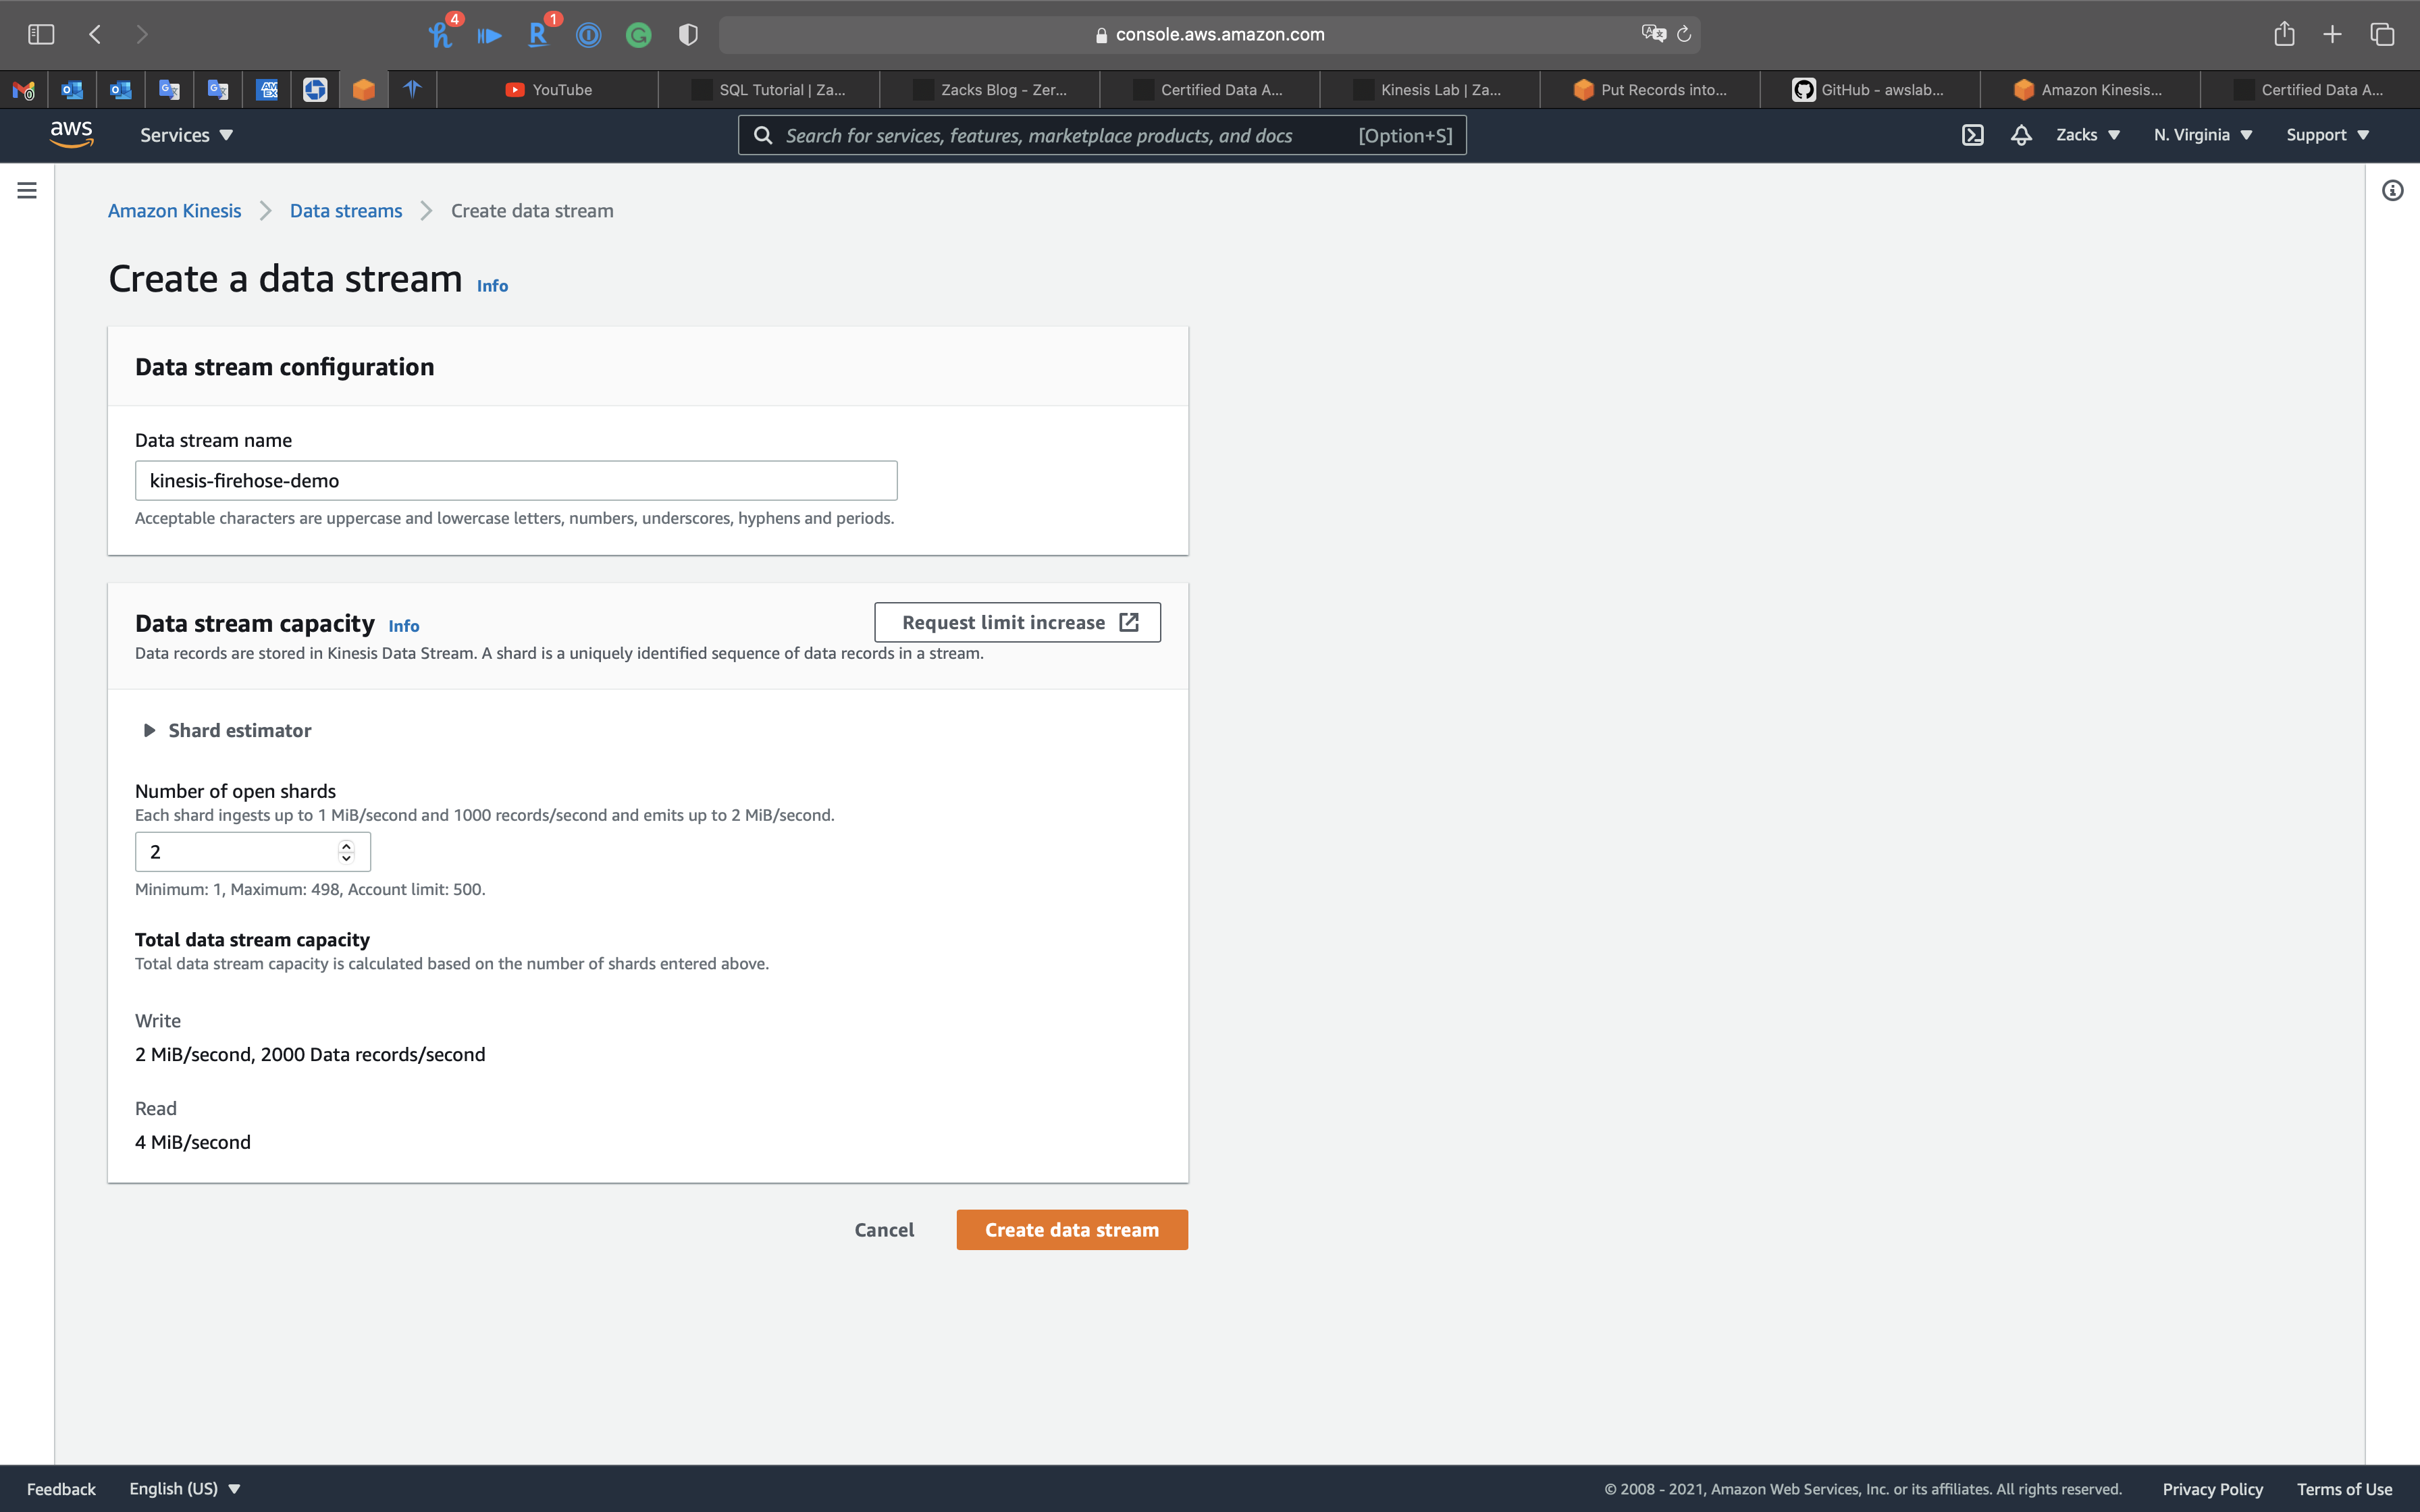
Kinesis Data Firehose Configuration
Services -> Kinesis
Click on Create delivery stream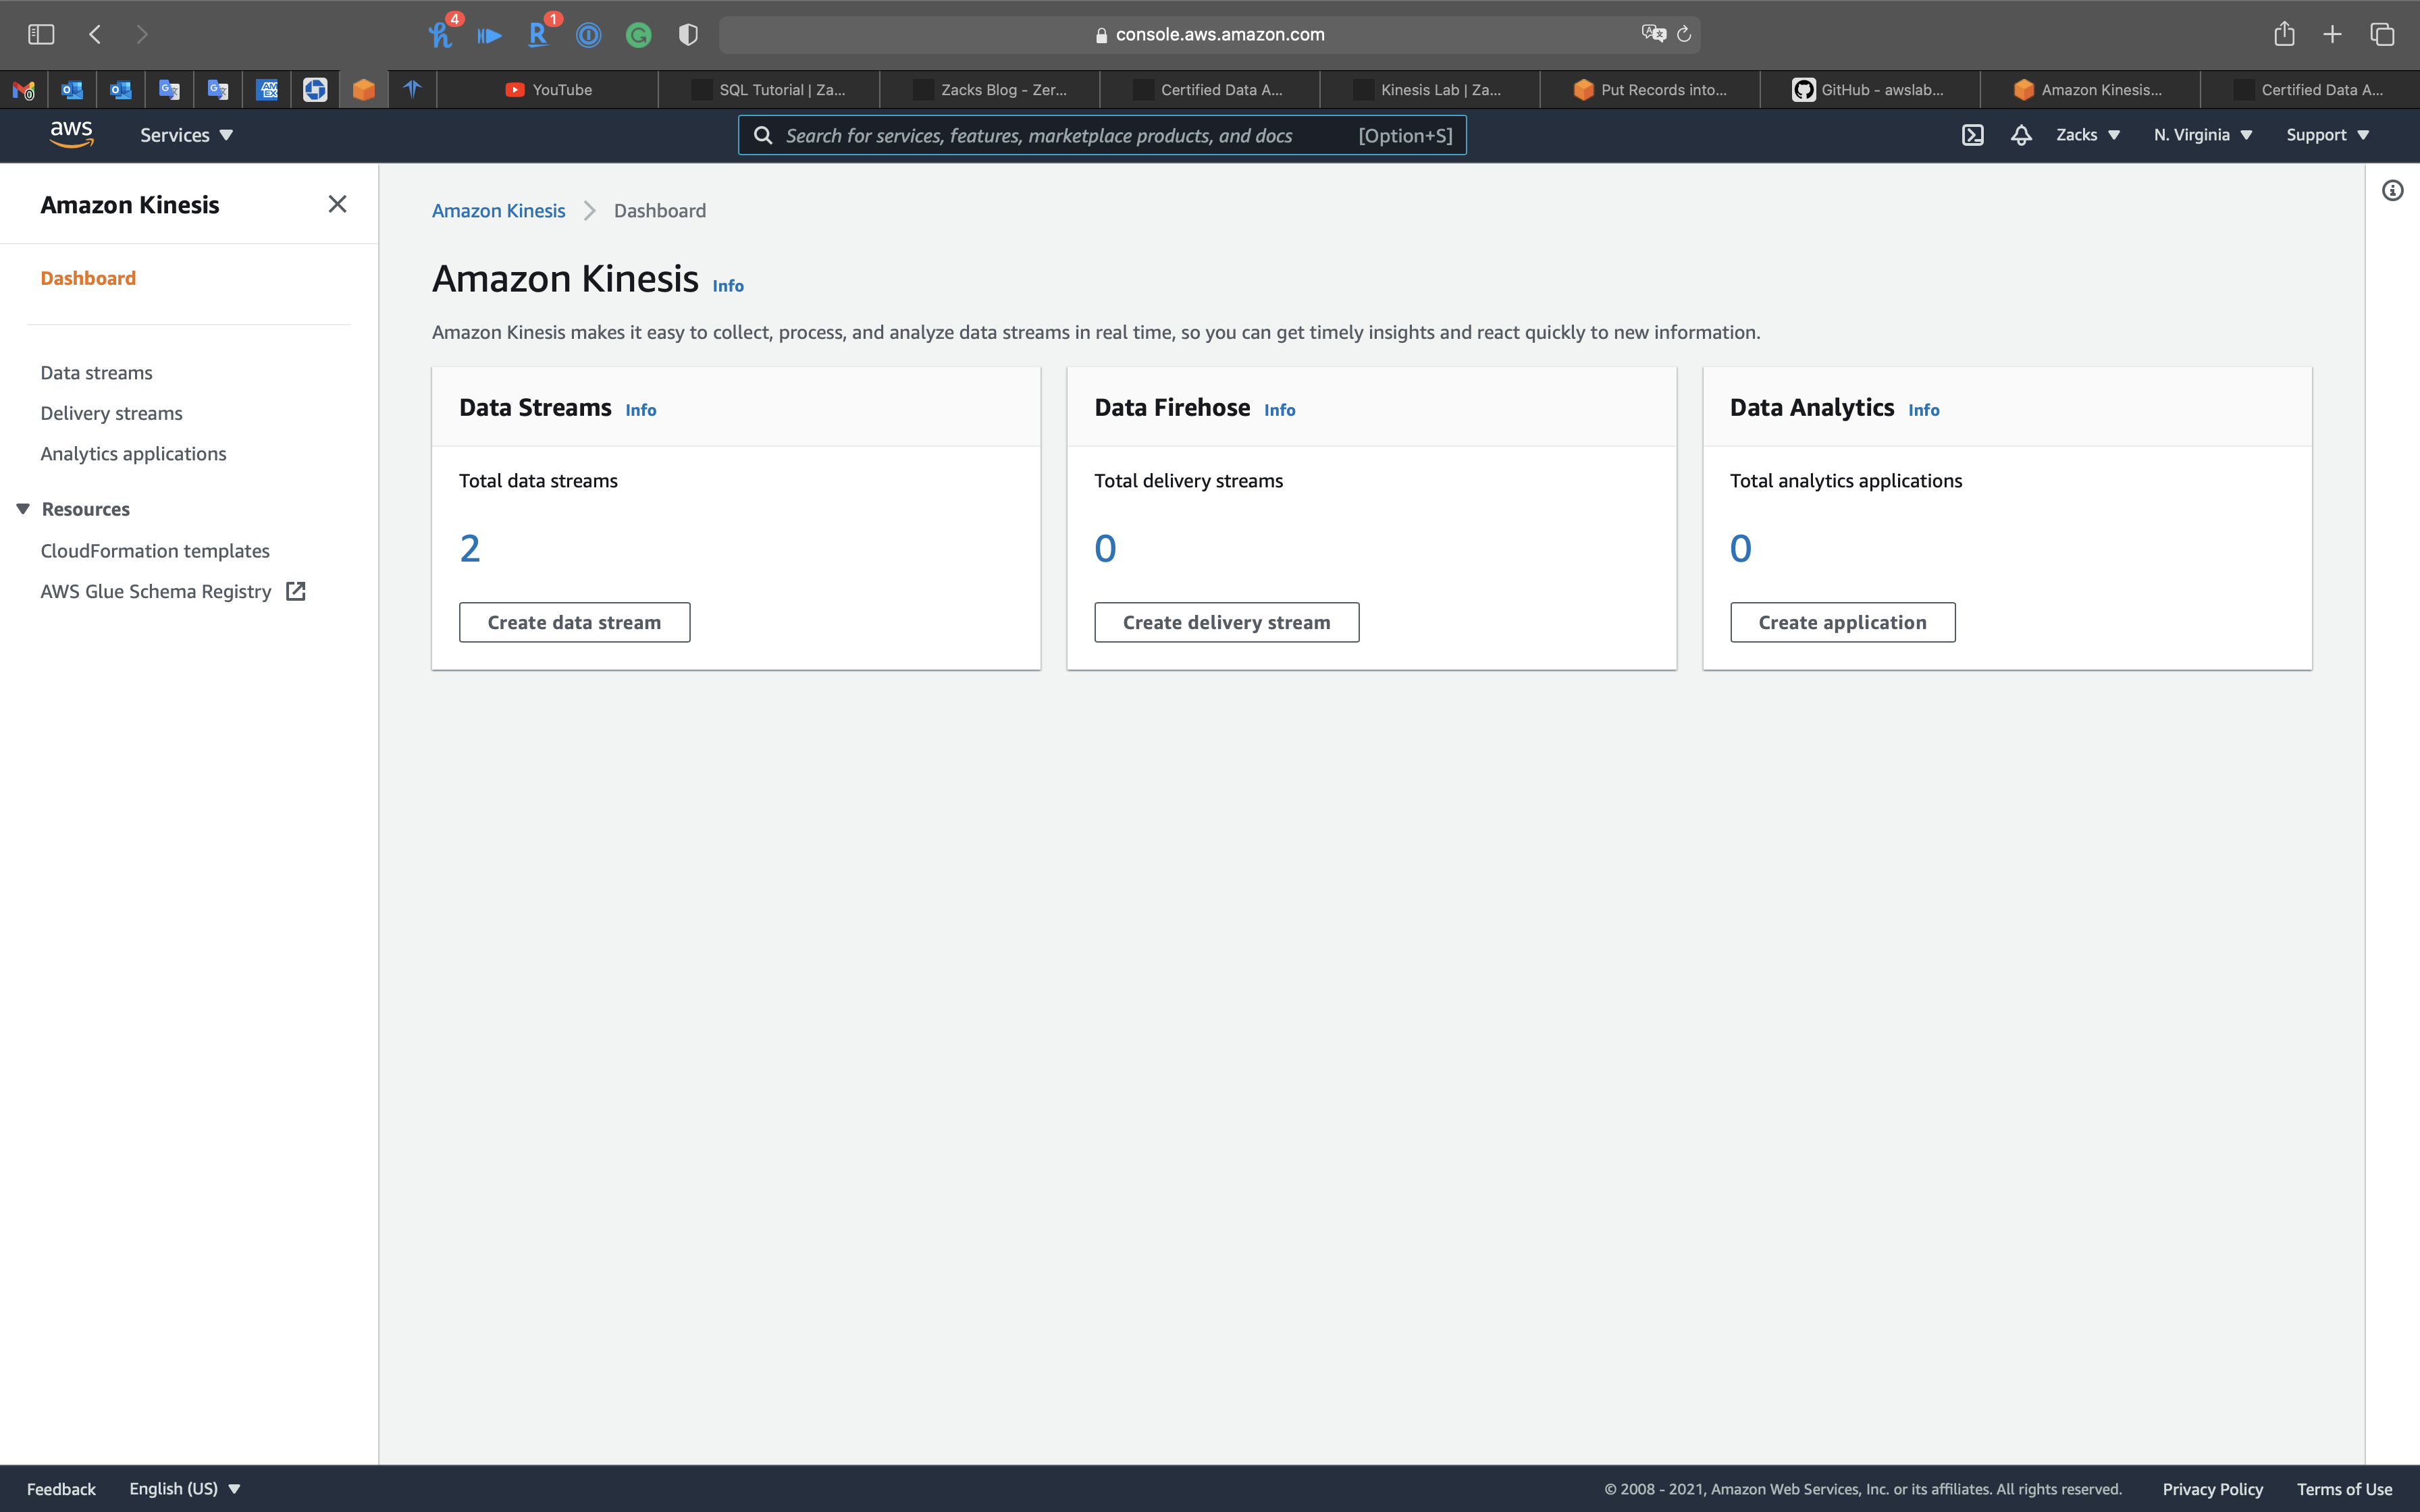
Step 1: Name and source
- Delivery stream name:
firehose-stream - Source:
Kinesis Data Stream- Select
kinesis-firehose-demo
- Select
Click on Next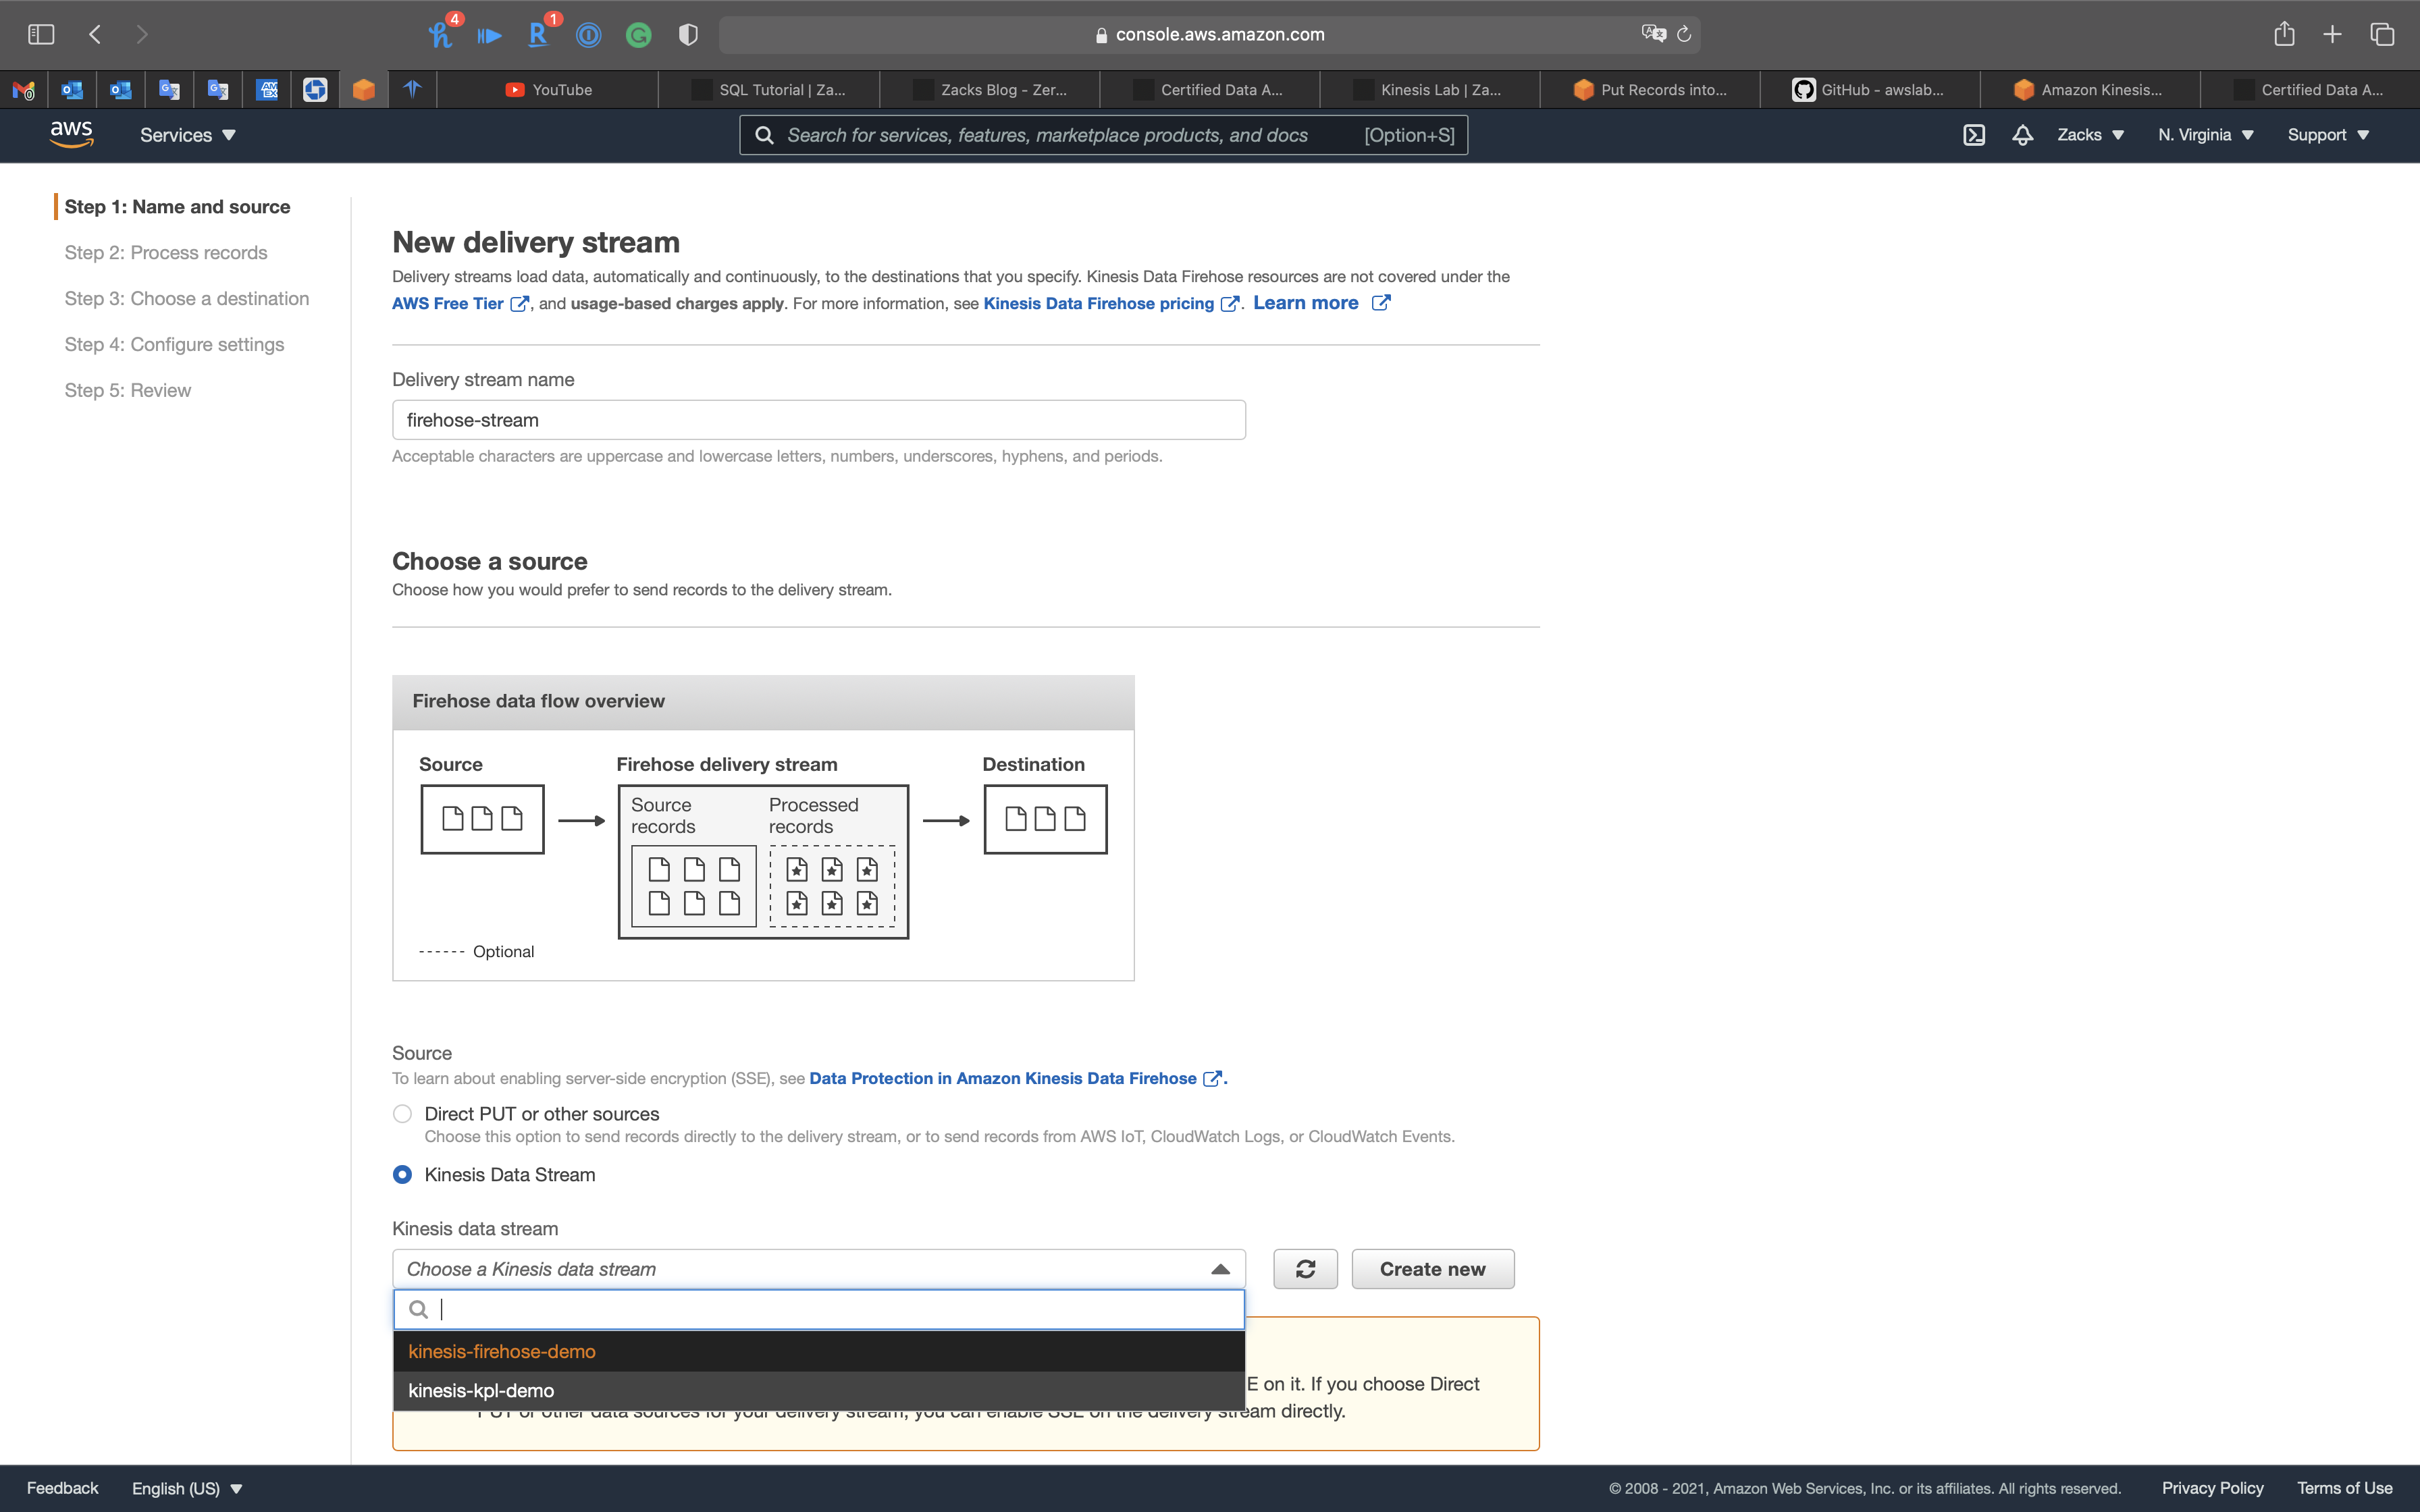
Step 2: Process records
- Data transformation:
Enabled
Open Lambda in new tab
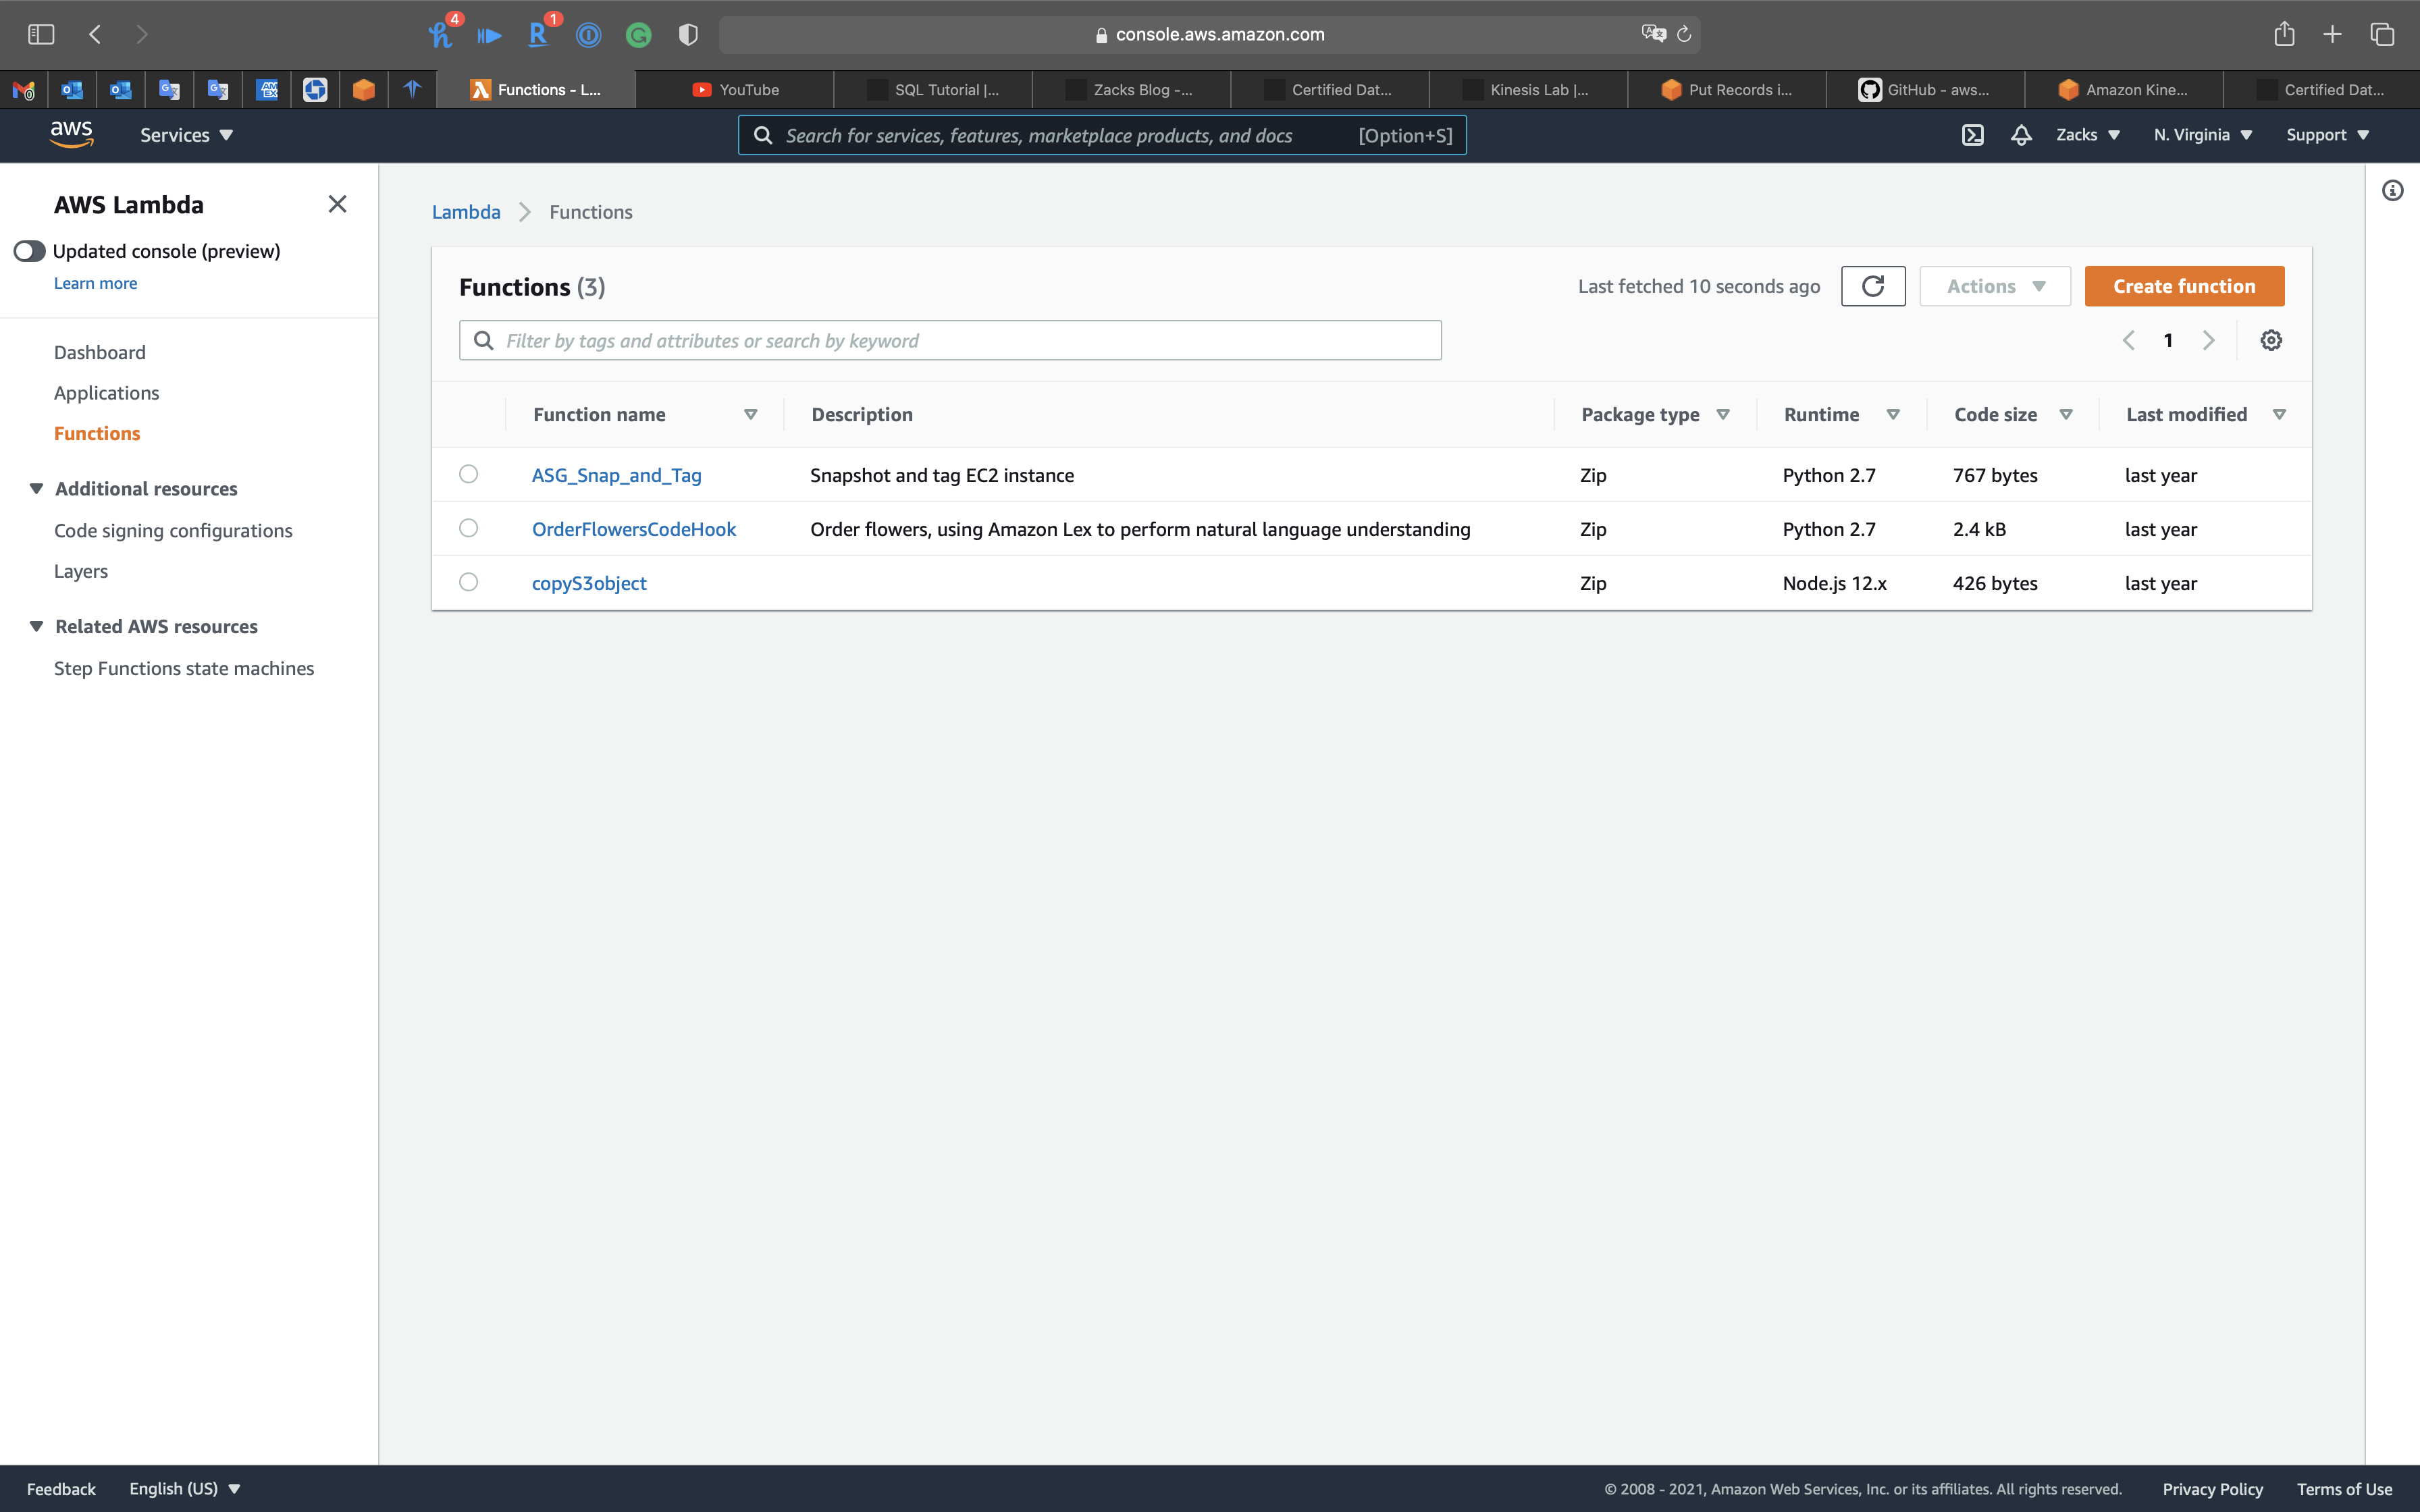
Services -> Lambda -> Dashboard
Click on Create function
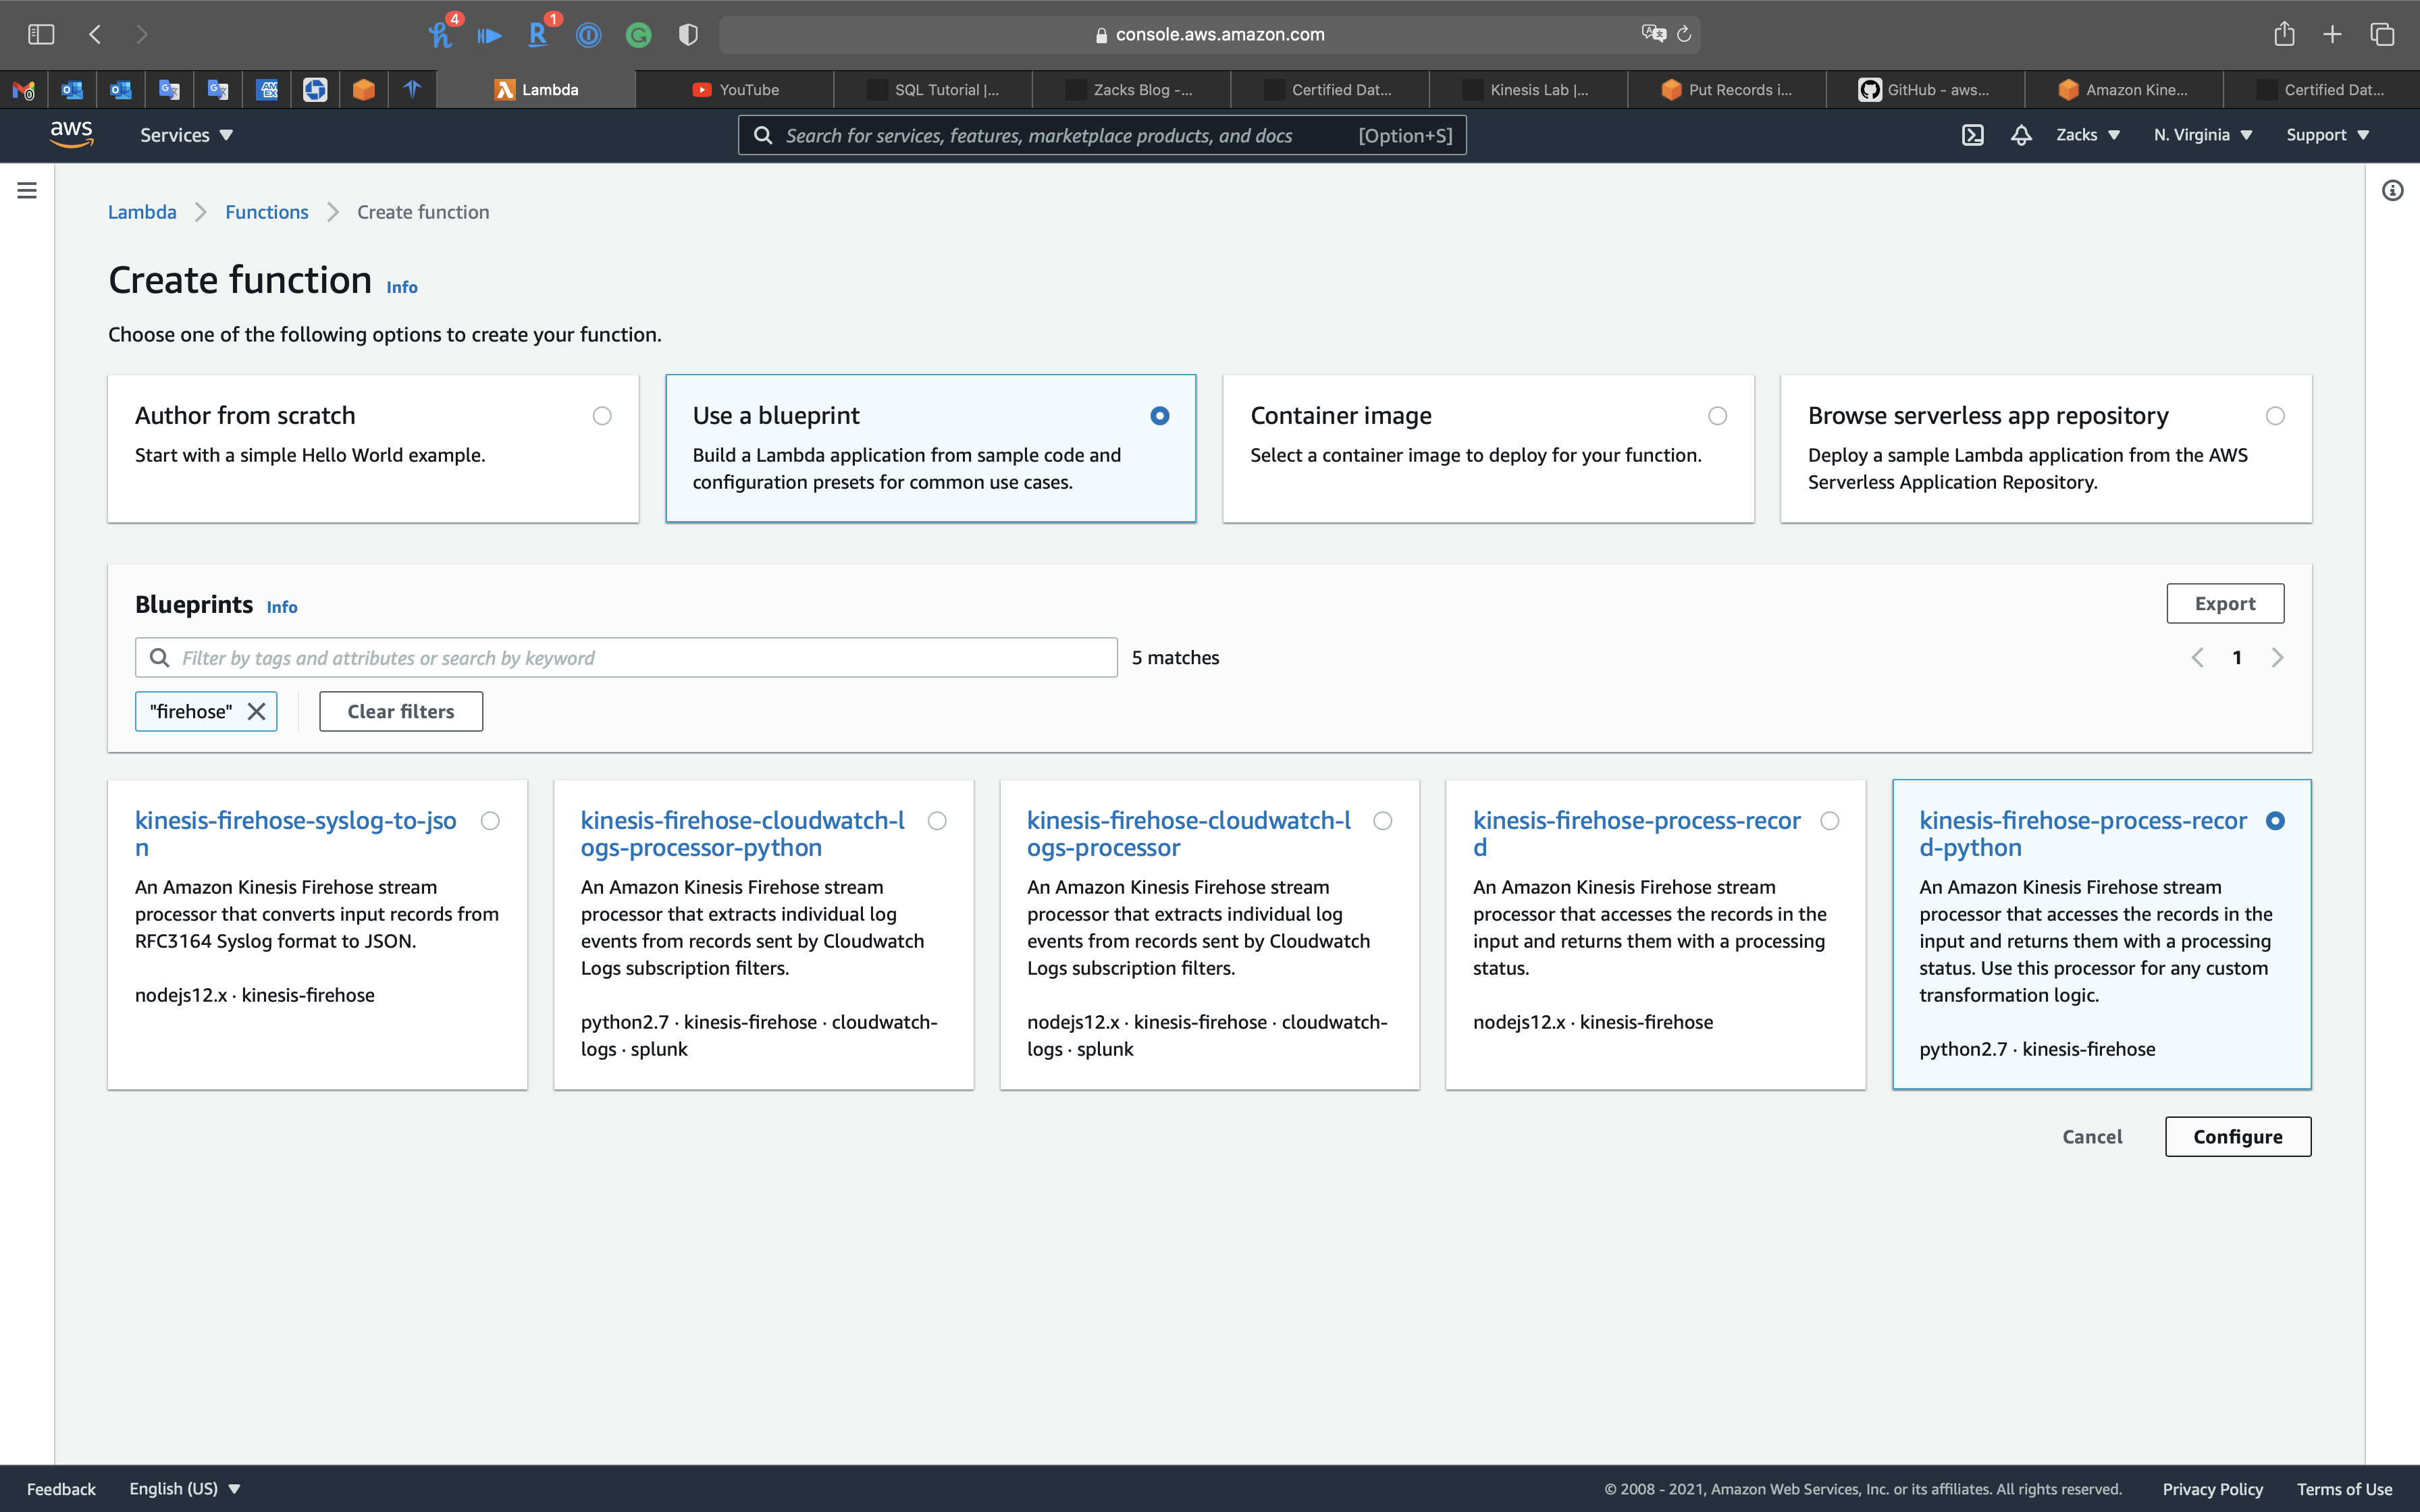
Click on Use a blueprint
Search for firehose
Select kinesis-firehose-process-record-python
Click on Configure
Function name: firehosetransformation
Execution role: Select Create a new role with basic Lambda permissions
Review the code
1 | from __future__ import print_function |
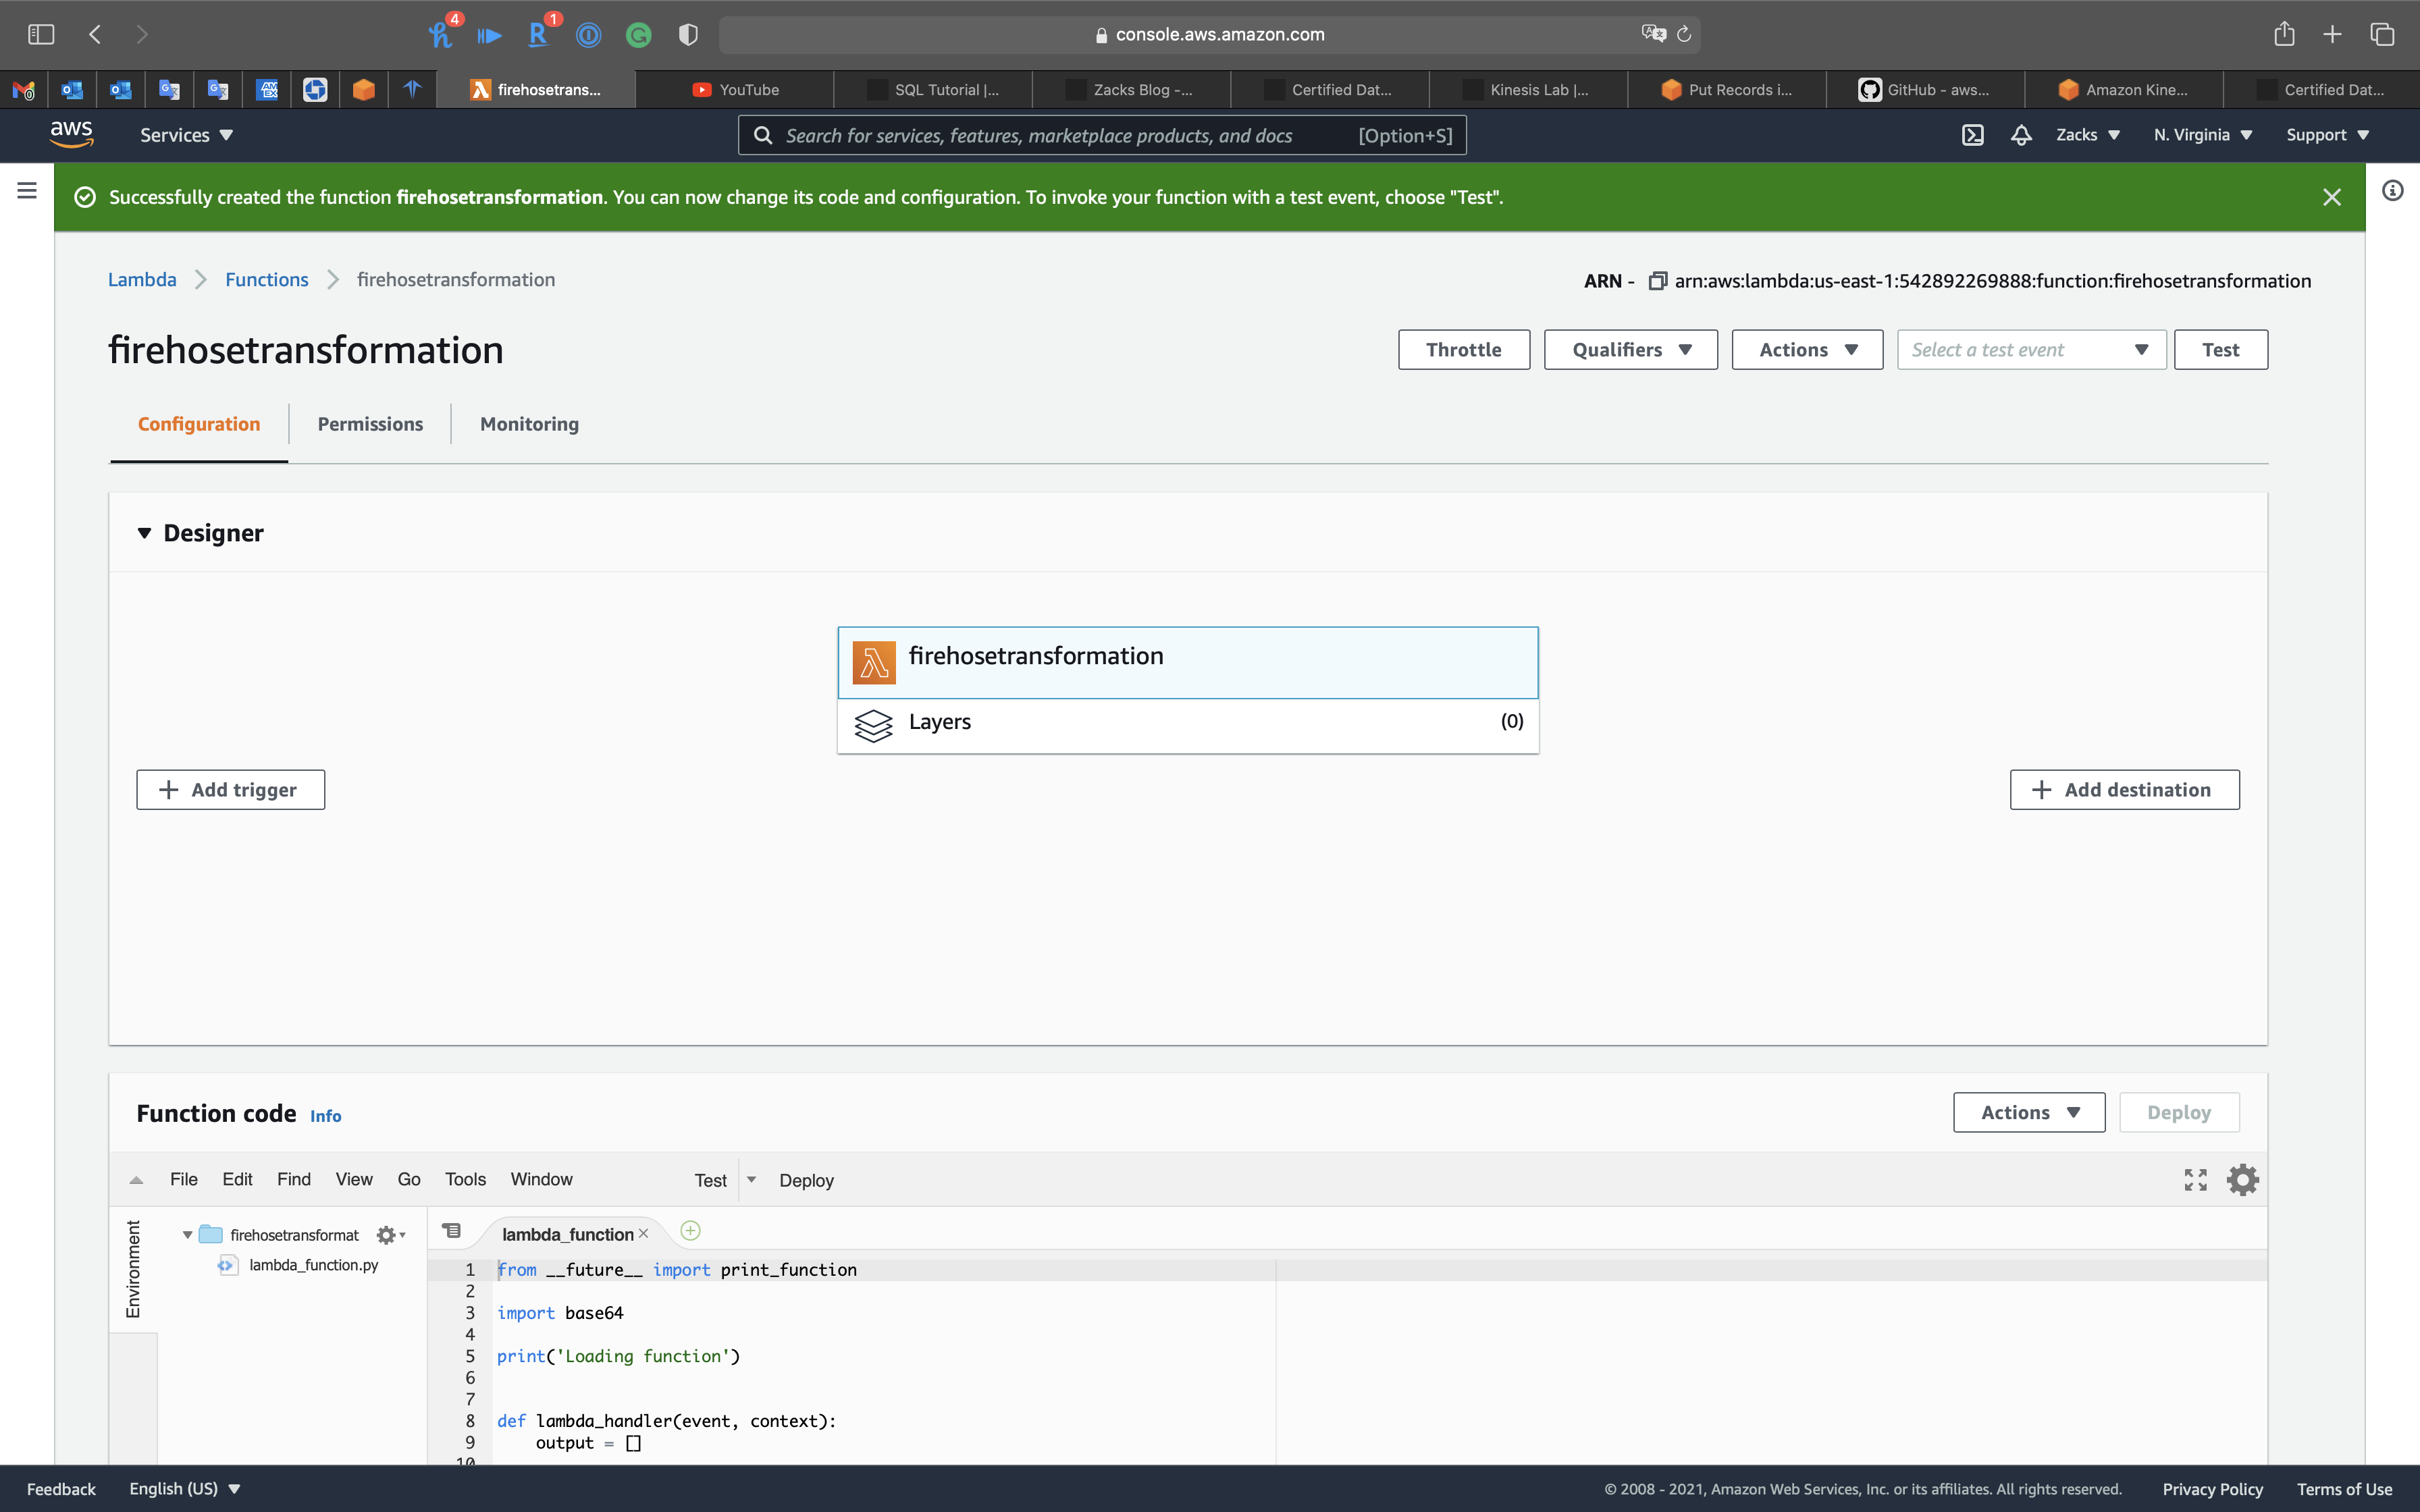
Click on Create function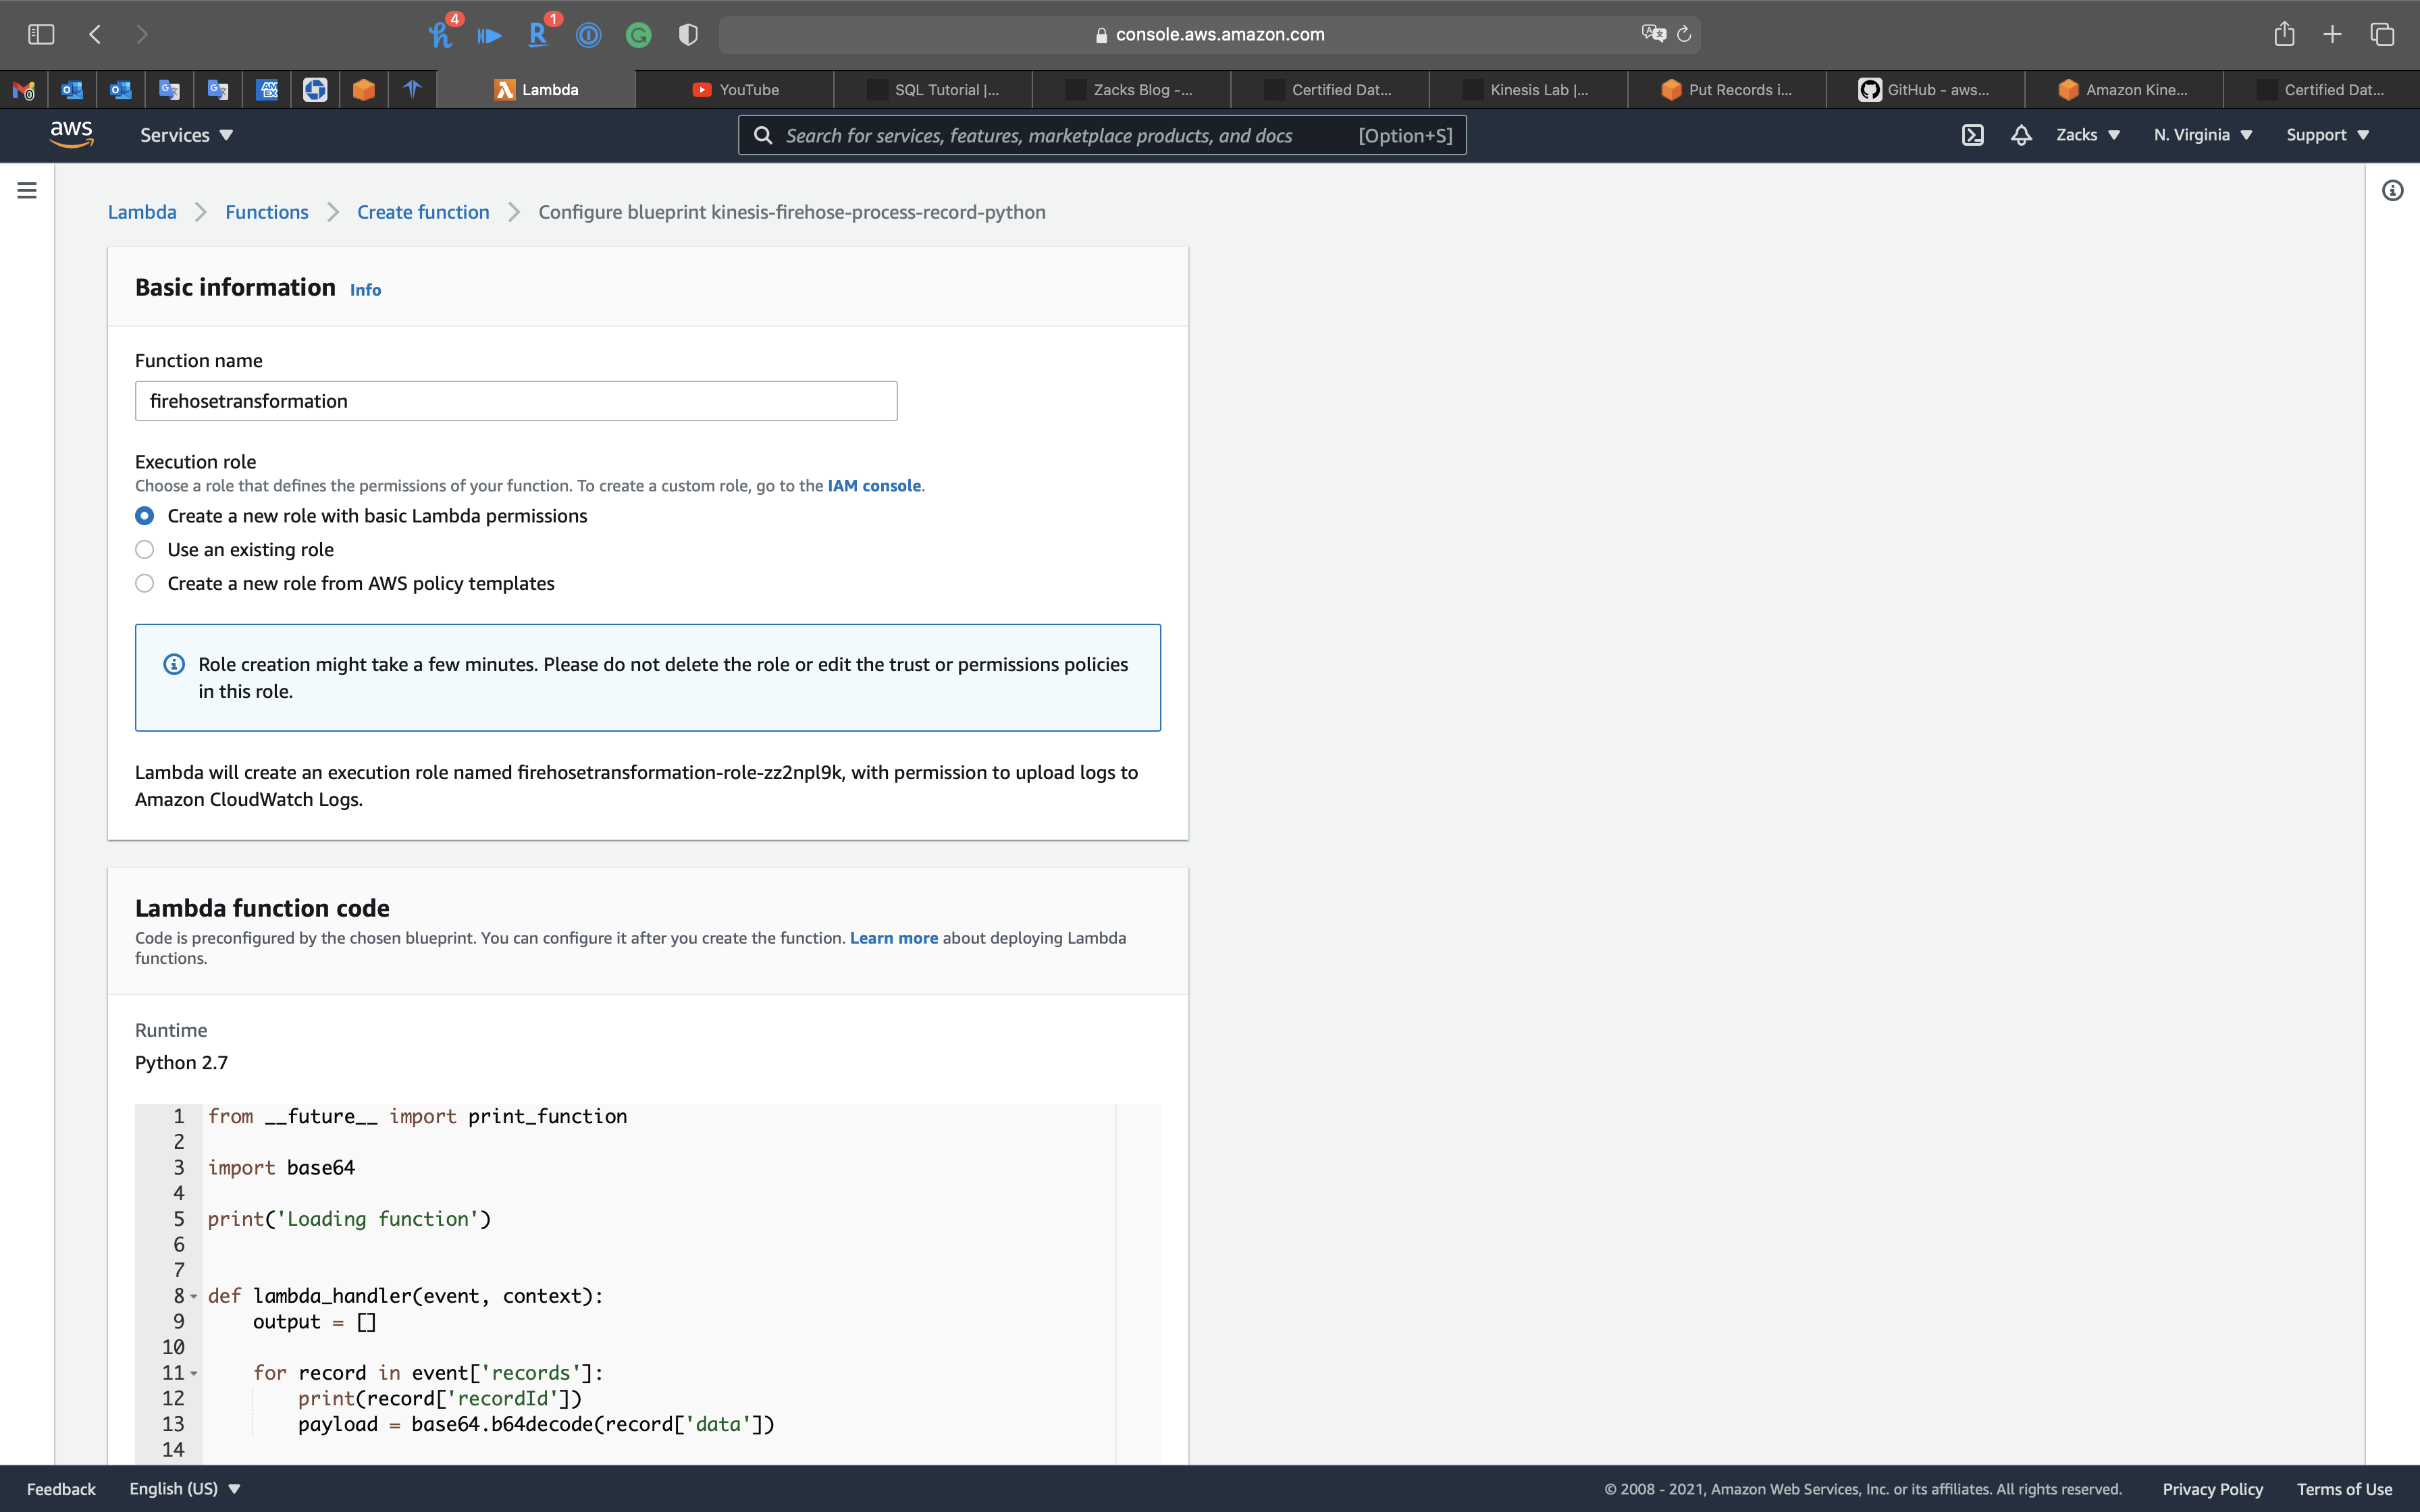
Go back to Kinesis Firehose page.
- Data transformation:
Enabled- Lambda function:
firehosetransformation(You may need click on the refresh button)
- Lambda function:

Go to Lambda page.
Scroll down to Basic settings, then click on Edit
- Timeout:
1 min 3 sec
Click on Save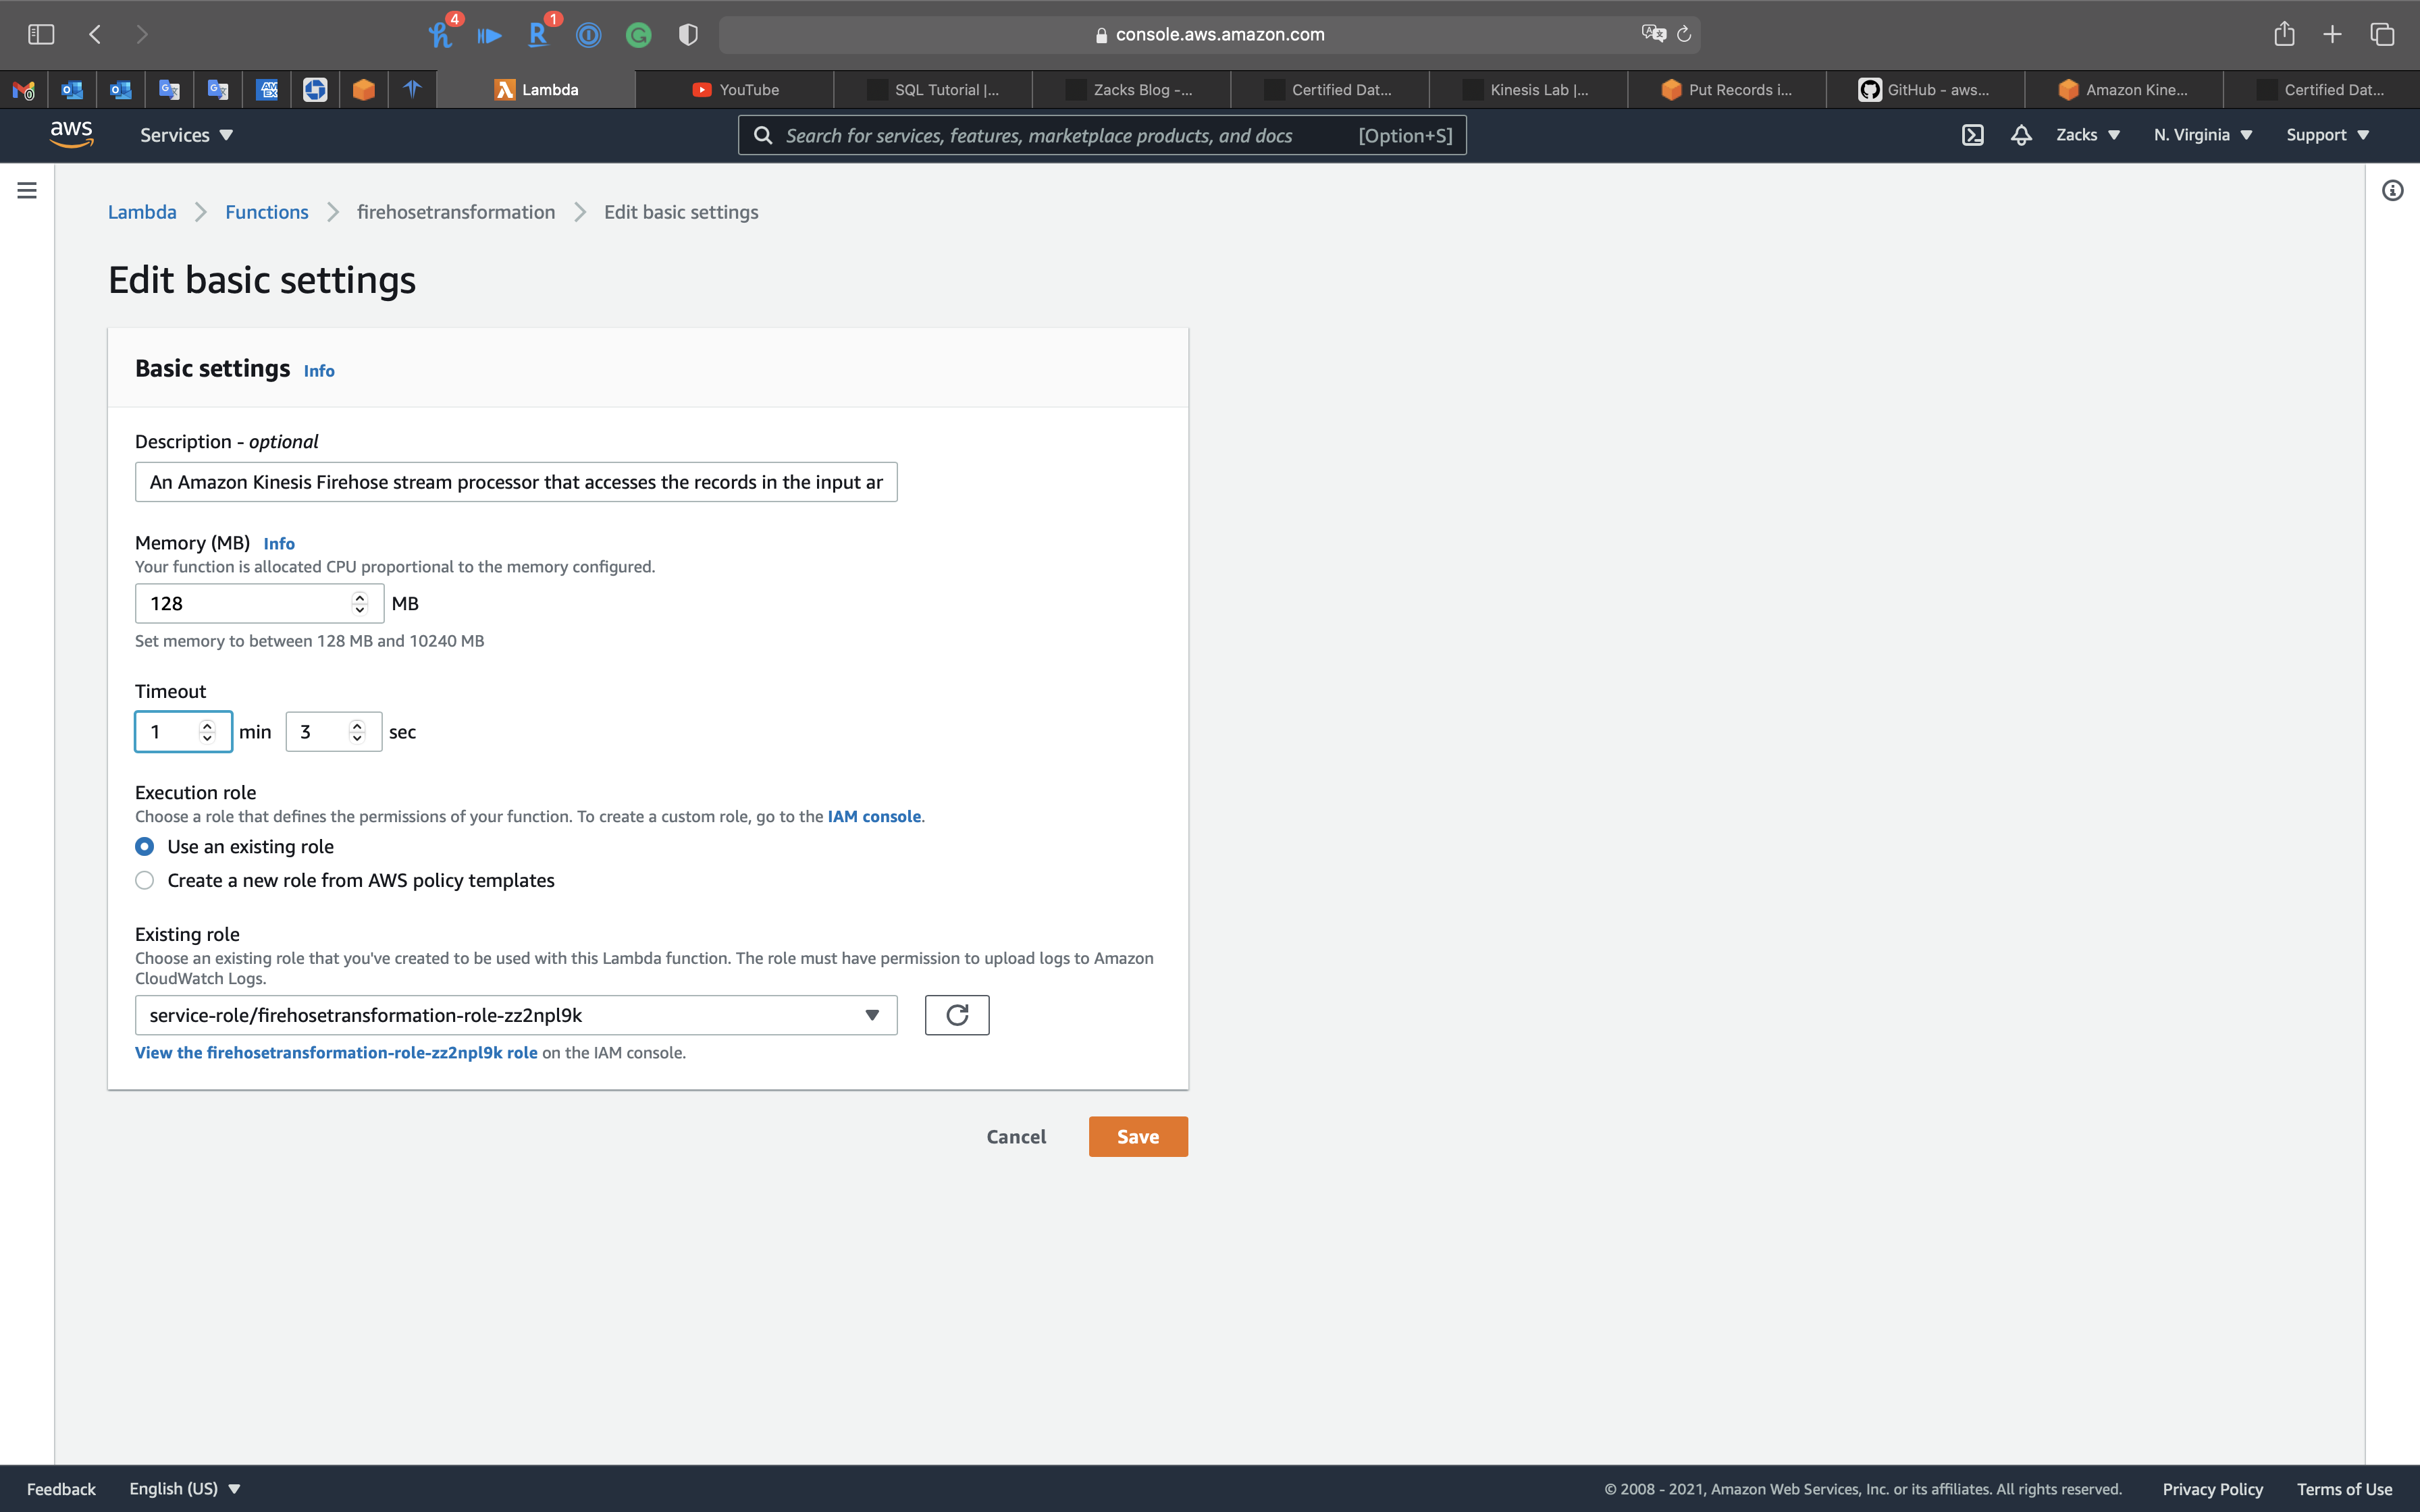
Go back to Kinesis Firehose page.
Increase Lambda function timeout
To reduce the risk of the function timing out before data transformation is complete, increase the Timeout to 1 minute or longer in the Advanced settings section of your Lambda configuration.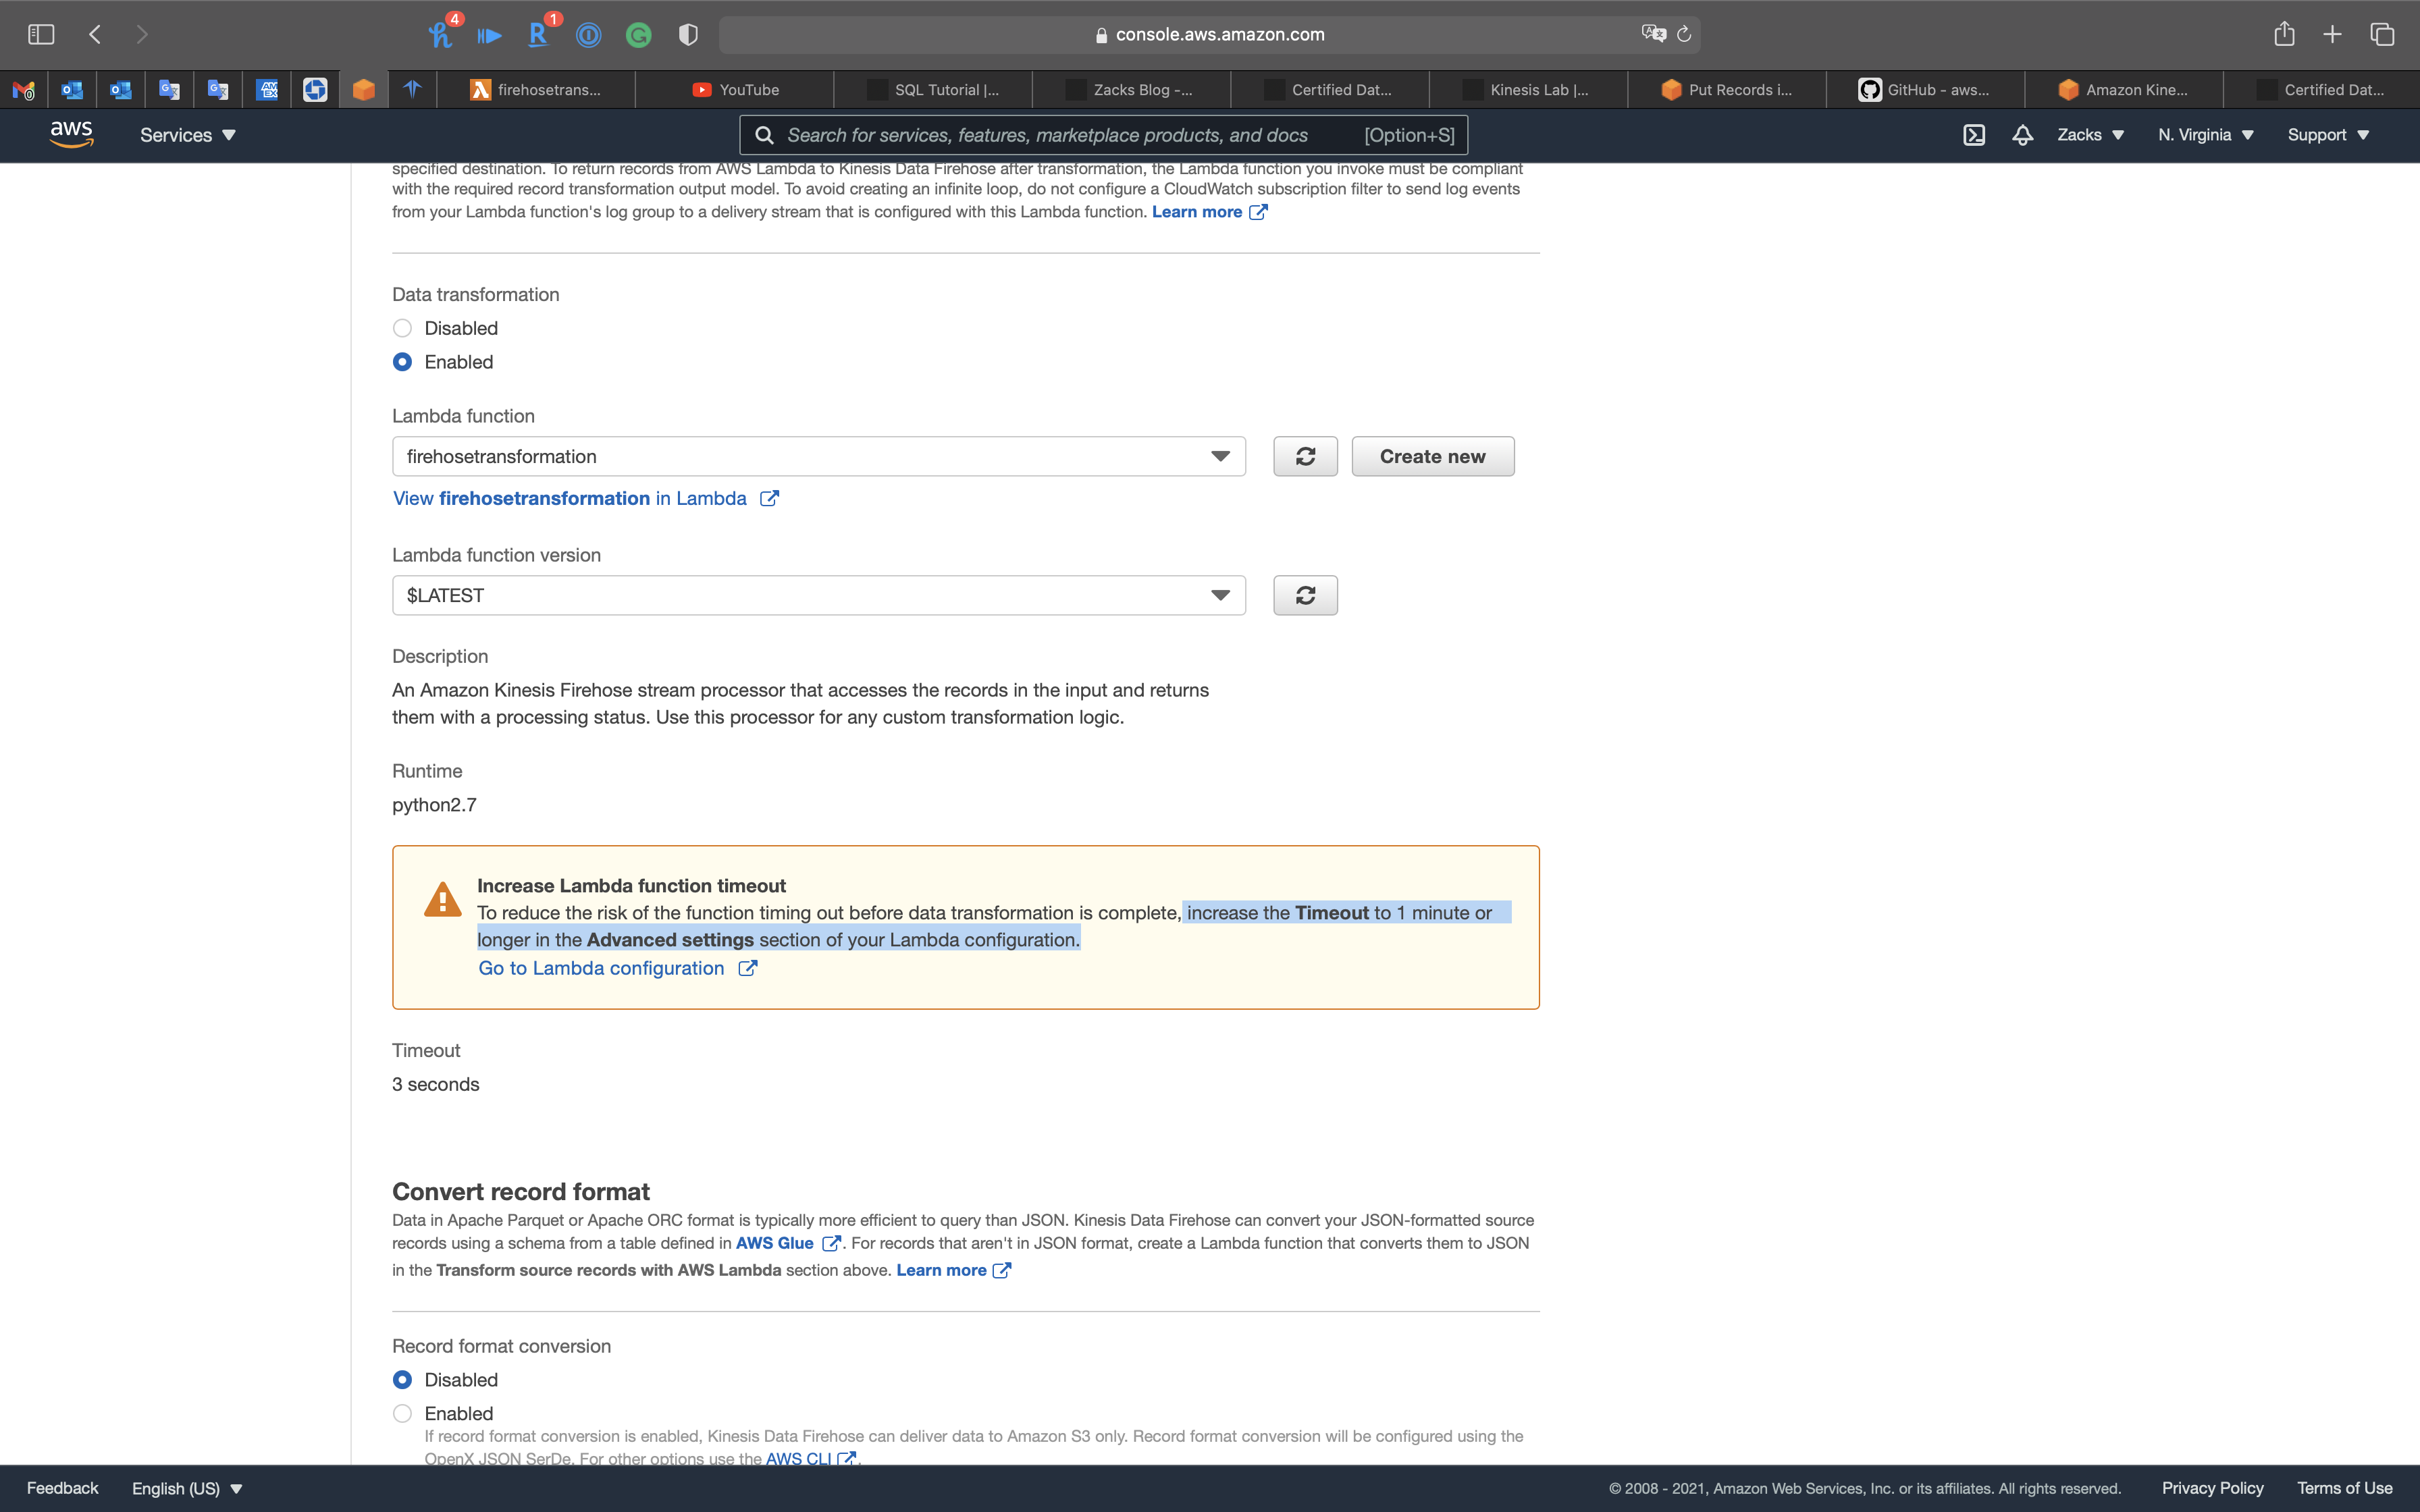
Click on Next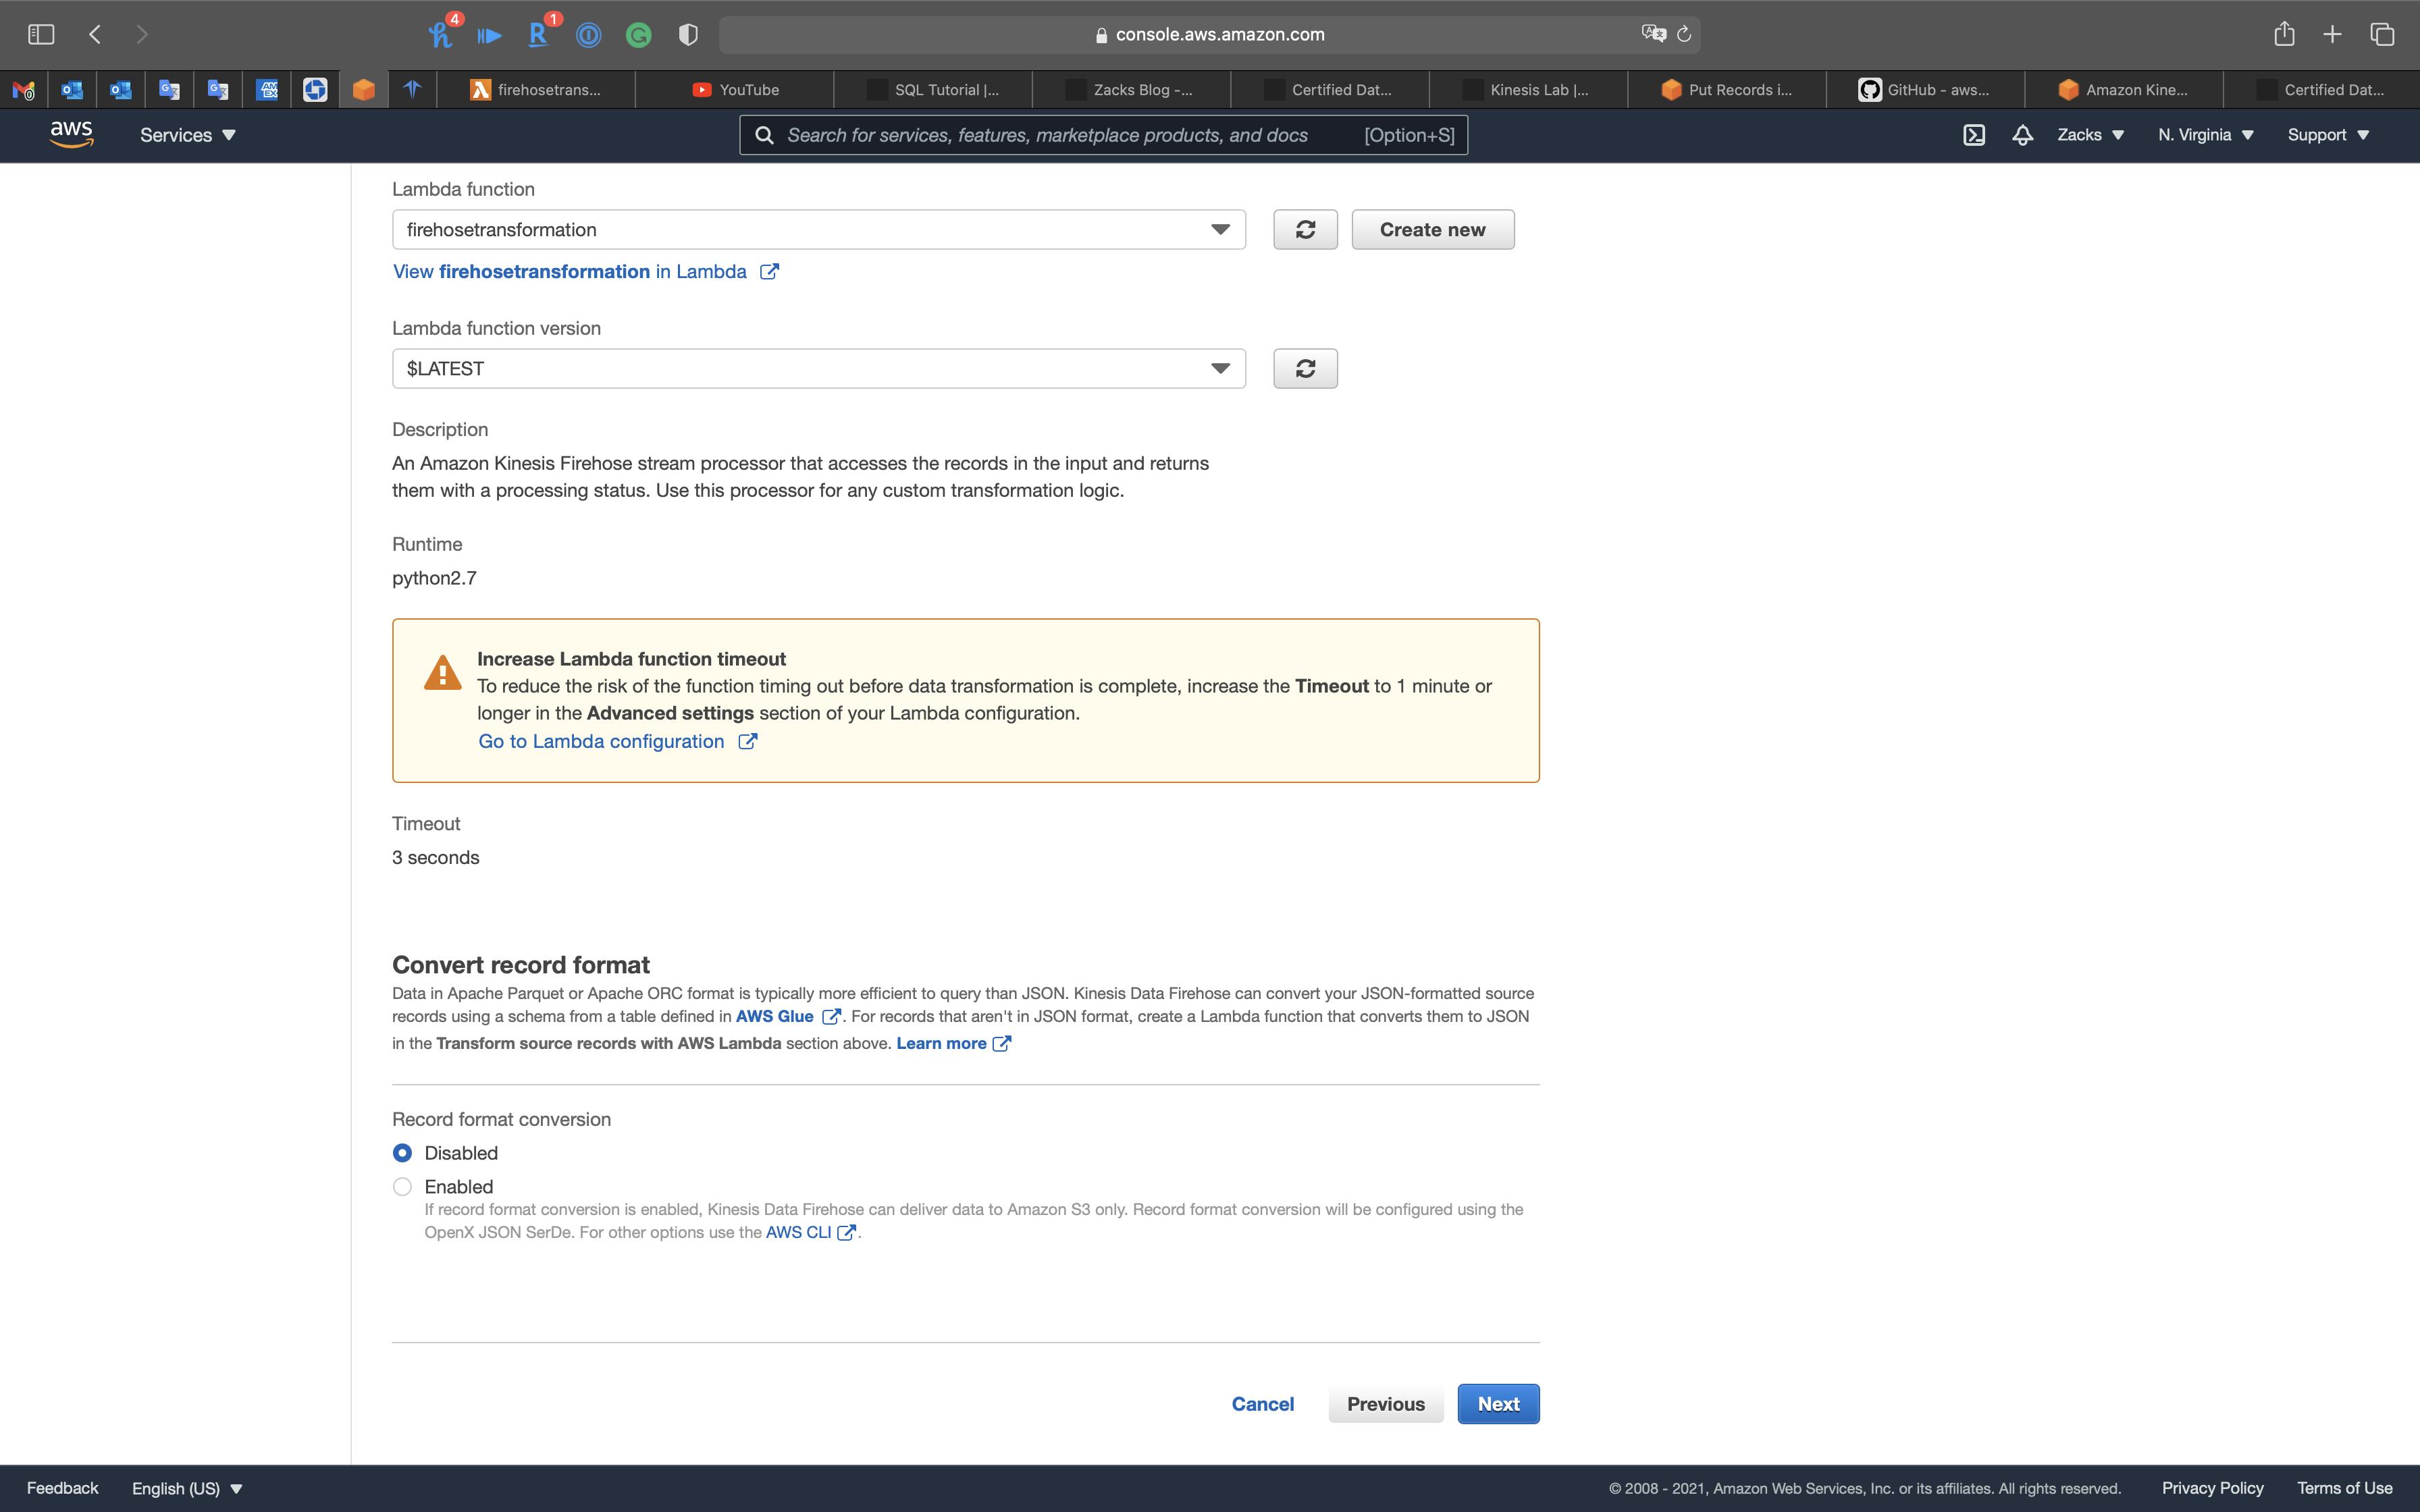
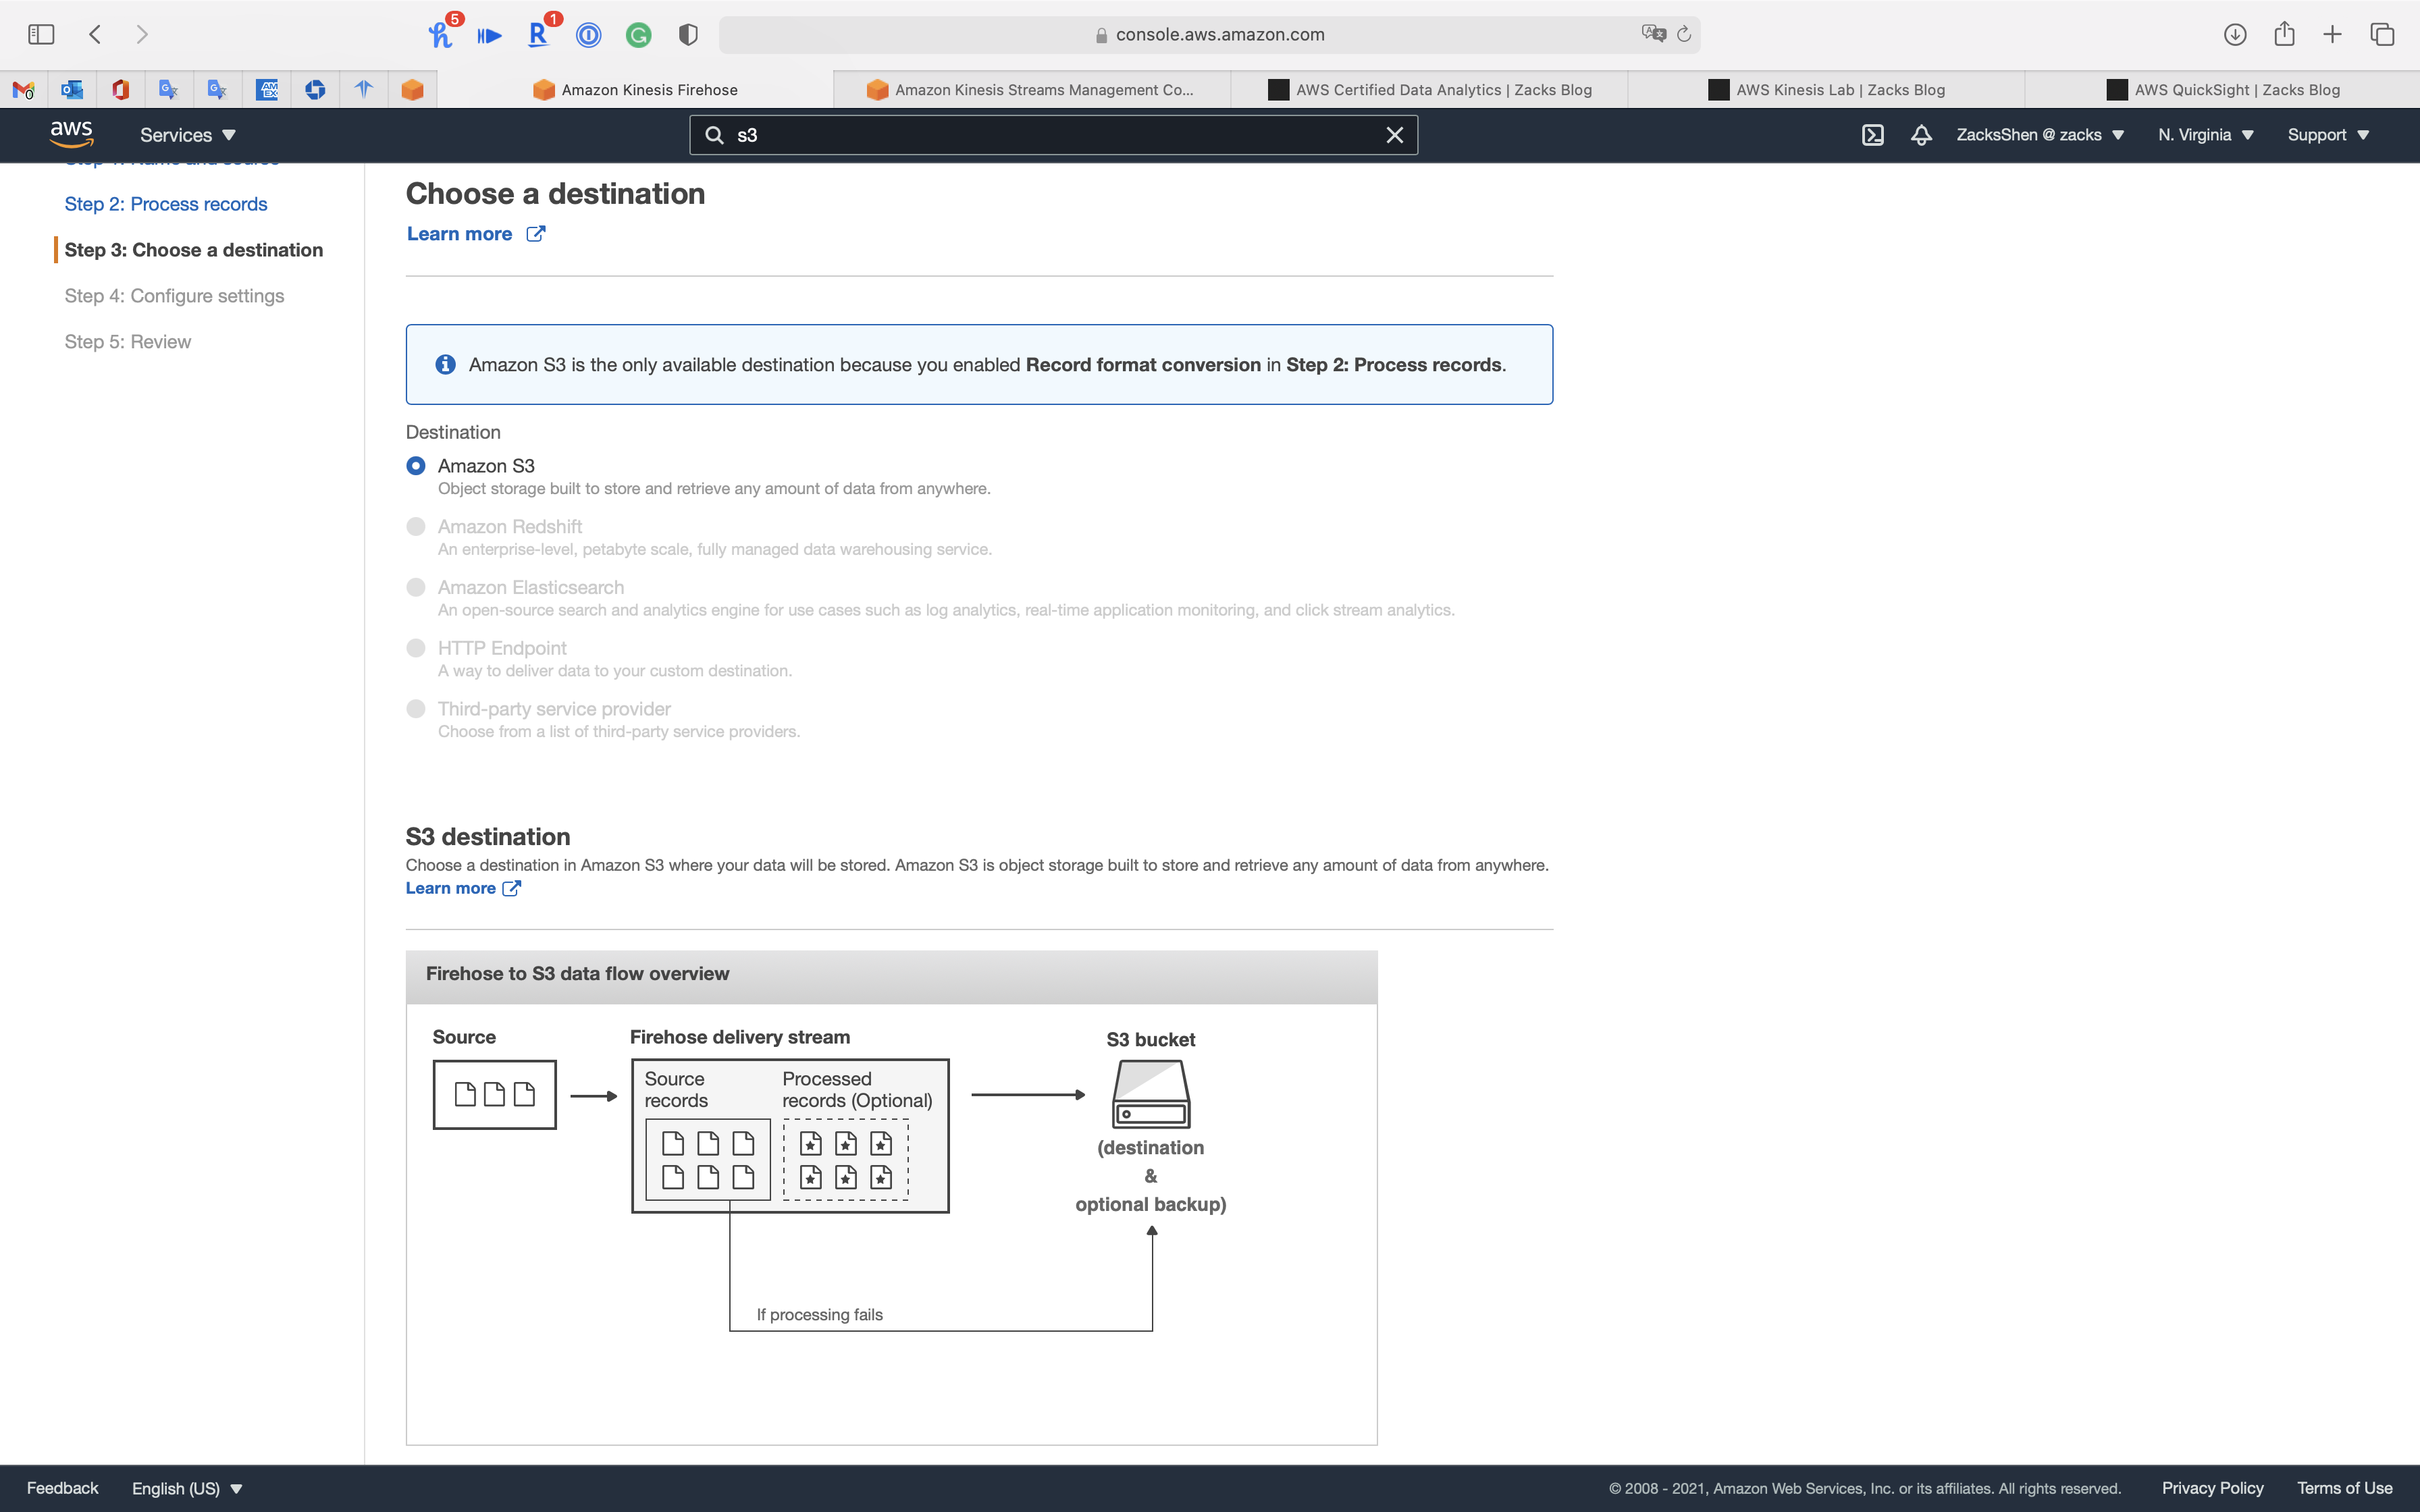
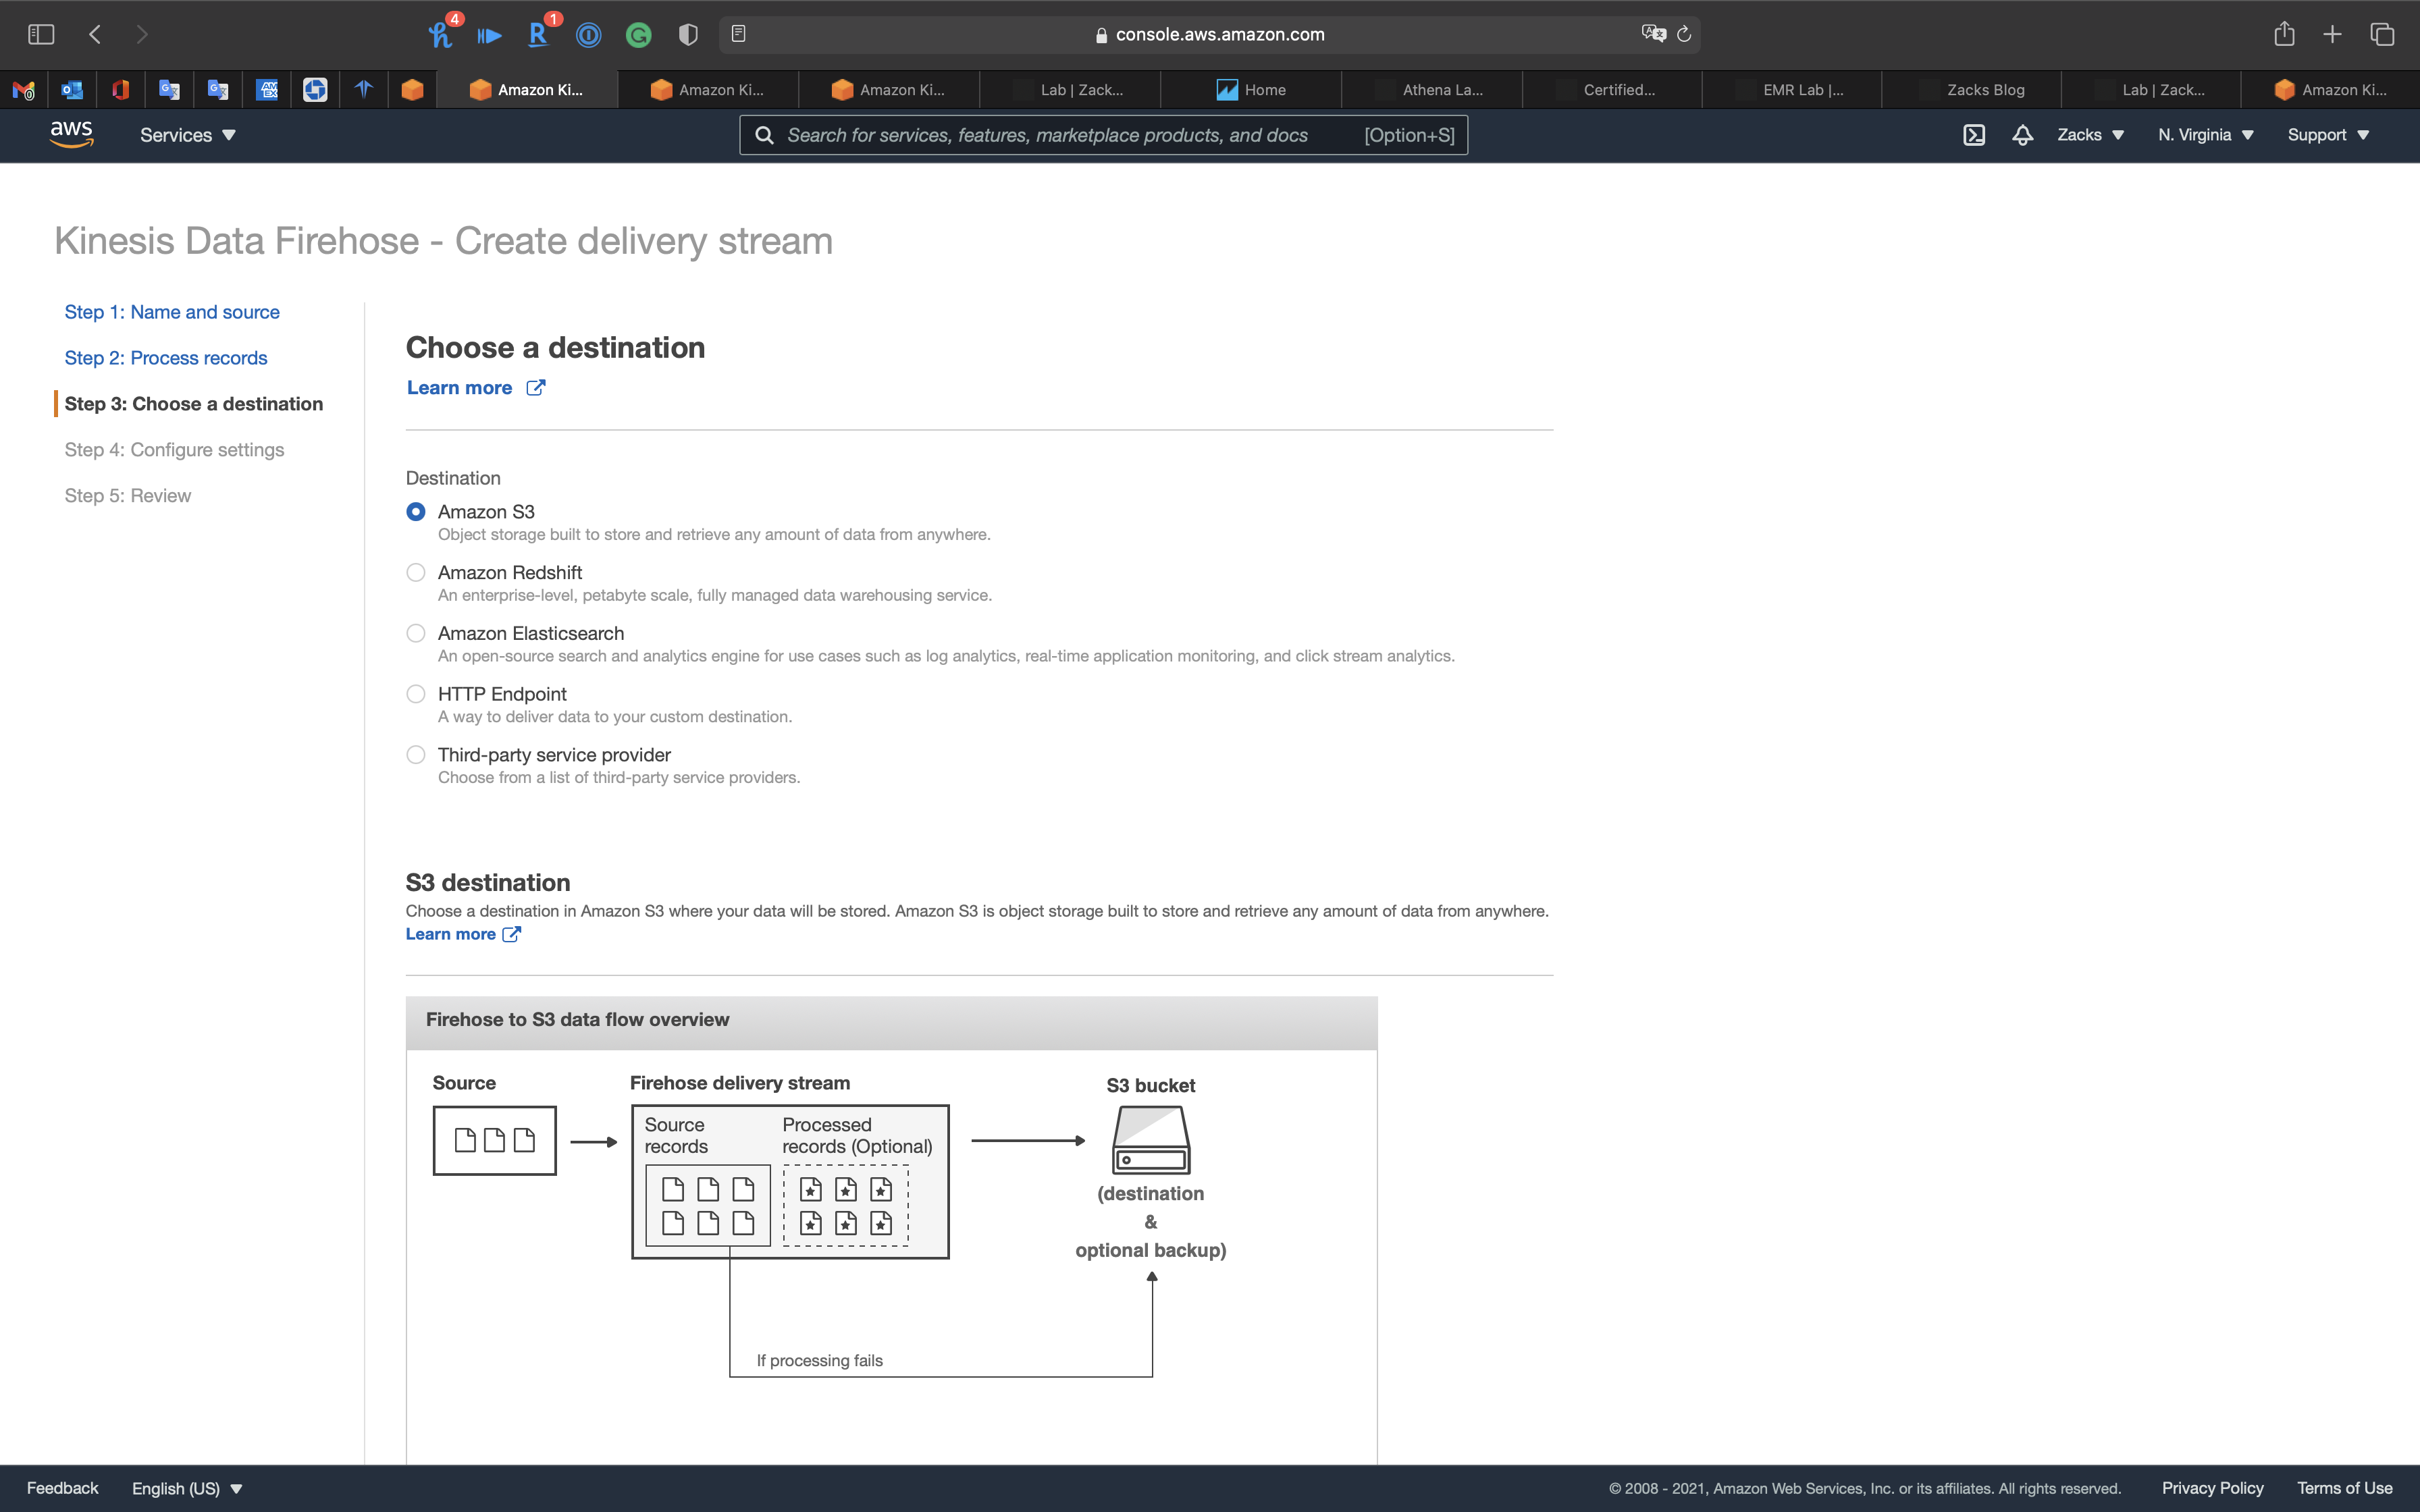
Step 3: Choose a destination
- Destination:
Amazon S3
S3 bucket: Click on Create new
Give your bucket an unique name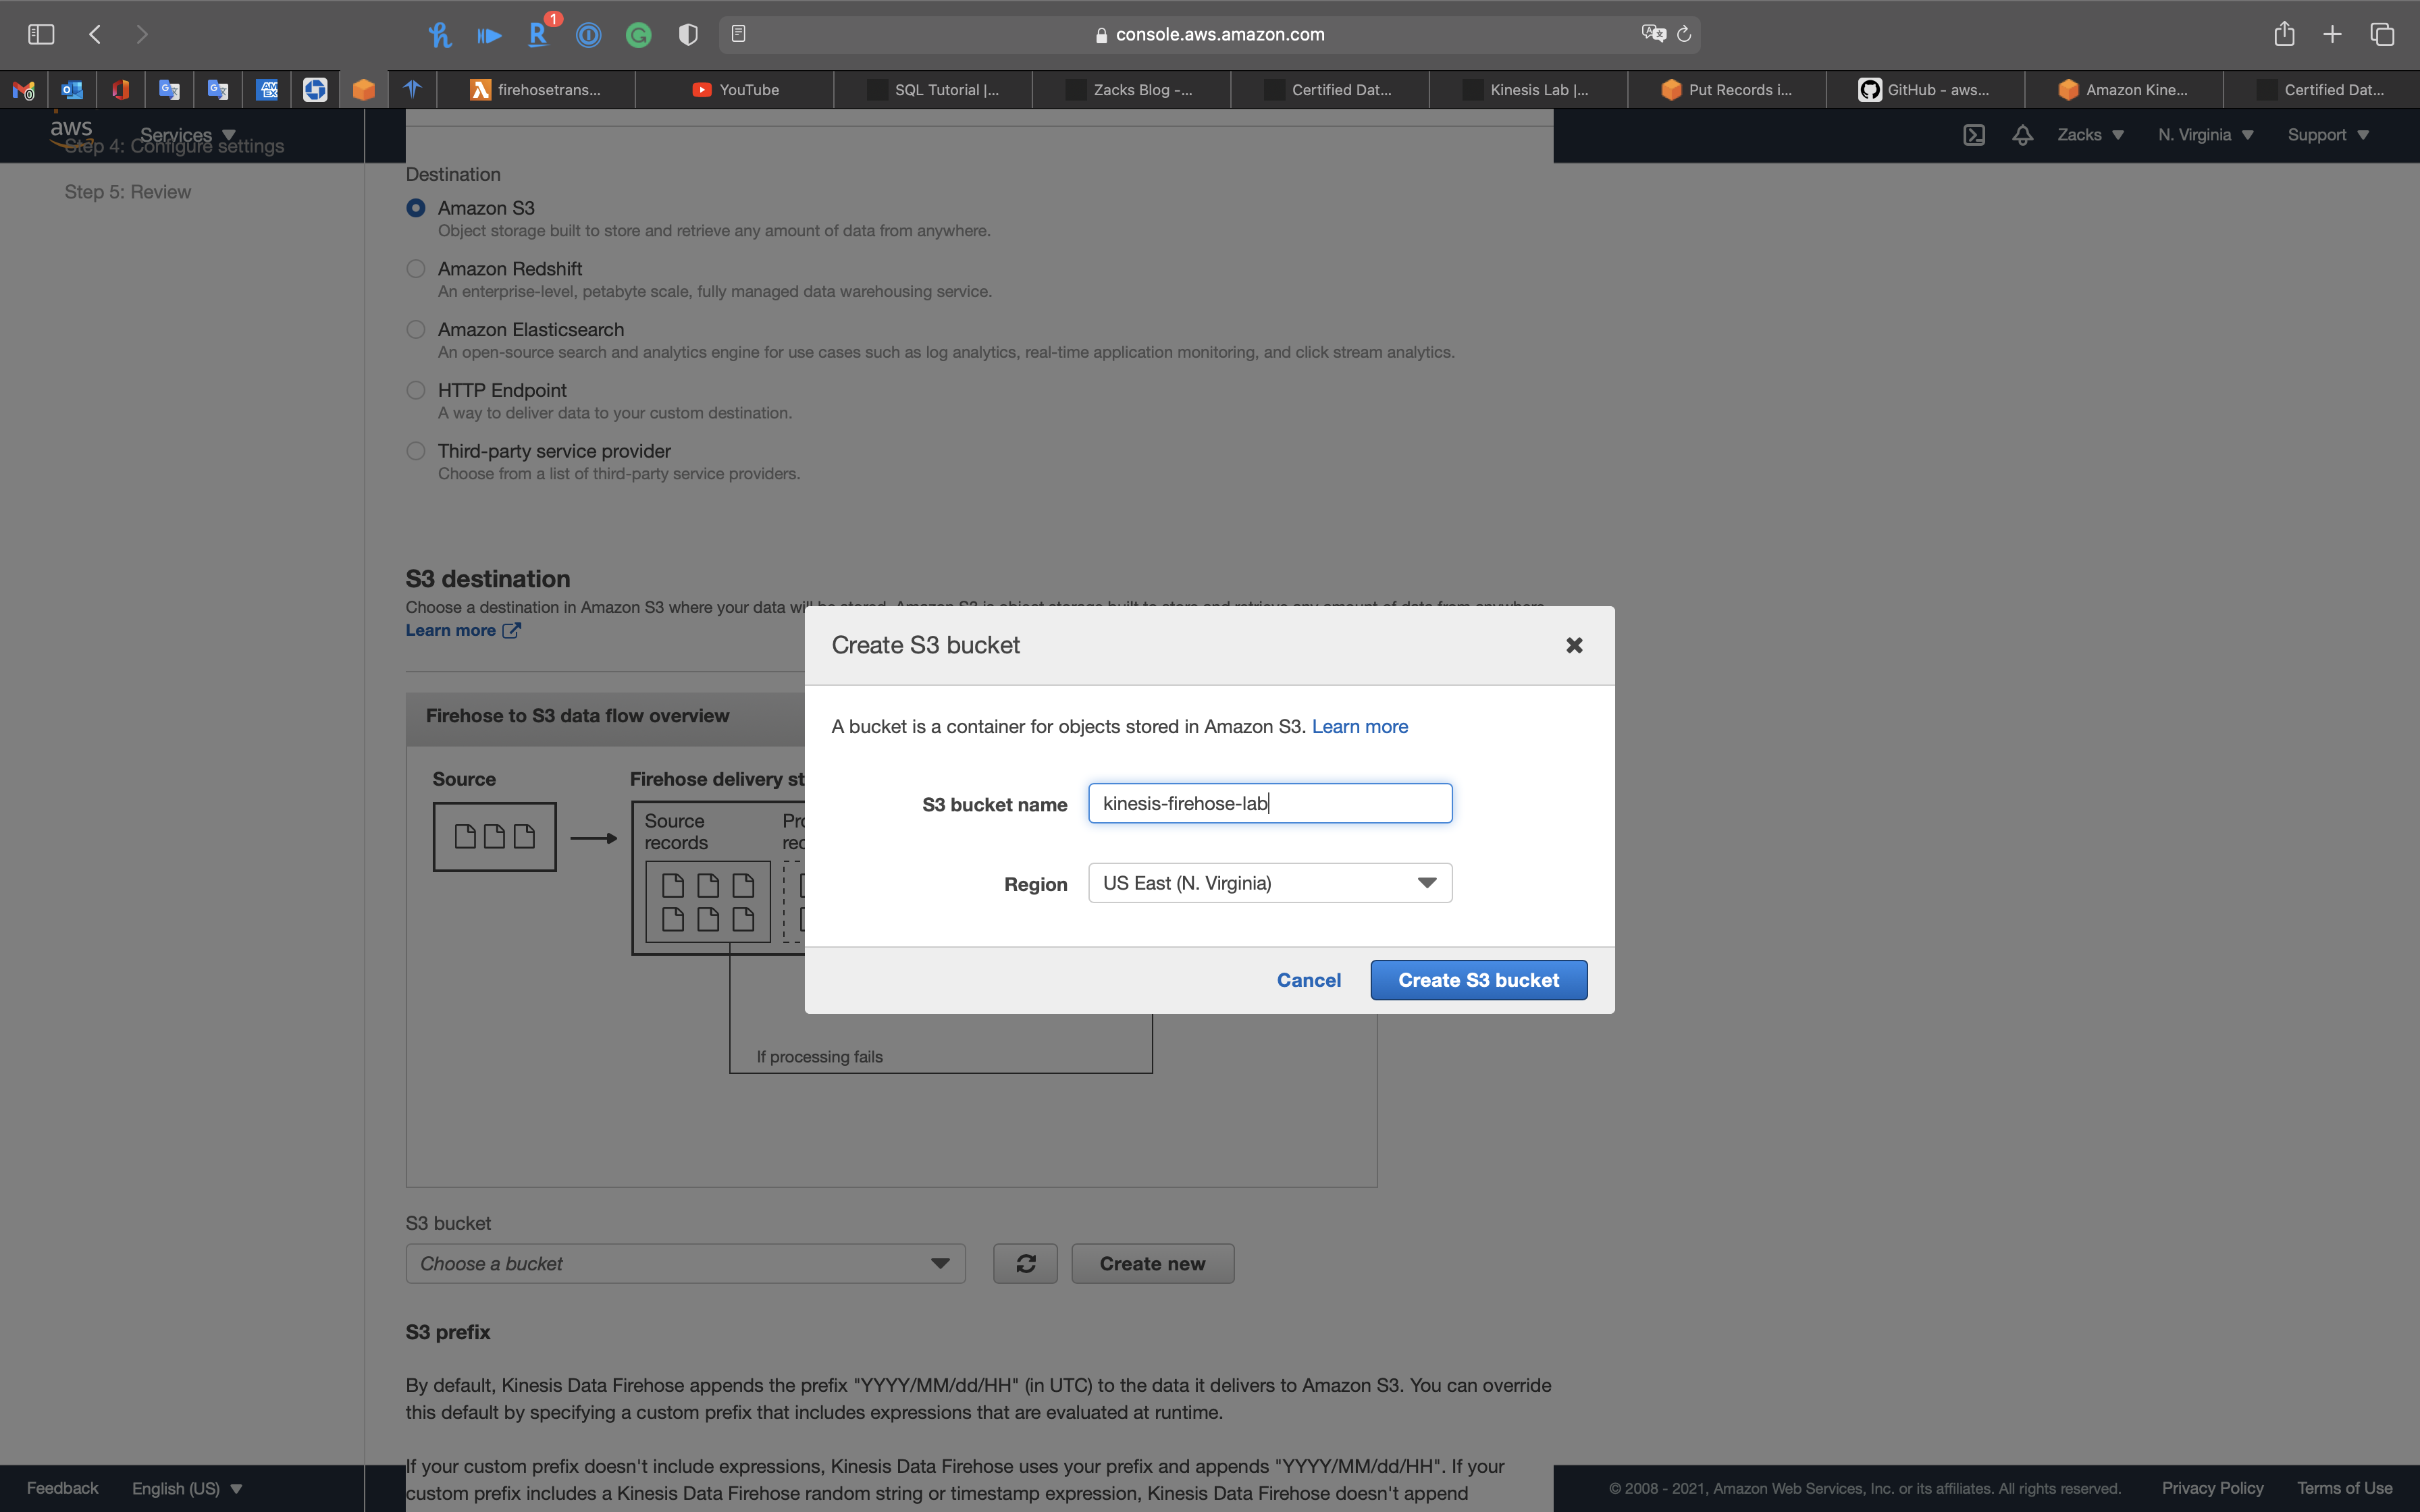
- Prefix - optional:
transformed - Error prefix - optional:
error
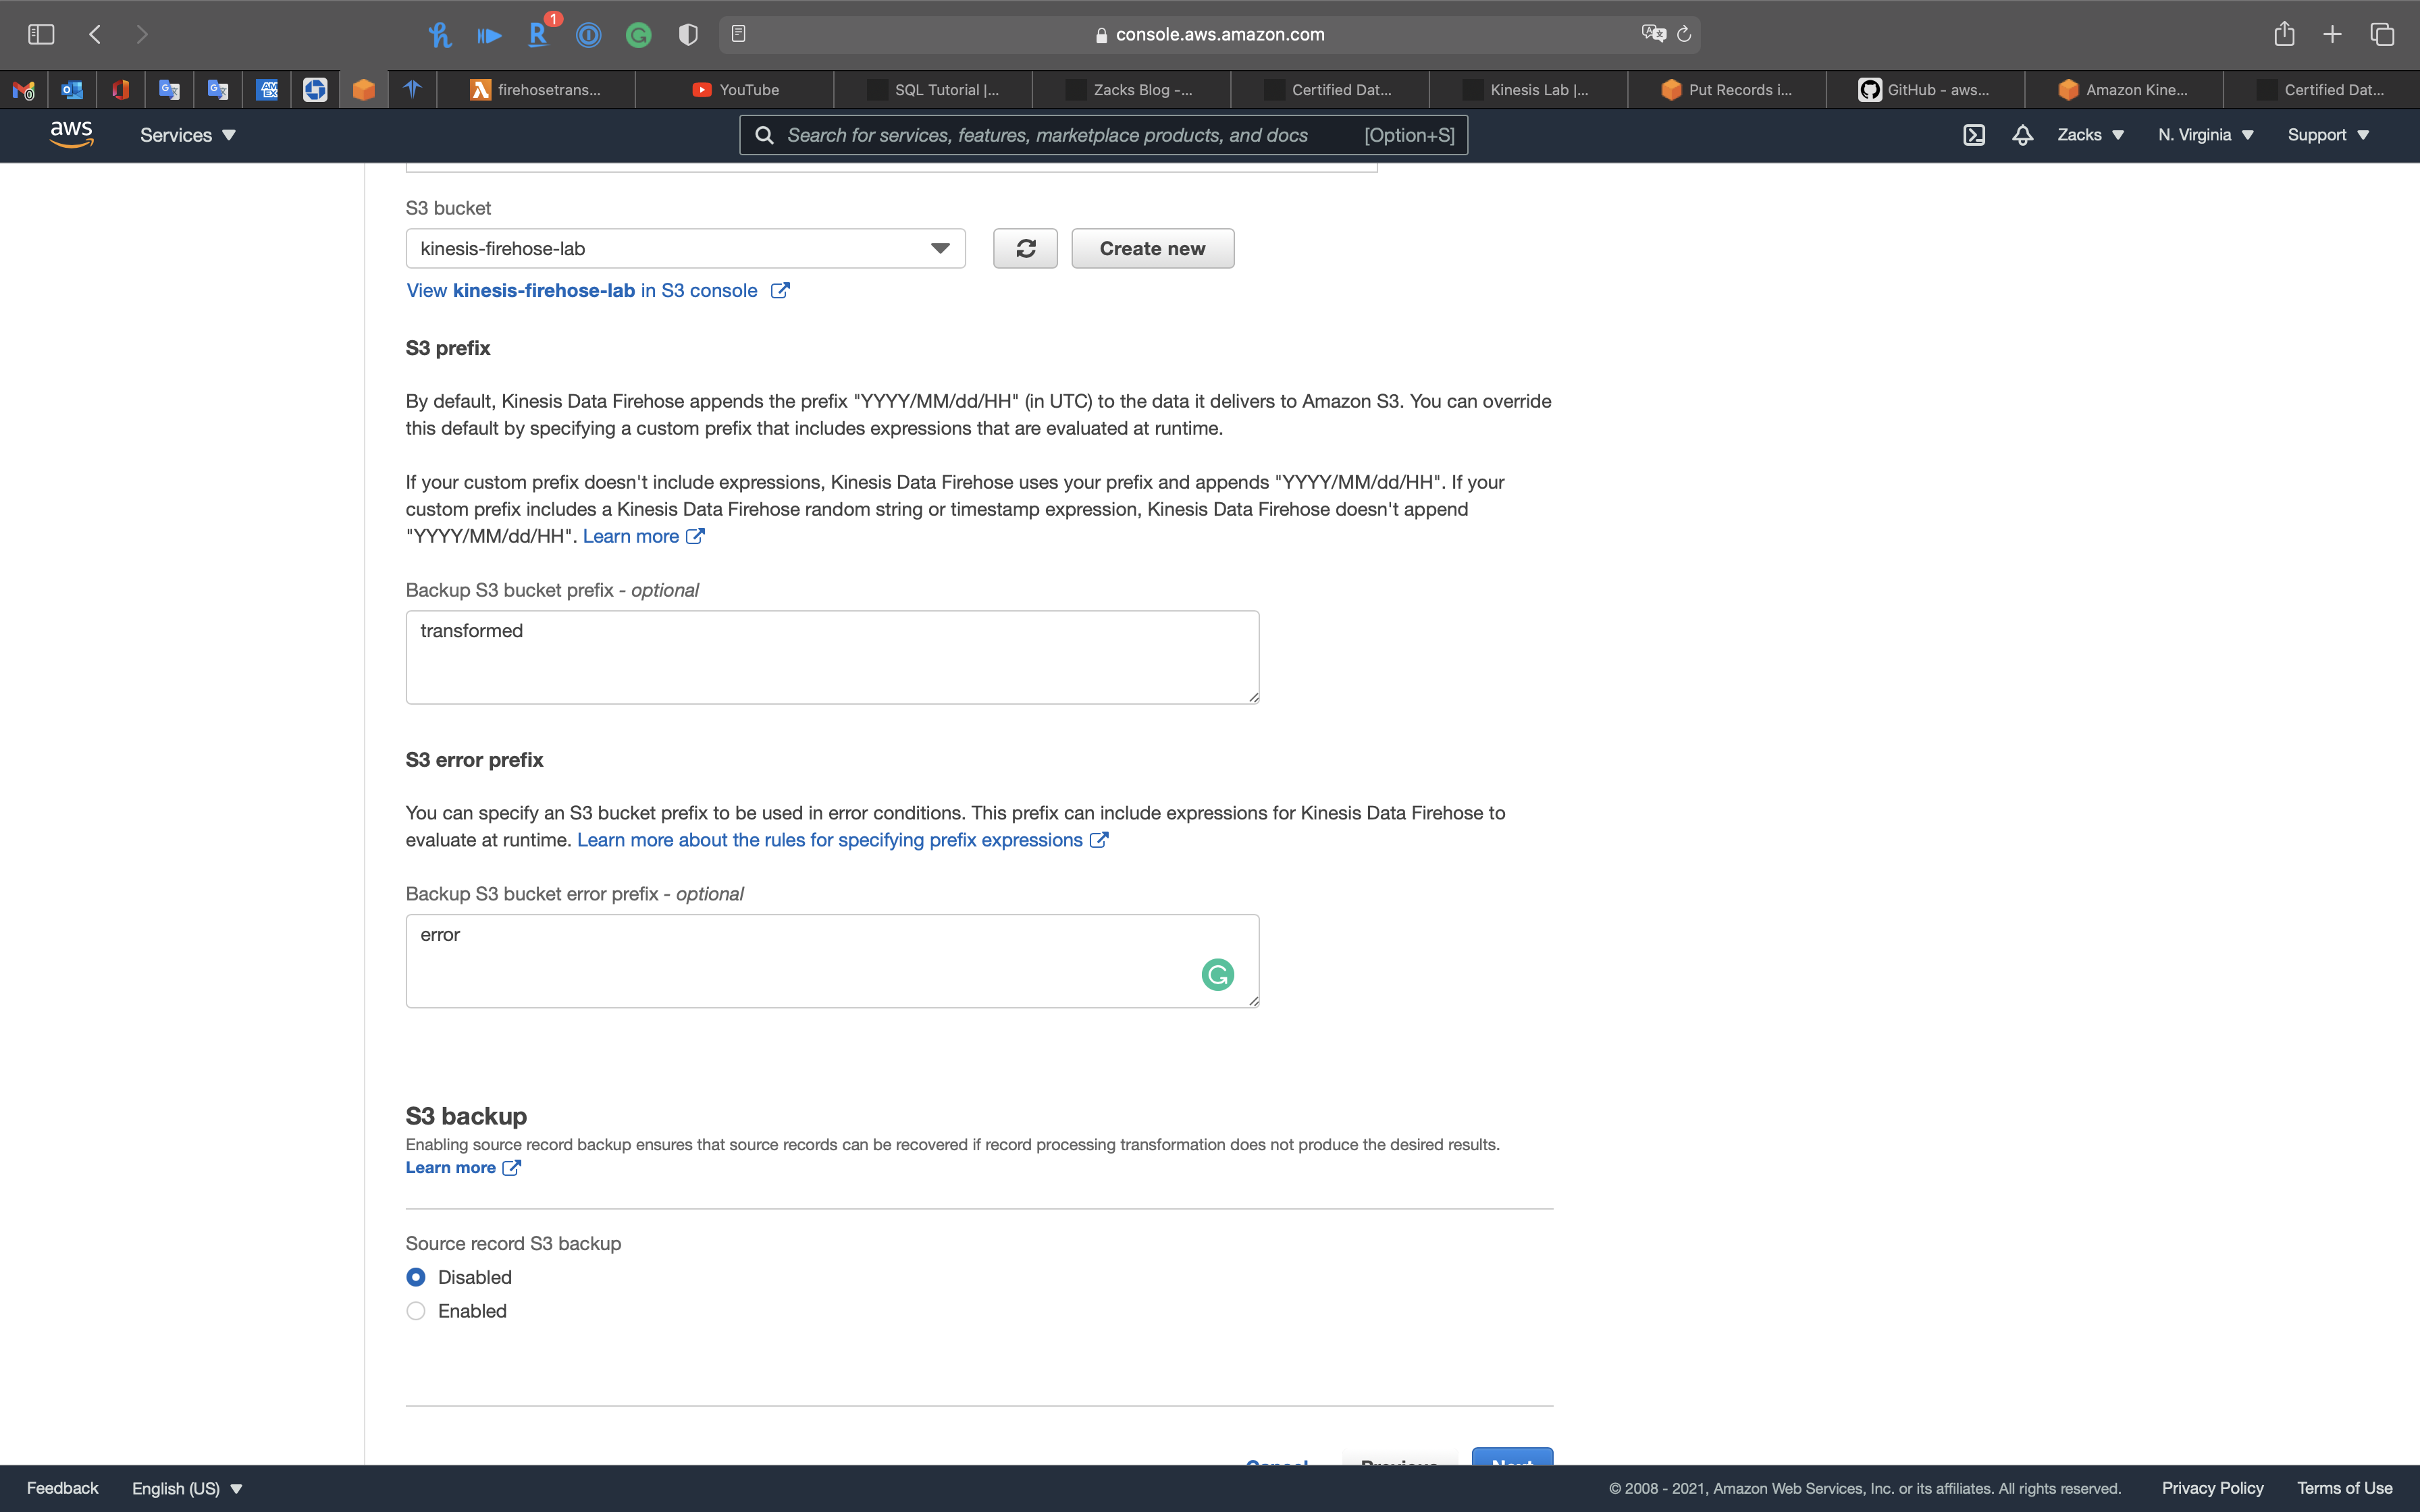
Source record S3 backup:
Enabled- Select your kinesis firehose bucket
Backup S3 bucket prefix - optional:
source_records/
Click on Next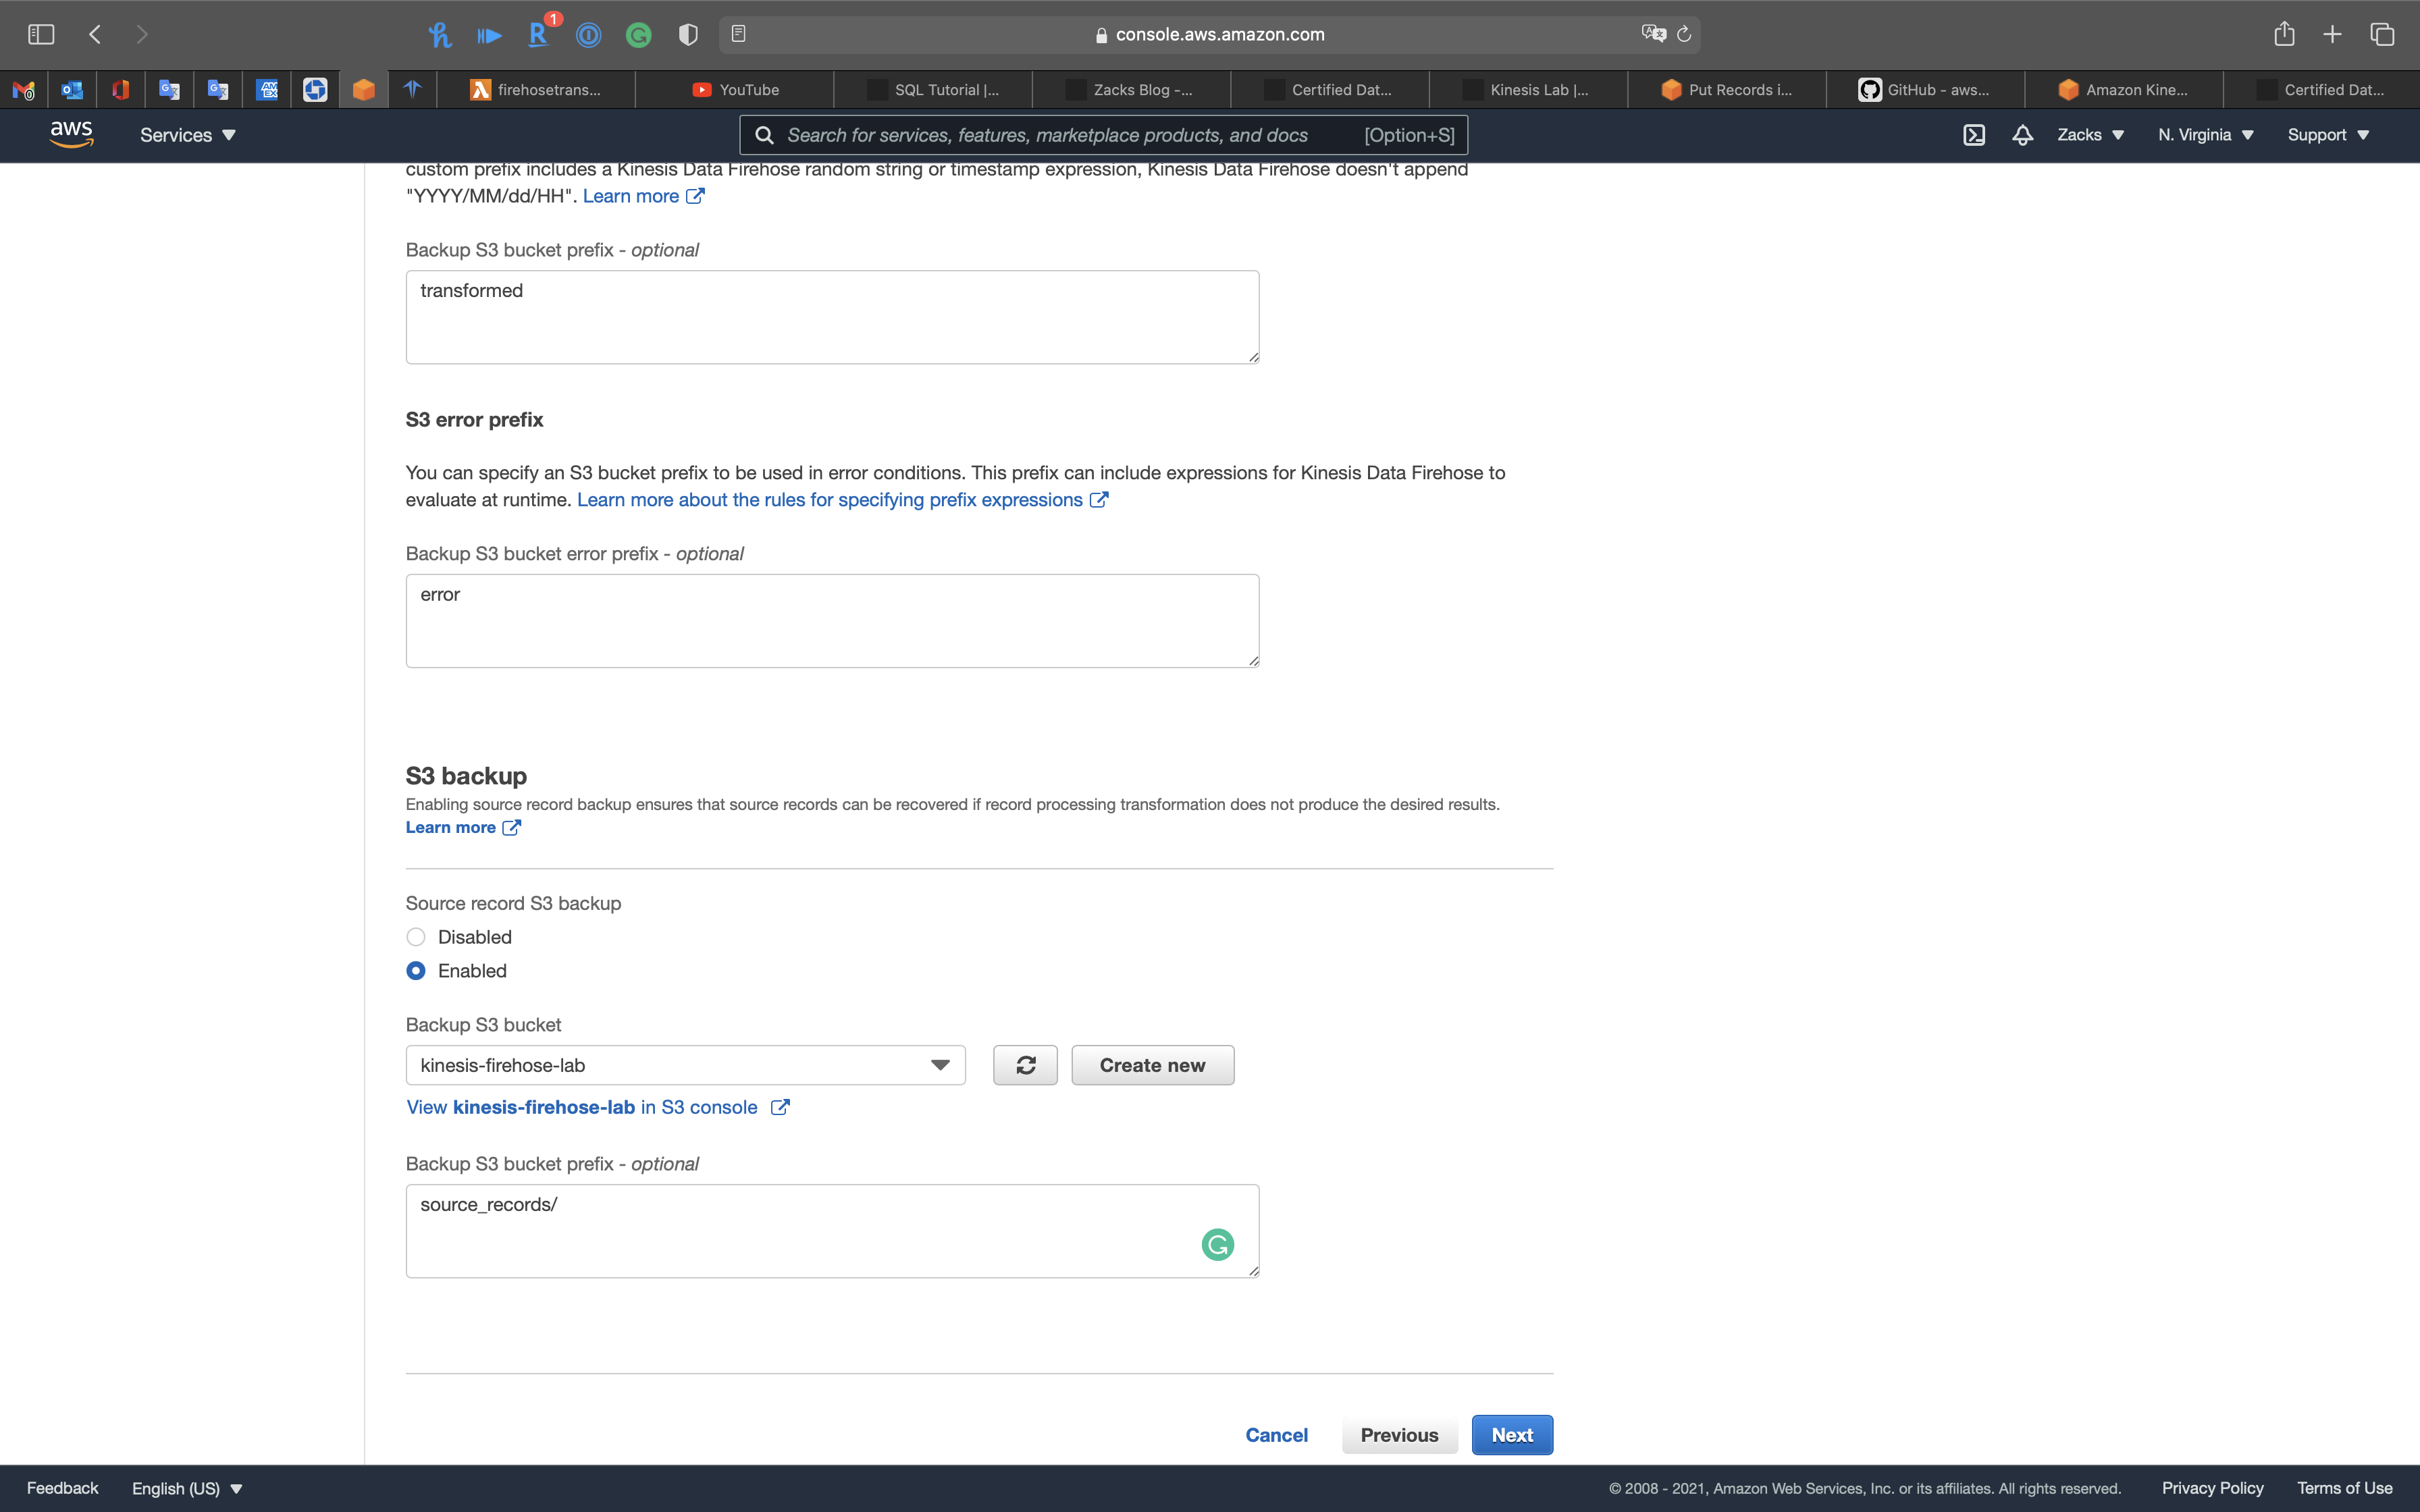
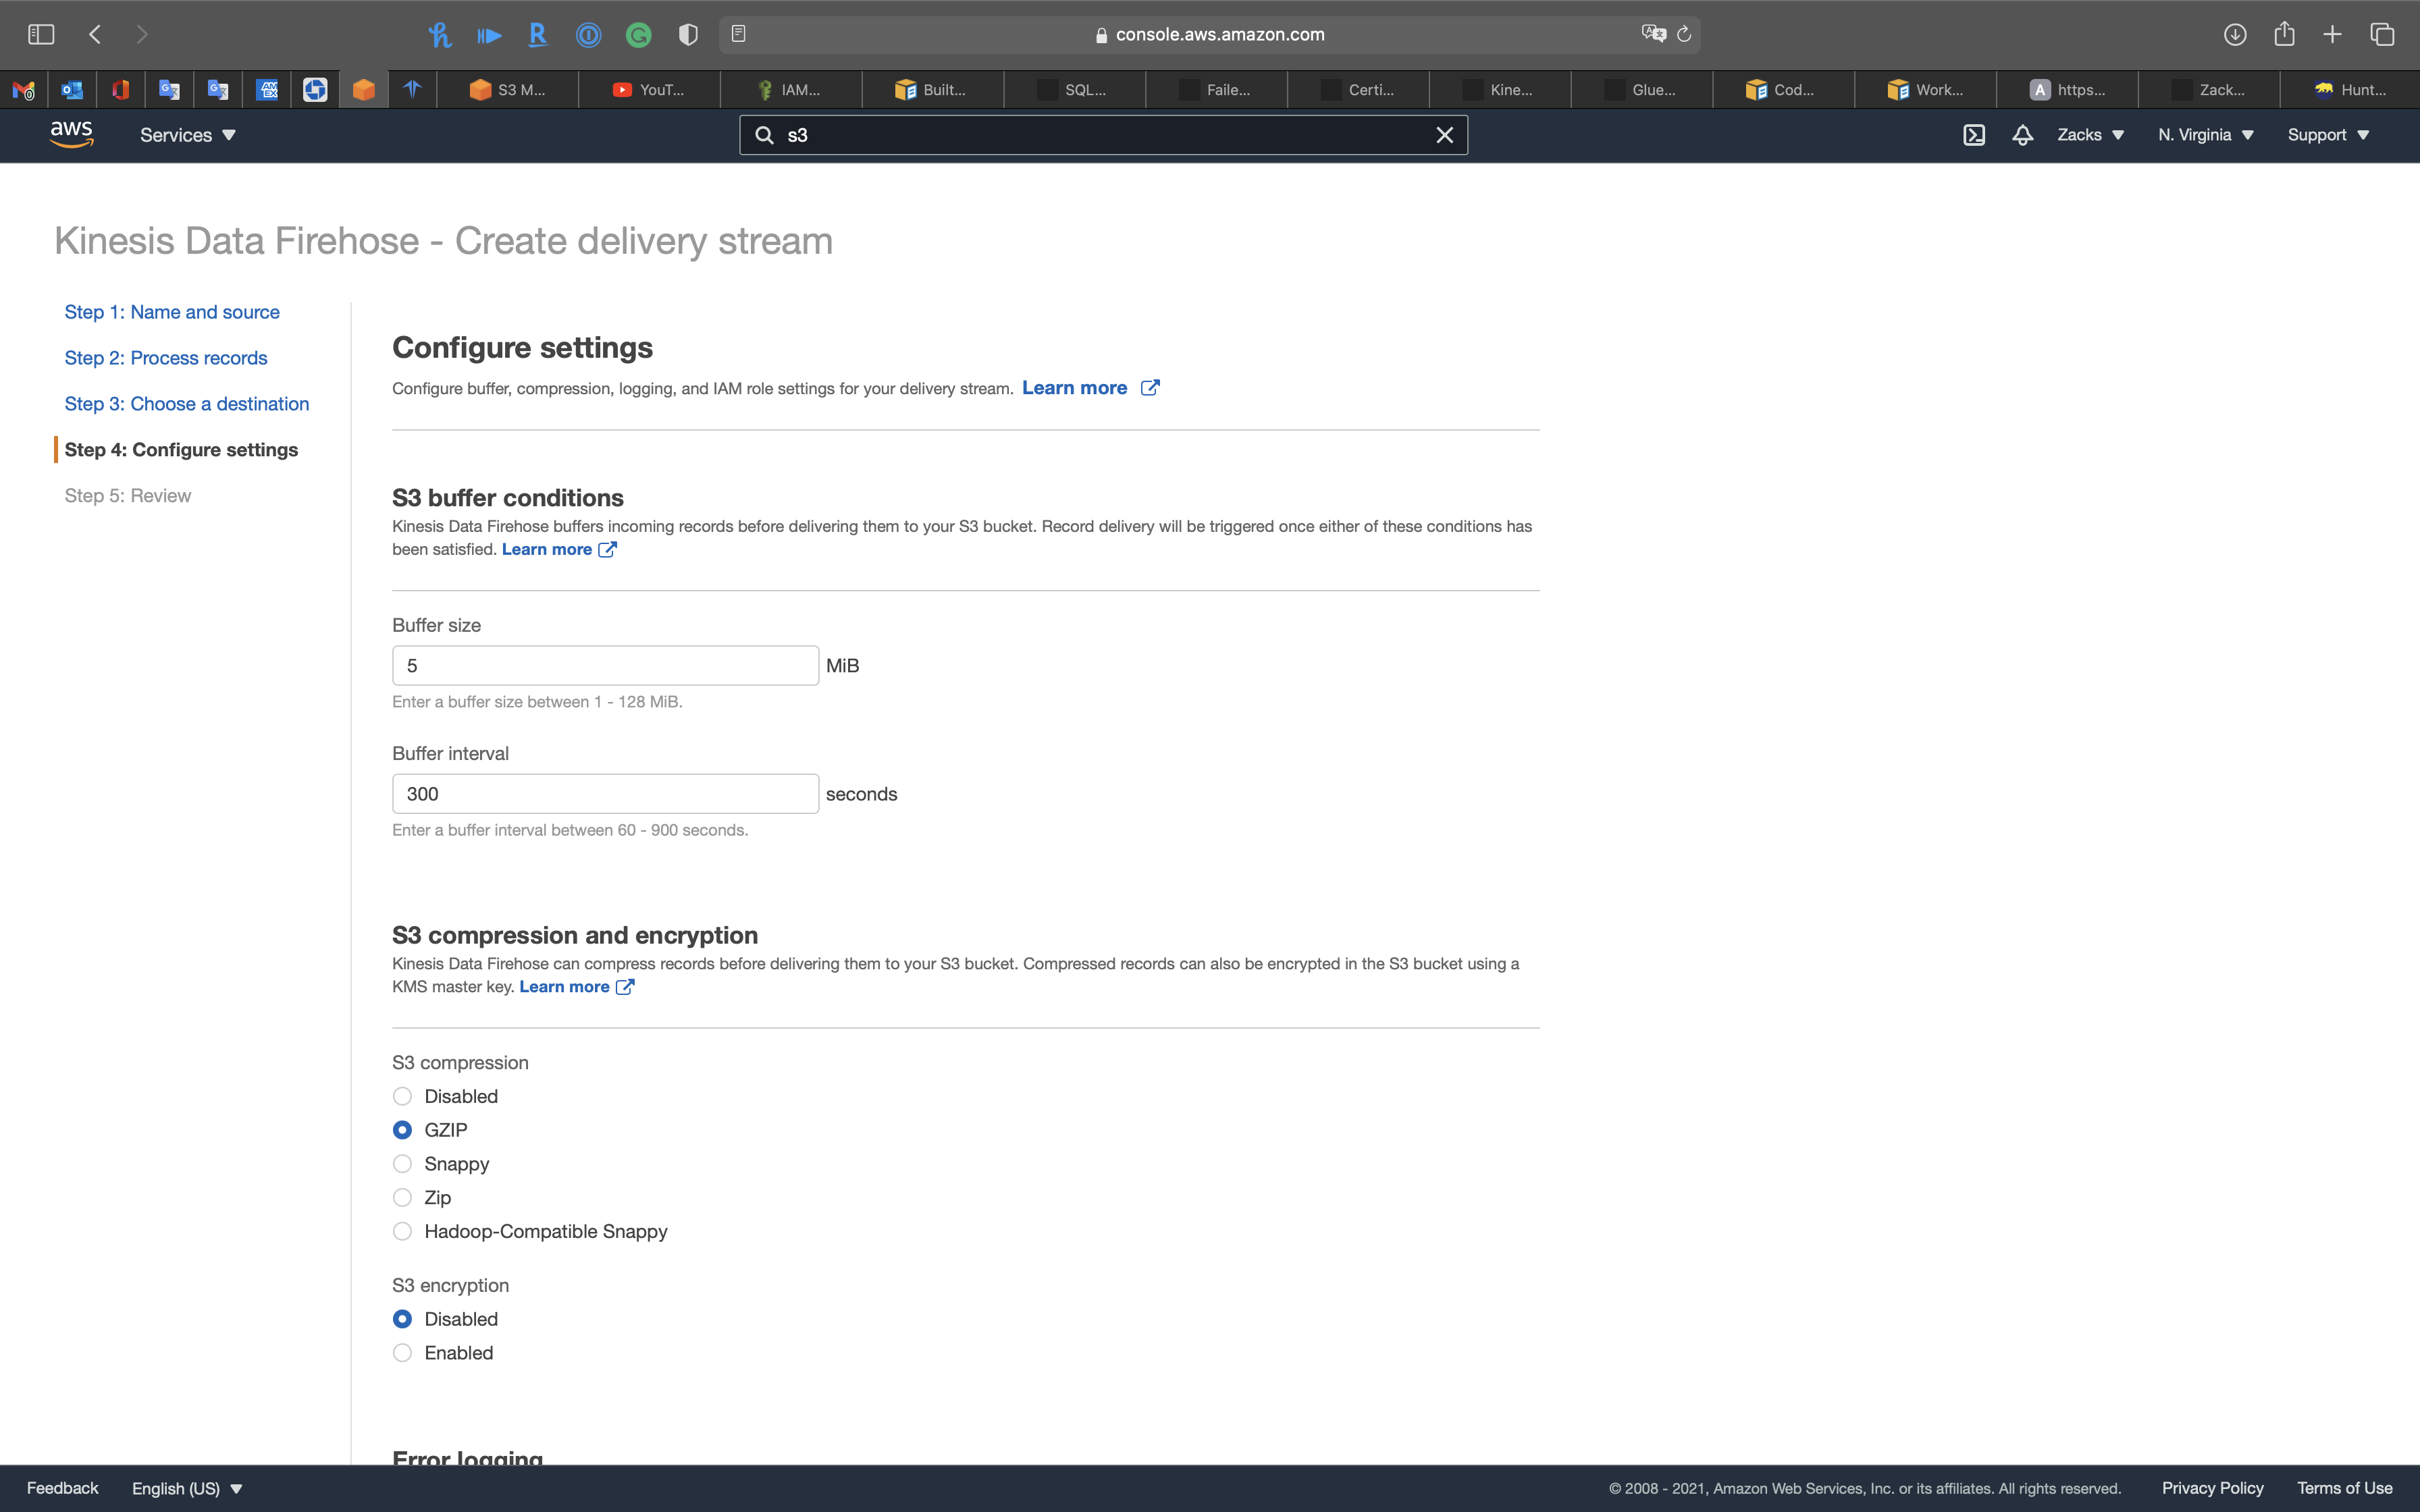
Step 4: Configure settings
- Buffer interval:
60
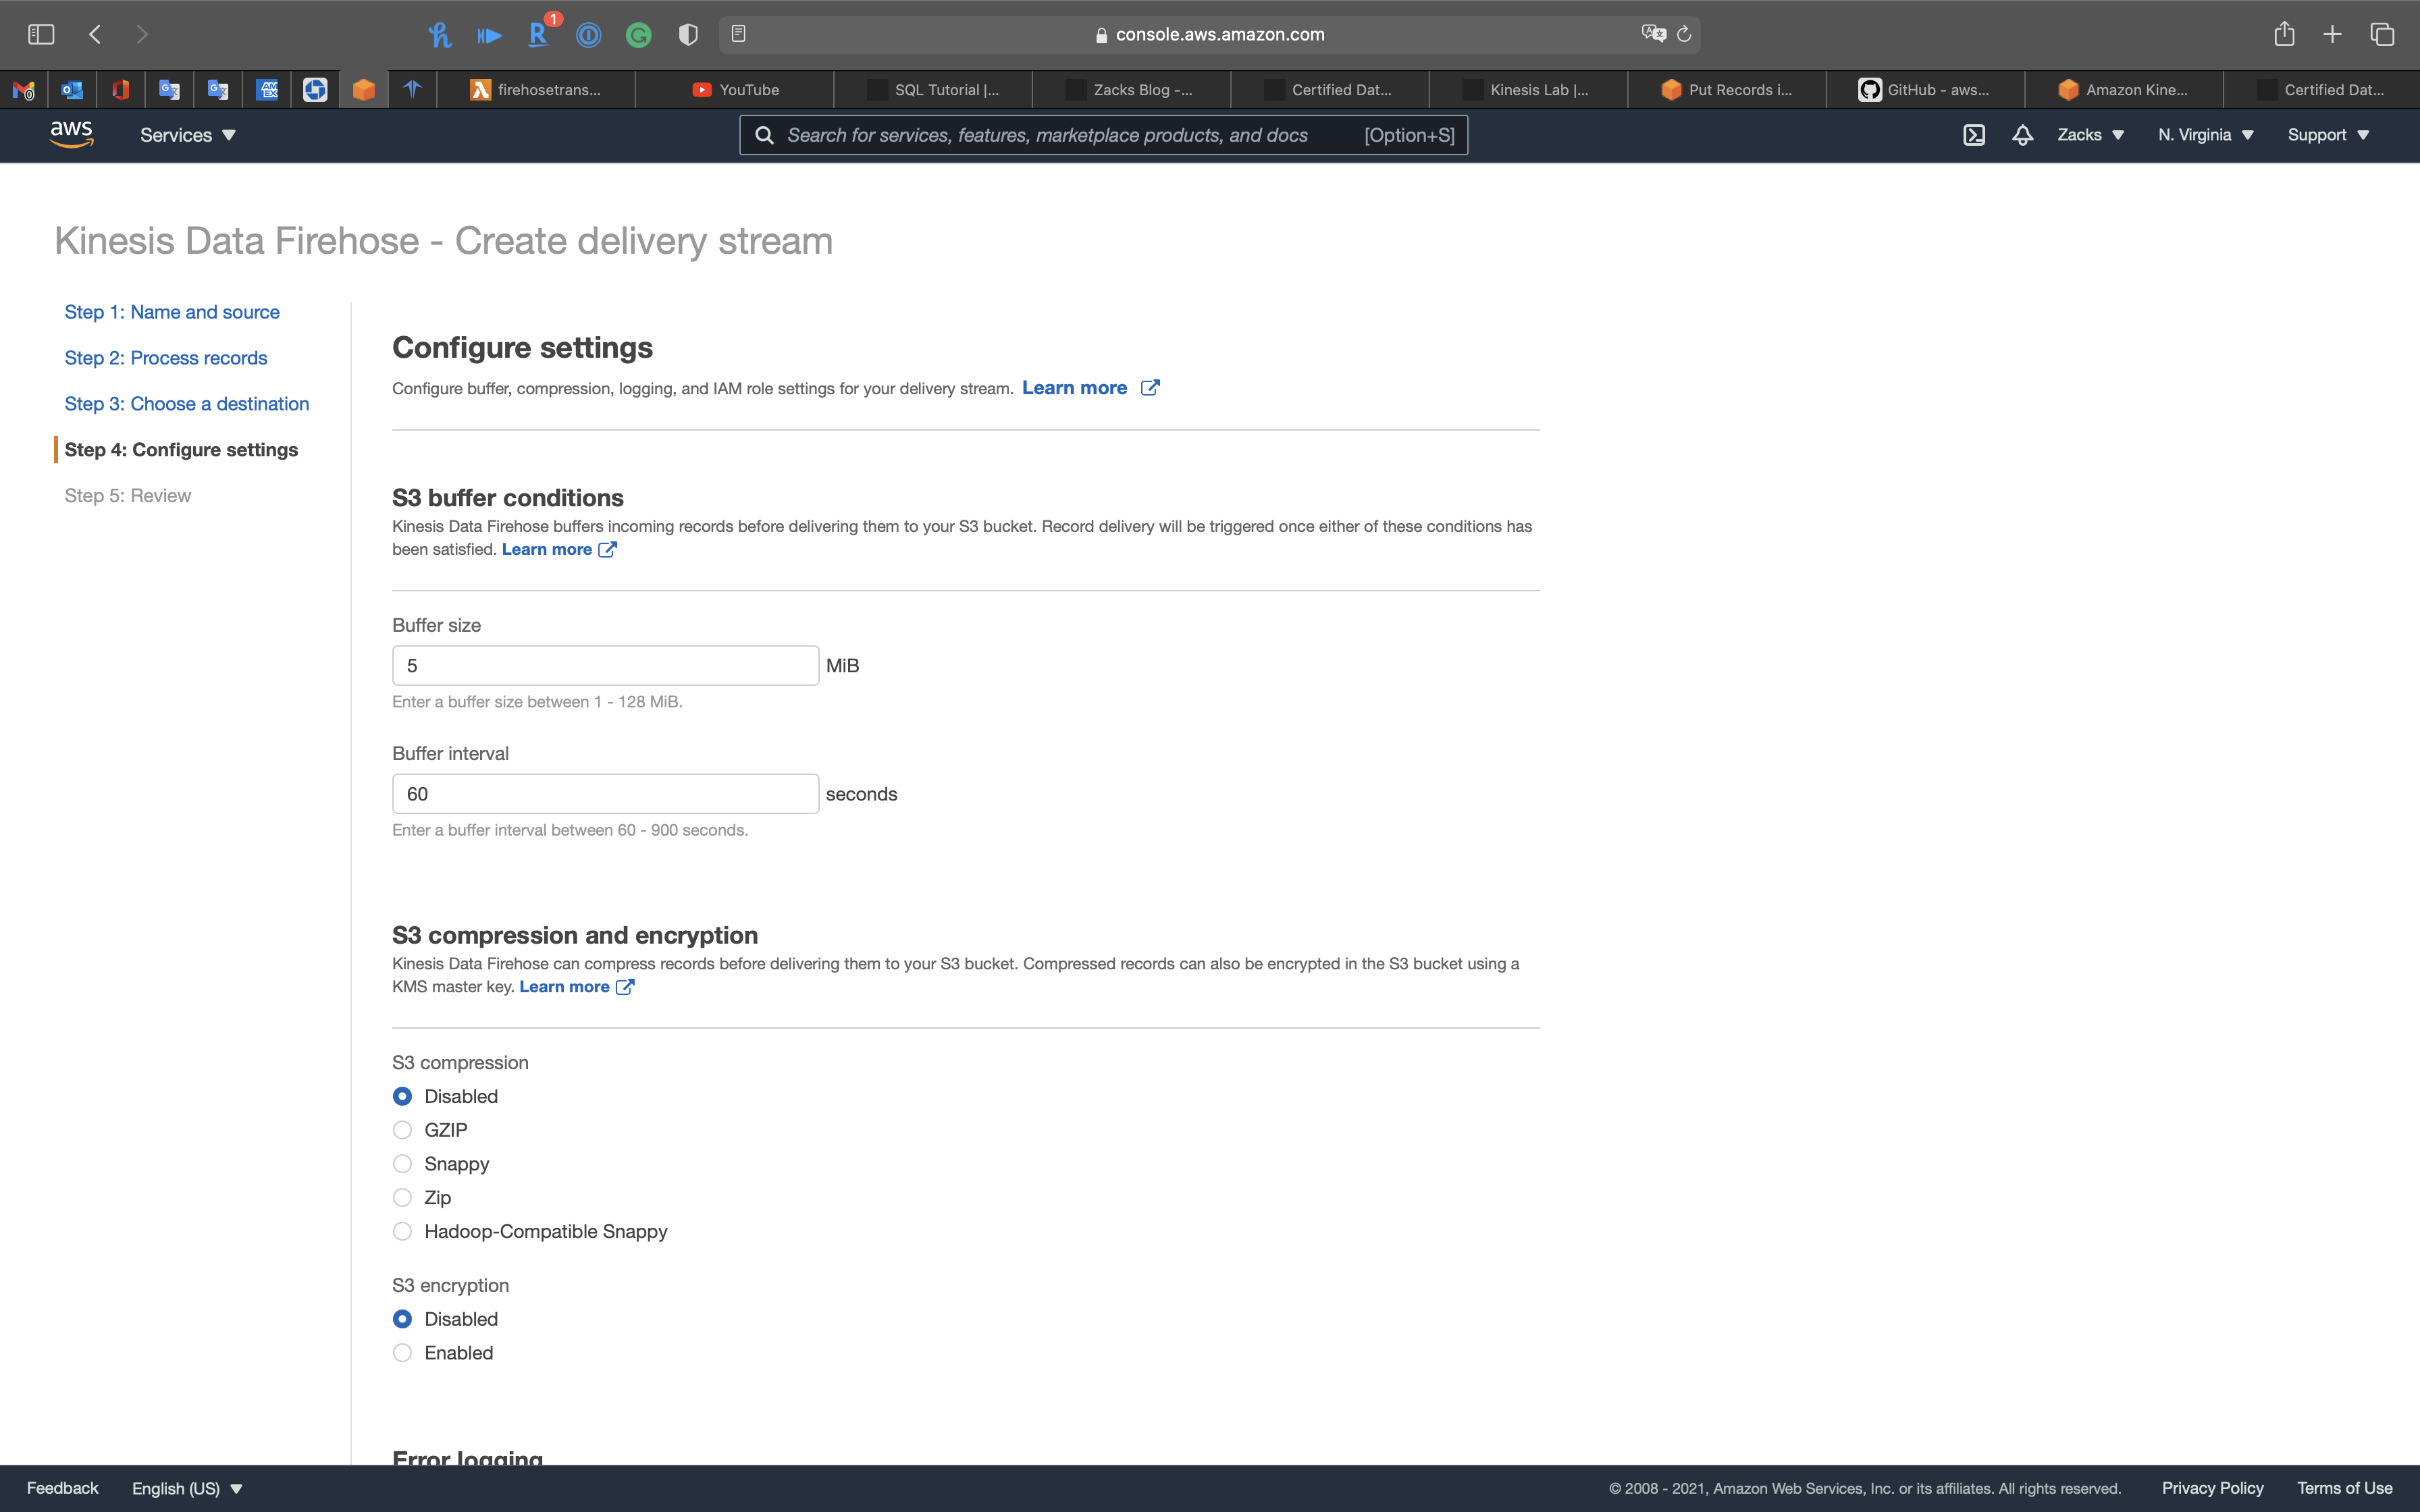
Click on Next
Step 5: Review
Click on Create delivery stream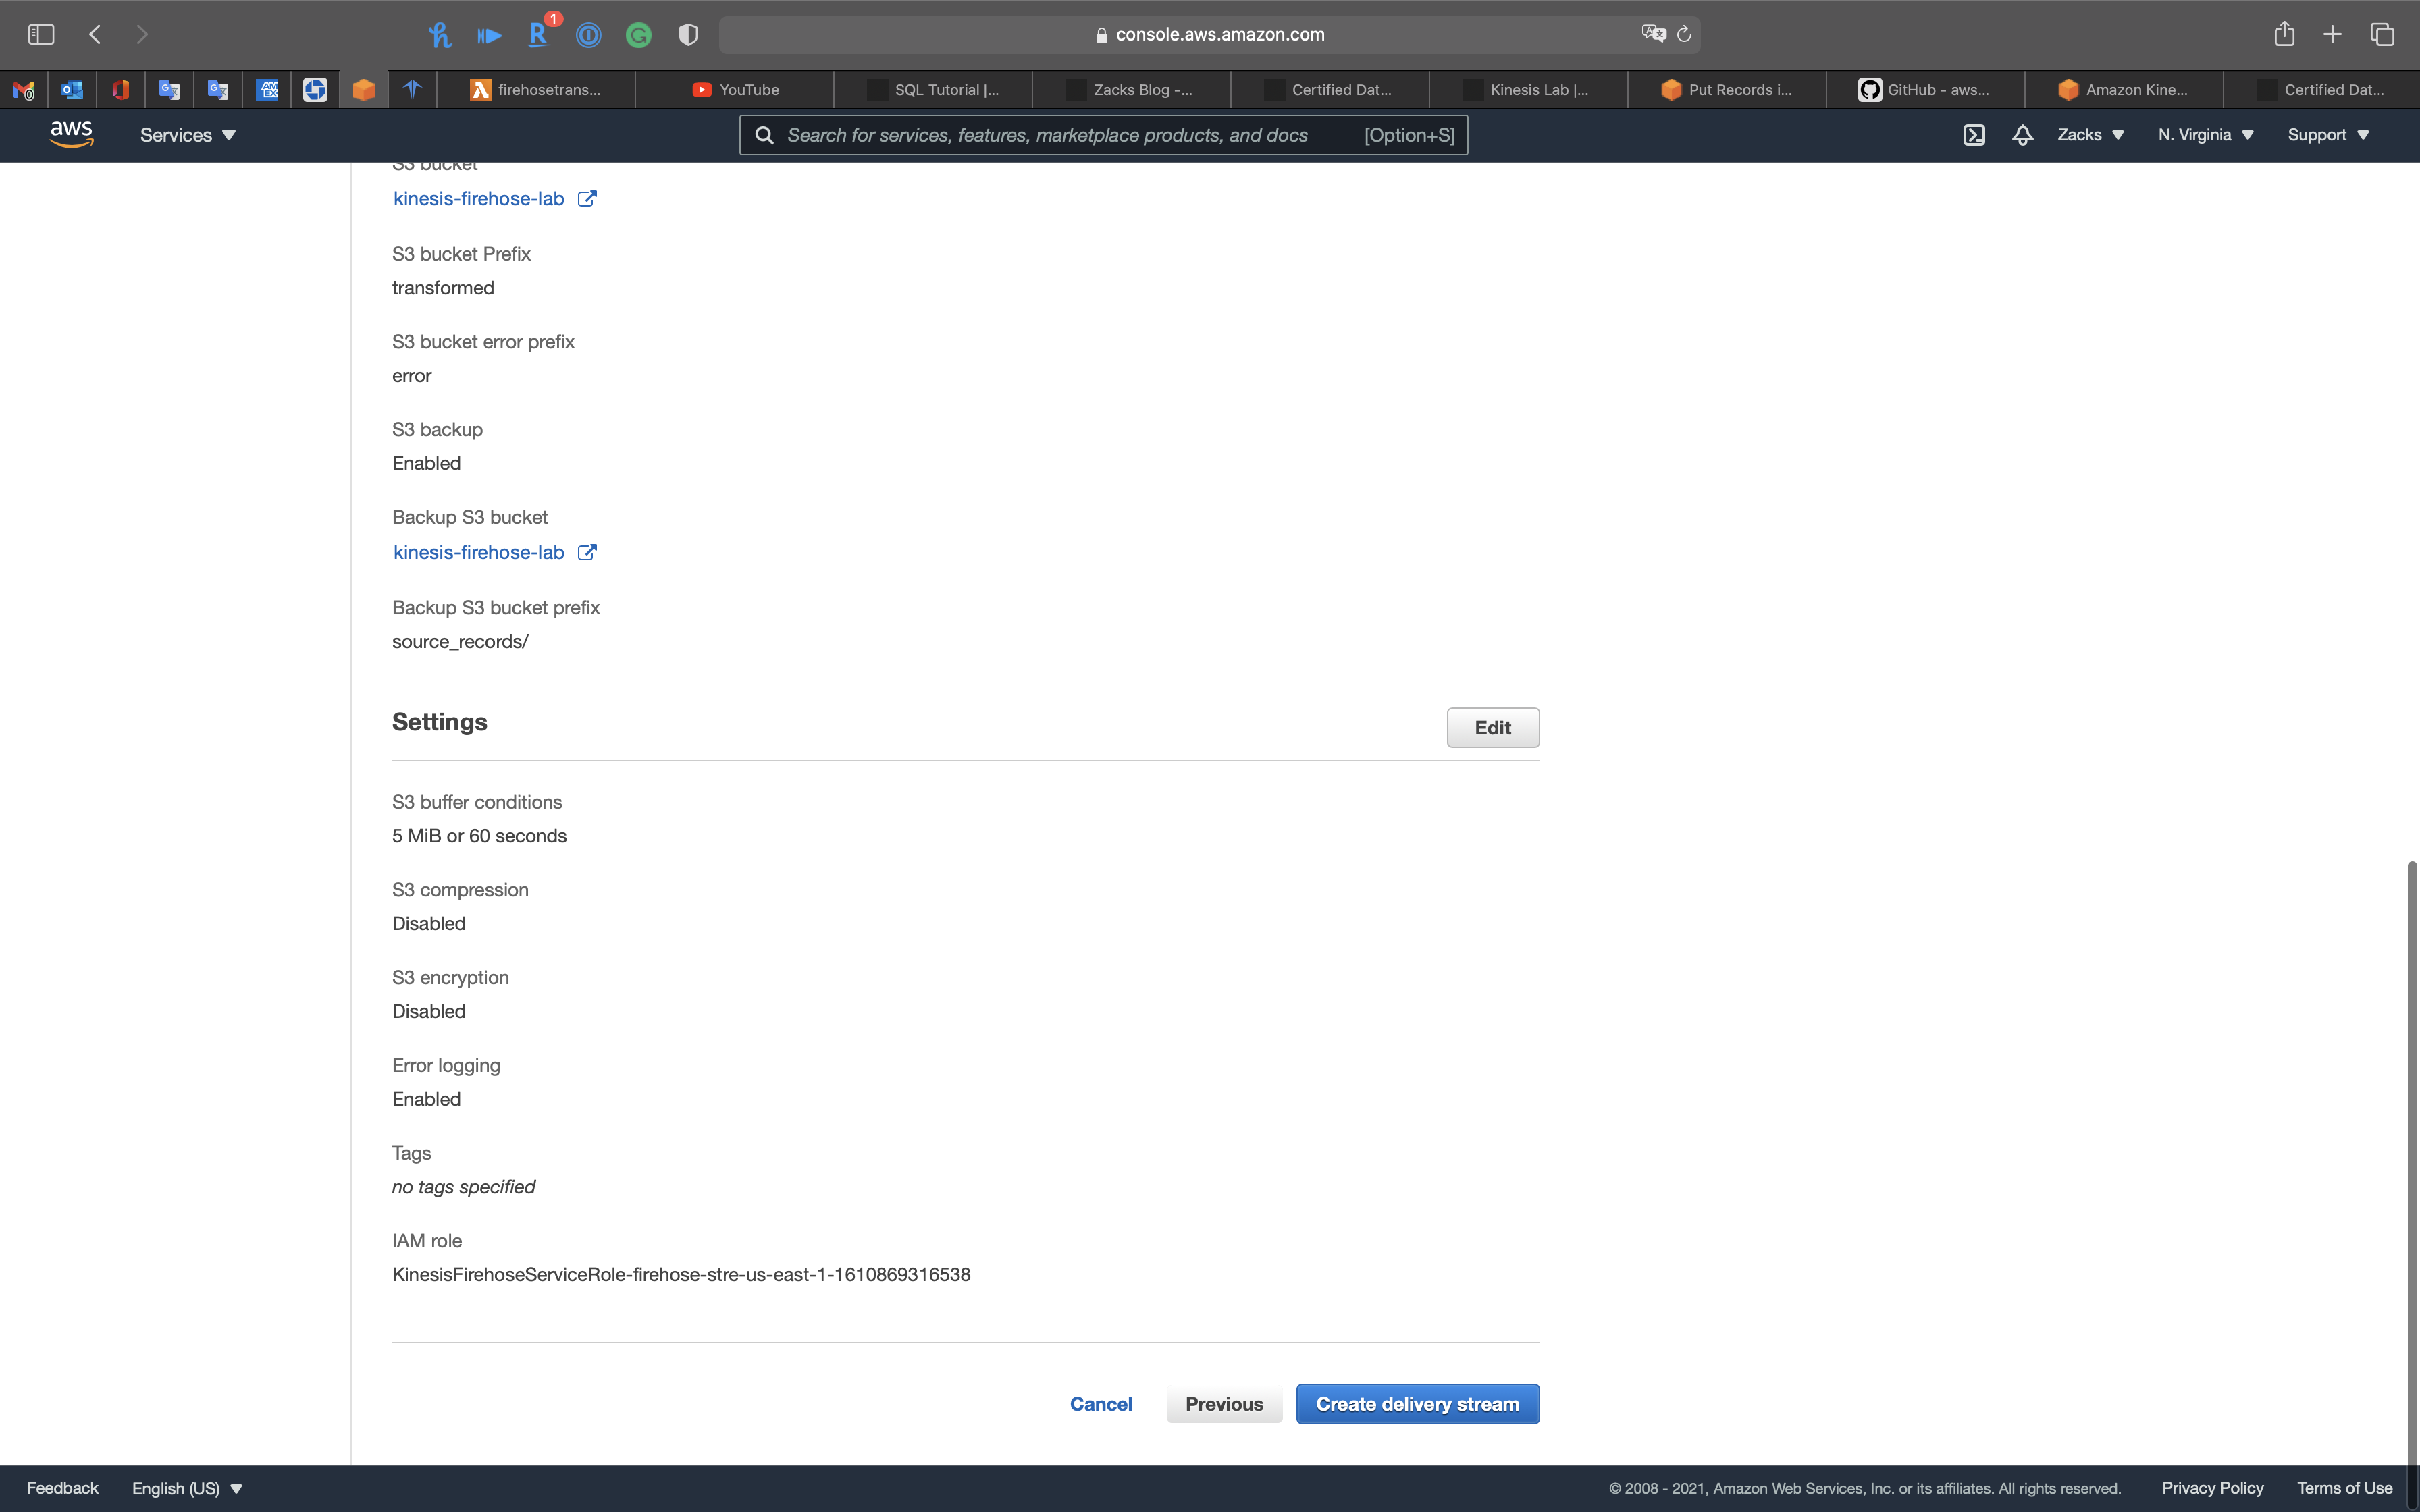
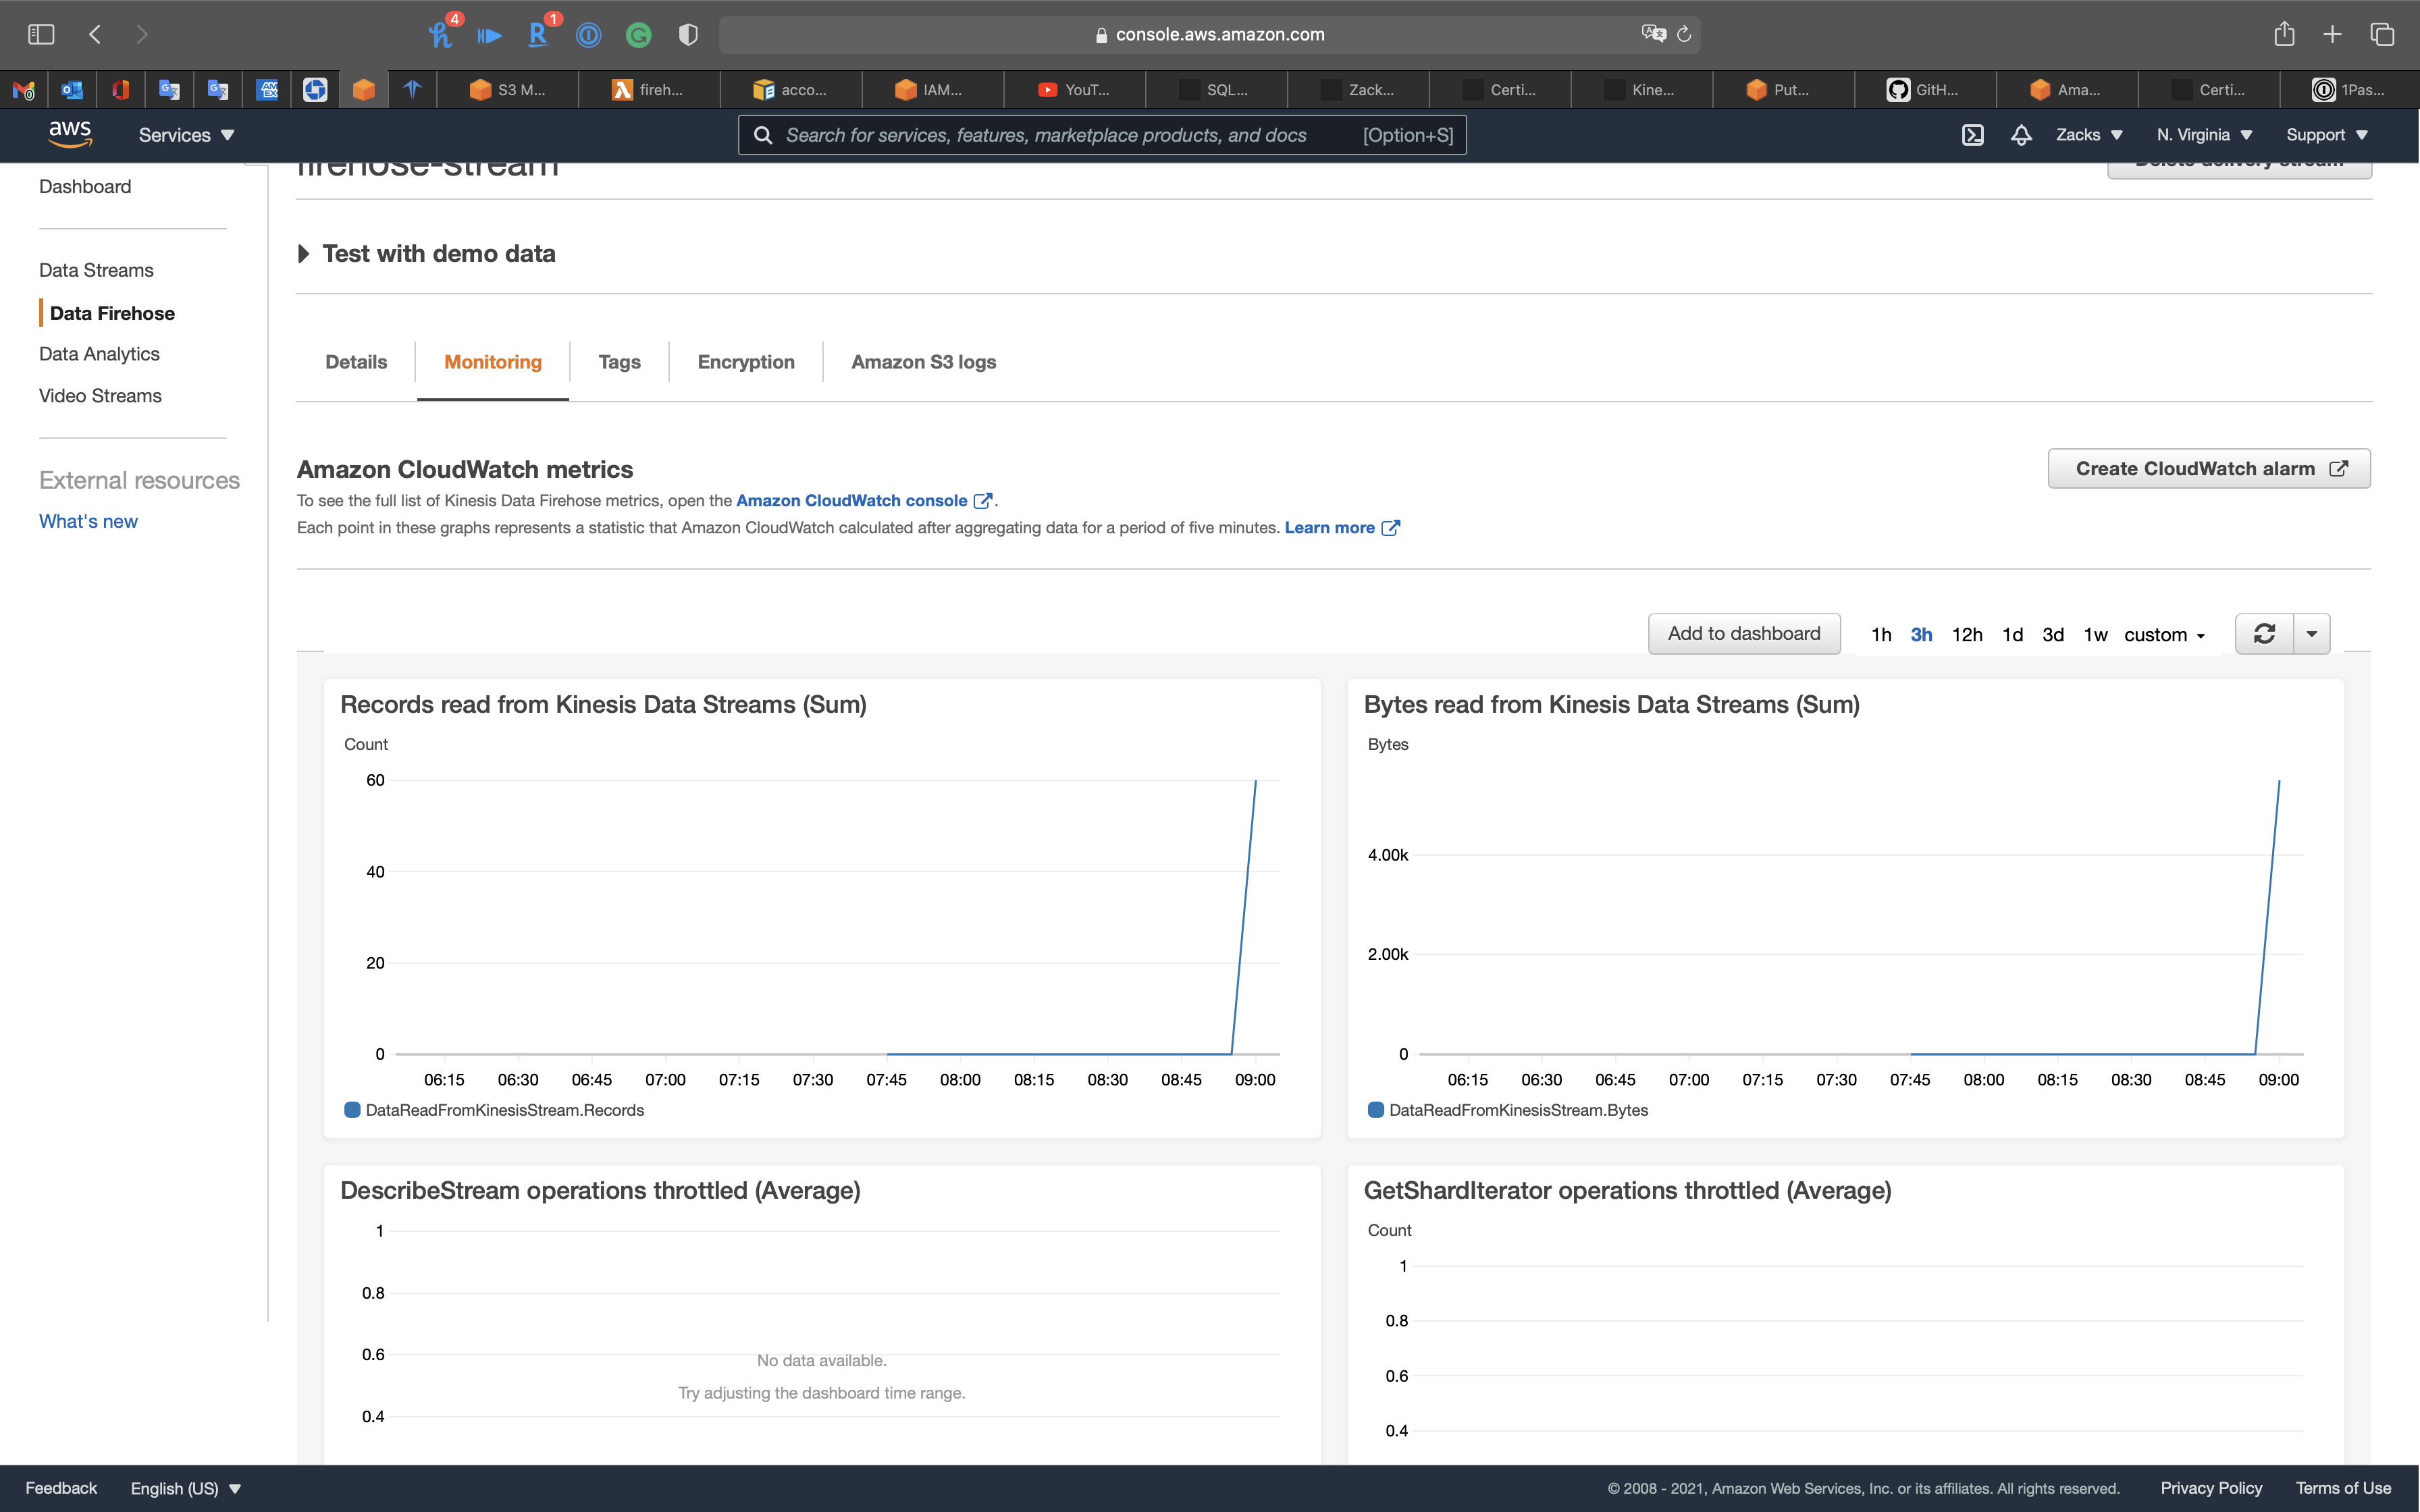
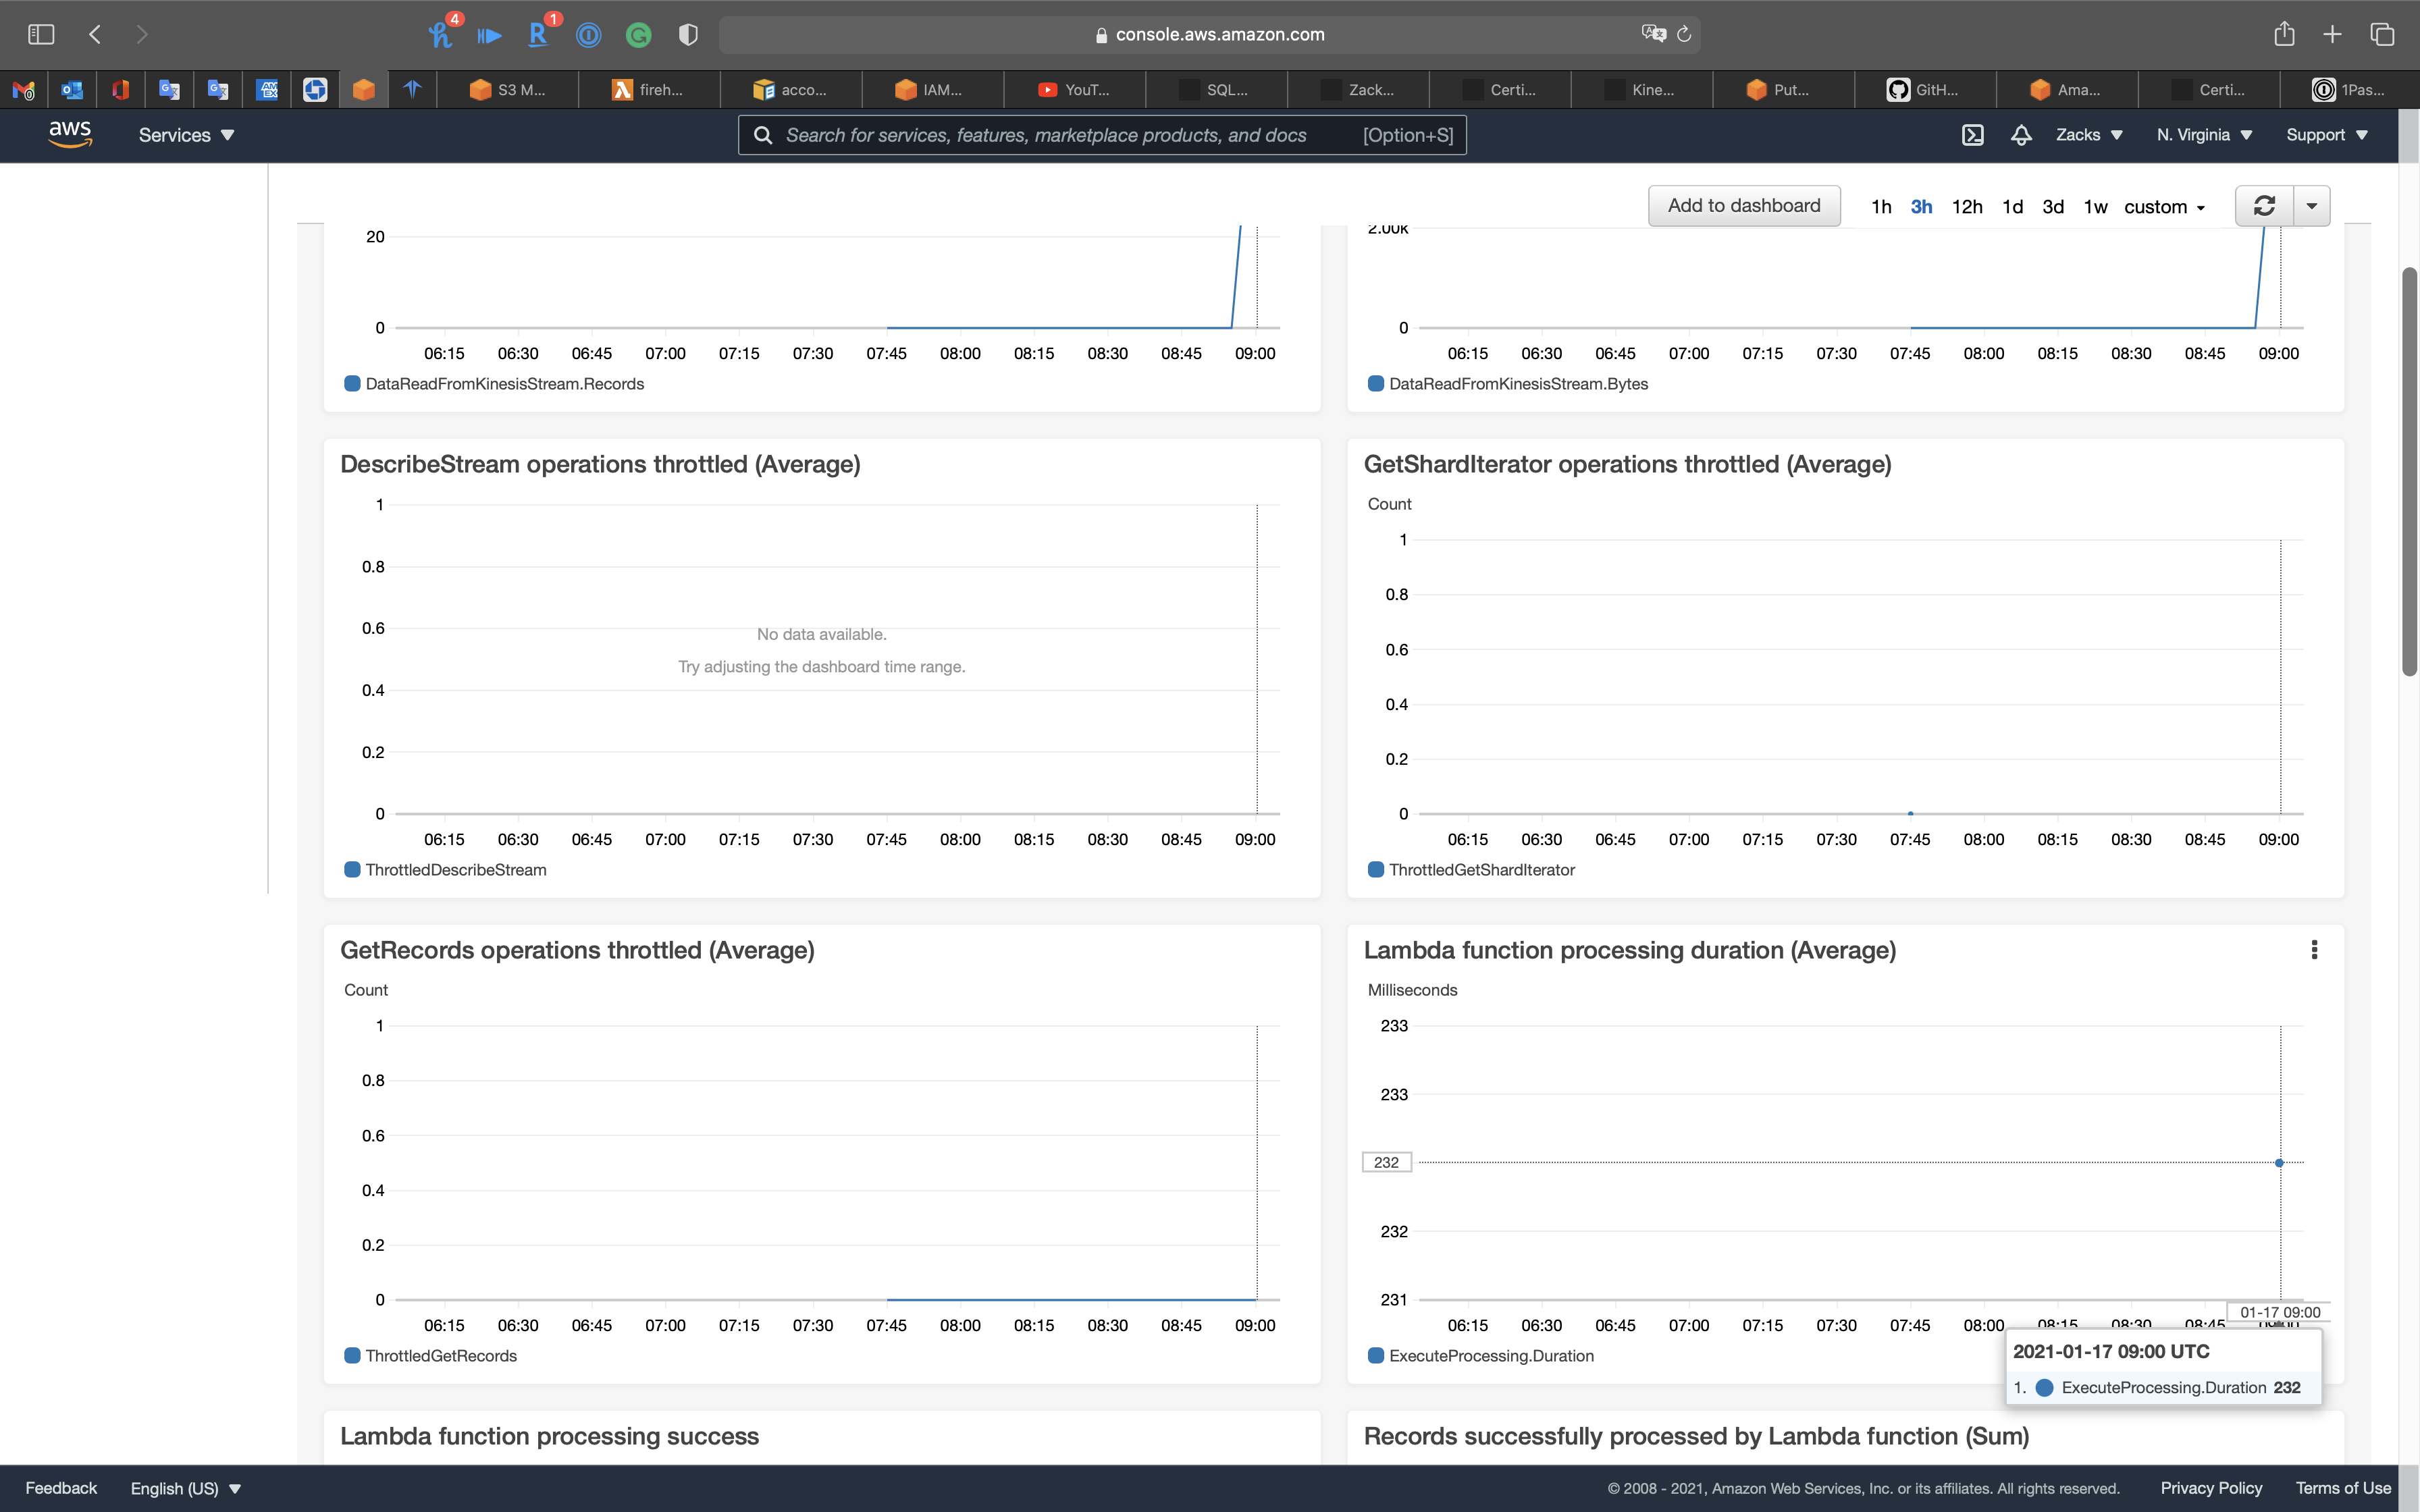
Monitor Firehose
Click on your firehose name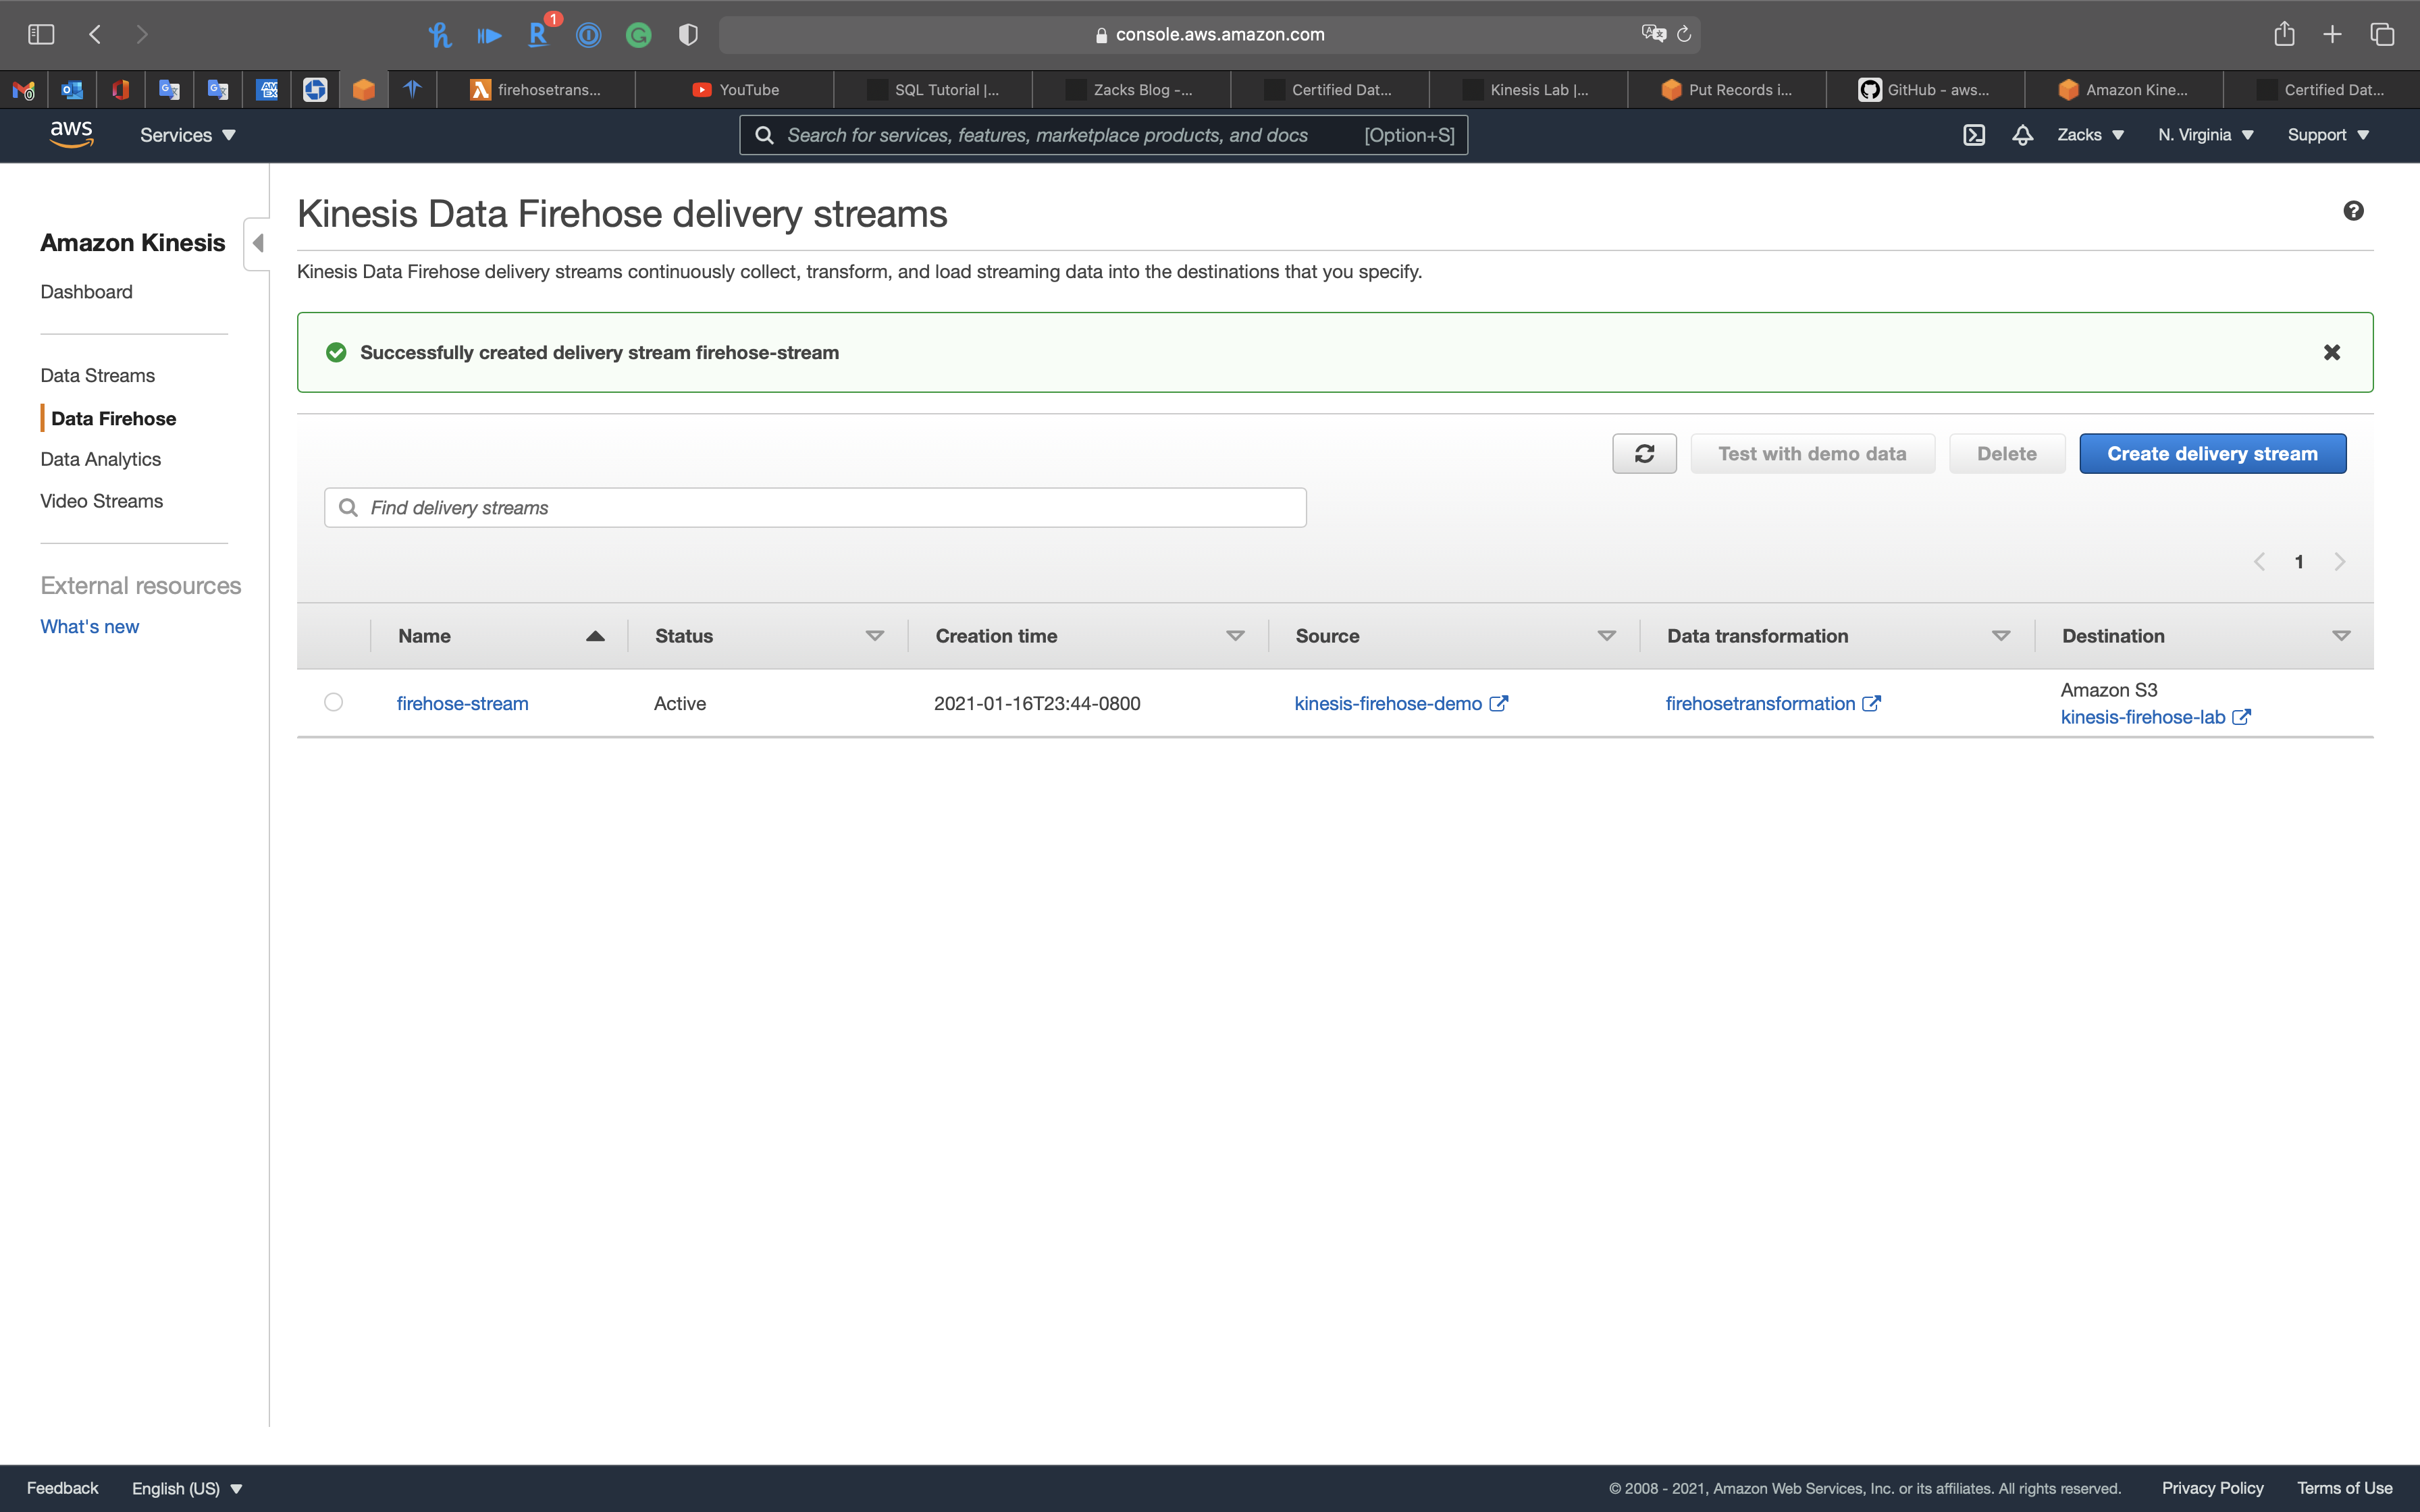
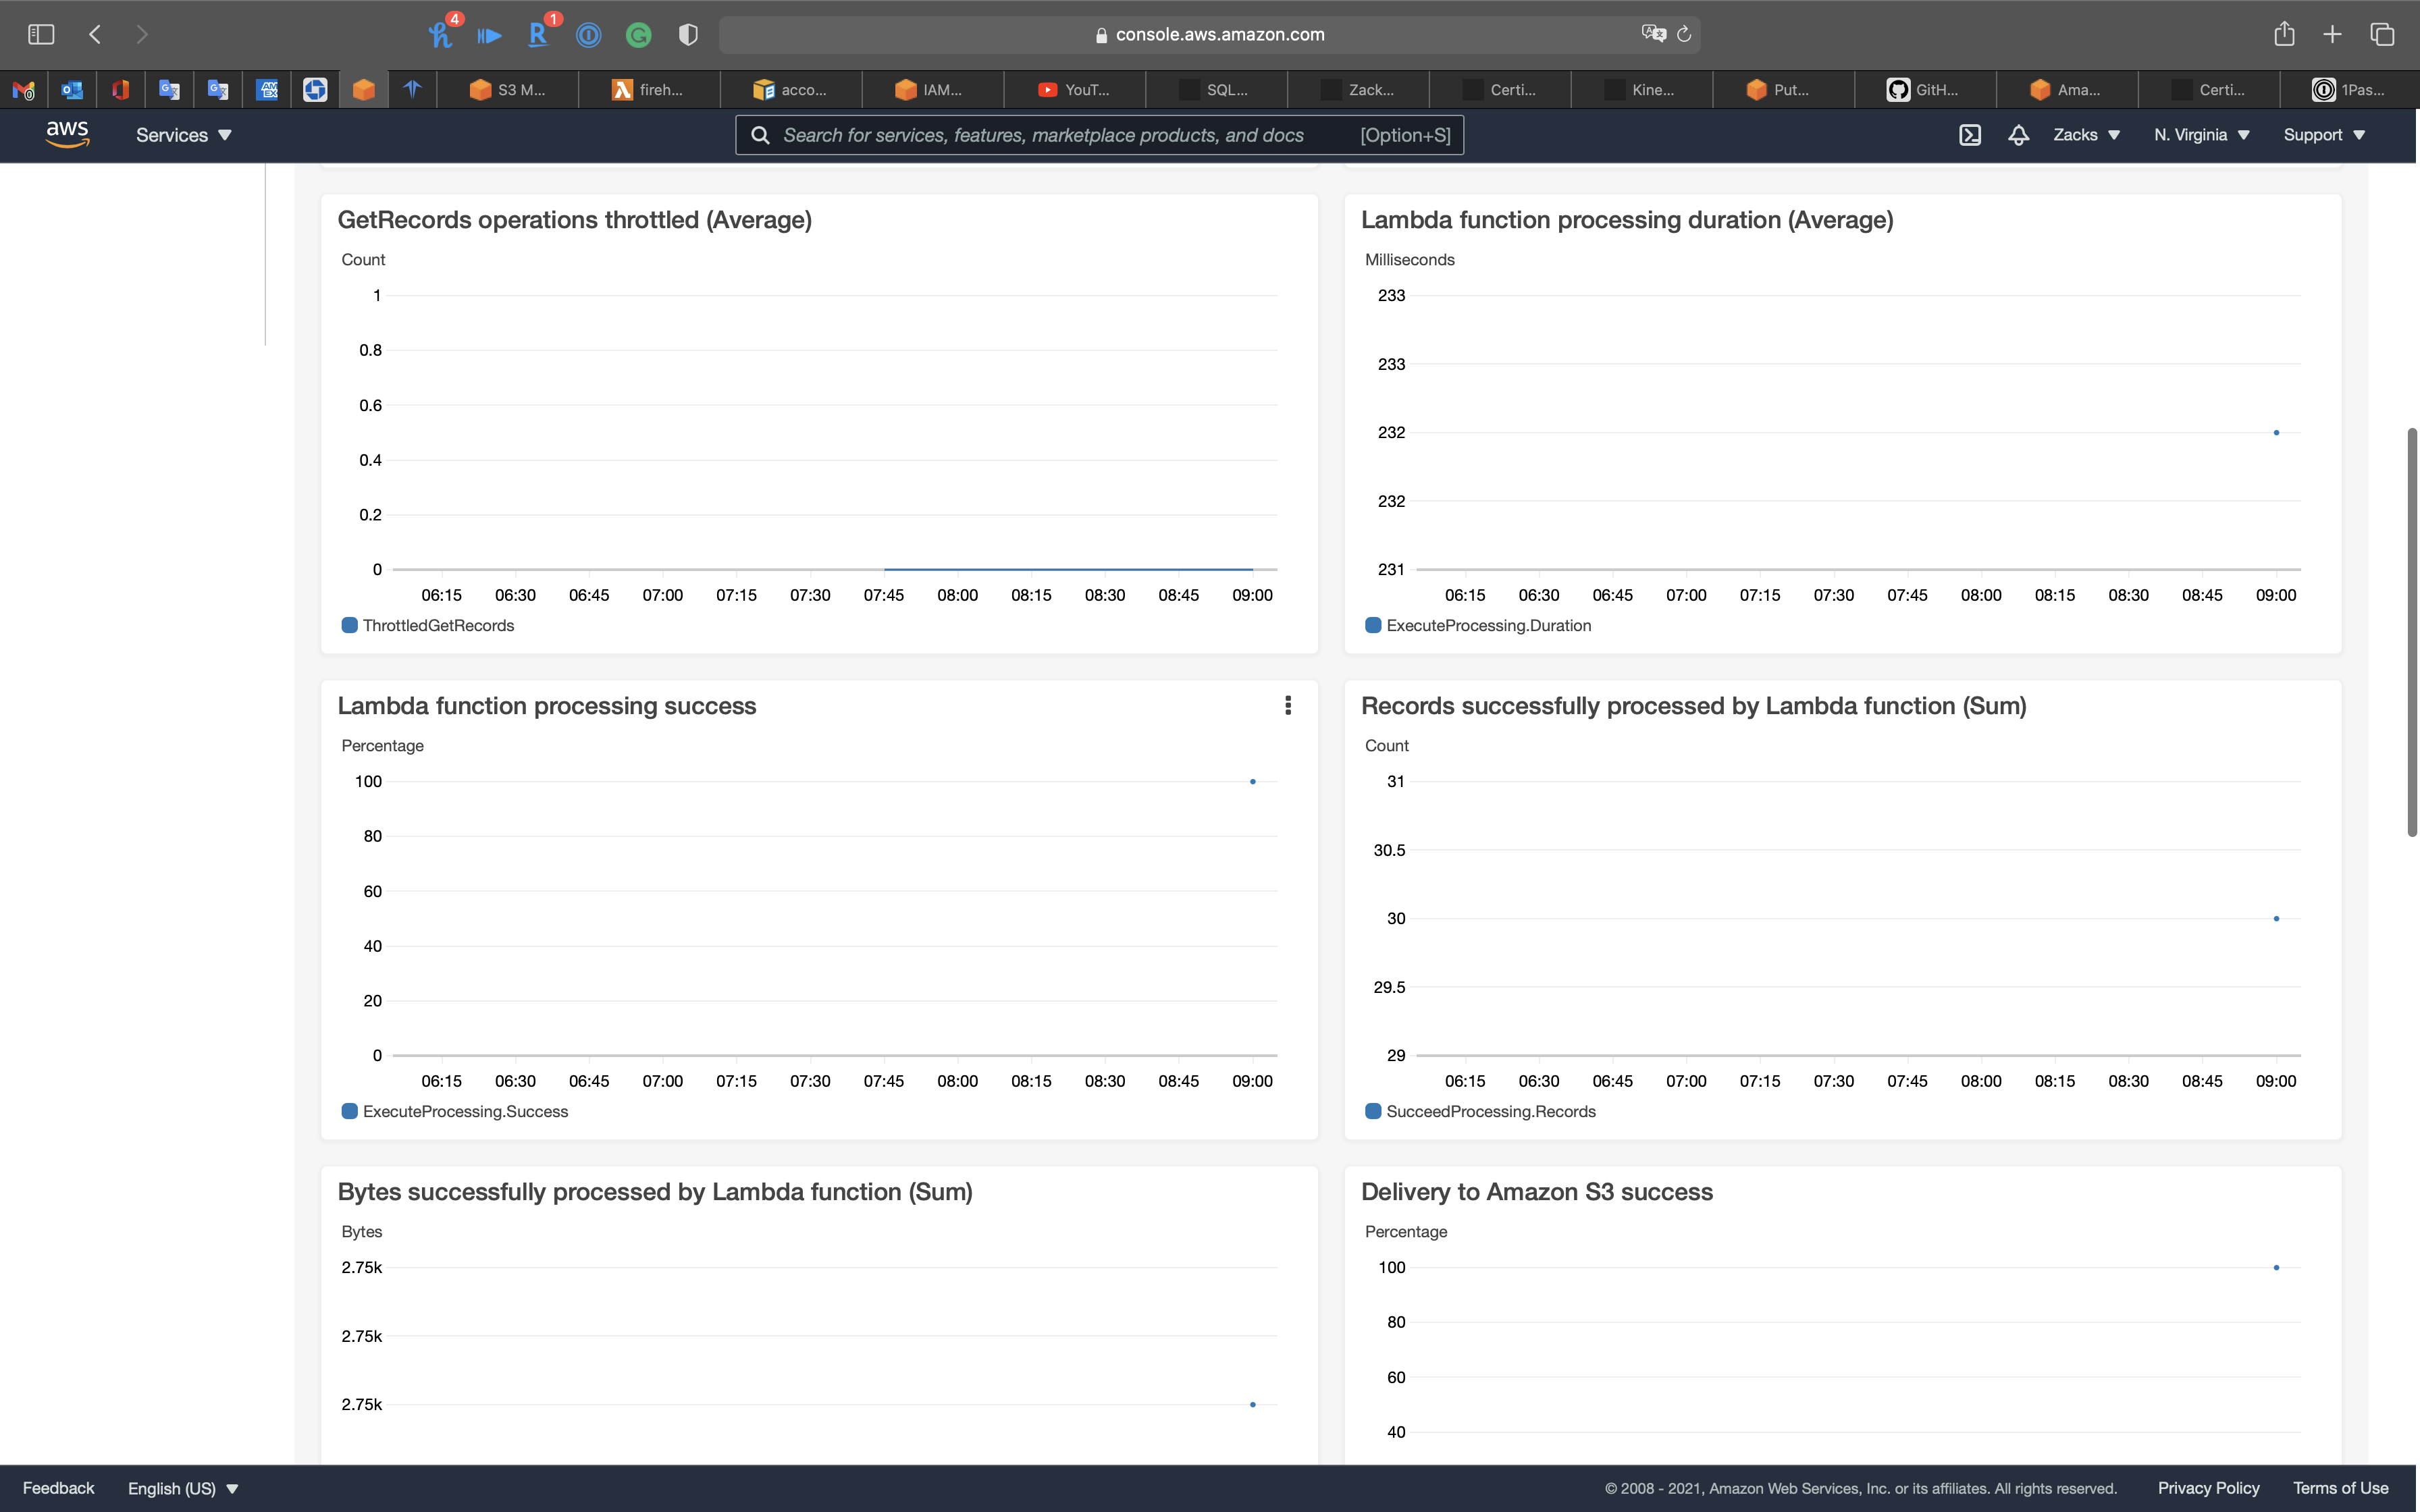
Click on Monitoring tab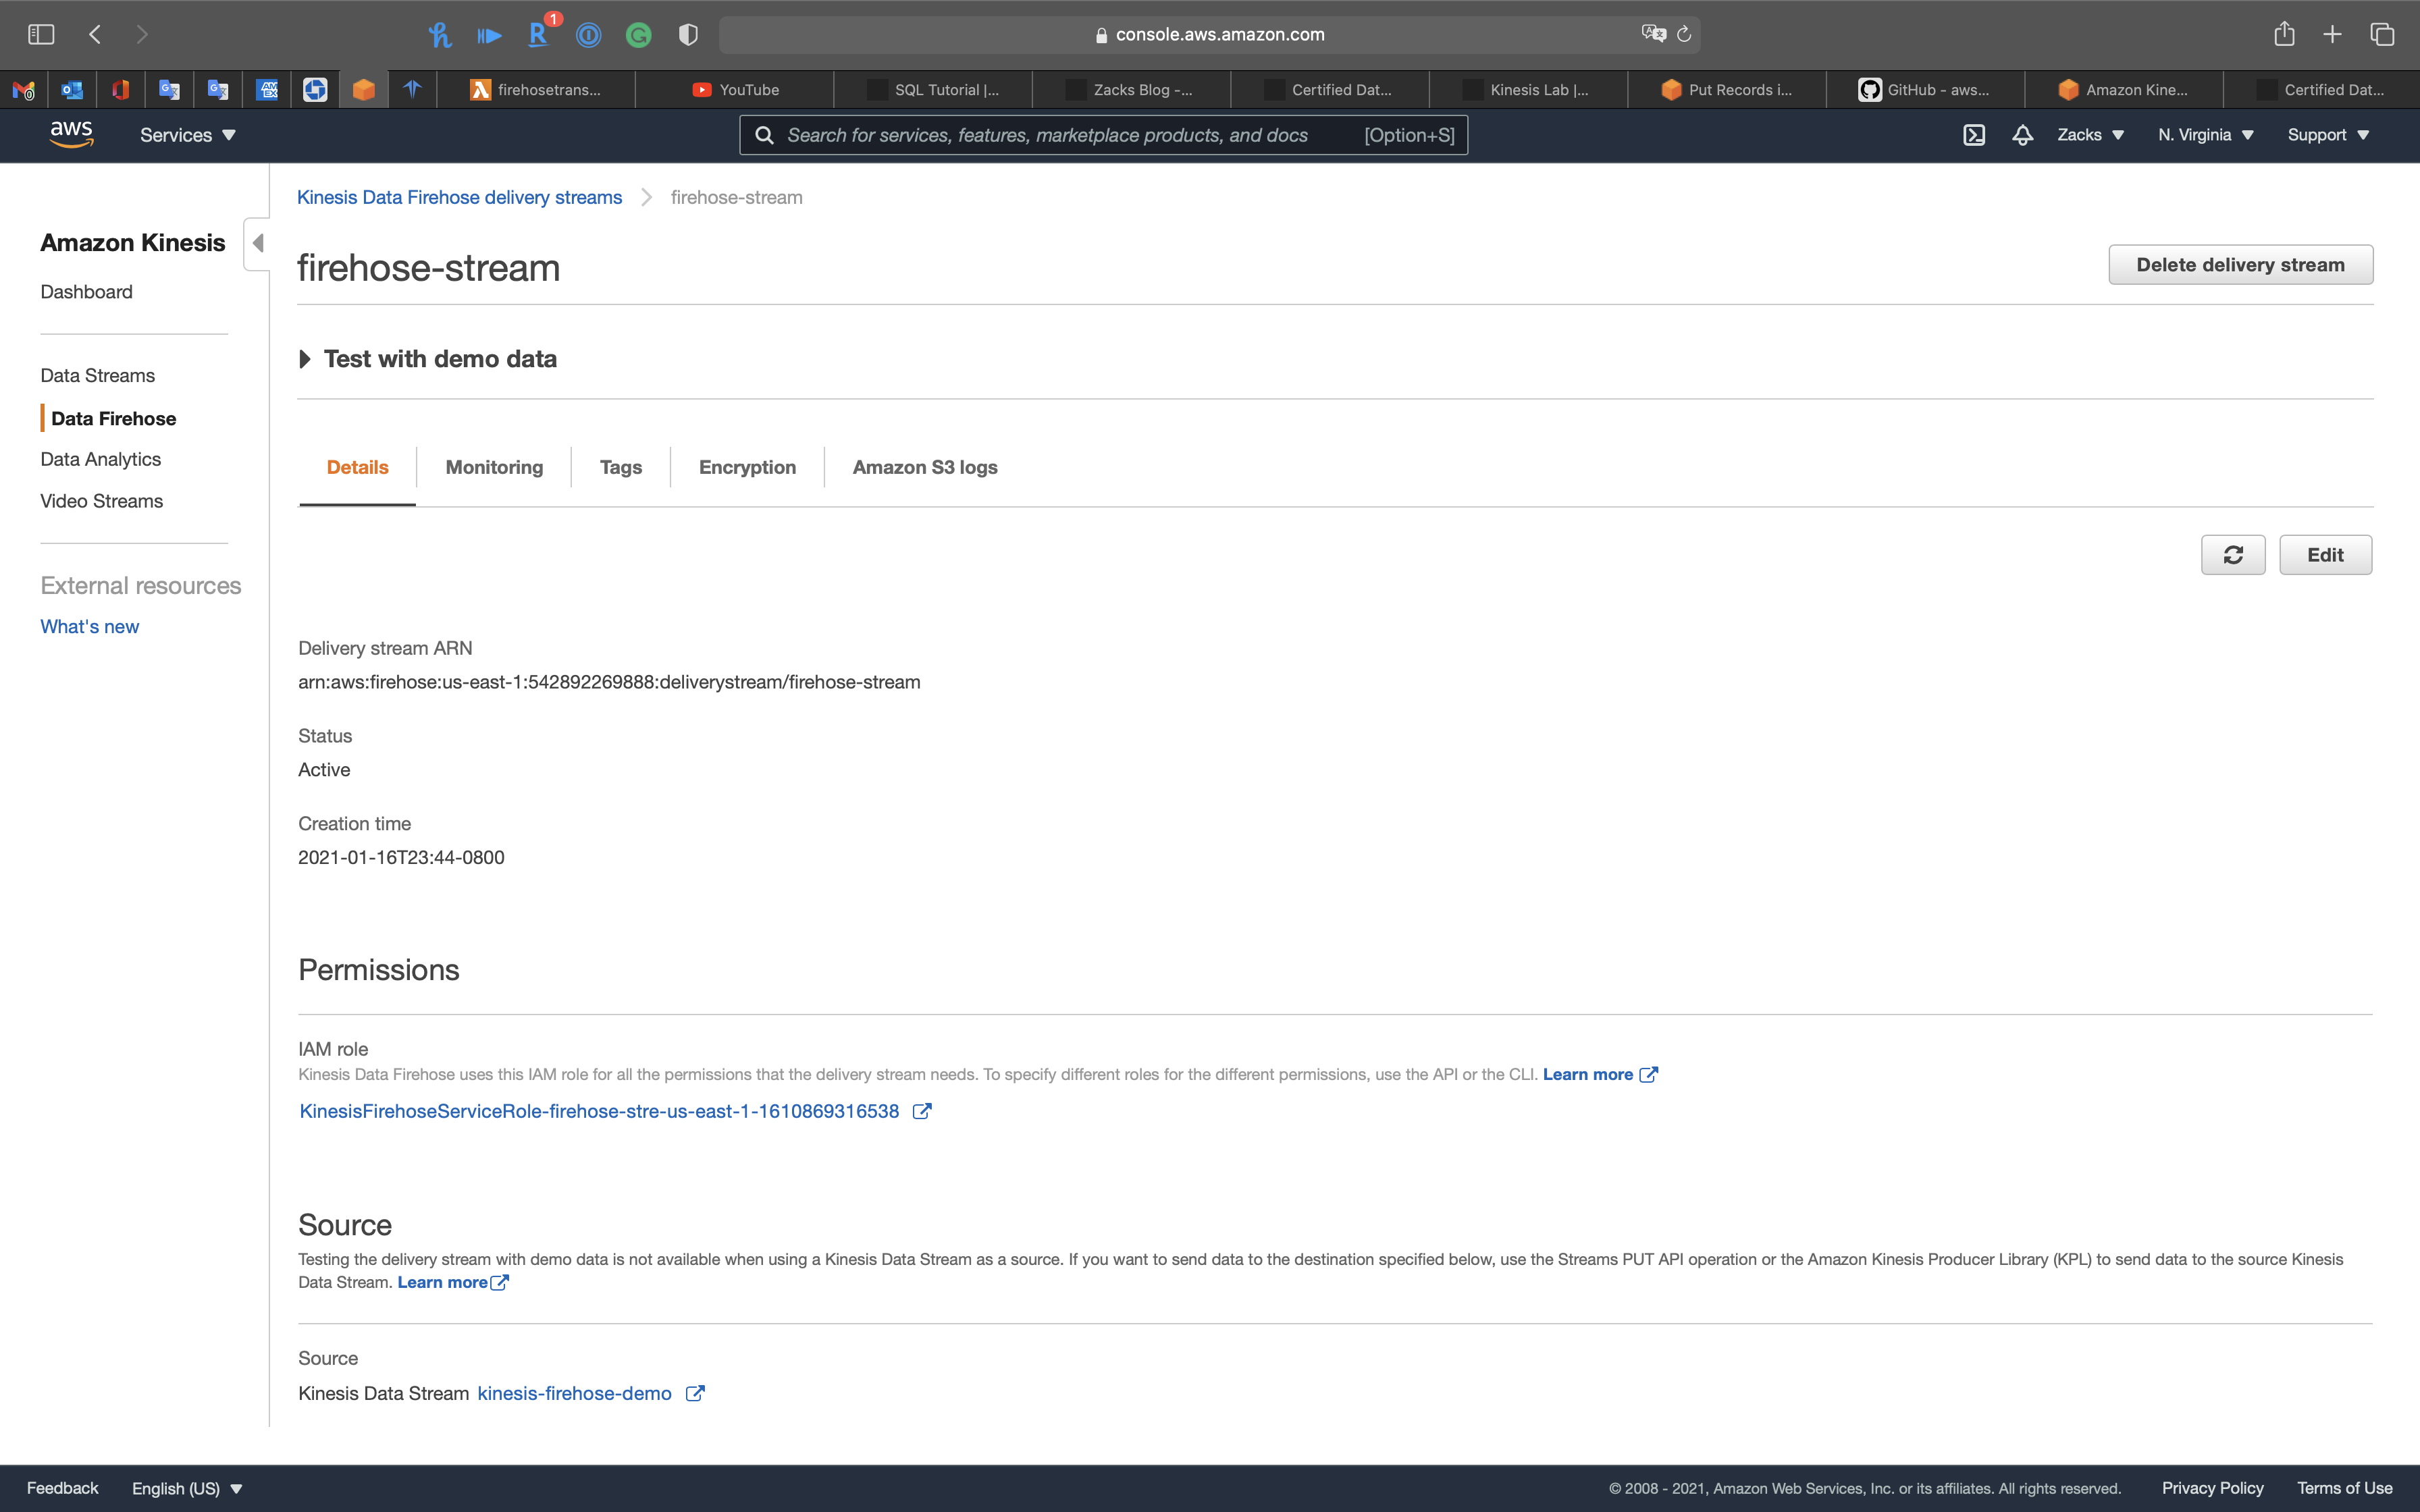

Feed data to Kinesis
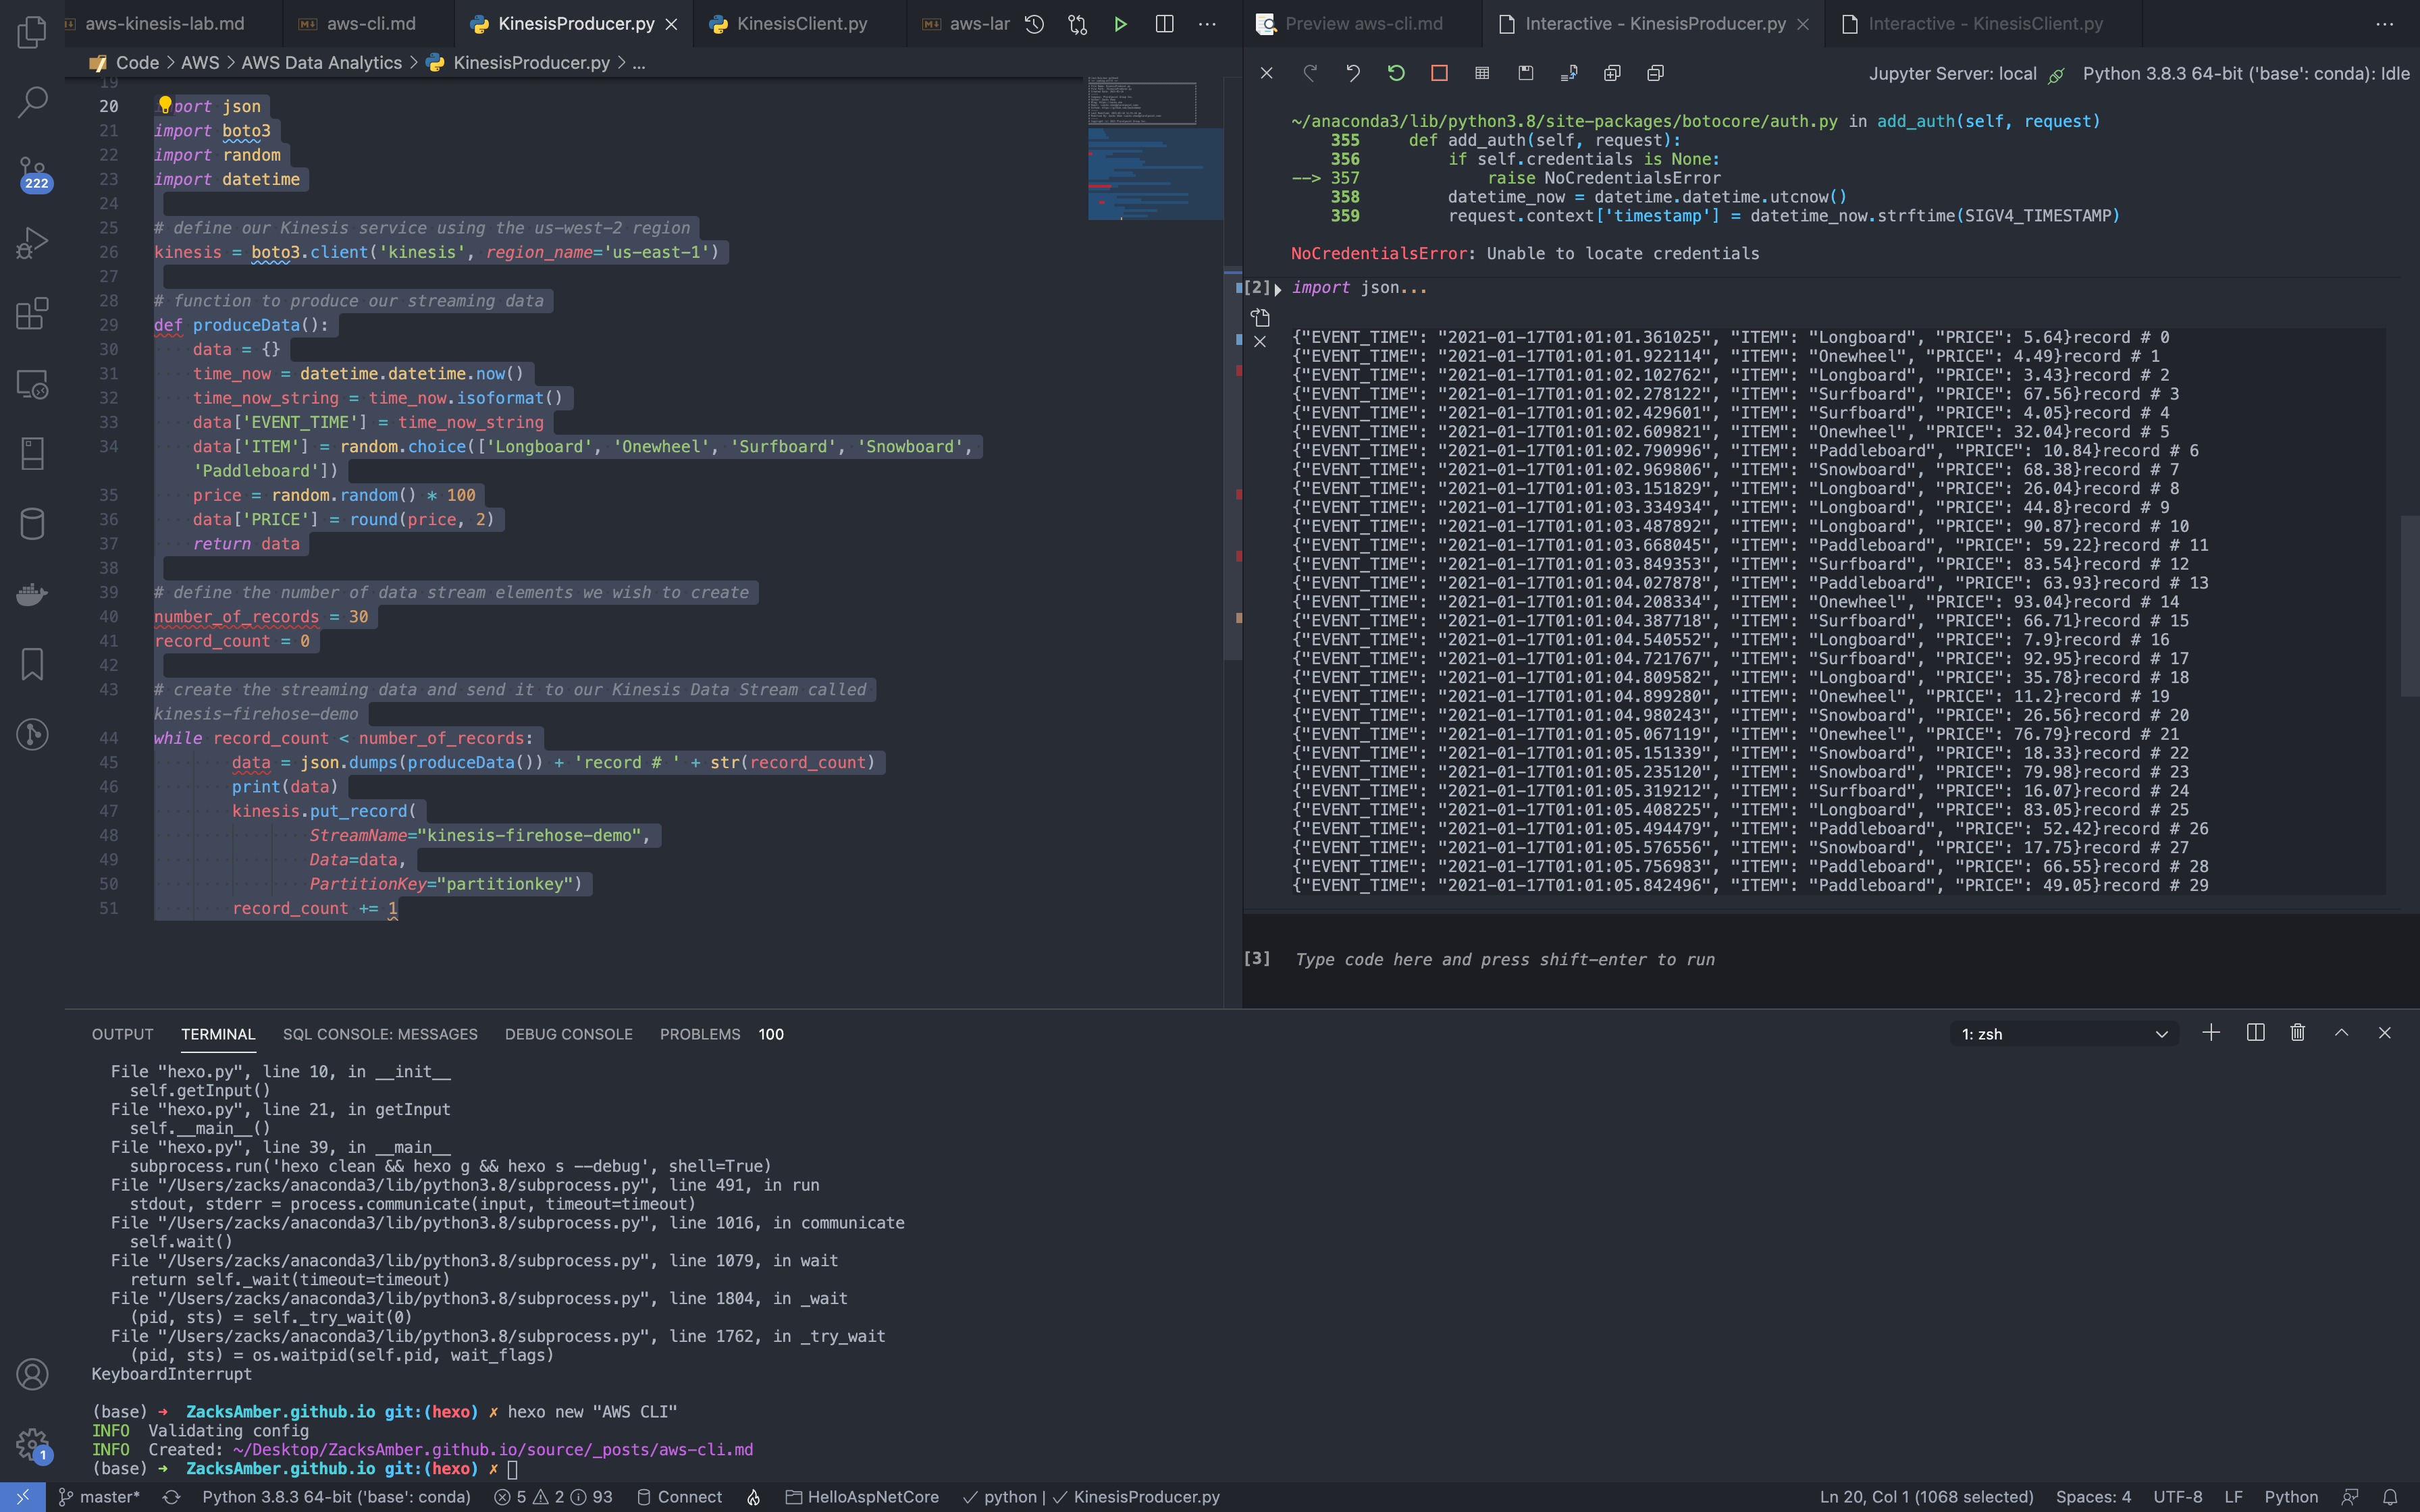
The following Python program will generate a JSON file with some records then send it to Kinesis Firehose.
1 | import json |
Run KinesisProducer.py.
Validation Test
Go to Kinesis Firehose Monitoring page.
Click on 1h.
Wait 60s then refresh the page.
Go to S3 and open the kinesis firehose lab bucket.
We have the transformed data and backup data.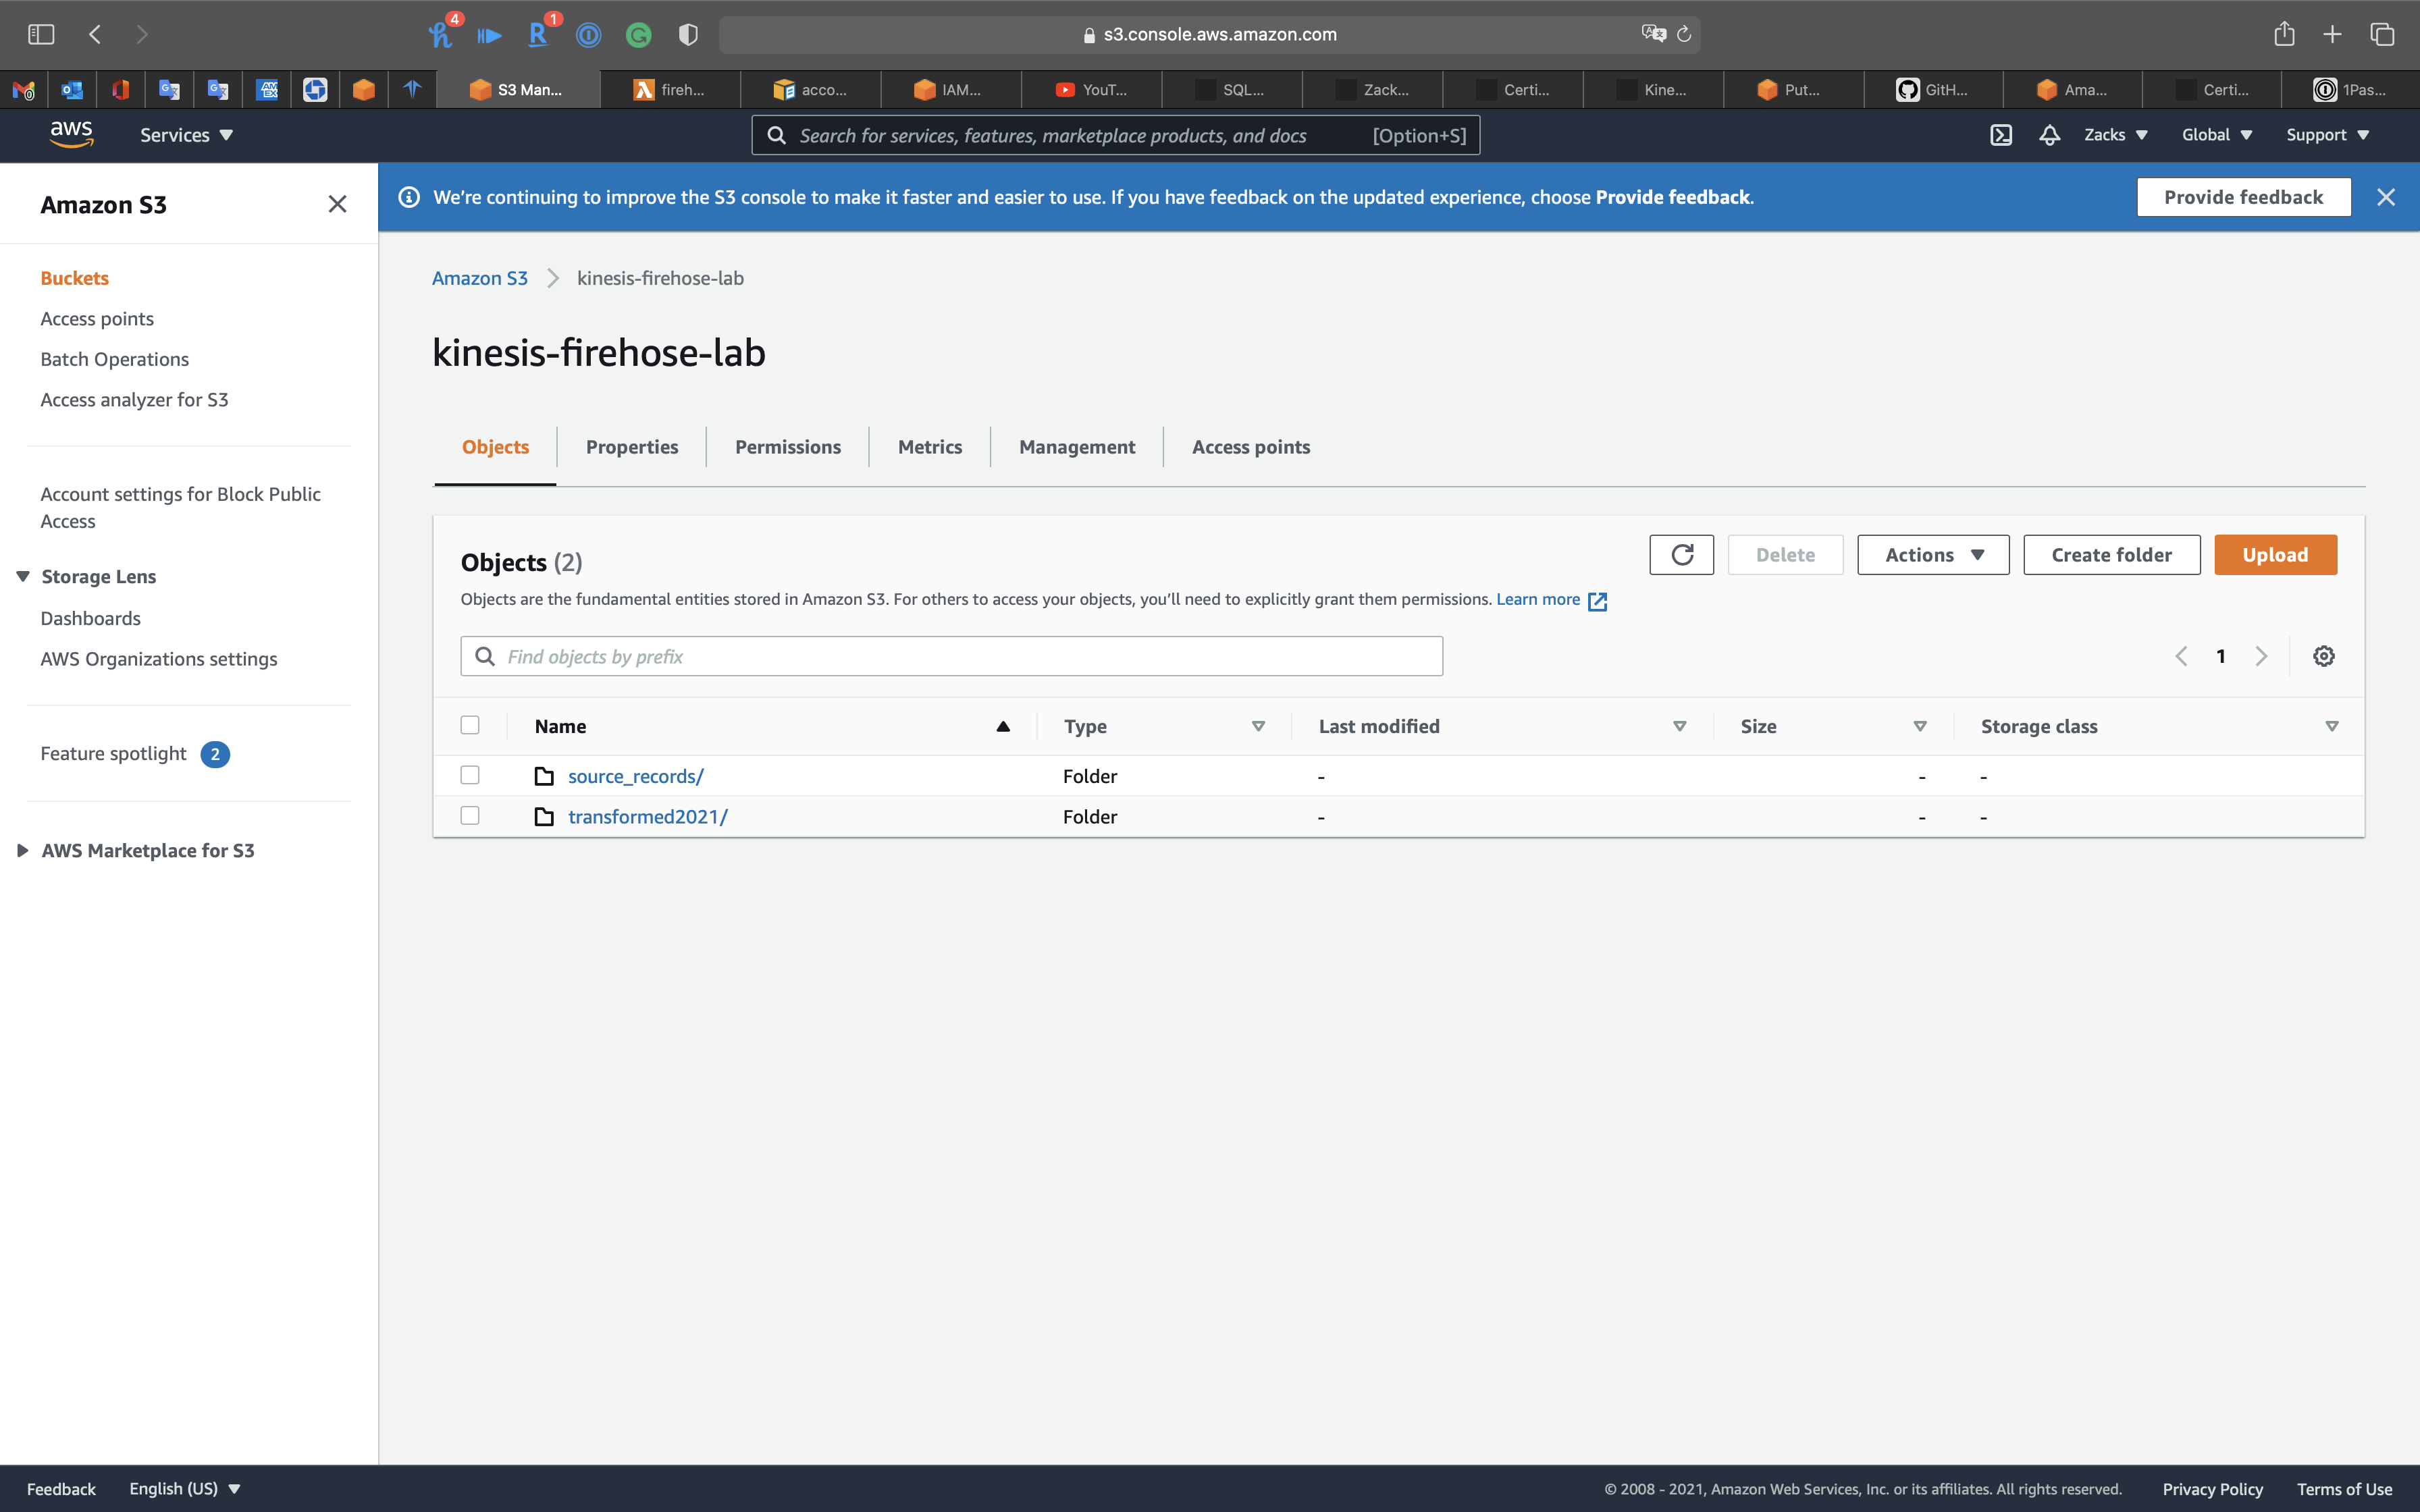
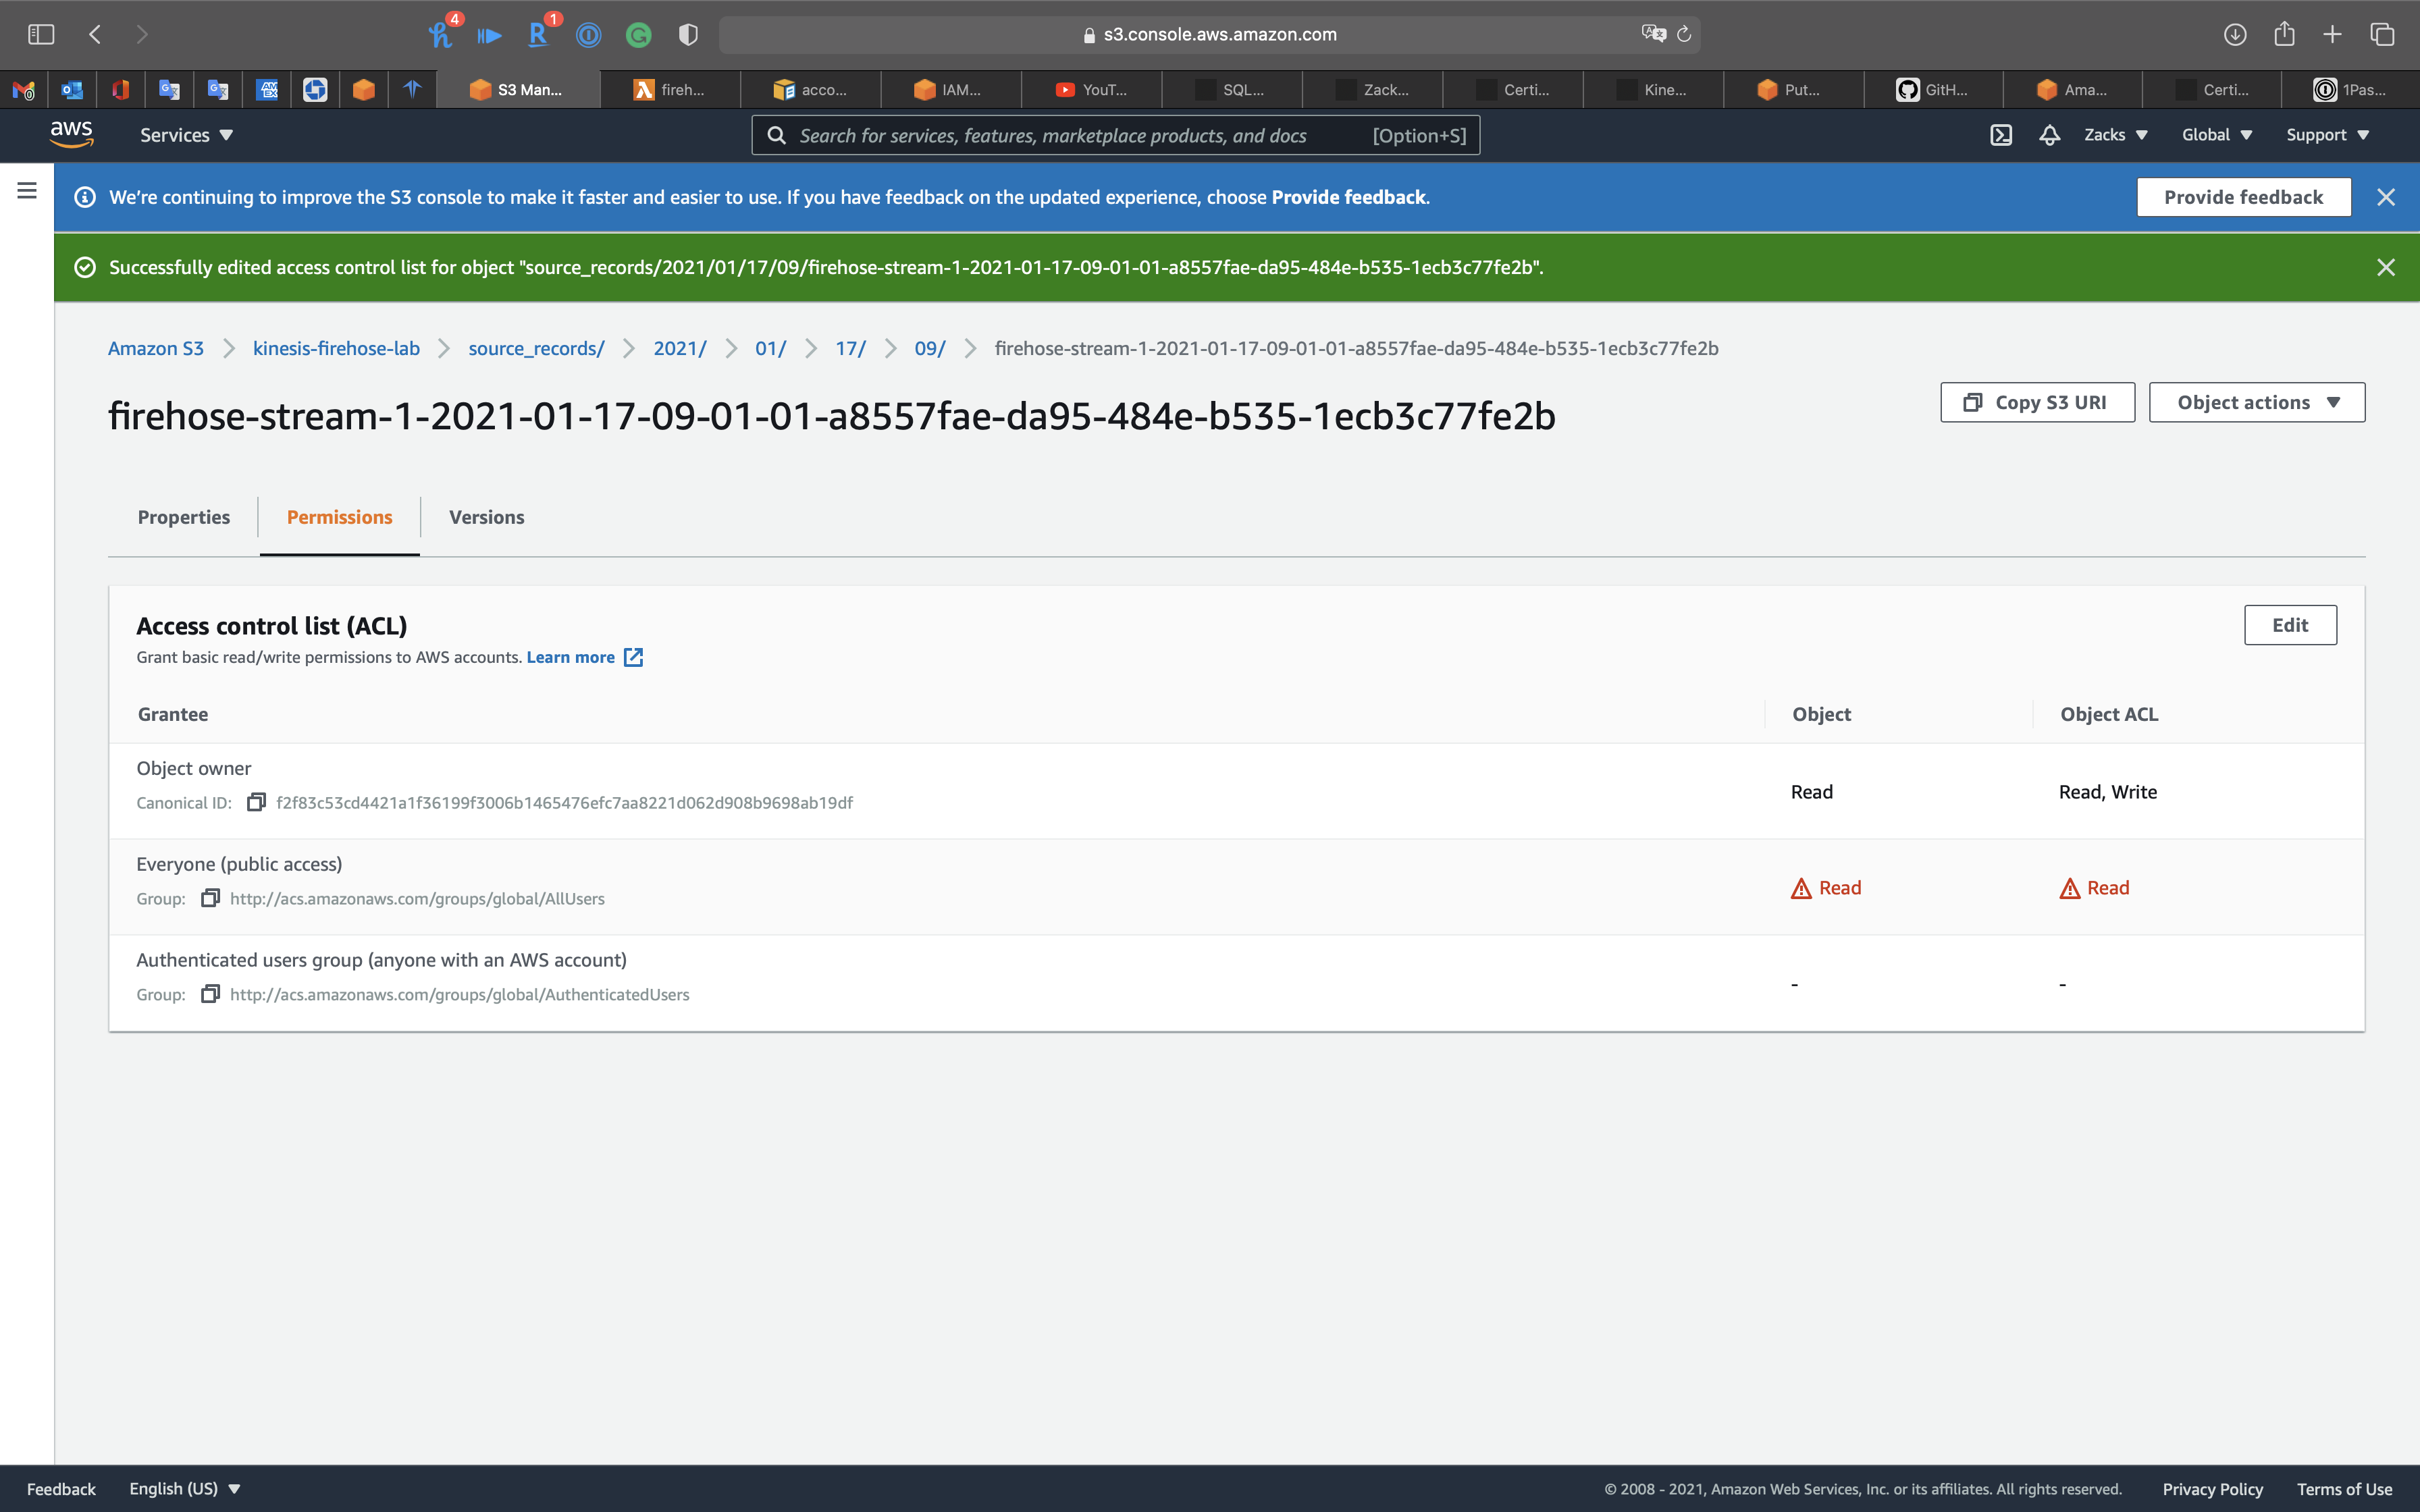
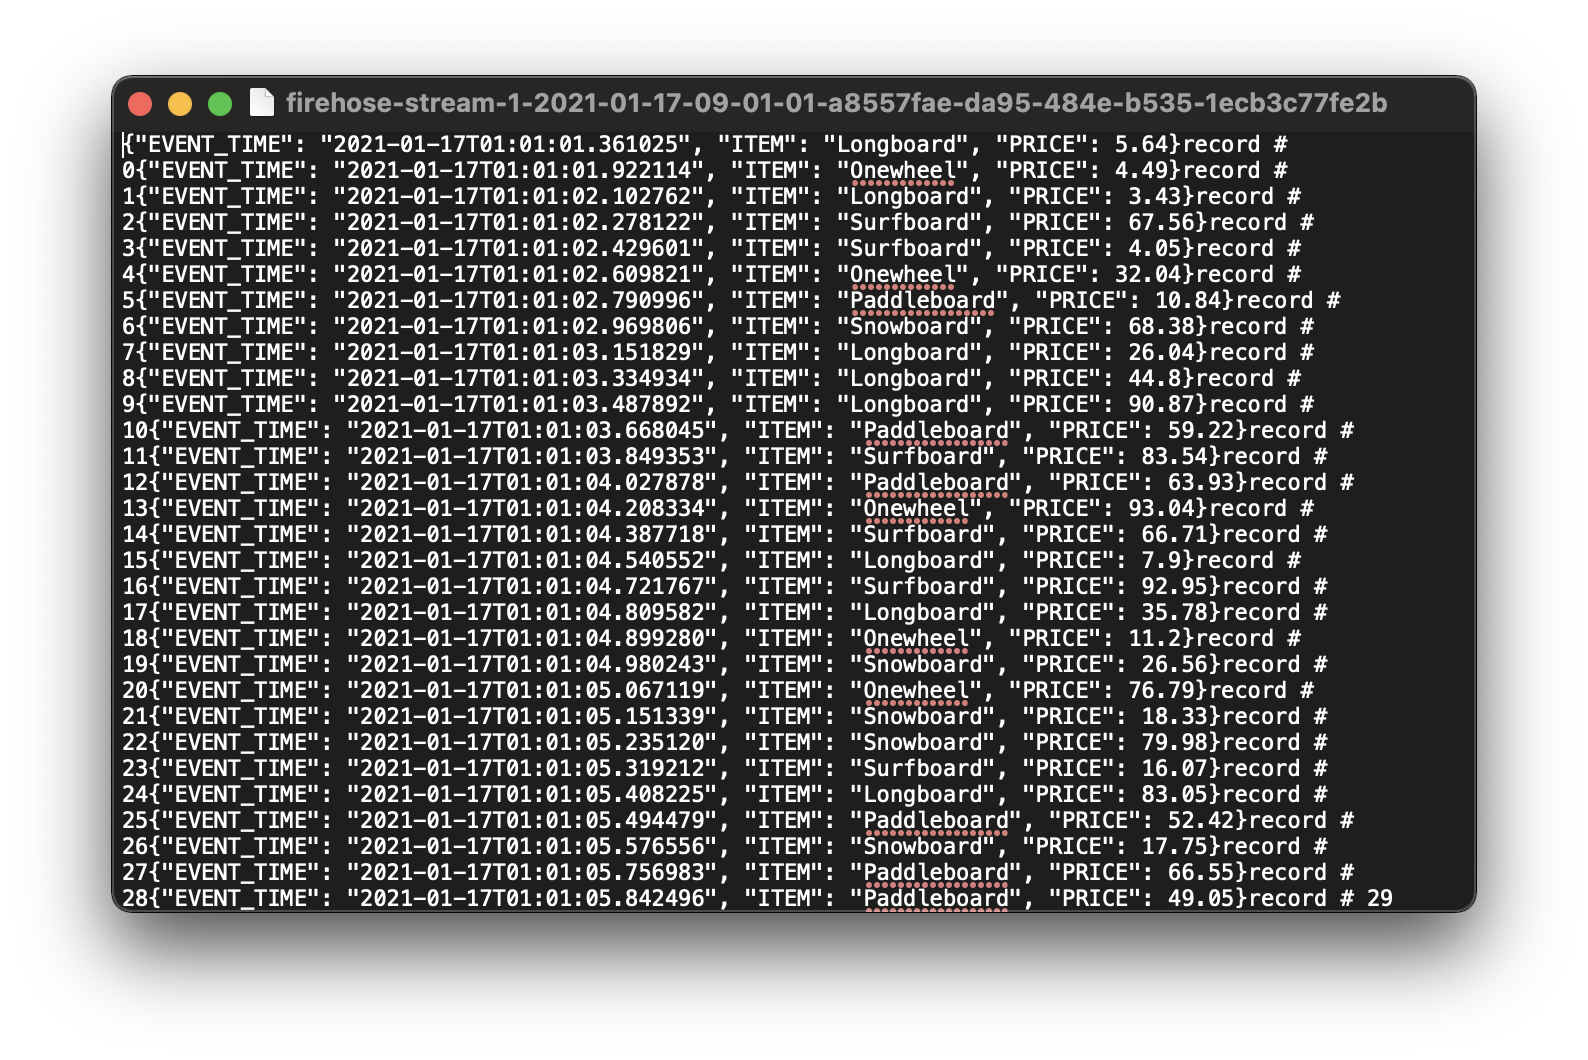
After give the object public access permission, we can download and open it.
Data Format and Compression Lab
Diagram
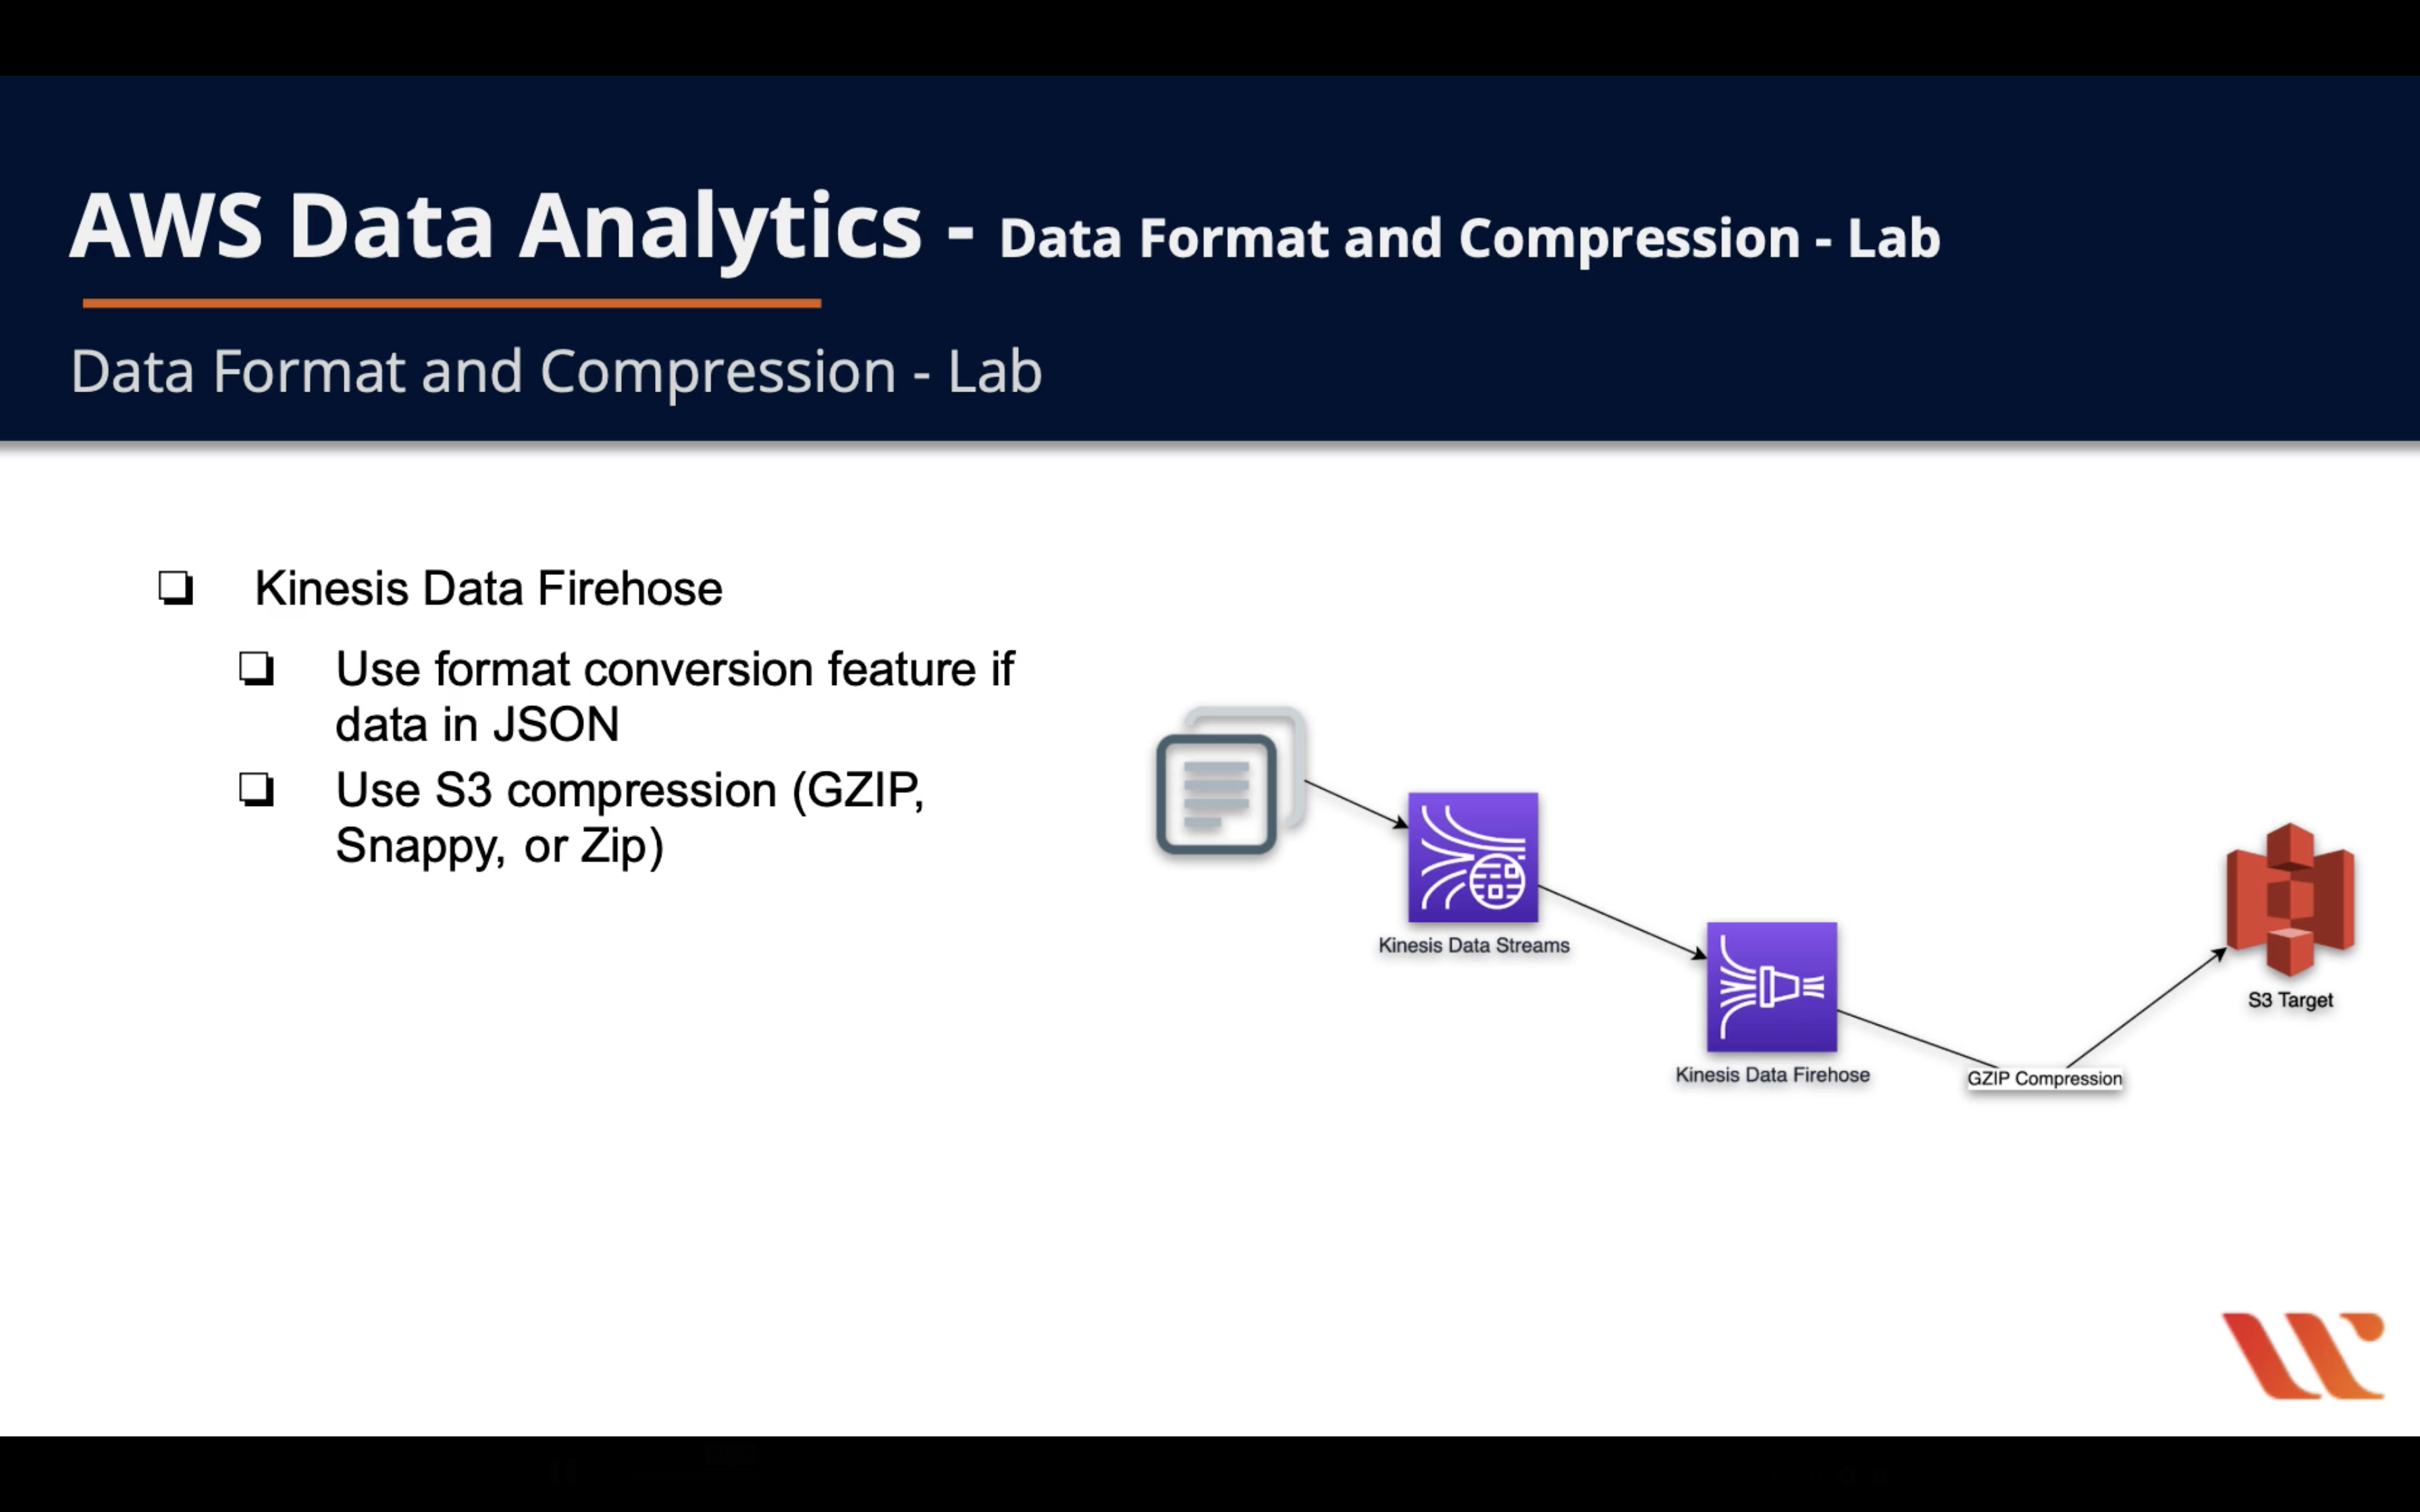
- Kinesis Data Firehose
- Use format conversion feature if data in JSON
- Use S3 compression (GZIP, Snappy, or Zip)
Kinesis Data Streams Configuration
Services -> Kinesis -> Data streams
Click on Create data stream
- Data stream name:
kinesis-transform-demo - Number of open shards:
1
Click on Create data stream
Kinesis Data Firehose Configuration
Services -> Kinesis -> Delivery streams
Step 1: Name and source
Click on Create delivery stream
- Delivery stream name:
kinesis-transform-firehose-demo - Source: Kinesis Data Stream:
kinesis-transform-demo
Click on Next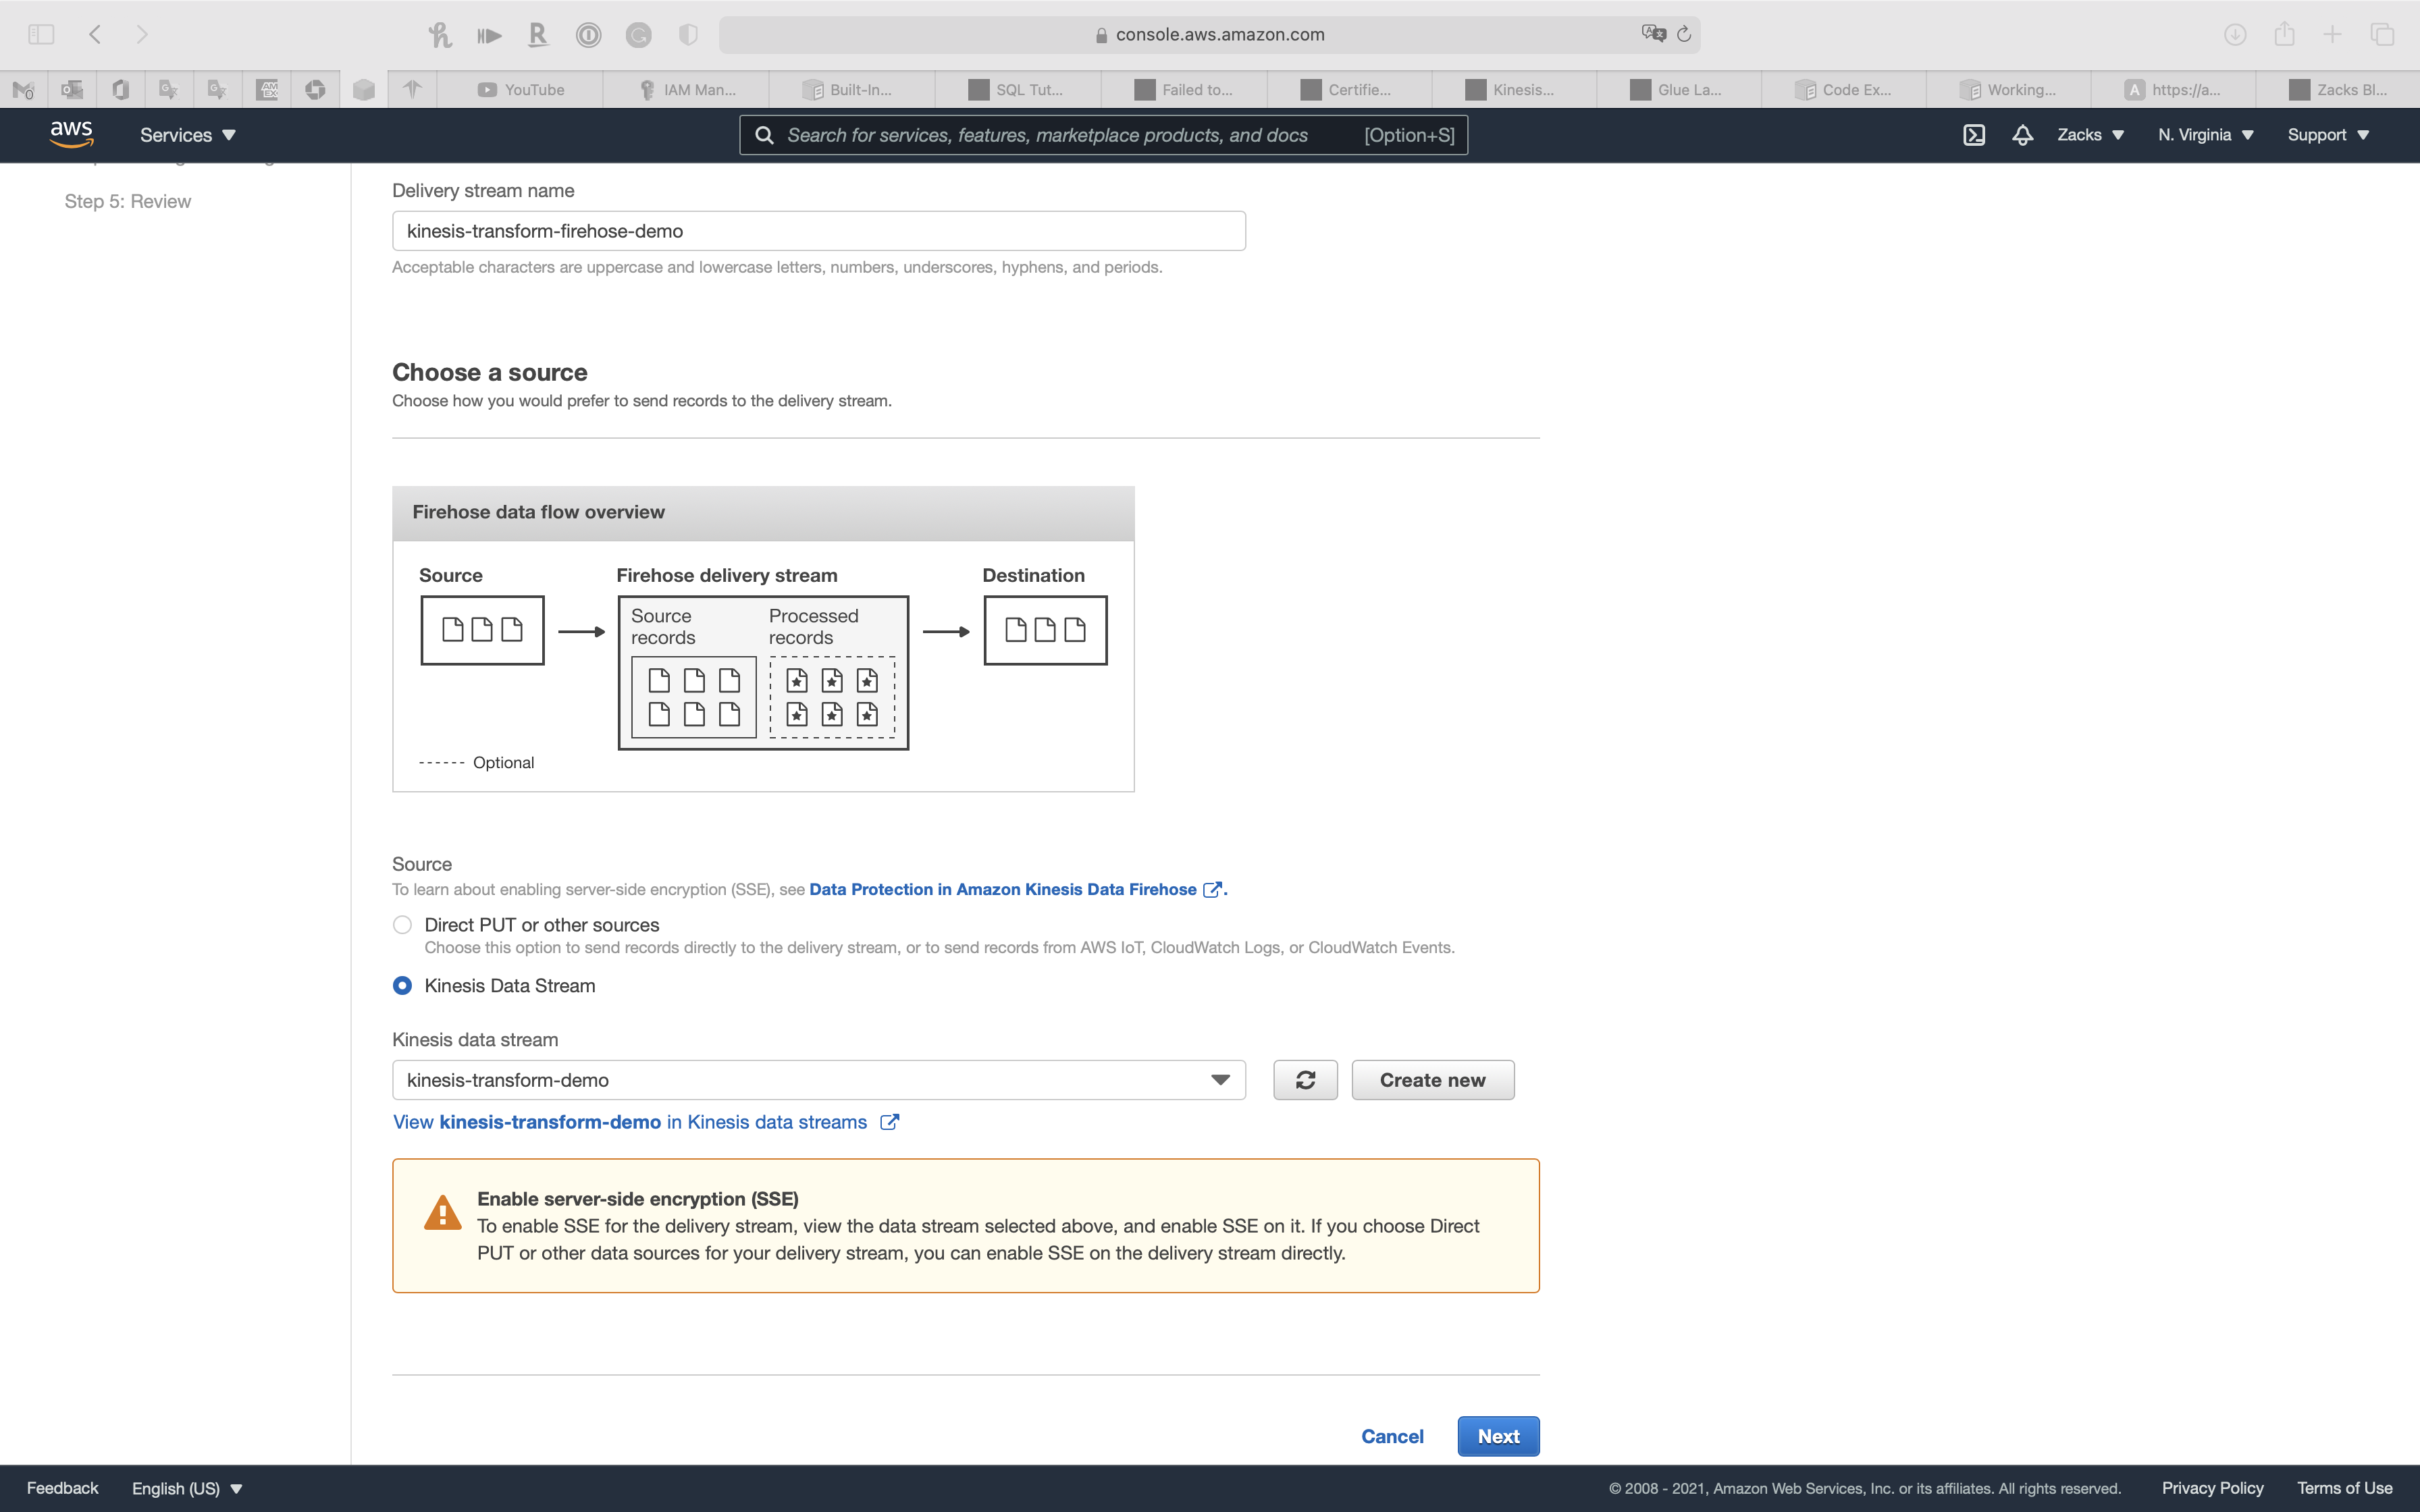
Step 2: Process records
Click on Next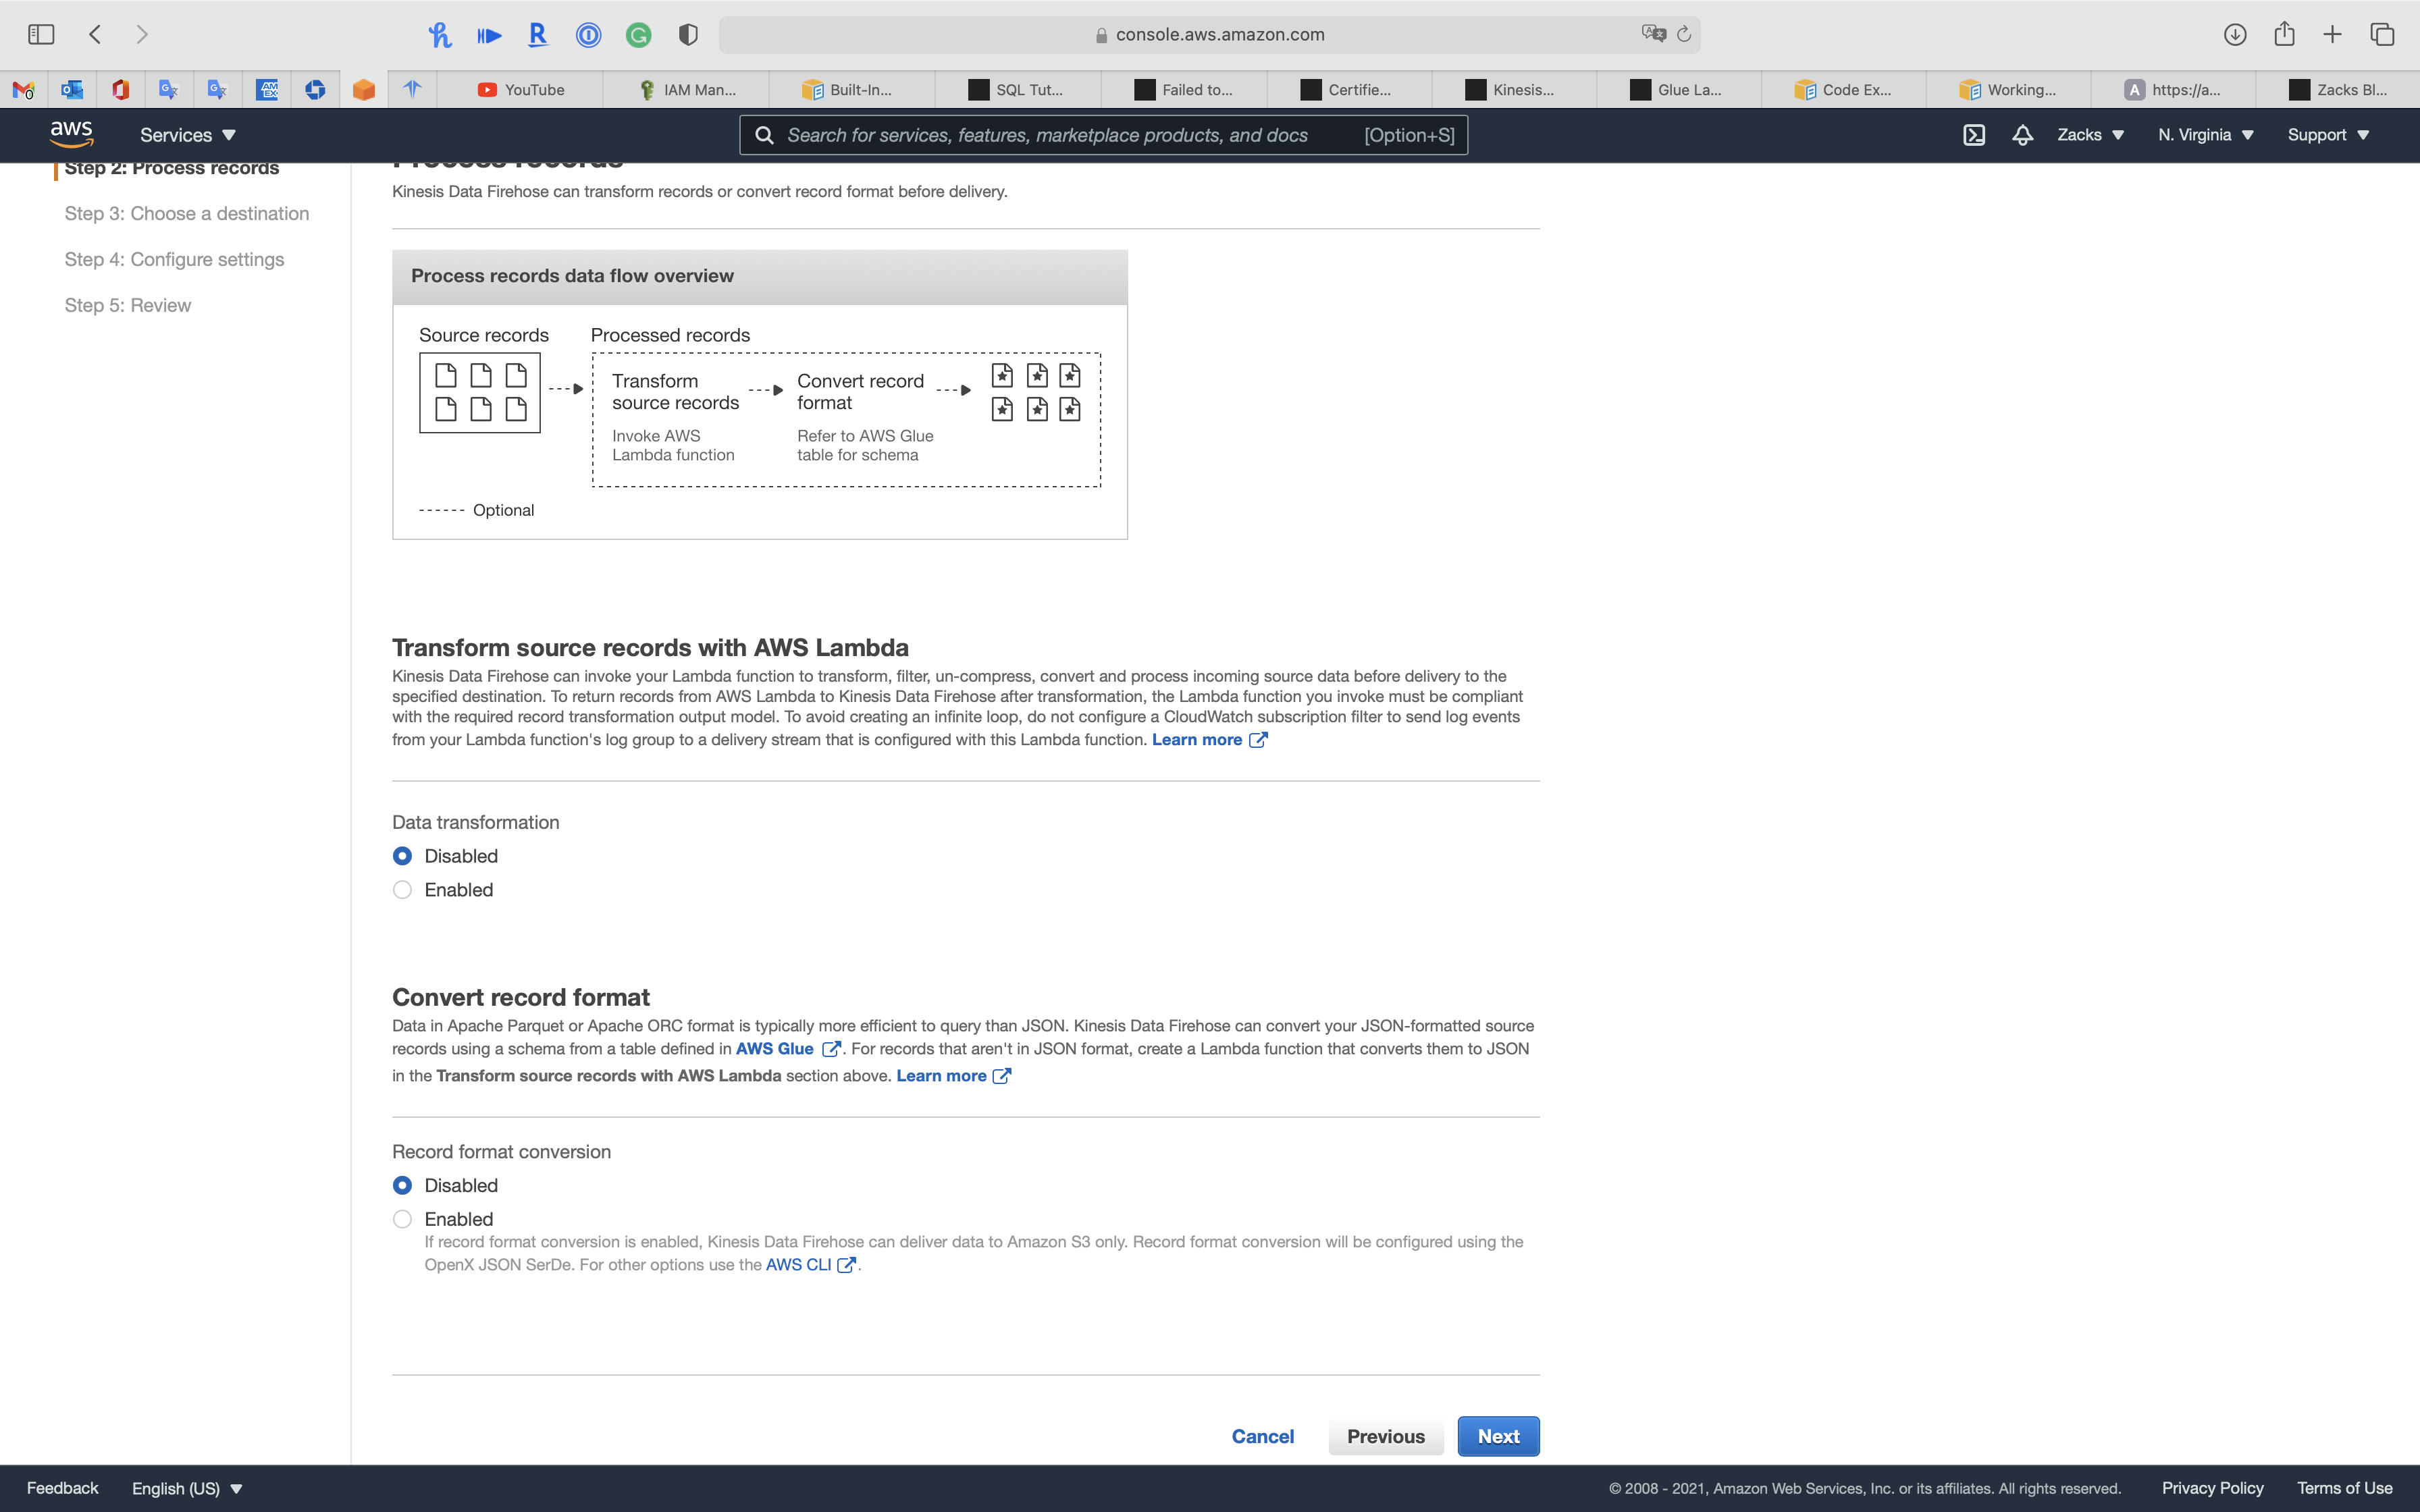
Step 3: Choose a destination
- Destination: Amazon S3
- S3 bucket: choose your lab bucket
- Backup S3 bucket prefix - optional:
compress-transform - Backup S3 error prefix - optional:
error-compress-transform
Click on Next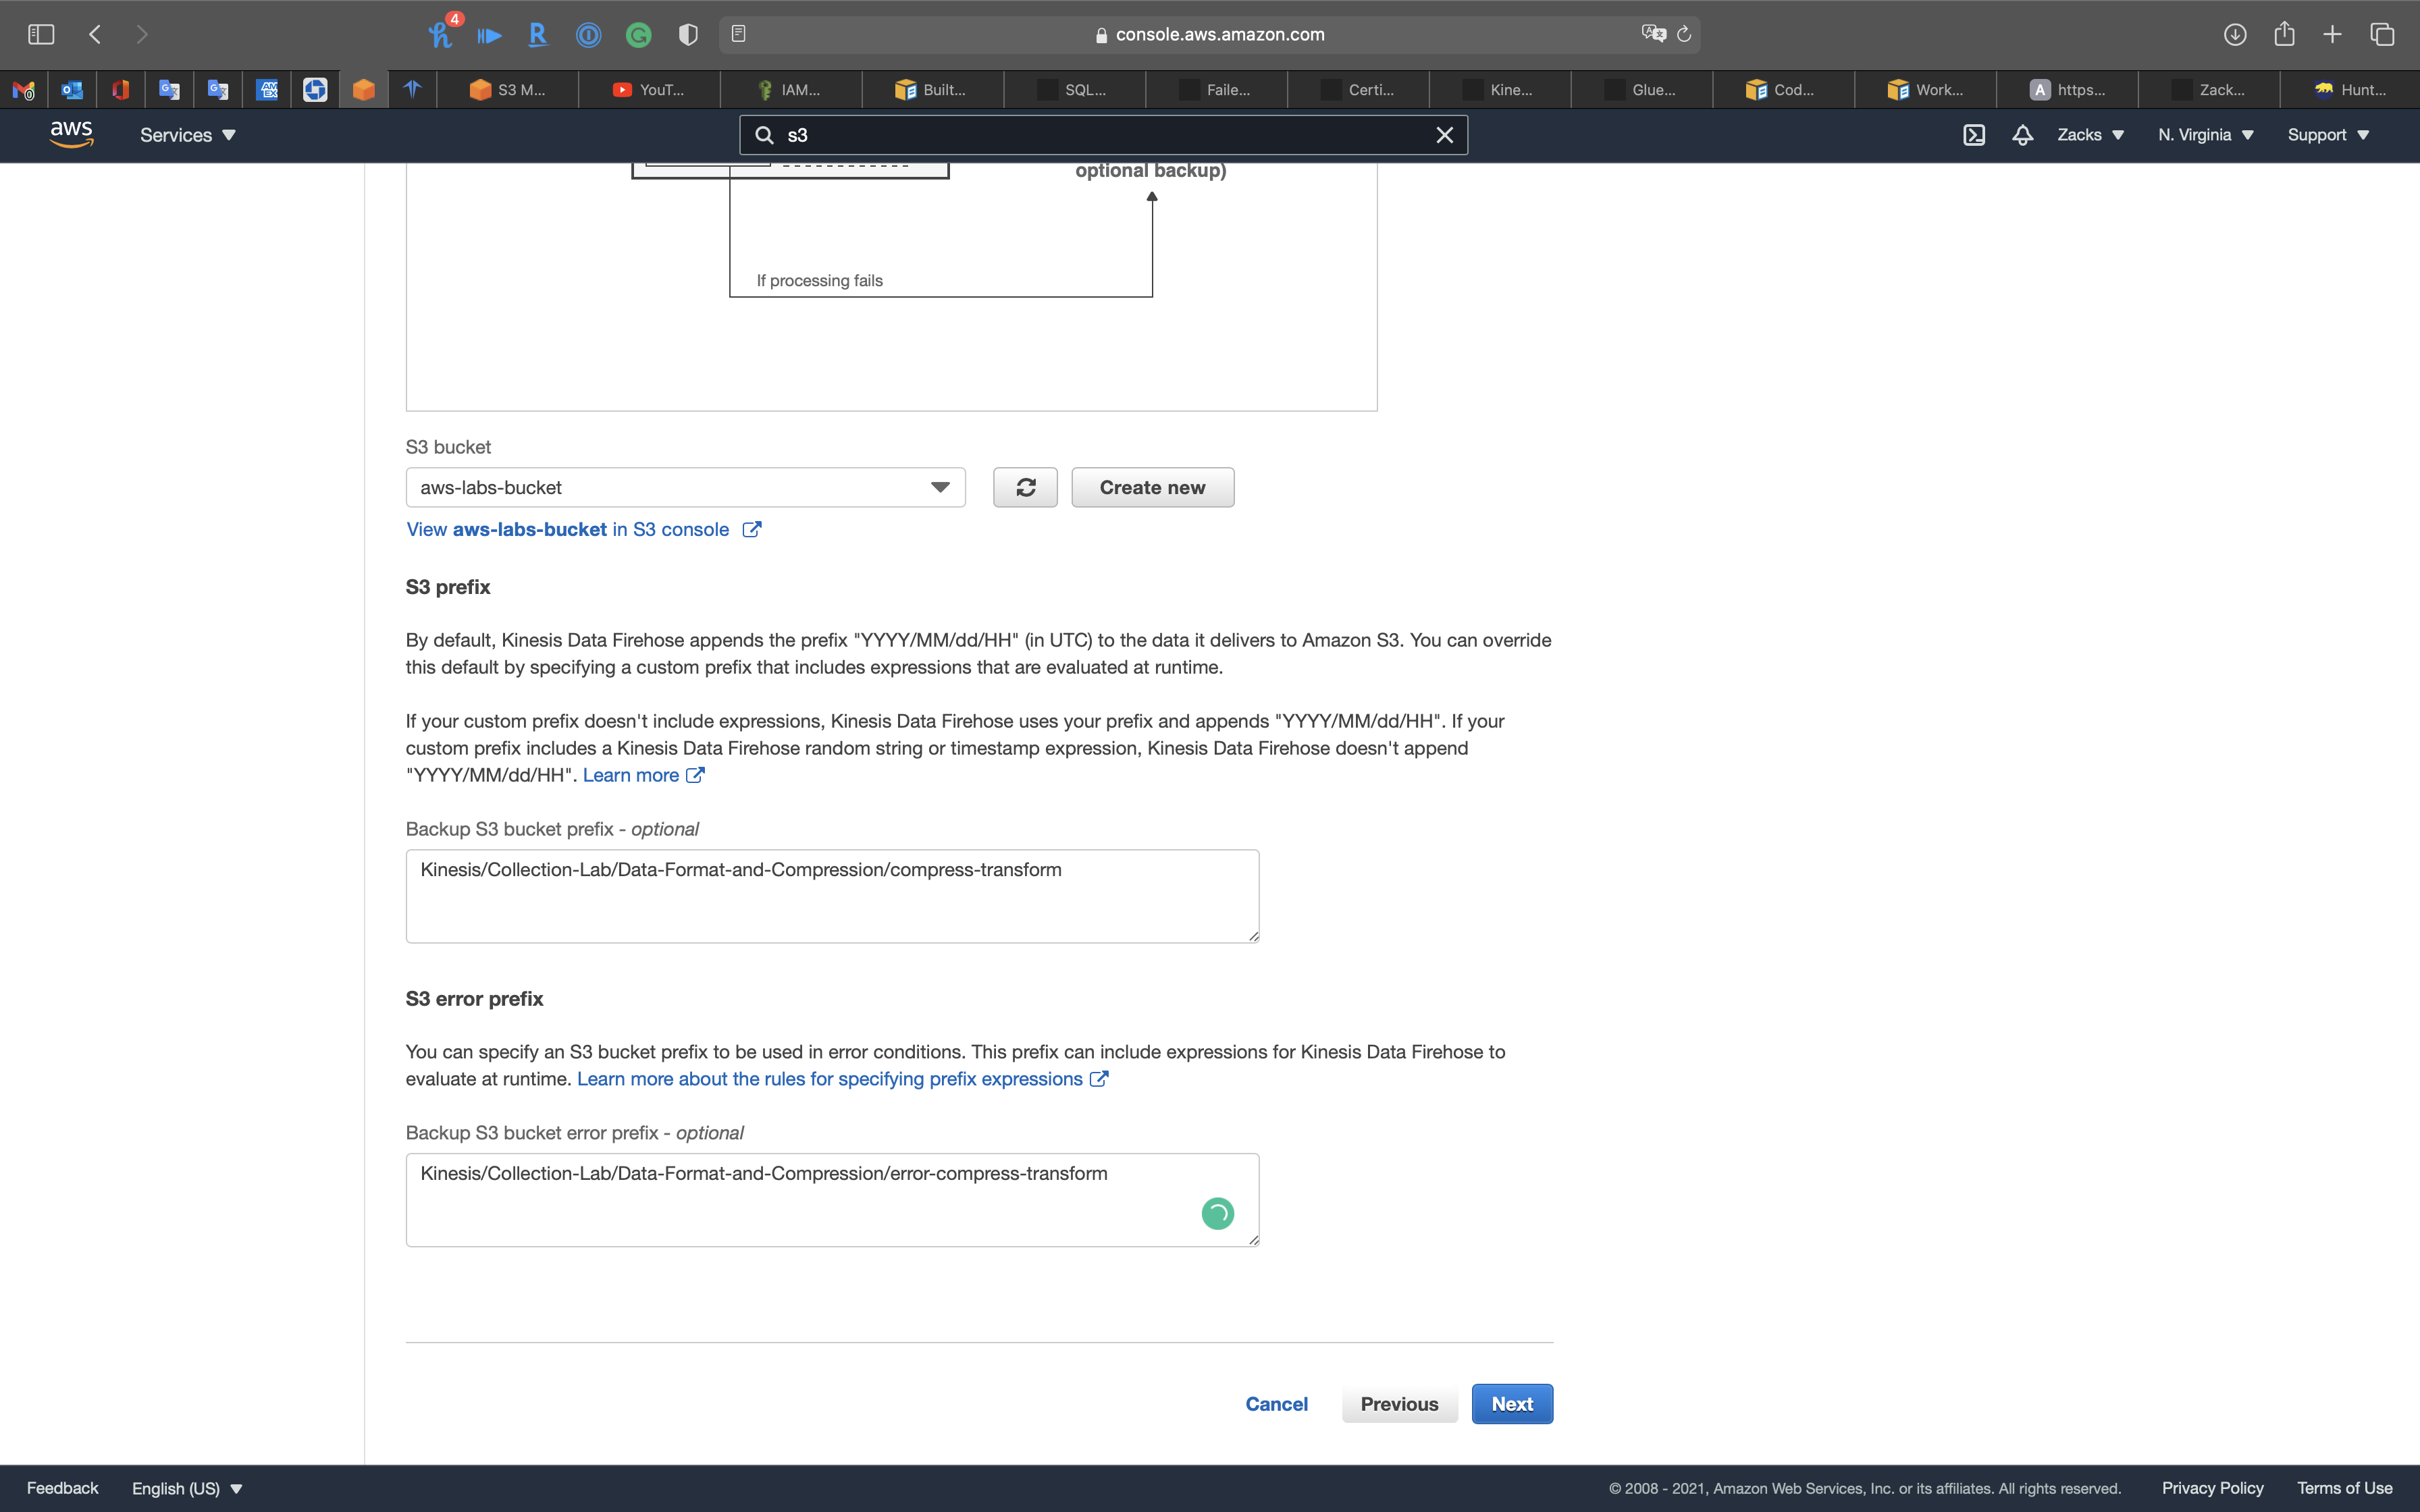
Step 4: Configure settings
S3 compression and encryption
- S3 compression:
GZIP
Click on Next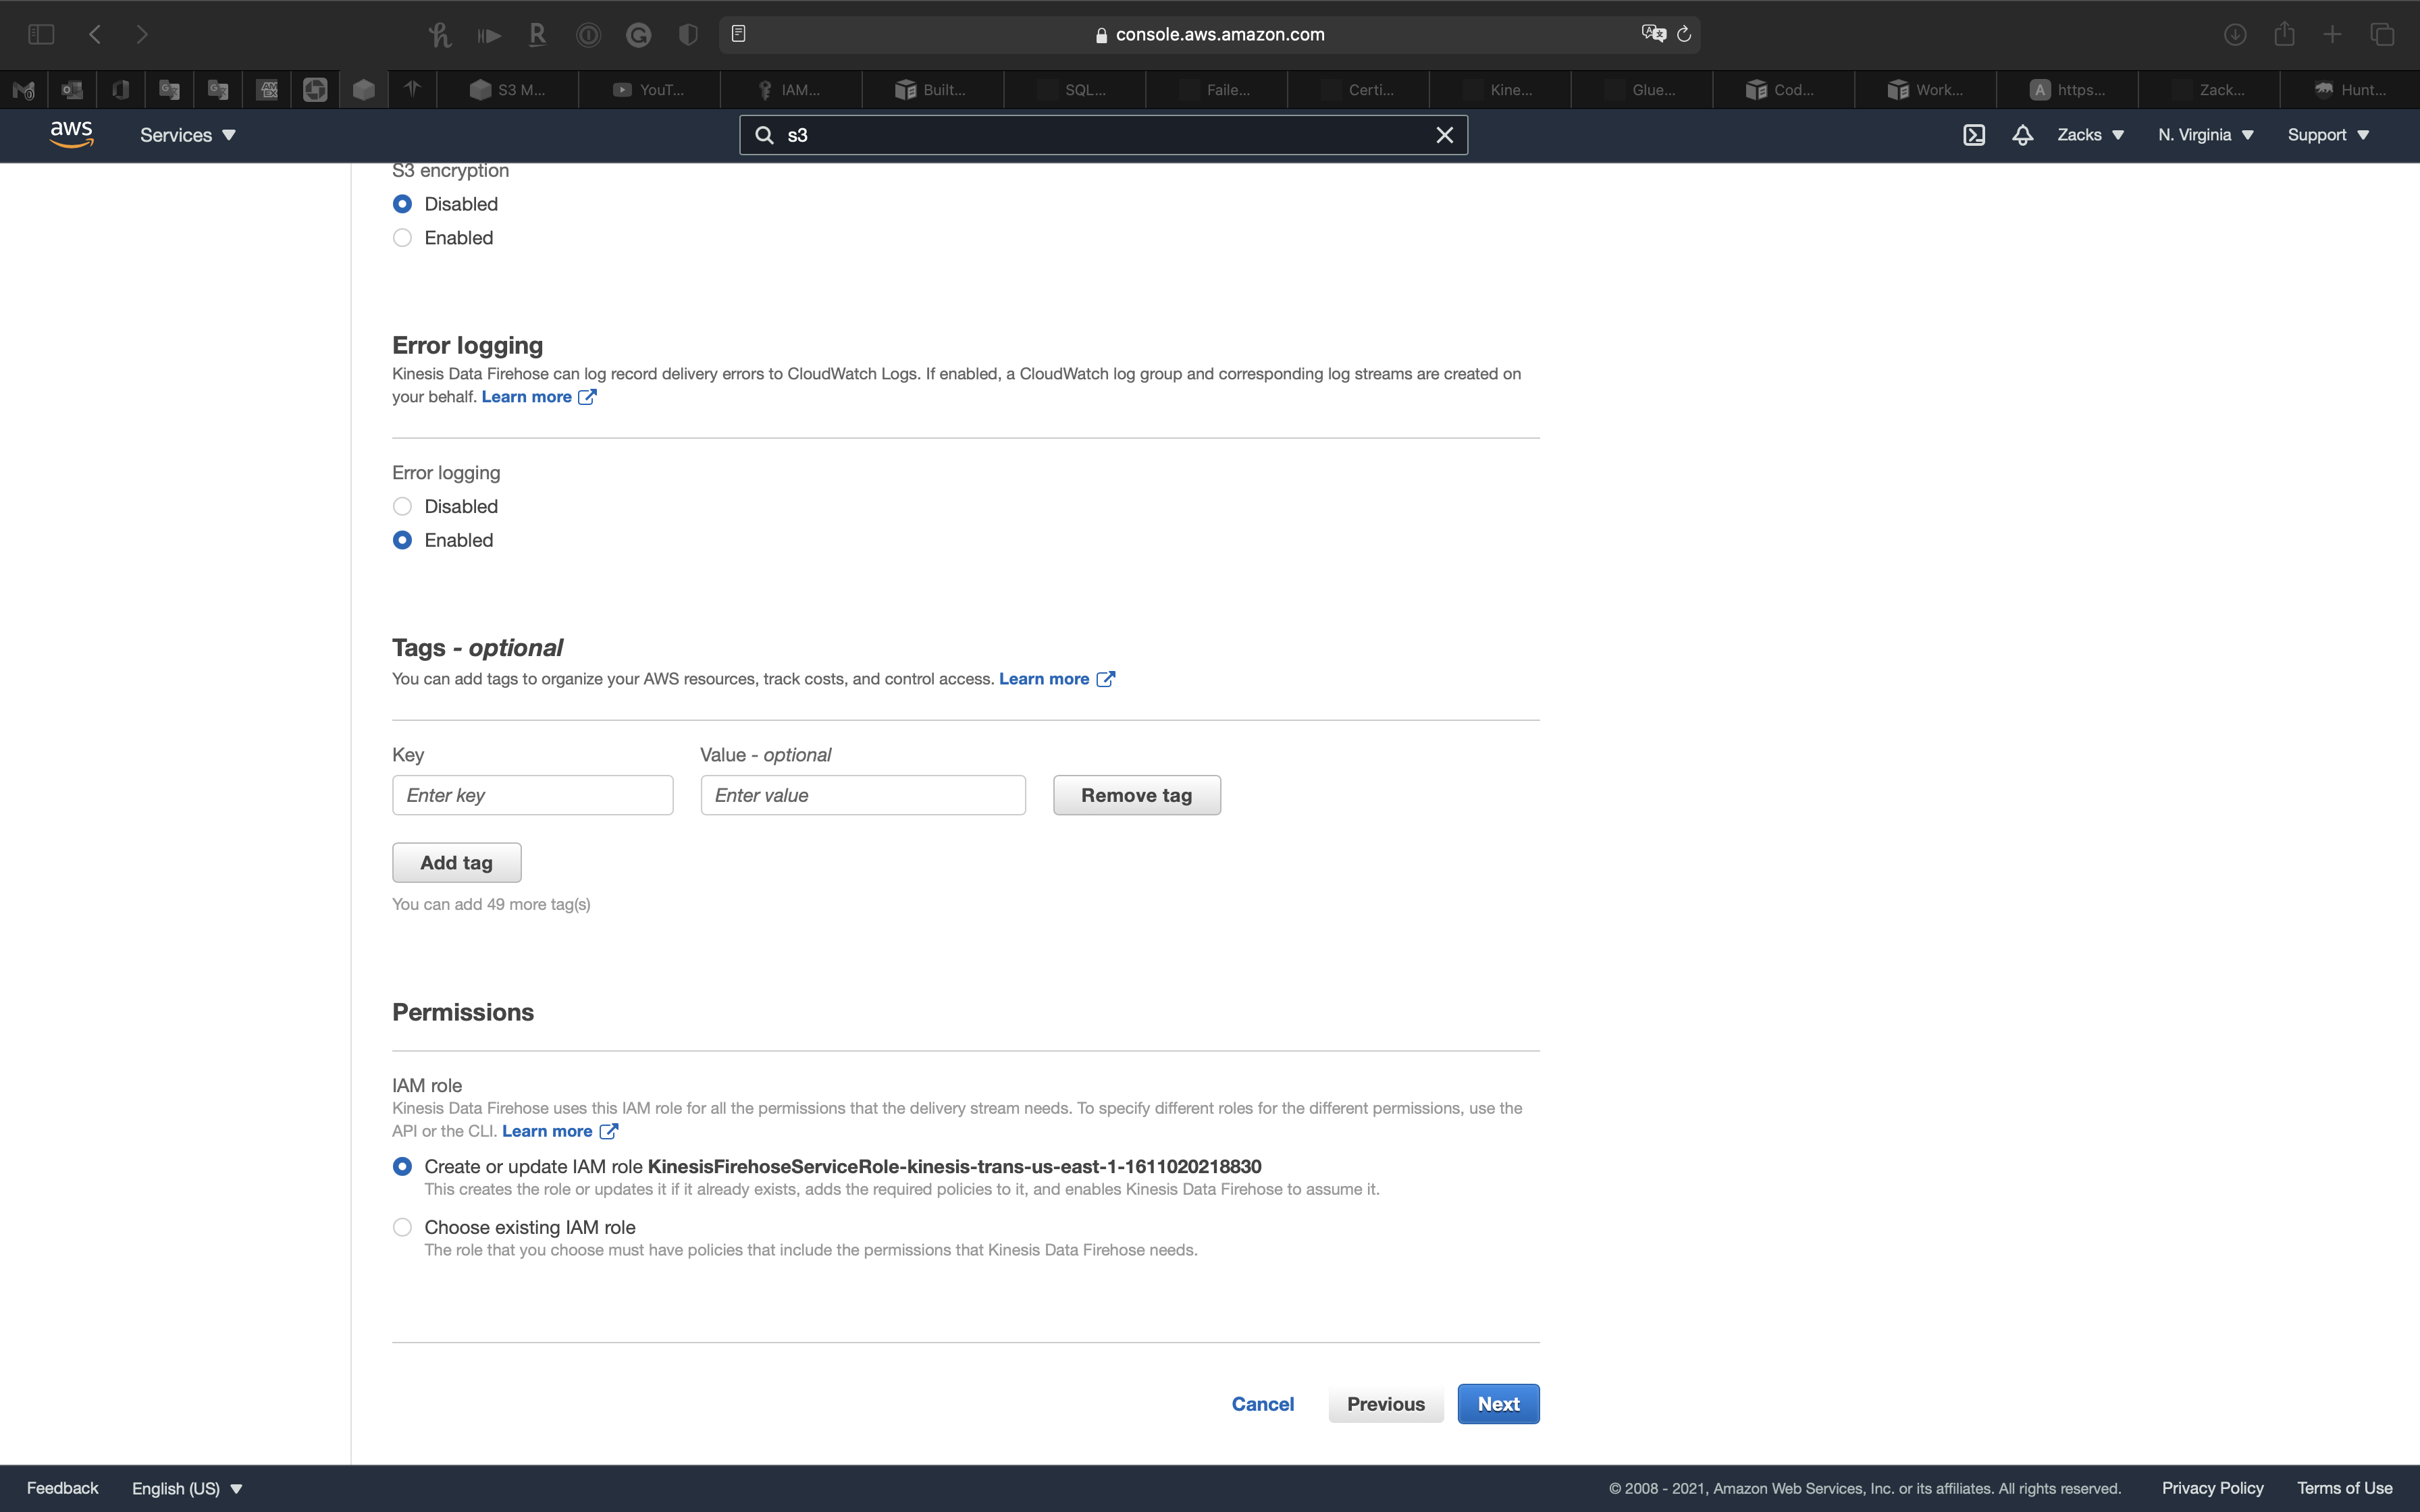
Step 5: Review
Click on Create delivery stream
Feed Kinesis Data Stream
1 | import sys |
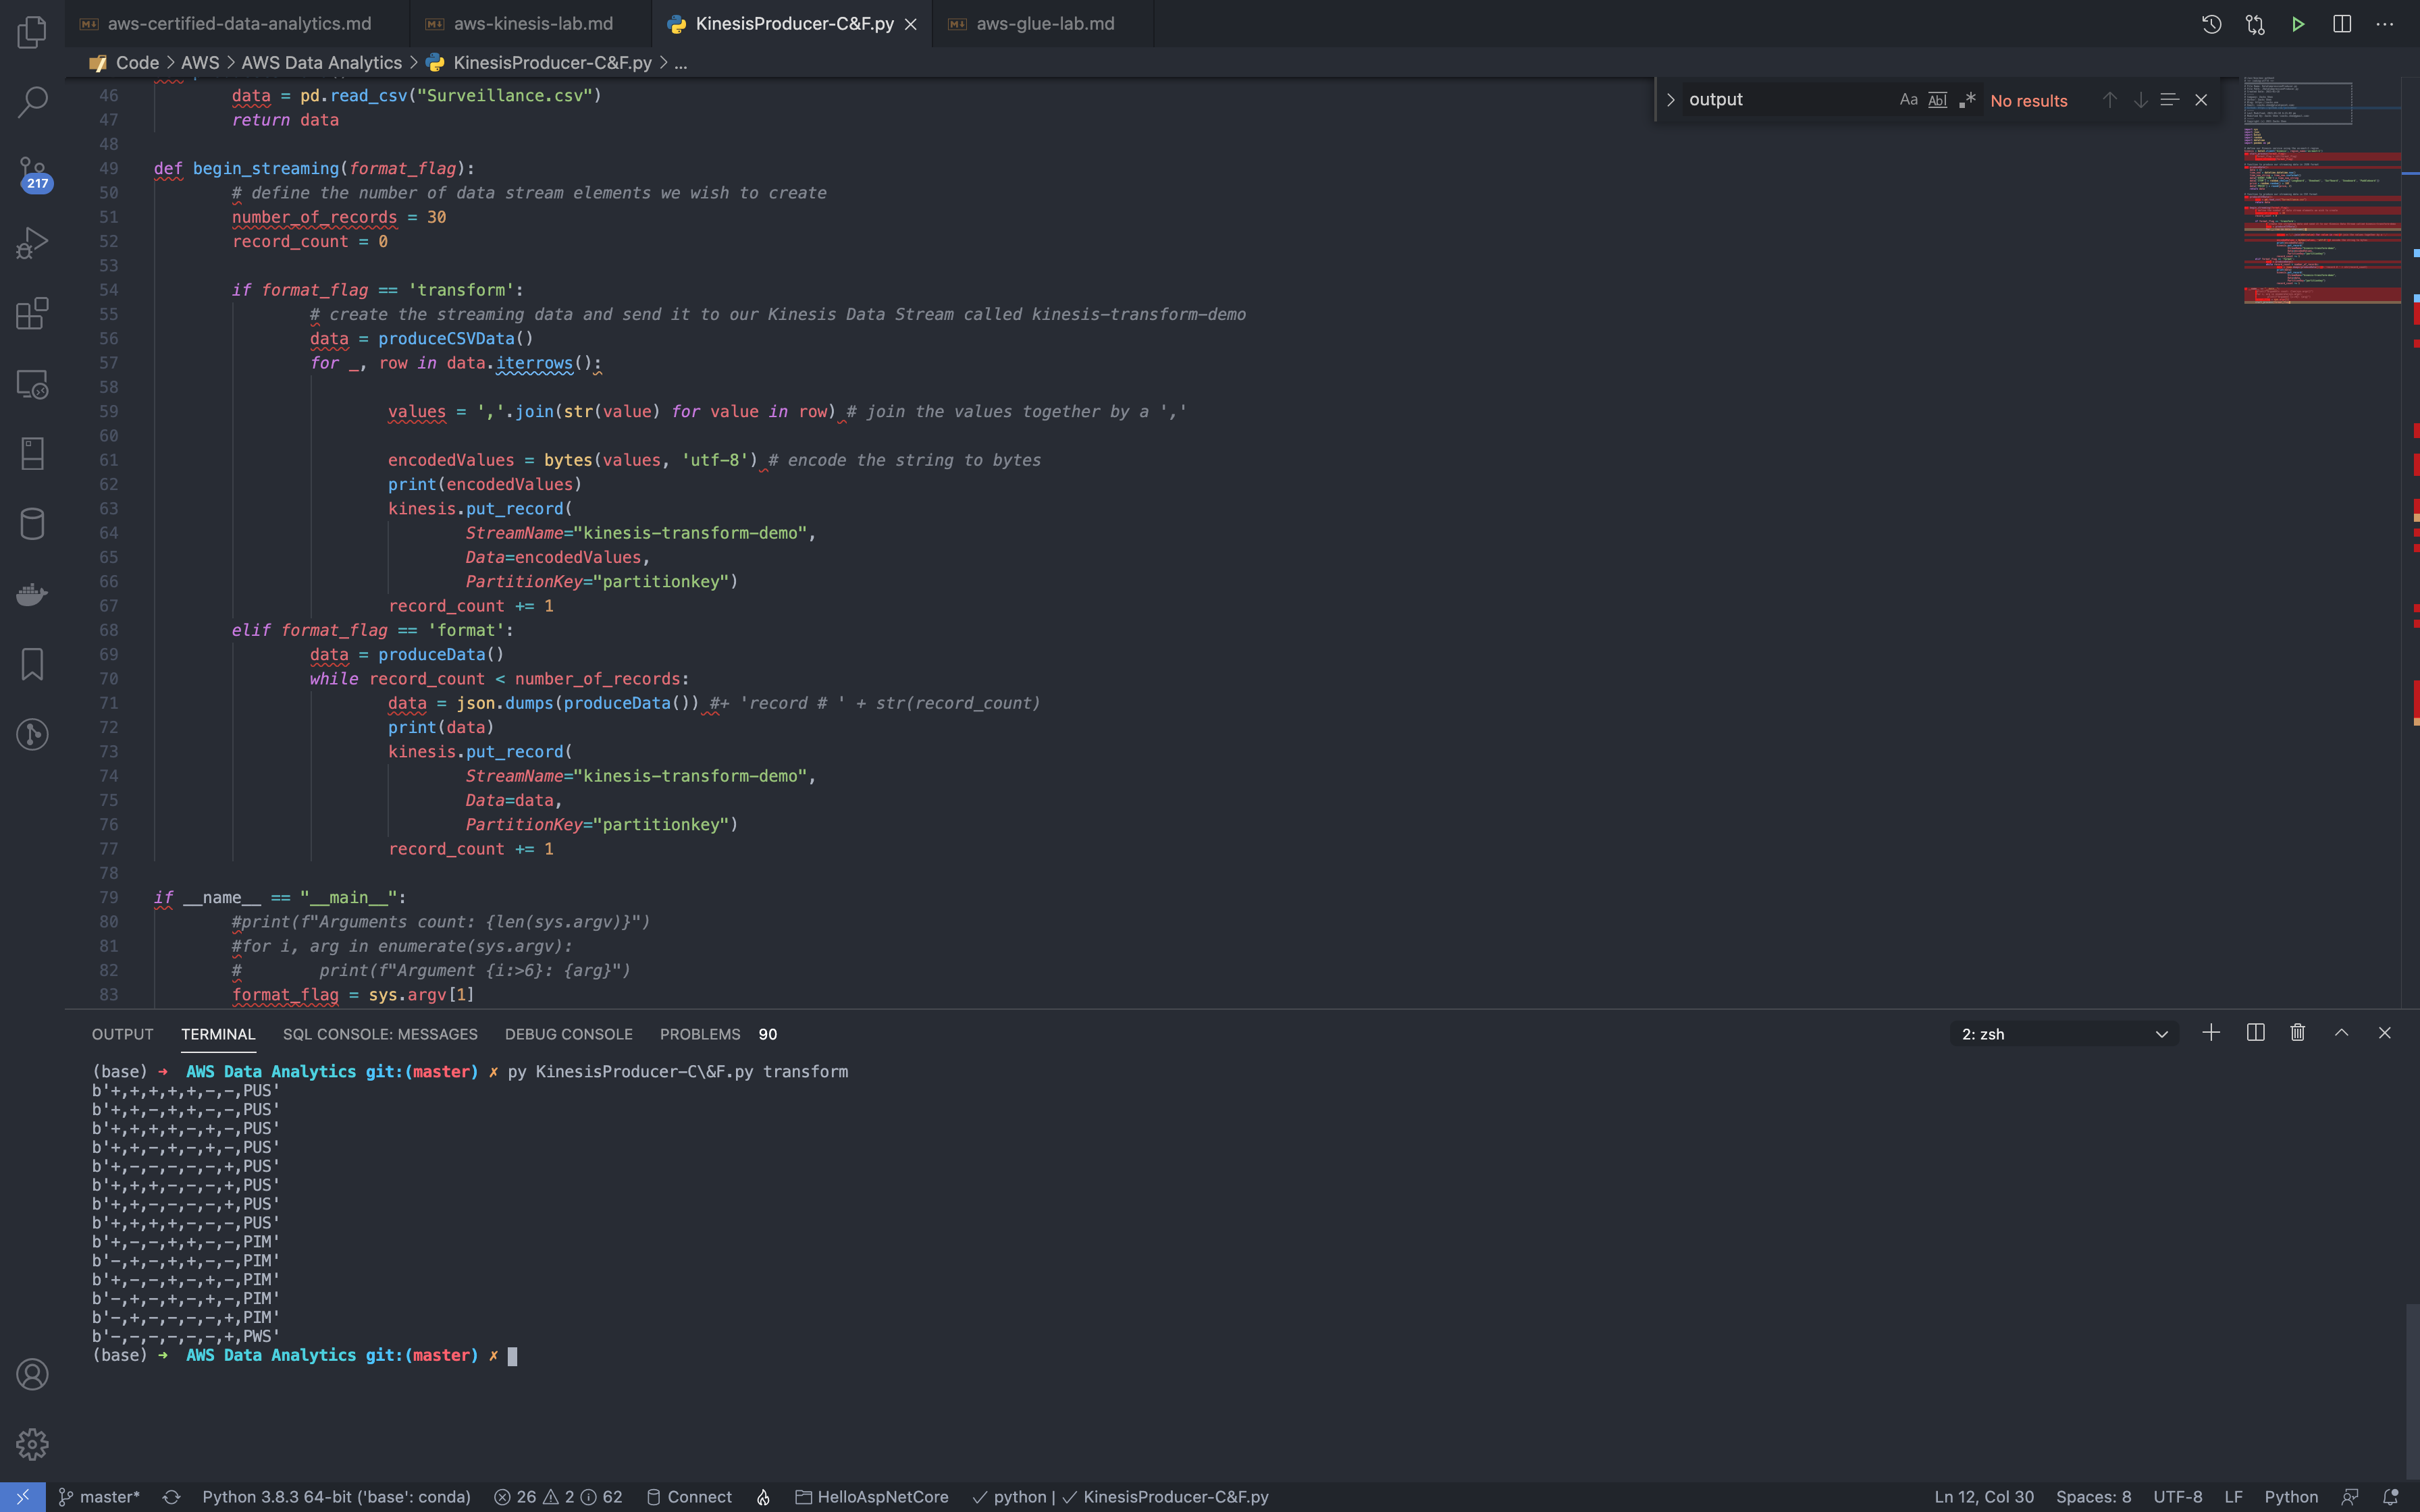
Copy the code above and create a Python file named KinesisProducer-C&F.py
1 | python3 KinesisProducer-C\&F.py format |
Notice the terminal windows shows we have sent some tabular data to kinesis-transform-demo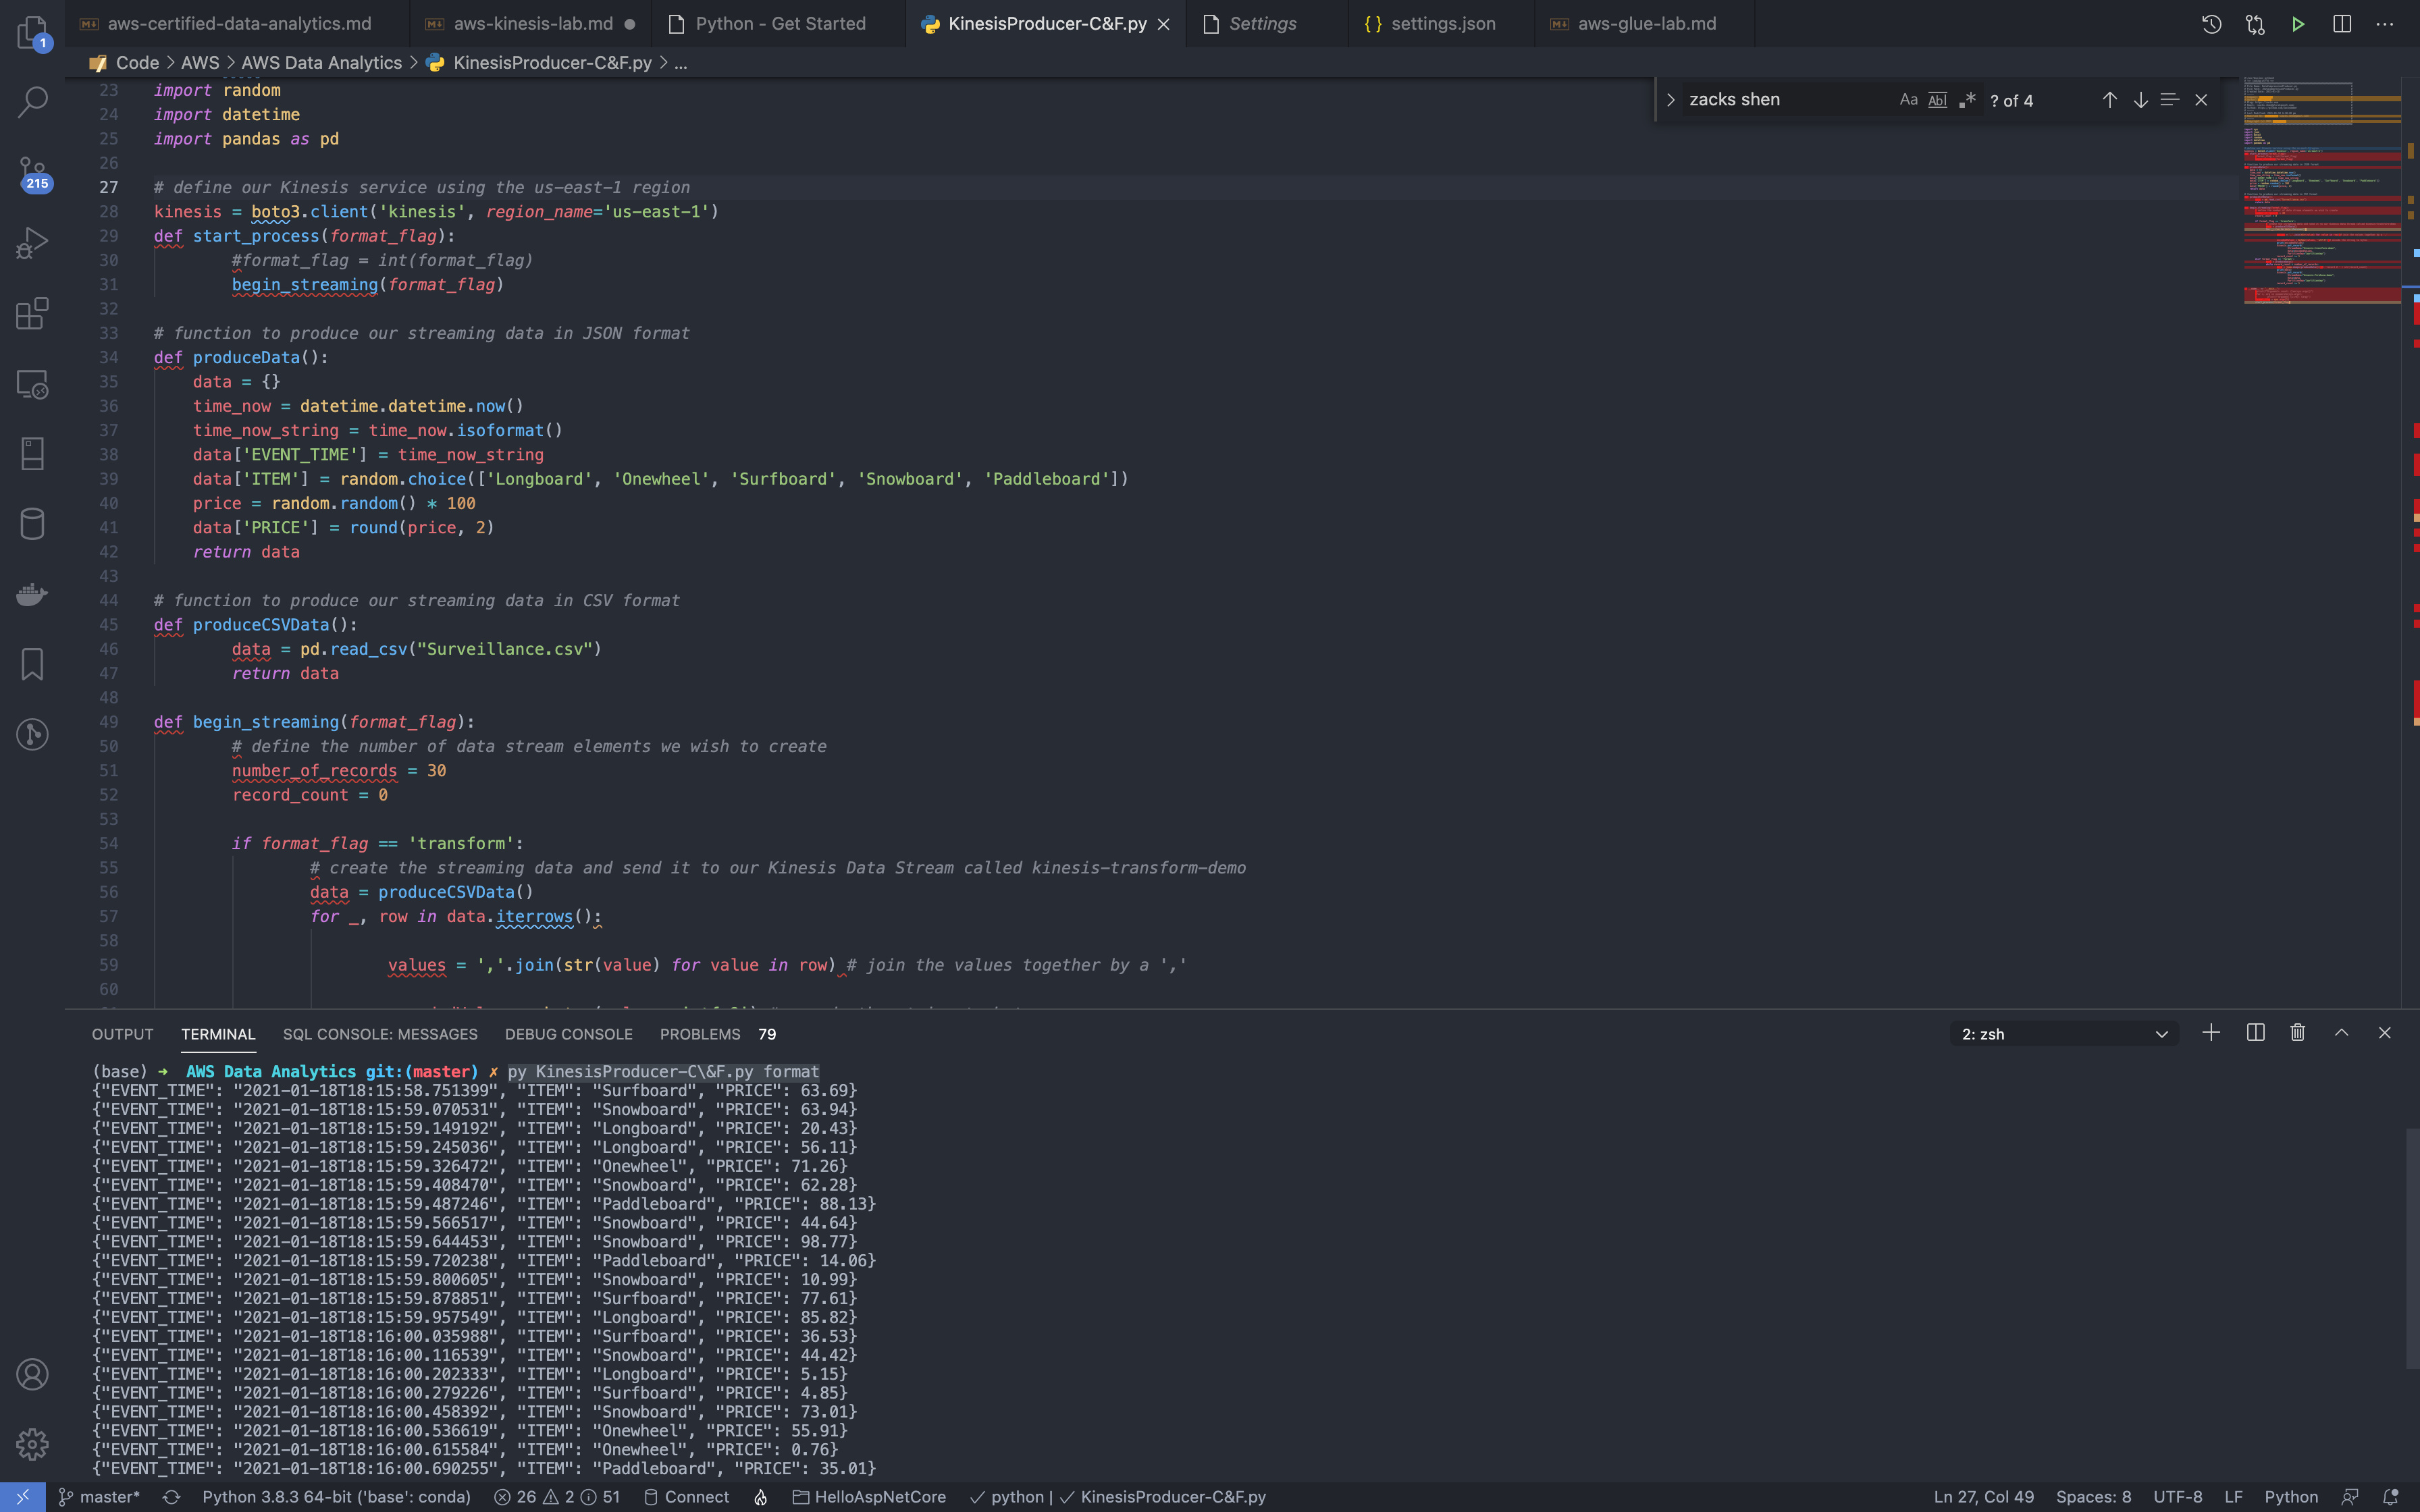
Validation Test
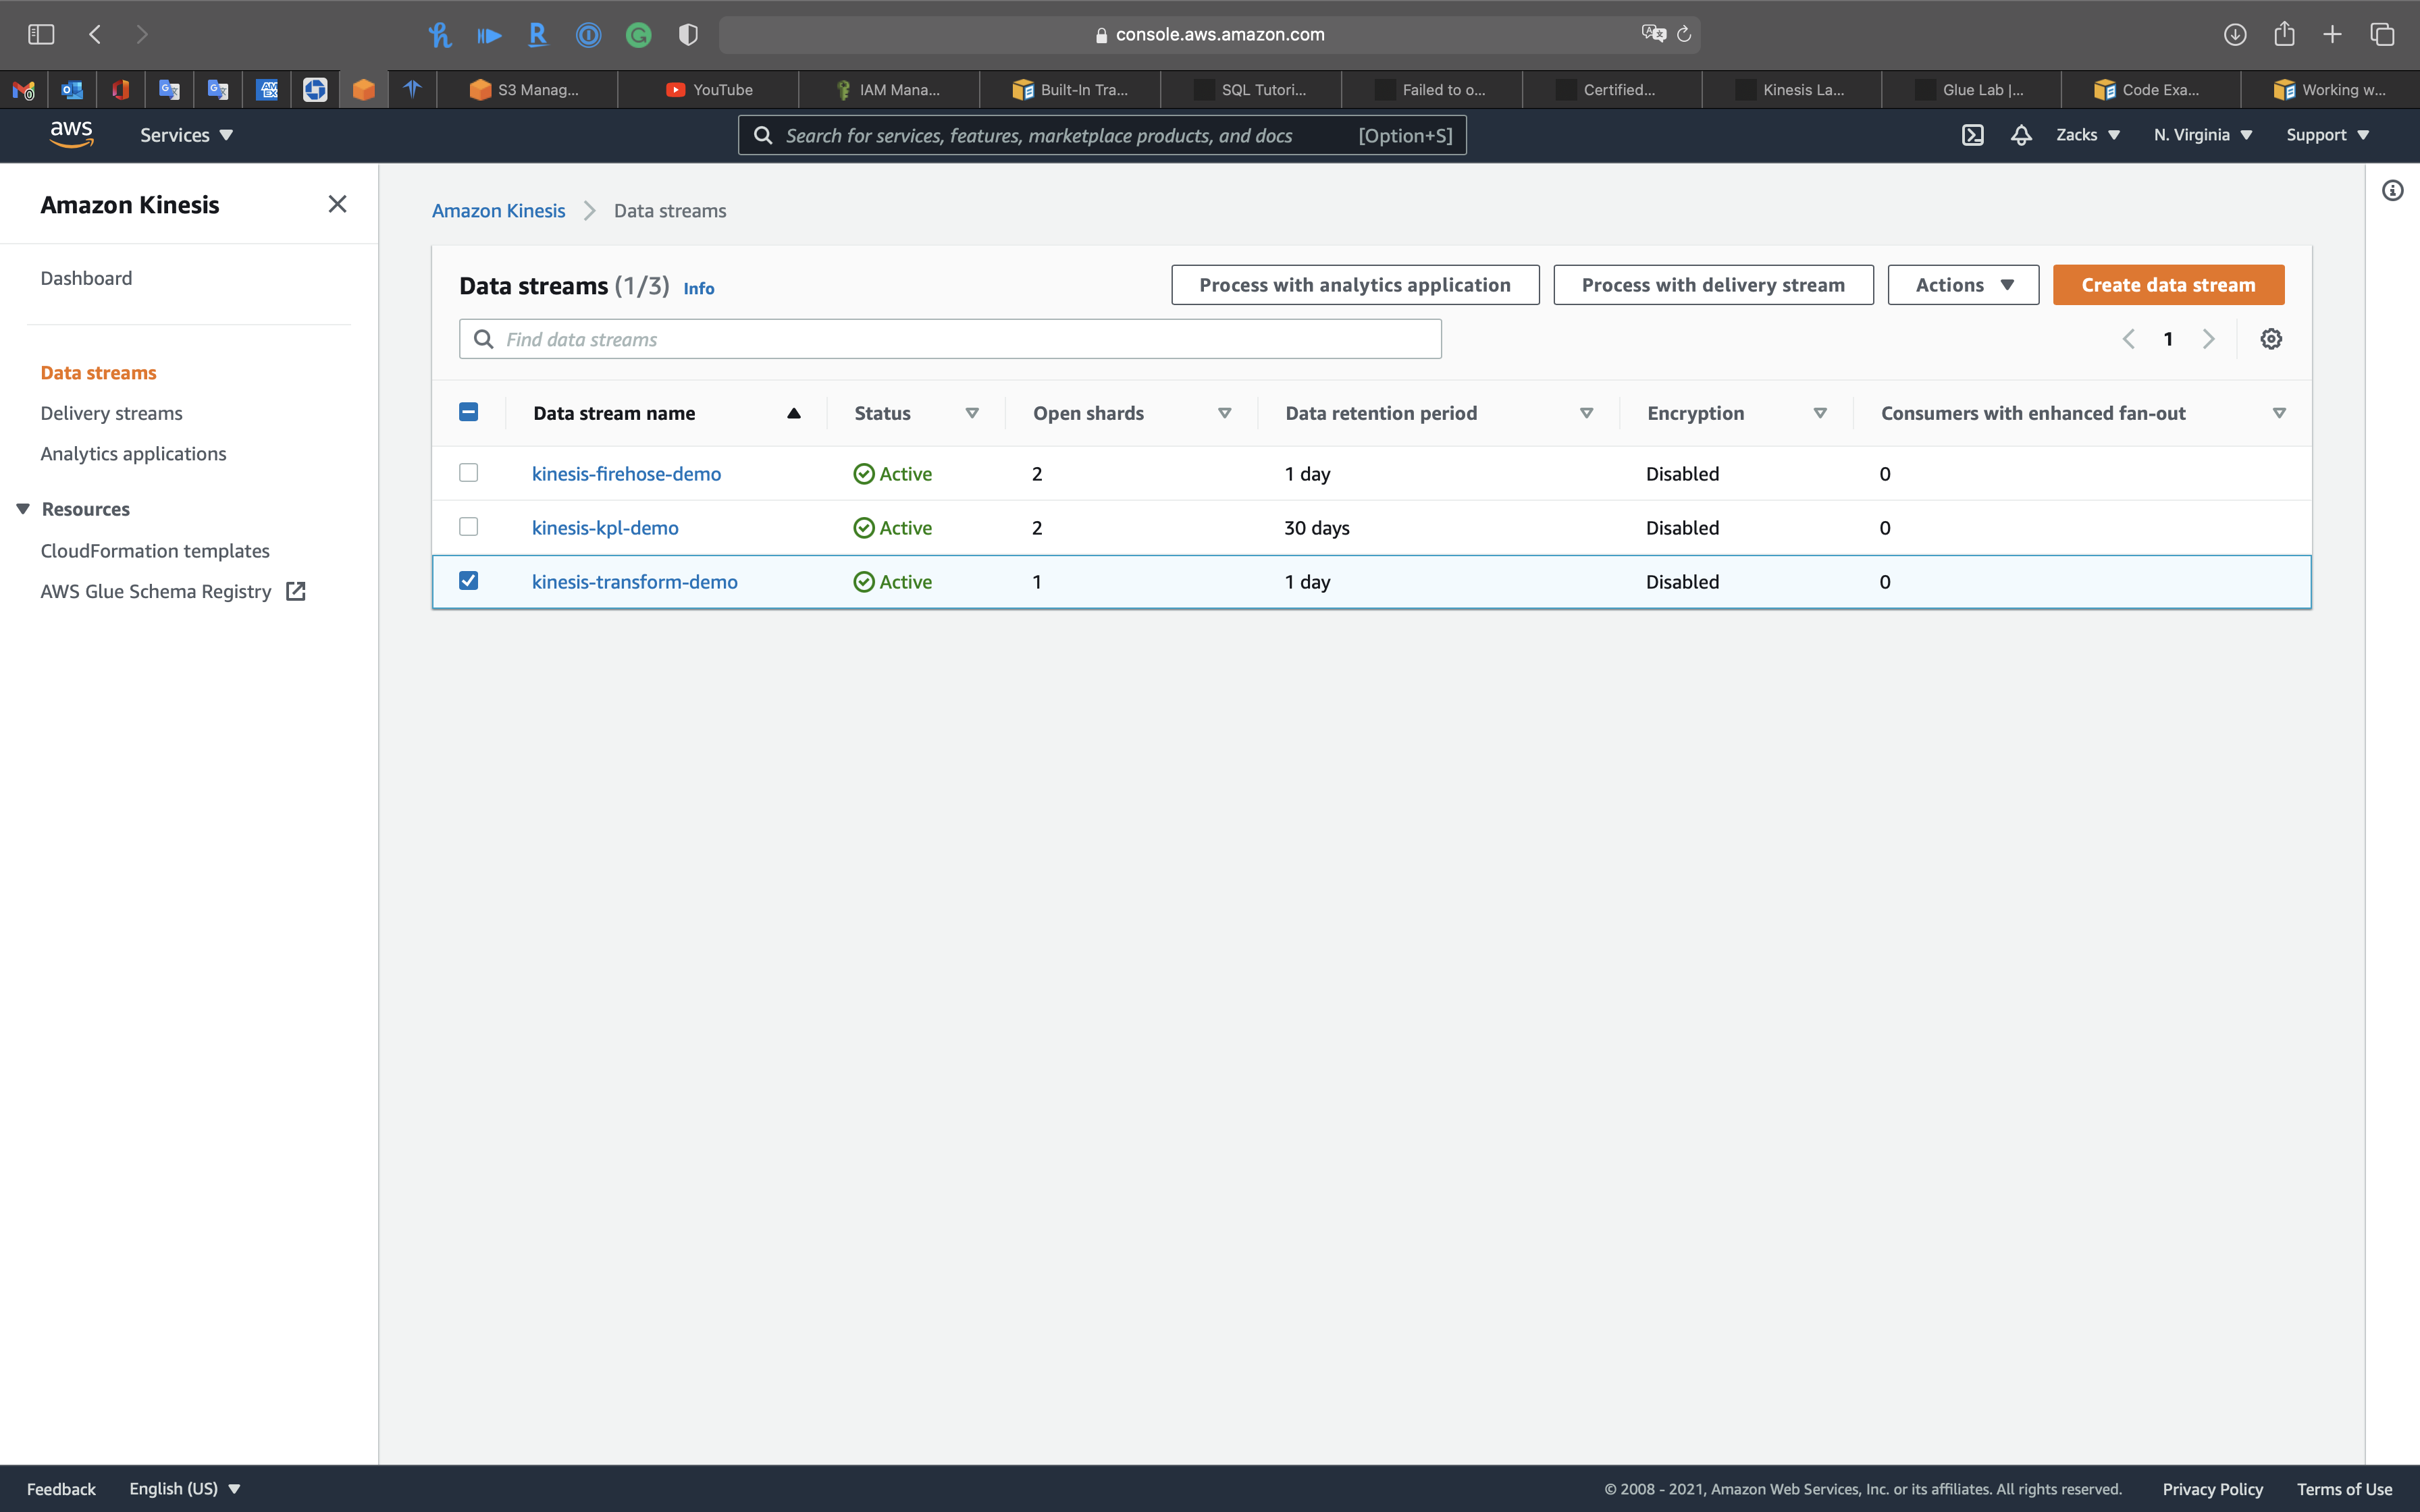
Services -> Kinesis -> Data streams
Click on kinesis-transform-demo
Click on Monitoring tab
Kinesis Data Stream monitor shows we have received the data.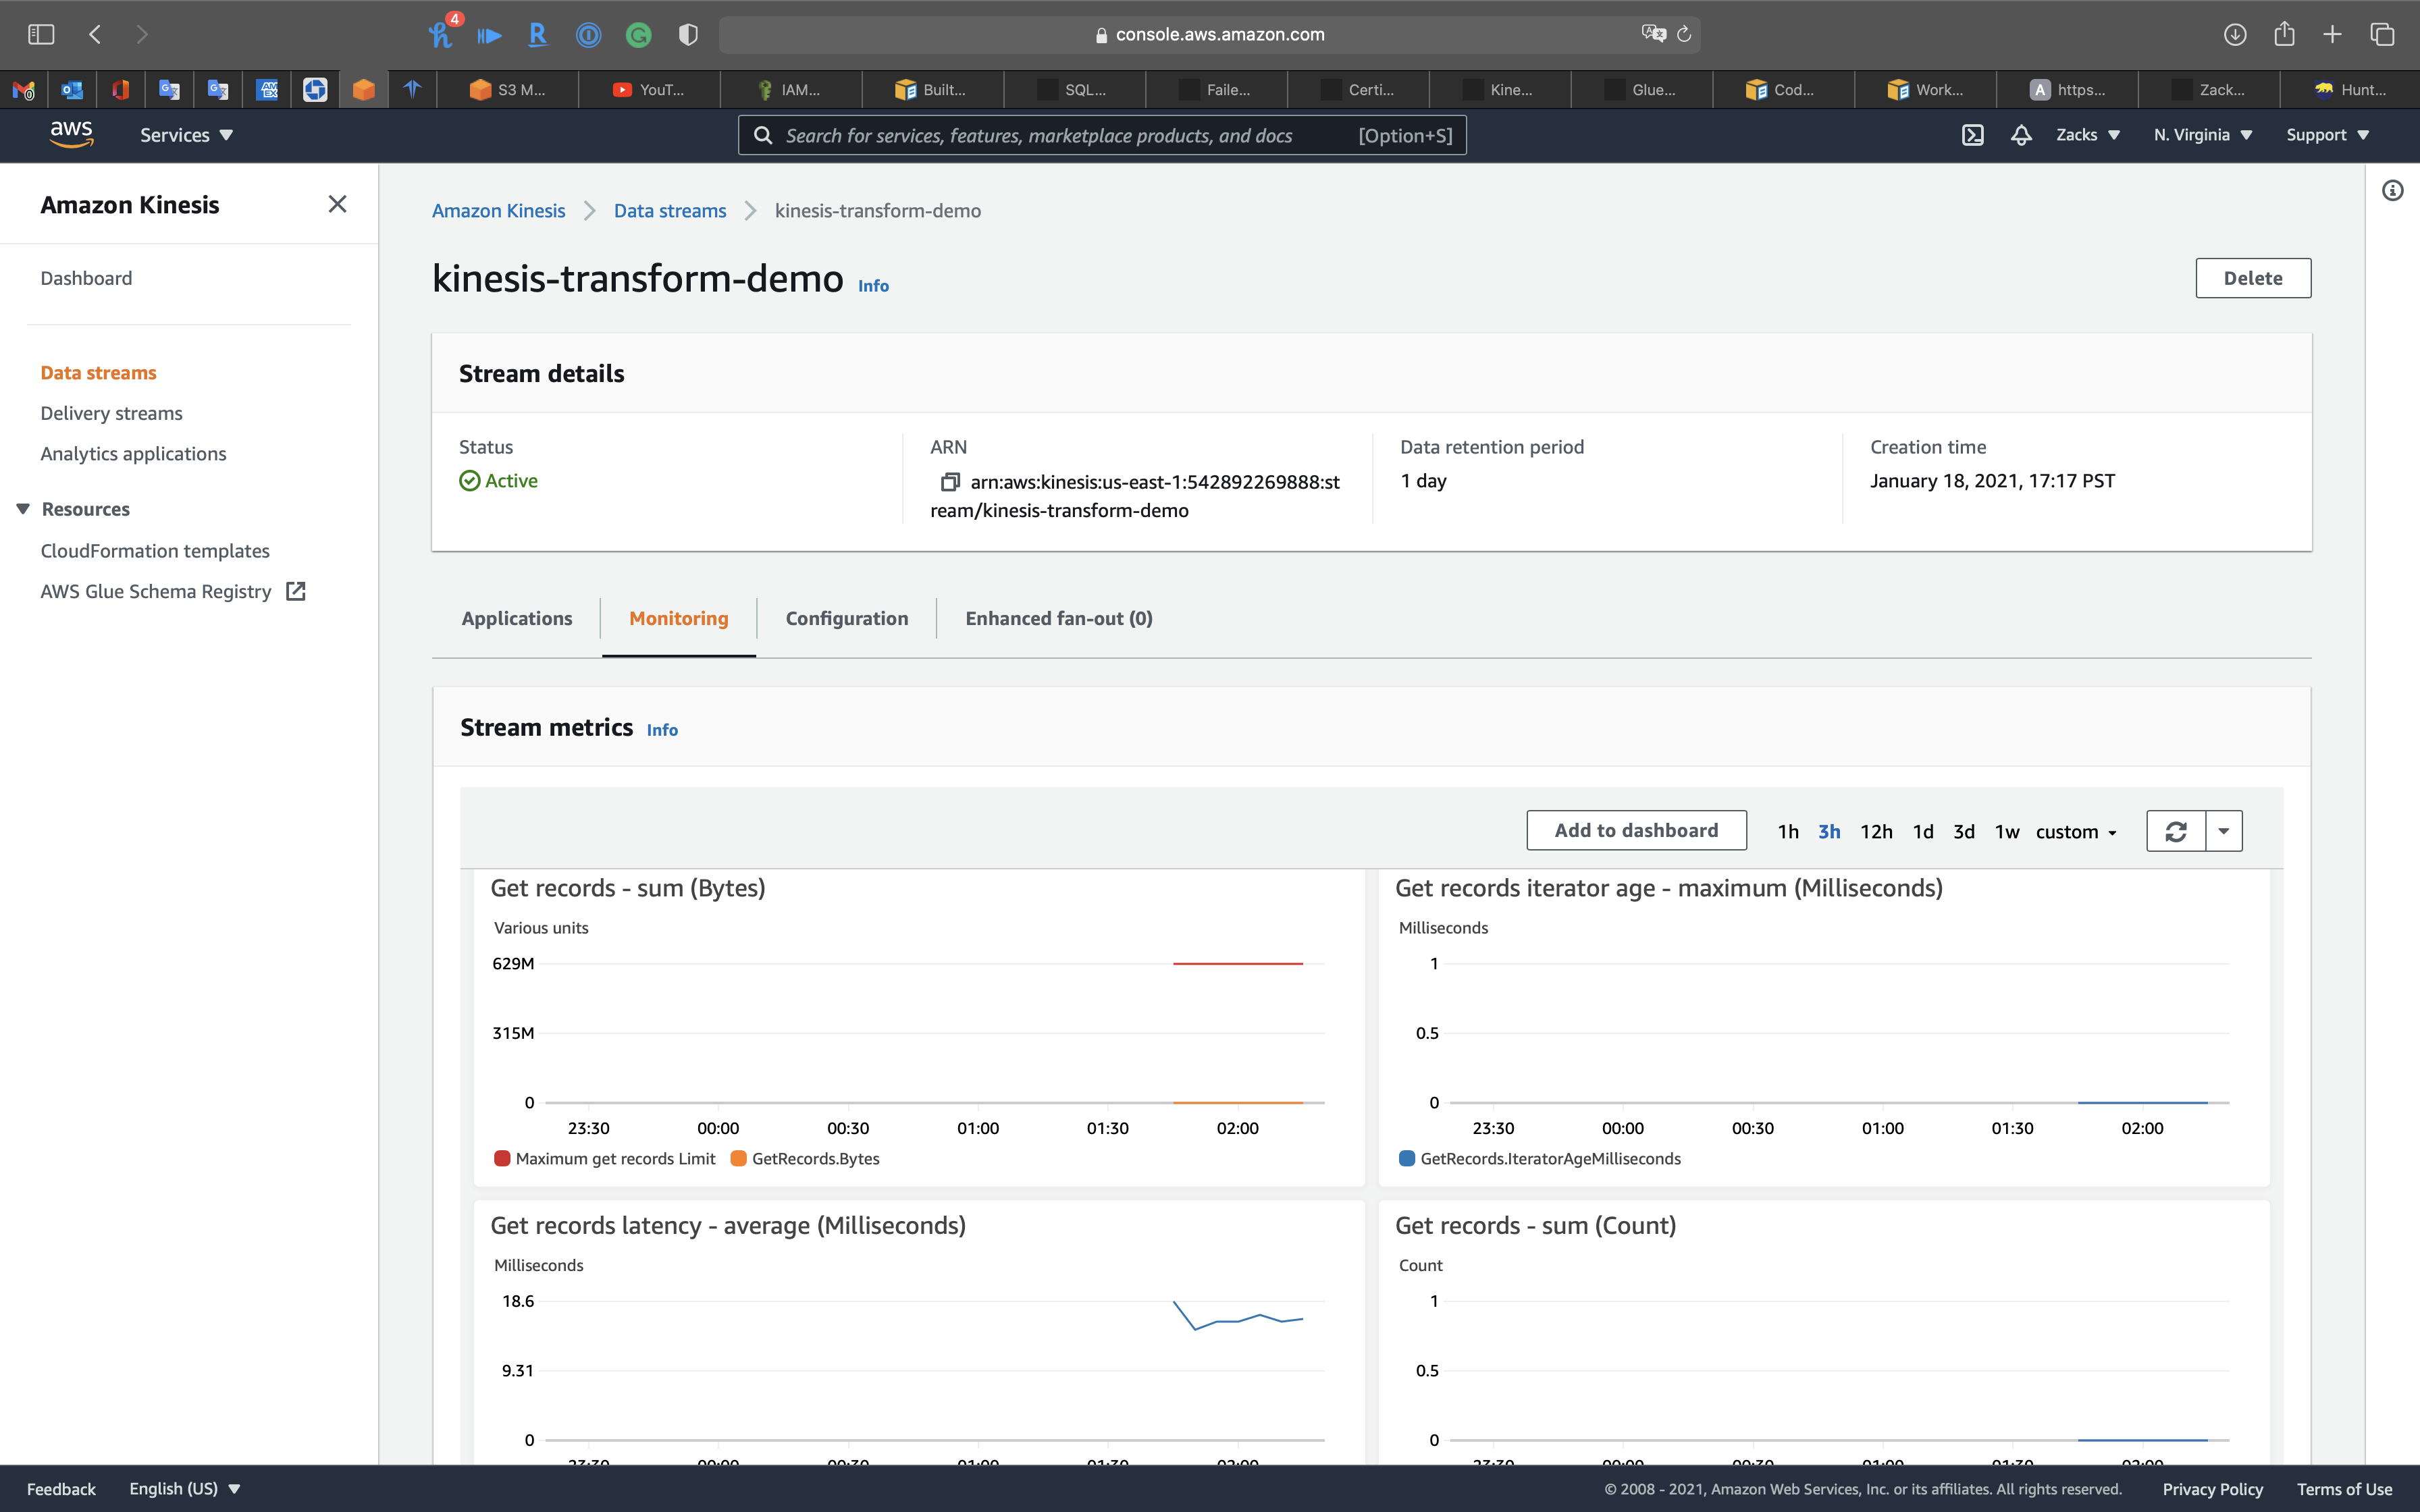
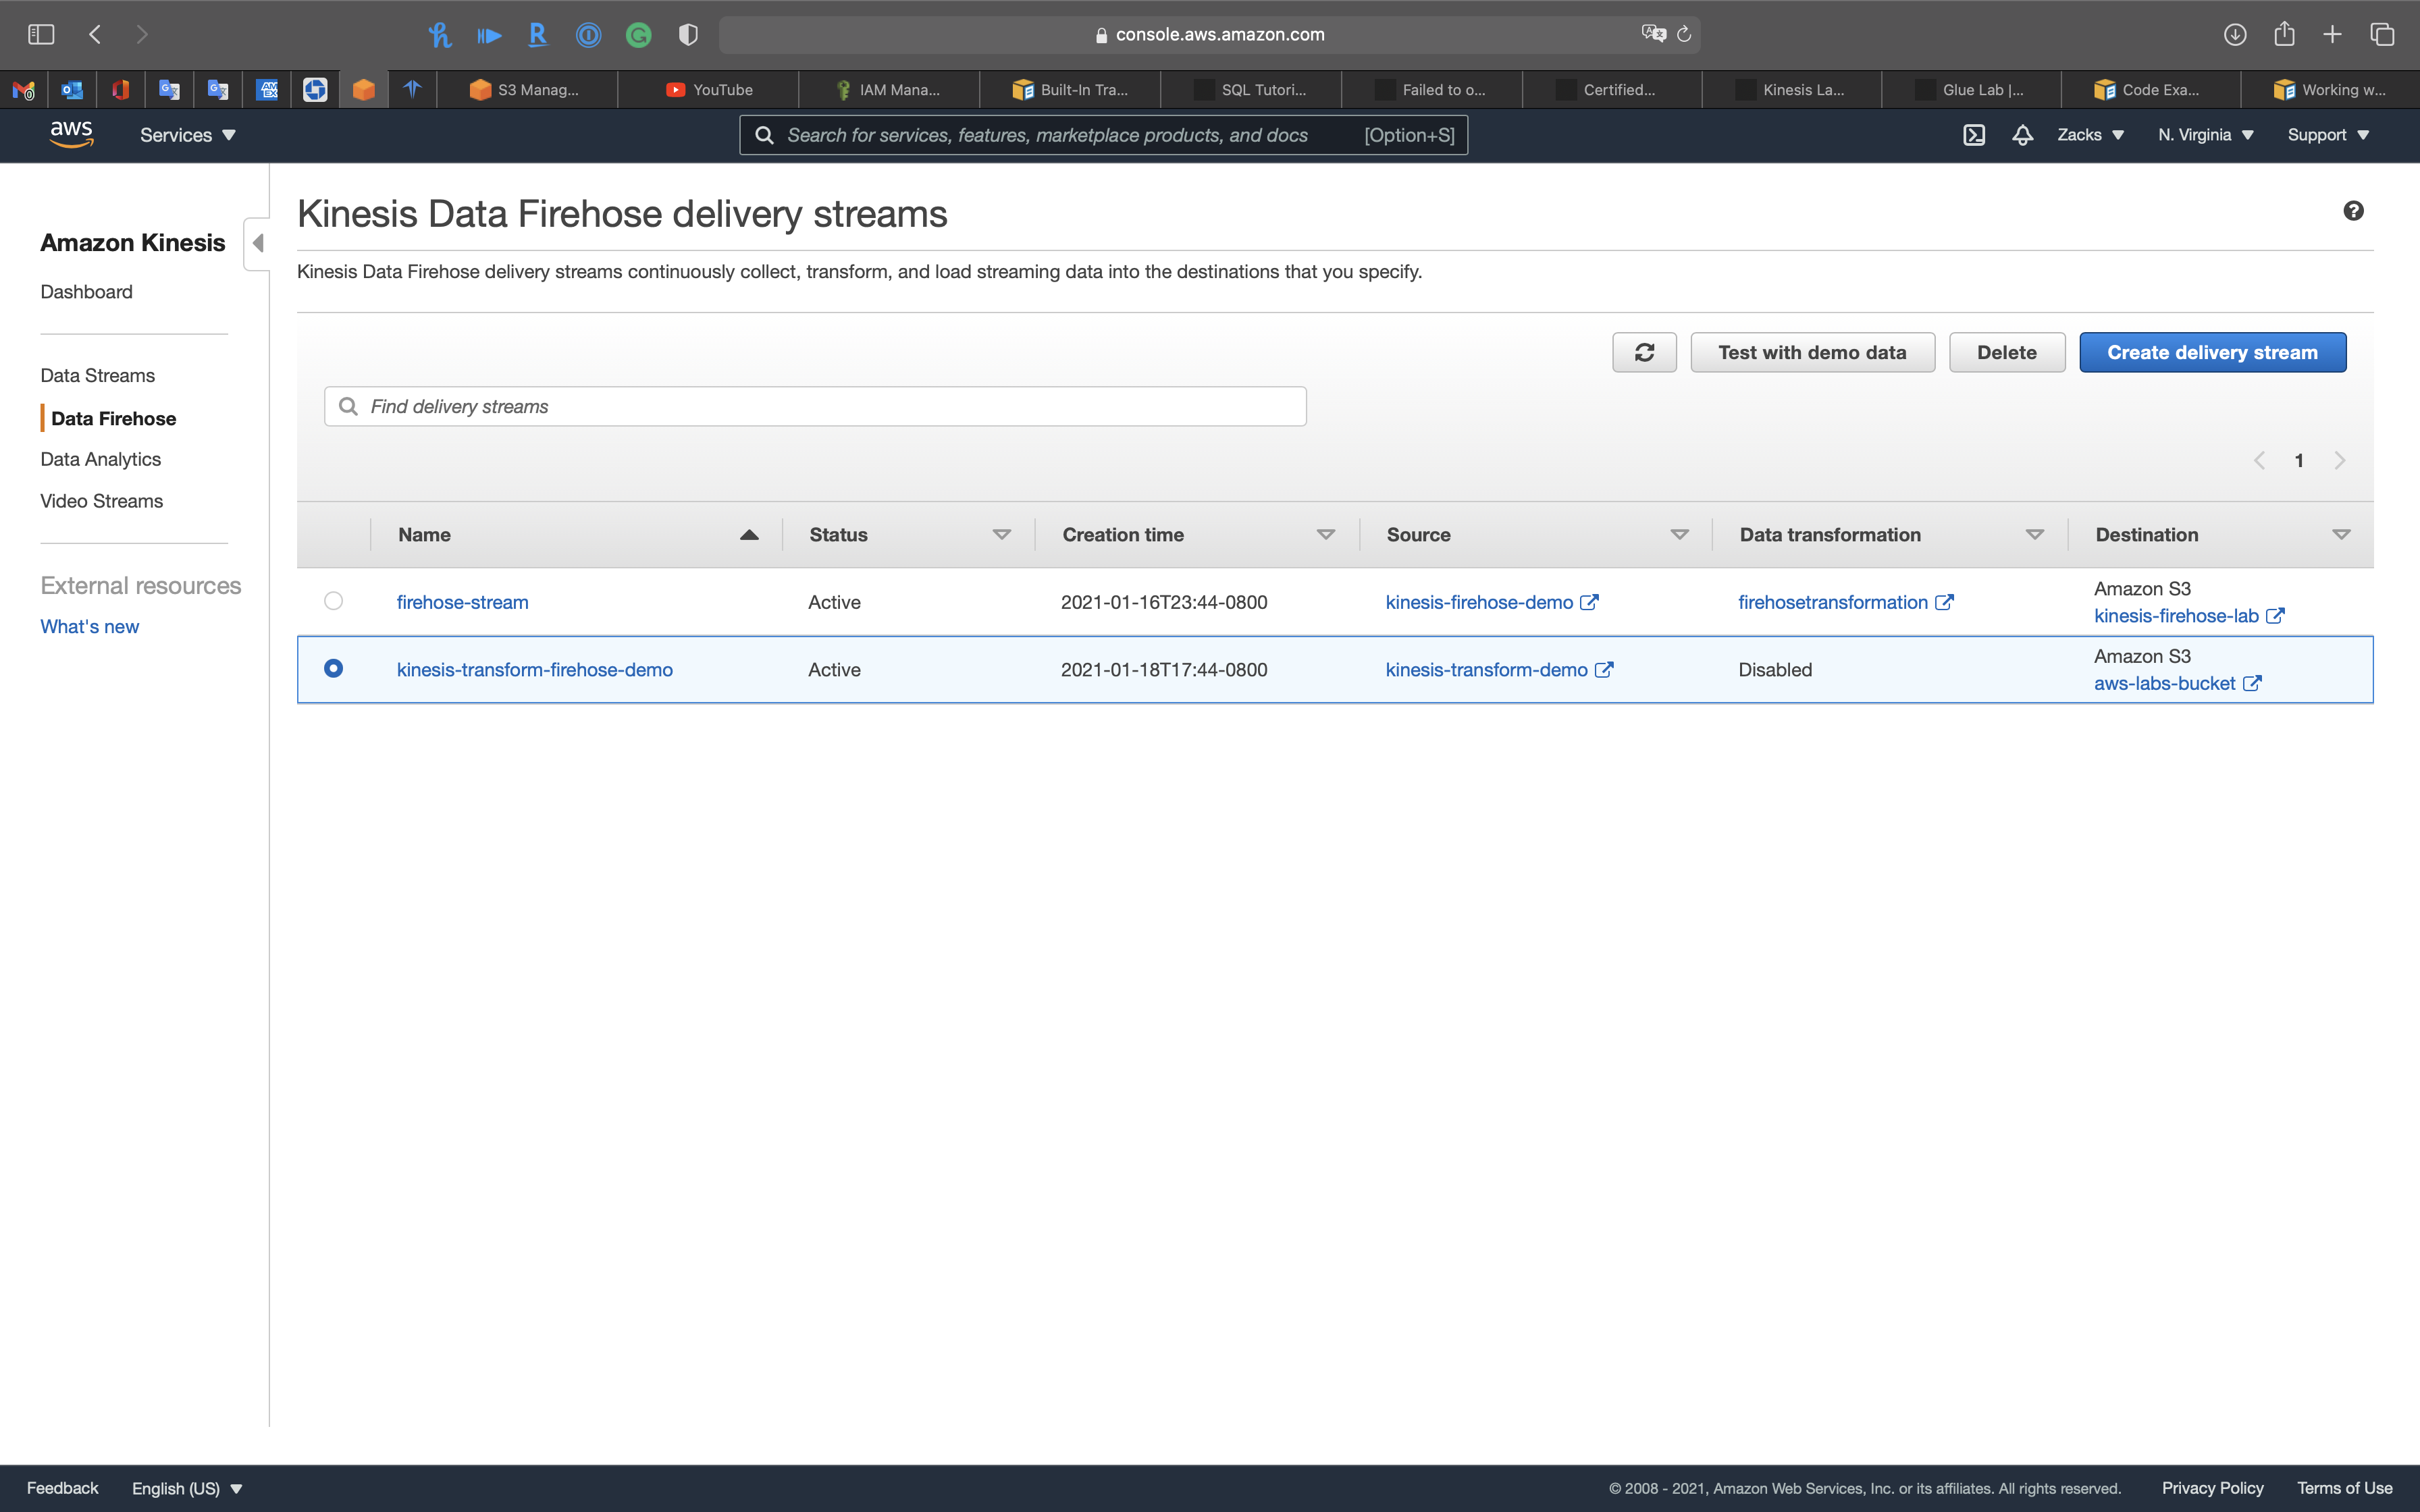
Services -> Kinesis -> Delivery streams
Click on kinesis-transform-firehose-demo
Click on Monitoring tab
Kinesis Data Firehose monitor shows Kinesis Data Stream has transformed the data to Kinesis Data Firehose.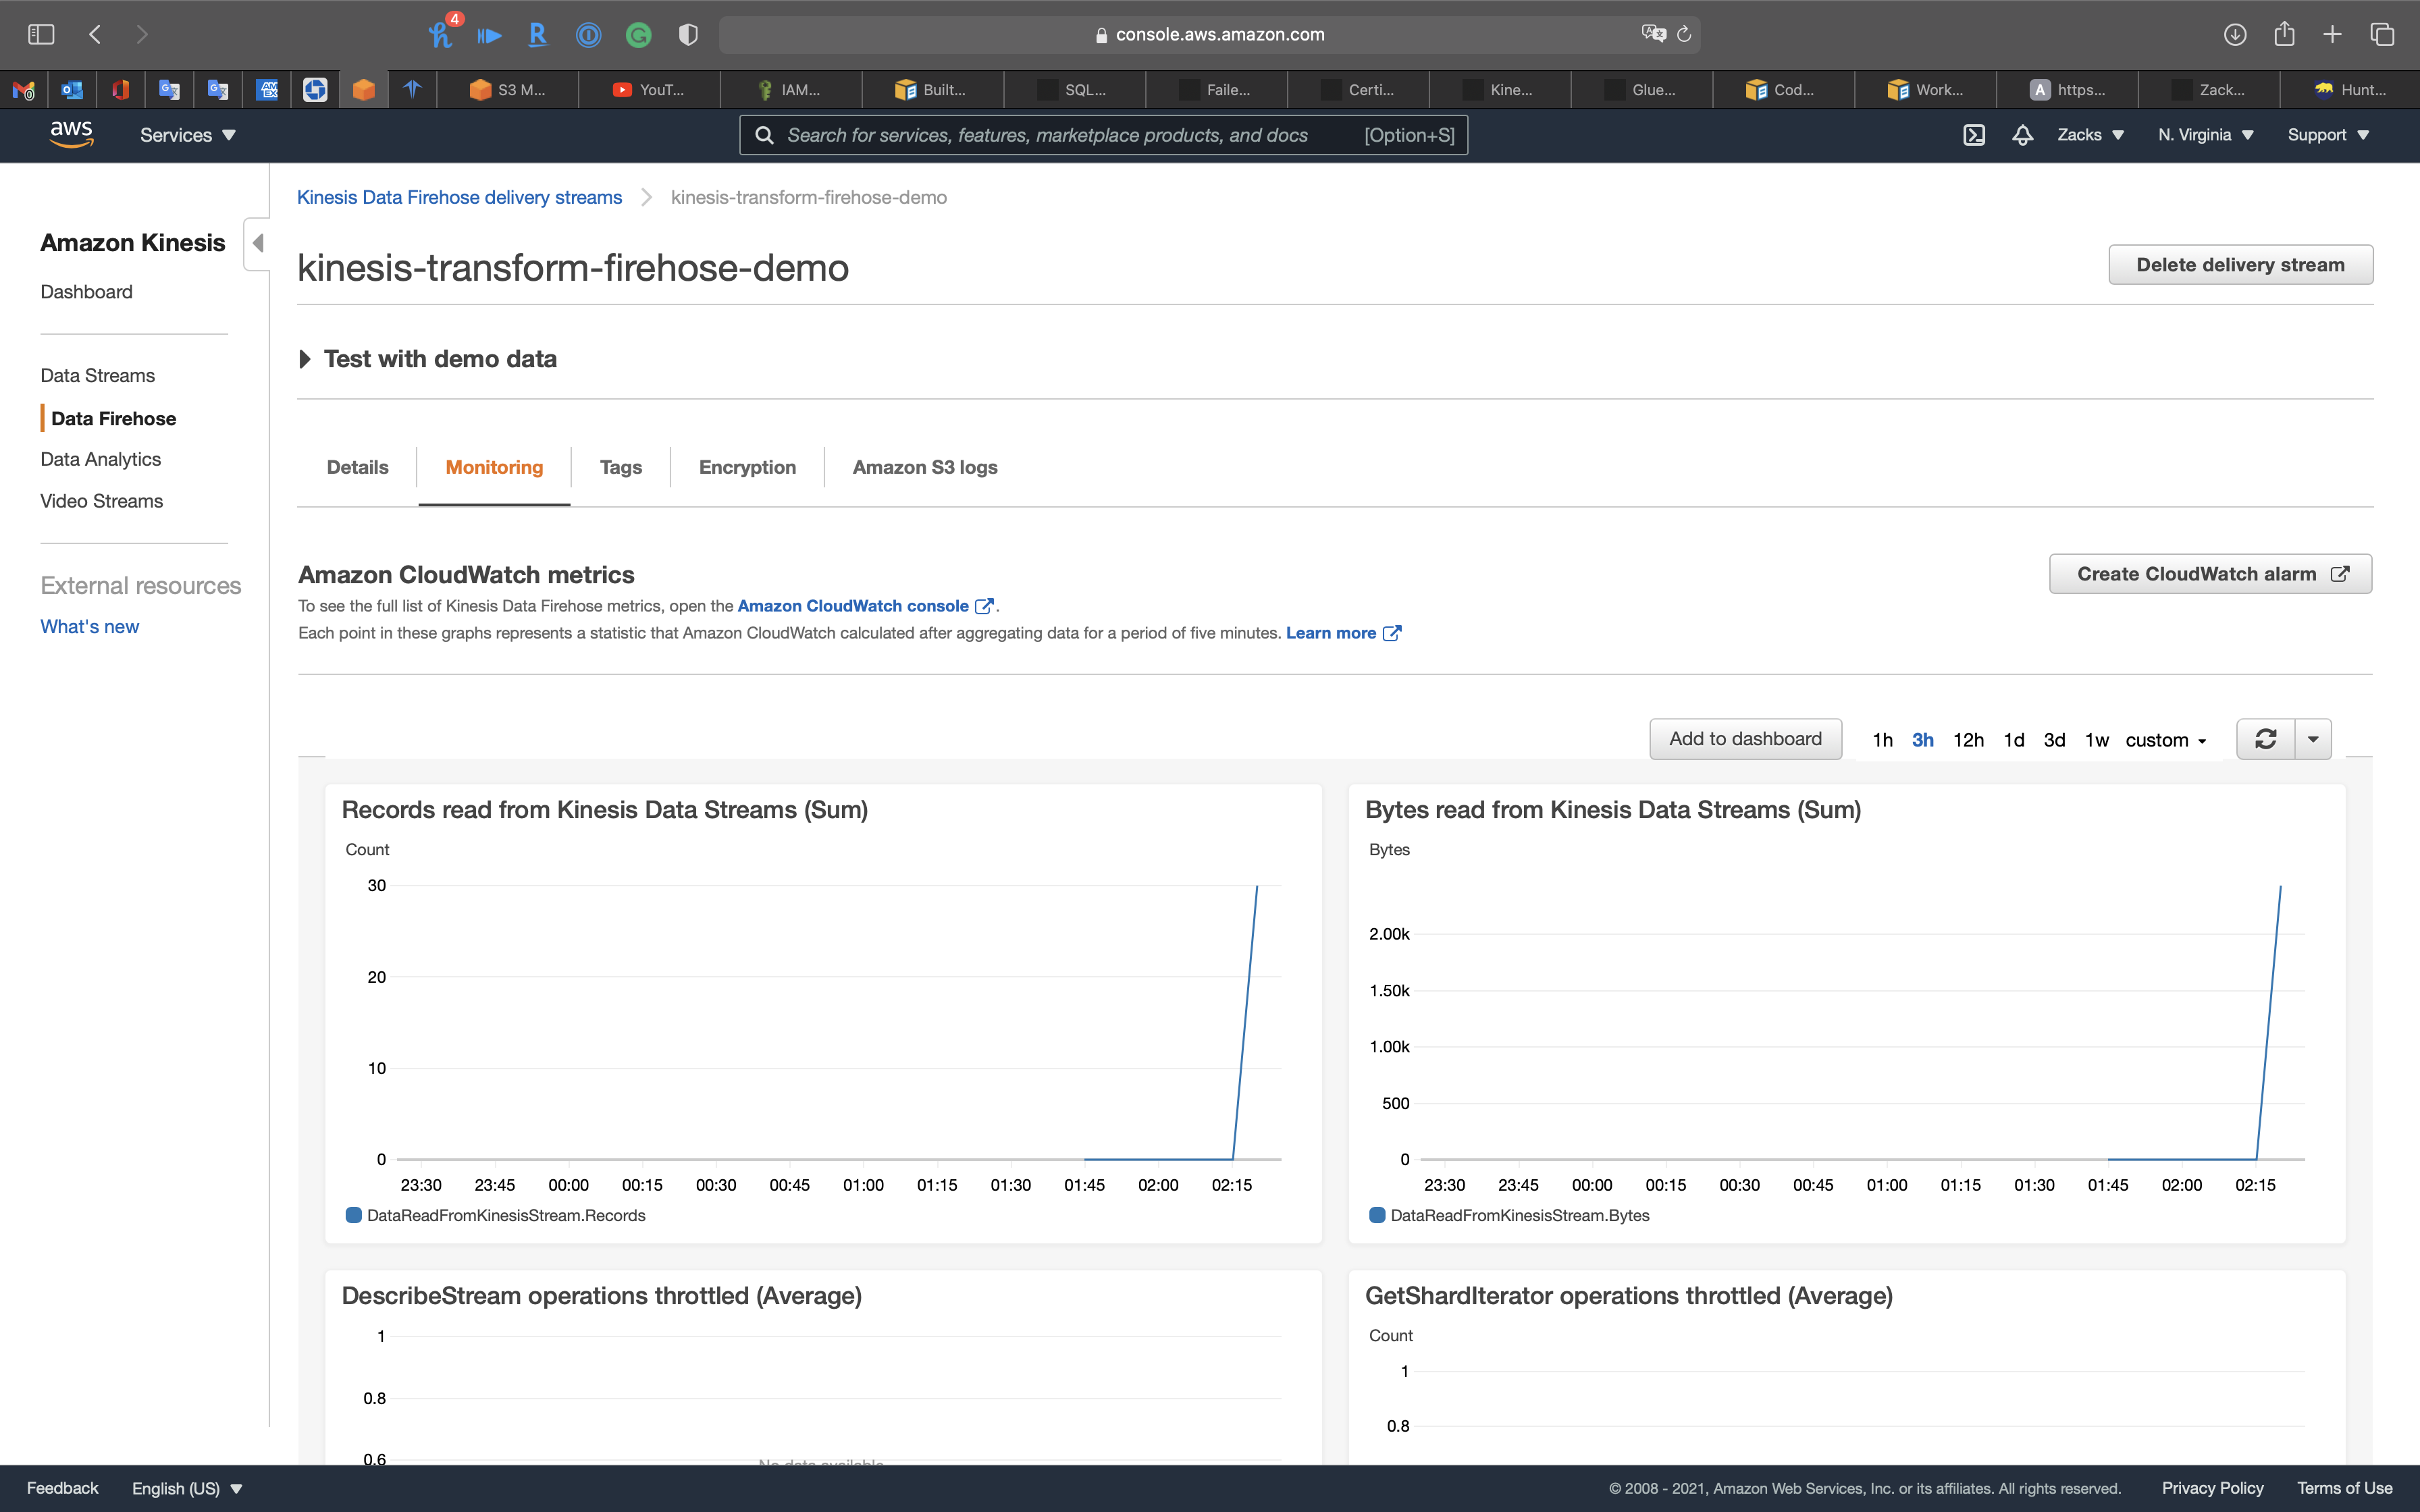
Services -> S3
Open your lab bucket.

S3 shows Kinesis Data Firehose has compressed then transformed the data to S3 bucket.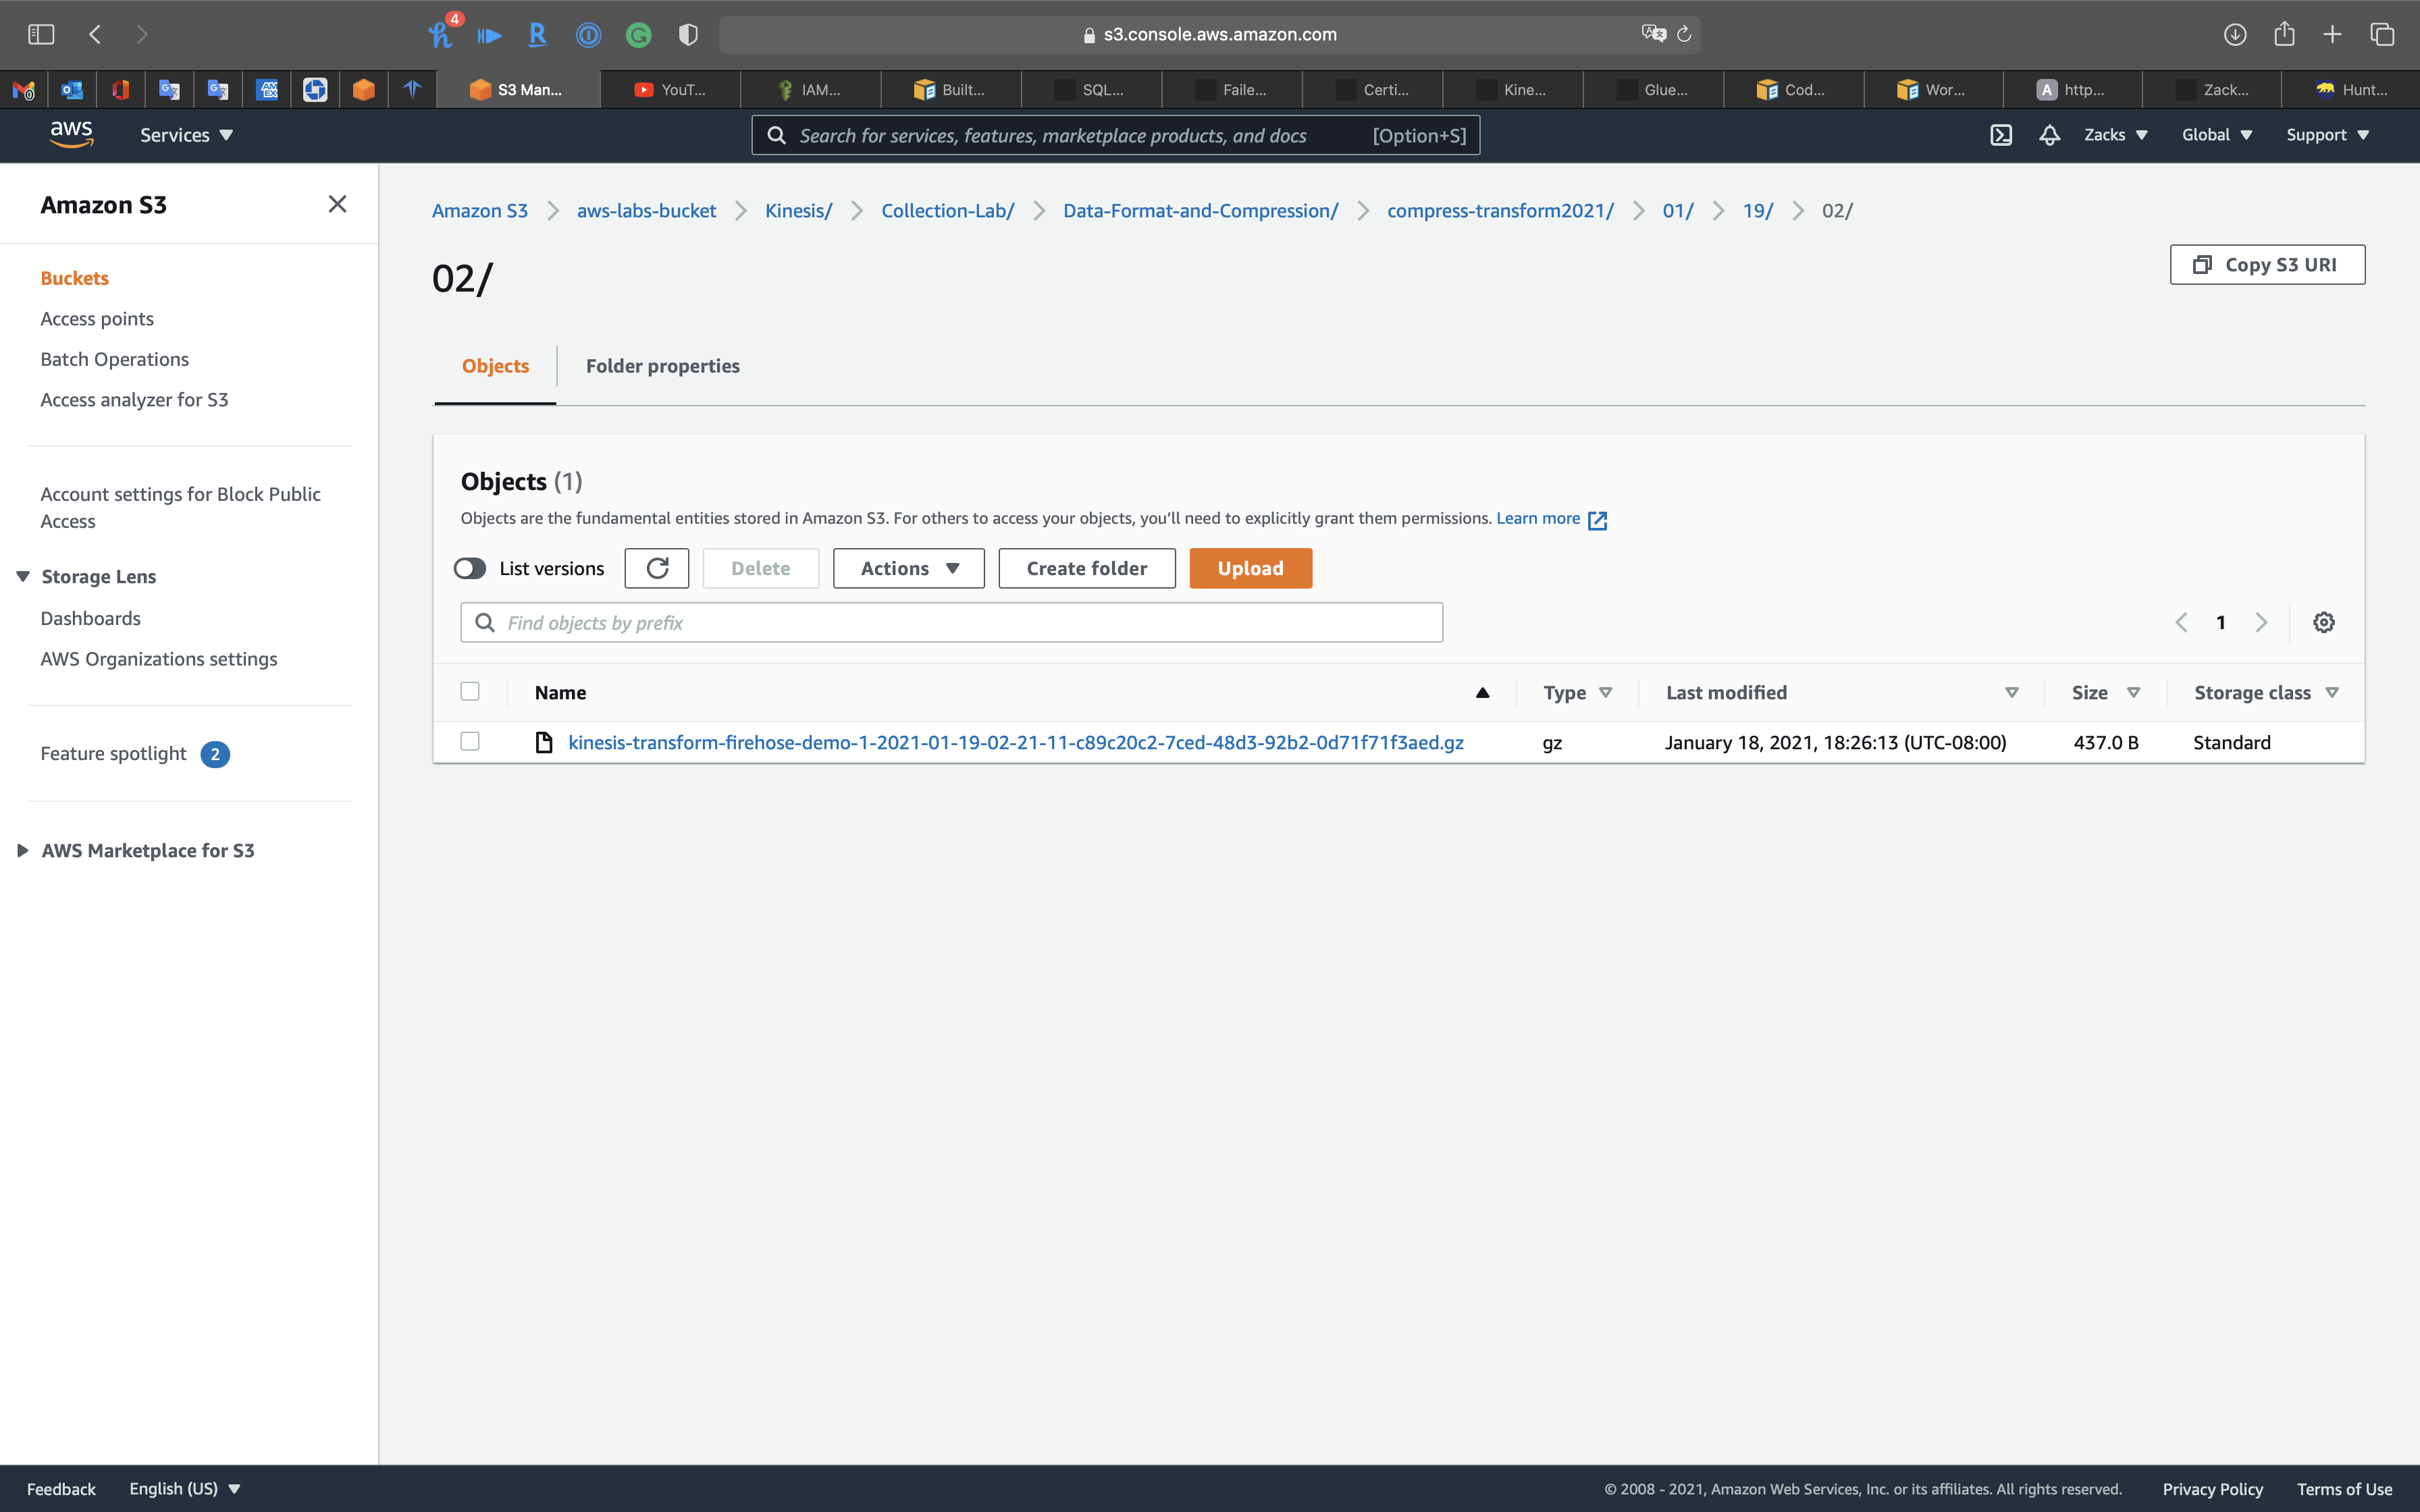
Download the file.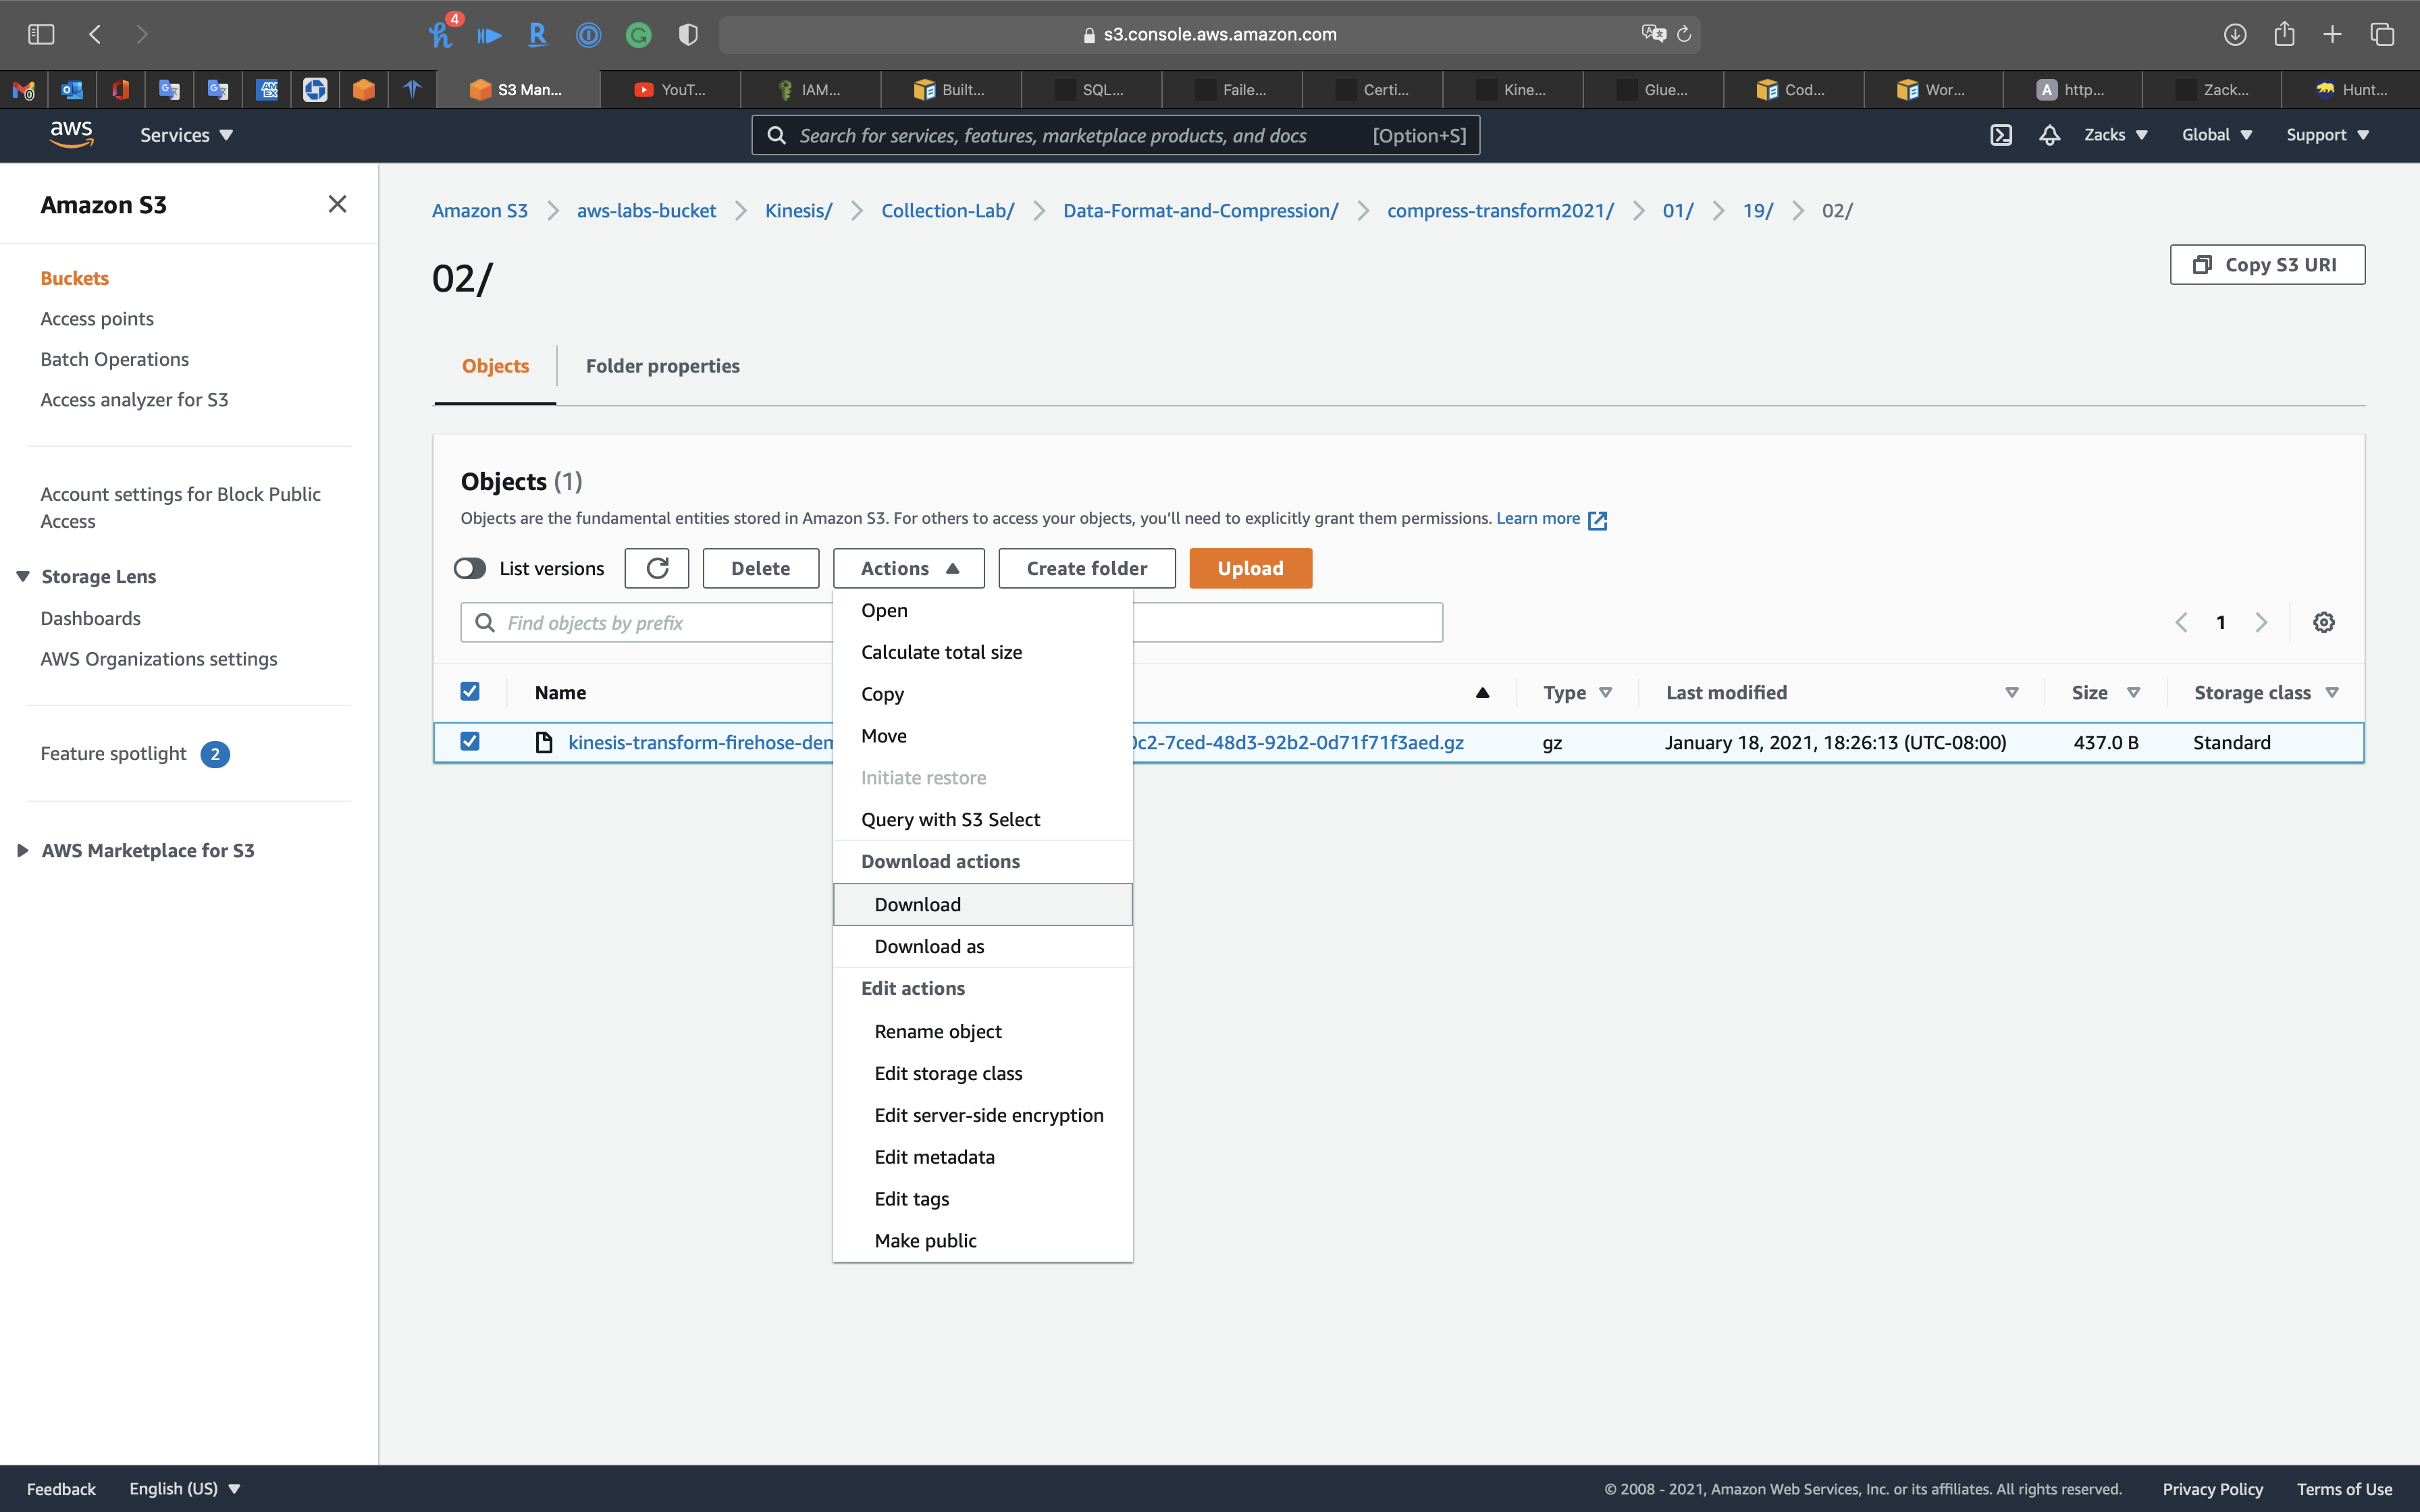
Open the file.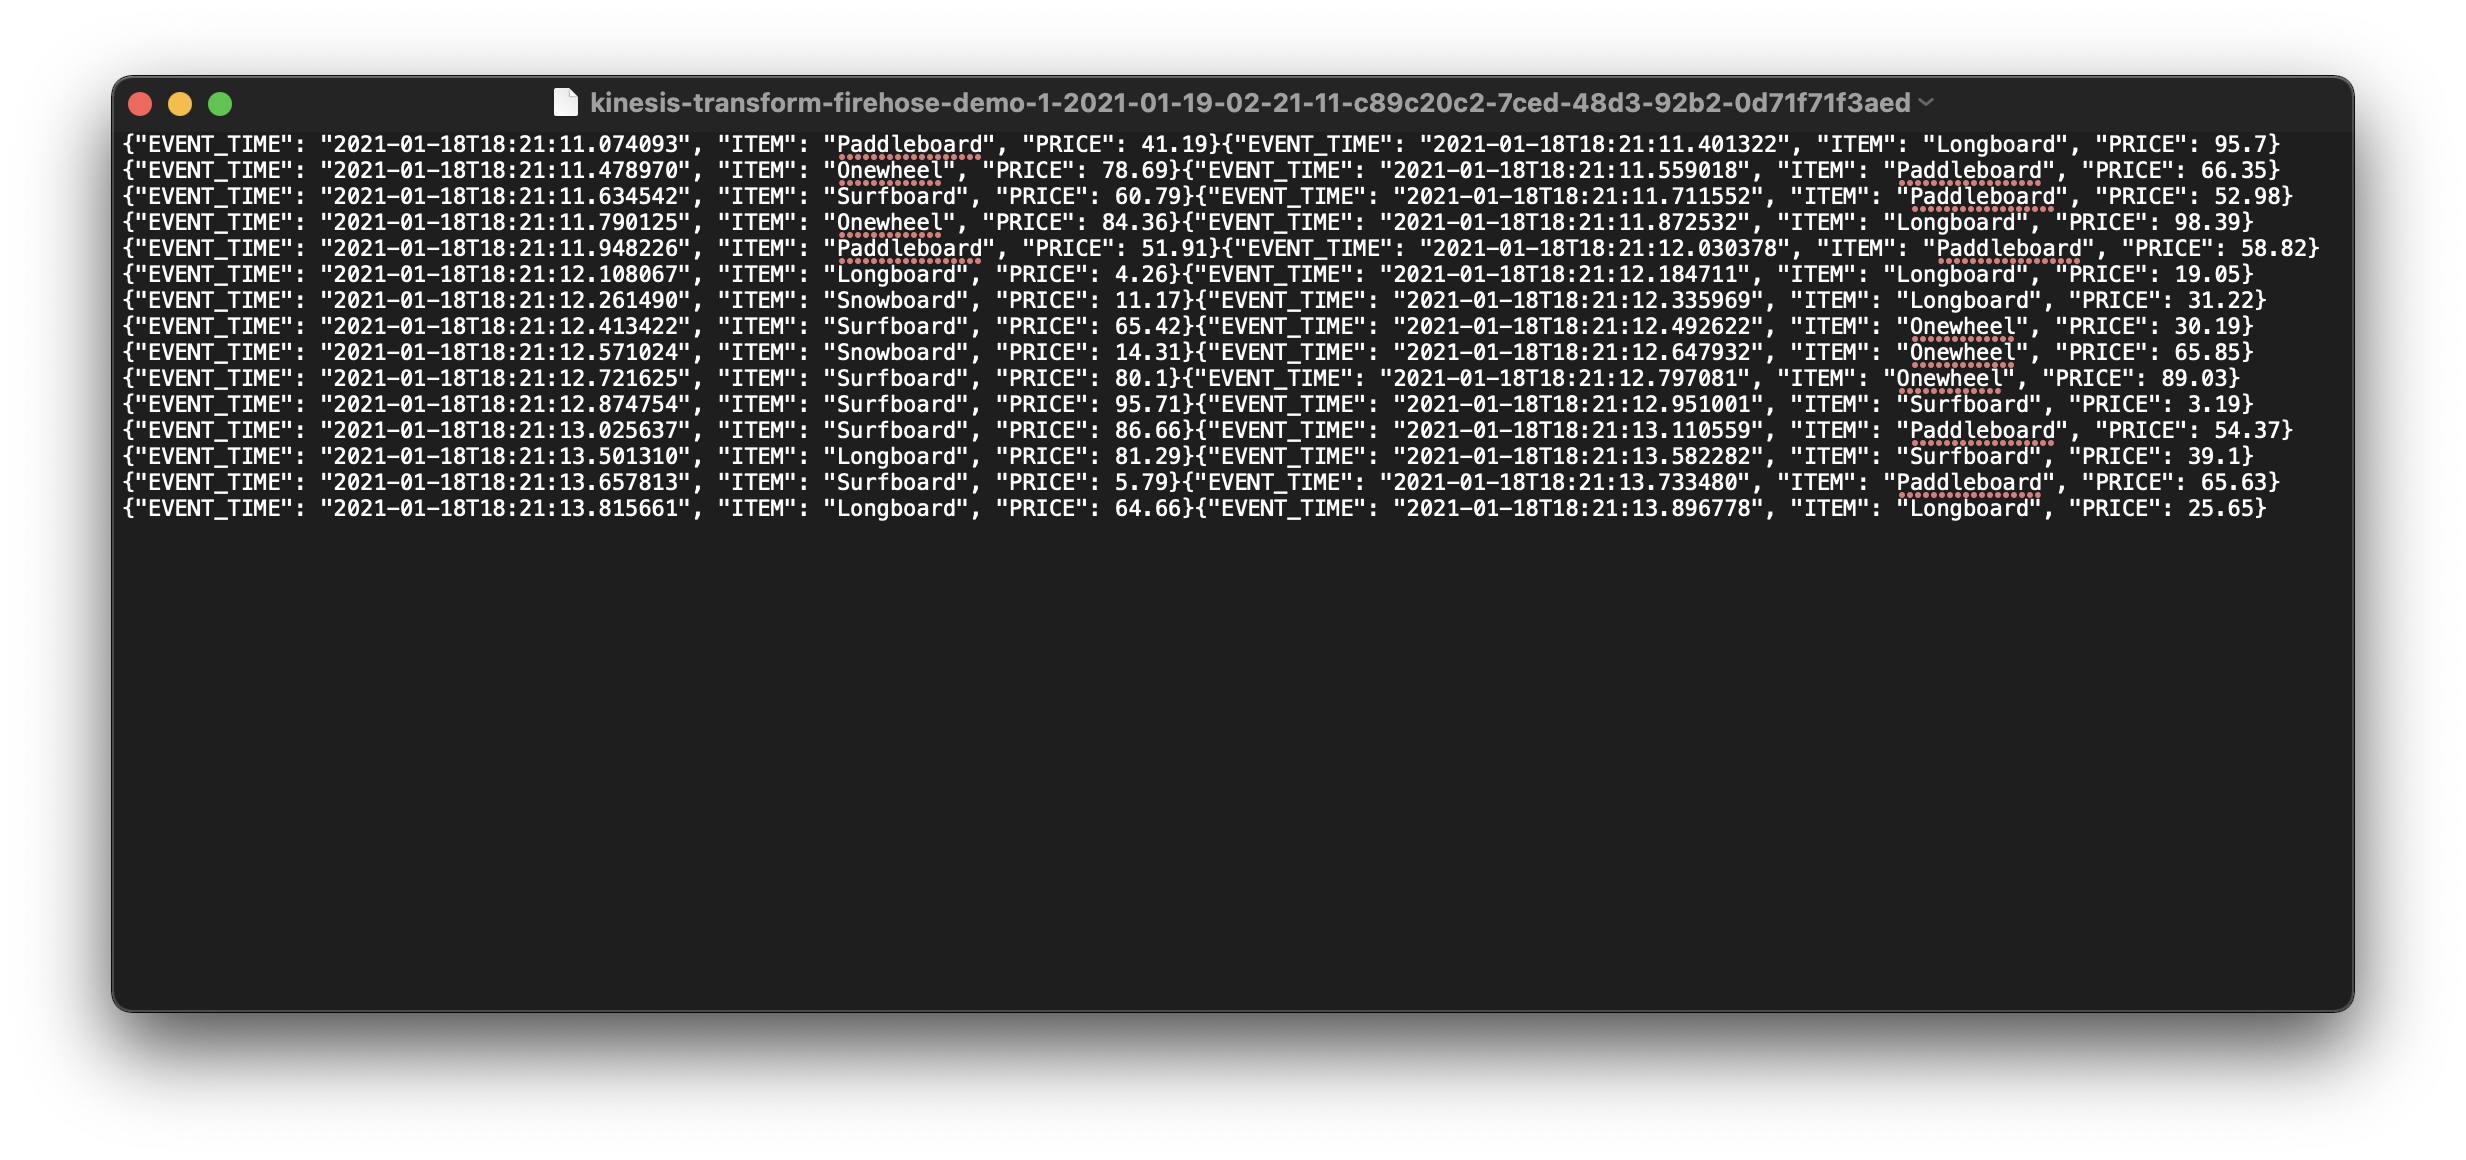
Data Transform and Format Lab
Data Source & Prerequisite
COVID-19 Surveillance Data Set
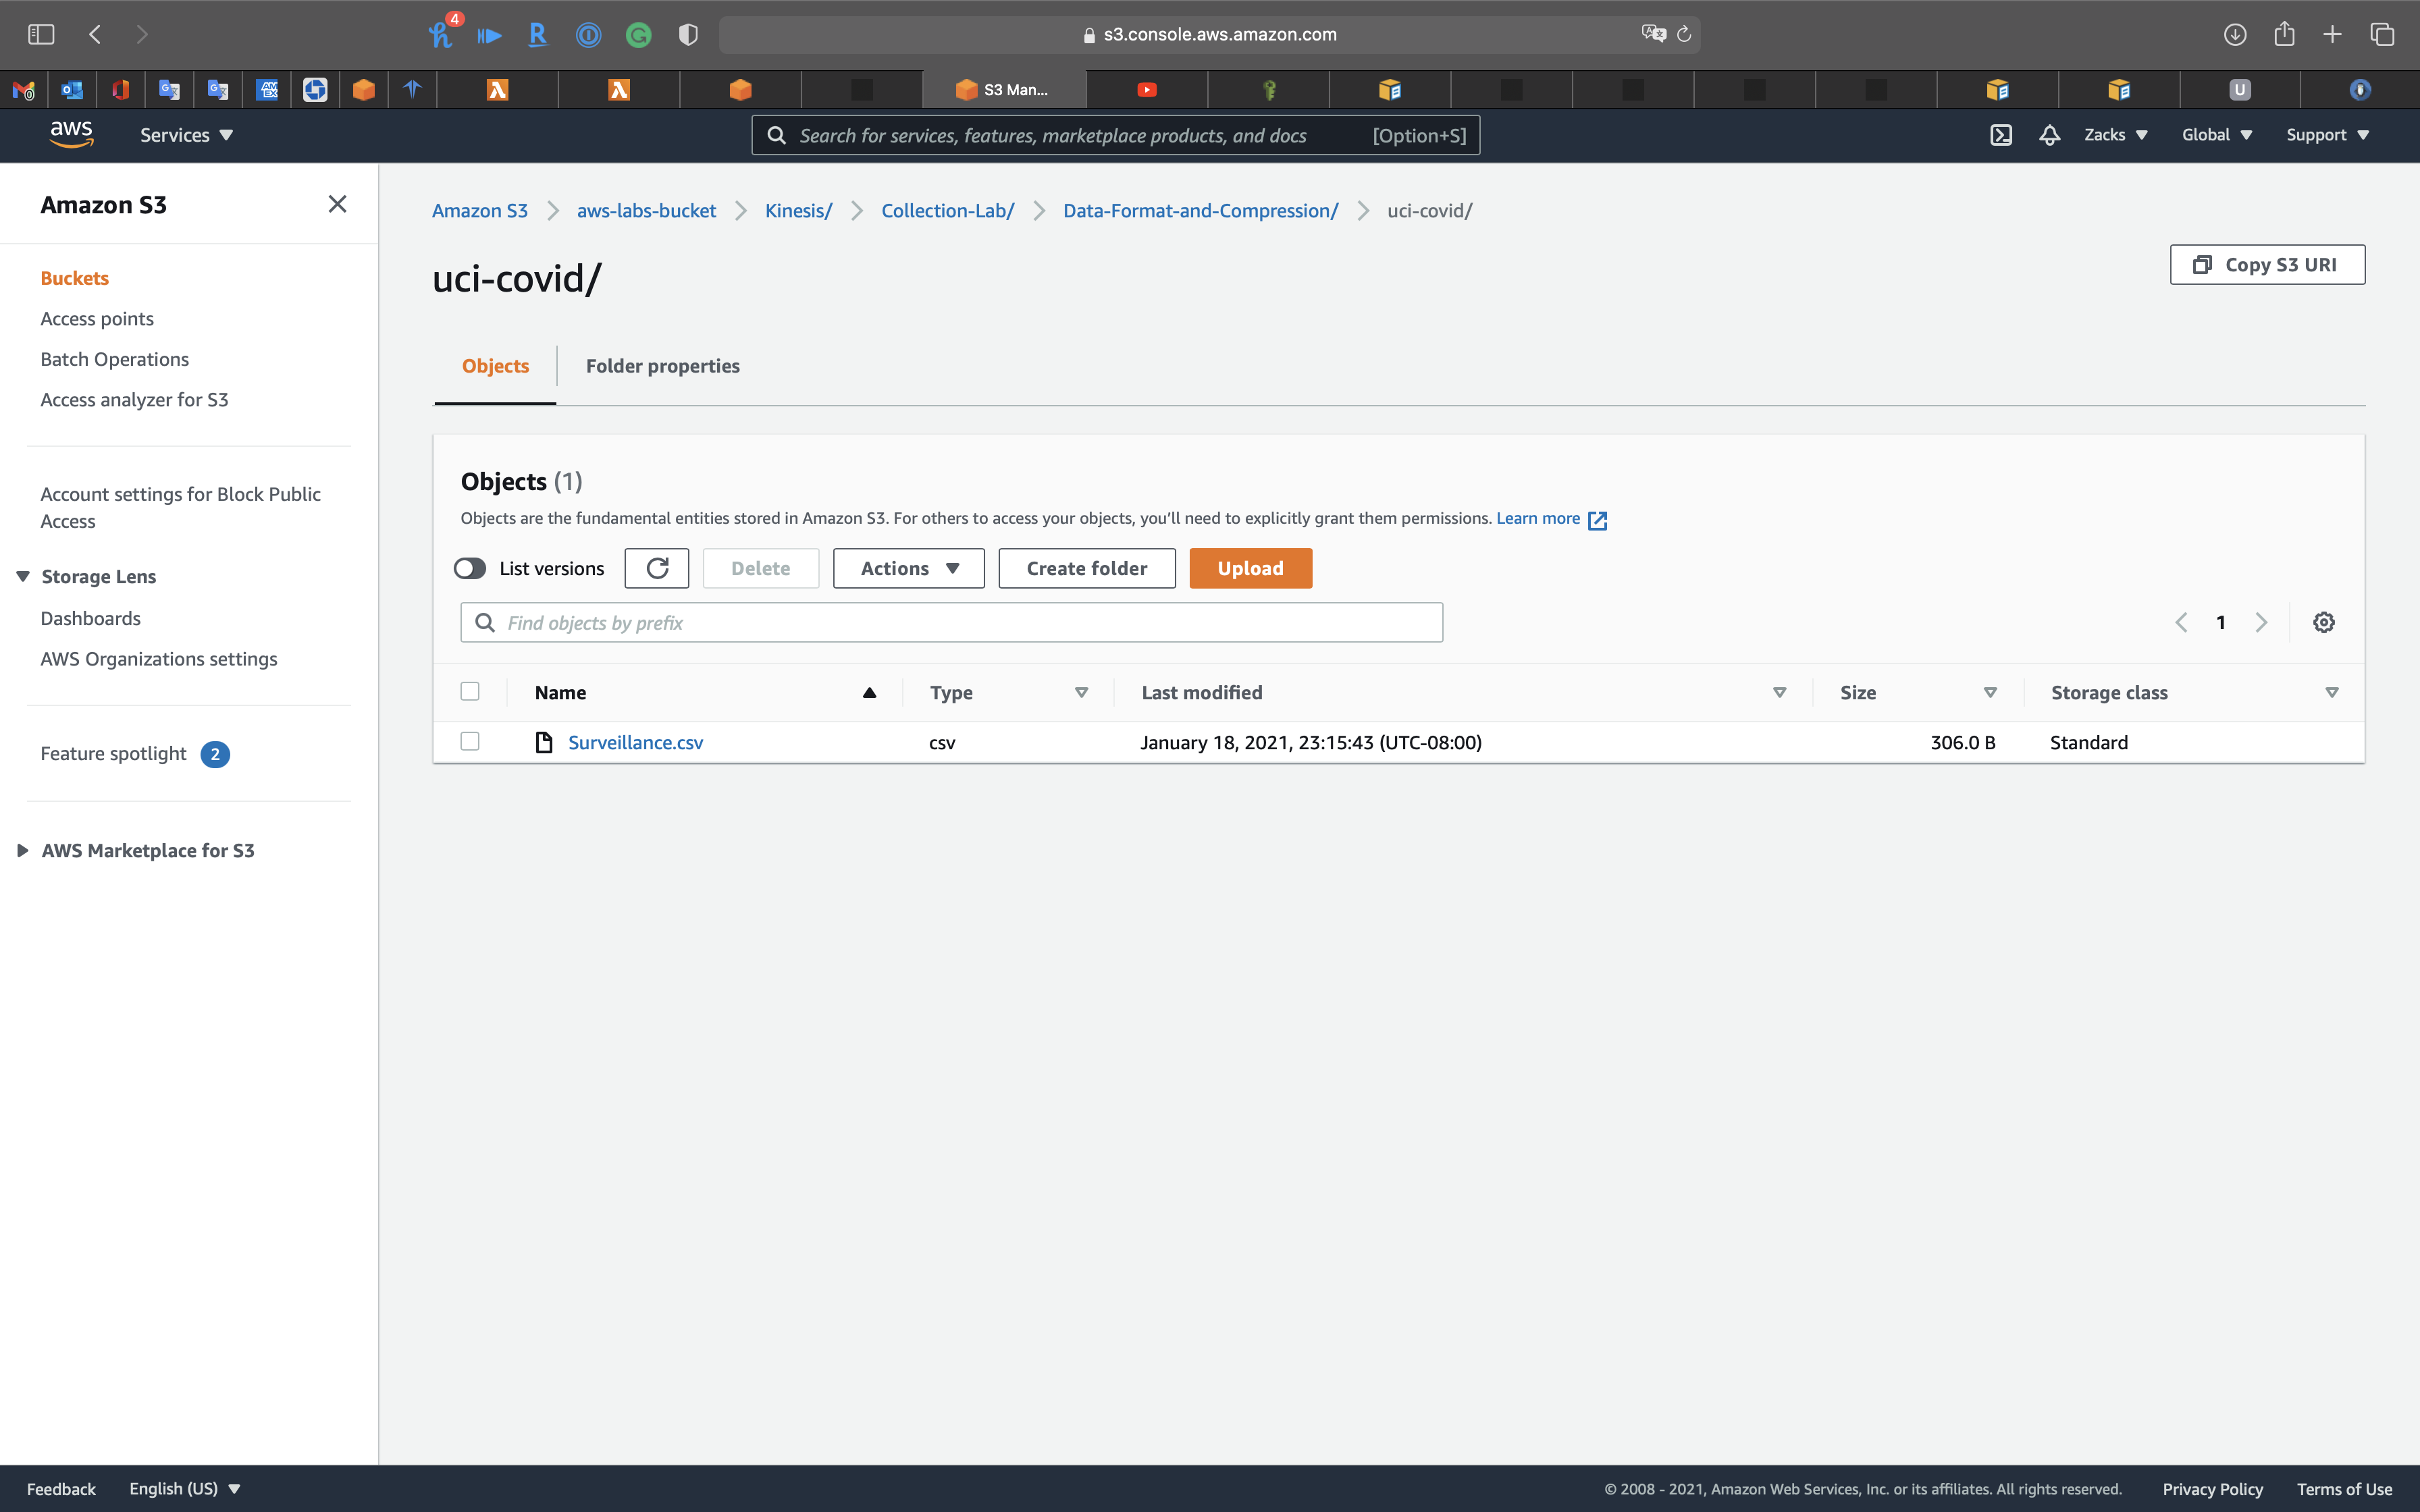
Download the dataset from the above link then upload it to your S3 bucket.
Diagram
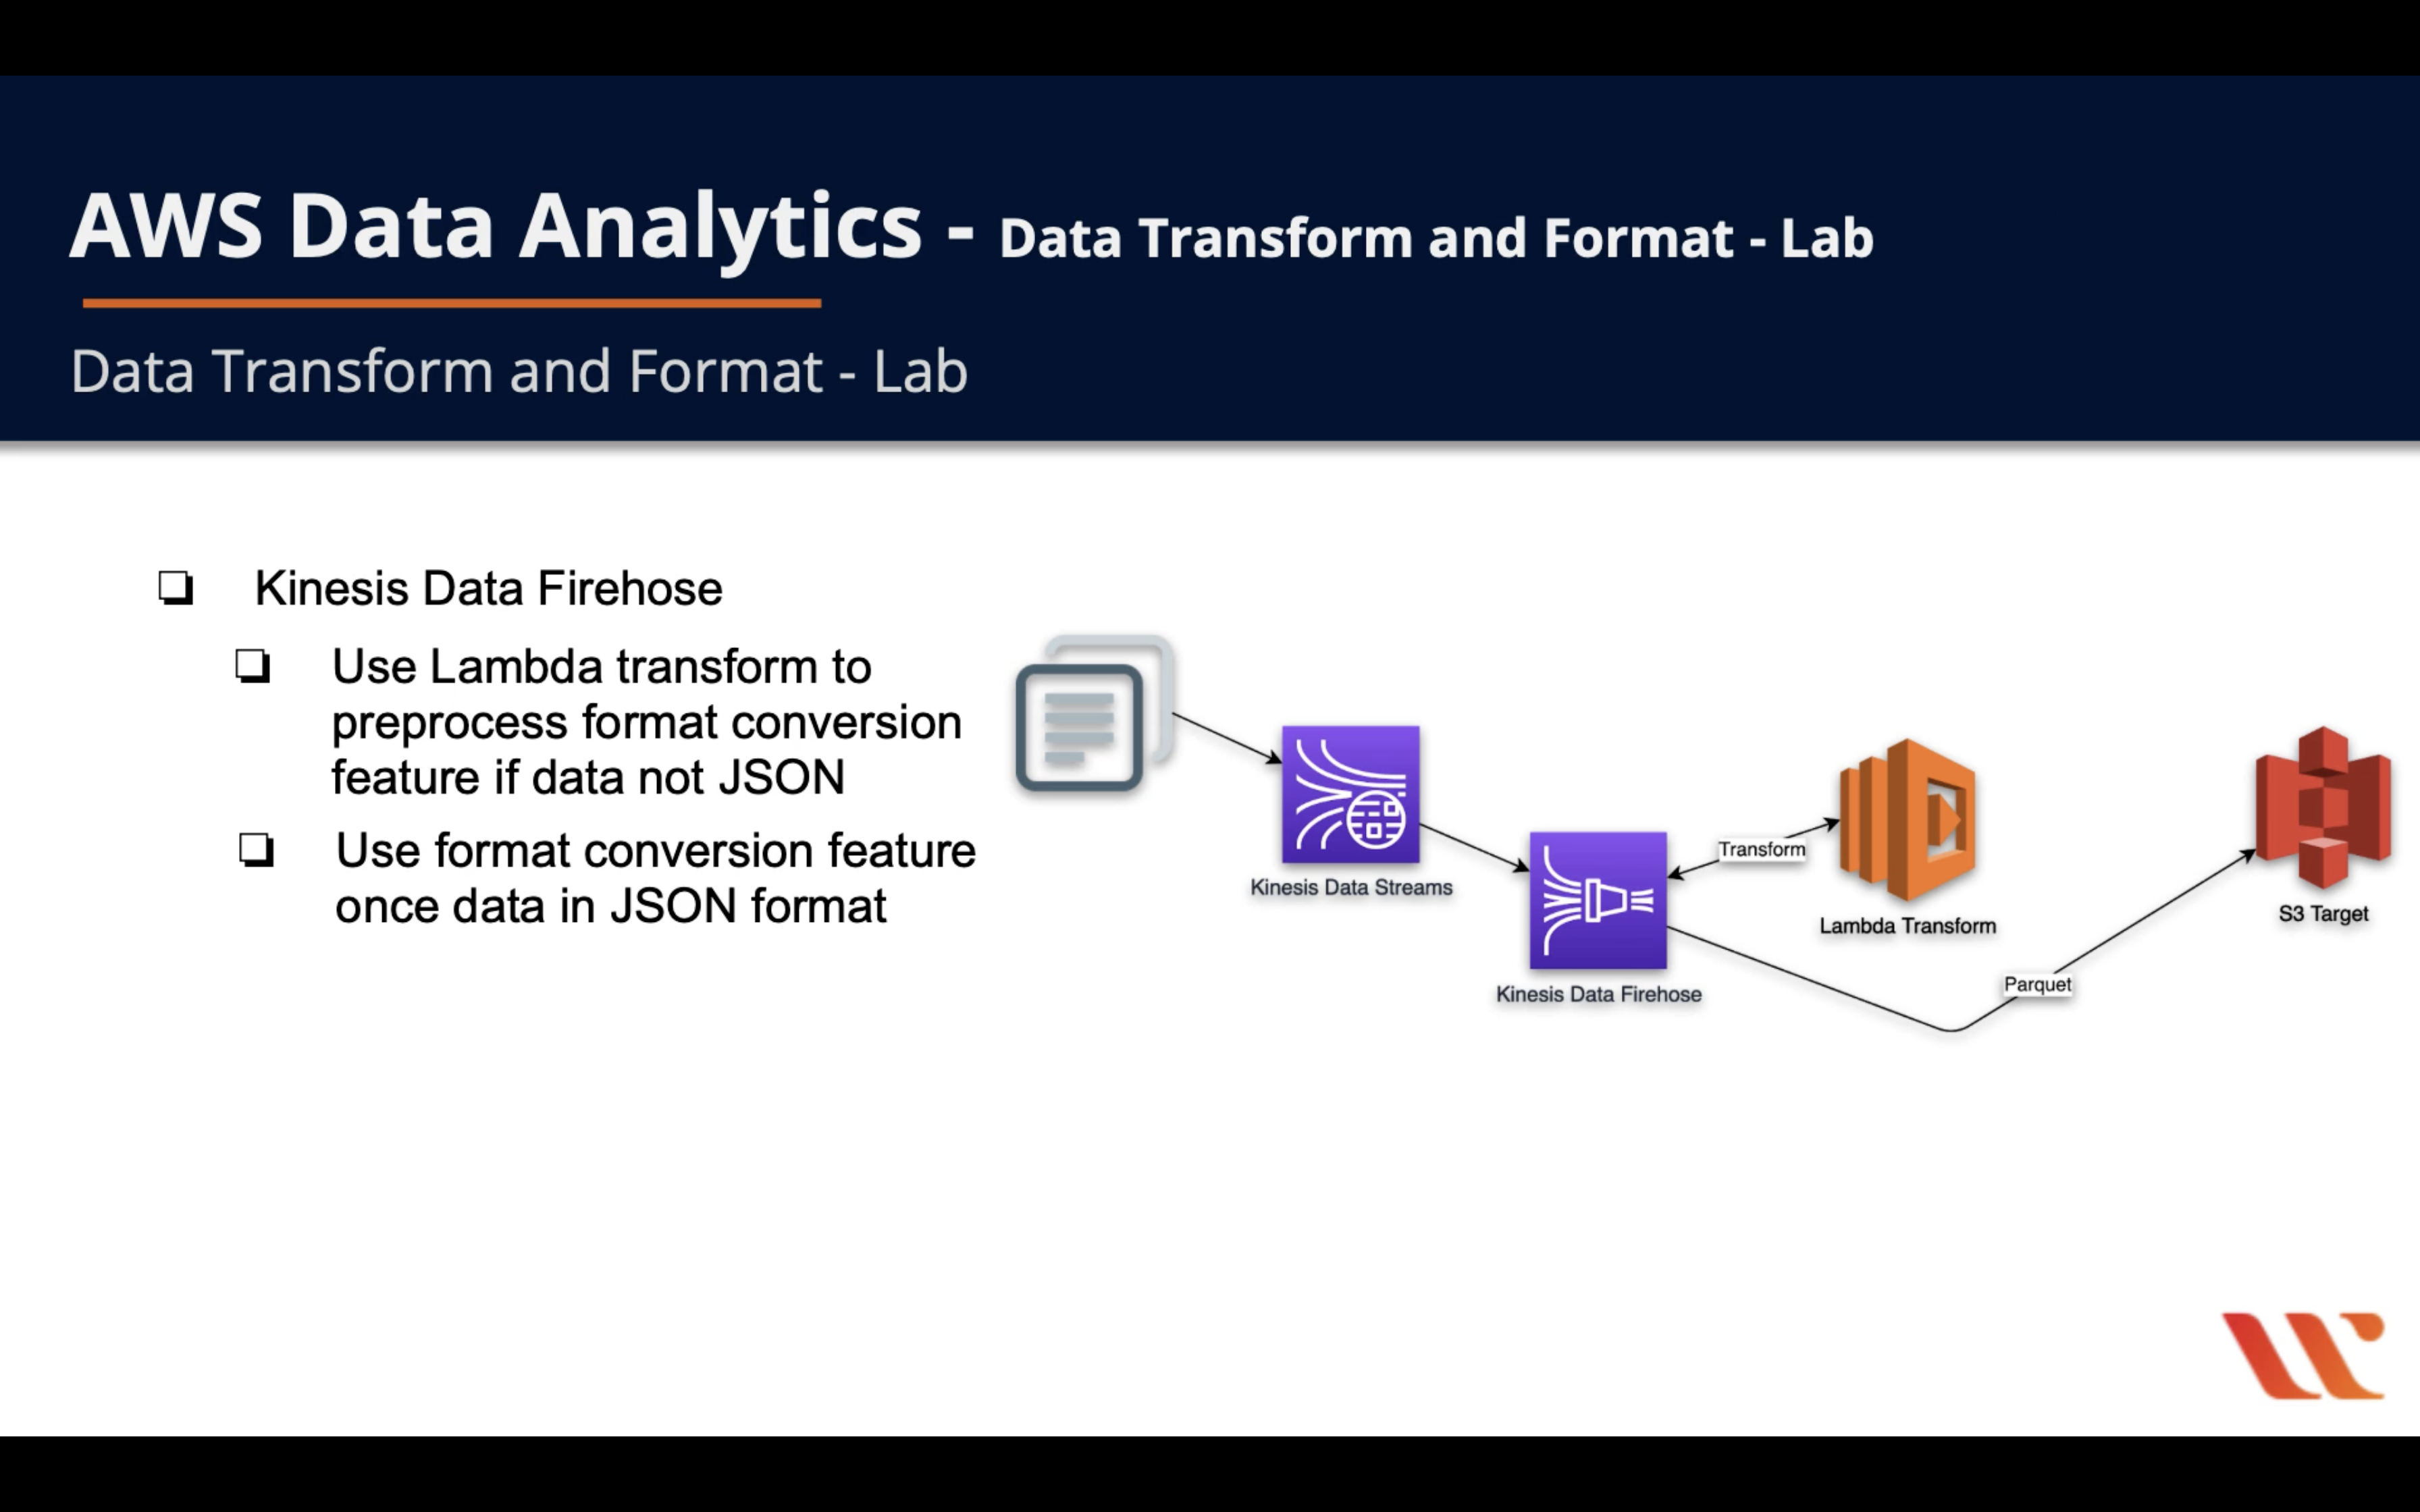
- Kinesis Data Firehose
- Use Lambda transform to preprocess format conversion feature if data not JSON
- Use format conversion feature once data in JSON format
AWS Glue Configuration
Services -> AWS Glue
Finish AWS Glue ETL Lab first if you cannot understand what is AWS Glue.
We want to crawl the .csv file to build the table in catalog. So we need configure the security.
Click on Security configurations navigation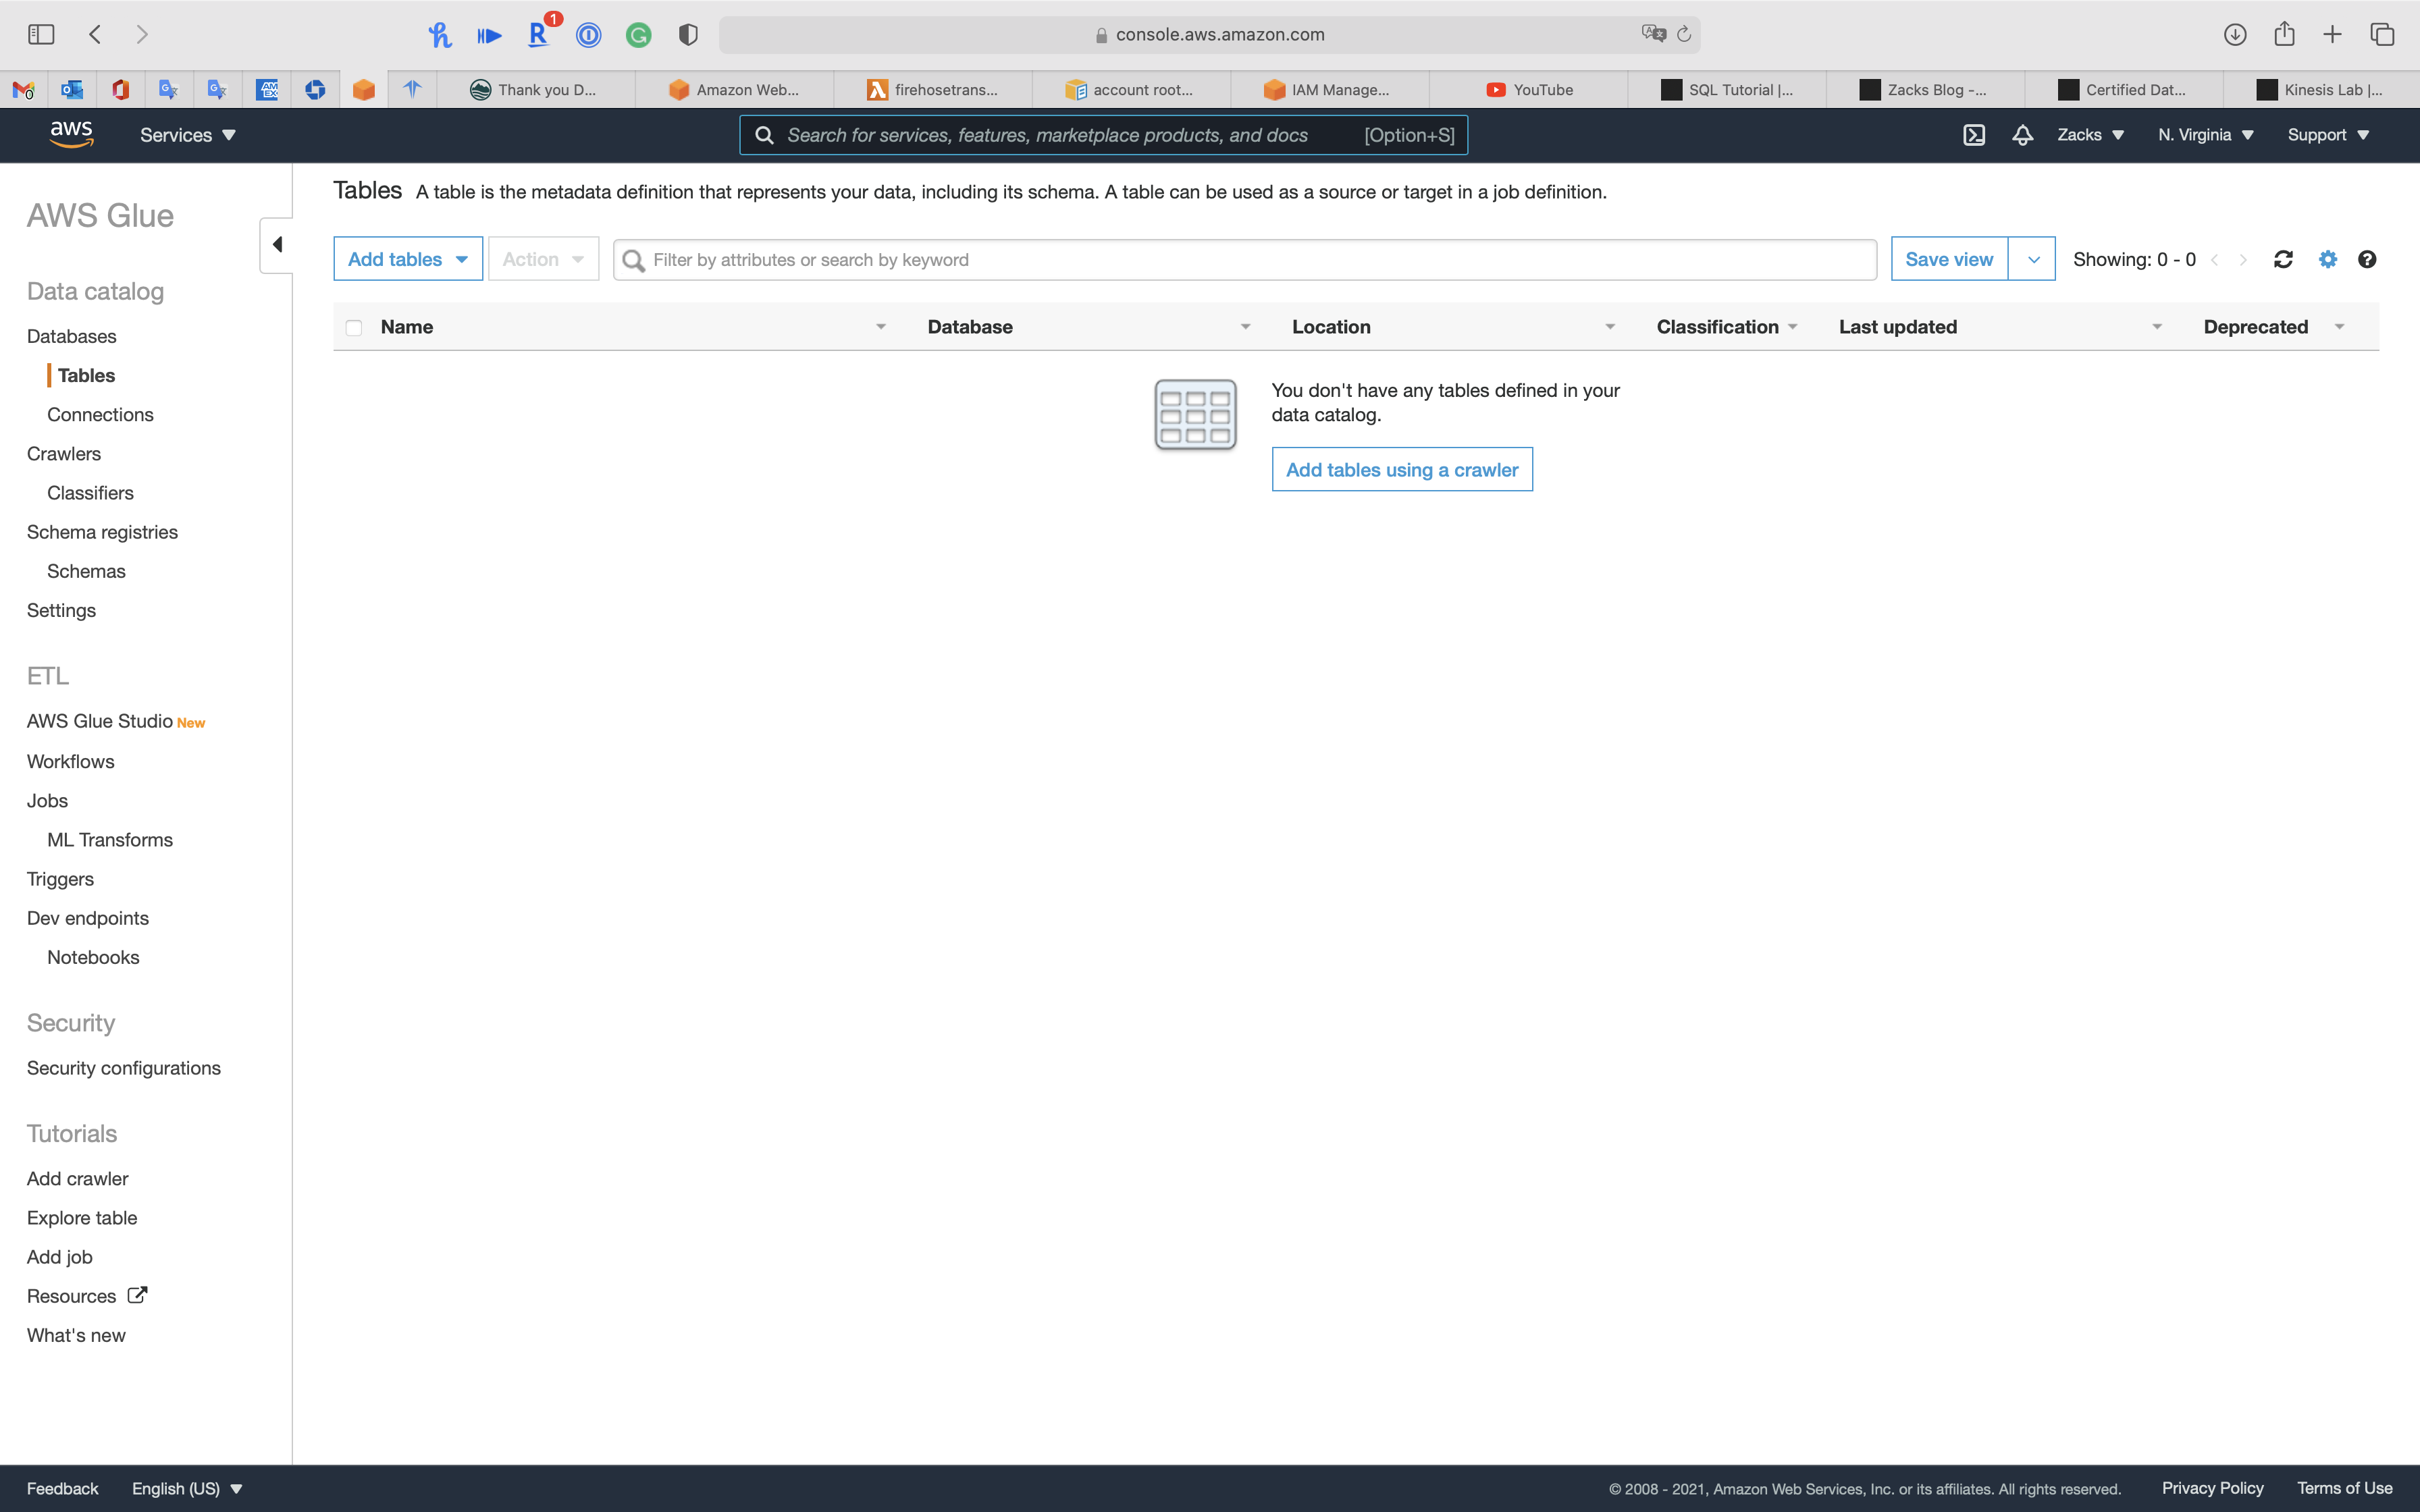
Security configurations
Click on Add security configuration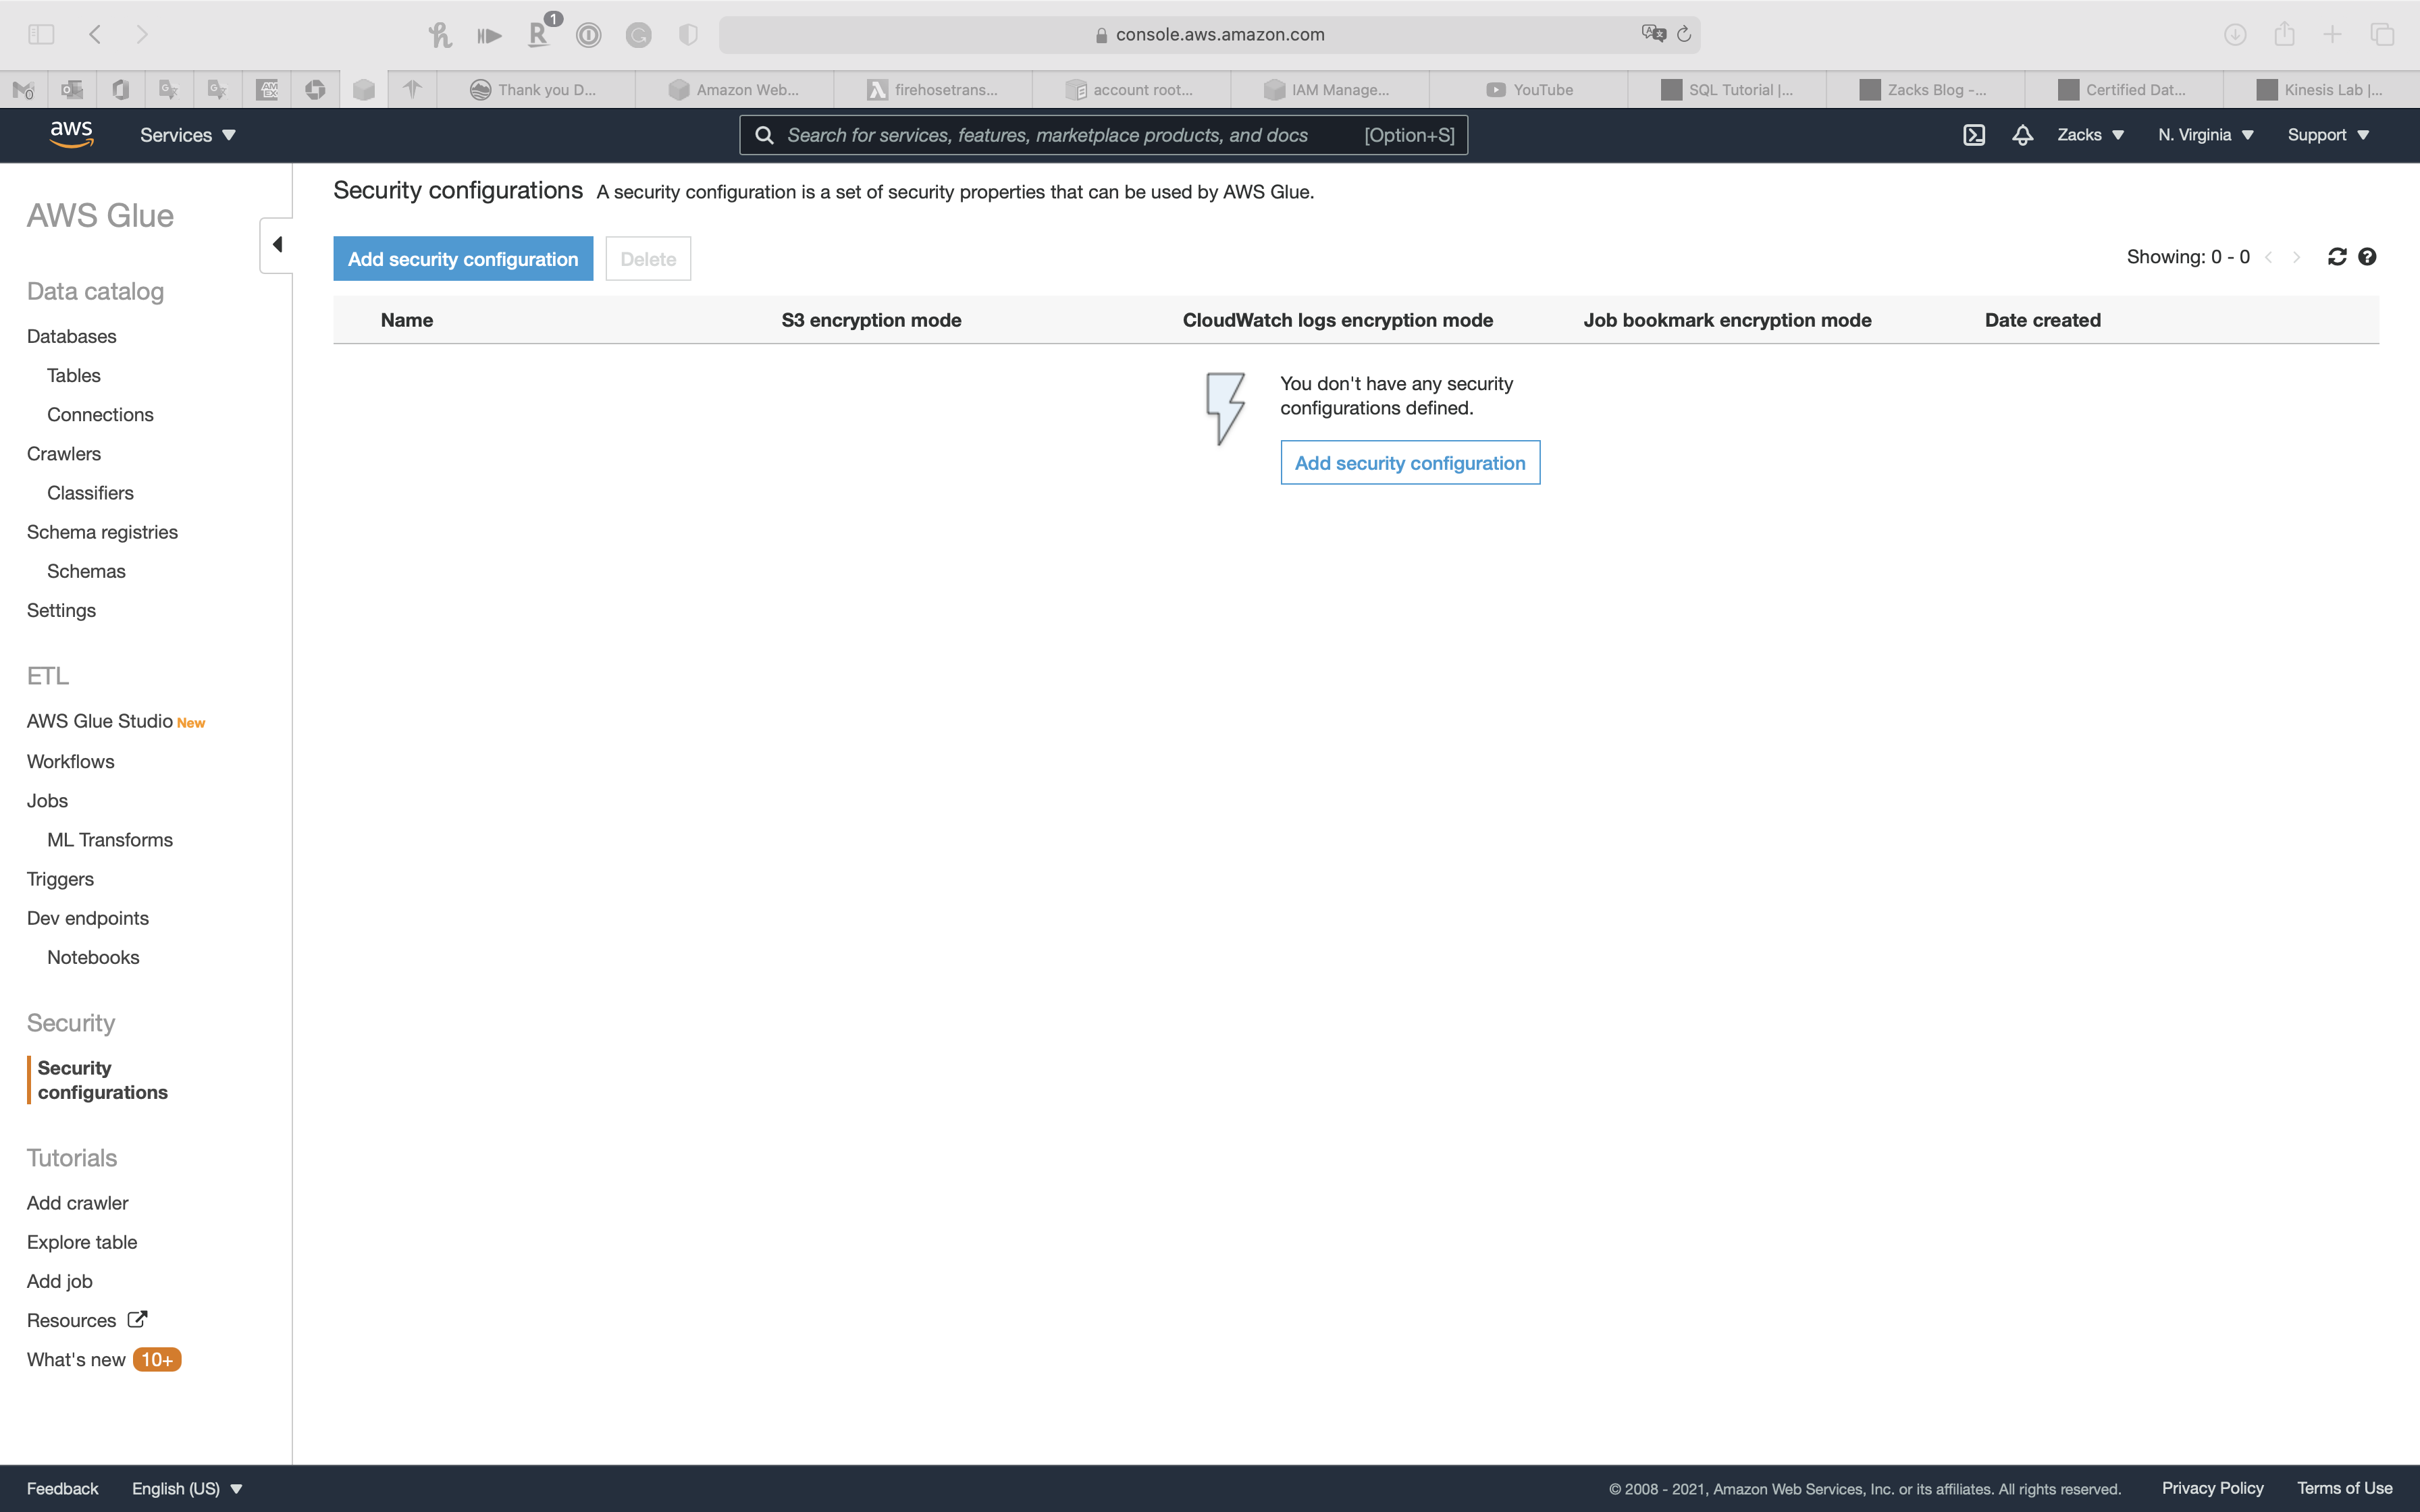
- Security configuration name:
glueDemoSecurityConfig - Encryption mode:
SSE-KMS
Three things we can encrypt in AWS Glue:
Data (at-rest)
CloudWatch logs
Job bookmark
Uncheck
CloudWatch logs encryption
Expand Advanced properties
- Uncheck
Job bookmark encryption
Click on Finish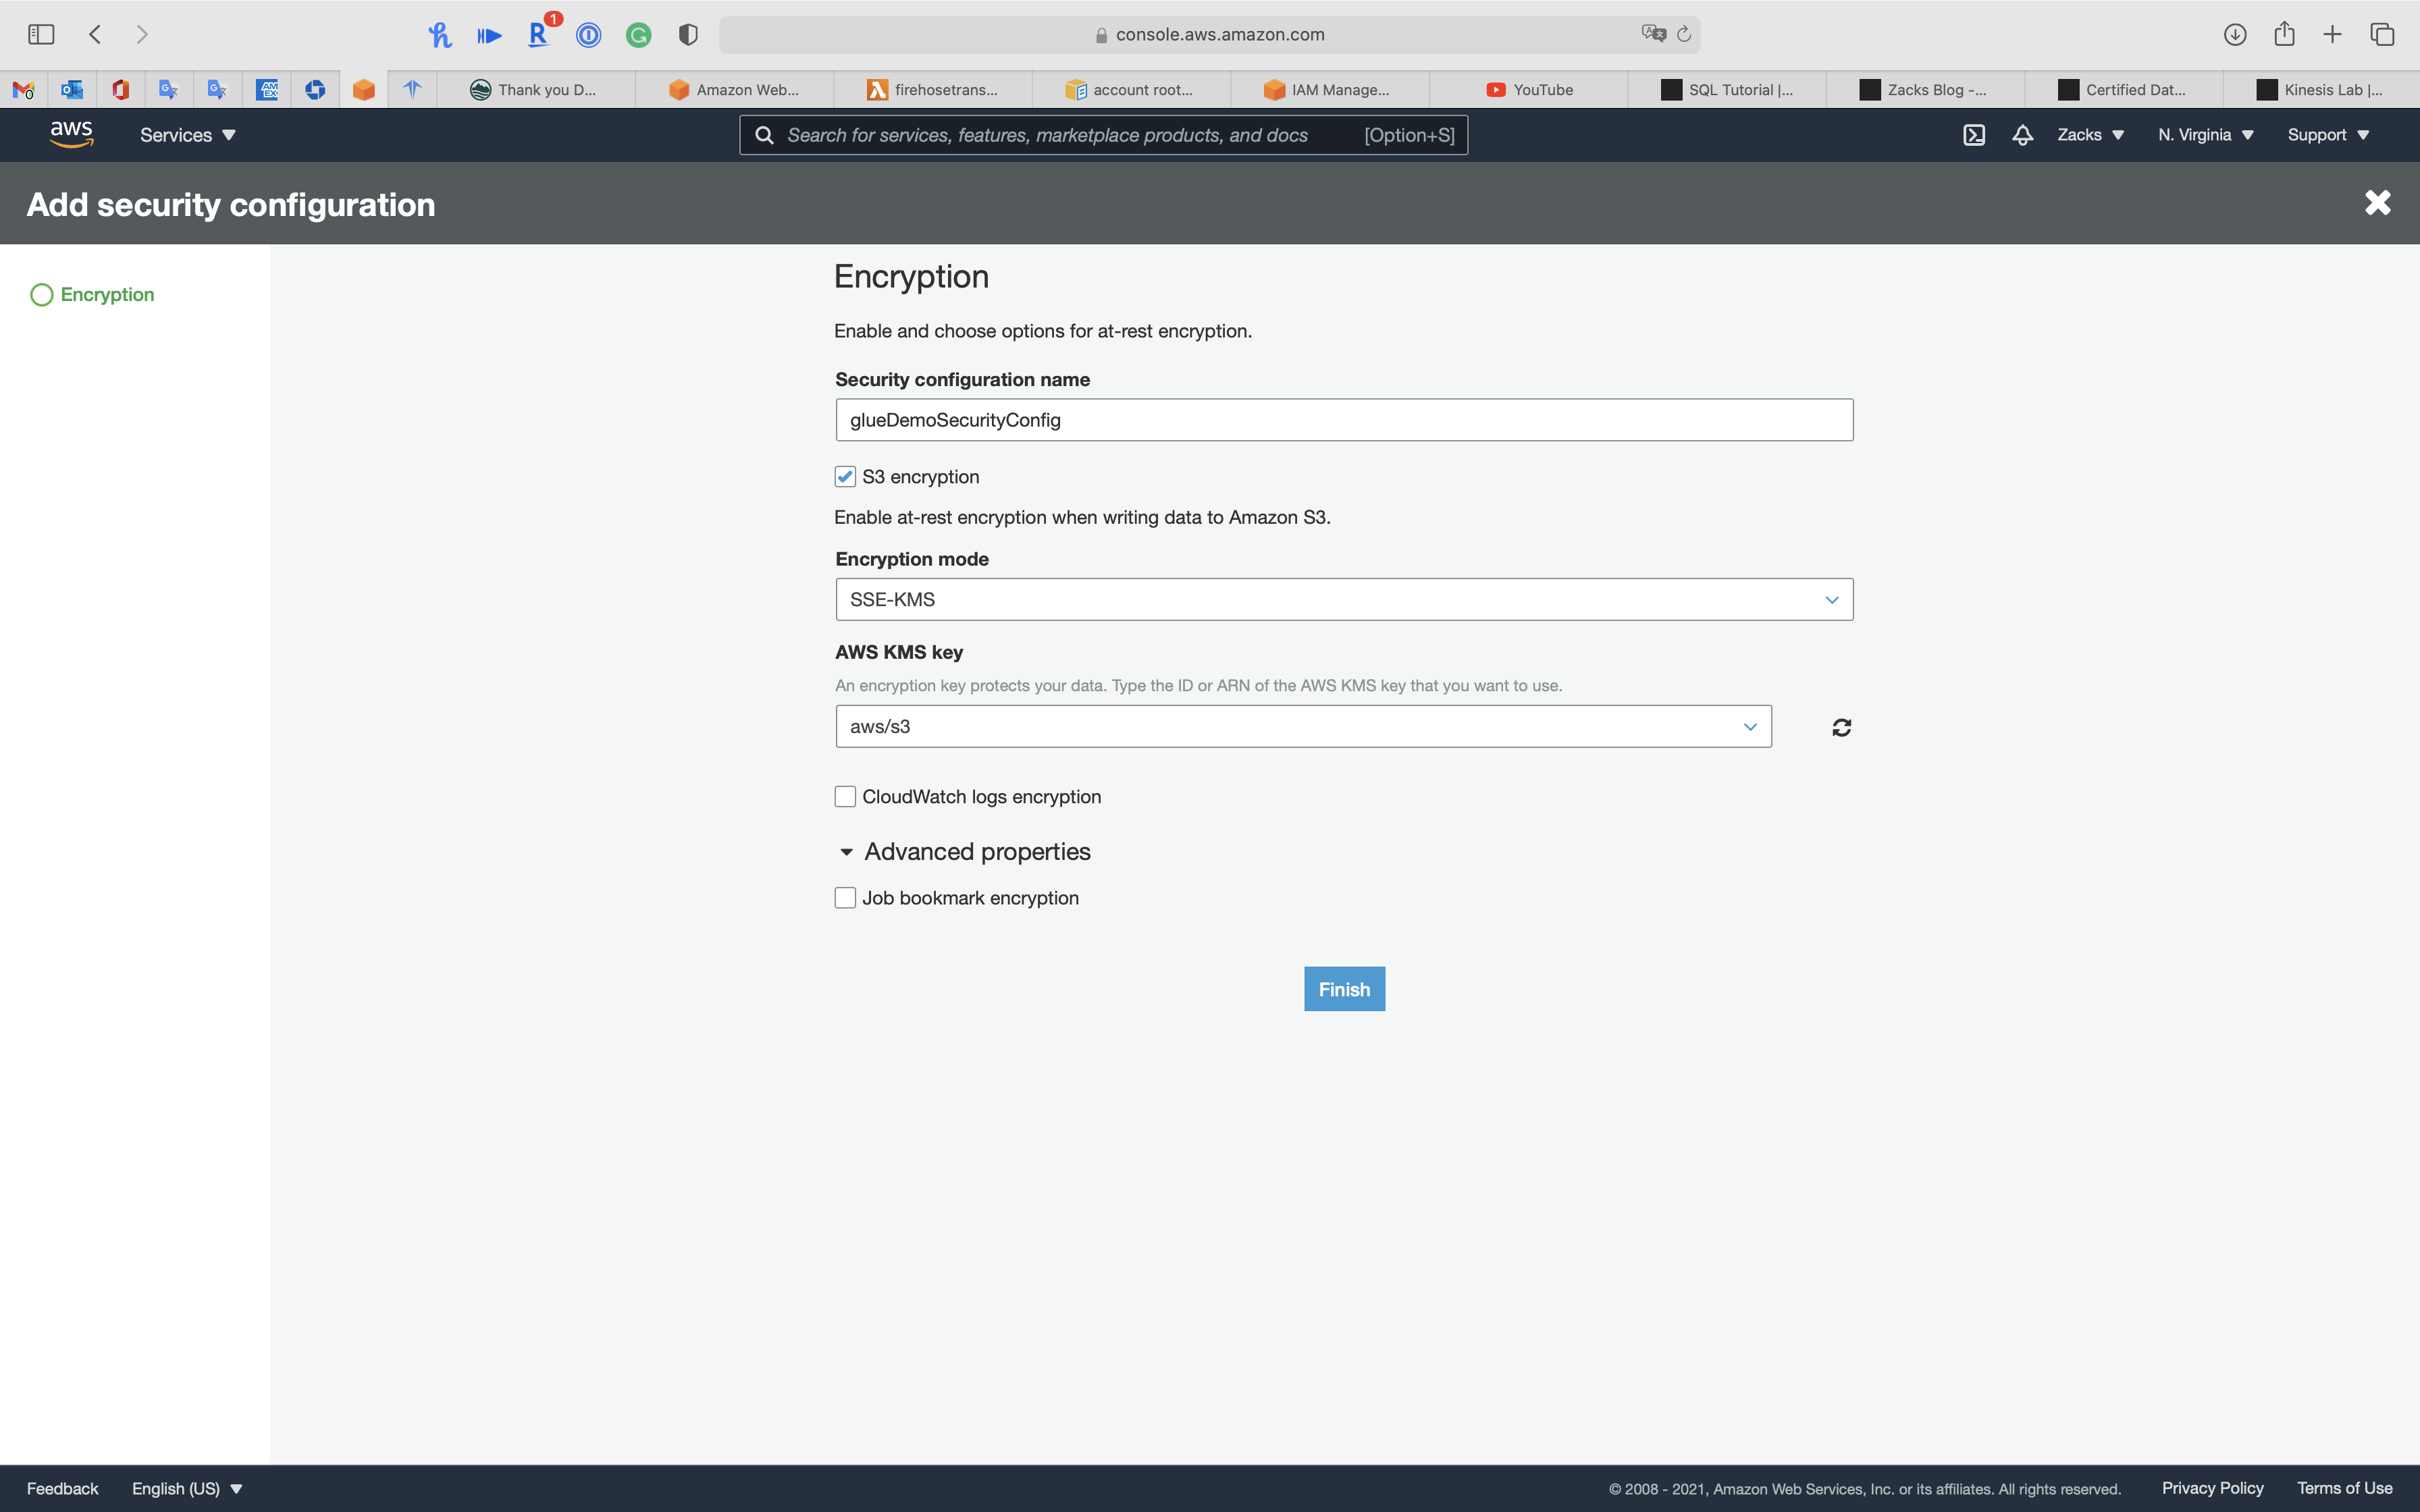
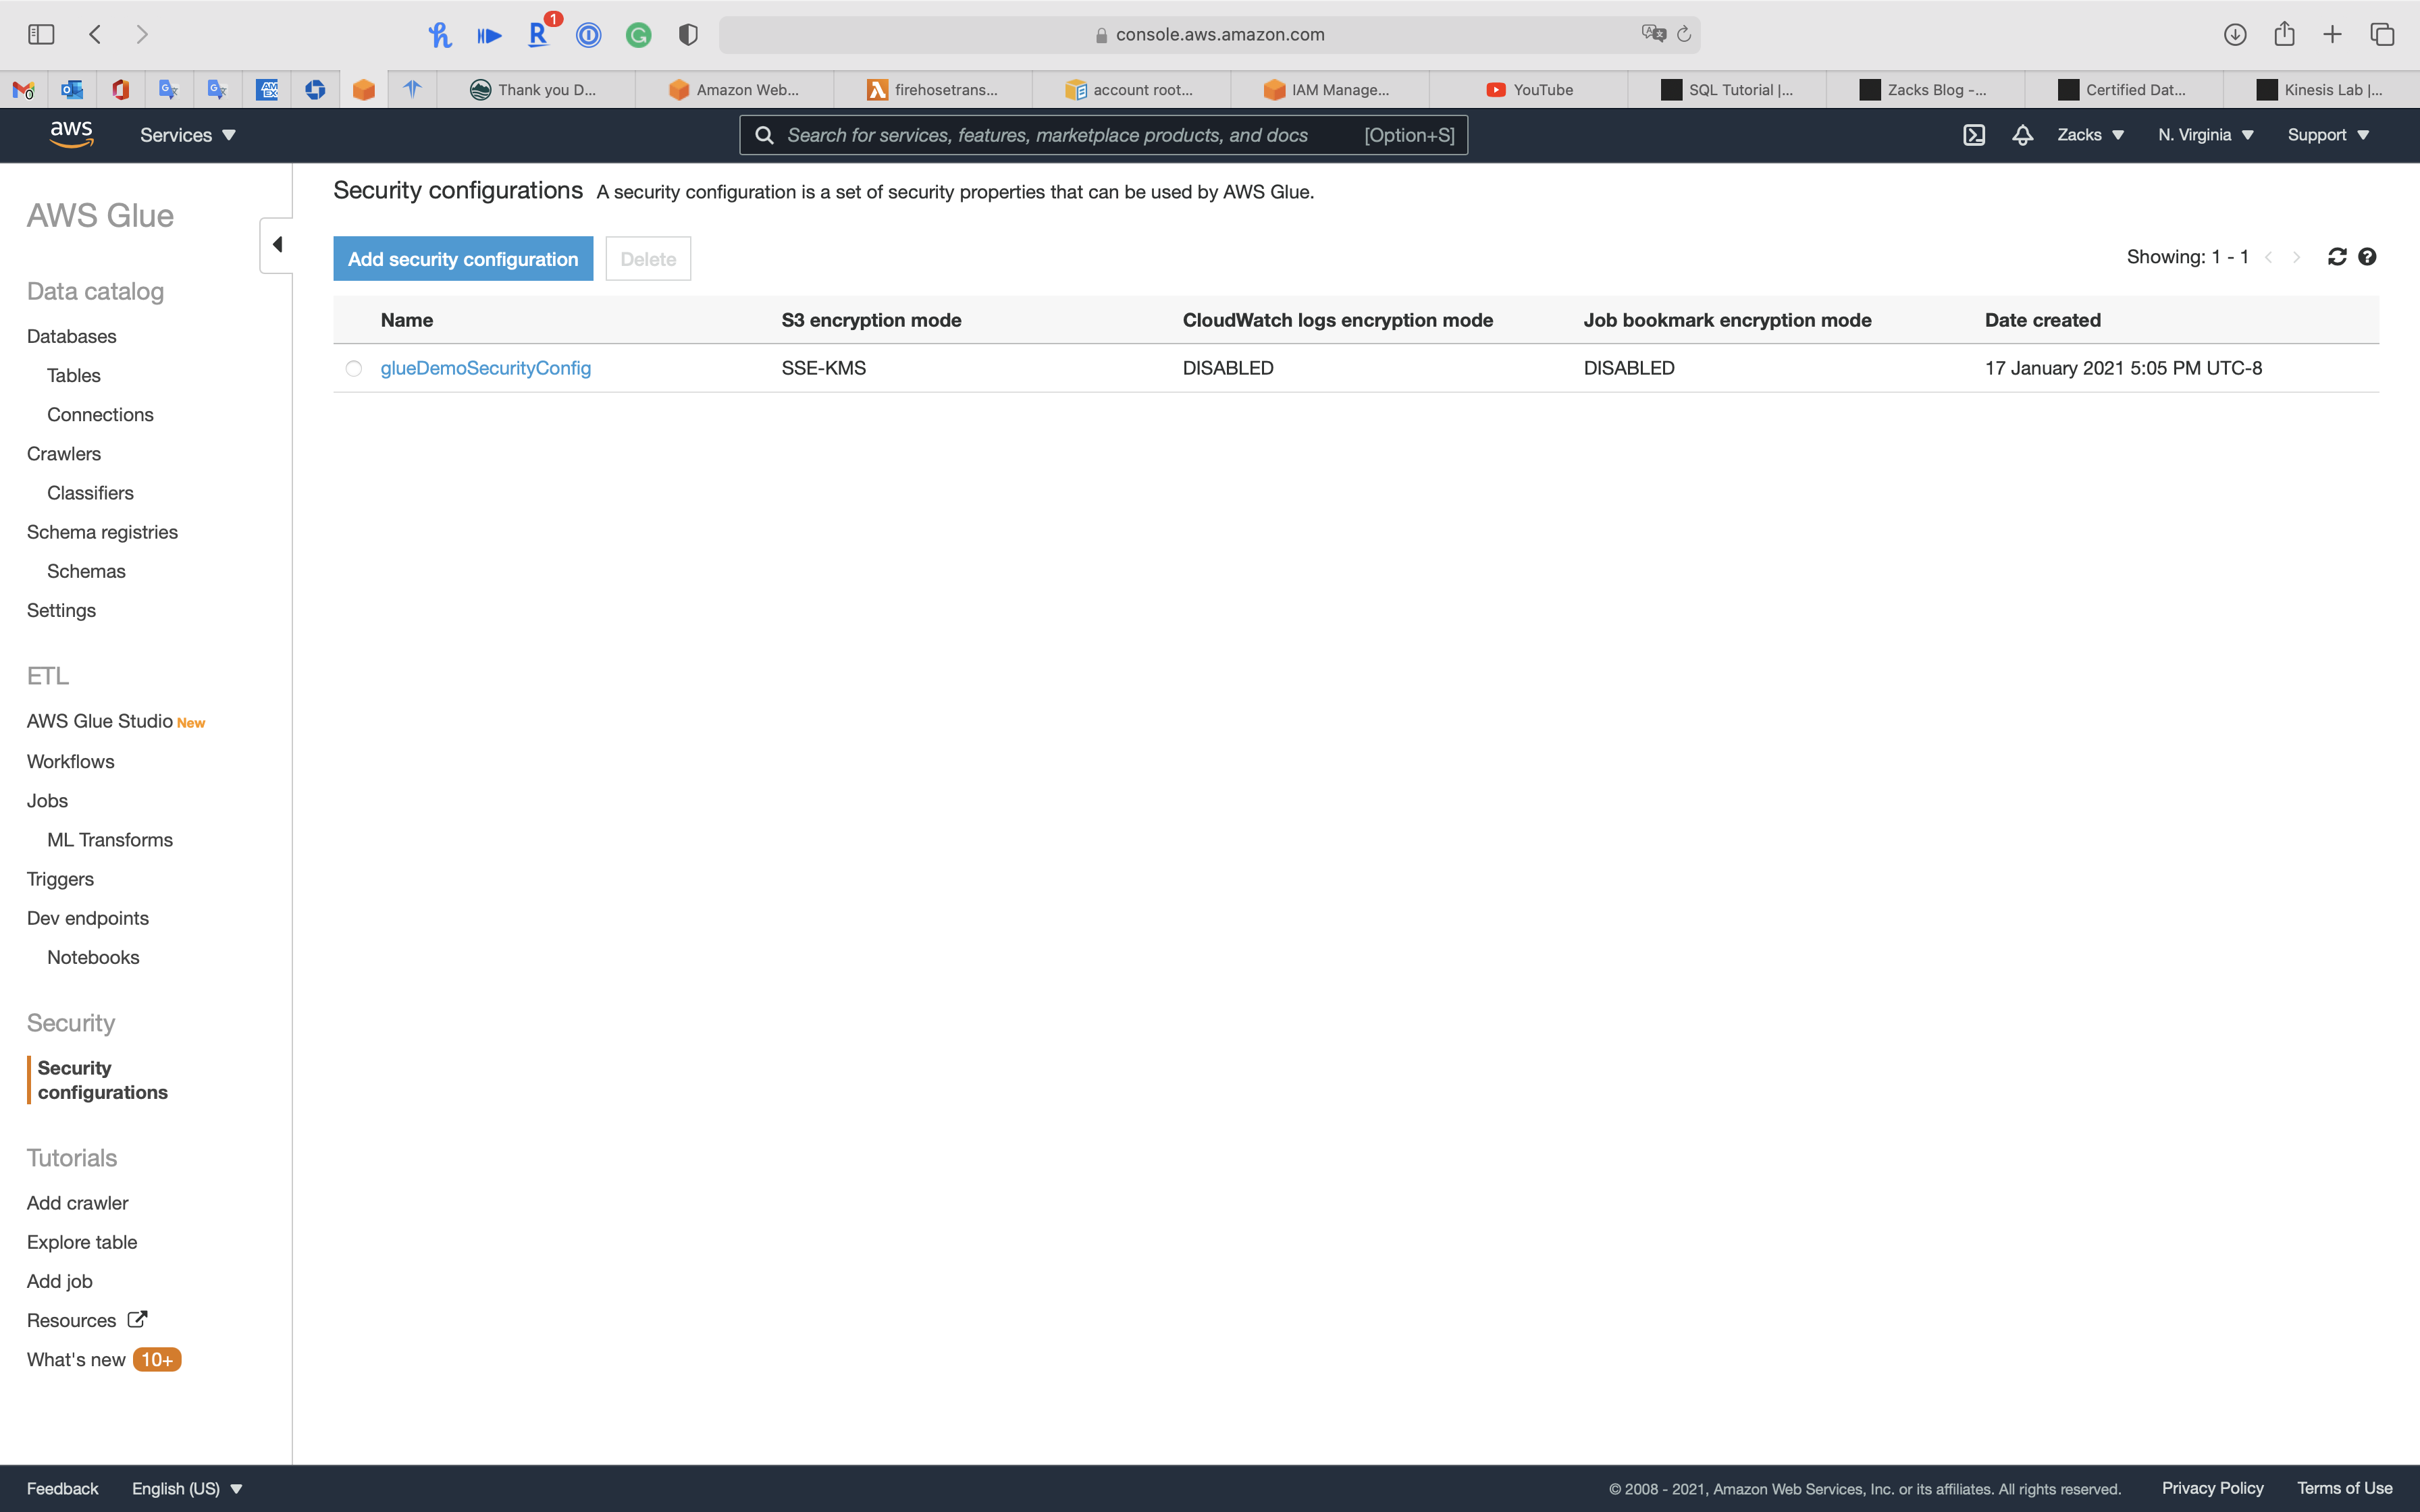
Refresh the page to see your security configuration
Extract Data
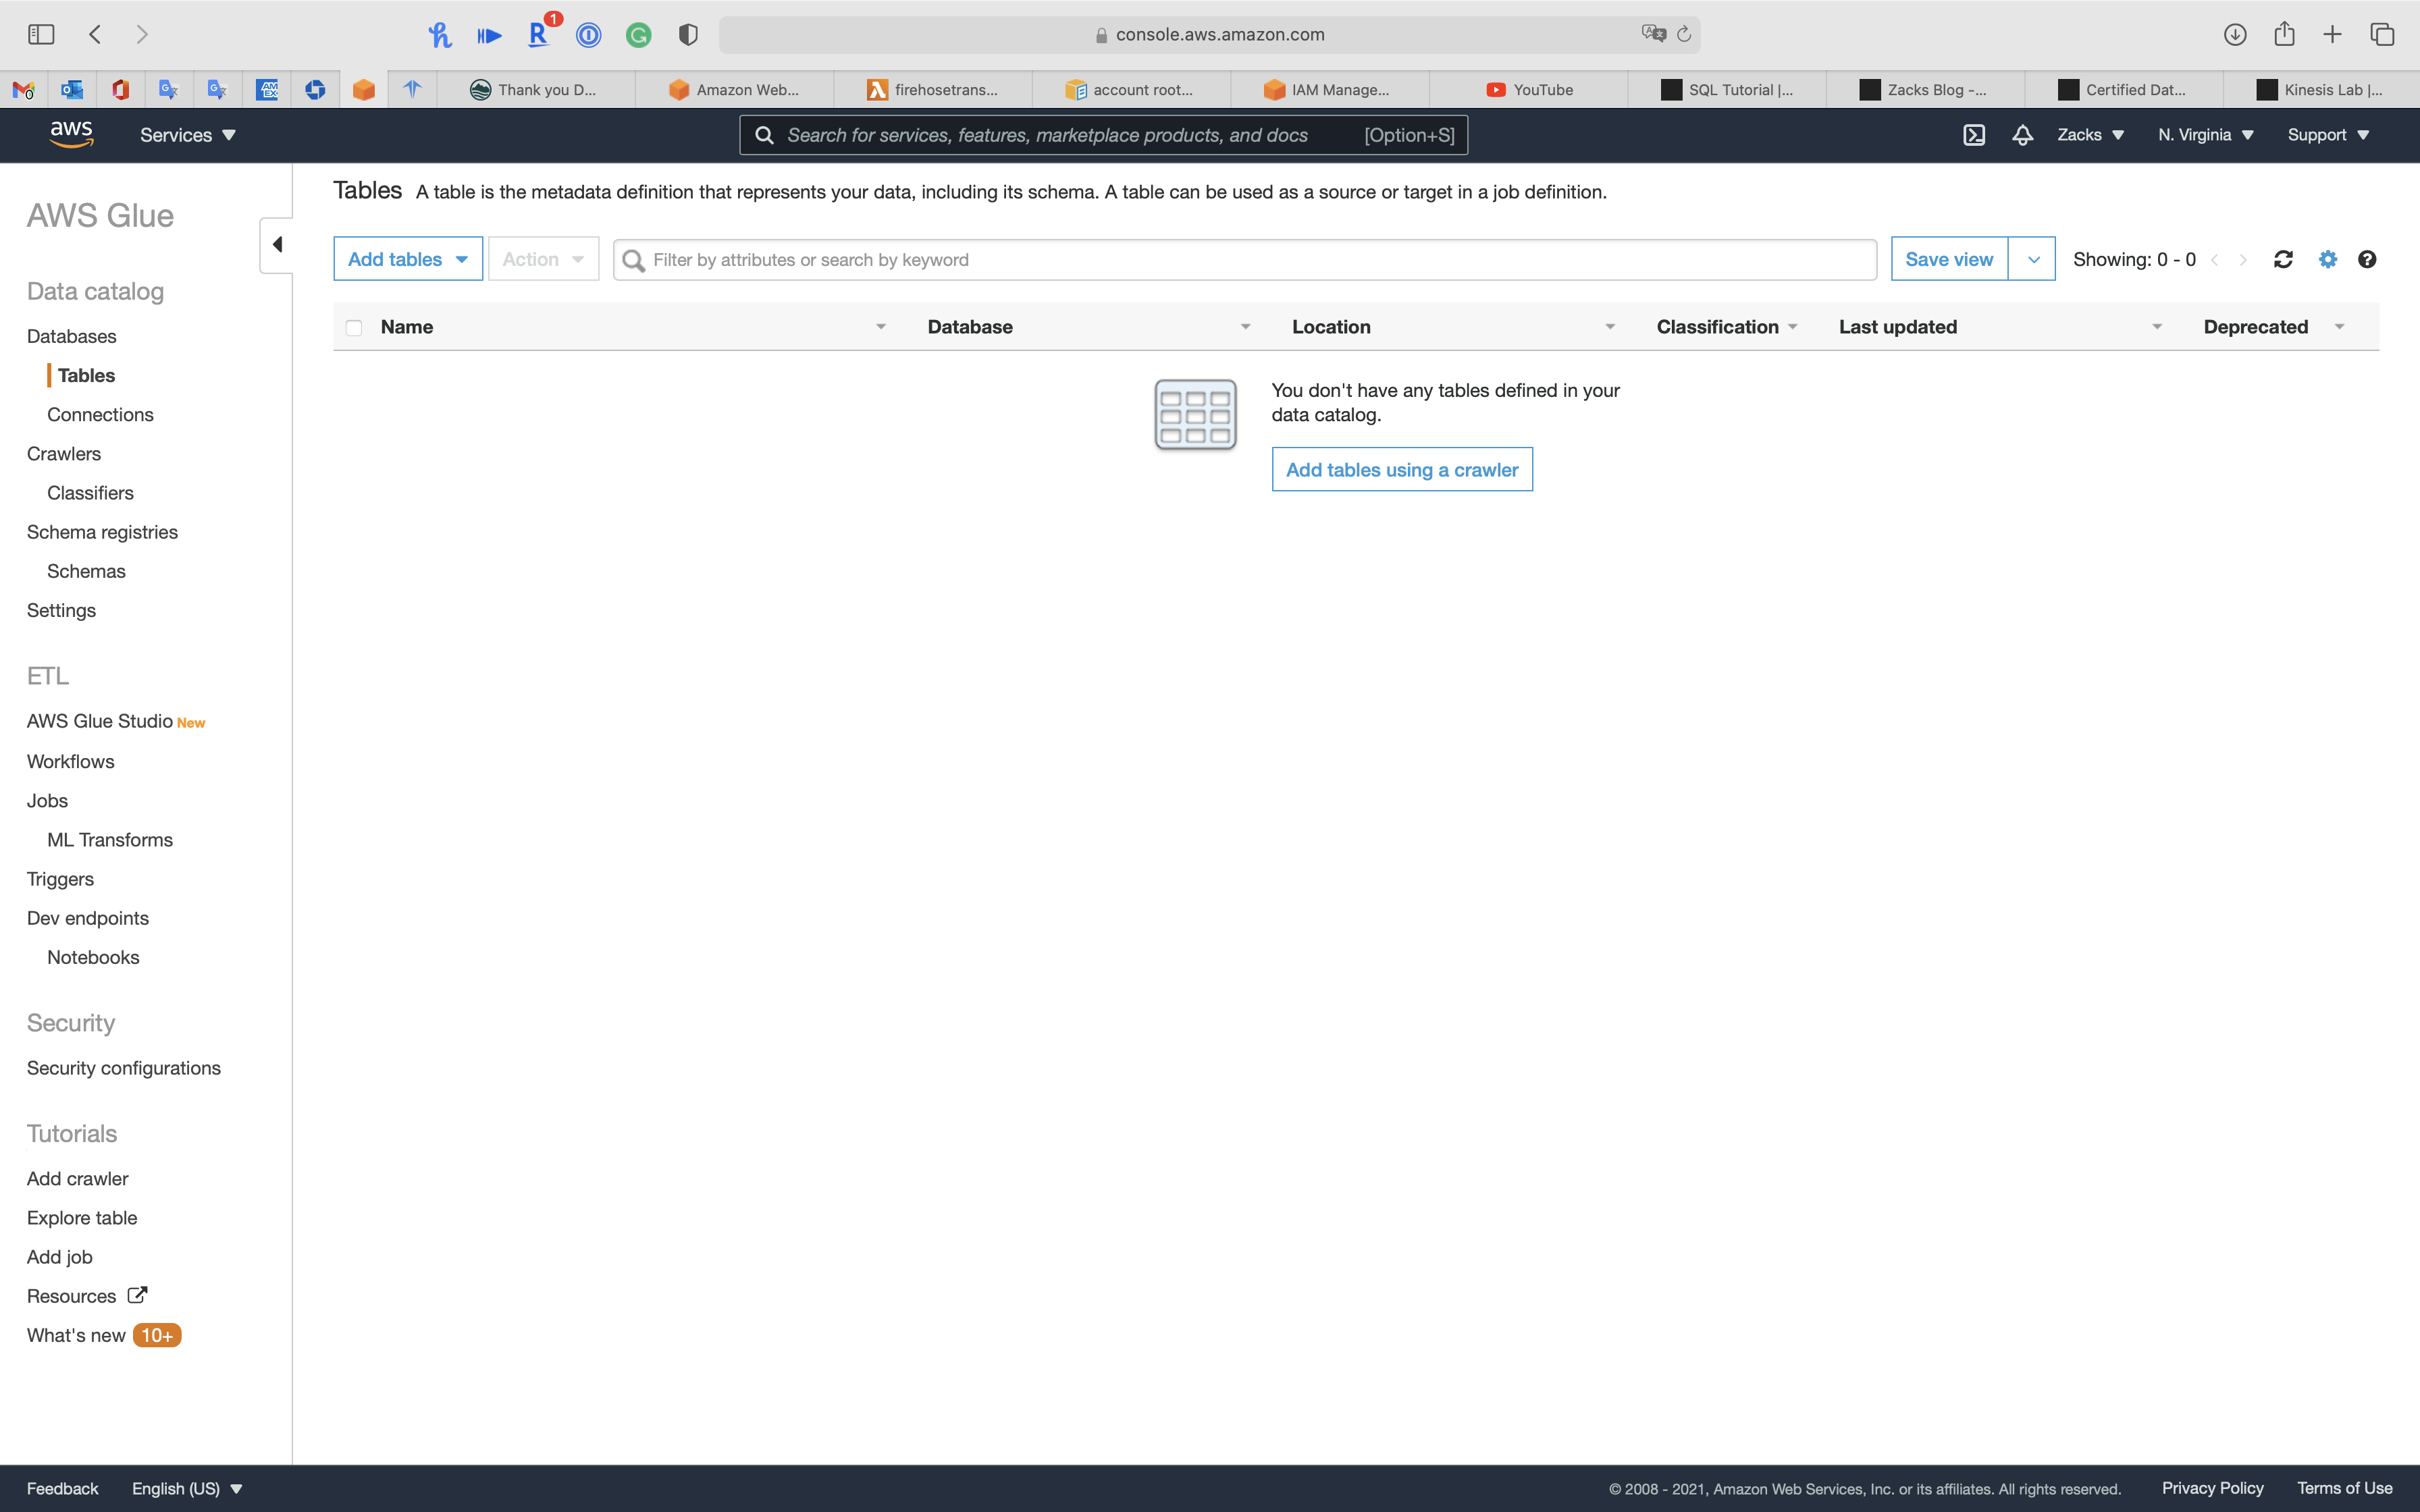
Click on Tables navigation
Click on Add tables using a crawler
Crawler info
- Crawler name:
uci-covid
Expand Tags, description, security configuration, and classifiers (optional)
- Description:
Glue crawler for COVID-19 Surveillance Data Set.Data source: https://archive.ics.uci.edu/ml/datasets/COVID-19+Surveillance
- Security configuration:
glueDemoSecurityConfig
Click on Next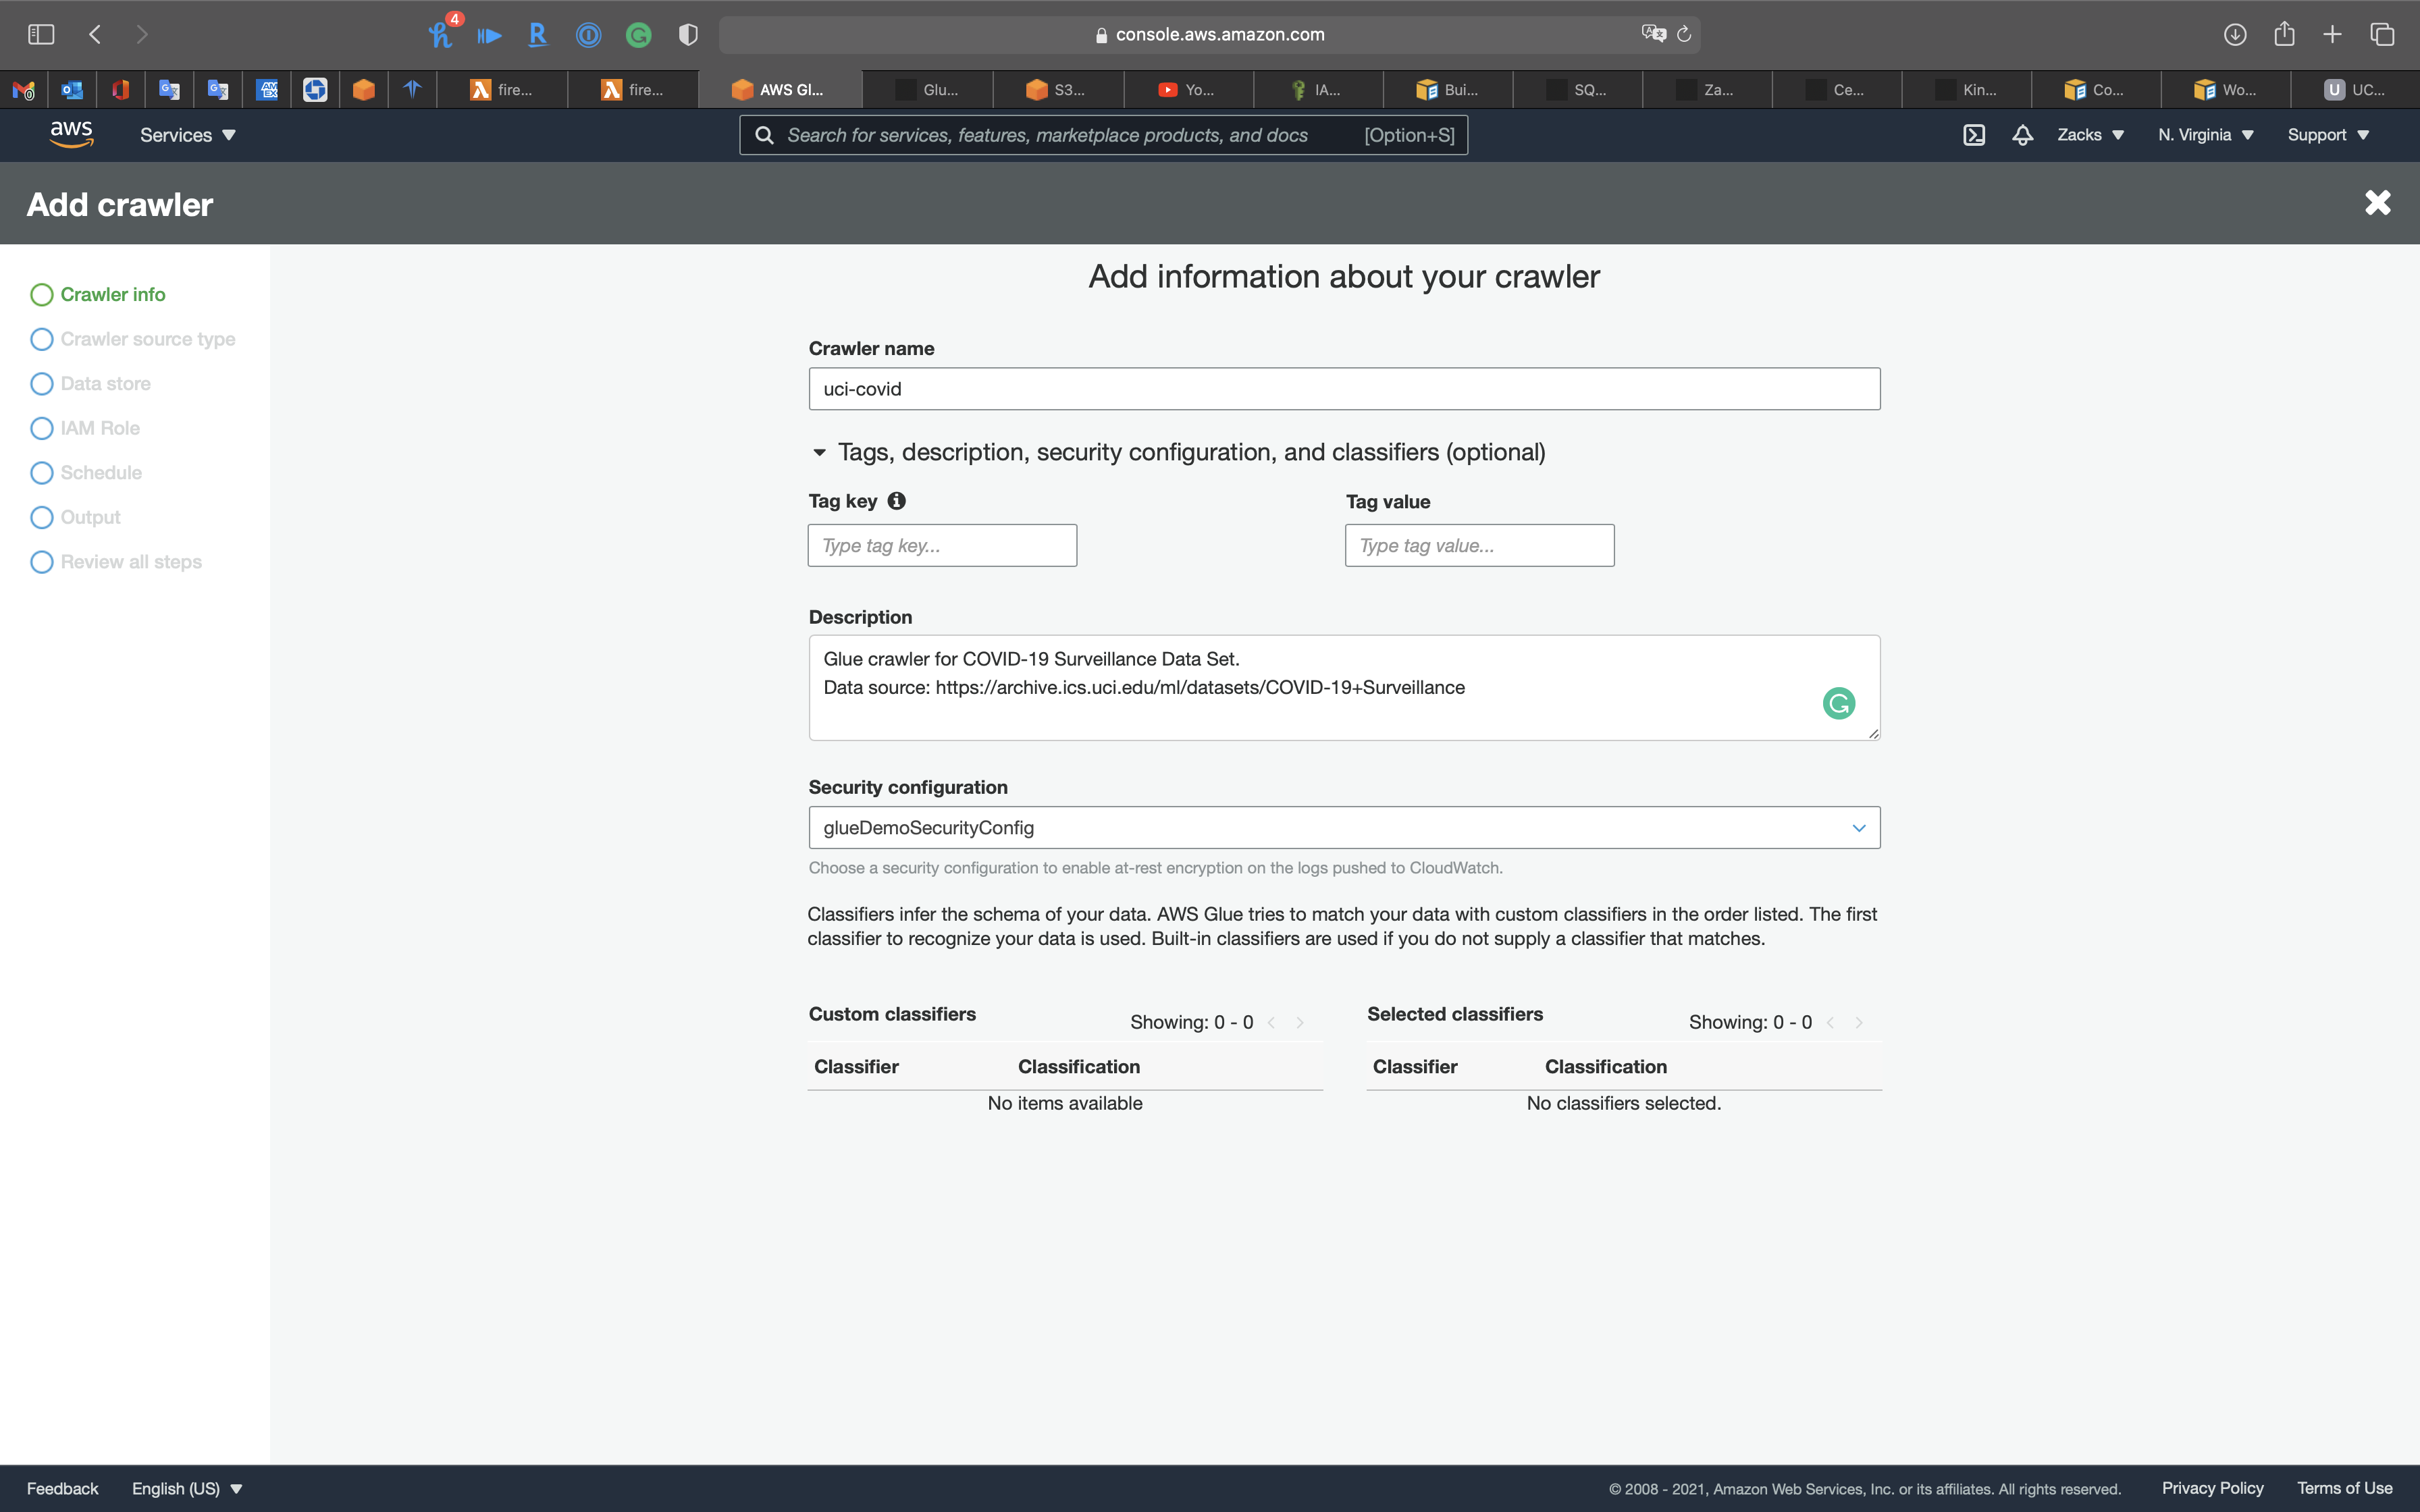
Crawler source type
Leave all settings as default
Click on Next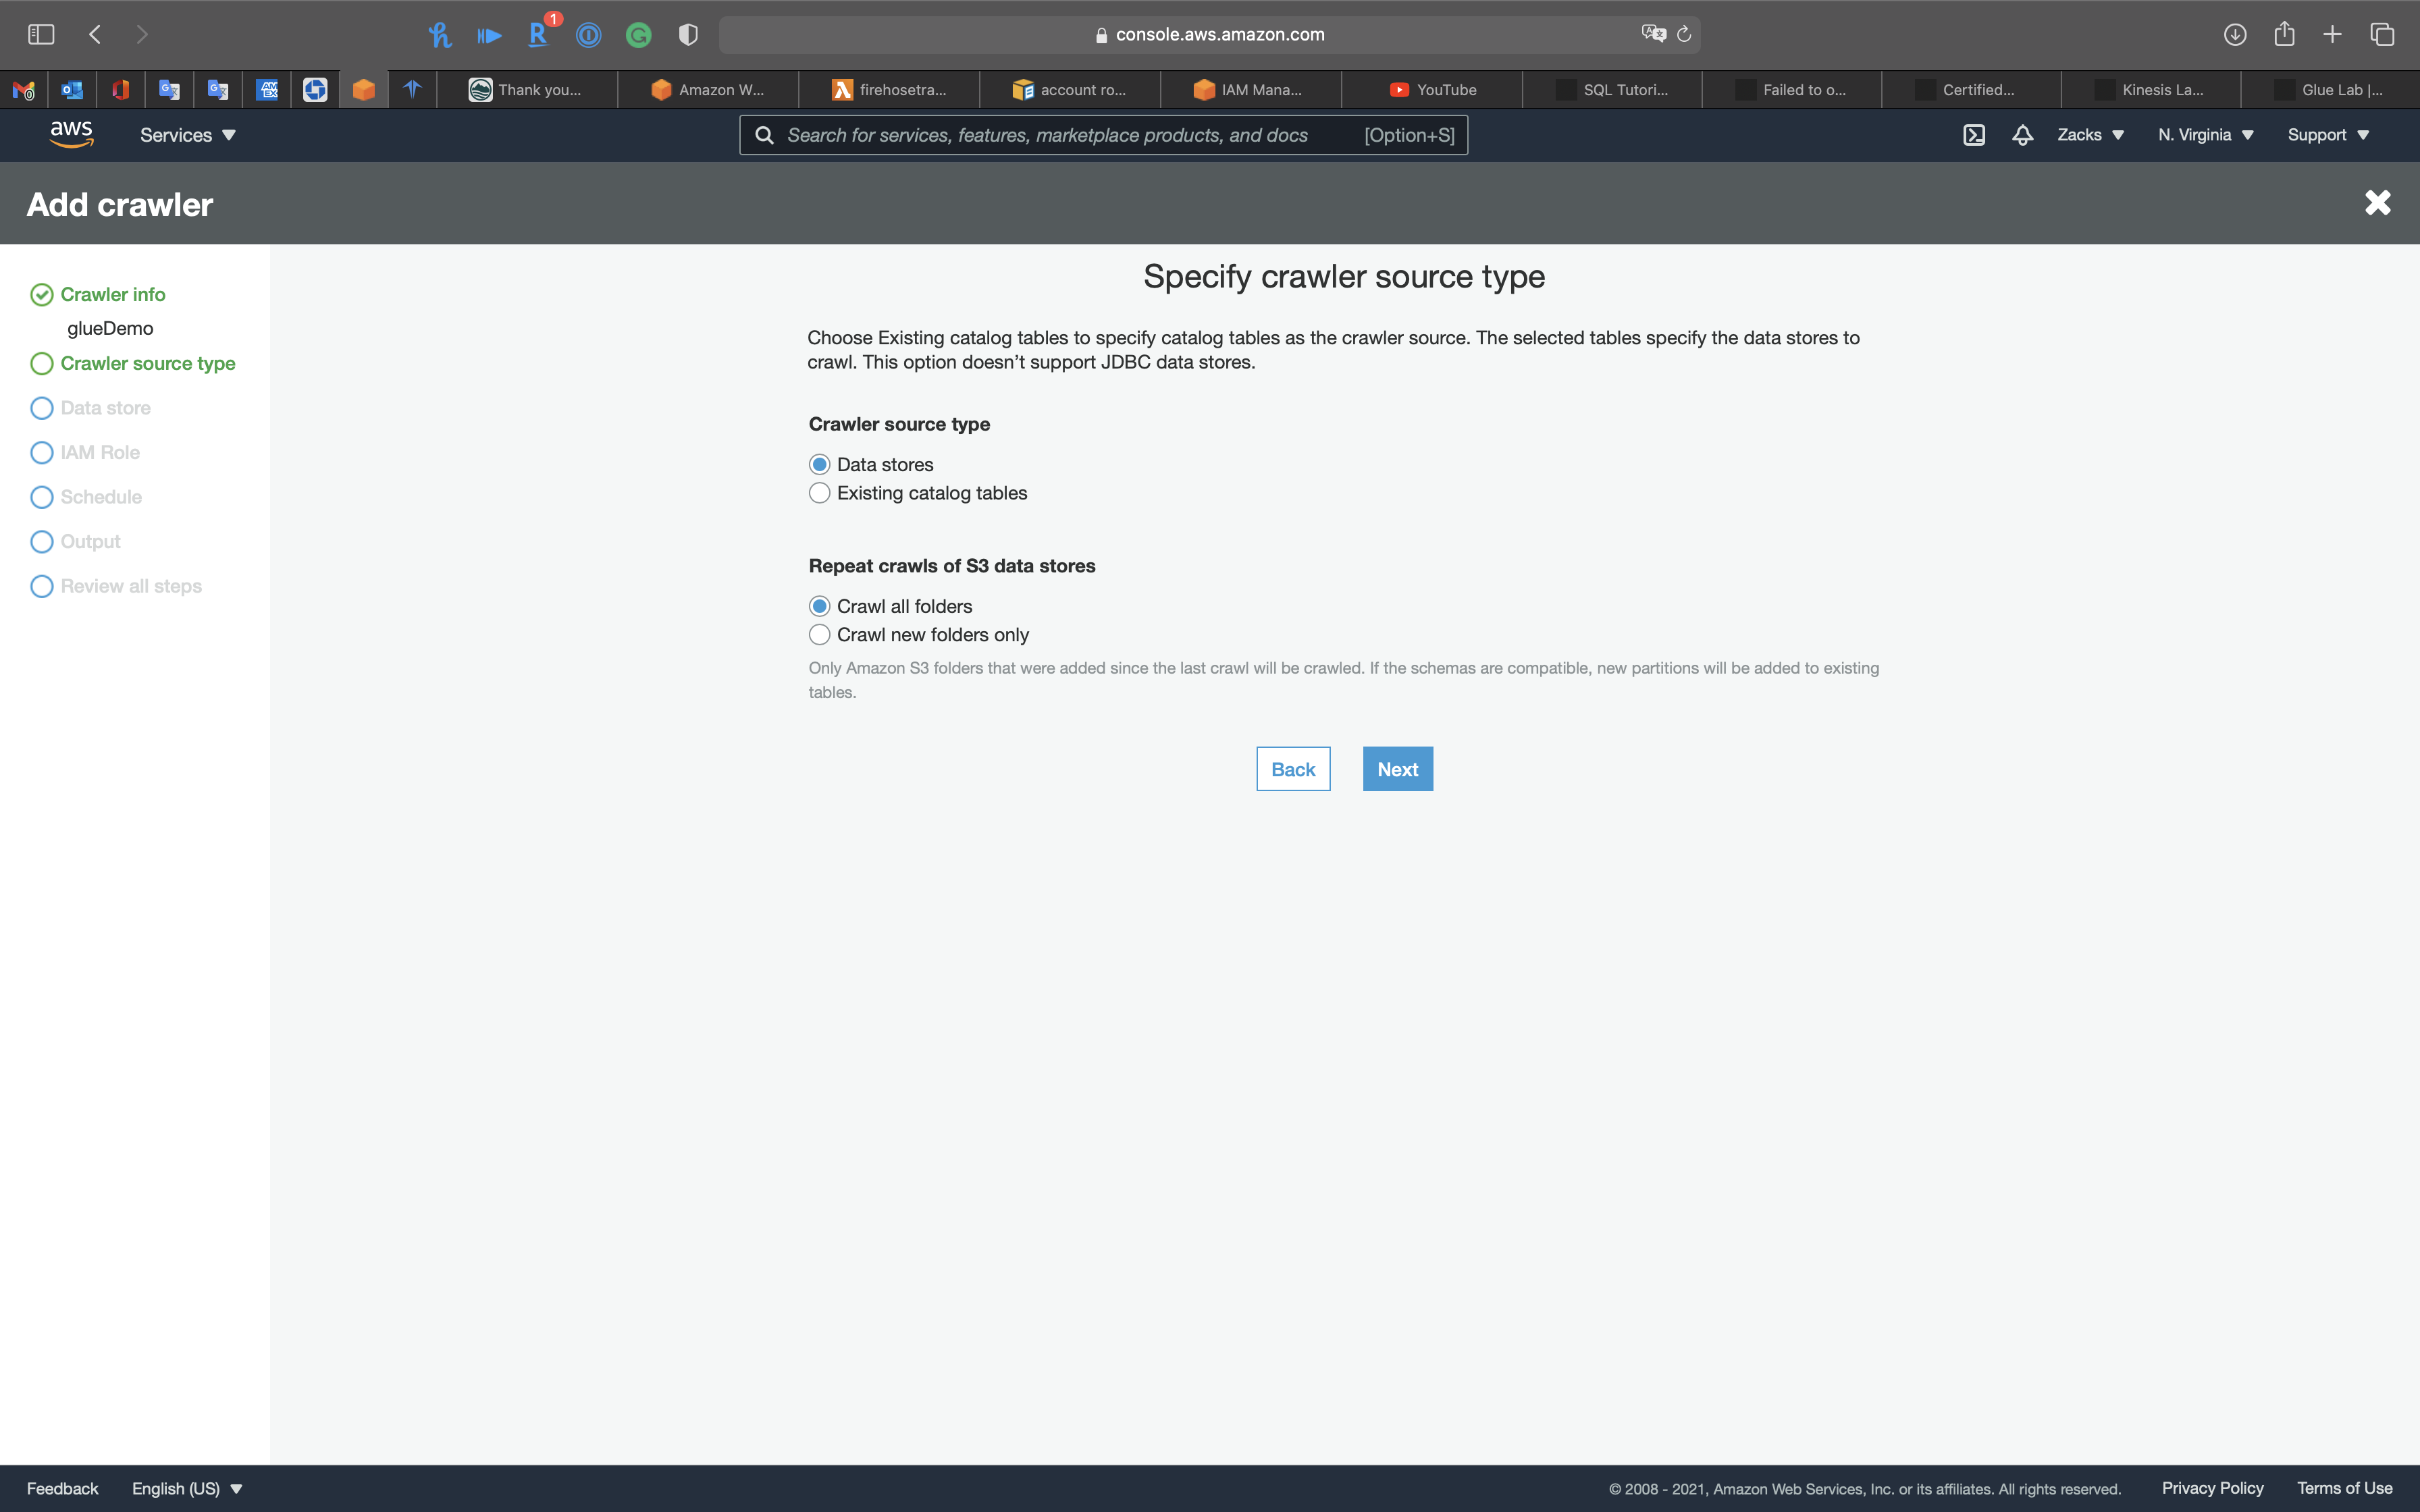
Data store
- Choose a data store from the following:
S3- S3
- JDBC
- DynamoDB
- Amazon DocumentDB
- MongoDB
- Table Name:
Select Surveillance.csv you uploaded at the prerequisite step.
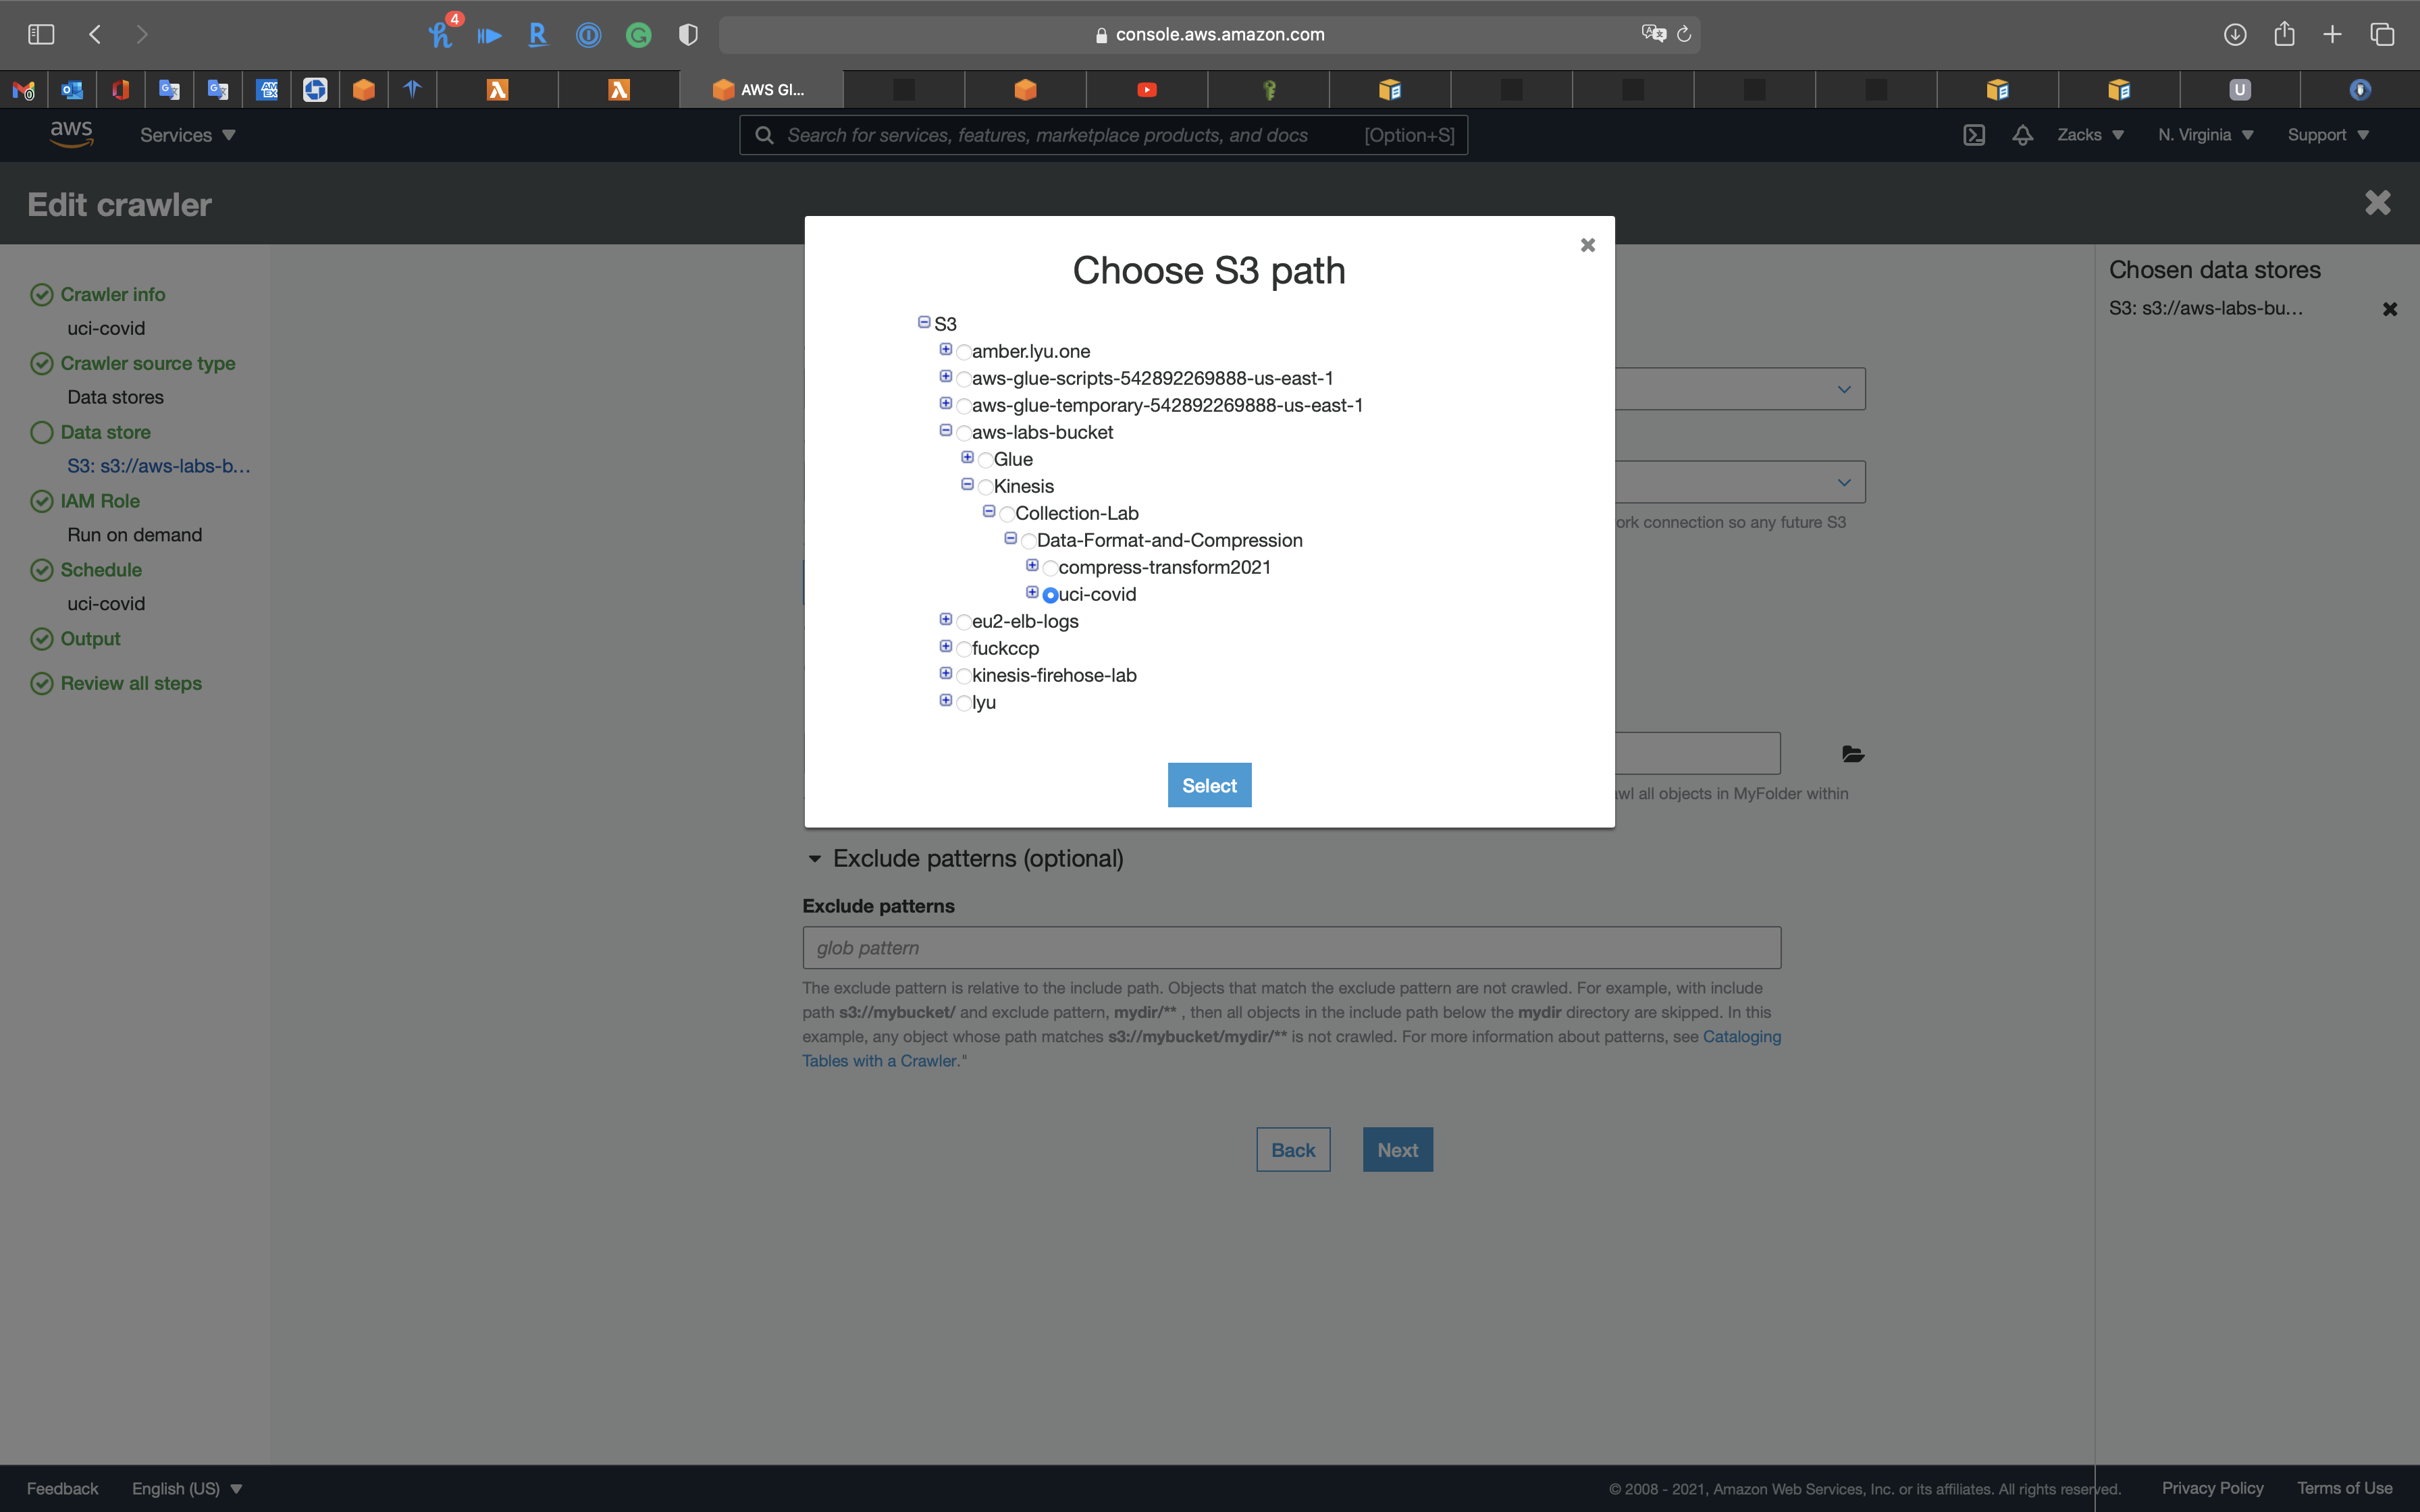
- Include path: your bucket with the sample .csv file. If you want to scan all files under the directory, add
/at the end of the path.
Exclude patterns: define the prefix of the data that you want the crawler skip.
Click on Next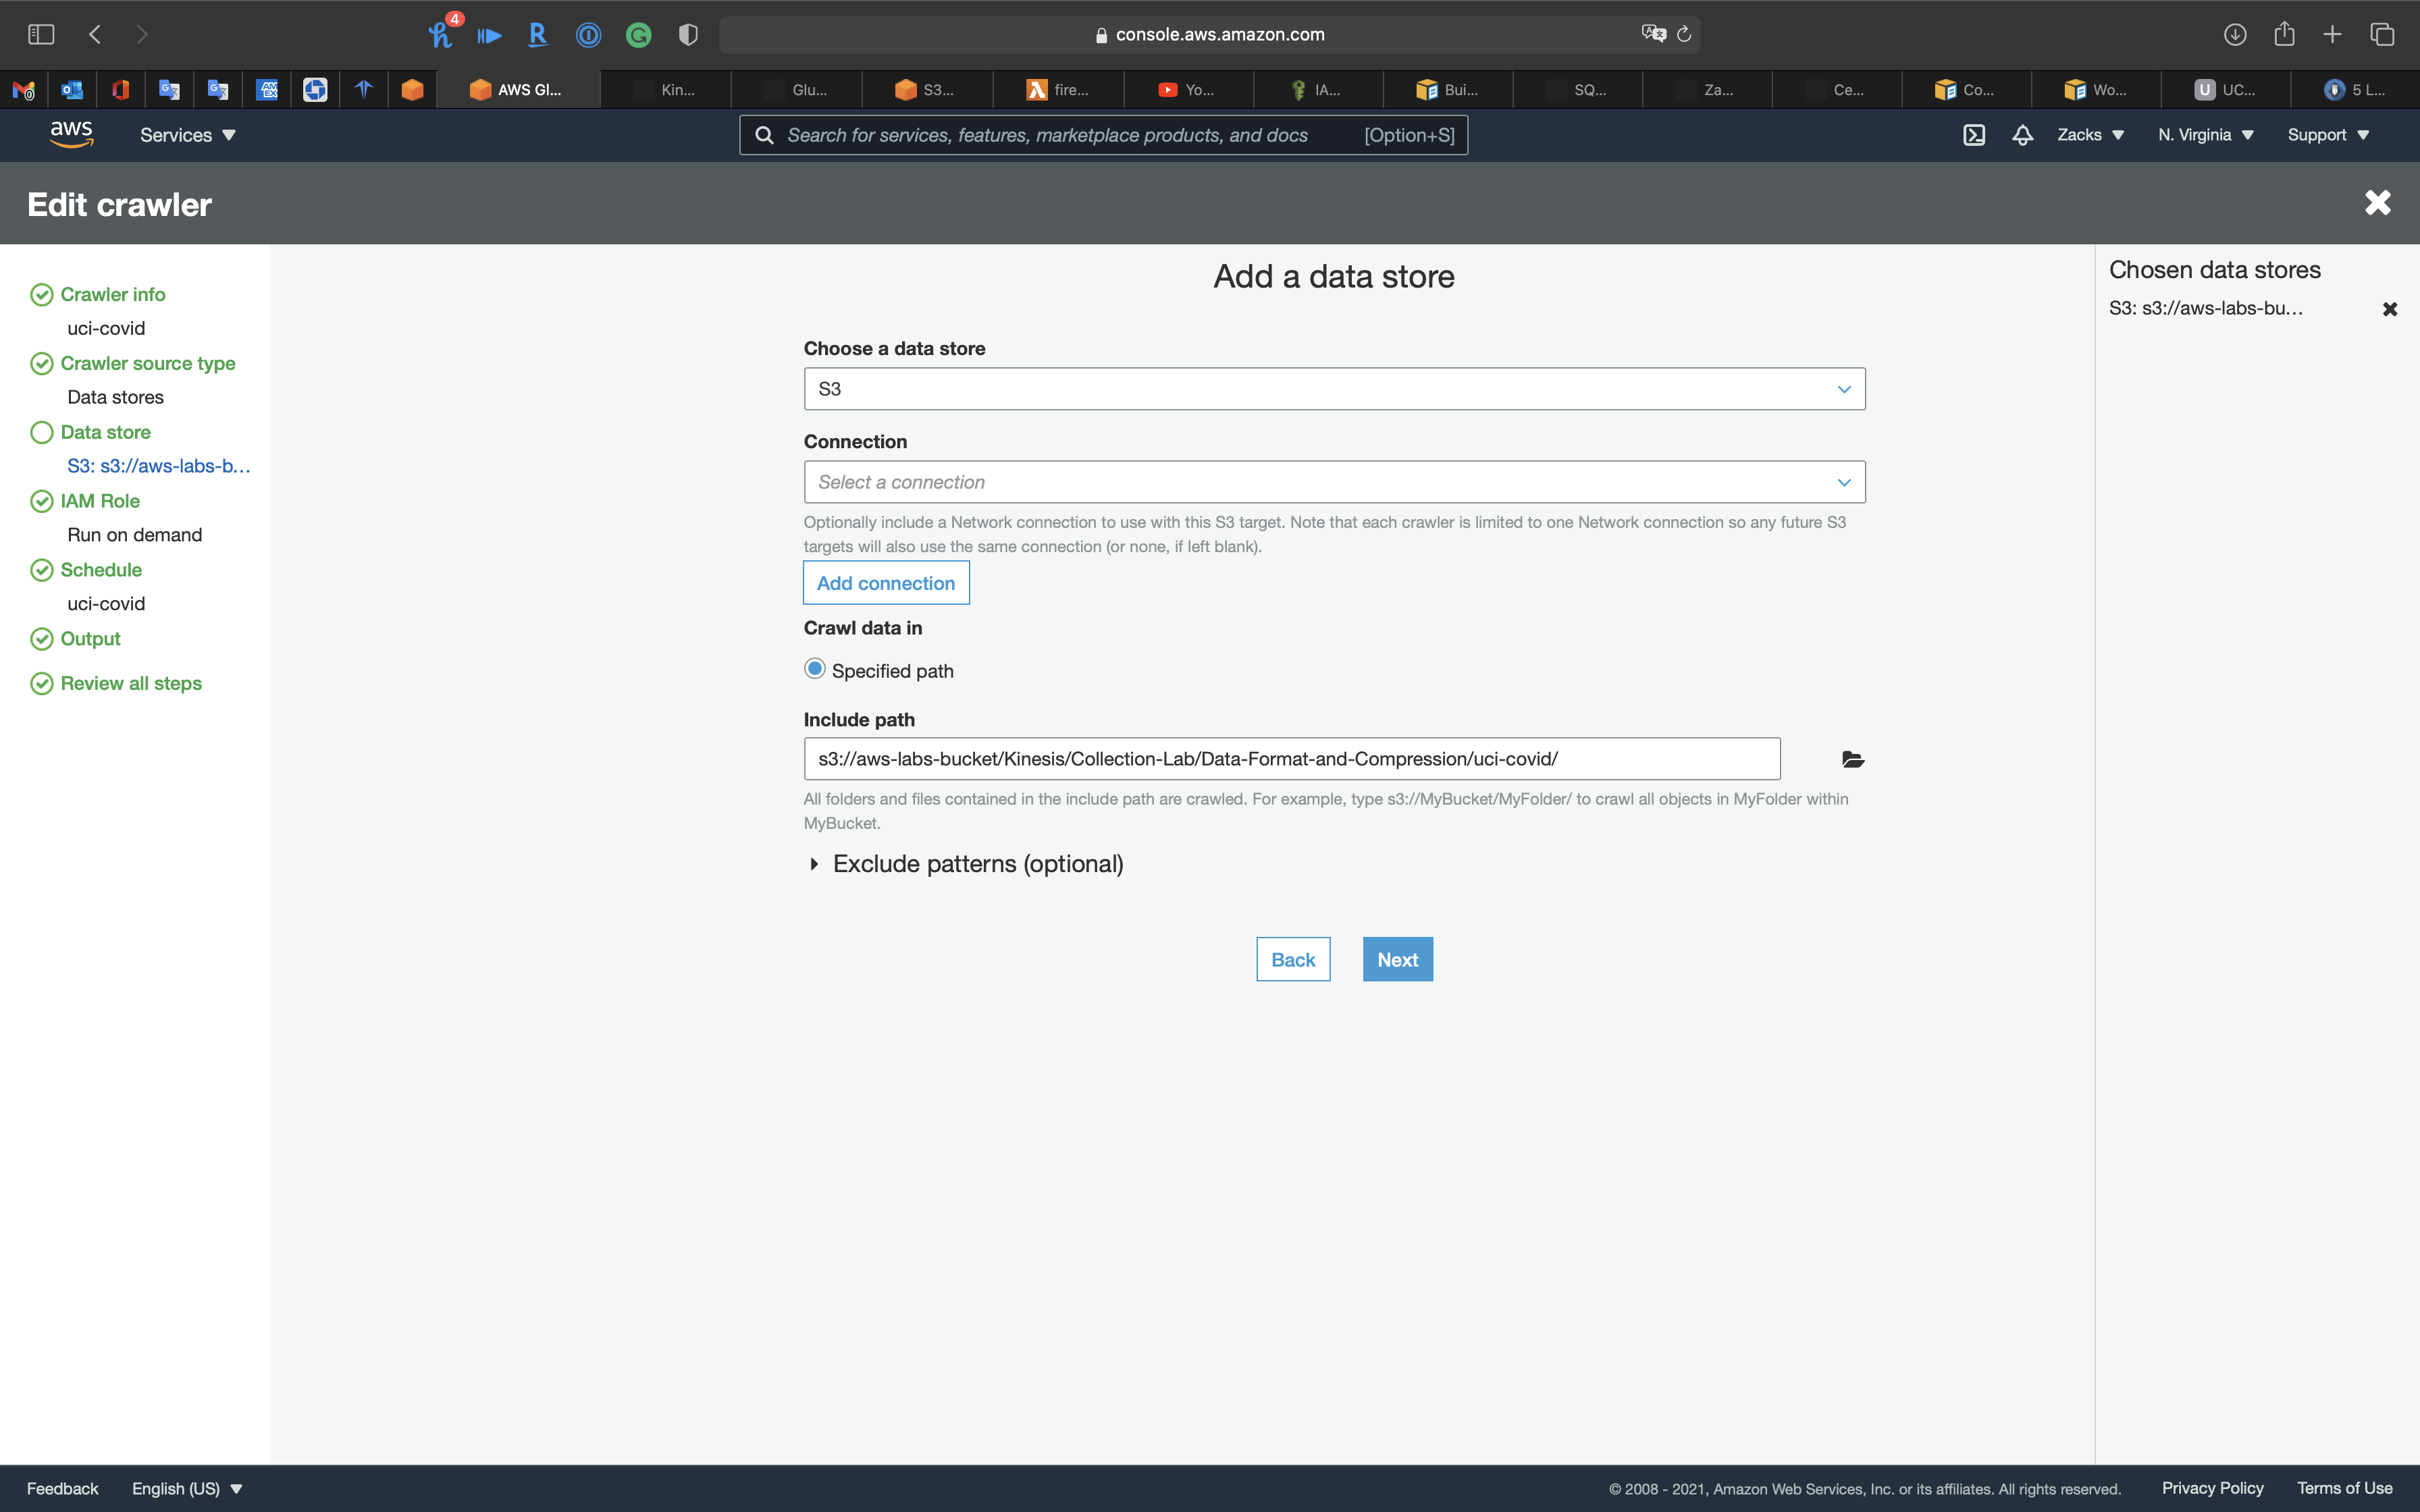
Select No and click on Next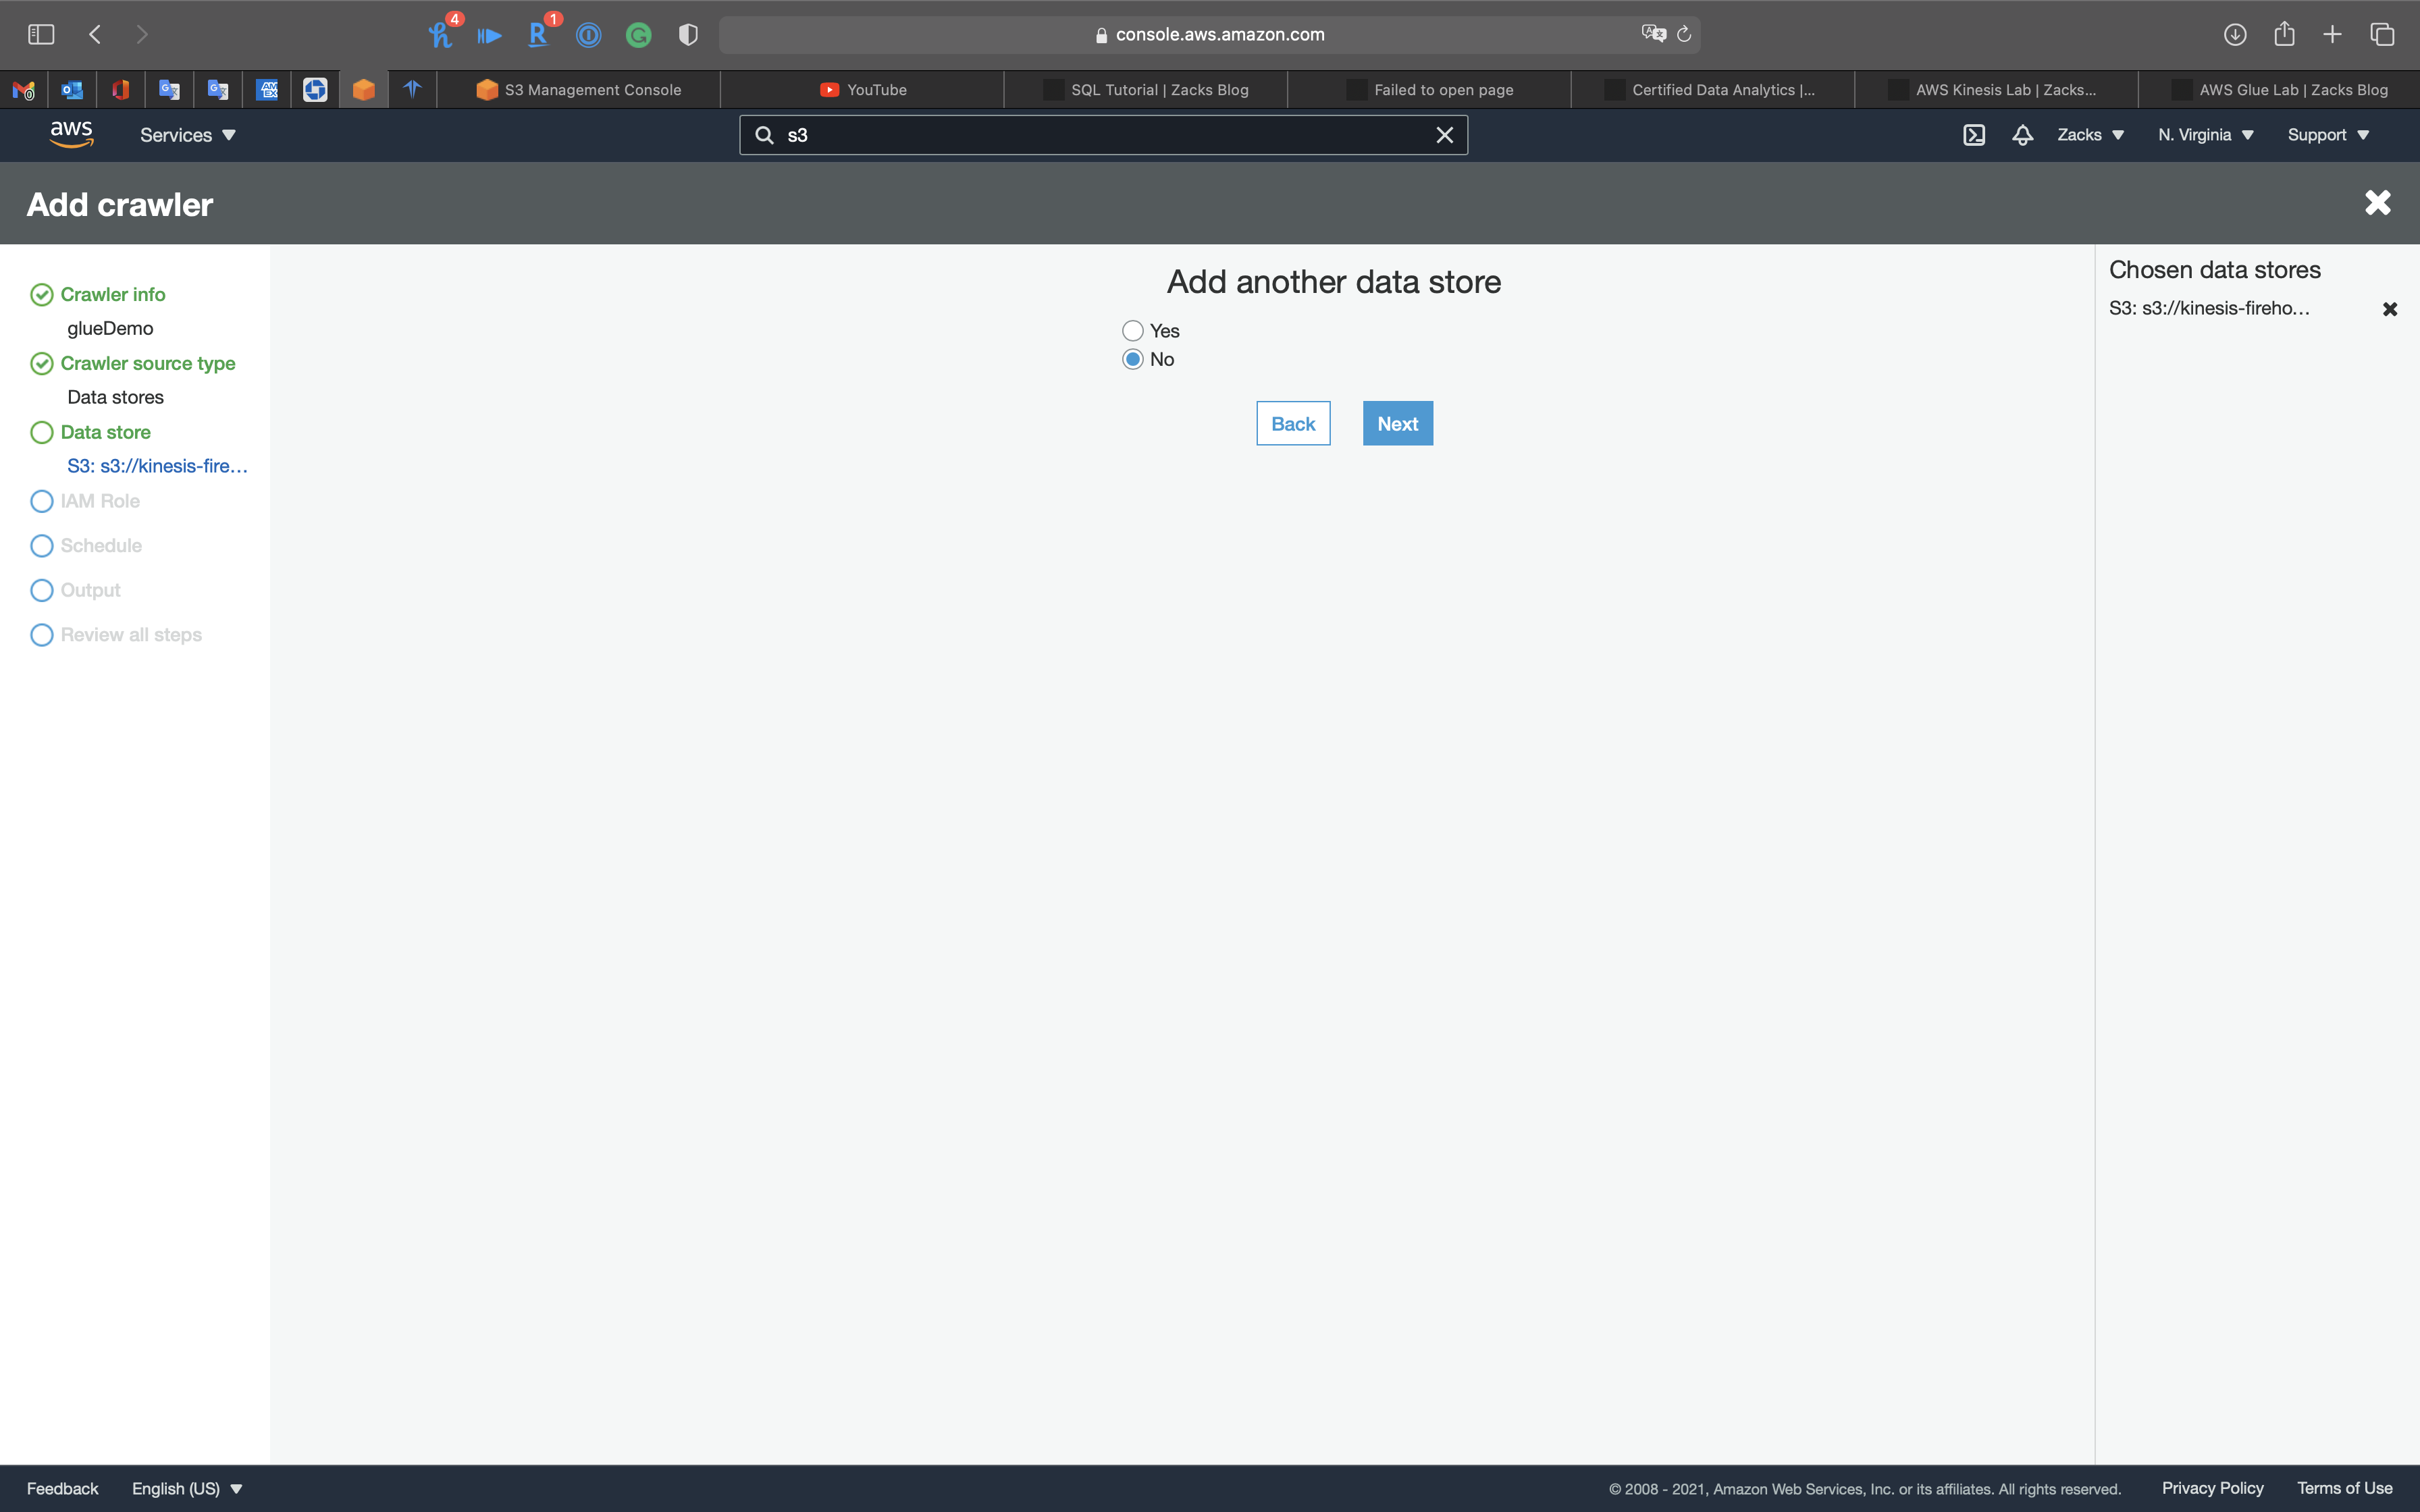
IAM Role
The IAM role allows the crawler to run and access your Amazon S3 data stores.
- Select
Create an IAM role
- Select
IAM Role for Glue: Role assumed by the crawler with permission to access your data store.
uci-covid
The IAM will give your new role (demoClawer) the S3 bucket the following permissions:
s3:GetObjects3:PutObject
Click on Next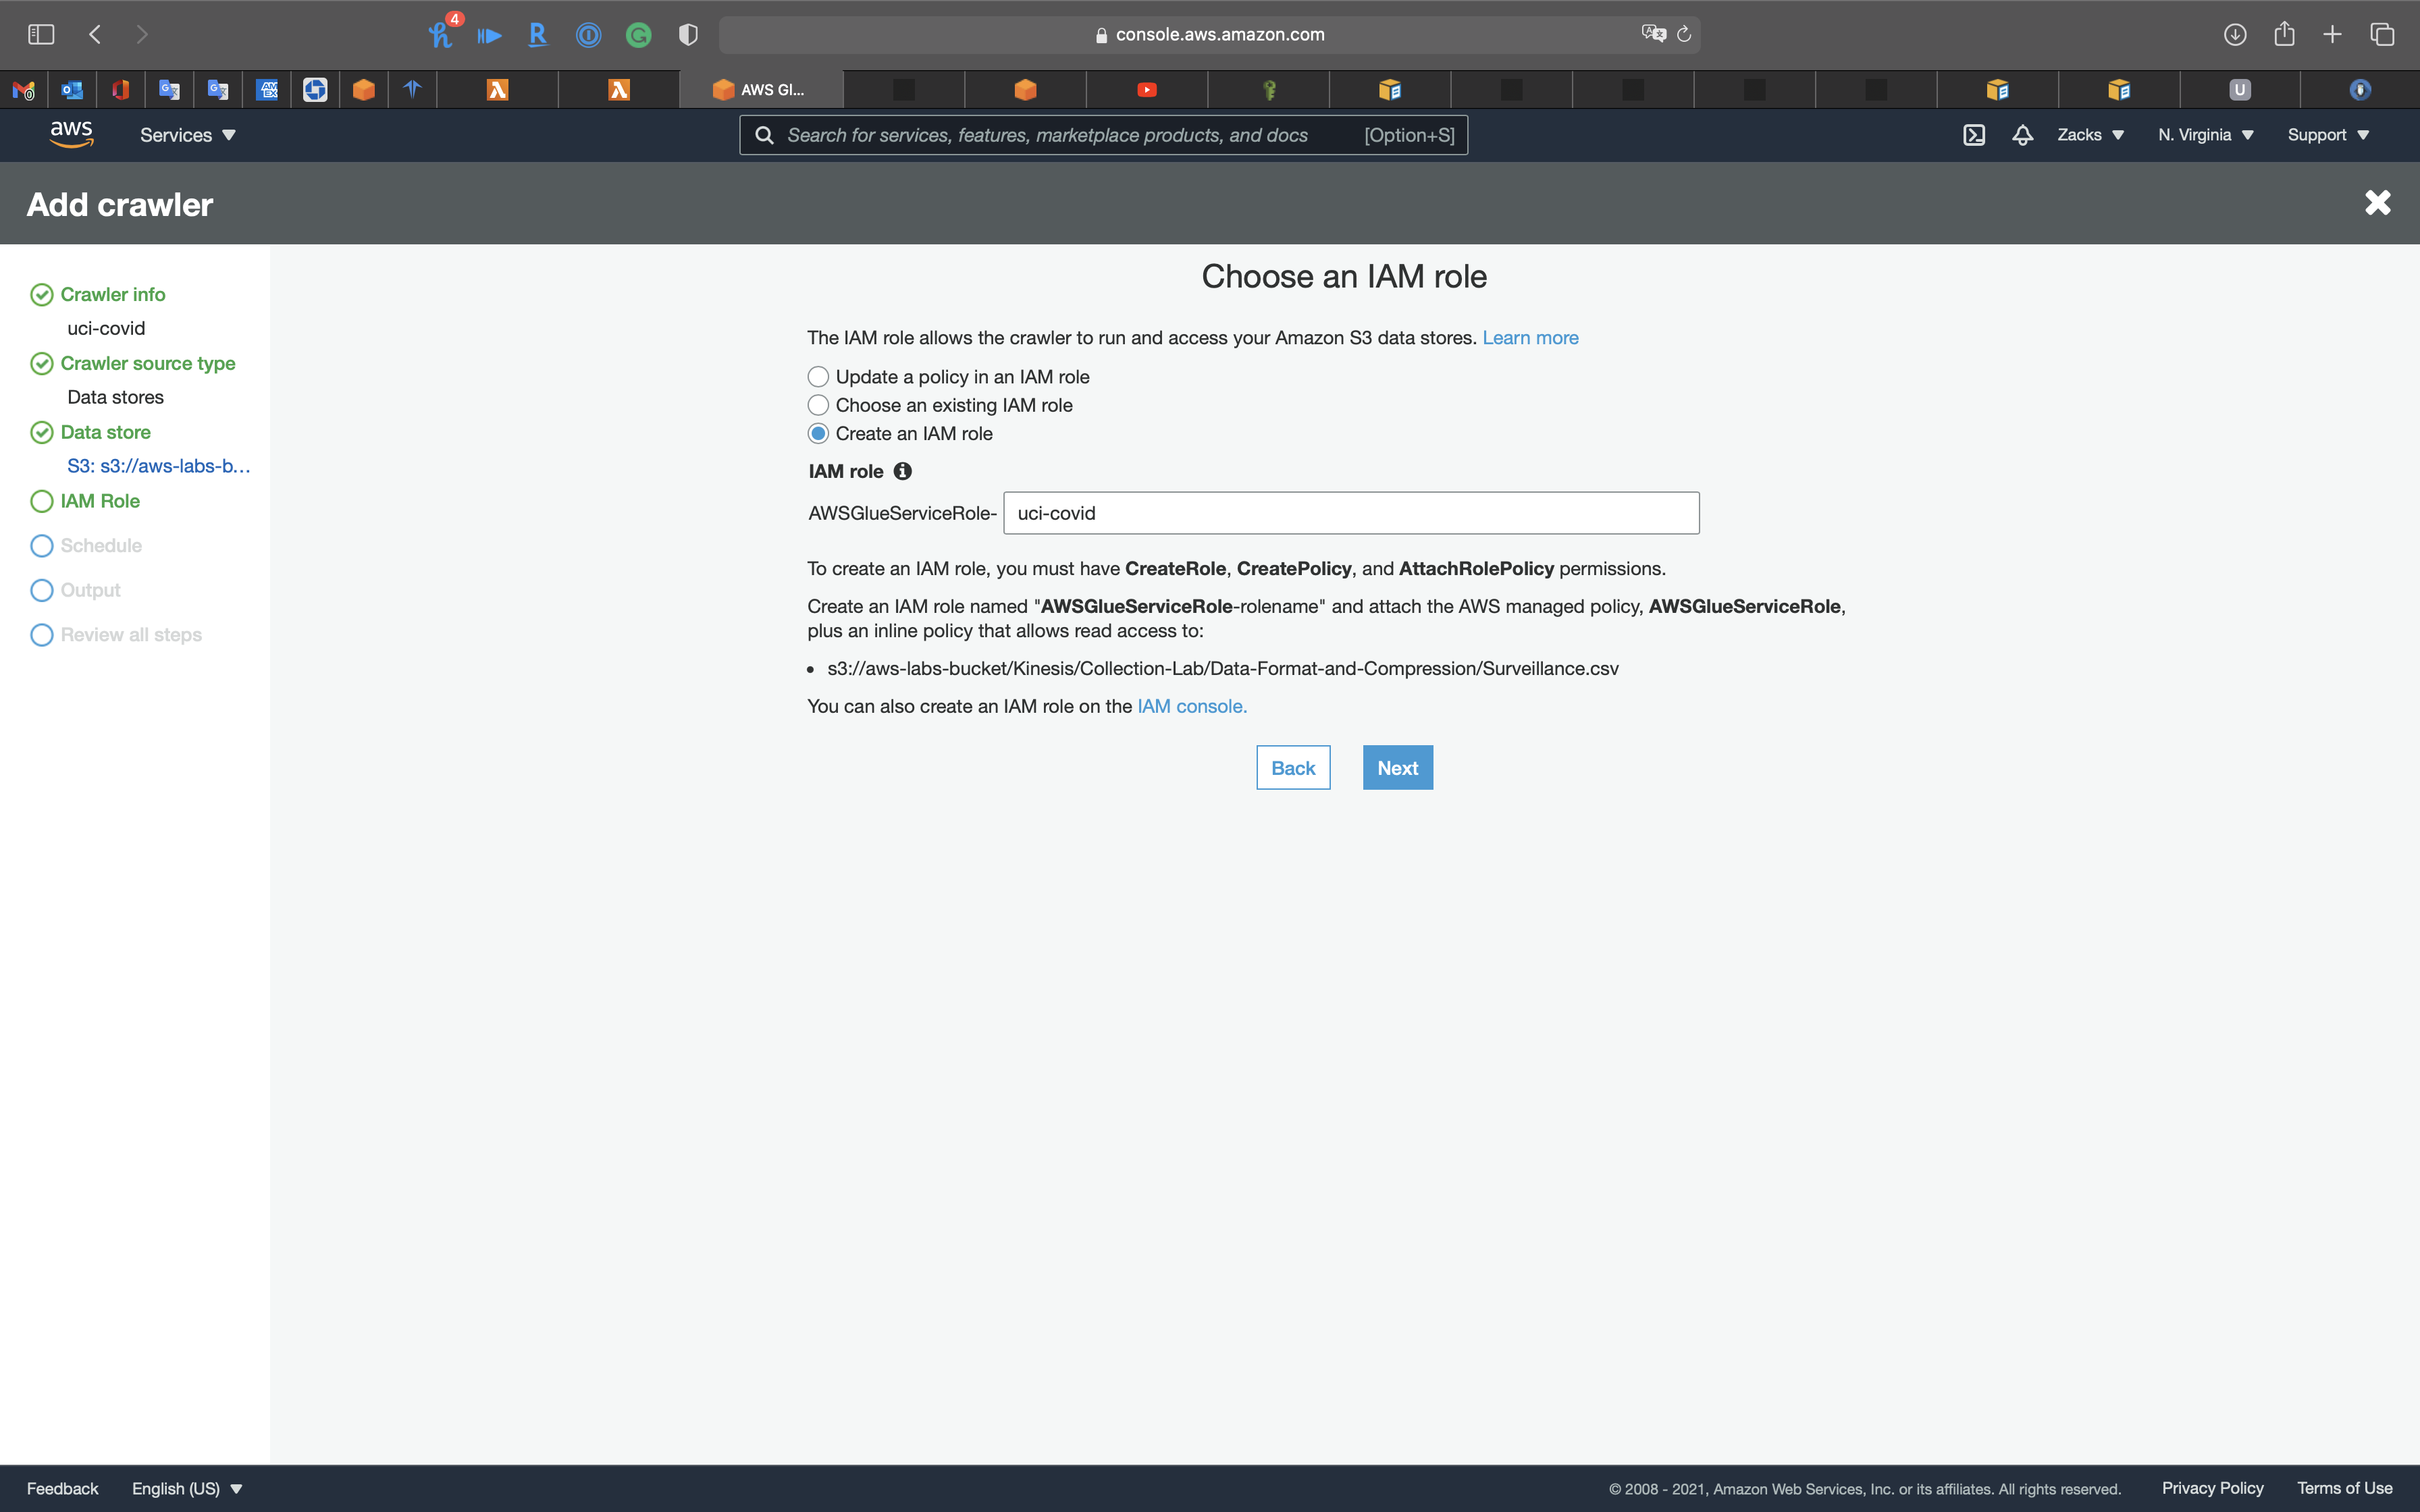
Schedule
- Frequency:
Run on demand
Click on Next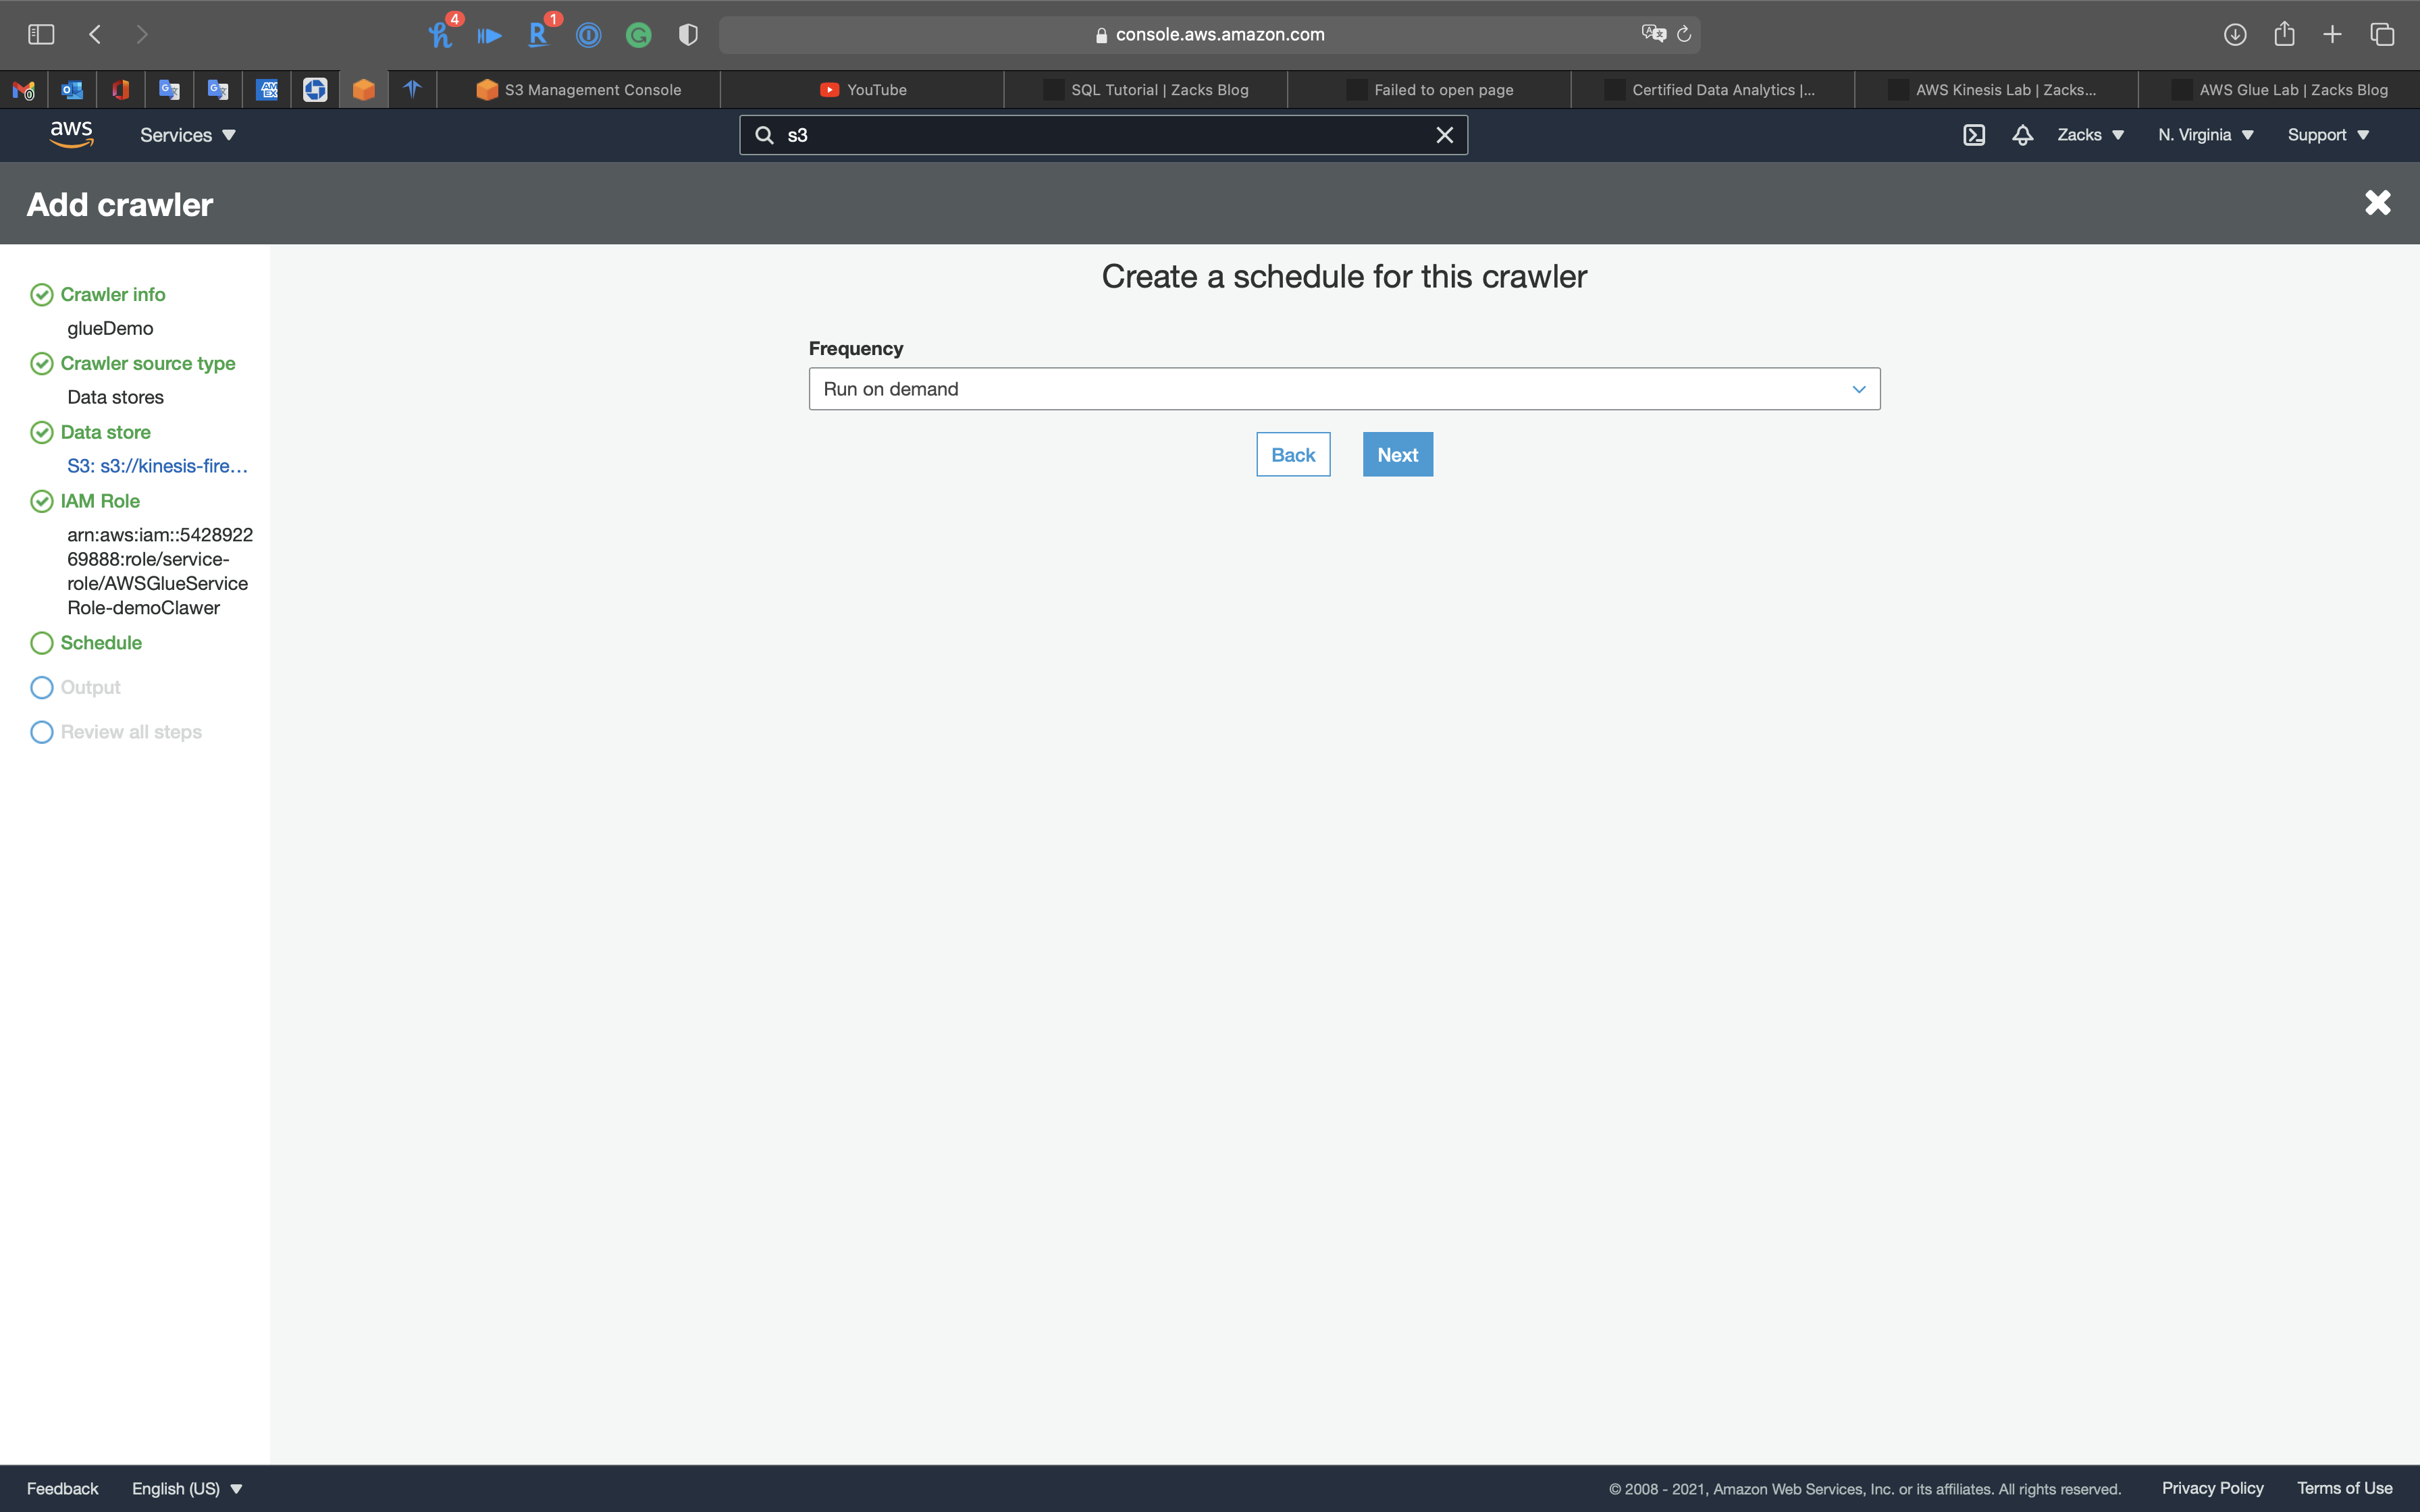
Output
Click on Add database
- Database:
uci-covid
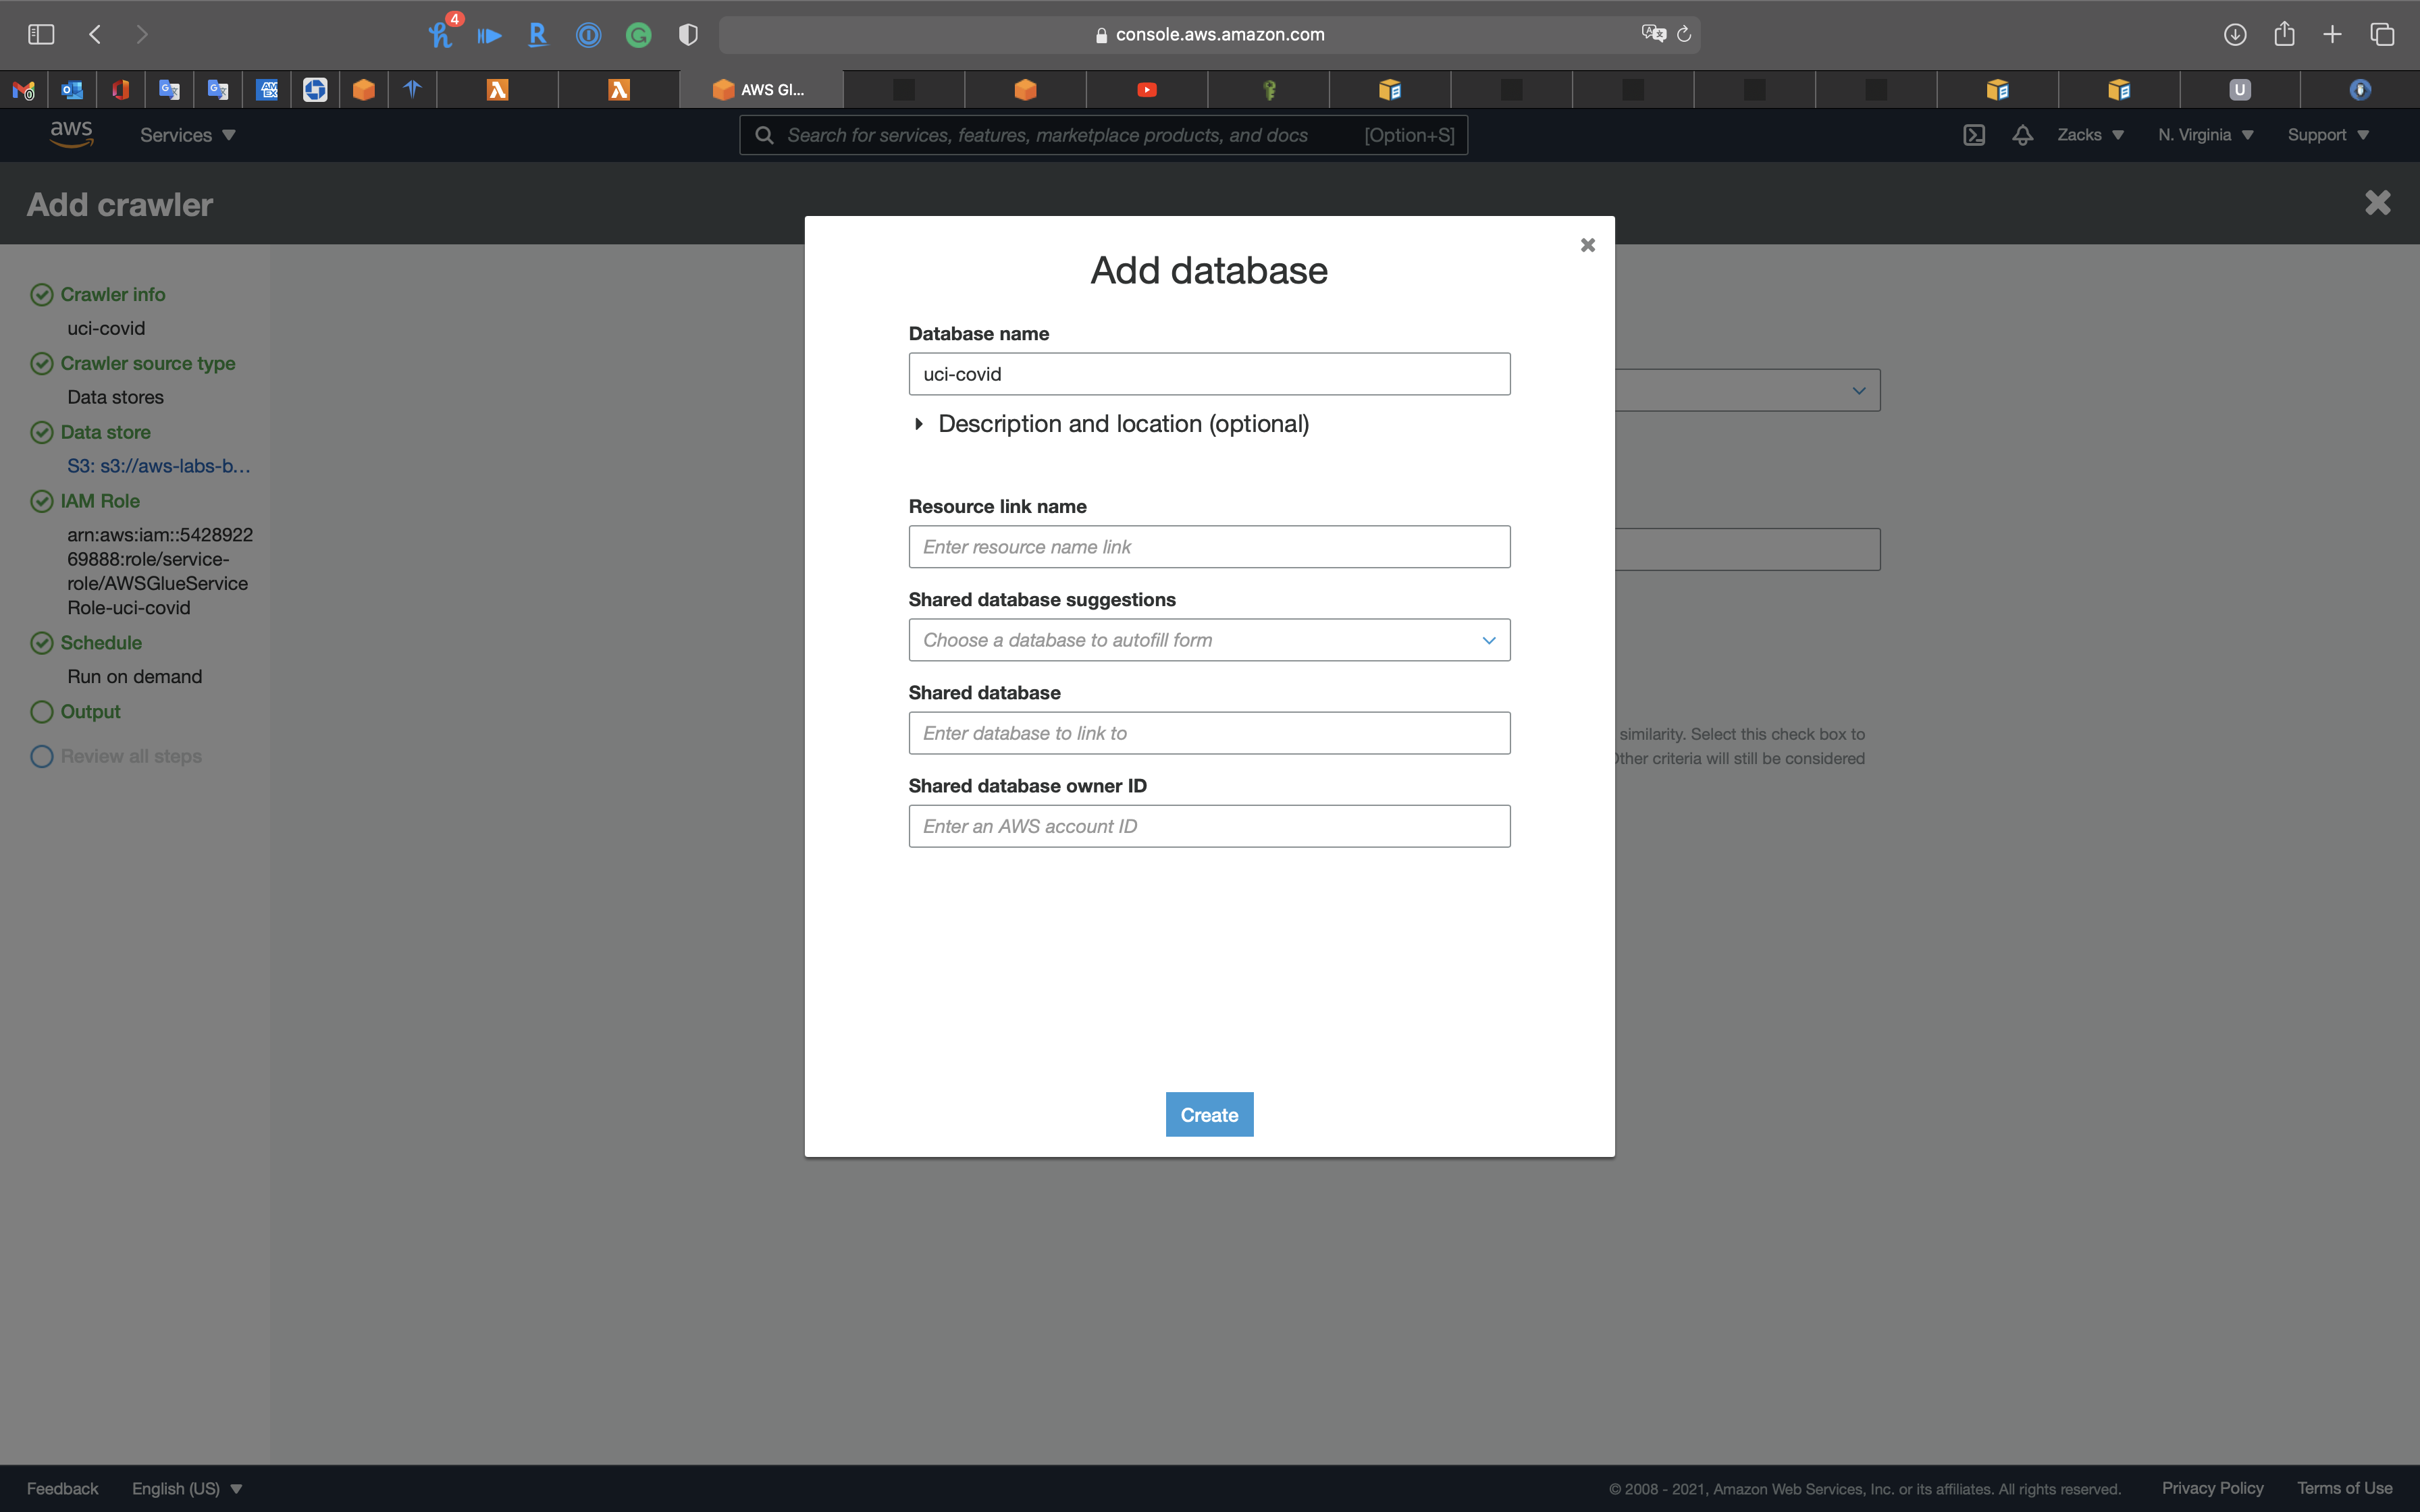
Click on Next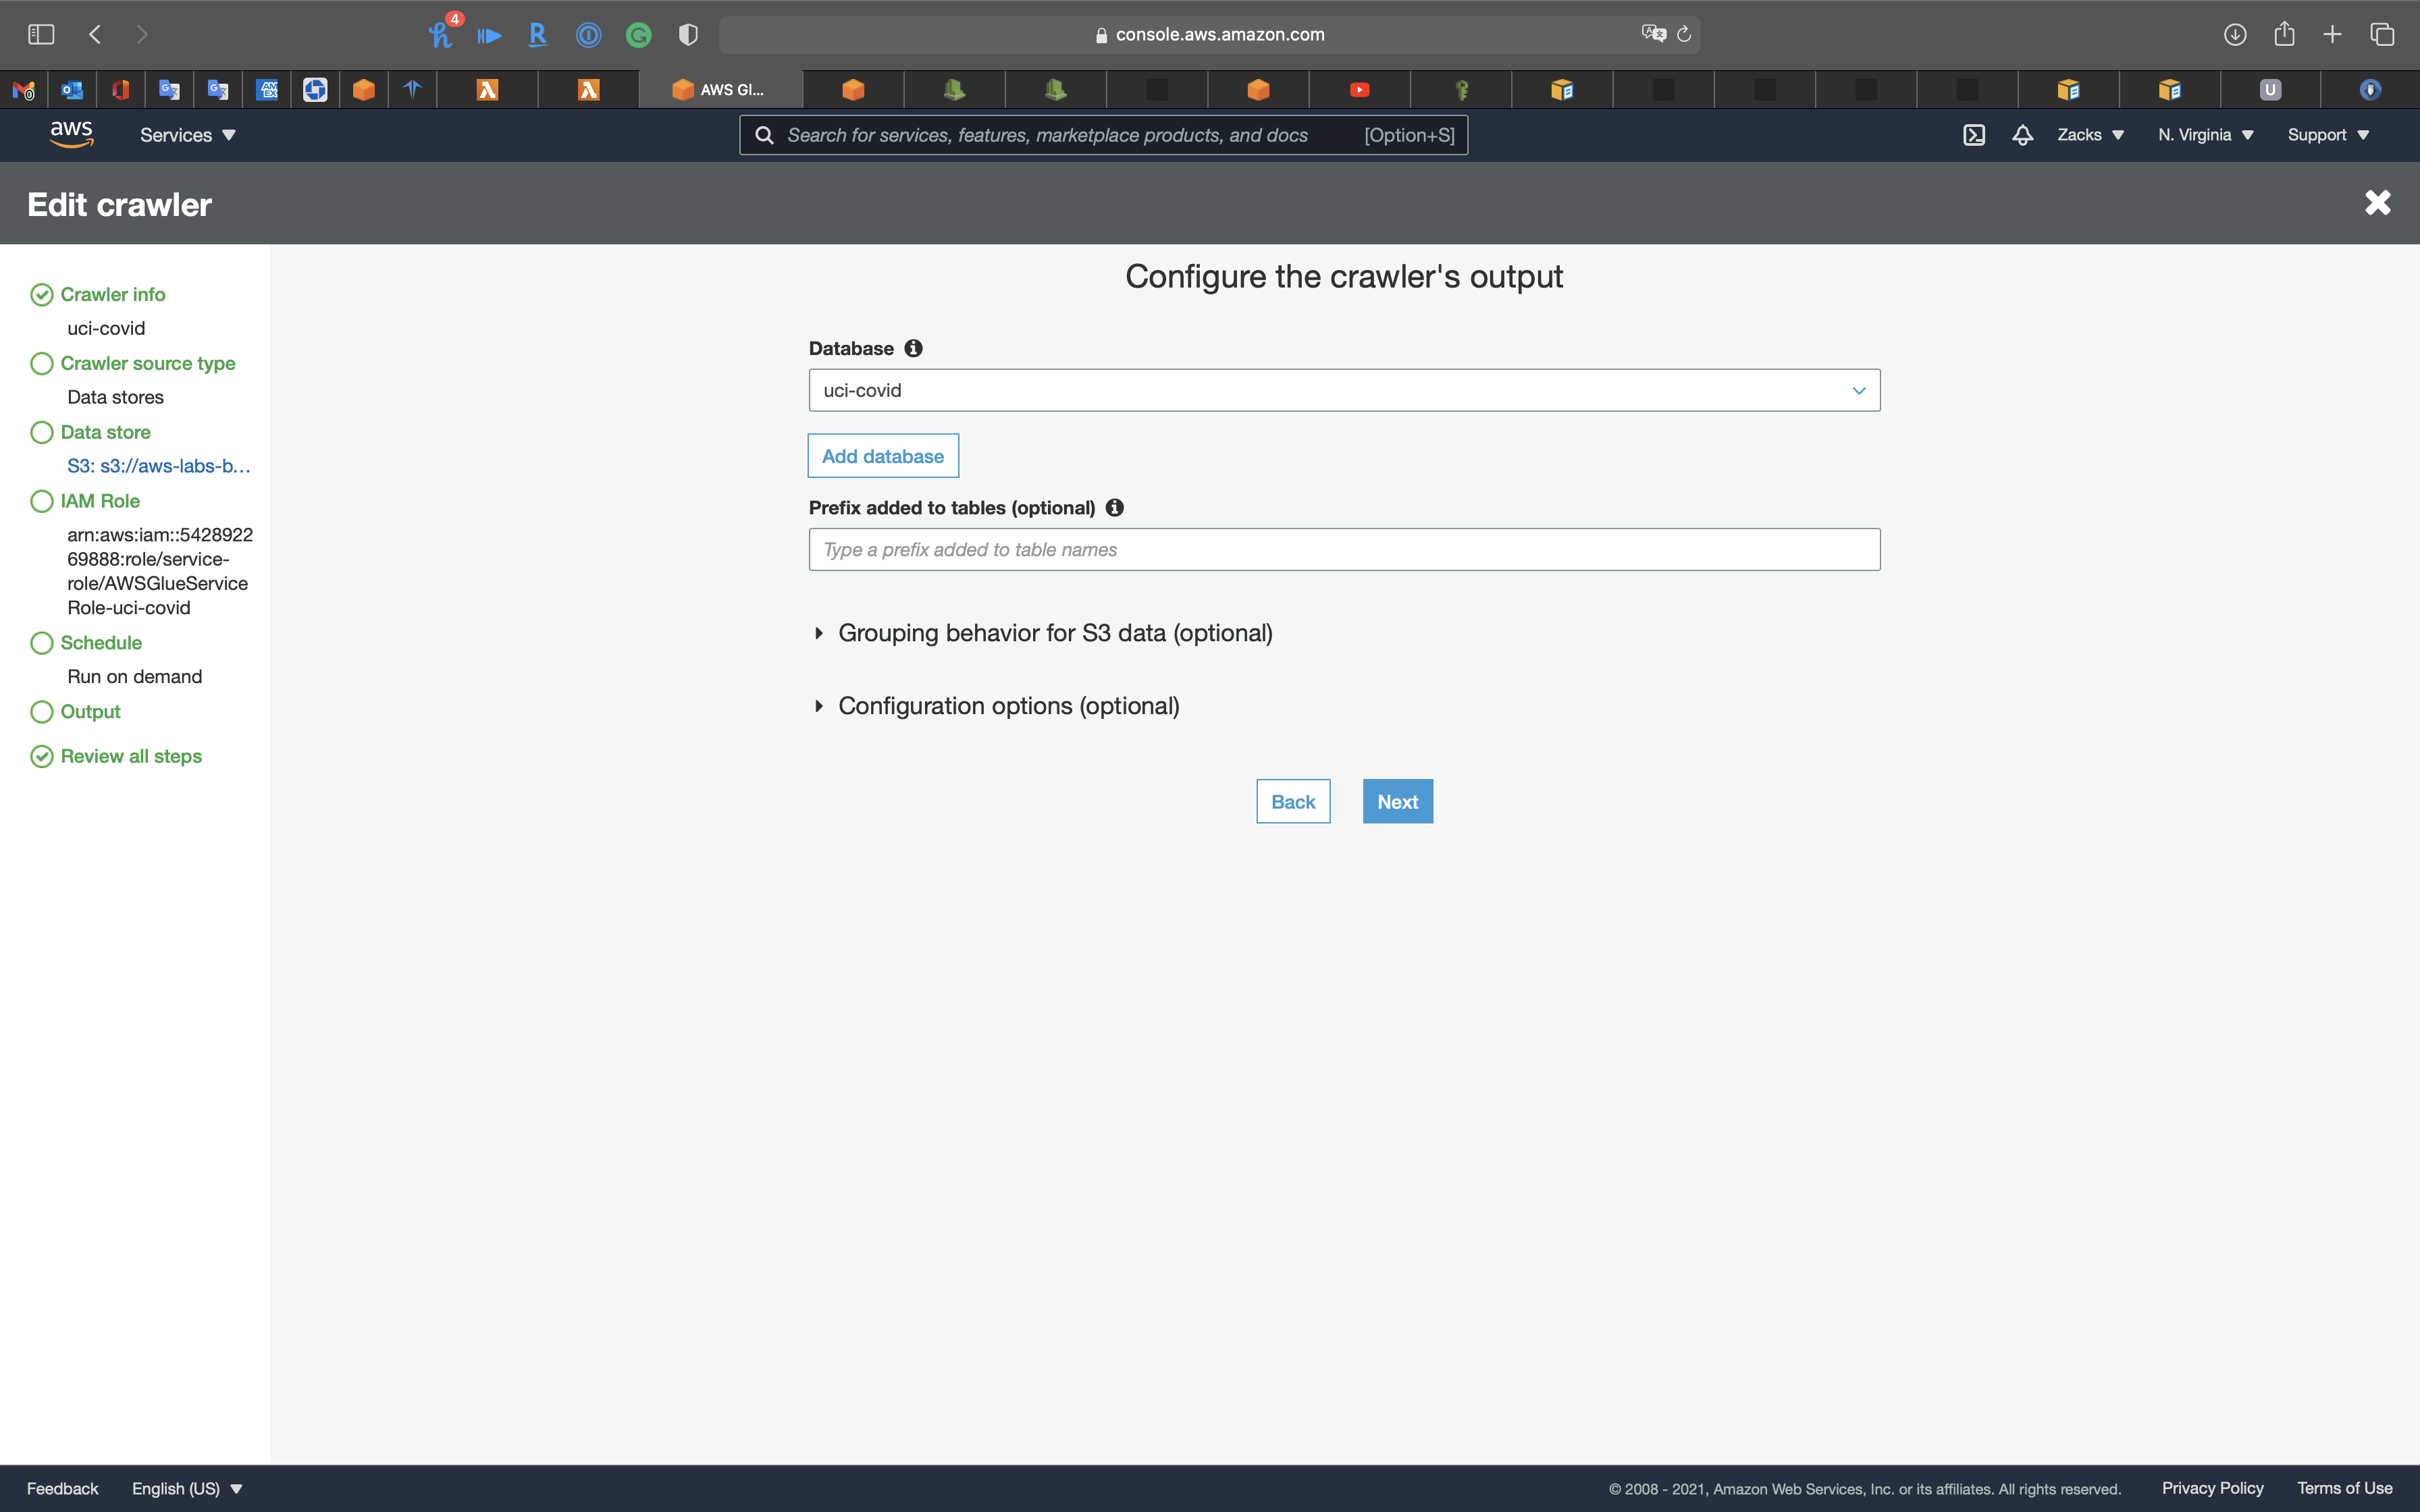
Review all steps
Click on Finish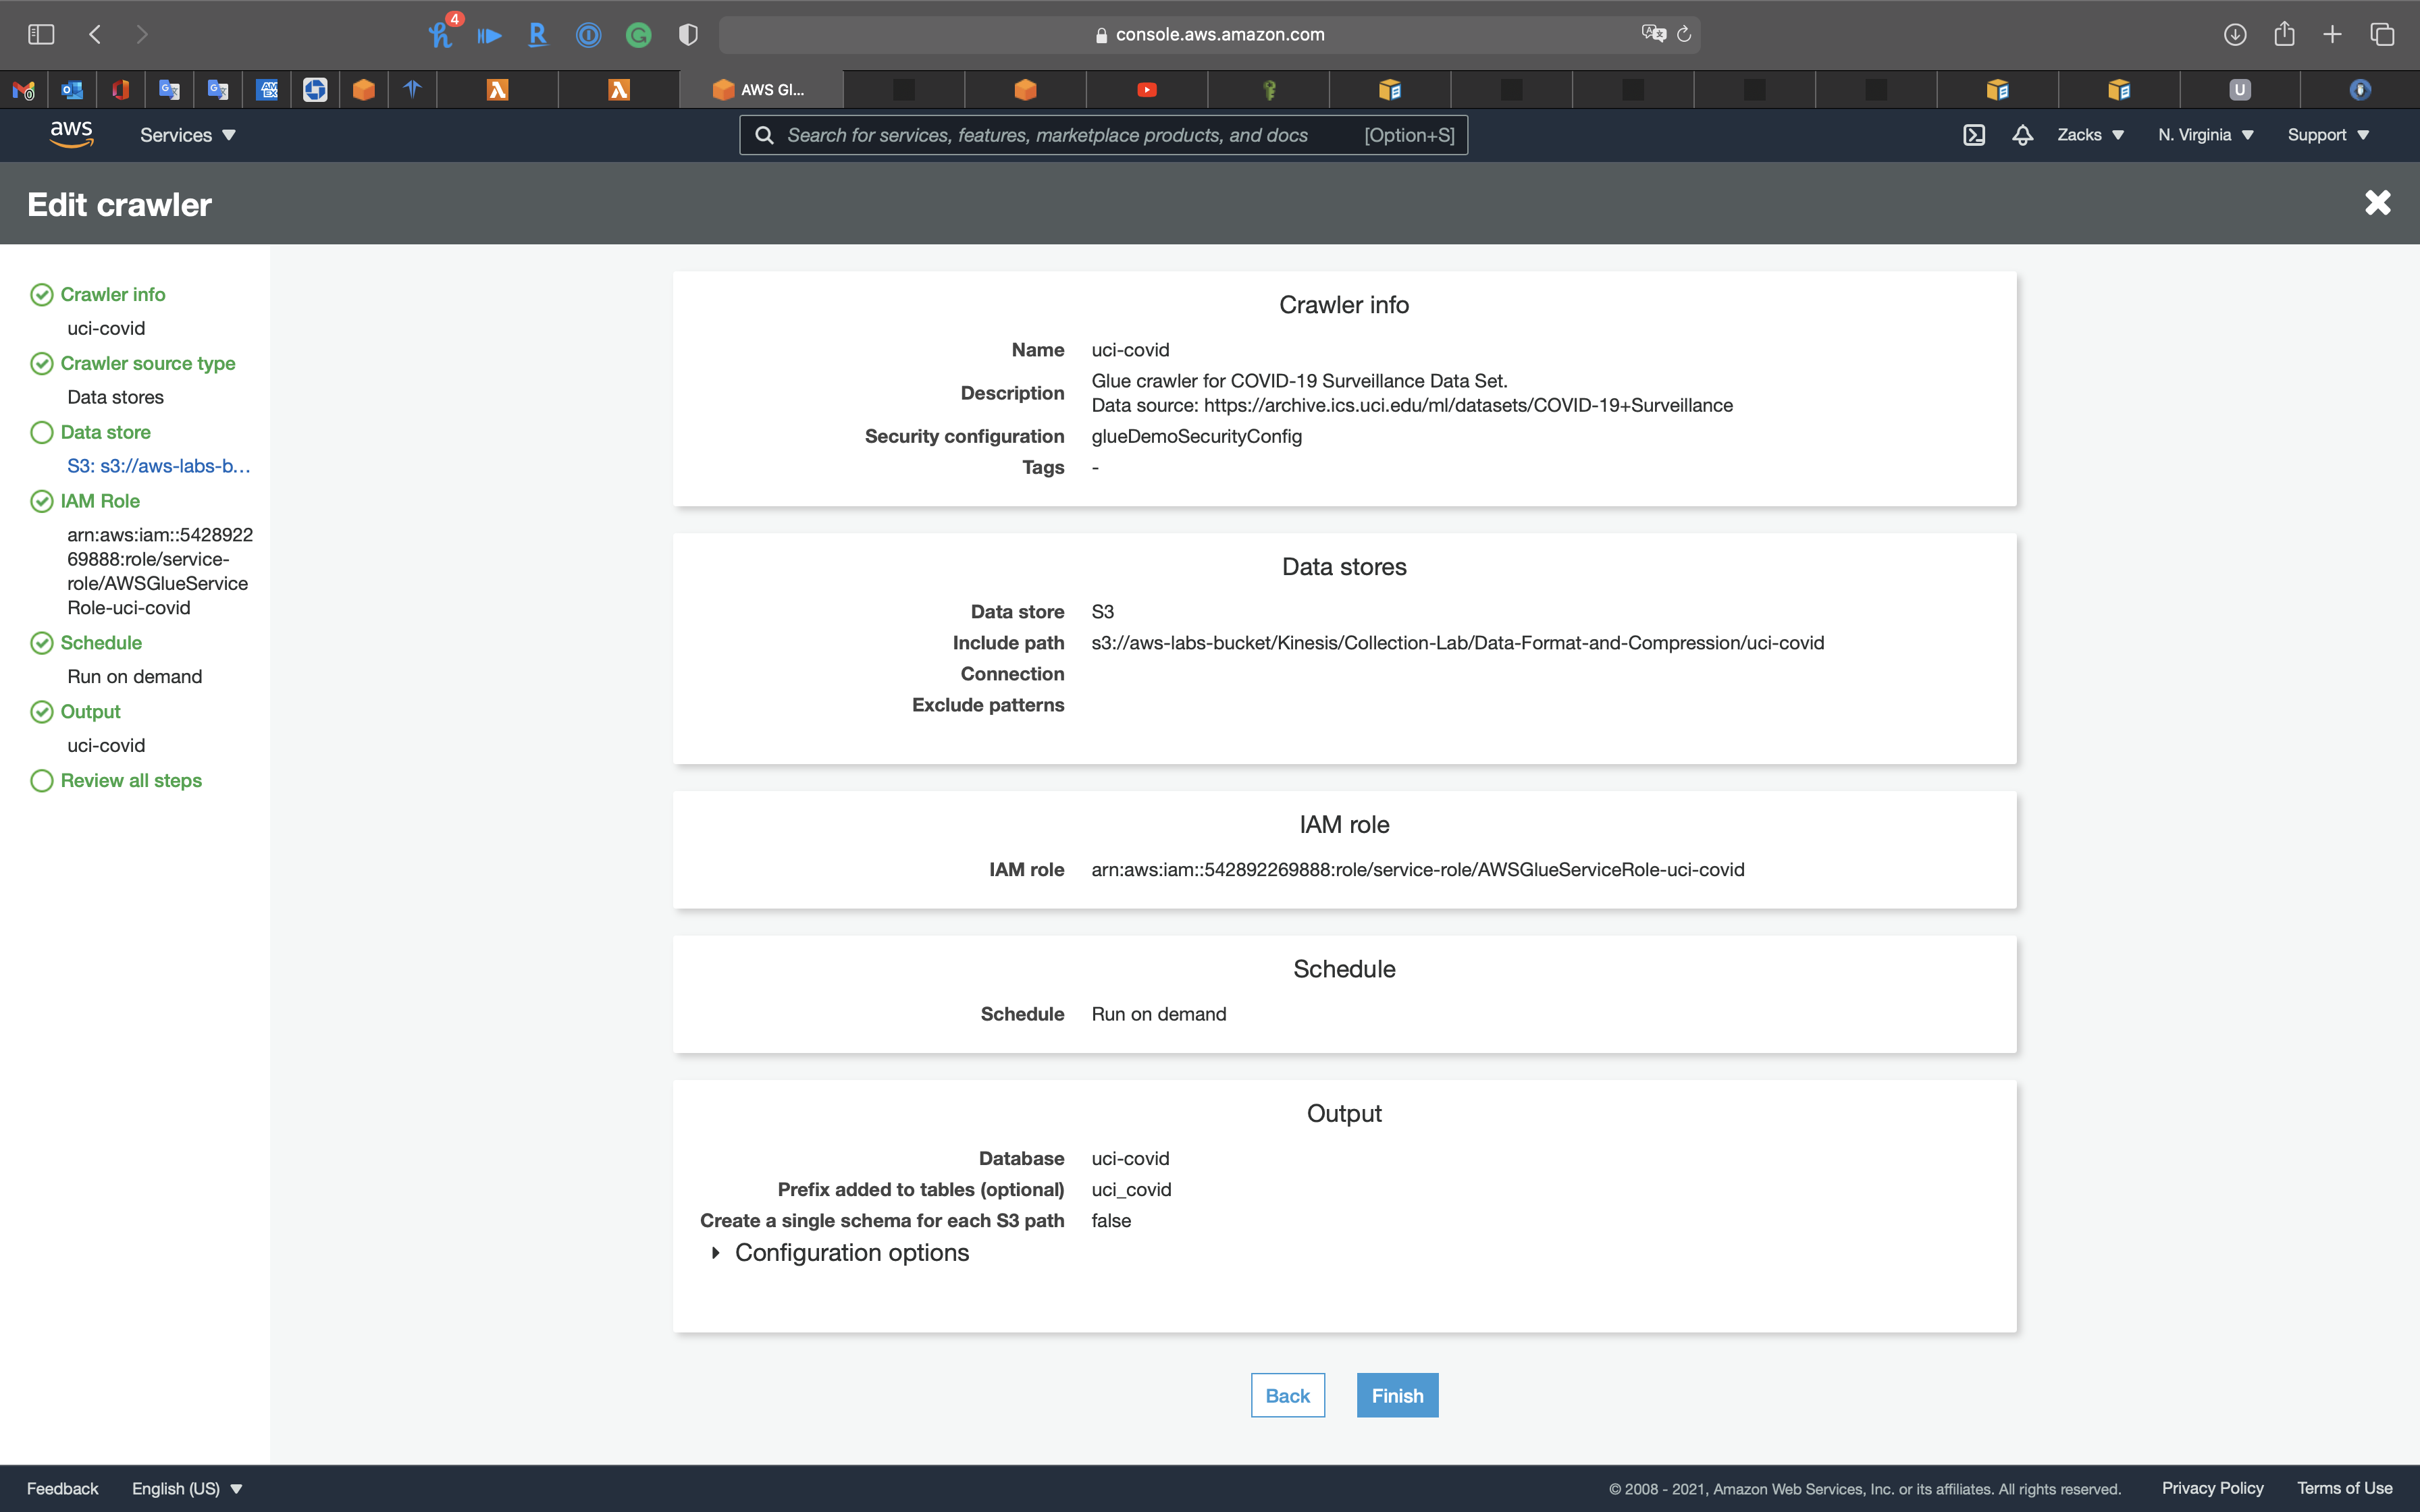
Validation Test
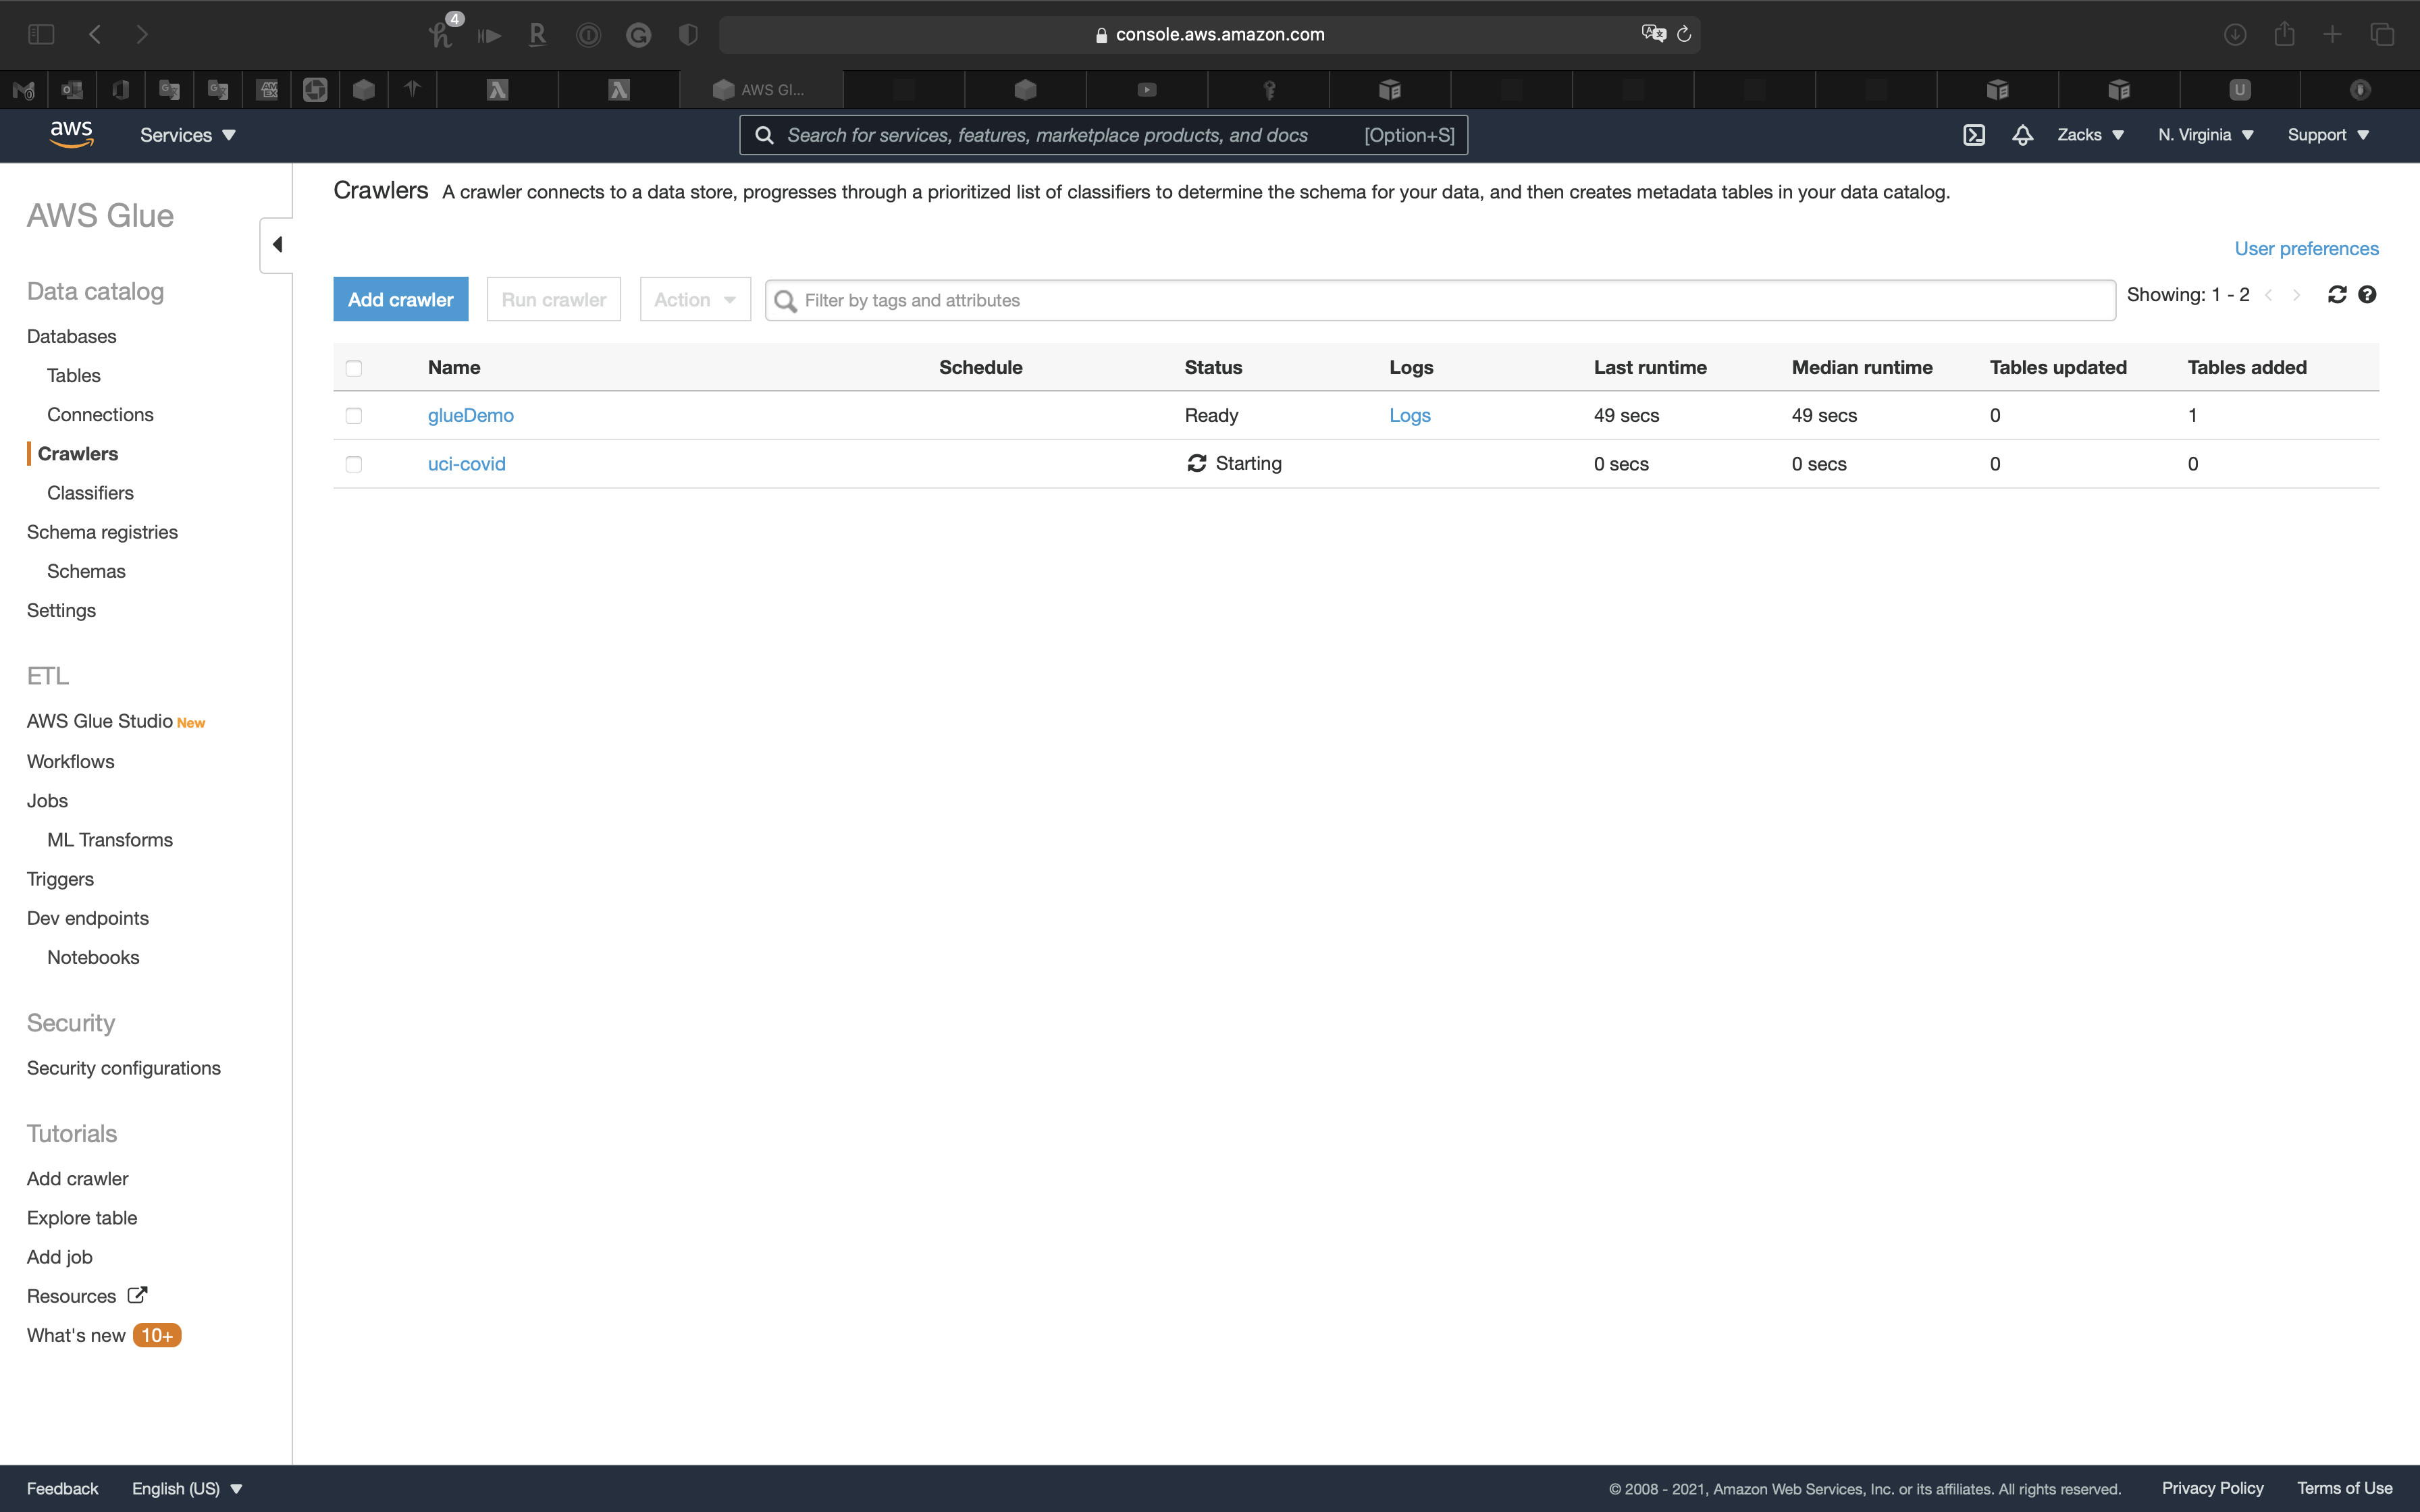
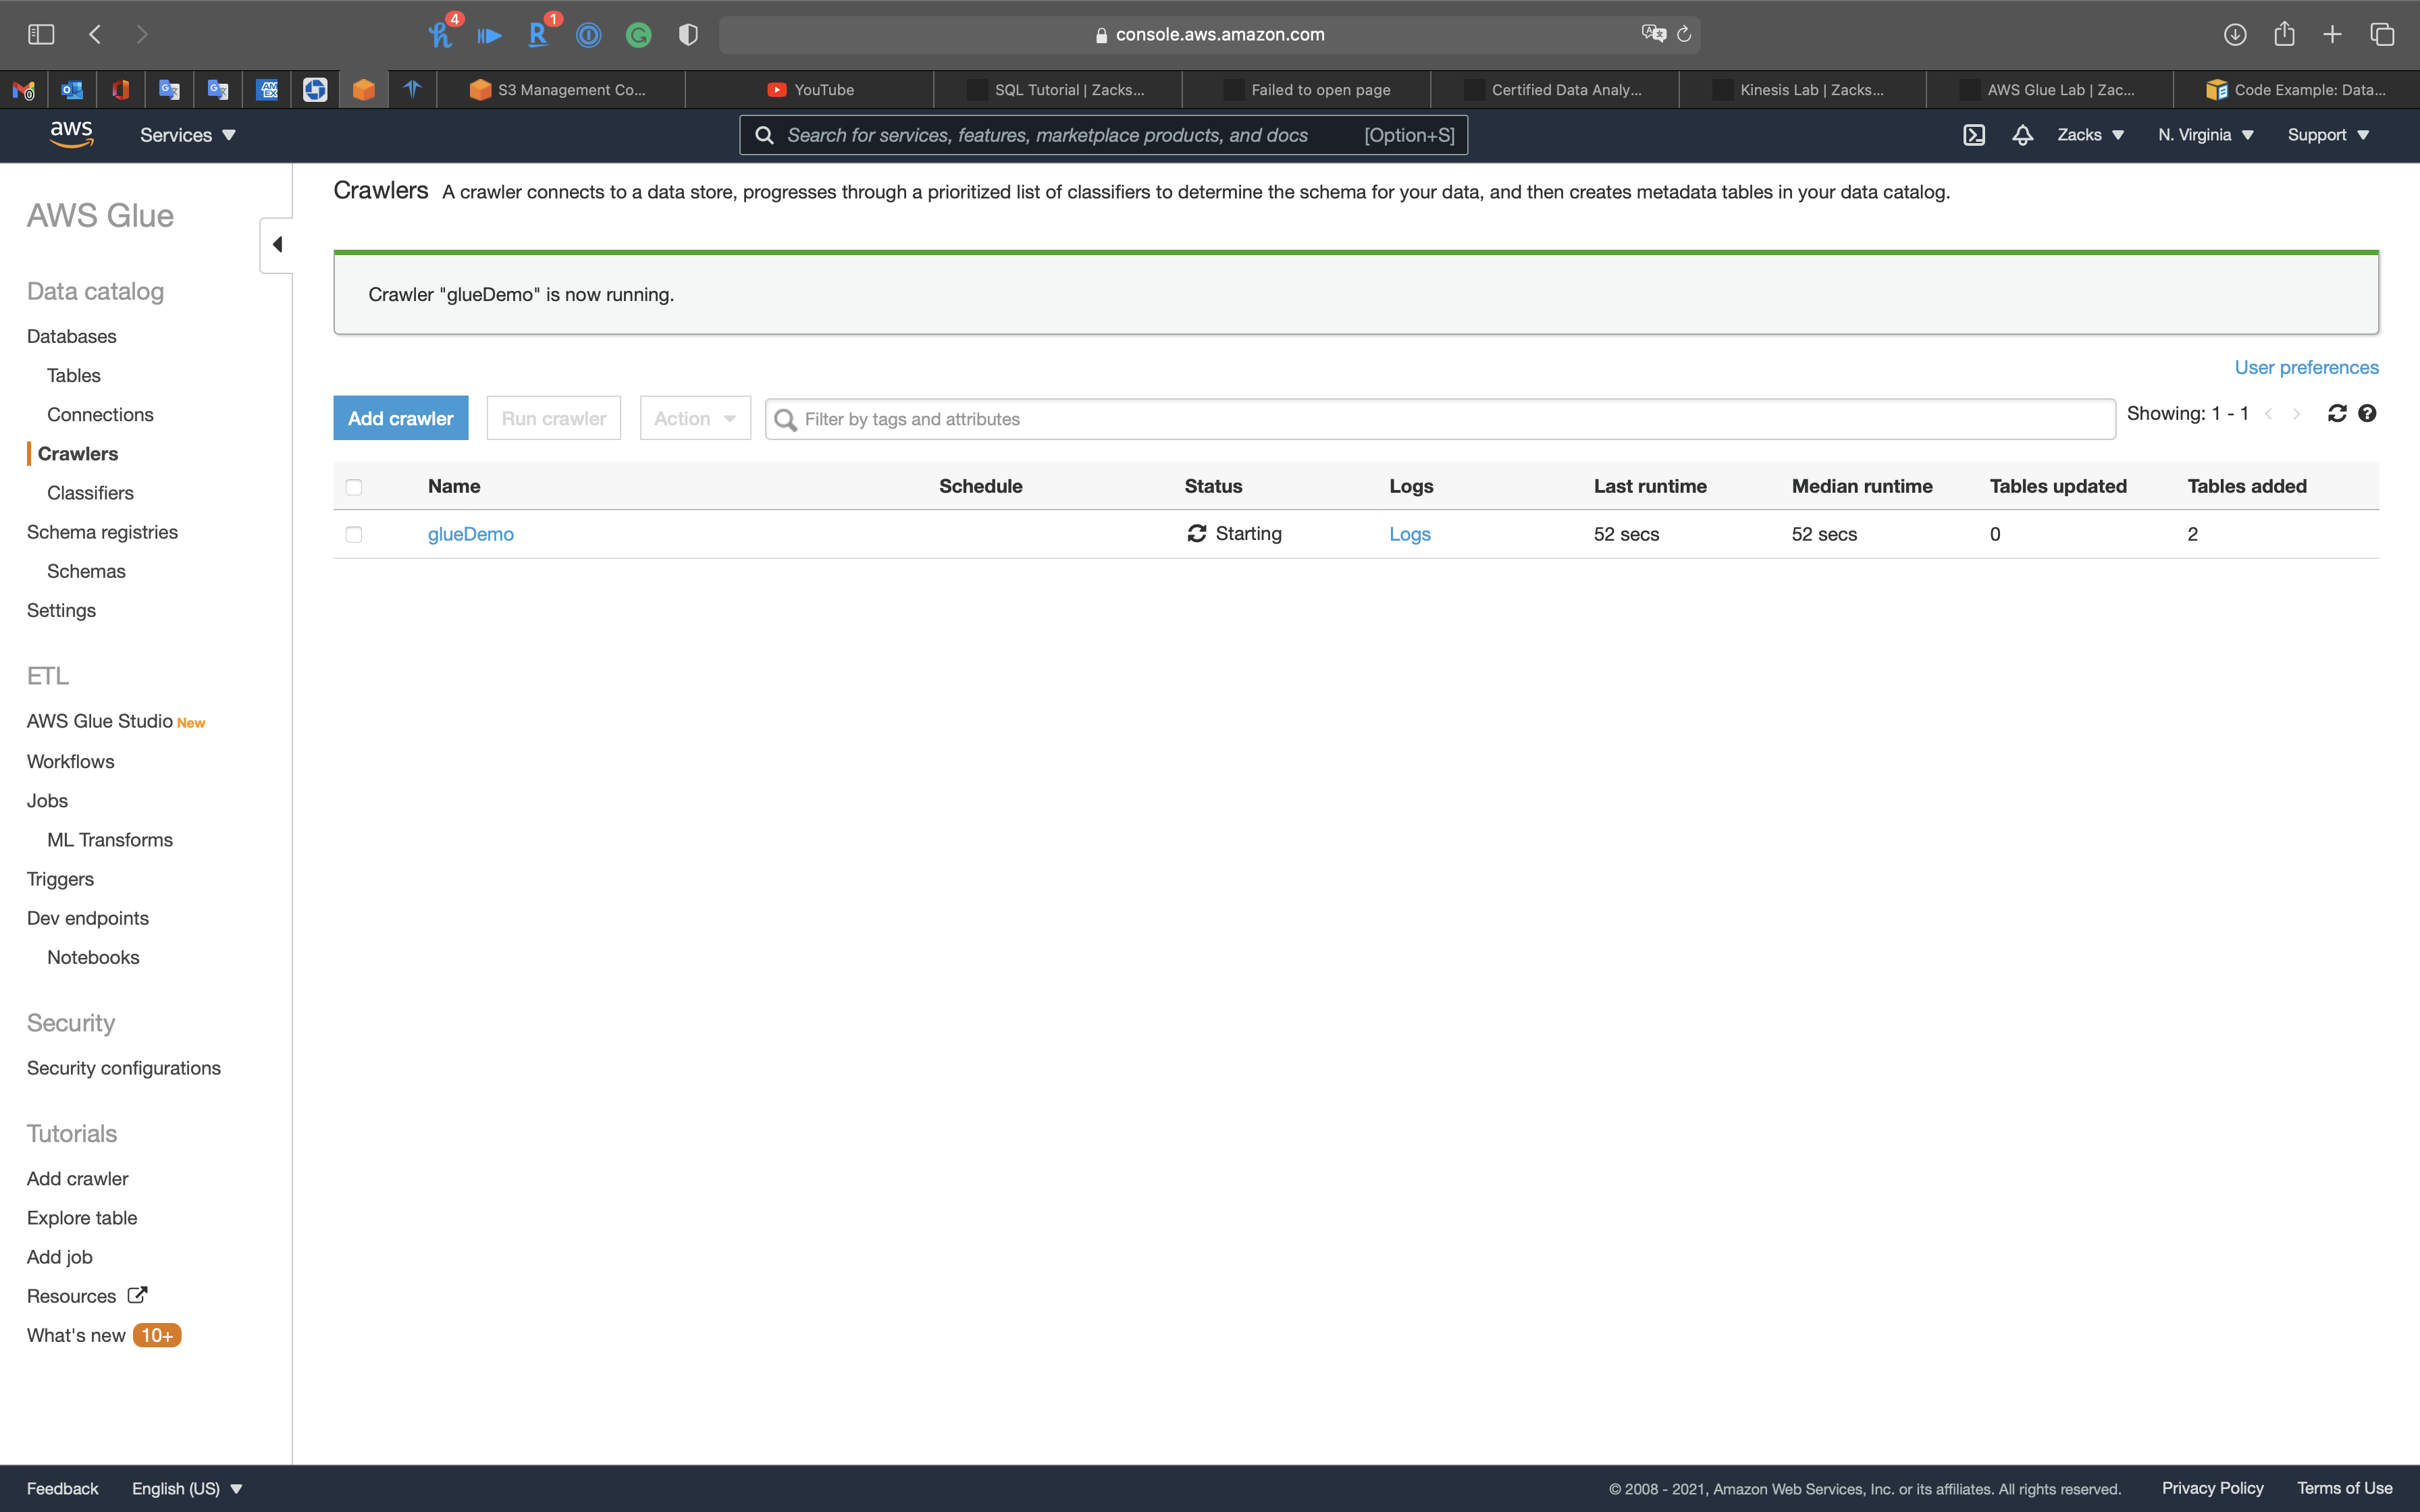
Run Crawler
Working with Crawlers on the AWS Glue Console
Select your new crawler, then click on Run crawler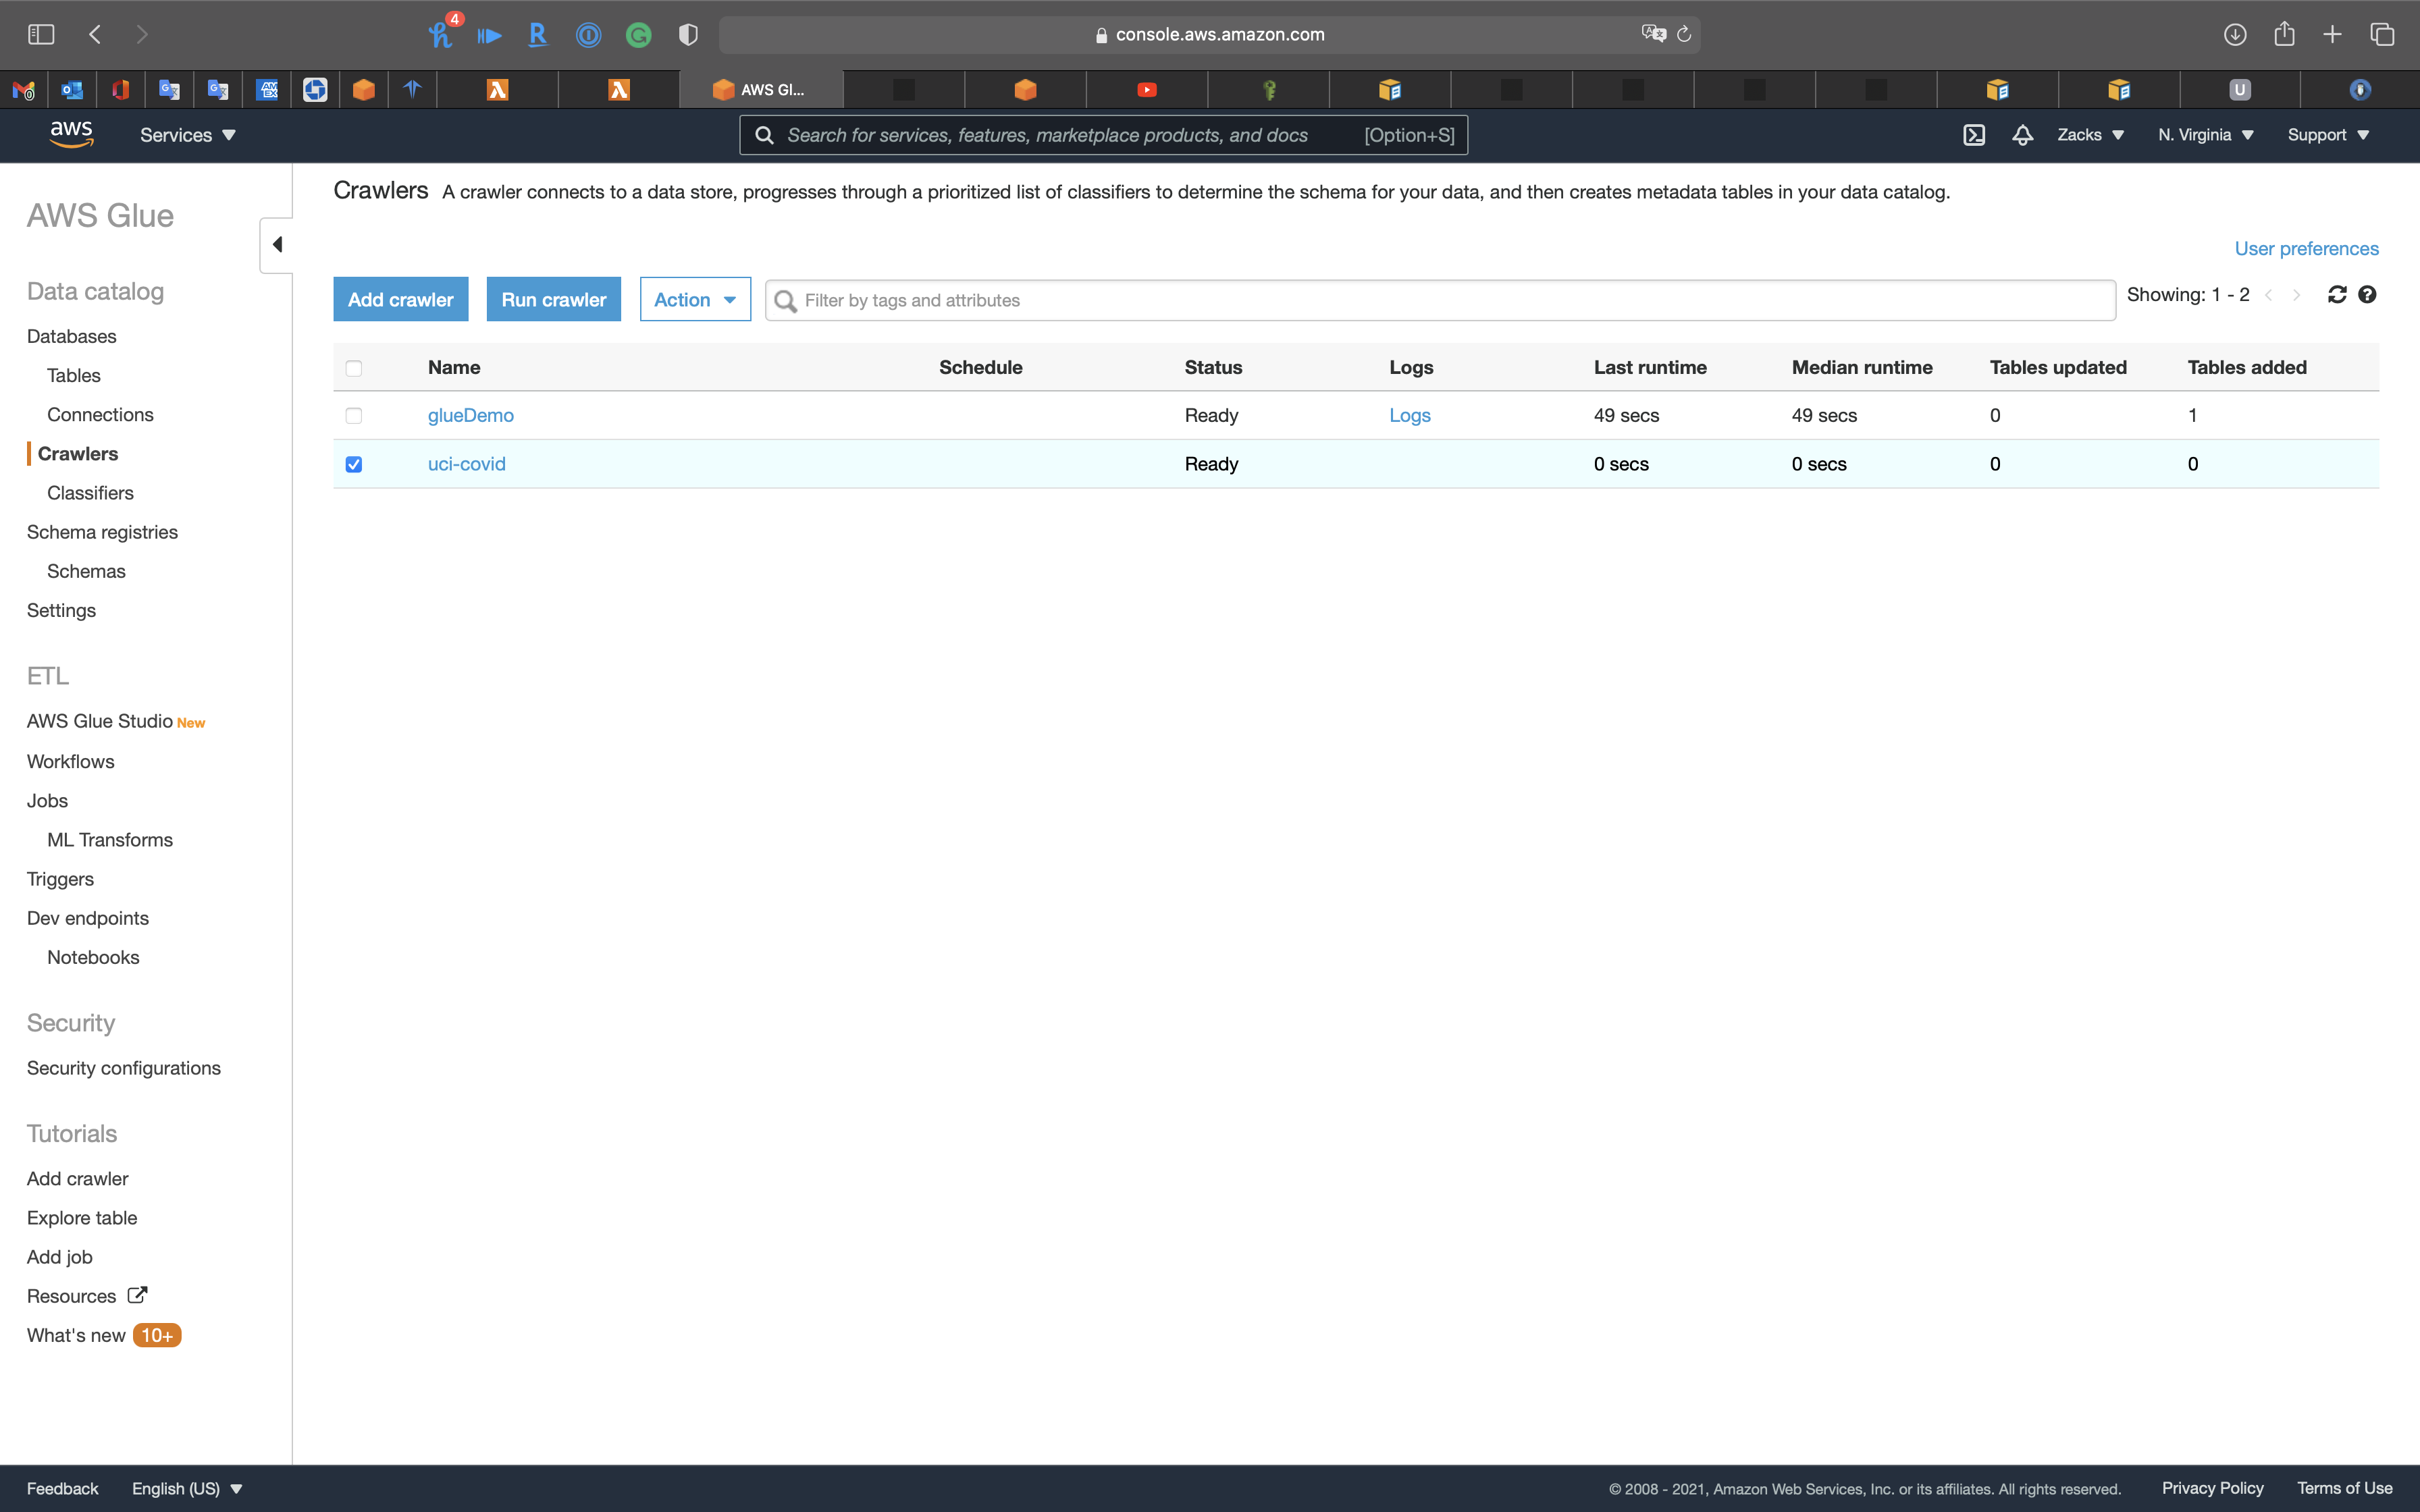
CloudWatch logs
Click on Logs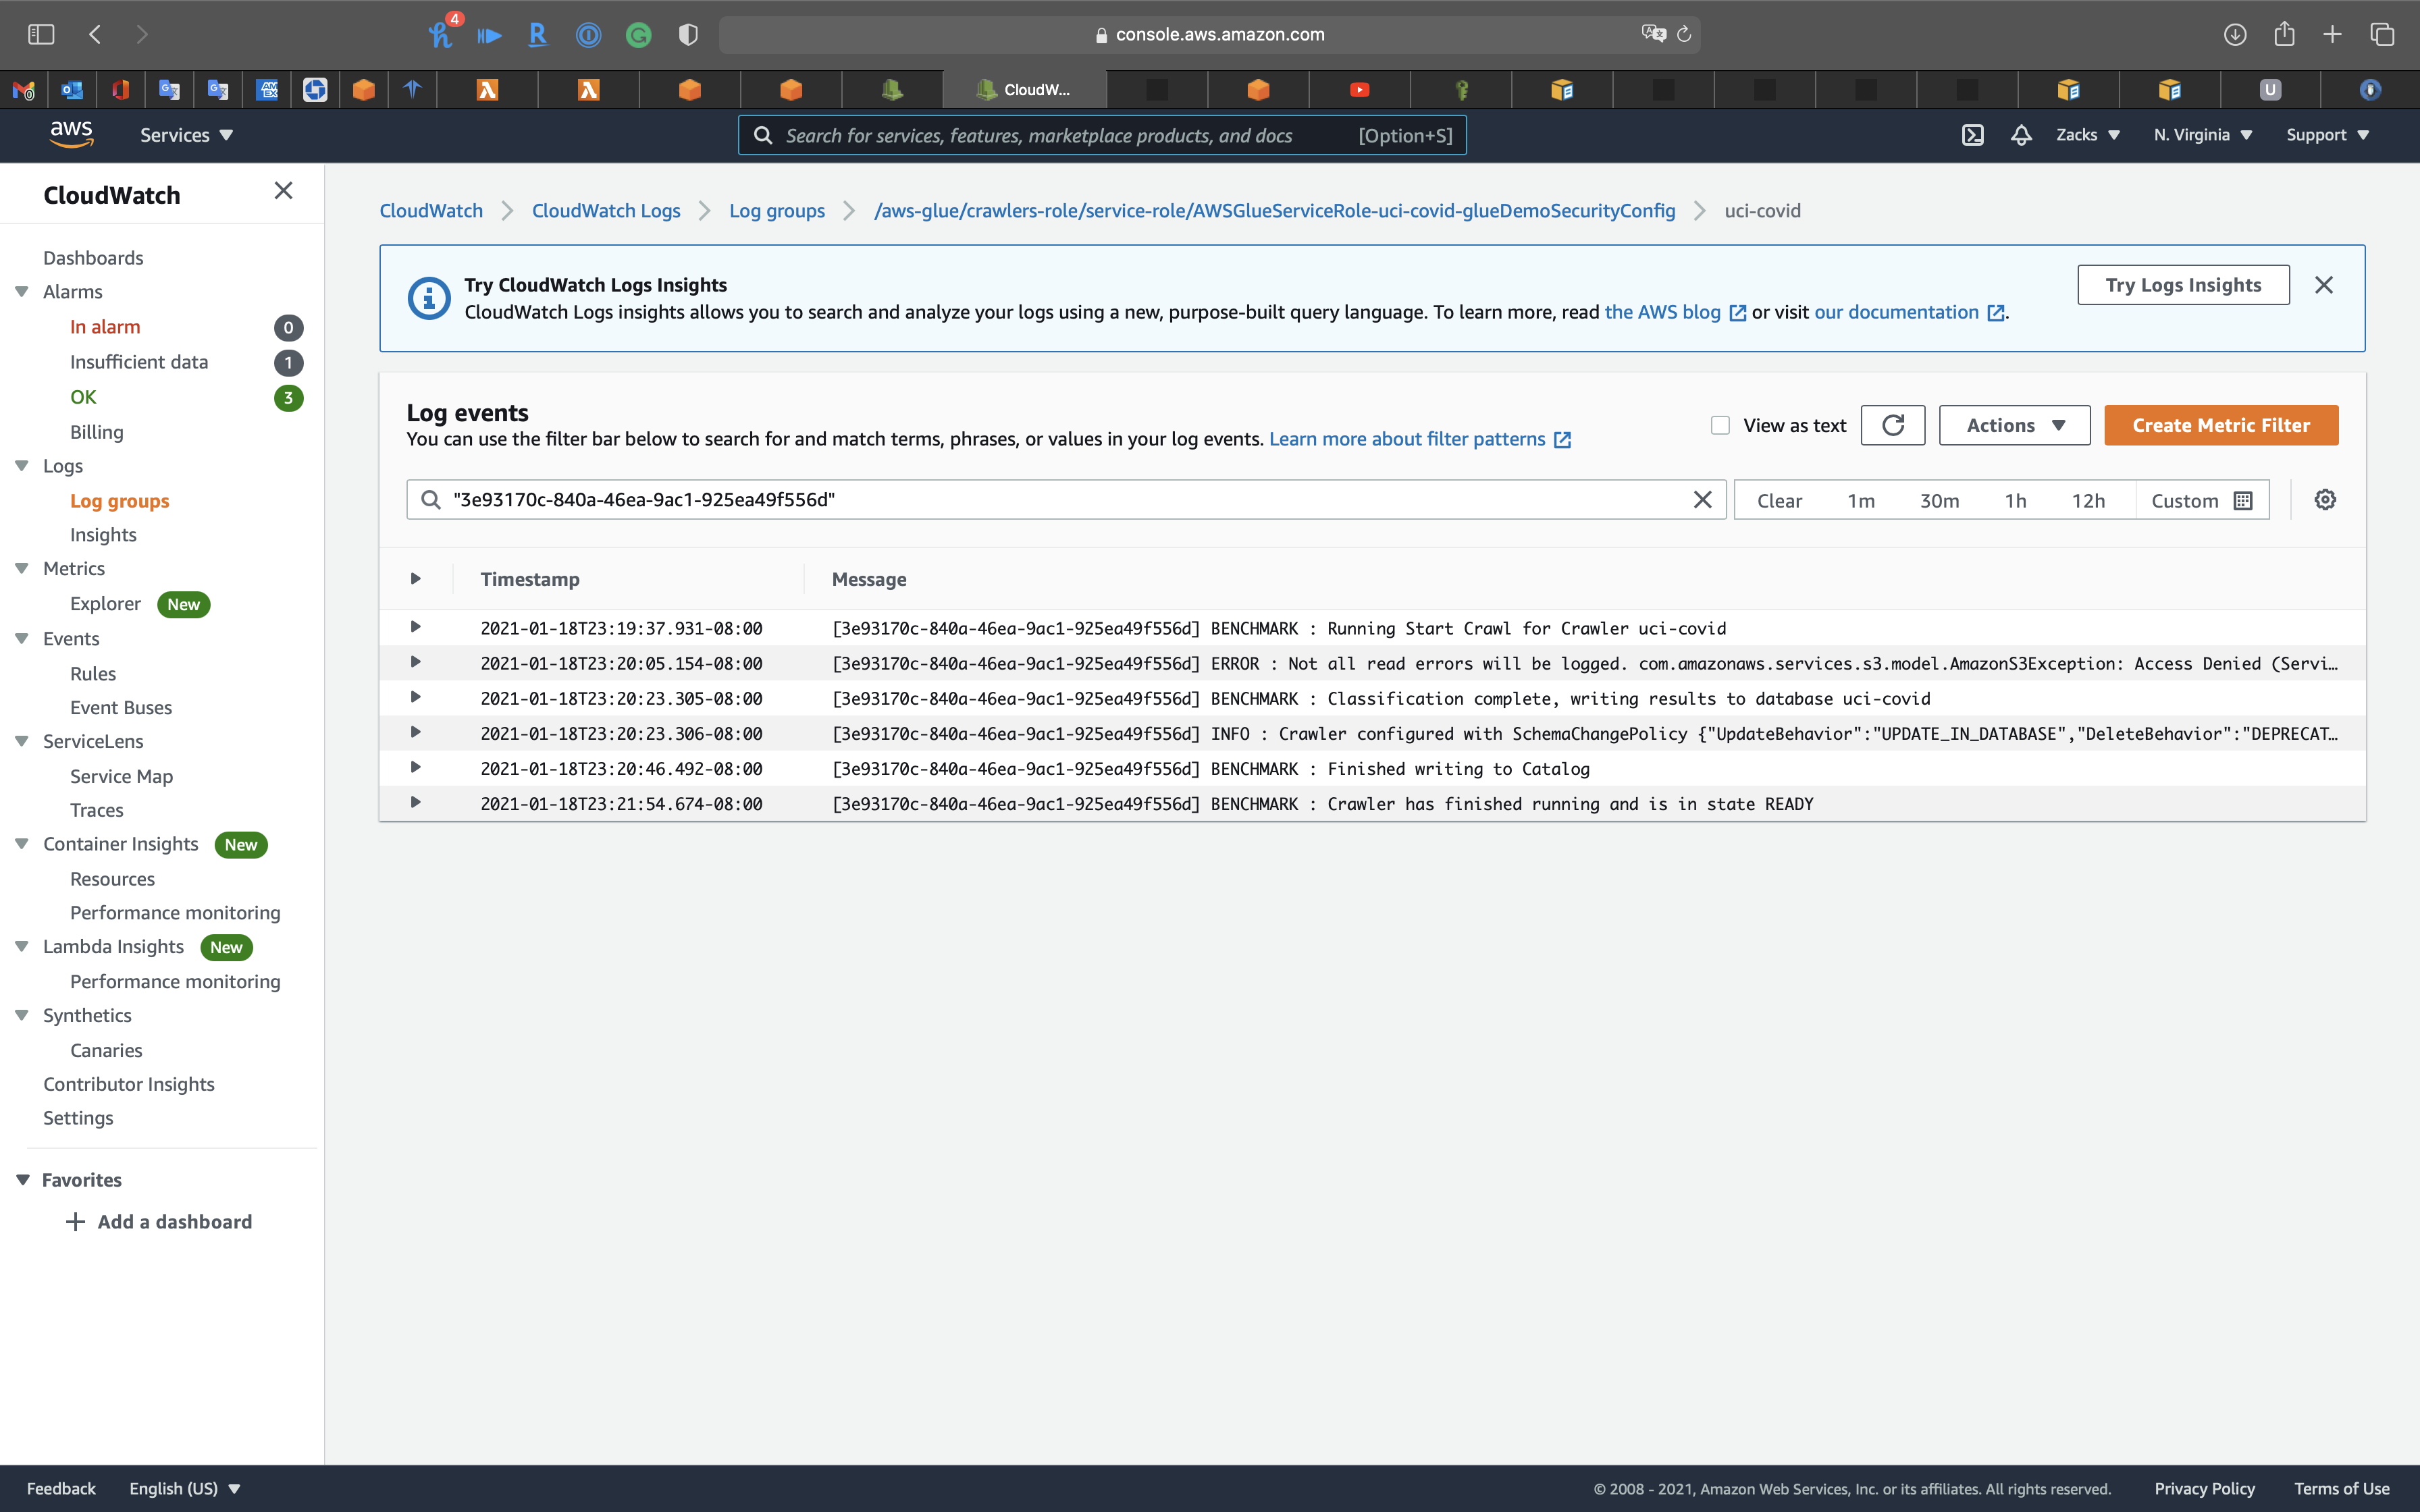
Databases
Click on Databases navigation
Click on uci-covid
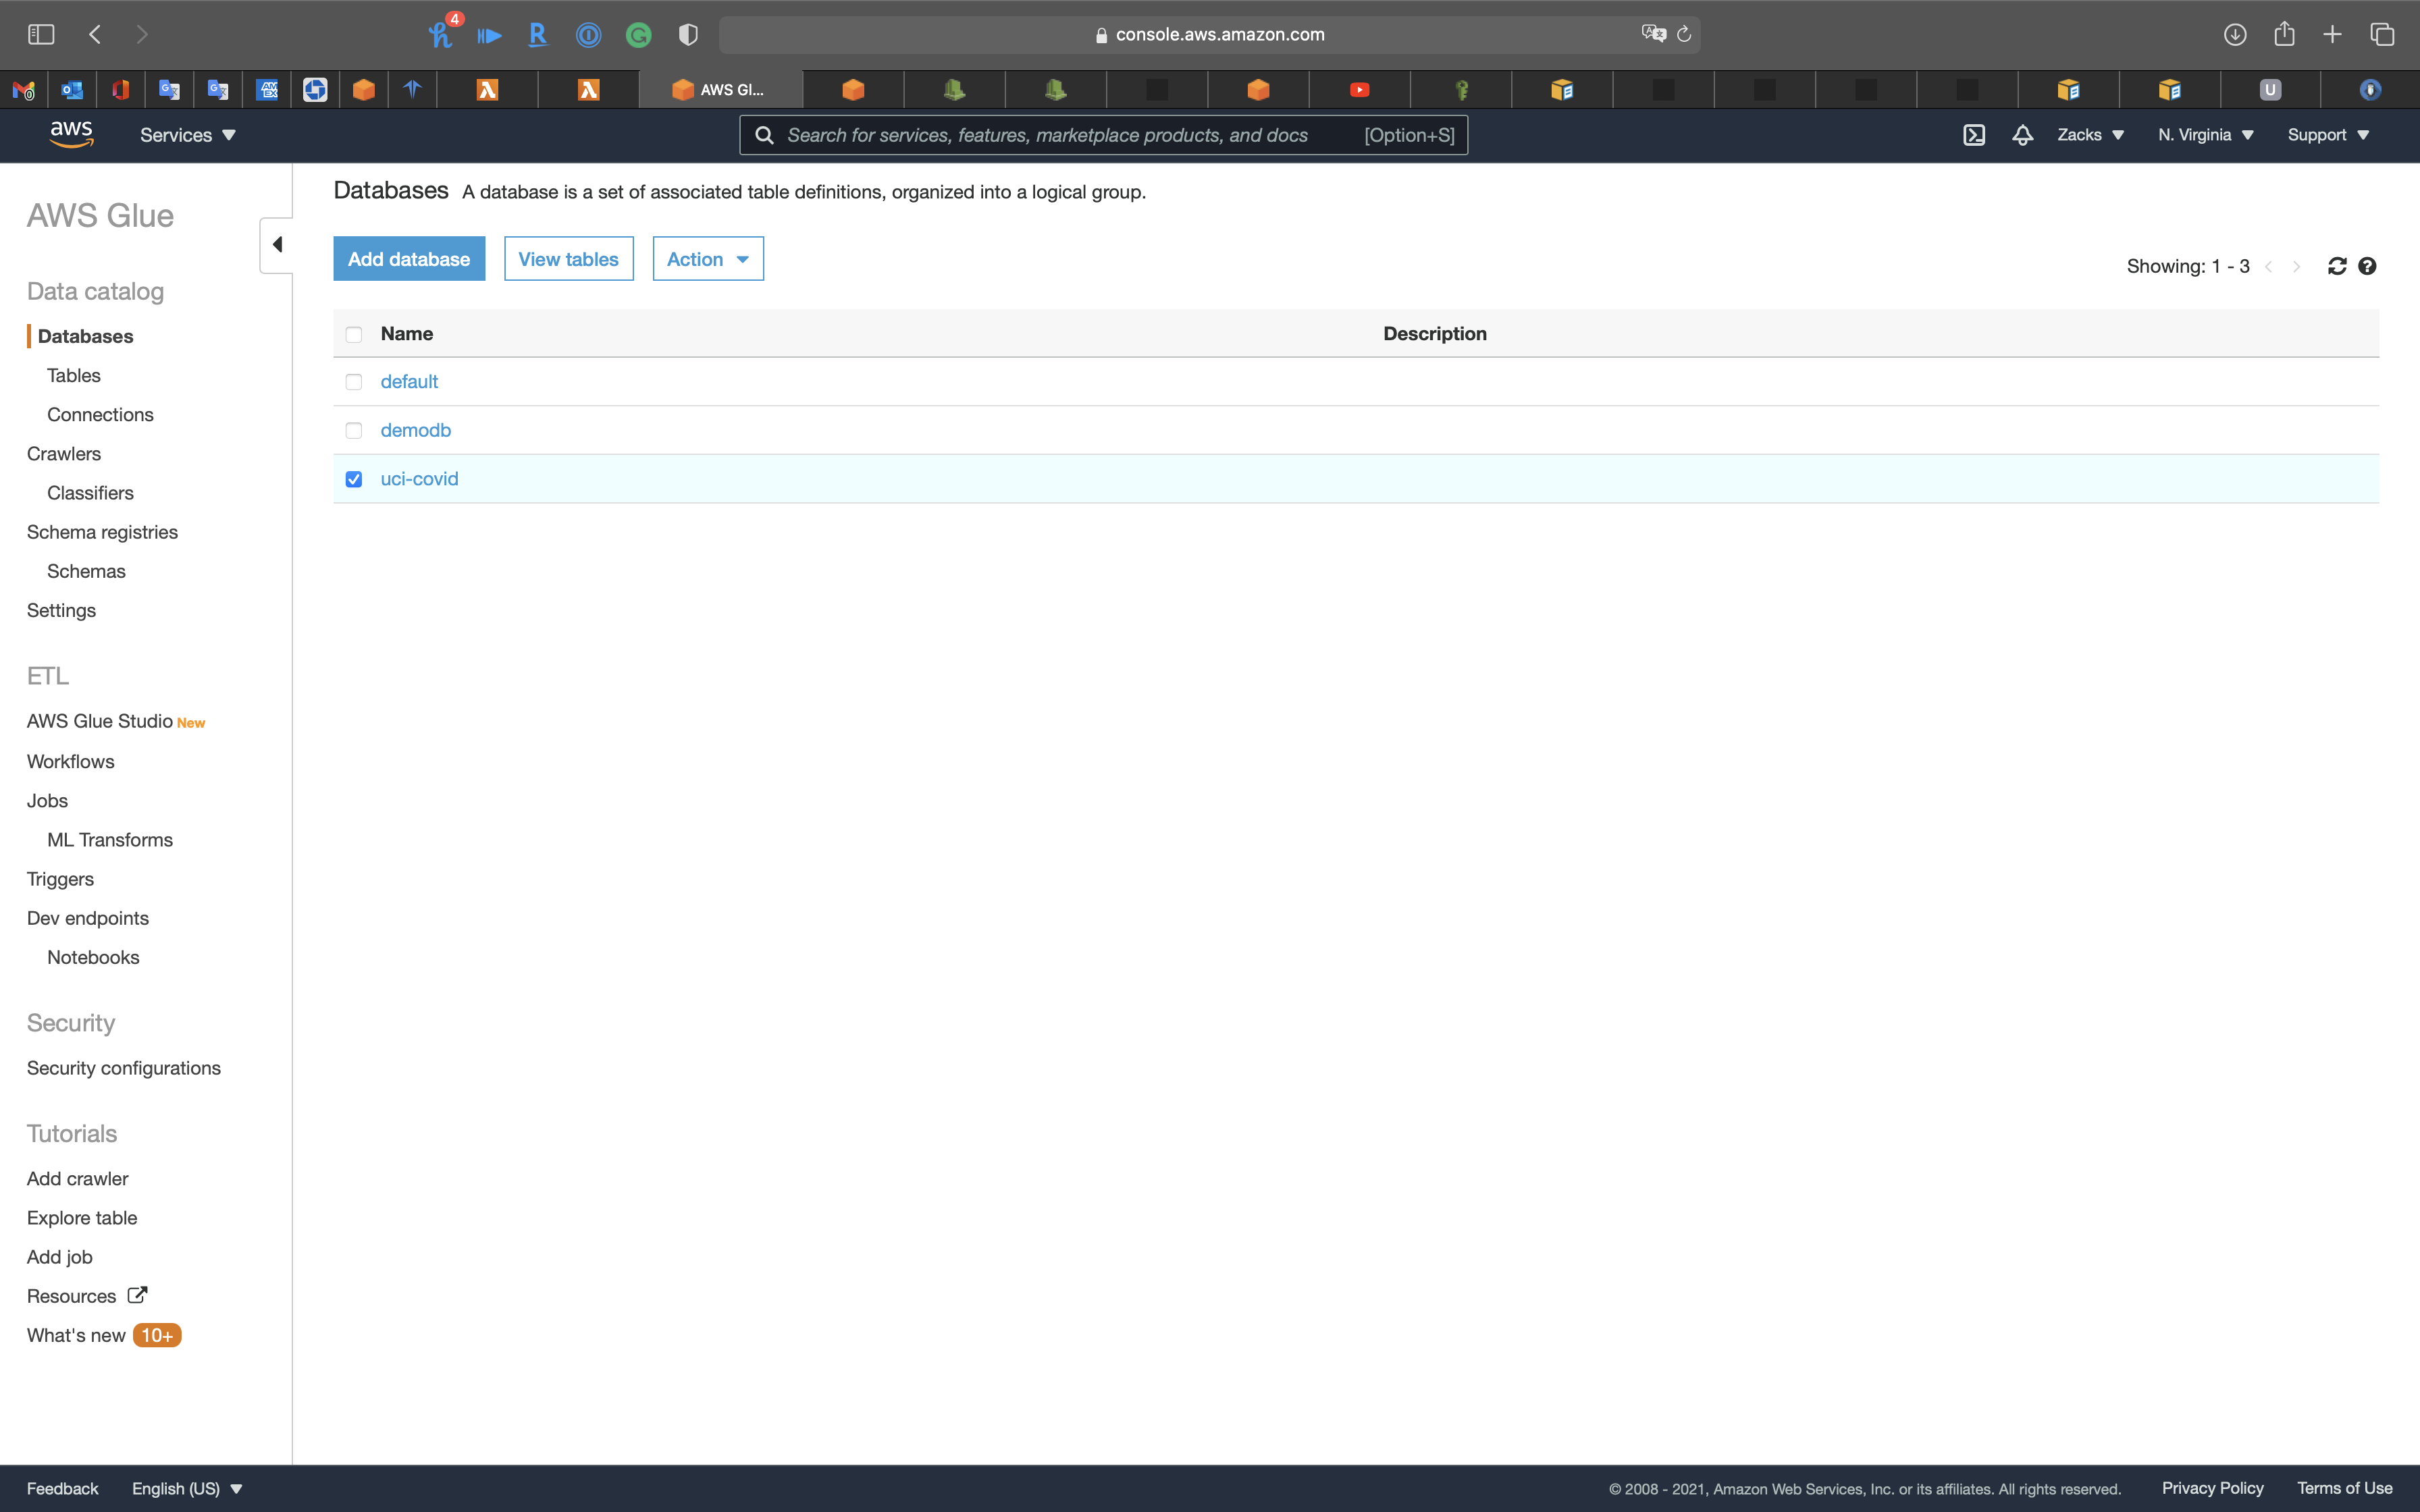
Click on tables in uci-covid

Transform Data
Click on Jobs navigation
Click on Add job
Job properties
- Name:
uci-covid-job
Click on Create IAM role
Ensure that this role has permission to your Amazon S3 sources, targets, temporary directory, scripts, and any libraries used by the job.
Temporarily give a role with AWSGlueConsoleFullAccess and AmazonS3FullAccess
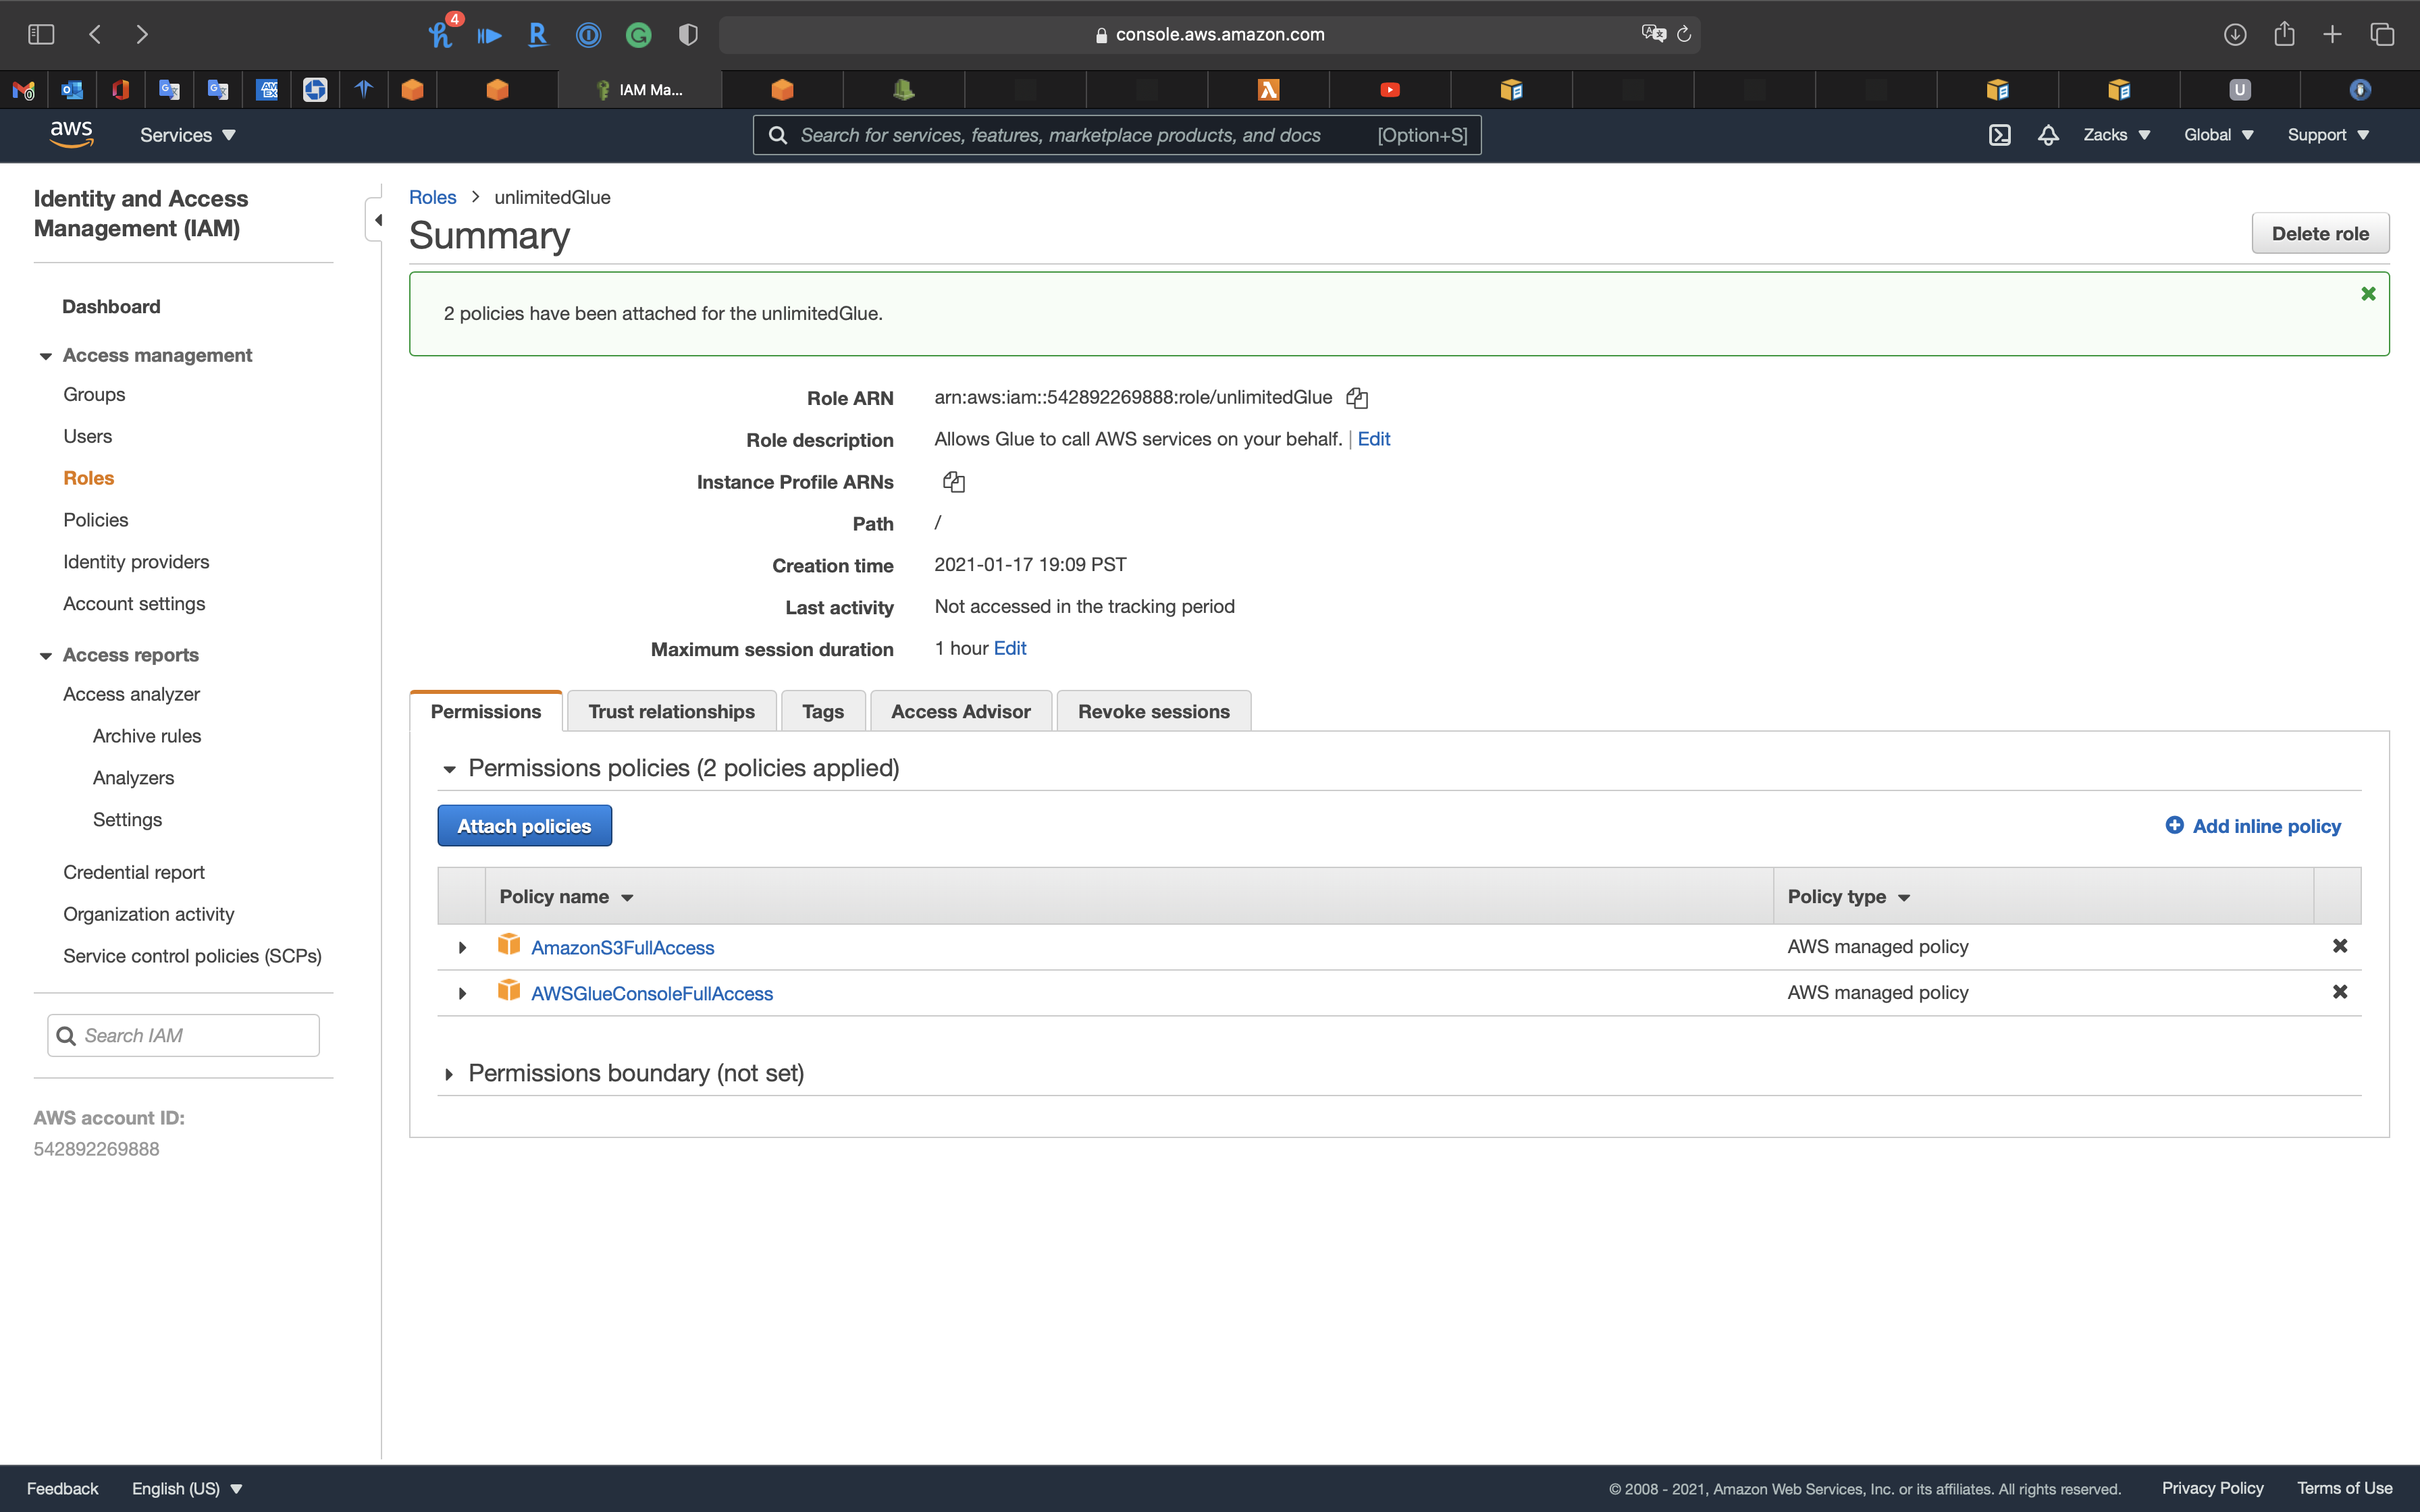
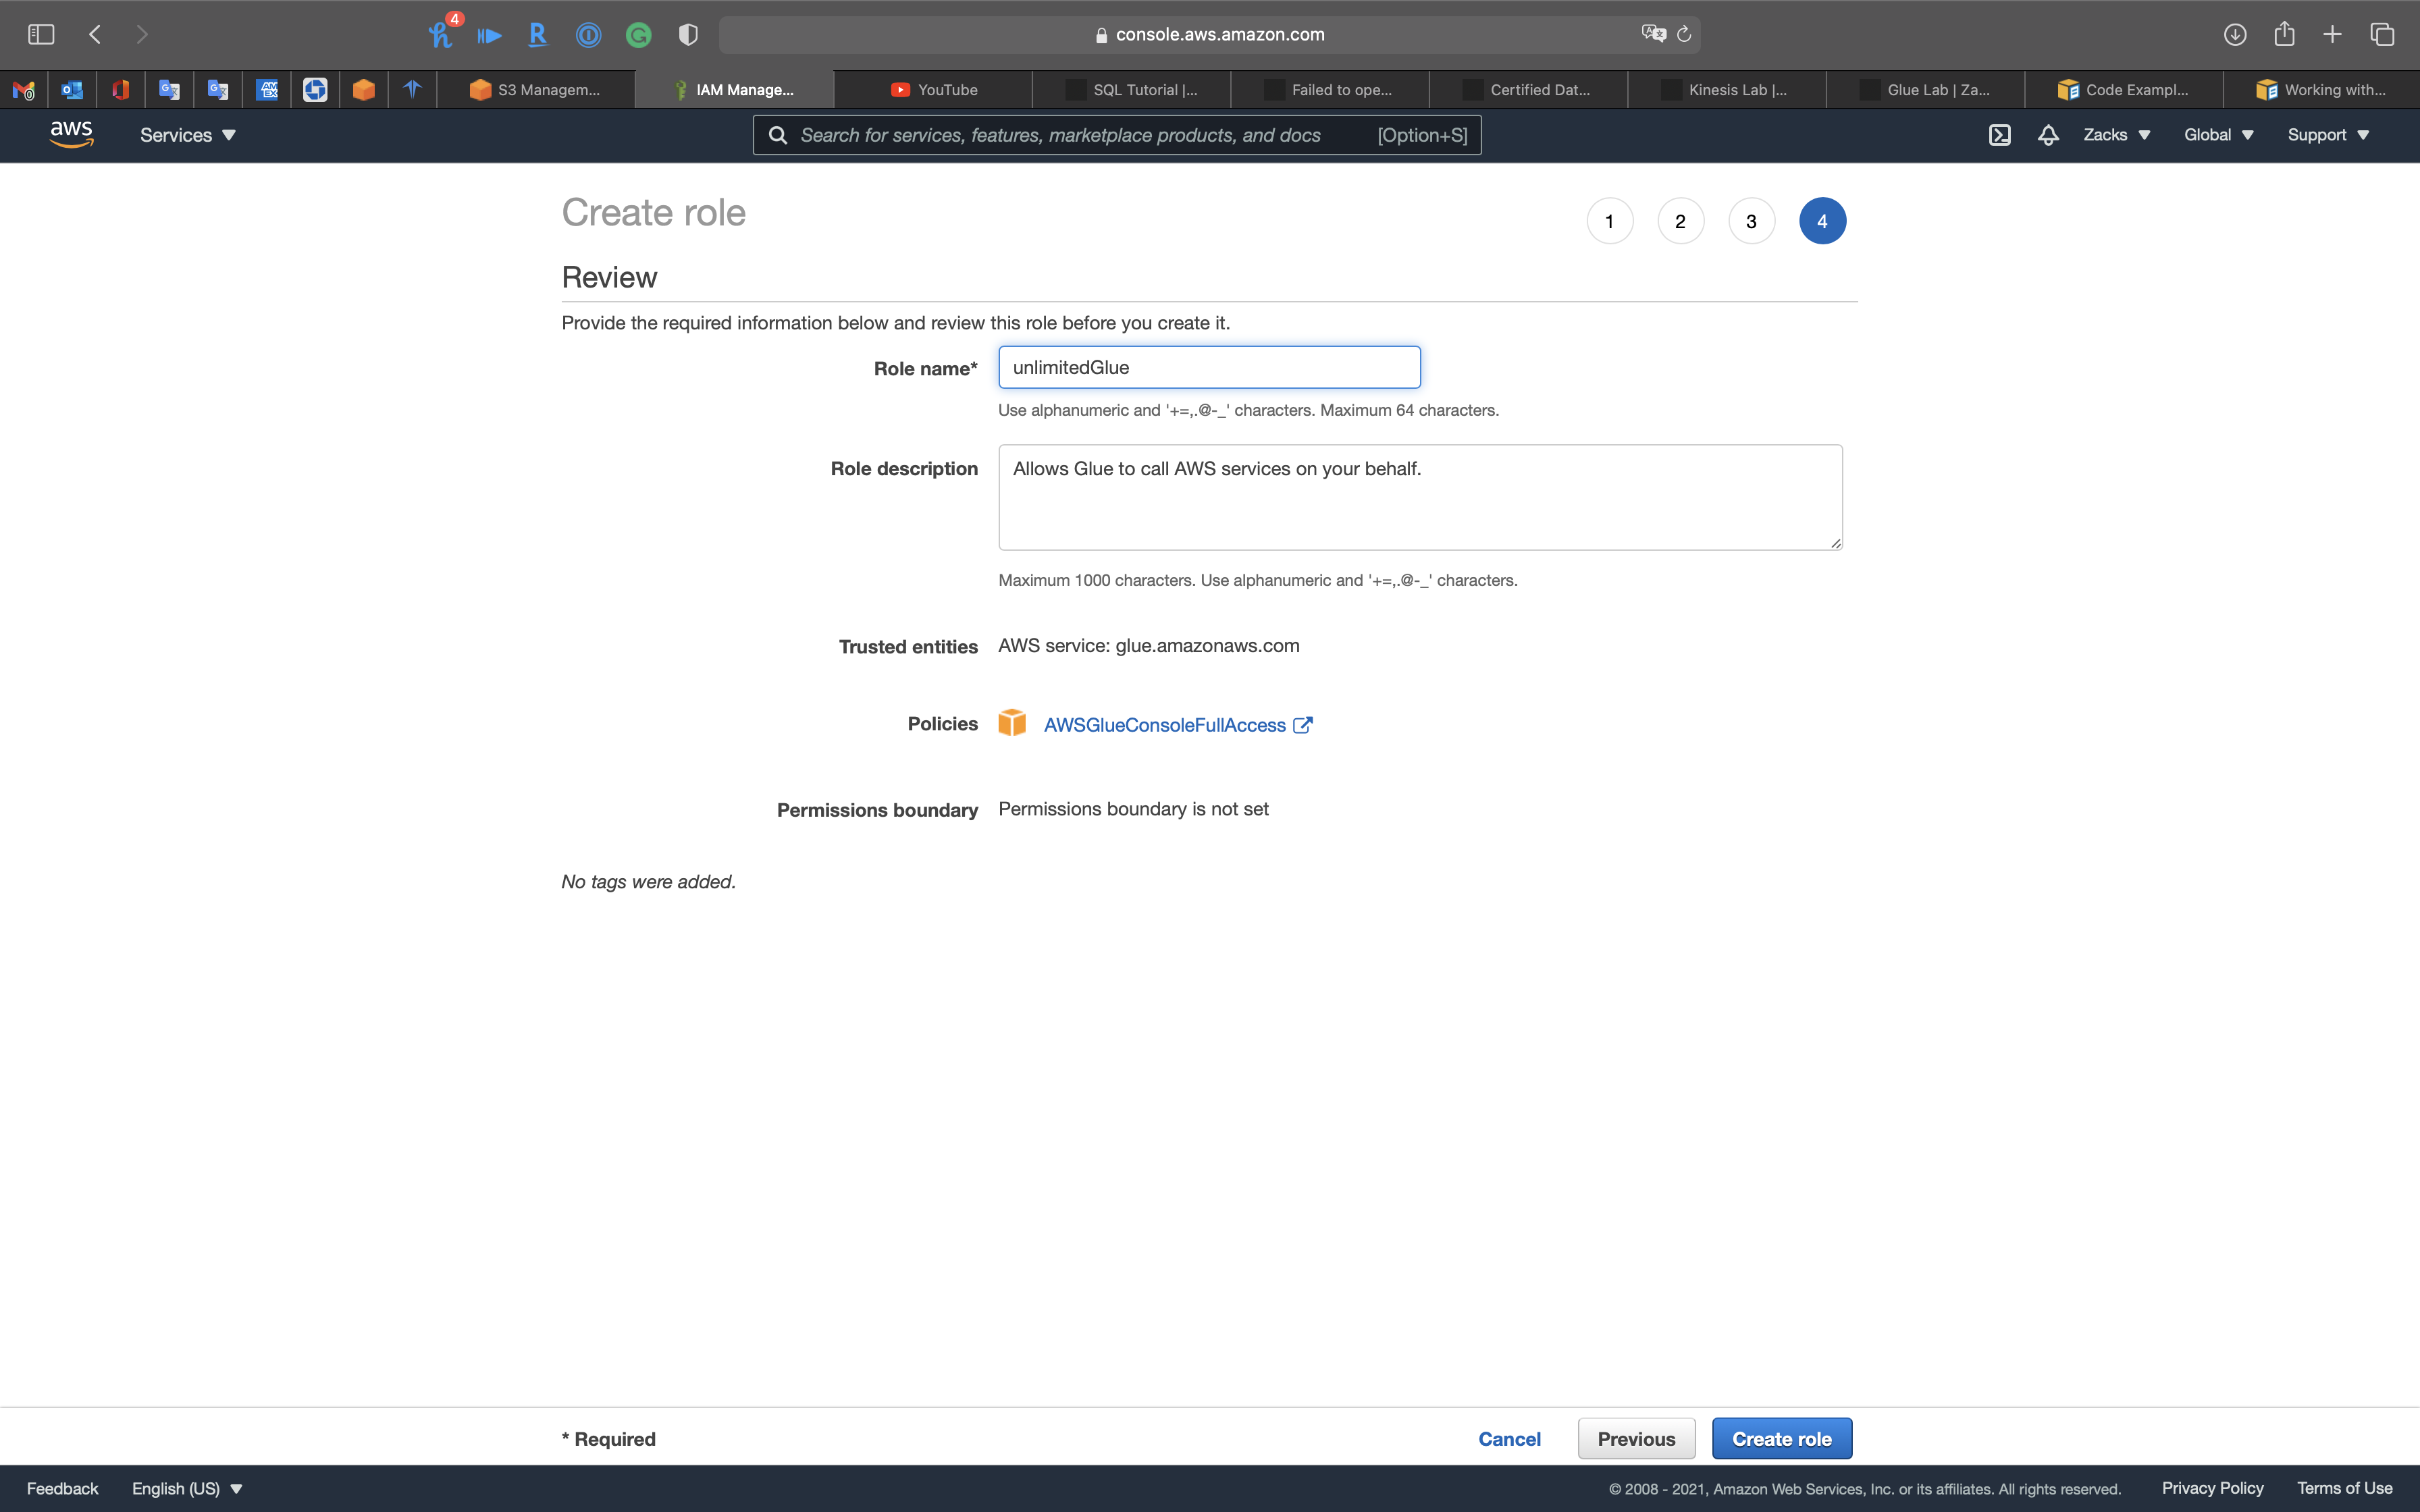
- IAM role:
unlimitedGlue
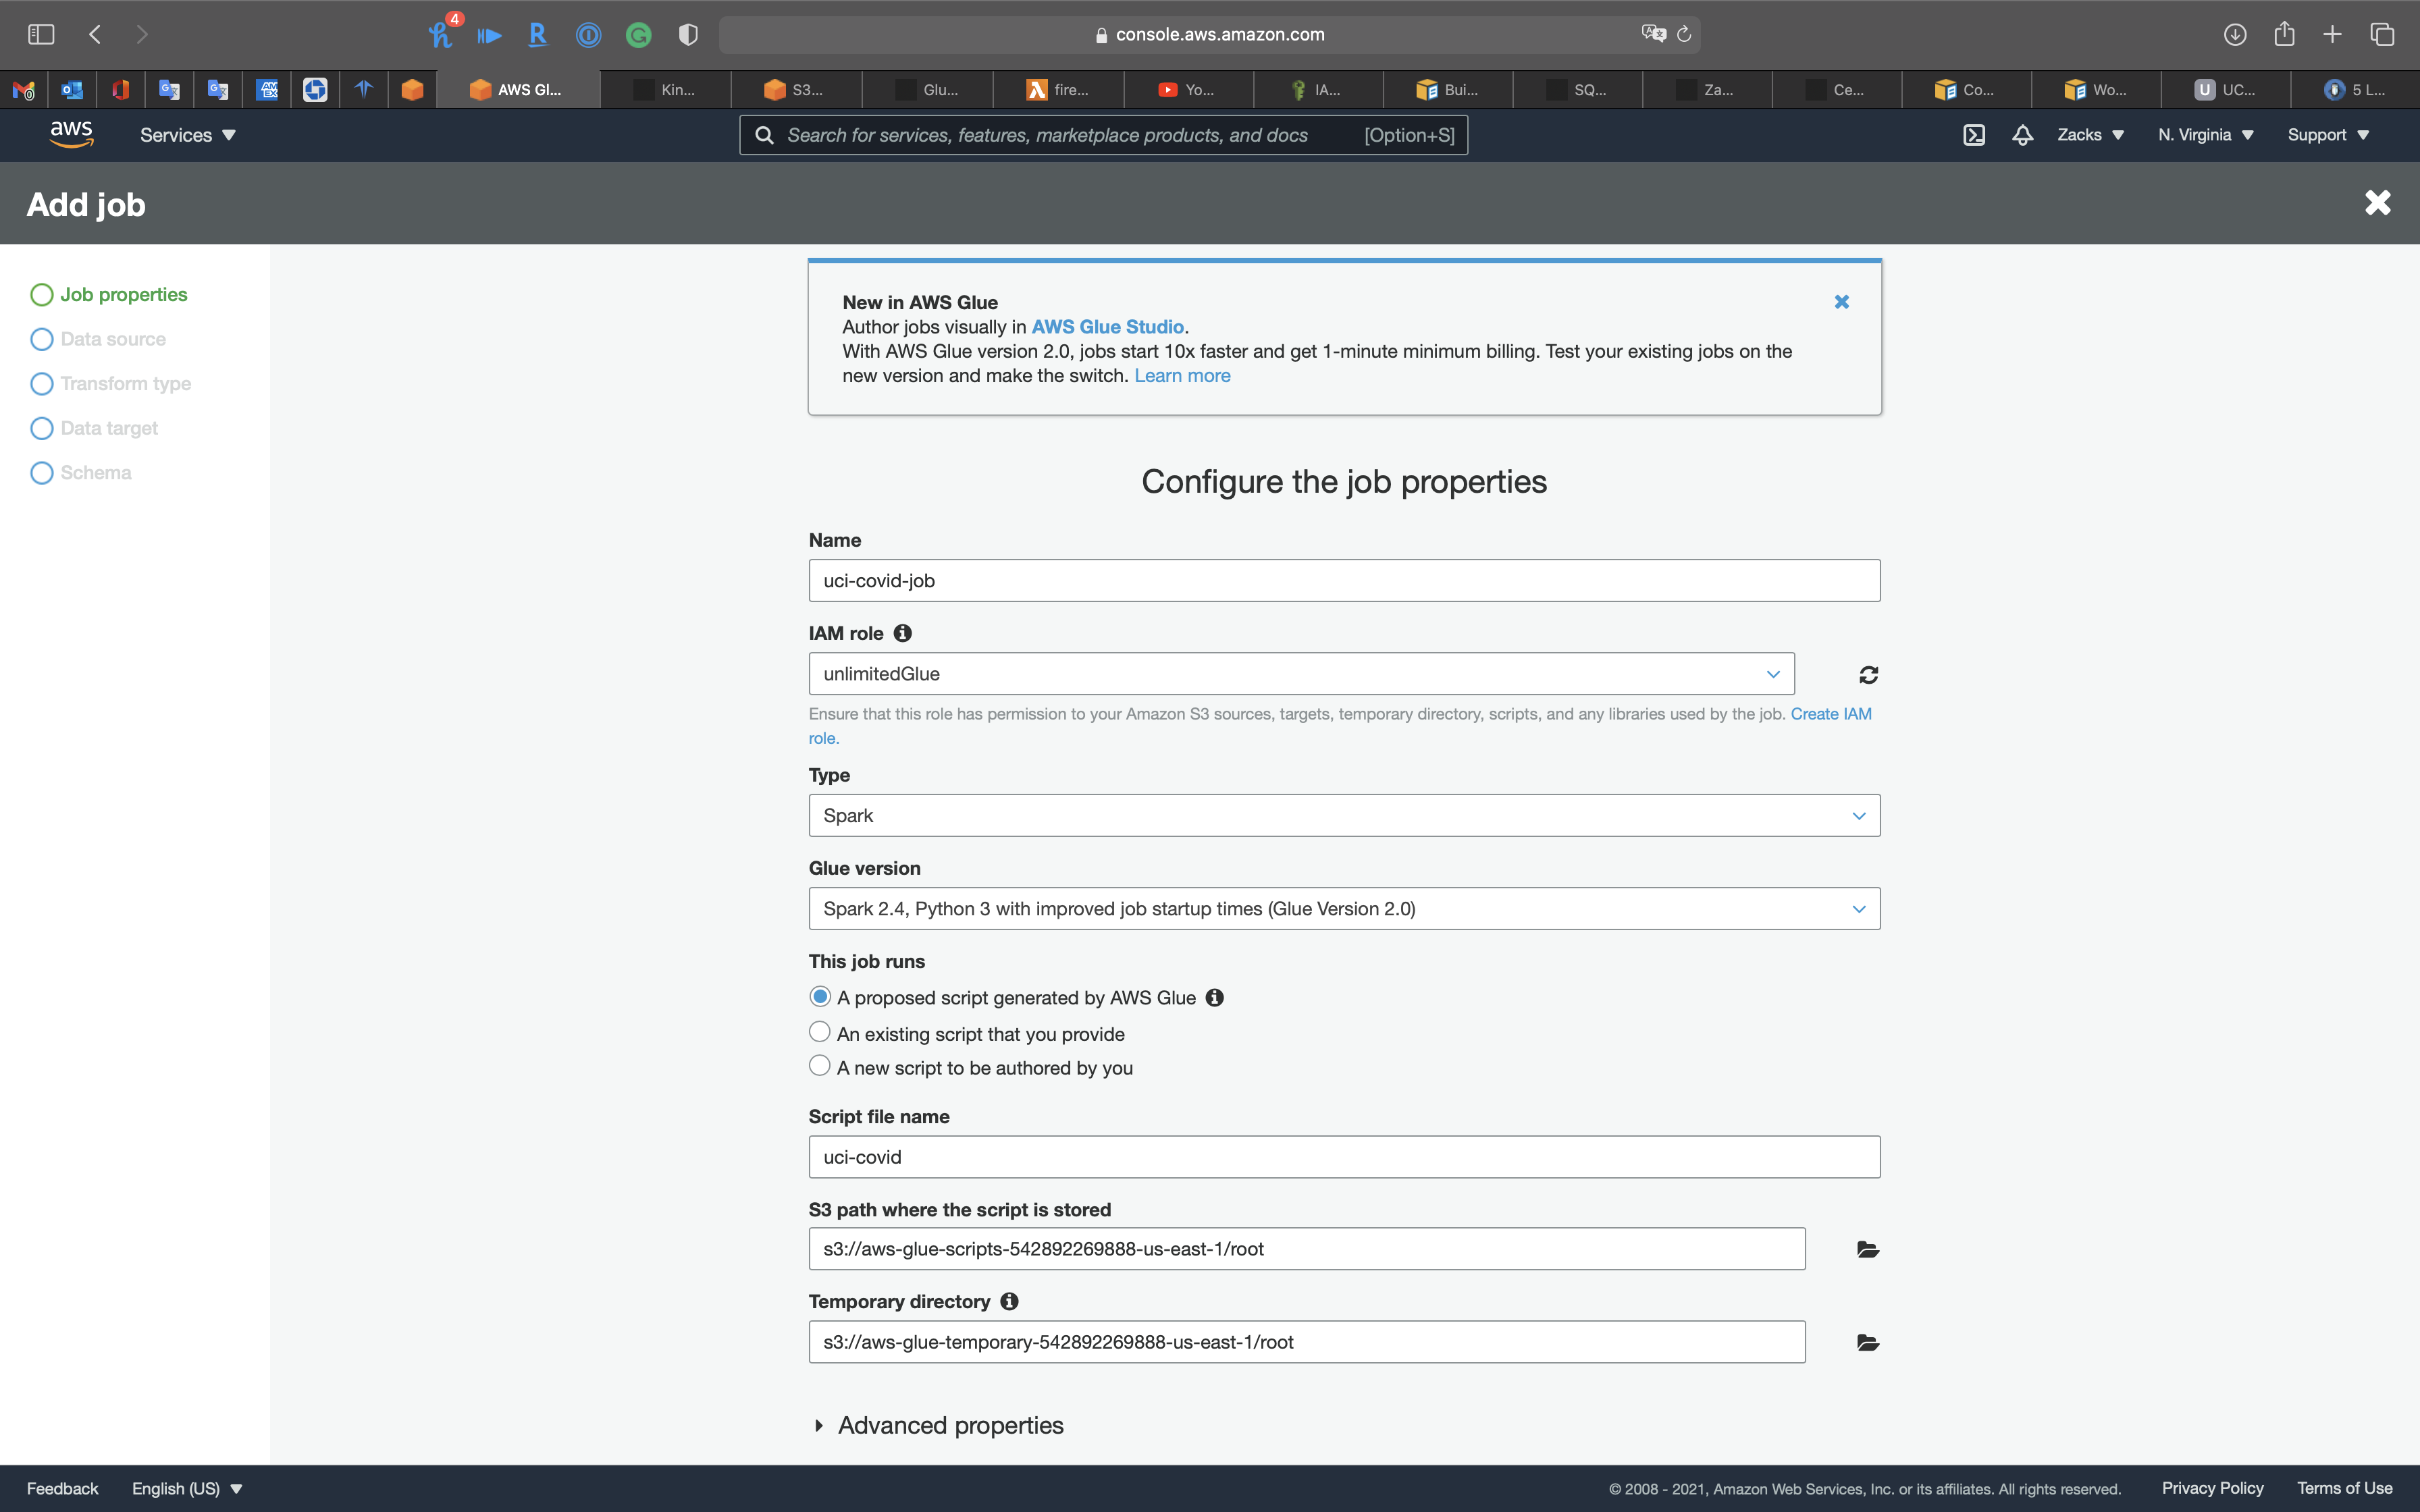
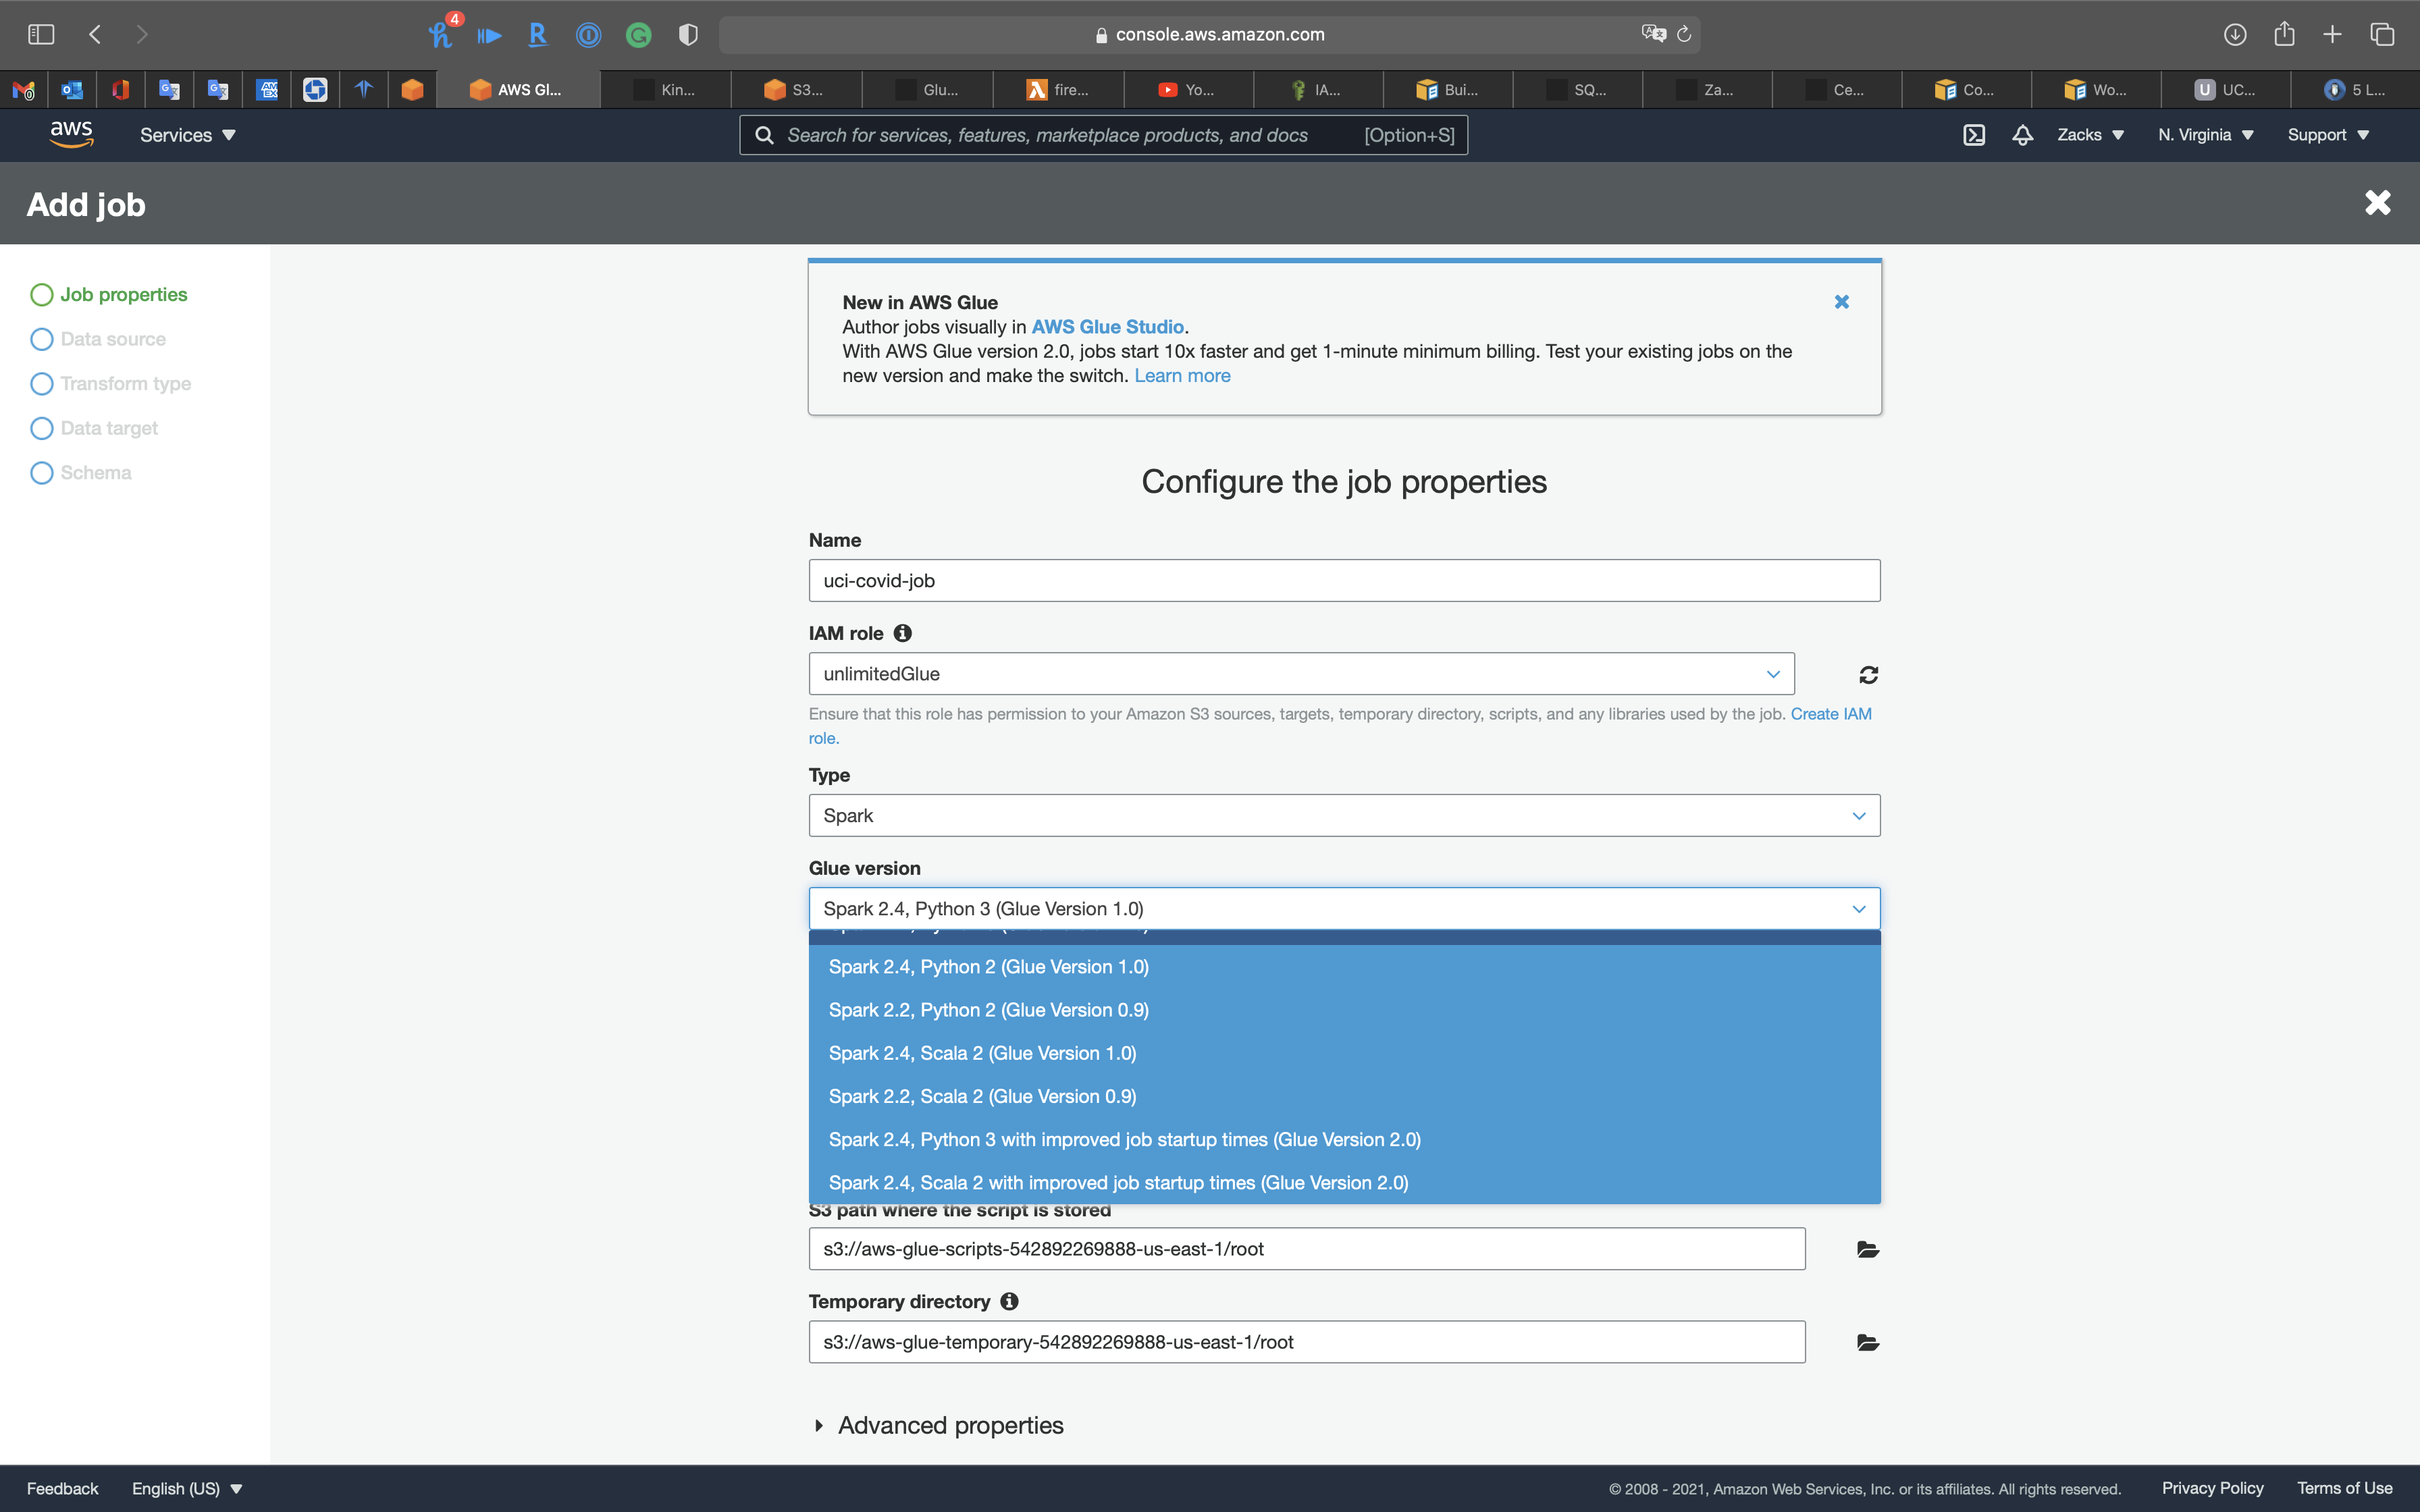
- Type:
Spark - Glue version:
Spark 2.4, Python 3 (Glue Version 1.0) - This job runs:
A proposed script generated by AWS Glue
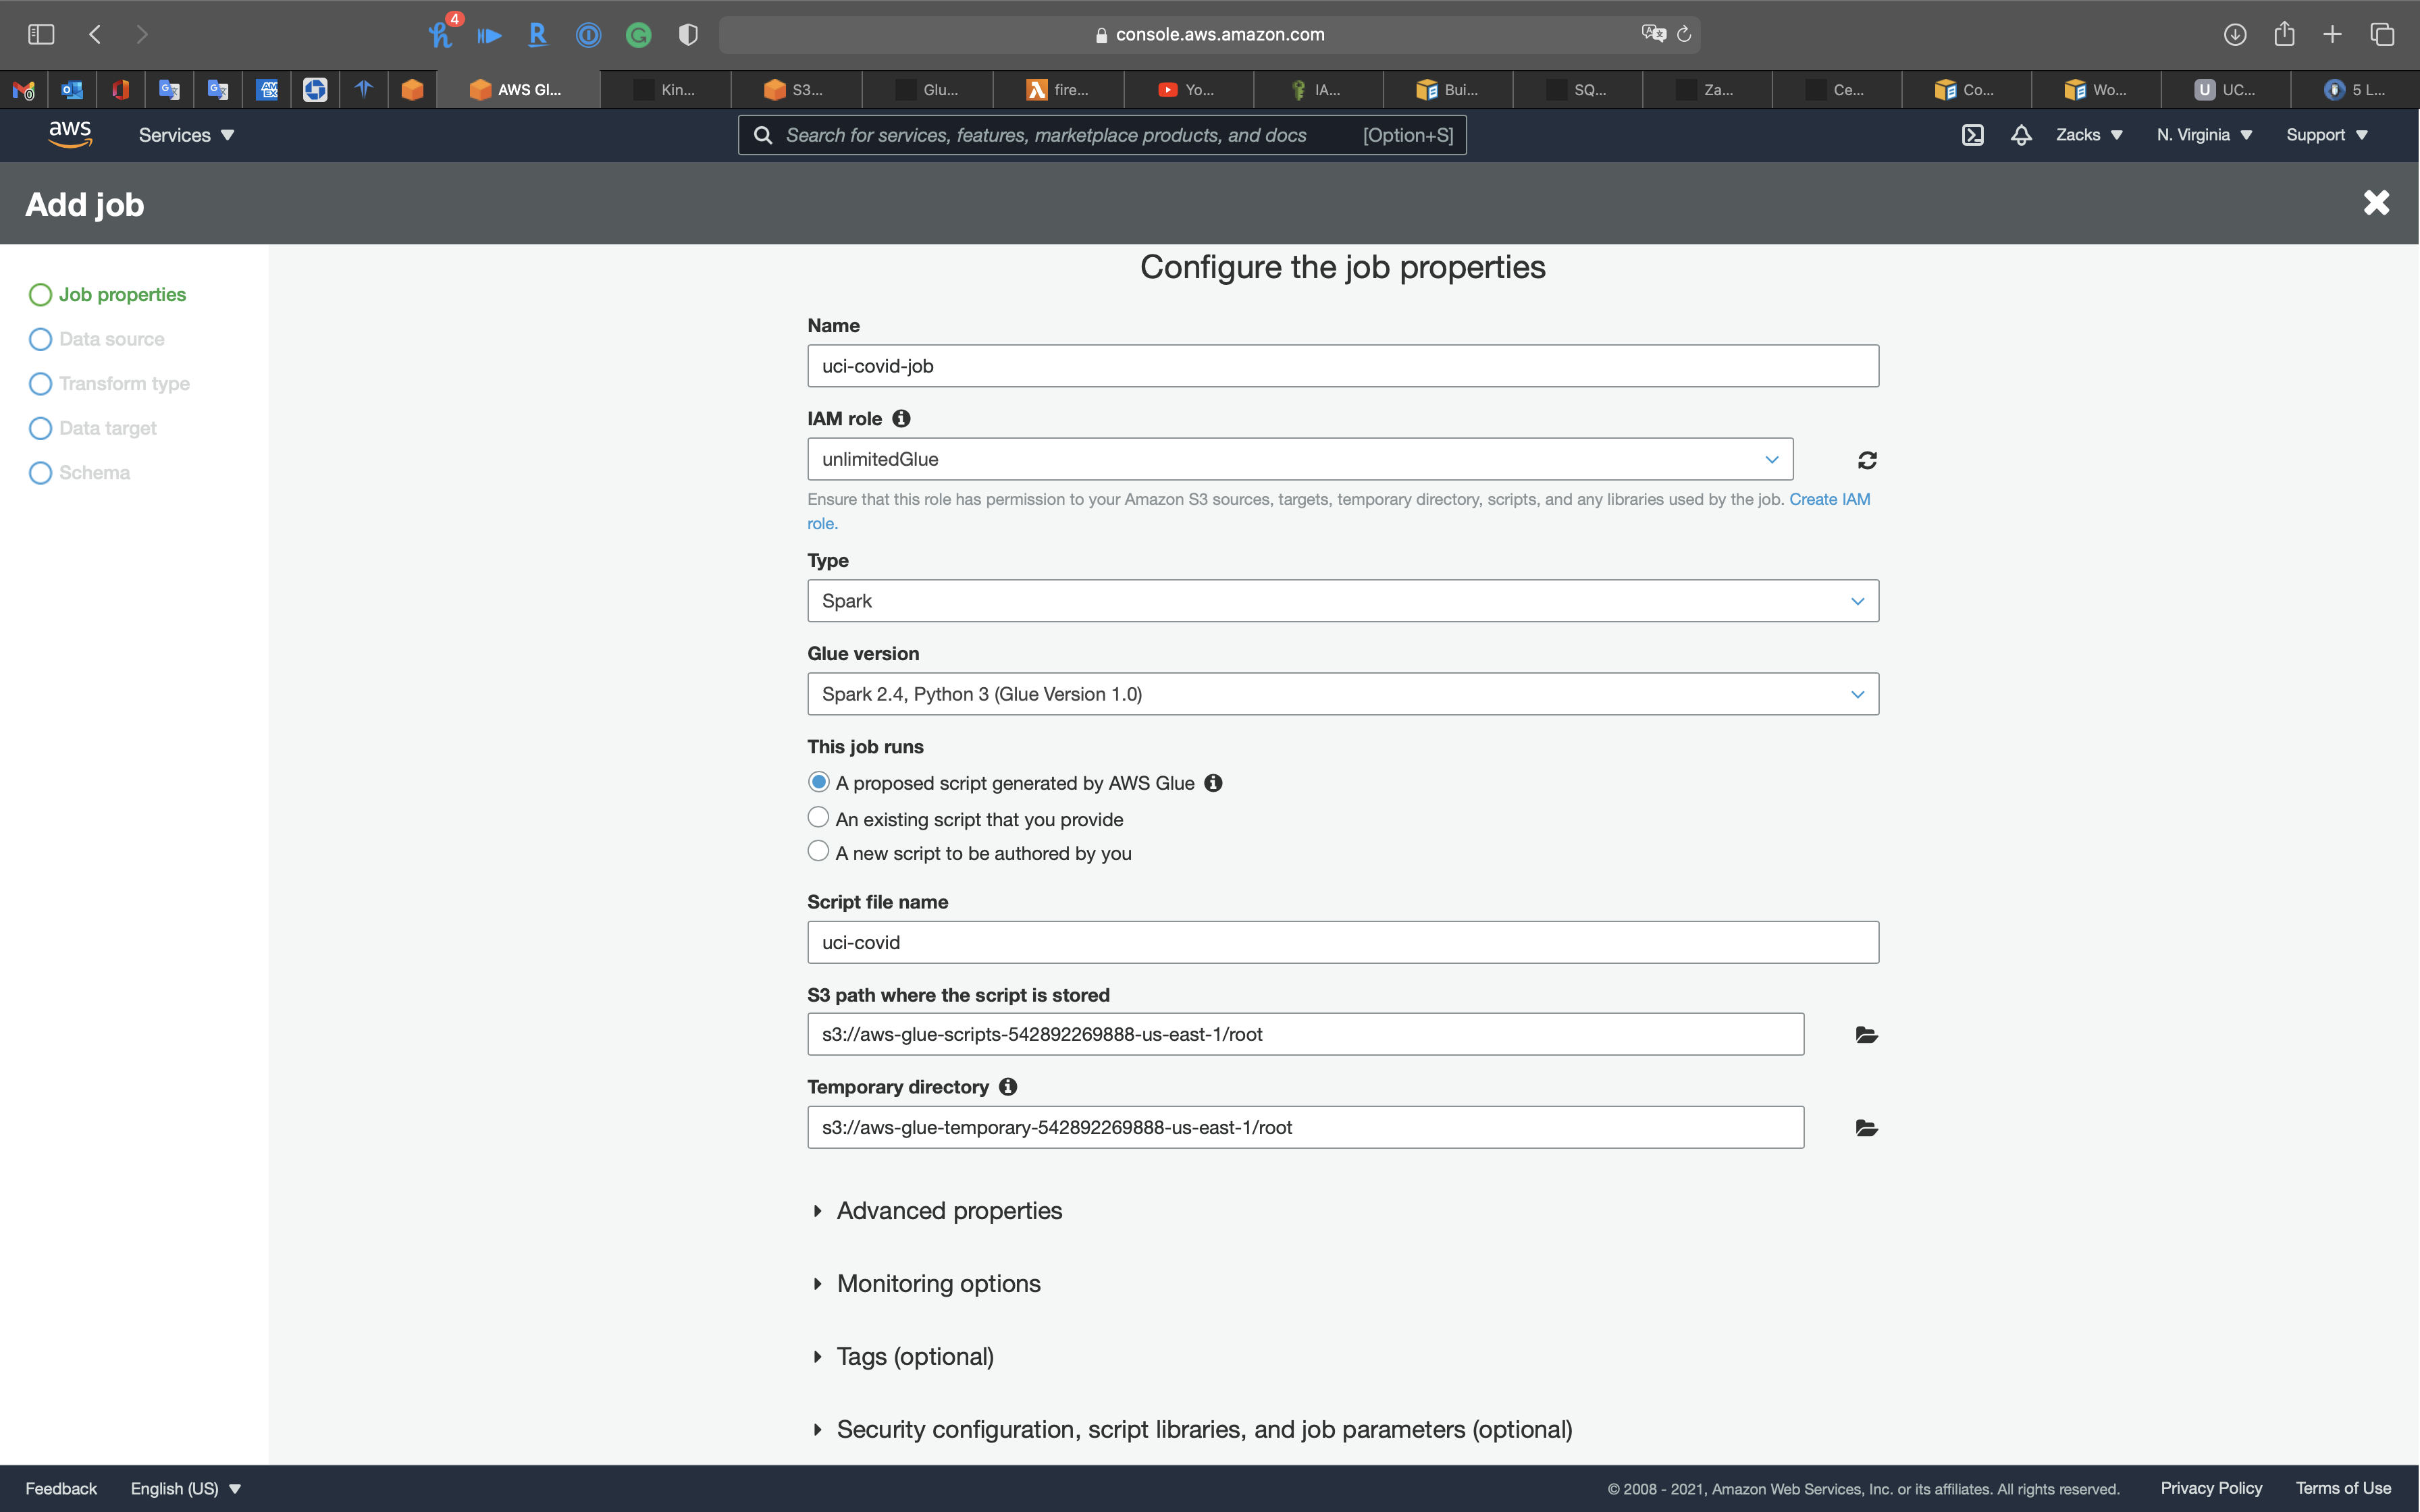
Expand Advanced properties
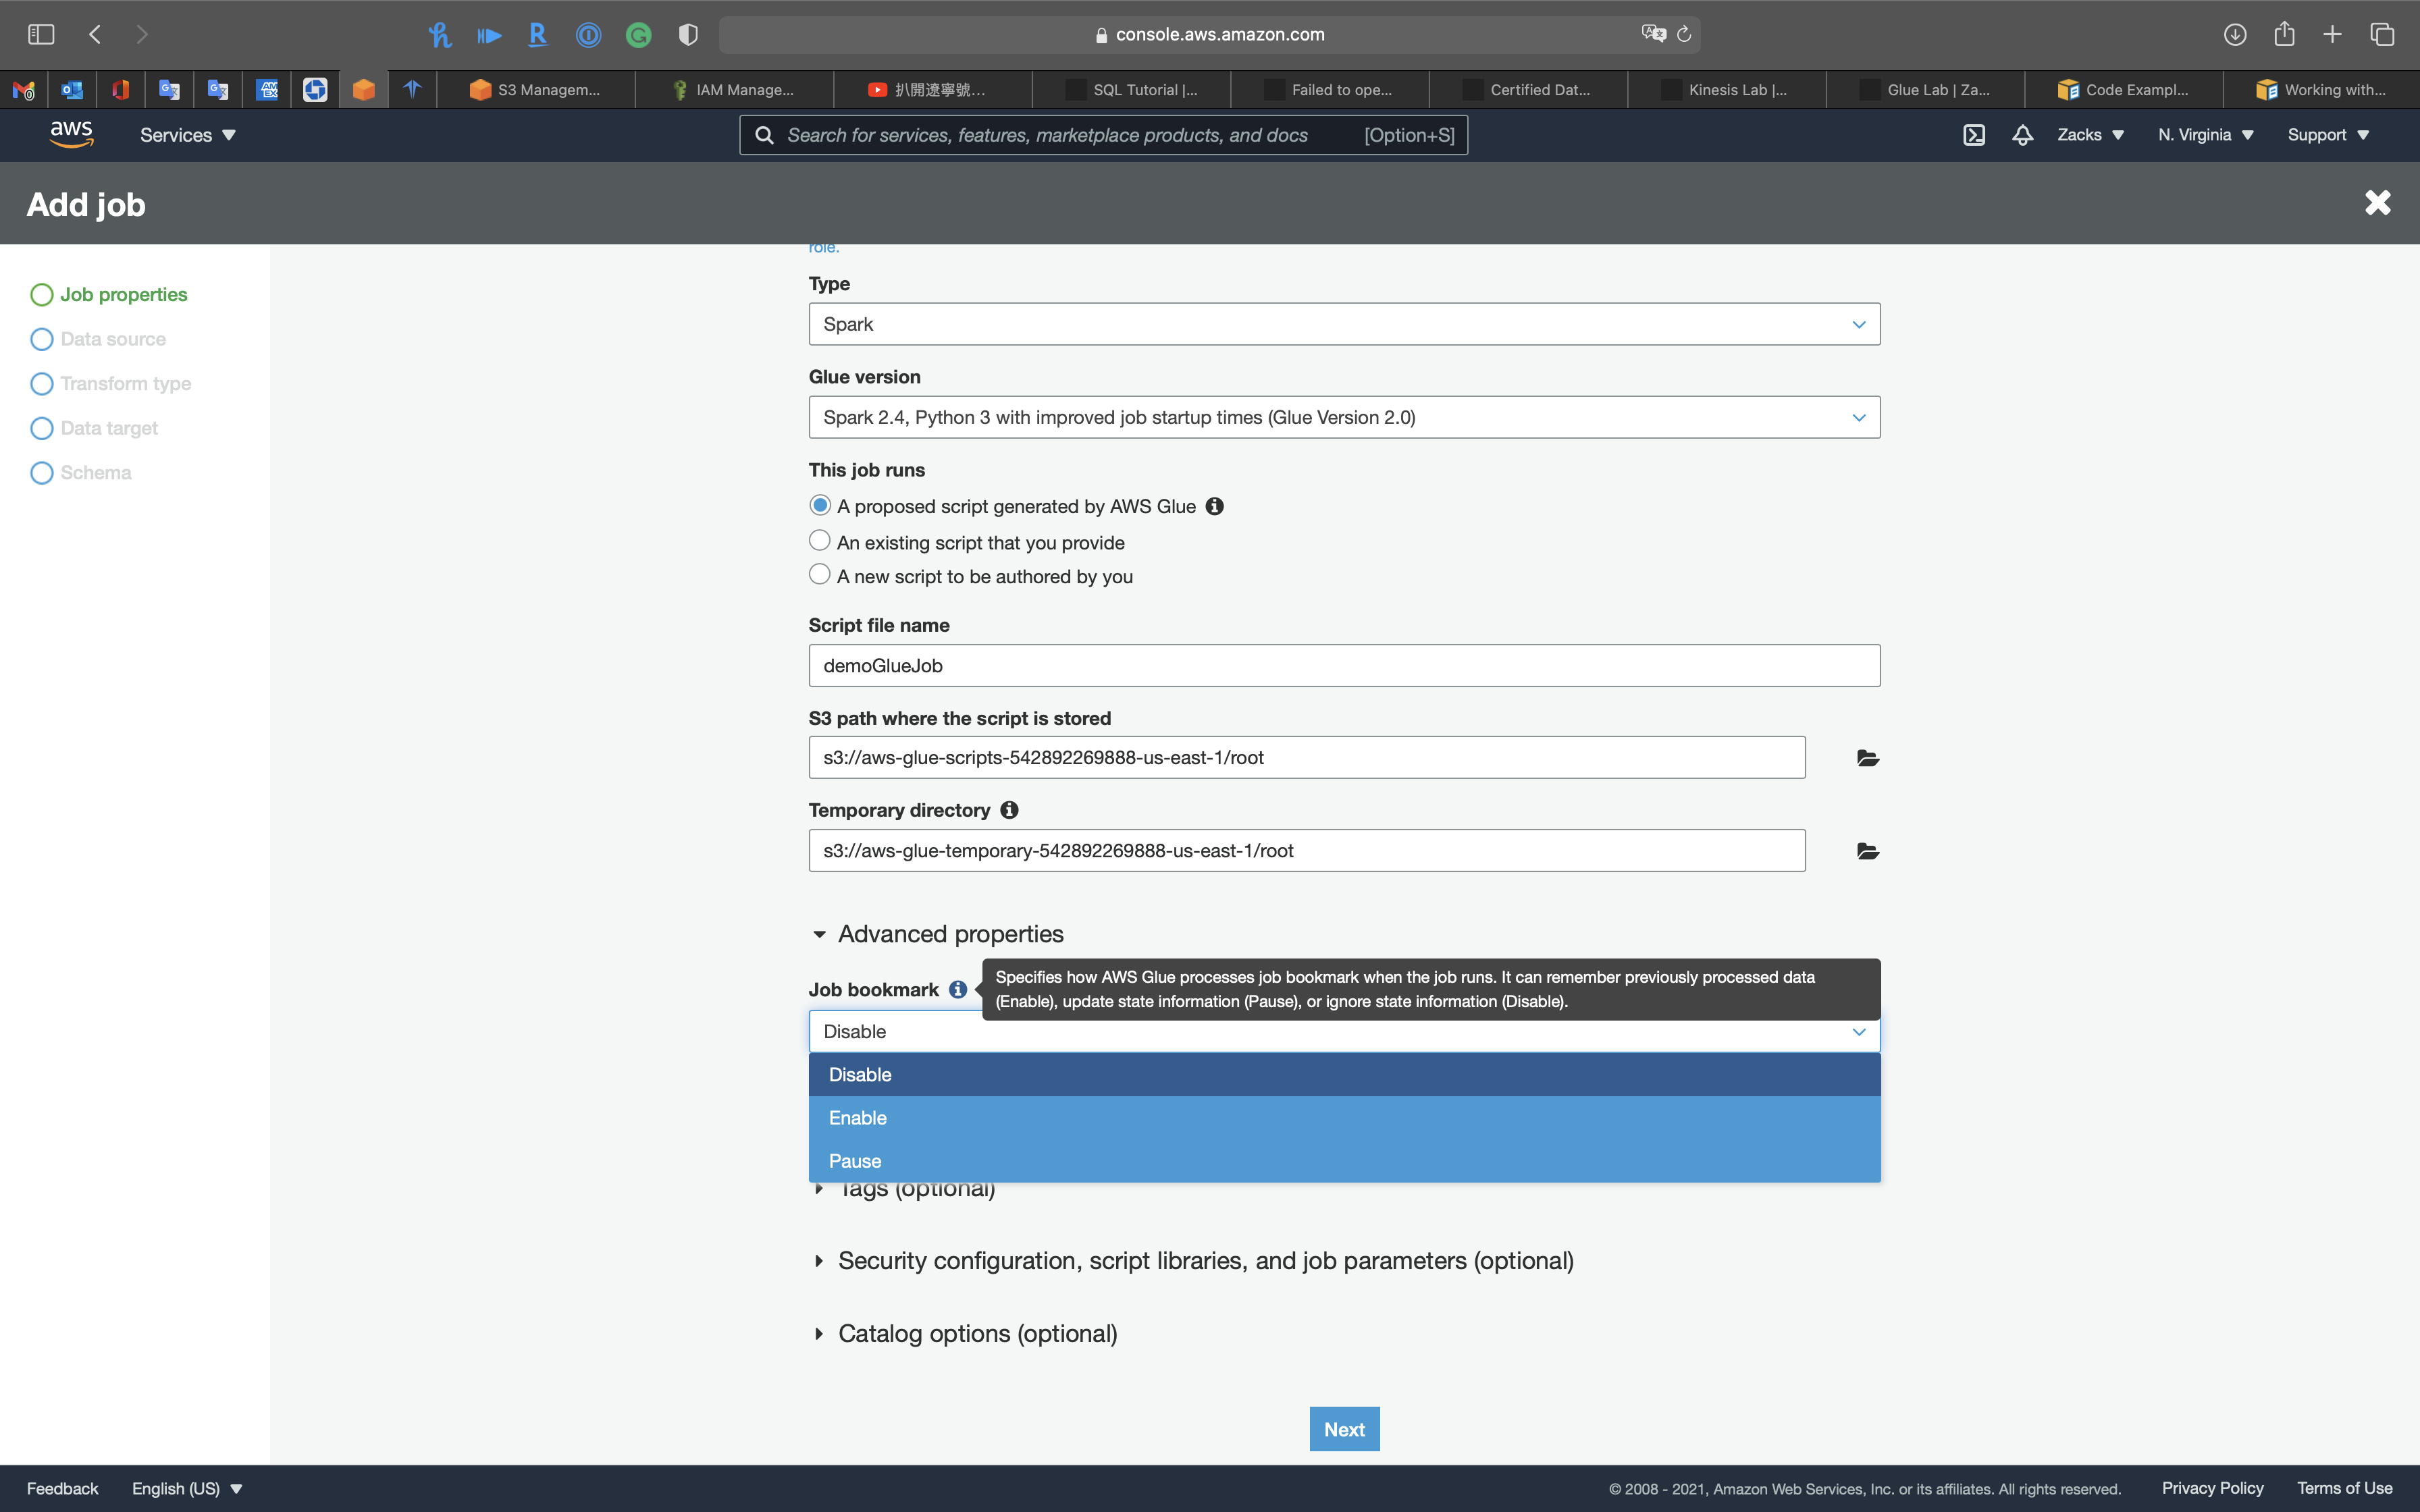
Expand Monitoring options
- Job bookmark: Specifies how AWS Glue processes job bookmark when the job runs. It can remember previously processed data (Enable), update state information (Pause), or ignore state information (Disable).
- Disable
Expand Security configuration, script libraries, and job parameters (optional)
Security configuration:
glueDemoSecurityWorker type:
Standard- Standard
- G.1X(Recommended for memory-intensive jobs)
- G.2X(Recommended for jobs with ML transforms)
Number of workers: The maximum number of workers you can define are
299forG.1X, and149forG.2X.Max concurrency: Sets the maximum number of concurrent runs that are allowed for this job. An error is returned when this threshold is reached. The default is
1.Job timeout (minutes): Set the execution time limit in minutes.
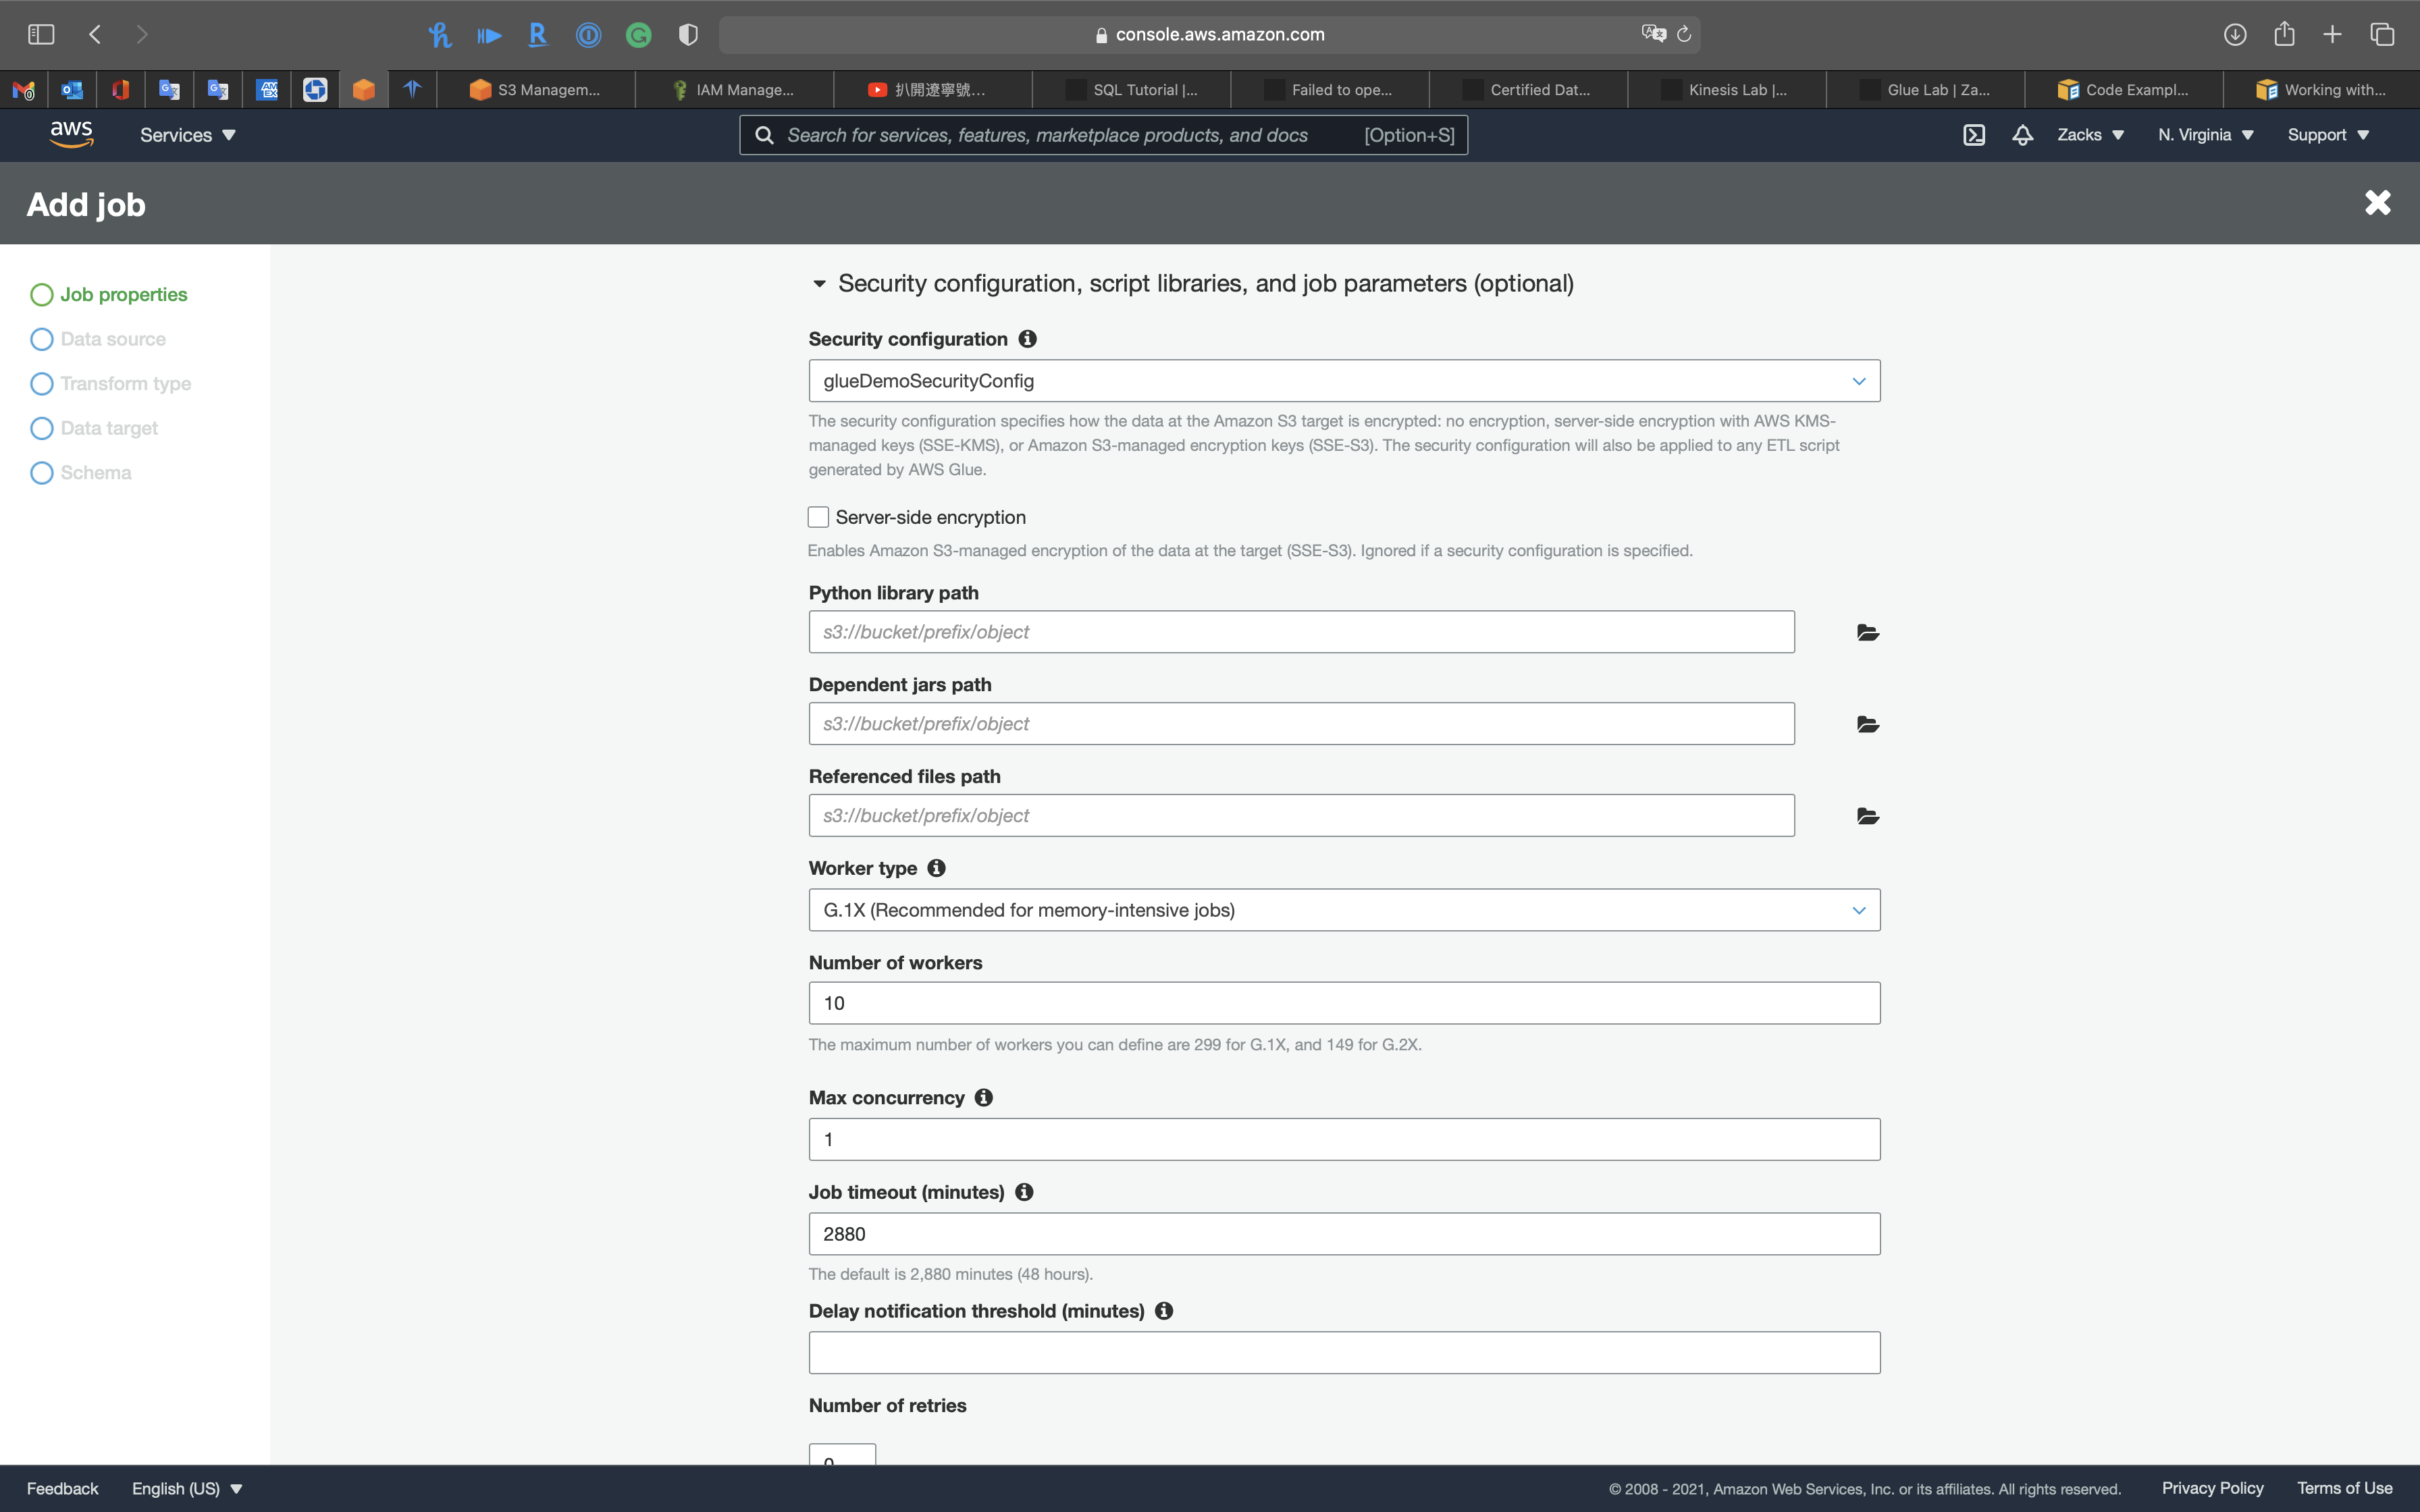
Delay notification threshold (minutes): Set a delay threshold in minutes. If the job runs longer than the specified time Glue will send a delay notification via CloudWatch
Catalog options (optional): To use Glue data catalog as the Hive metastore, the IAM role used for the job should have glue:CreateDatabase permissions. A database called “default” is created in the Glue catalog if it does not exist.
Click on Next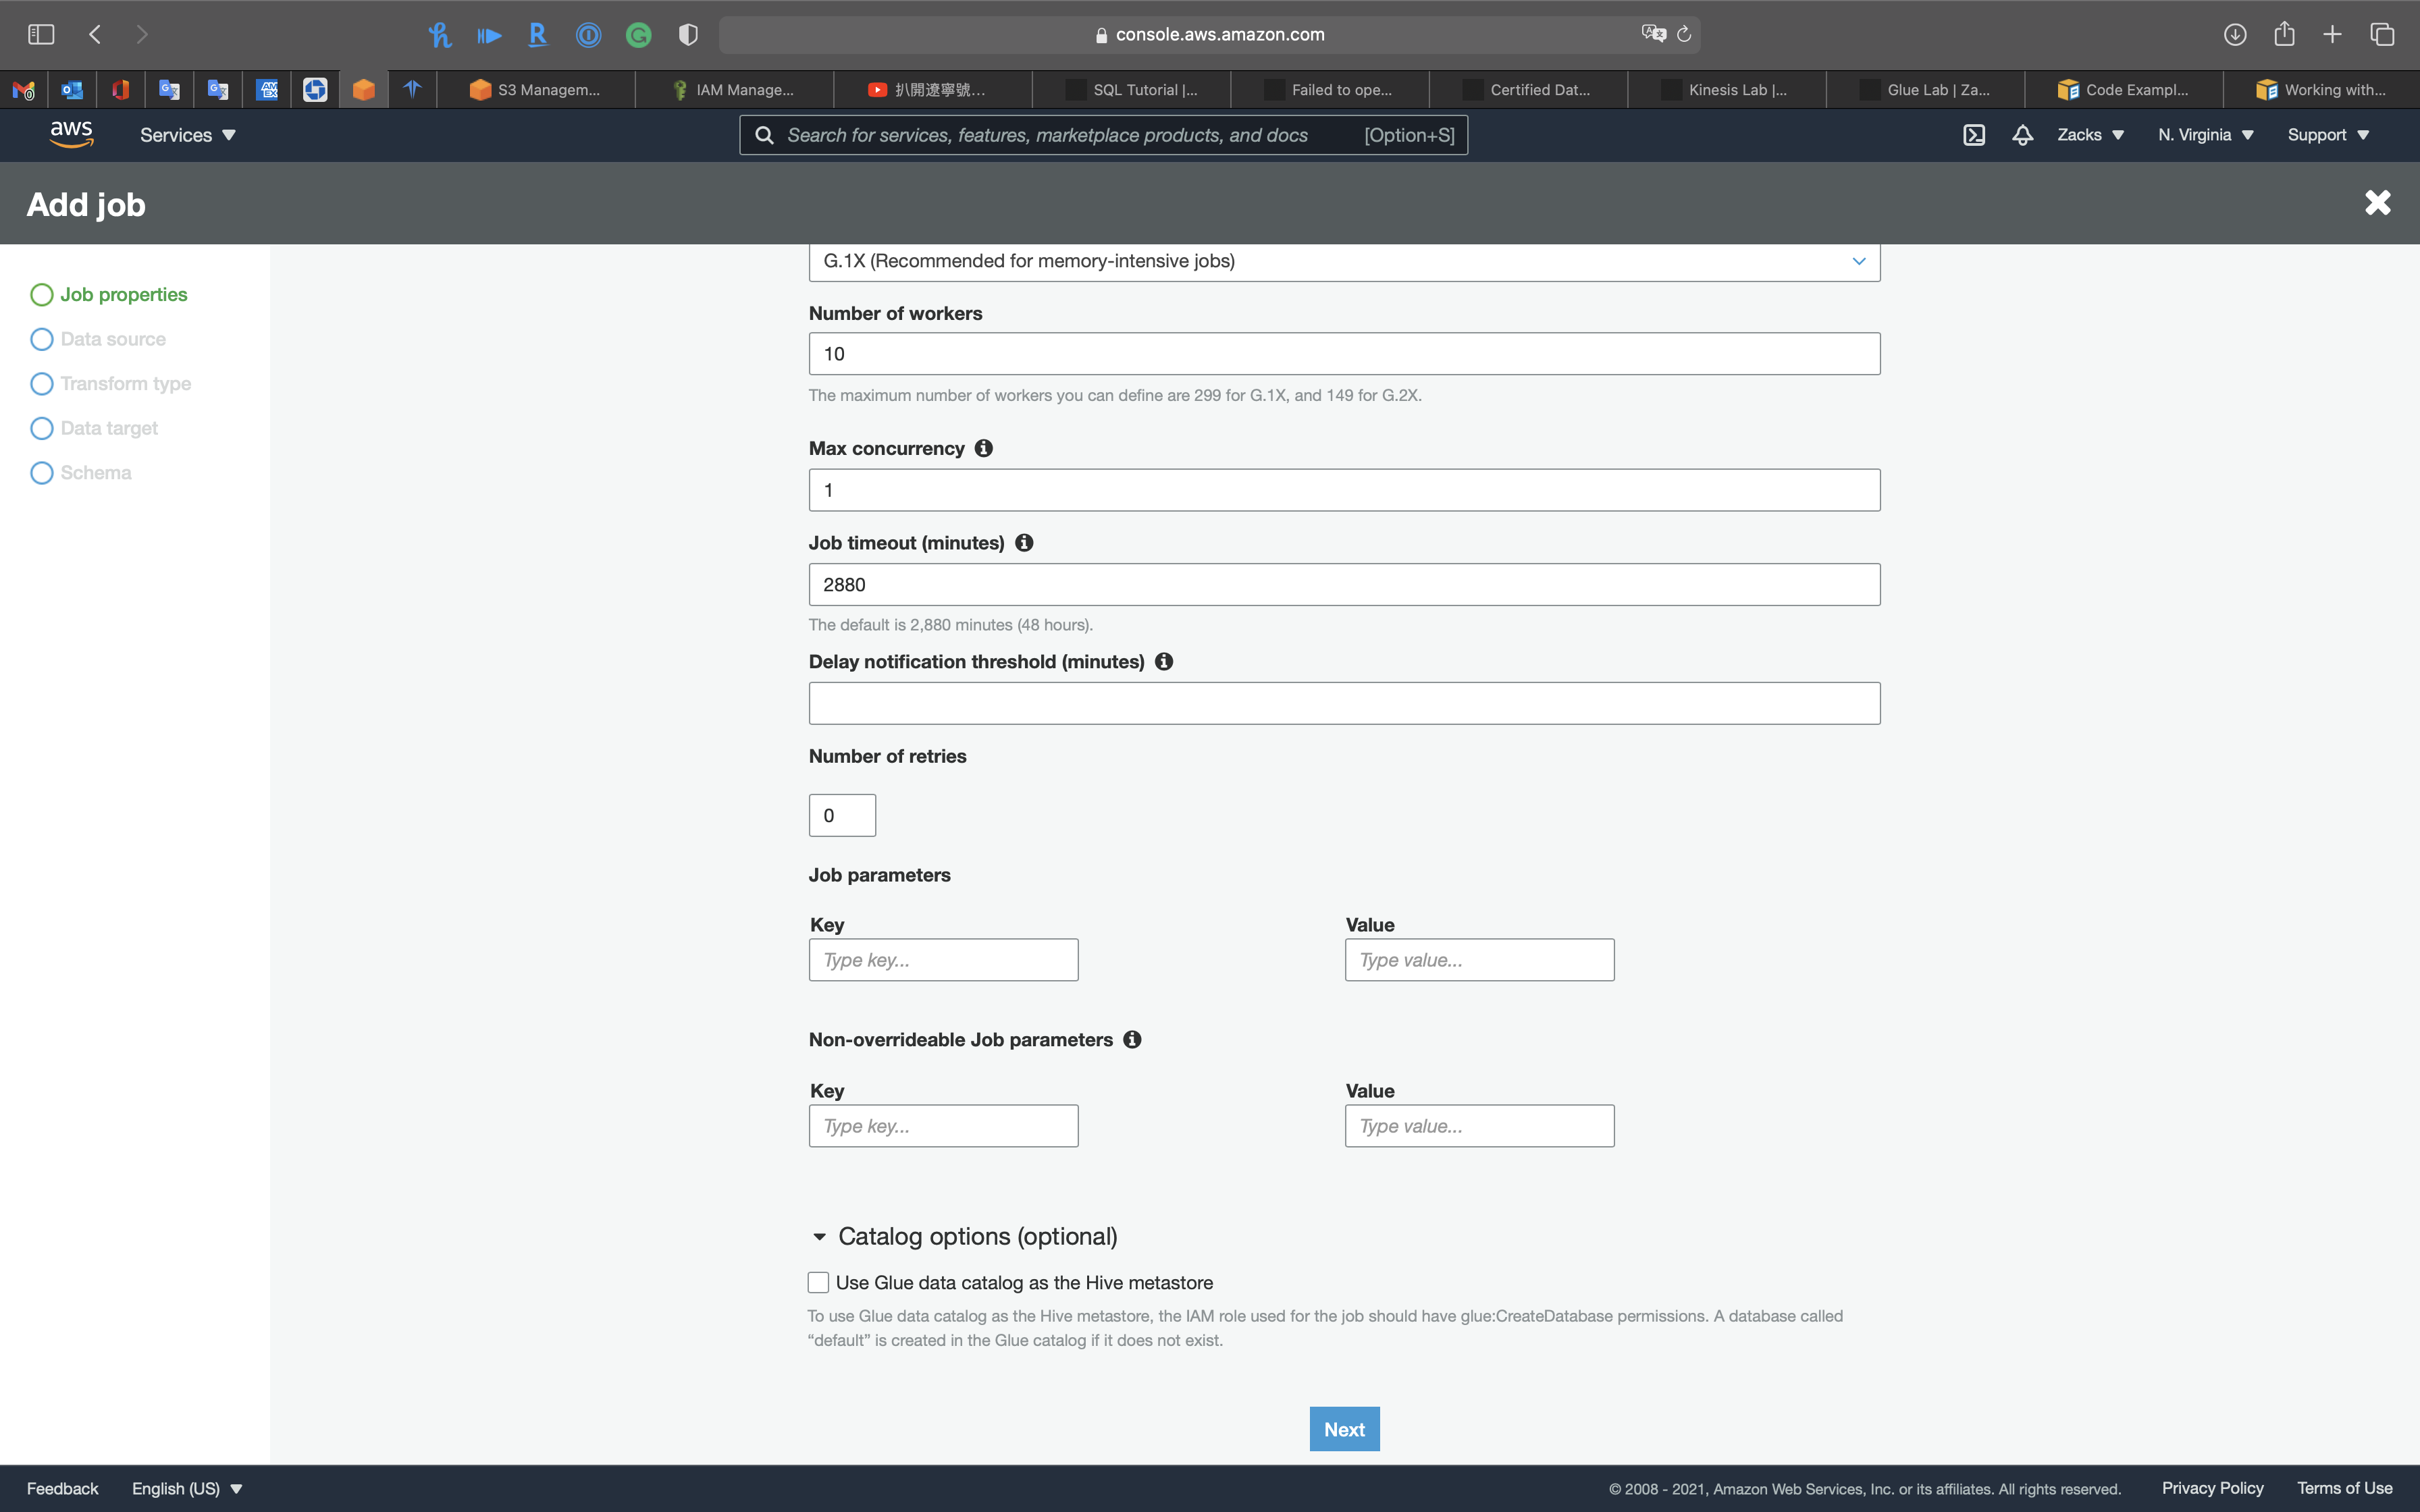
Data source
Select the data source you created before.
Click on Next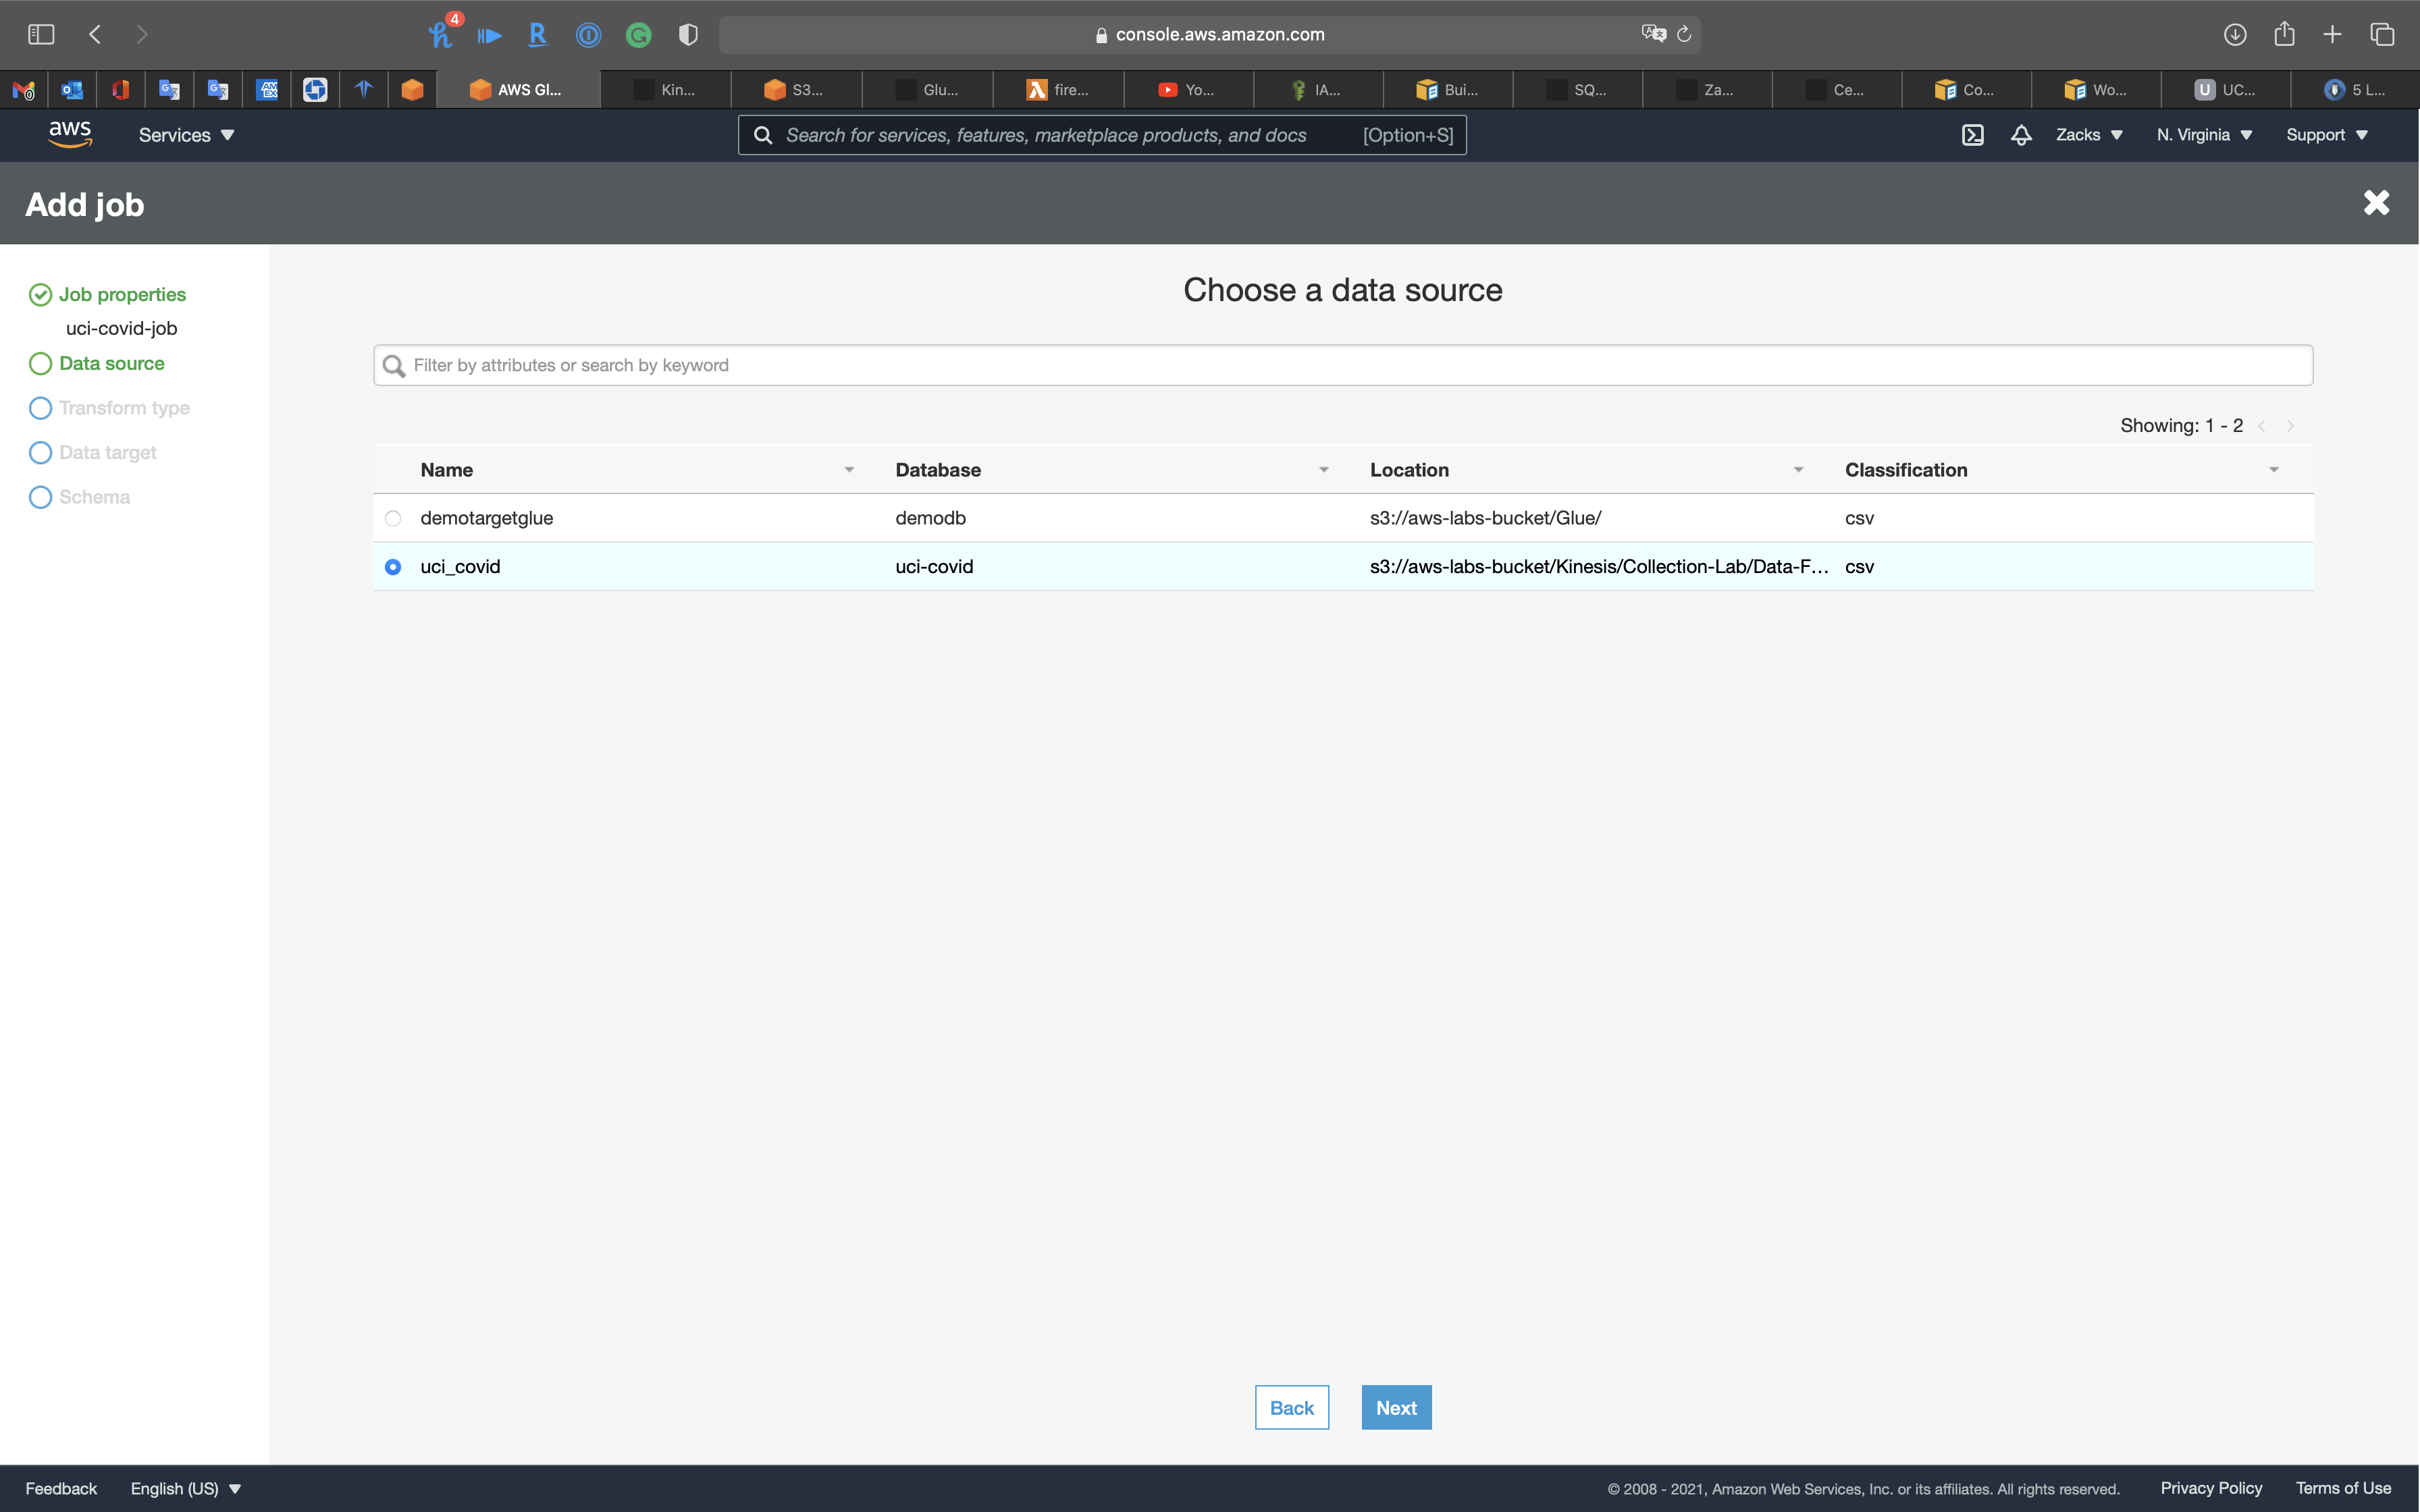
Transform type
- Change schema: Change schema of your source data and create a new target dataset
- Find matching records: Use machine learning to find matching records within your source data
- Remove duplicate records: When records match, the record with the lowest primary key value survives.
- Worker type: Set the type of predefined worker that is allocated when a job runs.
- Maximum capacity: Set the maximum number of AWS Glue data processing units (DPUs) that can be allocated when a job runs.
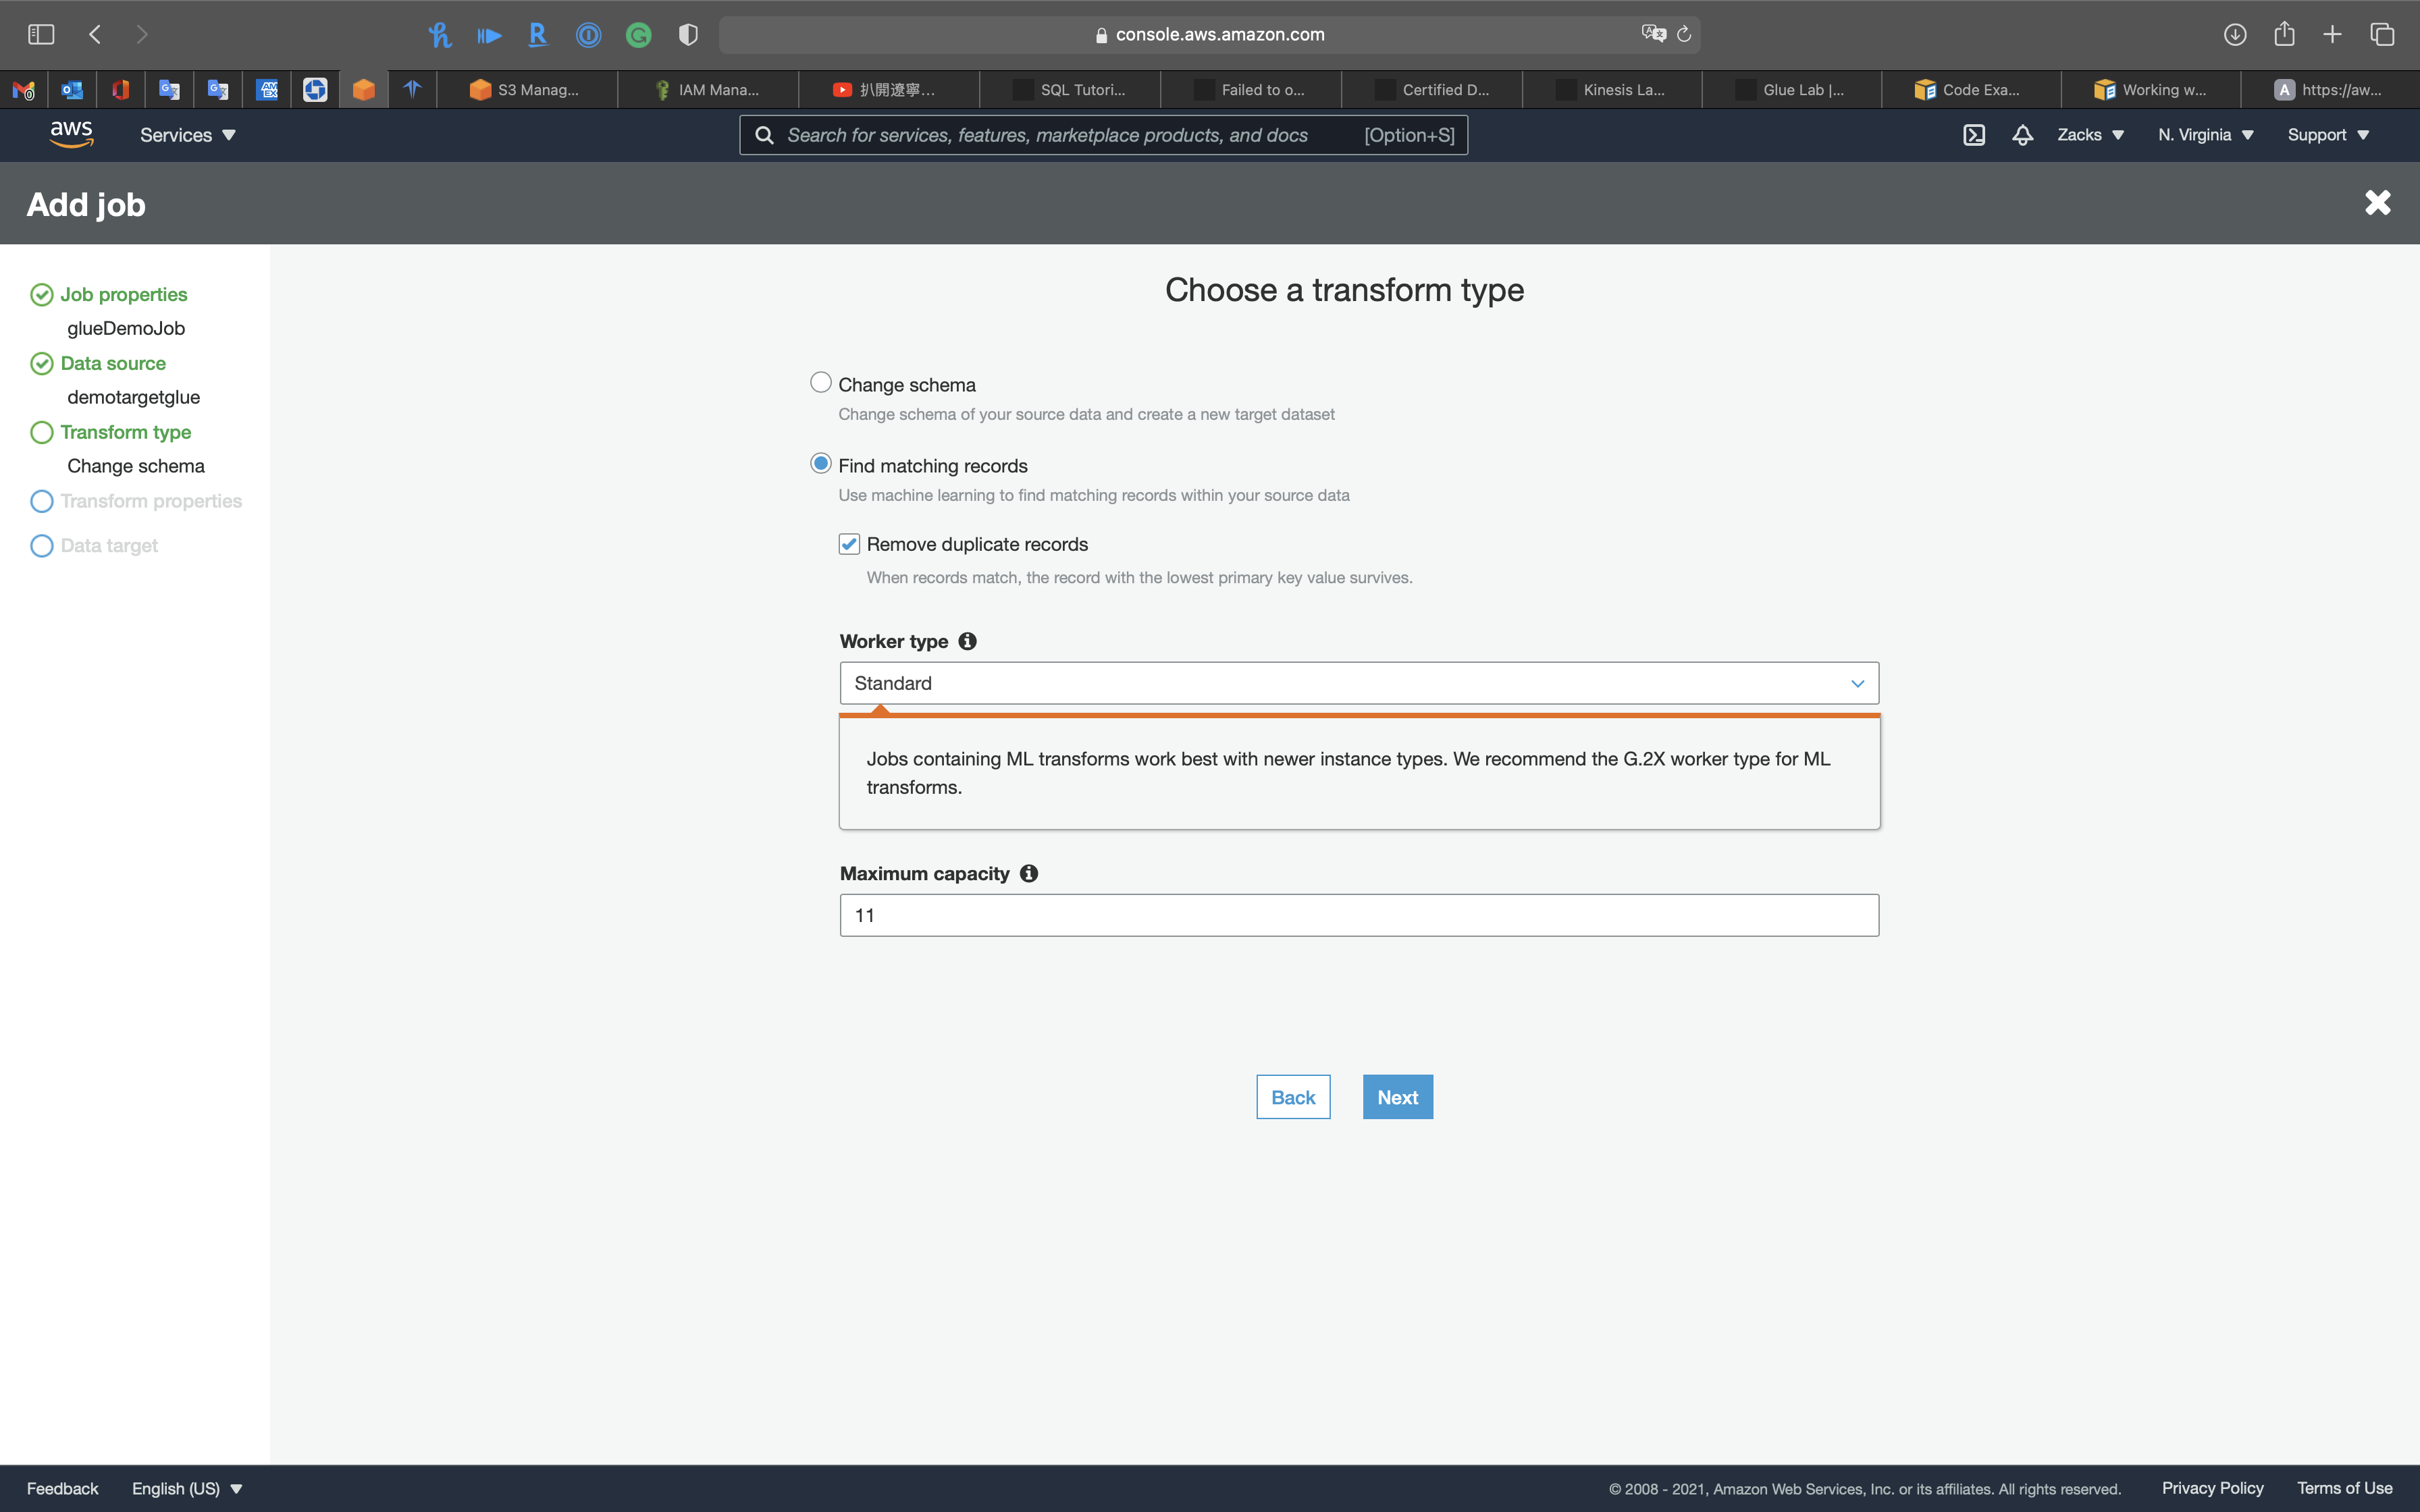
Select Change schema then click on Next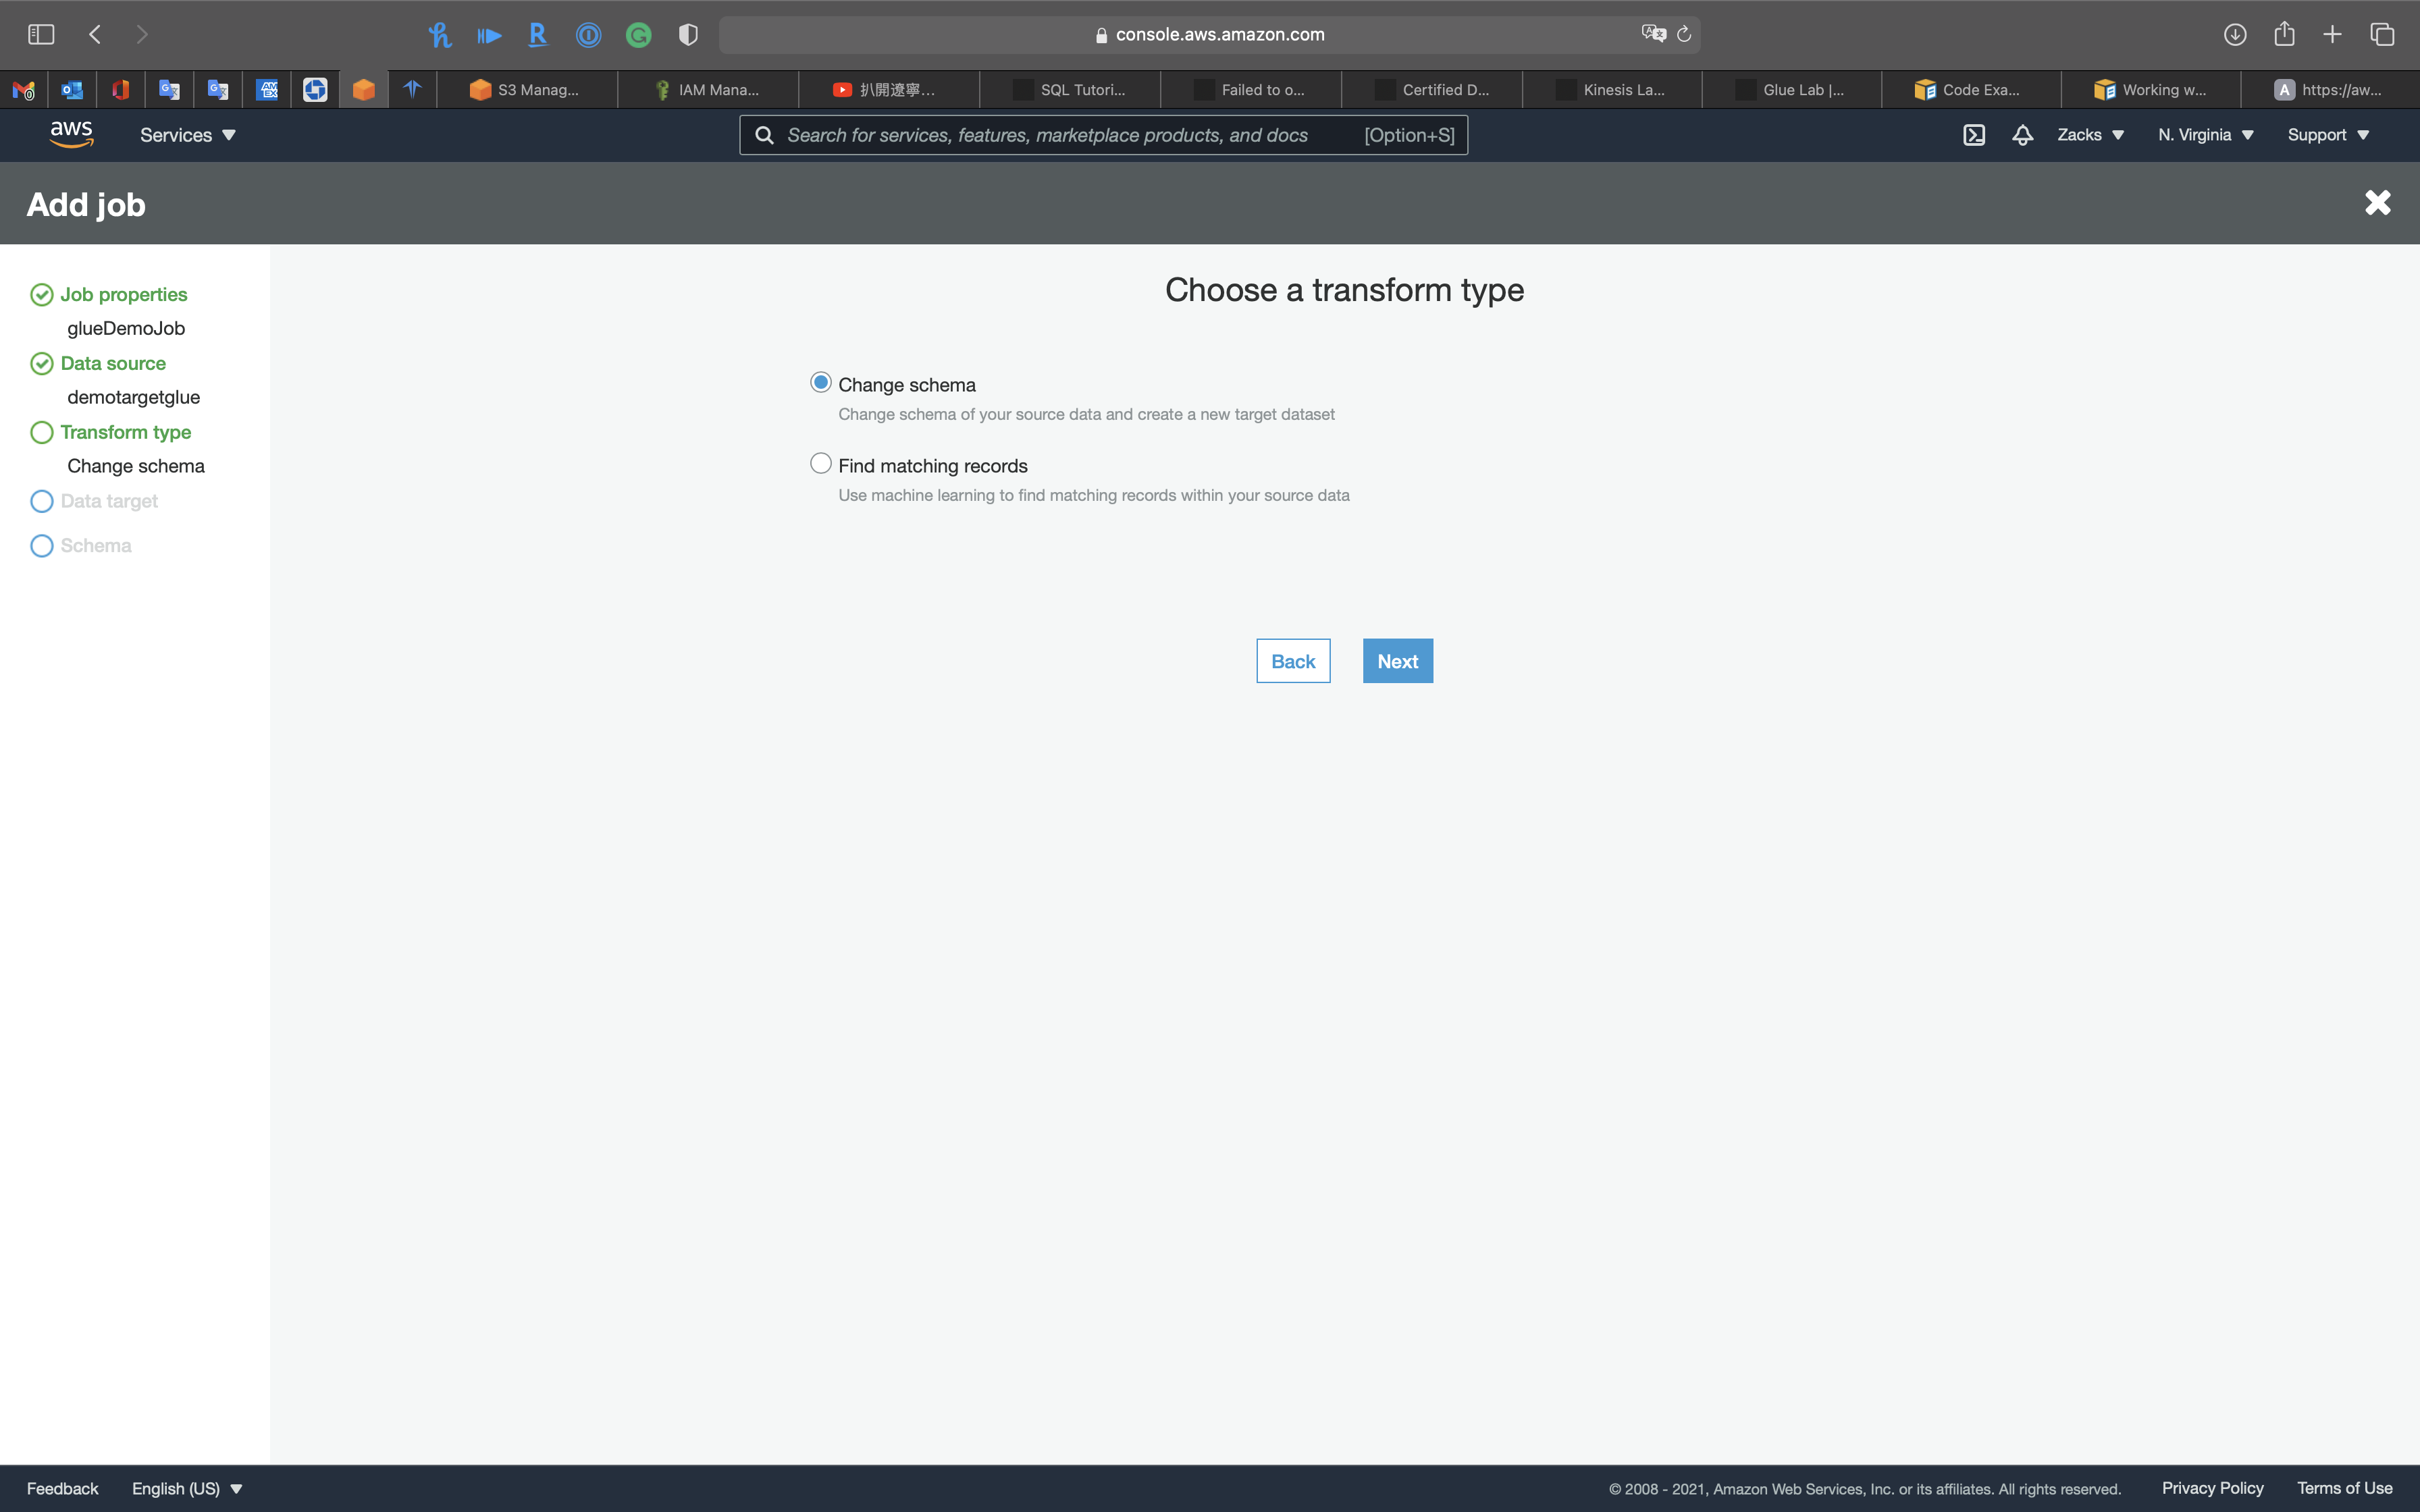
Data target
Select Create tables in your data target
- Data store:
Amazon S3 - Format:
JSON - Compression type:
None - Target path: choose your sample .csv file bucket
Click on Next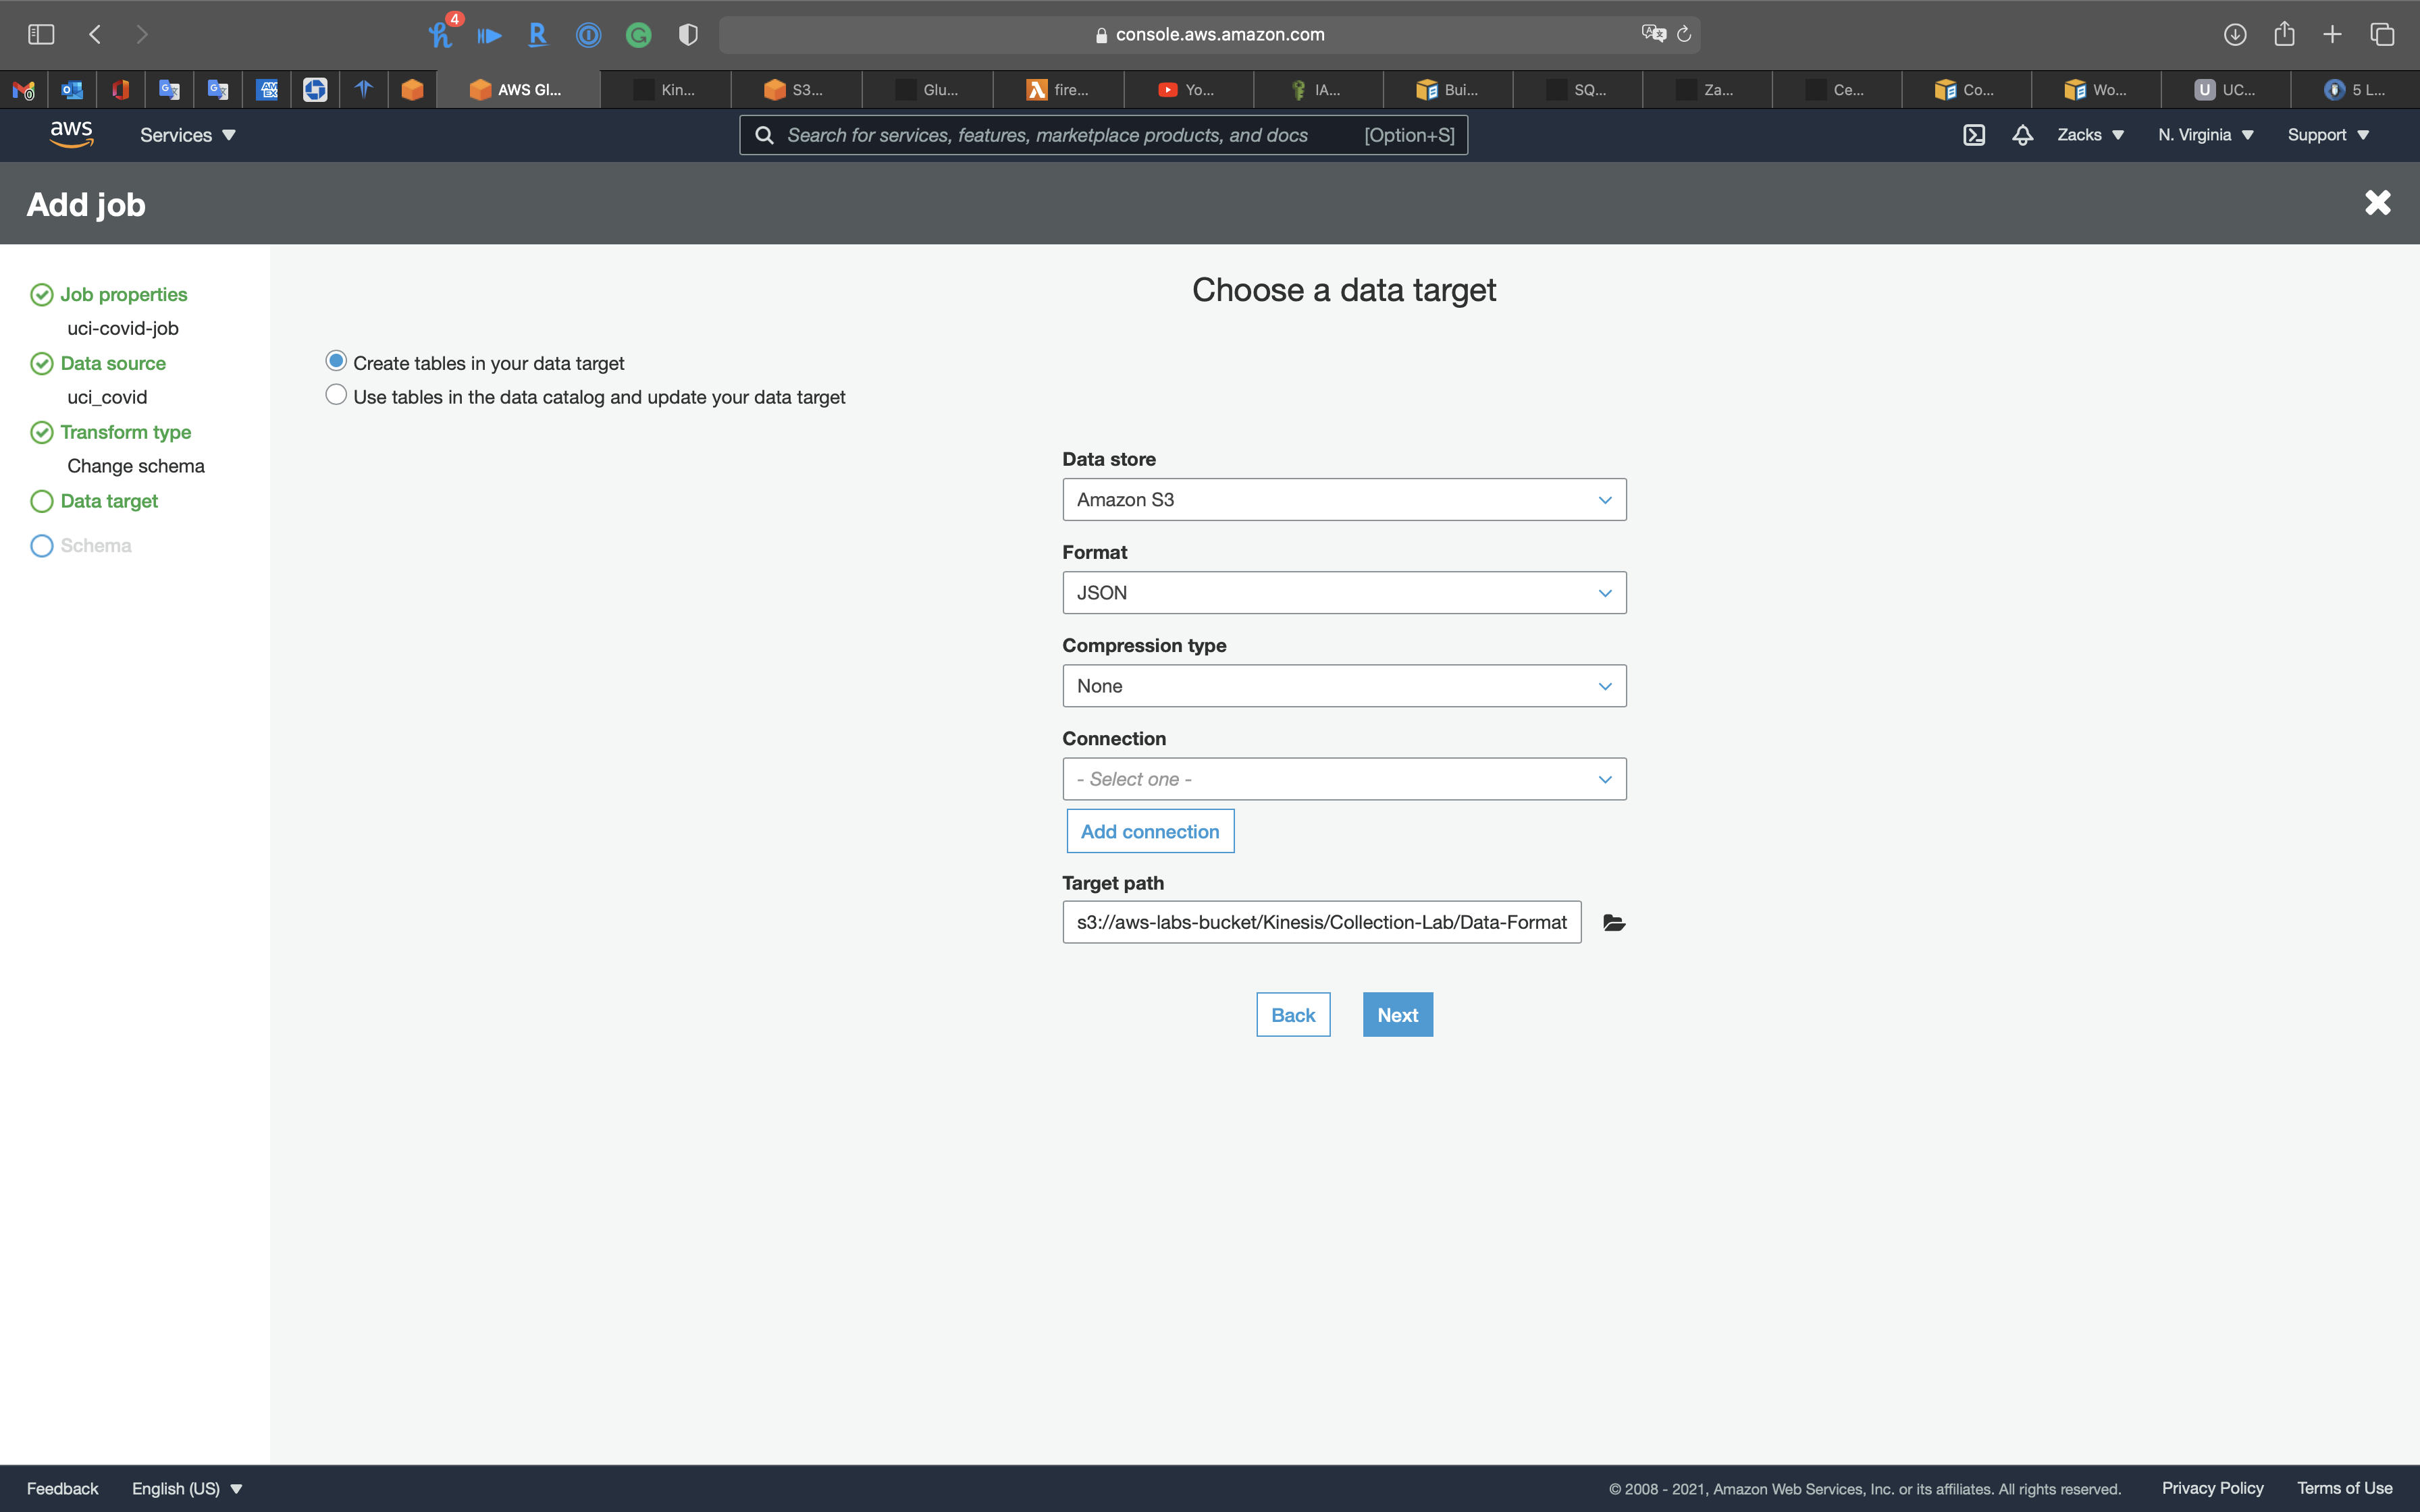
Schema
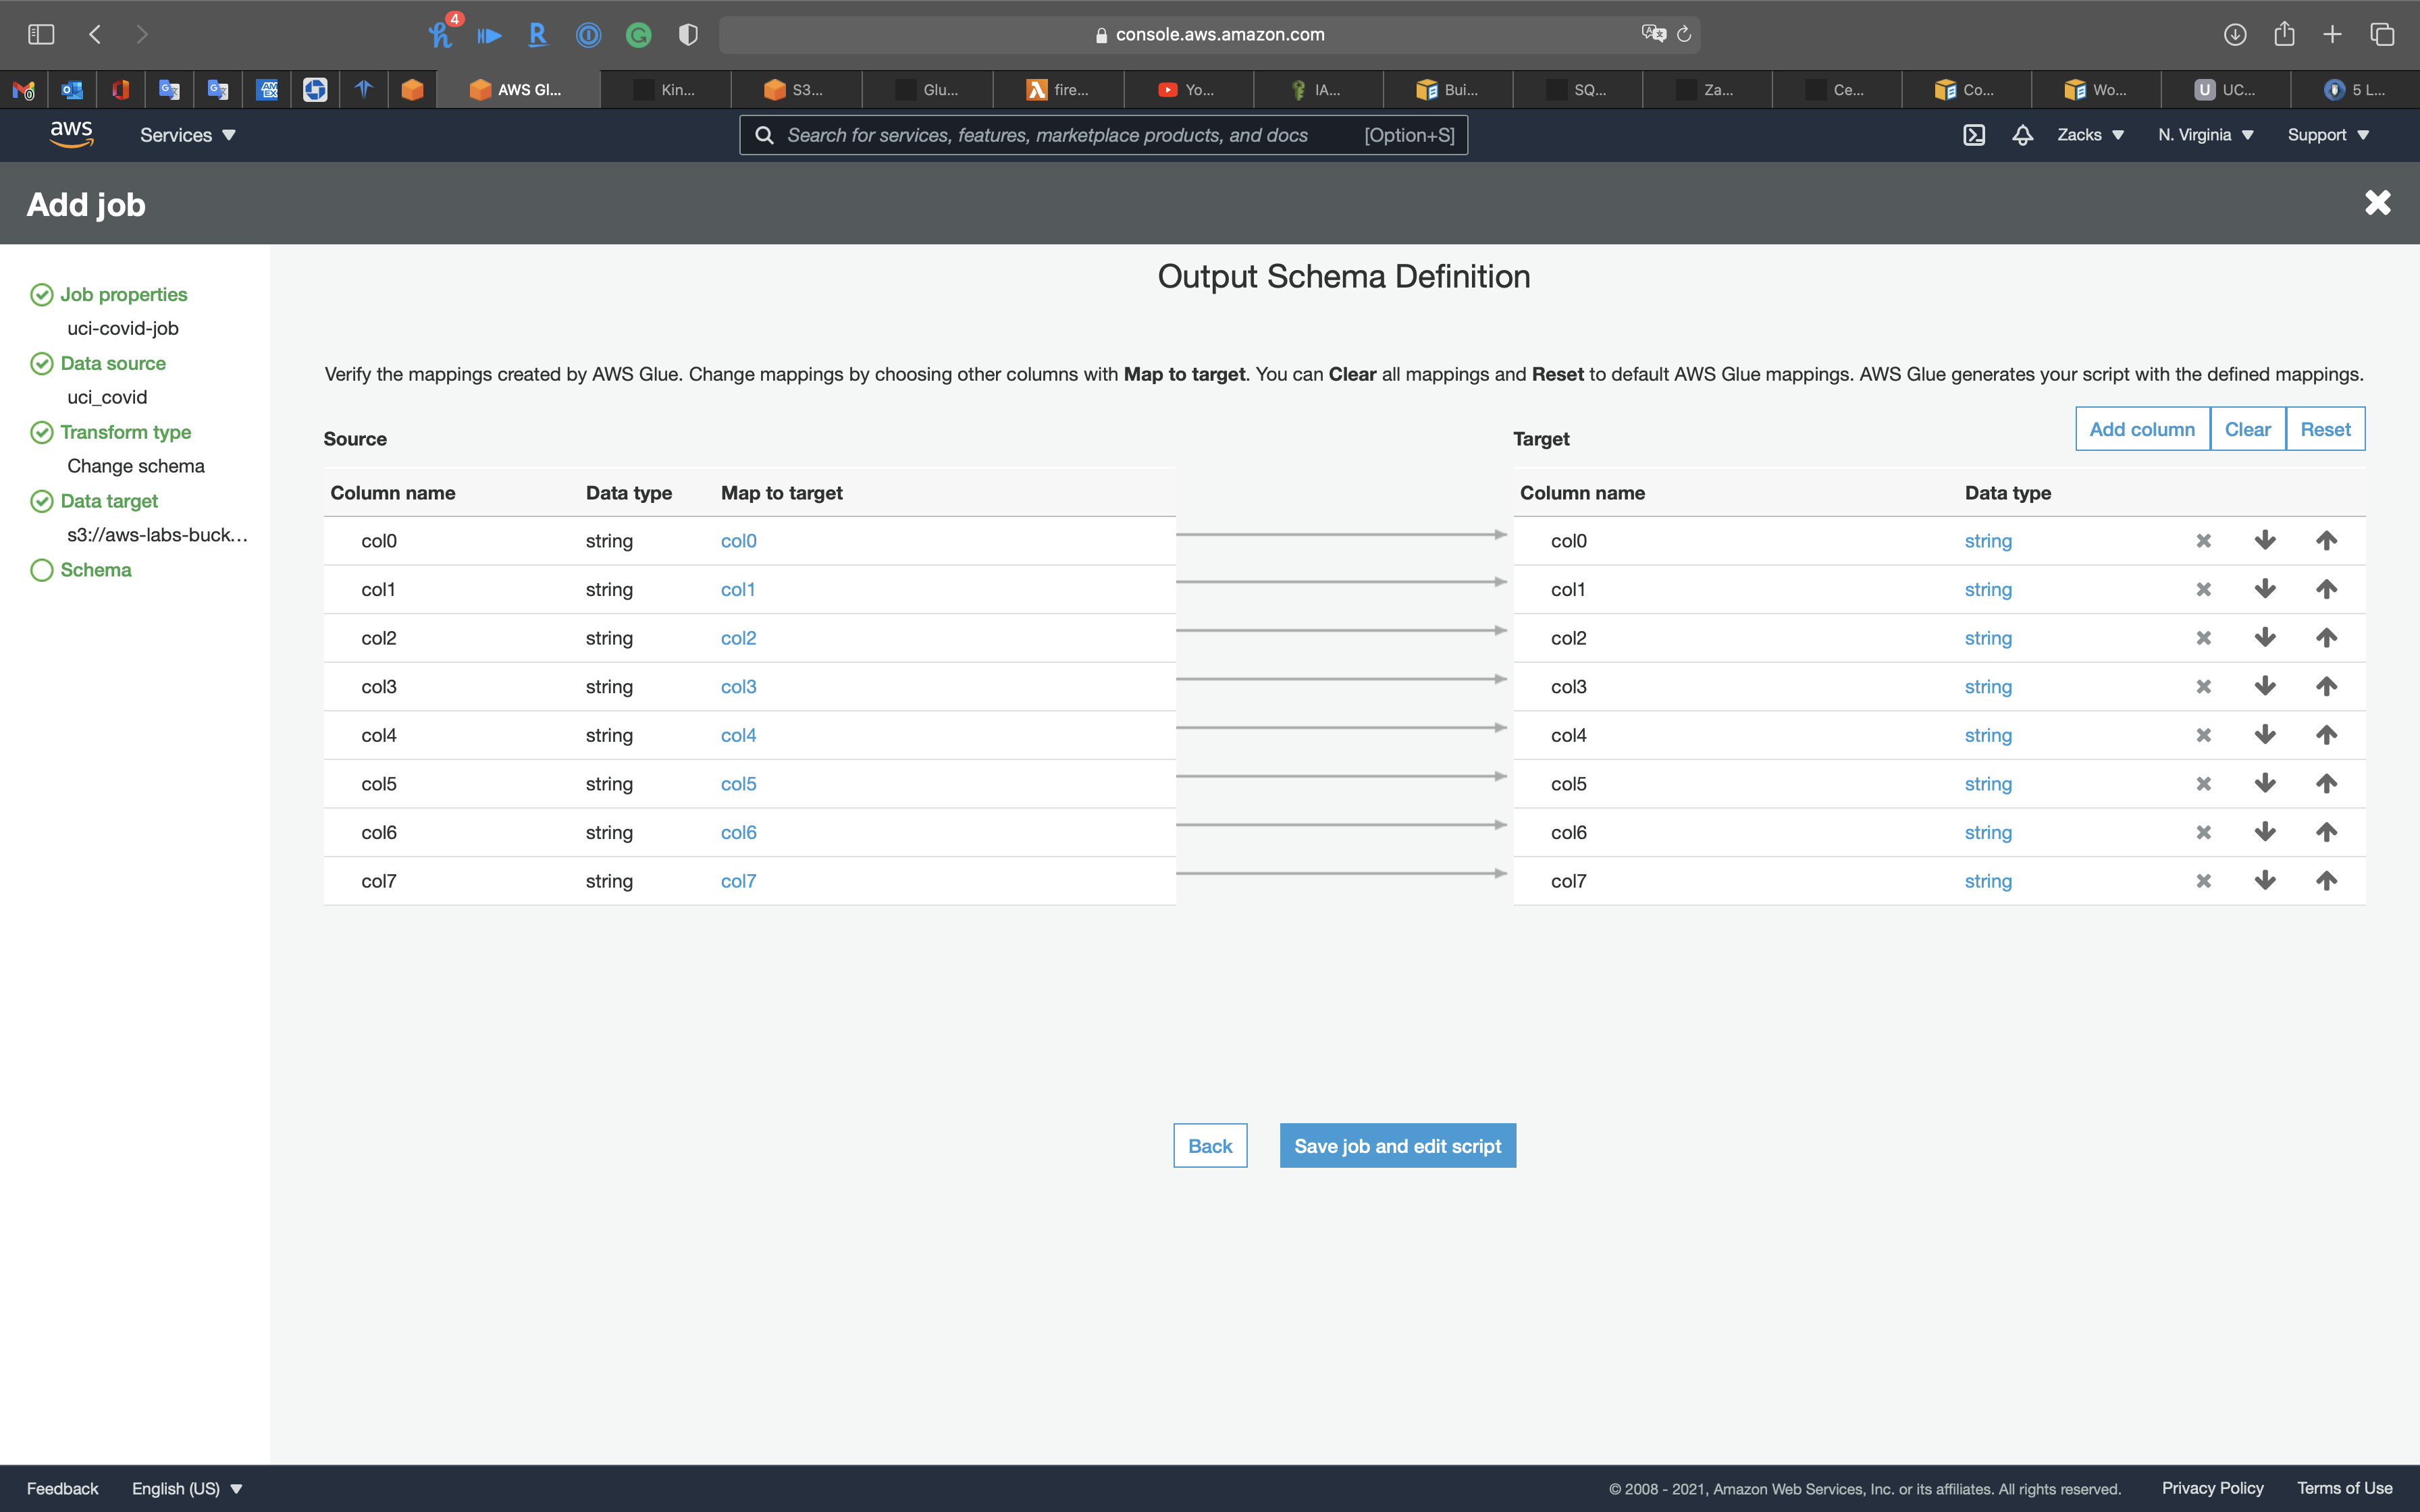
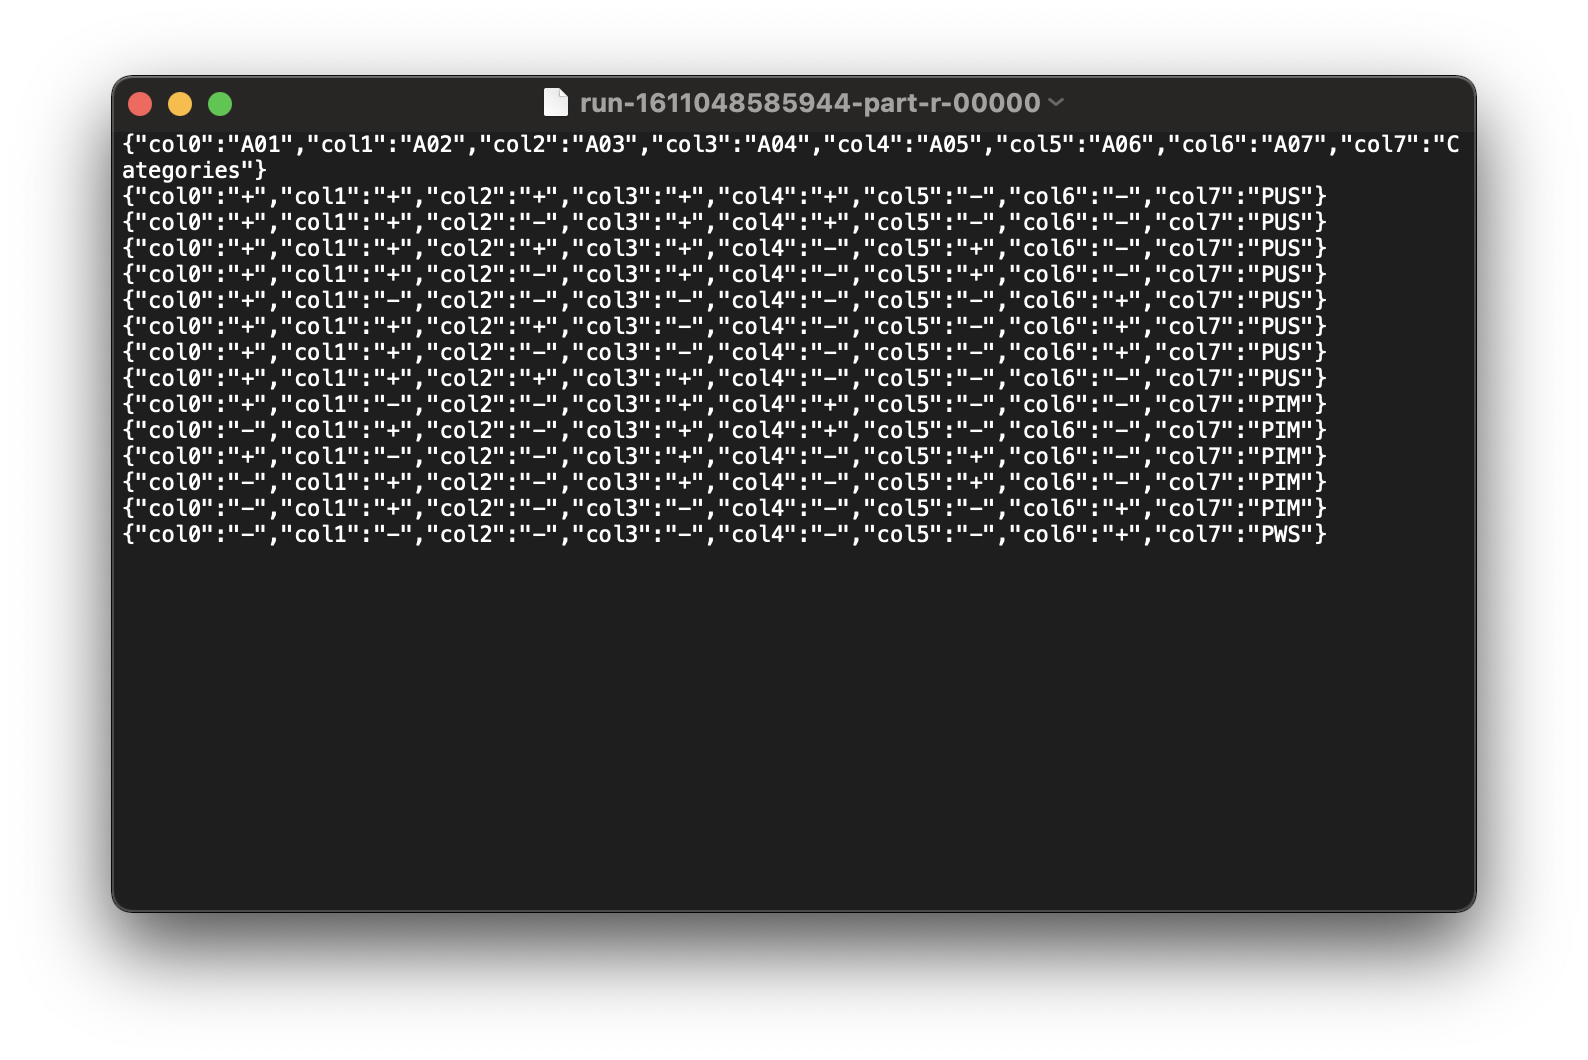
Review the original .csv file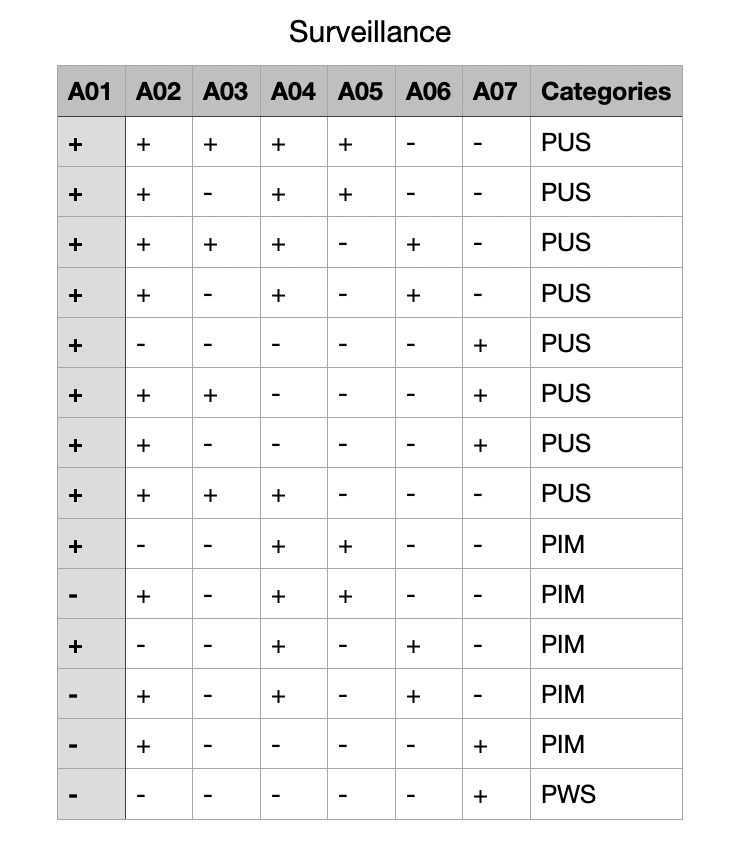
You can Add column, Delete column, Reorder columns.
Click on Save job and edit script.
Script editor

Click on Database on the left and top page.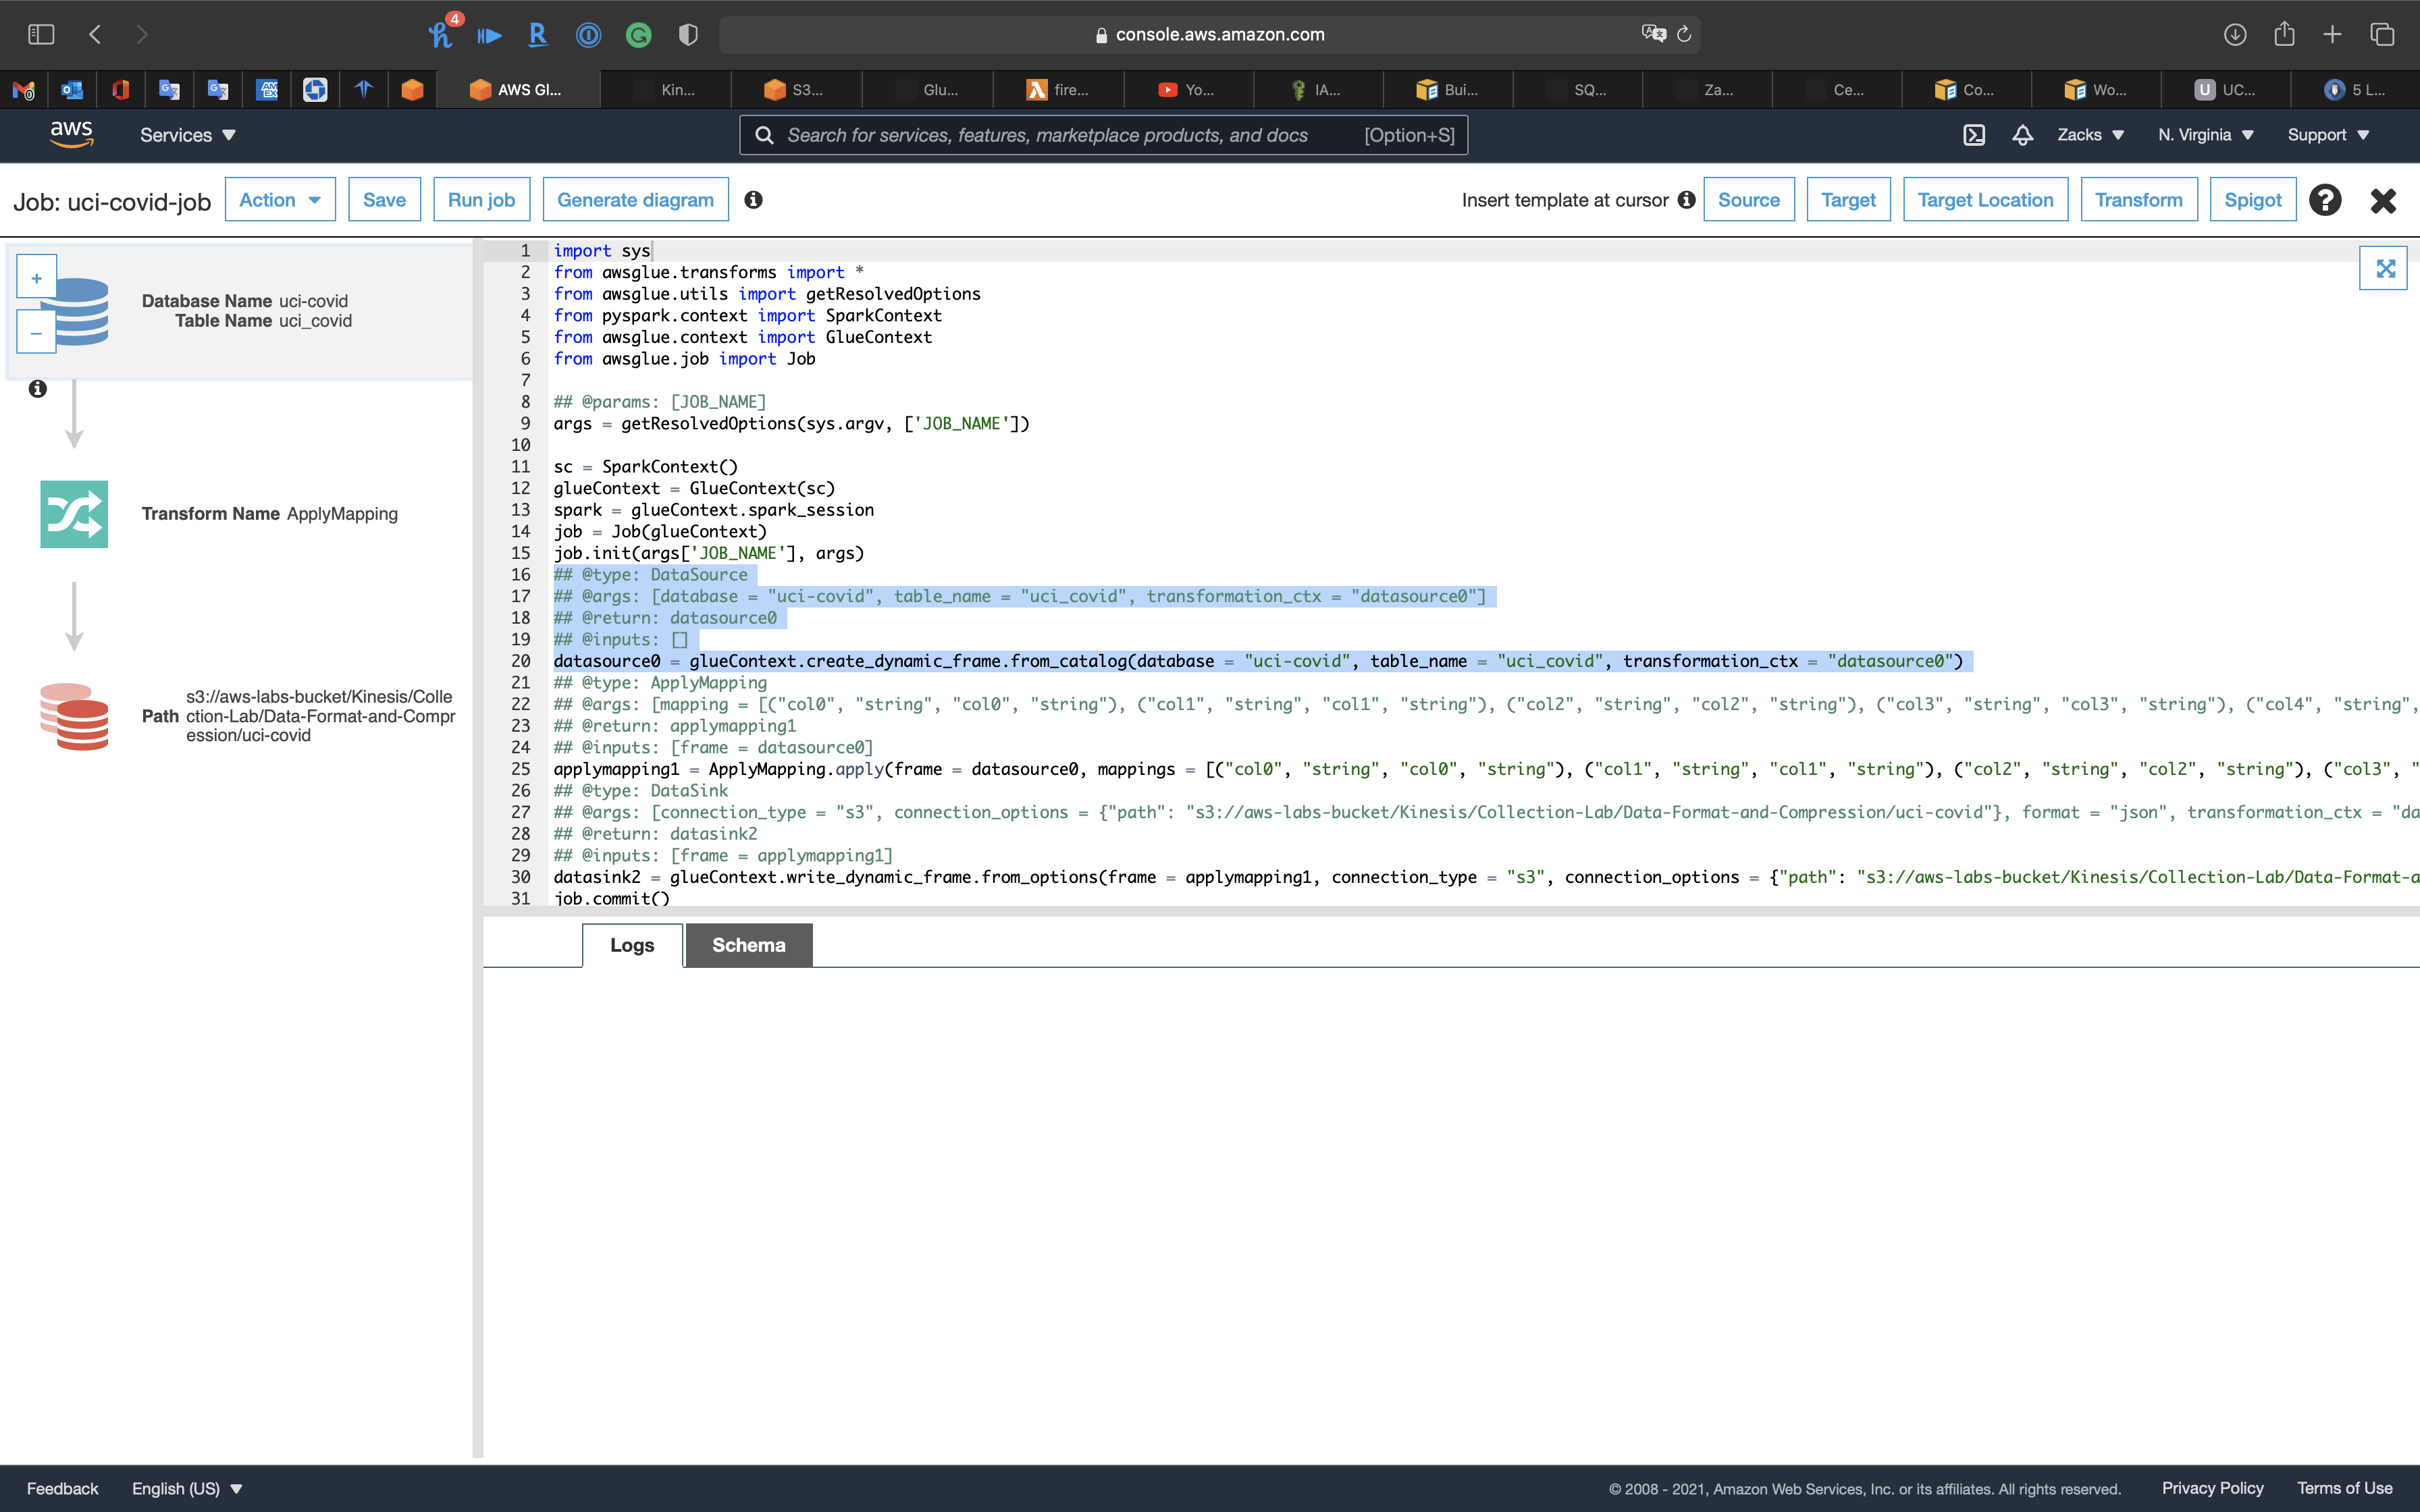
Then click on Schema tab.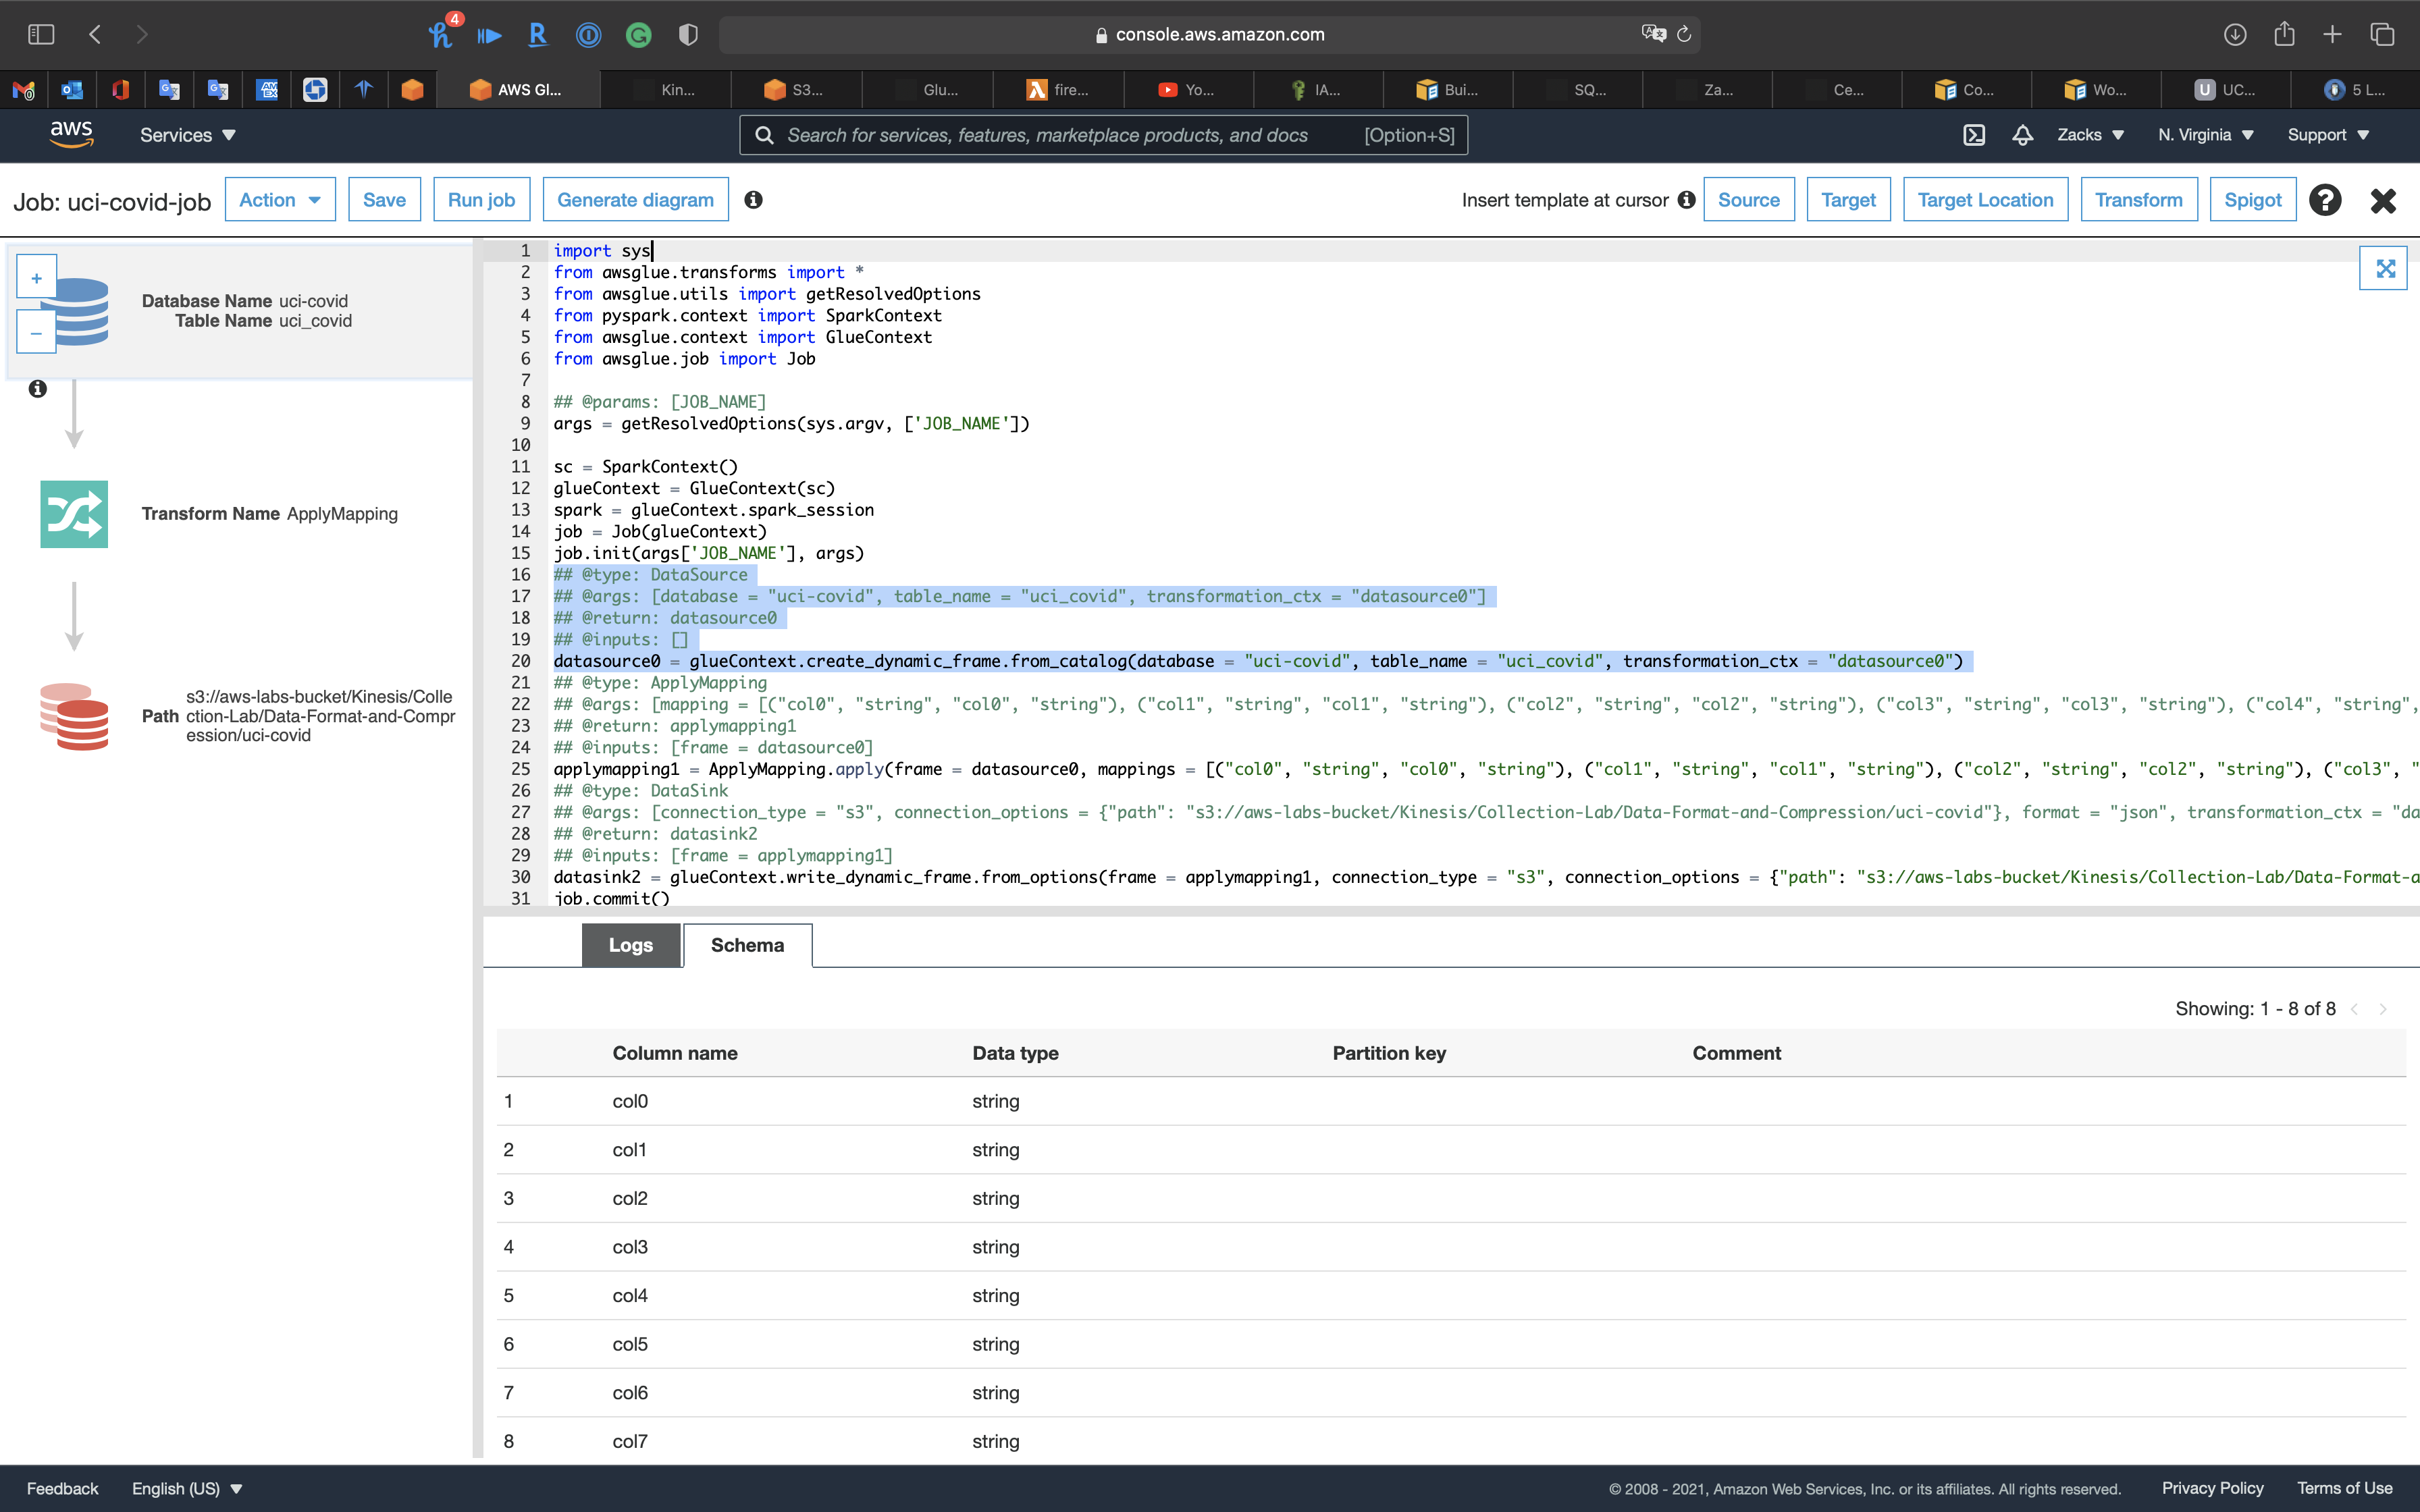
On the top navigation pane, you can change the Source, Target, Target Location.
See more of Transforms
Click on Run job
You have a second chance to modify the settings we did before.
Click on Run job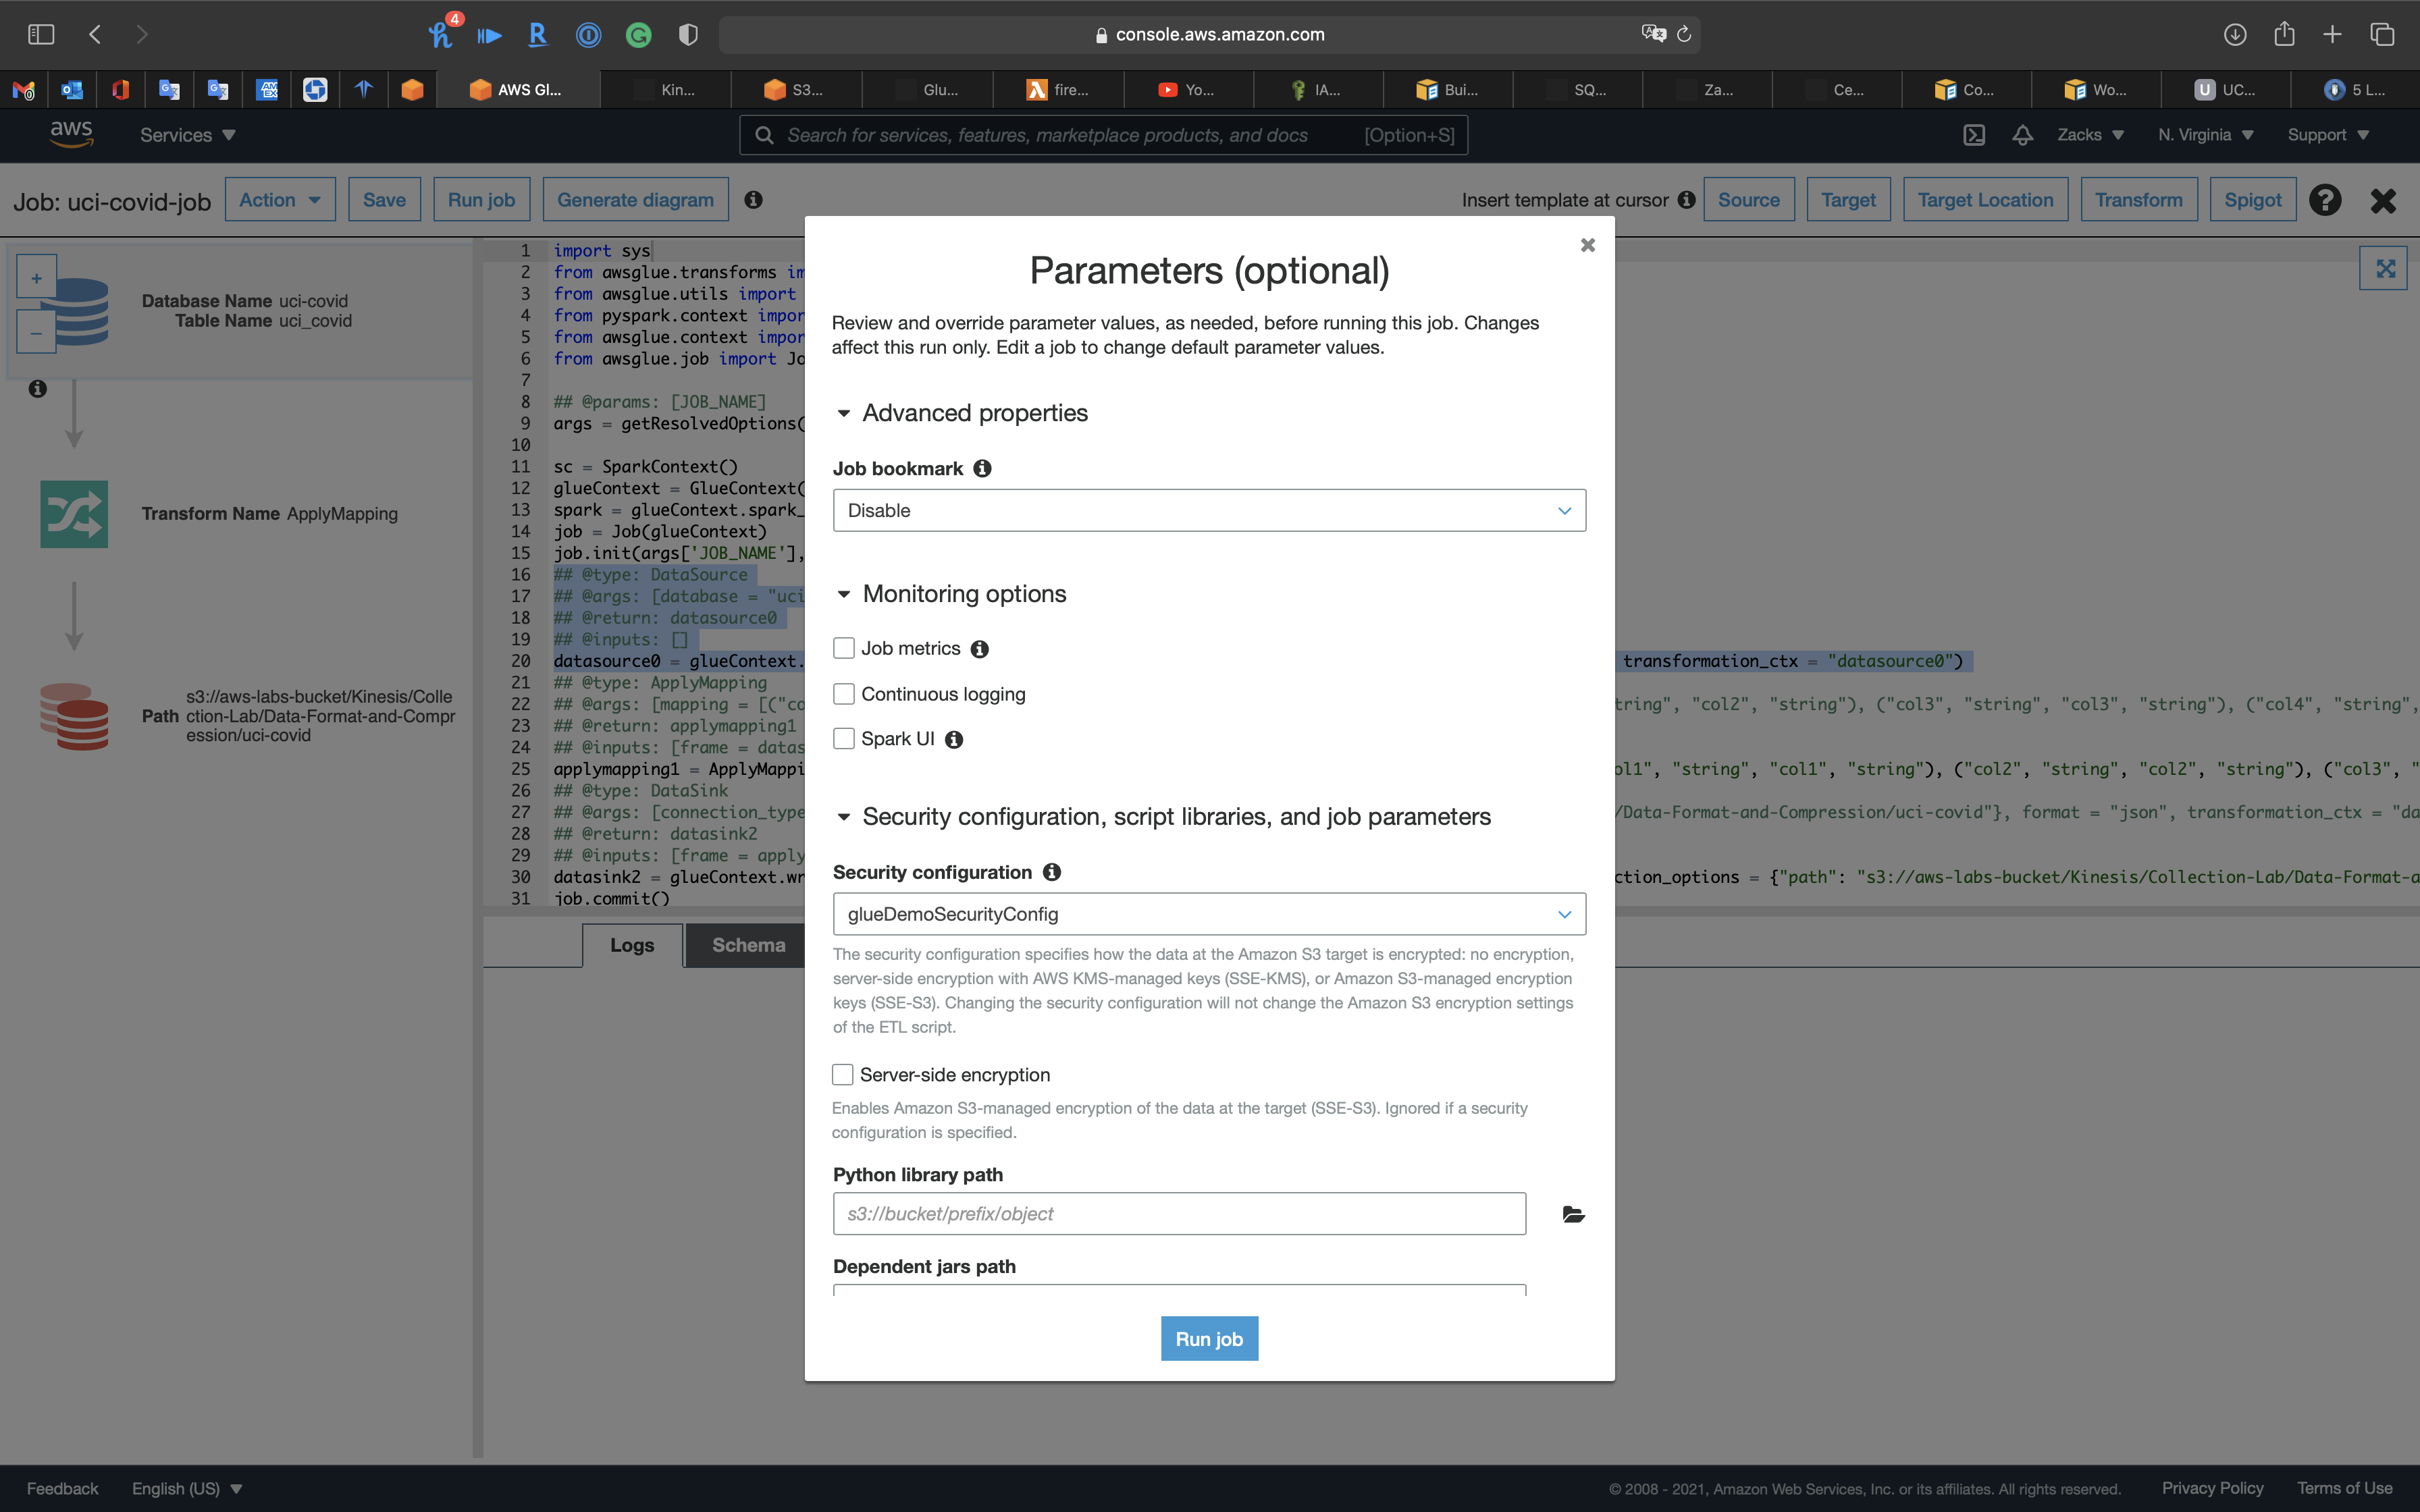
The job is running.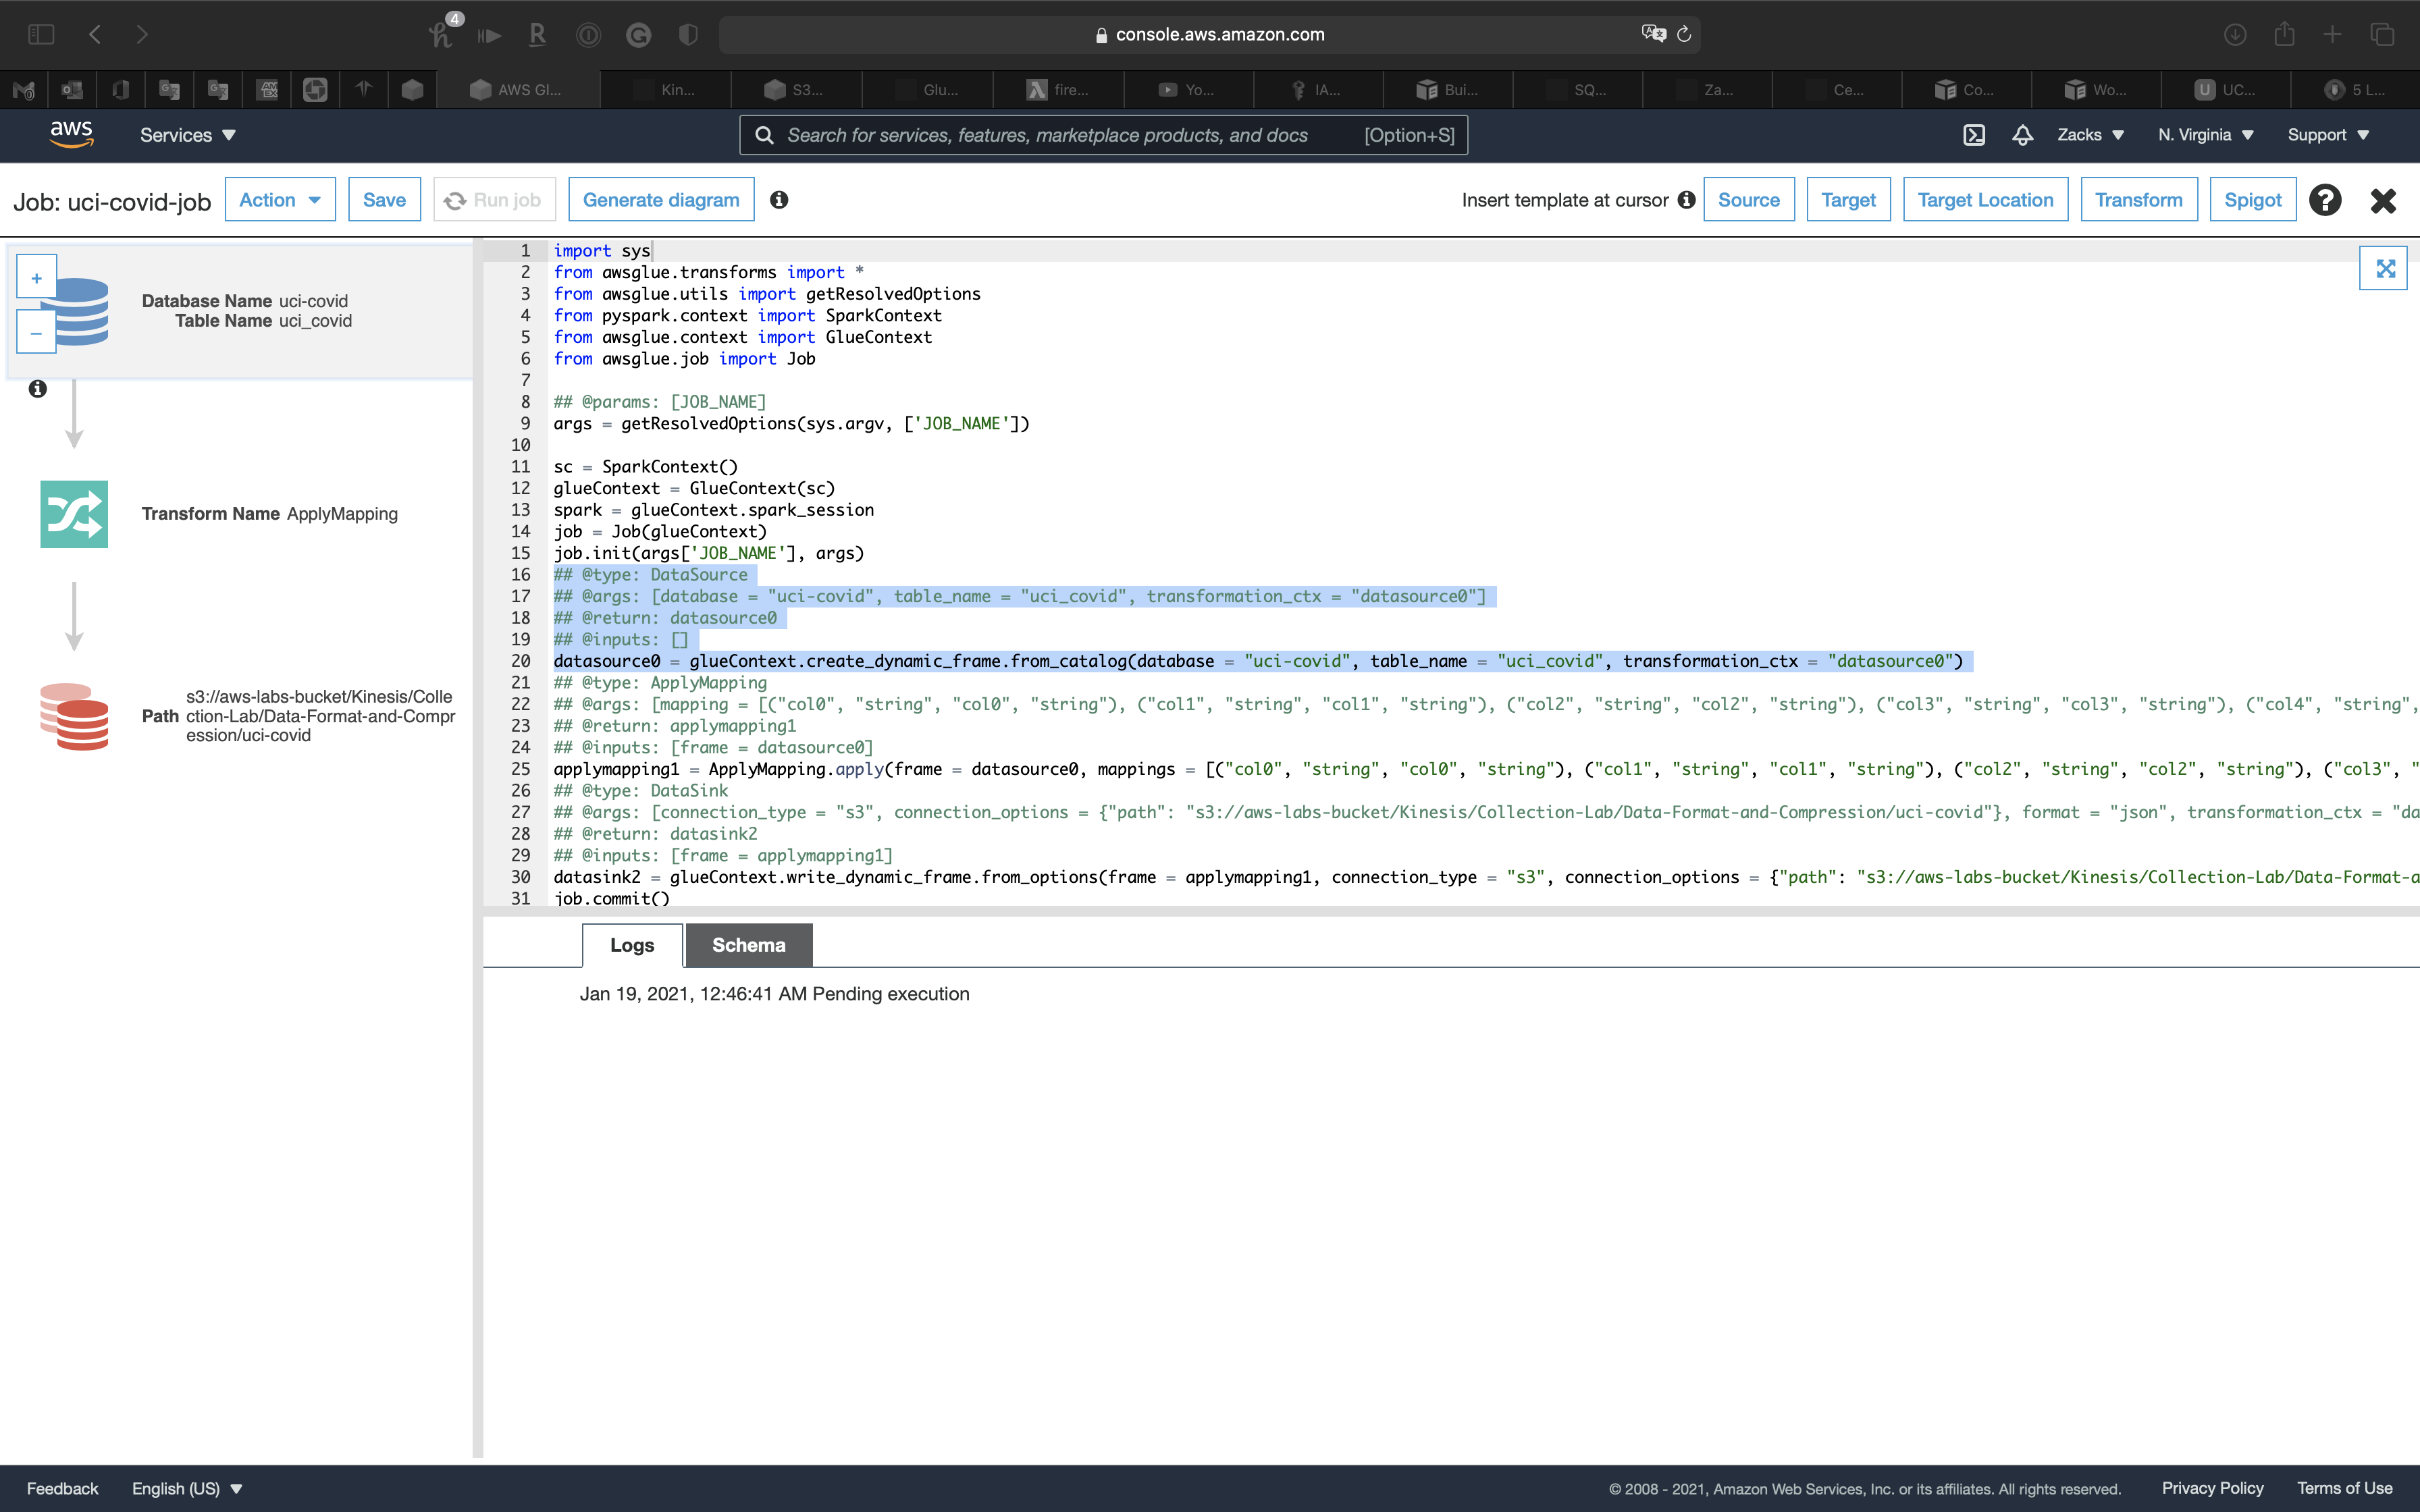
Refresh the page to see Logs
Once the refresh icon(on the left and top page) disappeared, the job is finished.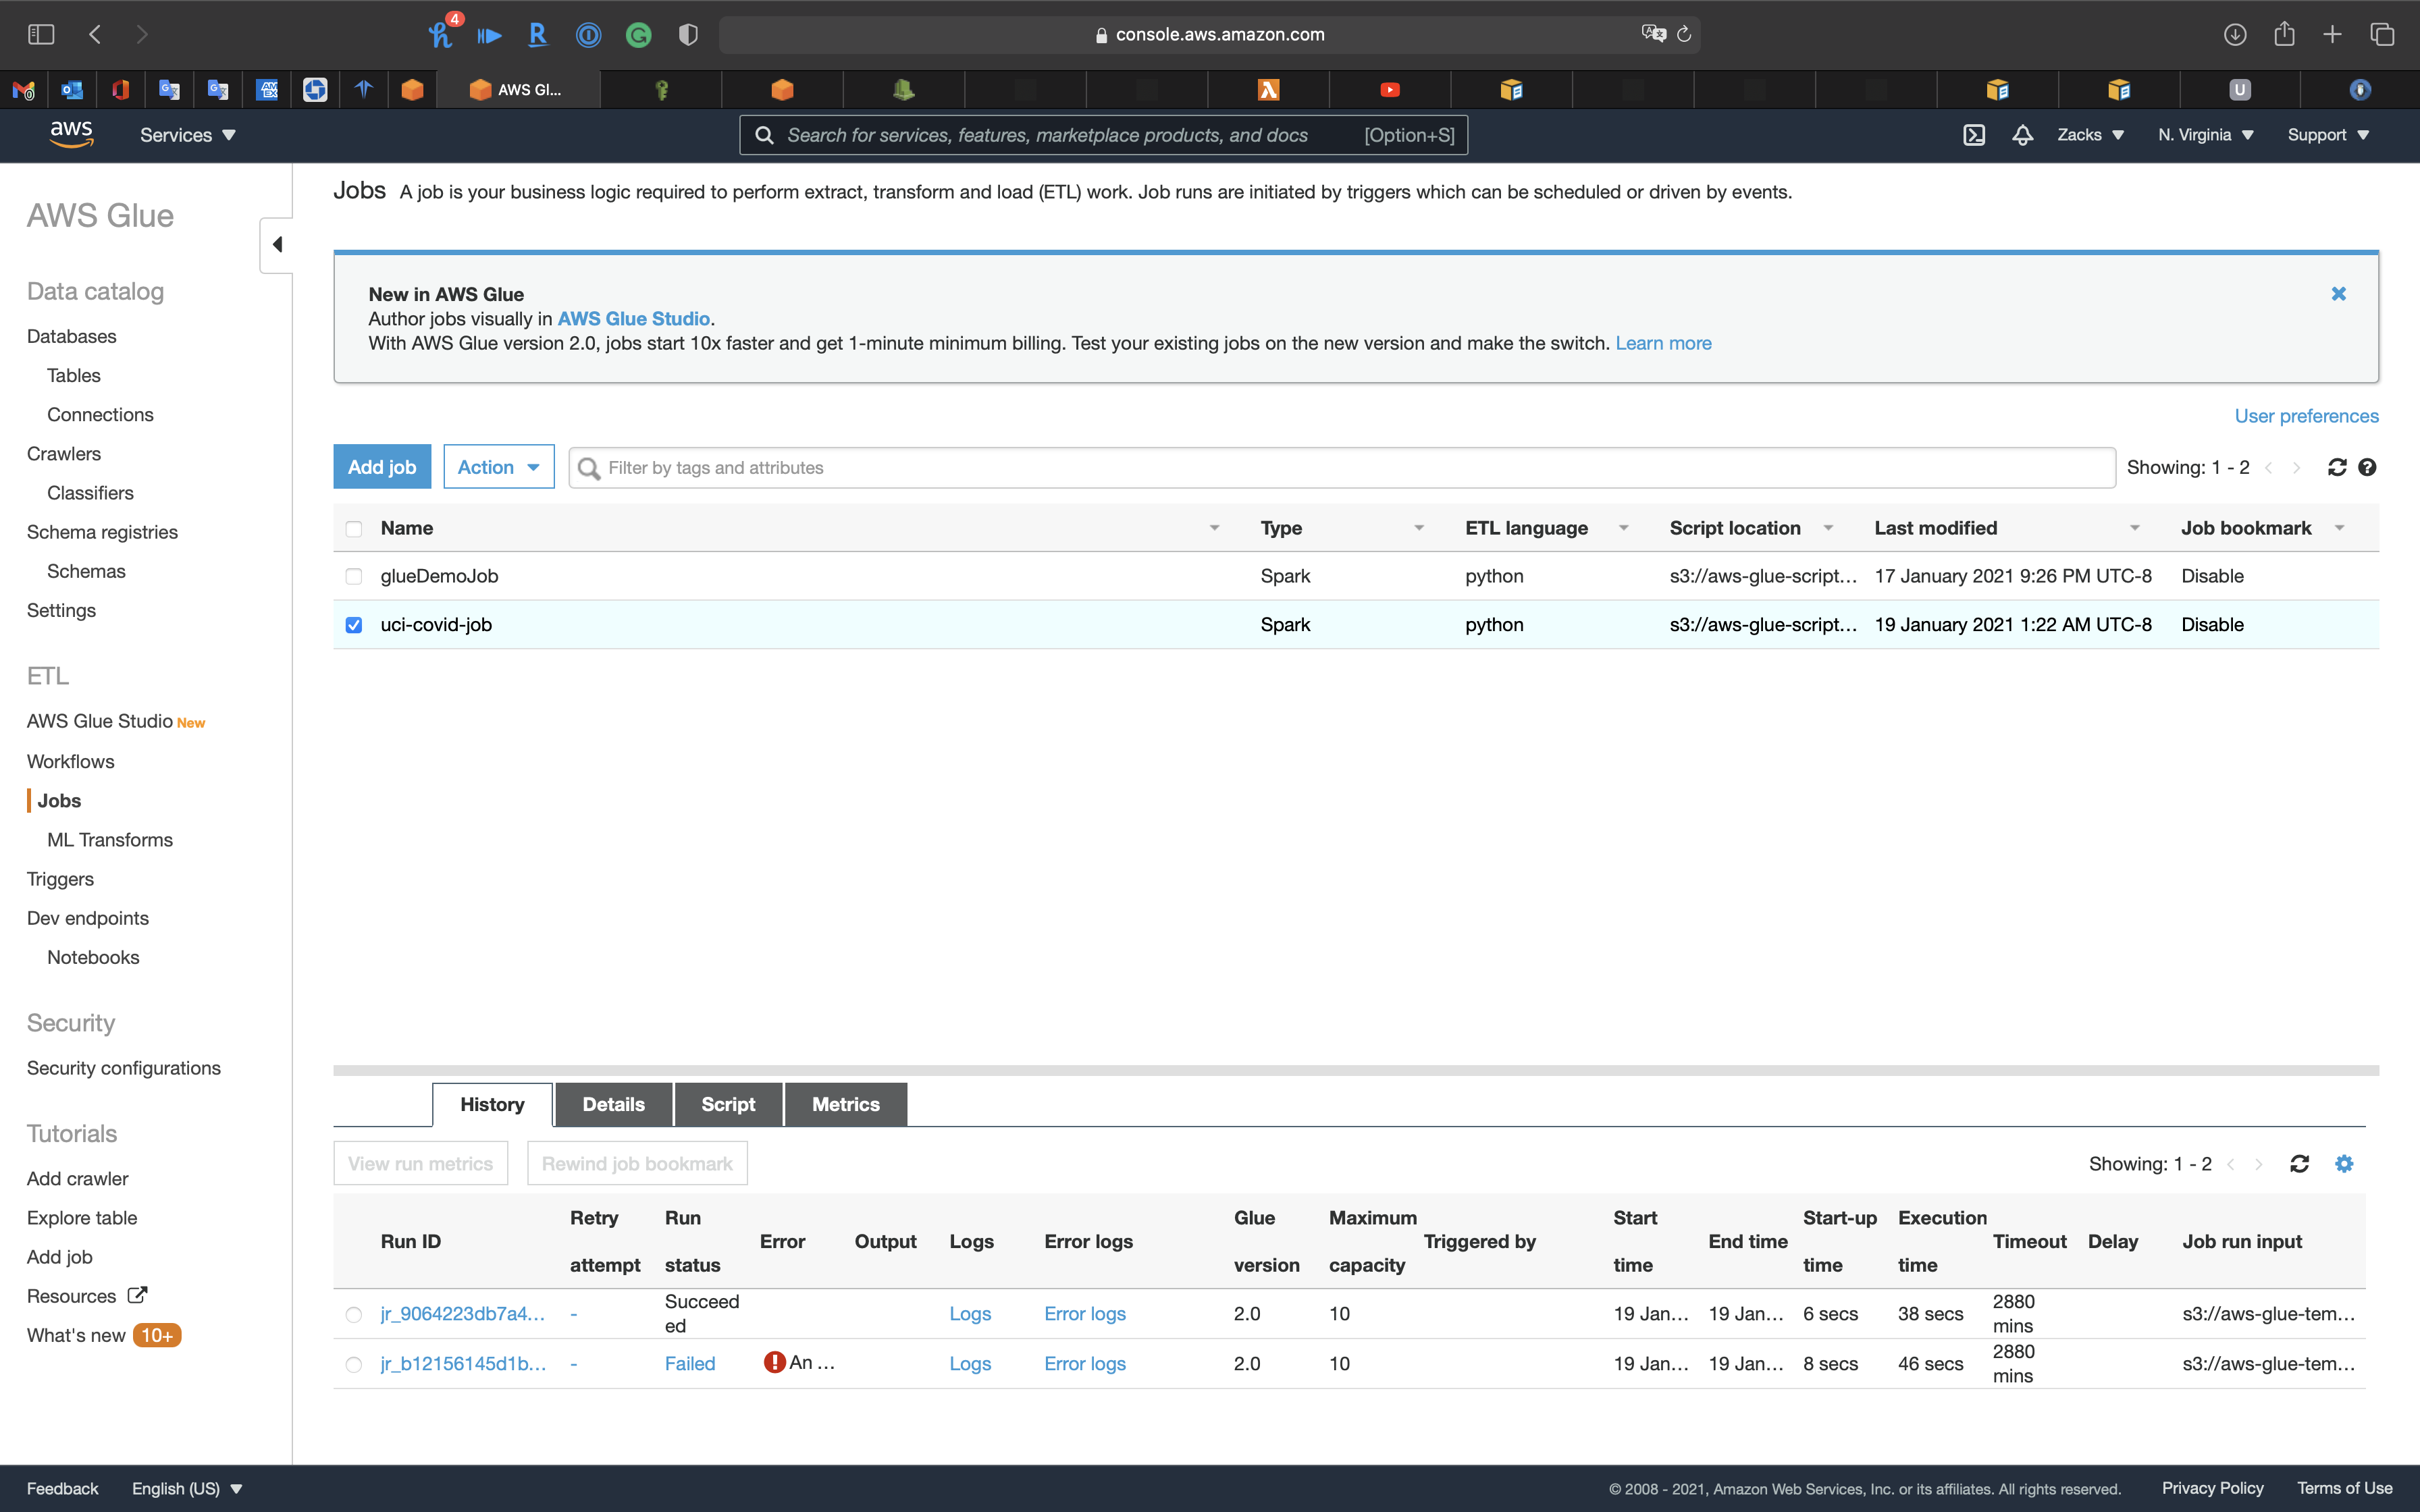
Go to S3 bucket to see the transformed file.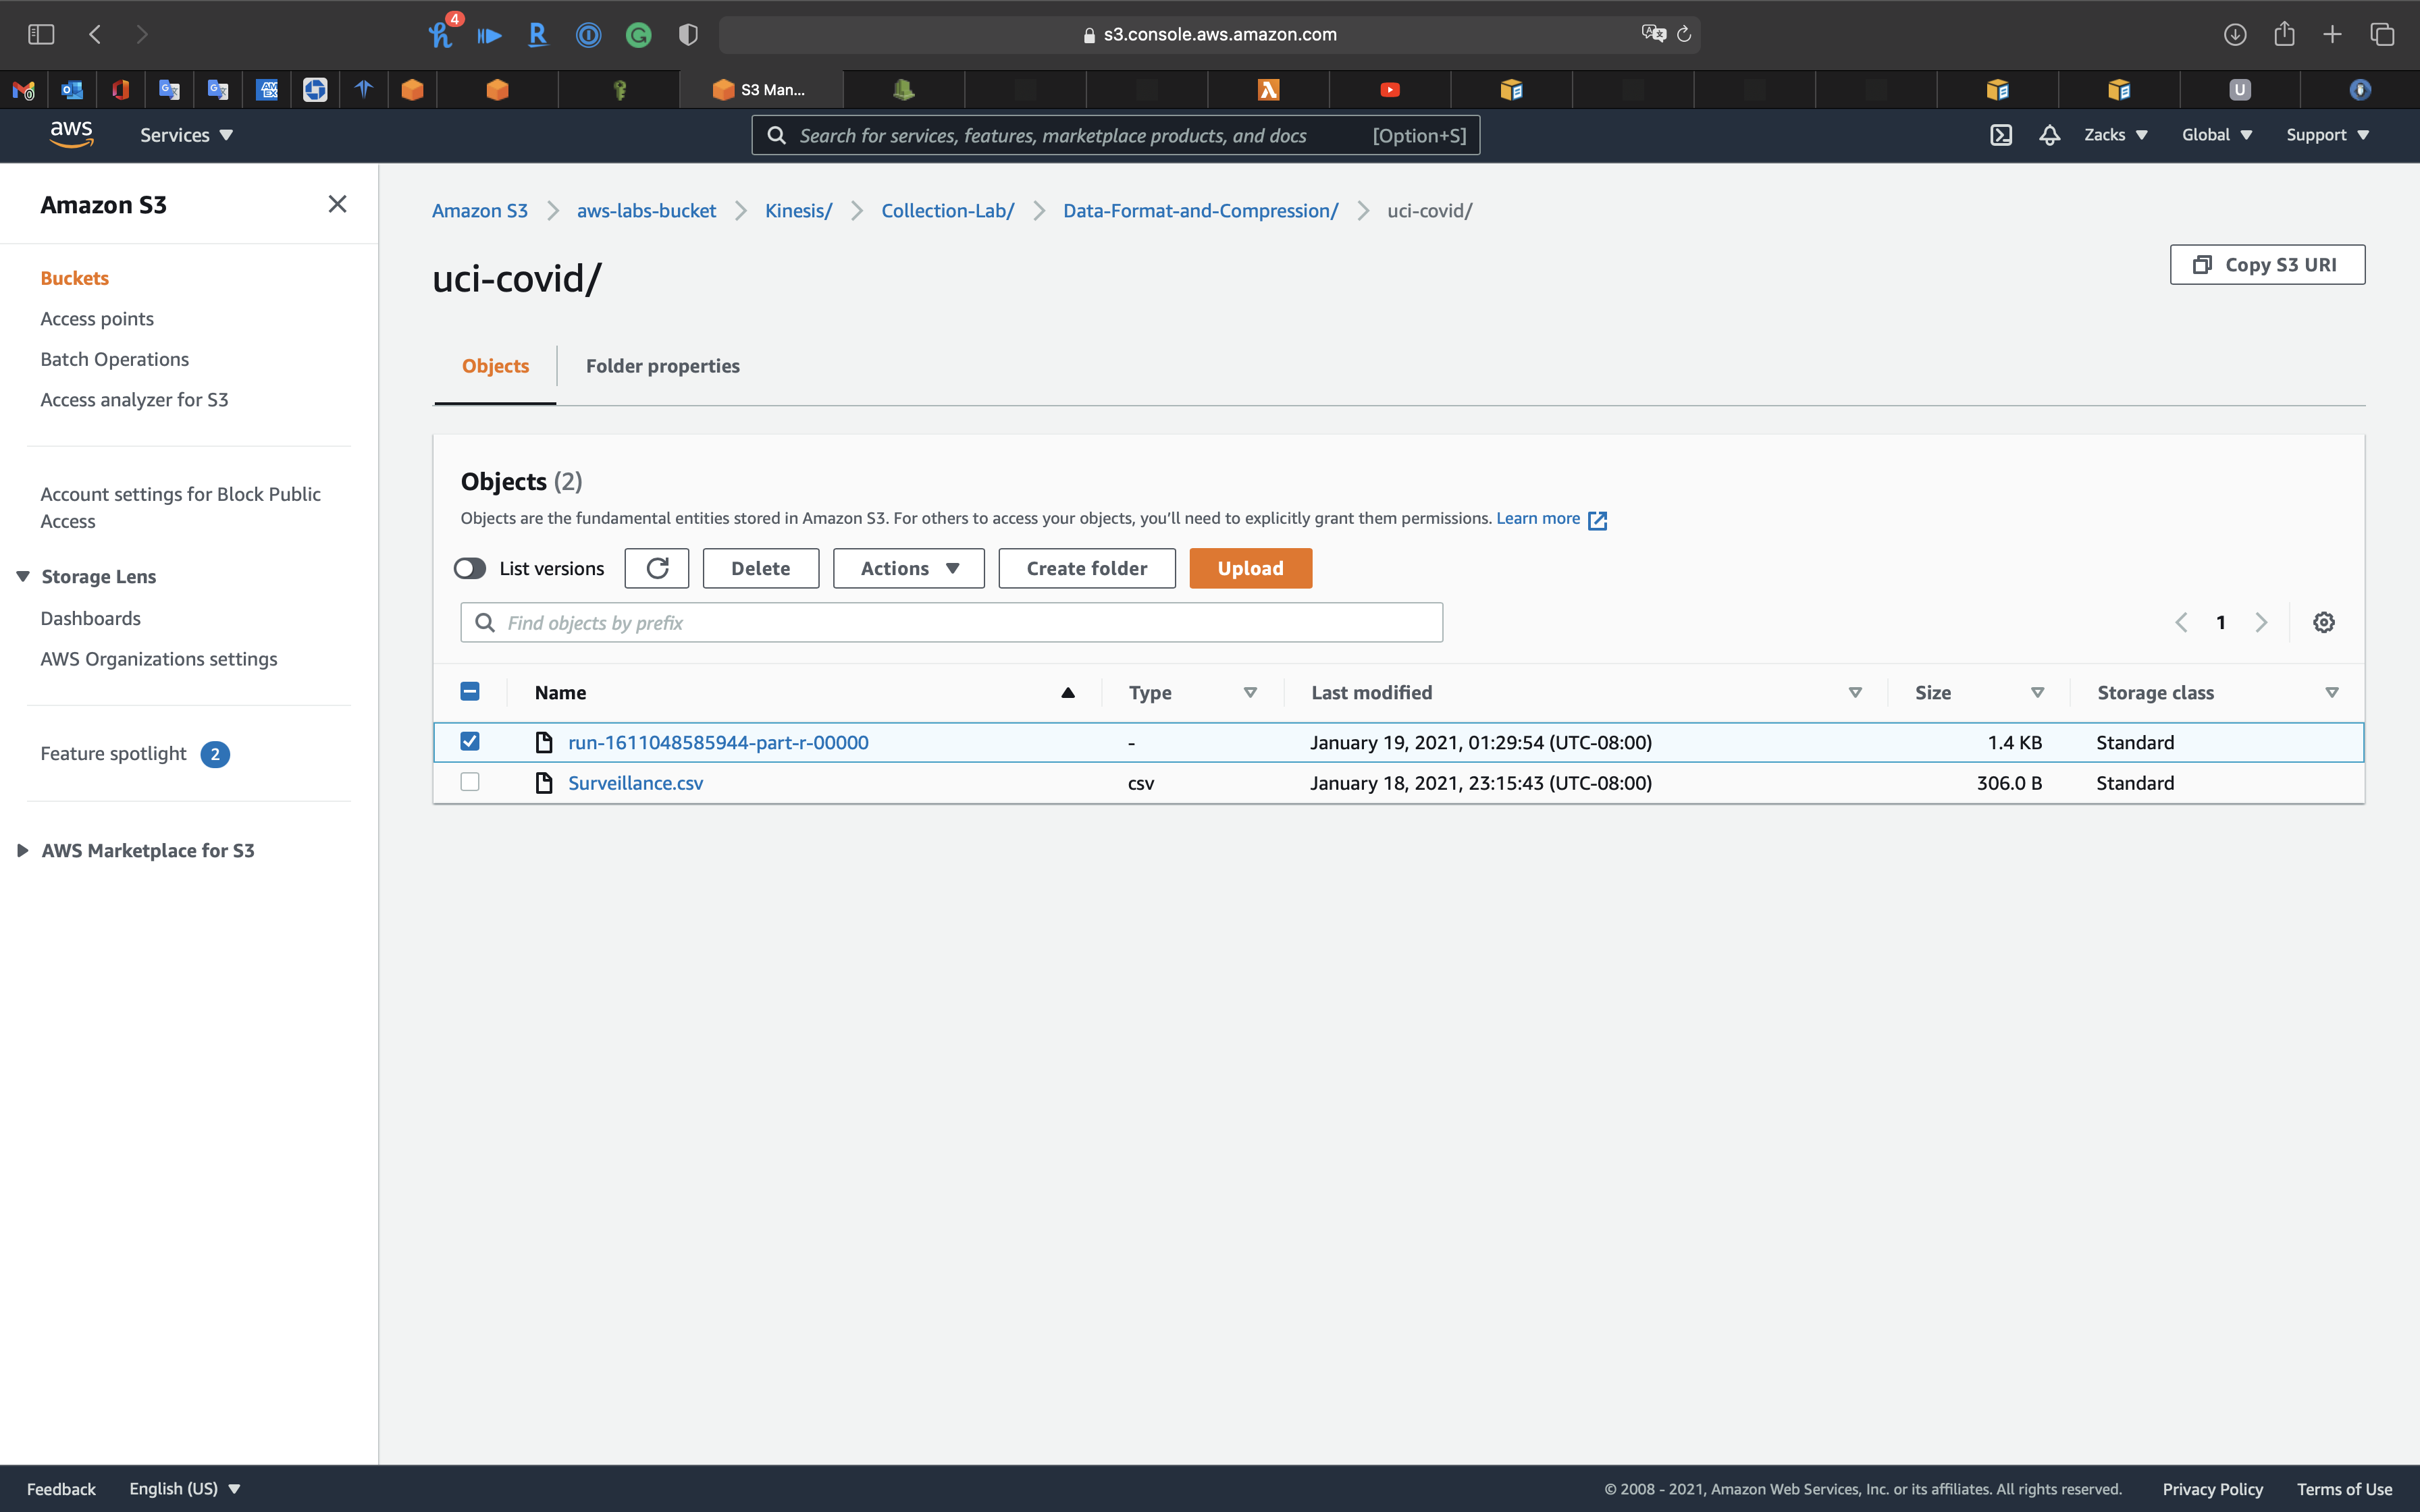
Select the transformed file, then click on Action and Download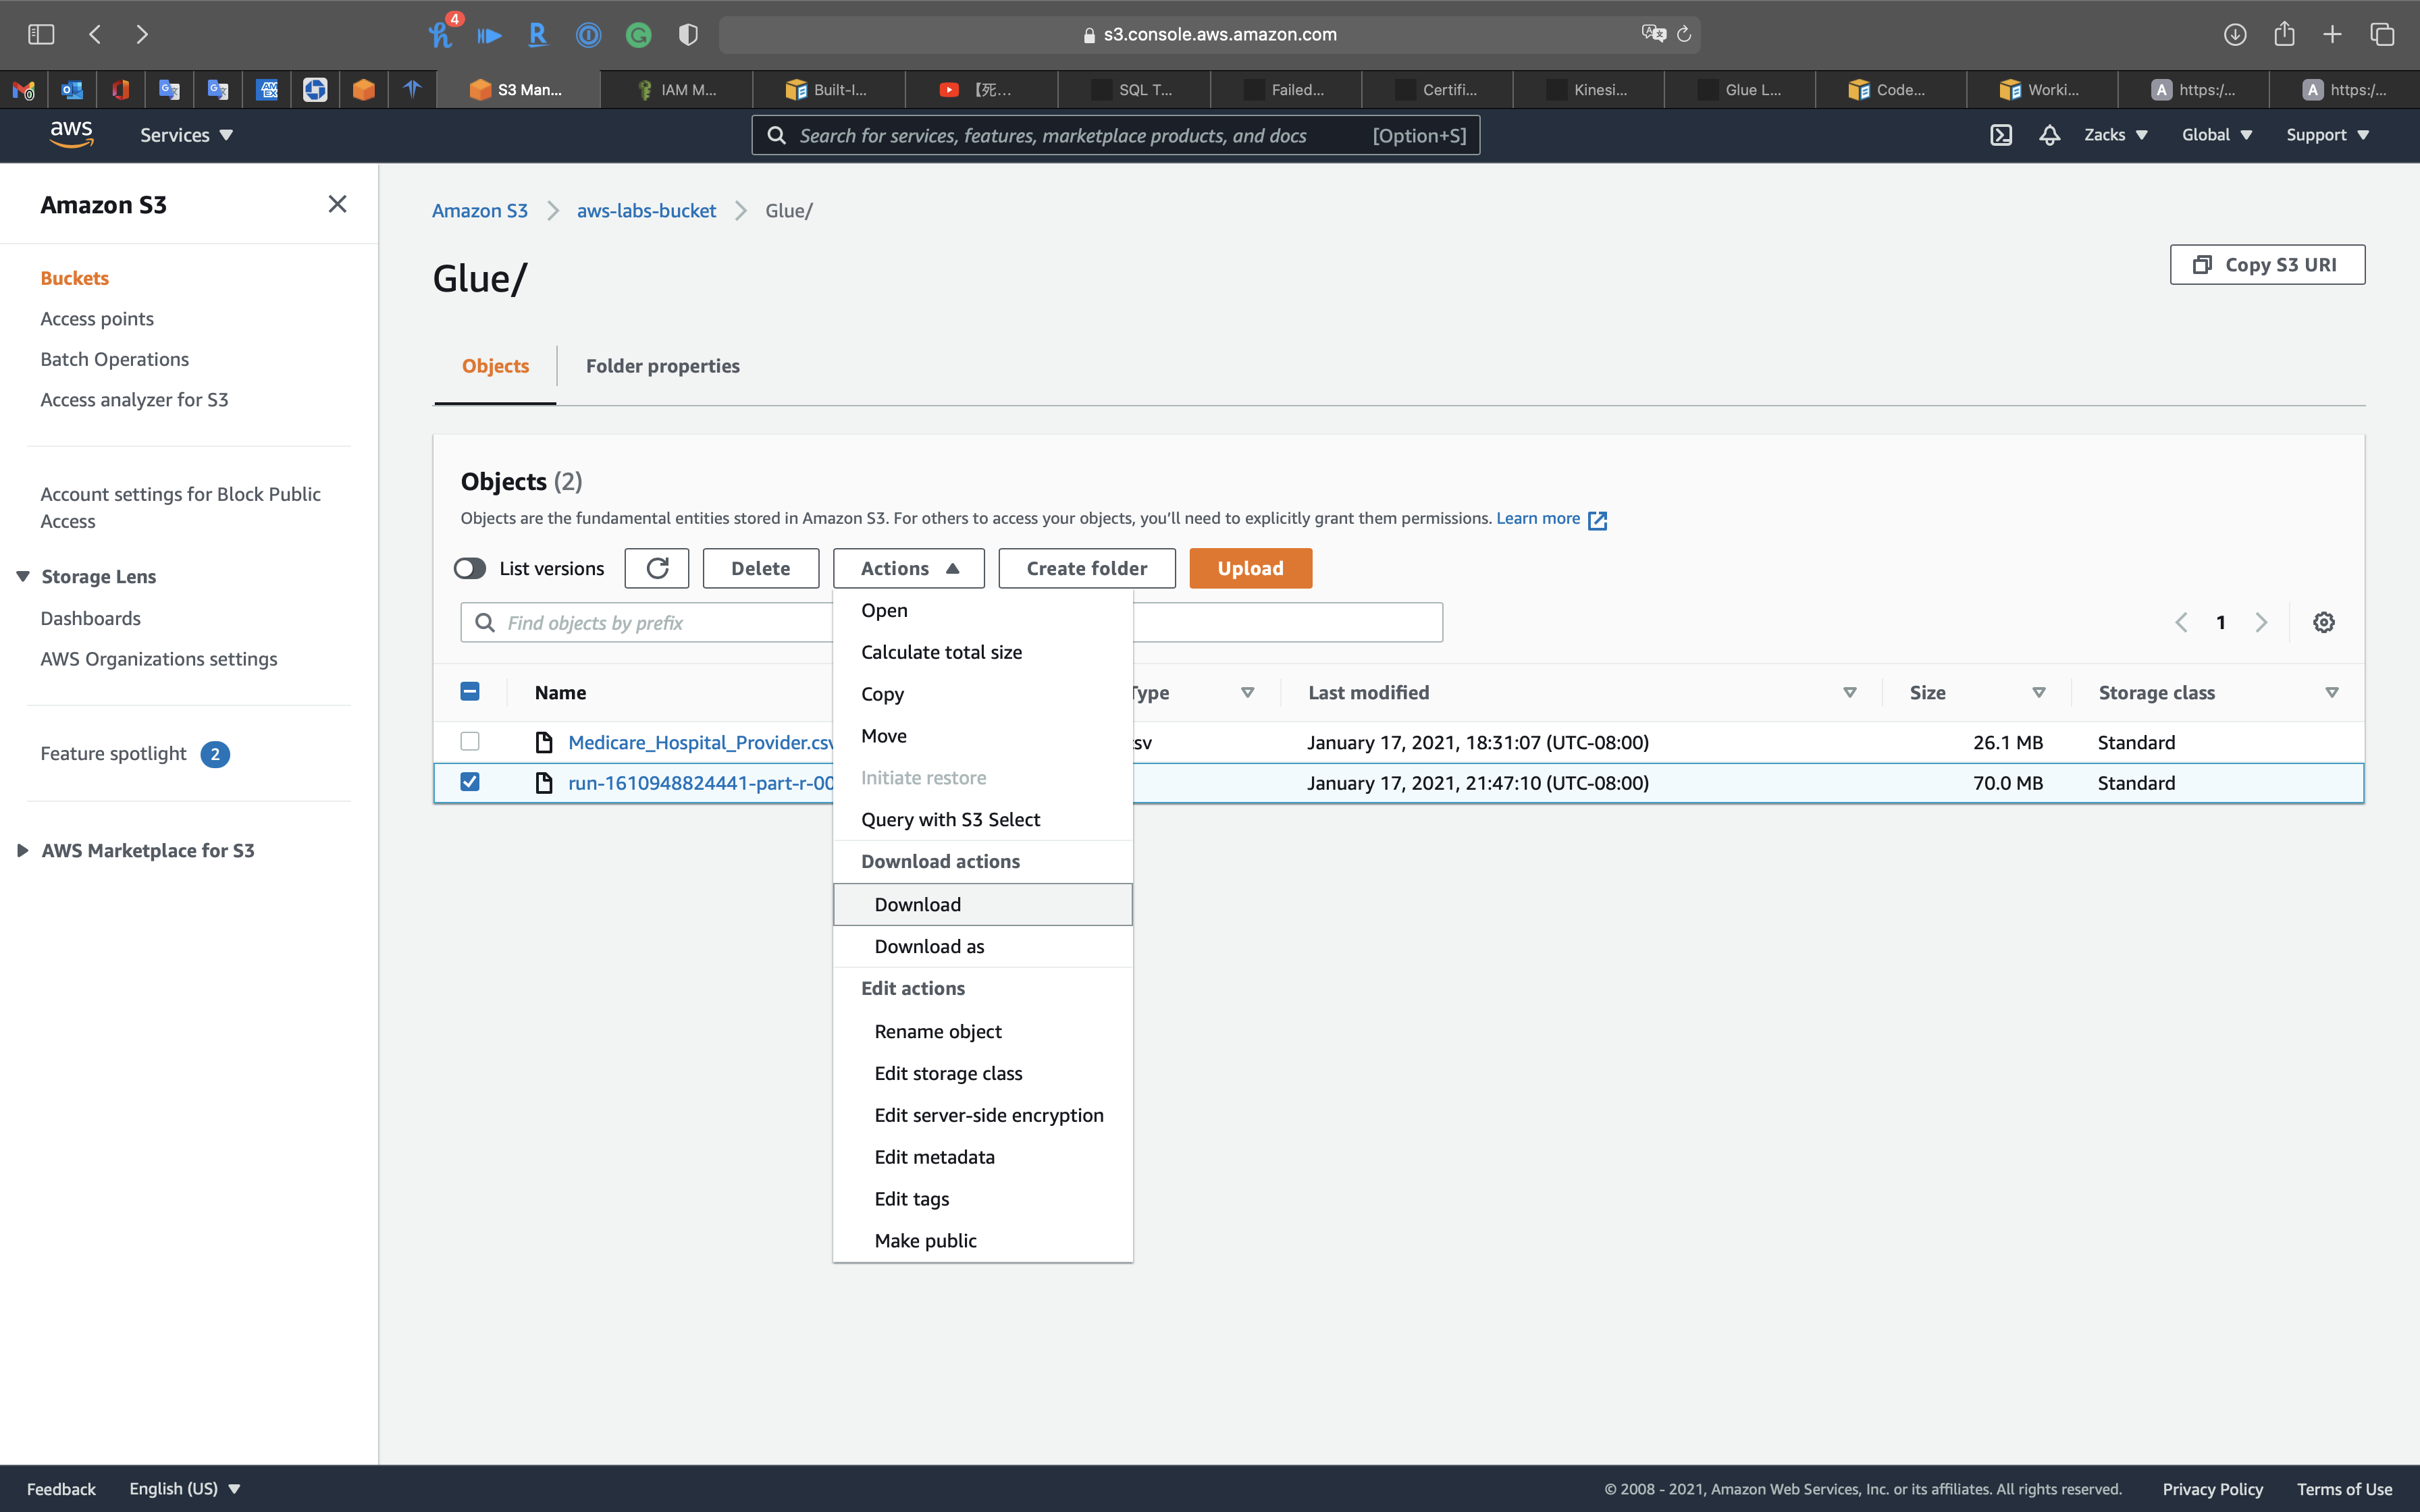
Compare to the .csv file.
Run Crawler Again
Services -> AWS Glue -> Crawlers
Since we have the .json file that converted from the .csv file in the S3 bucket, we need to run the crawler again.
Select uci-covid
Click on Run crawler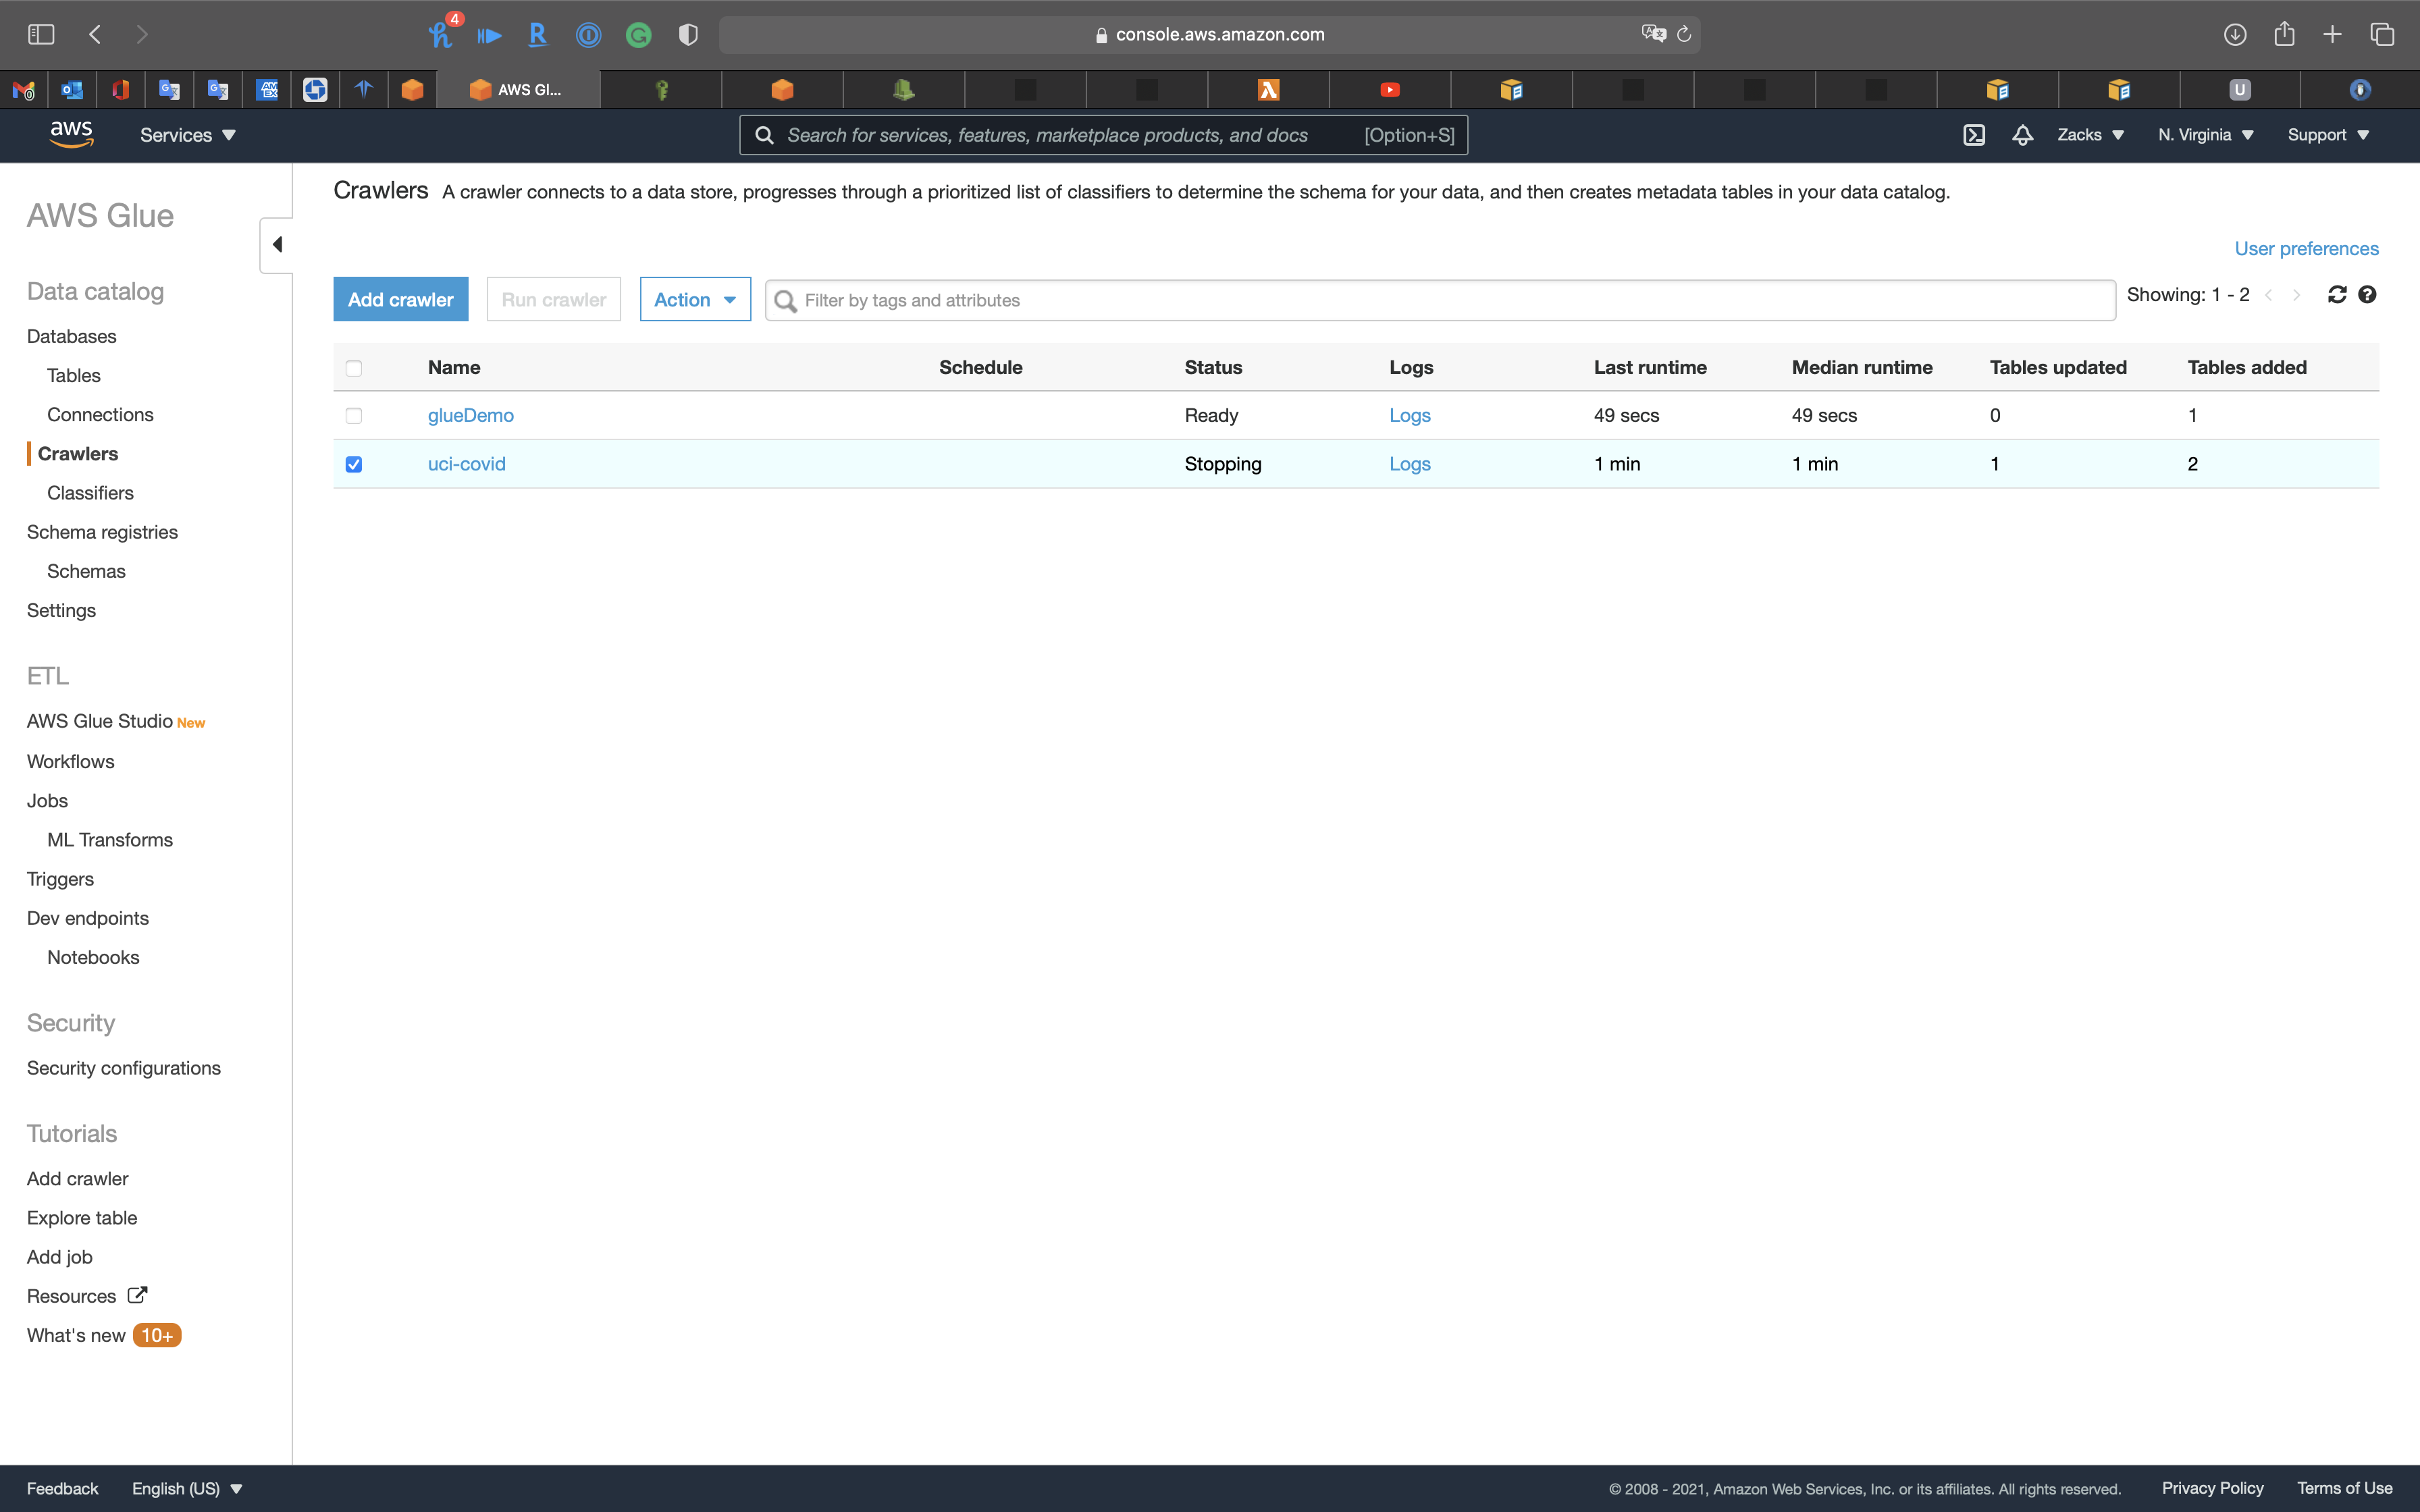
Click on Tables navigation.
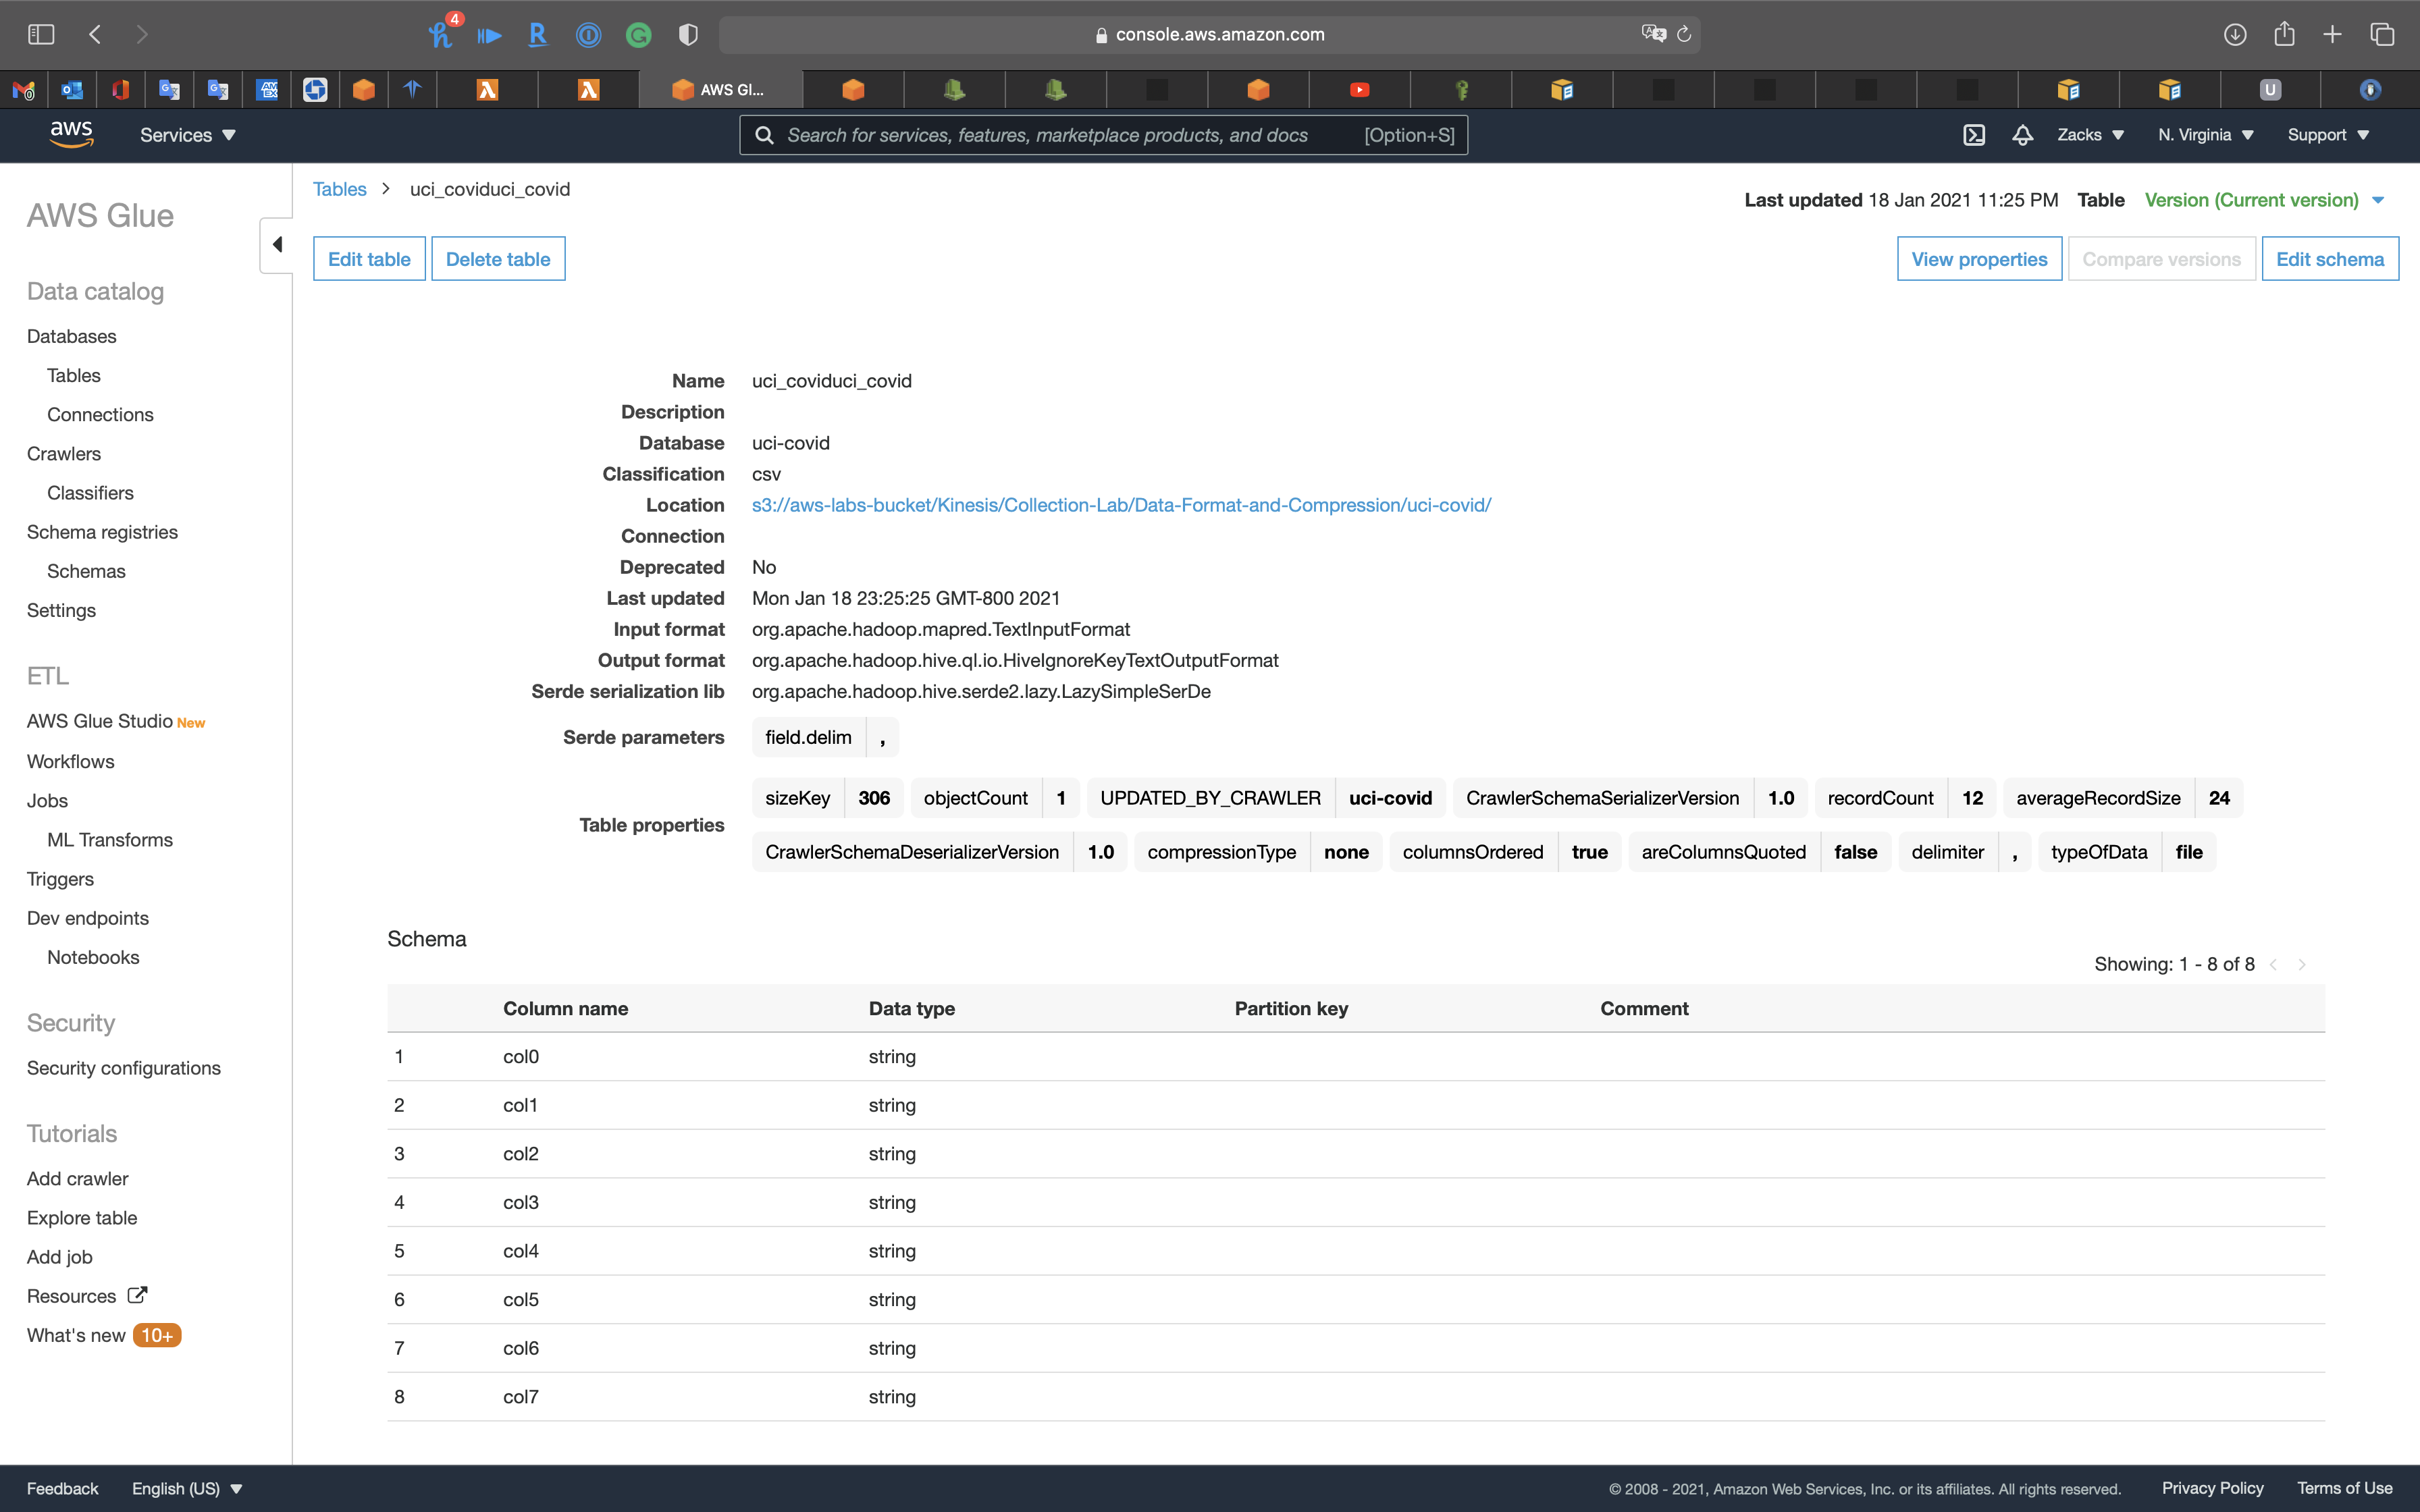
We have a brand new table that is .json format.
Click on the .json table.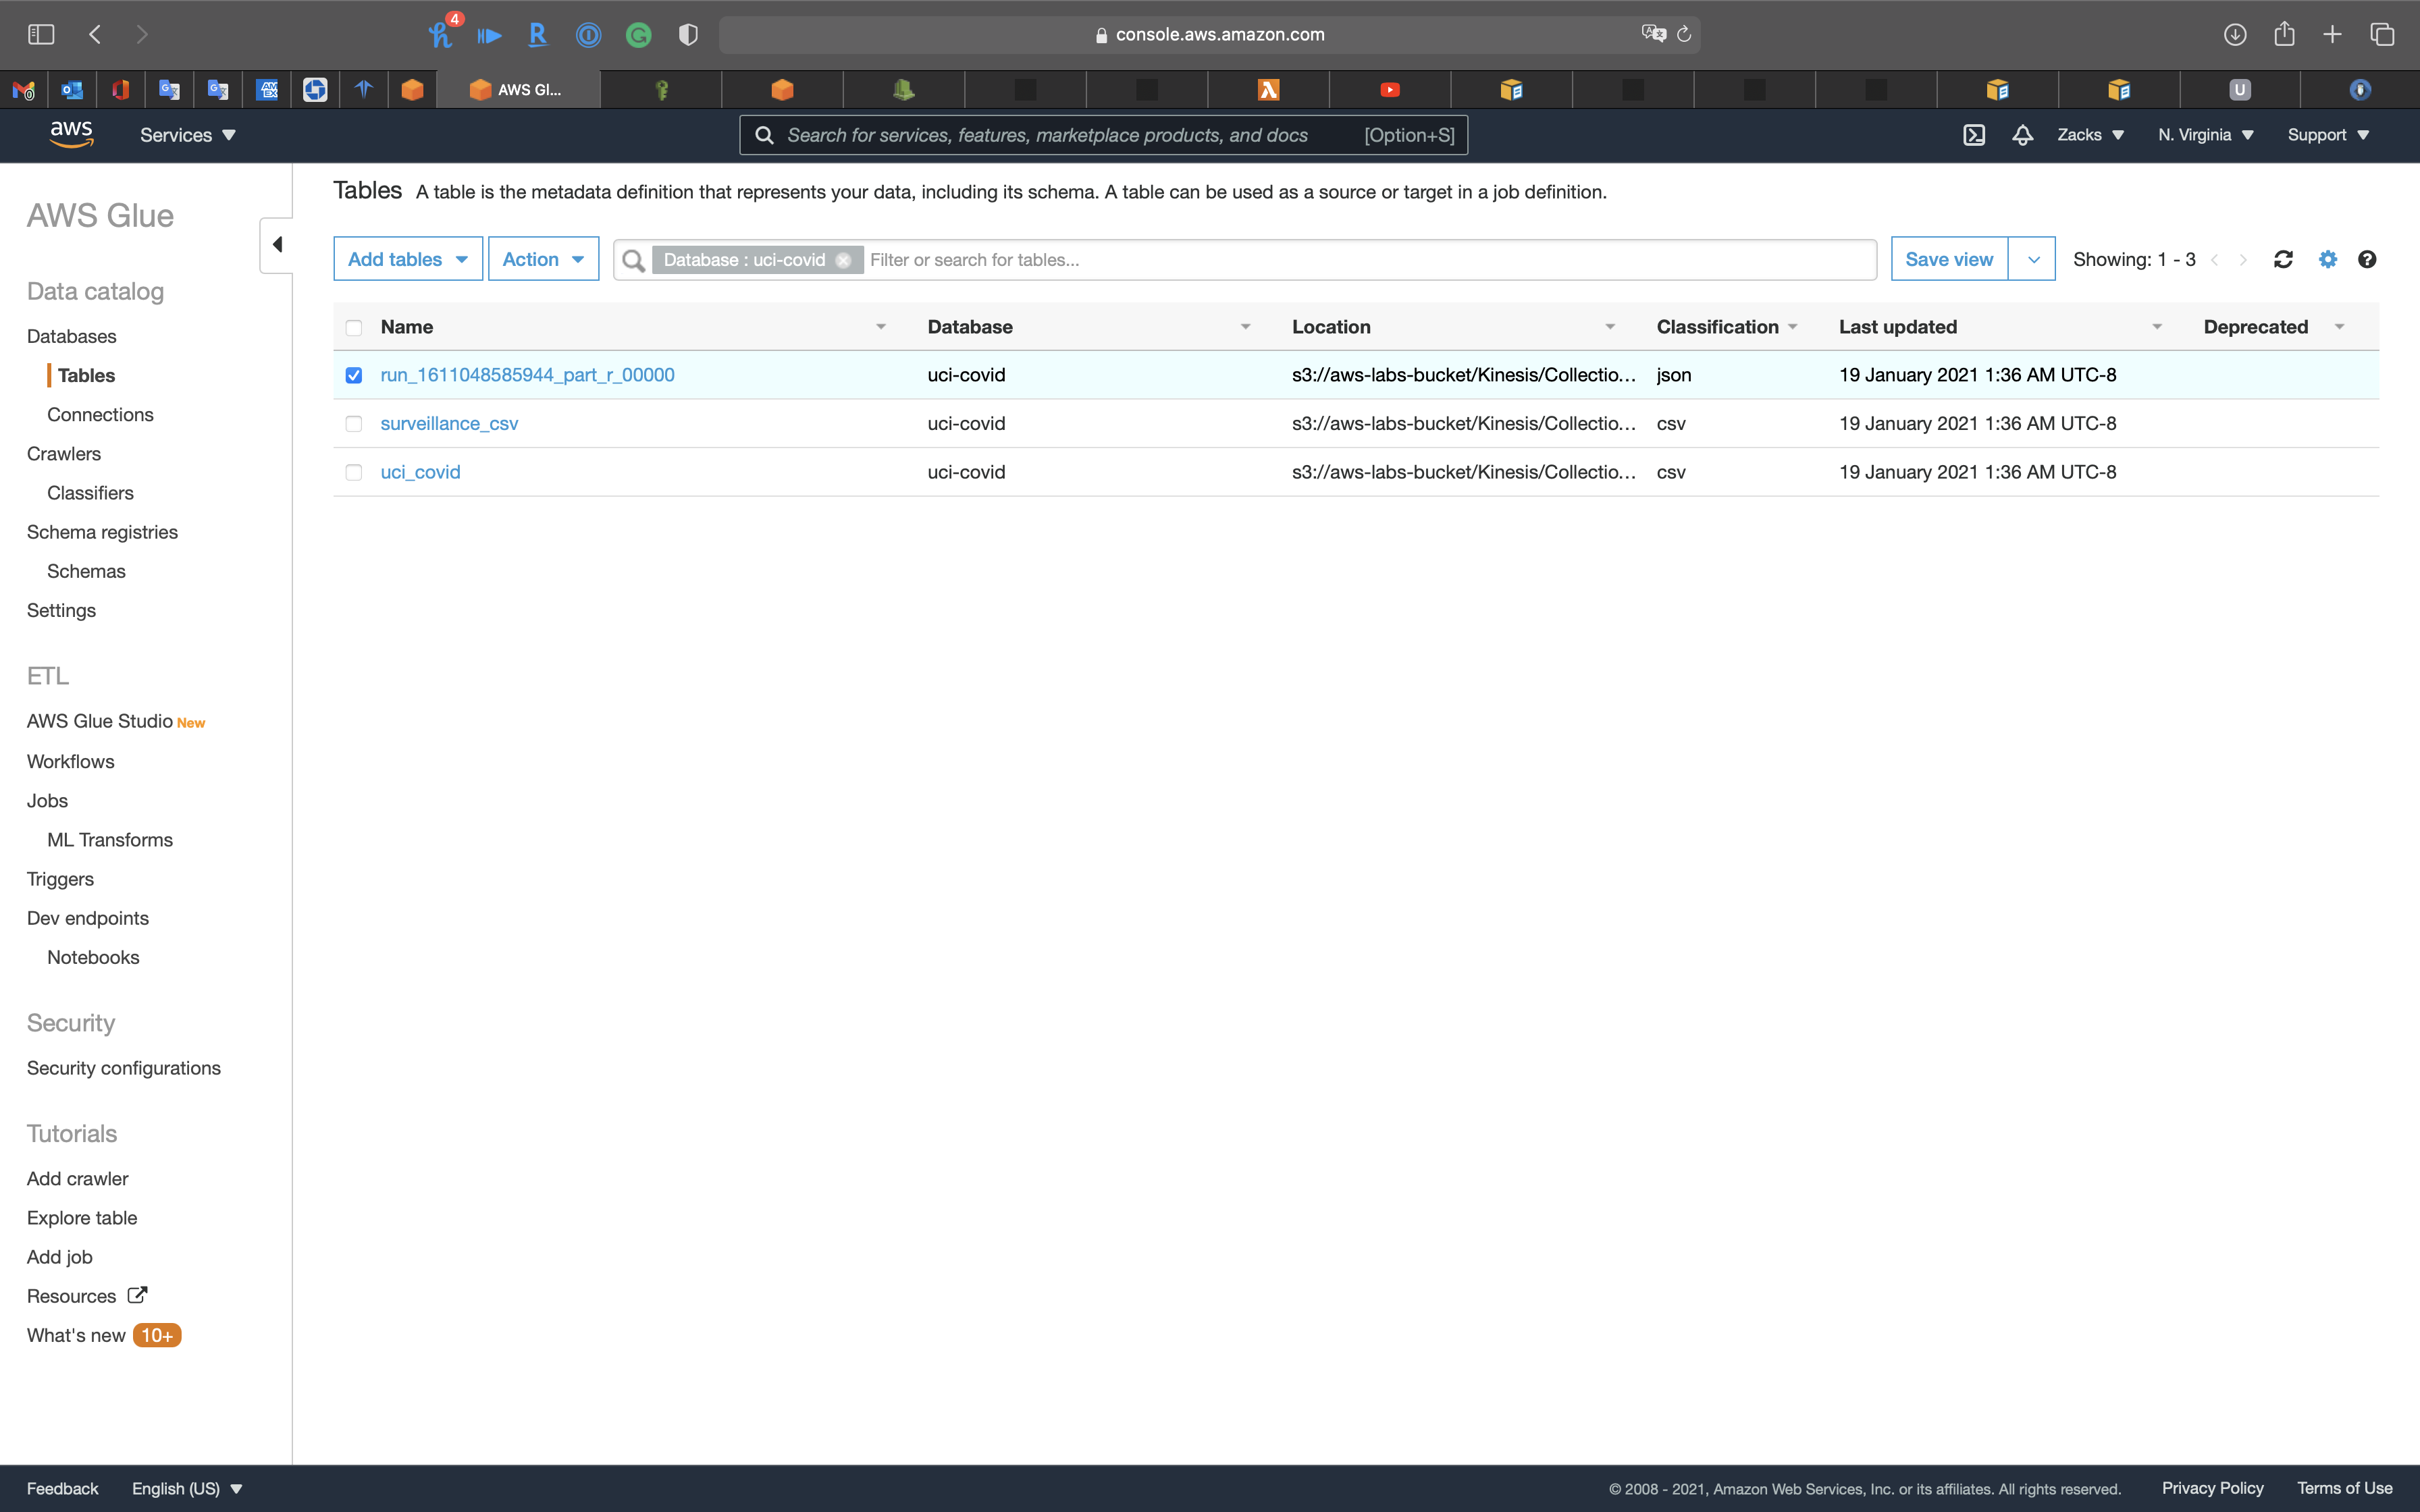
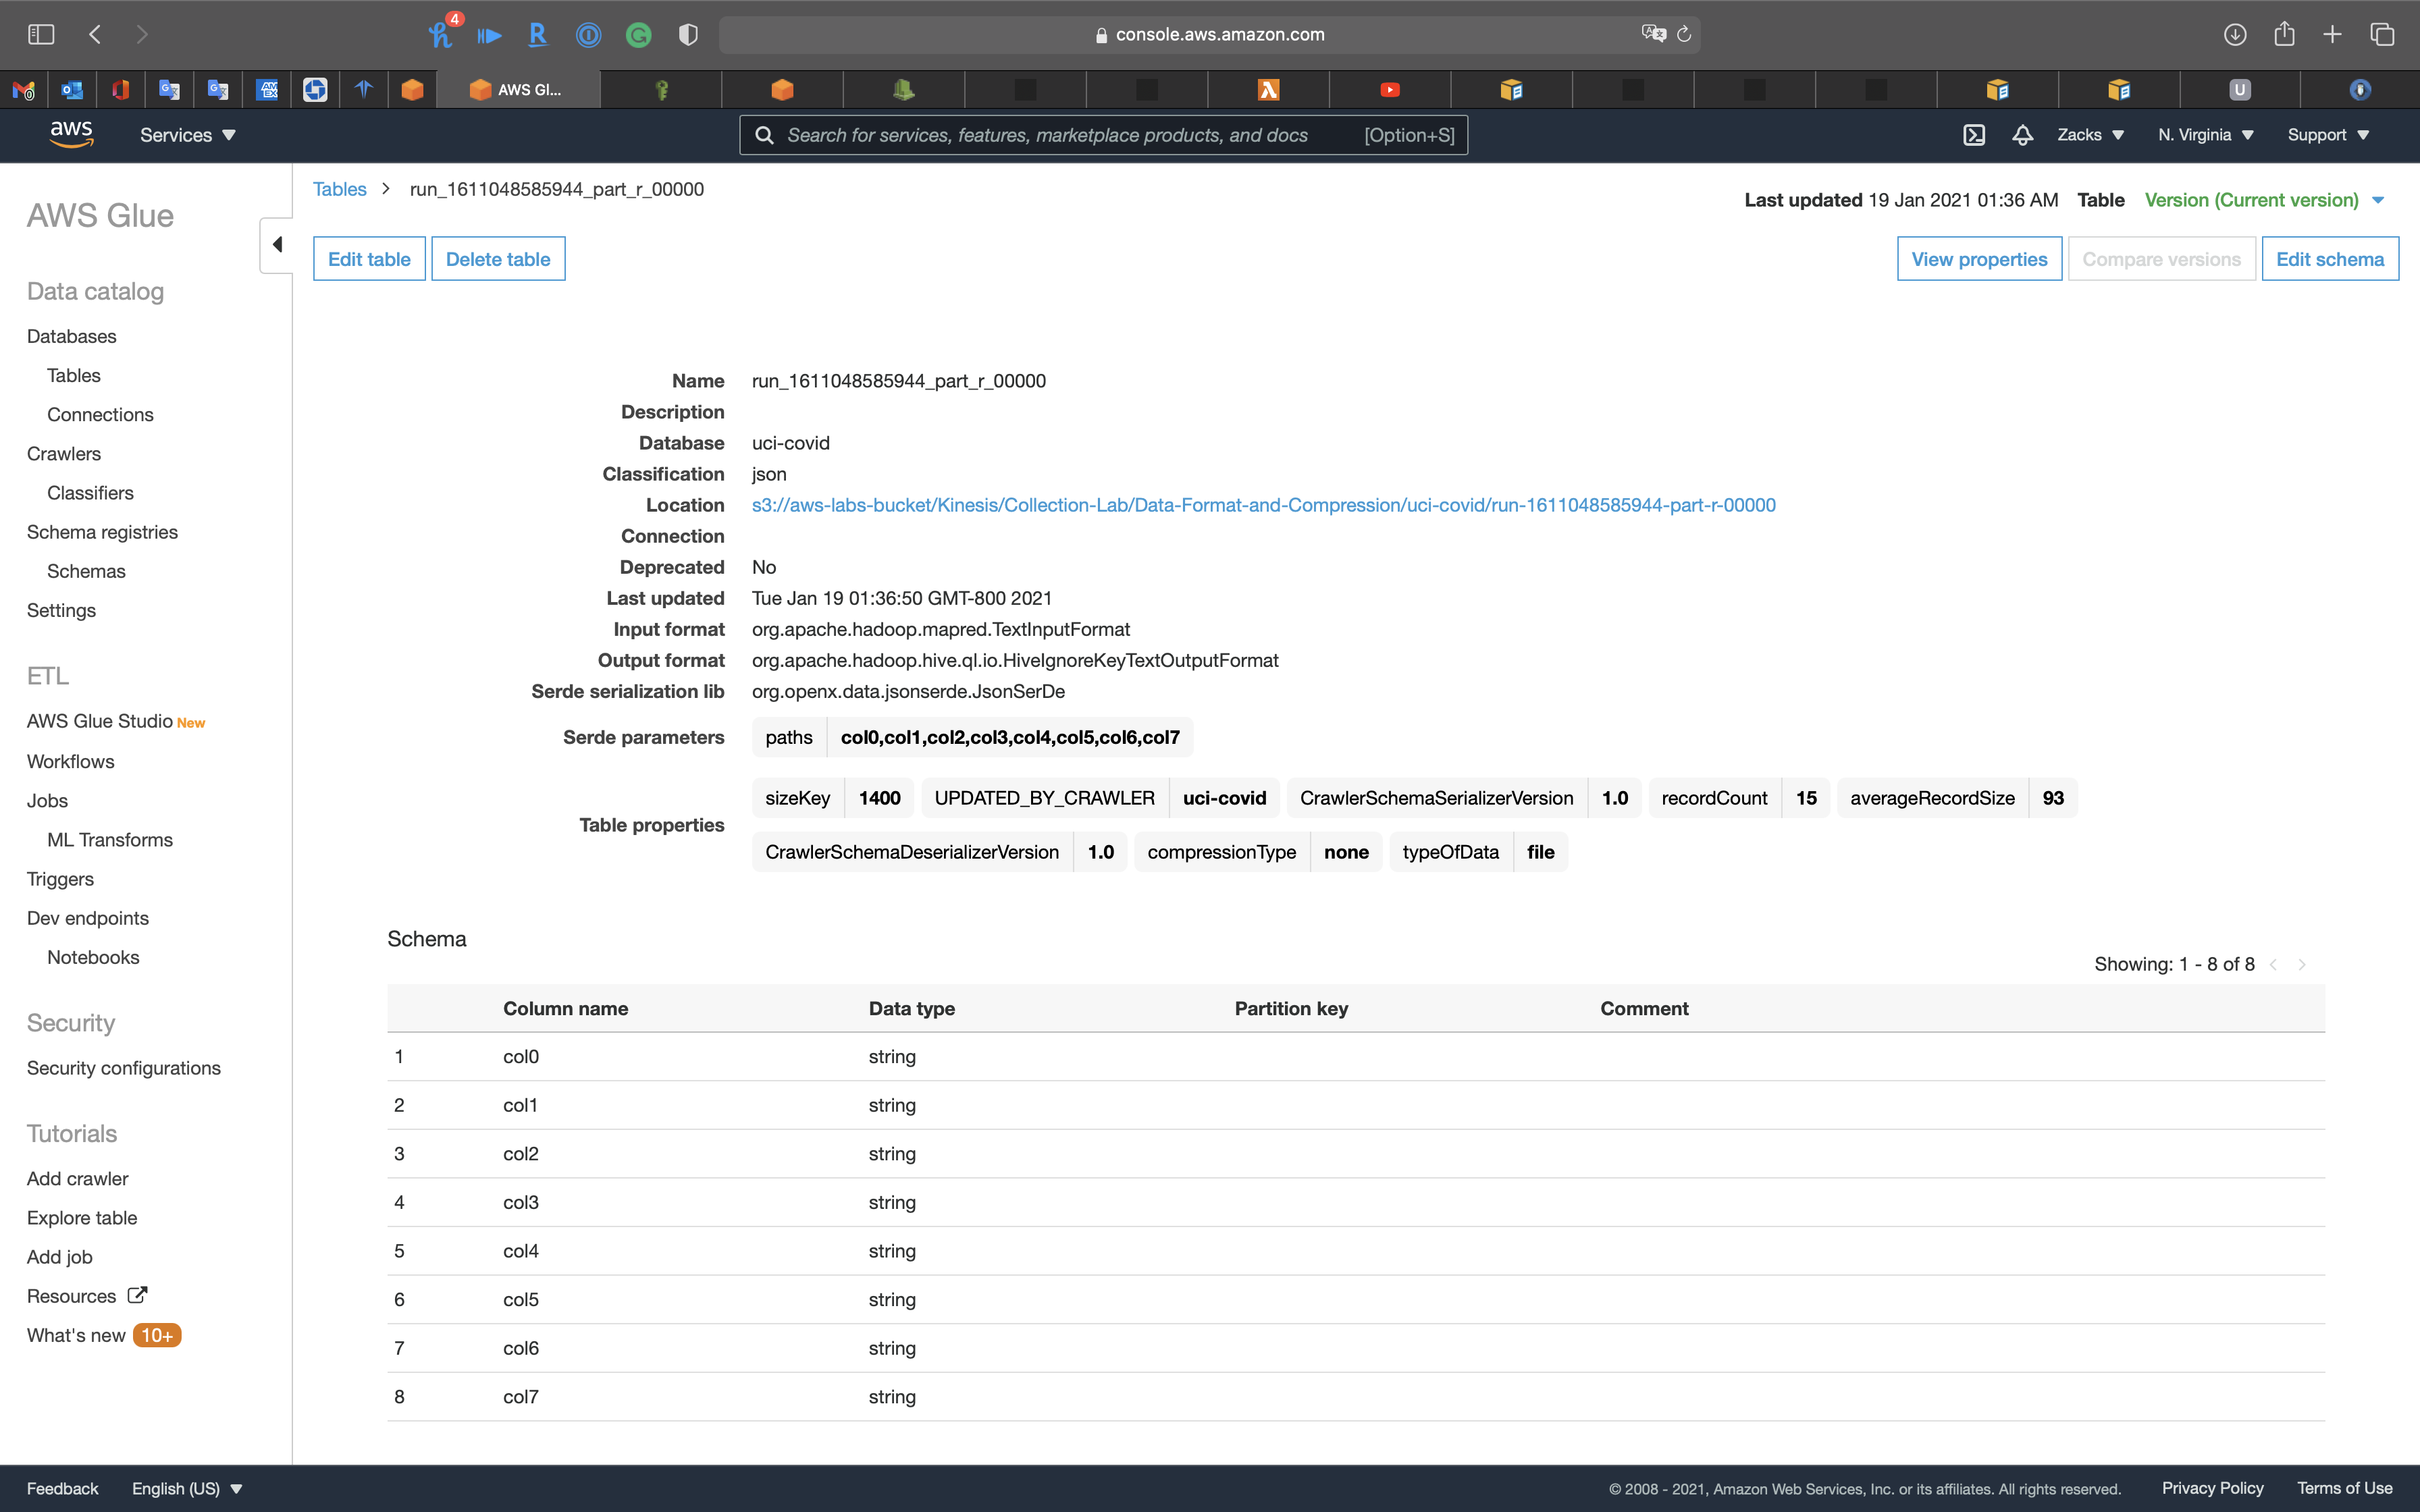
Click on Edit table
We manually update the Serde parameters, Key (path), Value from A01 to A07, and Category.
Click on Apply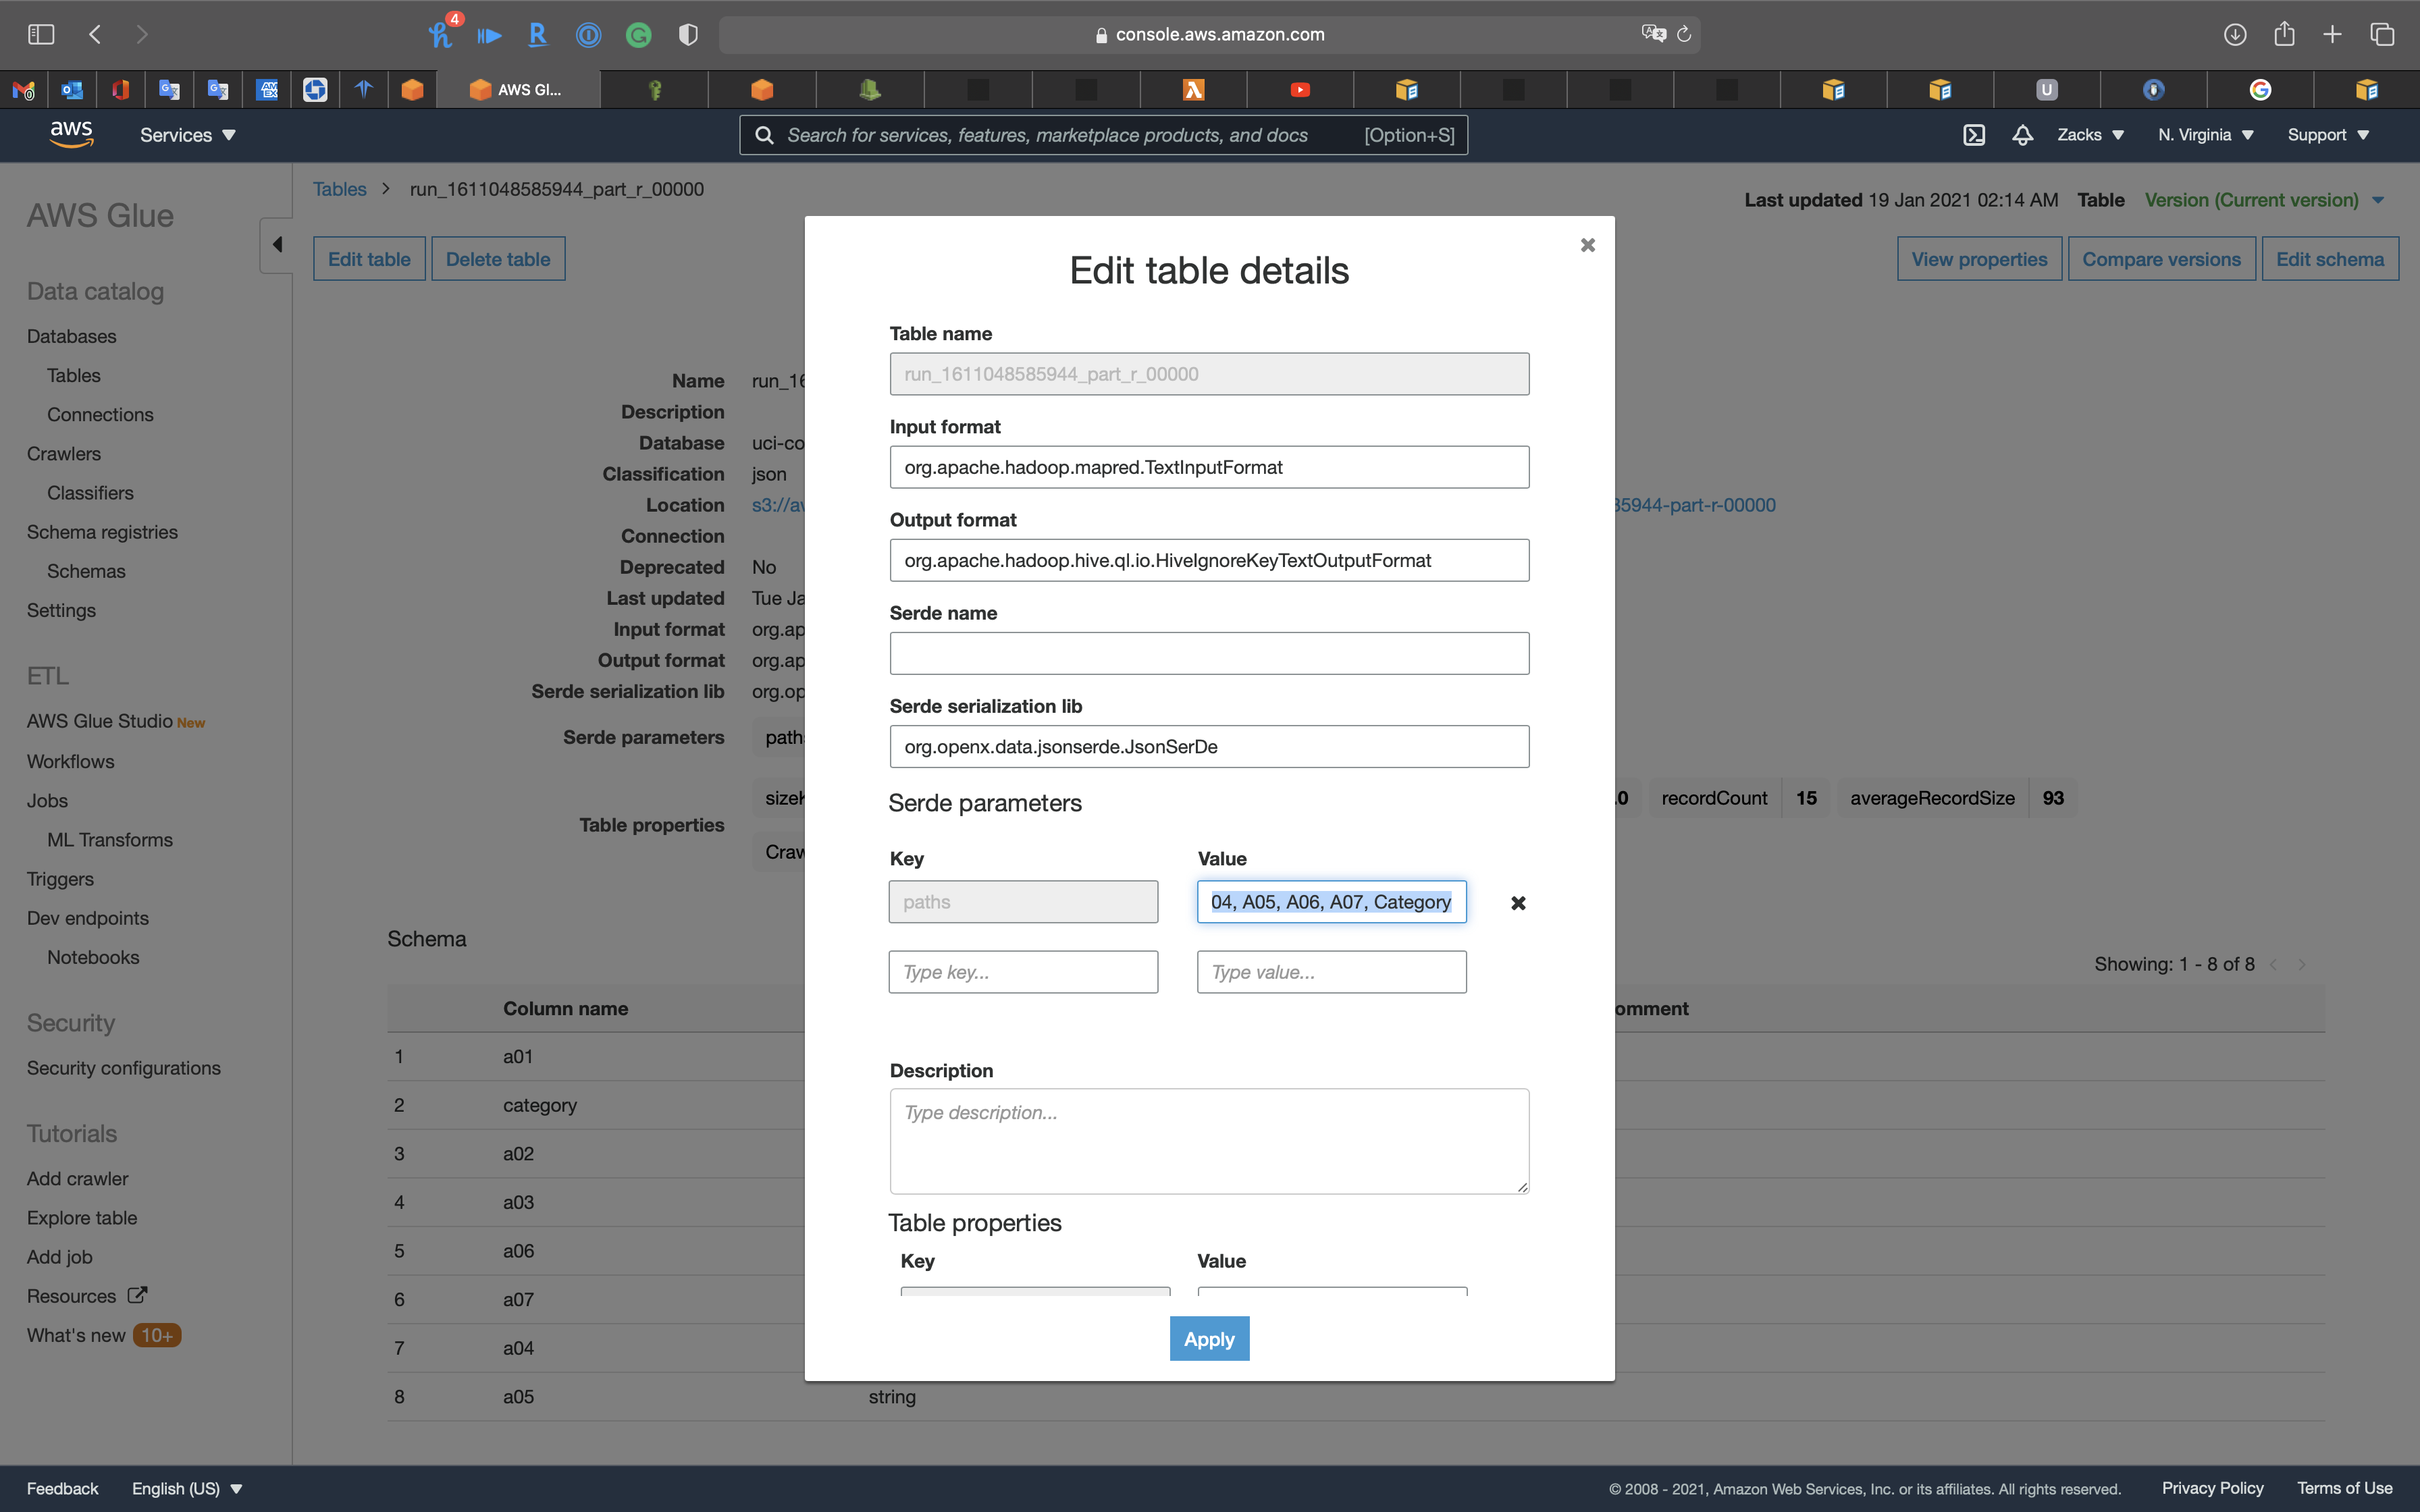
Click on Edit Schema
Then update the column name as the screenshot.
Click on Save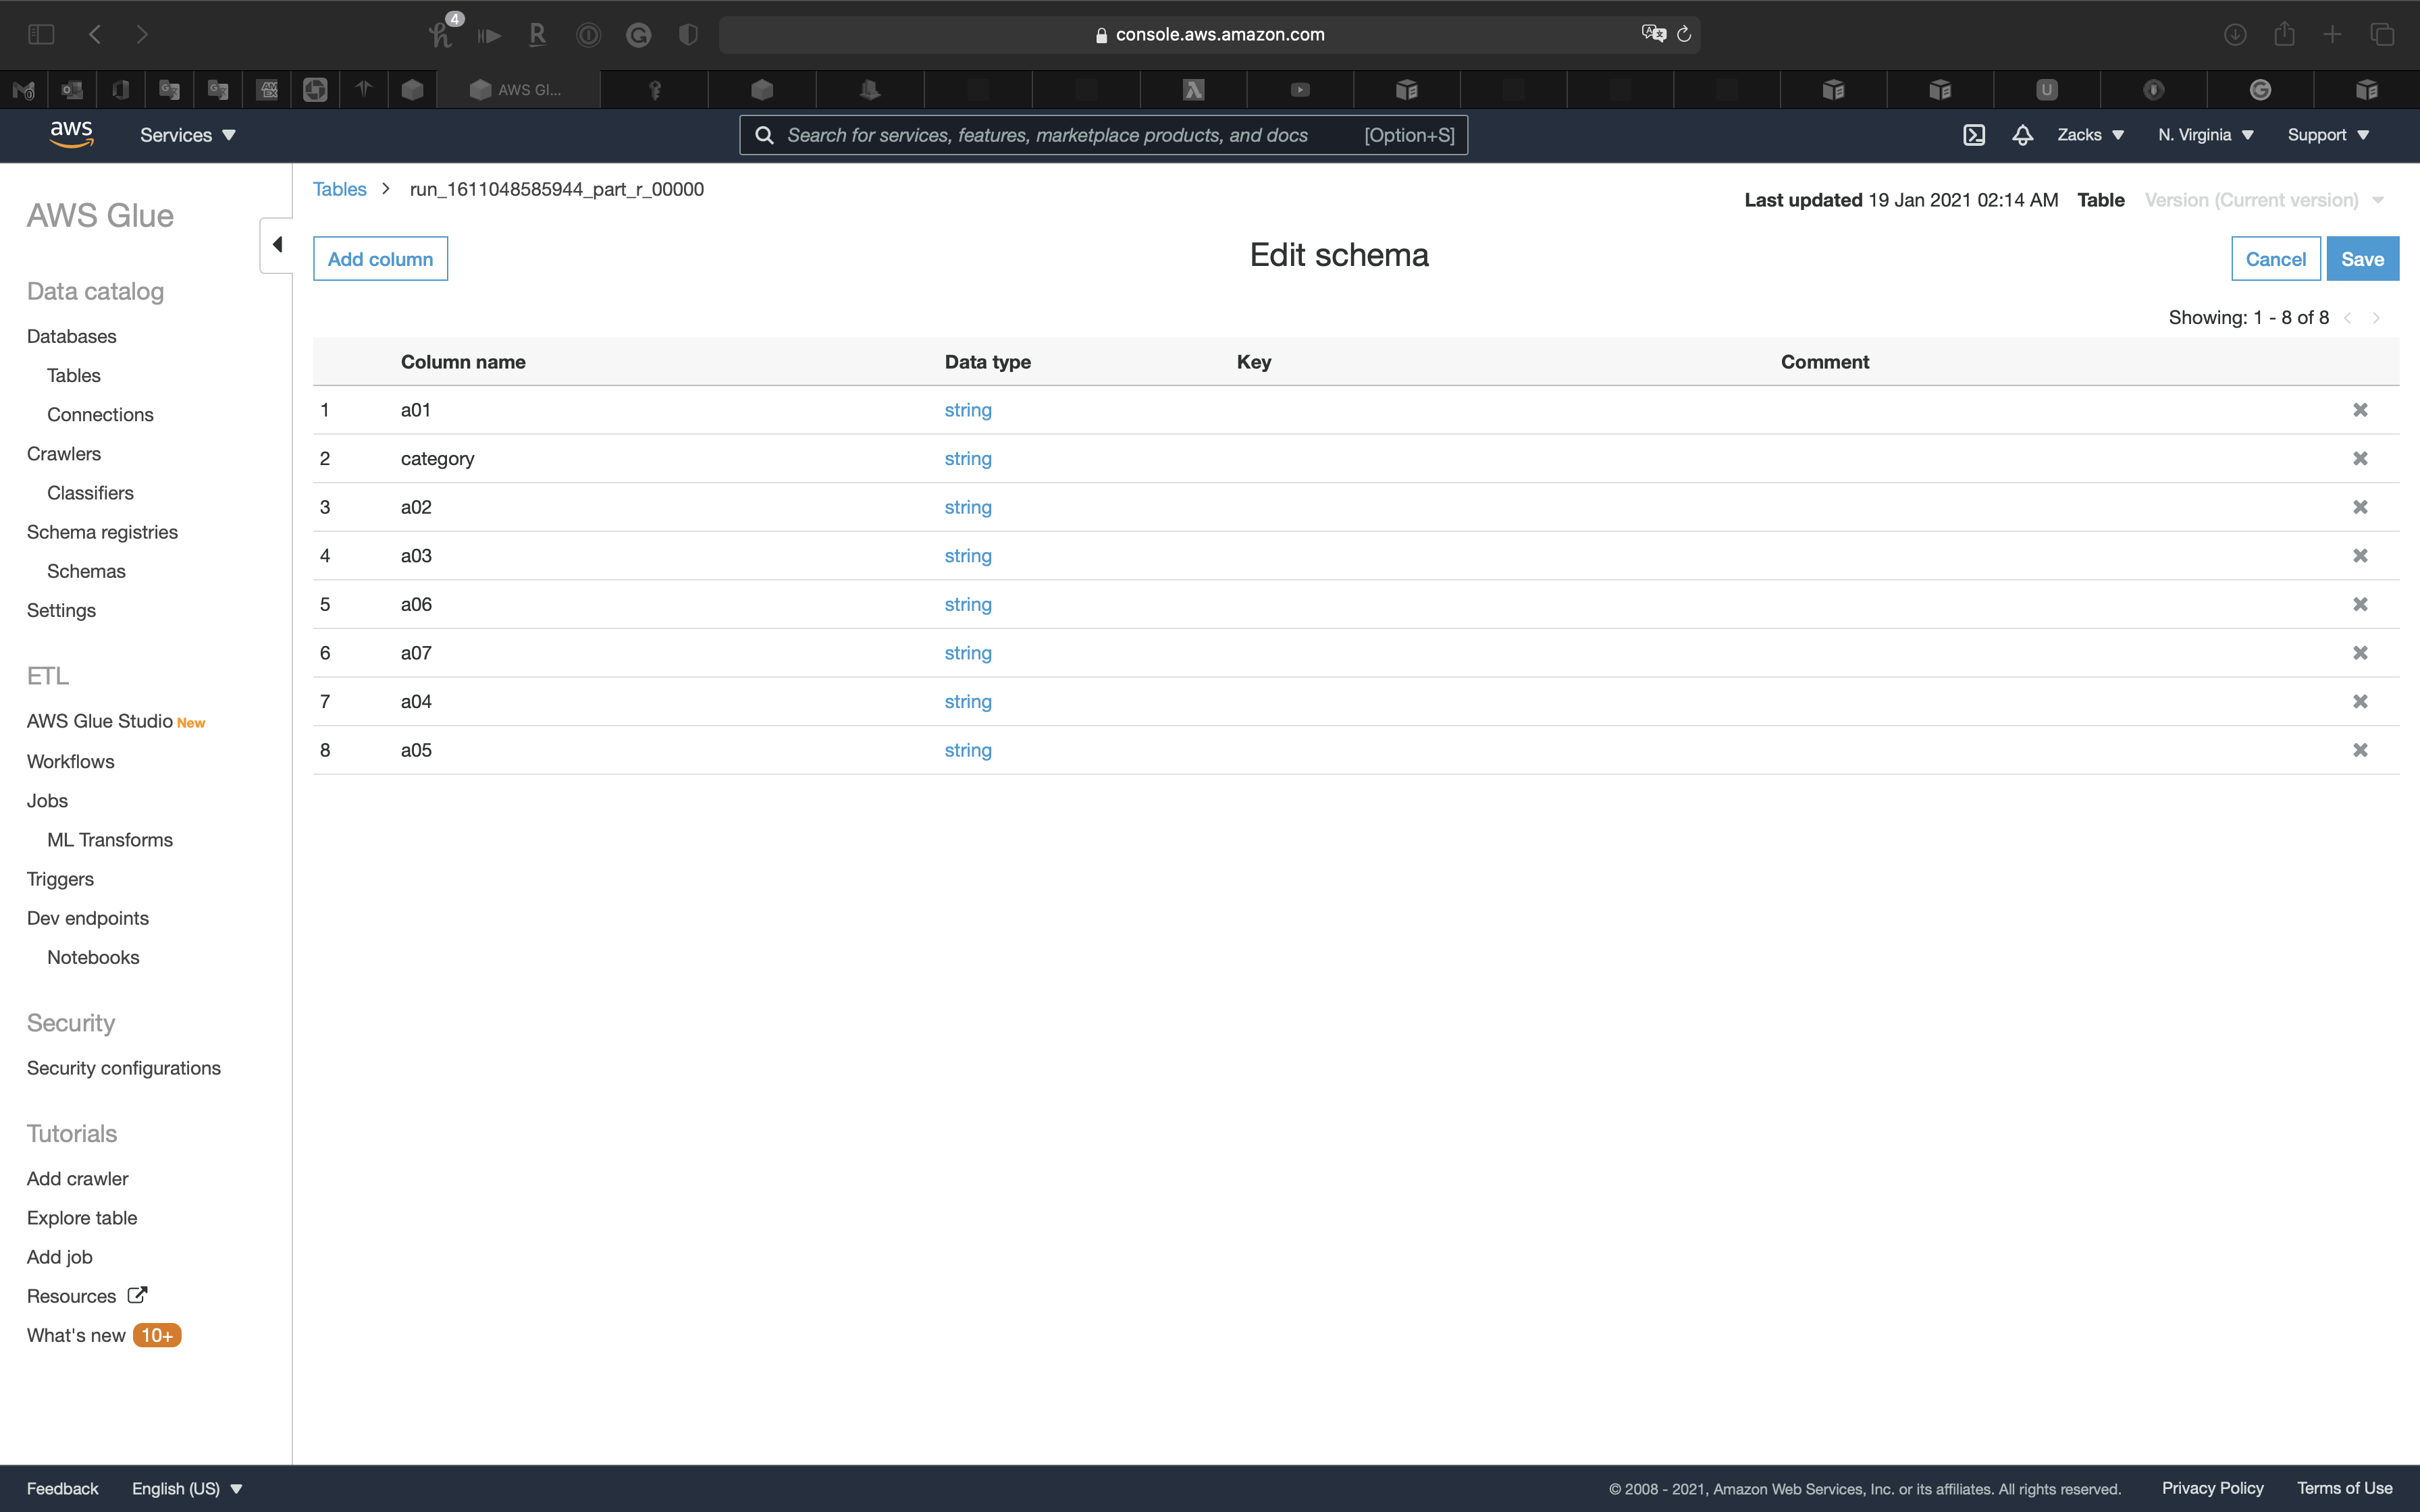
Lambda Configuration
Services -> Lambda
Create a Lambda function from scratch
Click on Create function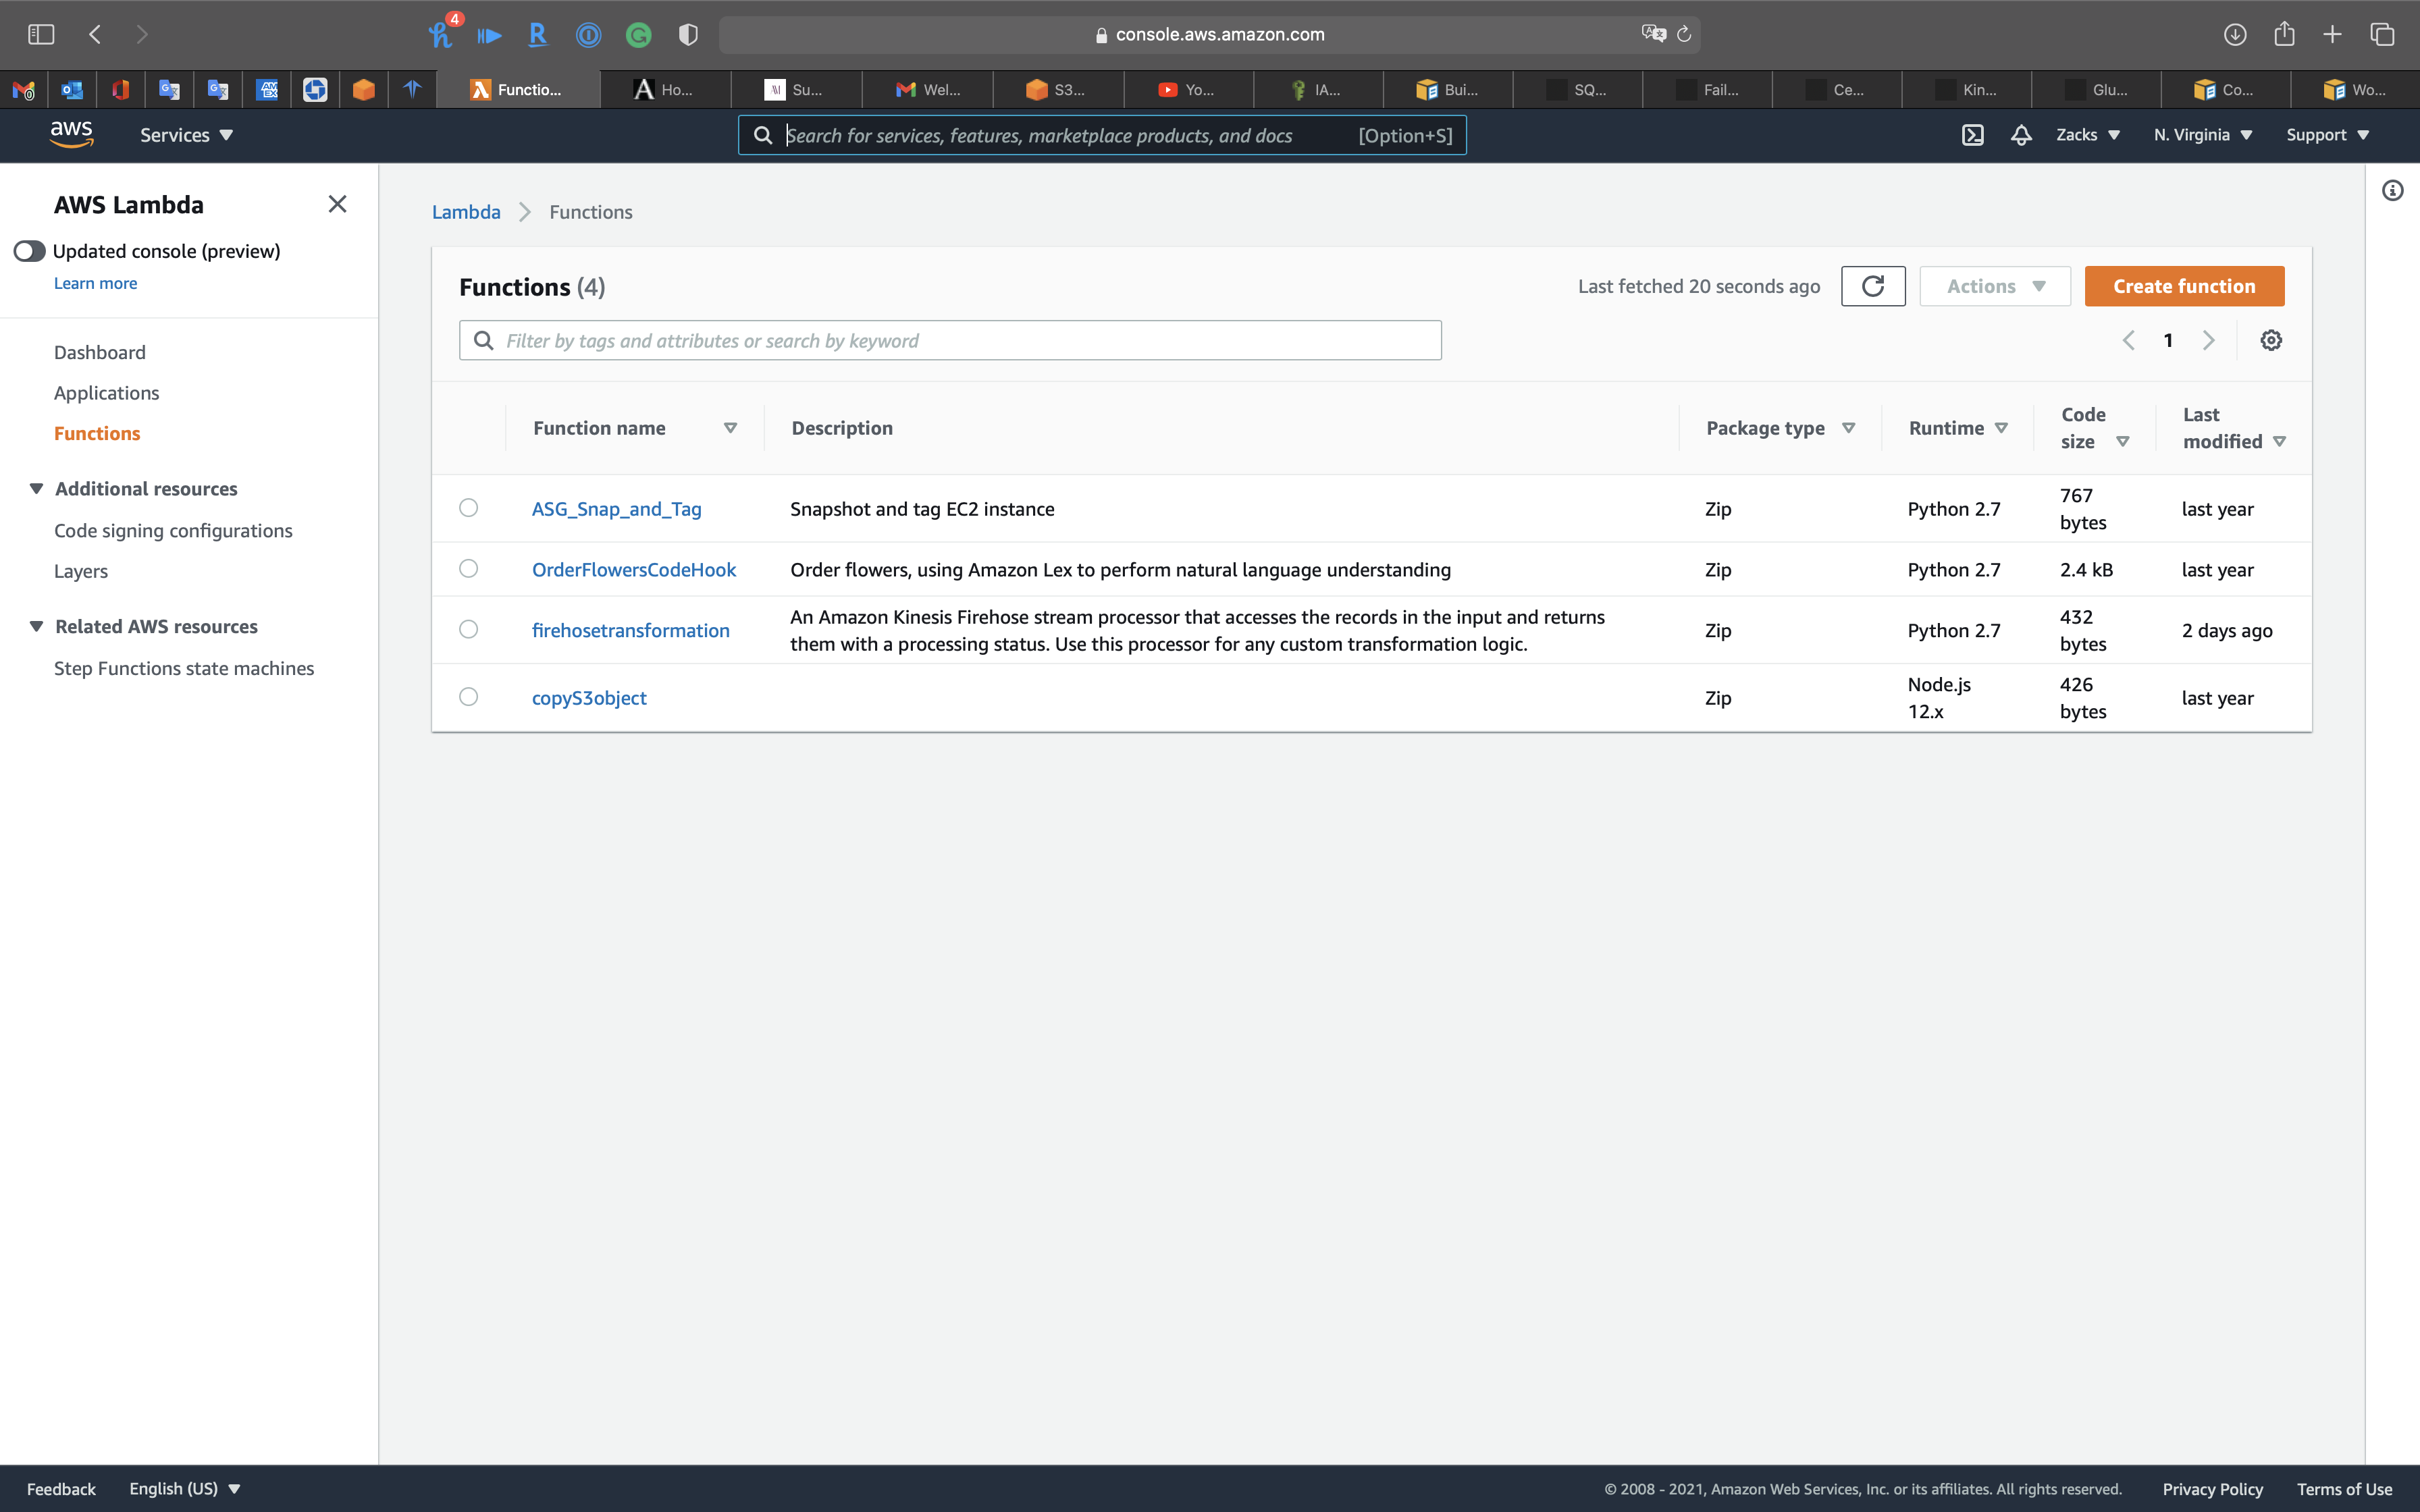
Select Author from scratch
Basic information
- Function name:
firehosetransformation2 - Runtime: Python 2.7
Expand Change default execution role
Execution role
- Select
Create a new role with basic Lambda permissions
Click on Create function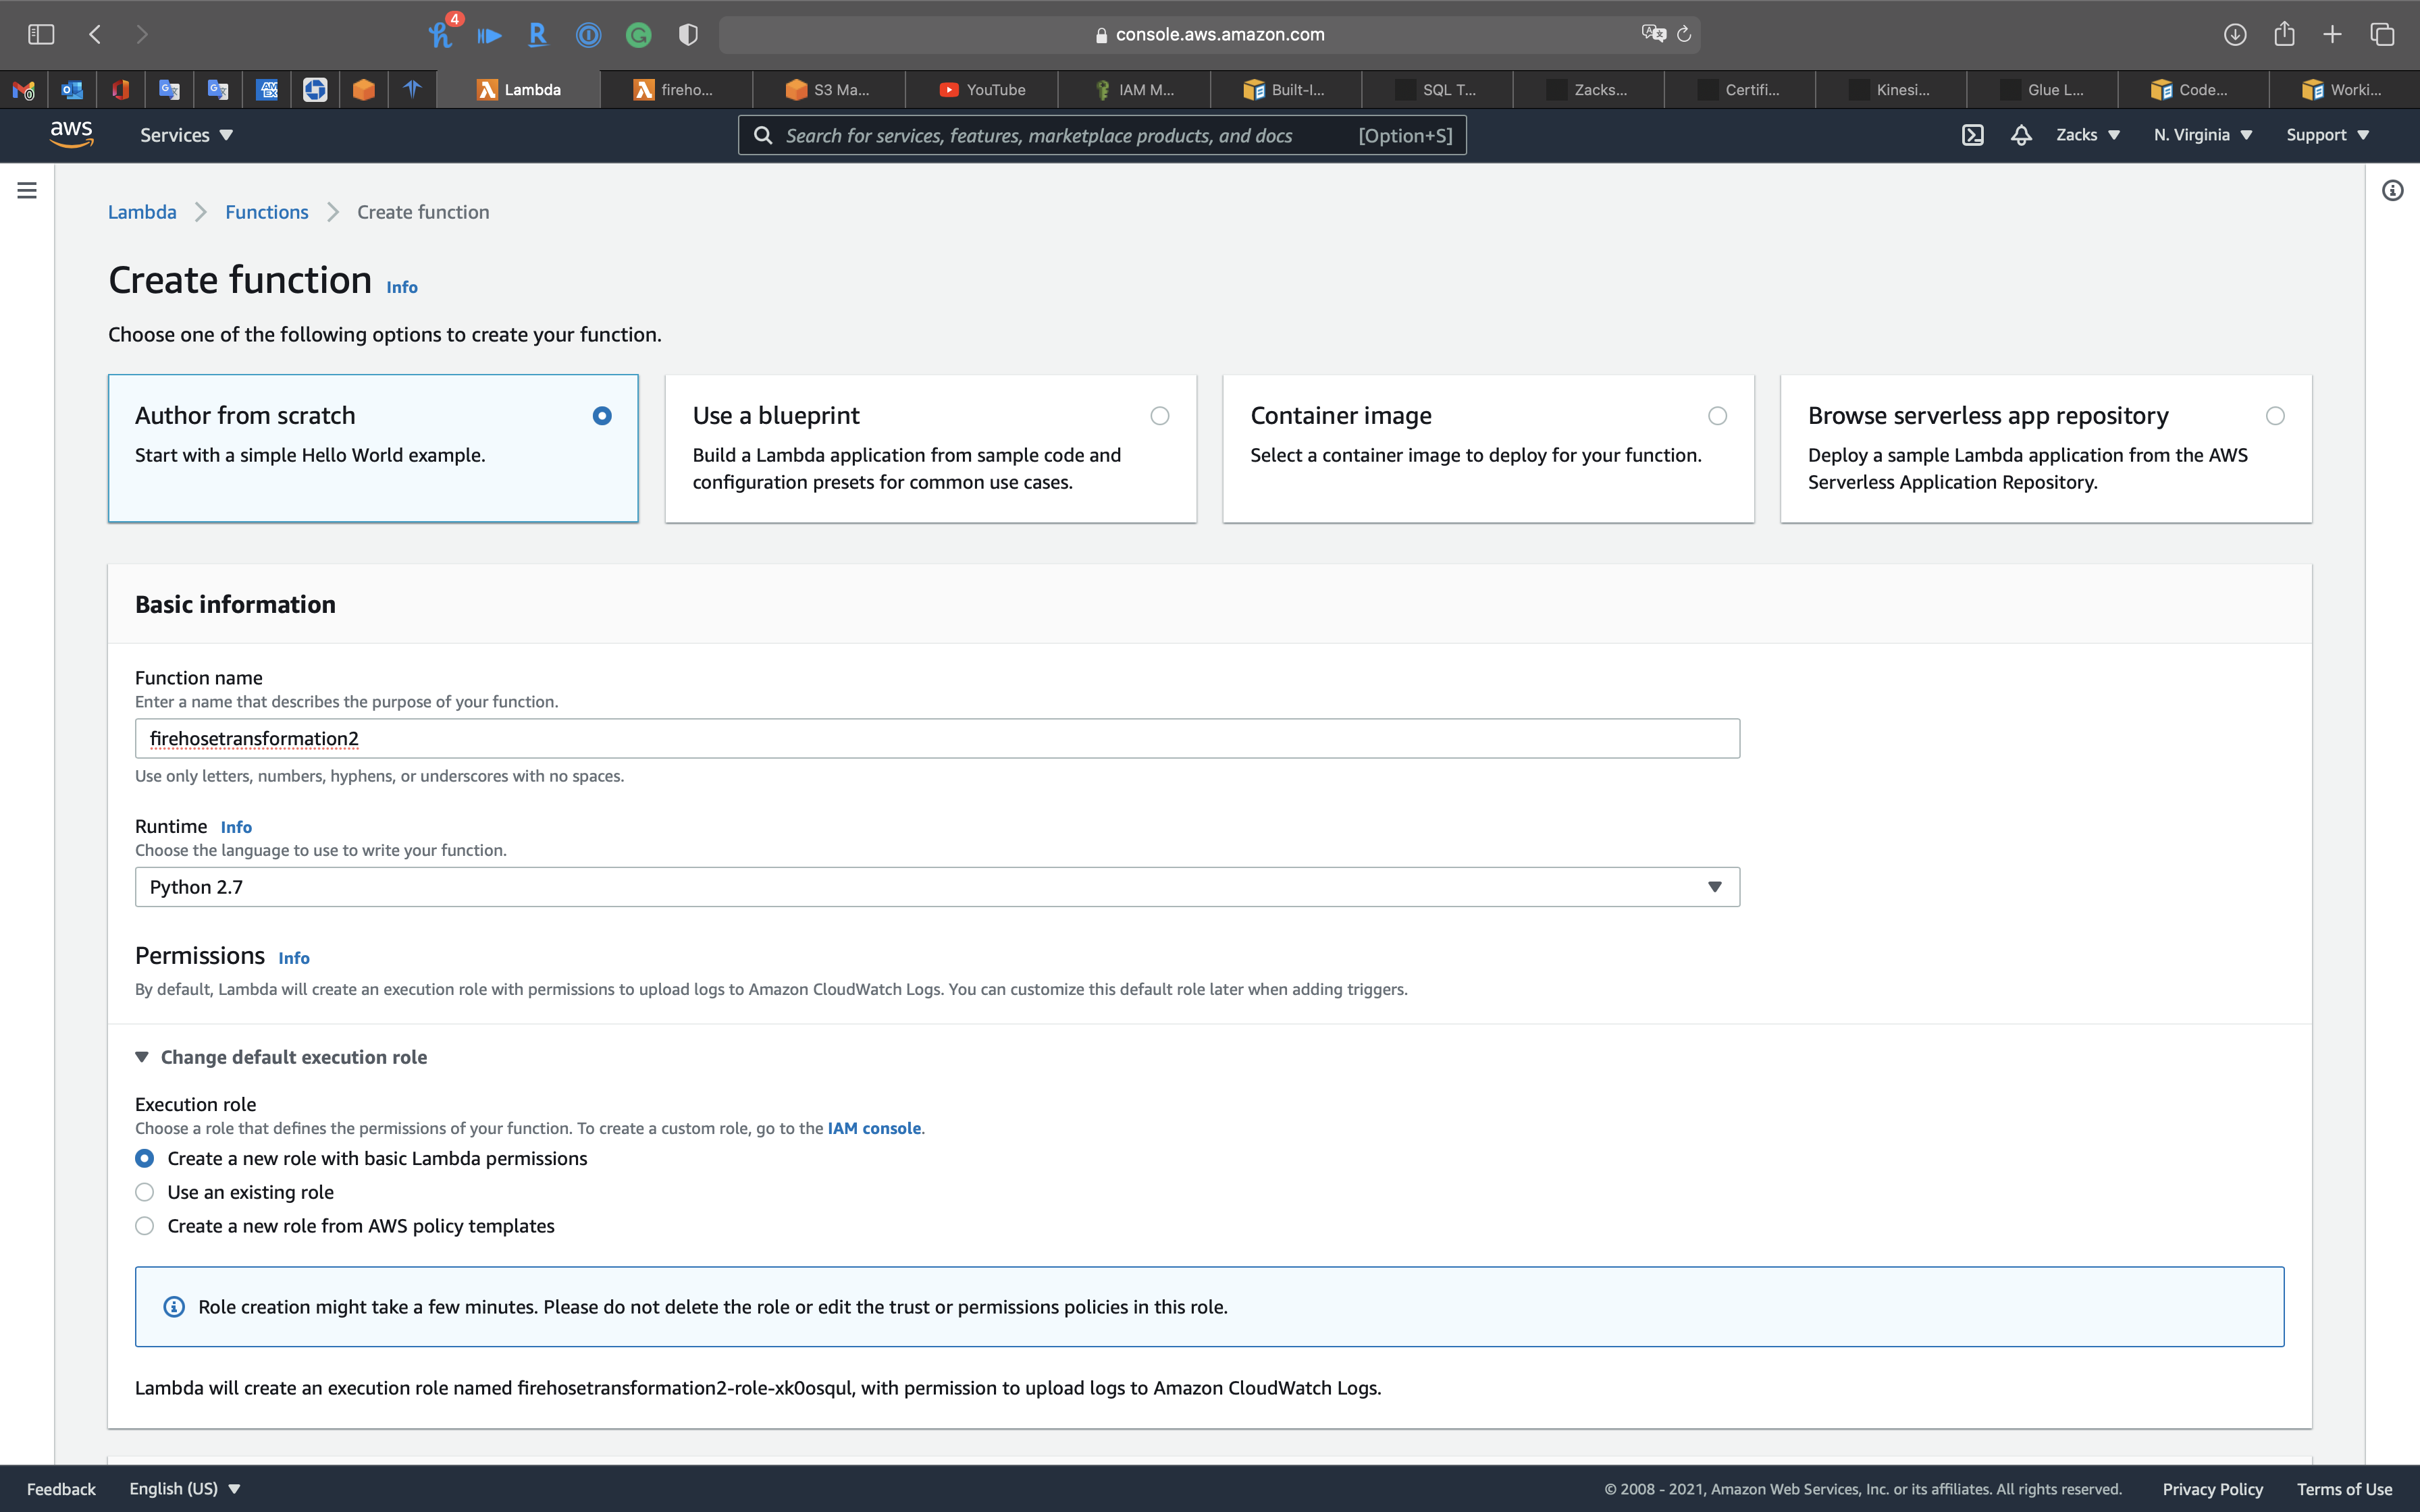
Edit function
Under Function code
Copy and paste the following code.
1 | from __future__ import print_function |
Click on Deploy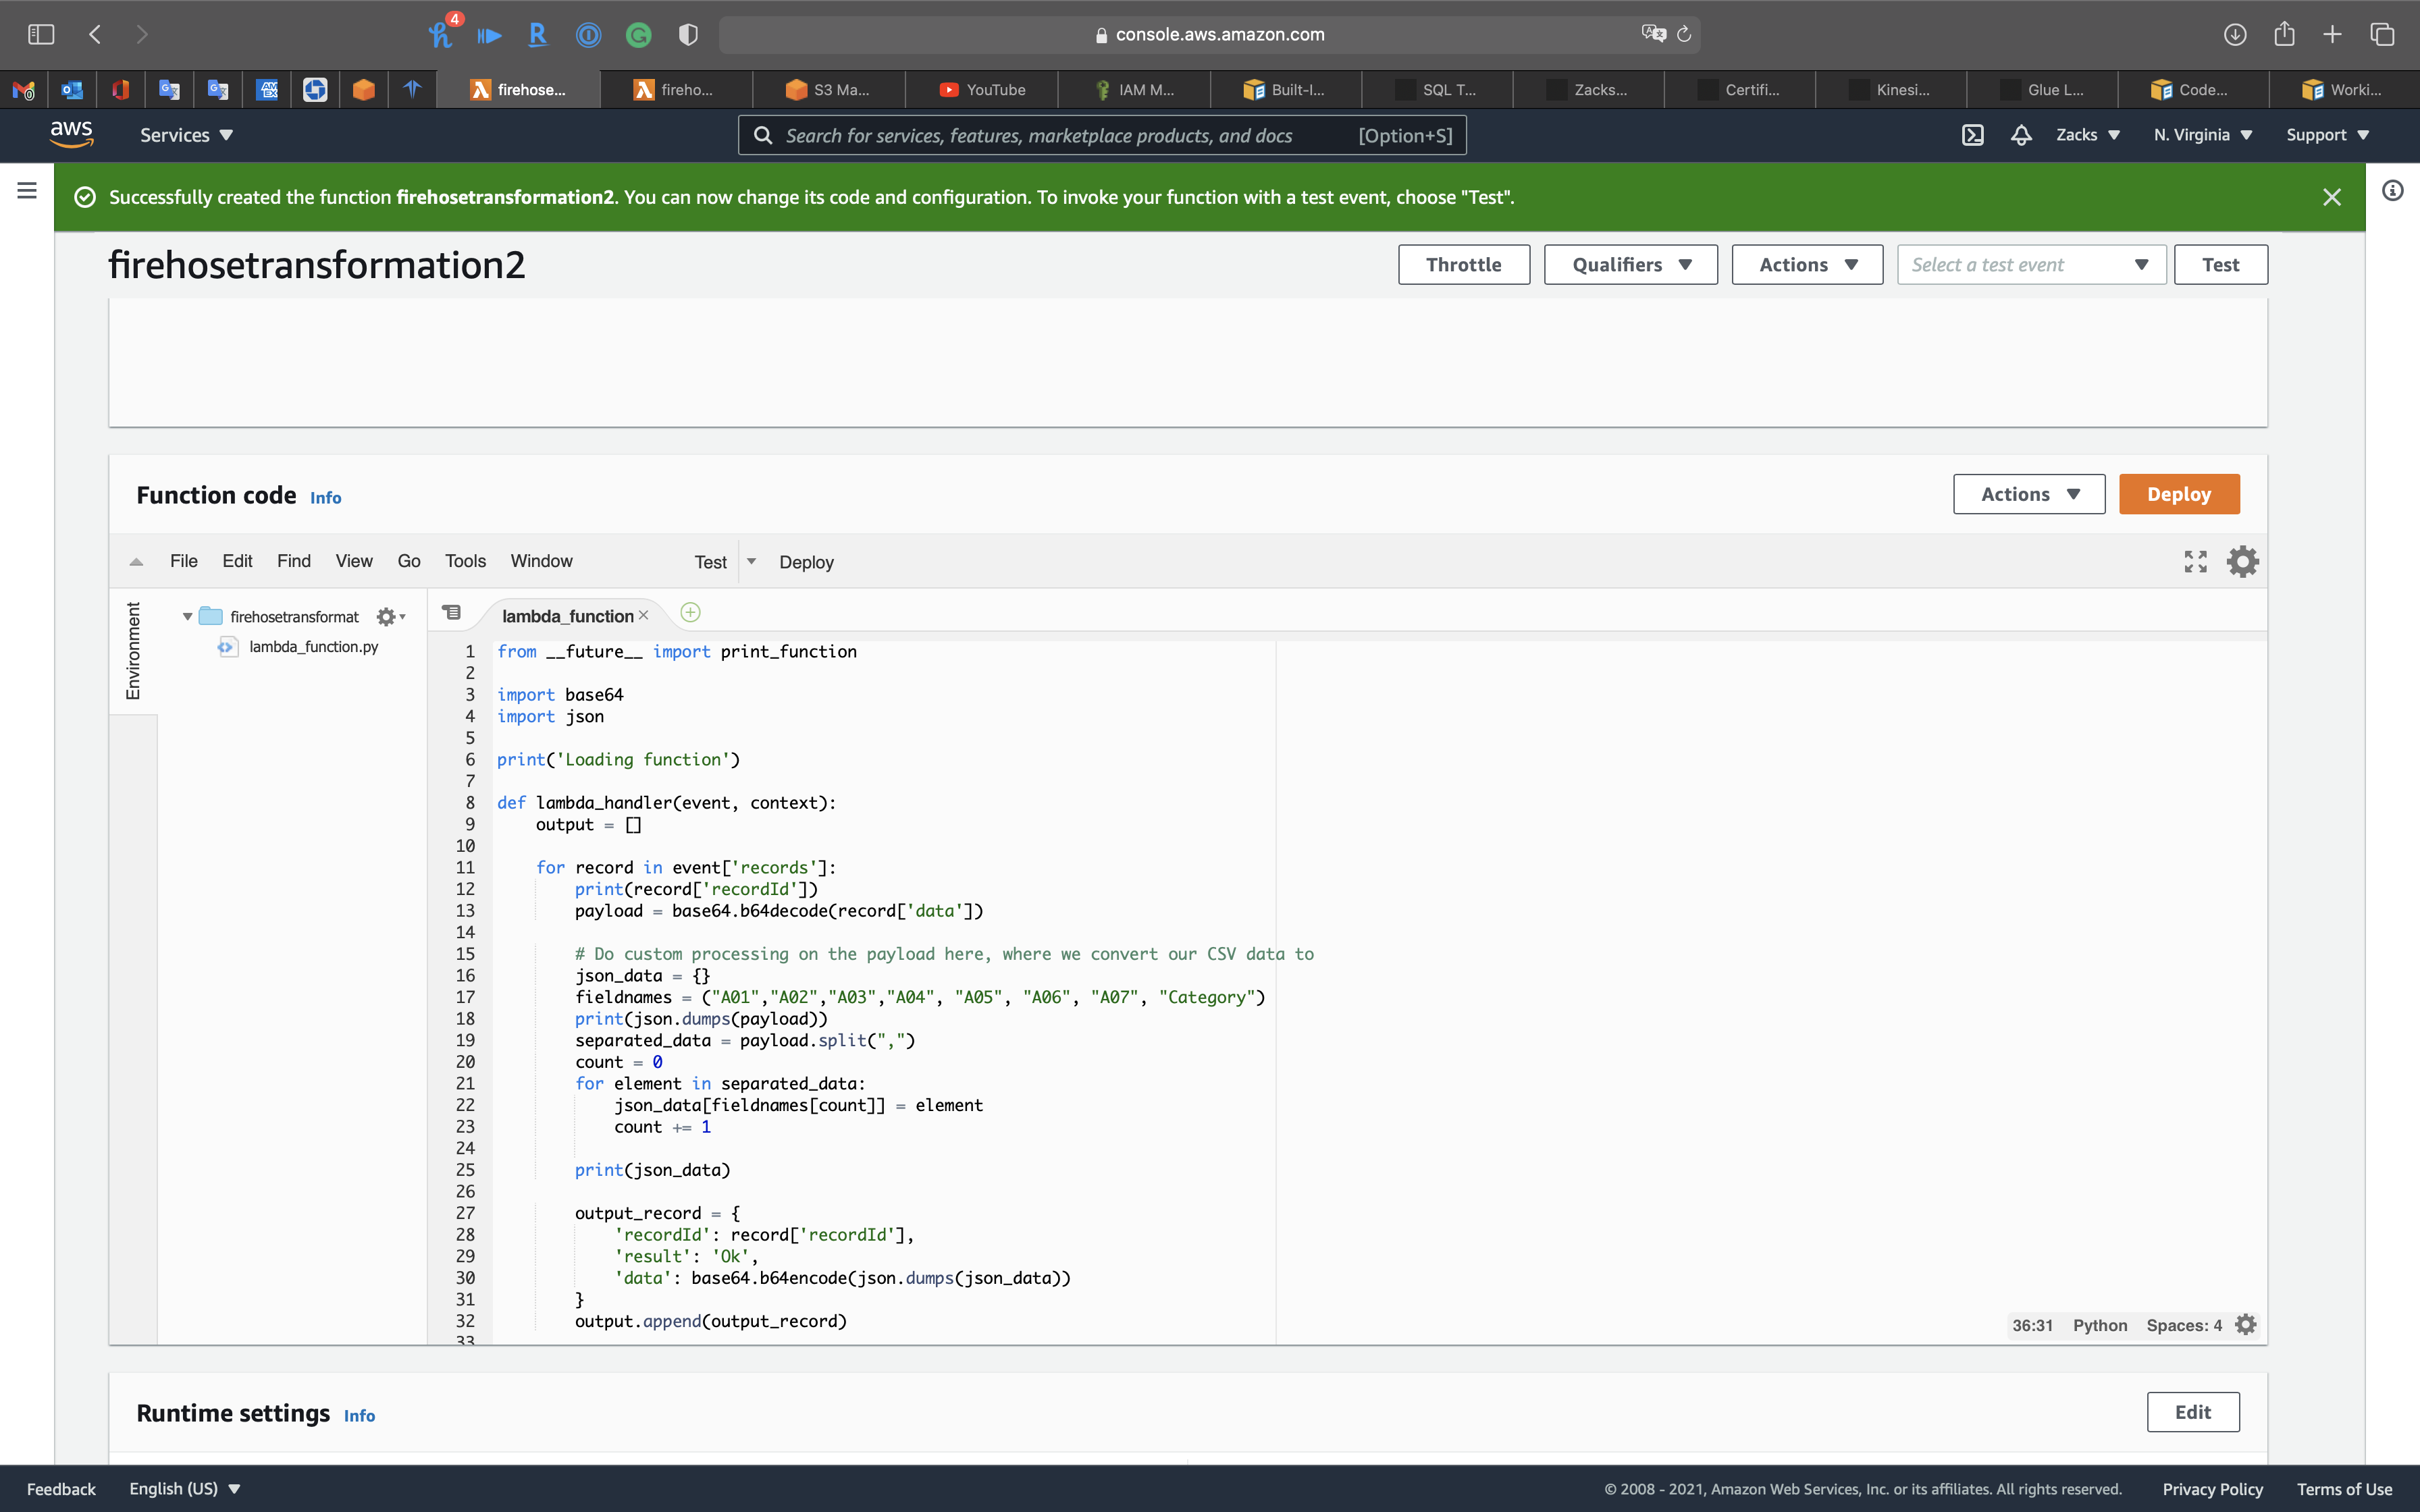
Scroll down to Basic settings, then click on Edit
- Timeout:
1 min 3 sec
Click on Save
Kinesis Data Streams Configuration
Services -> Kinesis -> Data Streams
Same as Data Compression Lab
If you have kinesis-transform-demo, skip the above step.
Kinesis Data Firehose Configuration
Services -> Kinesis -> Delivery streams
Almost ame as Data Compression Lab
If you have kinesis-transform-firehose-demo, skip the above step.
Click on kinesis-transform-firehose-demo
Click on Edit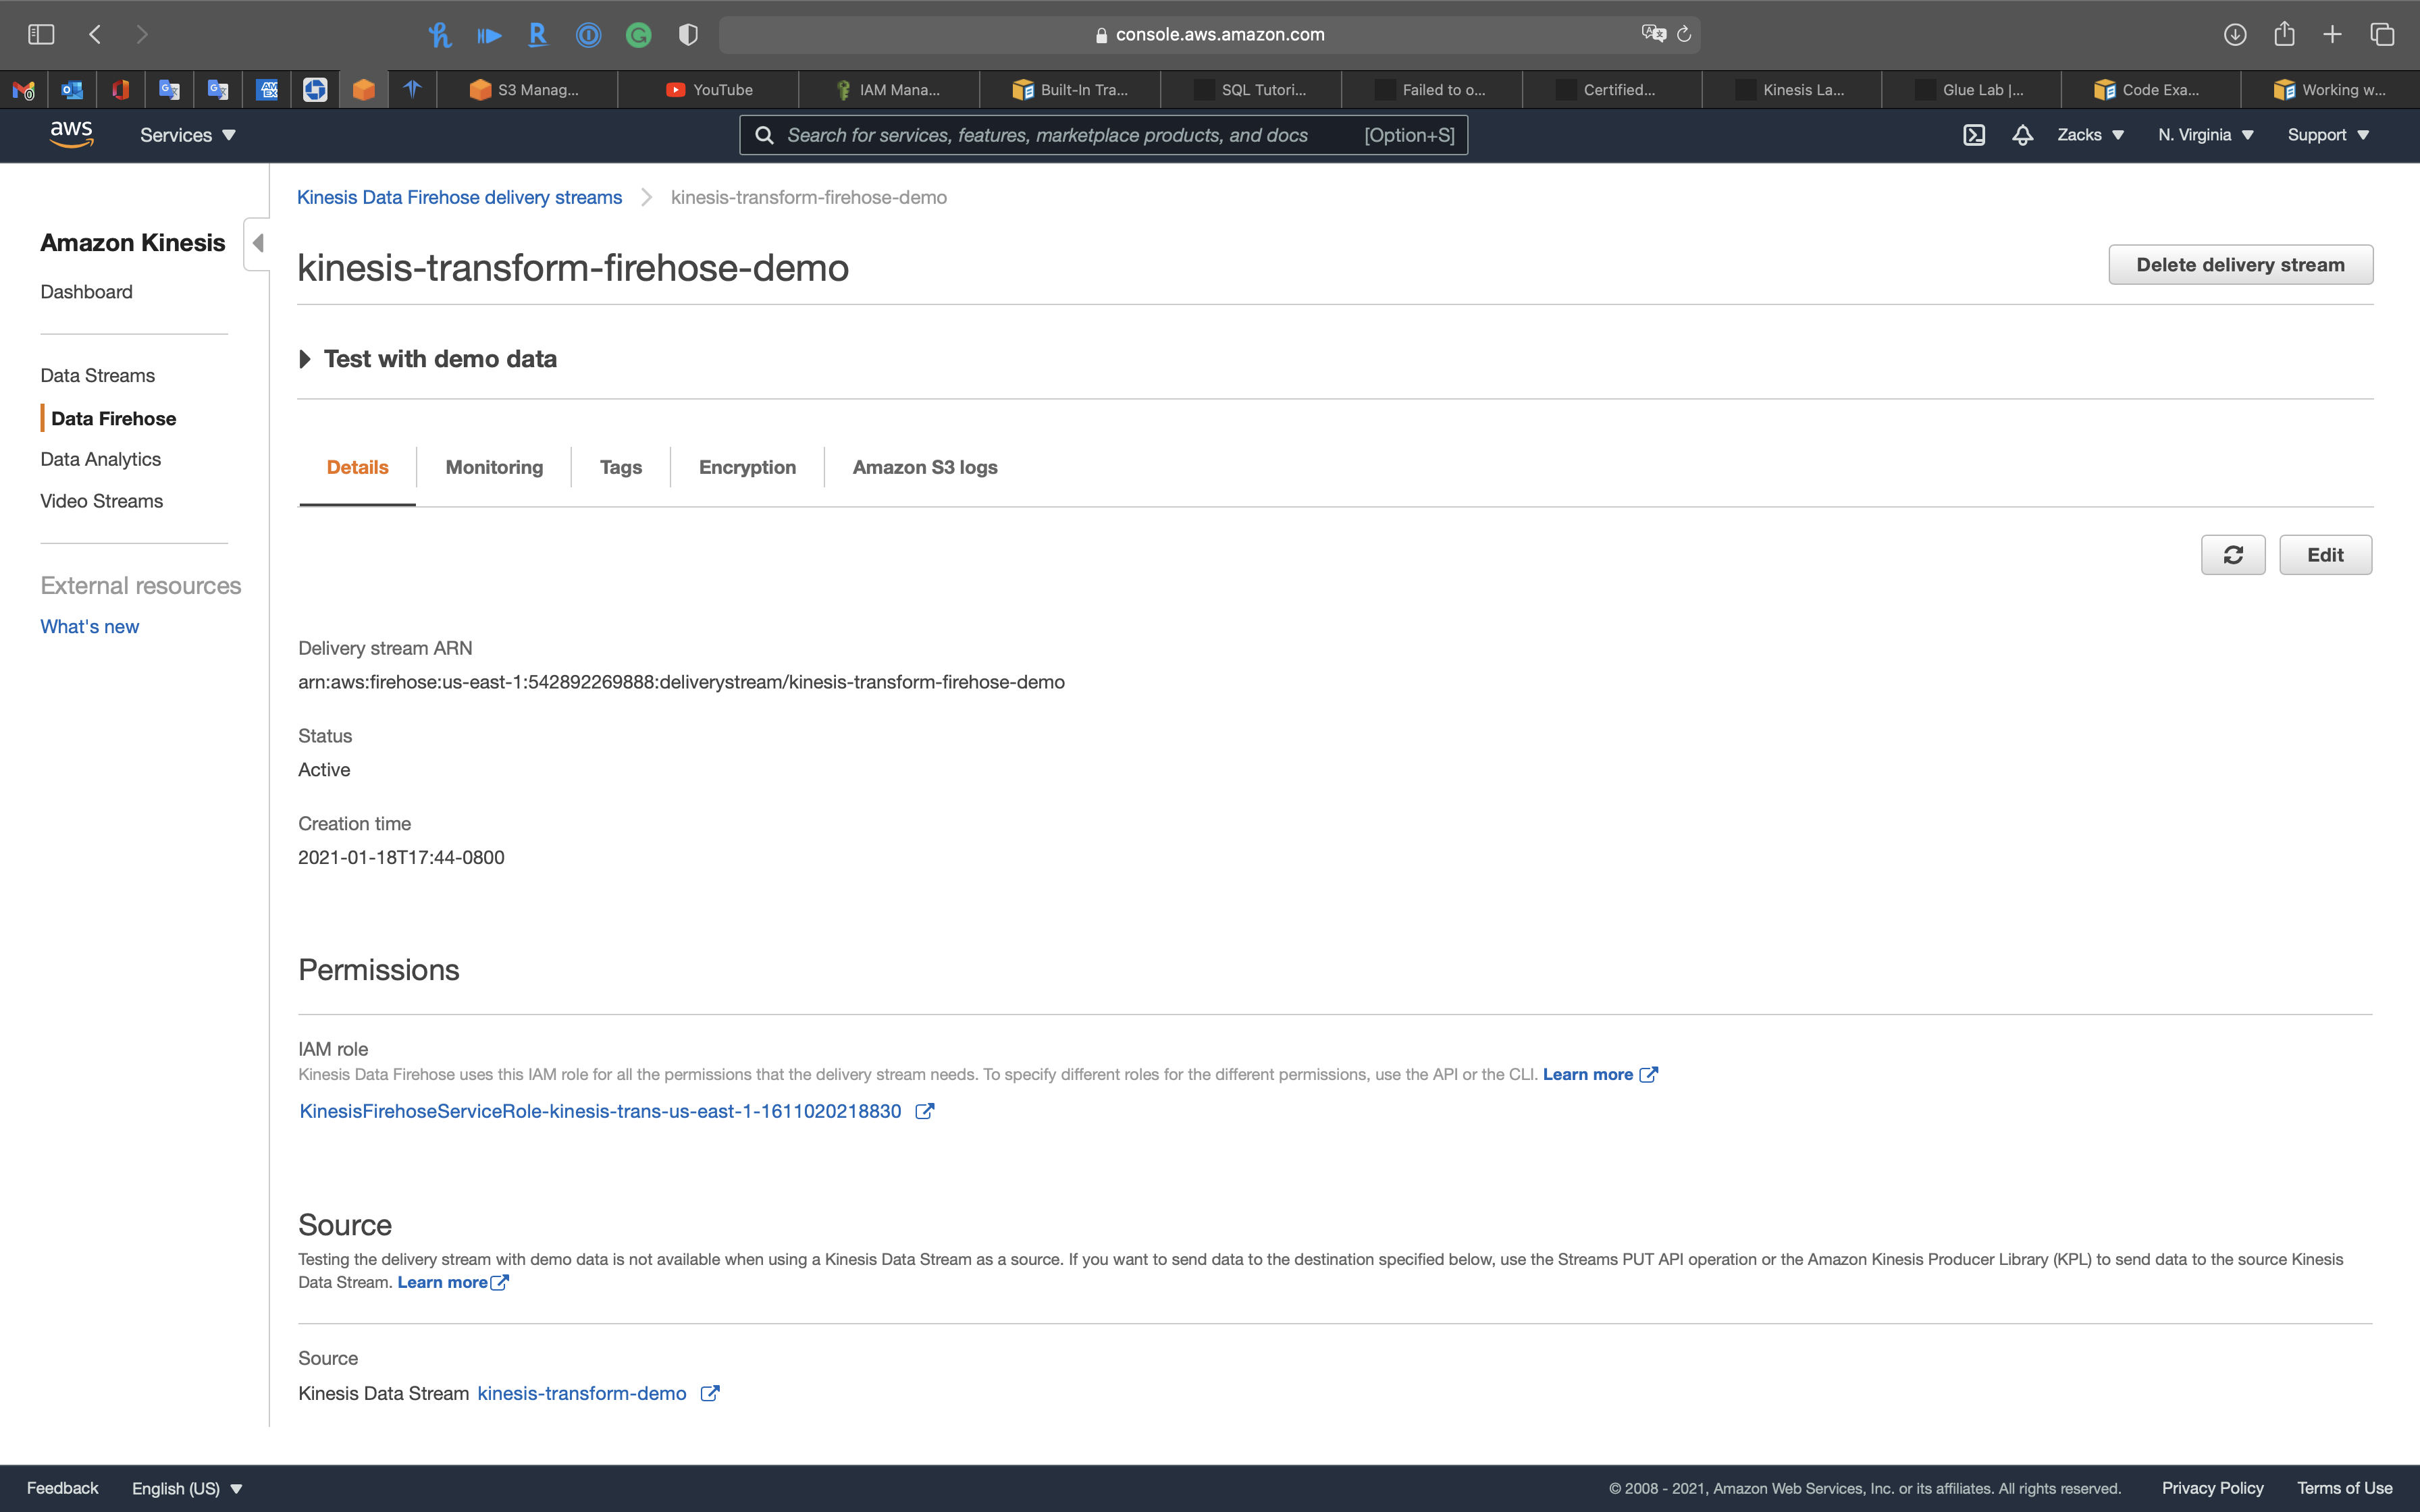
Transform source records with AWS Lambda
- Source record transformation:
Enabled - Lambda function:
firehosetransformation2
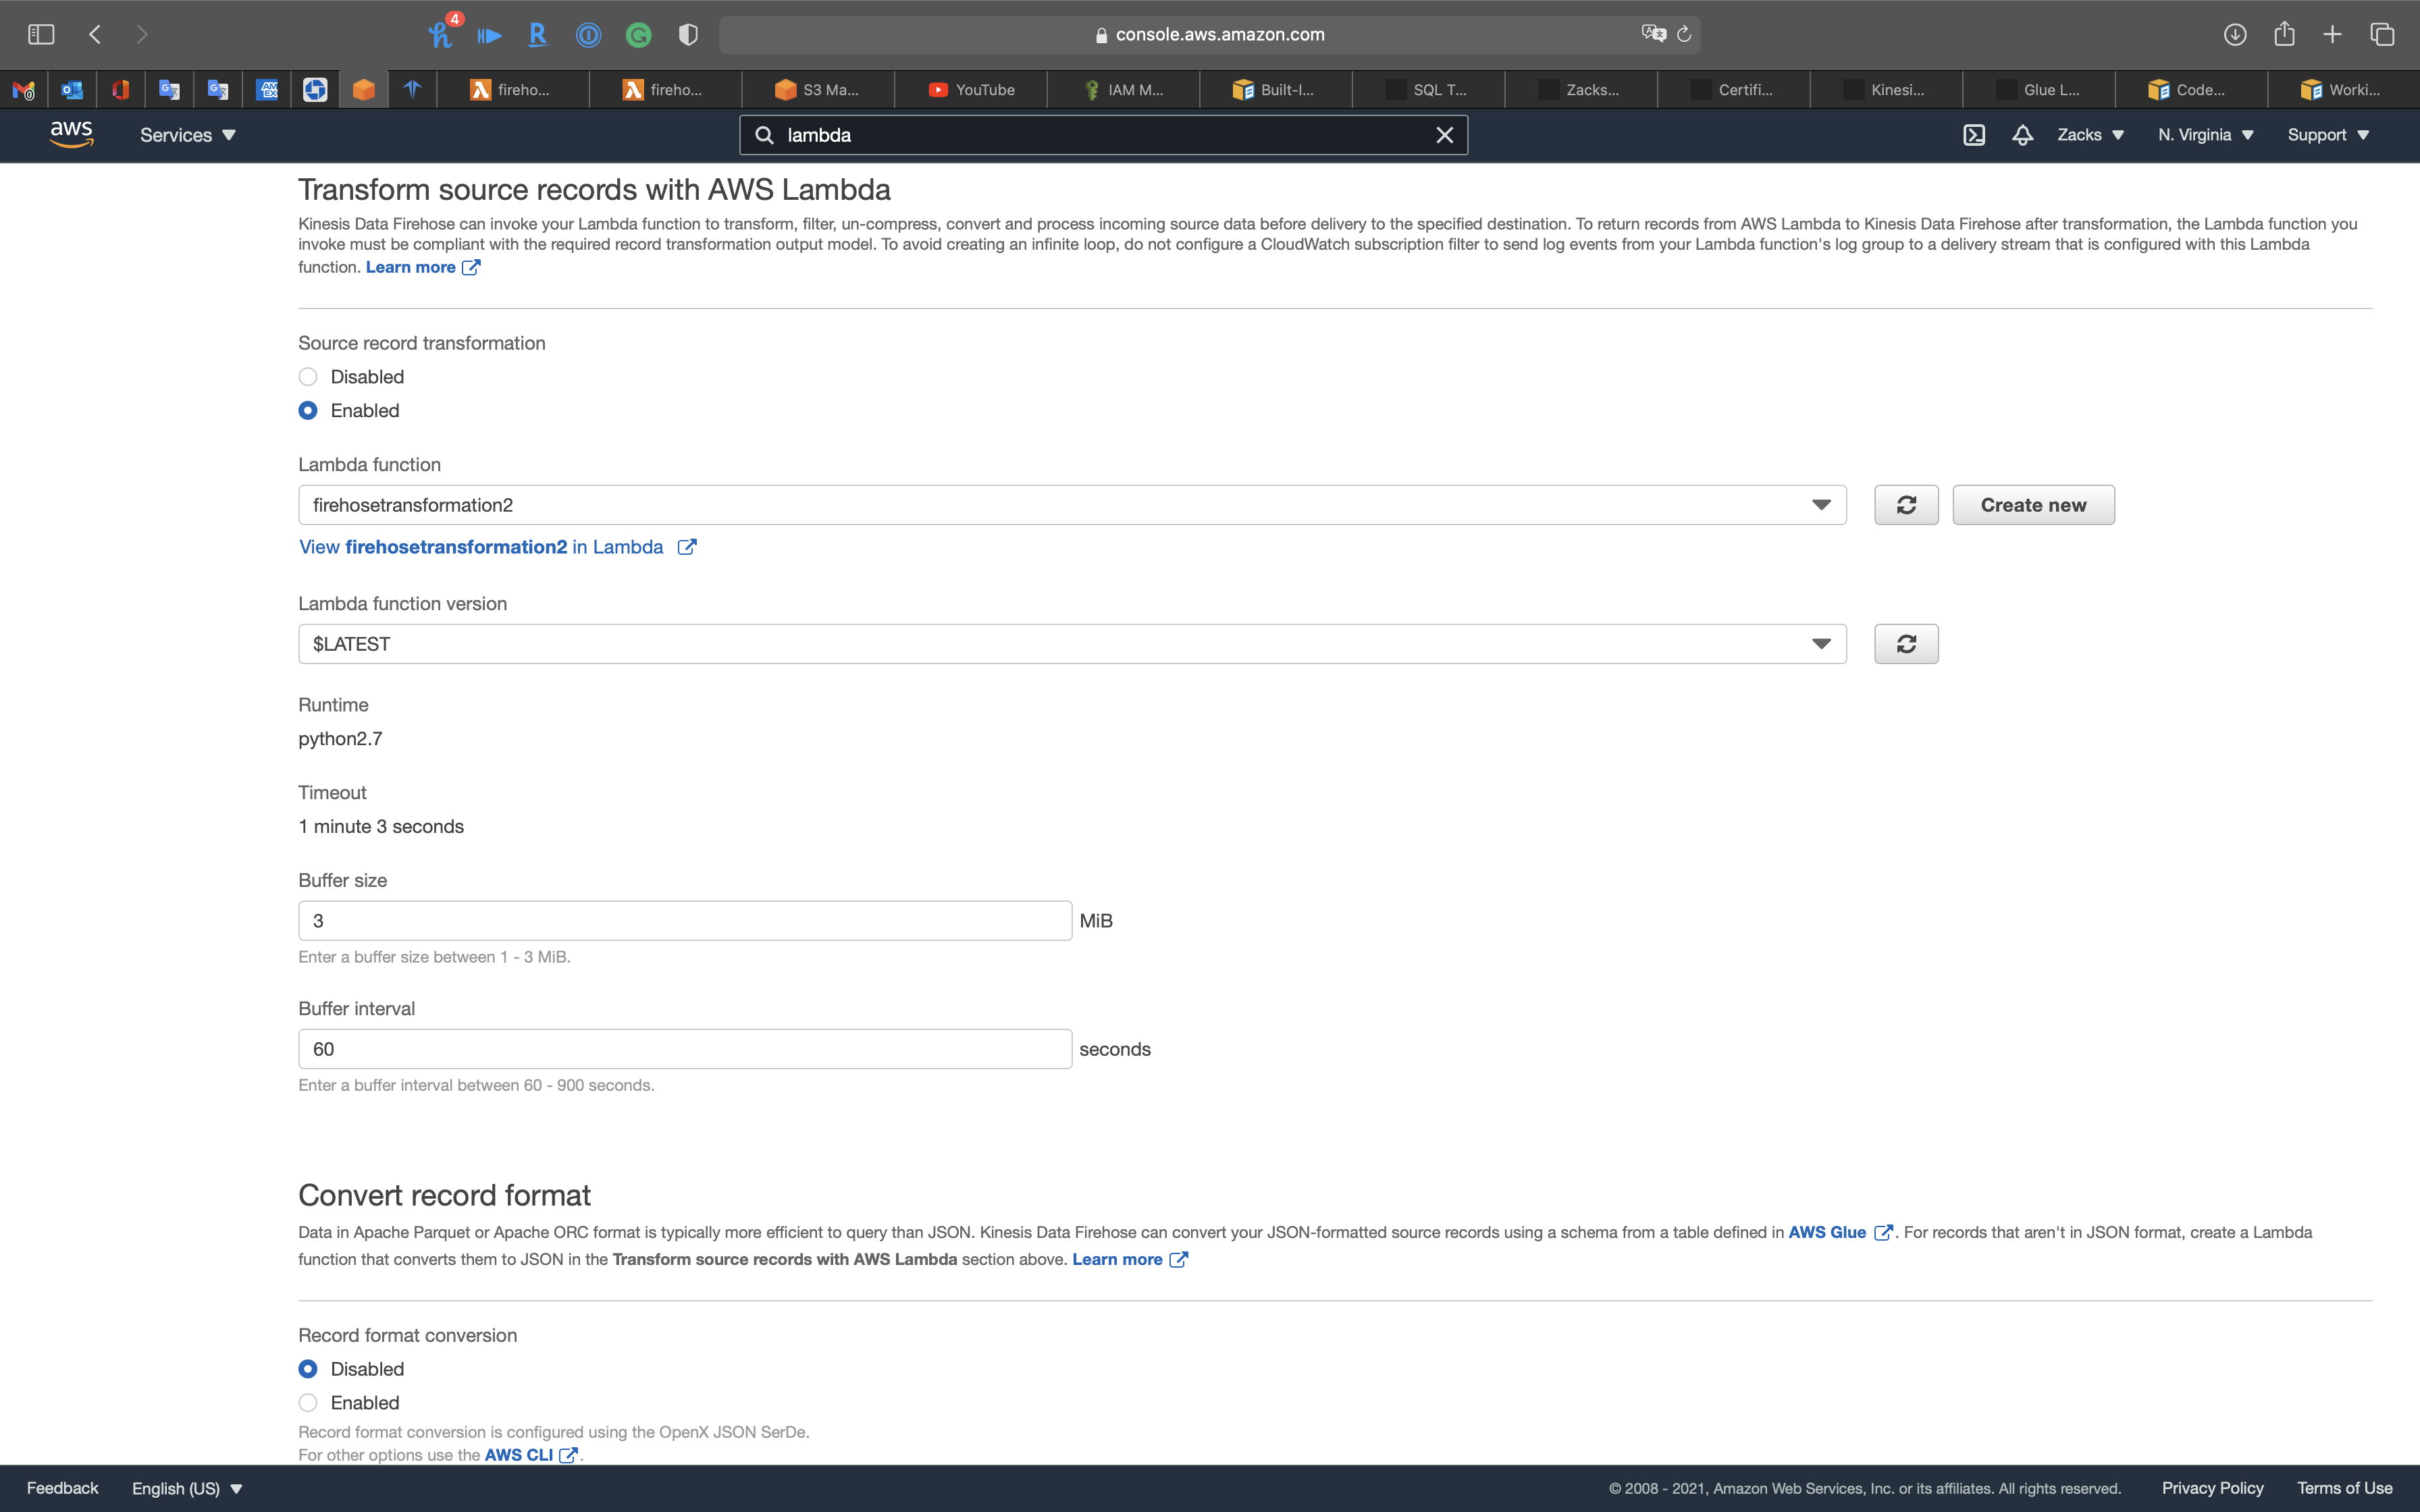
Convert record format
- Record format conversion:
Enabled
And we need a schema for the conversion.
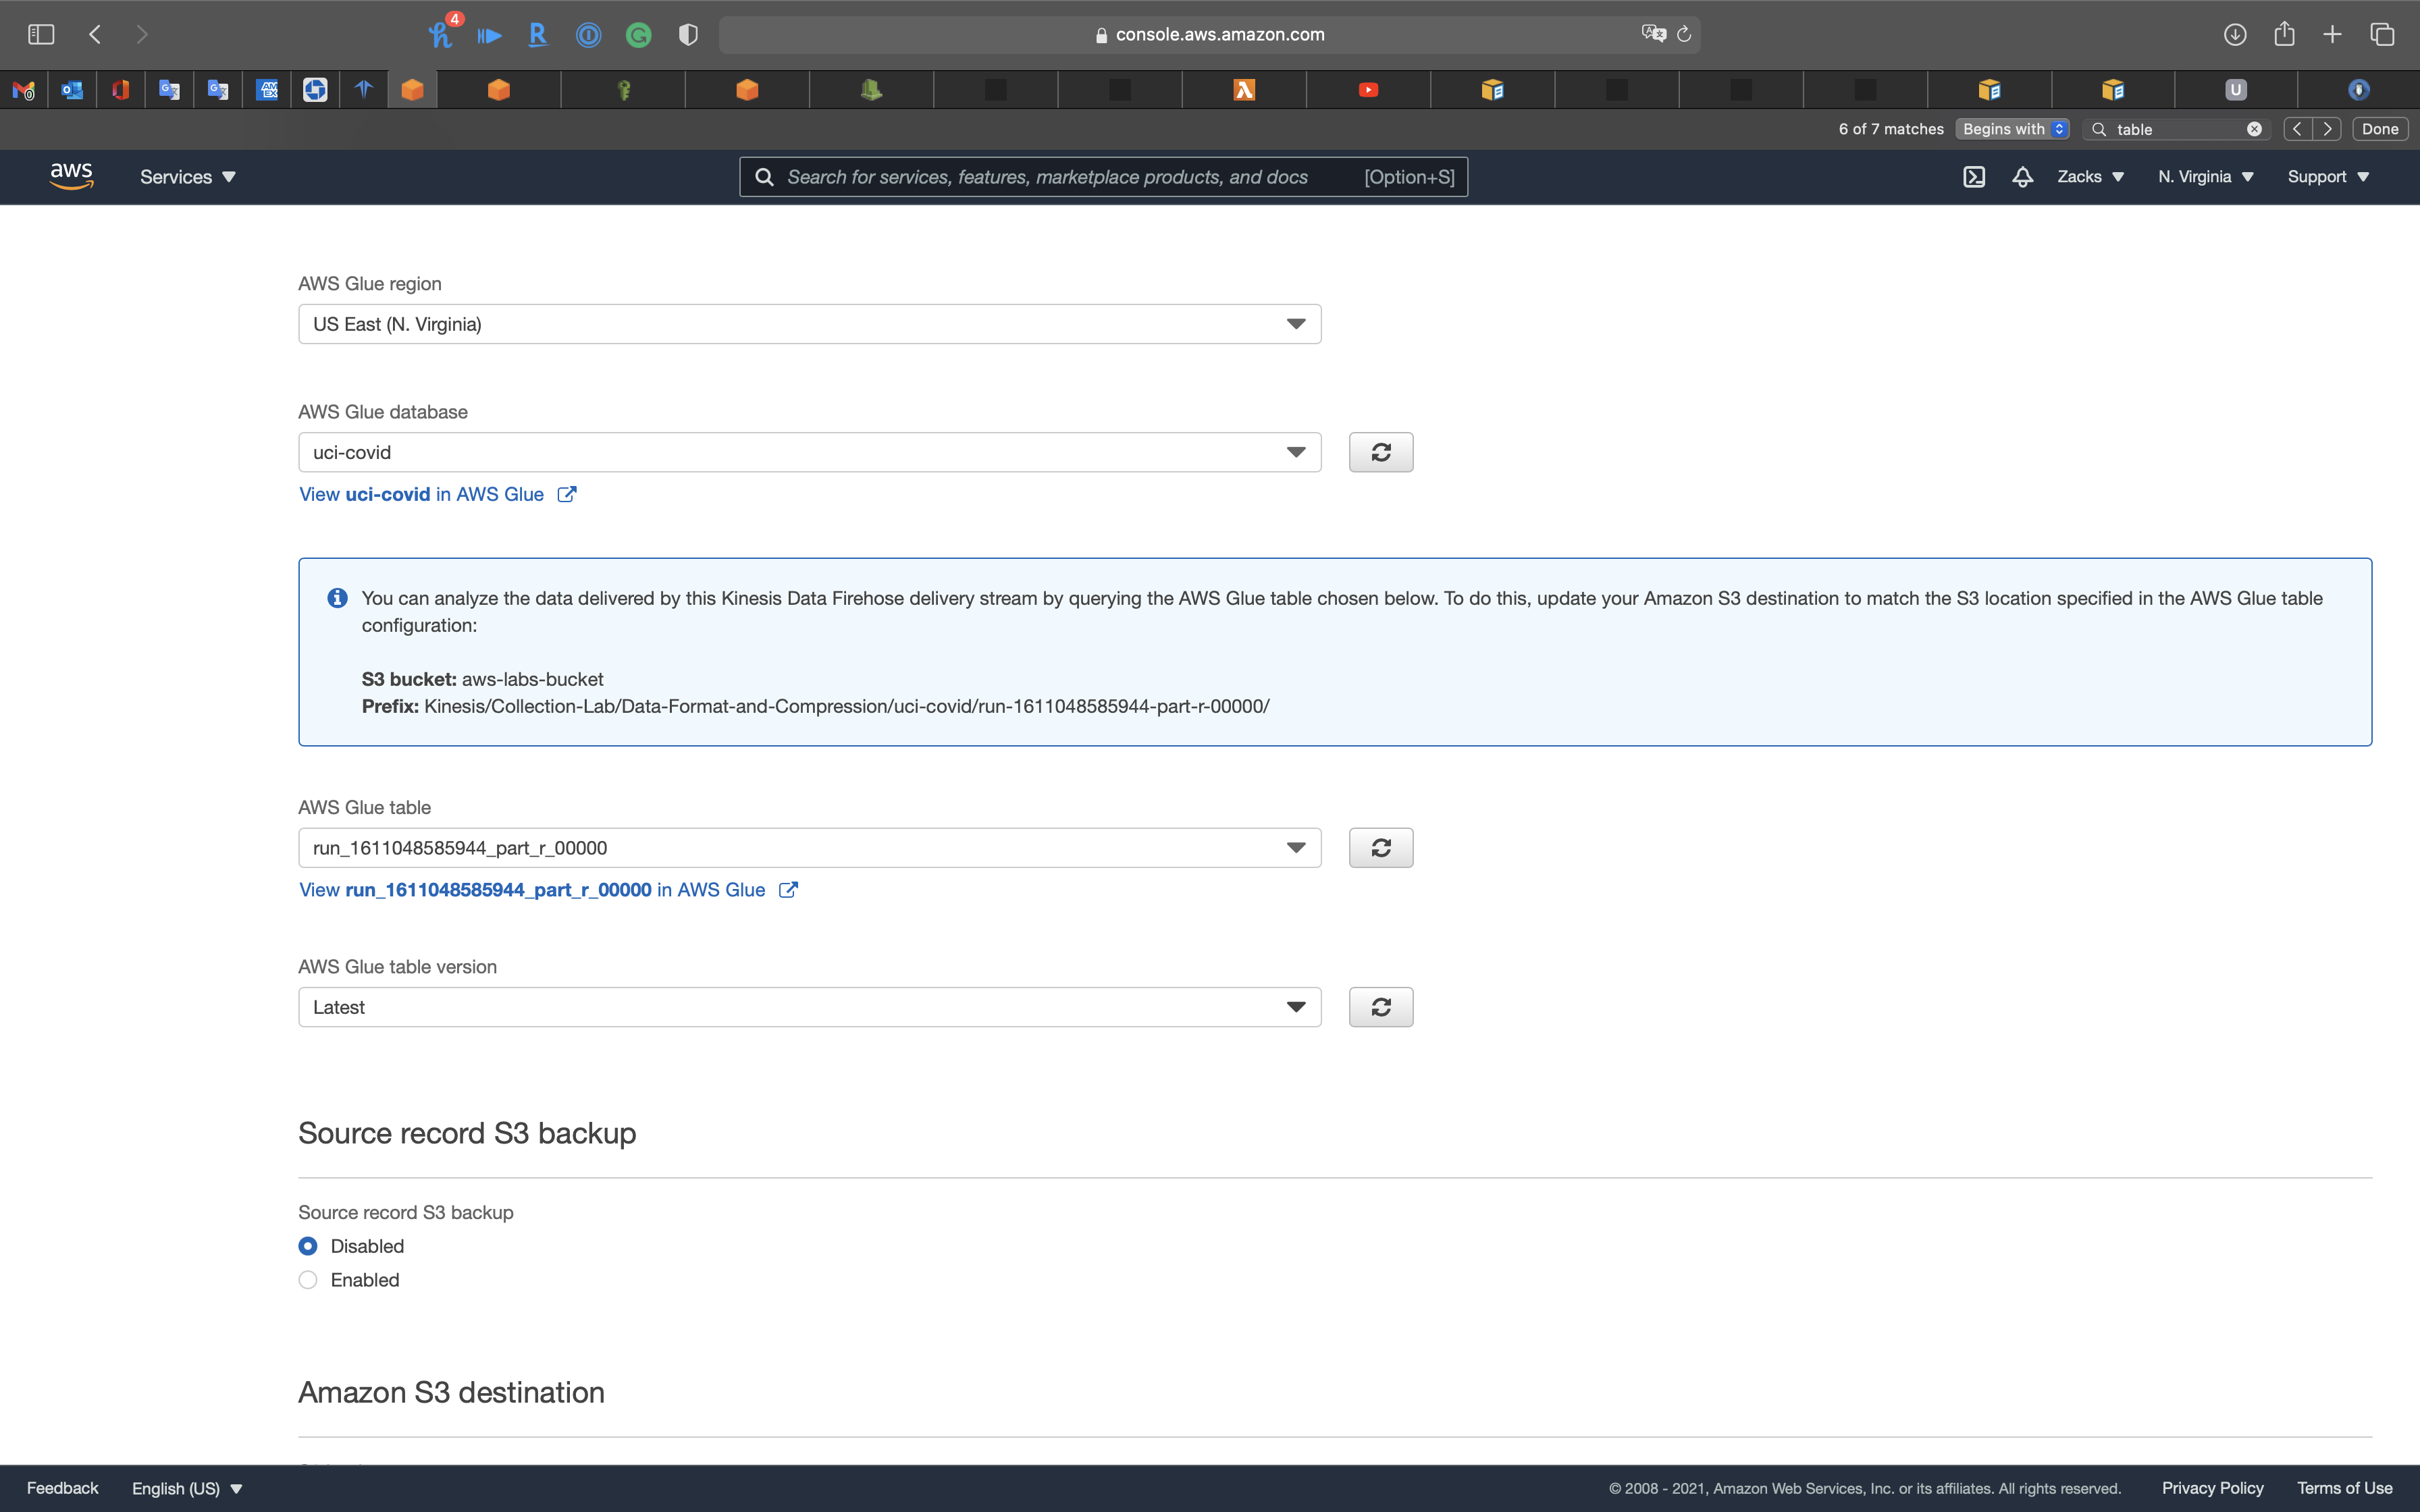
- AWS Glue region: Choose your region
- AWS Glue database:
uci-covid - AWS Glue table:
uci_covidconvert to the latest one, here isrun..(Because it is .json instead of .csv) - AWS Glue table version:
Latest
Source record S3 backup
- Source record S3 backup:
Disabled
P.S: Backup the source data before conversion.
Amazon S3 destination
S3 bucket: Choose your S3 bucket
Backup S3 bucket prefix - optional:
csv-transformBackup S3 bucket error prefix - optional:
csv-error-transformBuffer size:
128S3 compression:
Disabled
You don’t need to enable compression. Snappy compression was enabled automatically when you chose Record format conversion. To choose another compression method, or to disable data compression, use the AWS CLI.
- S3 encryption:
Disabled
Settings
- CloudWatch error logging:
Enabled
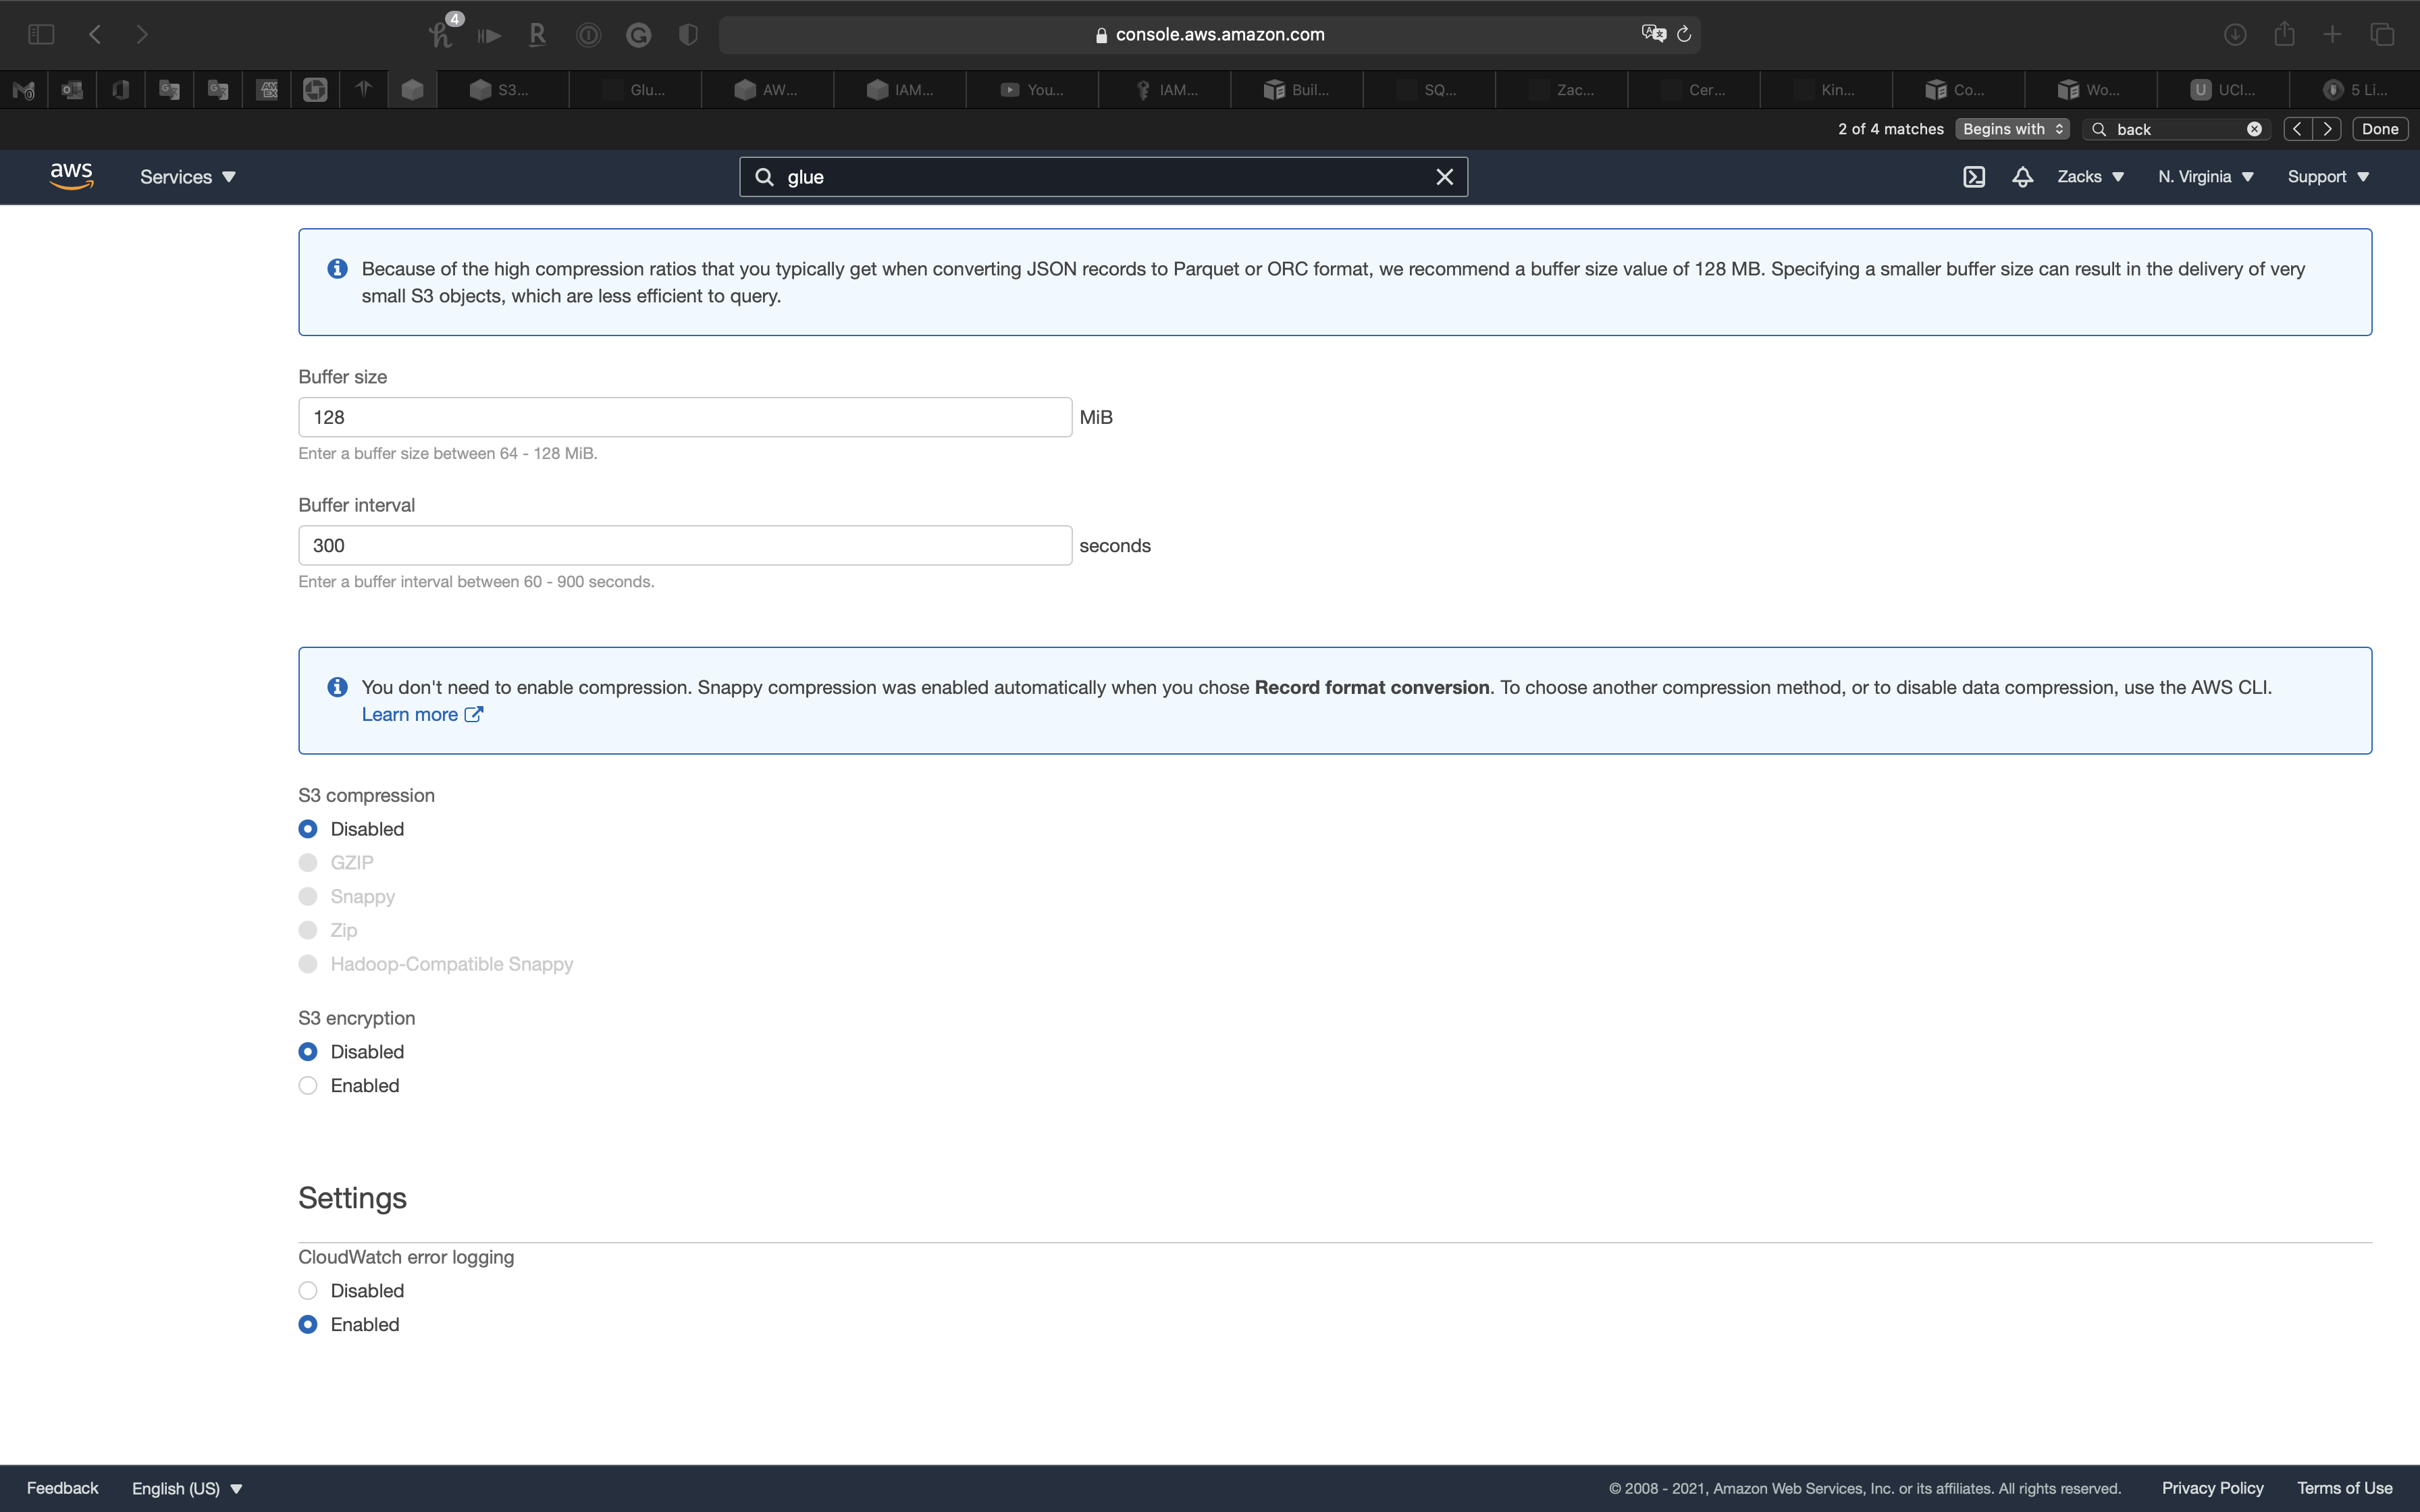
Scroll up and click on Save.
Feed Kinesis Data Stream
Move Surveillance.csv to the directory storing KinesisProducer-C&F.py
1 | python3 KinesisProducer-C\&F.py format |
Validation Test
Kinesis Monitoring
Services -> Kinesis -> Data Streams
Click on kinesis-transform-demo
Click on Monitoring tab
You can also click custom on the top of the cluster charts and select Local timezone
See Get records - sum (Count)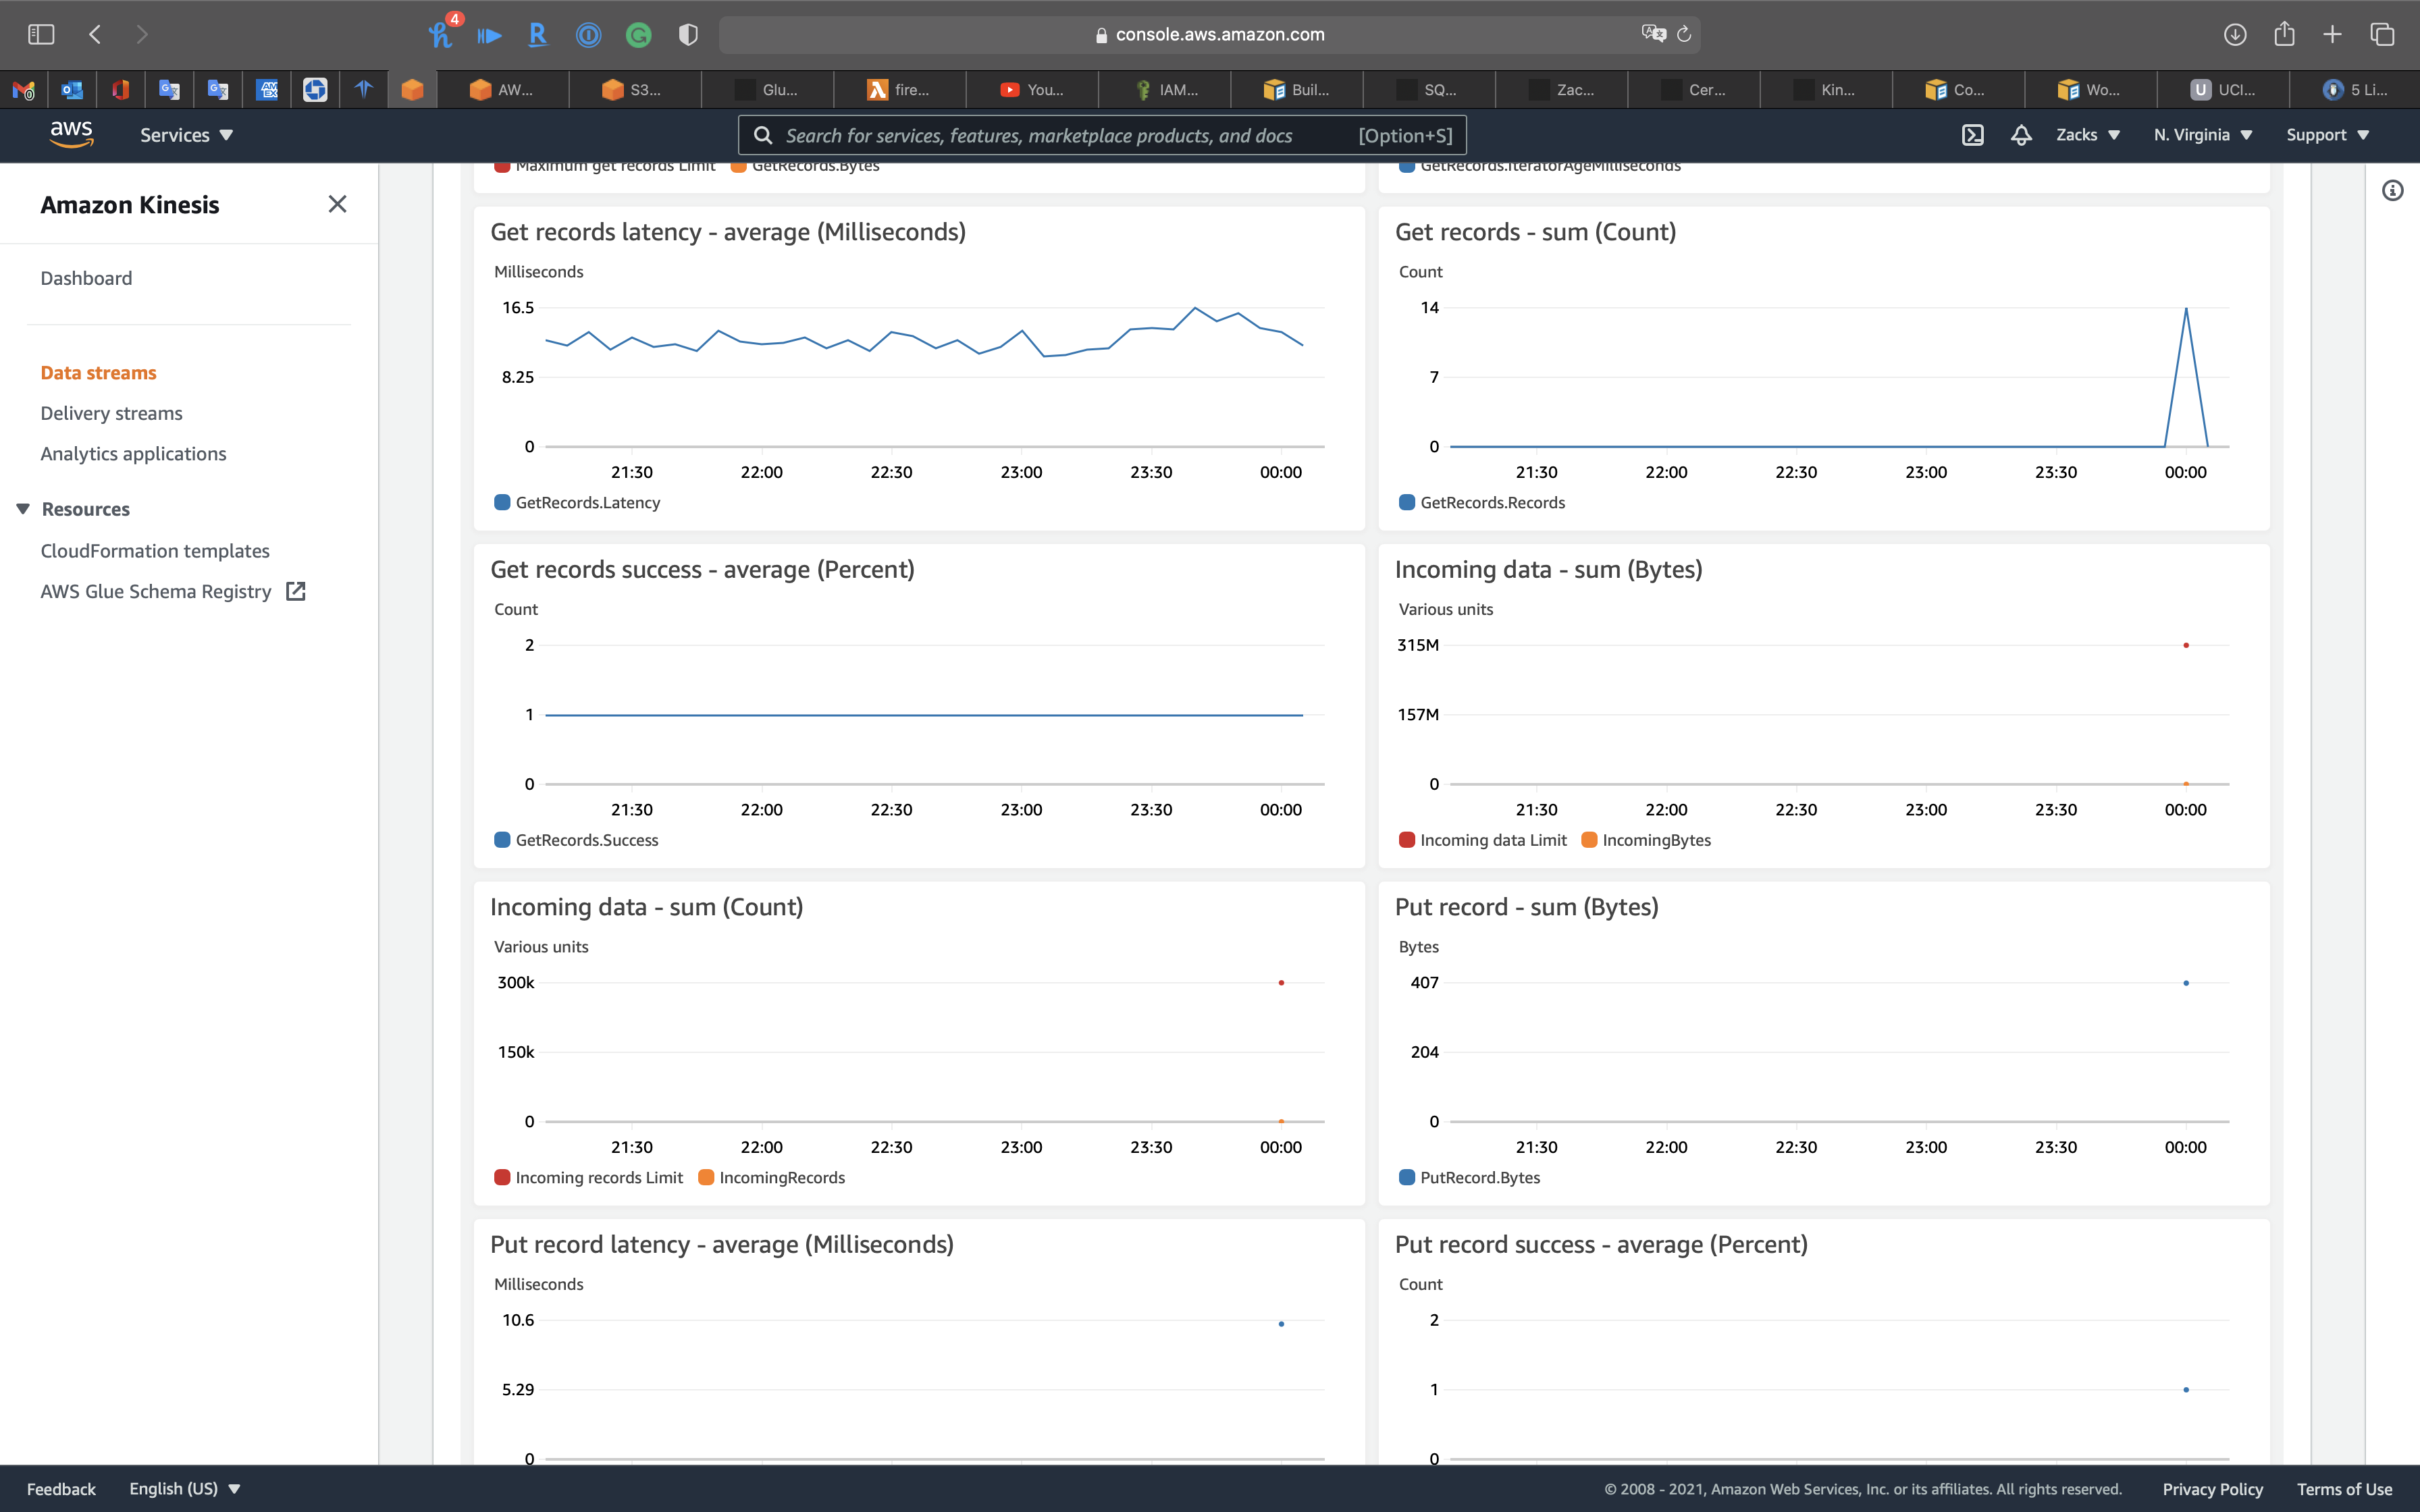
Services -> Kinesis -> Delivery streams
Click on kinesis-transform-firehose-demo
Click on Monitoring tab
You can also click custom on the top of the cluster charts and select Local timezone
See Records read from Kinesis Data Streams (Sum)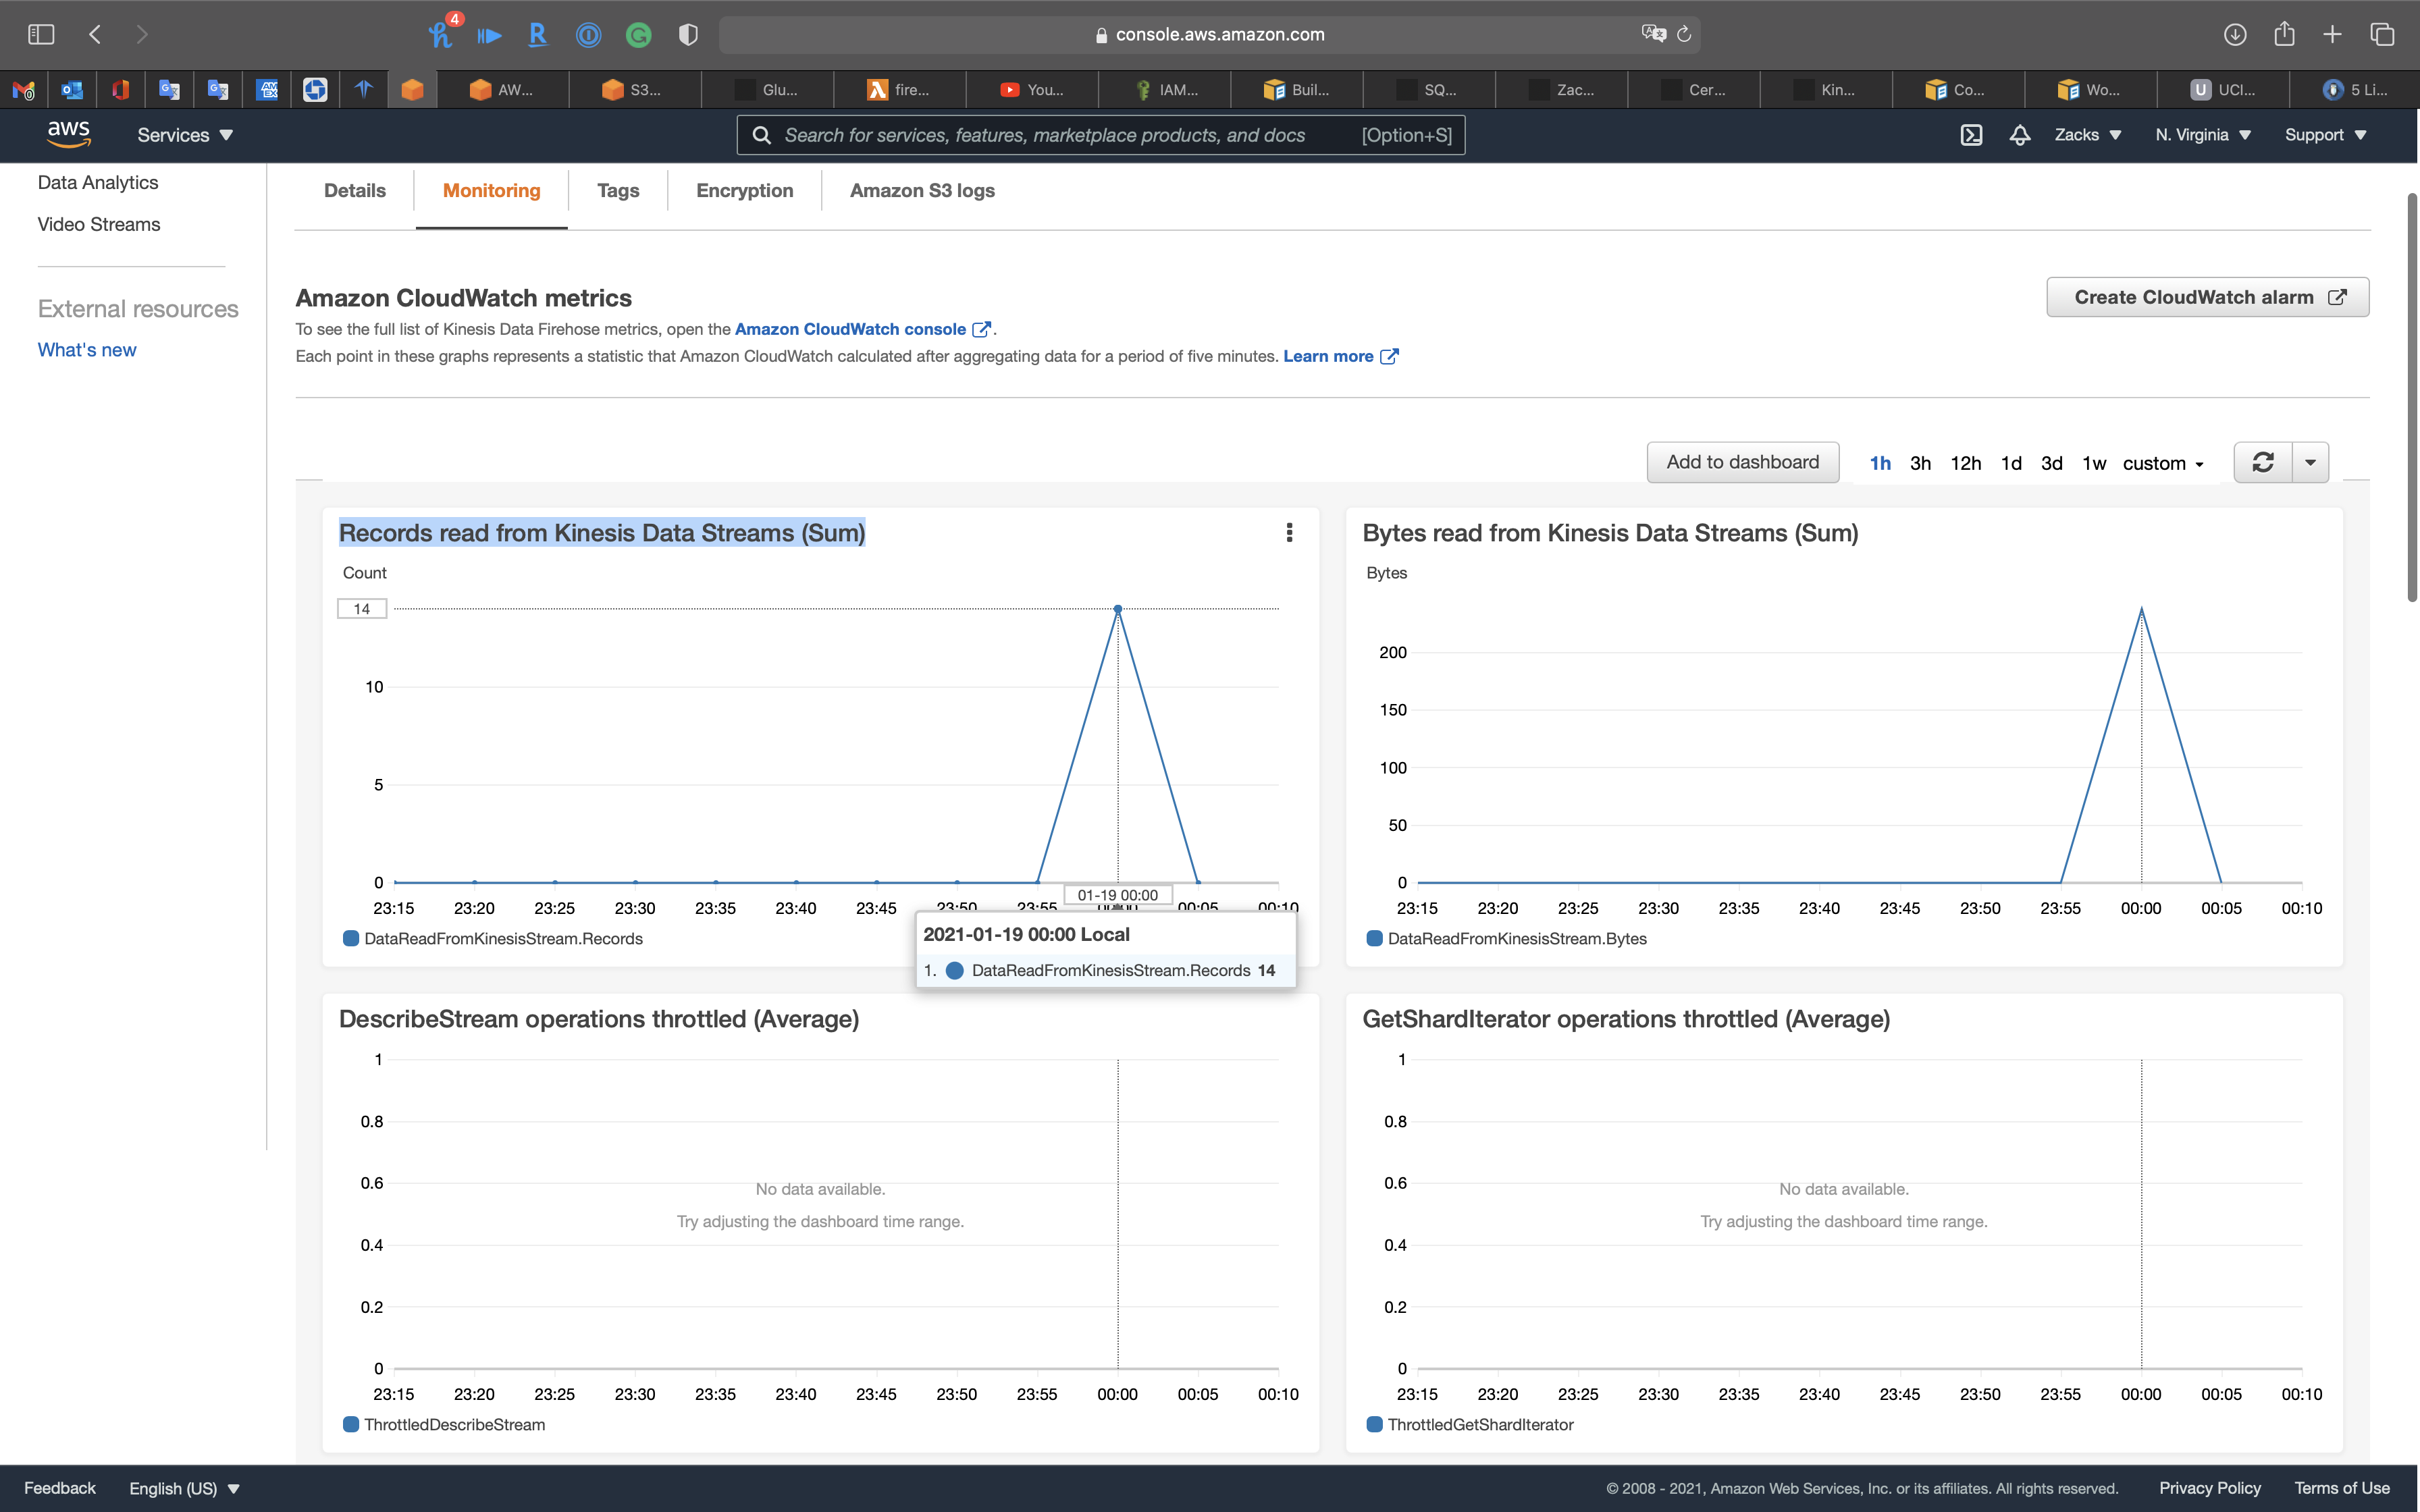
Services -> S3
Go to your bucket.
Then click on csv-transform2021 fold. (May need several minutes for generating)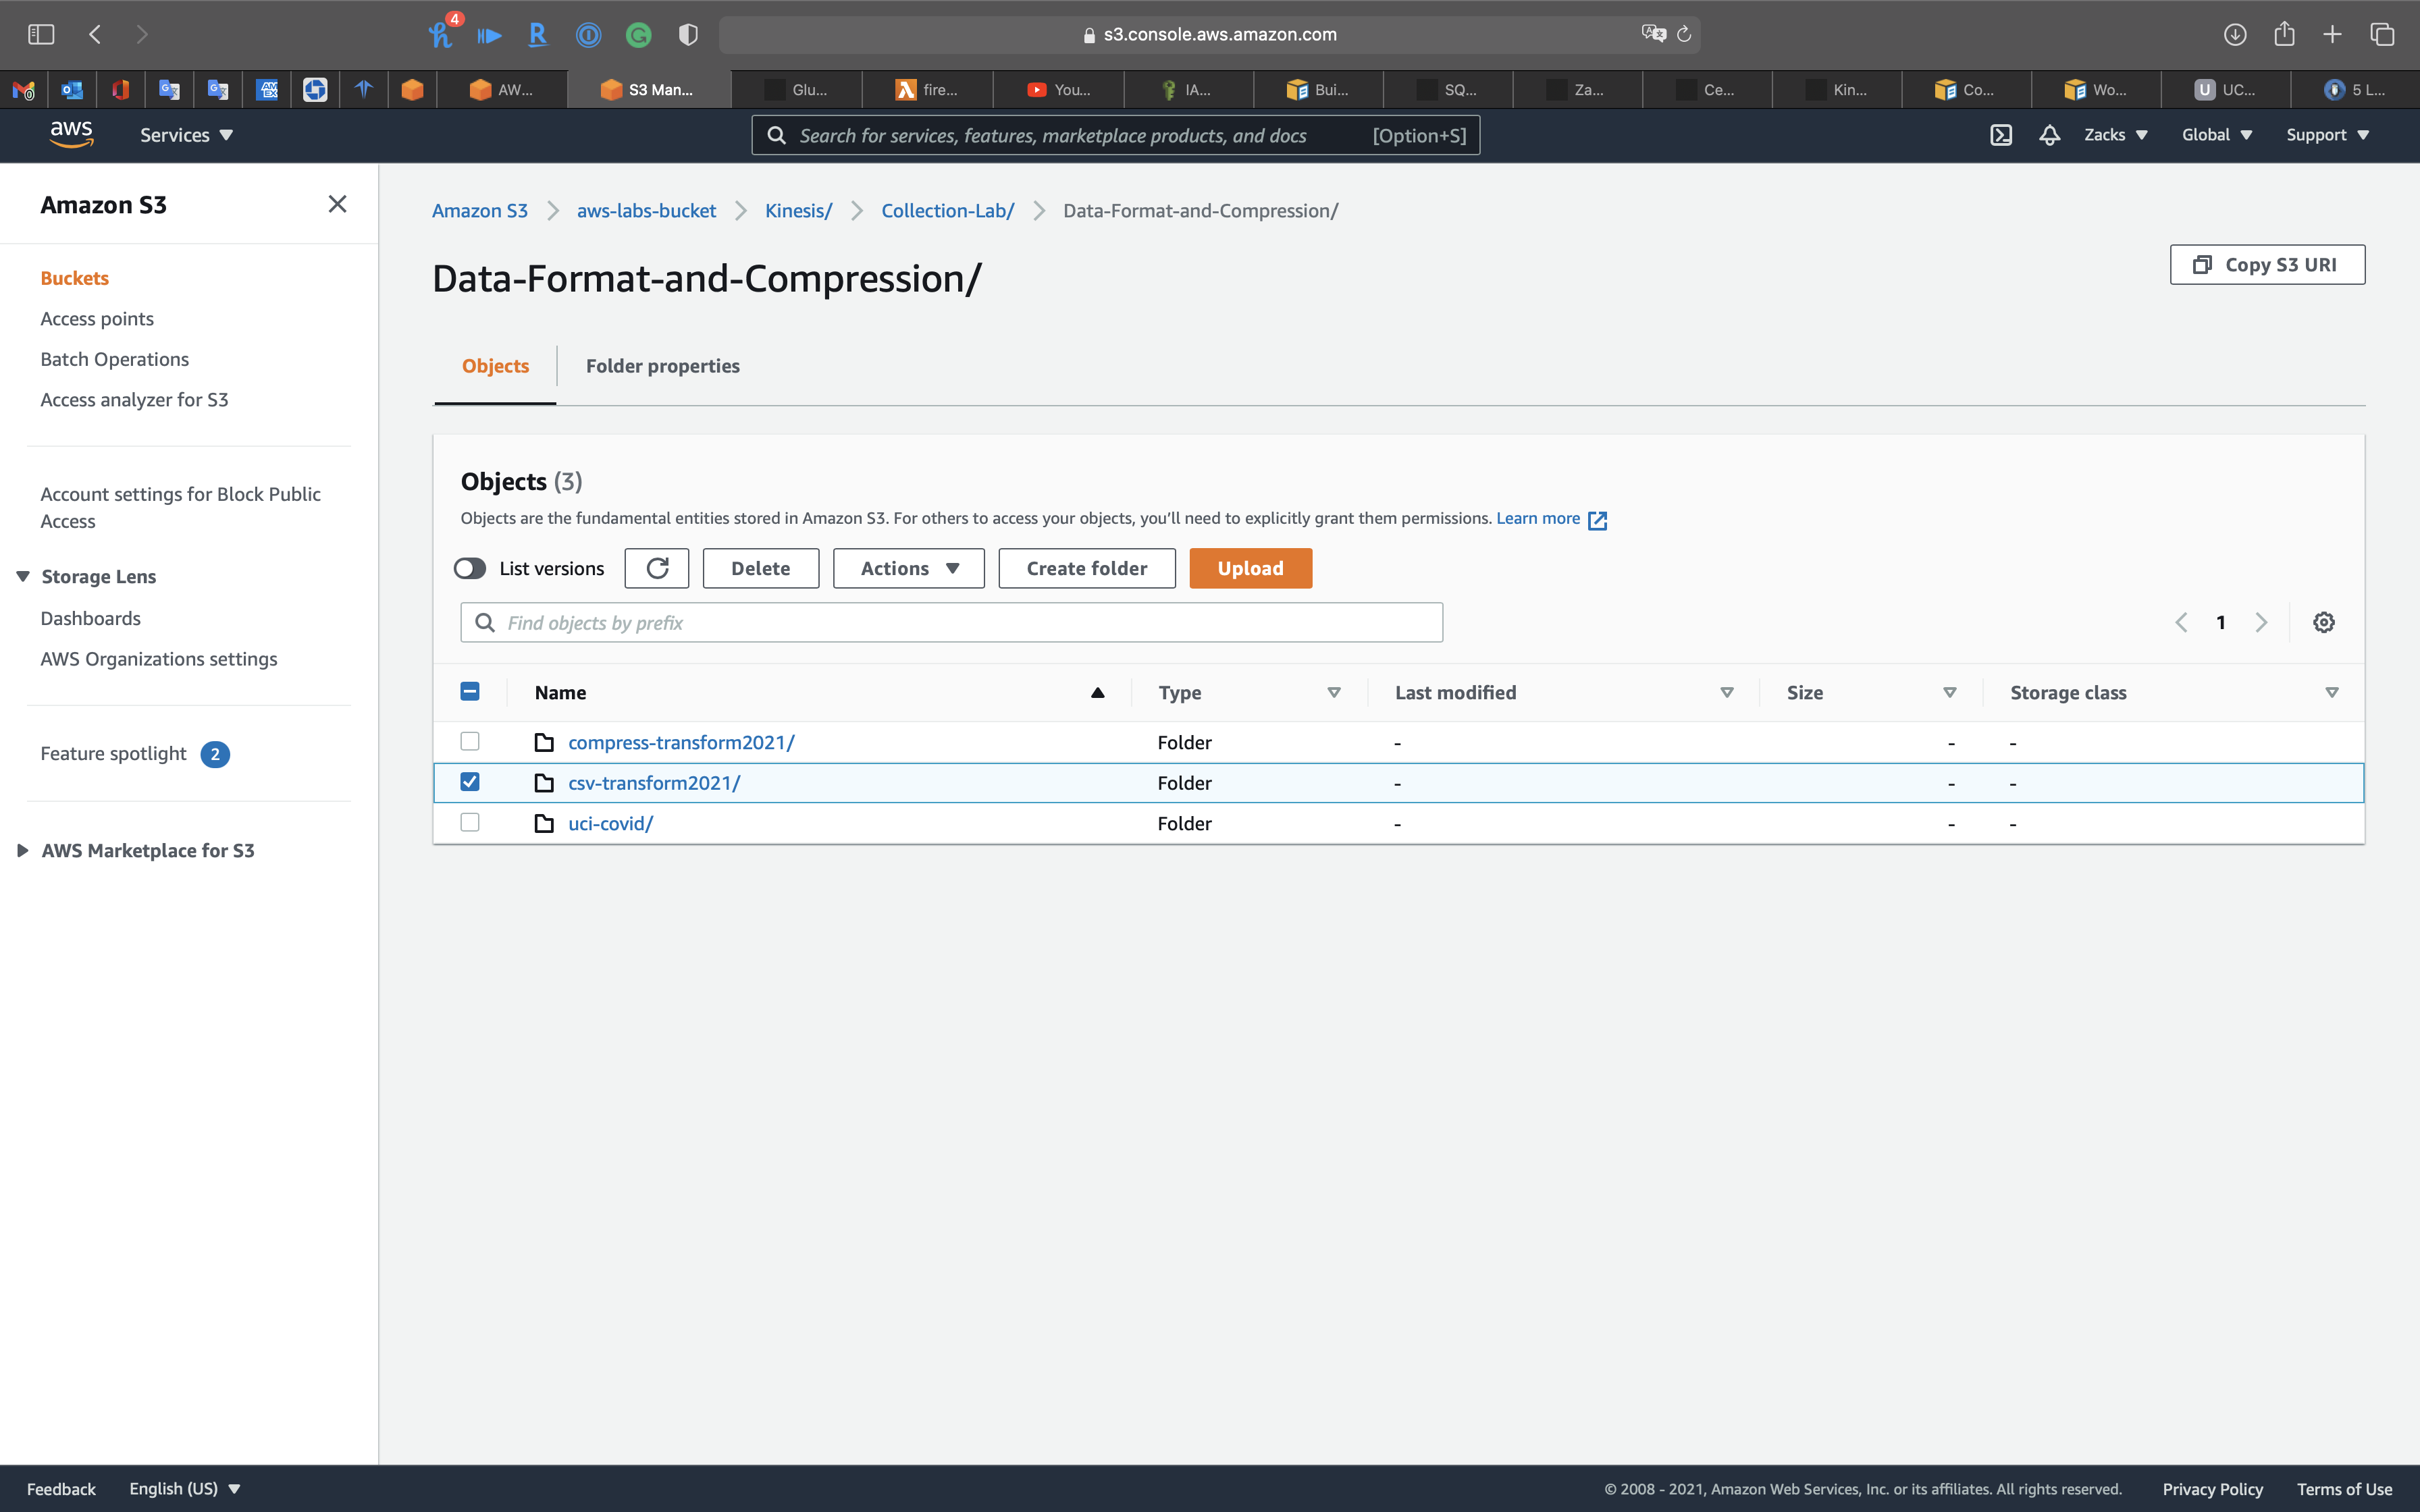
Download the parquet file.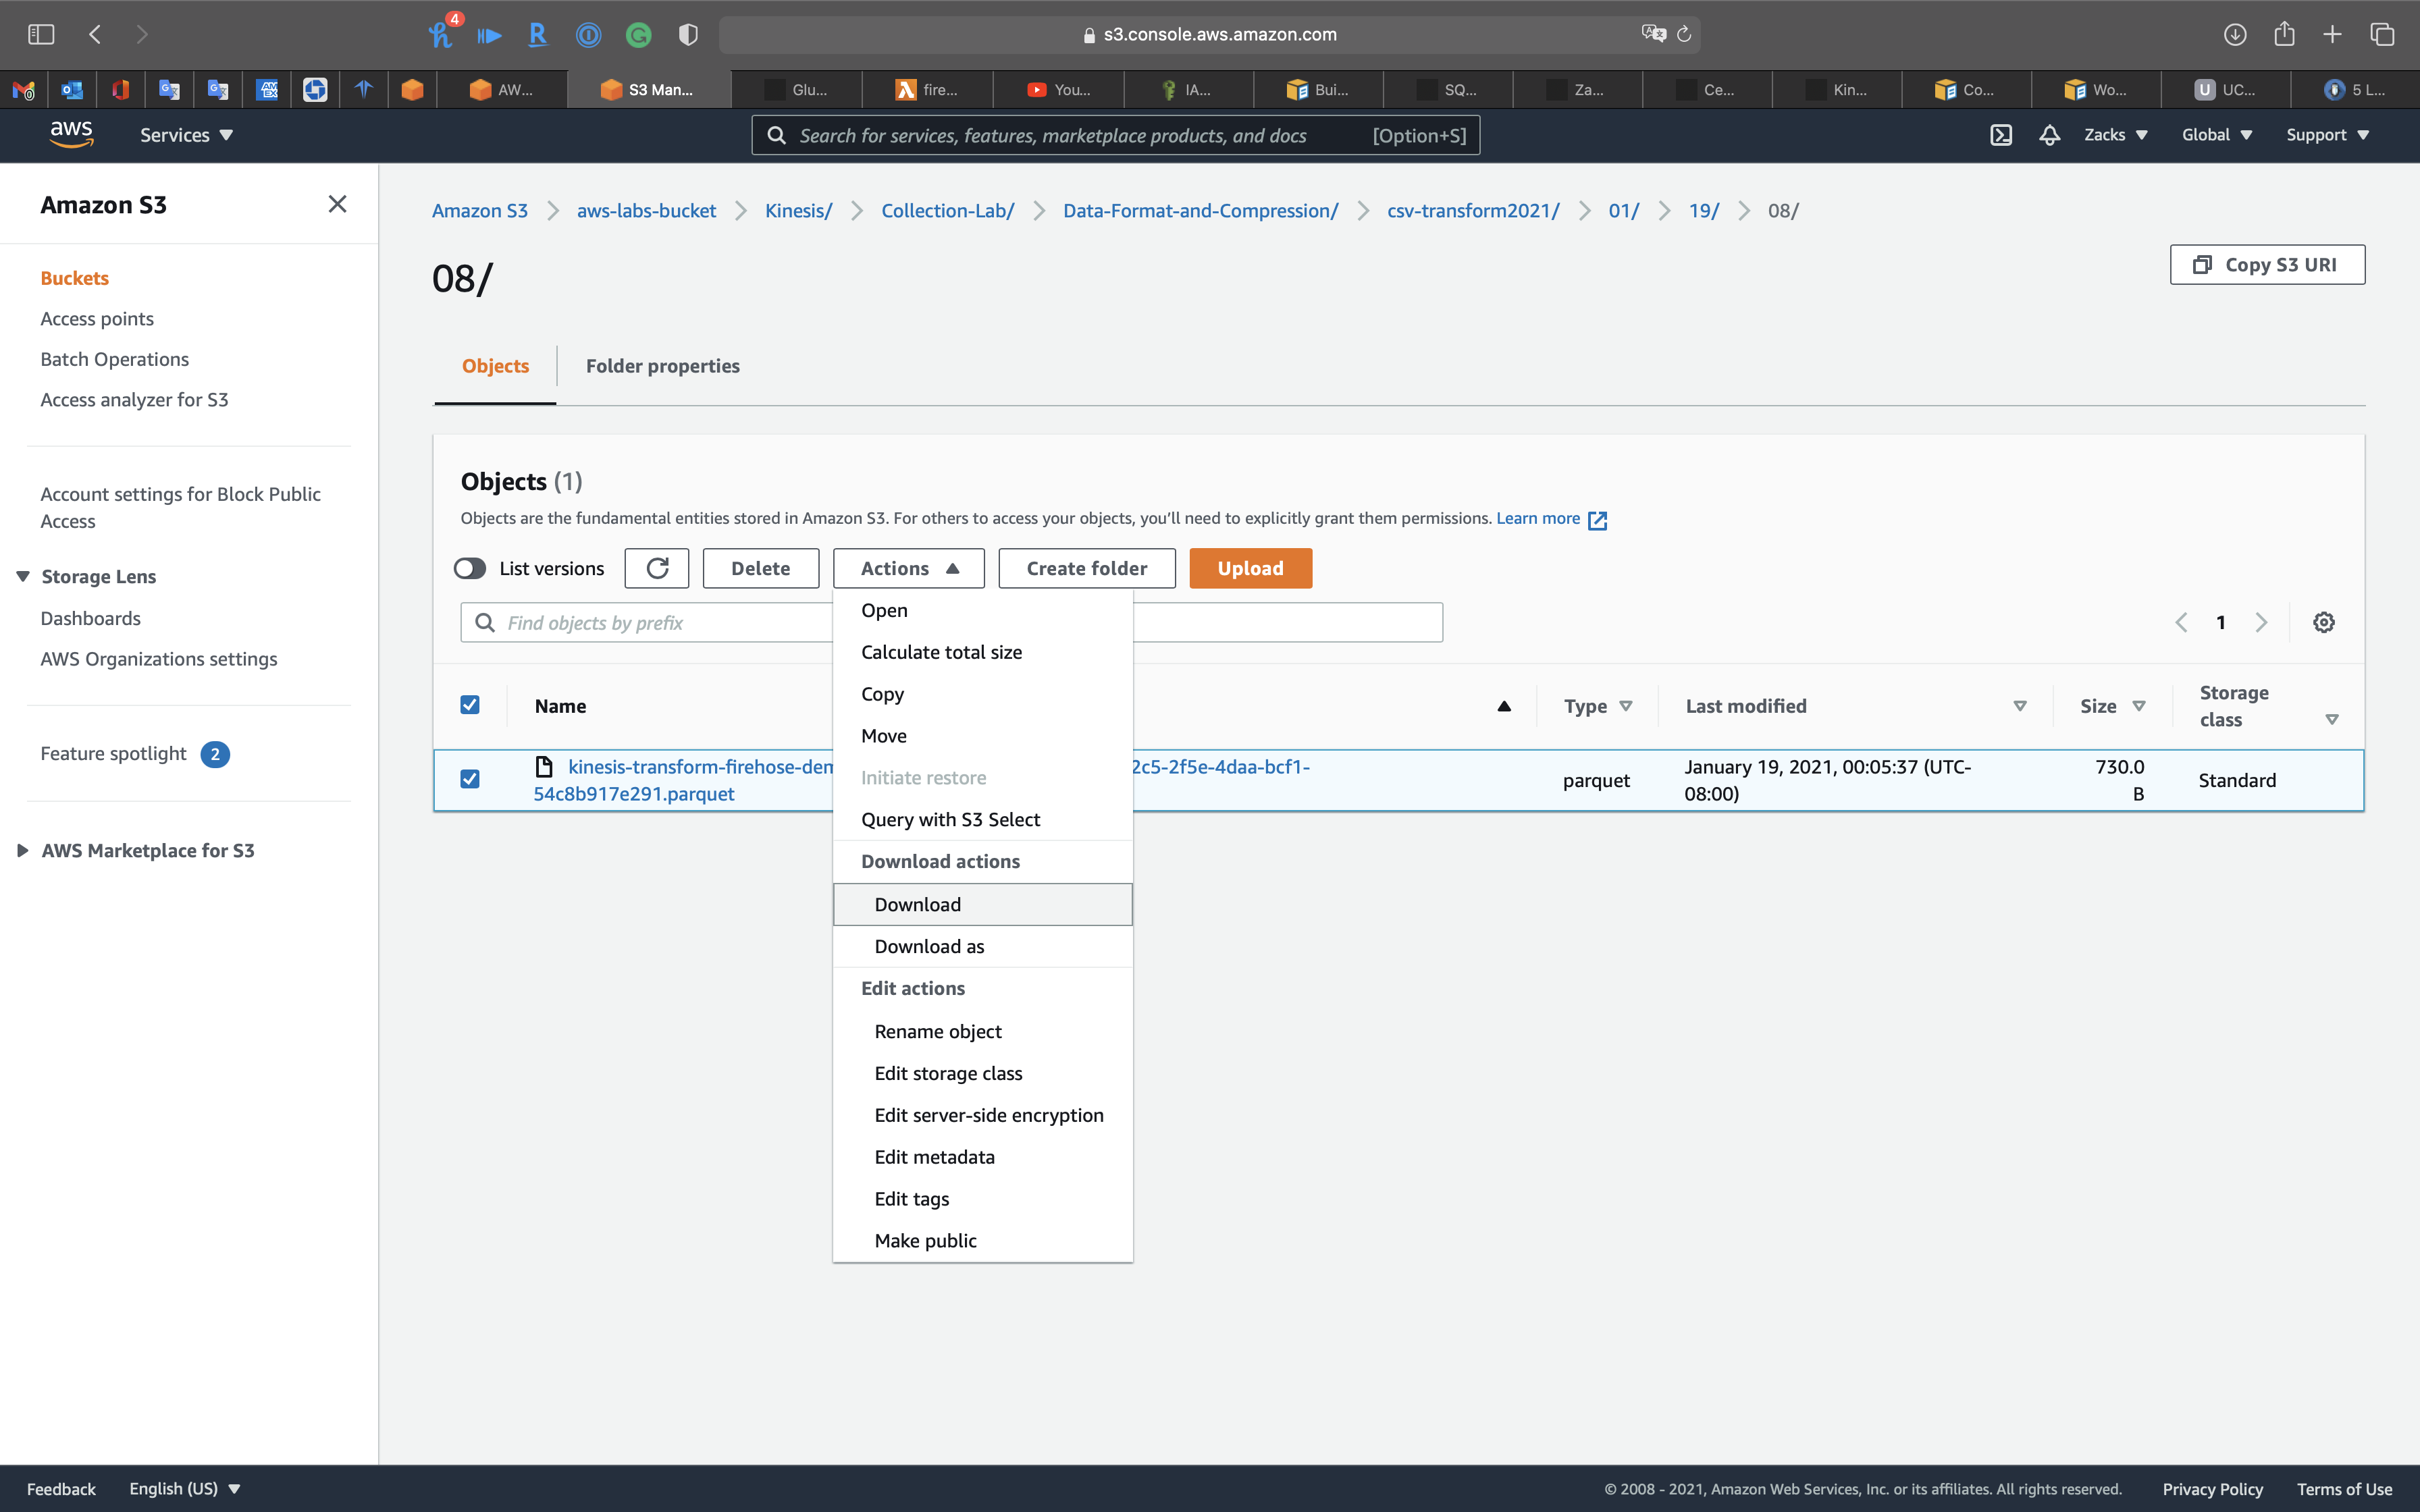
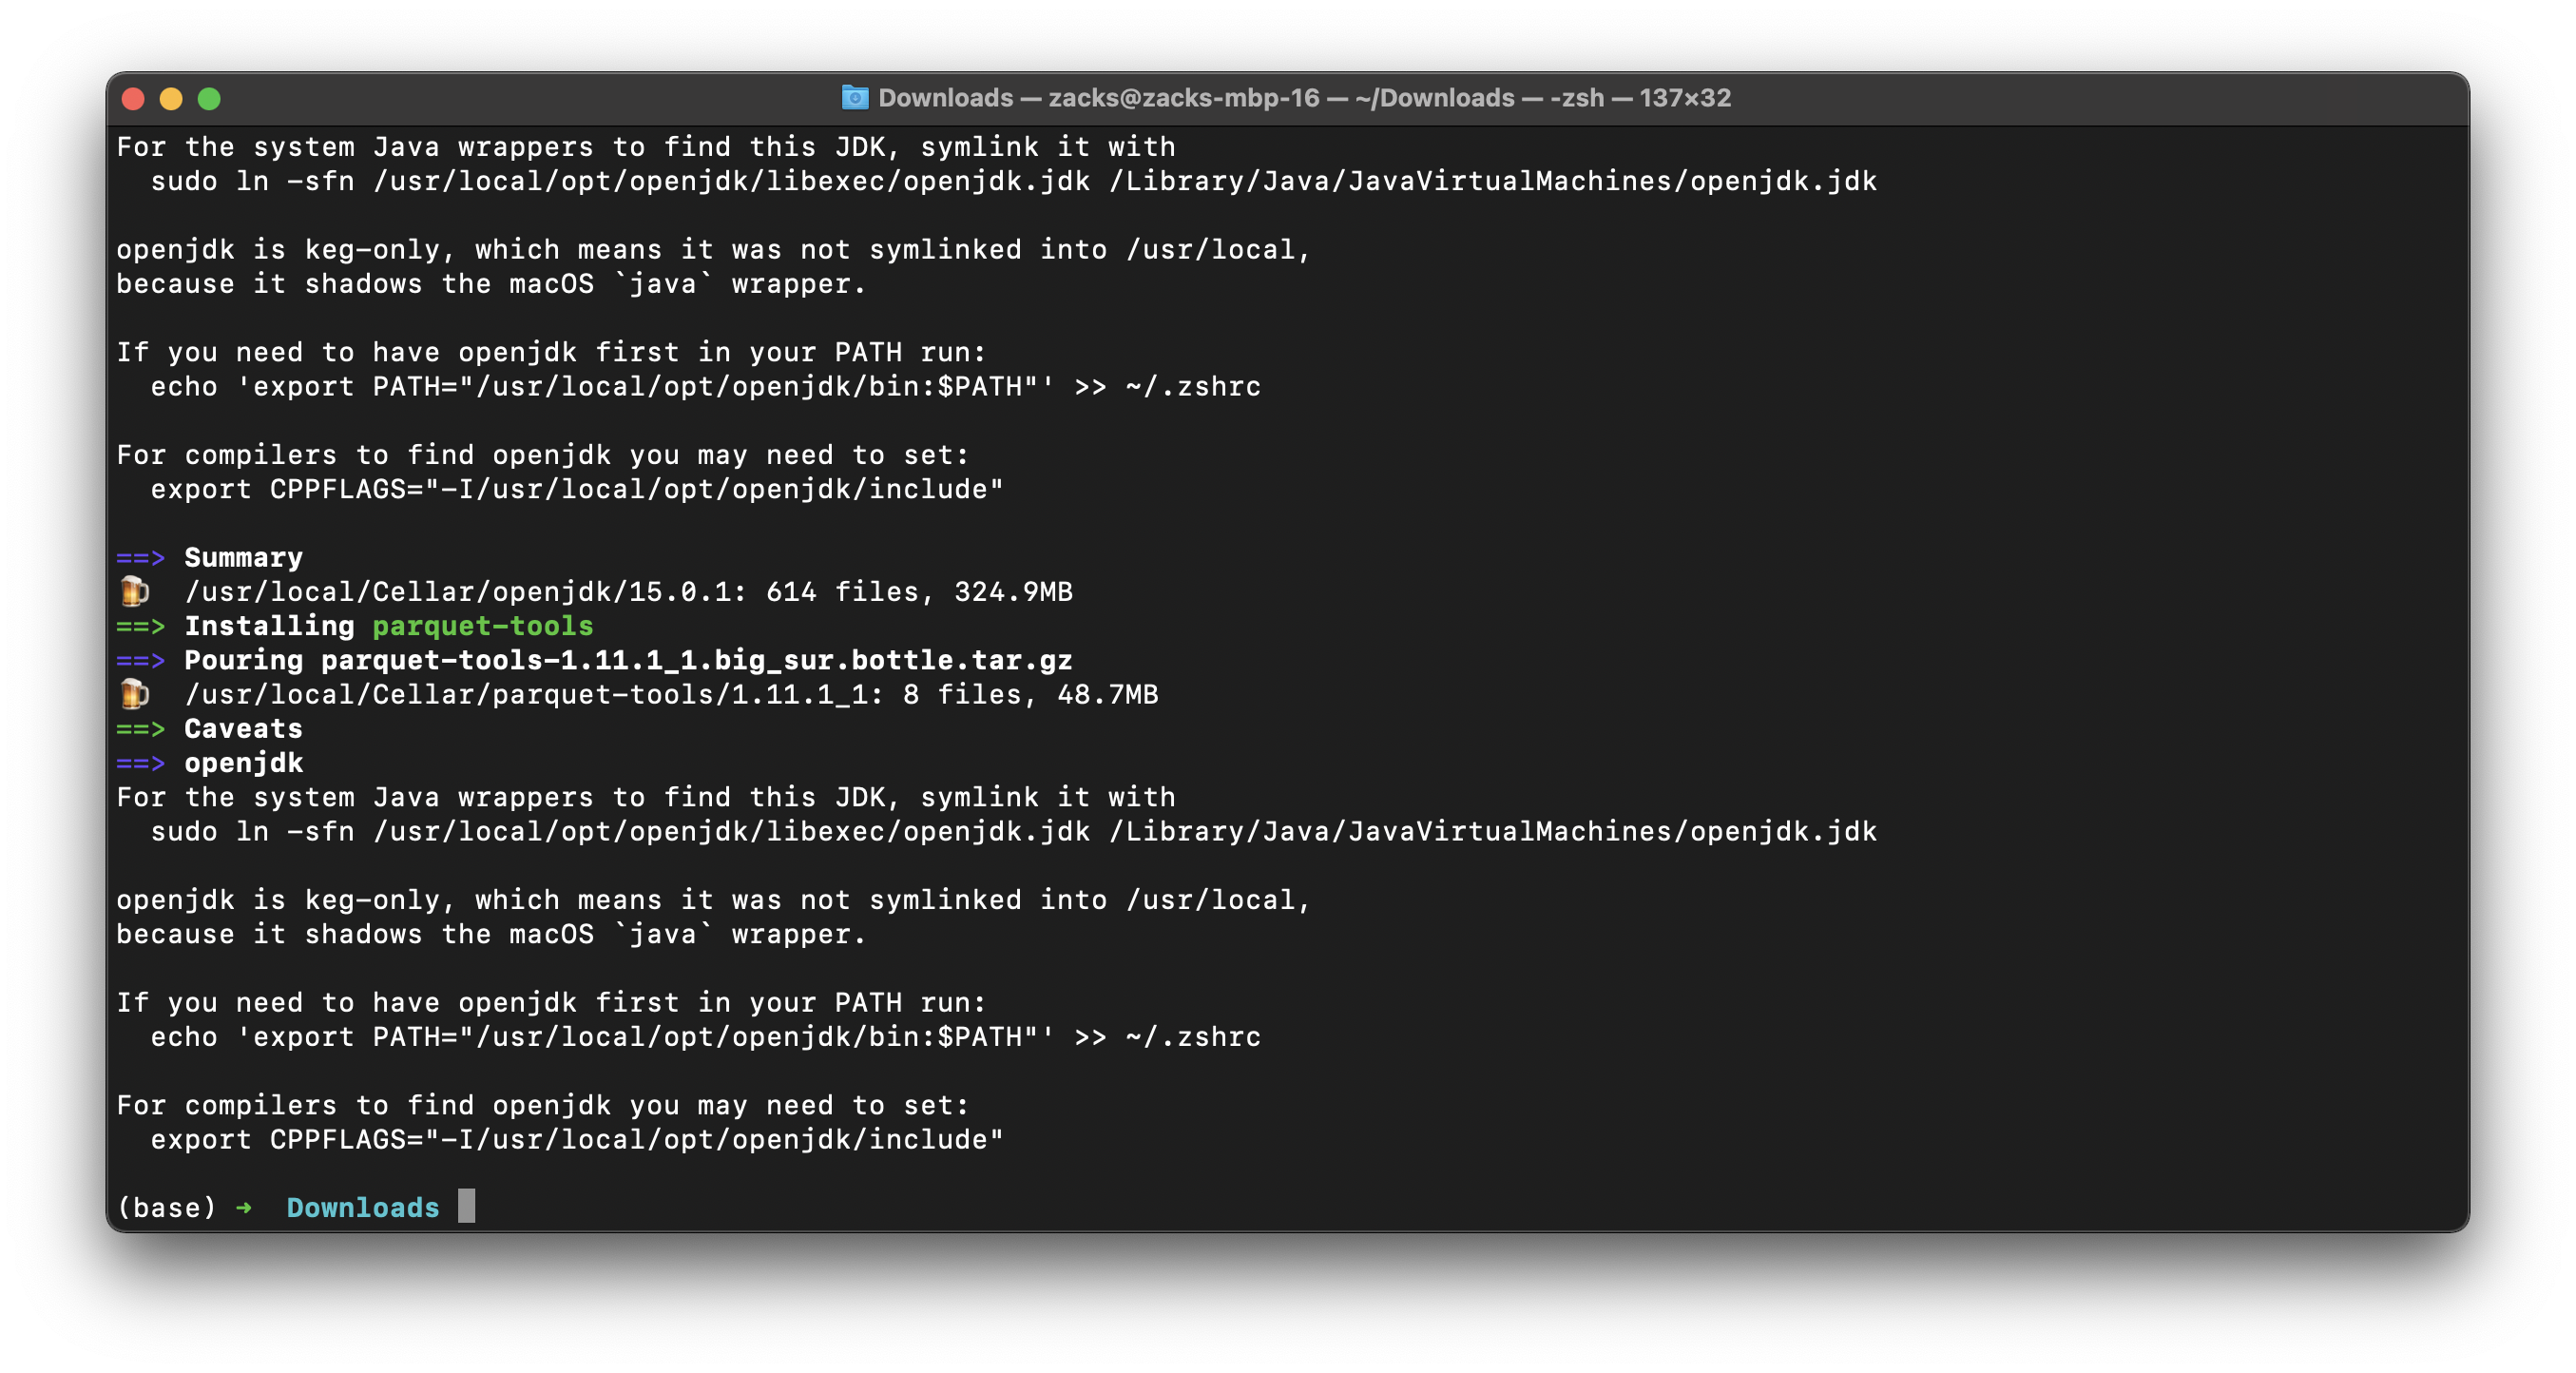
Install parquet-tools
1 | brew install parquet-tools |
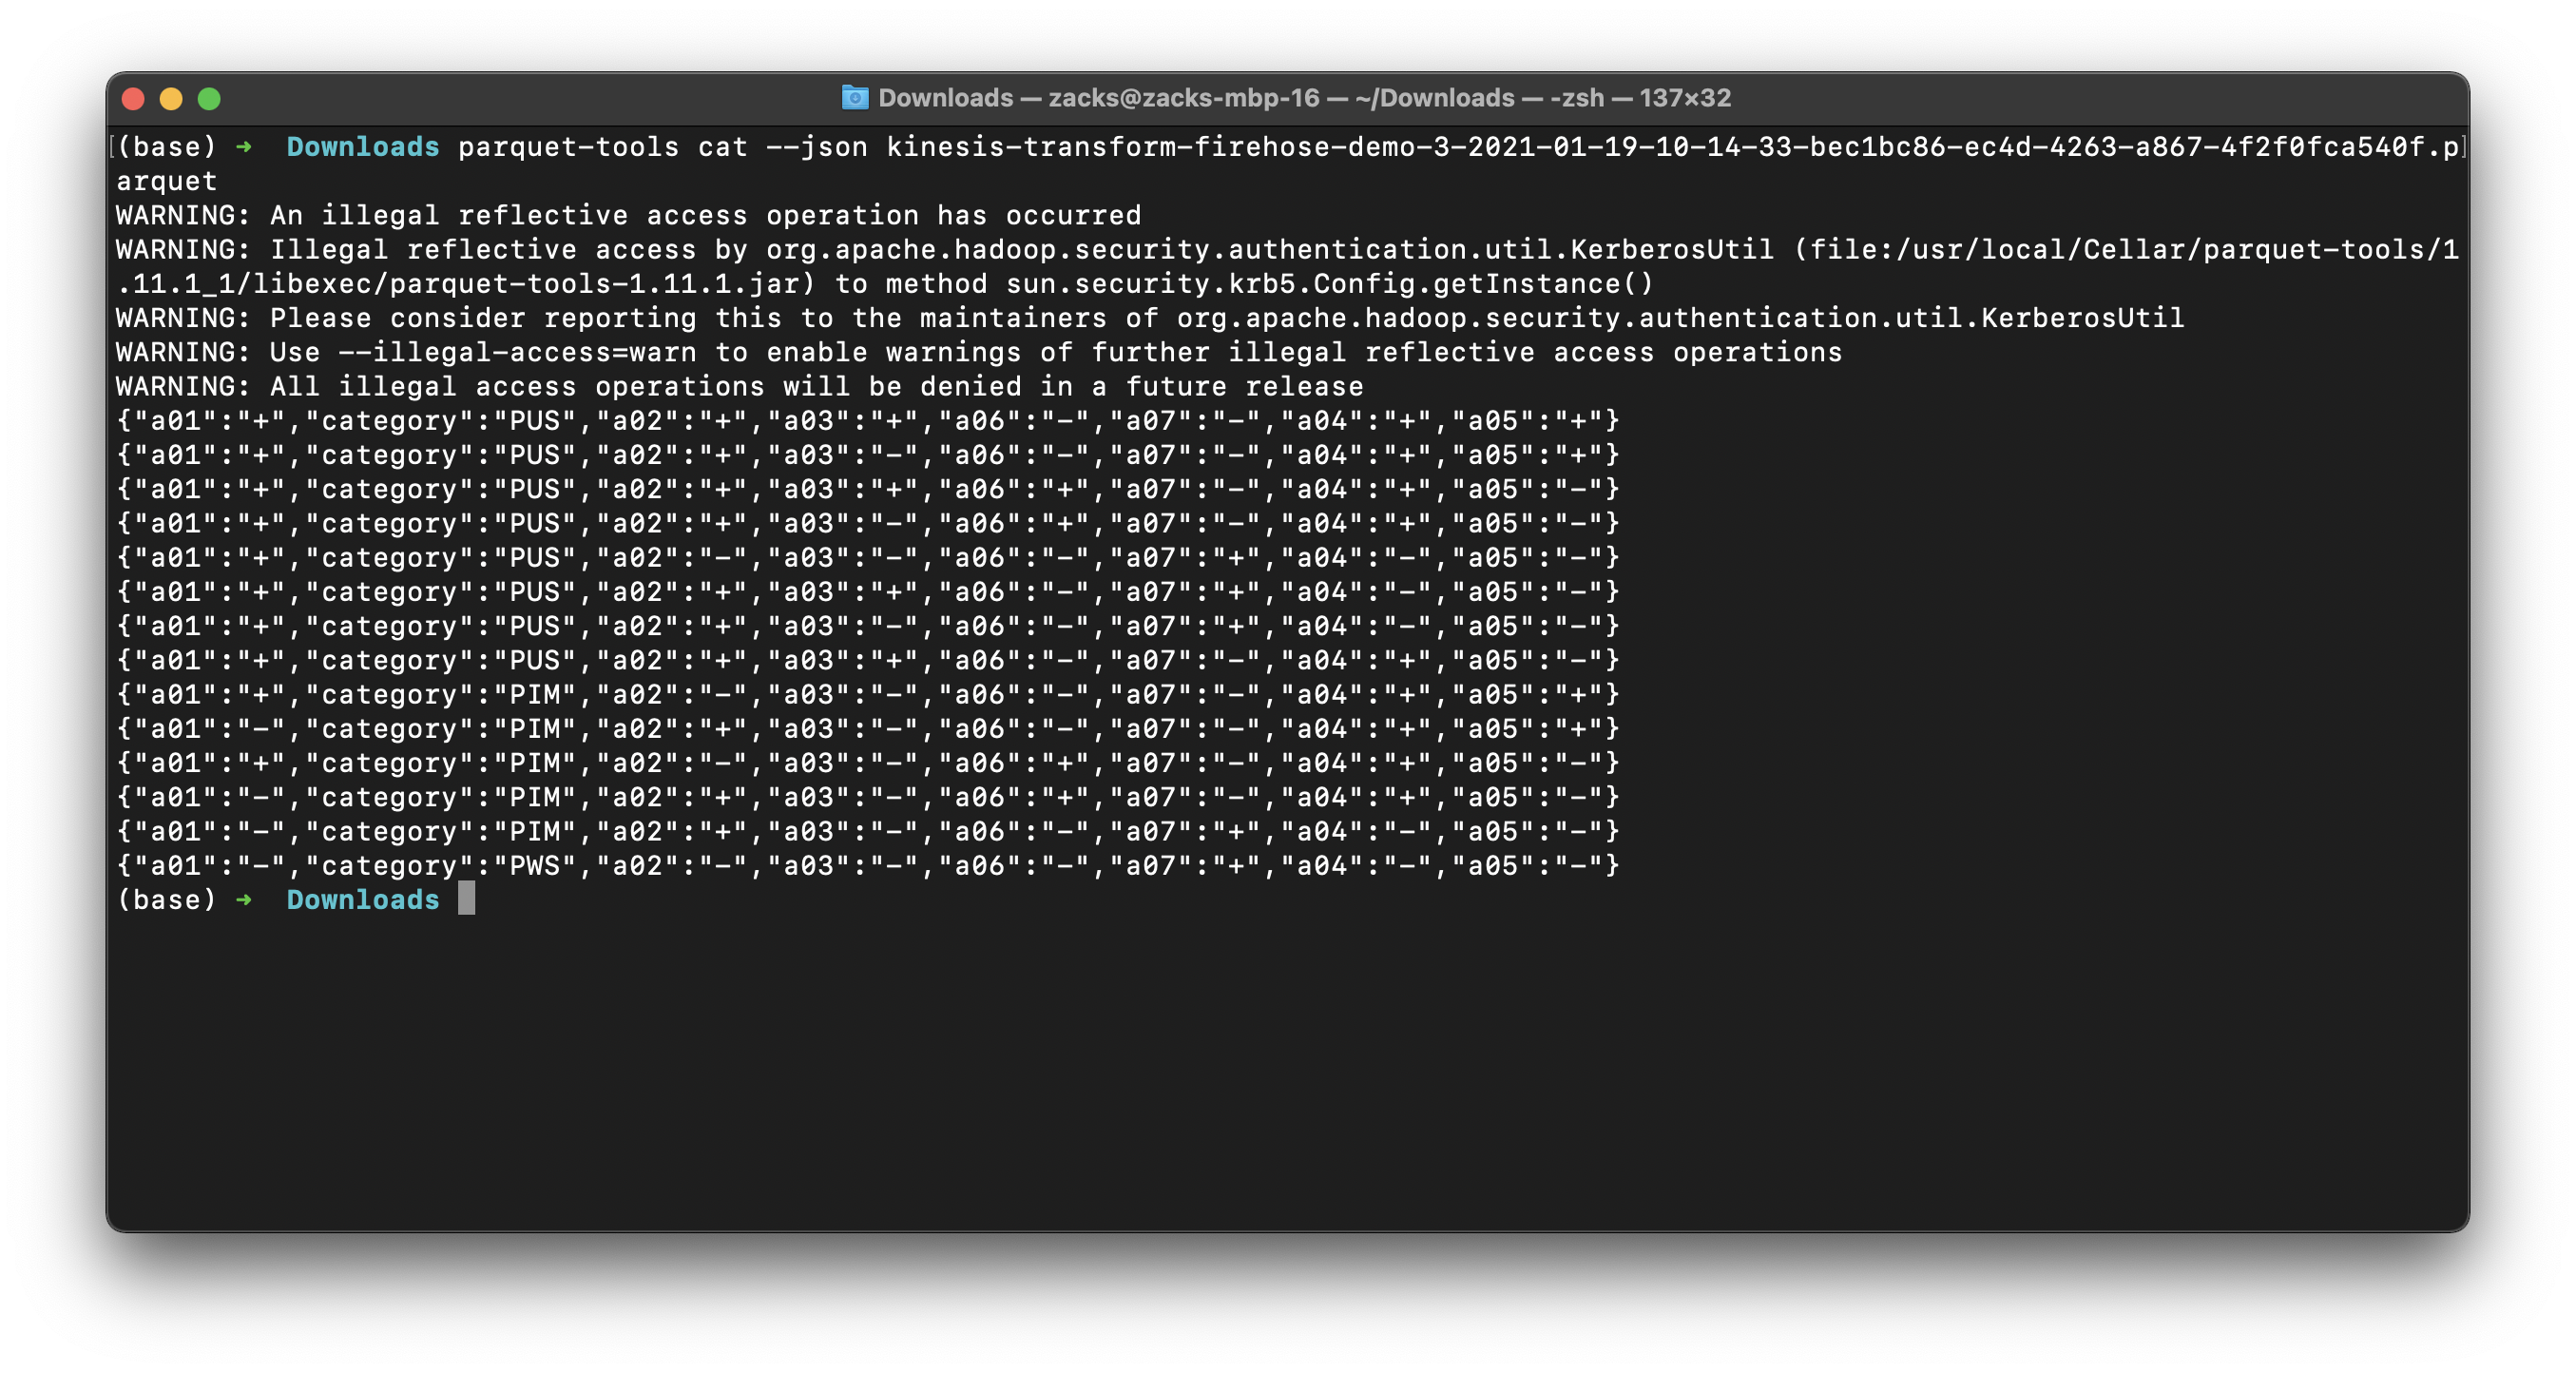
Use parquet-tools to open the parquet file
1 | cd ~/Downloads |
Conclusion
- We used AWS Glue Crawler for crawling the .csv file and got the table schema.
- We used Glue ETL job to transform the .csv file to .json file.
- We used AWS Glue Crawler again for crawling the .json file schema.
- We uploaded the Python 2.7 Lambda code.
- We set up the Kinesis.
- We invoked the Python Kinesis producer transform function to sent the
Surveillance.csvfile. - Kinesis Data Streams received the
Surveillance.csvthen transferred it to Kinesis Data Firehose. - Kinesis Data Firehose received the .csv file then transformed it to .json file based on the .json schema we got at step 3.
- In the future, we could automatically transform the same type data since we already have the schema and Kinesis workflow.
Kinesis ClickStream Analysis
Region: us-east-1
Lab Details
- Kinesis streaming of web log data through Kinesis Data Streams
- Kinesis Data Firehose transforms and delivers to S3
- Athena catalogs and queries in real time
- QuickSight visualize web log analytics
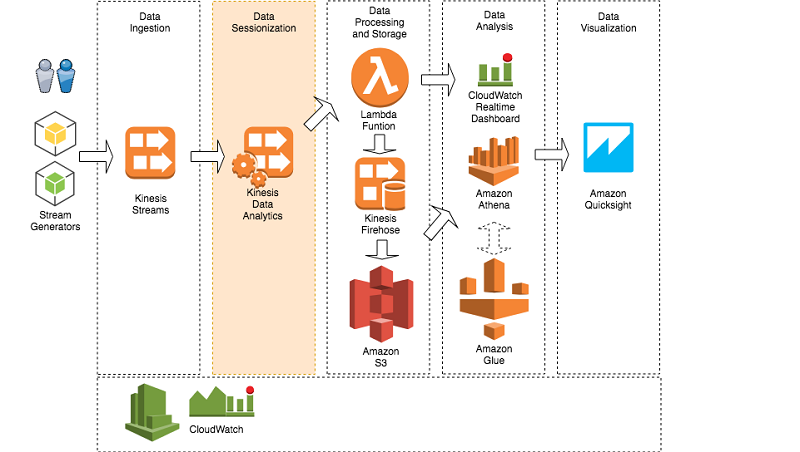
- Data ingestion: You can use Kinesis Data Streams to build custom applications that process or analyze streaming data for specialized needs. Kinesis Data Streams can continuously capture and store terabytes of data per hour from hundreds of thousands of sources, such as website clickstreams, financial transactions, social media feeds, IT logs, and location-tracking events.
- Data sessionization: Kinesis Data Analytics is the easiest way to process streaming data in real time with standard SQL without having to learn new programming languages or processing frameworks. With Kinesis Data Analytics, you can query streaming data or build entire streaming applications using SQL, so that you can gain actionable insights and respond to your business and customer needs promptly.
- Data processing and storage: The sessionization stream is read from Kinesis Data Analytics using an AWS Lambda function. The function triggers two events: one real-time dashboard in Amazon CloudWatch and a second one to persist data with Kinesis Data Firehose.
- Data analysis: AWS Glue is used to crawl Amazon S3 and build or update metadata definition for Amazon Athena tables.
Amazon Athena is an interactive query service that makes it easy to analyze data in Amazon S3 using standard SQL. Athena provides connectivity to any application using JDBC or ODBC drivers.
- Data visualization: Amazon QuickSight is a visualization tool that is natively used to build dashboards over Amazon Athena data.
- Monitoring: Amazon CloudWatch is a tool that lets you monitor the streaming activities, such as the number of bytes processed or delivered per second, or the number of failures.
Task Details
- Web Logs in JSON format generated by Python will be feeded to Kinesis Data Streams
- Set Kinesis Data Streams destination as Kinesis Data Firehose
- Kinesis Data Firehose transforms JSON data to Parquet data and places them onto S3 bucket
- Use Athena to query the Parquet data in S3 bucket
- Glue crawls the data through Athena and saves the schema in Glue Data Catalog
- Run analysis and visualization in real time by QuickSight that query data from Athena and S3 pipeline
Python ClickStream Generator
Create a Python program for sending stream data to Kinesis Data Streams.
To generate the workload, you can use a Python program with random values, simulating a beer-selling application.
The same user ID can have sessions on different devices, such as a tablet, a browser, or a phone application. This information is captured by the device ID. As a result, the data for the Python program payload has these parameters: a user ID, a device ID, a client event, and a client timestamp, as shown in the following example.
1 | import sys |
Kinesis Data Streams Configuration
Services -> Kinesis -> Data Streams
Create a Kinesis Data Stream for data ingestion.
Click on Create data stream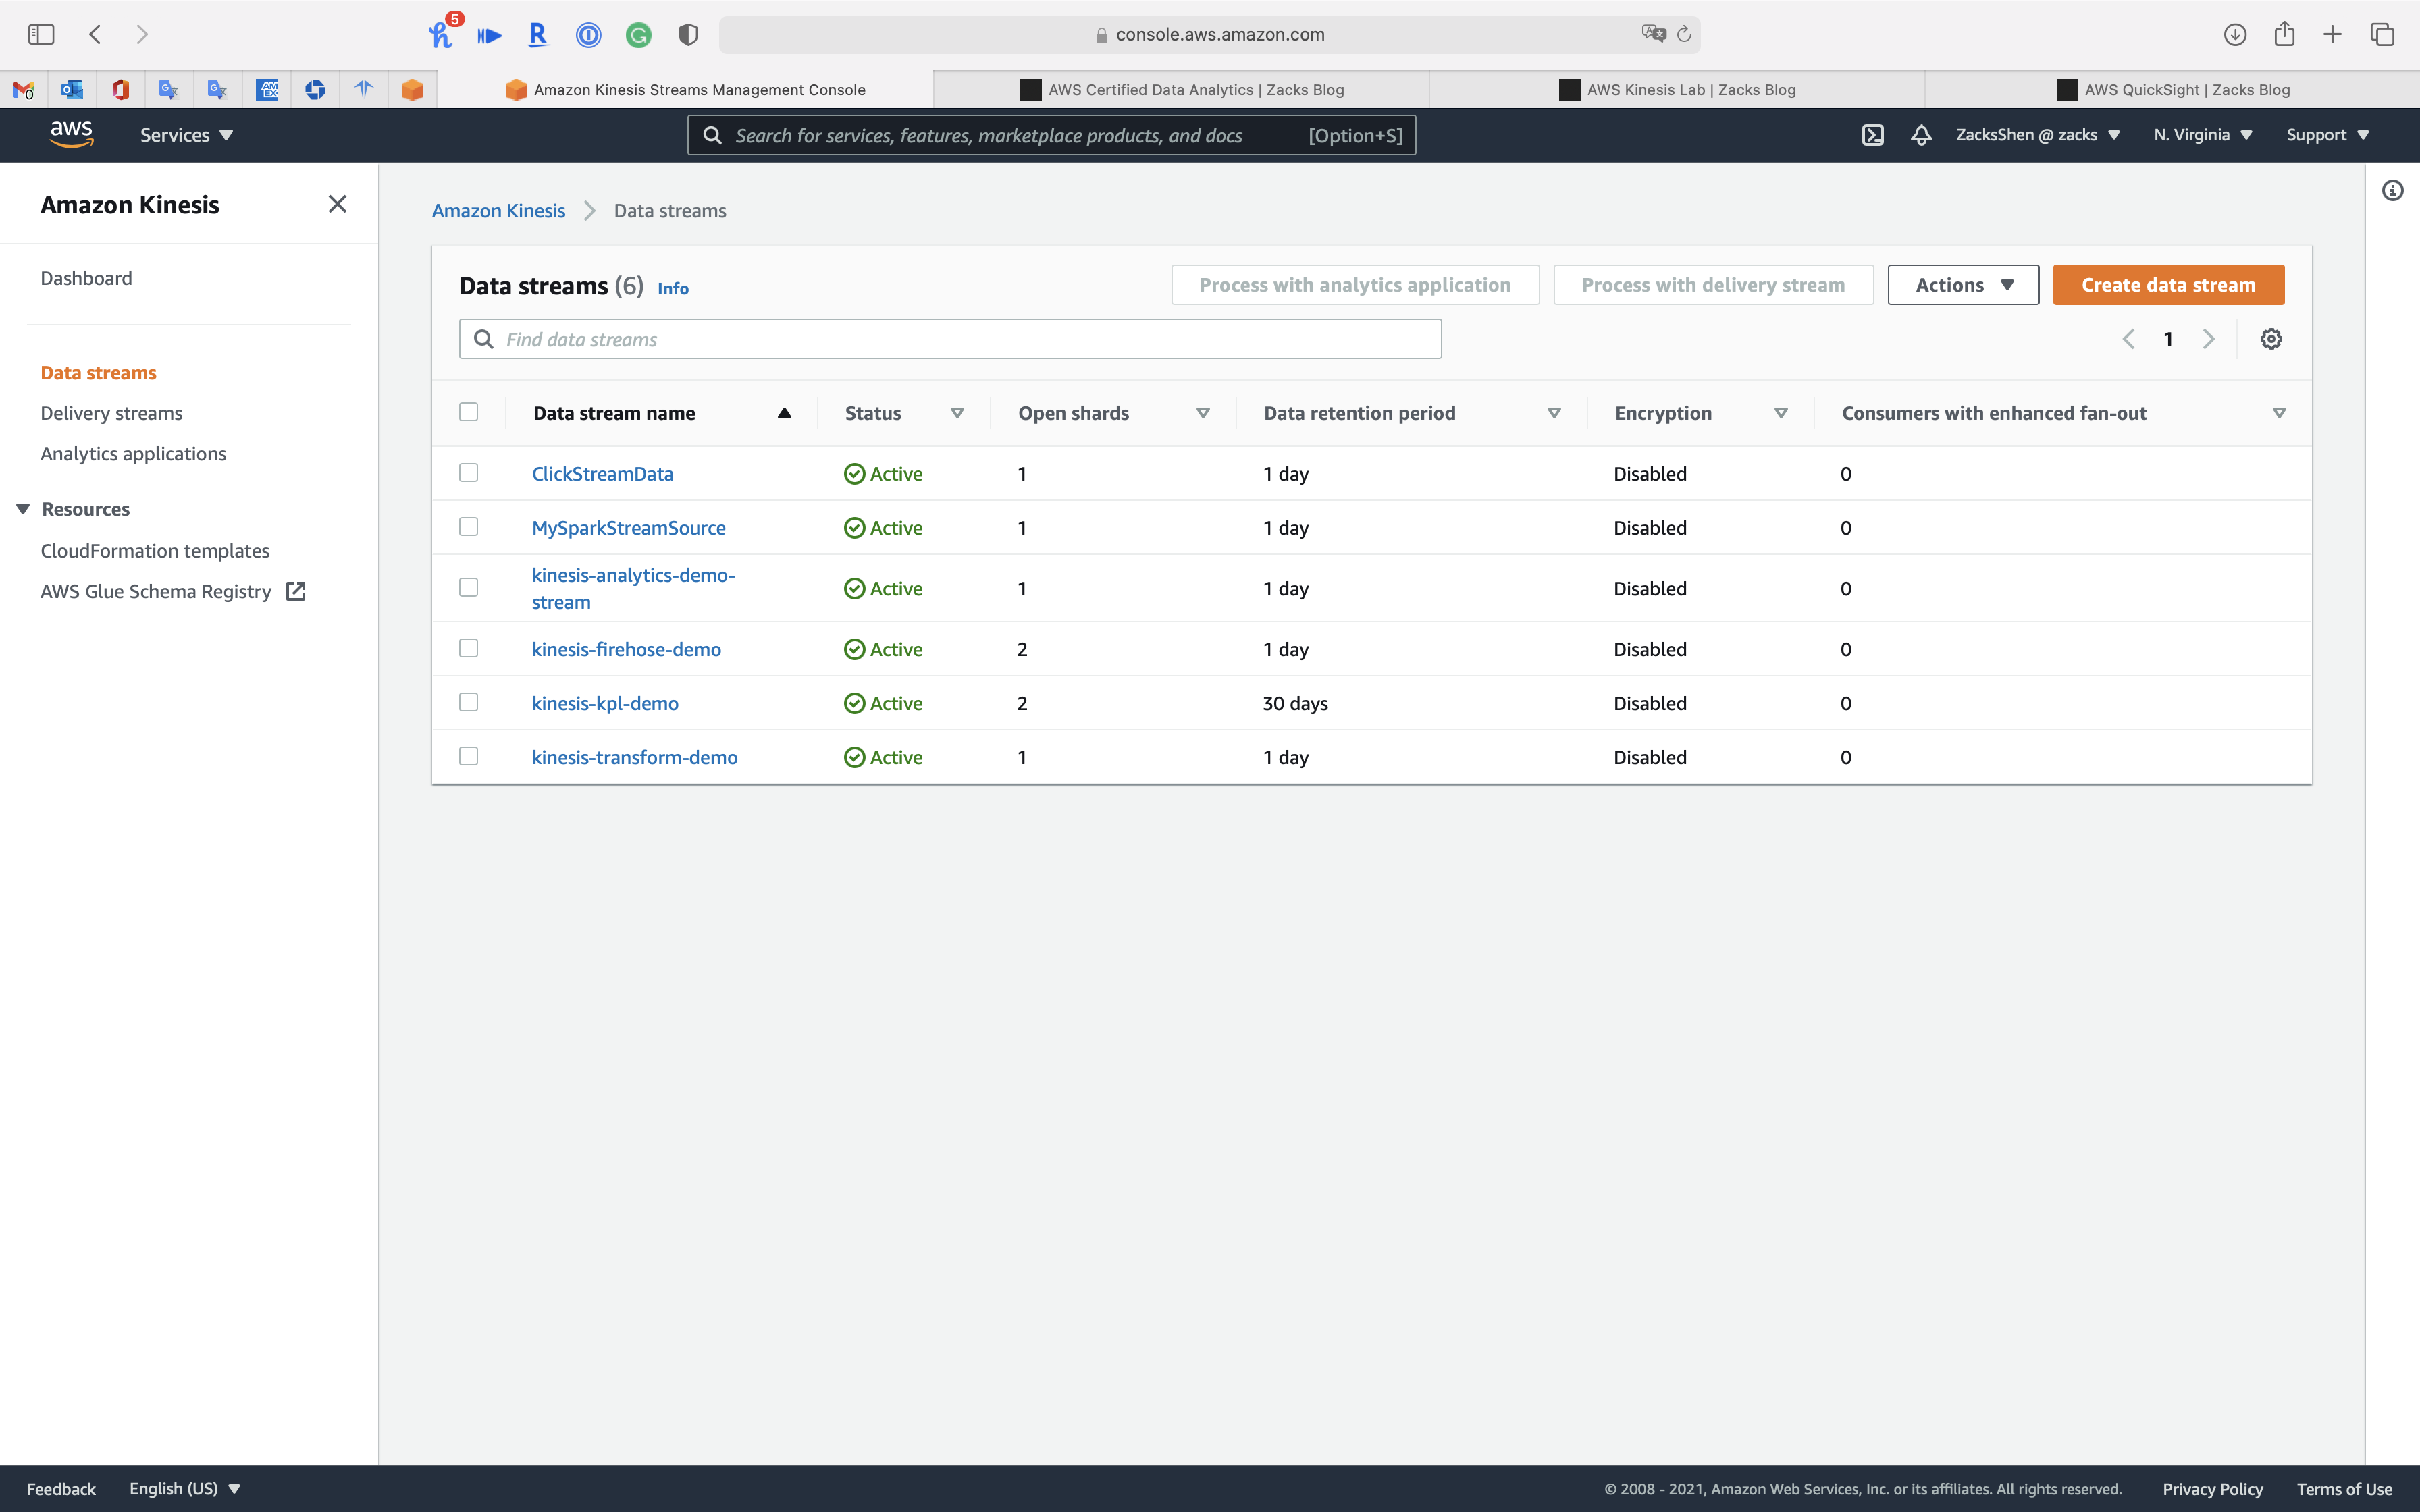
Data stream configuration
- Data stream name:
ClickStream-Kinesis-Data-Streams
Data stream capacity
- Number of open shards:
1
Click on Create data stream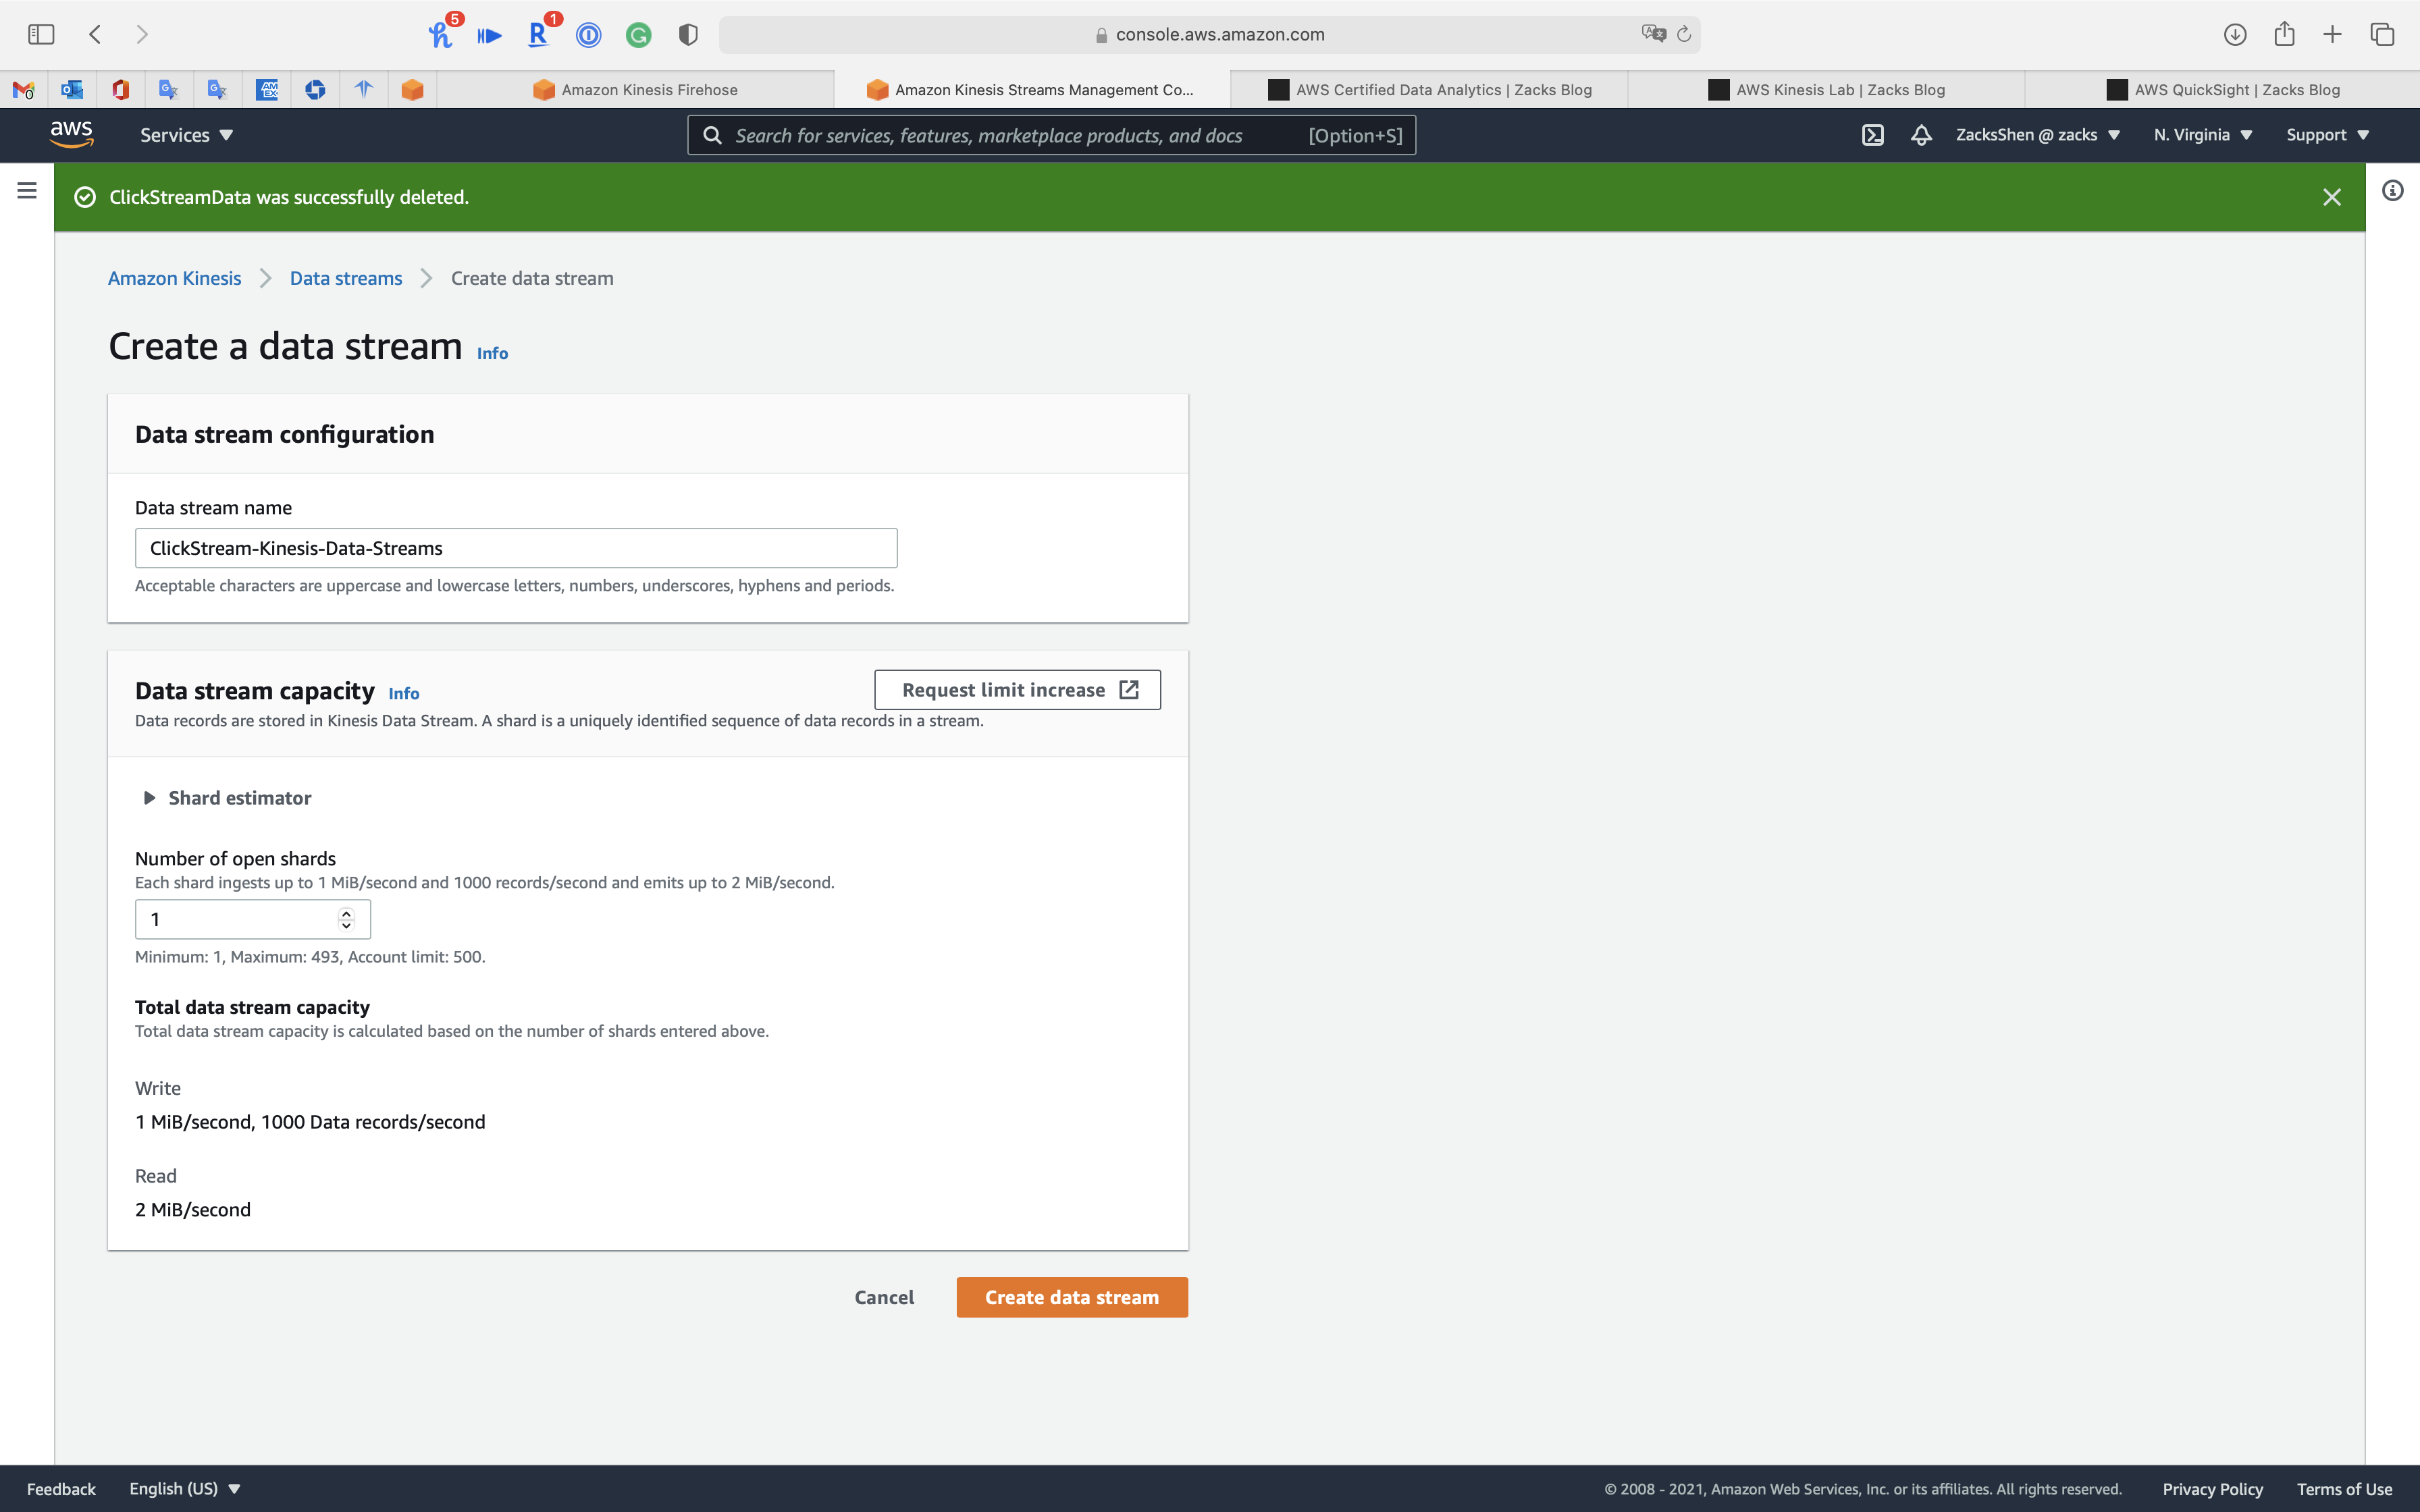
Athena Configuration
Services -> Athena
Use Athena to create a table that defines data structure and Glue Data Catalog
Set up Athena query result location in Amazon S3 (optional)
If you see Before you run your first query, you need to set up a query result location in Amazon S3. Learn more, Click on set up a query result location in Amazon S3
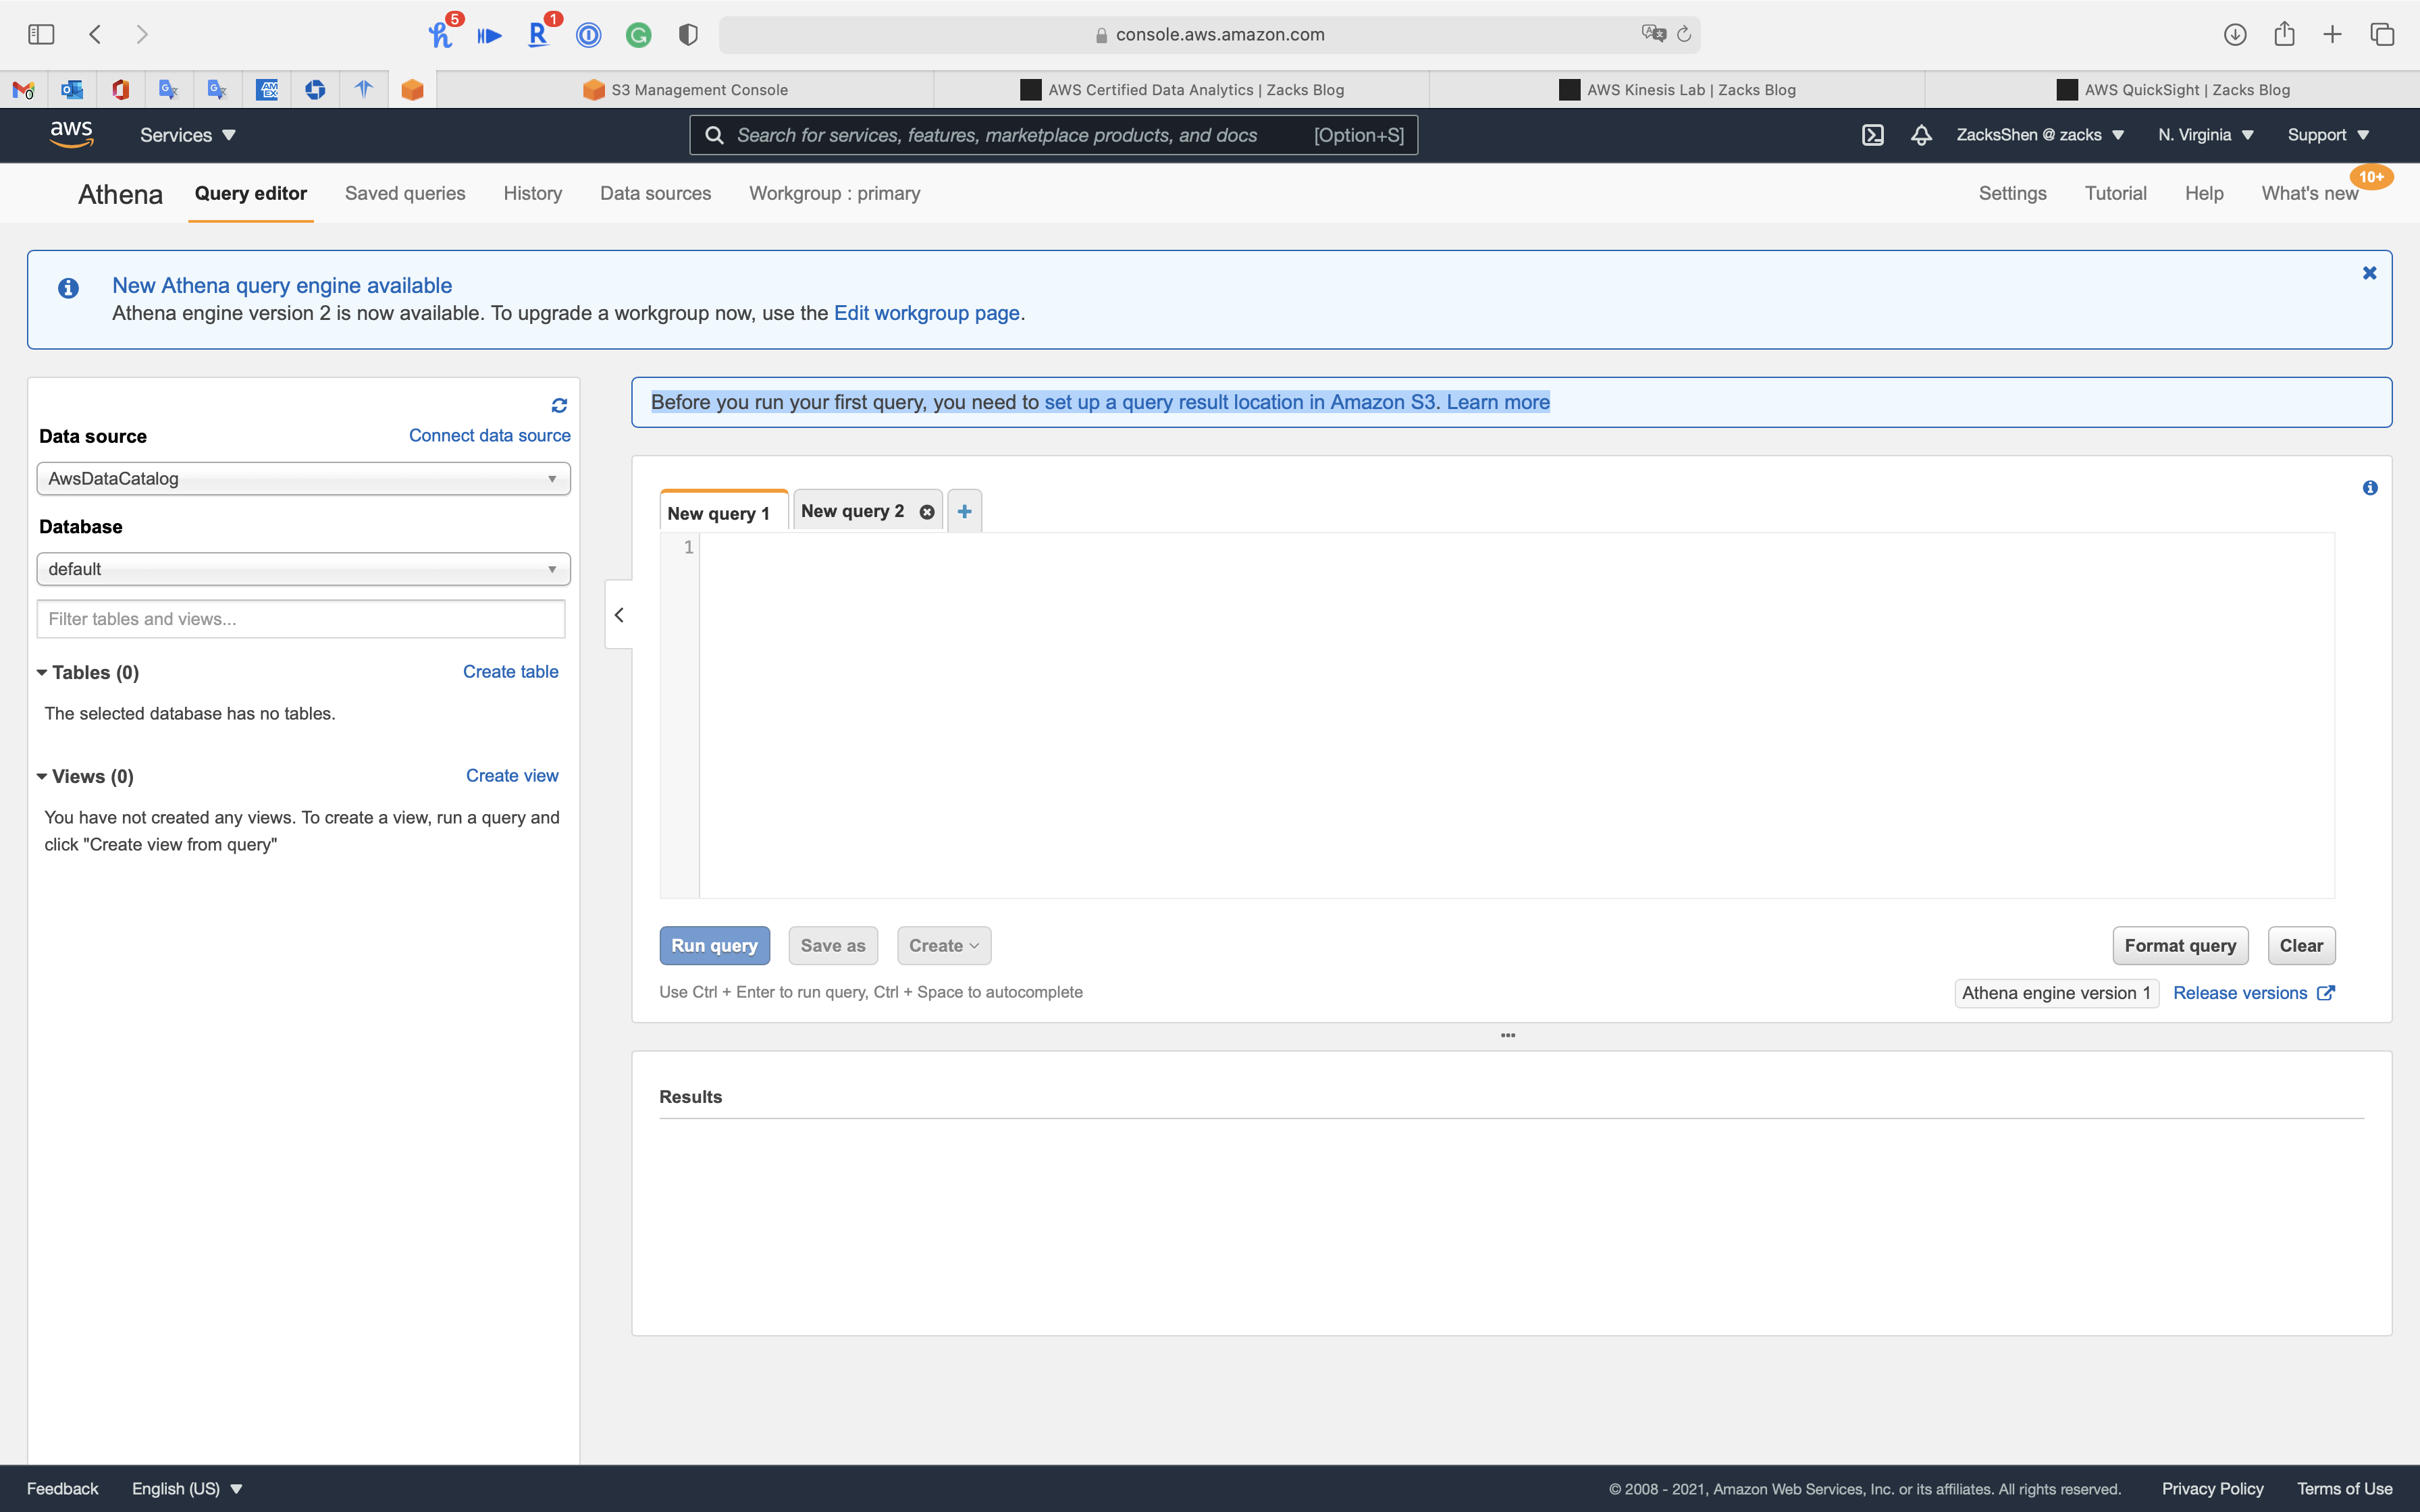
Choose a S3 bucket folder as the query result location, then click on Save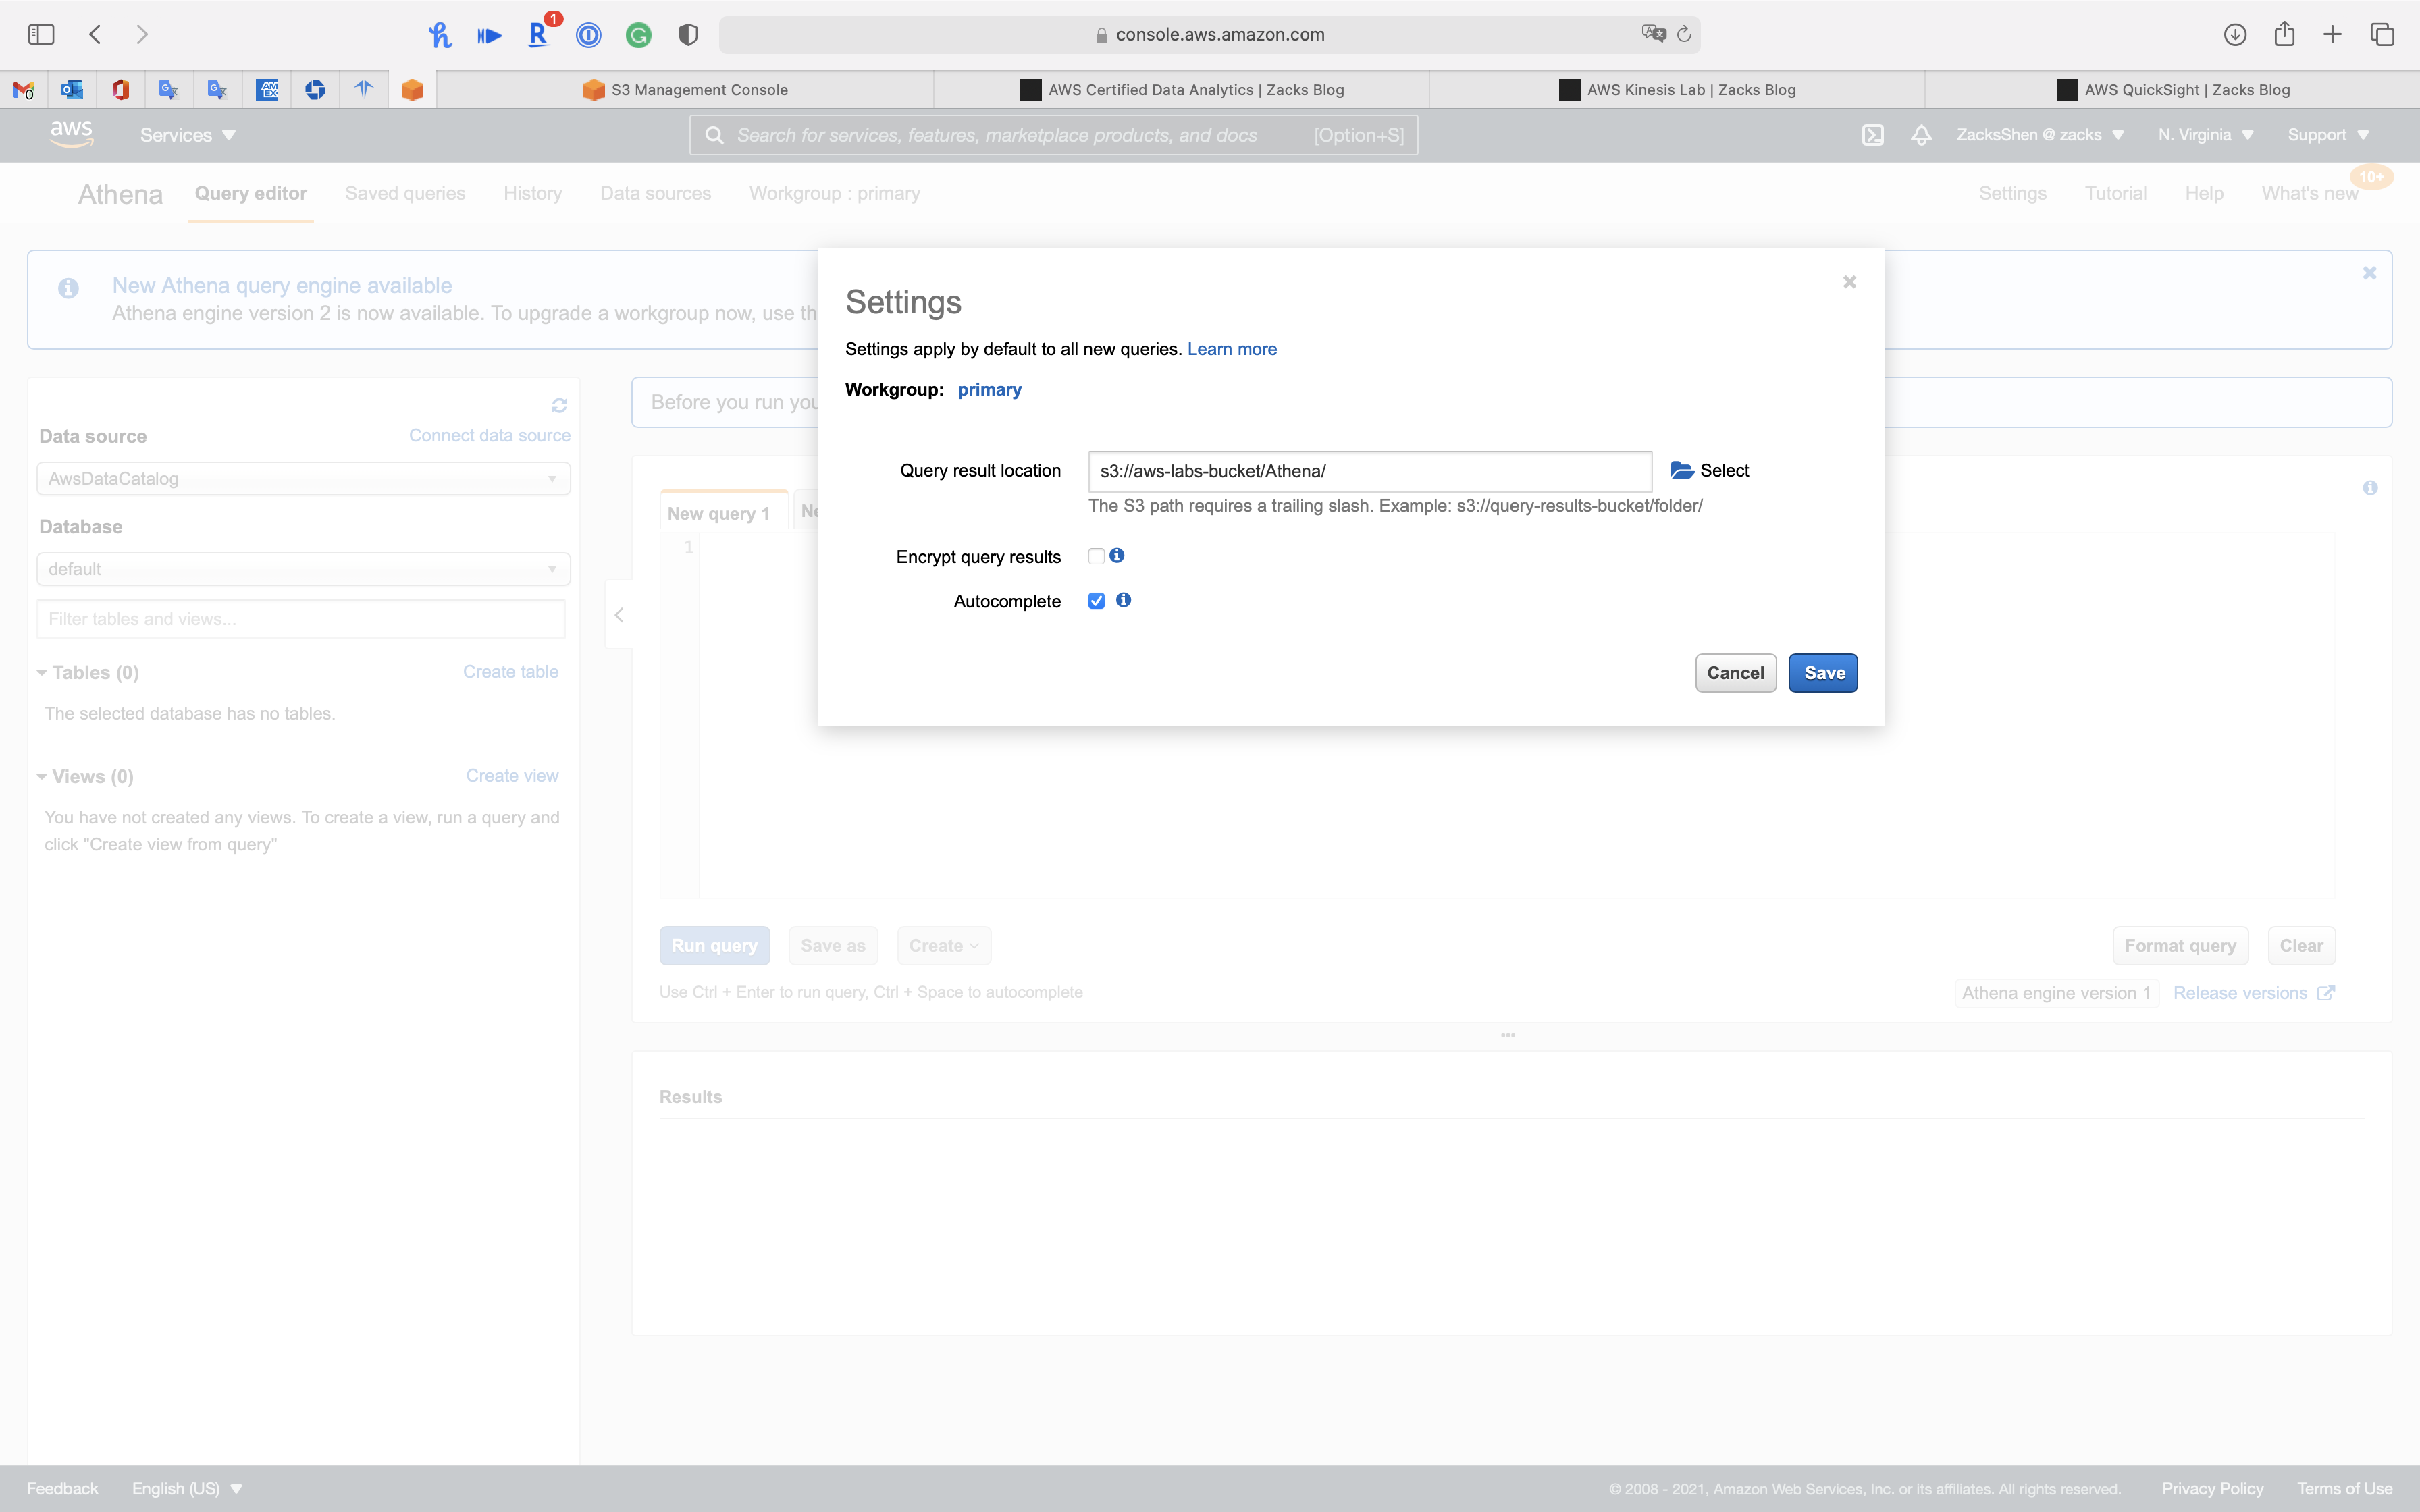
Create the table in default database and load the database from Parquet in S3 bucket.
Replace the LOCATION as your s3 bucket url.
1 | CREATE EXTERNAL TABLE default.clickstream ( |
Click on Run query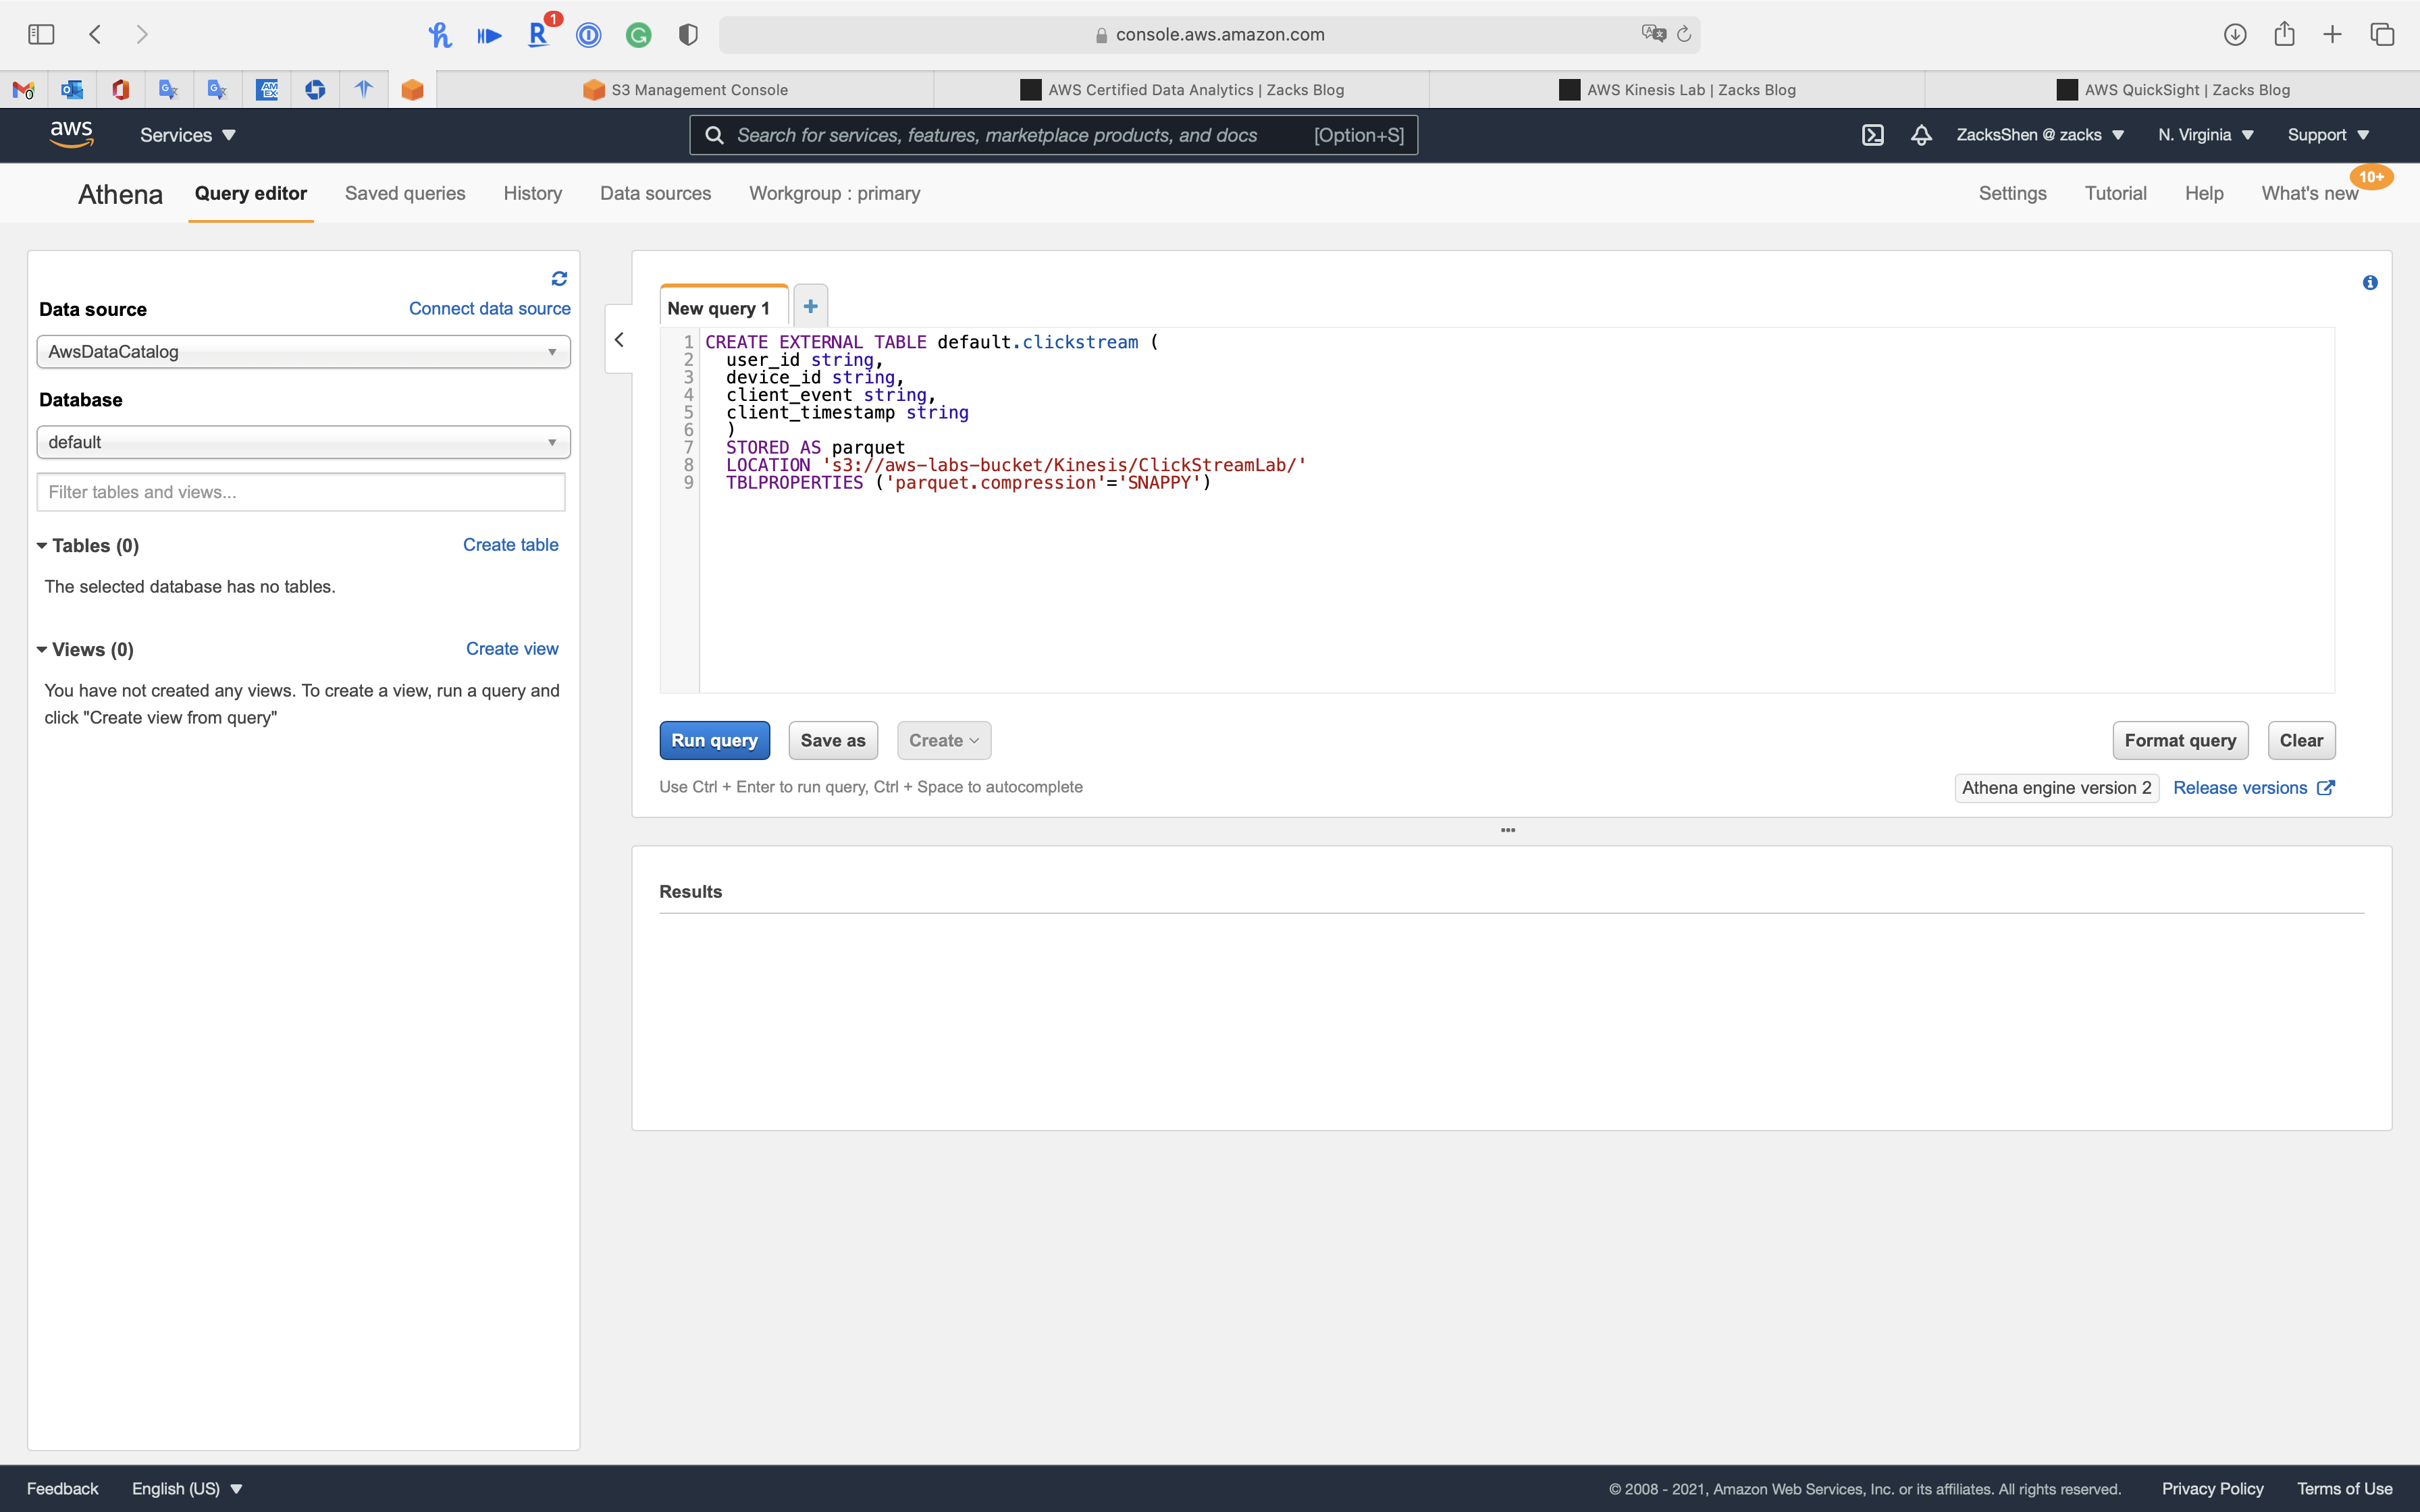
You can see the new table clickstream under database default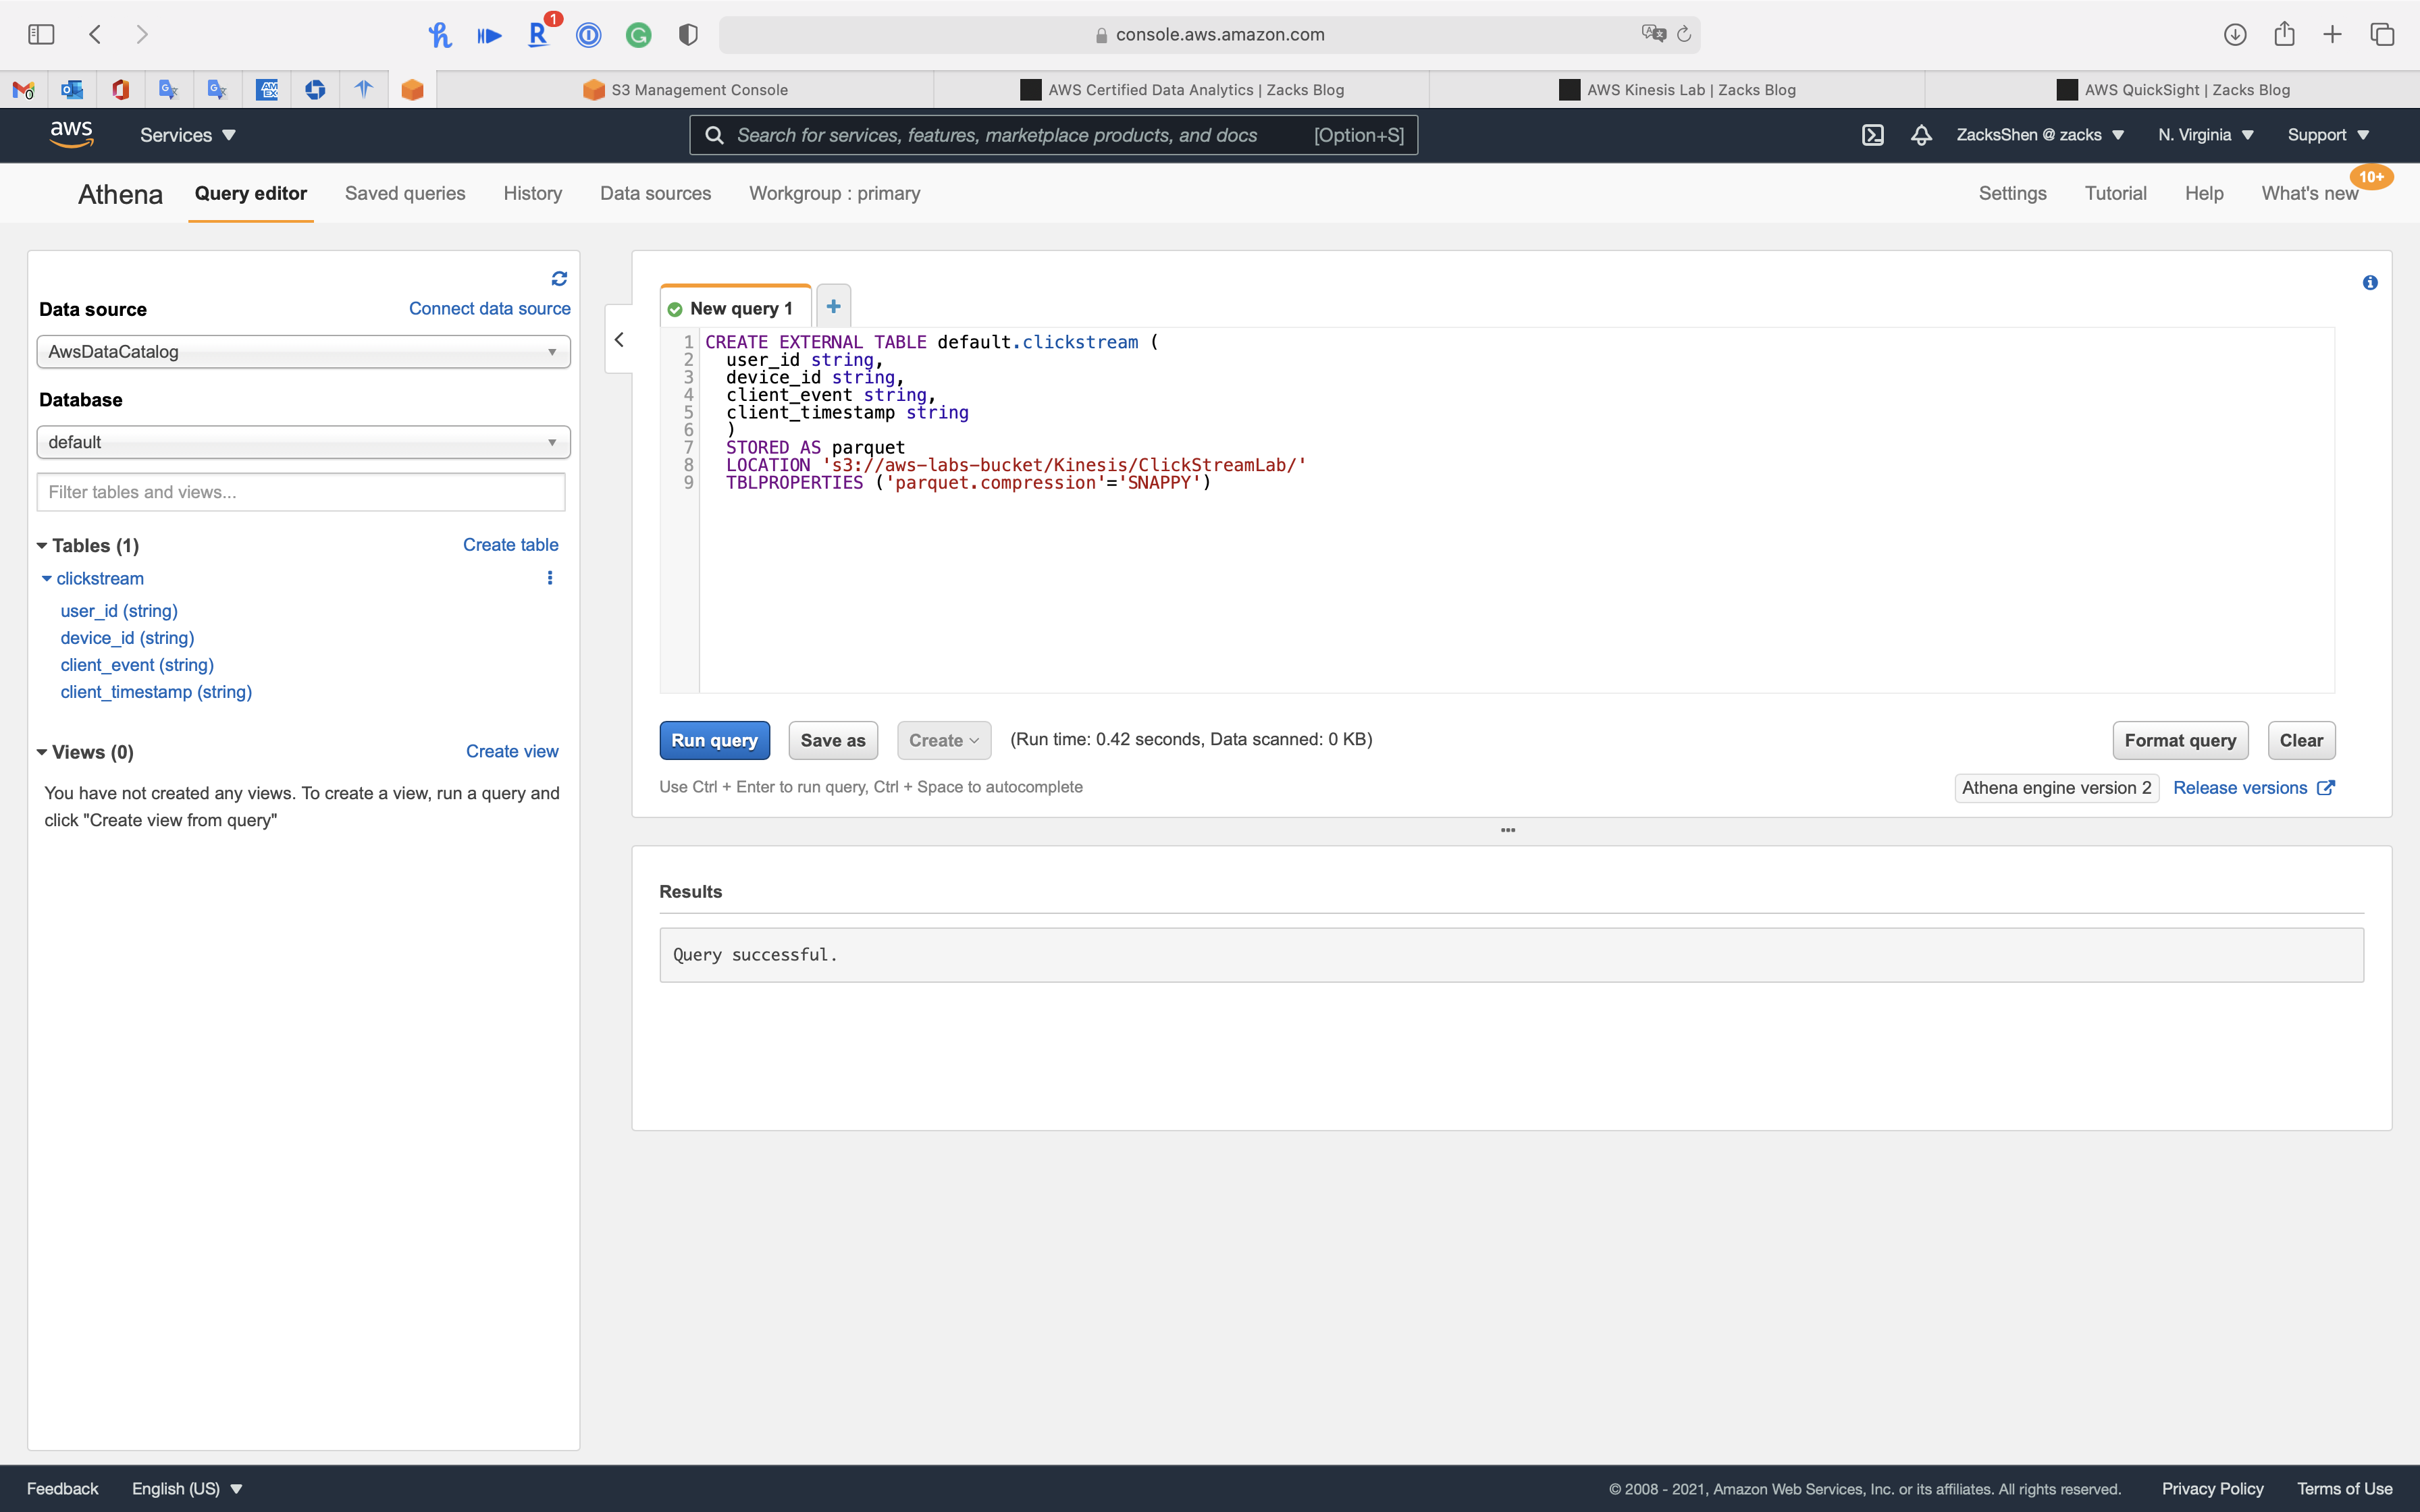
You can also see the Glue table is ready.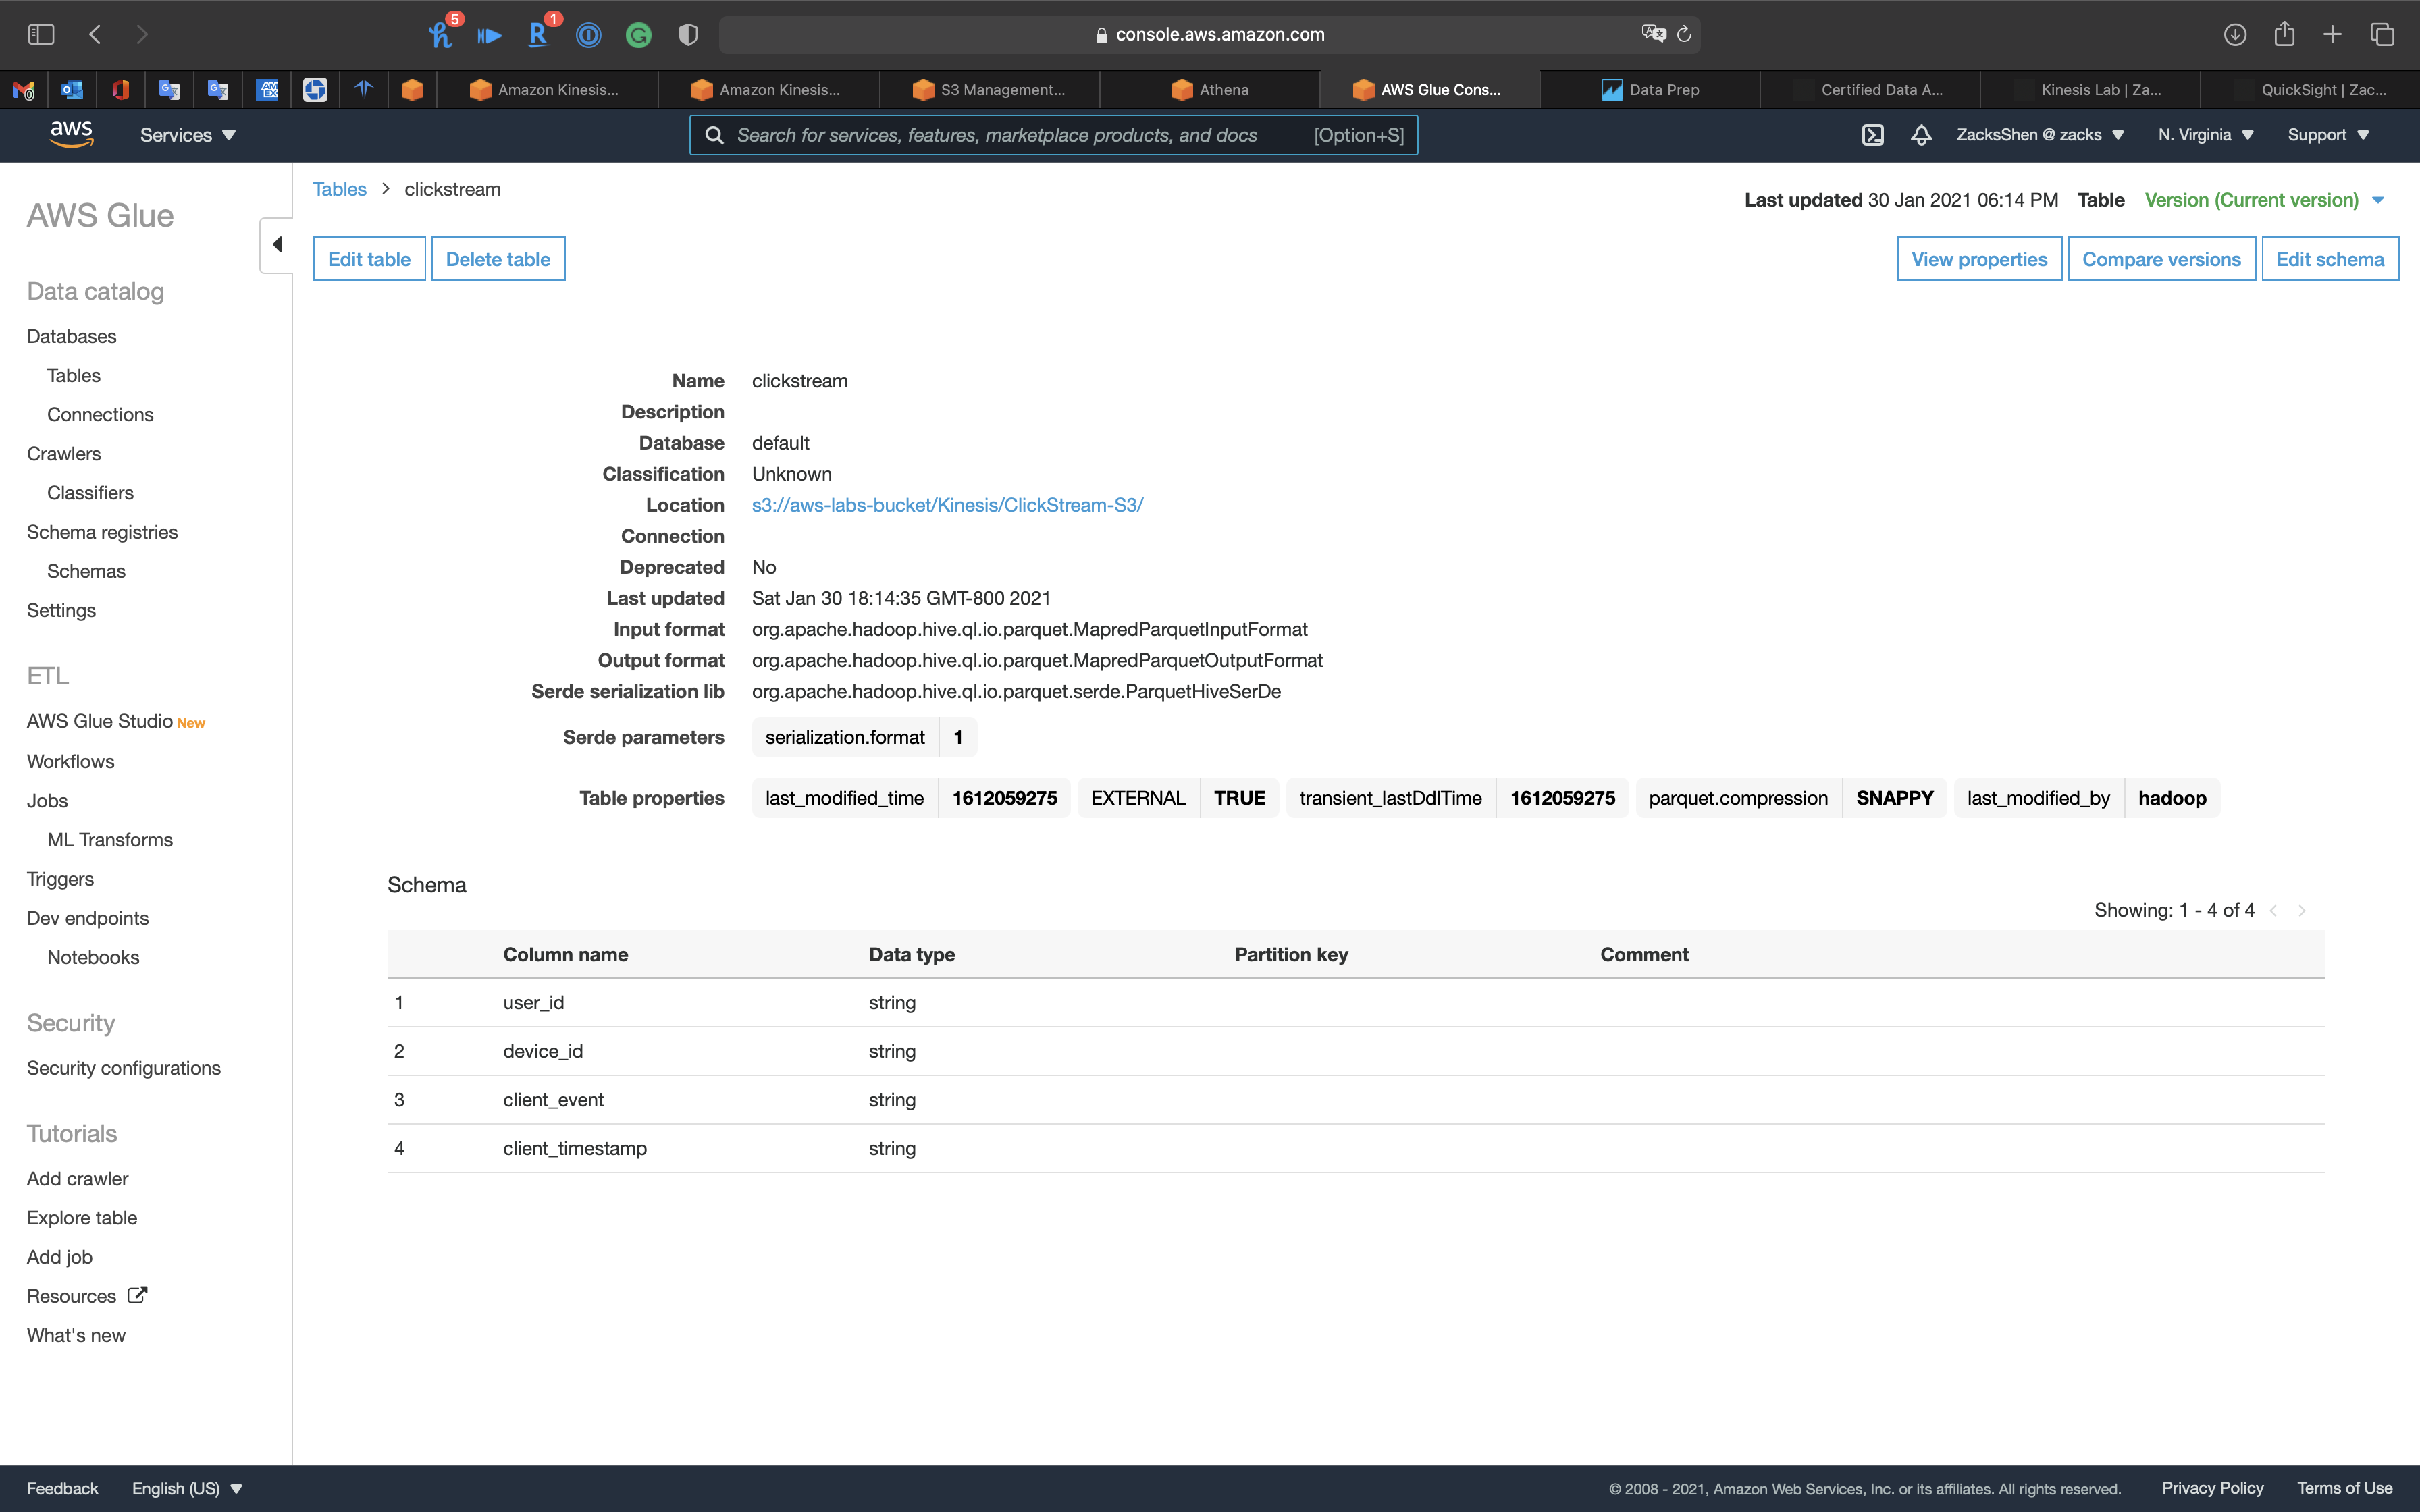
S3 Configuration
Create a folder ClickStream-S3 in S3 bucket.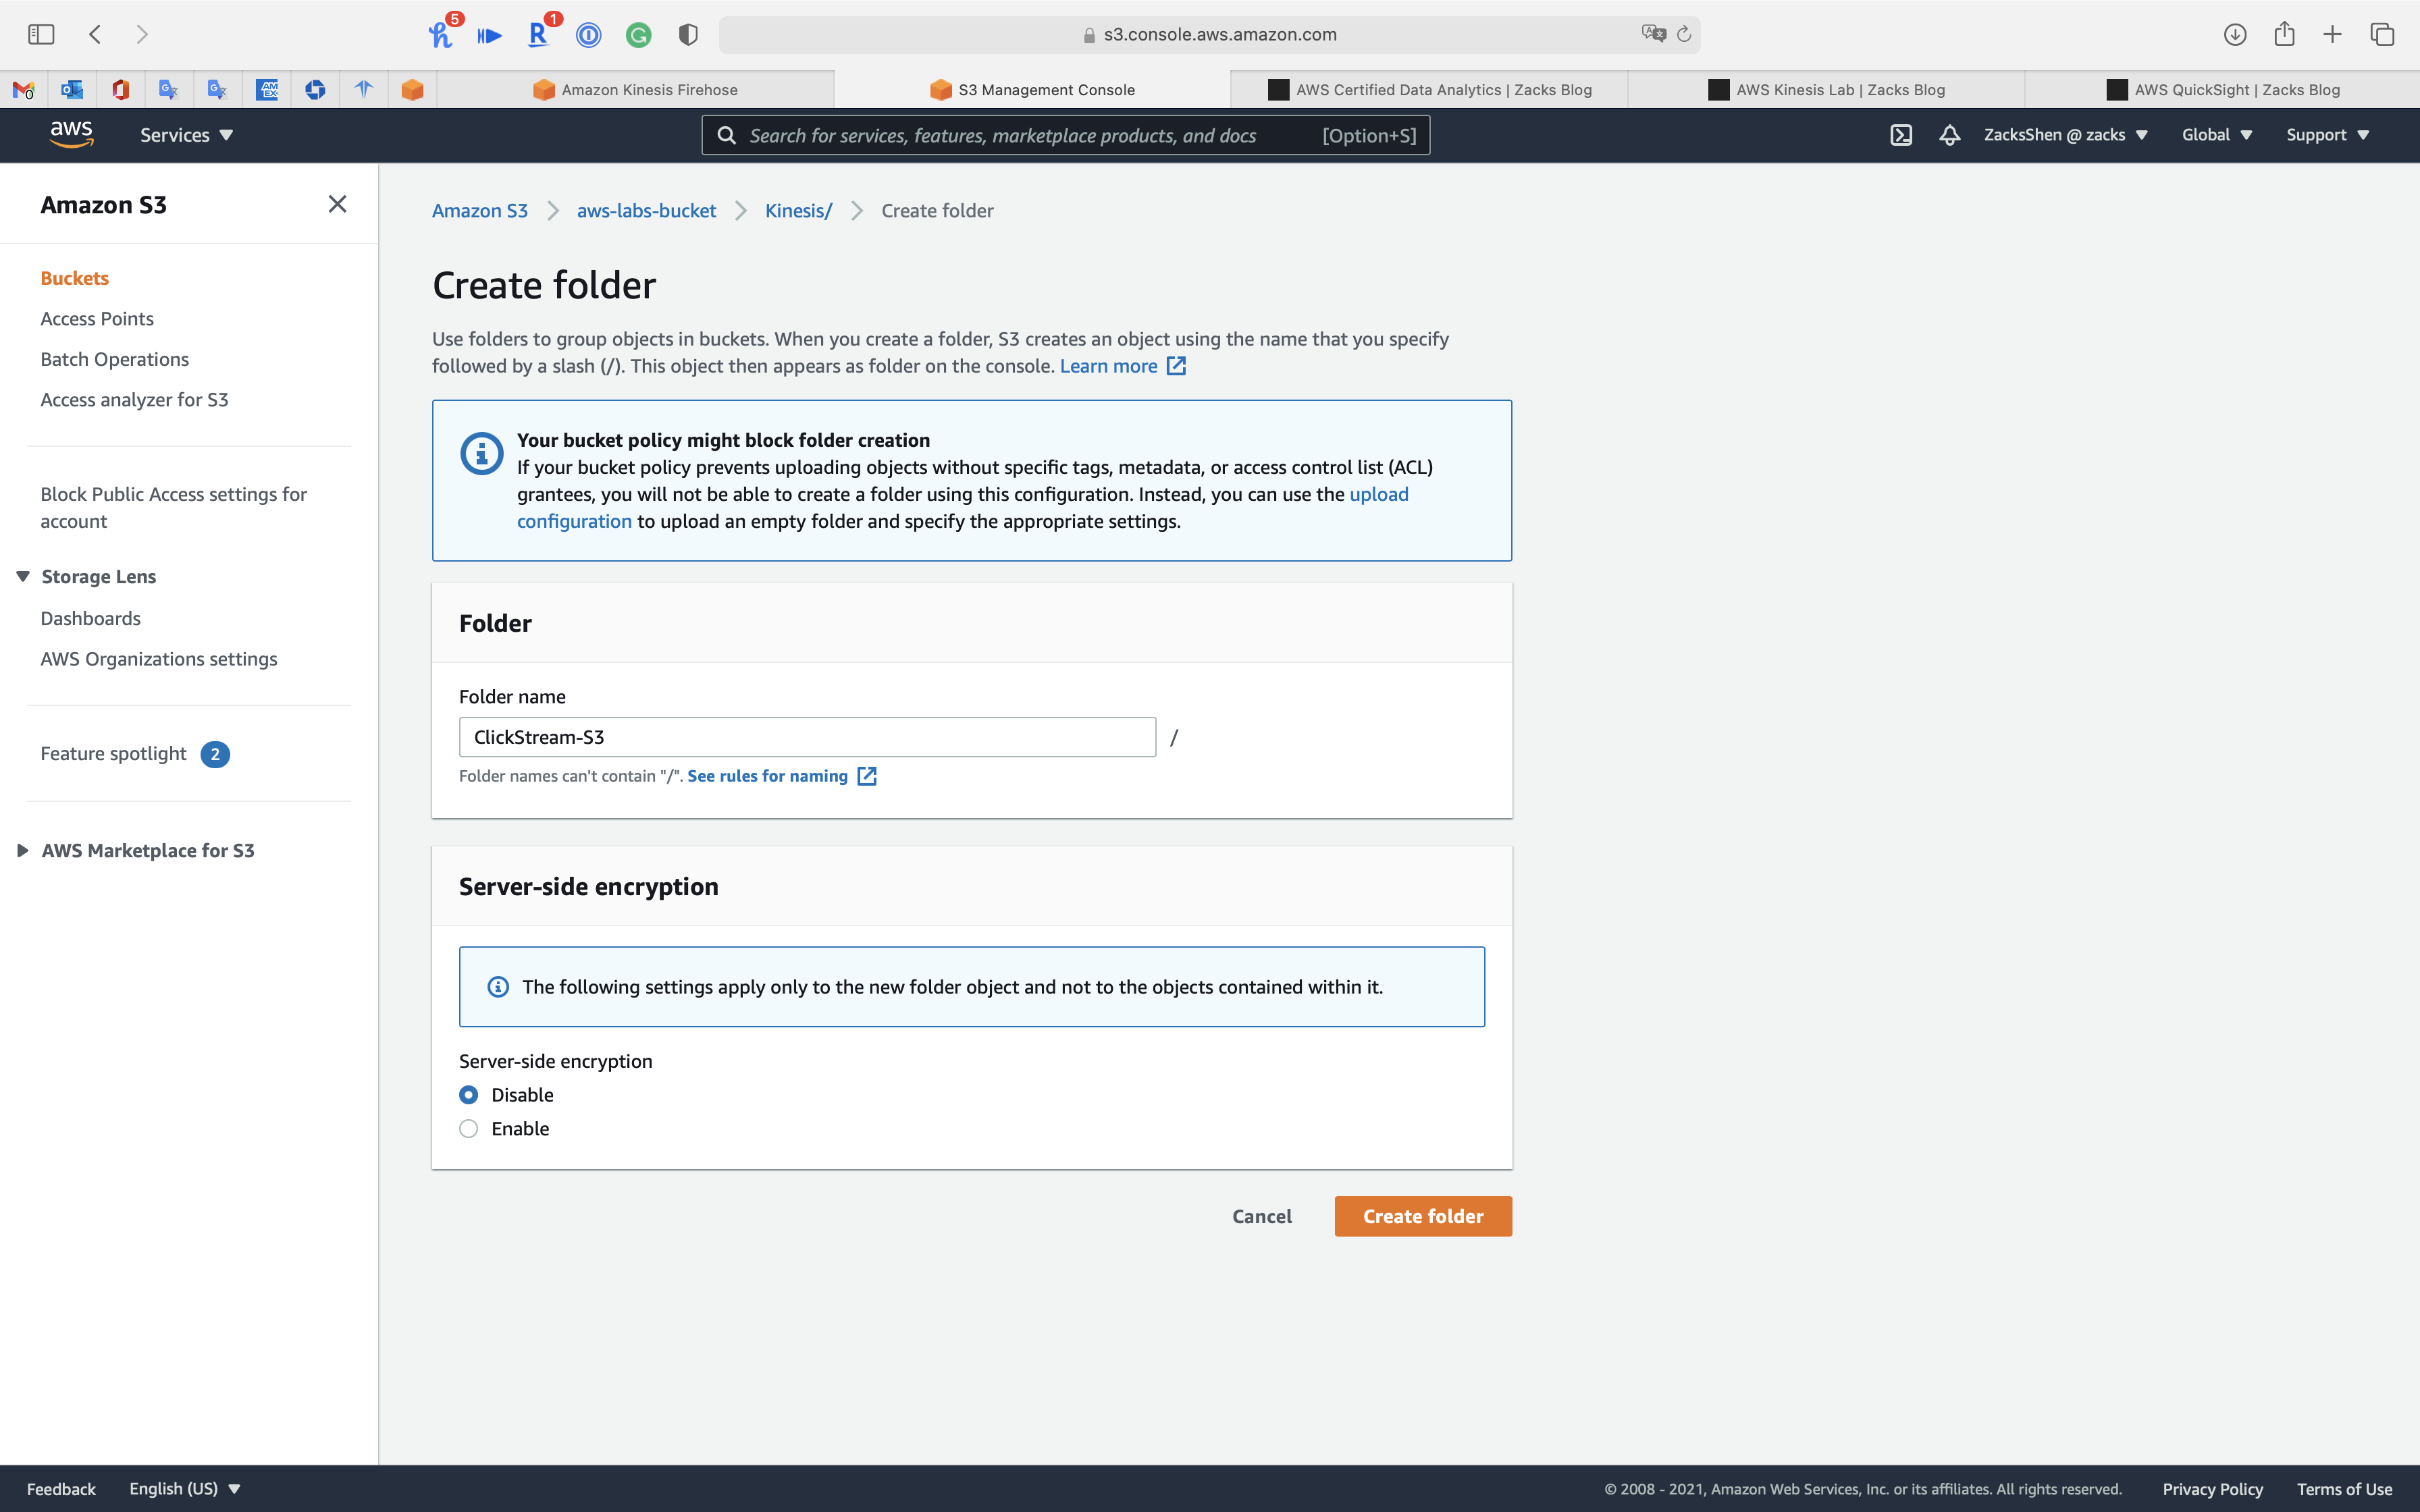
Kinesis Data Firehose Configuration
Services -> Kineses -> Delivery systems
Kinesis Data Streams receives and ingests the ClickStream data, then send it to Kinesis Data Firehose.
Kinesis Data Firehose deliveries the data to S3 bucket.
Click on Create delivery stream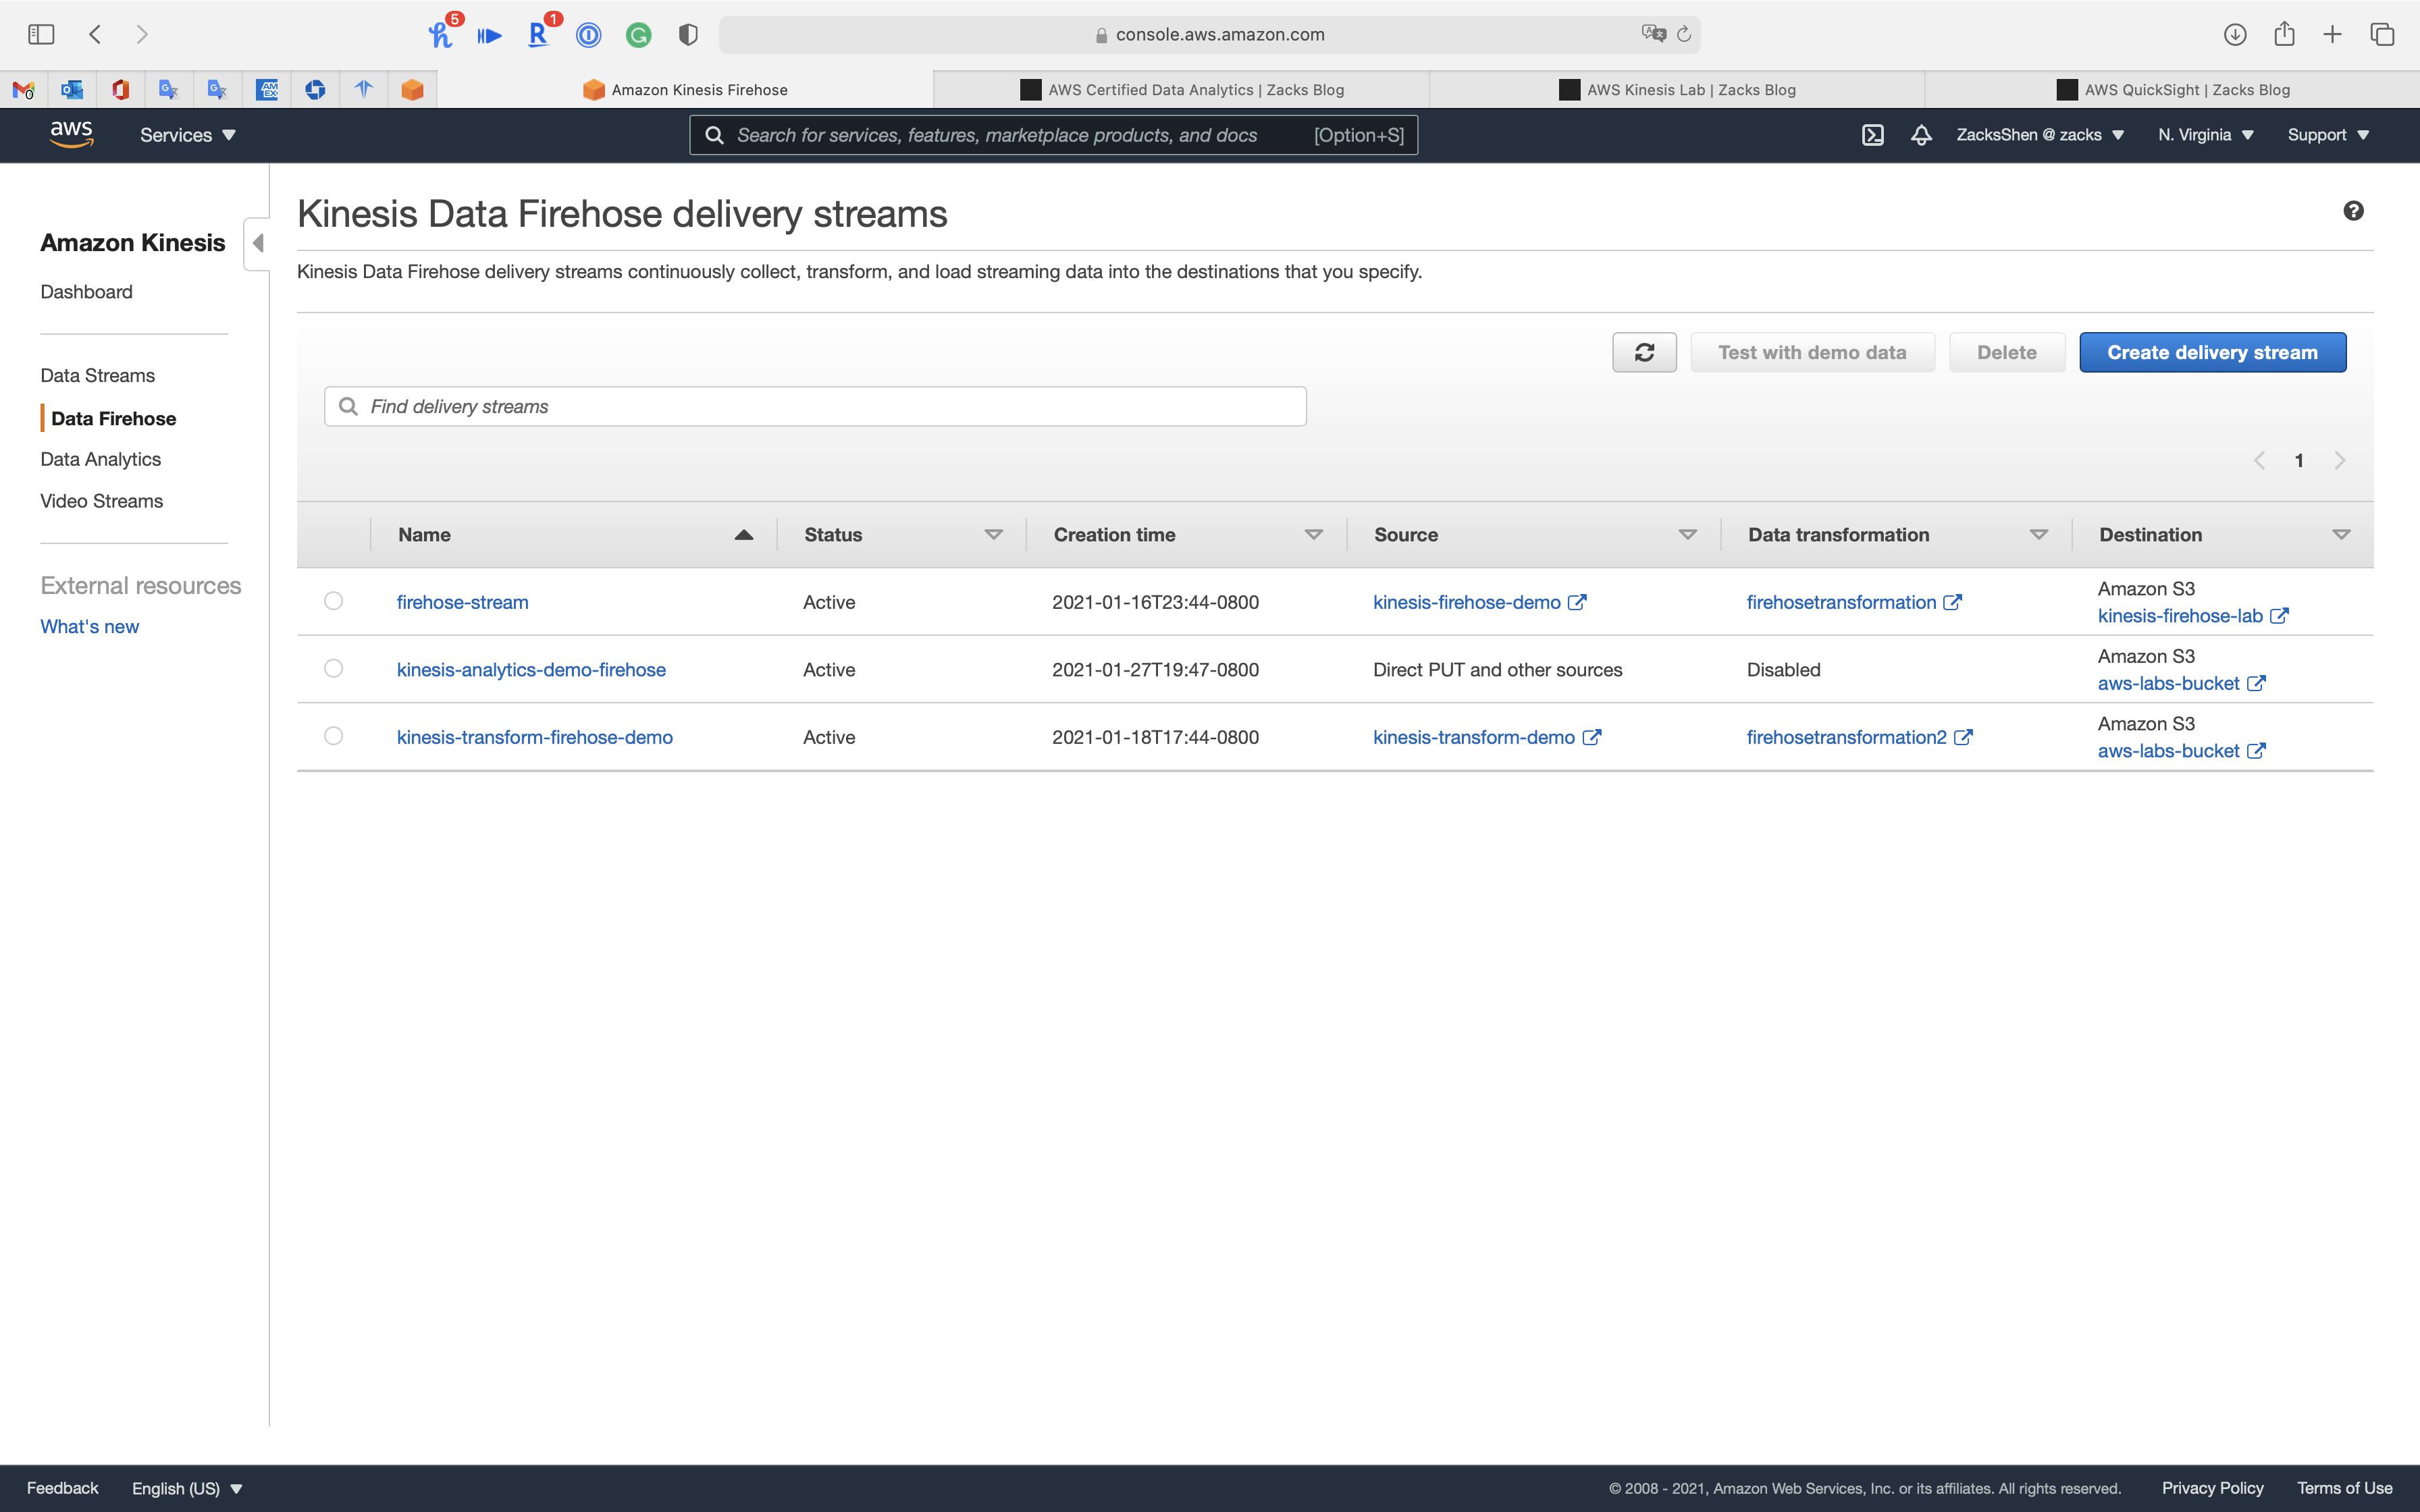
Step 1: Name and source
- Delivery stream name:
ClickStream-Kinesis-Data-Firehose - Source:
Kinesis Data Stream - Kinesis data stream:
ClickStream-Kinesis-Data-Streams
Click on Next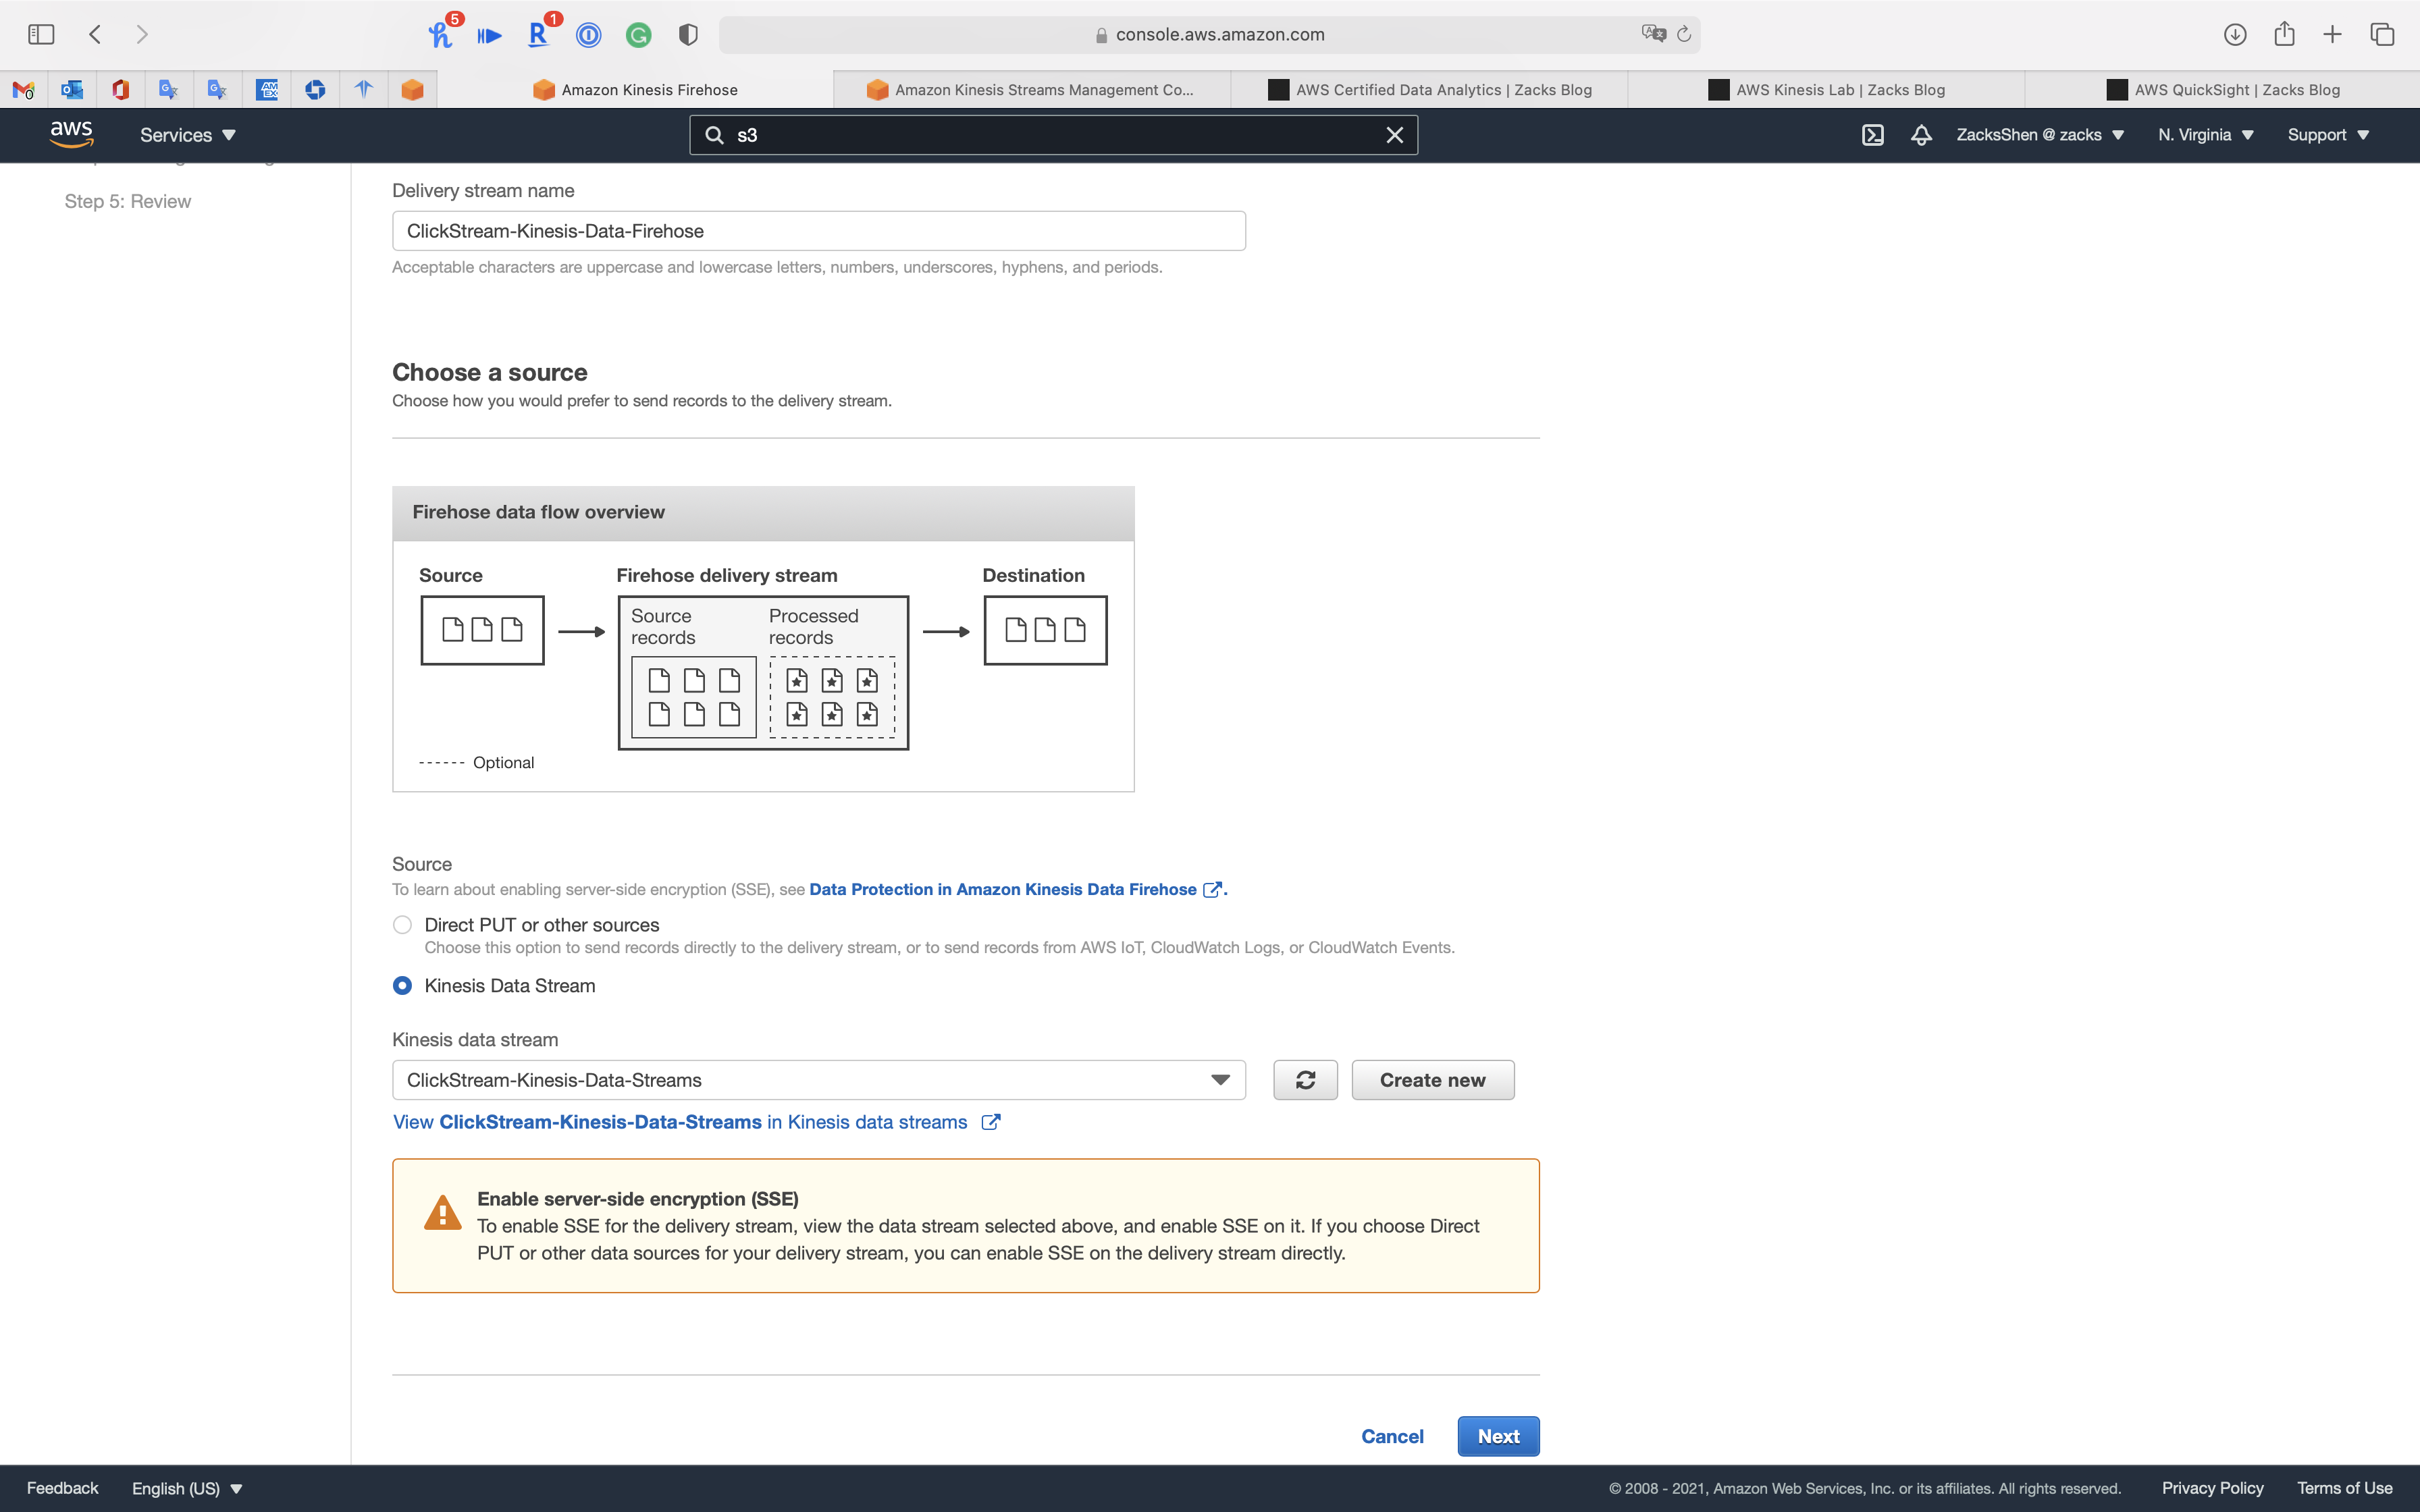
Step 2: Process records
- Data transformation:
Disabled
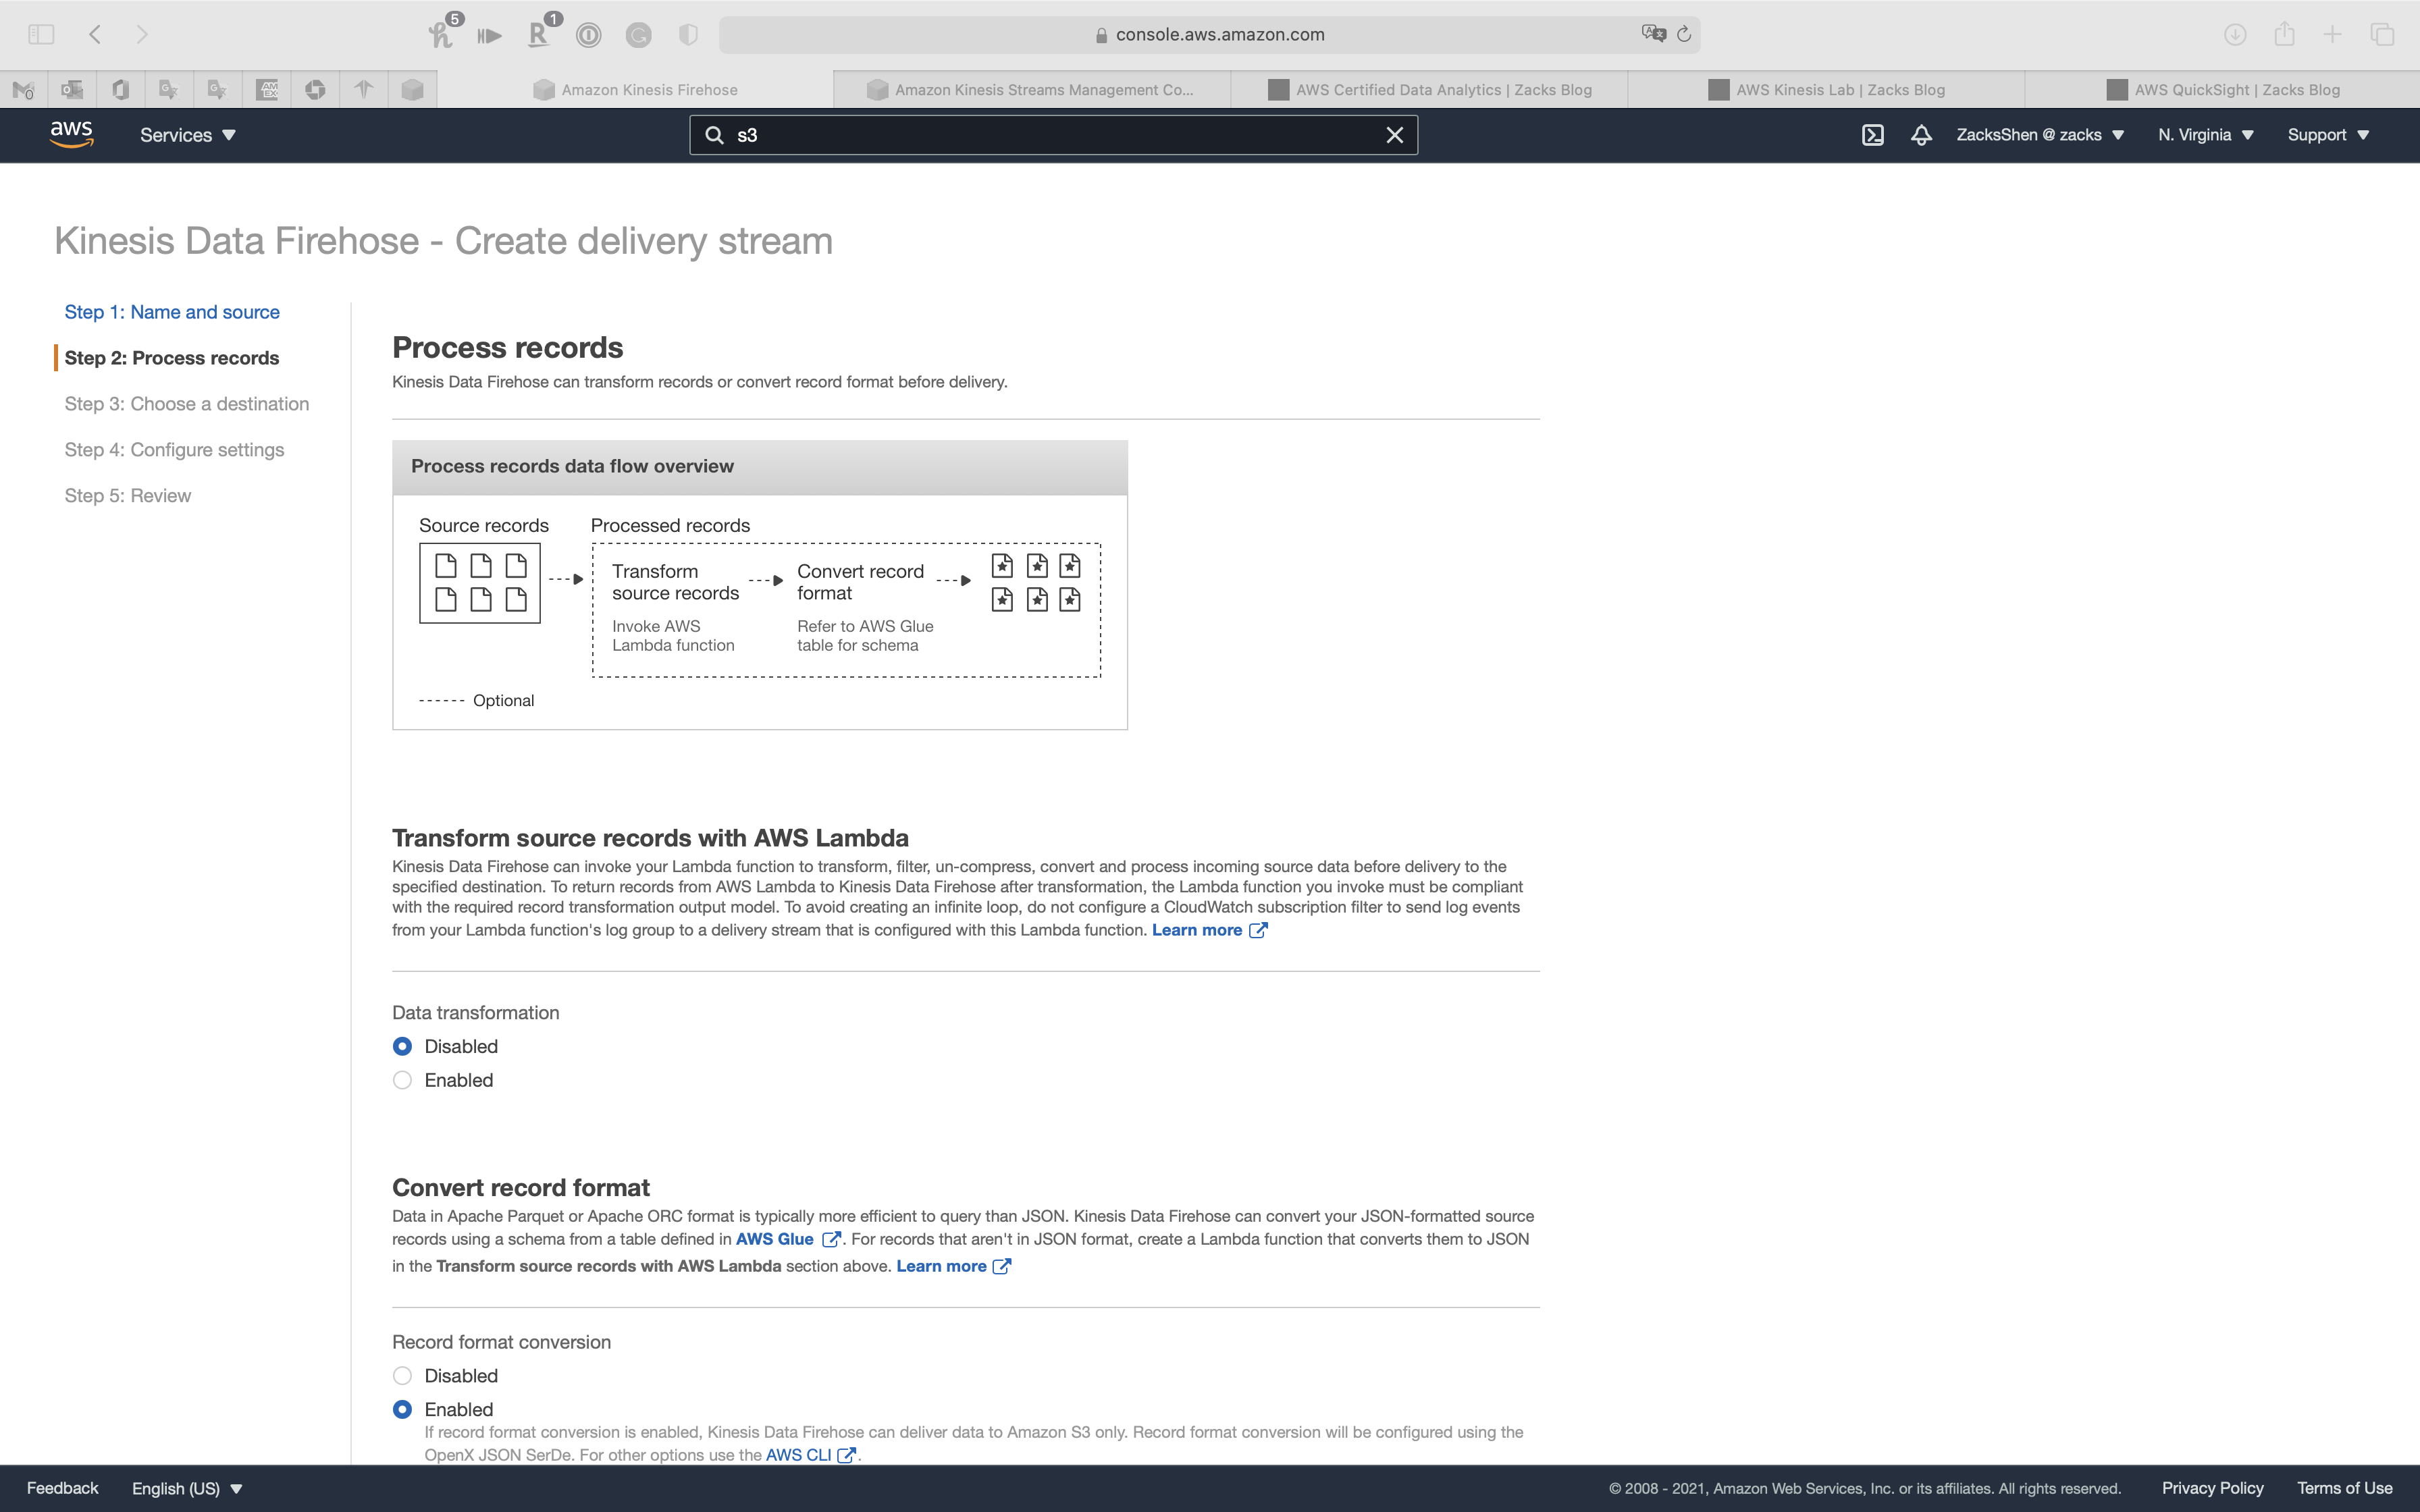
- Record format conversion:
Enabled - Output format:
Apache Parquet - AWS Glue region:
us-east-1 - AWS Glue database:
default - AWS Glue table:
clickstream - AWS Glue table version:
Latest
Click on Next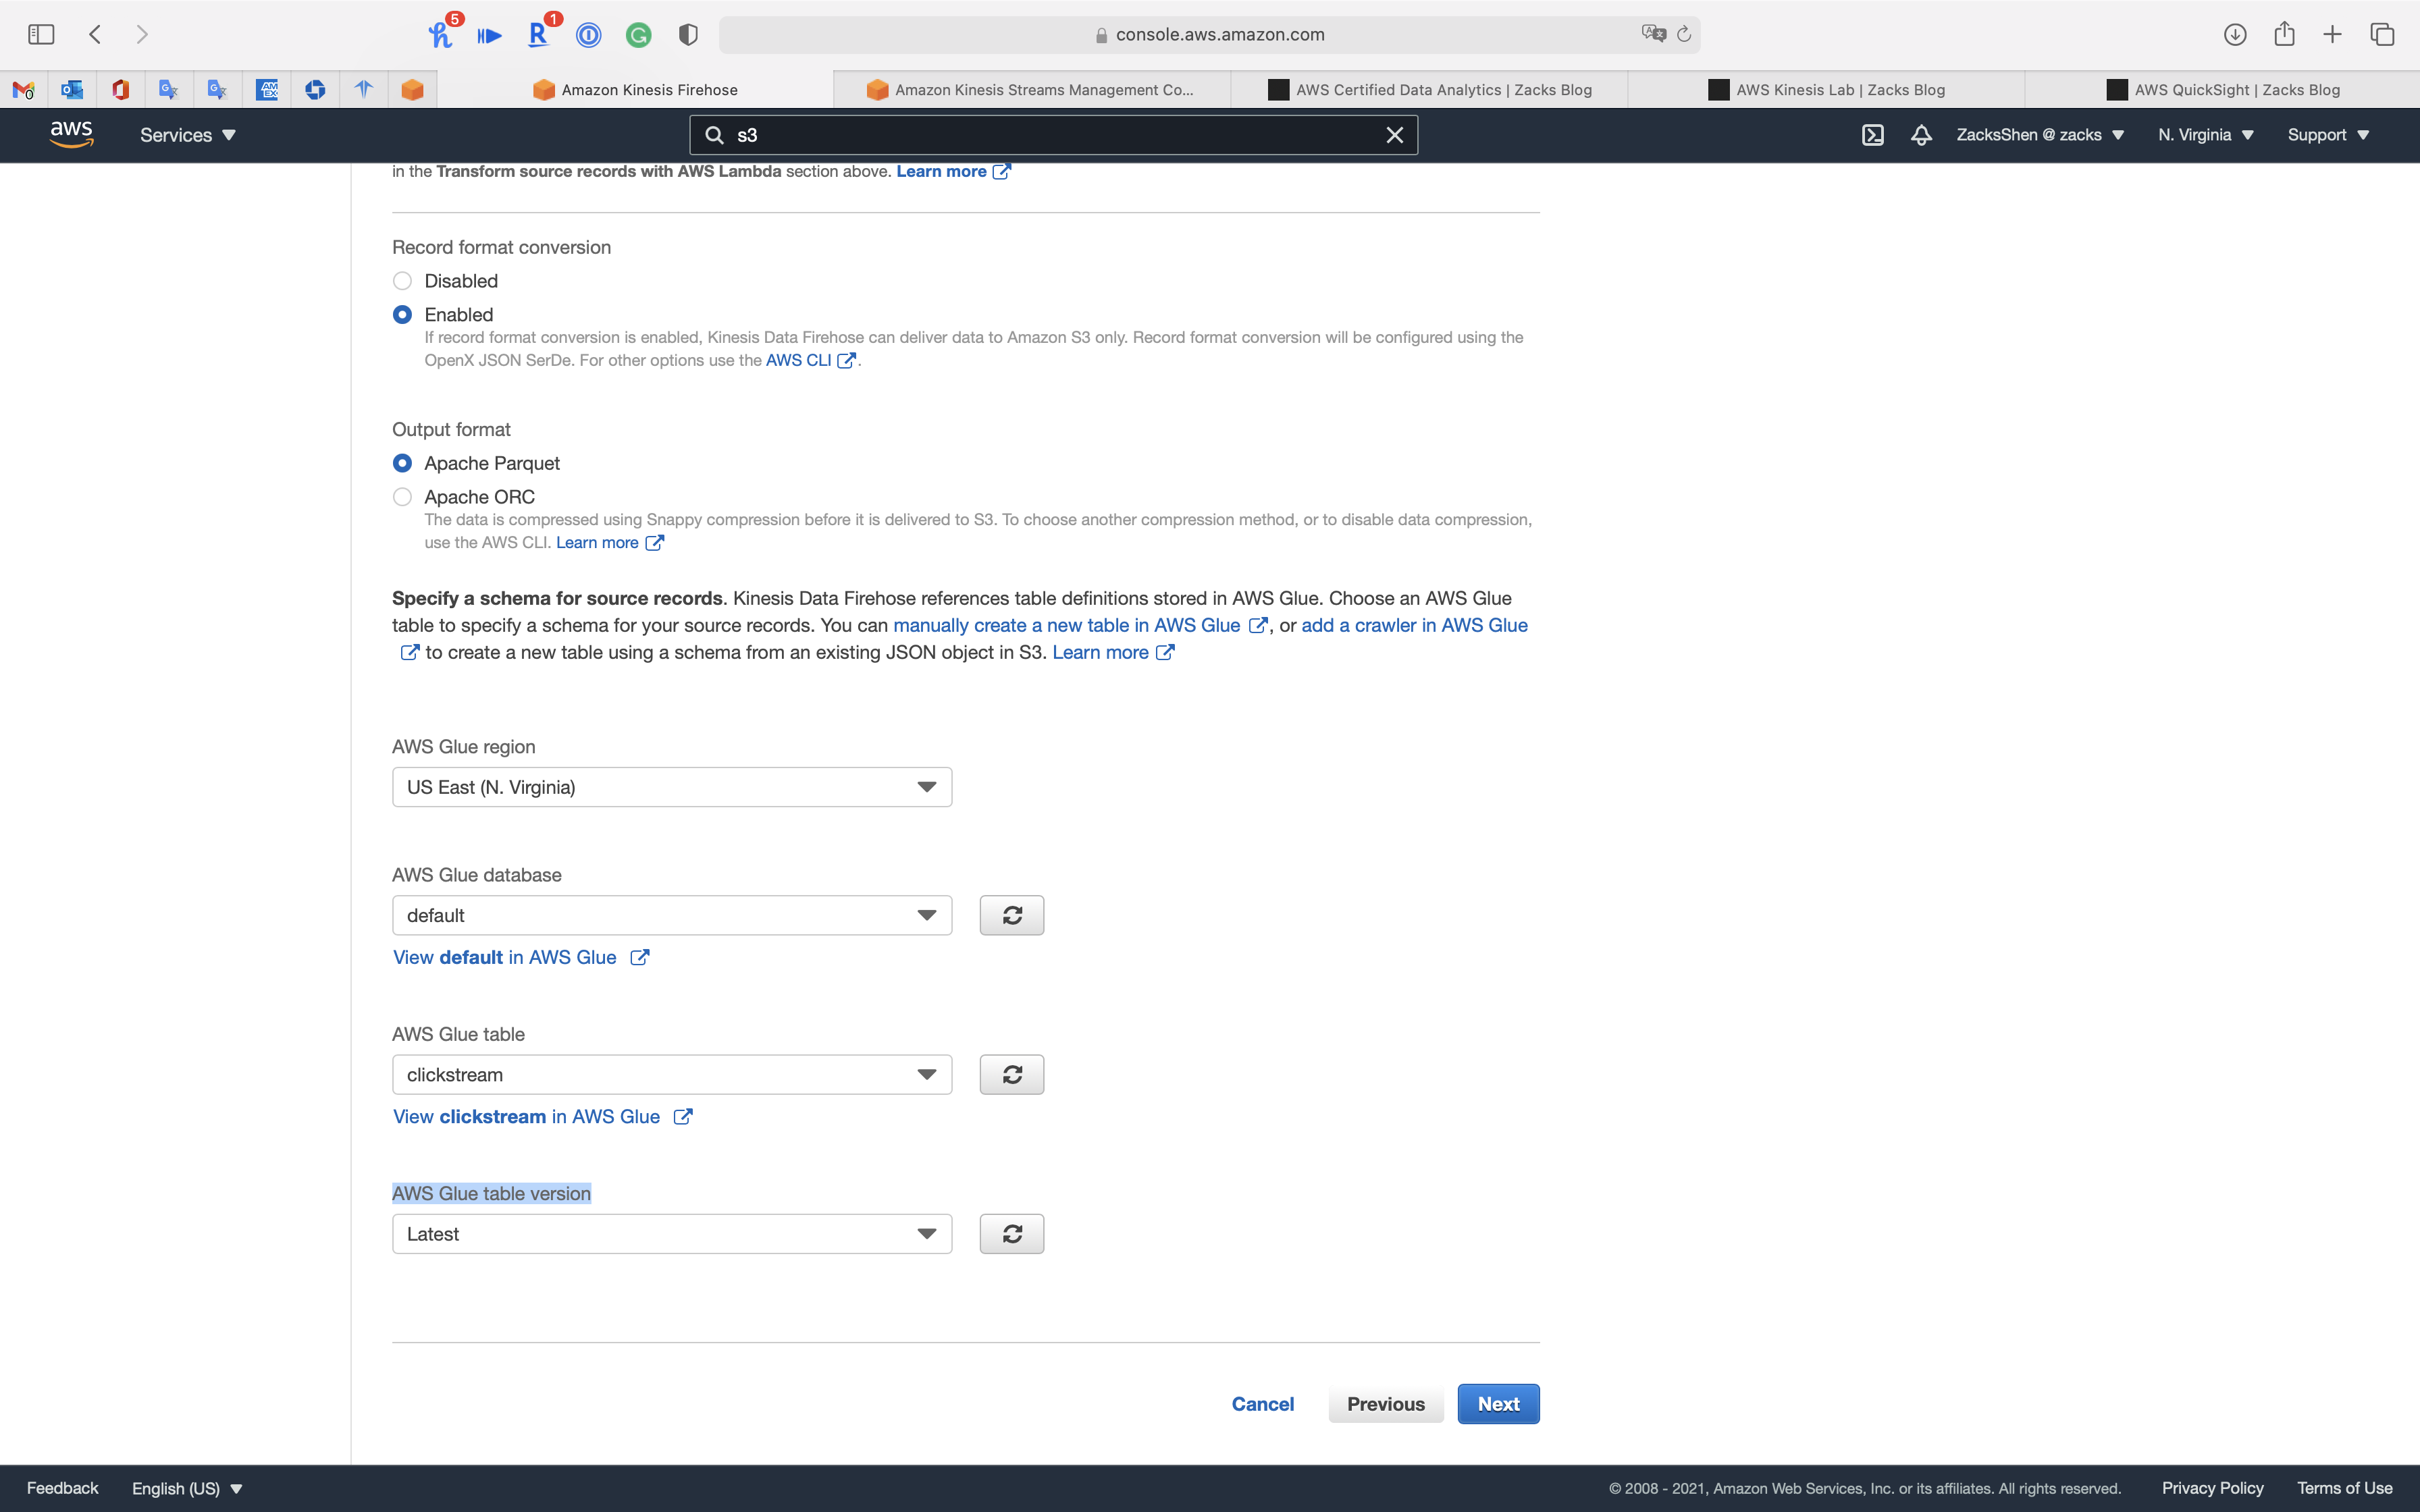
Step 3: Choose a destination
- Destination:
Amazon S3 - S3 bucket: choose your bucket
Use the folder path as S3 bucket prefix.
- Backup S3 bucket prefix - optional:
Kinesis/ClickStream-S3/ClickStream-Kinesis-Data-Streams - Backup S3 bucket error prefix - optional:
Kinesis/ClickStream-S3/ClickStream-Kinesis-Data-Streams-error
Click on Next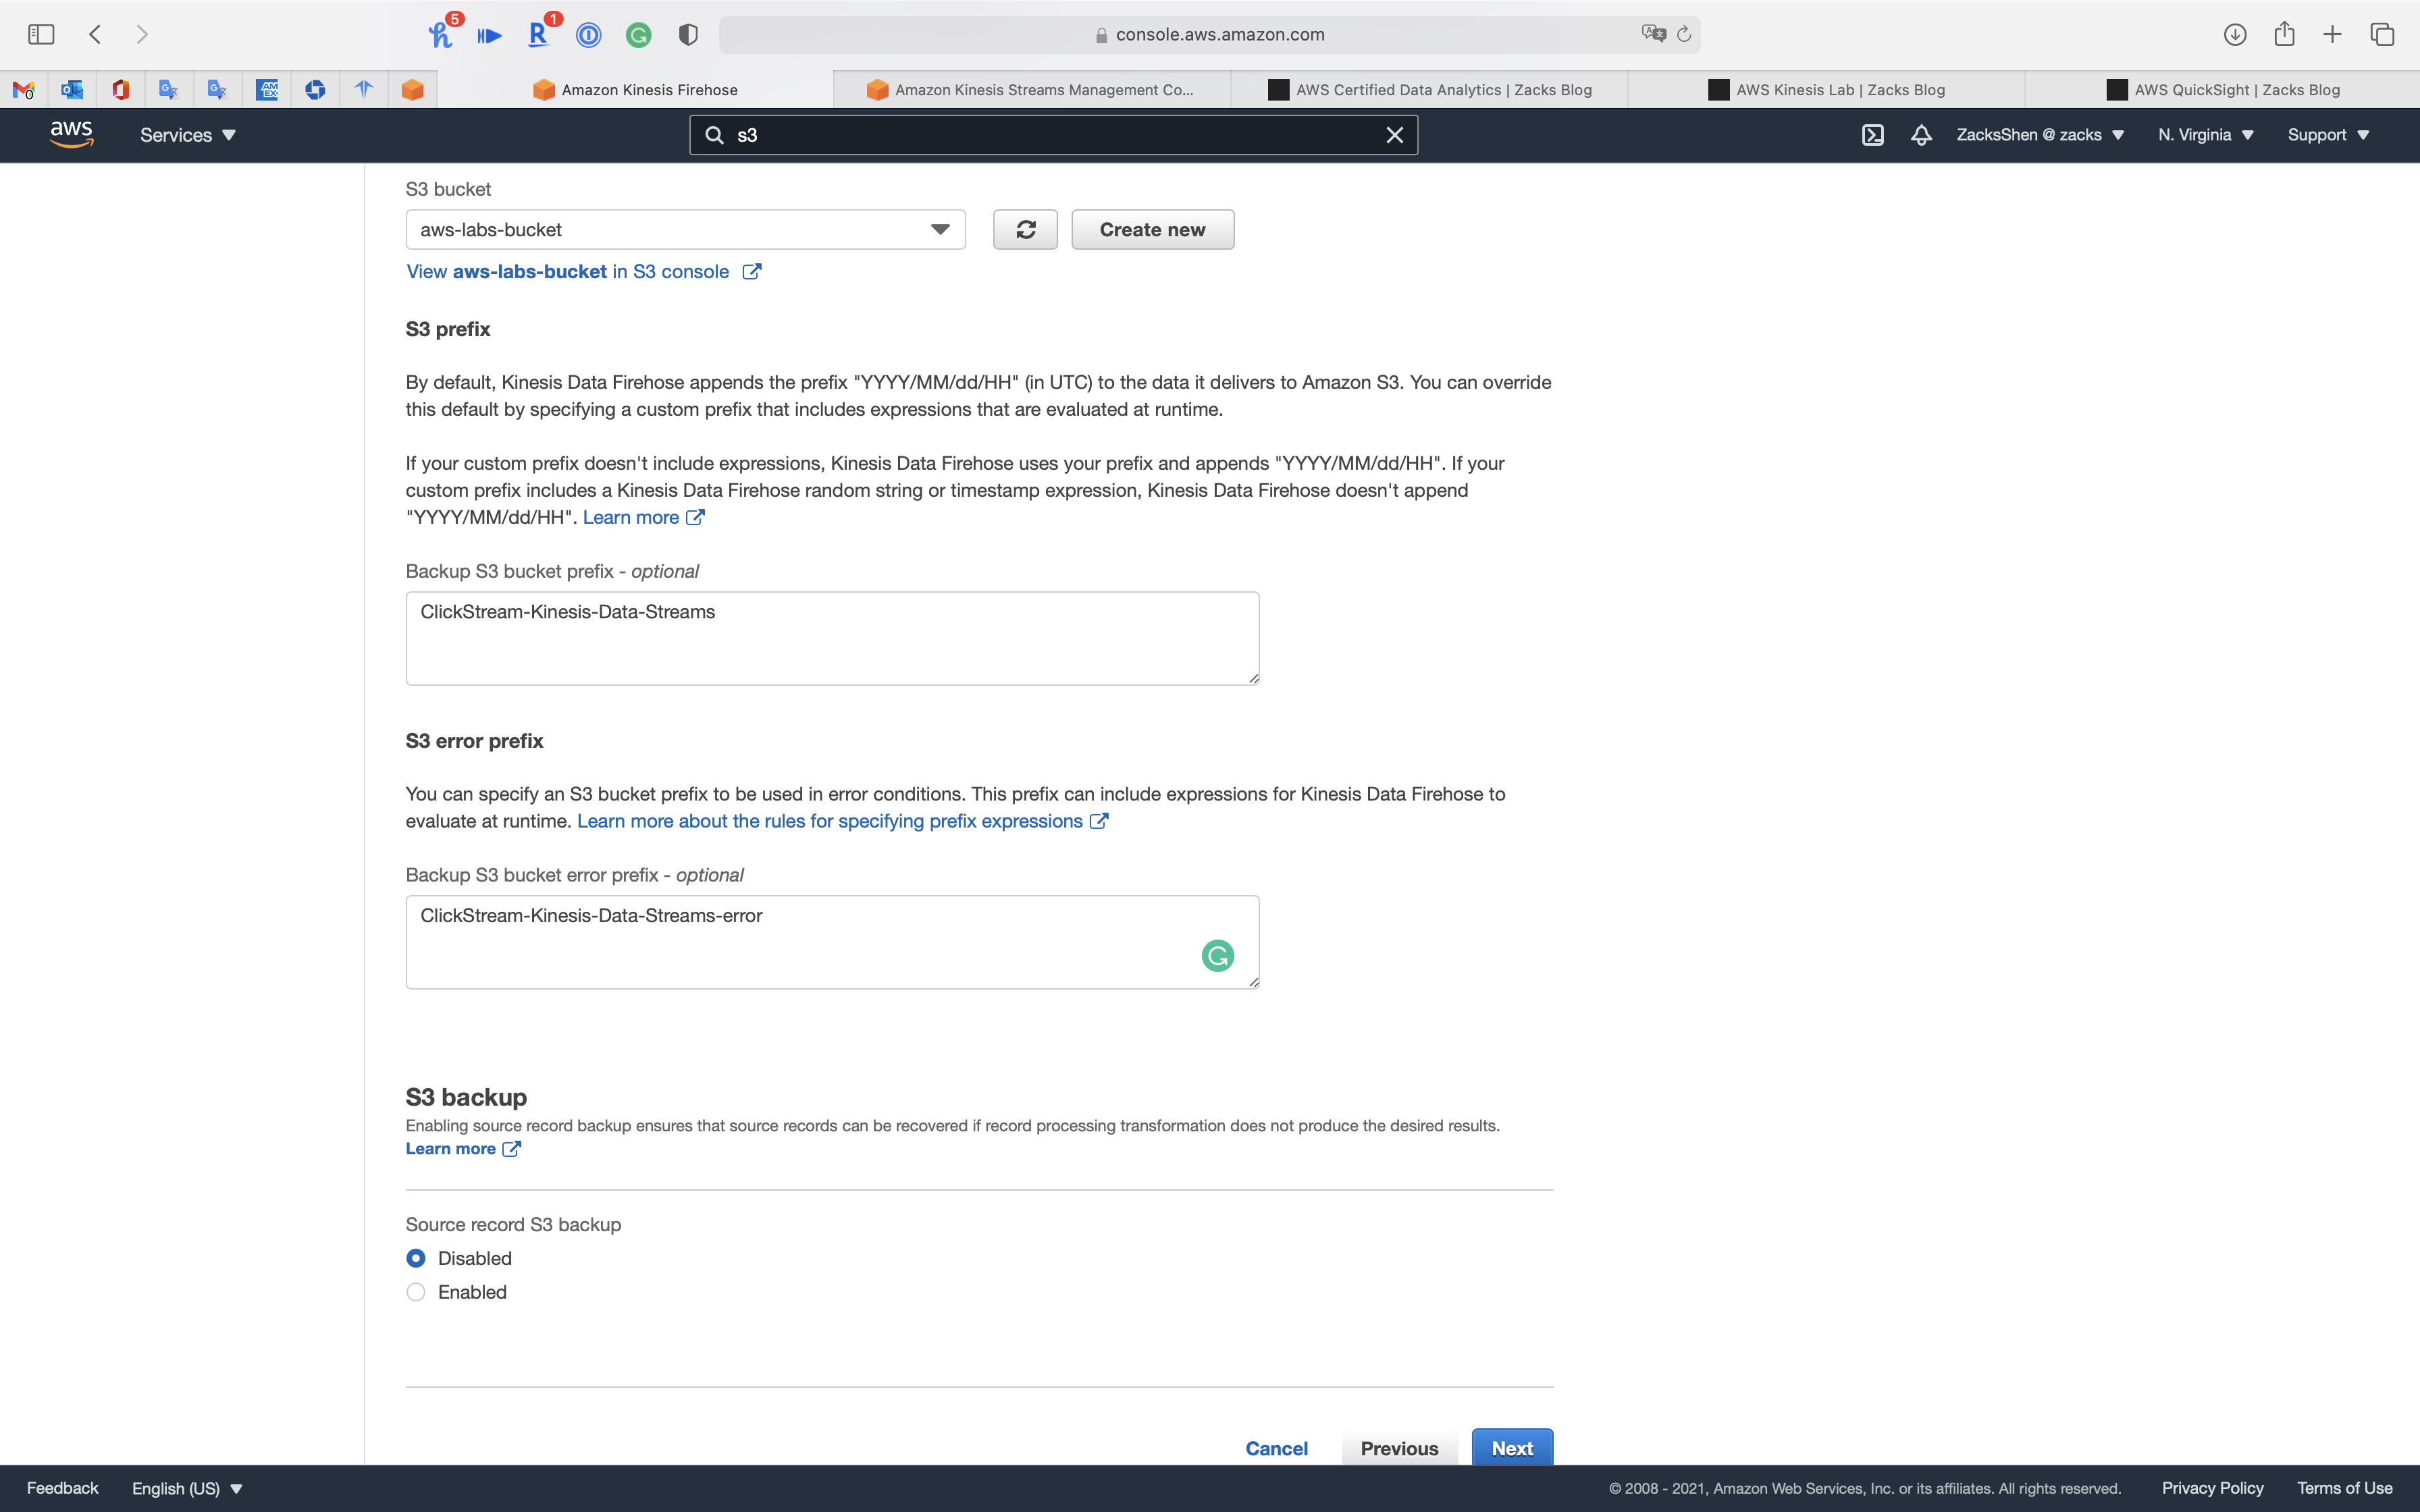
Step 4: Configure settings
Leave all settings as default
Click on Next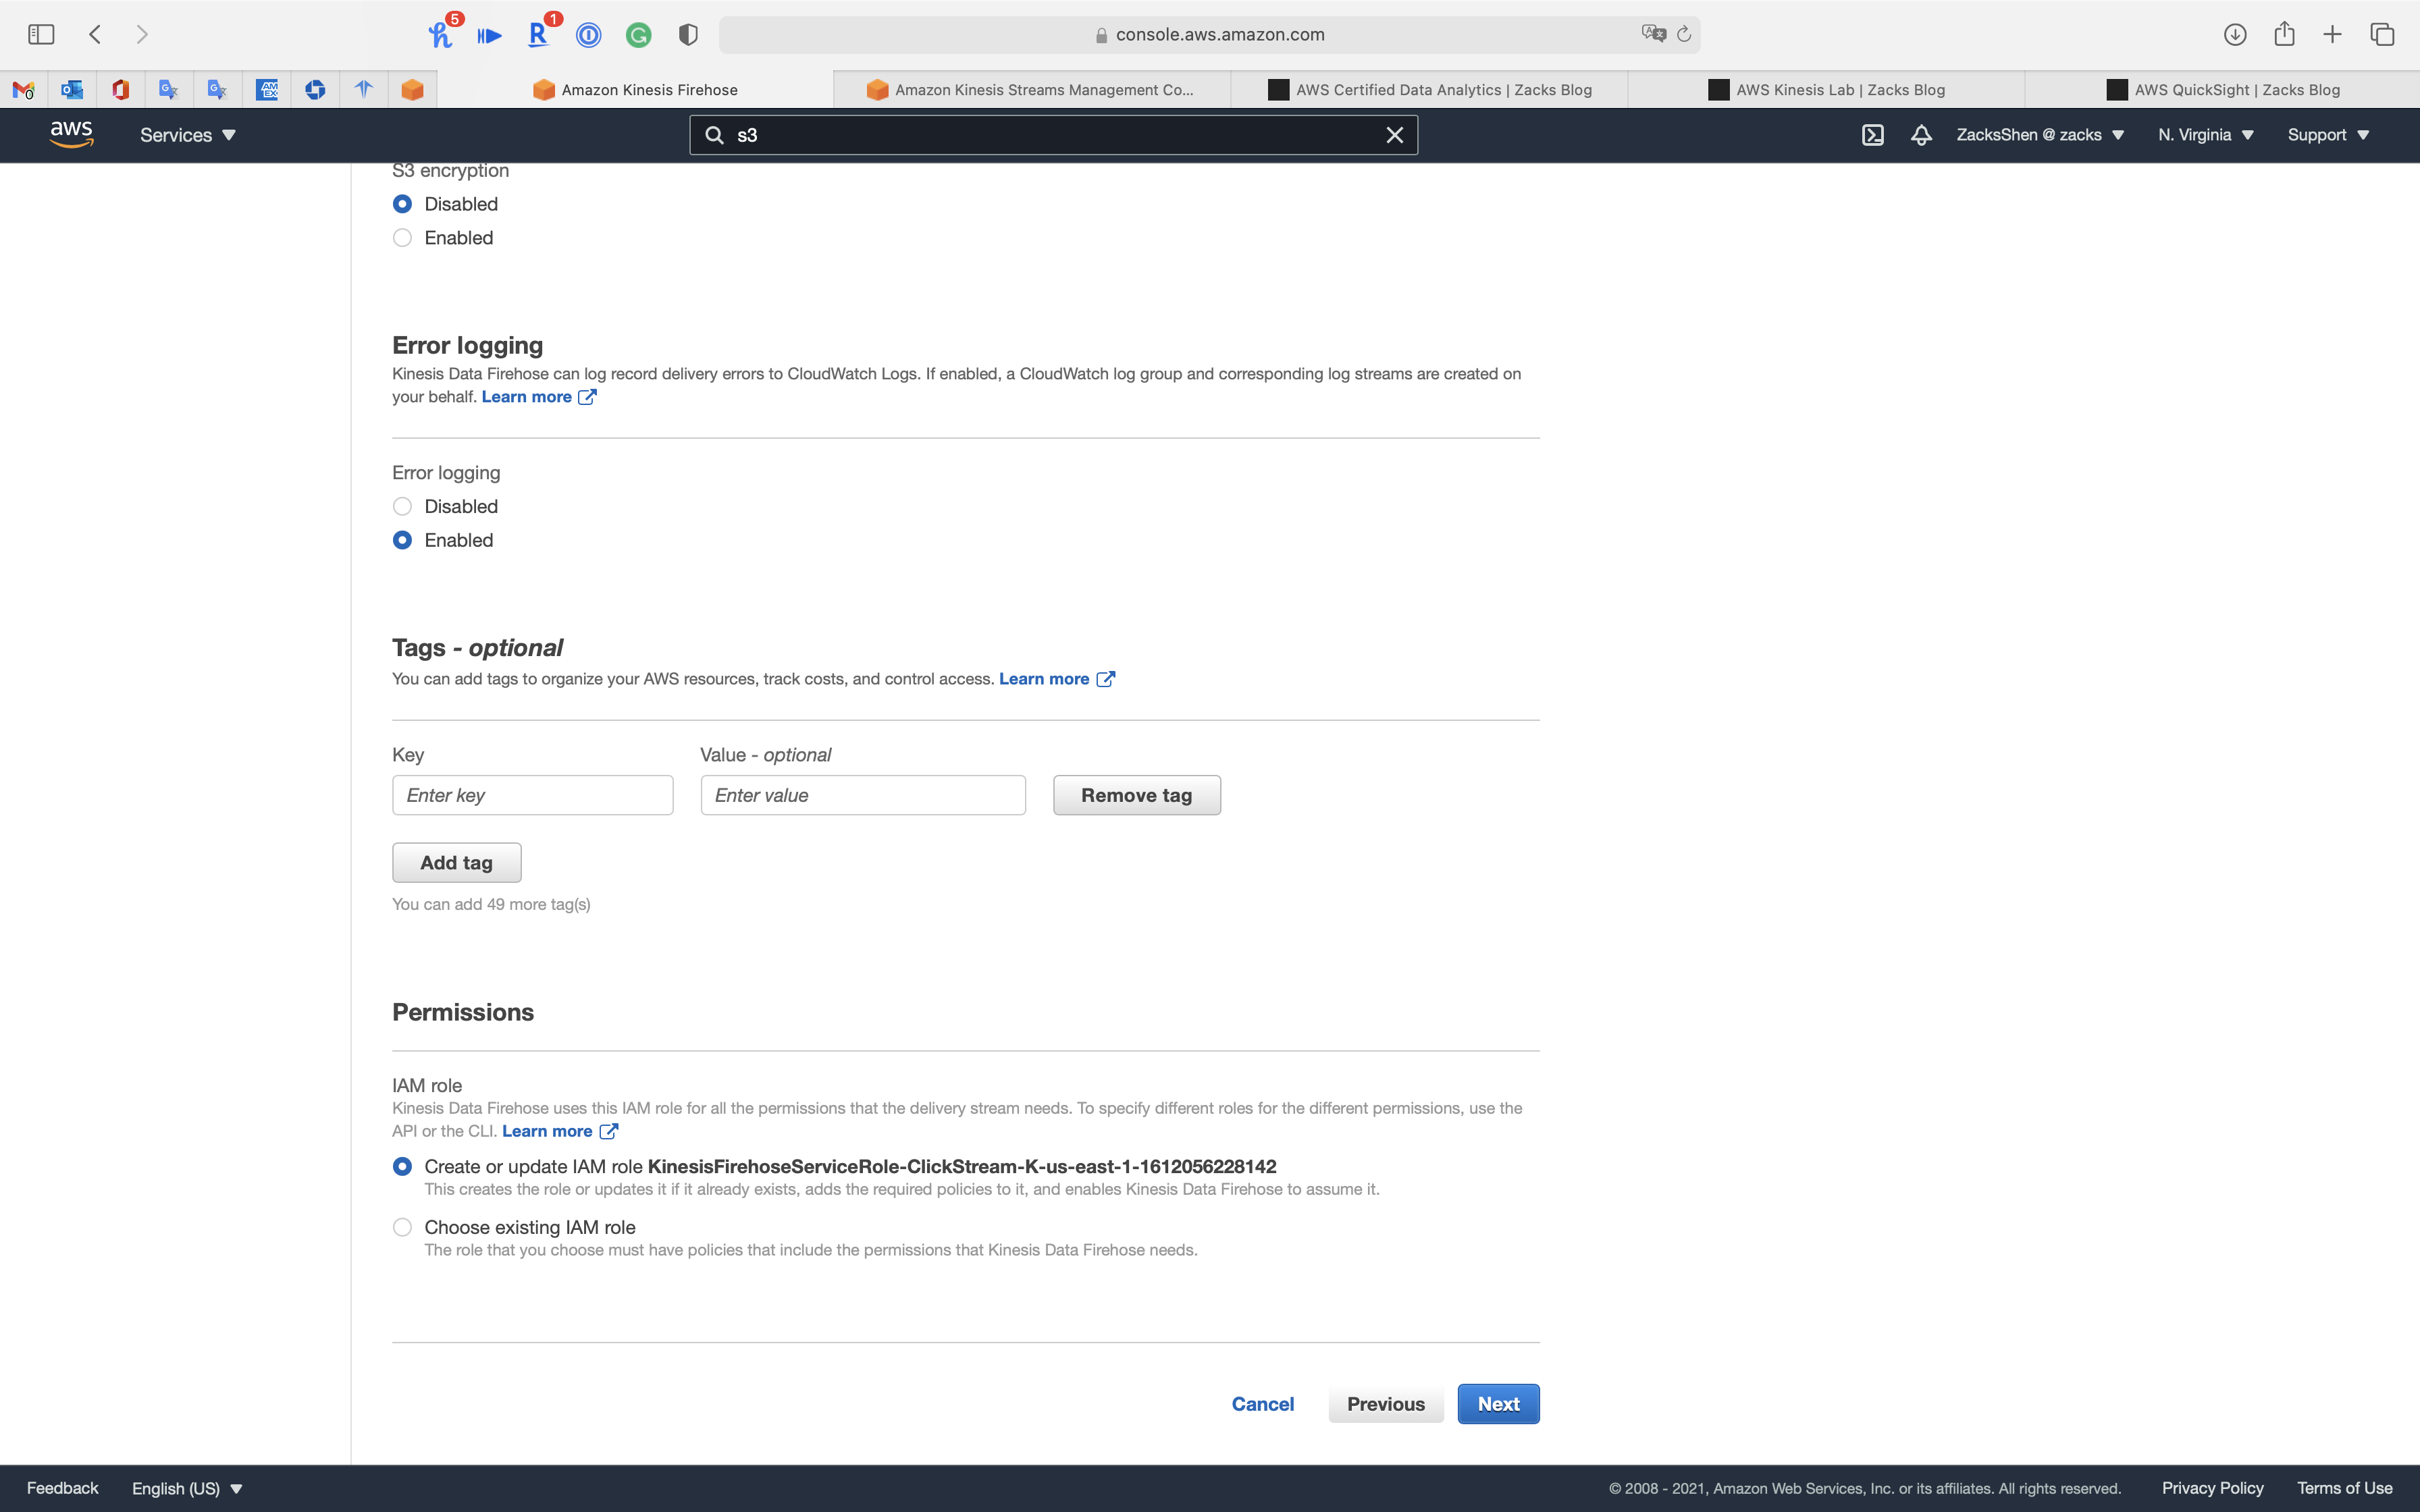
Step 5: Review
Click on Create delivery stream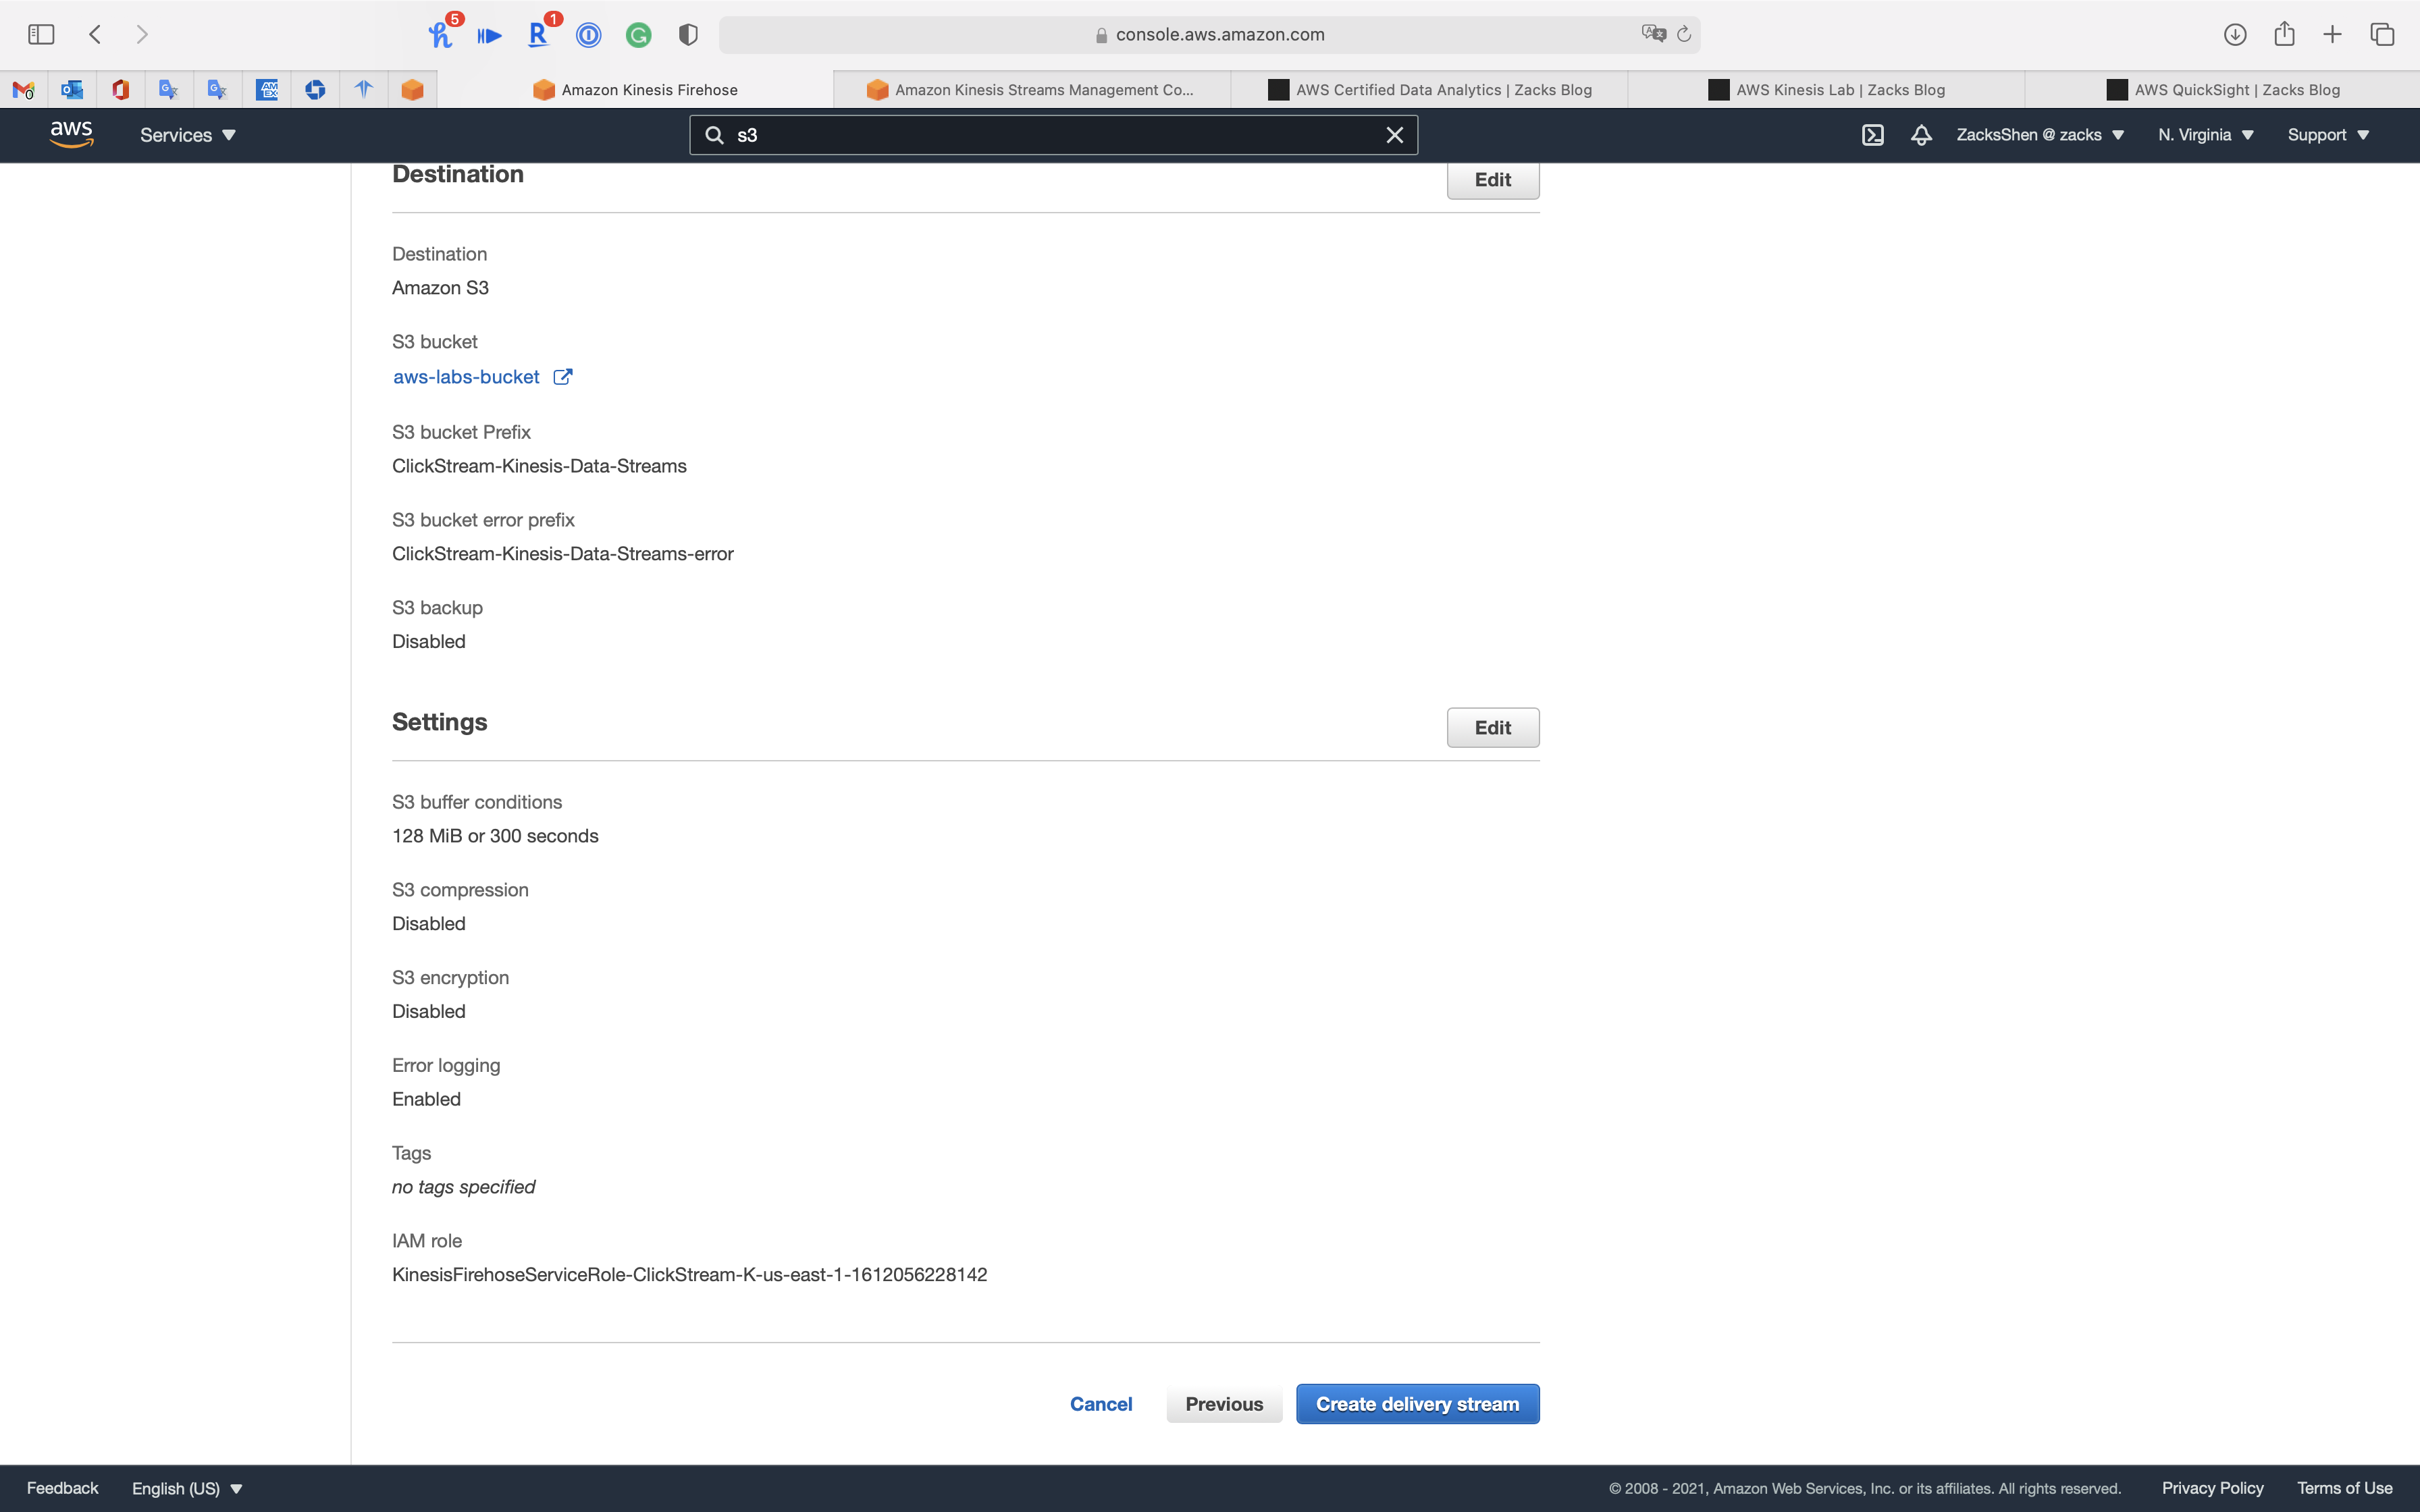
QuickSight Configuration
Services -> QuickSight
Use QuickSight to connect to Athena, and run analysis and visualization.
Connect to Athena
Click on Datasets on navigation panel
Click on New dataset on the right and top page
Click on Athena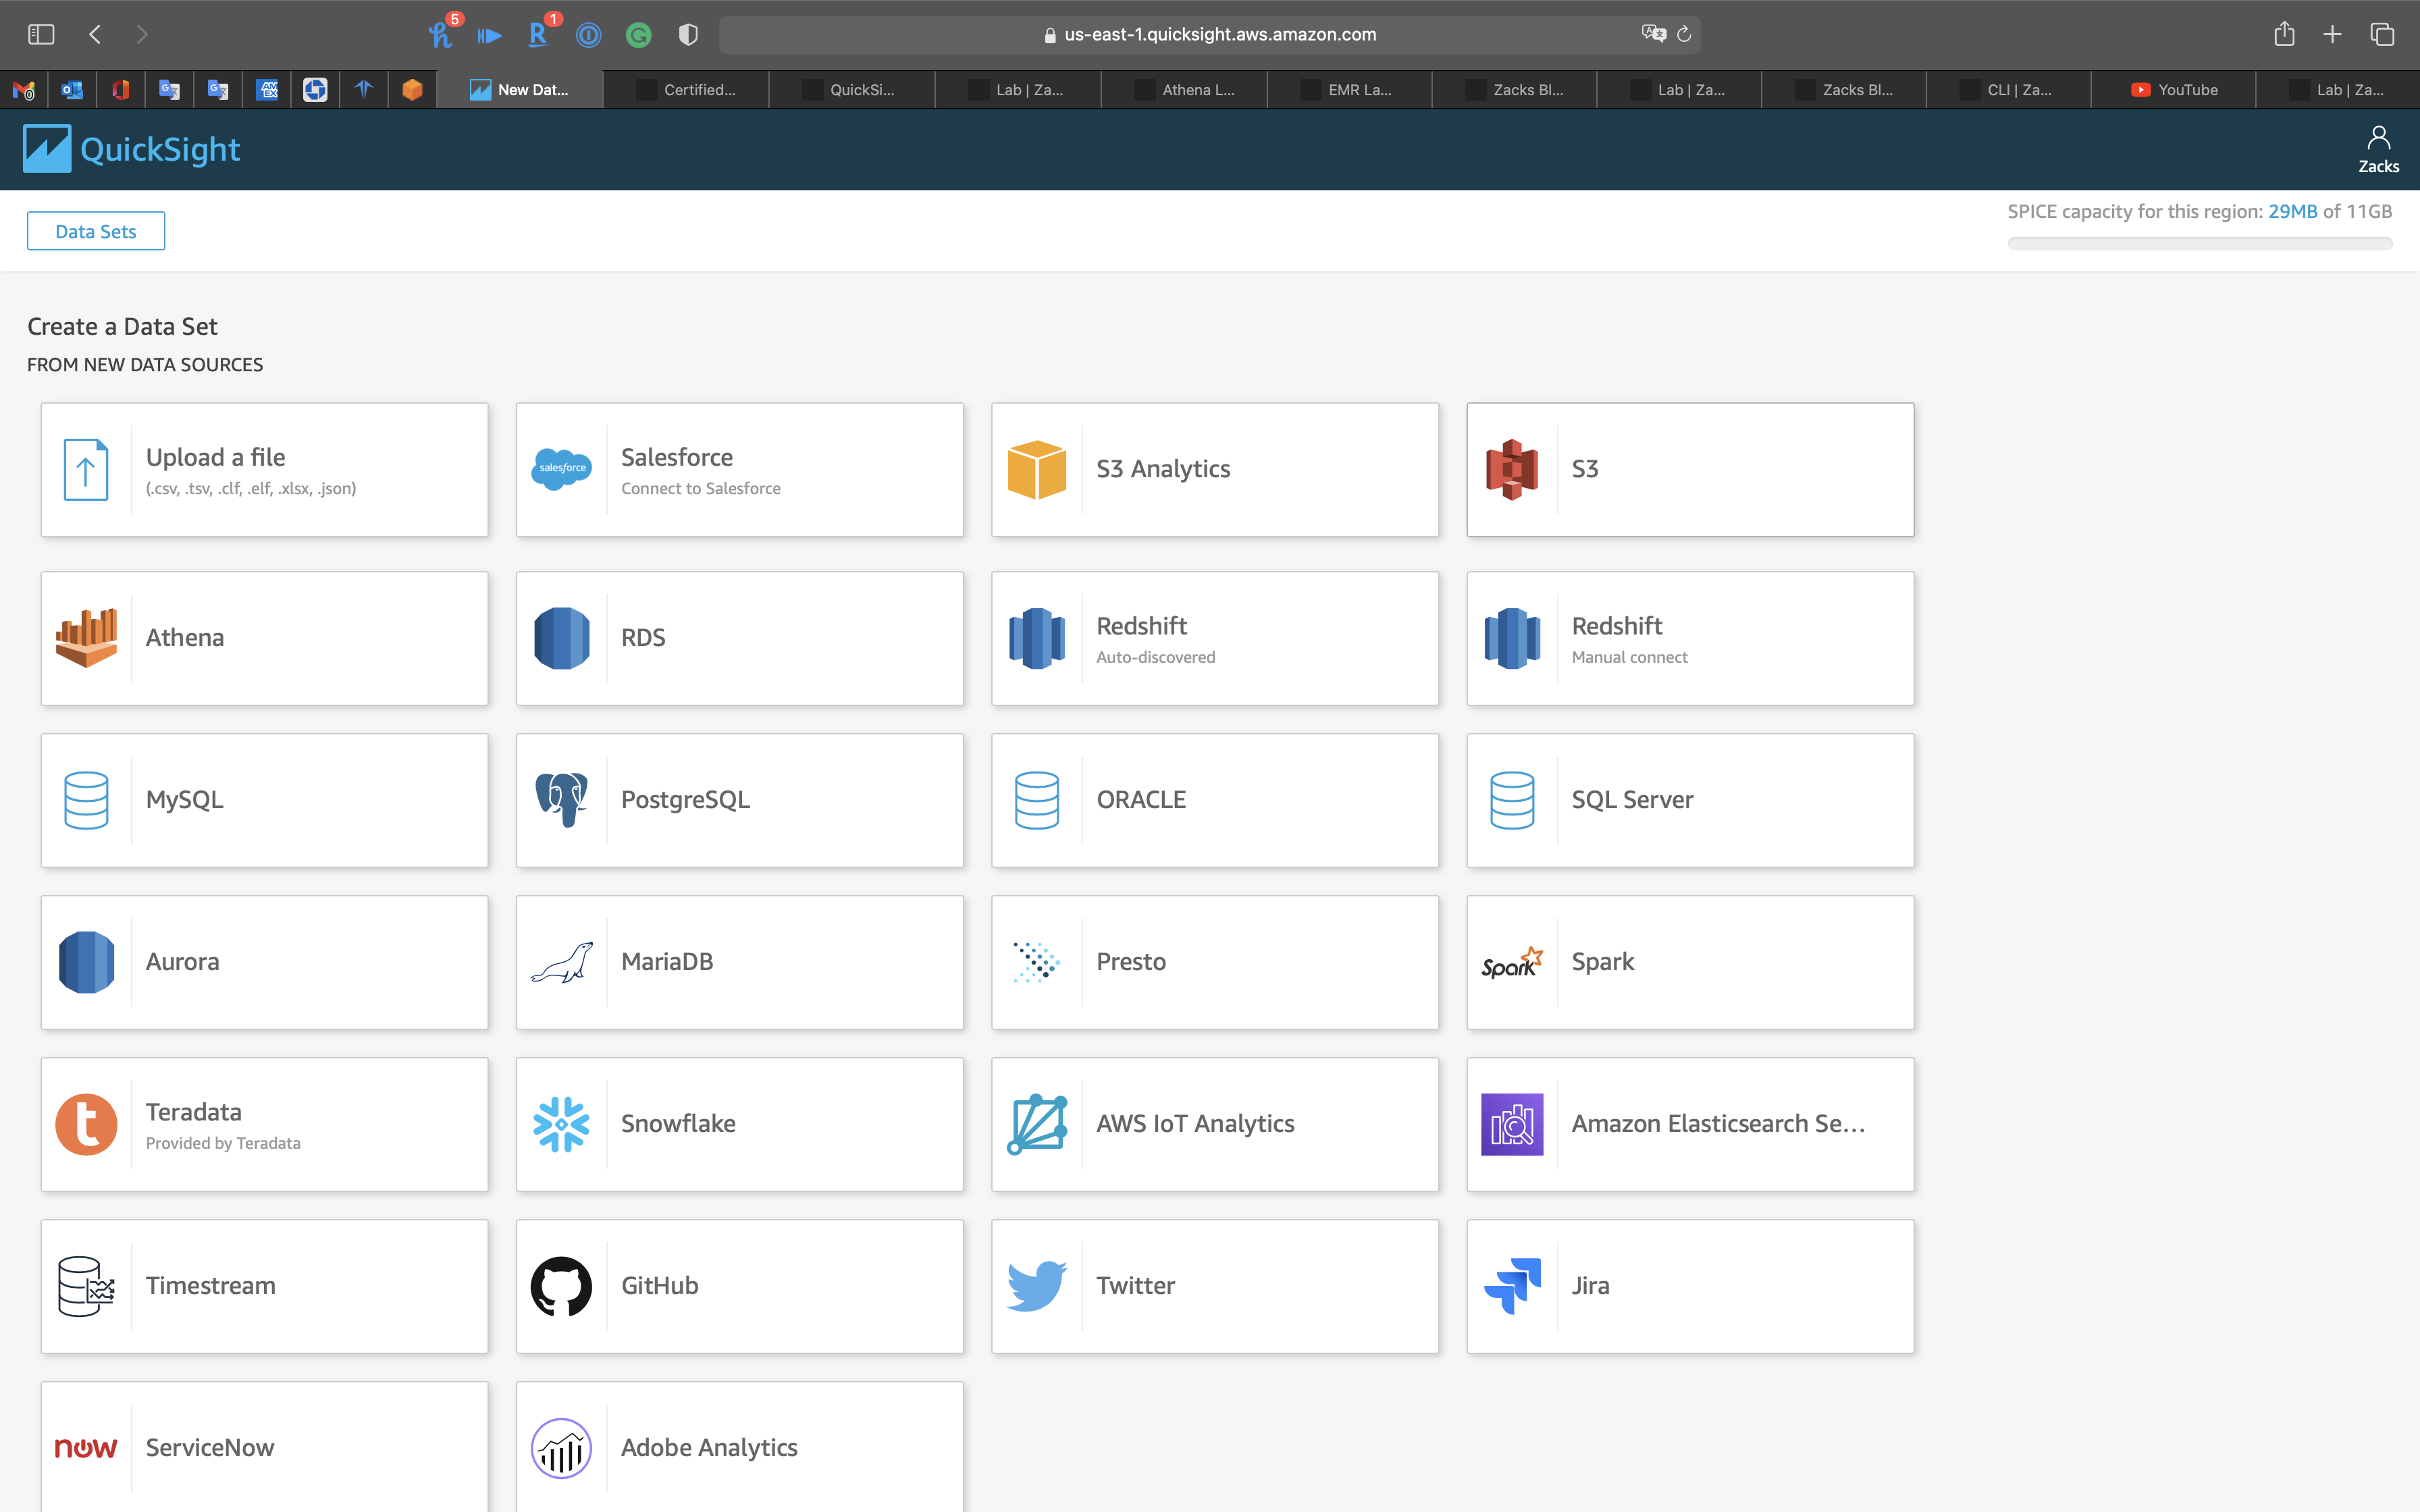
- Data source name:
ClickStream-Athena
Click on Validate connection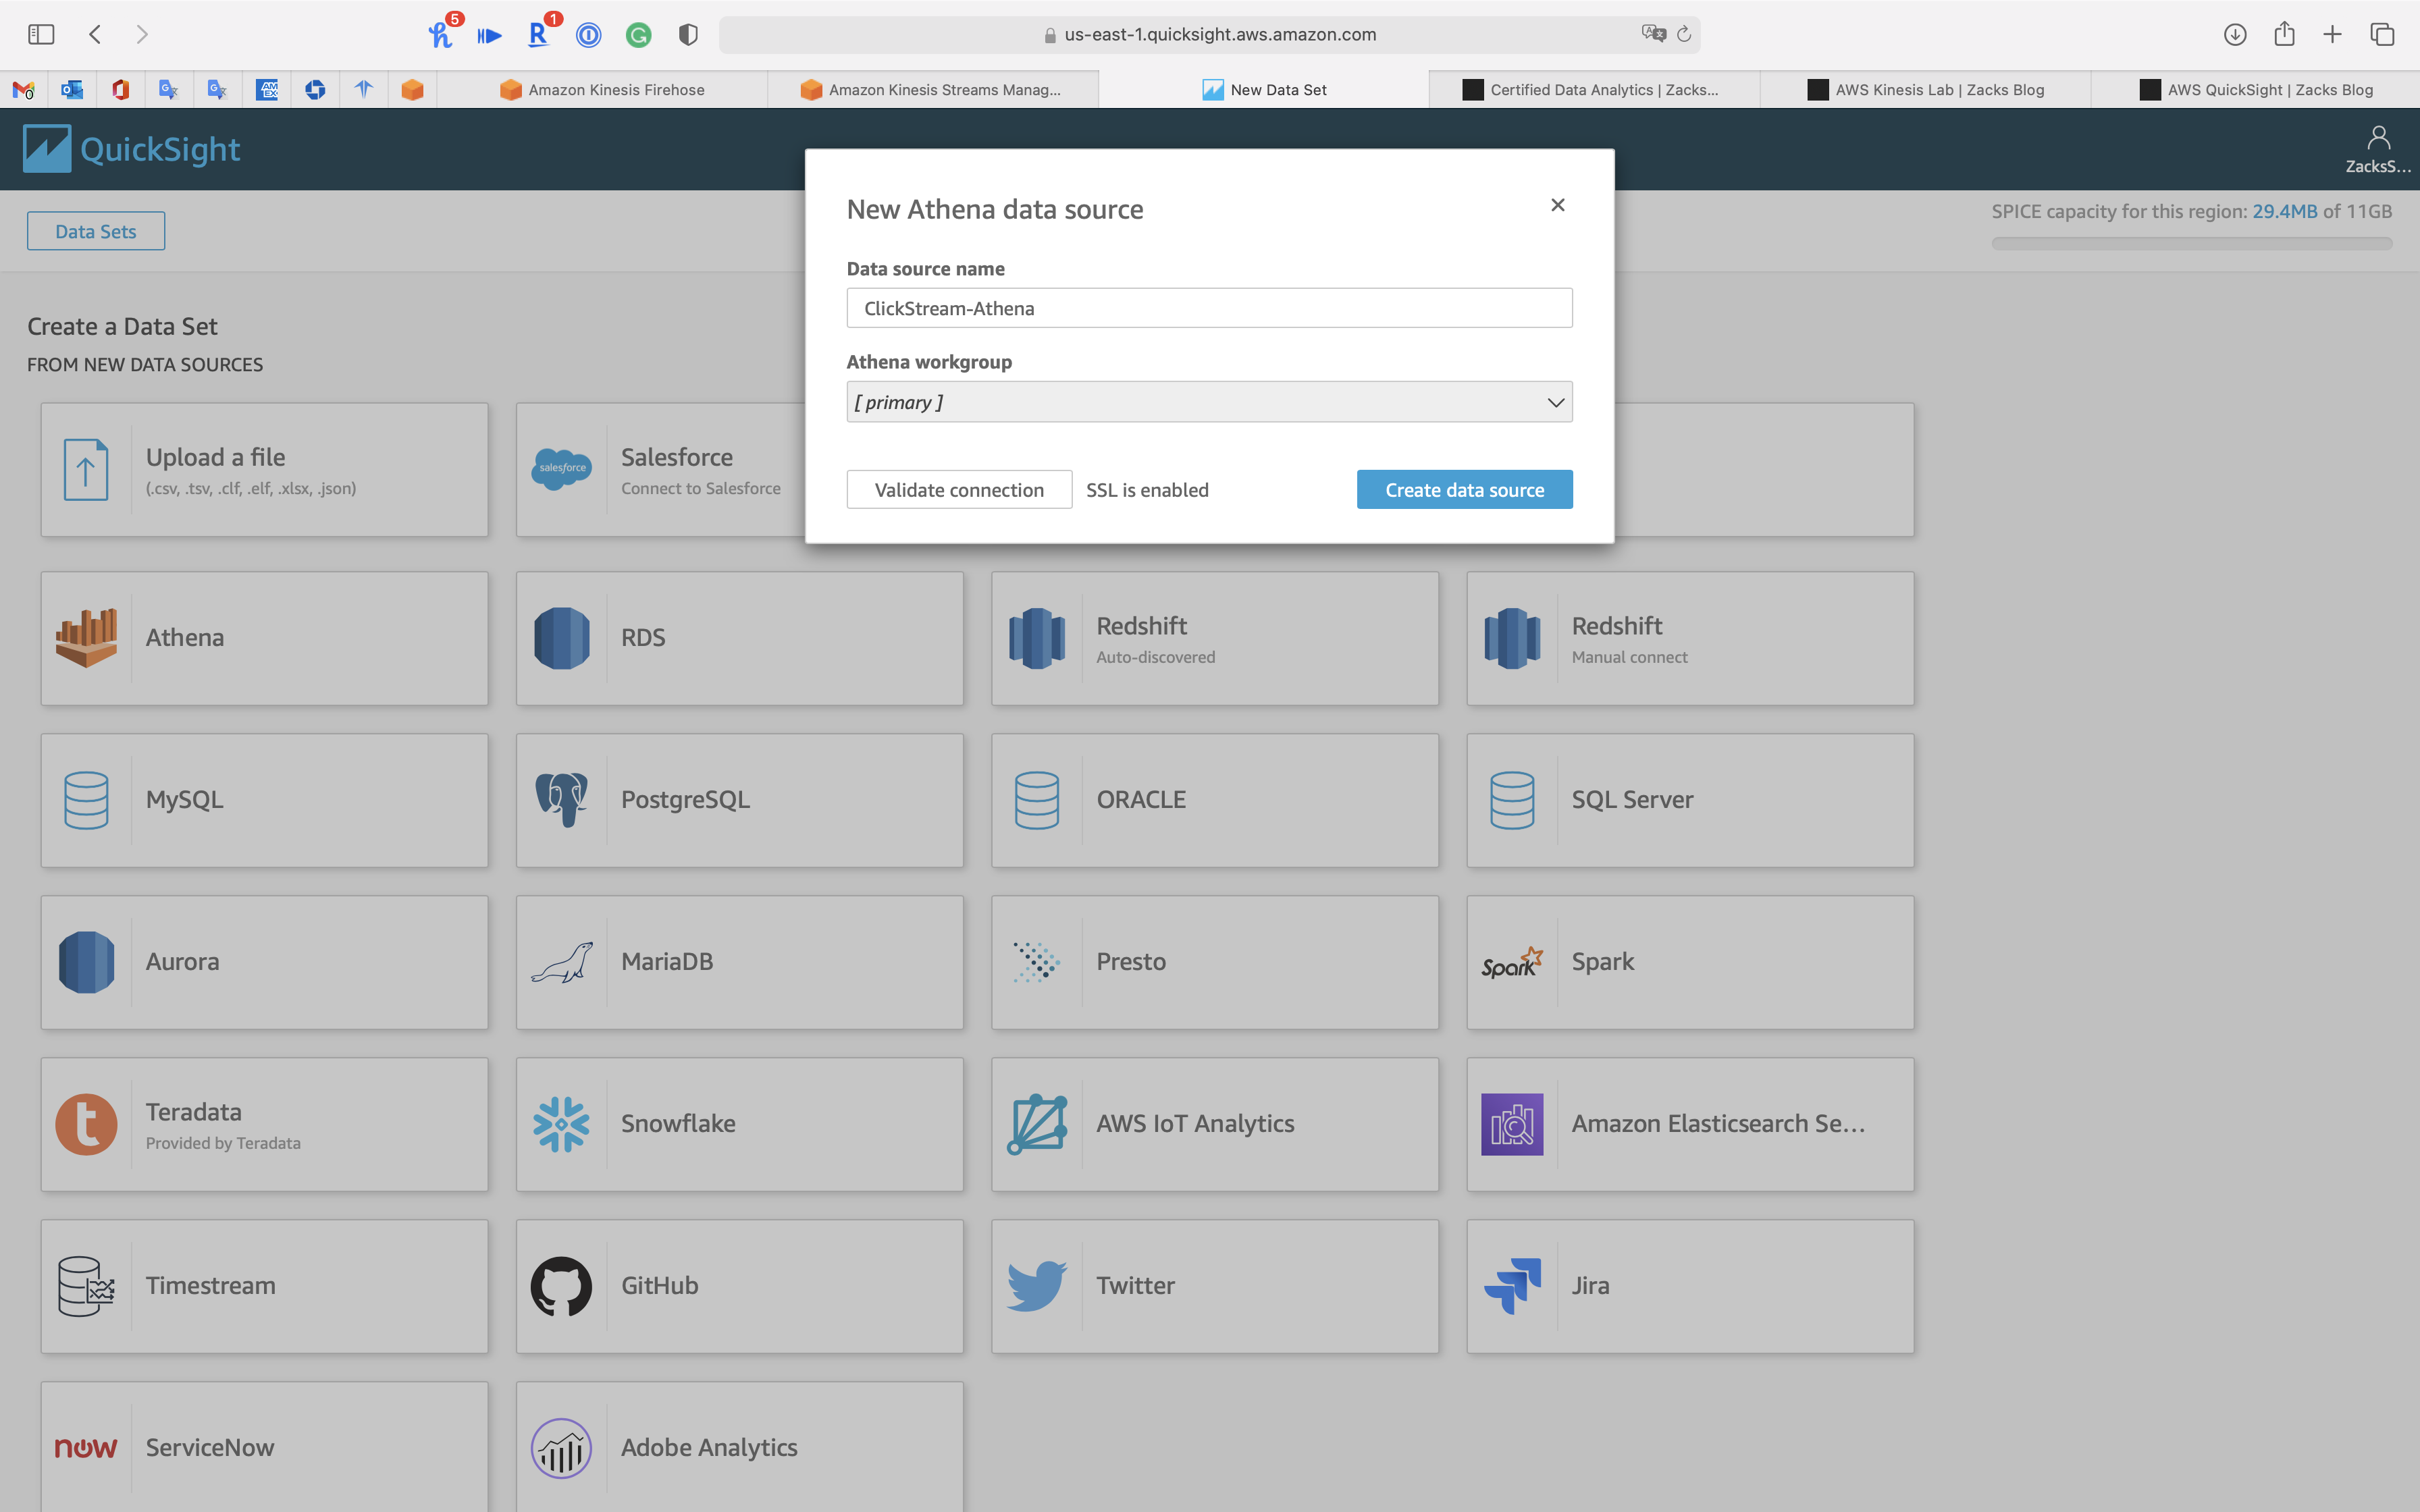
Click on Create data source
- Catalog:
AwsDataCatalog - Database:
default - Tables:
clickstream
Click on Edit/Preview data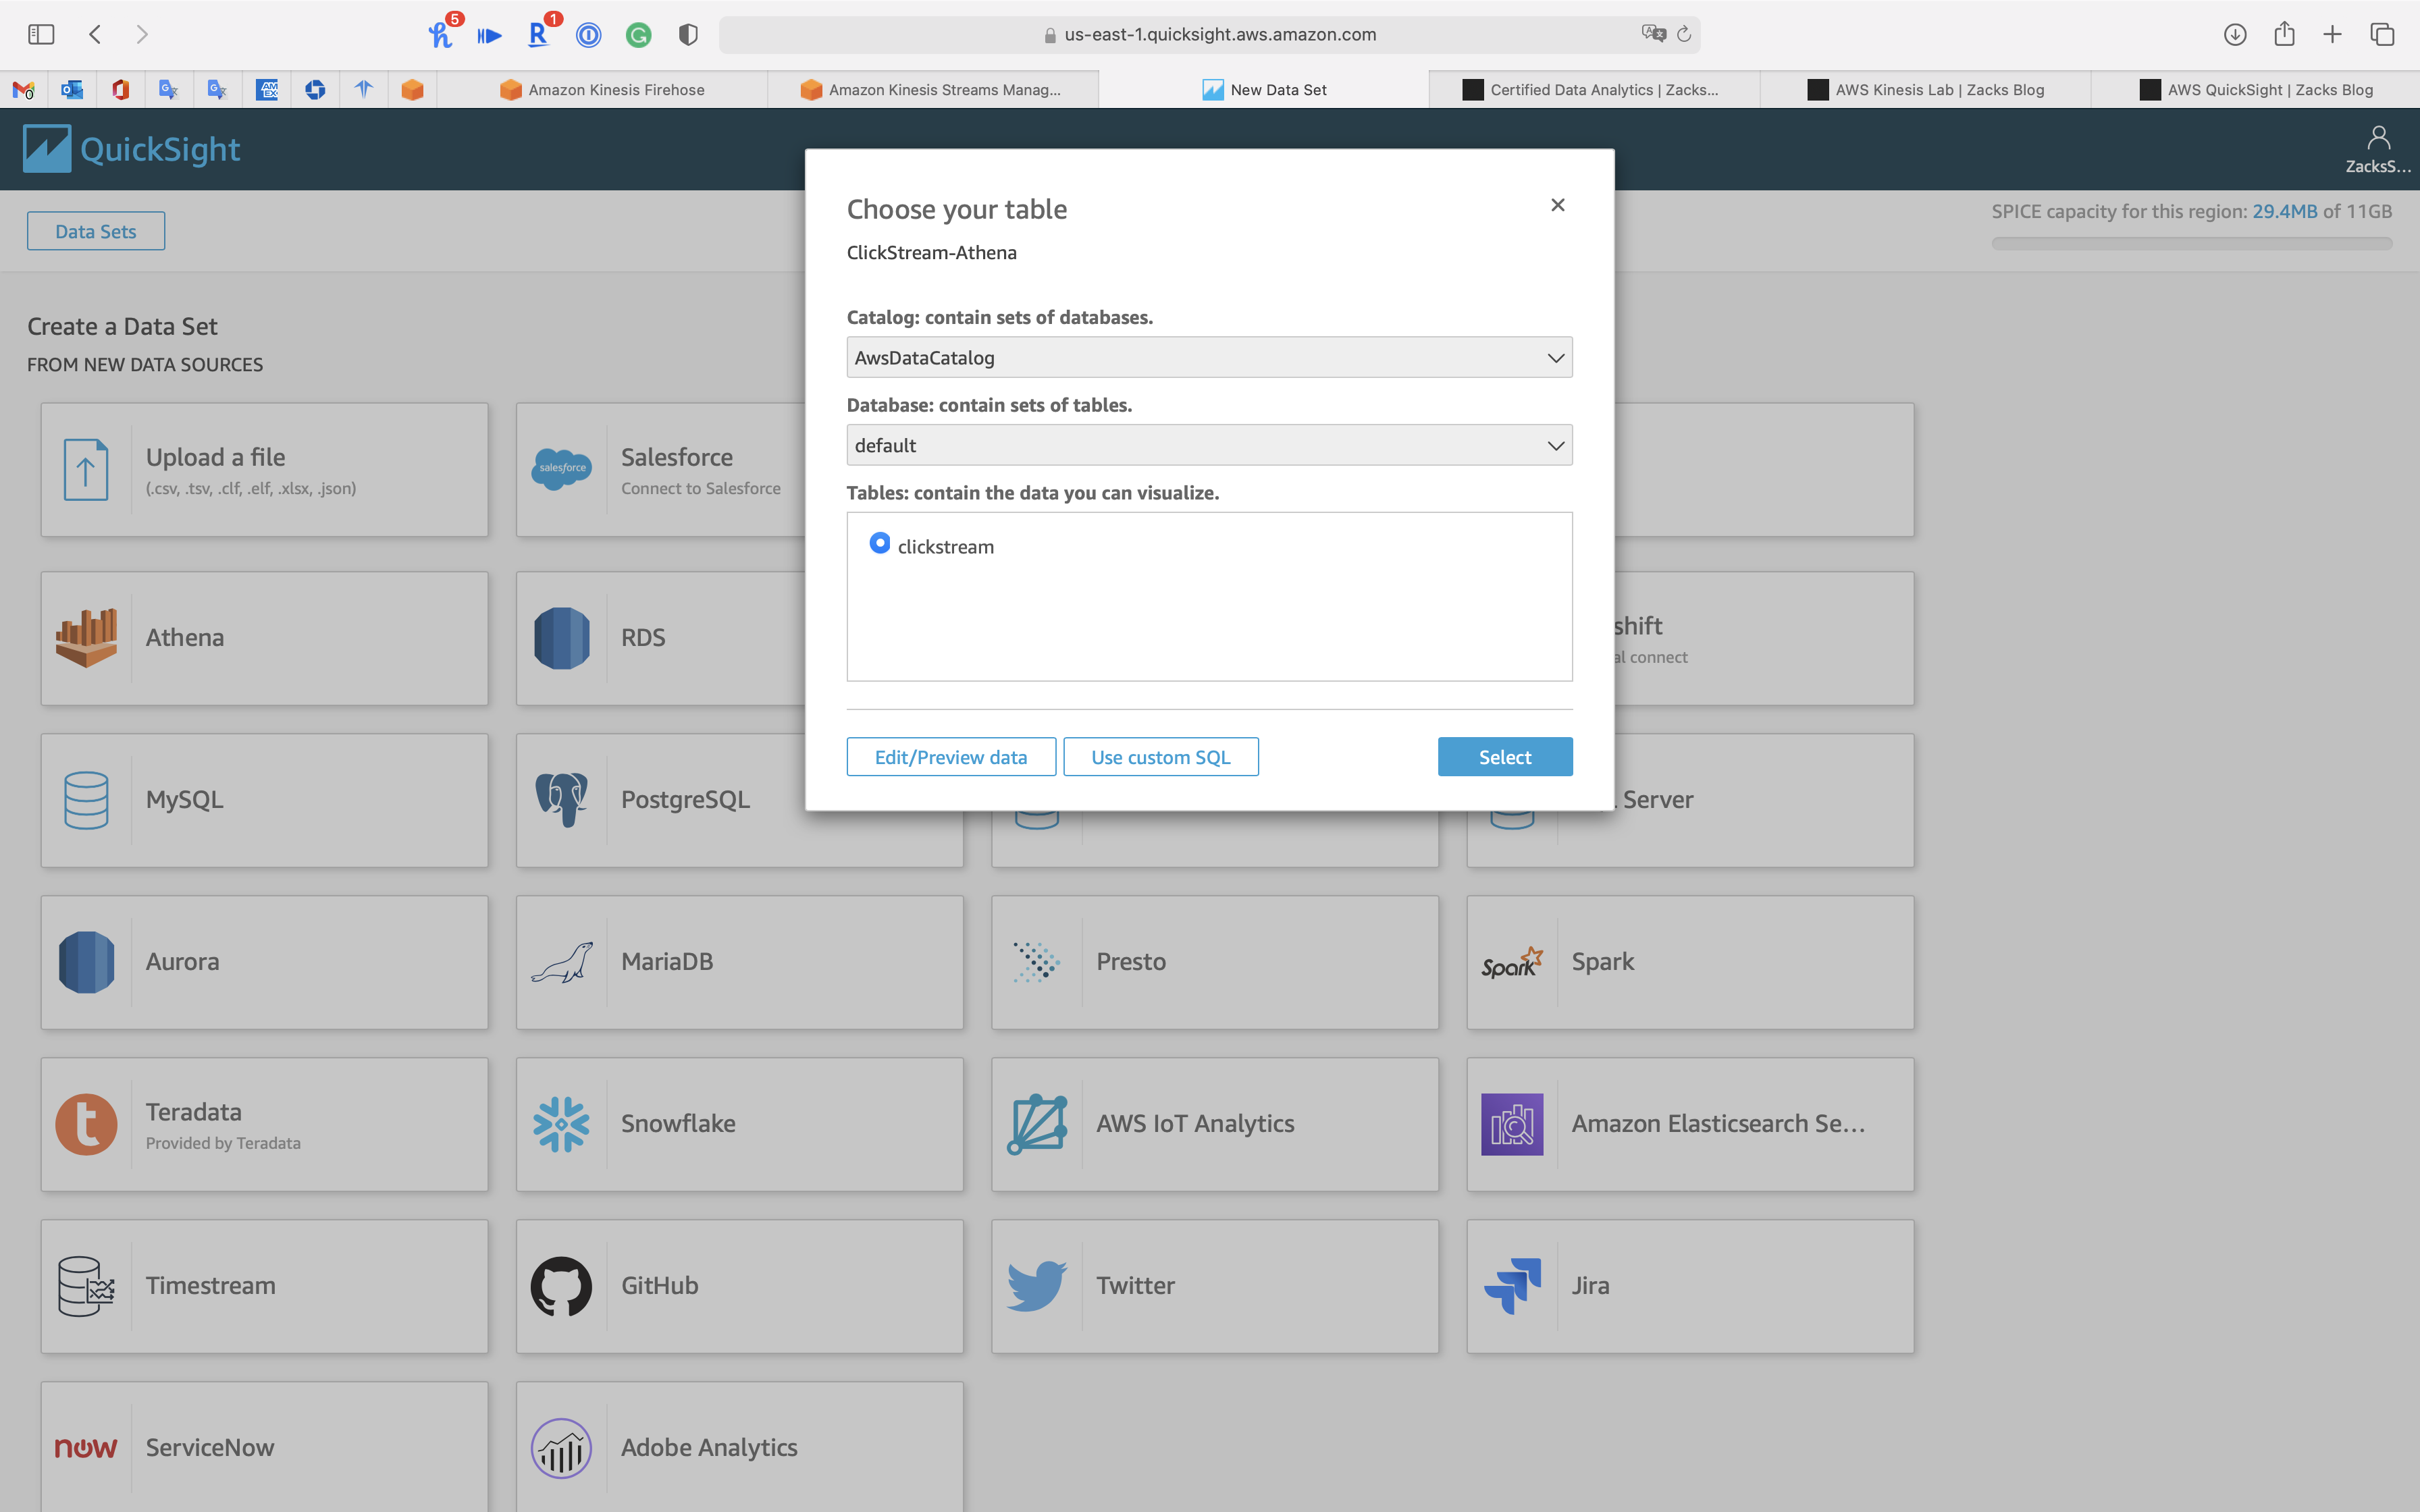
Edit/Preview data
You can see we have nothing in the database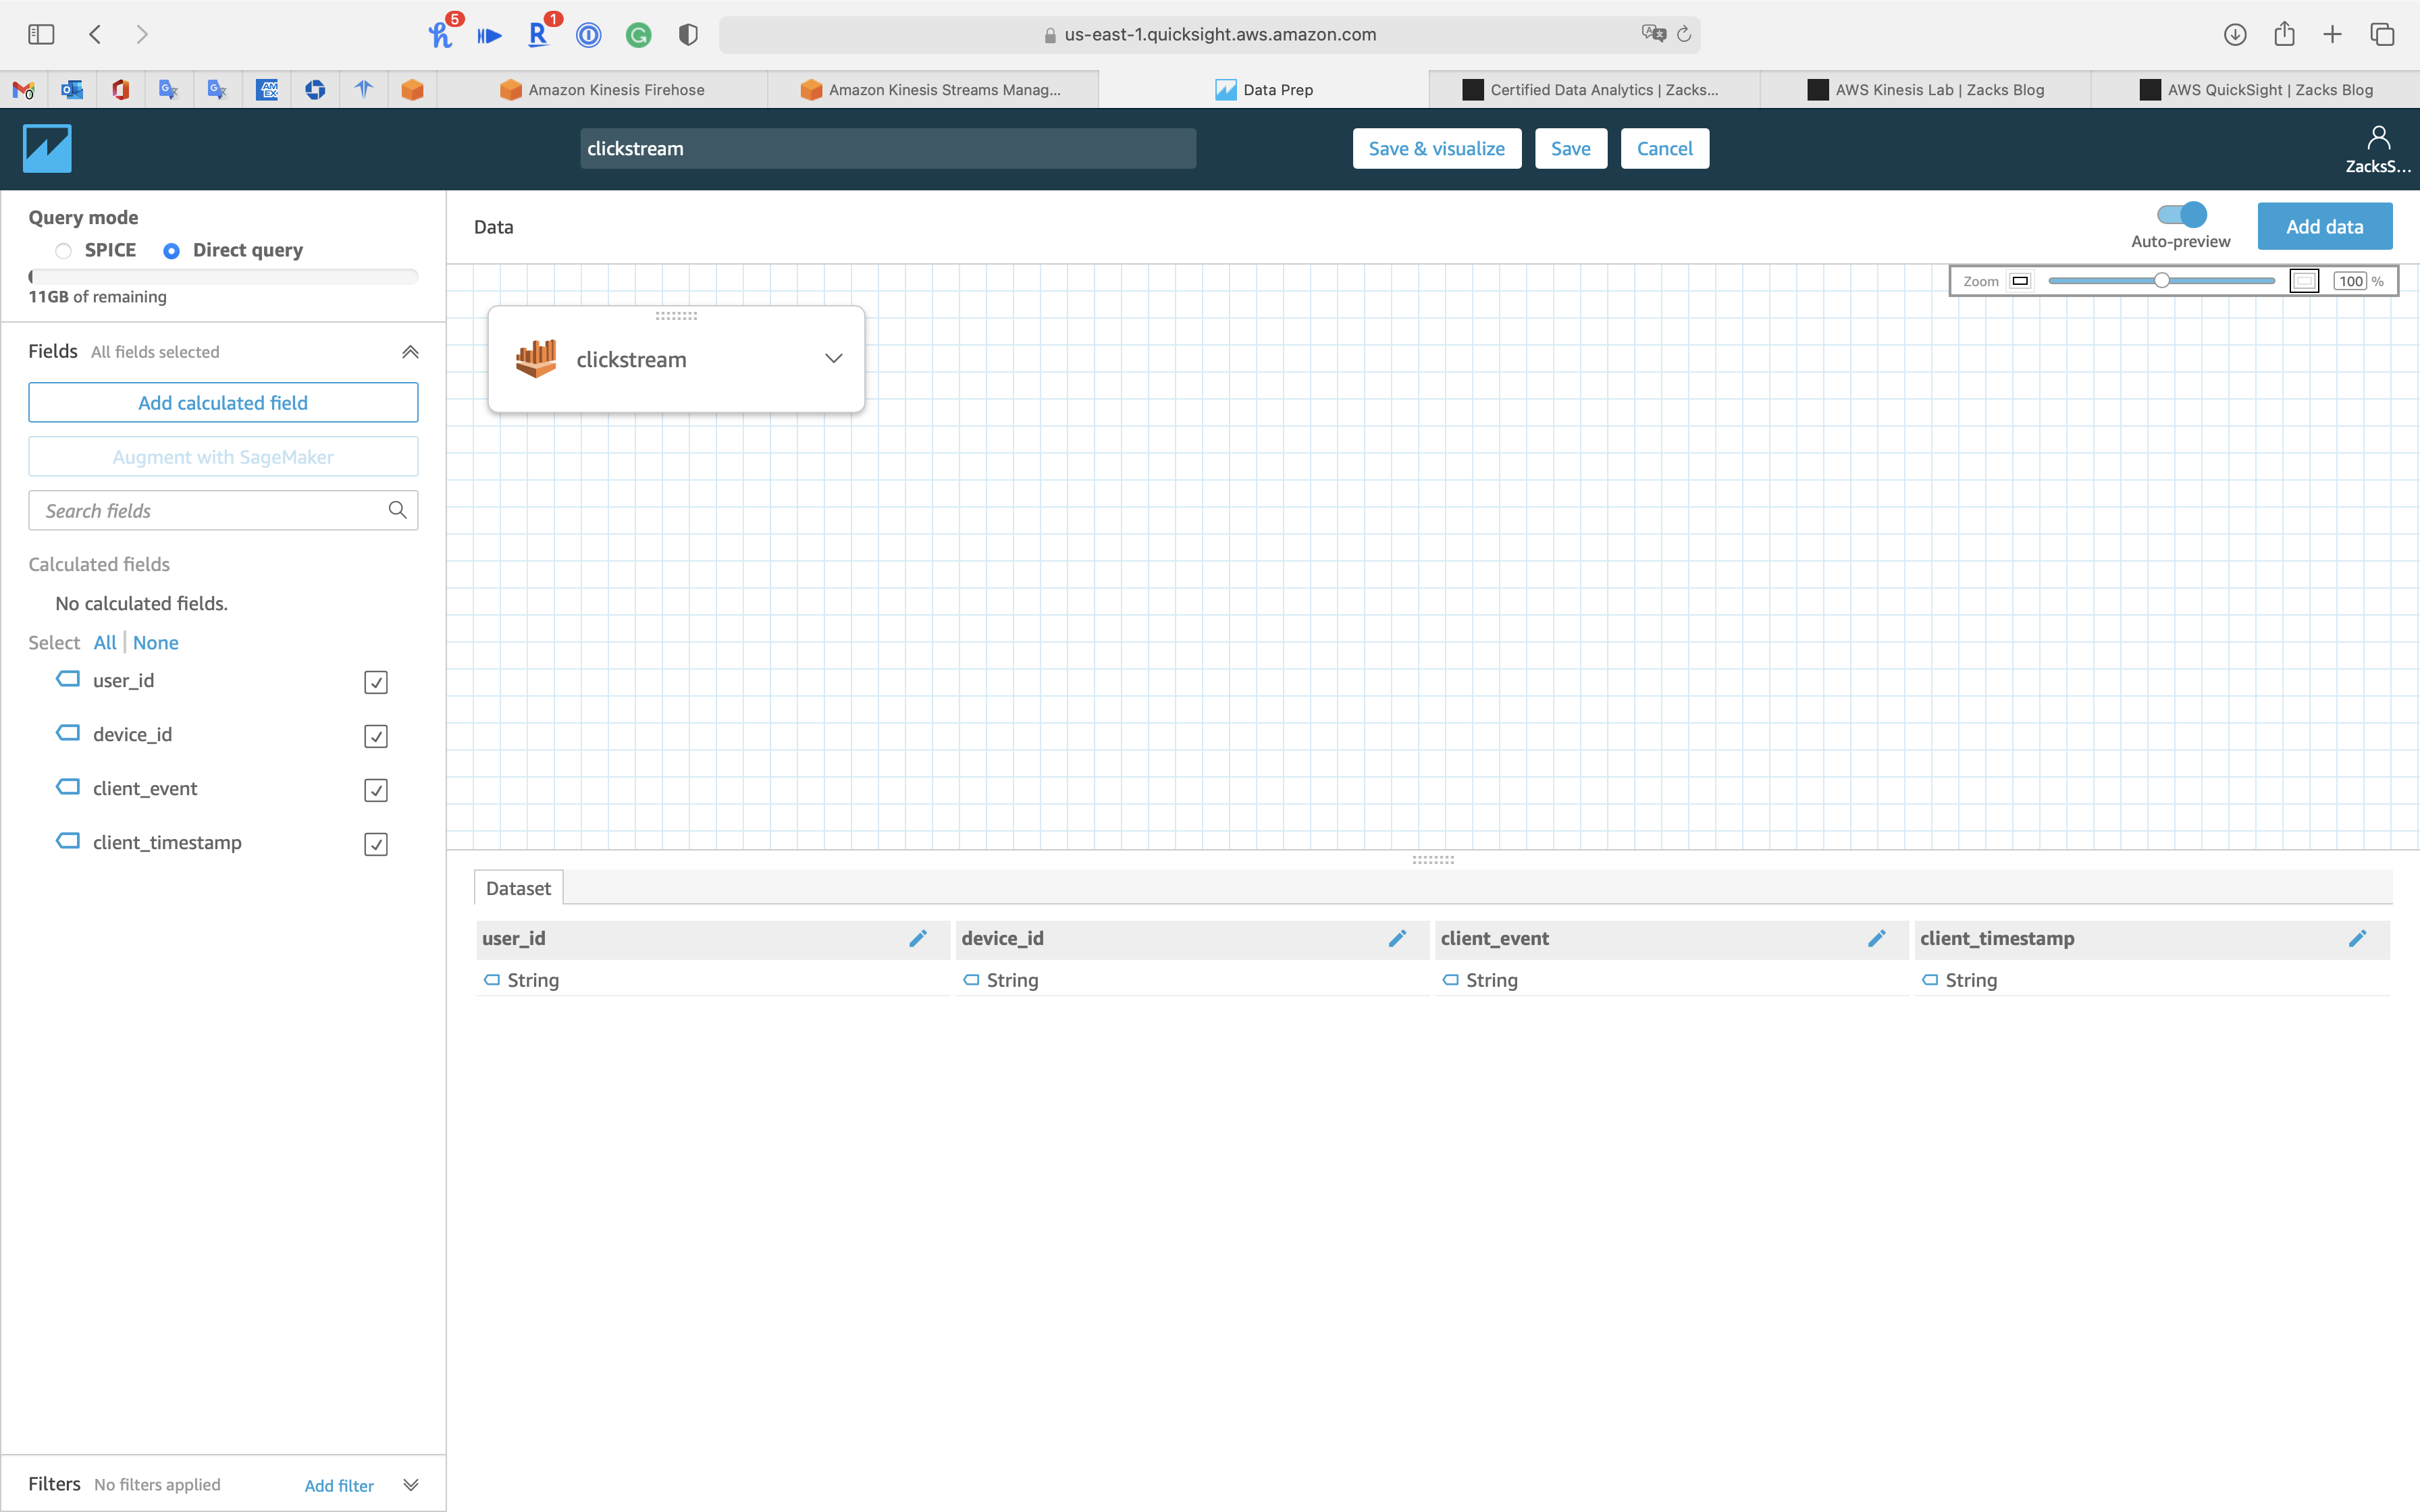
Run KinesisClickStreamGenerator.py on your local machine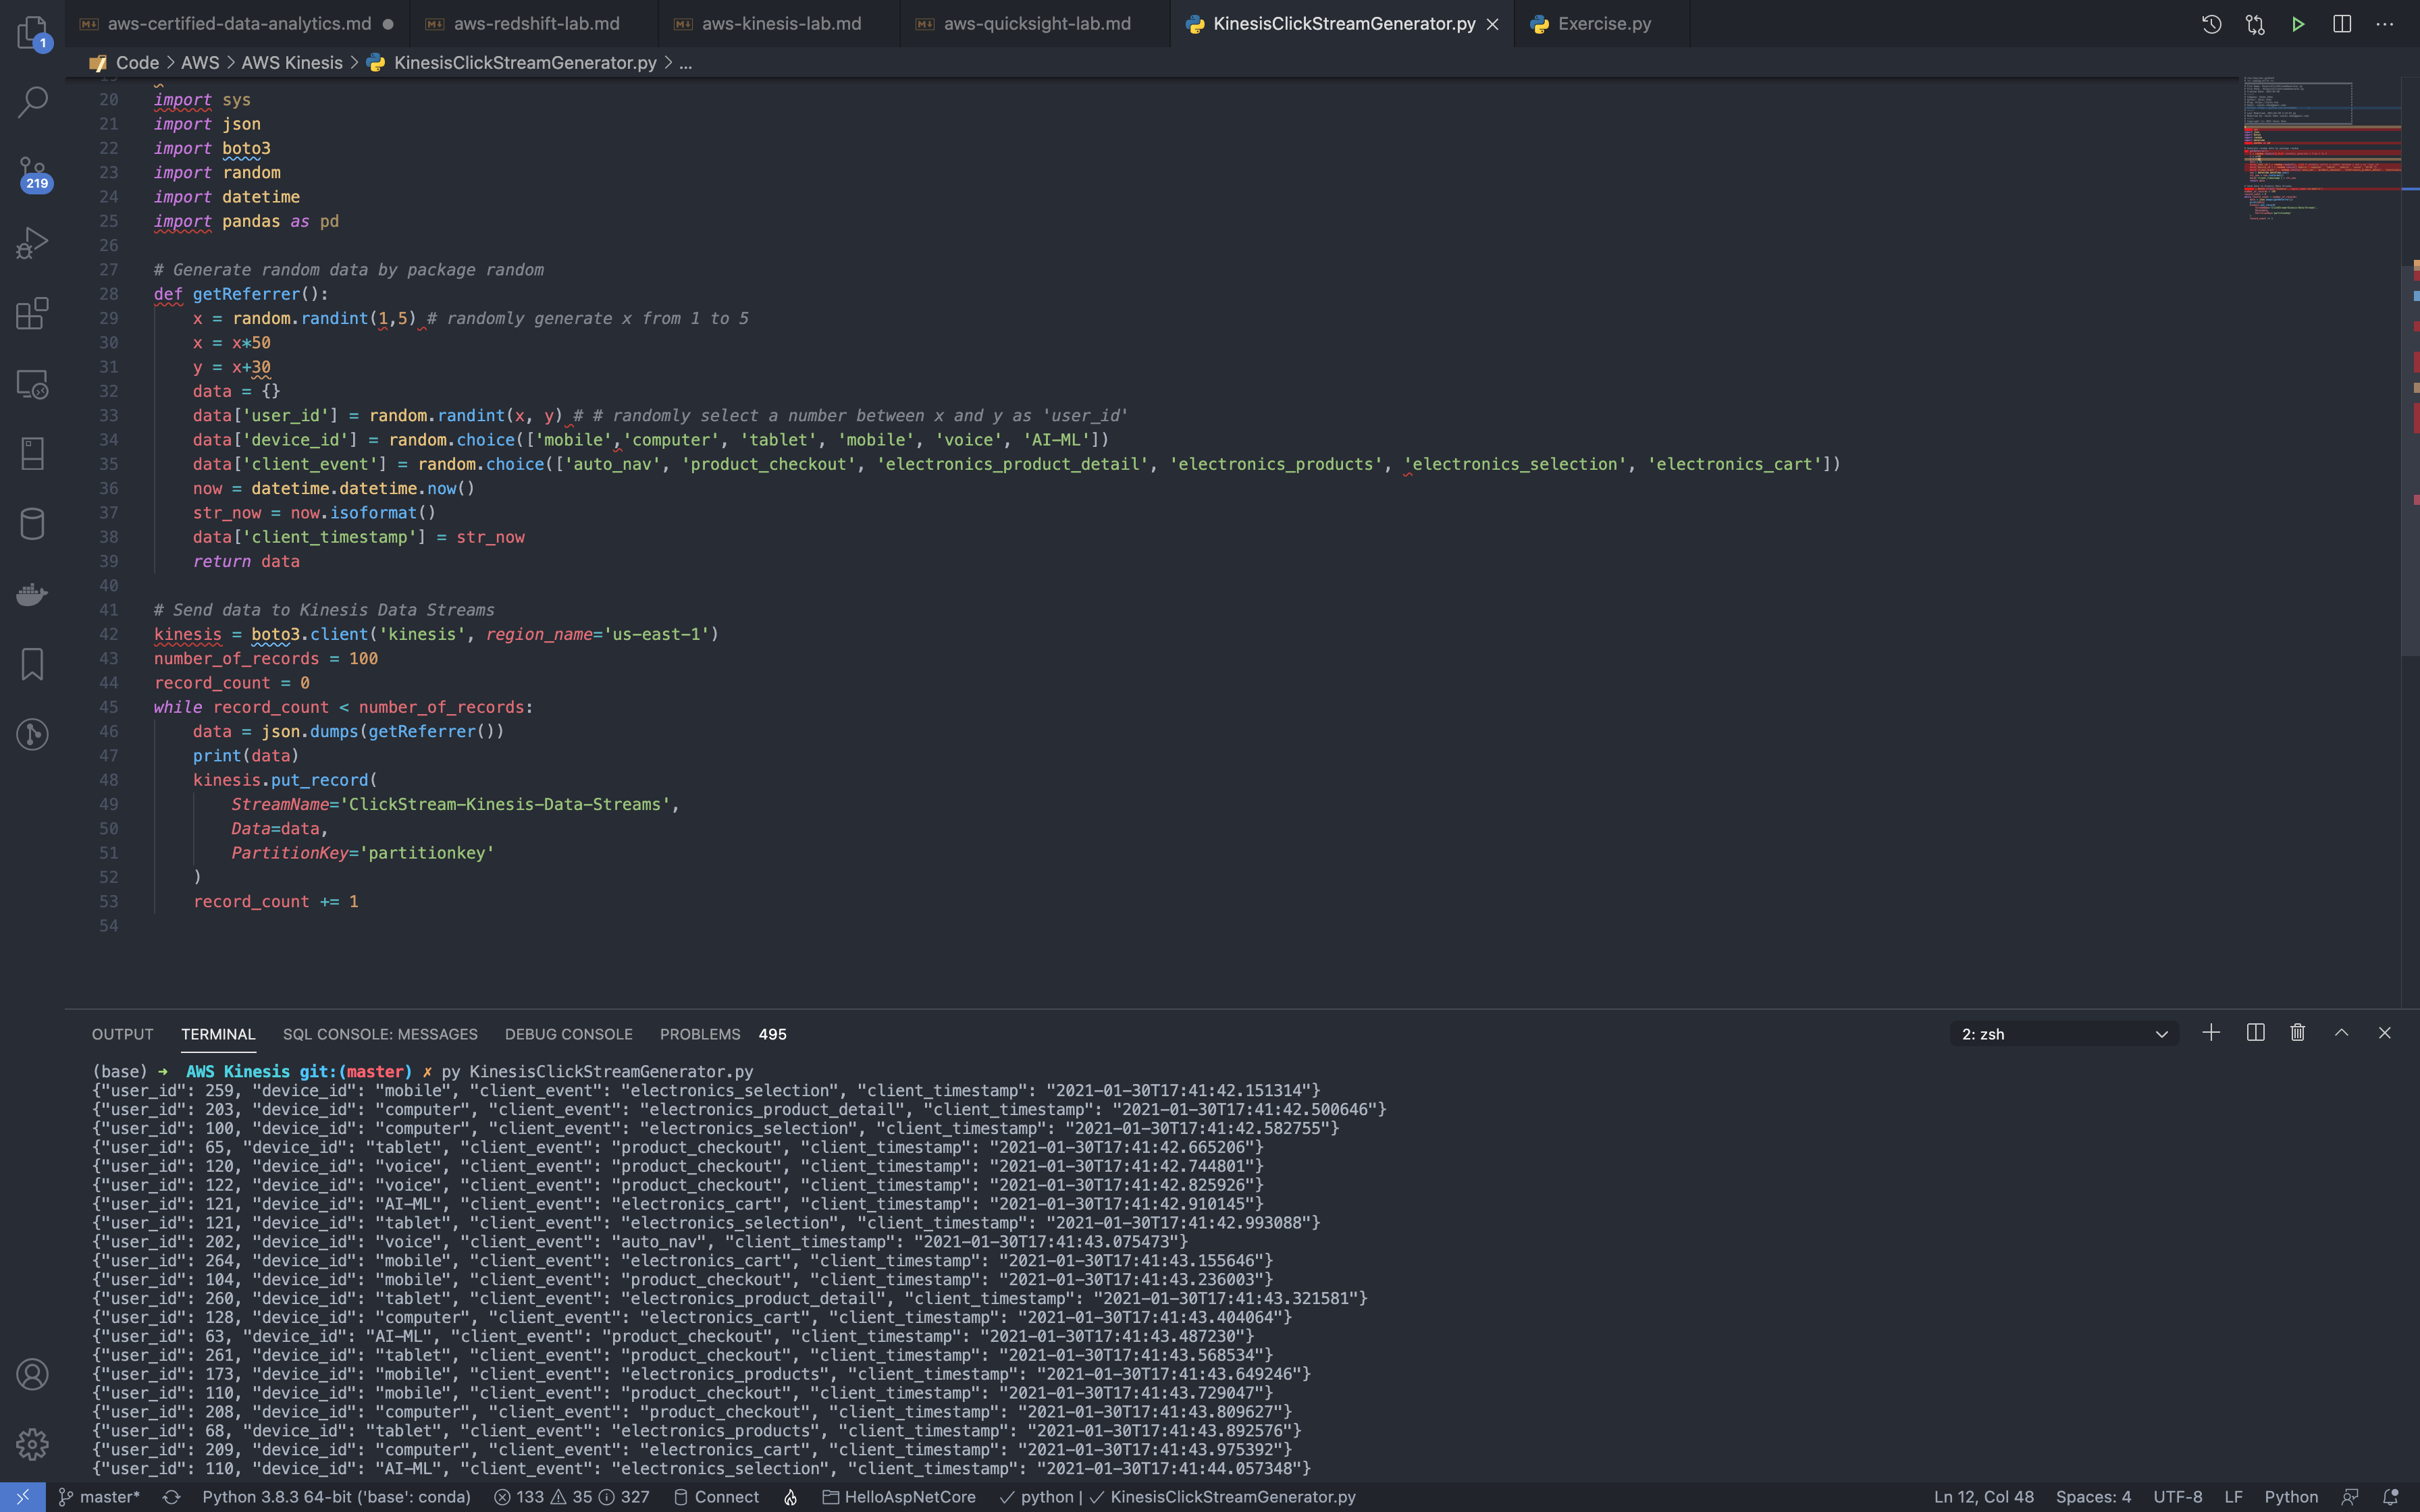
Kinesis Data Streams (ClickStream-Kinesis-Data-Streams): Received data.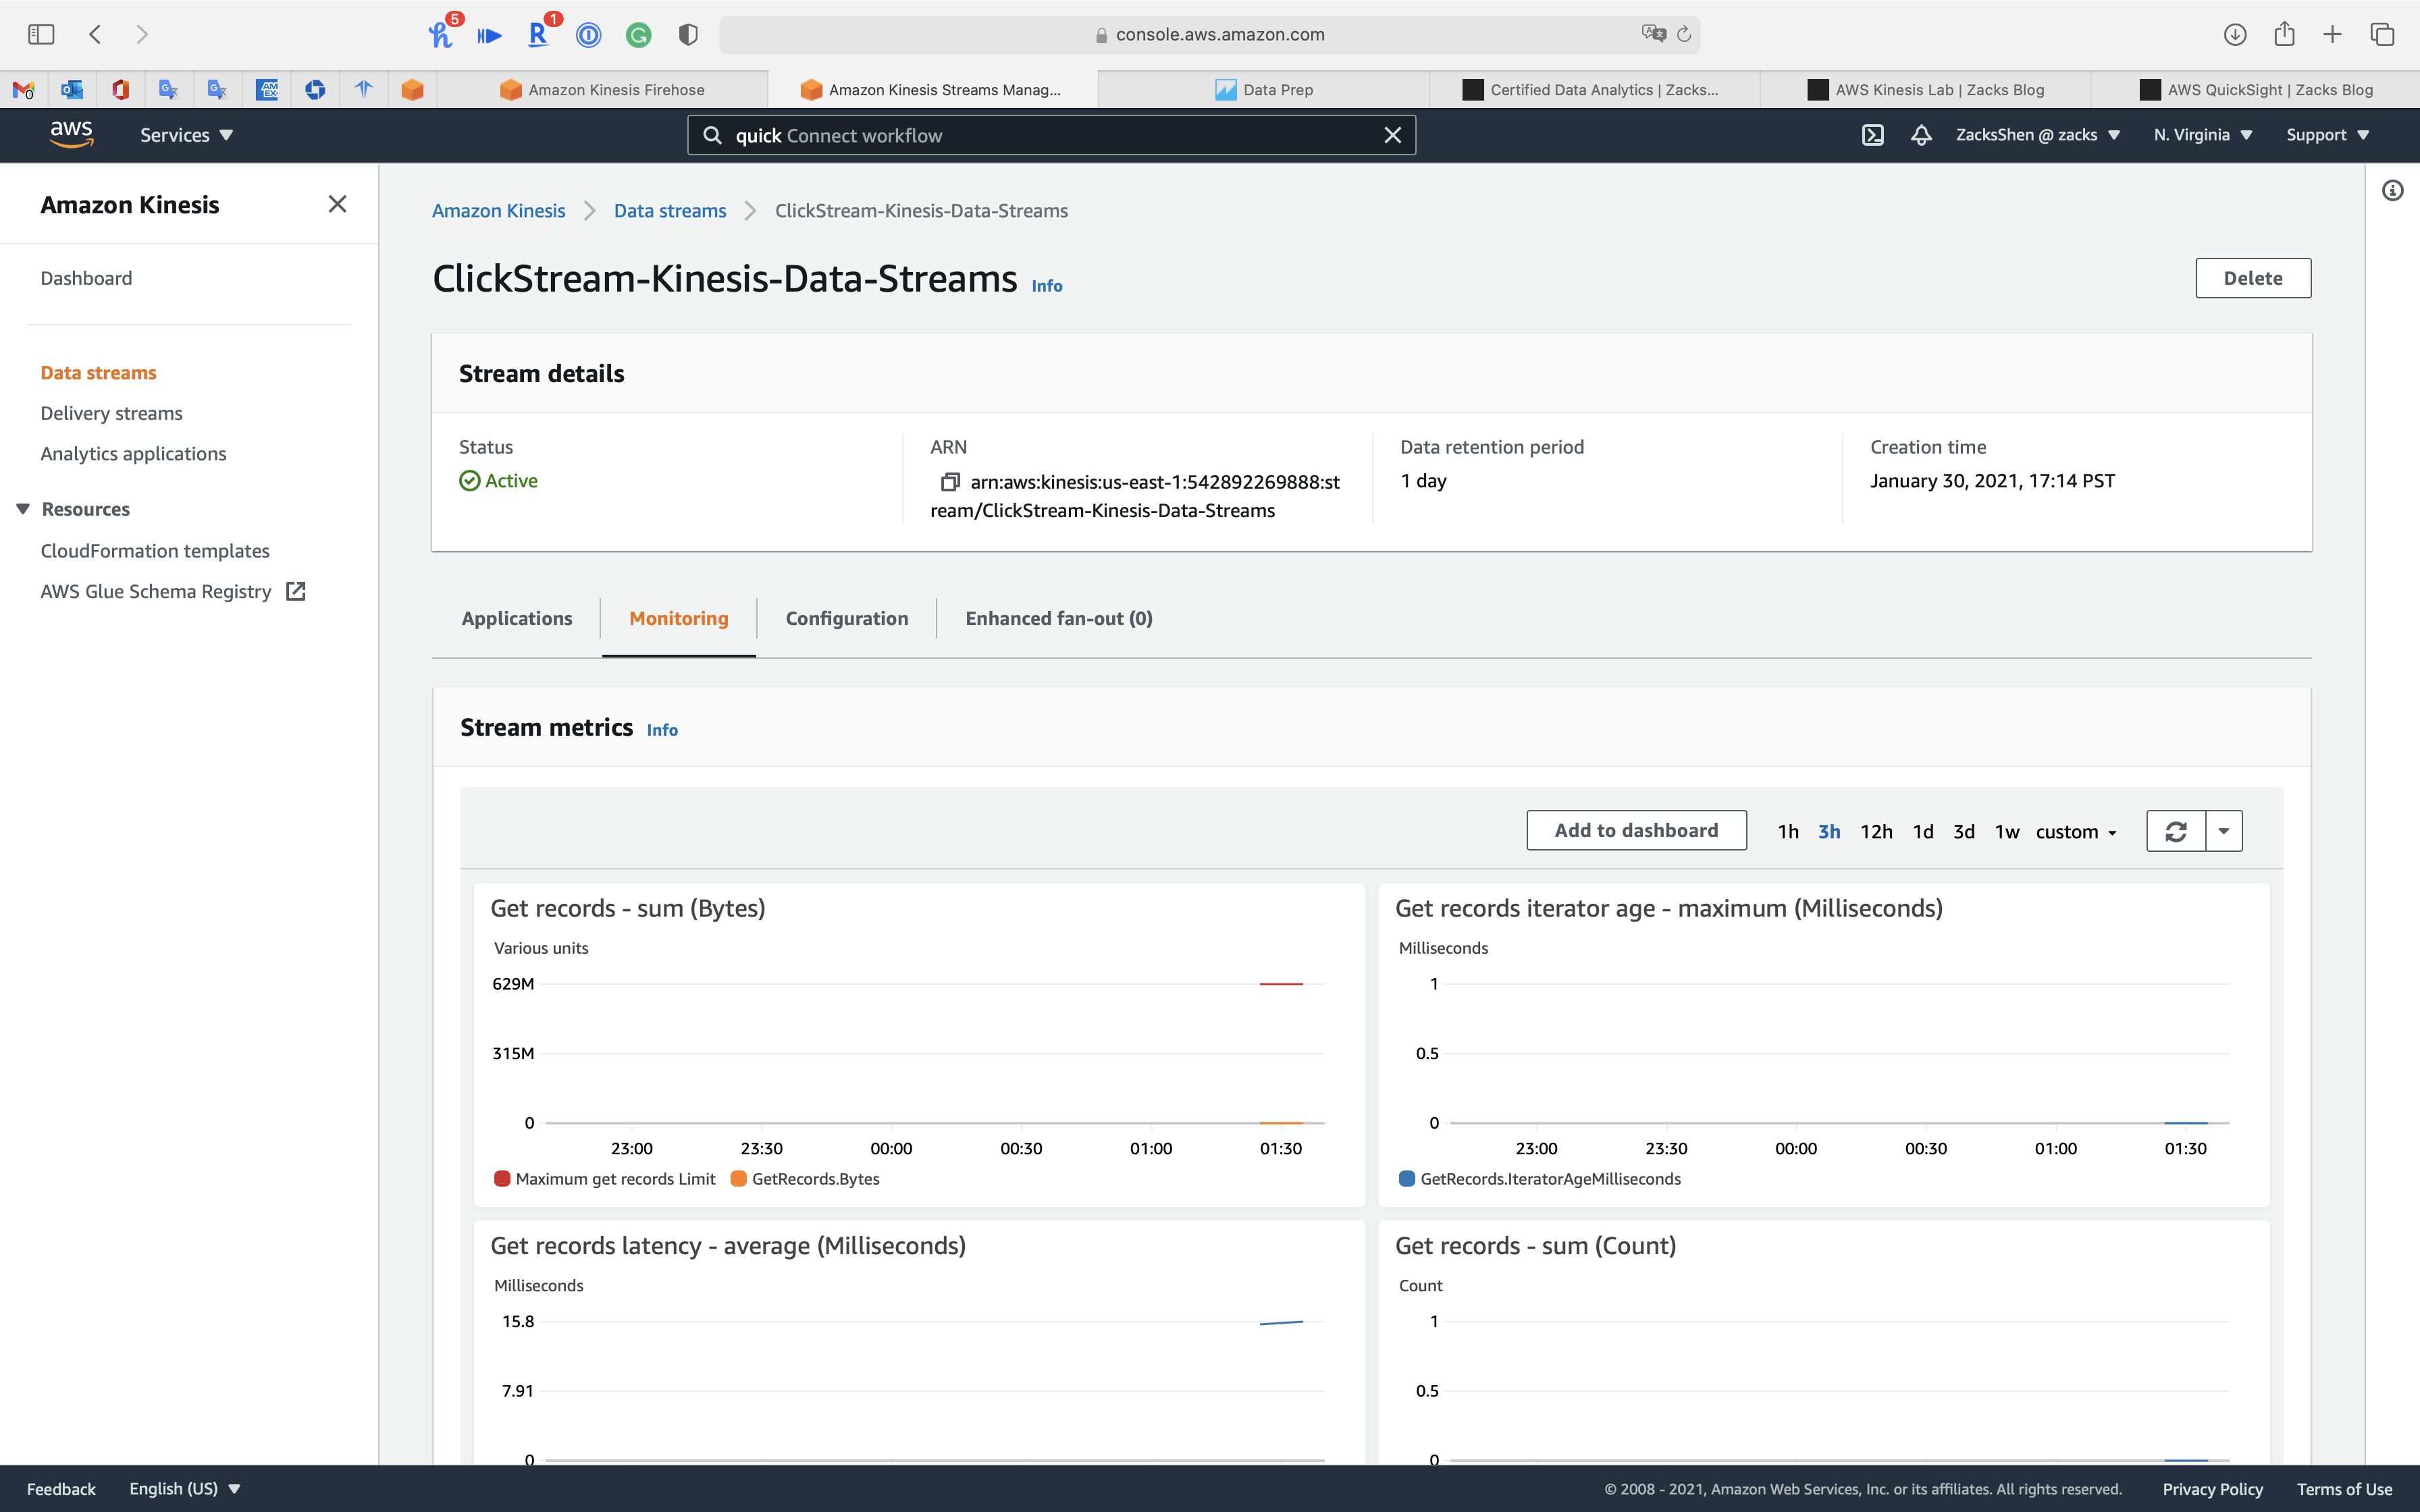
Kinesis Data Firehose (ClickStream-Kinesis-Data-Firehose): Received data, 100 records.
You may have to wait a minute for Kinesis Data Firehose to receive the data from Kinesis Data Streams.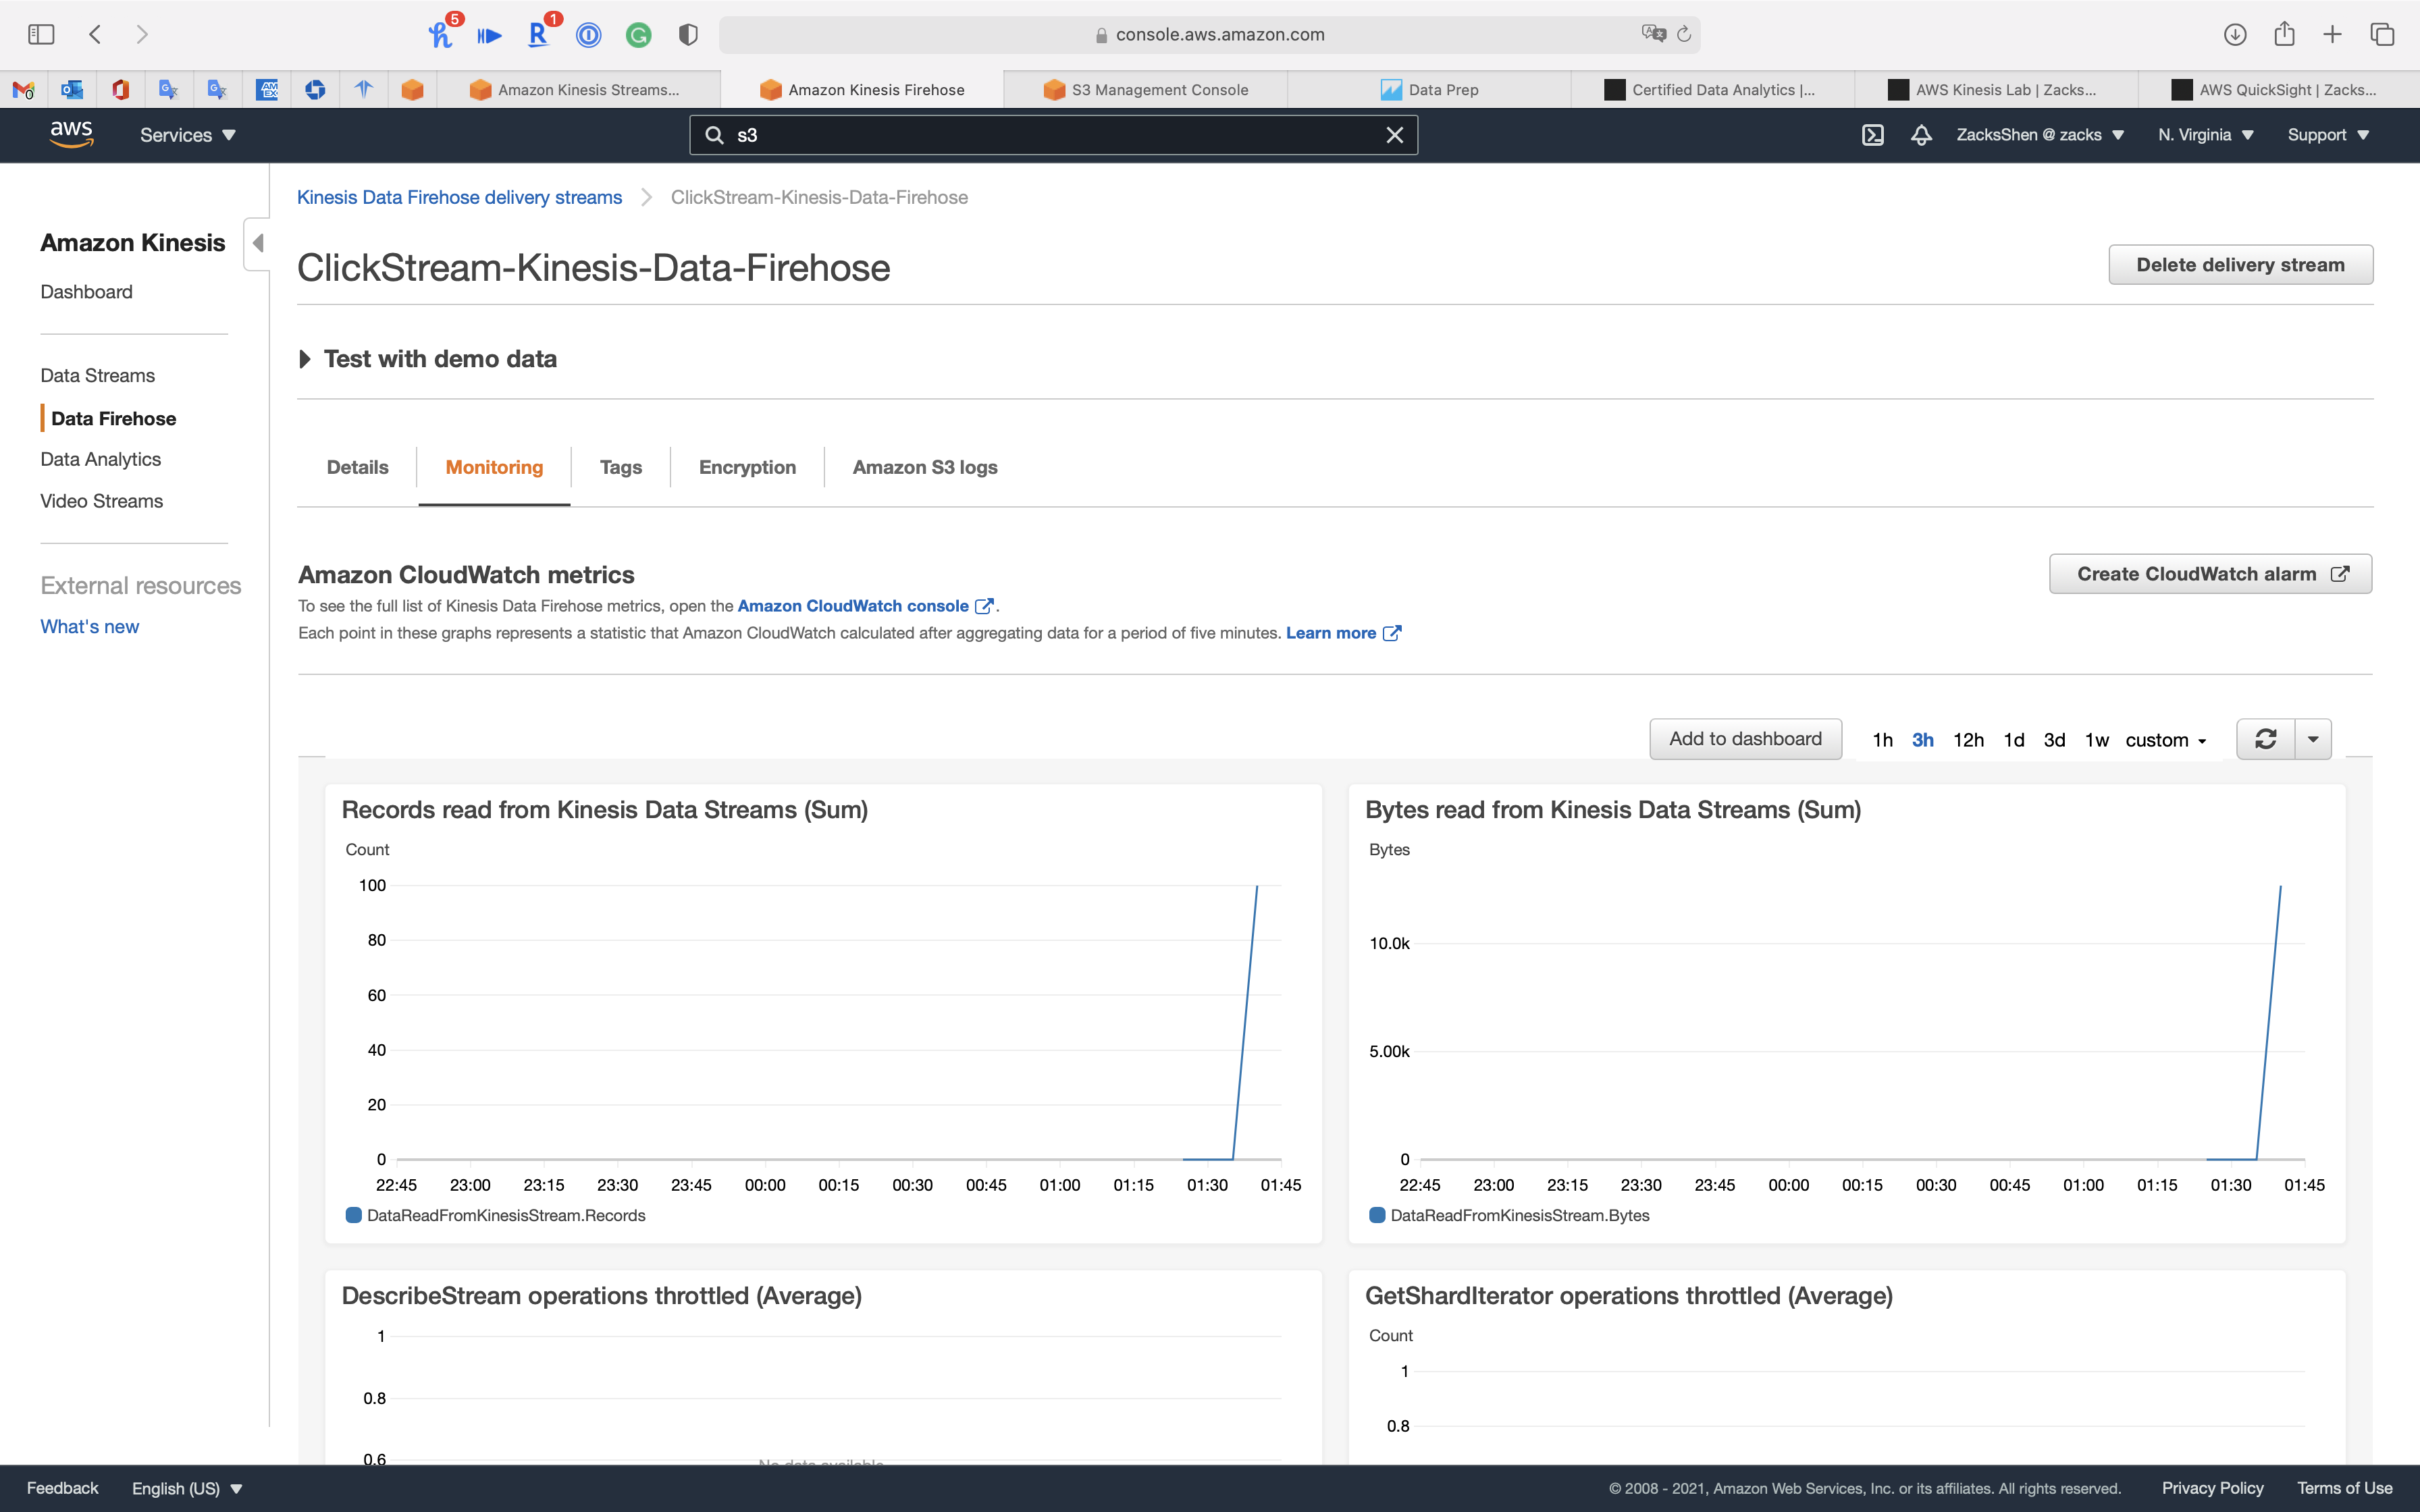
S3 (s3://aws-labs-bucket/Kinesis/ClickStream-S3/):
You may have to wait a minute for Kinesis Data Firehose to save the records in S3.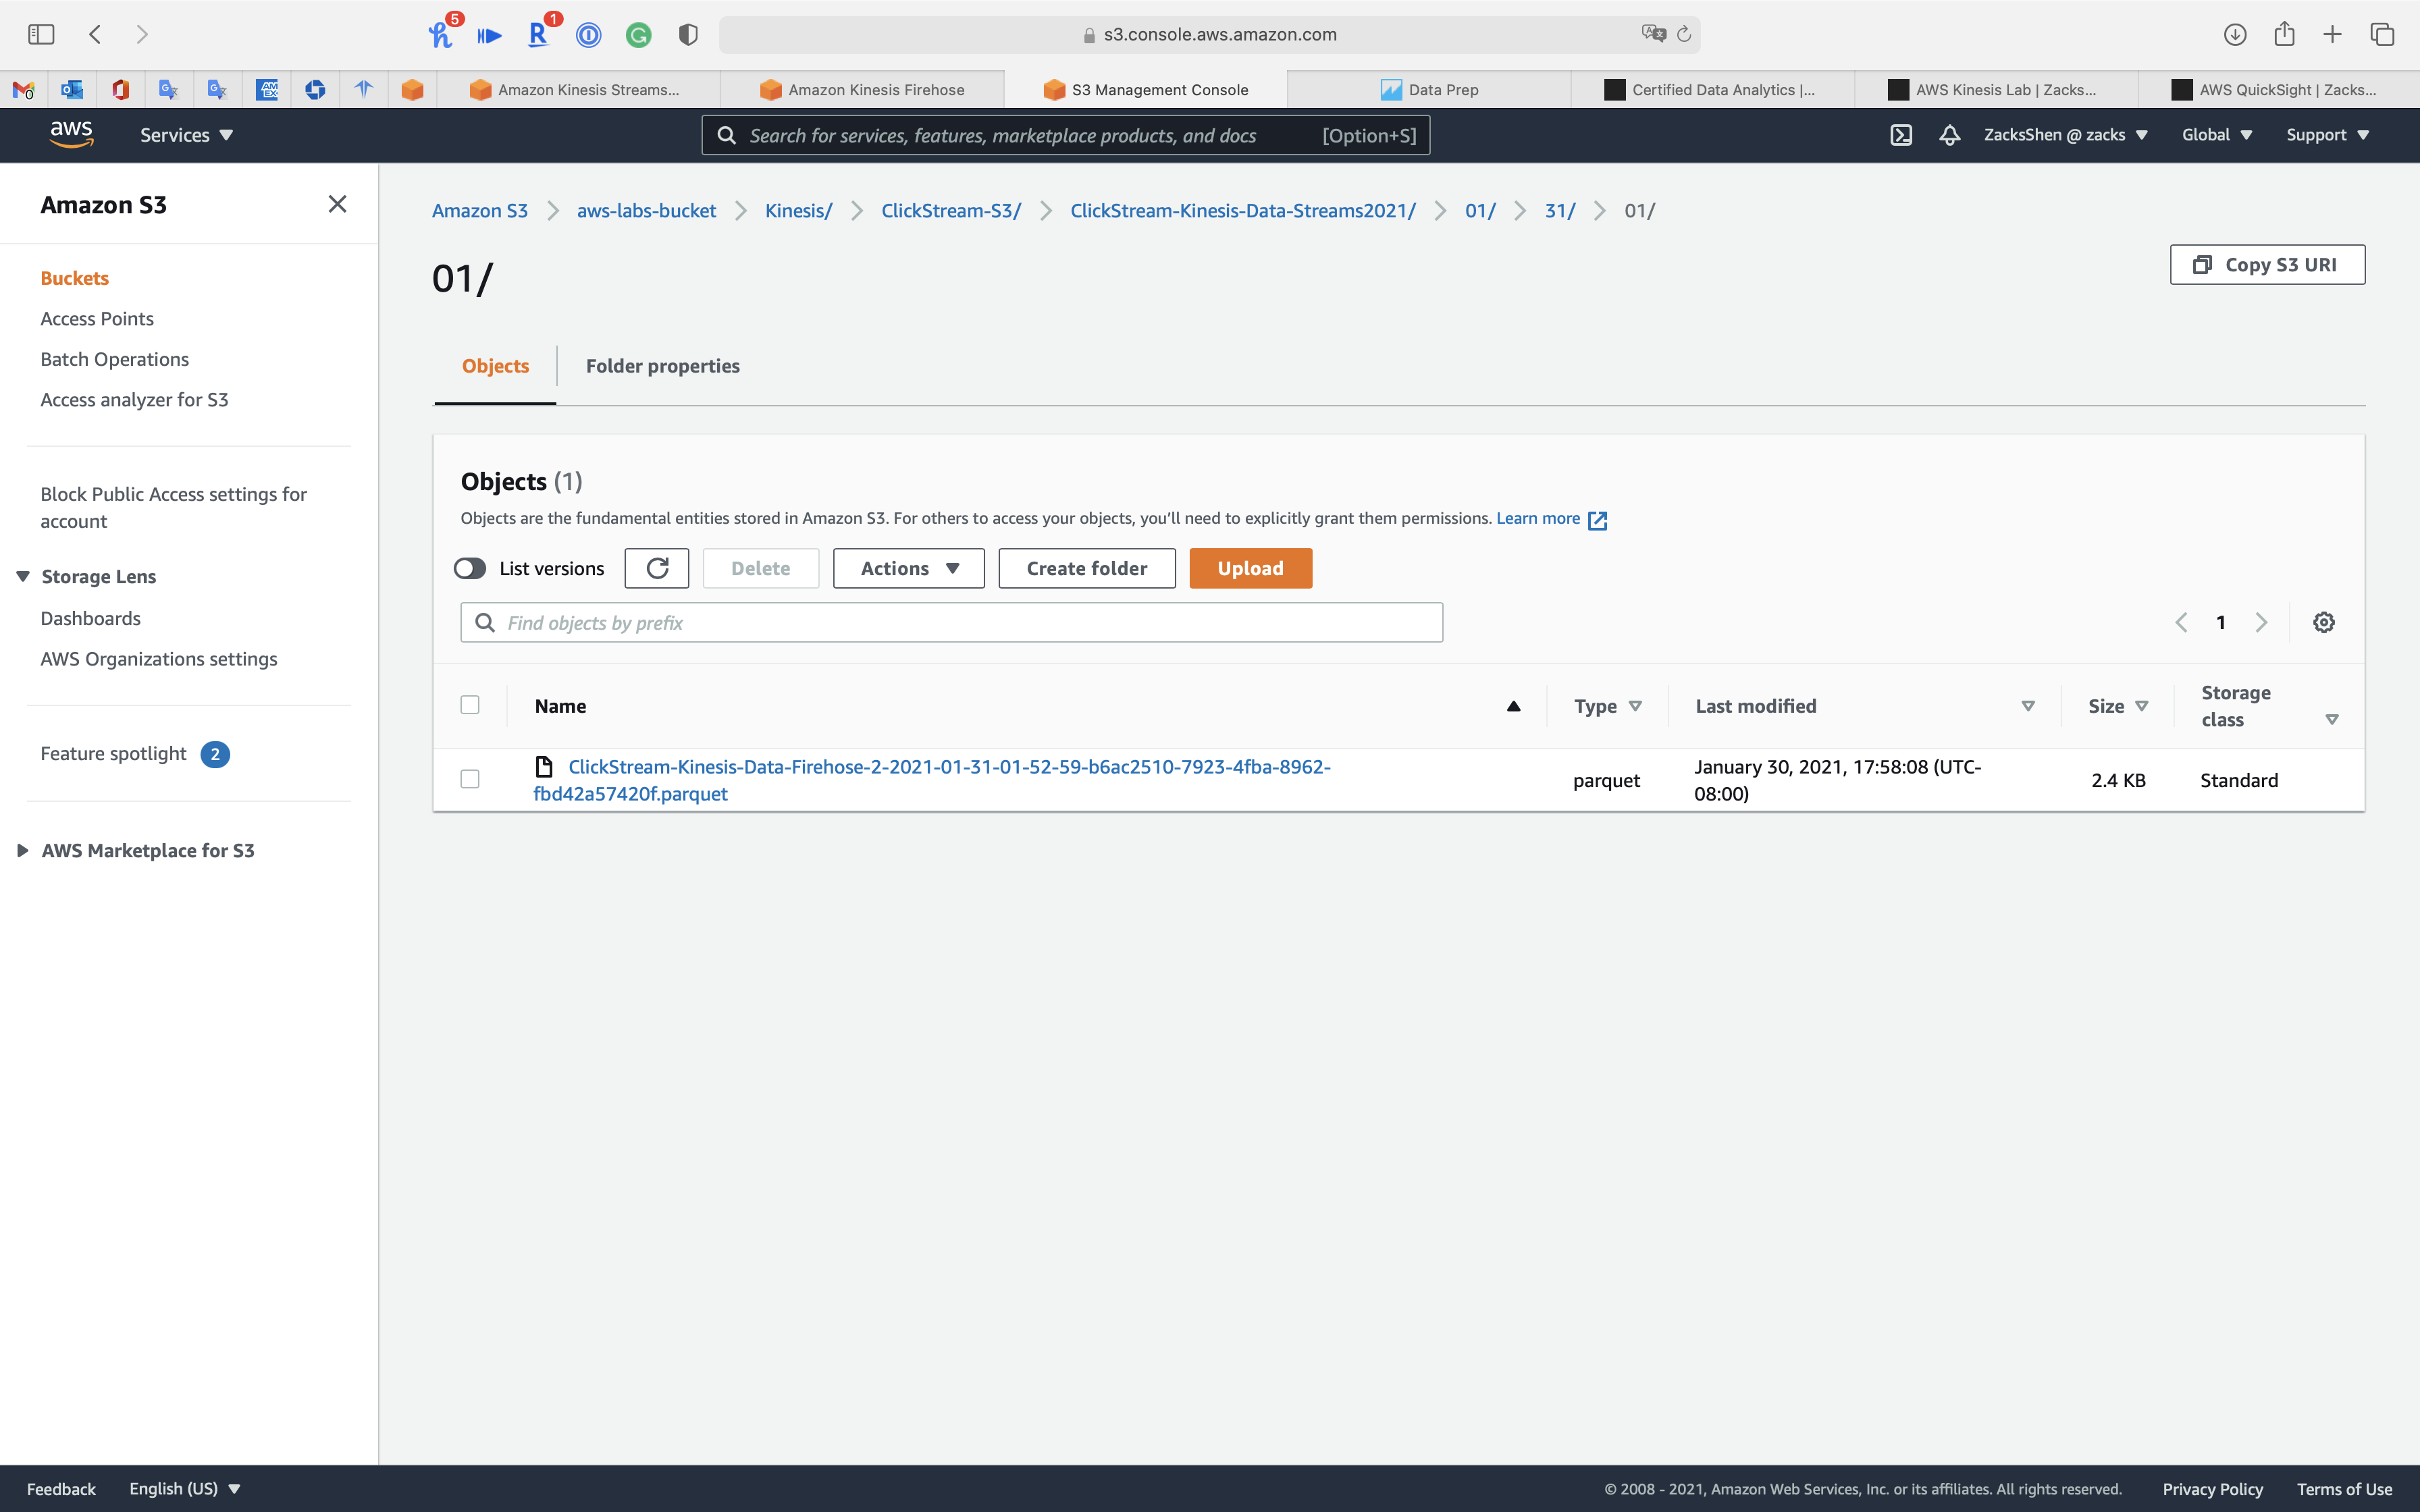
Back to QuickSight window.
Refresh the web page, you can see QuickSight has already loaded the data in S3 through Athena.
Click on Save & visualize on the top and middle page
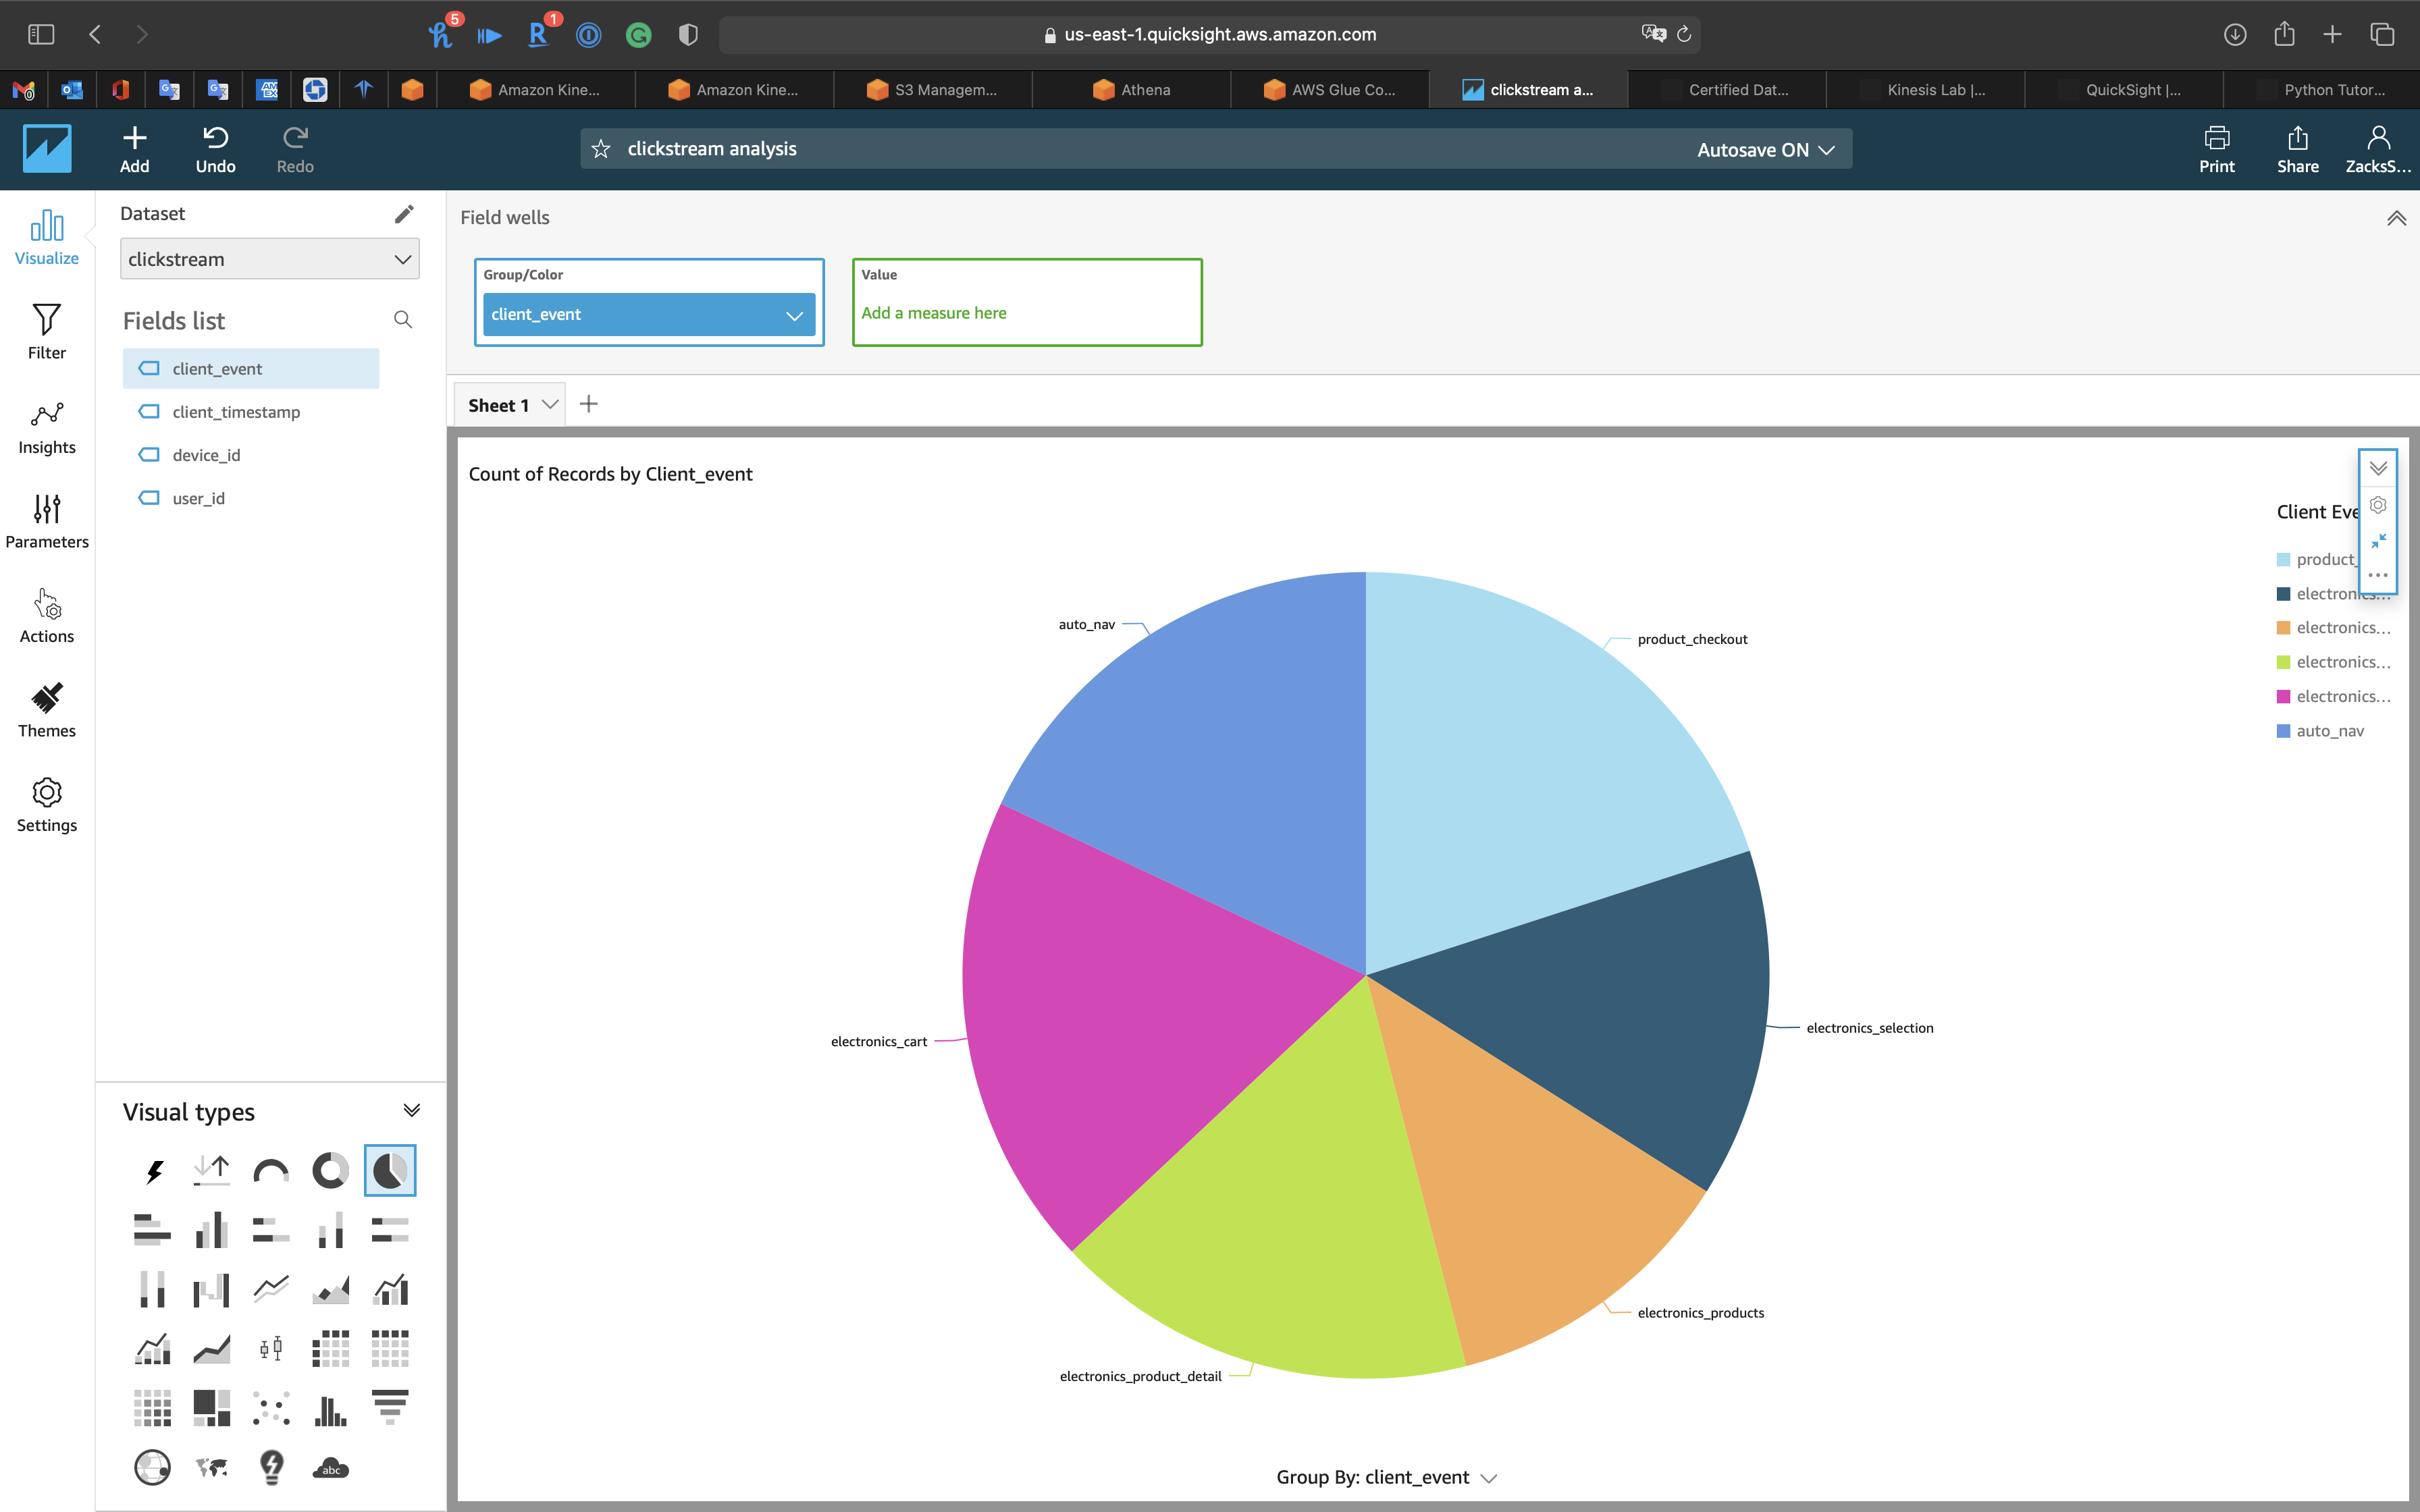
Pie Chart
- Visual types:
AutoGraph - Group/Color:
client_event
AutoGraph
- Visual types:
AutoGraph - Y axis:
client_event
You can see the Histogram of client_event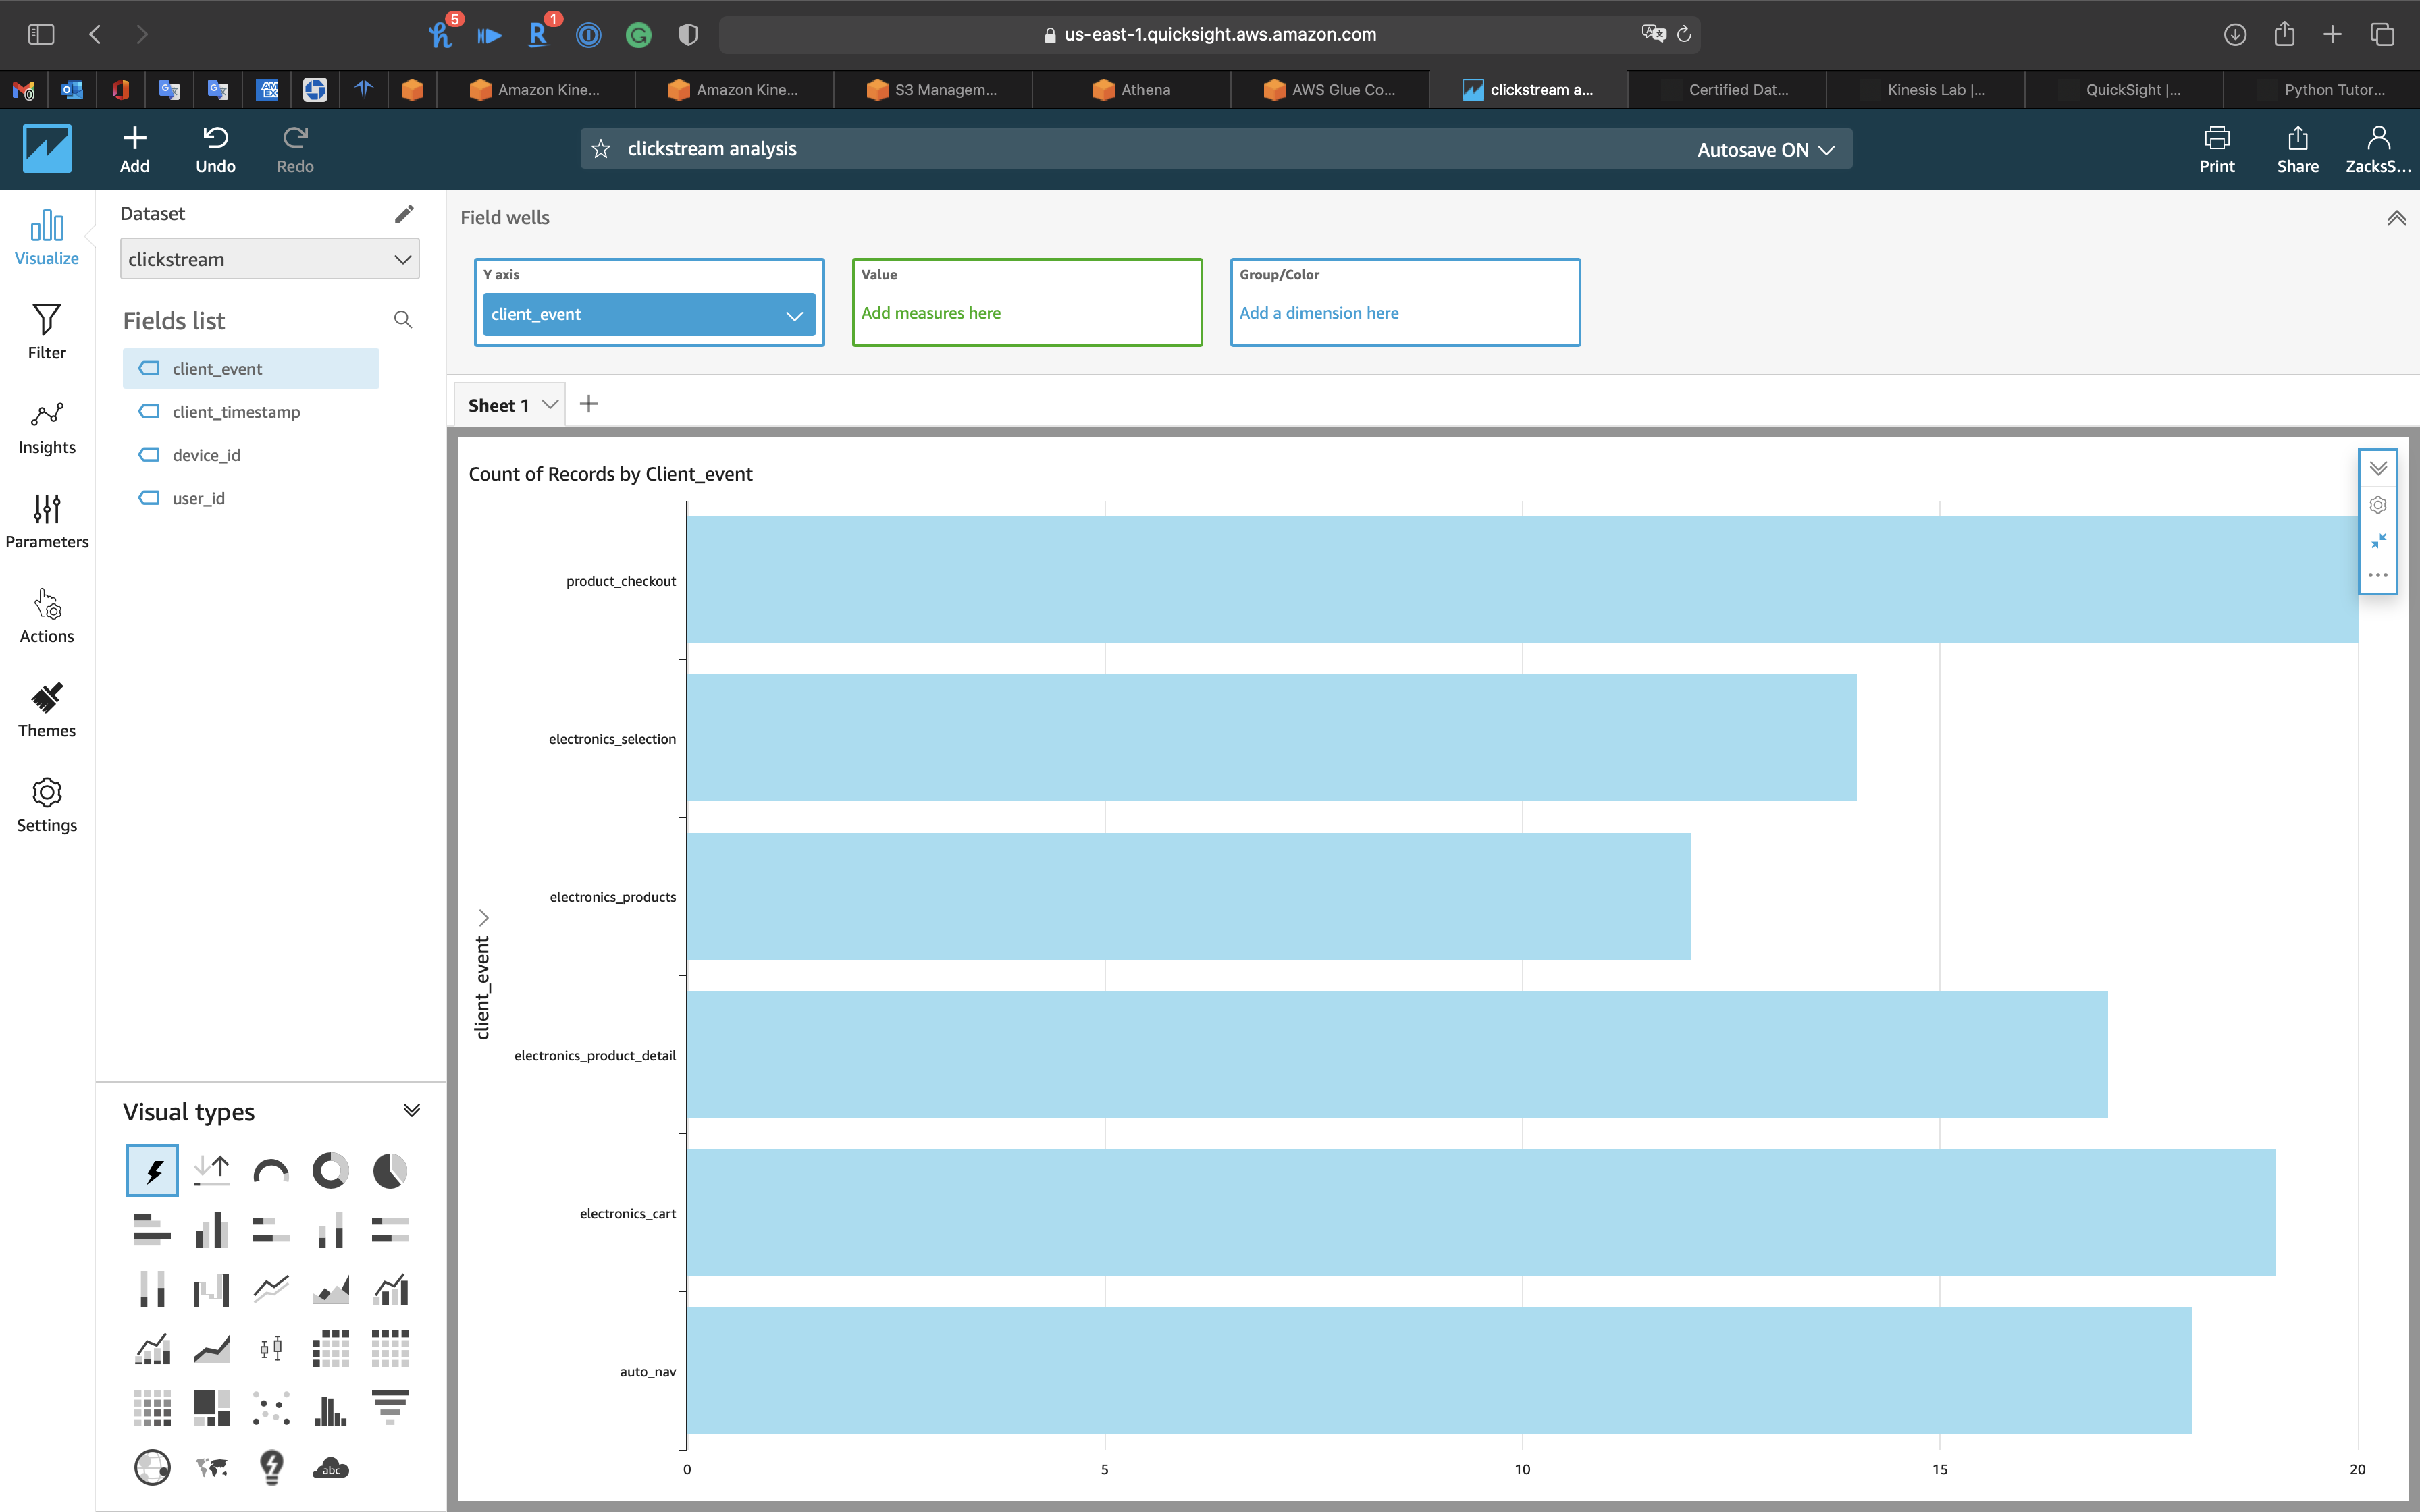
Try to modify the ClickStream-Kinesis-Data-Streams and let number_of_records = 200, then save the program.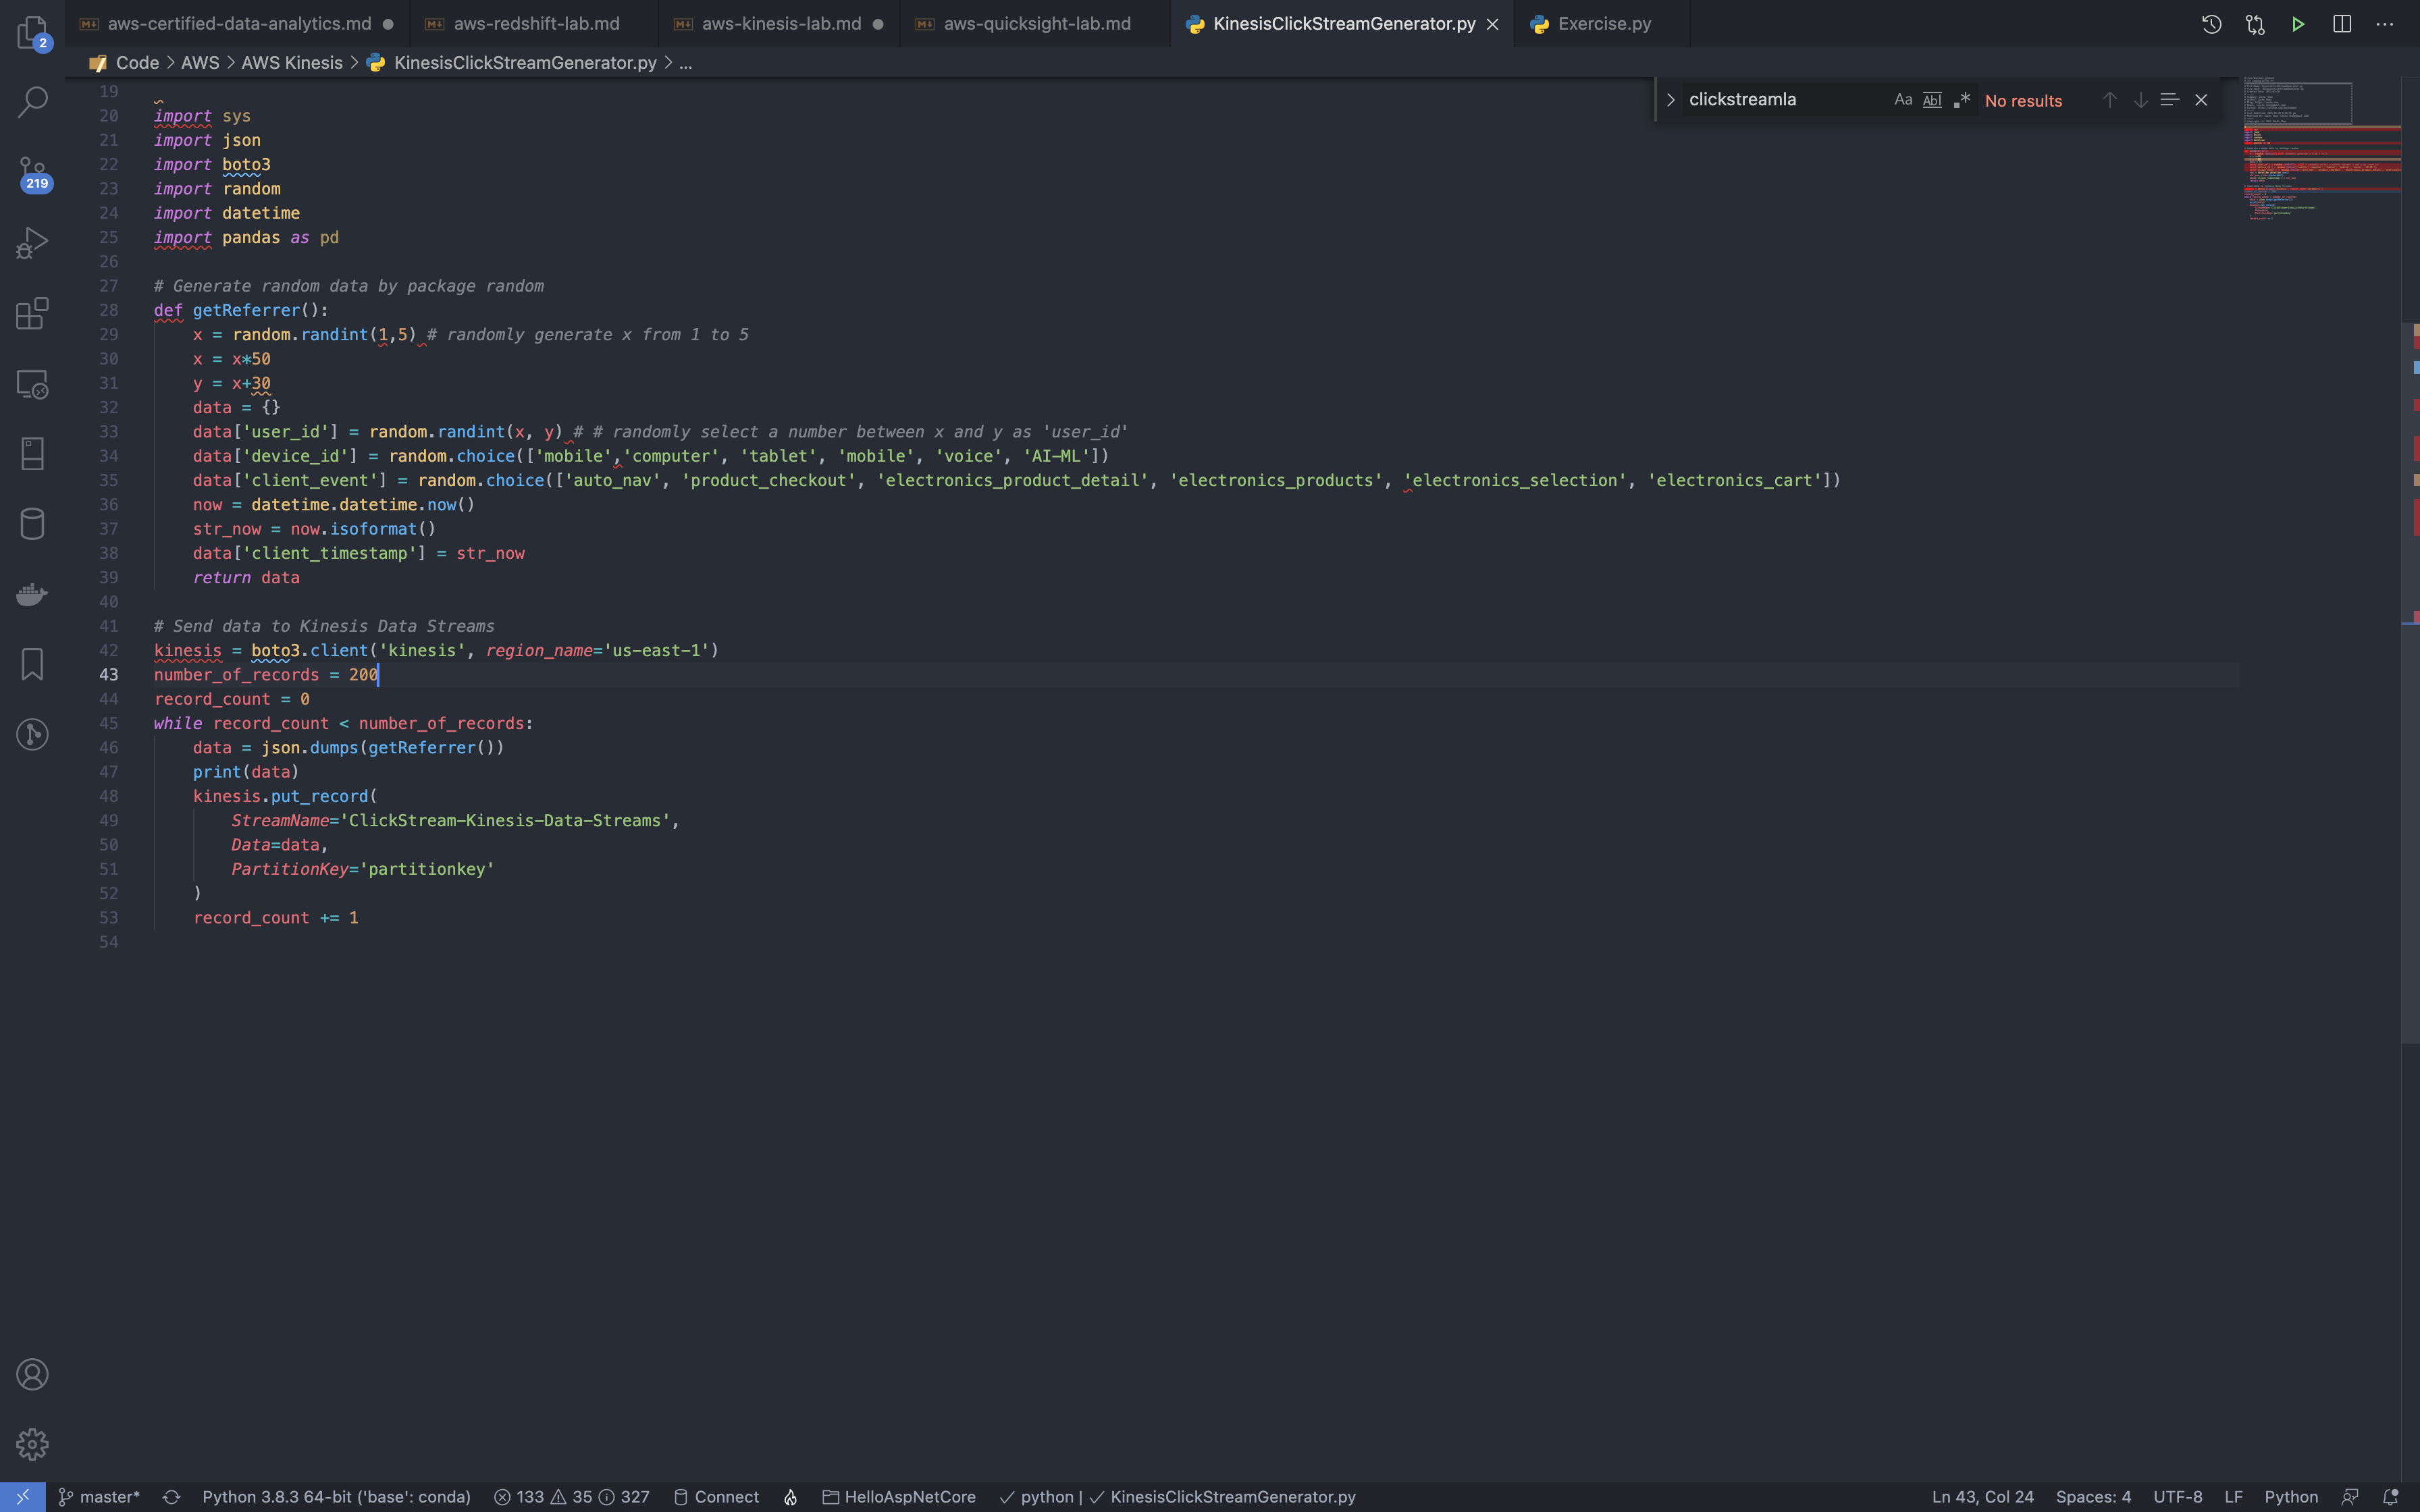
Run ClickStream-Kinesis-Data-Streams again.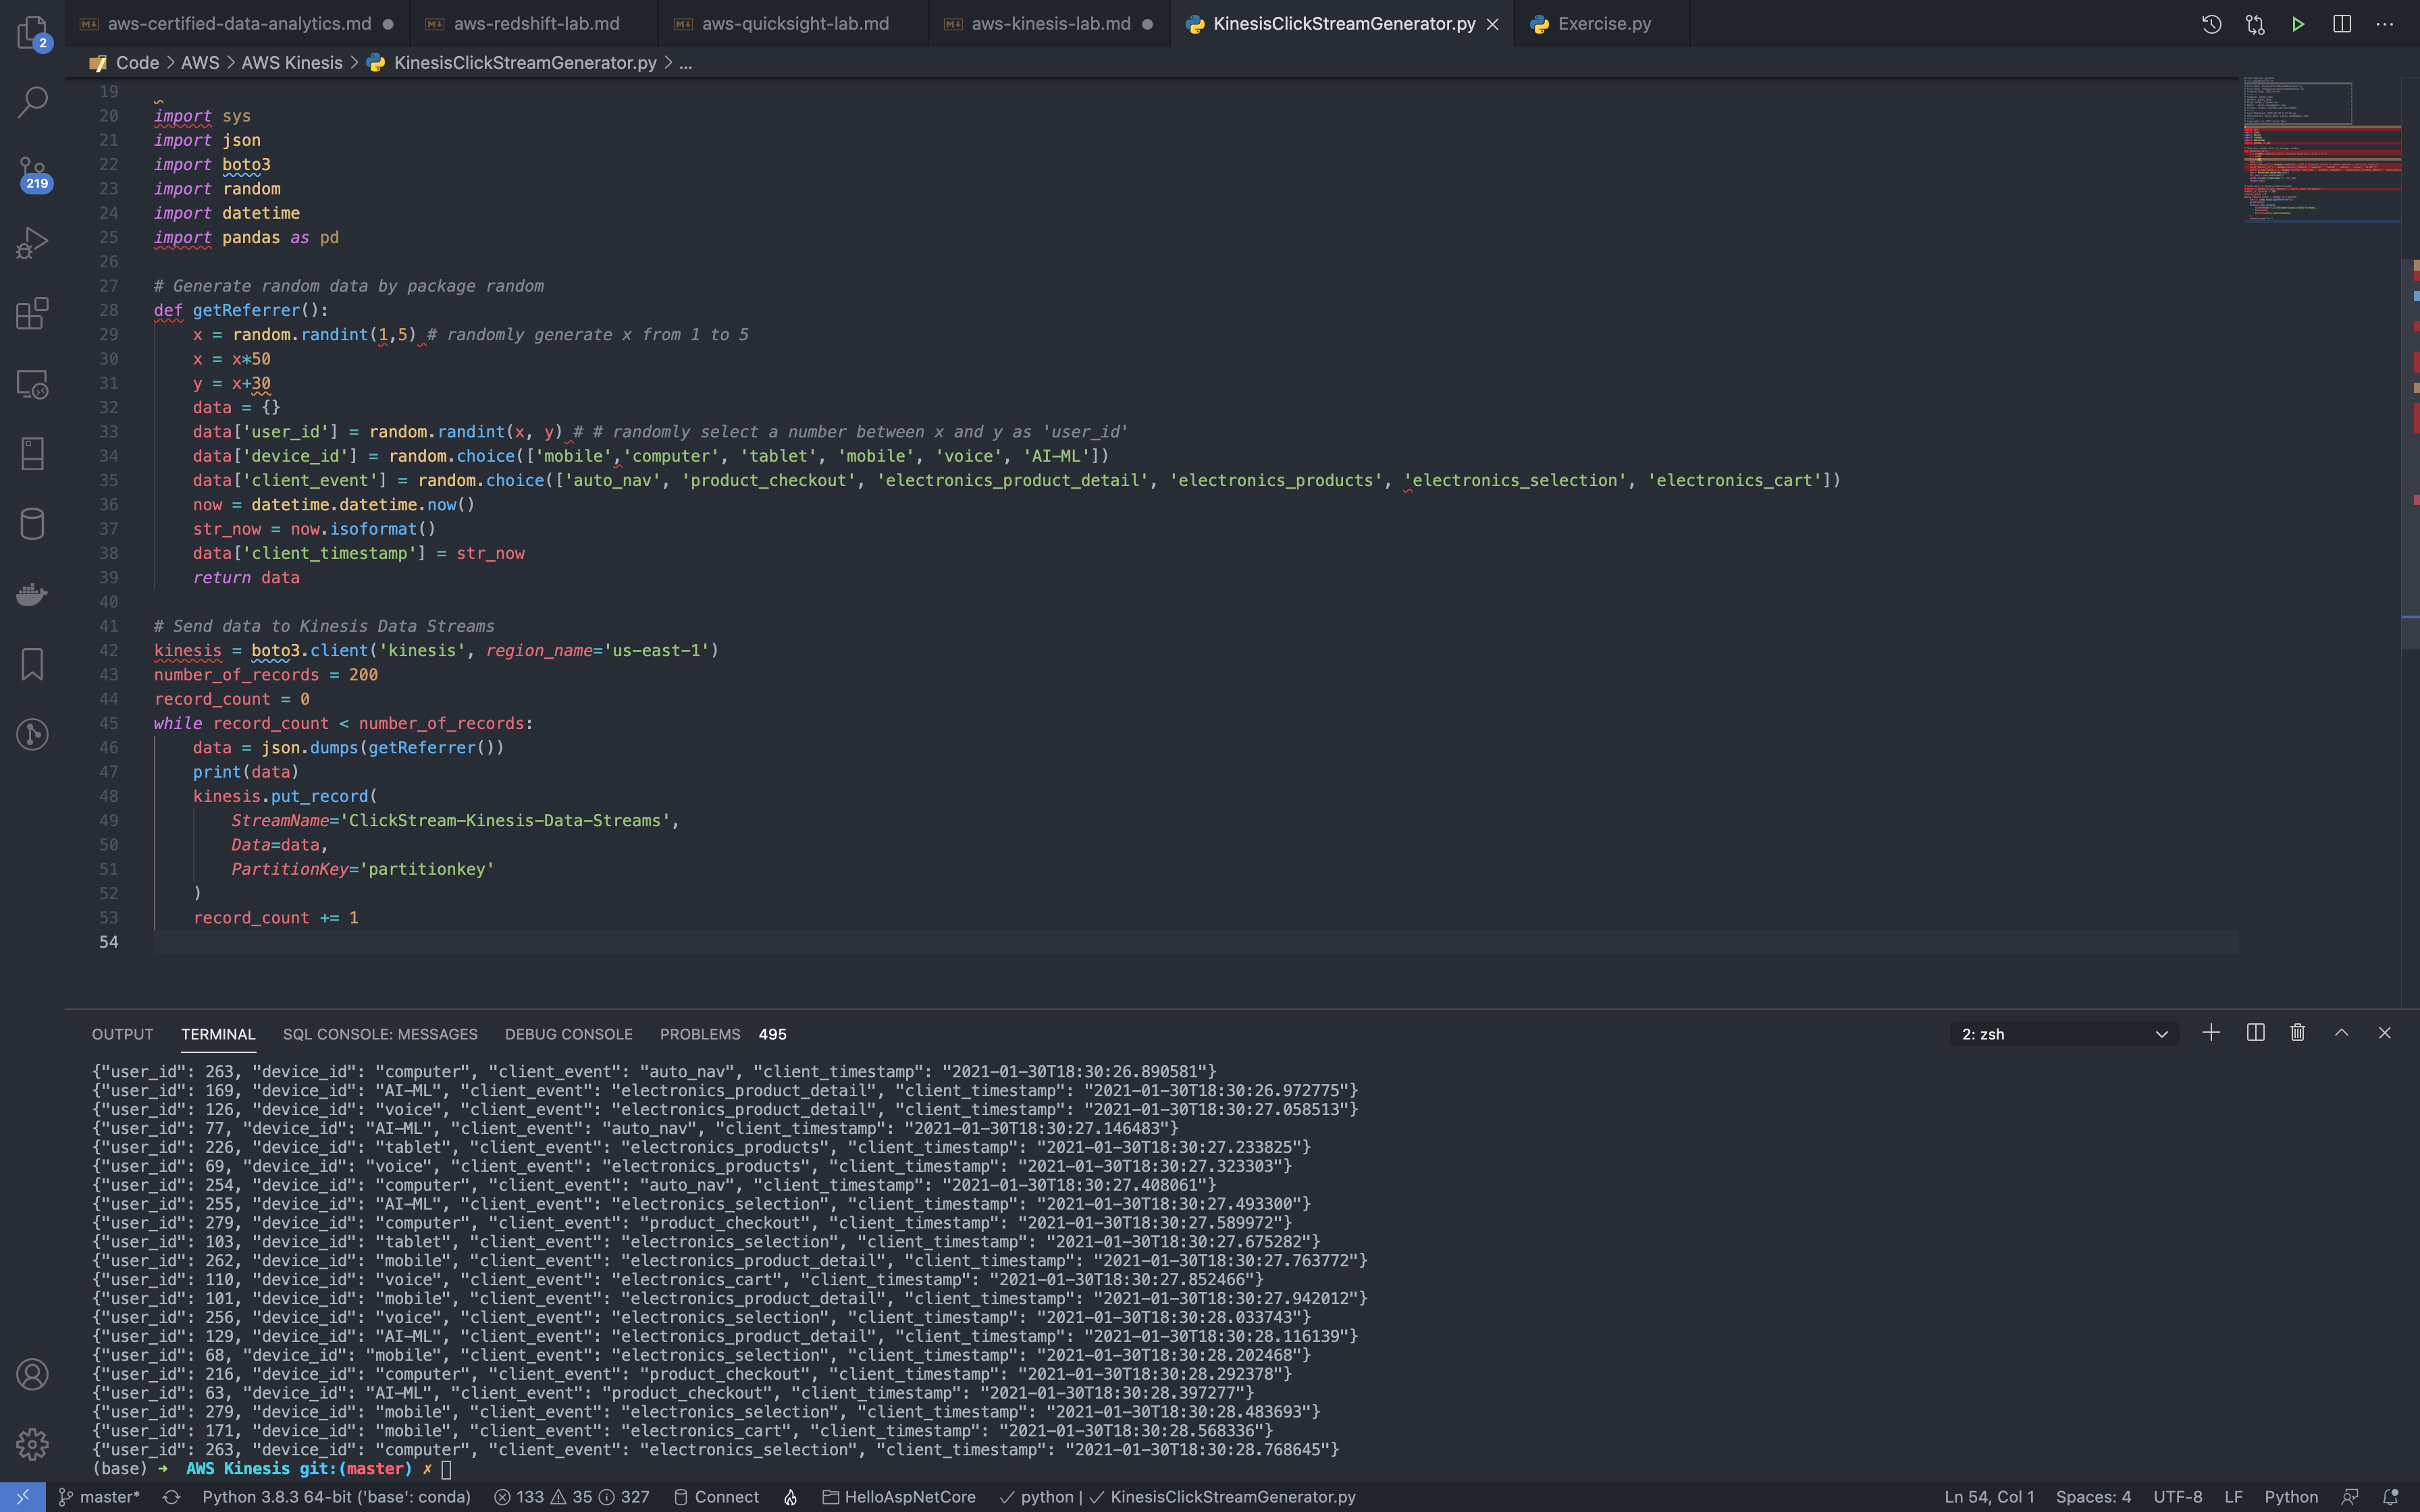
Wait several minutes and refresh the QuickSight page.
See we have 300 records now.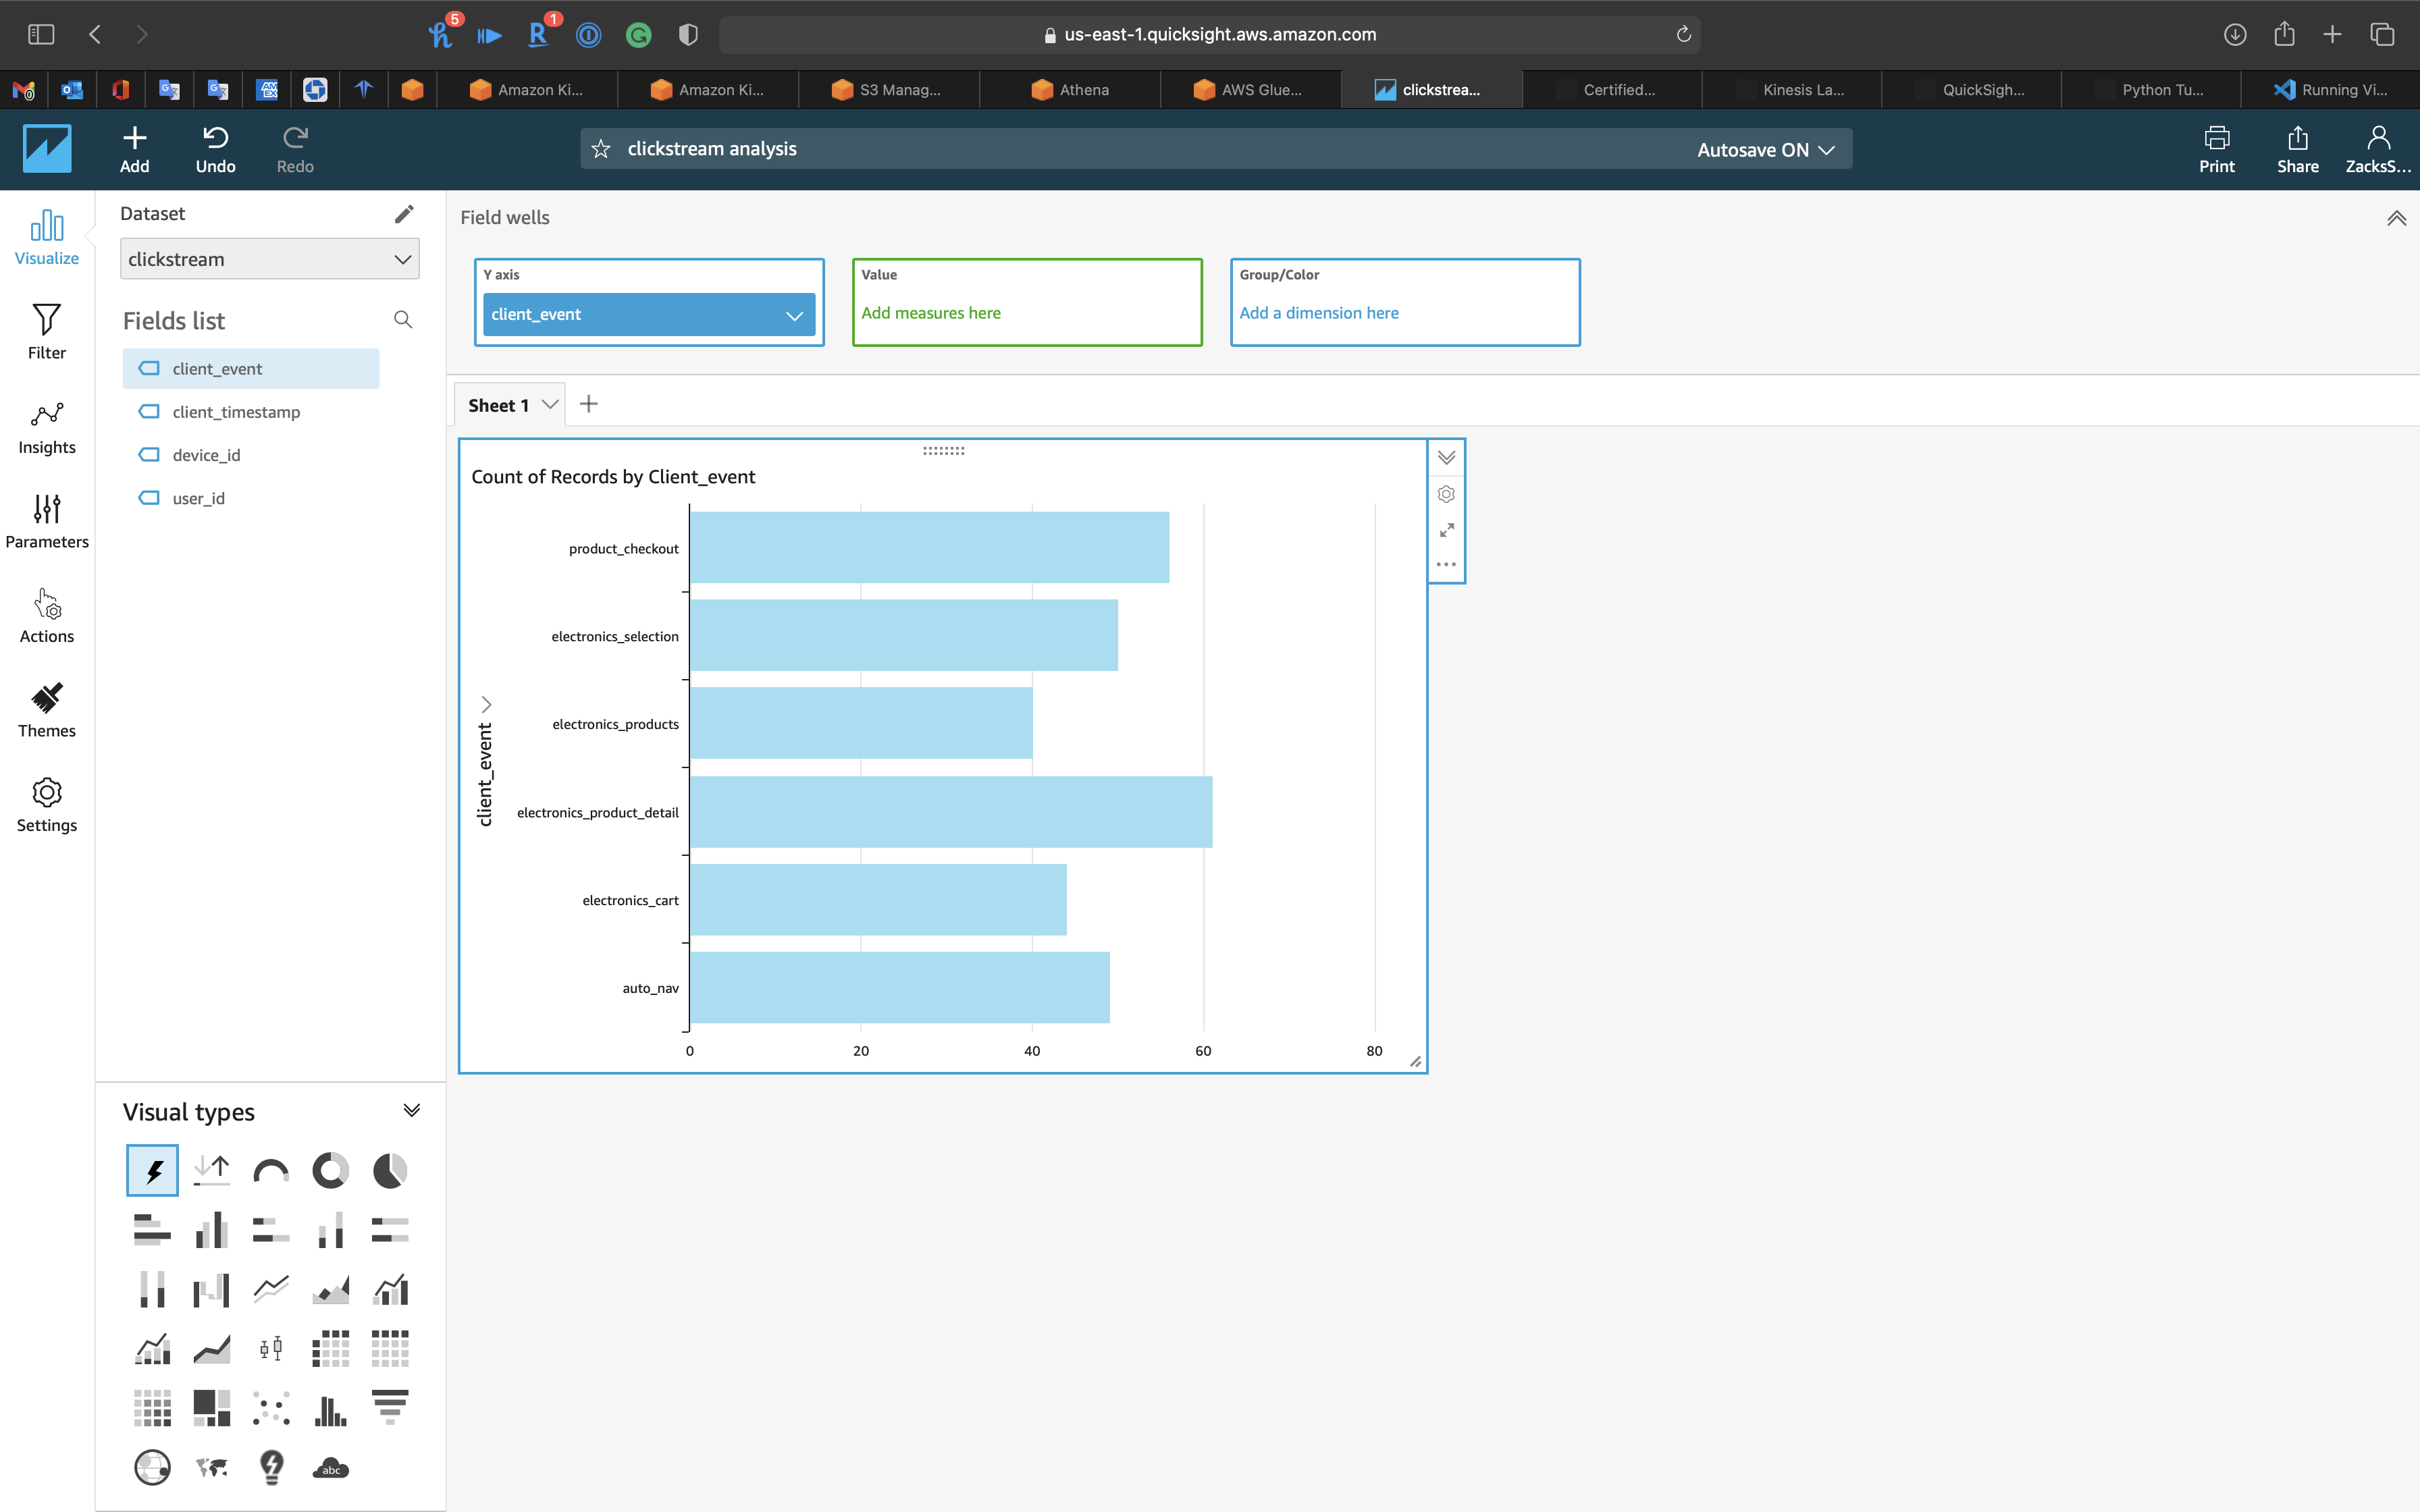
Kinesis Data Analytics
Kinesis Data Analytics Lab
Core Components
- Kinesis
- Kinesis Data Streams
- Kinesis Data Analytics
- Kinesis Data Firehose
- S3
- QuickSight
Lab Details
- Kinesis
- Kinesis Data Streams: Collect streaming data
- Kinesis Data Analytics: Get actionable insights from streaming data with serverless Apache Flink
- Kinesis Data Firehose: Ingest streaming data
- S3: Data storage
- QuickSight: Analyze and visualize data
Task Details
- Kinesis Data Analytics with Kinesis Data Streams, Kinesis Data Firehose, and QuickSight
- Create a Kinesis Data Analytics application
- Create a Kinesis Data Streams stock ticker stream
- Create a Kinesis Firehose delivery stream to store on S3
- Create manifest file for our S3 data store
- Use QuickSight to visualize our stock ticker data
Diagram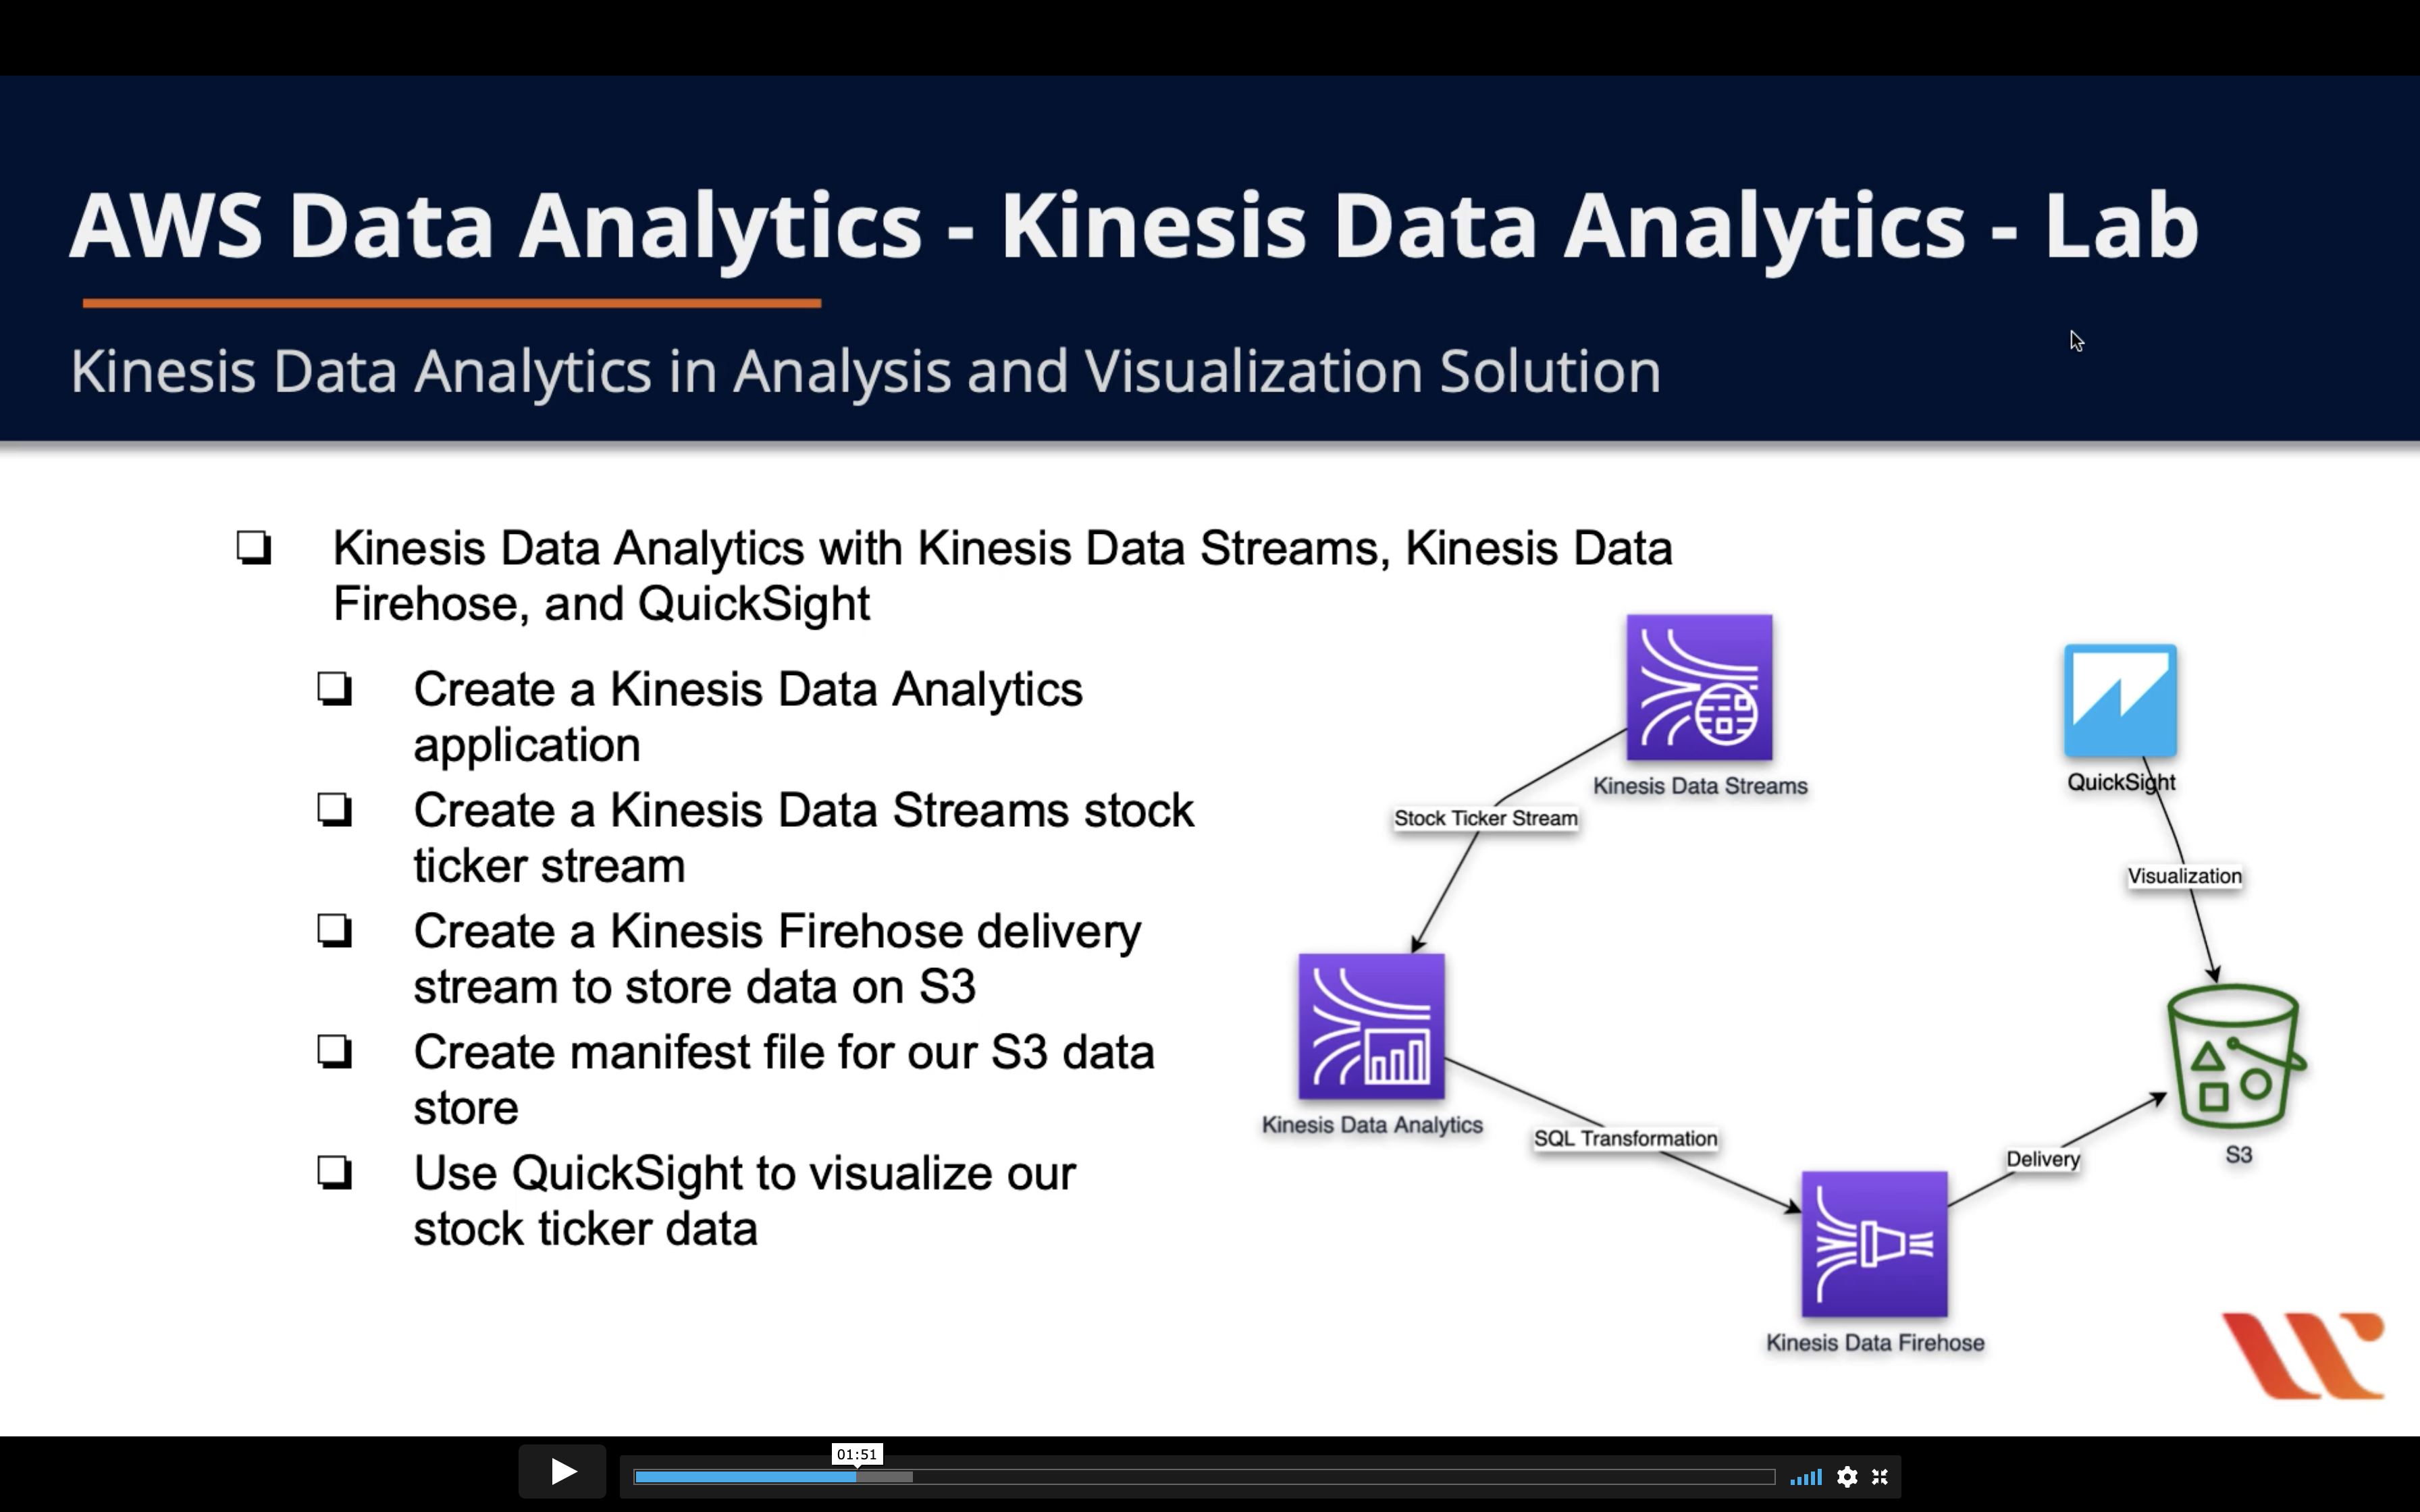
Kinesis Data Firehose Configuration
Services -> Kinesis
Click on Create delivery stream
Step 1: Name and source
- Delivery stream name:
kinesis-analytics-demo-firehose - Source:
Direct PUT or other sources
Click on Next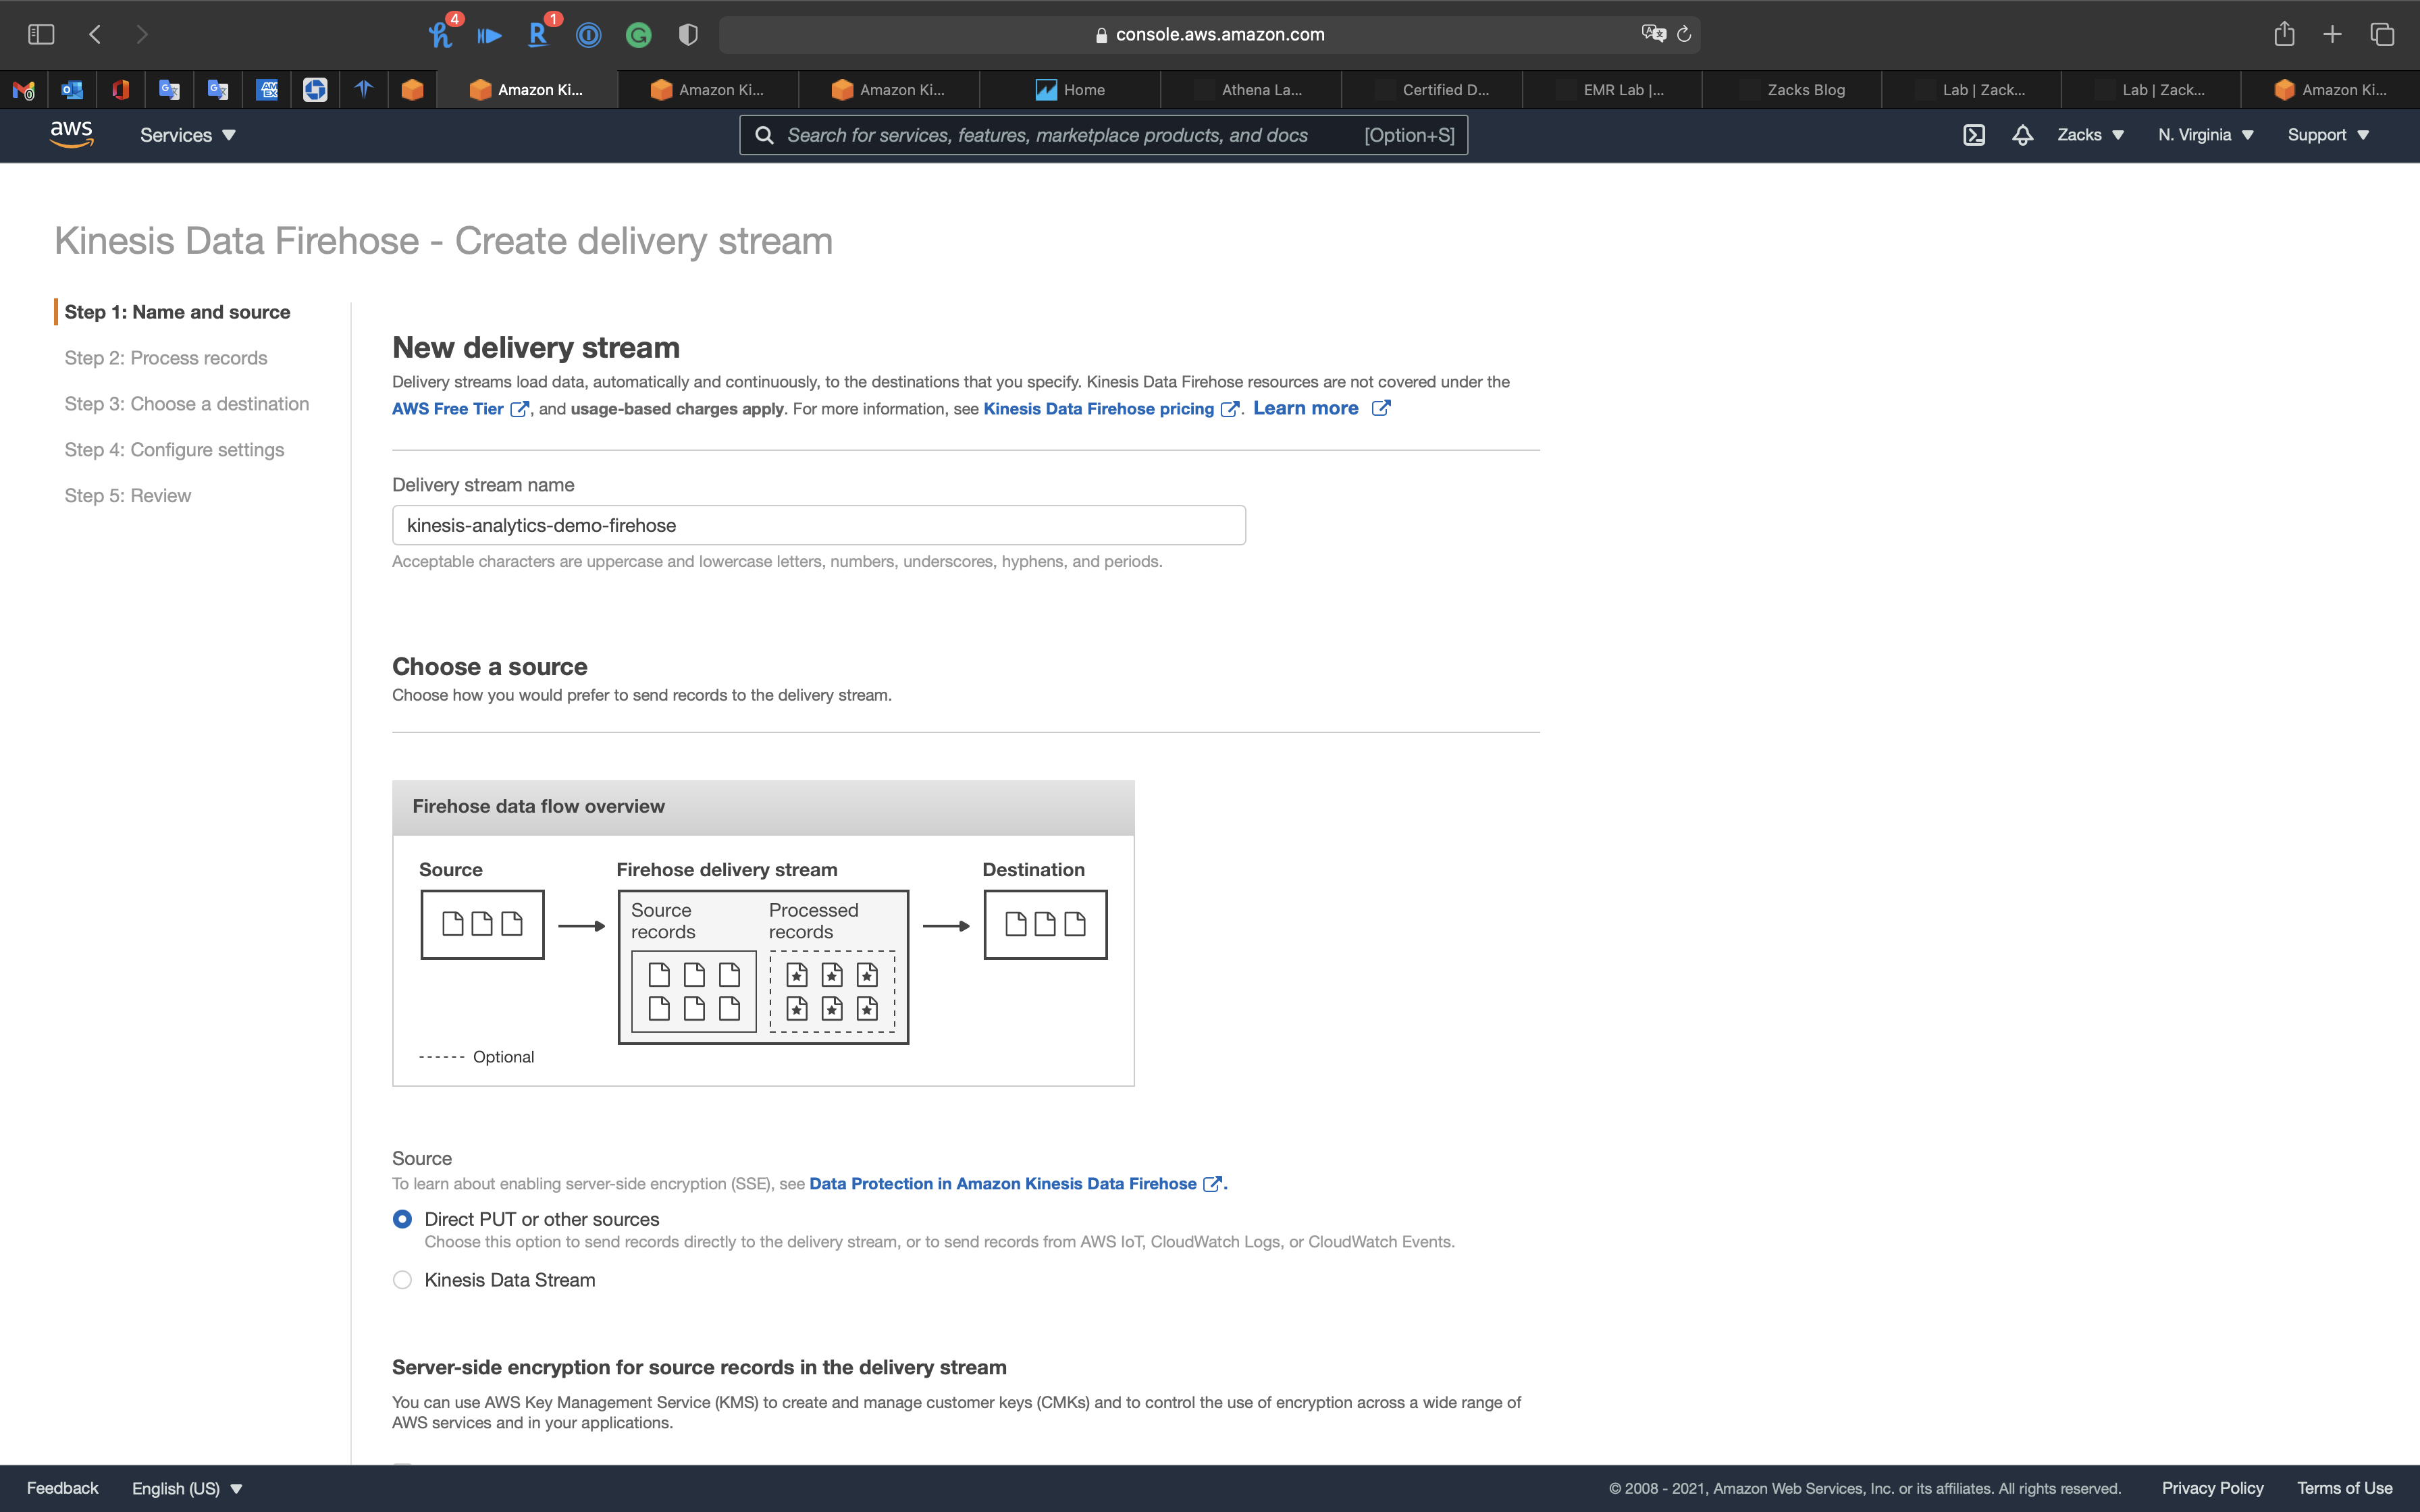
Step 2: Process records
- Data transformation:
Disabled - Record format conversion:
Disabled
Click on Next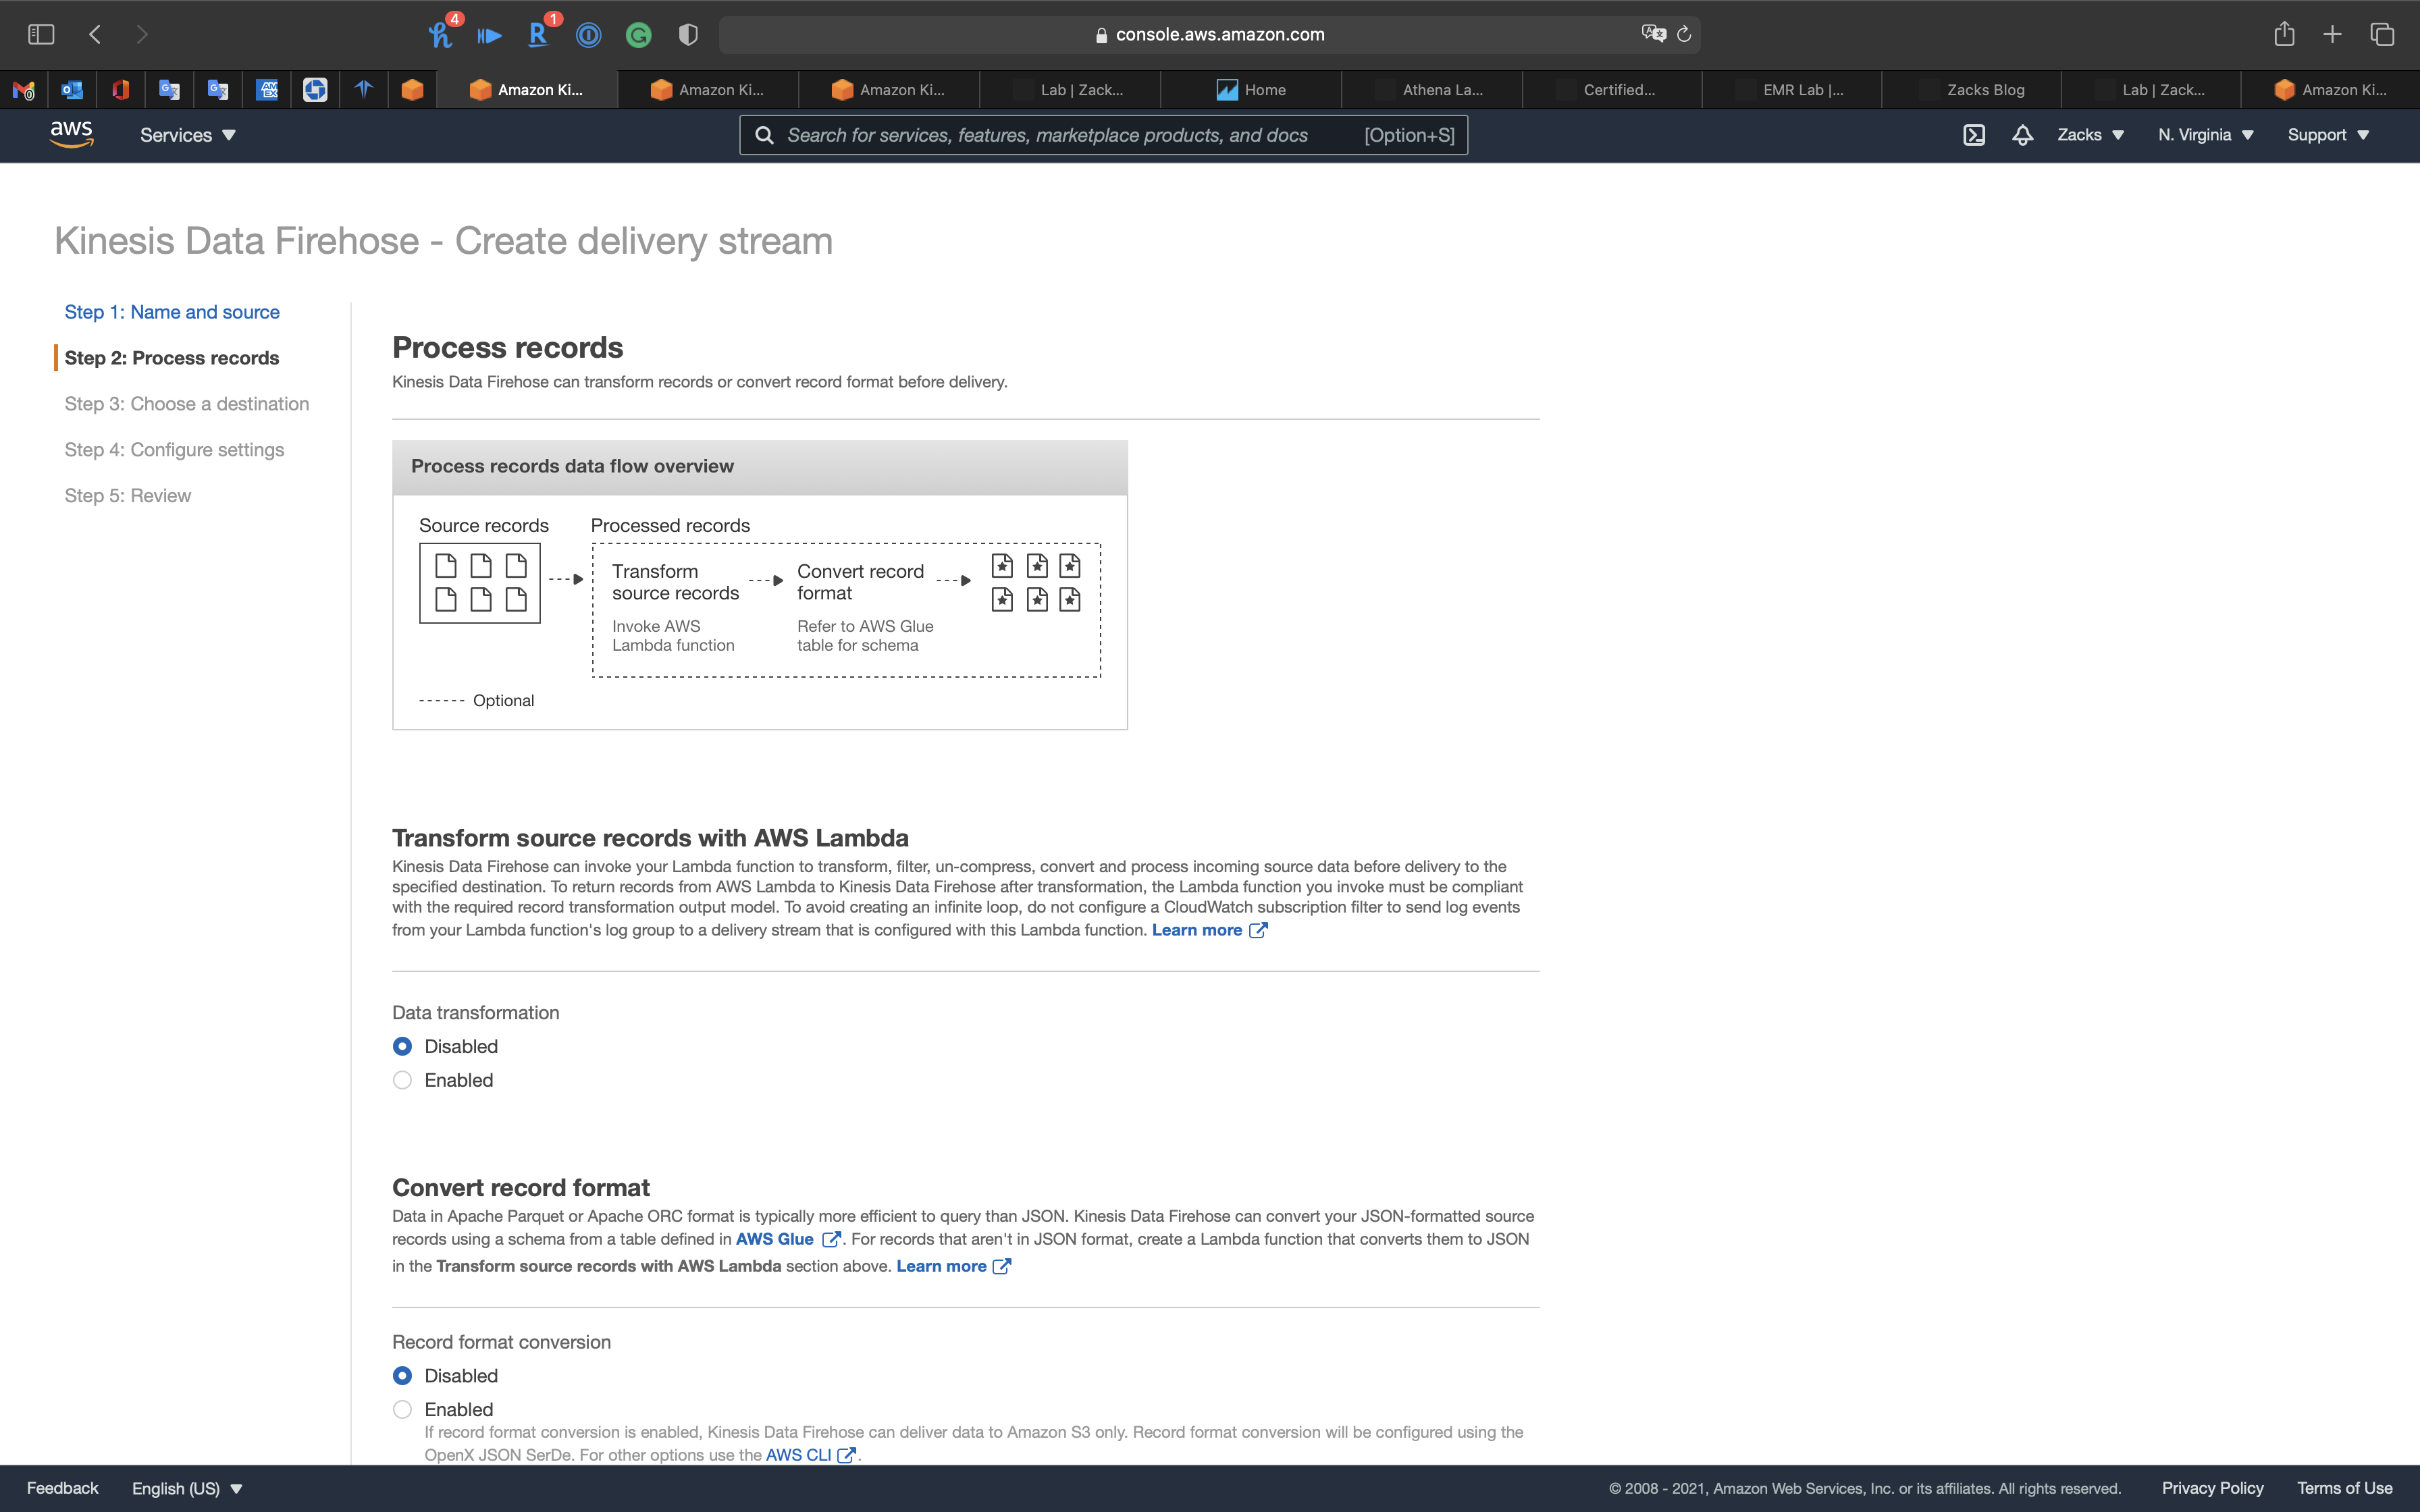
Step 3: Choose a destination
- Destination:
Amazon S3 - S3 bucket: choose your bucket
- Backup S3 bucket prefix - optional:
kinesis-analytics-demo - Backup S3 bucket error prefix - optional:
kinesis-analytics-demo-error
Click on Next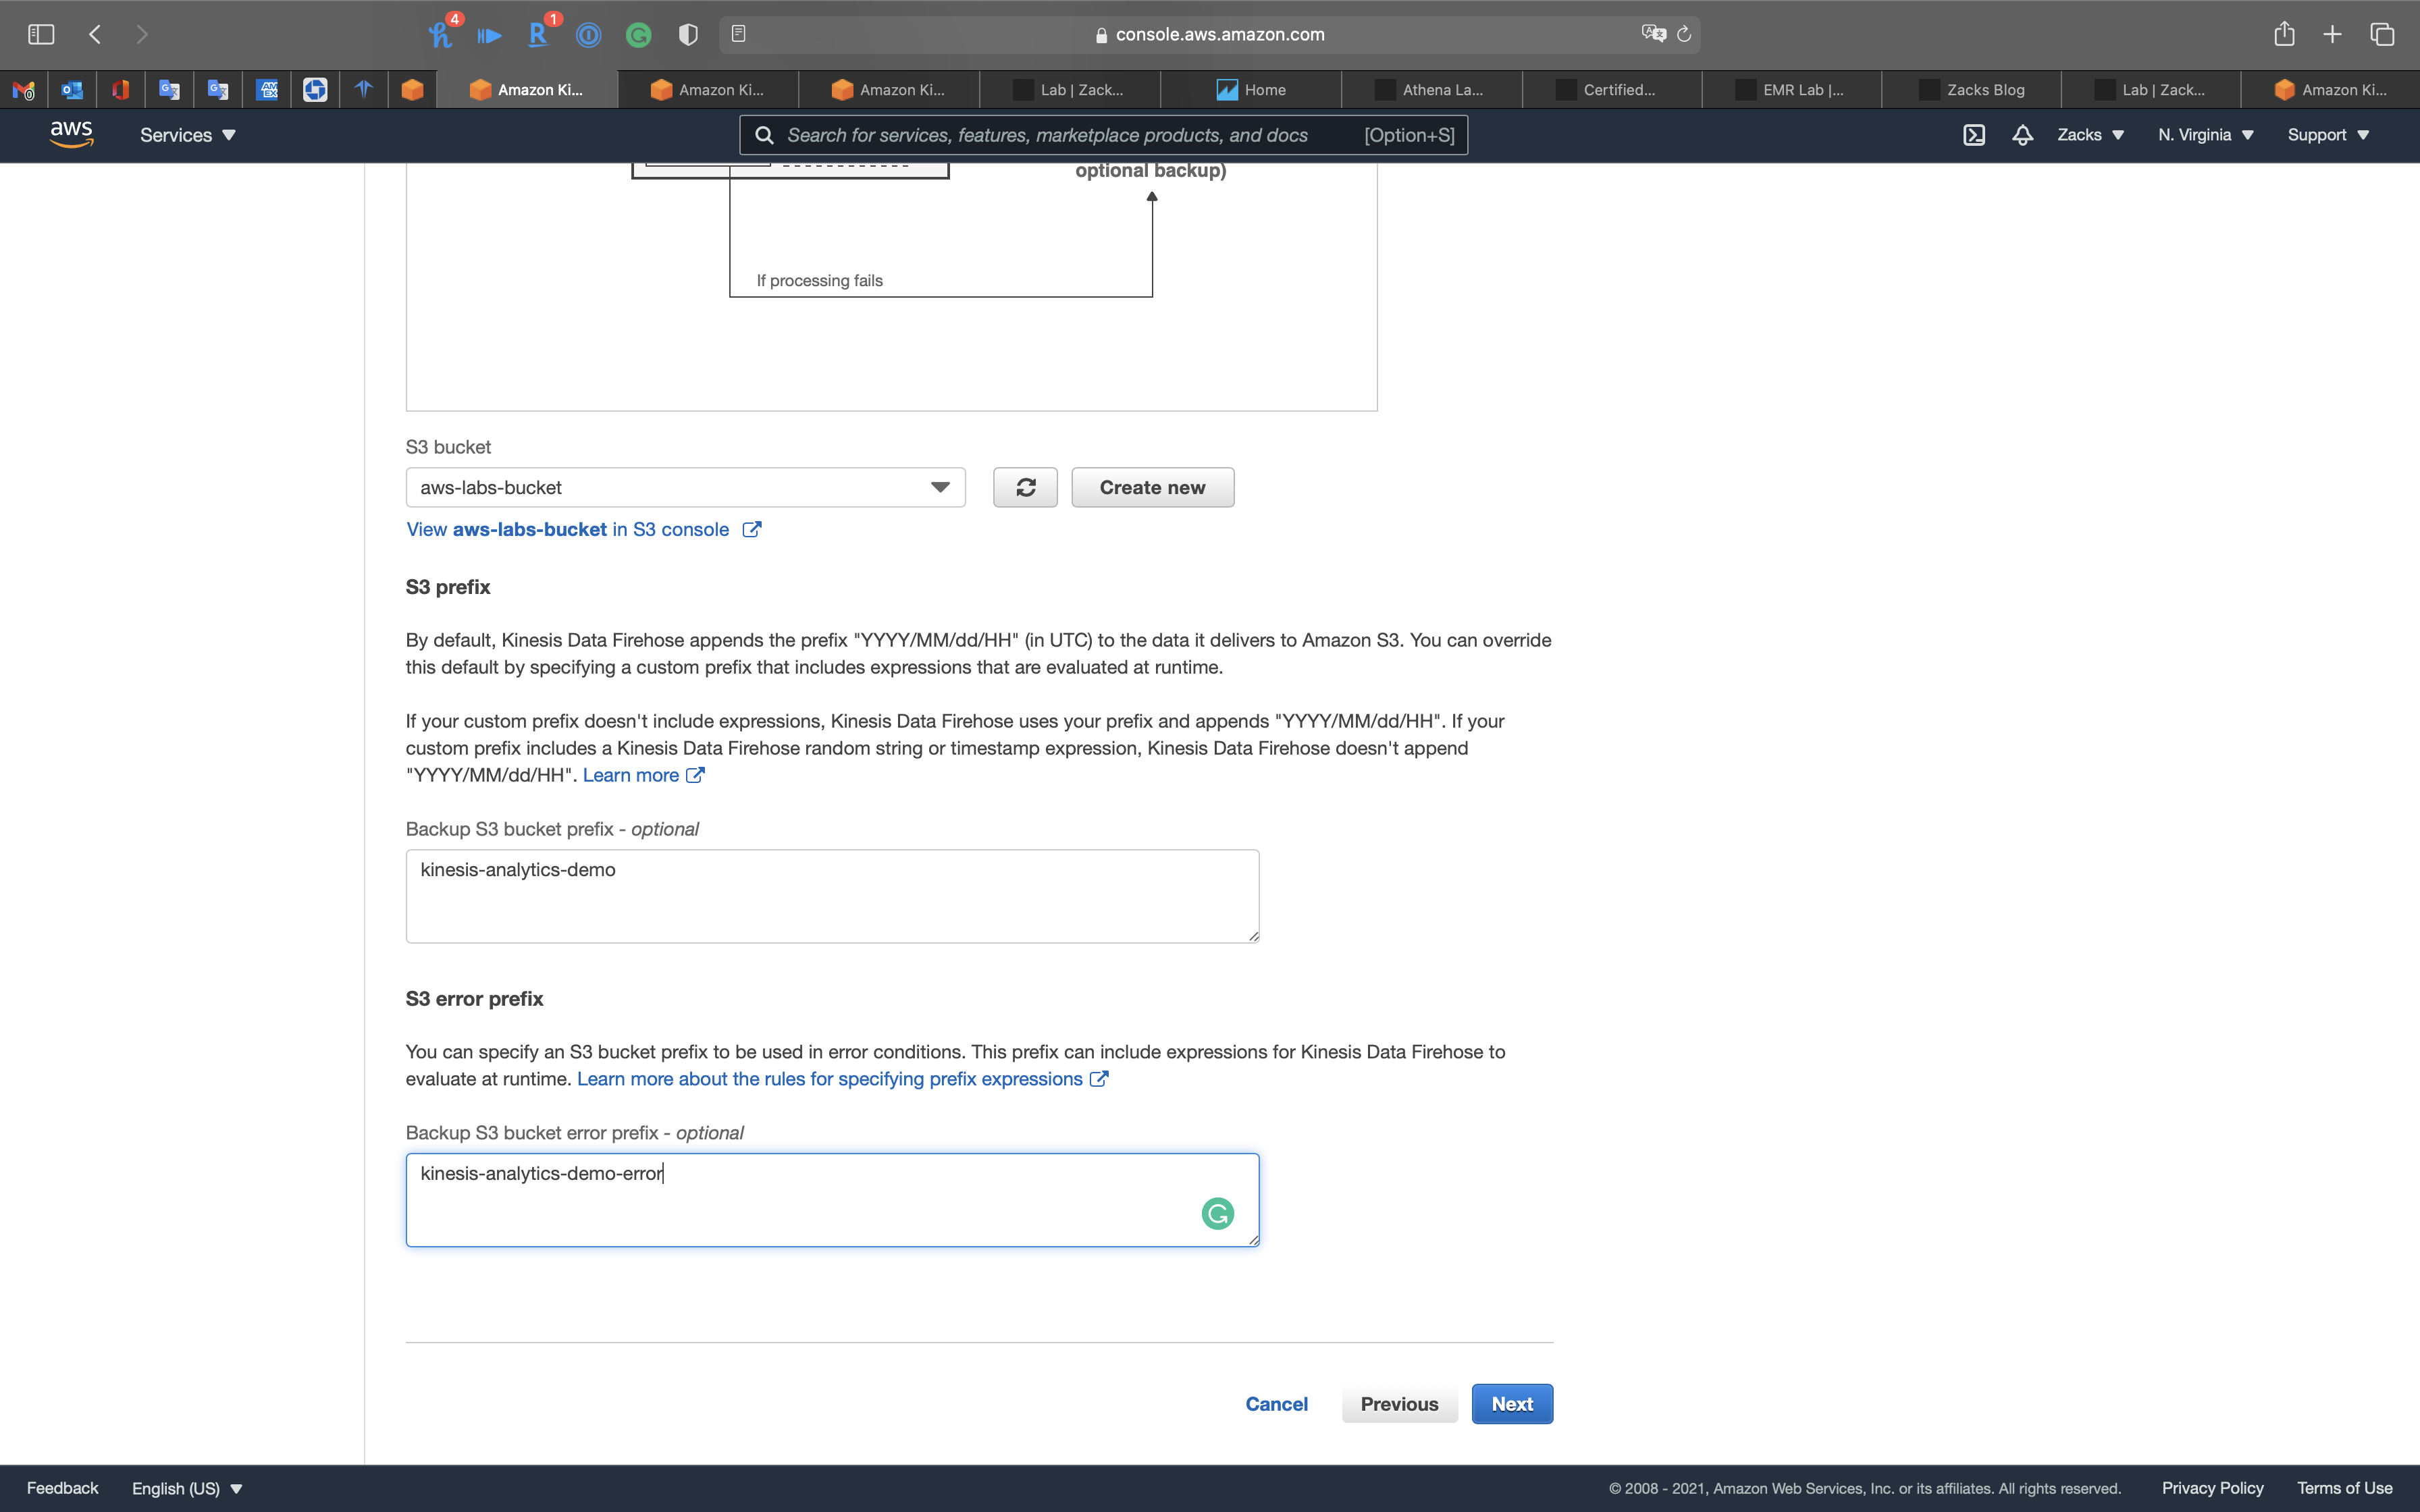
Step 4: Configure settings
- Buffer interval:
60
Click on Next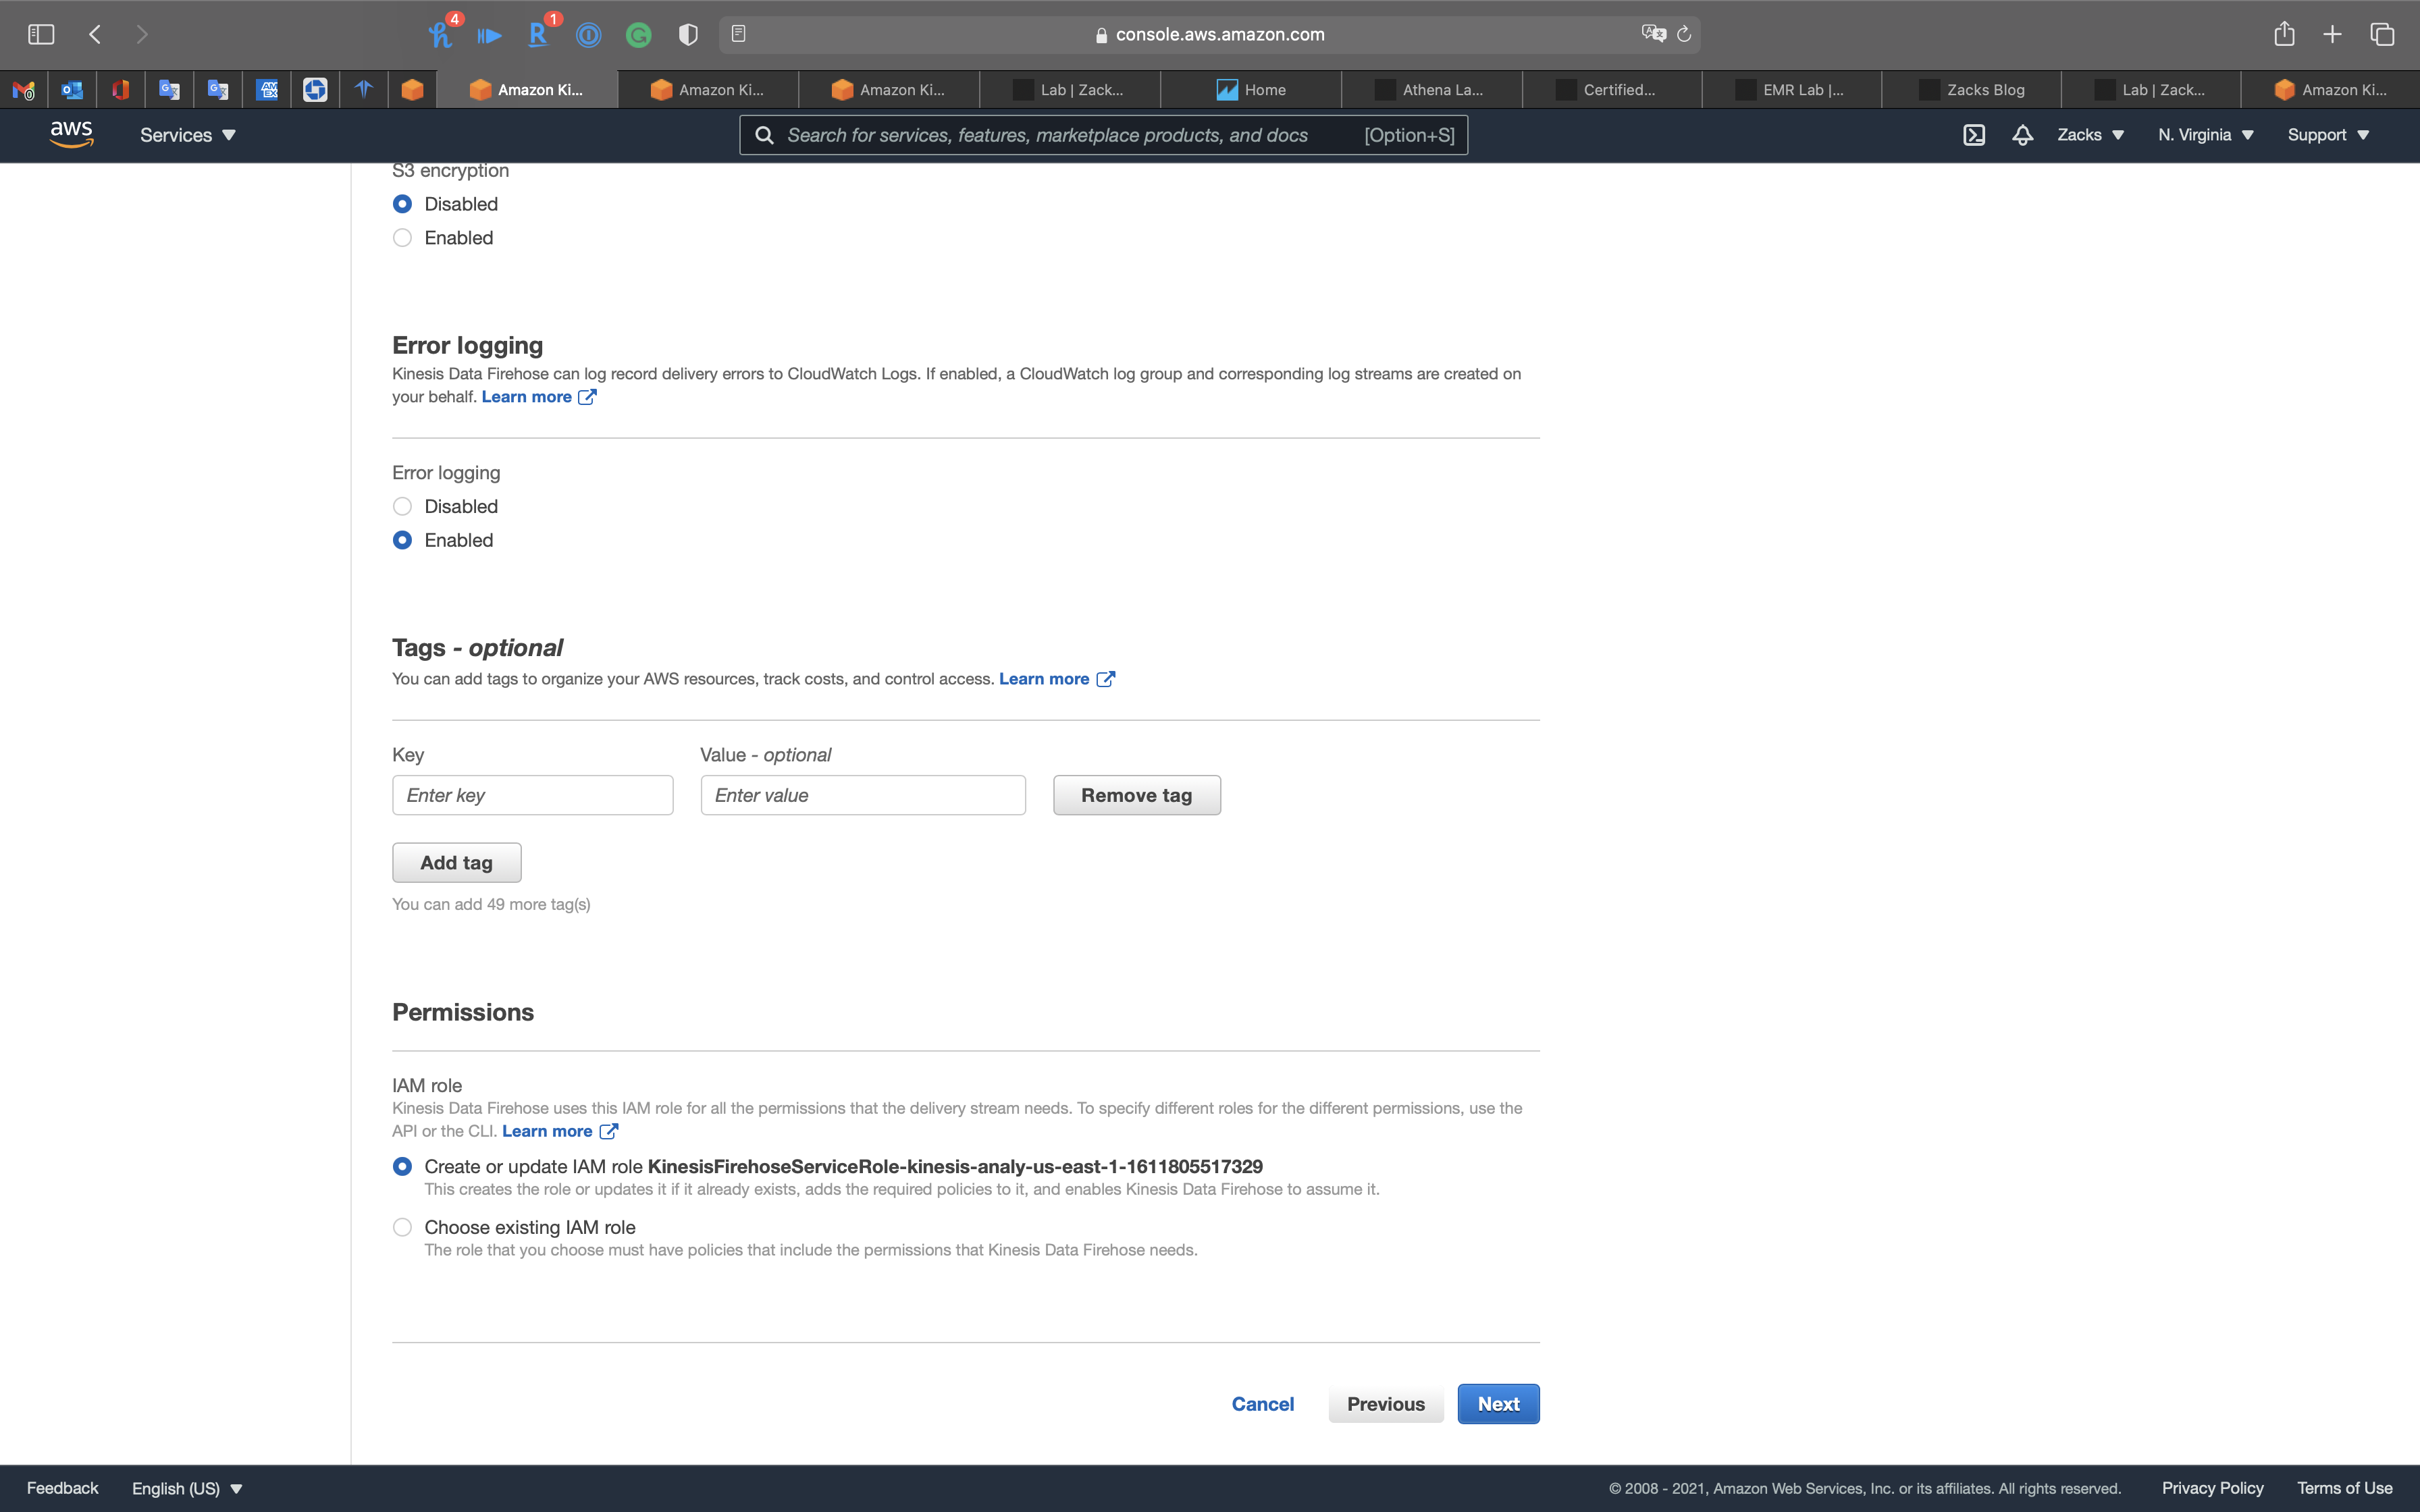
Step 5: Review
Click on Create delivery stream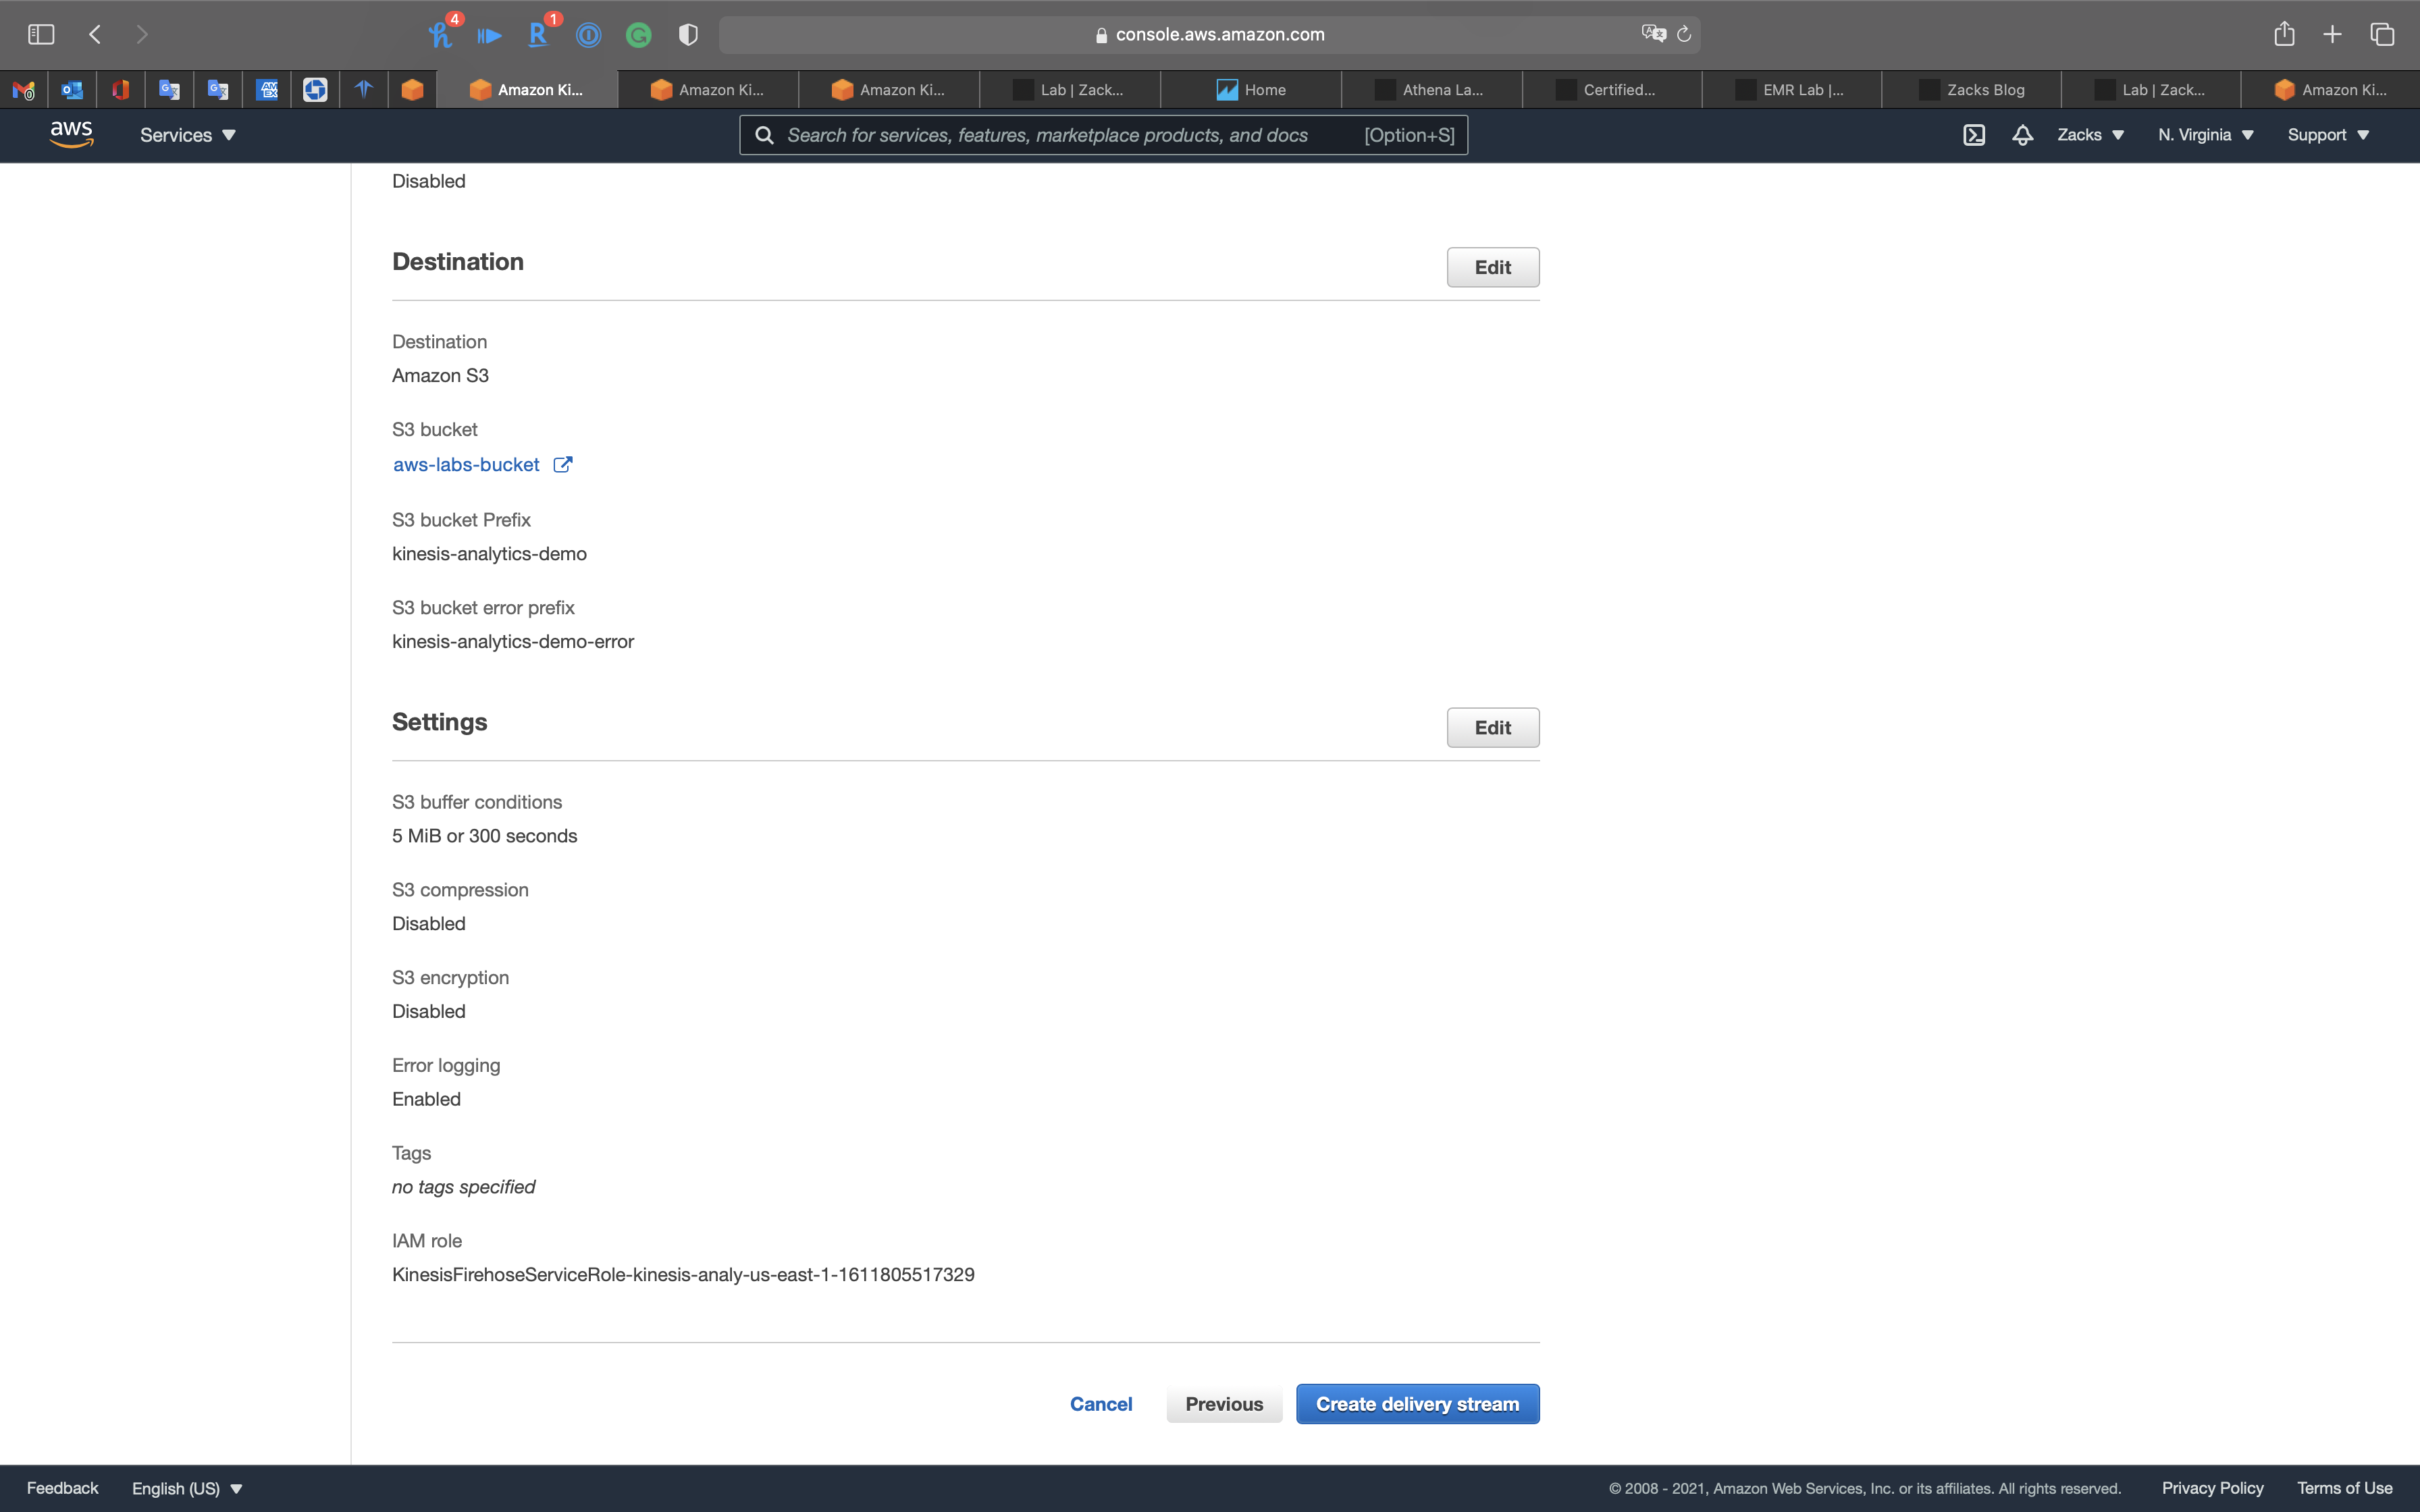
Kinesis Data Analytics Configuration
Services -> Kinesis
Click on Analytics applications
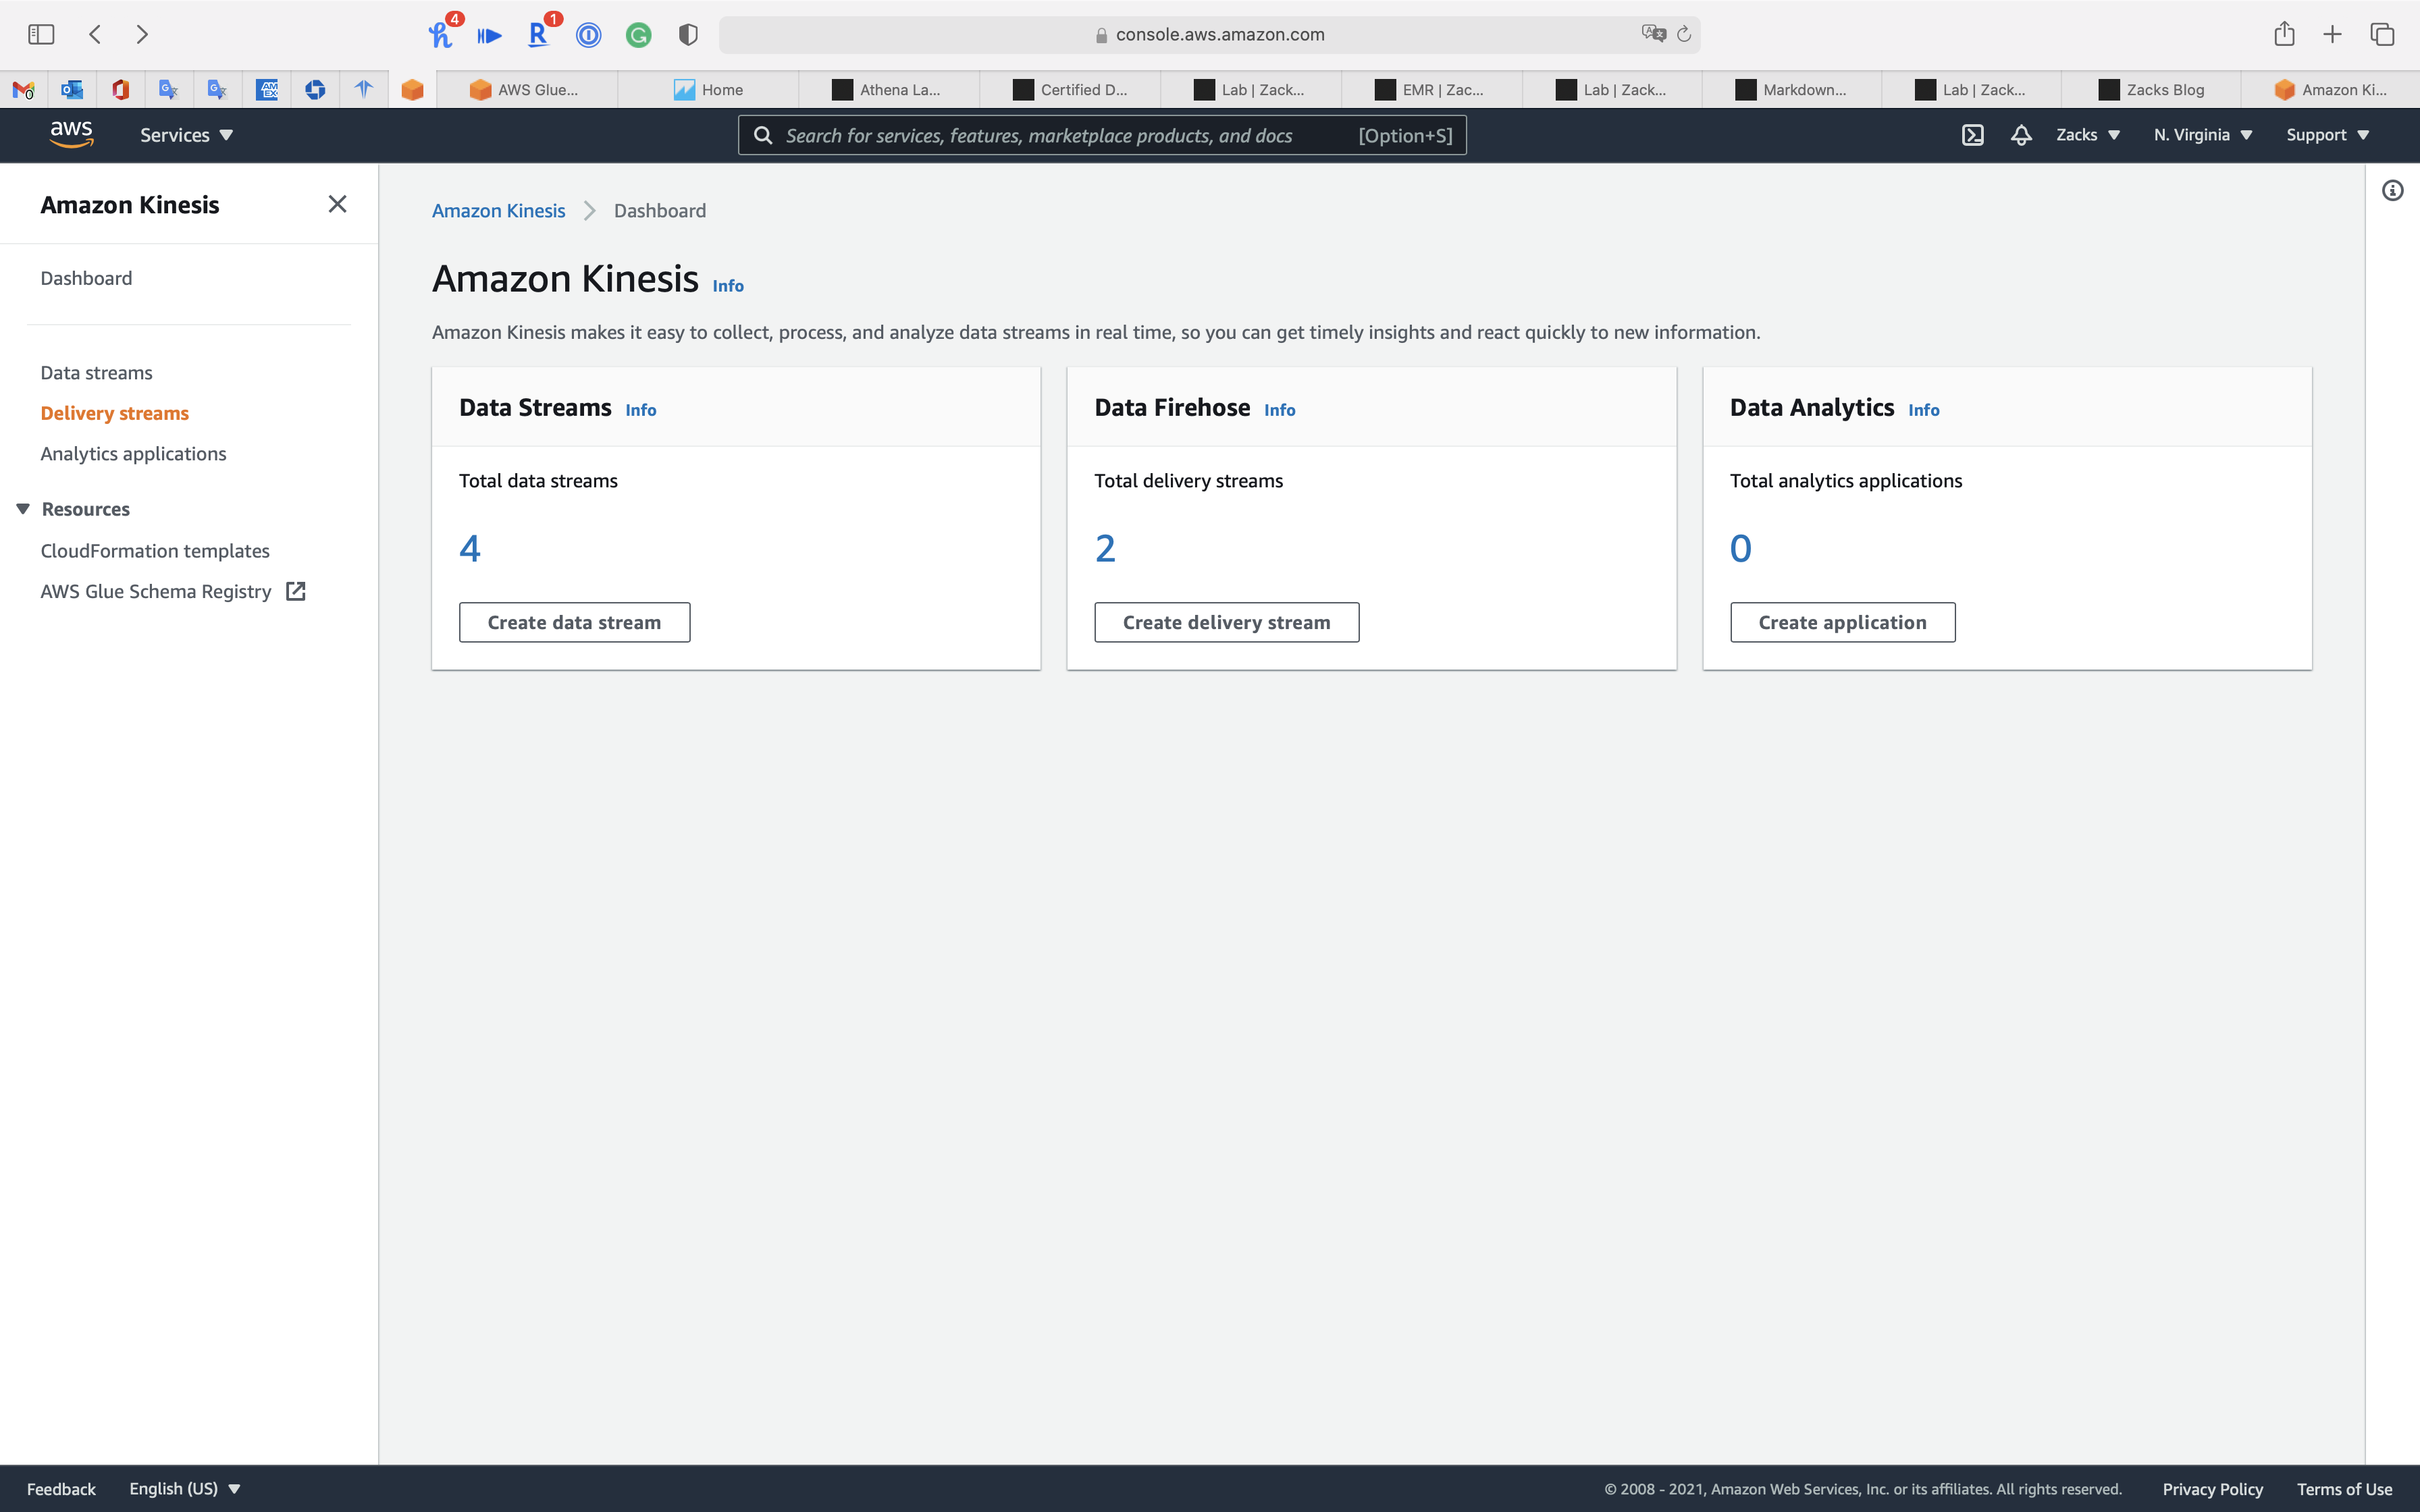
Click on Create application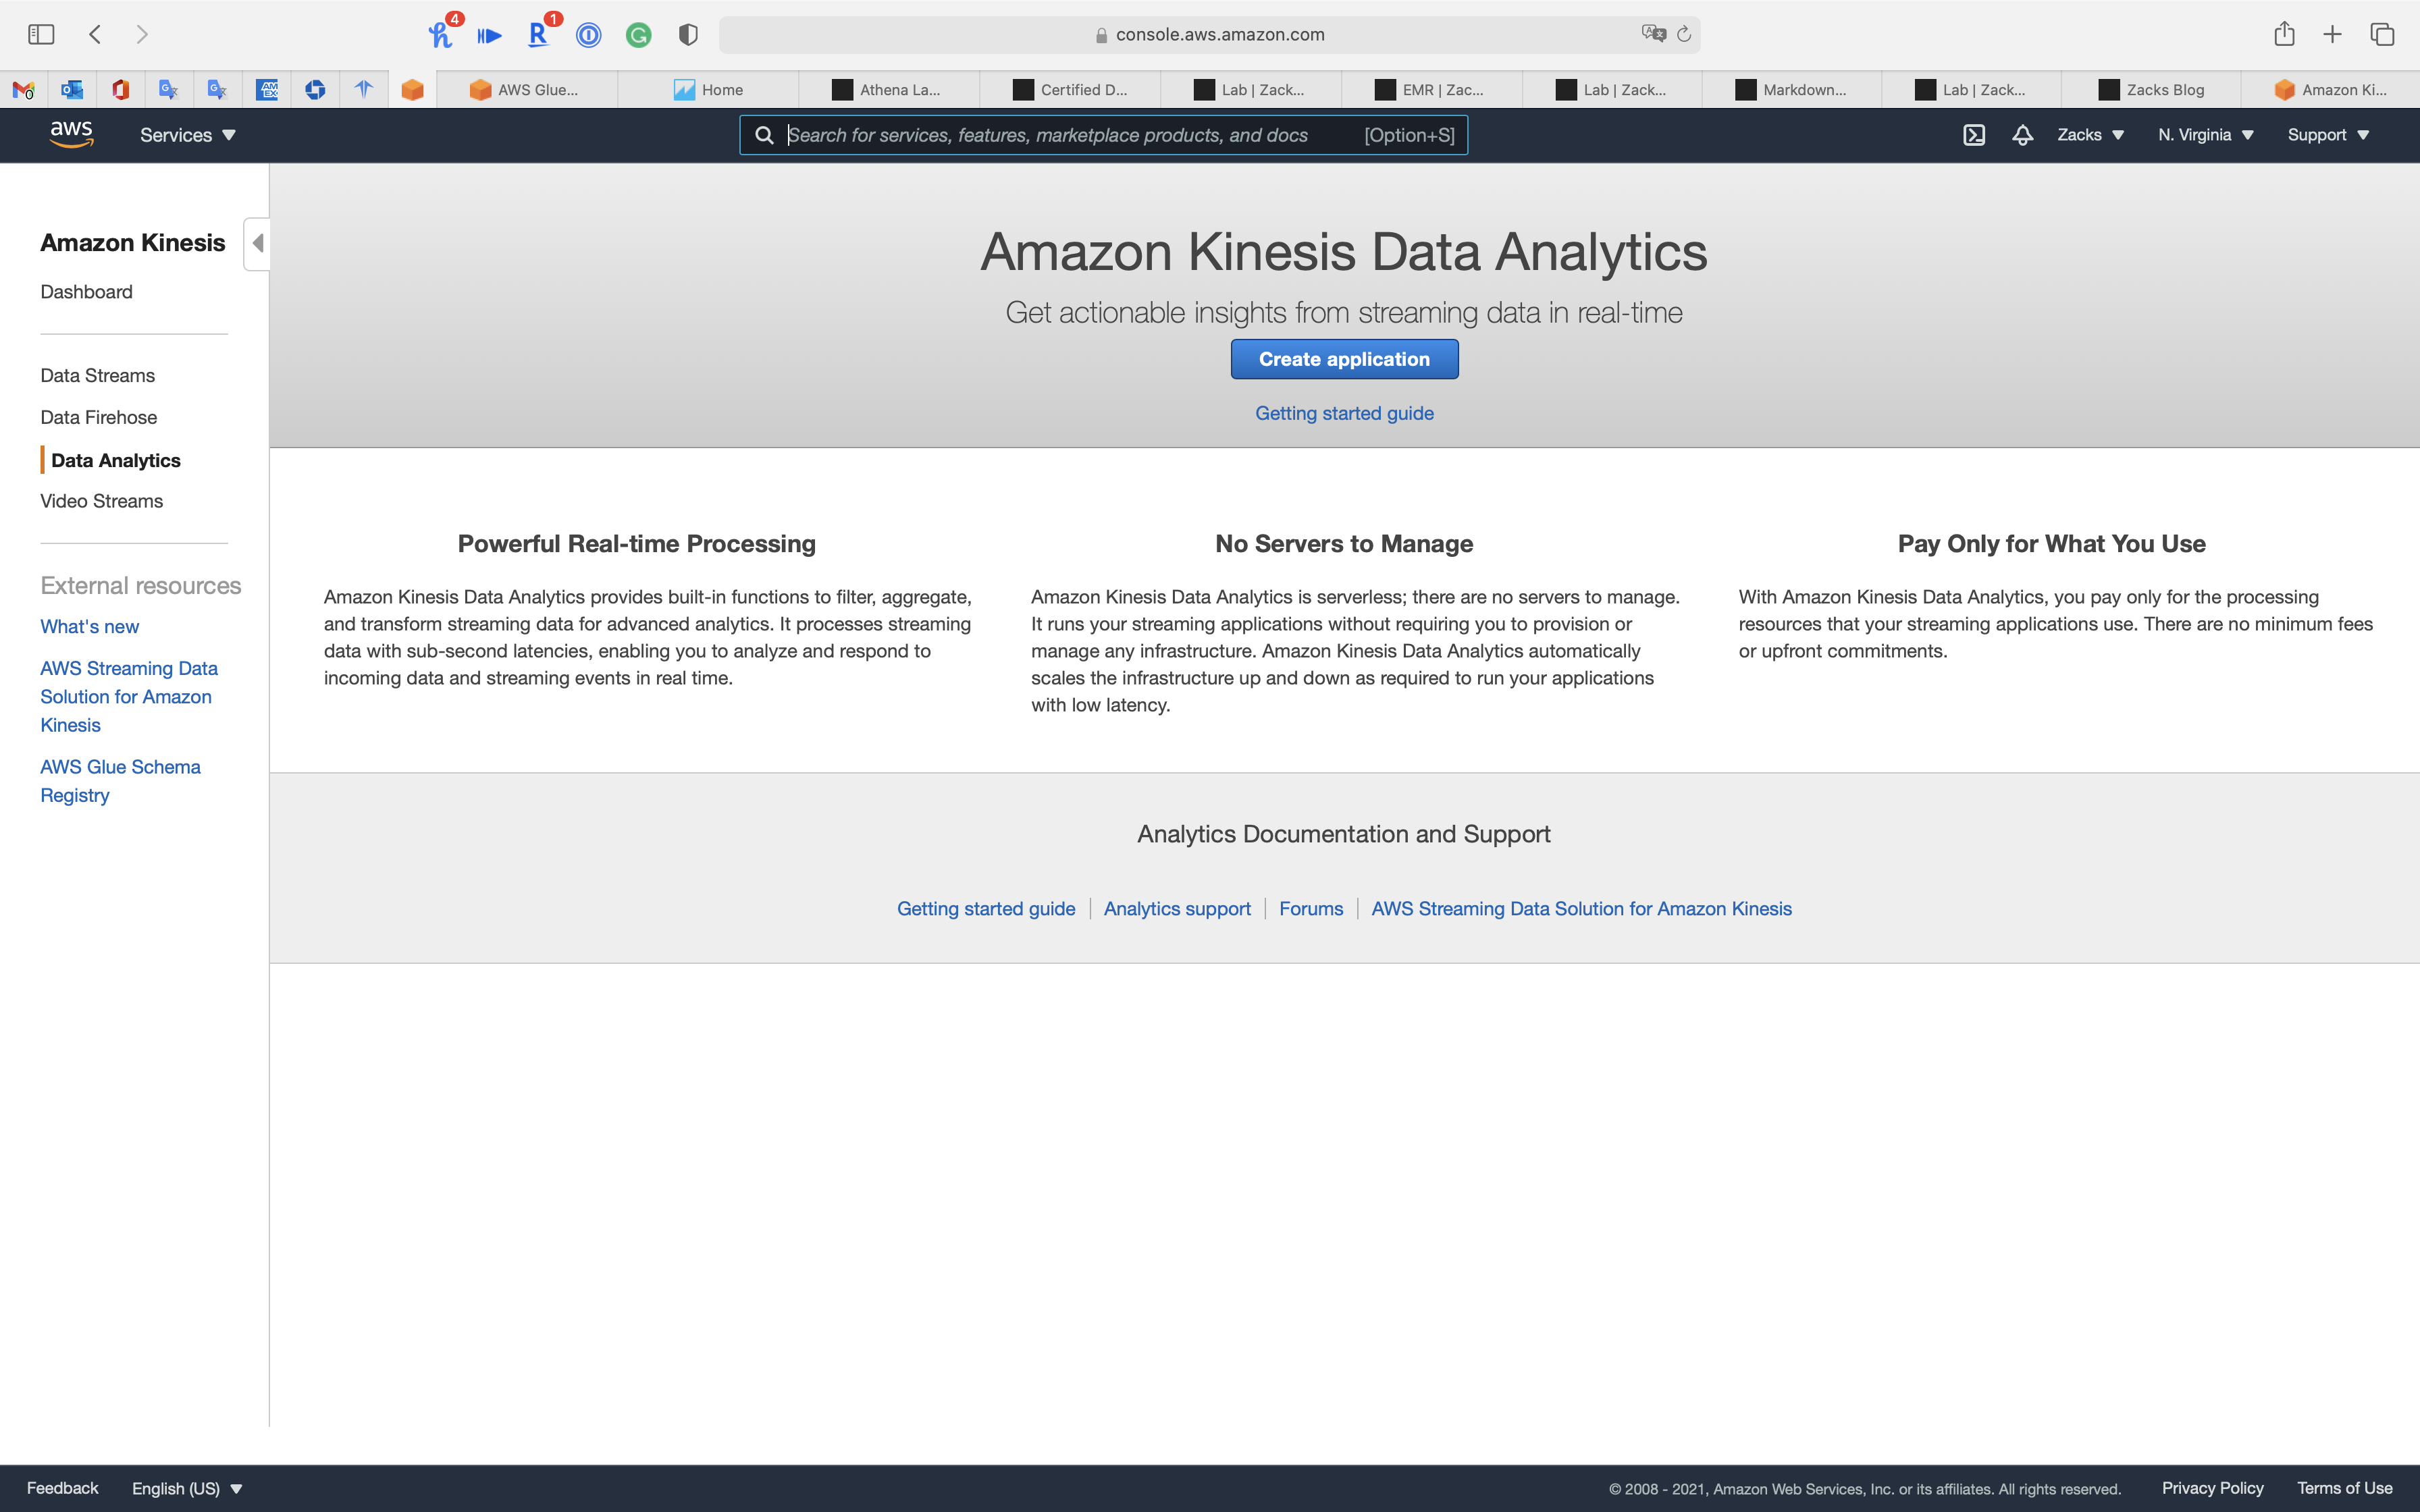
Create a Data Analytics Application
- Application:
TickerApp - Runtime:
SQL
Click on Create application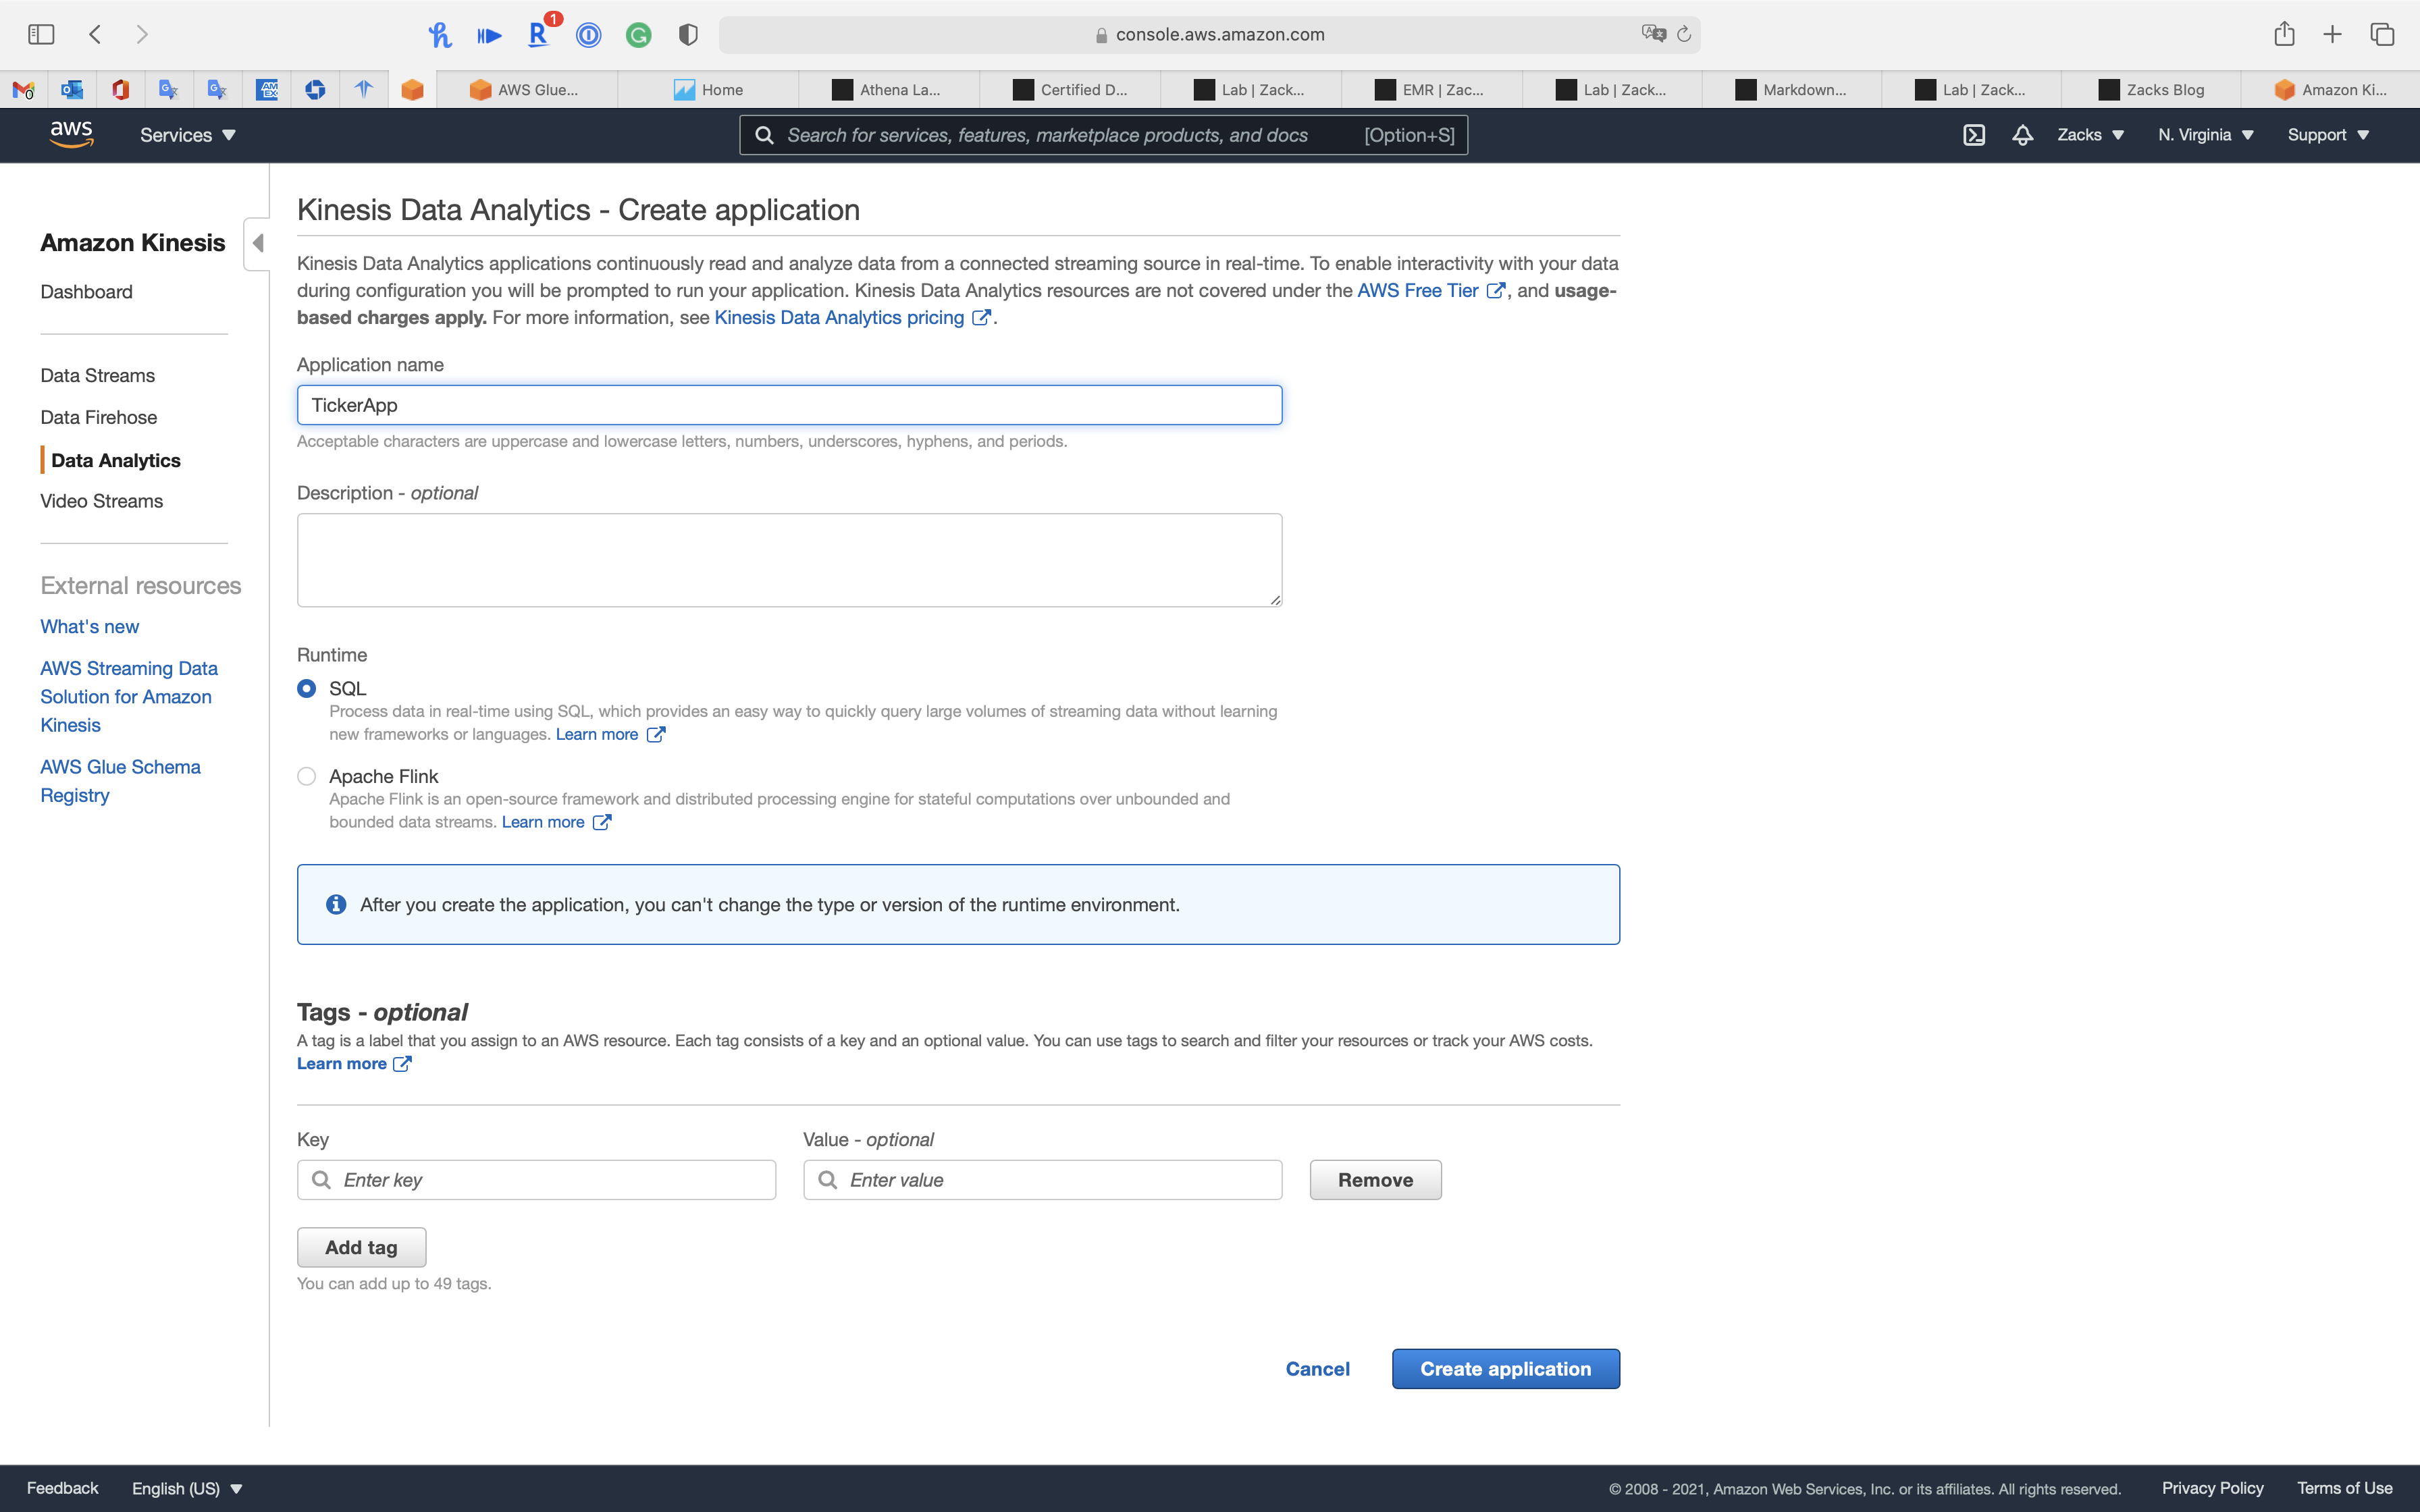
Step 1: Source
Connect streaming data
Click on Connect streaming data for data feeding.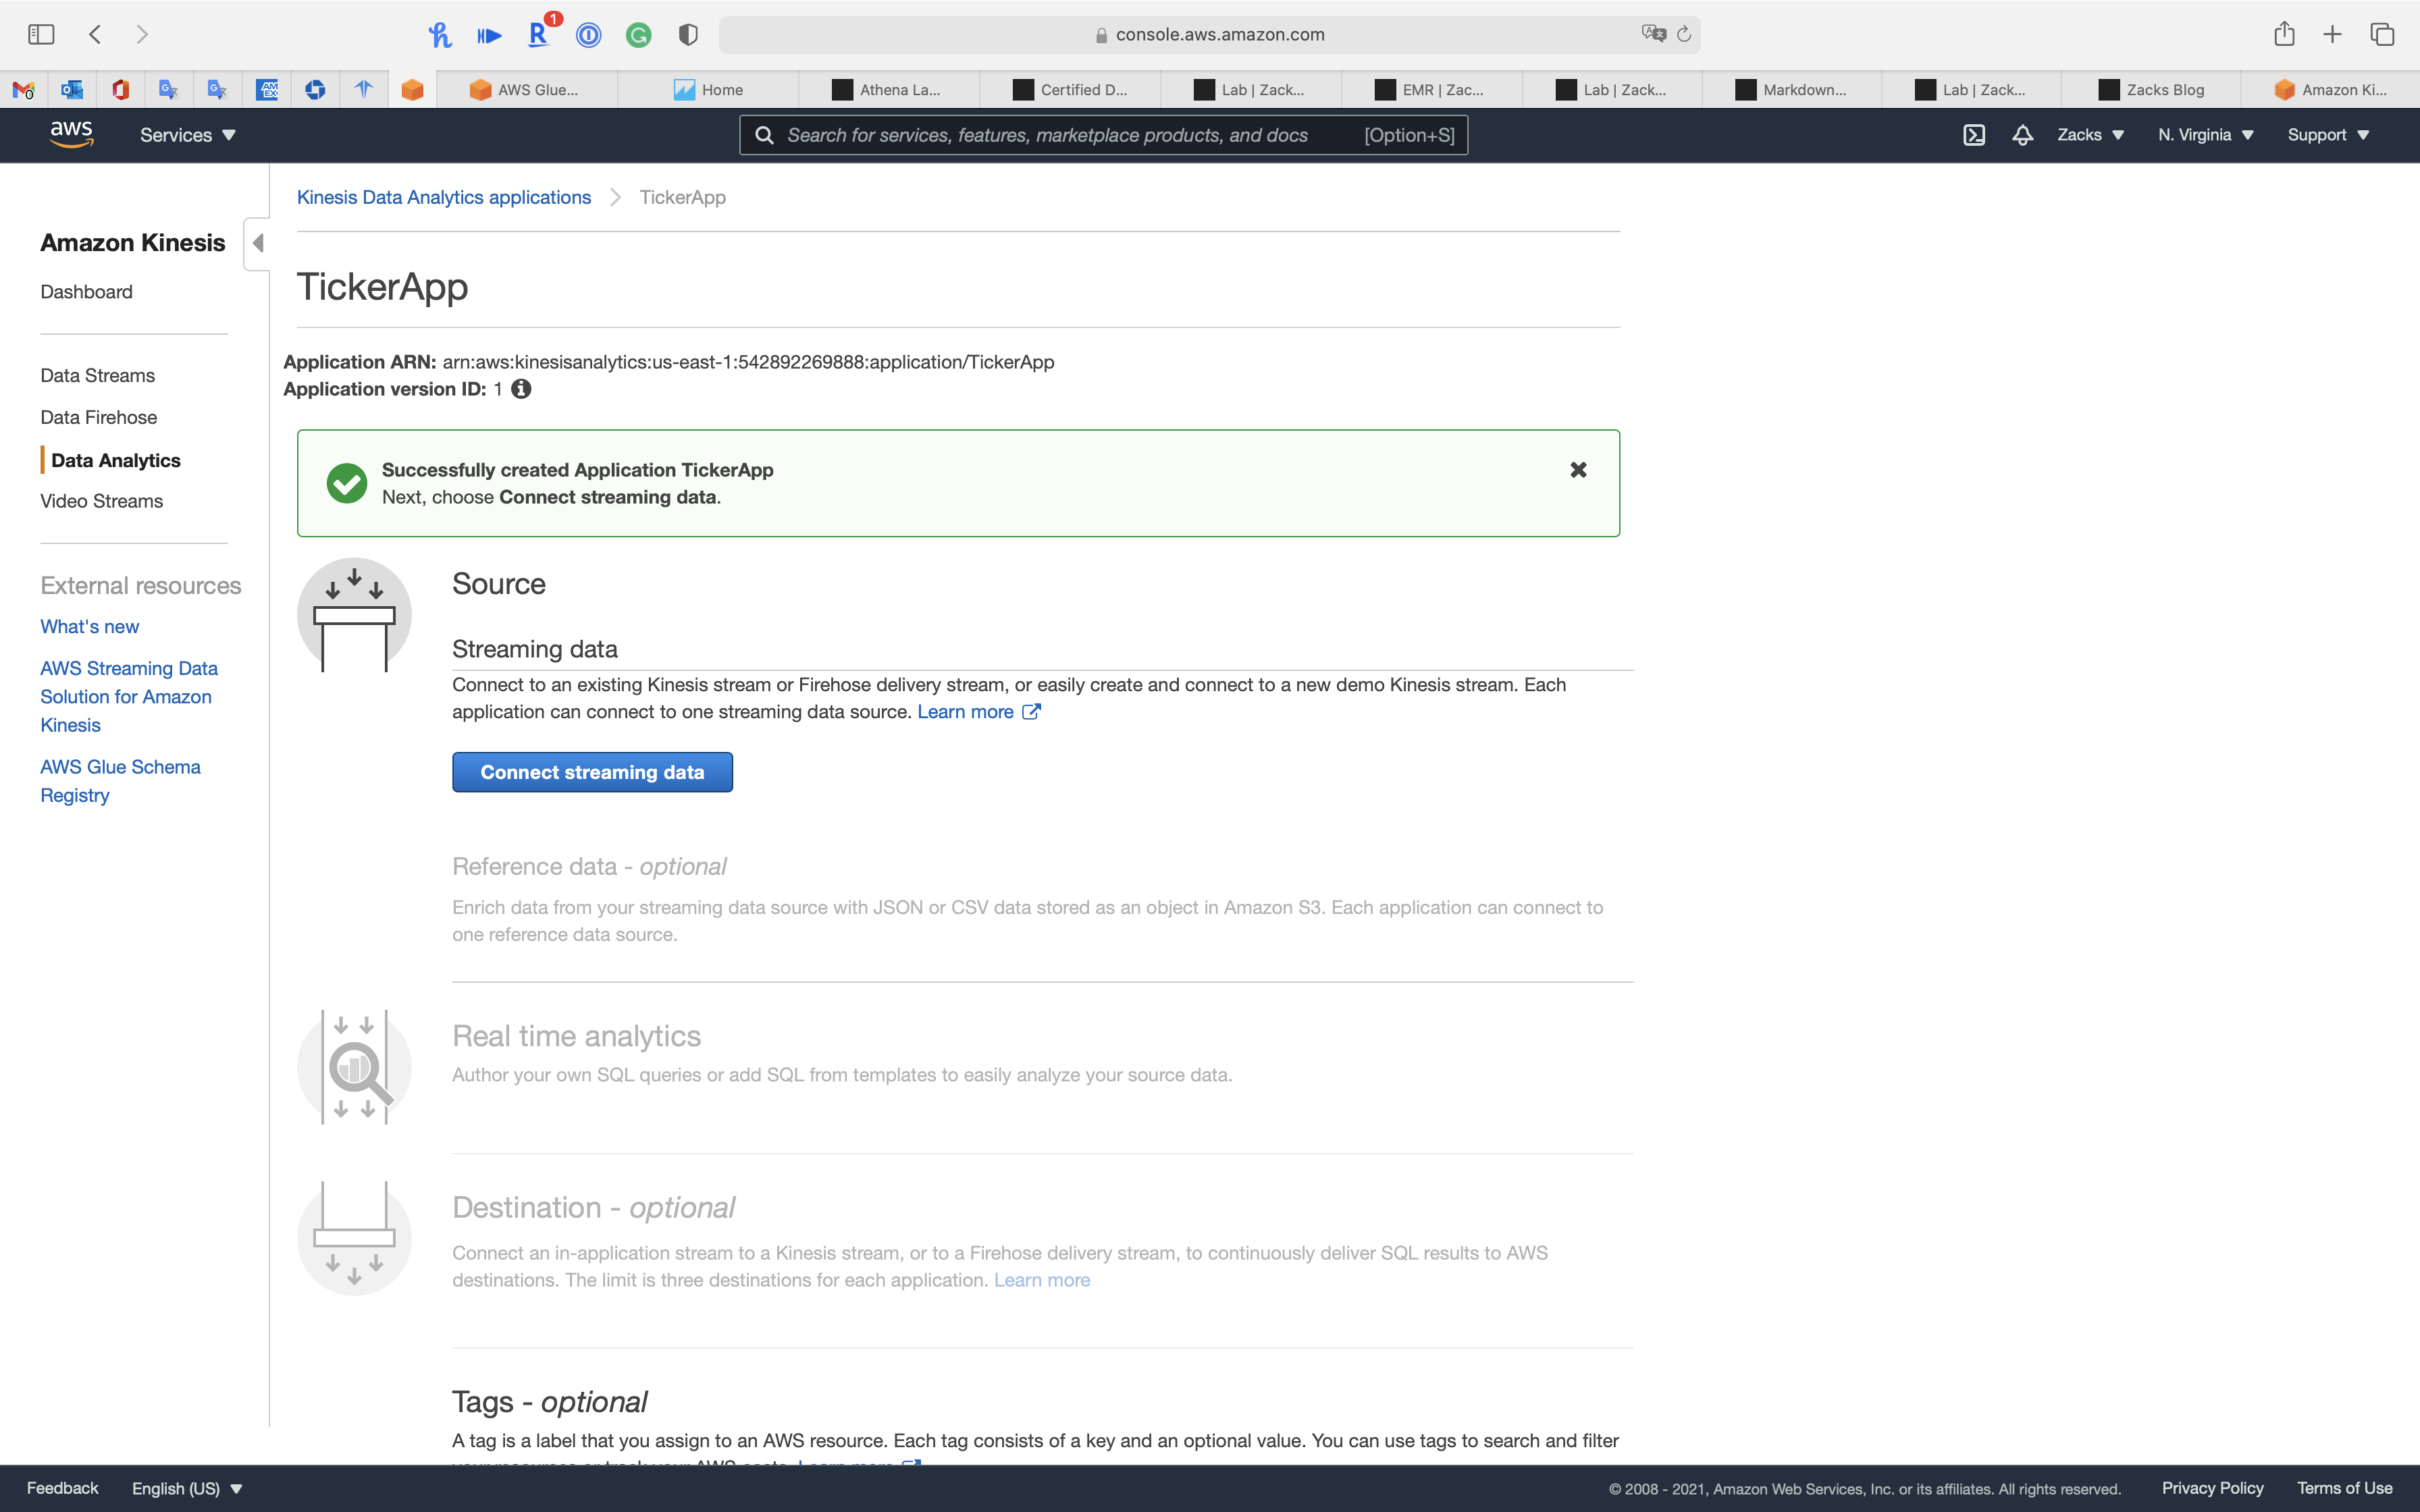
If you select Choose source, you can connect to previous Kinesis Data stream or Kinesis Firehose delivery stream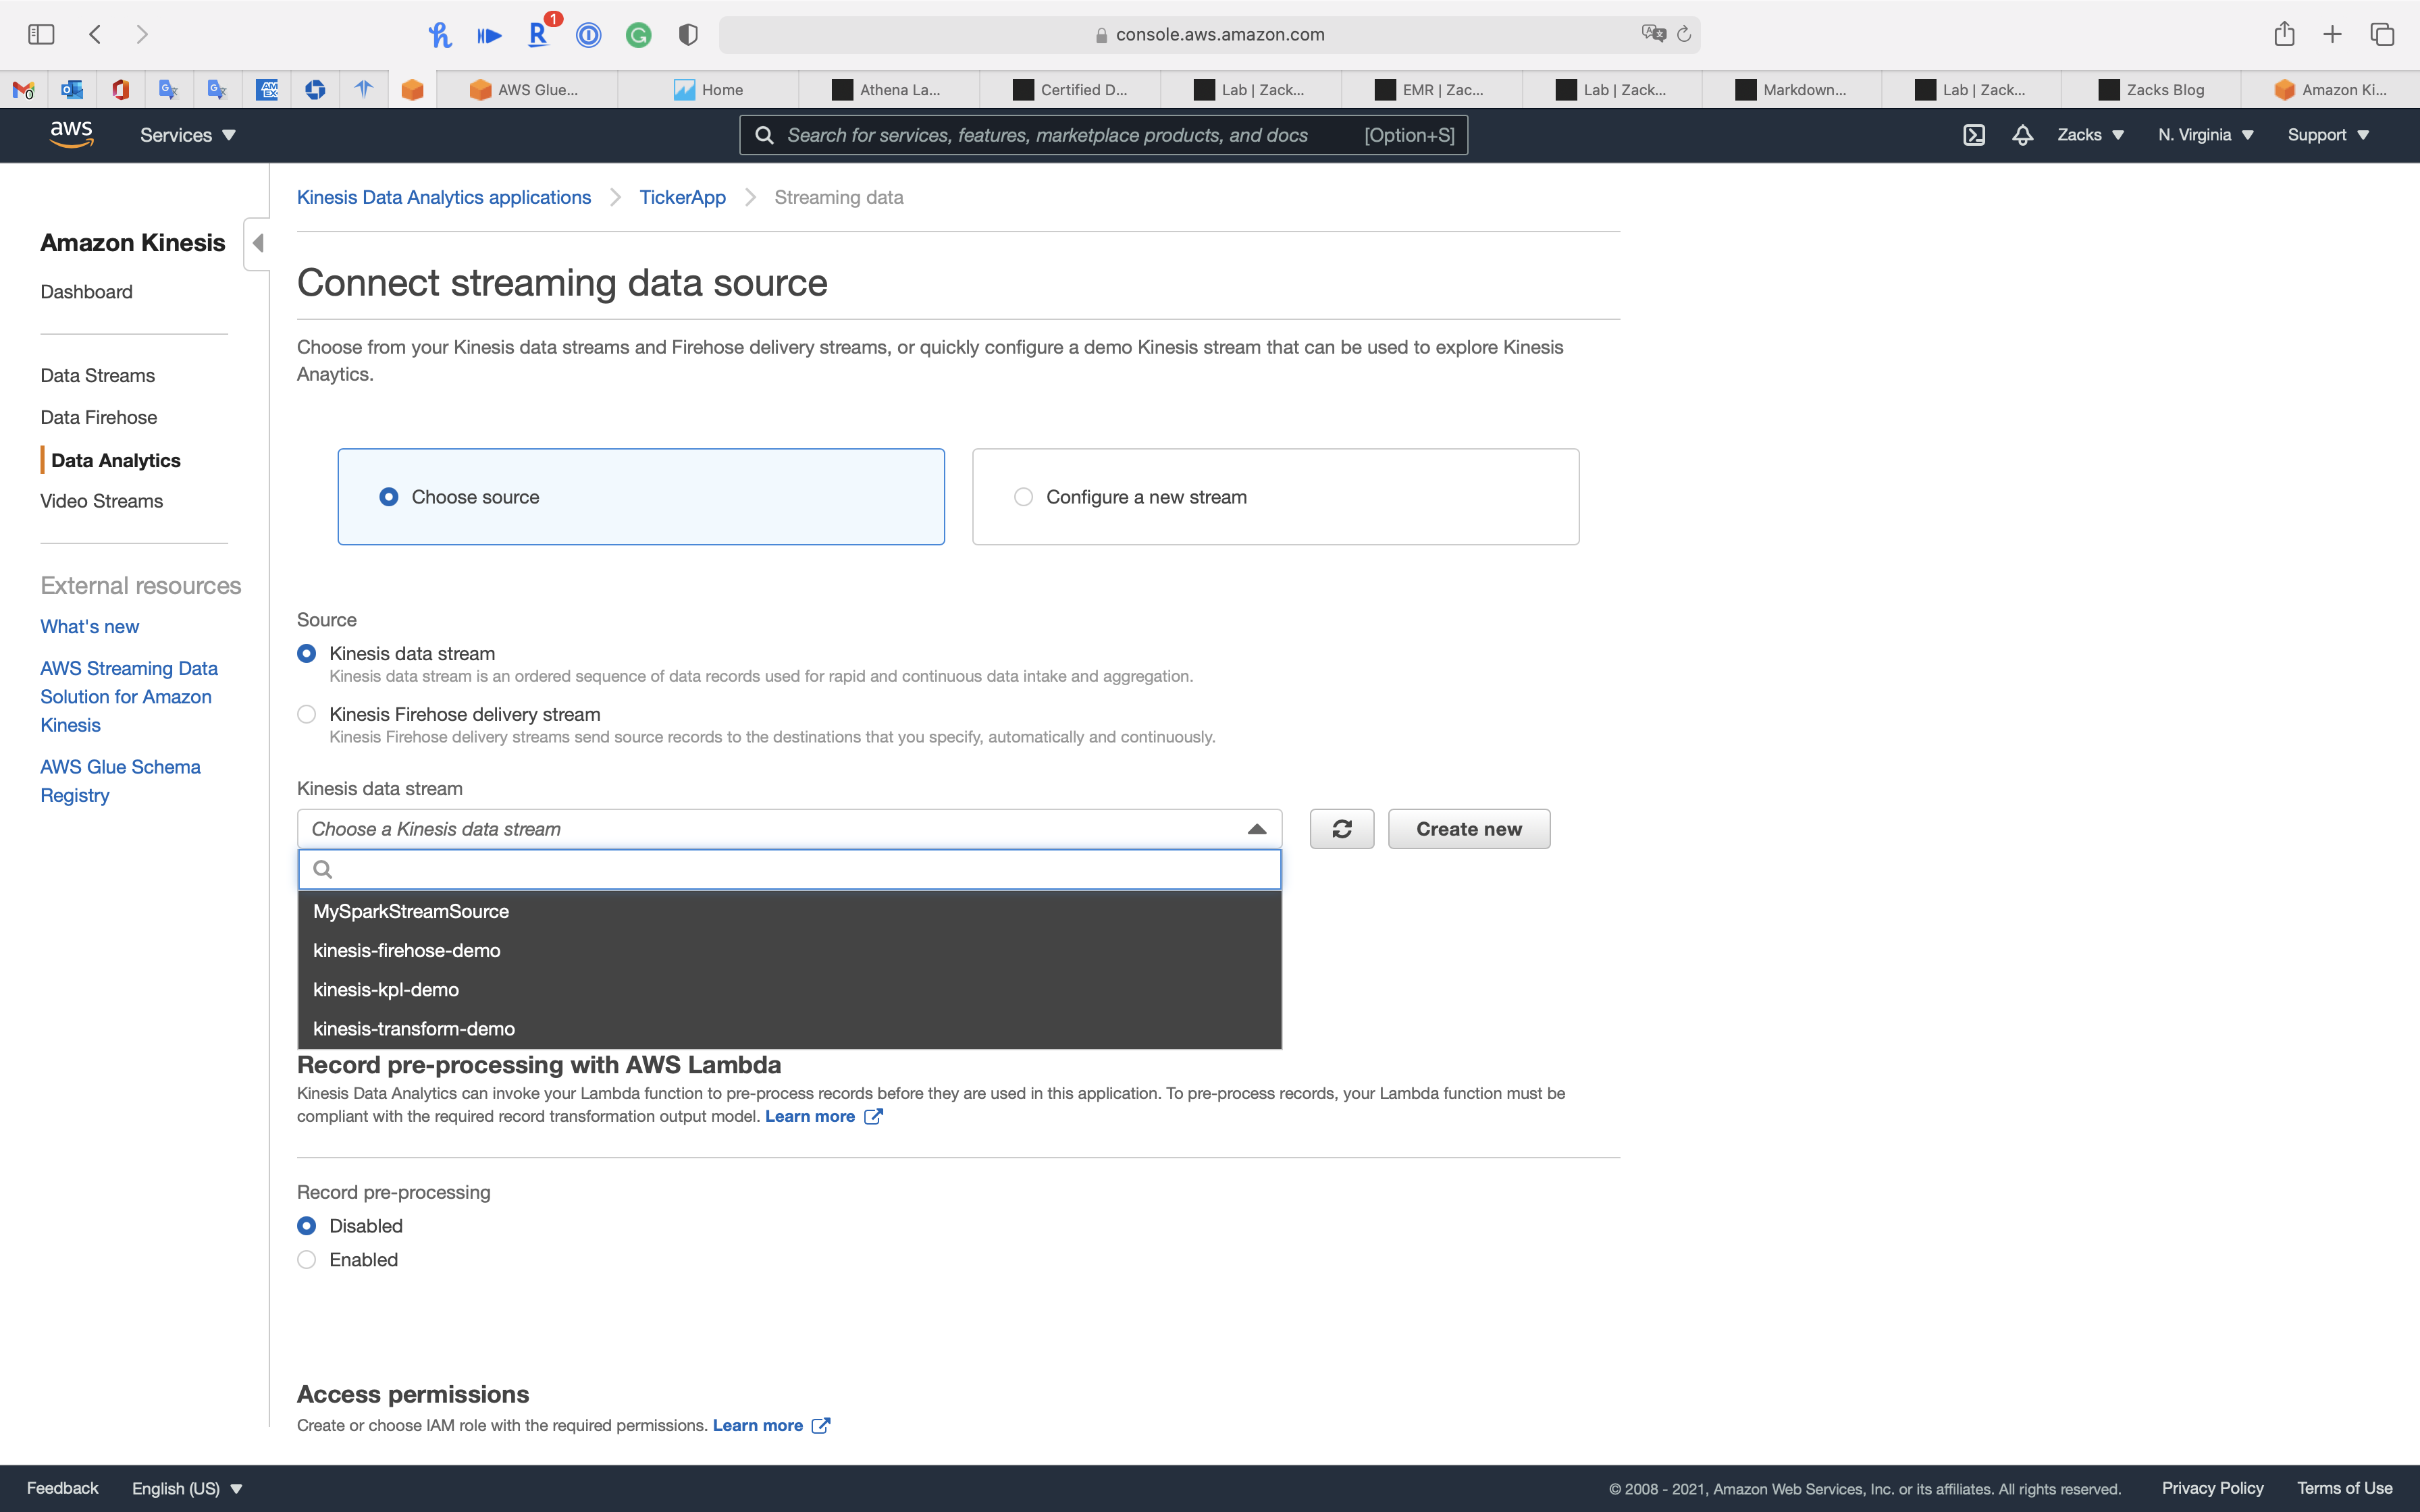
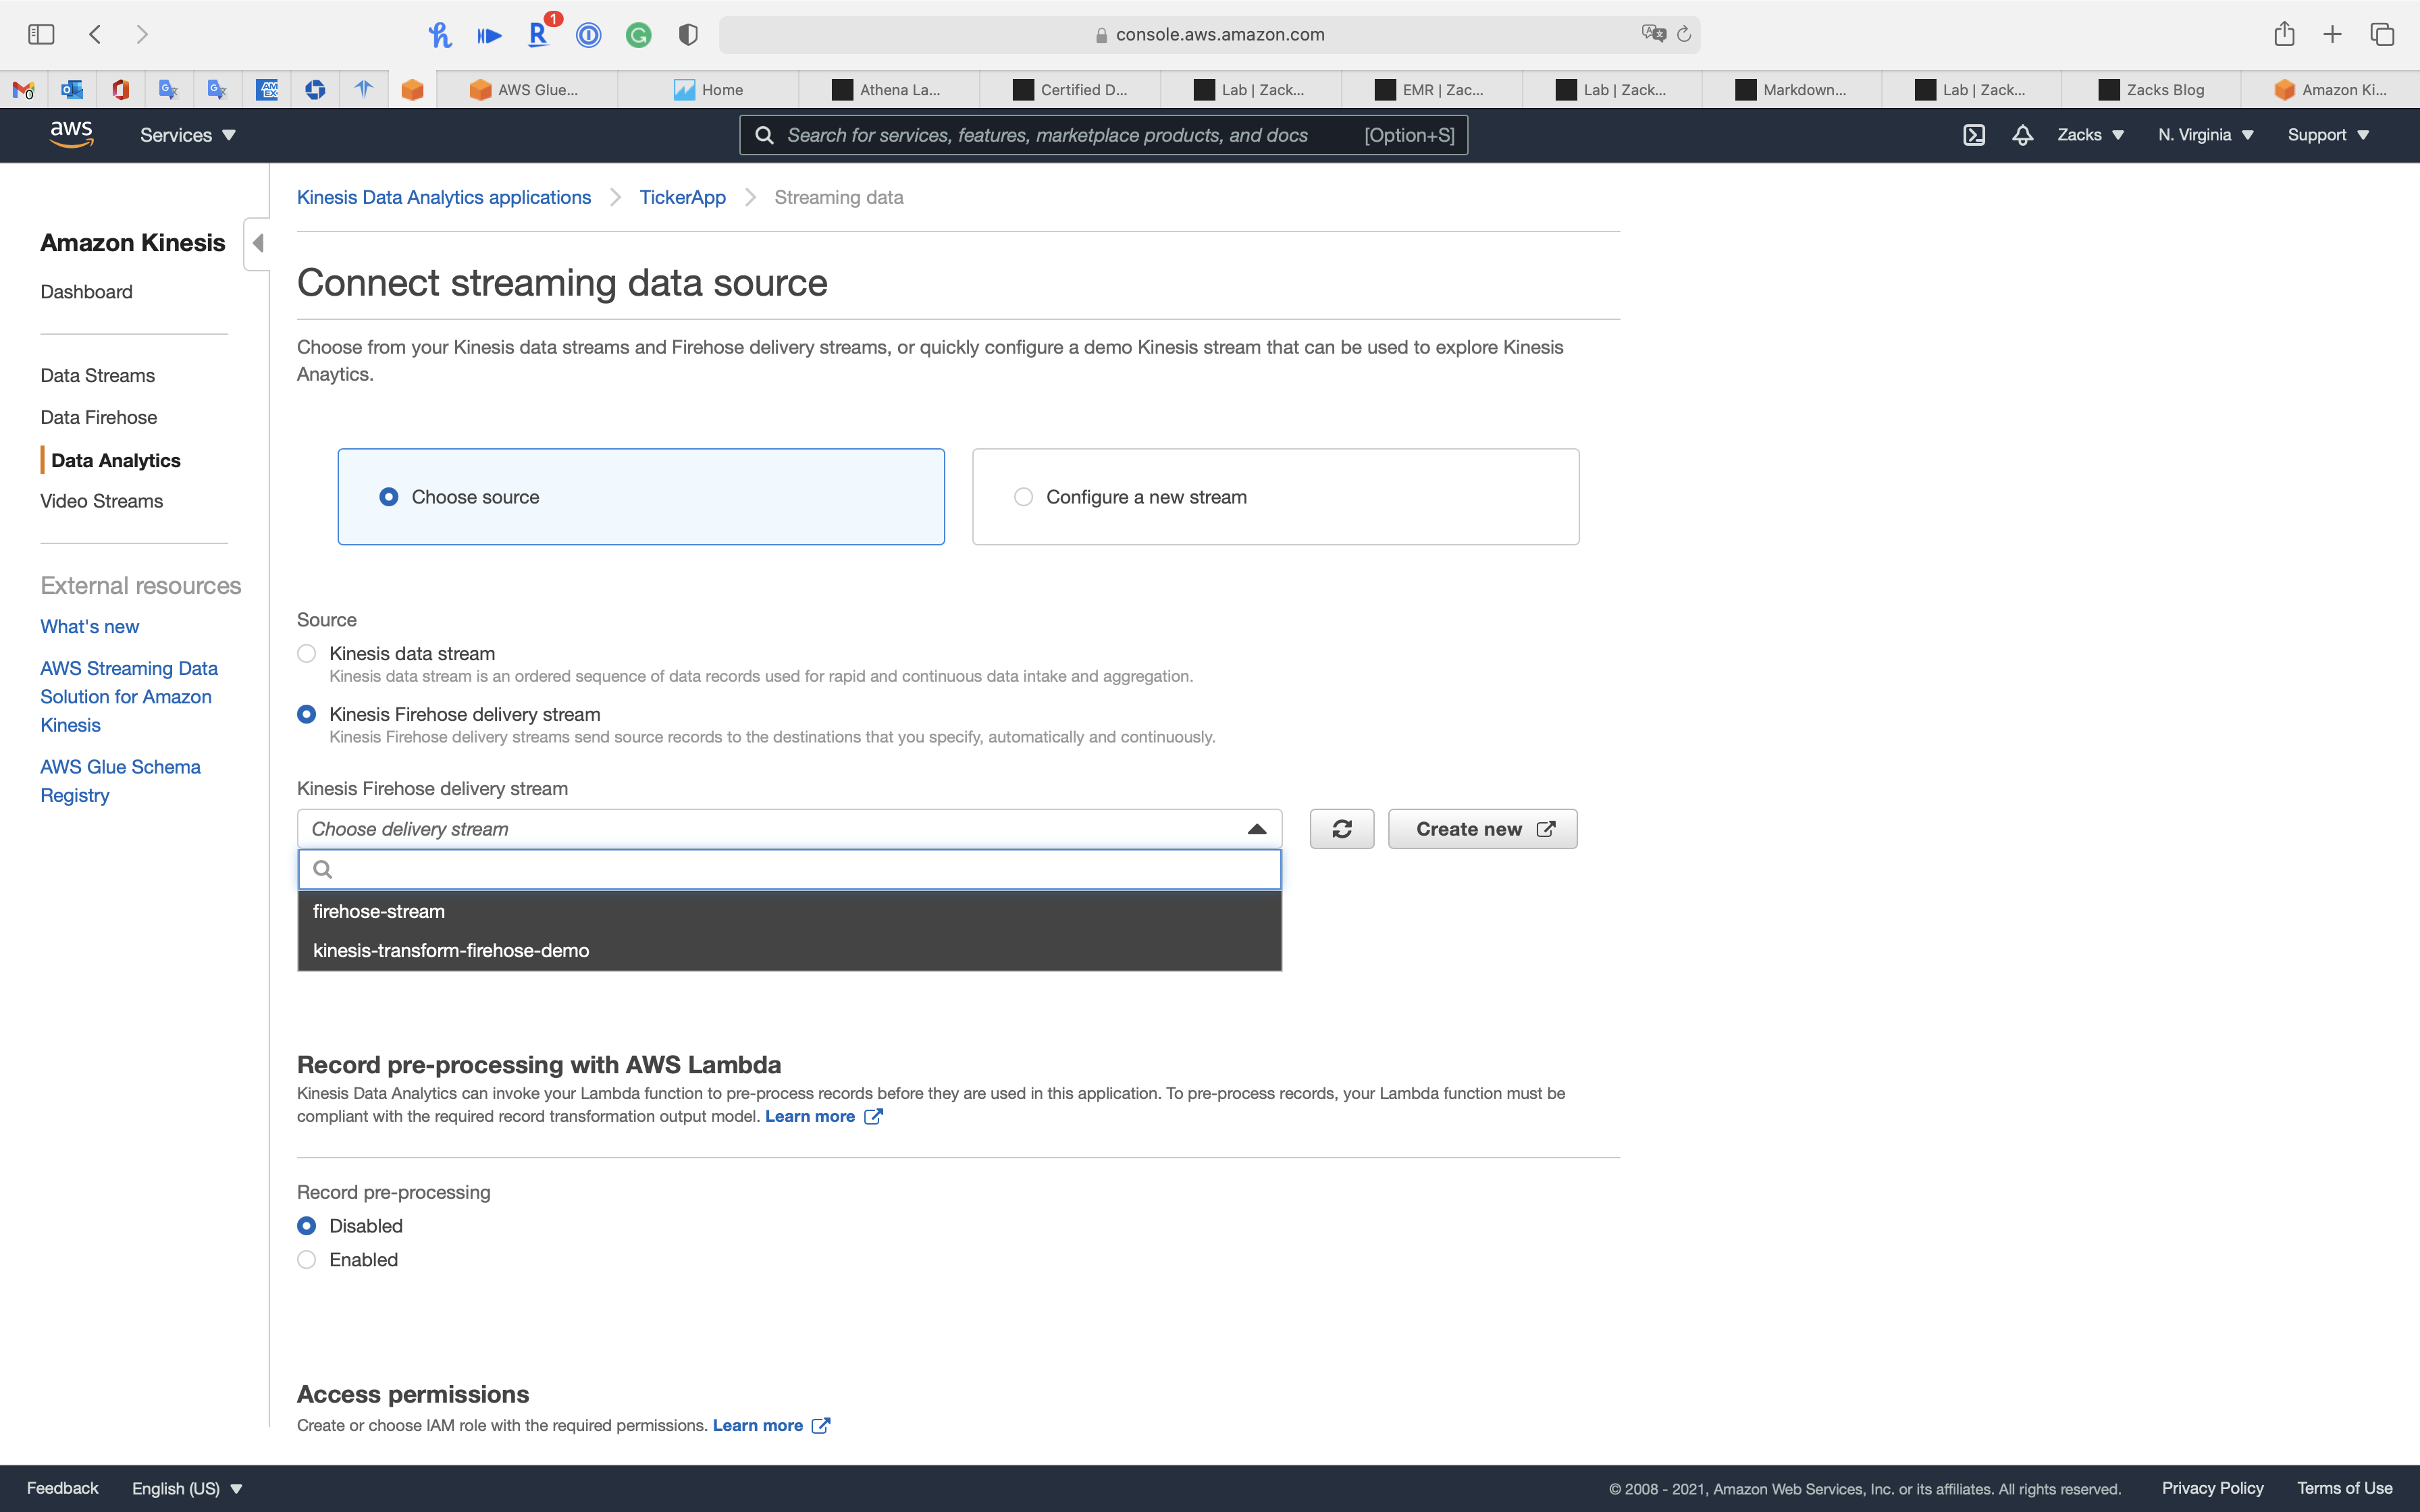
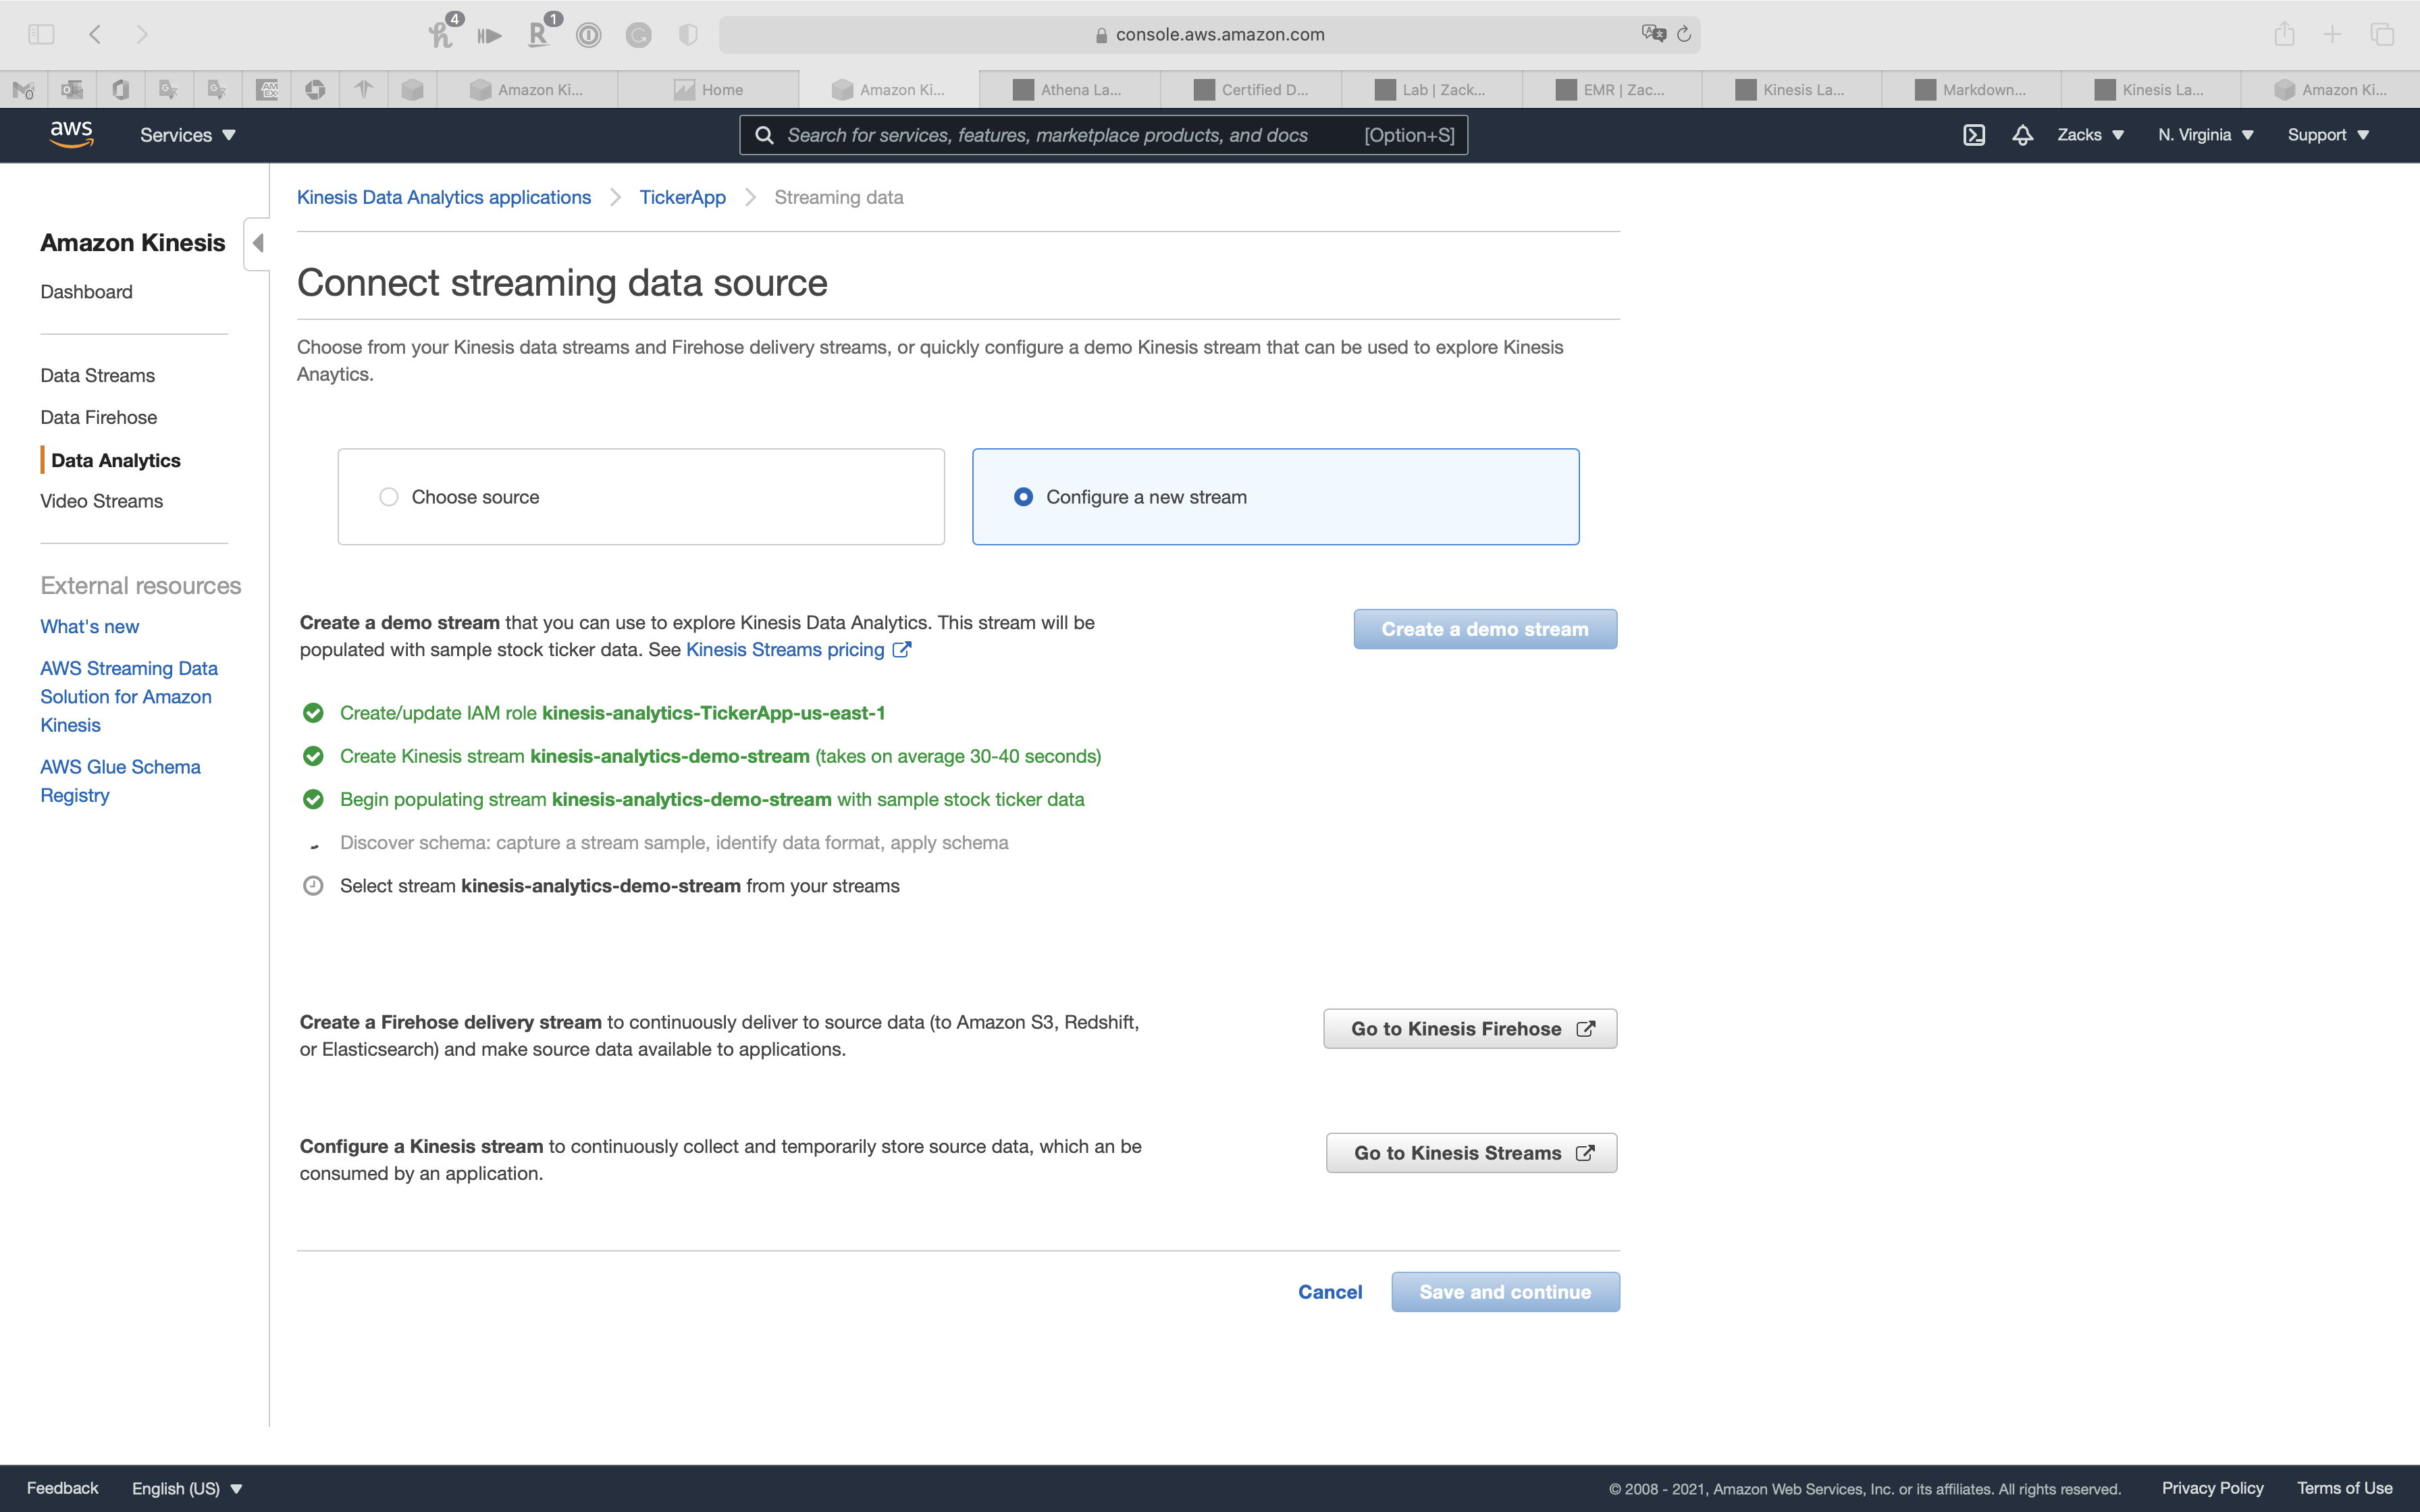
Select Configure a new stream for create a new stream.
We will go with Create a demo stream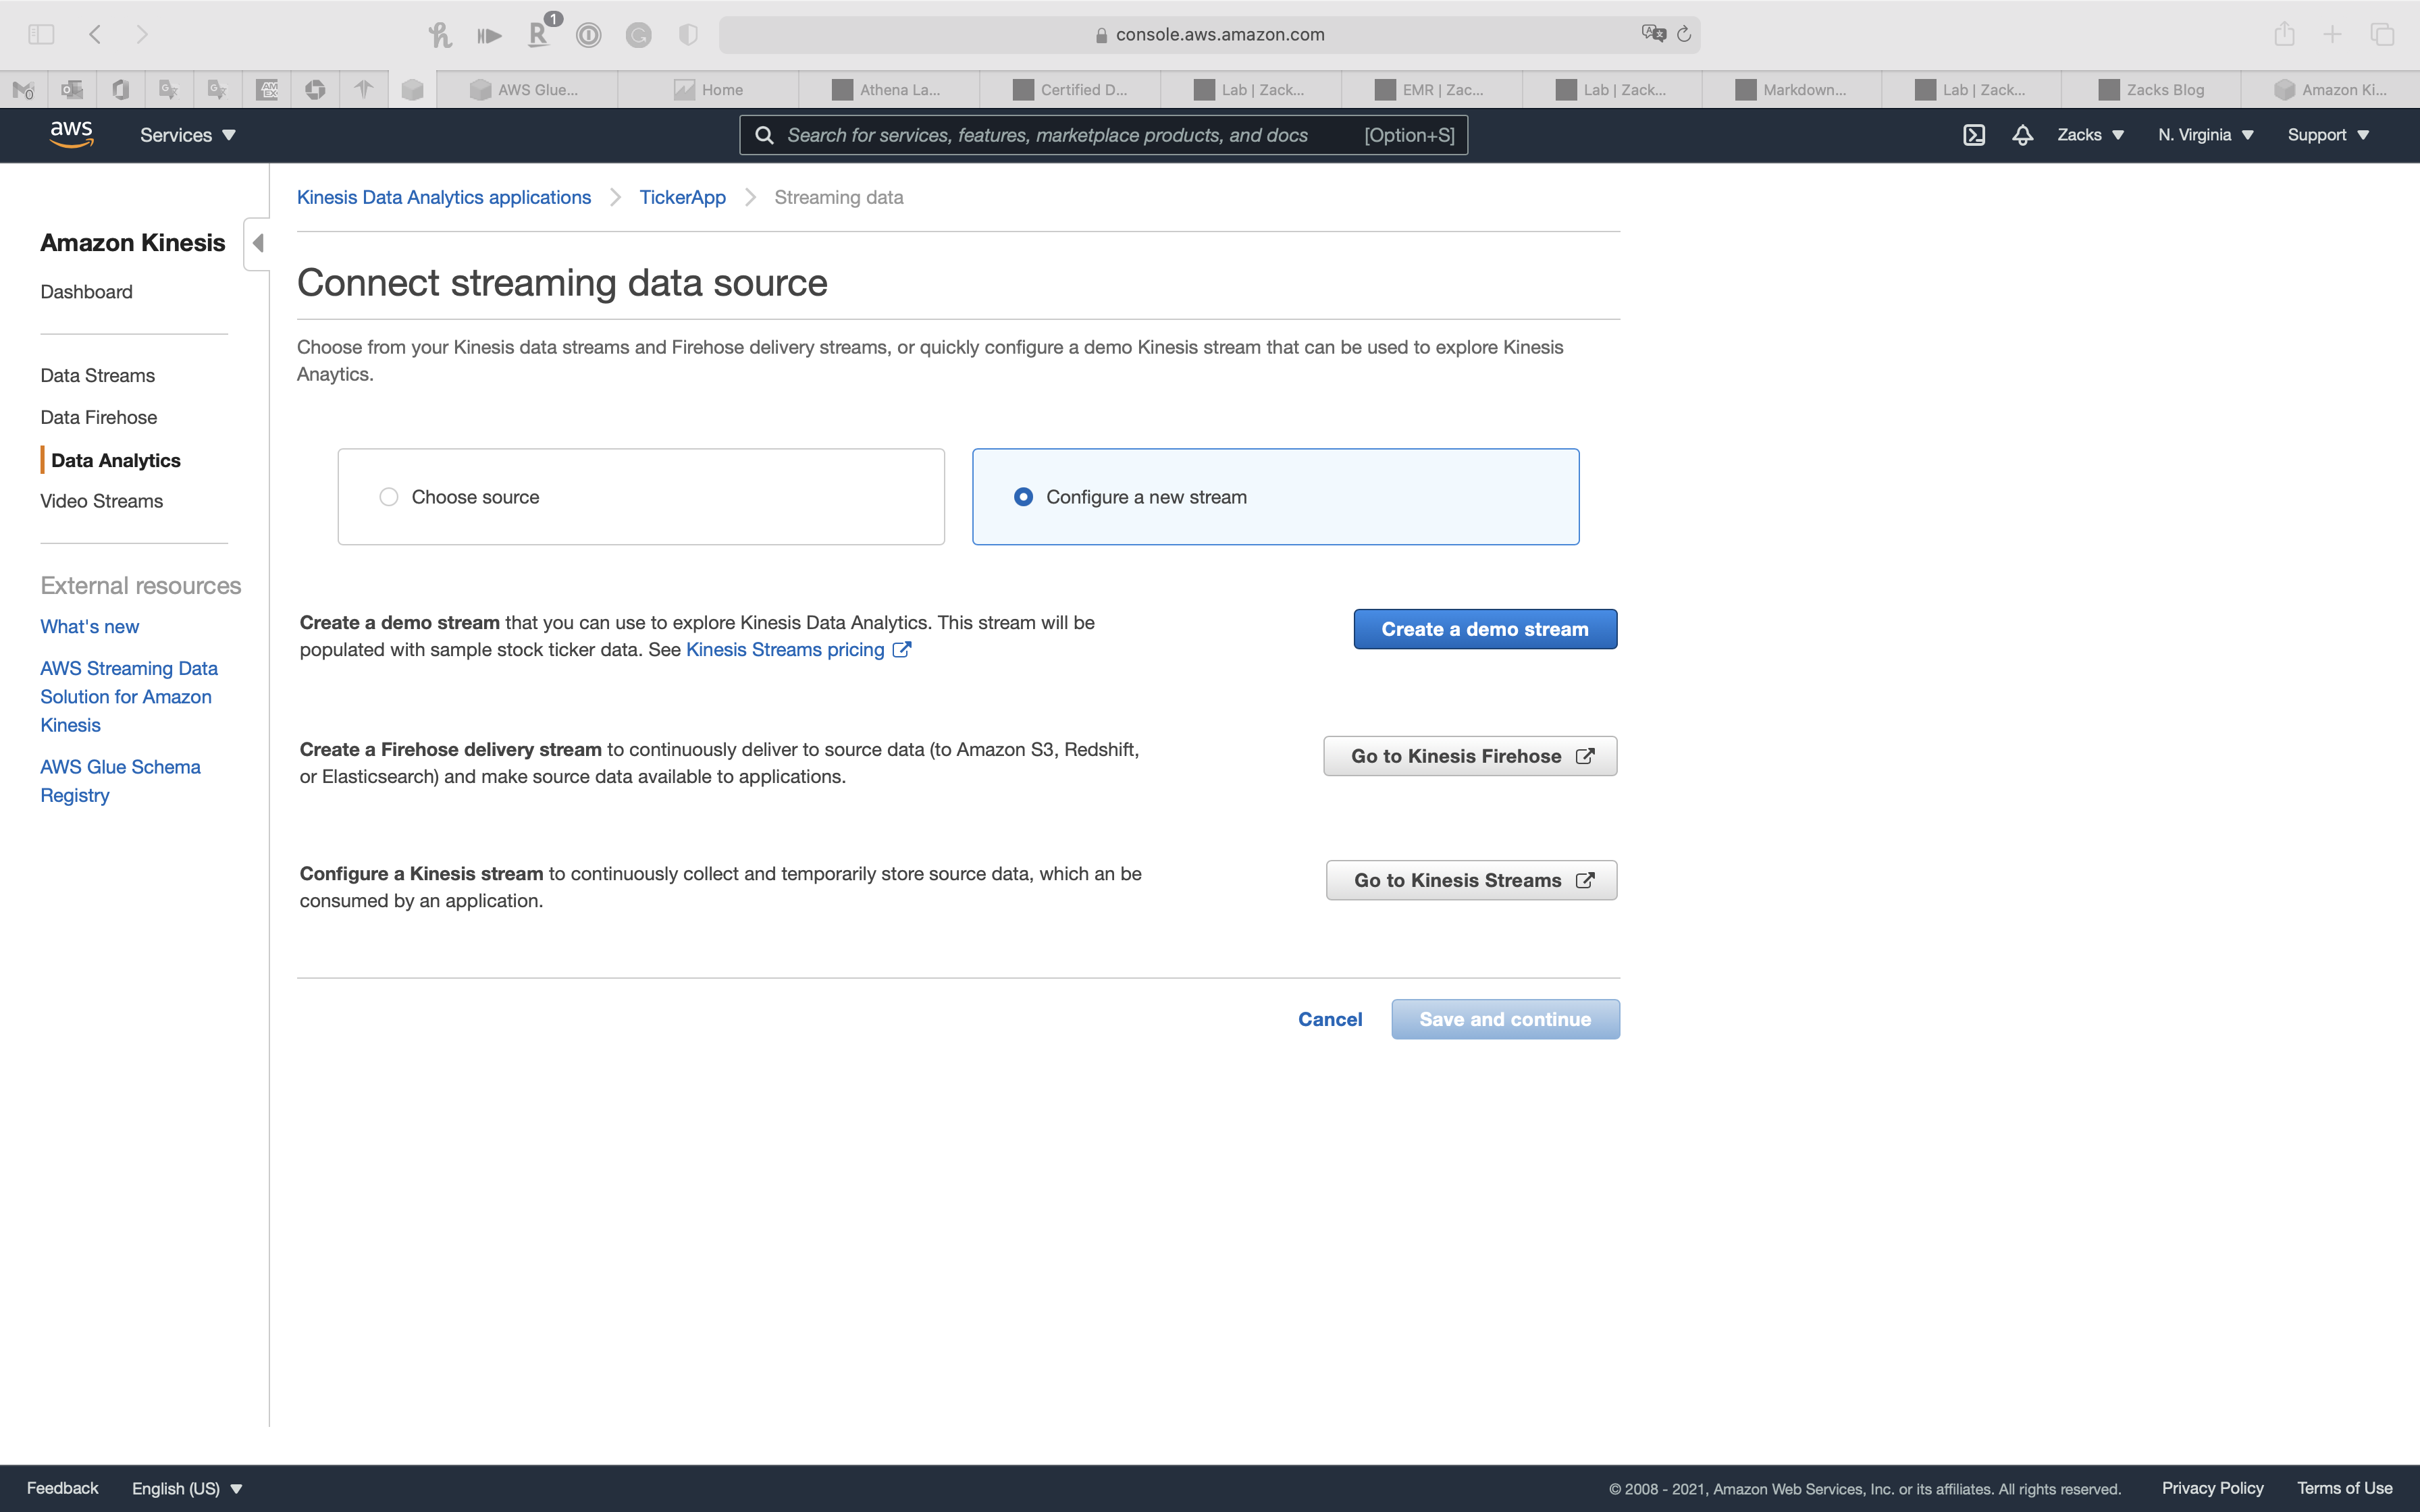
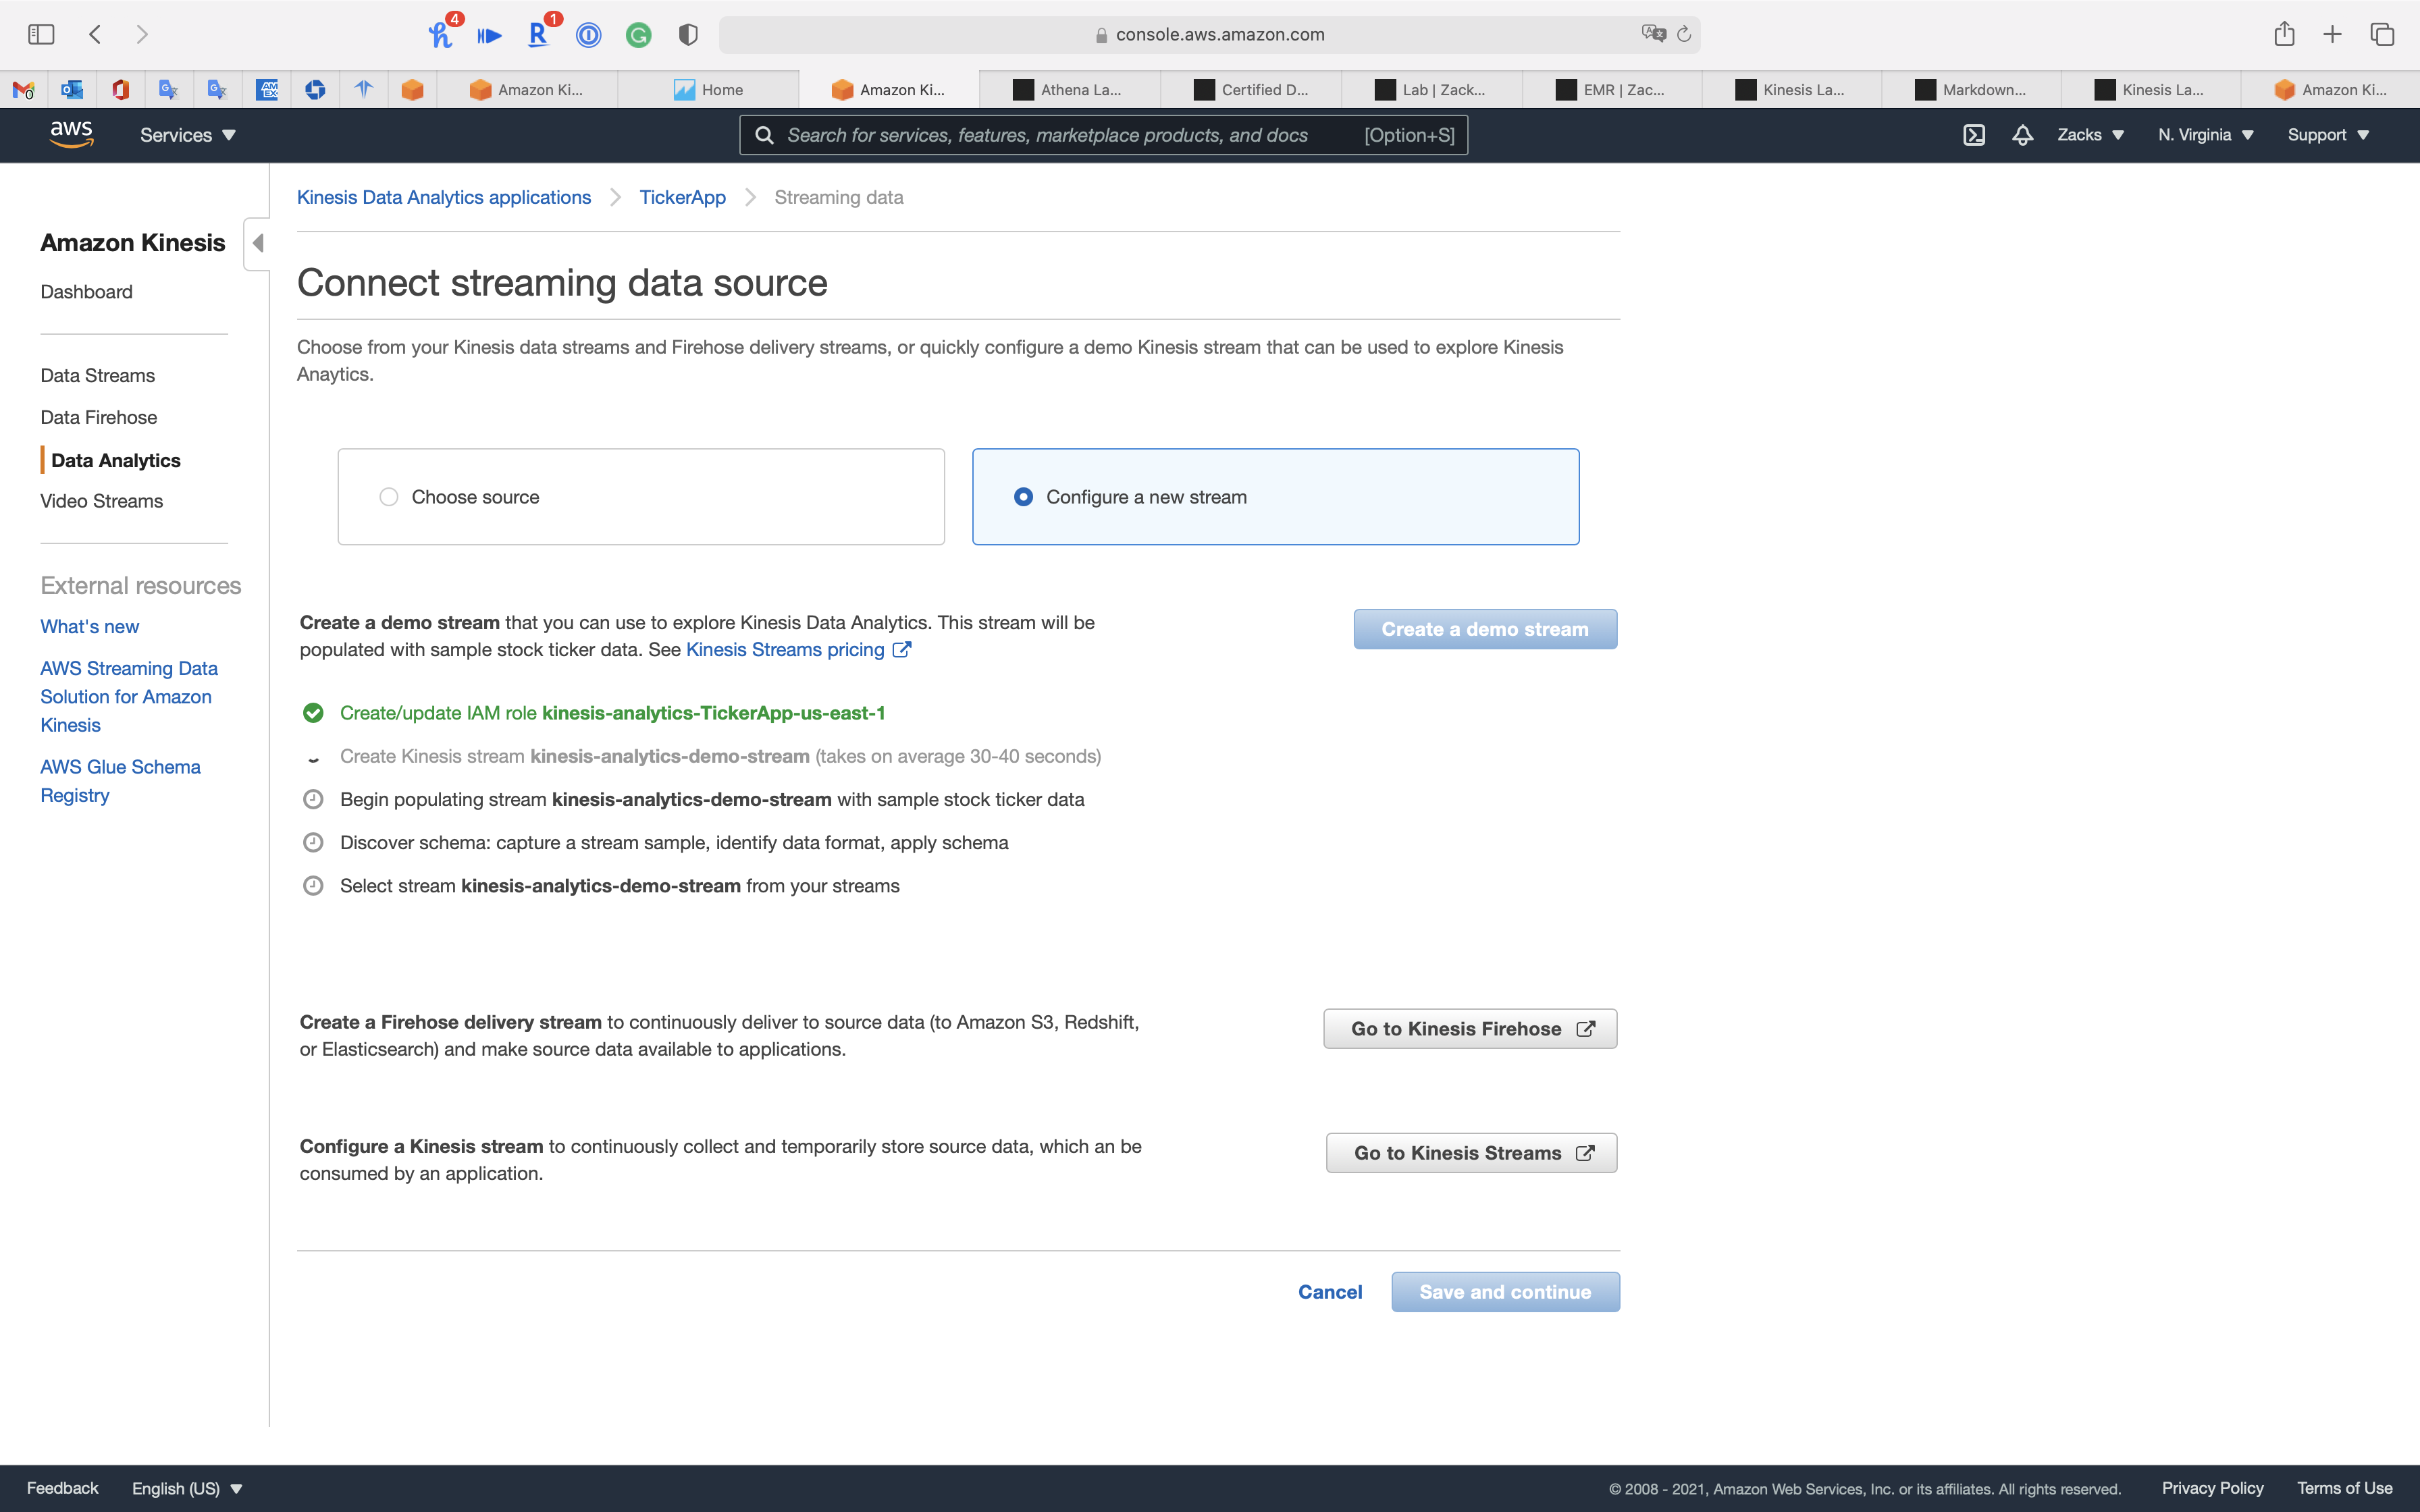
Create a demo stream
AWS Data will do the following steps automatically for creating a demo stream:
- Create/update IAM role
kinesis-analytics-TickerApp-us-east-1 - Create Kinesis stream
kinesis-analytics-demo-stream(takes on average 30-40 seconds) - Begin populating stream
kinesis-analytics-demo-streamwith sample stock ticker data - Discover schema: capture a stream sample, identify data format, apply schema
- Select stream
kinesis-analytics-demo-streamfrom your streams
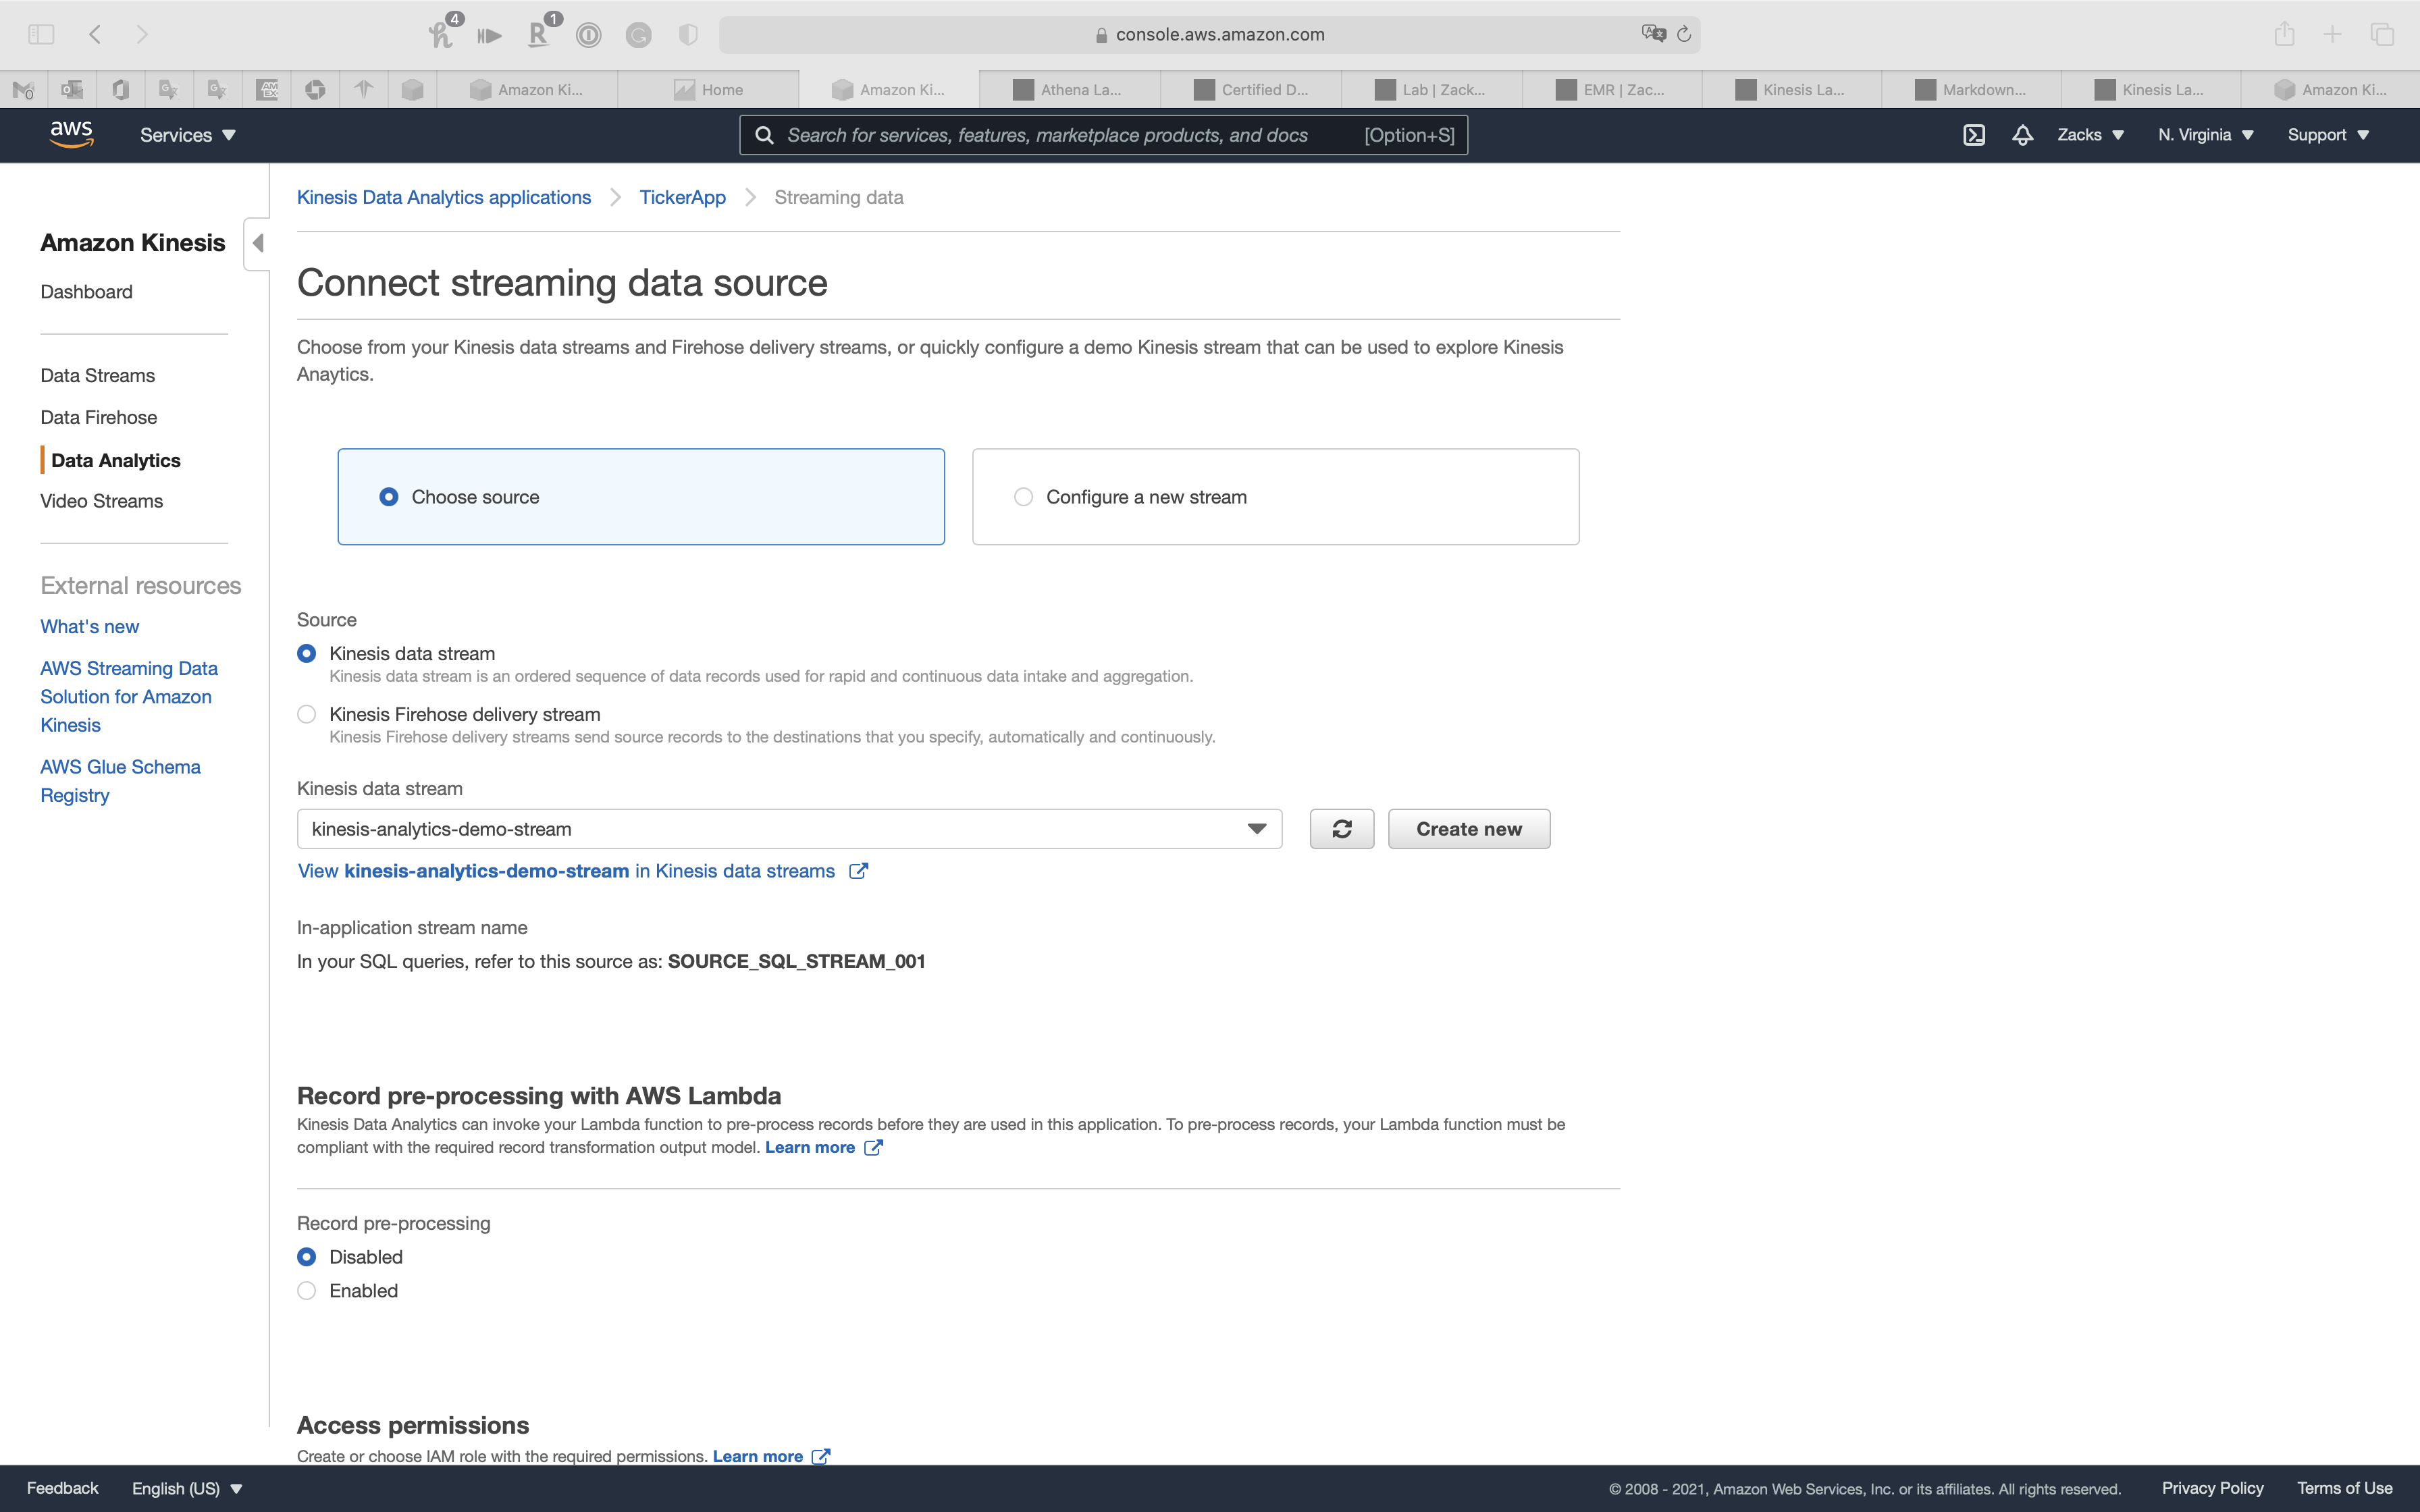
You can see kinesis-analytics-demo-stream on Data Streams page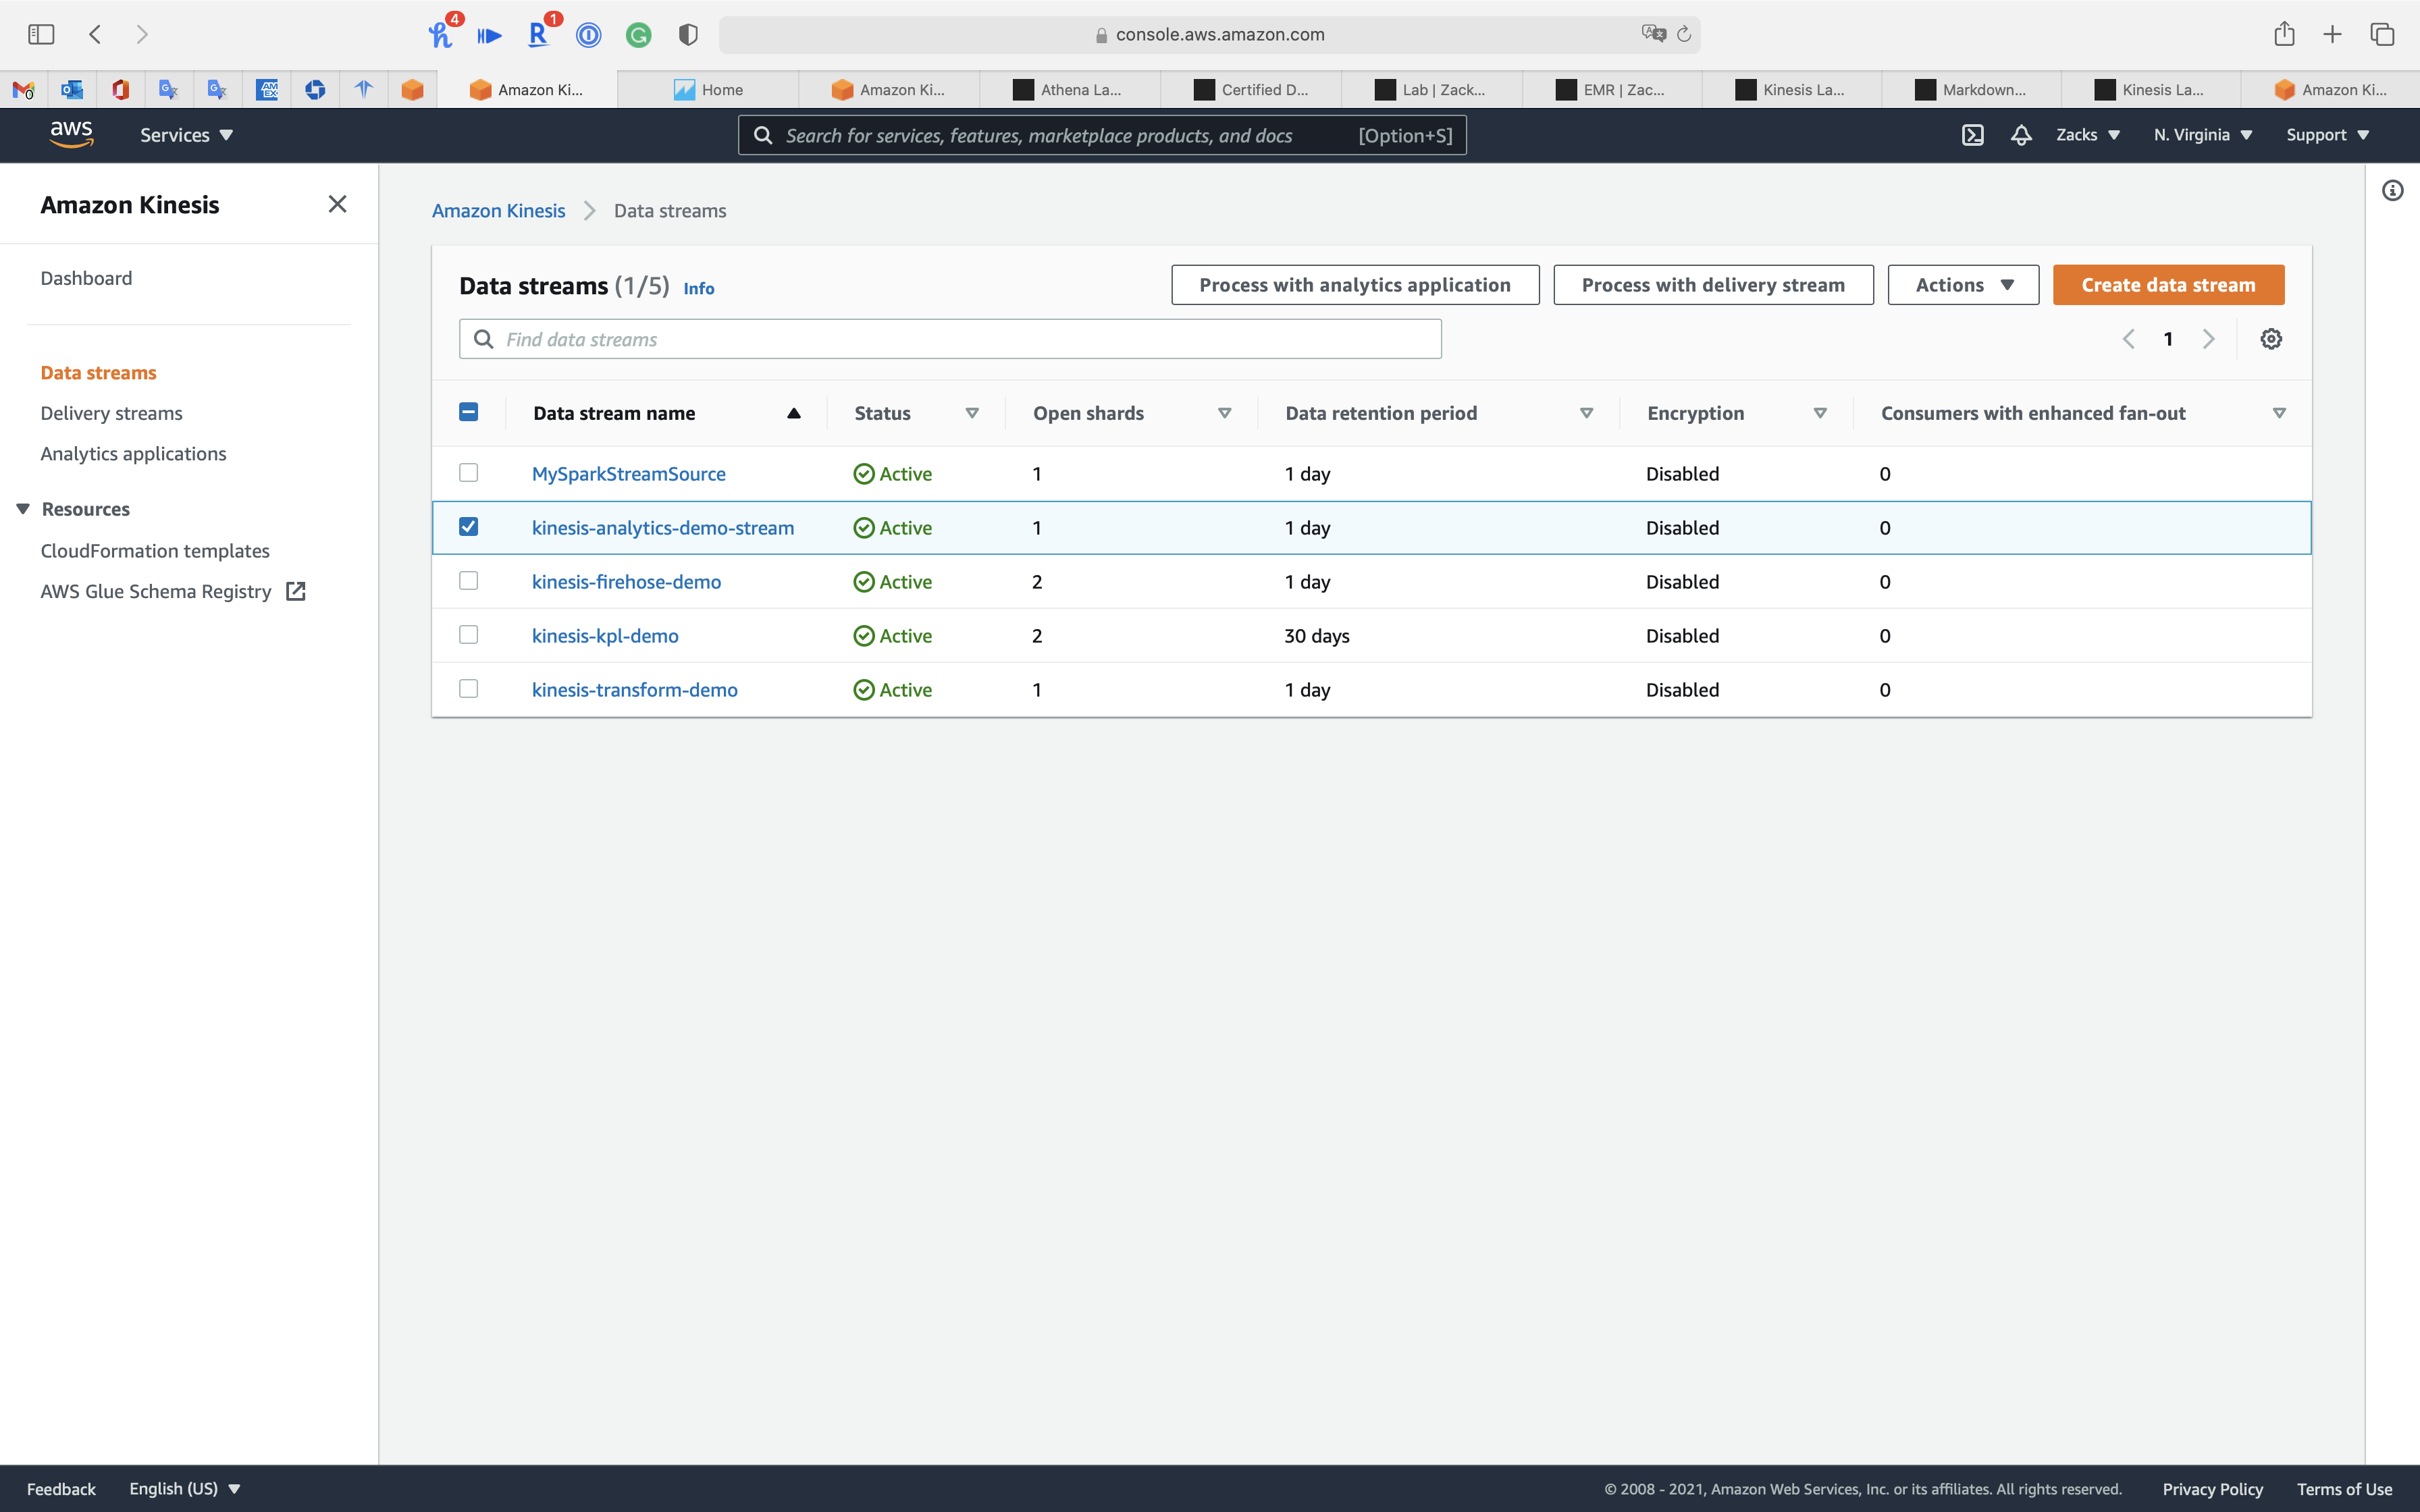
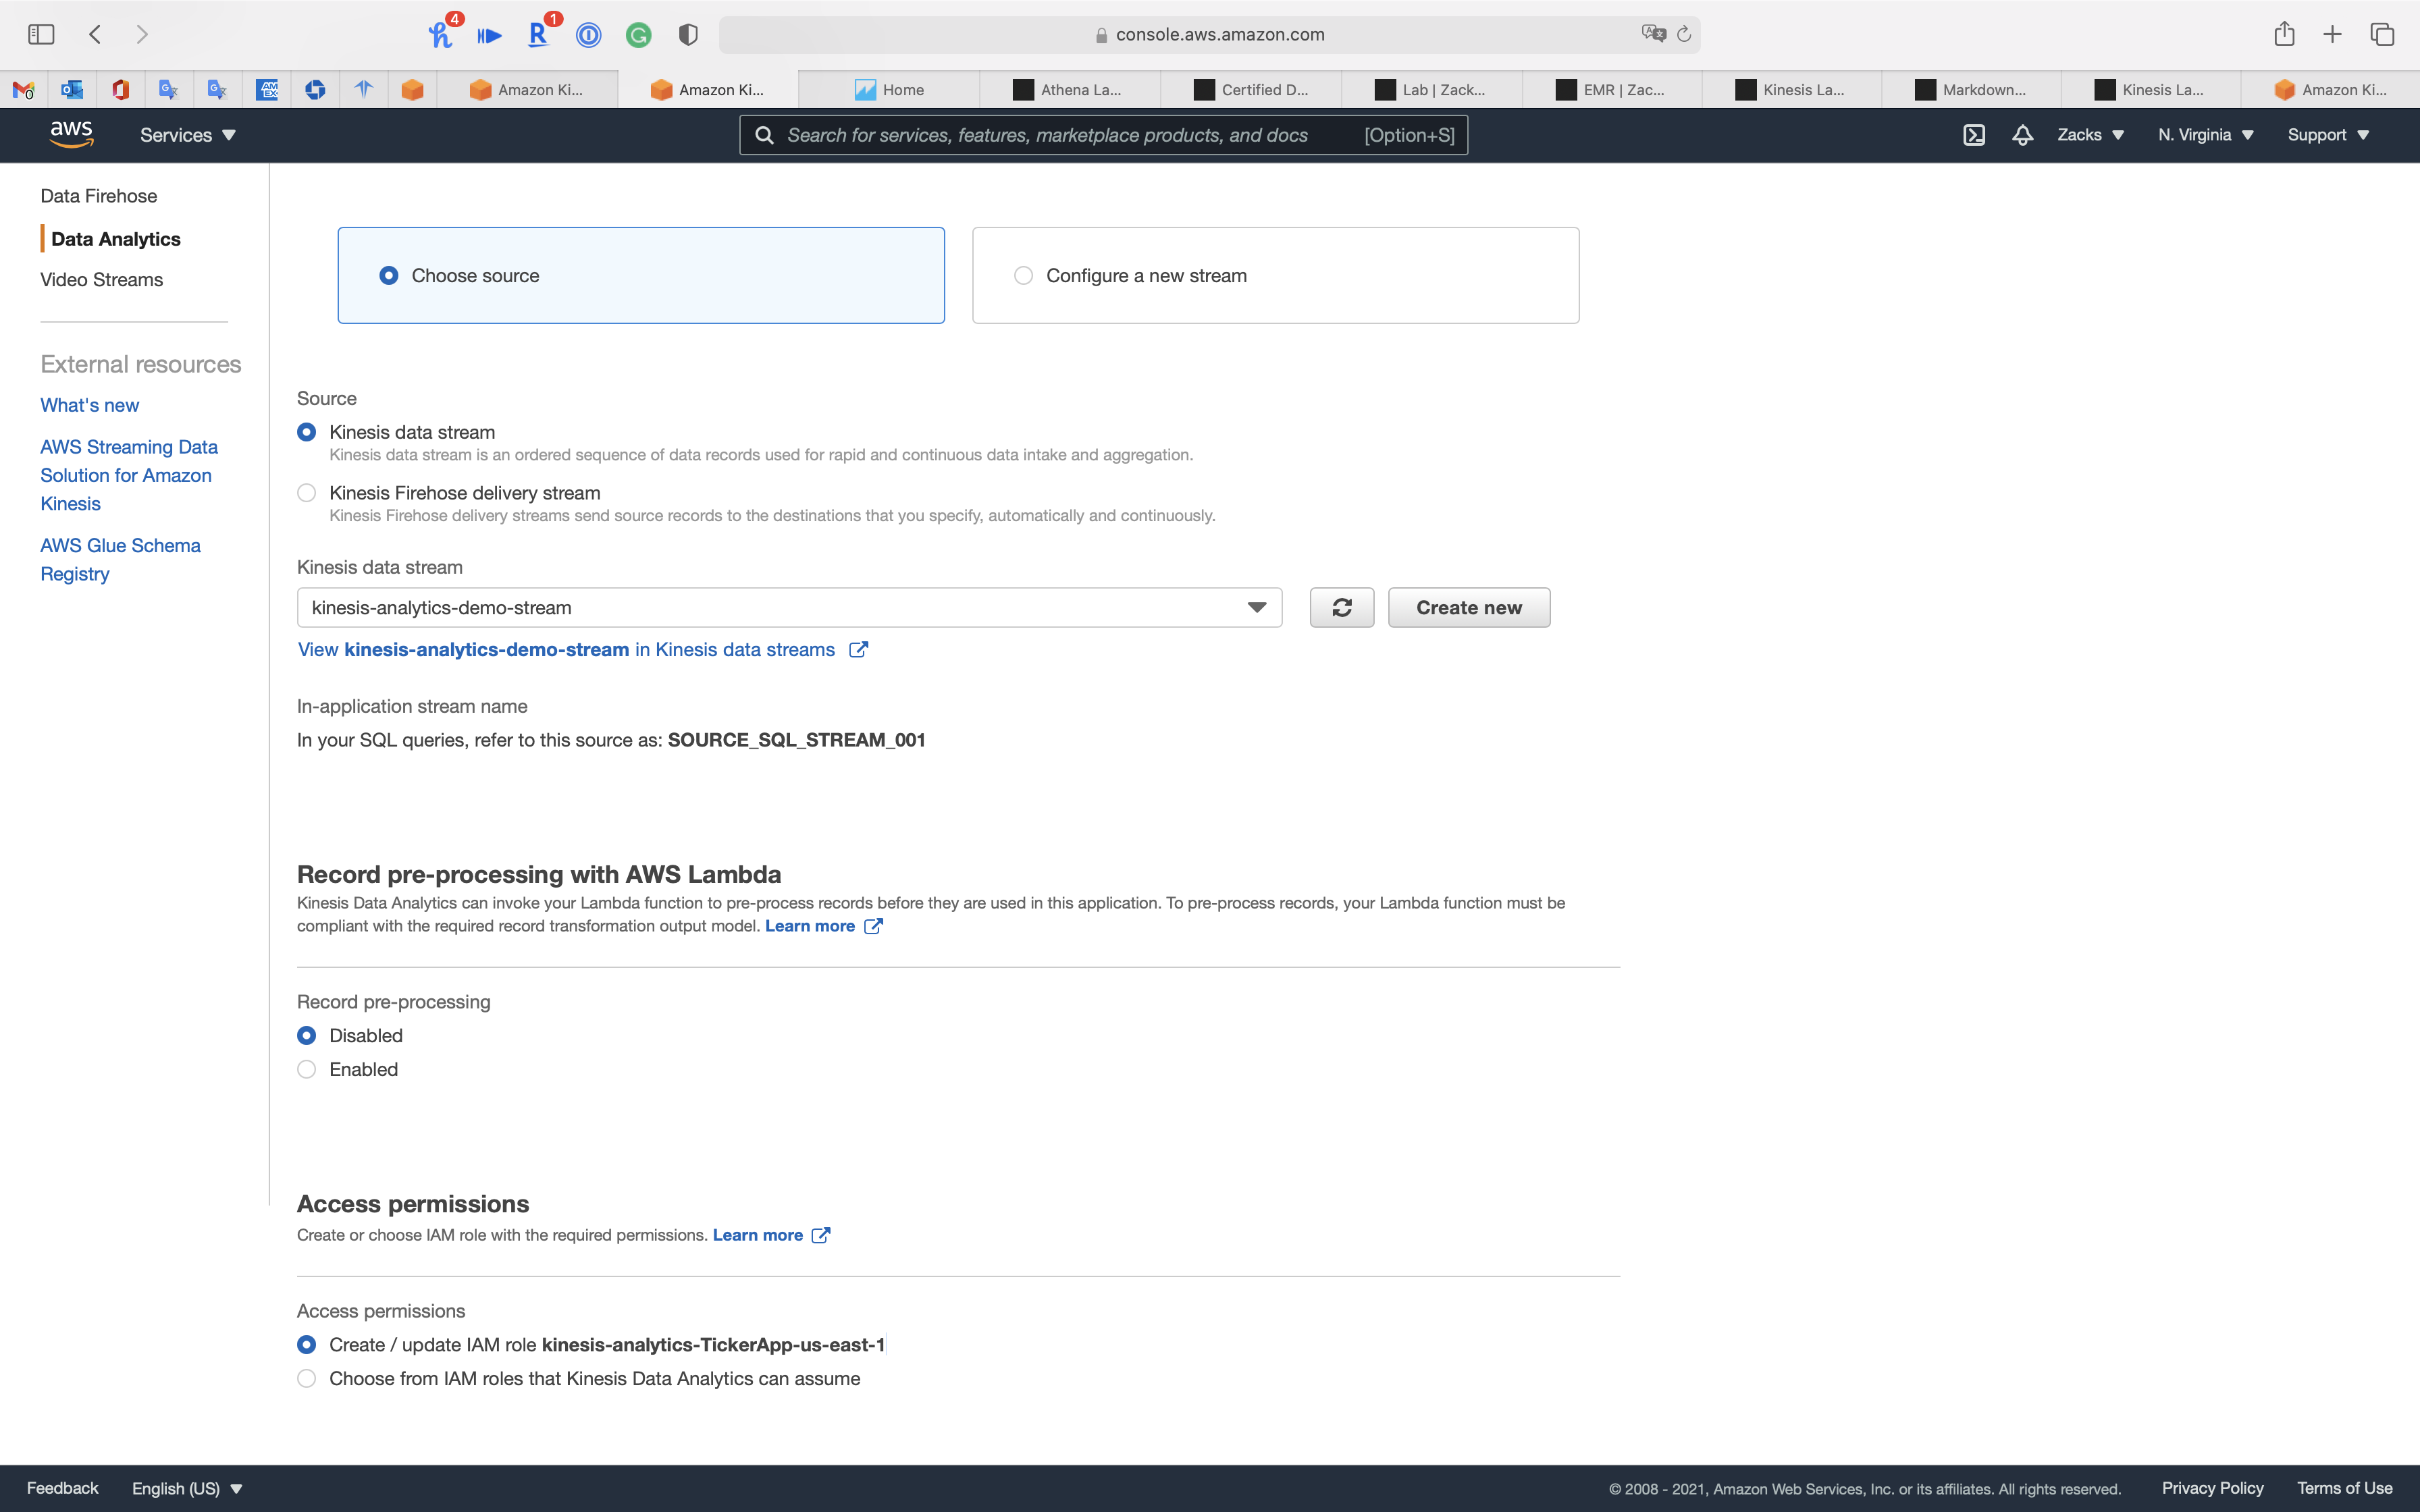
Record pre-processing with AWS Lambda
Kinesis Data Analytics can invoke your Lambda function to pre-process records before they are used in this application. To pre-process records, your Lambda function must be compliant with the required record transformation output model.
- Record pre-processing:
Disabled
Access permissions
Create or choose IAM role with the required permissions.
- Access permissions:
Create / update IAM role kinesis-analytics-TickerApp-us-east-1
Schema
Schema discovery can generate a schema using recent records from the source. Schema column names are the same as in the source, unless they contain special characters, repeated column names, or reserved keywords.
Click on Save and continue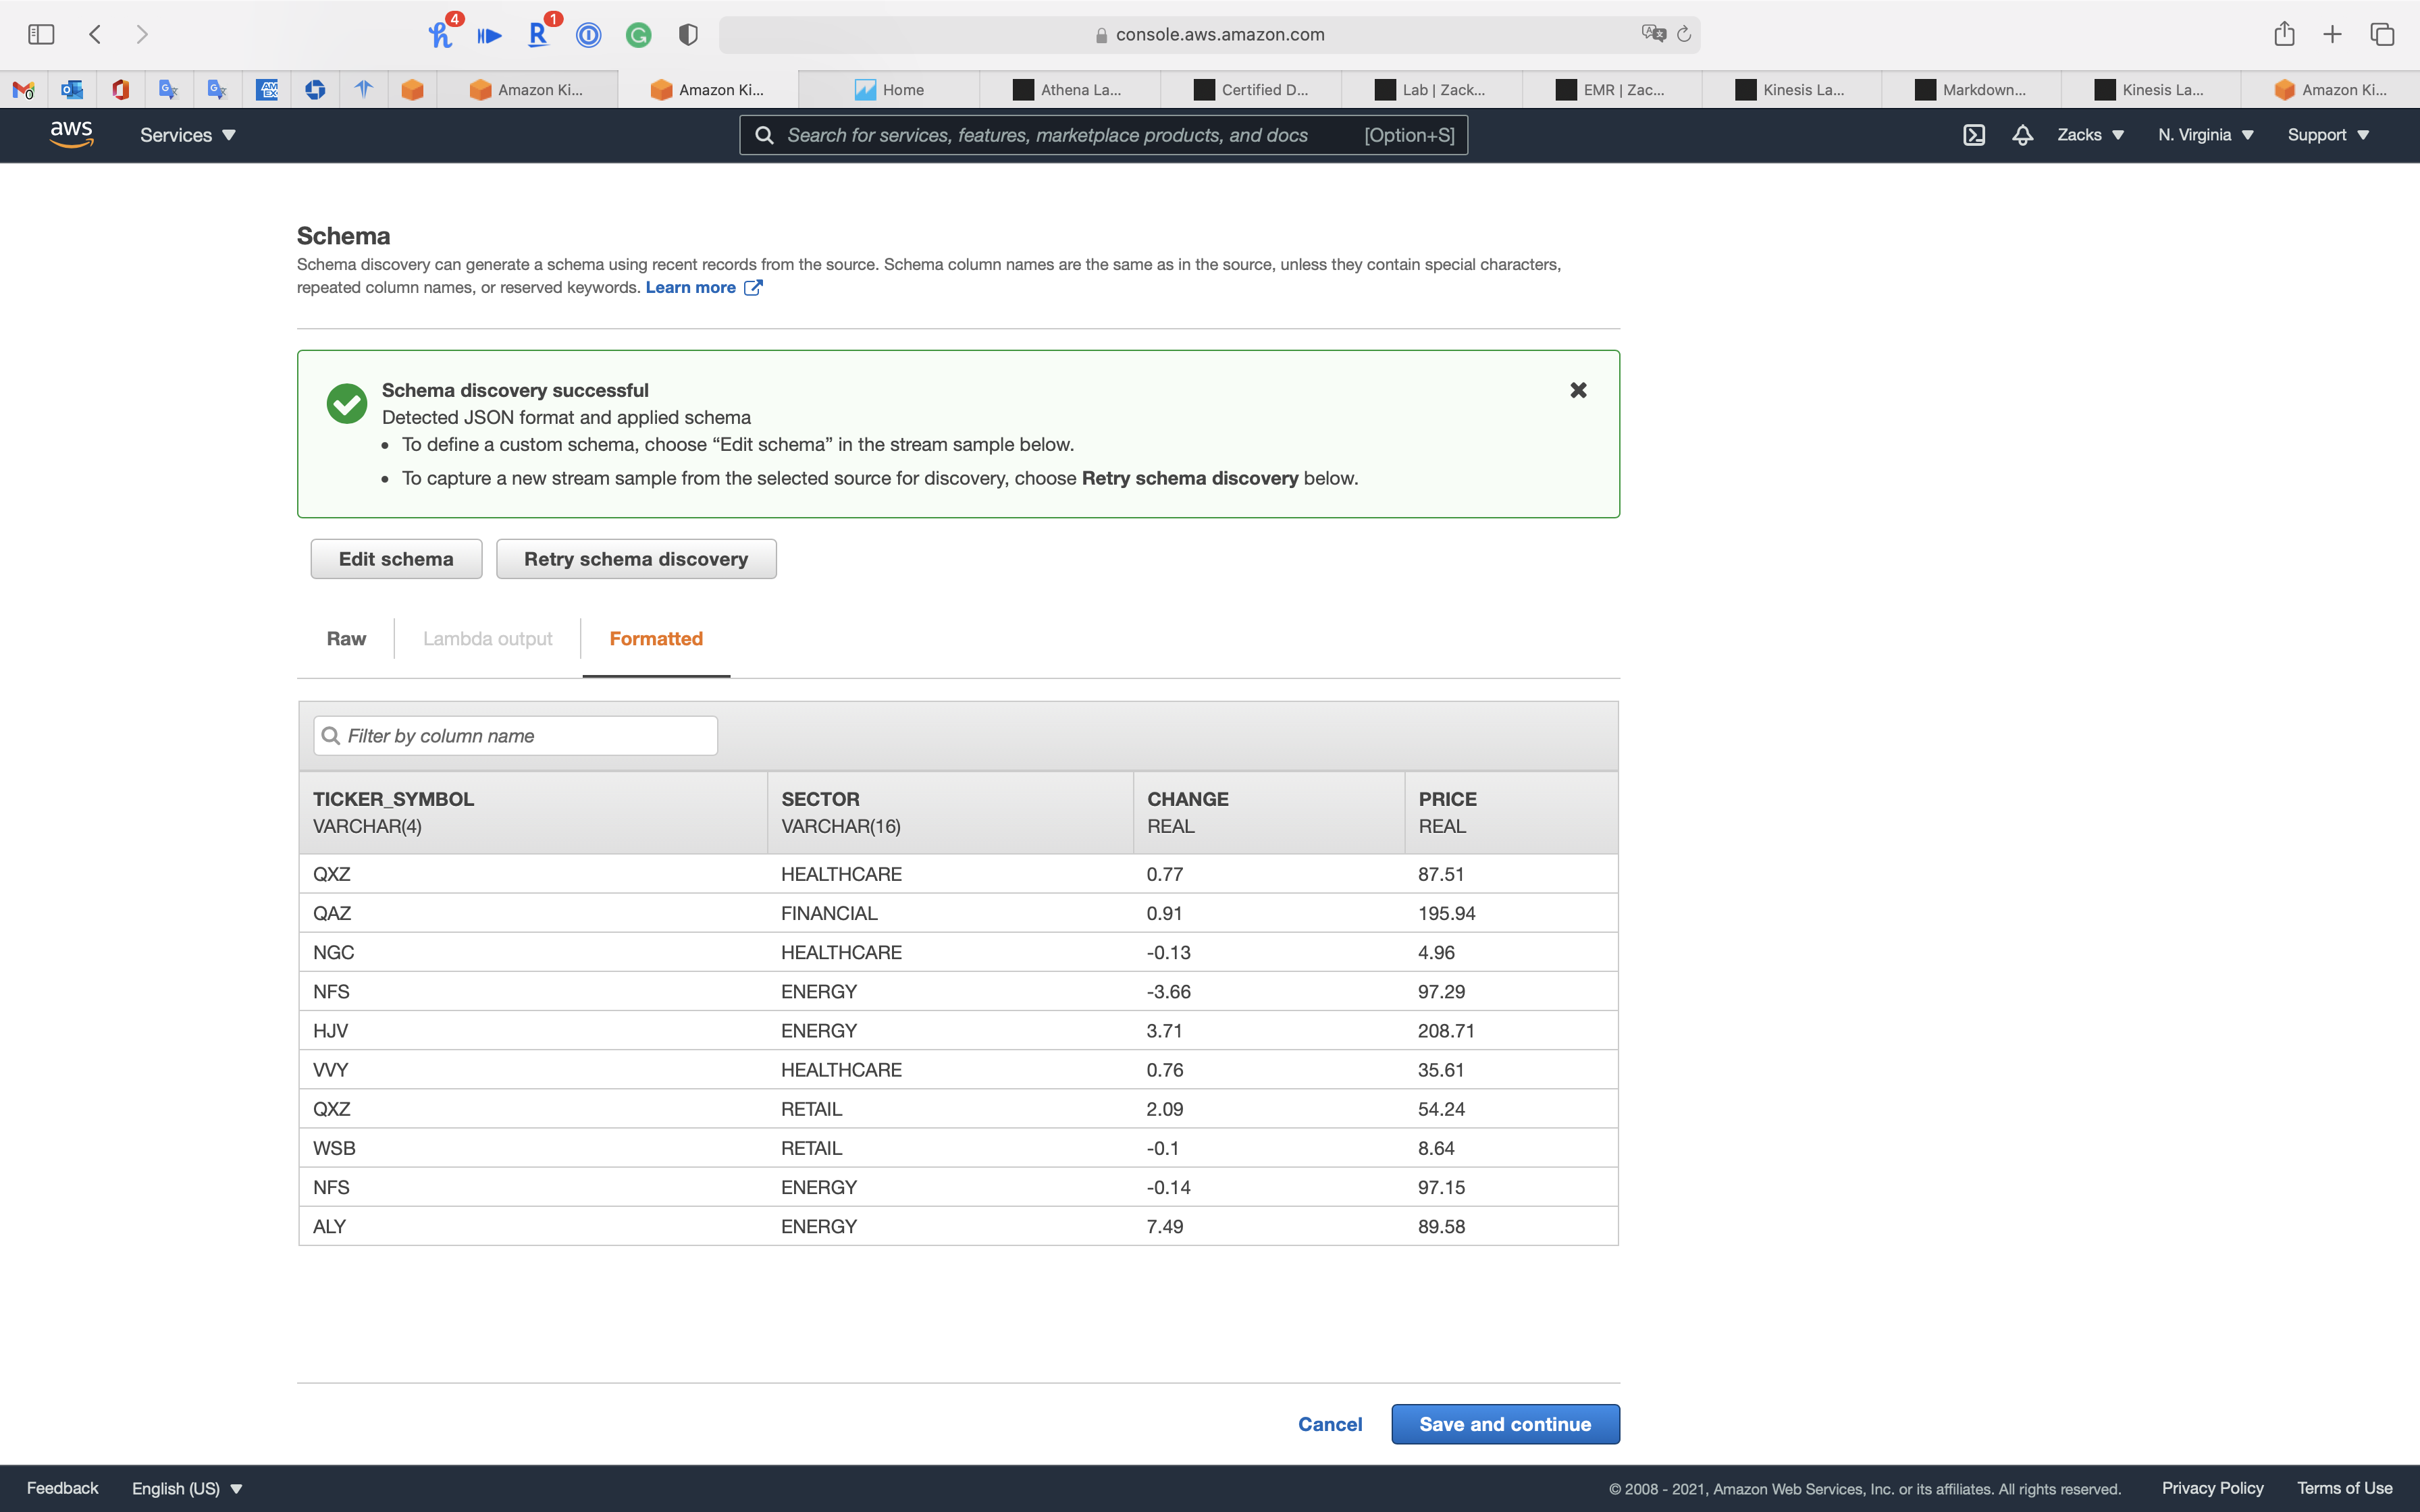
Step 2: Real time analytics
Click on Go to SQL editor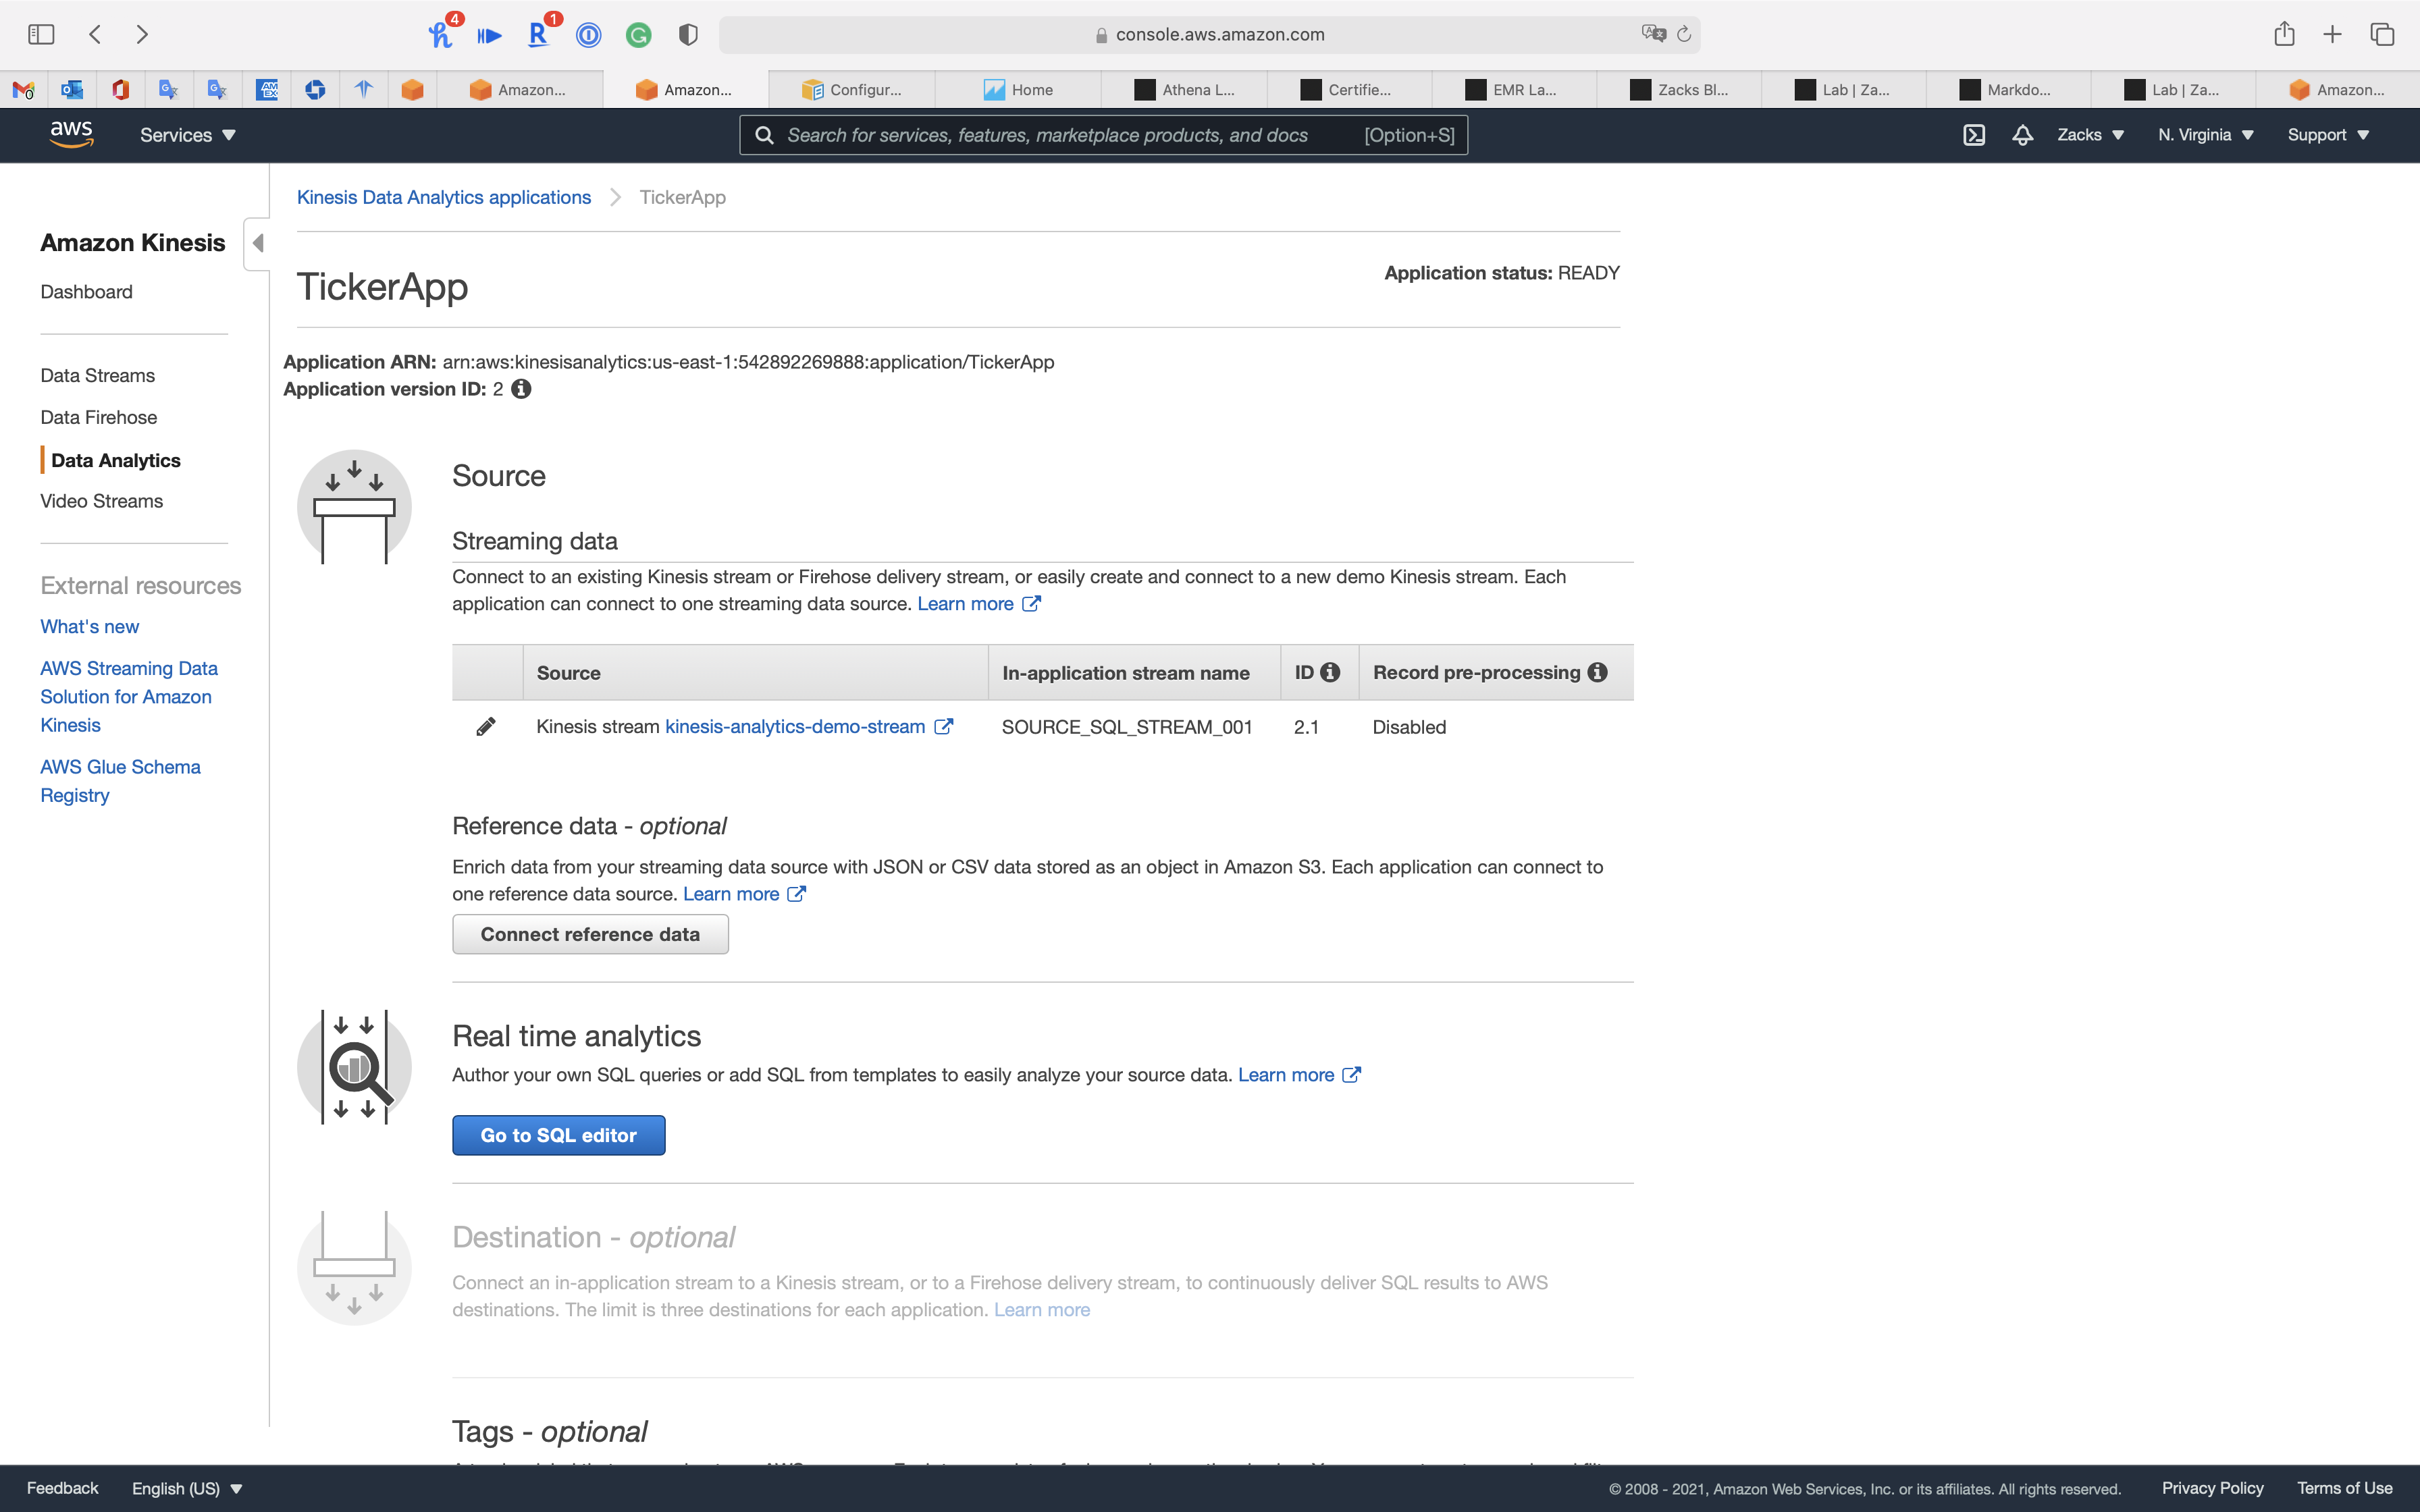
The SQL editor is much more powerful when your application is running.
- See samples from your source data stream
- Get feedback on any errors in your configuration or SQL
- Watch as your data is processed in real-time by your SQL code
Click on Yes, start application
Click on Add SQL from templates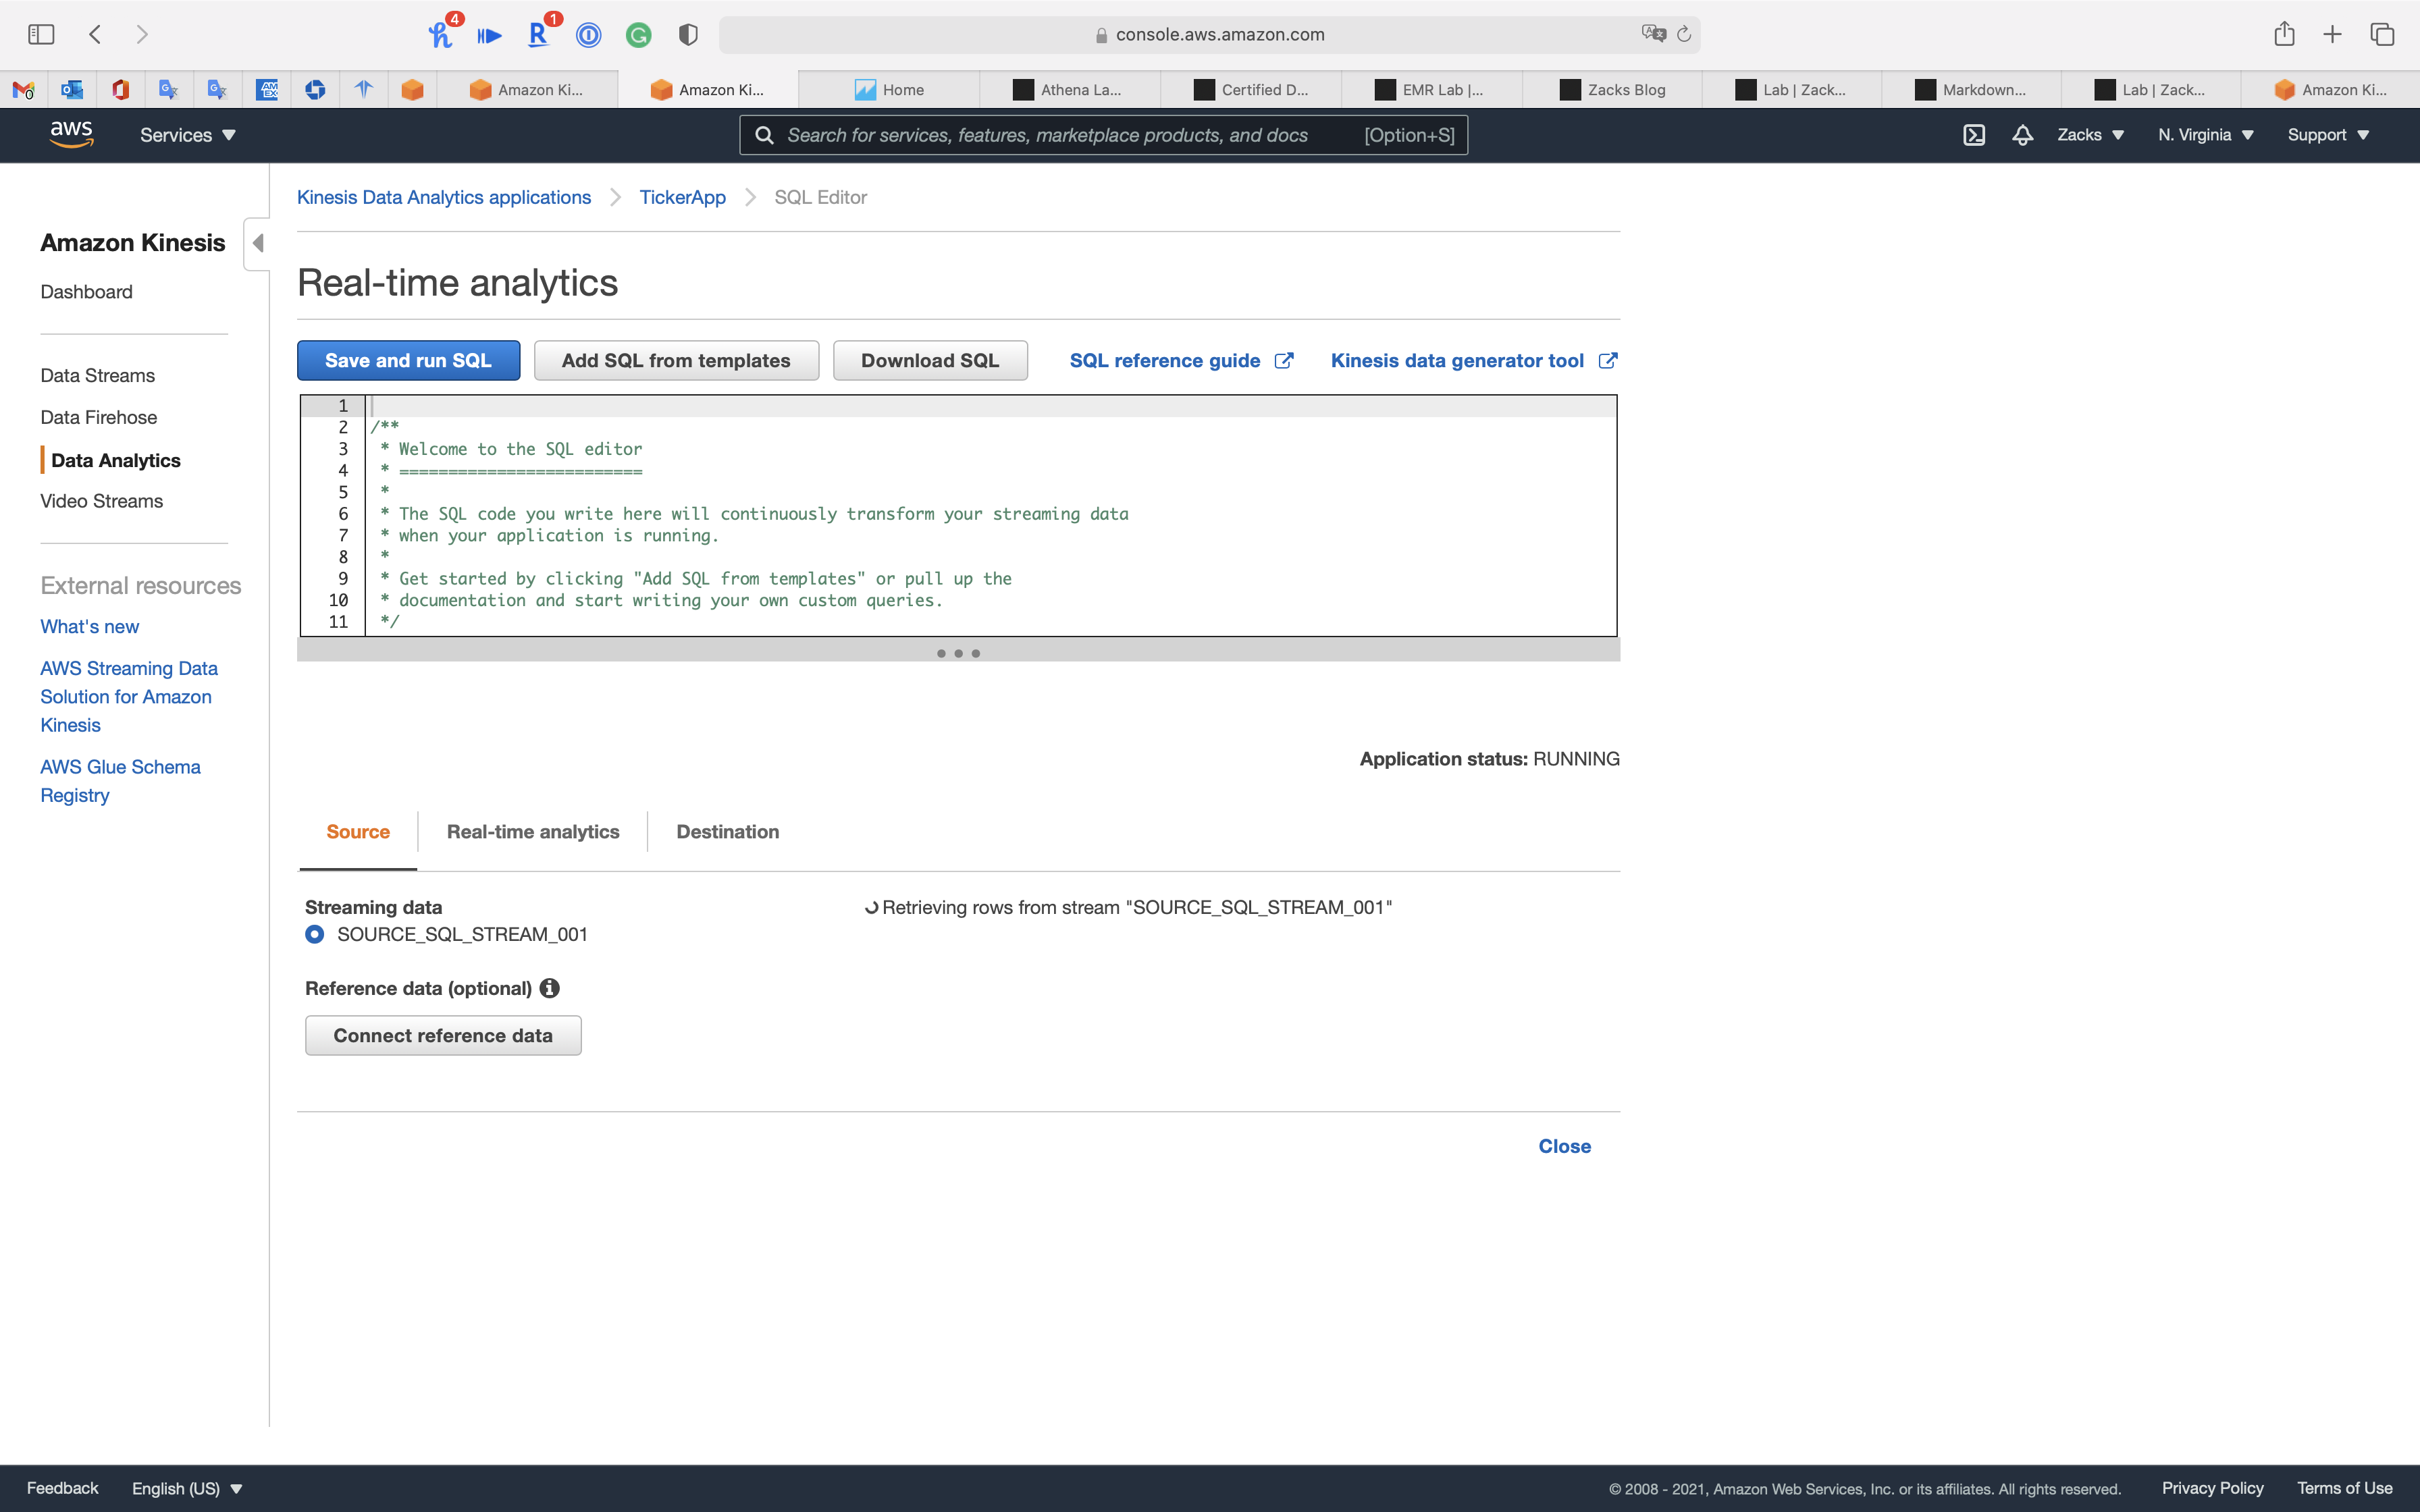
Select Continuous filter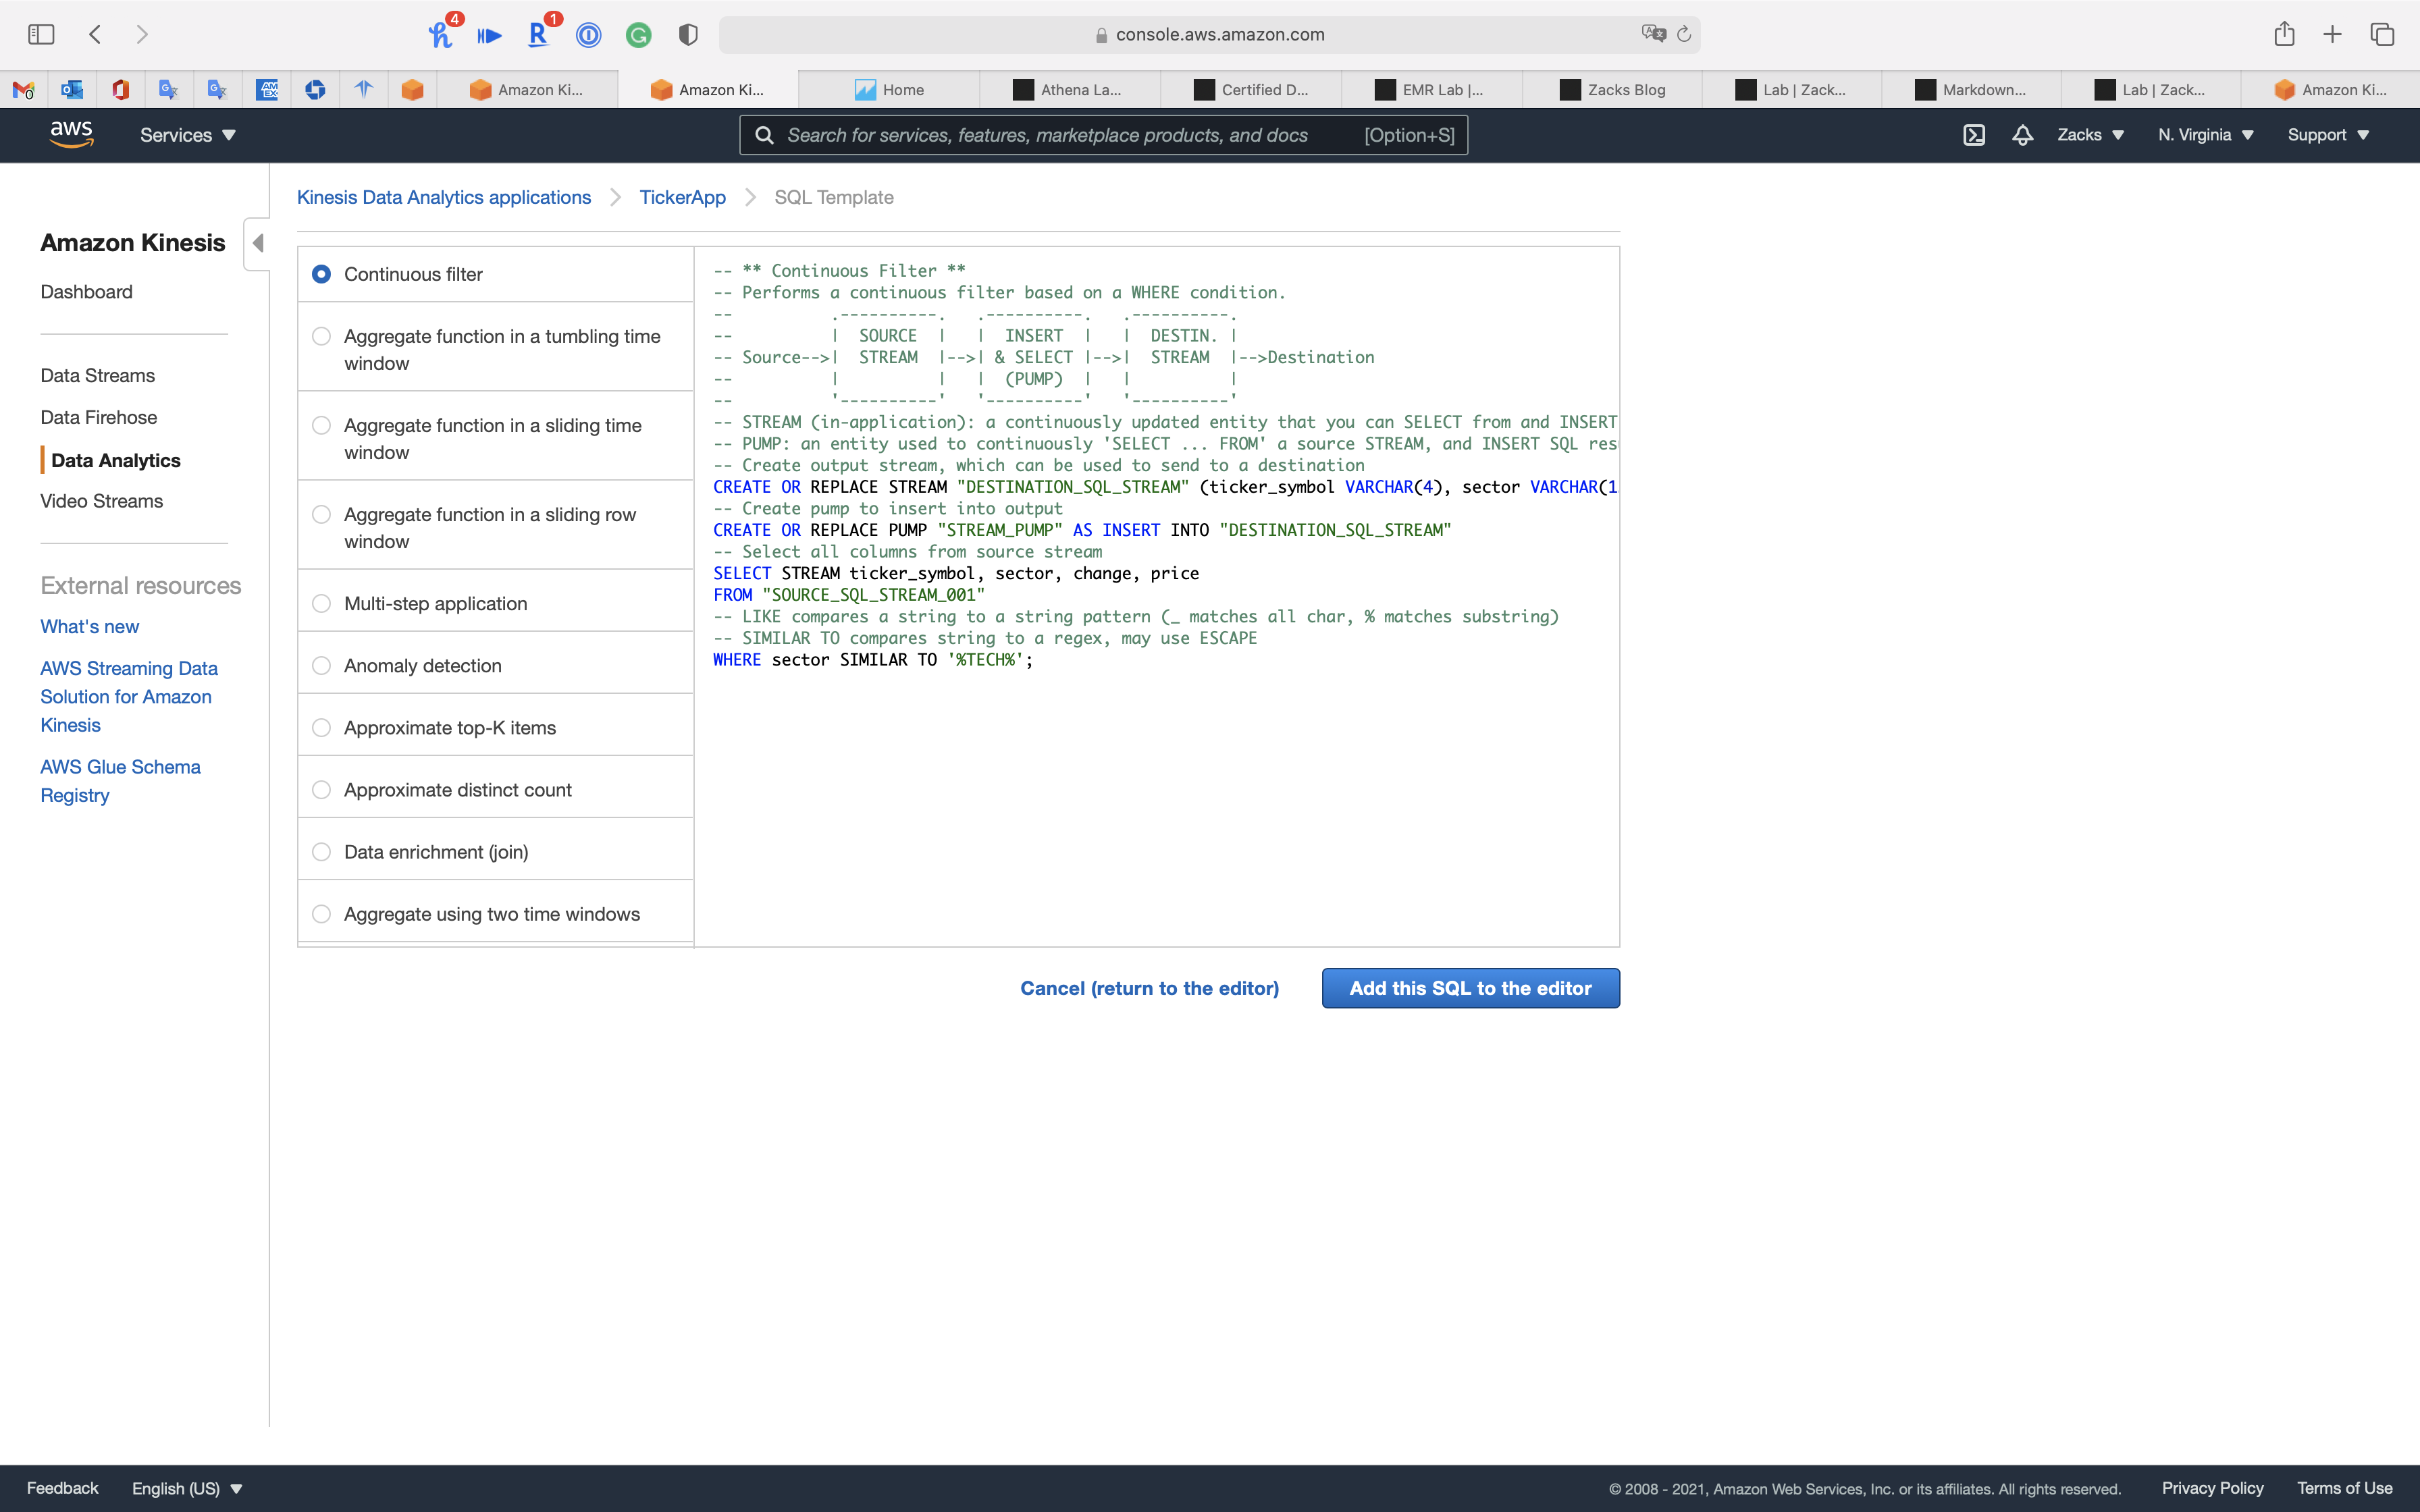
1 | -- ** Continuous Filter ** |
Click Add this SQL to the editor
Click Save and run SQL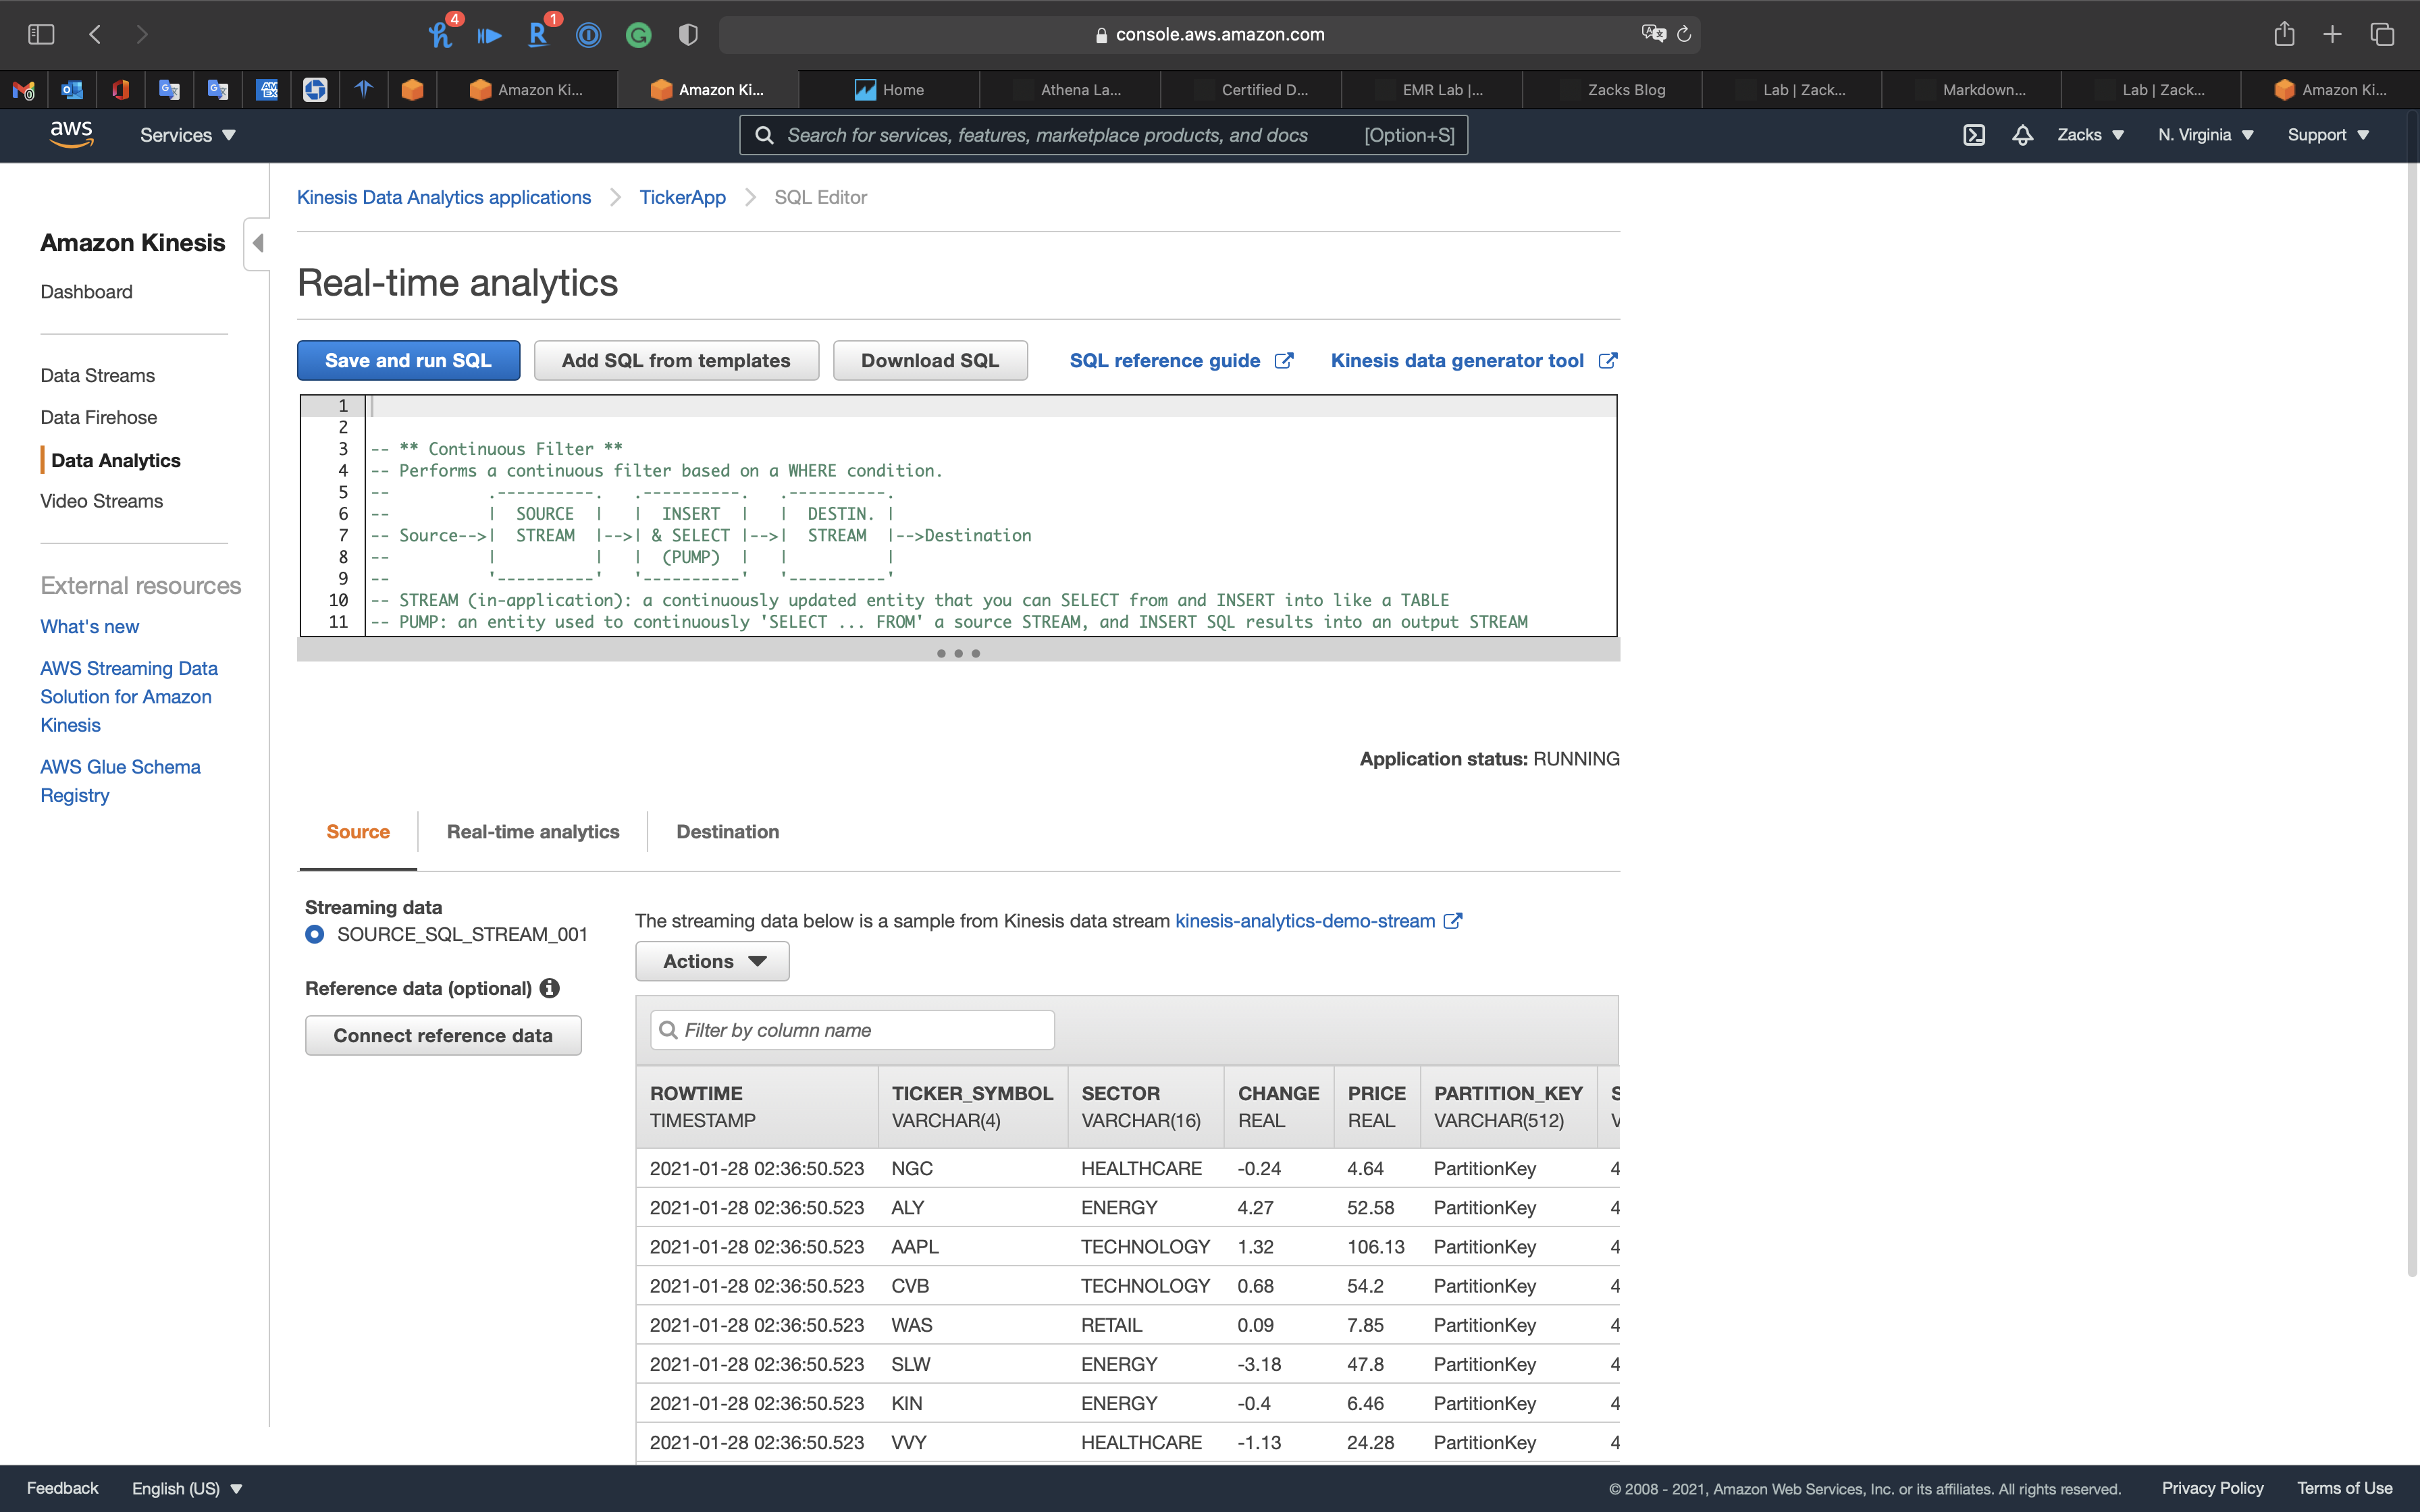
Click on Destination tab
We are going to send the in-application stream to Kinesis Firehose Delivery System.
Click on Connect to a destination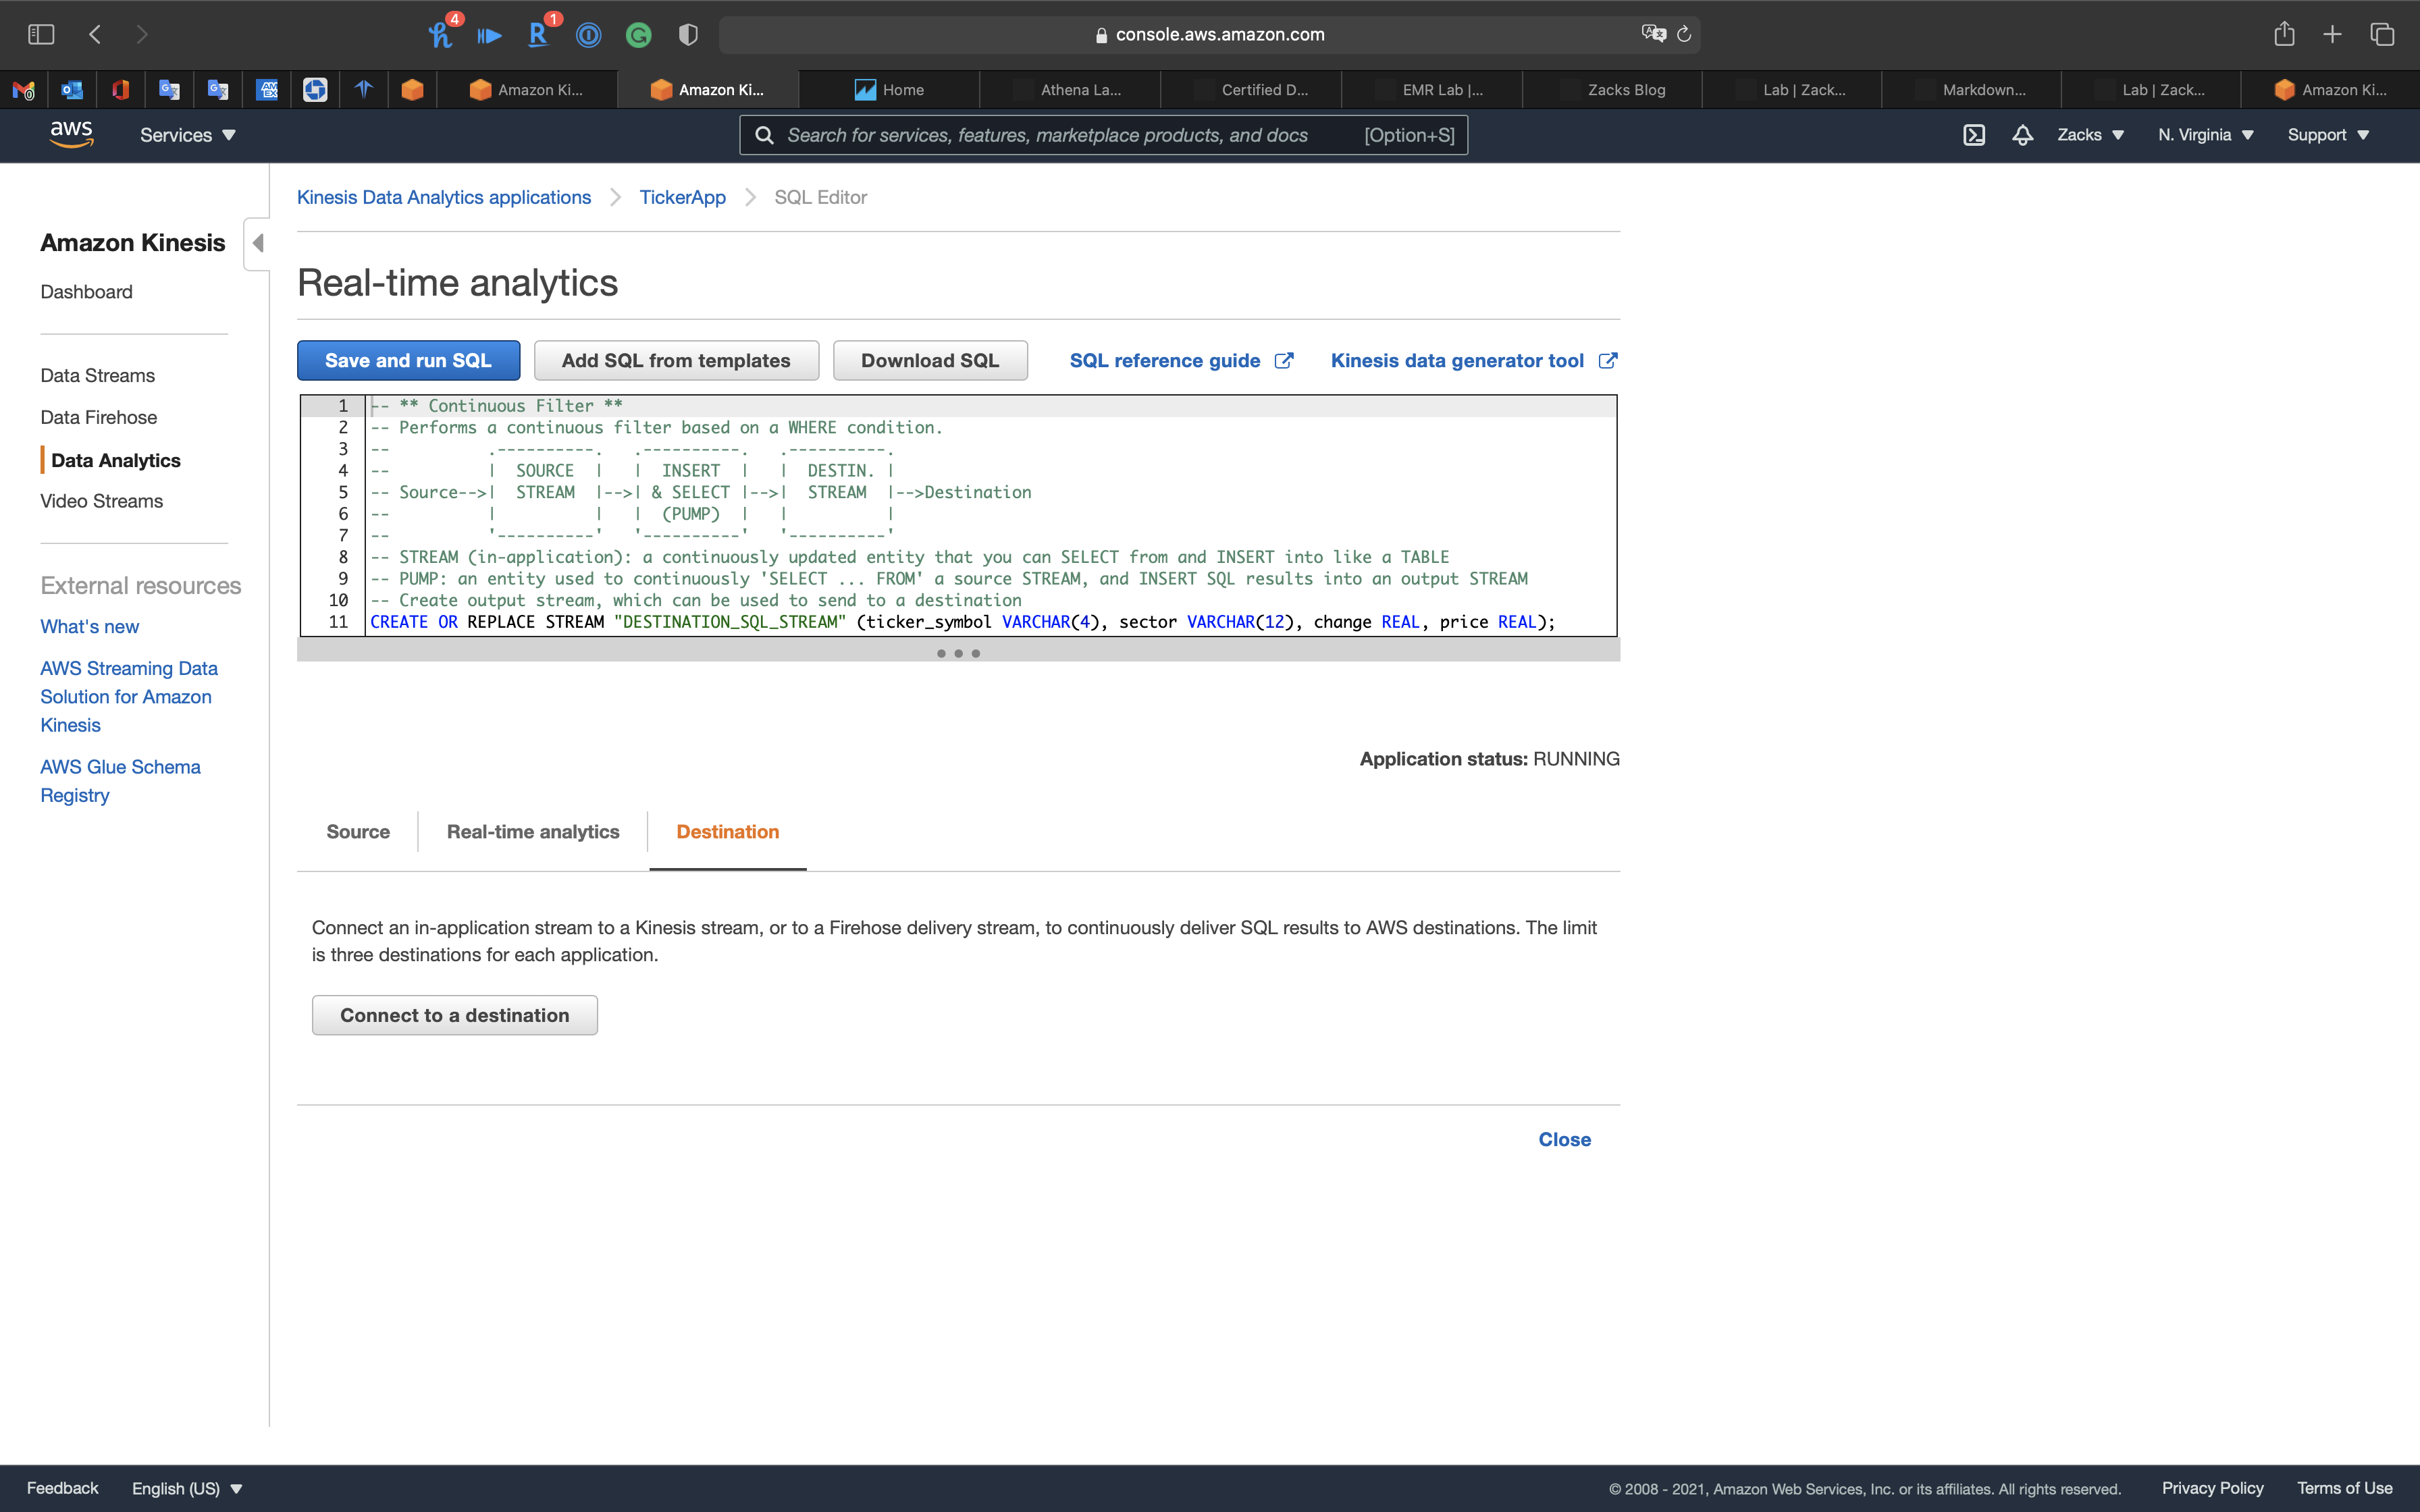
Step 3: Destination optional
- Destination:
Kinesis Firehose delivery system
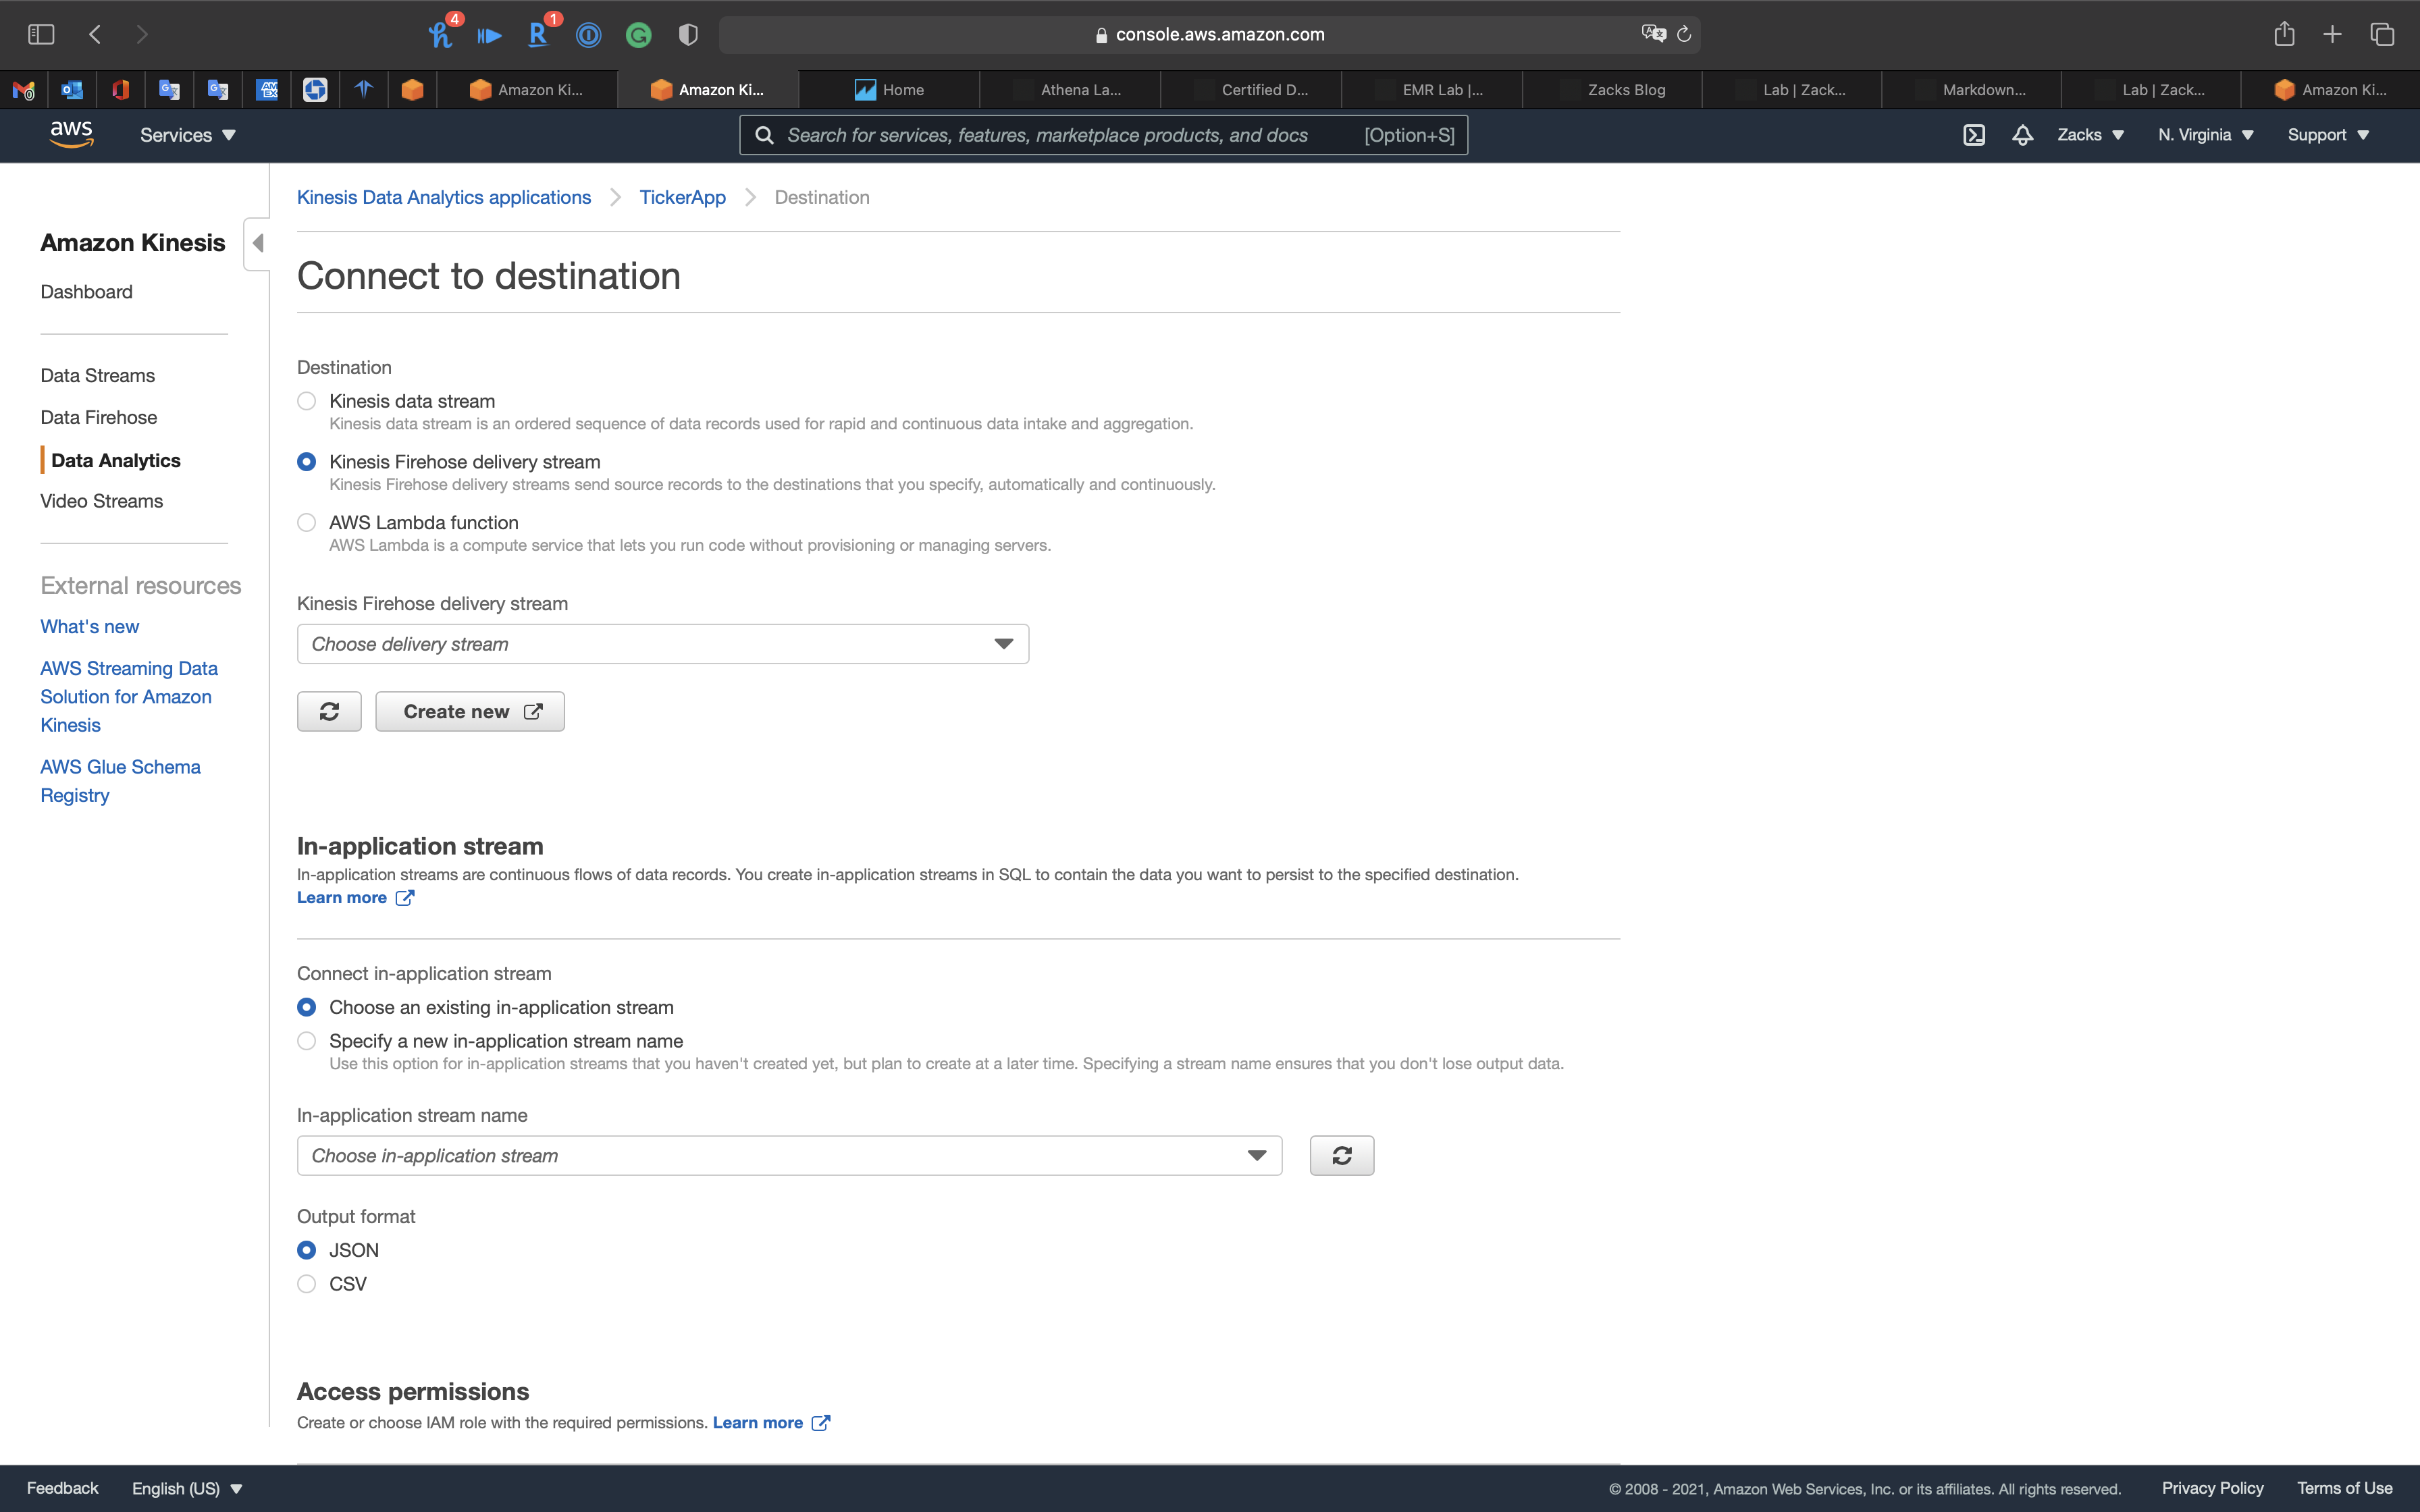
If you choose a Kinesis Data Firehose connected to a Kinesis Data Streams. You will see the following error:Delivery stream *** is connected to Kinesis data stream ***. Delivery streams that receive records from a Kinesis data stream cannot connect to an Analytics application. Instead, choose the connected Kinesis data stream.
It means you need to let the Kinesis Data Analytics App connecting to Kinesis Data Firehose directly. The Data transferring path is: Kinesis Data Streams -> Kinesis Data Analytics -> Kinesis Data Firehose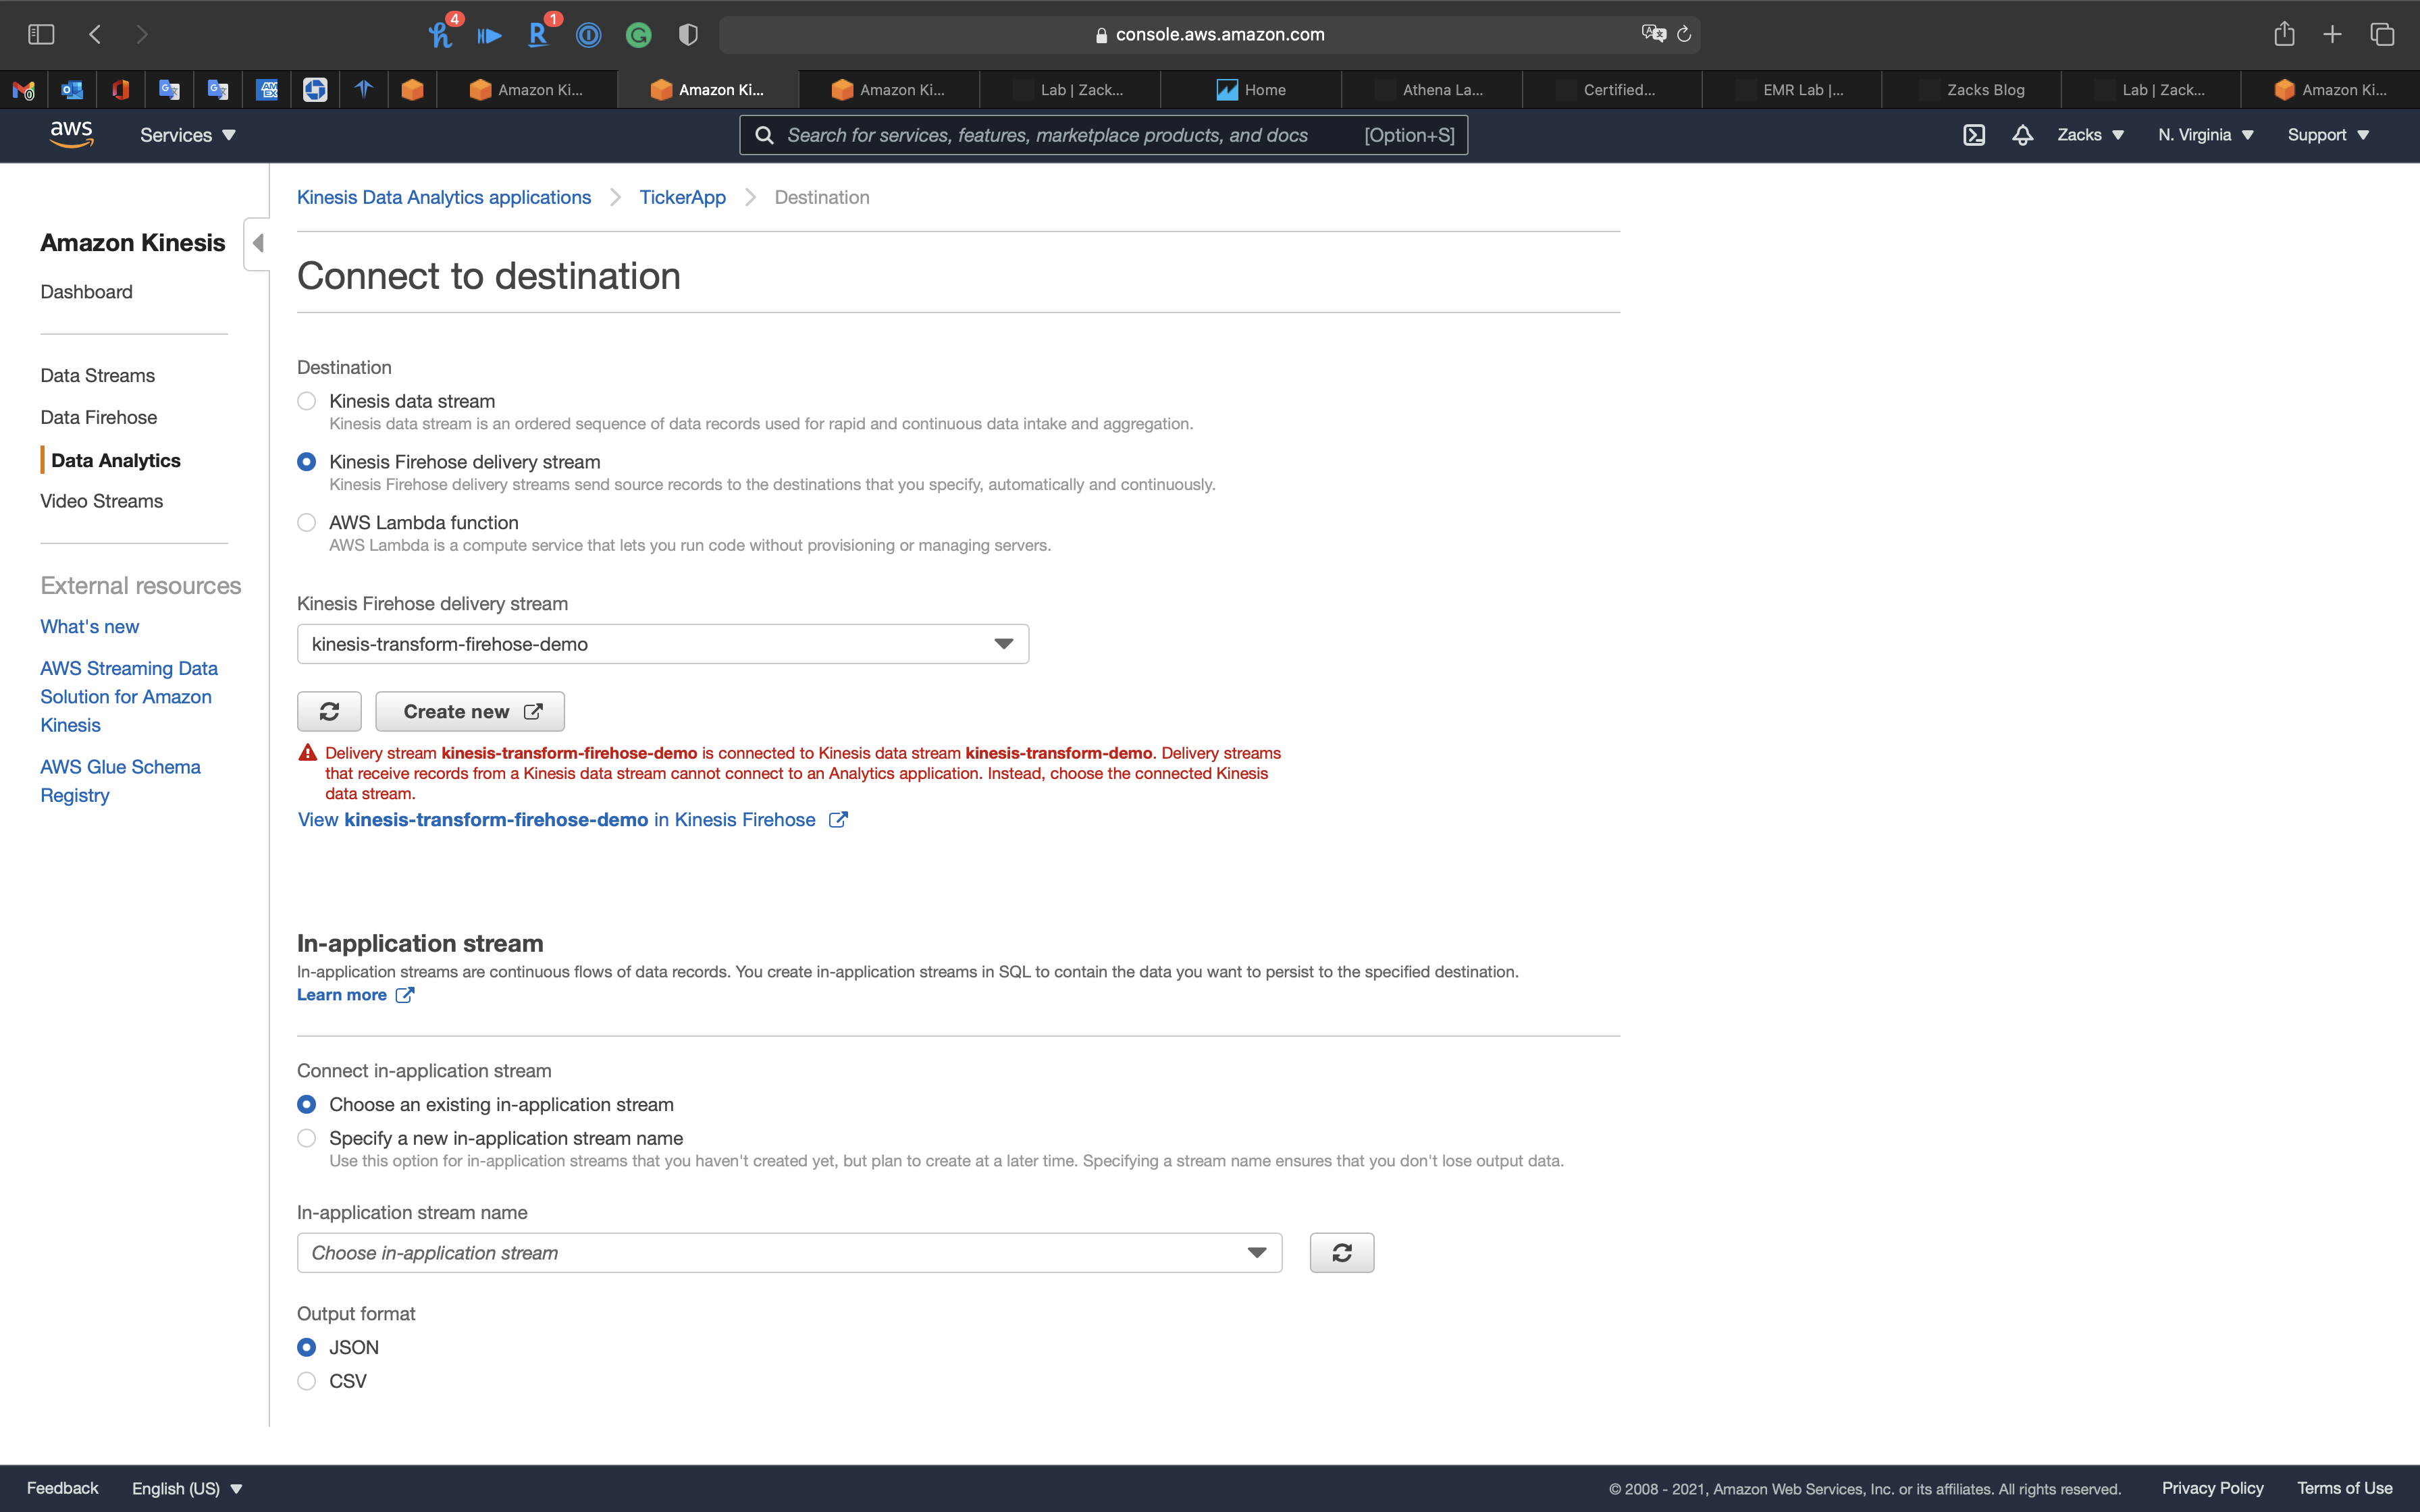
- Kinesis Firehose delivery system:
kinesis-analytics-demo-firehose
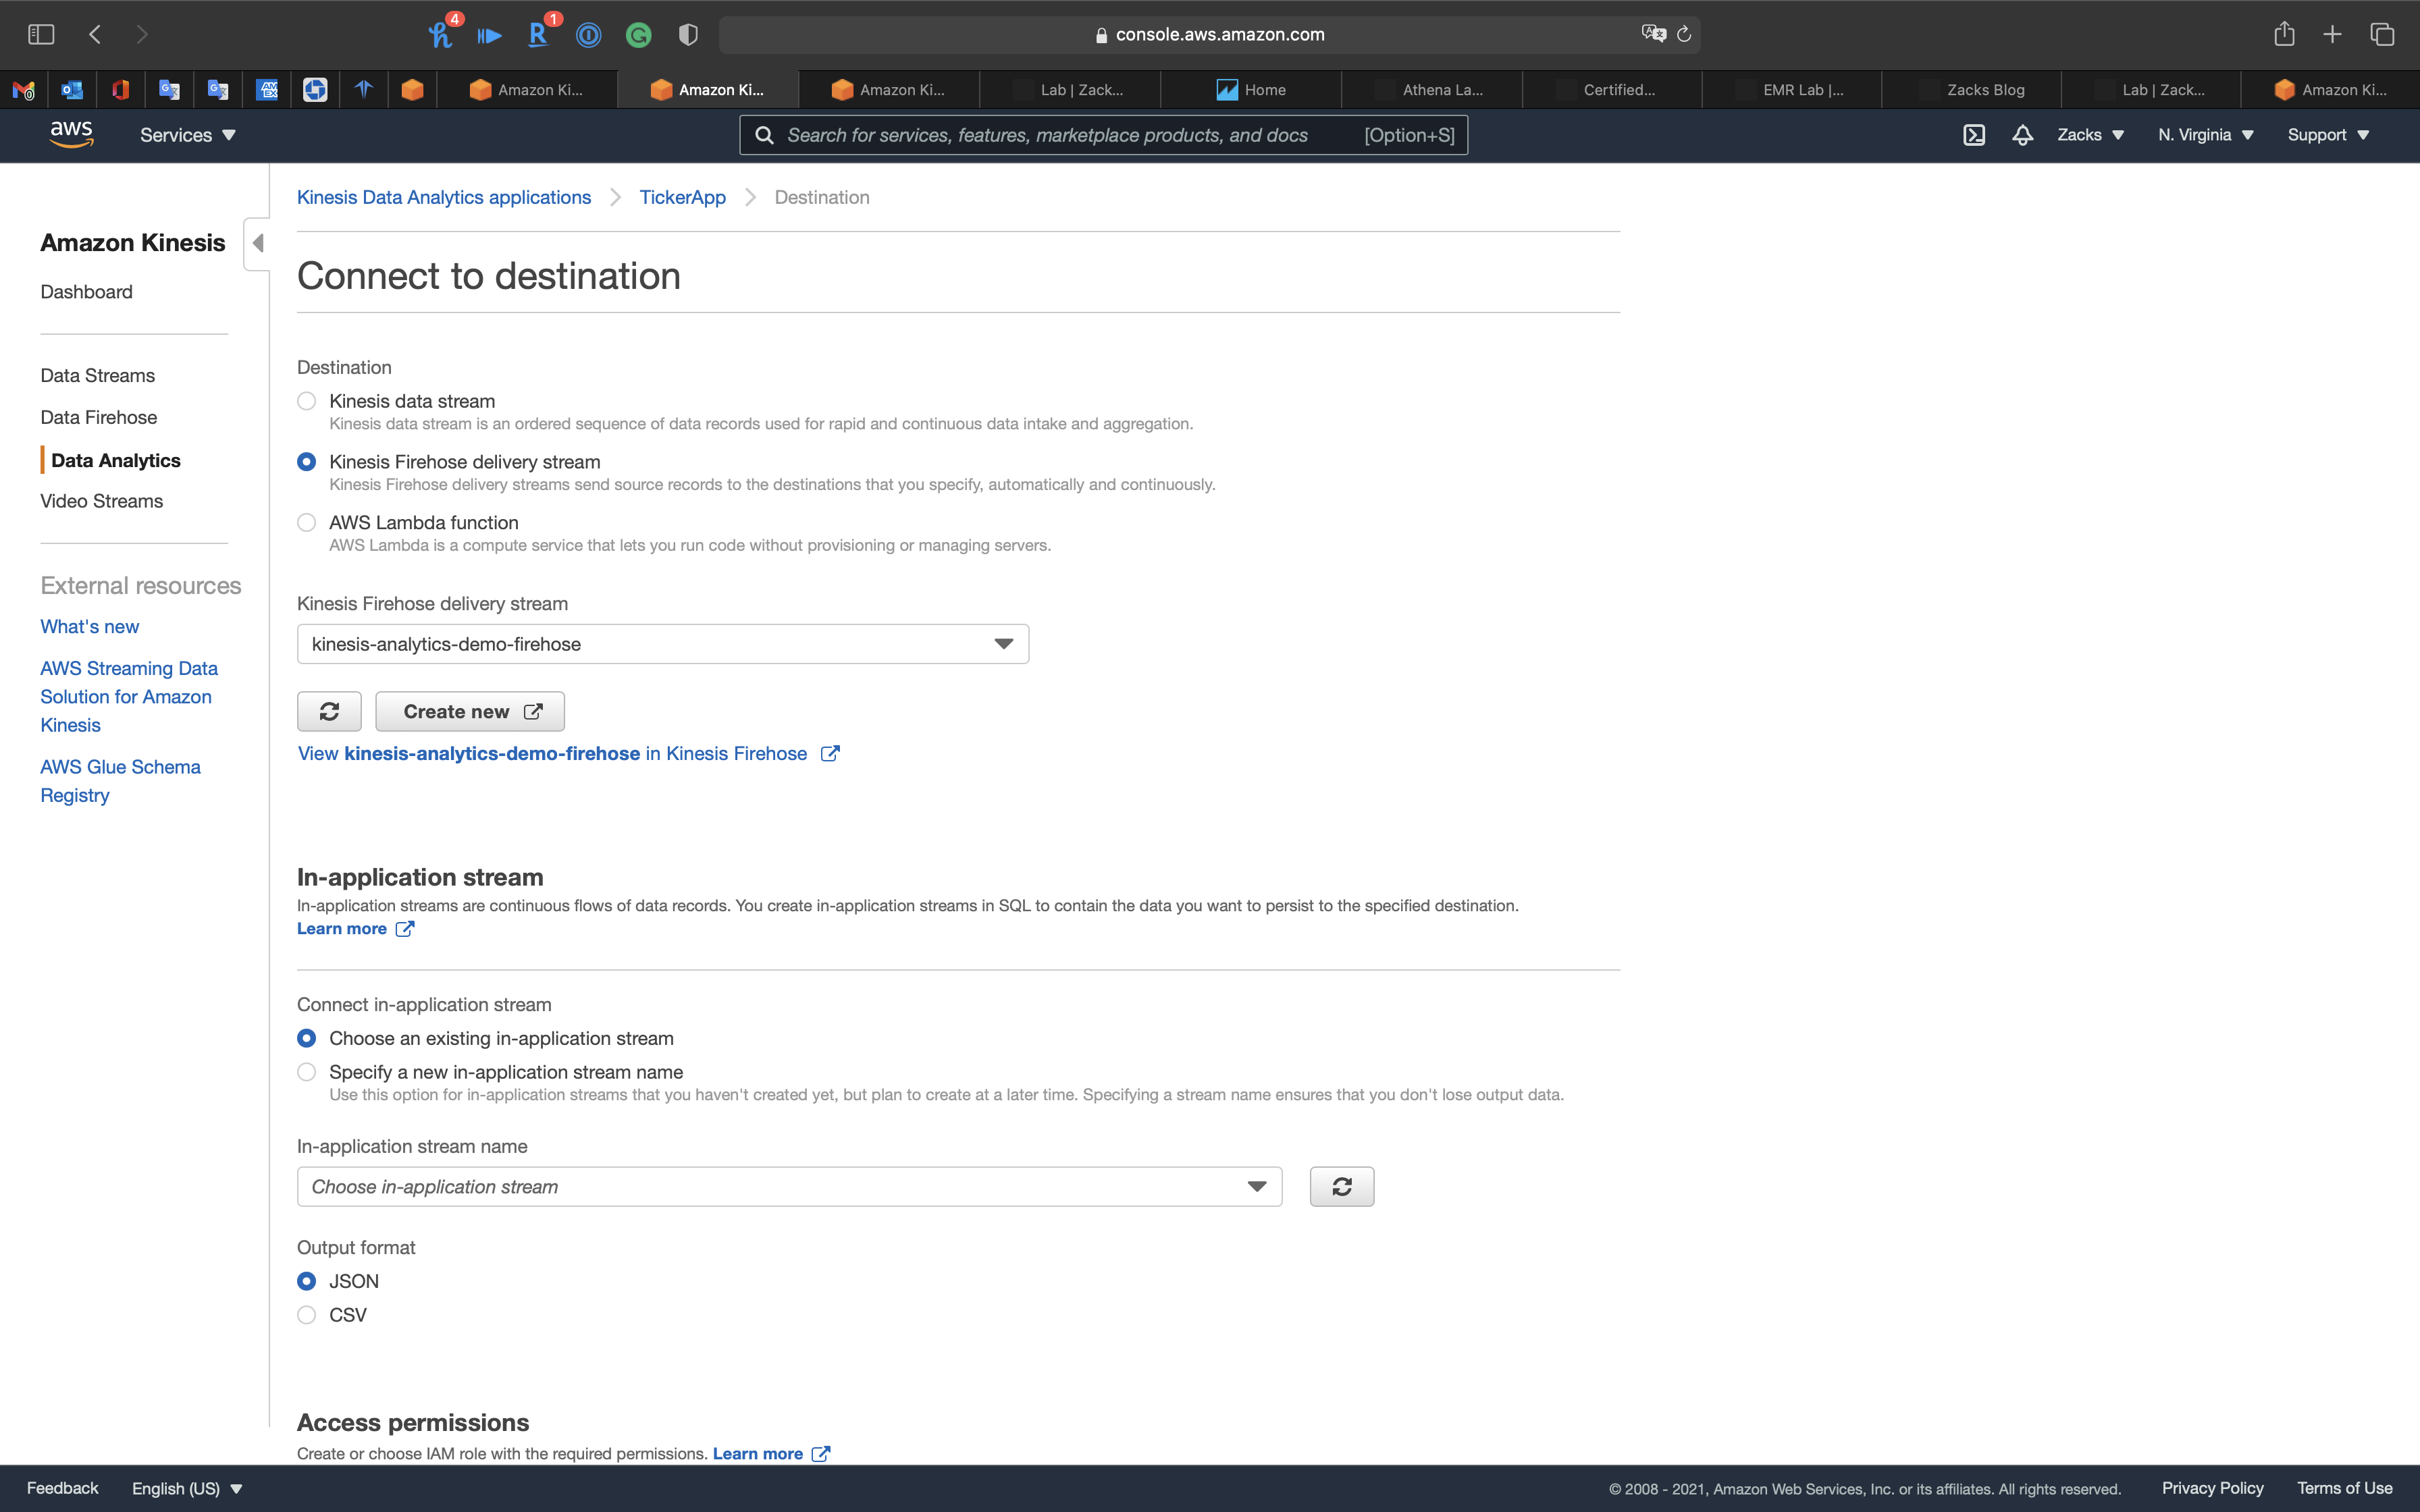
In-application stream
In-application streams are continuous flows of data records. You create in-application streams in SQL to contain the data you want to persist to the specified destination.
- Connect in-application stream:
Choose an existing in-application stream - In-application stream name:
DESTINATION_SQL_STREAM - Output format:
JSON
Click on Save and continue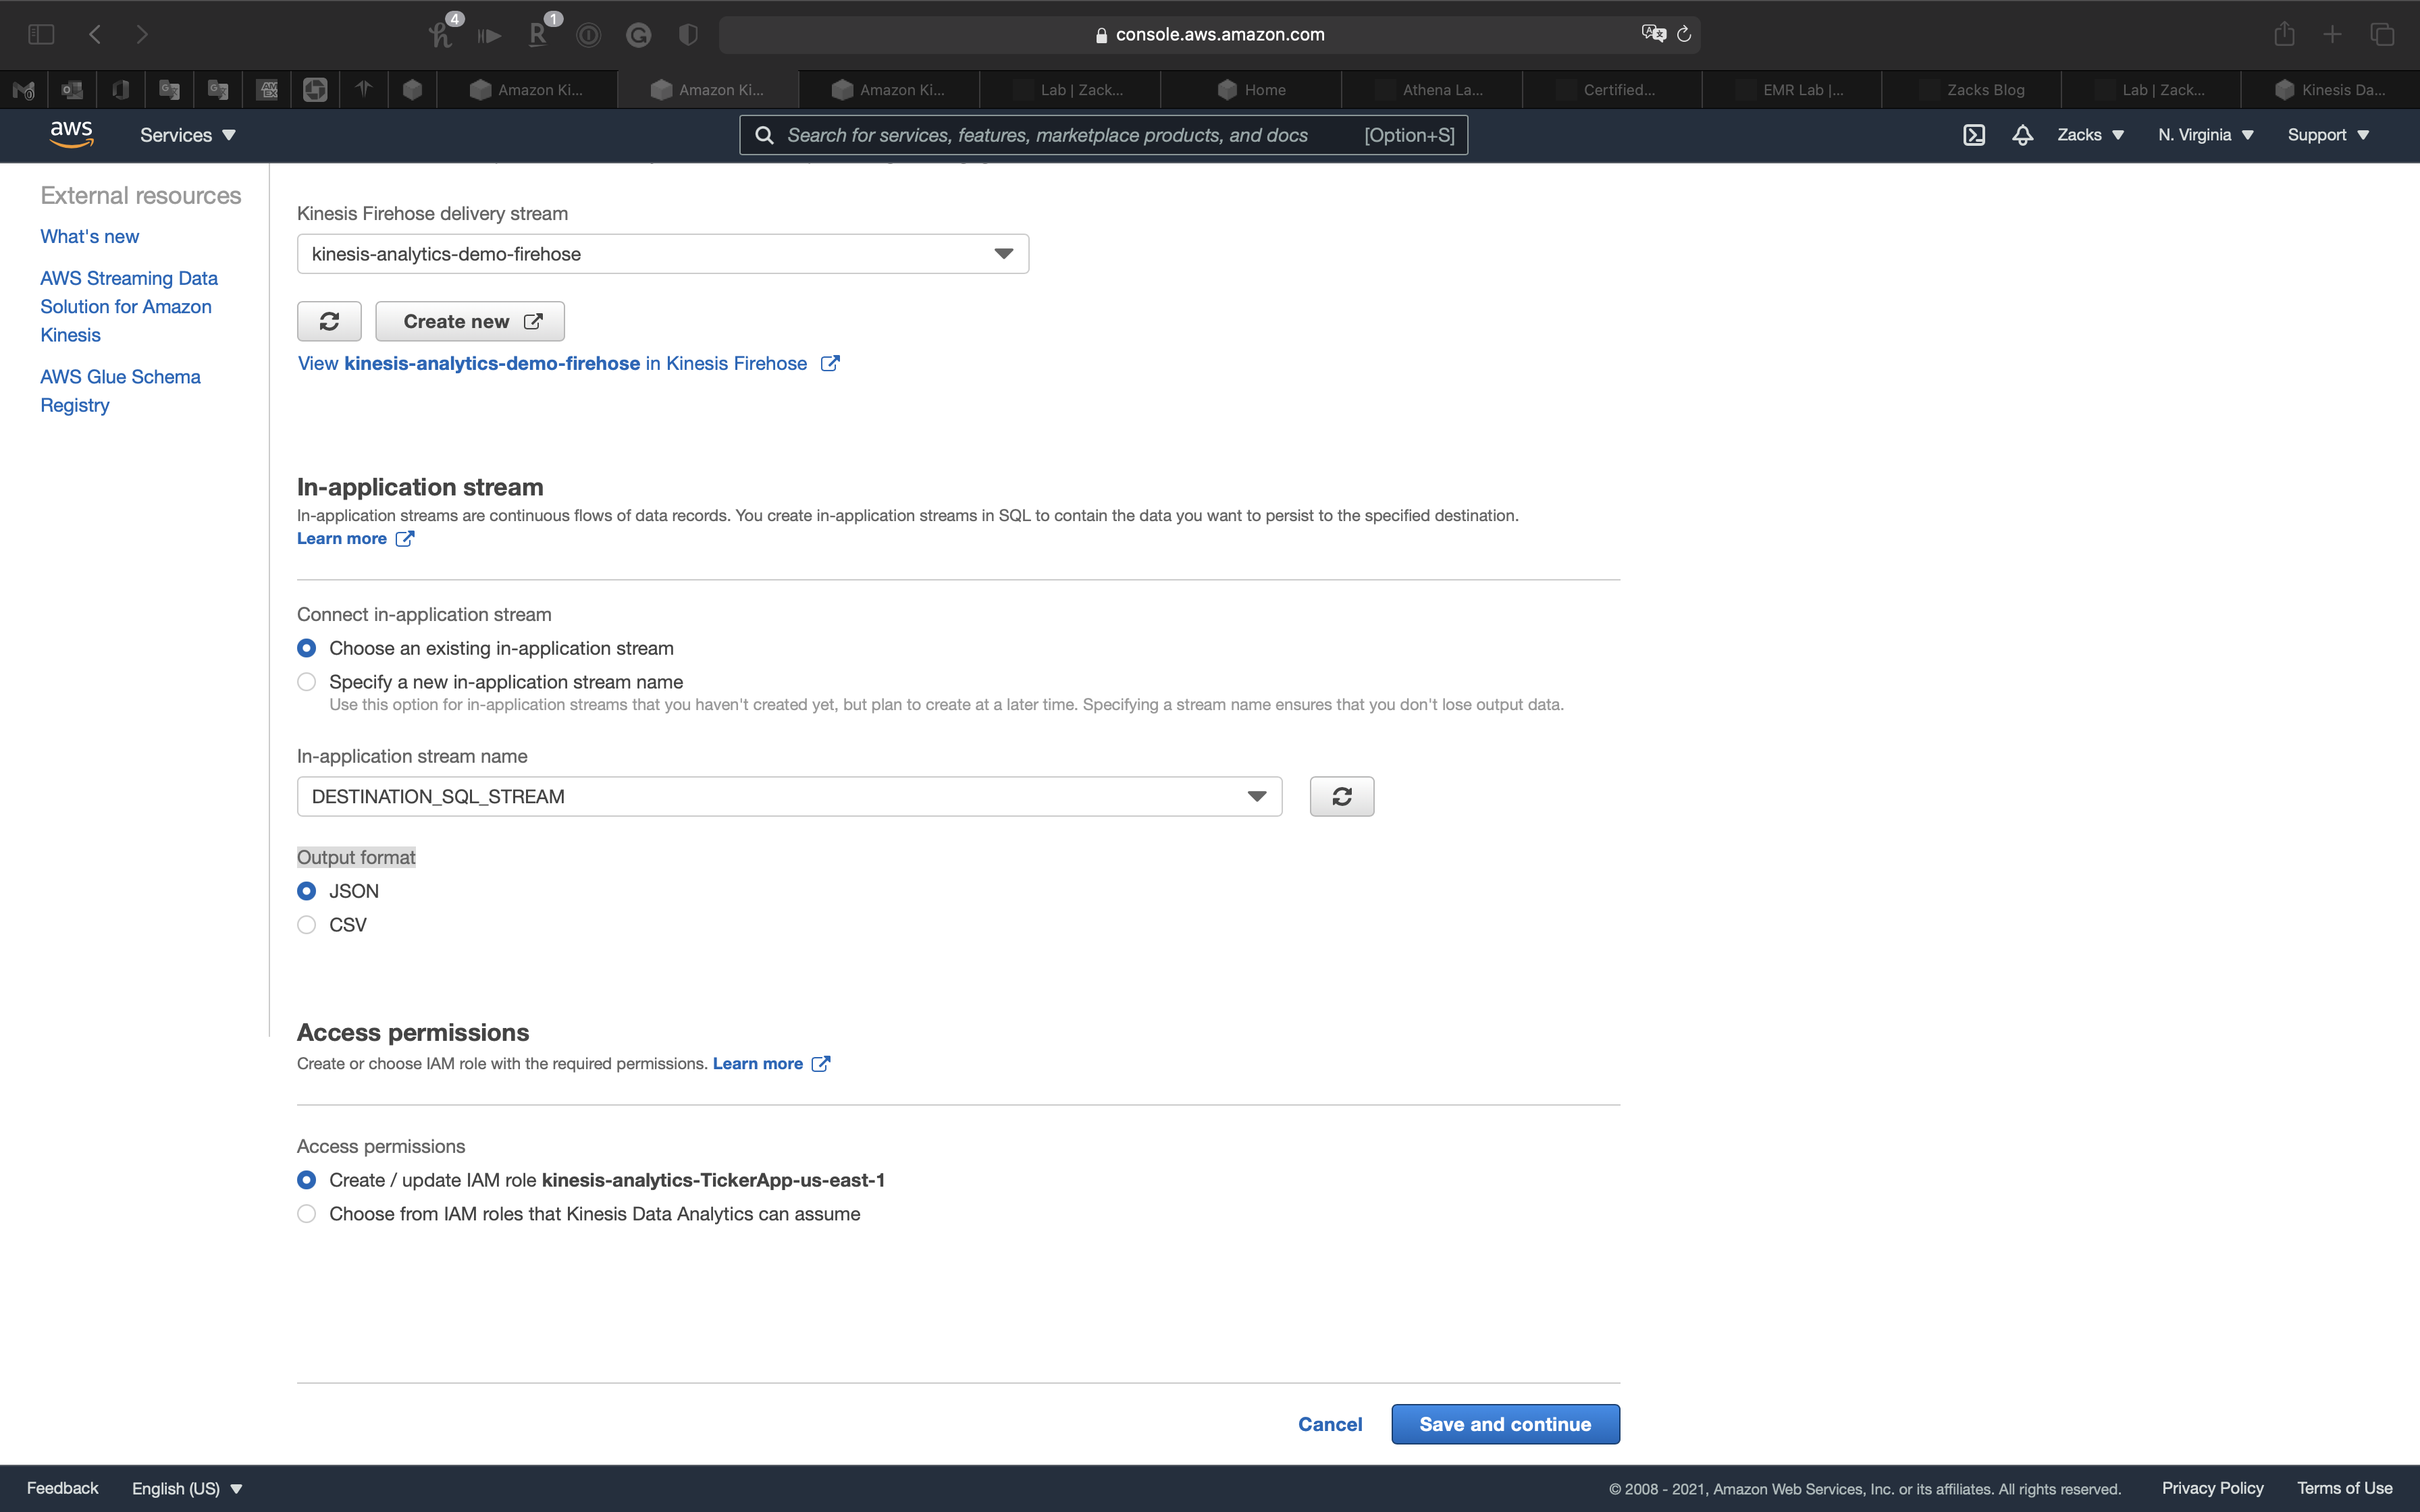
Check the Real time analytics
Click on Go to SQL results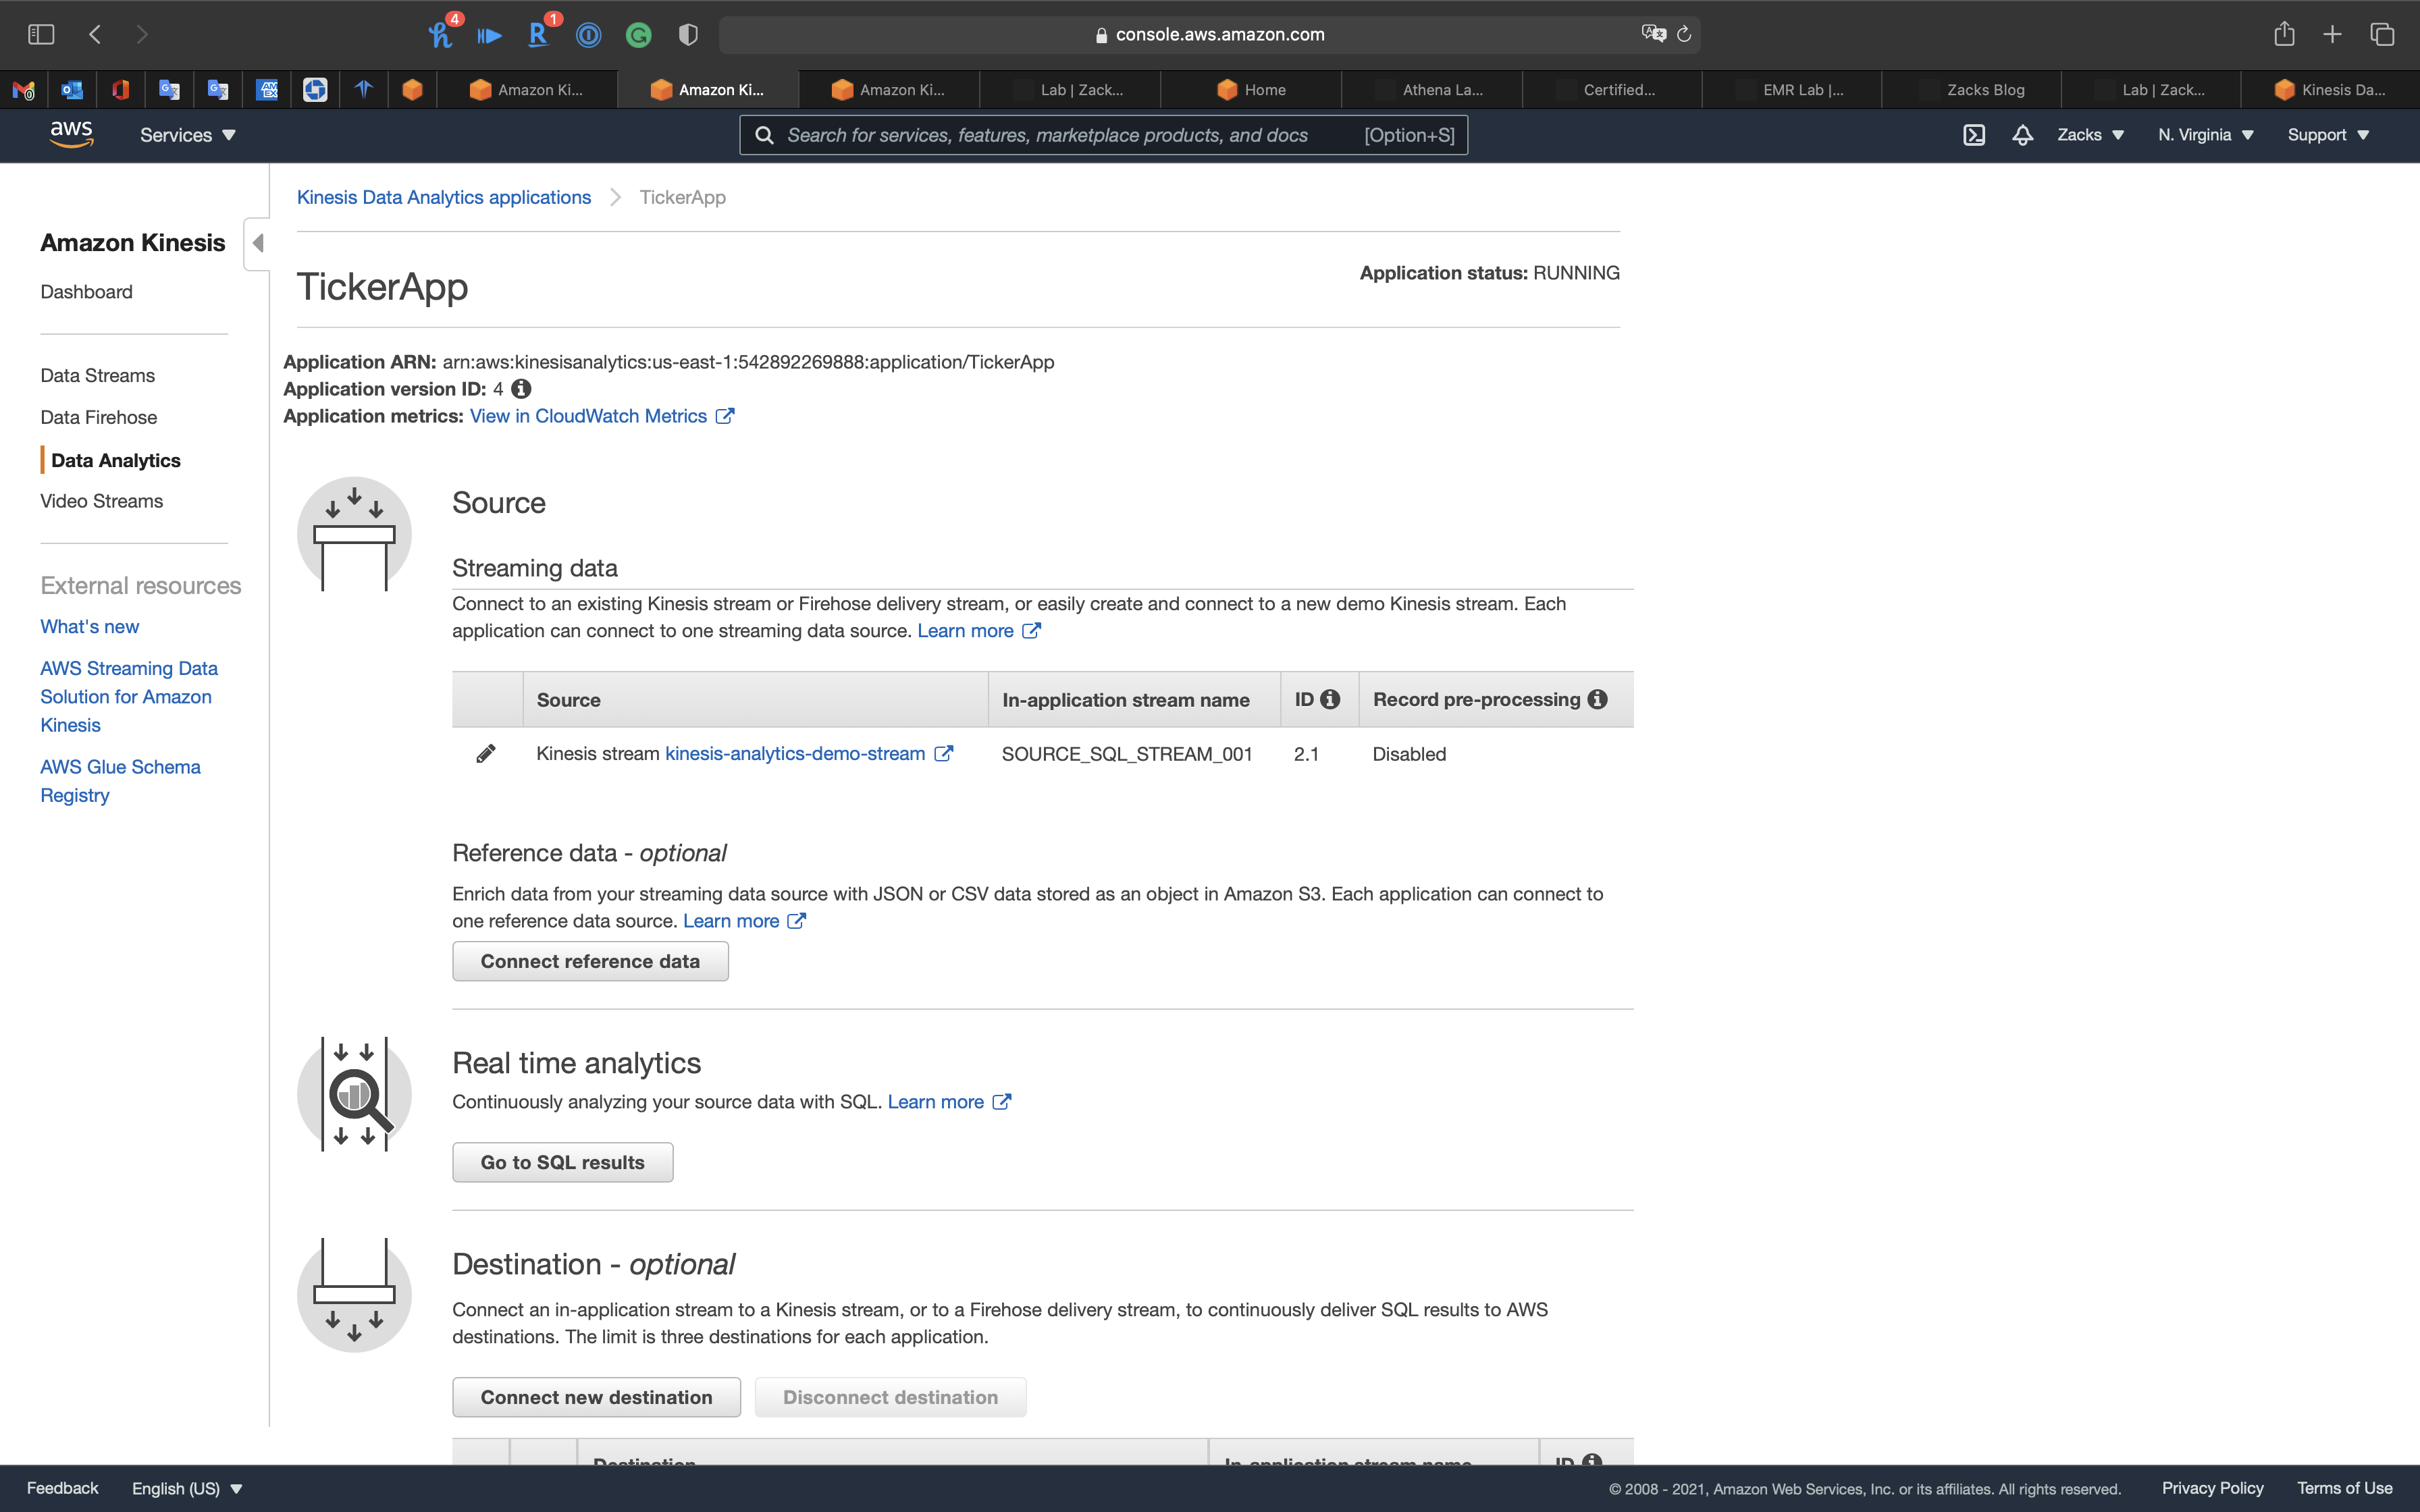
Application status: RUNNING
The Kinesis Data Analytics App is receiving data, so we can go check the Kinesis Data Firehose (kinesis-analytics-demo-firehose) Monitoring
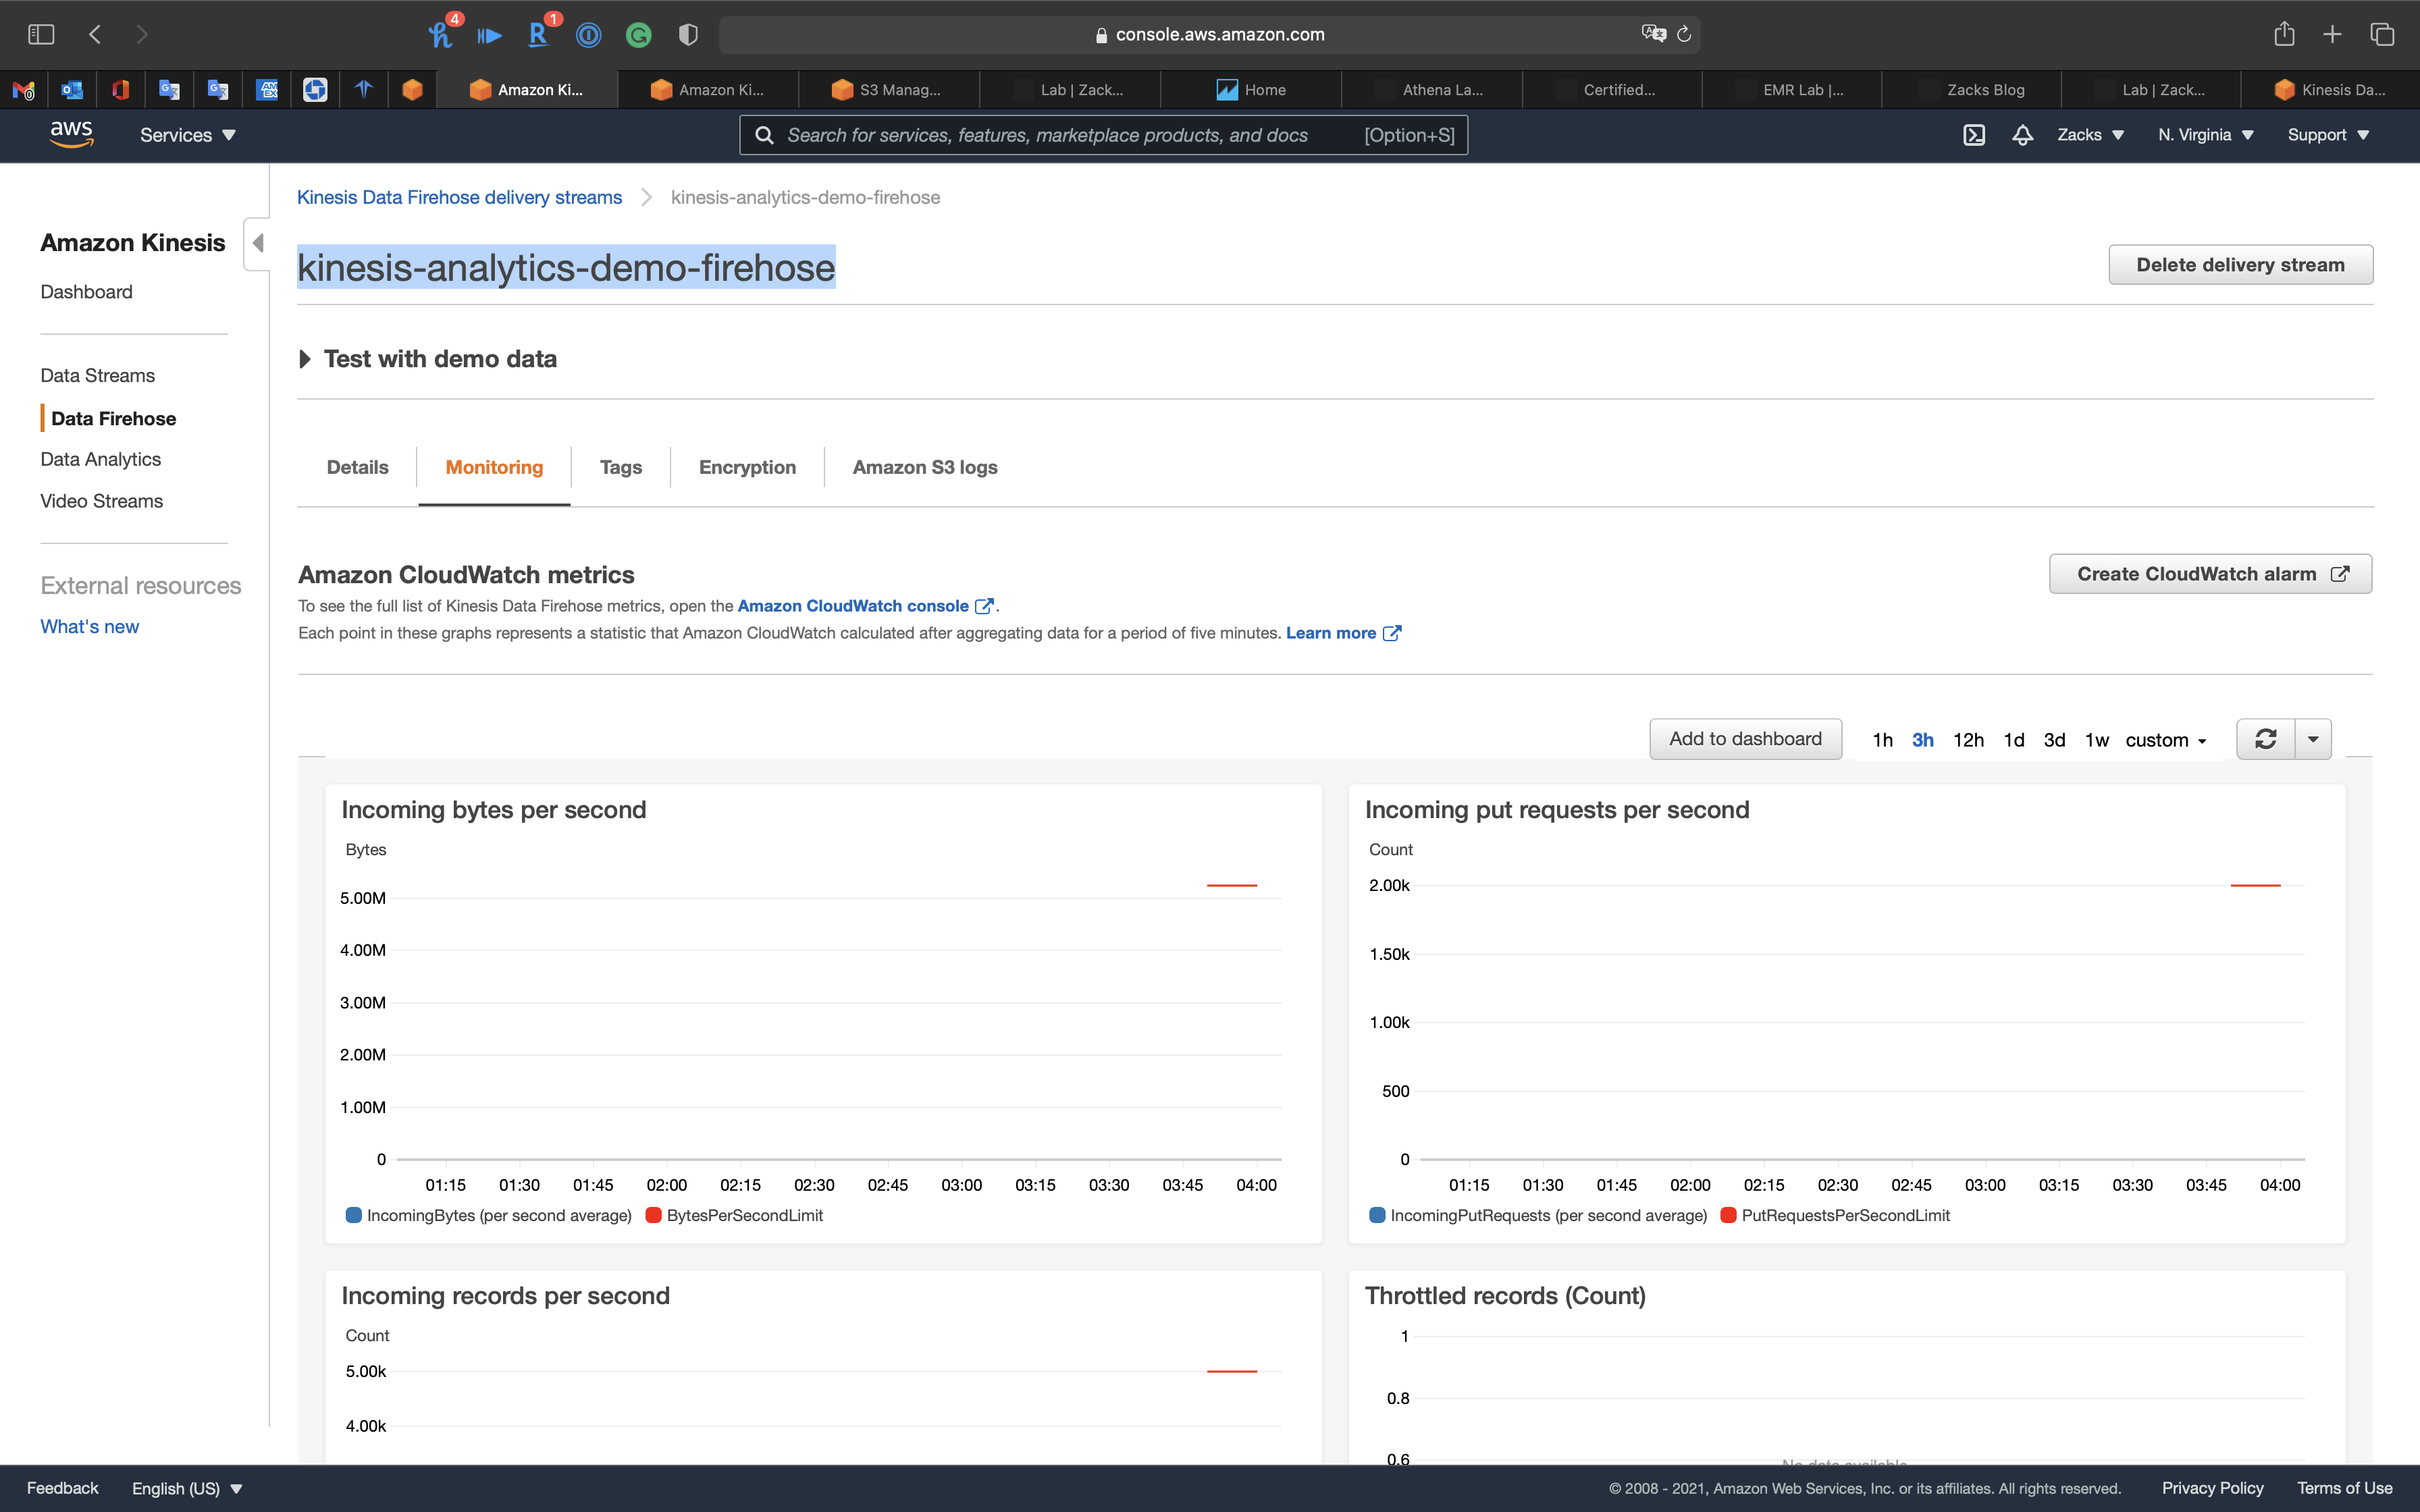
And Kinesis Data Firehose (kinesis-analytics-demo-firehose) has storing data in S3 bucket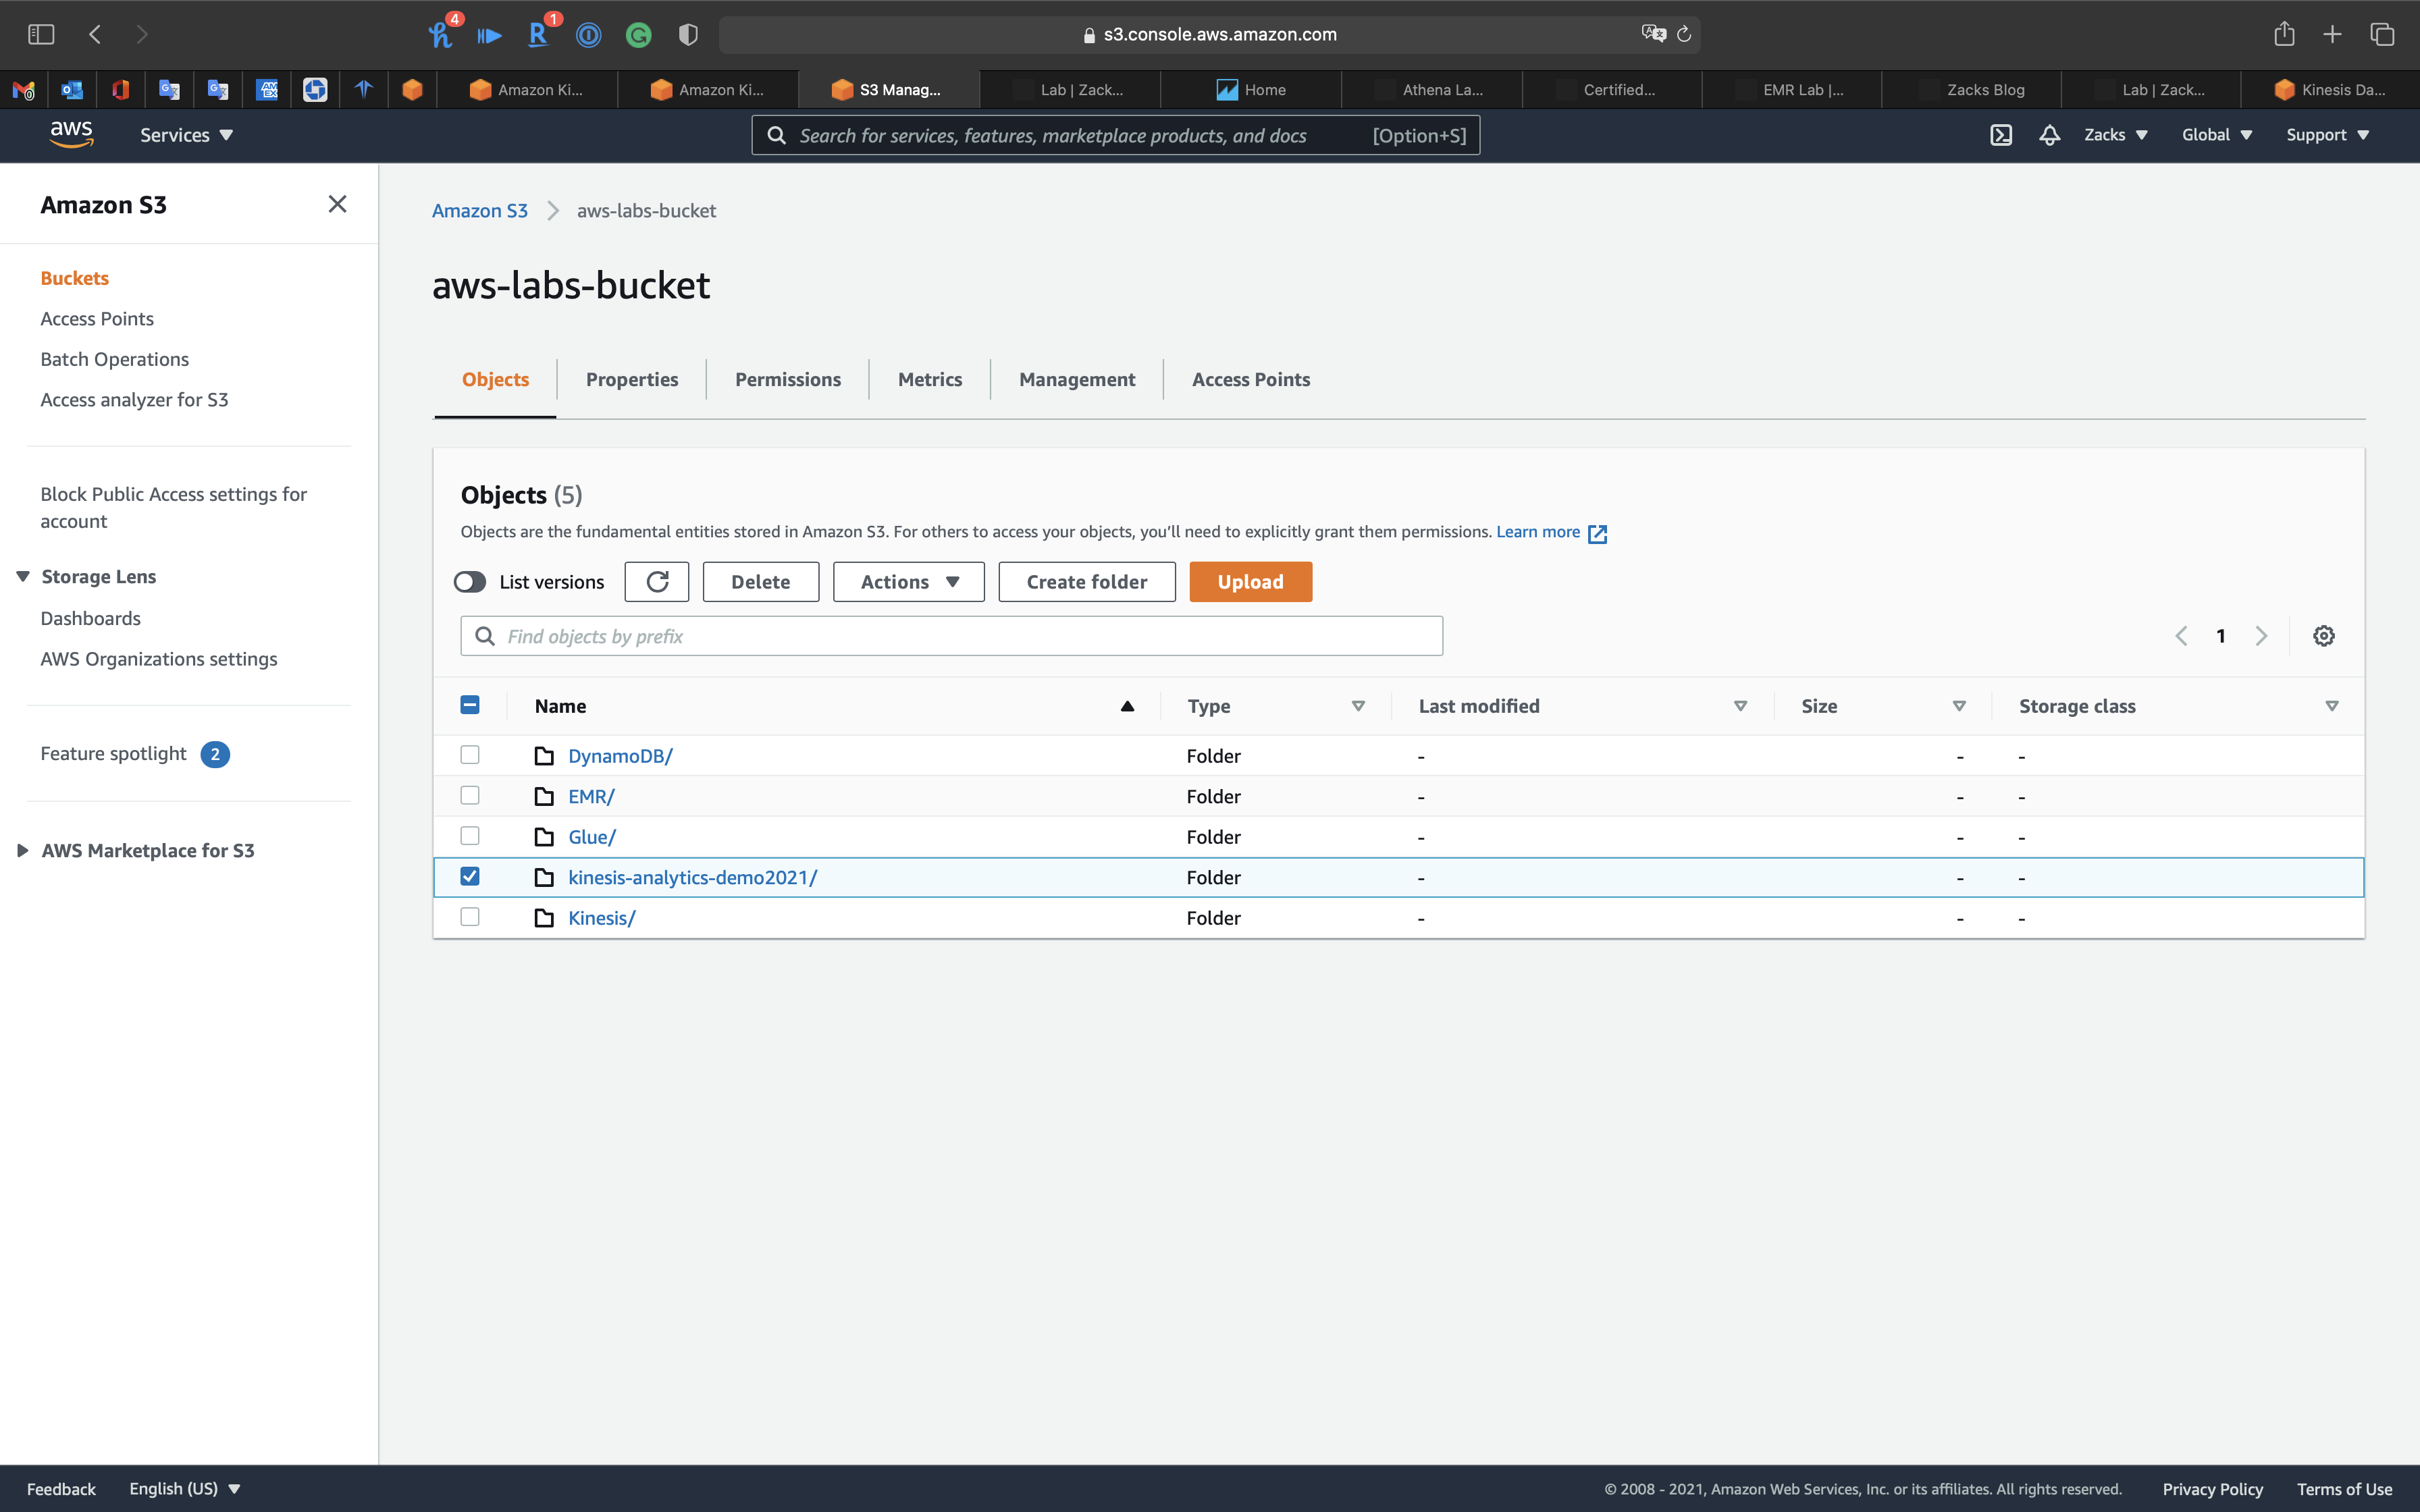
Open the folder to see what is inside.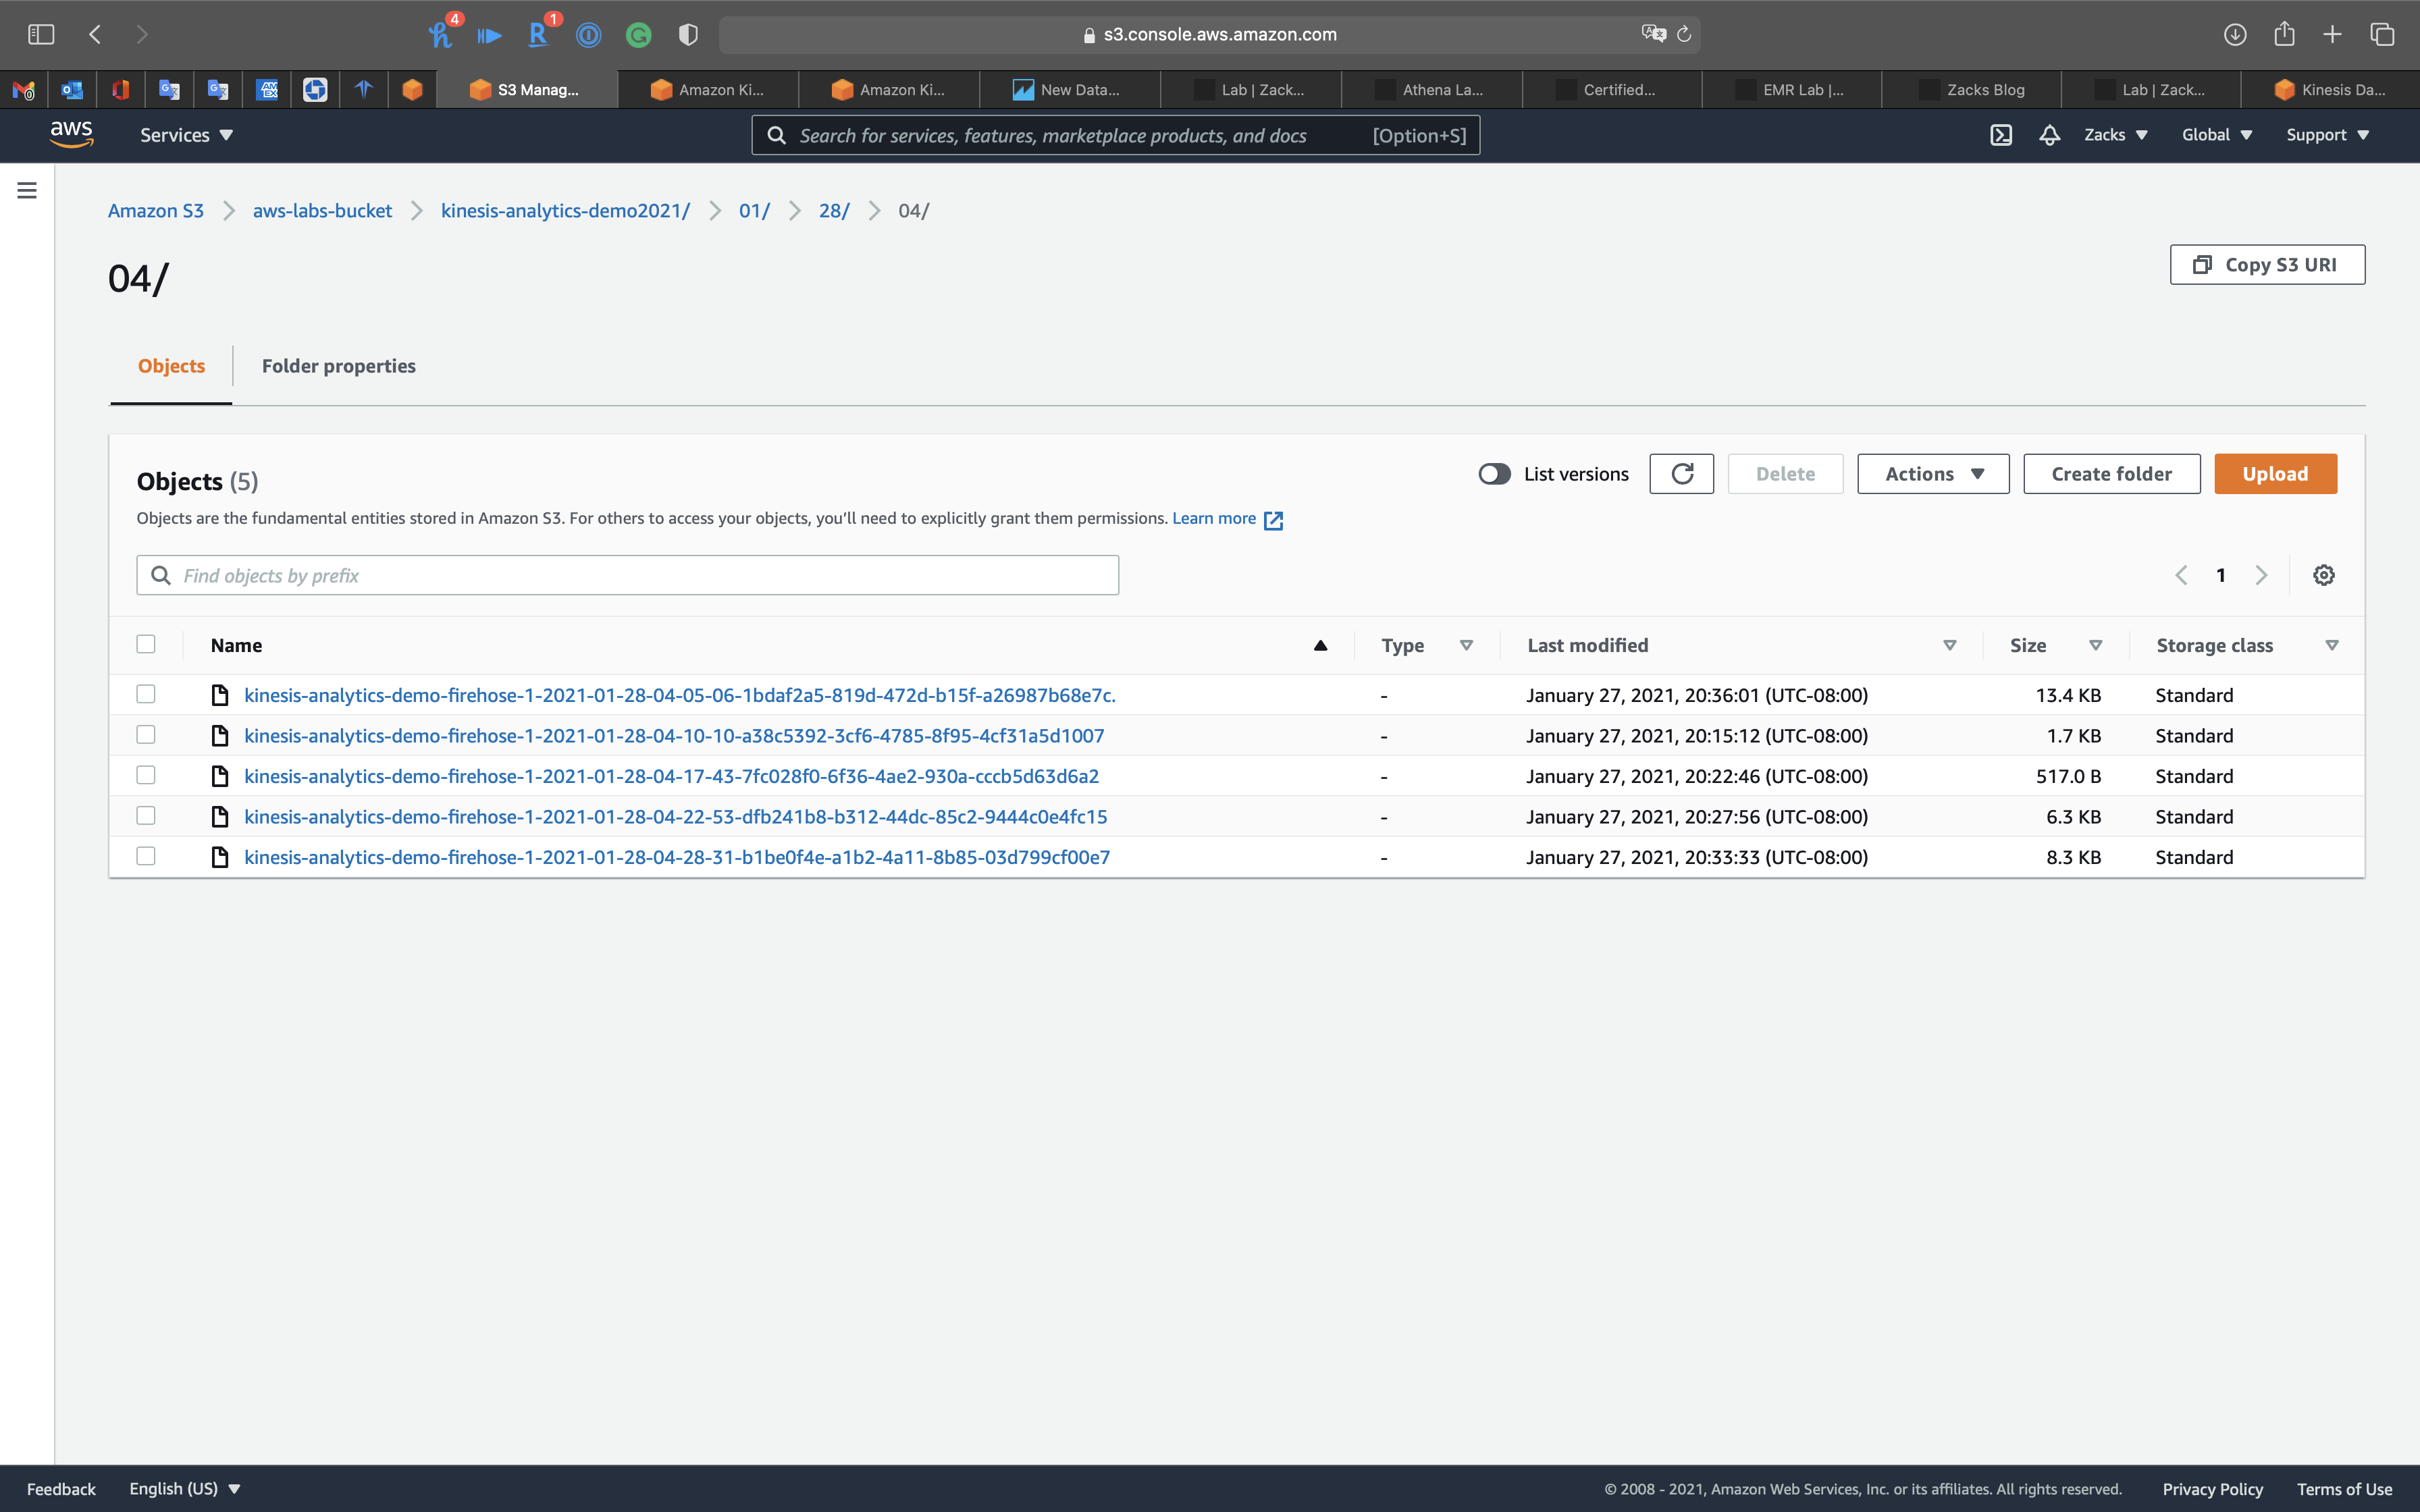
Download the file.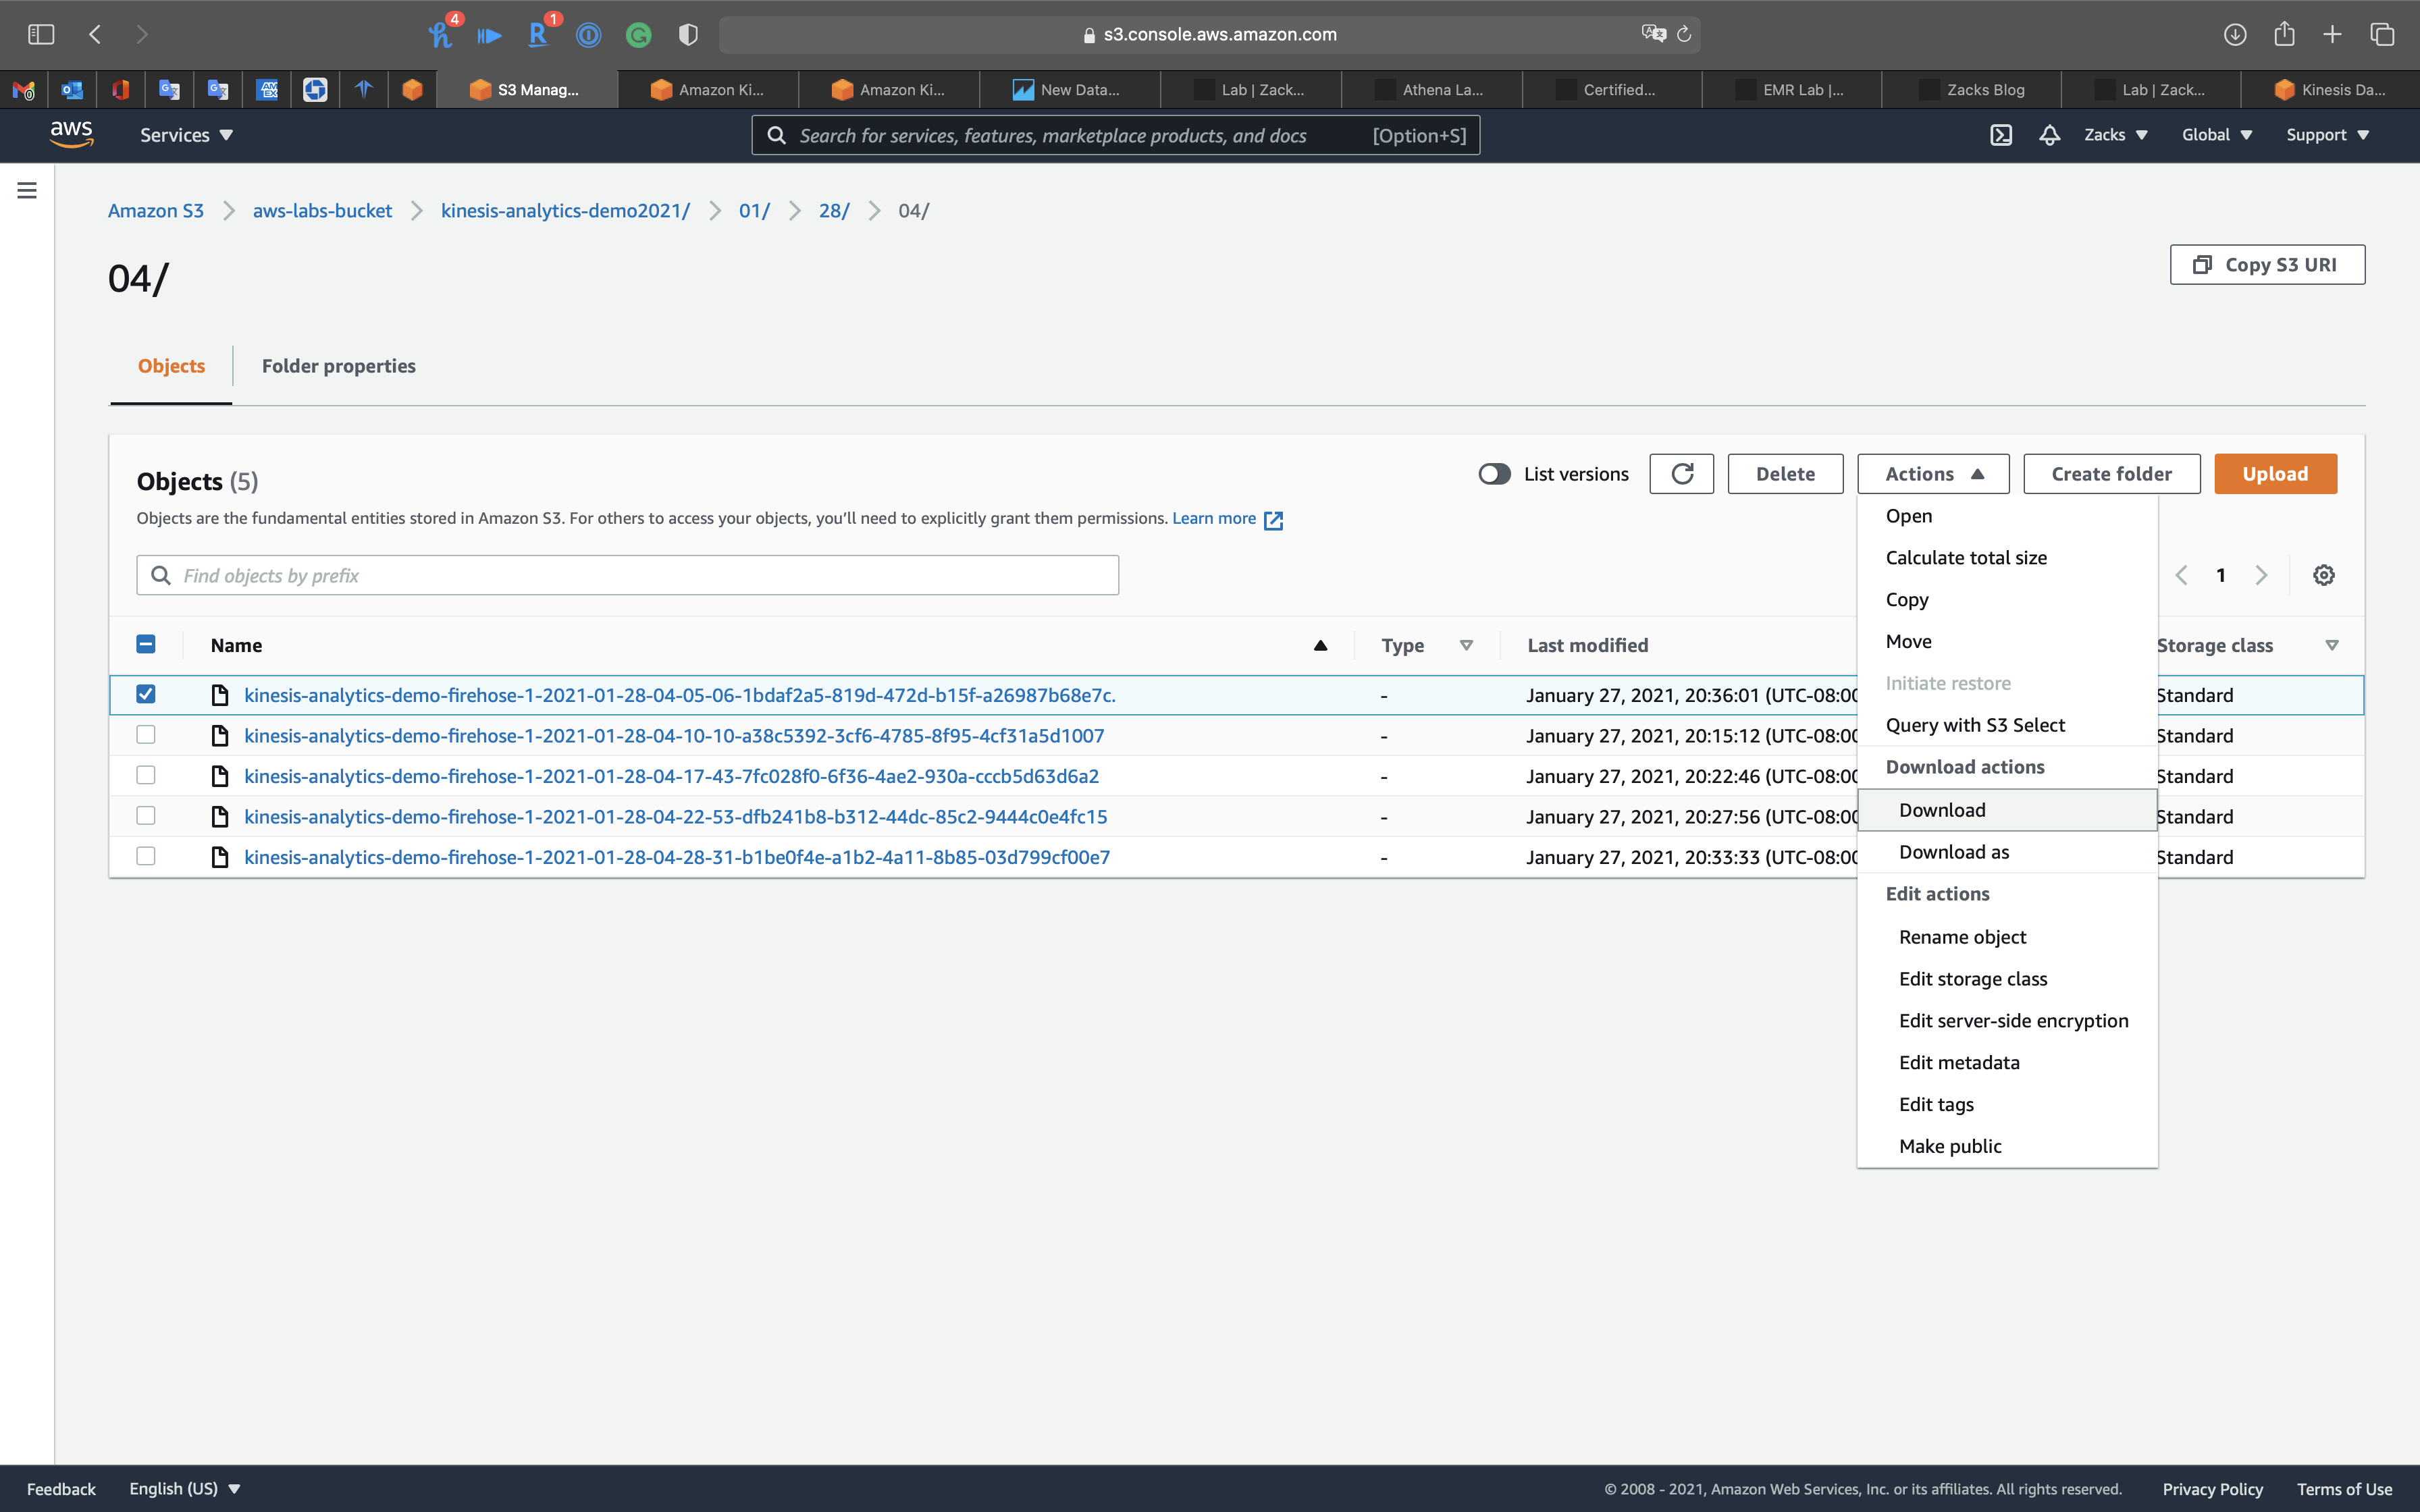
Open the JSON file.
Remember we used the SQL query for continuously filtering WHERE sector SIMILAR TO '%TECH%';, that’s why we can only see the TECHNOLOGY` tickers.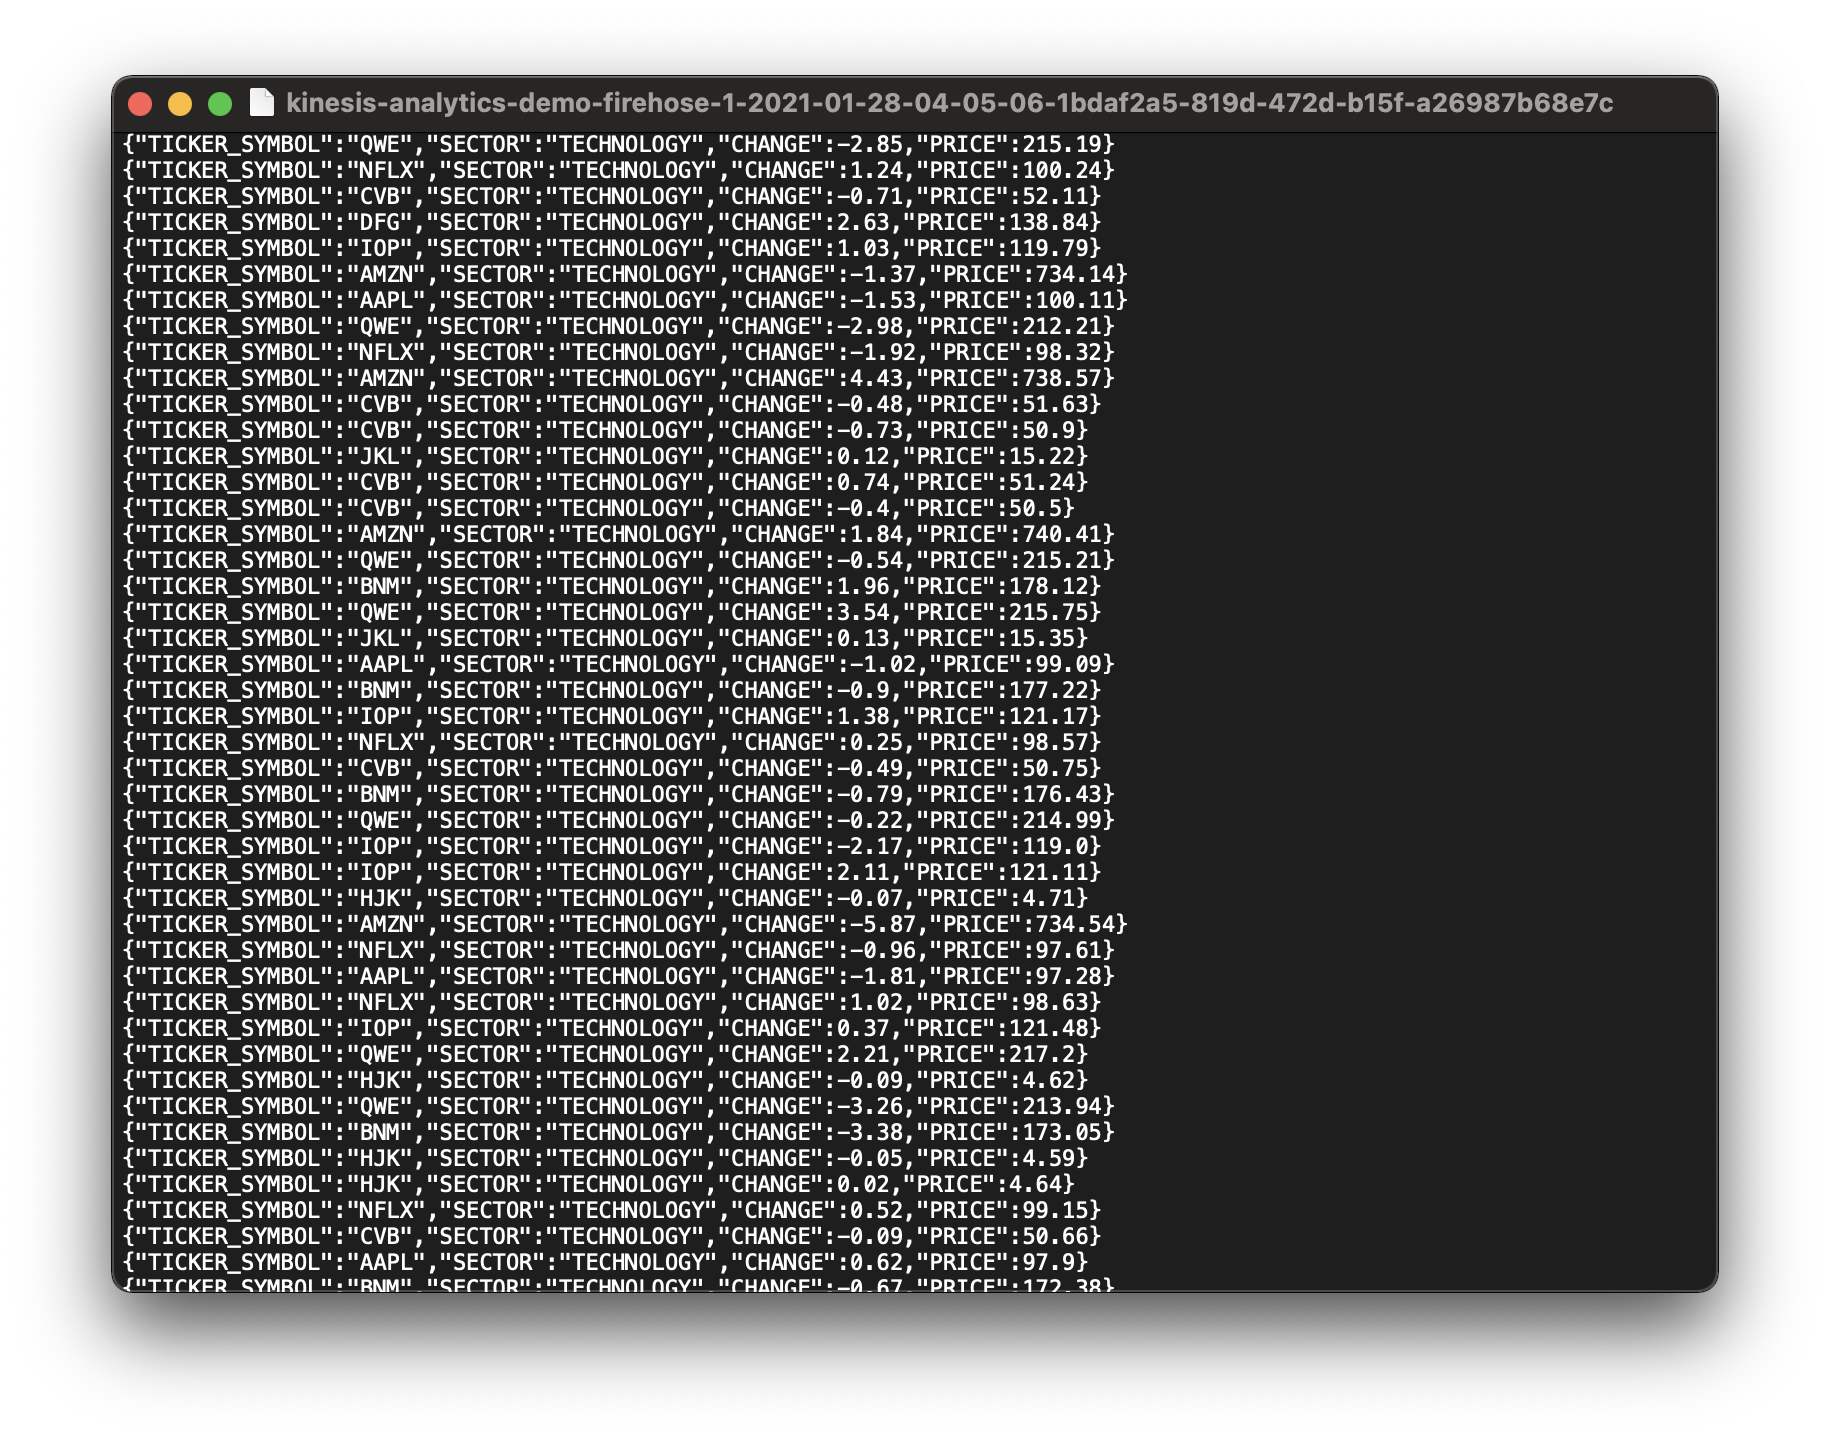
Back to the S3 bucket.
Click one of the file to see the detail.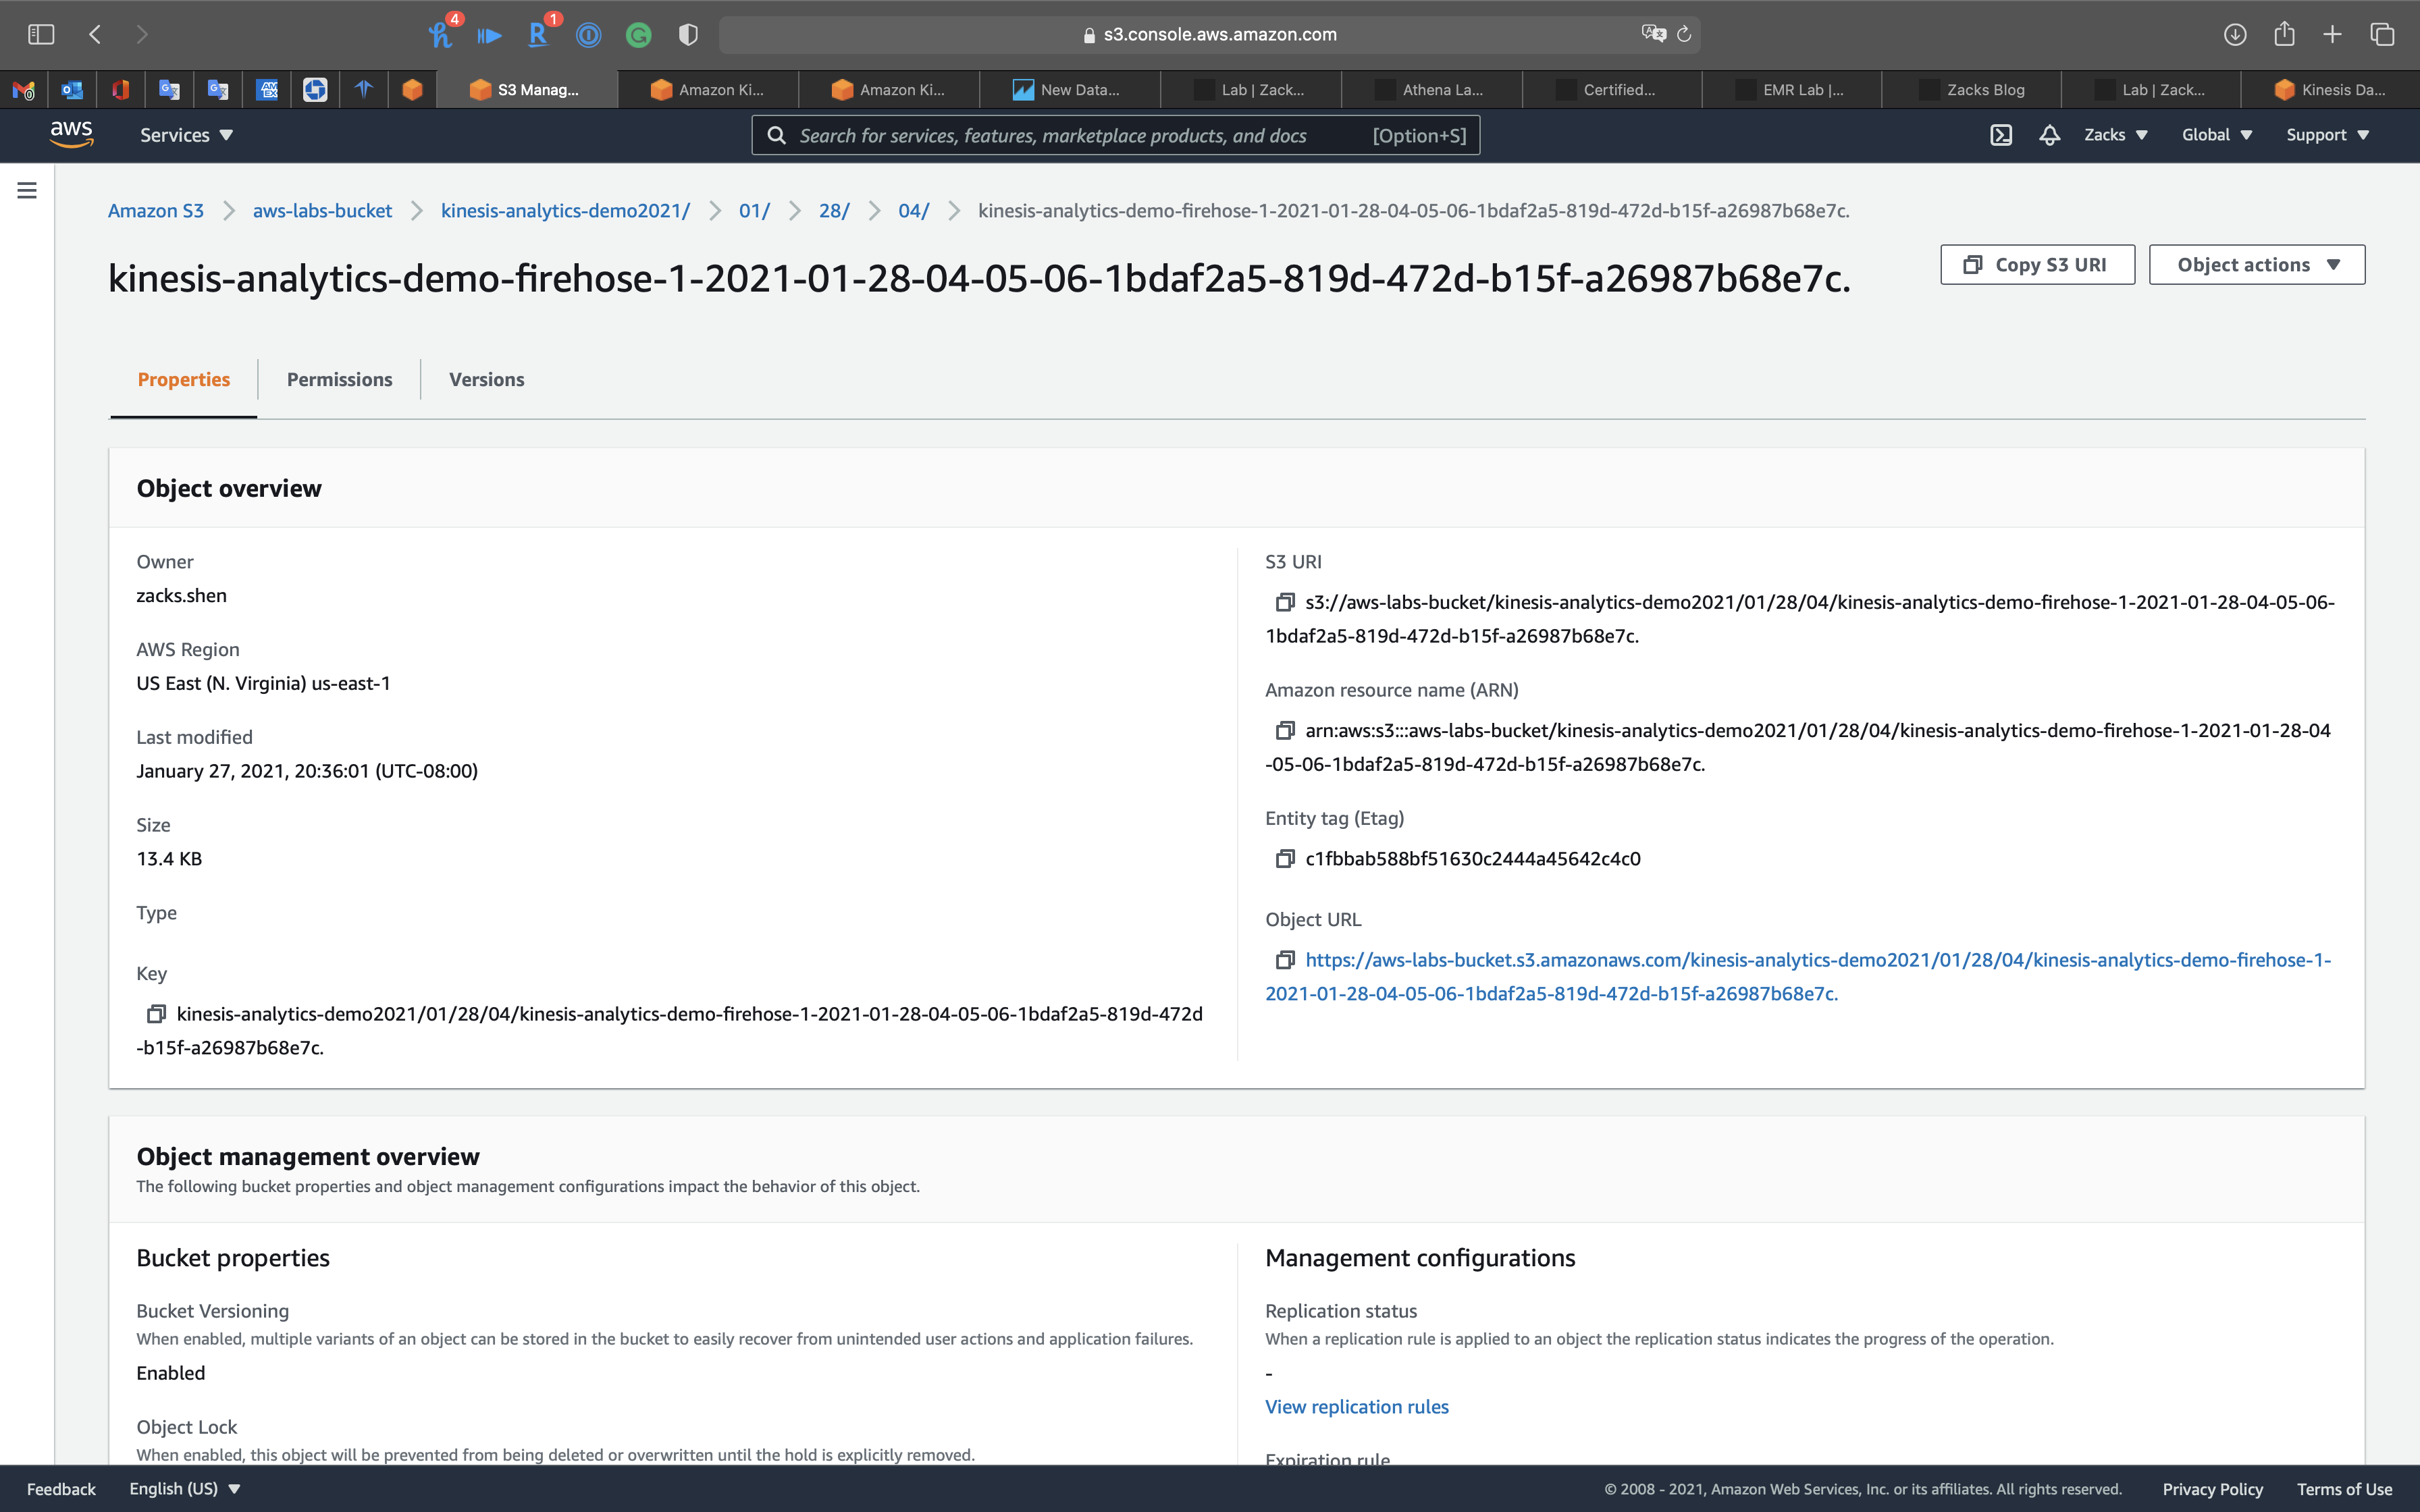
Copy the object S3 URI
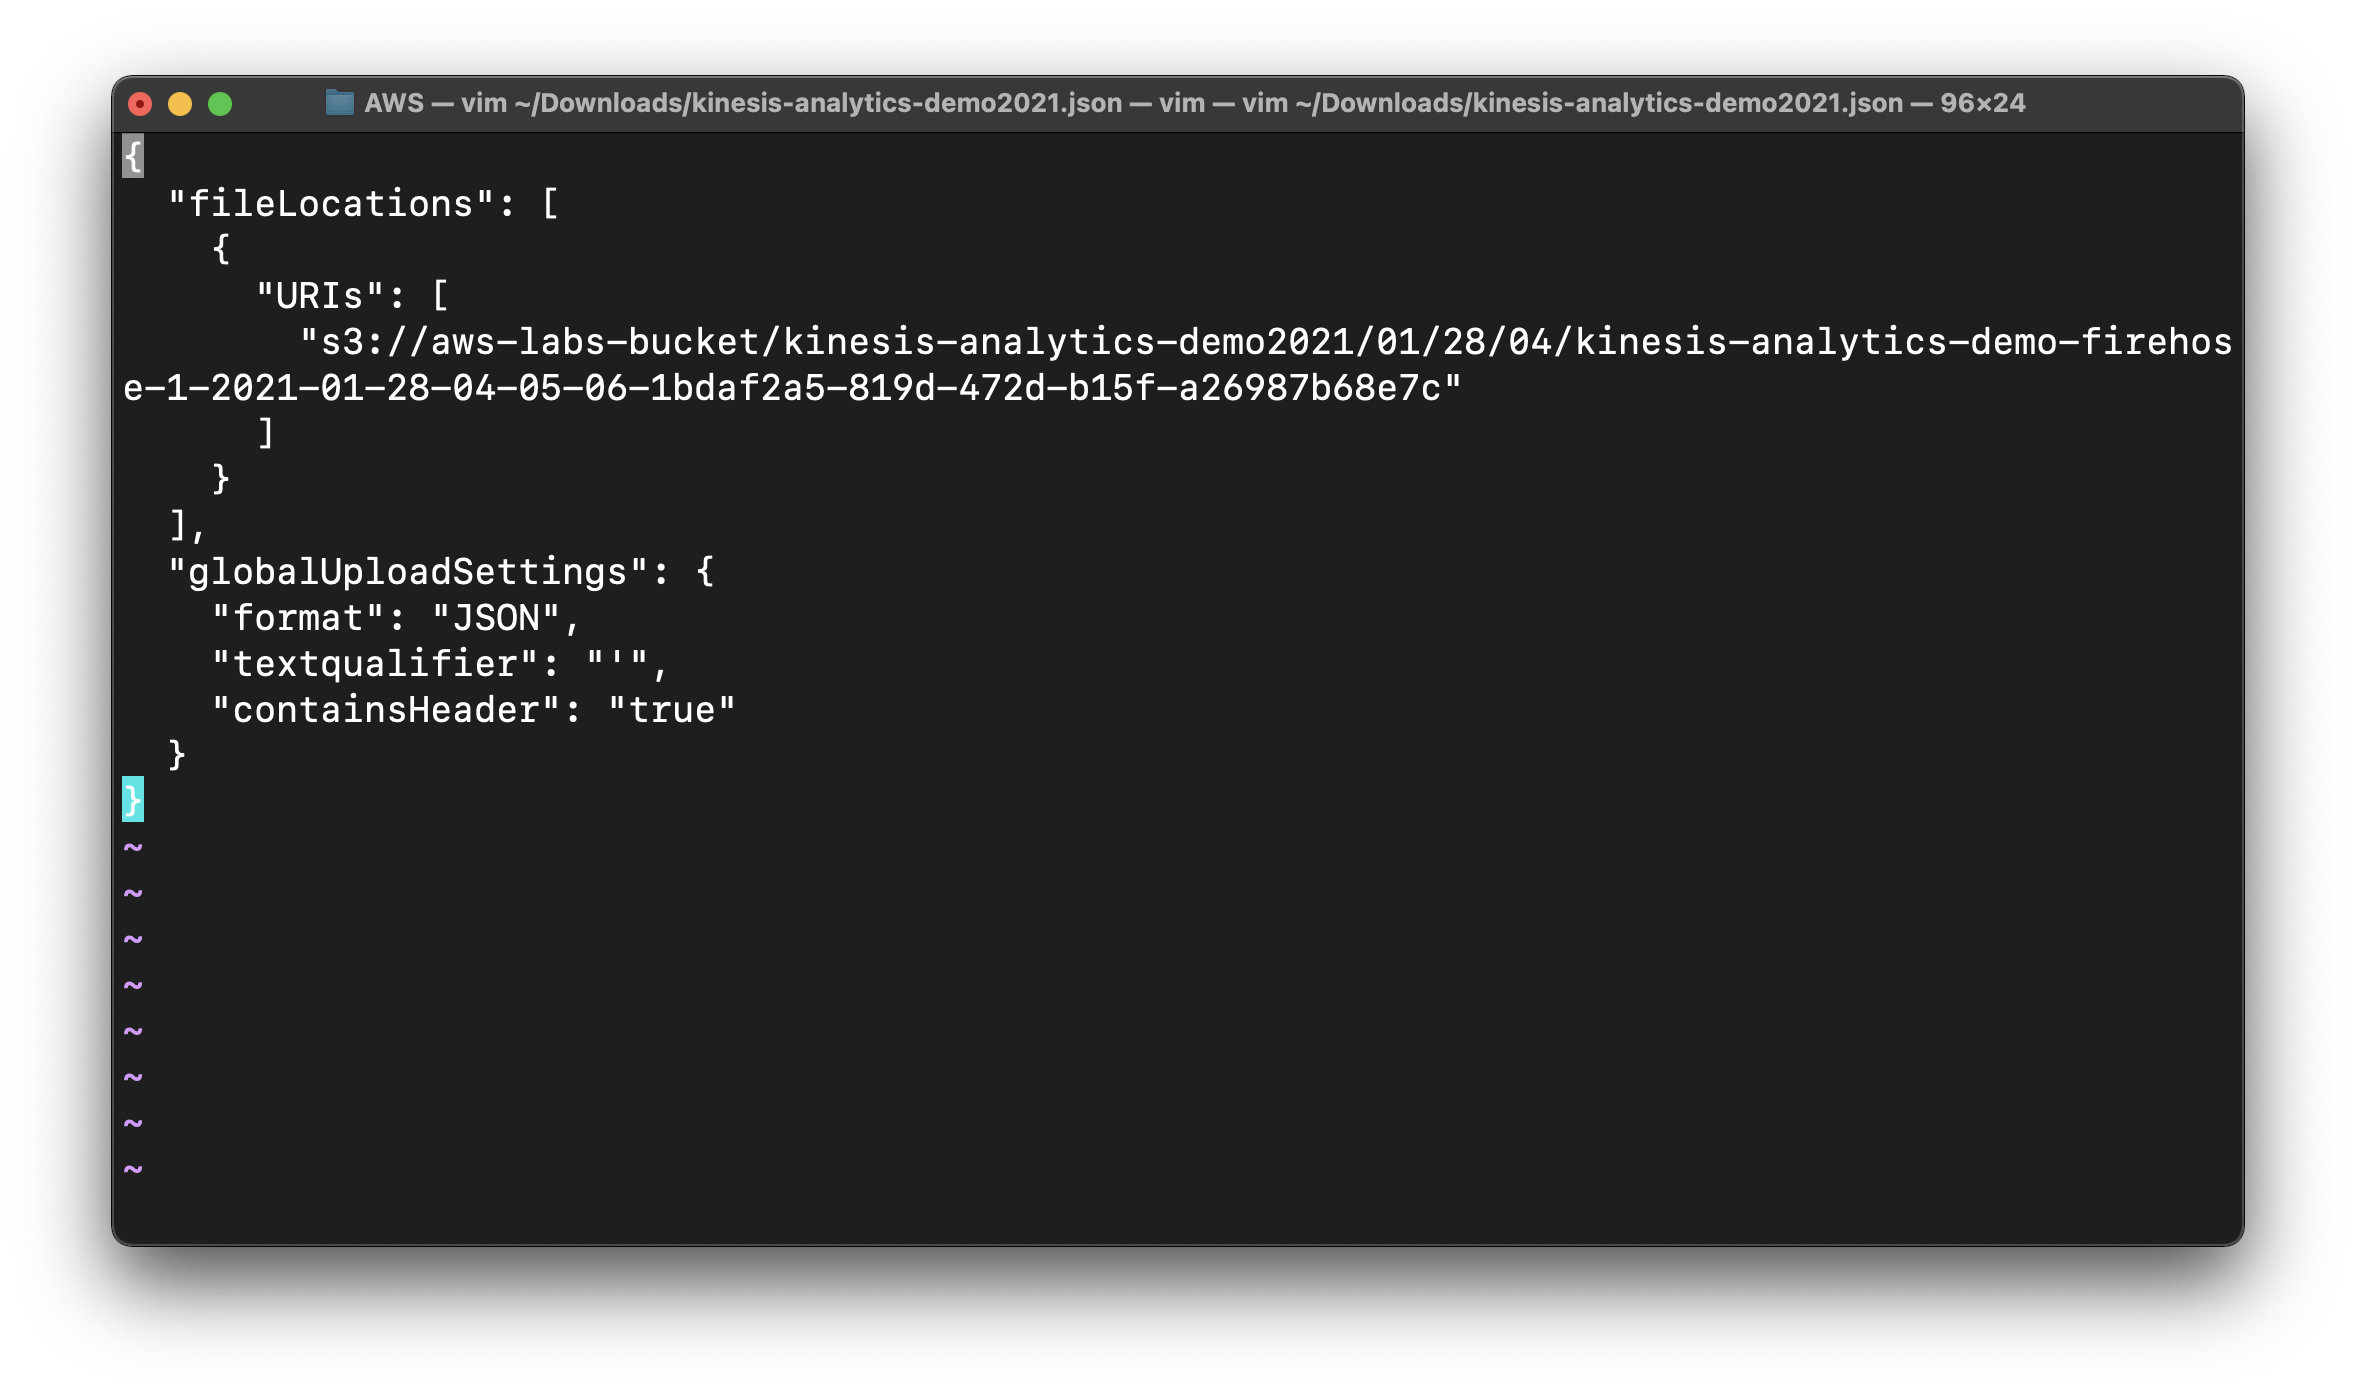
On your local machine, create a file kinesis-analytics-demo2021.json
Then copy and past the following JSON code and replace the URIs field to your object S3 URI.
1 | { |
Go to kinesis-analytics-demo2021 folder and click on Upload.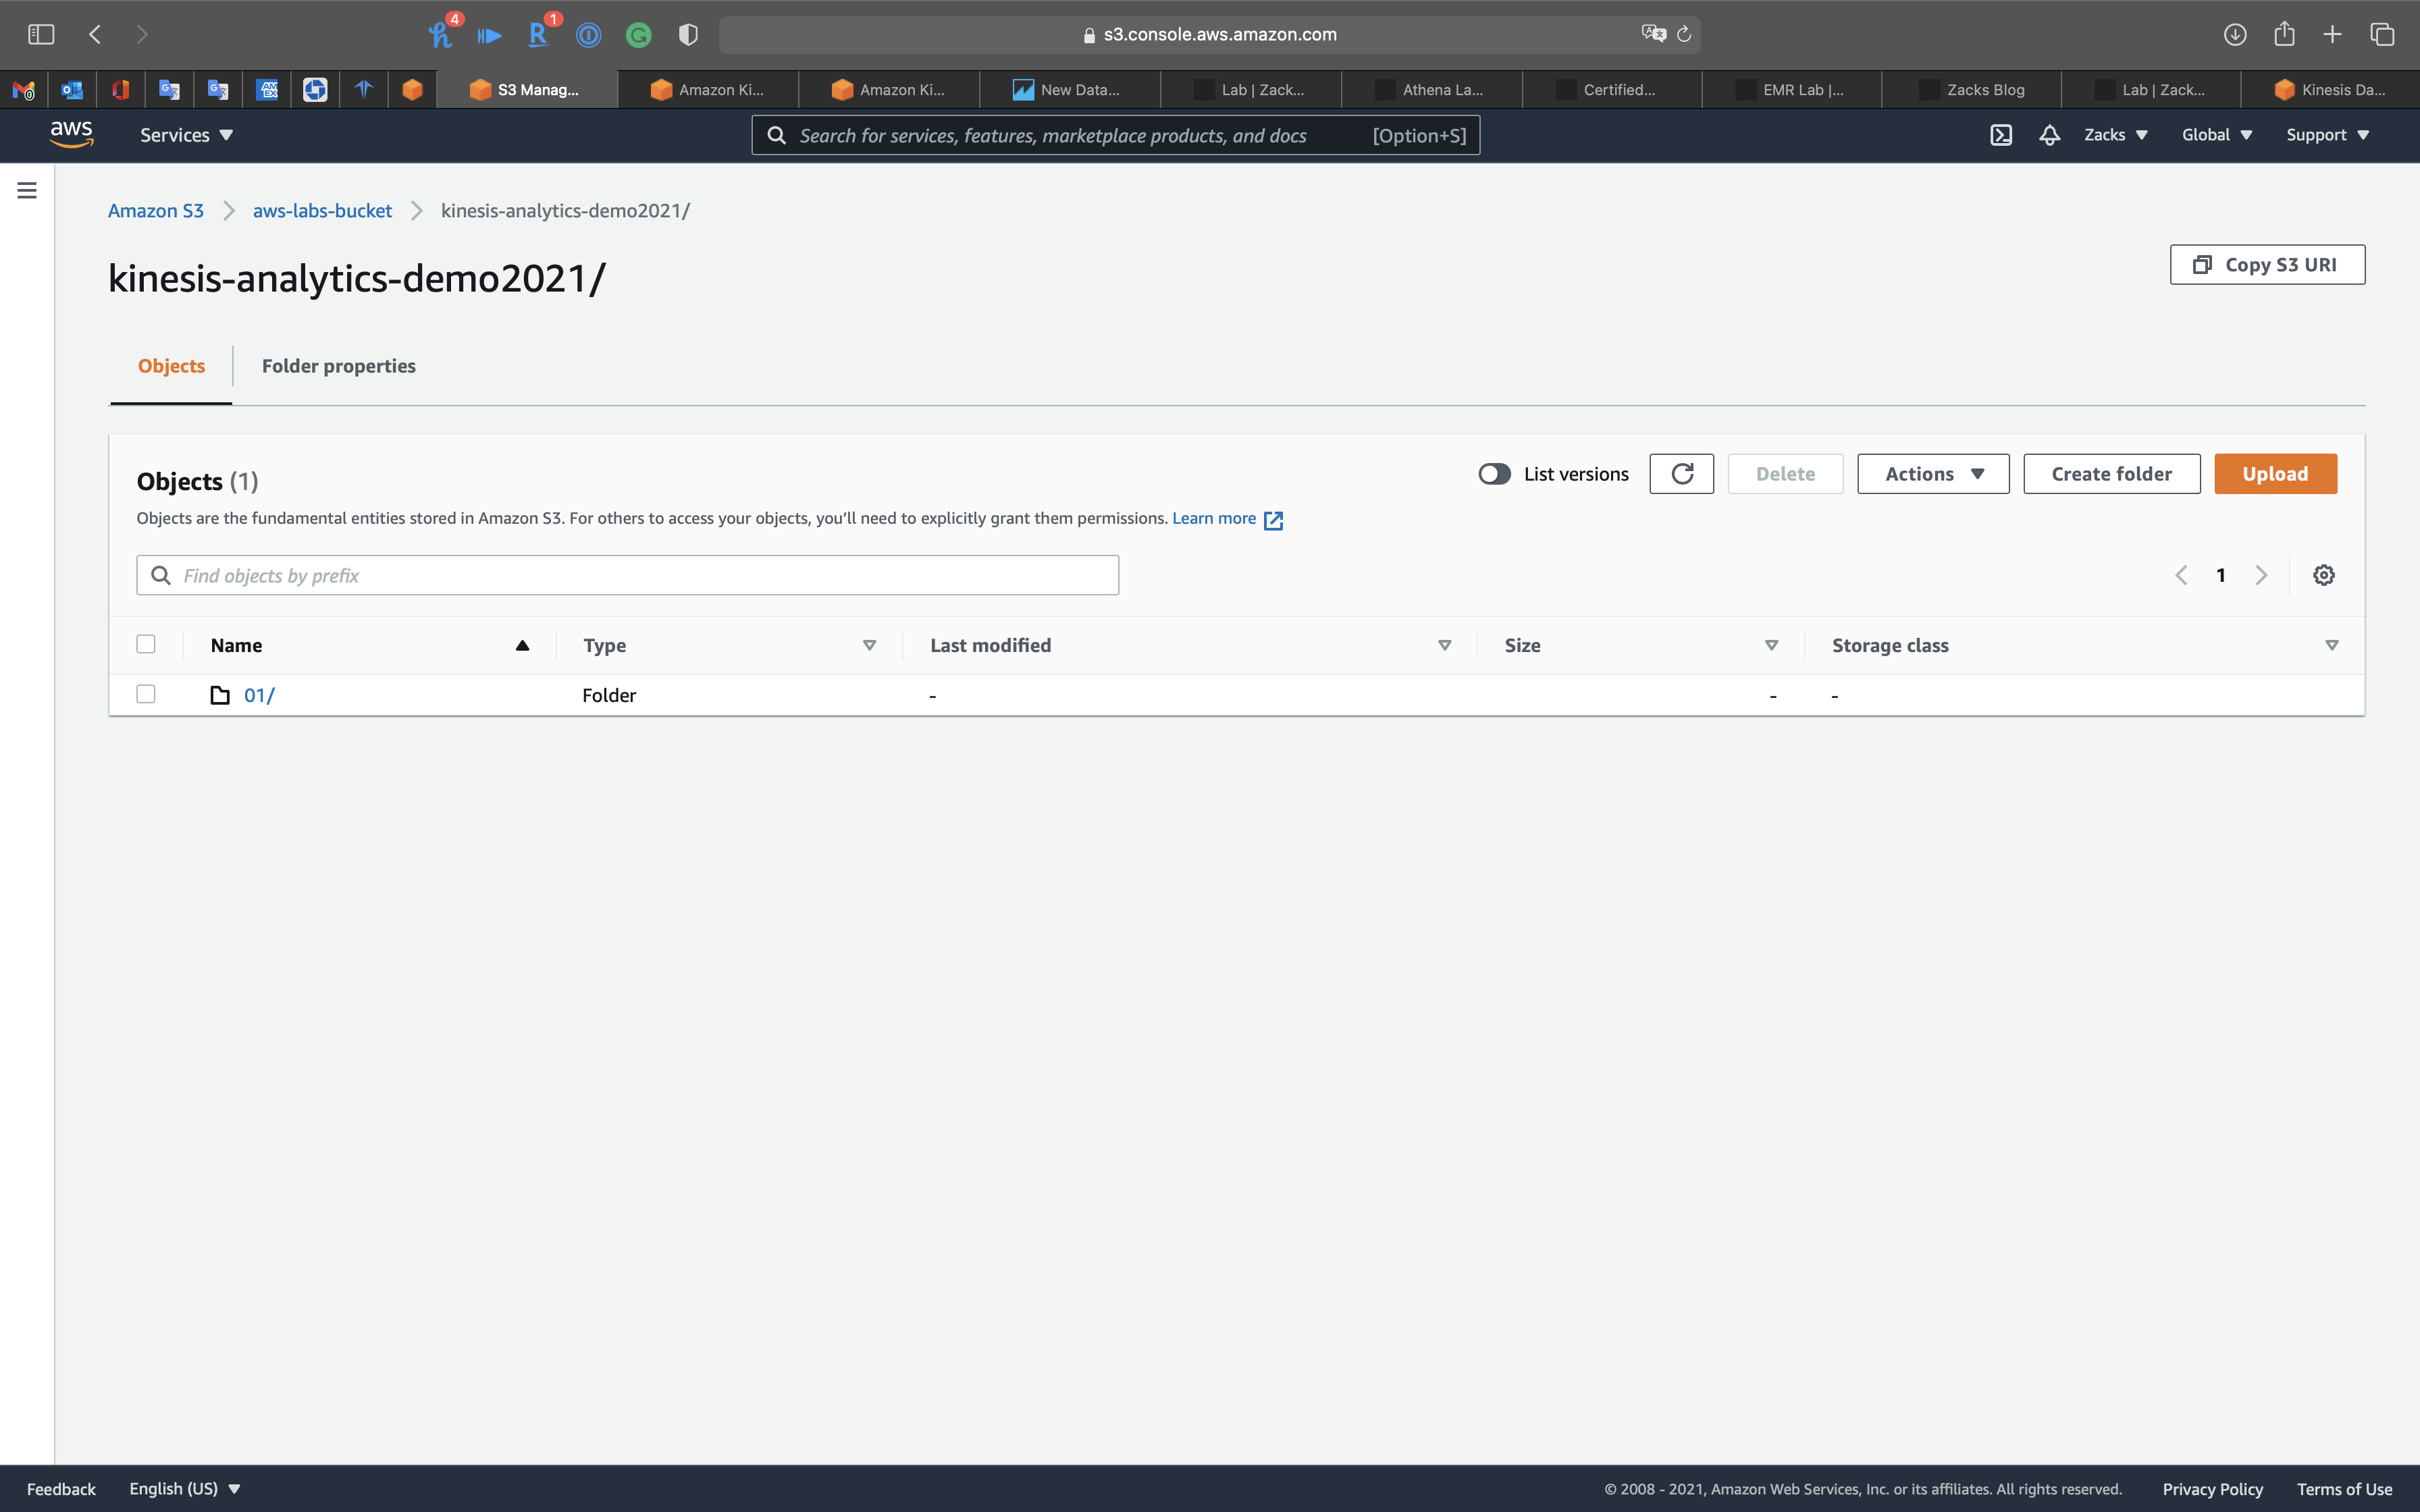
Click on Add files and select kinesis-analytics-demo2021.json
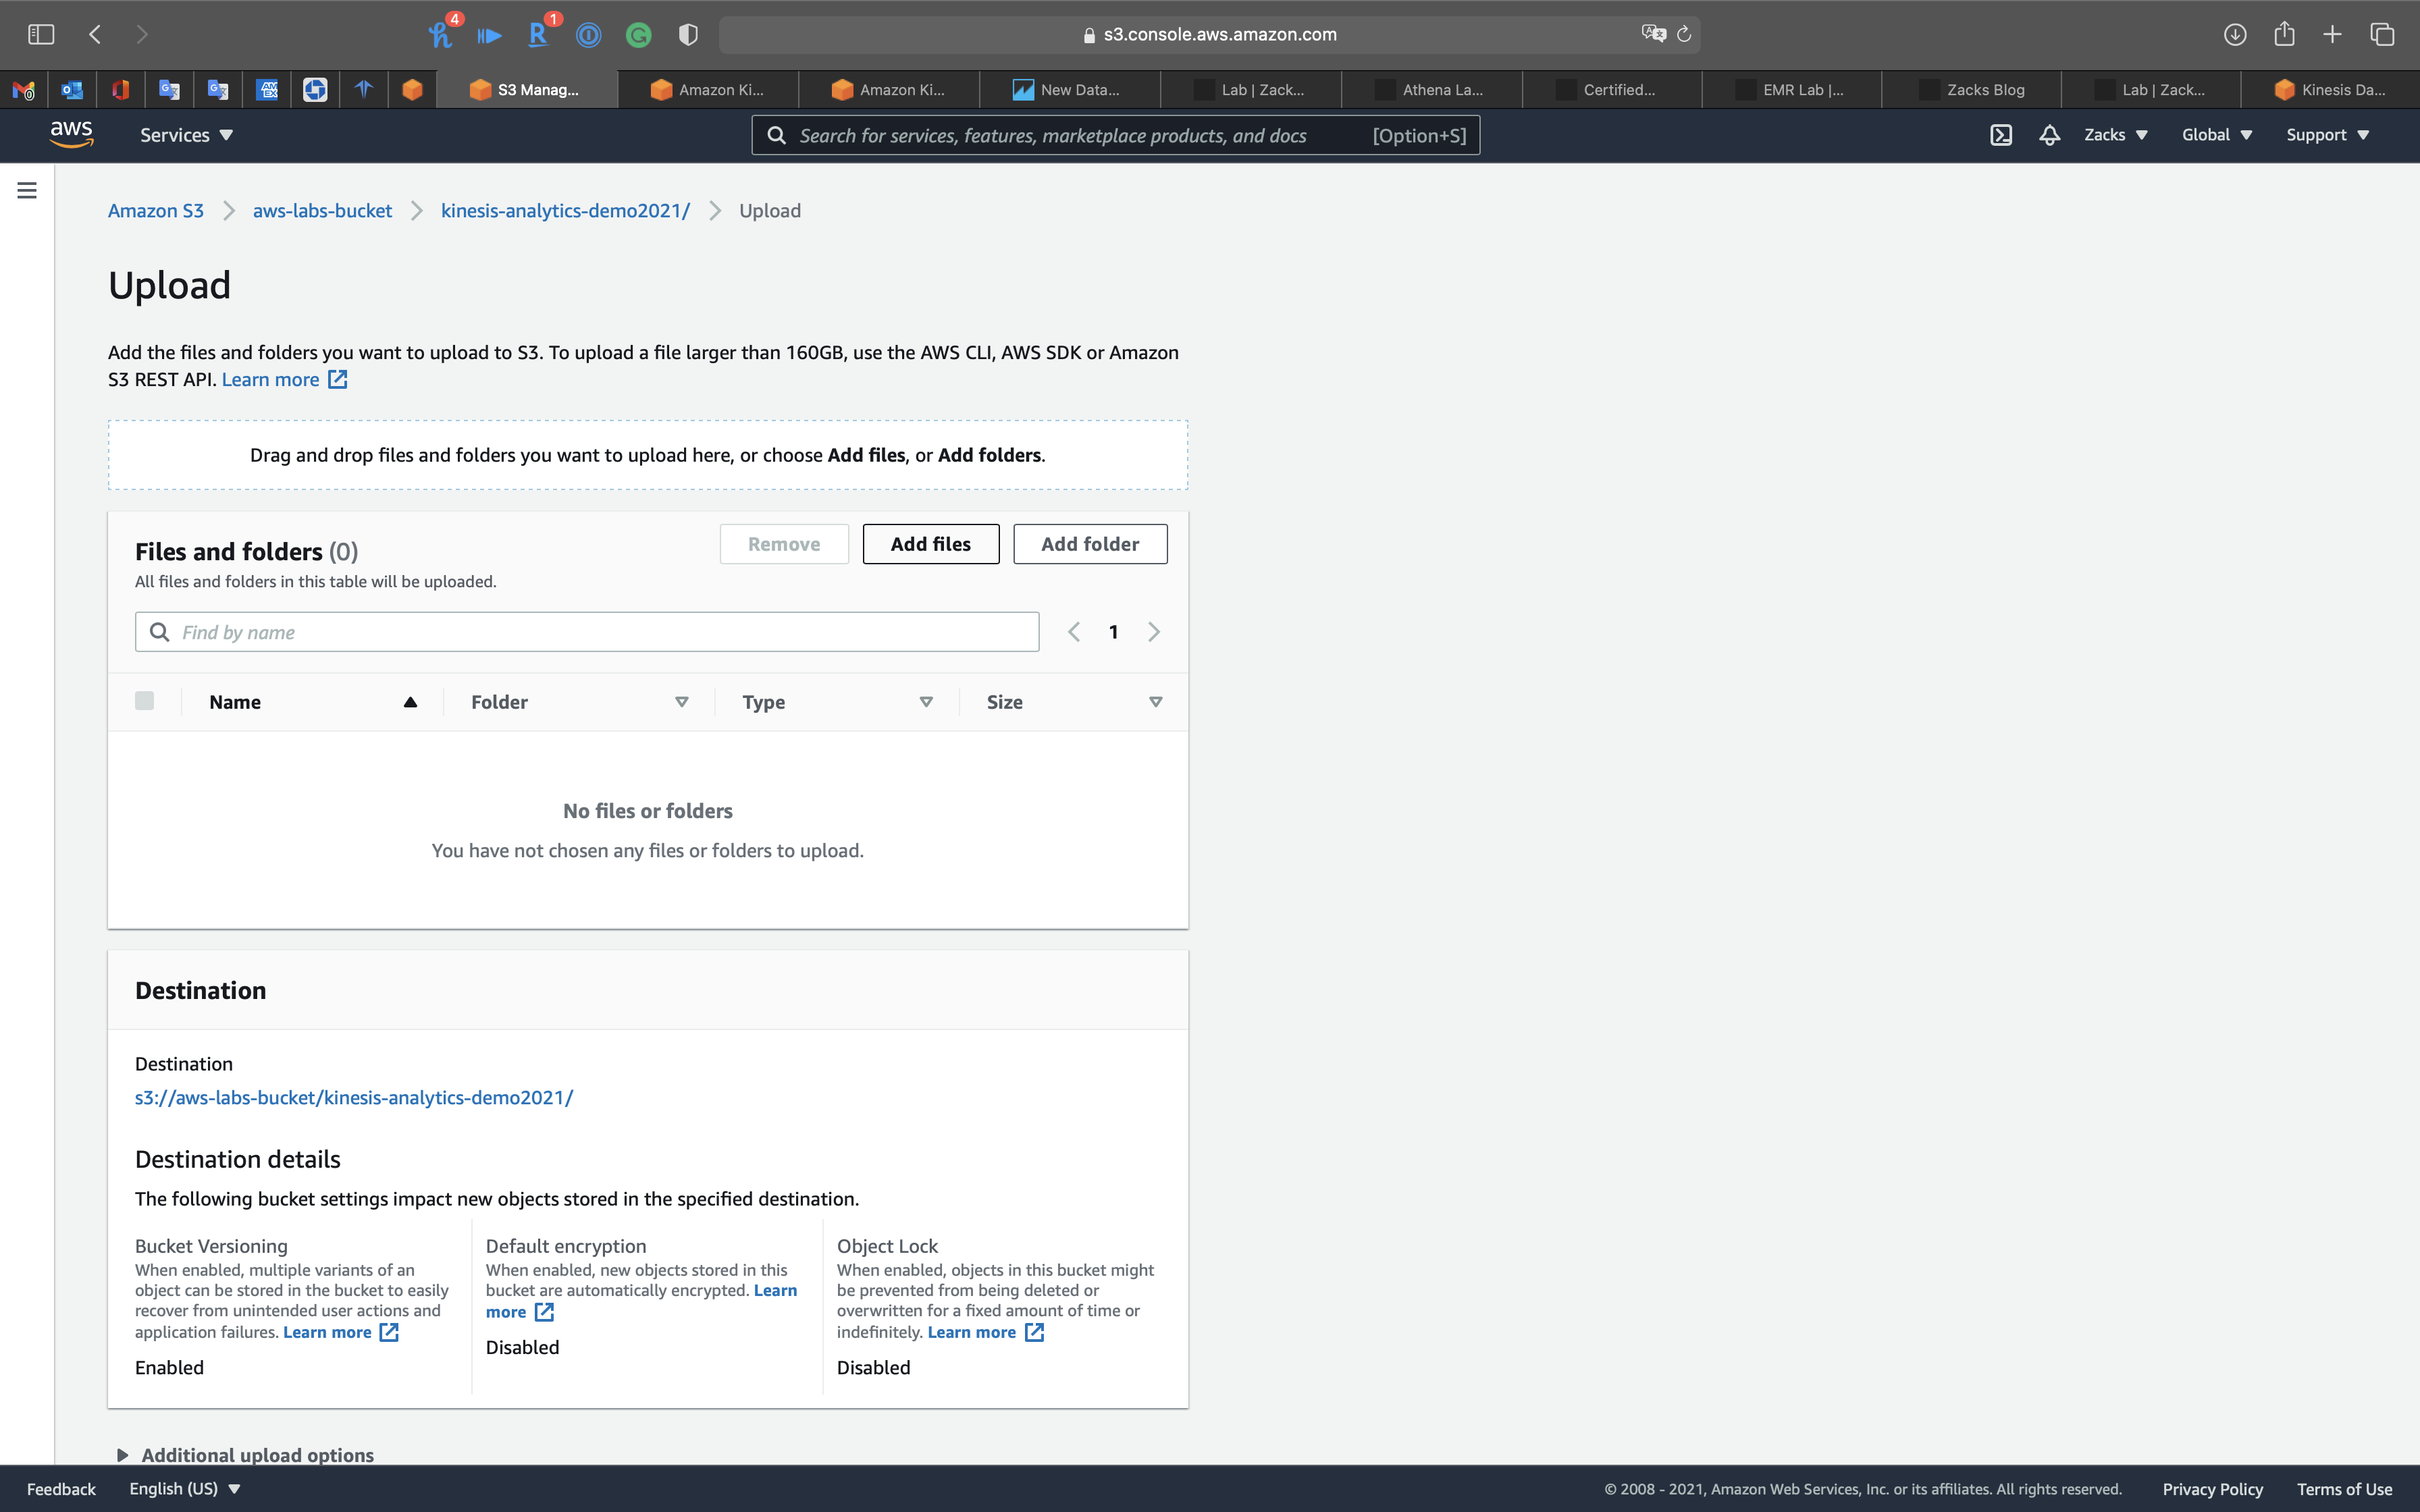

Select kinesis-analytics-demo2021.json then click on Upload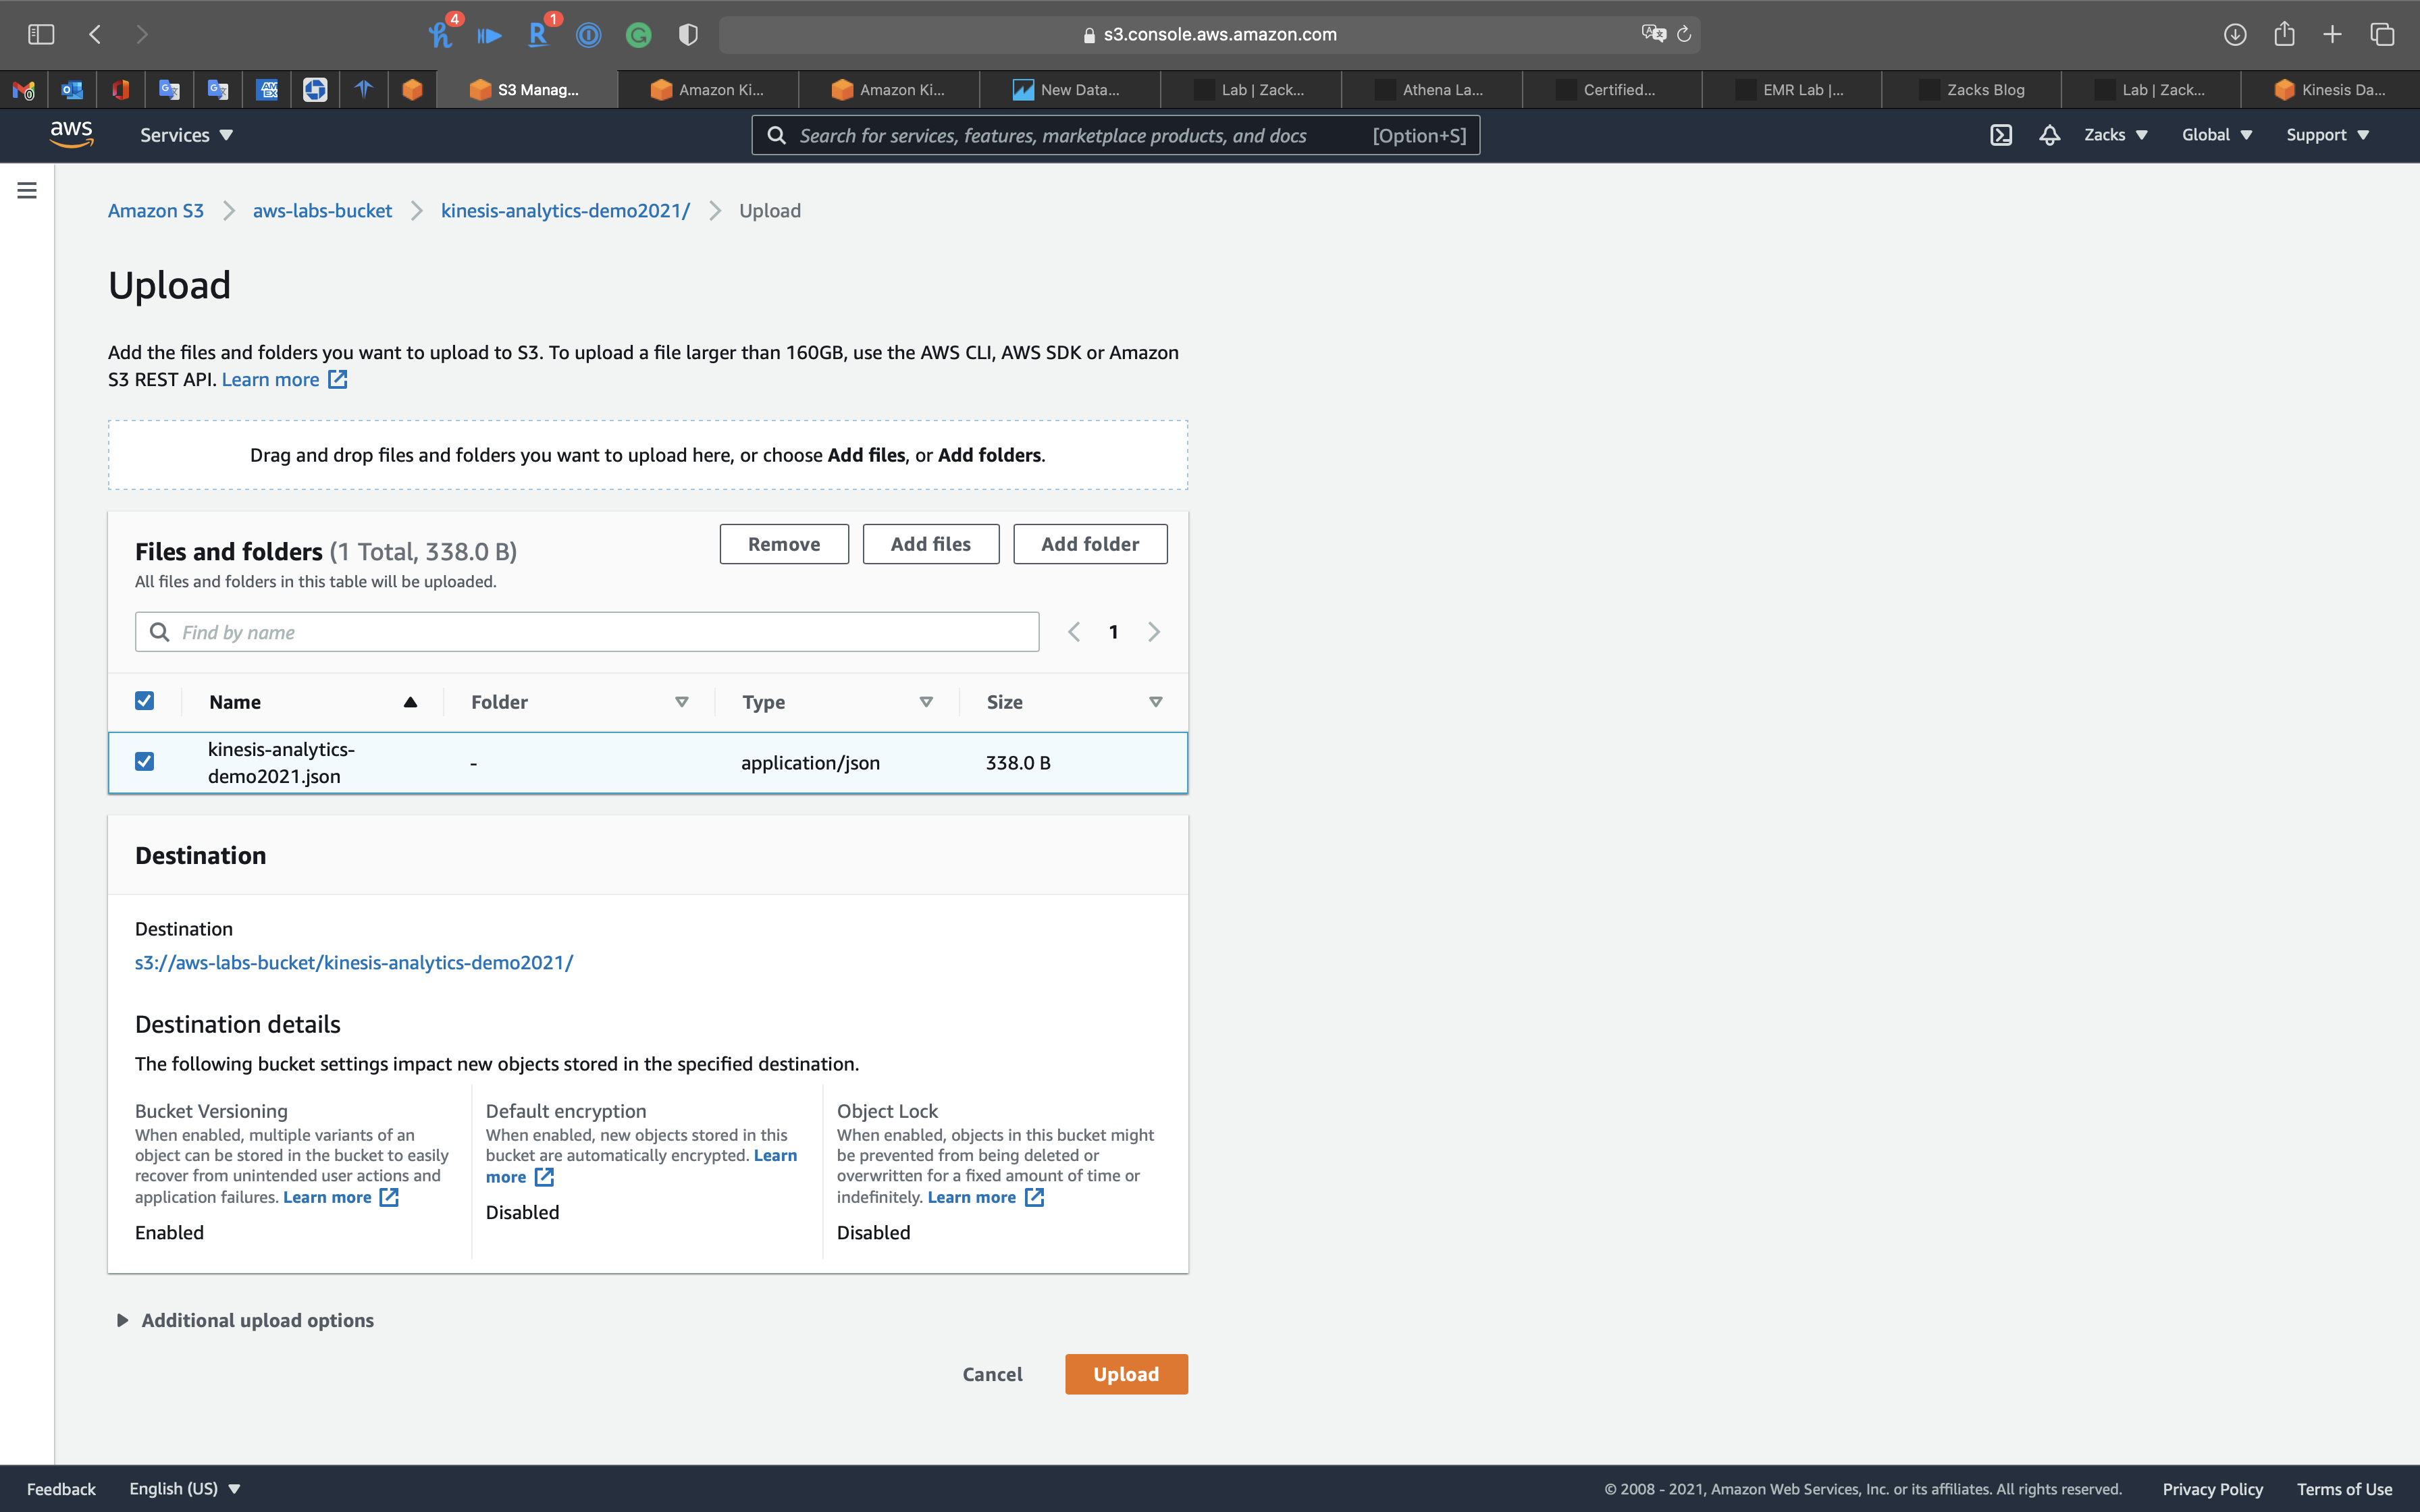
Click on kinesis-analytics-demo2021.json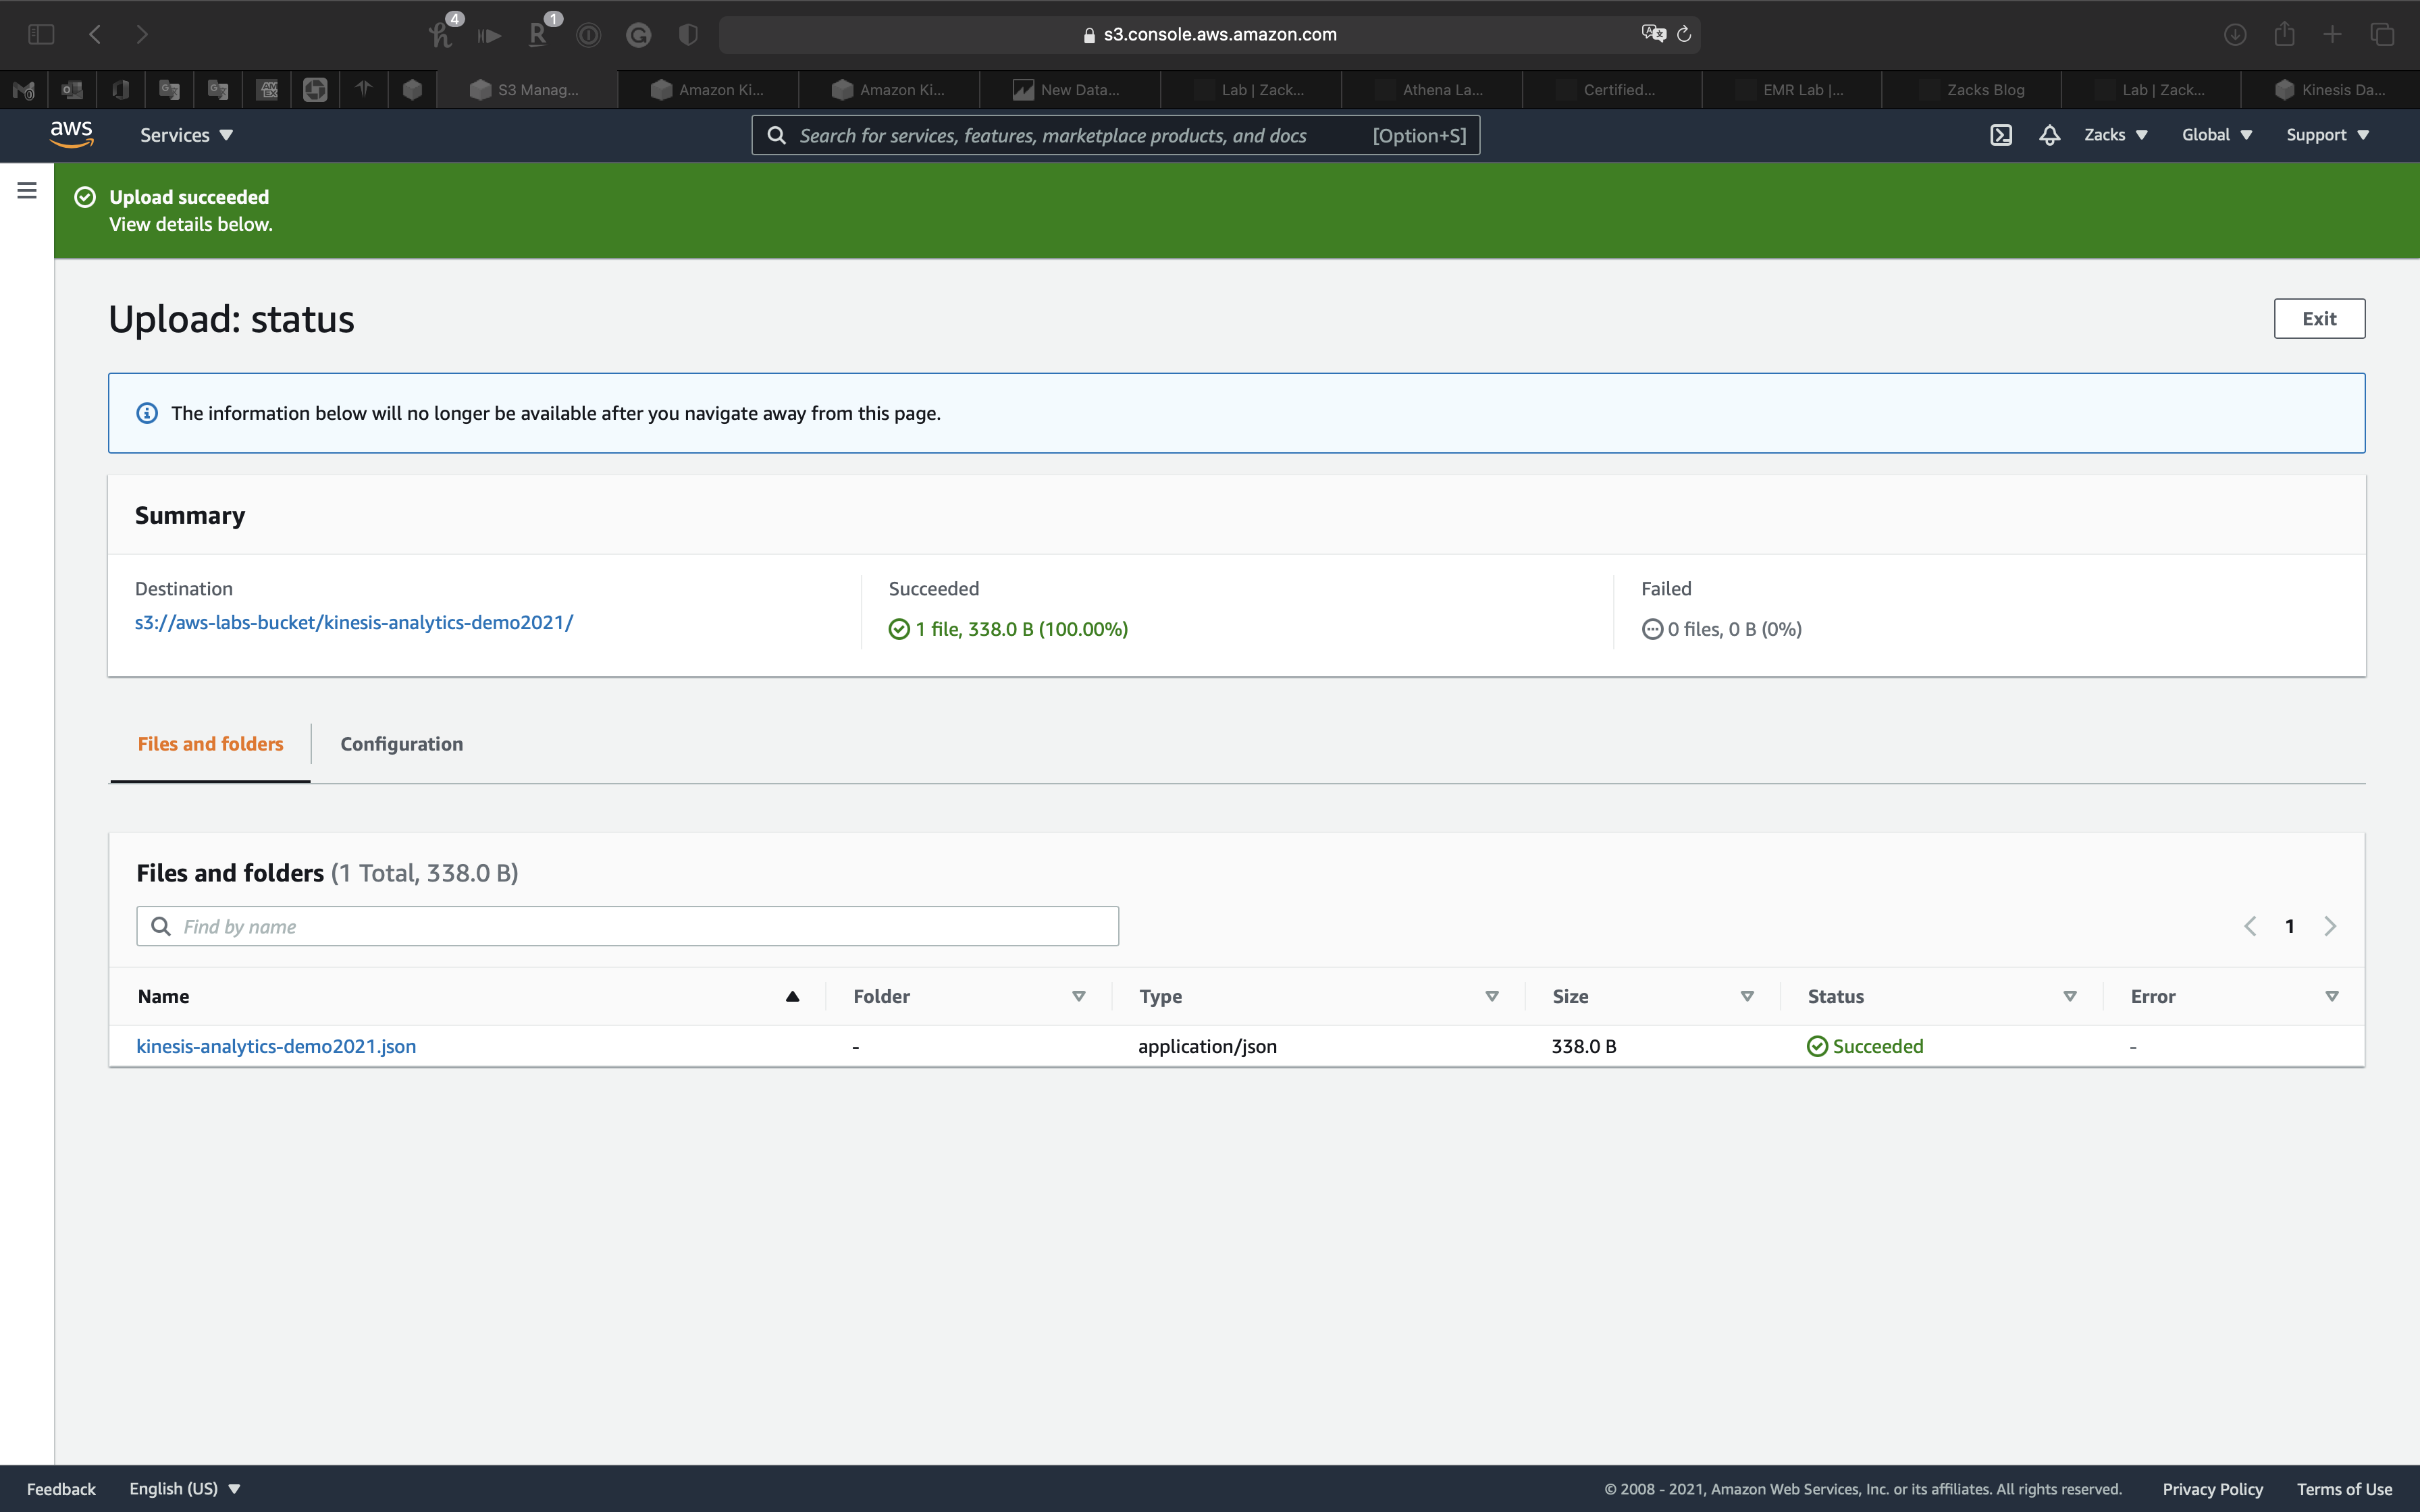
Copy S3 URI
QuickSight Configuration
Services -> QuickSight
You may need to create an account and login.
Connect to S3
Click on Datasets on navigation panel
Click on New dataset on the right and top page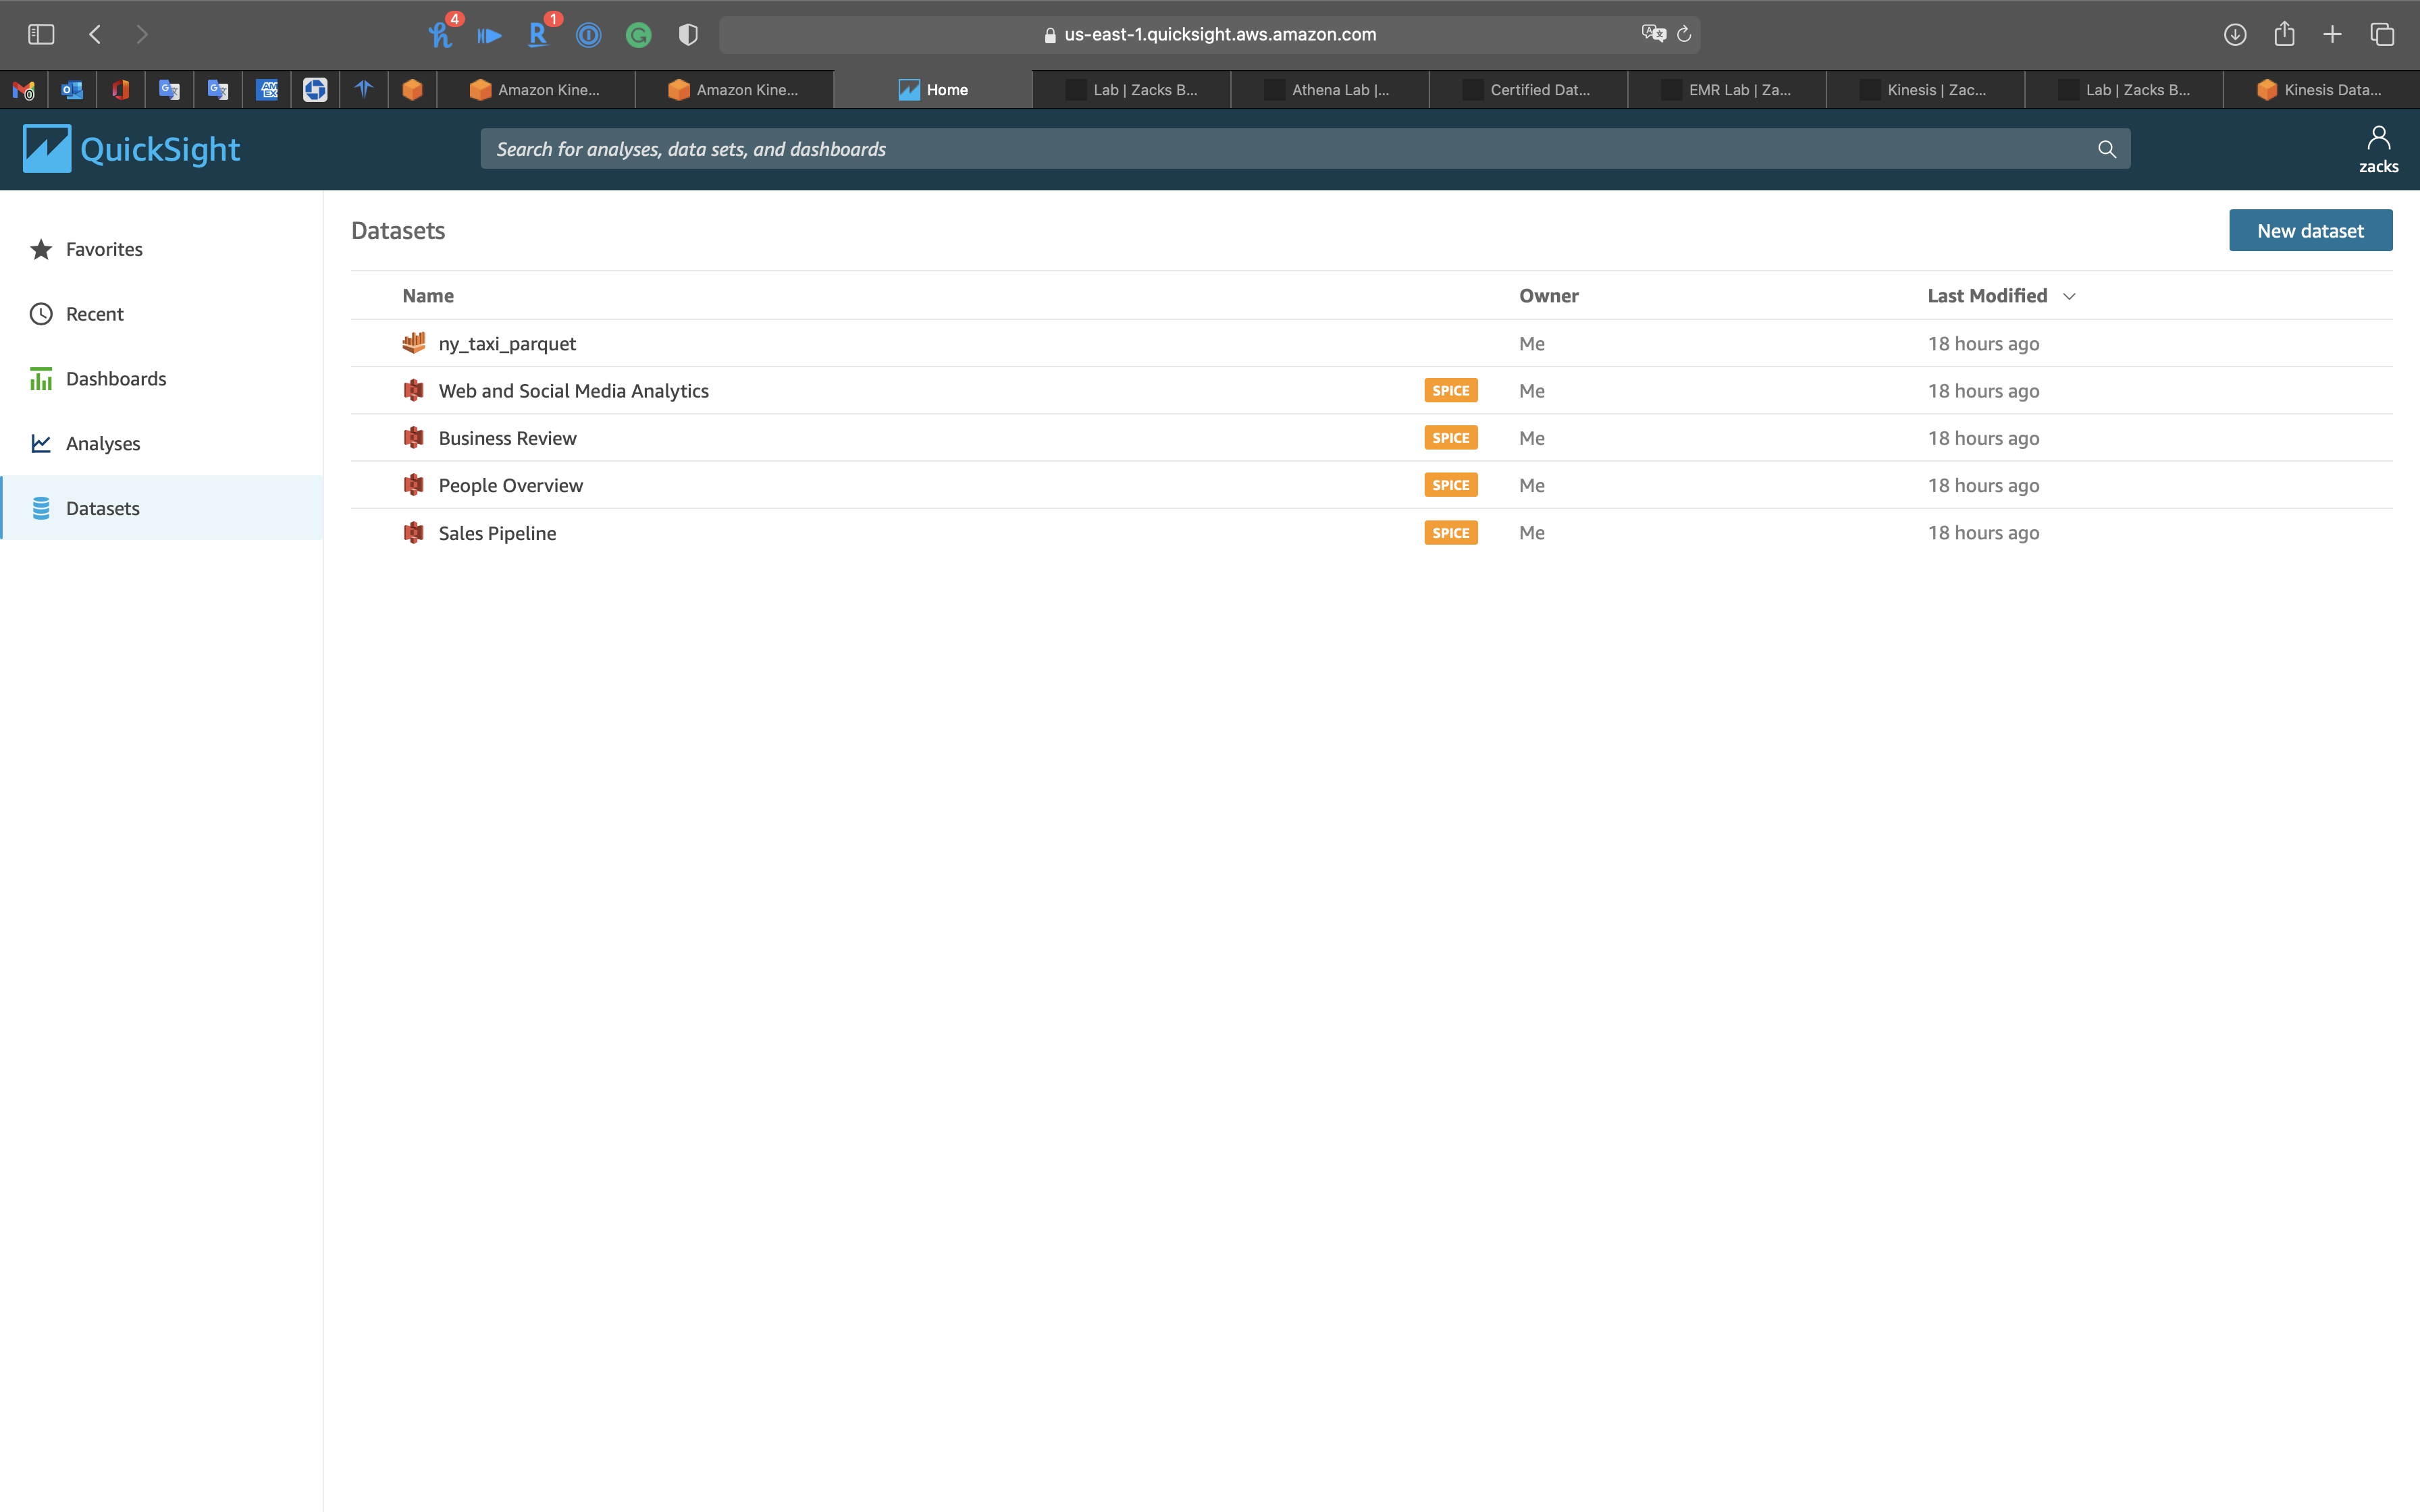
Click on S3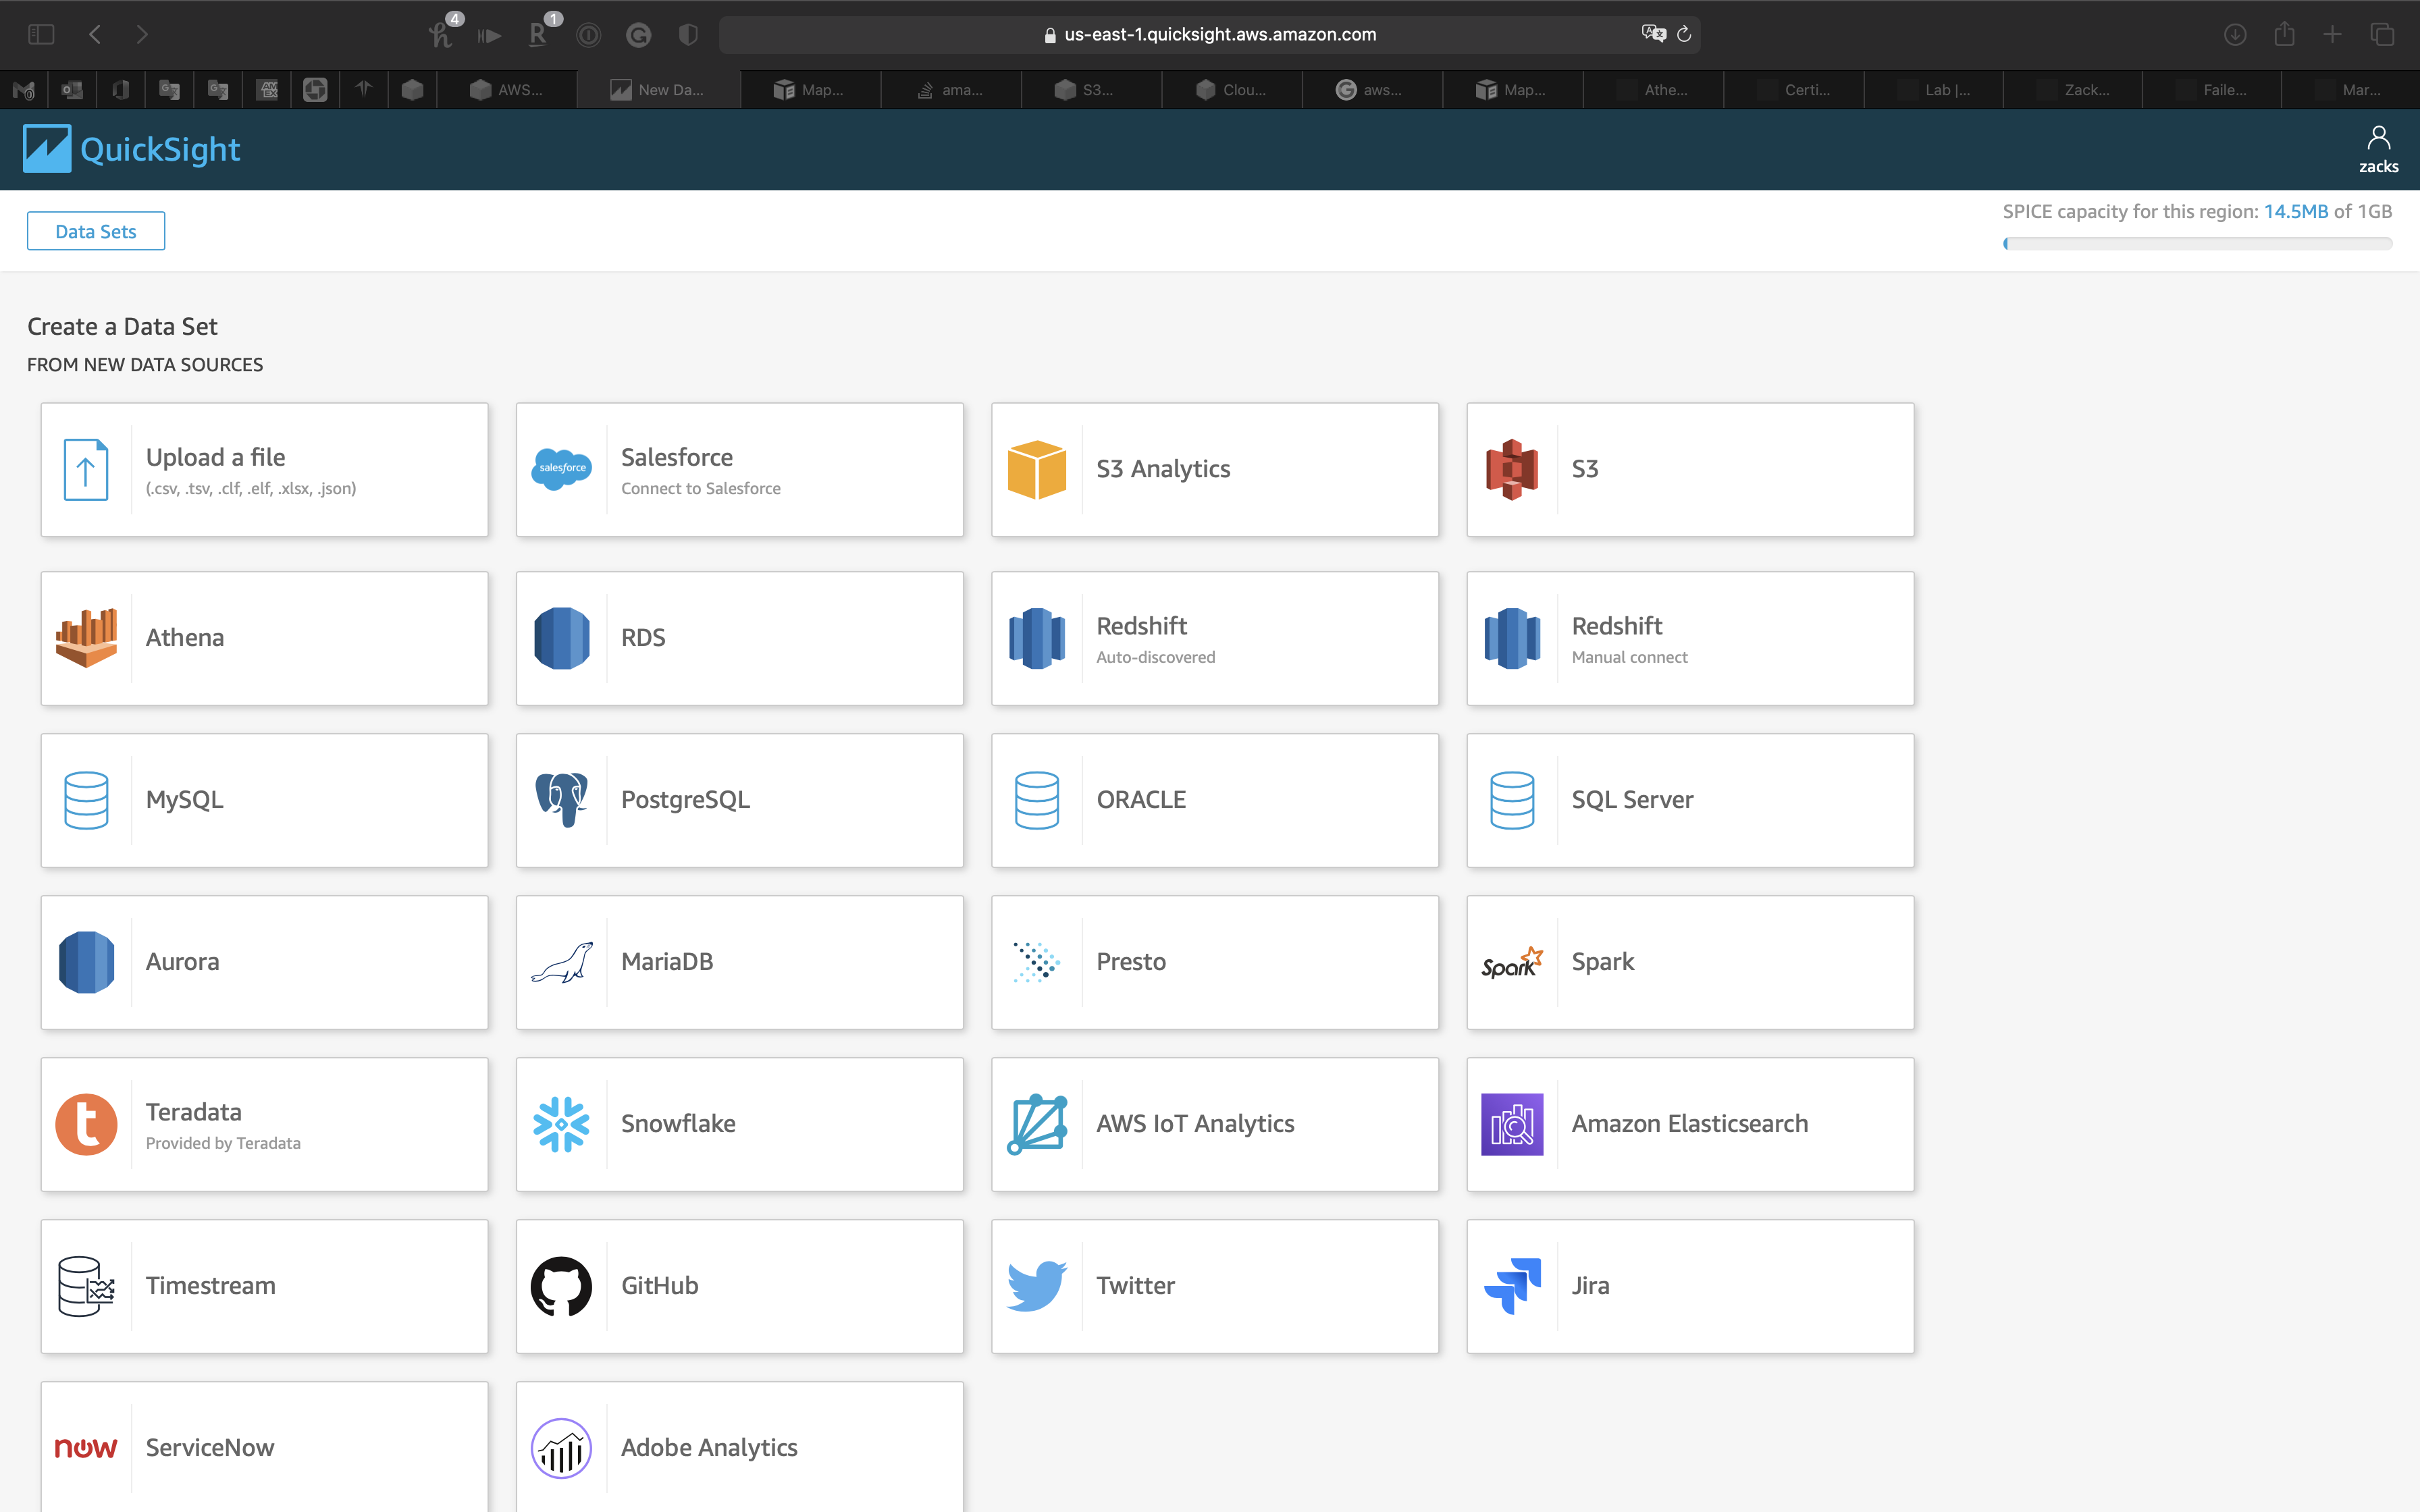
- Data source name:
TickerData
Click on URL and enter your JSON manifest file (mine is kinesis-analytics-demo2021.json) URL.
Click on Connect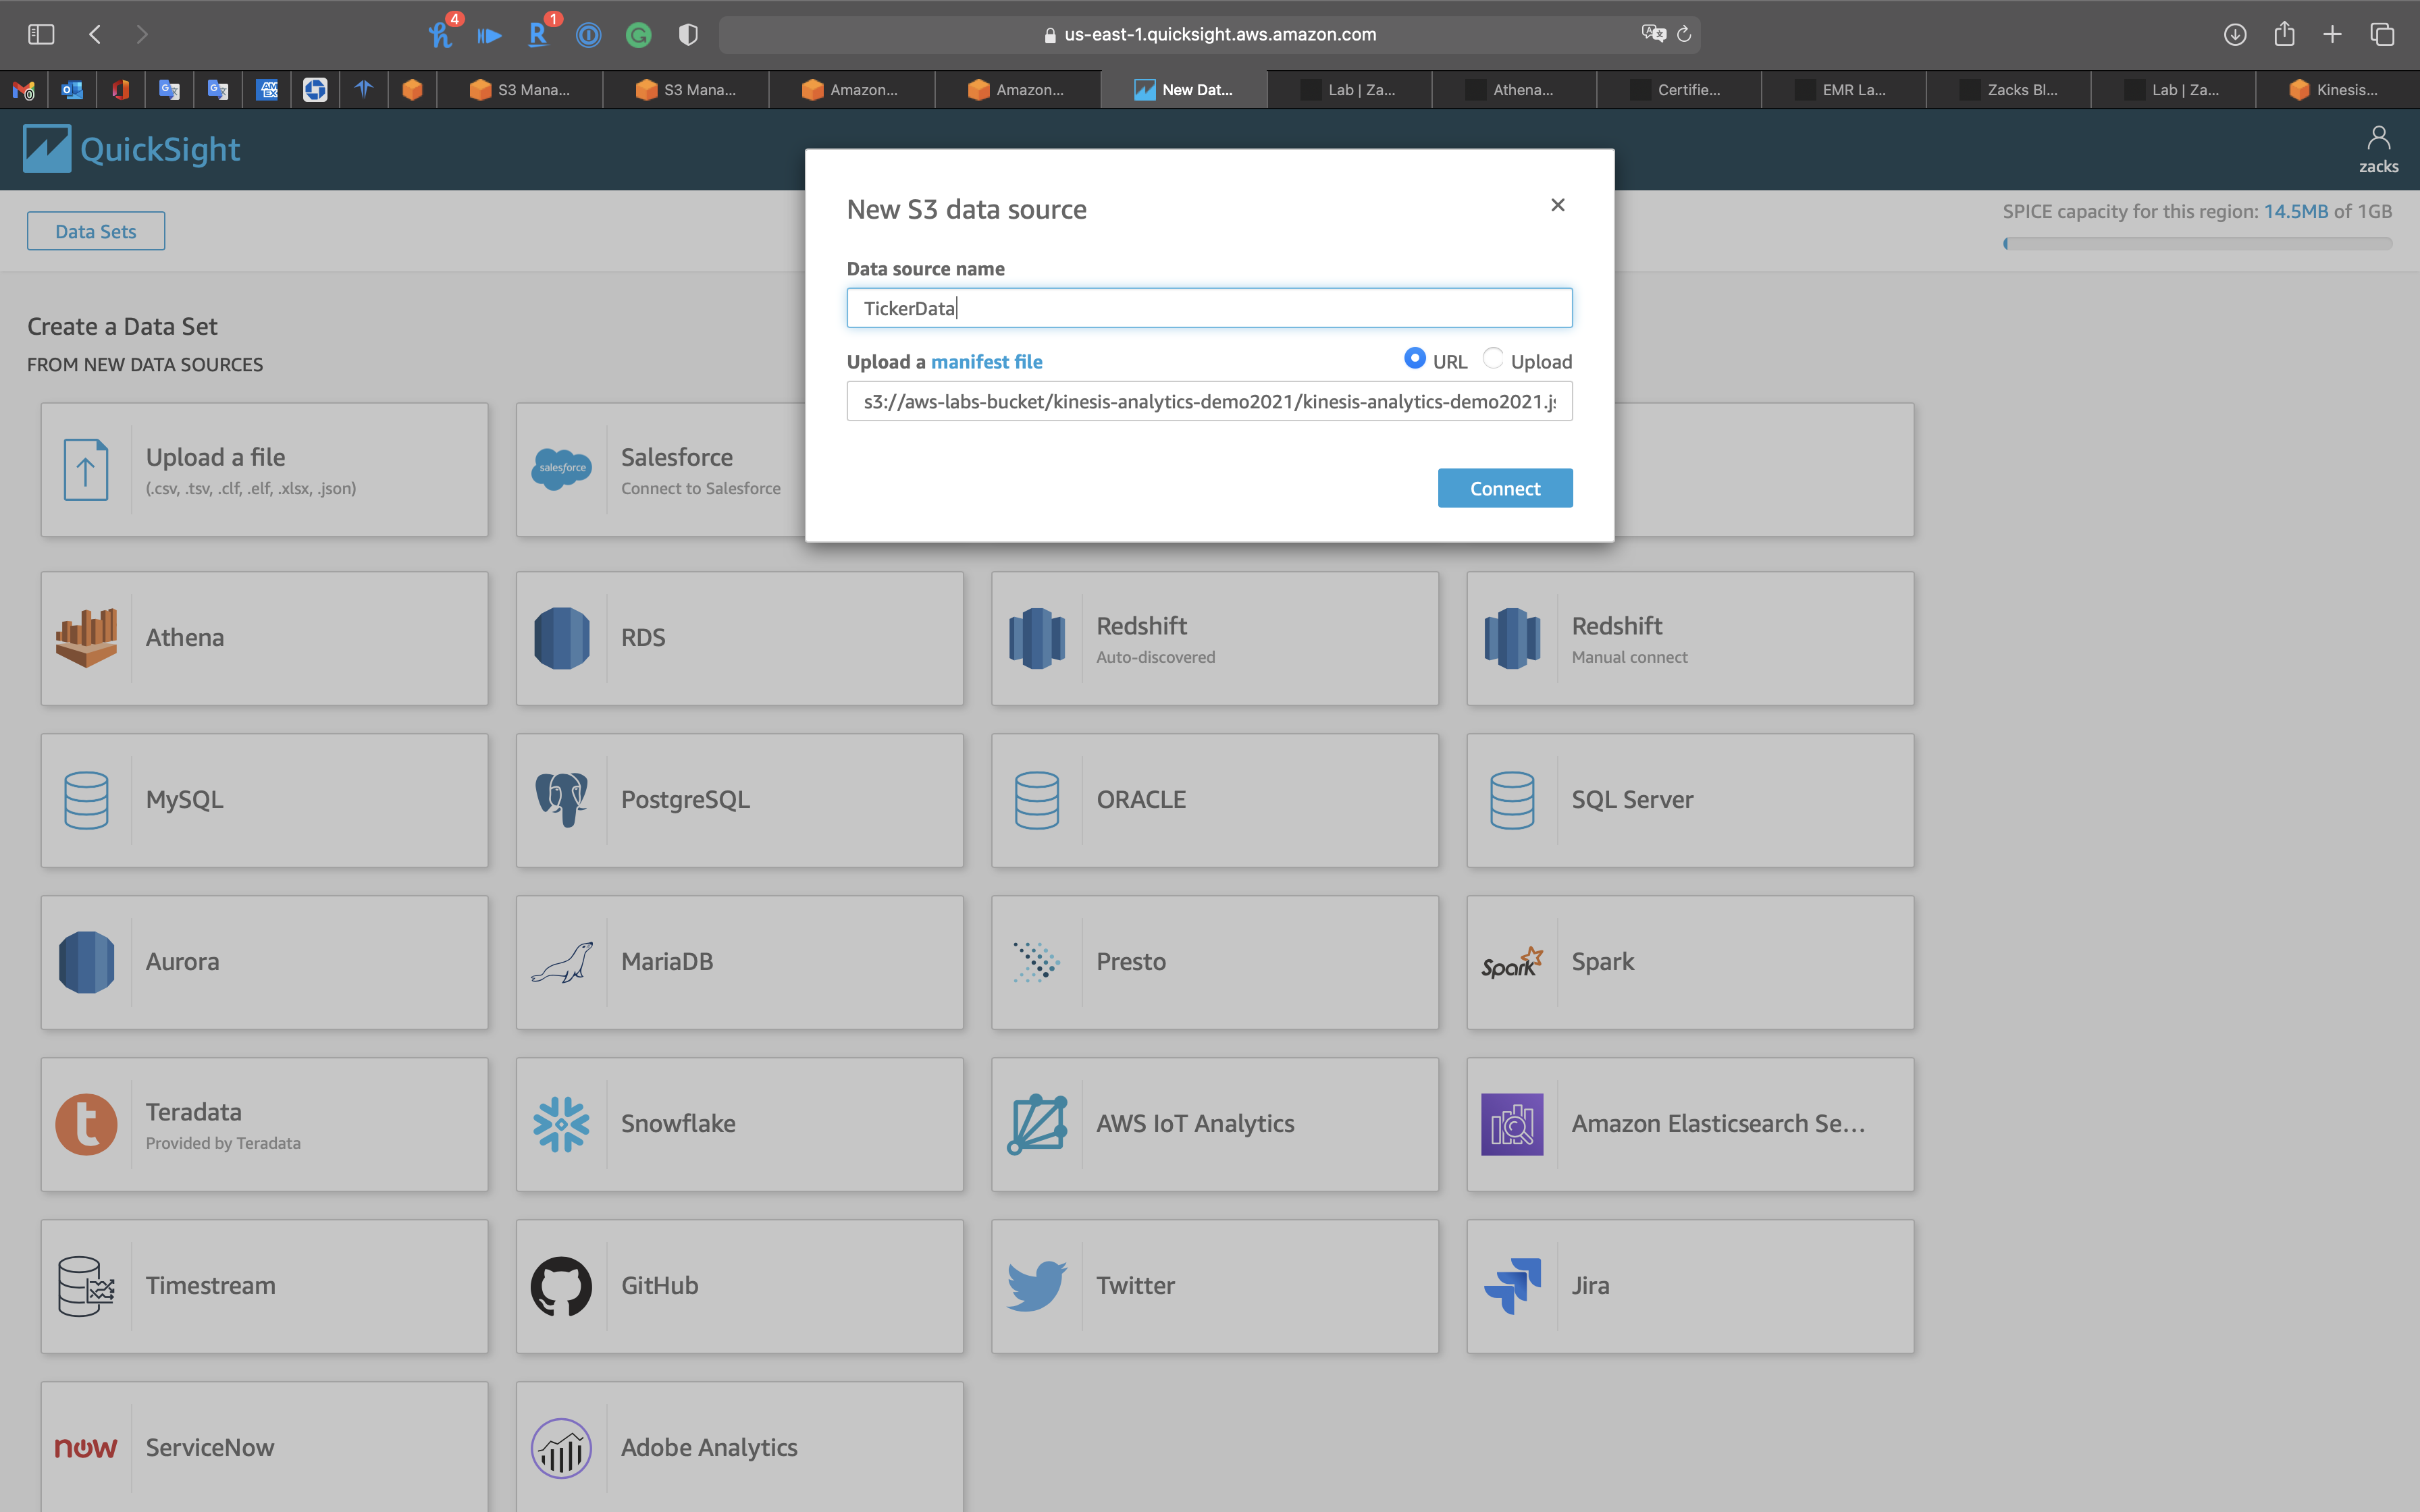
Click on Edit/Preview data
Edit/Preview data
Click on Save & visualize on the top and middle page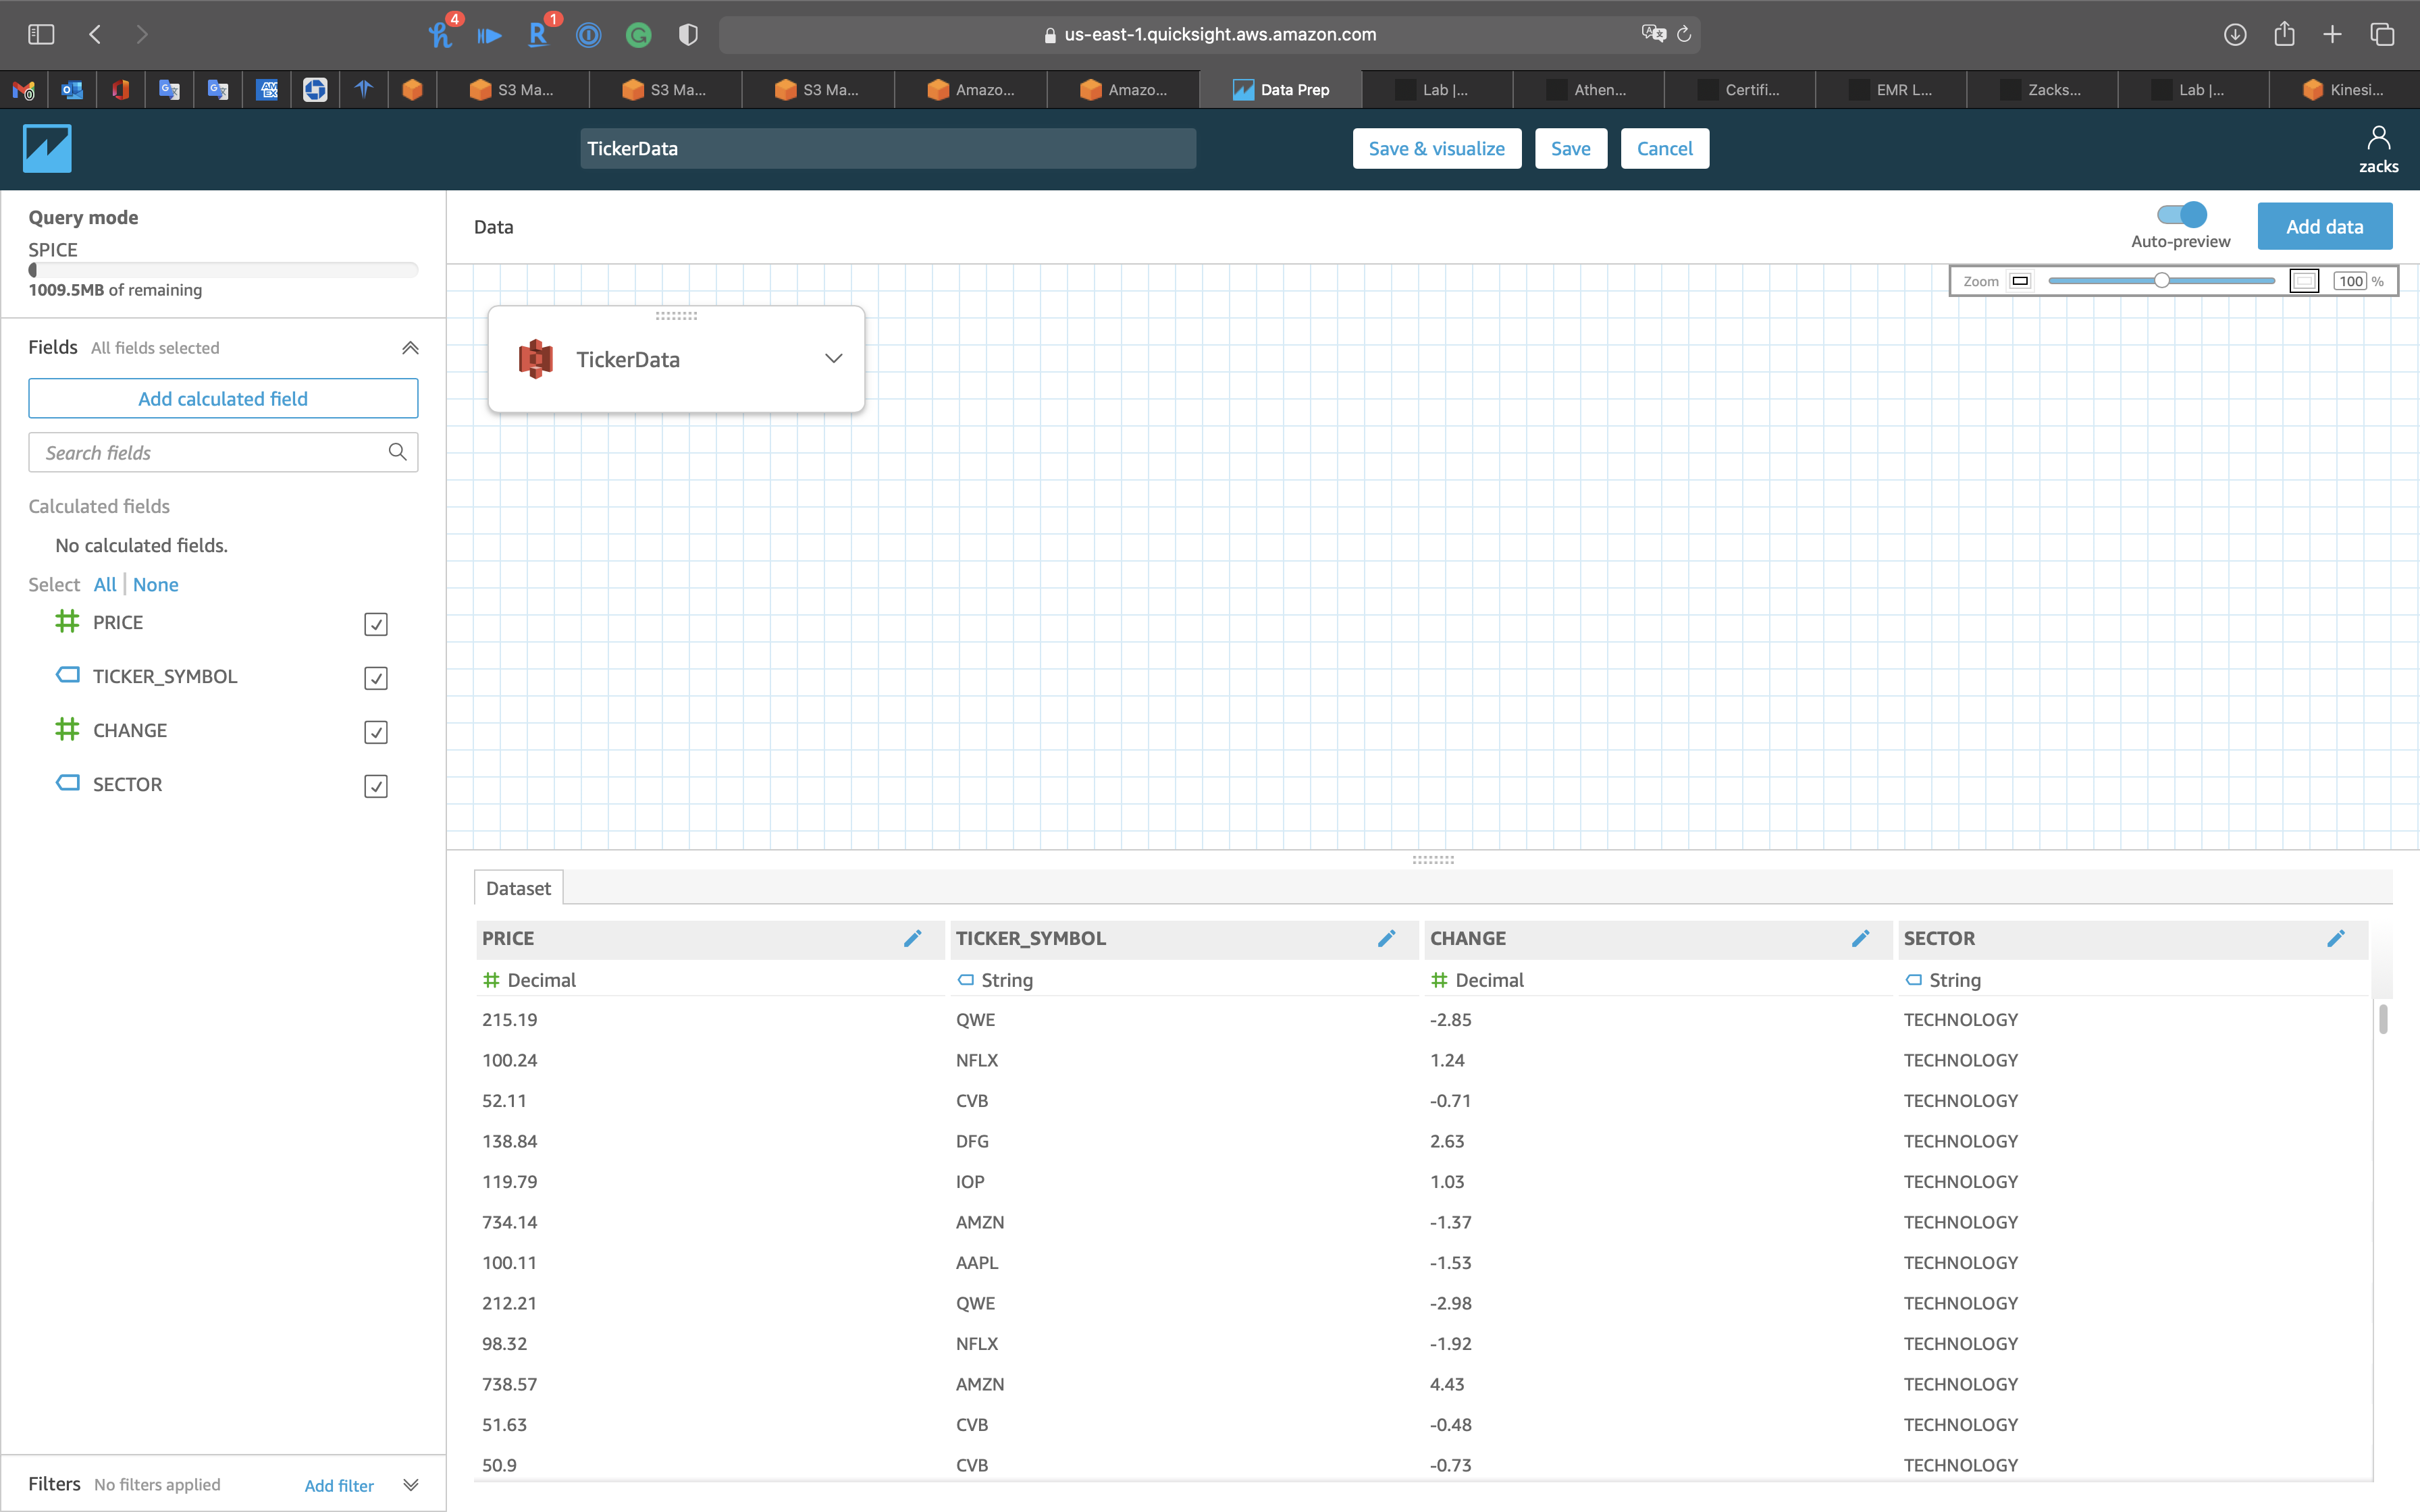
Cluster bar combo chart
- Visual types:
Cluster bar combo chart - X axis:
TICKER_SYMBOL - Bars:
PRICE (Sum) - Group/Color for bars:
SECTOR - Lines:
CHANGE (Sum)
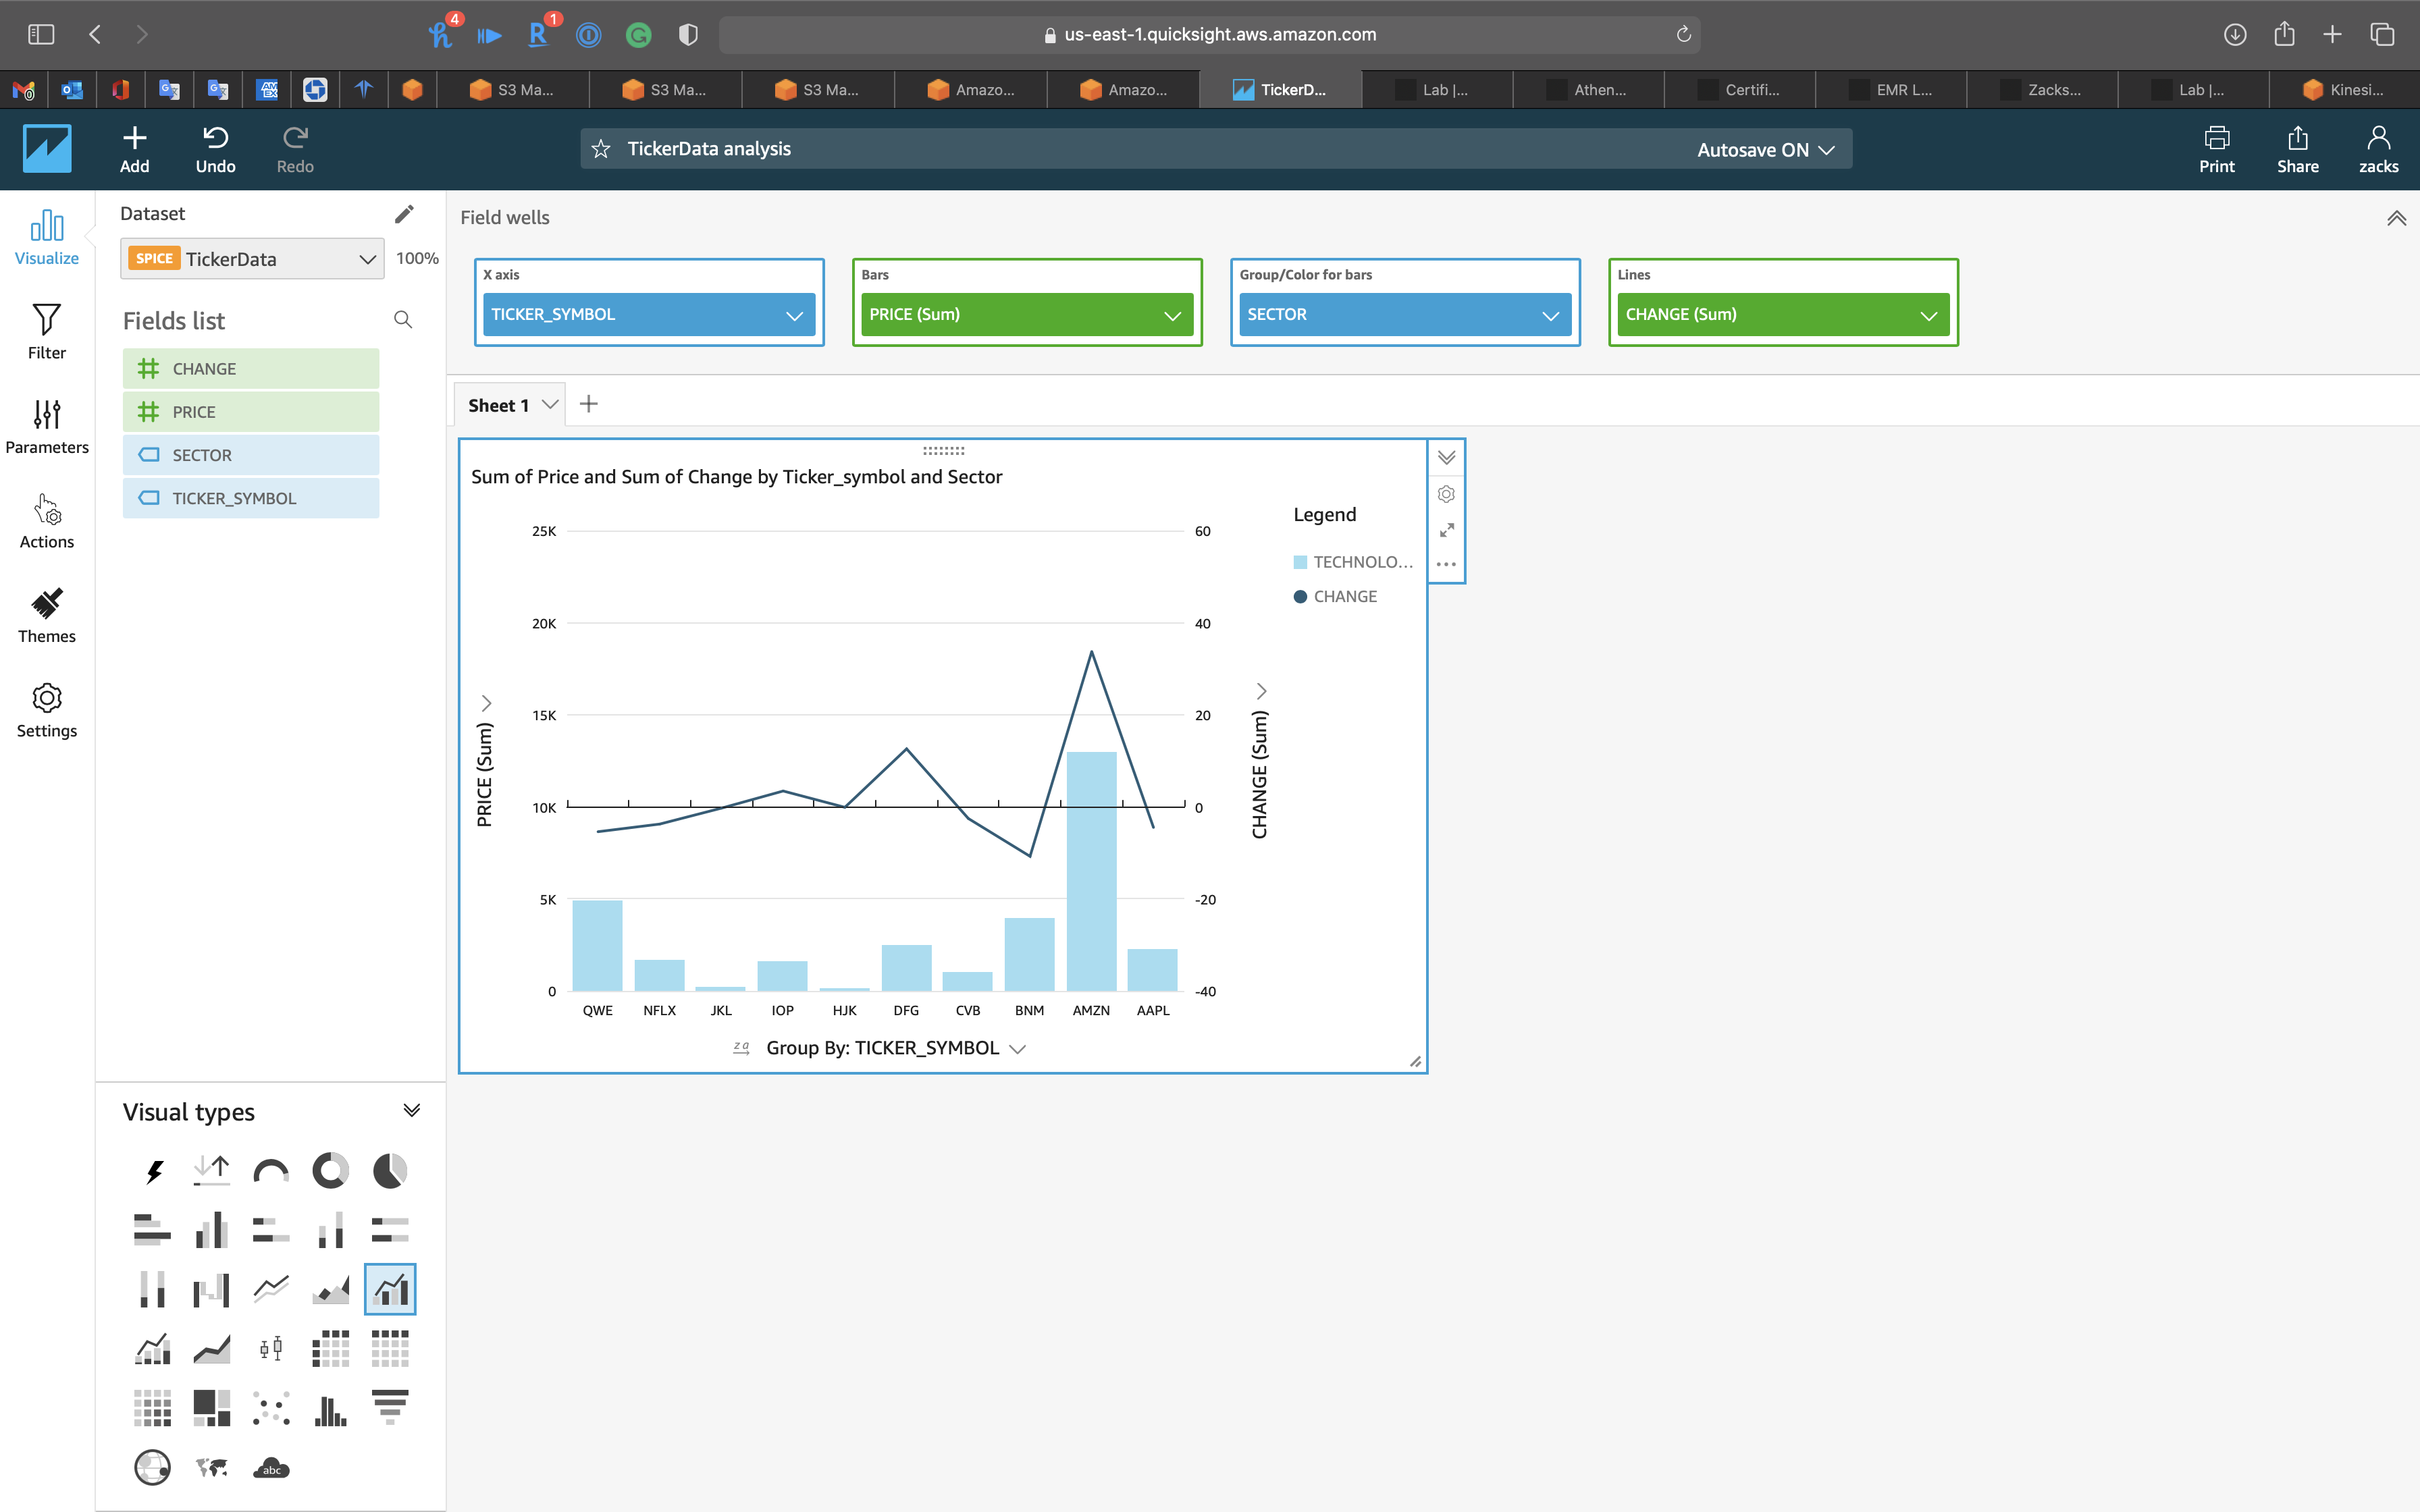
You can hold cursor on any bar to see the detail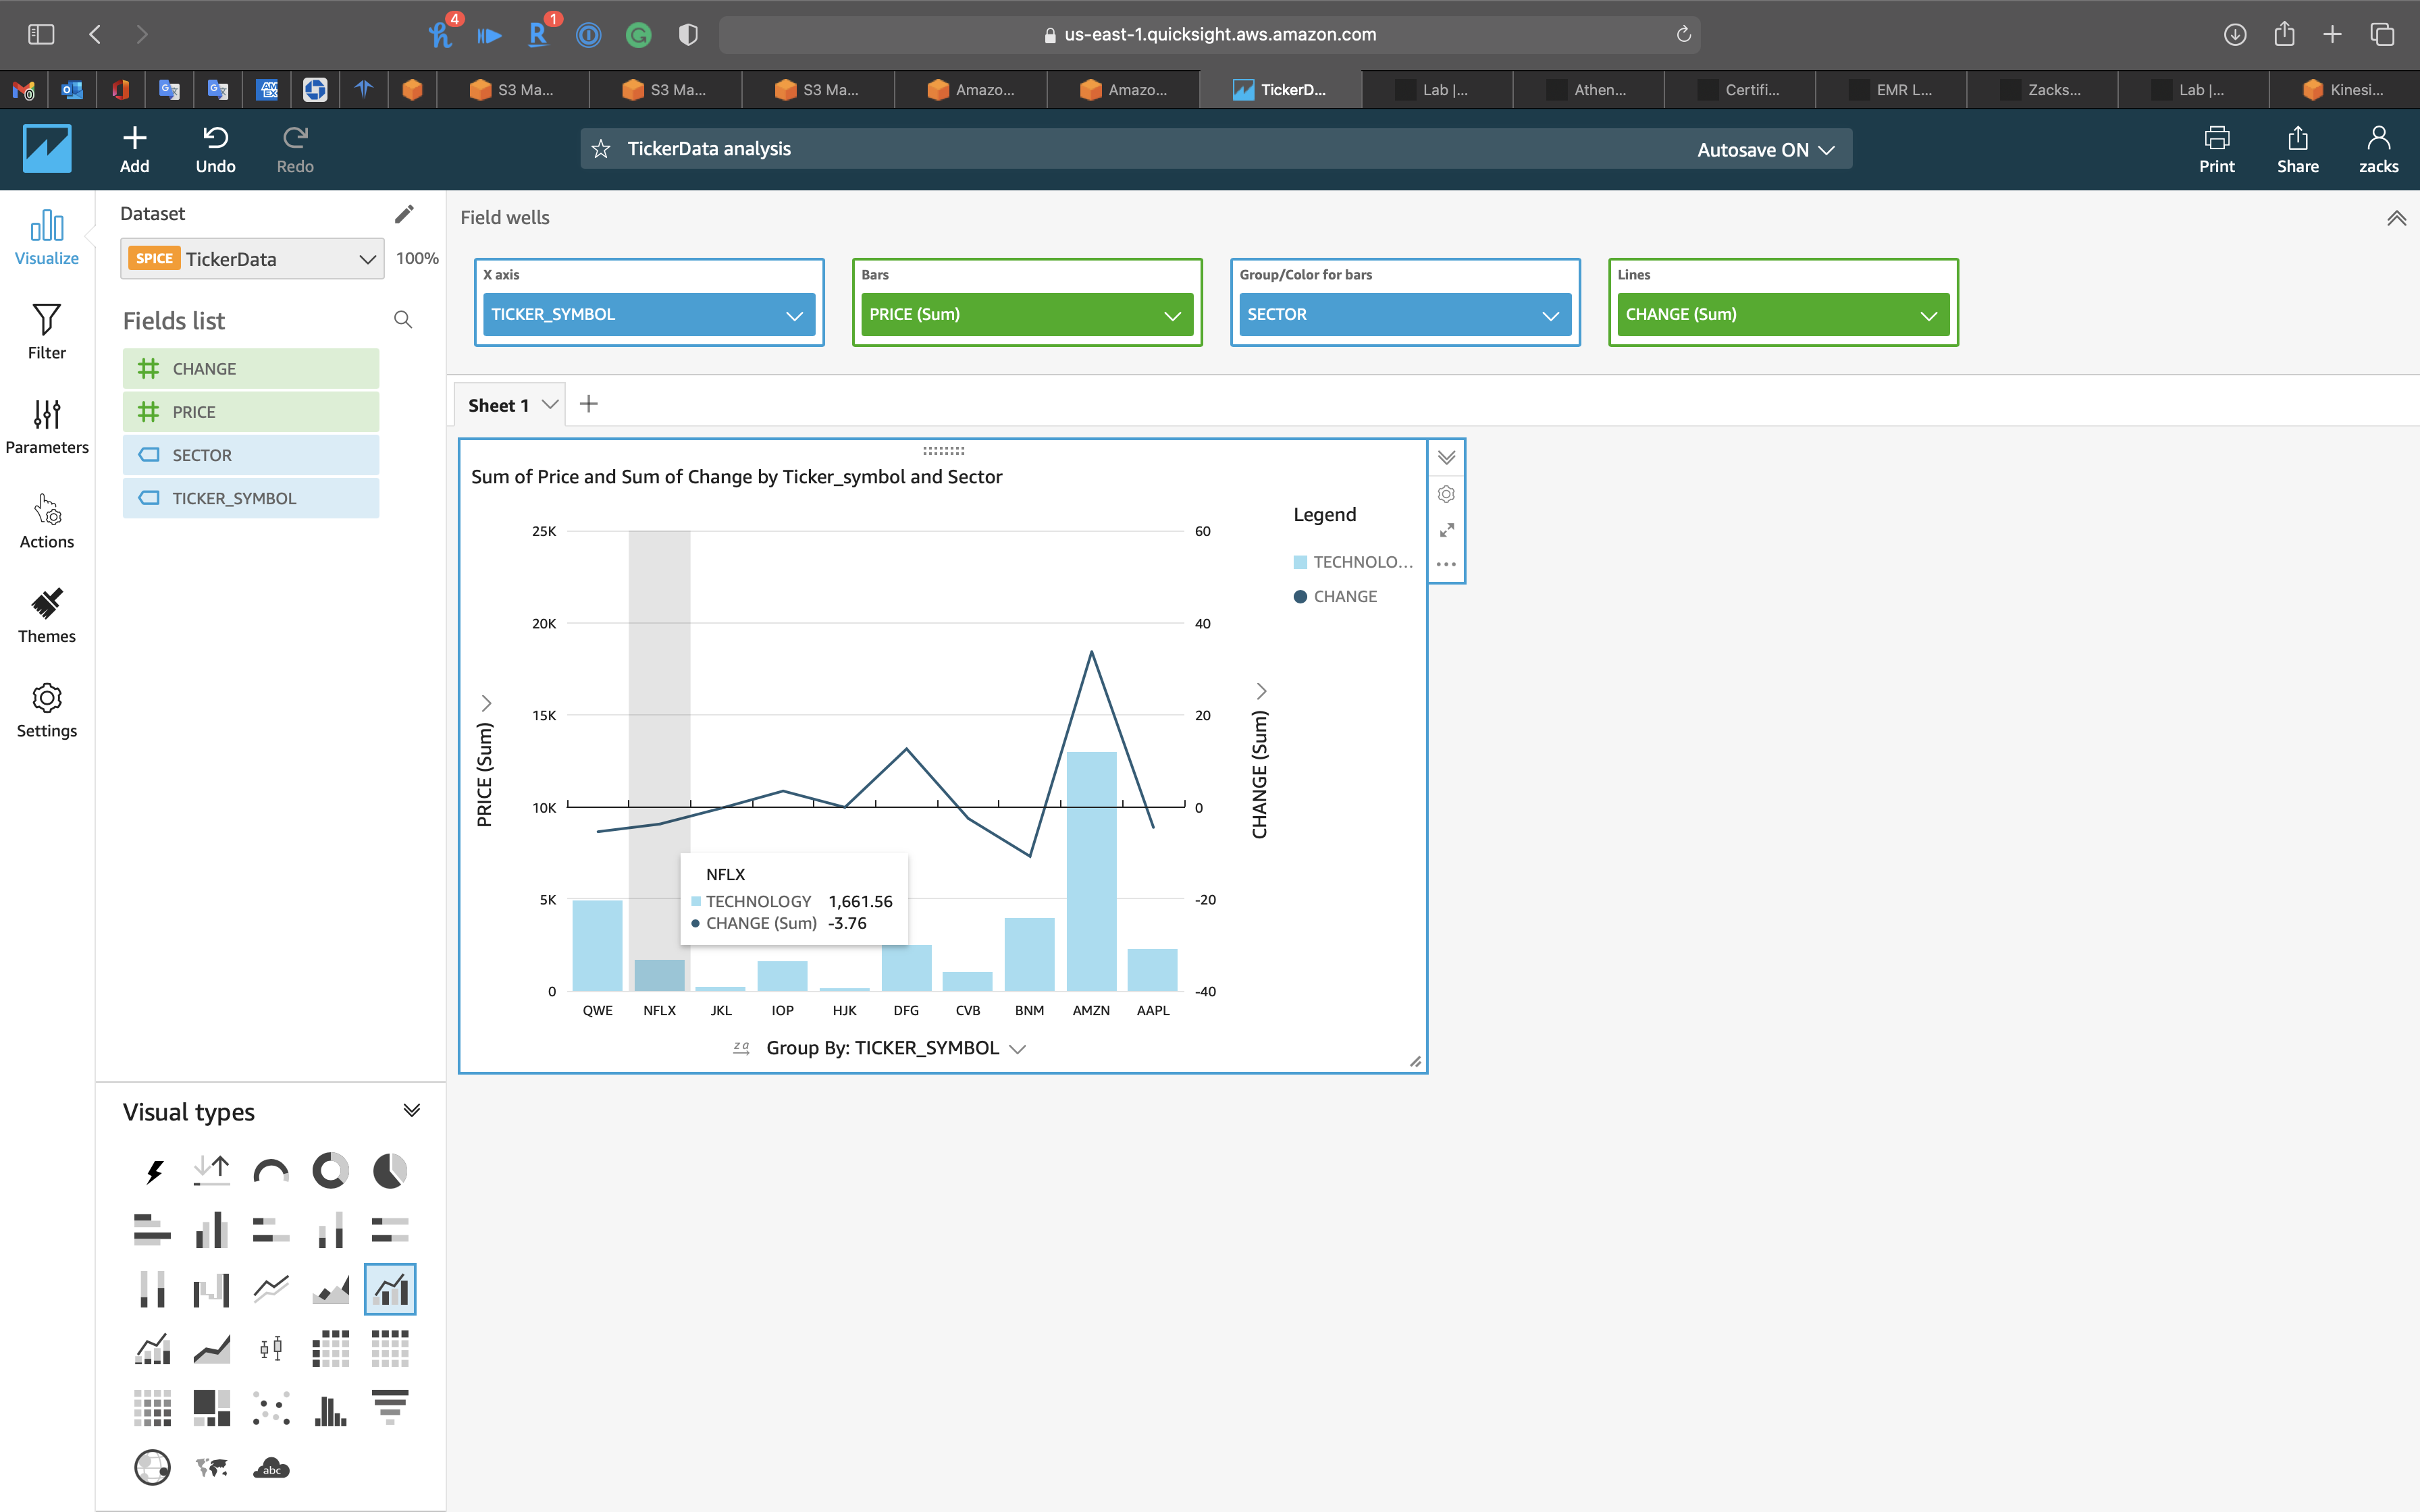
Stop Feeding Data
Services -> Kinesis -> Data Analytics
Select TickerApp, then click on Actions -> Stop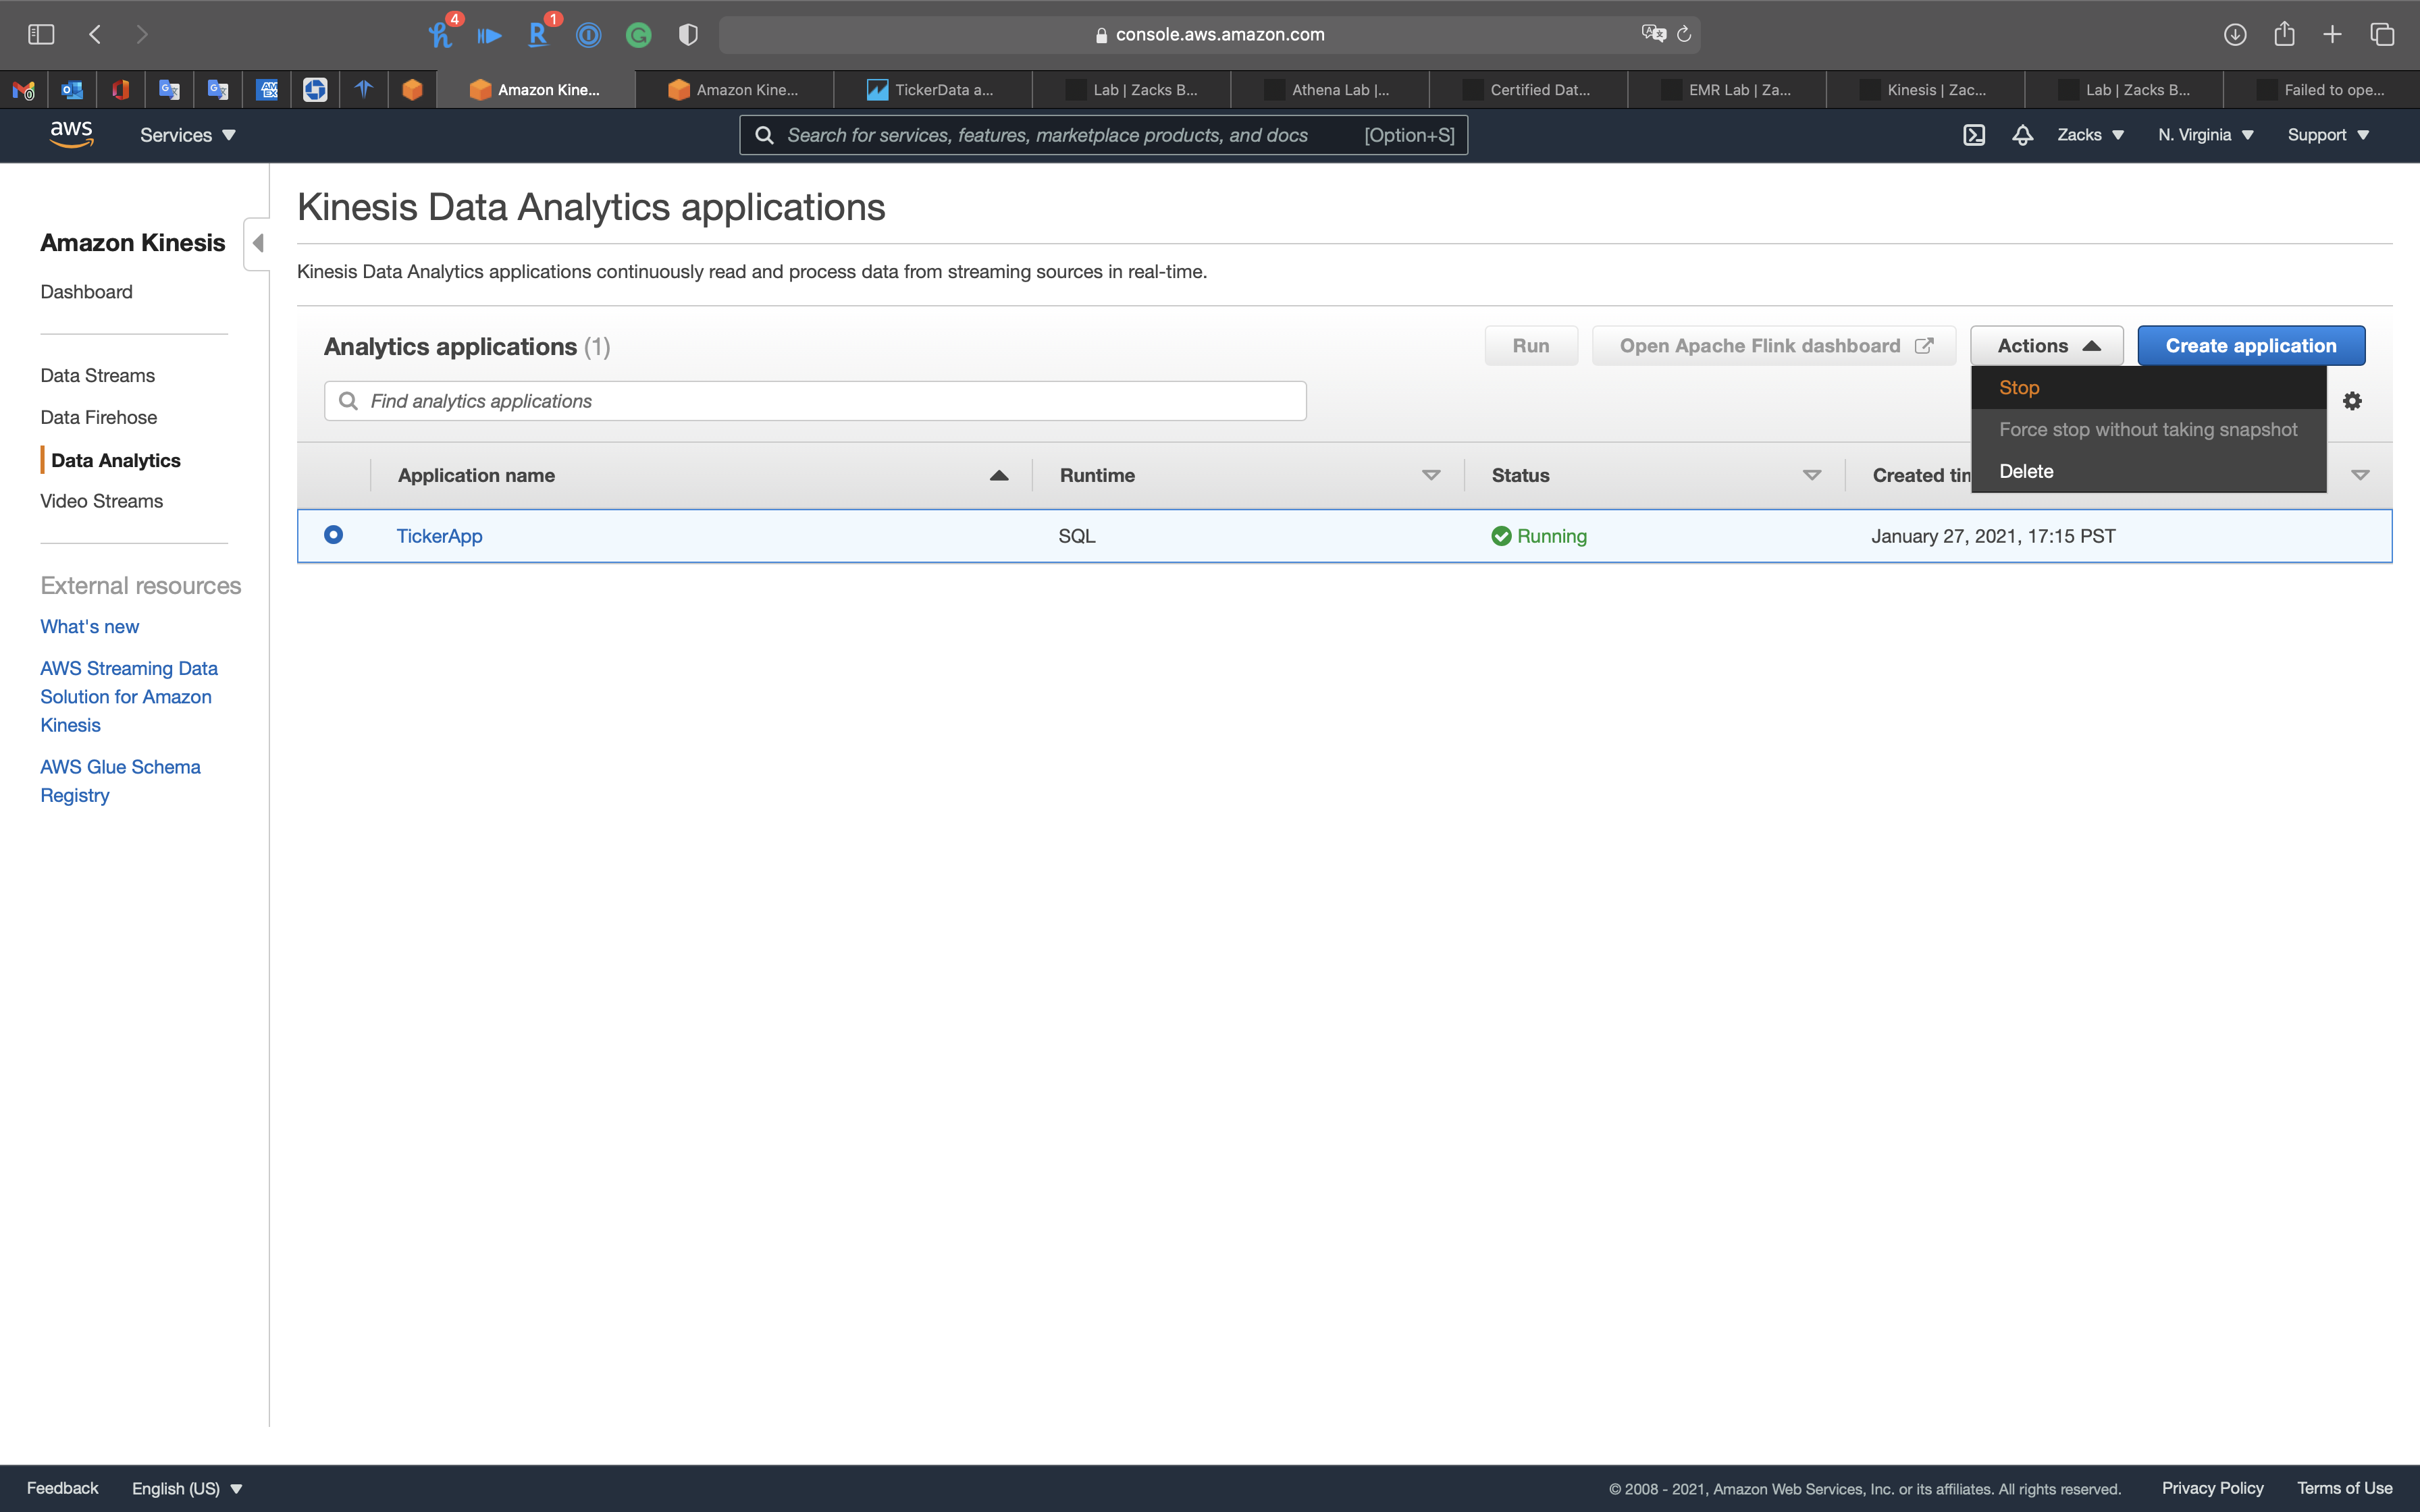
Click on Stop
Status: Stopping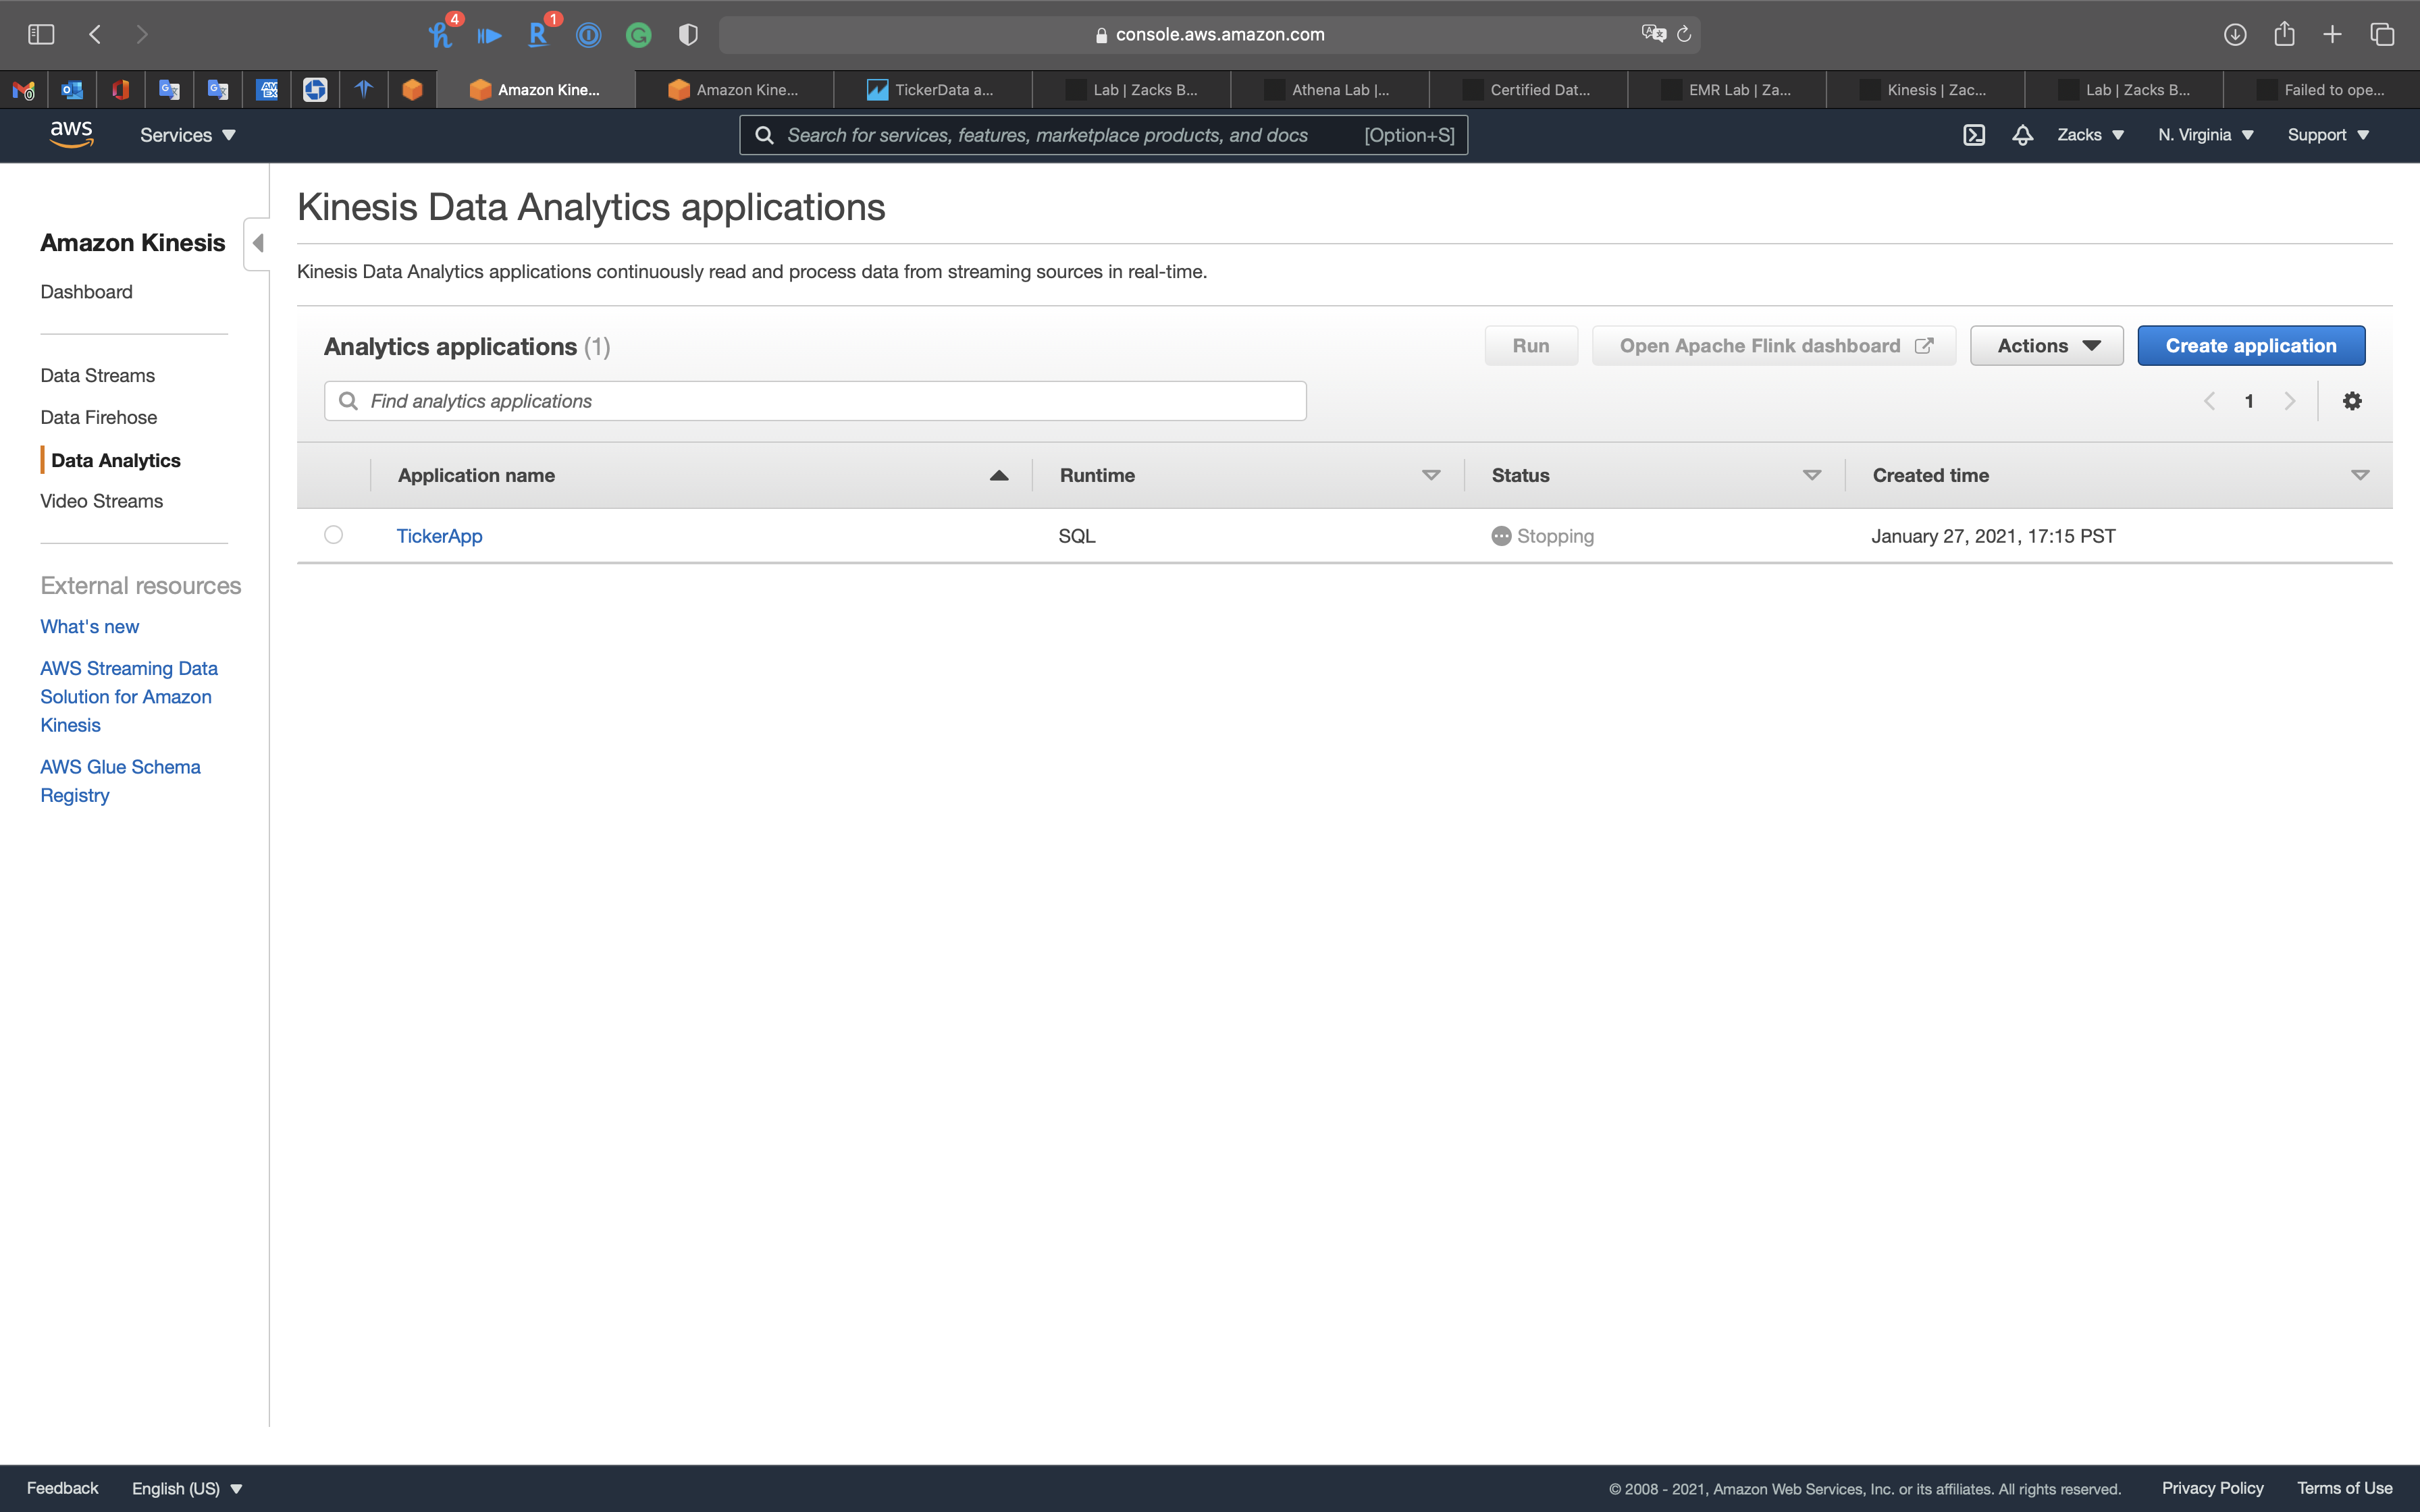
Wait unit the Status changed to Stopped