AWS EMR Lab
AWS EMR
EMR Cluster
EMR Spark - Env Setup
Task Details
- Build EMR cluster with 1 master node and 1 core node
- Submit work to cluster
- SSH
- Step
- YARN to manage cluster
EMR Configuration - Cluster
Services -> EMR -> Clusters
Click on Create cluster
Cluster - Create Cluster - Quick Options
Click on Create cluster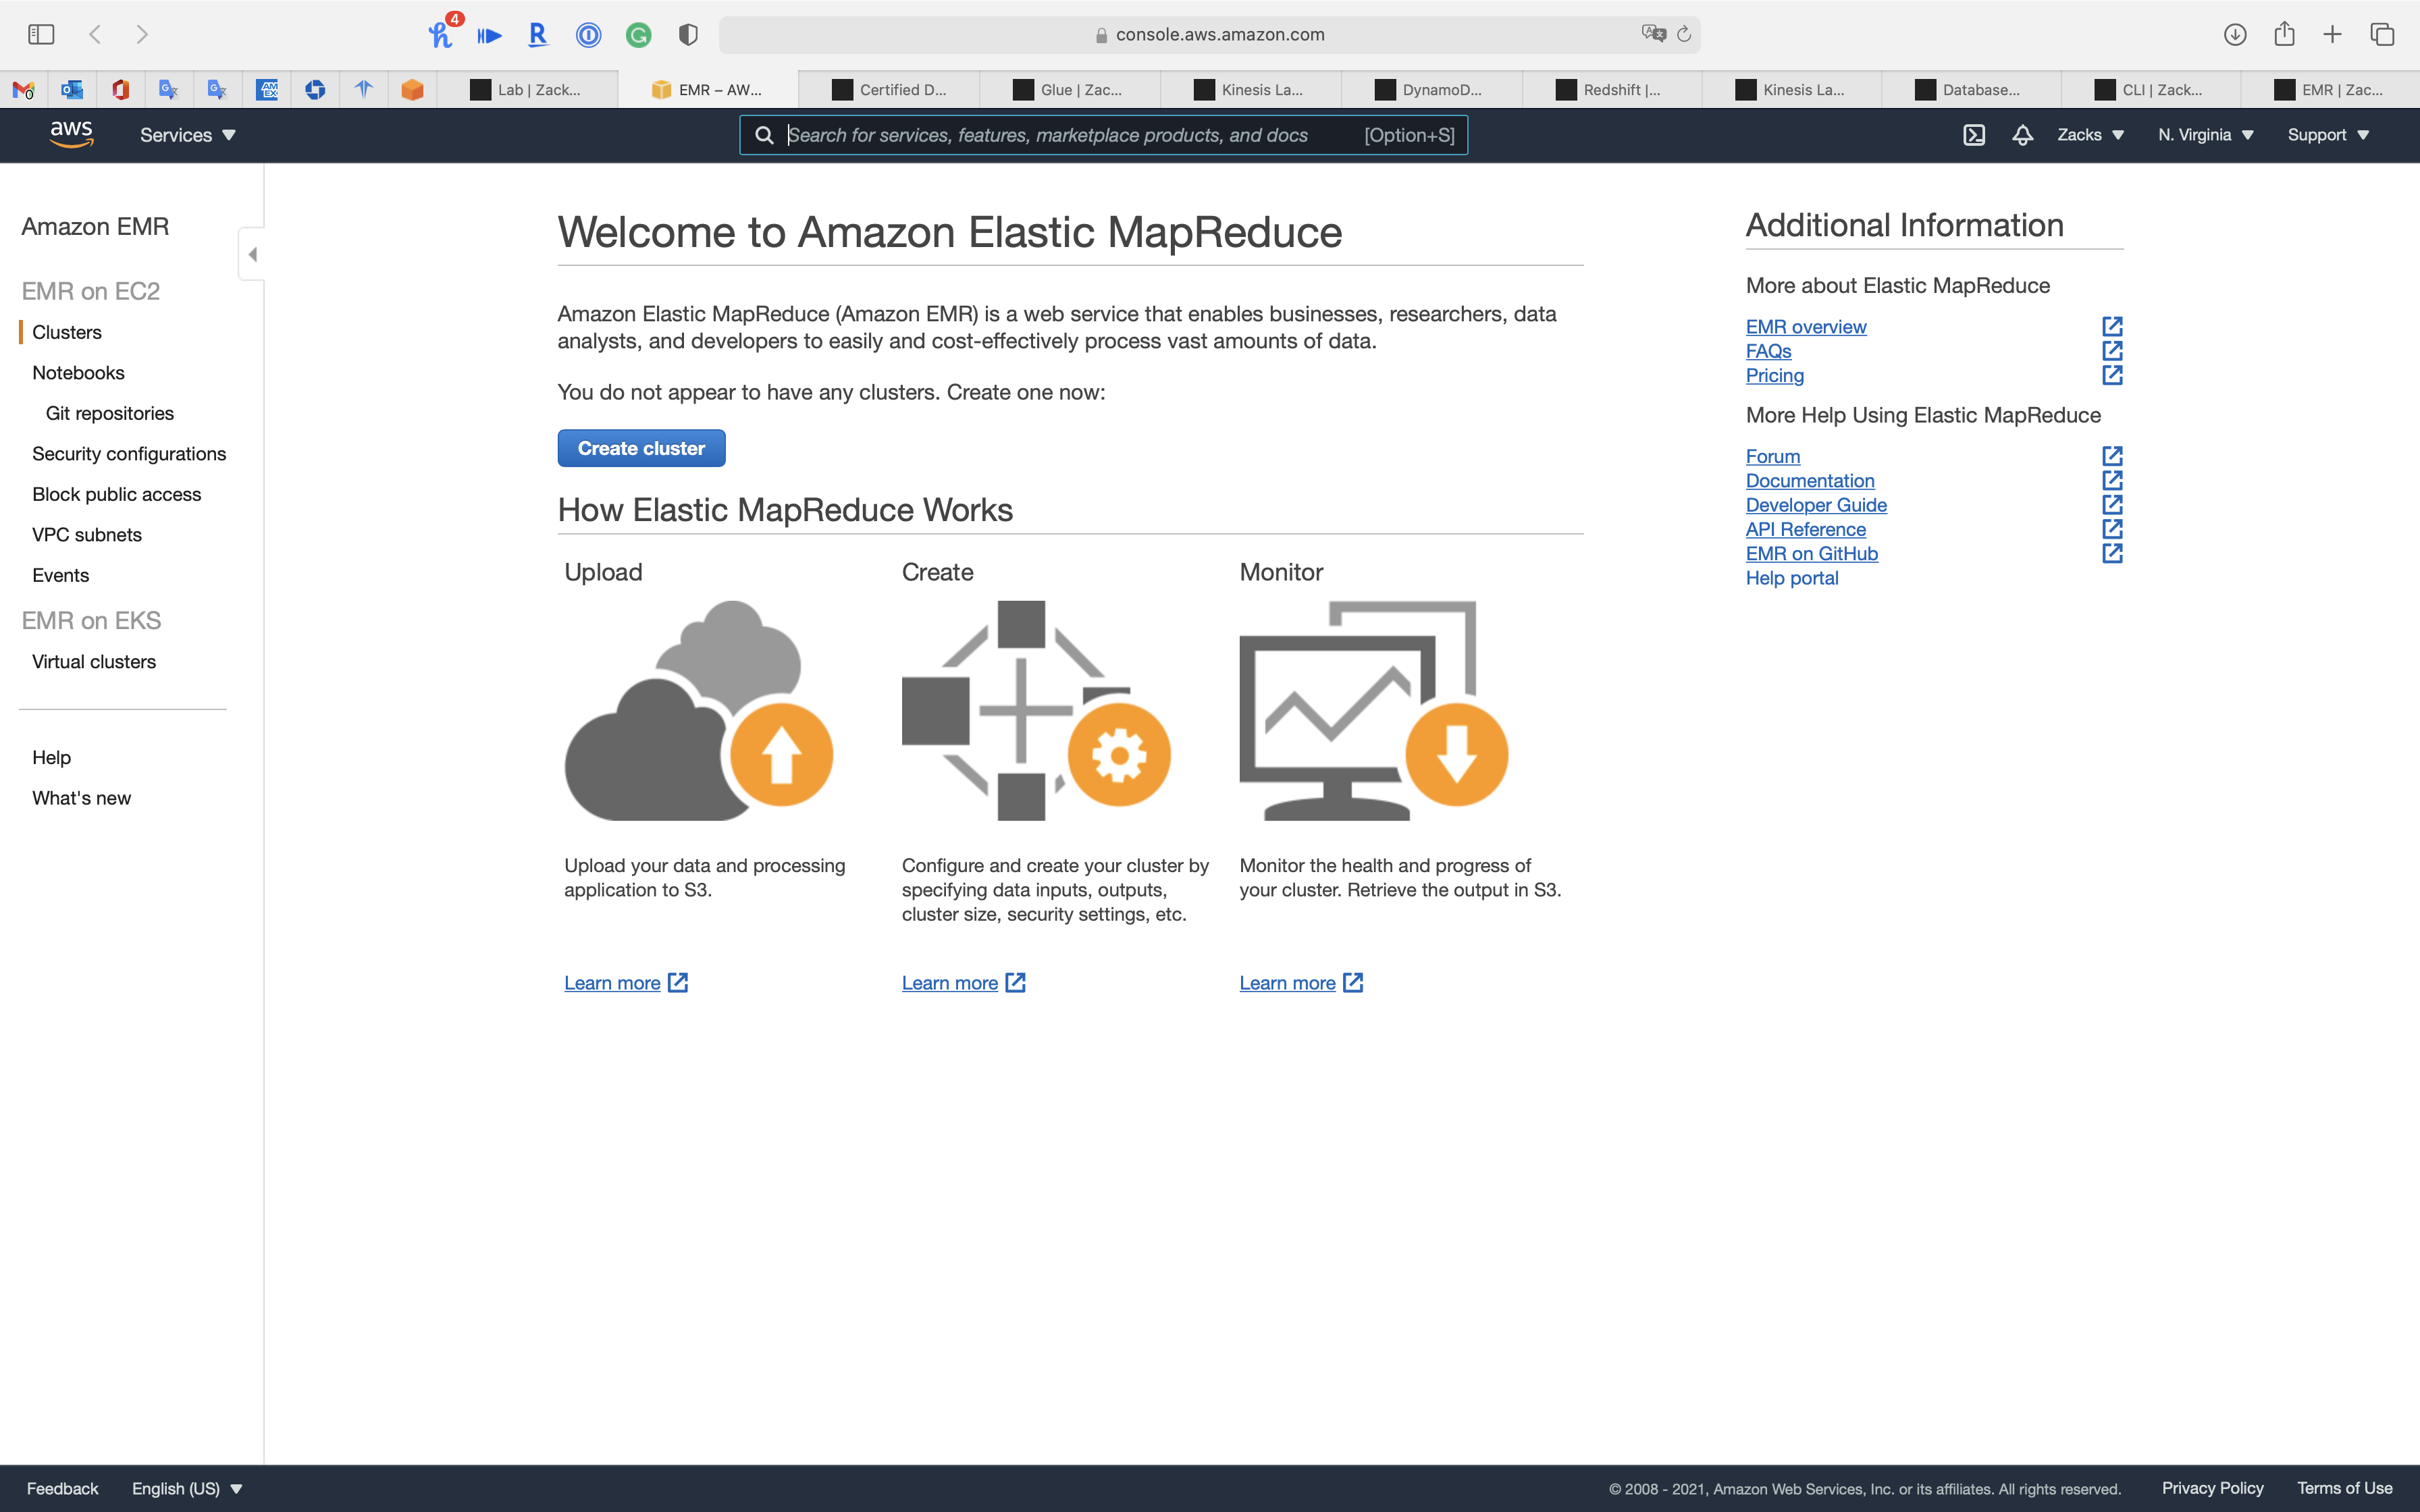
General Configuration
- Cluster Name:
My Pig Cluster- Logging: check
- Launch mode:
Cluster- Cluster: With Cluster, EMR creates a cluster with a set of specified applications.
- Step execution: With Step execution, EMR will create a cluster, execute added steps and terminate when done.
Software configuration
- Release:
emr-5.32.0 - Application:
Core Hadoop: Hadoop 2.10.1, Hive 2.3.7, Hue 4.8.0, Mahout 0.13.0, Pig 0.17.0, and Tez 0.9.2
Hardware configuration
- Instance type:
m5.xlarge - Number of instances:
2 - Cluster scaling: uncheck
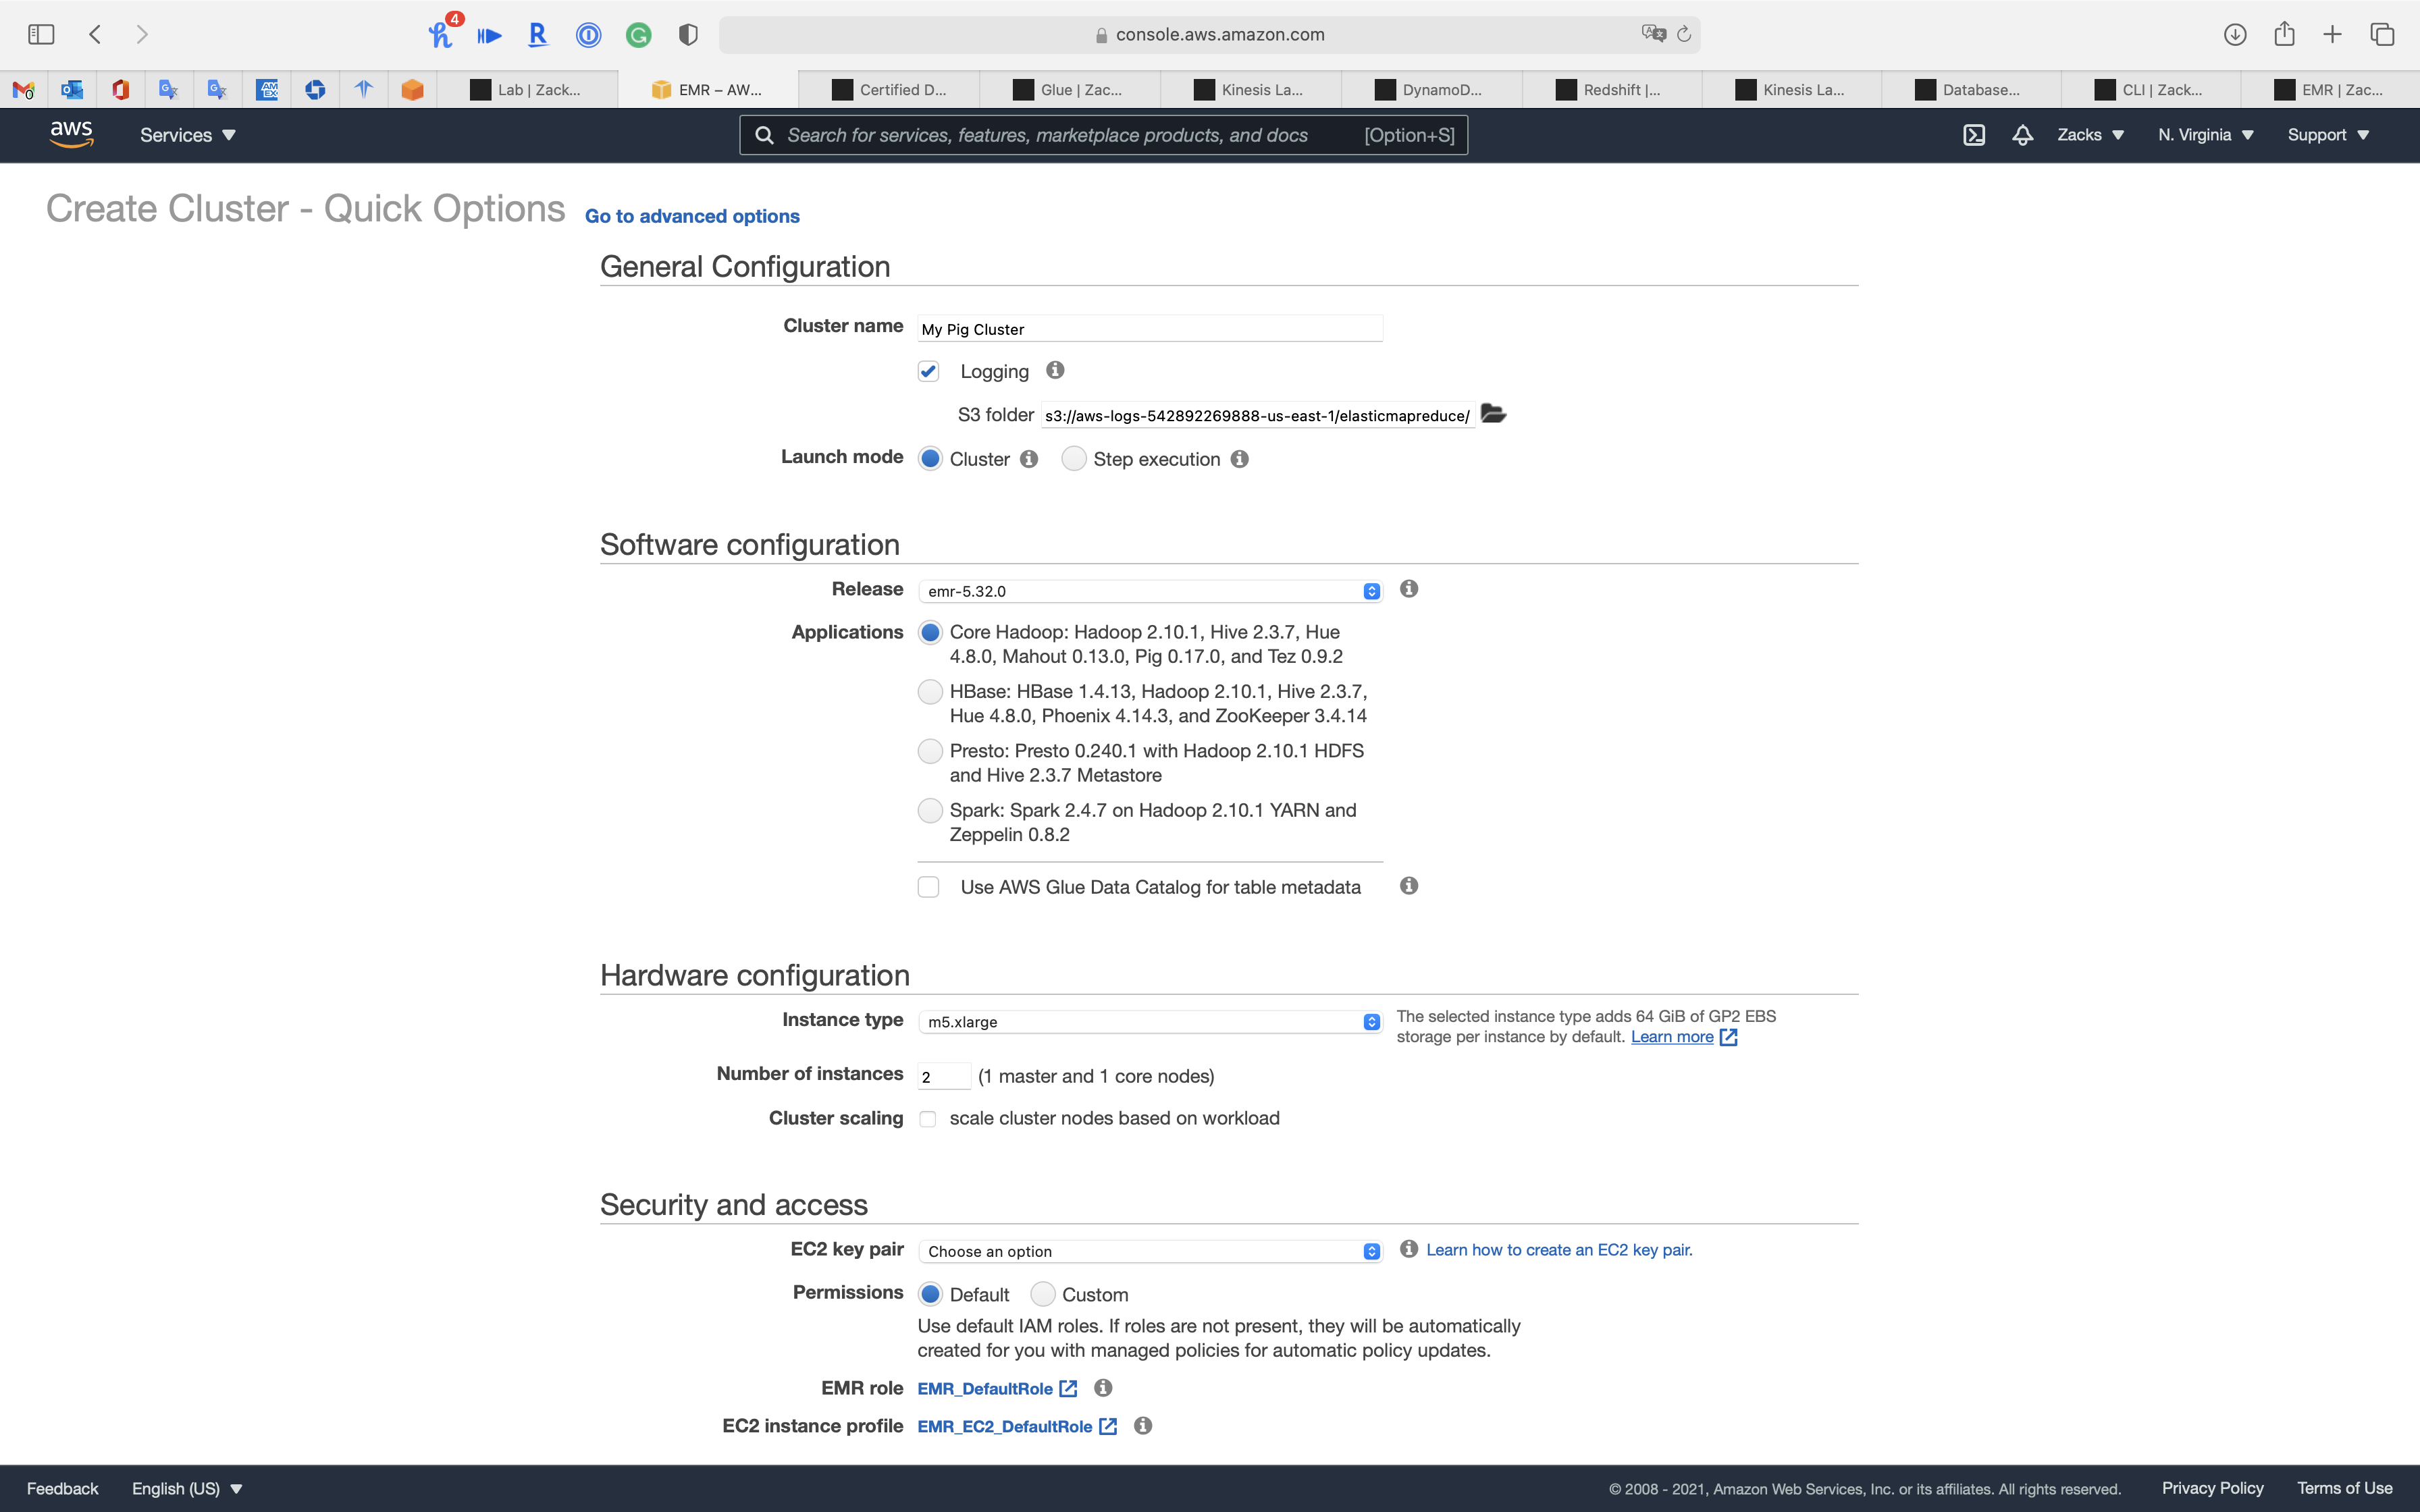
Security and access
EC2 key pair: select an existing key pair or go to Services -> EC2 -> Key Pairs console to create a new one
Click on Create cluster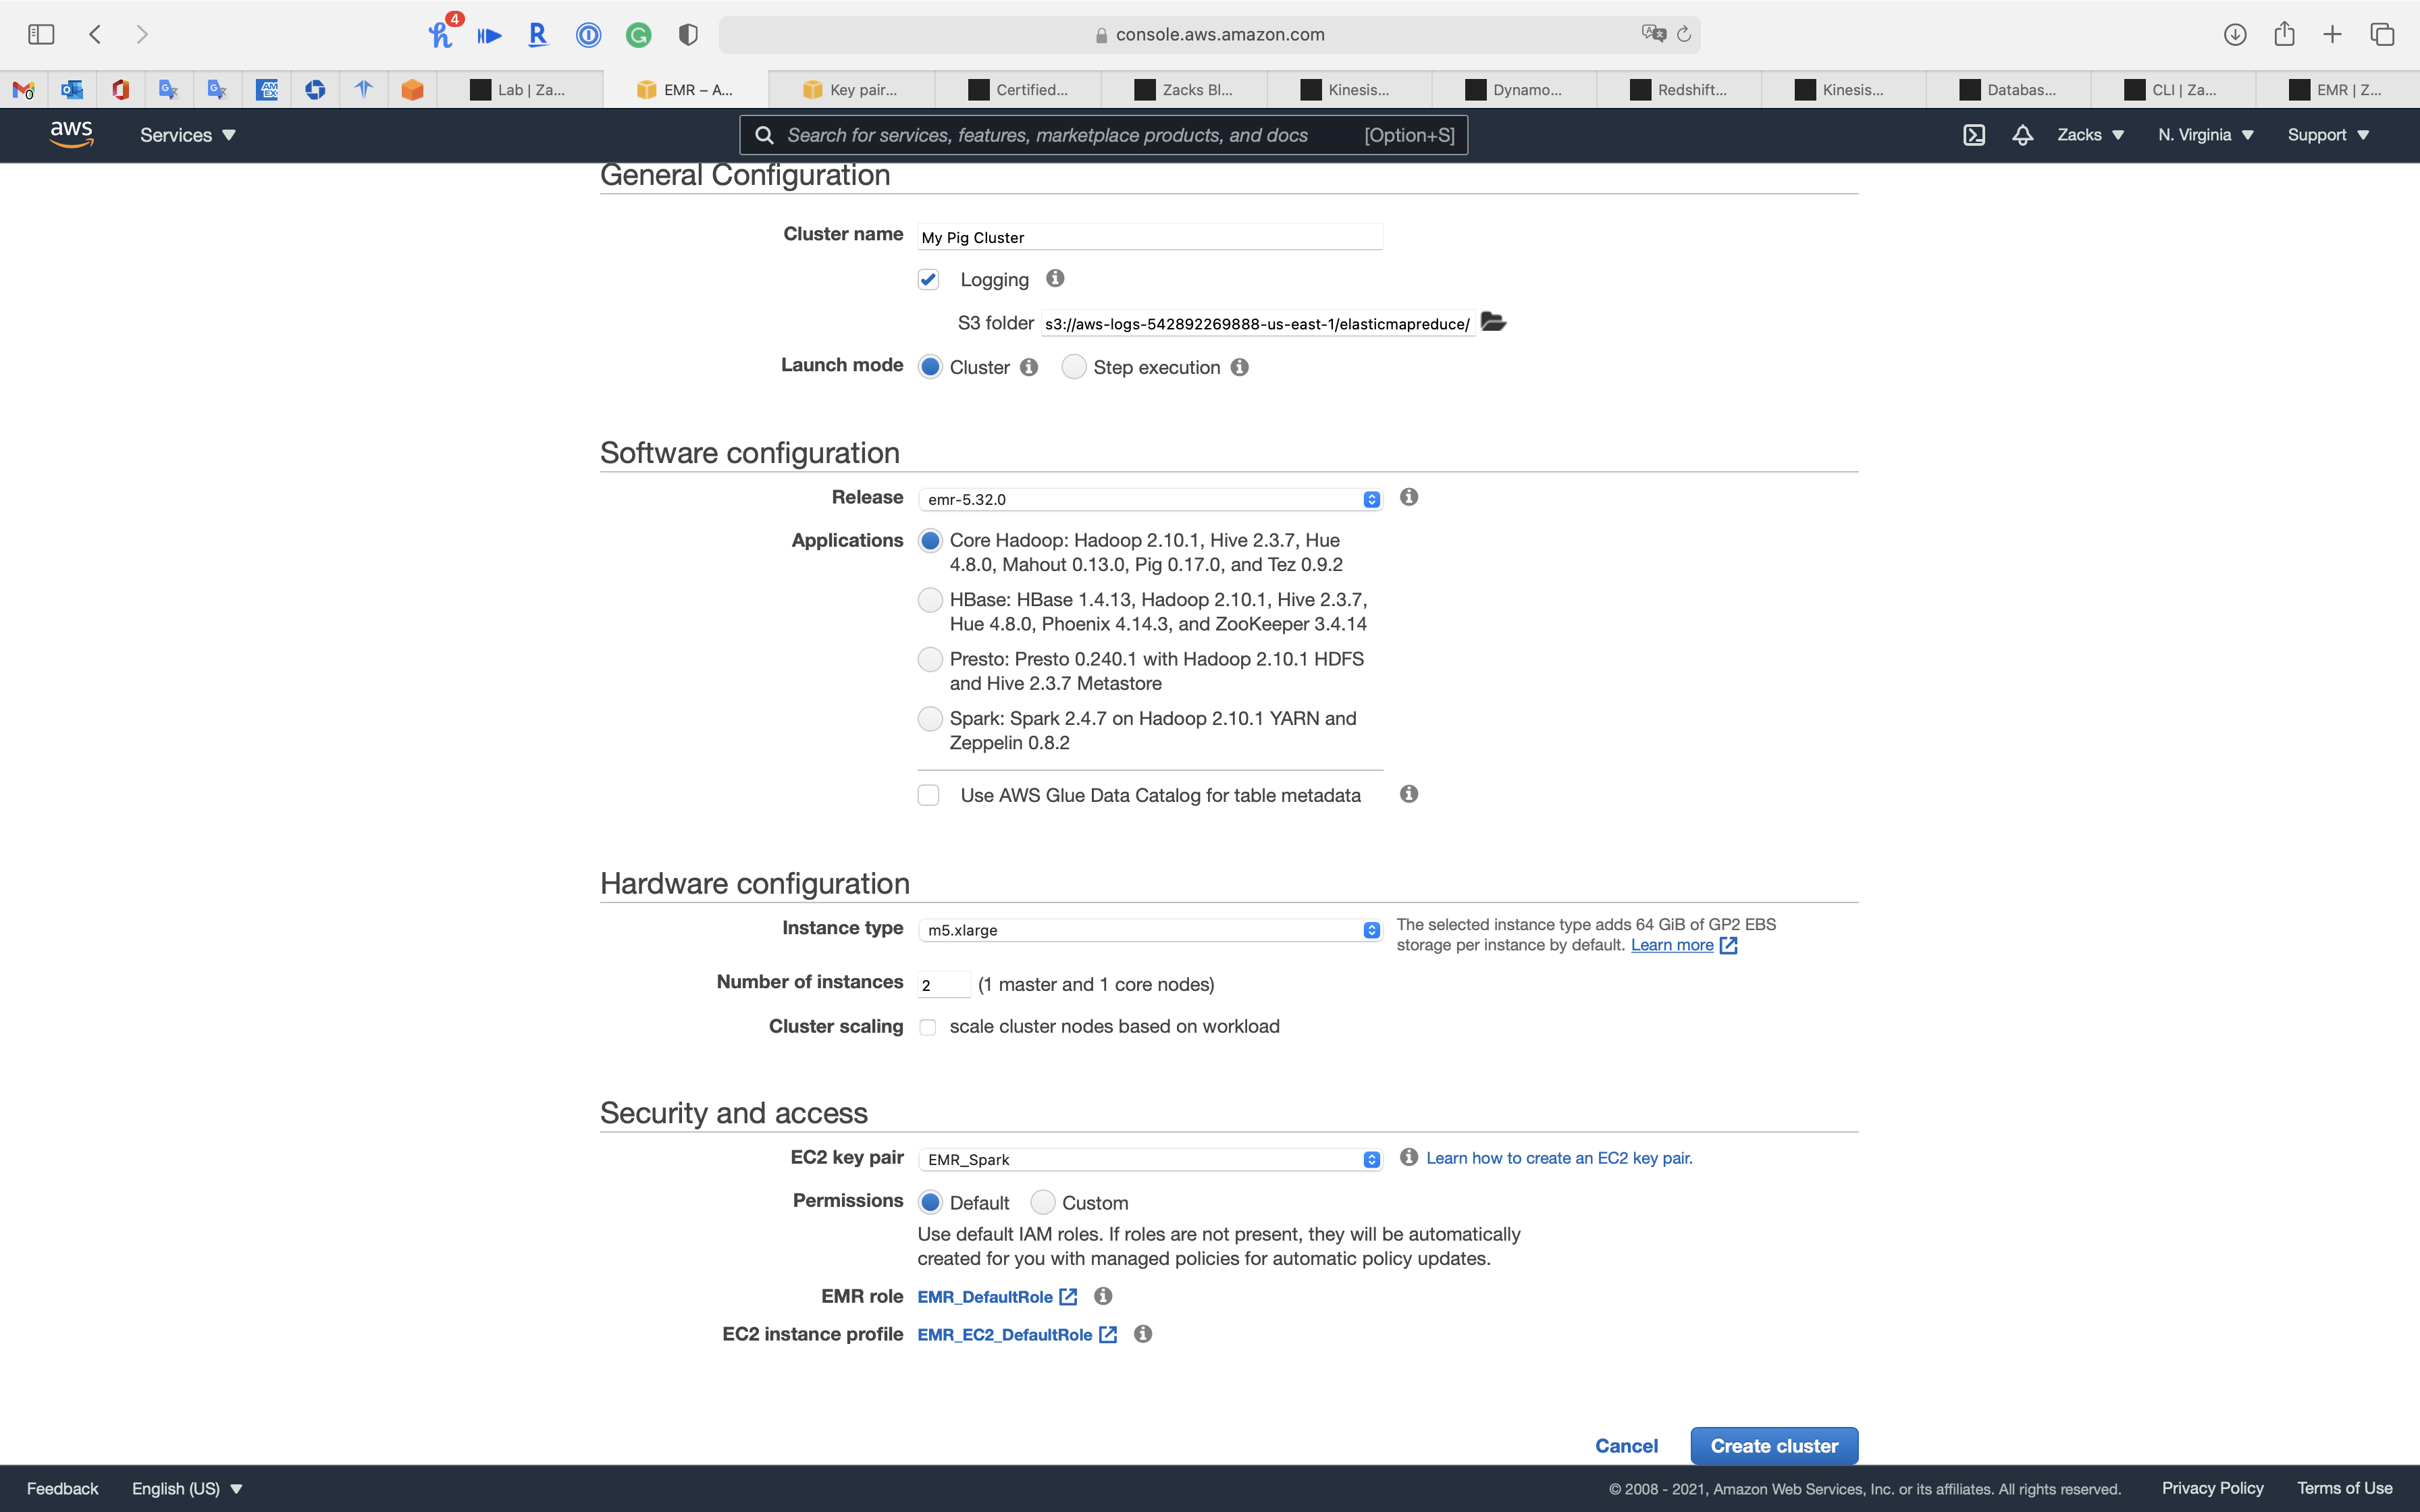
Click on Cluster on the navigation panel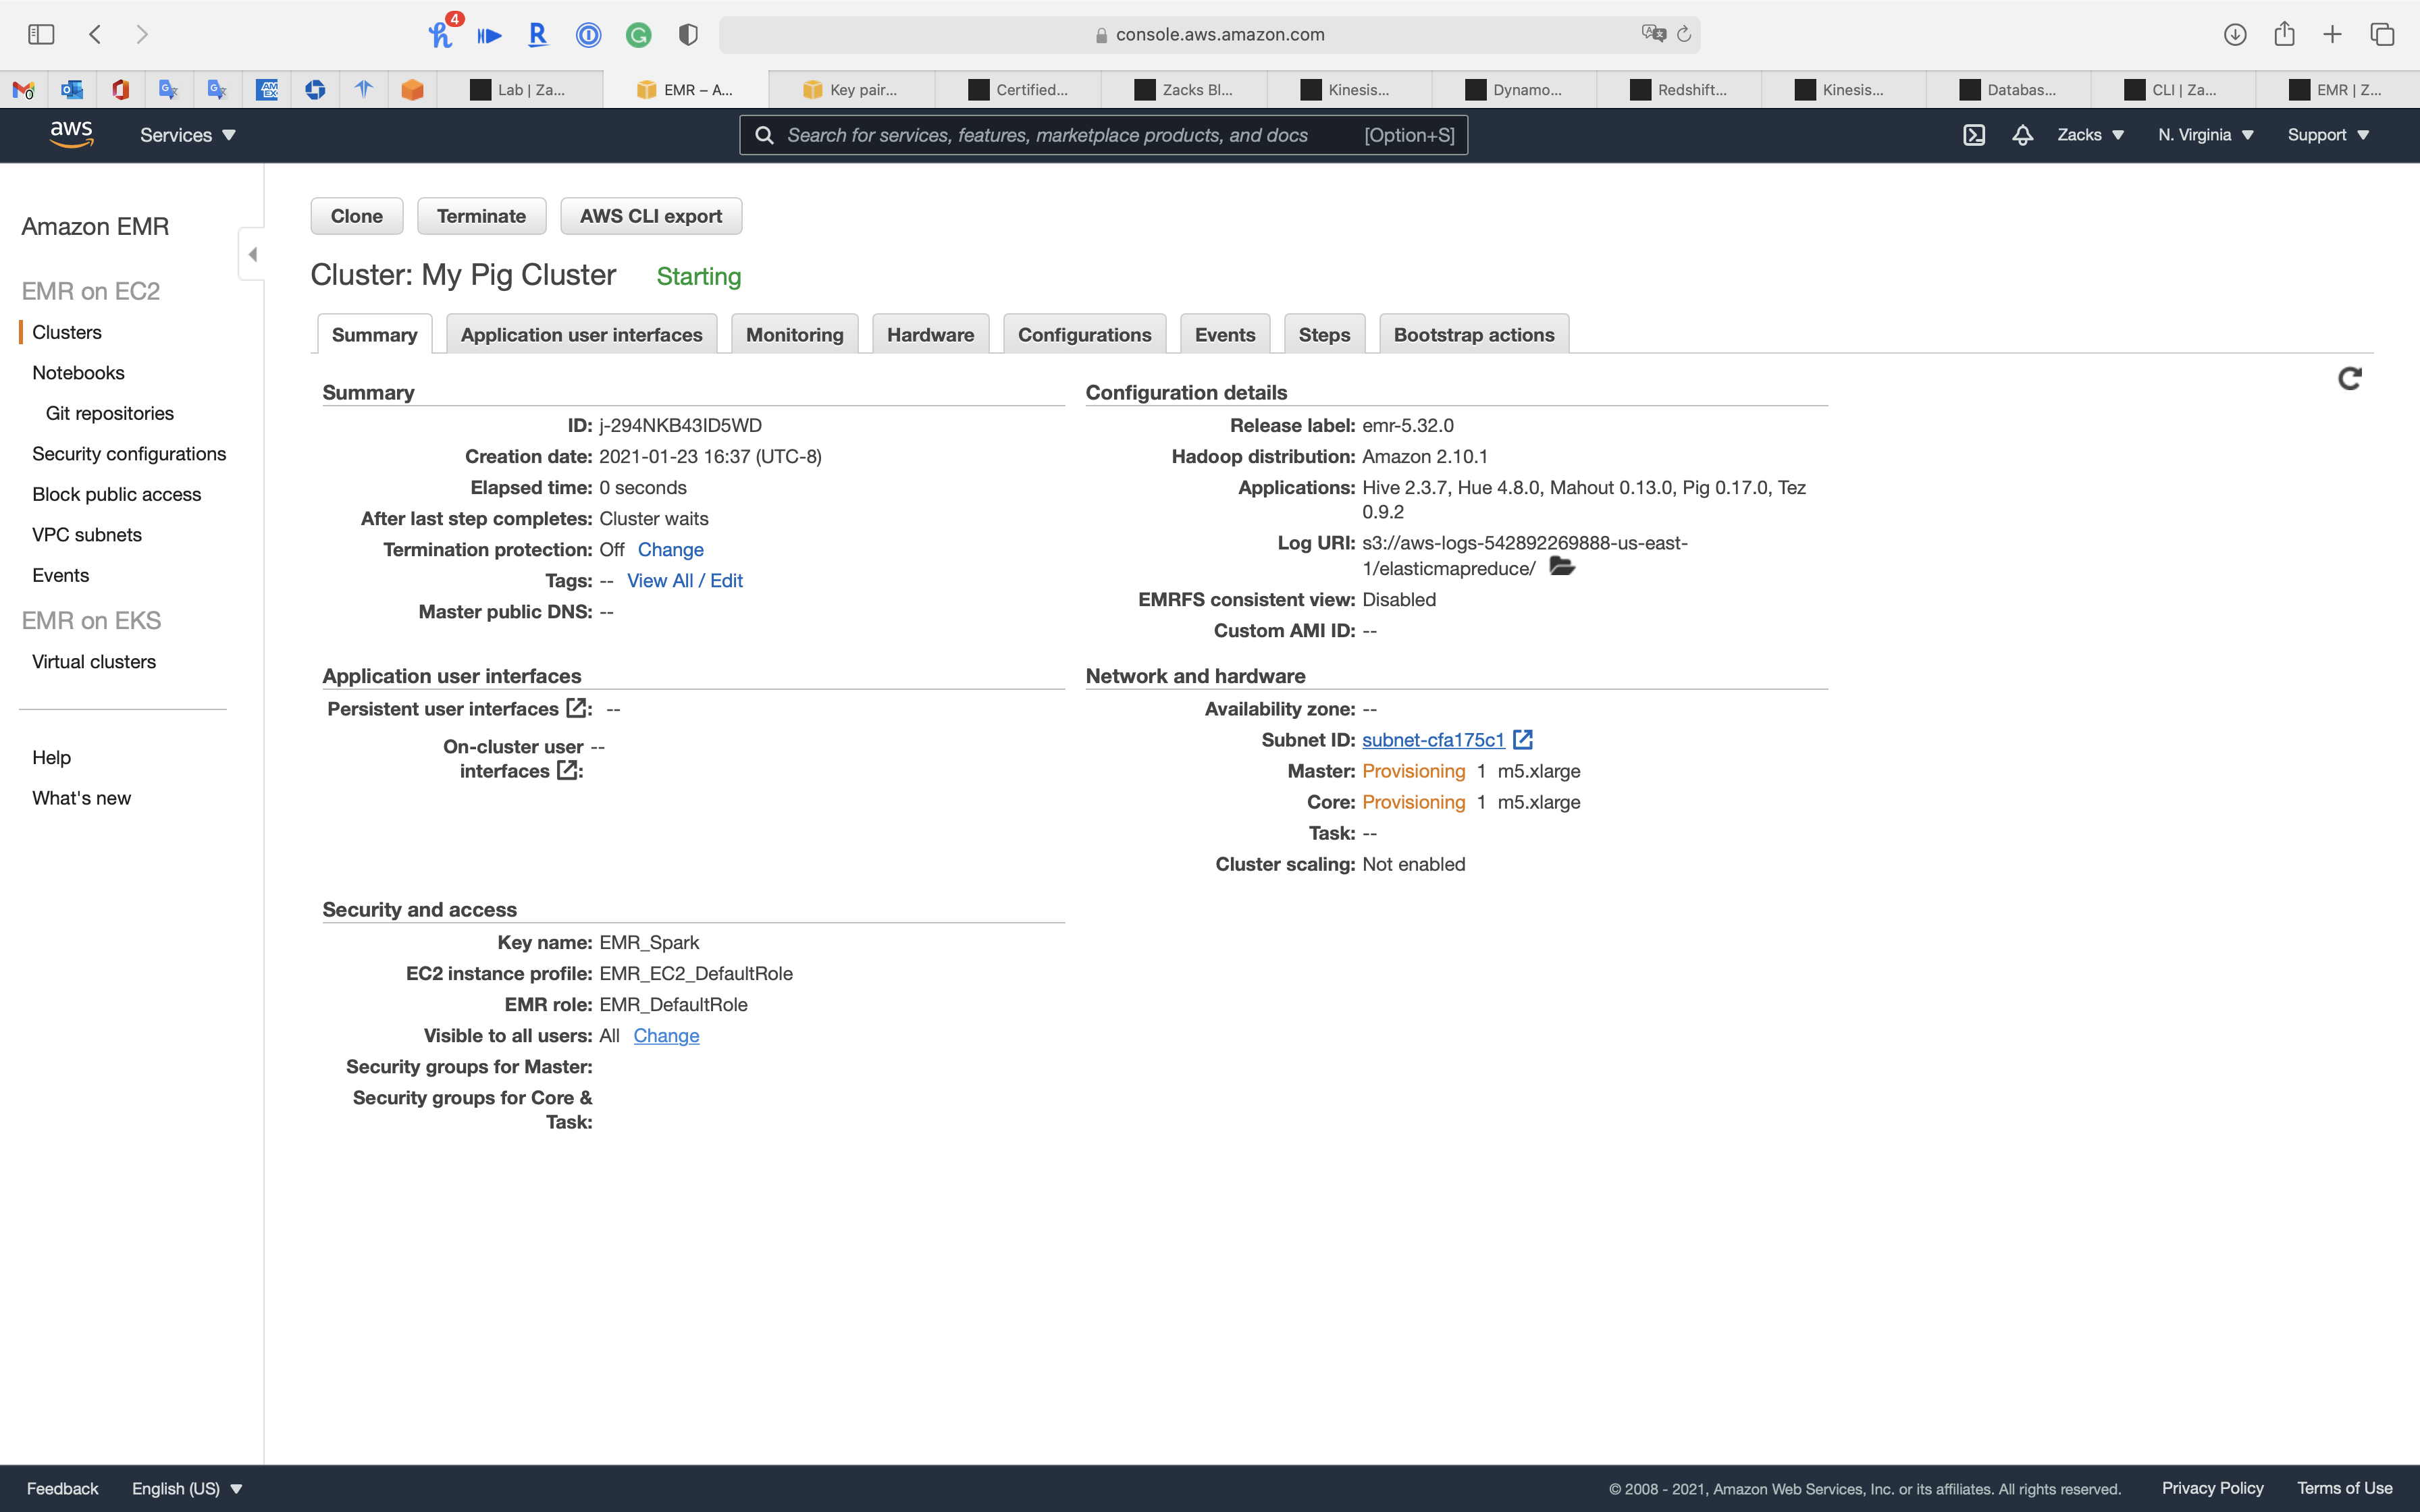
EMR Steps
Wait until the cluster’s Status change from Starting to Waiting cluster ready
You may need refresh the page.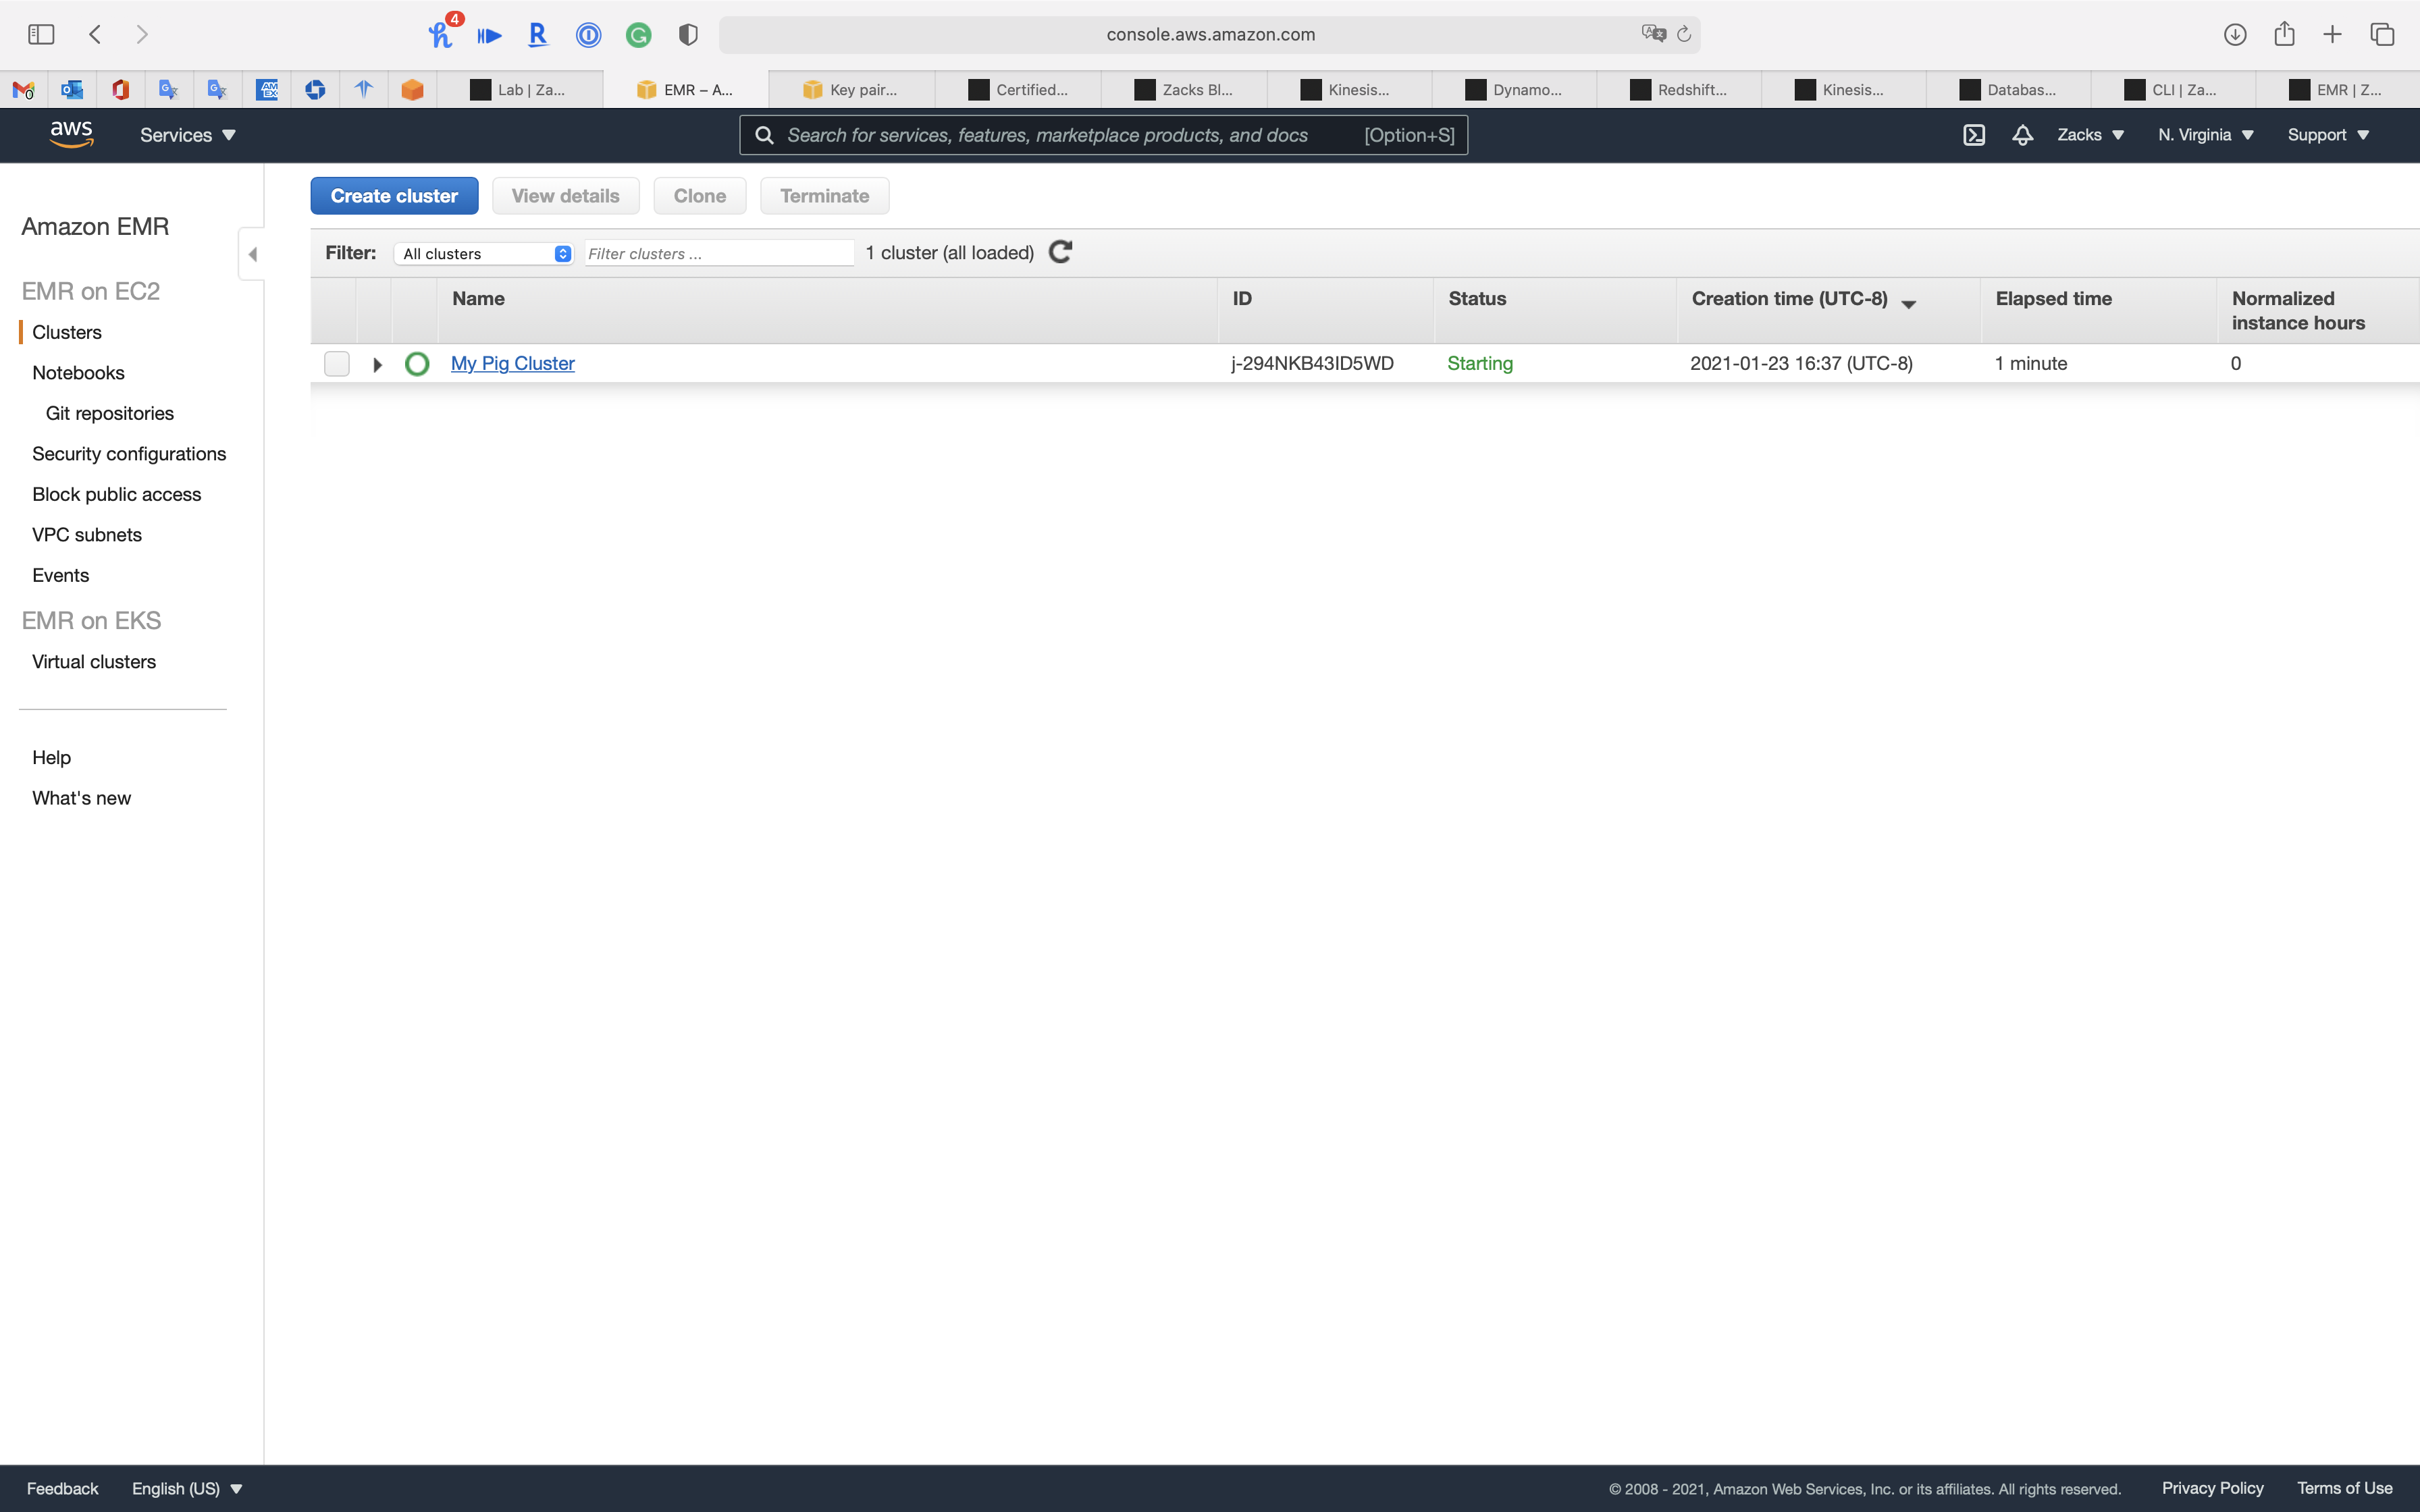
Click on your cluster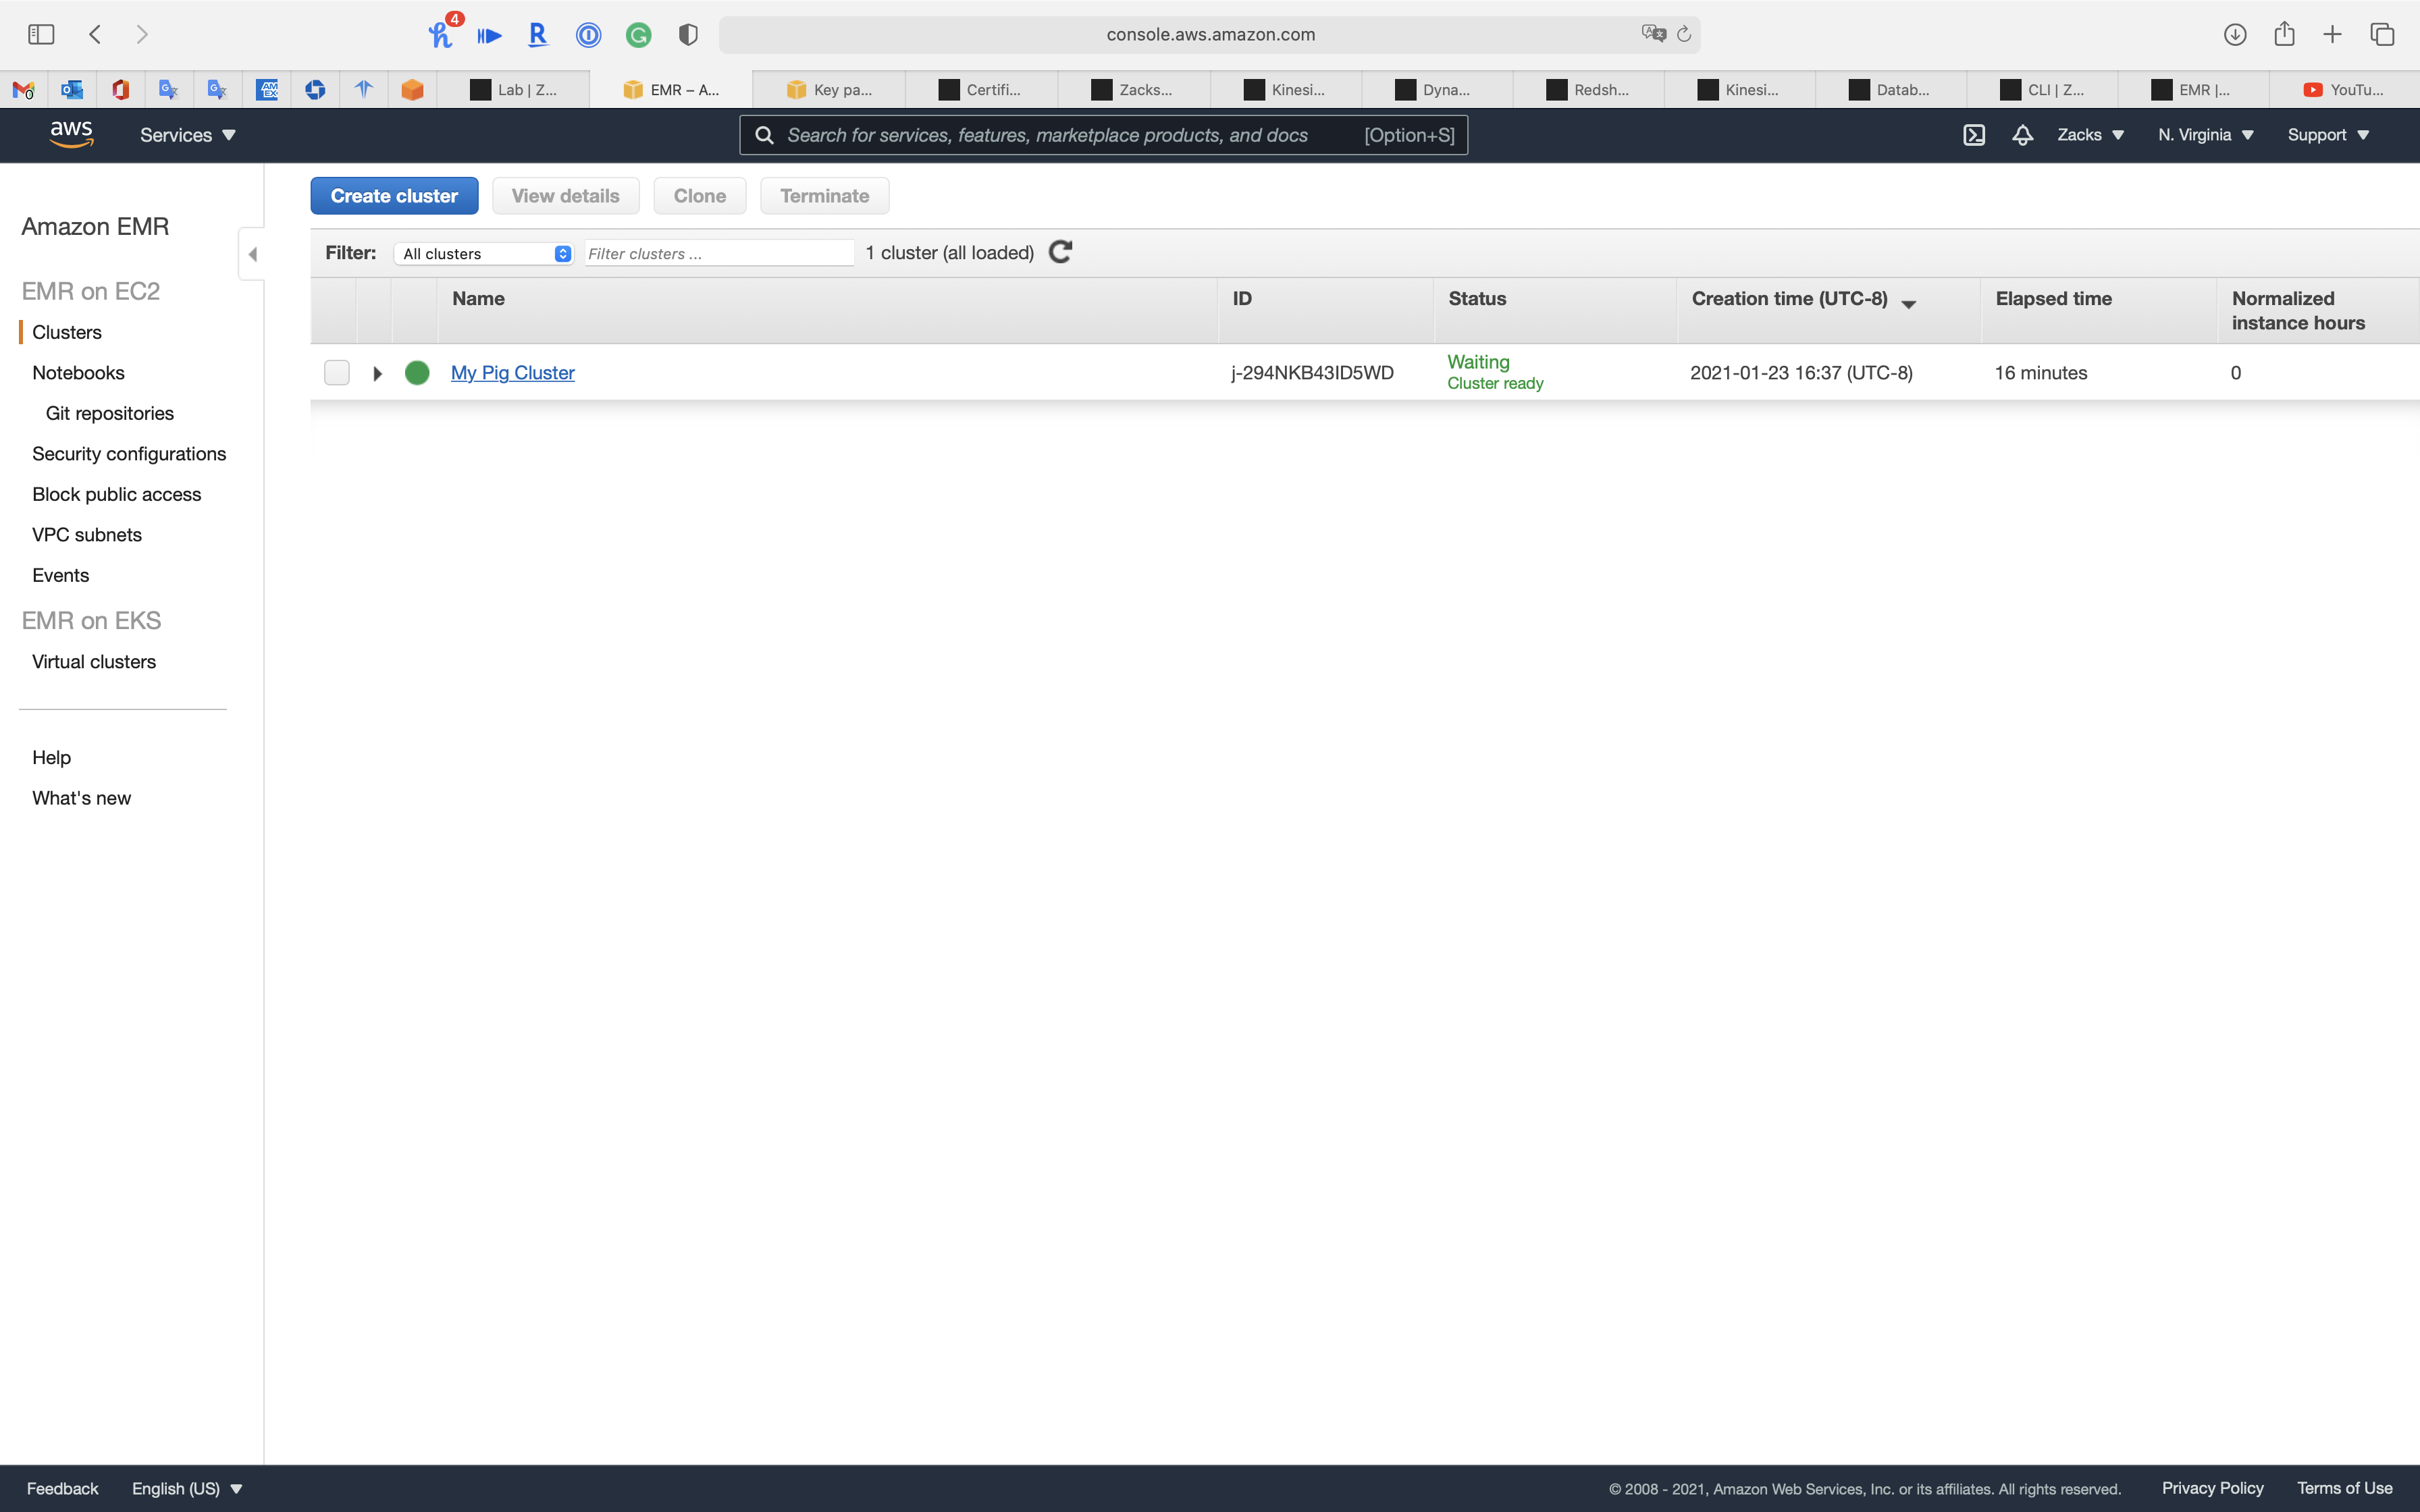
Security Group Configuration
Services -> EC2 -> Security Groups
We need to add our IP address and SSH to the white list to the security of EMR Master node.
Find the security group with the name ElasticMapReduce-master
Click on it.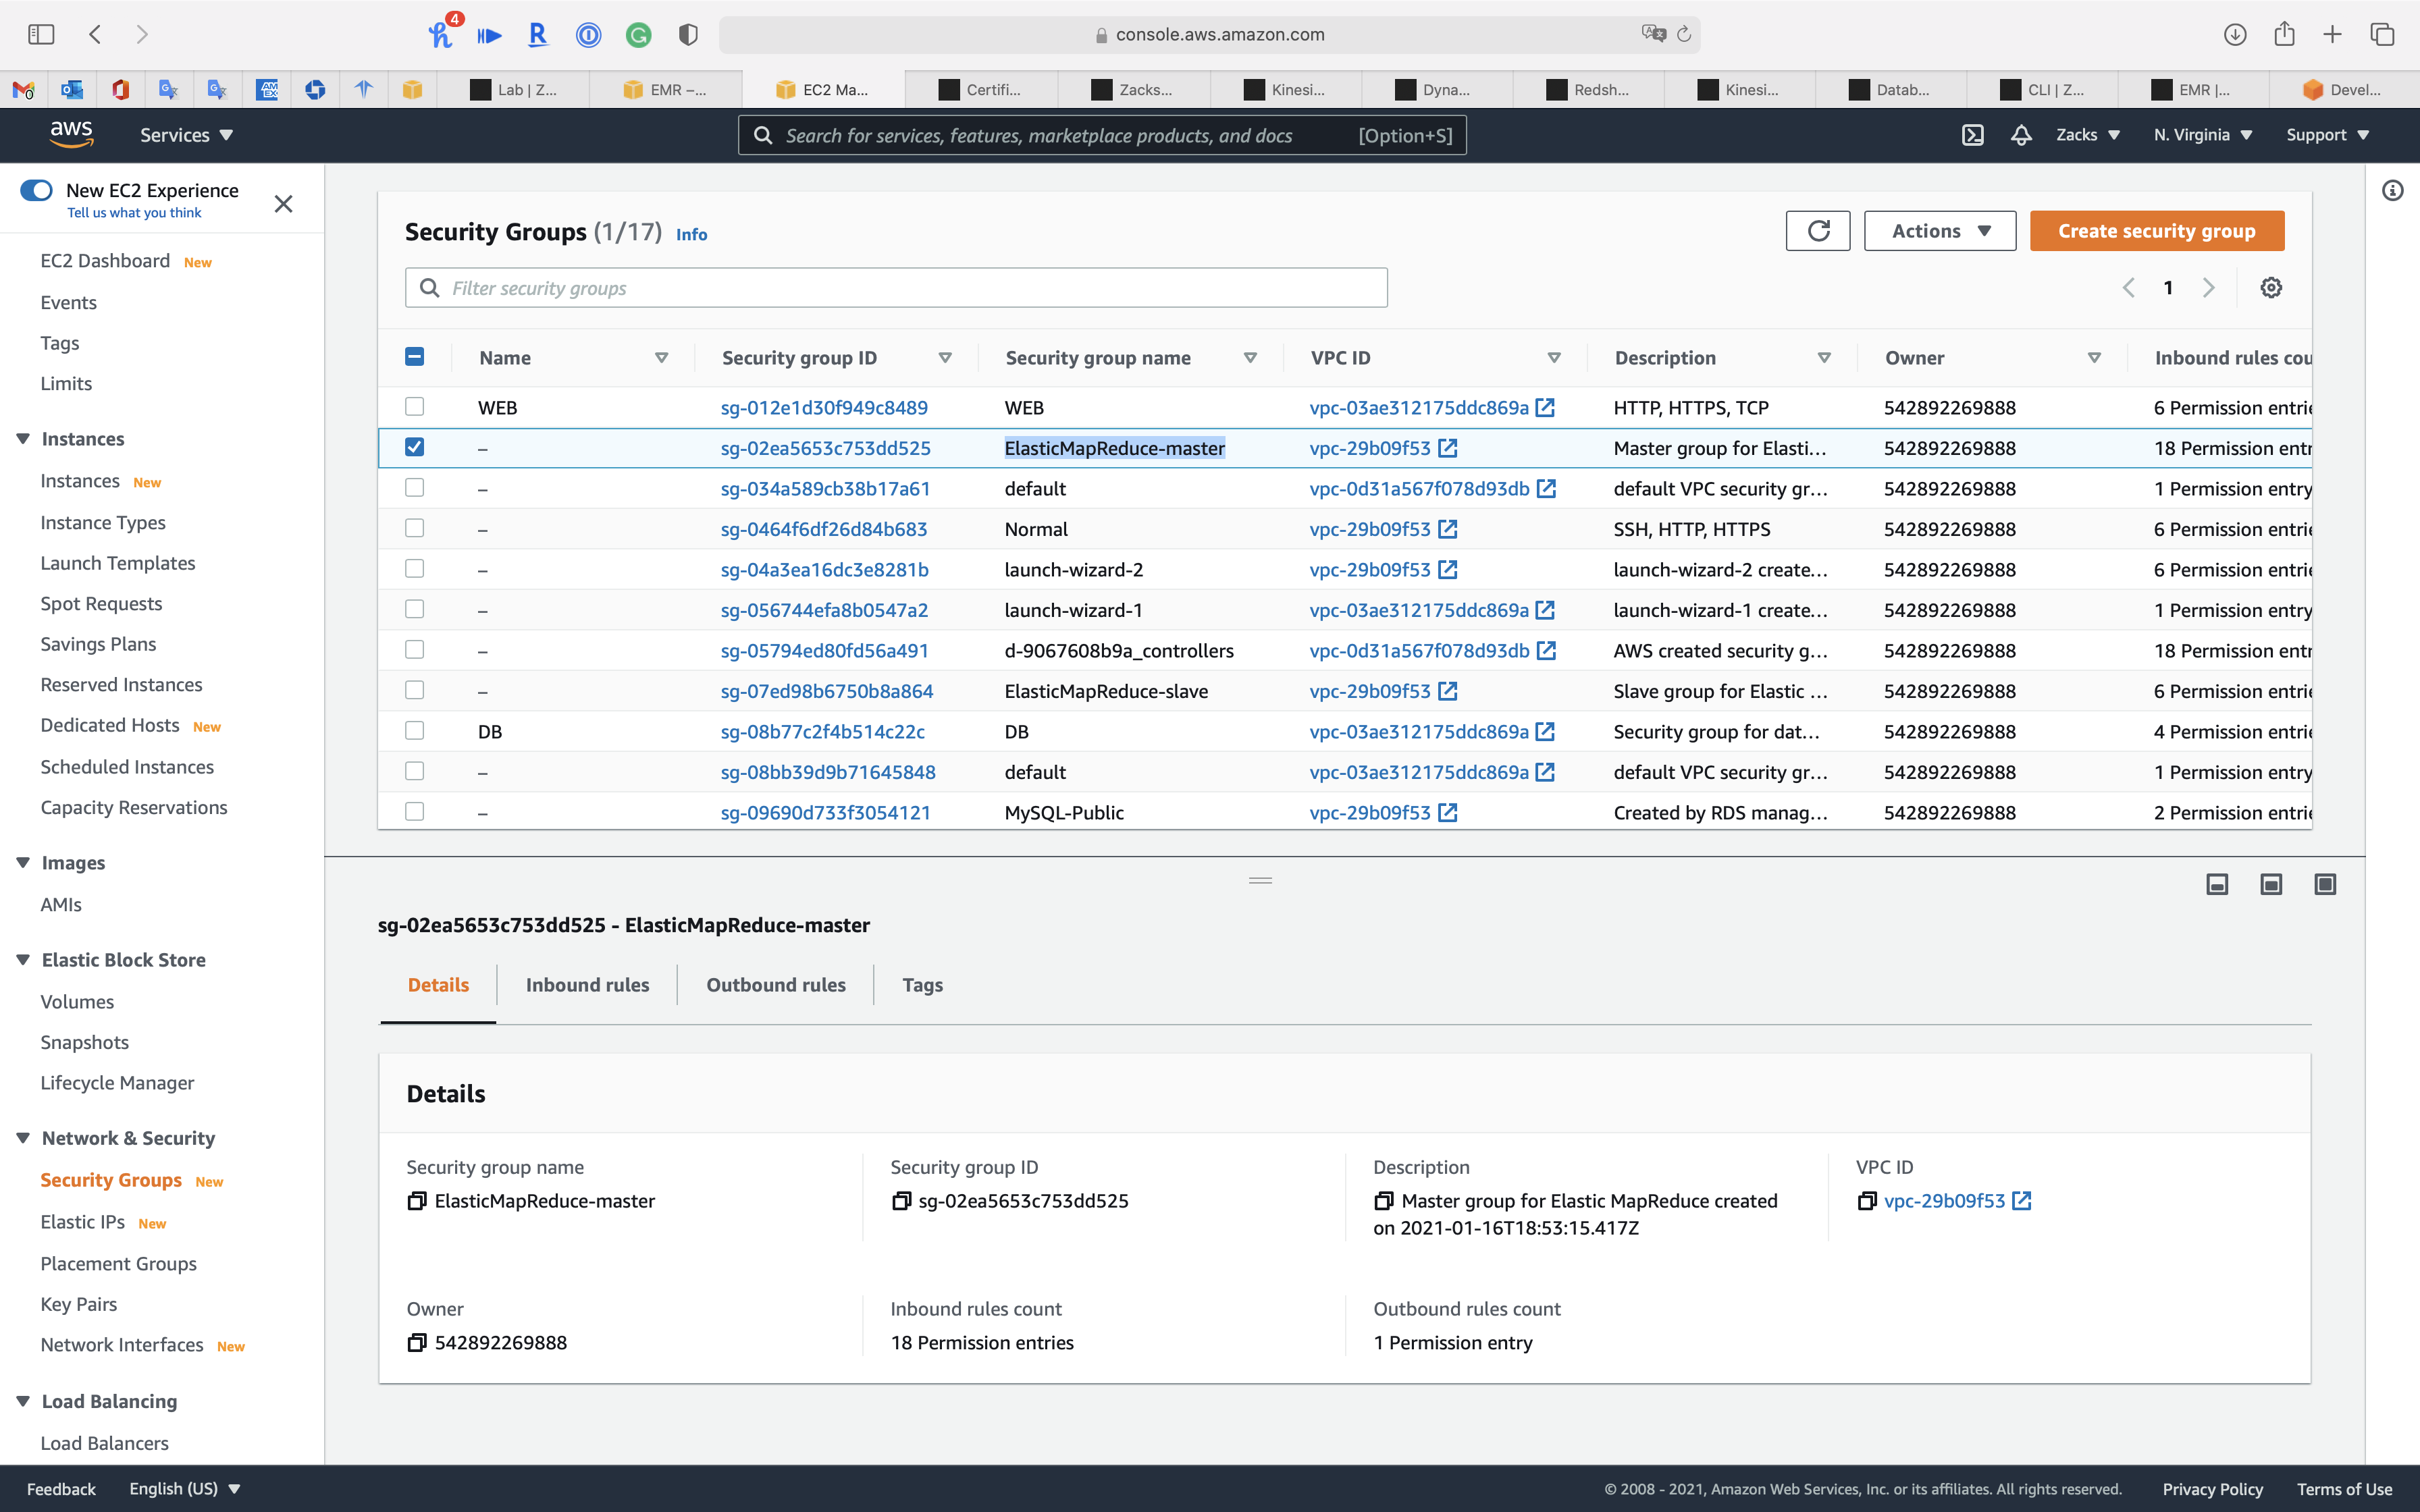
Click on Edit inbound rules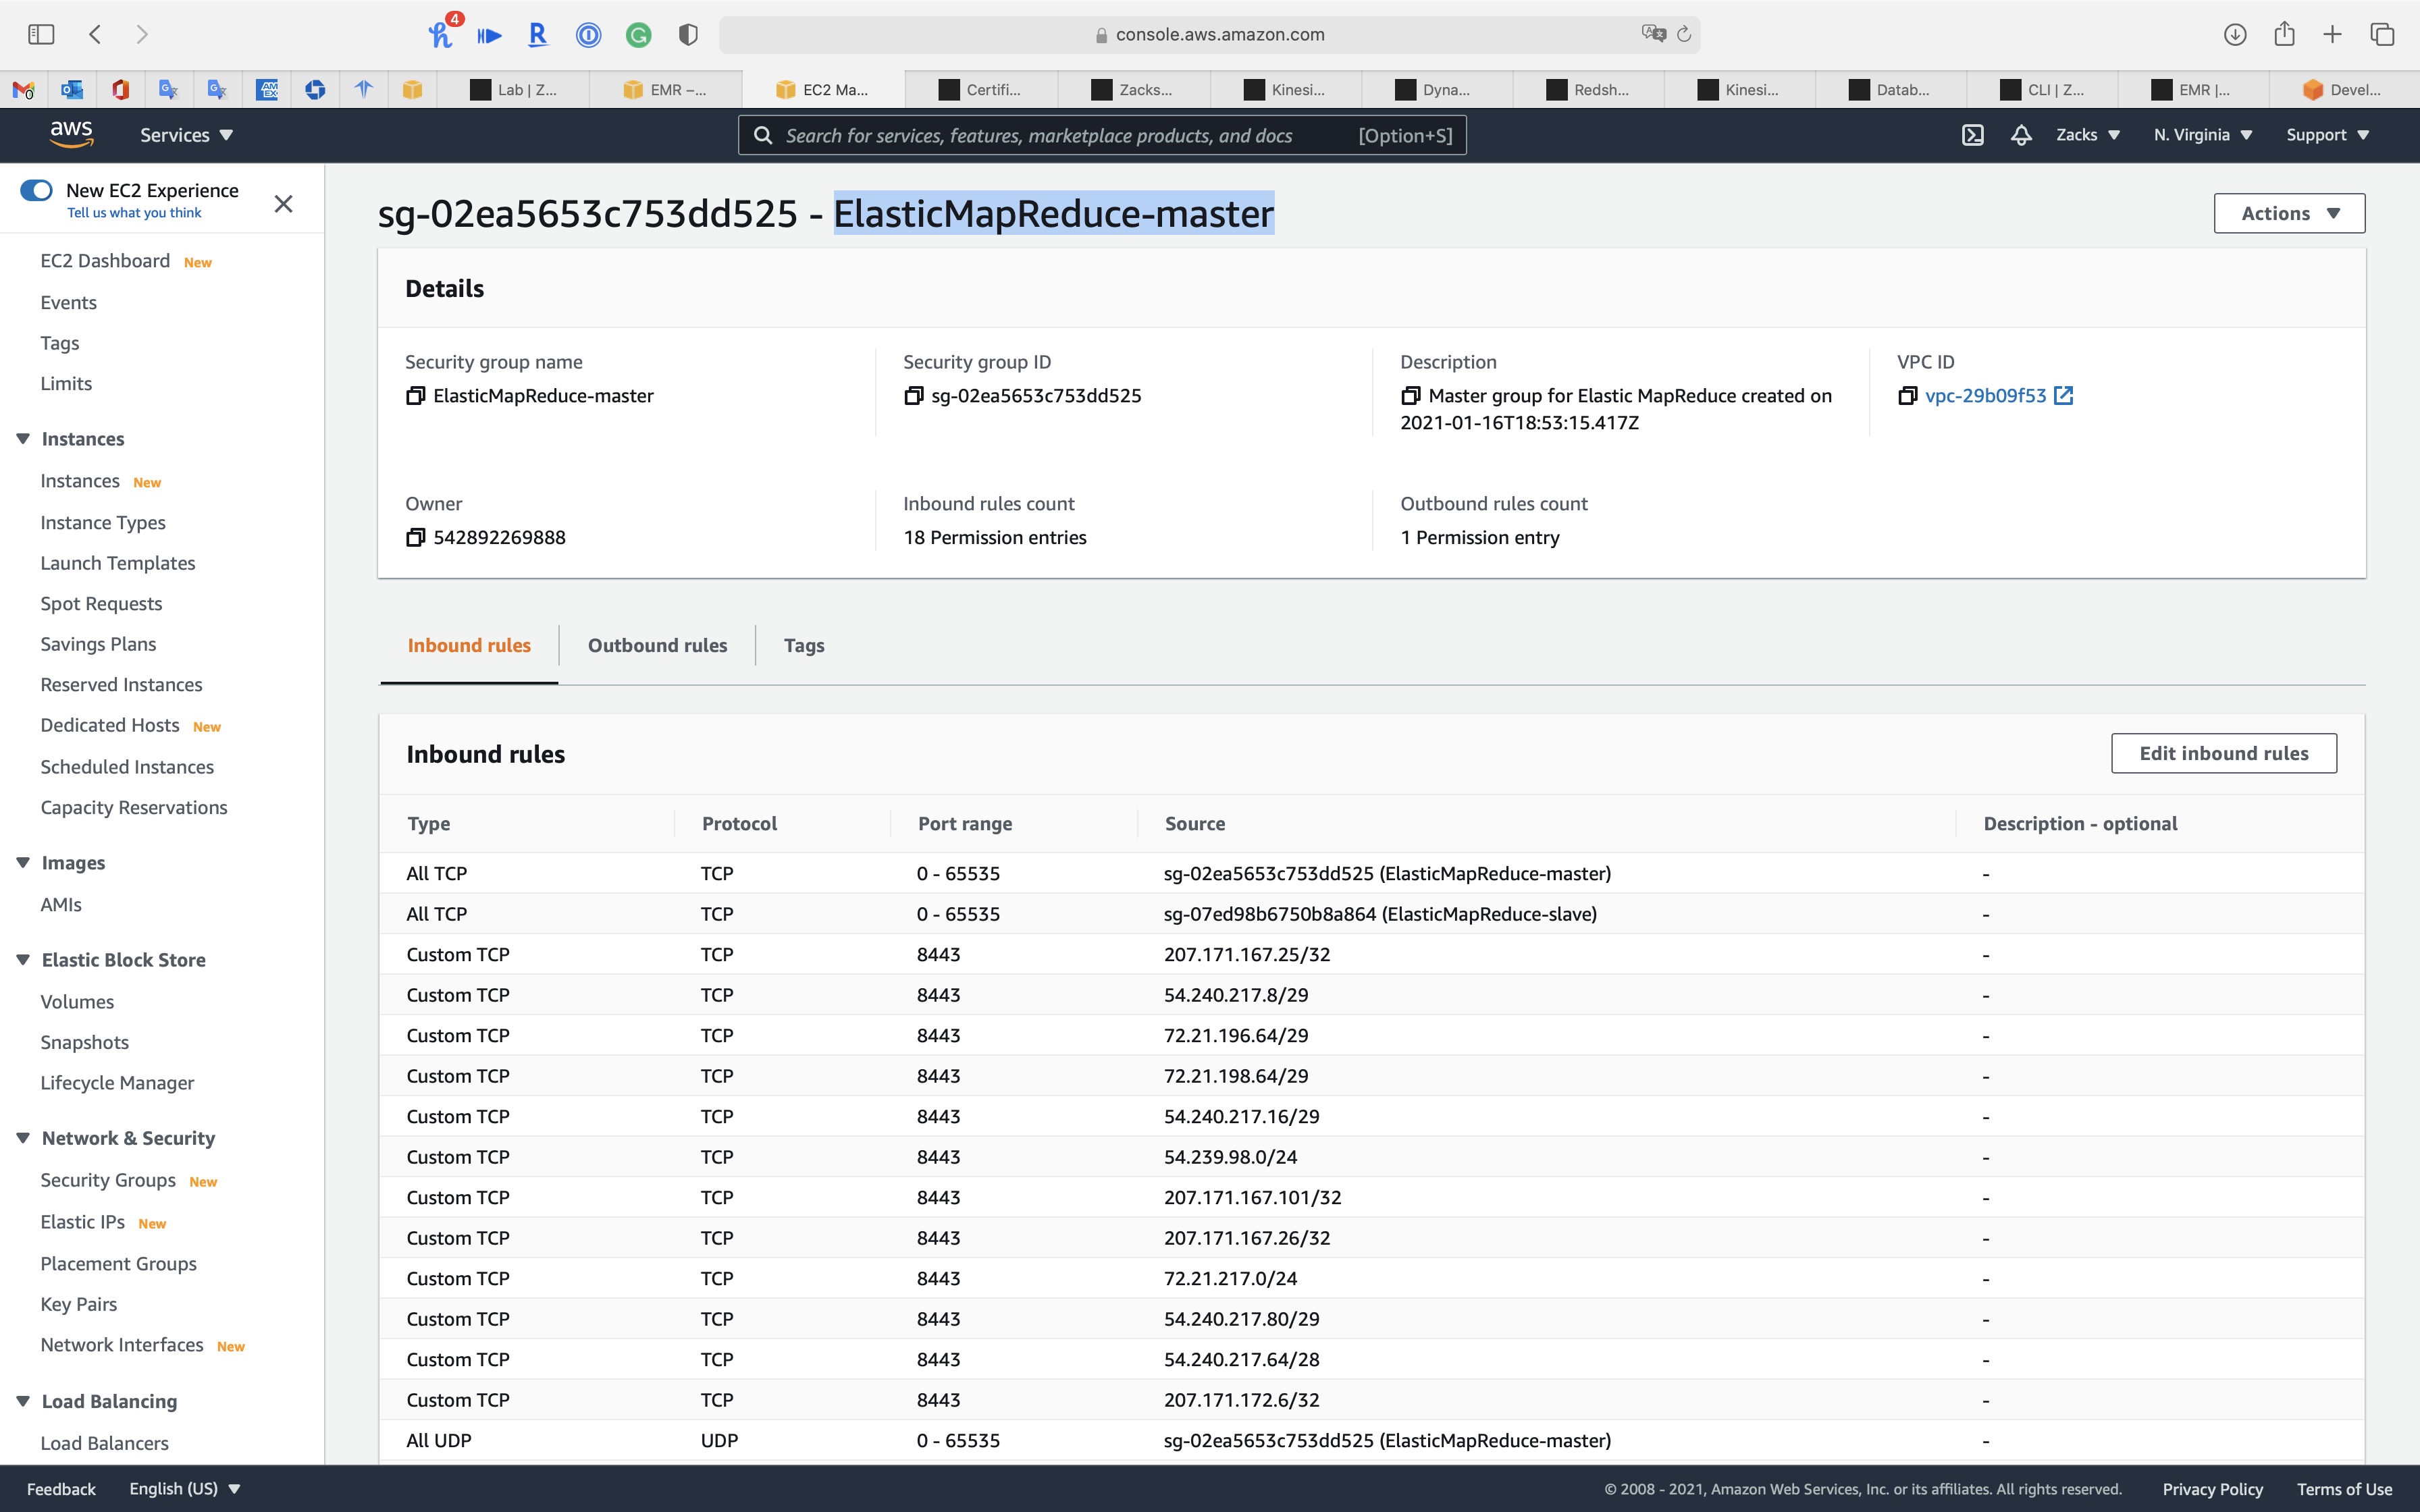
Click on Add rule
- Type:
SSH - Protocol:
TCP - Port range:
22 - Source:
AnywhereorMy IP
Click on Save rules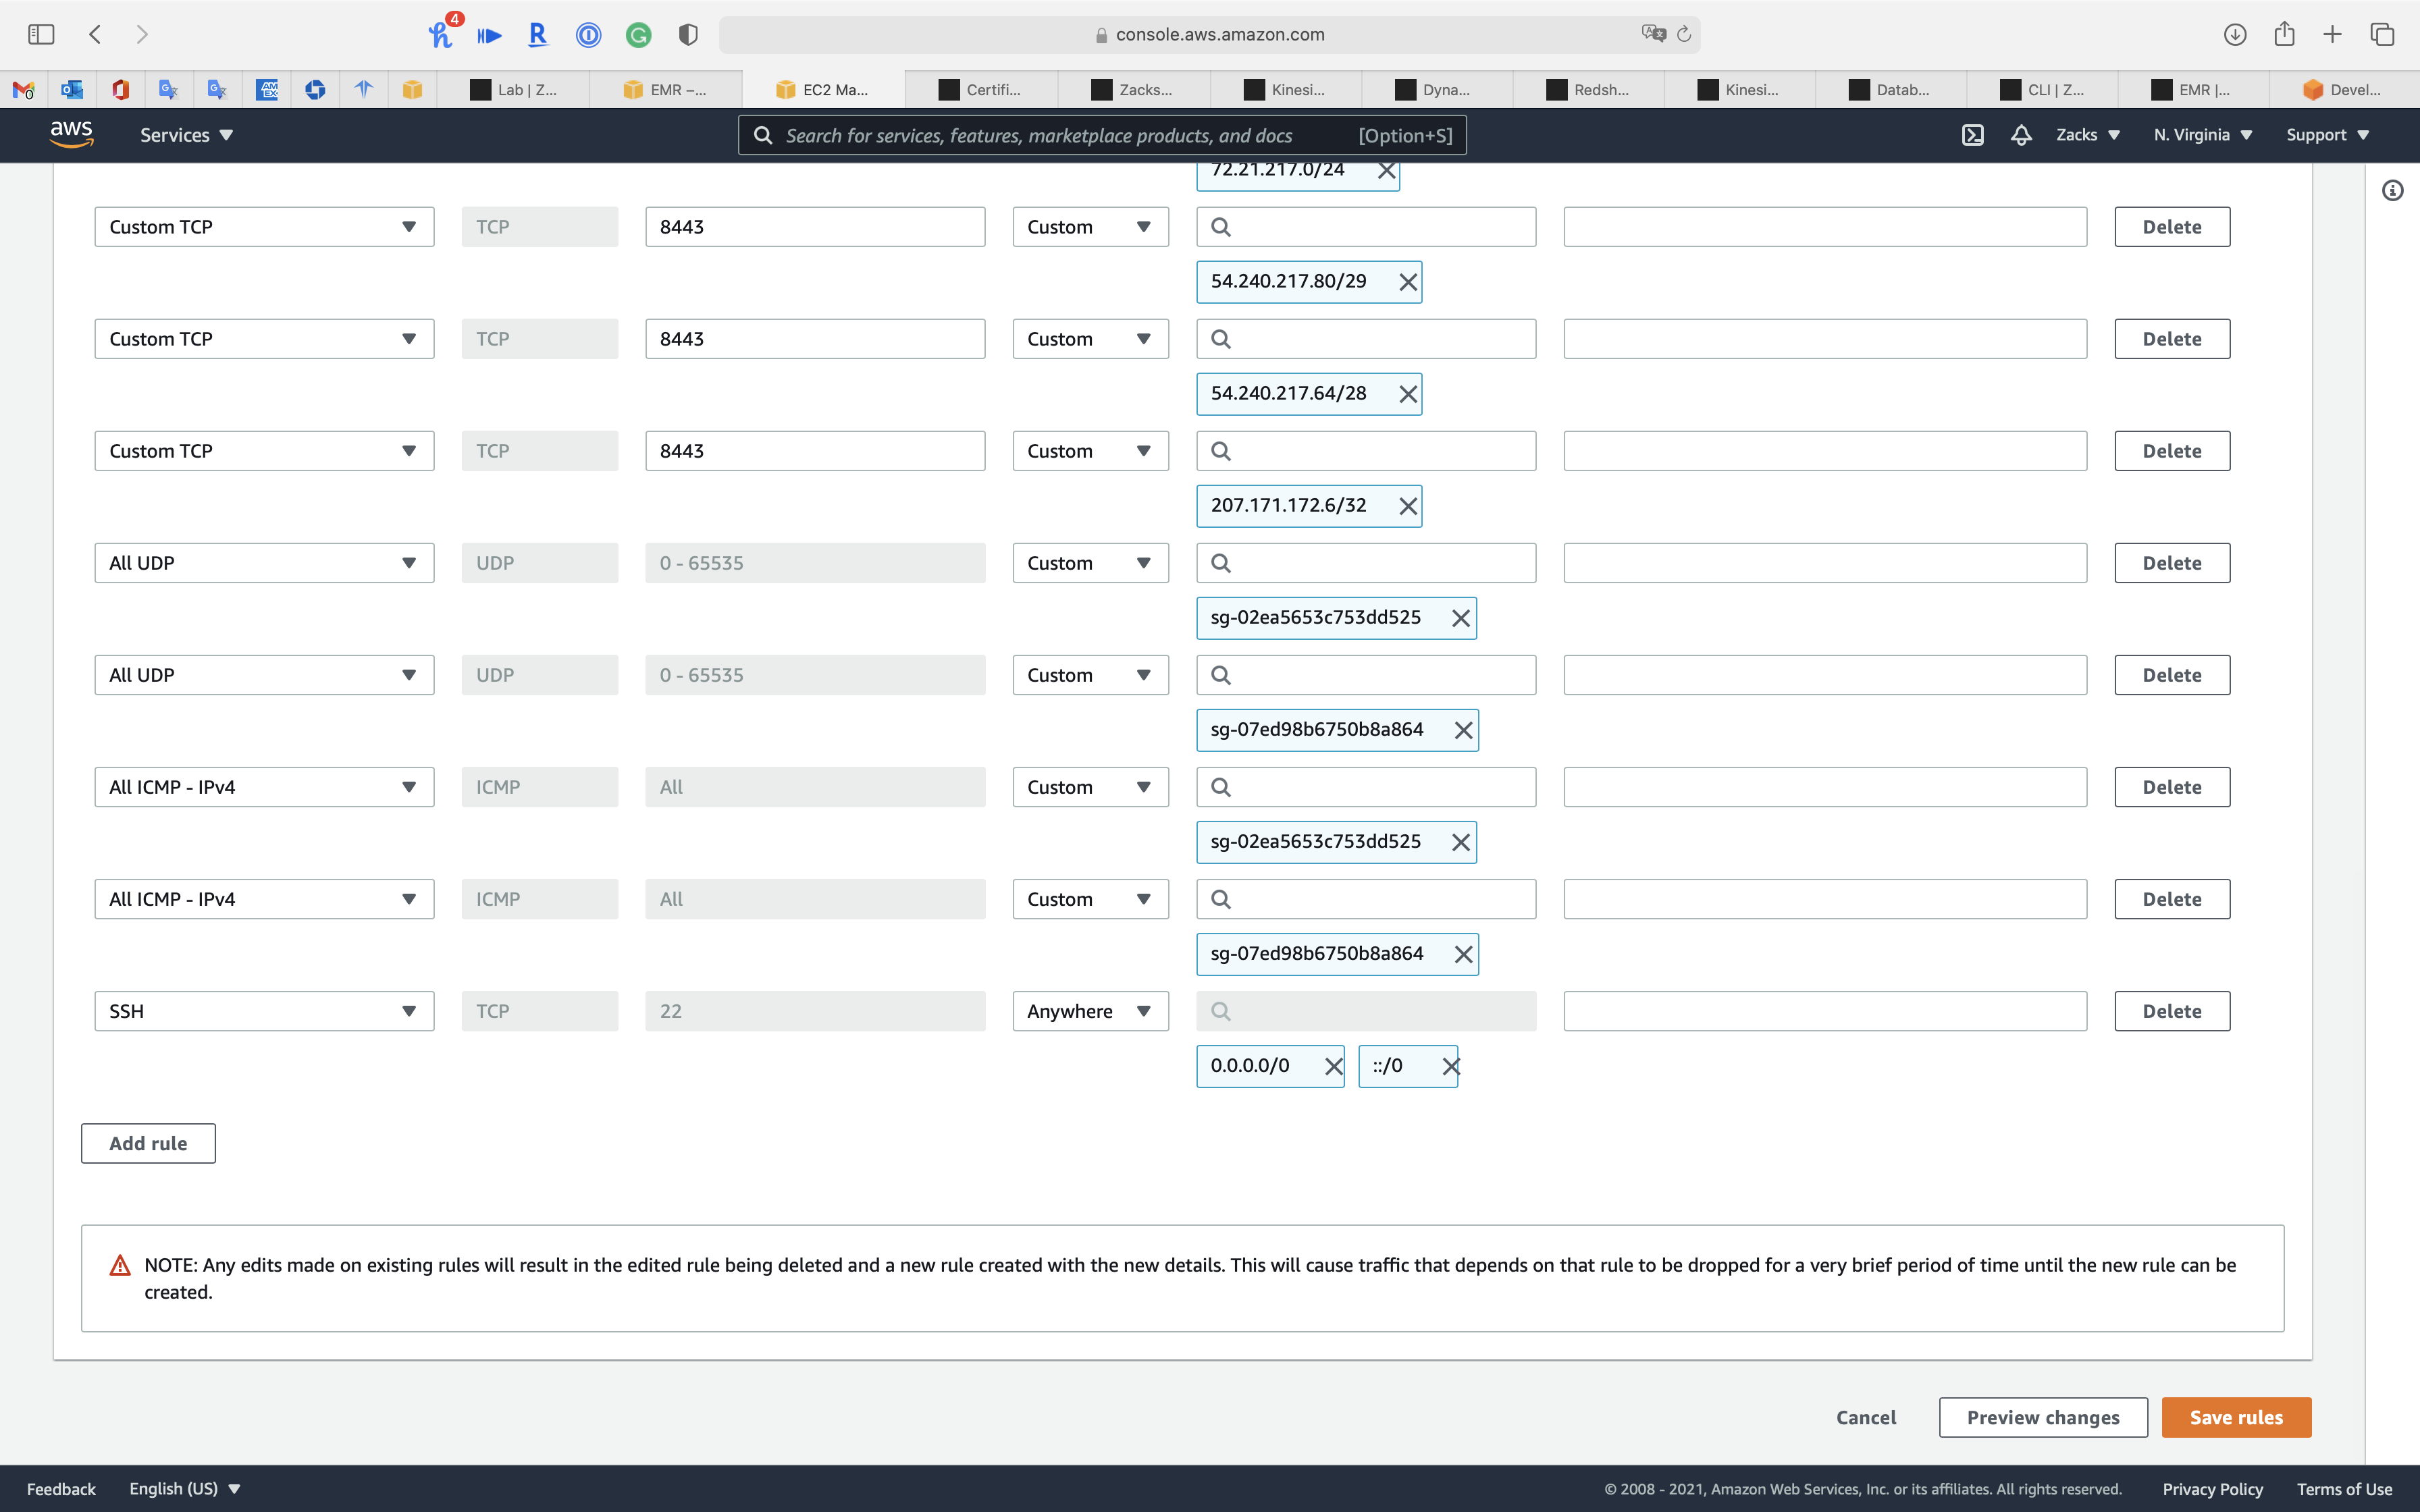
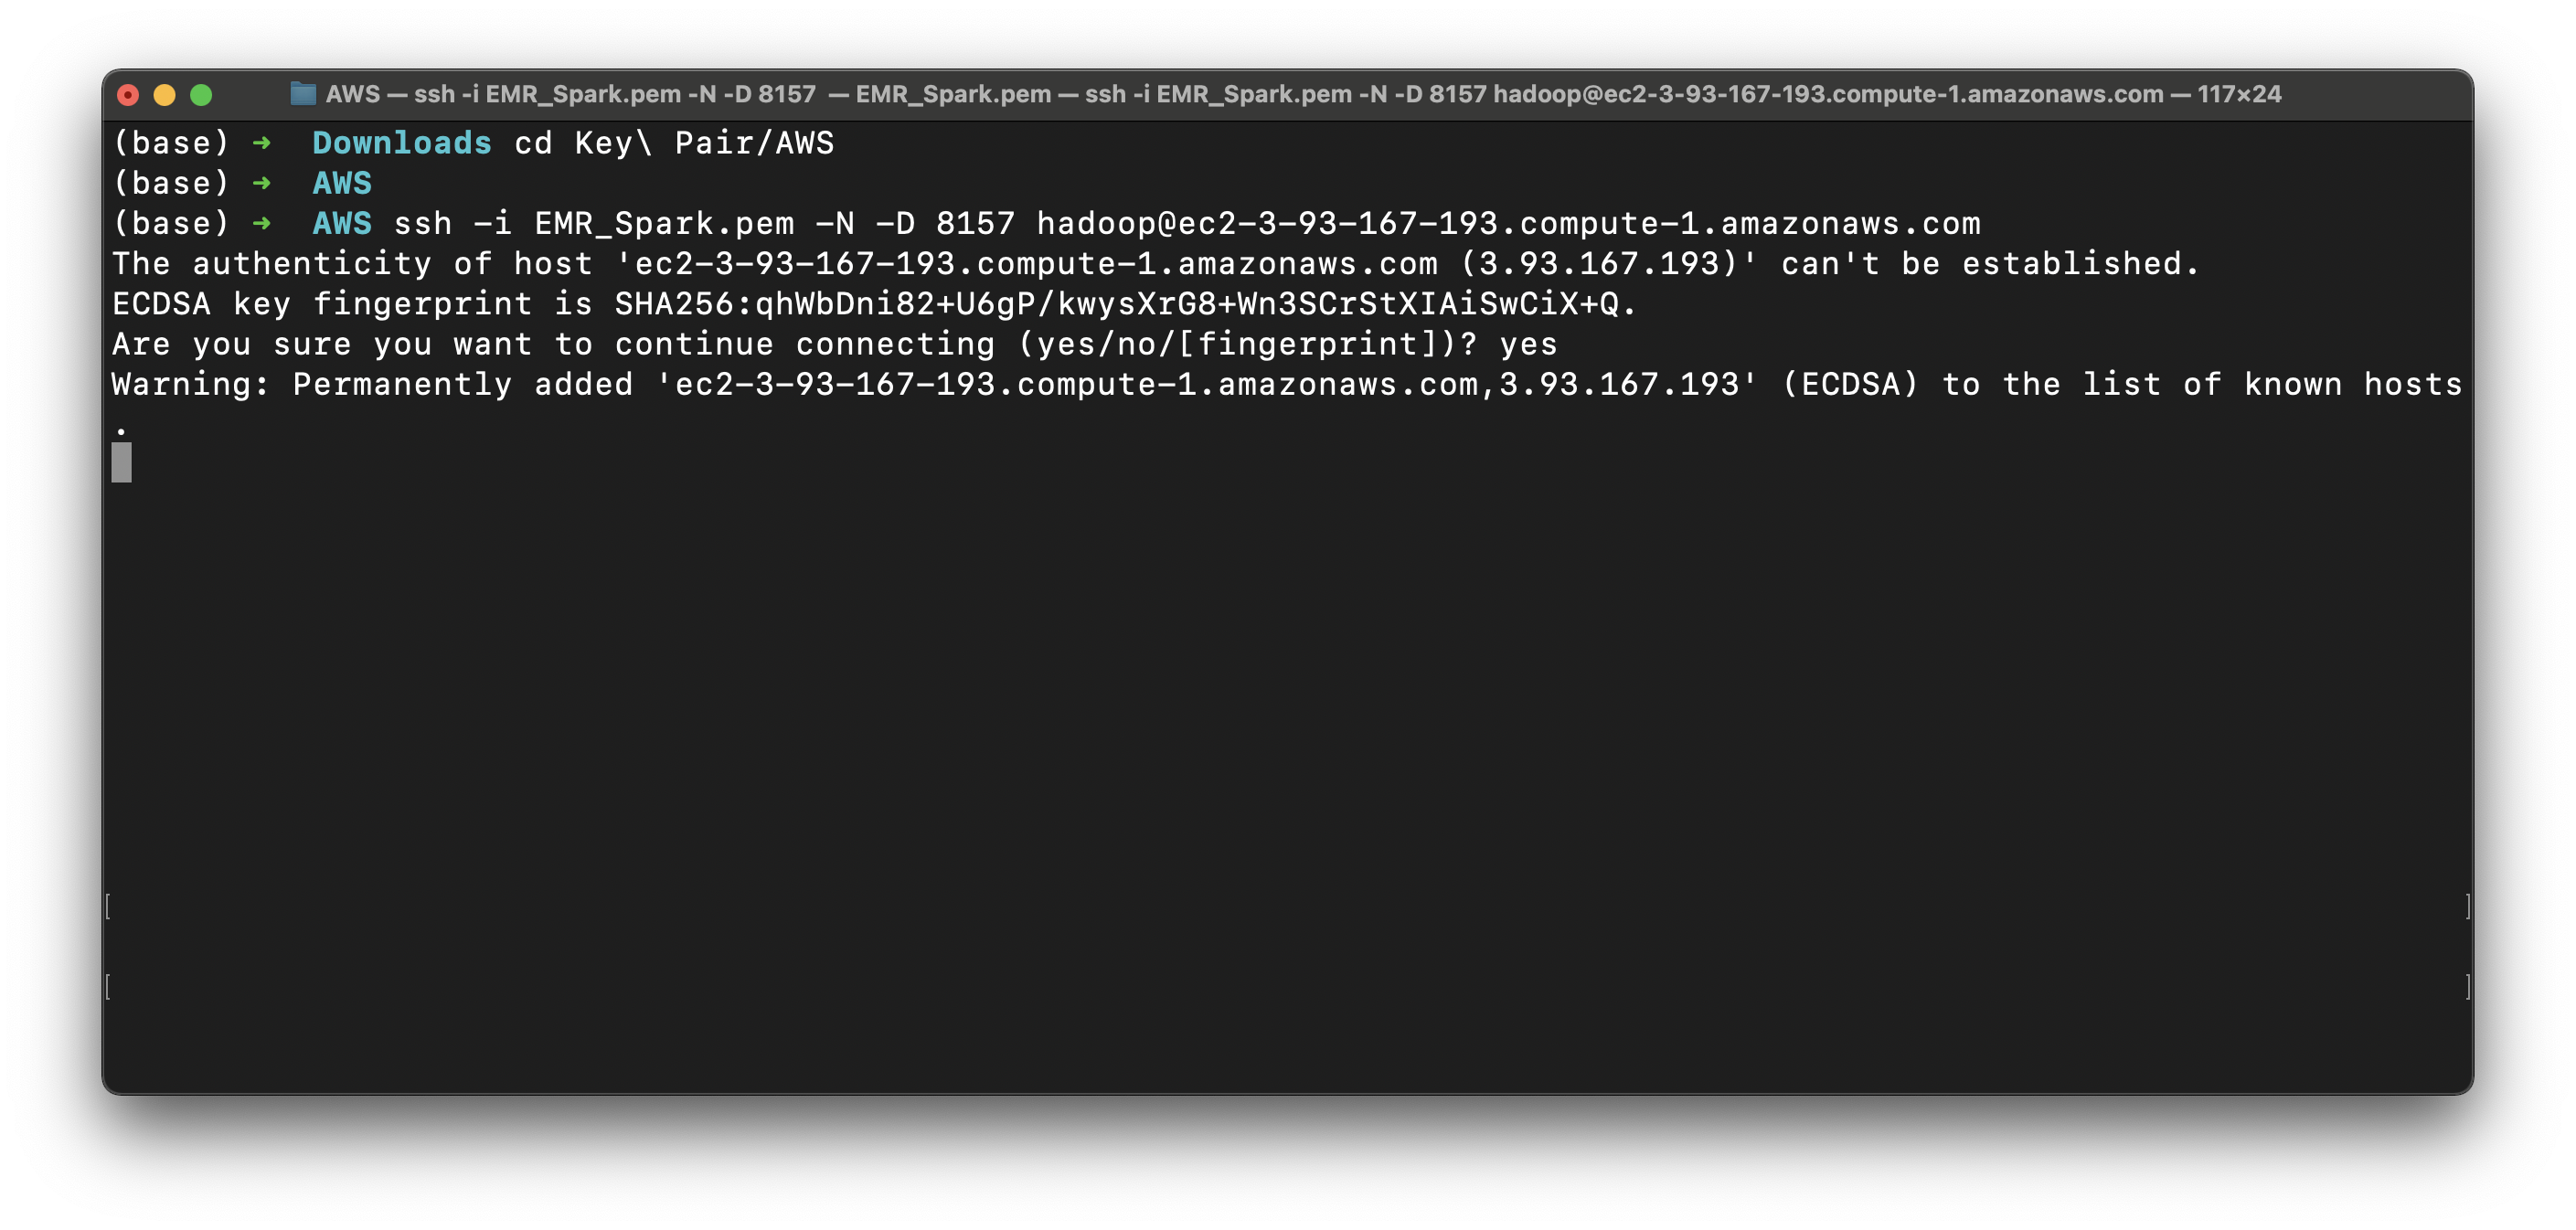
Connect to EMR Master Node through SSH
Go back to EMR console
Click on Connect to the Master Node Using SSH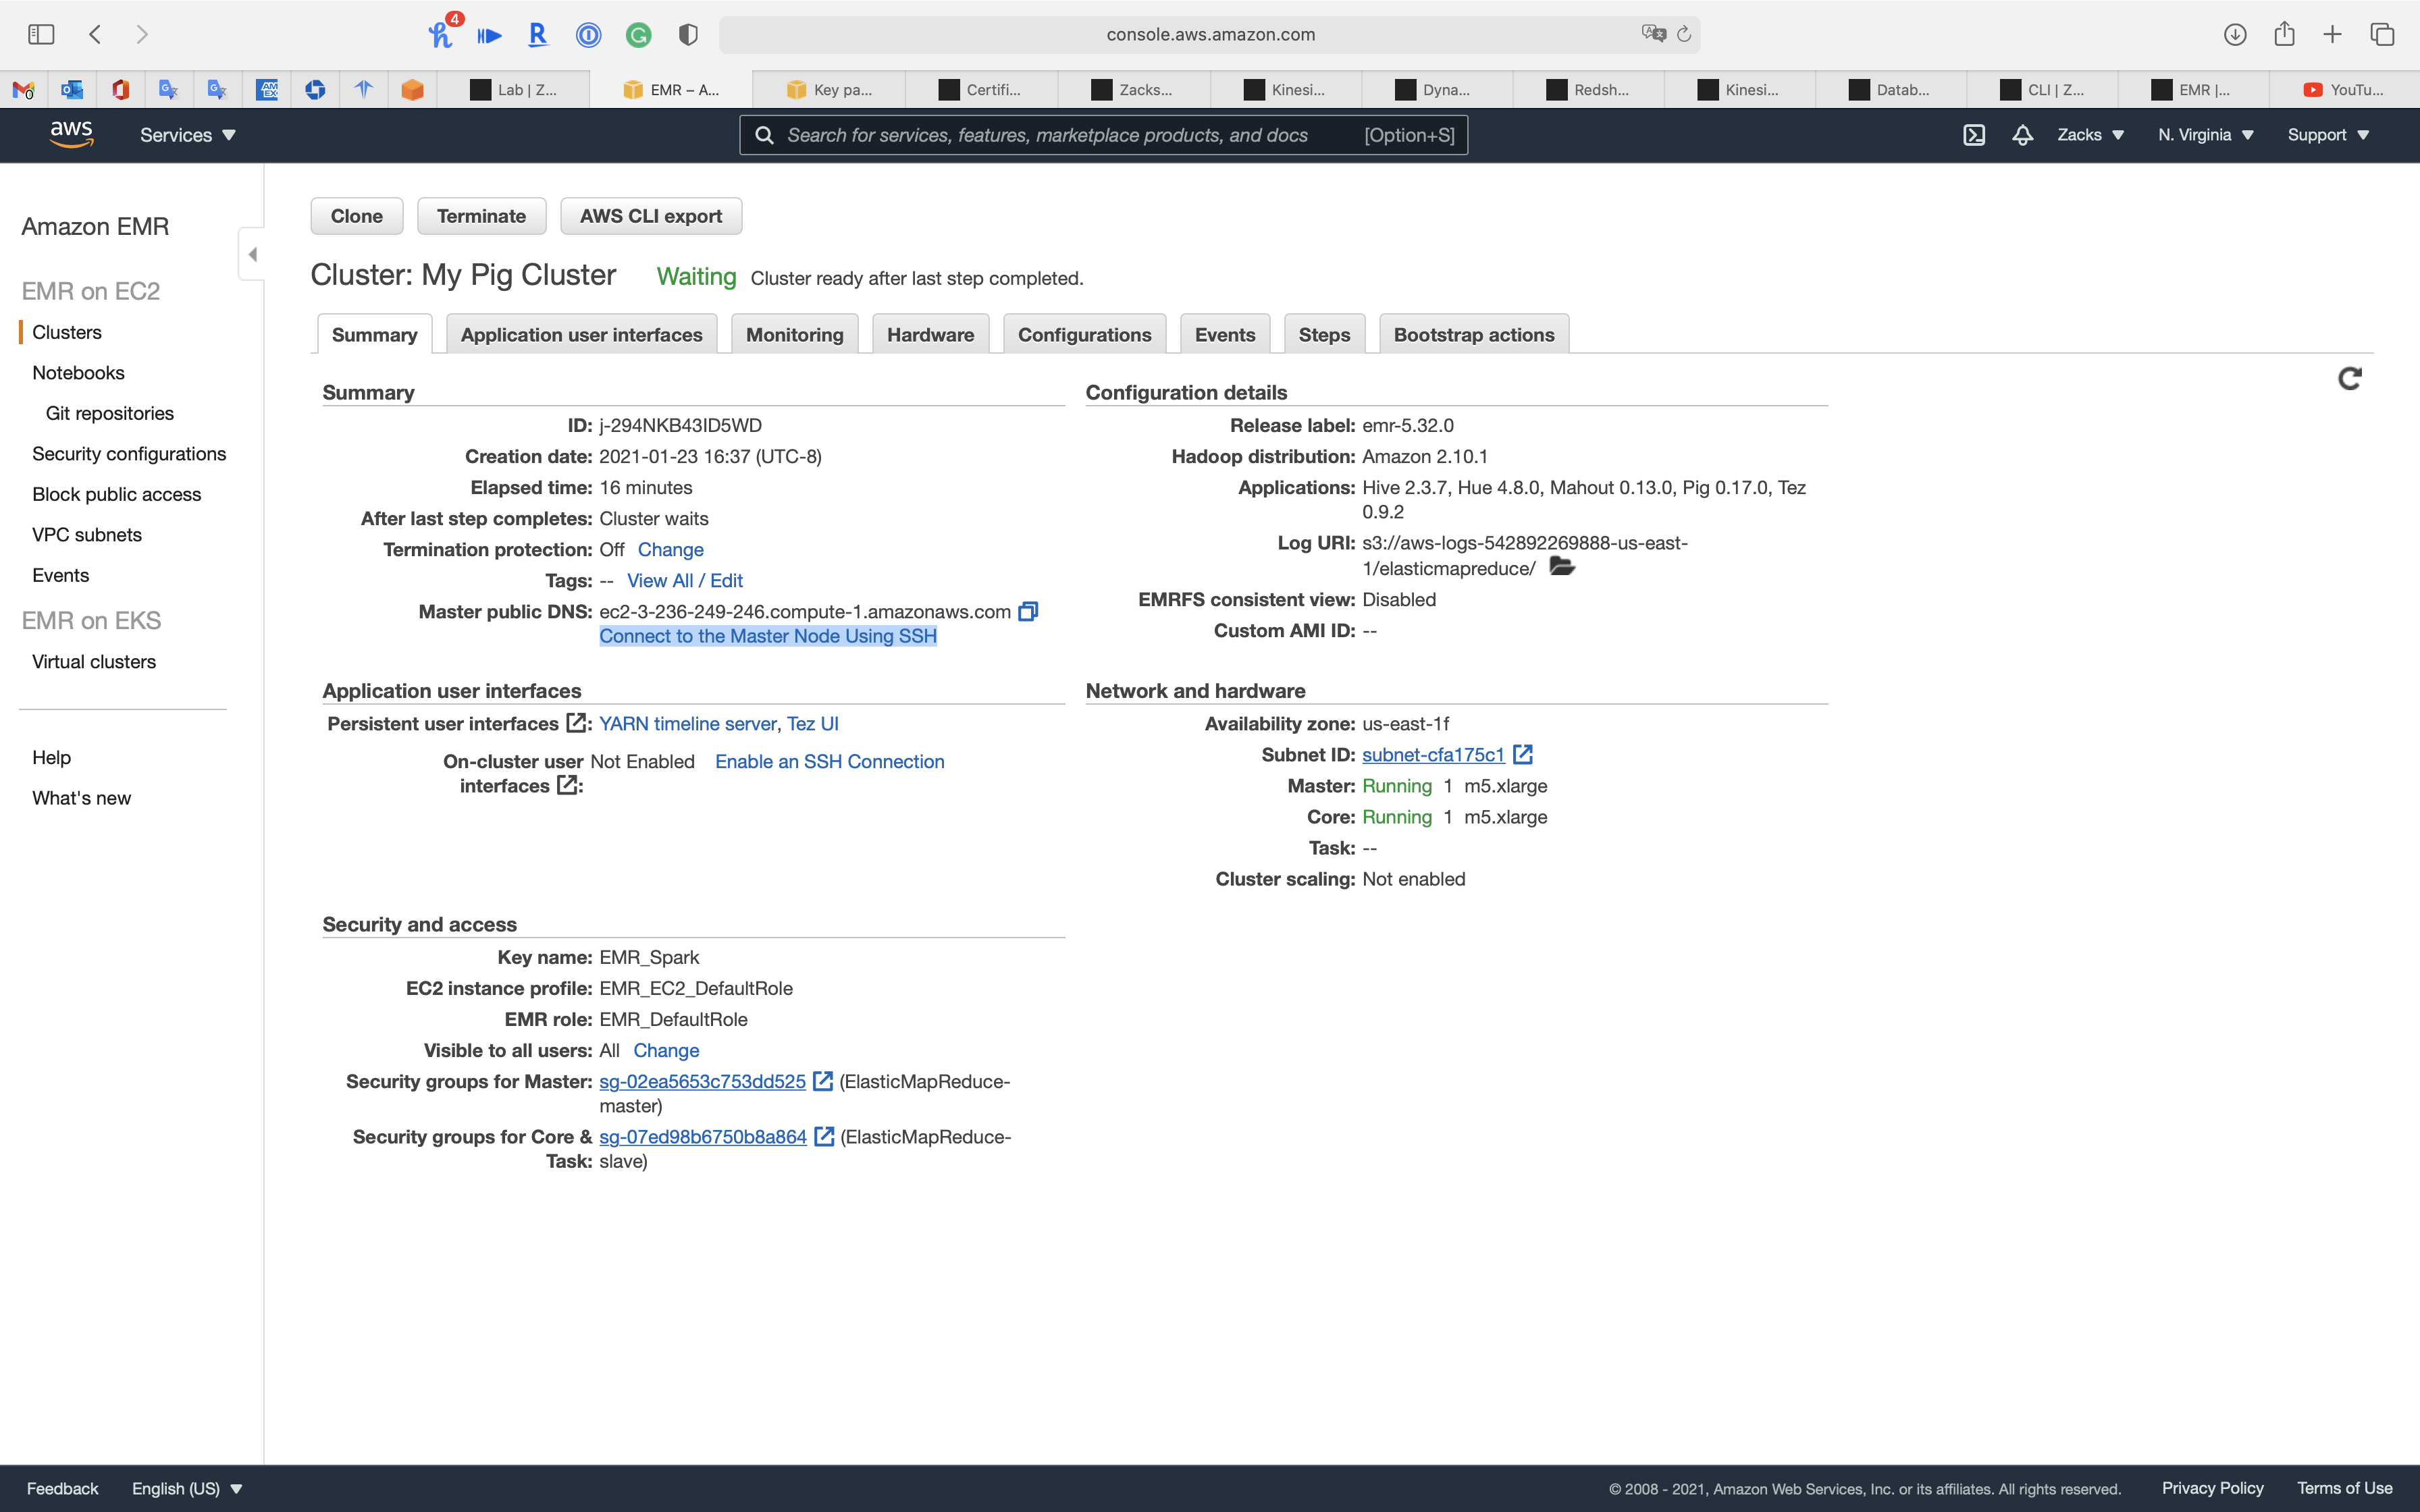
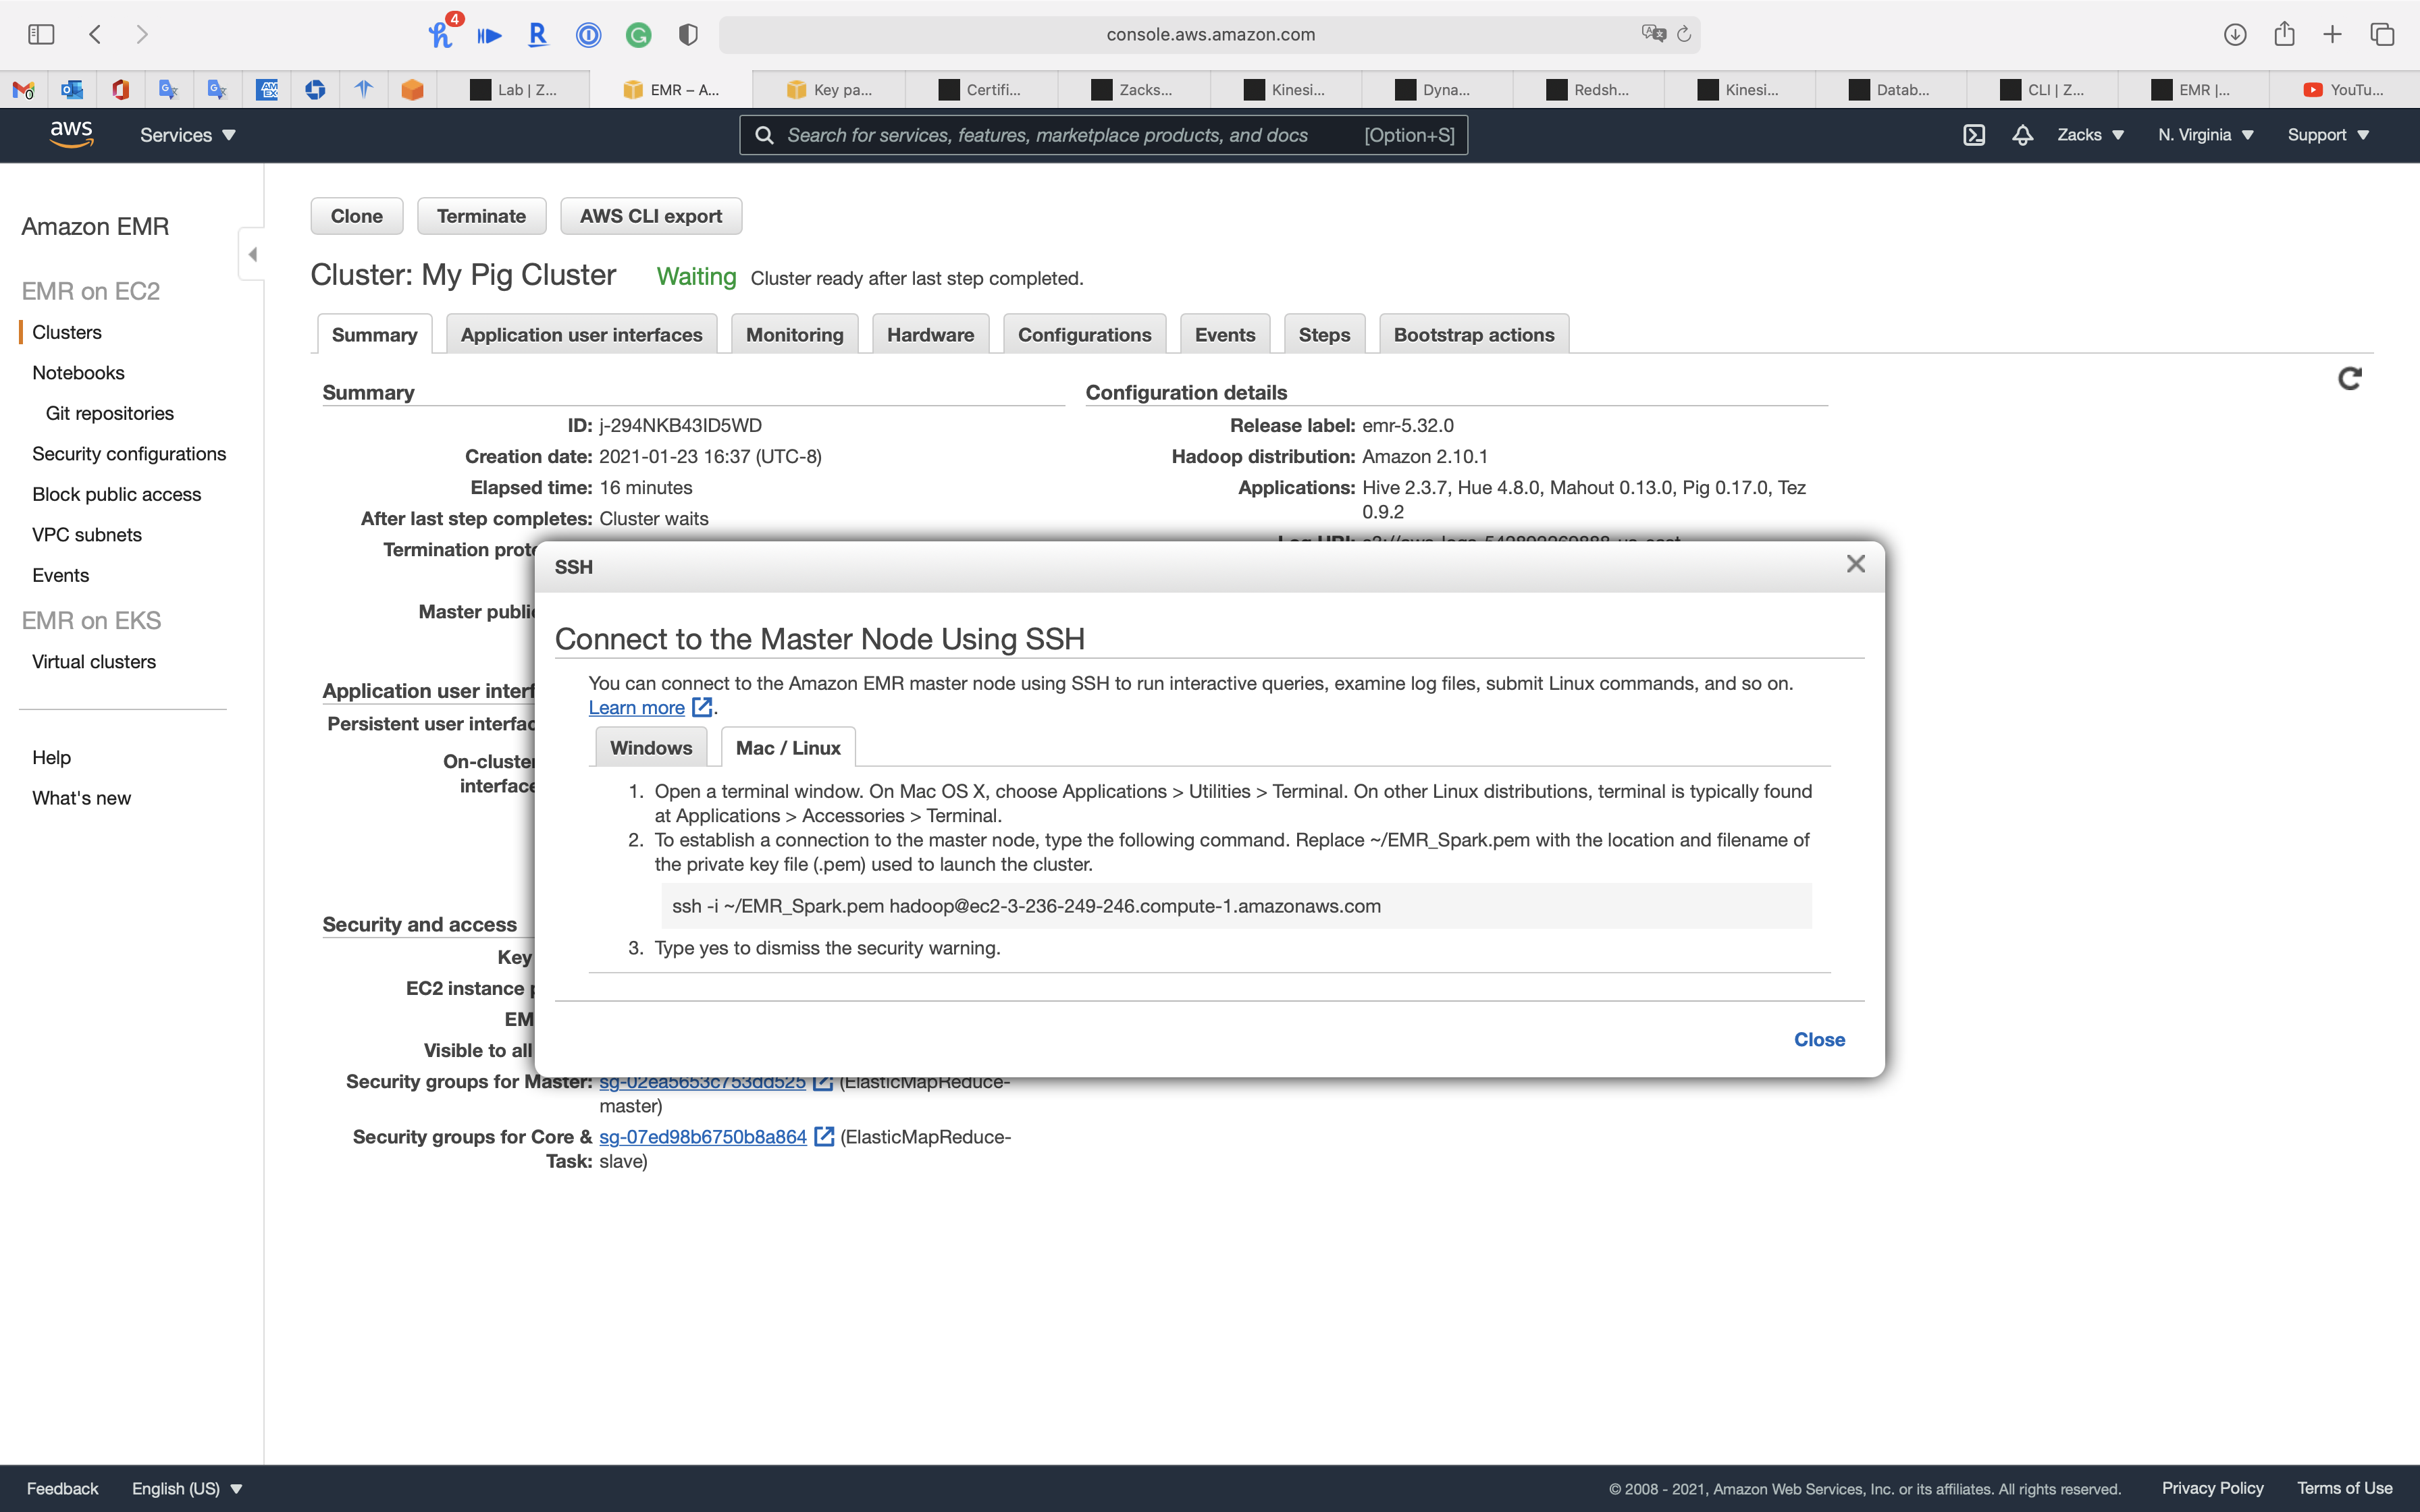
1 | chmod 0400 EMR_Spark.pem |
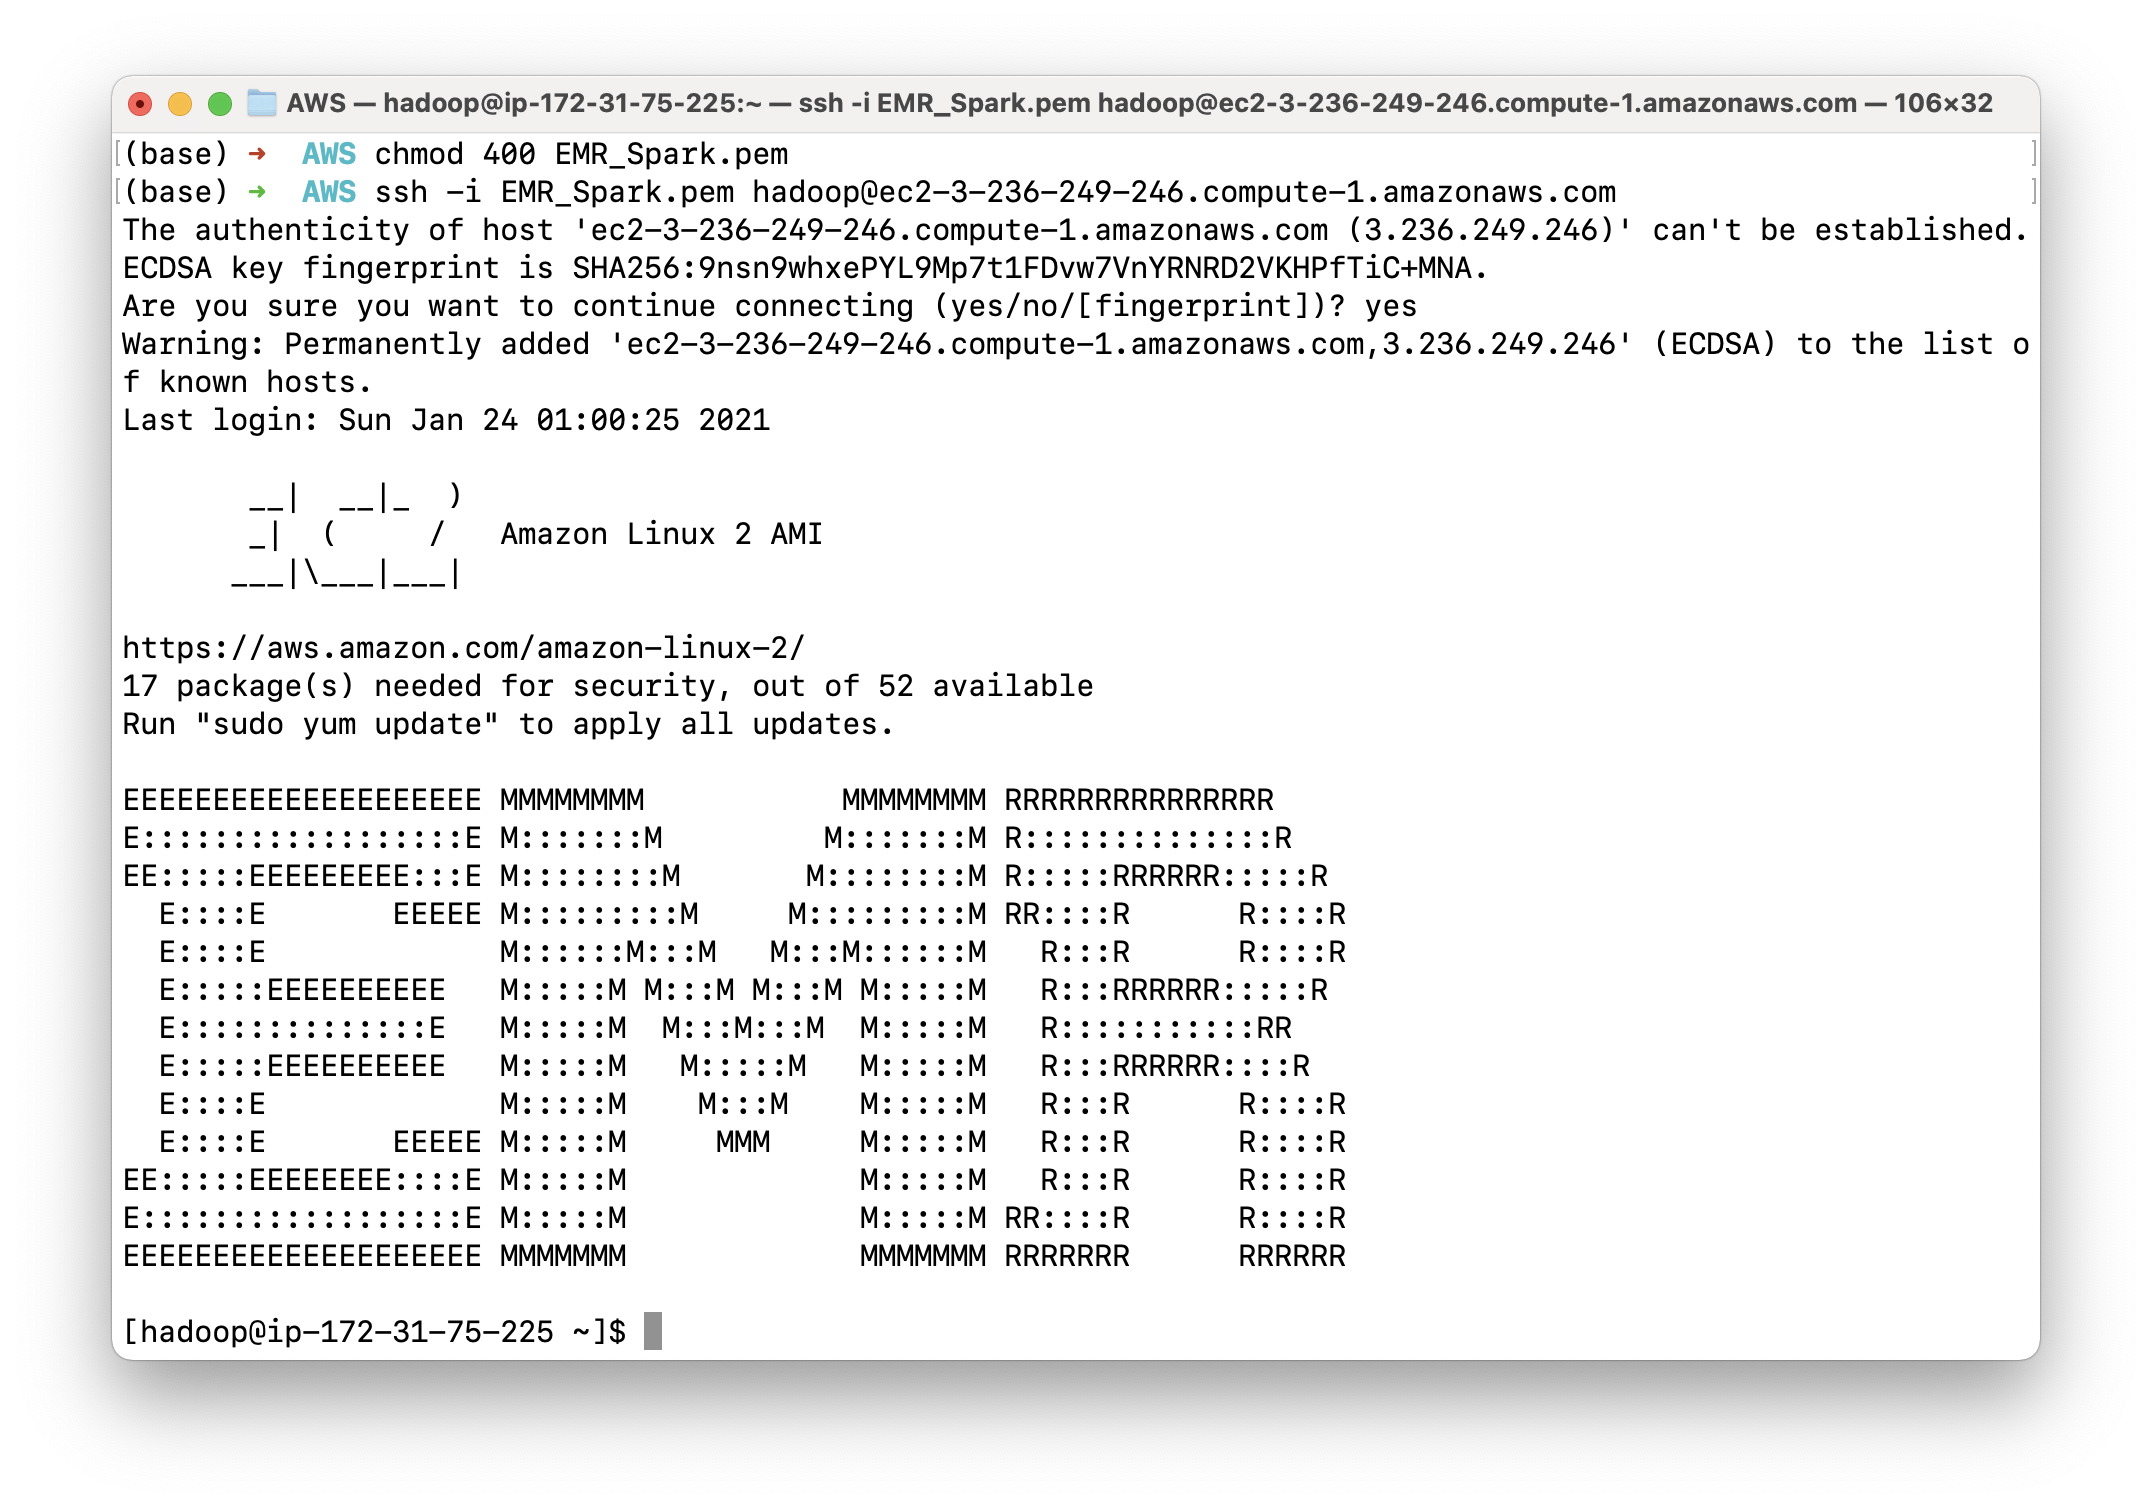
Show all nodes through YARN command.
1 | yarn node -list -showDetails -all |
It shows we have one node (the core node)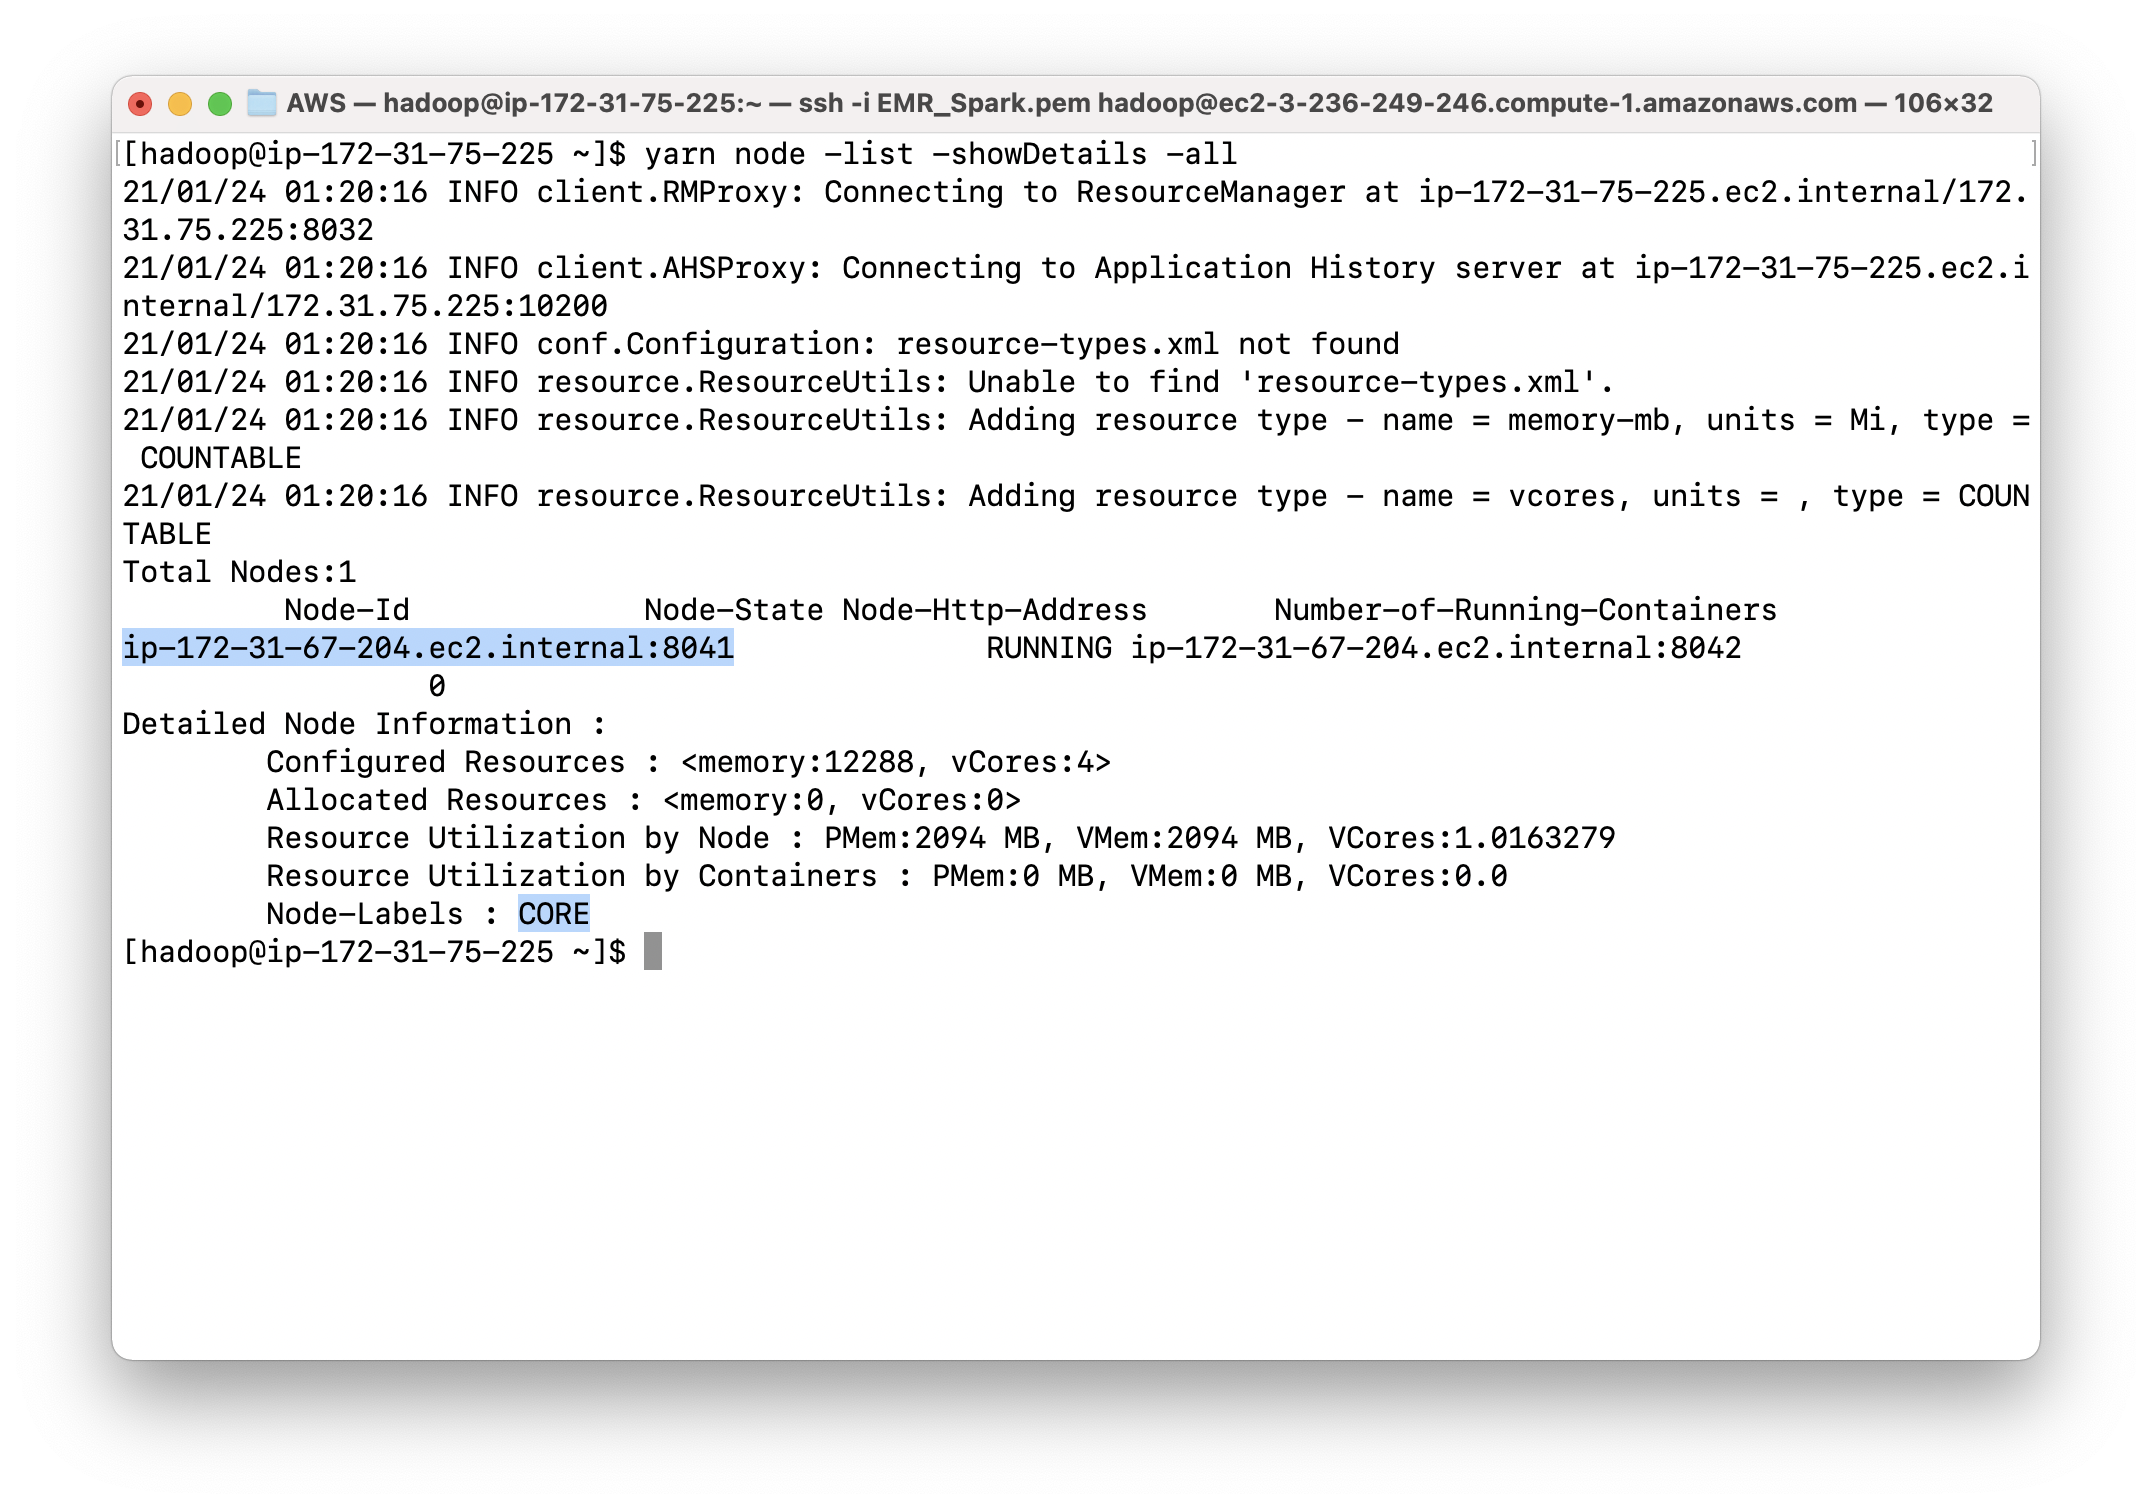
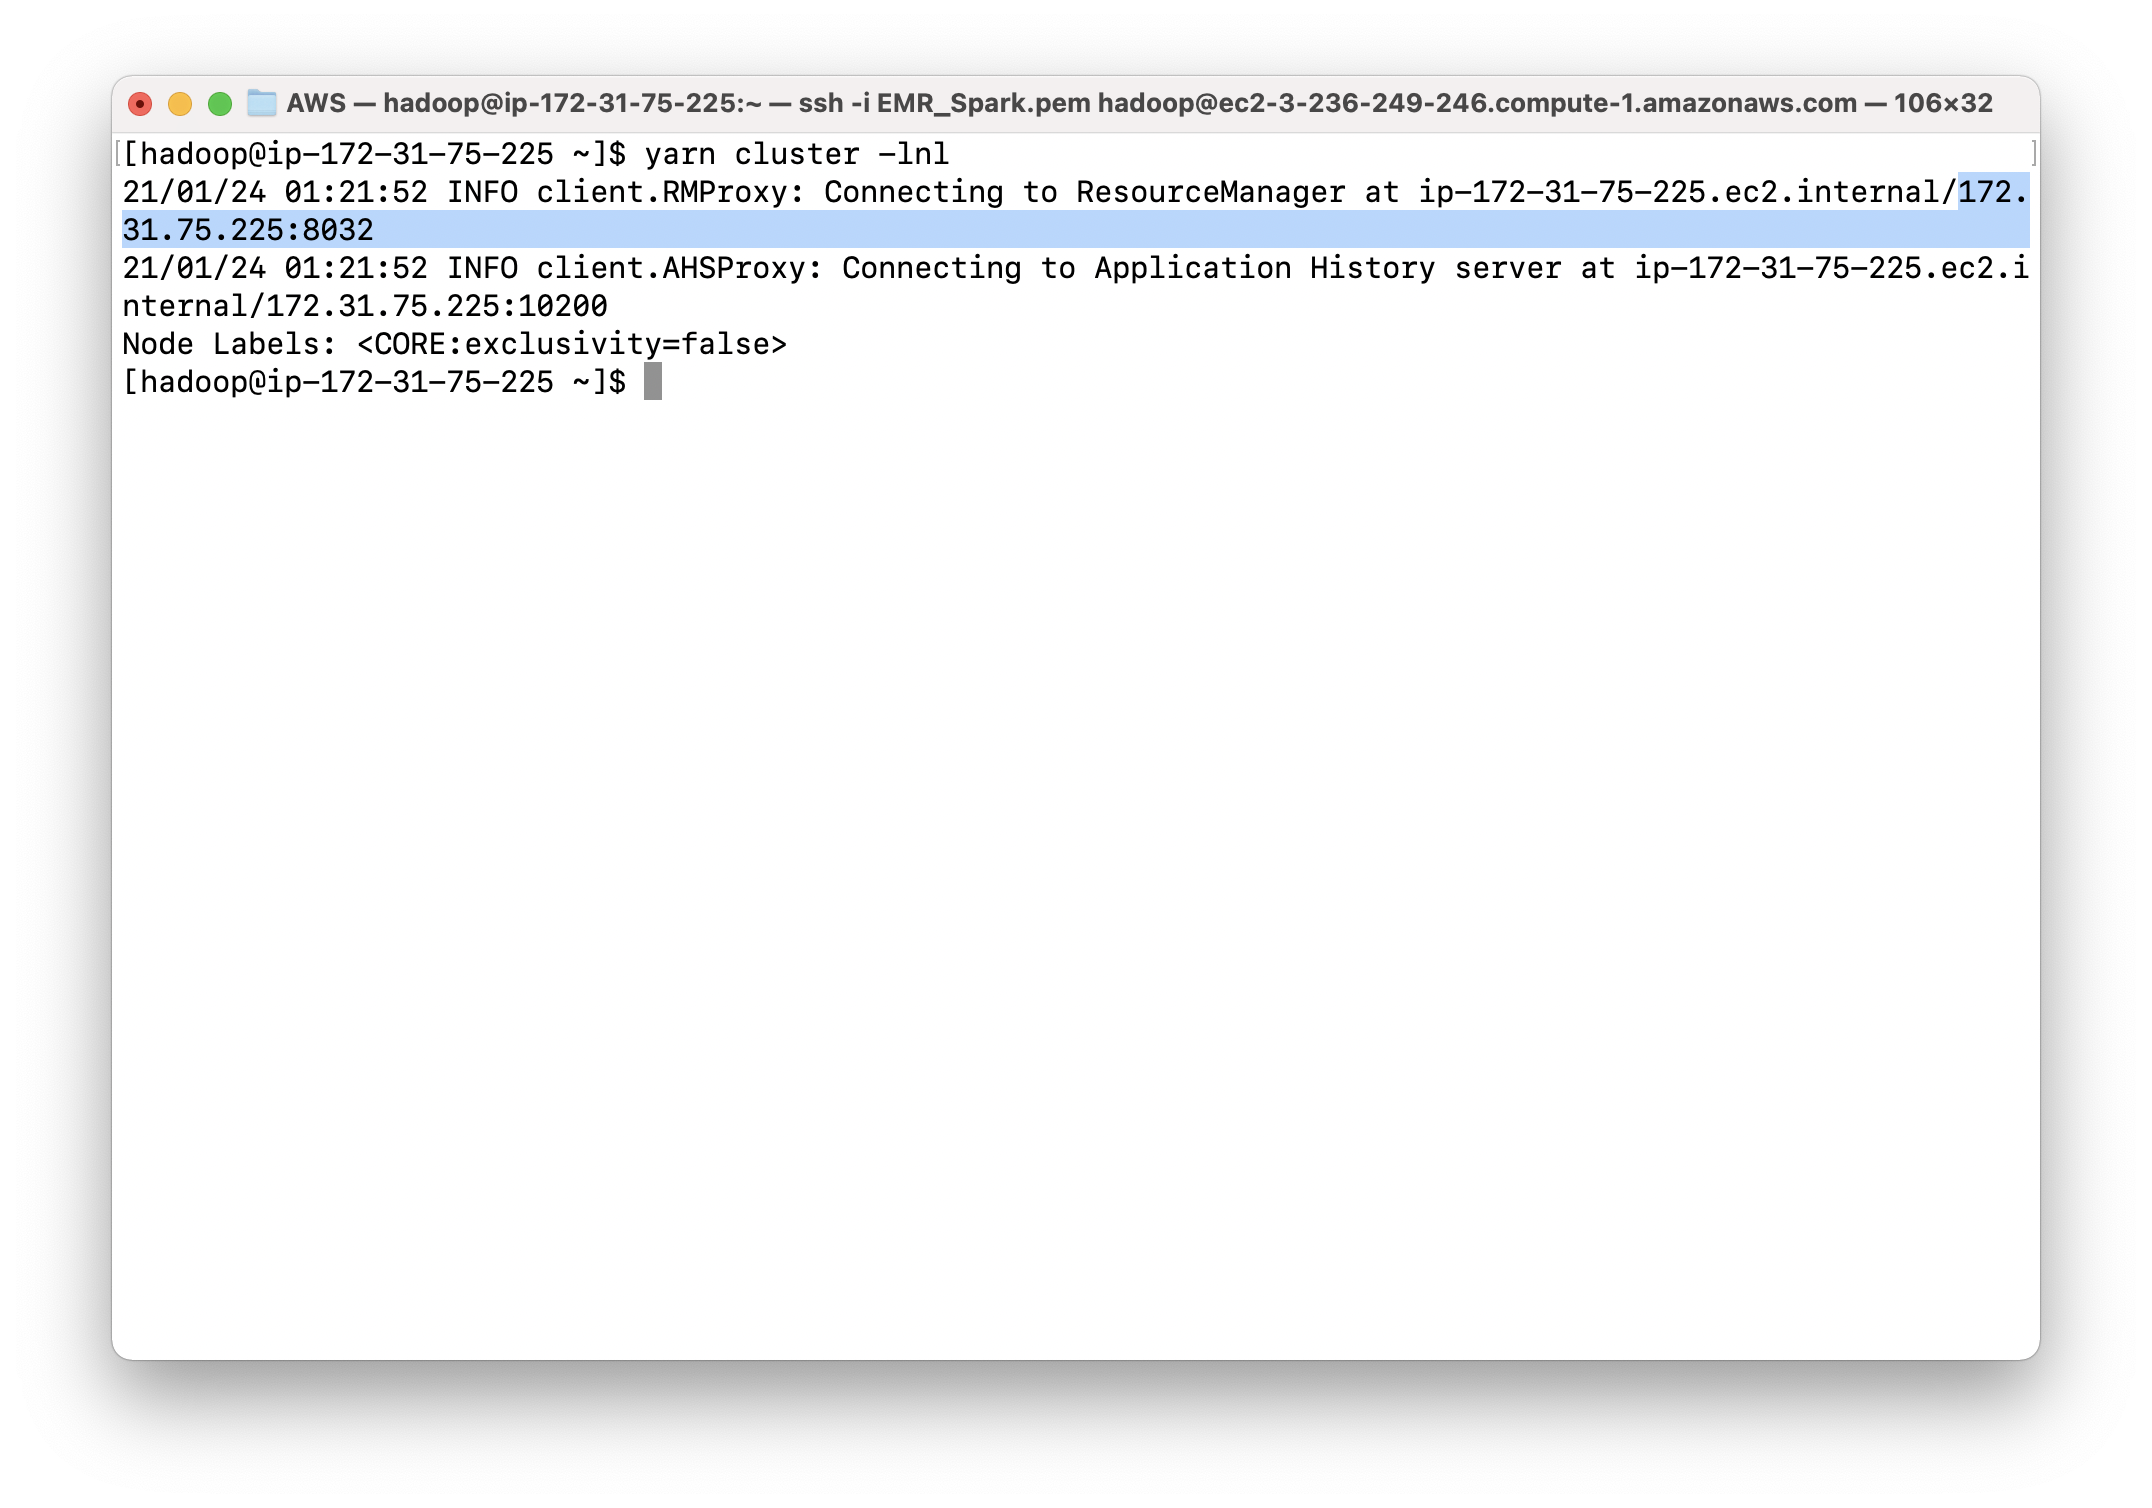
To see the cluster details
1 | yarn cluster -lnl |
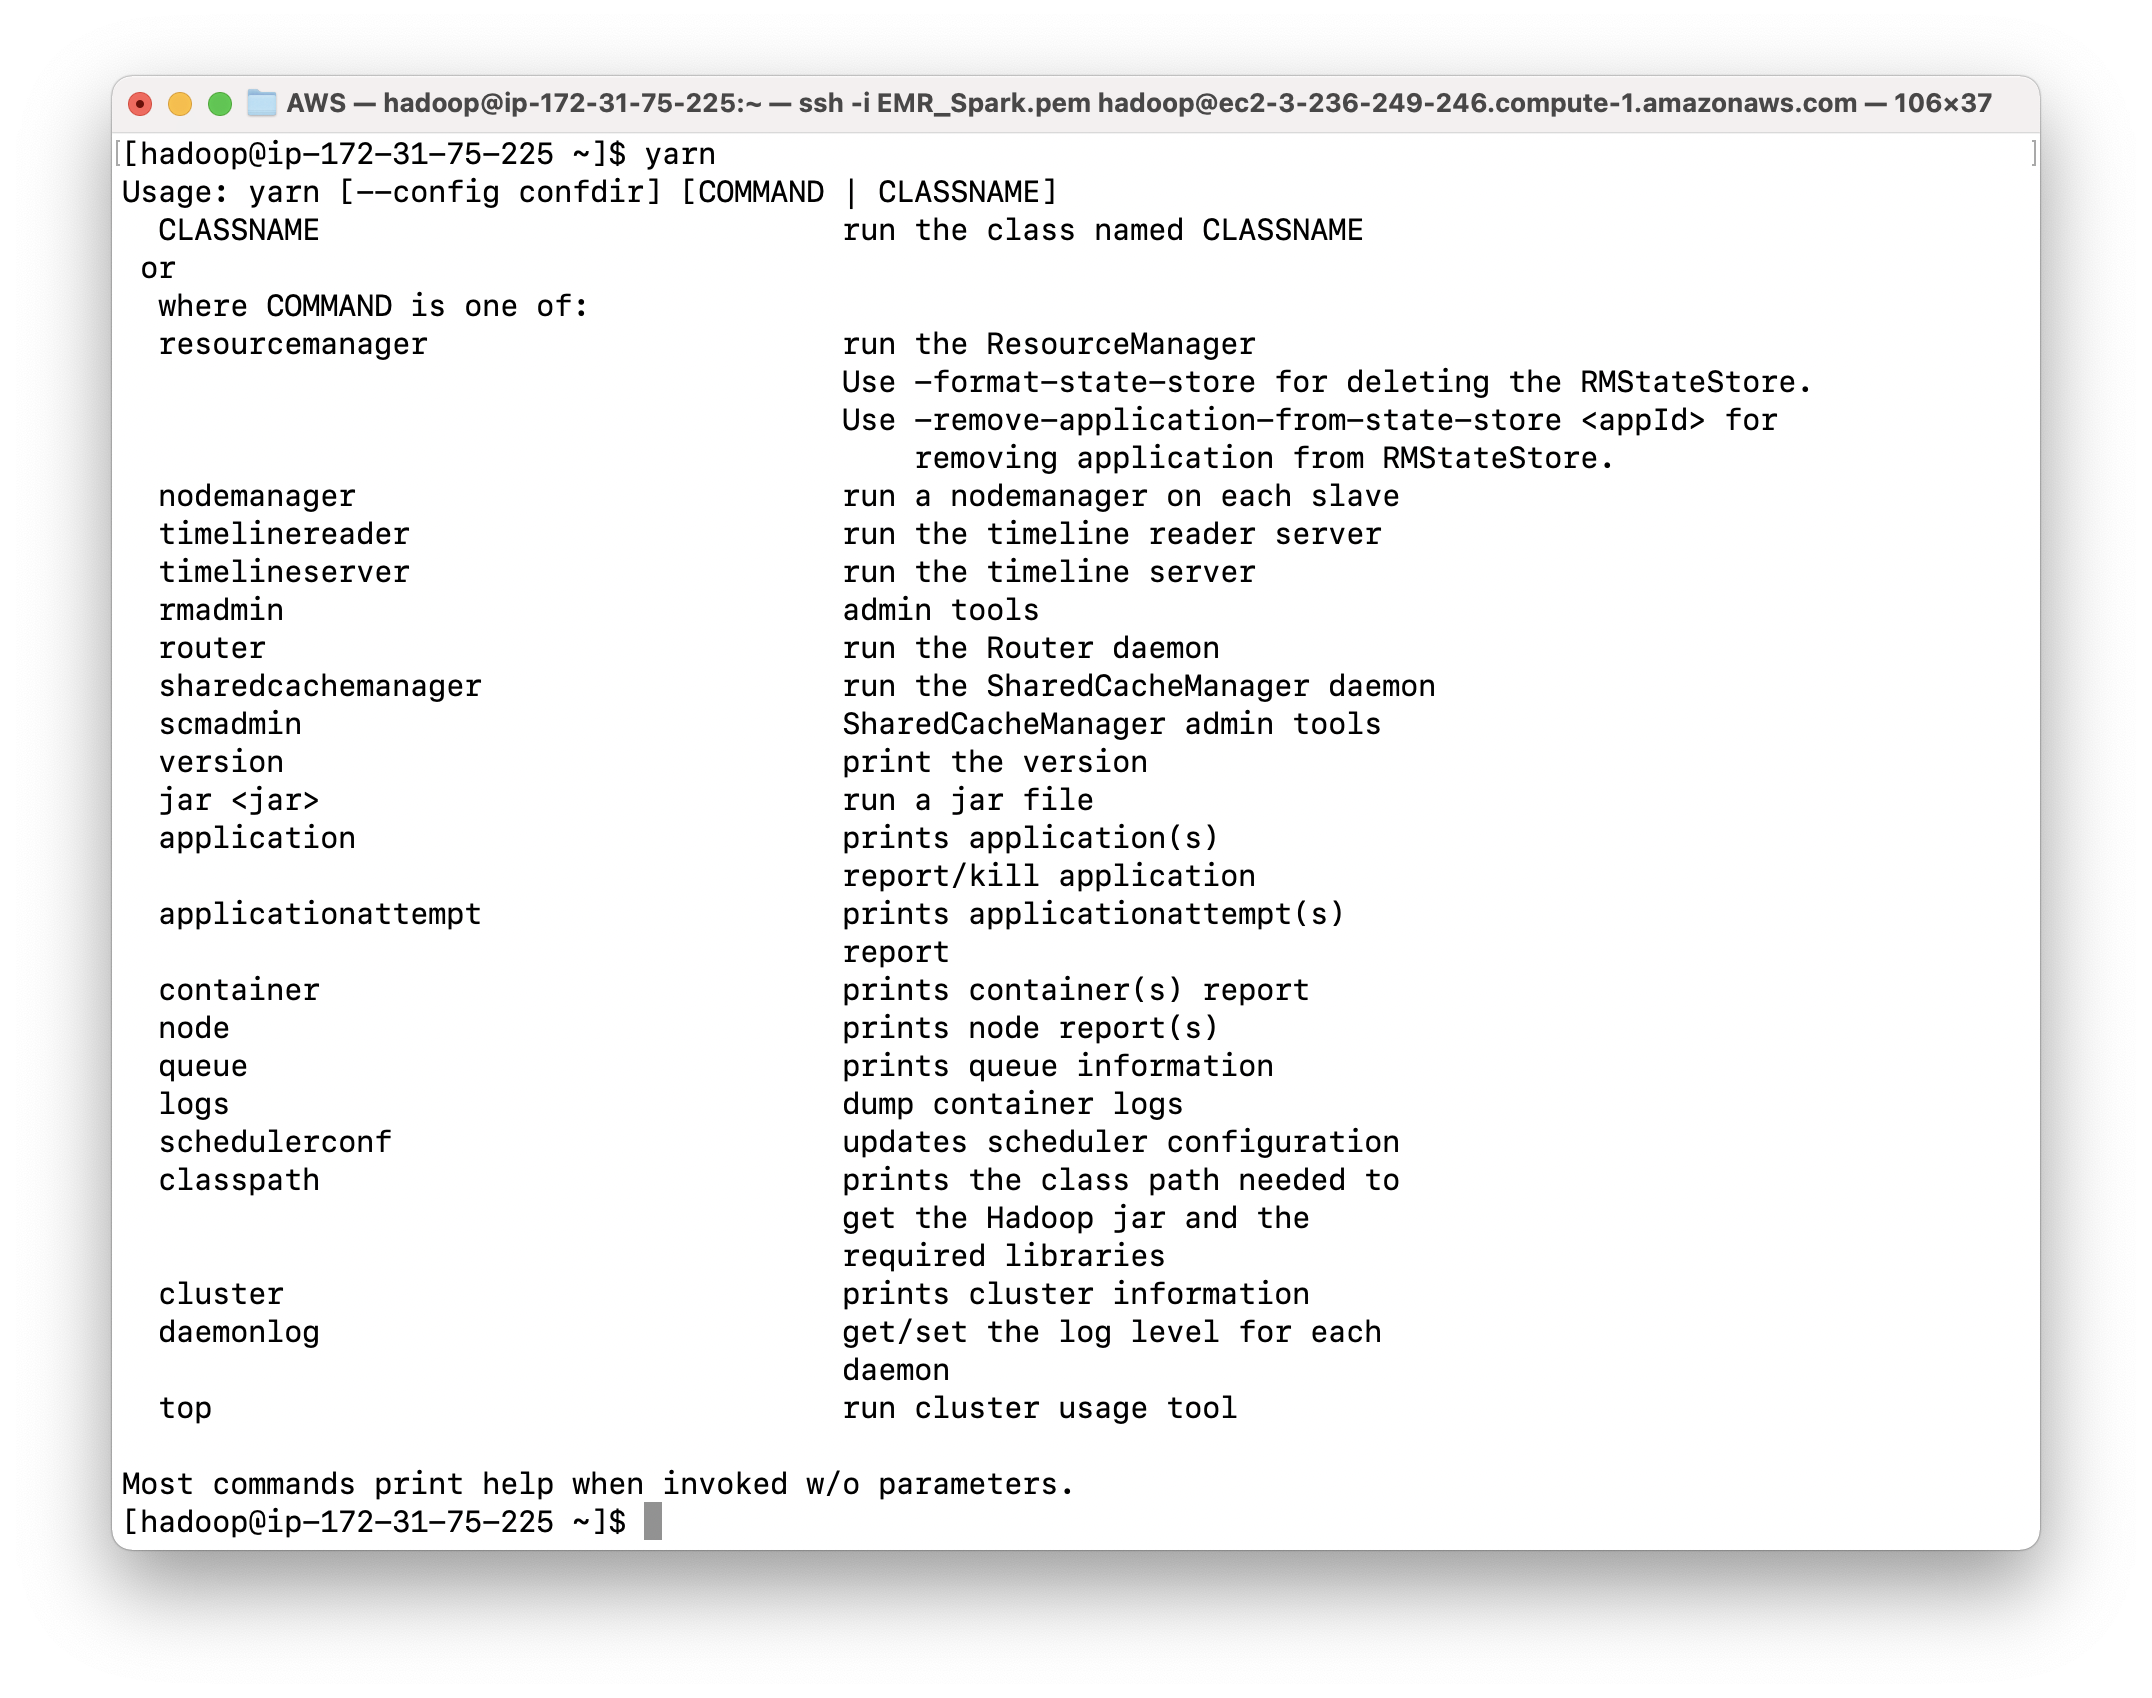
To see the yarn command
1 | yarn |
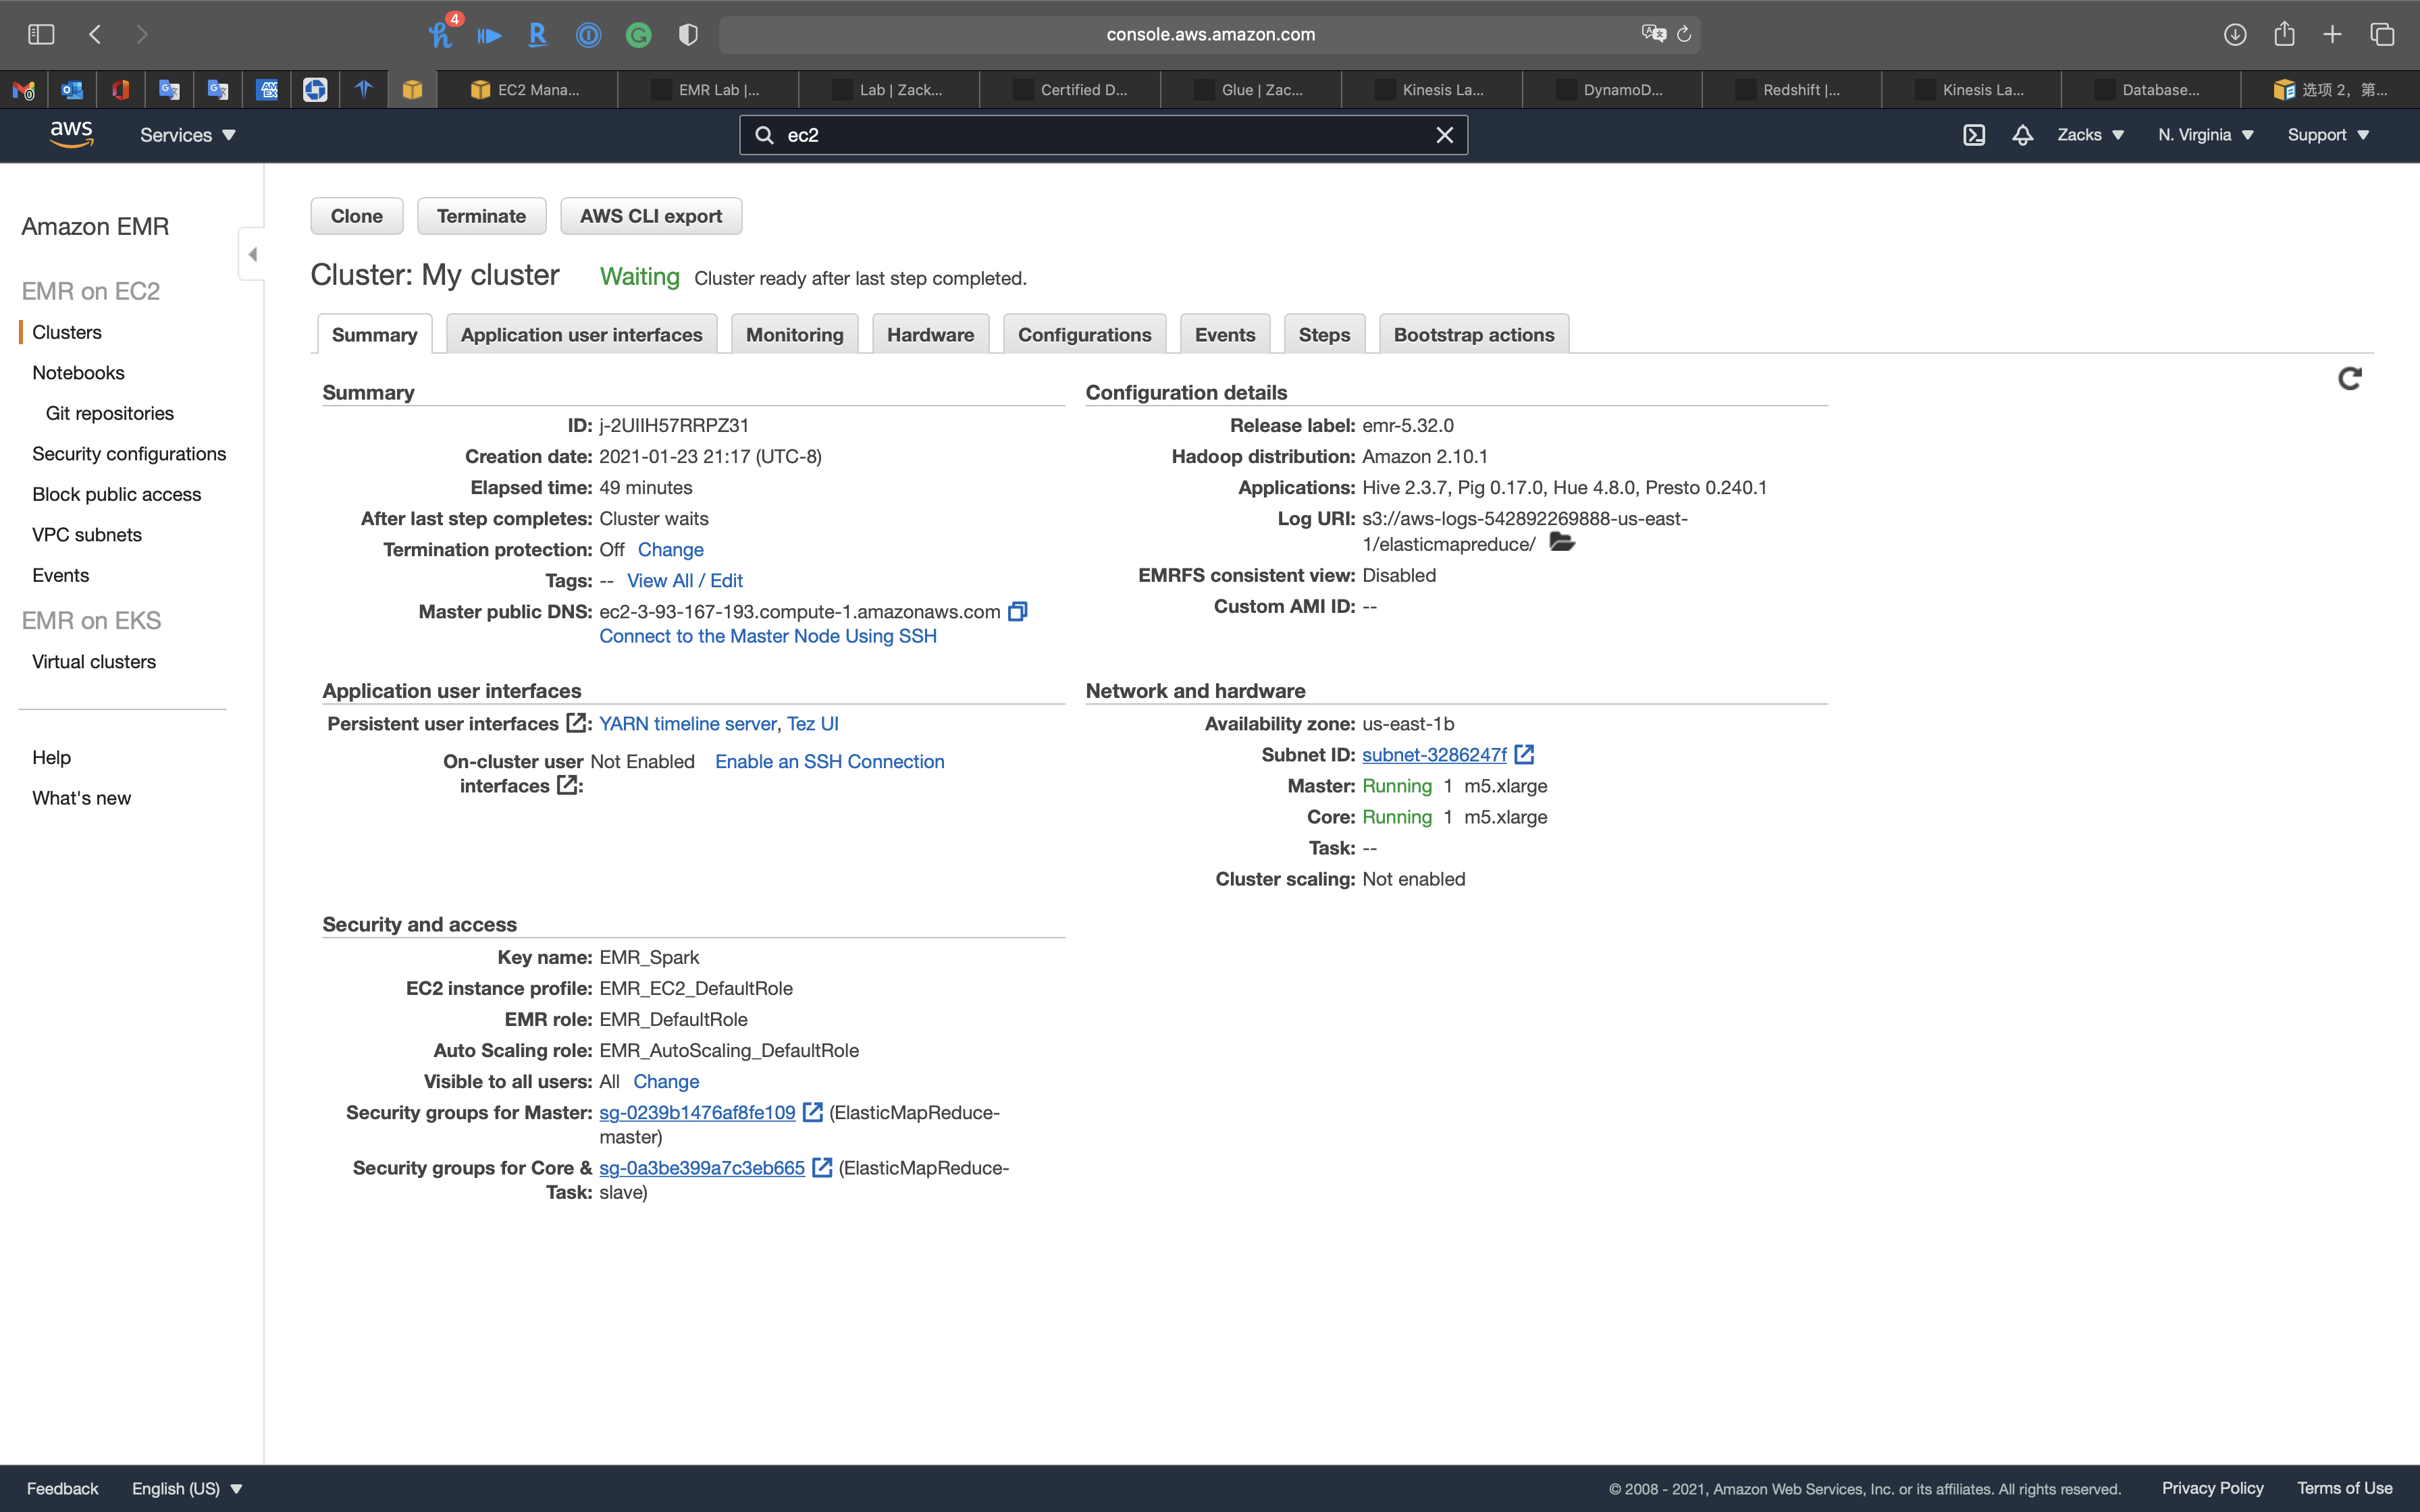
EMR Review
Services -> EMR -> Clusters
Click on your cluster.
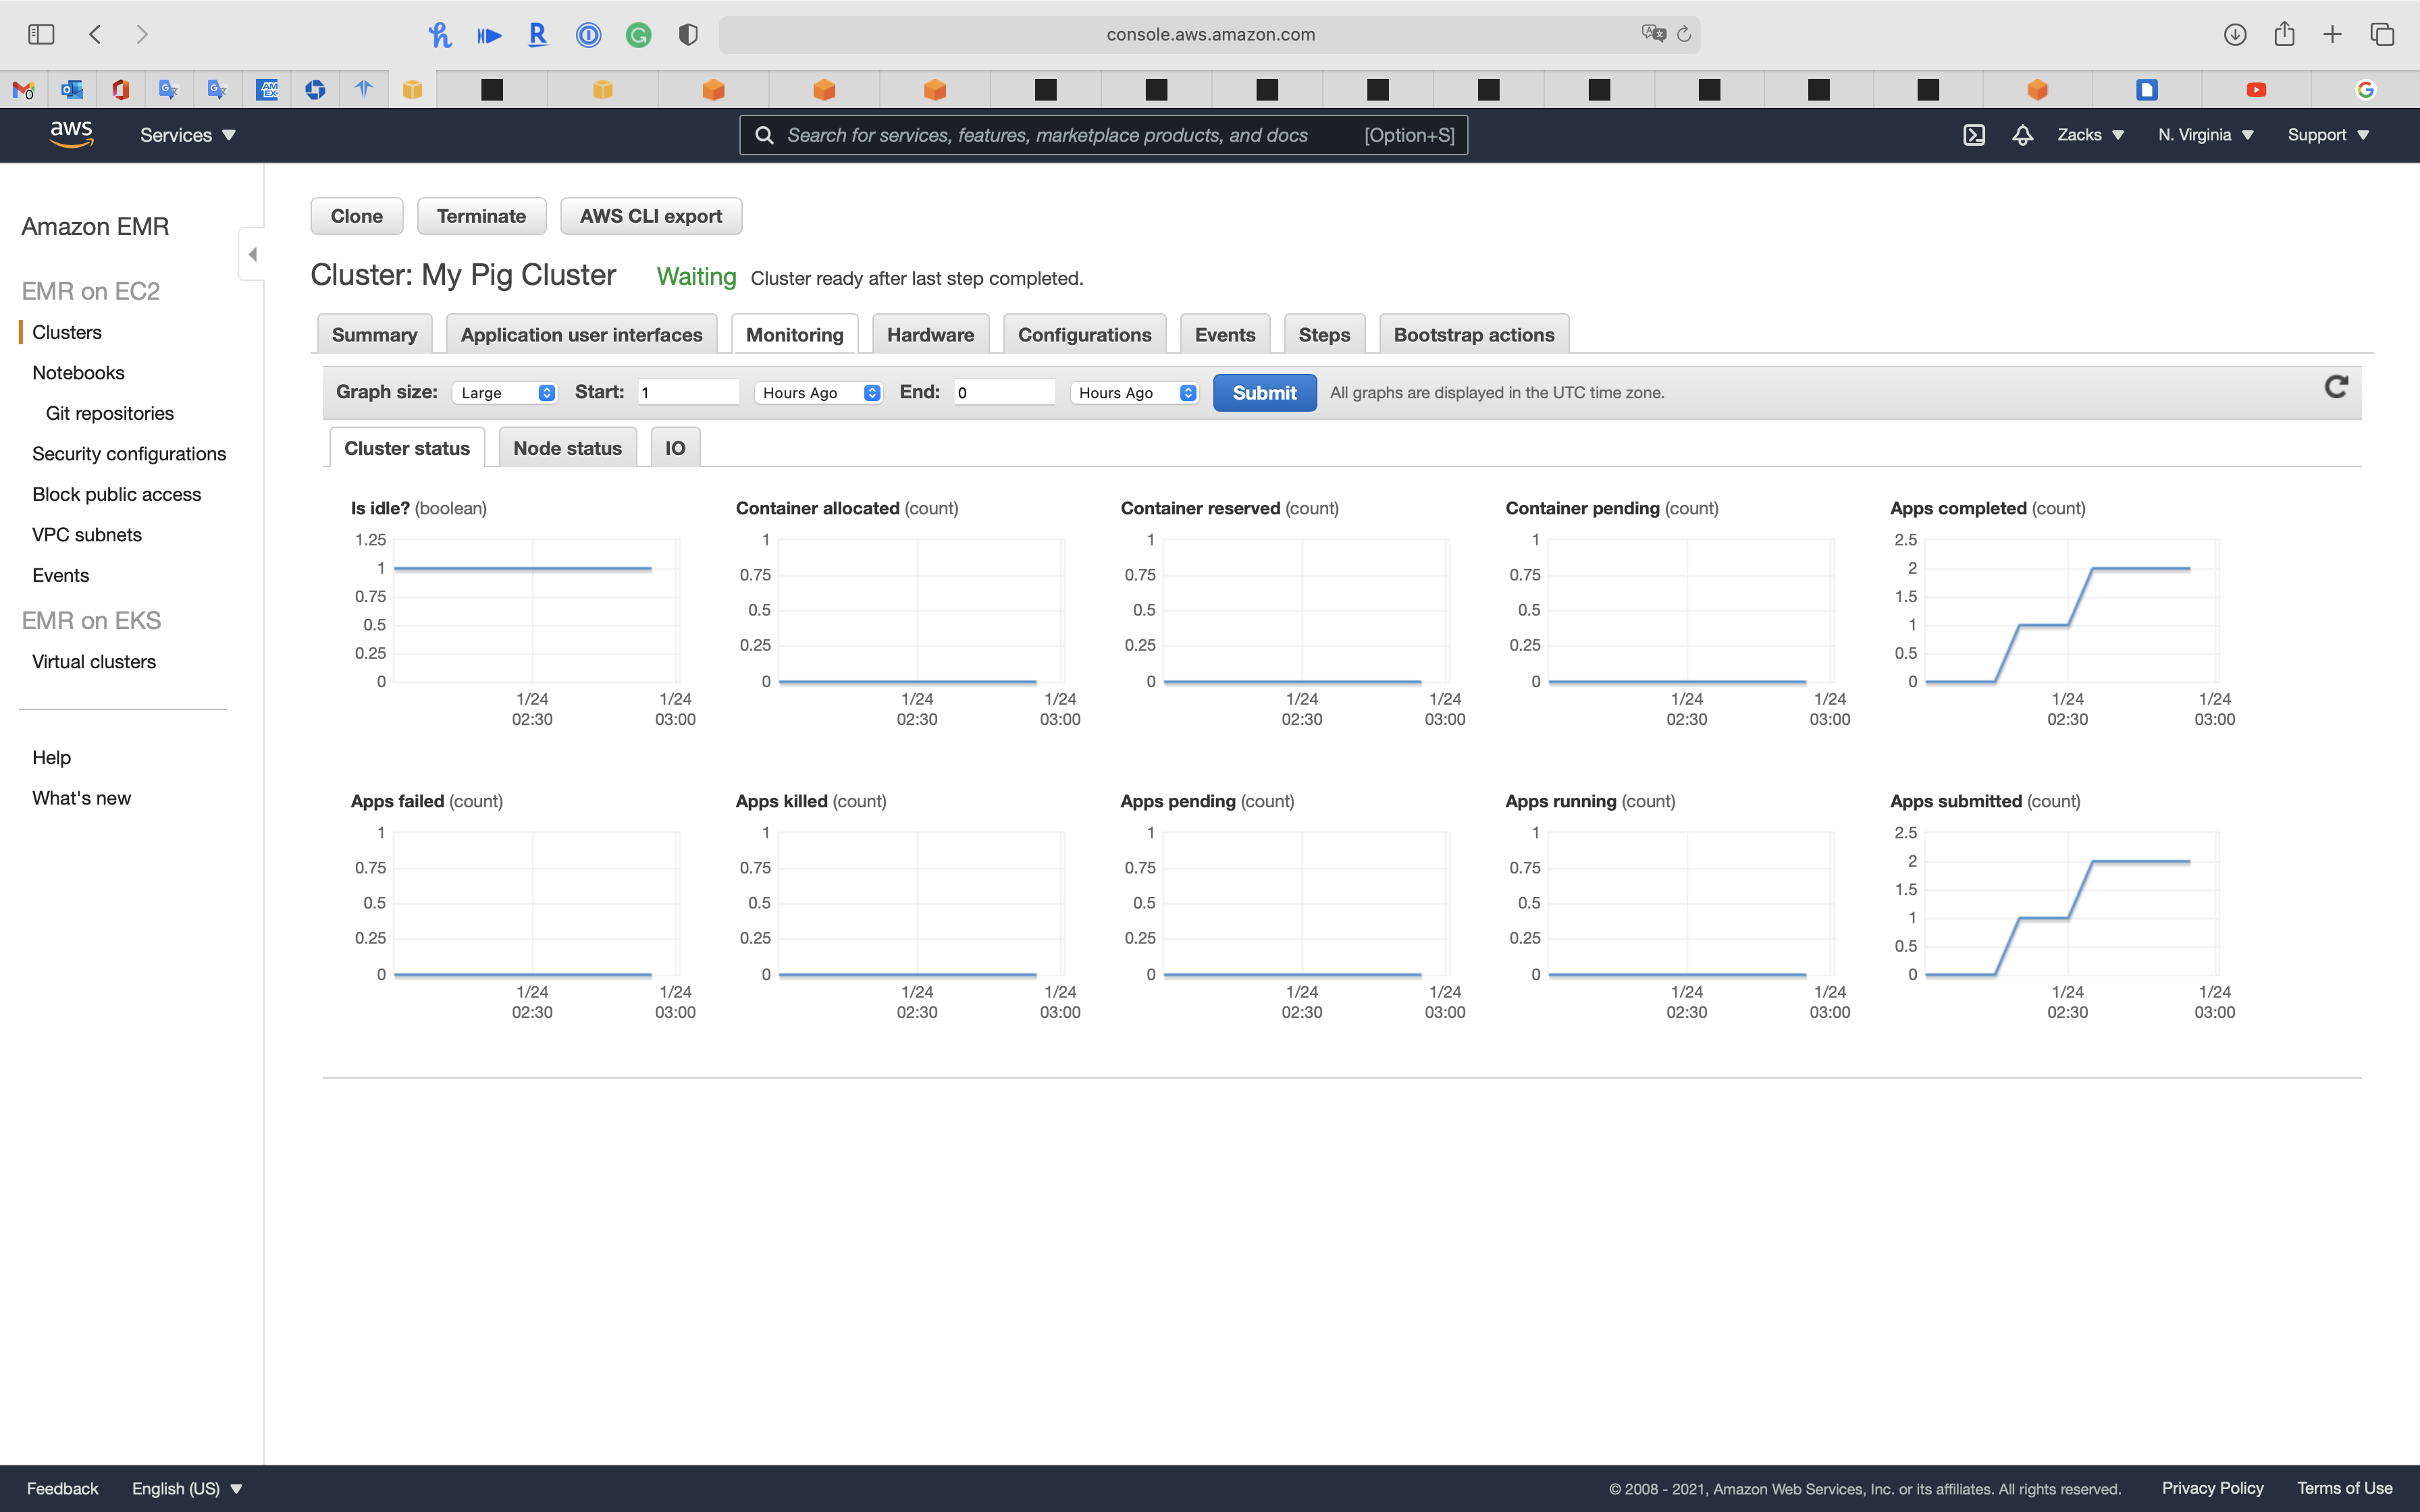
Summary
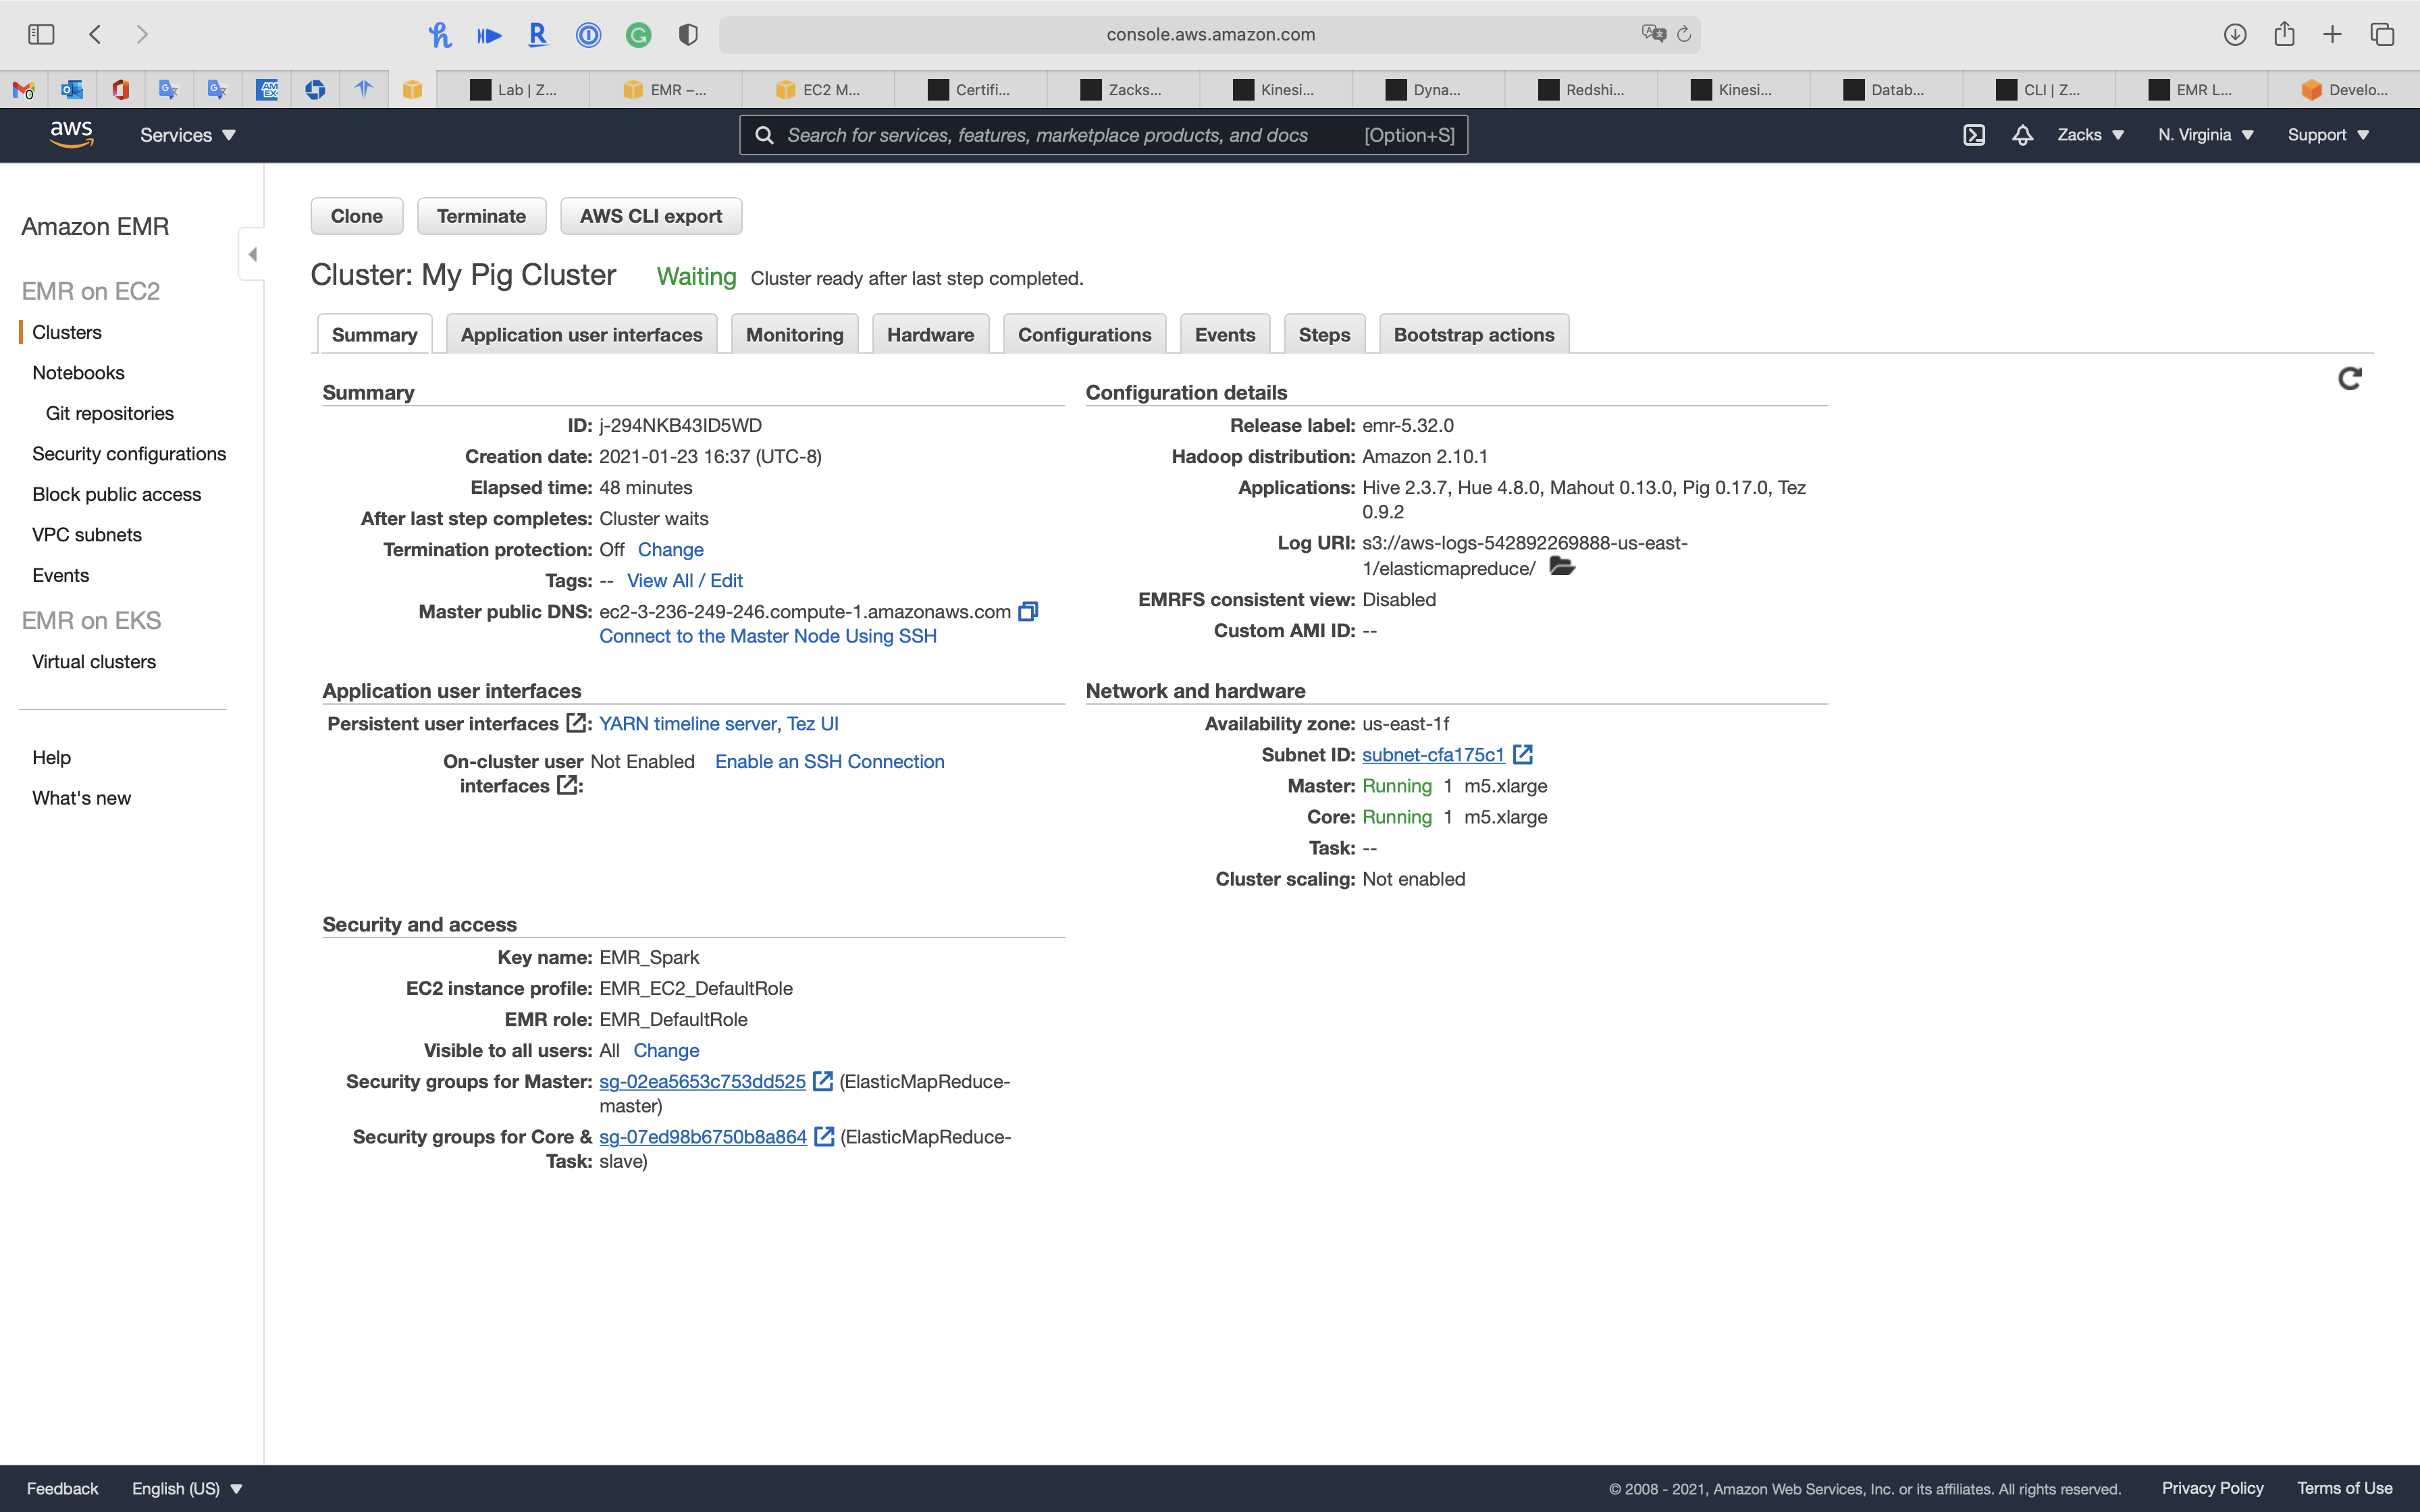
Application user interfaces
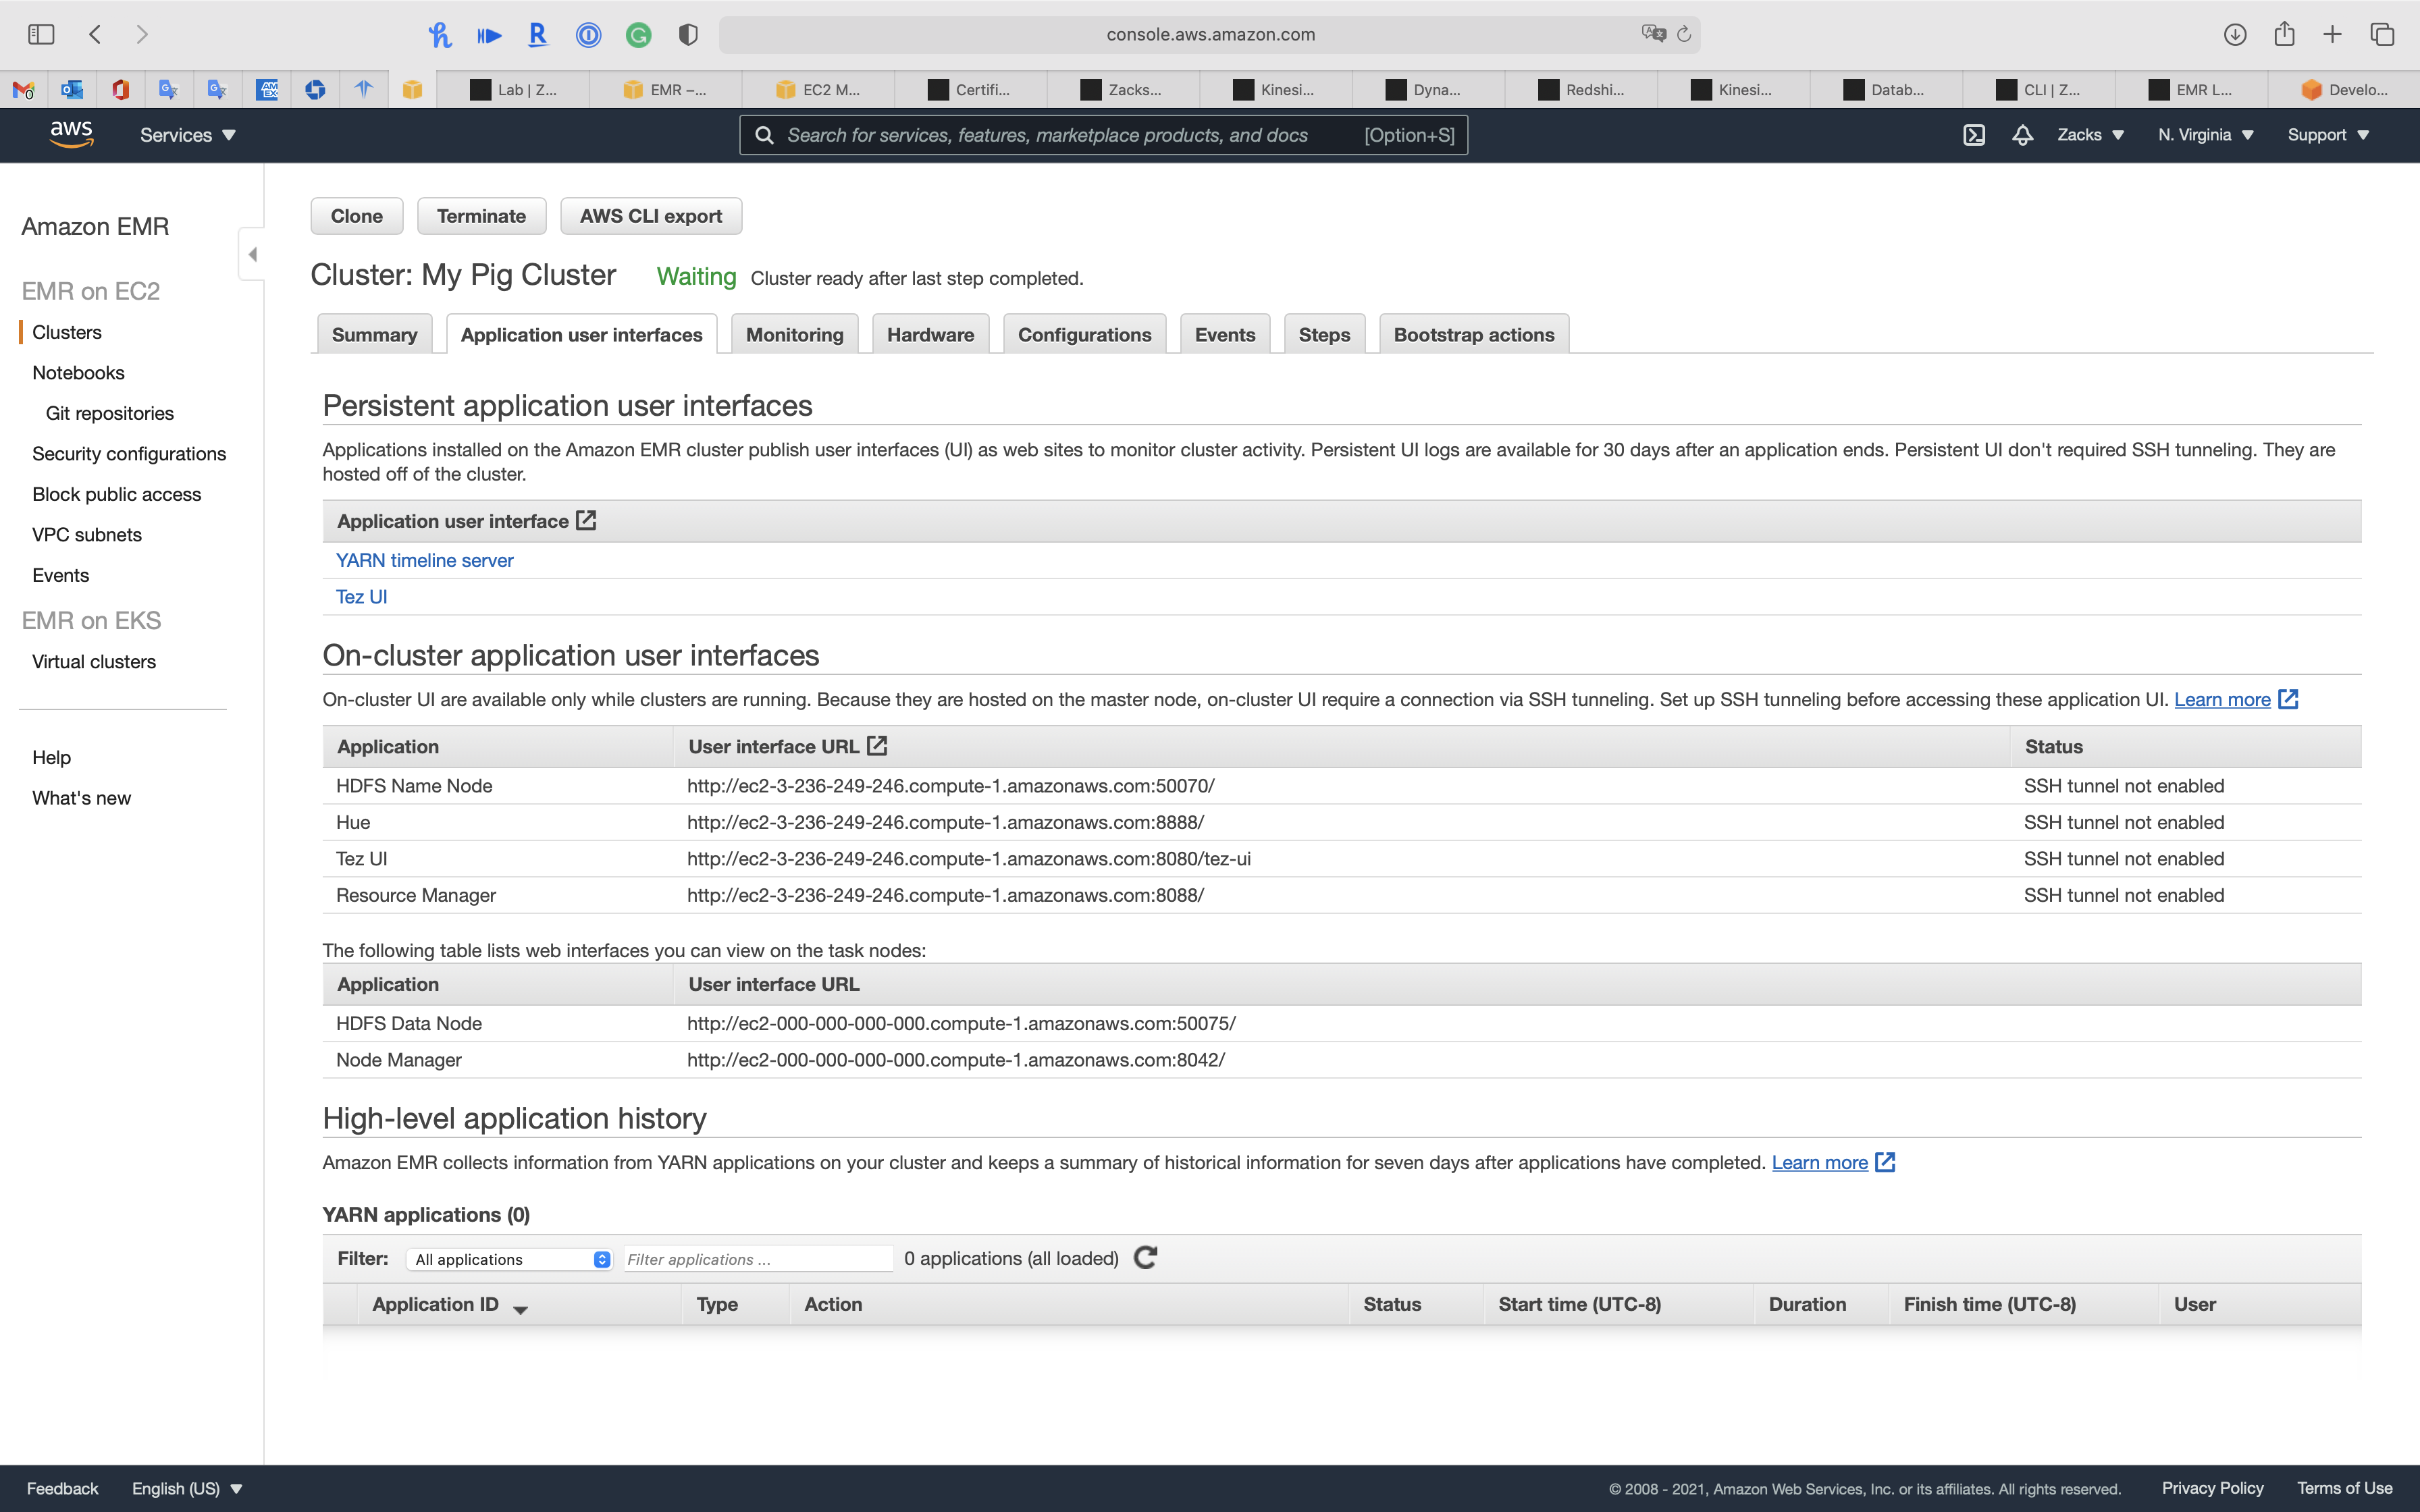
Monitoring

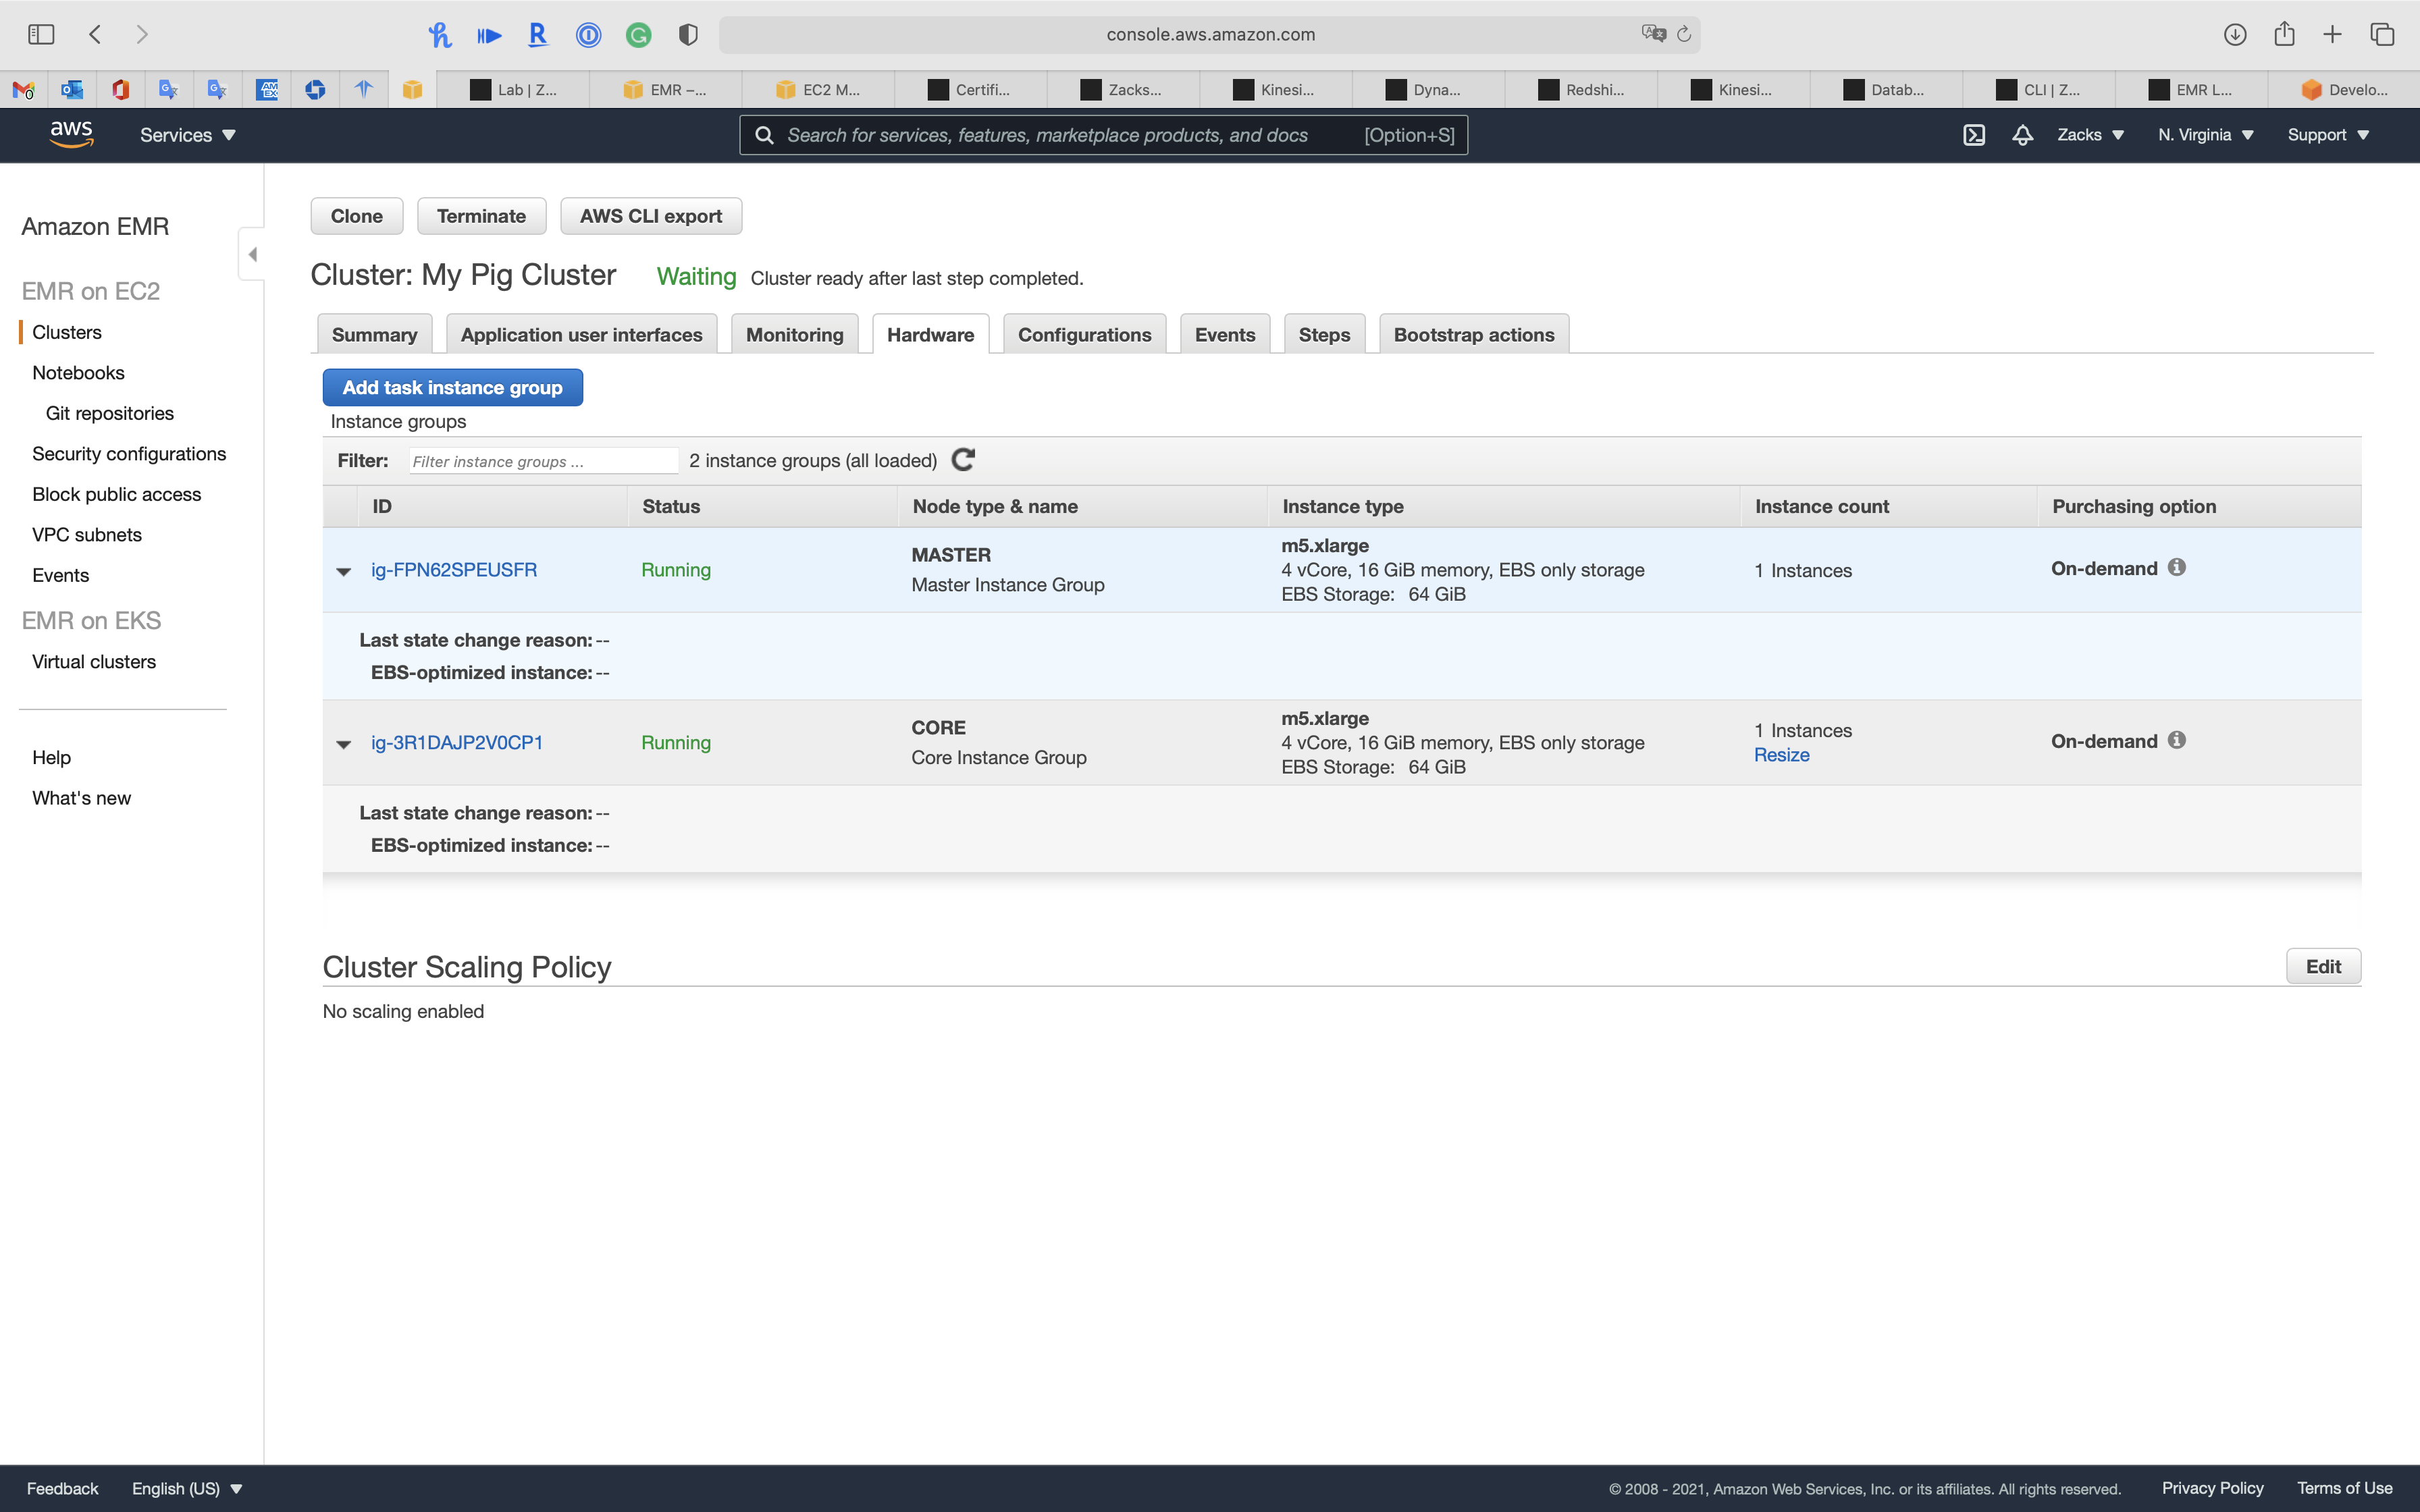
Hardware
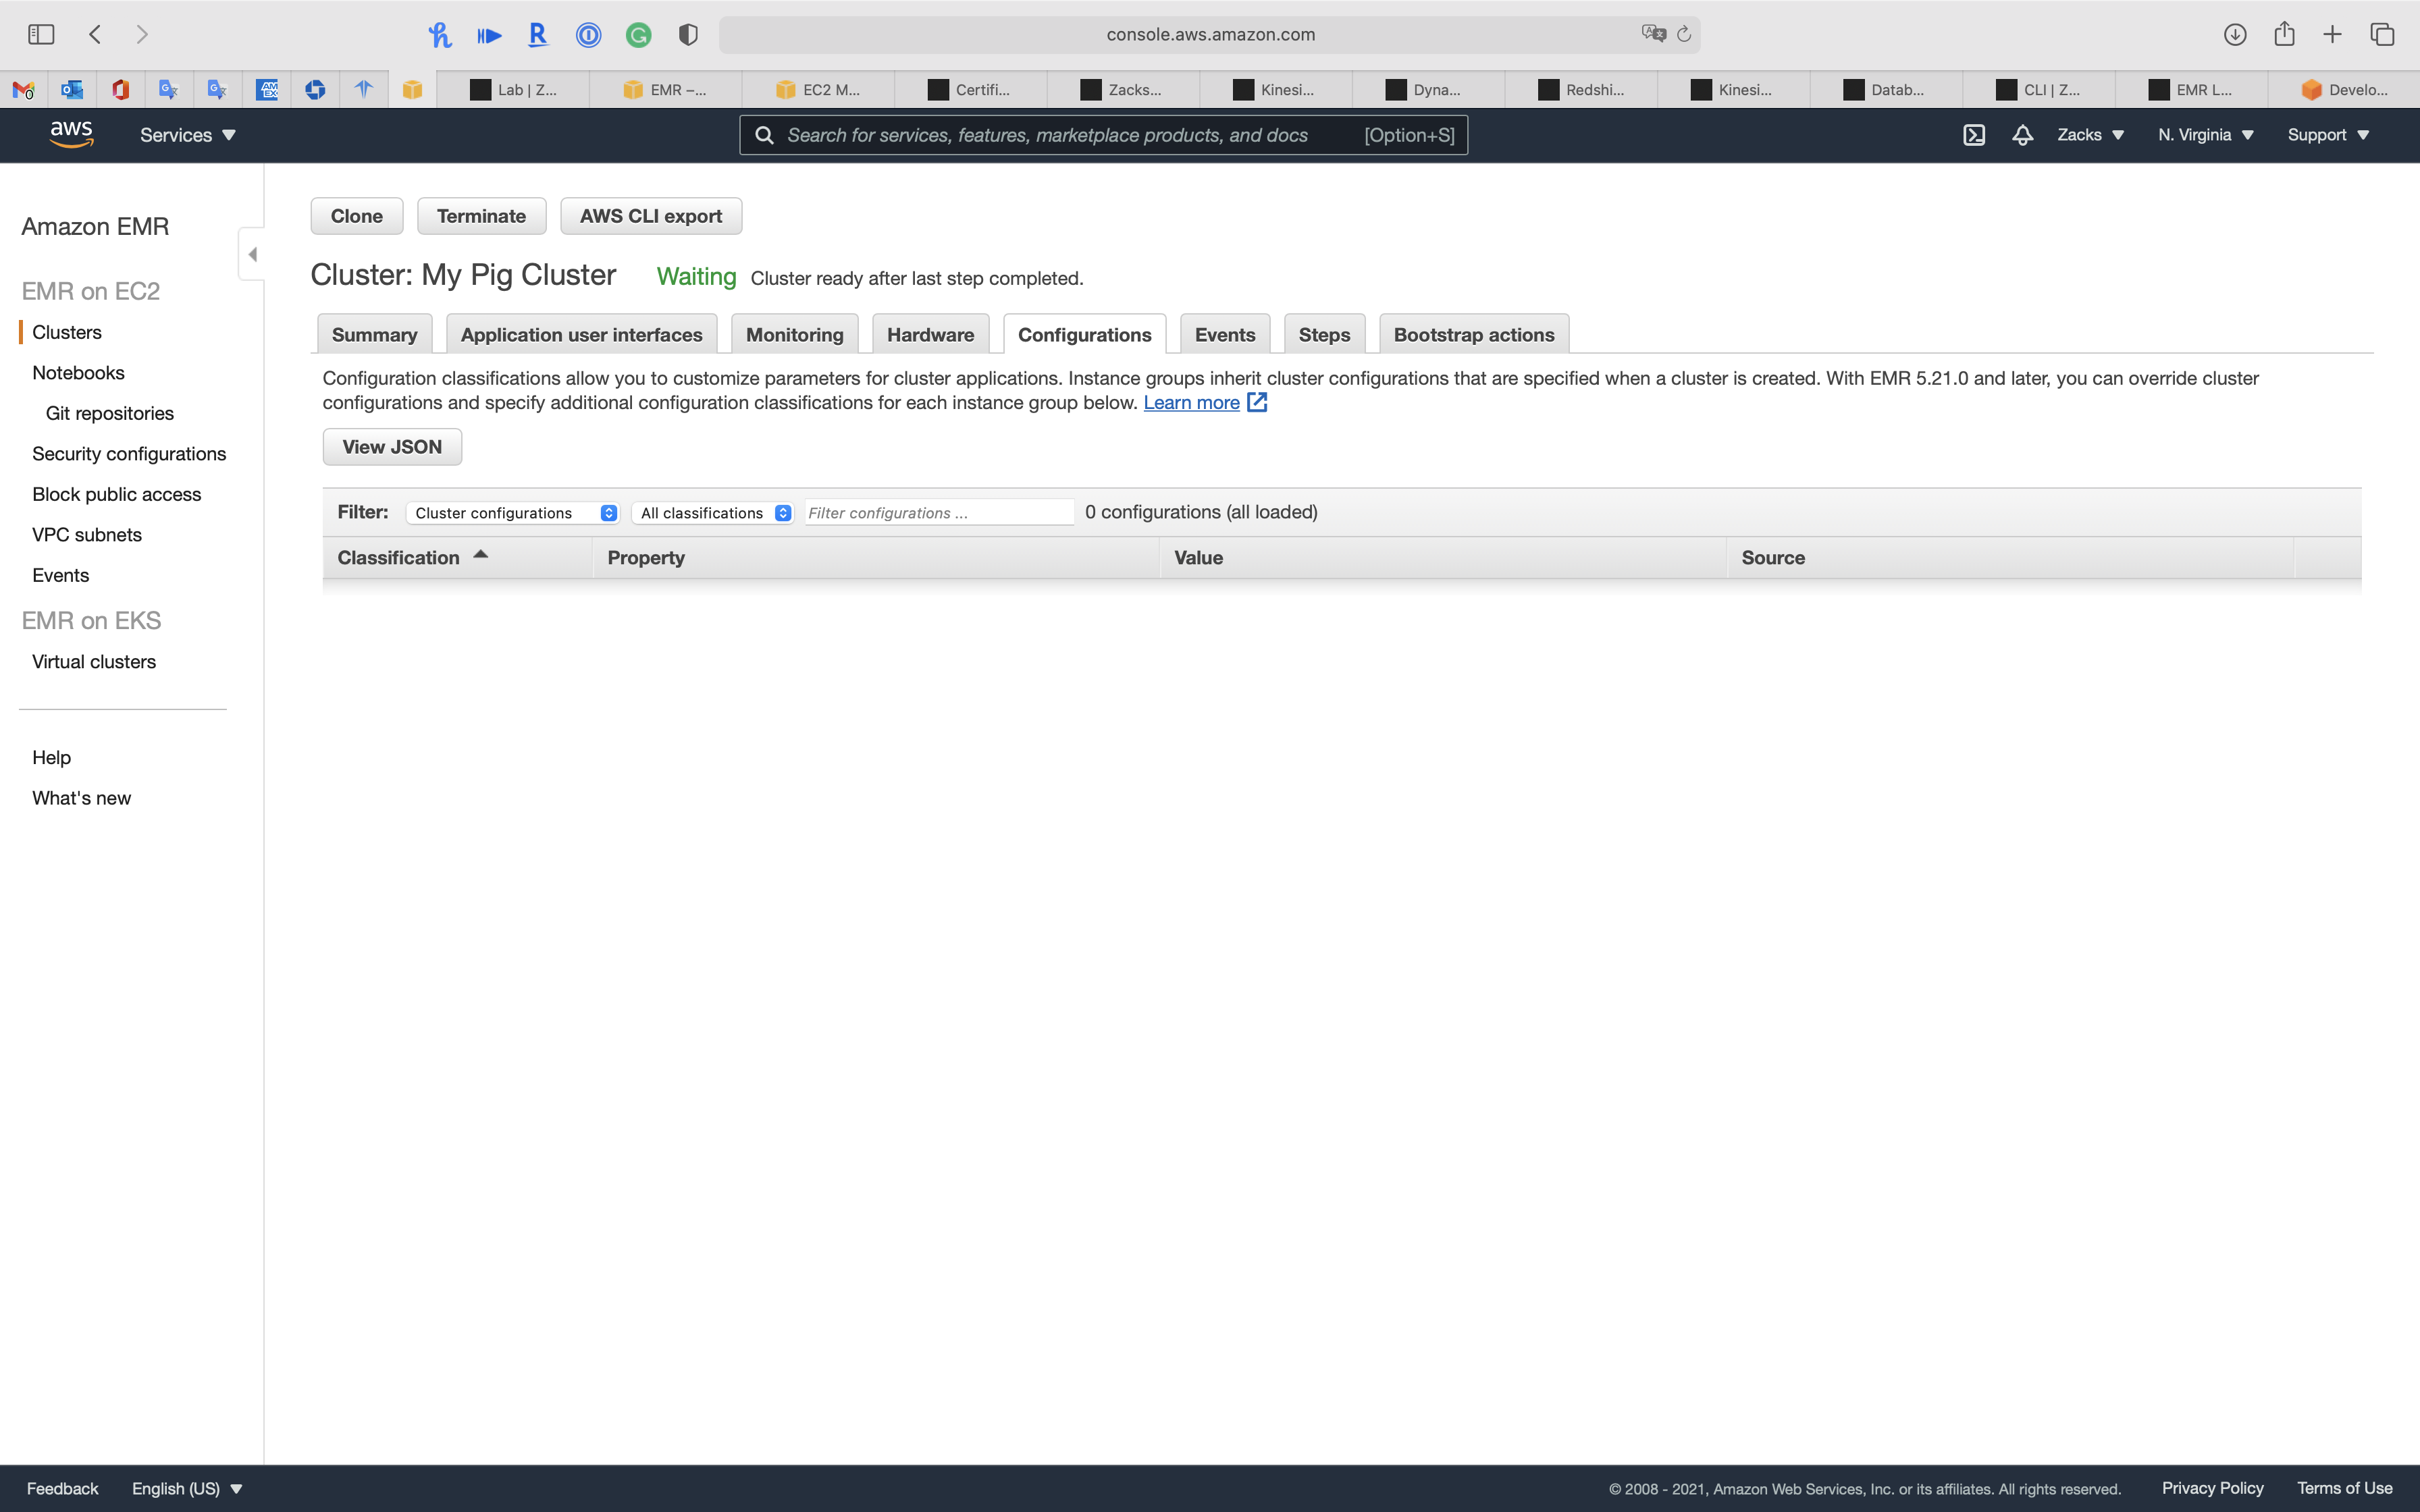
Configurations
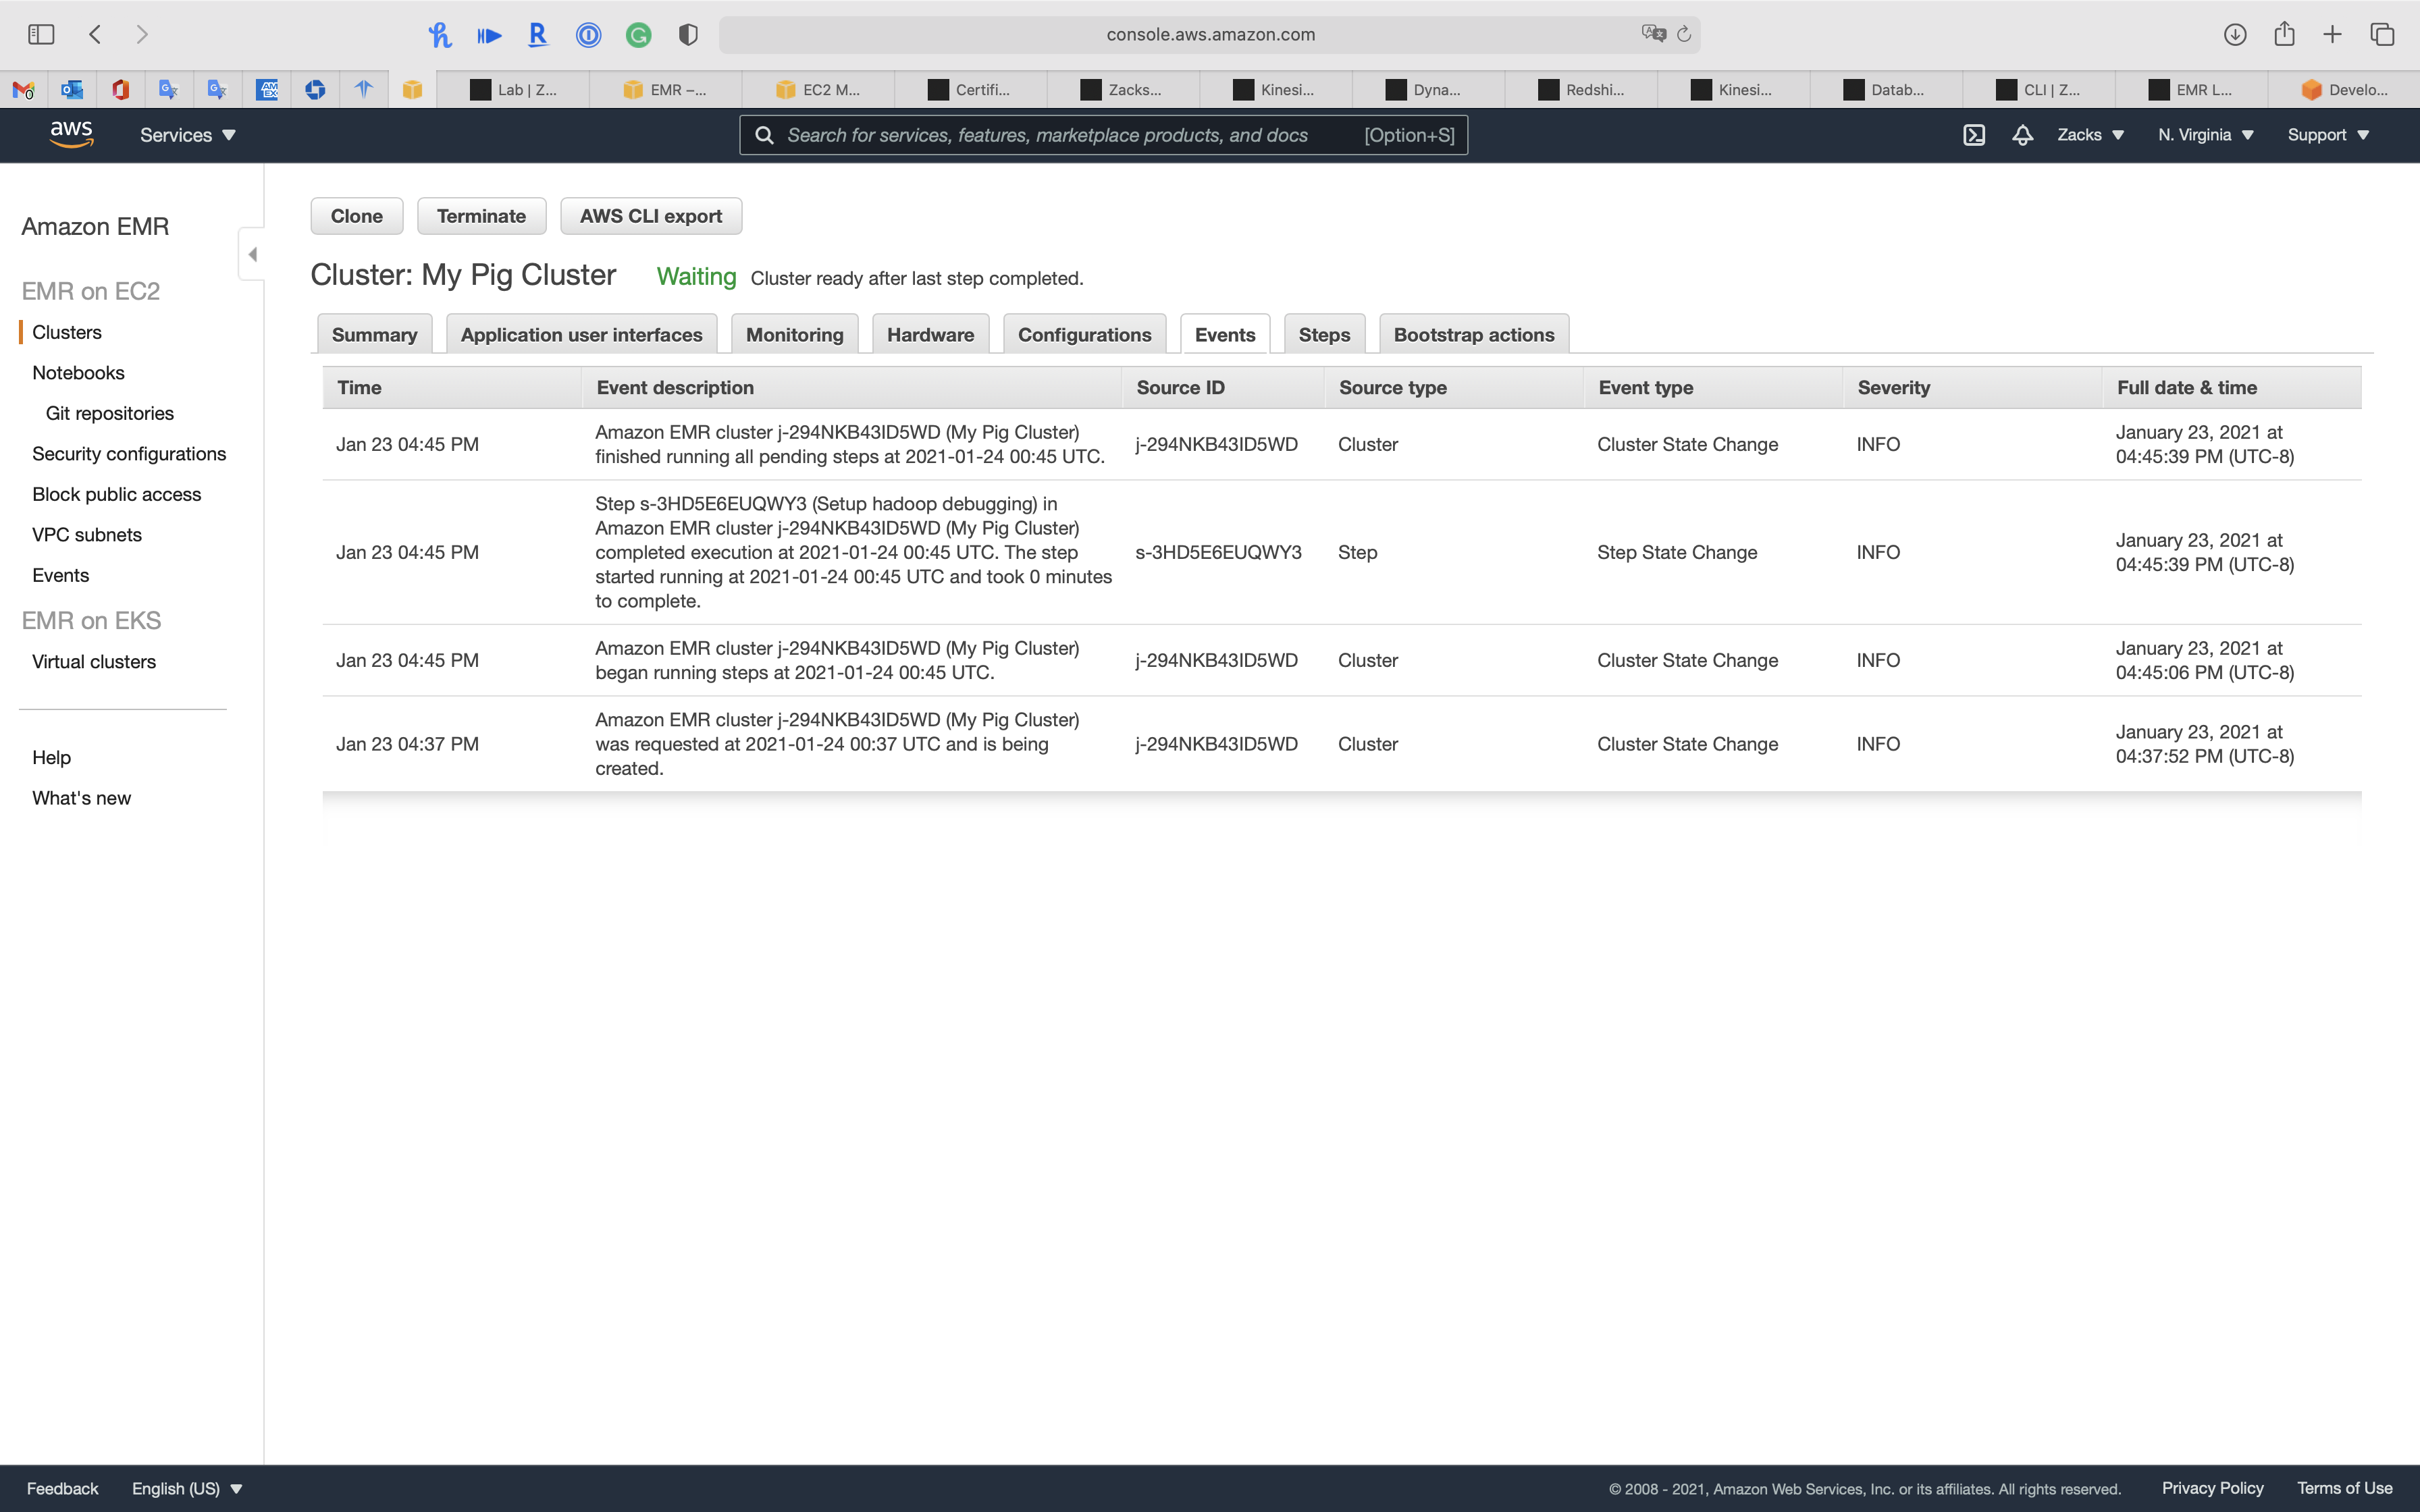
Events
Steps
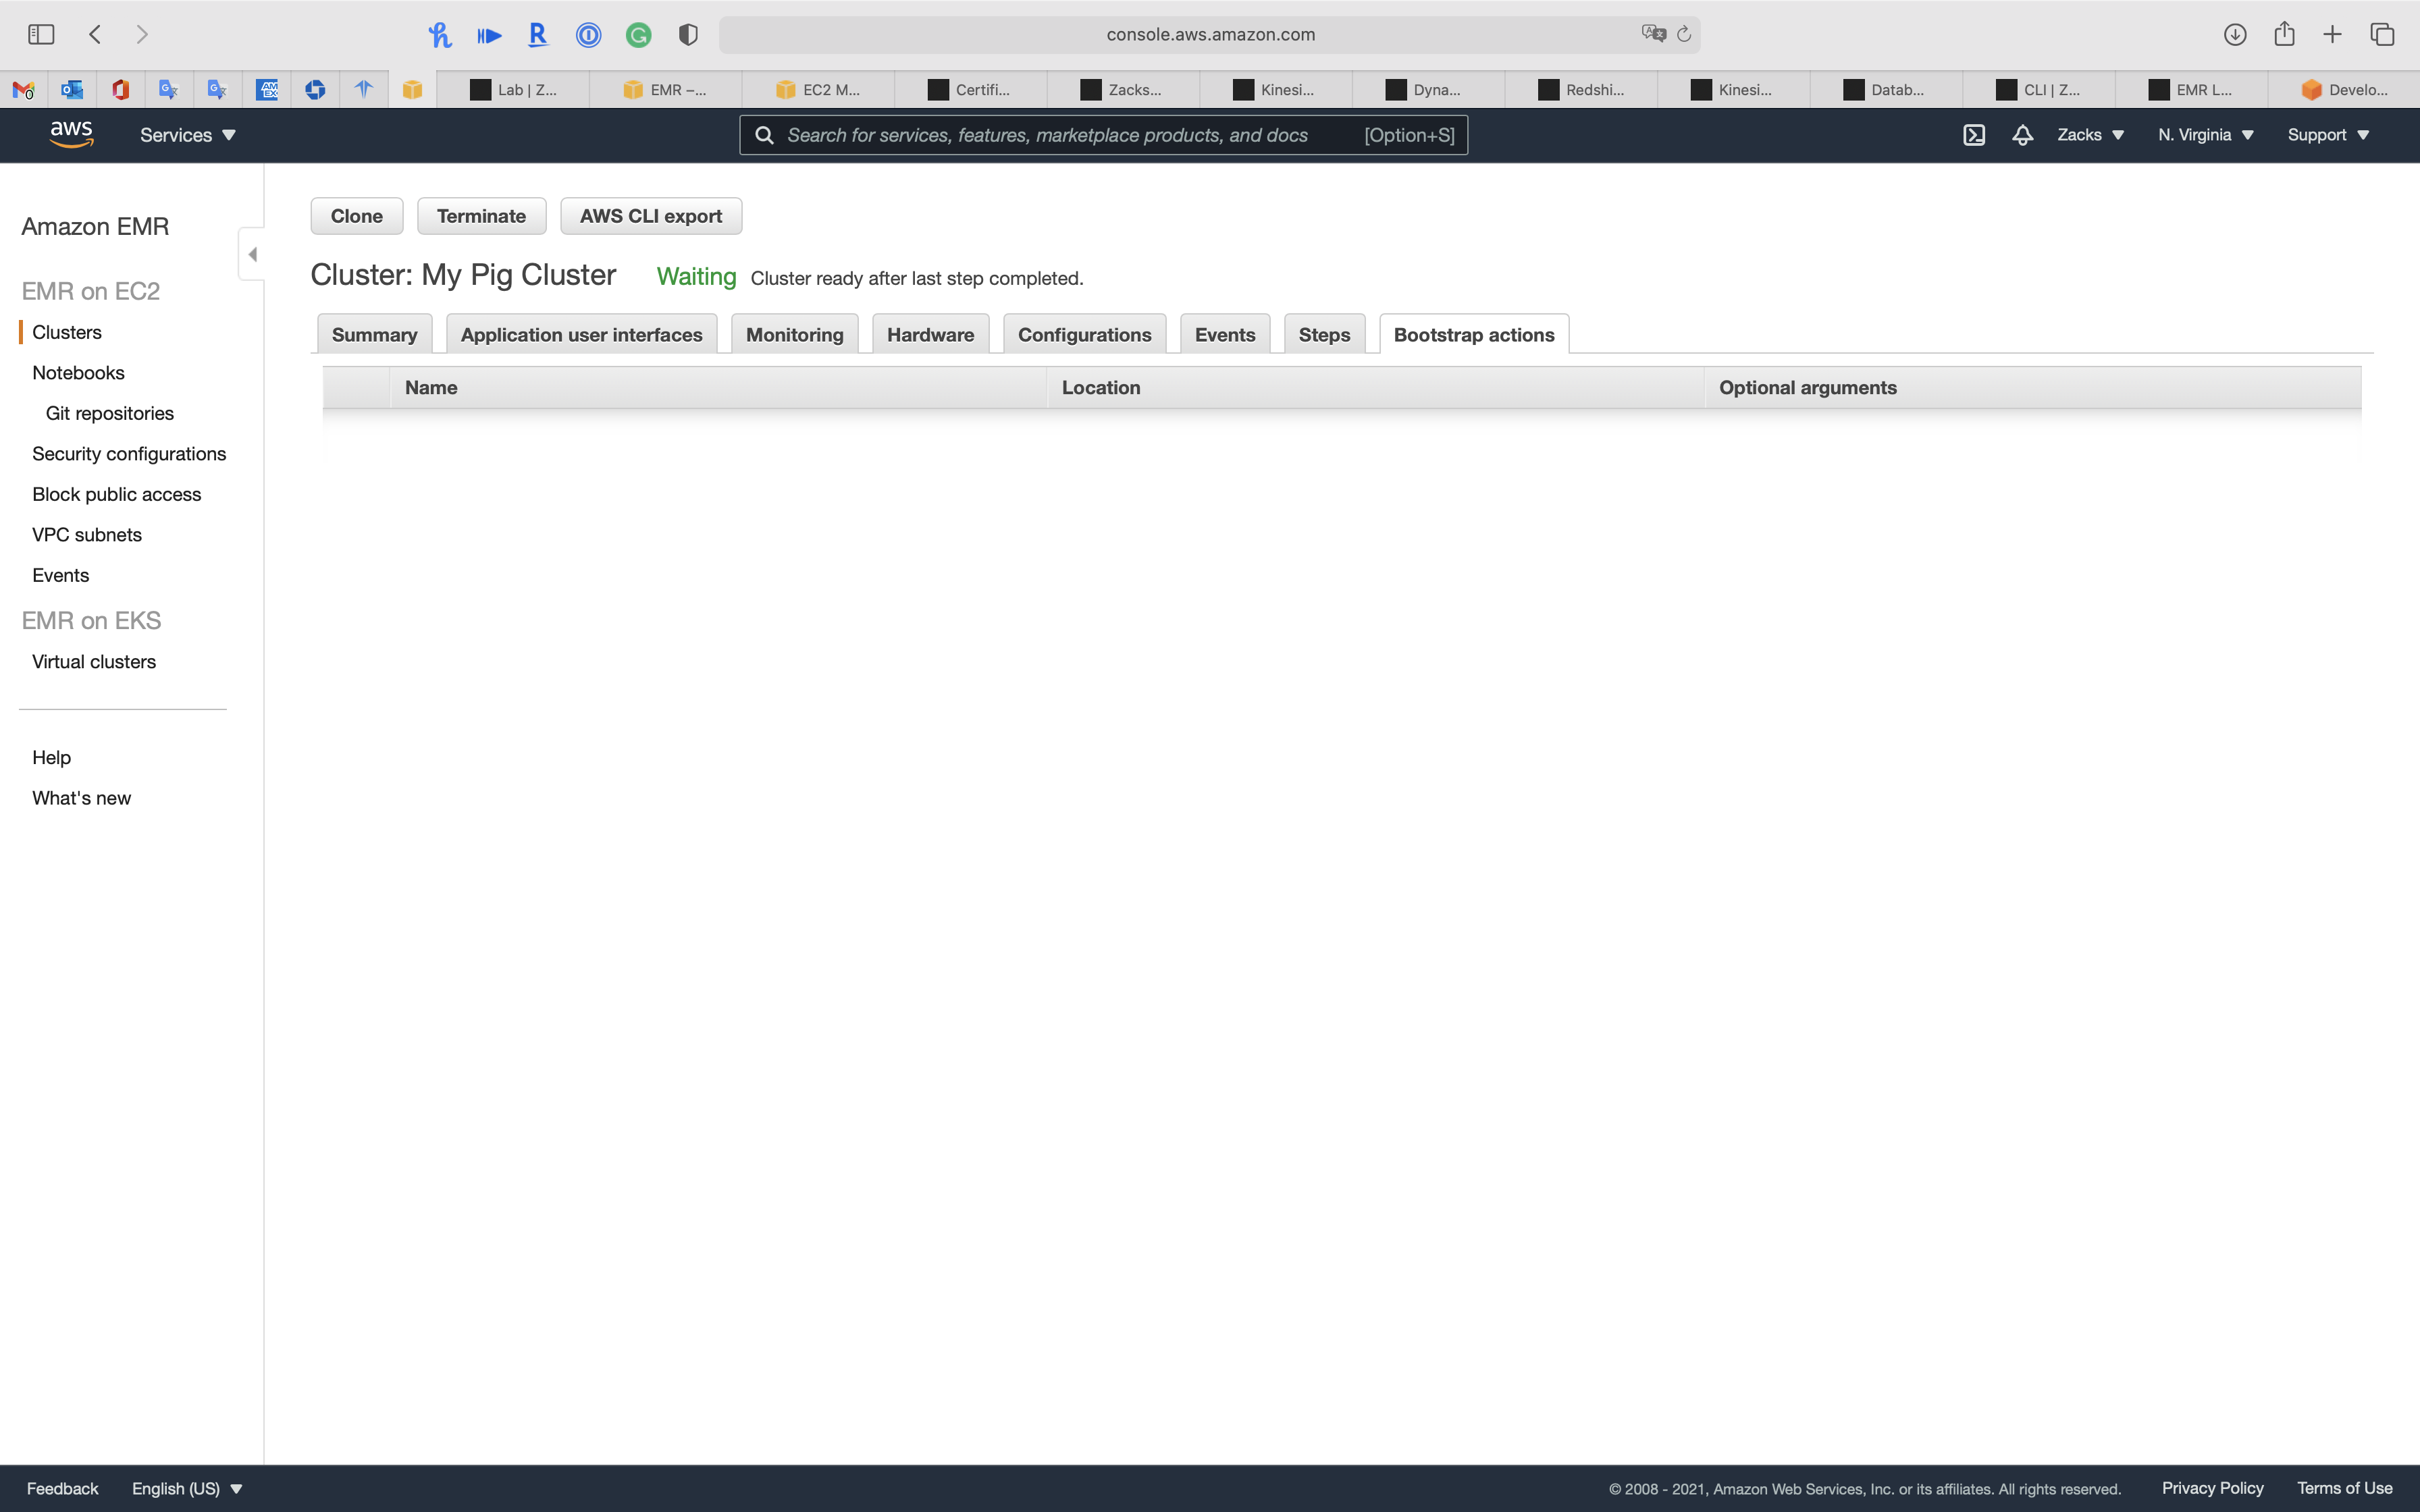
Bootstrap actions
EMR Configuration - Steps
Services -> EMR -> Clusters
Click on Create cluster
Steps - Add Step
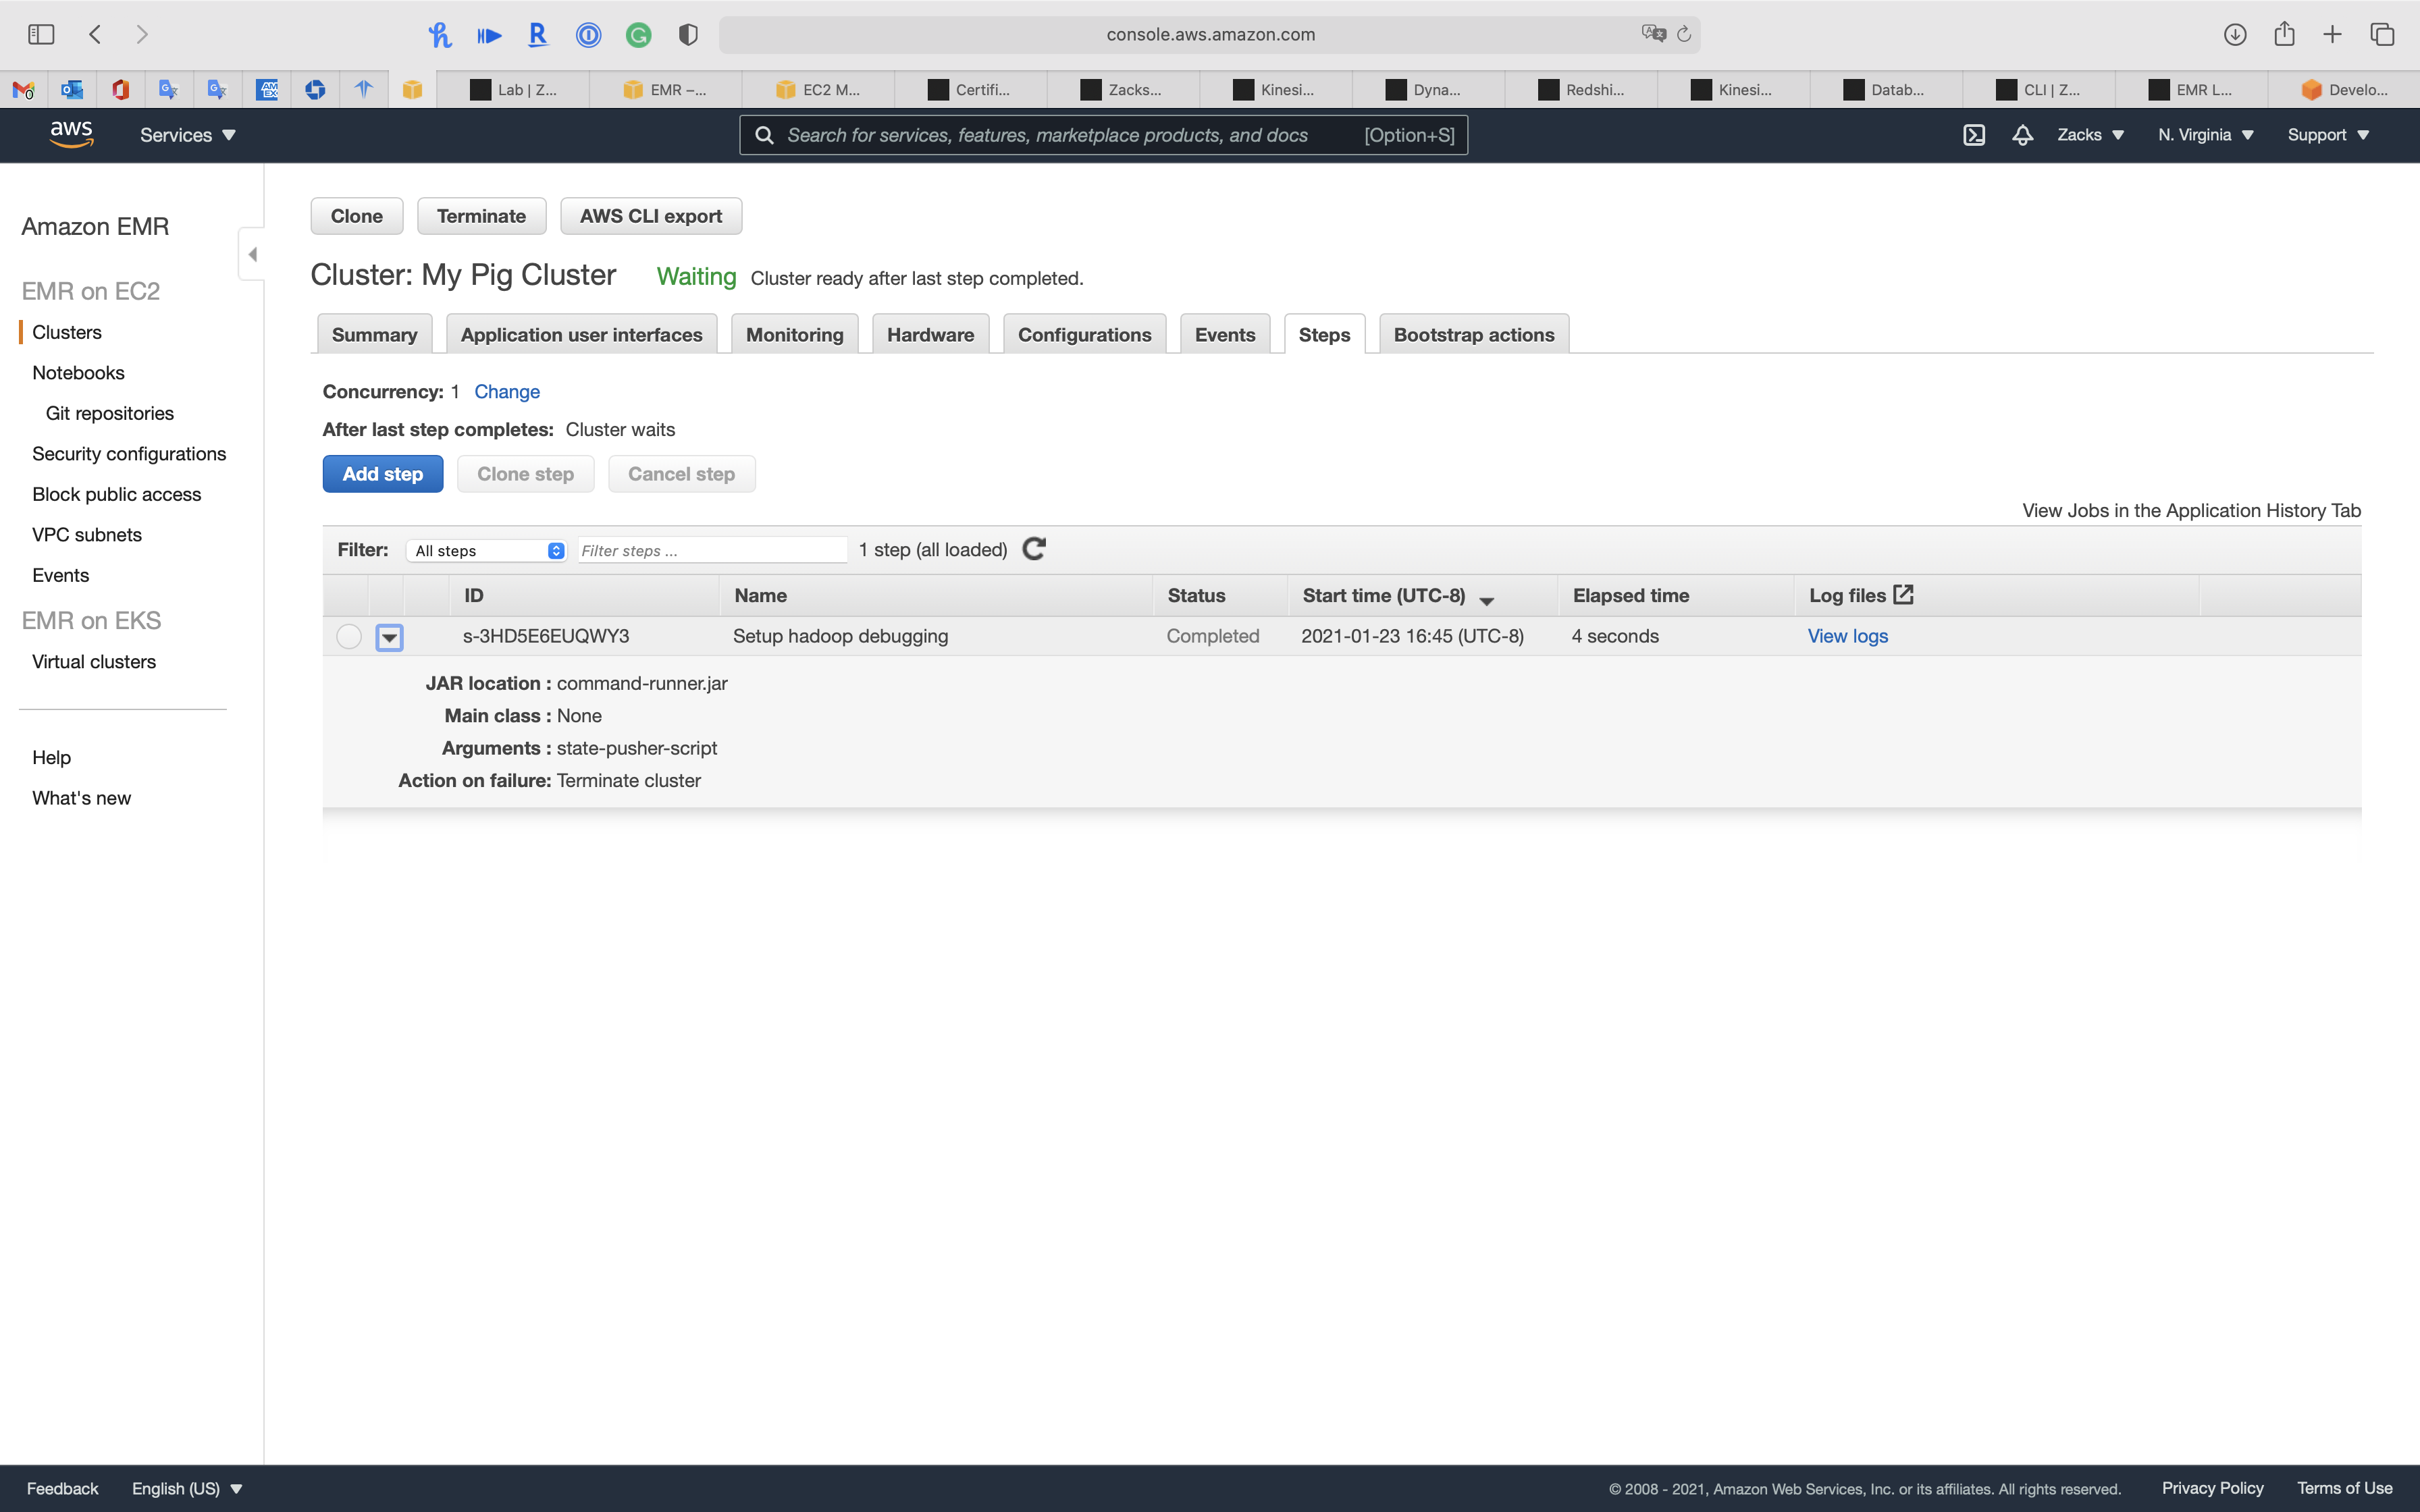
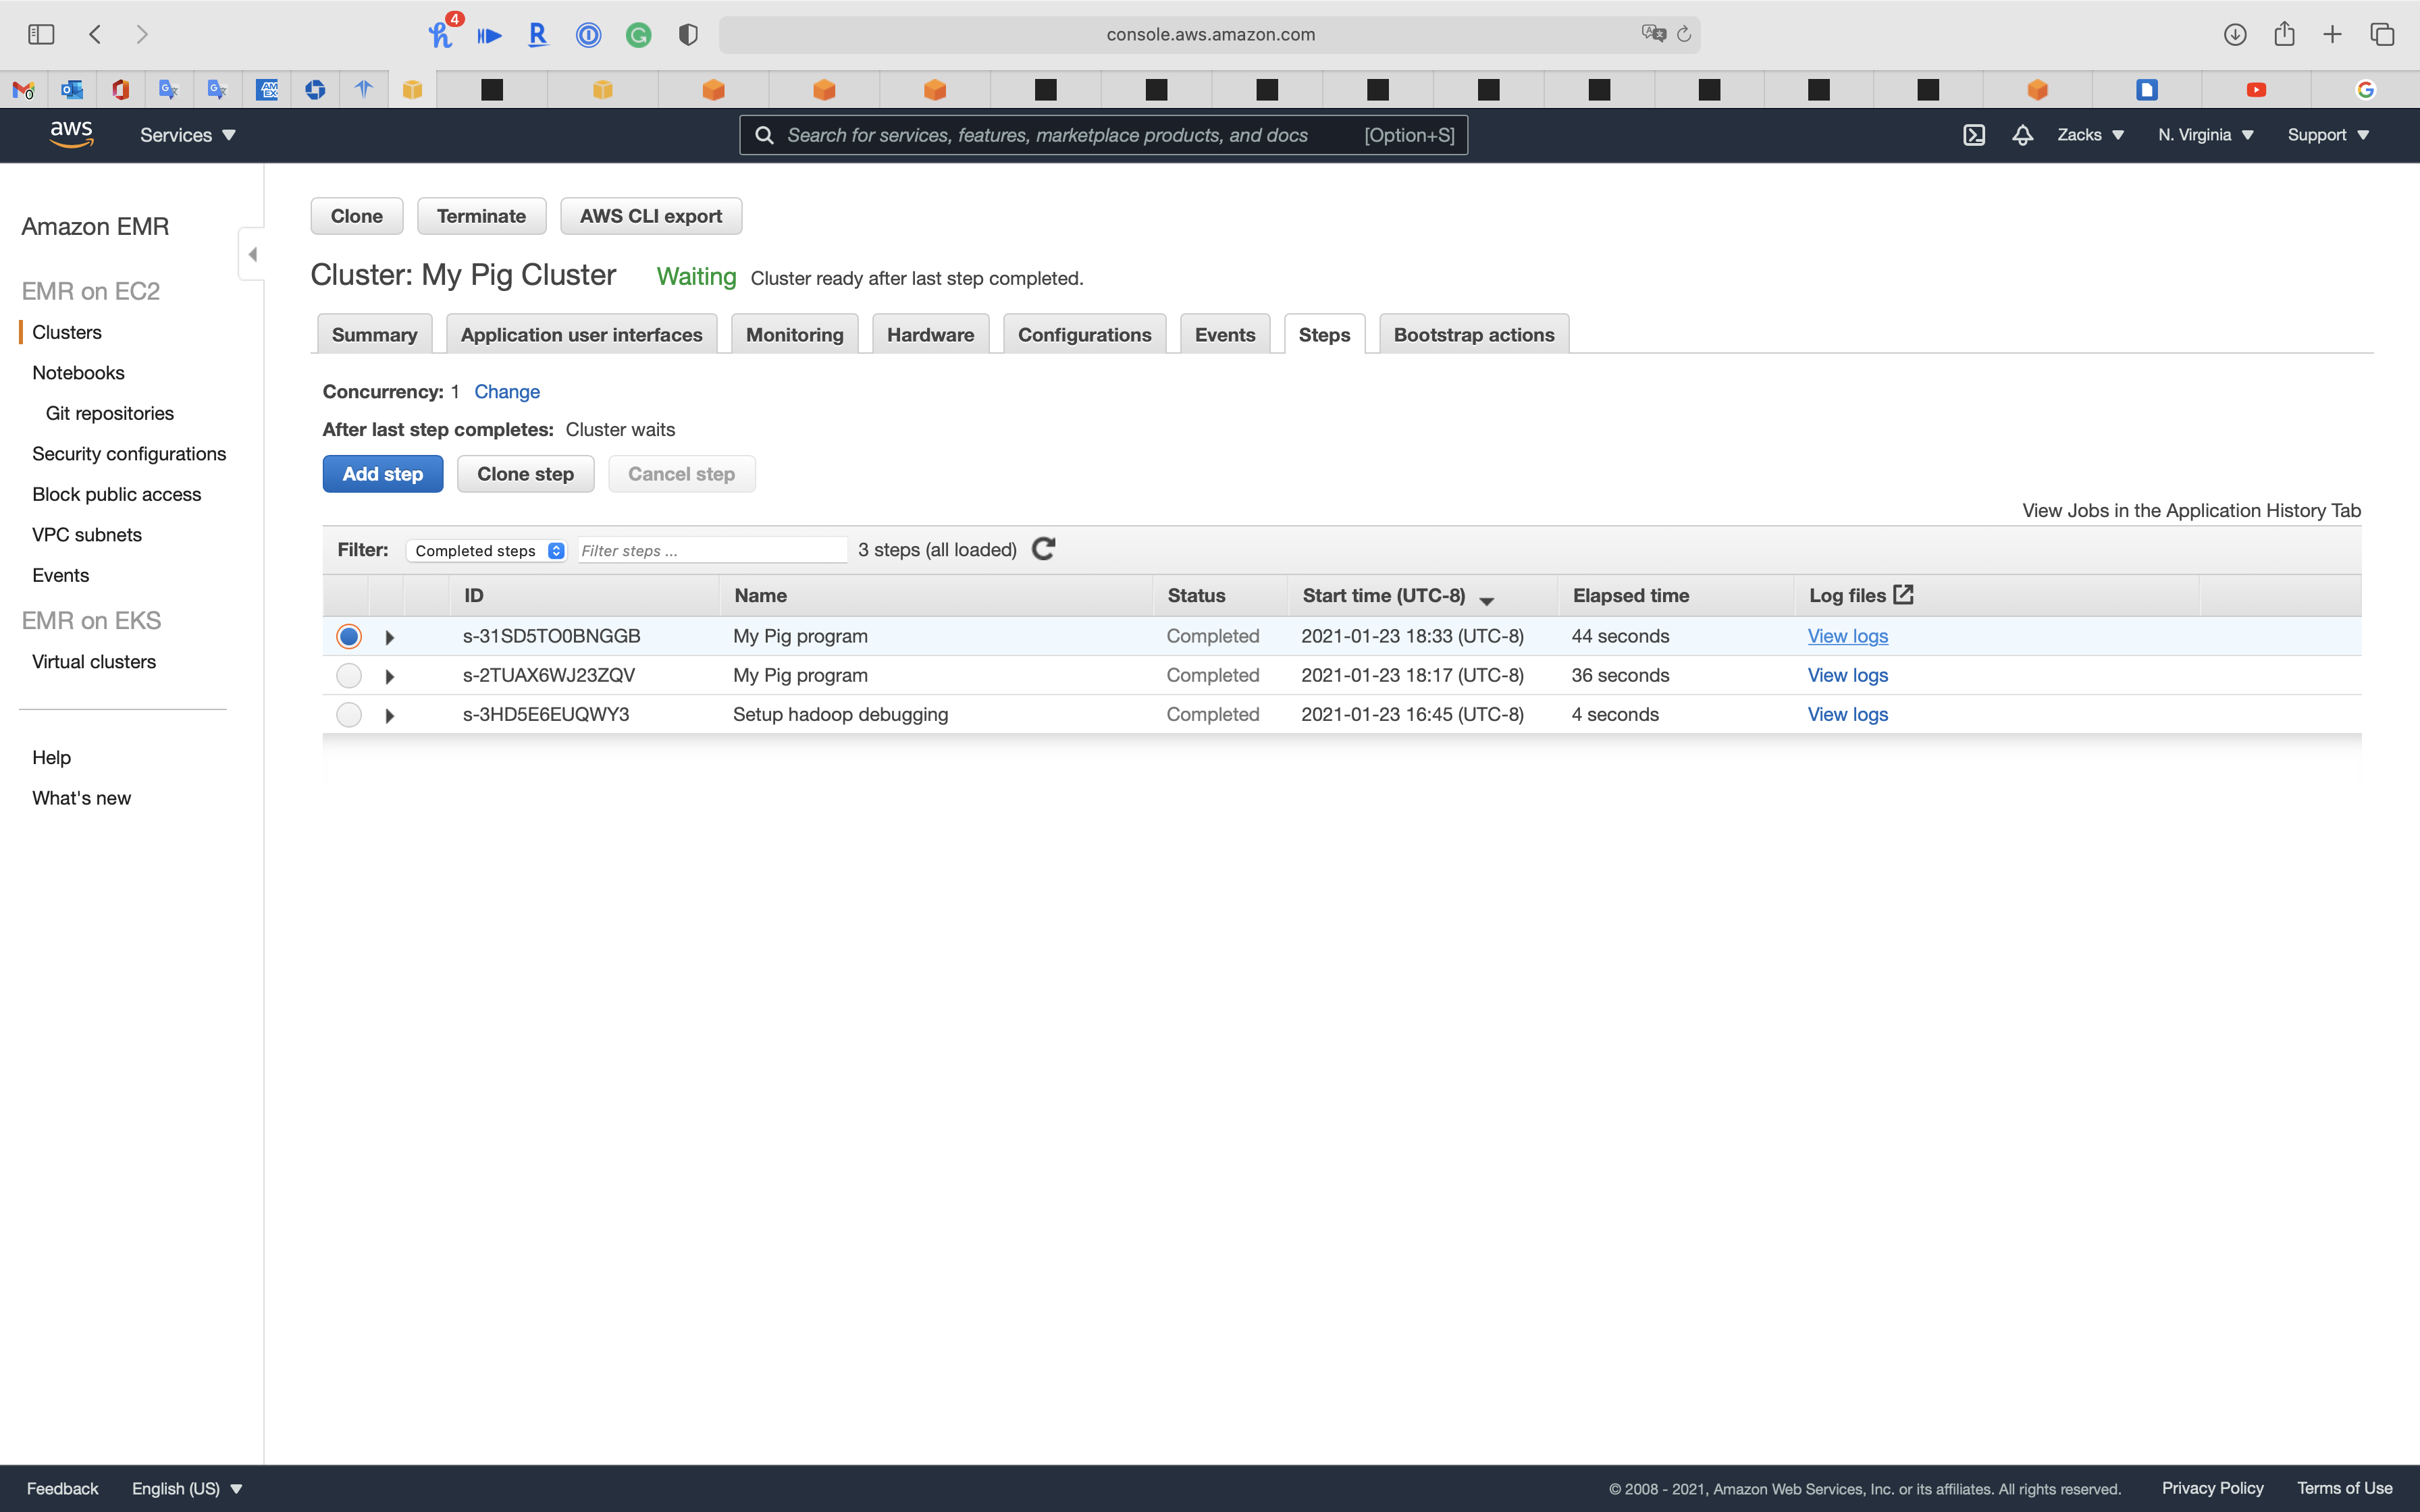
Click on your cluster then click on Steps tab
We can see the 1st step (kickstart step) is Completed.
Click on Add step
- Step type:
Pig programCustom JARStreaming programHive programPig program
- Name:
My Pig program - Script S3 location: create and input your pig program path (must be the script!)
- Download the sample .pig program then upload it to your S3 bucket.
- Input S3 Location: create and input your pig Input directory
- Download the sample pig input then upload it to your S3 bucket.
- https://aws-labs-bucket.s3.amazonaws.com/EMR/Pig_Input/access_log_1
- https://aws-labs-bucket.s3.amazonaws.com/EMR/Pig_Input/access_log_2
- https://aws-labs-bucket.s3.amazonaws.com/EMR/Pig_Input/access_log_3
- https://aws-labs-bucket.s3.amazonaws.com/EMR/Pig_Input/access_log_4
- https://aws-labs-bucket.s3.amazonaws.com/EMR/Pig_Input/access_log_5
- https://aws-labs-bucket.s3.amazonaws.com/EMR/Pig_Input/access_log_6
- Output S3 Location: create and input your pig Output directory
Click on Add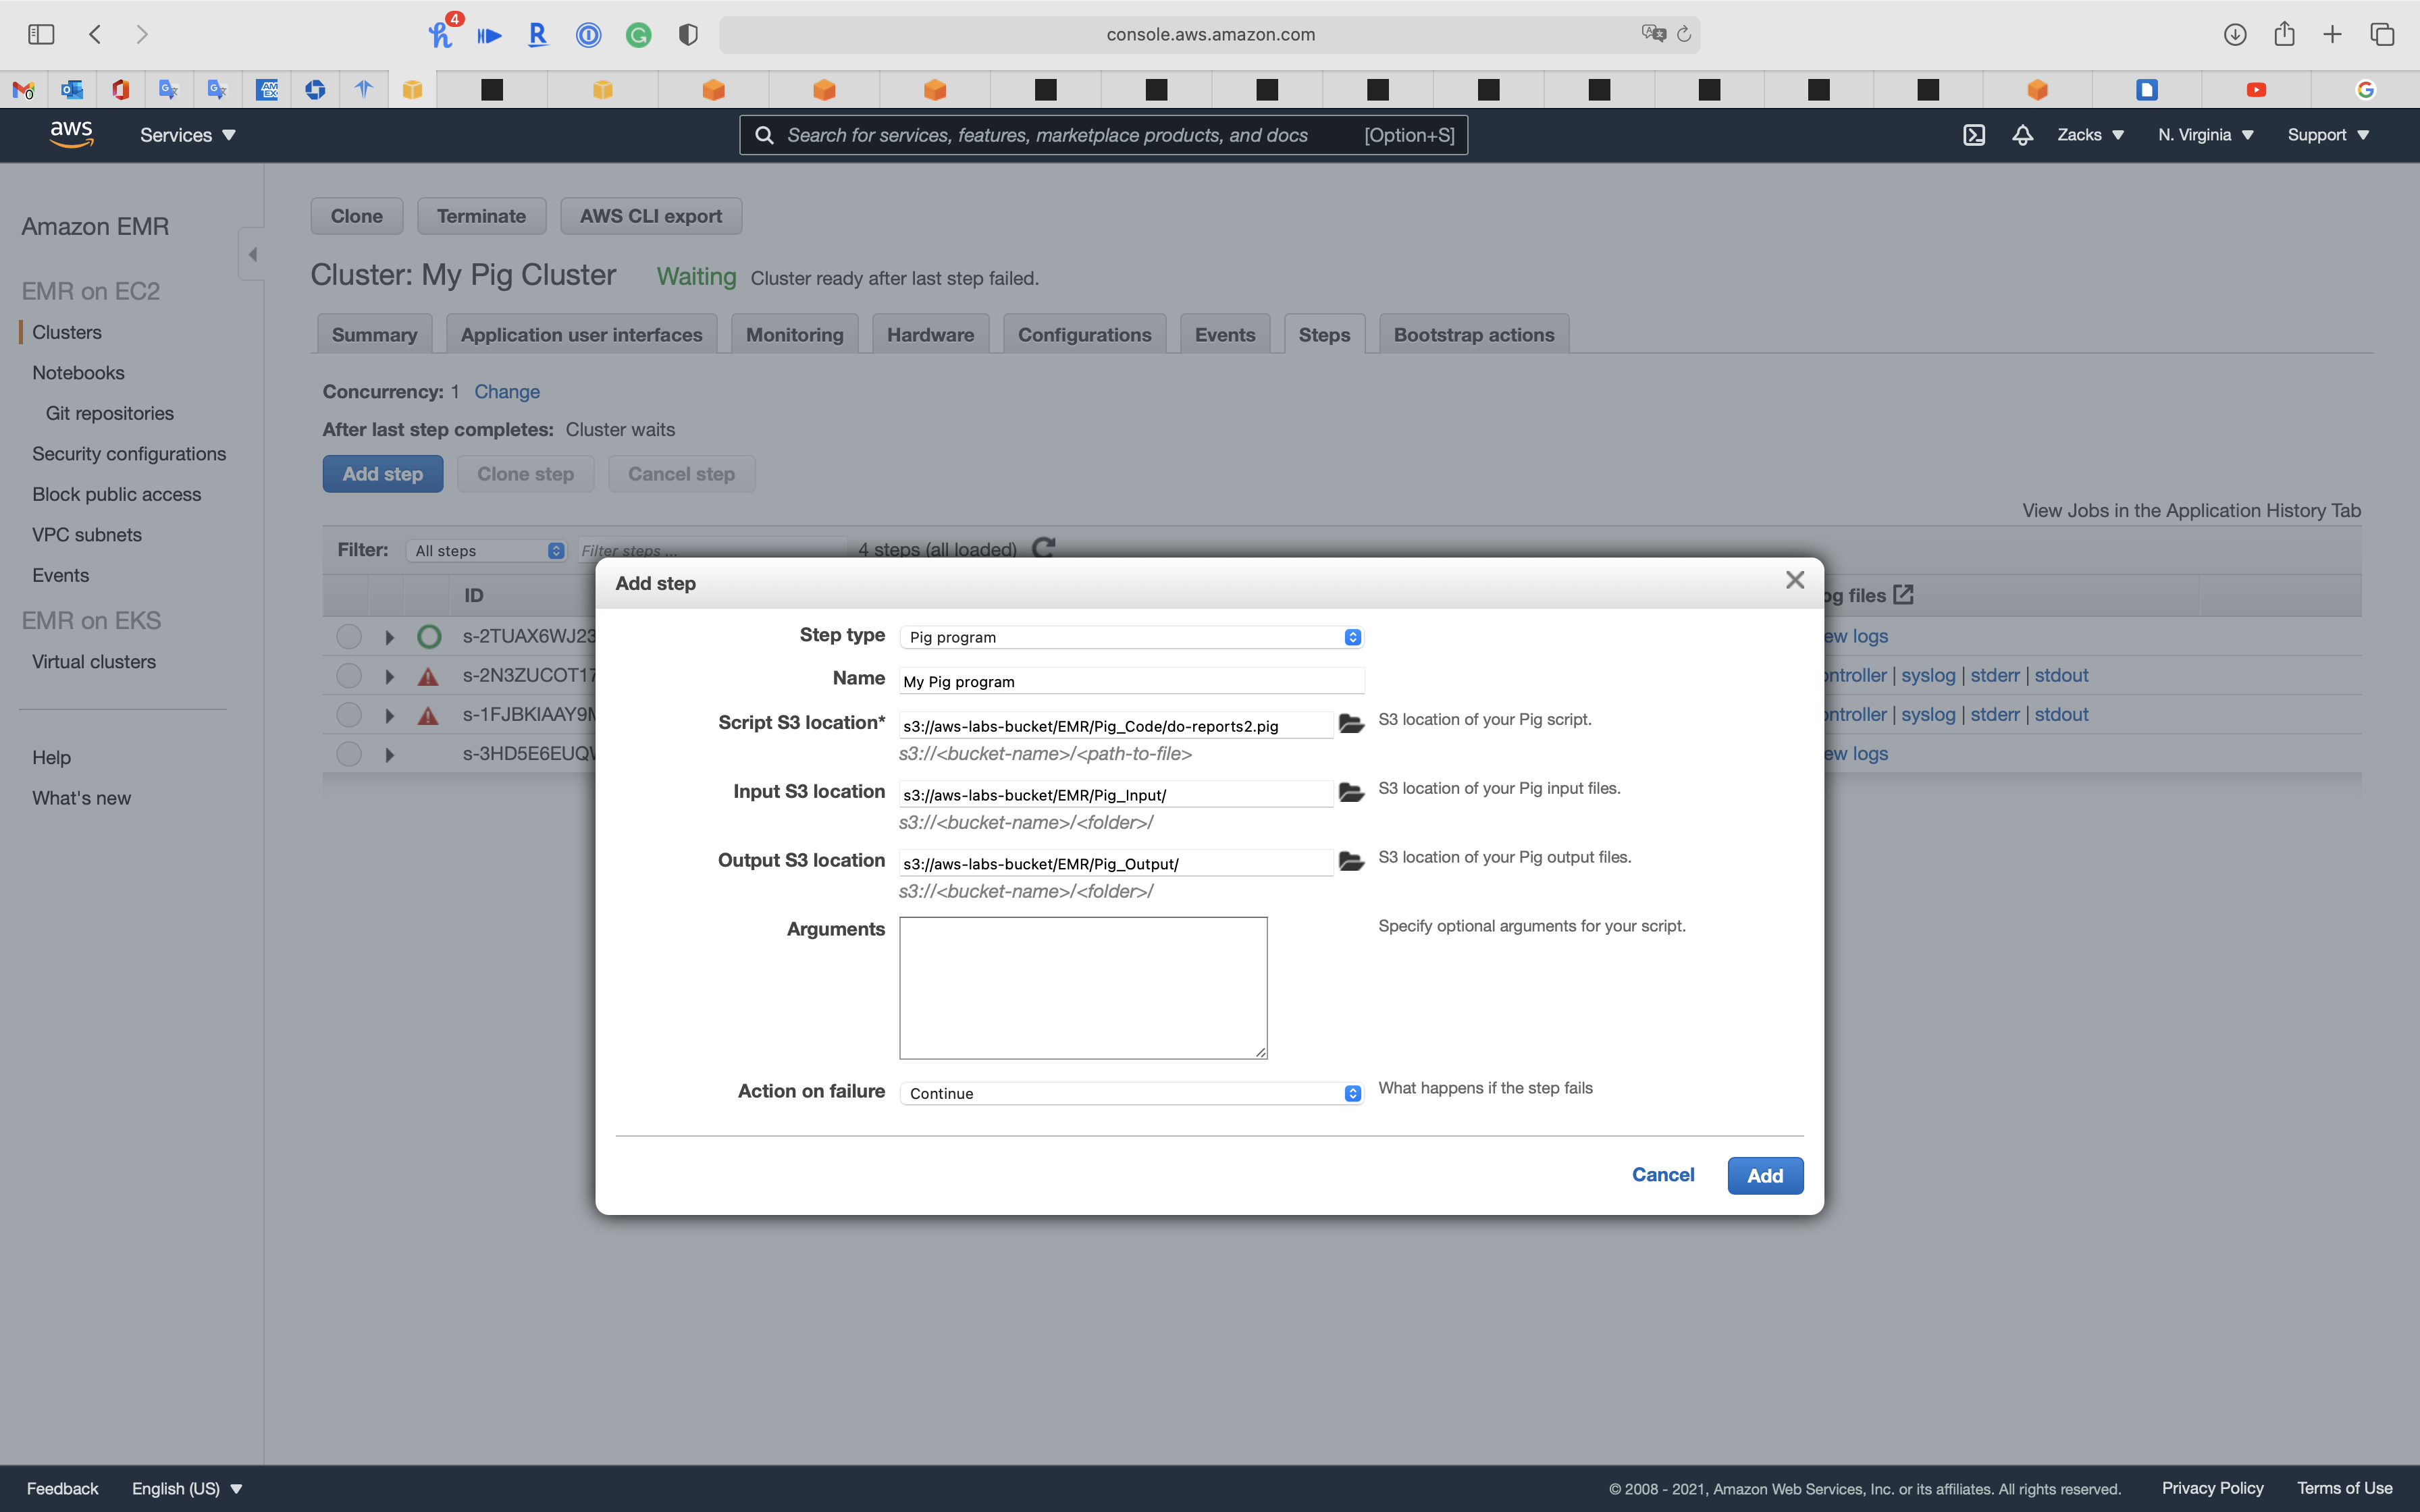
Pig Program Review
This pig program will import logs and break into tuples
1 | -- |
Run step
After you add a new EMR step, you can see the Status is Pending, which means it is running now.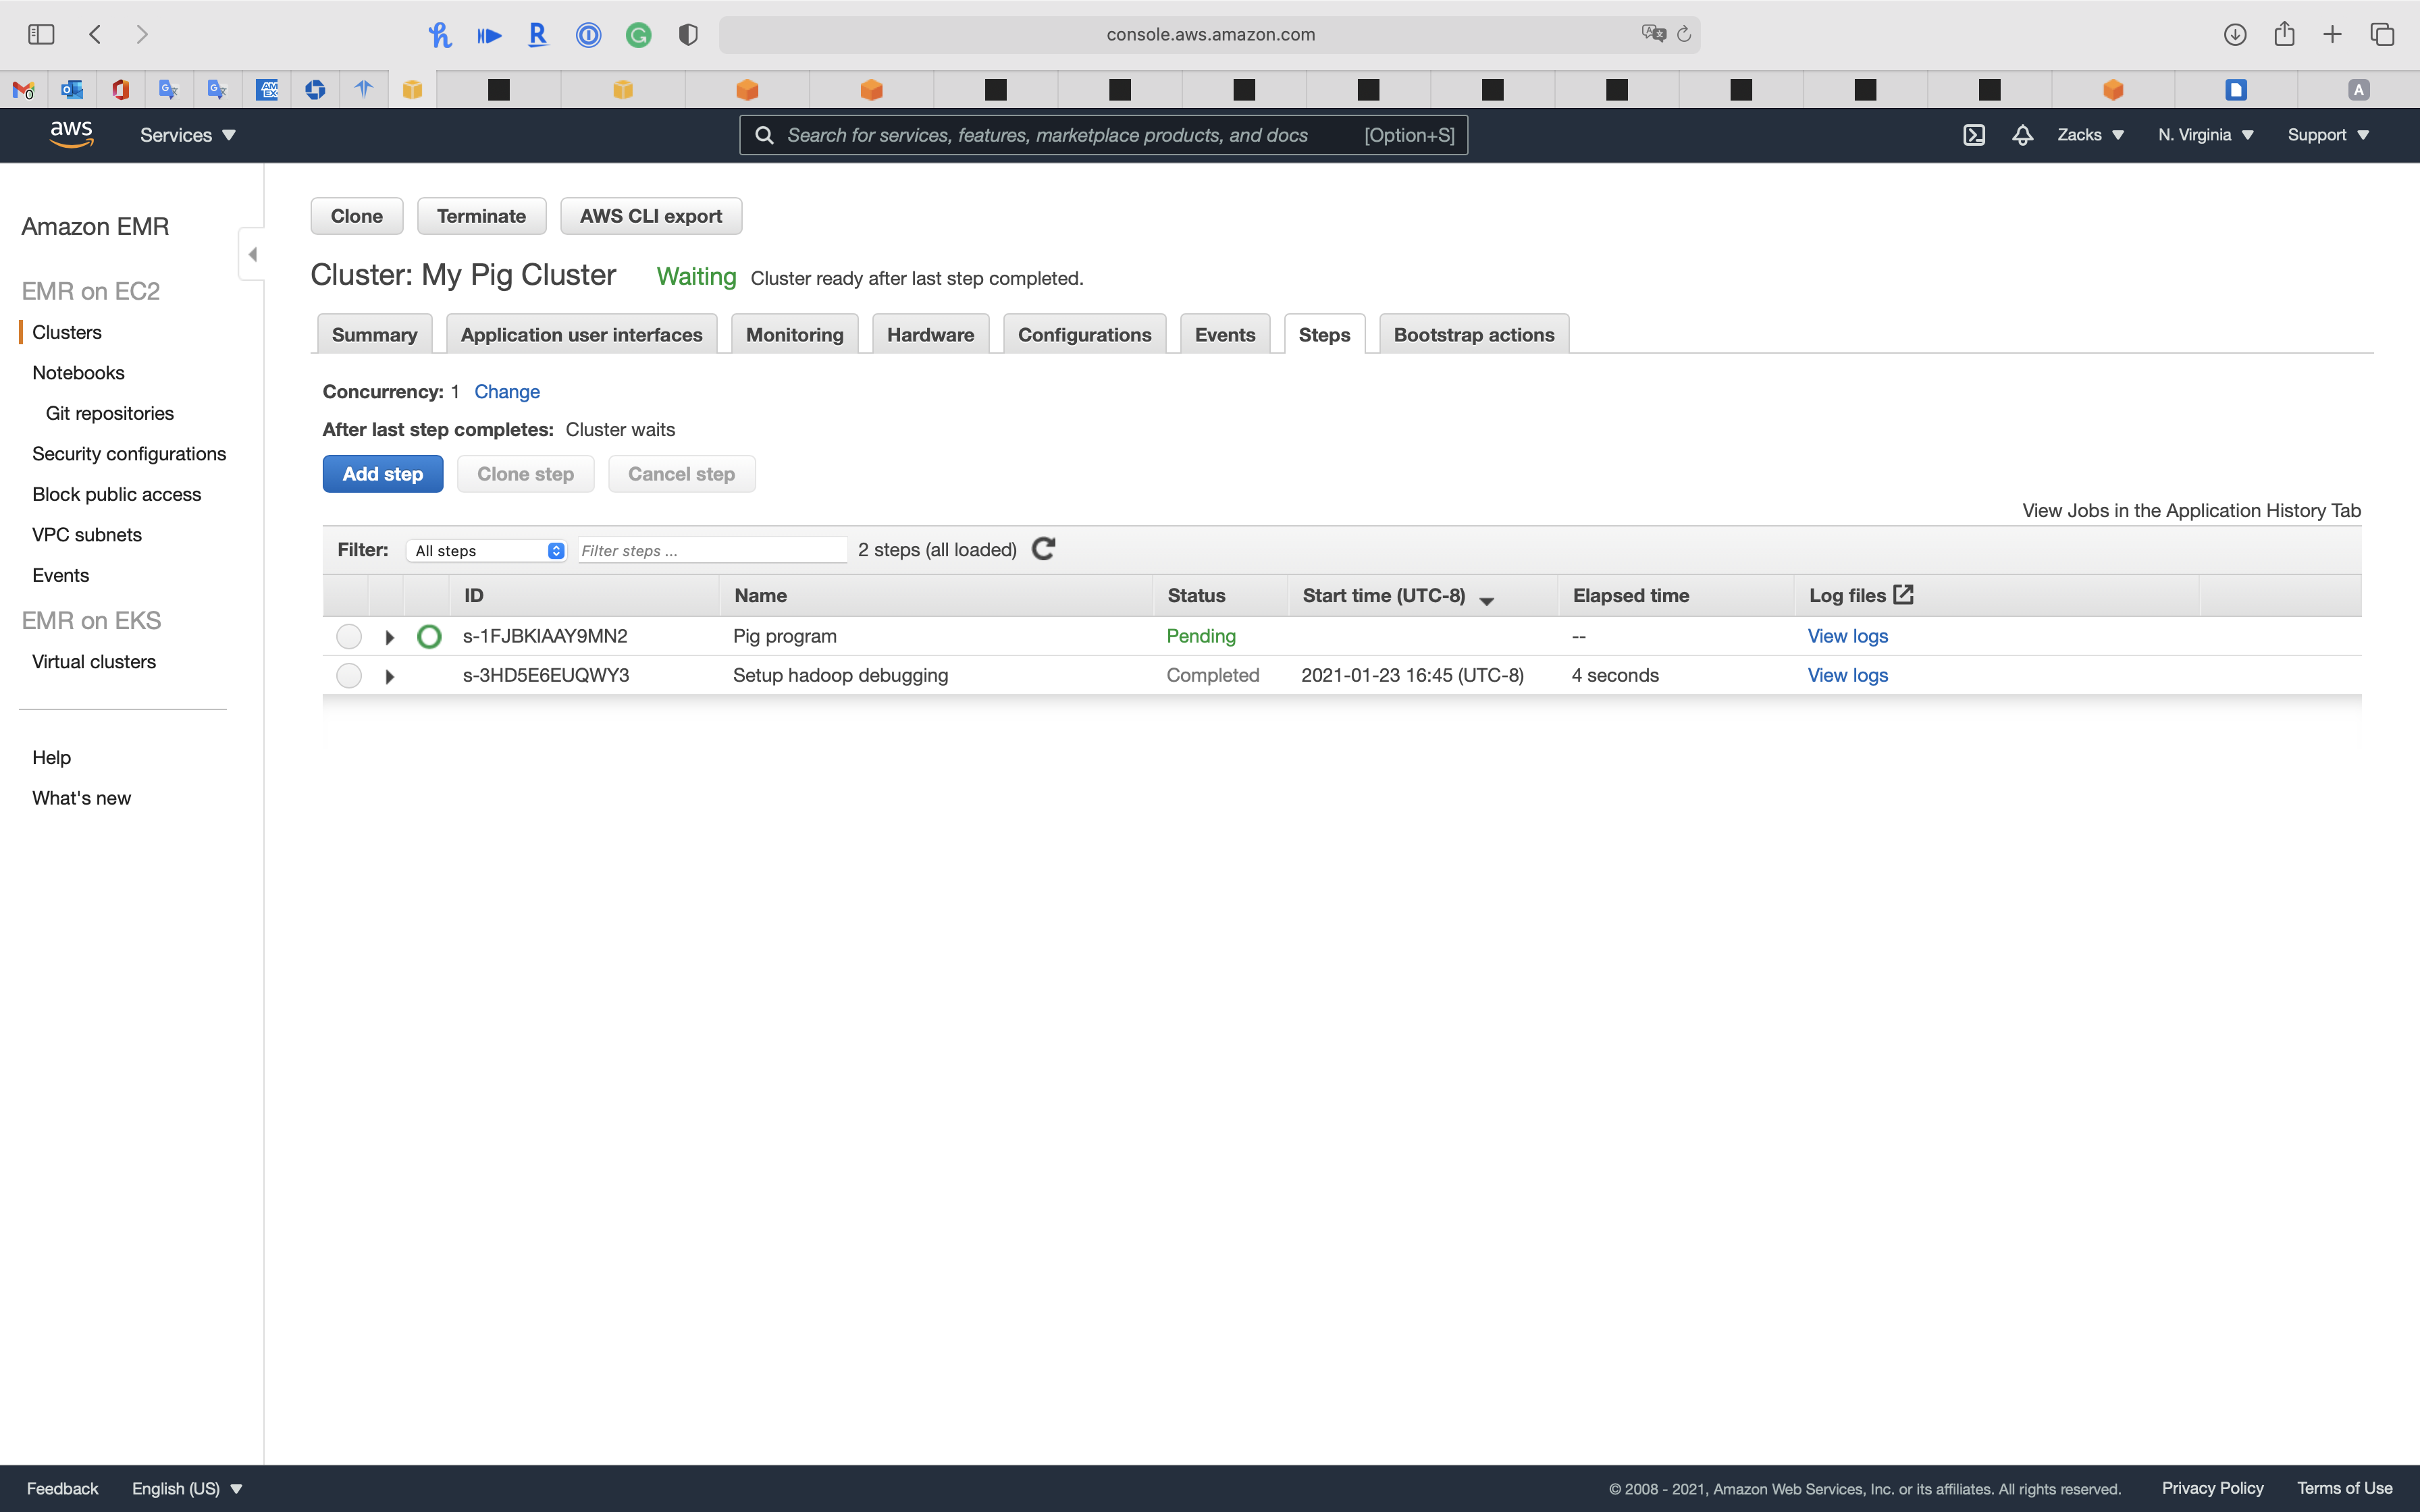
Wait until the Status change to completed.
You may need refresh the page.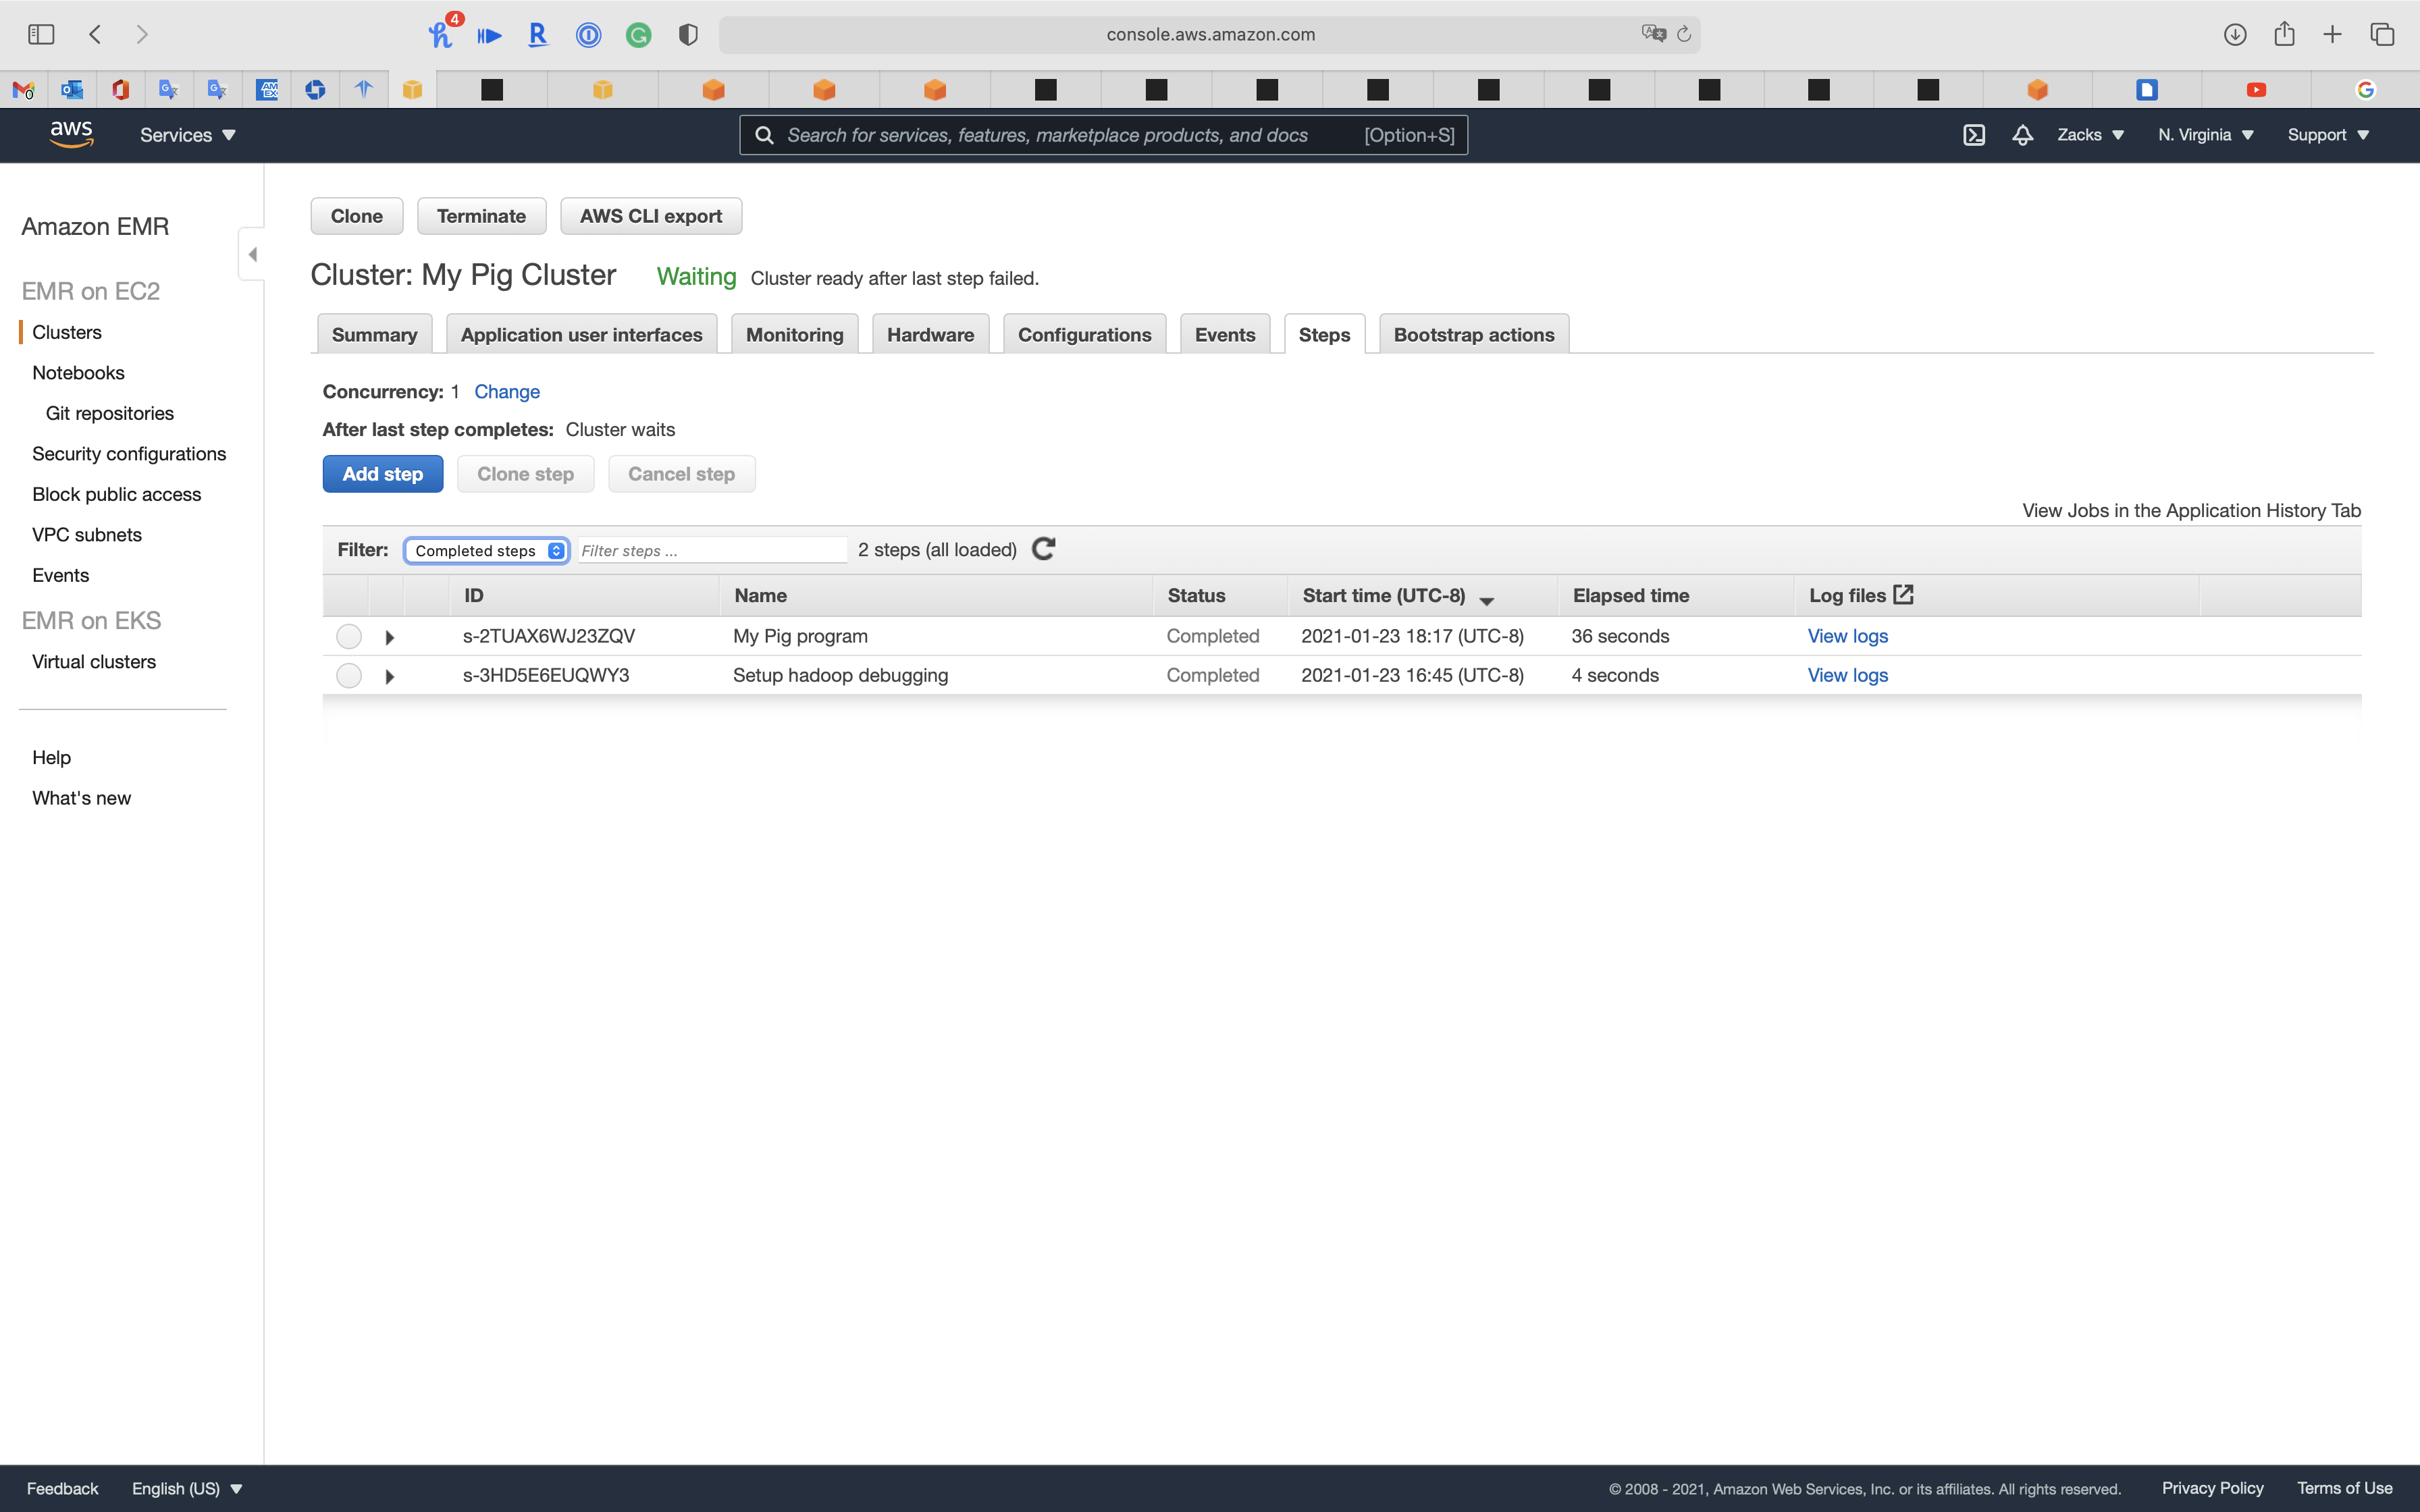
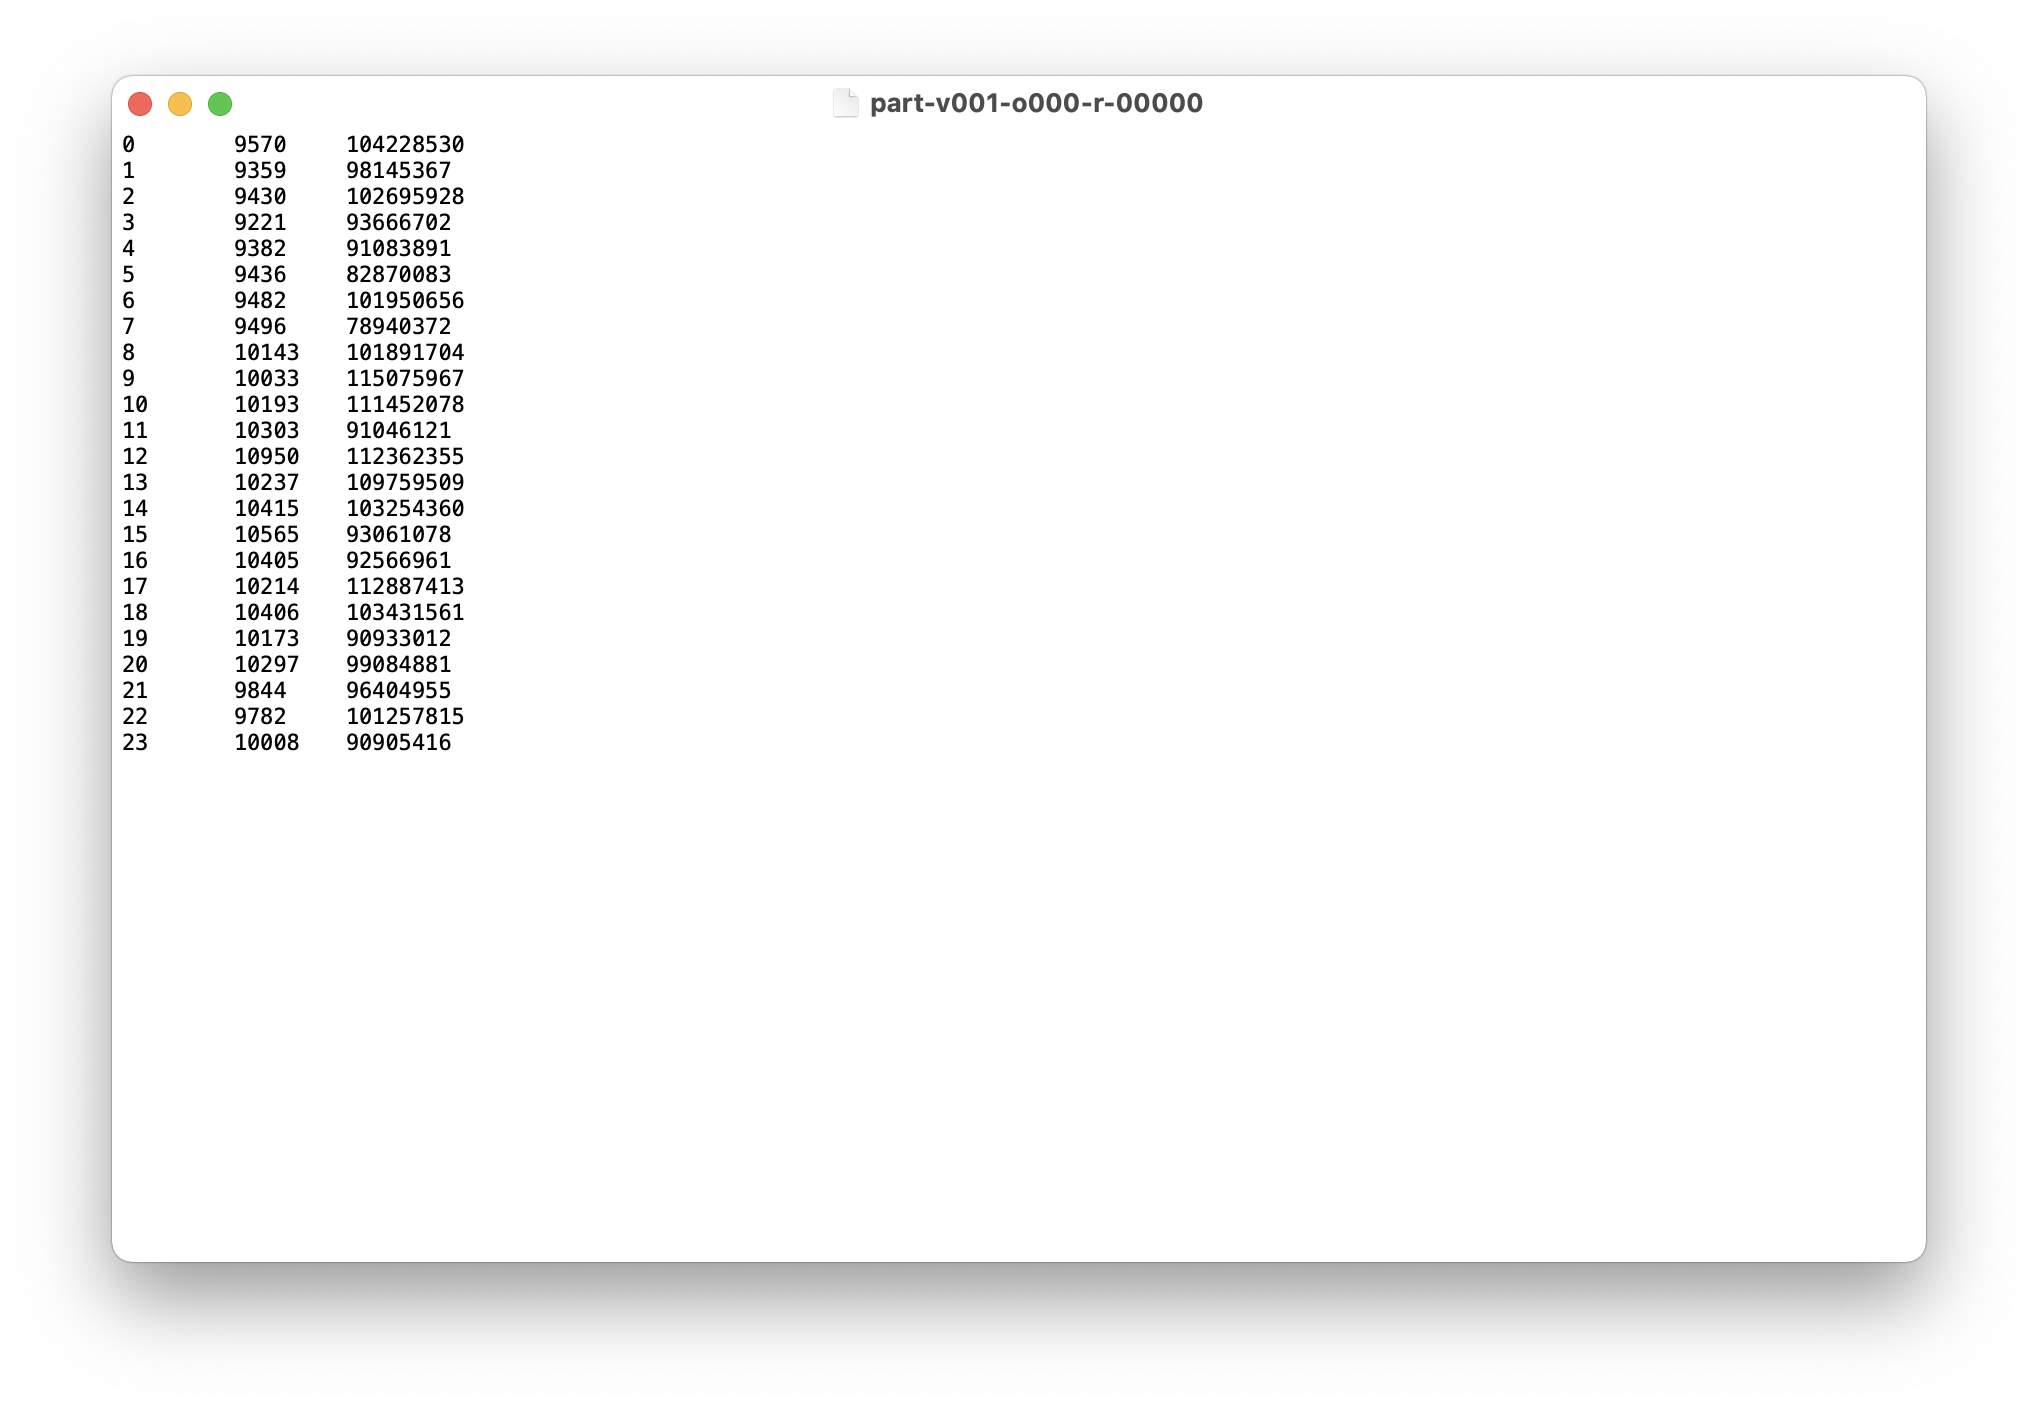
Validation Test
Original Pig Input files
Generally speaking, they are http request log.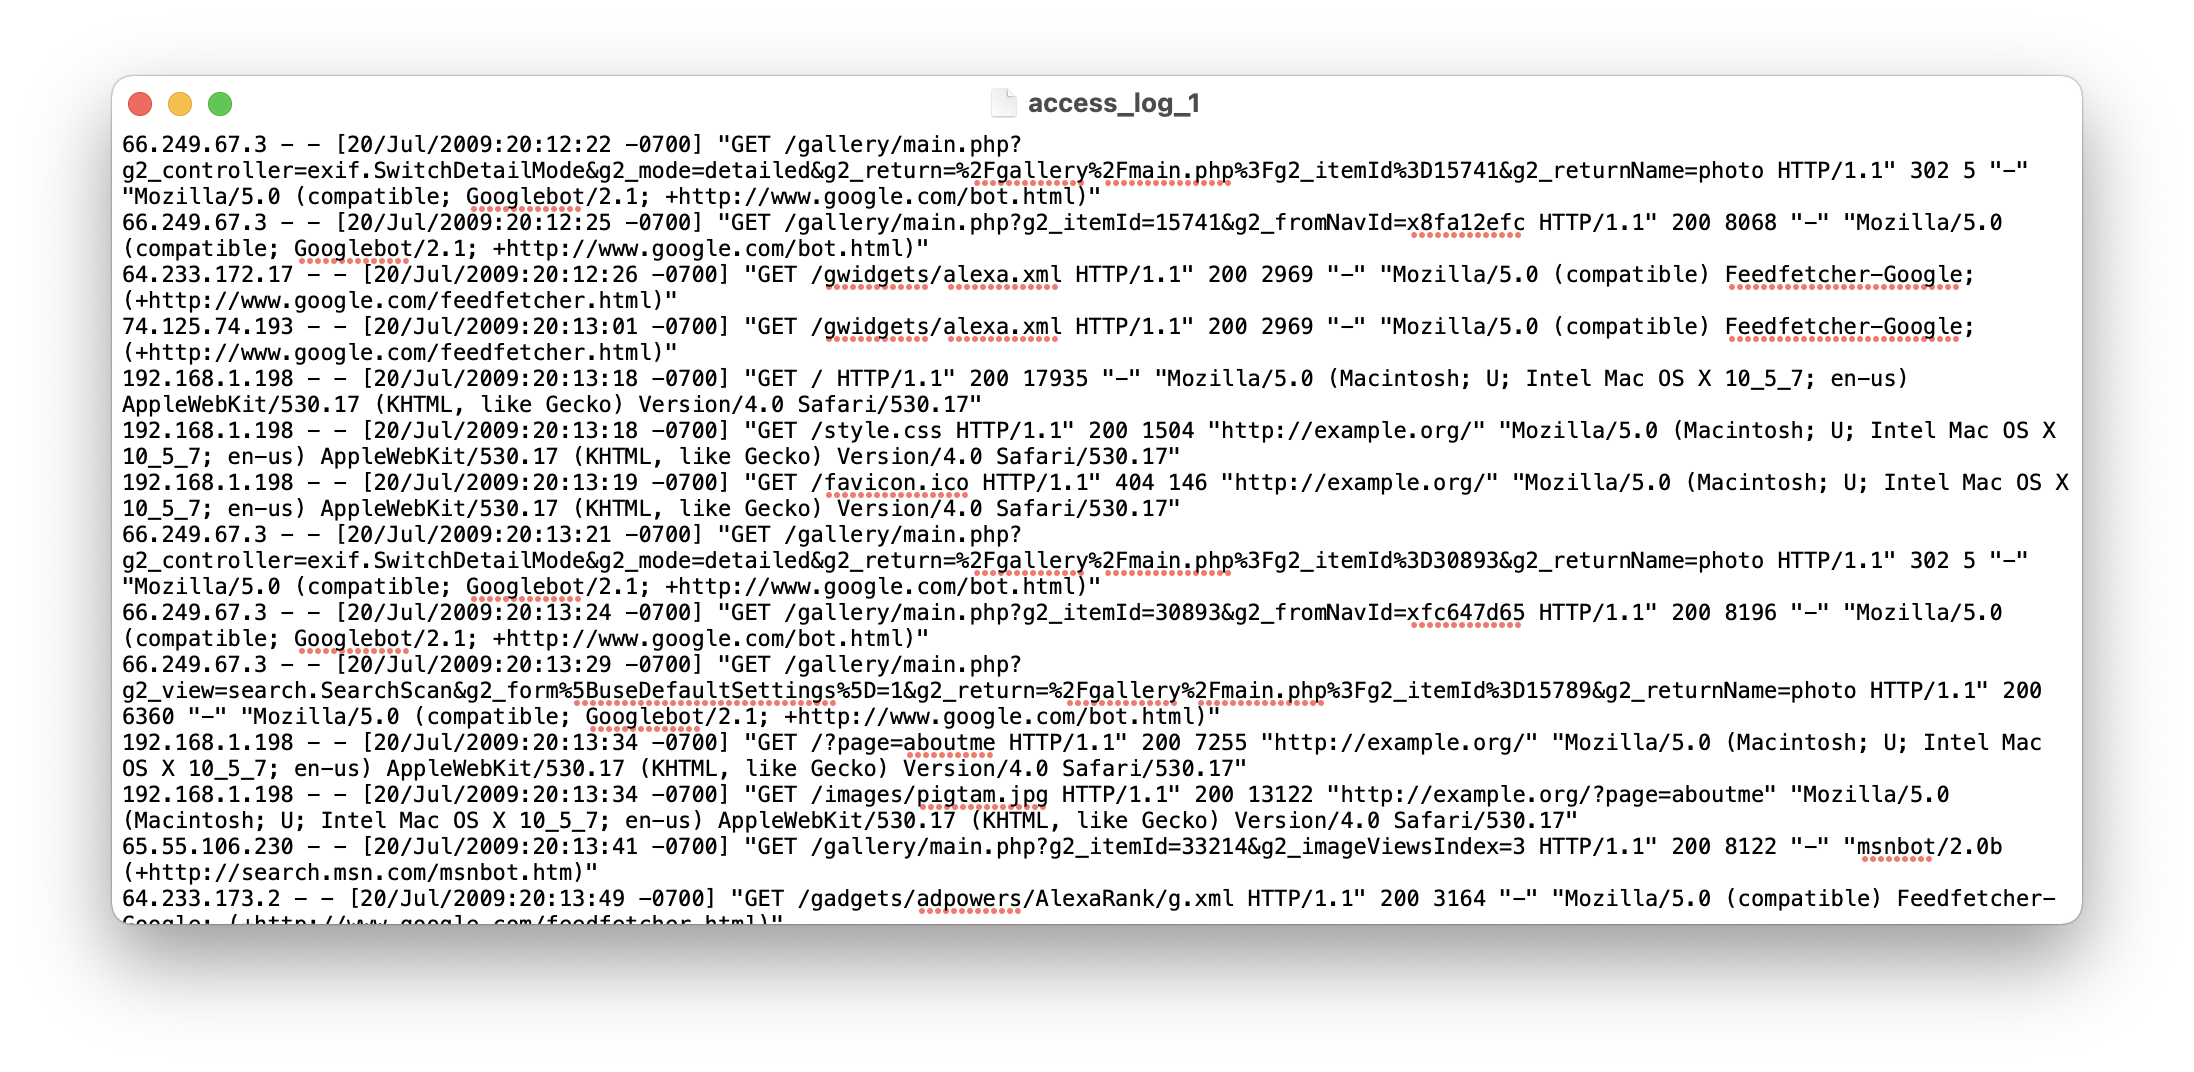
S3
Services -> S3
Go to your S3 bucket.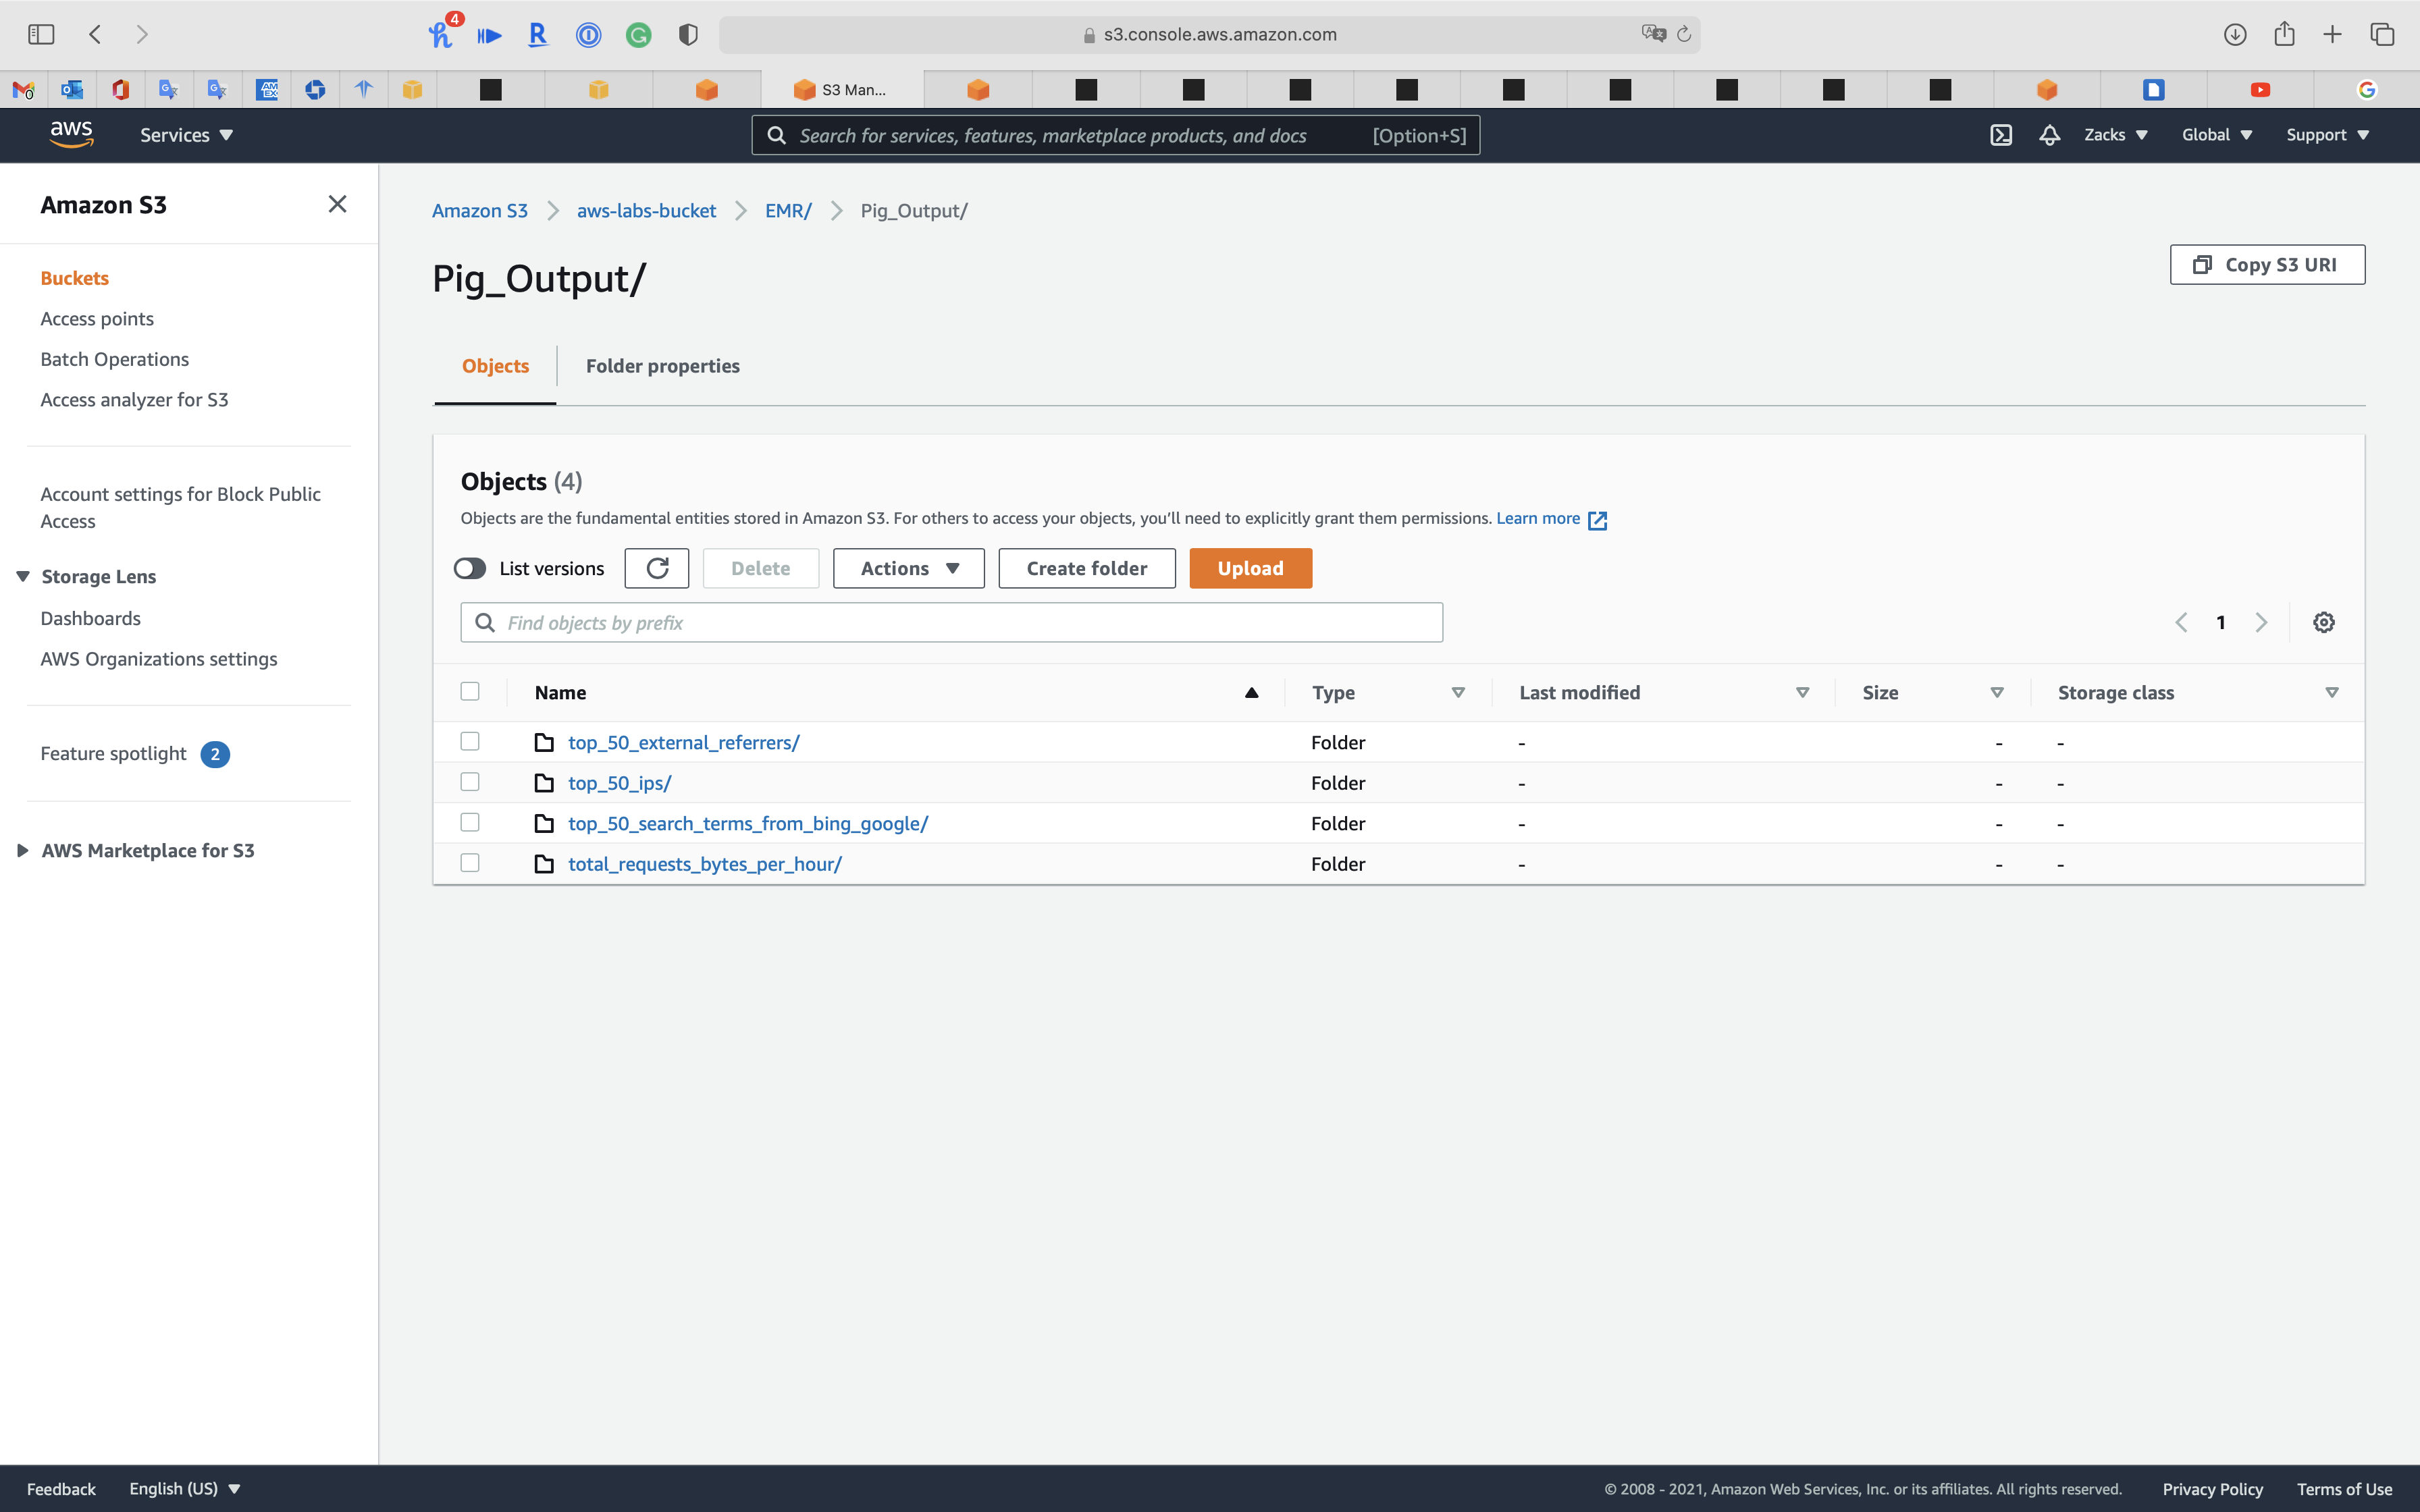
top_50_external_referrers/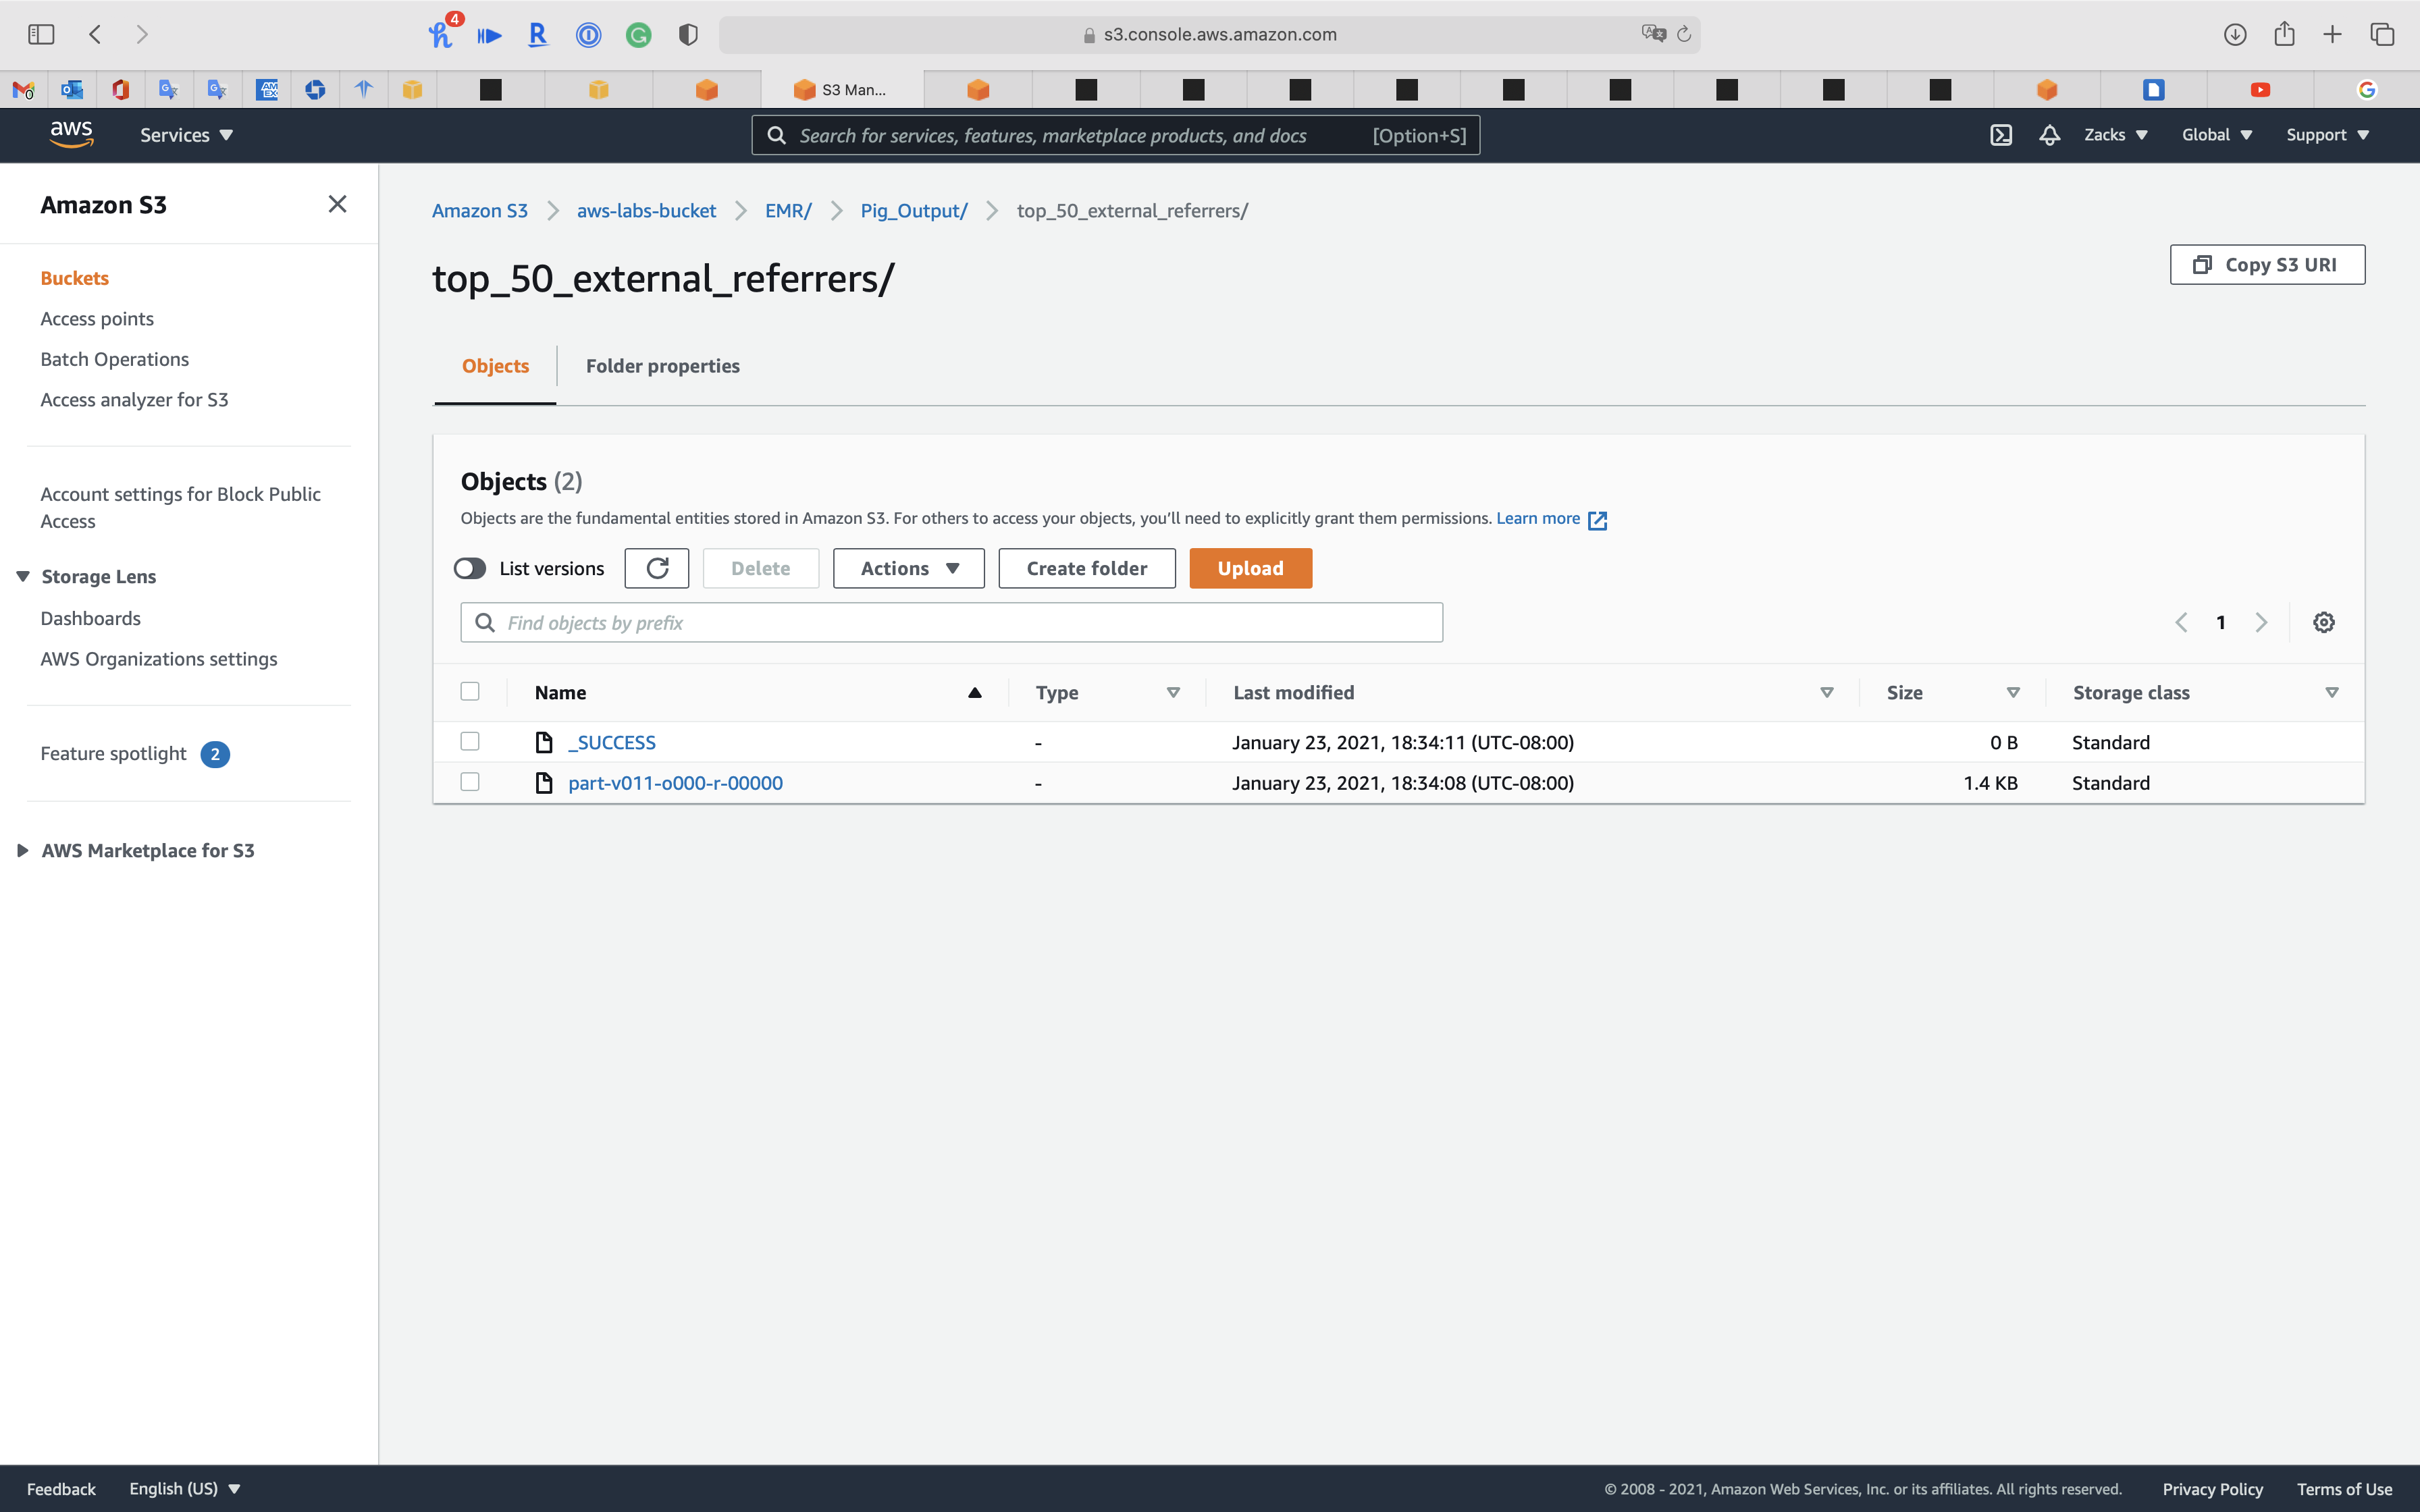
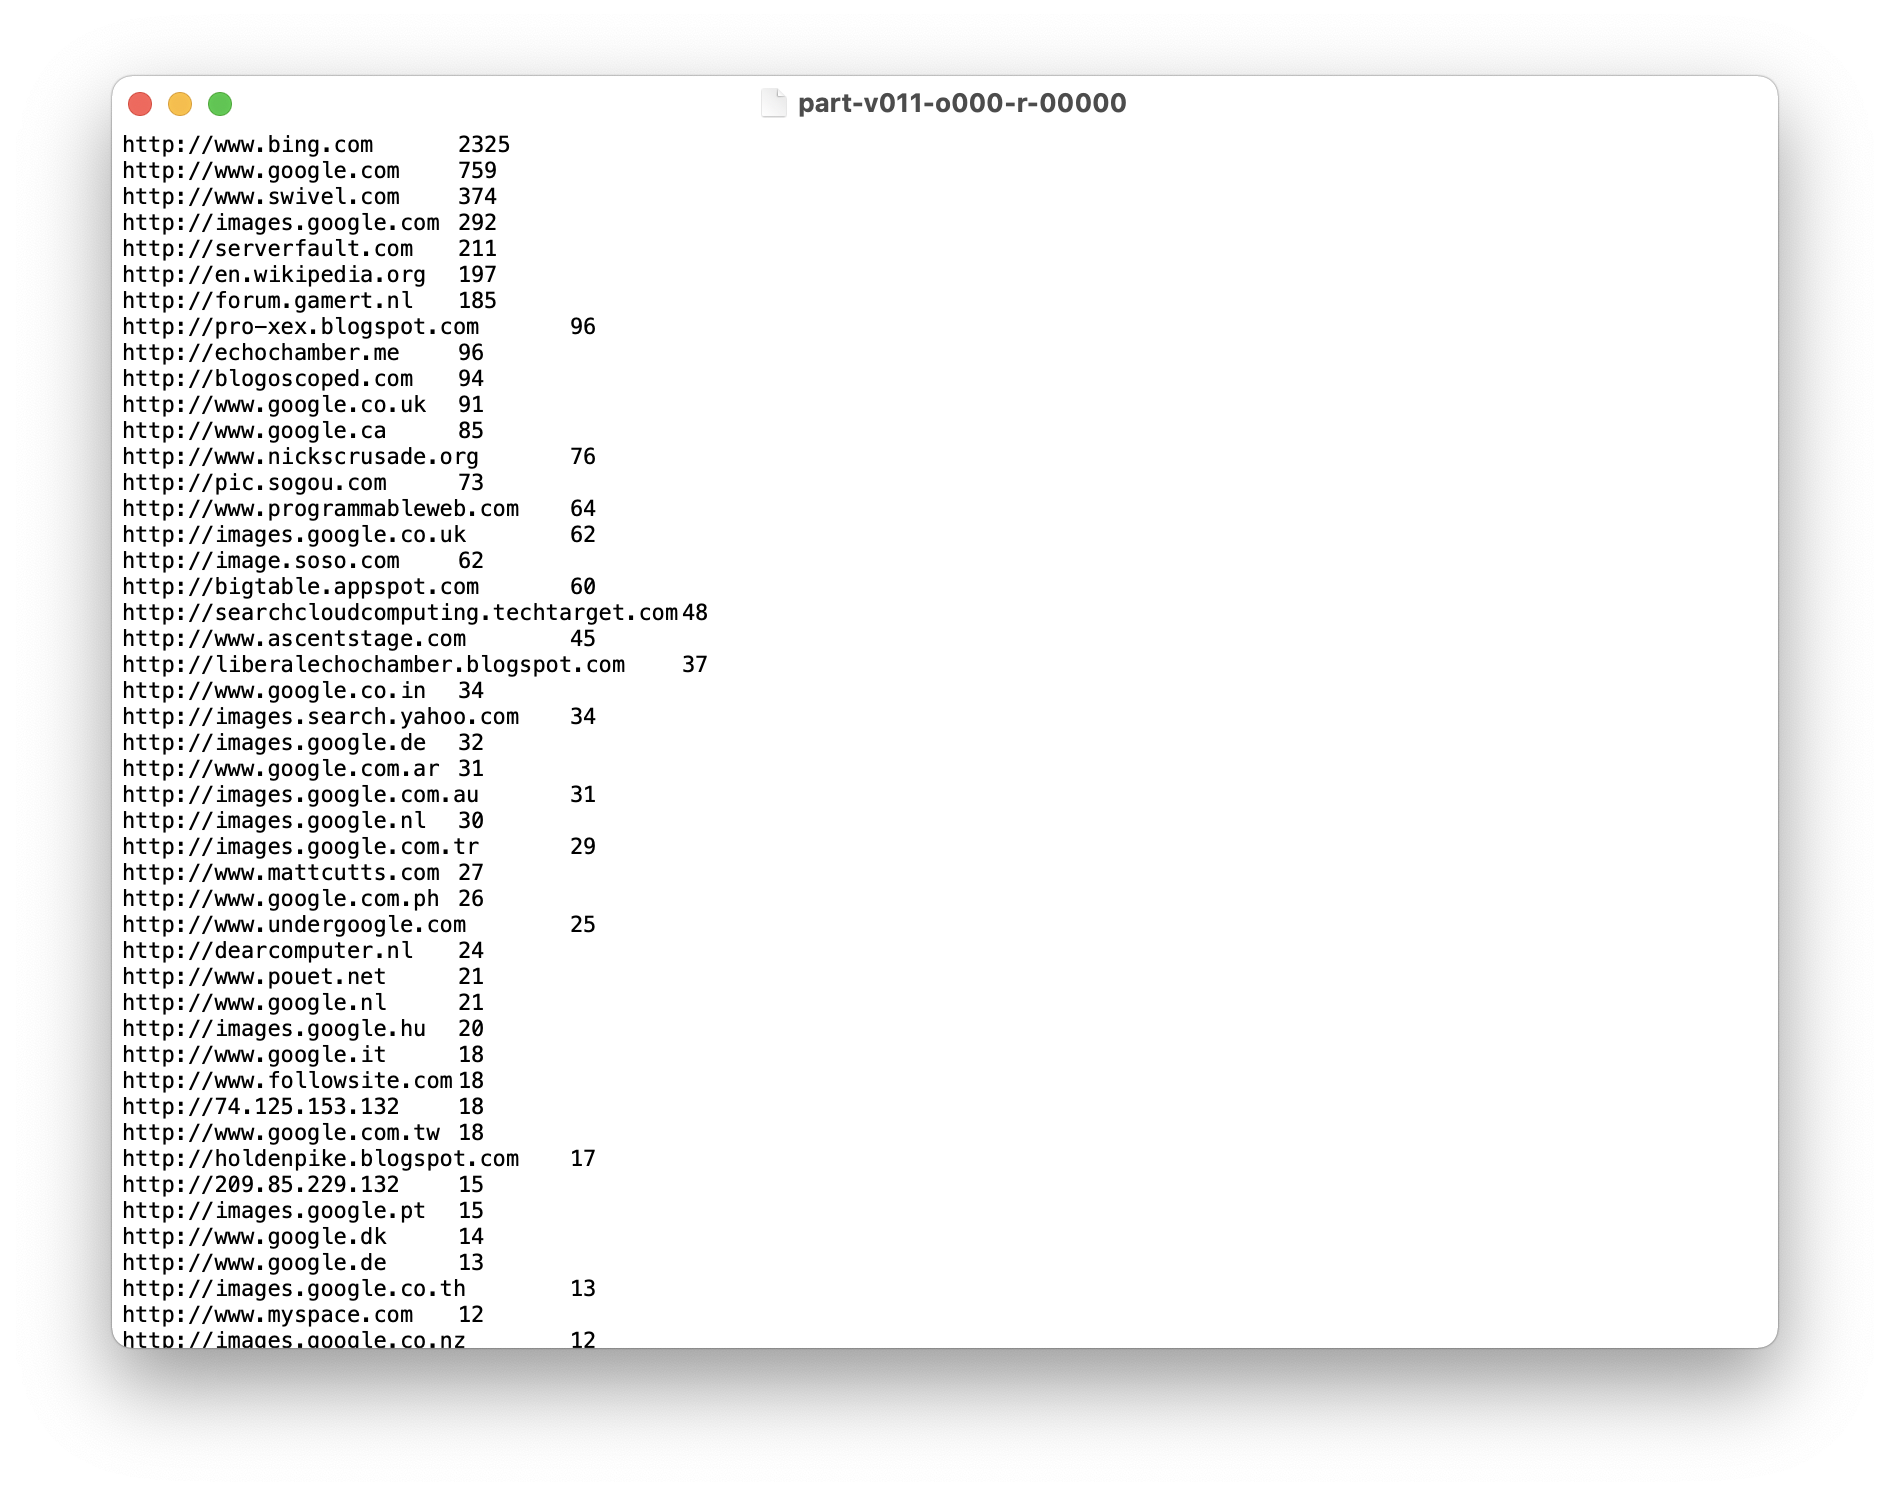
top_50_ips/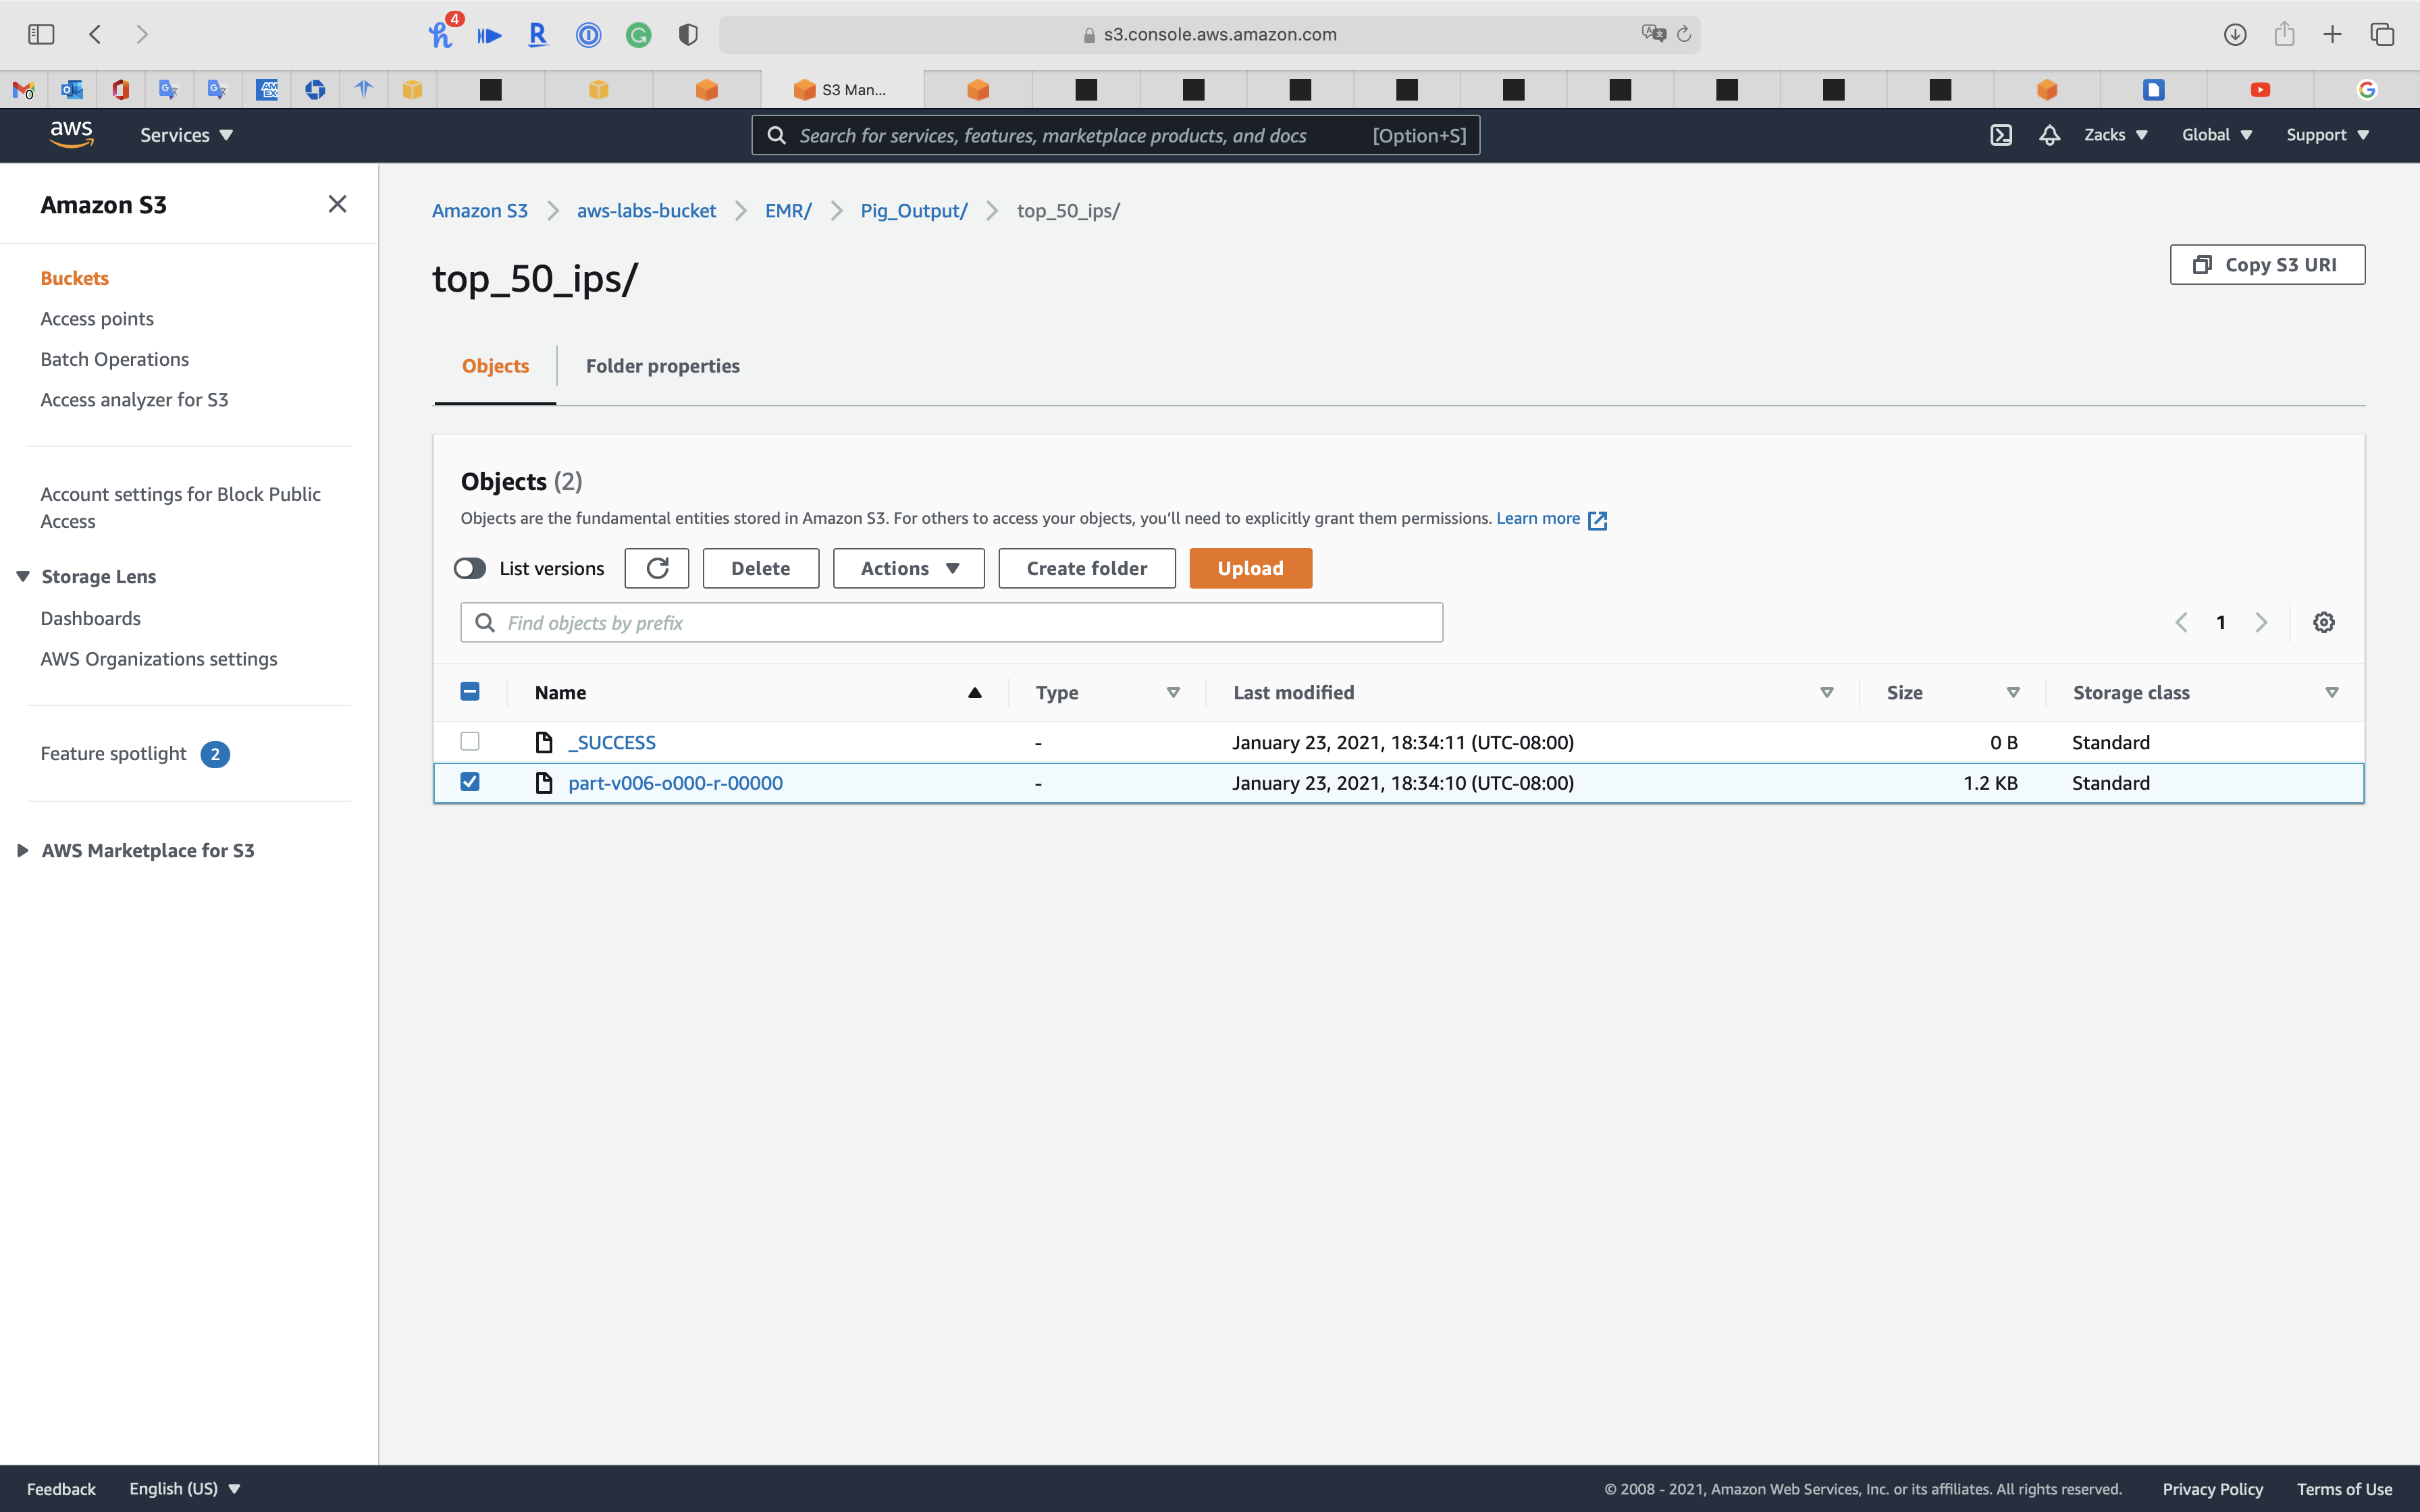

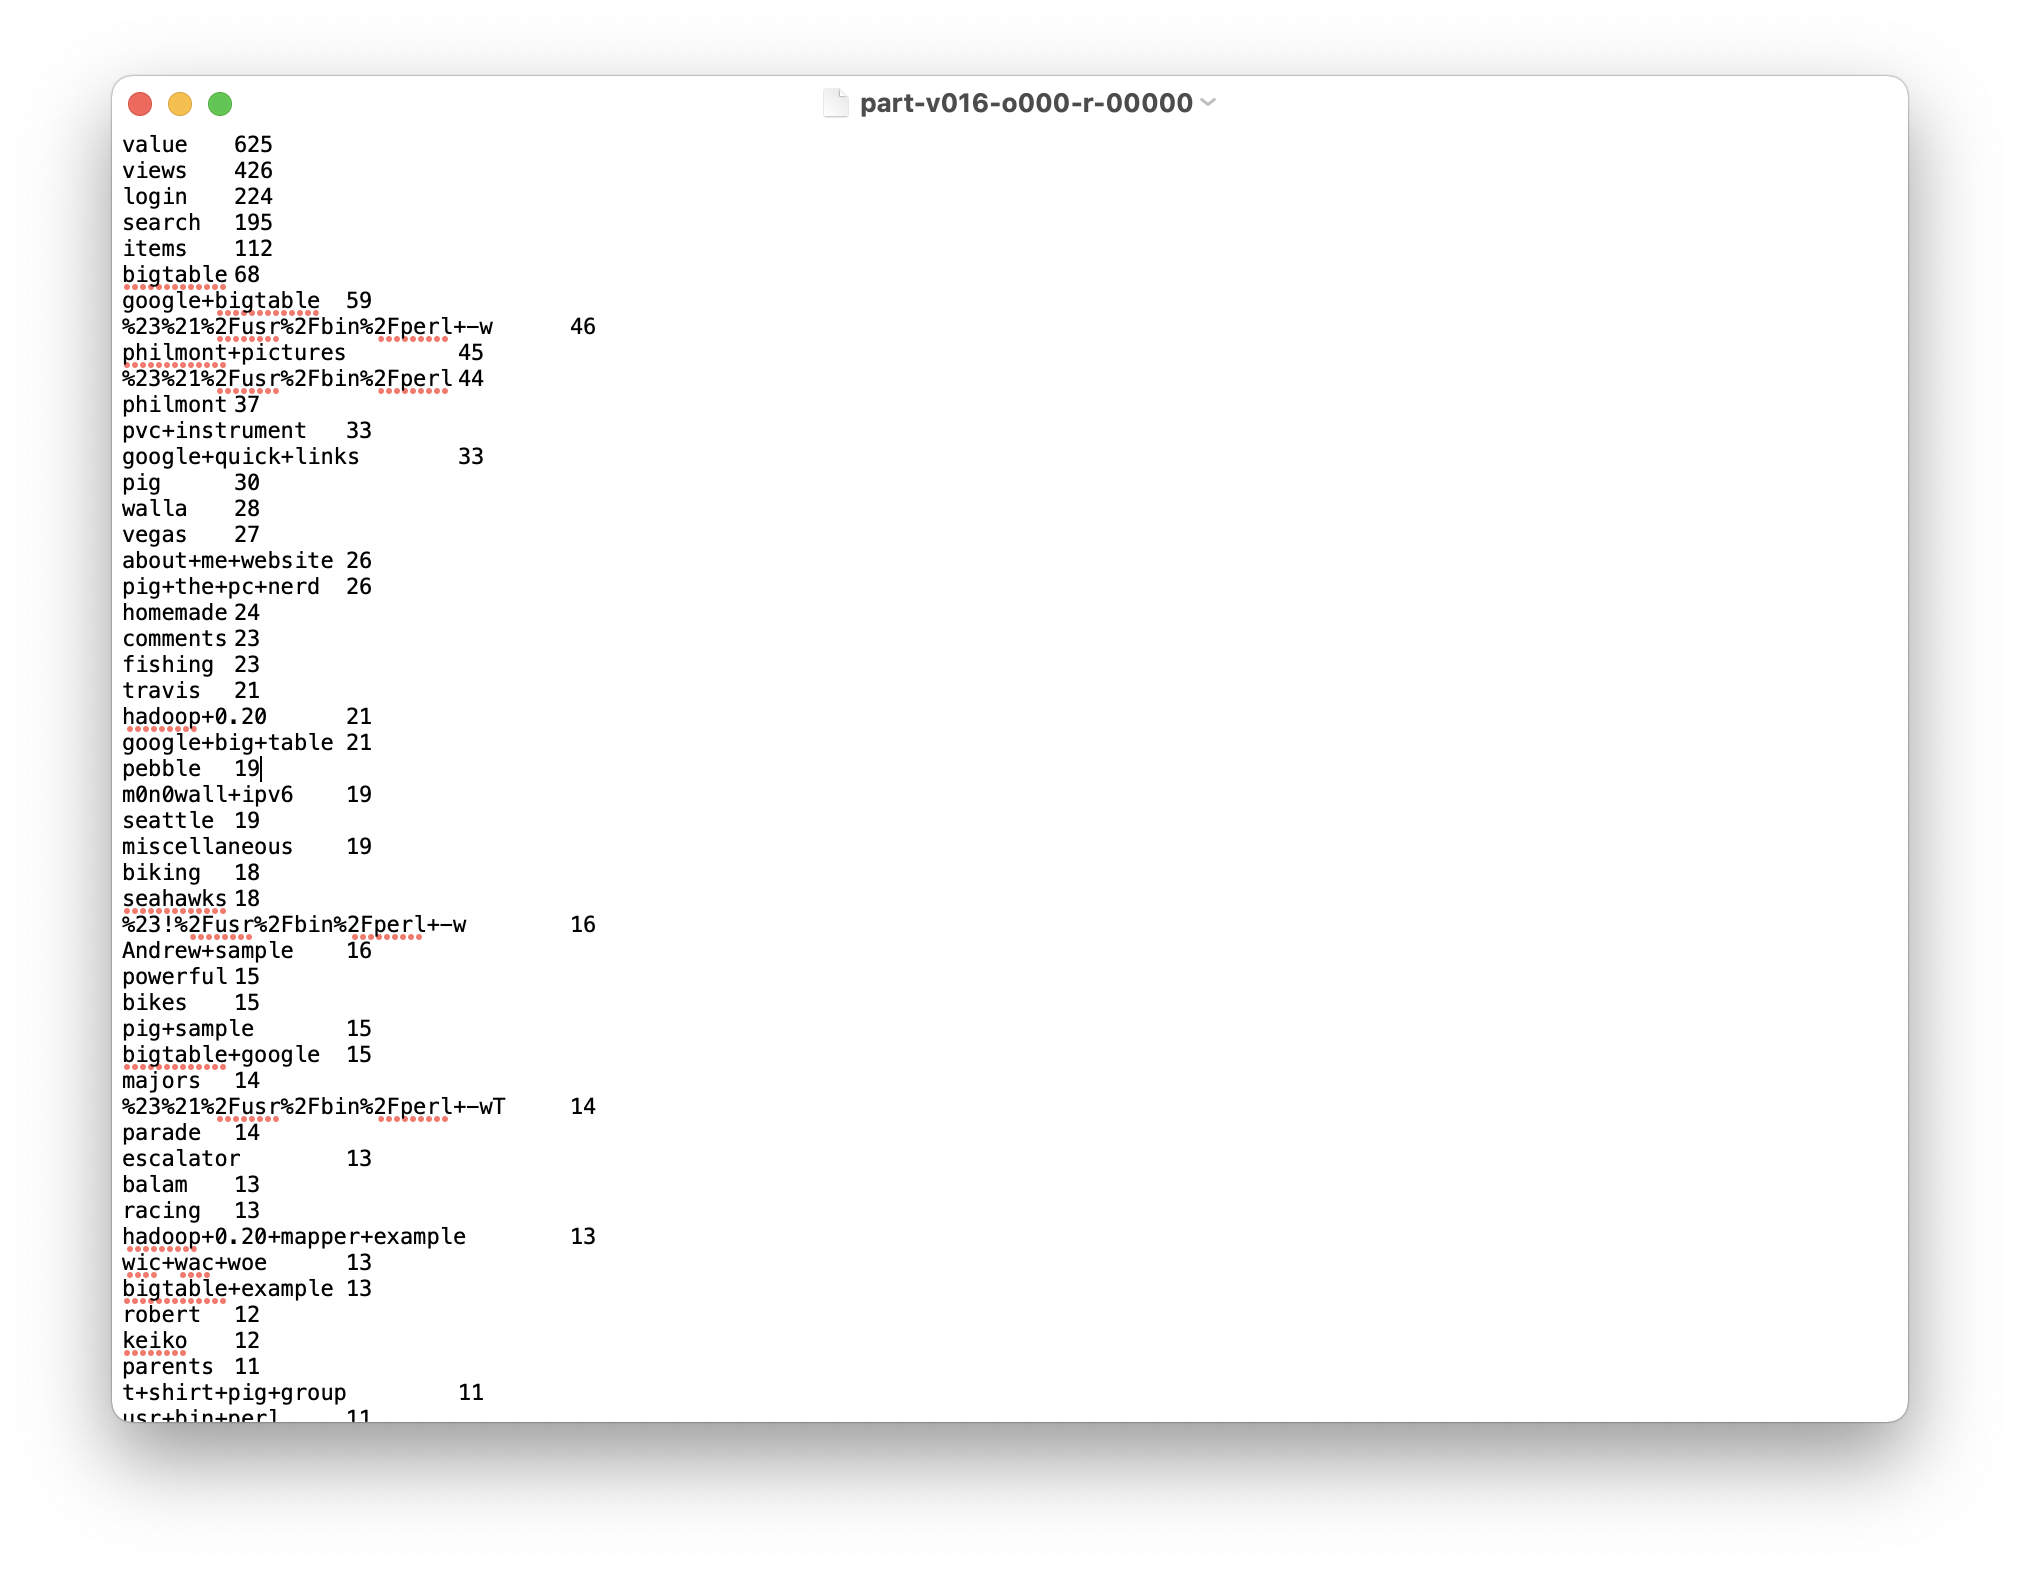
top_50_search_terms_from_bing_google/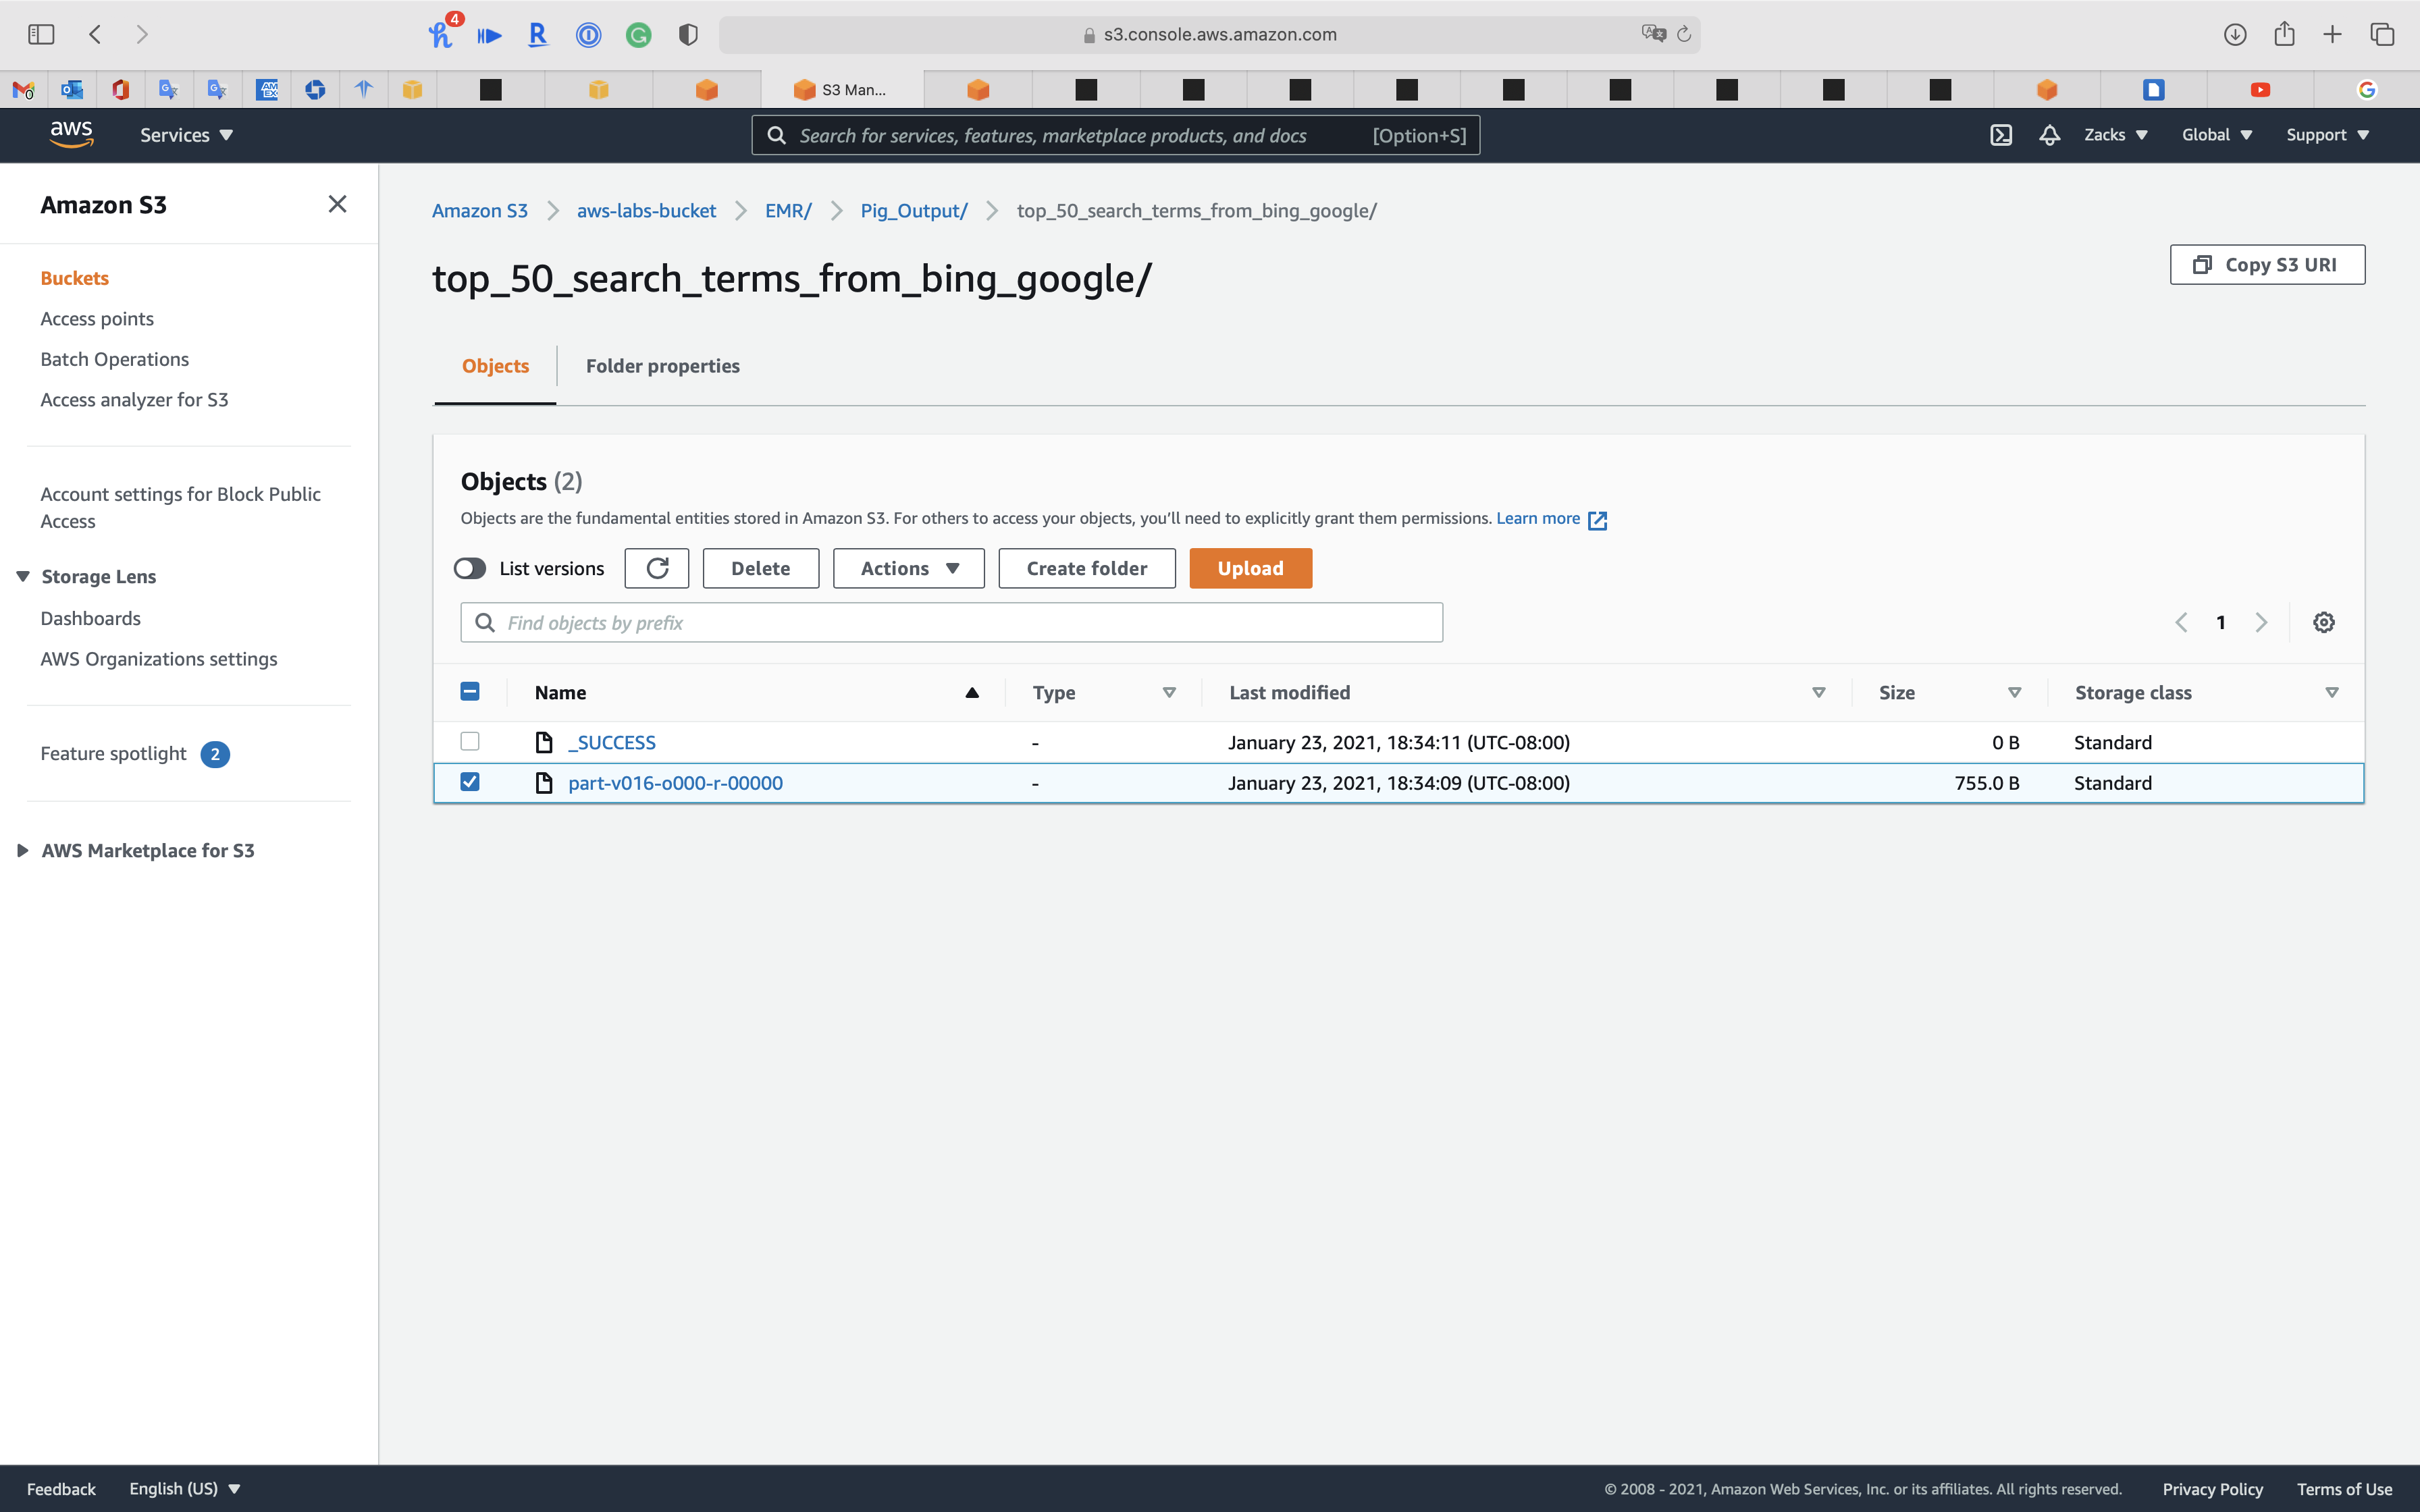
total_requests_bytes_per_hour/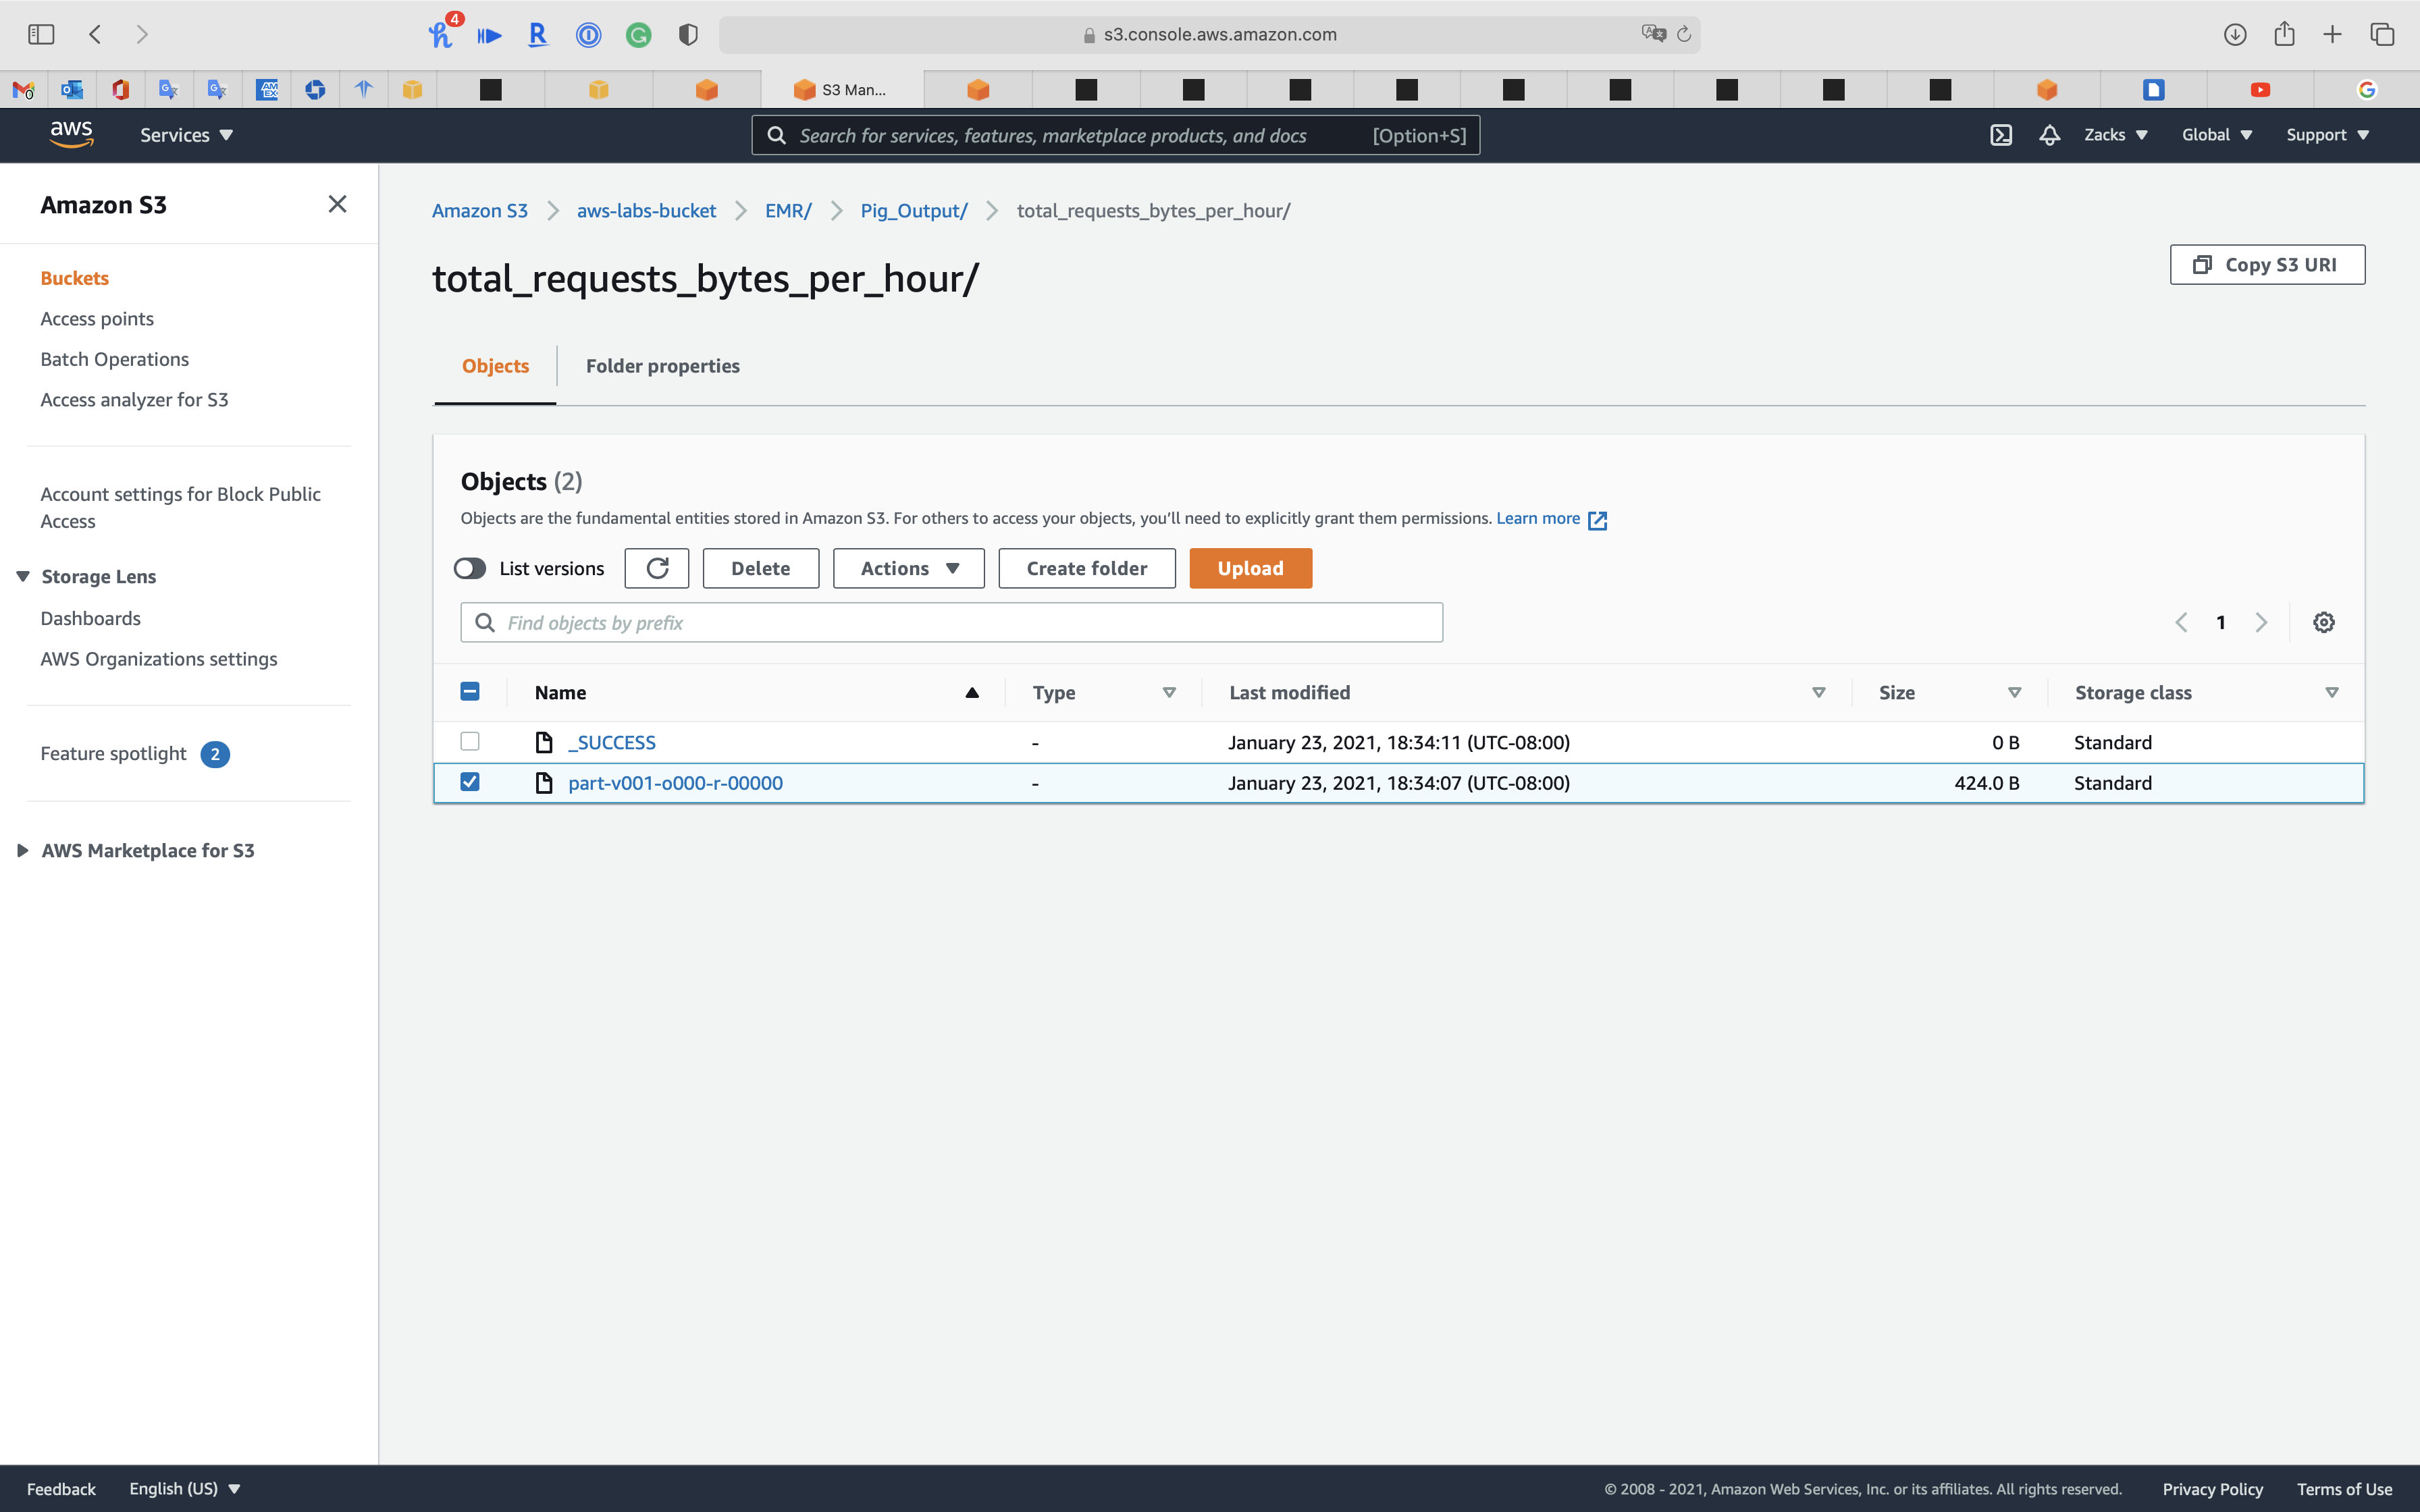
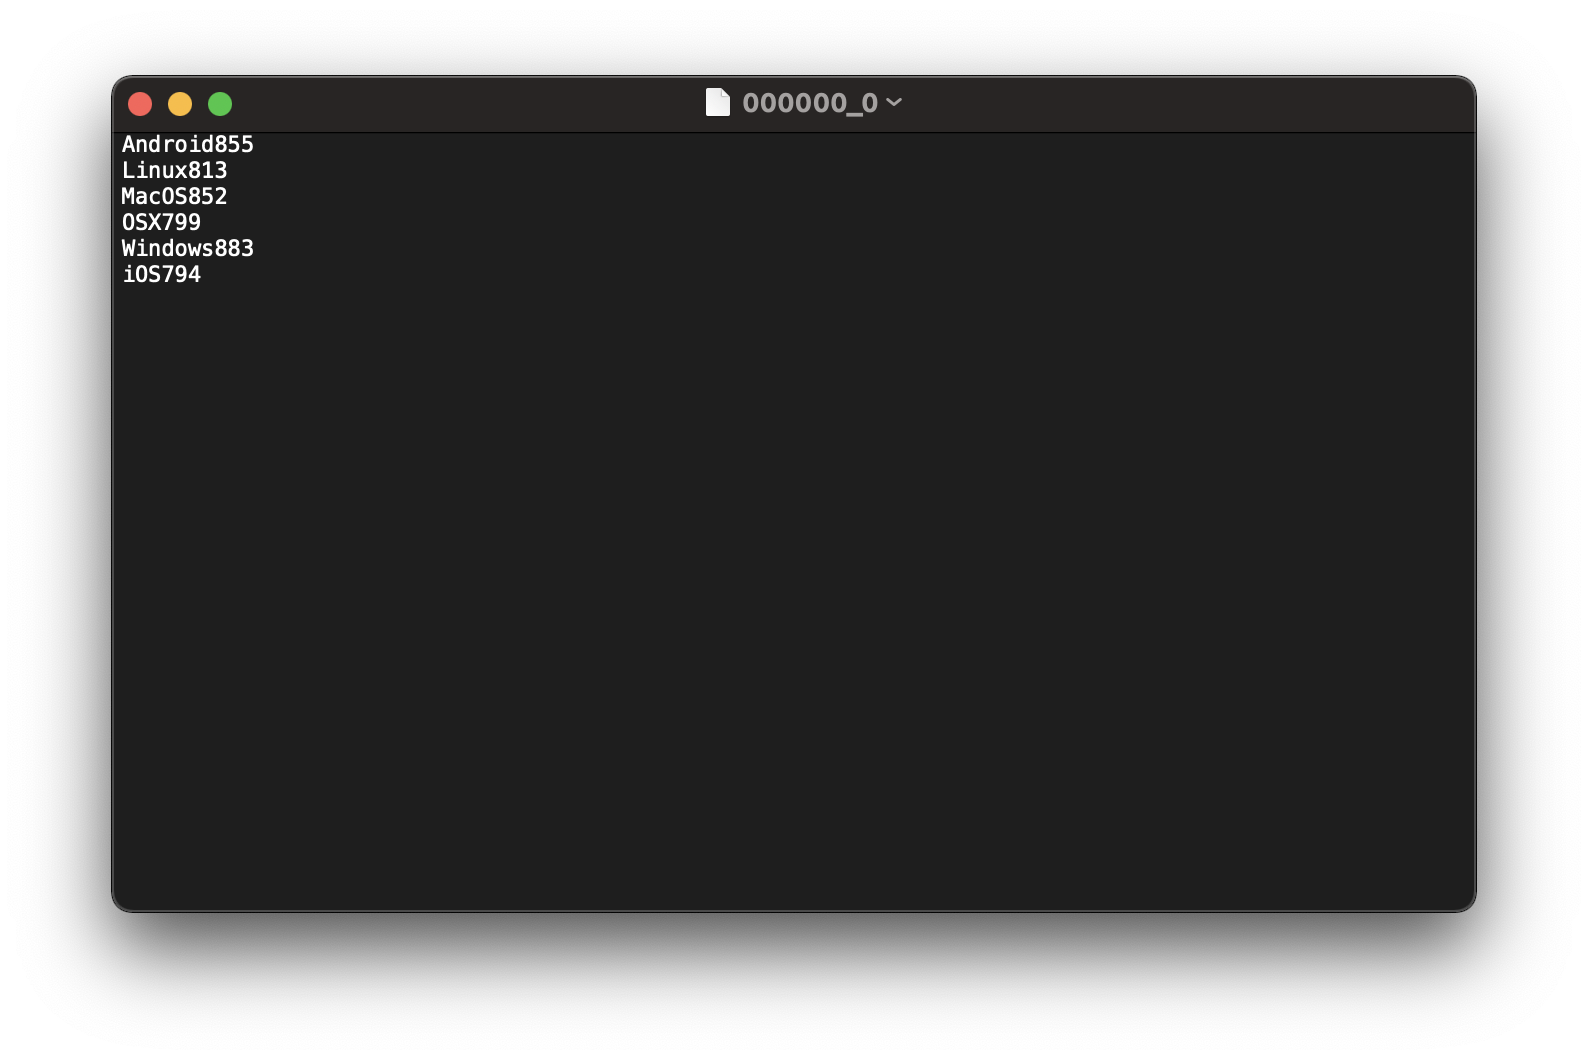
View the log
controller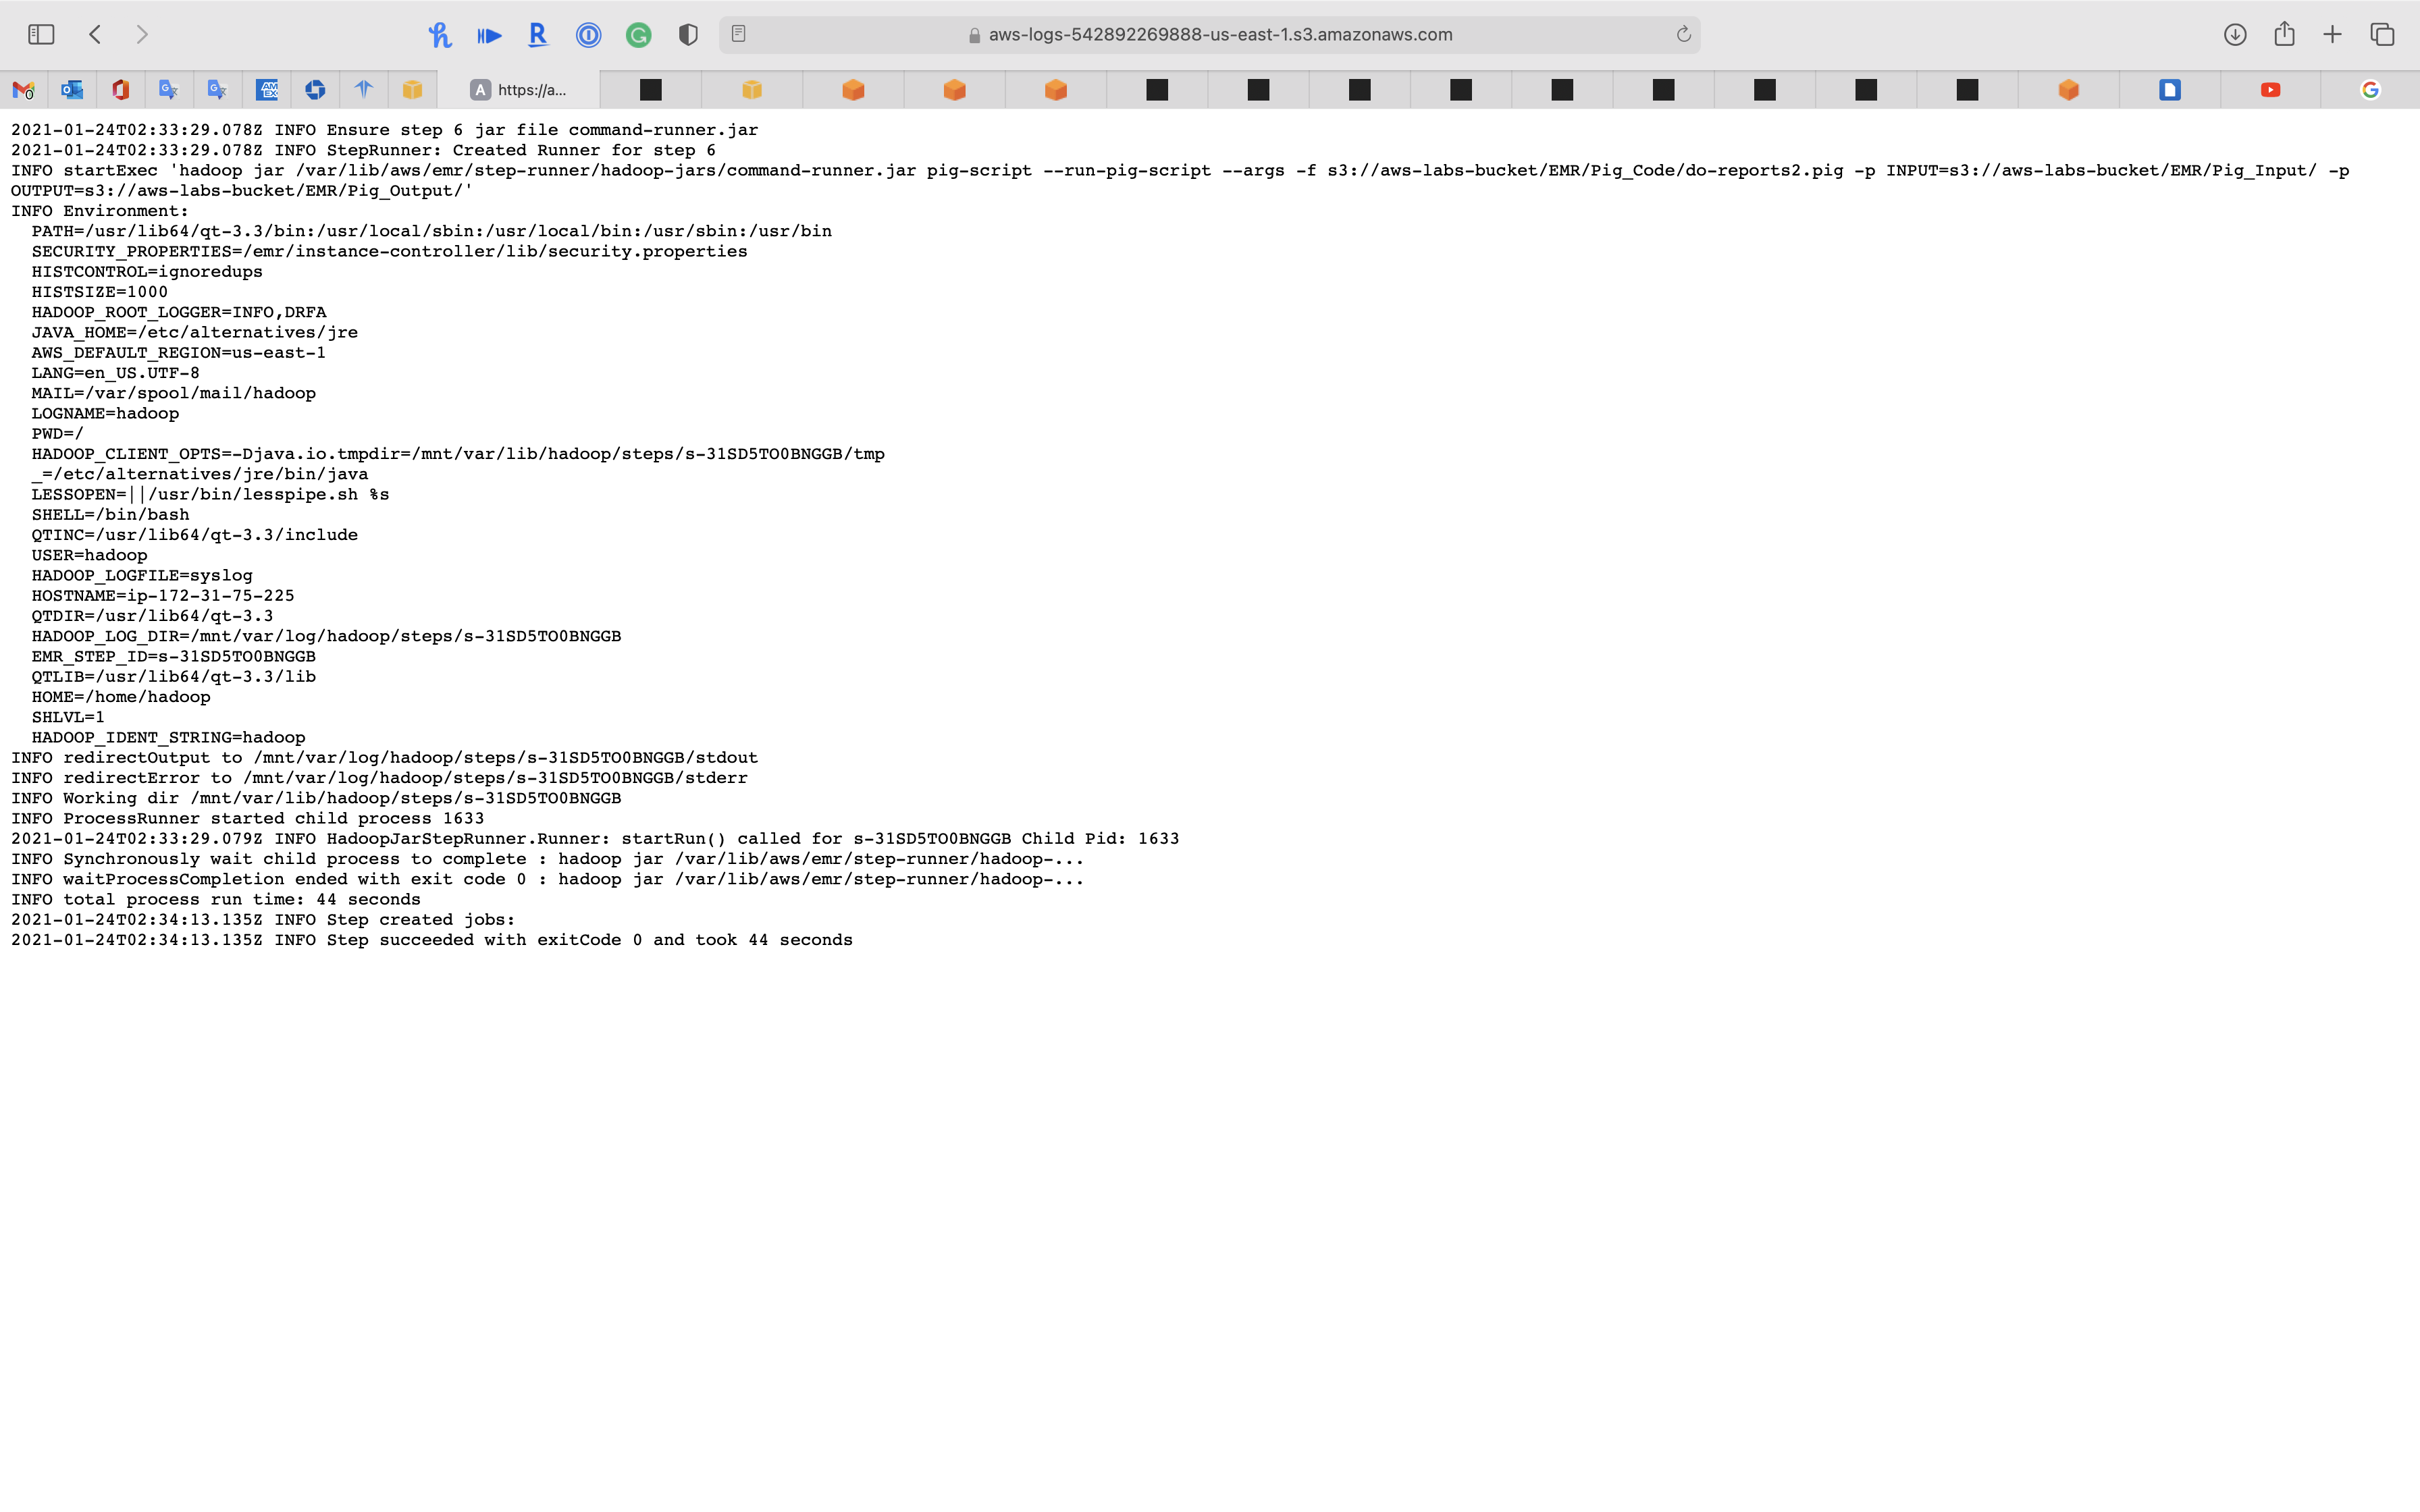
syslog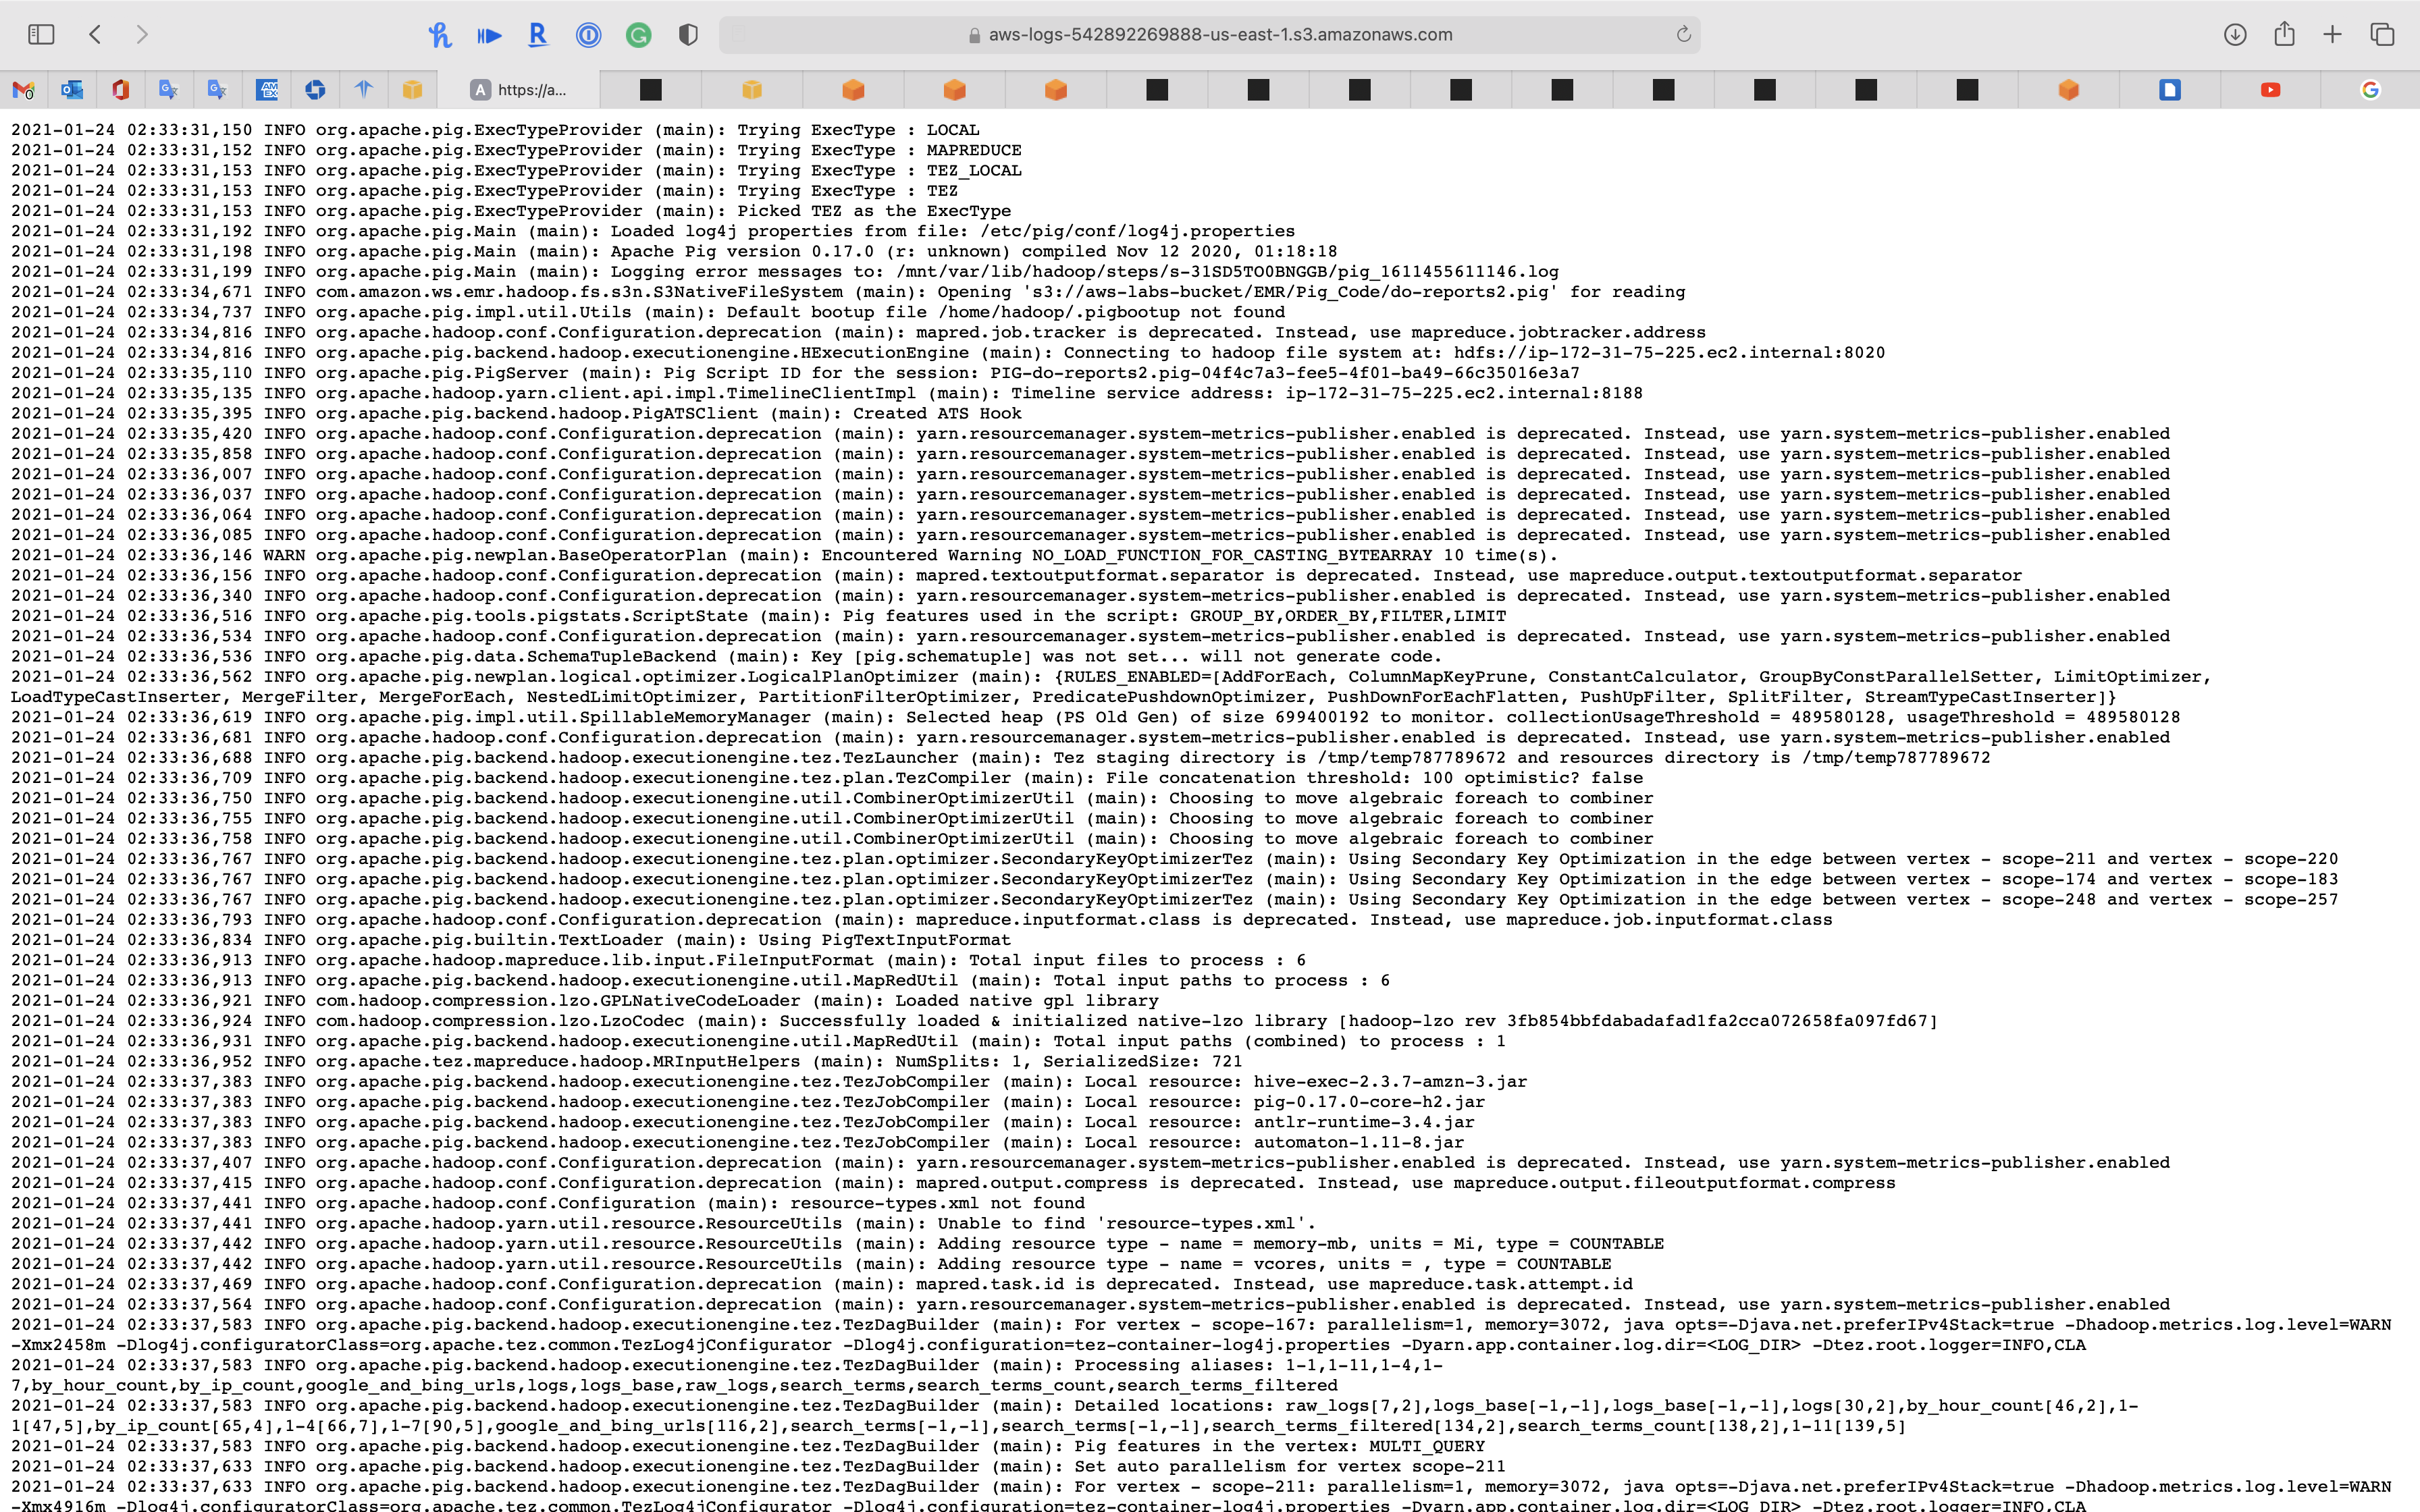
stderr
stdout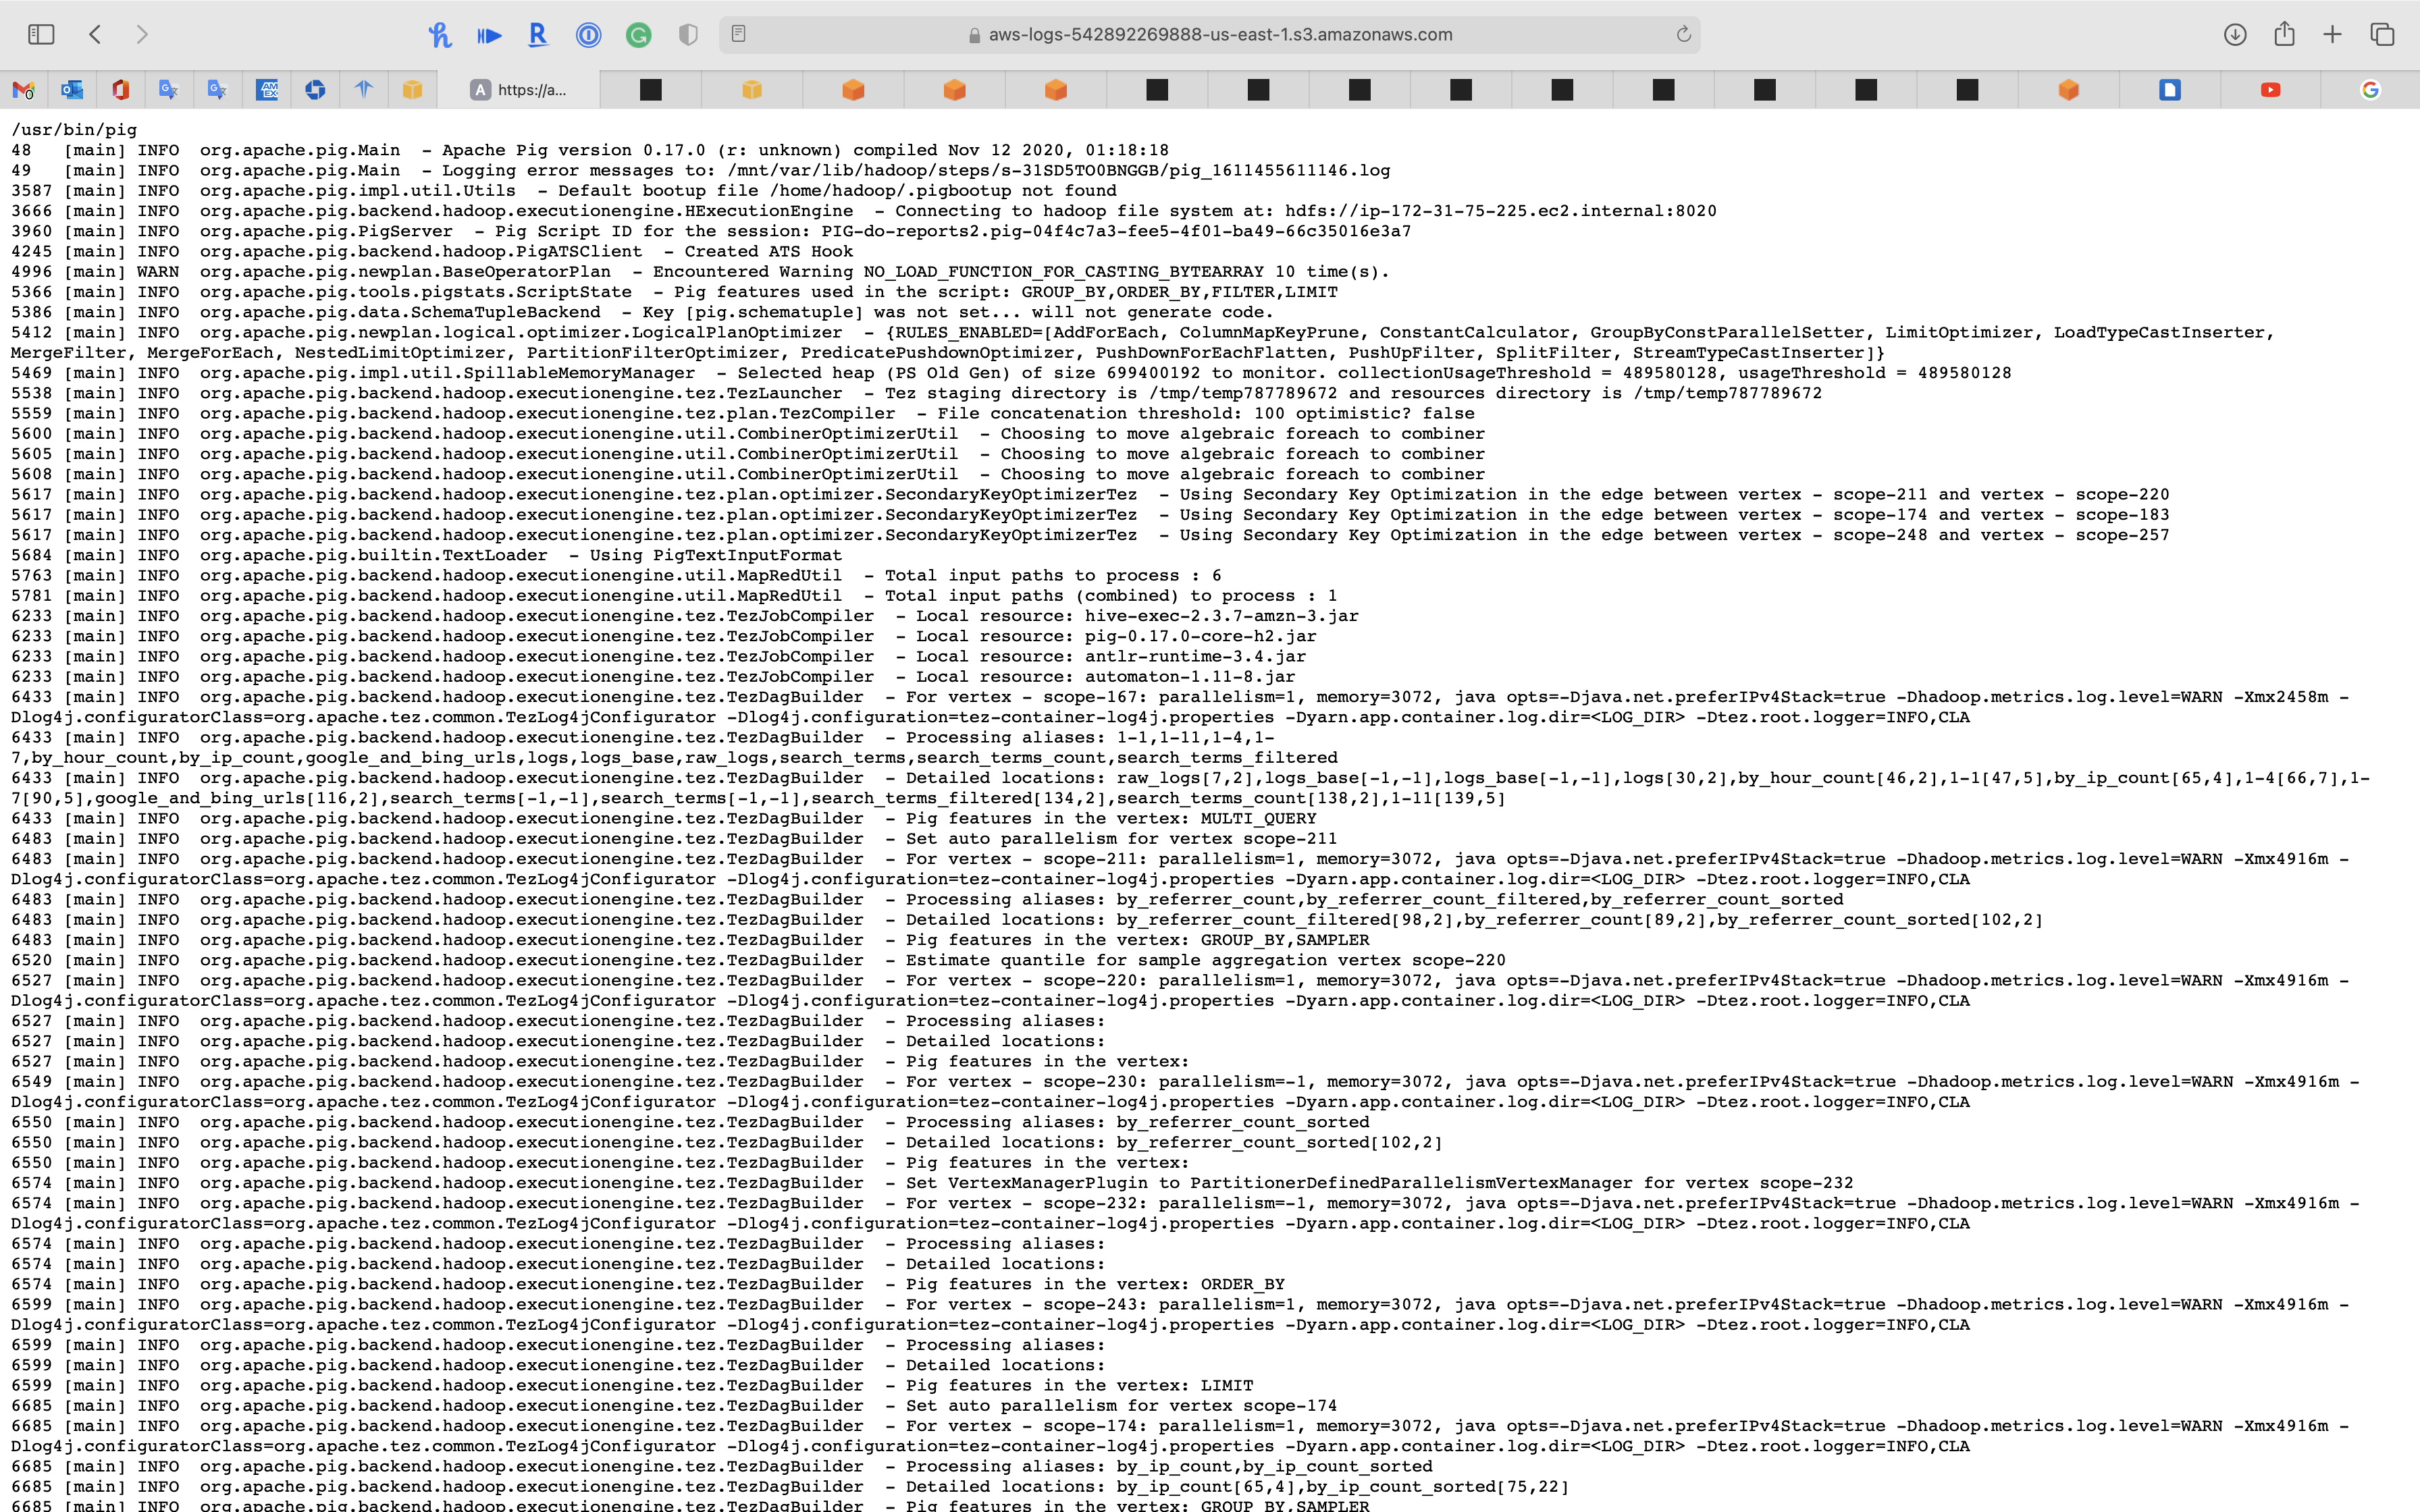
Monitoring
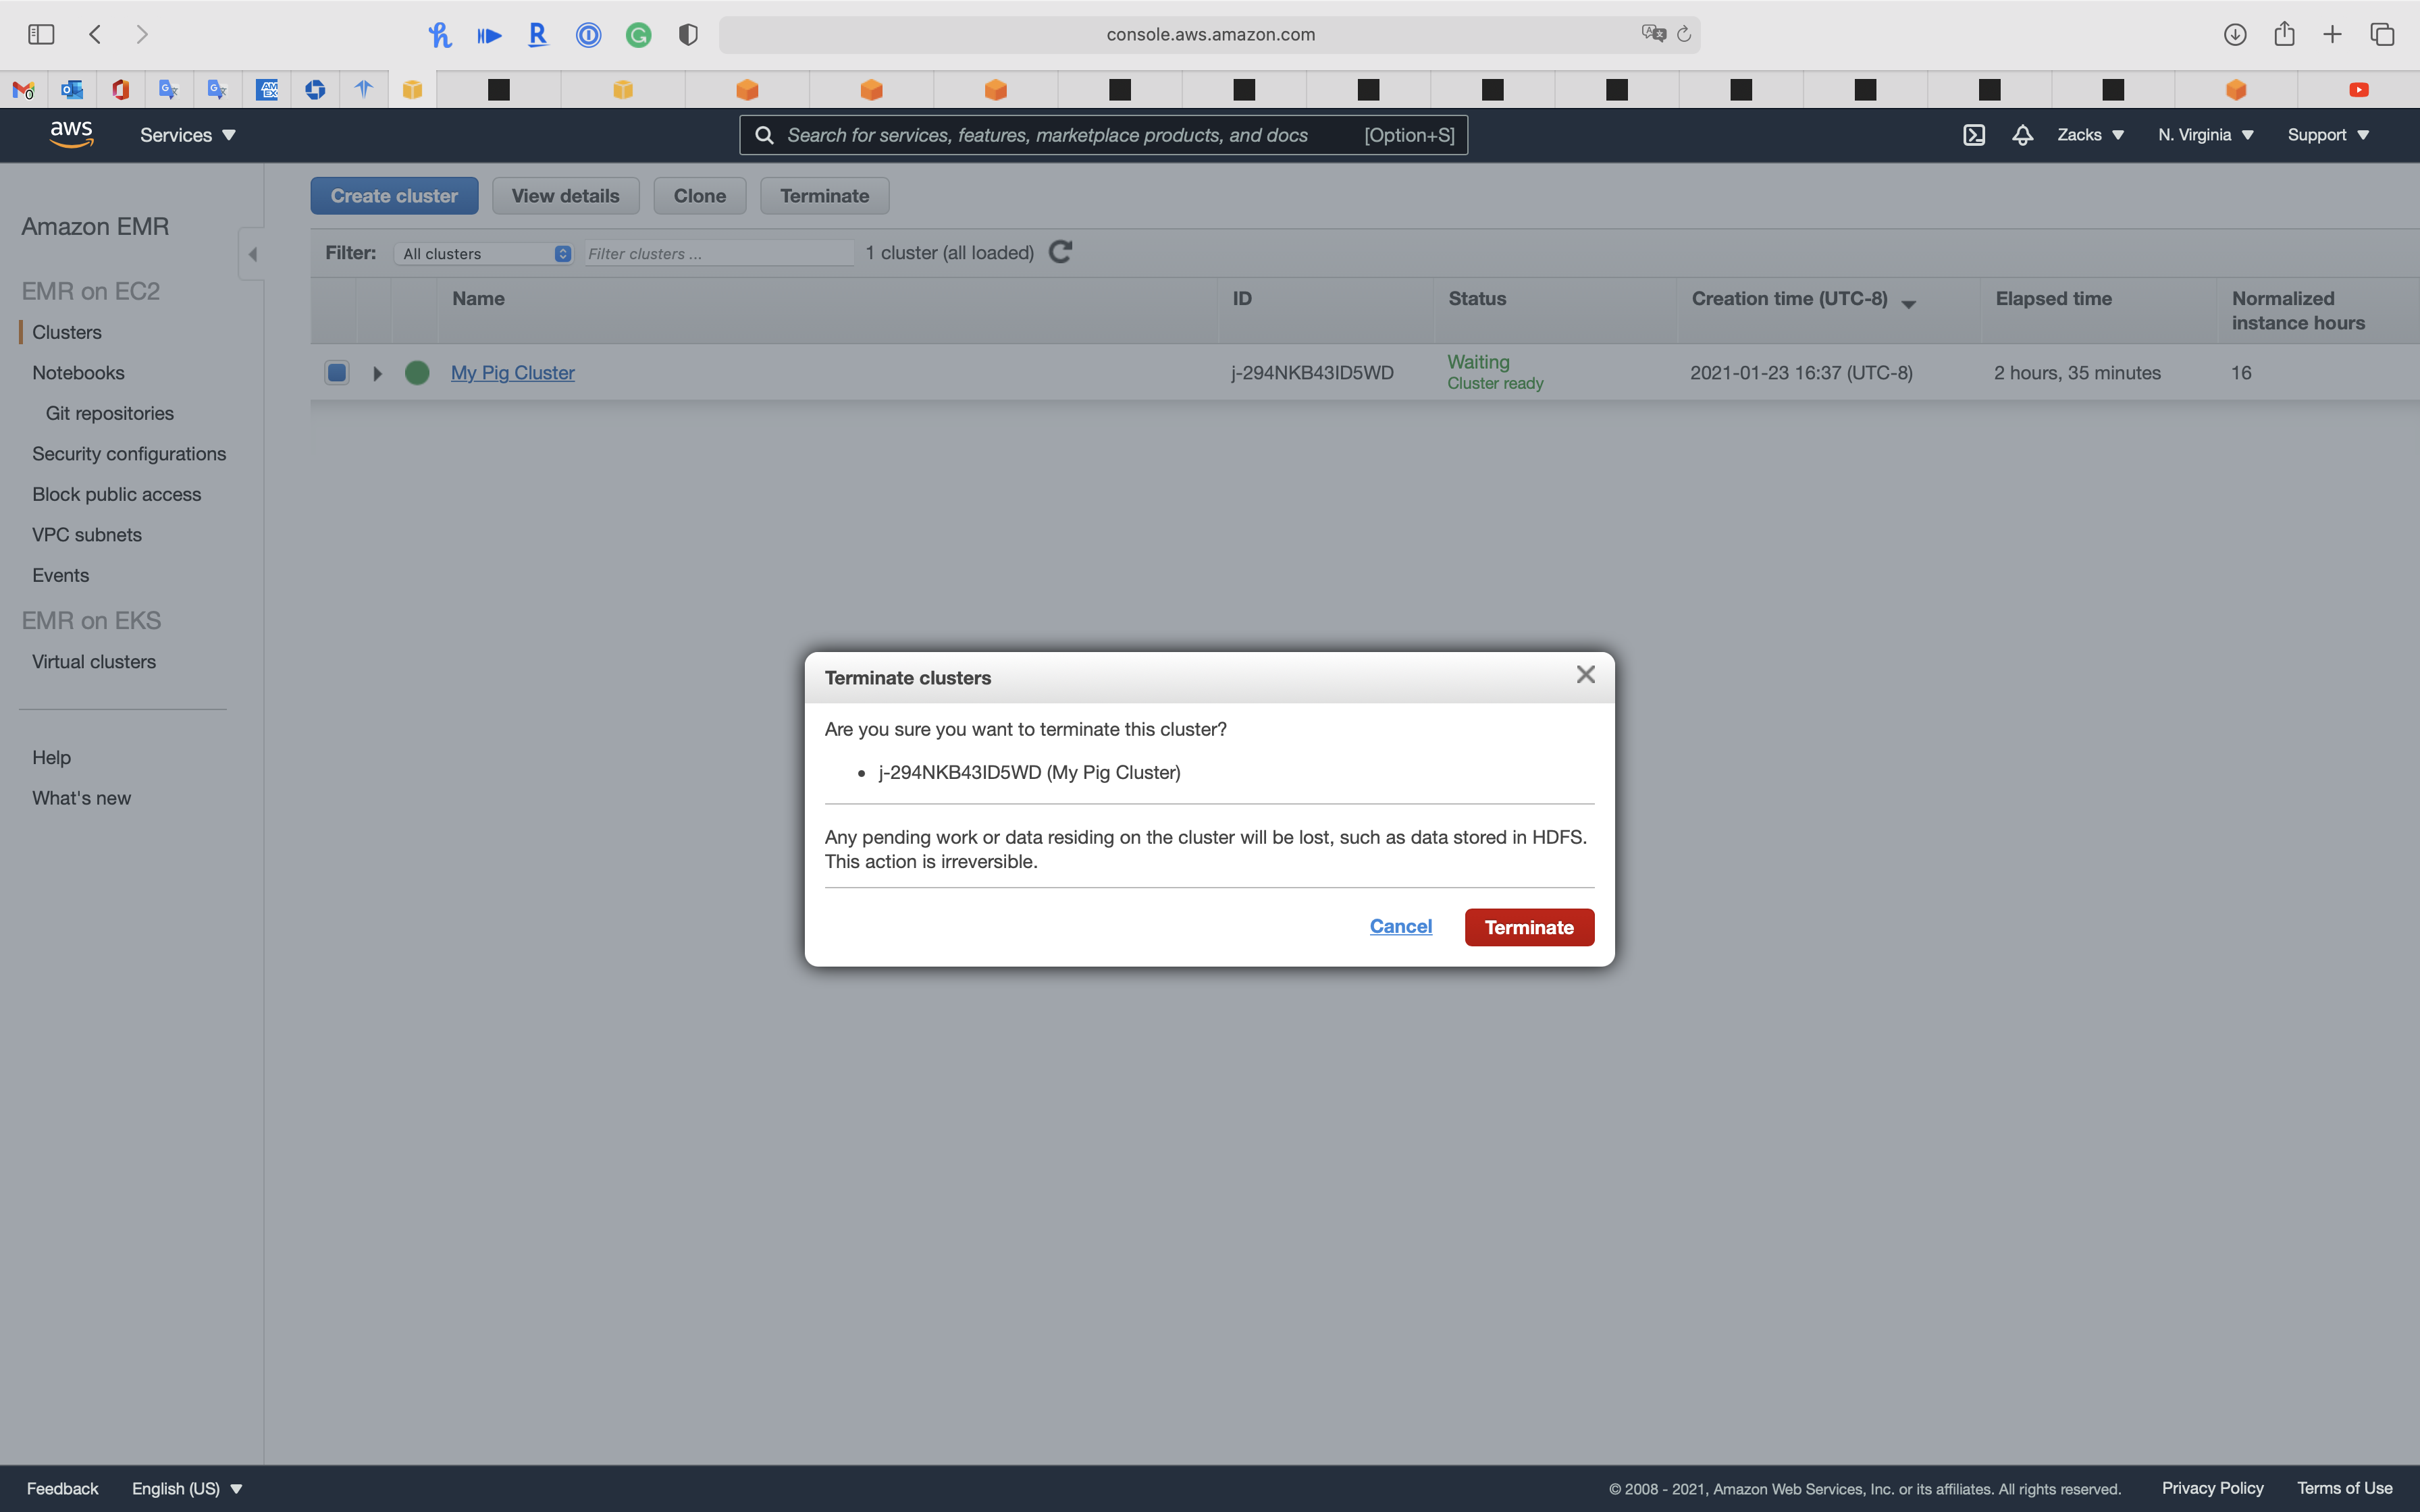
Warning
Terminate the EMR Cluster to avoid bankrupt.
Go to Services -> EC2 -> Security Groups
Delete the EMR related security groups.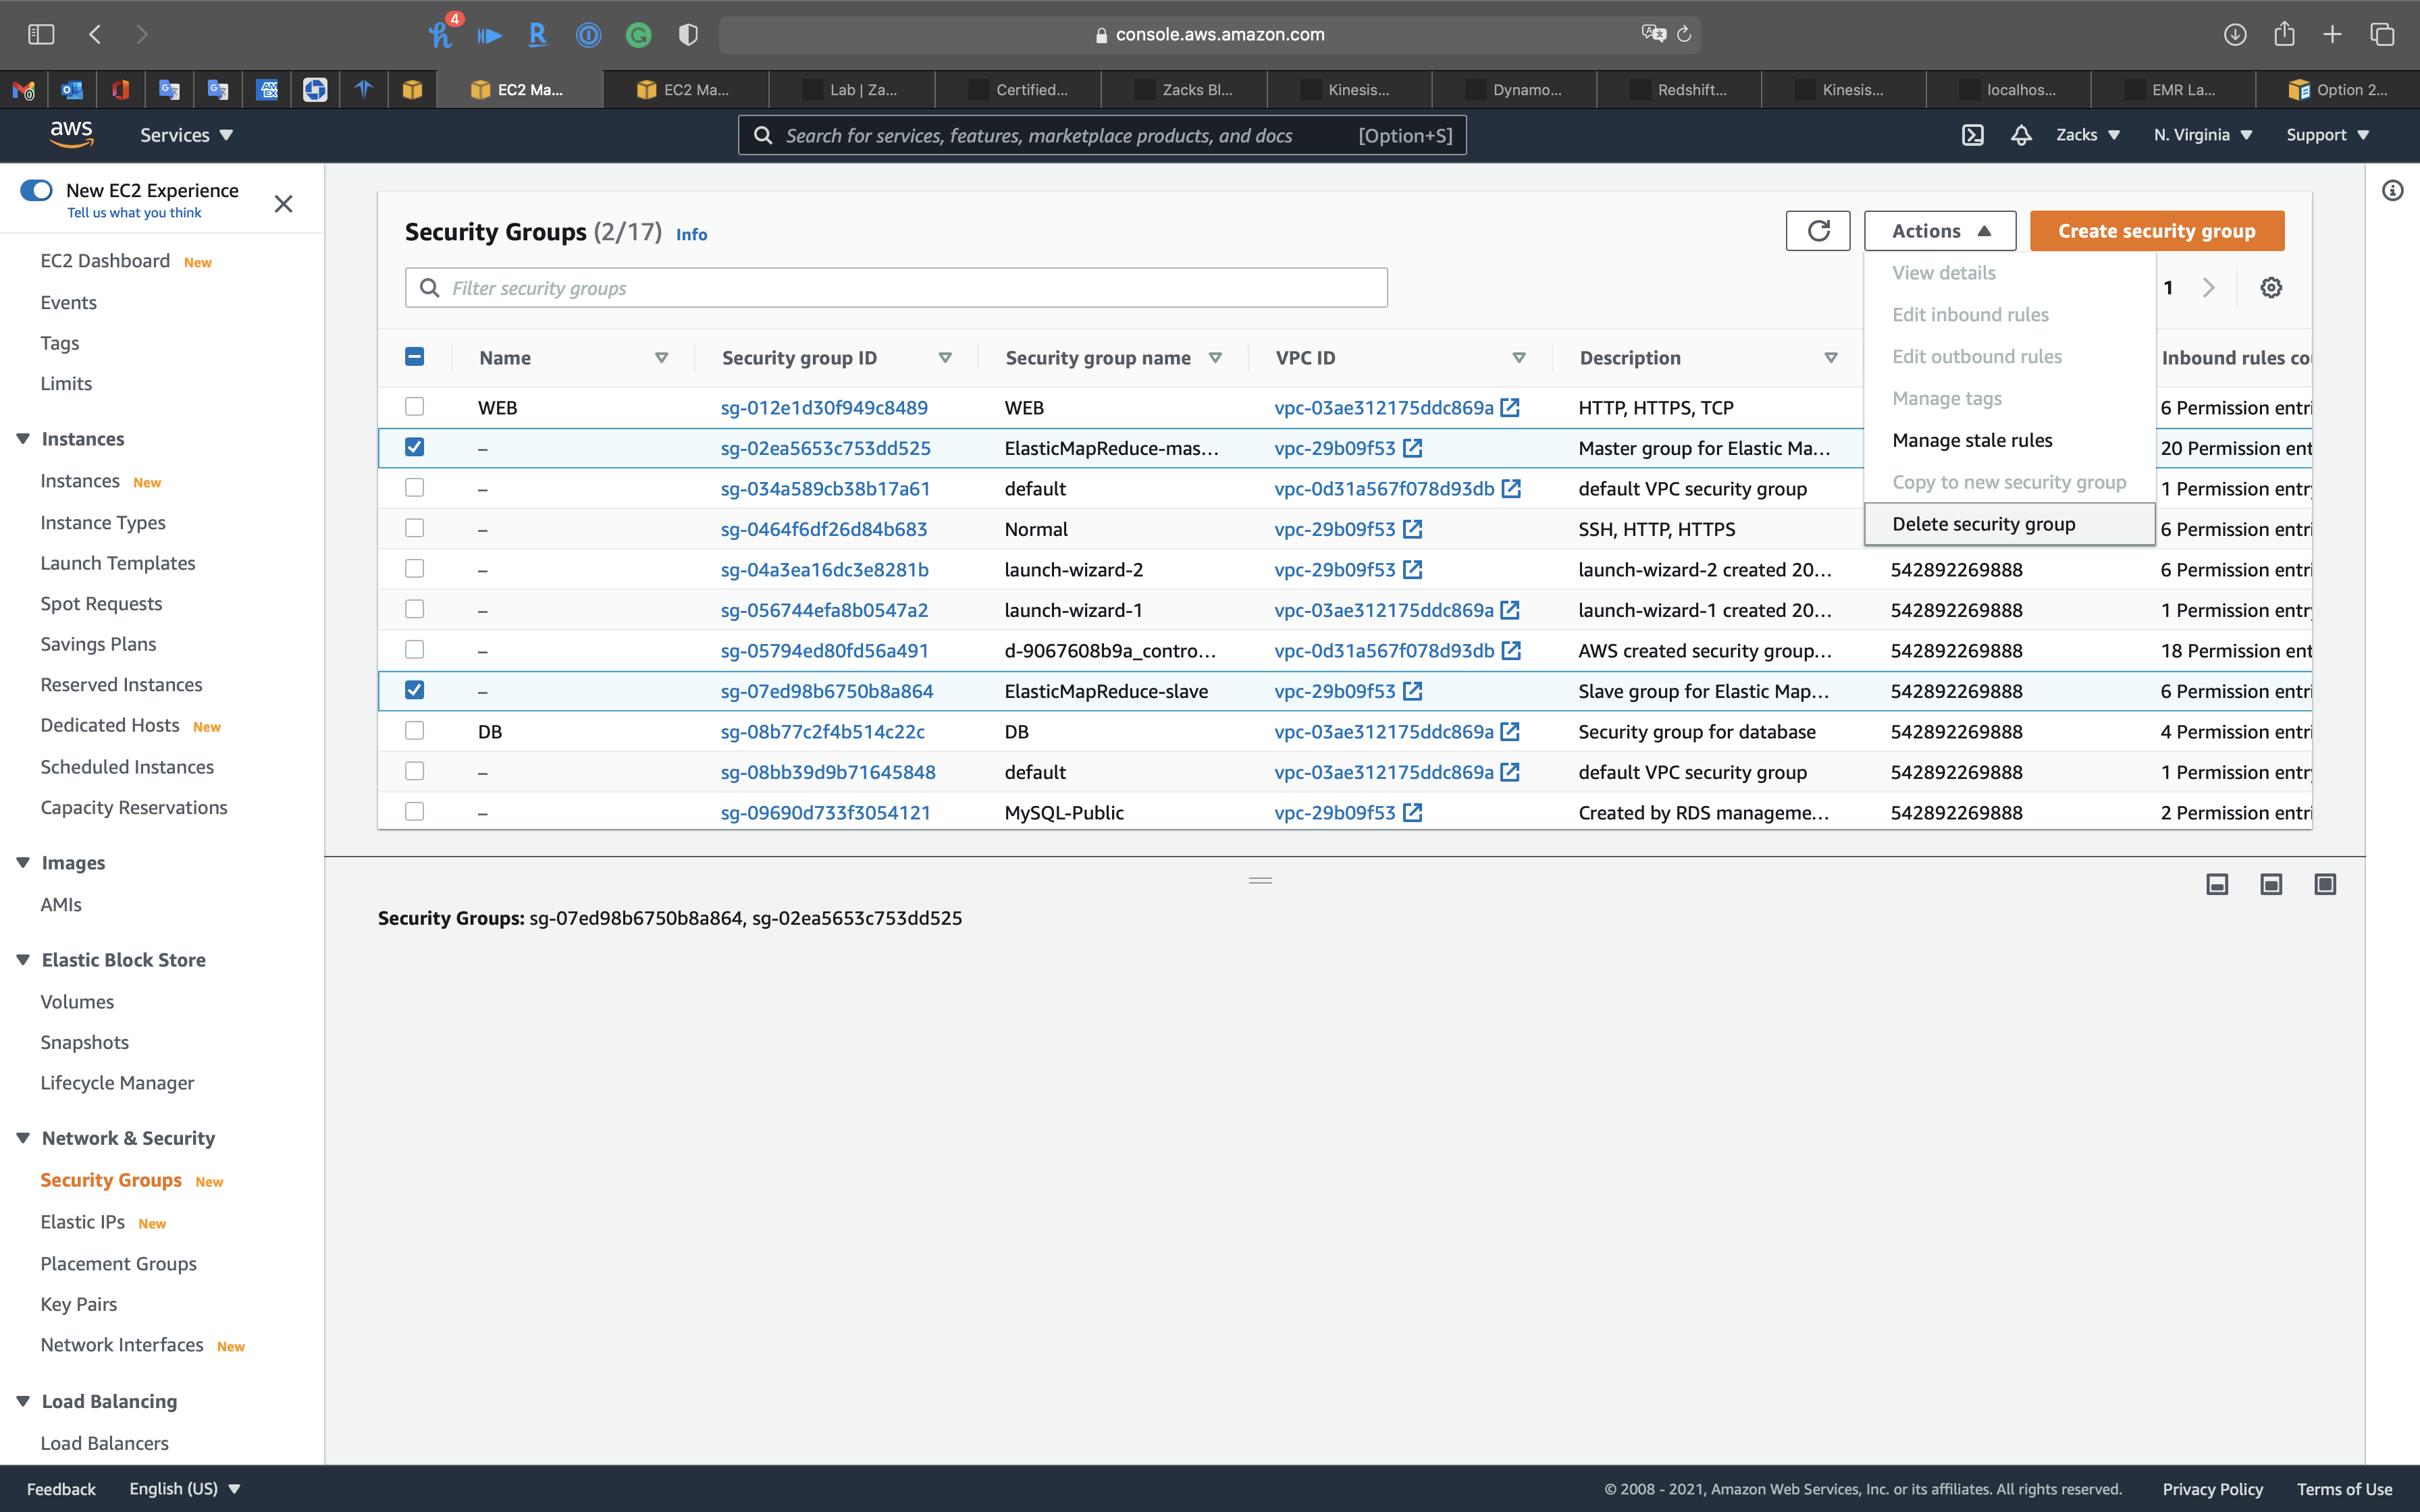
You CANNOT delete them together. You MUST delete the slave sg fist then then delete master sg since slave sg refers master sg
EMR New York Taxi
Core Components
- AWS EMR Cluster
- Master Node
- Hadoop
- Presto
- Hue
- Core Node
- Master Node
- AWS Glue
- Glue Data Catalog
- Glue Crawler
- Glue ETL
- AWS S3
Lab Details
Generally speaking, AWS EMR + AWS Glue + AWS S3 are the big data techniques for querying None-SQL data, e.g., data in CSV, JSON, or Parquet, by SQL statements.
- AWS S3: Data storage for raw data (.csv) and transformed data (.parquet)
- AWS Glue: Database schema storage
- ETL Job
- Extract raw data schema
- Transform raw data to other document type
- Change output schema
- Load raw data schema and transformed data schema
- Database & Tables
- Store schemas
- ETL Job
- AWS EMR: Big data integration platform for running multiple big data applications, such as Hadoop, Presto, and Hue.
In comparison to the traditional RDBMS, which stores data and schemas in the same location, big data separates the schemas and data storage. The structure is designed for schema fixed but continuous increasing data causing tremendous amount of data analysis.
Task Details
Query Non-SQL batch data in SQL statement.
- AWS S3
- Download data from TLC and upload the data to Amazon S3
- AWS Glue
- Using AWS Glue to create the database then crawl the data in S3 for building table schemas.
- Using AWS Glue ETL Job to transform the raw data (.csv) to (.parquet) for getting the date in
timestamptype instead ofstringtype.
- AWS EMR
- Using AWS EMR to build powerful cloud computing resource and install needed big data applications.
- SSH into AWS EMR Master Node to run SQL query through Presto, a SQL query engine for Hadoop.
- Log into Hue, an user interactive for Hadoop that allows you run Hive query.
Prerequisite
Download Data
Download data from NYC gov, visit TLC Trip Record Data
Or click here ot download 2016 January - Yellow Taxi Trip Records (CSV)
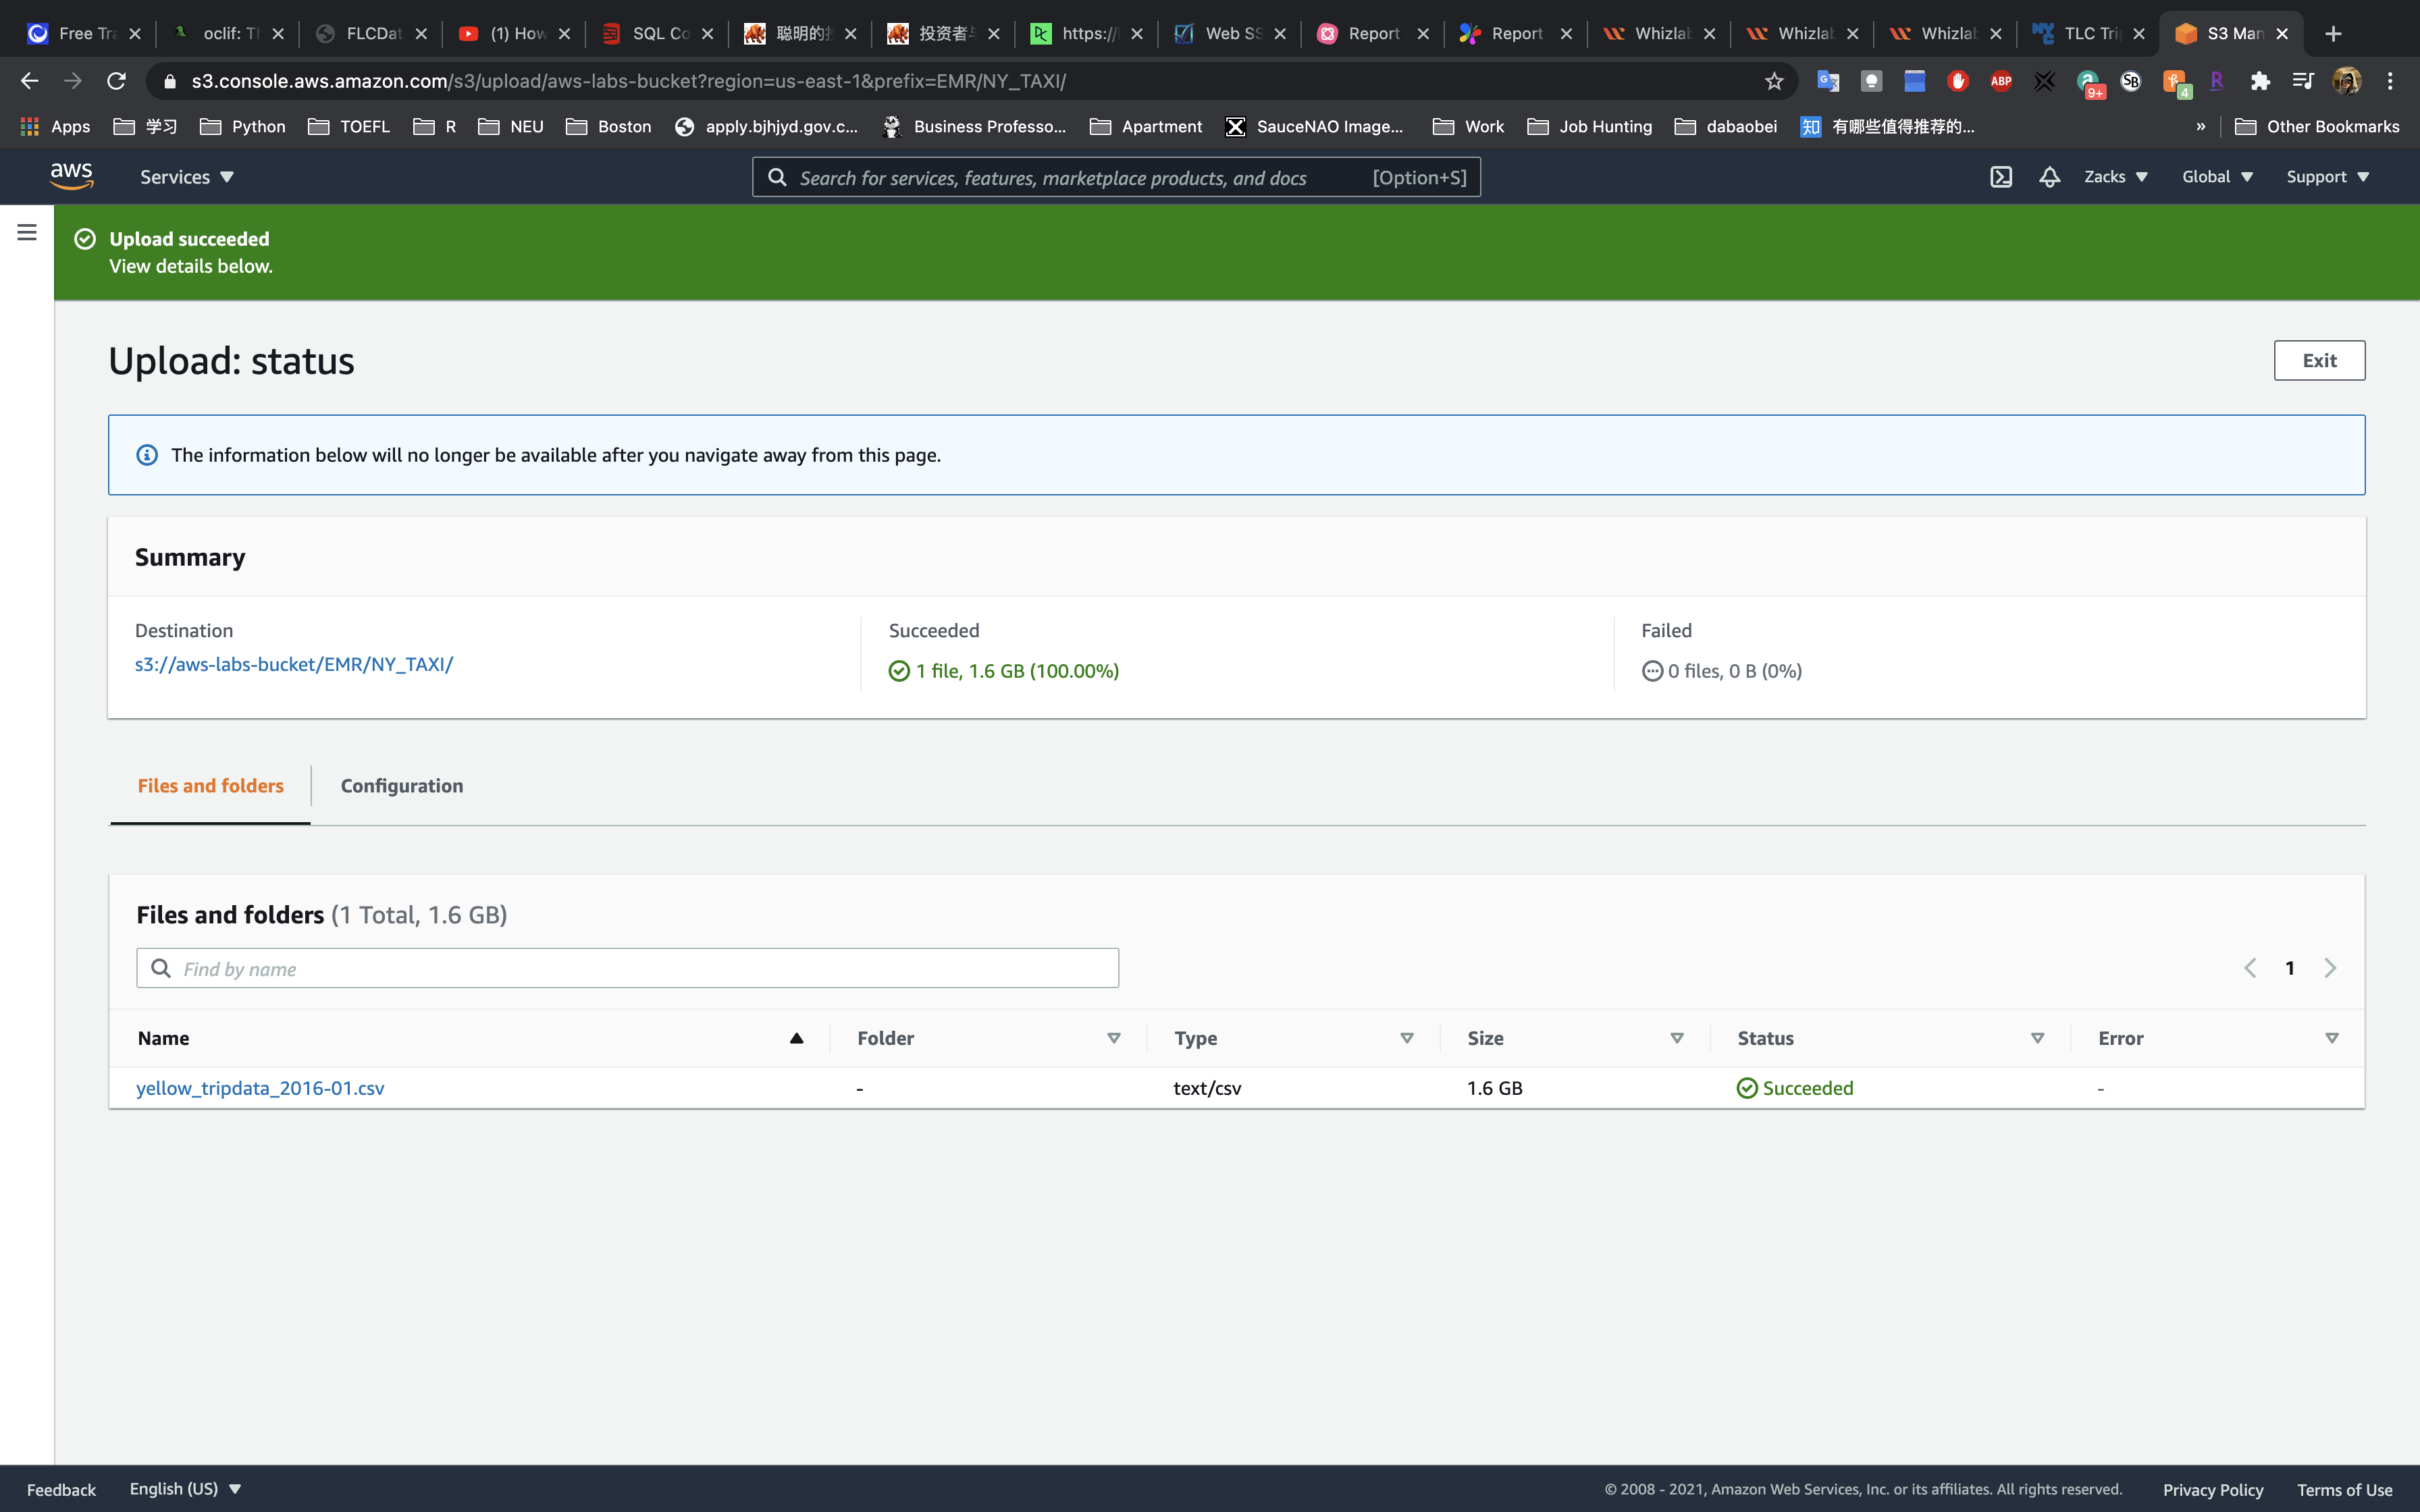
Validate raw data
We can see it is a huge data with 1.6GB
1 | cd ~/Downloads |
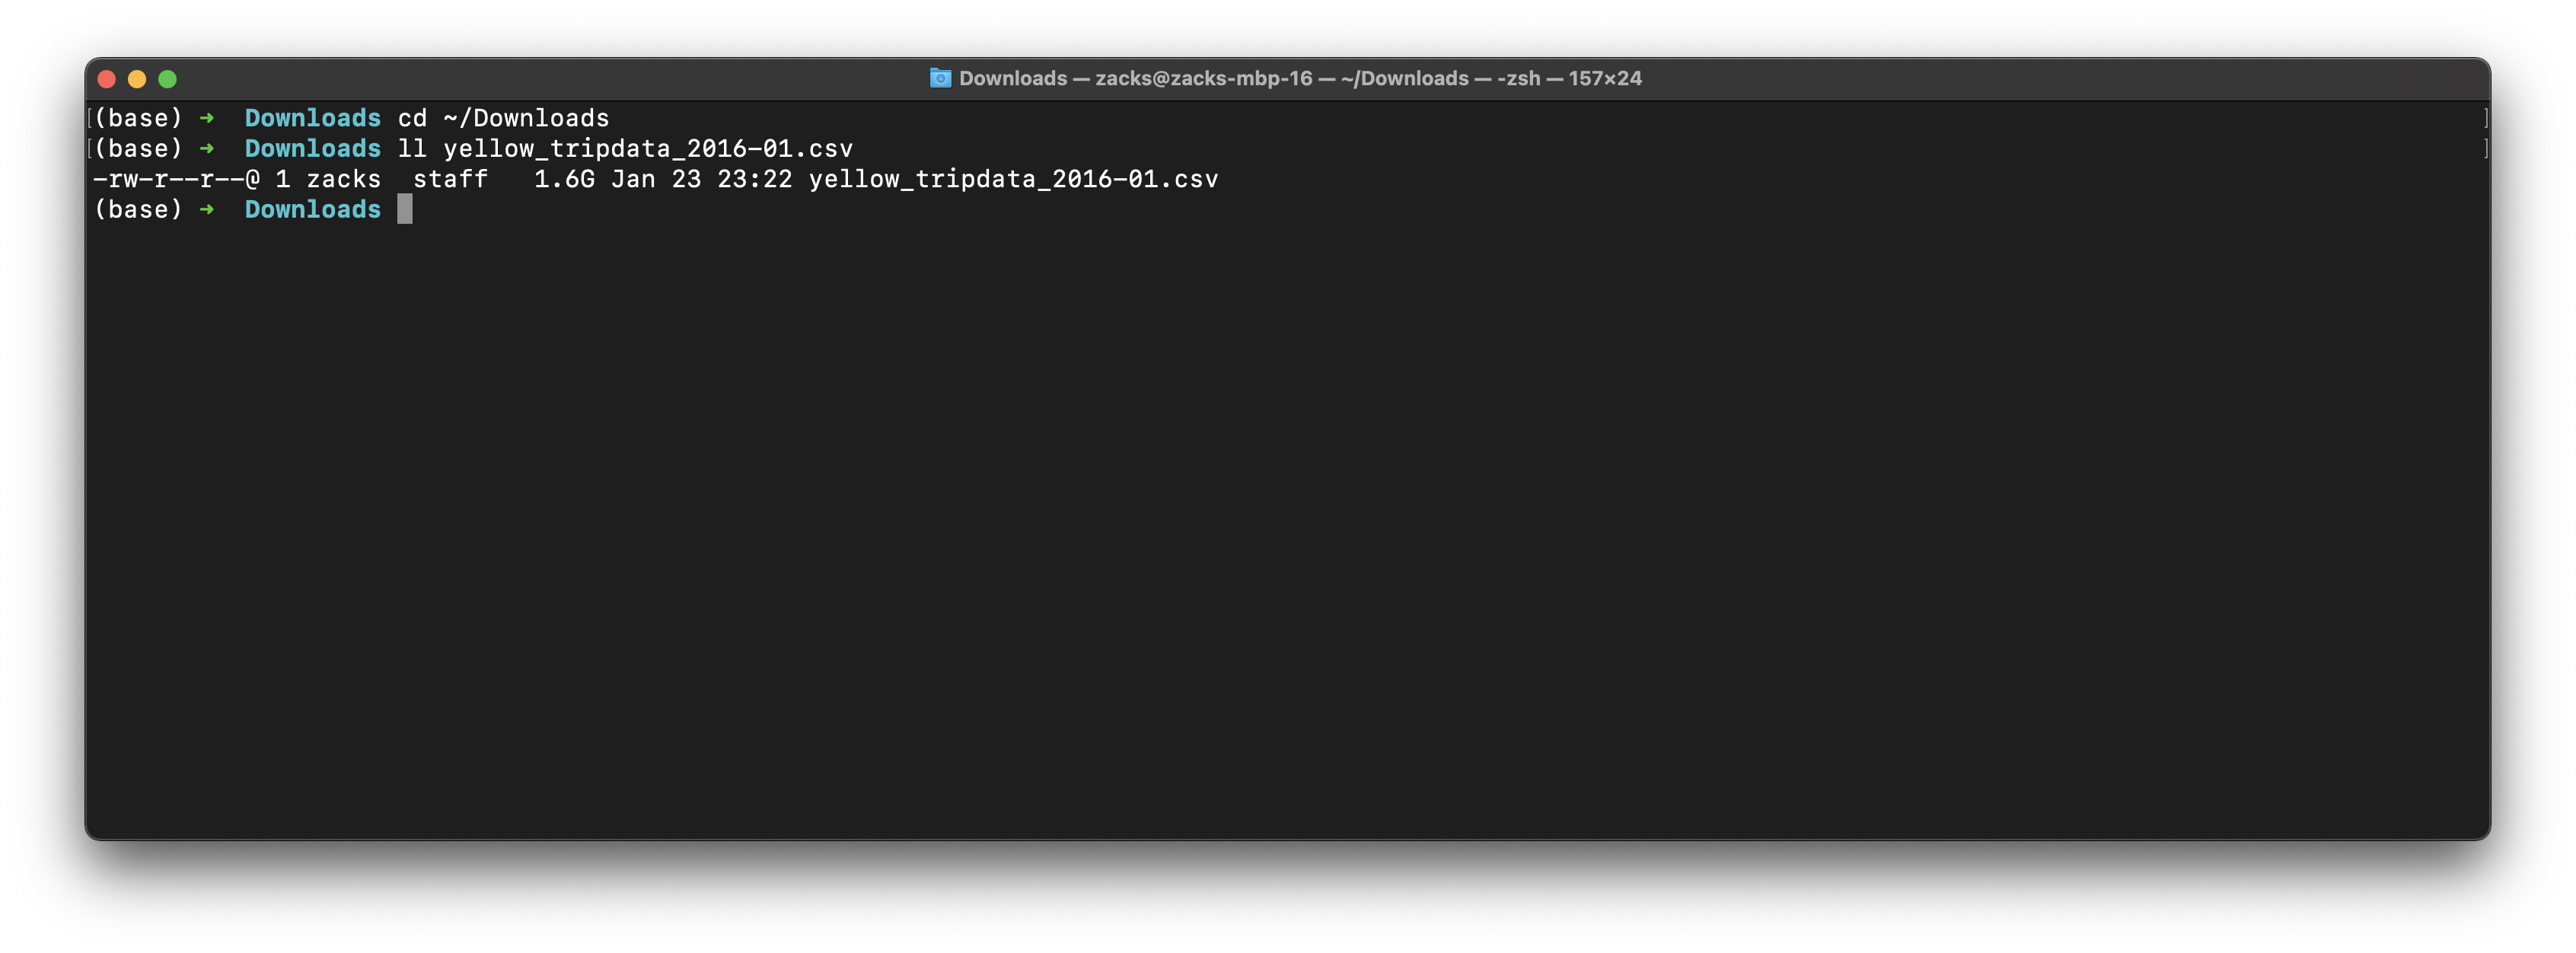
New York city has 10,906,859 records of yellow taxi in Jan, 2016.
1 | wc -l yellow_tripdata_2016-01.csv |

S3 Configuration
Create a bucket for storing the lab data.
Create bucket and folders
Create a folder in your S3 bucket for storing raw data.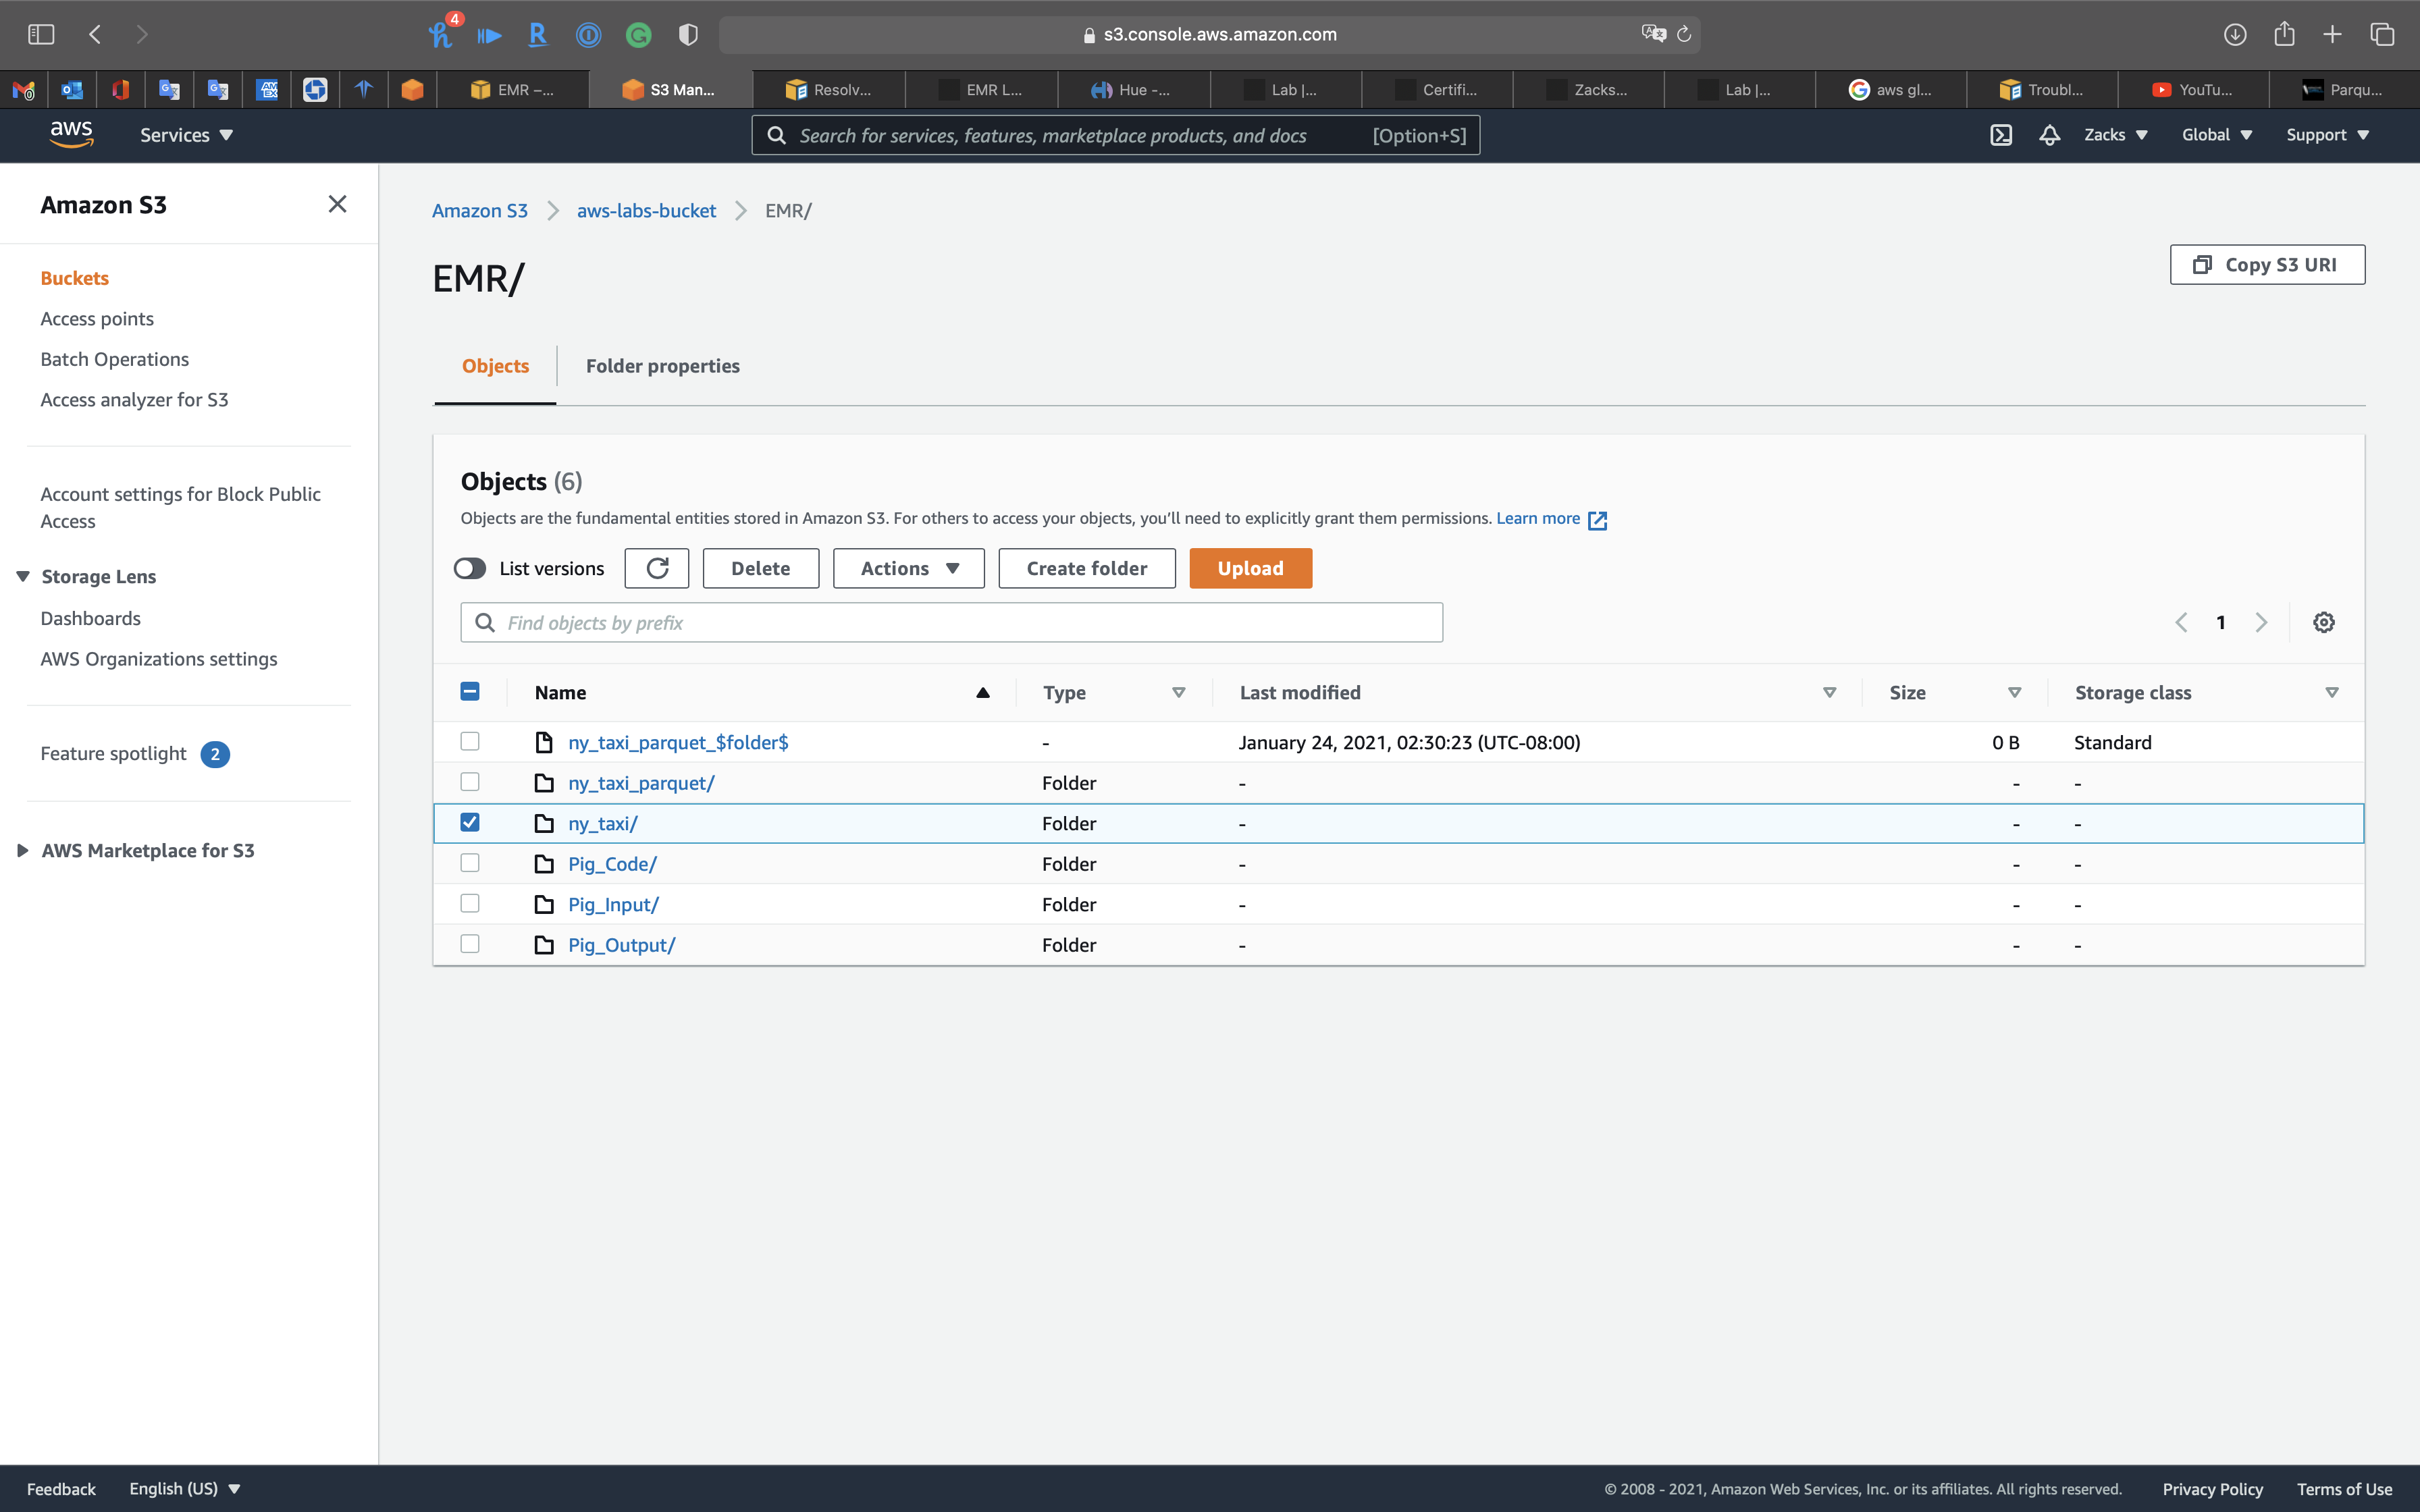
Create a folder in your S3 bucket for storing parquet data.
Upload data to your raw data folder
Click on your folder for the raw data.
You may need to stably upload the data through Chrome.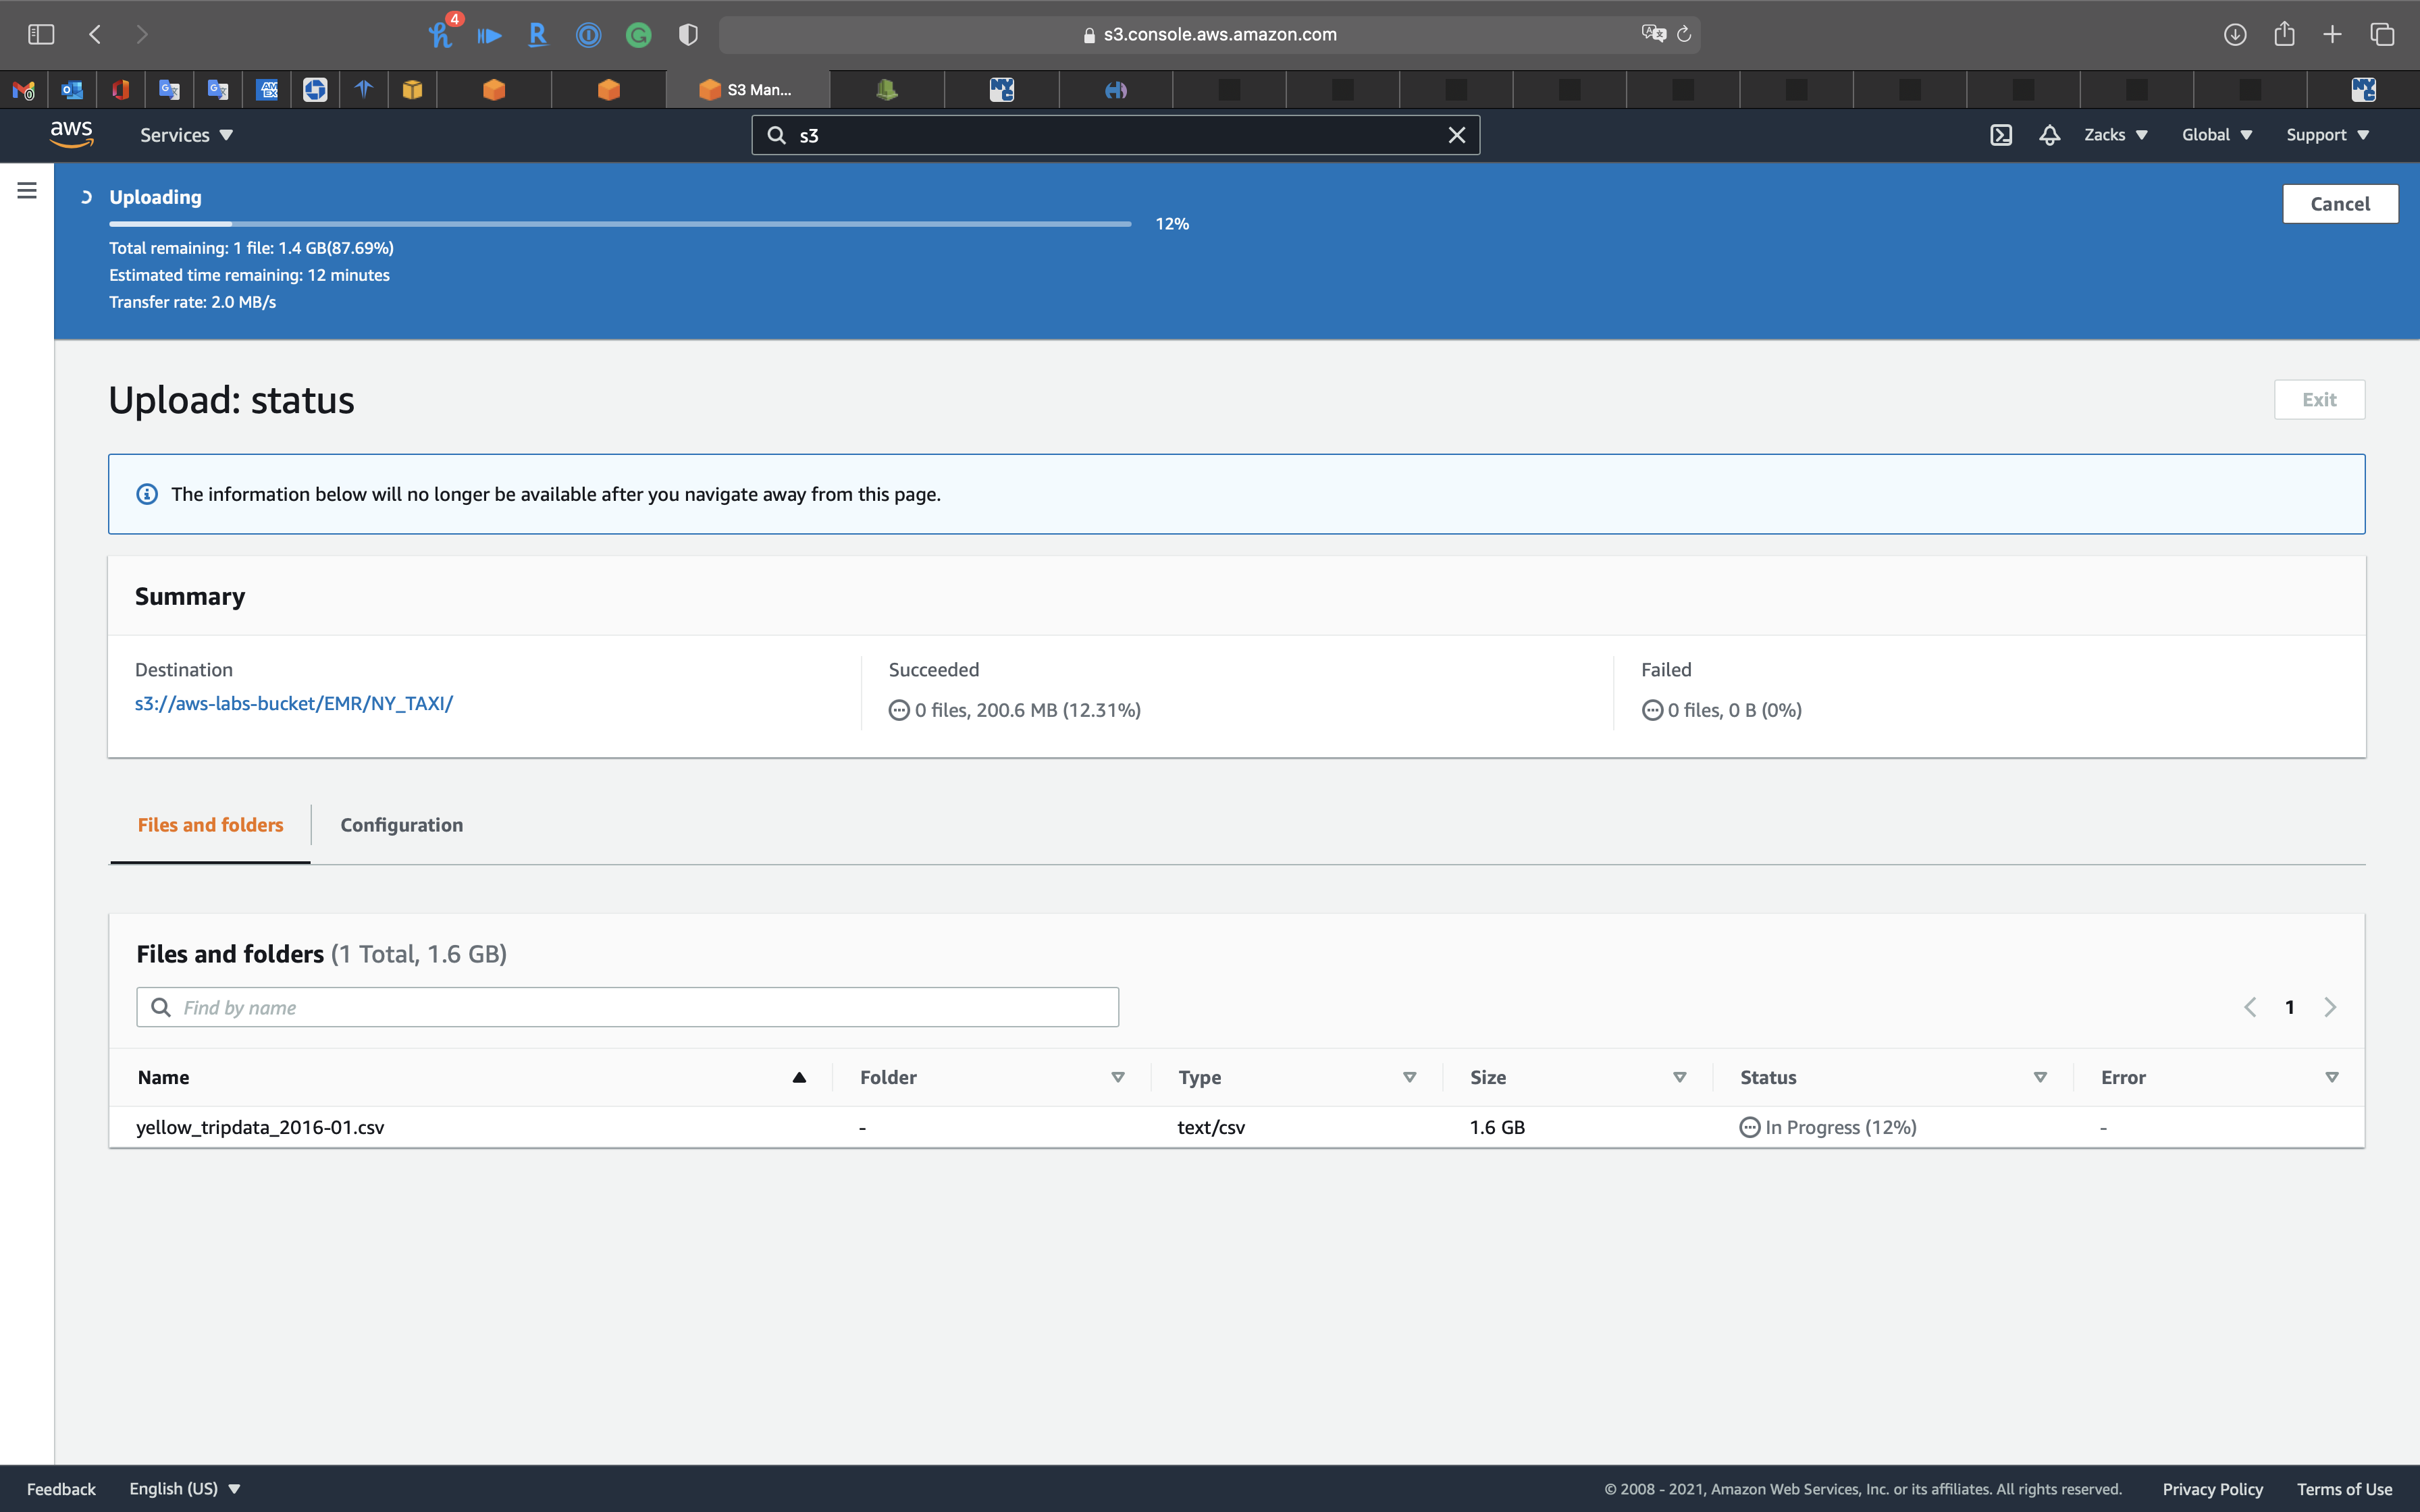
Glue Configuration
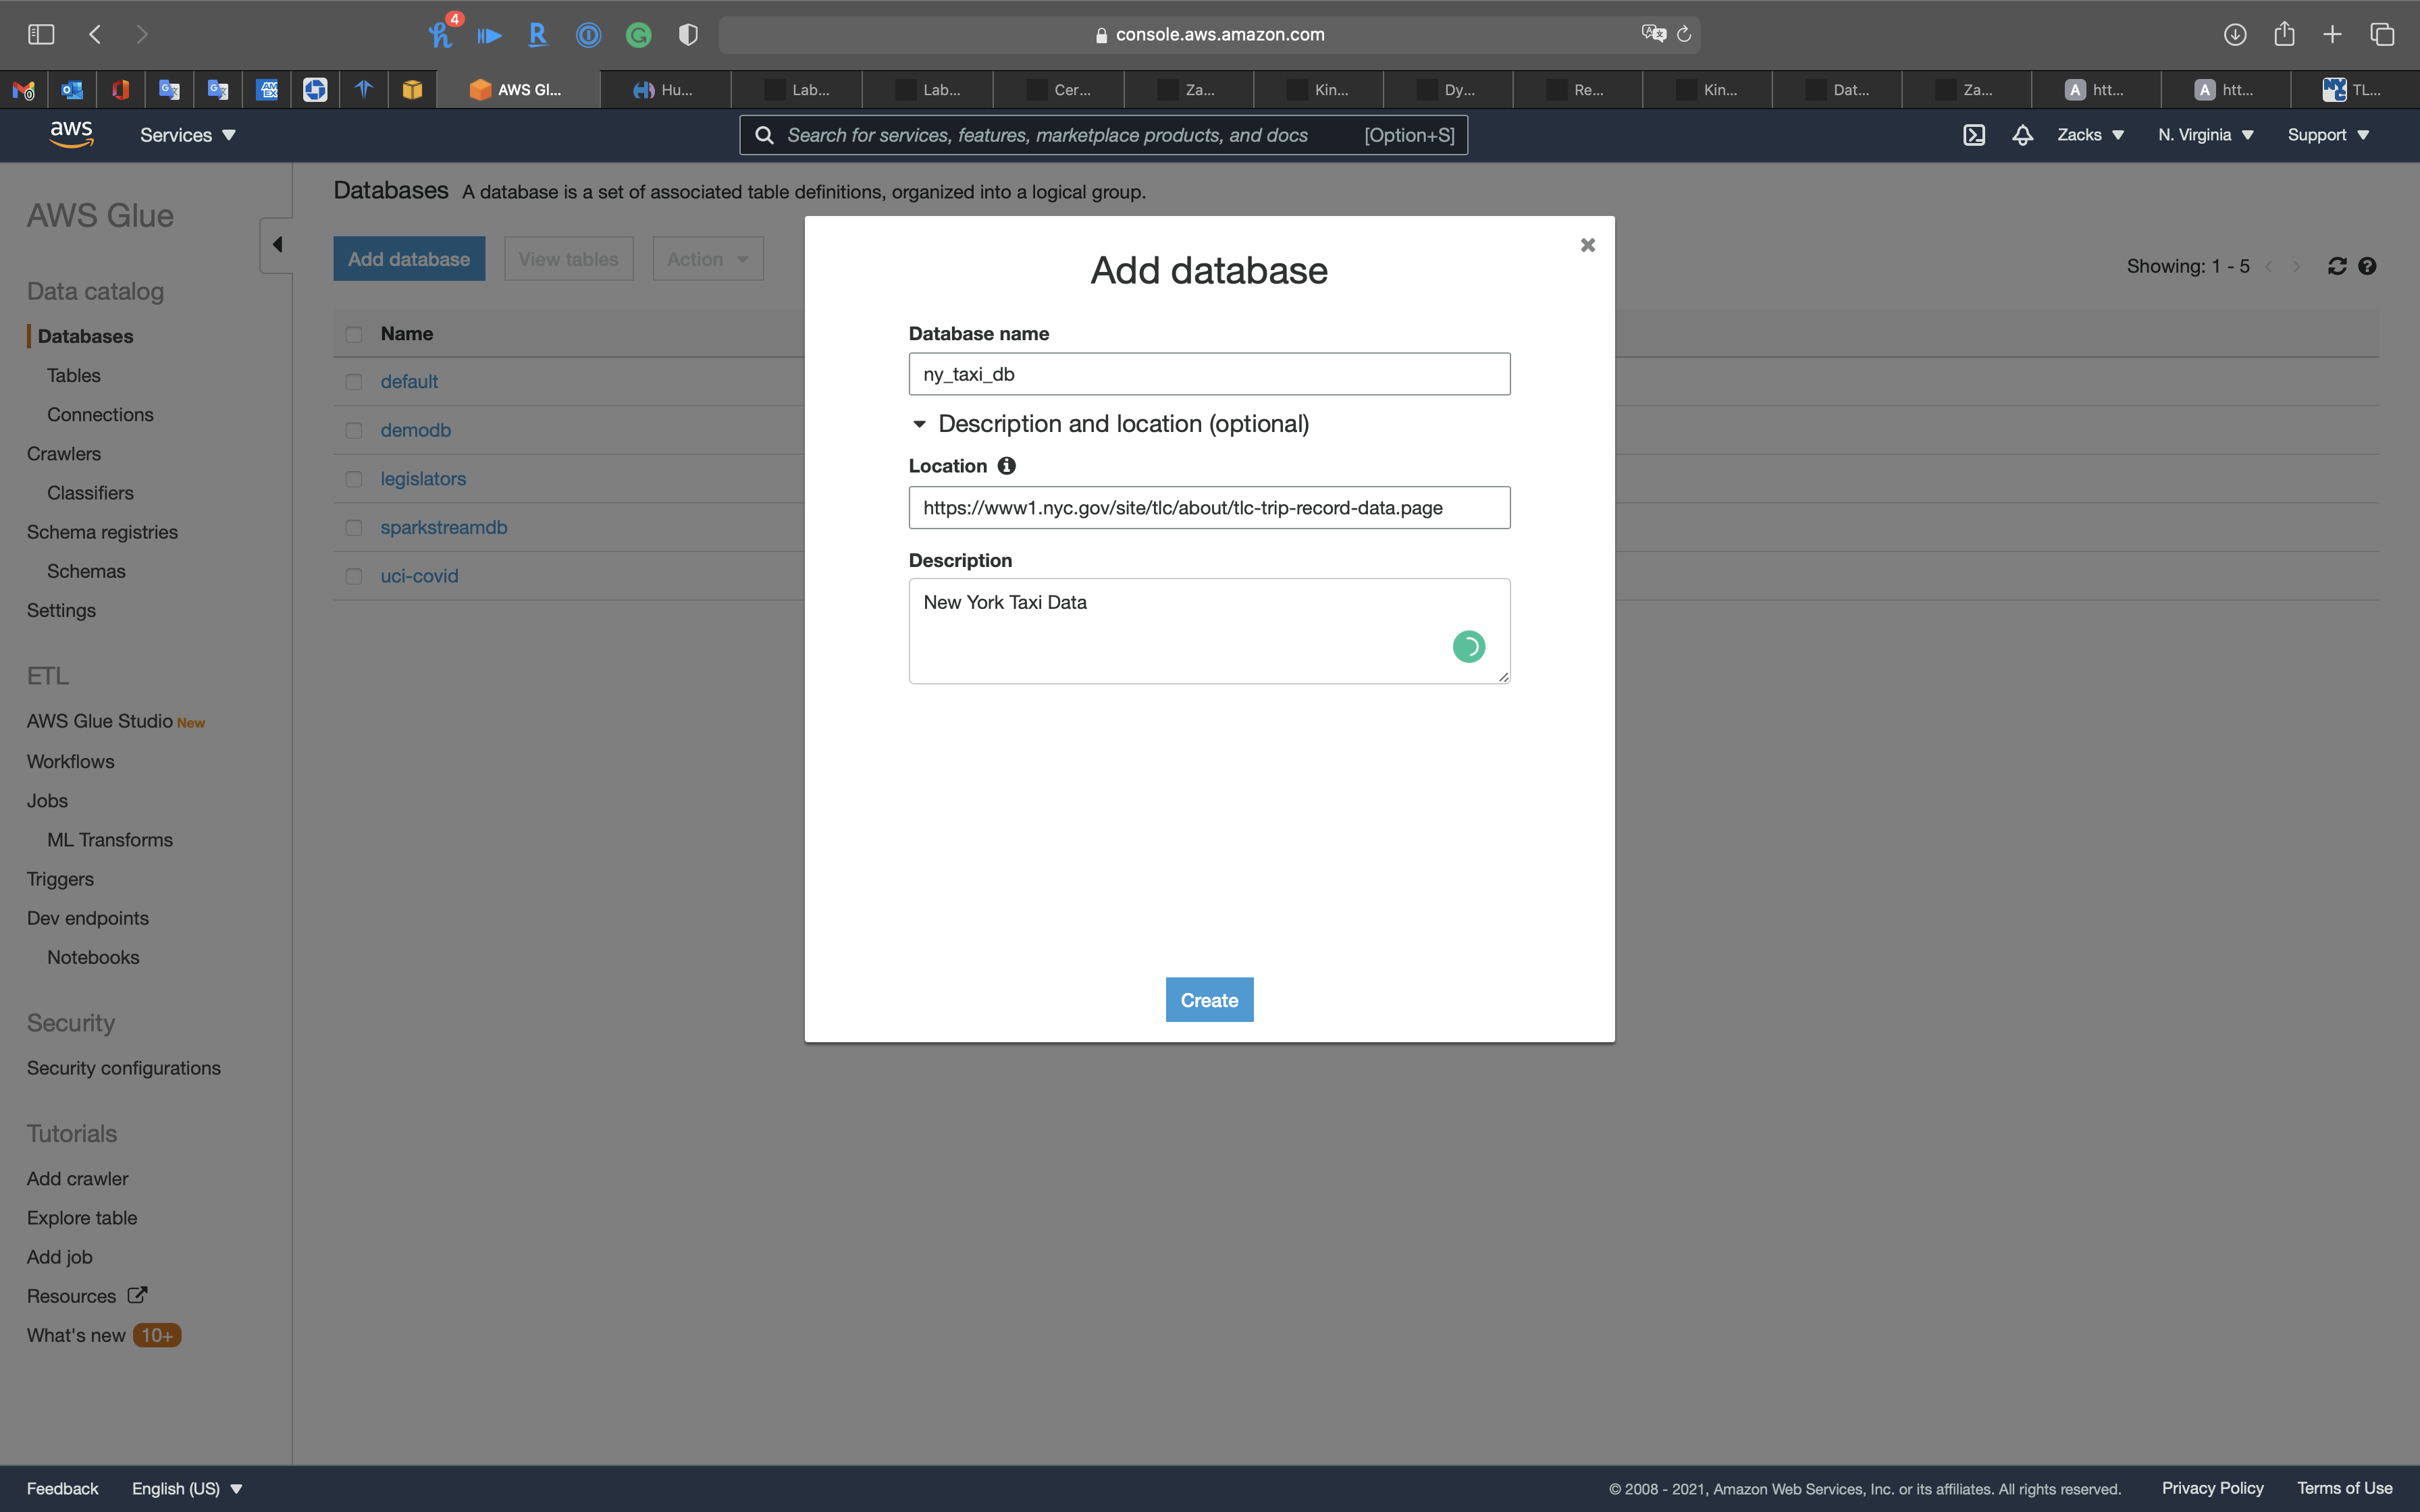
Create a Database for Raw Data Table & Transformed Data Table
Create a database for storing raw data and transformed data schemas.
Click on Add databases
- Database name:
ny_taxi_db - Location:
https://www1.nyc.gov/site/tlc/about/tlc-trip-record-data.page - Description:
New York Taxi Data
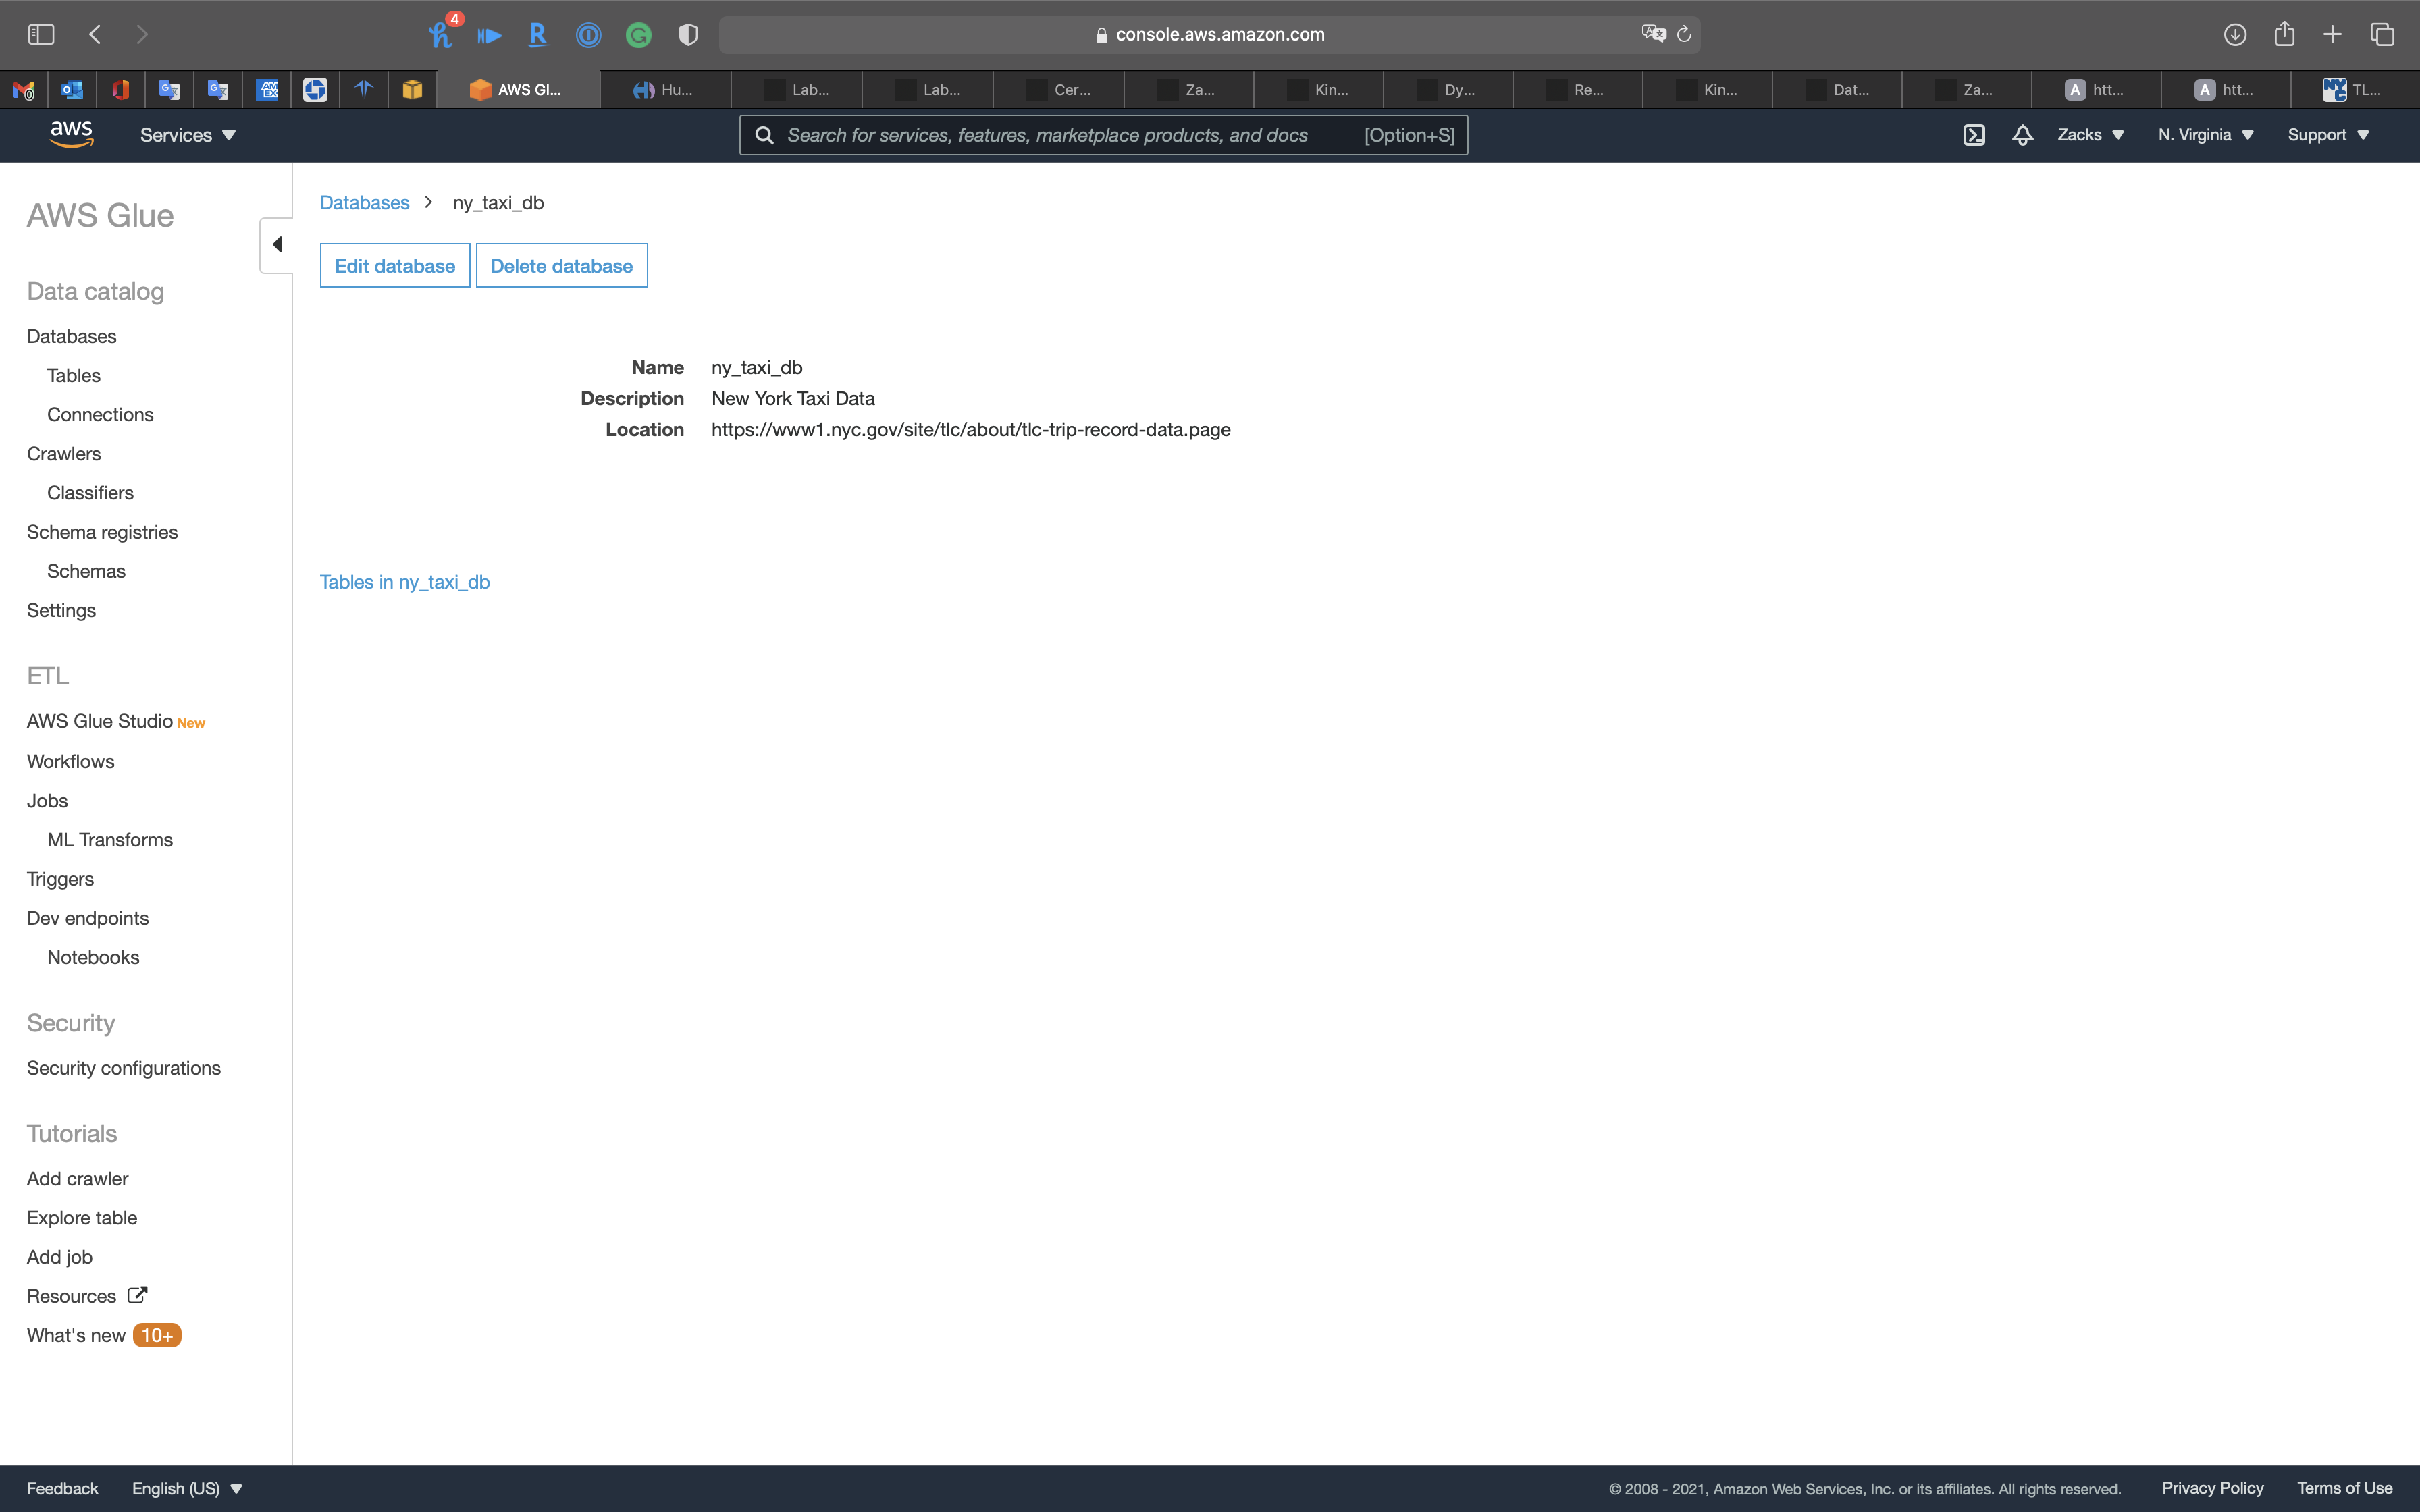
Click ny_taxi_db
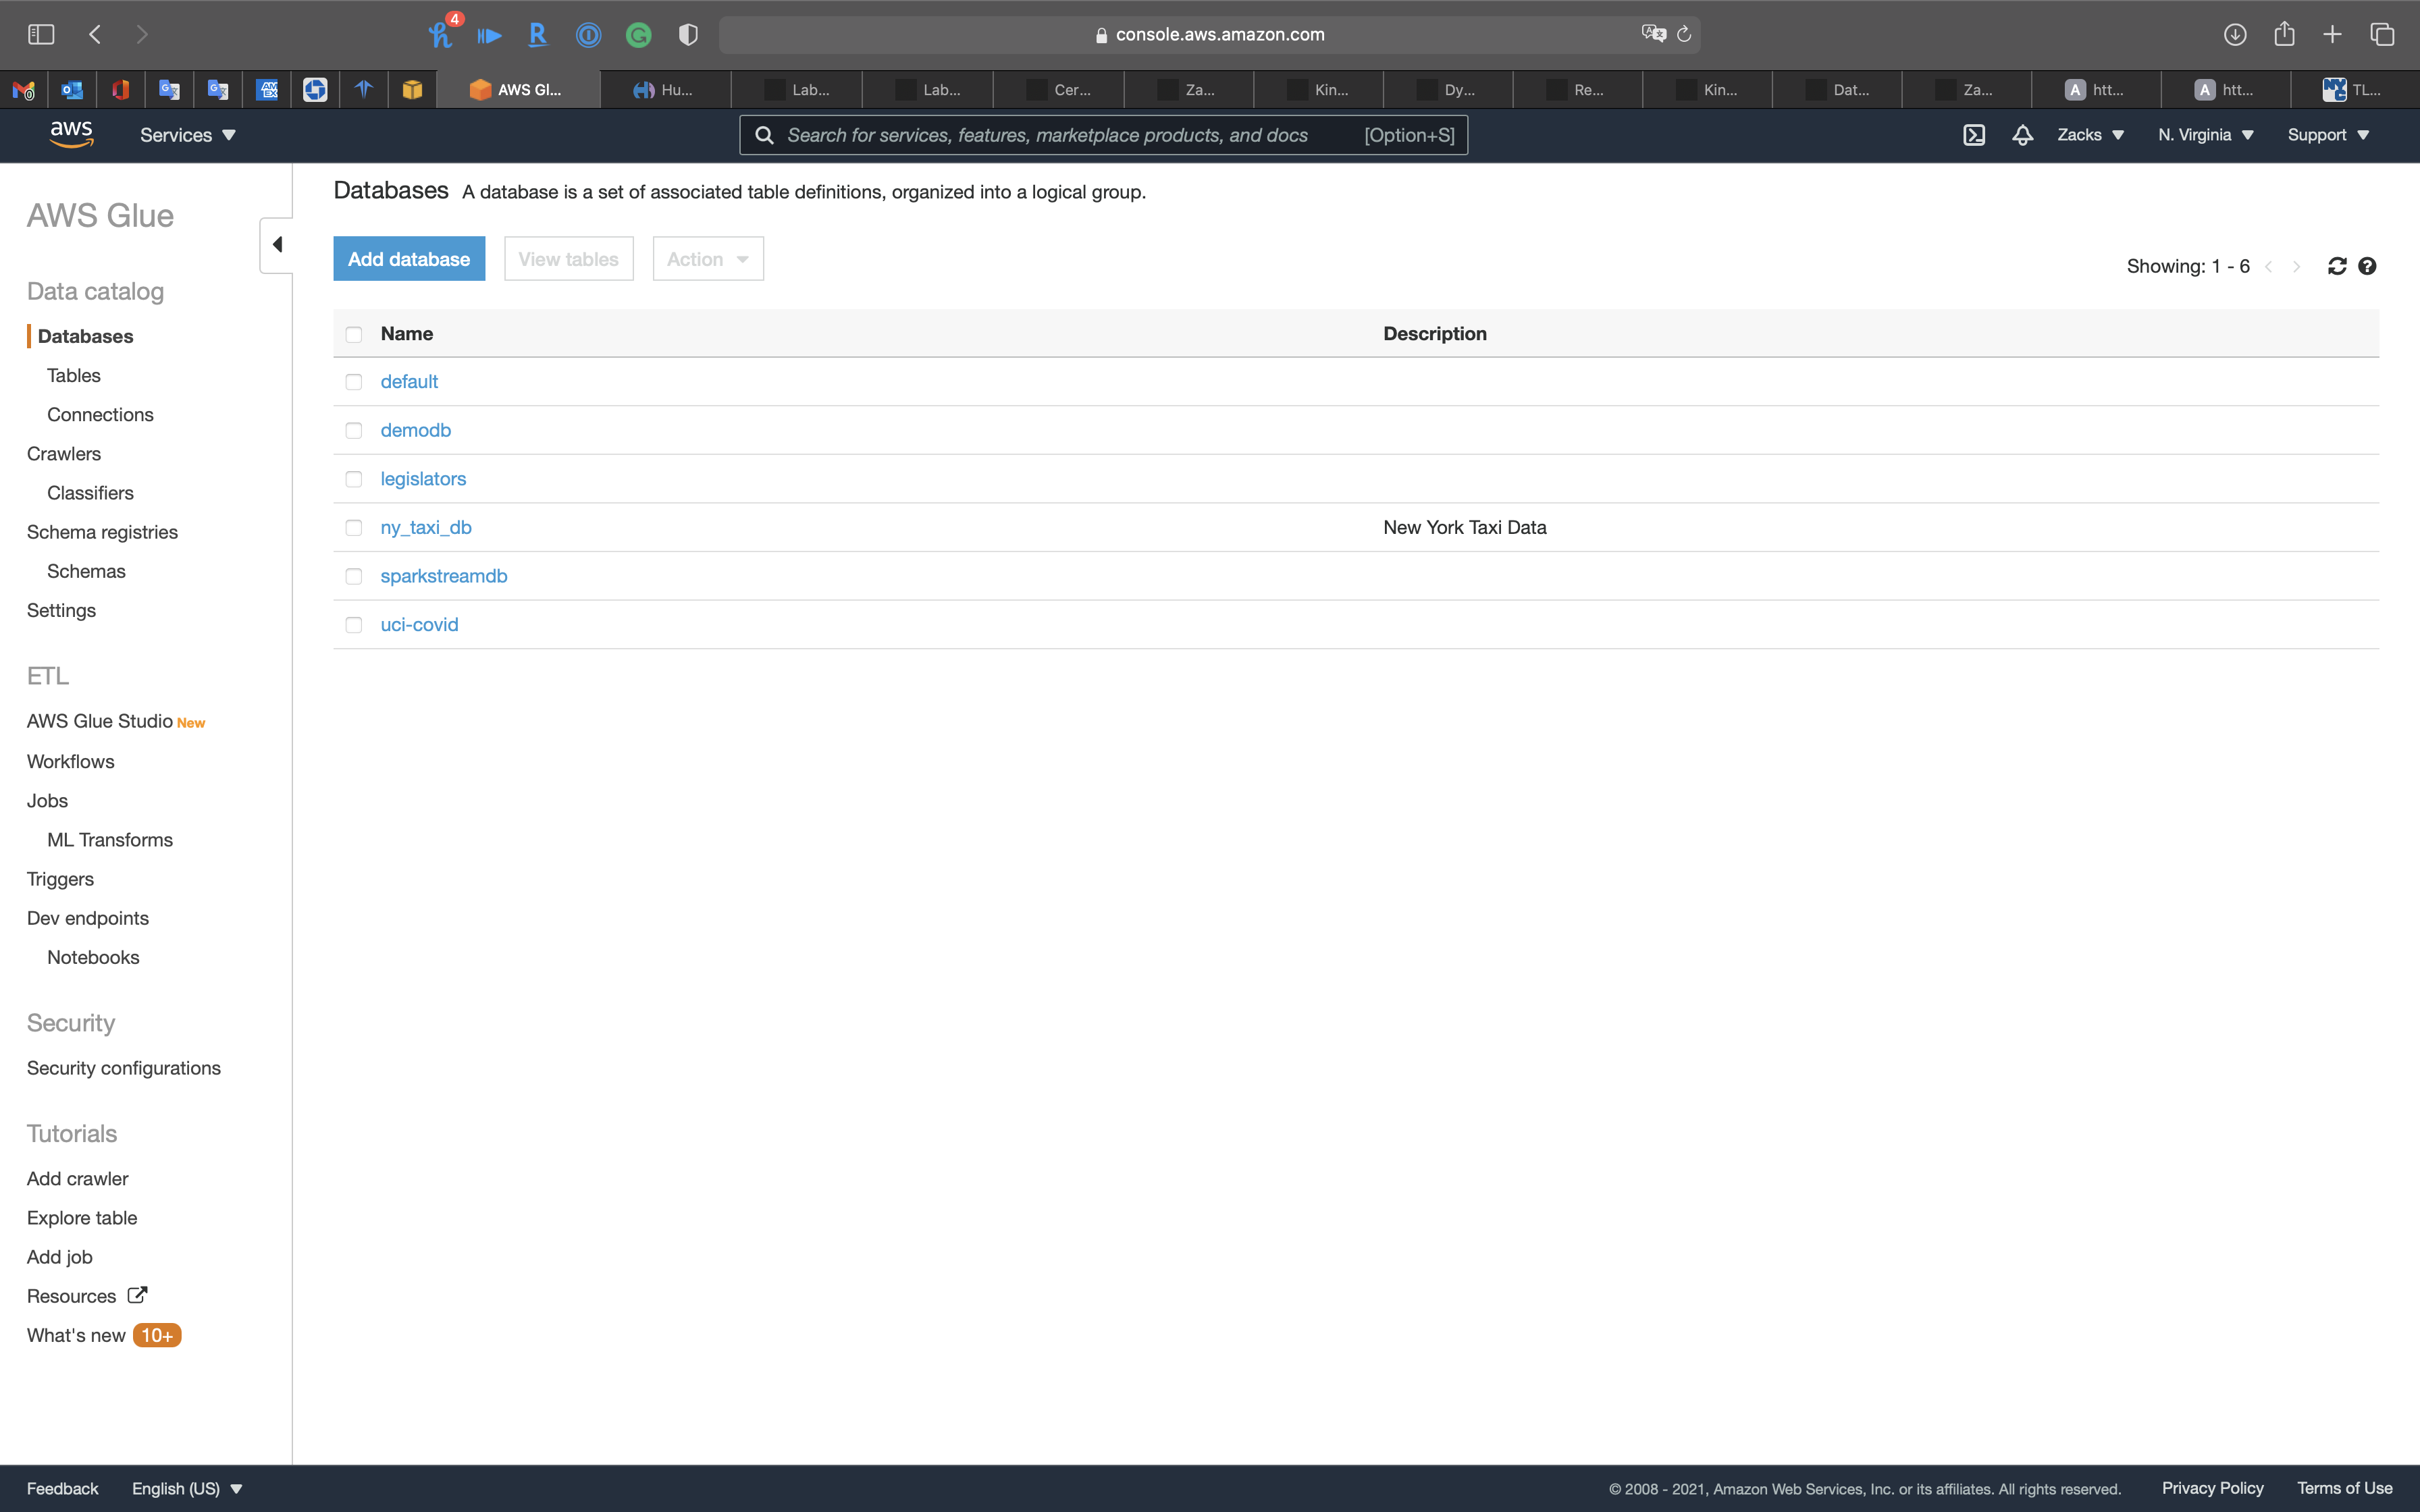
Click on Tables in ny_taxi_db
Click on Create tables using a crawler

Create Raw Data Table through Crawler
Use Crawler to craw the .csv metadata.
Crawler Info
- Crawler name:
ny_taxi_crawler
Click on Next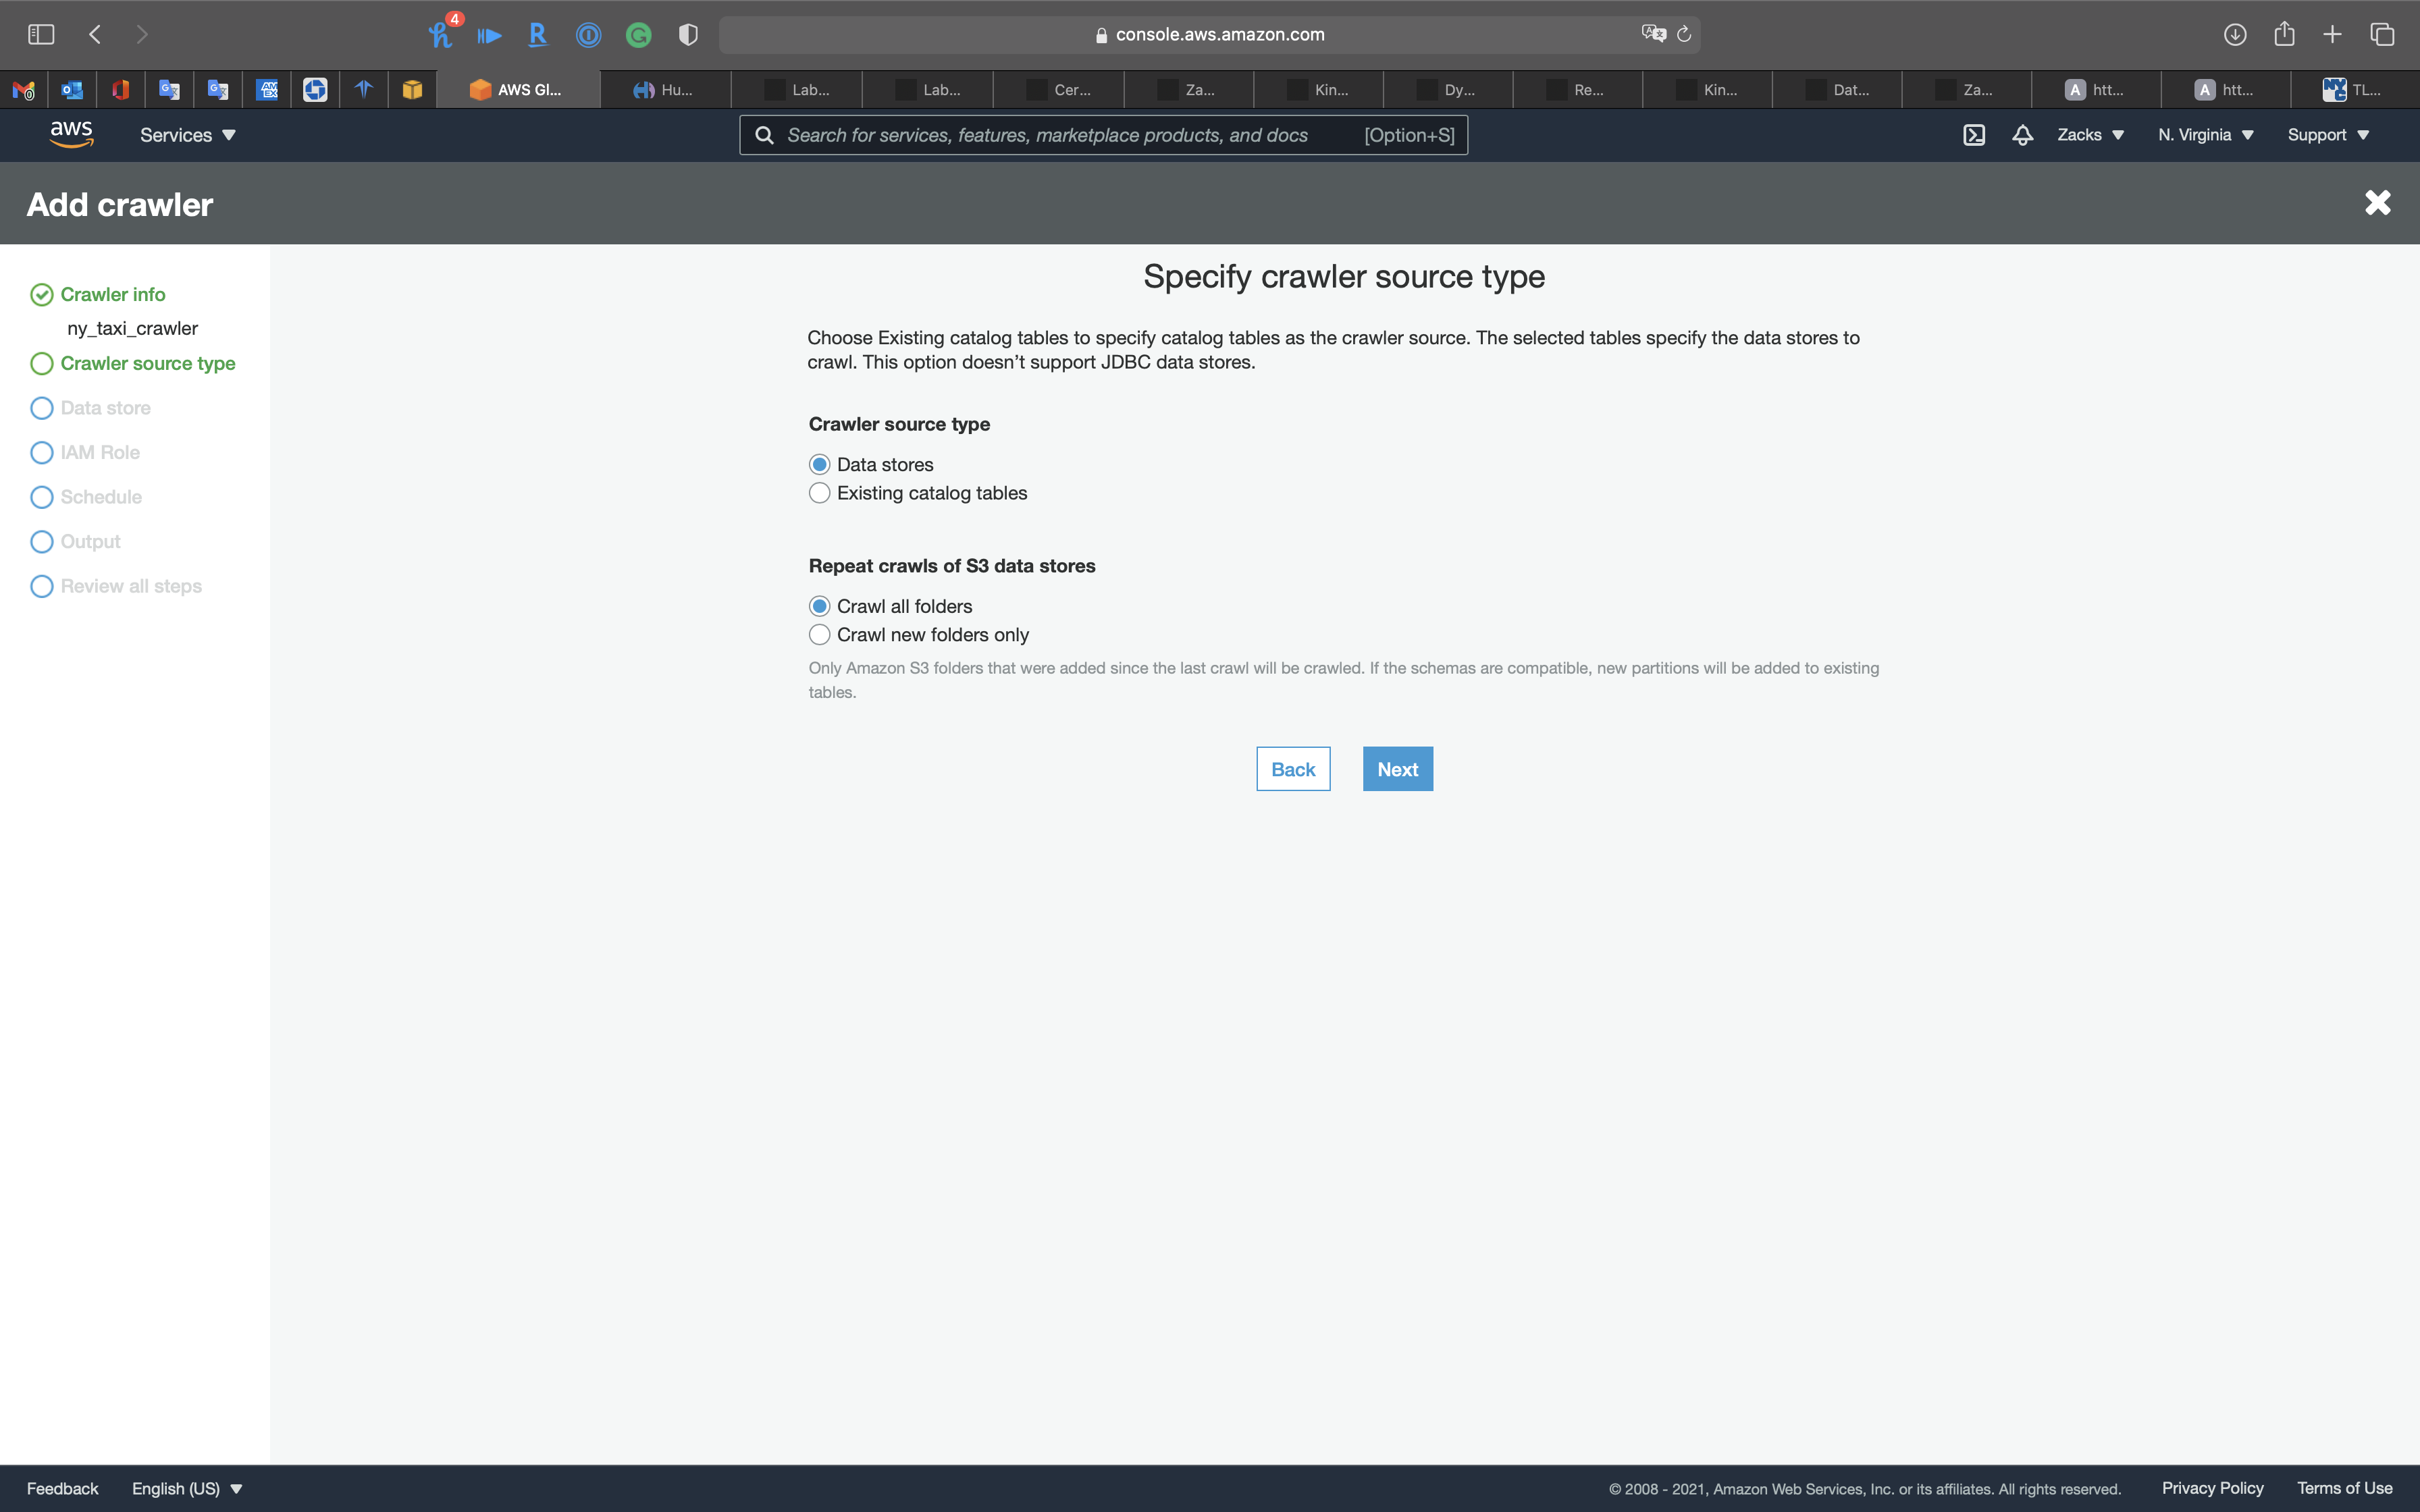
Crawler source type
Click on Next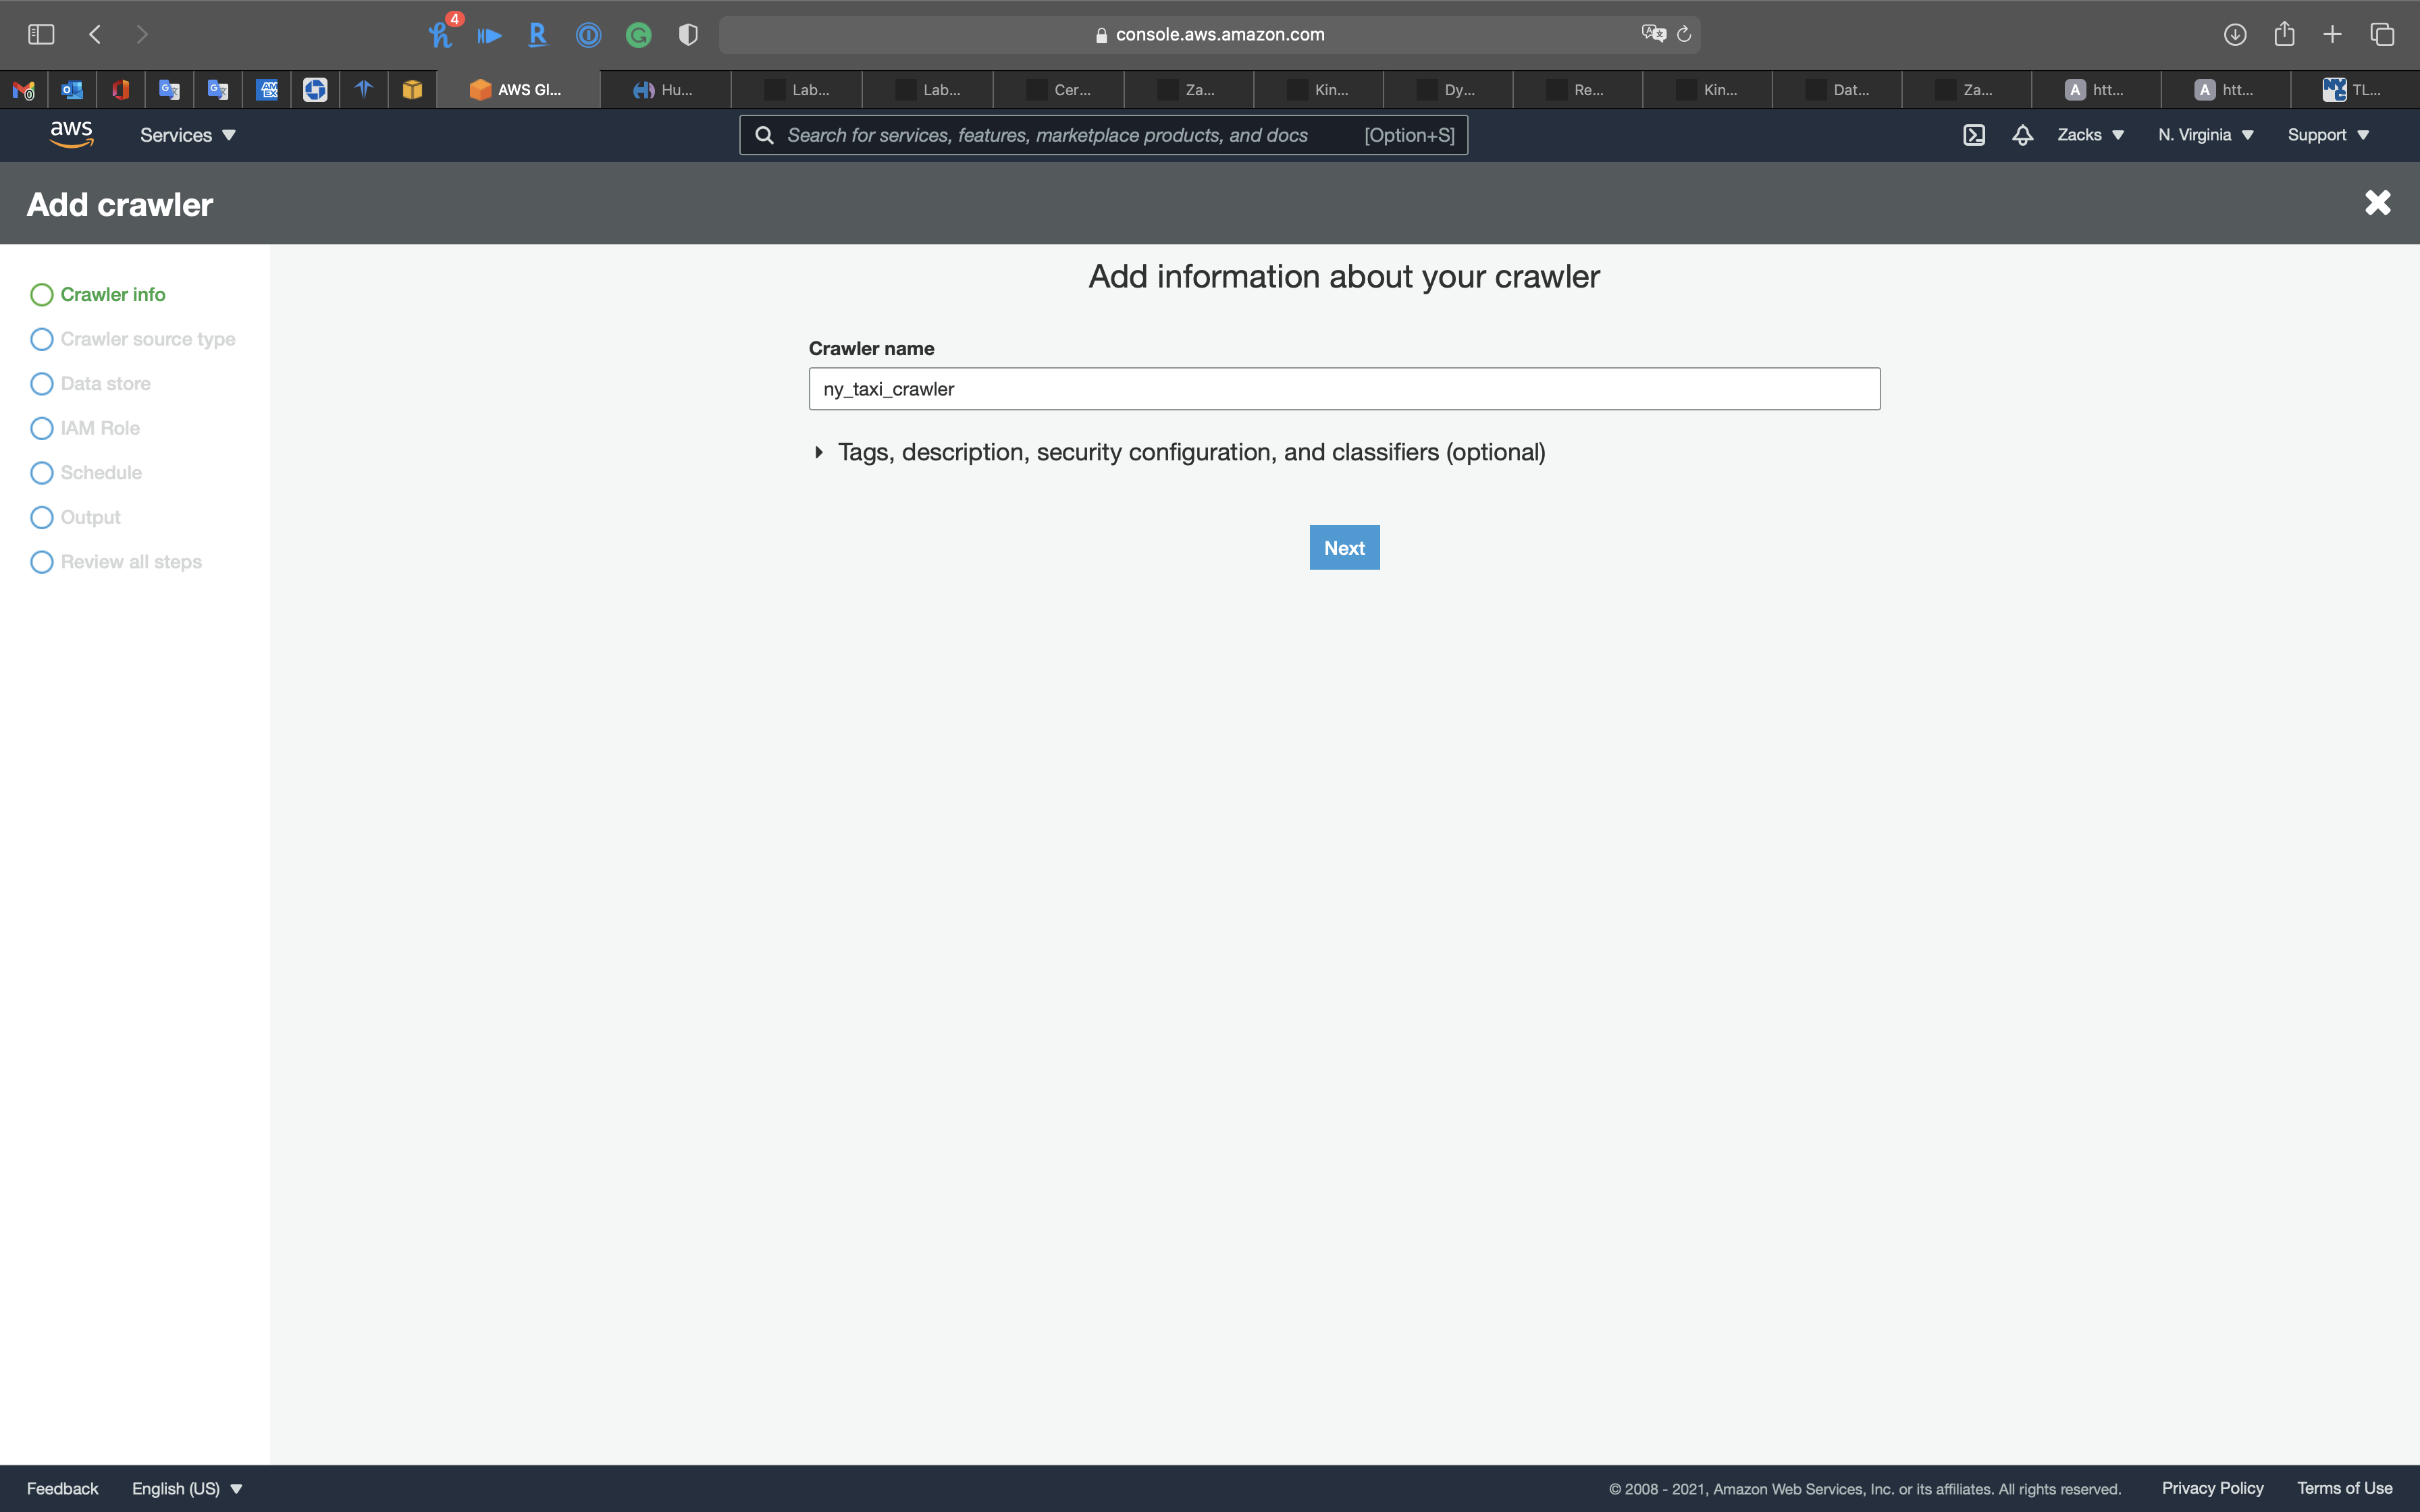
Data store
- Choose a data store:
S3 - Include path: your S3 bucket
Click on Next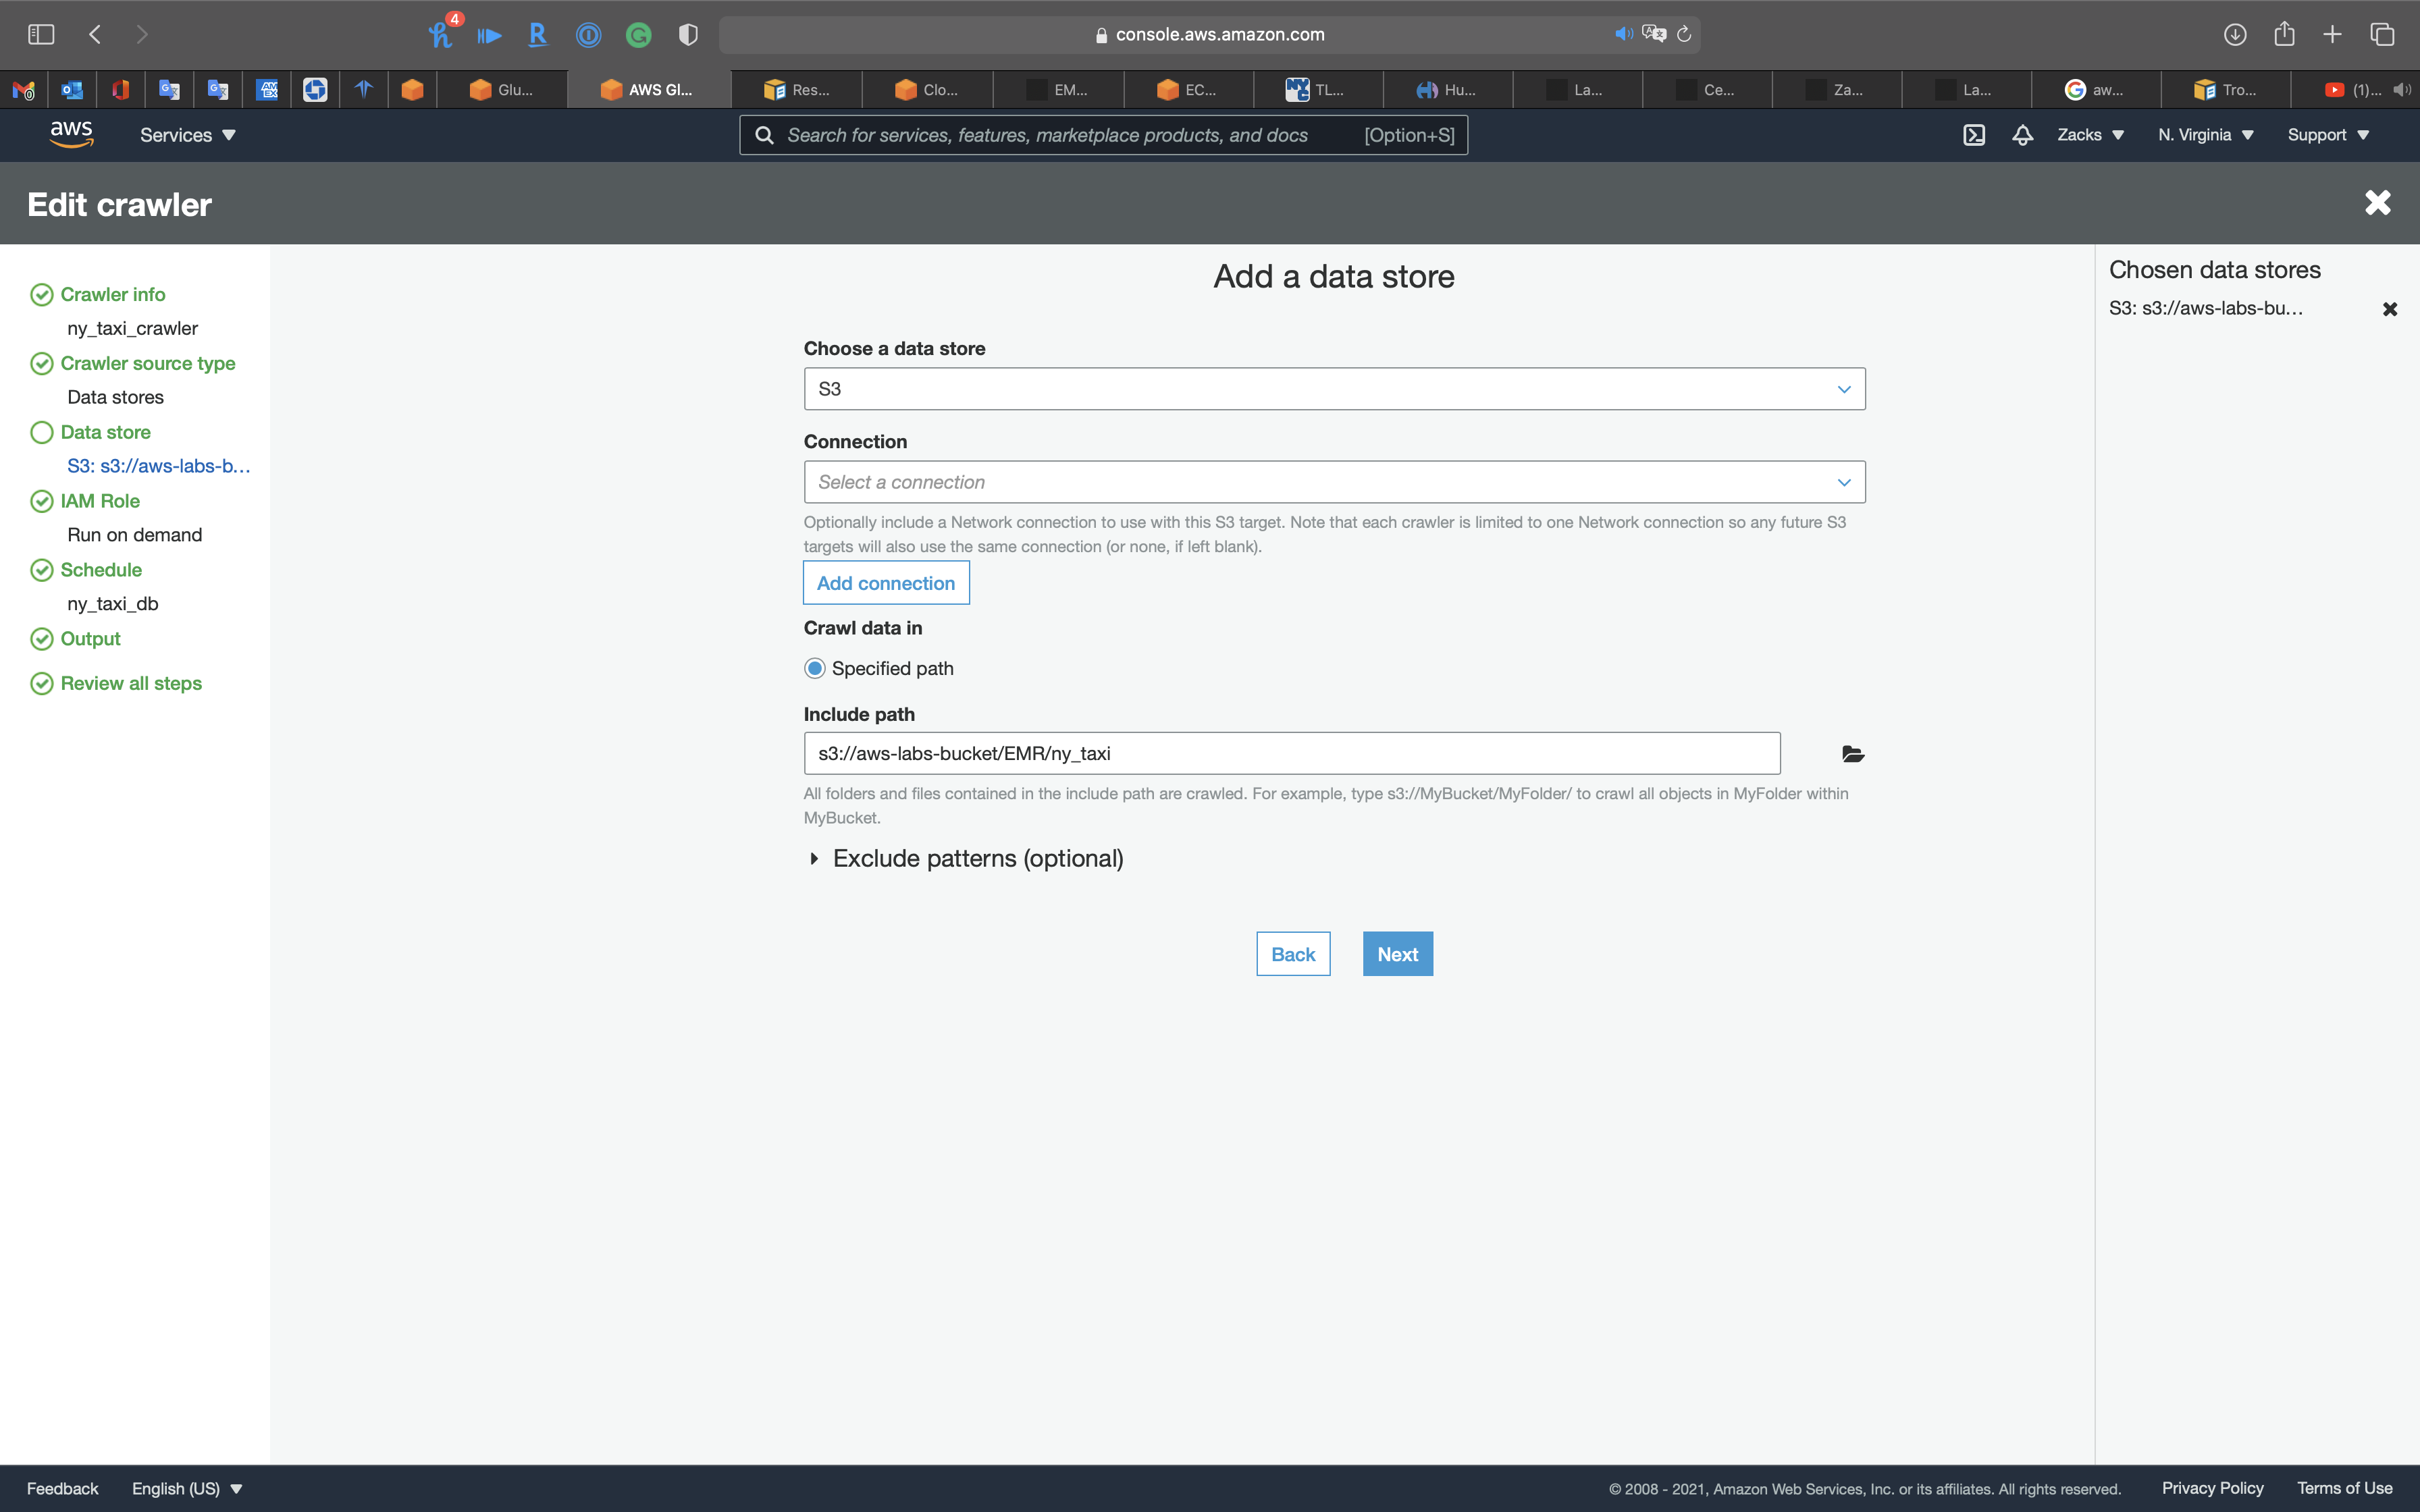
Click on Next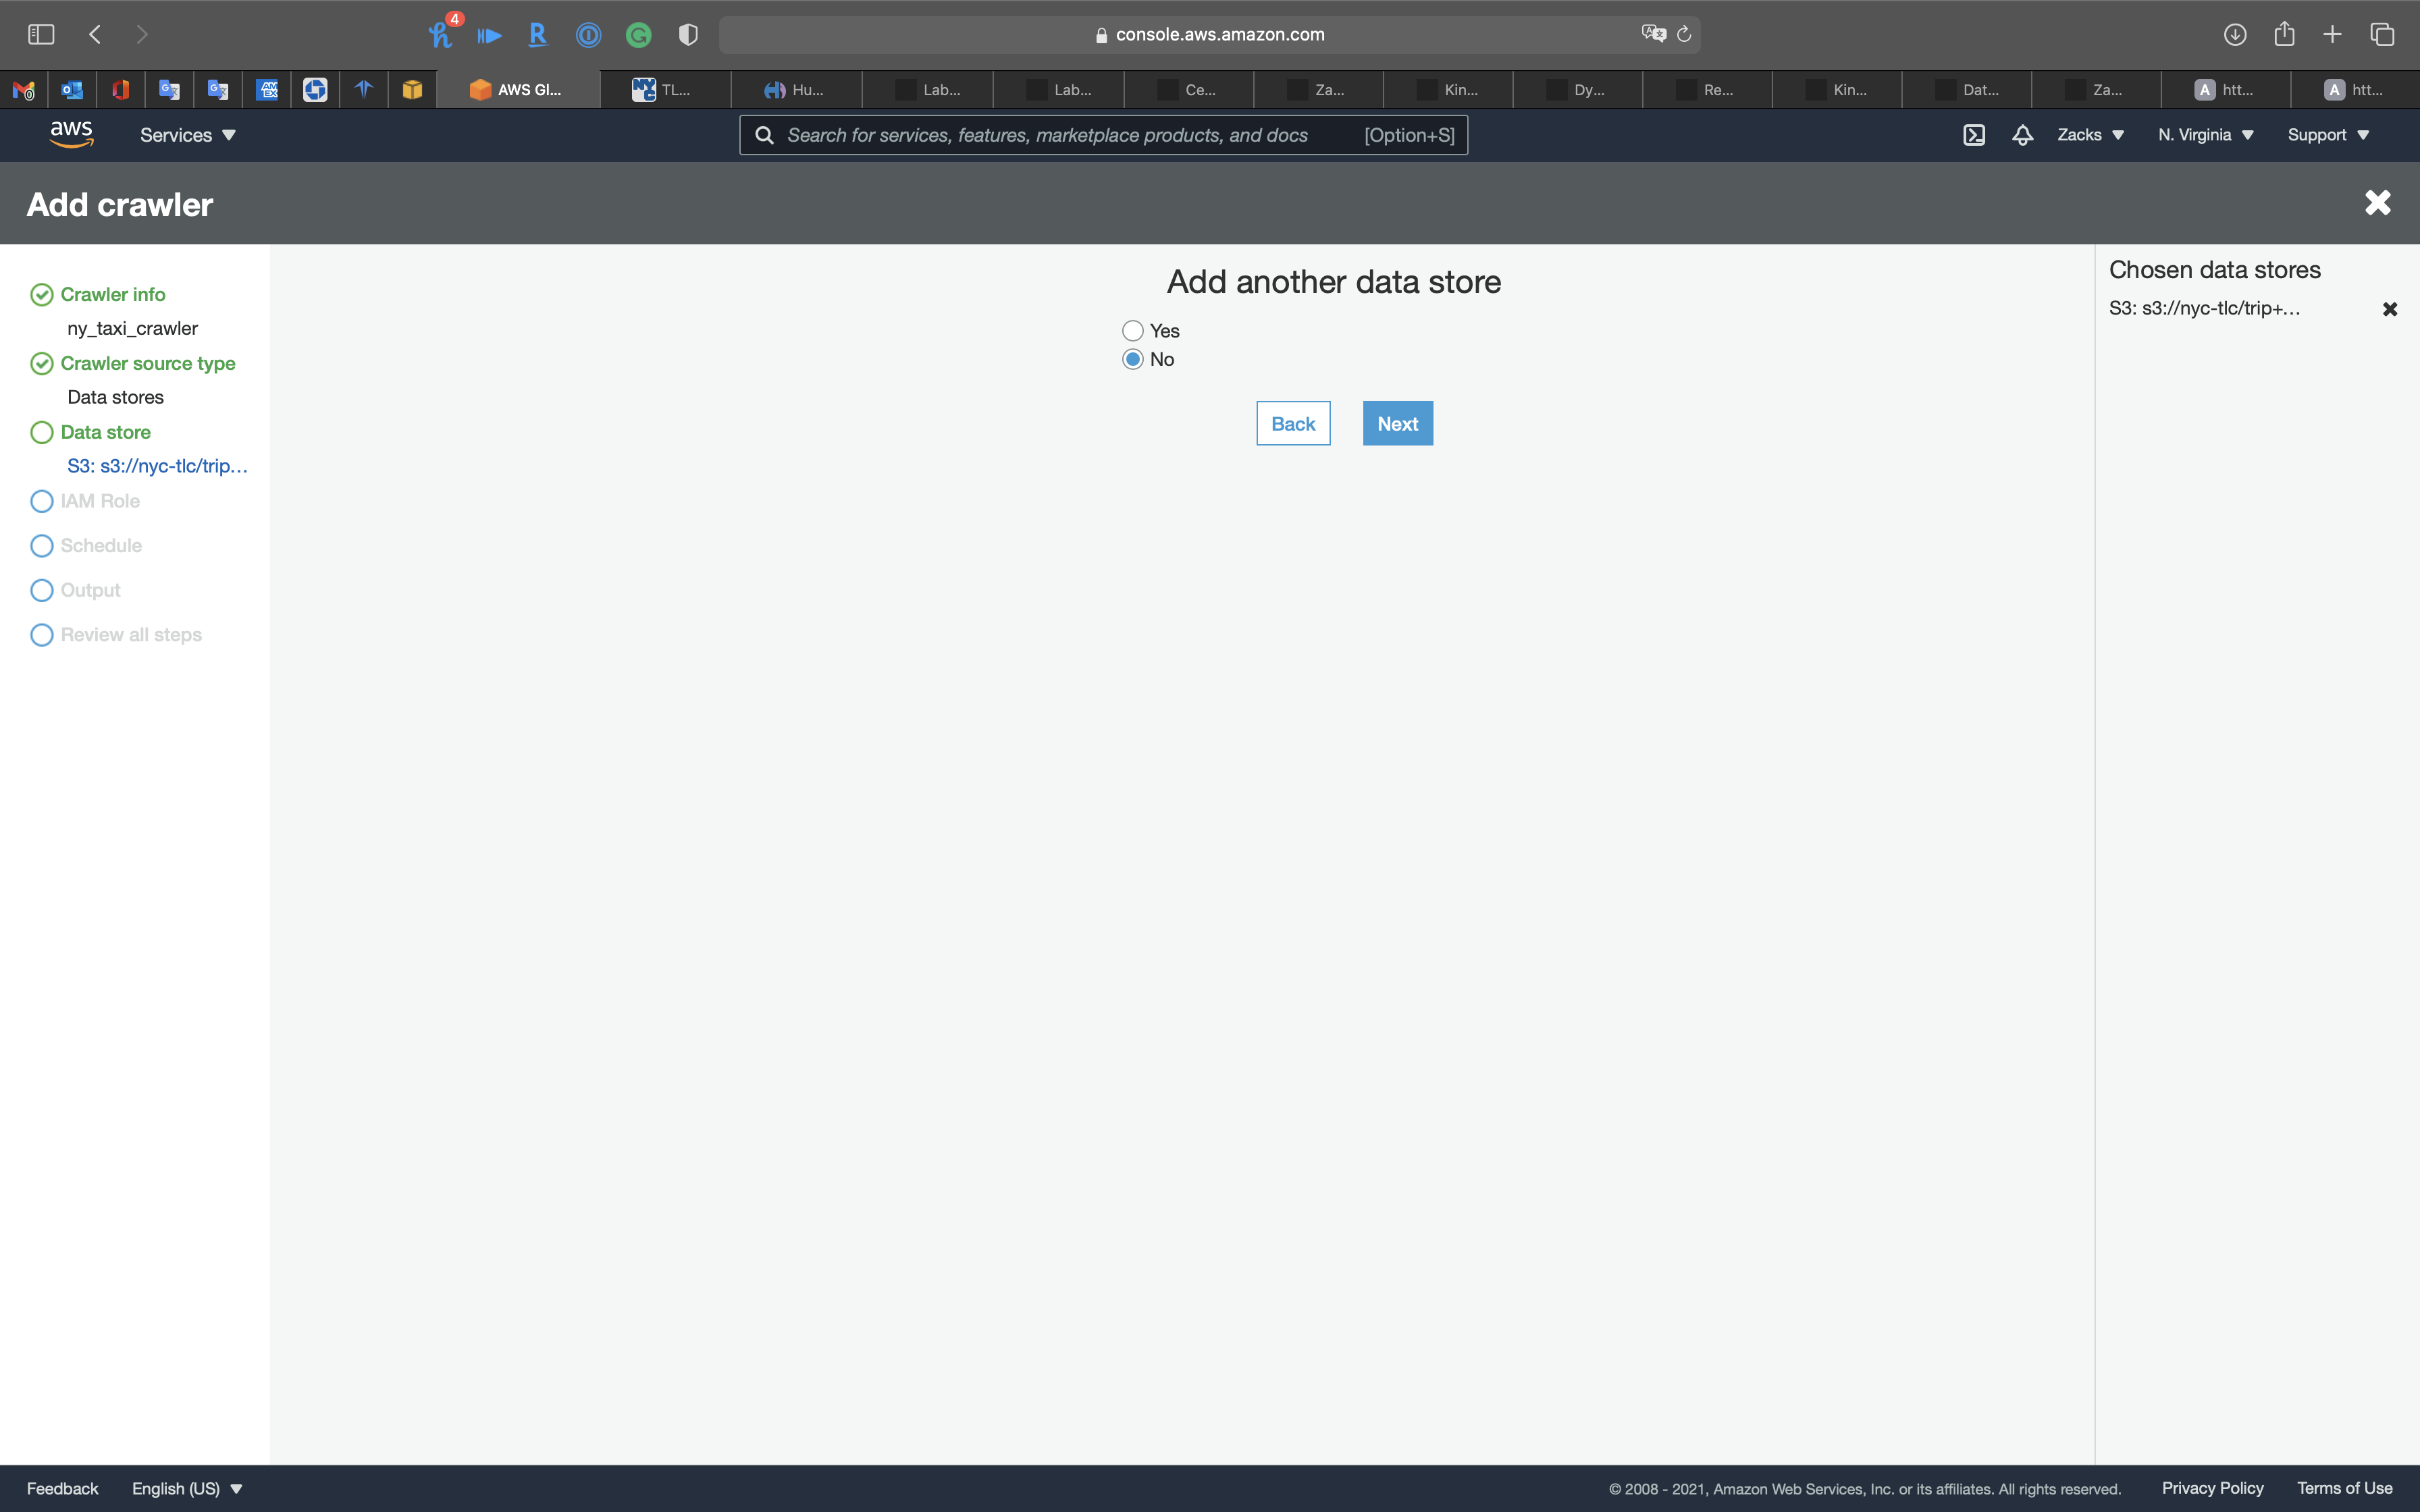
IAM Role
Create a new IAM Role or choose an existing IAM Role if you have.
Policies:
AmazonS3FullAccessAmazonKinesisFullAccessAWSGlueServiceRole
Click on Next
Schedule
- Frequency:
Run on demand
Click on Next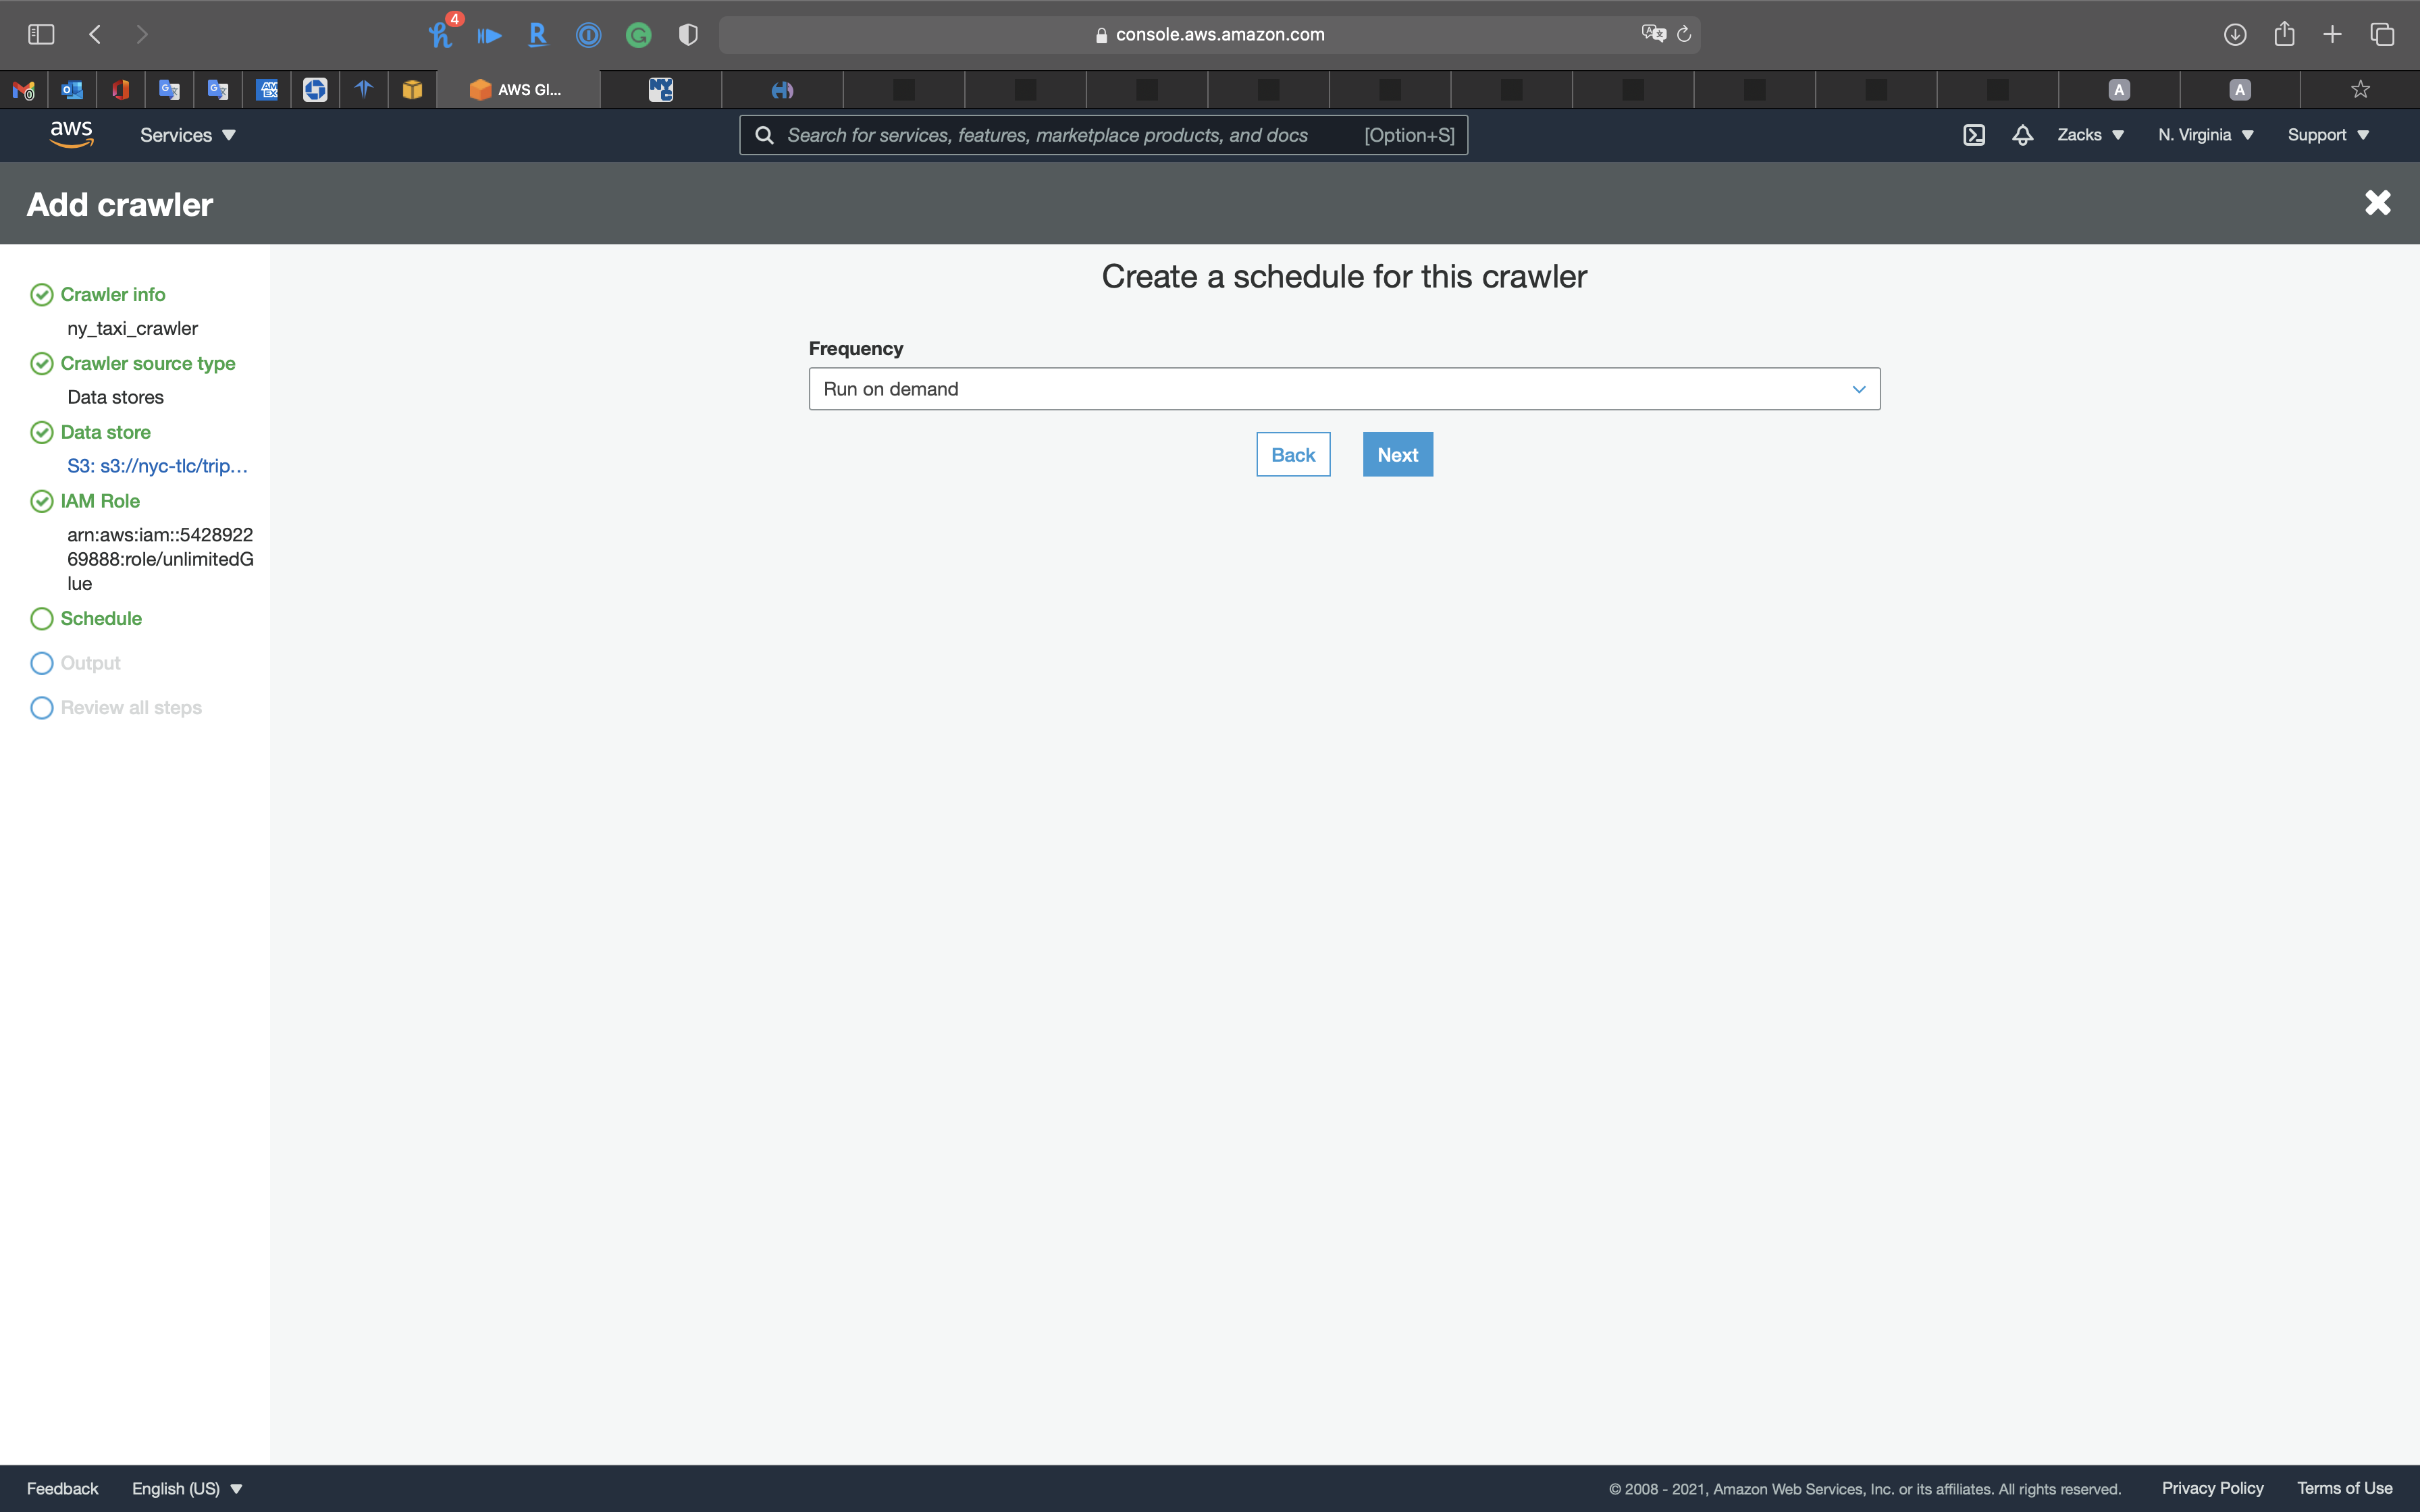
Output
- Database:
ny_taxi_db
Click on Next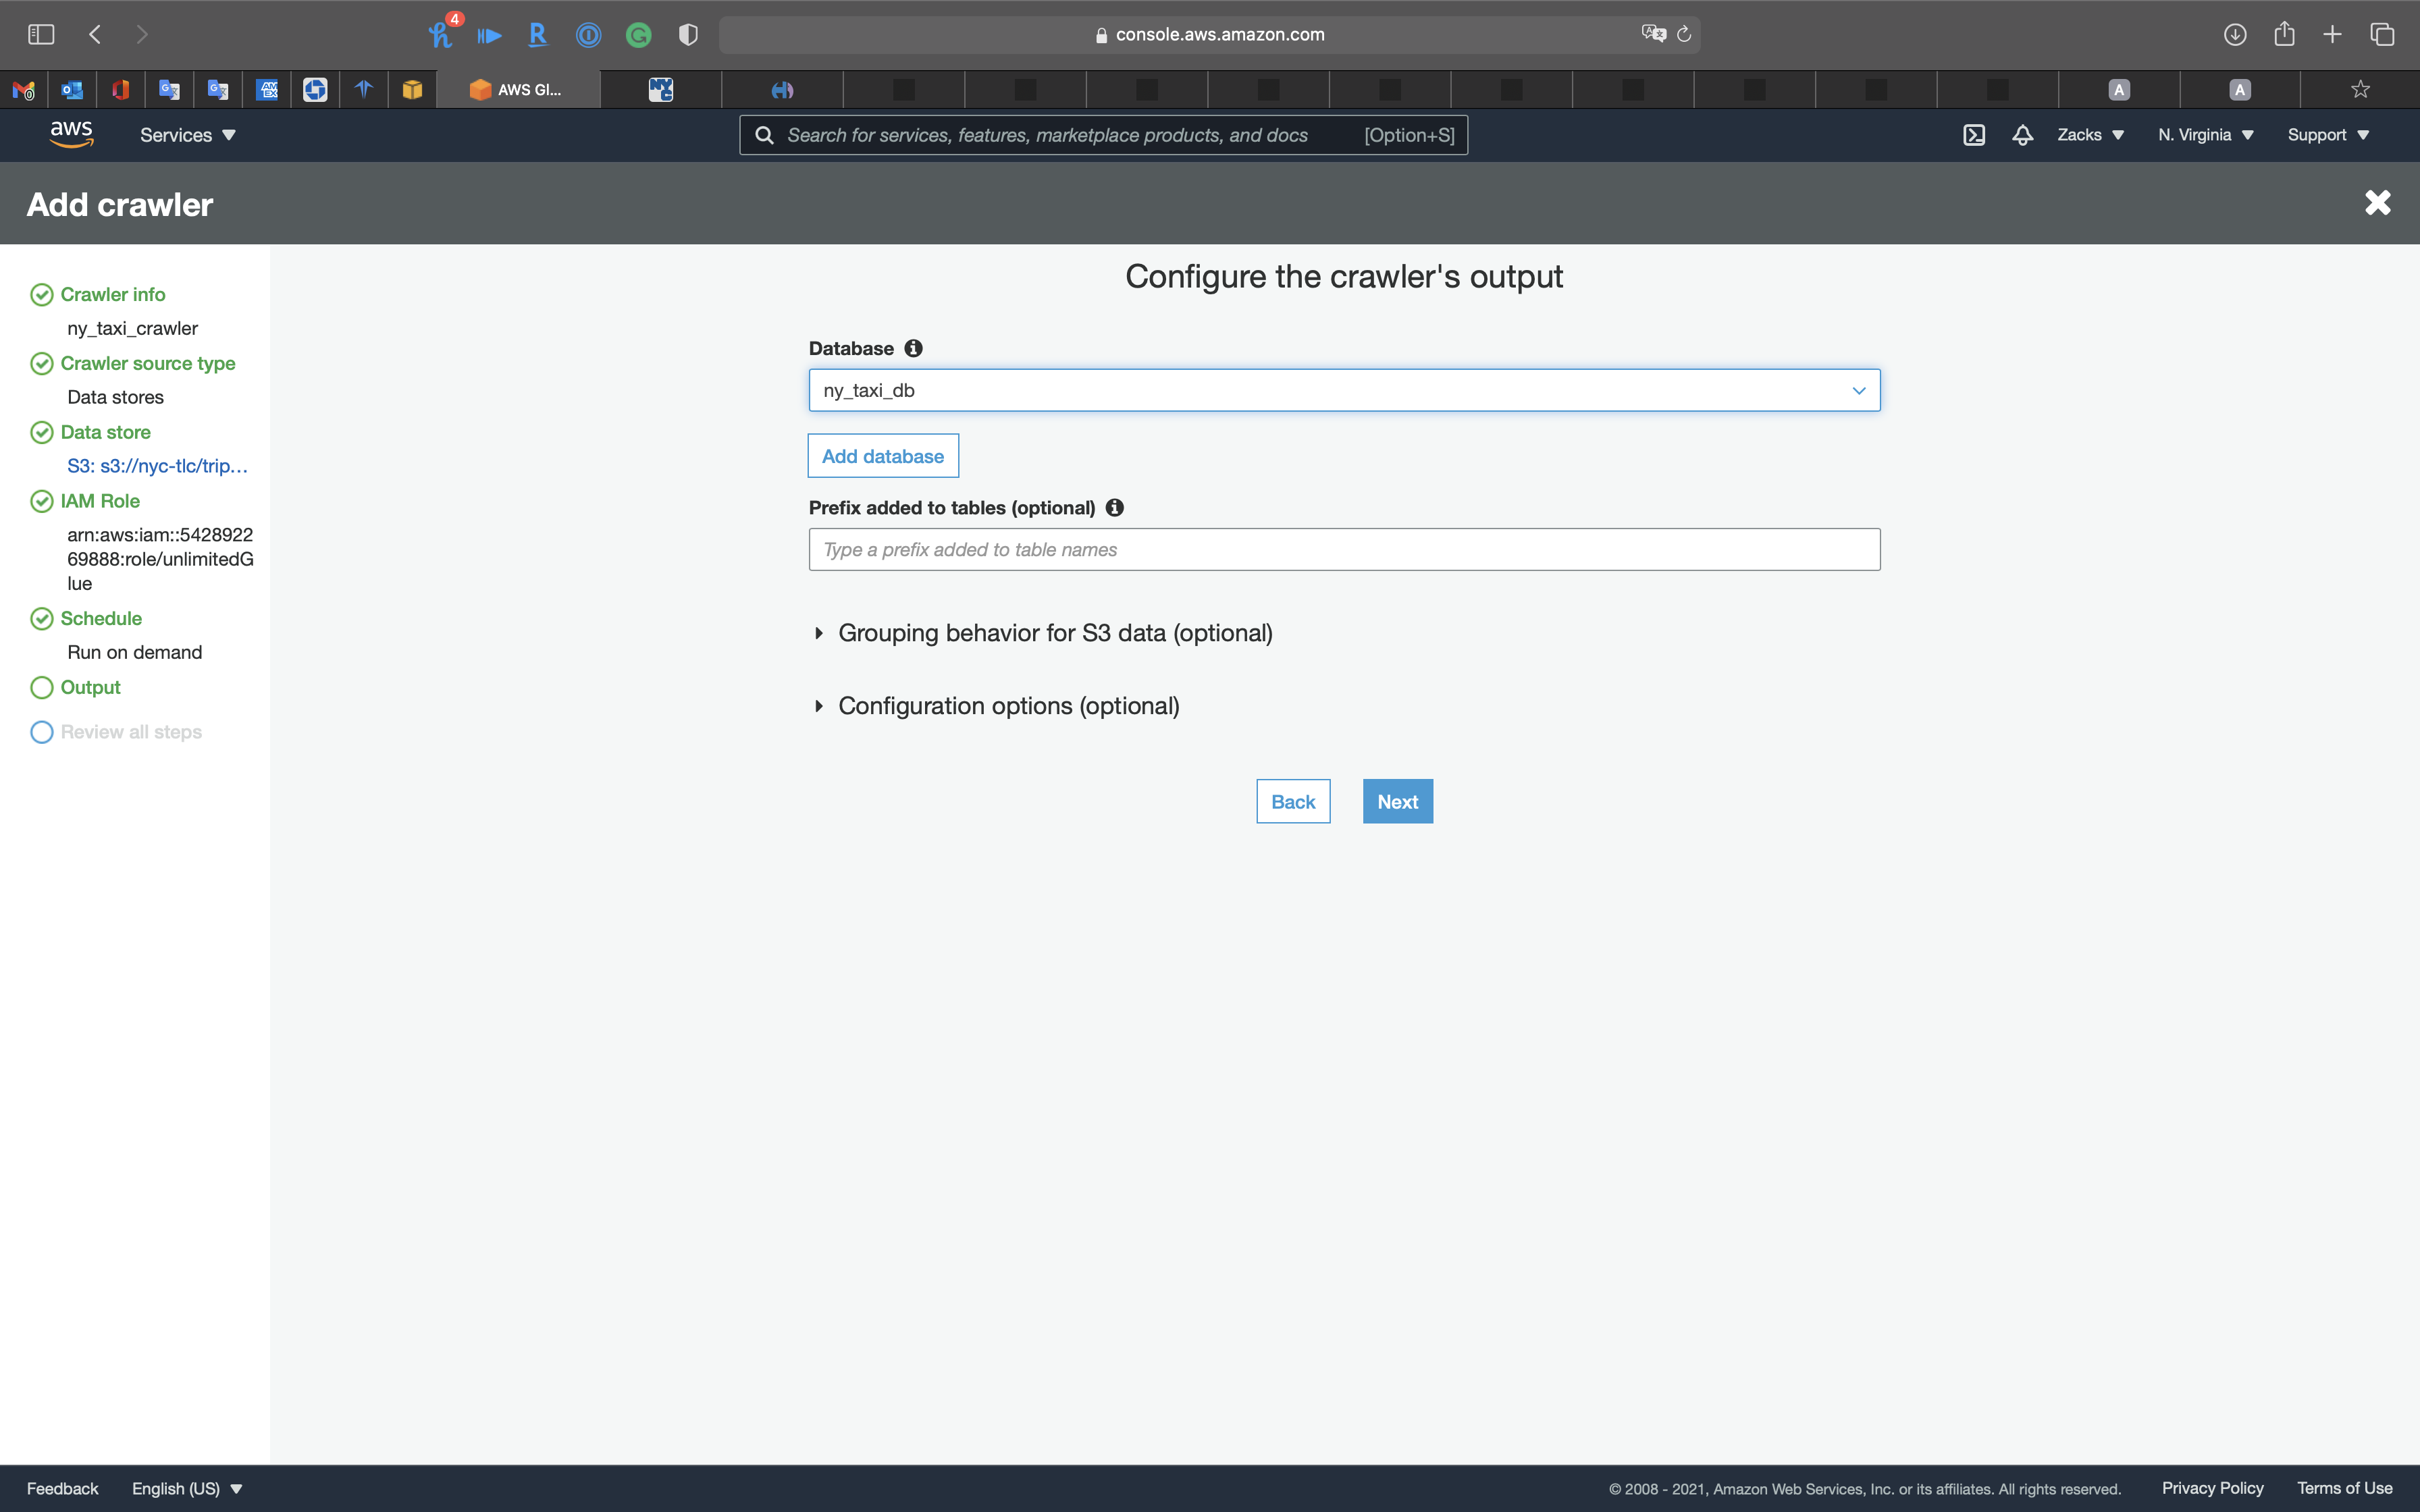
Review all steps
Click on Next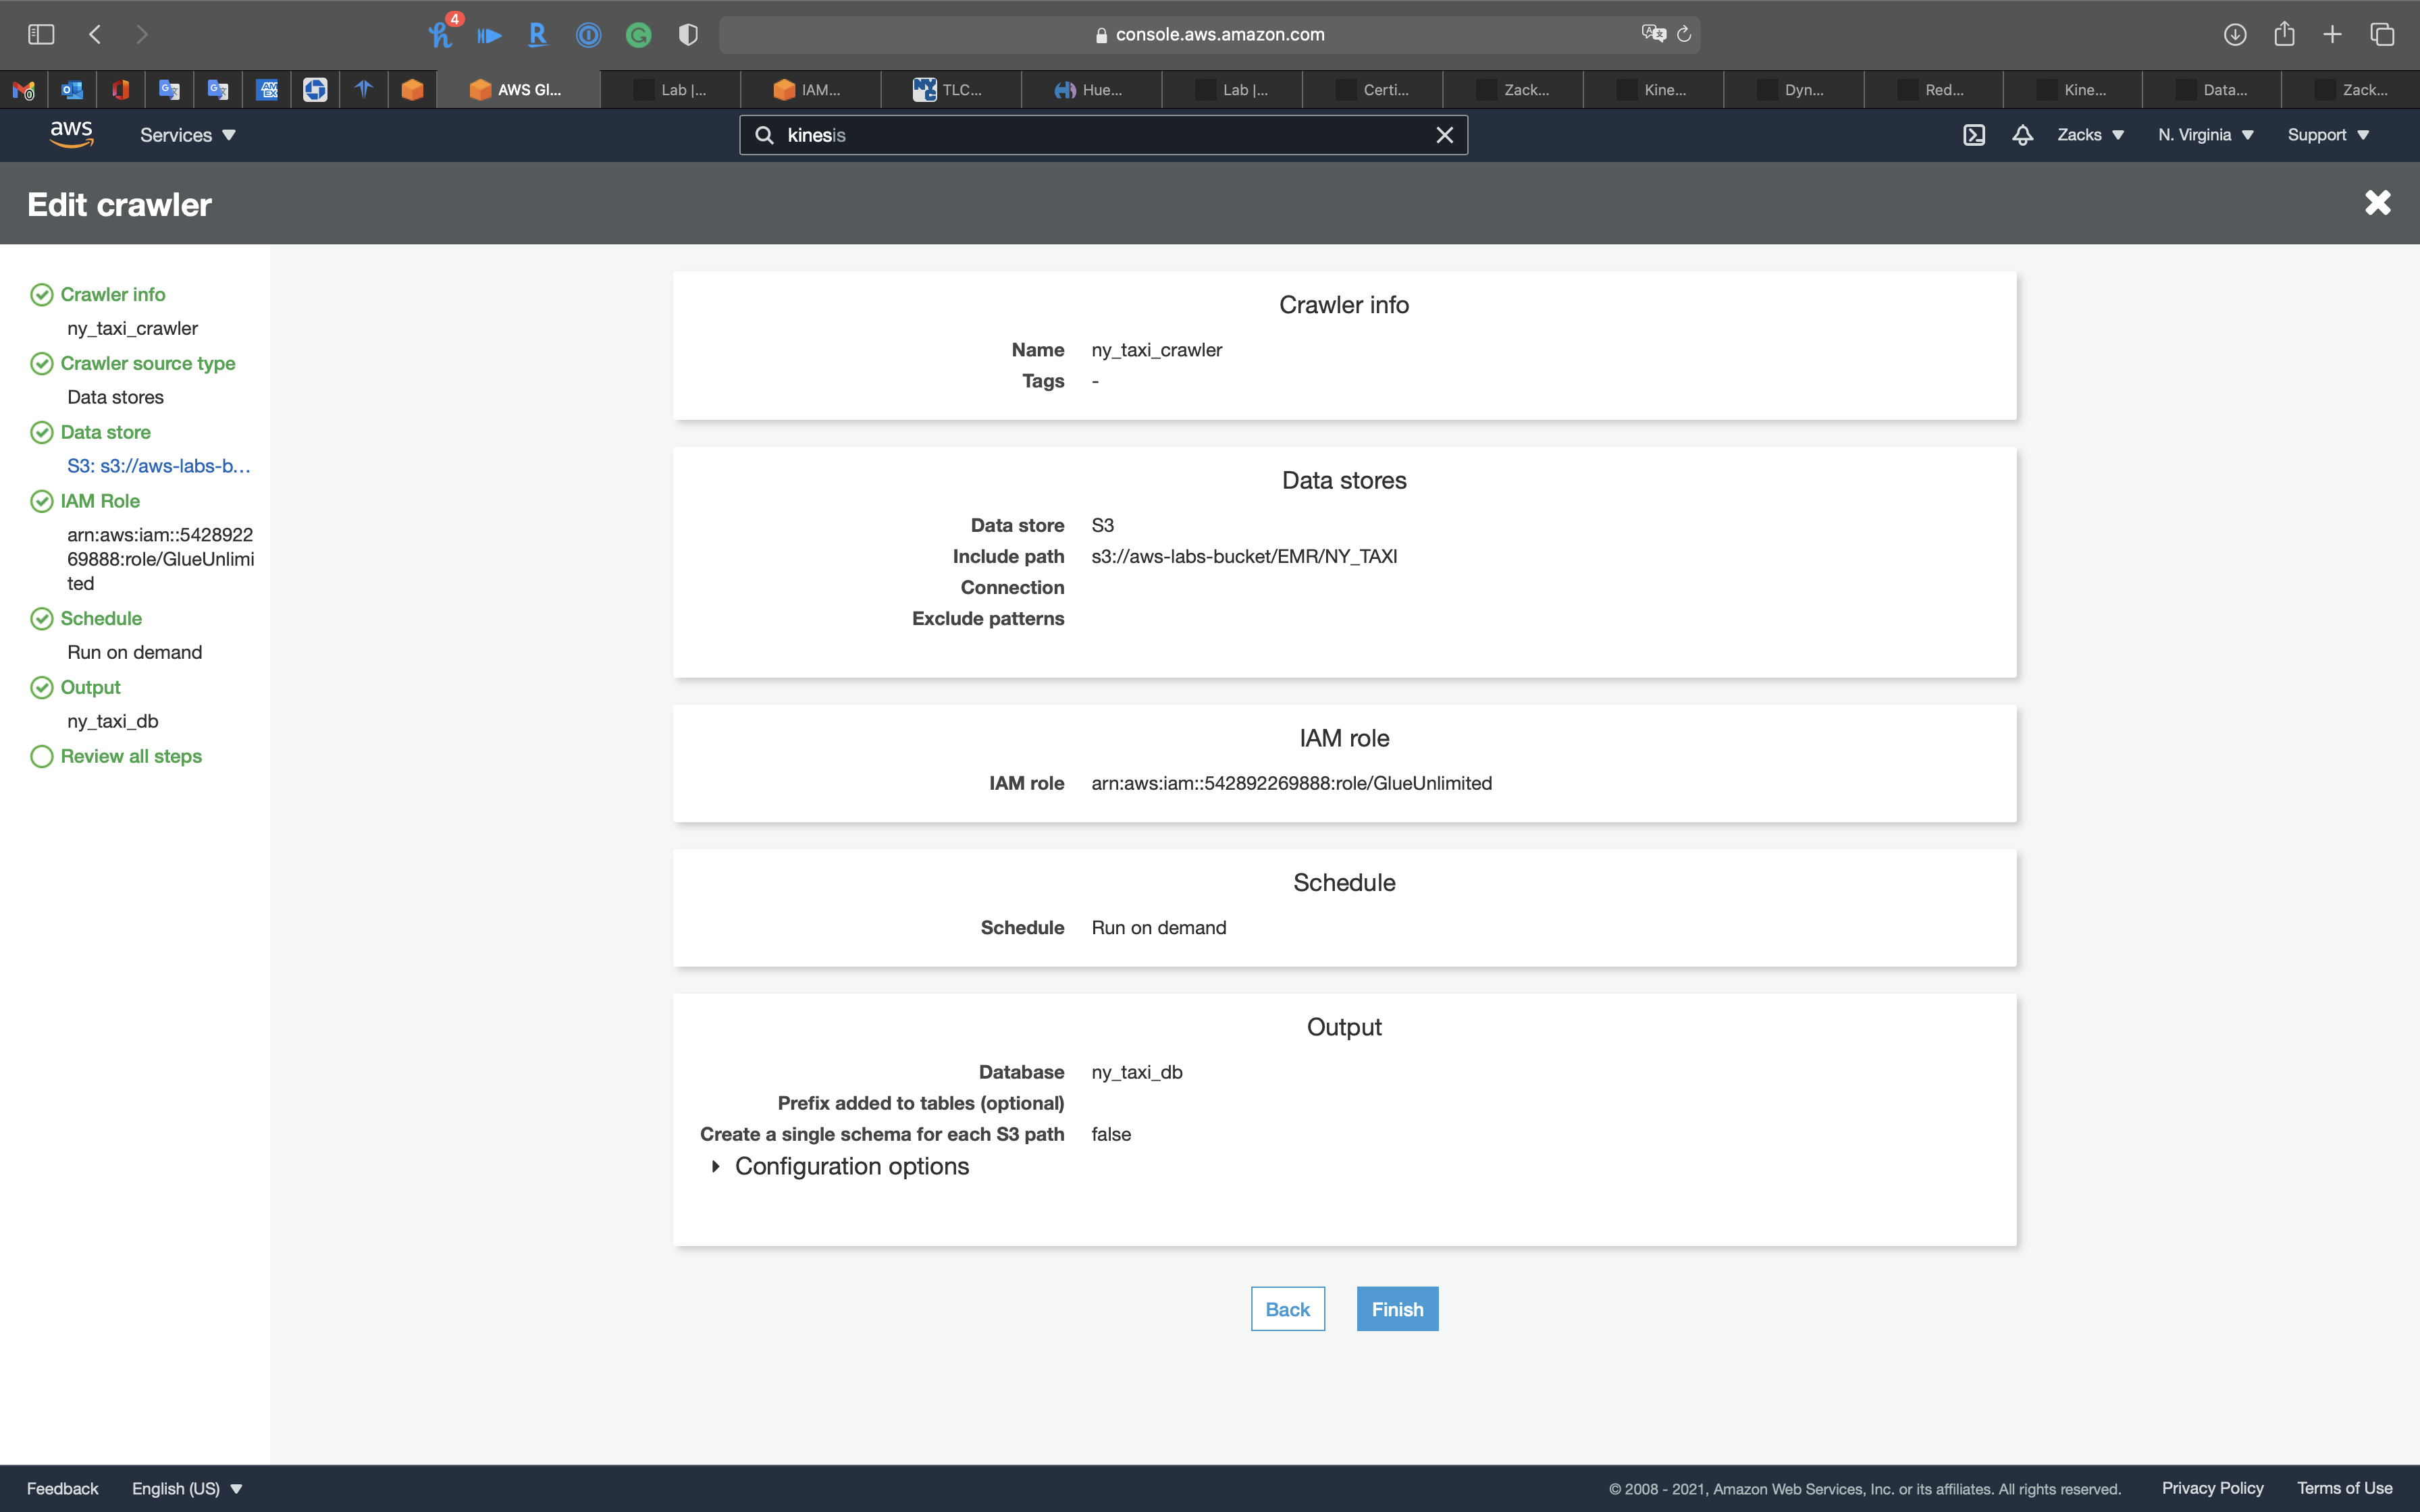
Select the Crawler, and click on Run crawler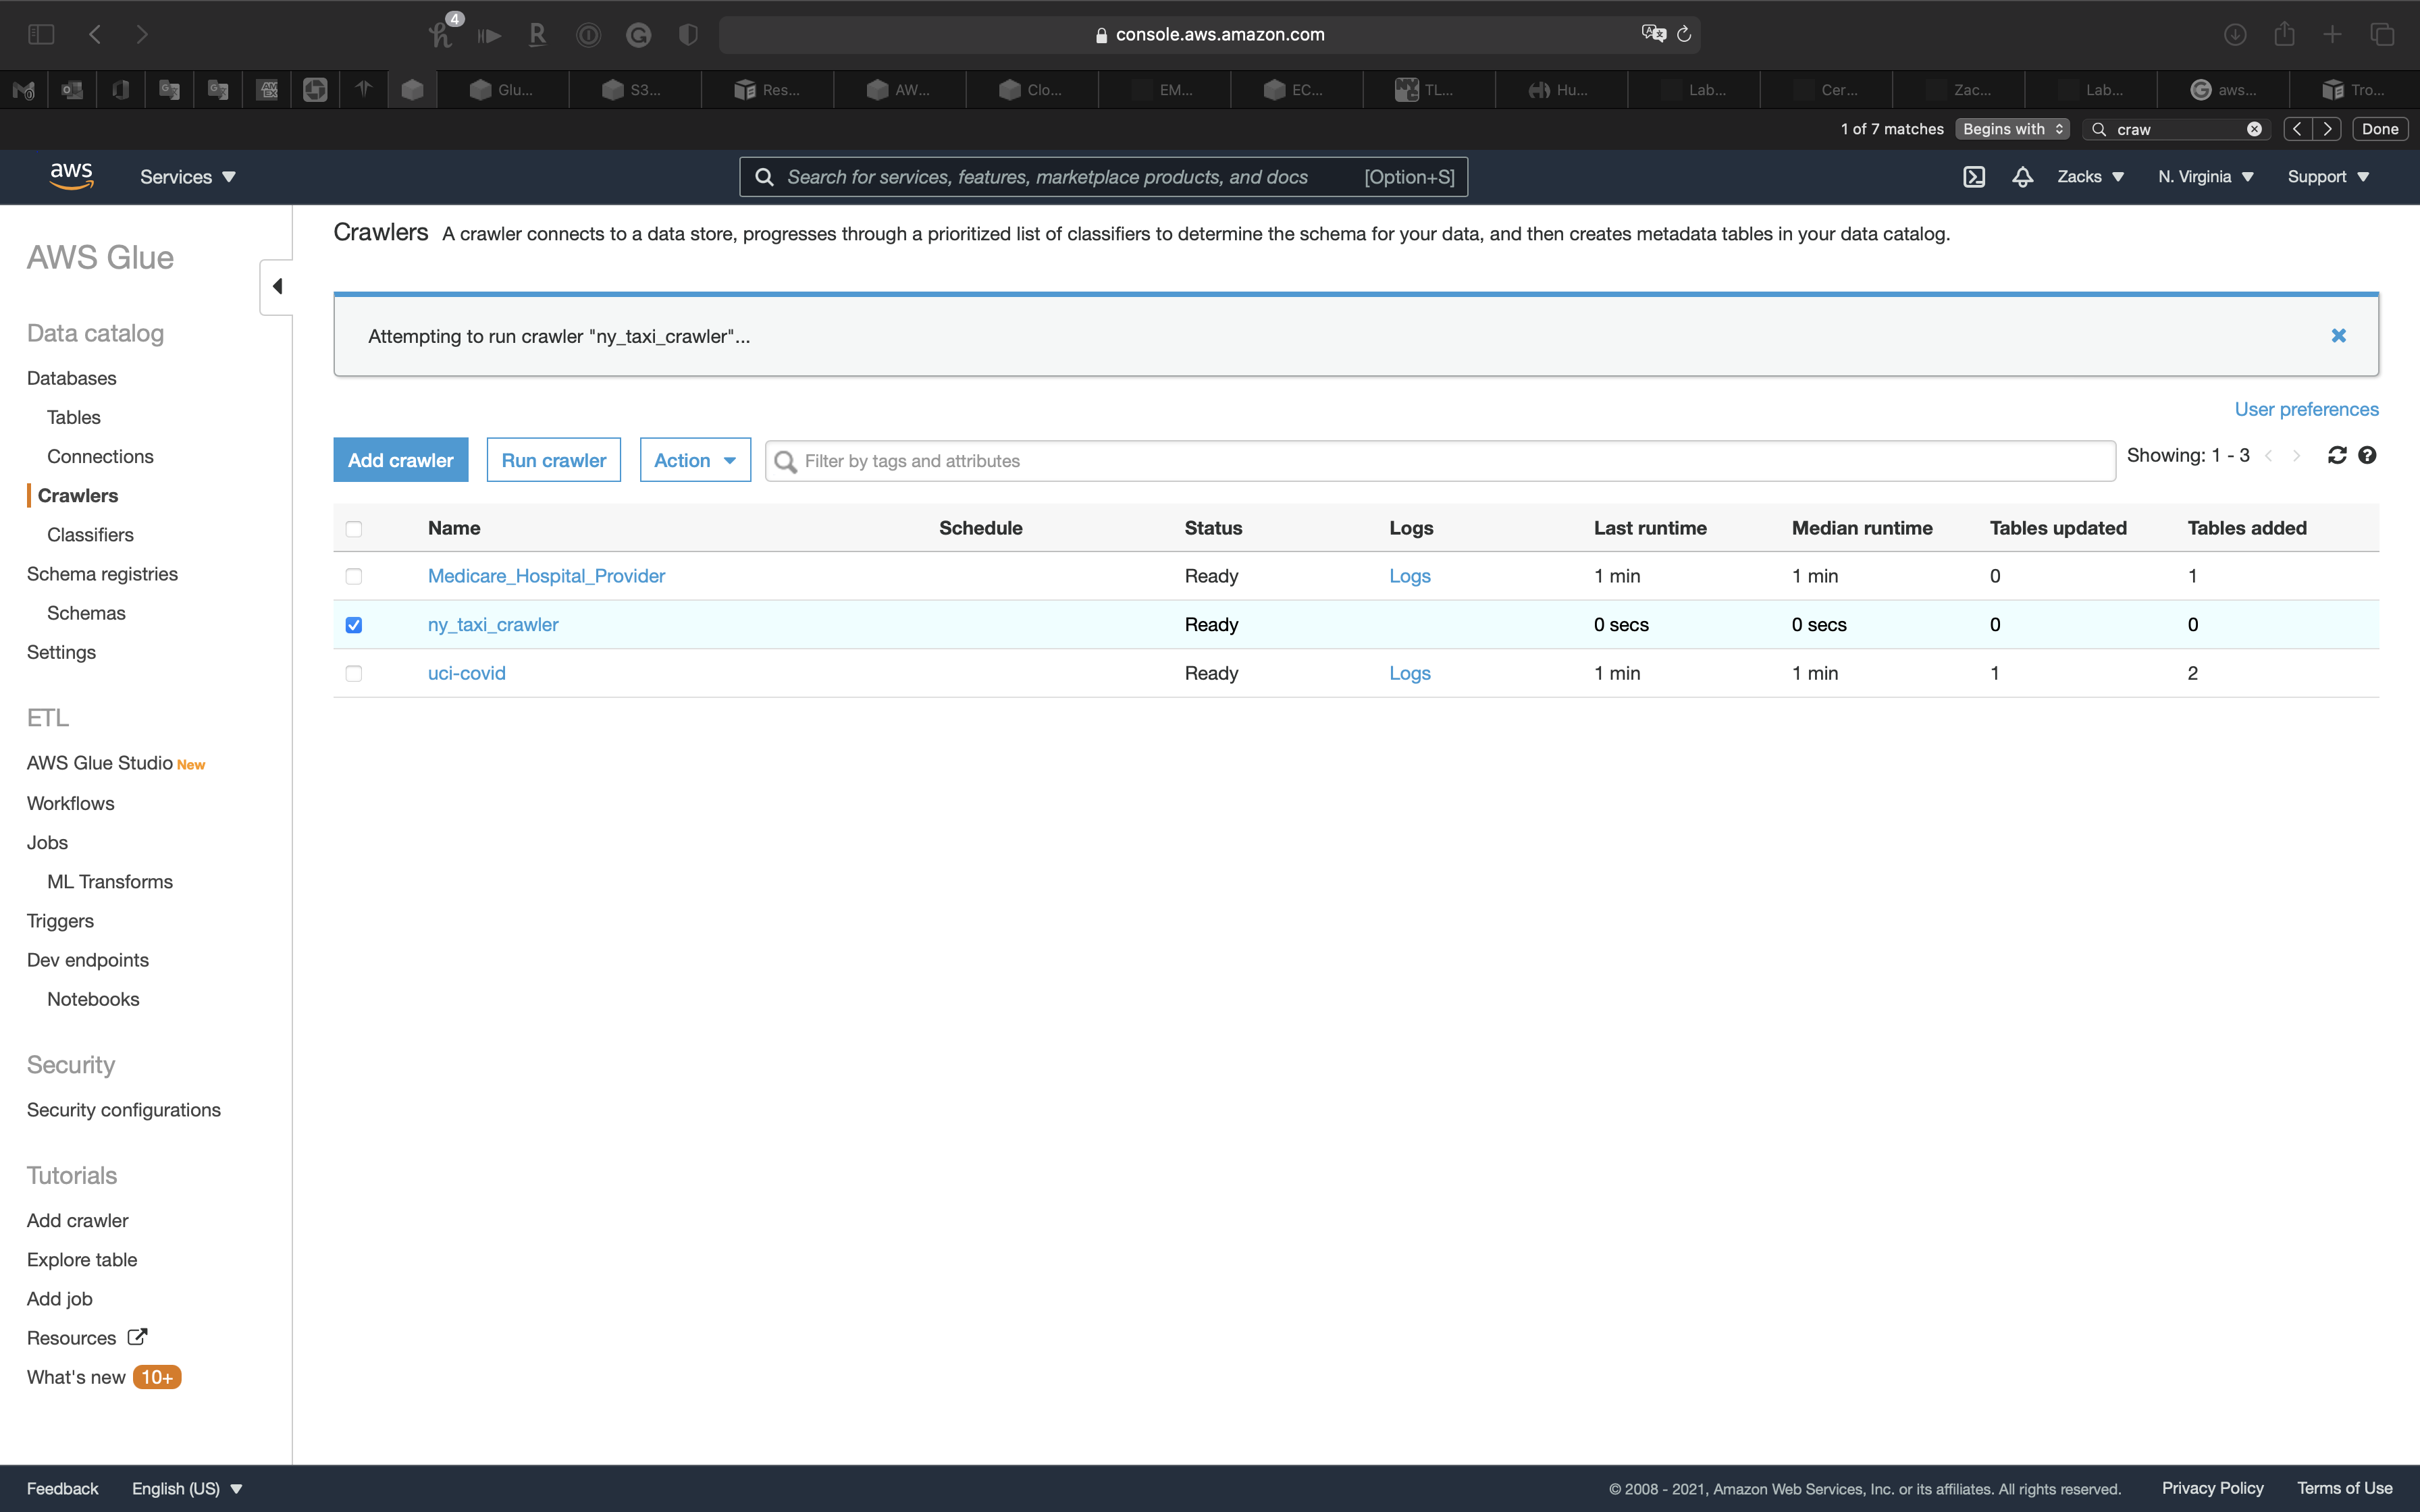
Review the table
Now you can see the table
Click on ny_taxi table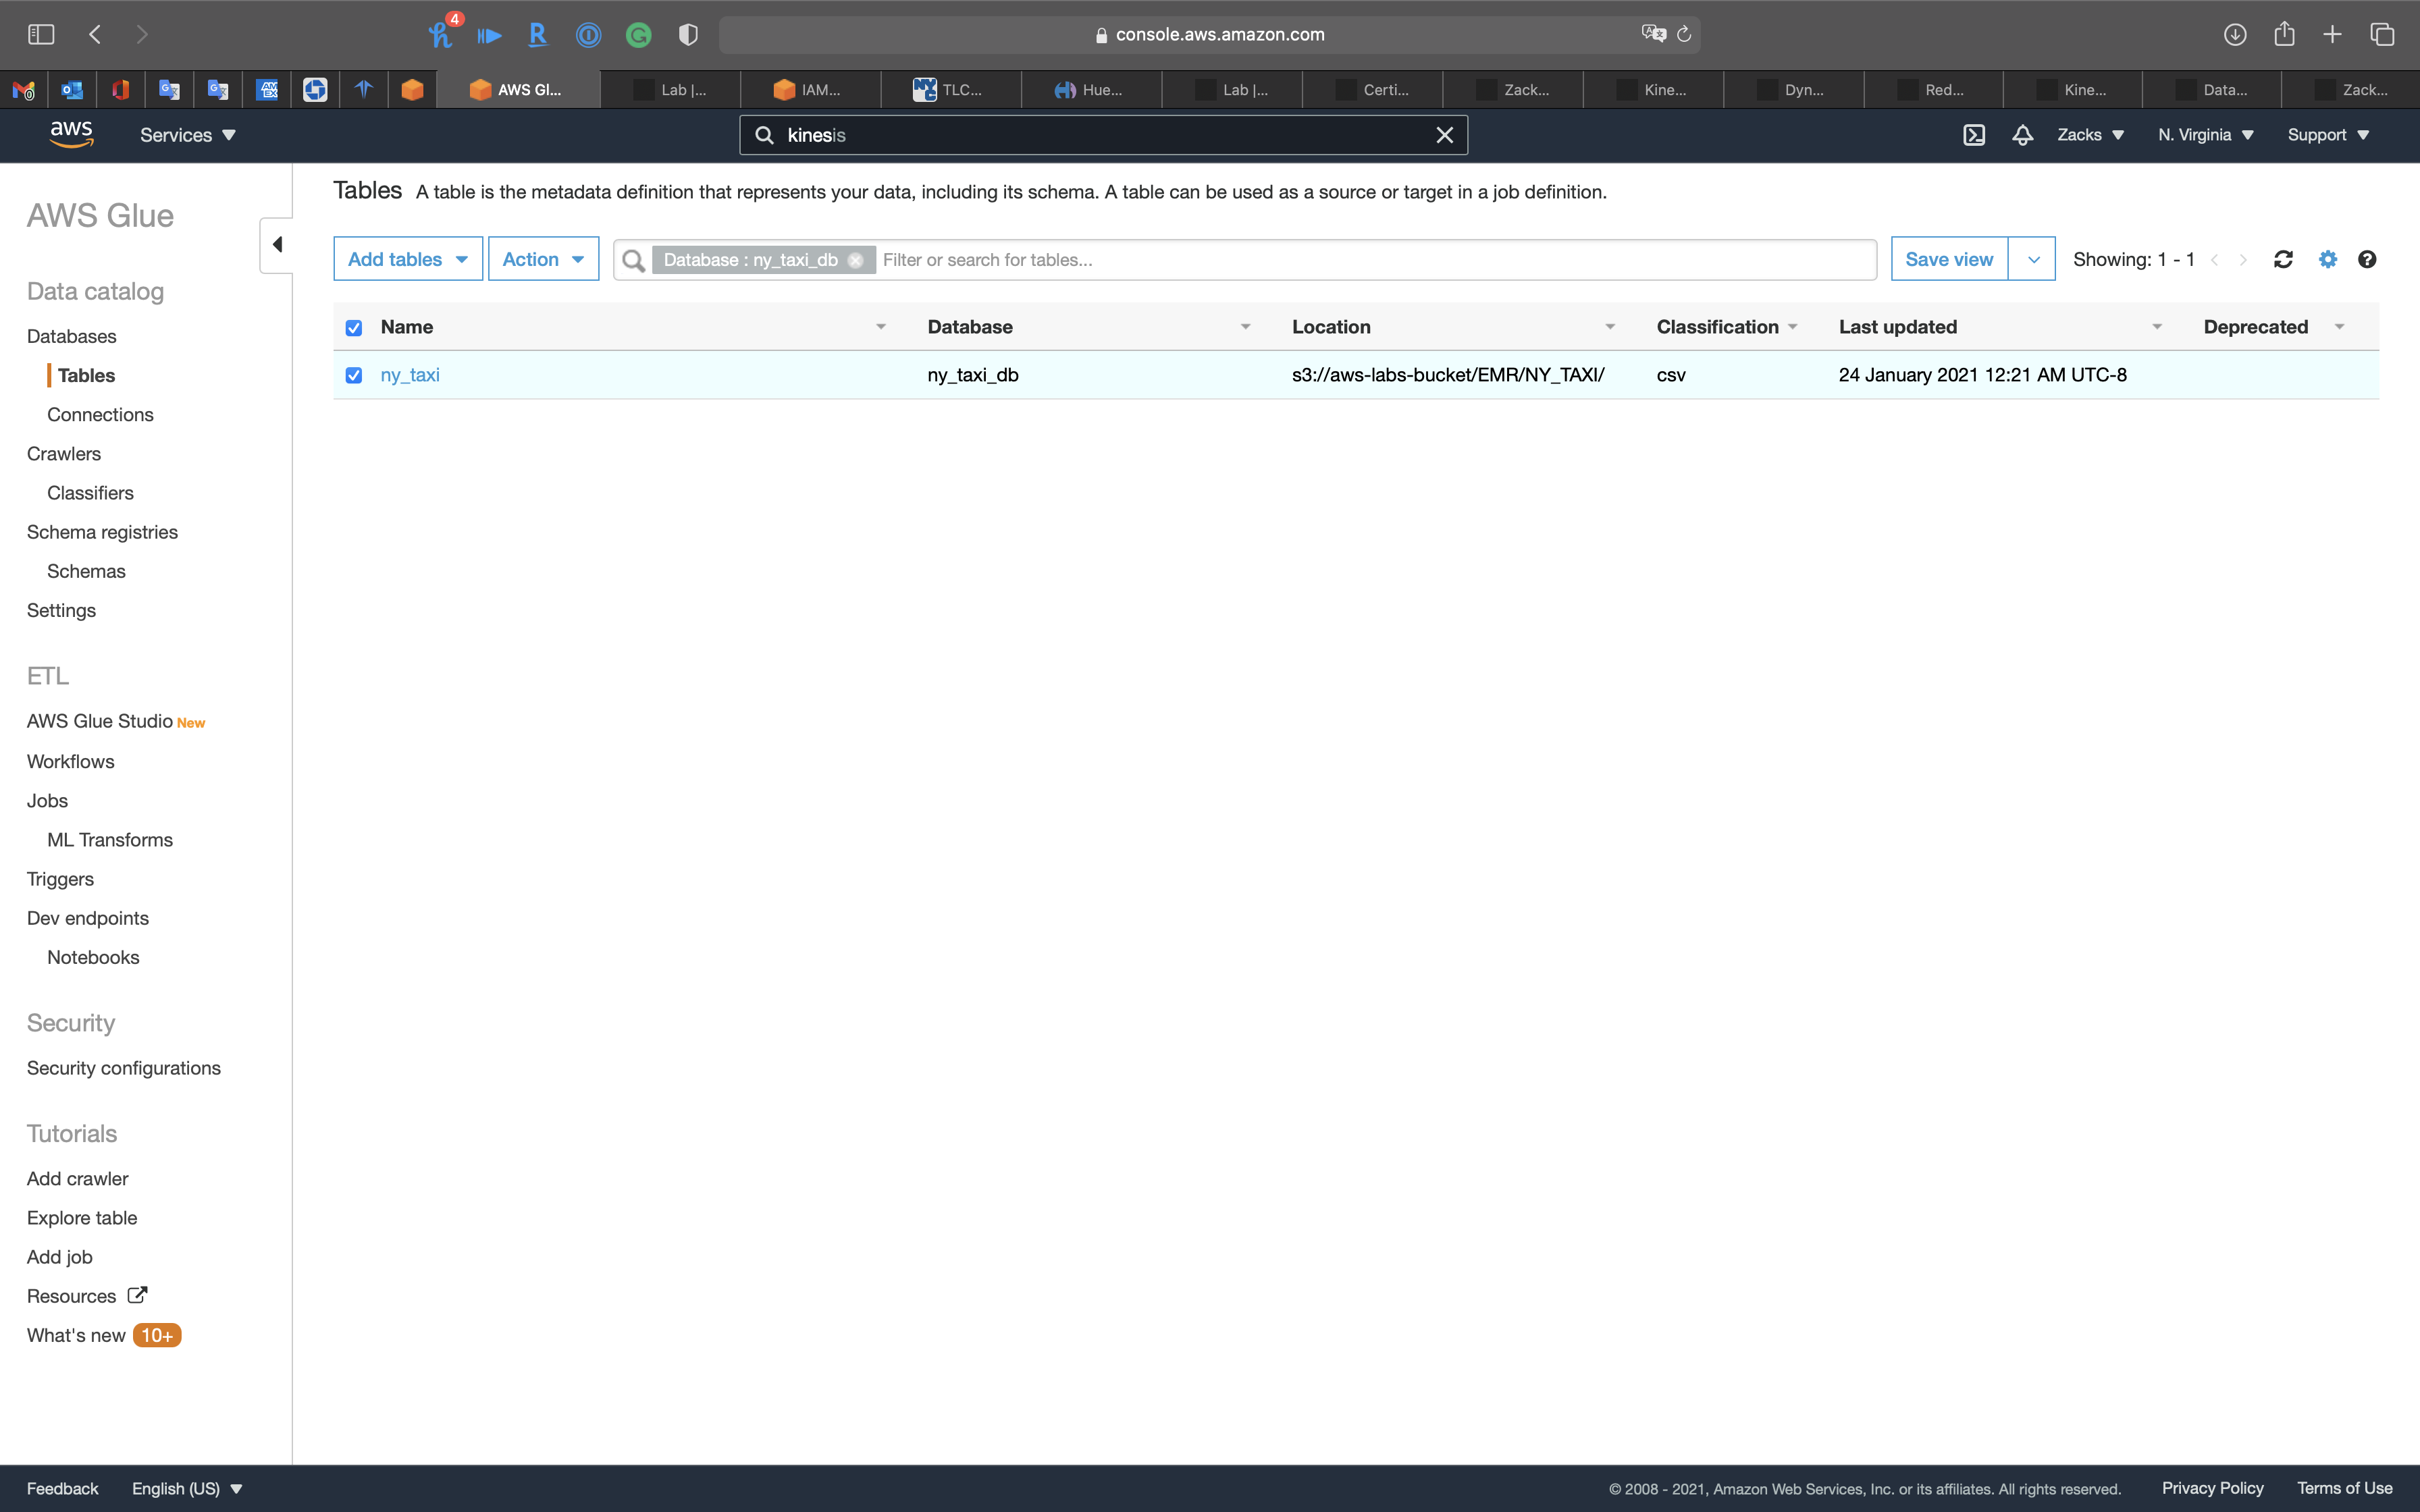
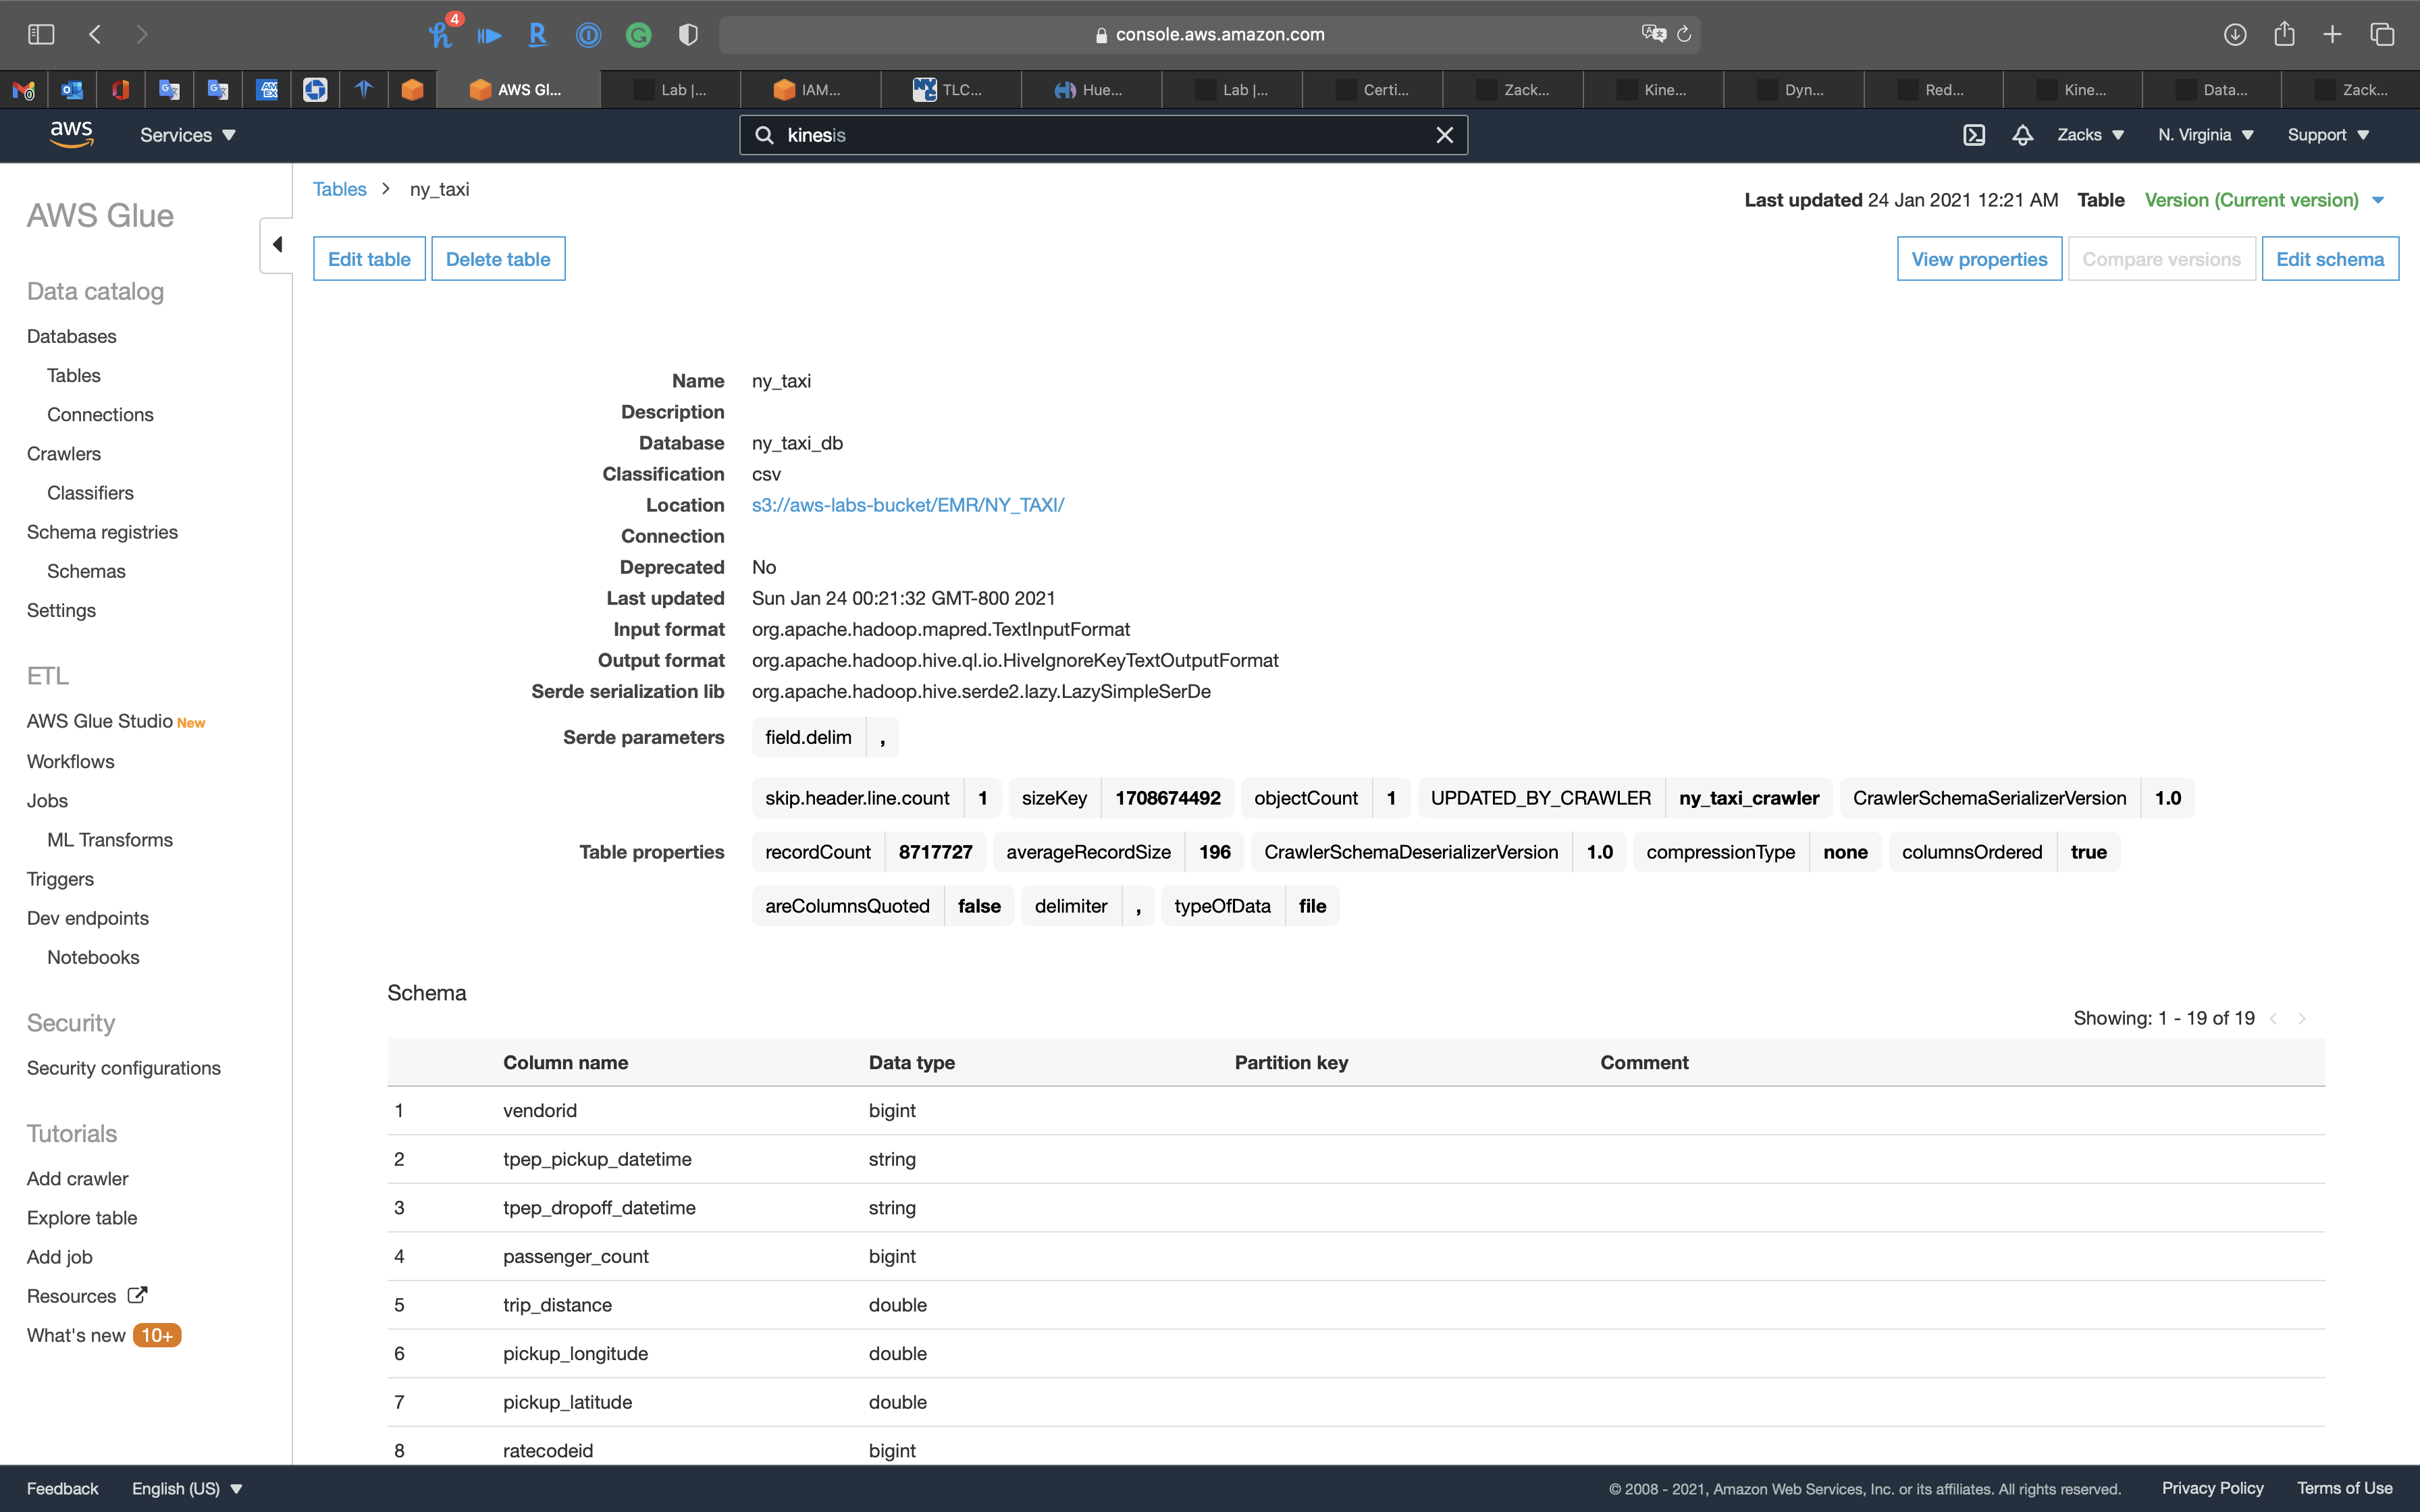

ETL - Jobs
At this step, AWS Glue transform the raw data from .csv to apache .parquet.
As we can see, the raw data has stream date format, which we need to change string to timestamp for time related query.
Services -> AWS Glue -> AWS Glue Studios
Click on Create and mange jobs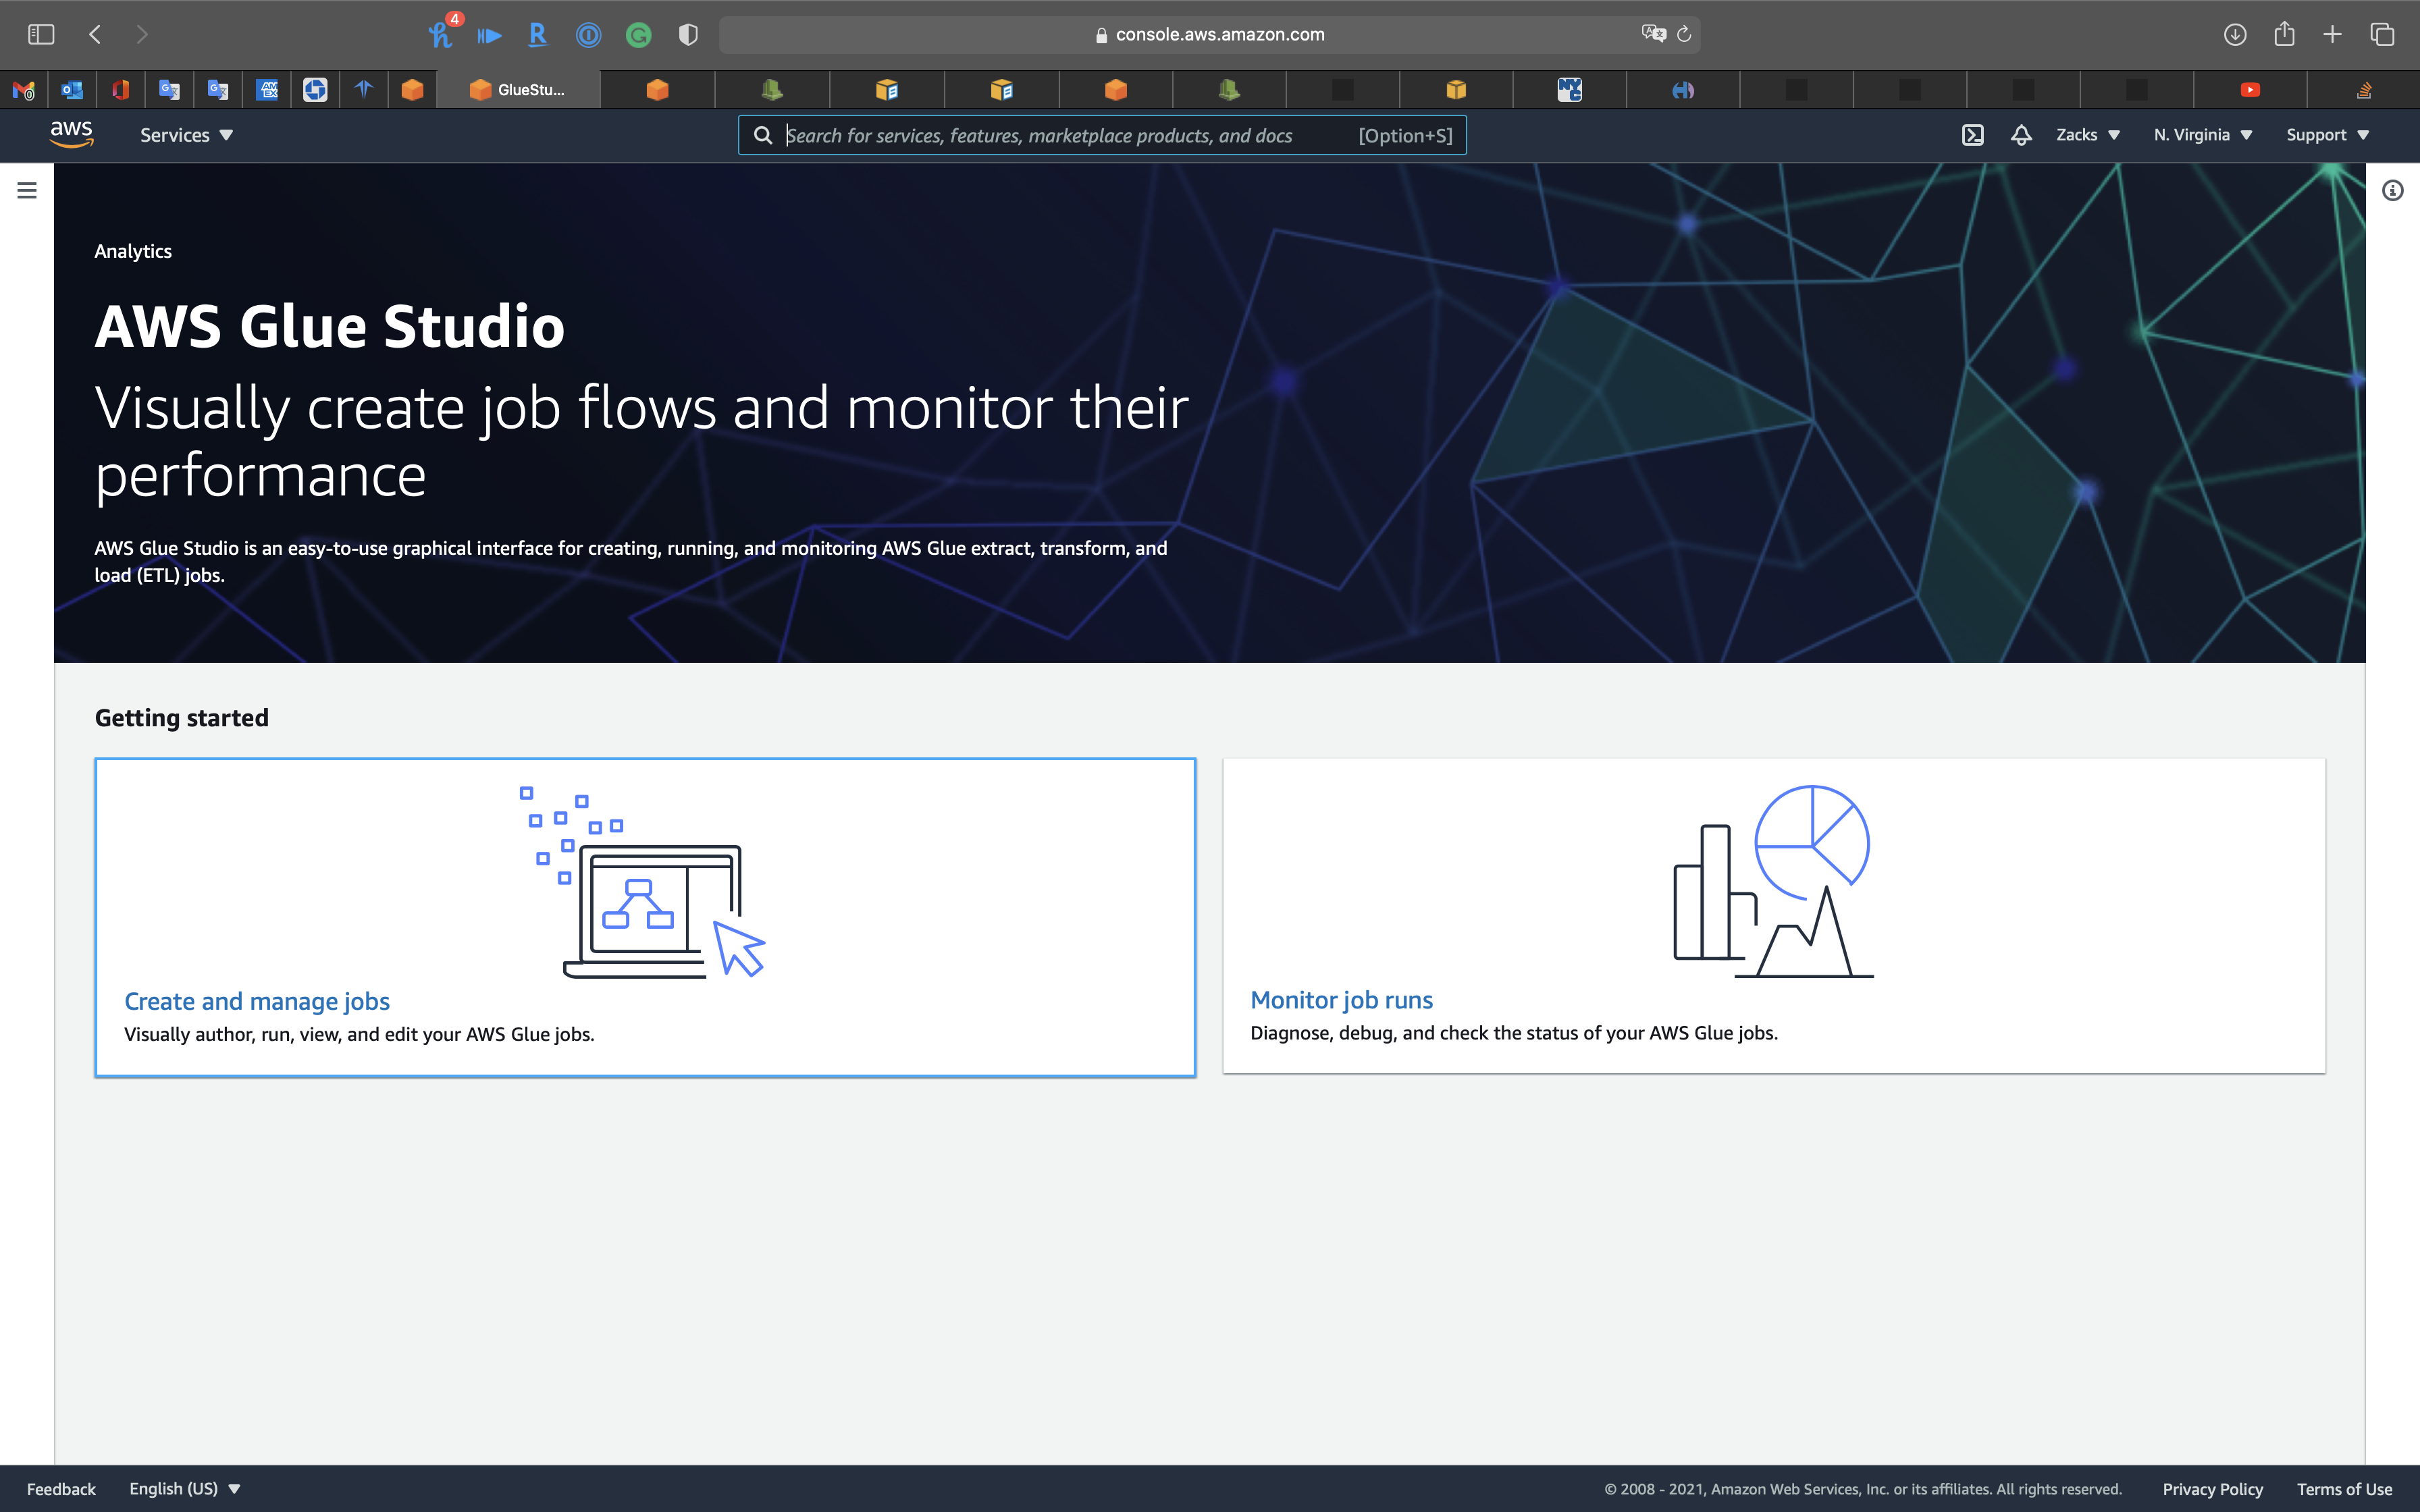
Create job
- Select
Source and target added to the graph
Click on Create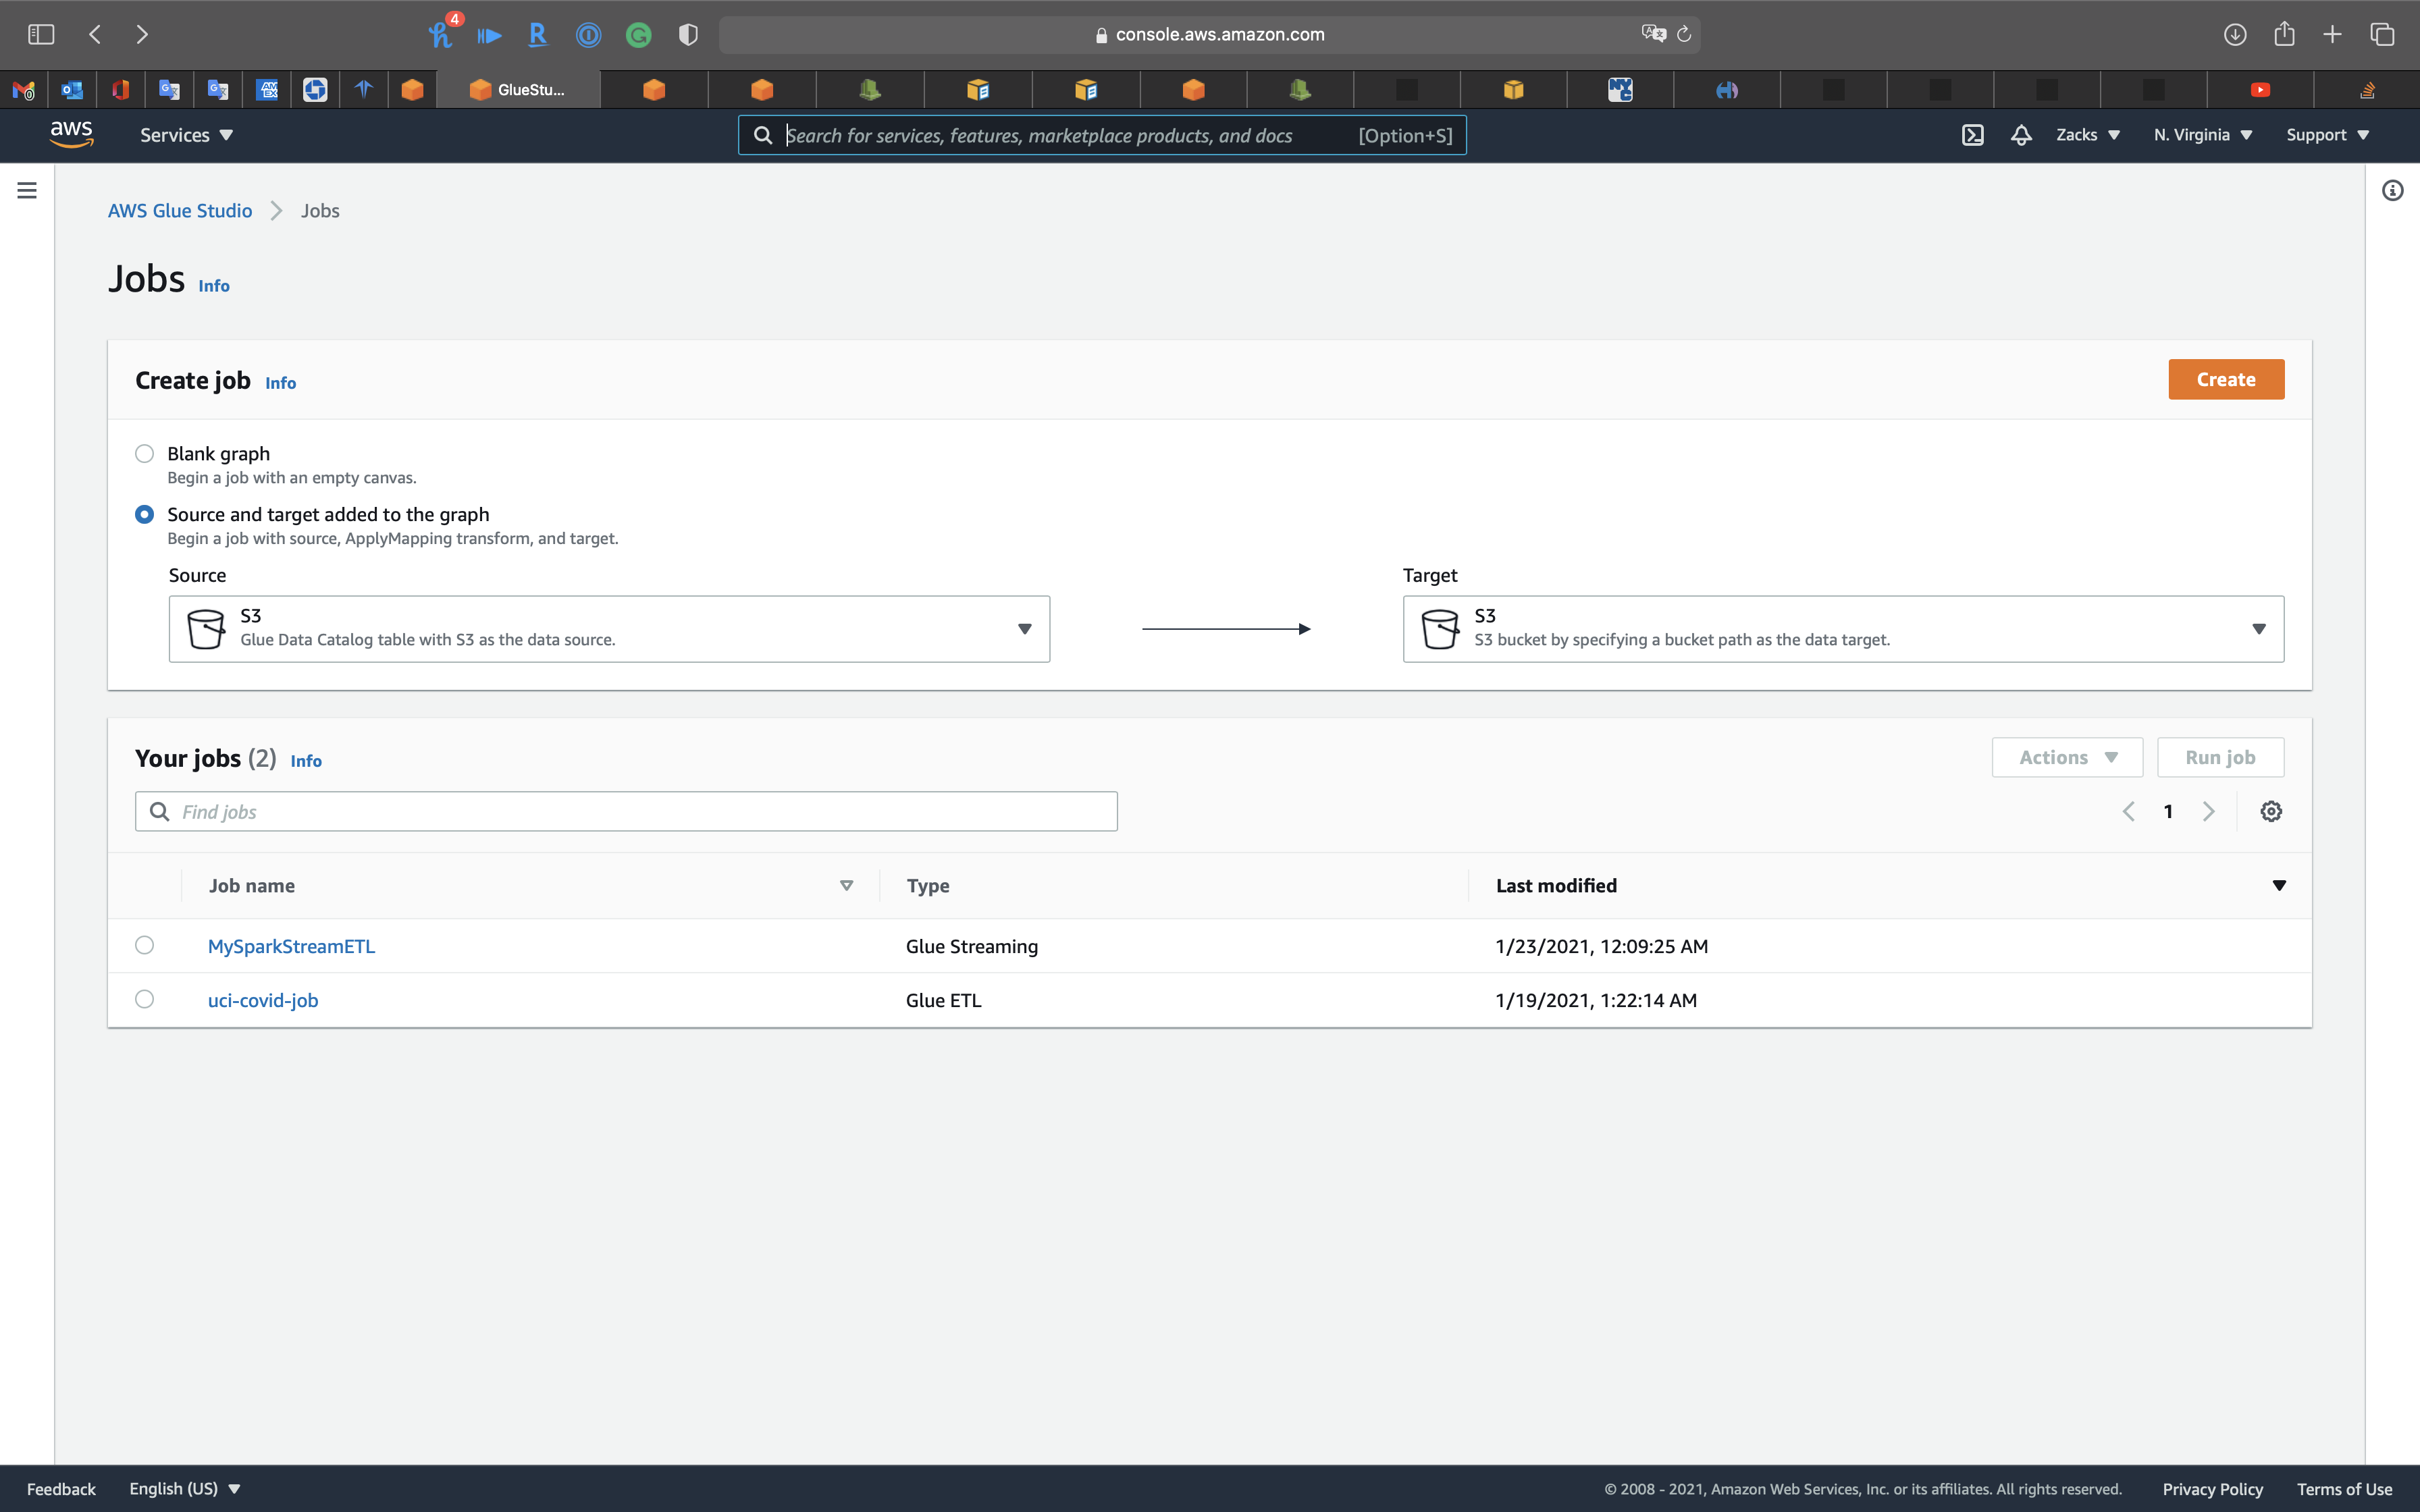
Click on Untitled job on the left and top page to edit the job name.
ny_taxi_etl_parquet
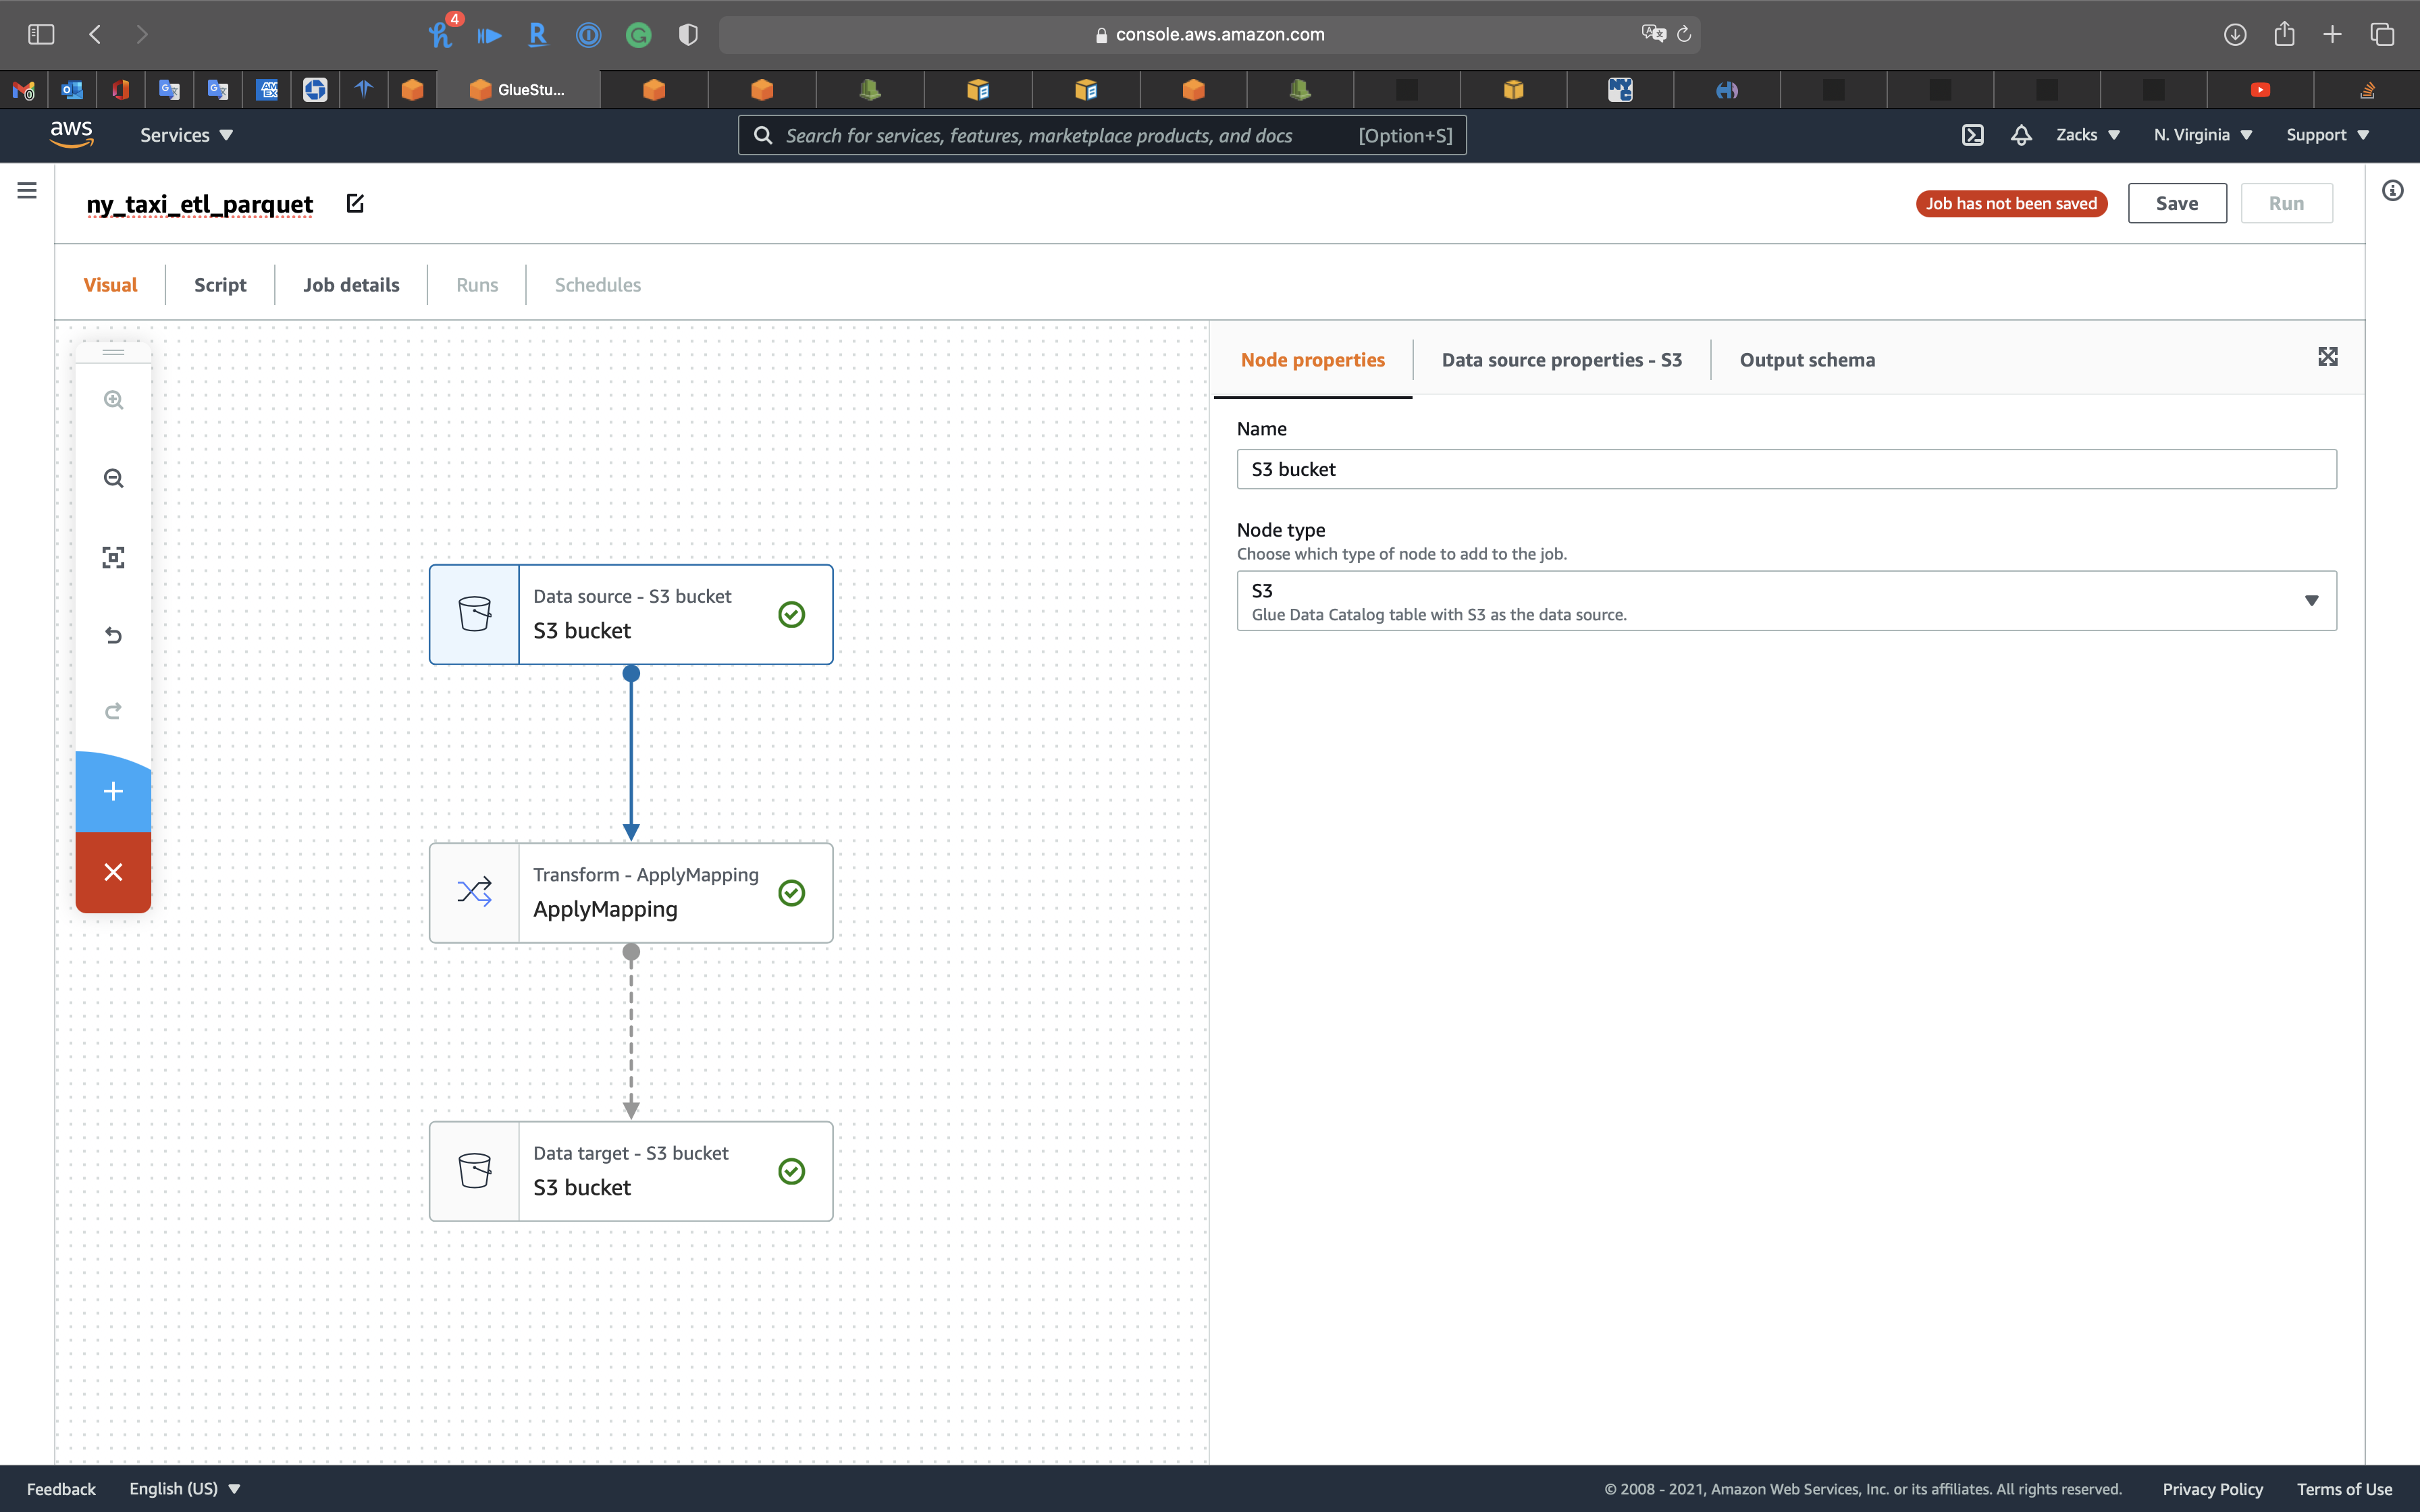
Click on the 1st node, S3 bucket icon, then choose your Database.
- Database:
ny_taxi_db - Table:
ny_taxi
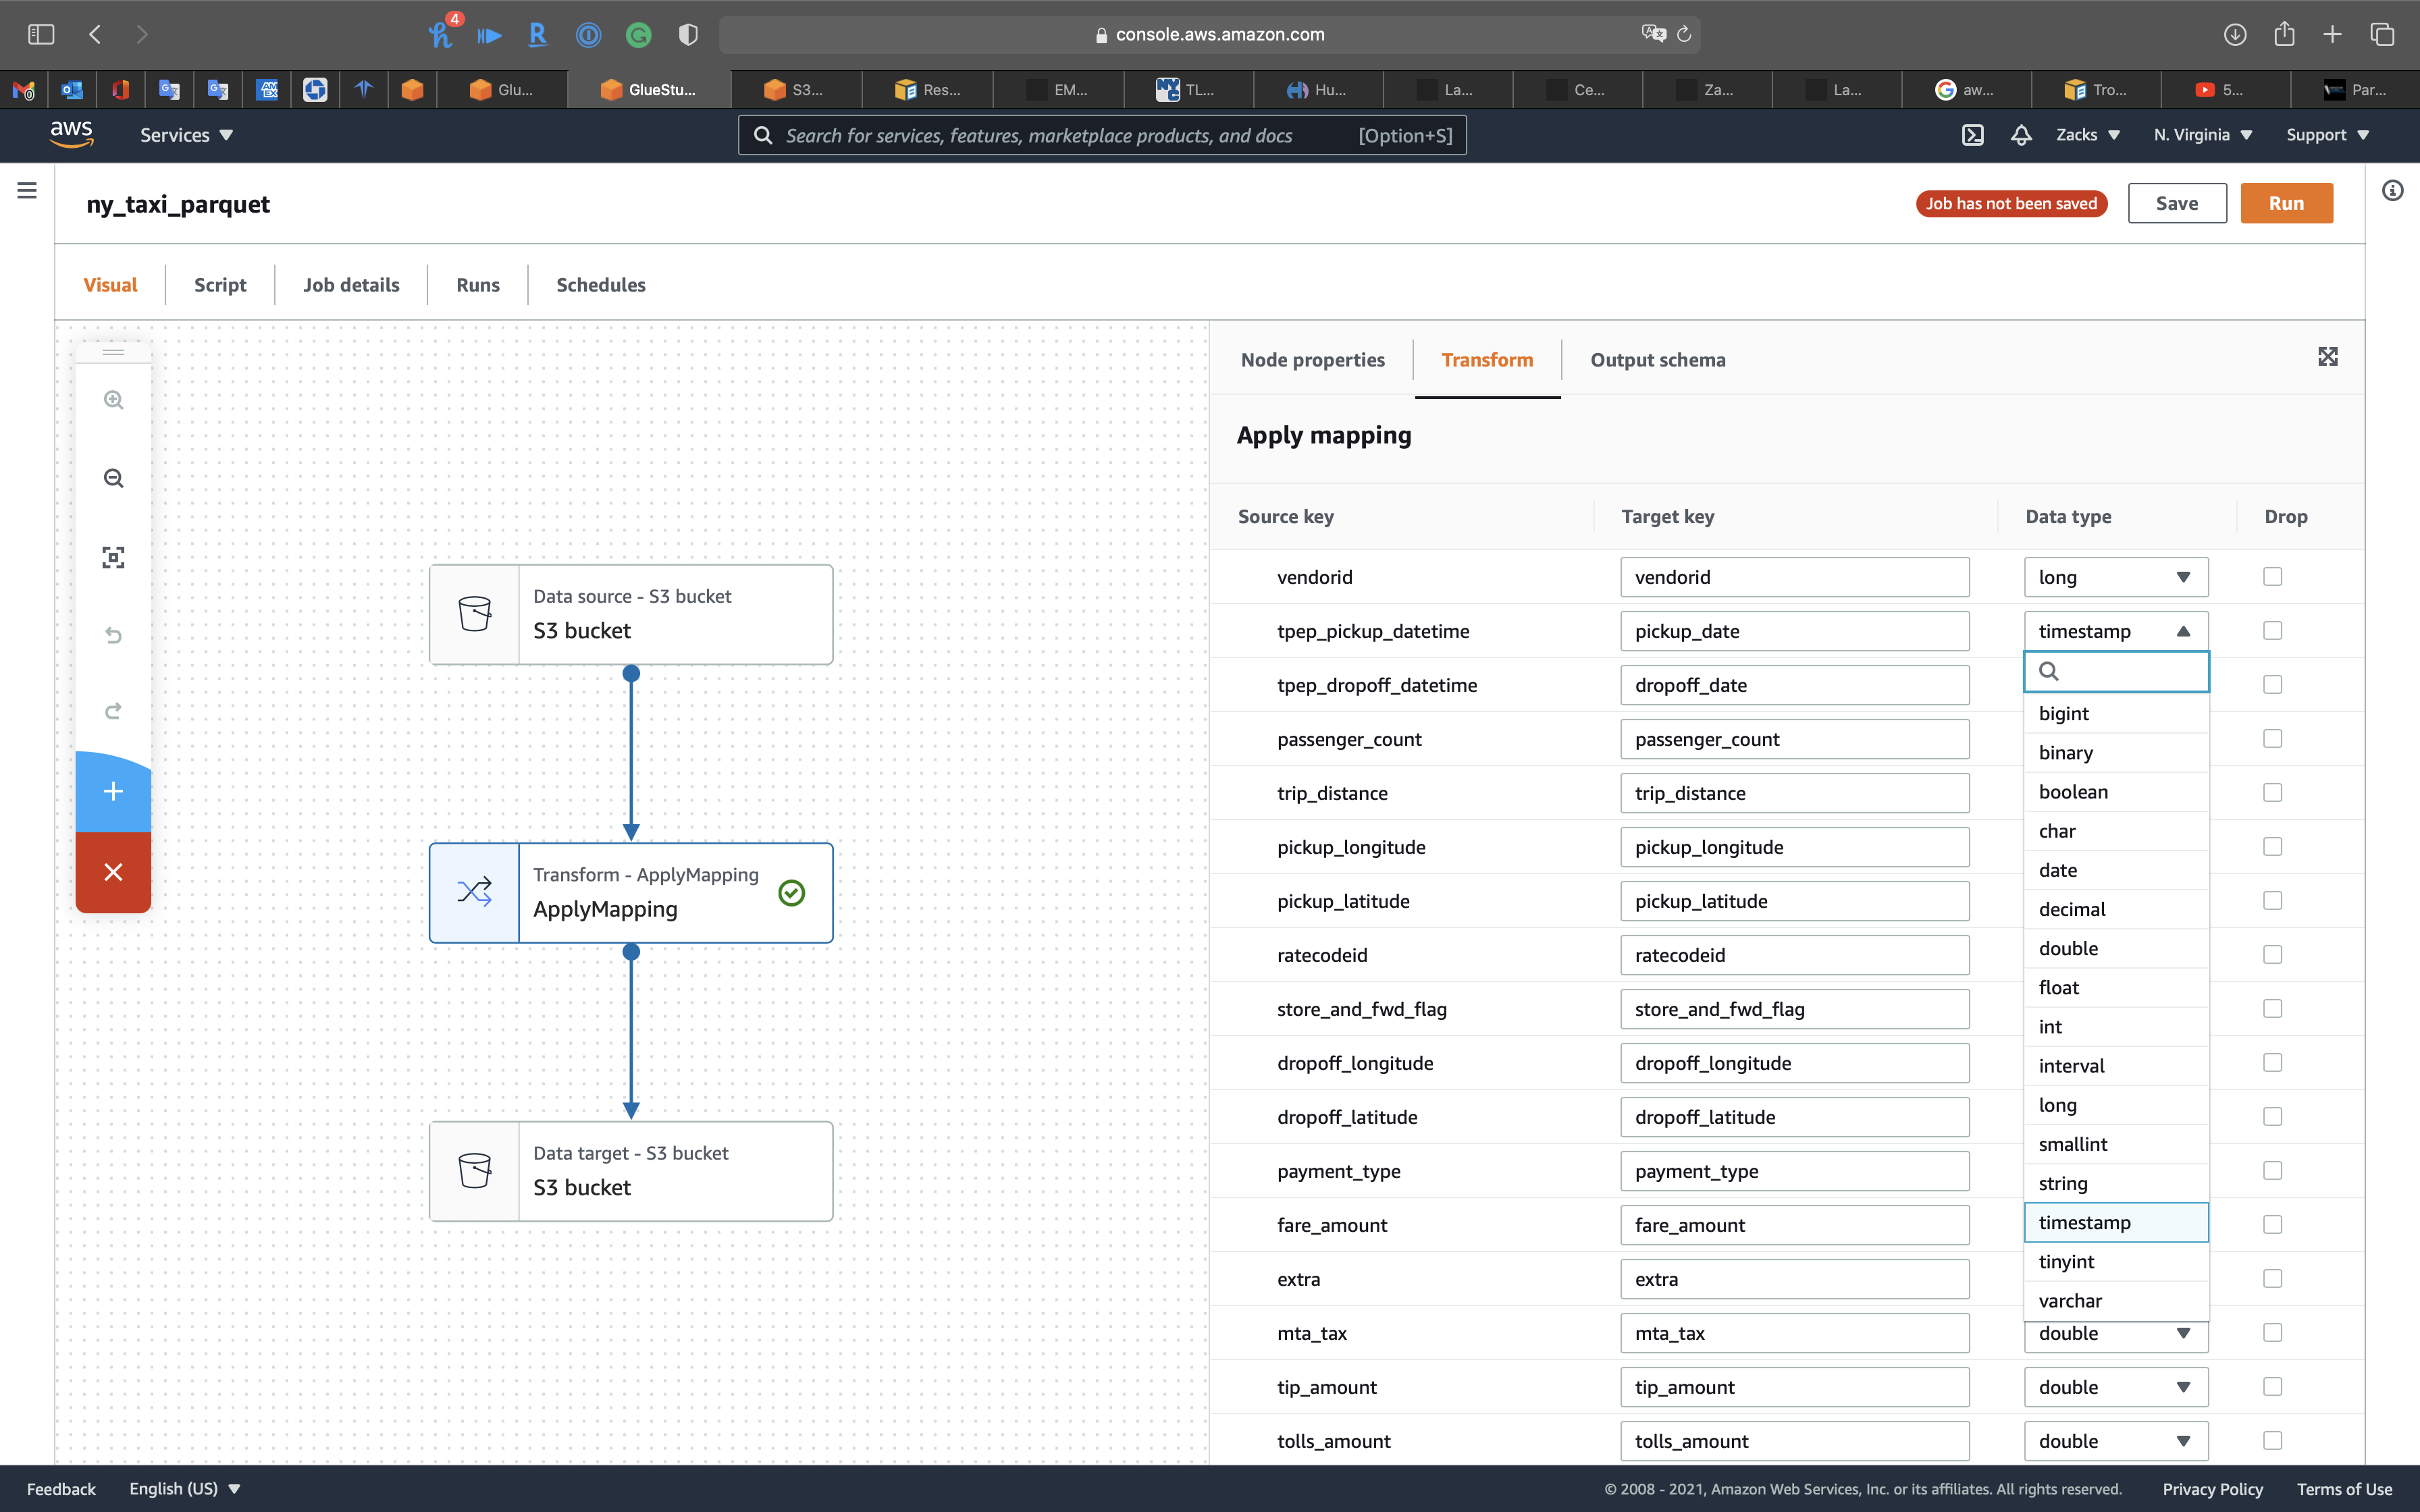
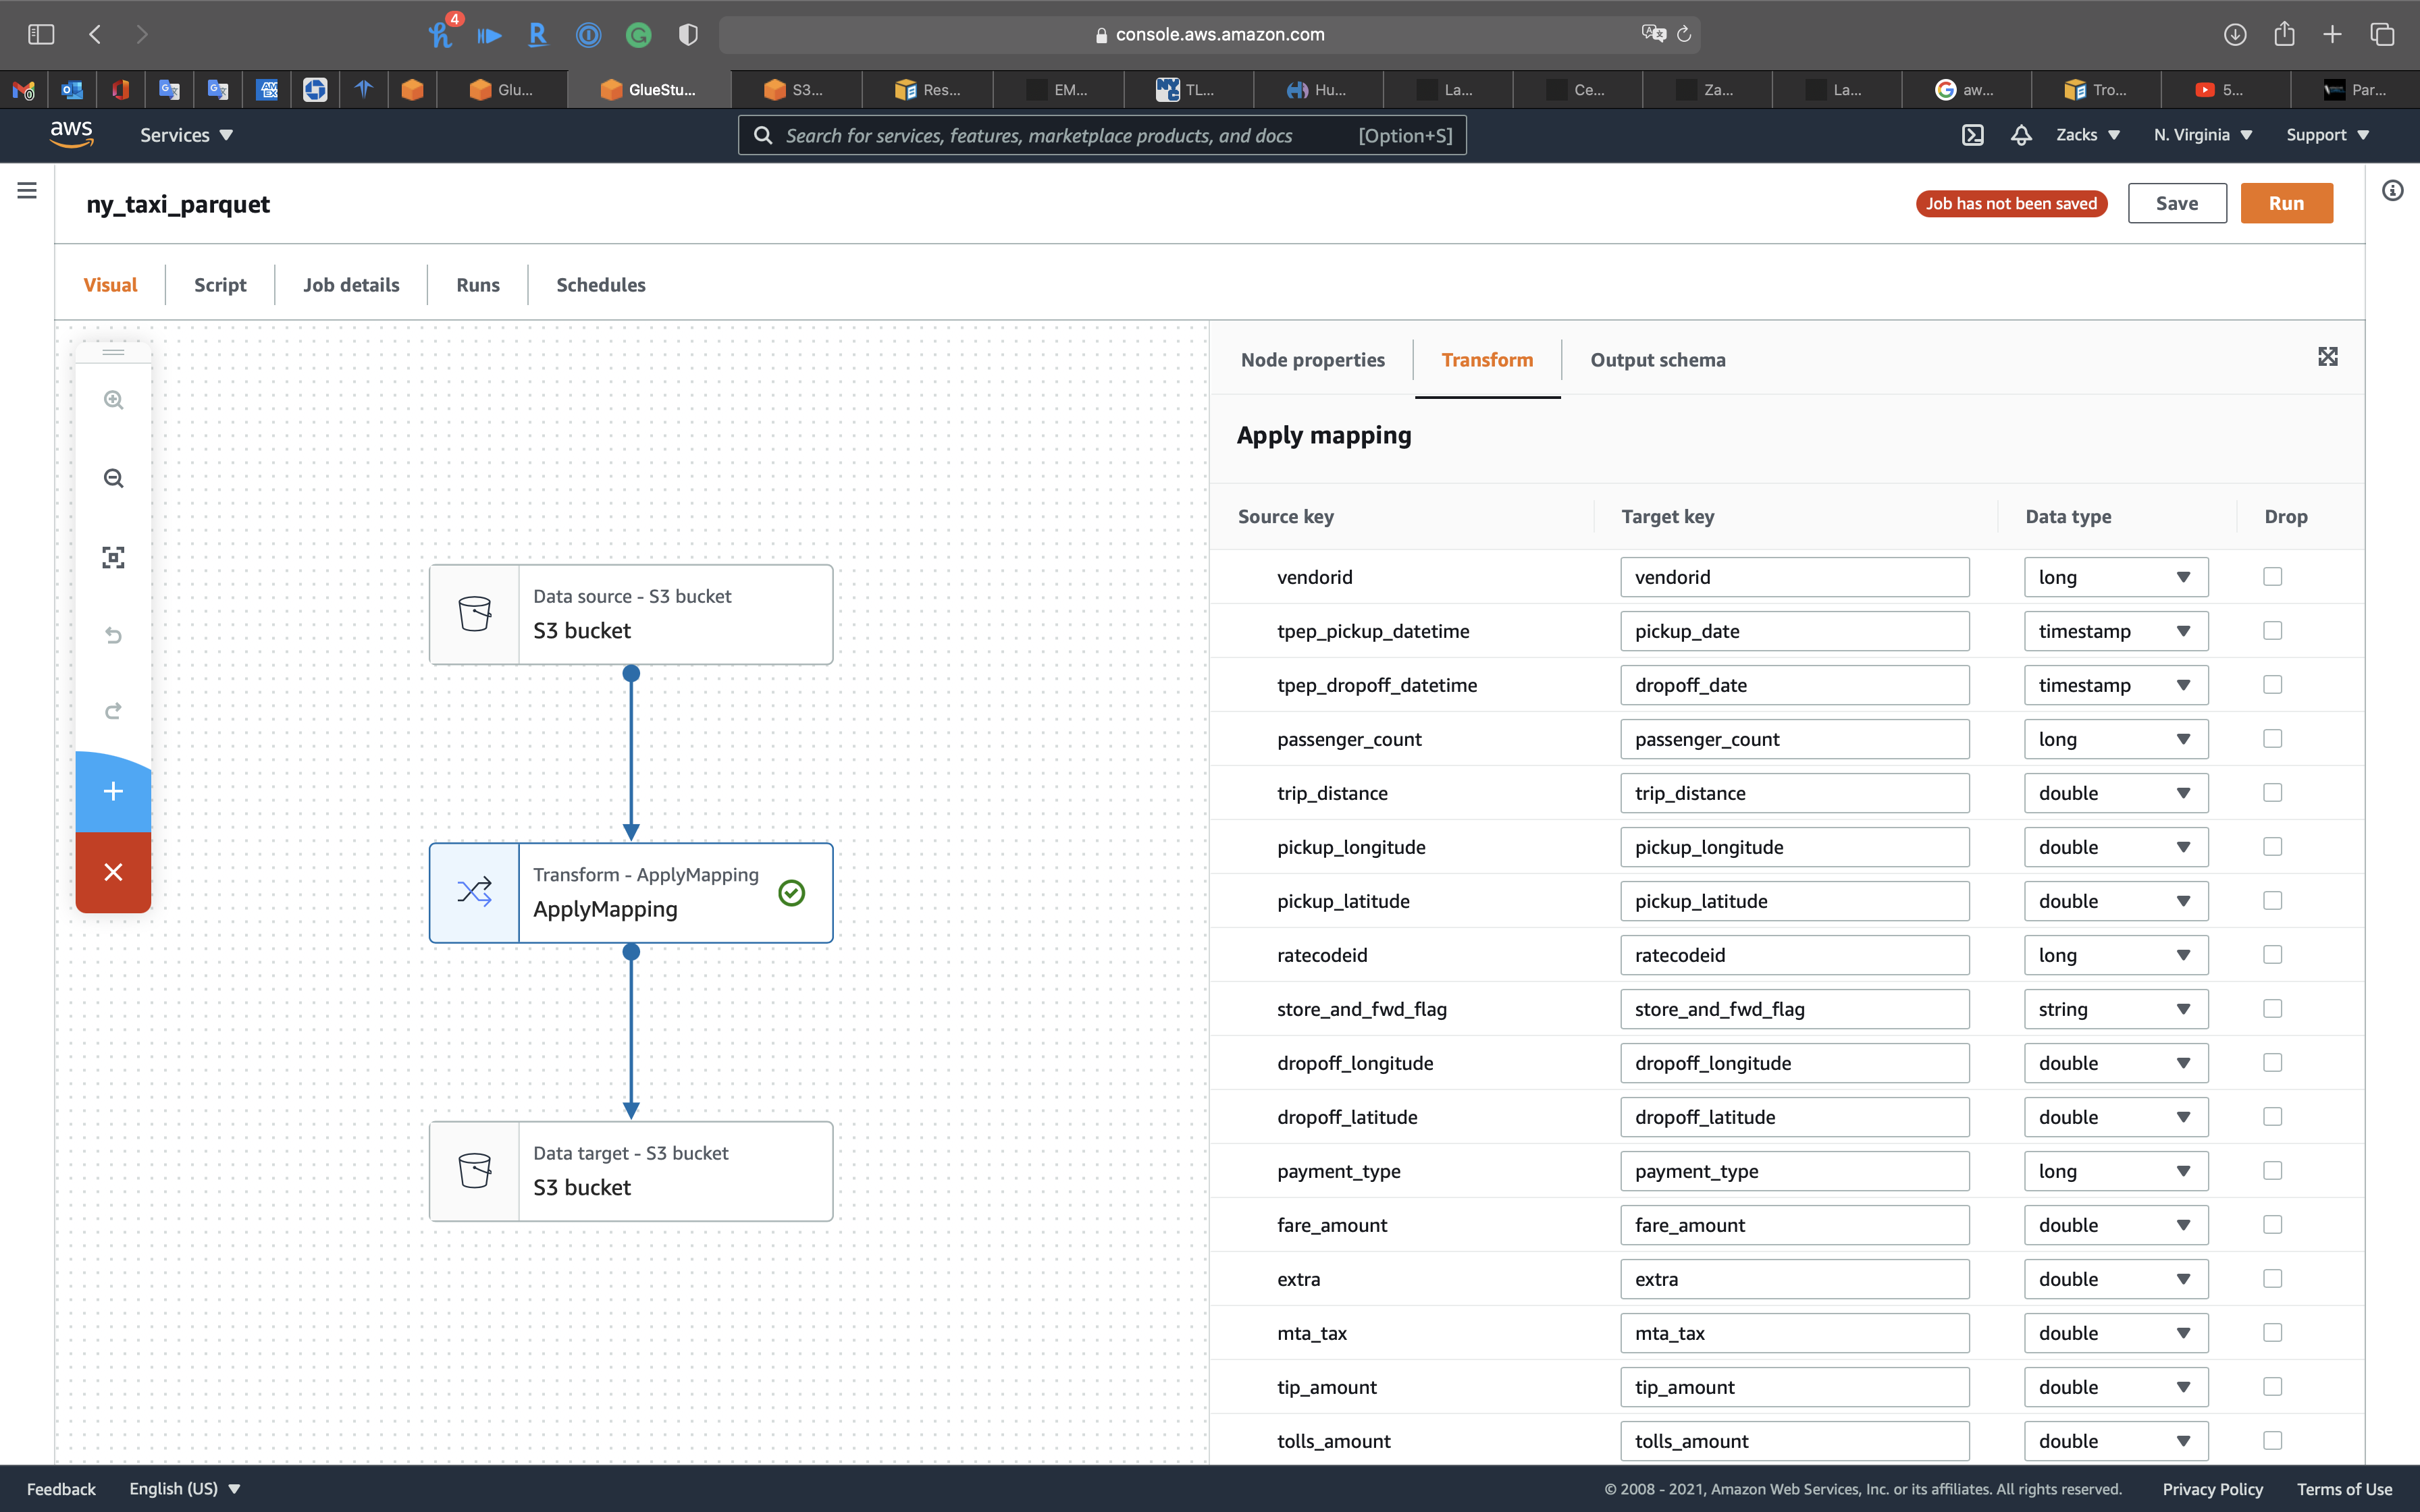
Click on the 2nd node, Transform - ApplyMapping icon, then change tpep_pickup_datetime and tpep_dropoff_datetime to pickup_date and dropoff_date. Modify their Data type to timestamp.
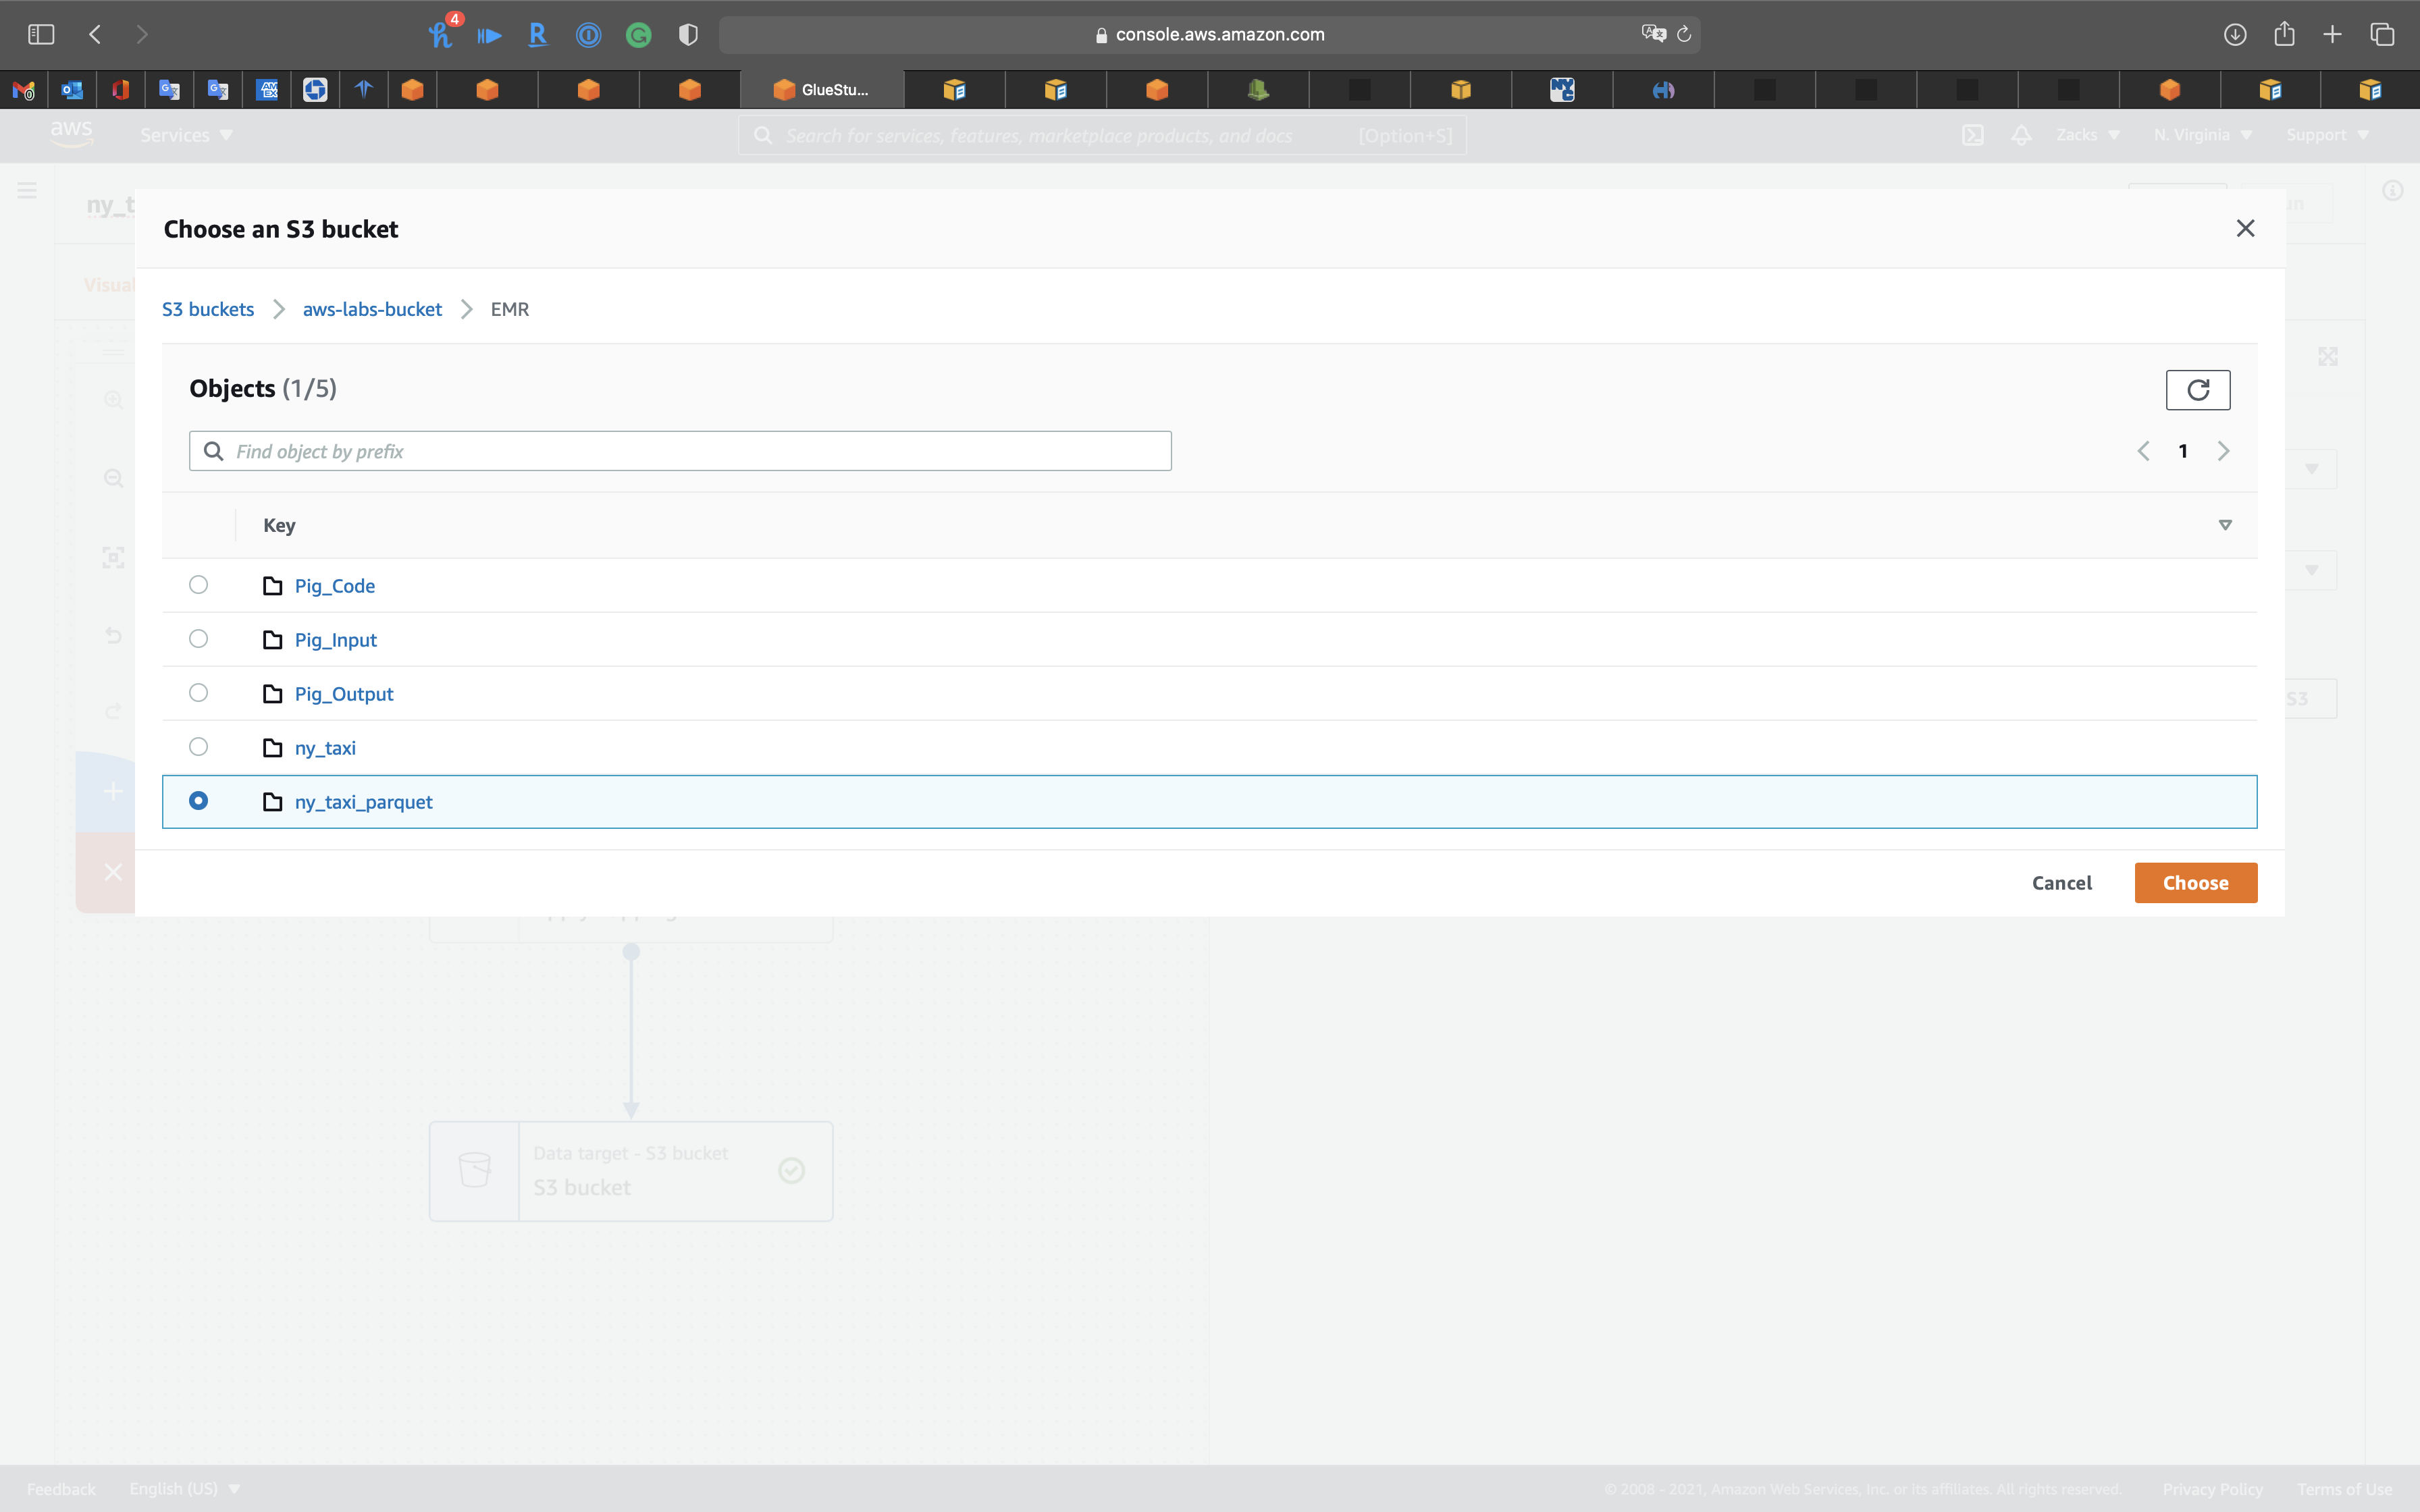
Click on the 3rd node, S3 bucket icon, then set the followings:
- Format:
Parquet - Compression Type:
None - S3 Target Location: choose your S3 bucket
Select your bucket then click on Choose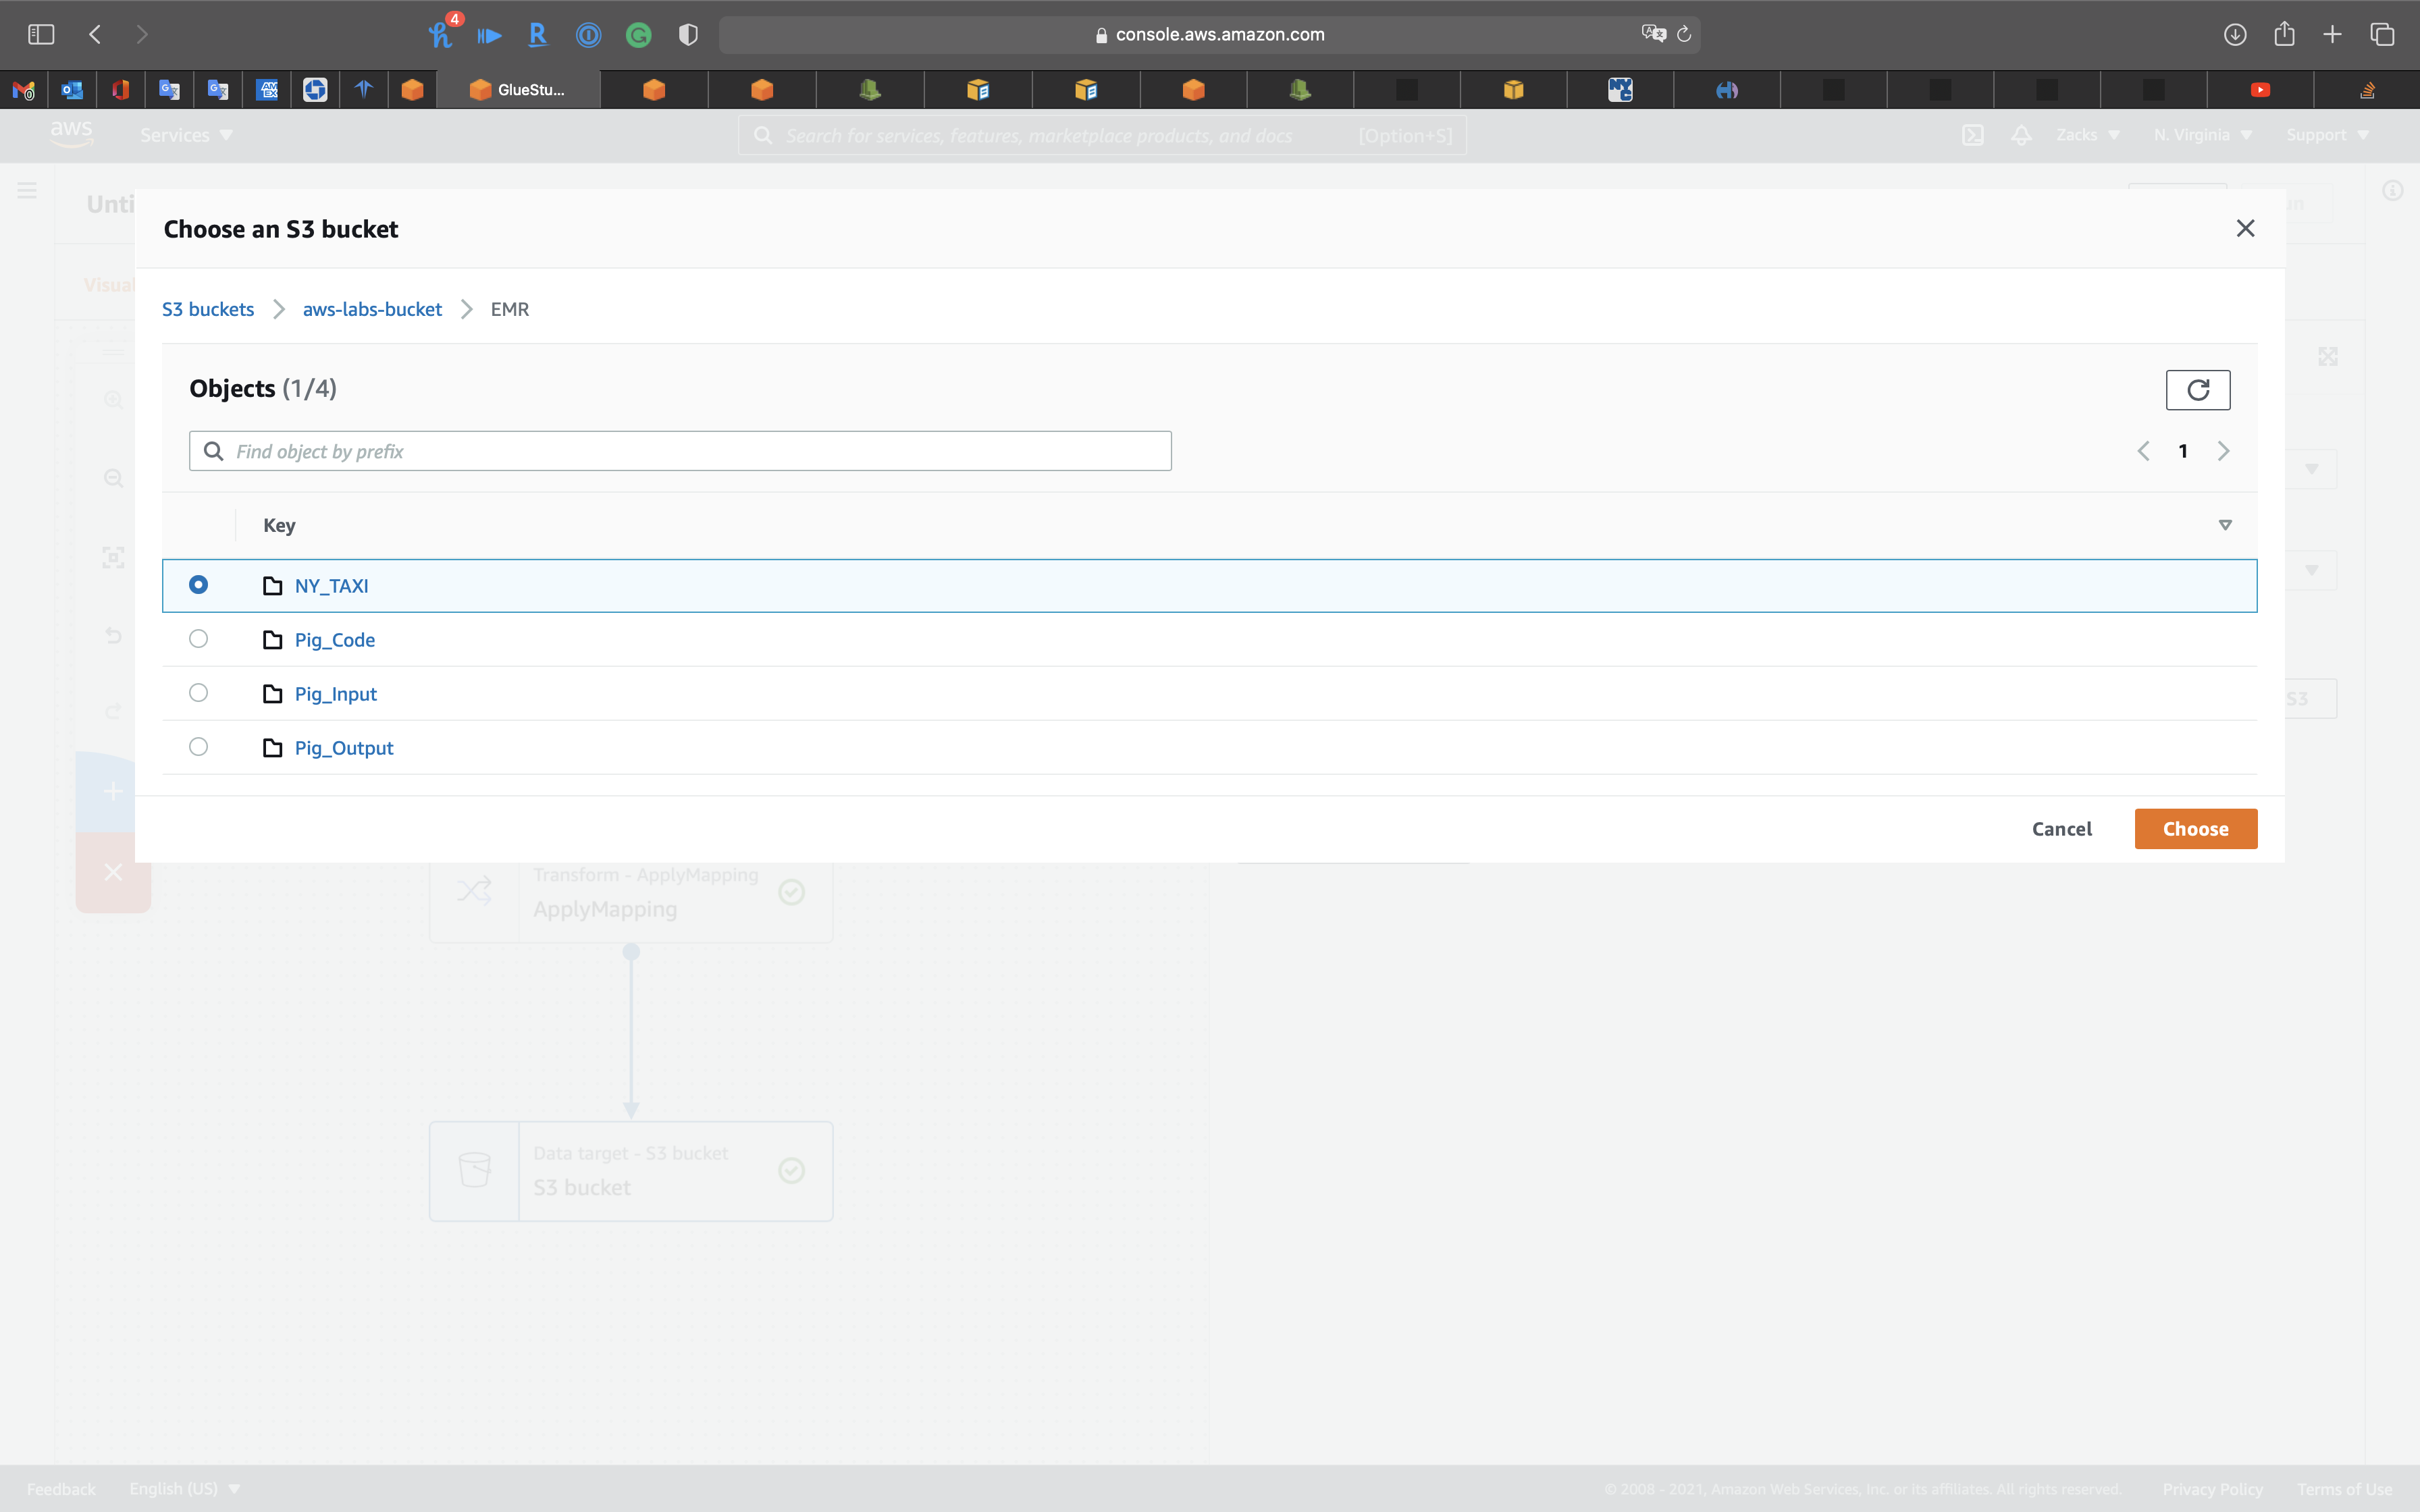
Click on Job details tab.
- IAM Role:
GlueUnlimited - Bookmarks:
Disable
Click on Save on the right and top page.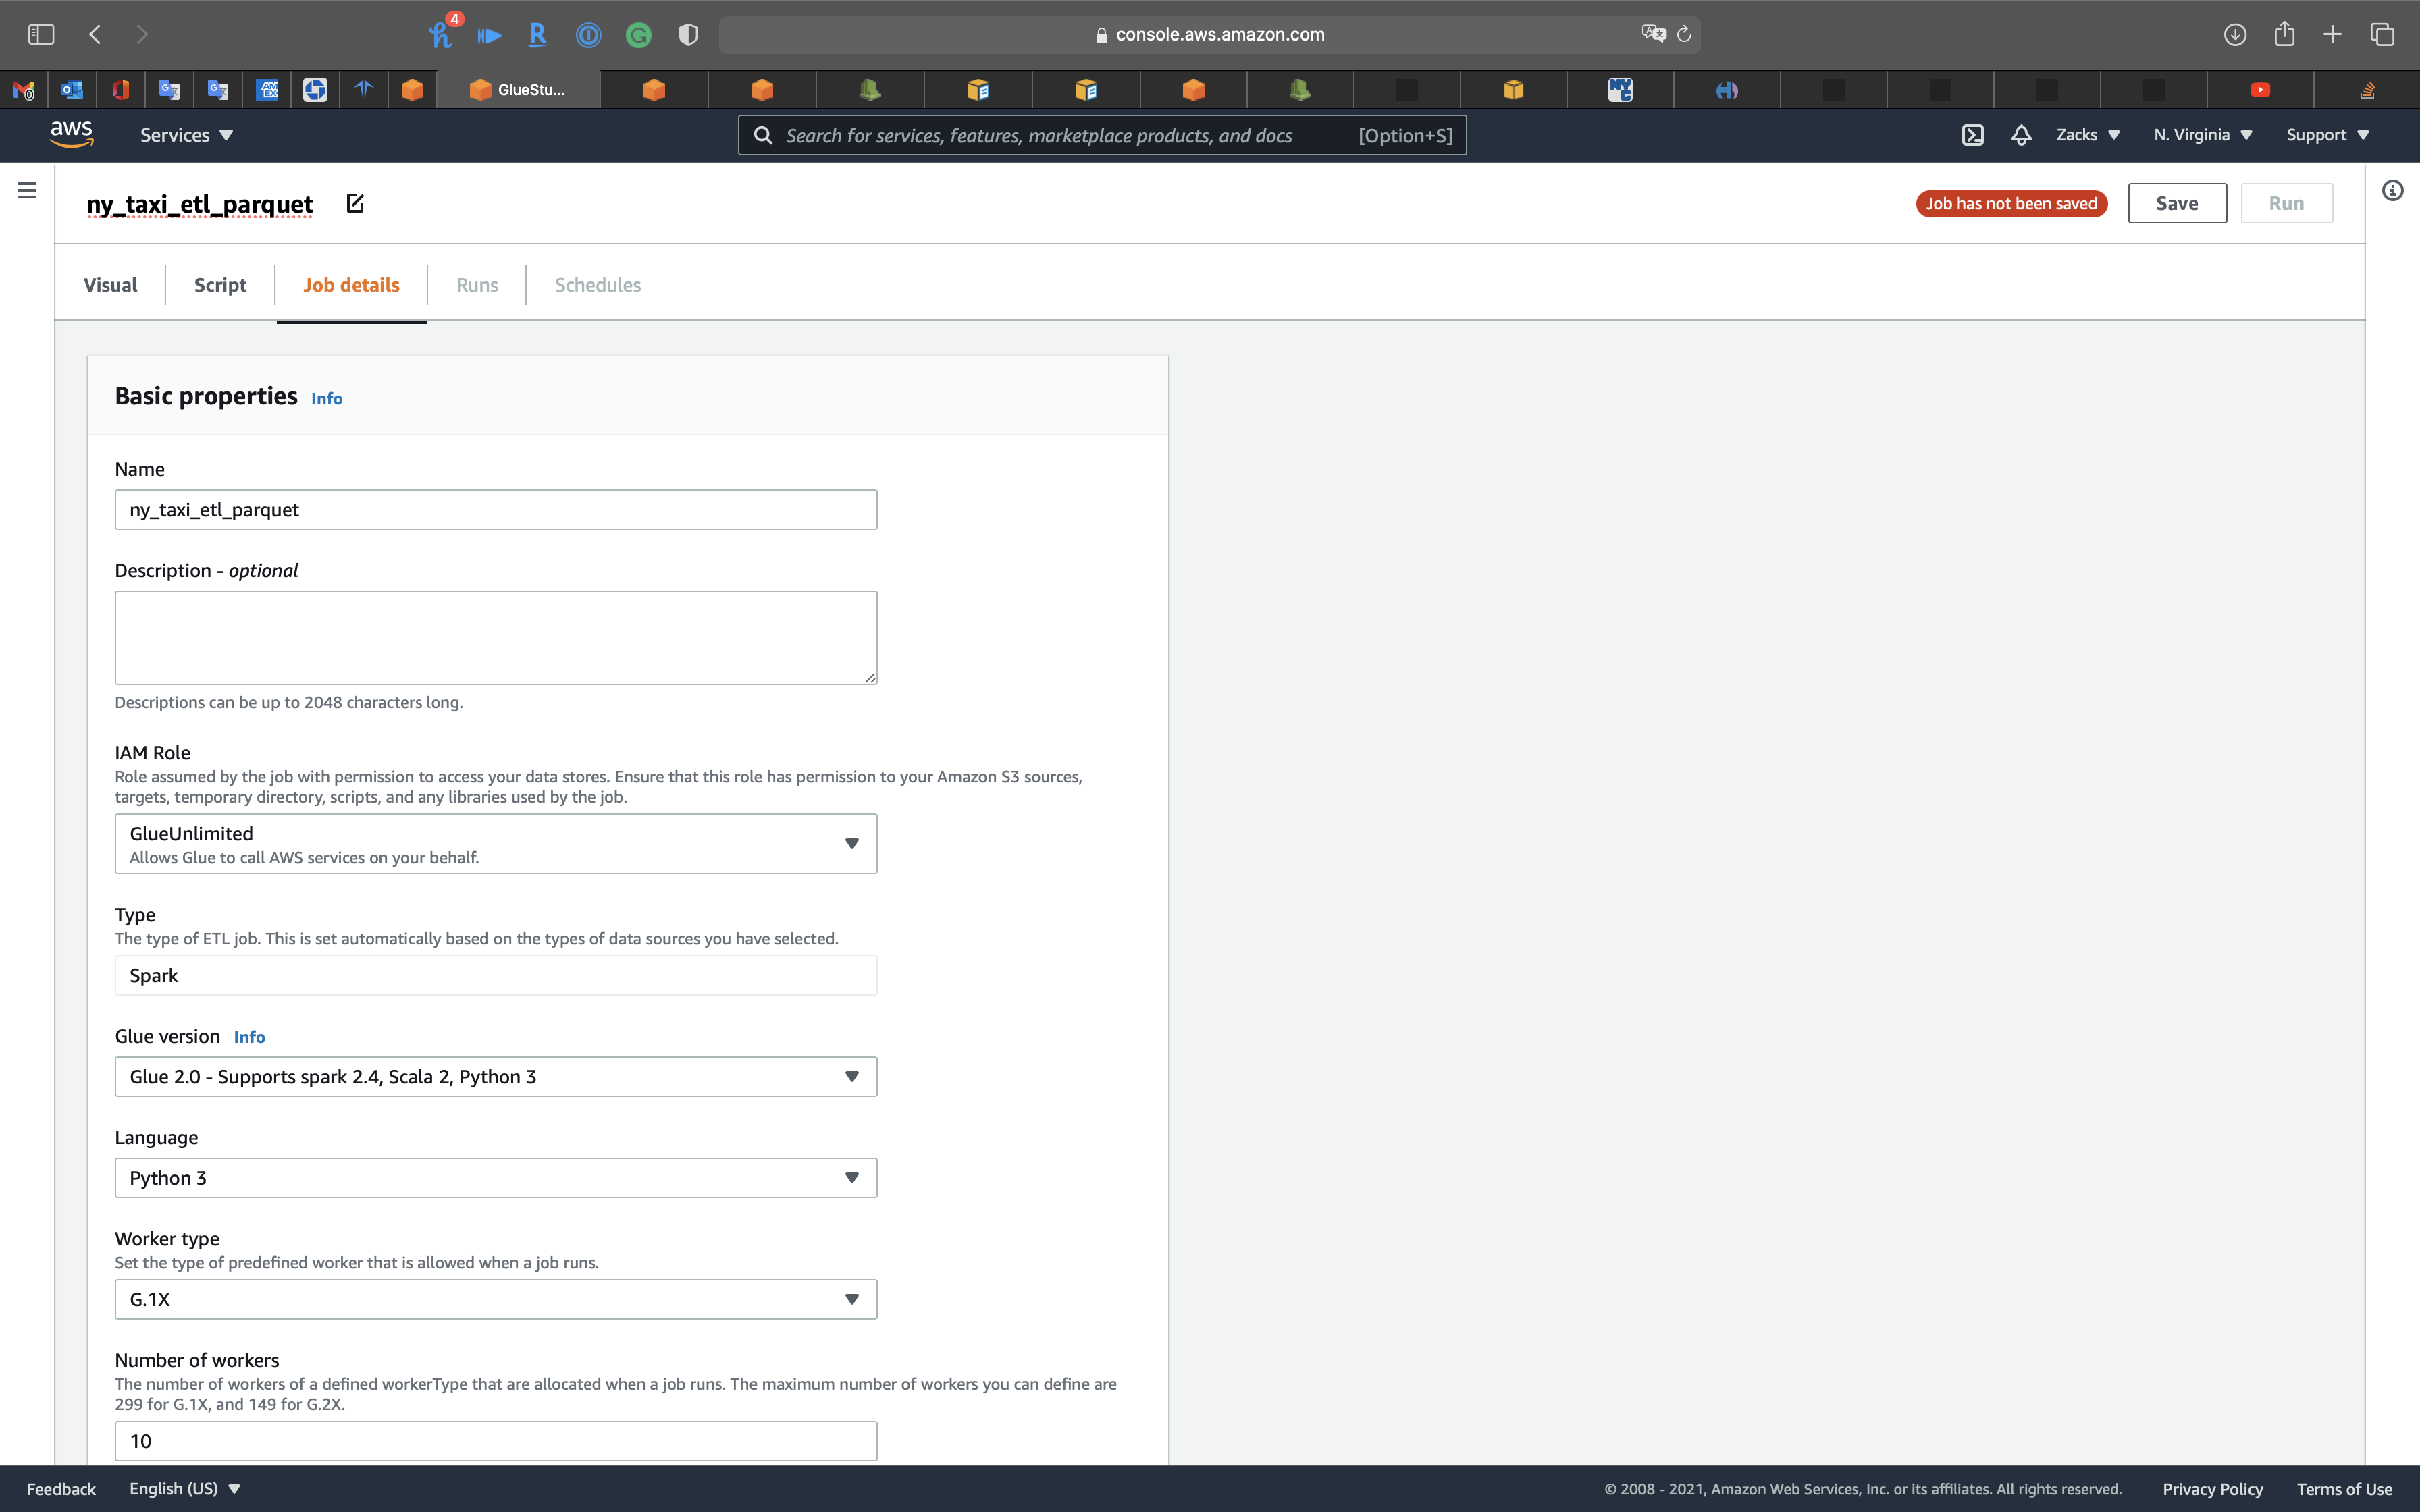
Services -> Glue -> Jobs
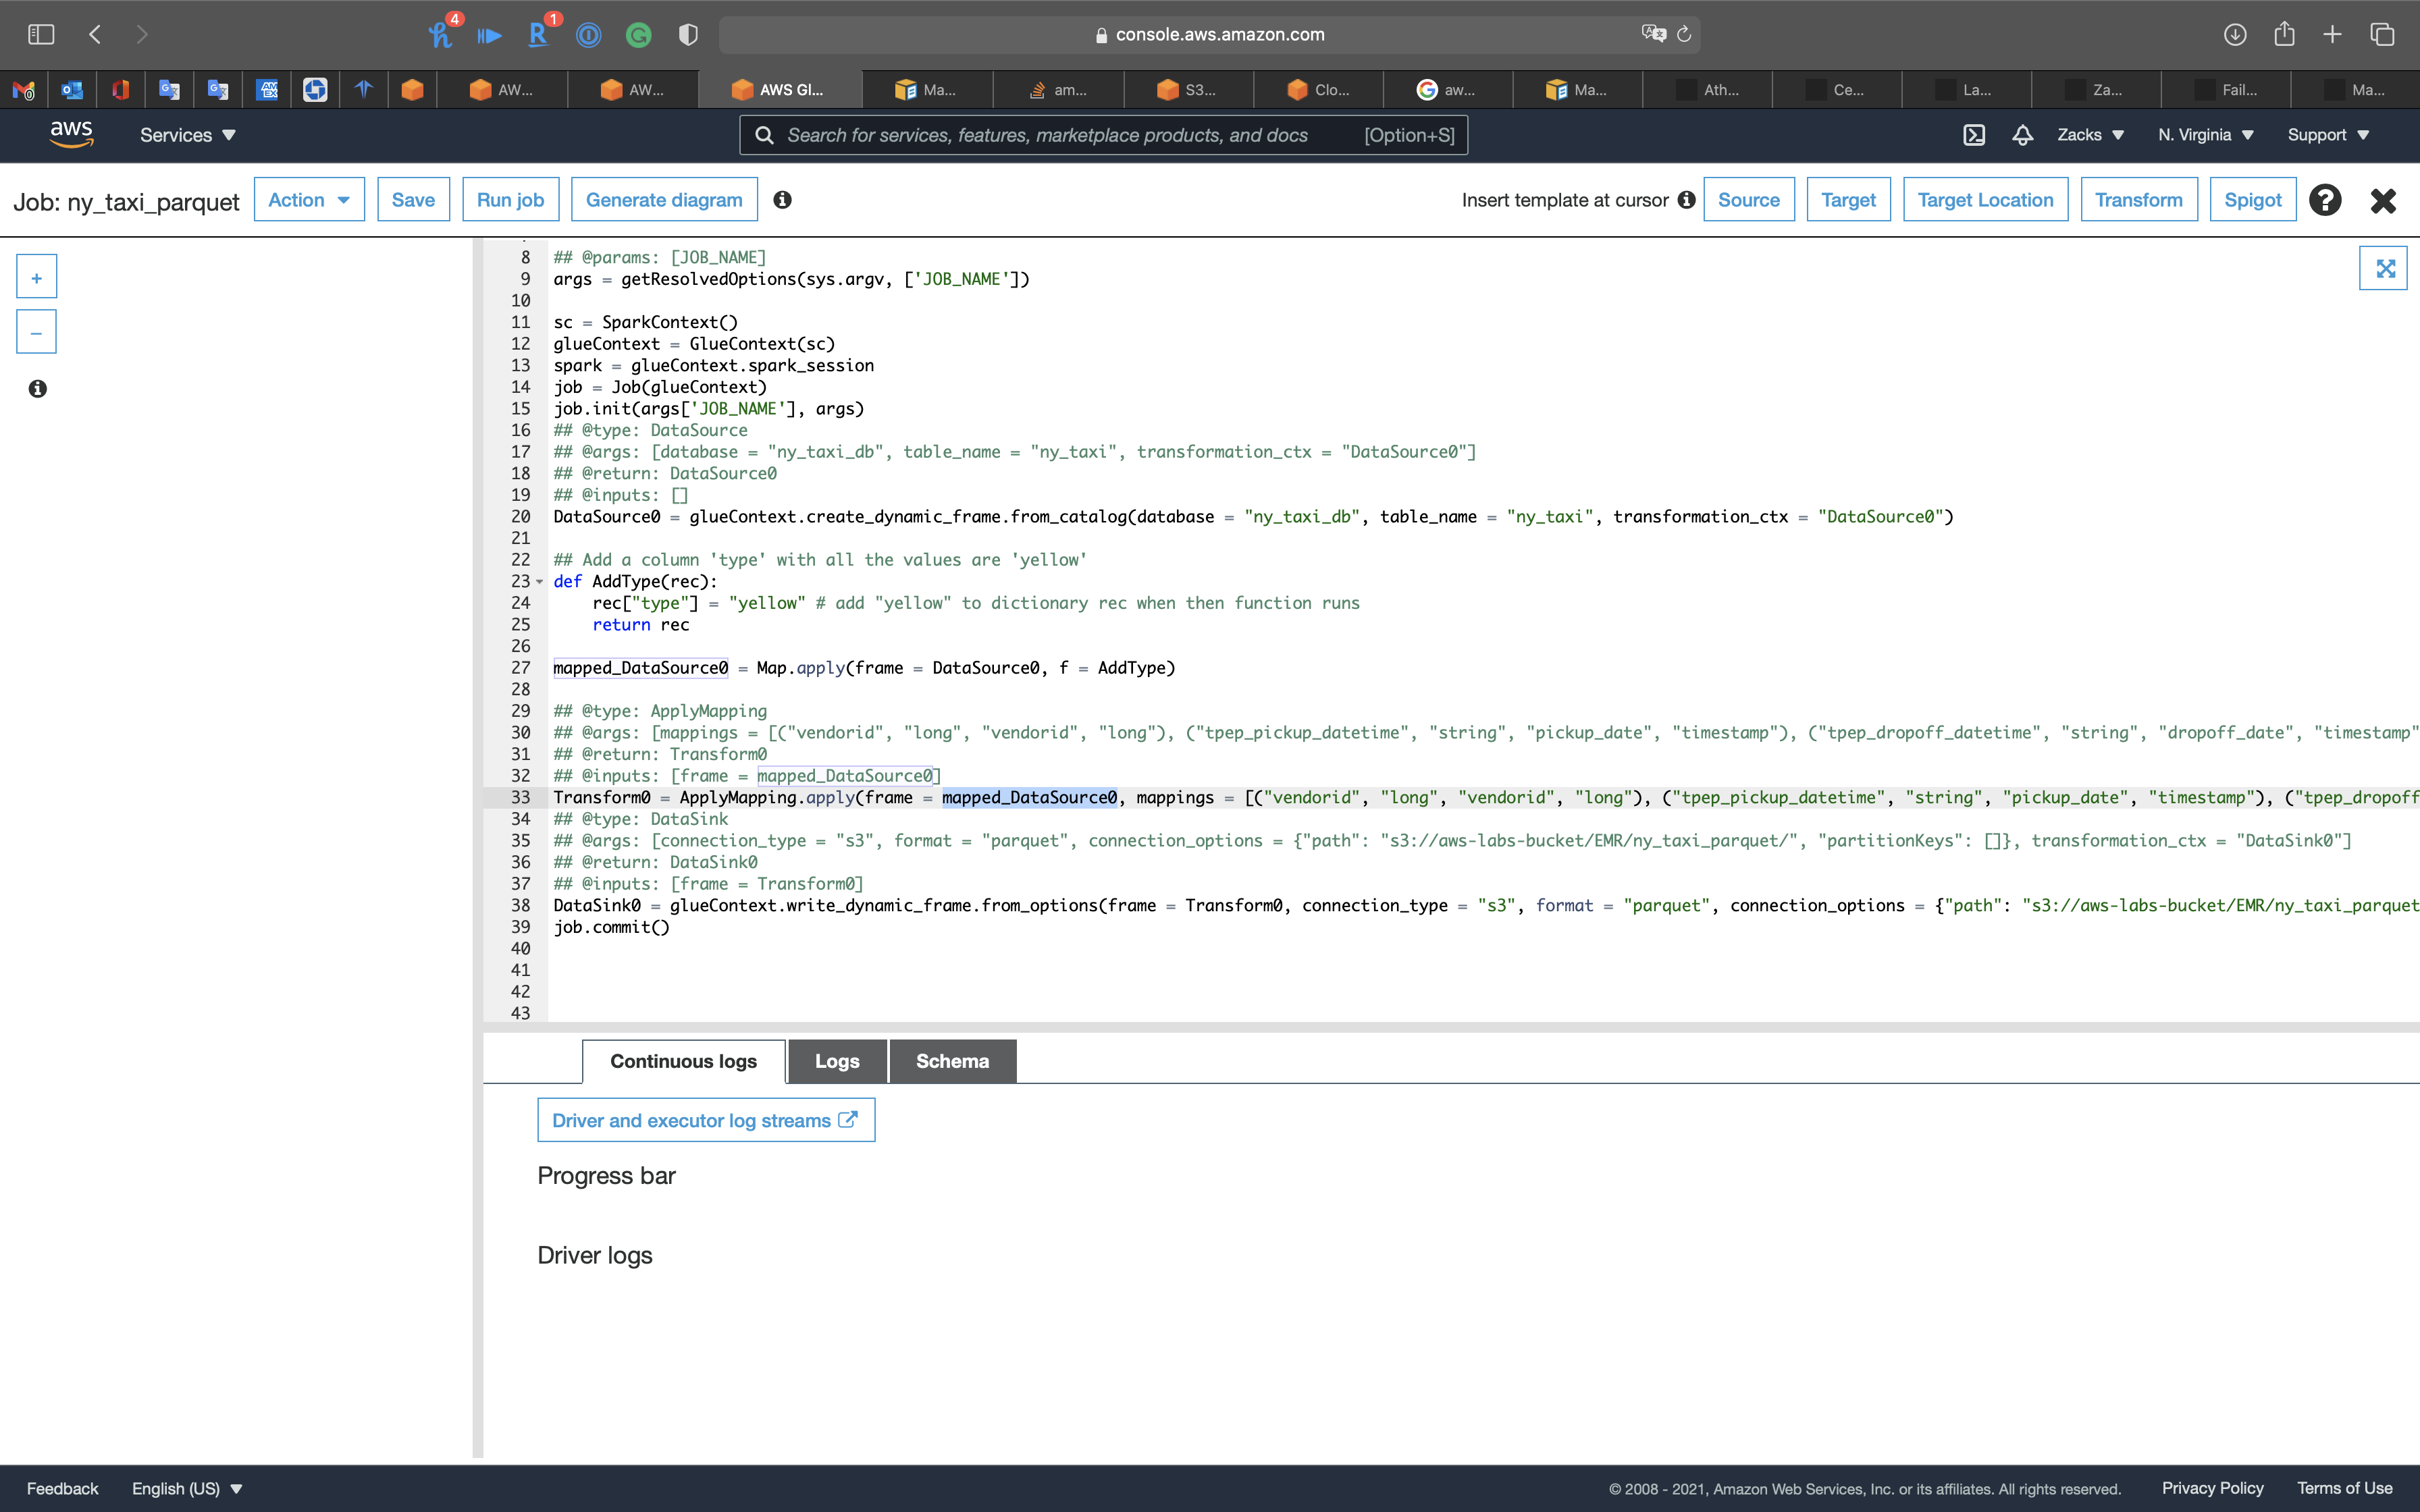
Select ny_taxi_parquet_ver and click on Action -> Edit script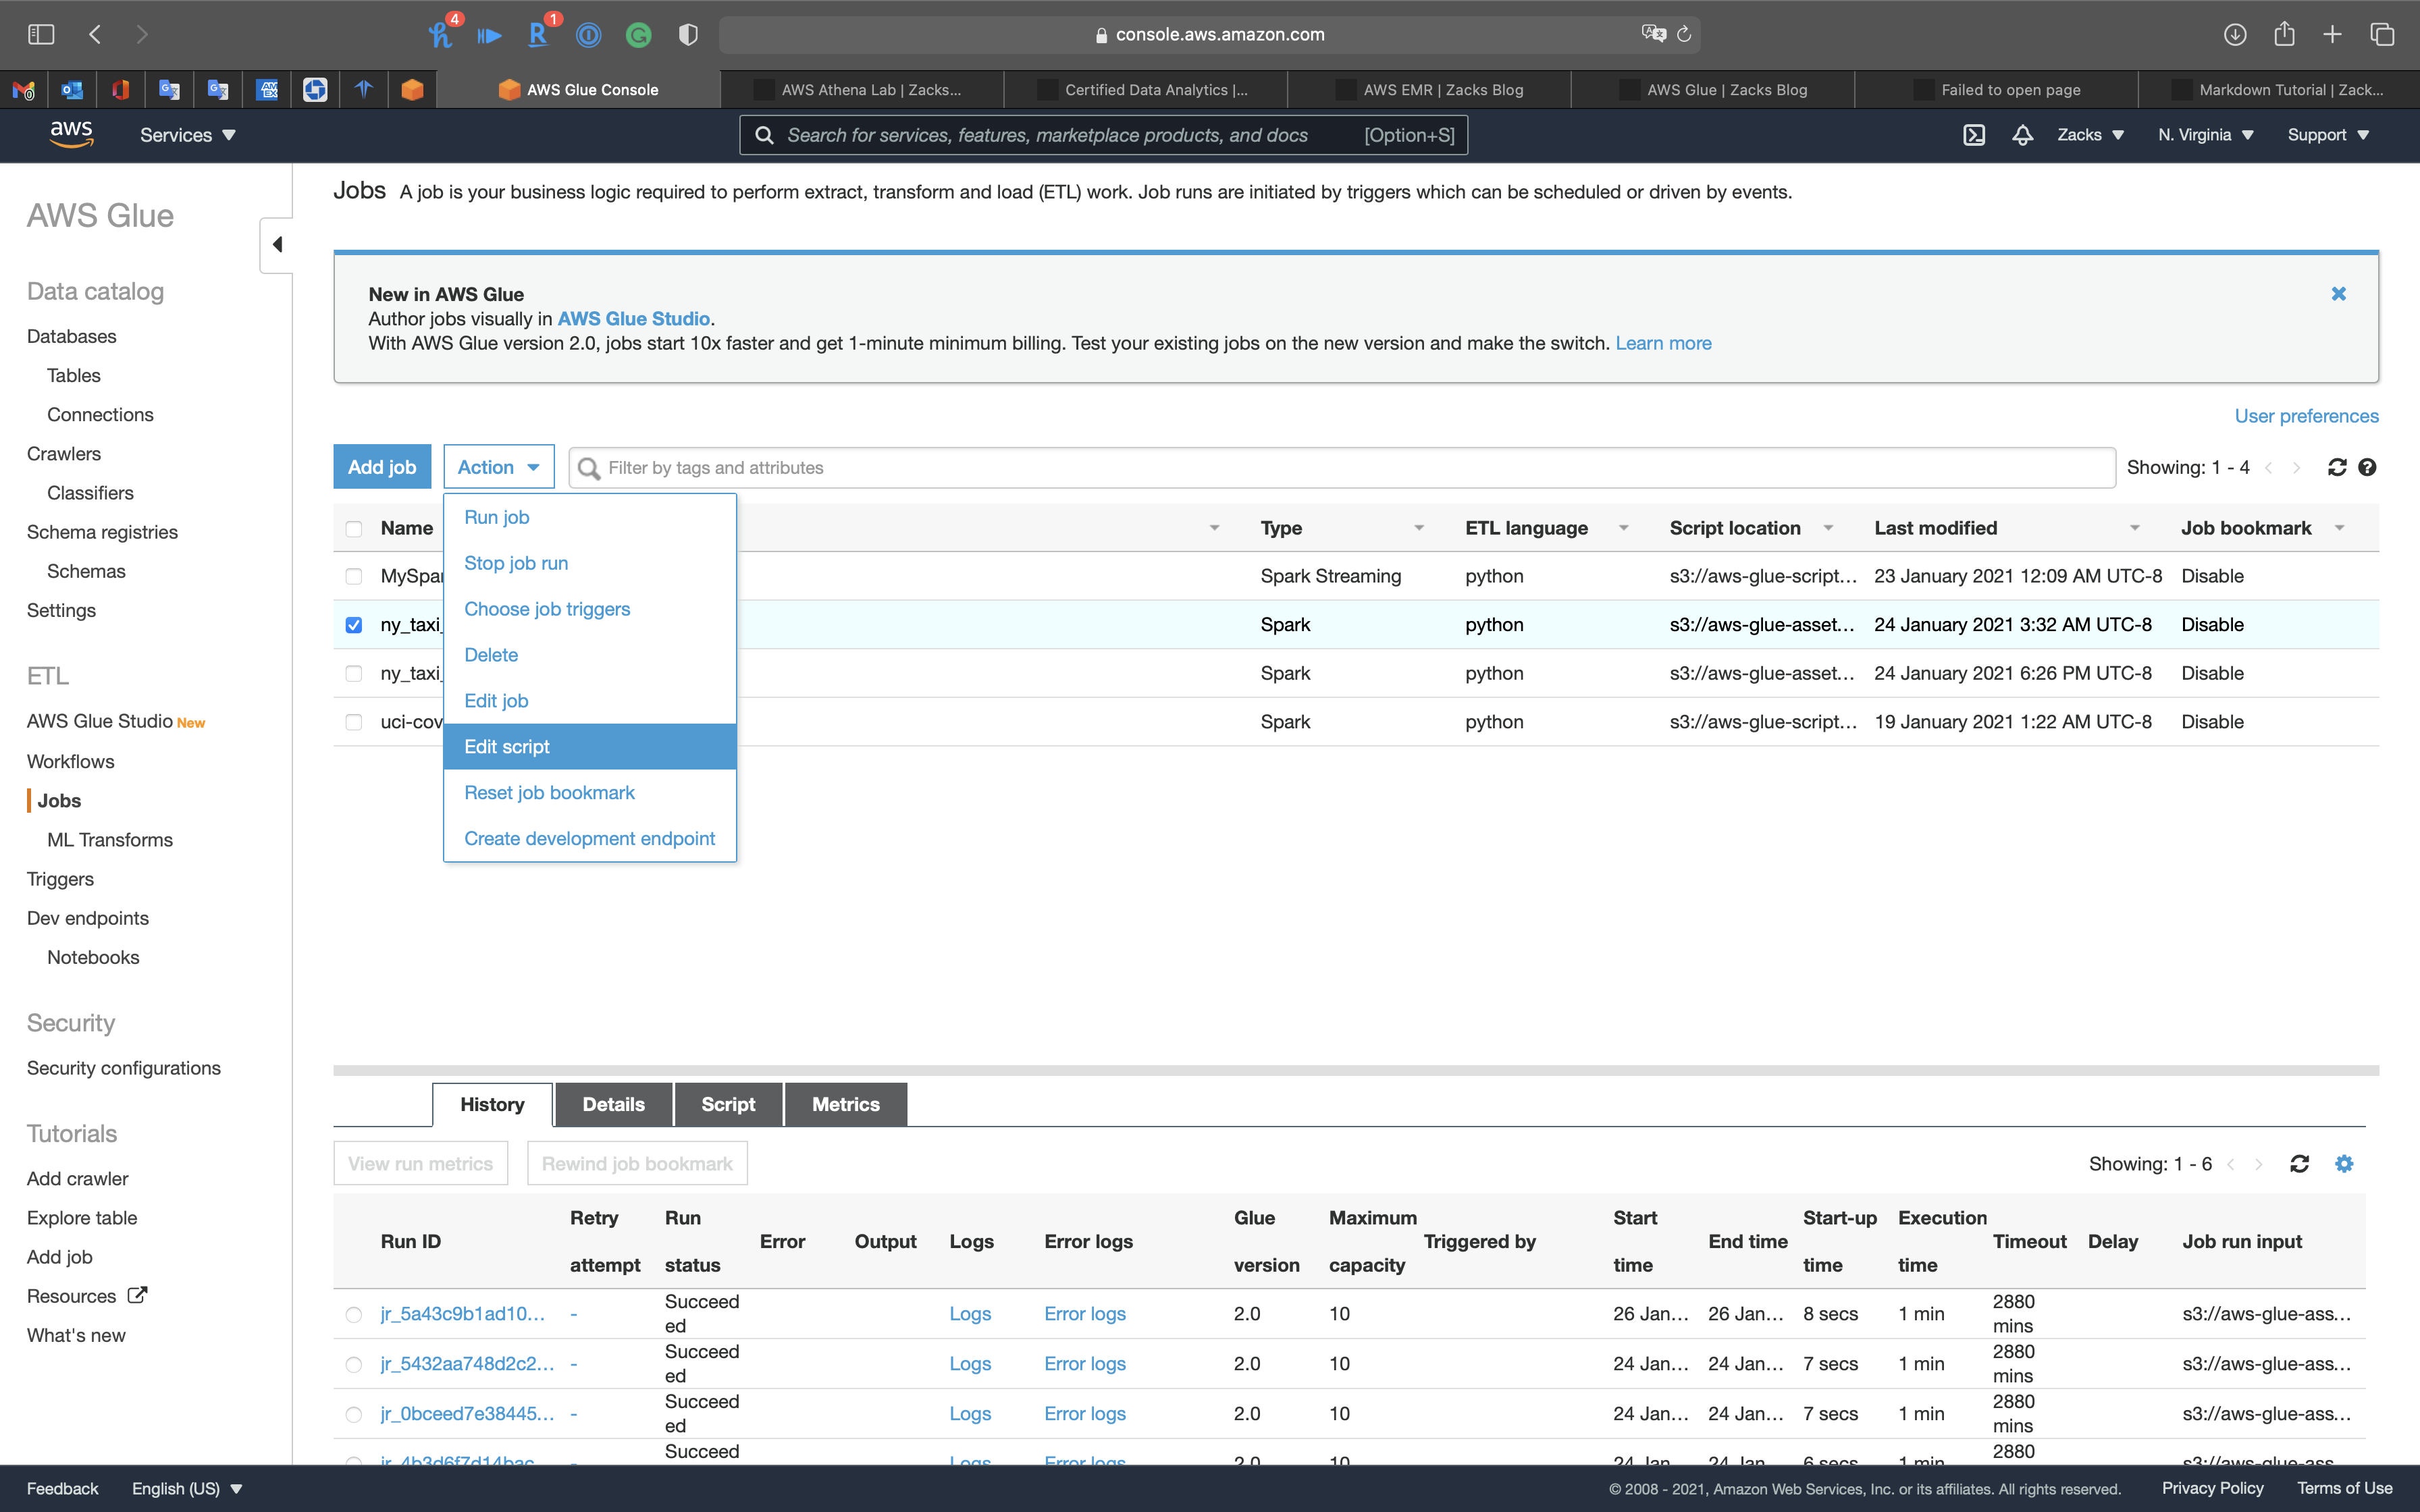
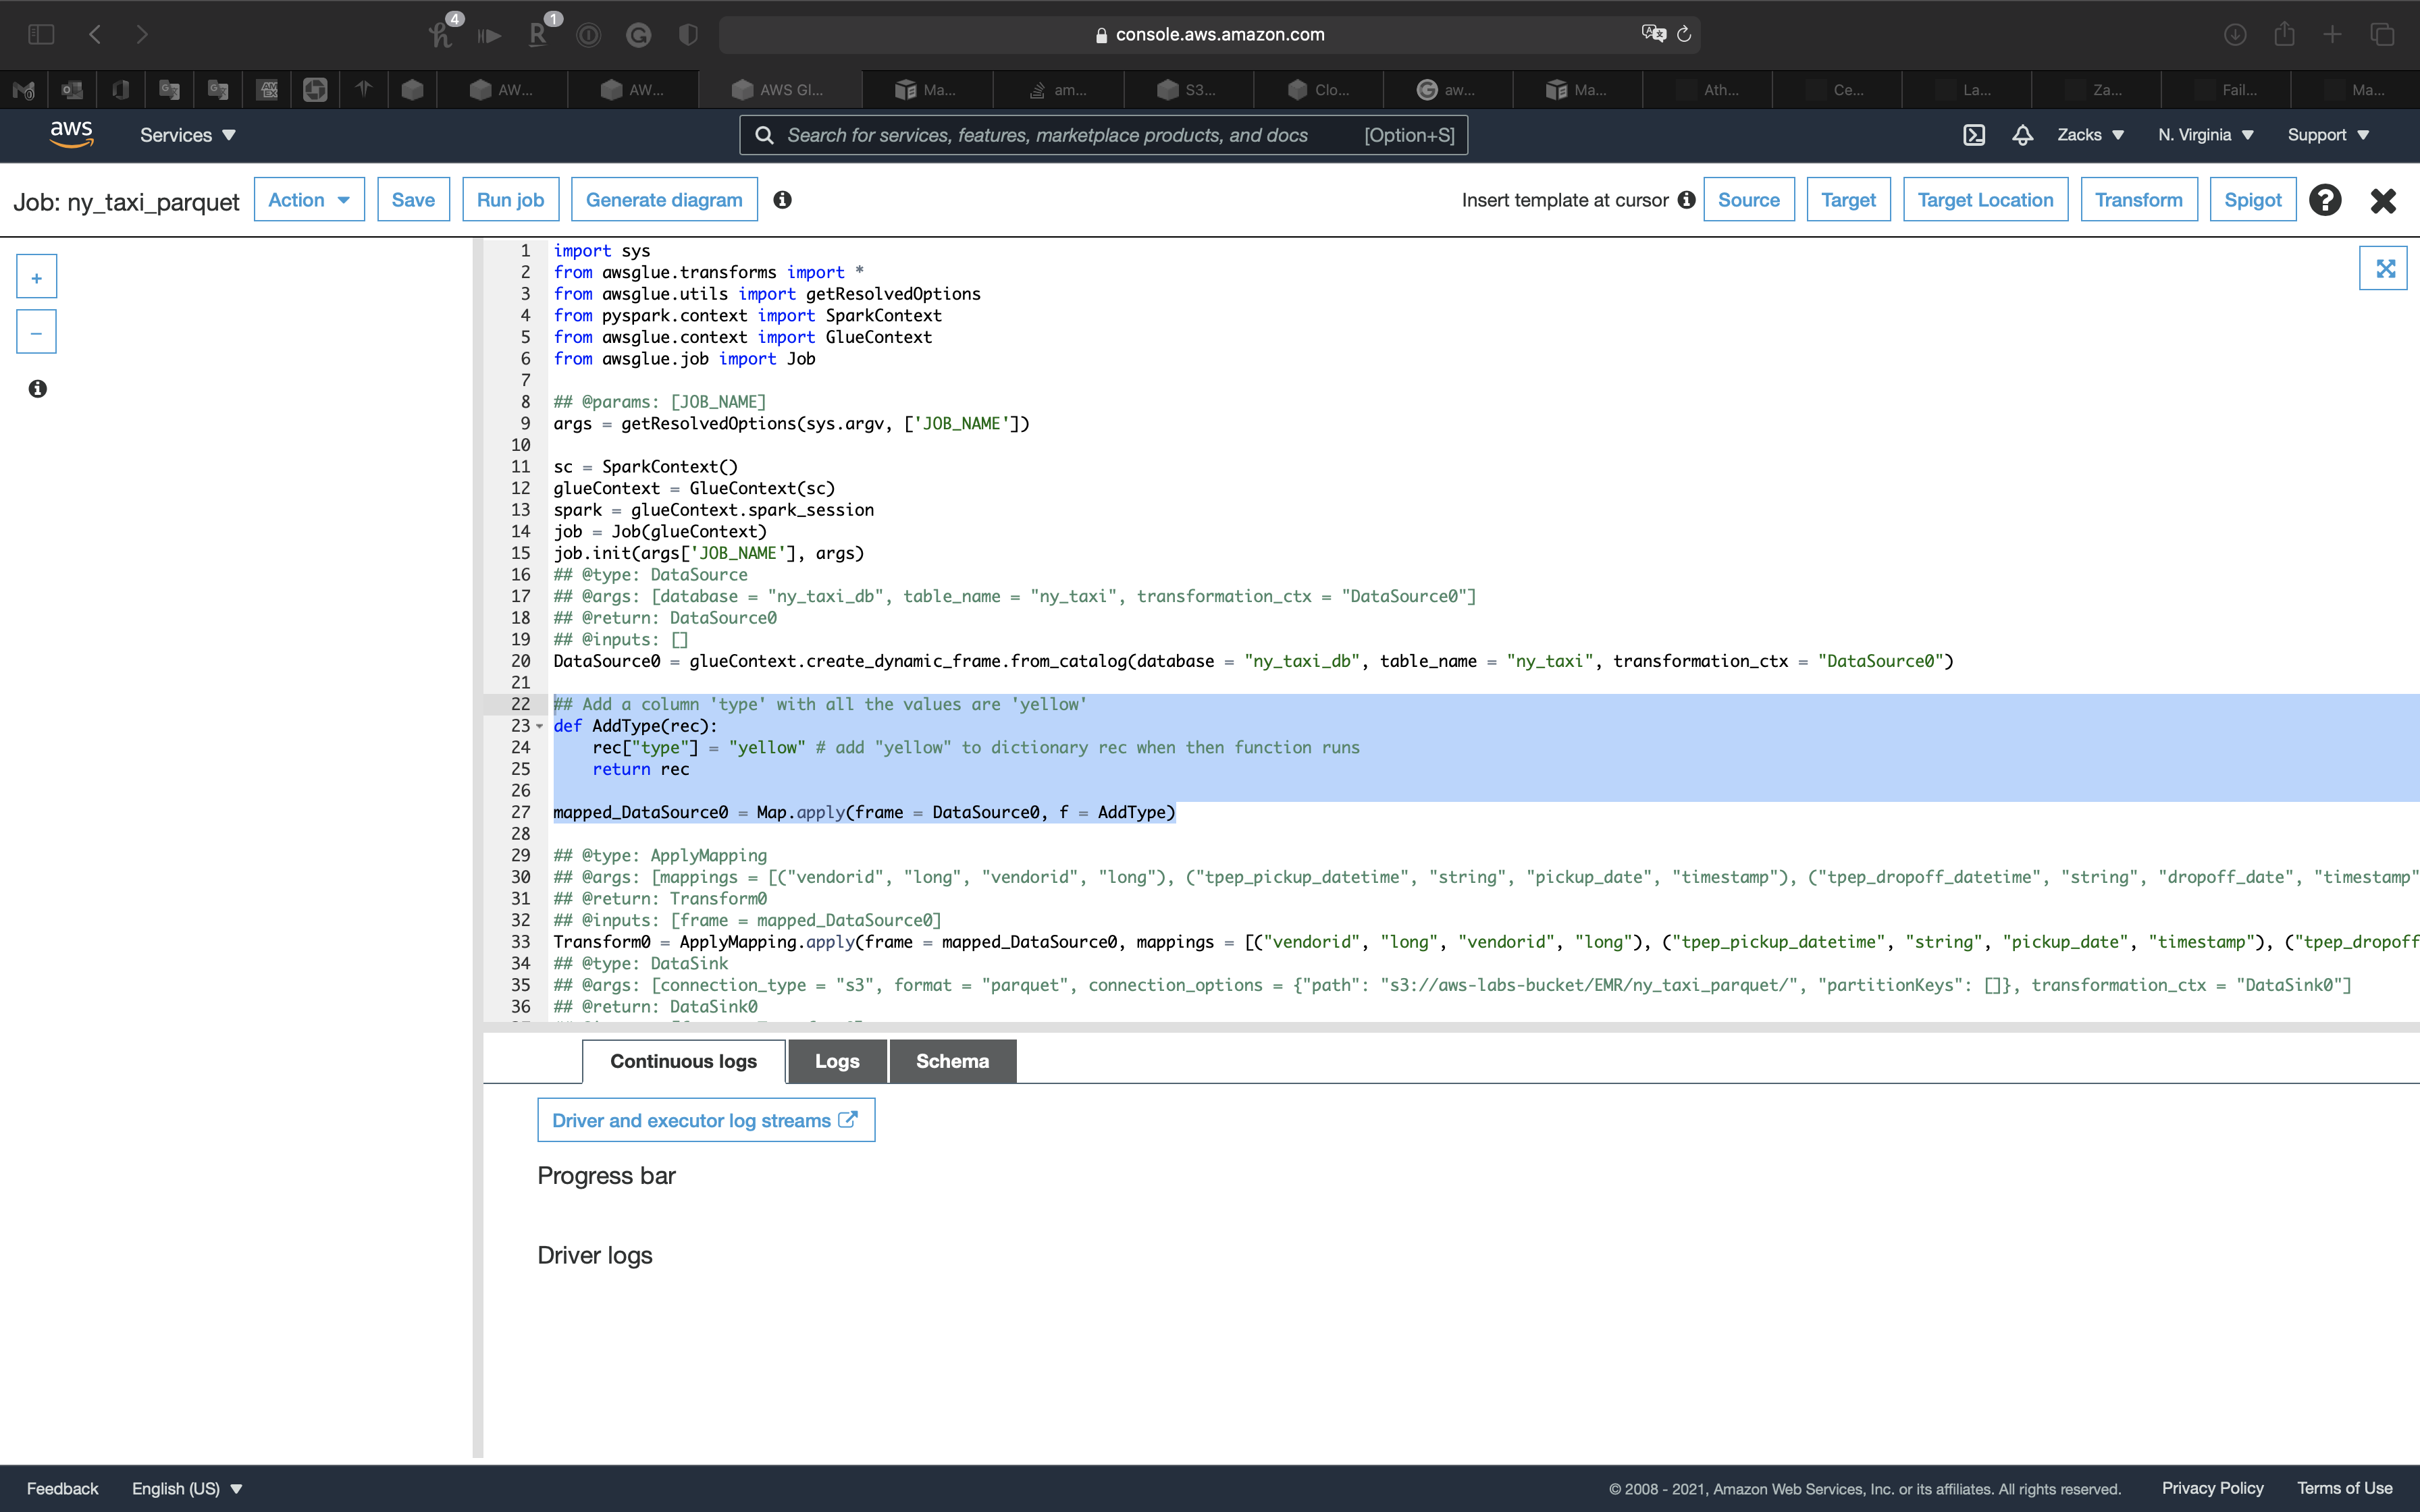
Add a column type with all the values are yellow to .parquet files
Add the following code under line 20
1 | ## Add a column 'type' with all the values are 'yellow' |
Add the following code to the end of Transform0 = ApplyMapping.apply()
1 | , ("type", "string", "type", "string") |
The complete code should be the following code. (Scroll right)
1 | Transform0 = ApplyMapping.apply(frame = mapped_DataSource0, mappings = [("vendorid", "long", "vendorid", "long"), ("tpep_pickup_datetime", "string", "pickup_date", "timestamp"), ("tpep_dropoff_datetime", "string", "dropoff_date", "timestamp"), ("passenger_count", "long", "passenger_count", "long"), ("trip_distance", "double", "trip_distance", "double"), ("pickup_longitude", "double", "pickup_longitude", "double"), ("pickup_latitude", "double", "pickup_latitude", "double"), ("ratecodeid", "long", "ratecodeid", "long"), ("store_and_fwd_flag", "string", "store_and_fwd_flag", "string"), ("dropoff_longitude", "double", "dropoff_longitude", "double"), ("dropoff_latitude", "double", "dropoff_latitude", "double"), ("payment_type", "long", "payment_type", "long"), ("fare_amount", "double", "fare_amount", "double"), ("extra", "double", "extra", "double"), ("mta_tax", "double", "mta_tax", "double"), ("tip_amount", "double", "tip_amount", "double"), ("tolls_amount", "double", "tolls_amount", "double"), ("improvement_surcharge", "double", "improvement_surcharge", "double"), ("total_amount", "double", "total_amount", "double"), ("type", "string", "type", "string")], transformation_ctx = "Transform0") |

Modify Transform0 = ApplyMapping.apply(frame = DataSource0, to Transform0 = ApplyMapping.apply(frame = mapped_DataSource0,
Click on X on the right of the page.
Then select ny_taxi_parquet, click on Action -> Run job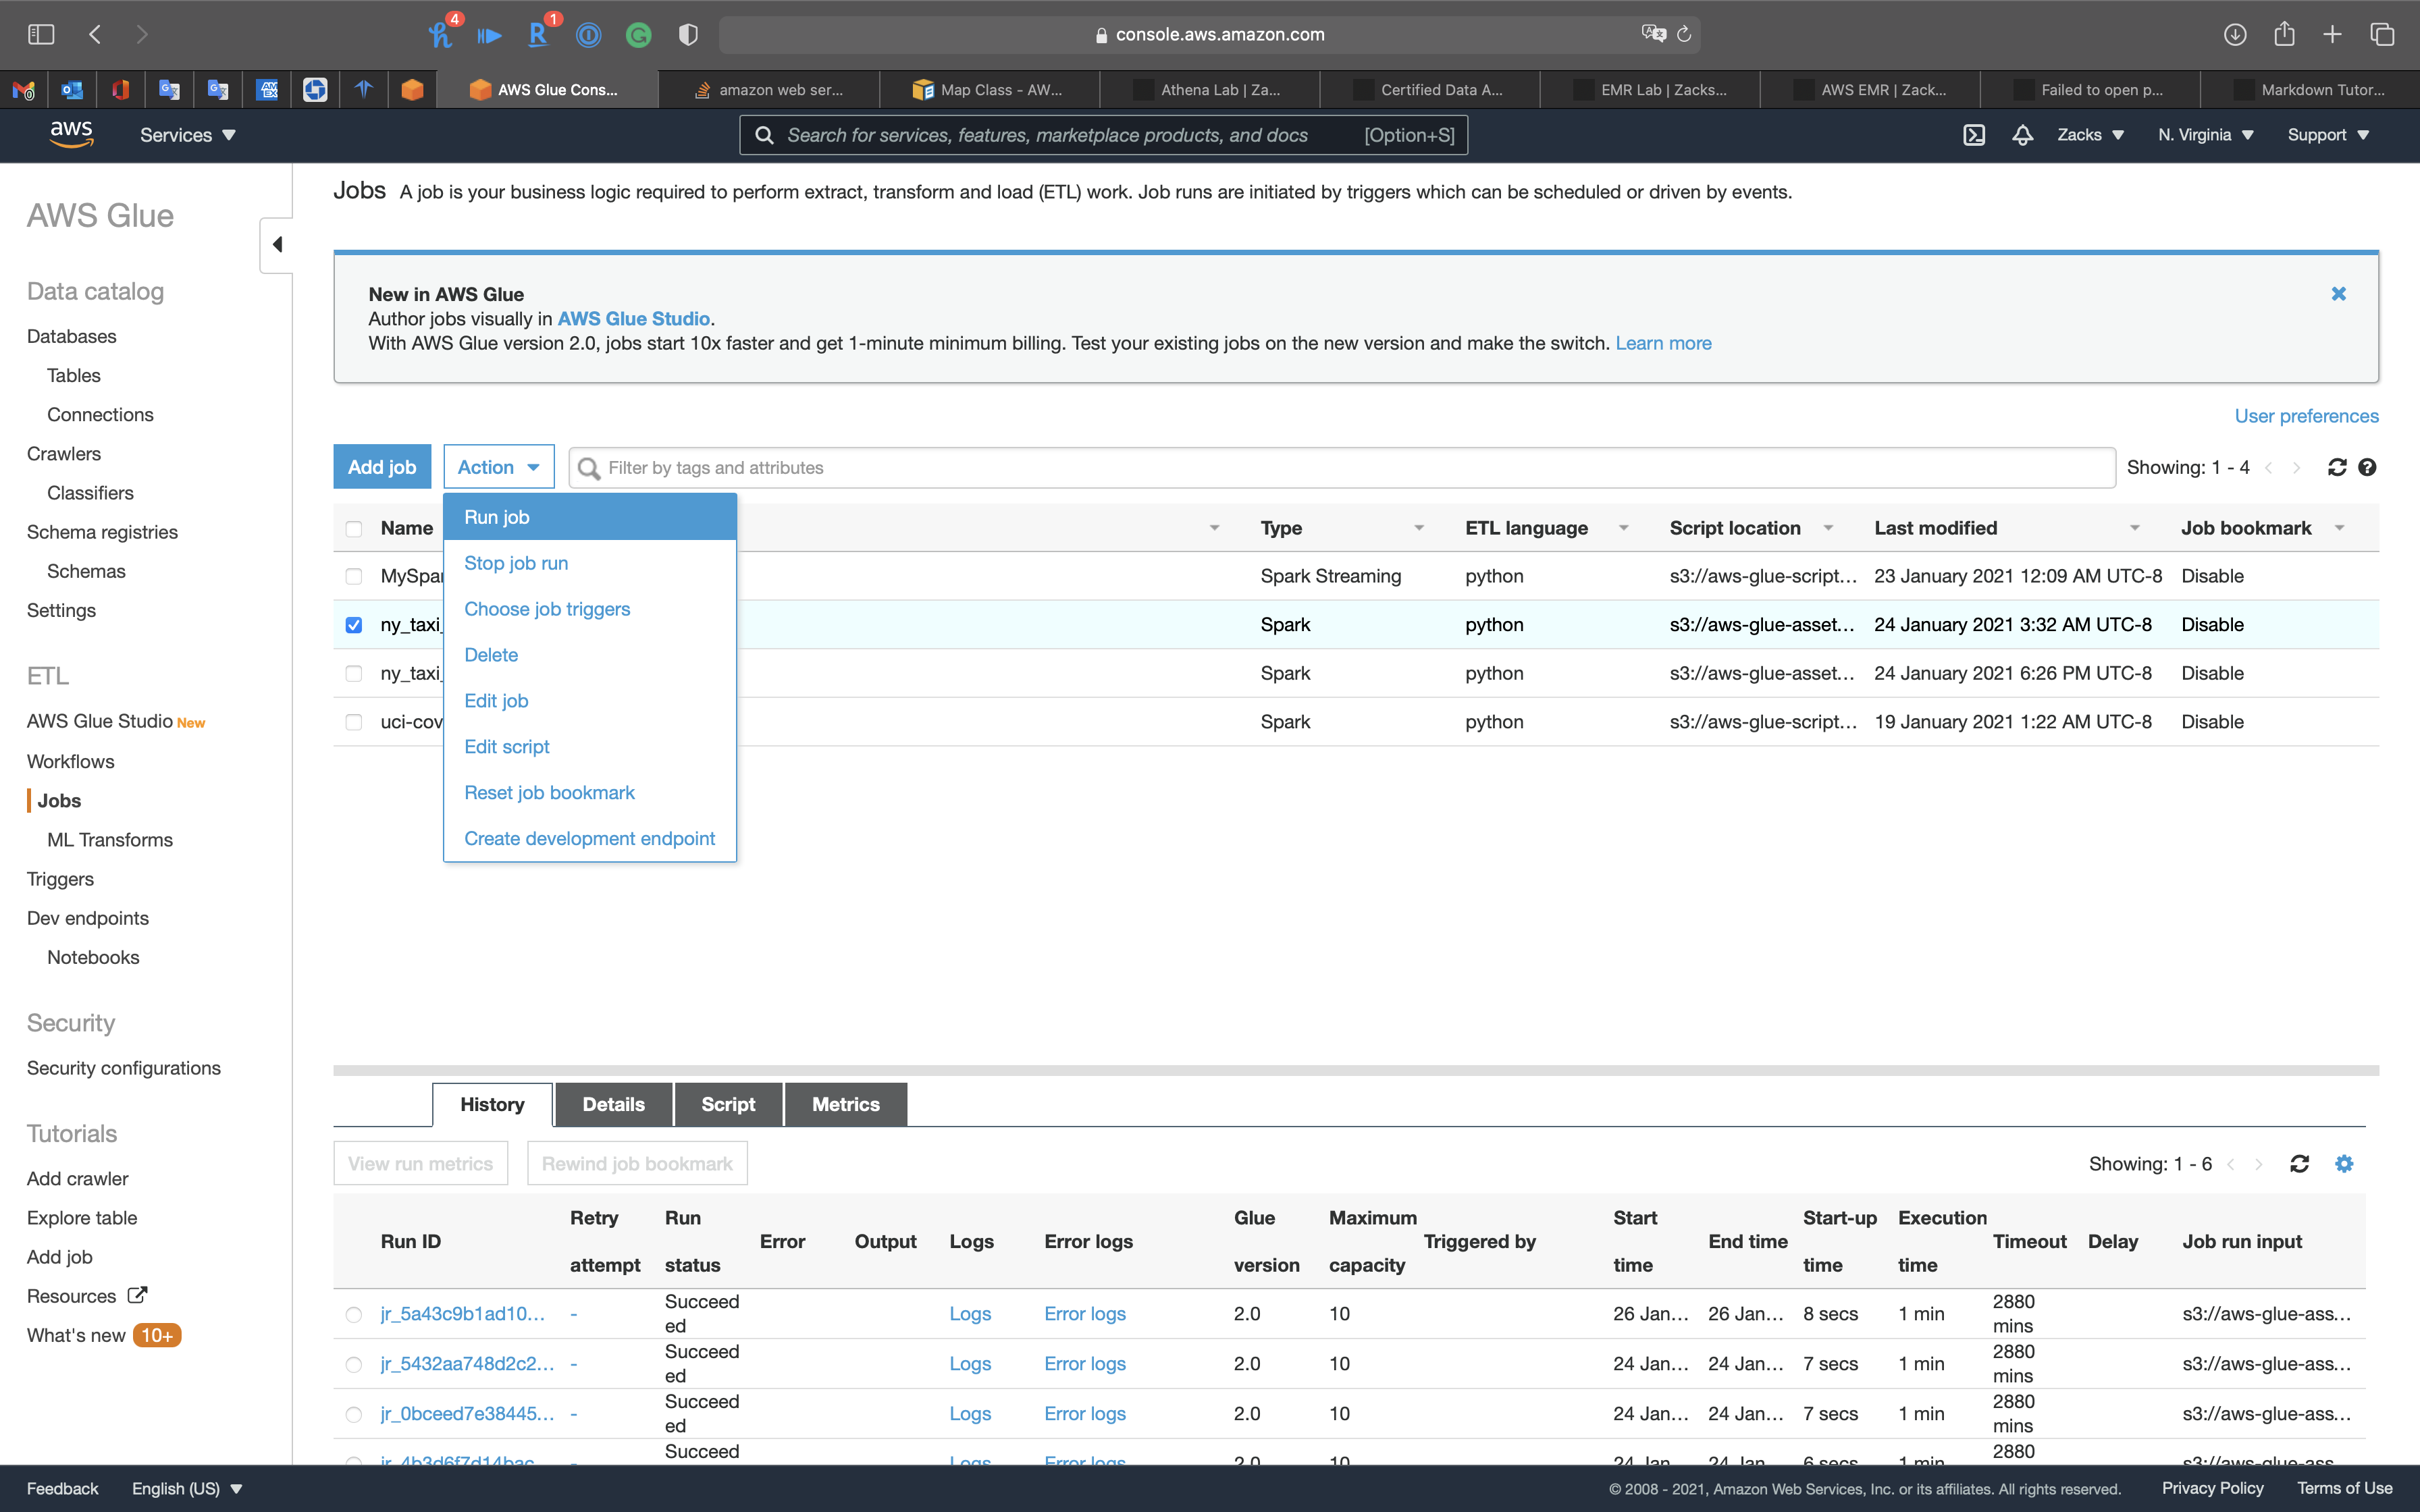
Click on Run job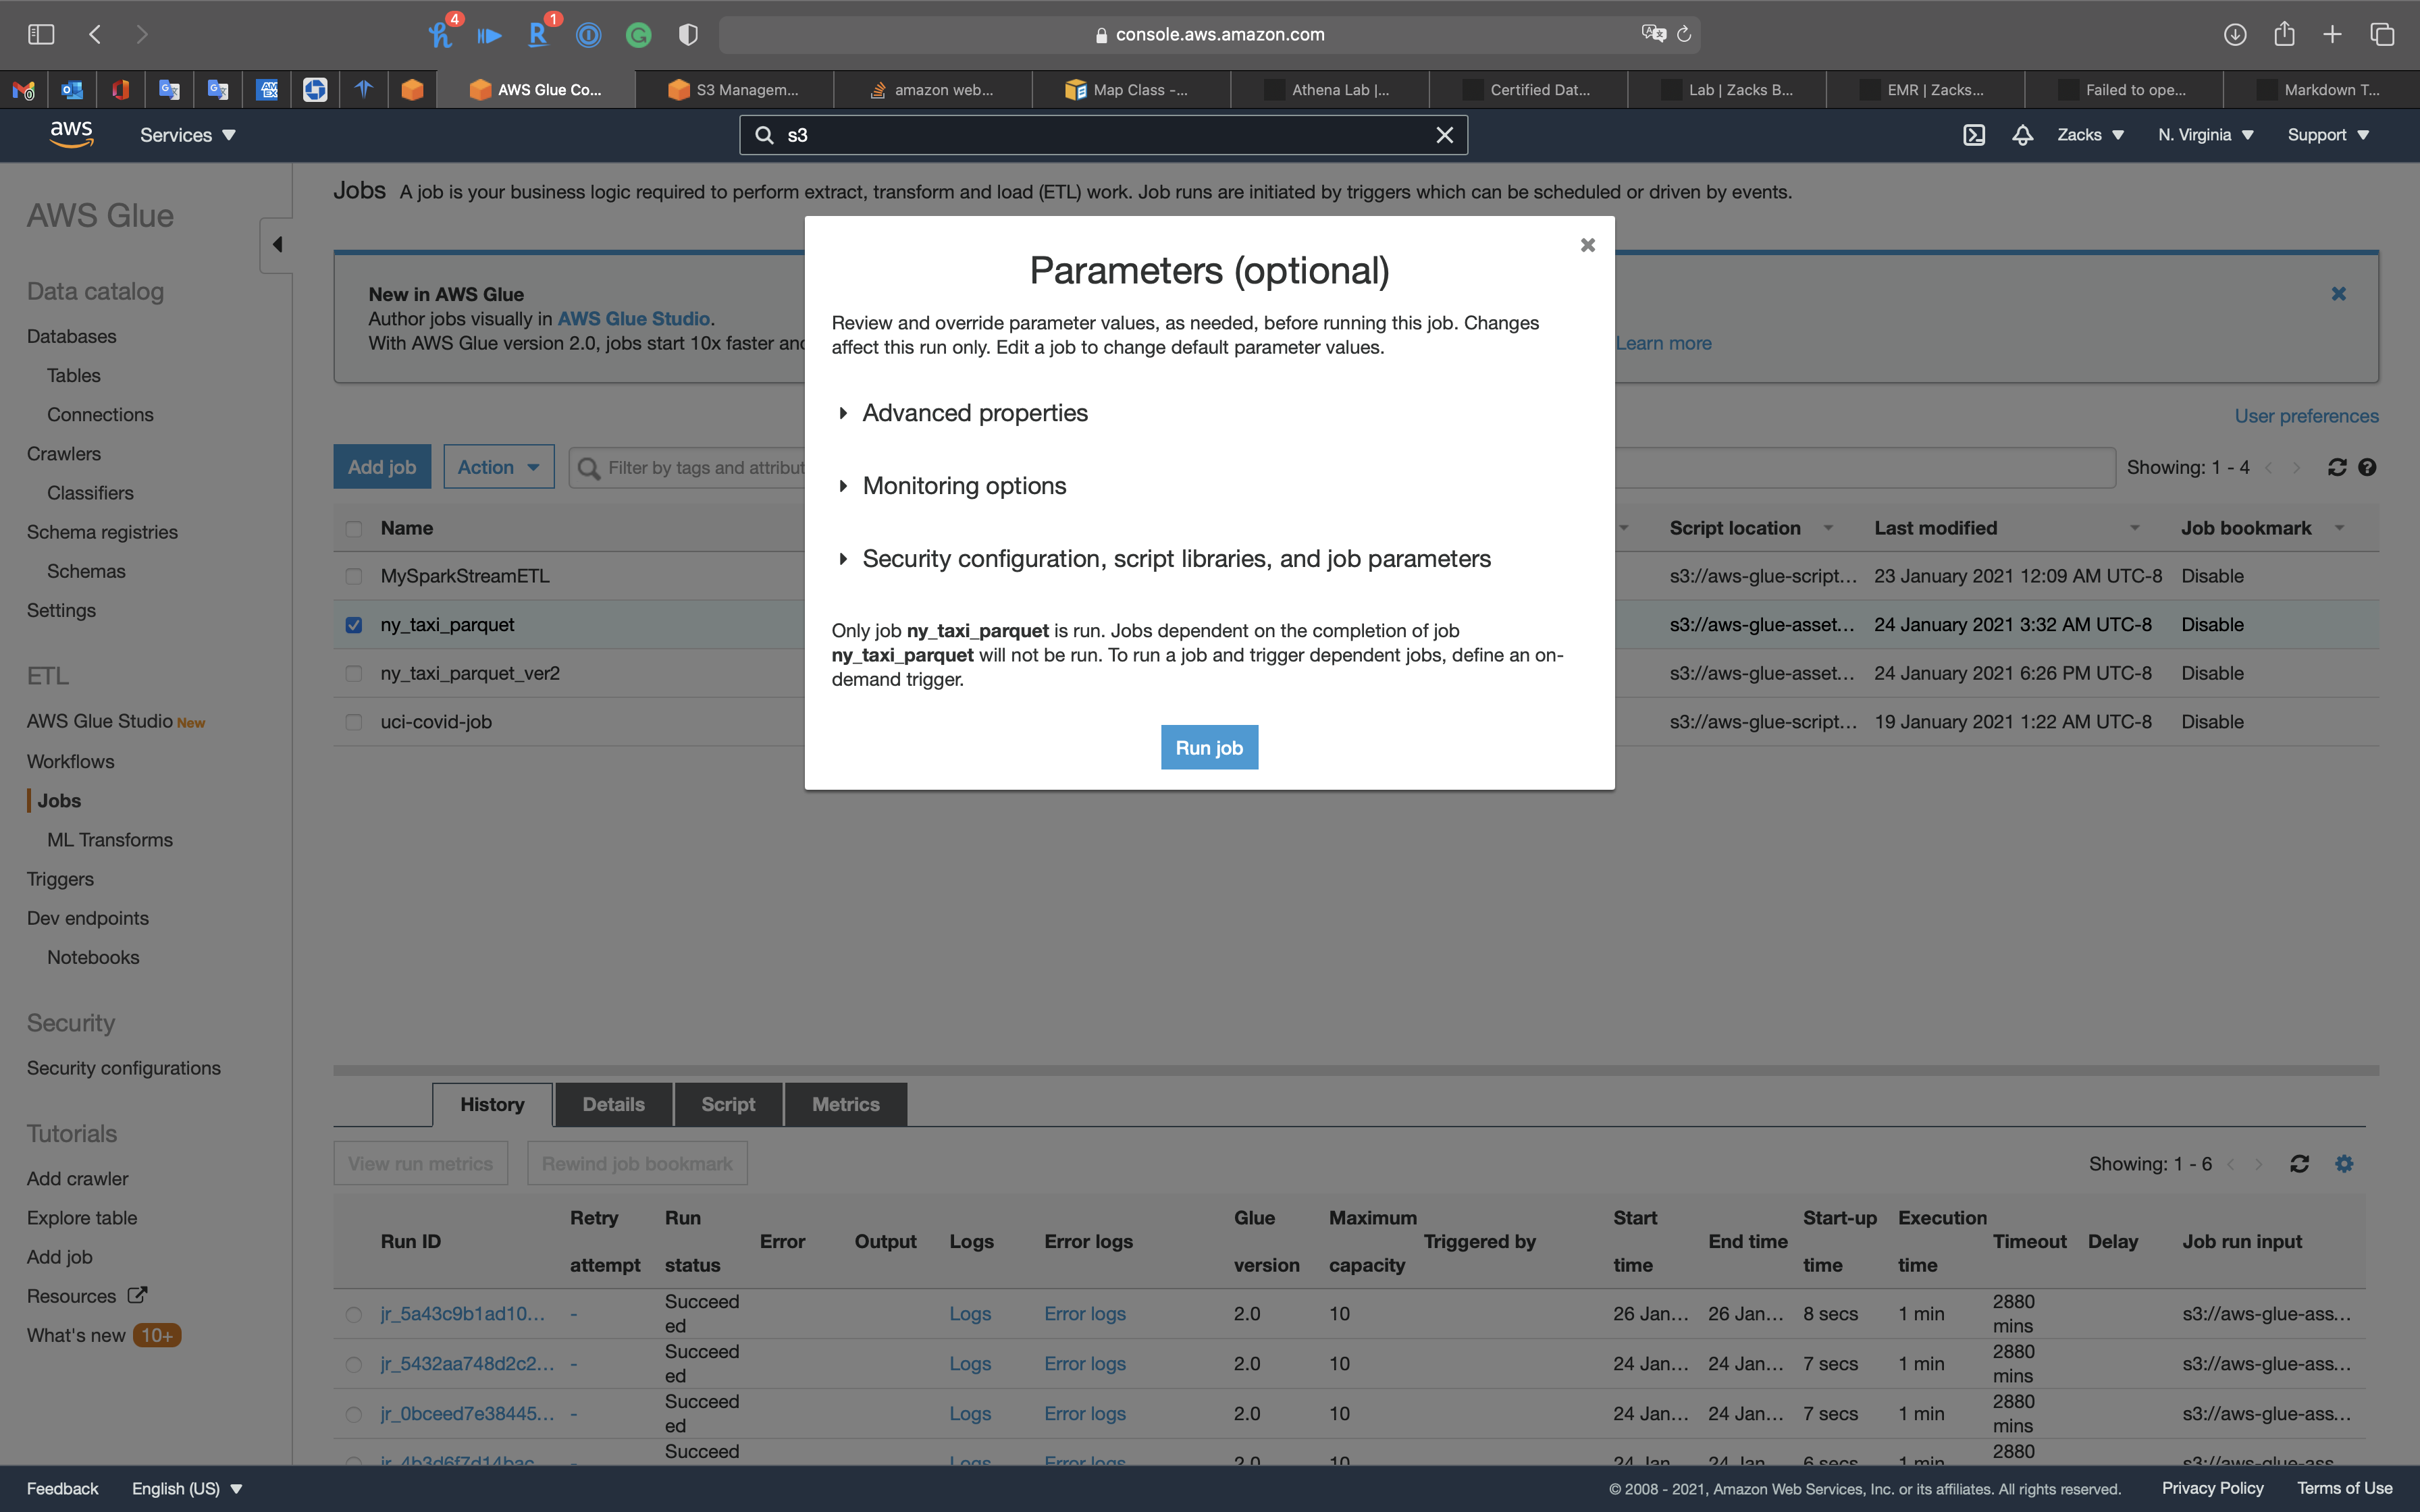
Select ny_taxi_parquet to see the History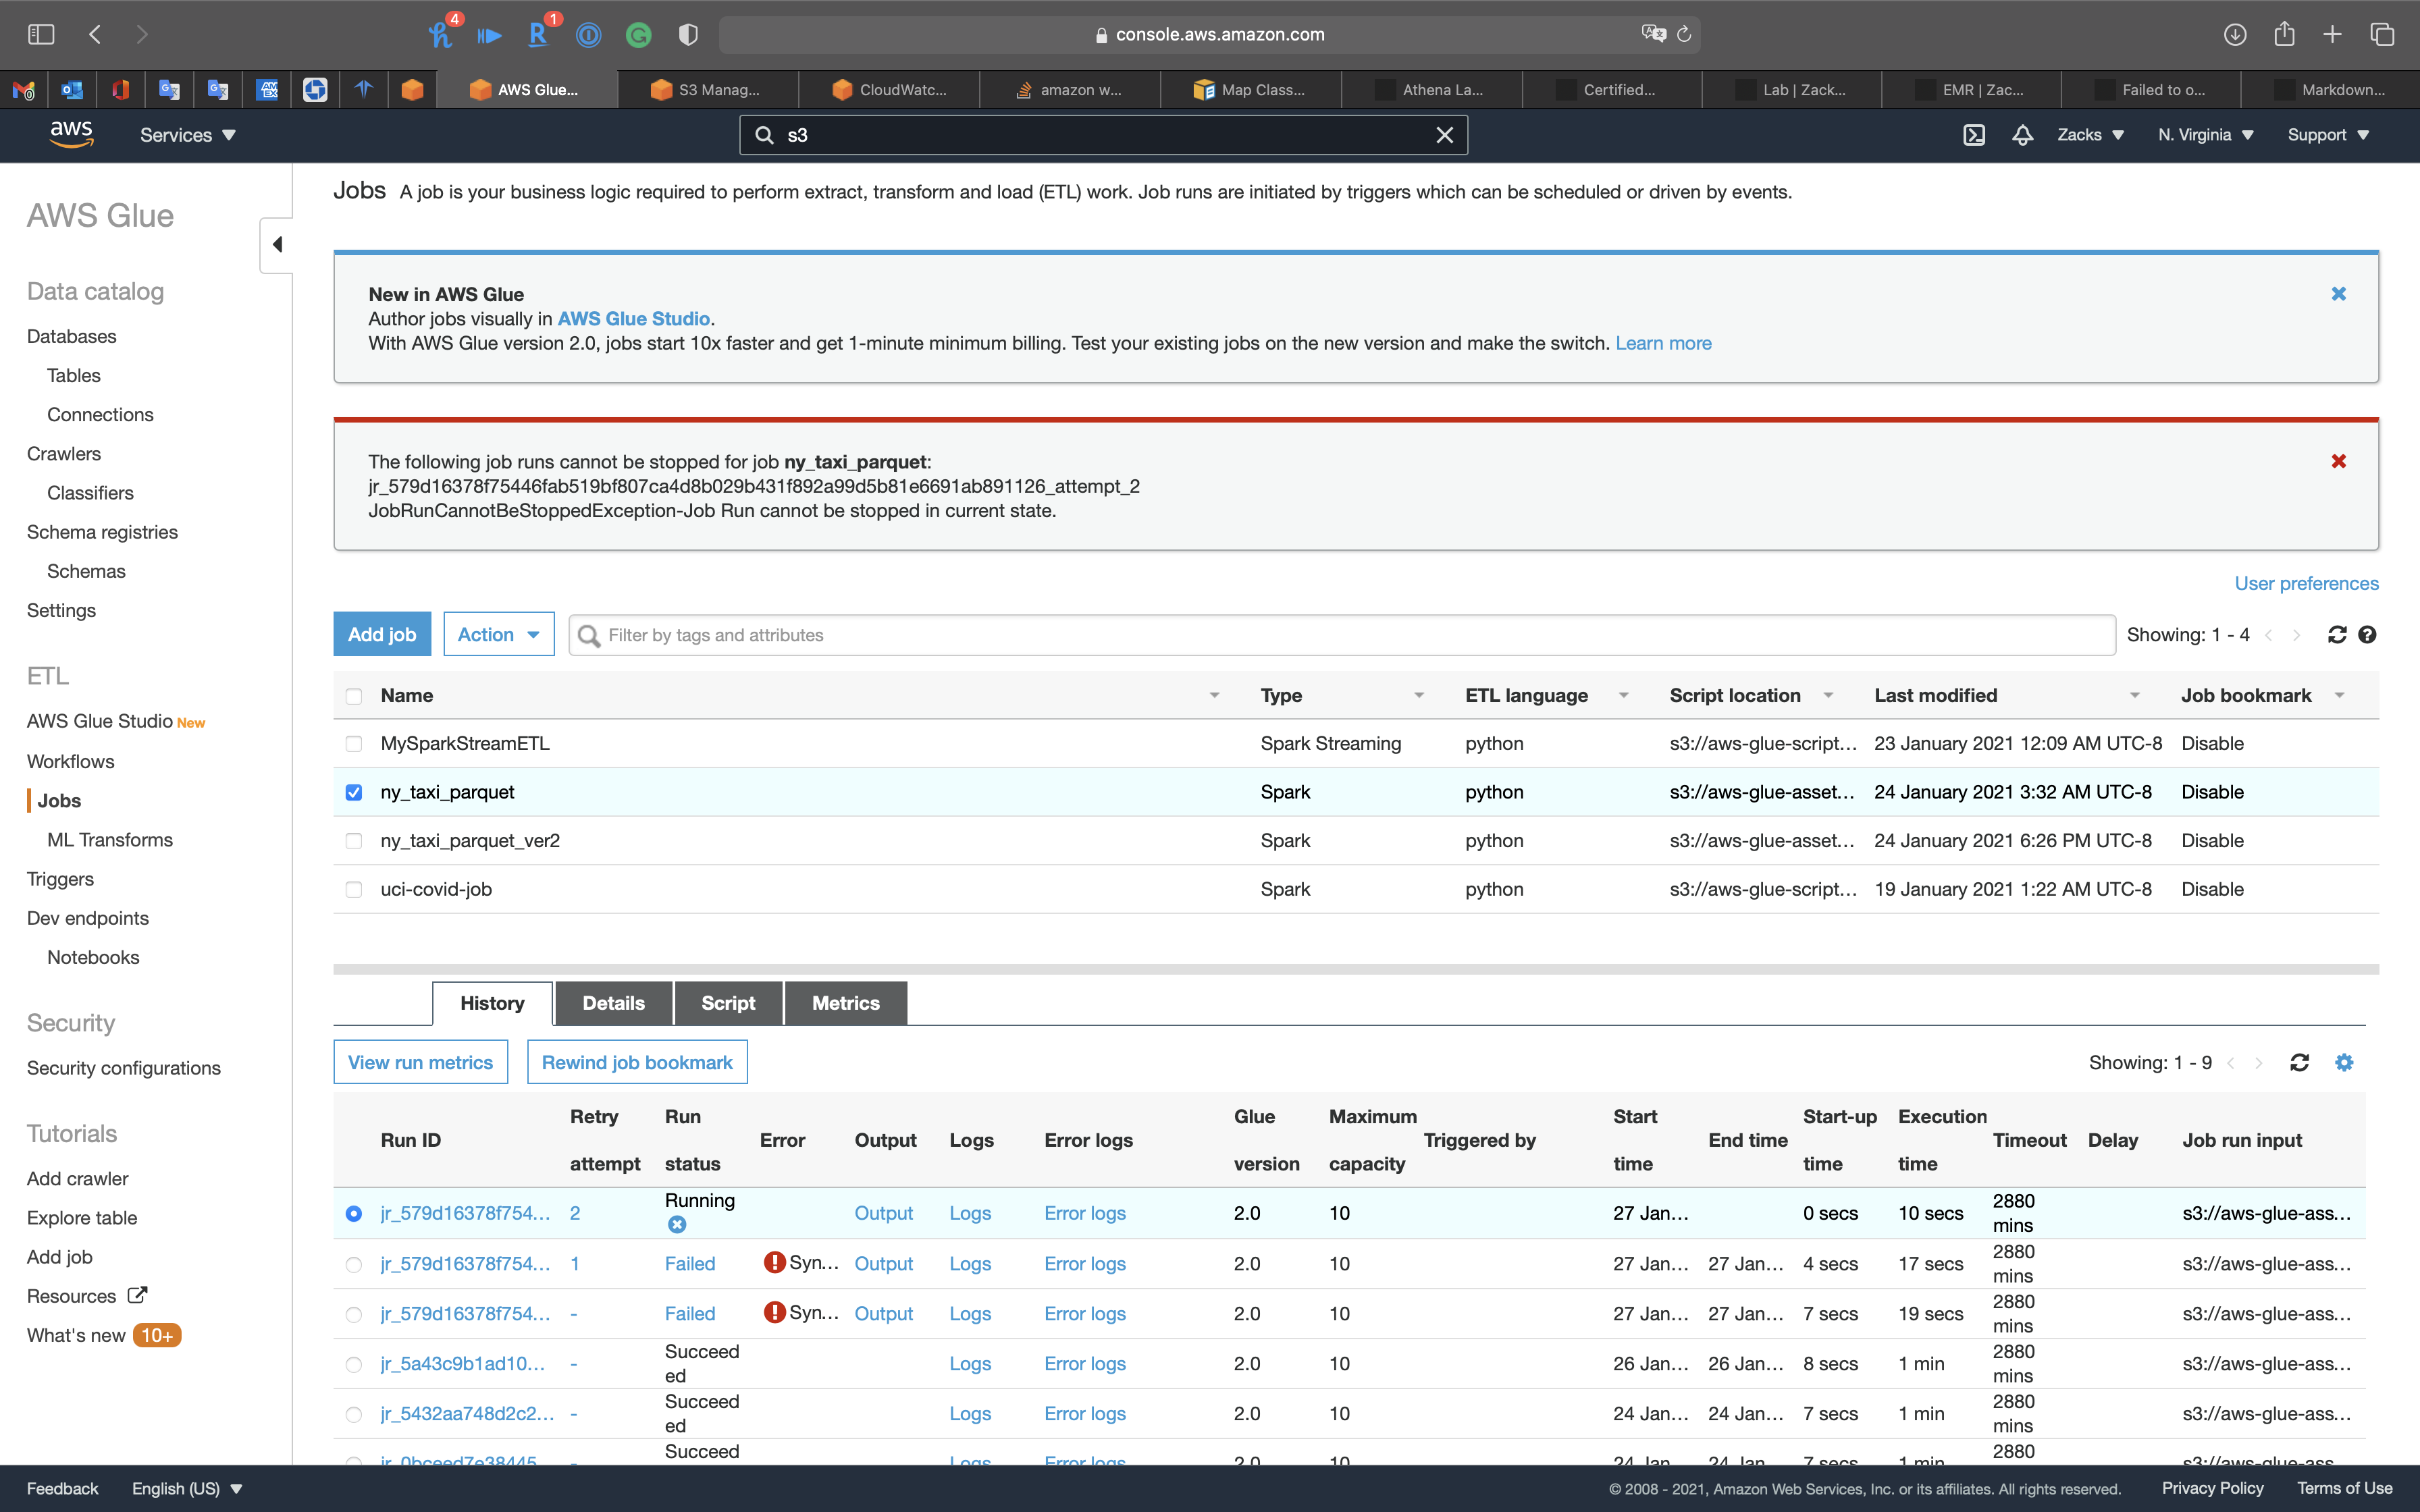
We can also check the S3 bucket.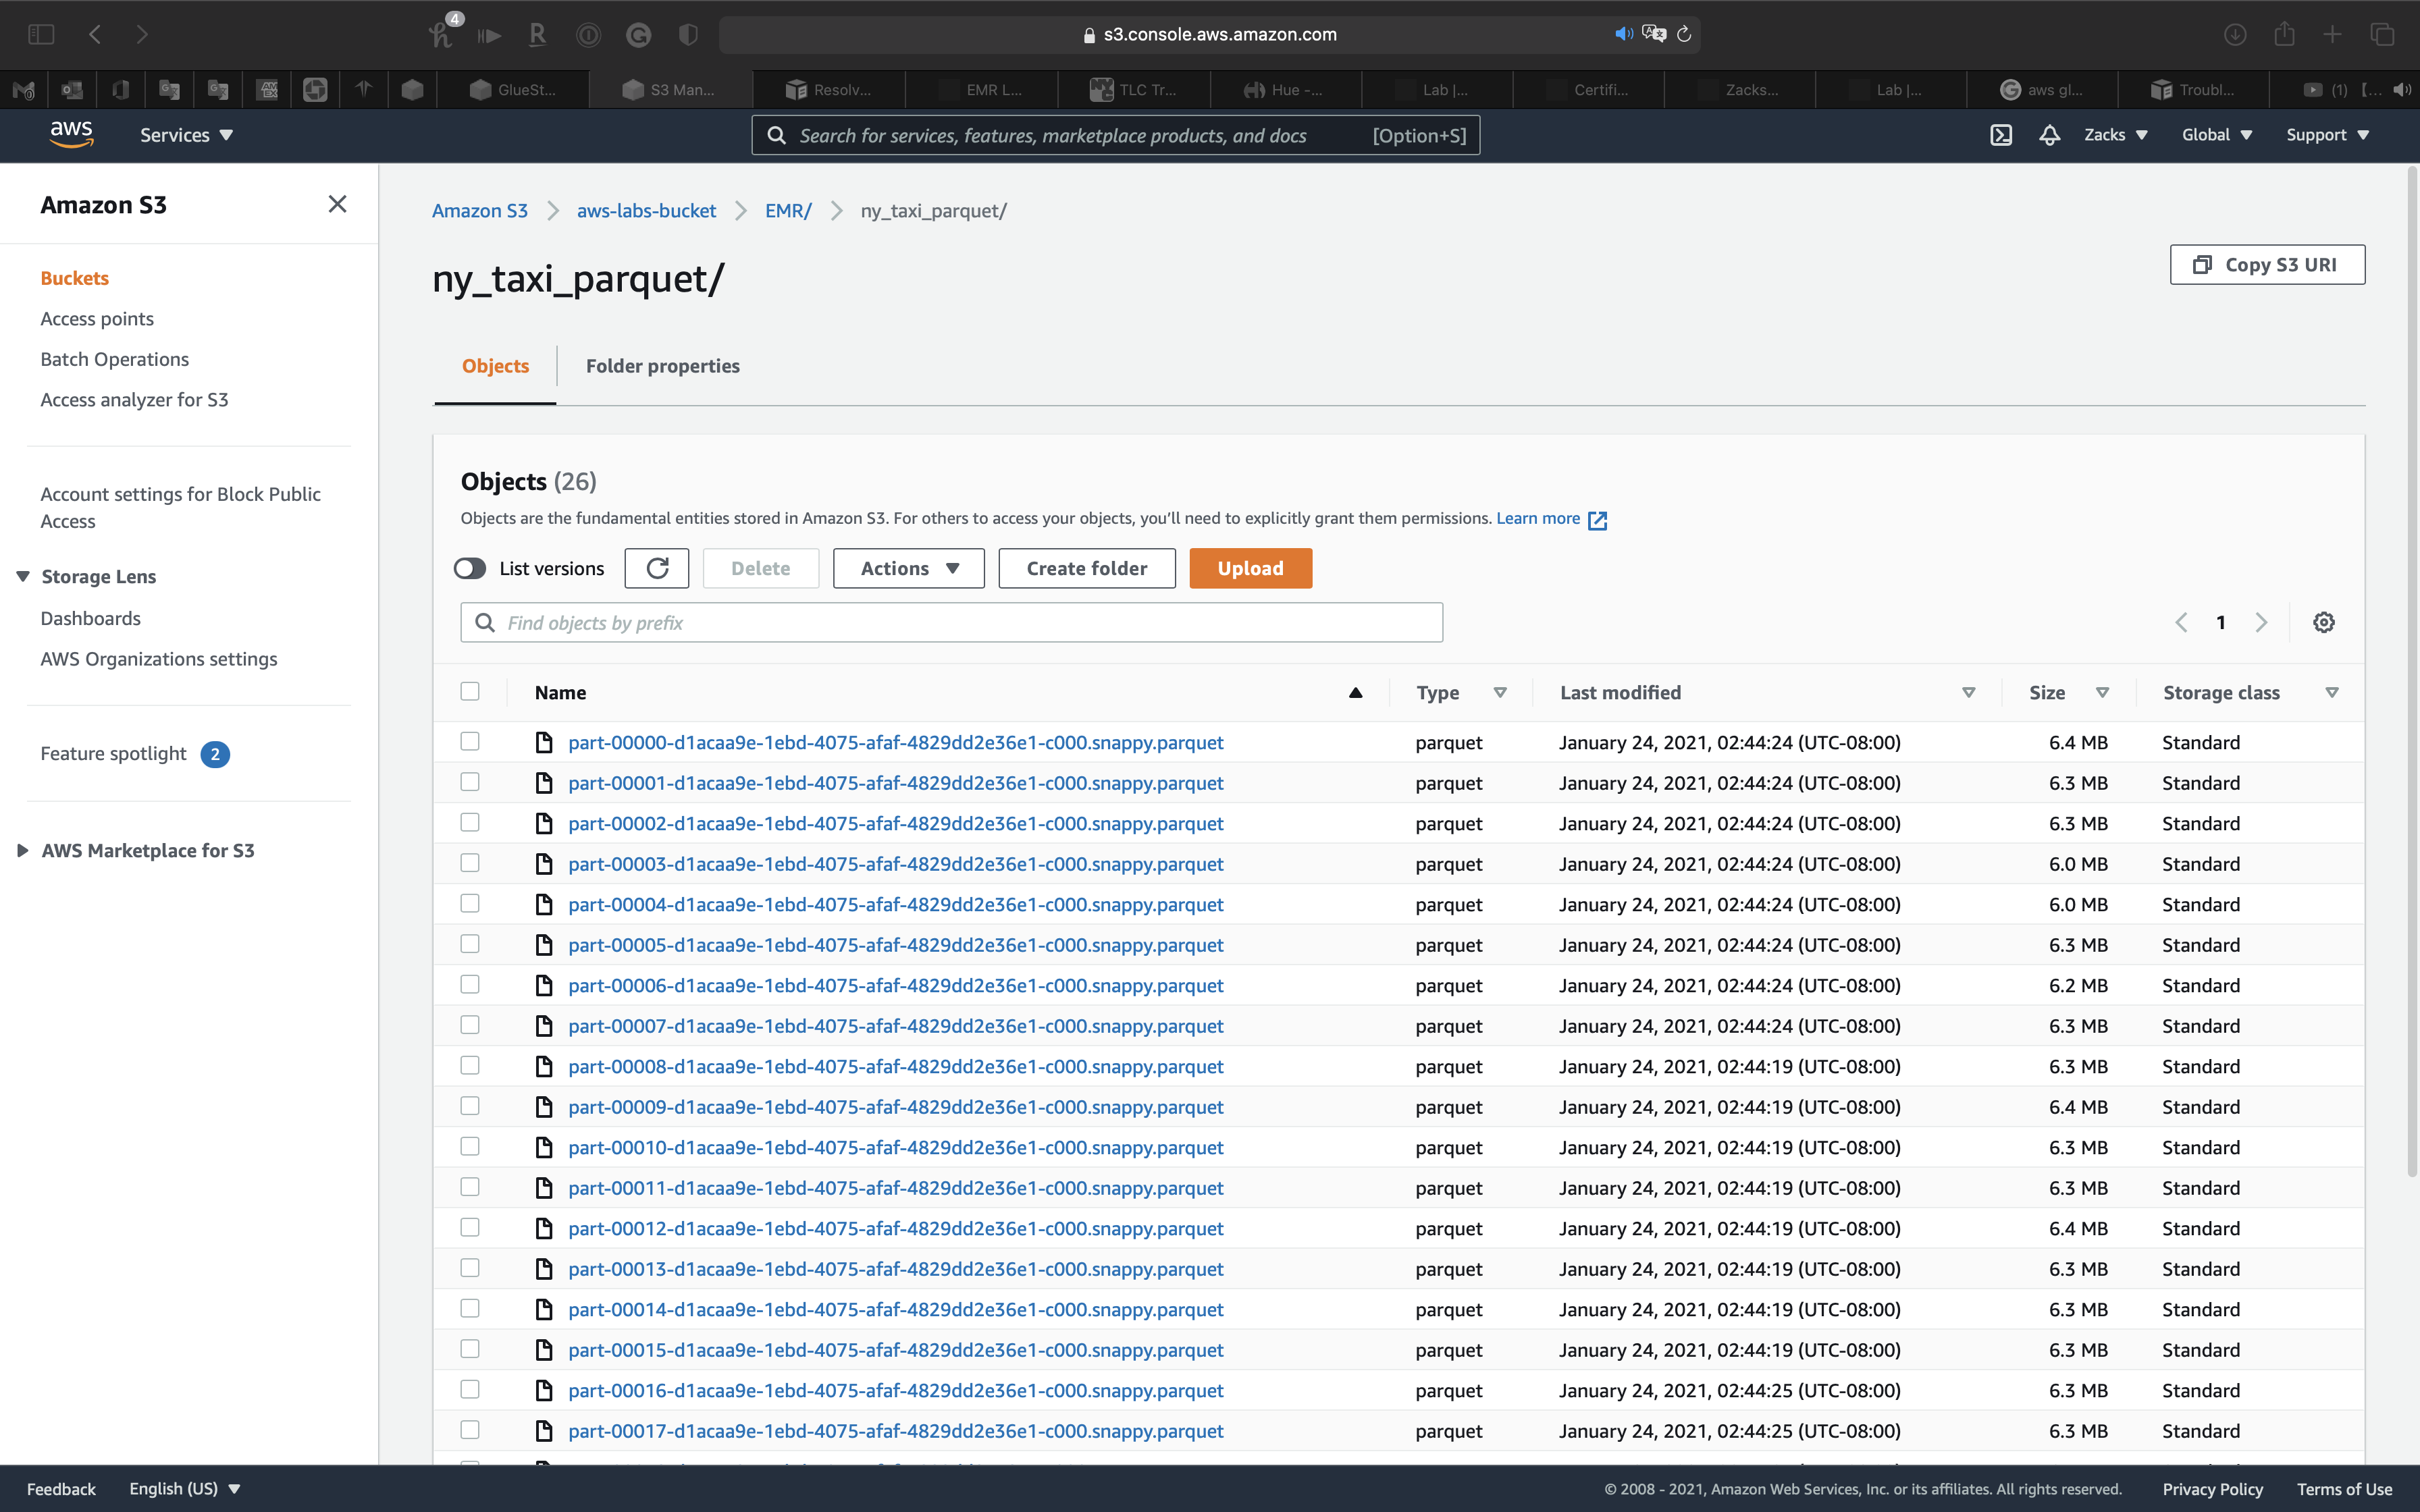
Create Transformed Data Table through Crawler
Use Crawler to craw the .parquet files metadata.
Services -> Glue -> Databases
Click on ny_taxi_db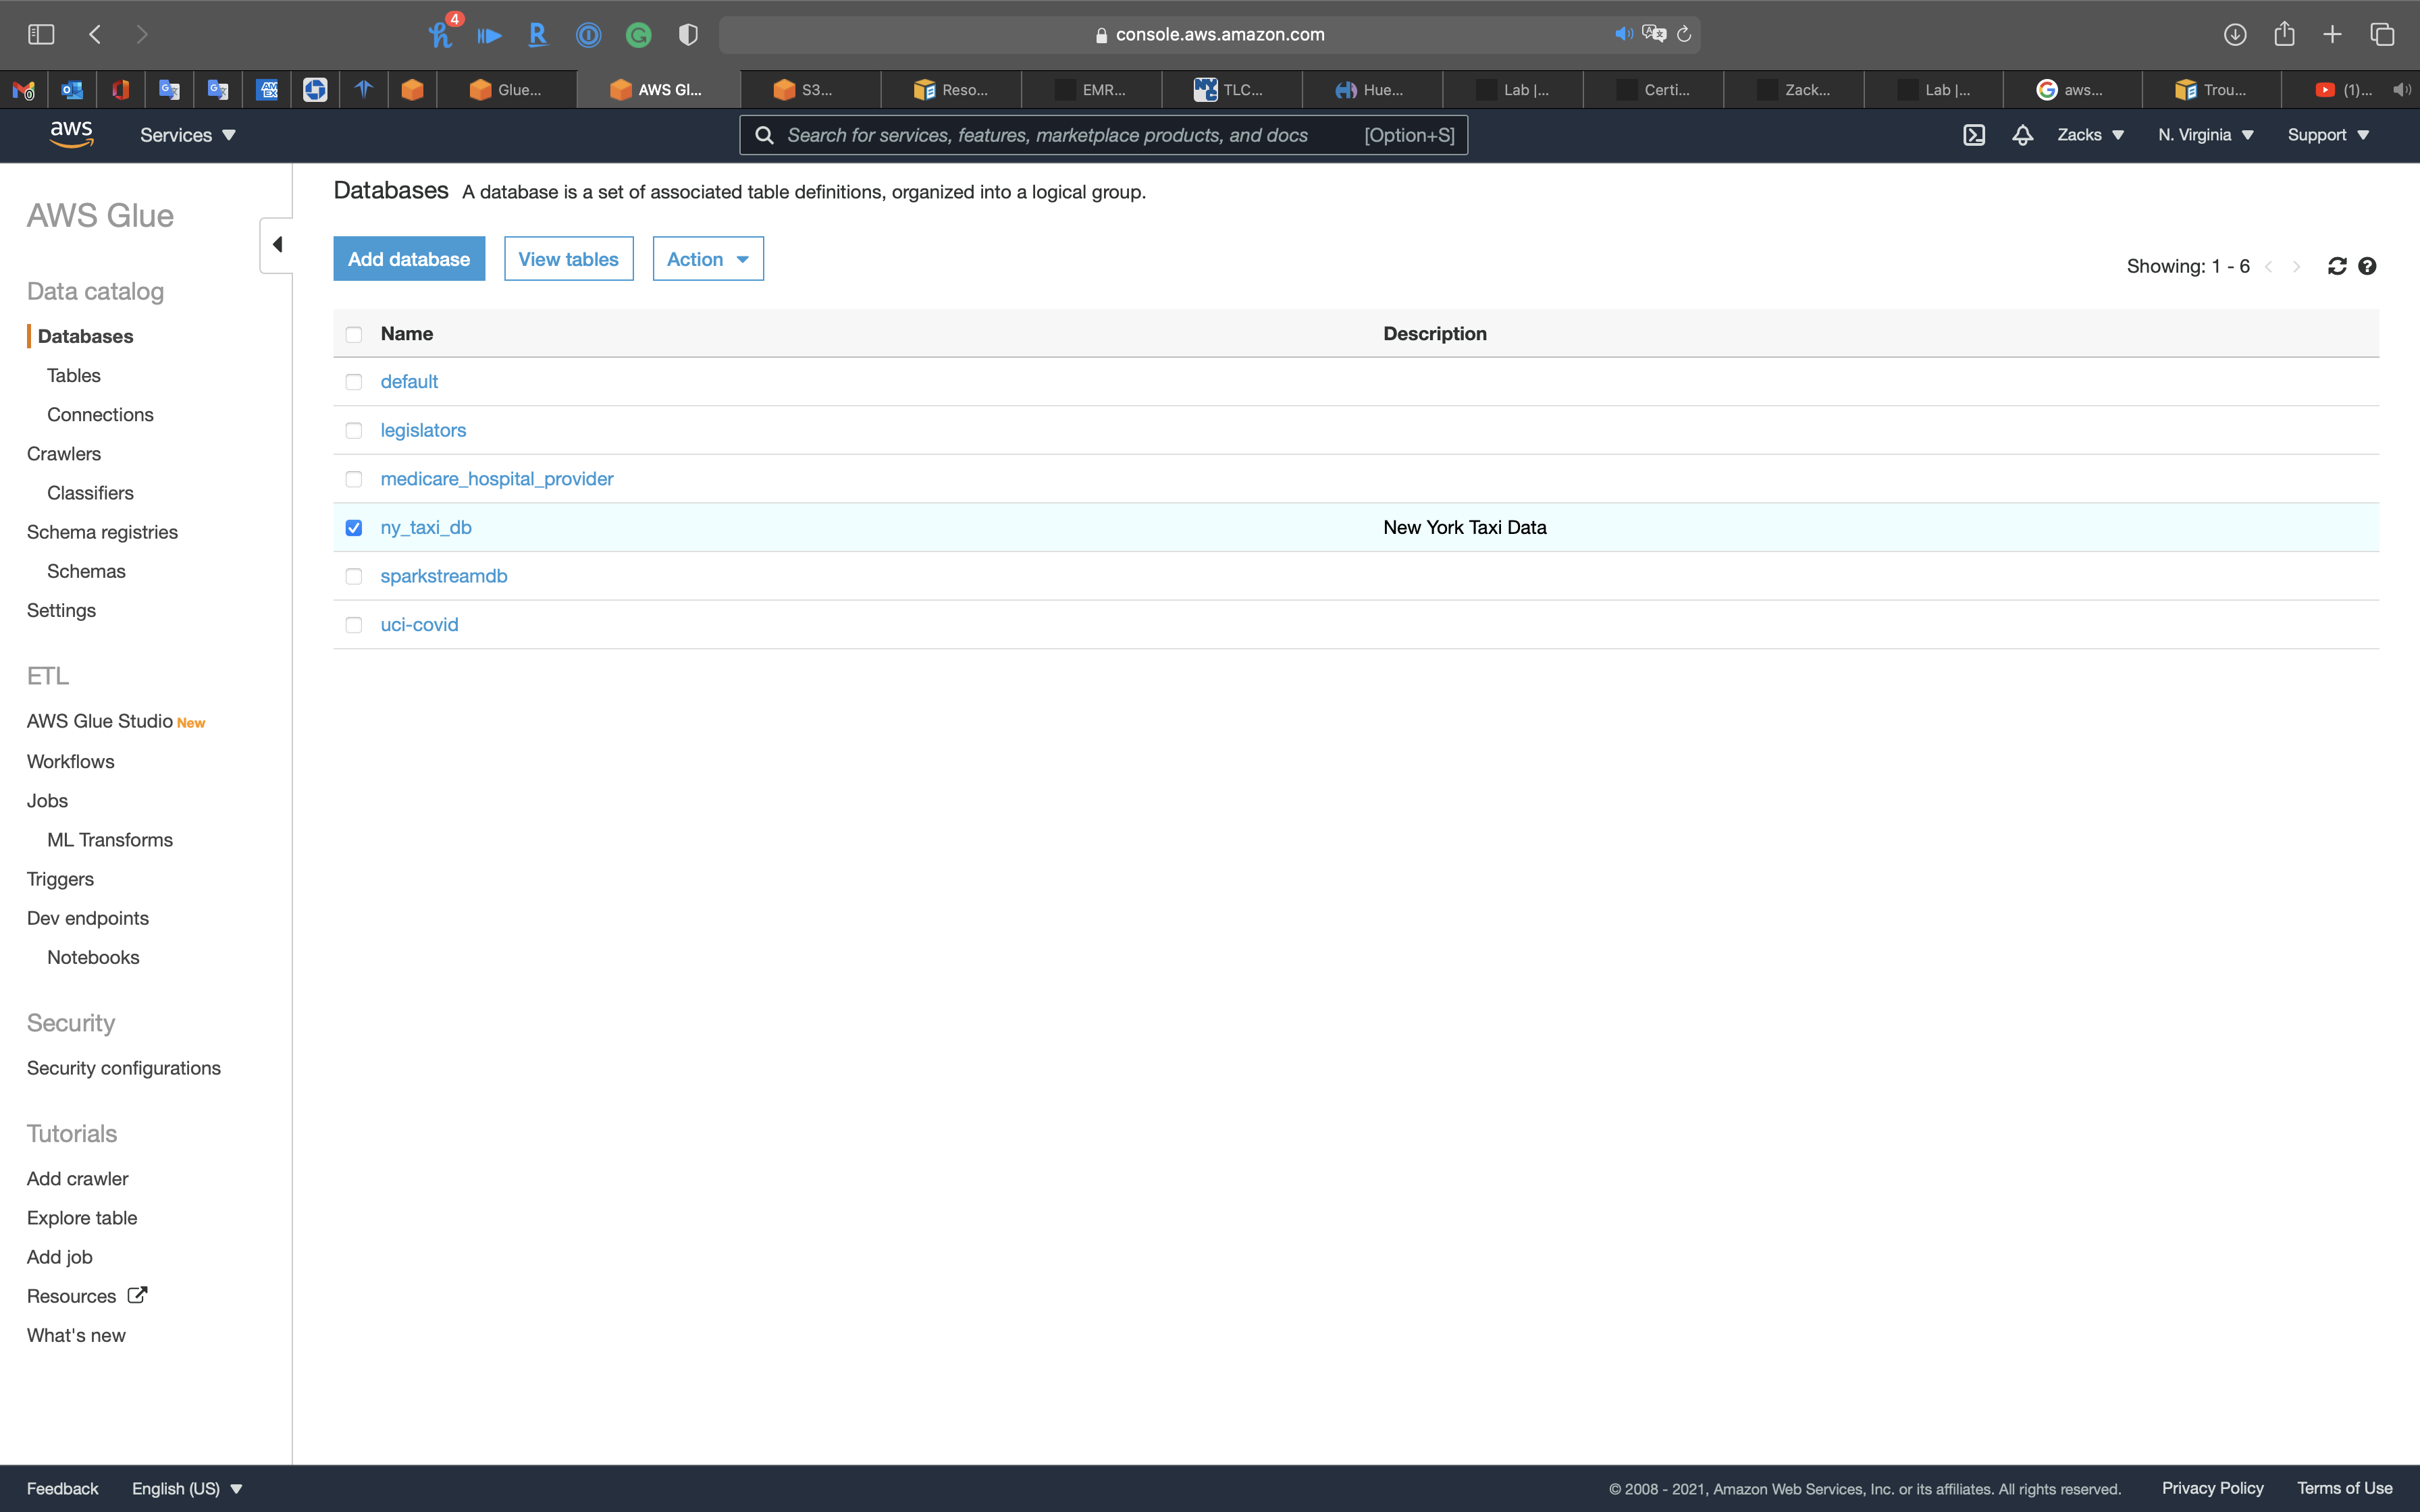
Click on Add tables -> add tables using a crawler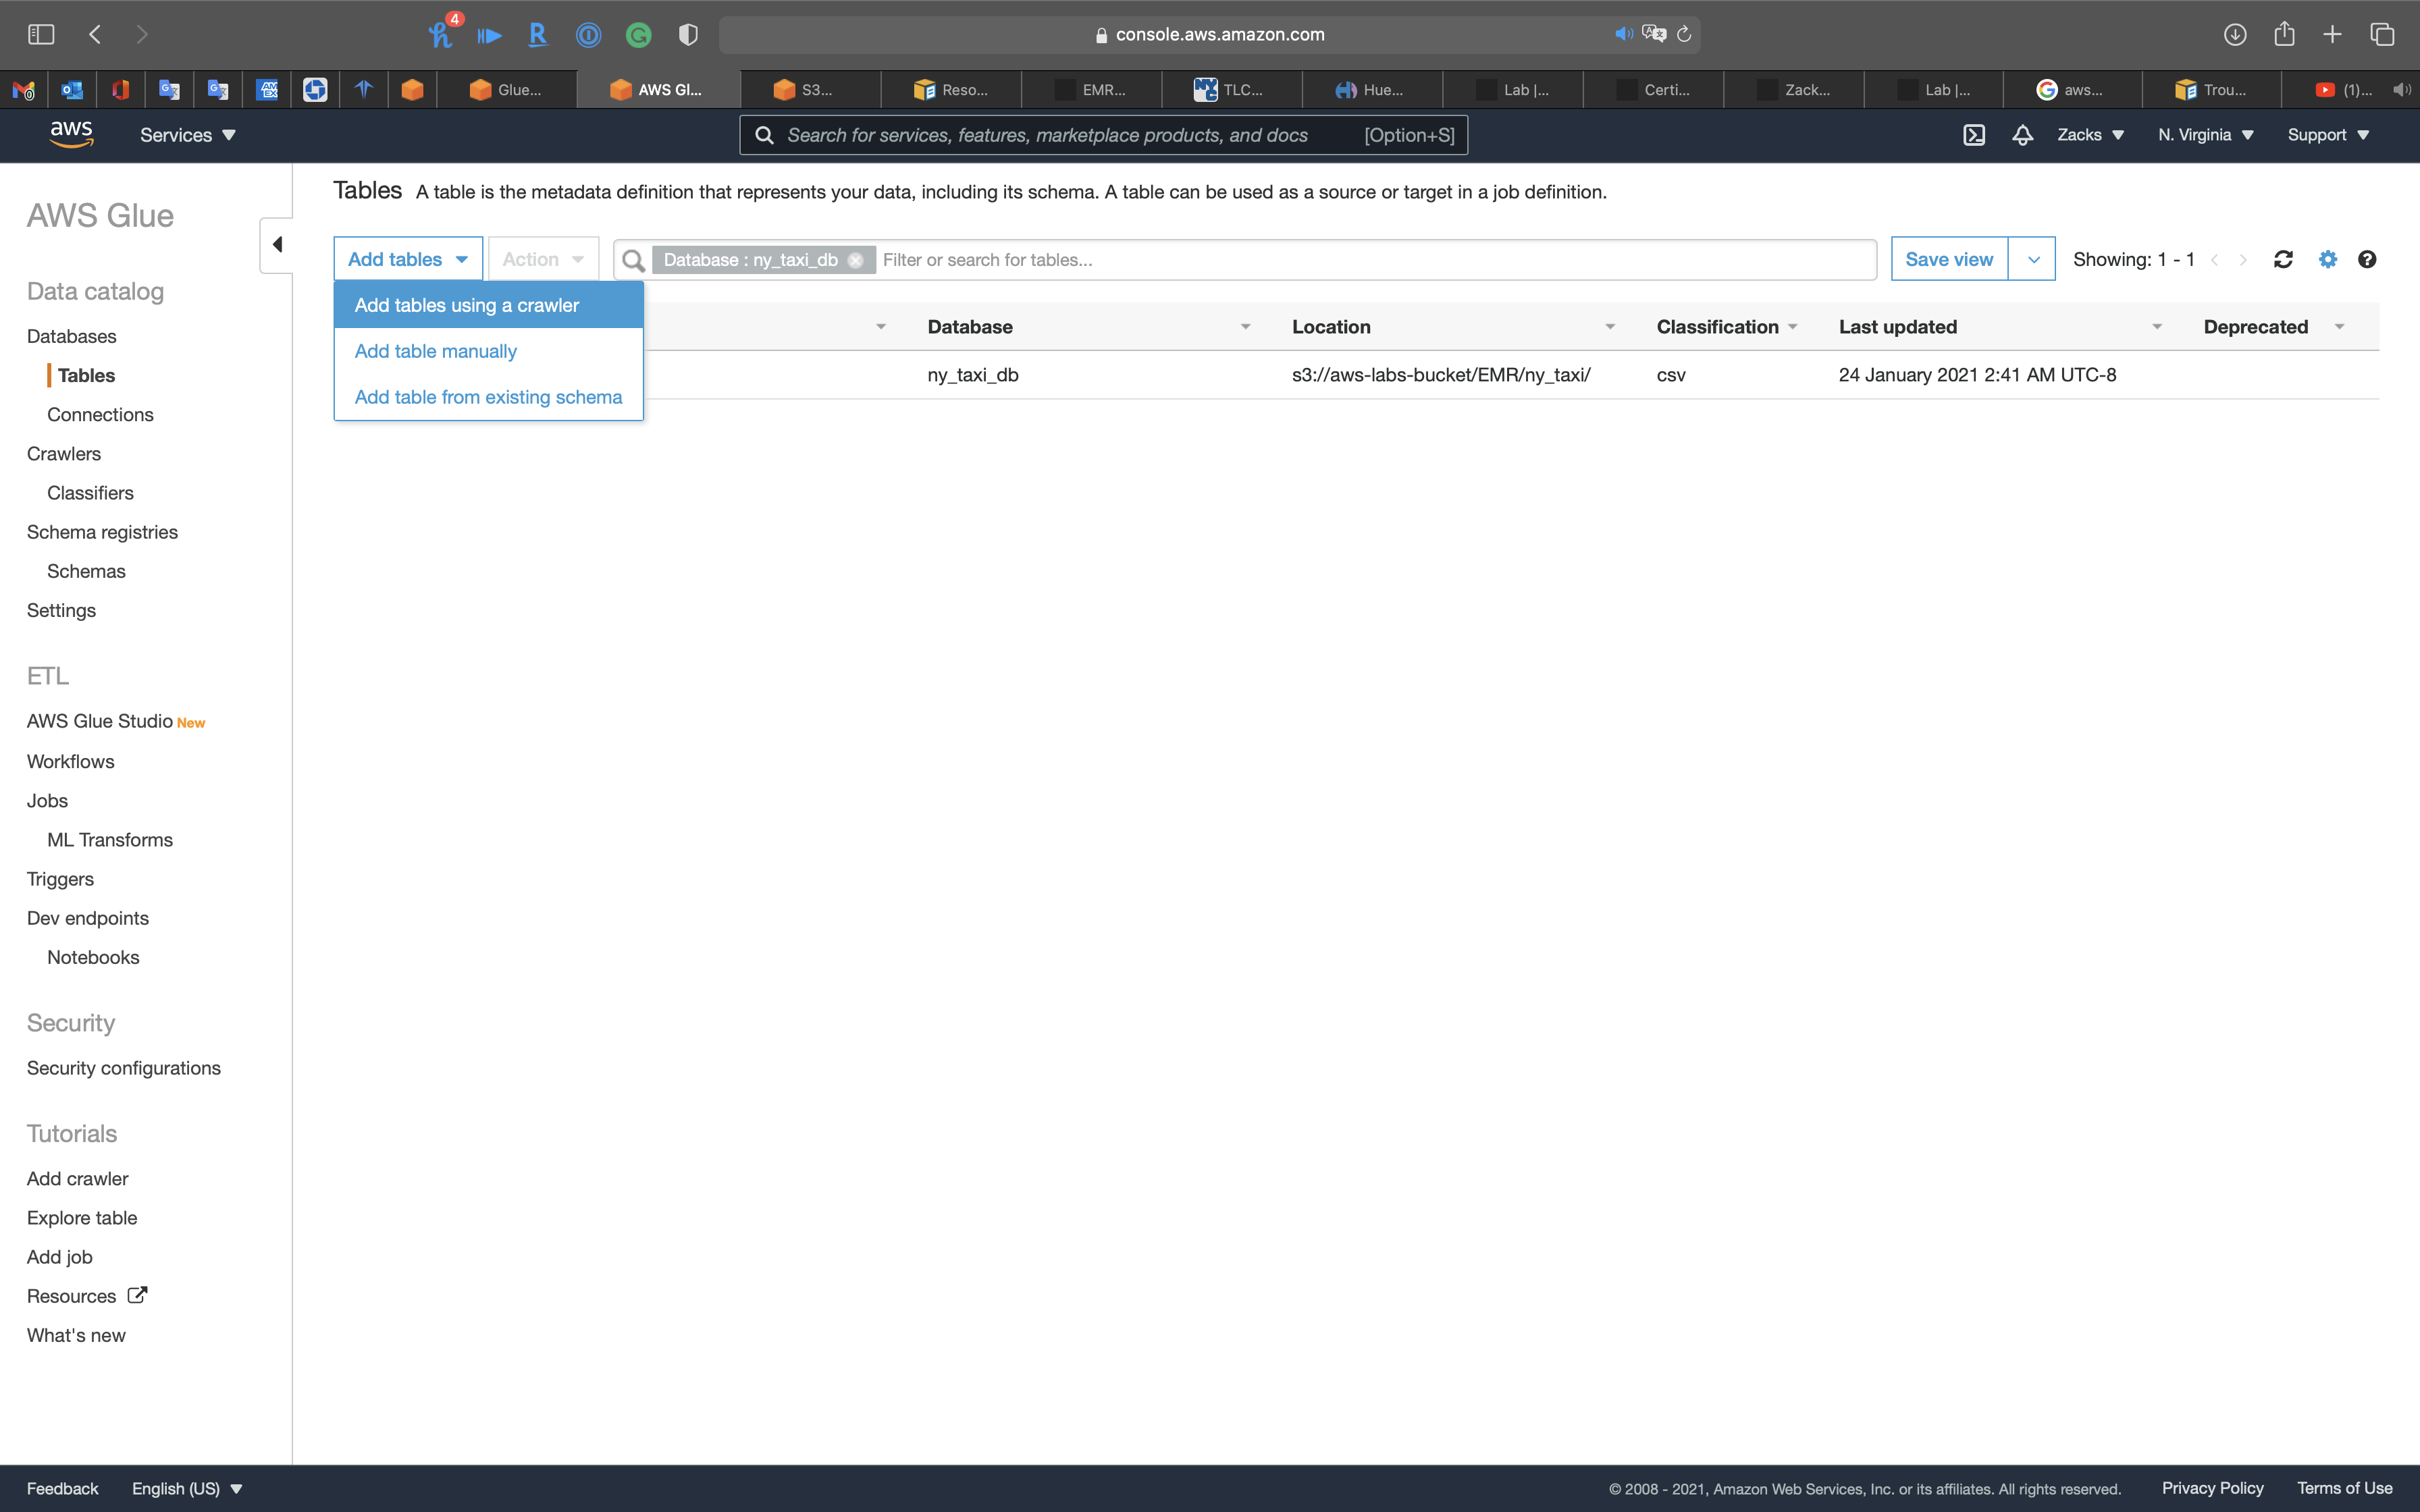
Crawler Info
- Crawler name:
ny_taxi_parquet_crawler
Click on Next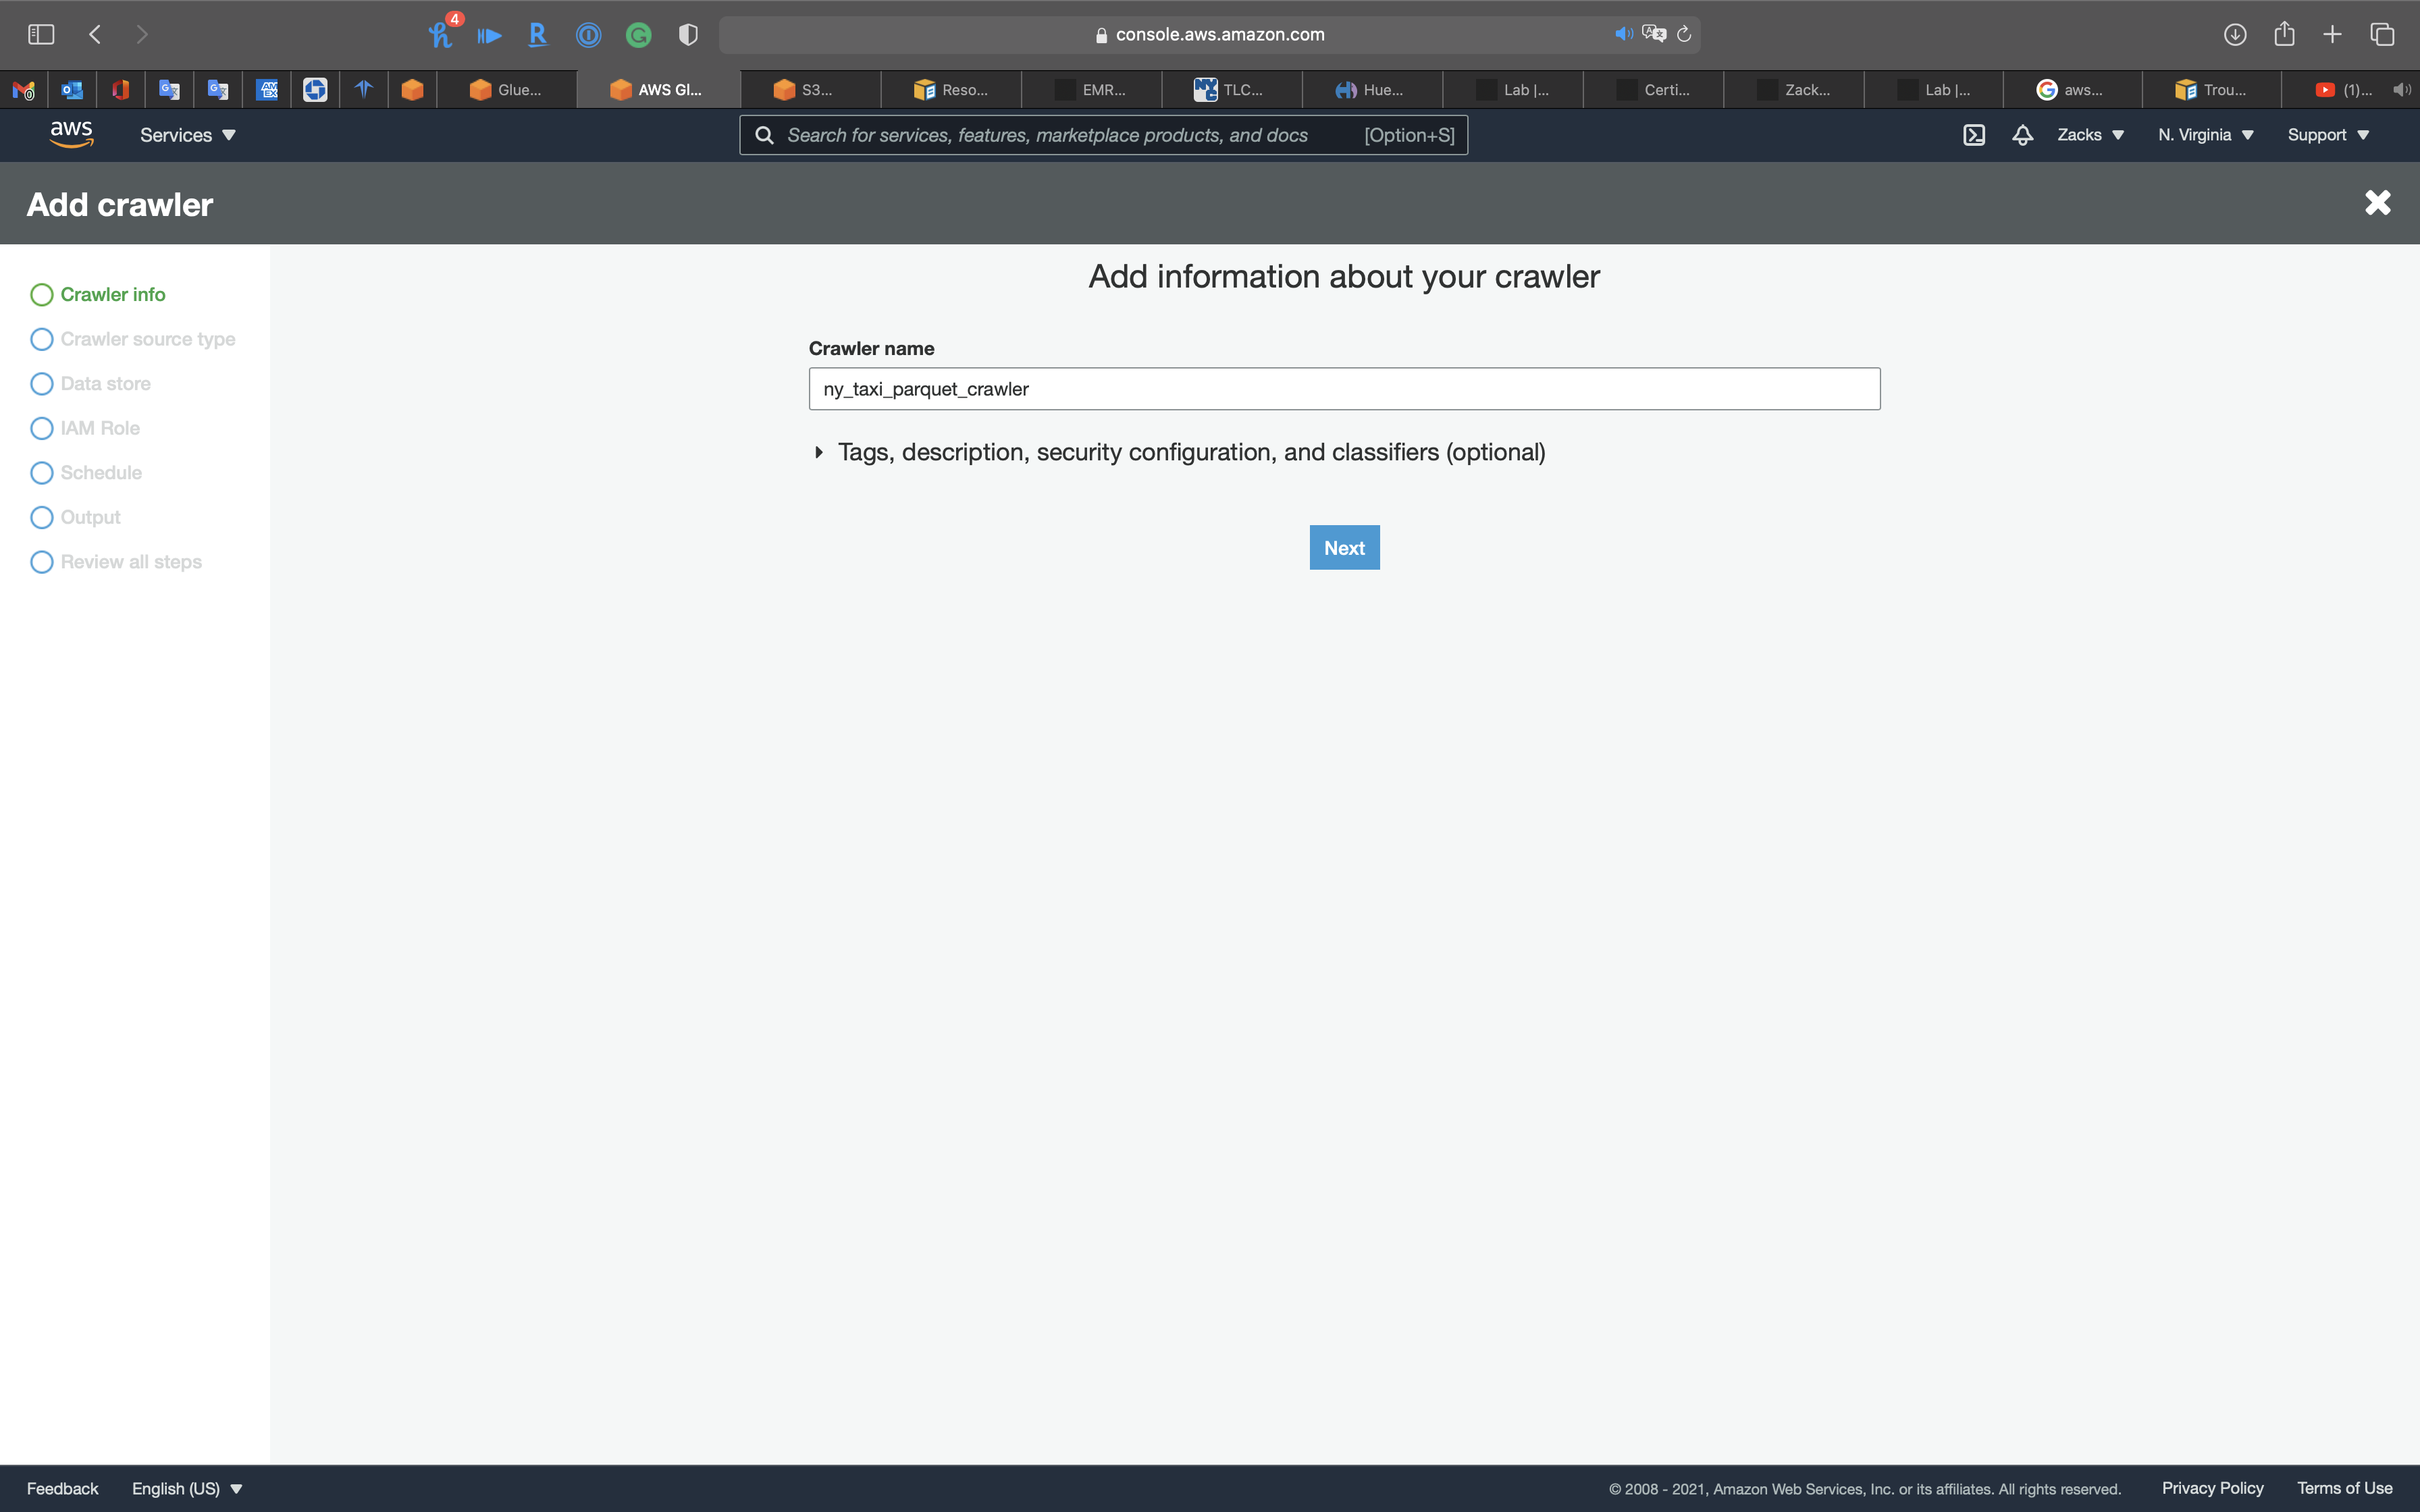
Crawler source type
Click on Next
Data store
- Choose a data store:
S3 - Include path: your S3 bucket
Click on Next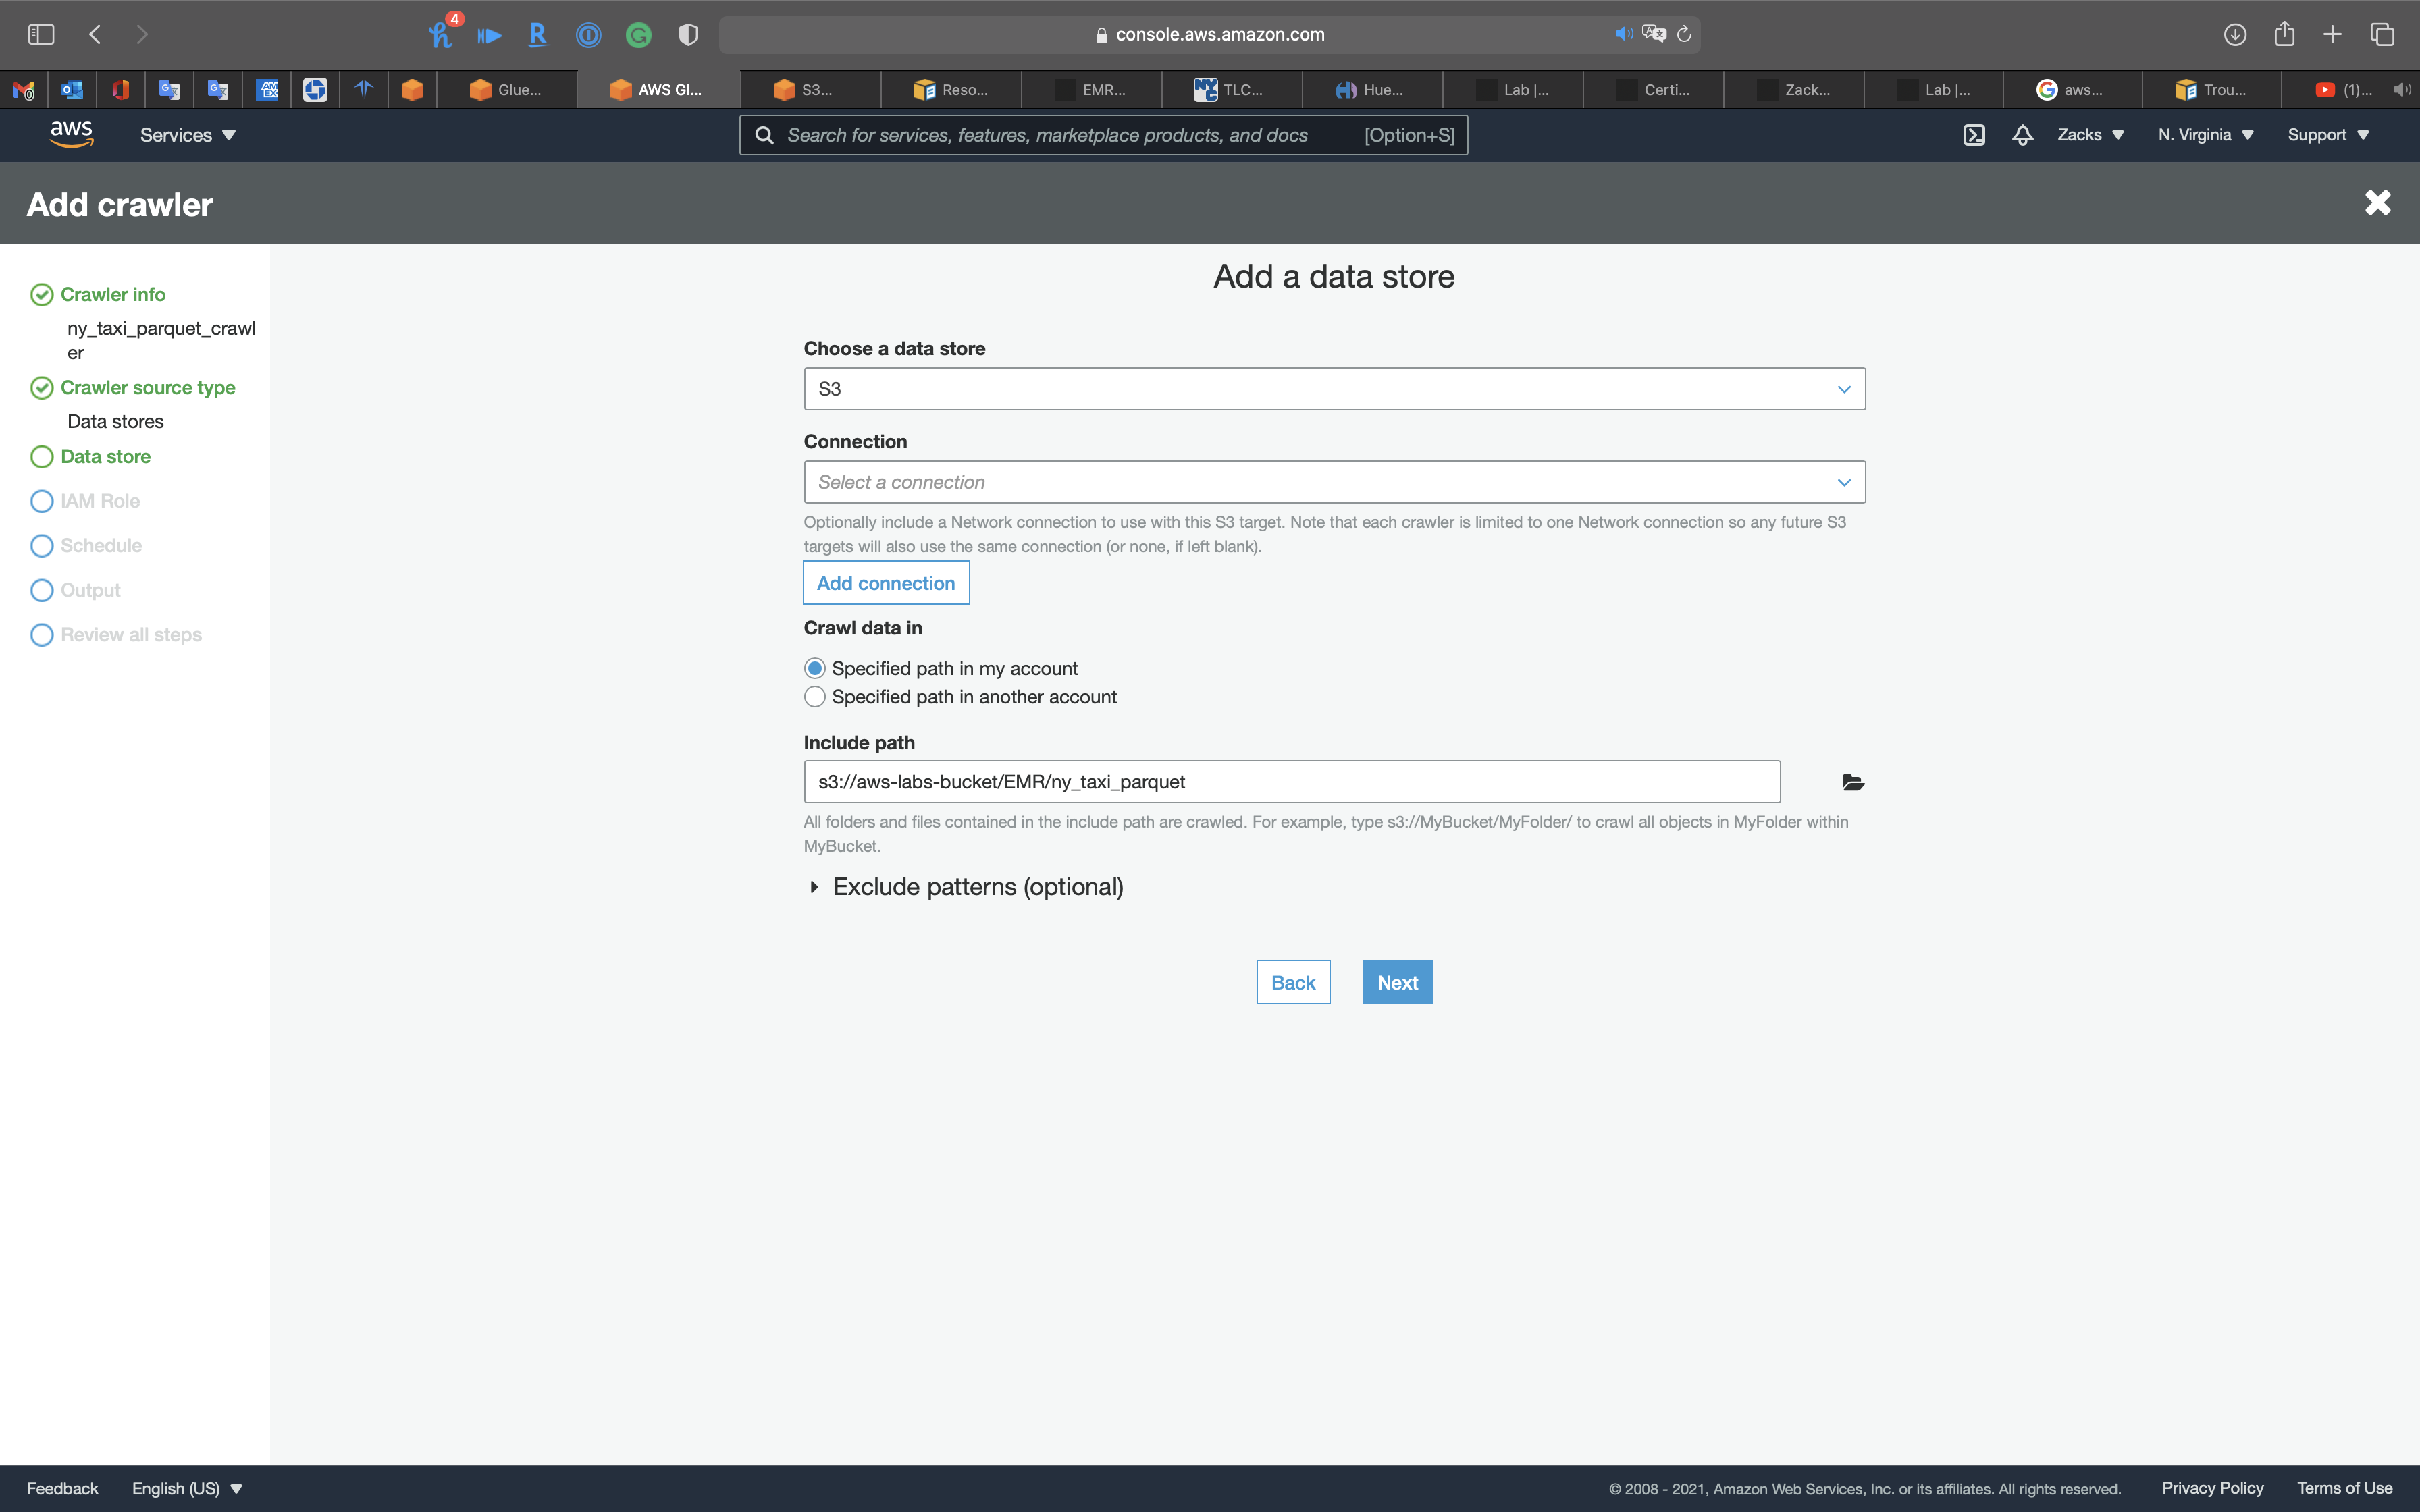
IAM Role
Create a new IAM Role or choose an existing IAM Role if you have.
Policies:
AmazonS3FullAccessAmazonKinesisFullAccessAWSGlueServiceRole
Click on Next
Schedule
- Frequency:
Run on demand
Click on Next
Output
- Database:
ny_taxi_db
Click on Next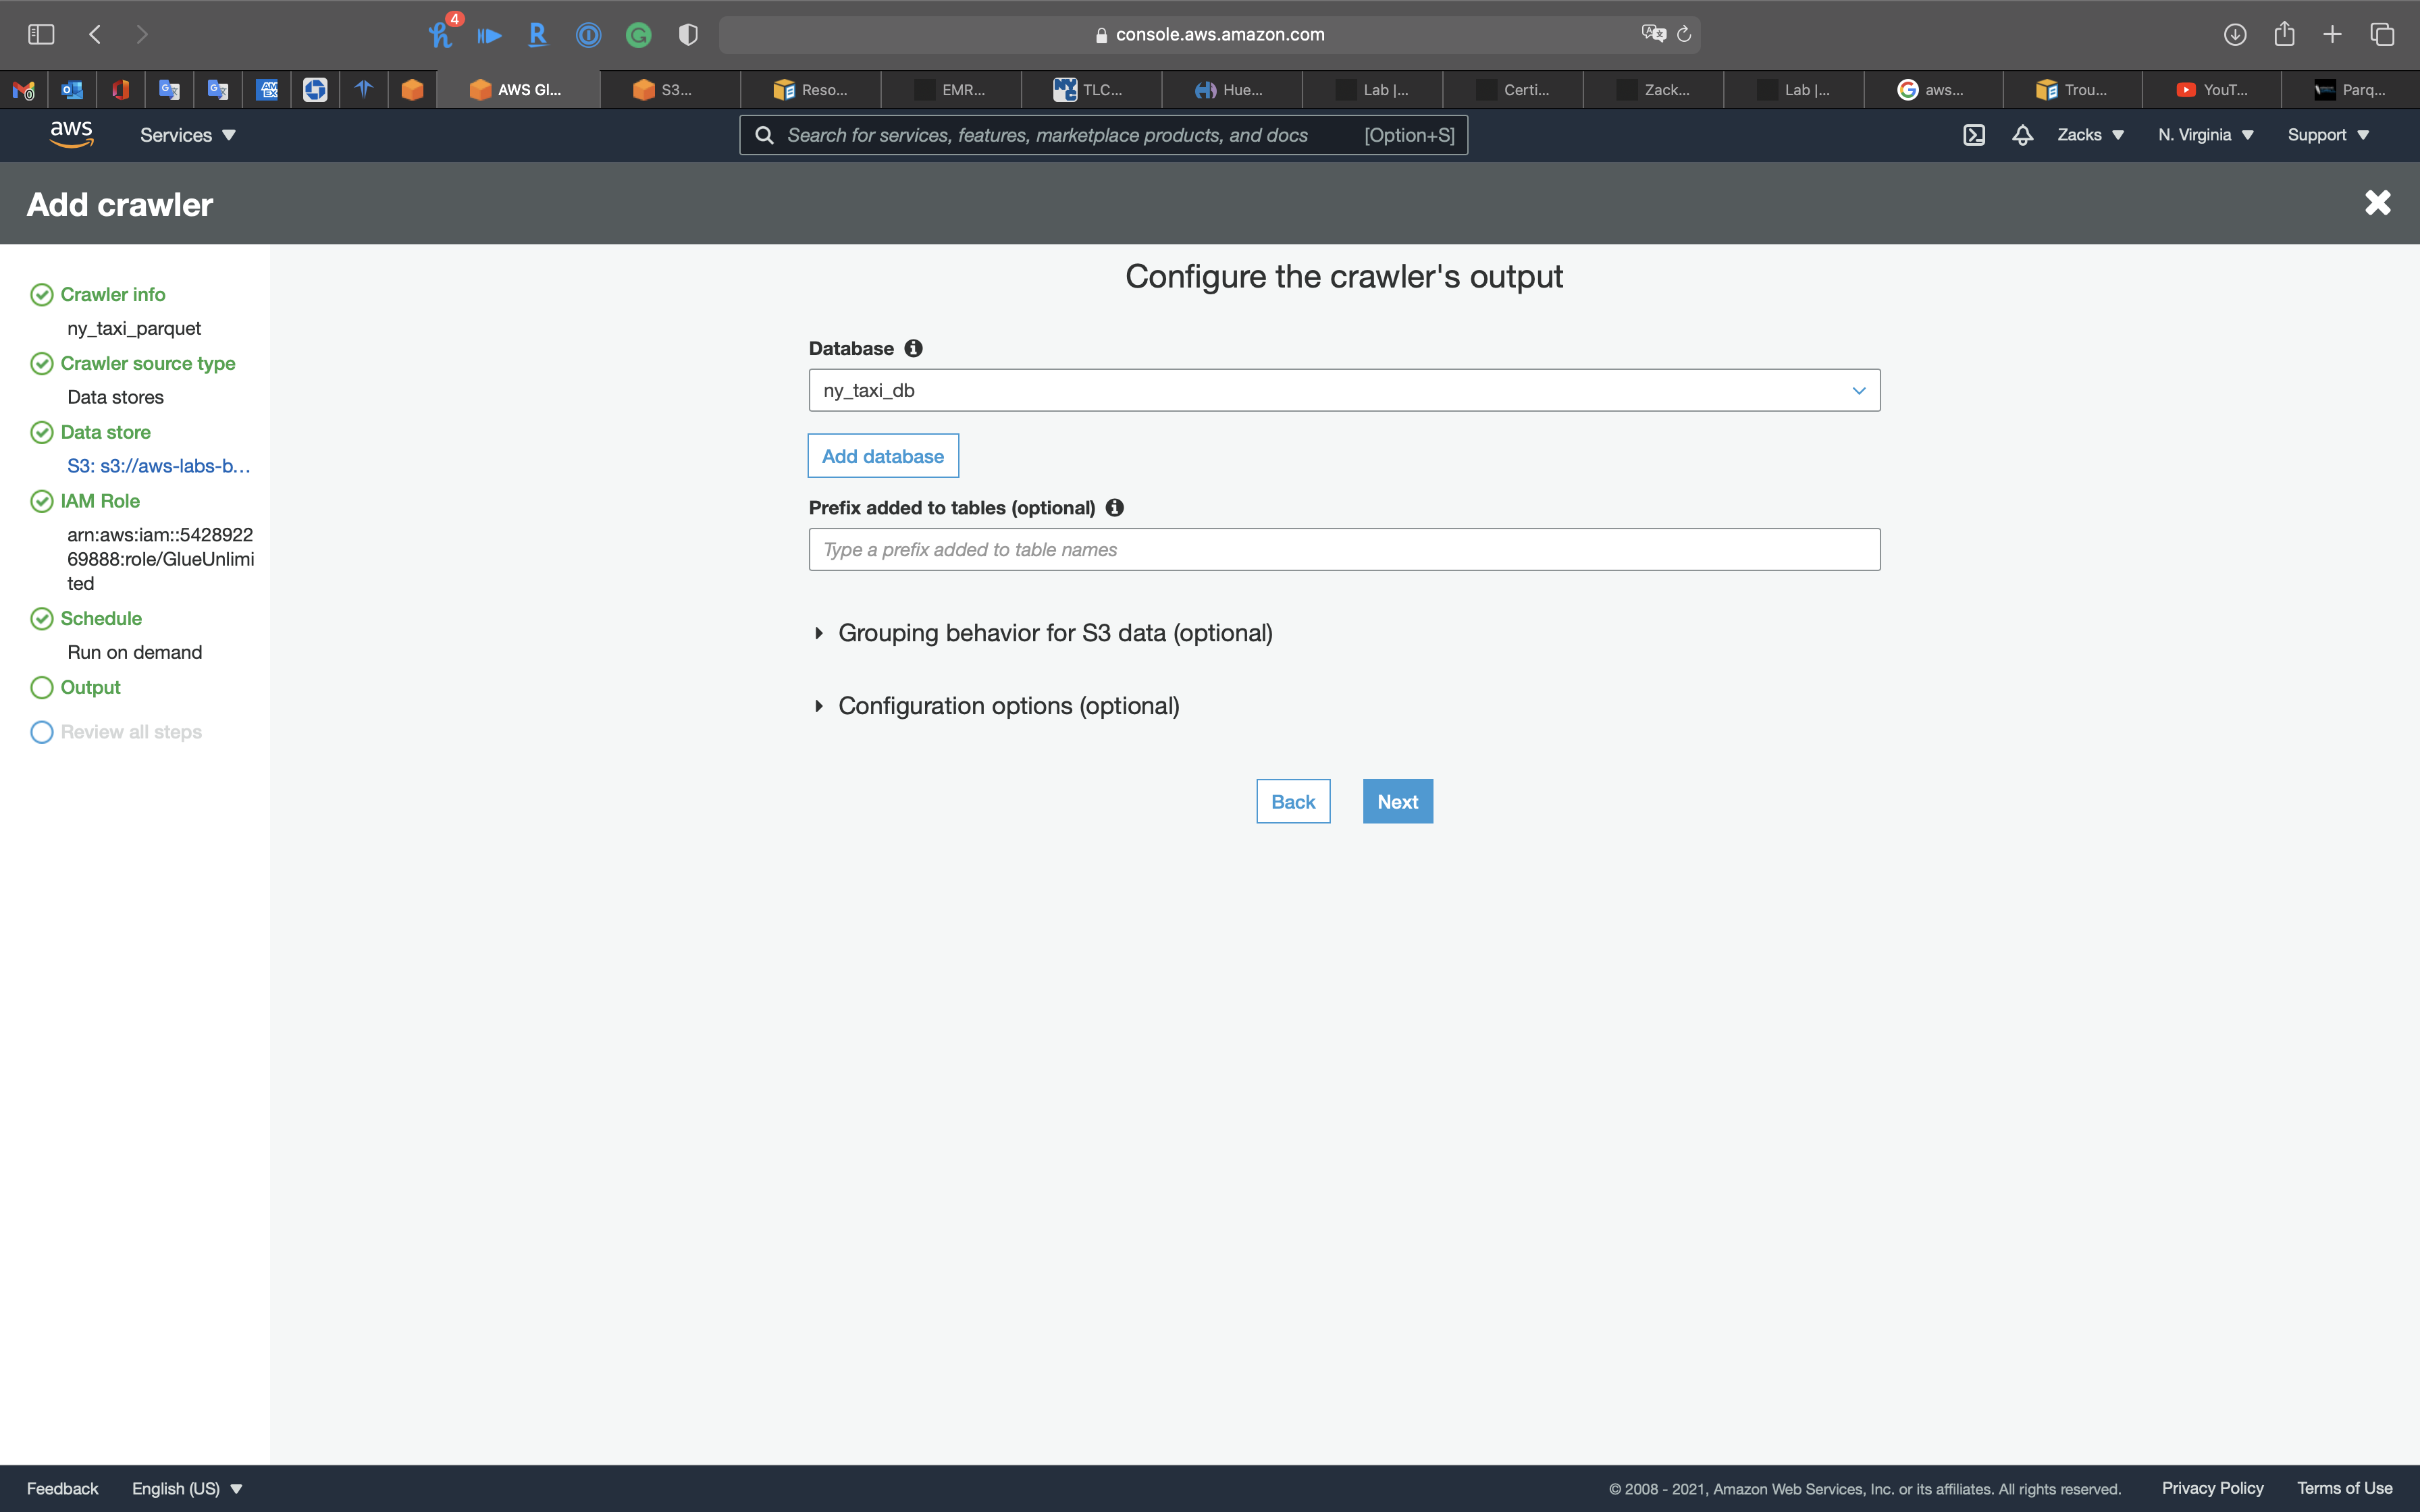
Review all steps
Click on Next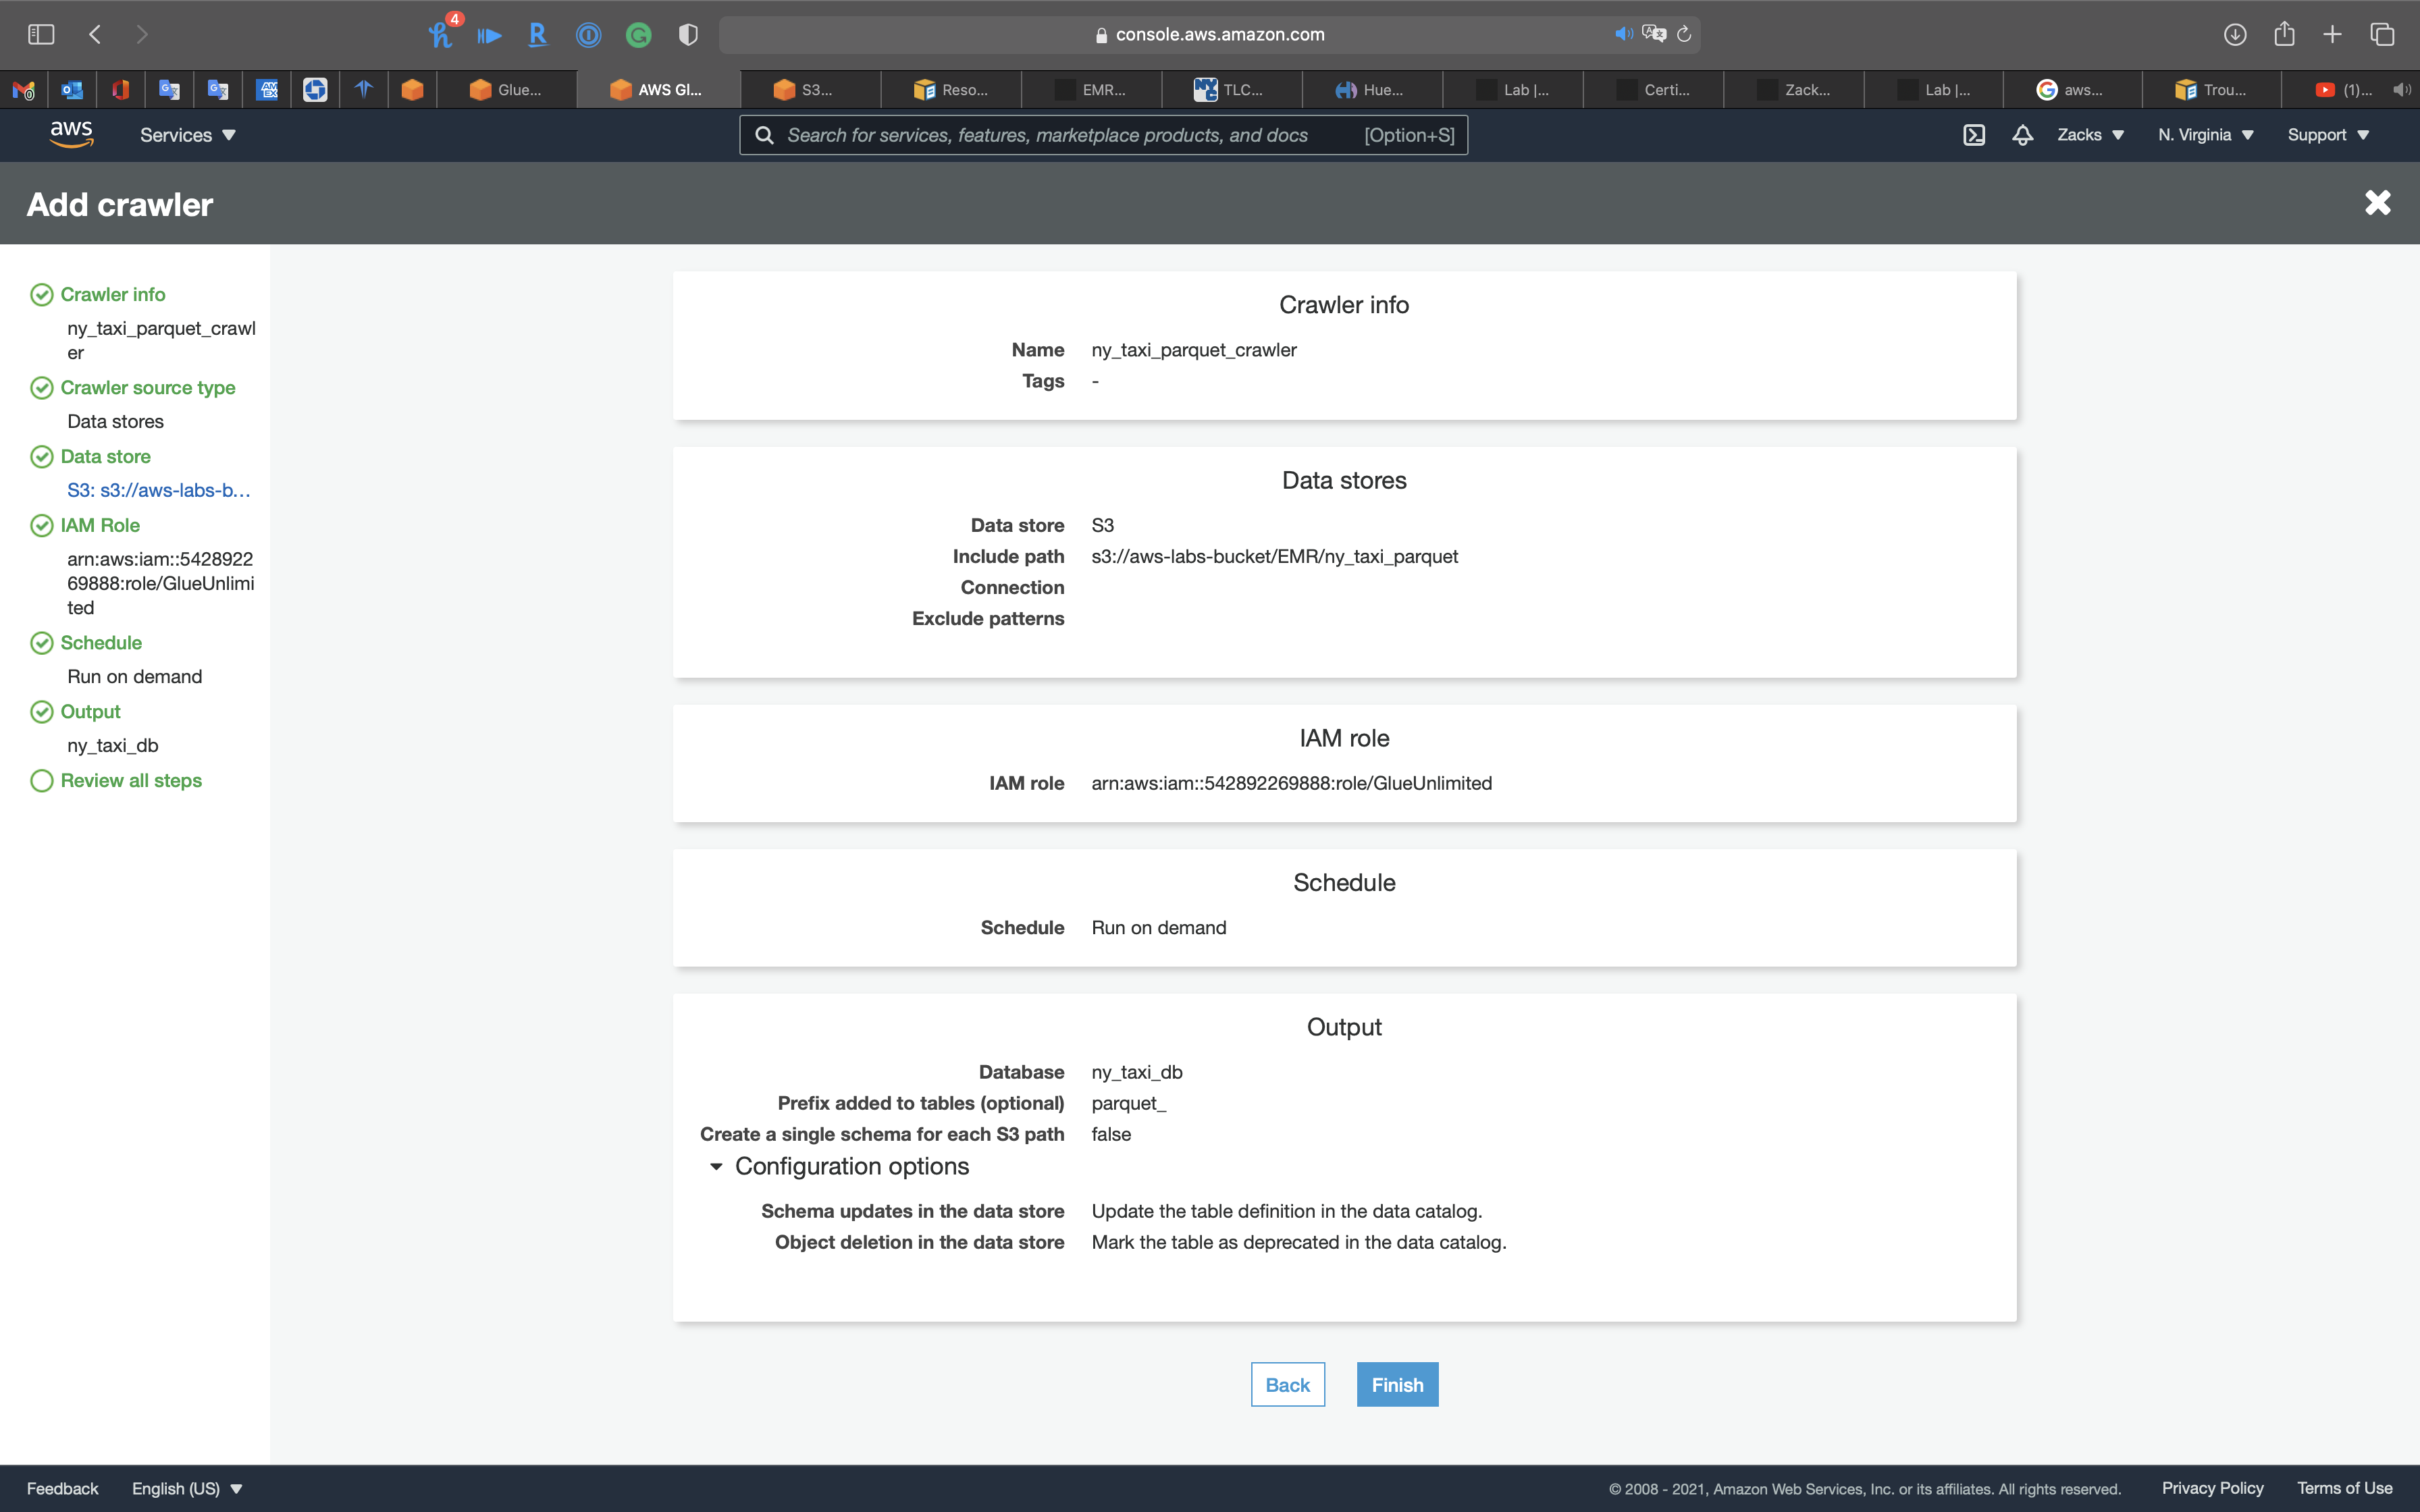
Select the Crawler, and click on Run crawler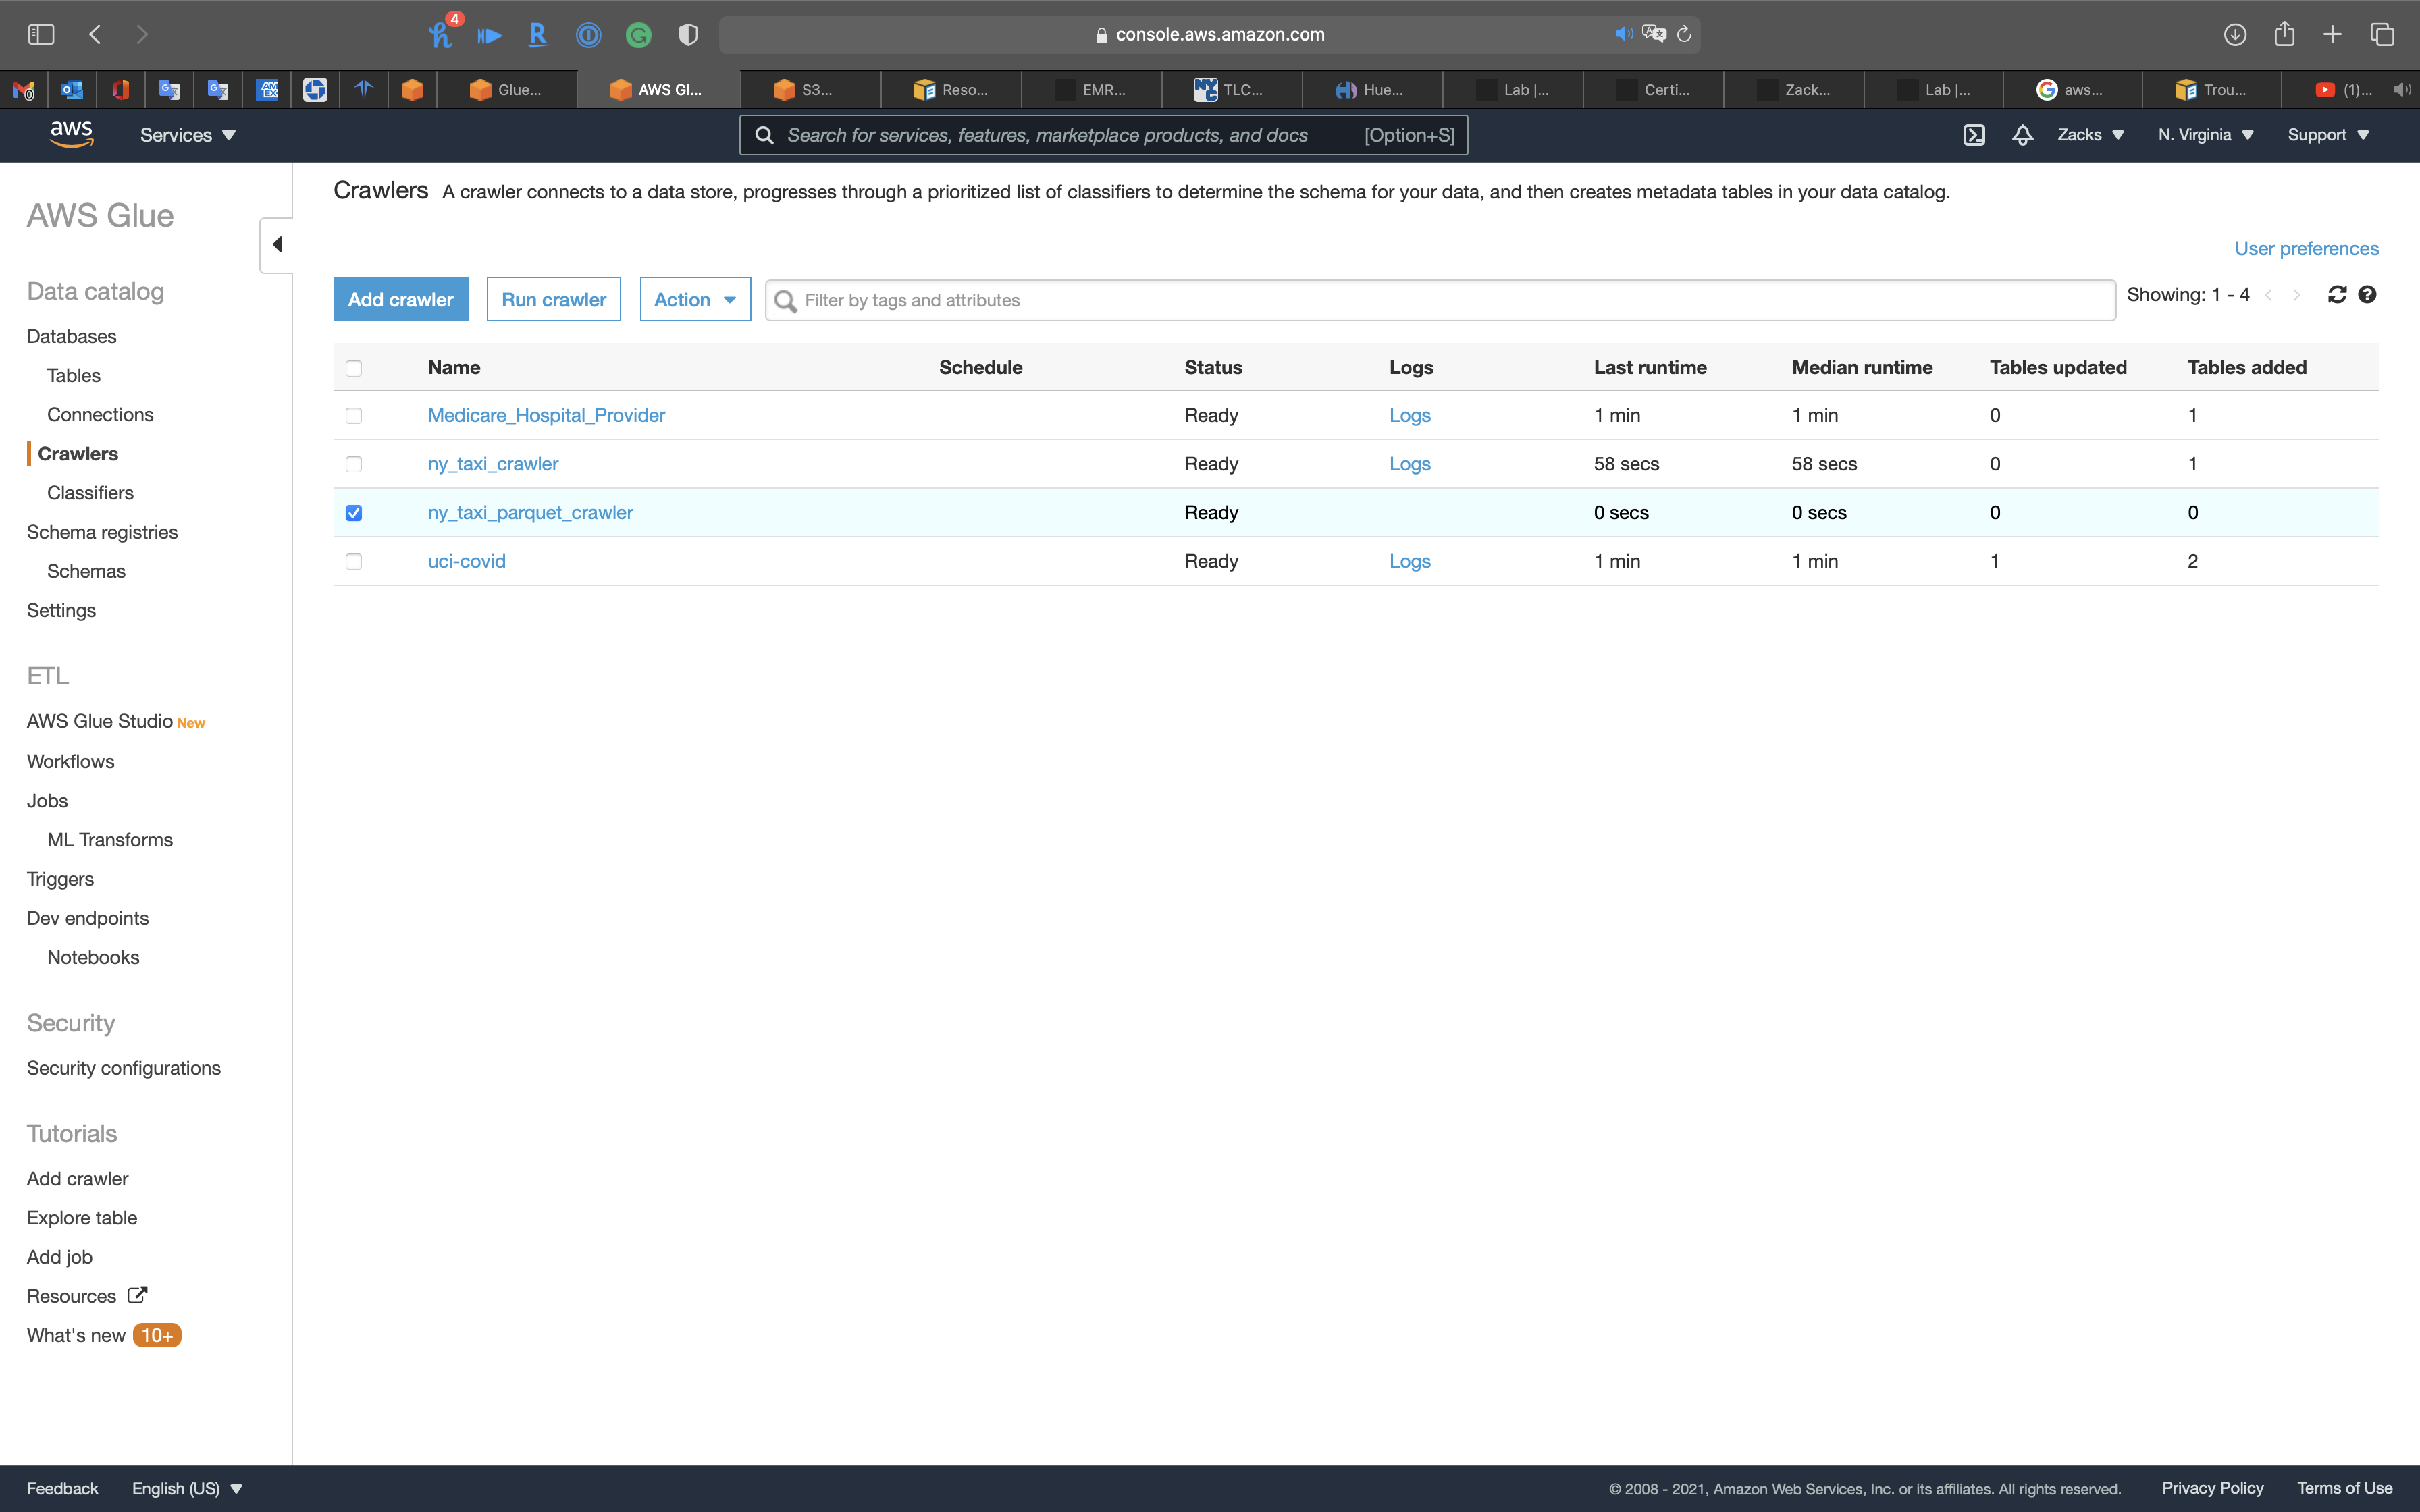
Review the table
Now you can see the table
Click on ny_taxi_parquet table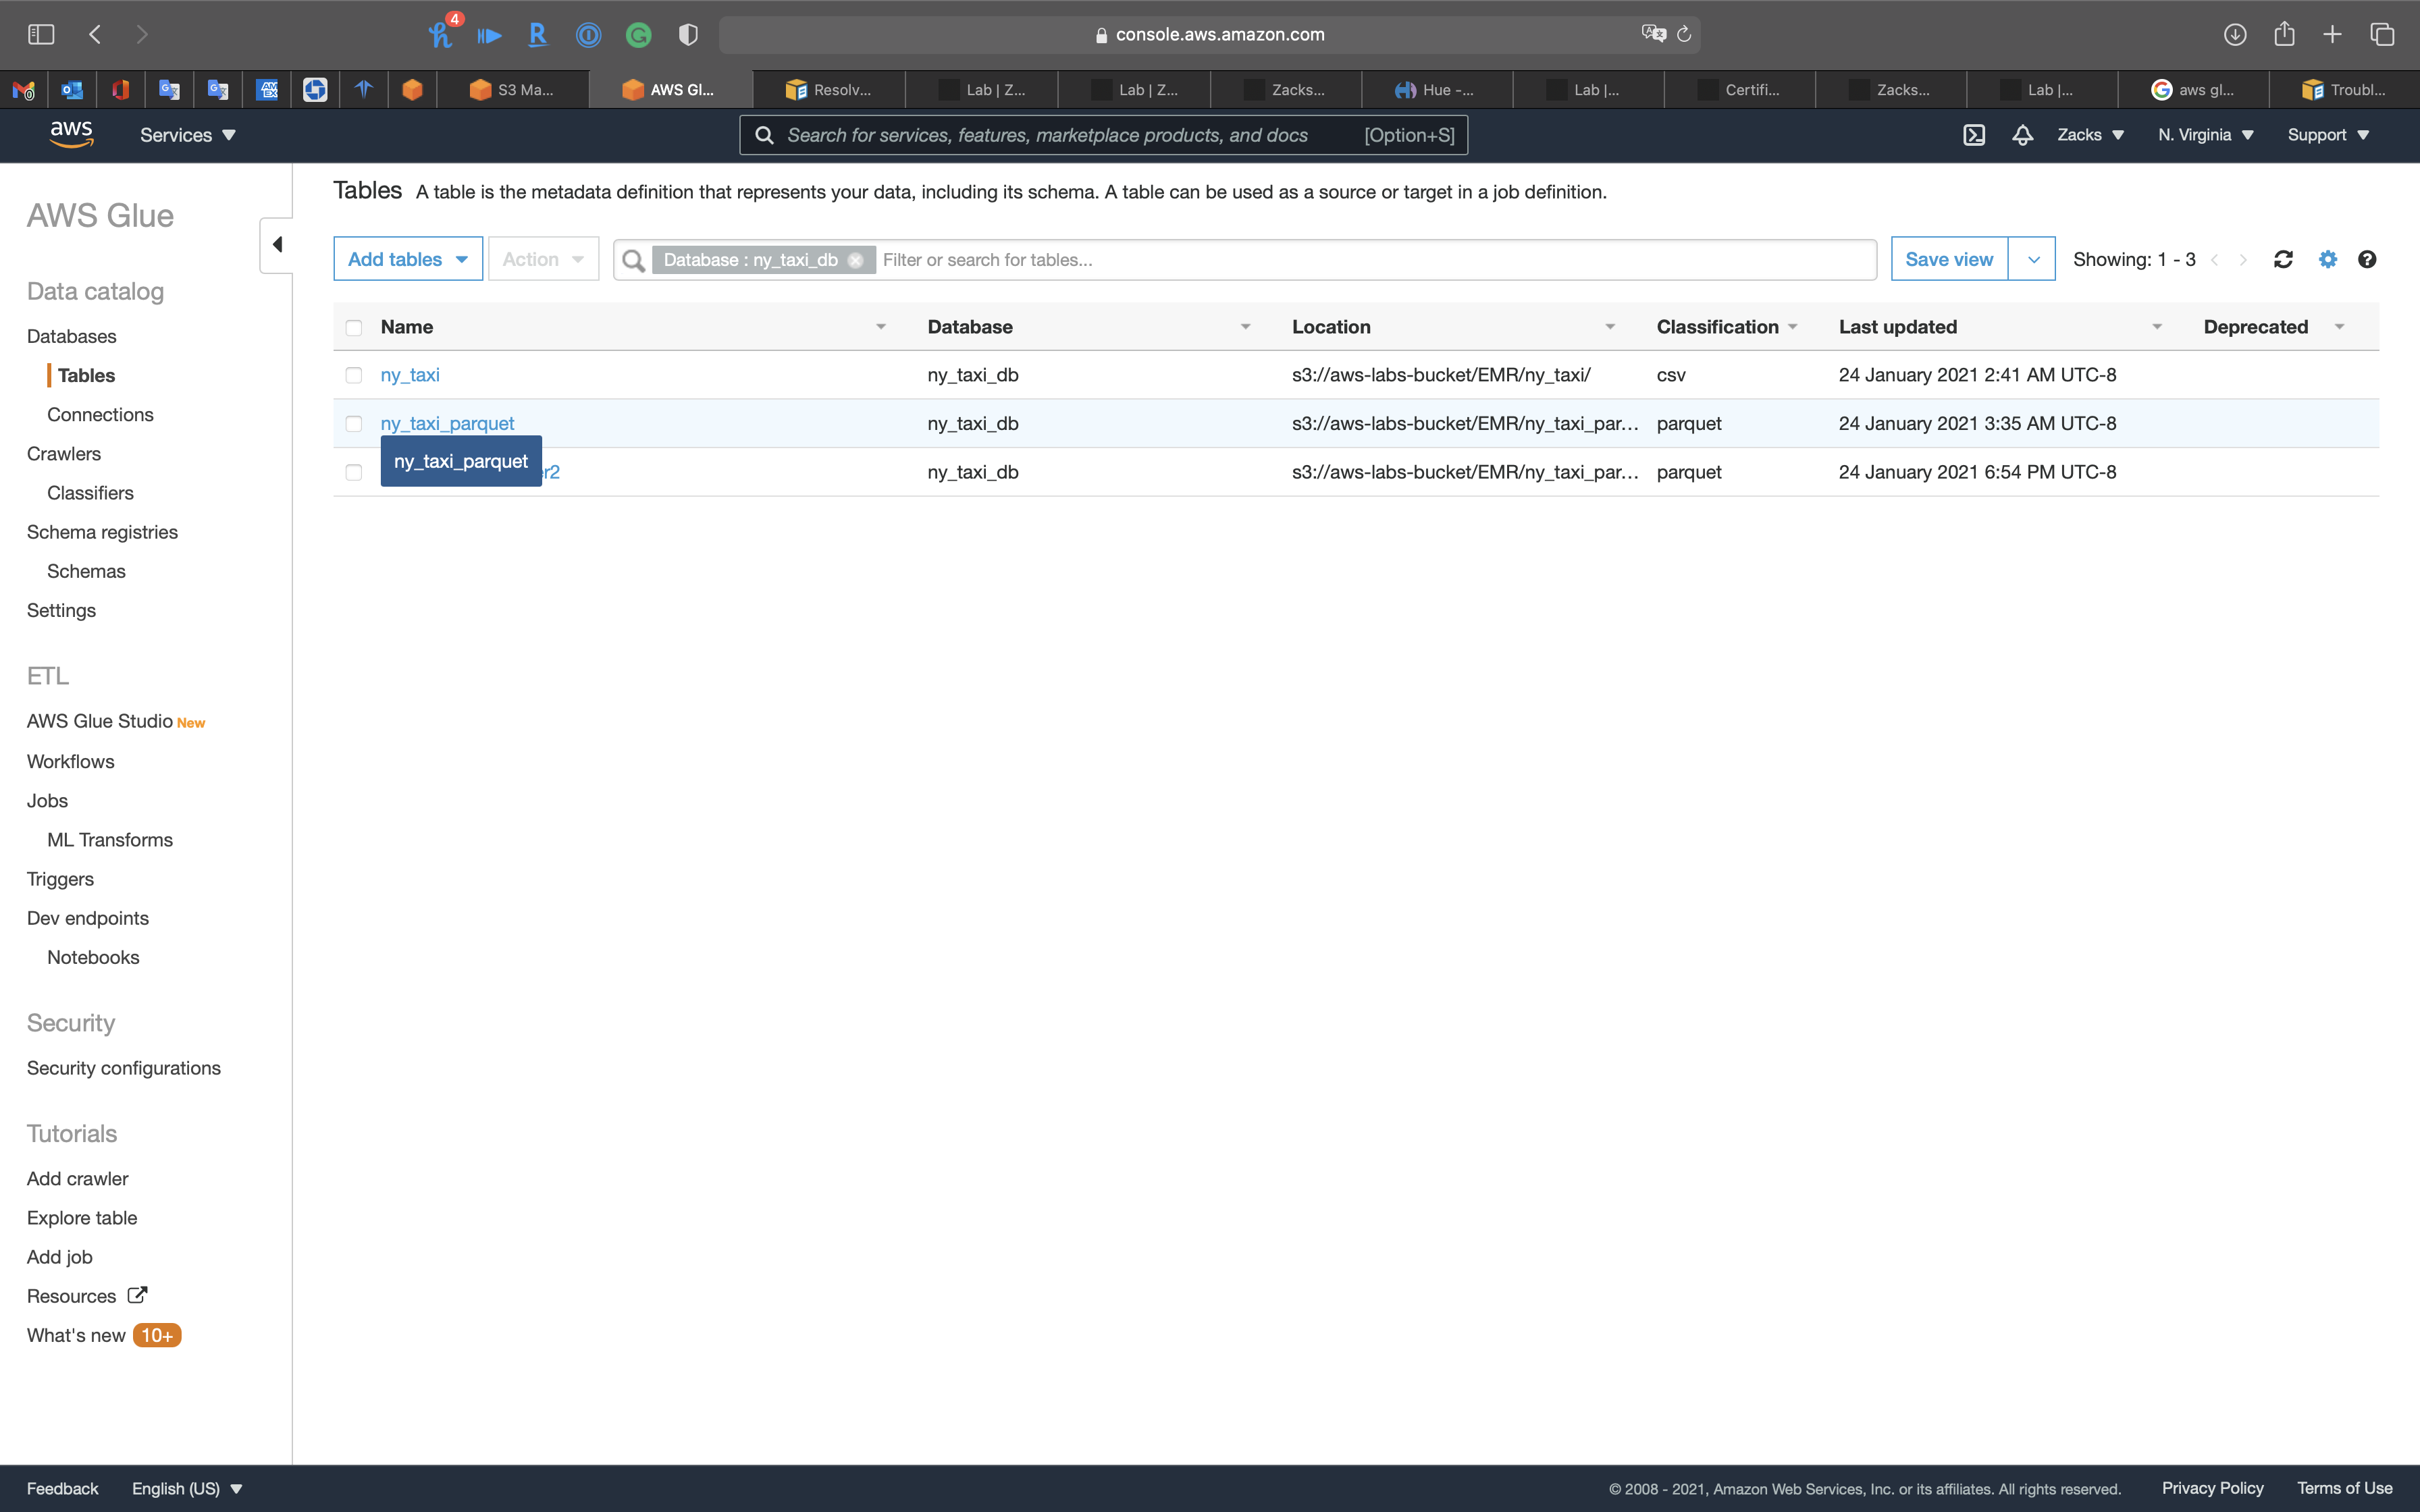
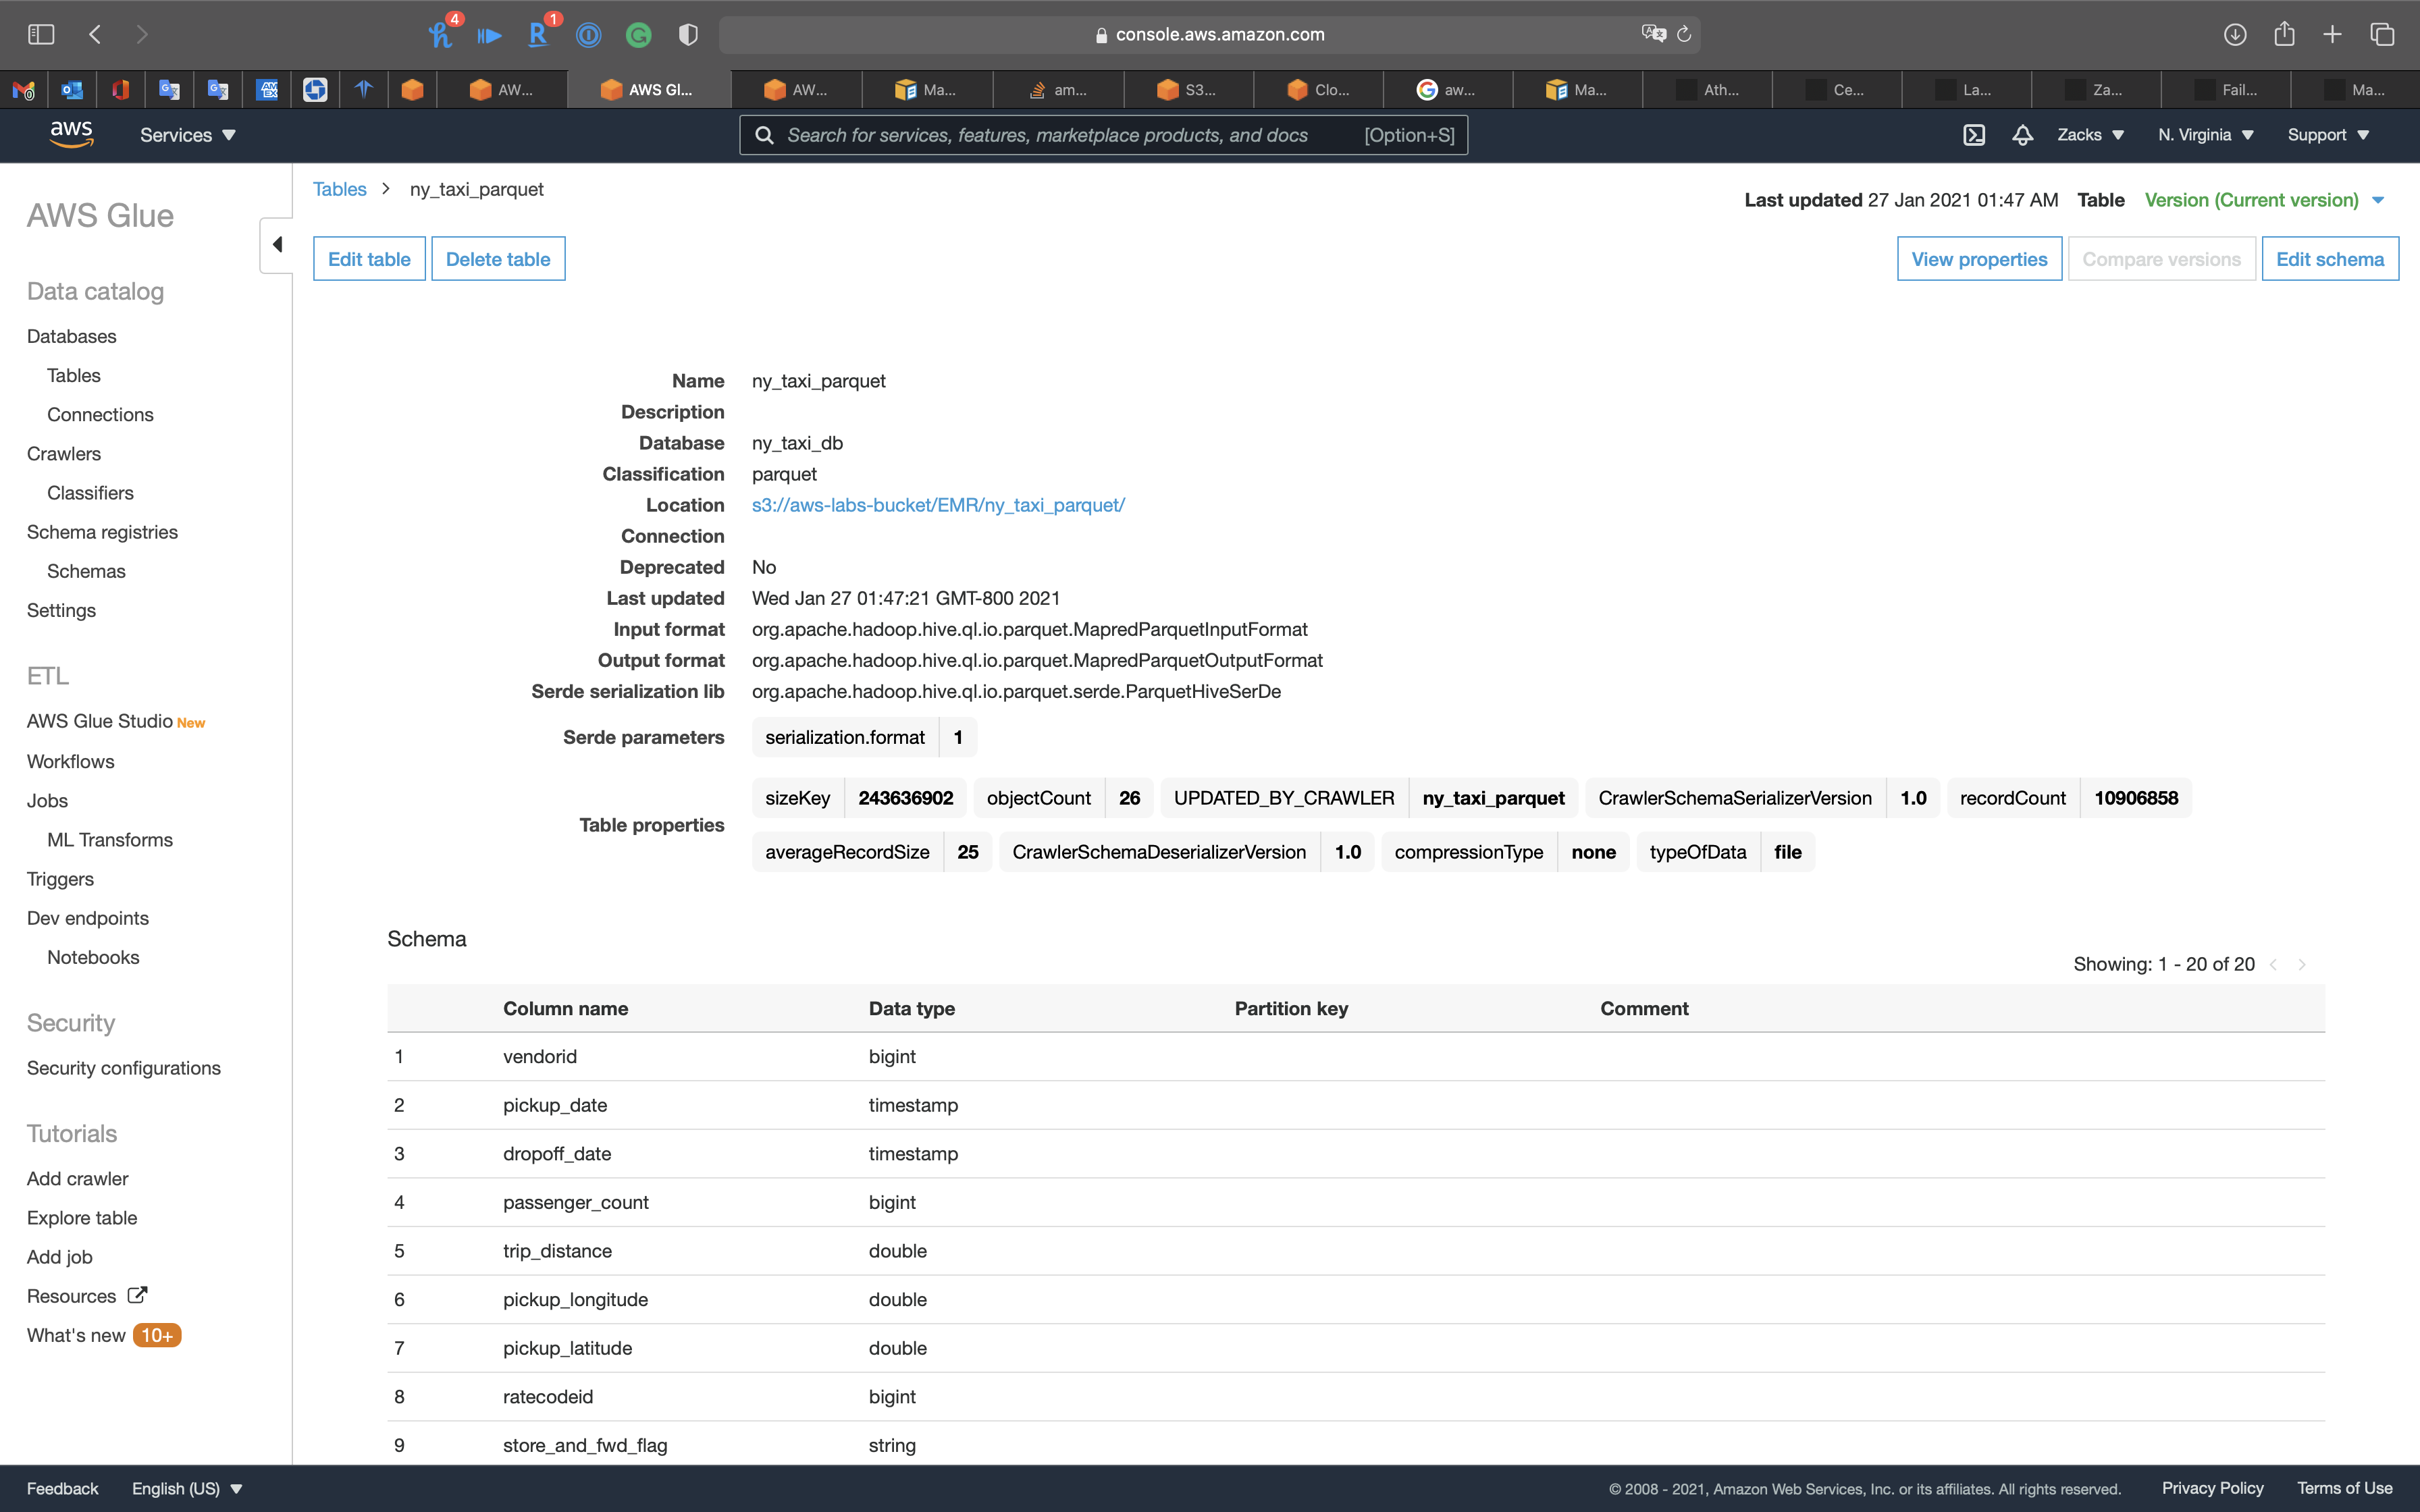
Notice we have the pickup_date and dropoff_date columns, and they are timestamp data type.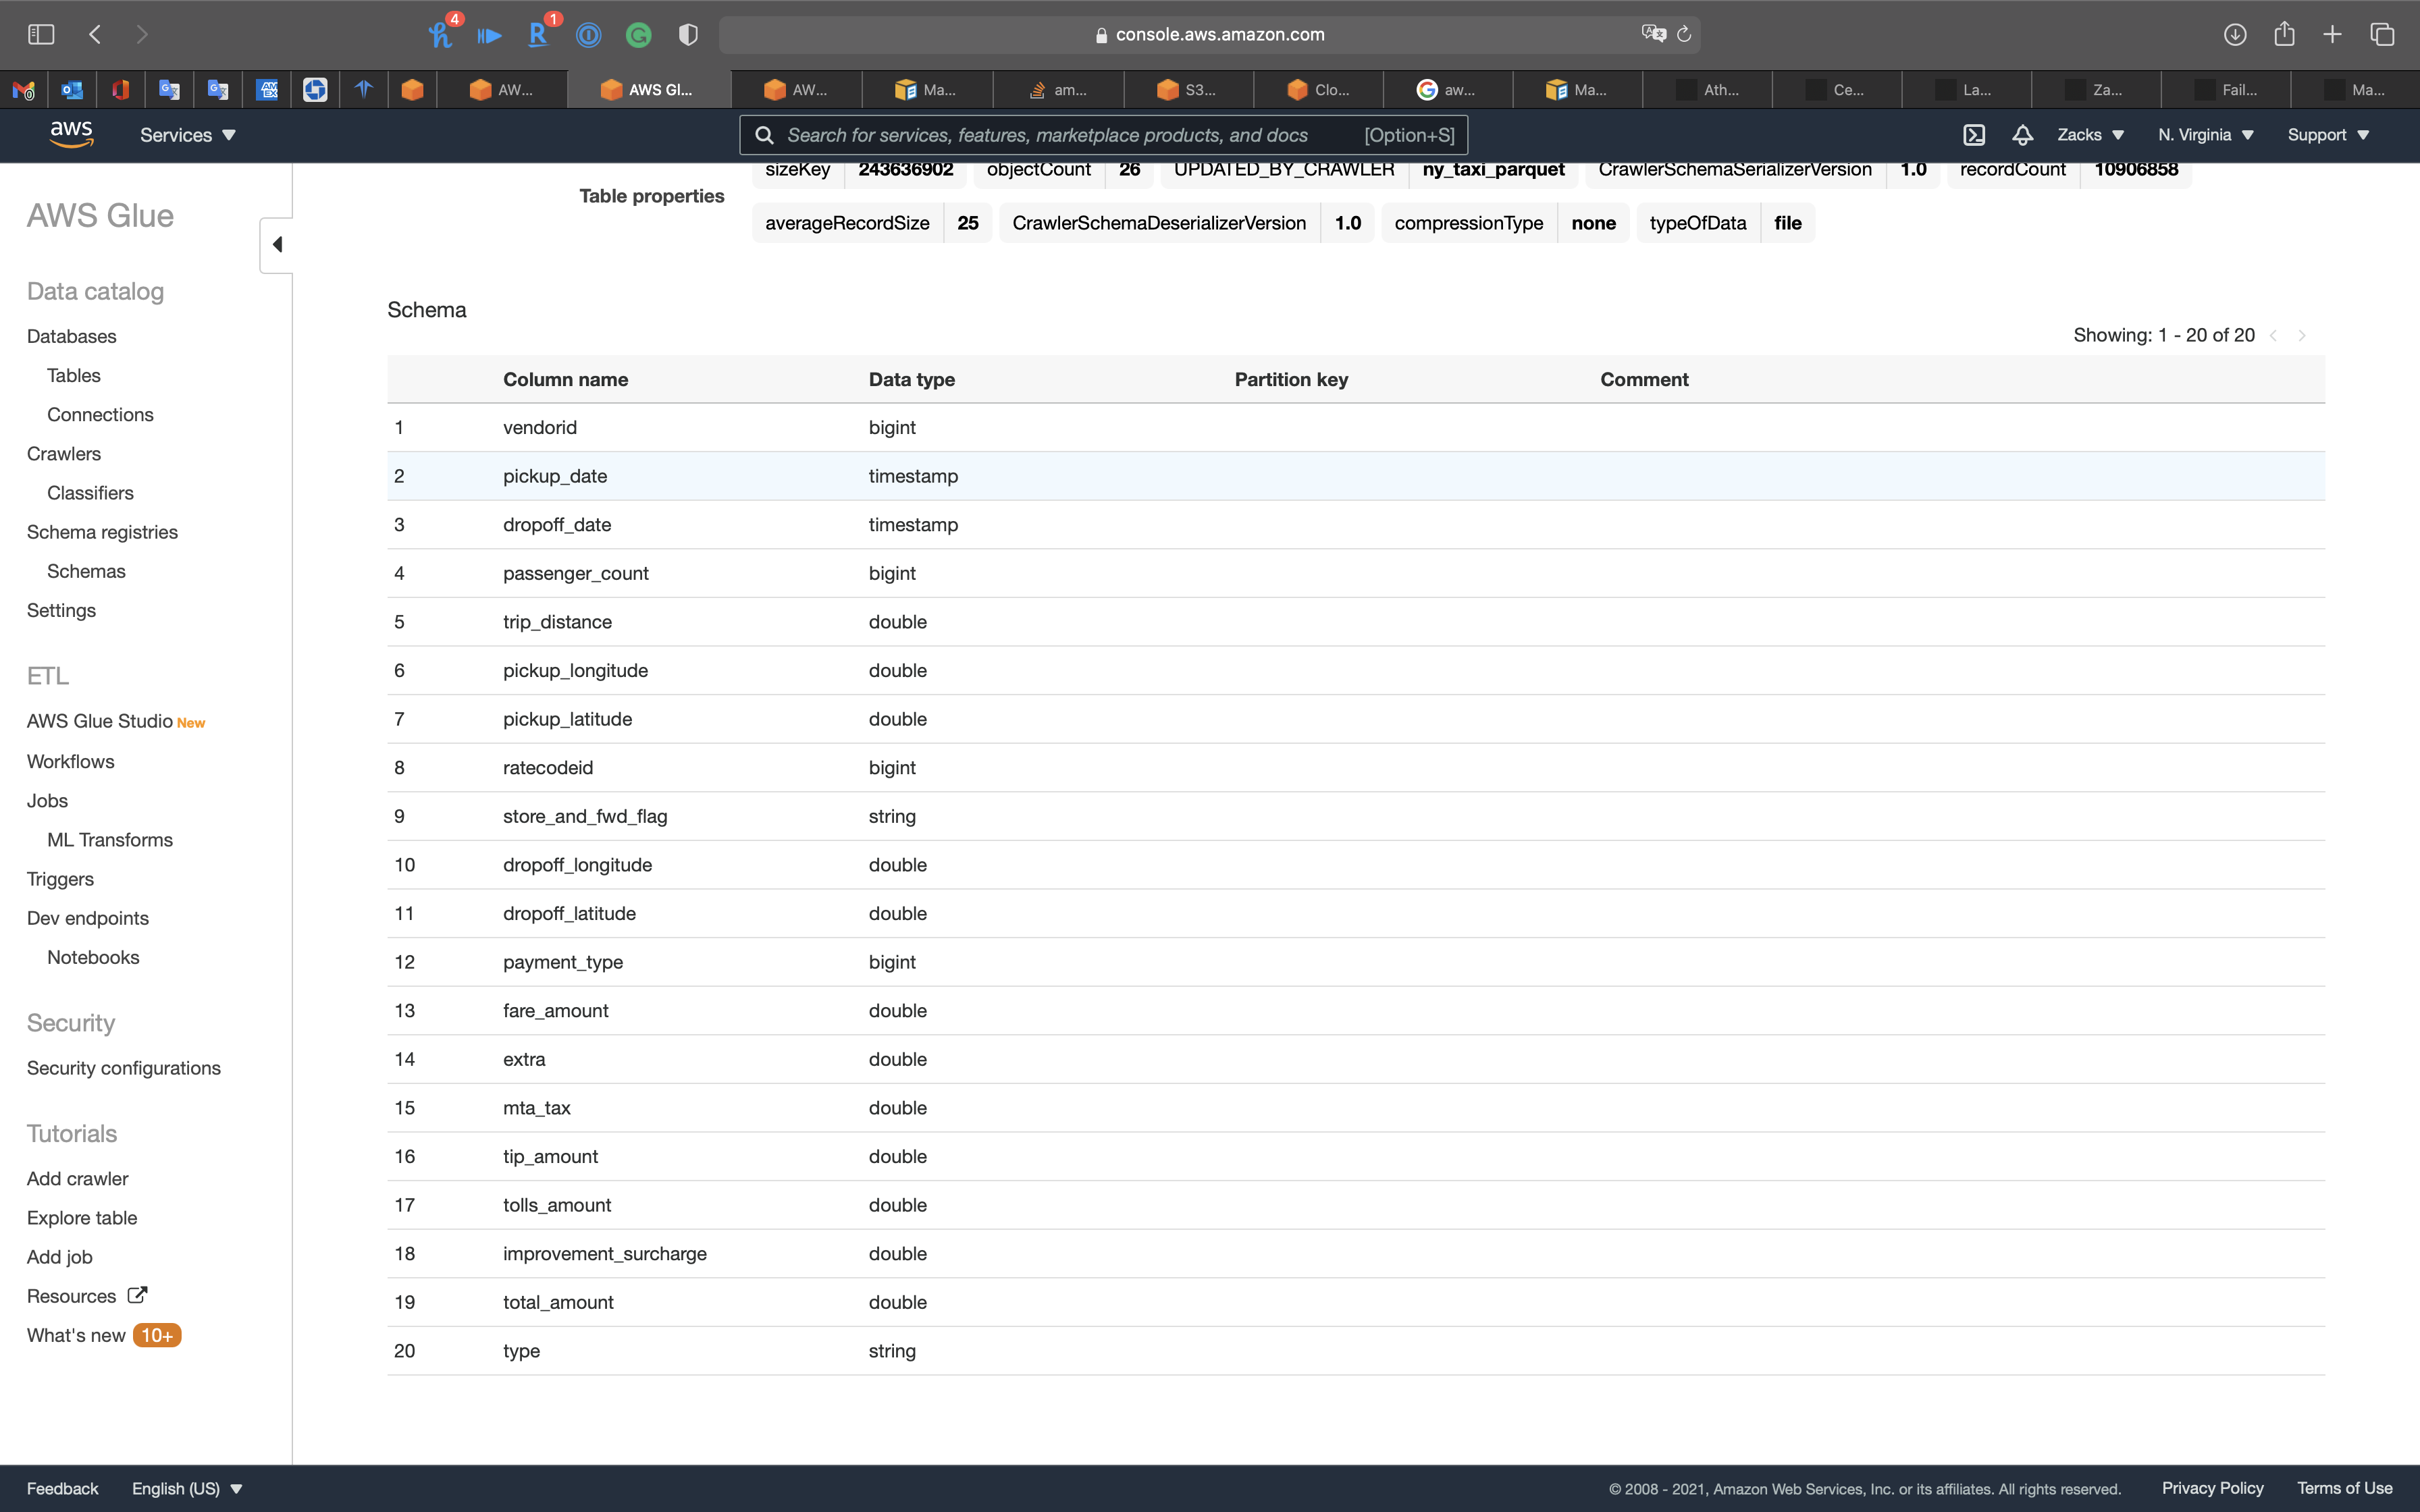
Notice we have the new column type.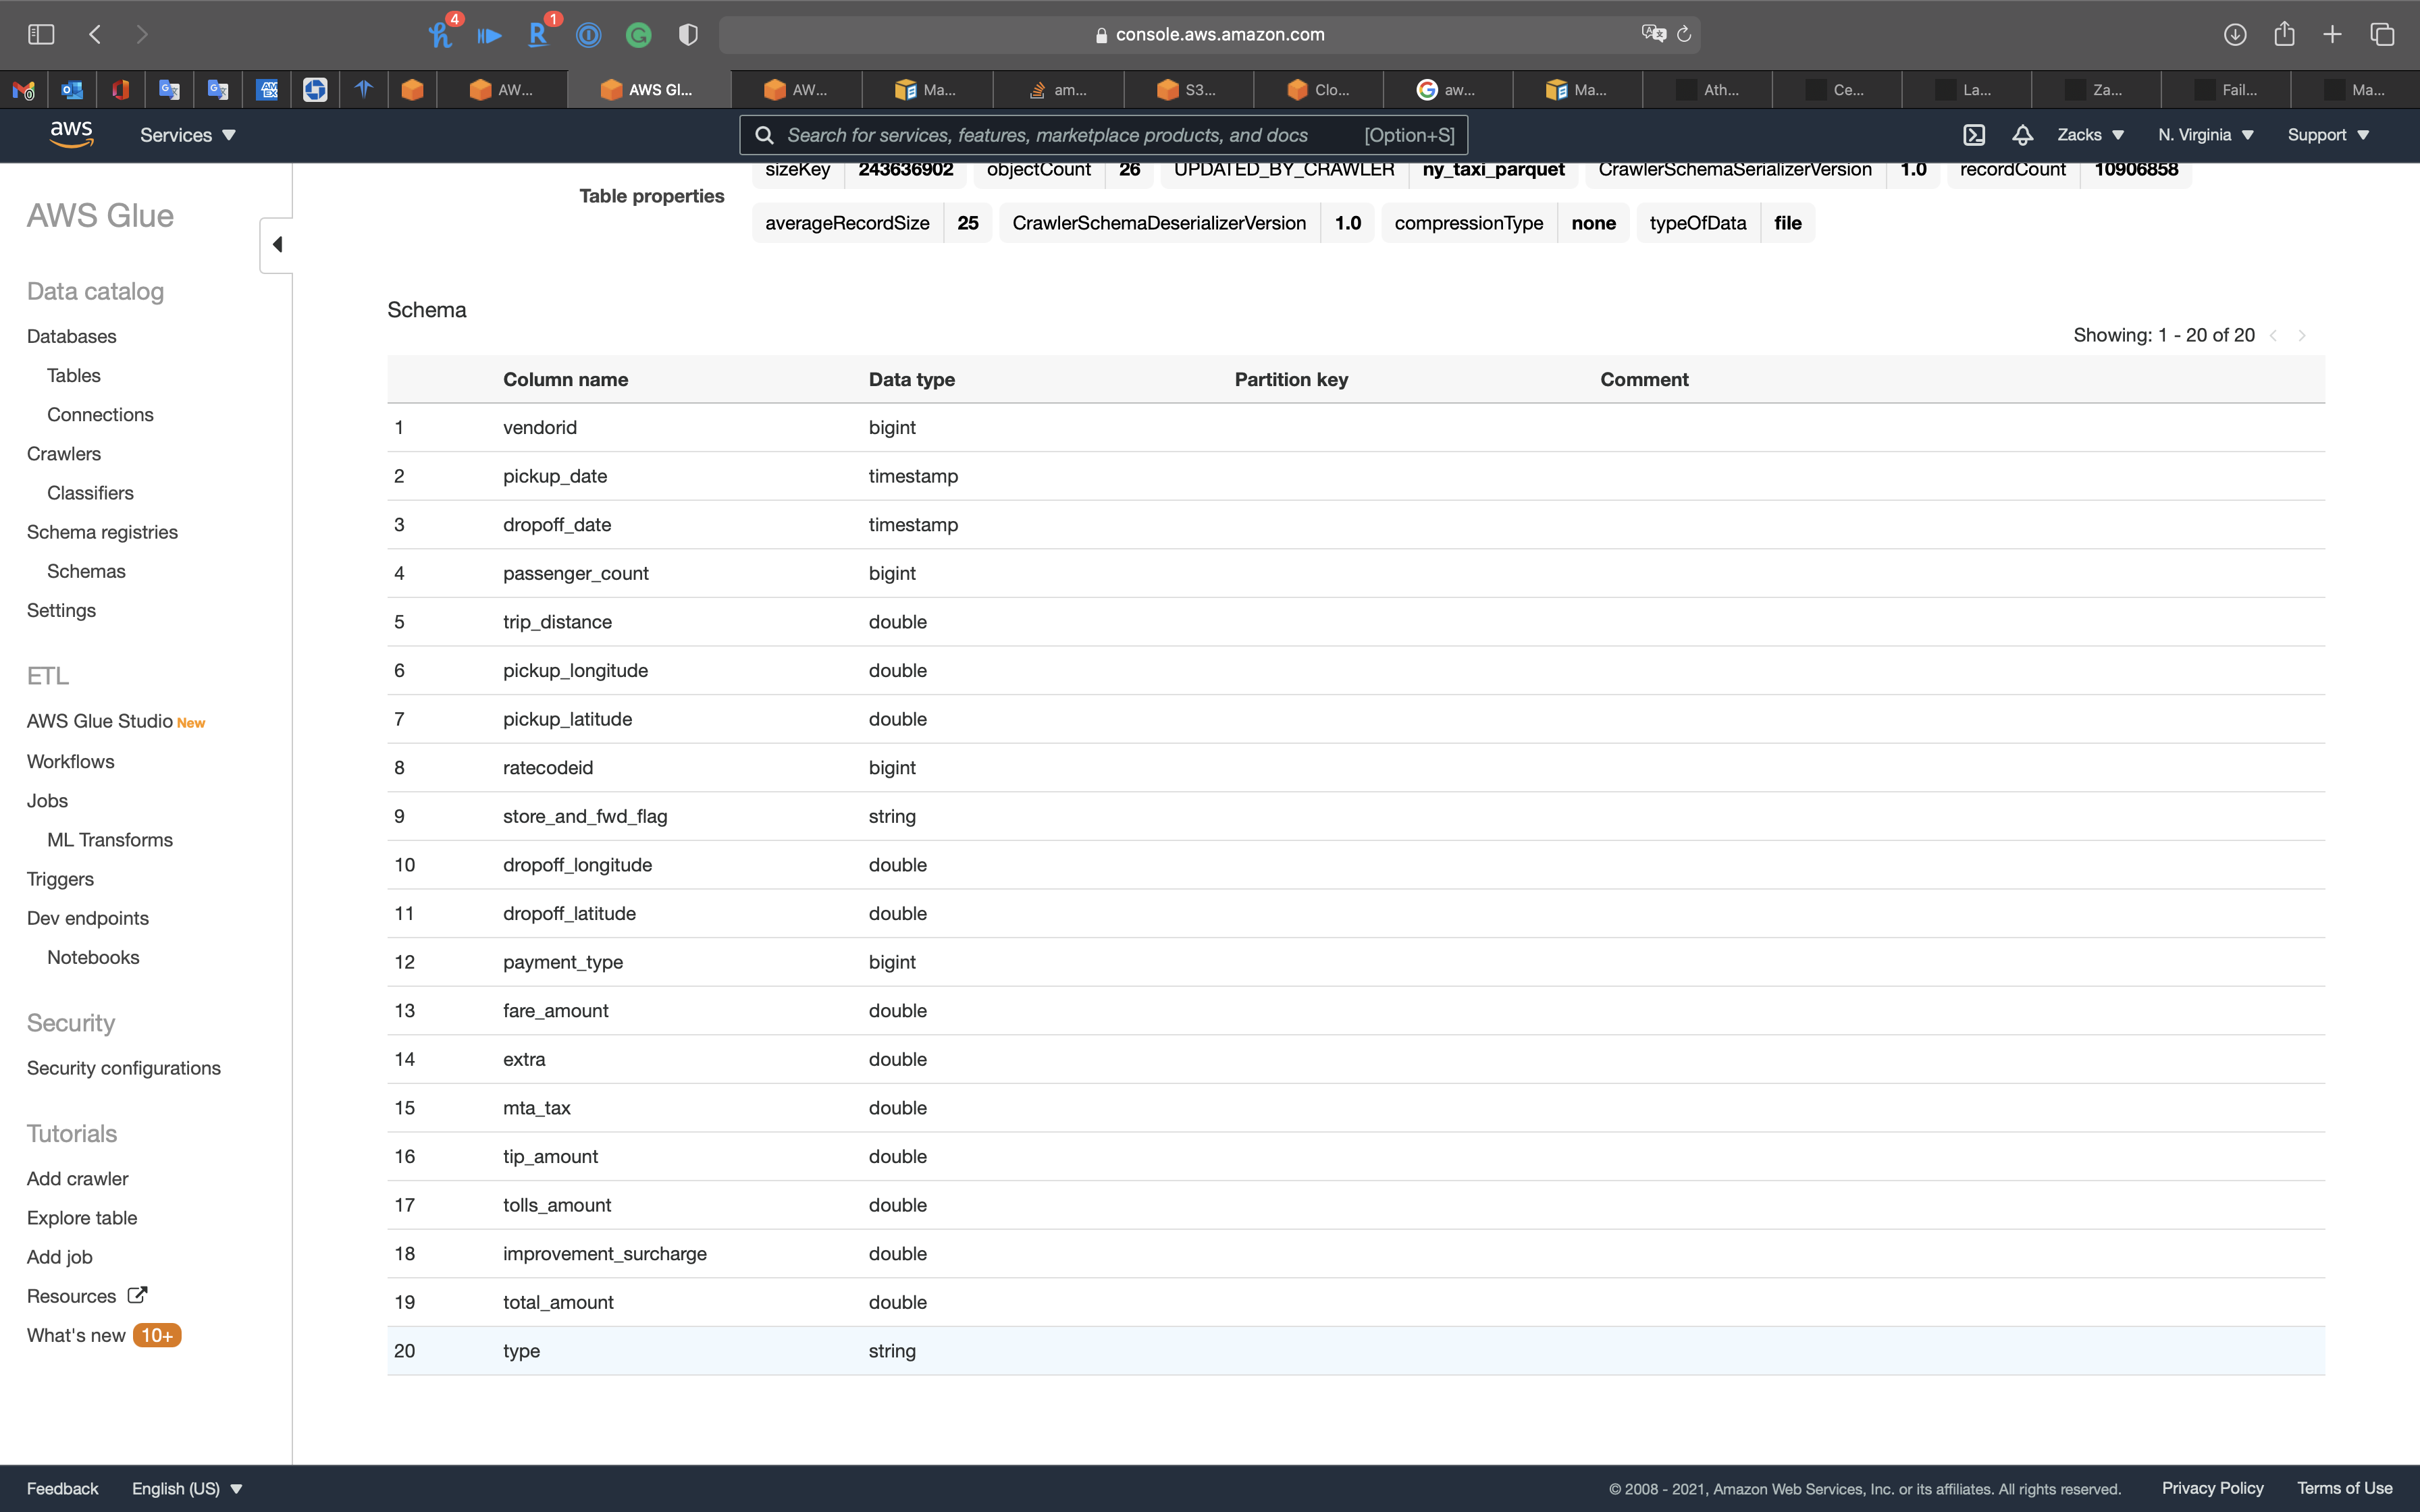
EMR Configuration
Services -> EMR -> Clusters
Click on Create cluster
Create Cluster - Advanced Options
Create a EMR Cluster for running Hadoop and related components.
Click on Go to advanced options on the top of the page.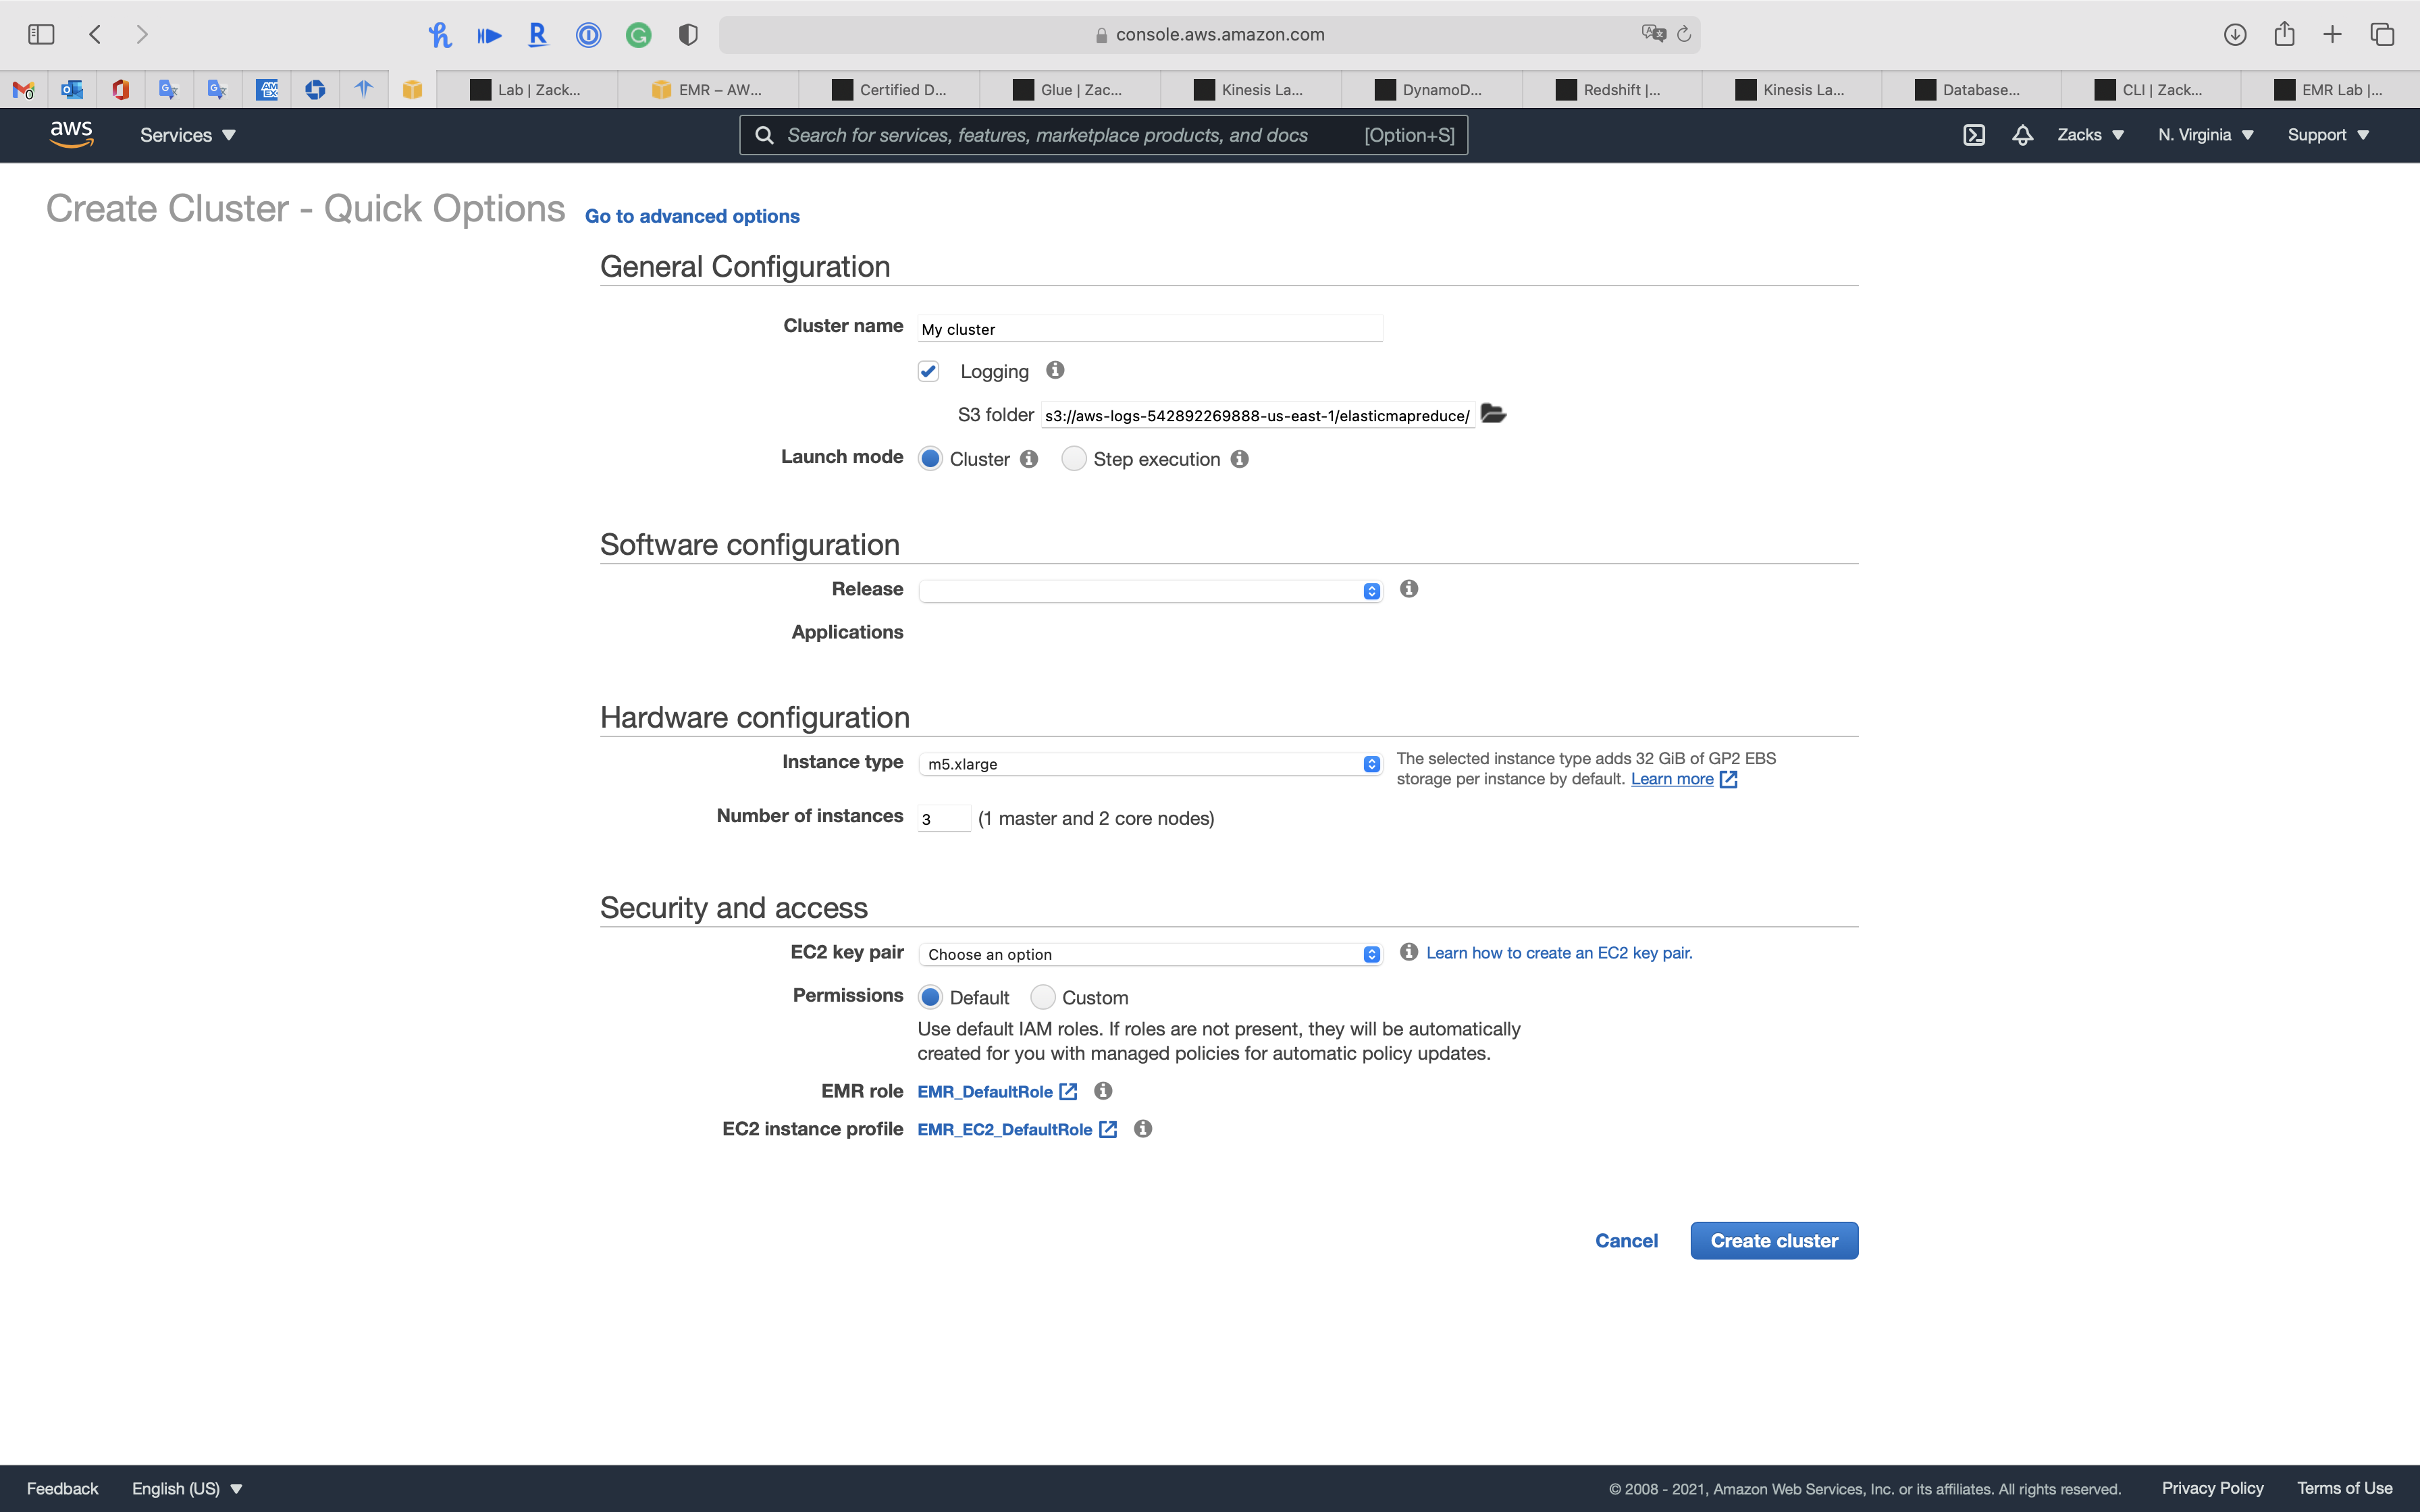
Step 1: Software and Steps
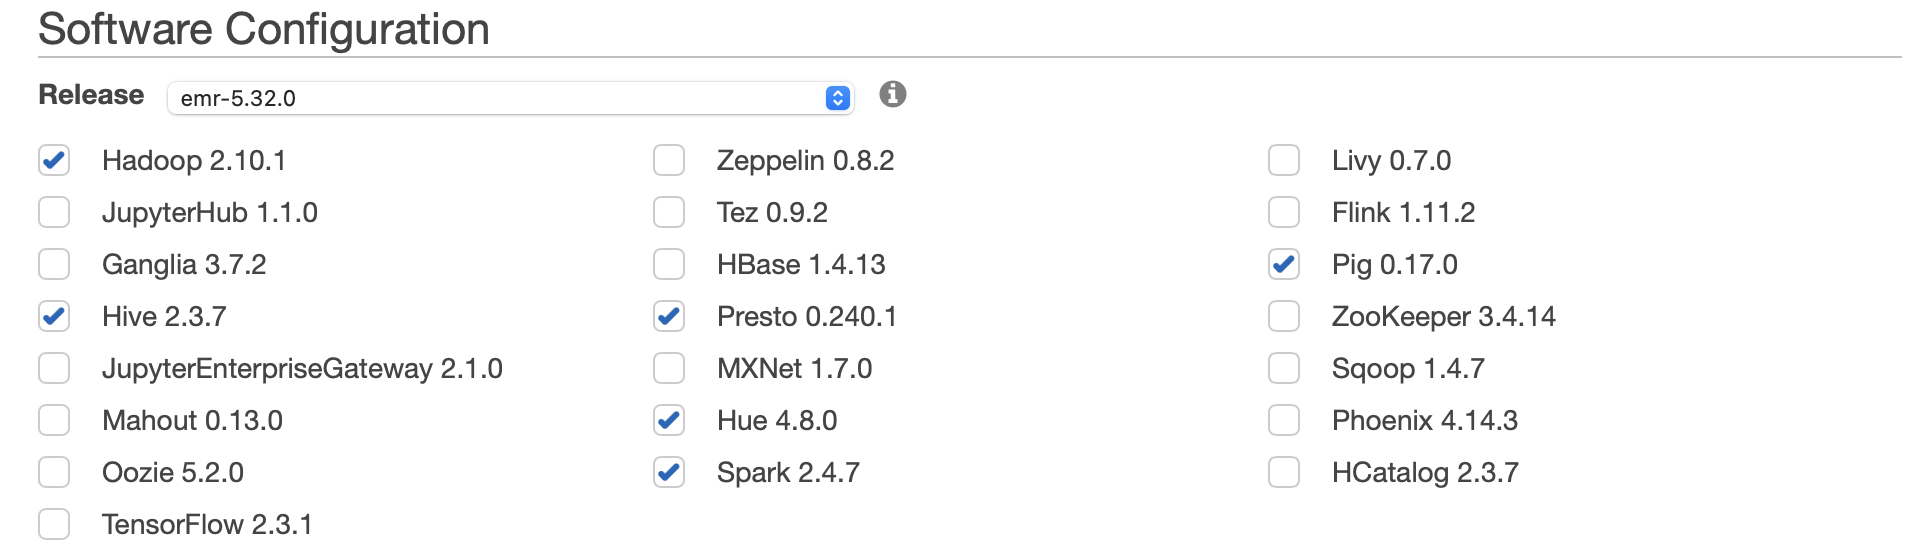
Software Configuration
- Release
emr-5.32.0 - Hadoop
- Hive
- Presto
- Hue
- Pig
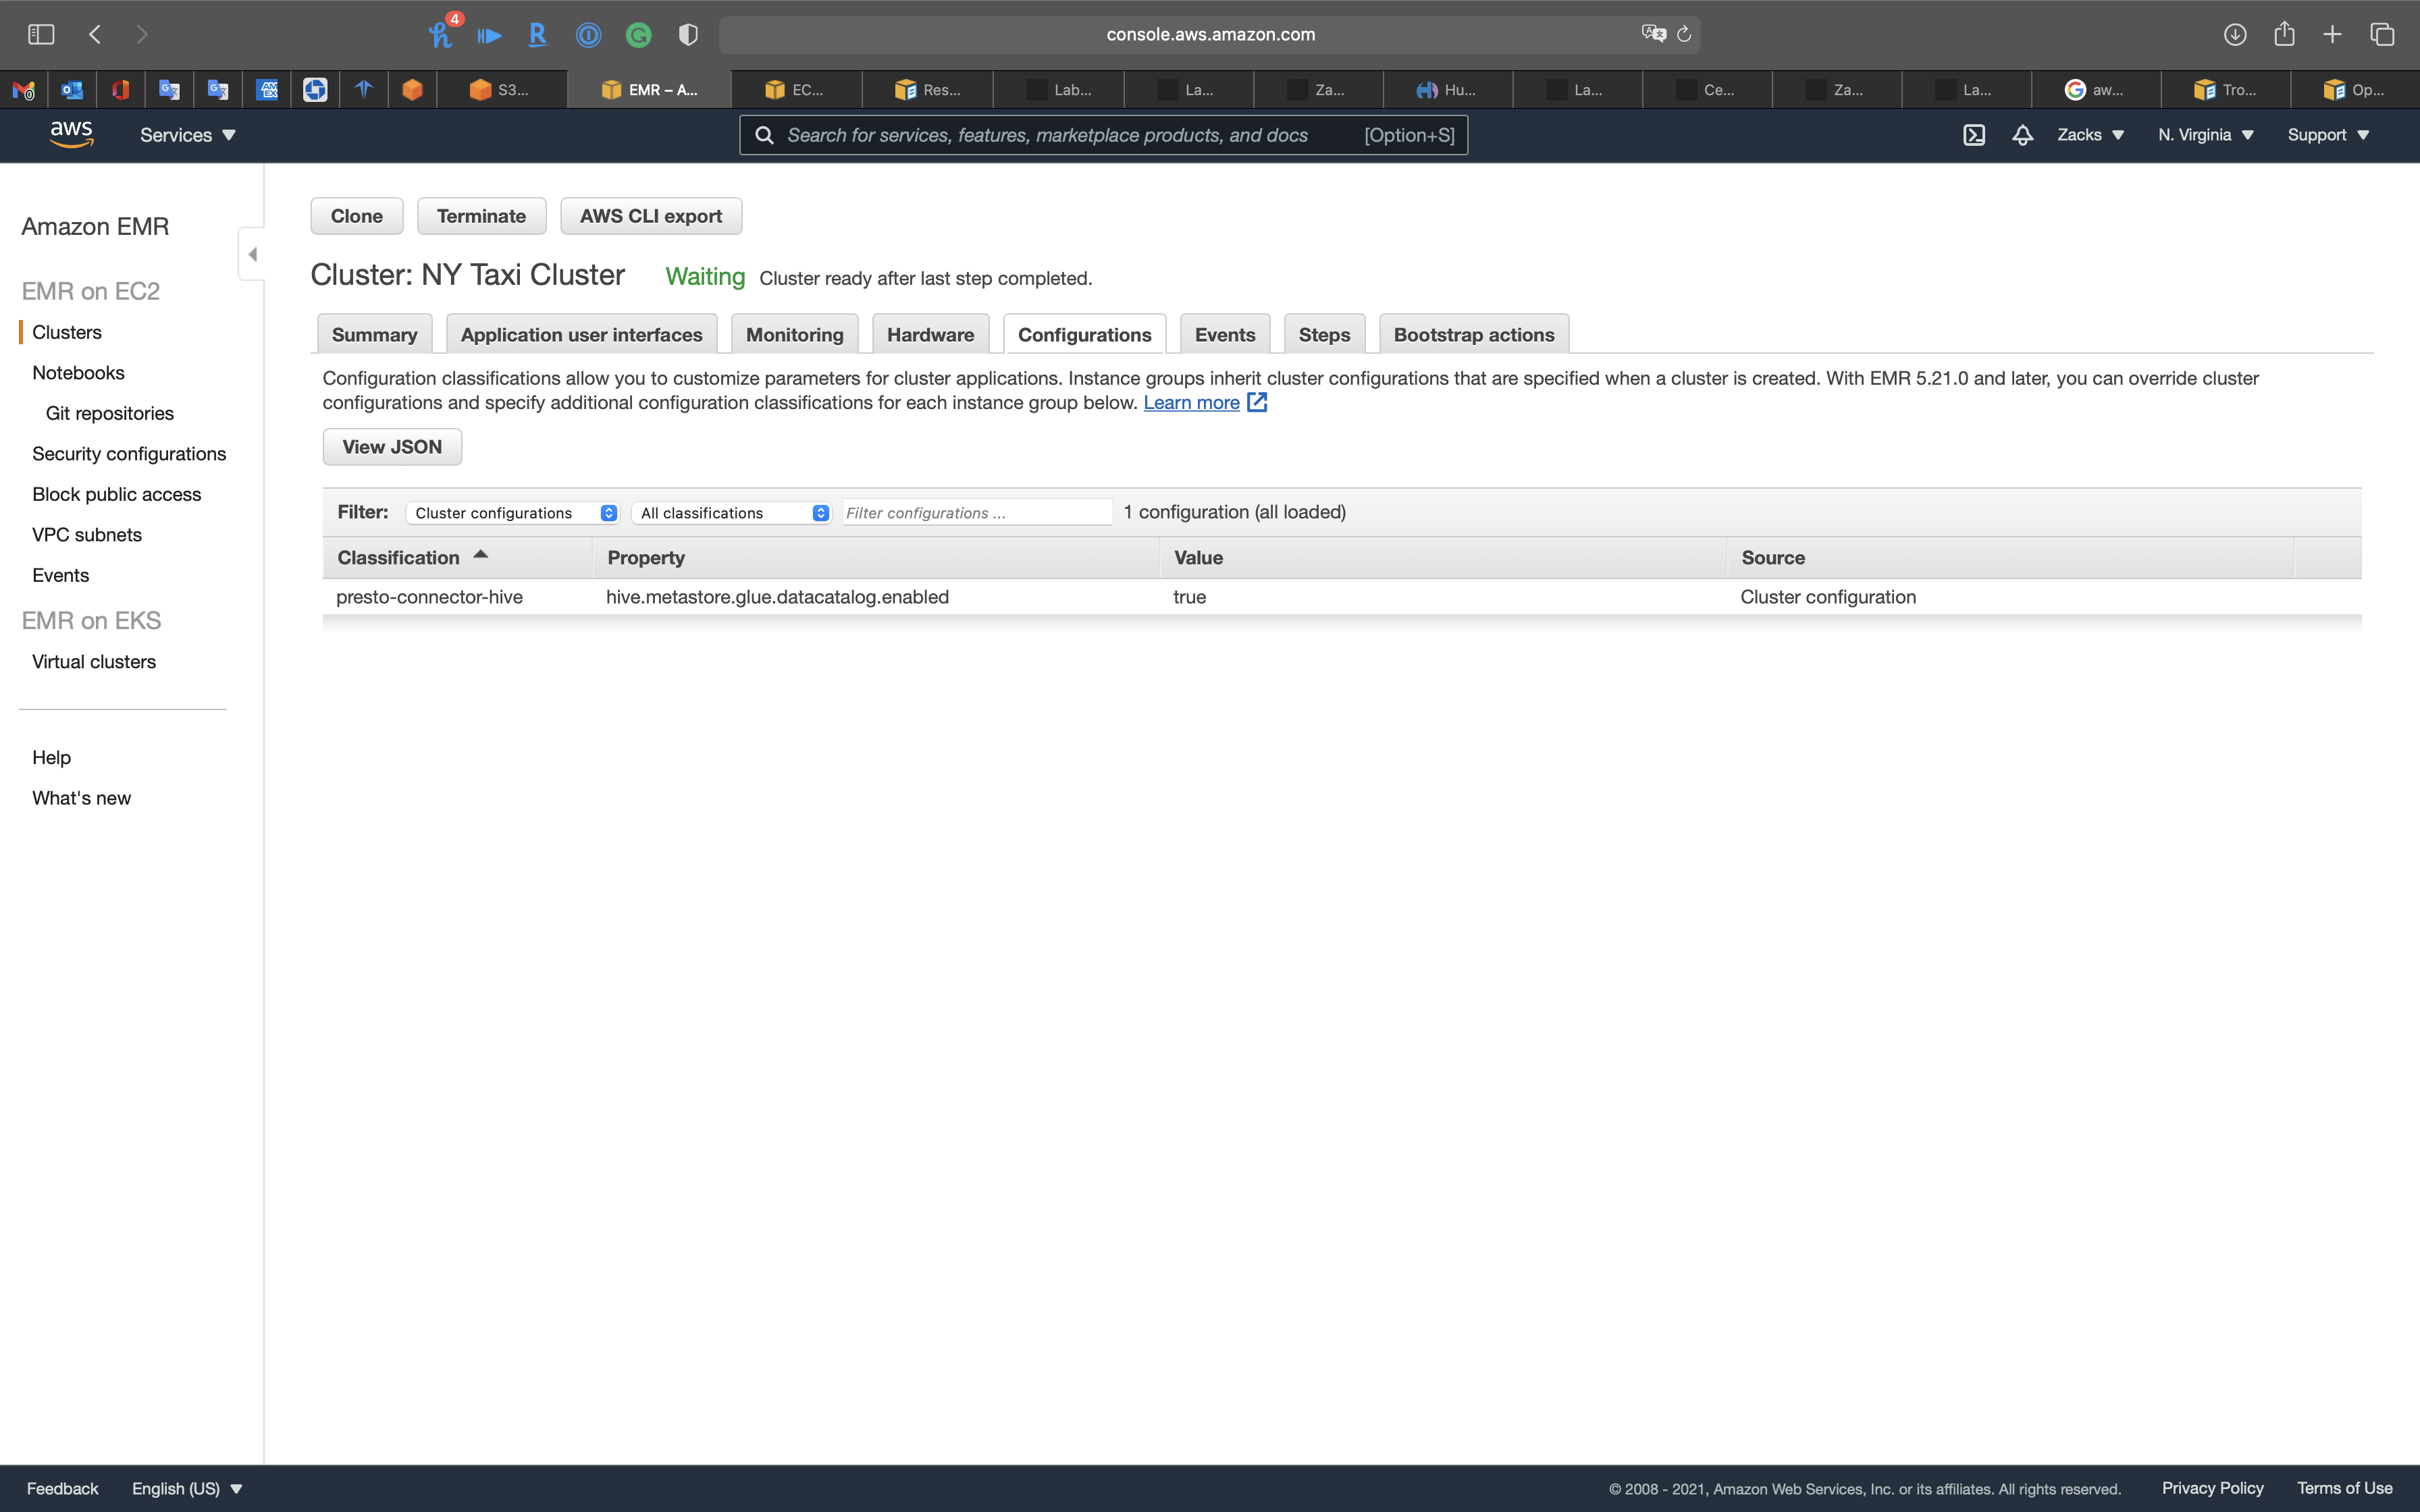
AWS Glue Data Catalog settings (optional)
Use for Presto table metadata(Use the AWS Glue Data Catalog to provide an external Hive metastore for Presto.)
Click on Next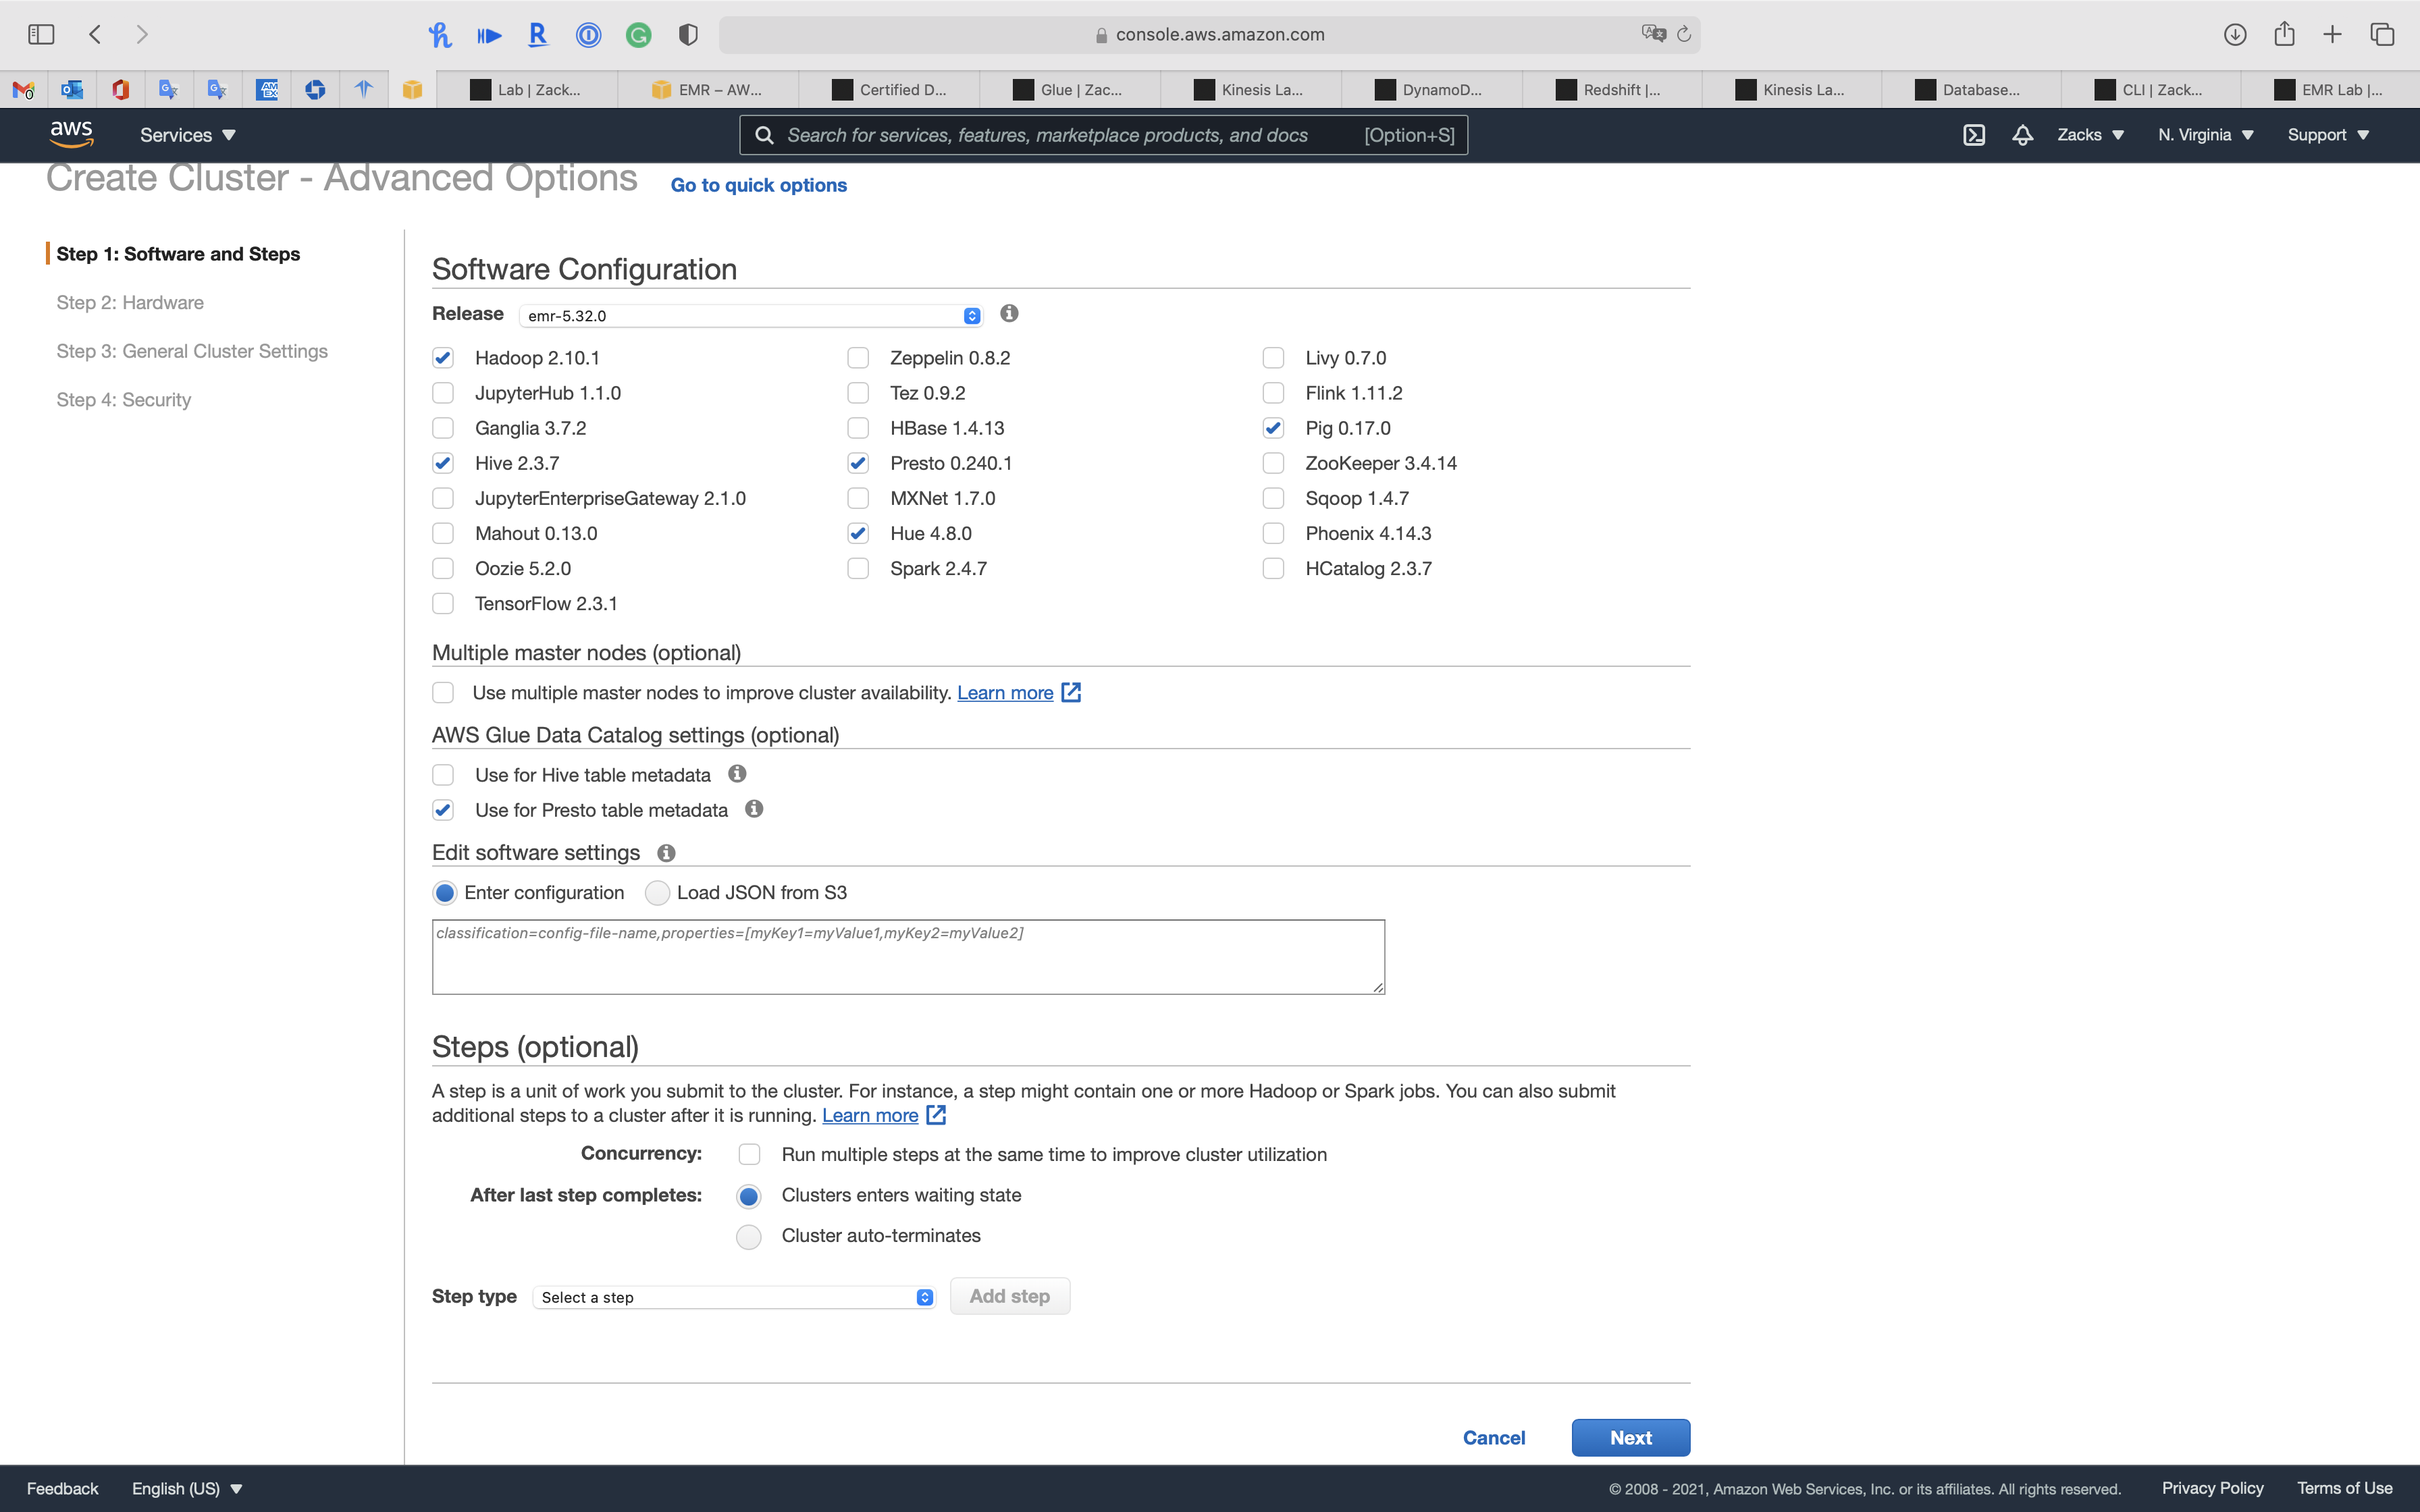
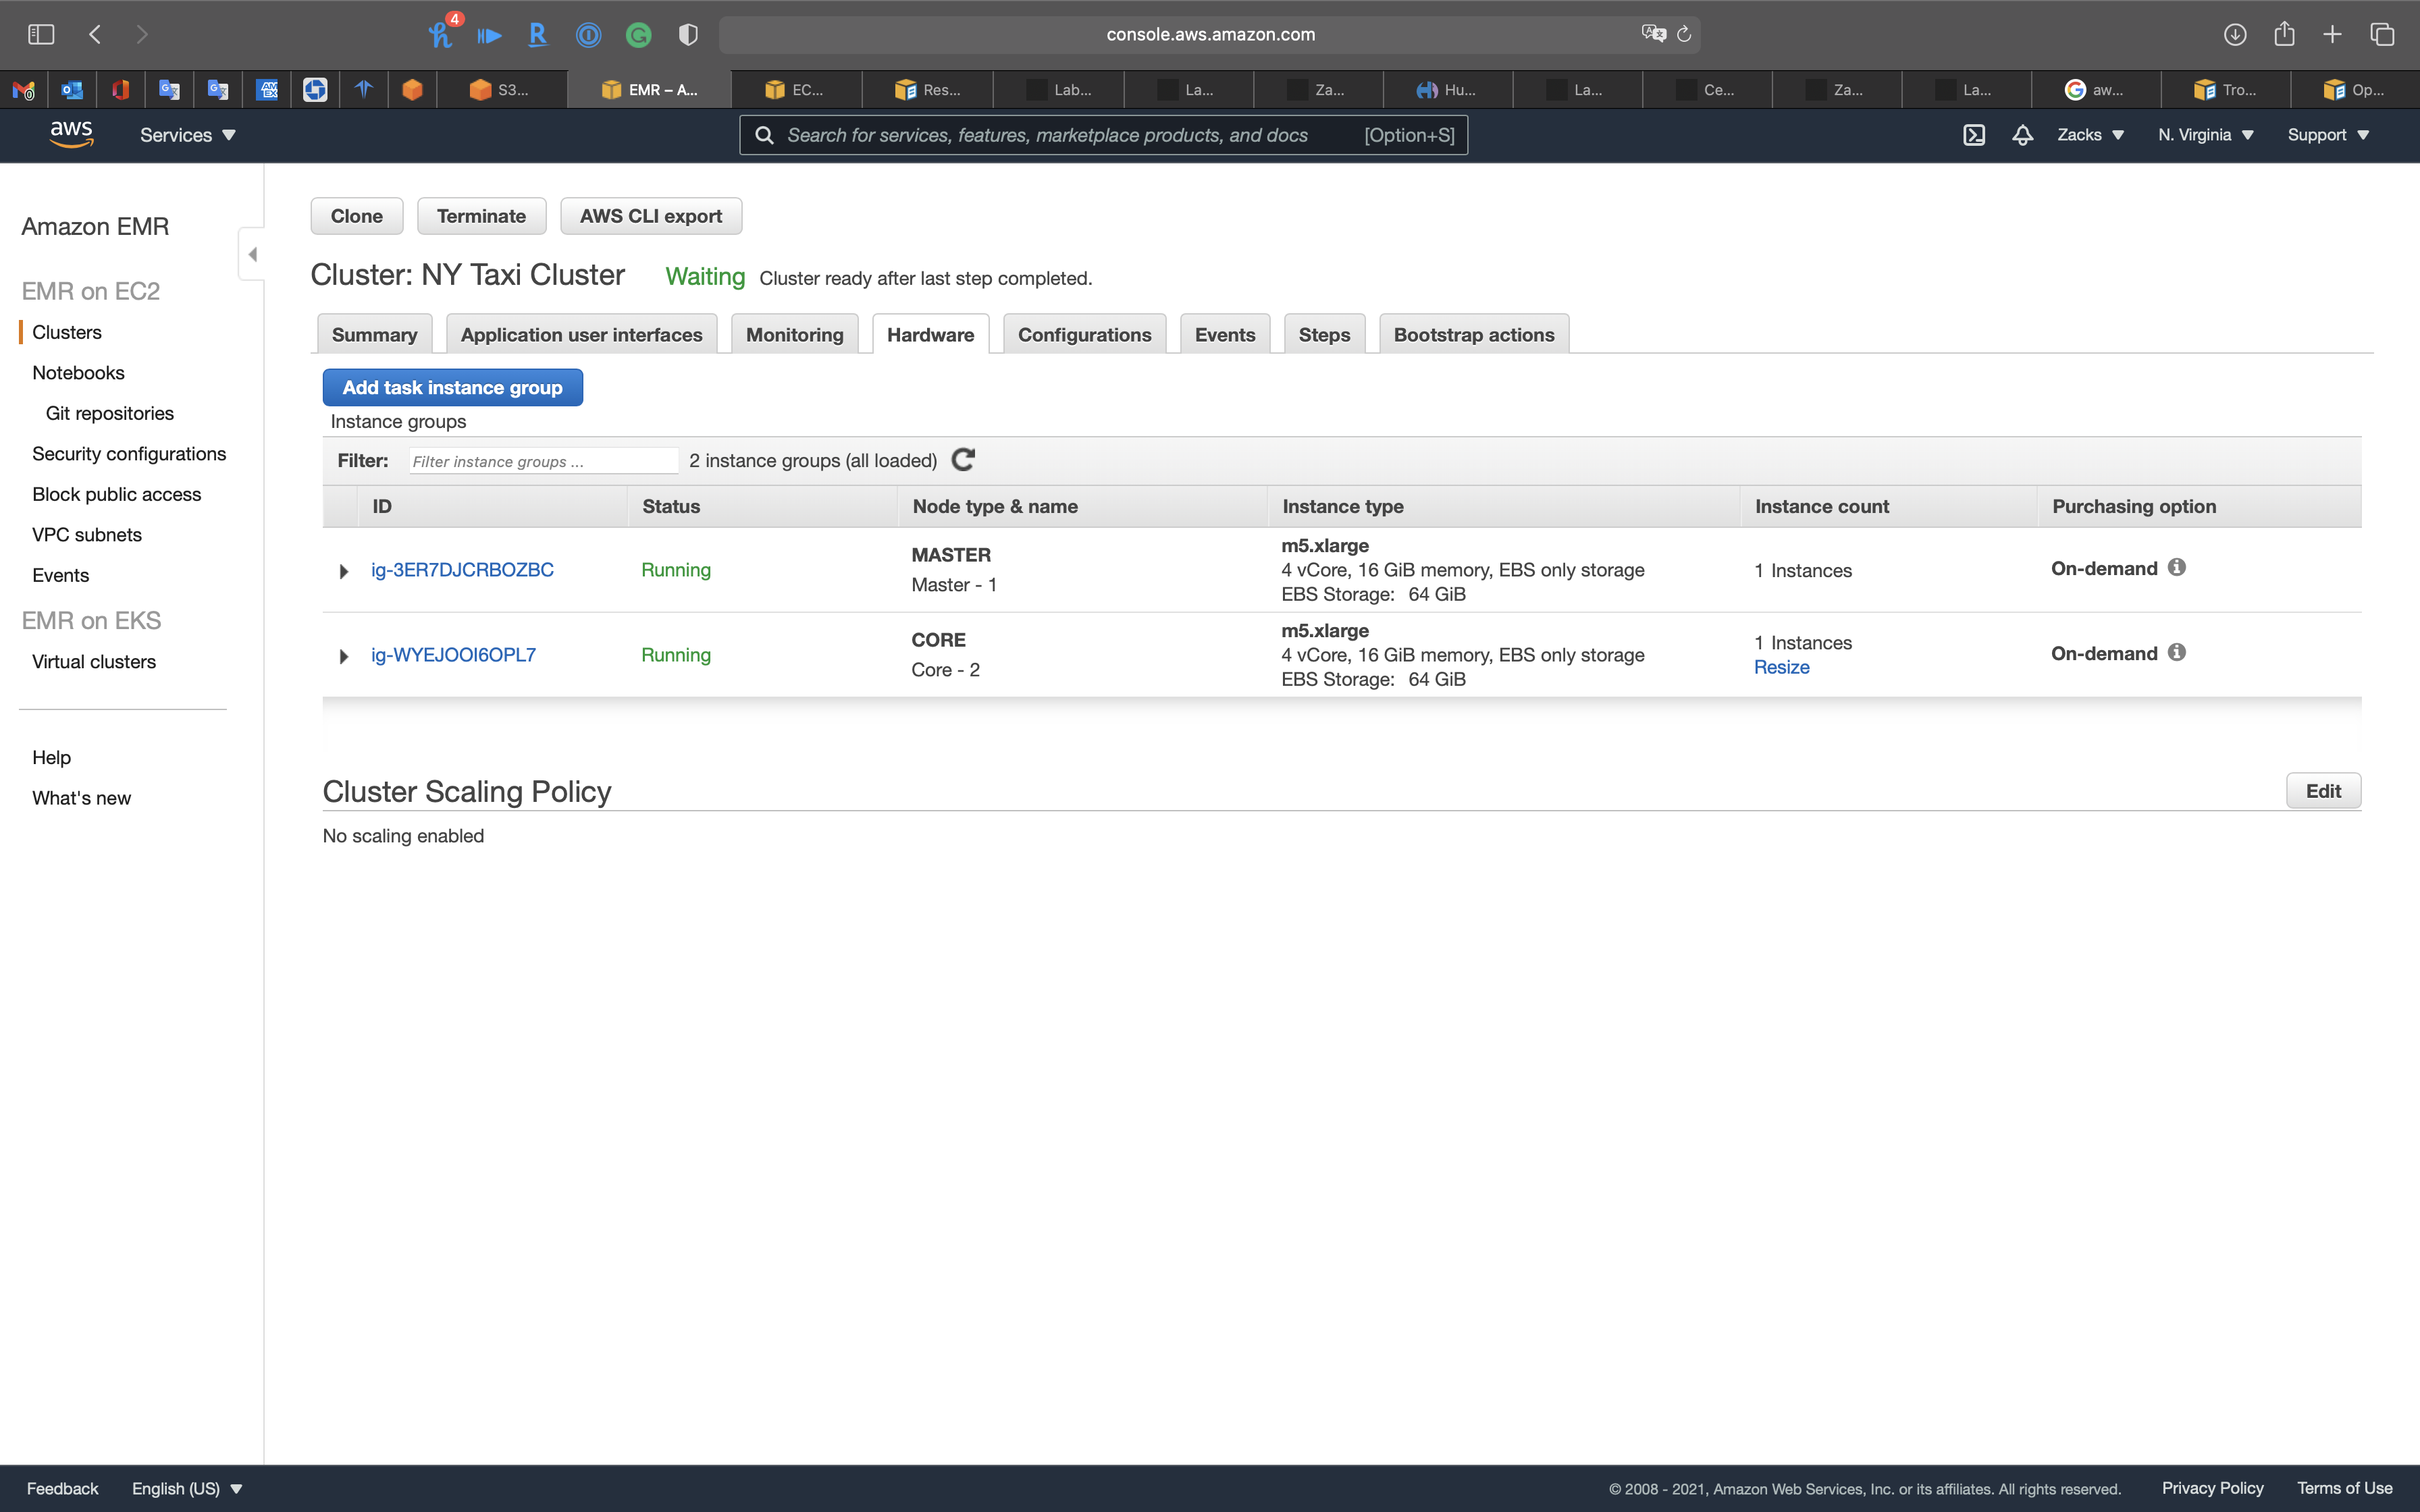
Step 2: Hardware
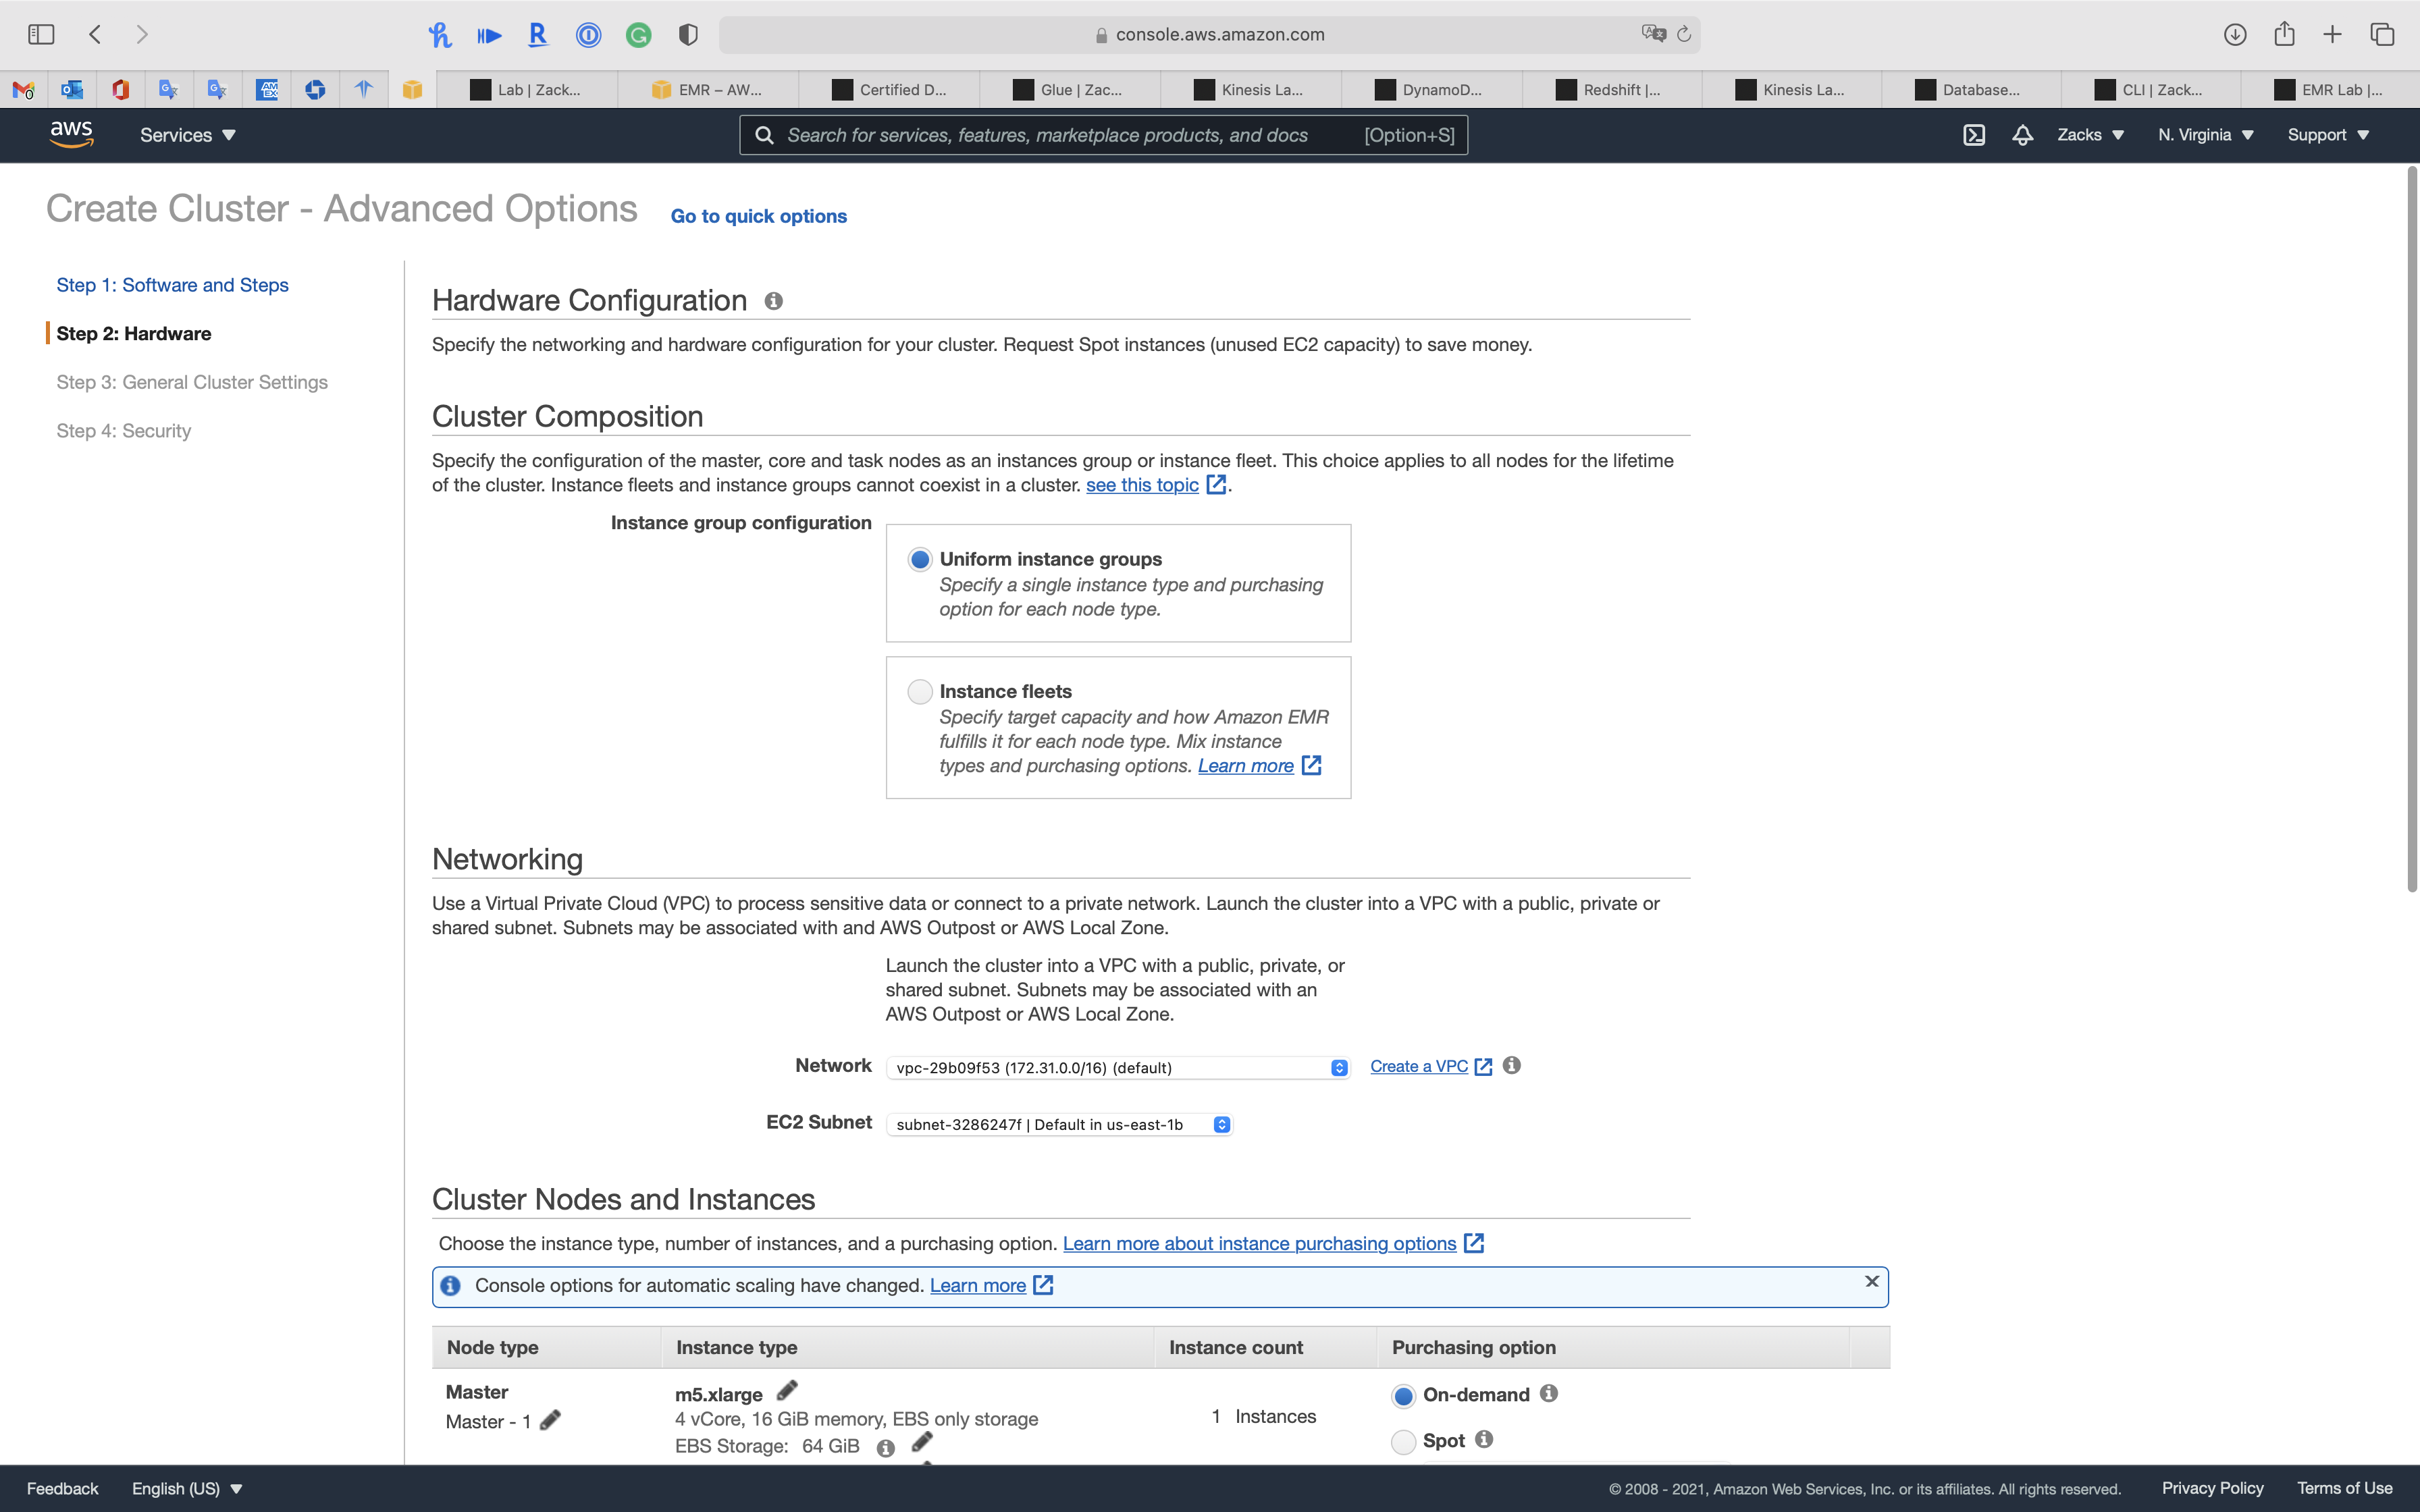
Node Type
- Master, 1 instance, On-demand
- Core, 1 instance, On-demand
- Task, 0 instance, On-demand
Click on Next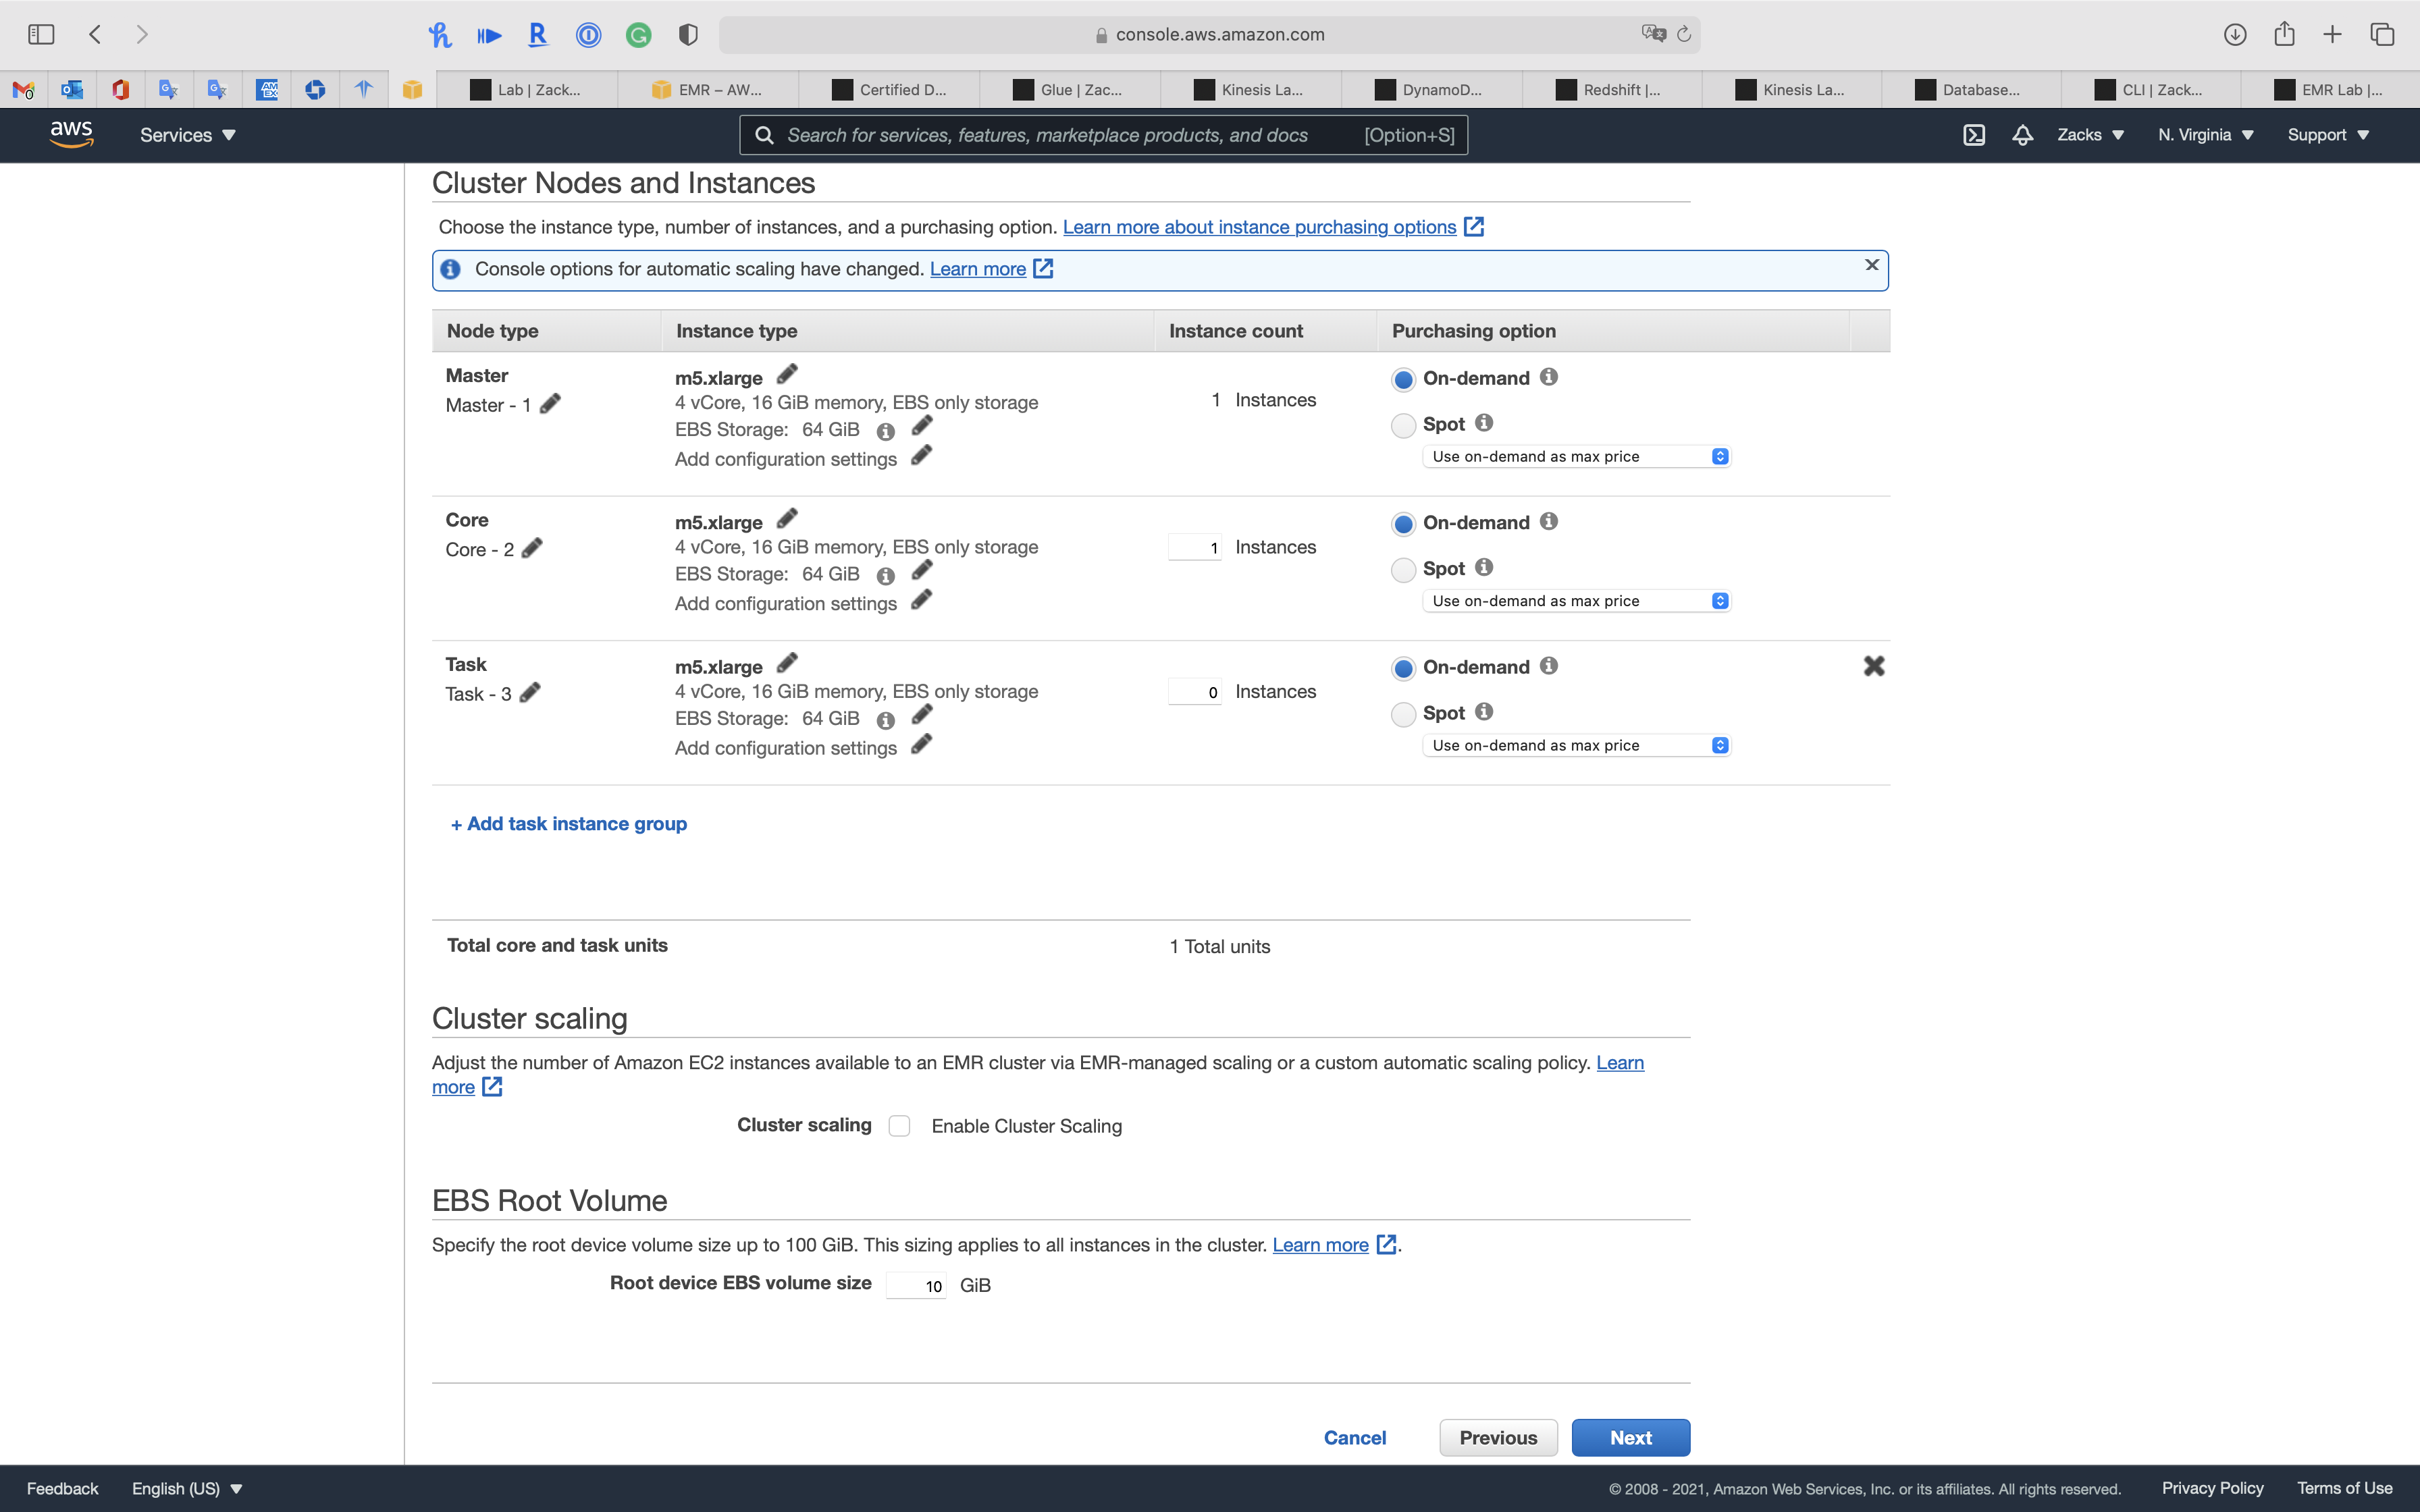
Step 3: General Cluster Settings
- Termination protection (Prevents accidental termination of the cluster: to shut down the cluster, you must turn off termination protection.)
- Uncheck
Click on Next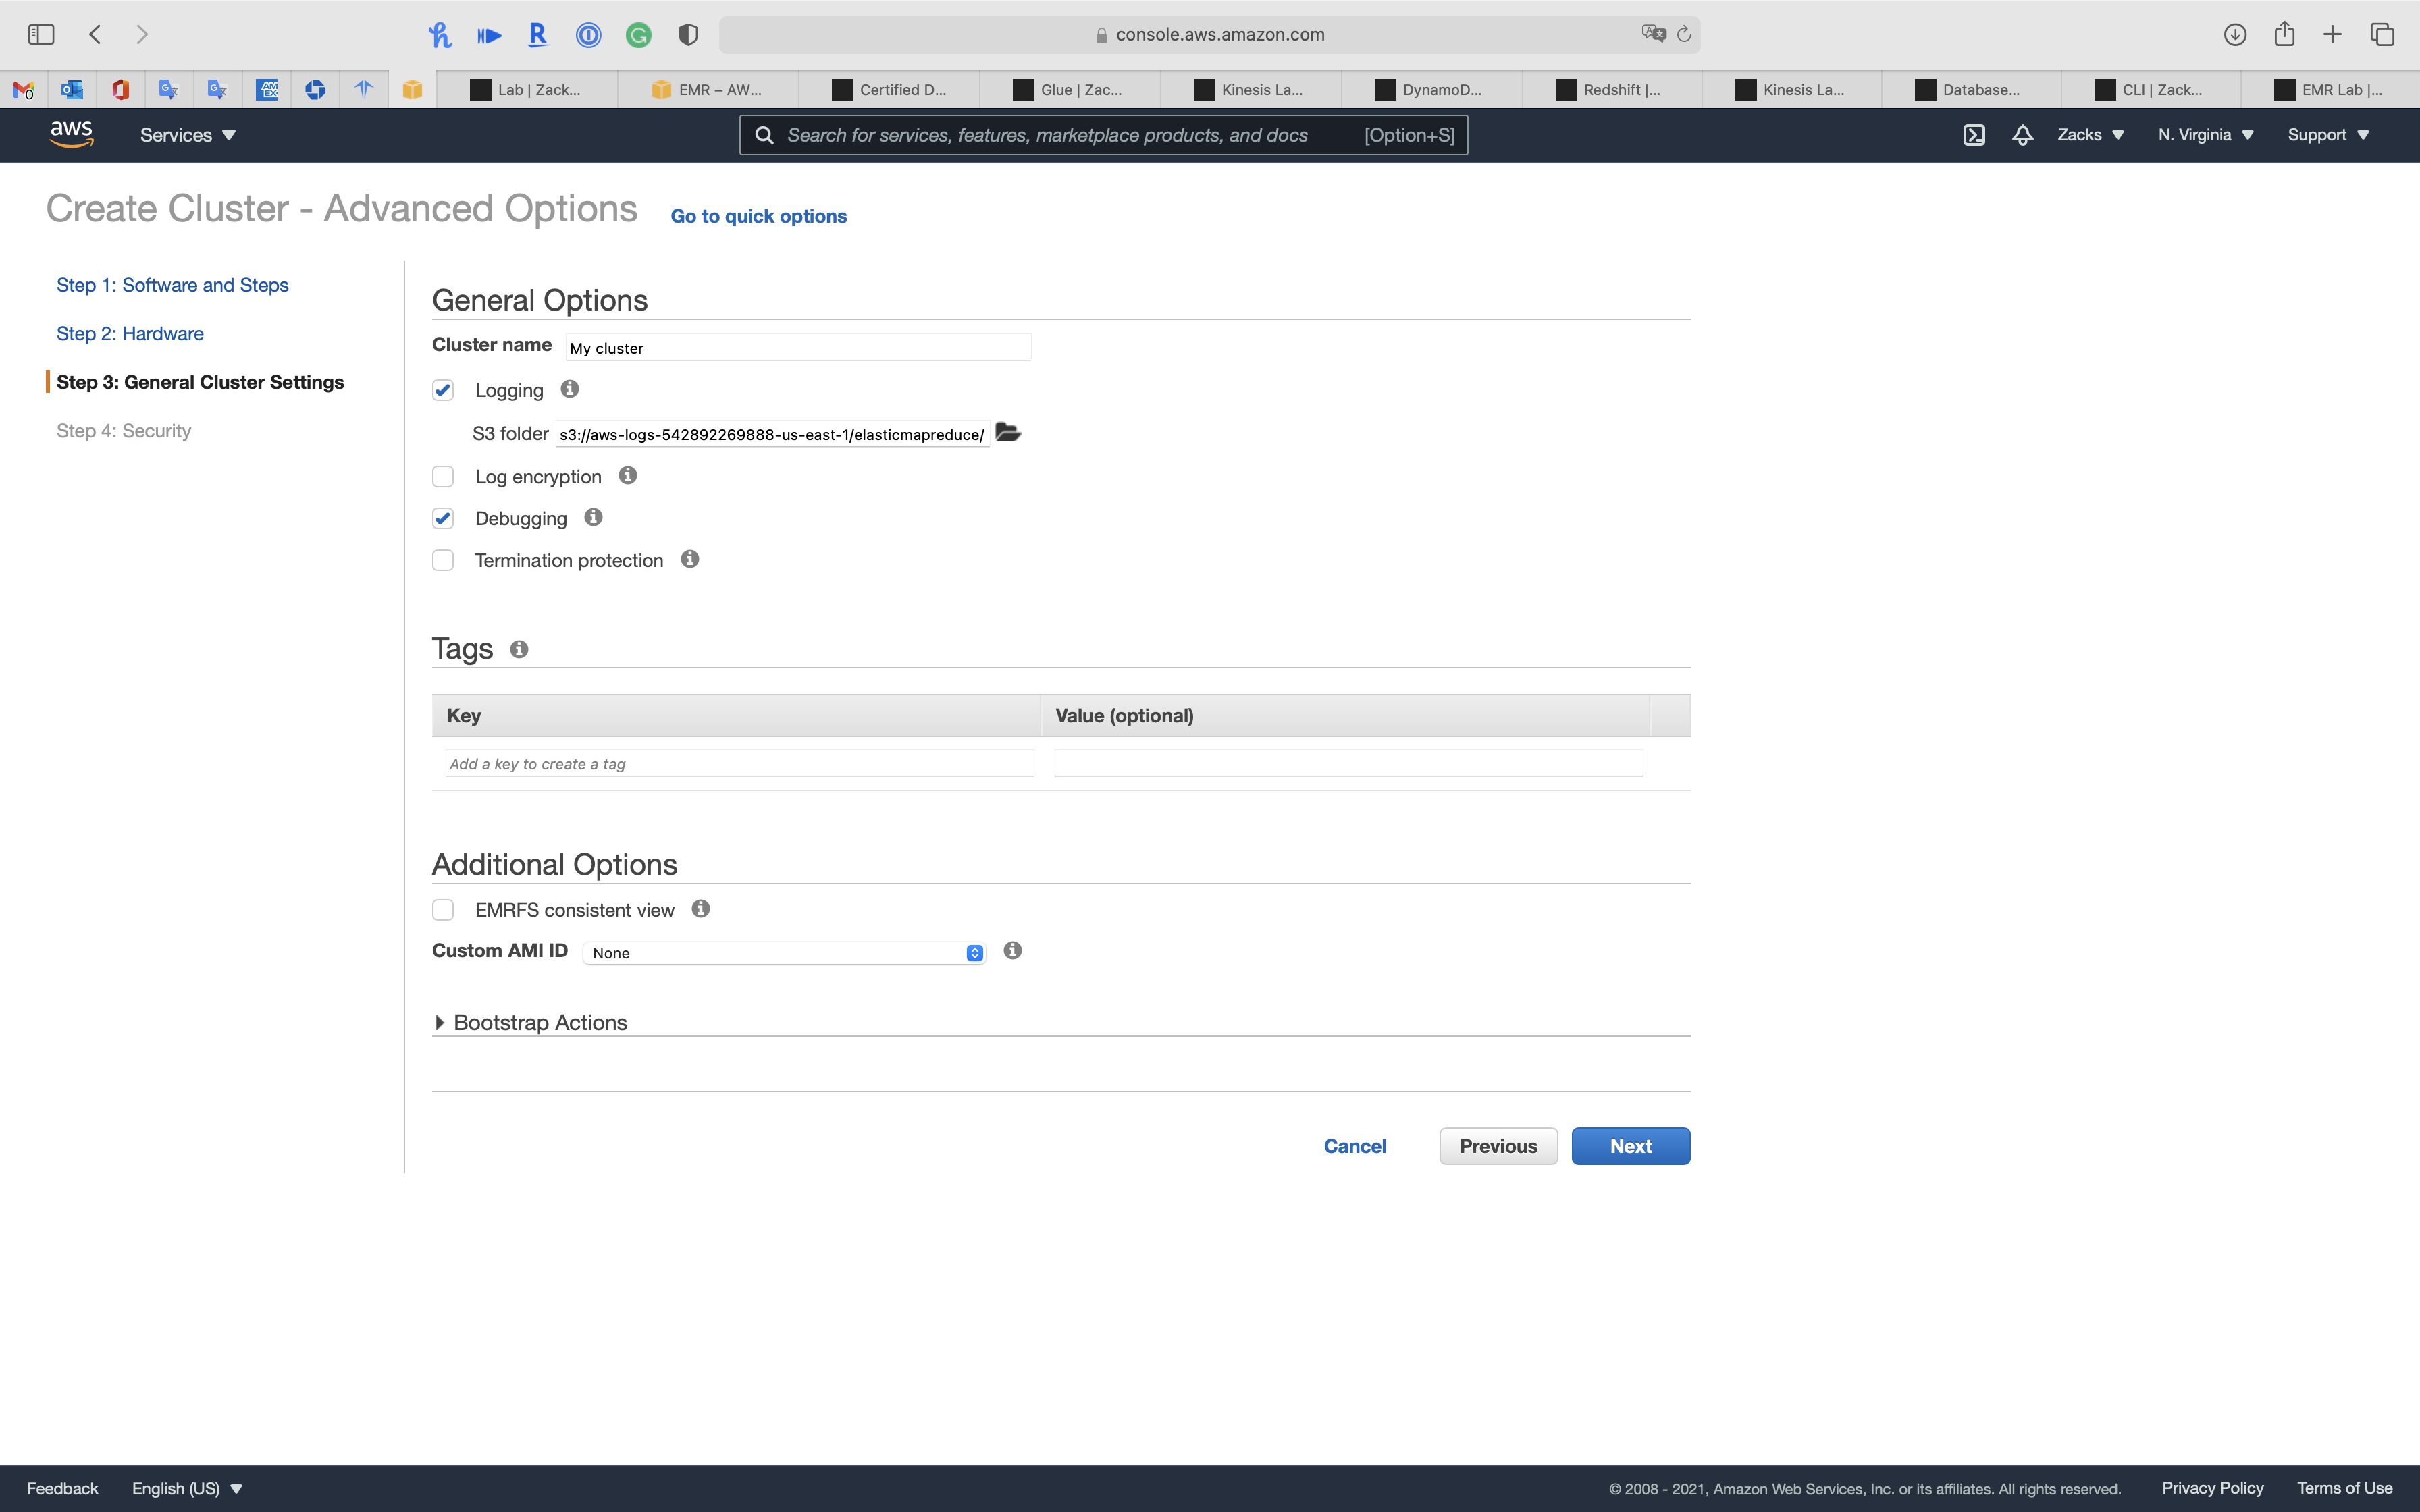
Step 4: Security
Security Options
- EC2 key pair: choose your pervious key pair
EC2 security groups
- Master:
Create ElasticMapReduce-master - Core & Task:
Create ElasticMapReduce-slave
Click on Create cluster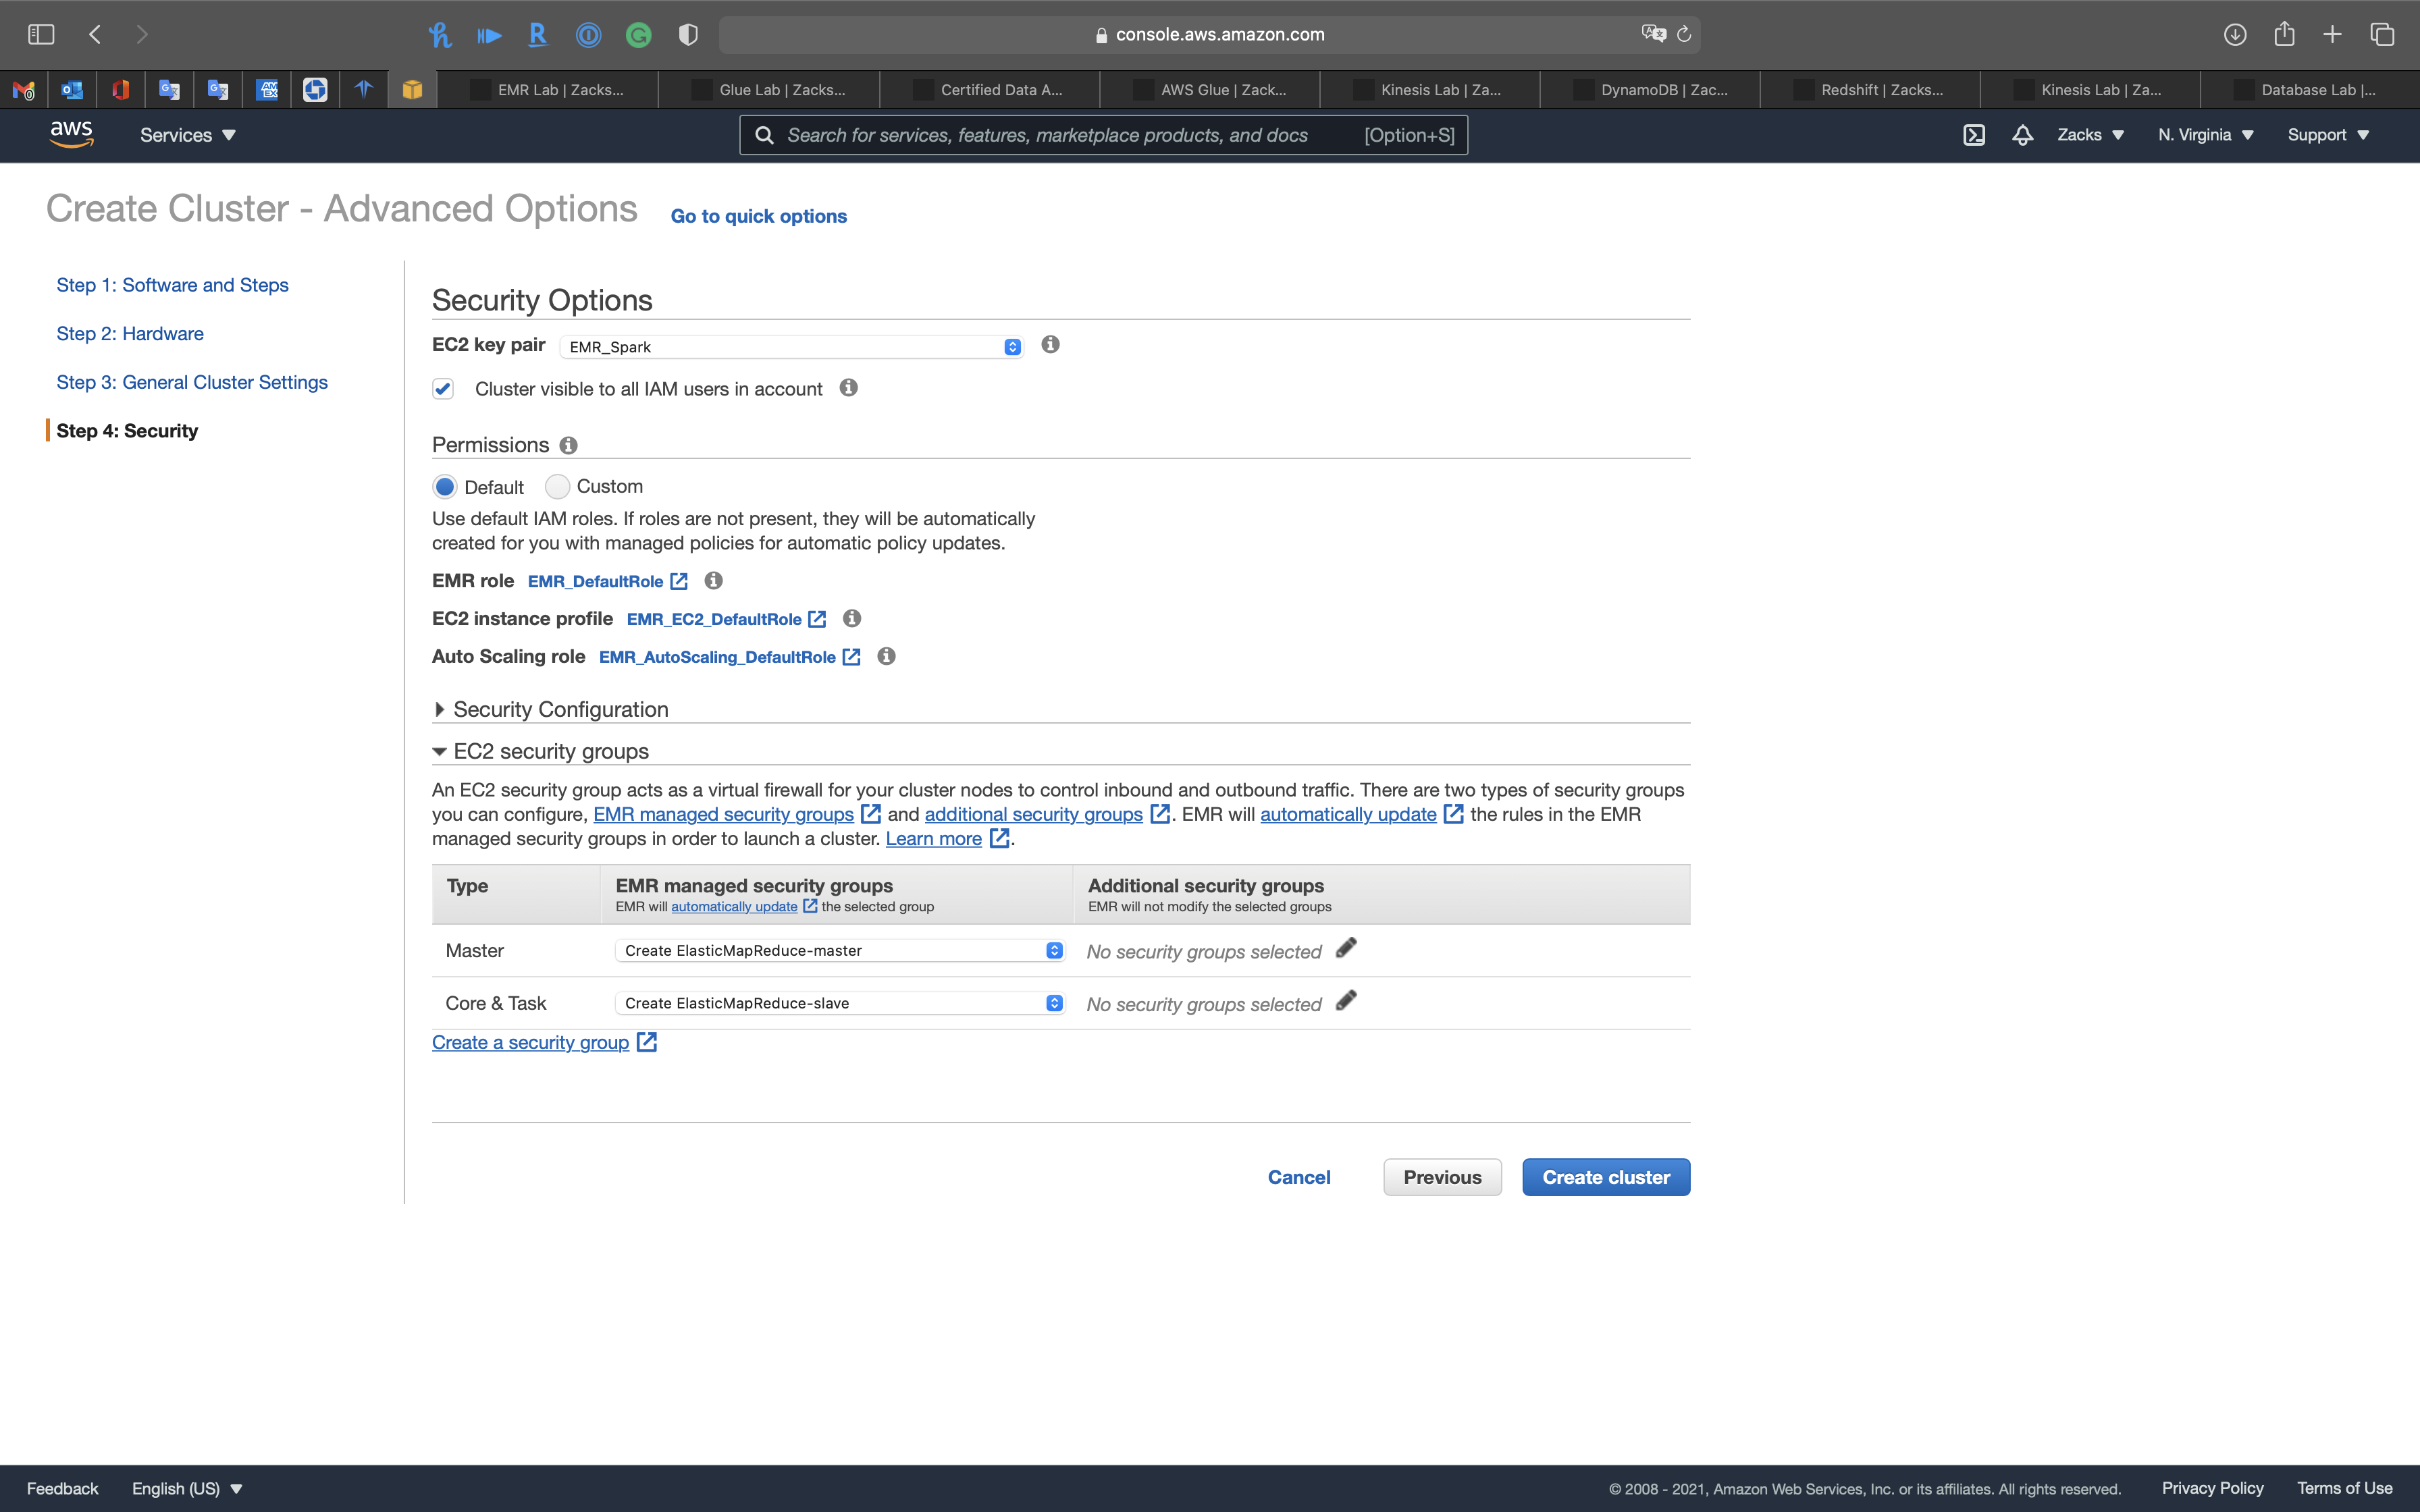
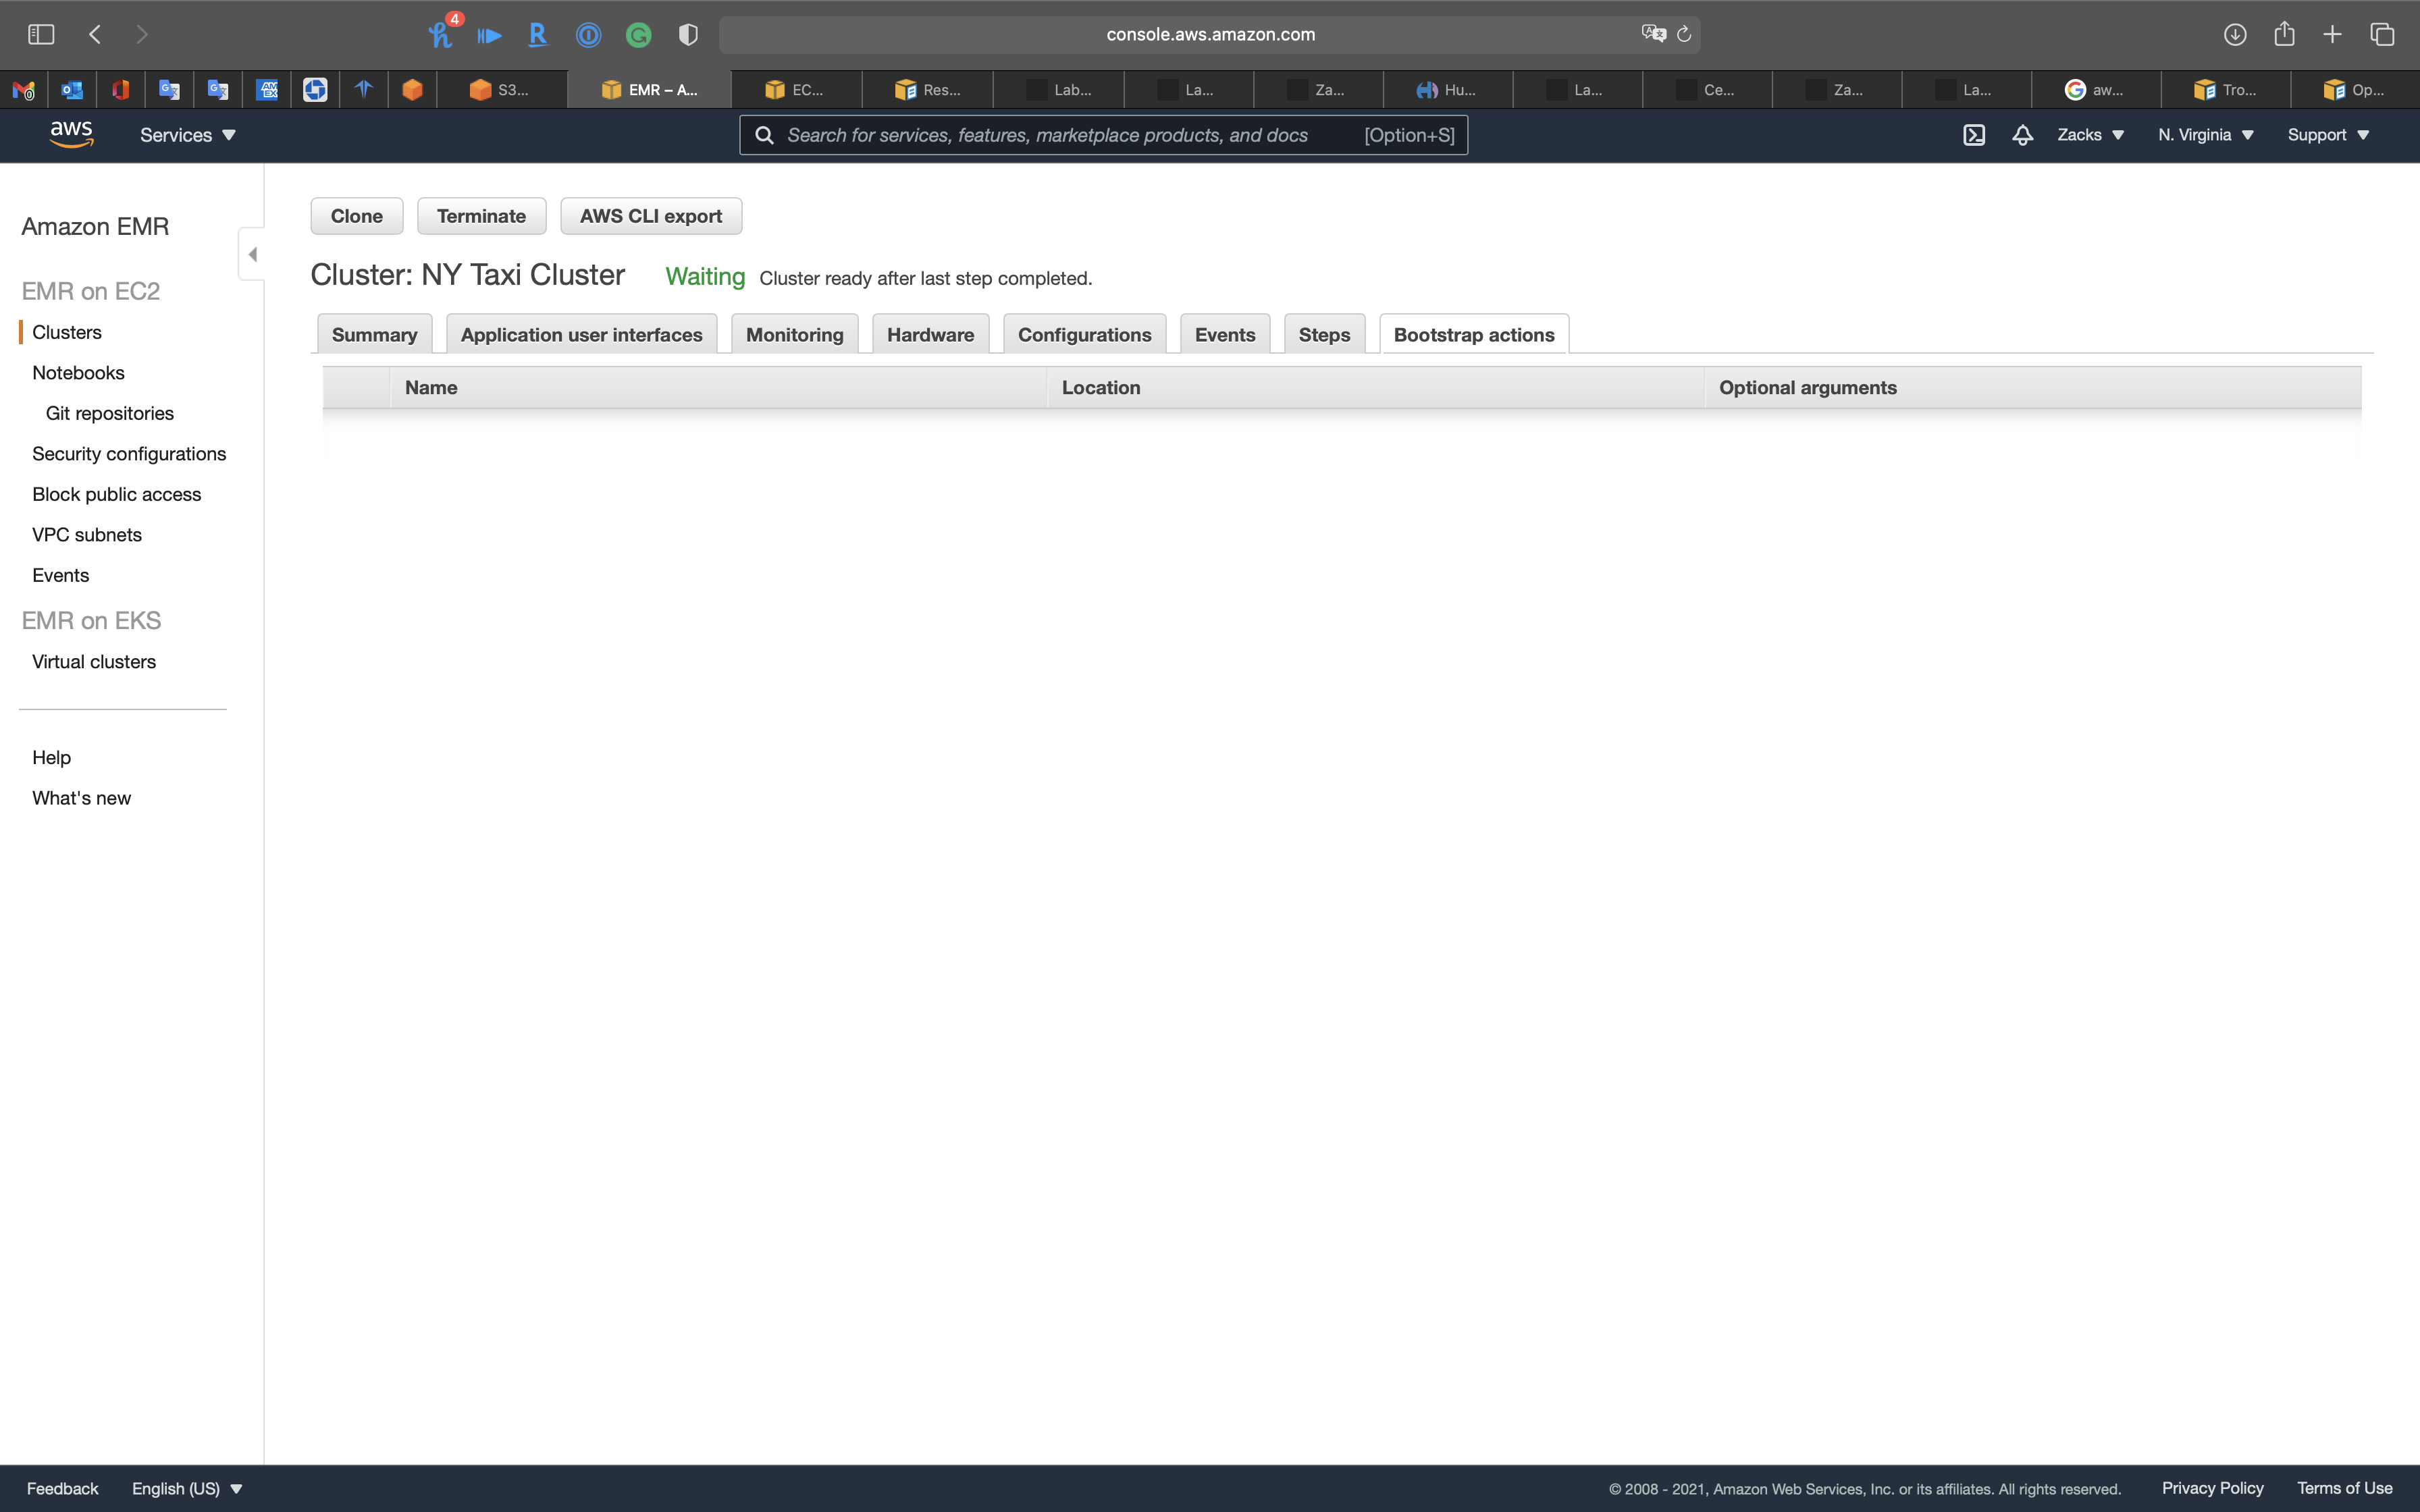
EMR Cluster Console
Summary
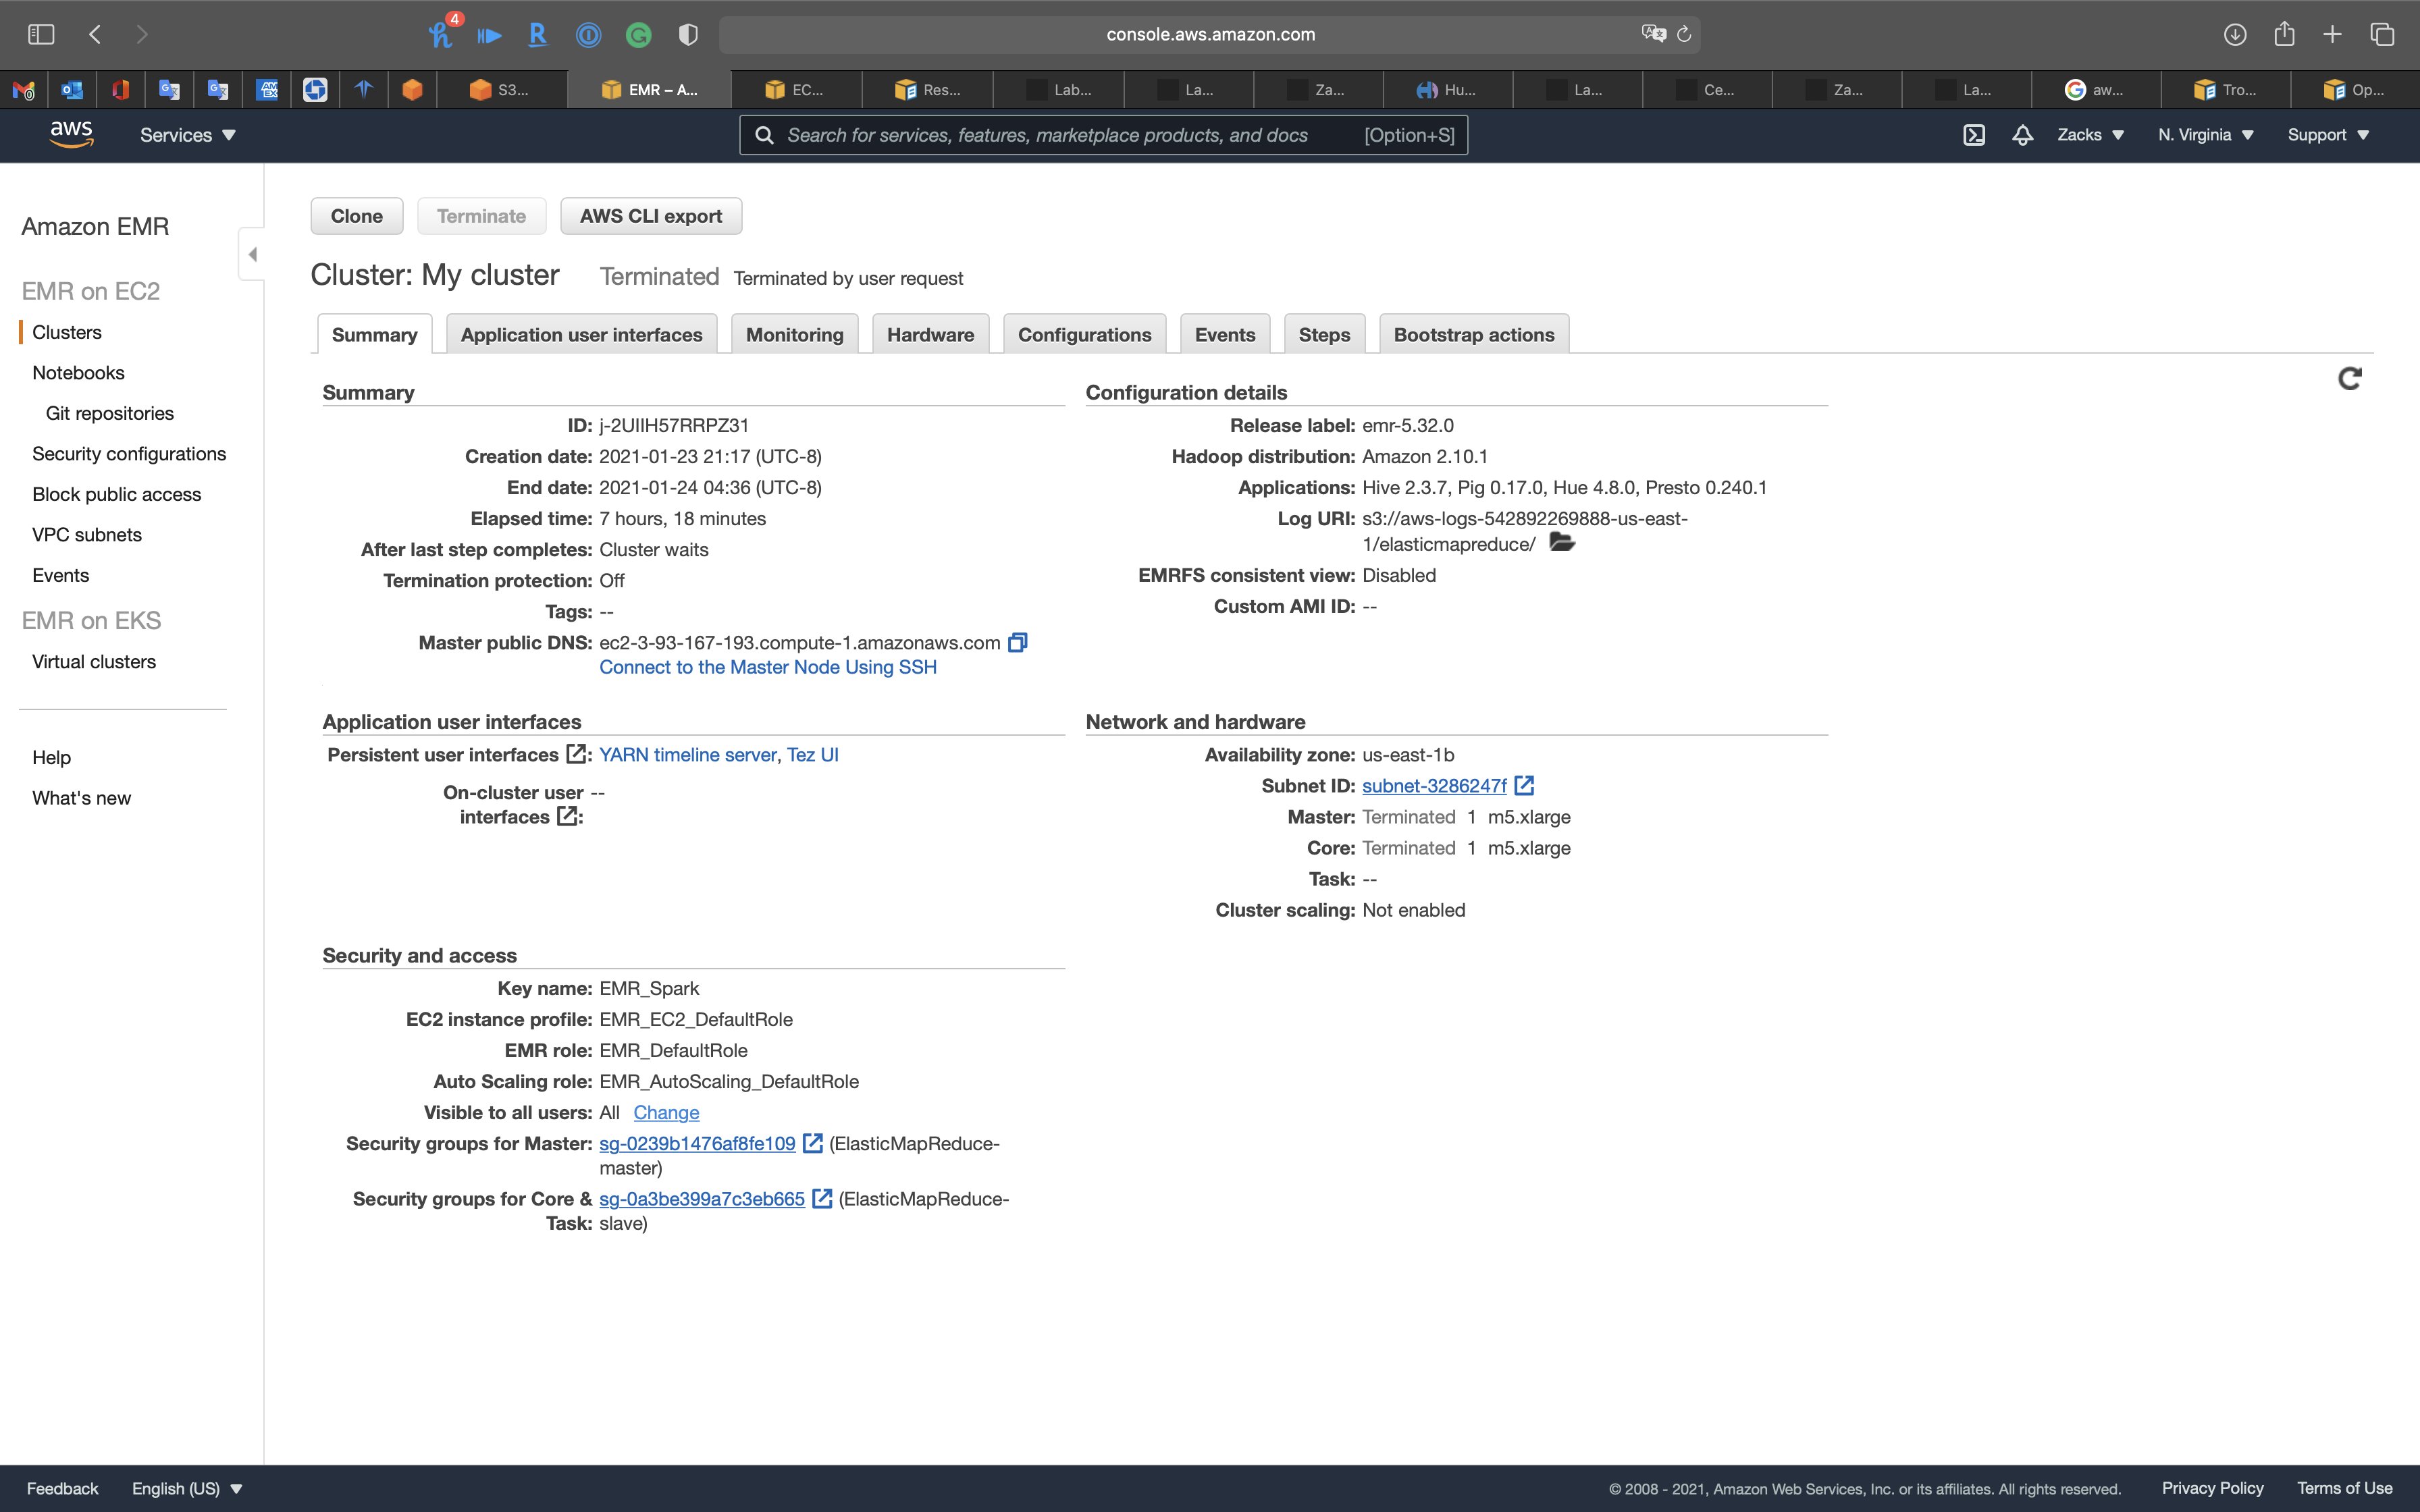
Application user interfaces
Monitoring

Hardware
Configurations
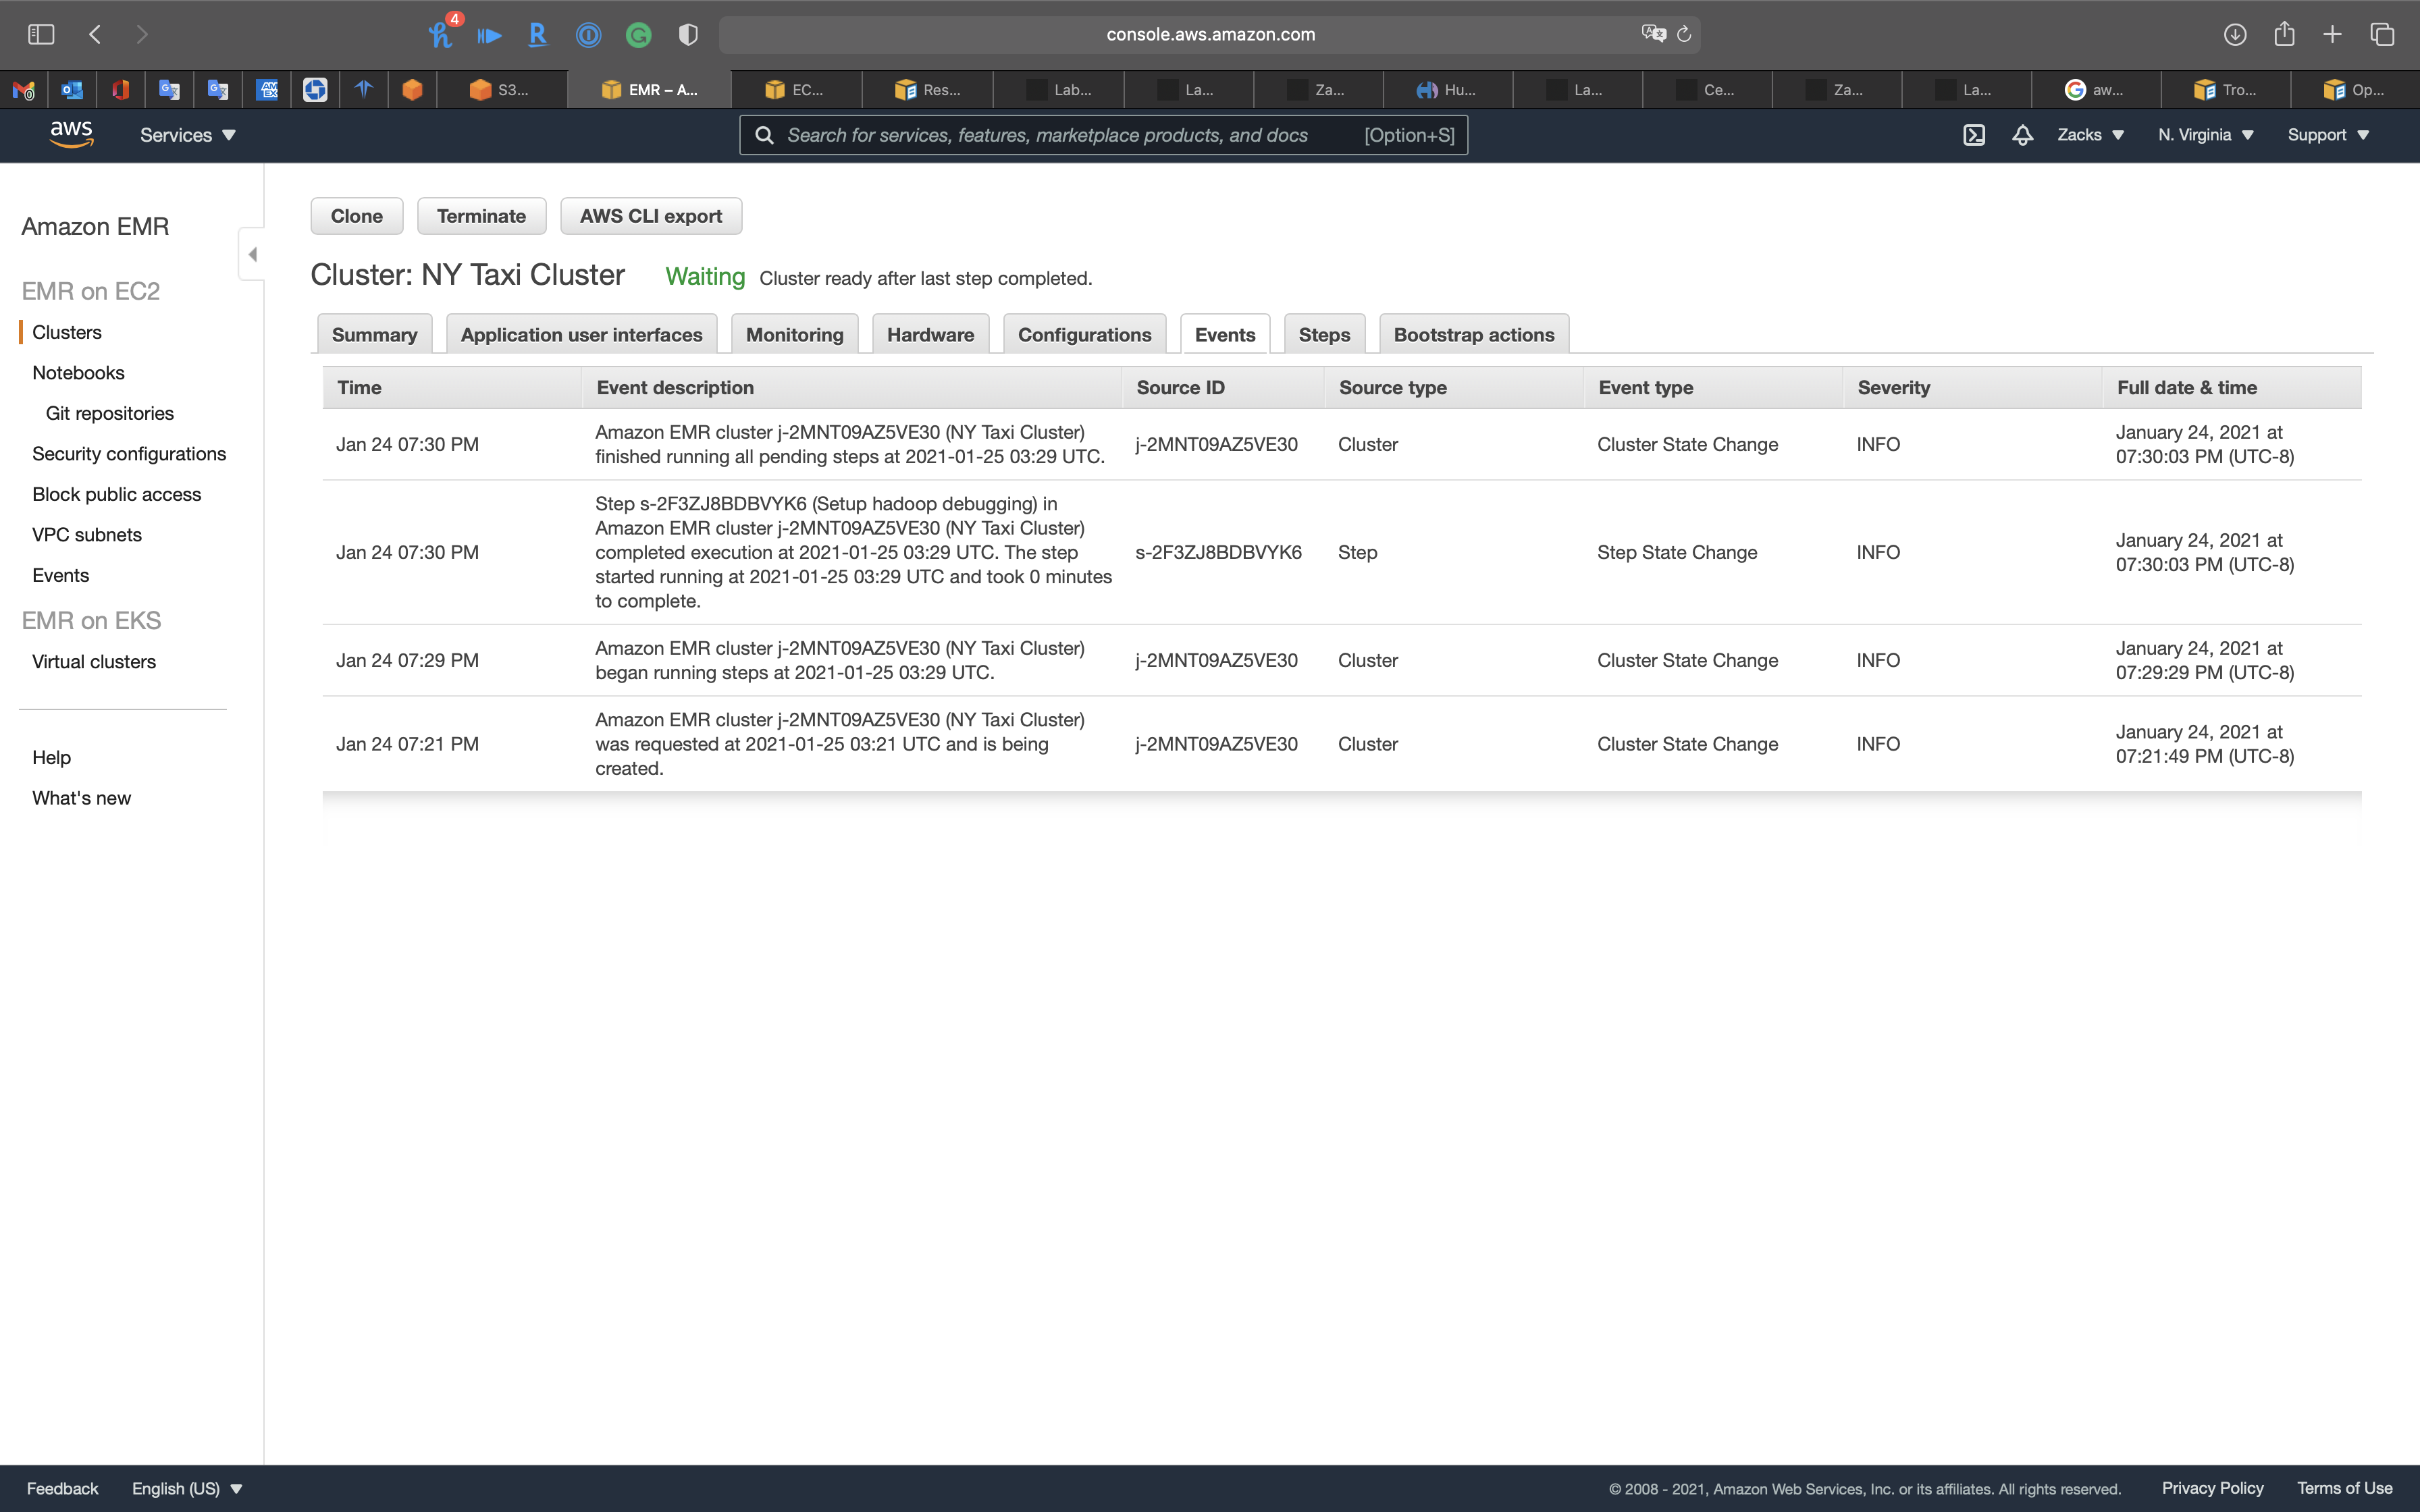
Events
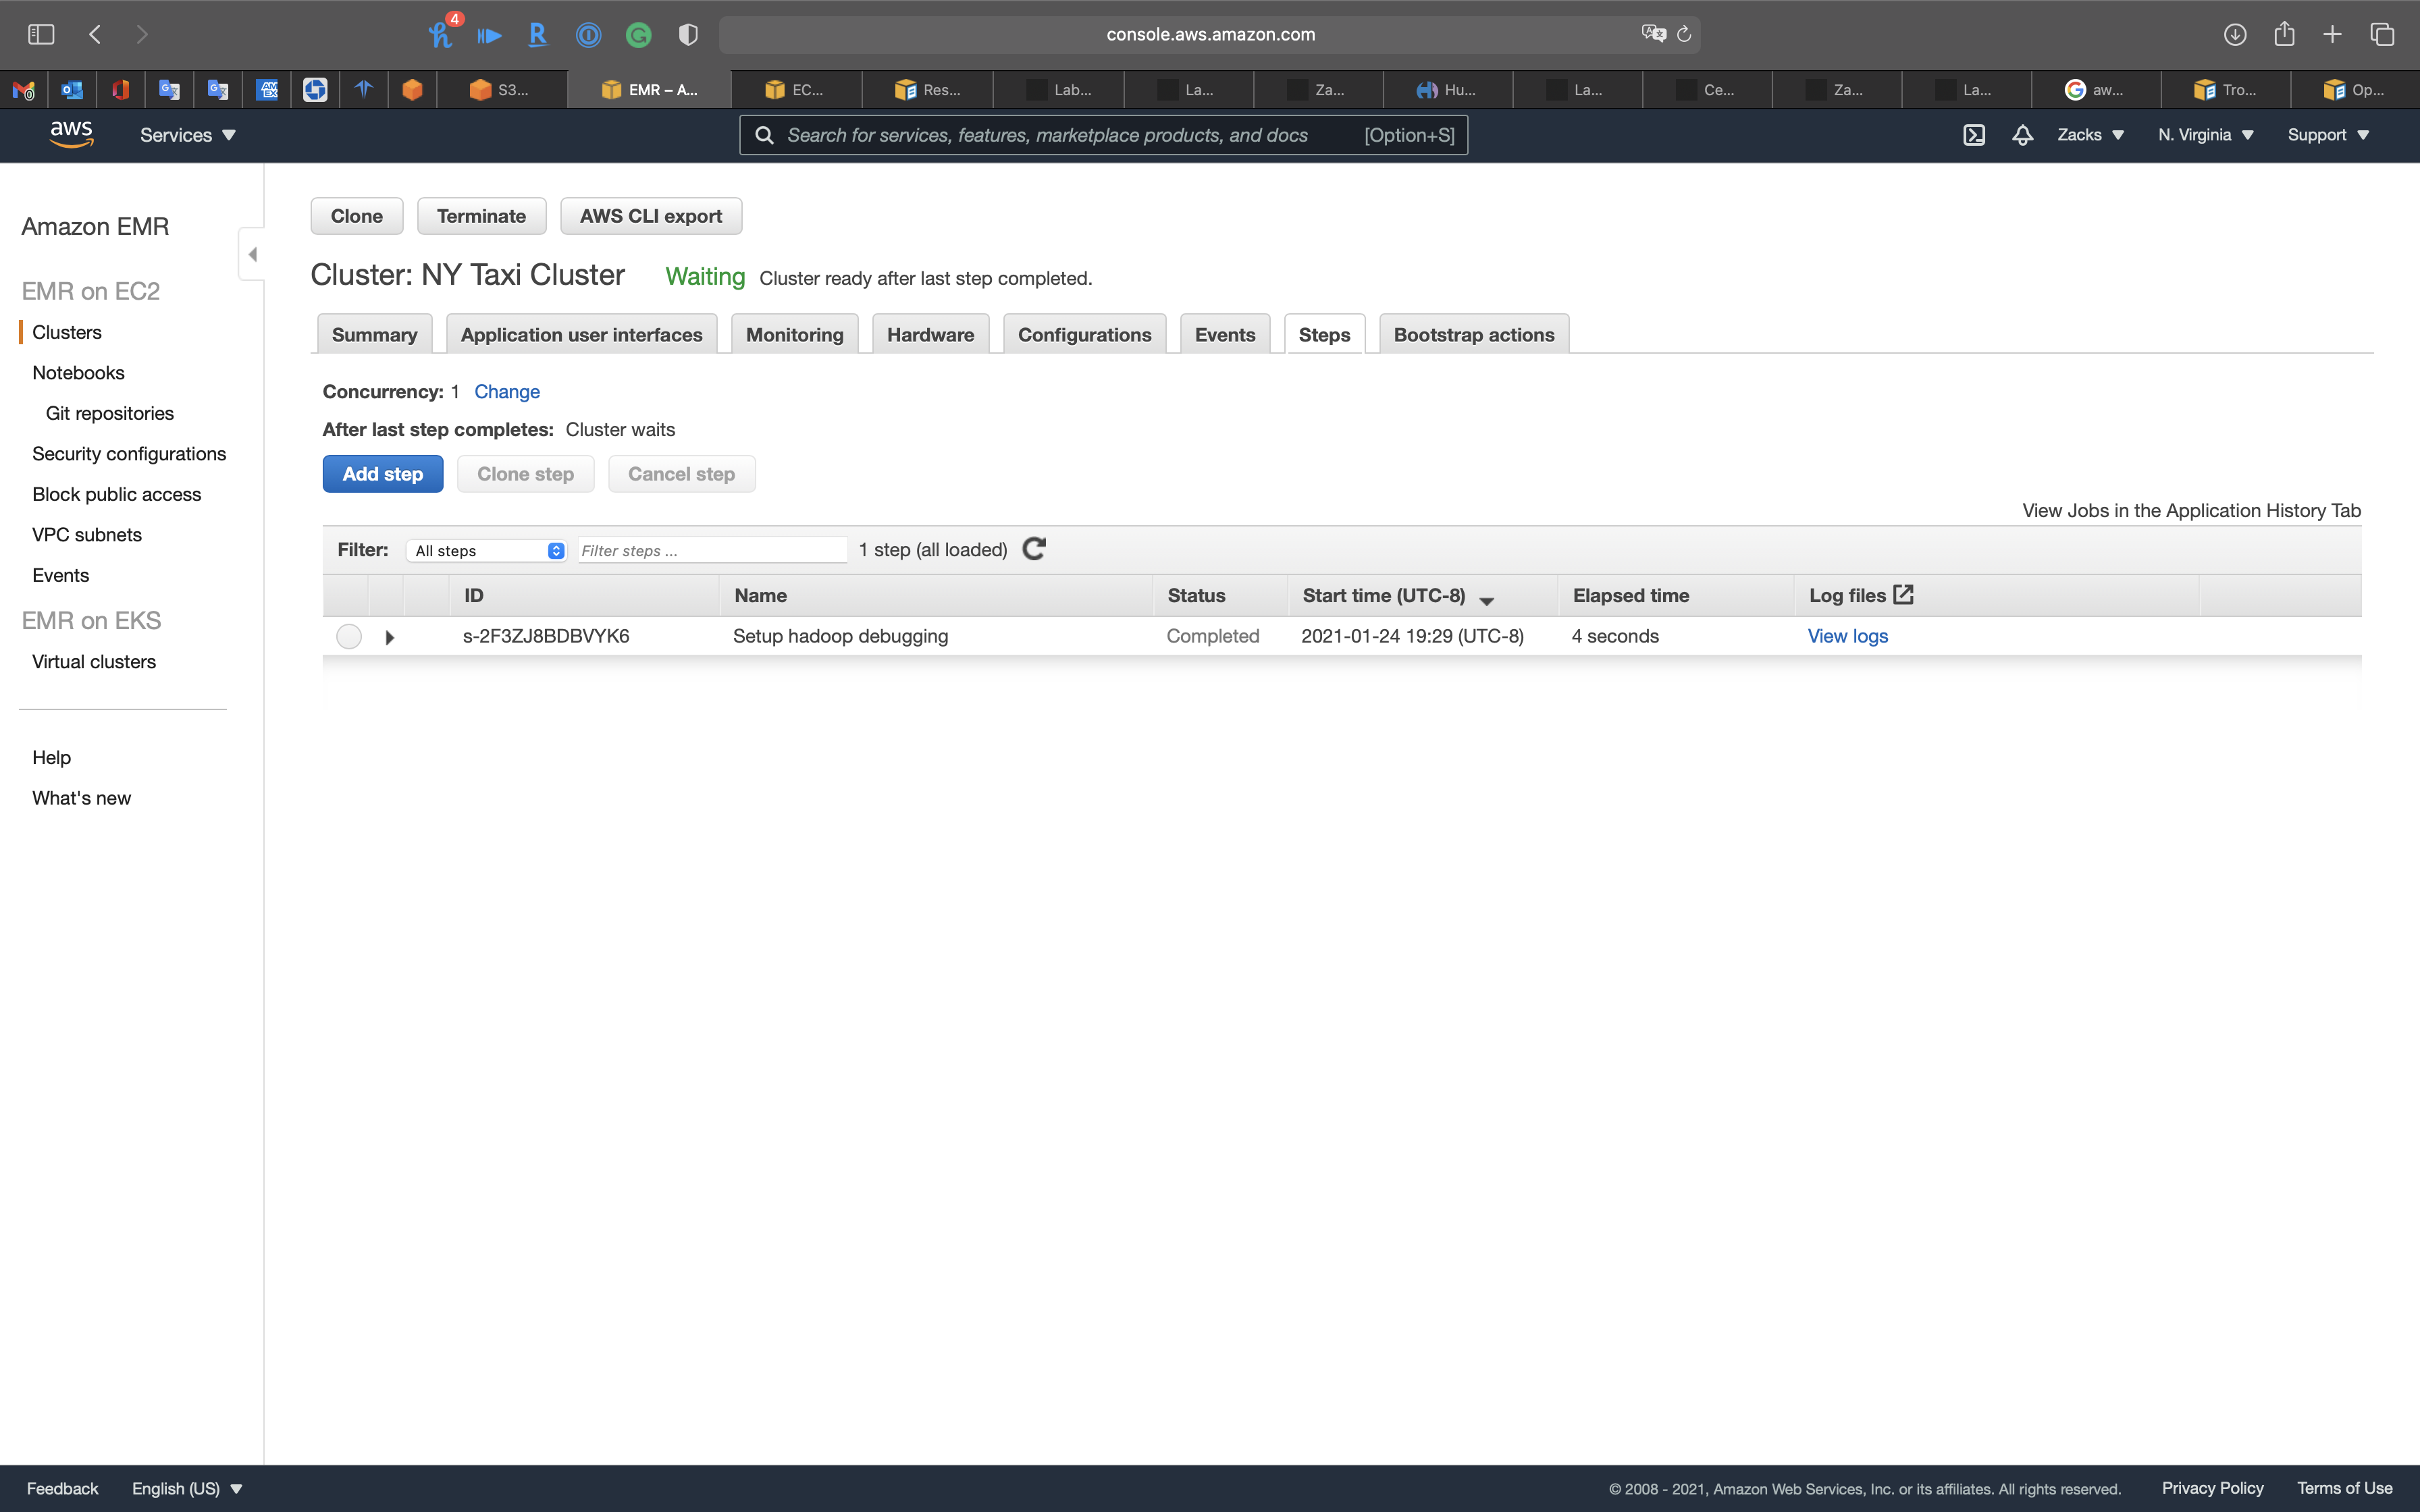
Steps
Bootstrap actions
SSH Tunnel Configuration
Before You Connect: Authorize Inbound Traffic
Option 2, Part 1: Set Up an SSH Tunnel to the Master Node Using Dynamic Port Forwarding
Option 2, Part 2: Configure Proxy Settings to View Websites Hosted on the Master Node
We want to visit Hue website from the master node, so we need to set up a FoxyProxy for Google Chrome.
Set up an SSH Tunnel to the Master Node using dynamic port forwarding
Click on your cluster. See Summary.
Click on Security groups for Master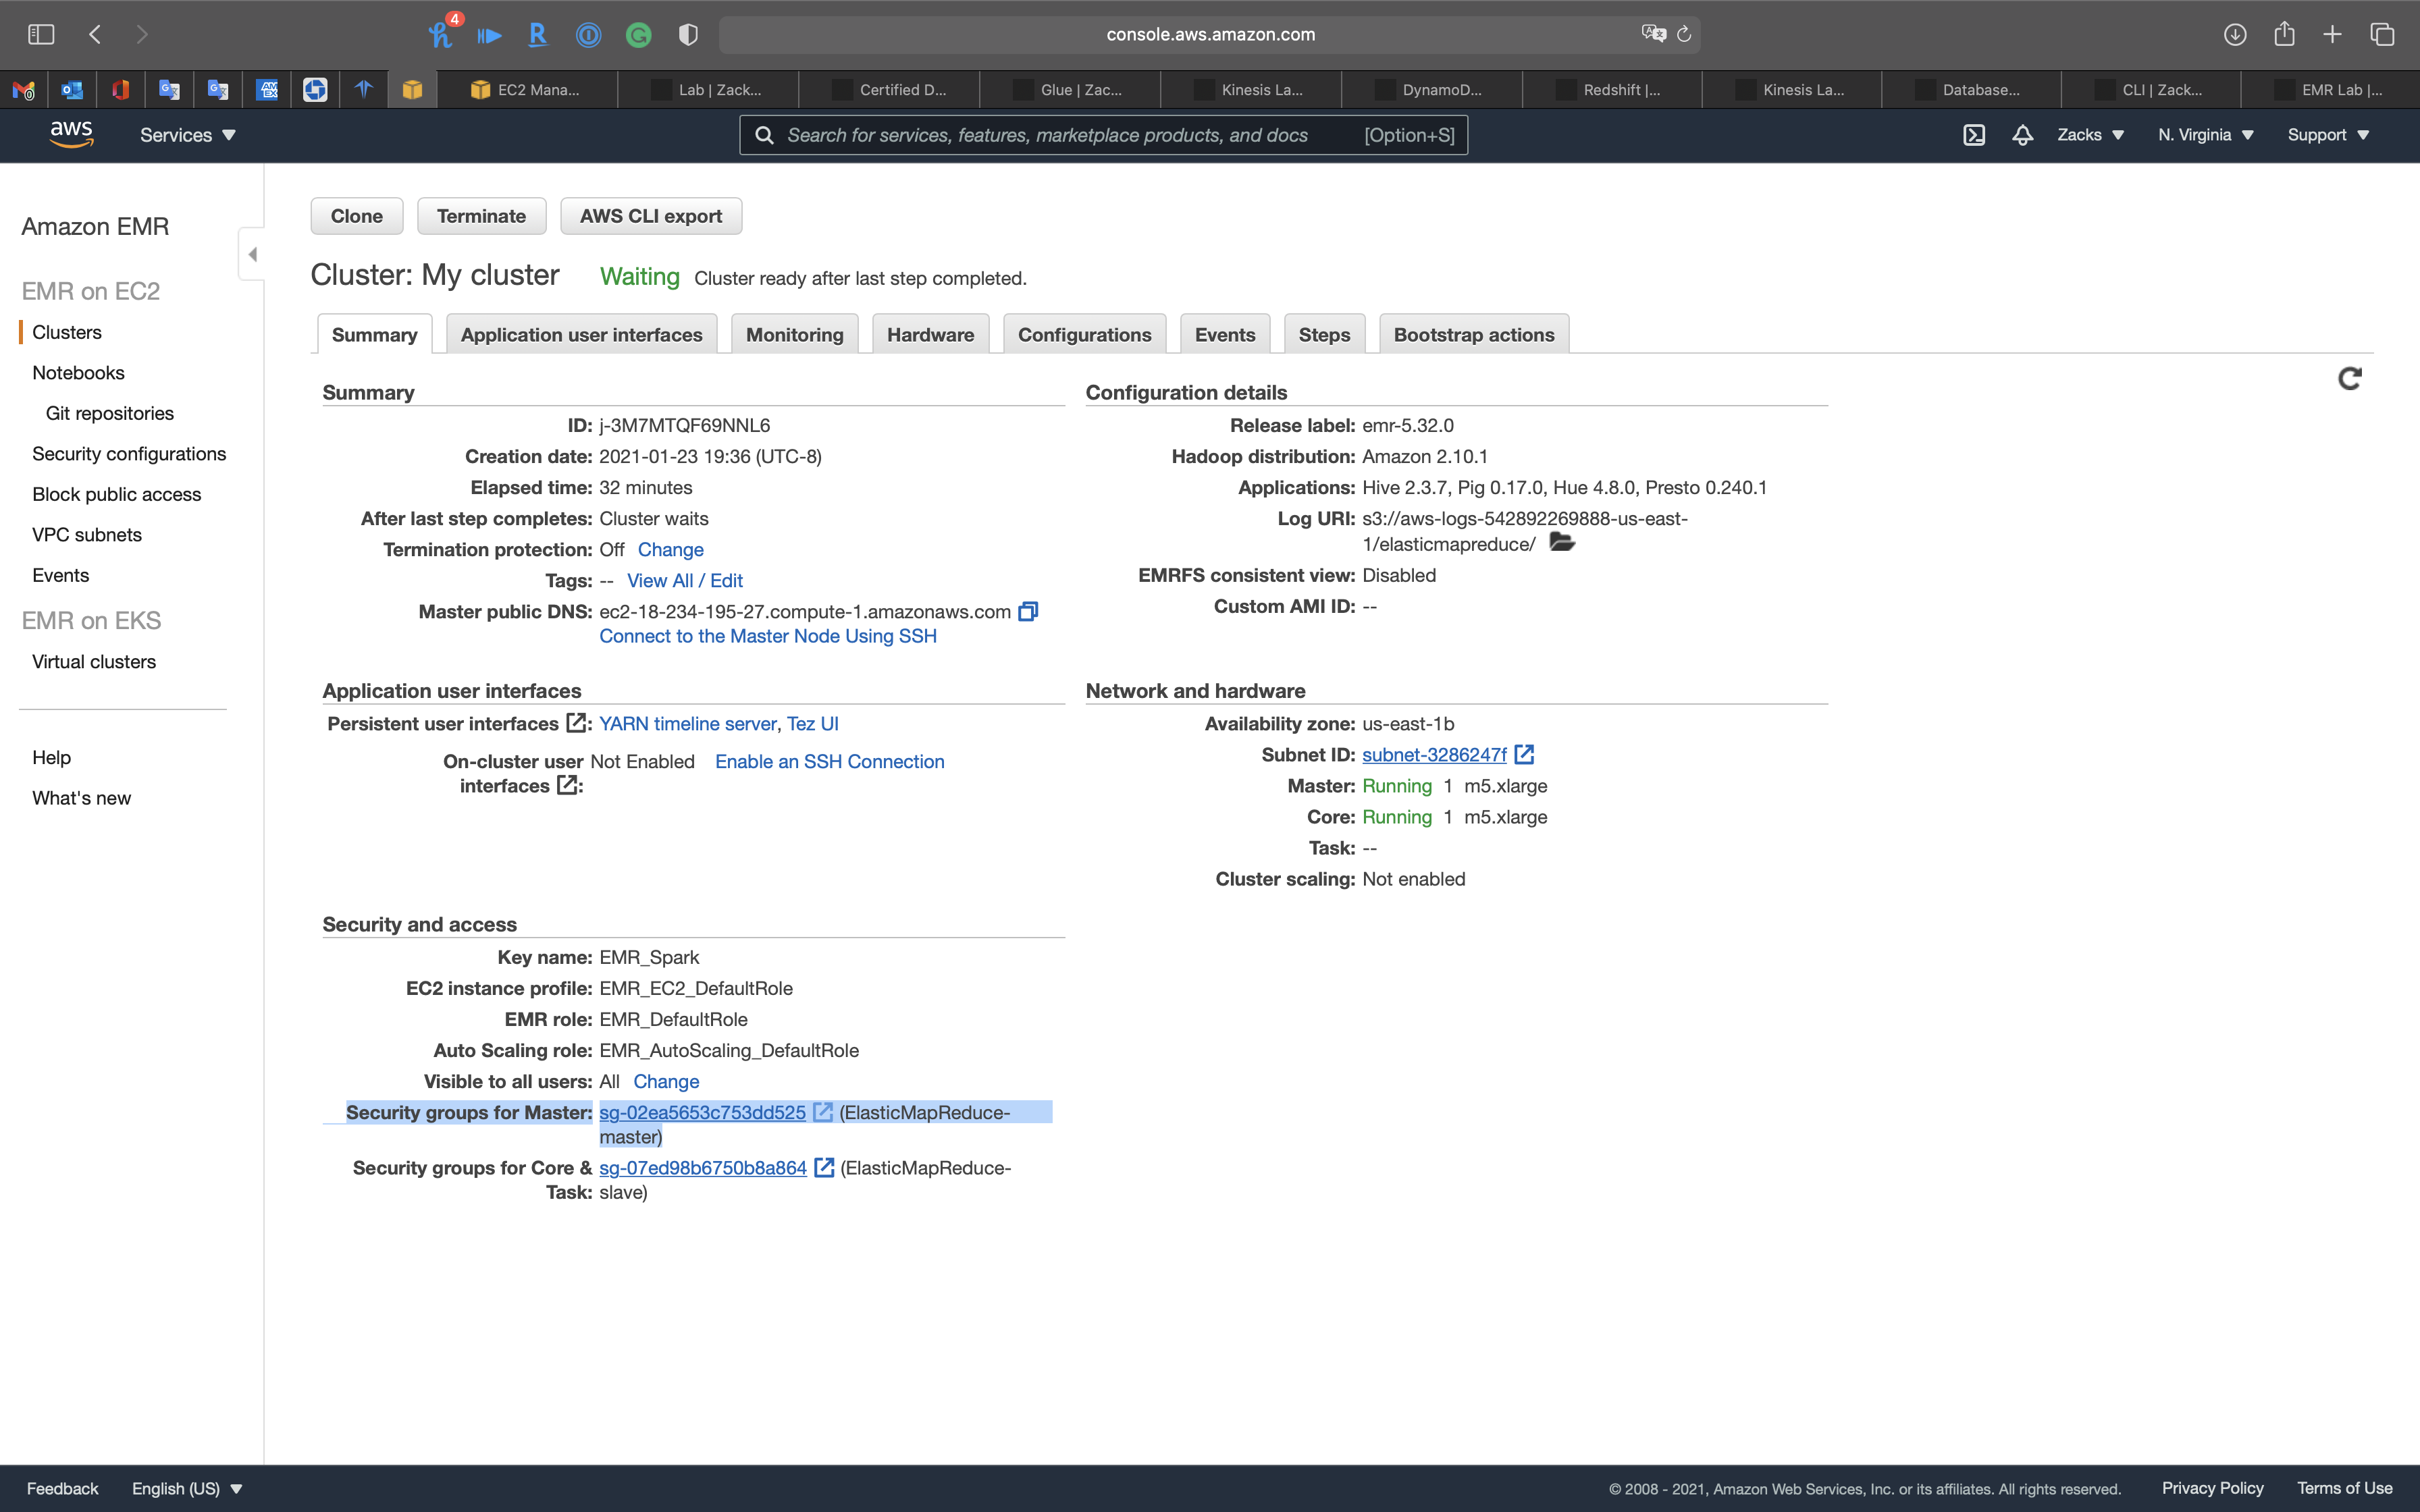
Click on the ElasticMapReduce-master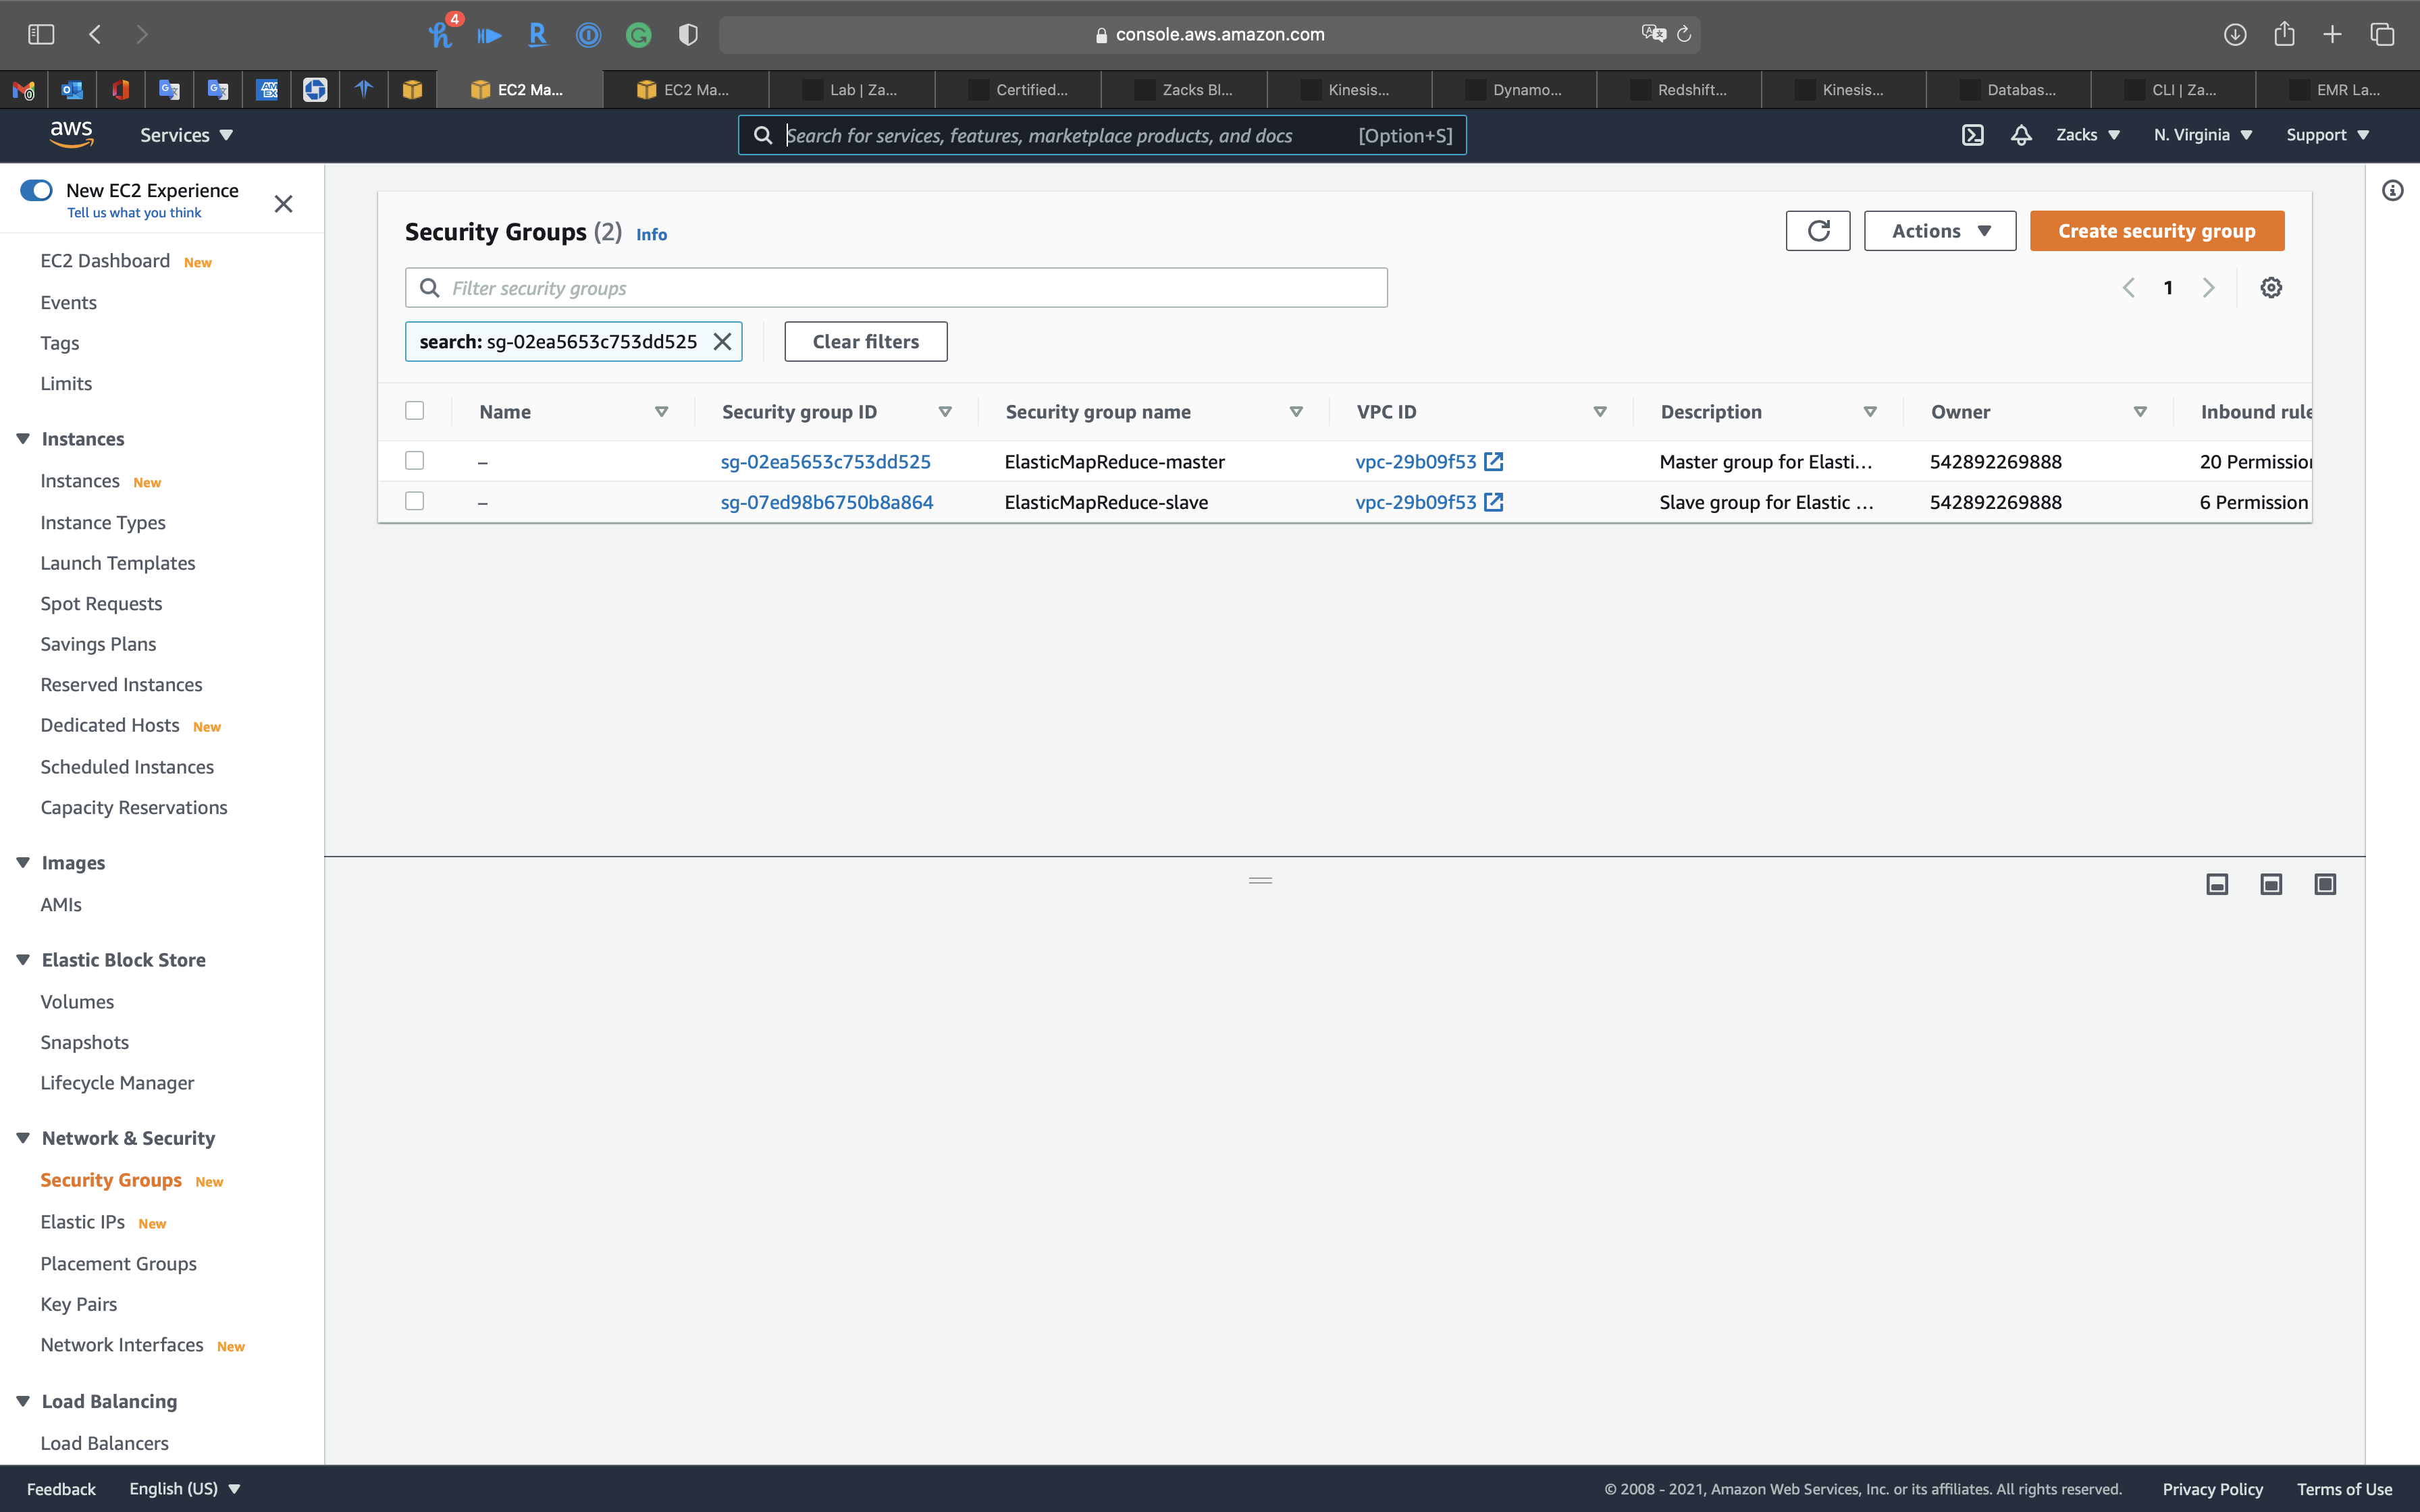
Add SSH
Check for an inbound rule that allows public access with the following settings. If it exists, choose Delete to remove it.
- Type:
SSH - Protocol:
TCP - Port range:
22 - Source:
Custom 0.0.0.0/0
We need to add our IP address, SSH, and port 8157 for SSH forwarding to the white list to the security of EMR Master node.
- Type:
SSH - Protocol:
TCP - Port range:
22 - Source:
My IP
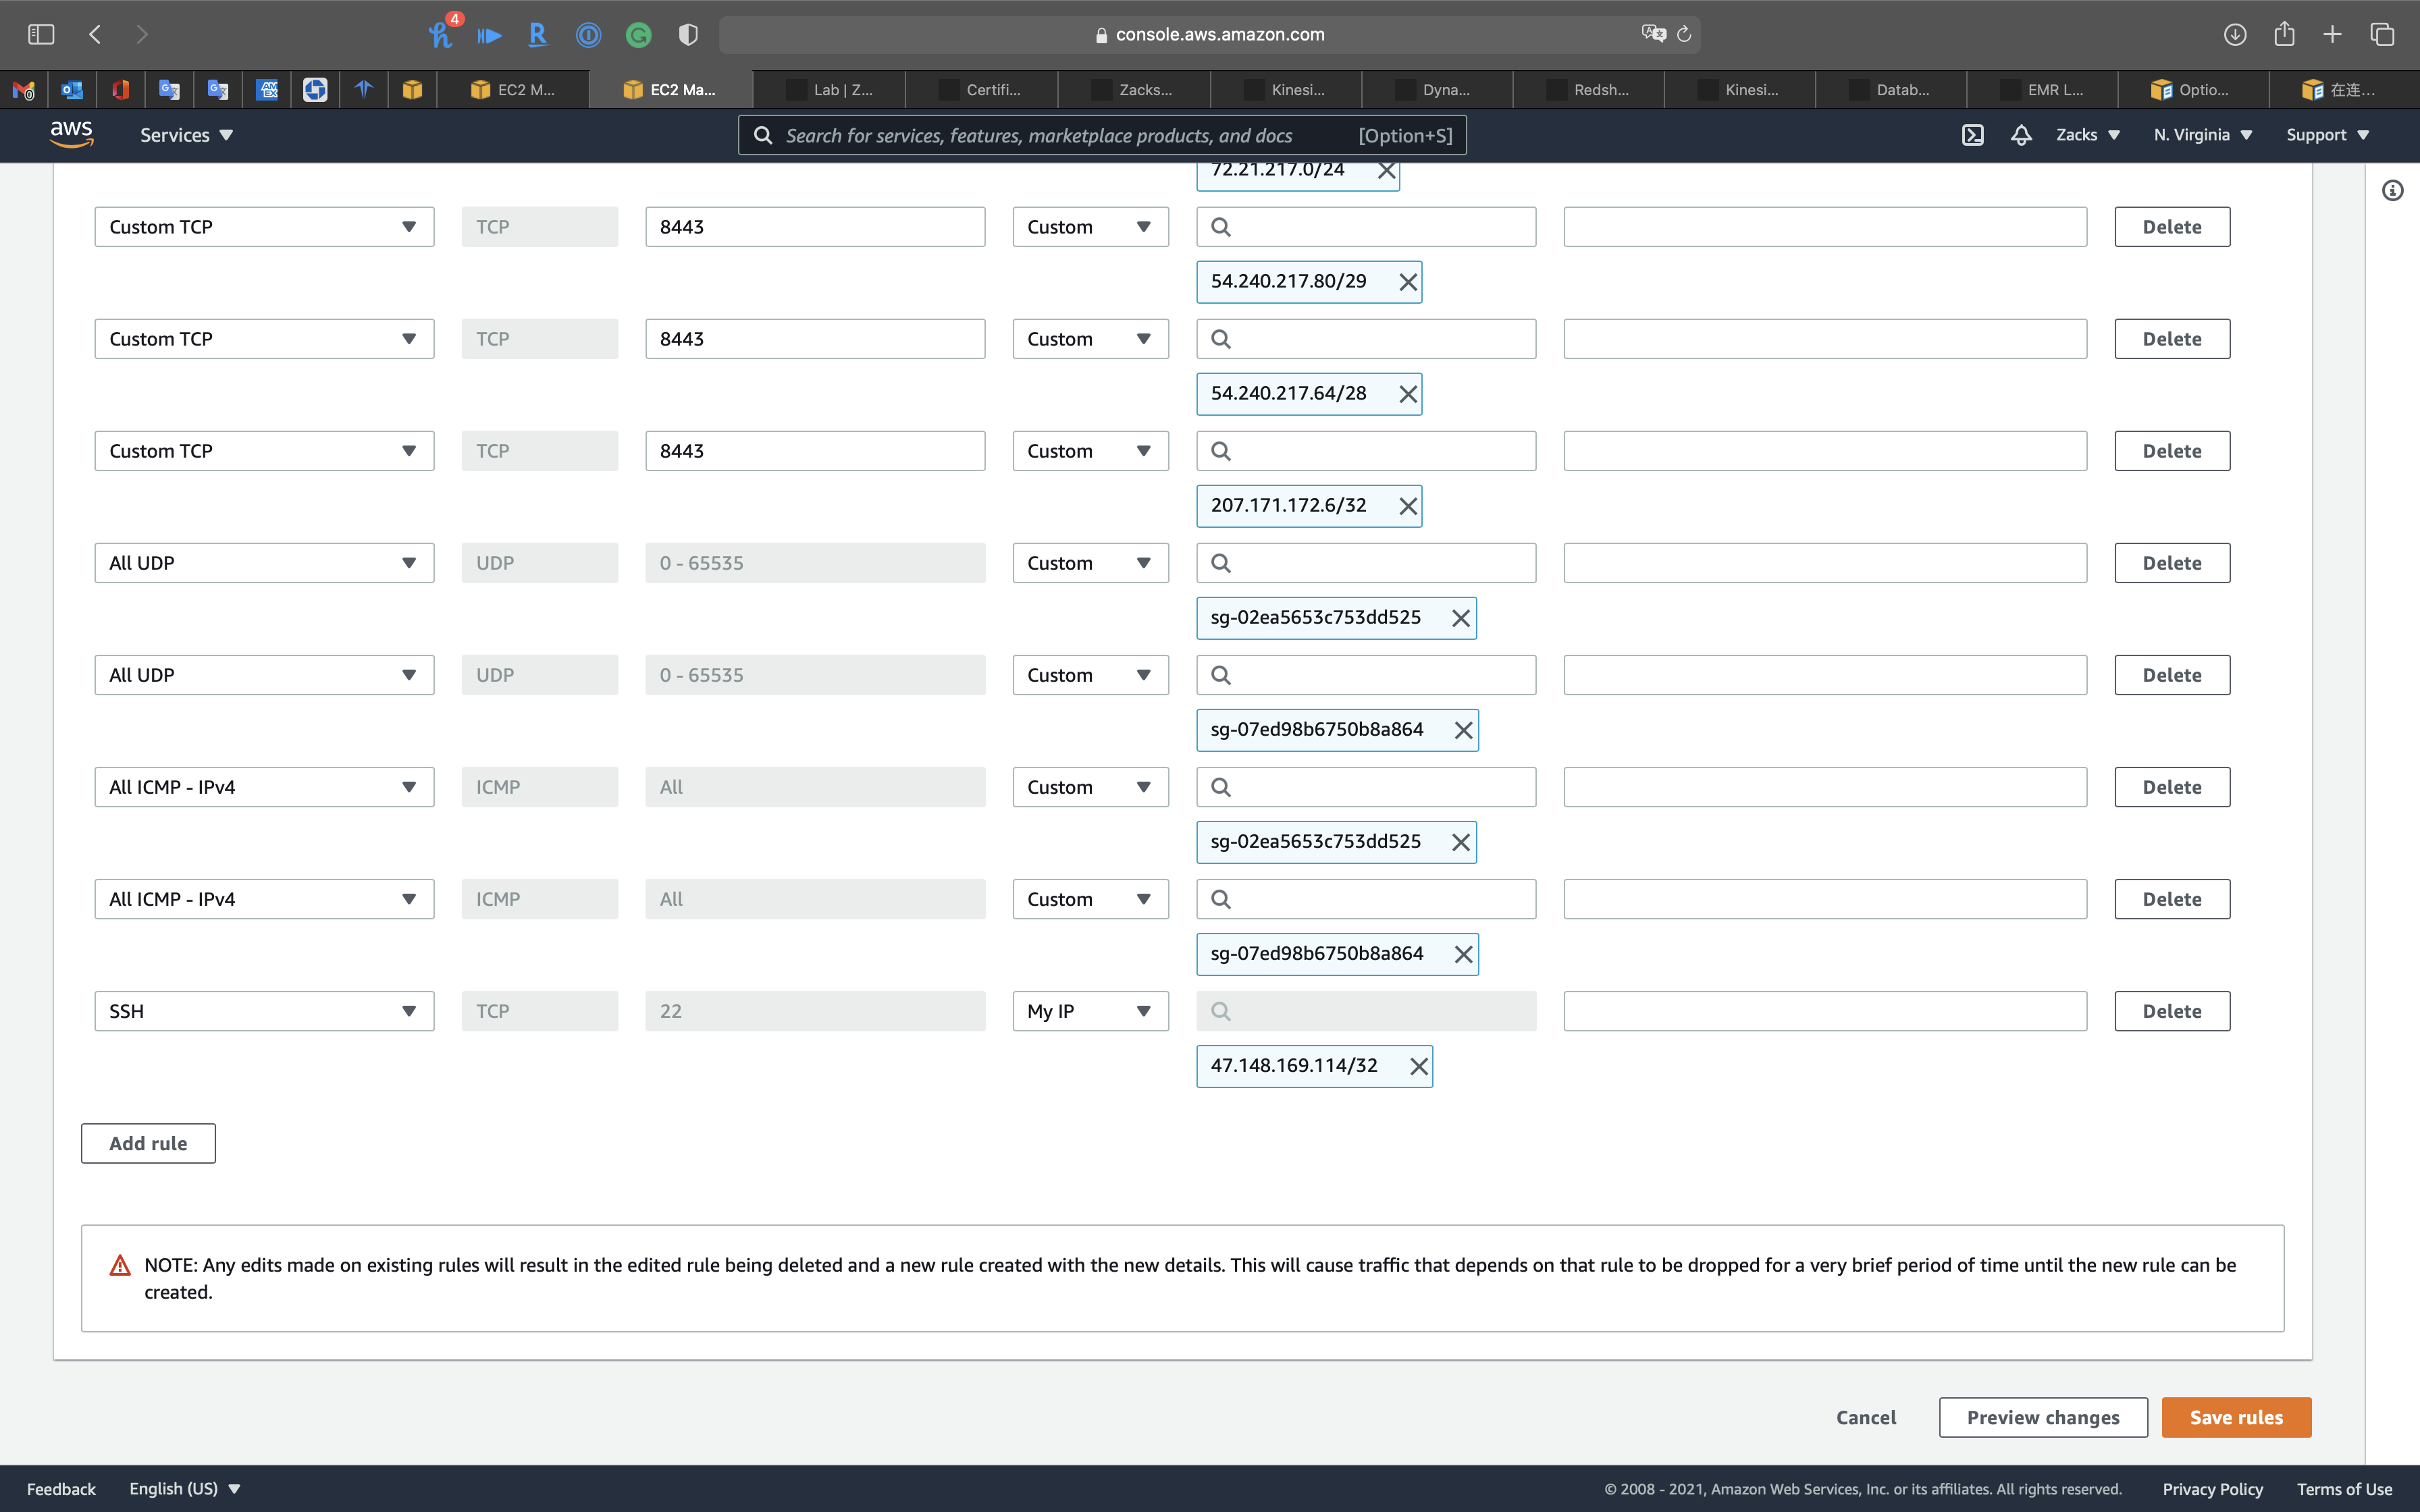
Add Custom 8888 for Hue
Click on Add rule
- Type:
Custom TCP - Protocol:
TCP - Port range:
8888 - Source:
AnywhereorMy IP
Click on Save rules
Build SSH Forward
Copy Master public DNS
1 | chmod 0400 EMR_Spark.pem |
It will add a port forward for your request.
Presto
Basic Reviews & Data Integrity Check
Copy Master public DNS
Click on Connect to the Master Node Using SSH
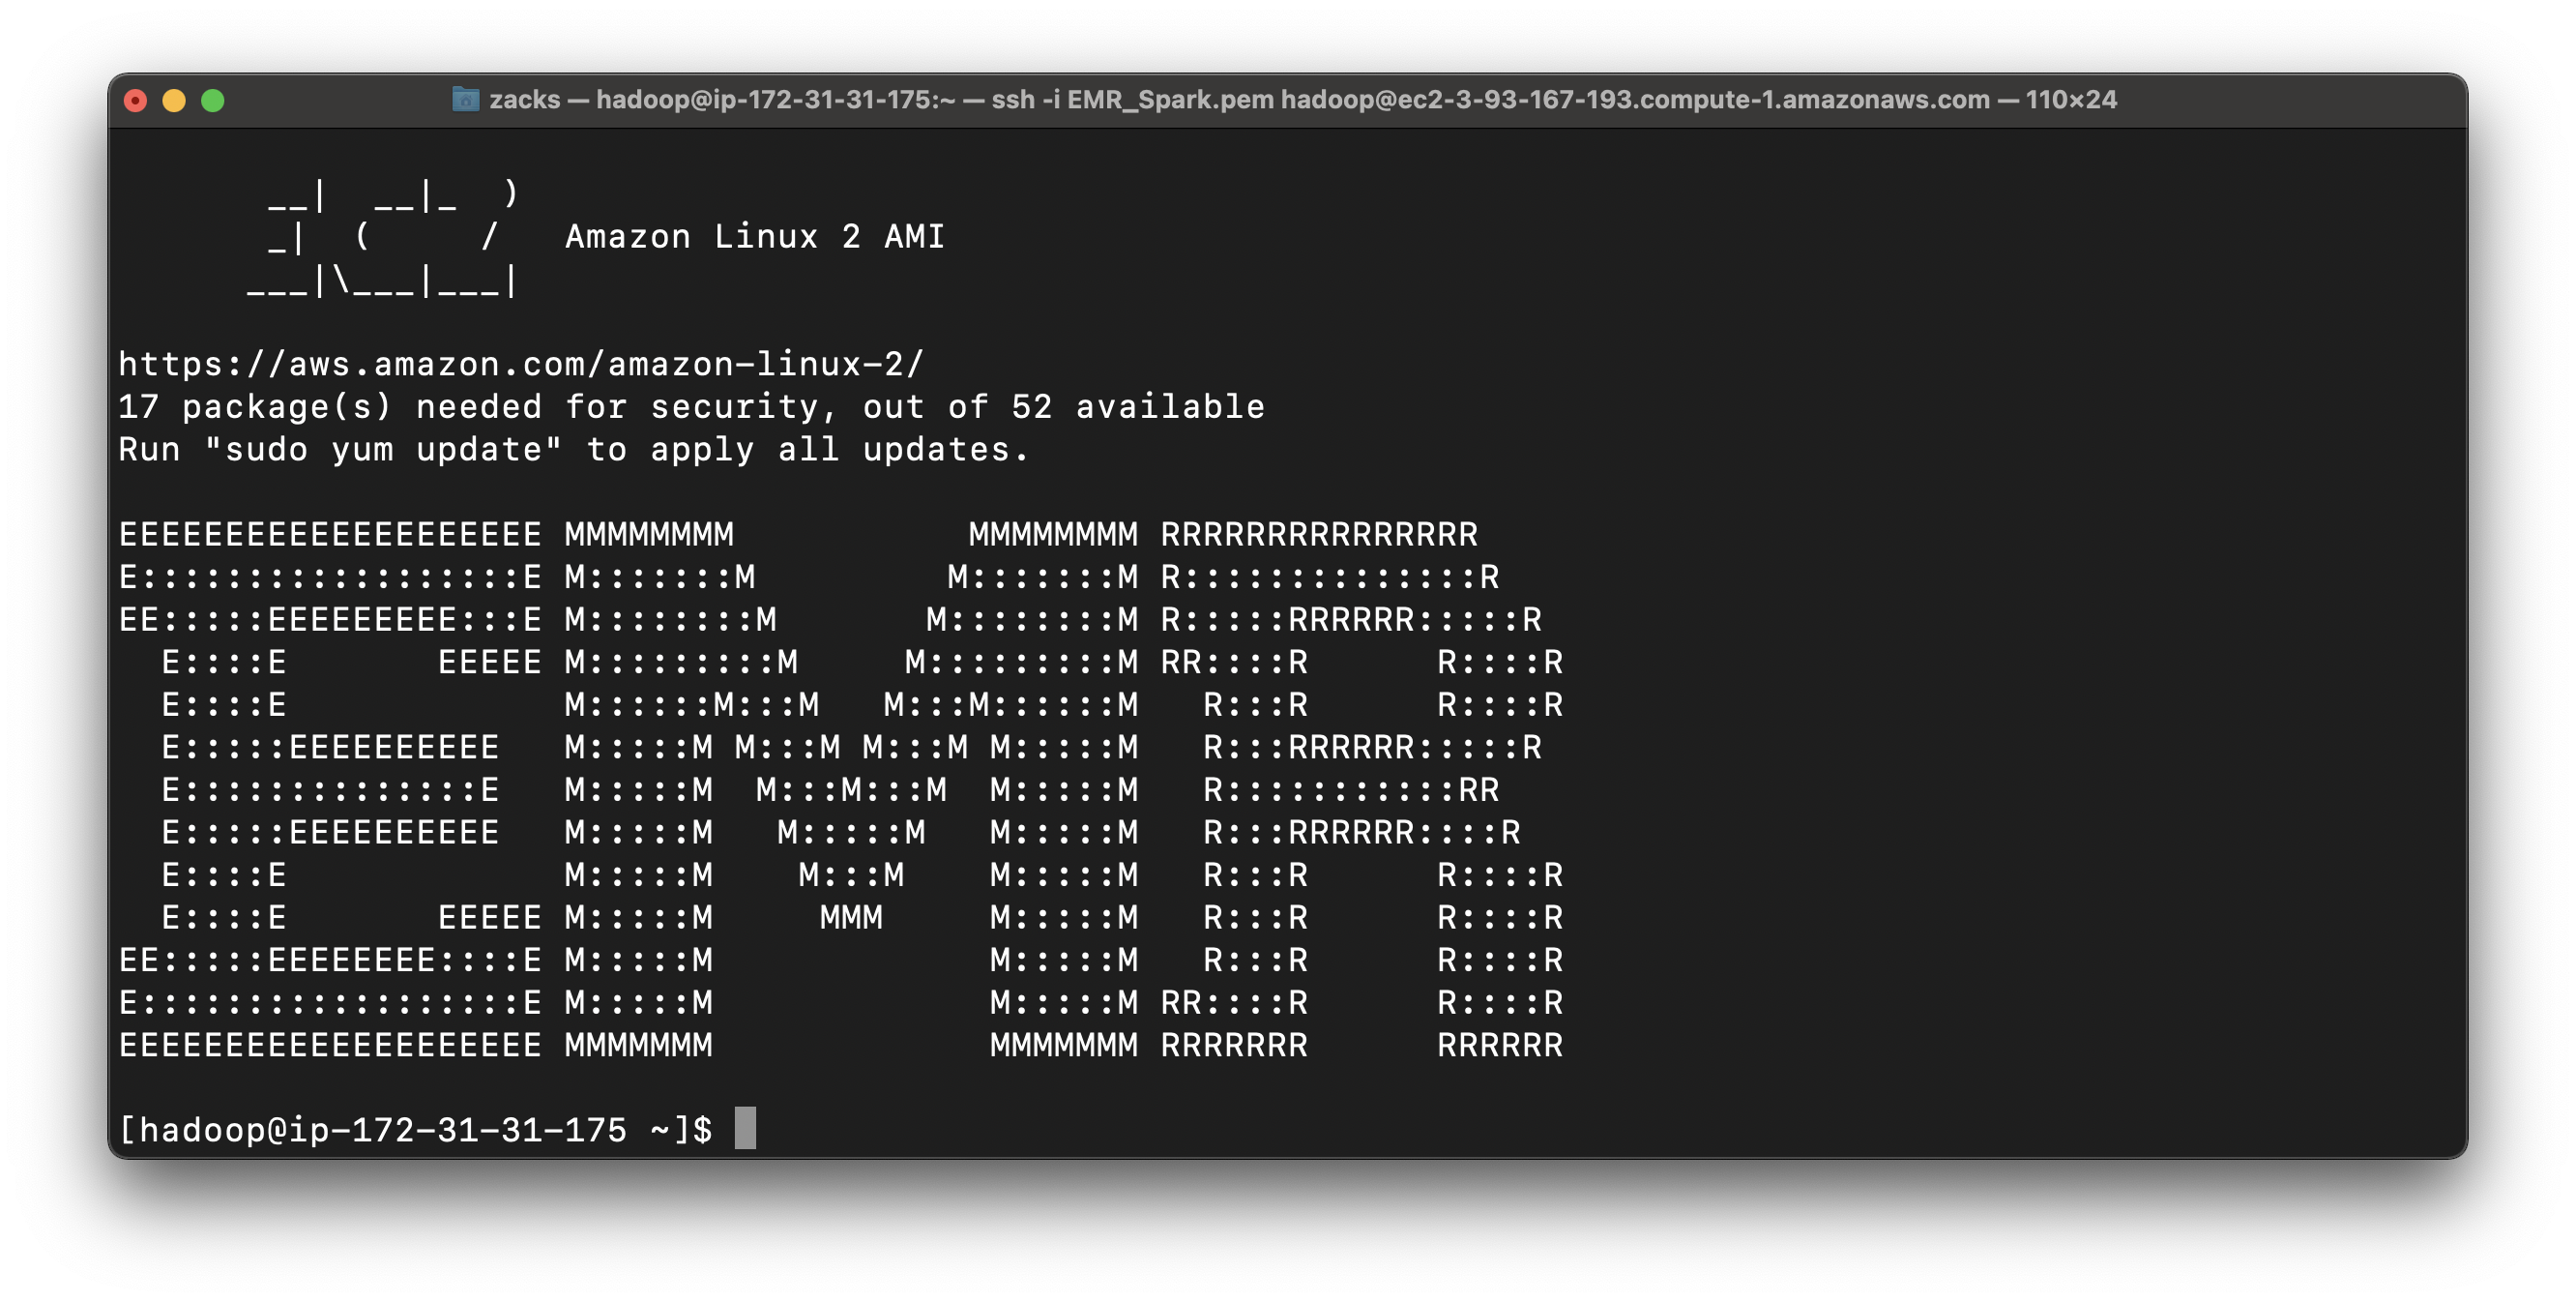
Open another terminal to SSH into the EMR master node.
1 | ssh -i EMR_Spark.pem hadoop@ec2-3-93-167-193.compute-1.amazonaws.com |
1 | presto-cli --catalog hive |
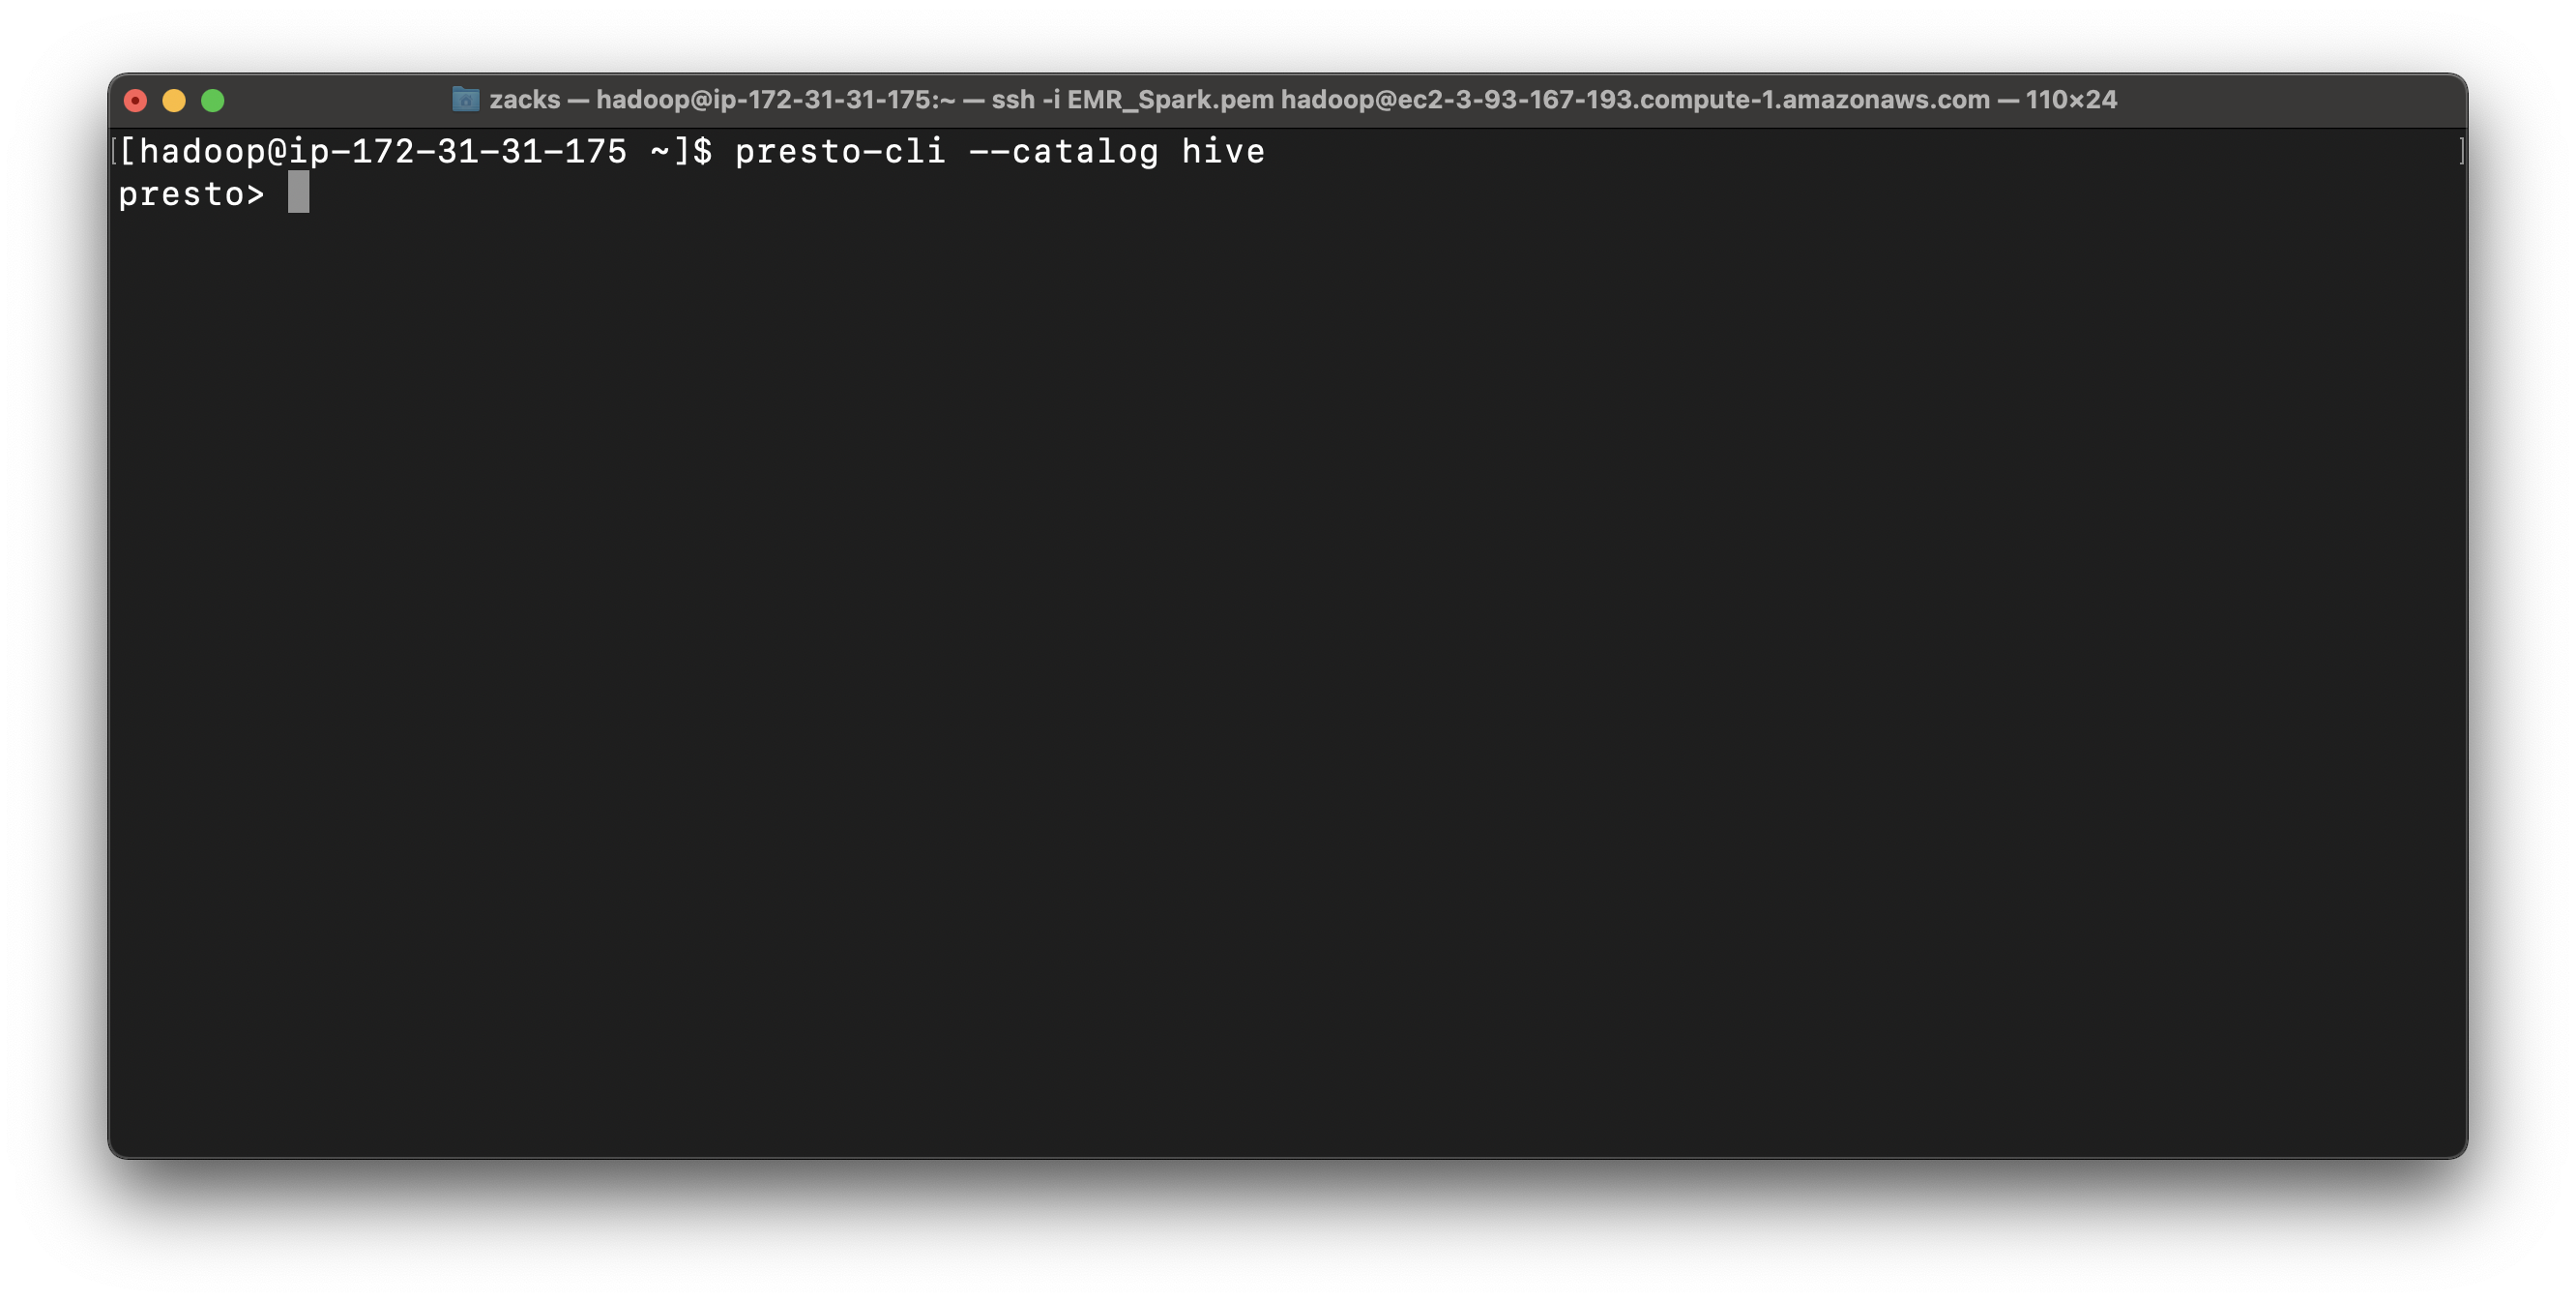
You can see all your databases in AWS Glue.
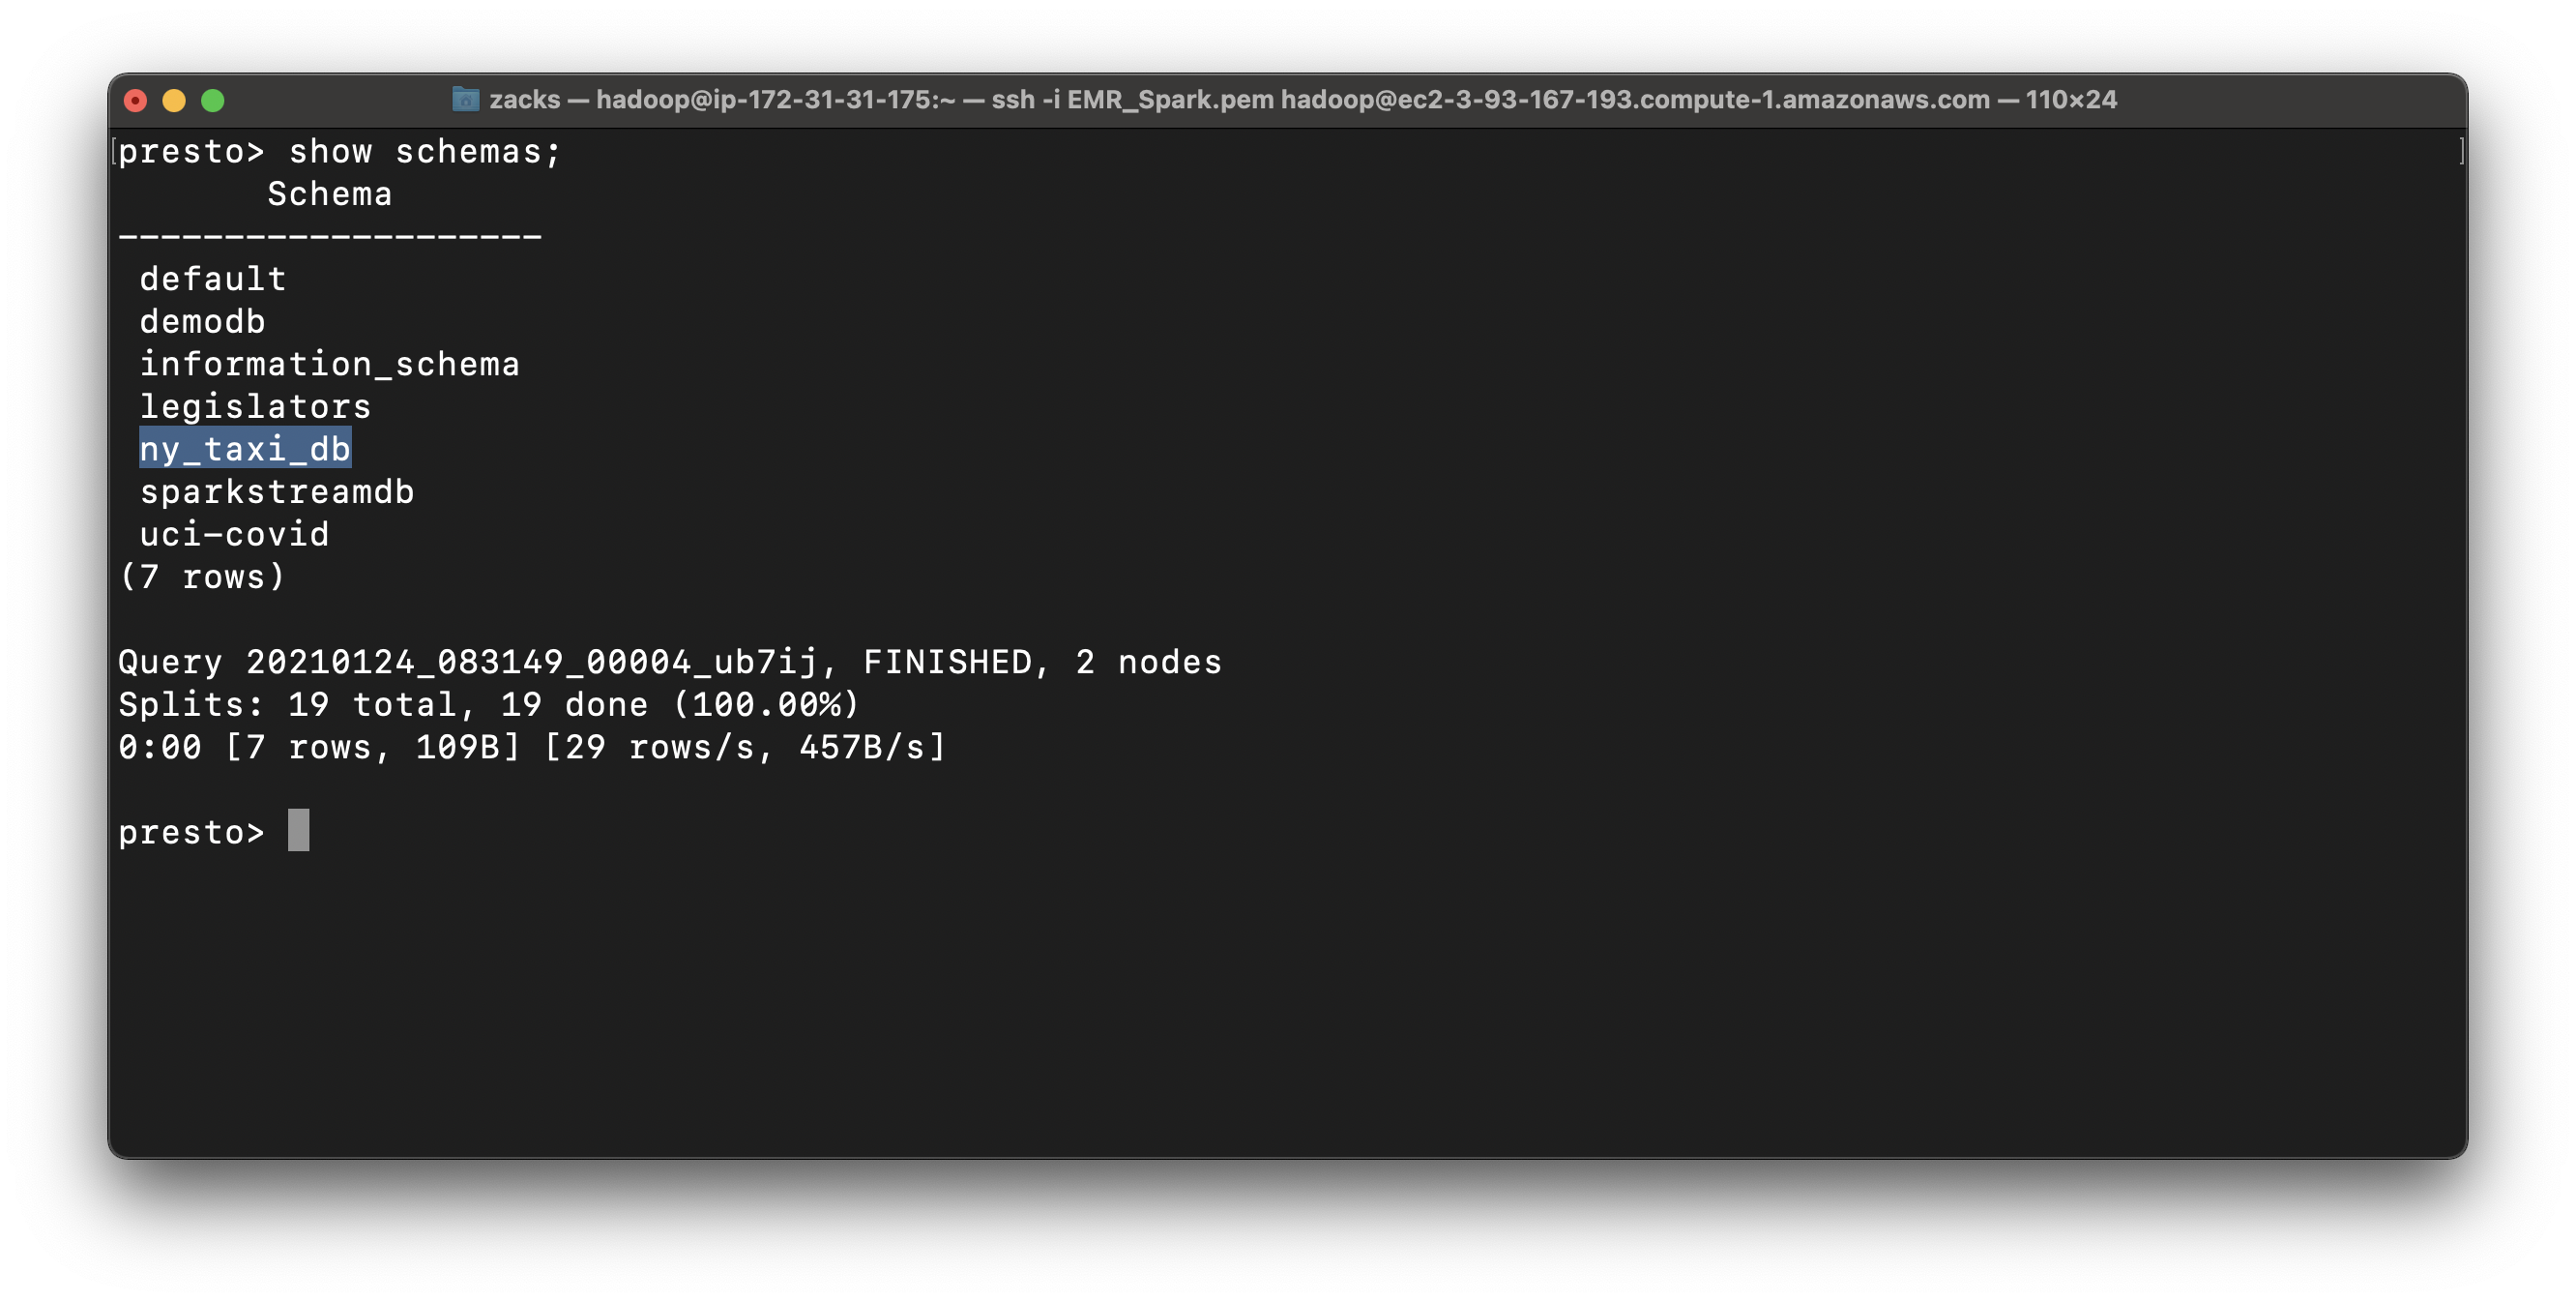
1 | show schemas; |
We can see several schemas. They are all come from AWS Glue, since we checked Use for Presto table metadata at the EMR configuration step. And we can see ny_taxi_db
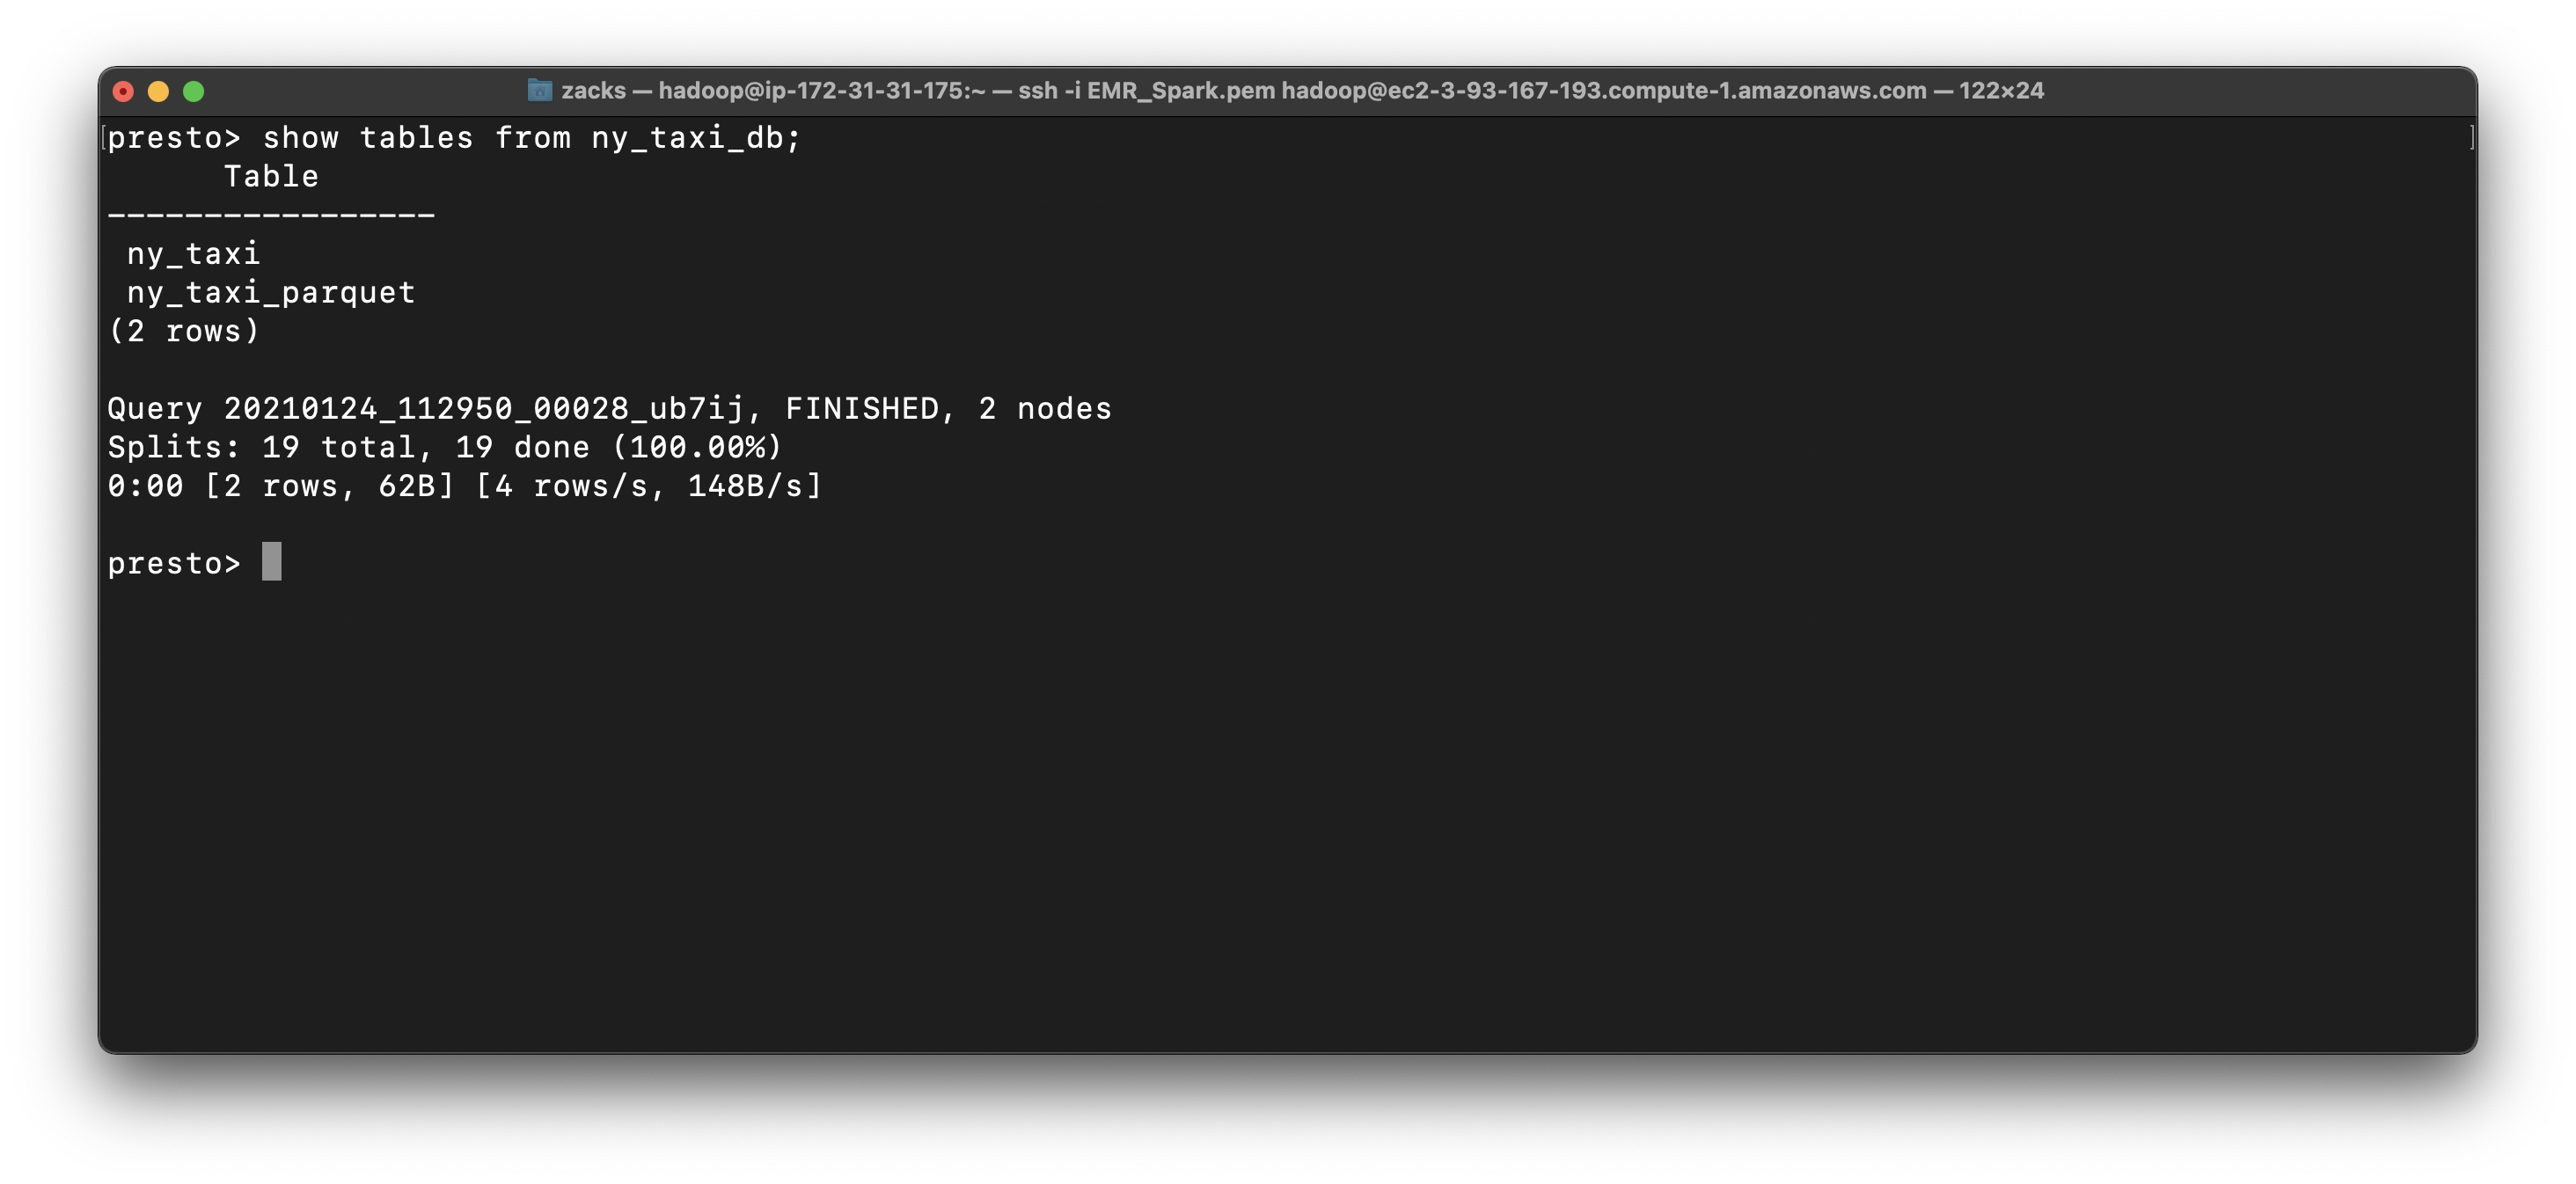
In ny_taxi_db, we have two tables, one is the CSV and another is Parquet.
Actually they are the schemas not the real tables.
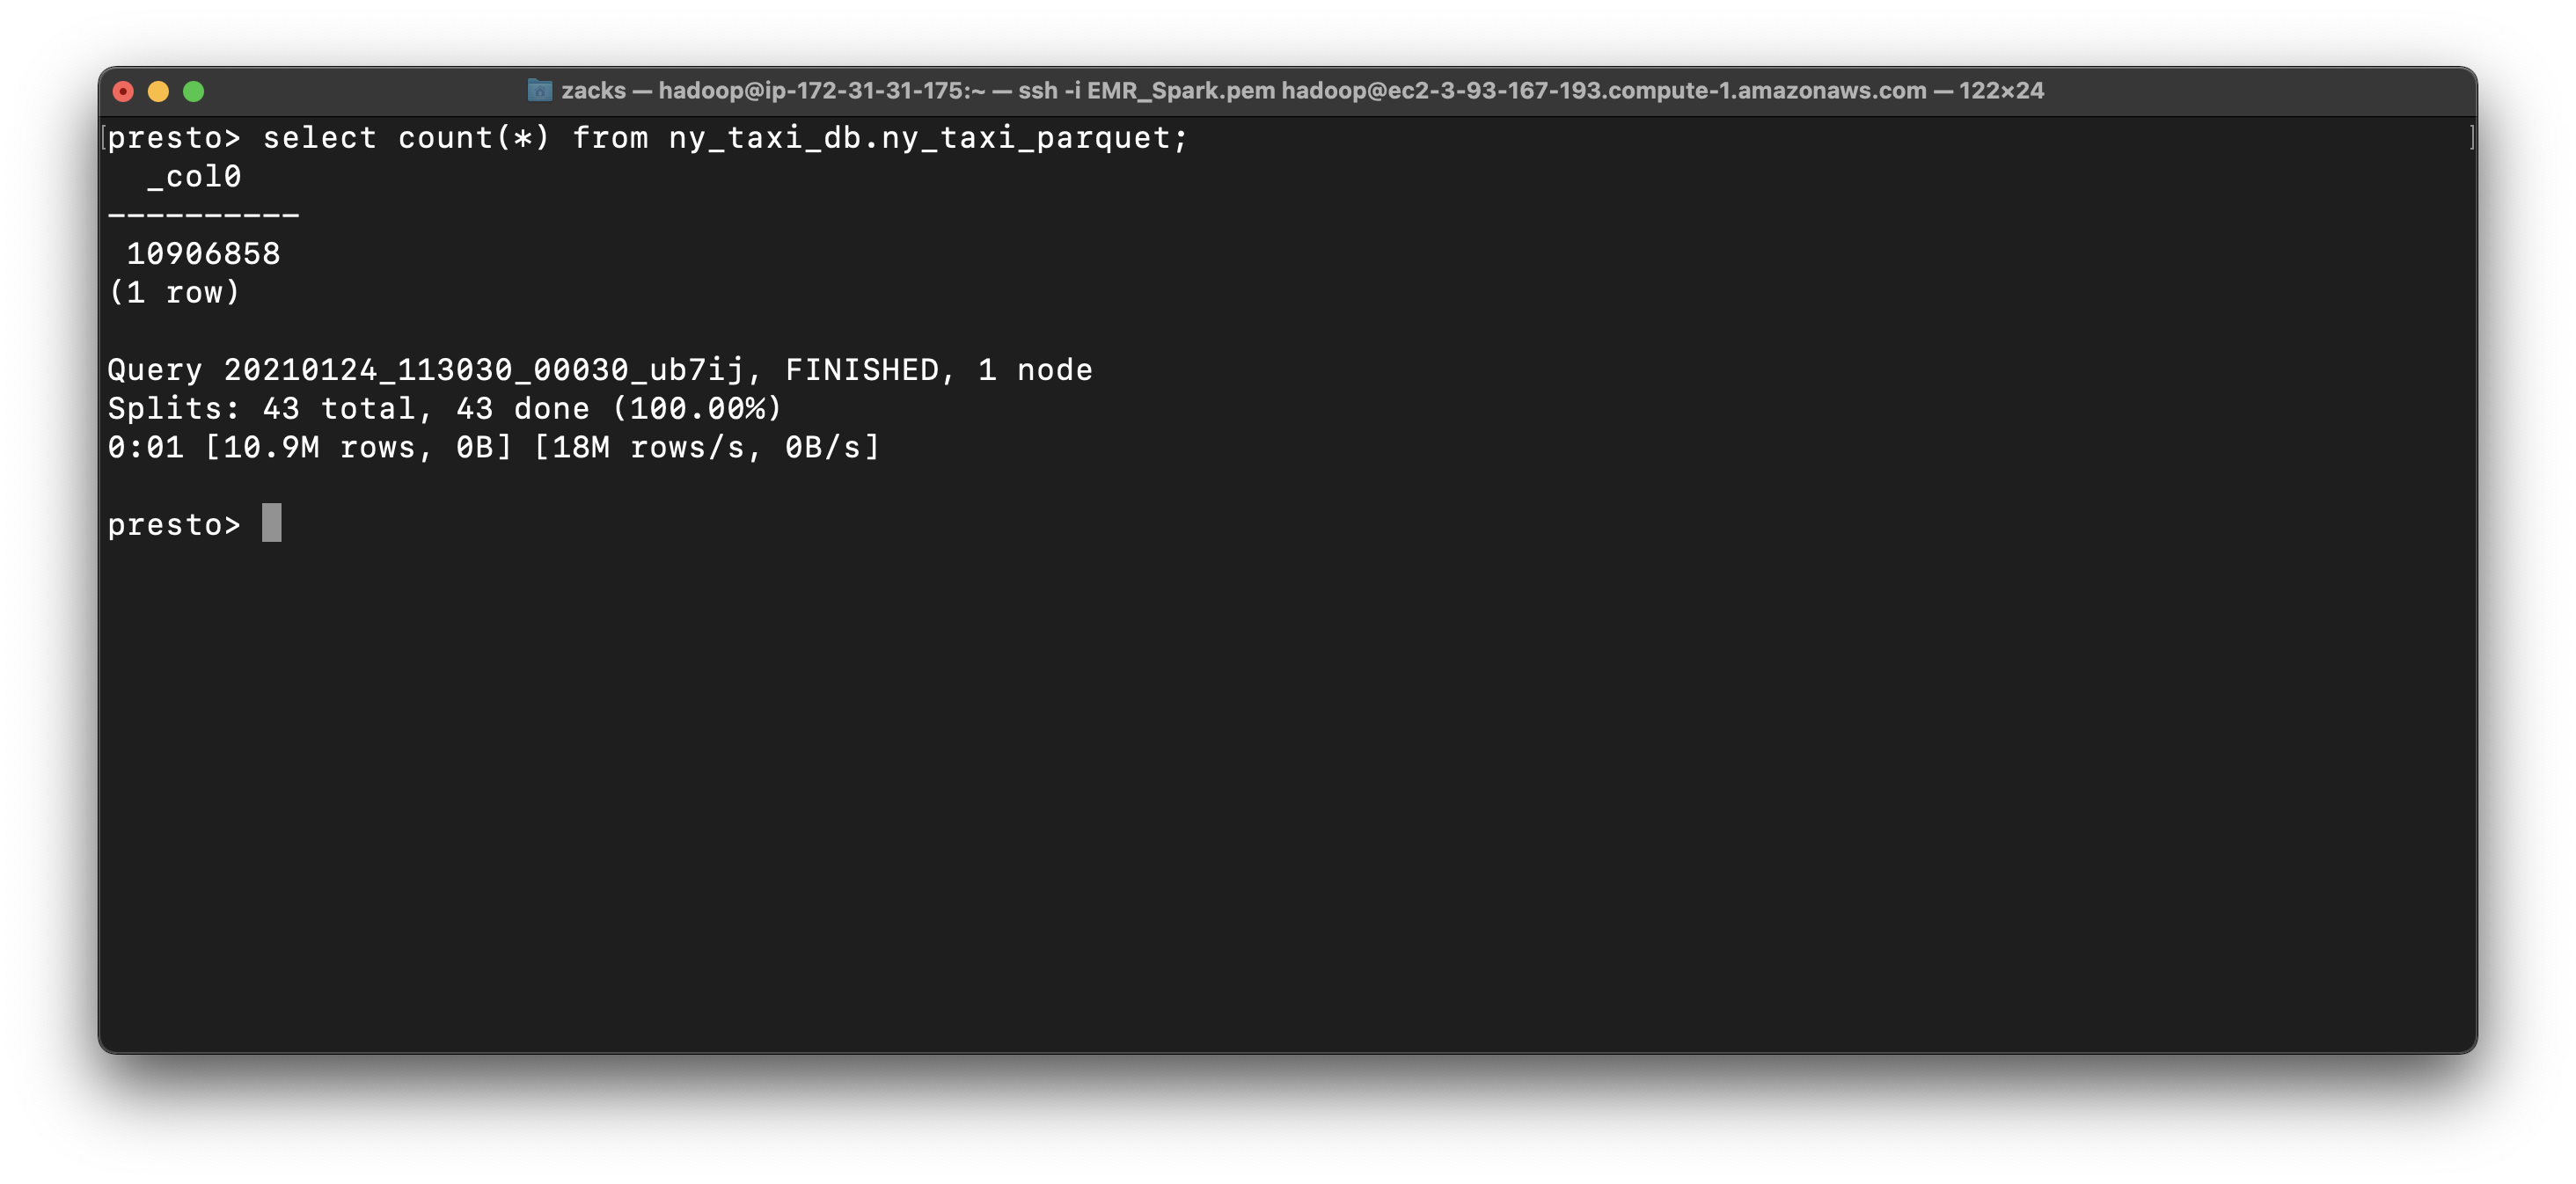
However, when we query the data from the tables, the schemas help the database engine locate and extract from S3 directly!
Even we are using SQL statements to query data that is not store in the SQL database!
1 | show tables from ny_taxi_db; |
1 | select count(*) from ny_taxi_db.ny_taxi; |

1 | select count(*) from ny_taxi_db.ny_taxi_parquet; |
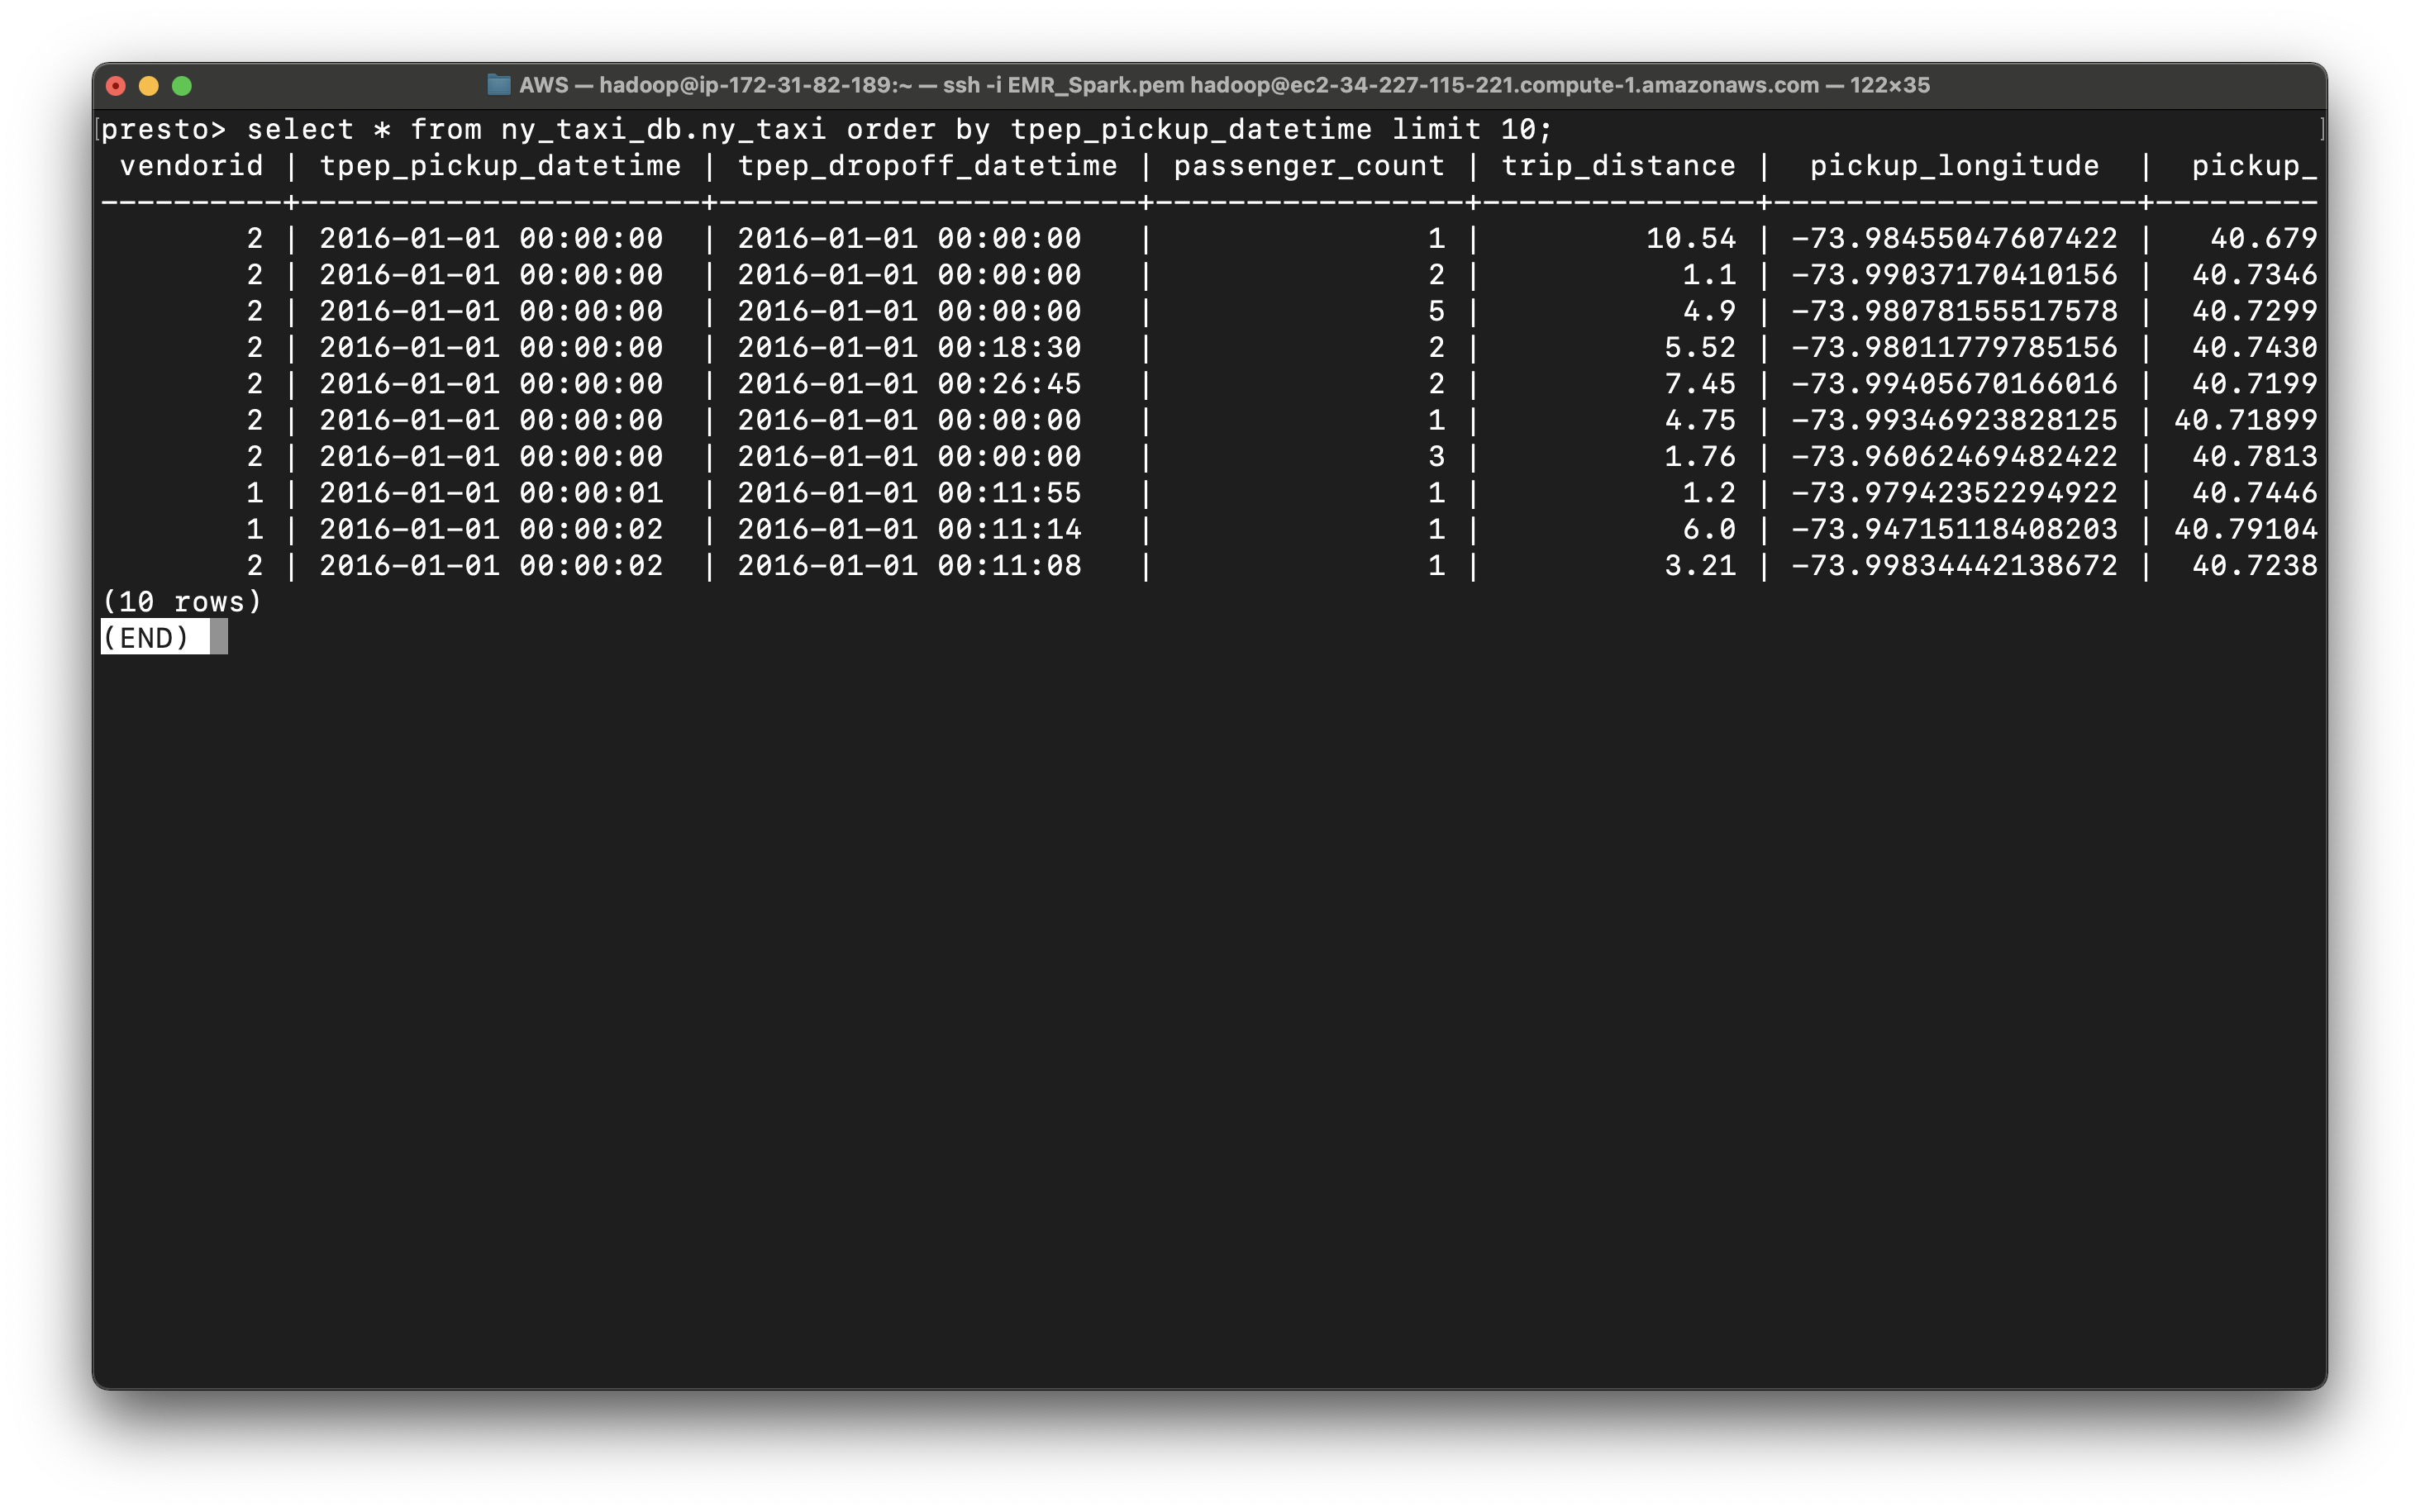
Notice in ny_taxi table, the datetime is string type, which is hard to extract date and time.
1 | select * from ny_taxi_db.ny_taxi order by tpep_pickup_datetime limit 10; |
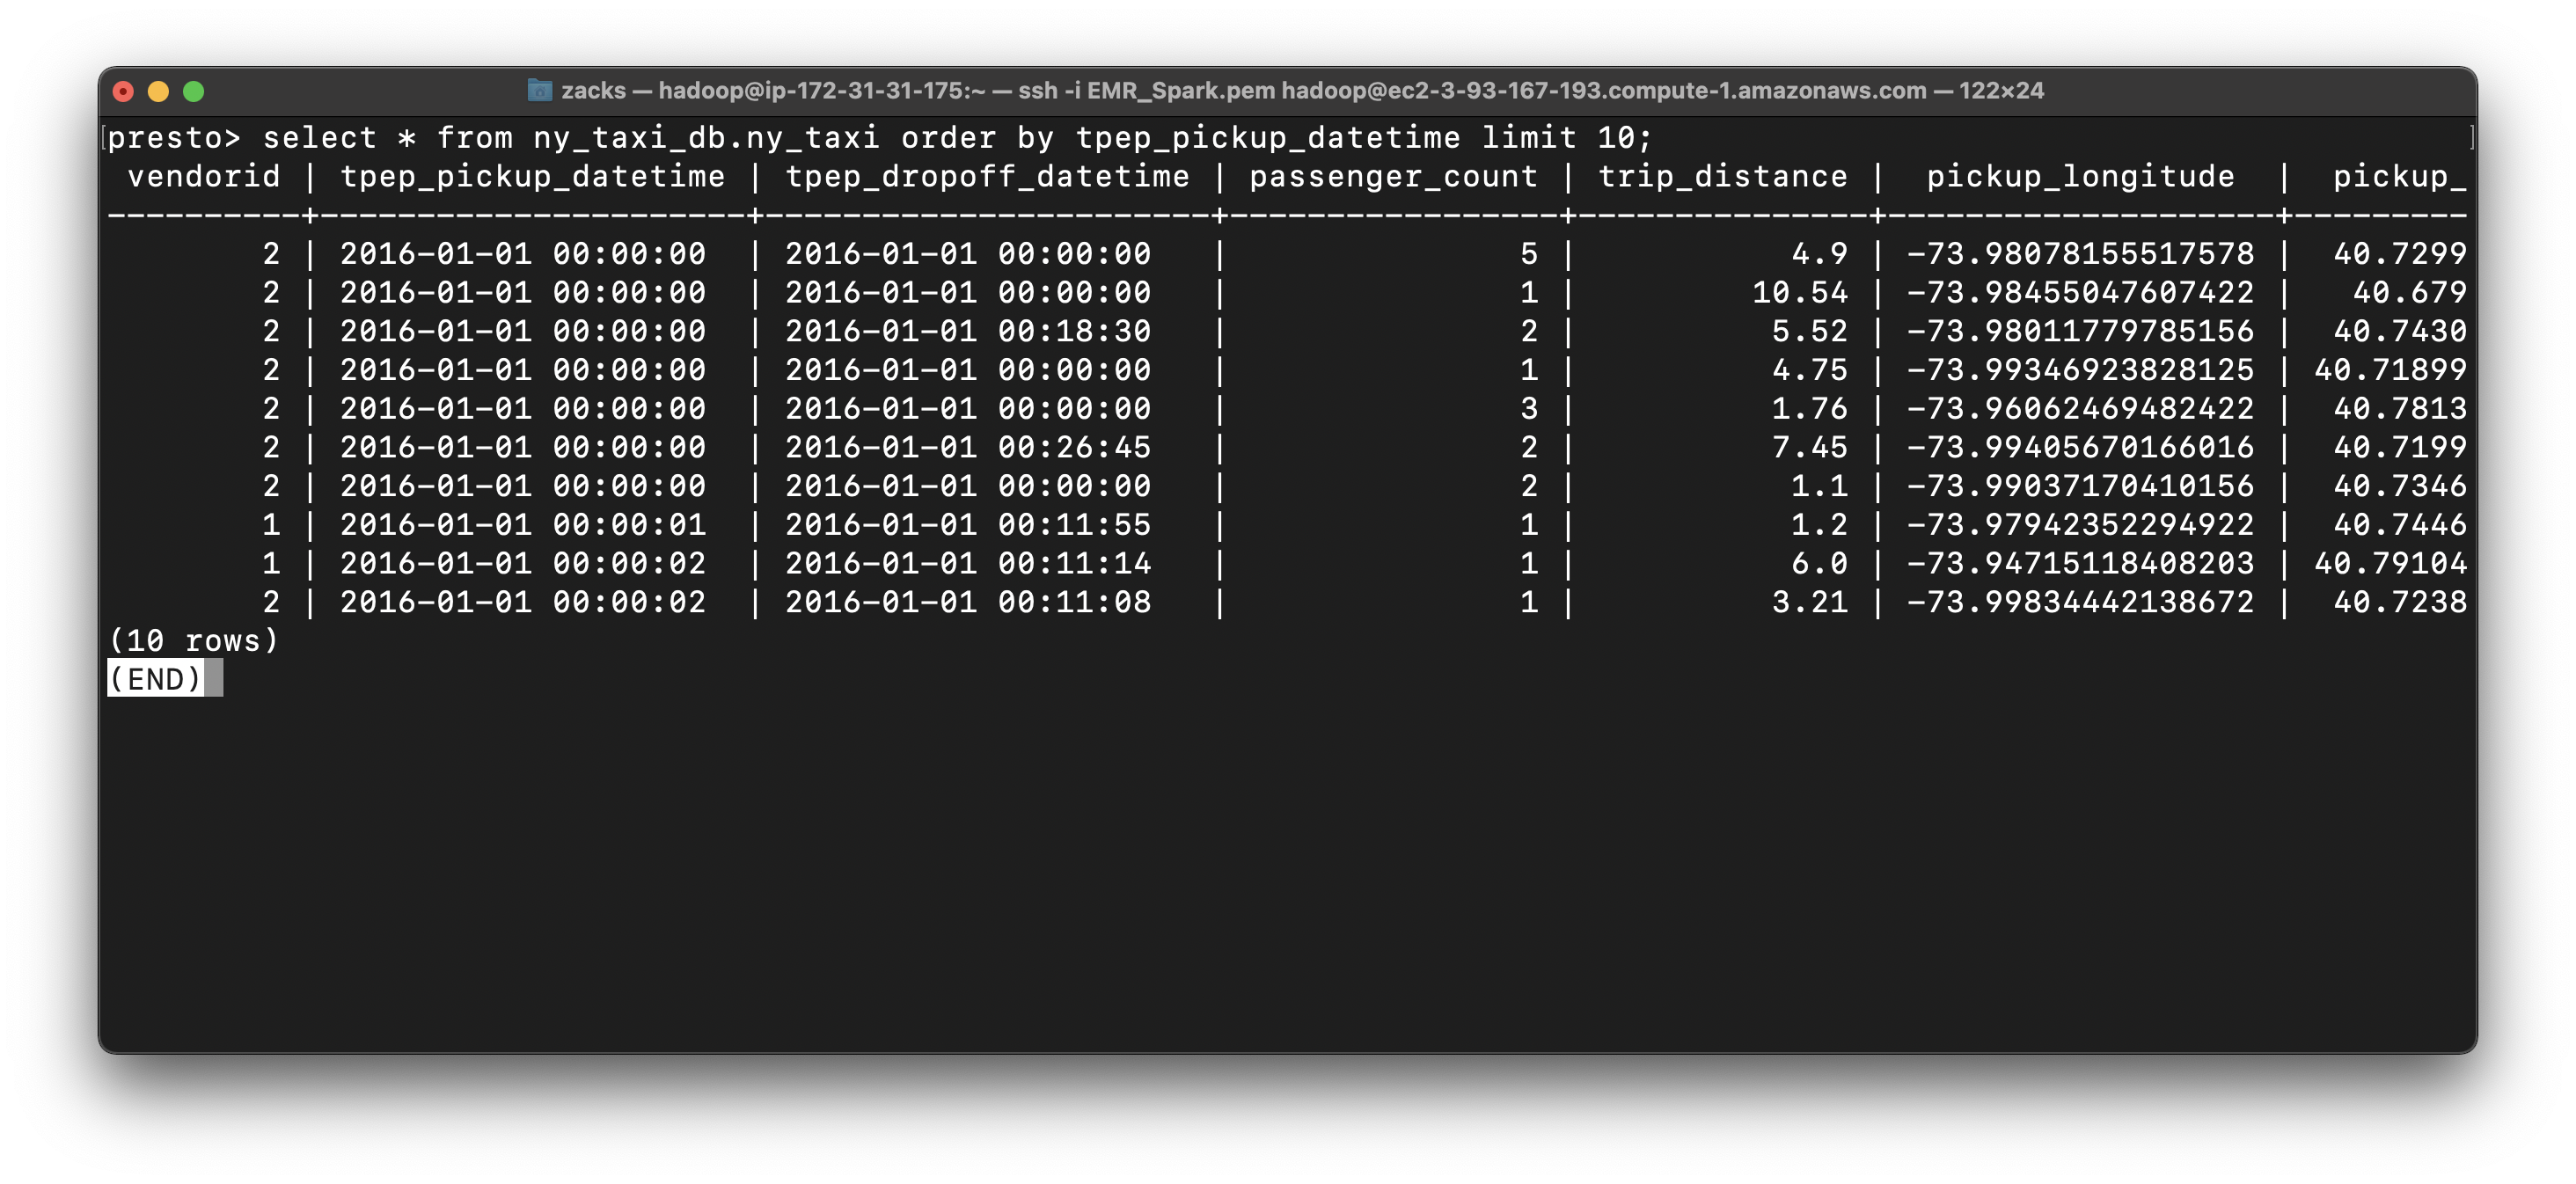
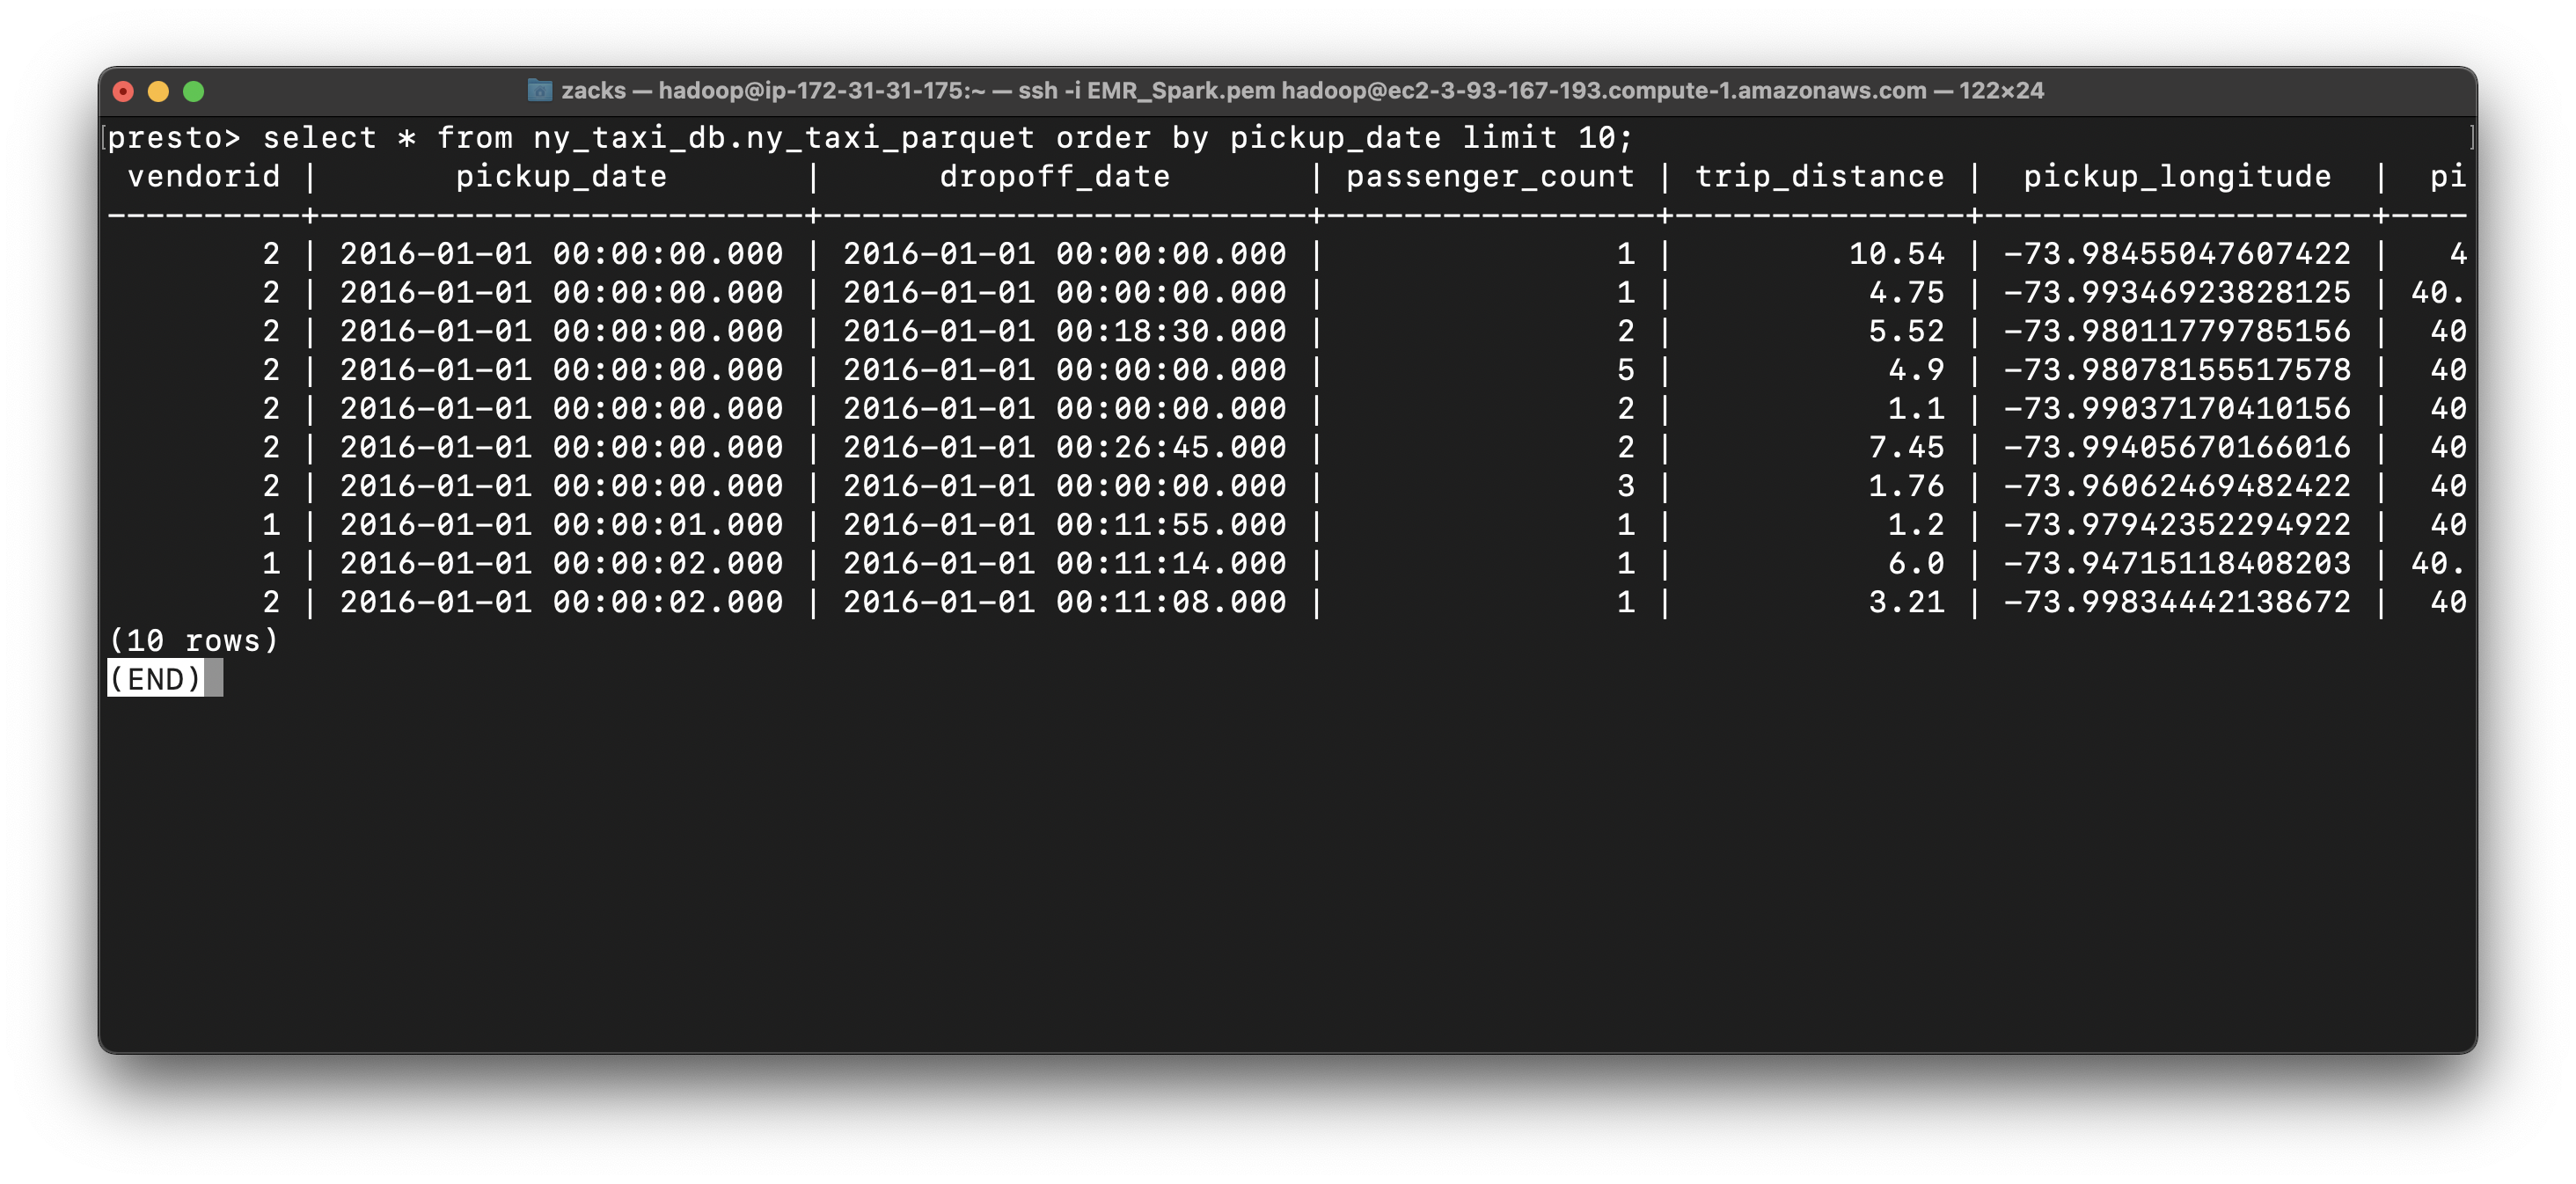
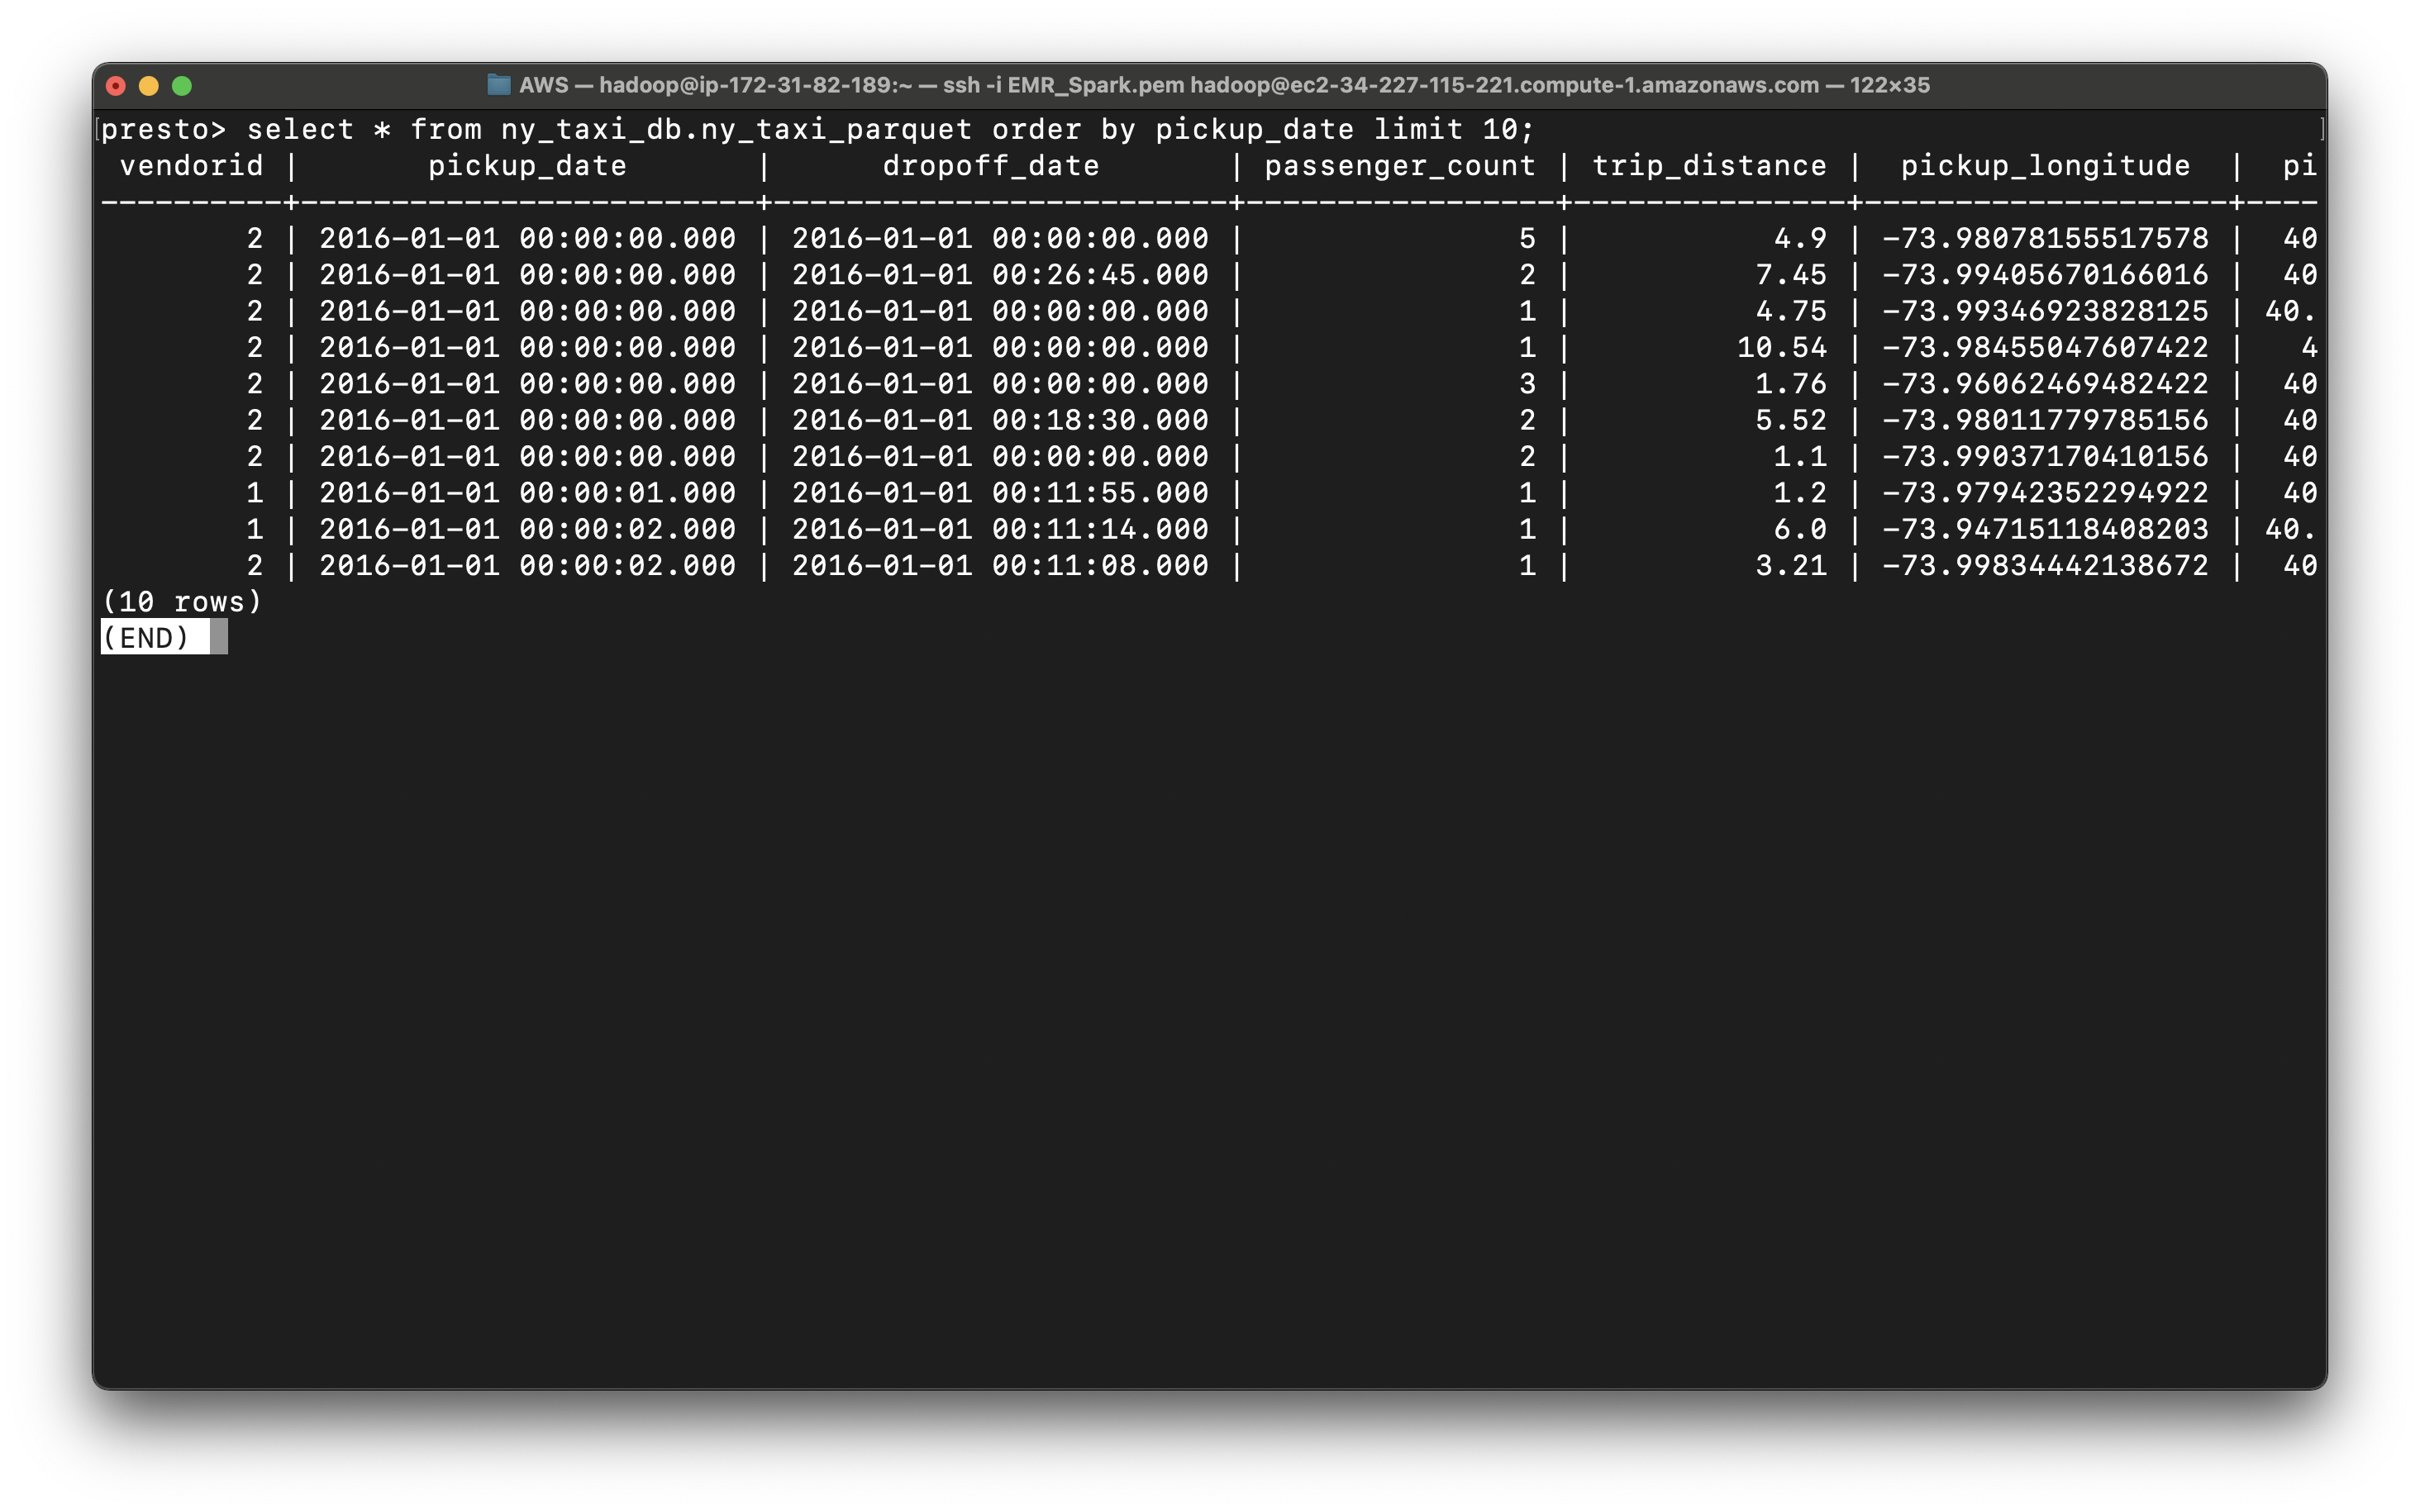
Since we use AWS Glue ETL convert the string of datetime in CSV file to timestamp and removed tpep_ prefix.
1 | select * from ny_taxi_db.ny_taxi_parquet order by pickup_date limit 10; |
Presto Query
Use parquet to make time related queries
1 | SELECT EXTRACT (HOUR FROM pickup_date) AS hour, avg(fare_amount) AS average_fare FROM ny_taxi_db.ny_taxi_parquet GROUP BY 1 ORDER BY 1; |
We get the average_fare based on hour.
Conclusion: A taxi driver living in New York could earn the maximum fare during 4 AM to 5 AM.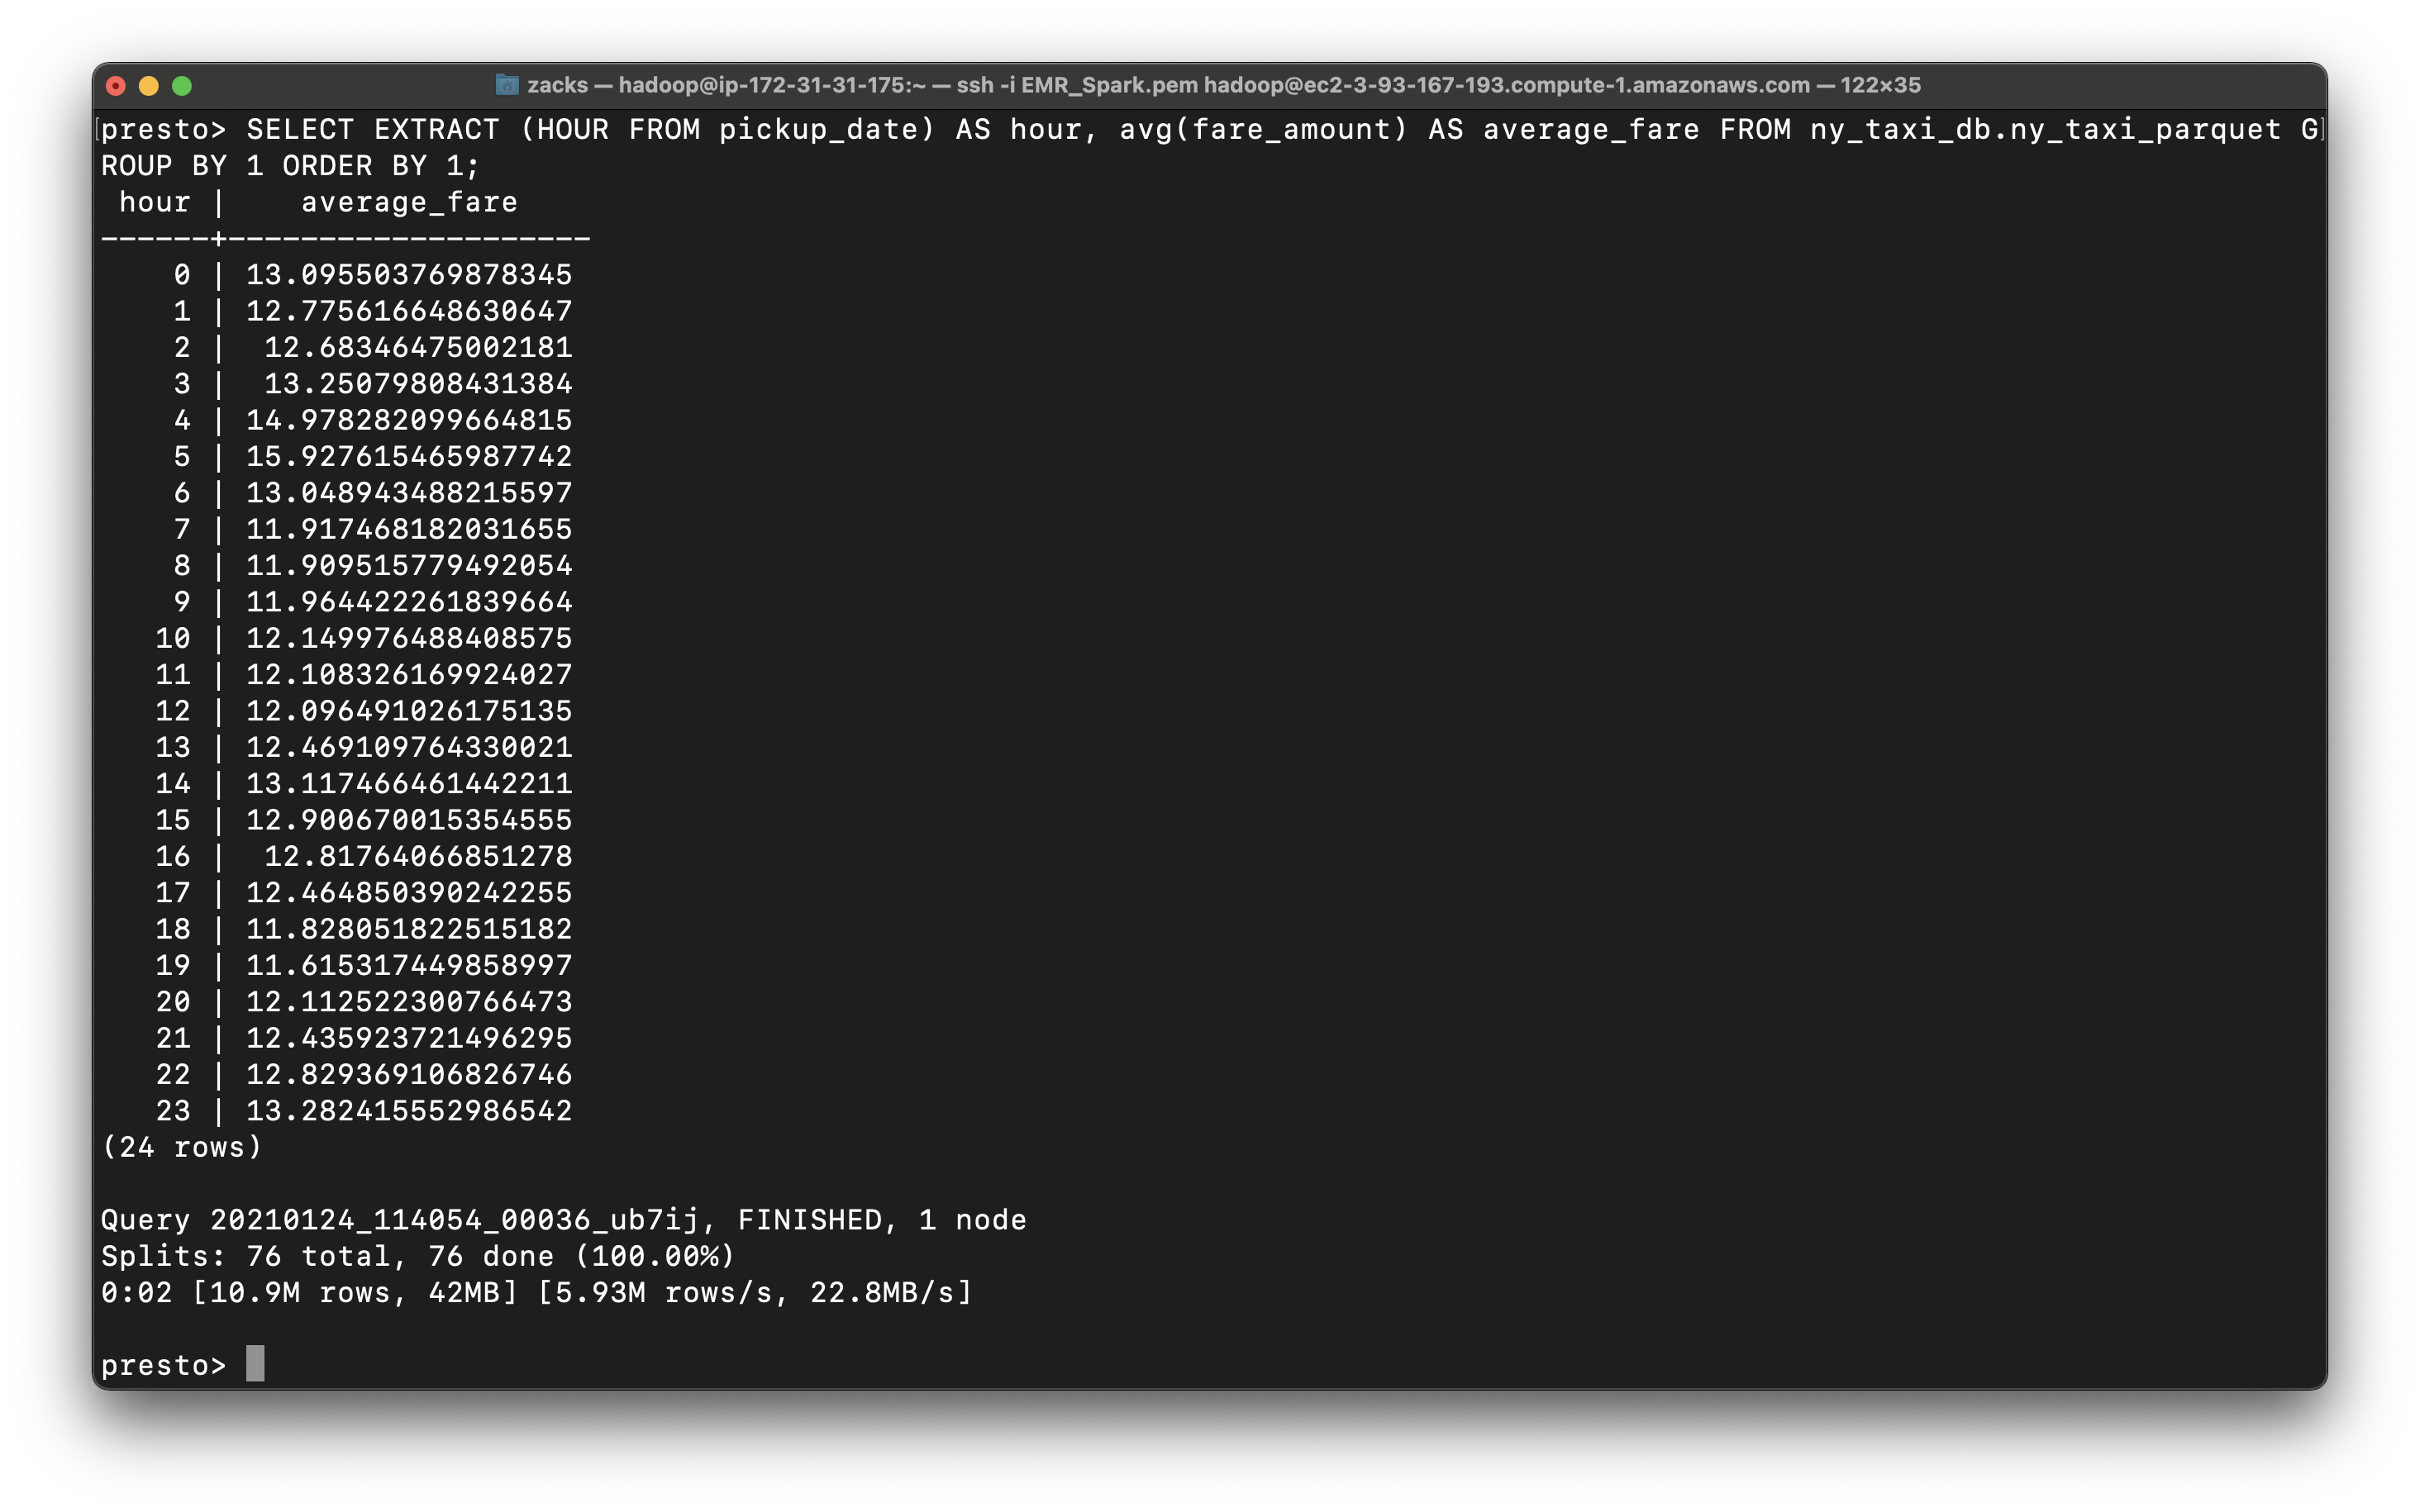
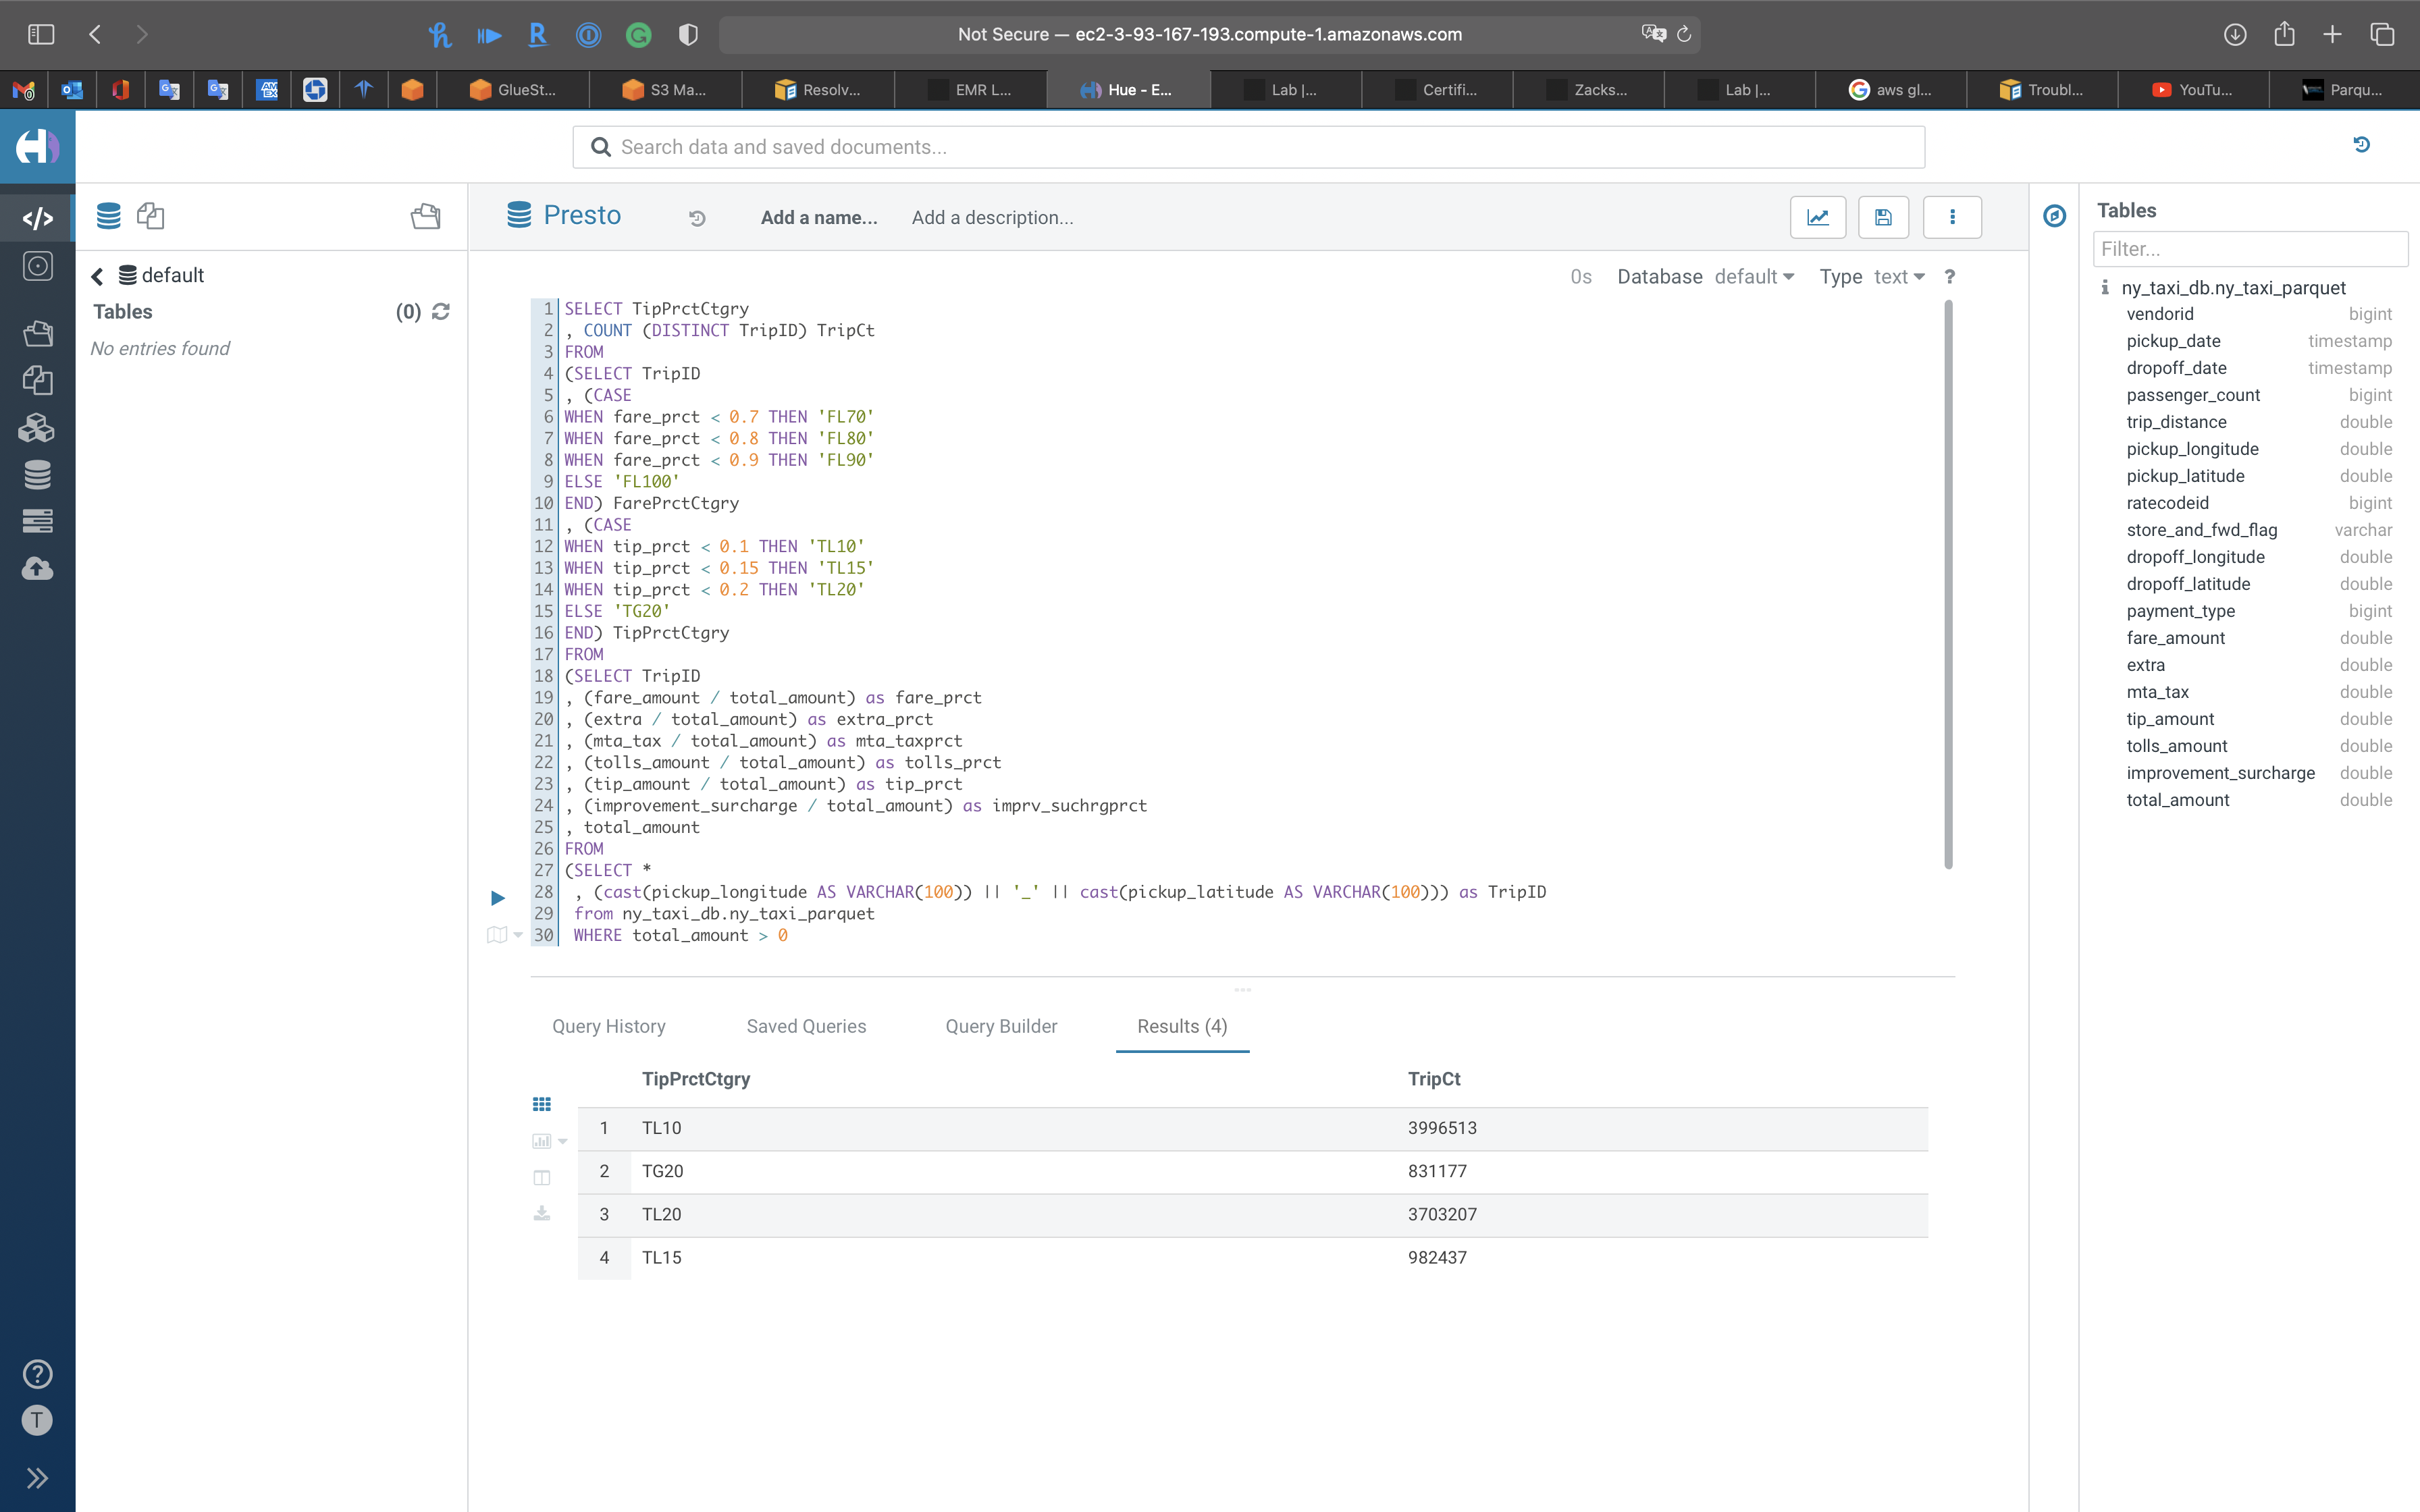
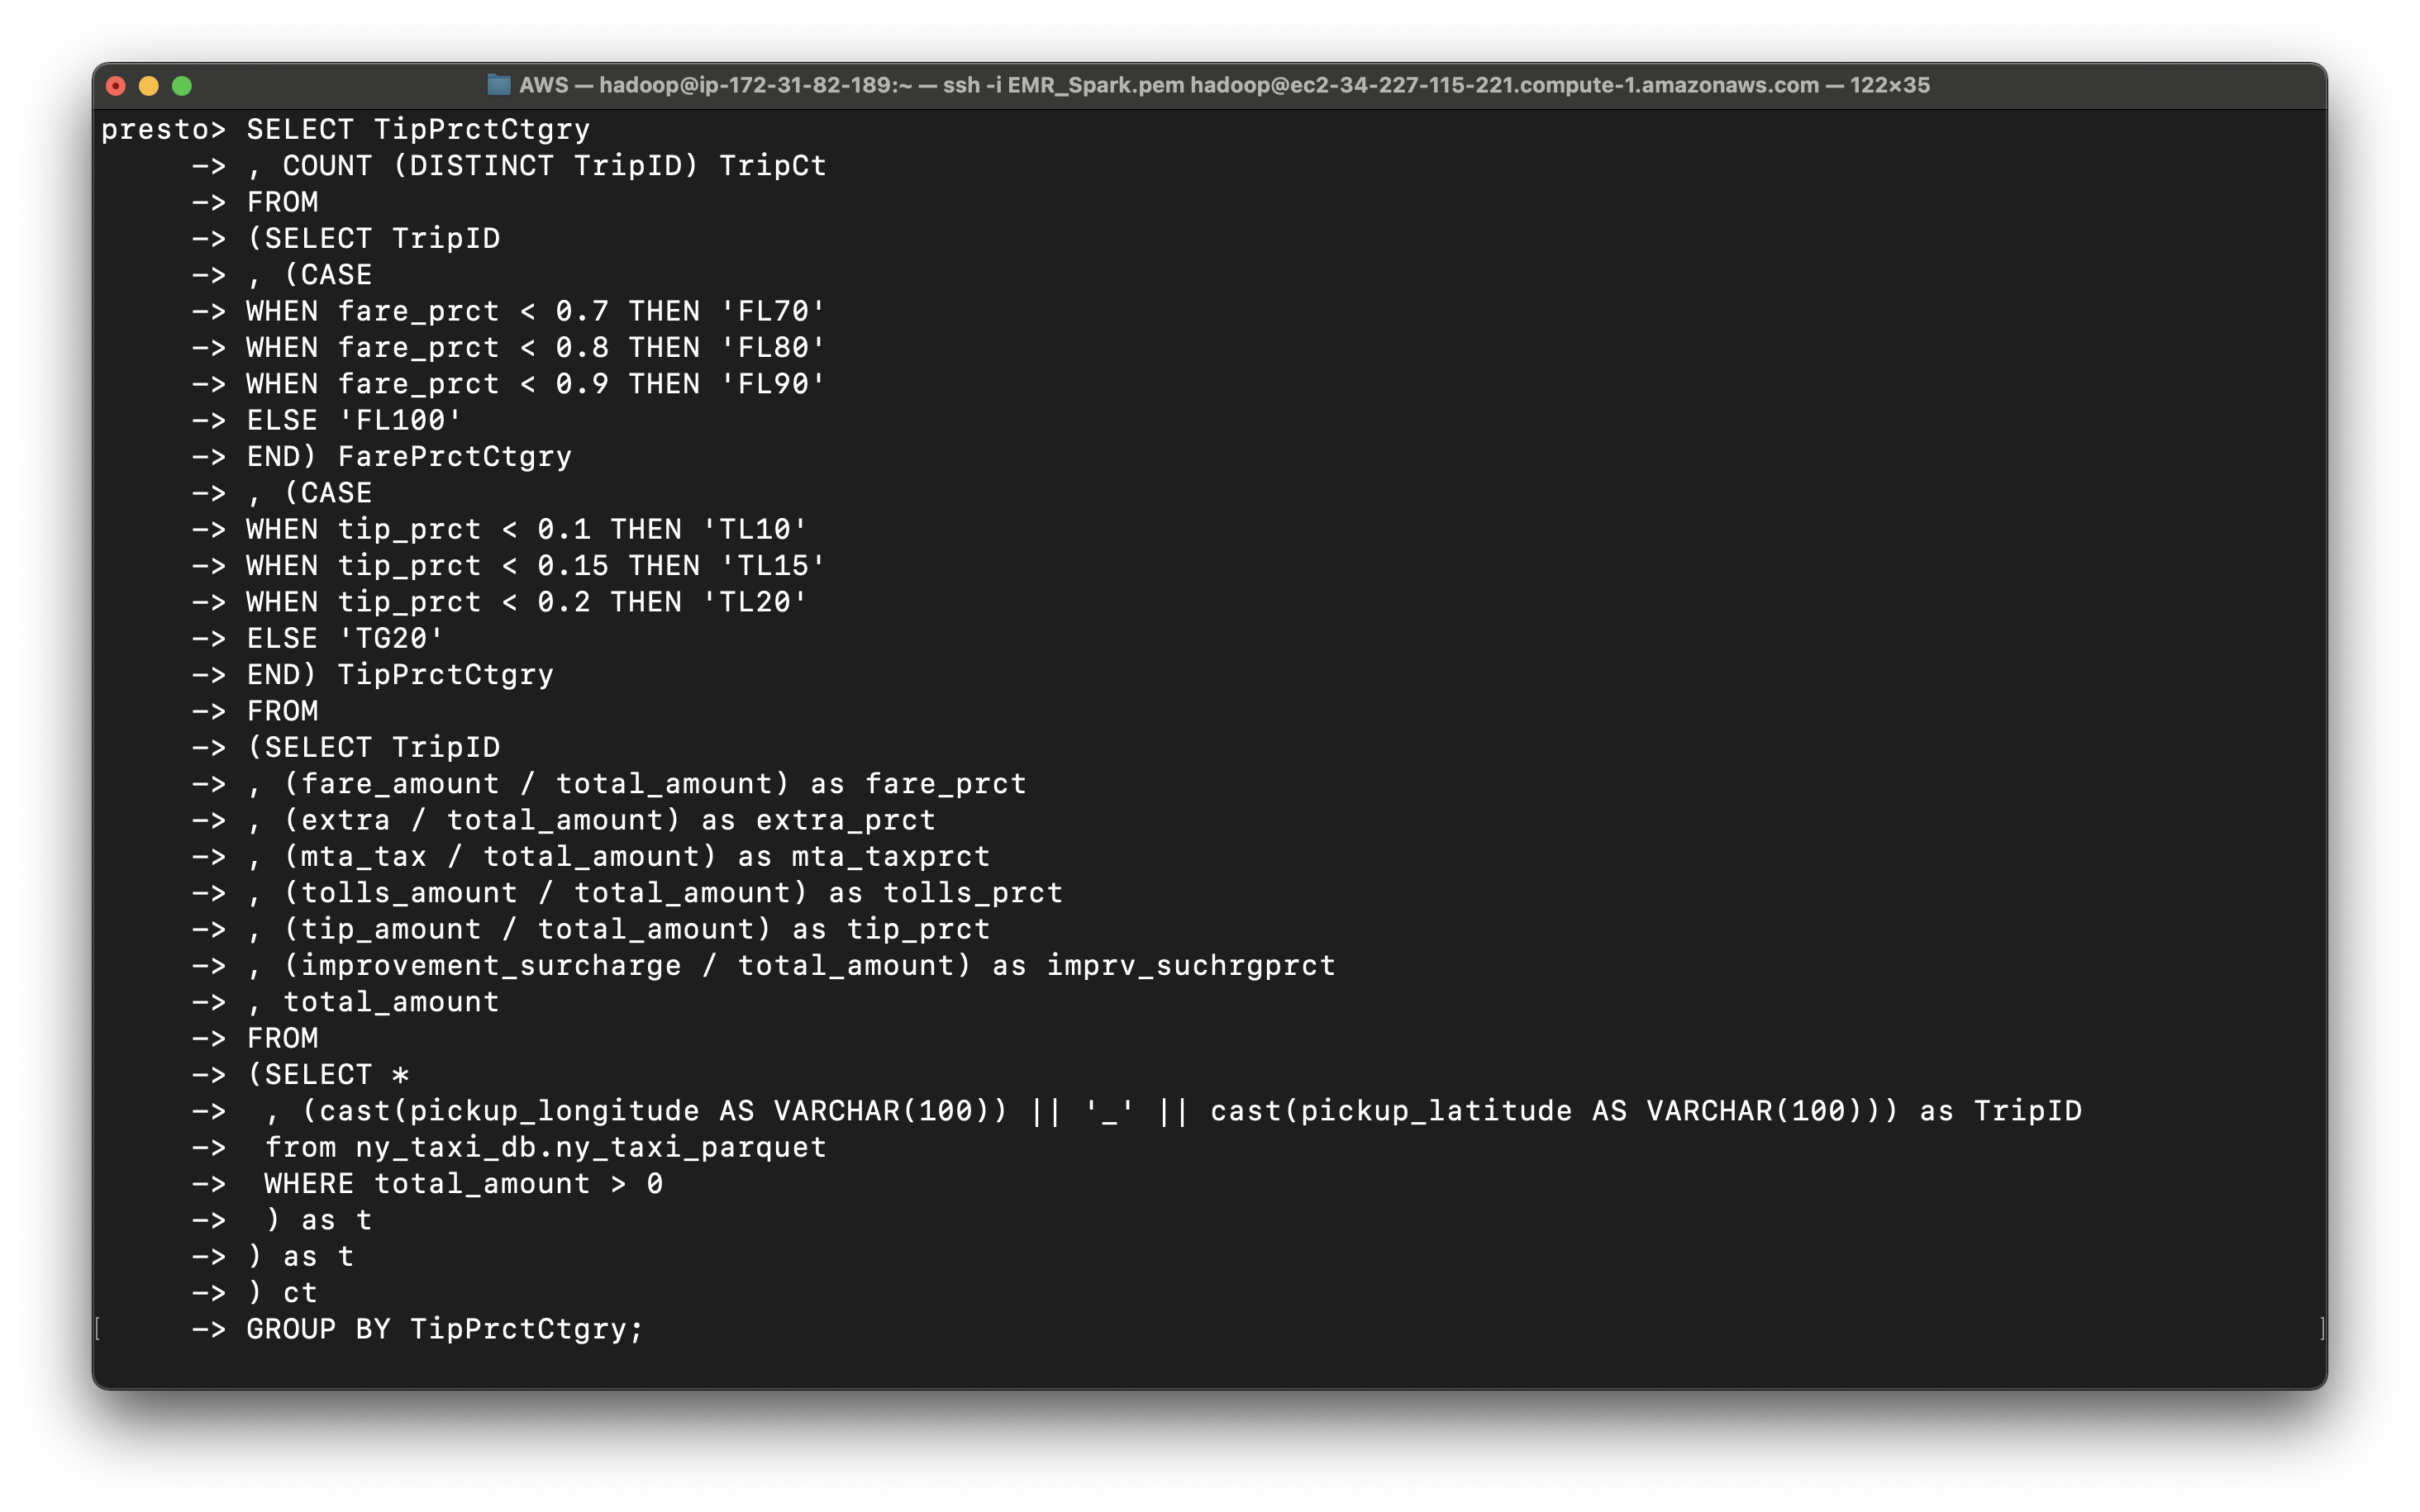
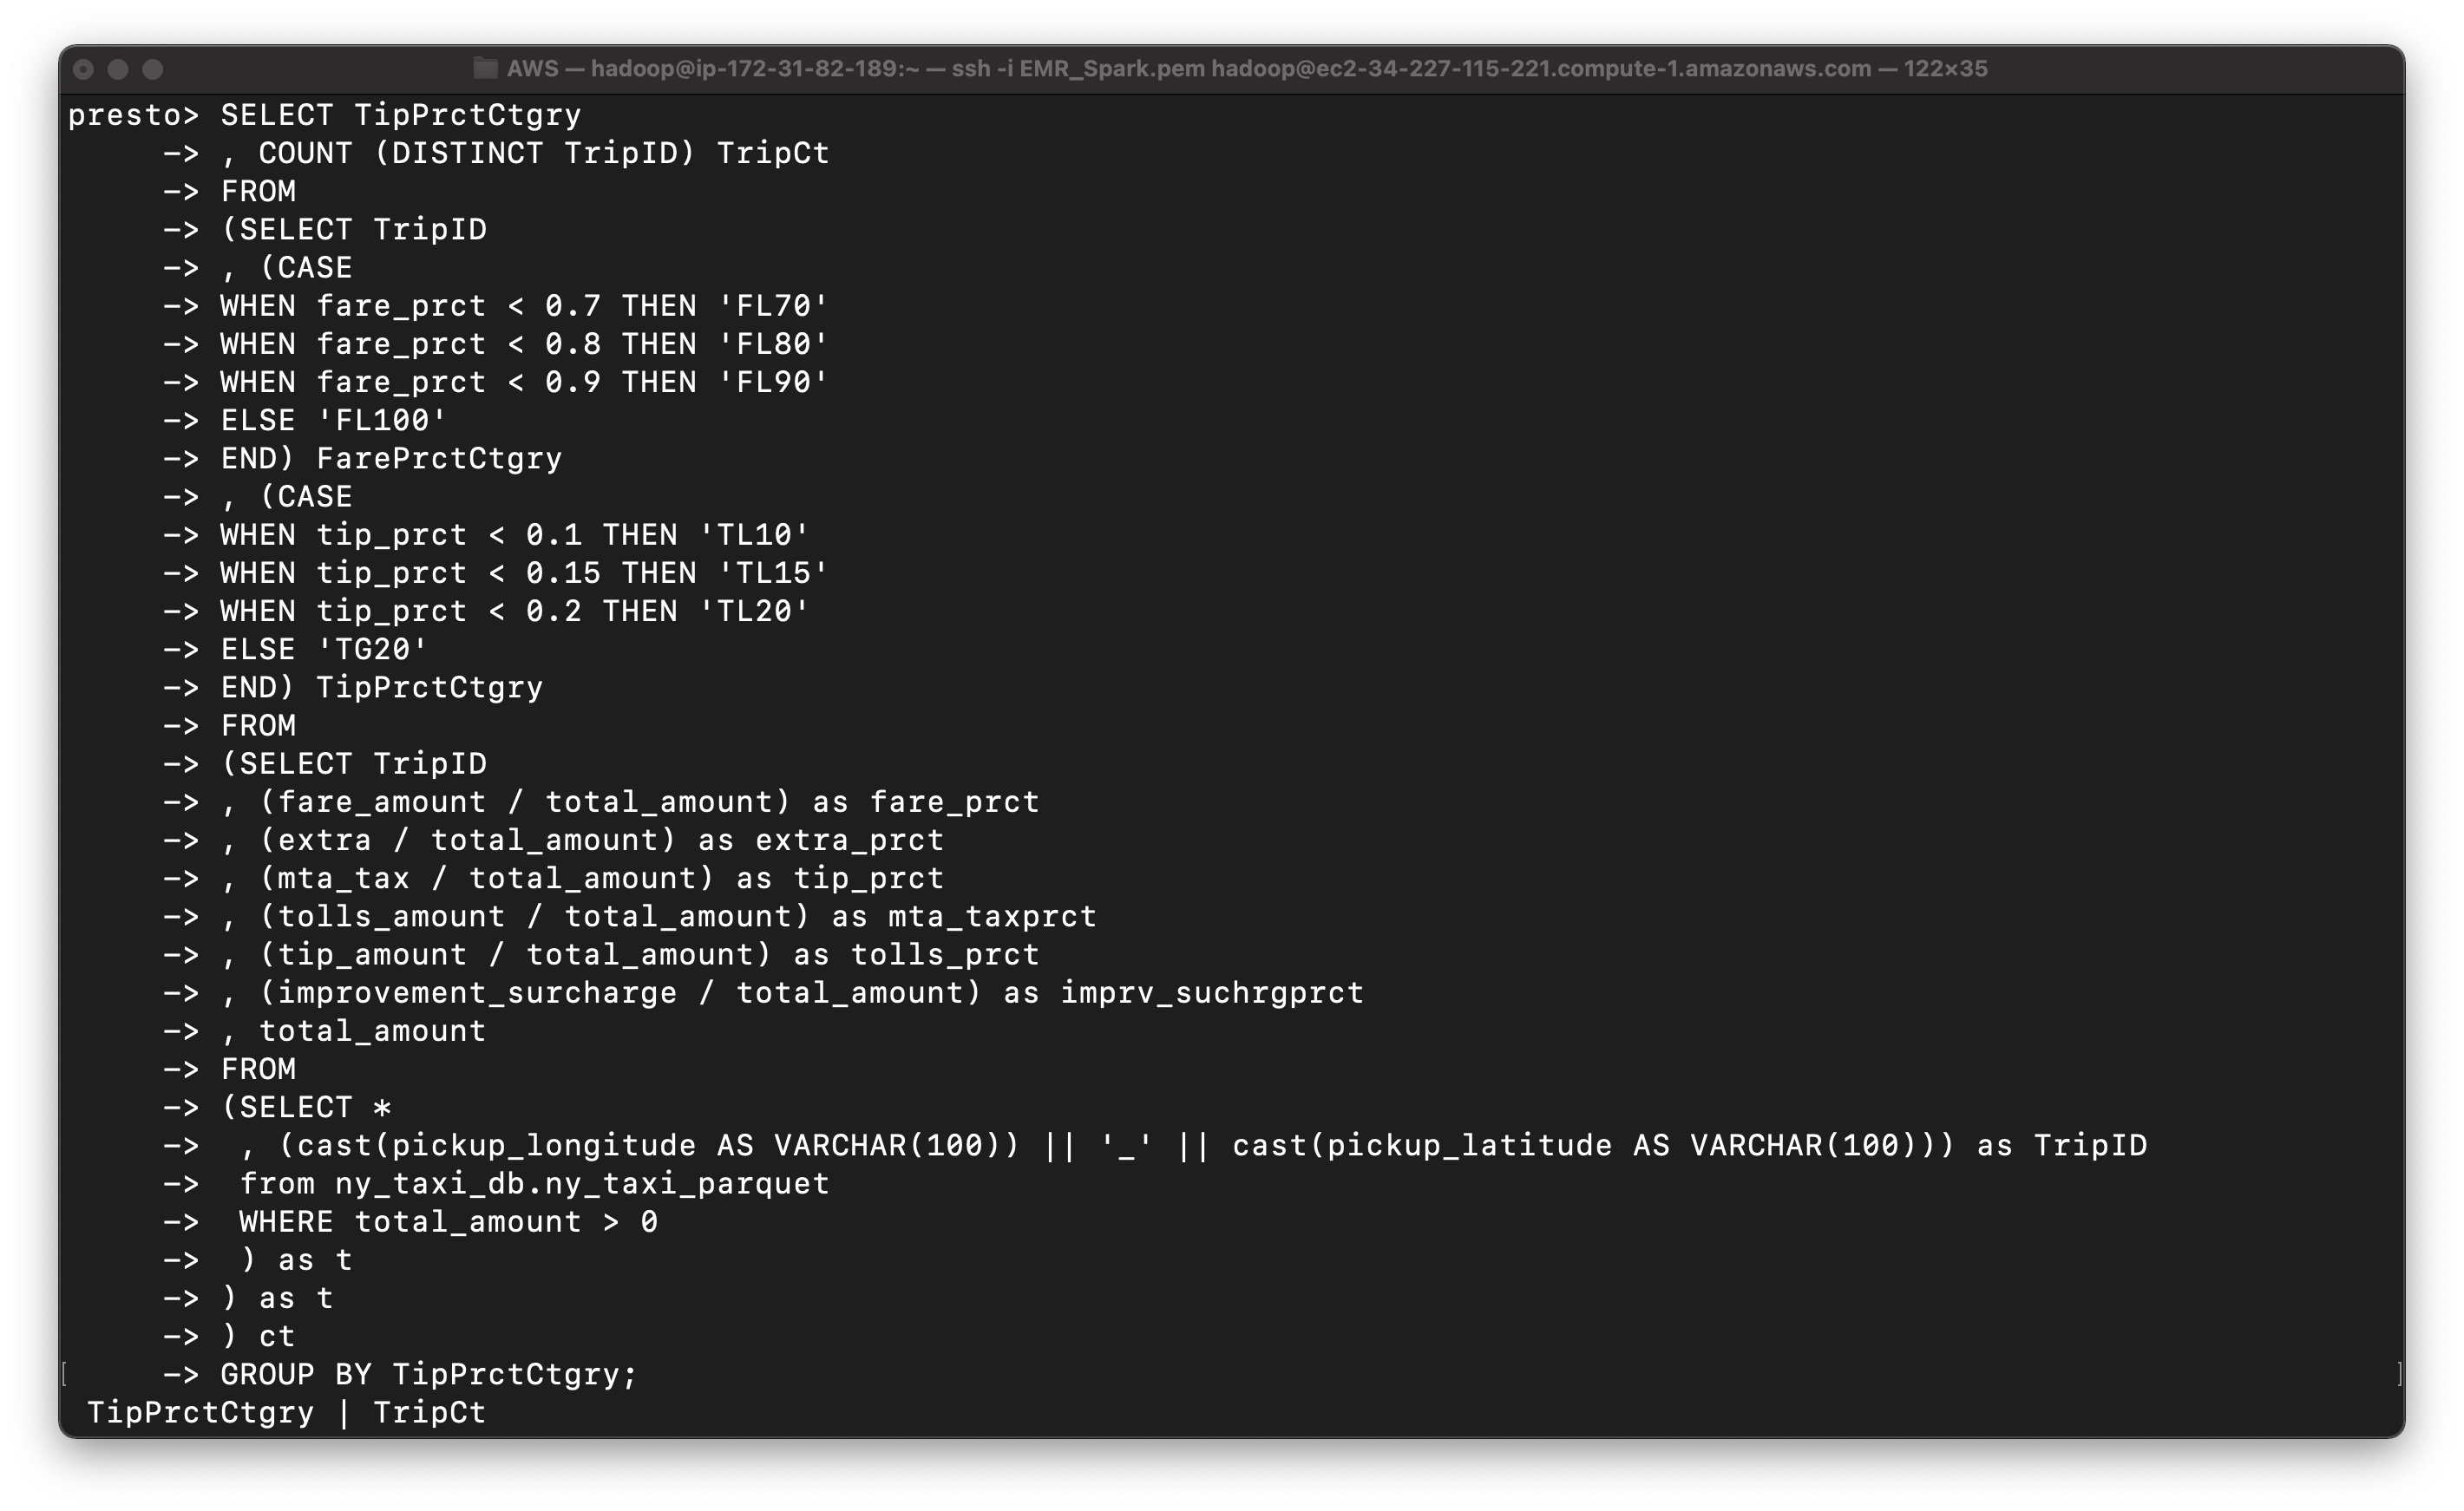
Query the tip percent category
1 | SELECT TipPrctCtgry |
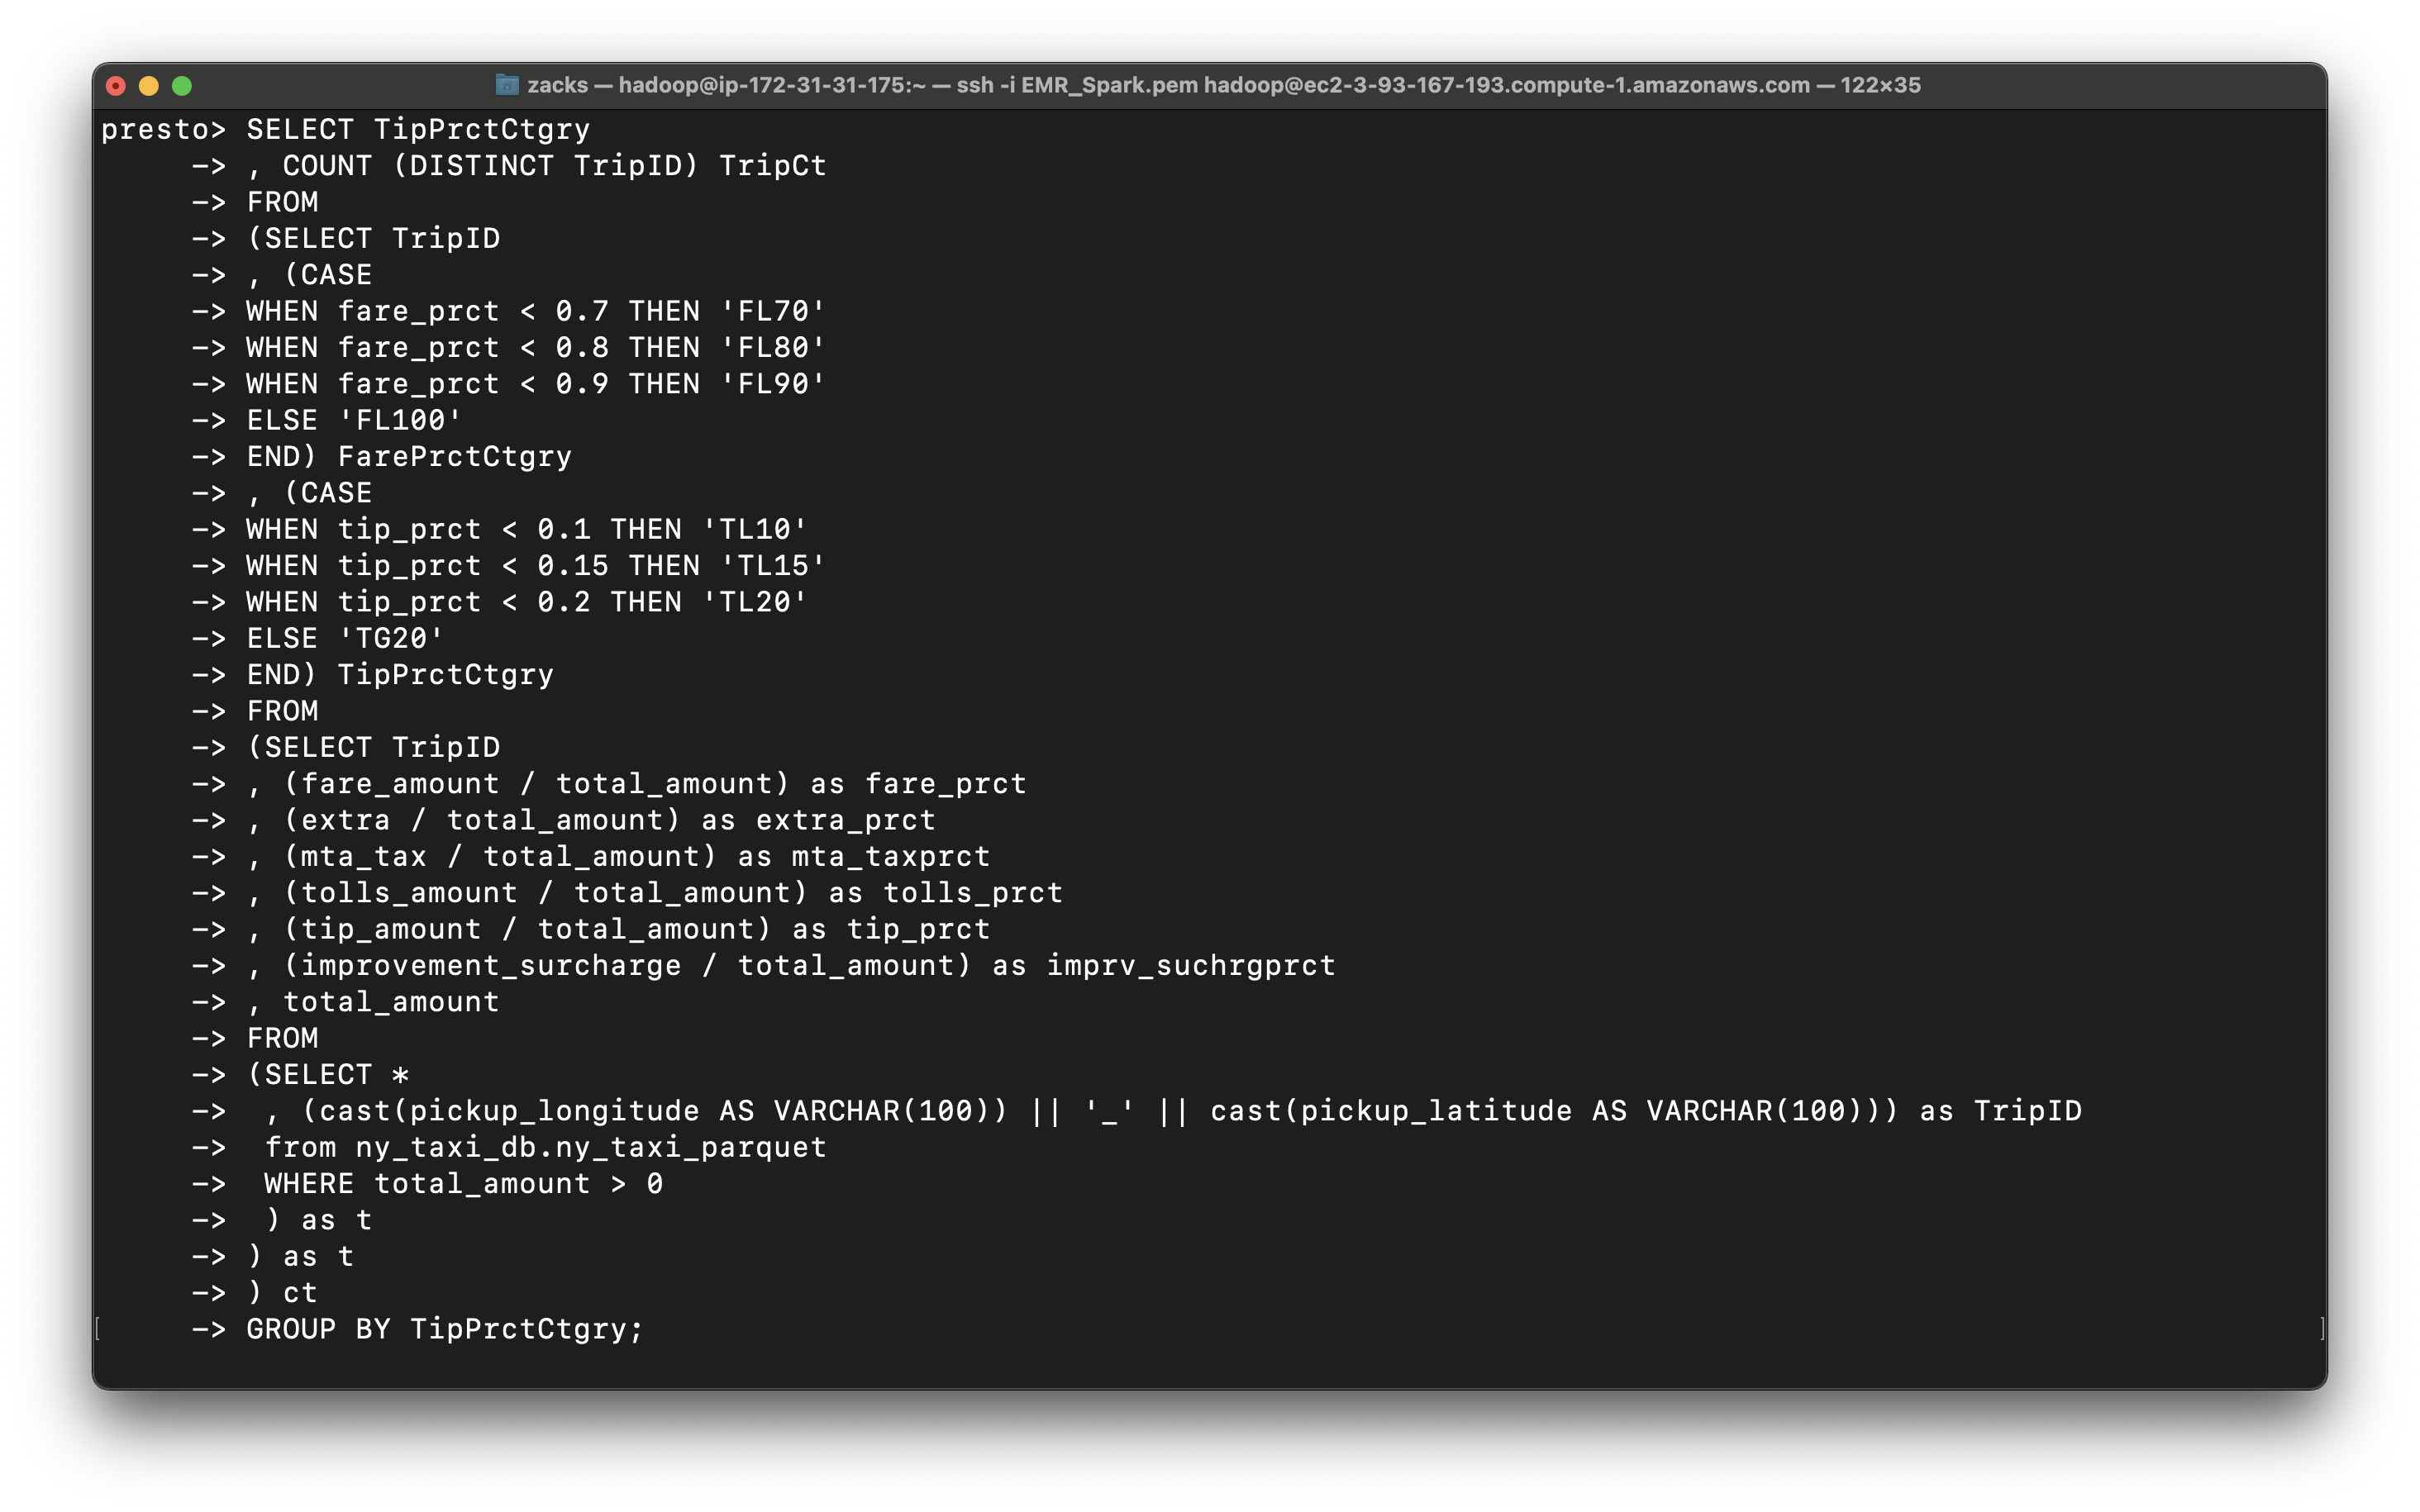

1 | , (mta_tax / total_amount) as tip_prct |
1 | SELECT TipPrctCtgry |

You can see most trips give 10 percent tips or higher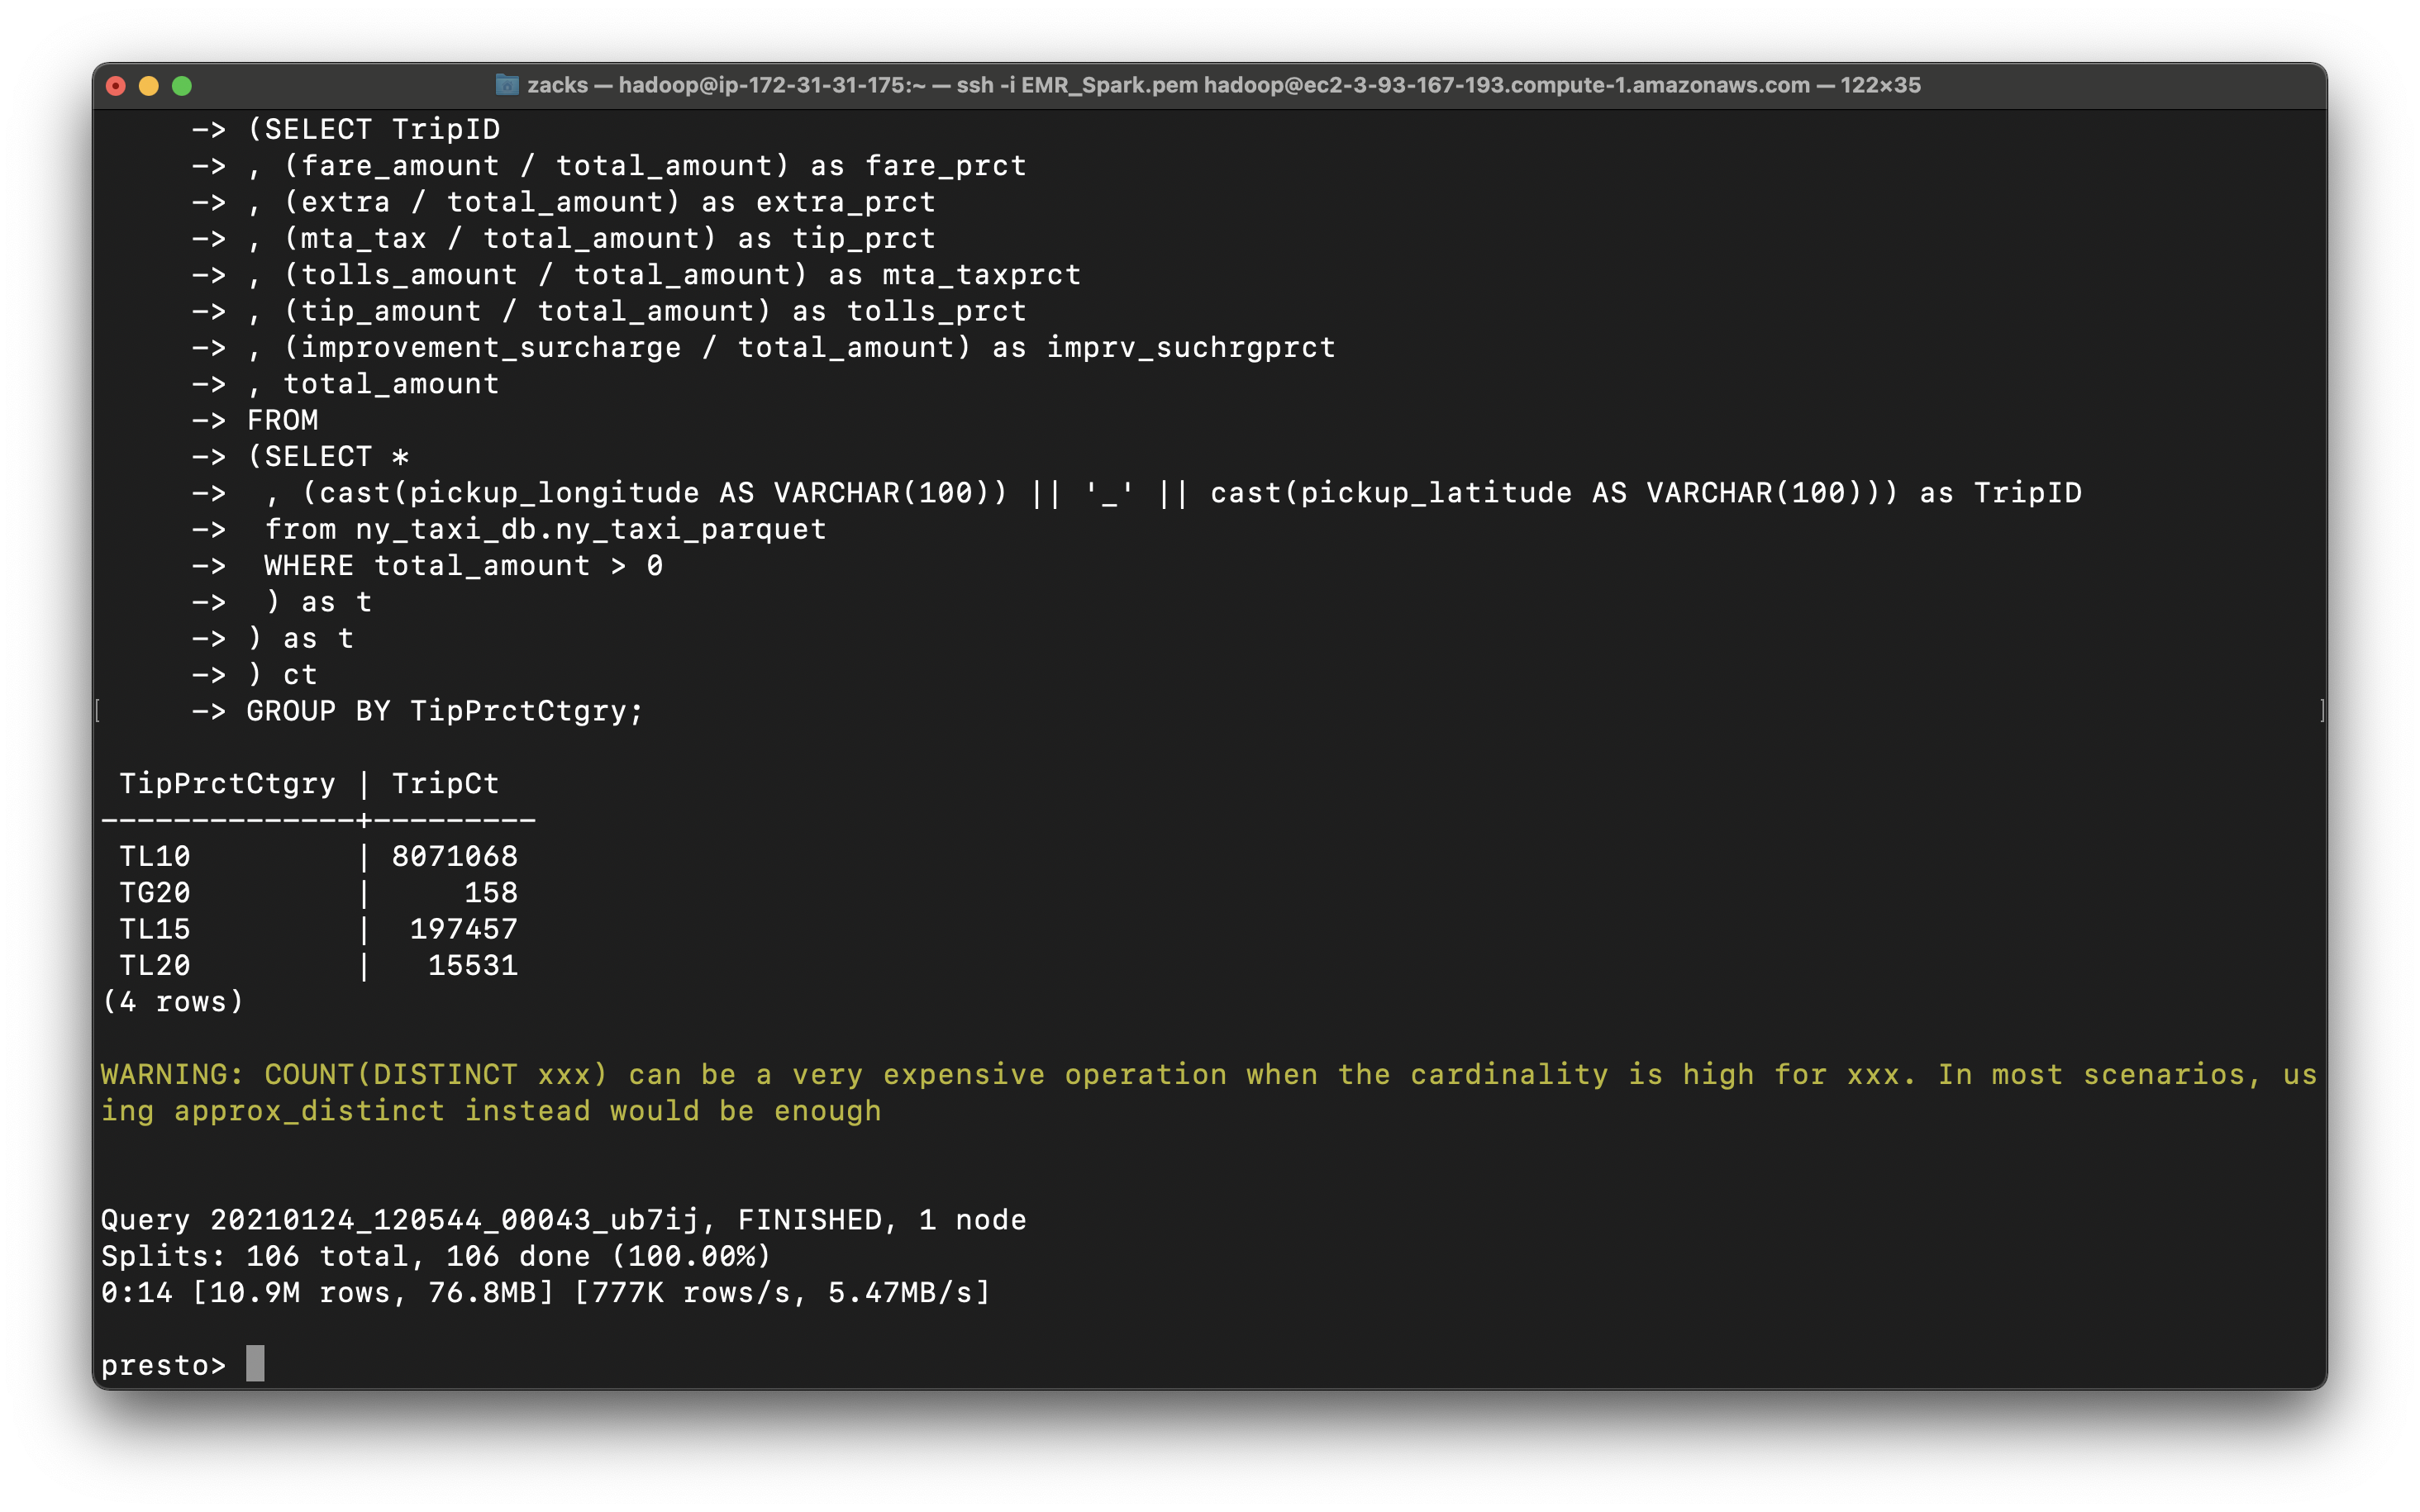
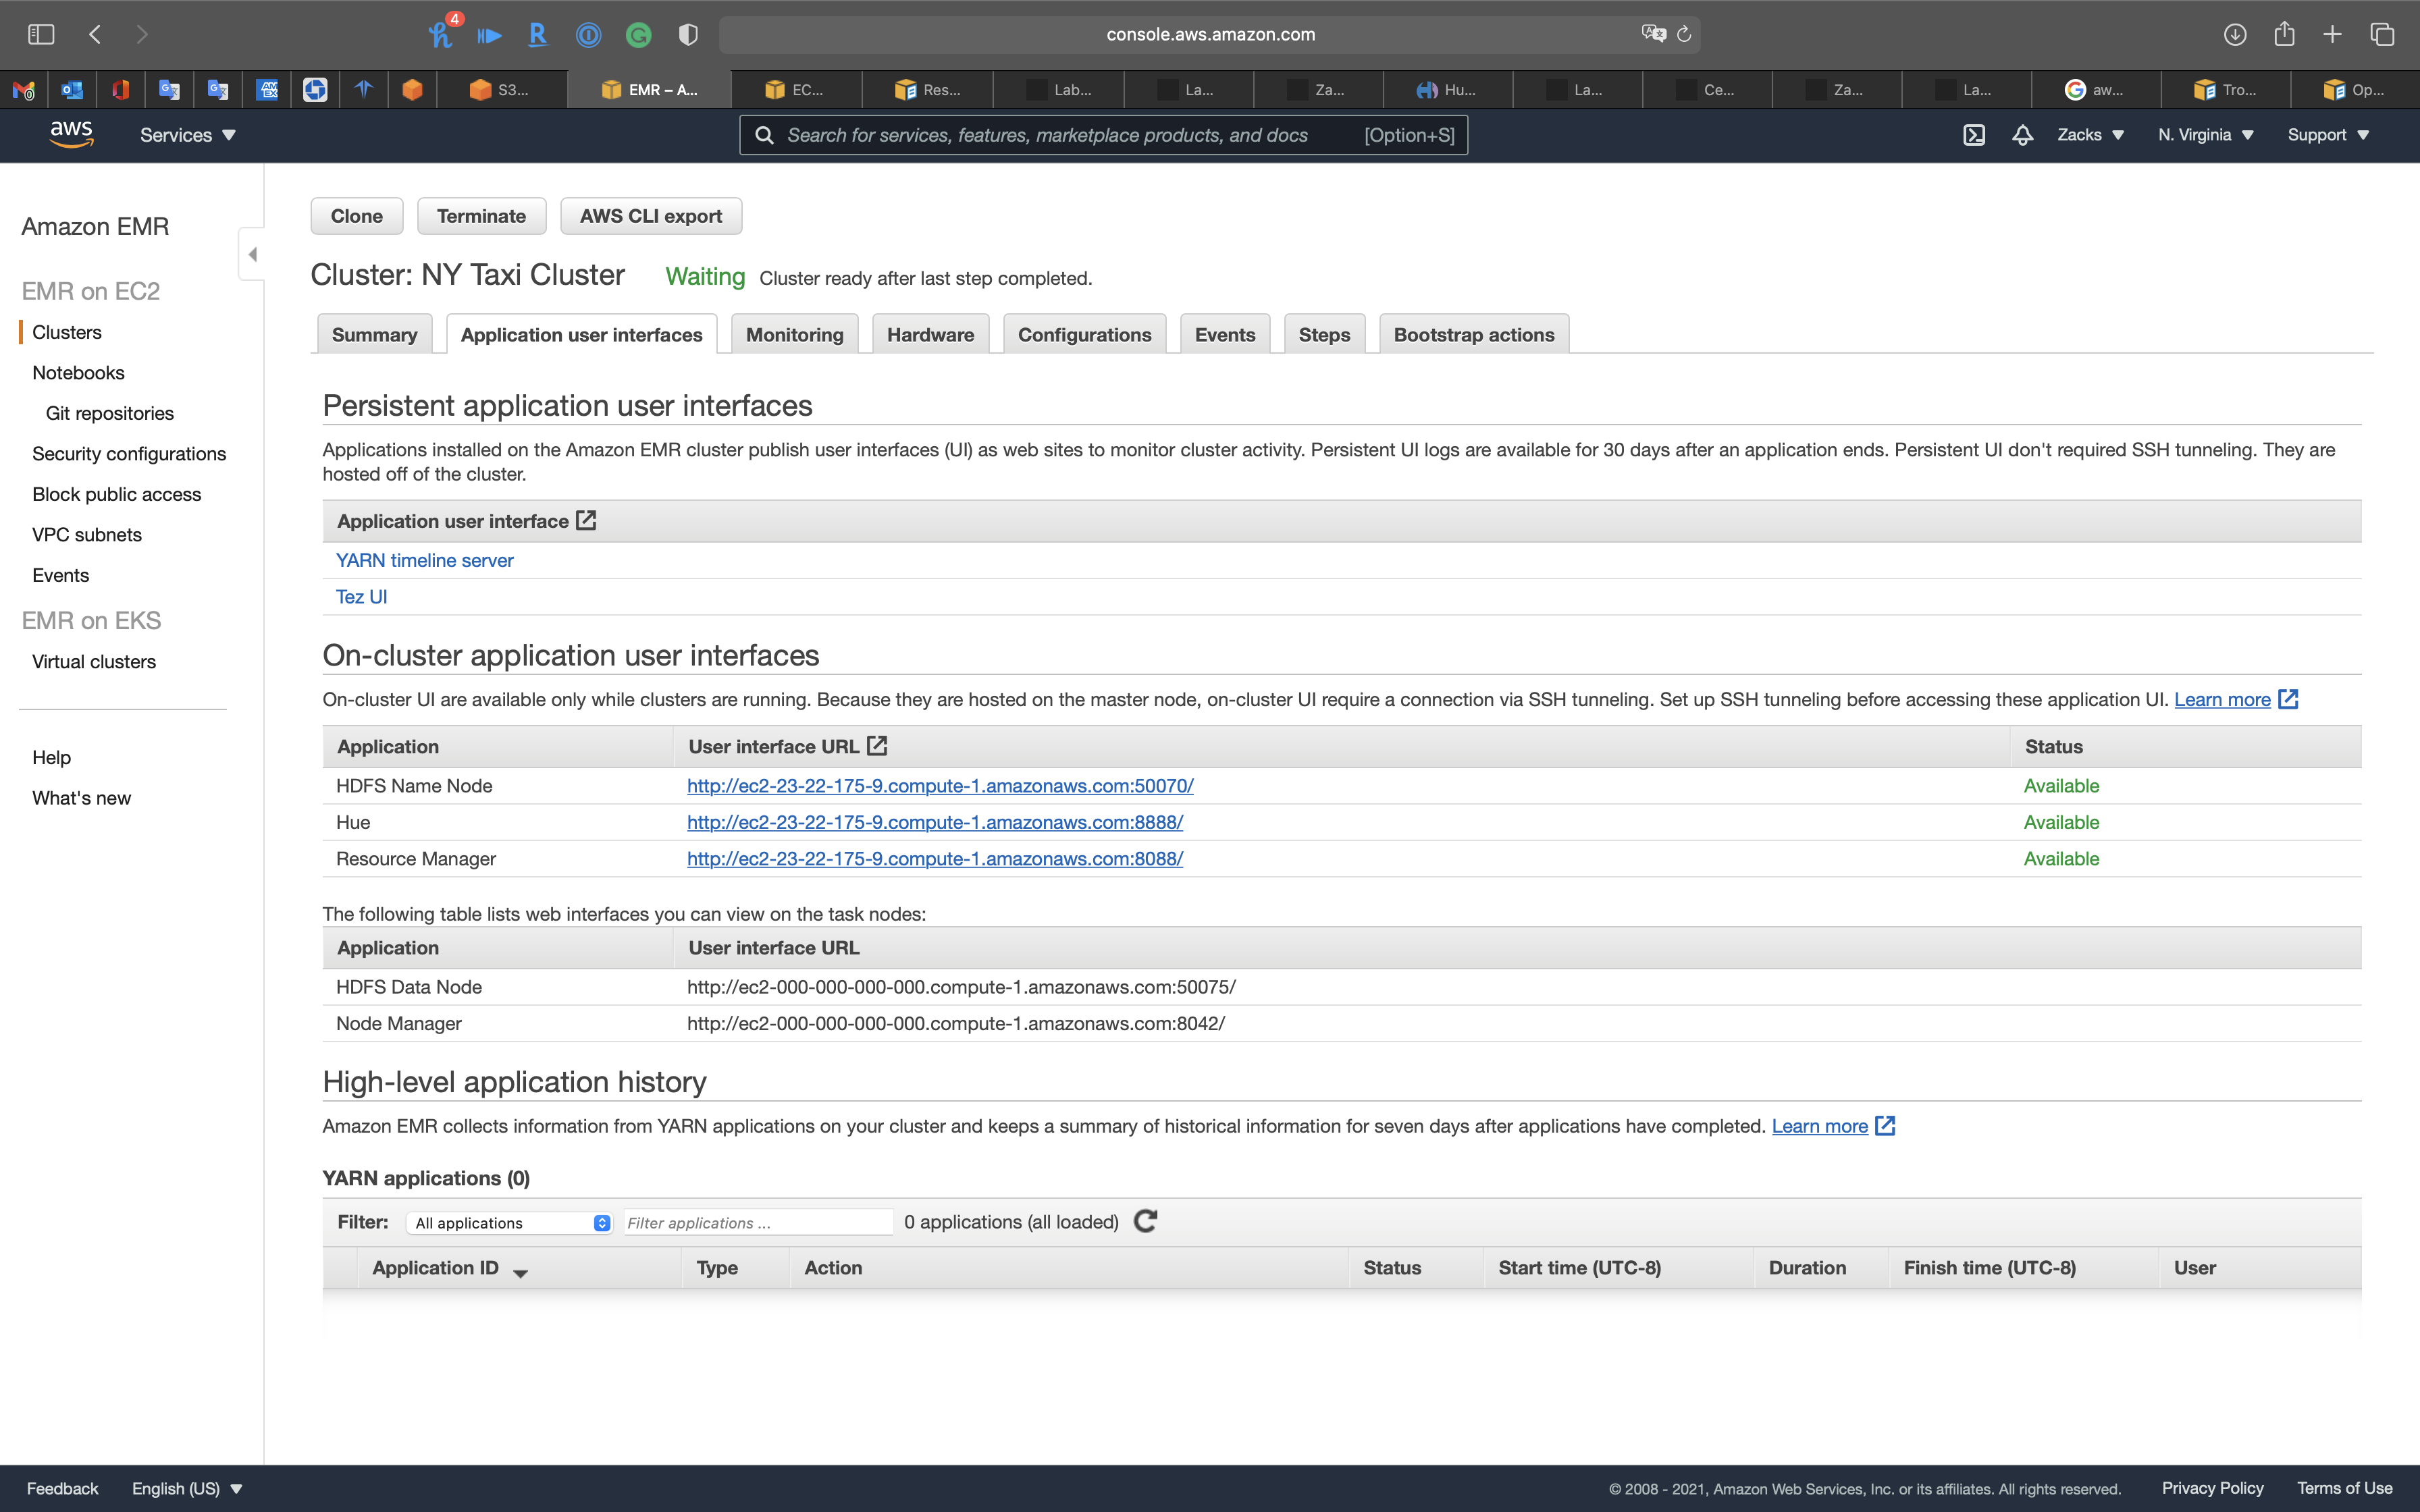
Hue
Use Hue for querying data
Services -> Cluster
- Click on your master node.
- Copy the master node dns first.
- Paste your master node dns +
:8888to the browser- For example:
http://ec2-23-22-175-9.compute-1.amazonaws.com:8888
- For example:
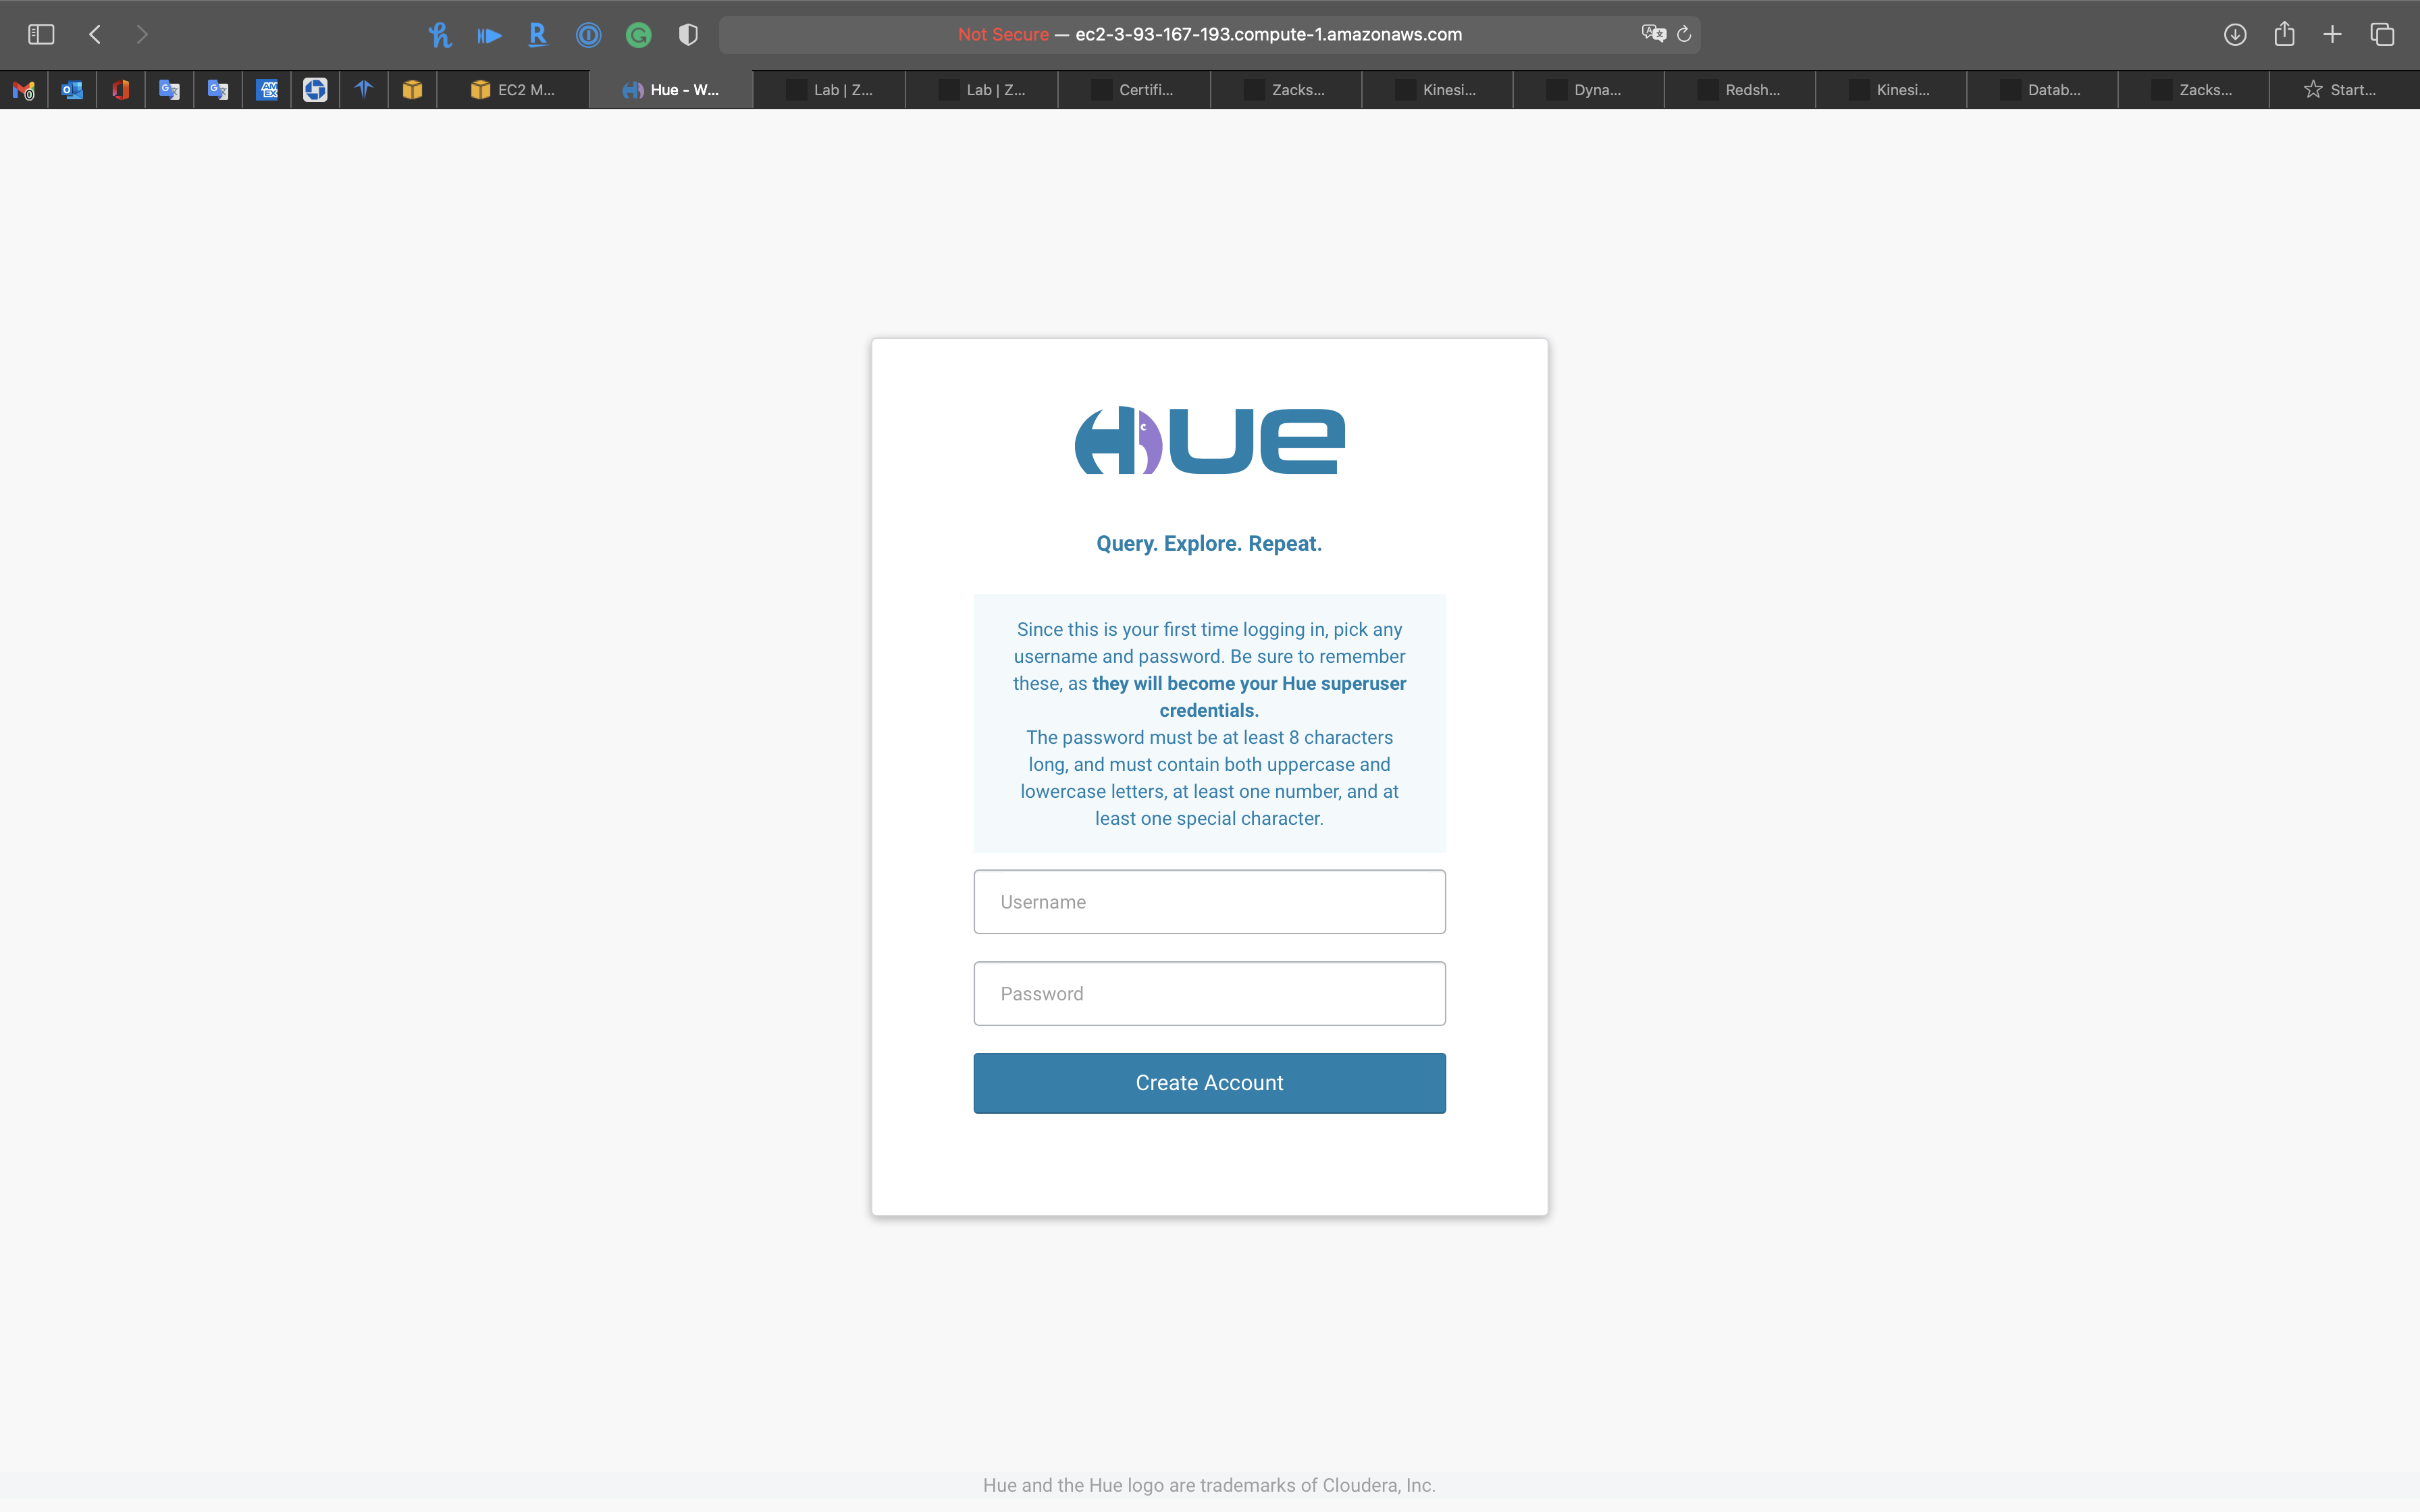
Create an account
- Username
- Password
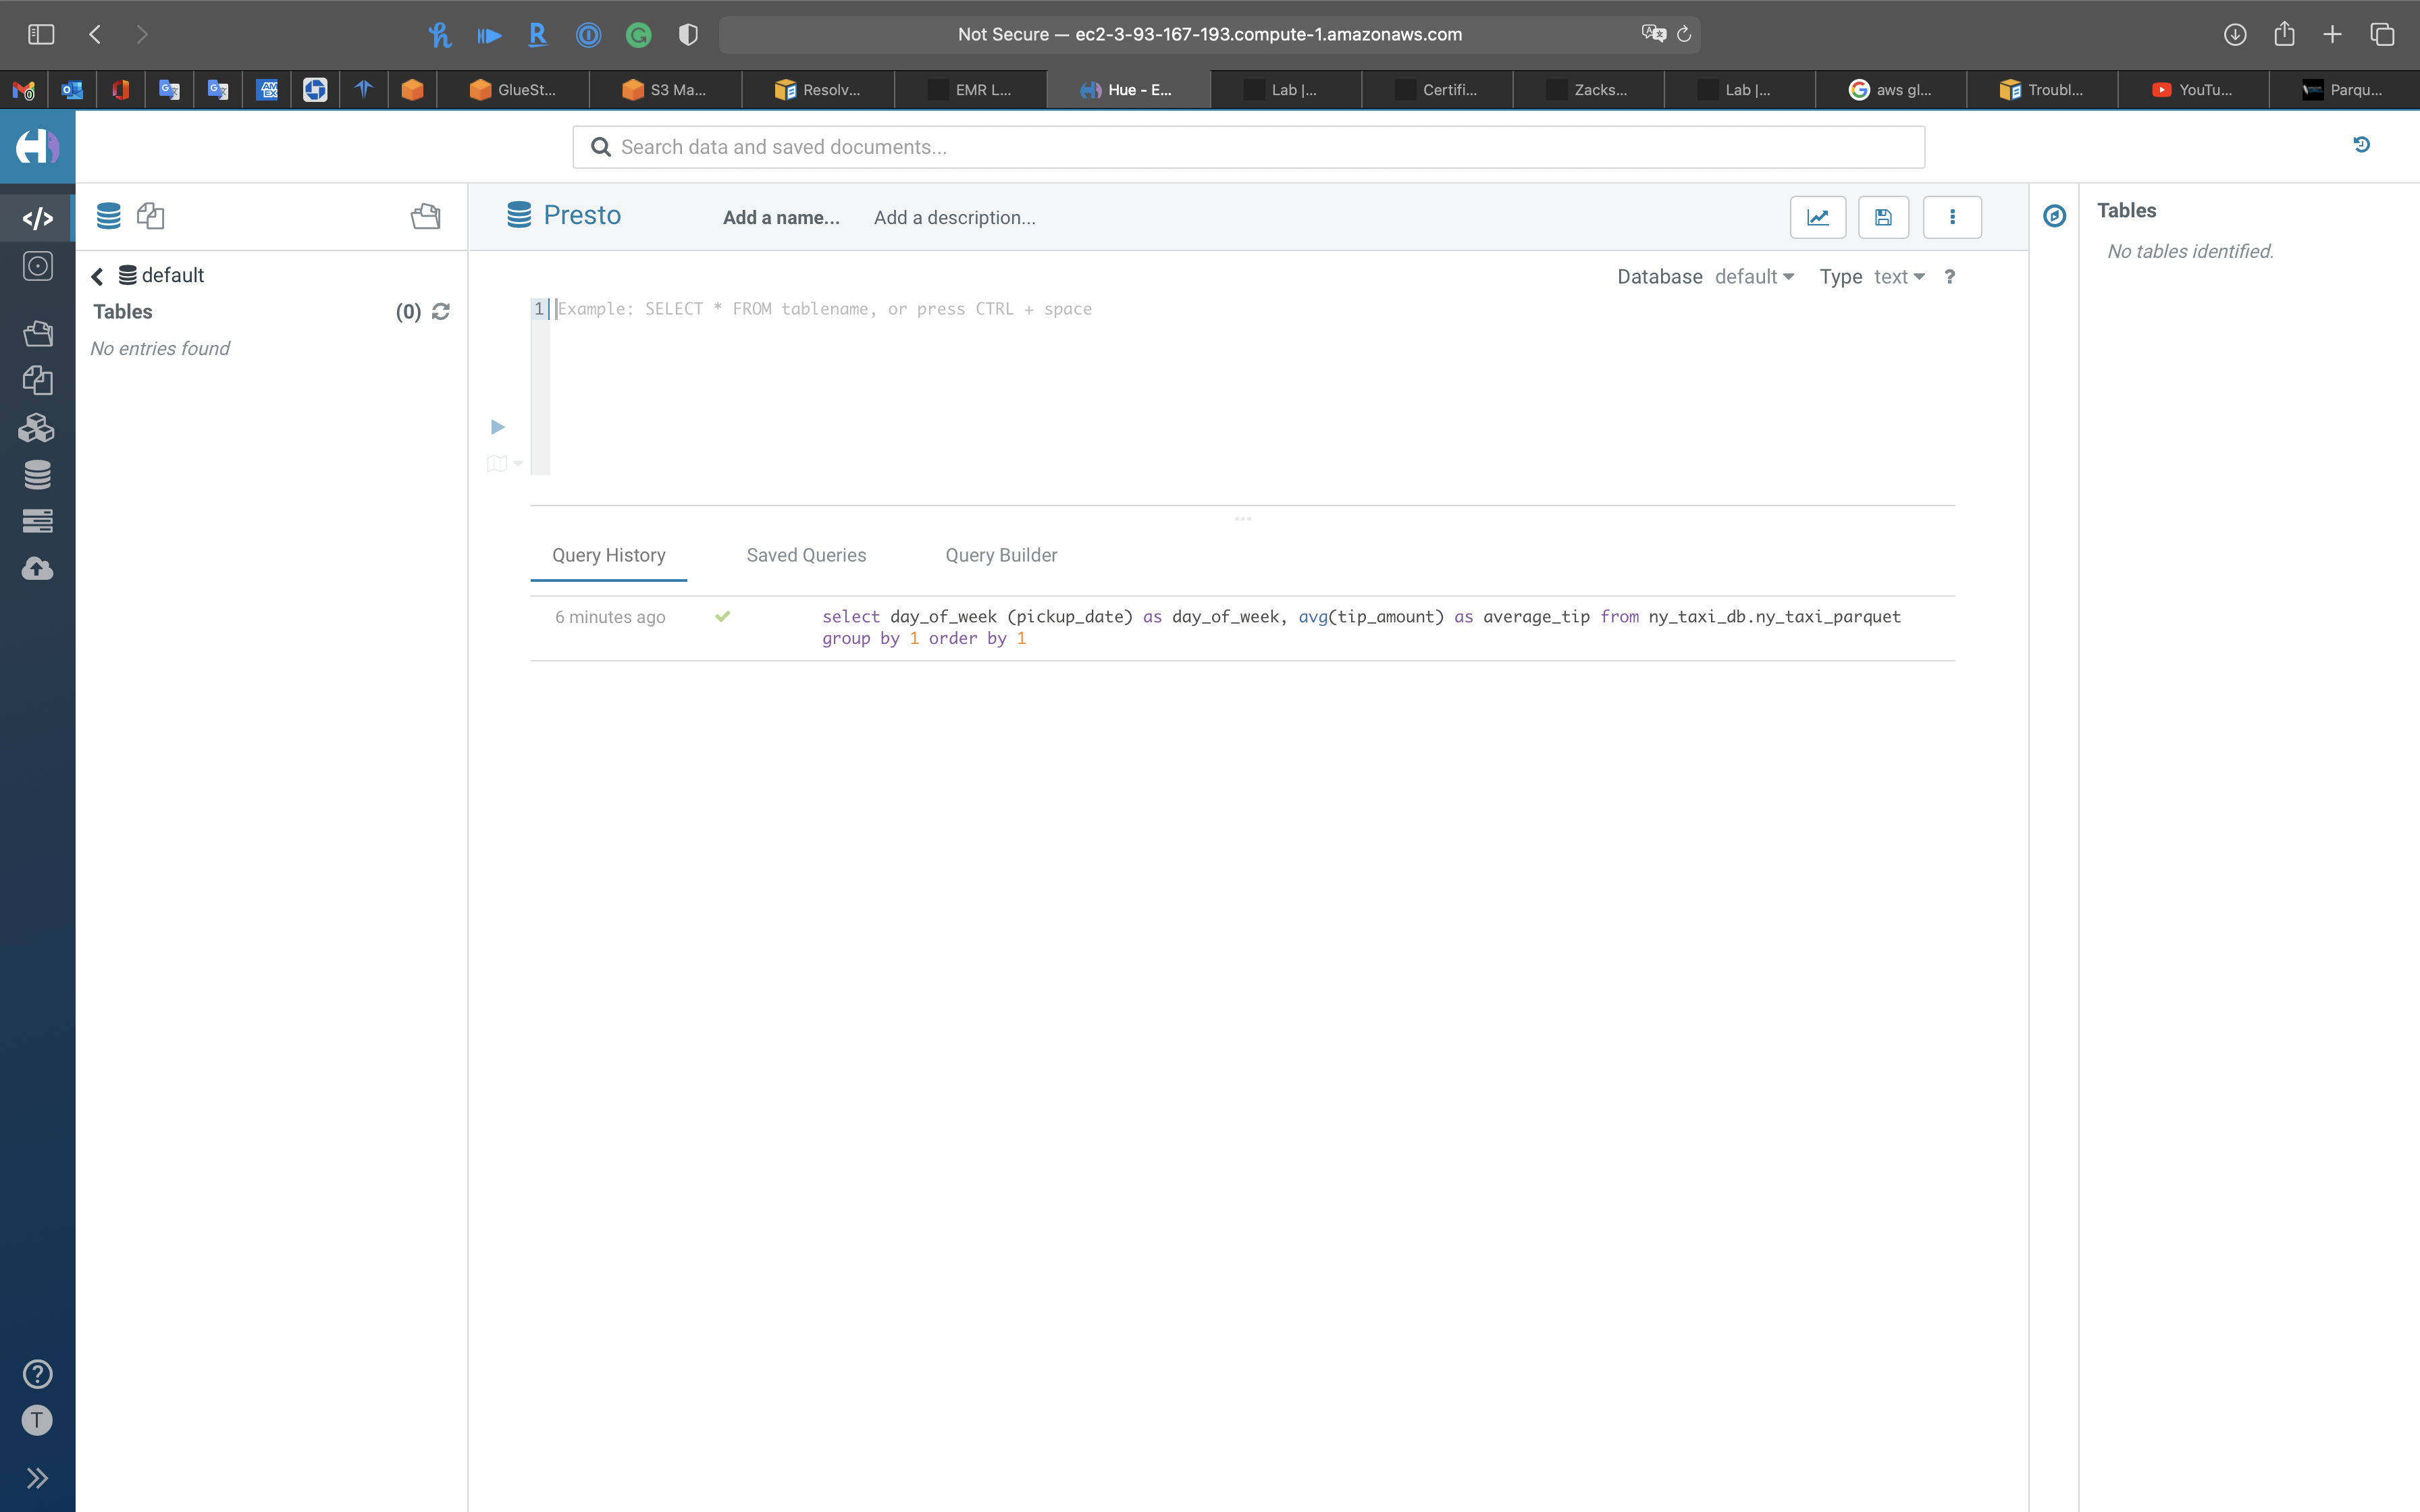
Script
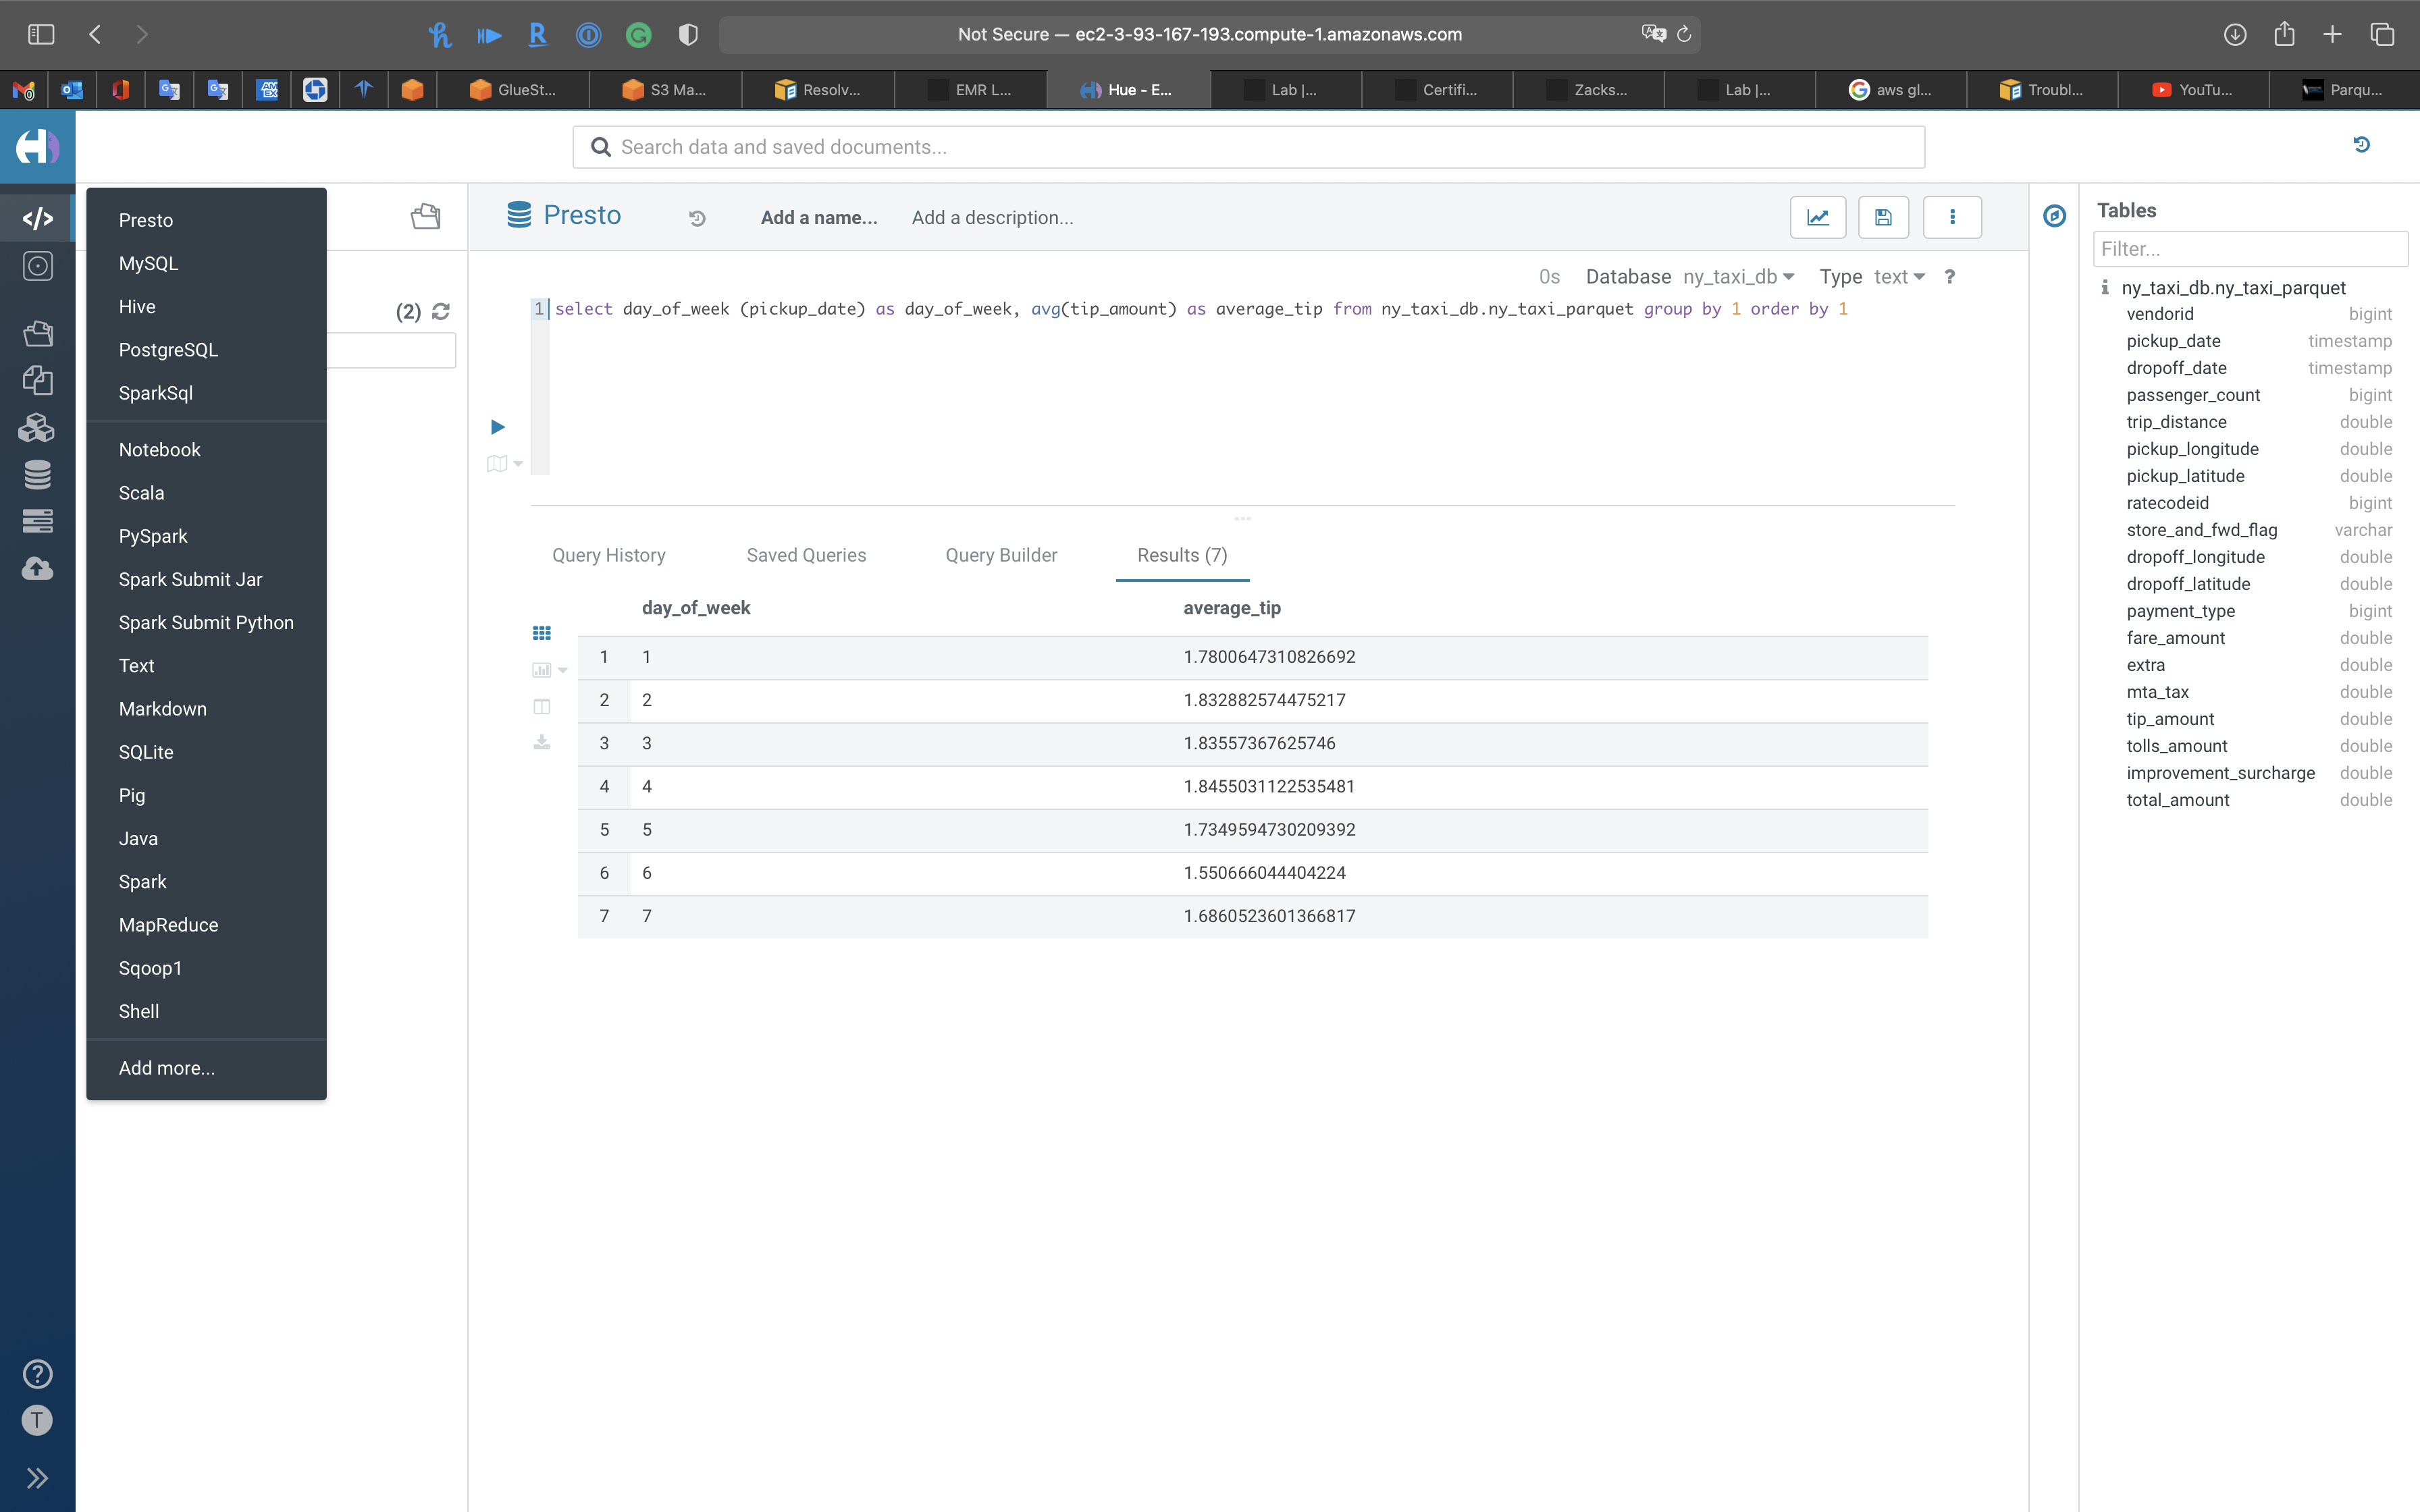
1 | select day_of_week (pickup_date) as day_of_week, avg(tip_amount) as average_tip from ny_taxi_db.ny_taxi_parquet group by 1 order by 1 |
Notice the columns were previewed by Hue automatically
Click on the run button.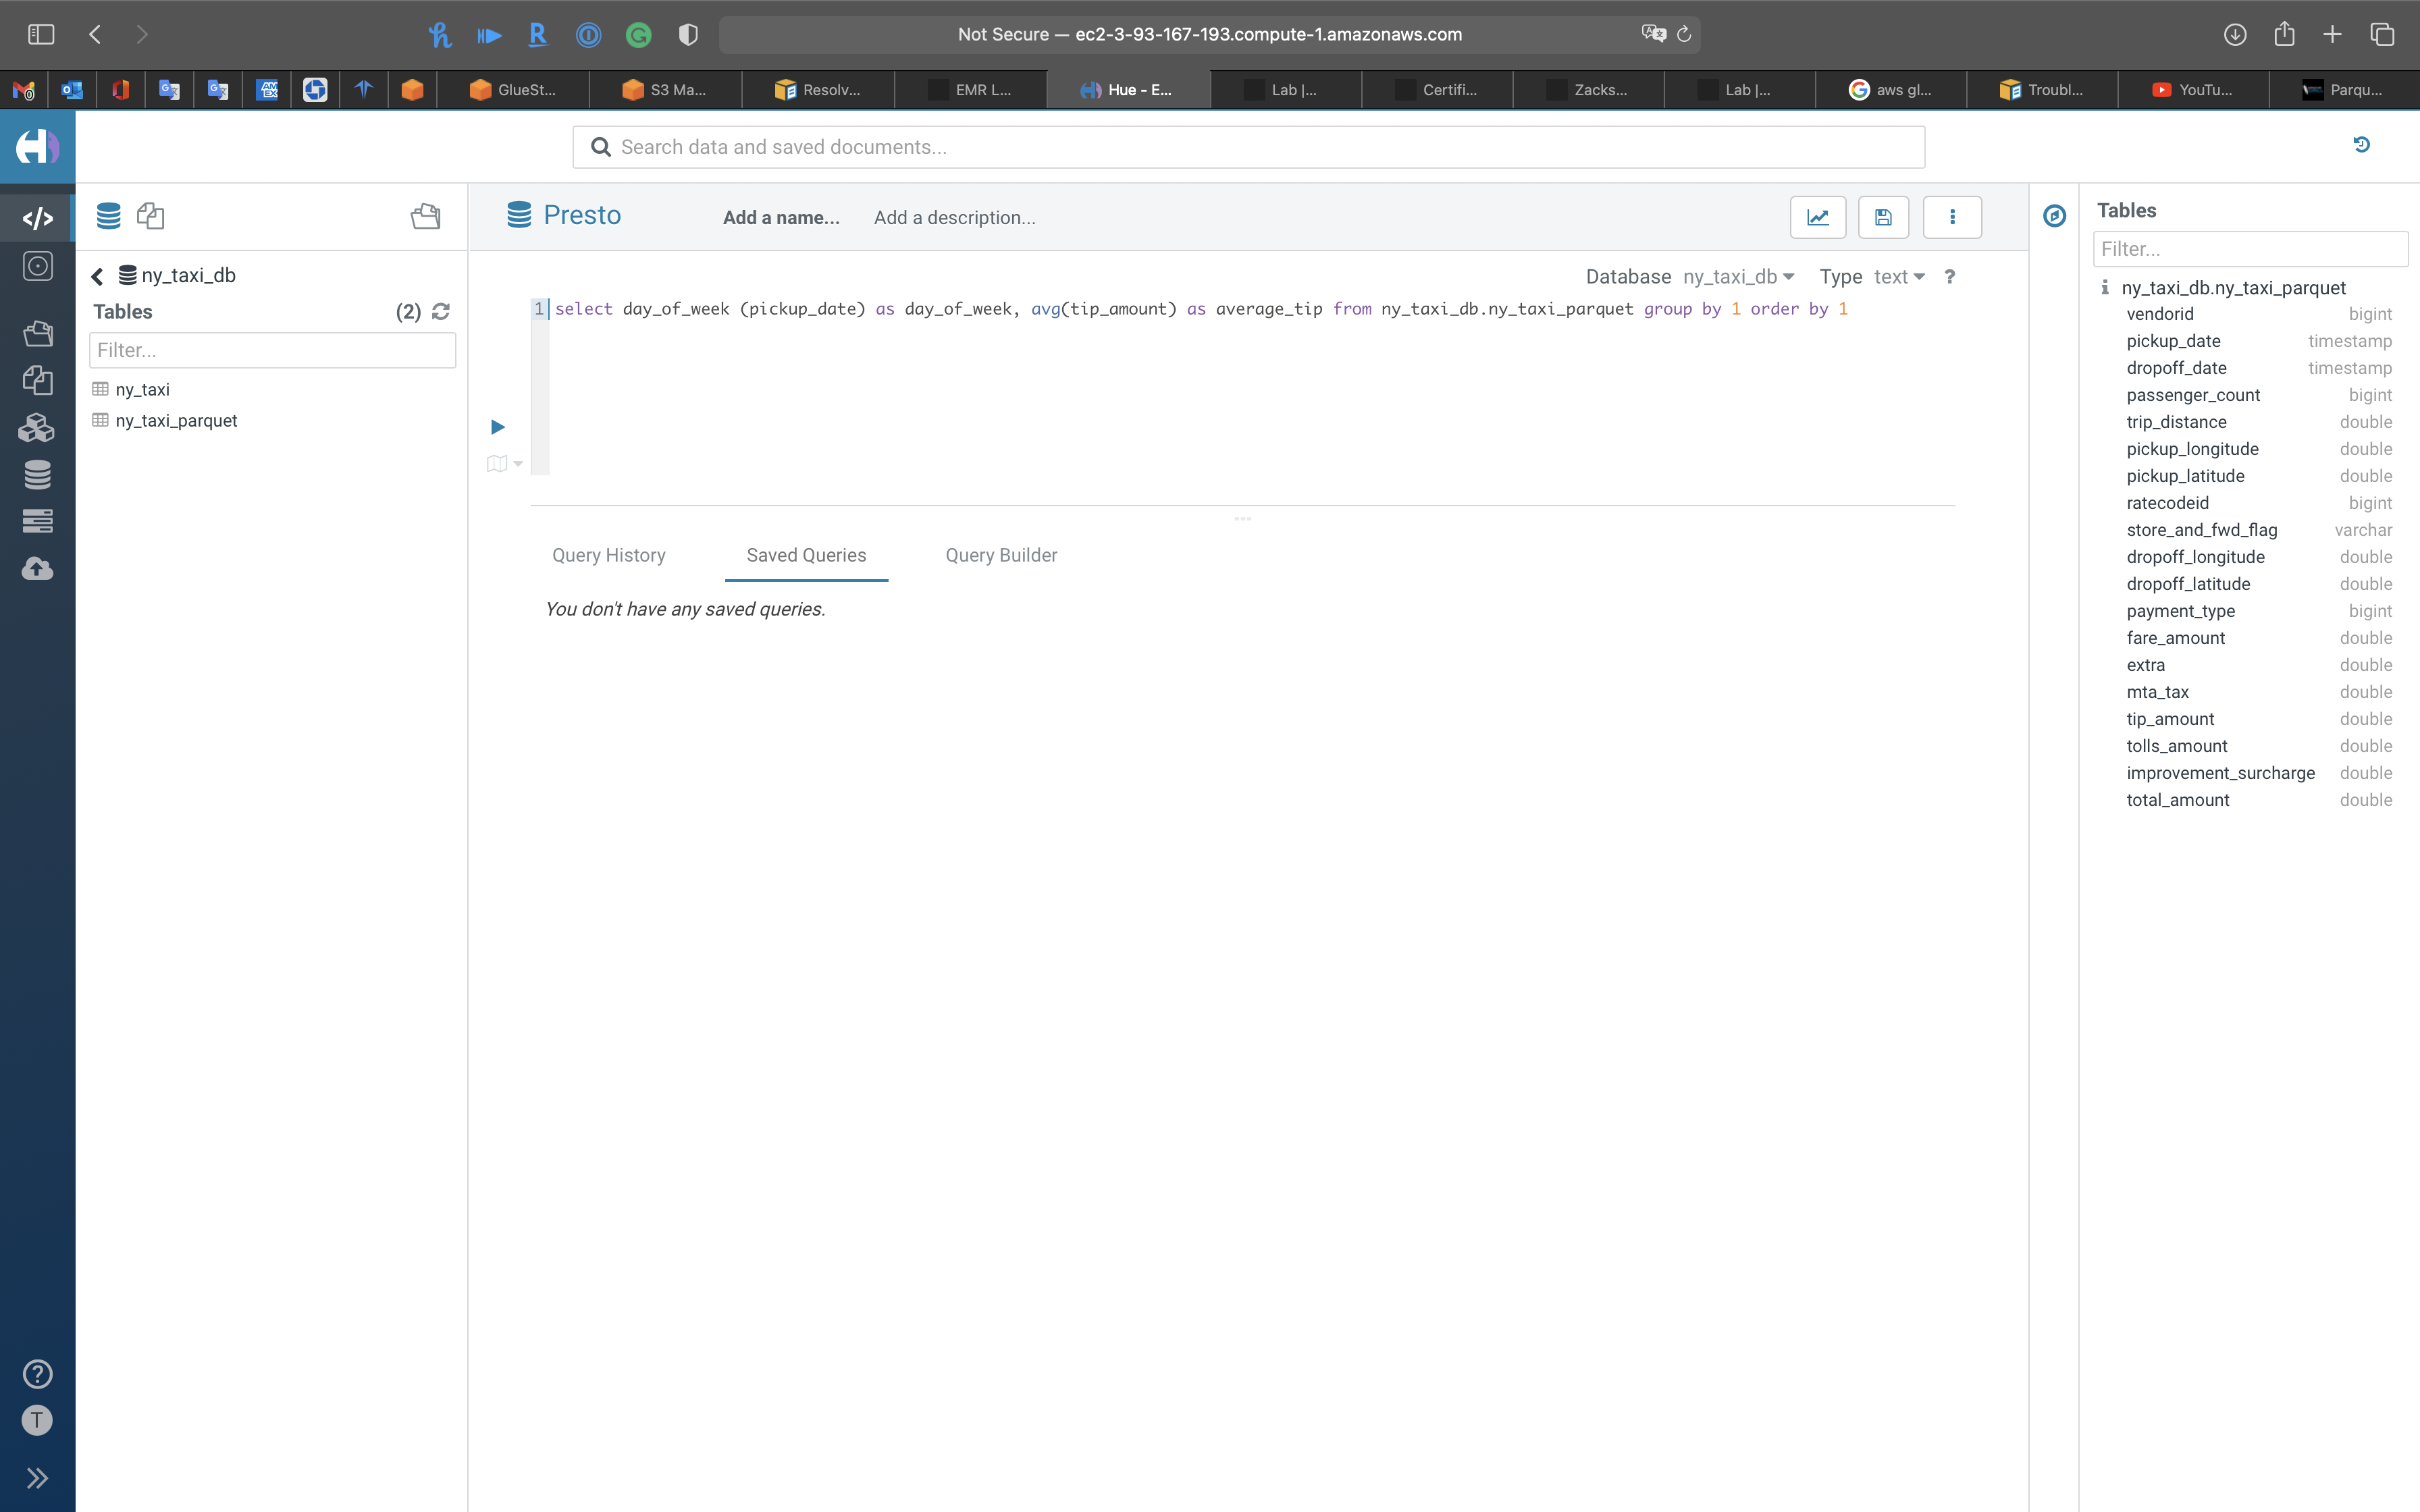
Seem like high tip day is Thursday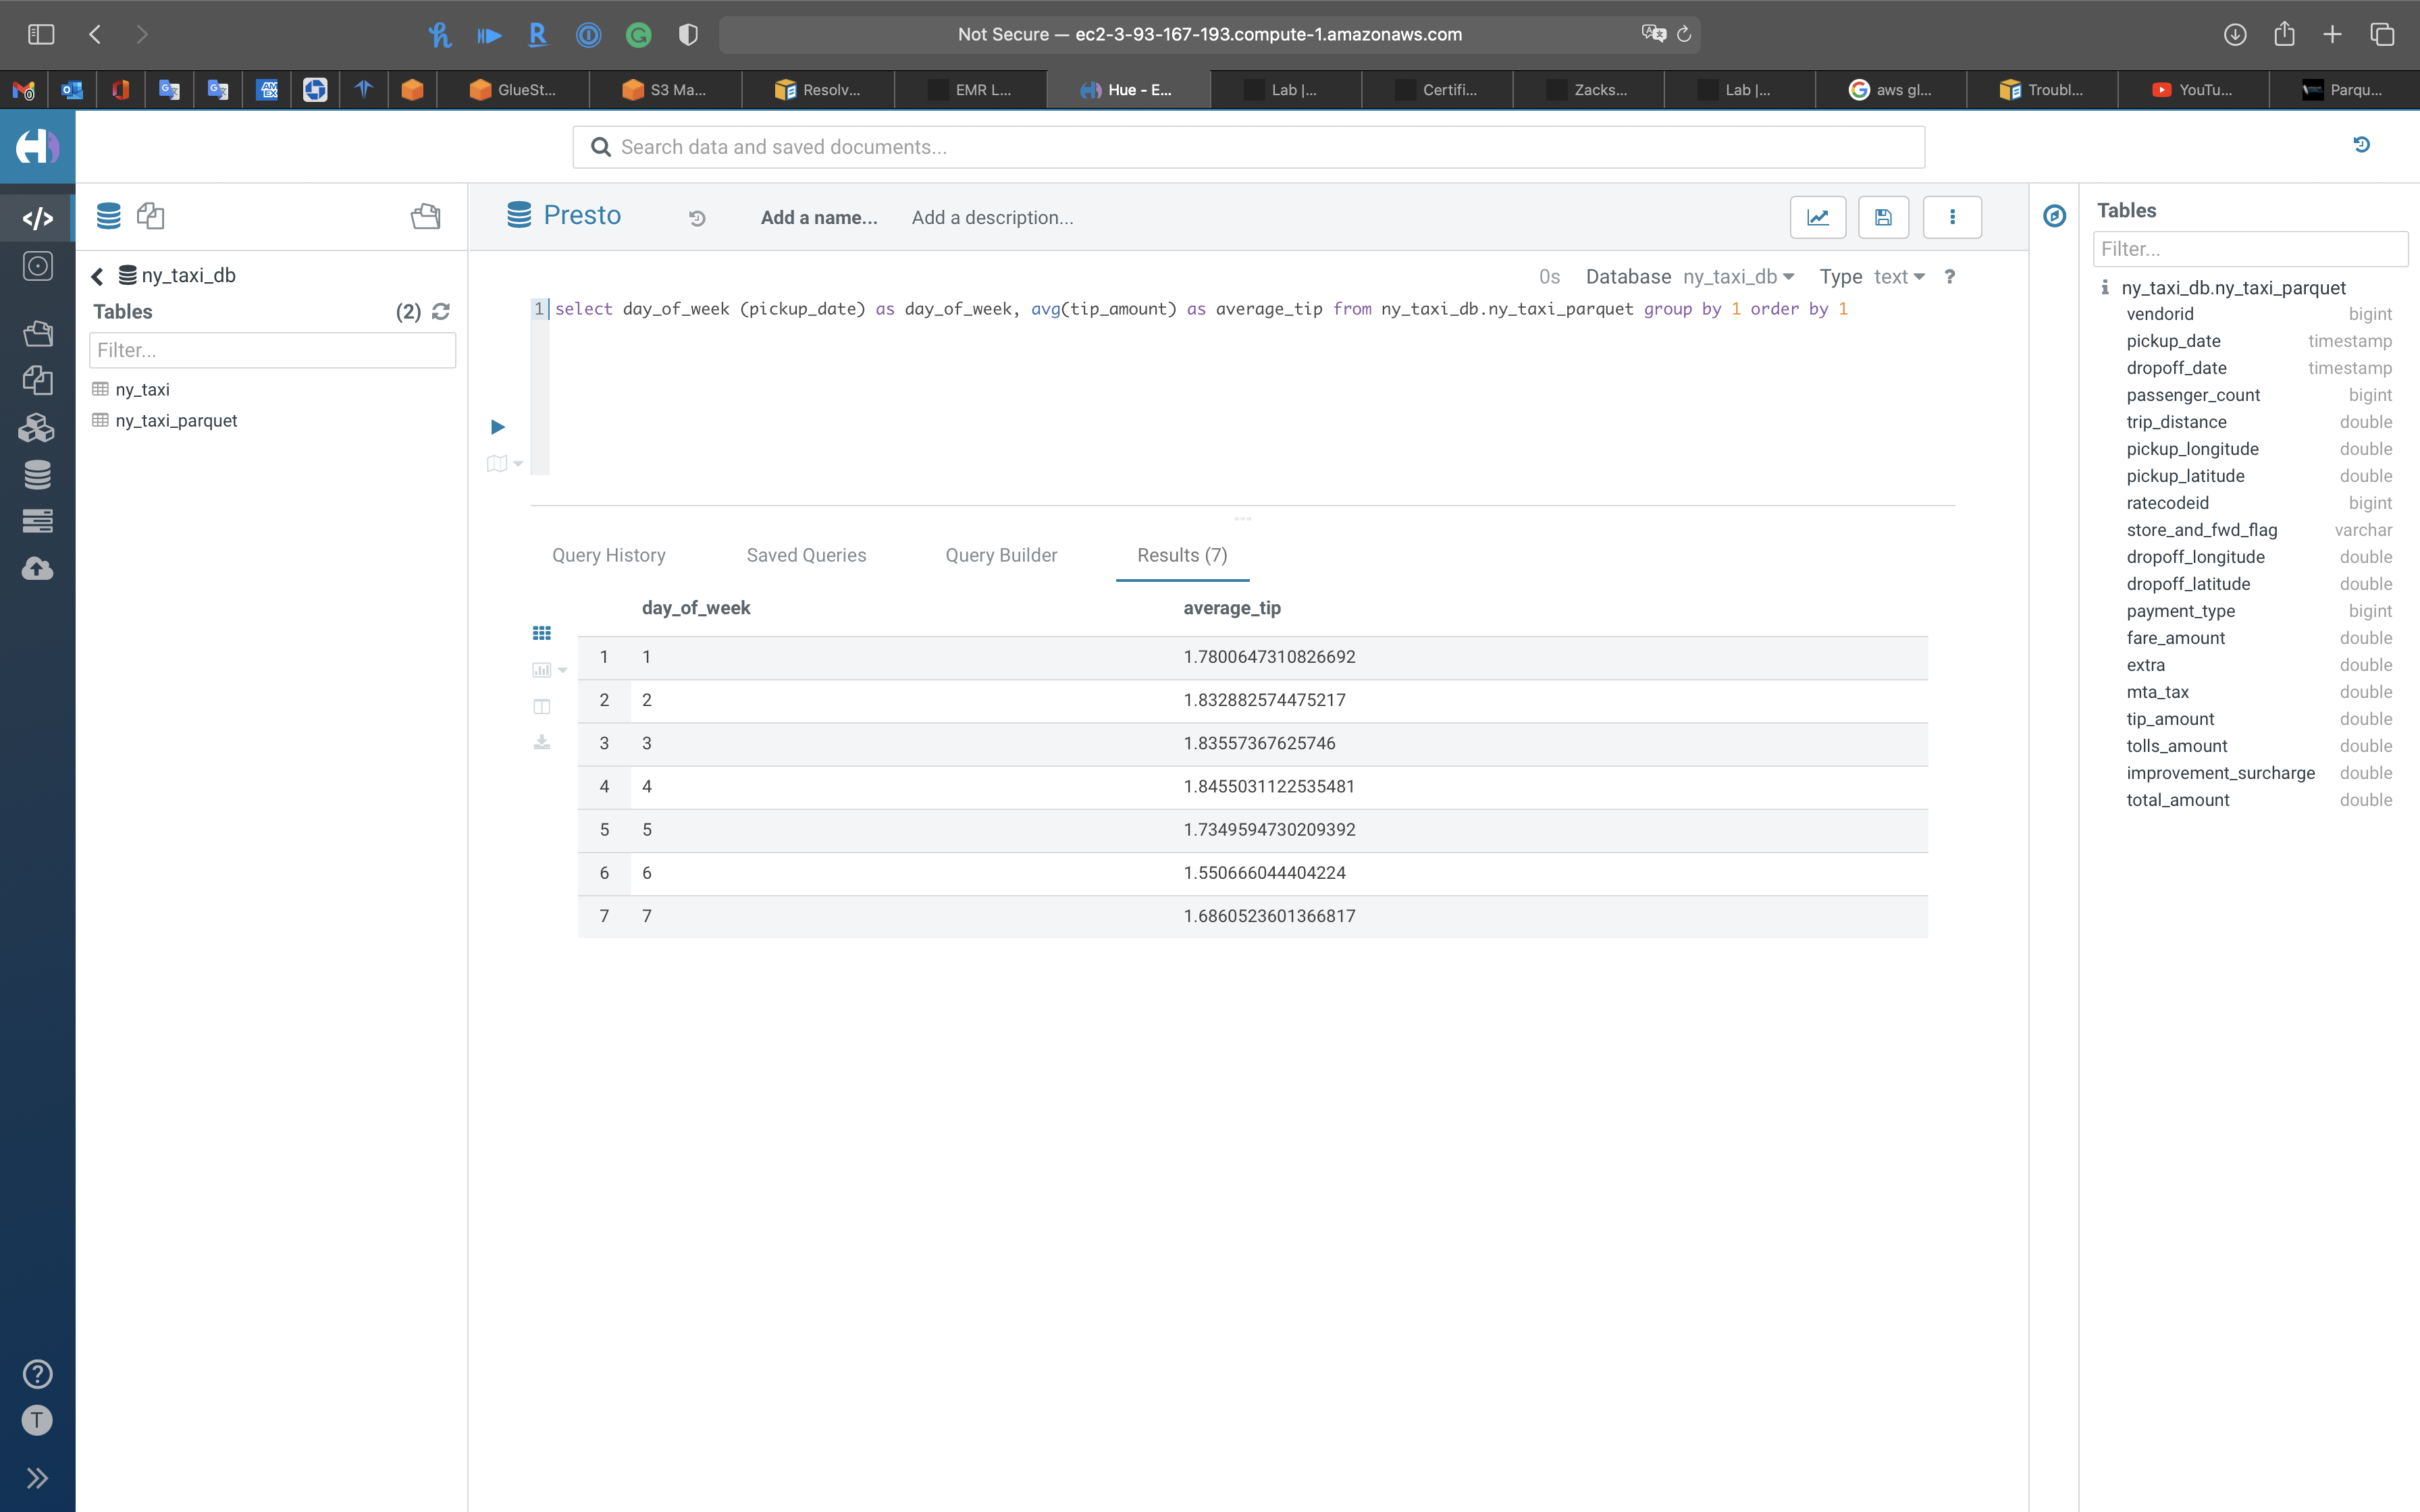
1 | SELECT TipPrctCtgry |
You can also see query history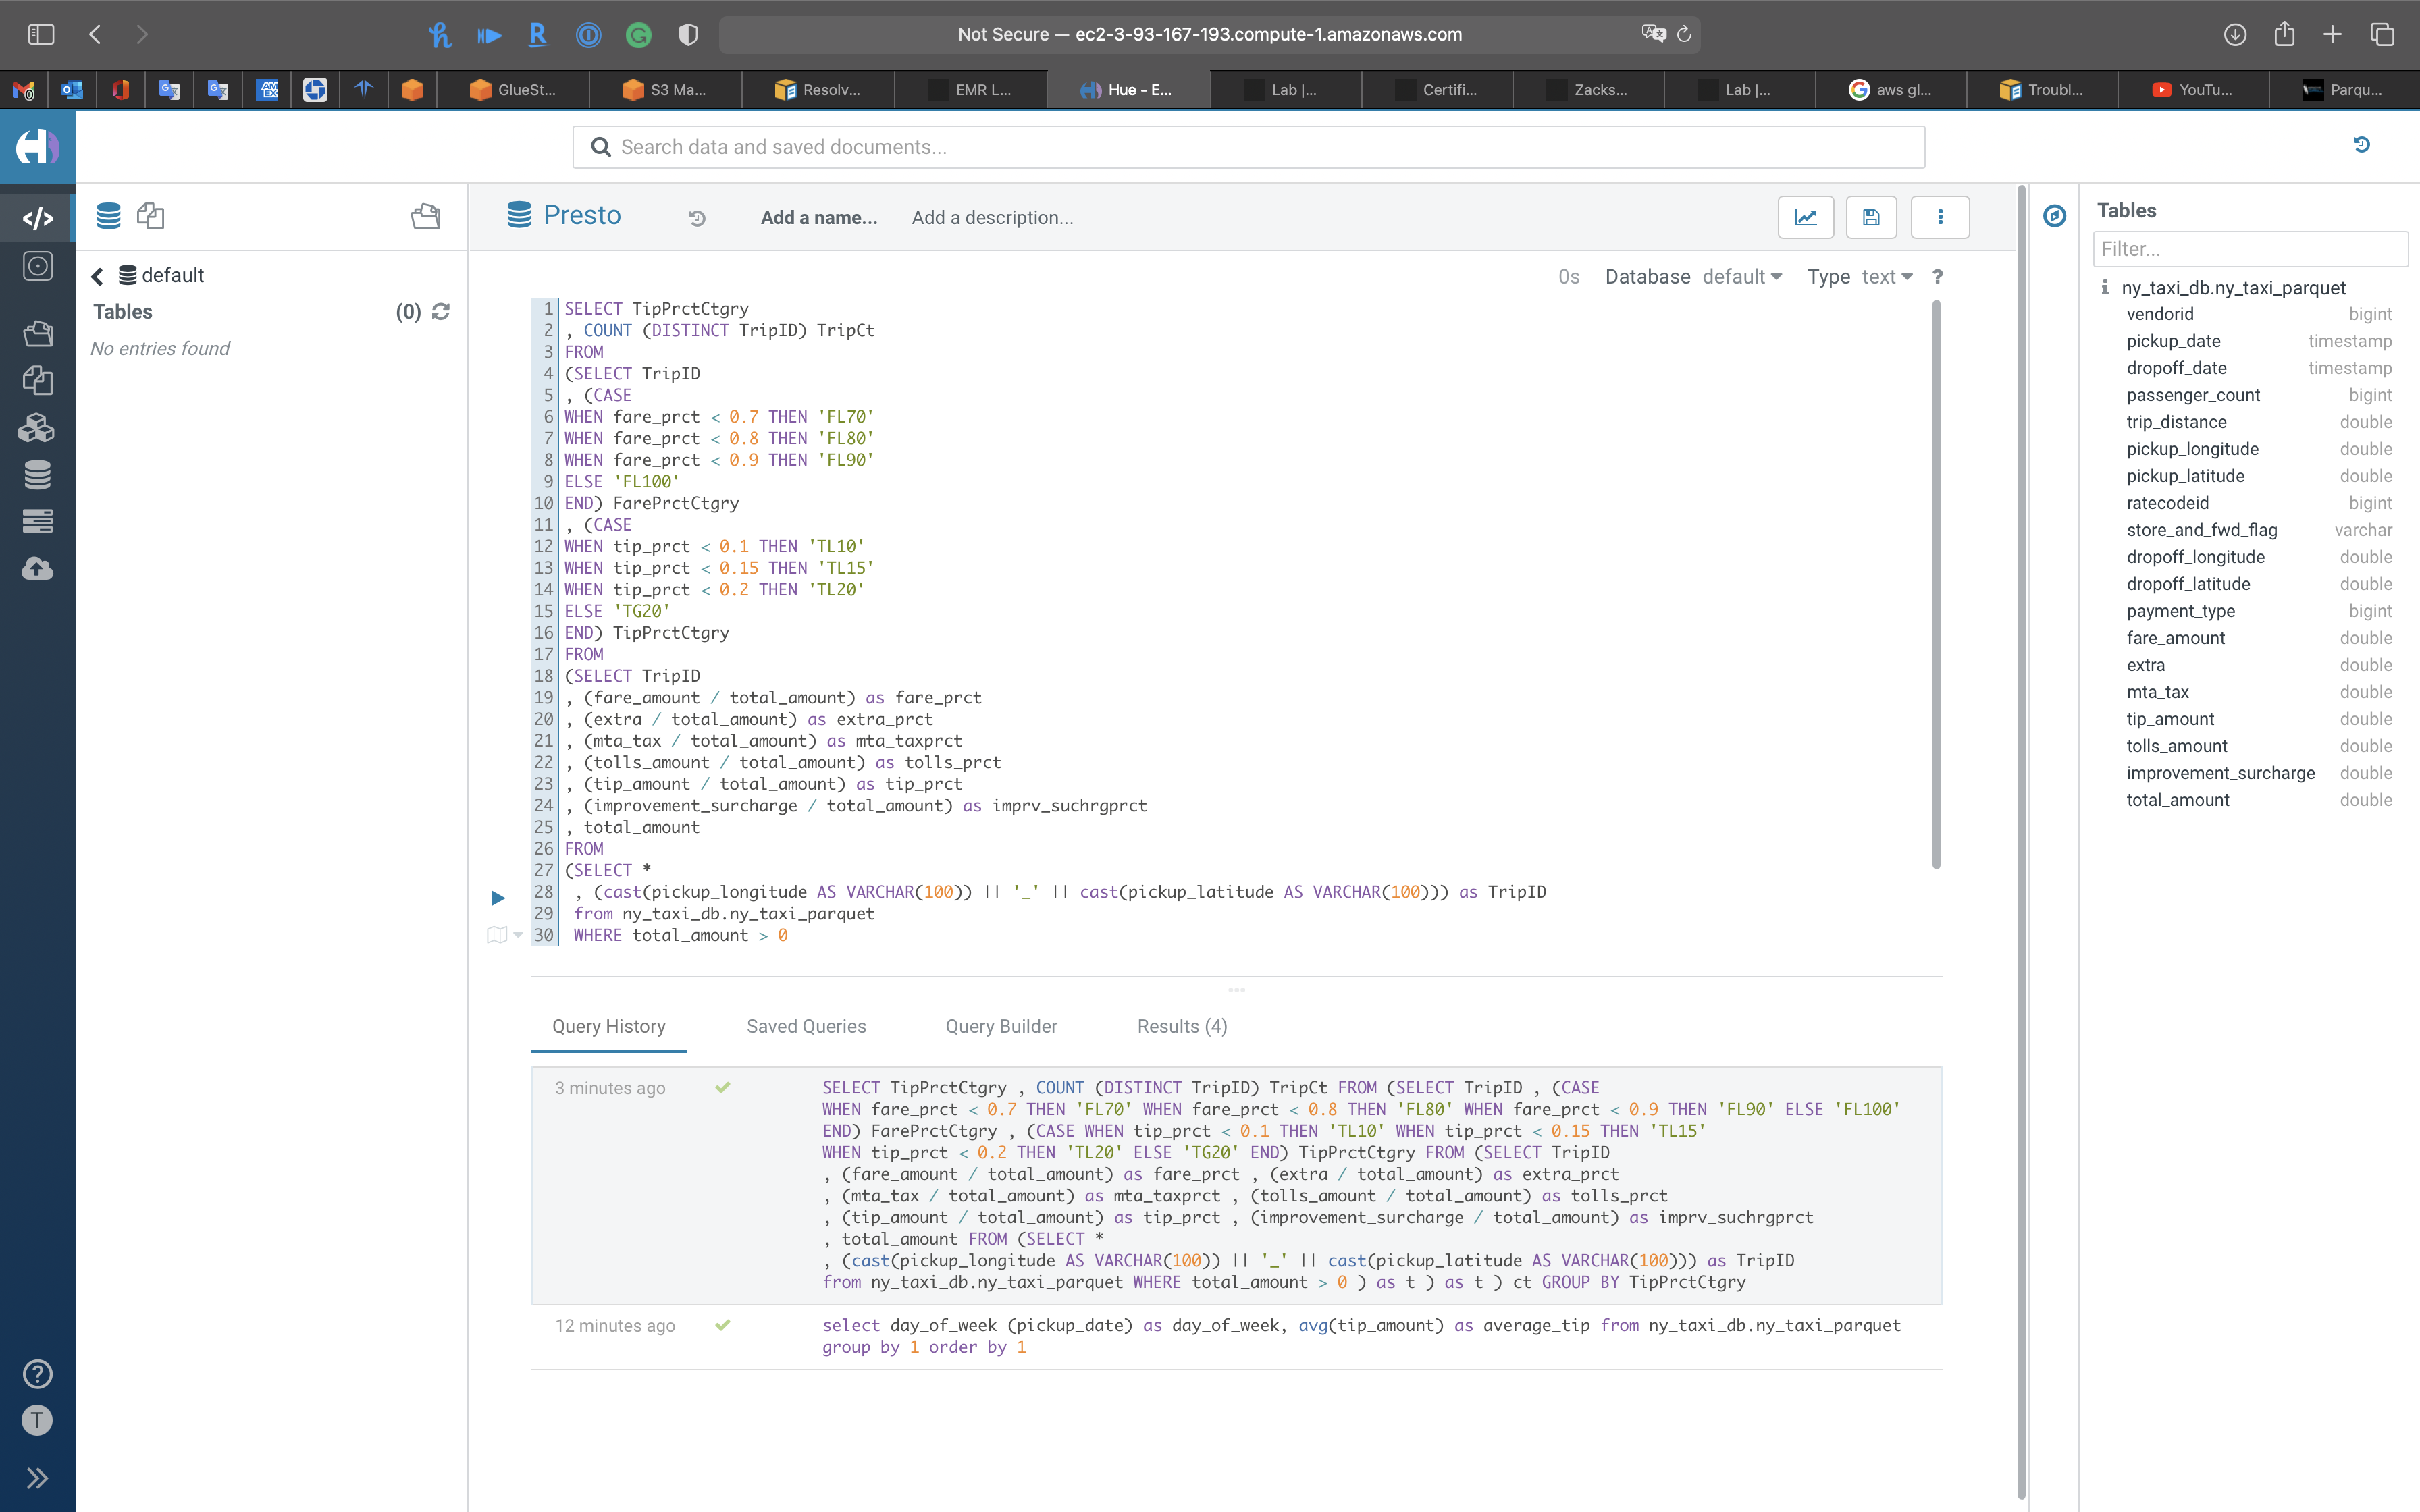
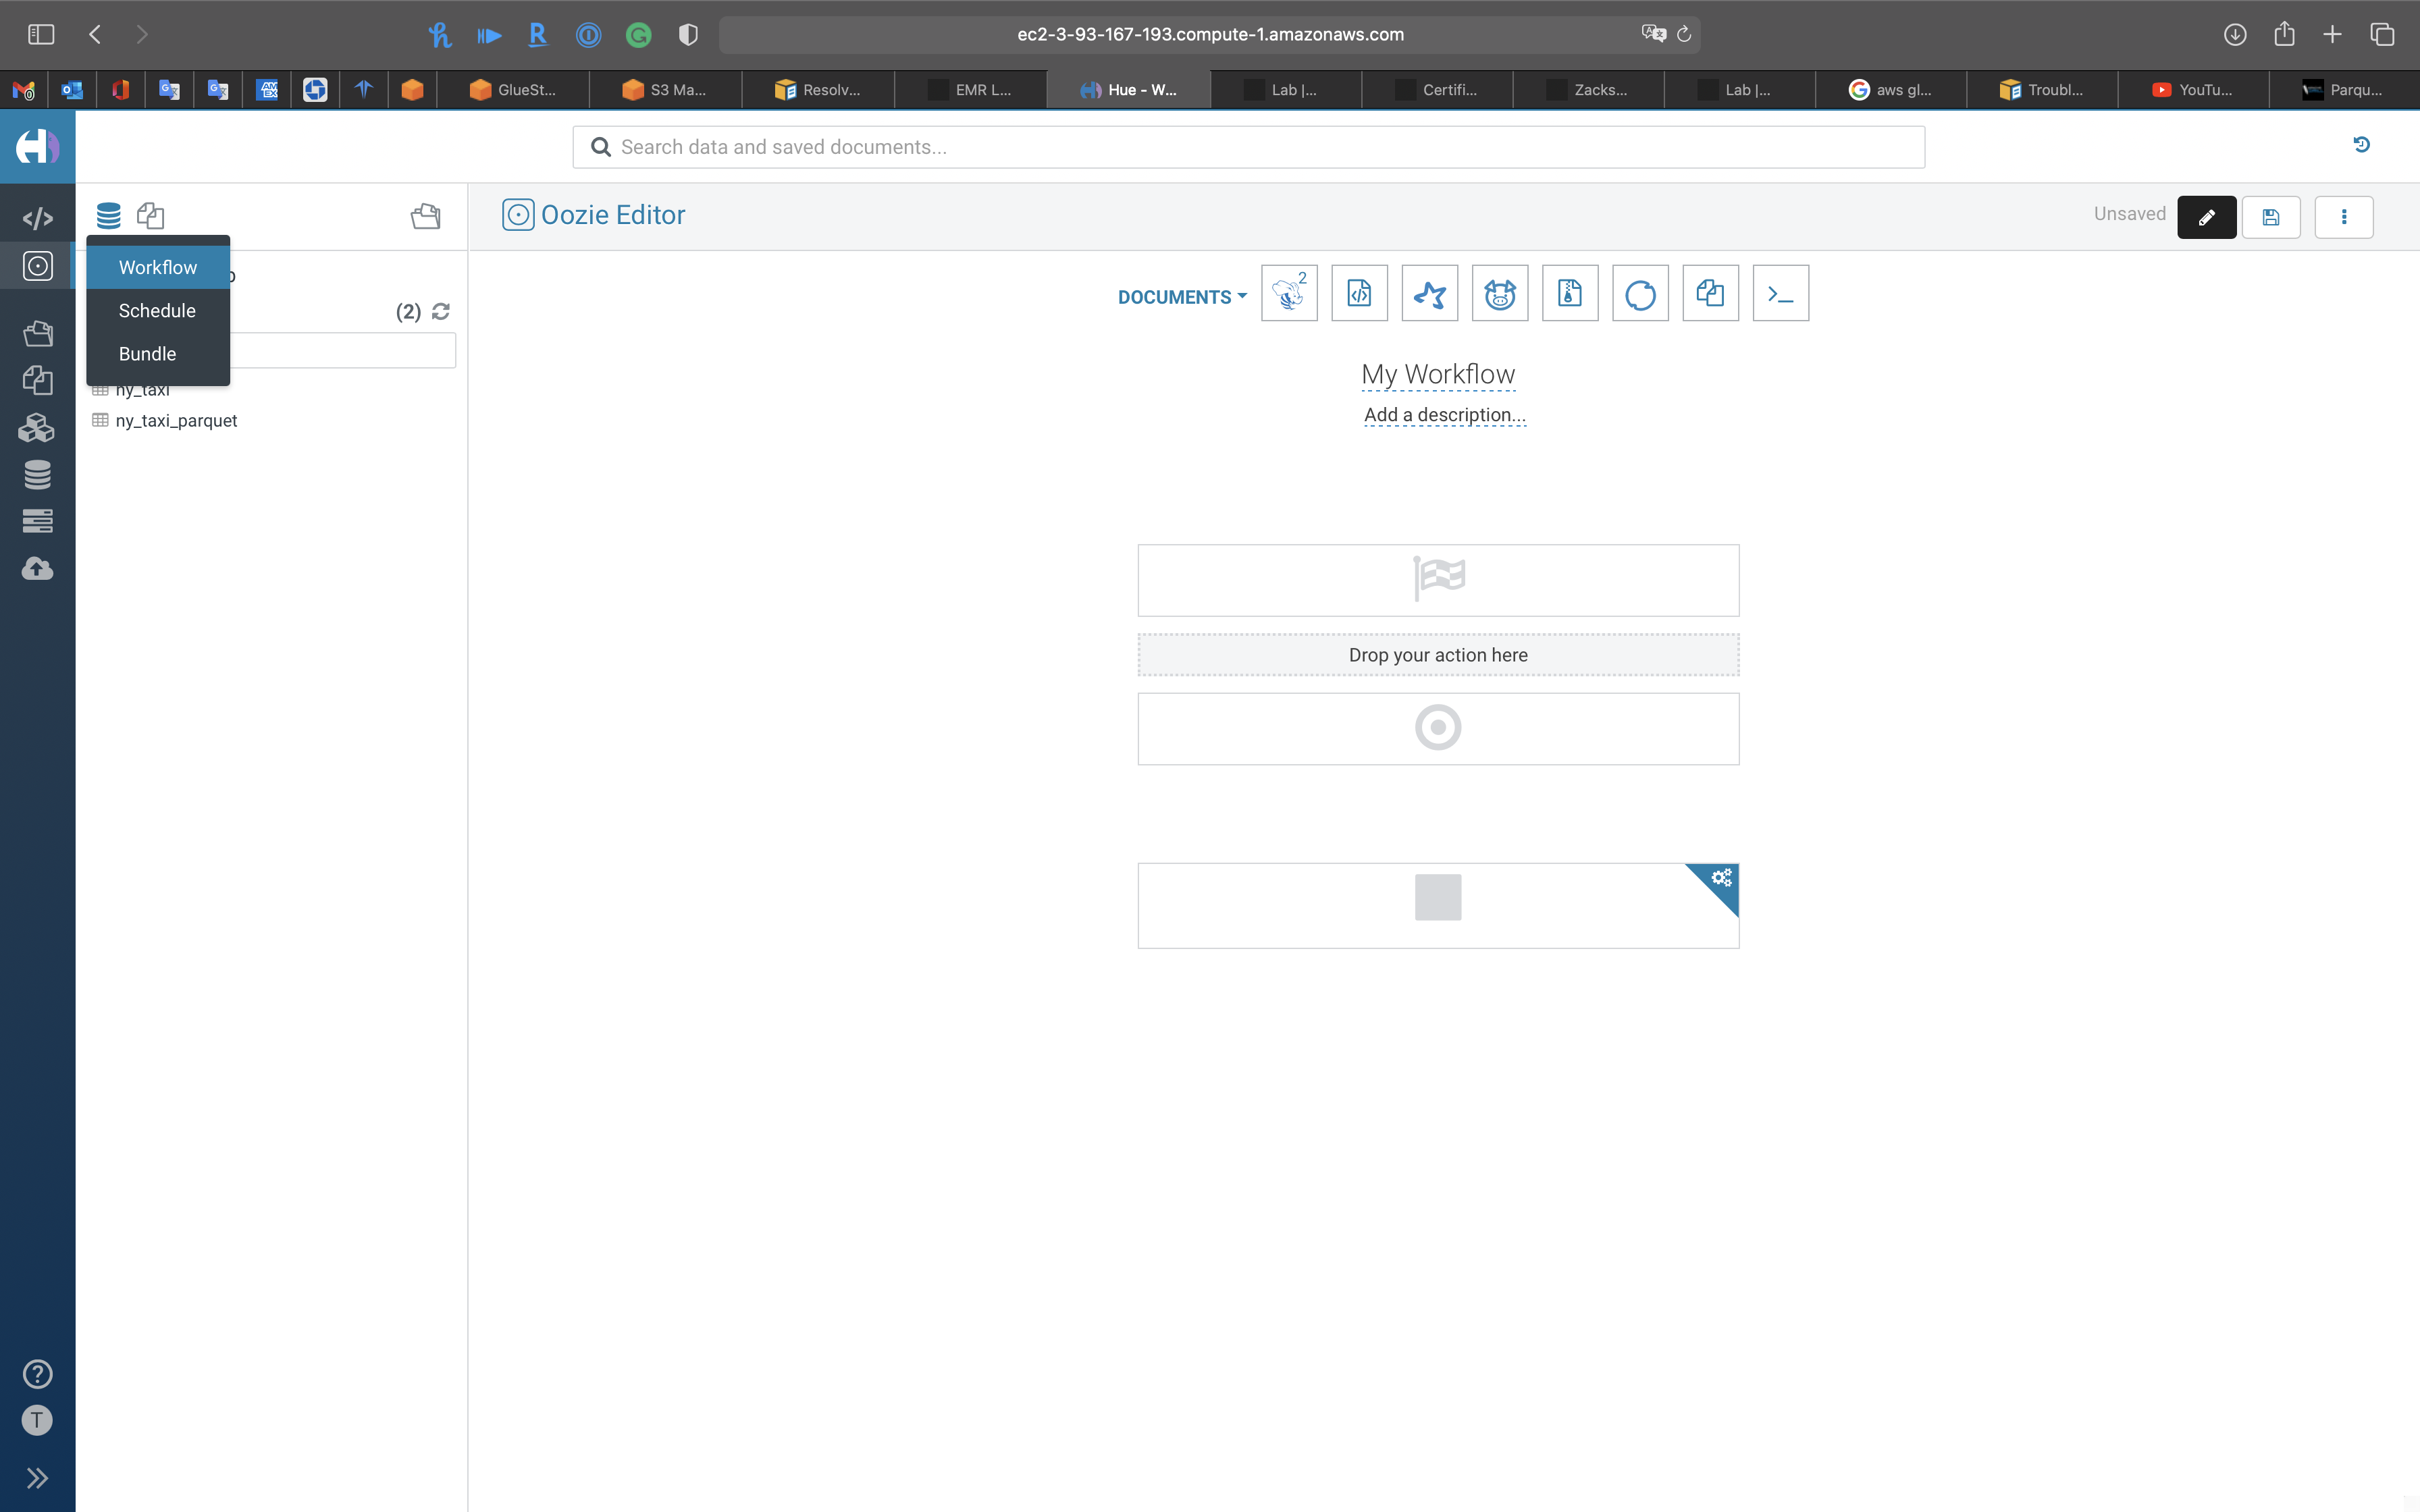
Workflow
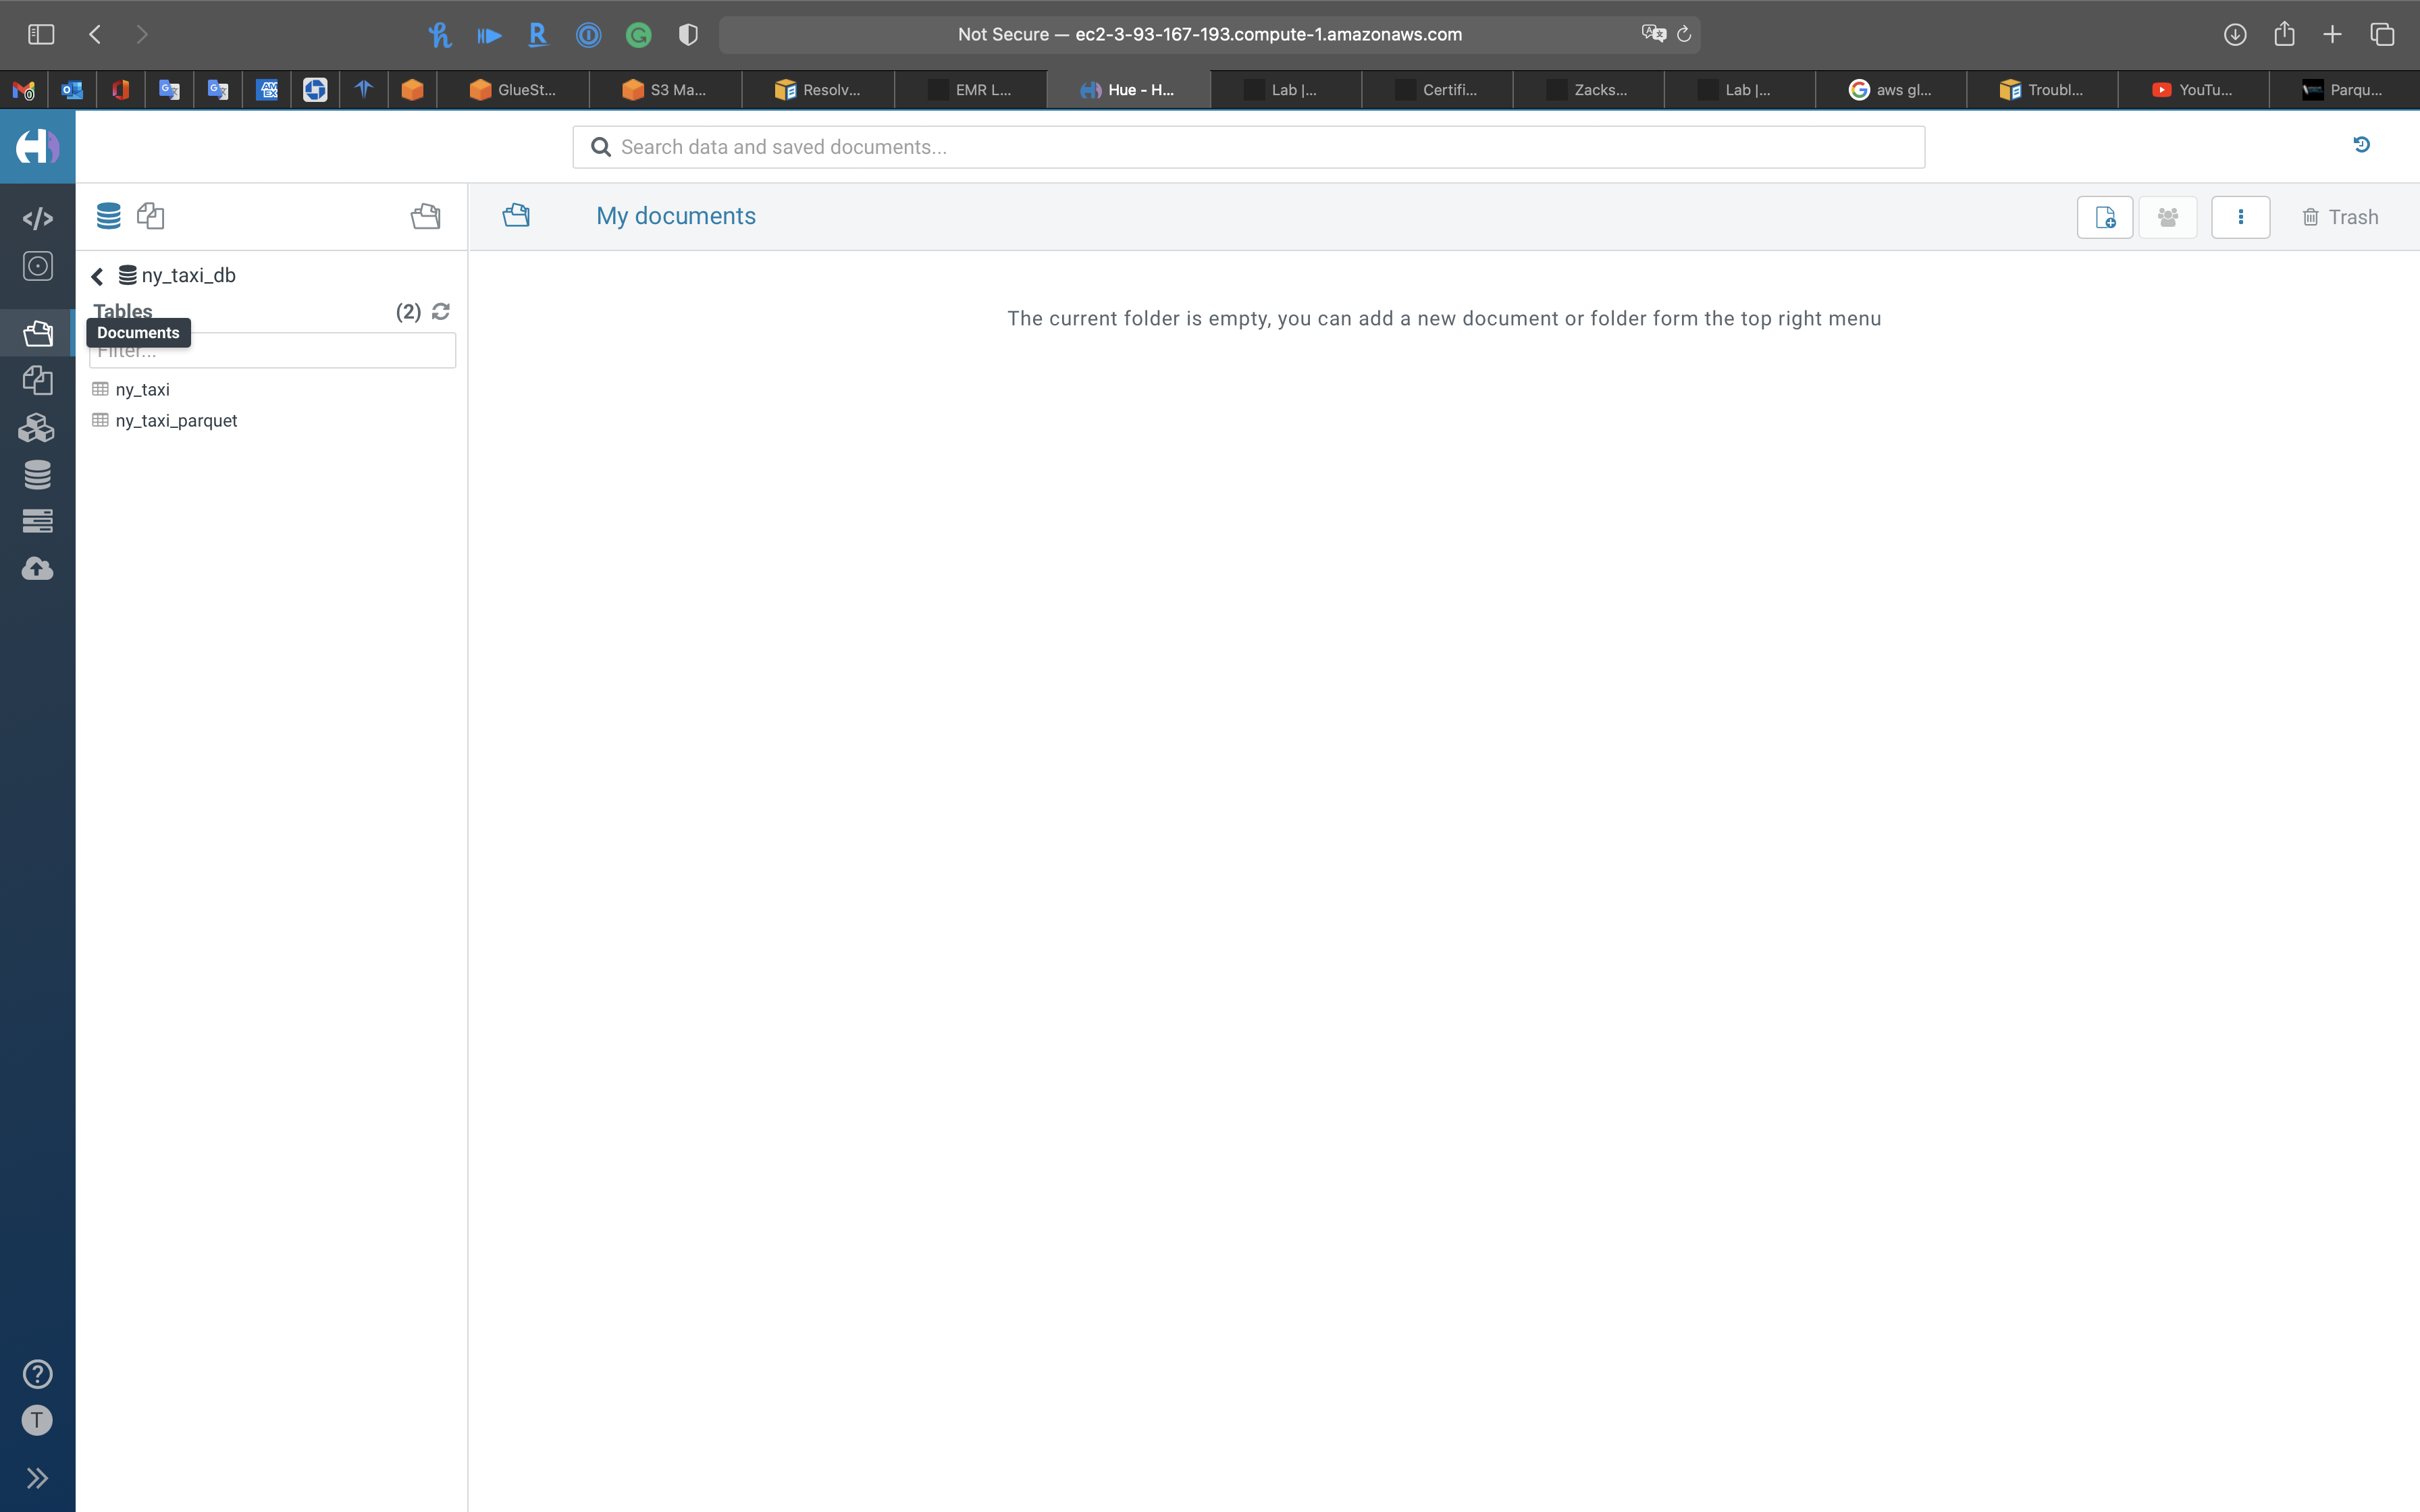
Documents
Files
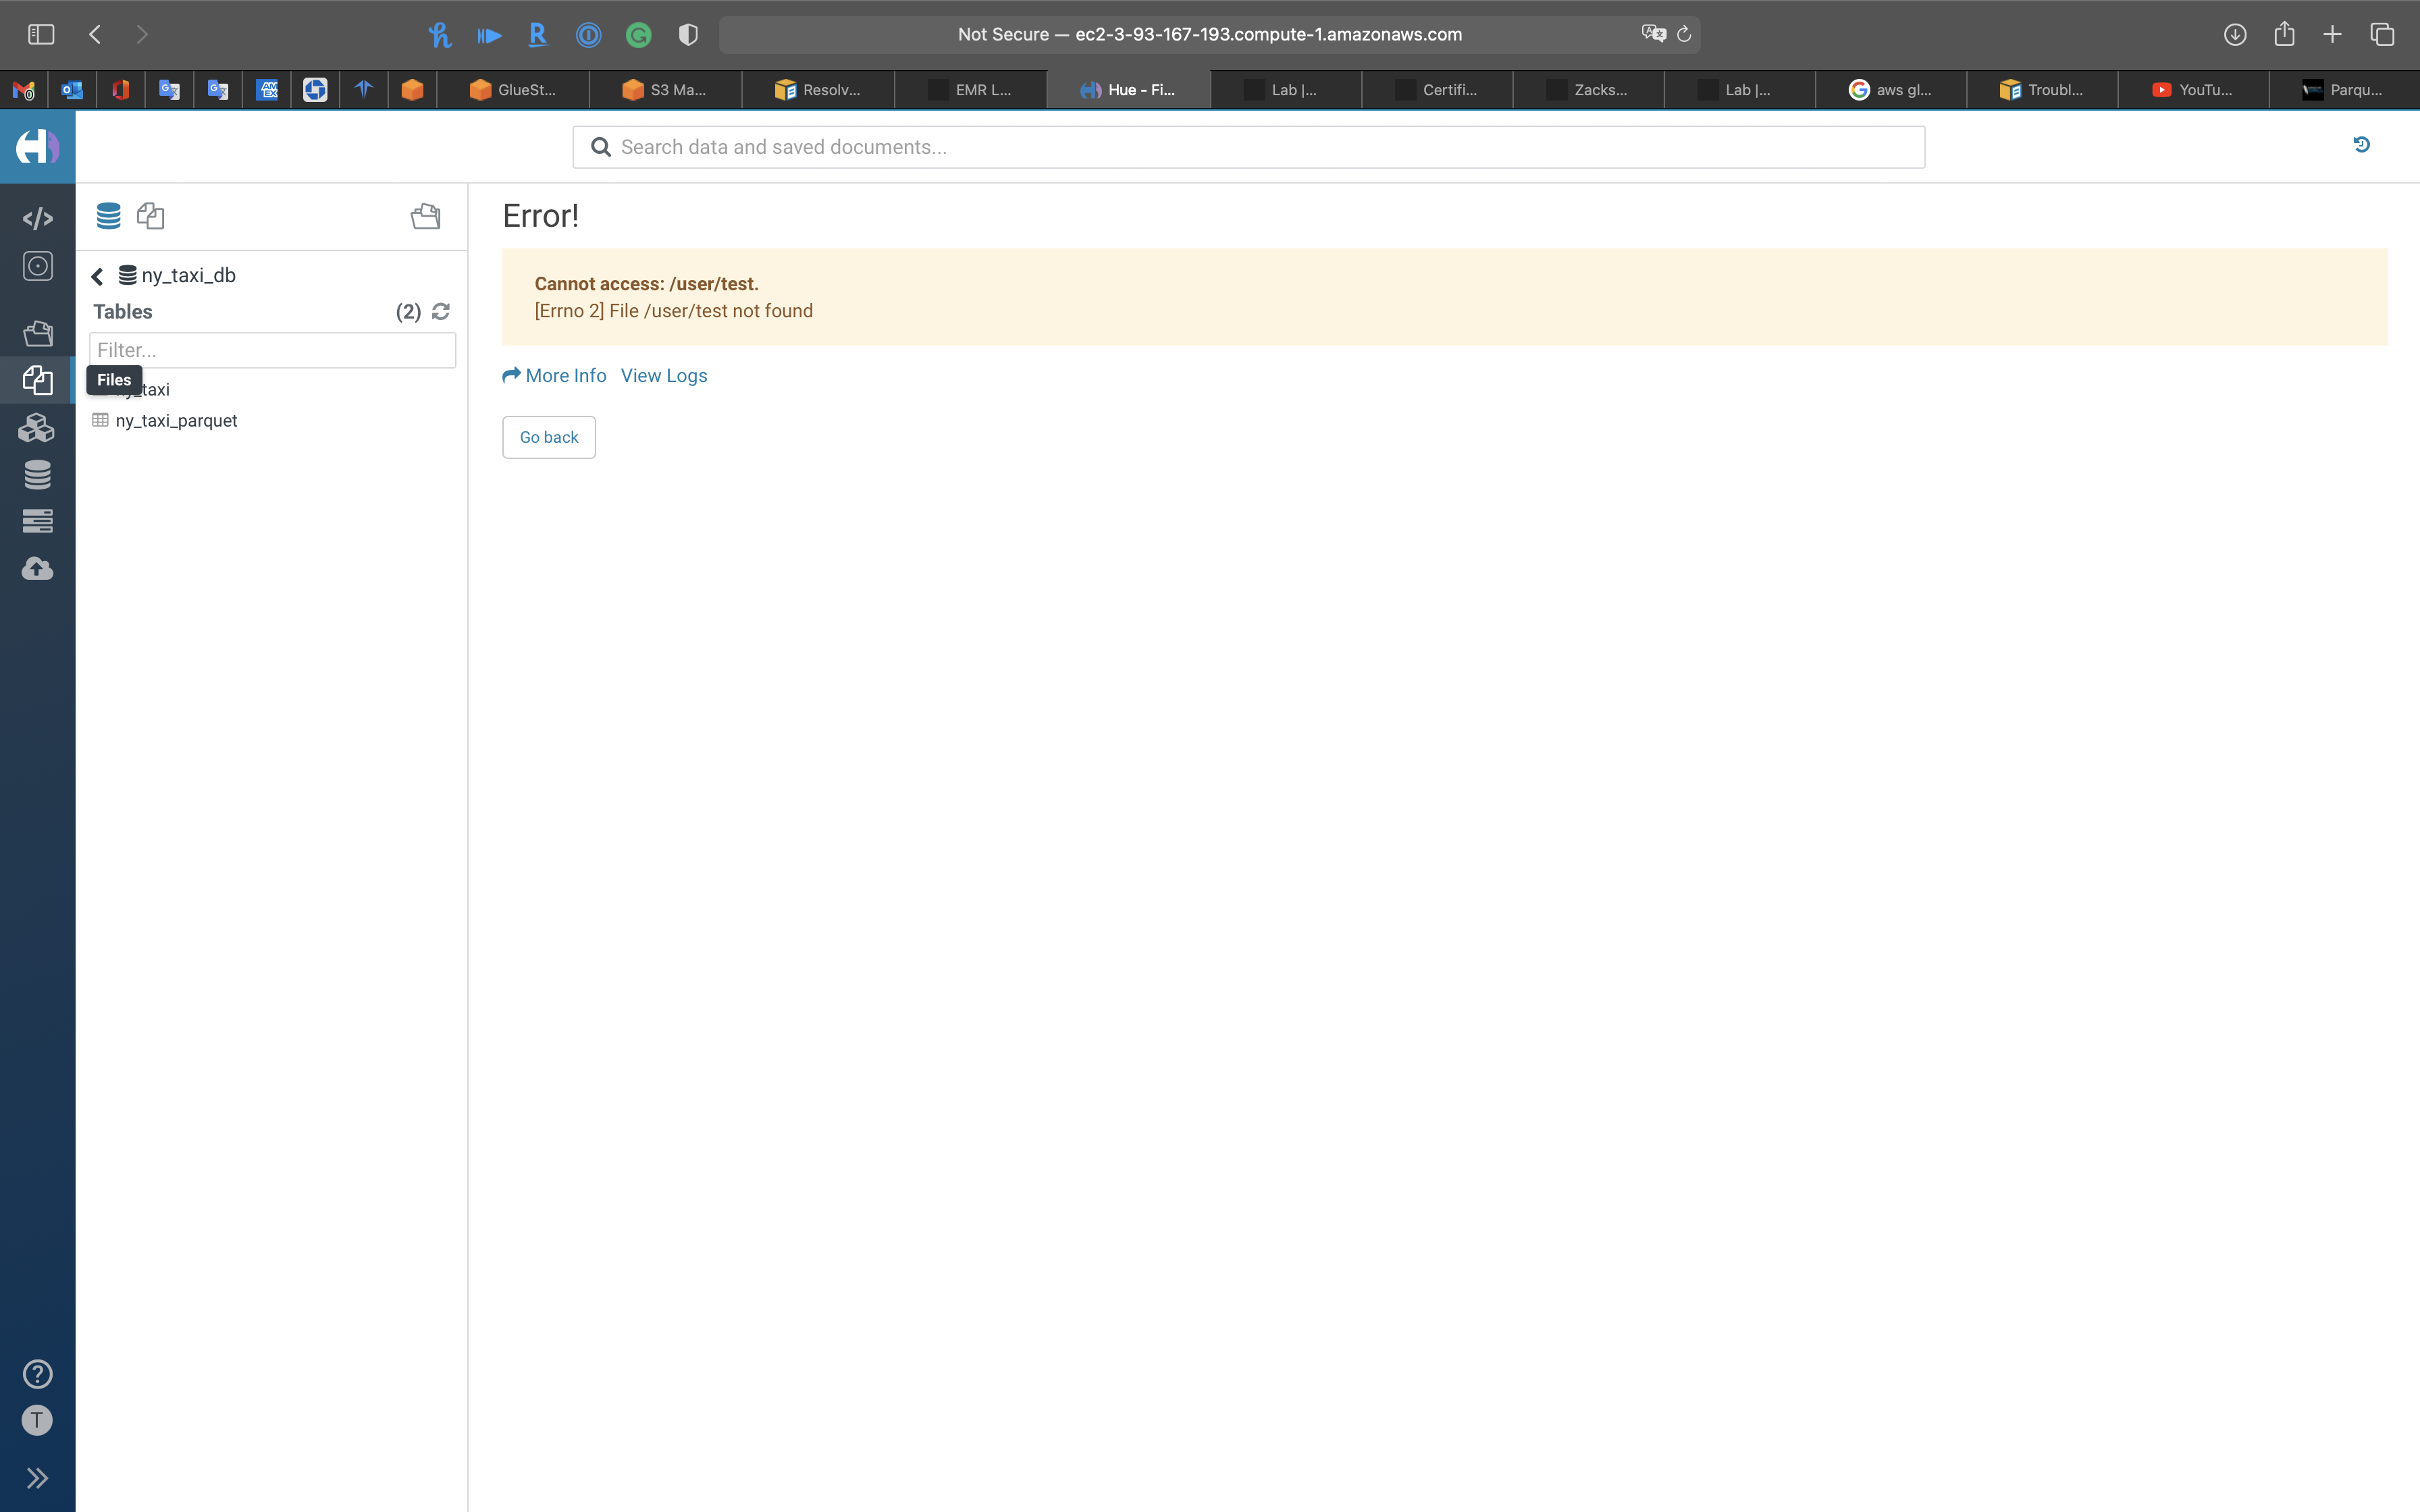
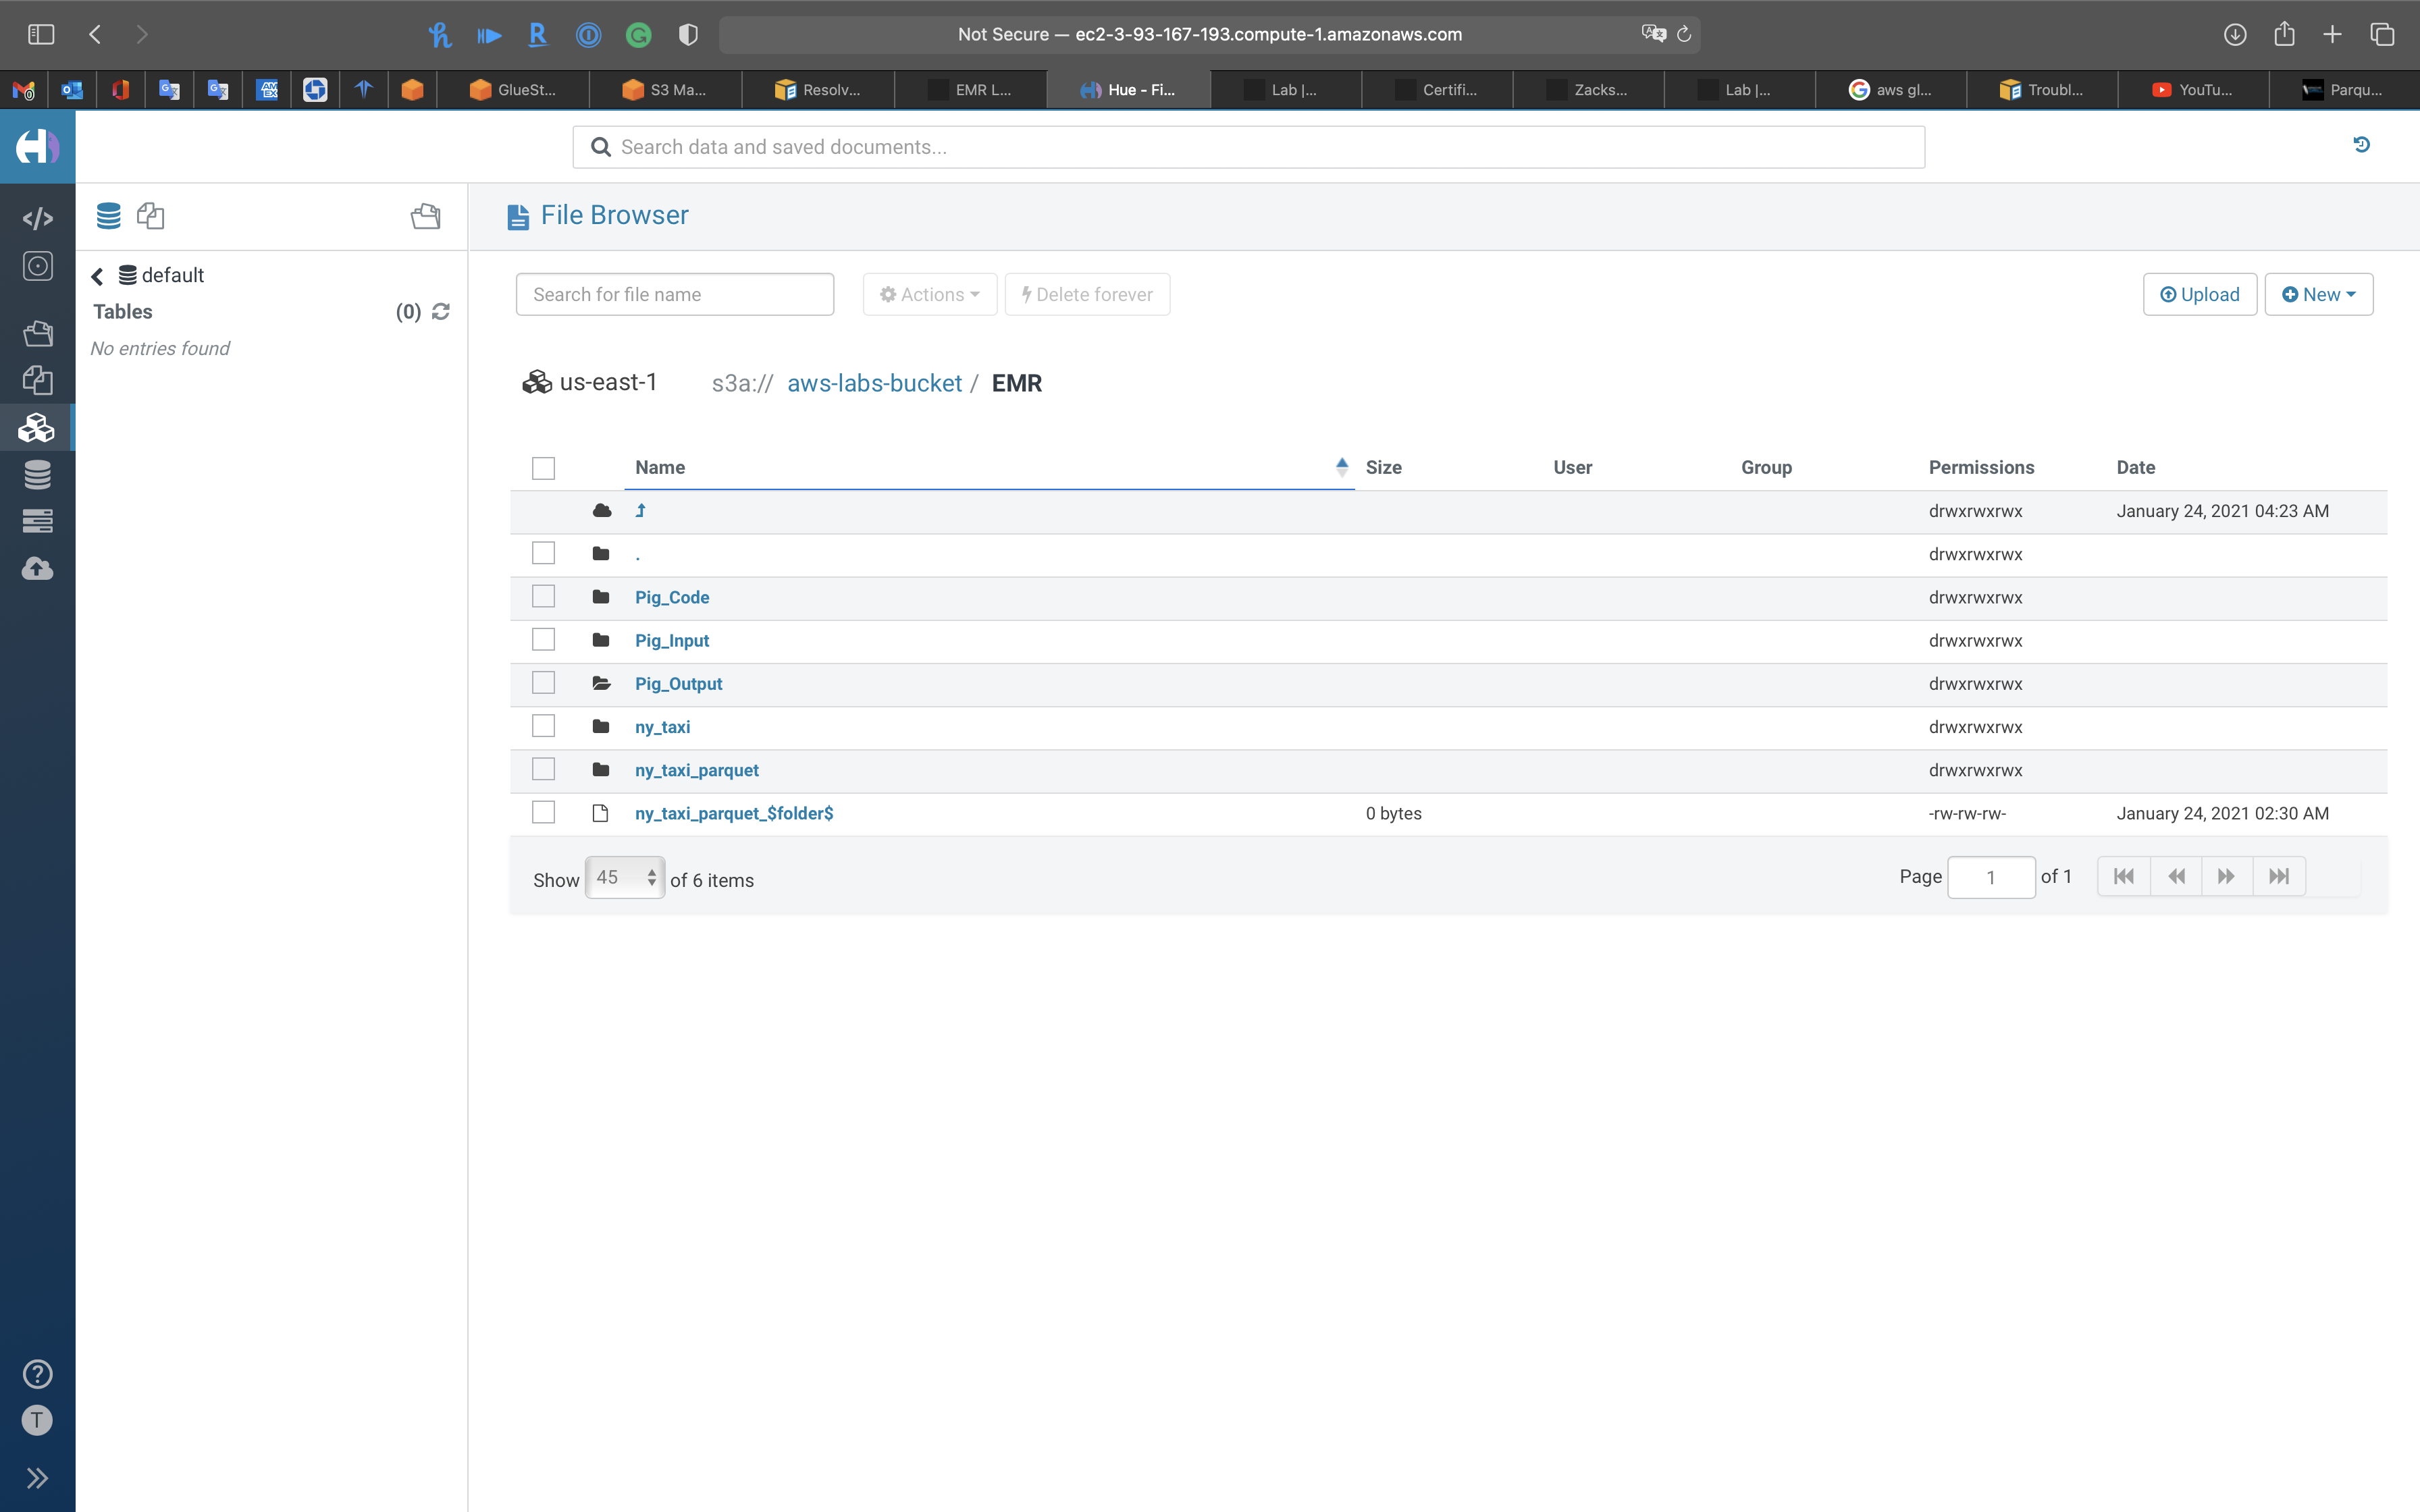
S3
You can visit your S3 buckets directly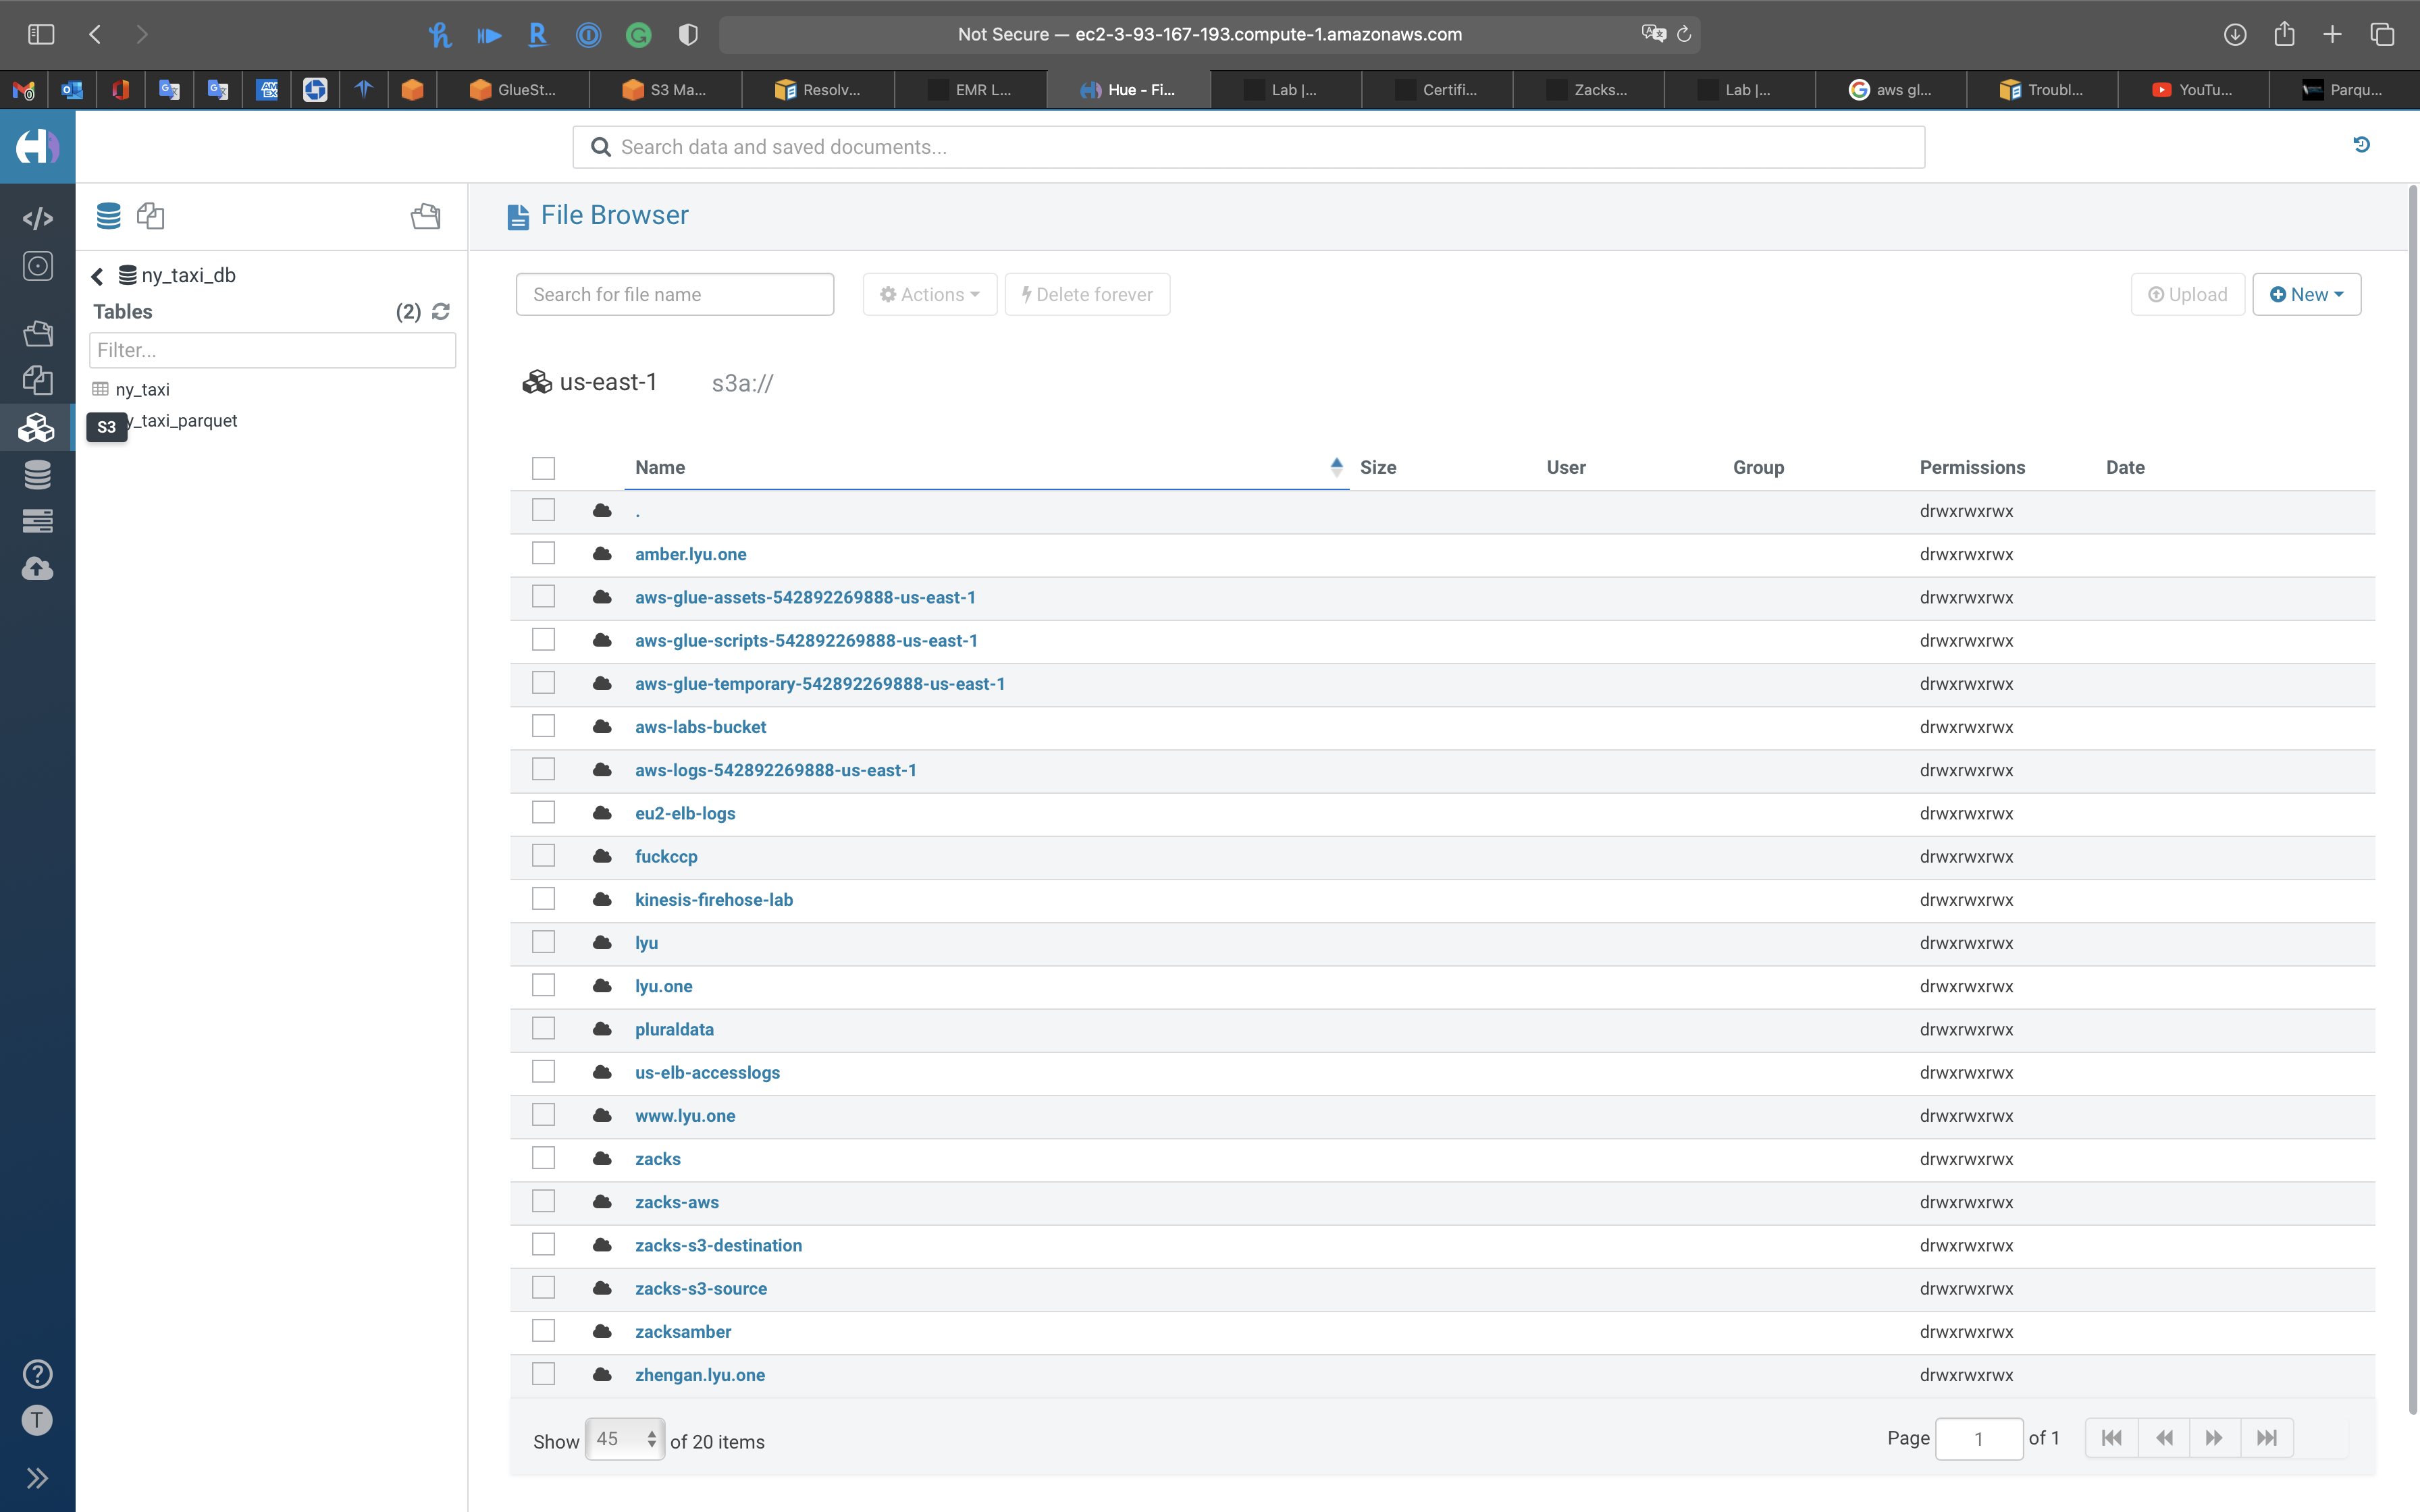
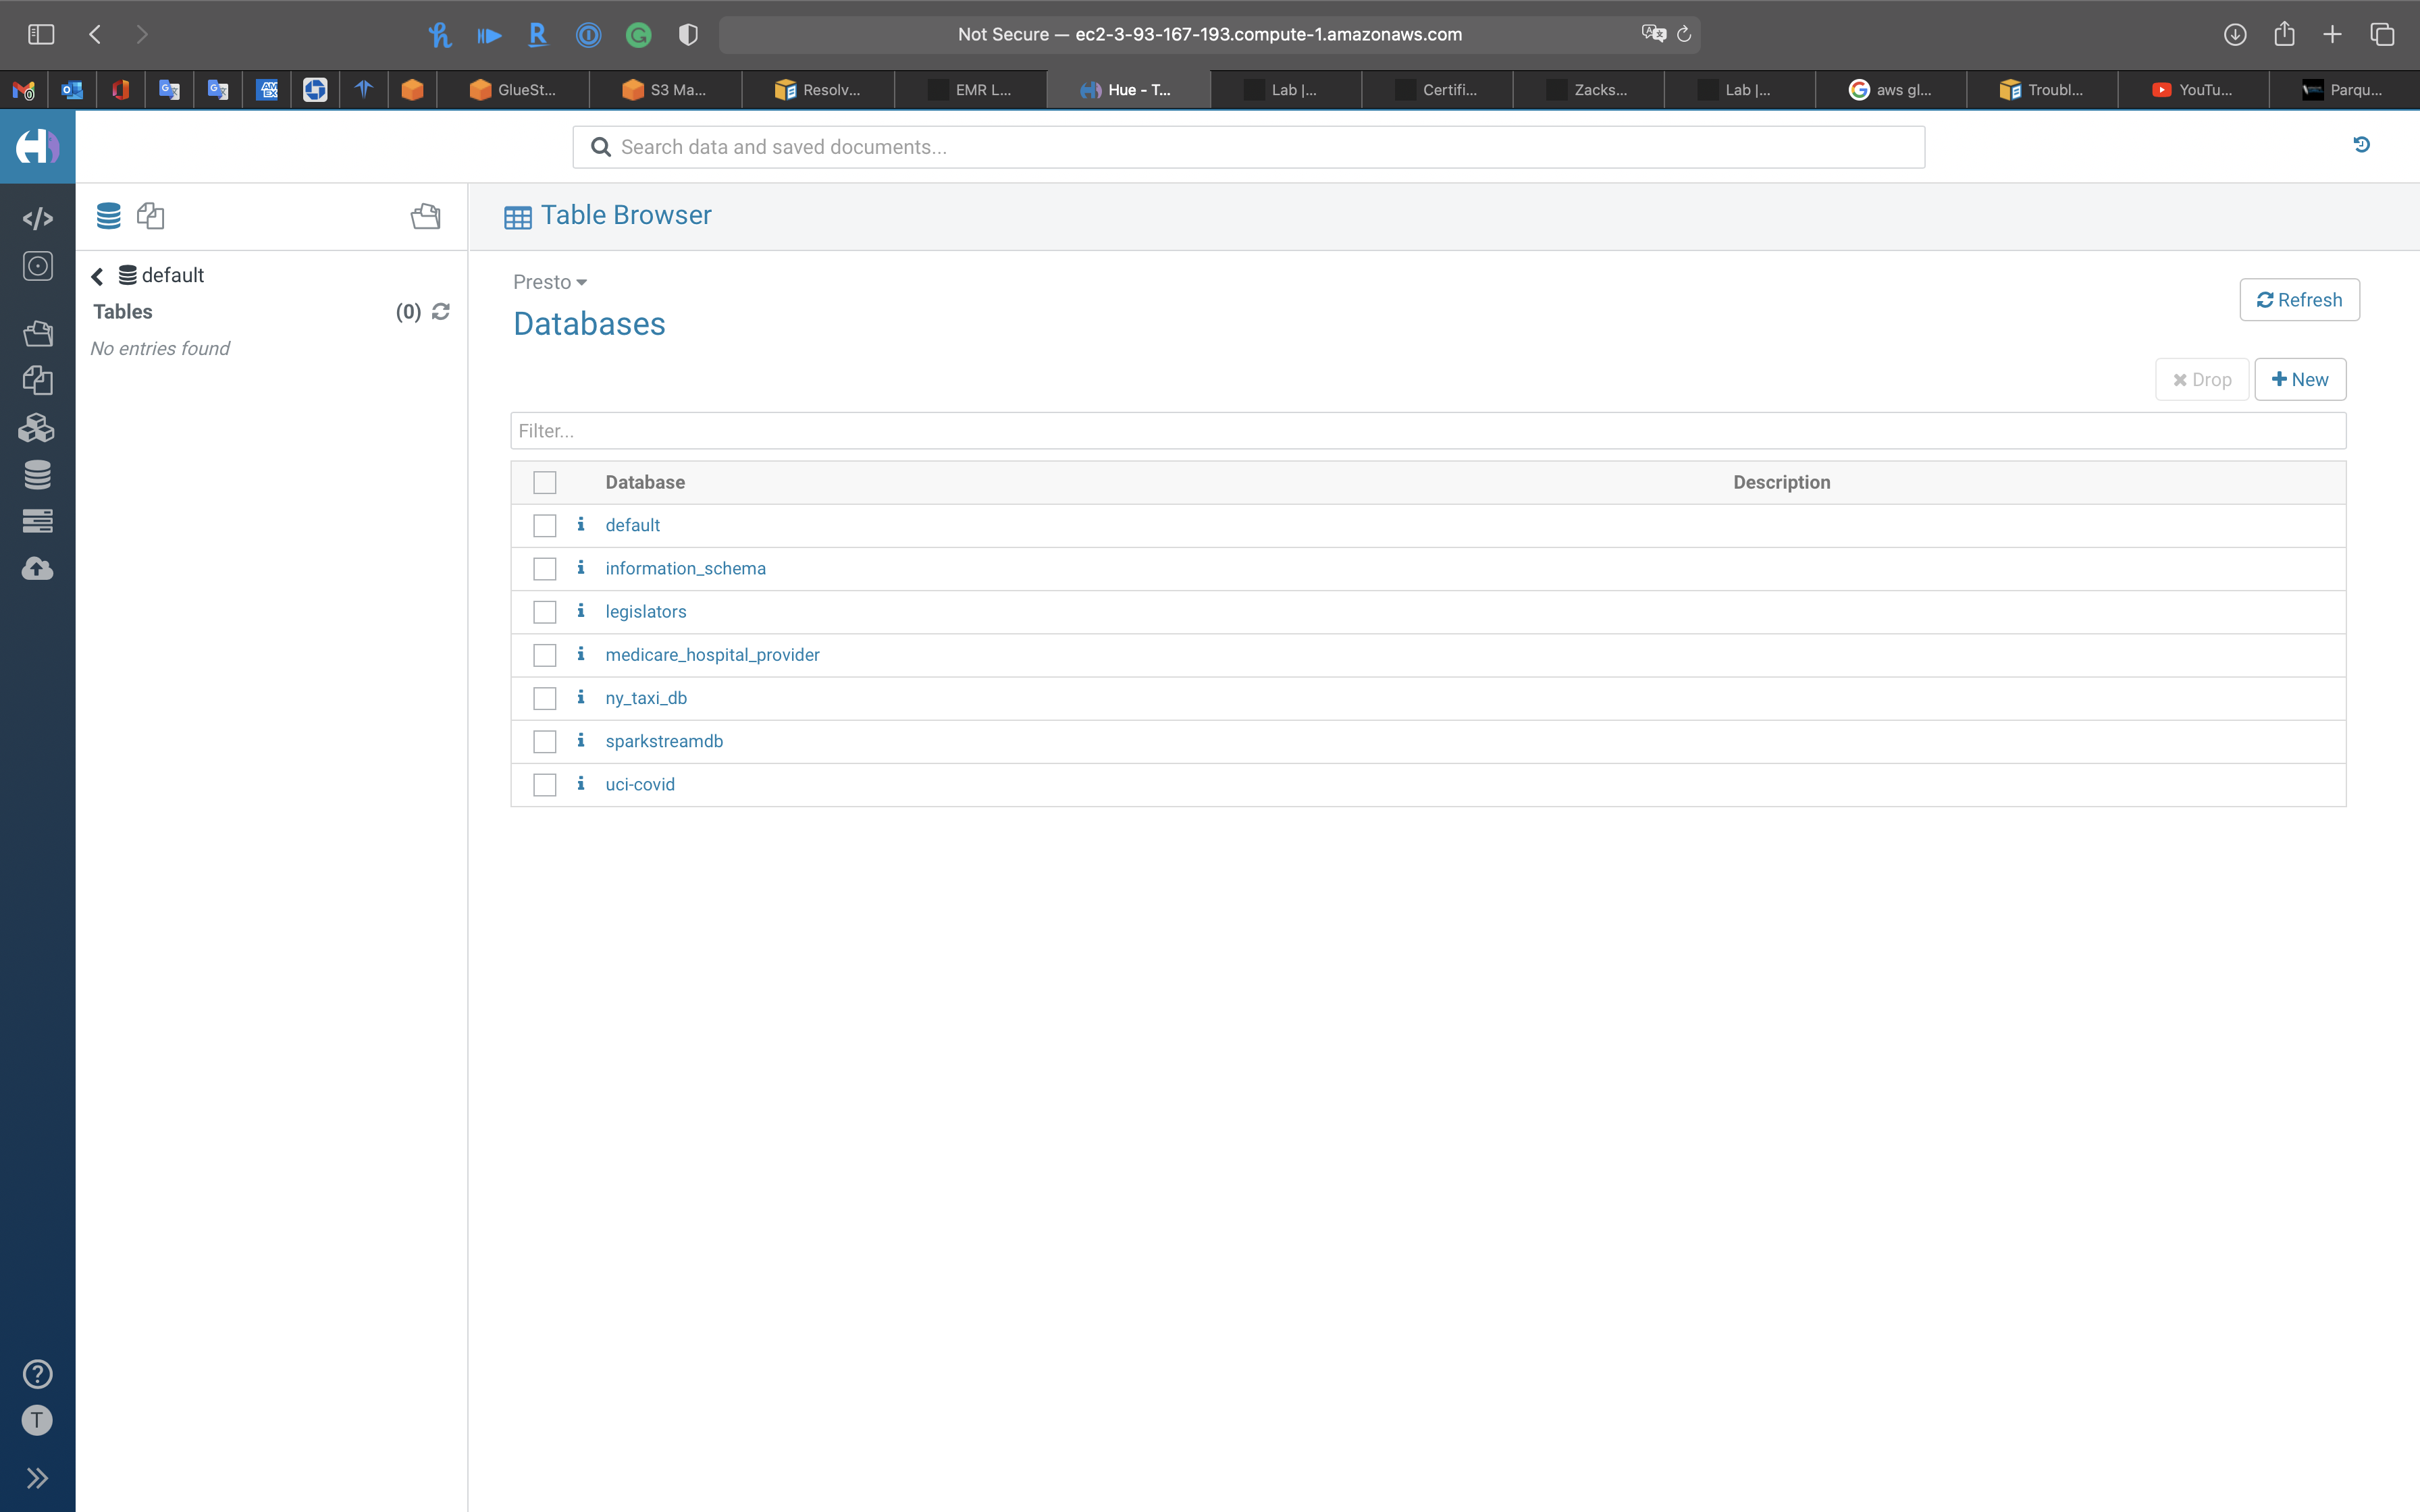
Tables
Tables in the current Database
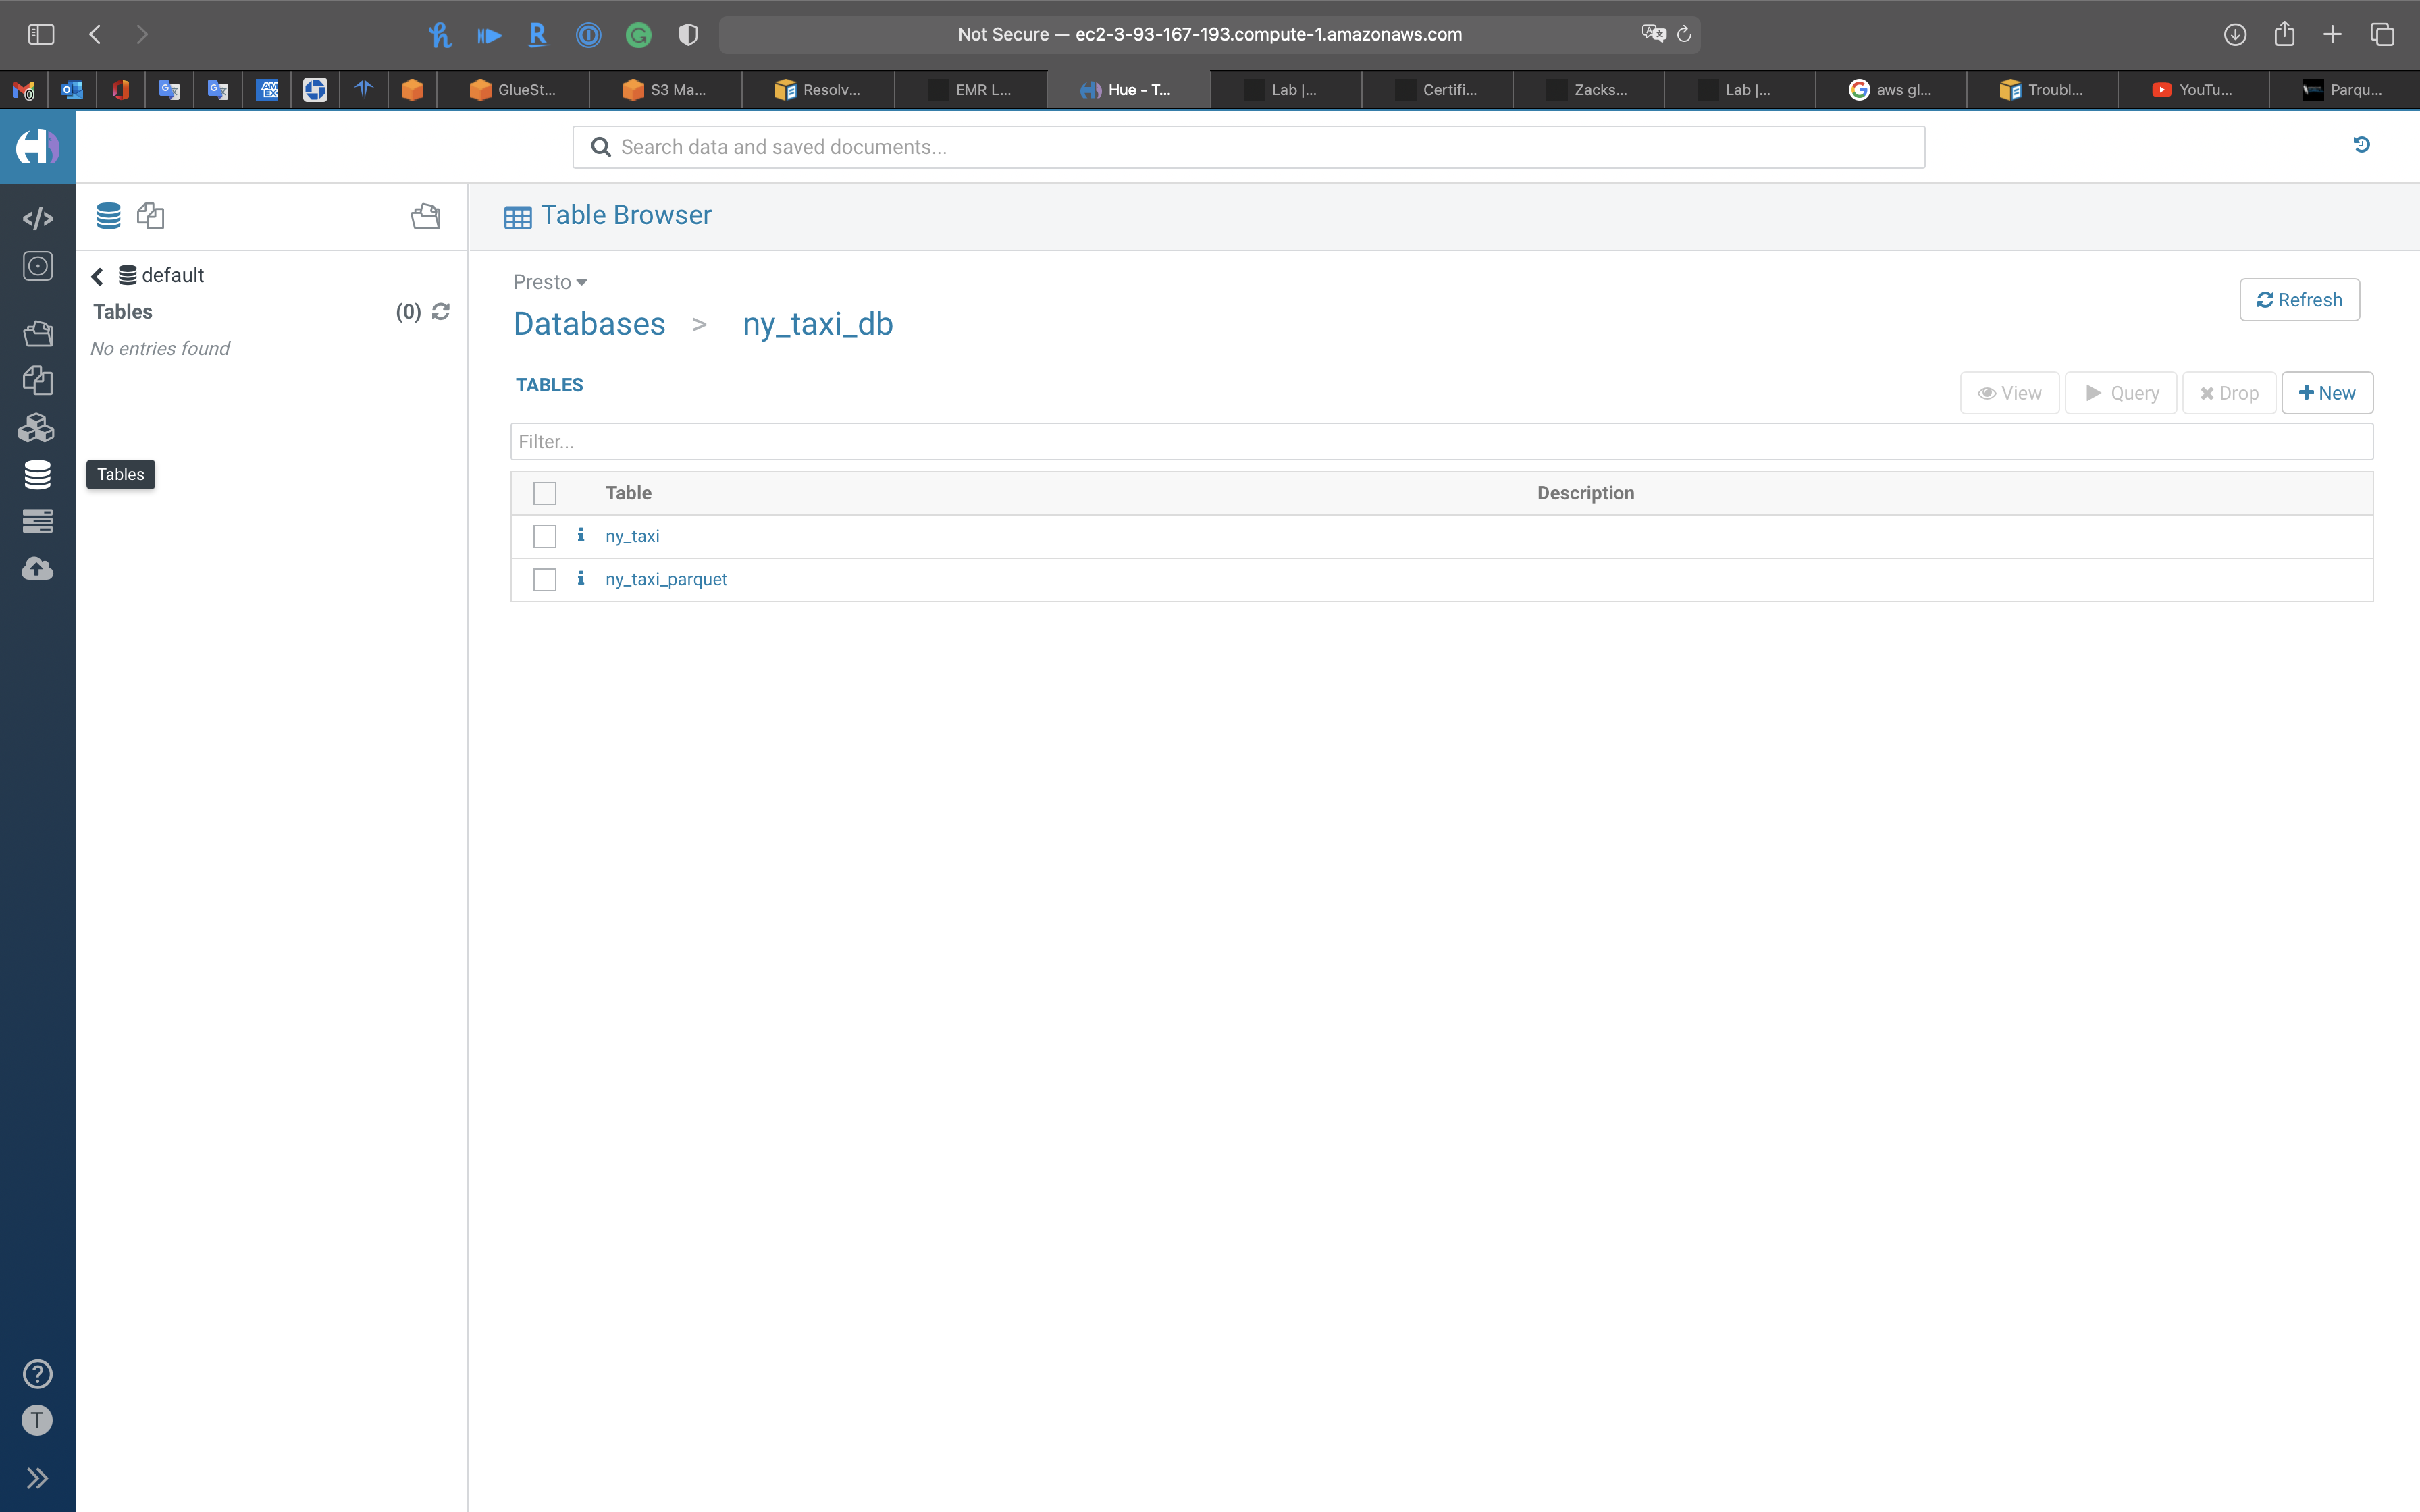
Click on Databases to see all the databases(schemas) in AWS Glue
Jobs
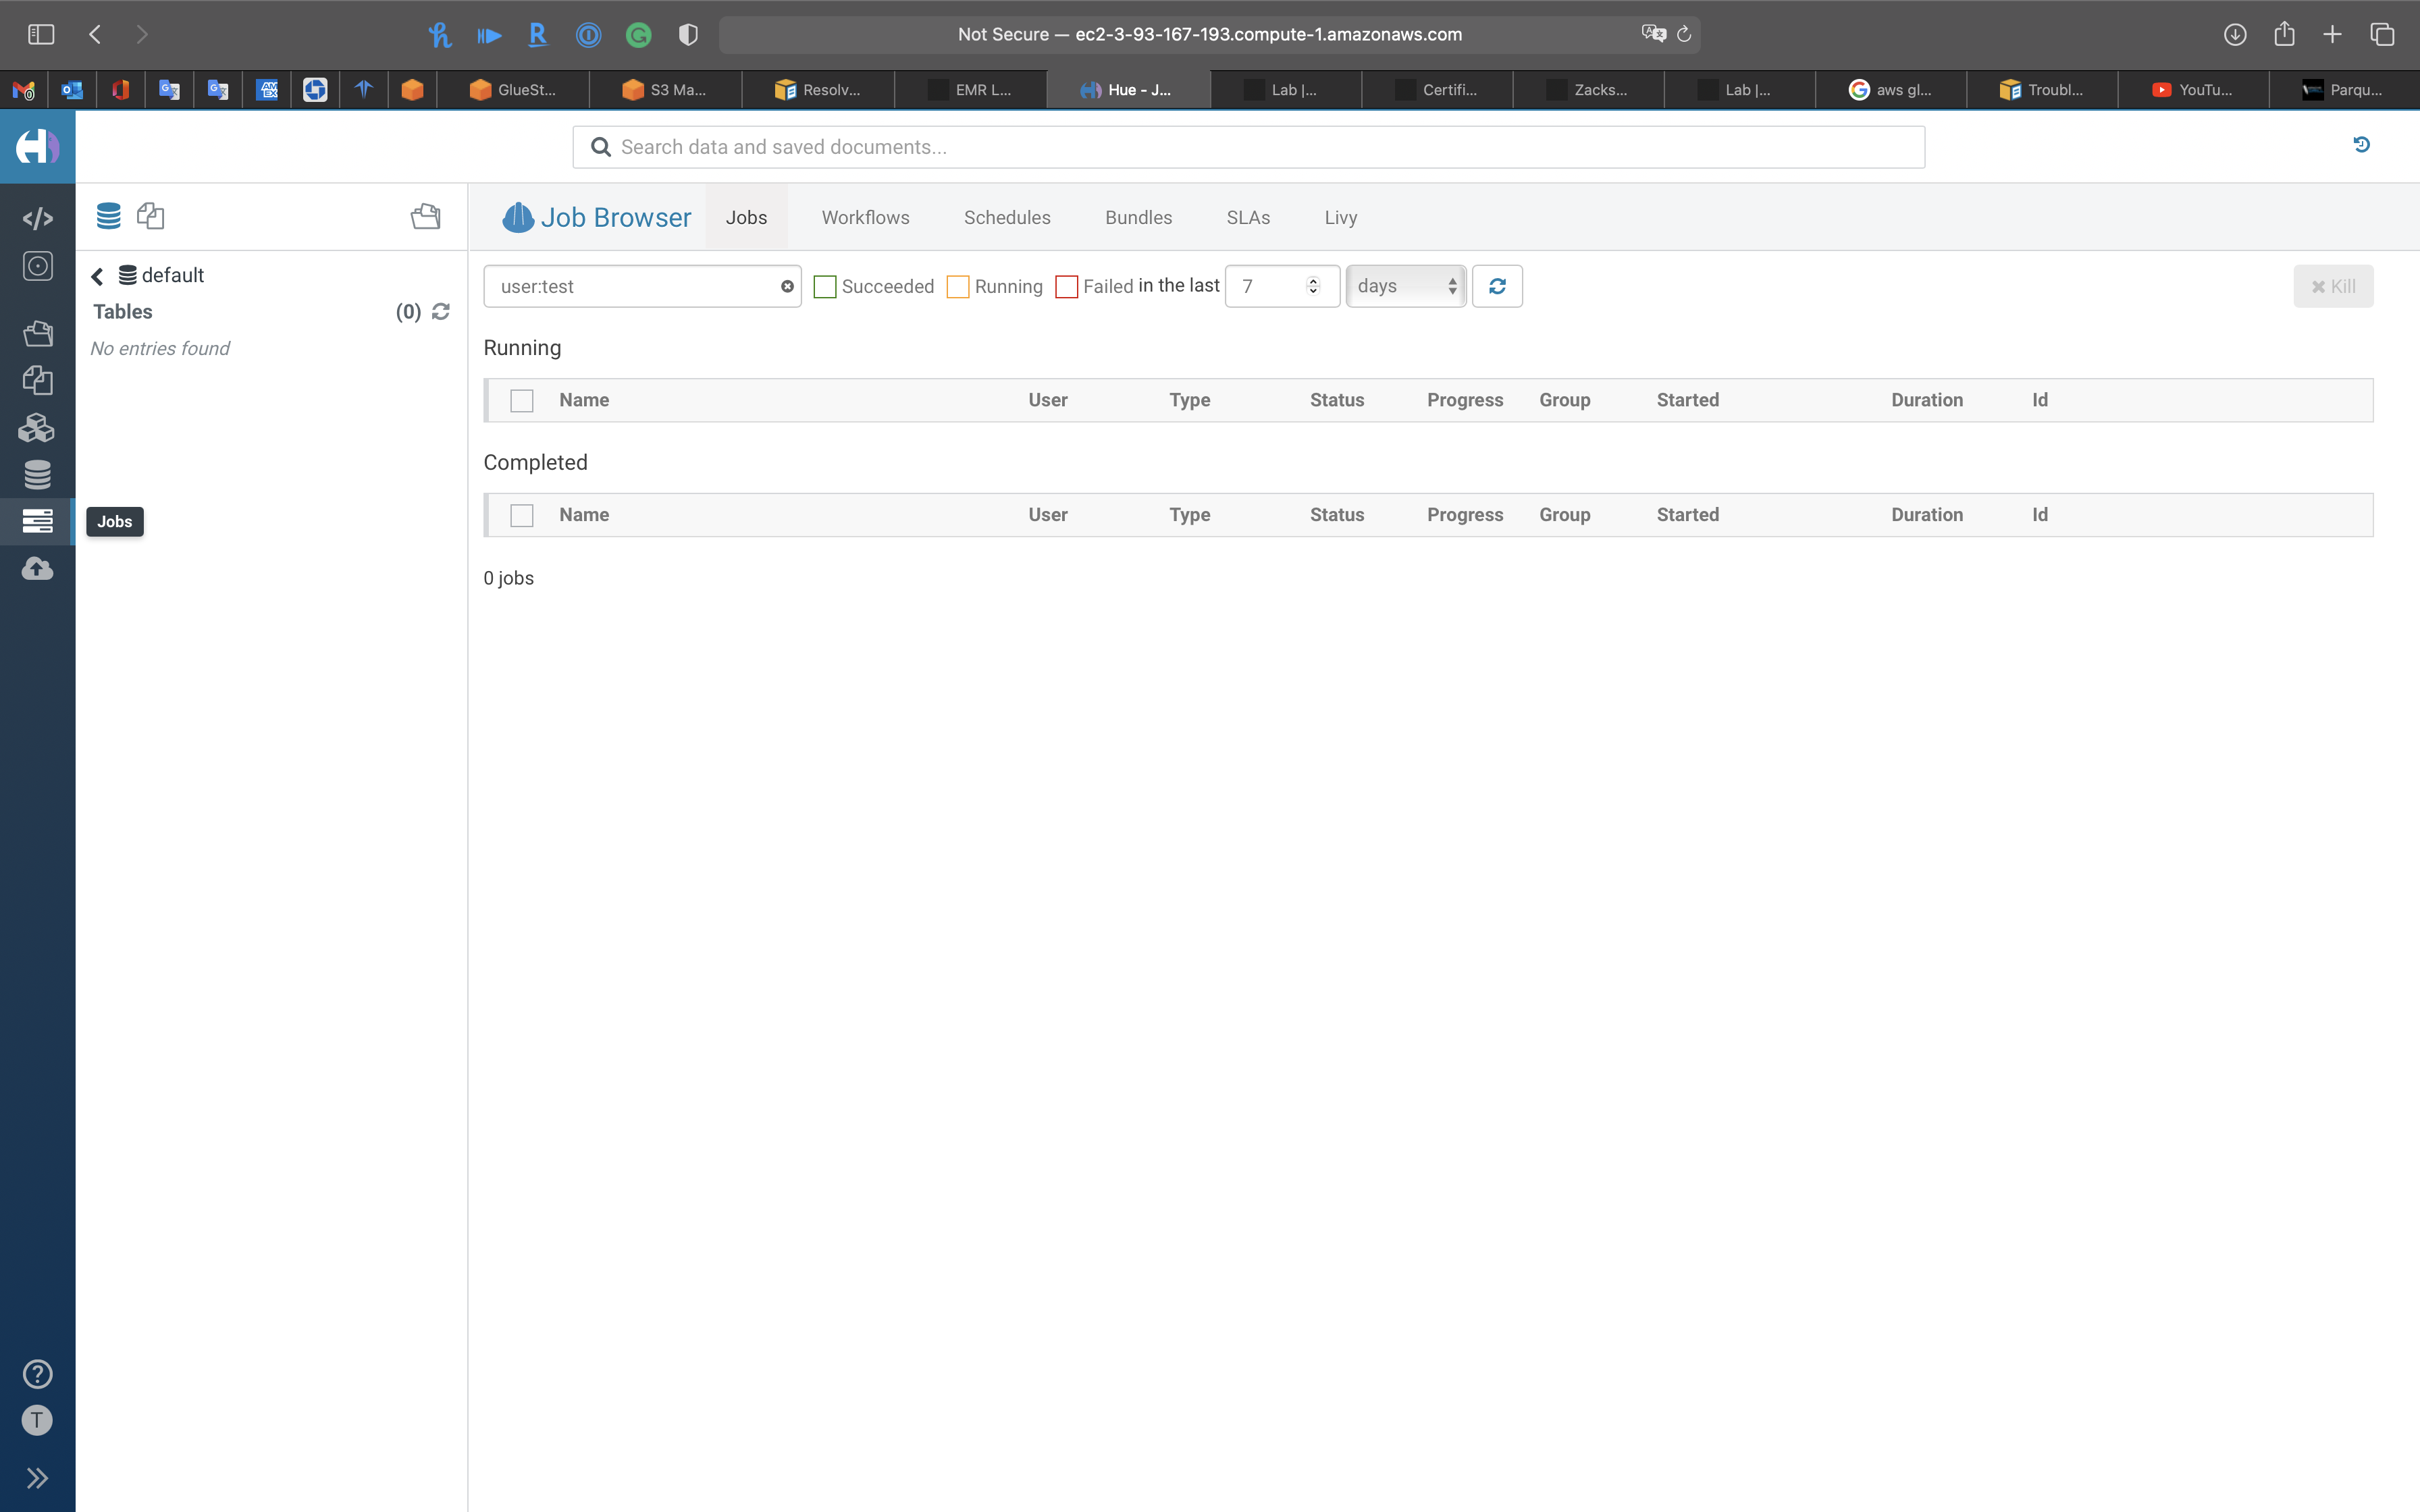
Importer
Warning: Terminate the EMR Cluster
Terminate the EMR Cluster to avoid bankrupt.
Select your Cluster then click on Terminate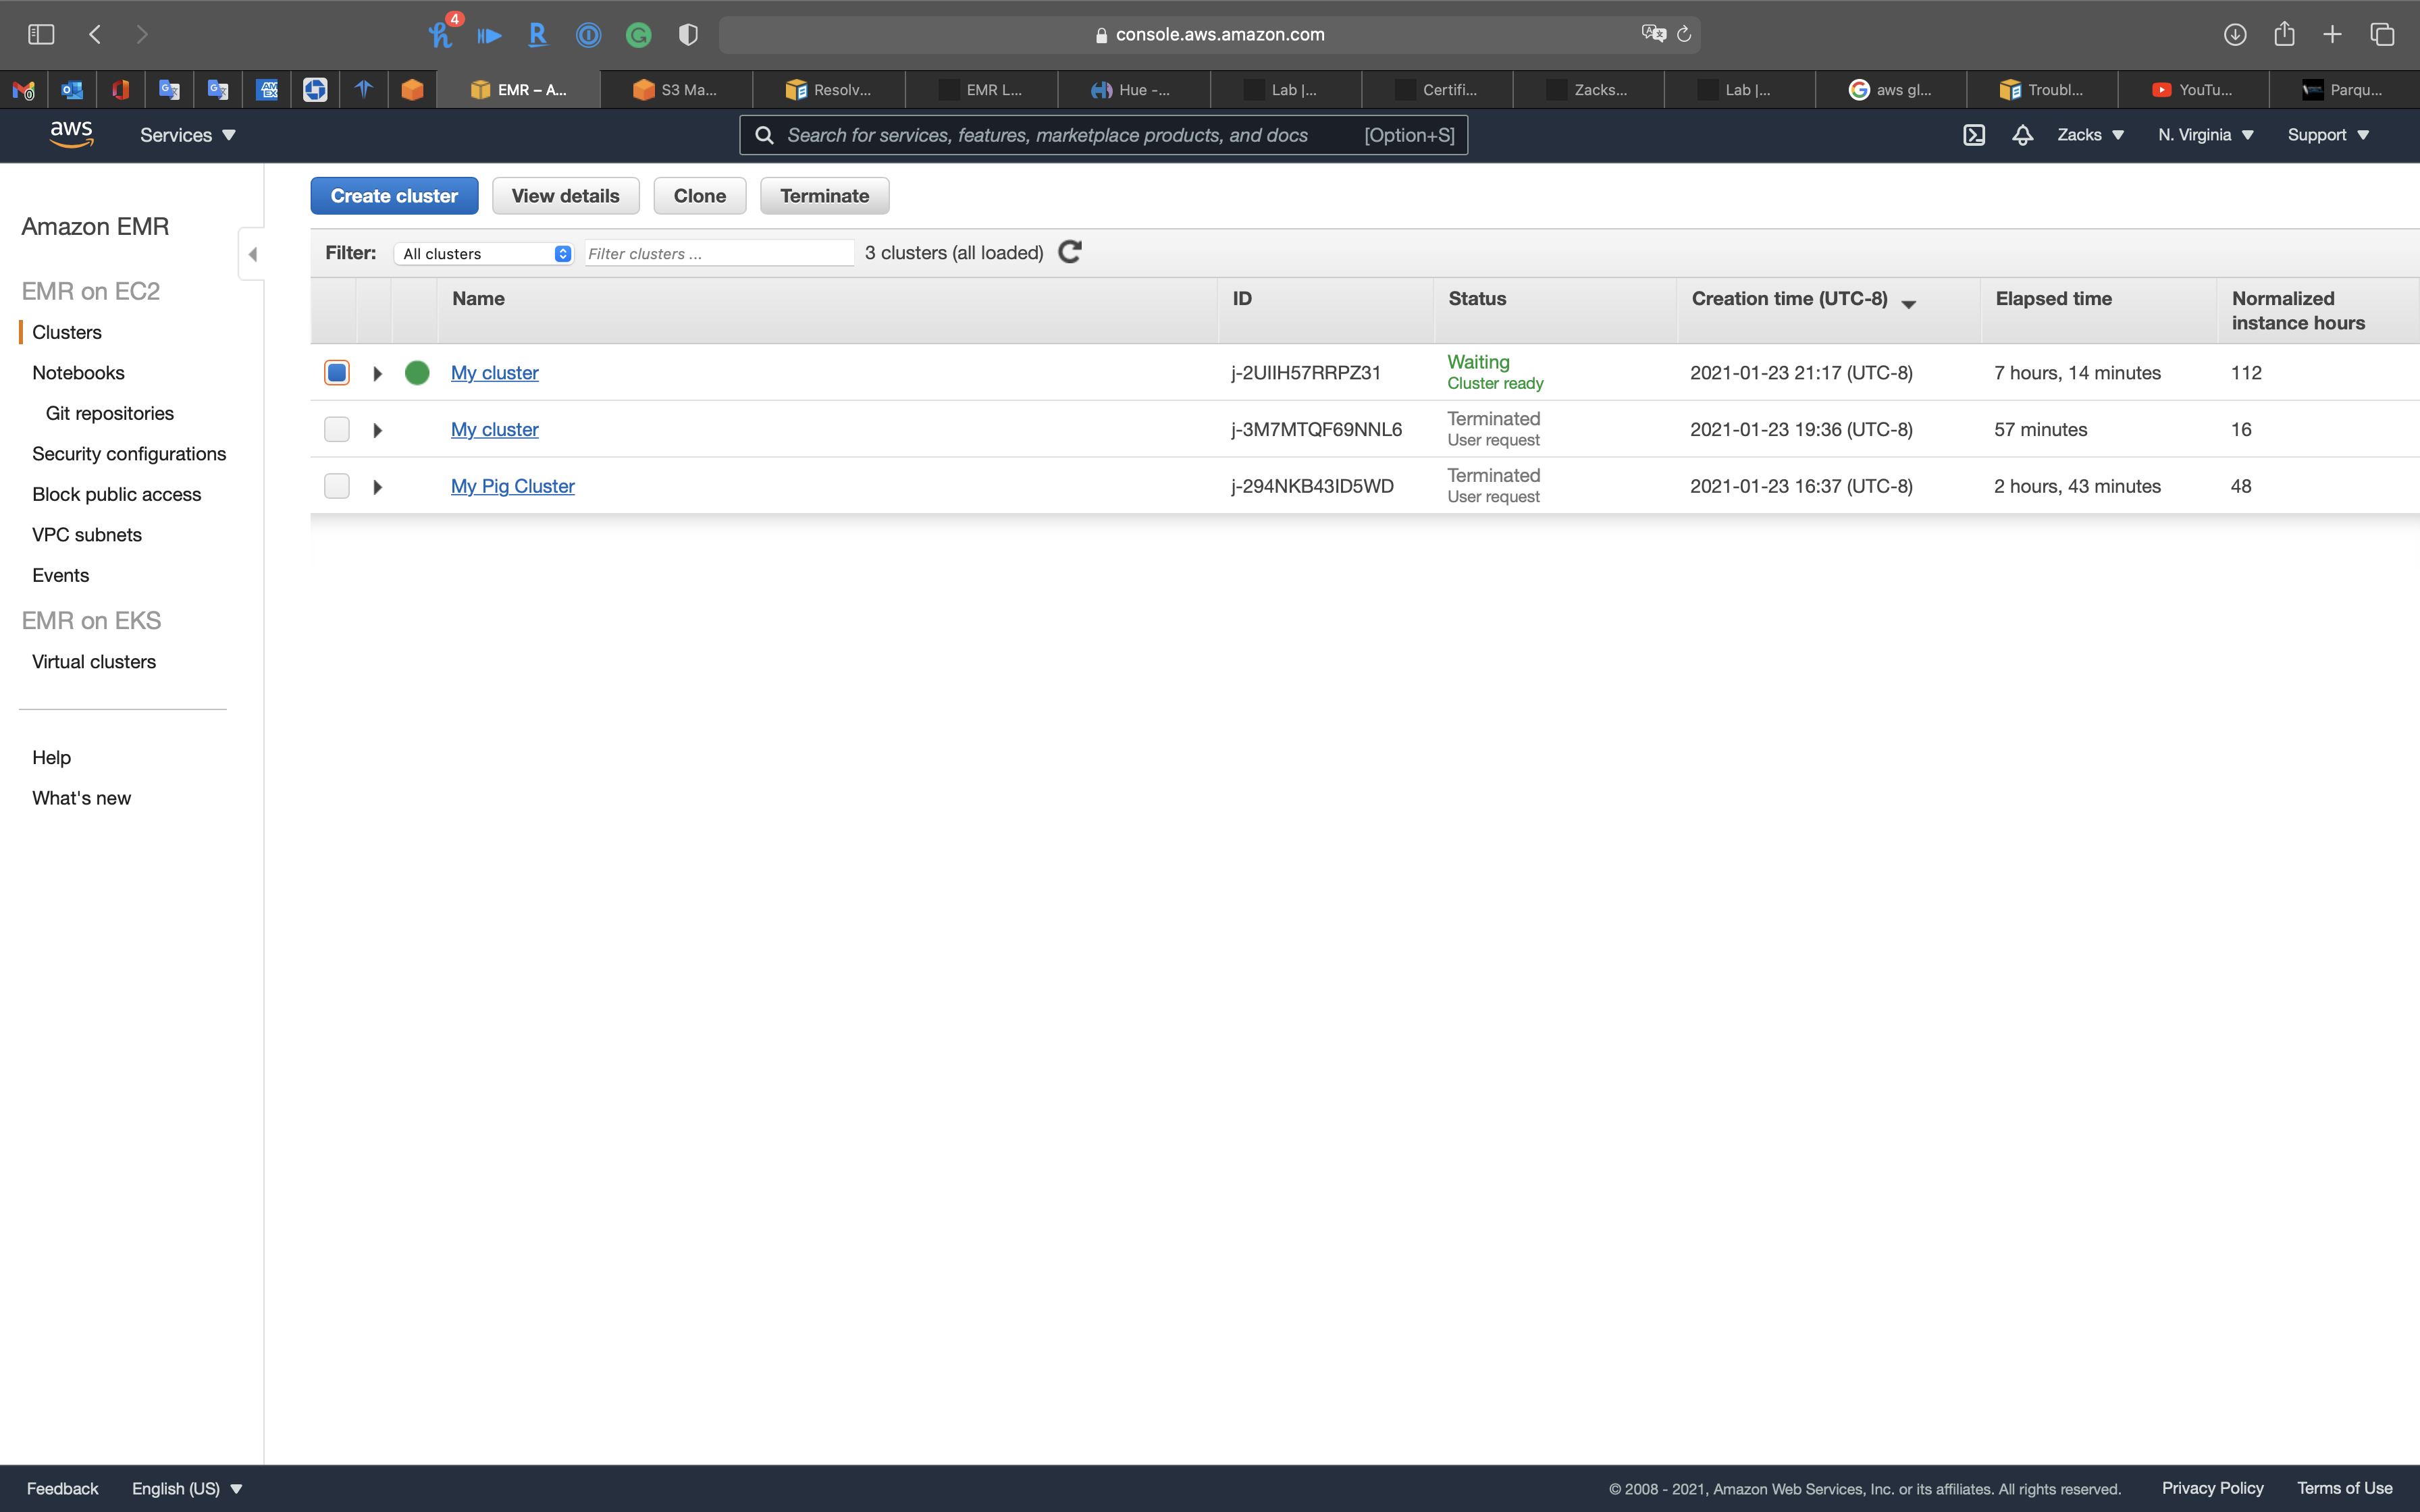
EMR Automation
Step Functions Directly with EMR
Prerequisite
Finish EMR New York Taxi Big Data Lab
Delete Previous S3
Services -> S3
After you finished EMR New York Taxi, you need to delete the transformed .parquet files since this lab will automatically run the Glue ETL Job through Step Functions.
Deleting them to see the lab result.
Open ny_taxi_parquet folder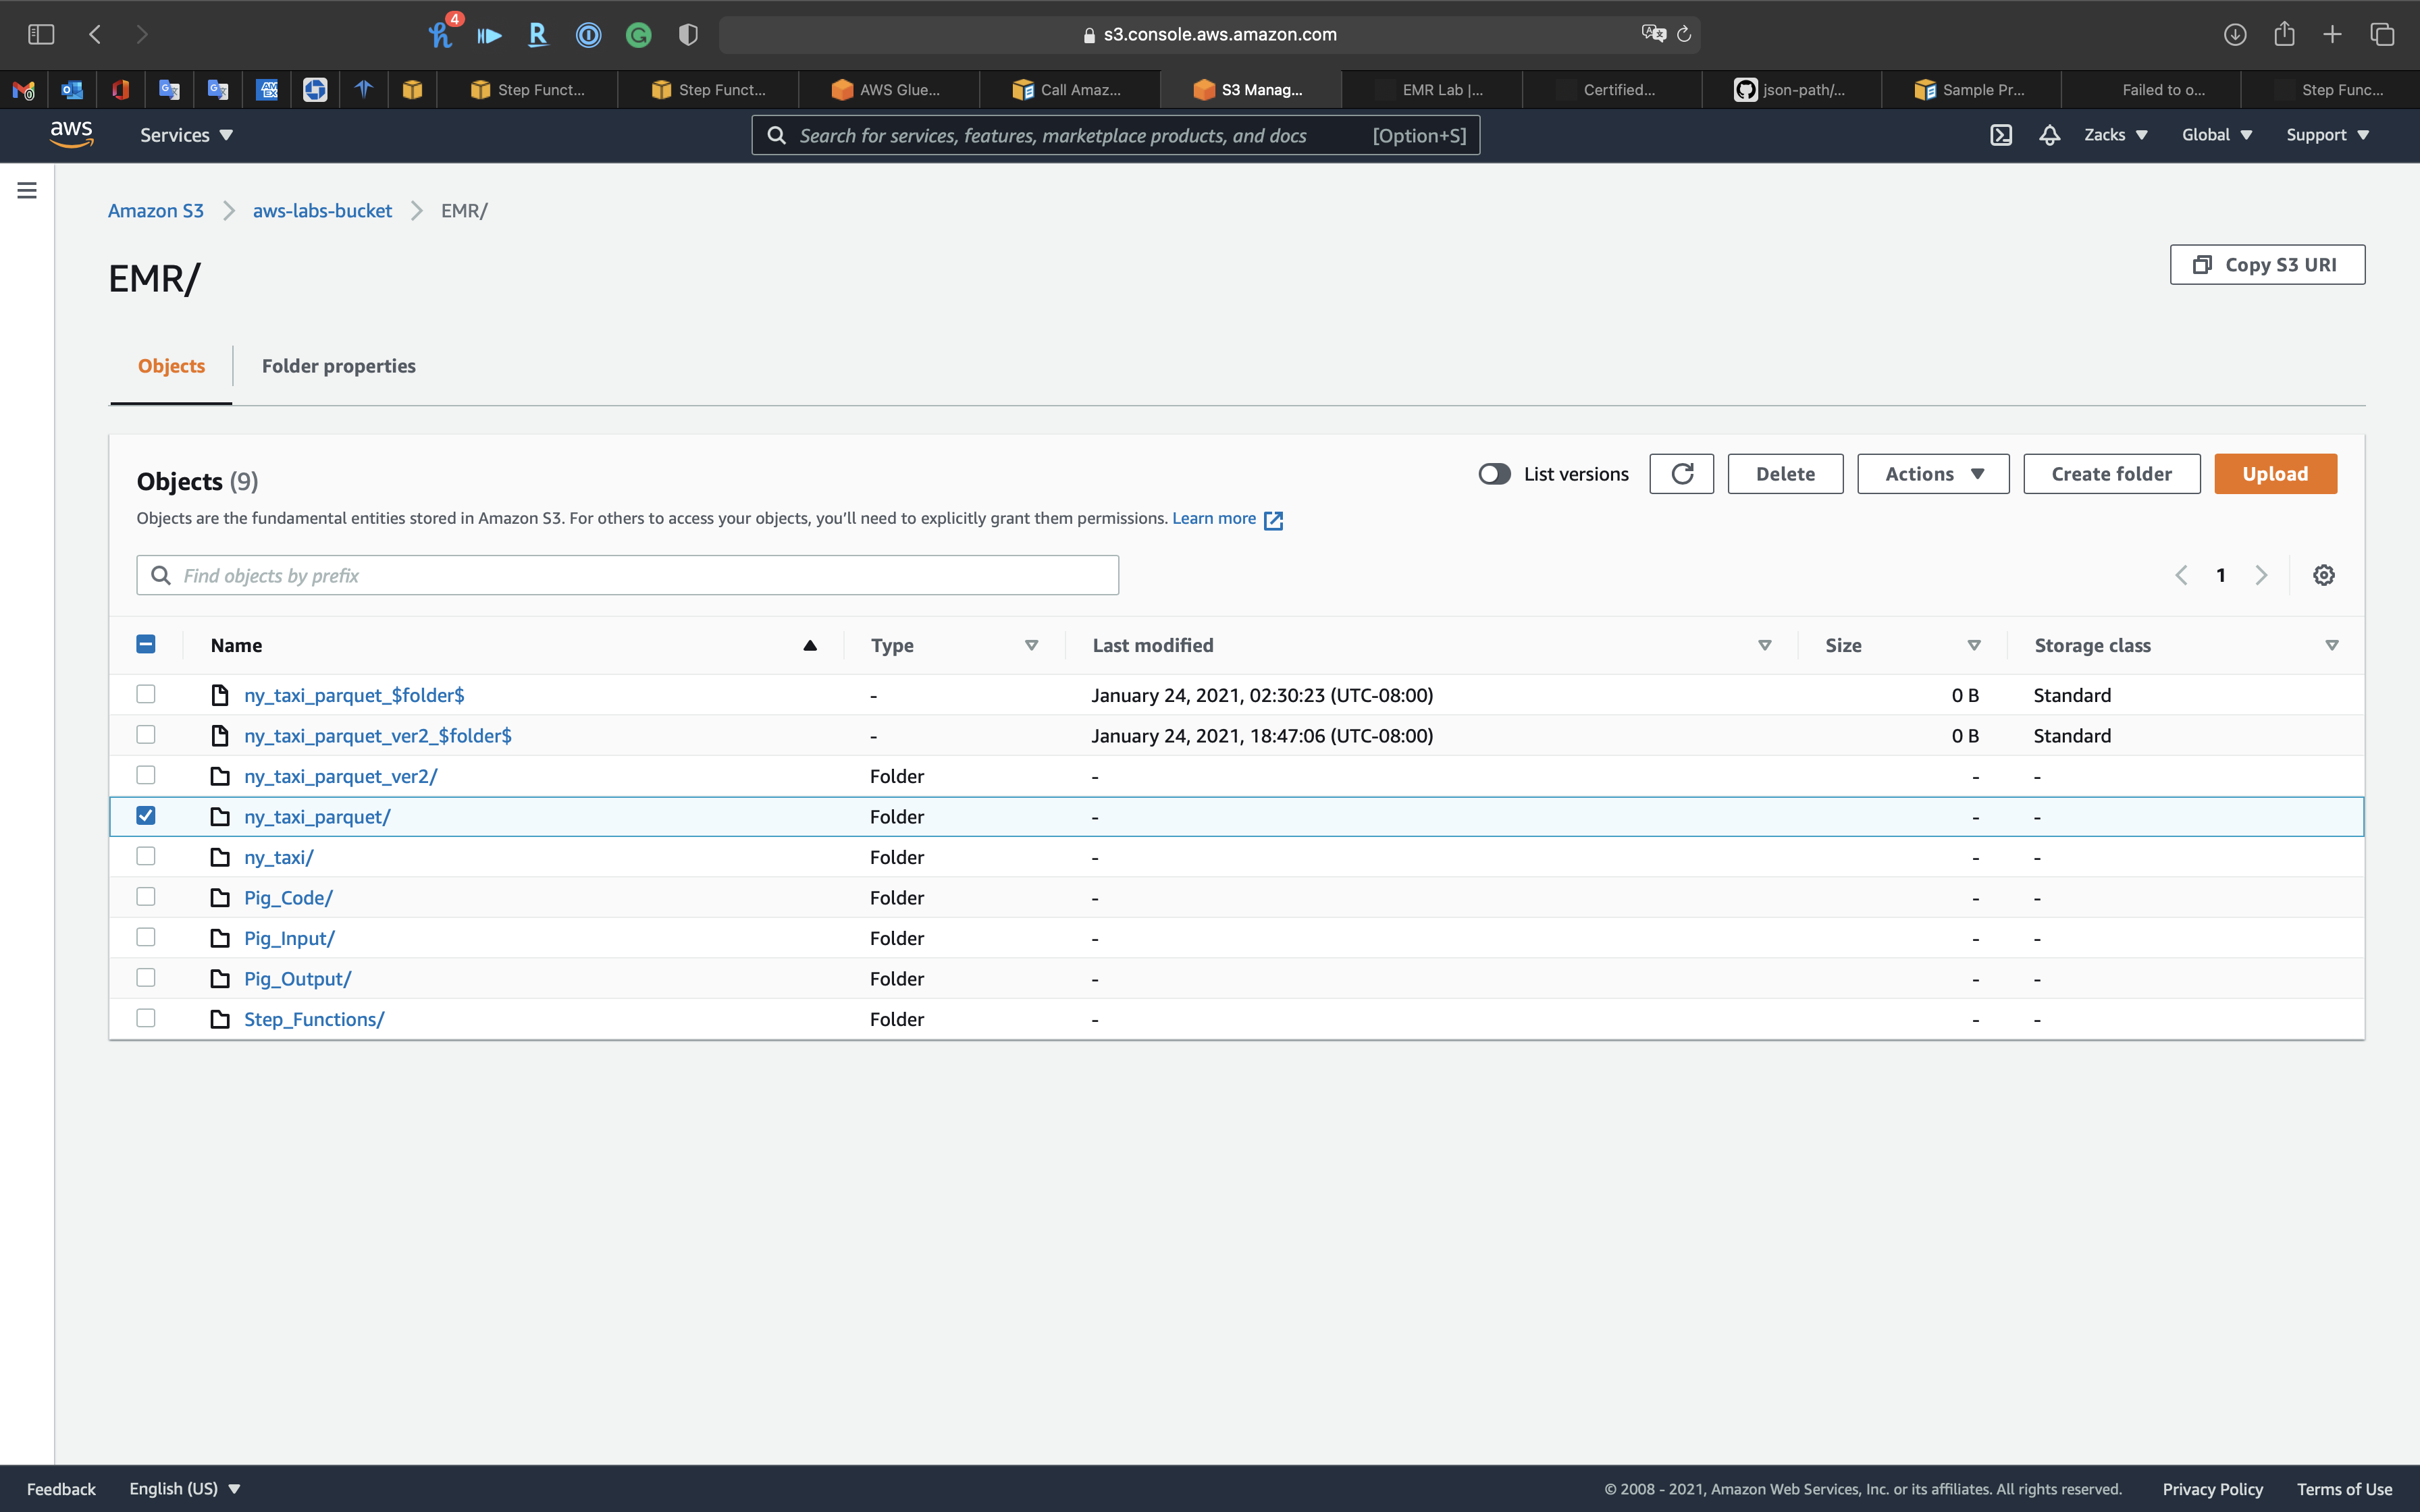
Delete previous .parquet files. (26 in total)
Click on Delete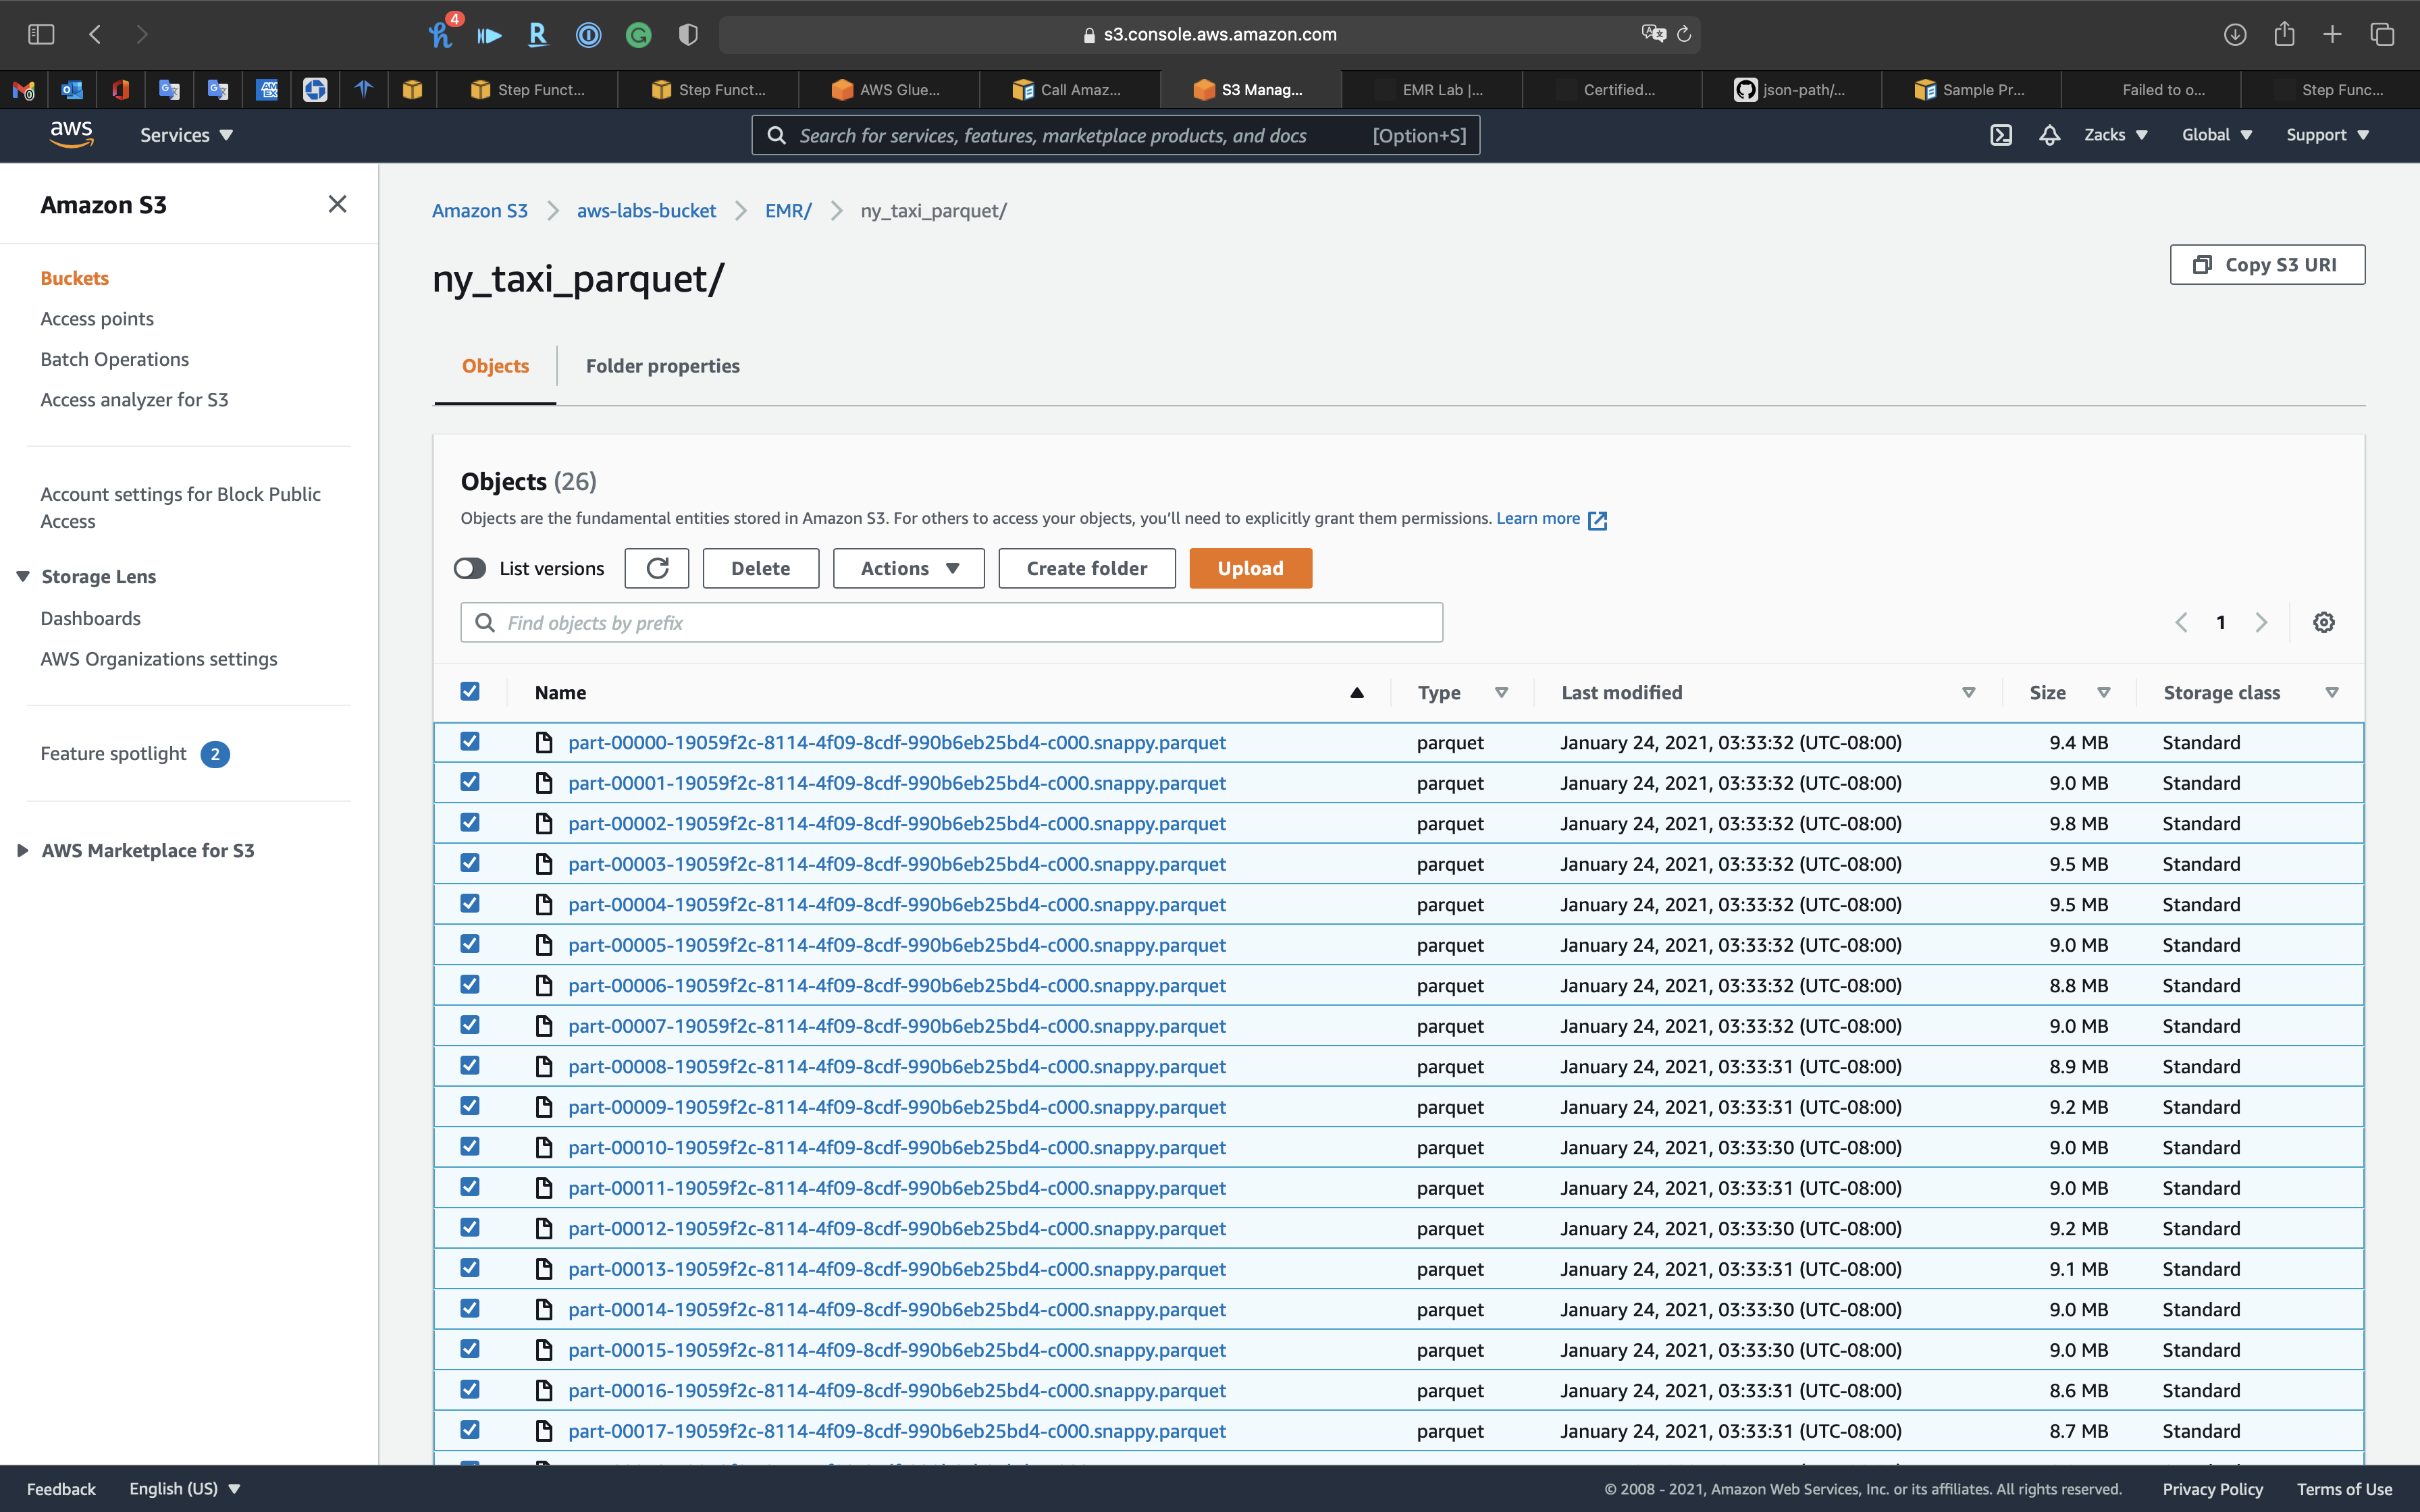
Input delete
Click on Delete objects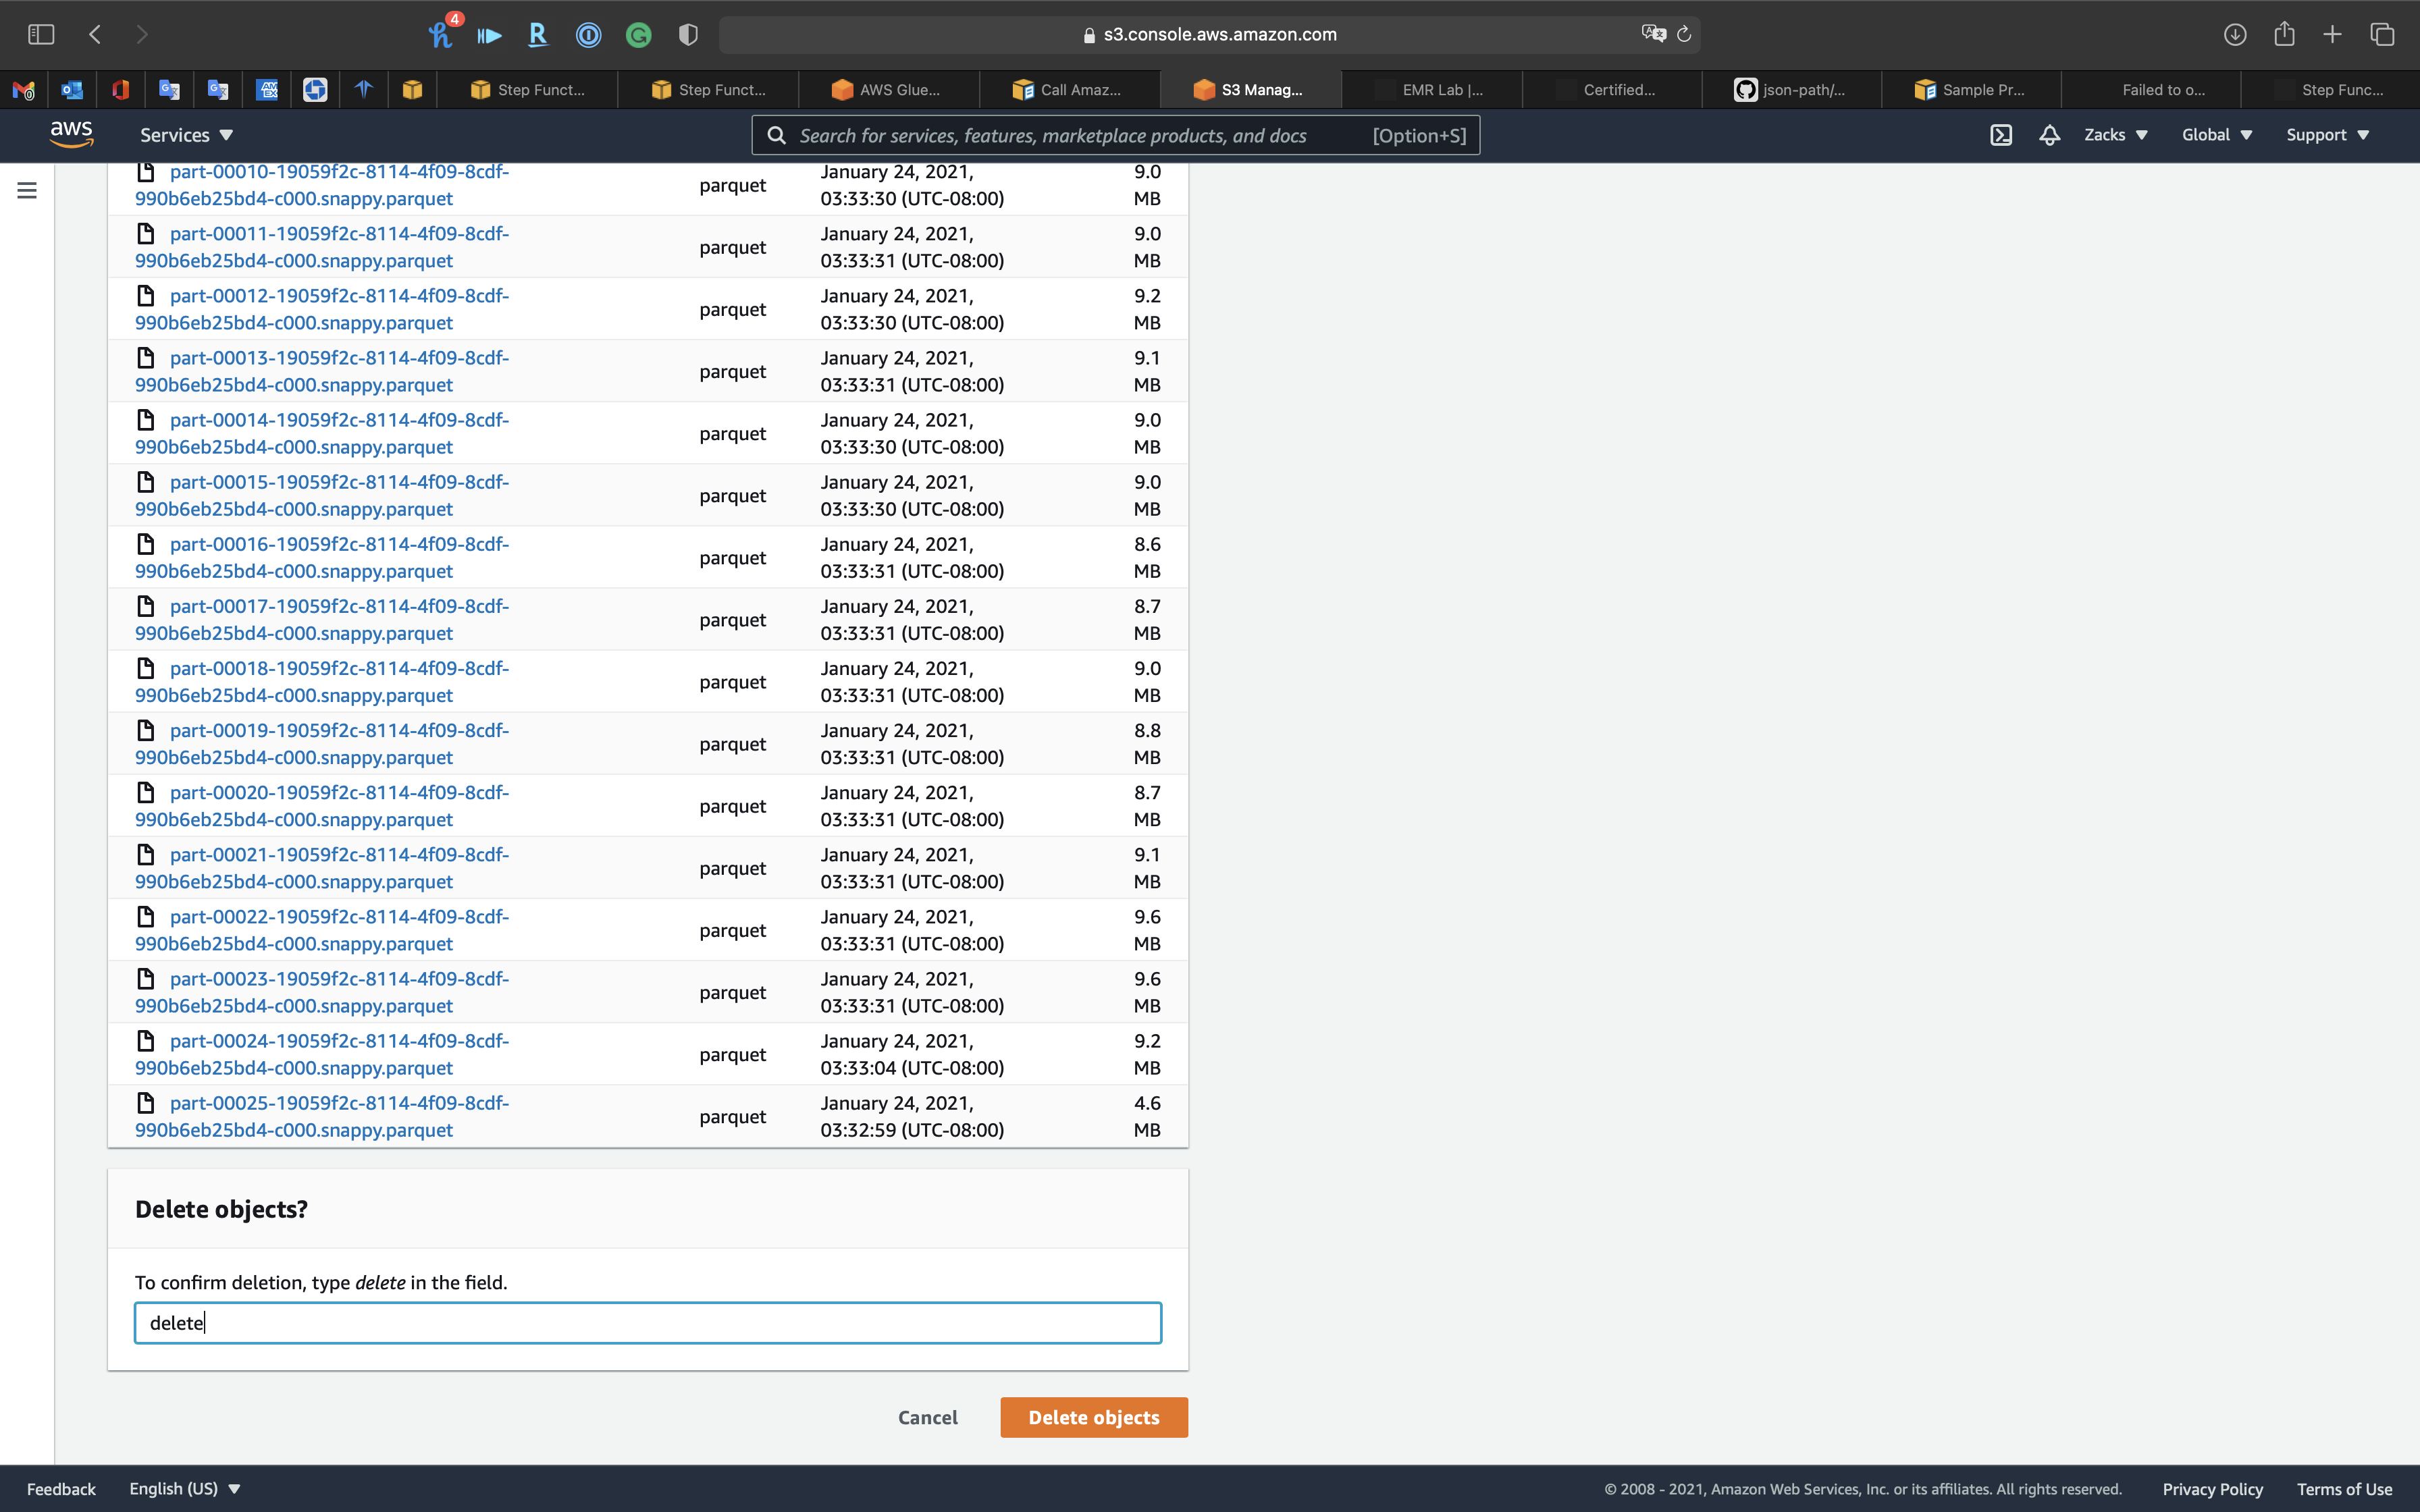
Lab Details
- Use Step Functions to control all steps in your EMR cluster operation
- Also integrate other AWS services into your workflow
Task Details
- Create an IAM role for Step Functions.
- Create a Step Function.
Workflow: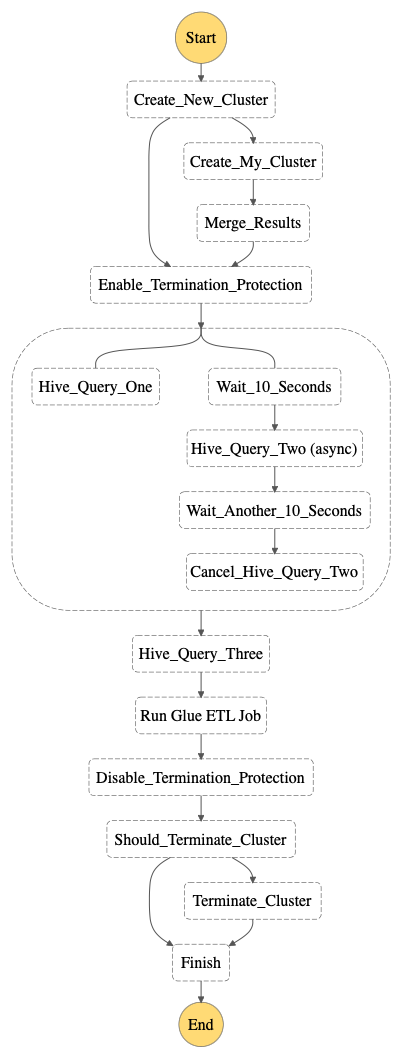
IAM Configuration
Services -> IAM -> Roles
Step 1: Select type of trusted entity
Click on Create role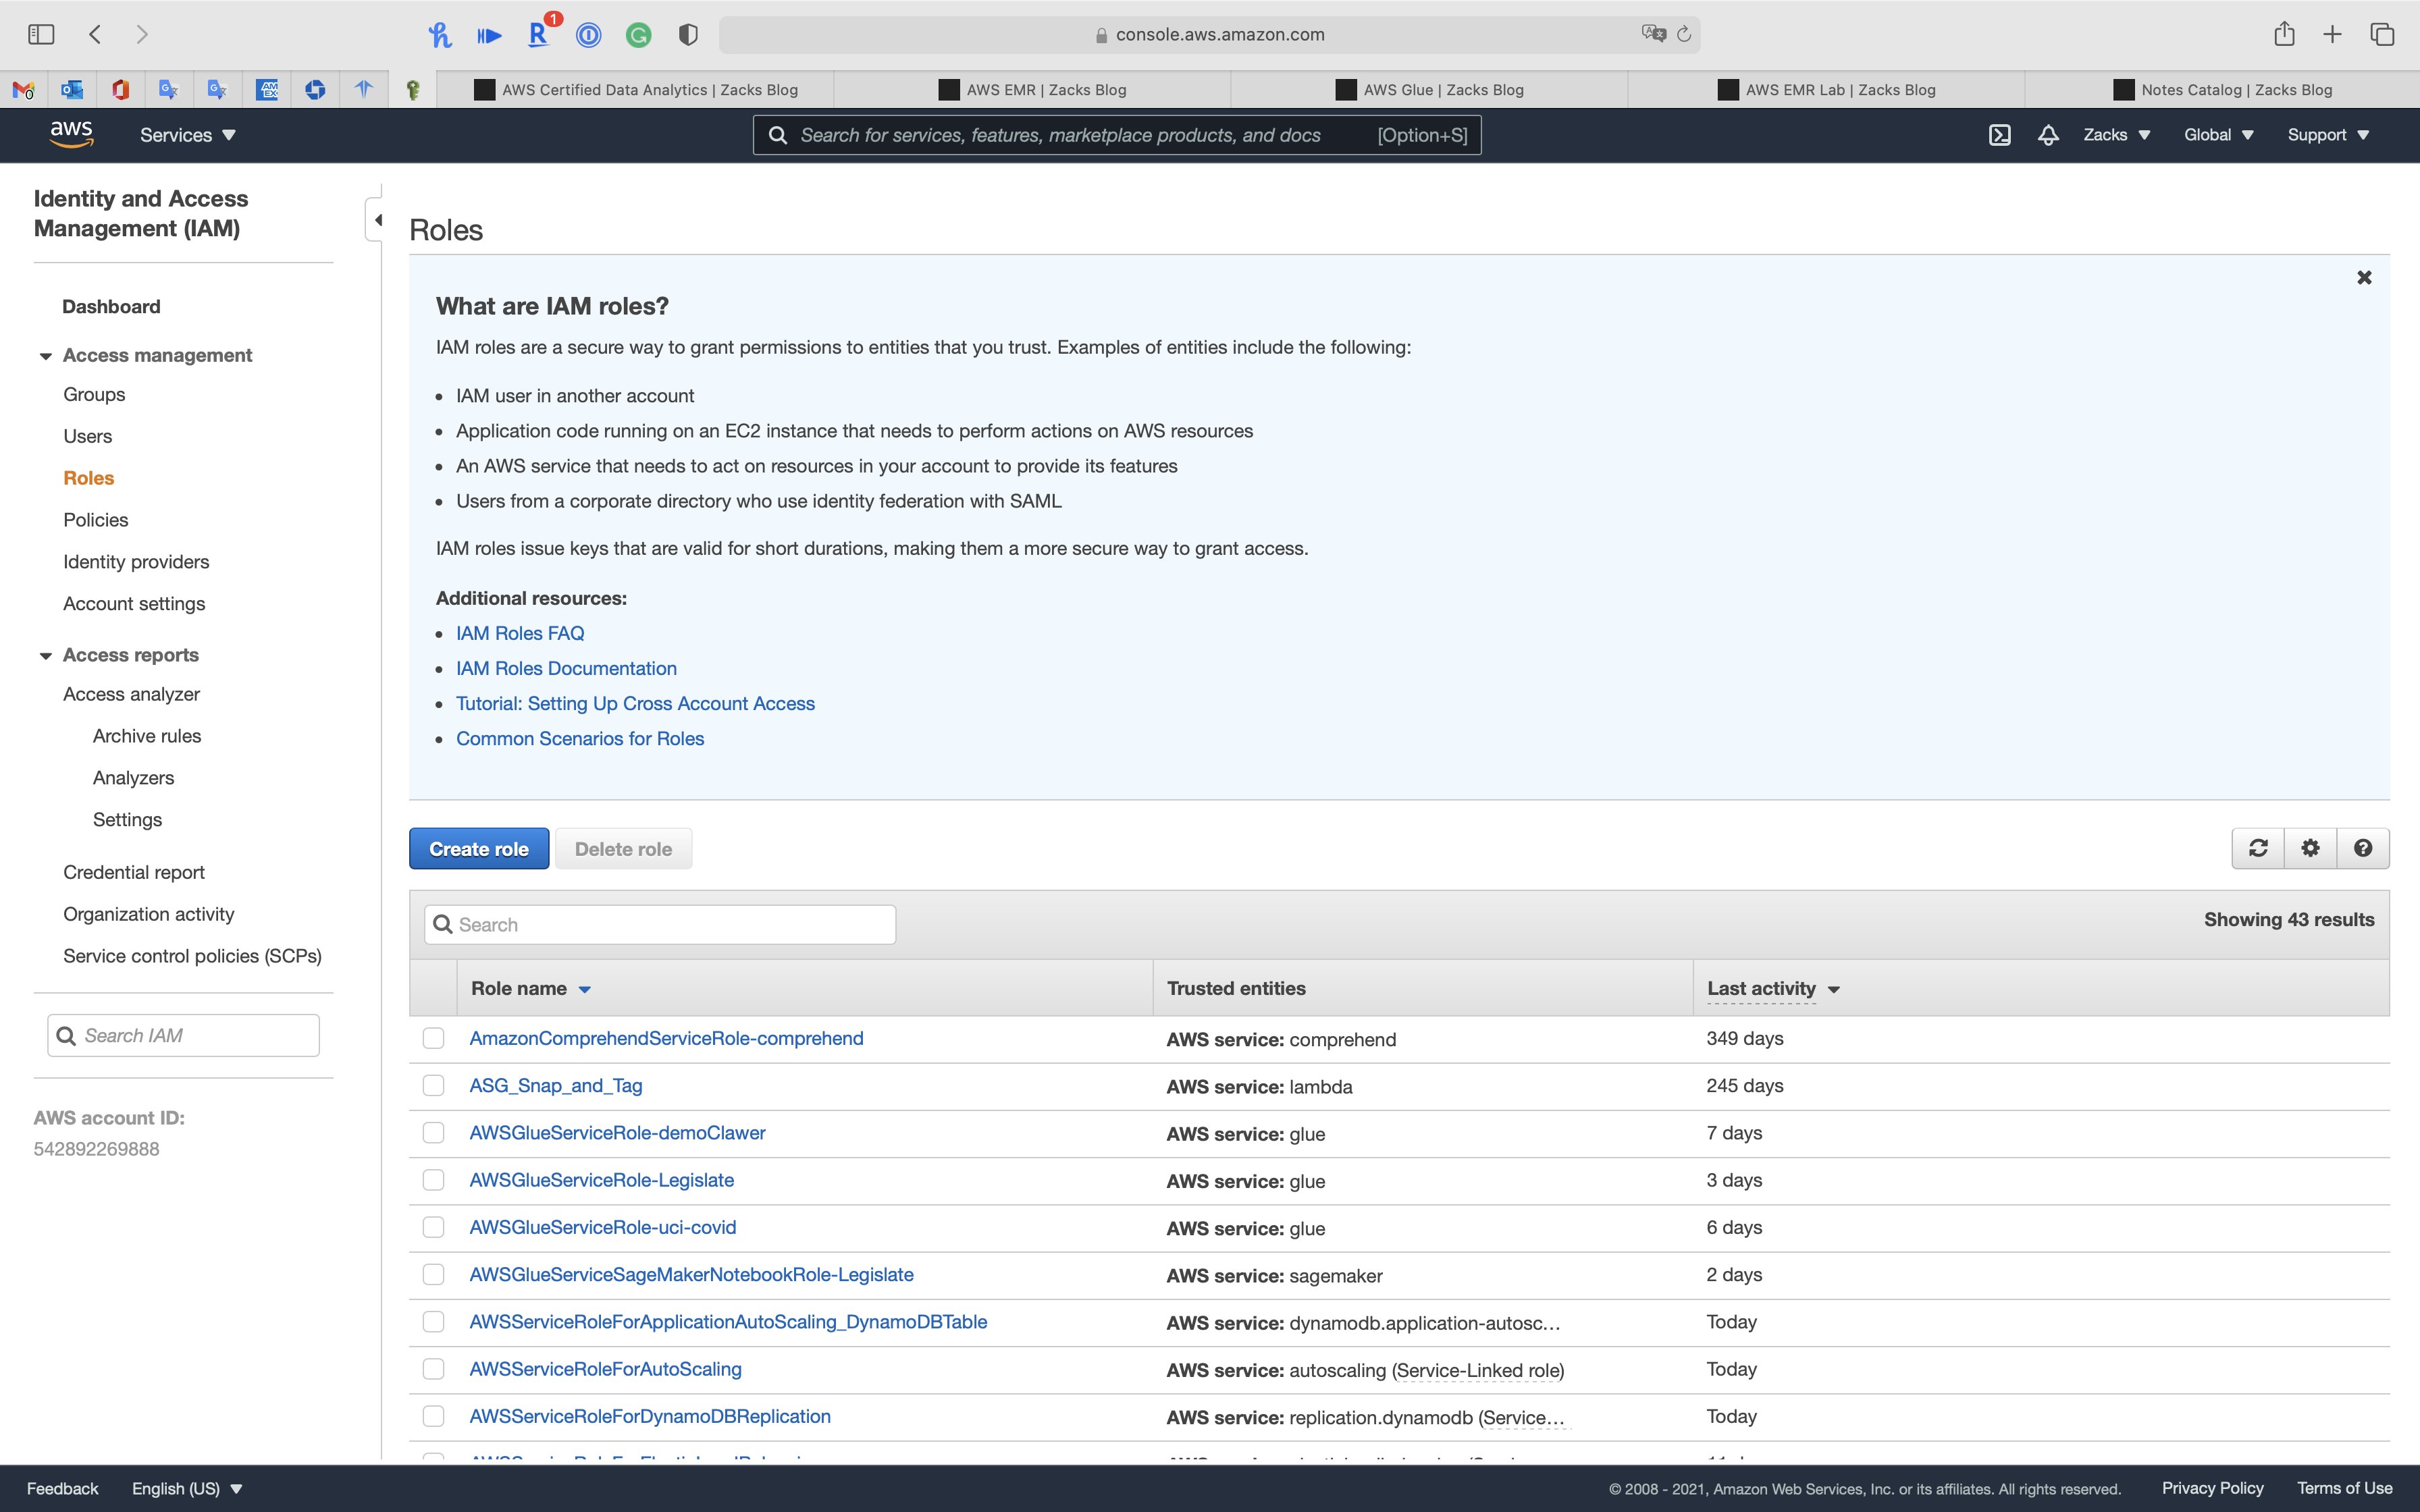
Select Step Functions then click on Next: Permissions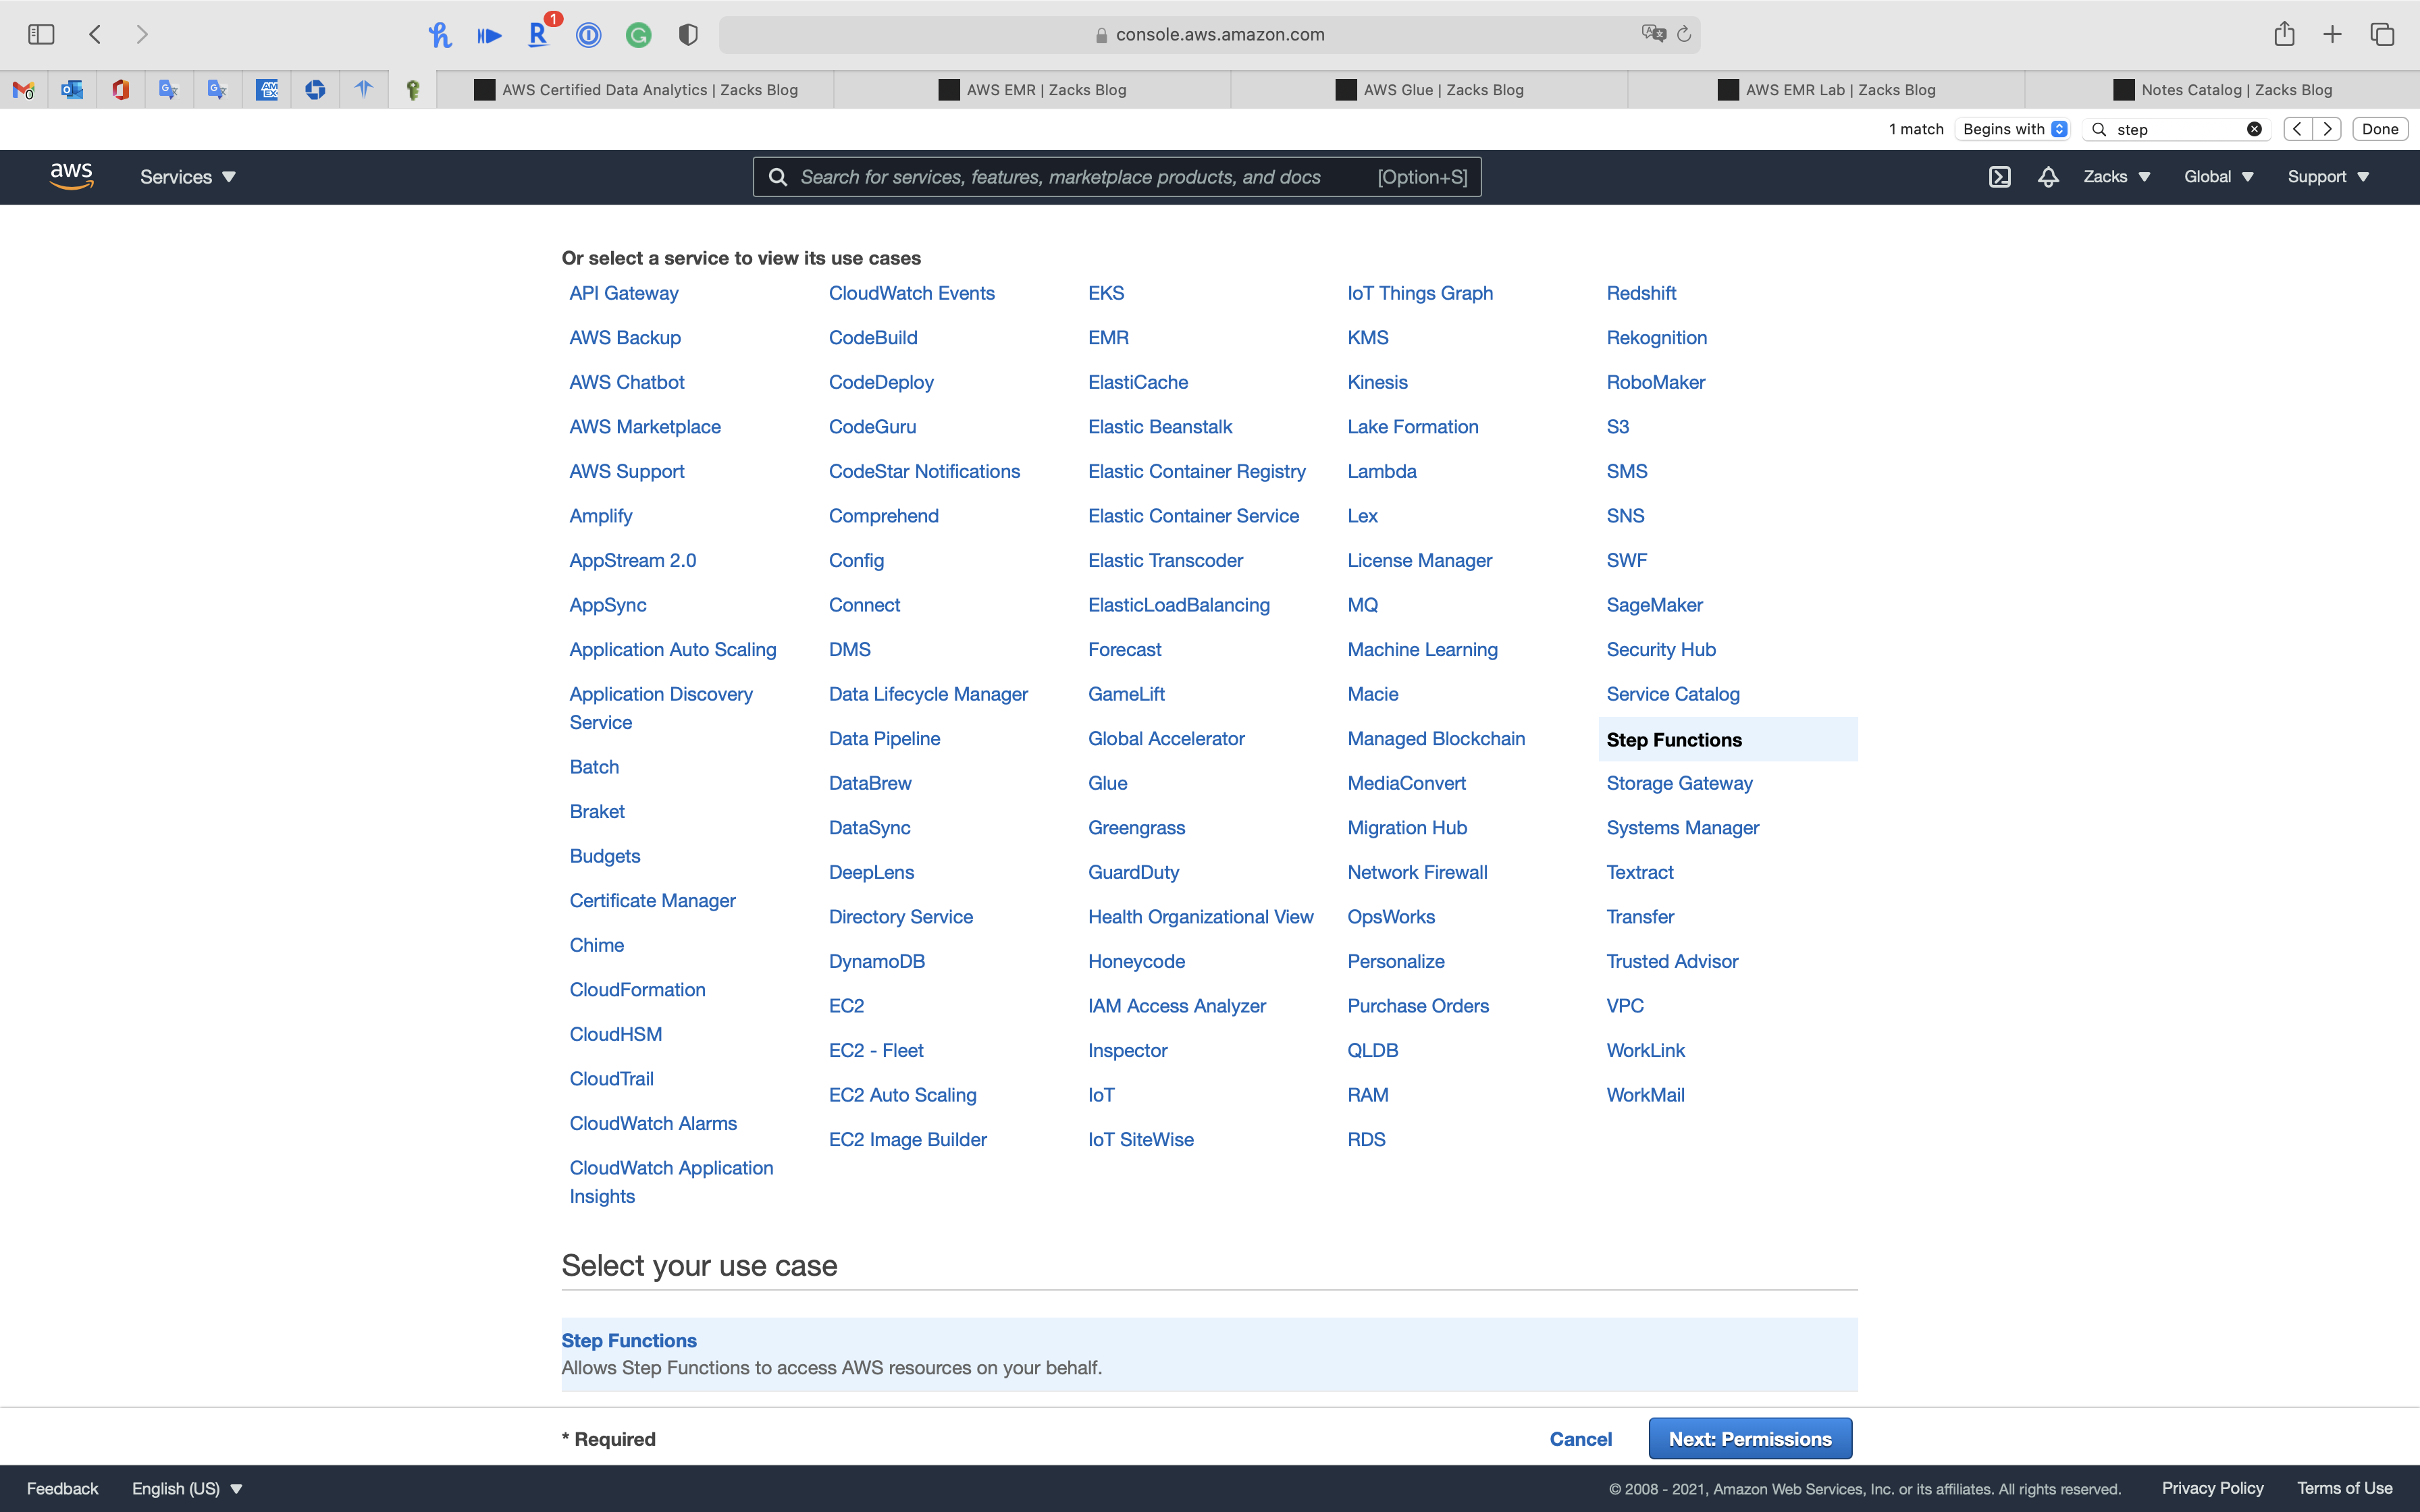
Step 2: Attached permissions policies
AWSLambdaRole is the default policy attached on Step Functions.
Click on Next: Tags
Step 3: Add tags (options)
Click on Next: Review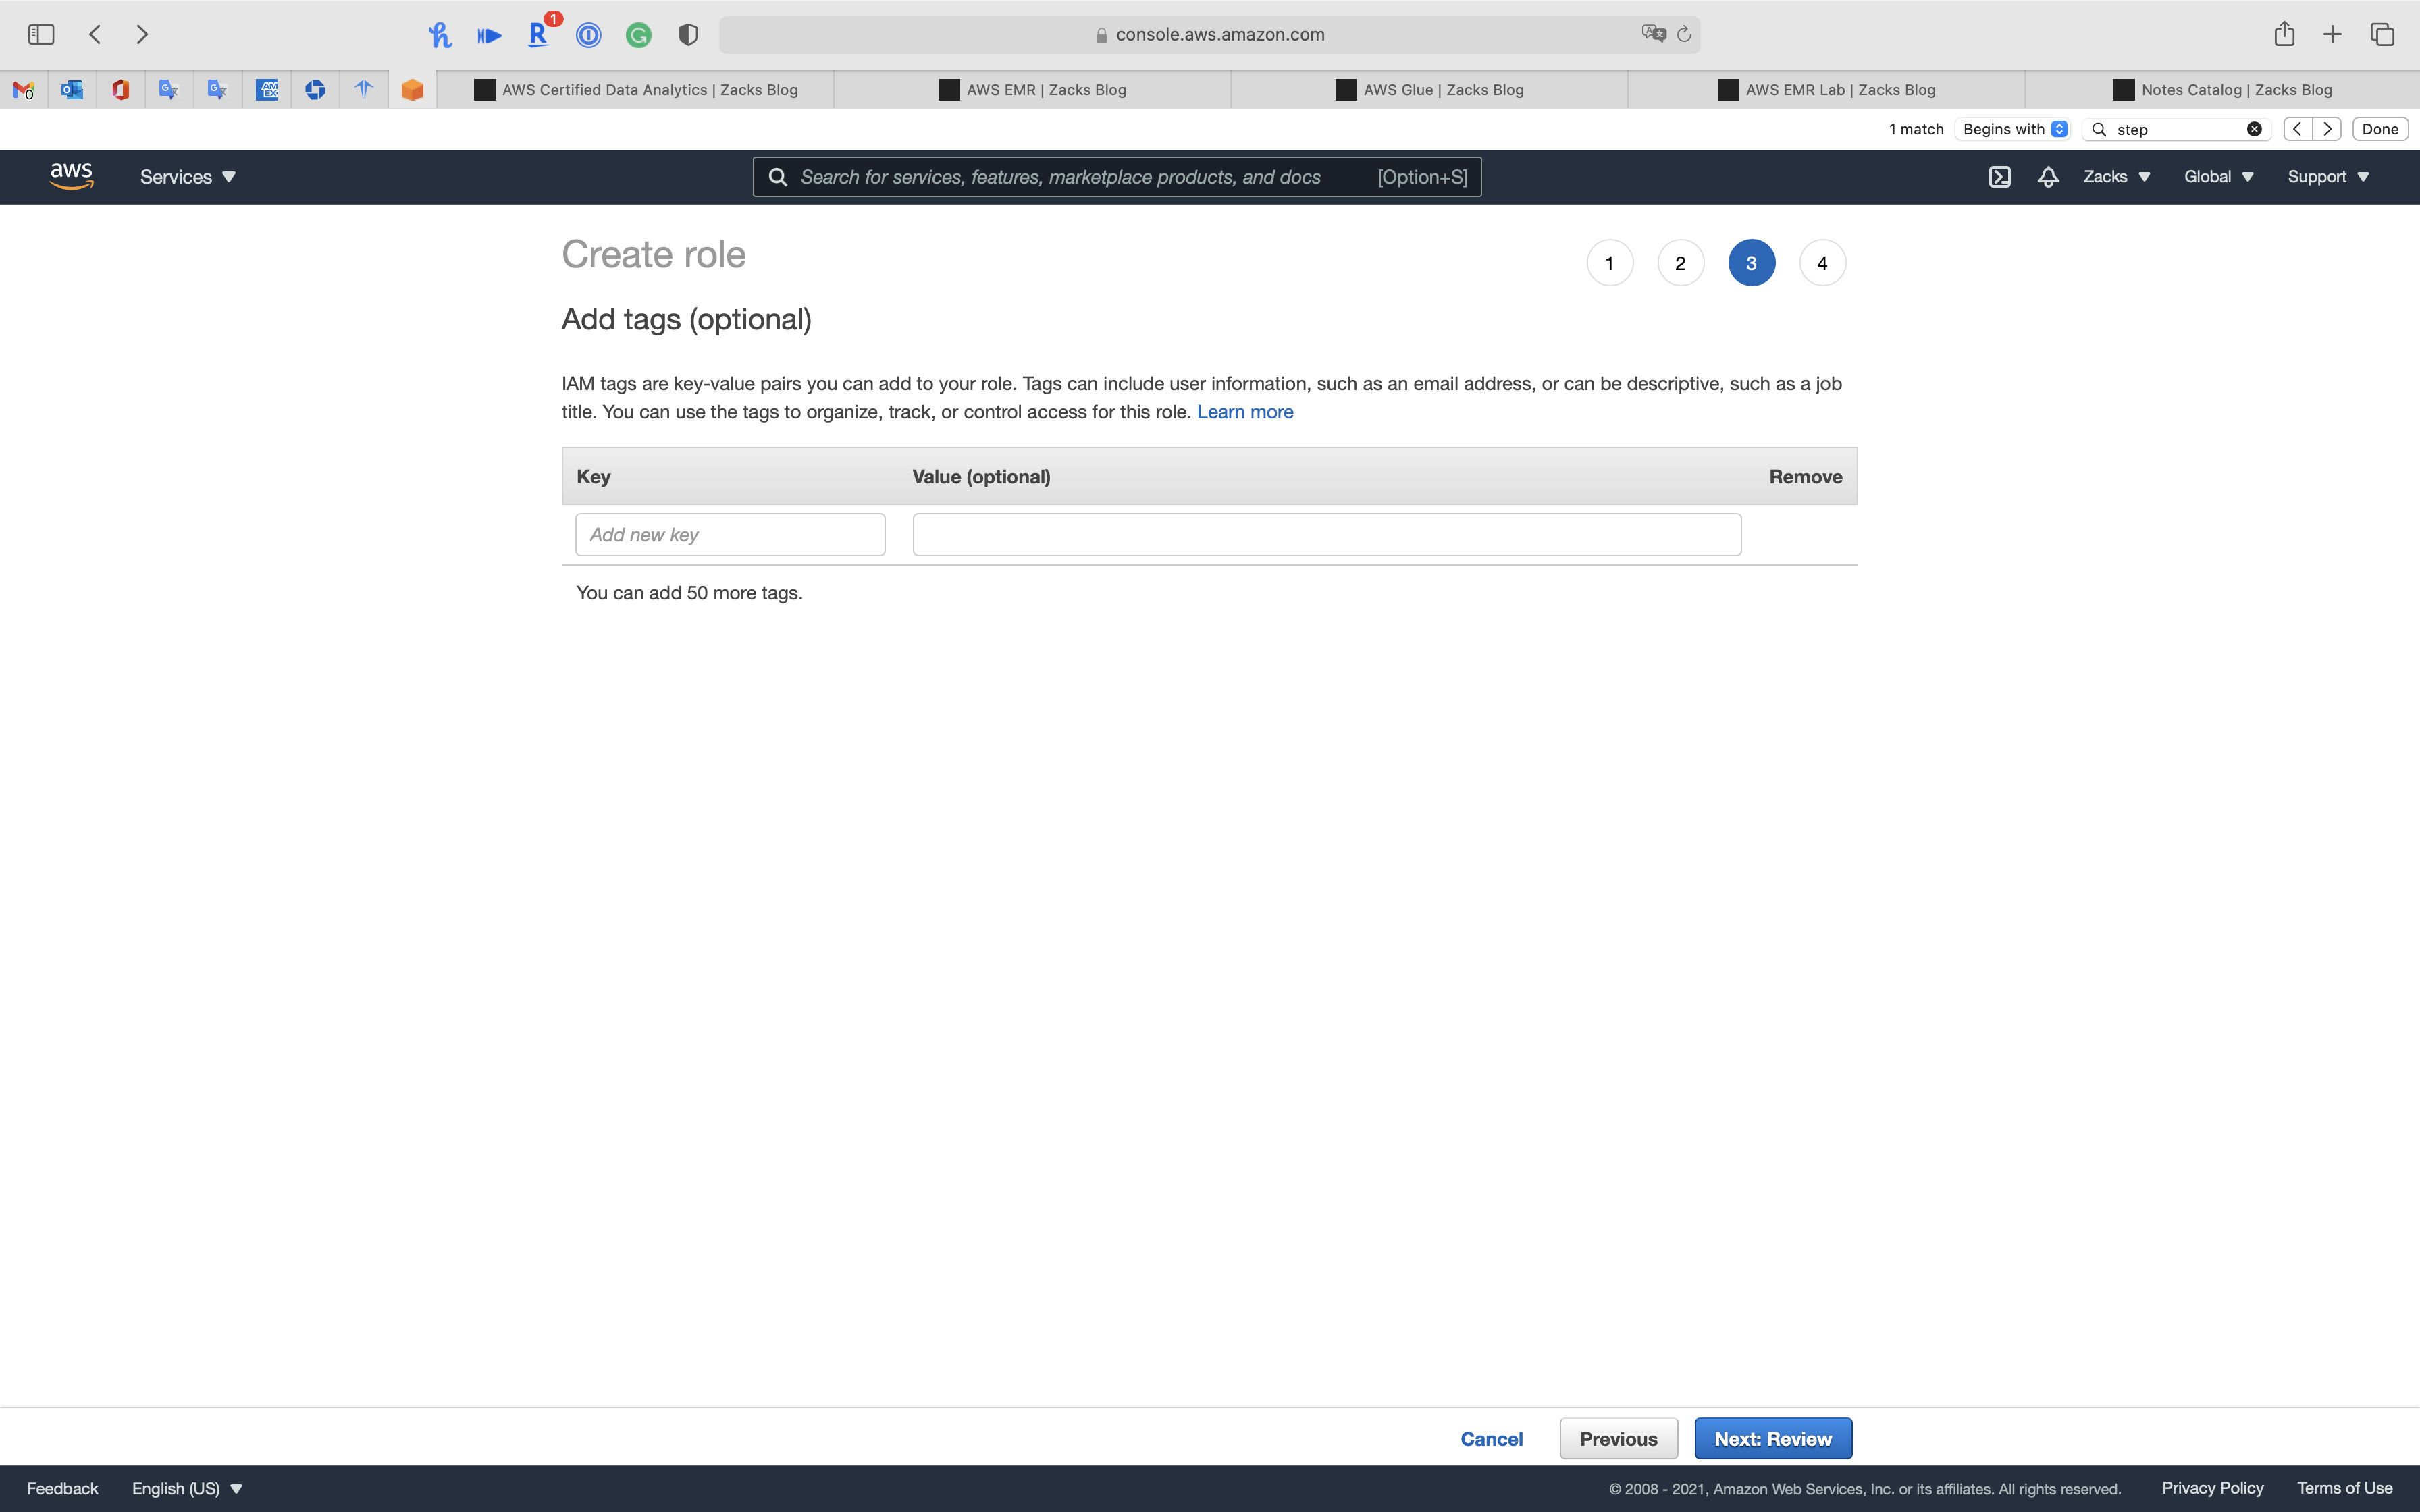
Step 4: Review
- Role name:
StepFunctions-EMR
Click on Create role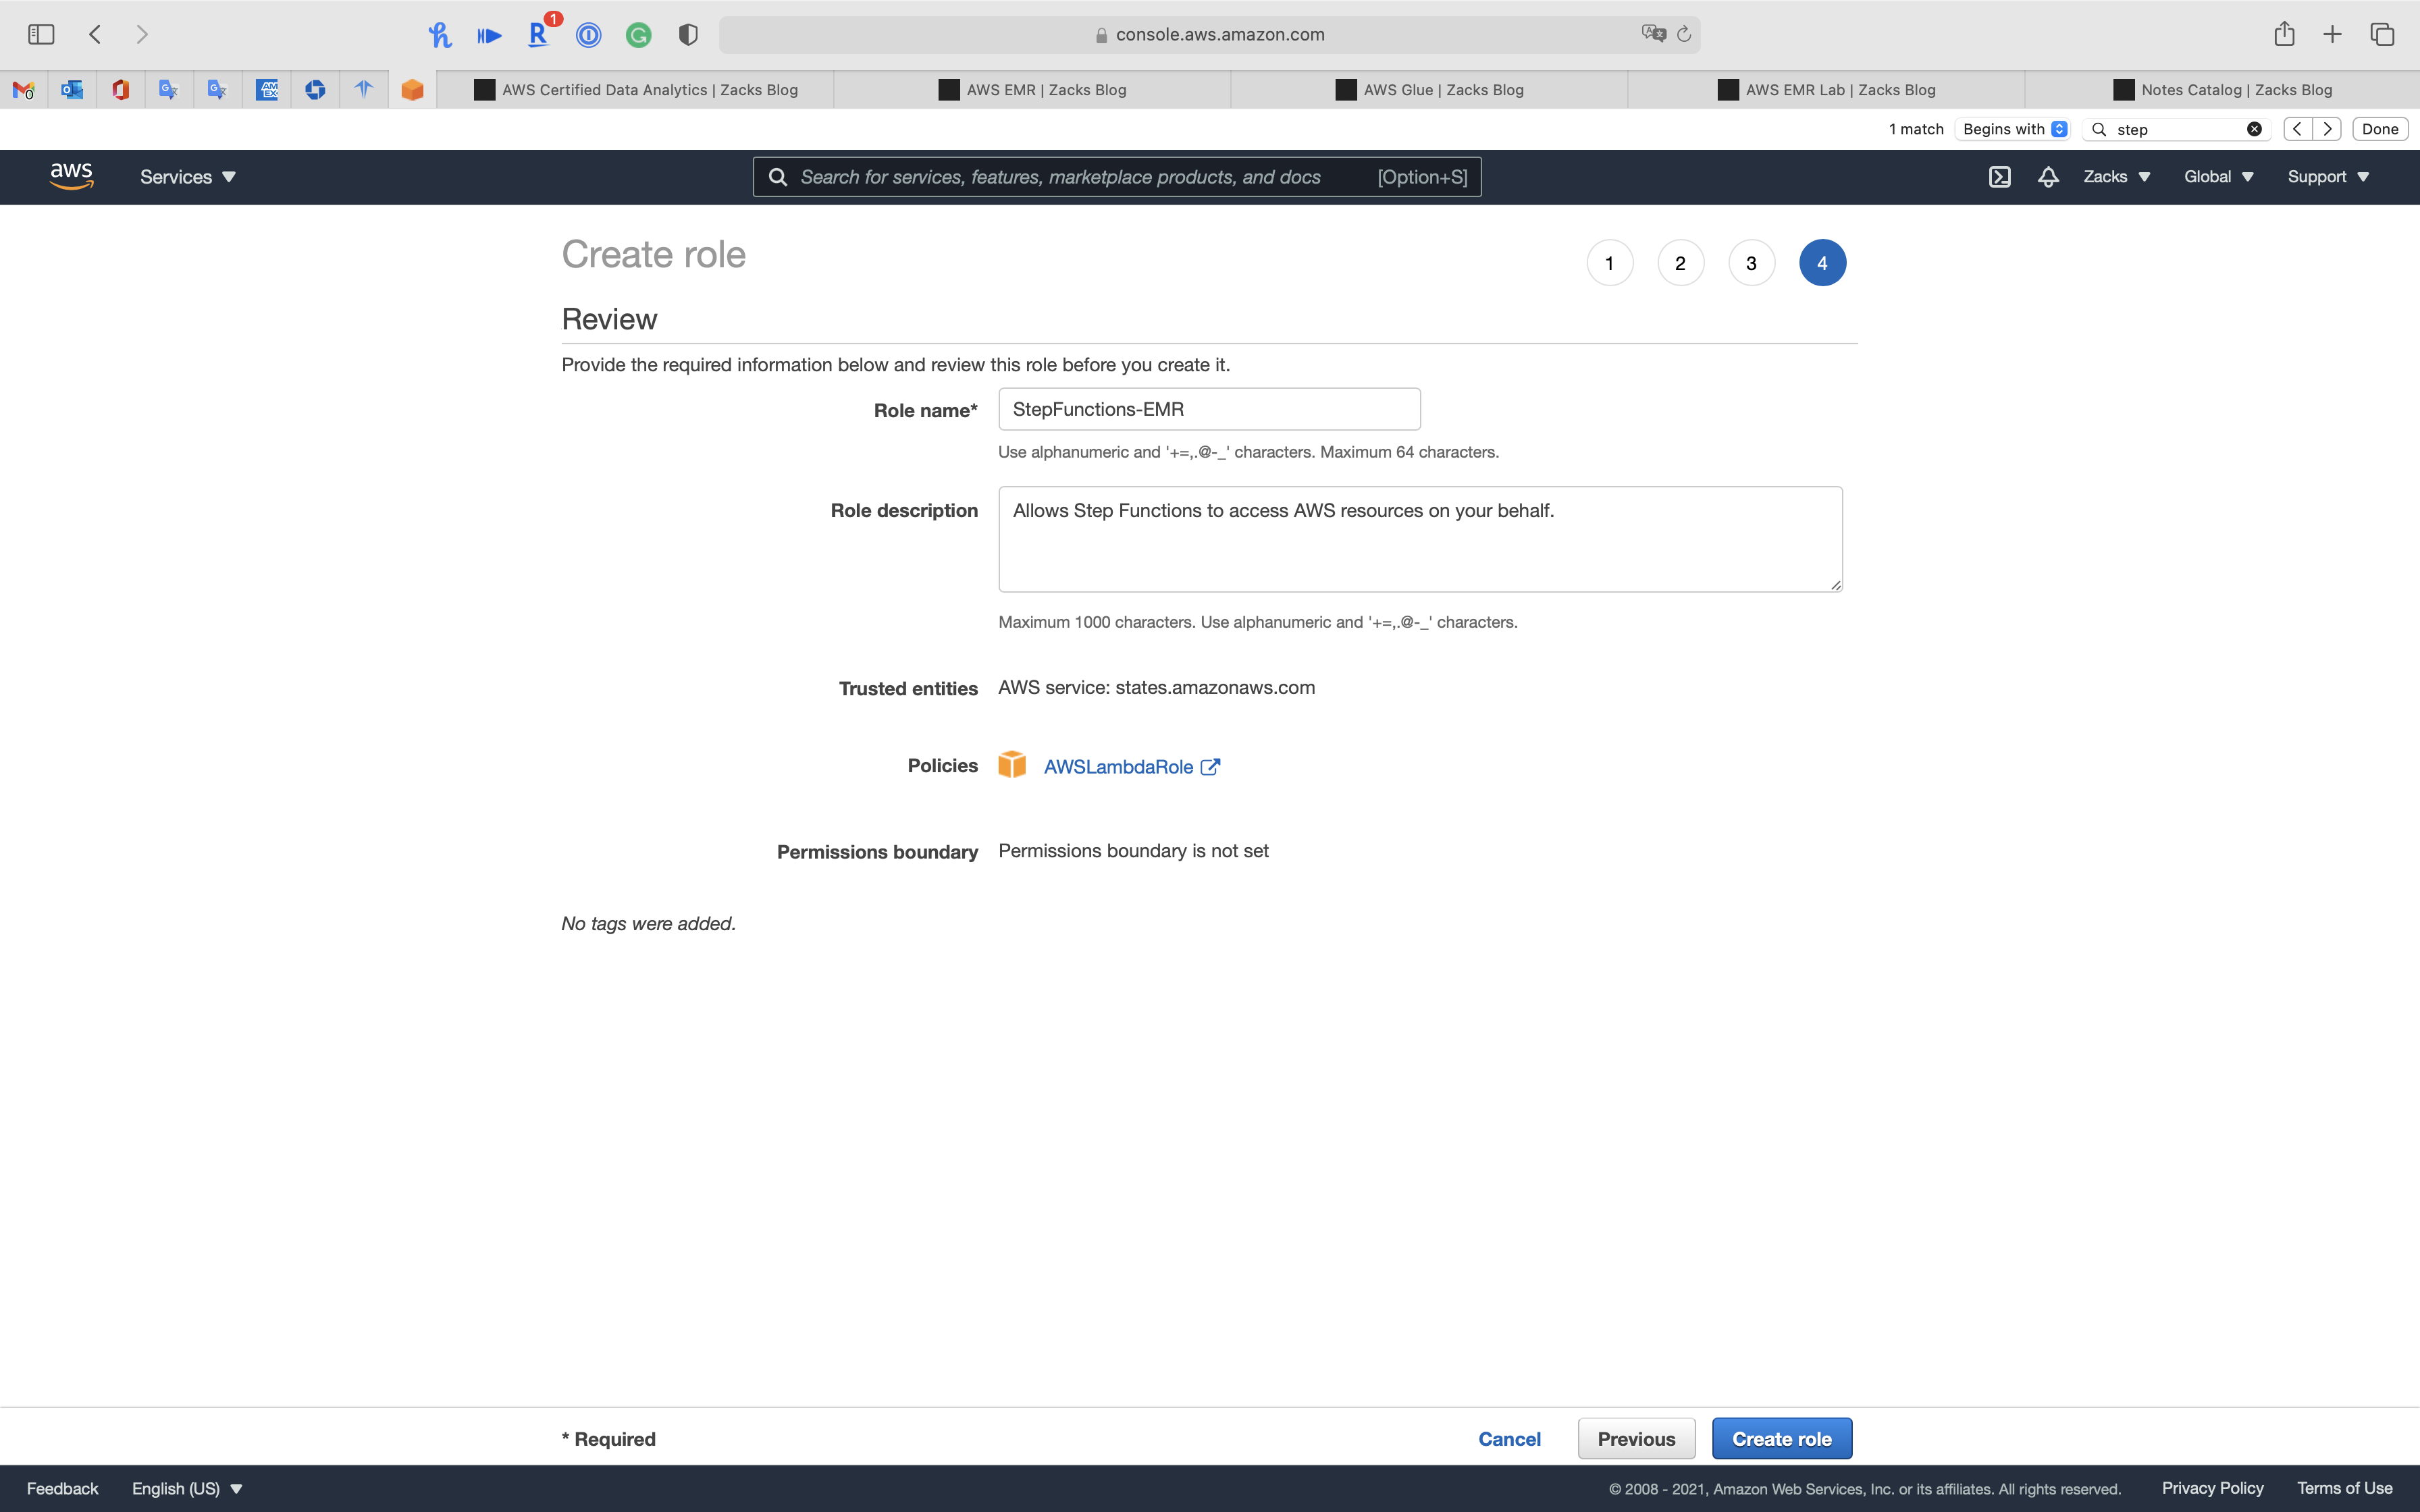
Attach More Policies
Search StepFunctions-EMR then click on it.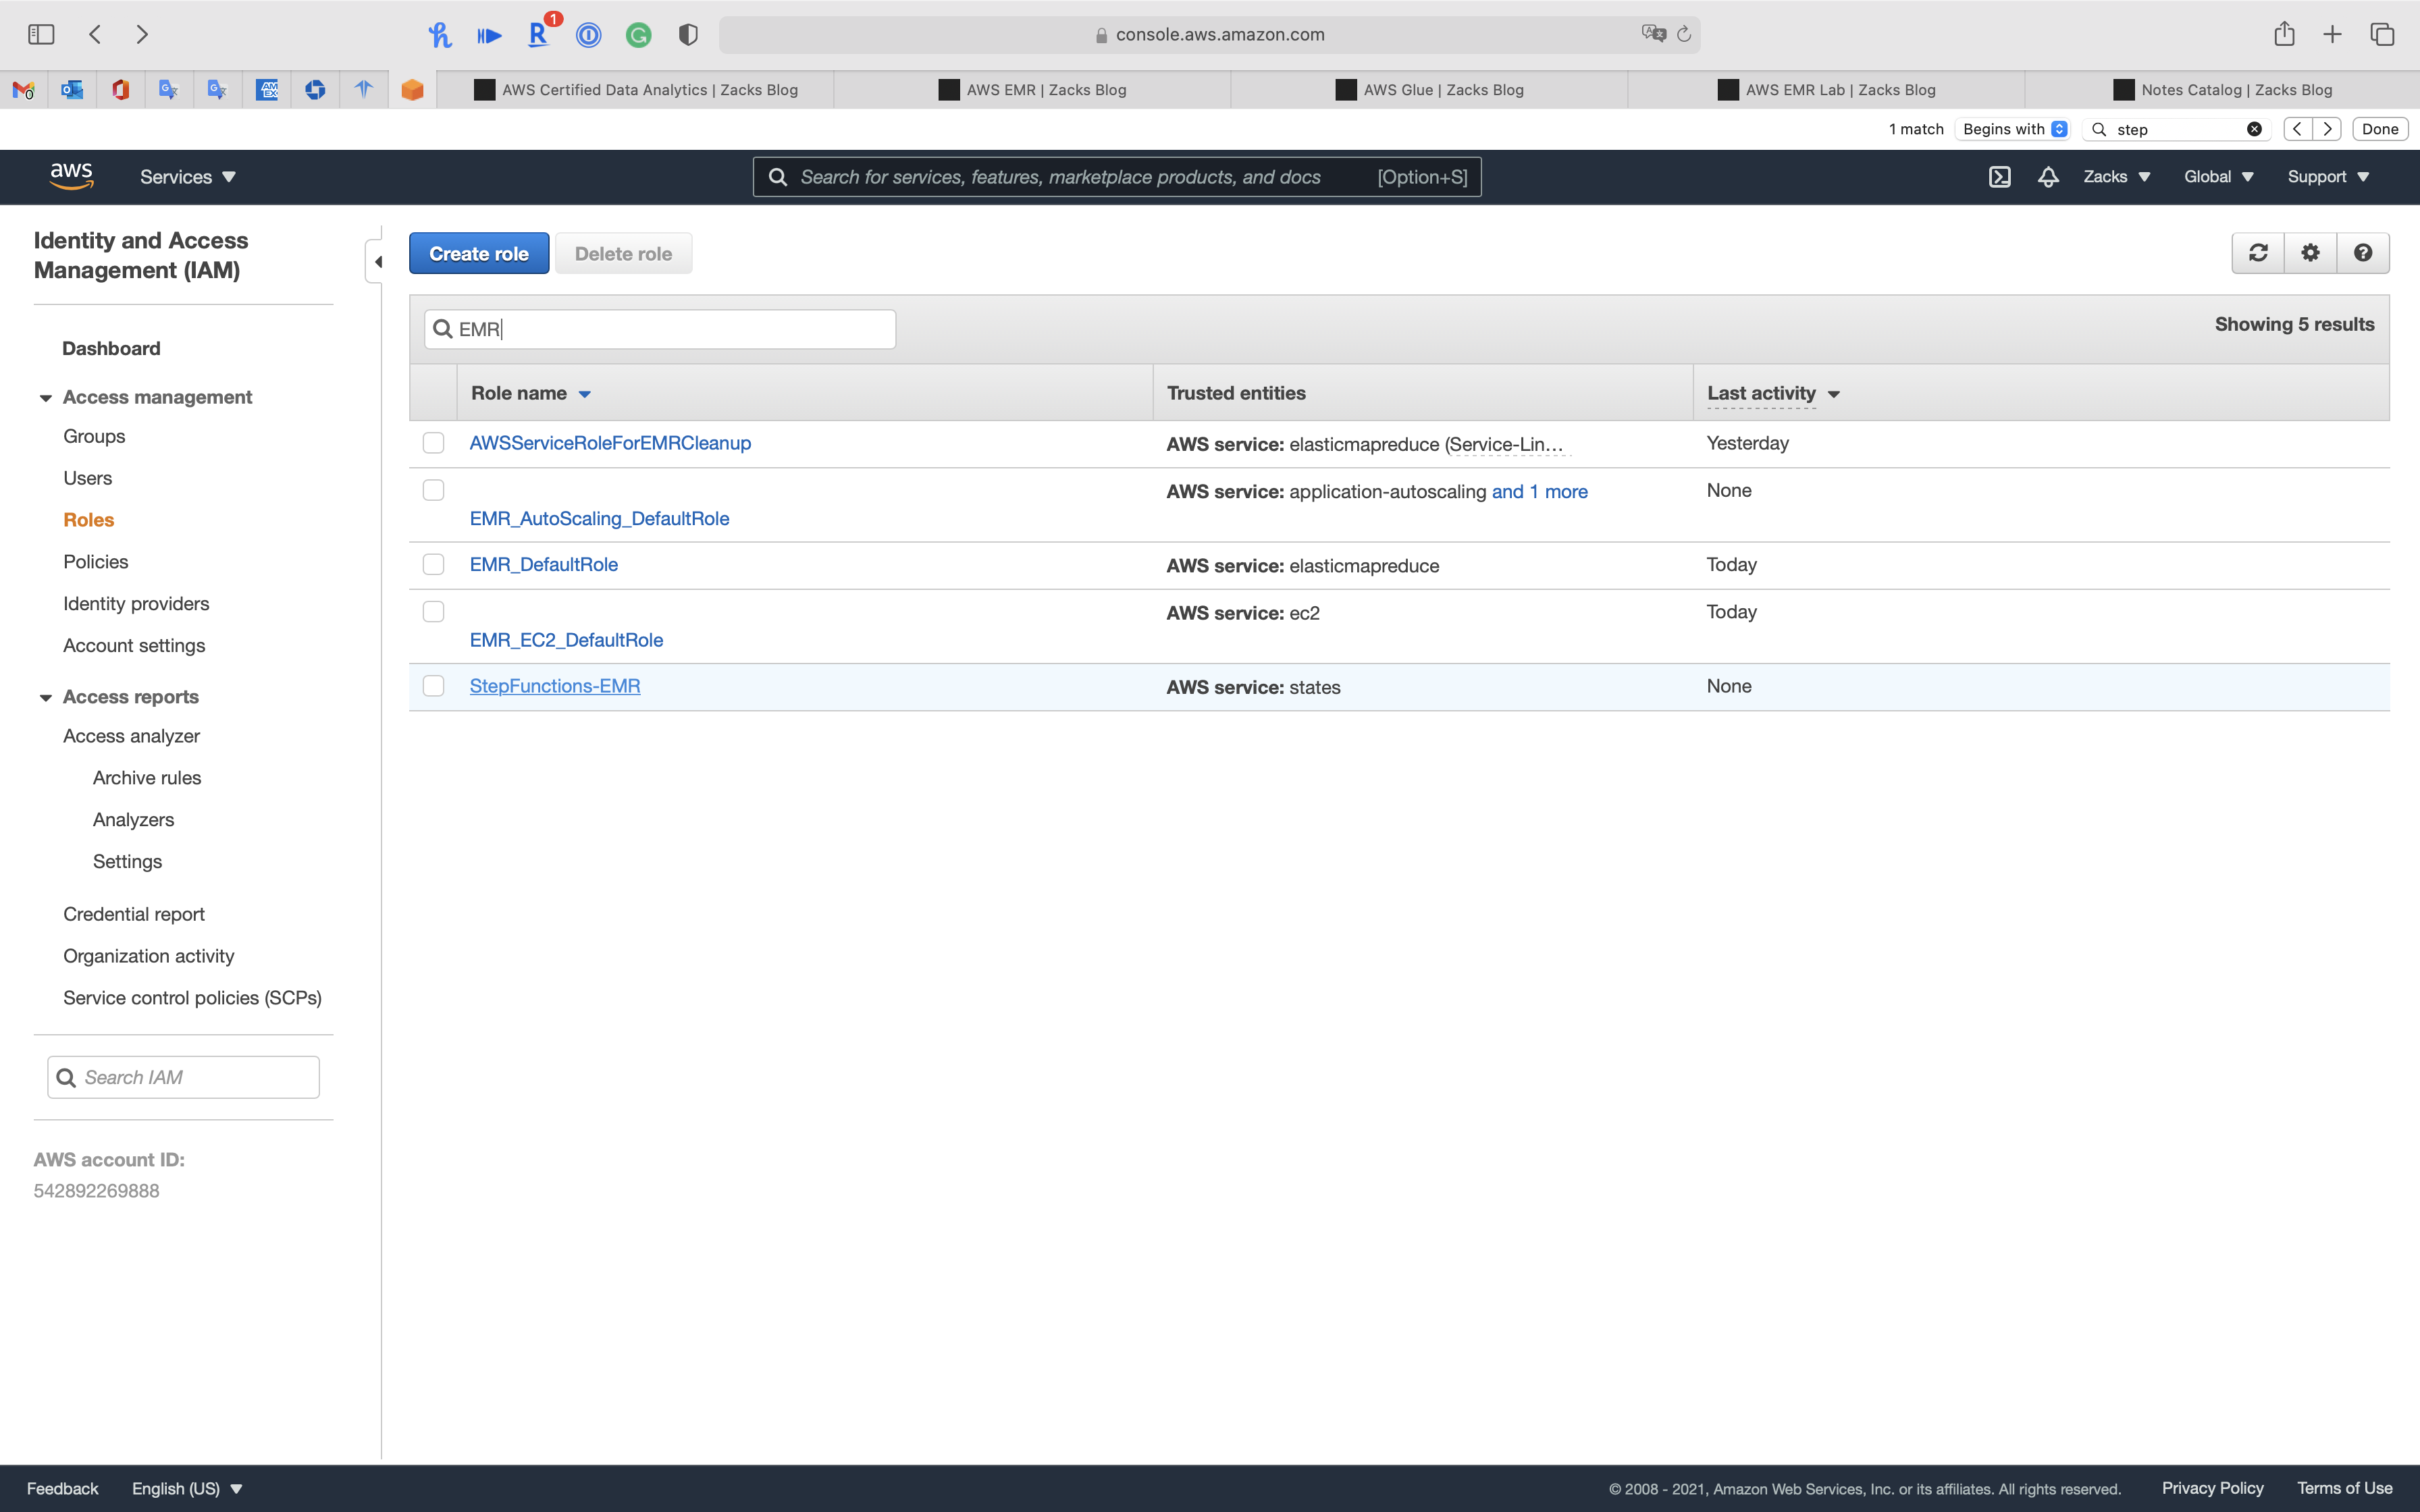
Click on Attach policies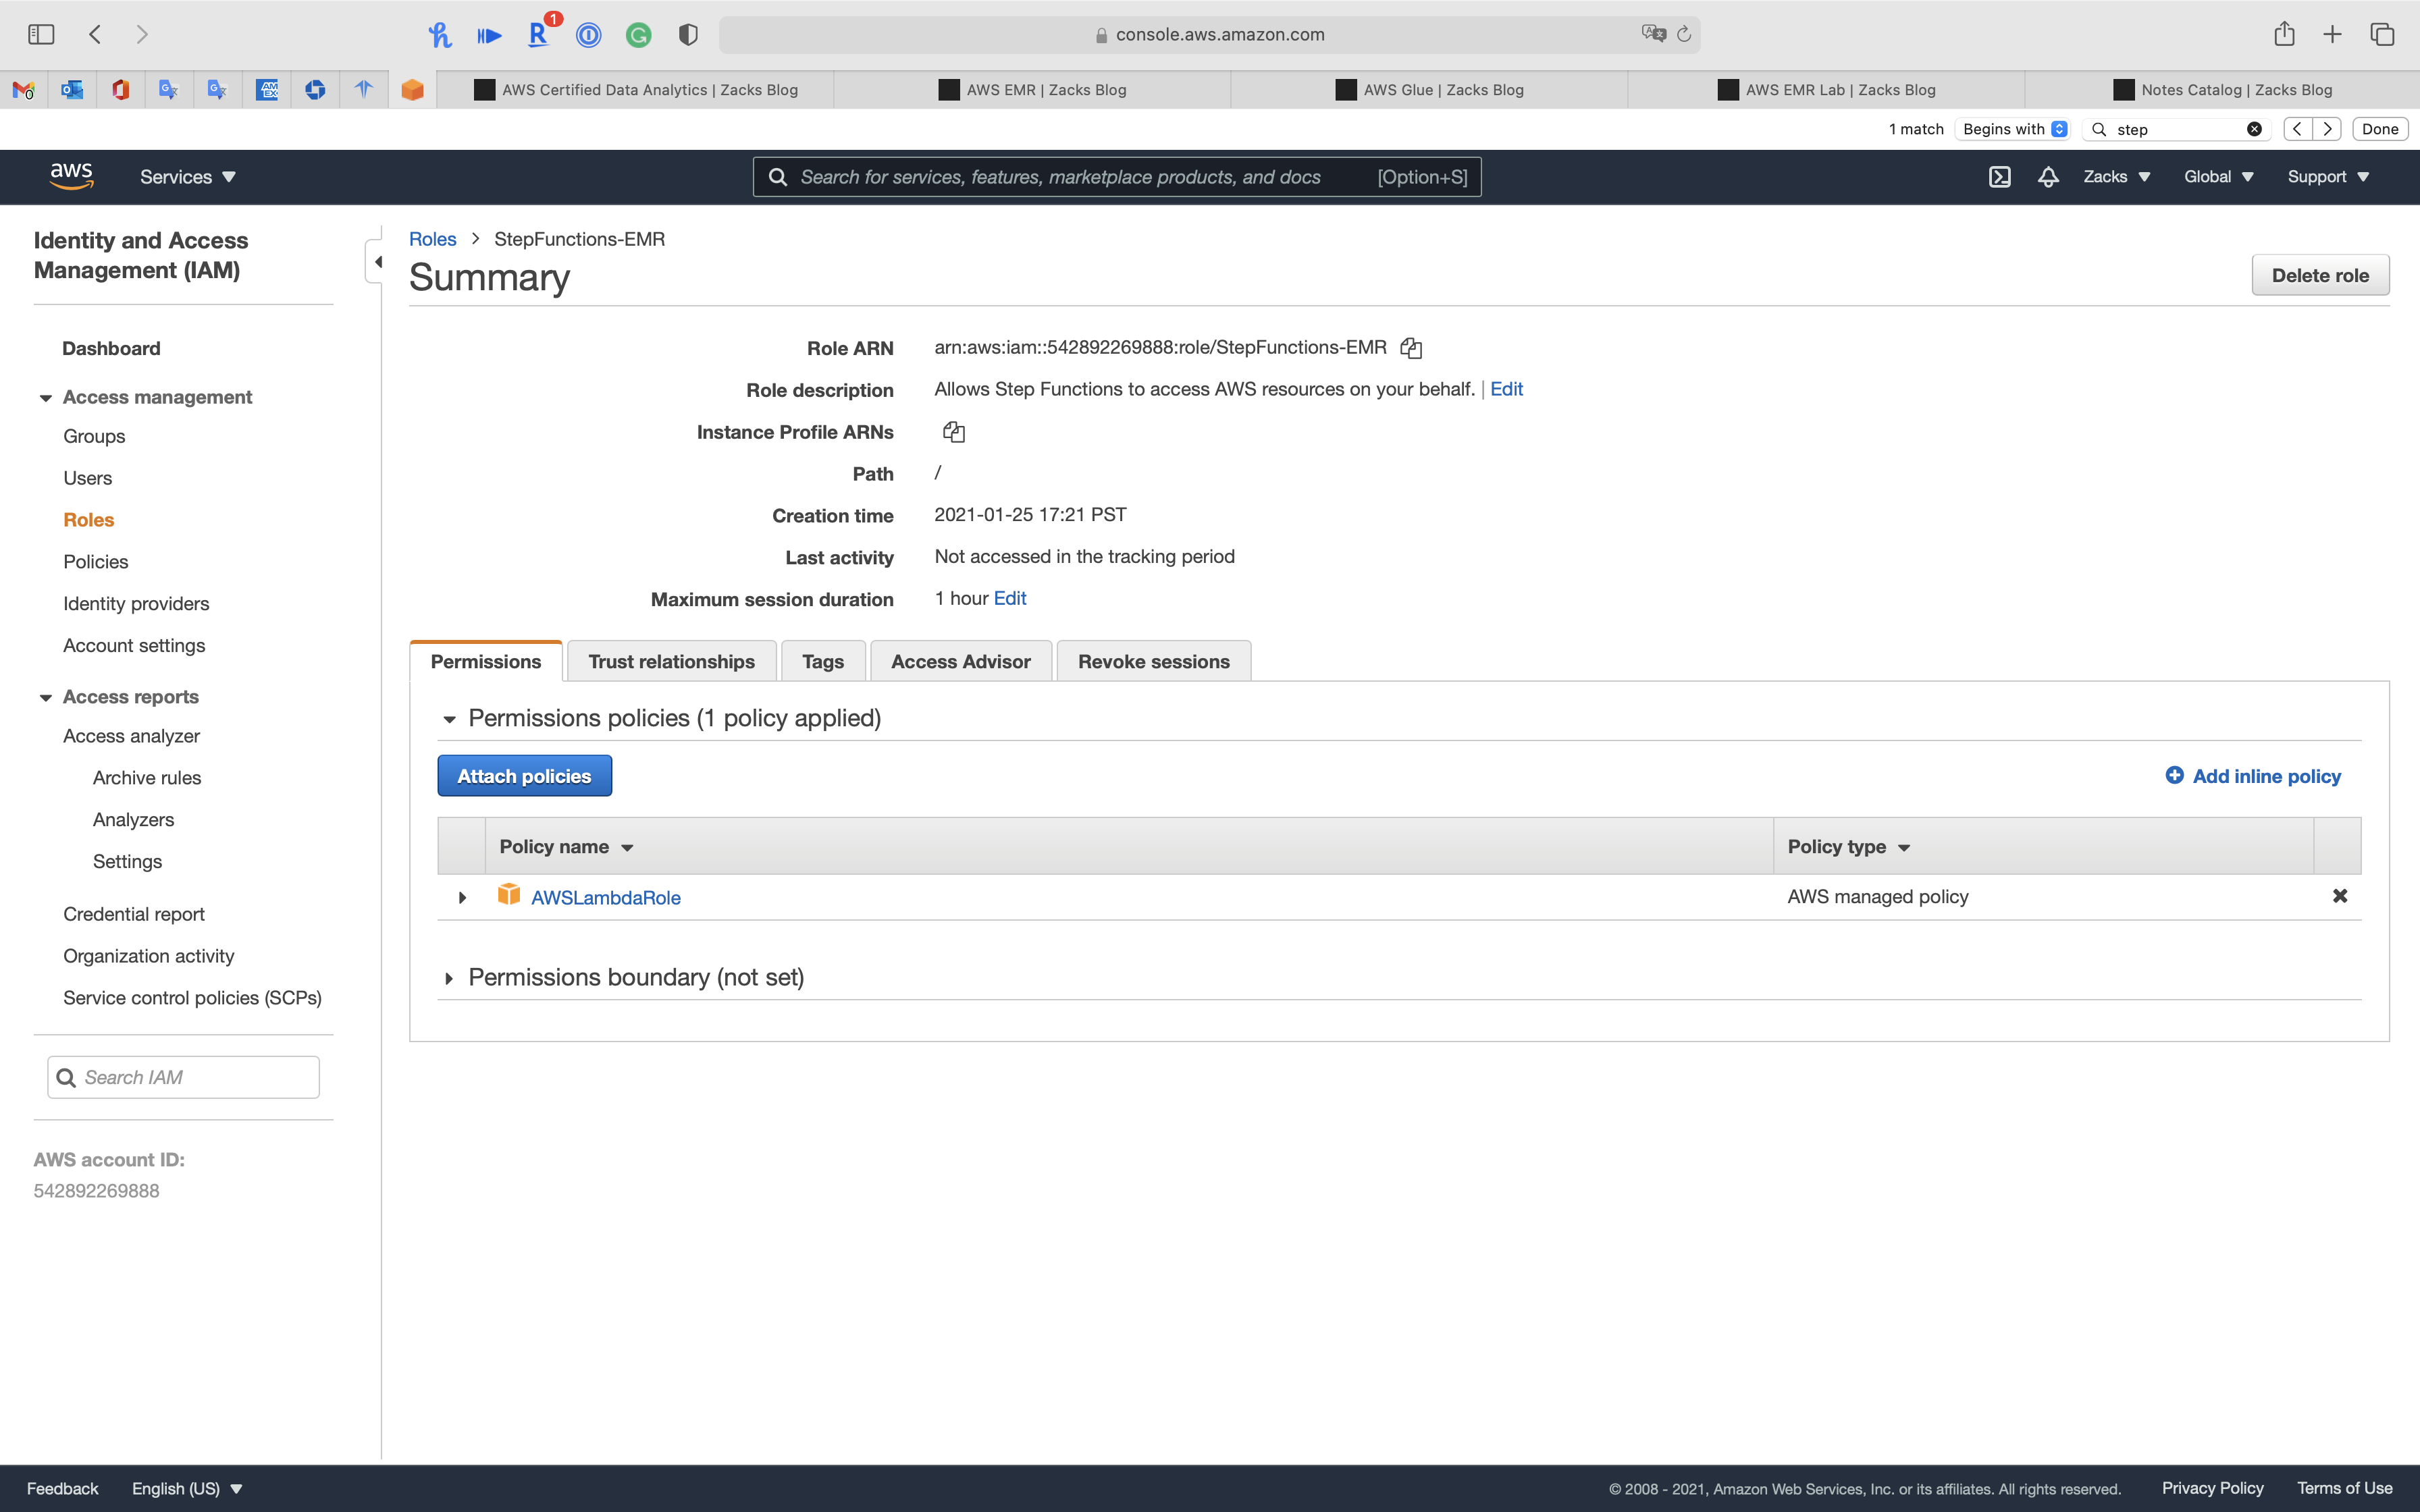
Separately search the following policies then select them.
AmazonElasticMapReduceFullAccessAWSGlueServiceRole
Click on Attach policy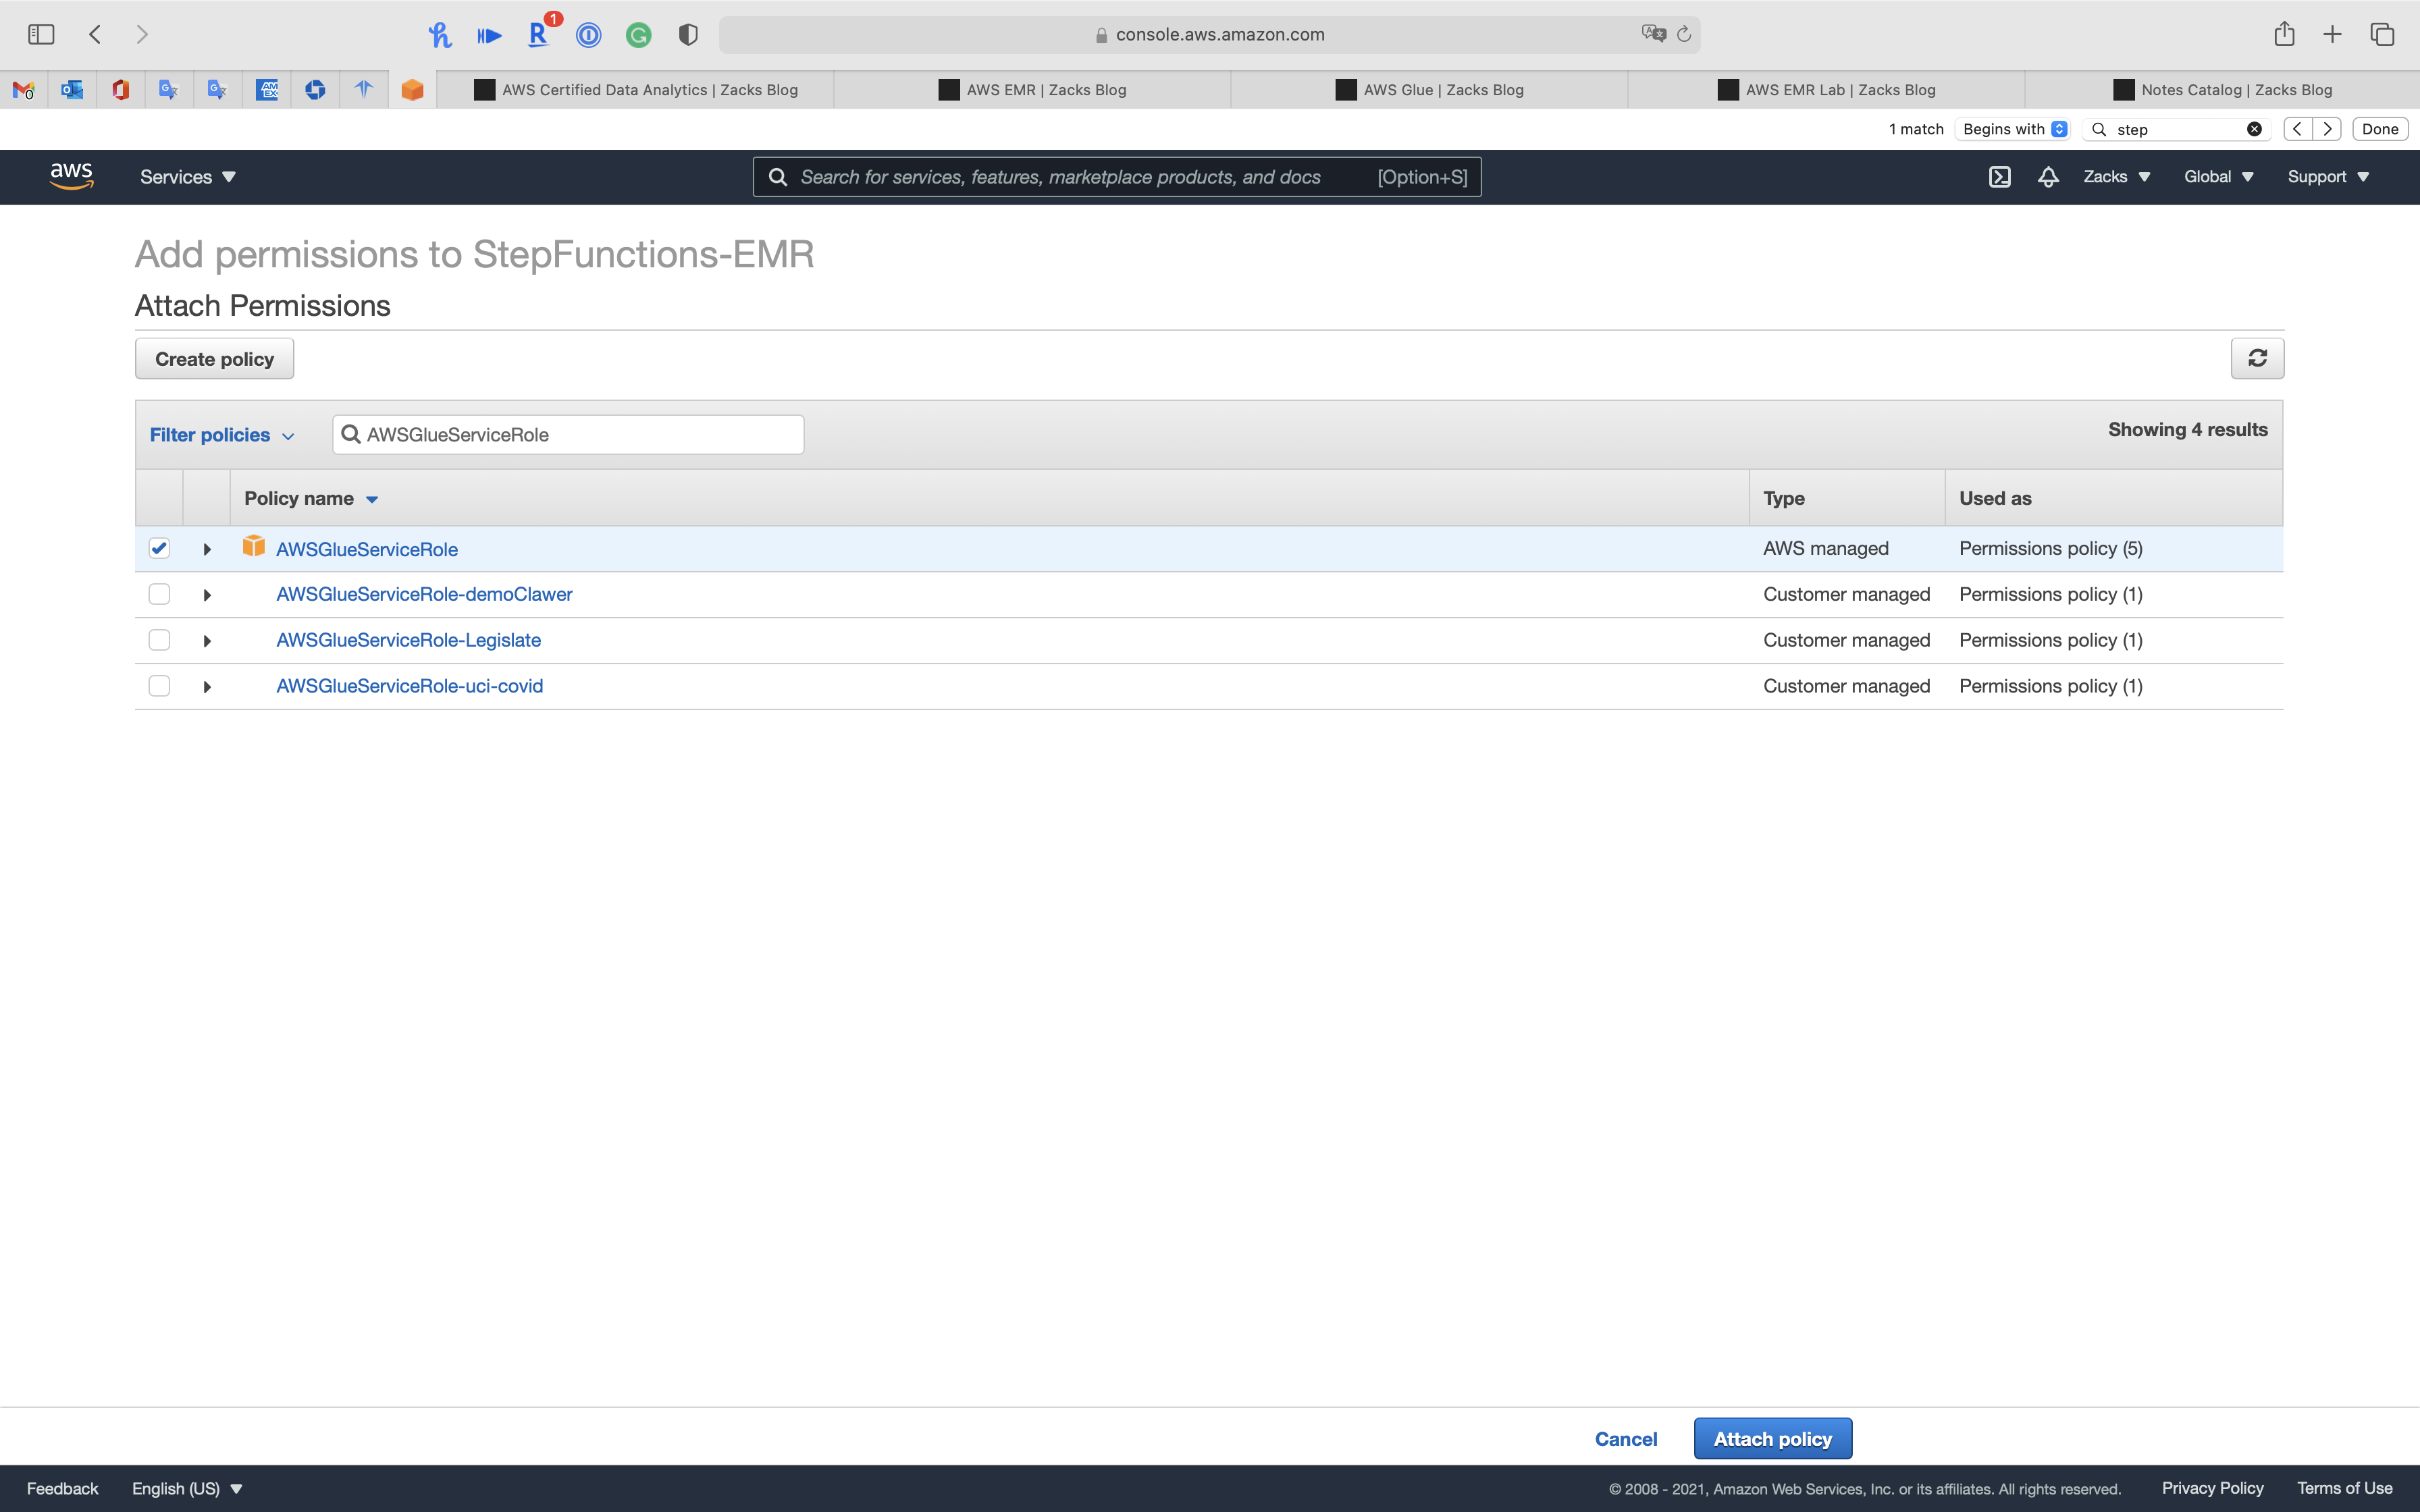
Now we have necessary permissions for Step Function to run EMR cluster.
Step Functions Configuration
Services -> Step Functions
Click on the 三 button on the left and top page to collapse the navigation.
Then Click on State machines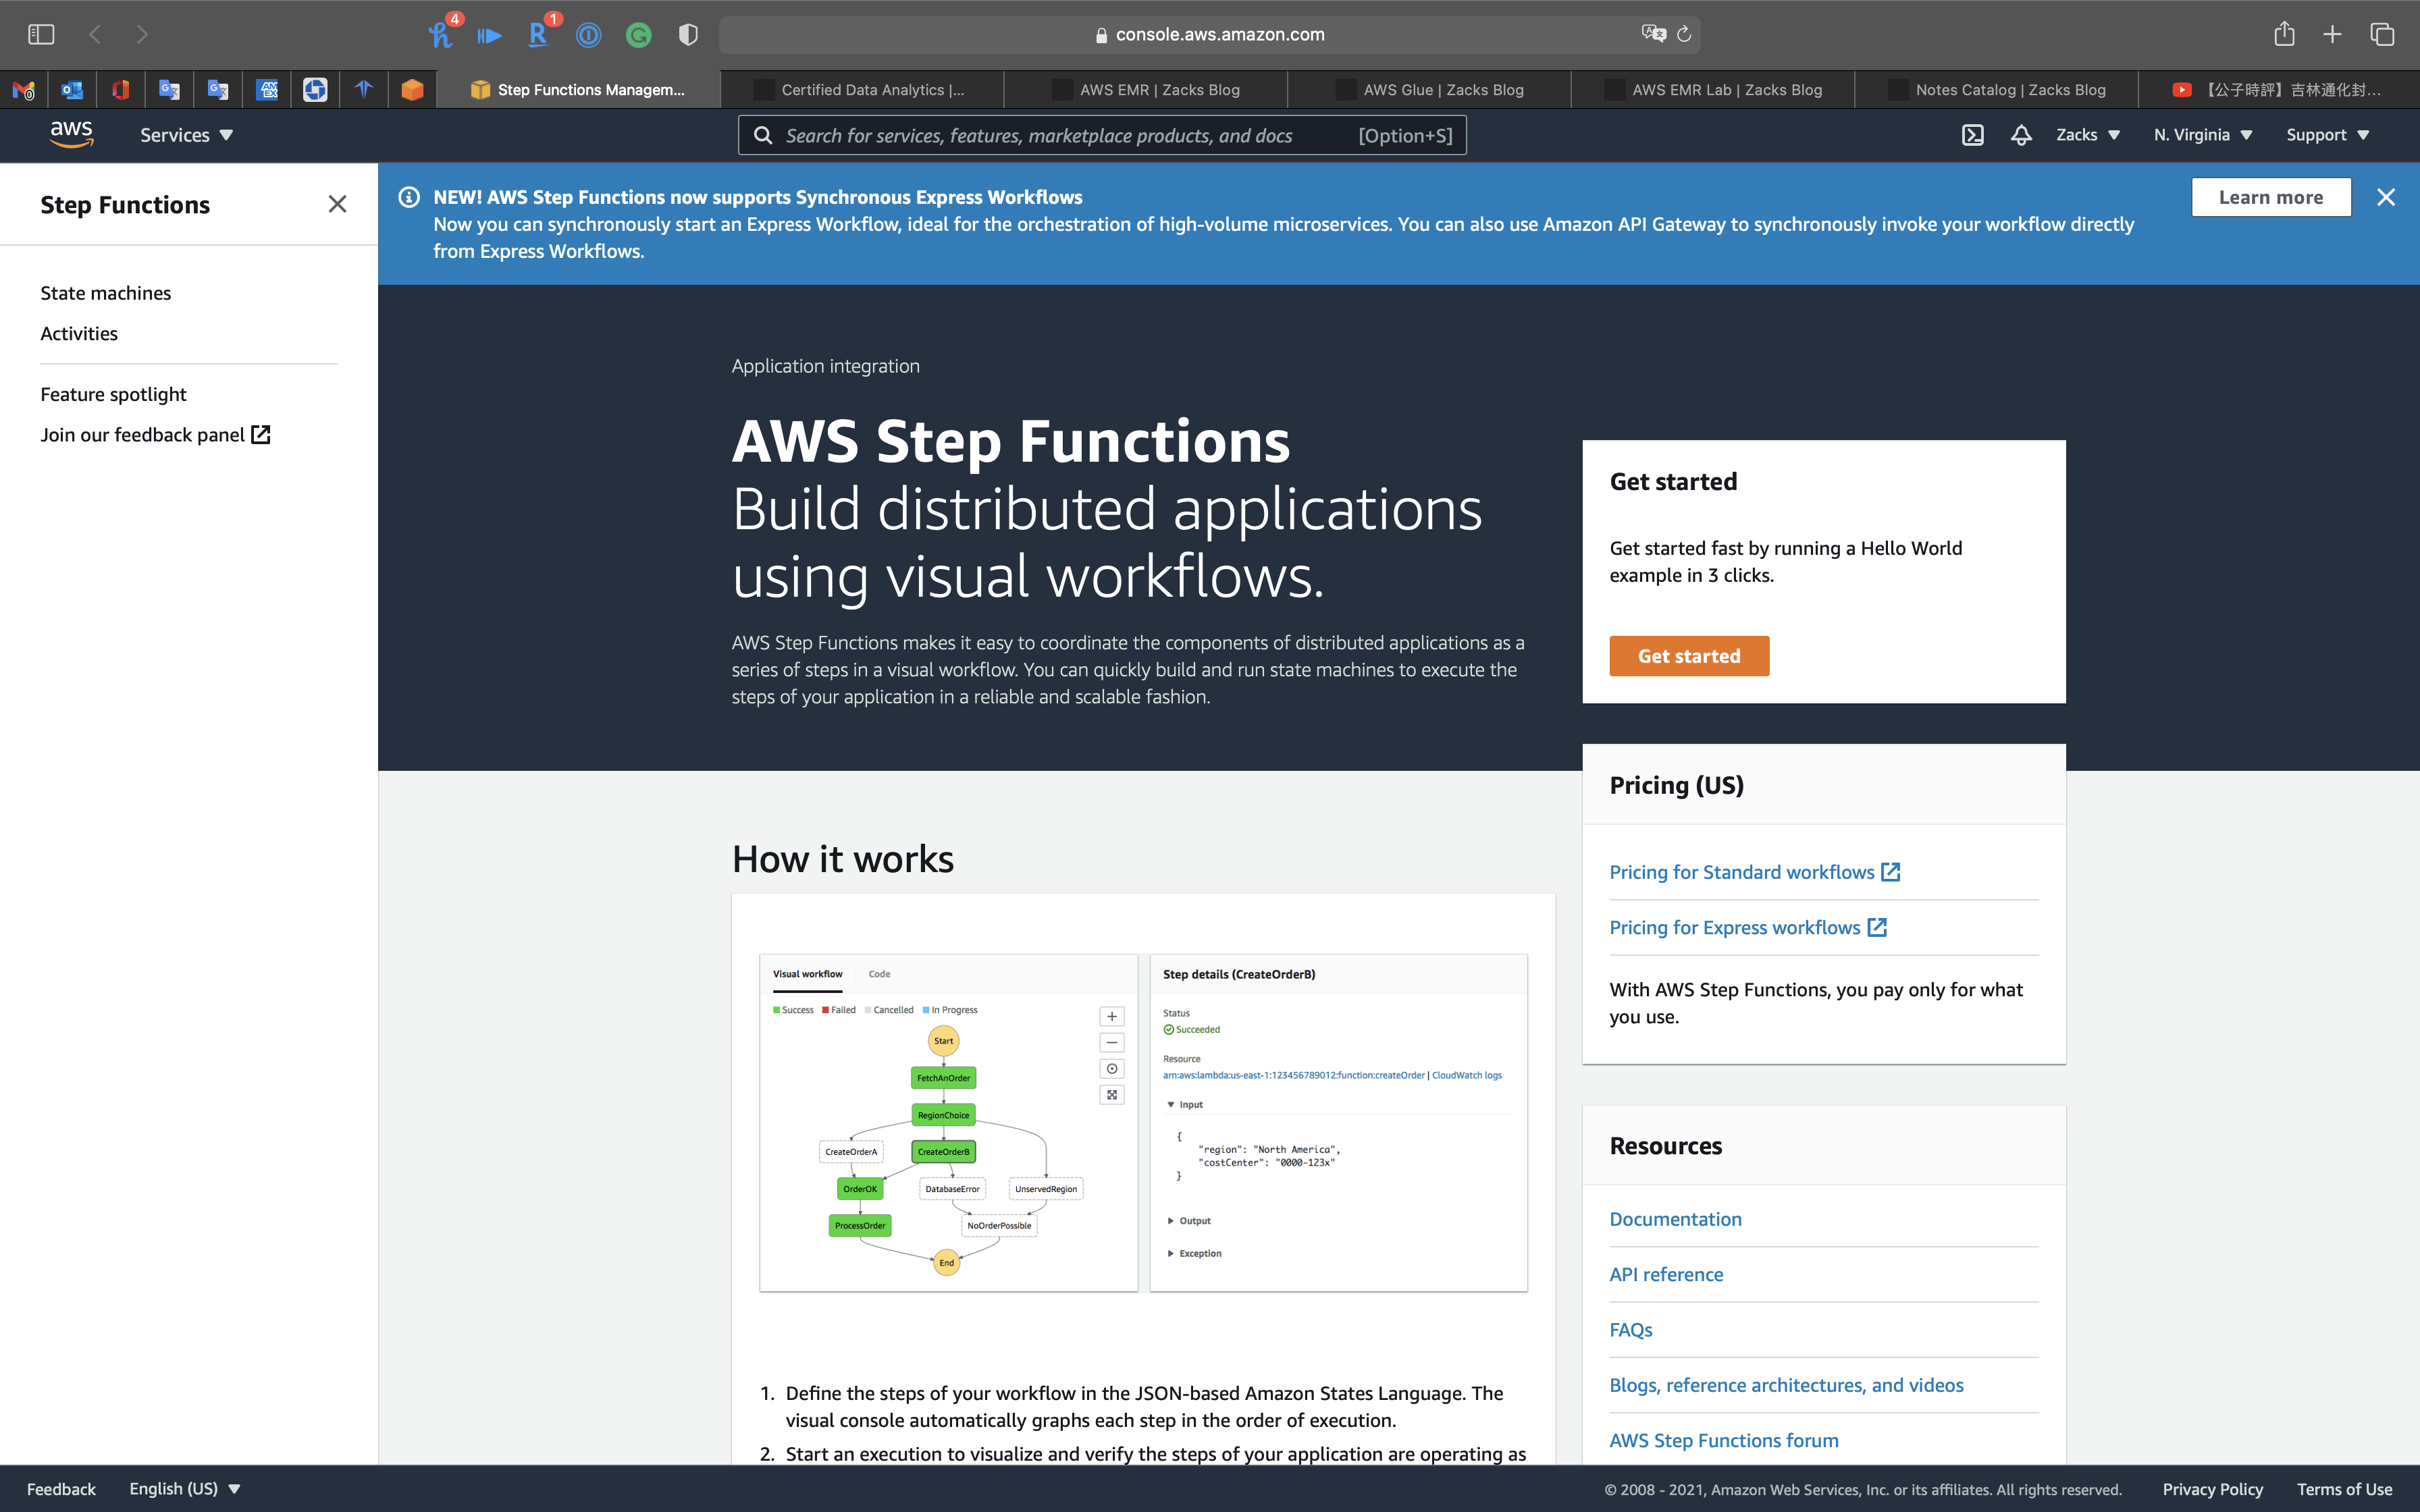
Create State Machine
Click on Create state machine
Select
Author with code snippetsType:
Standard- Standard: Durable, checkpointed workflows for machine learning, order fulfillment, IT/DevOps automation, ETL jobs, and other long-duration workloads.
- Express: Event-driven workflows for streaming data processing, microservices orchestration, IoT data ingestion, mobile backends, and other short duration, high-event-rate workloads.
Step 1: Define state machine
Copy and paste the following .json code to your code editor like VSCode, then scroll down this web page.
1 | { |
The followings are the states of the Step Function.
“Create_New_Cluster”
Review the following .json code.
Replace or update the following important parameters:
Name: Replace it to your cluster name.ReleaseLabel: You can go to Services -> EMR -> Clusters, click onCreate cluster -> go to advanced optionsto see the latest stable emr version and update this parameter.Applications: Add the applications you need to the EMR cluster, includingClassification&"hive.metastore.glue.datacatalog.enabled": "true"are necessary for Hive to grab Glue data catalog.LogUri: Replace it to your S3 bucket for logging the Step FunctionEc2KeyName: Set your key Pair.InstanceFleetTypeMASTERCORETASK
Go to your S3 bucket, you can see you already have a bucket start at aws-logs-.
Visit the bucket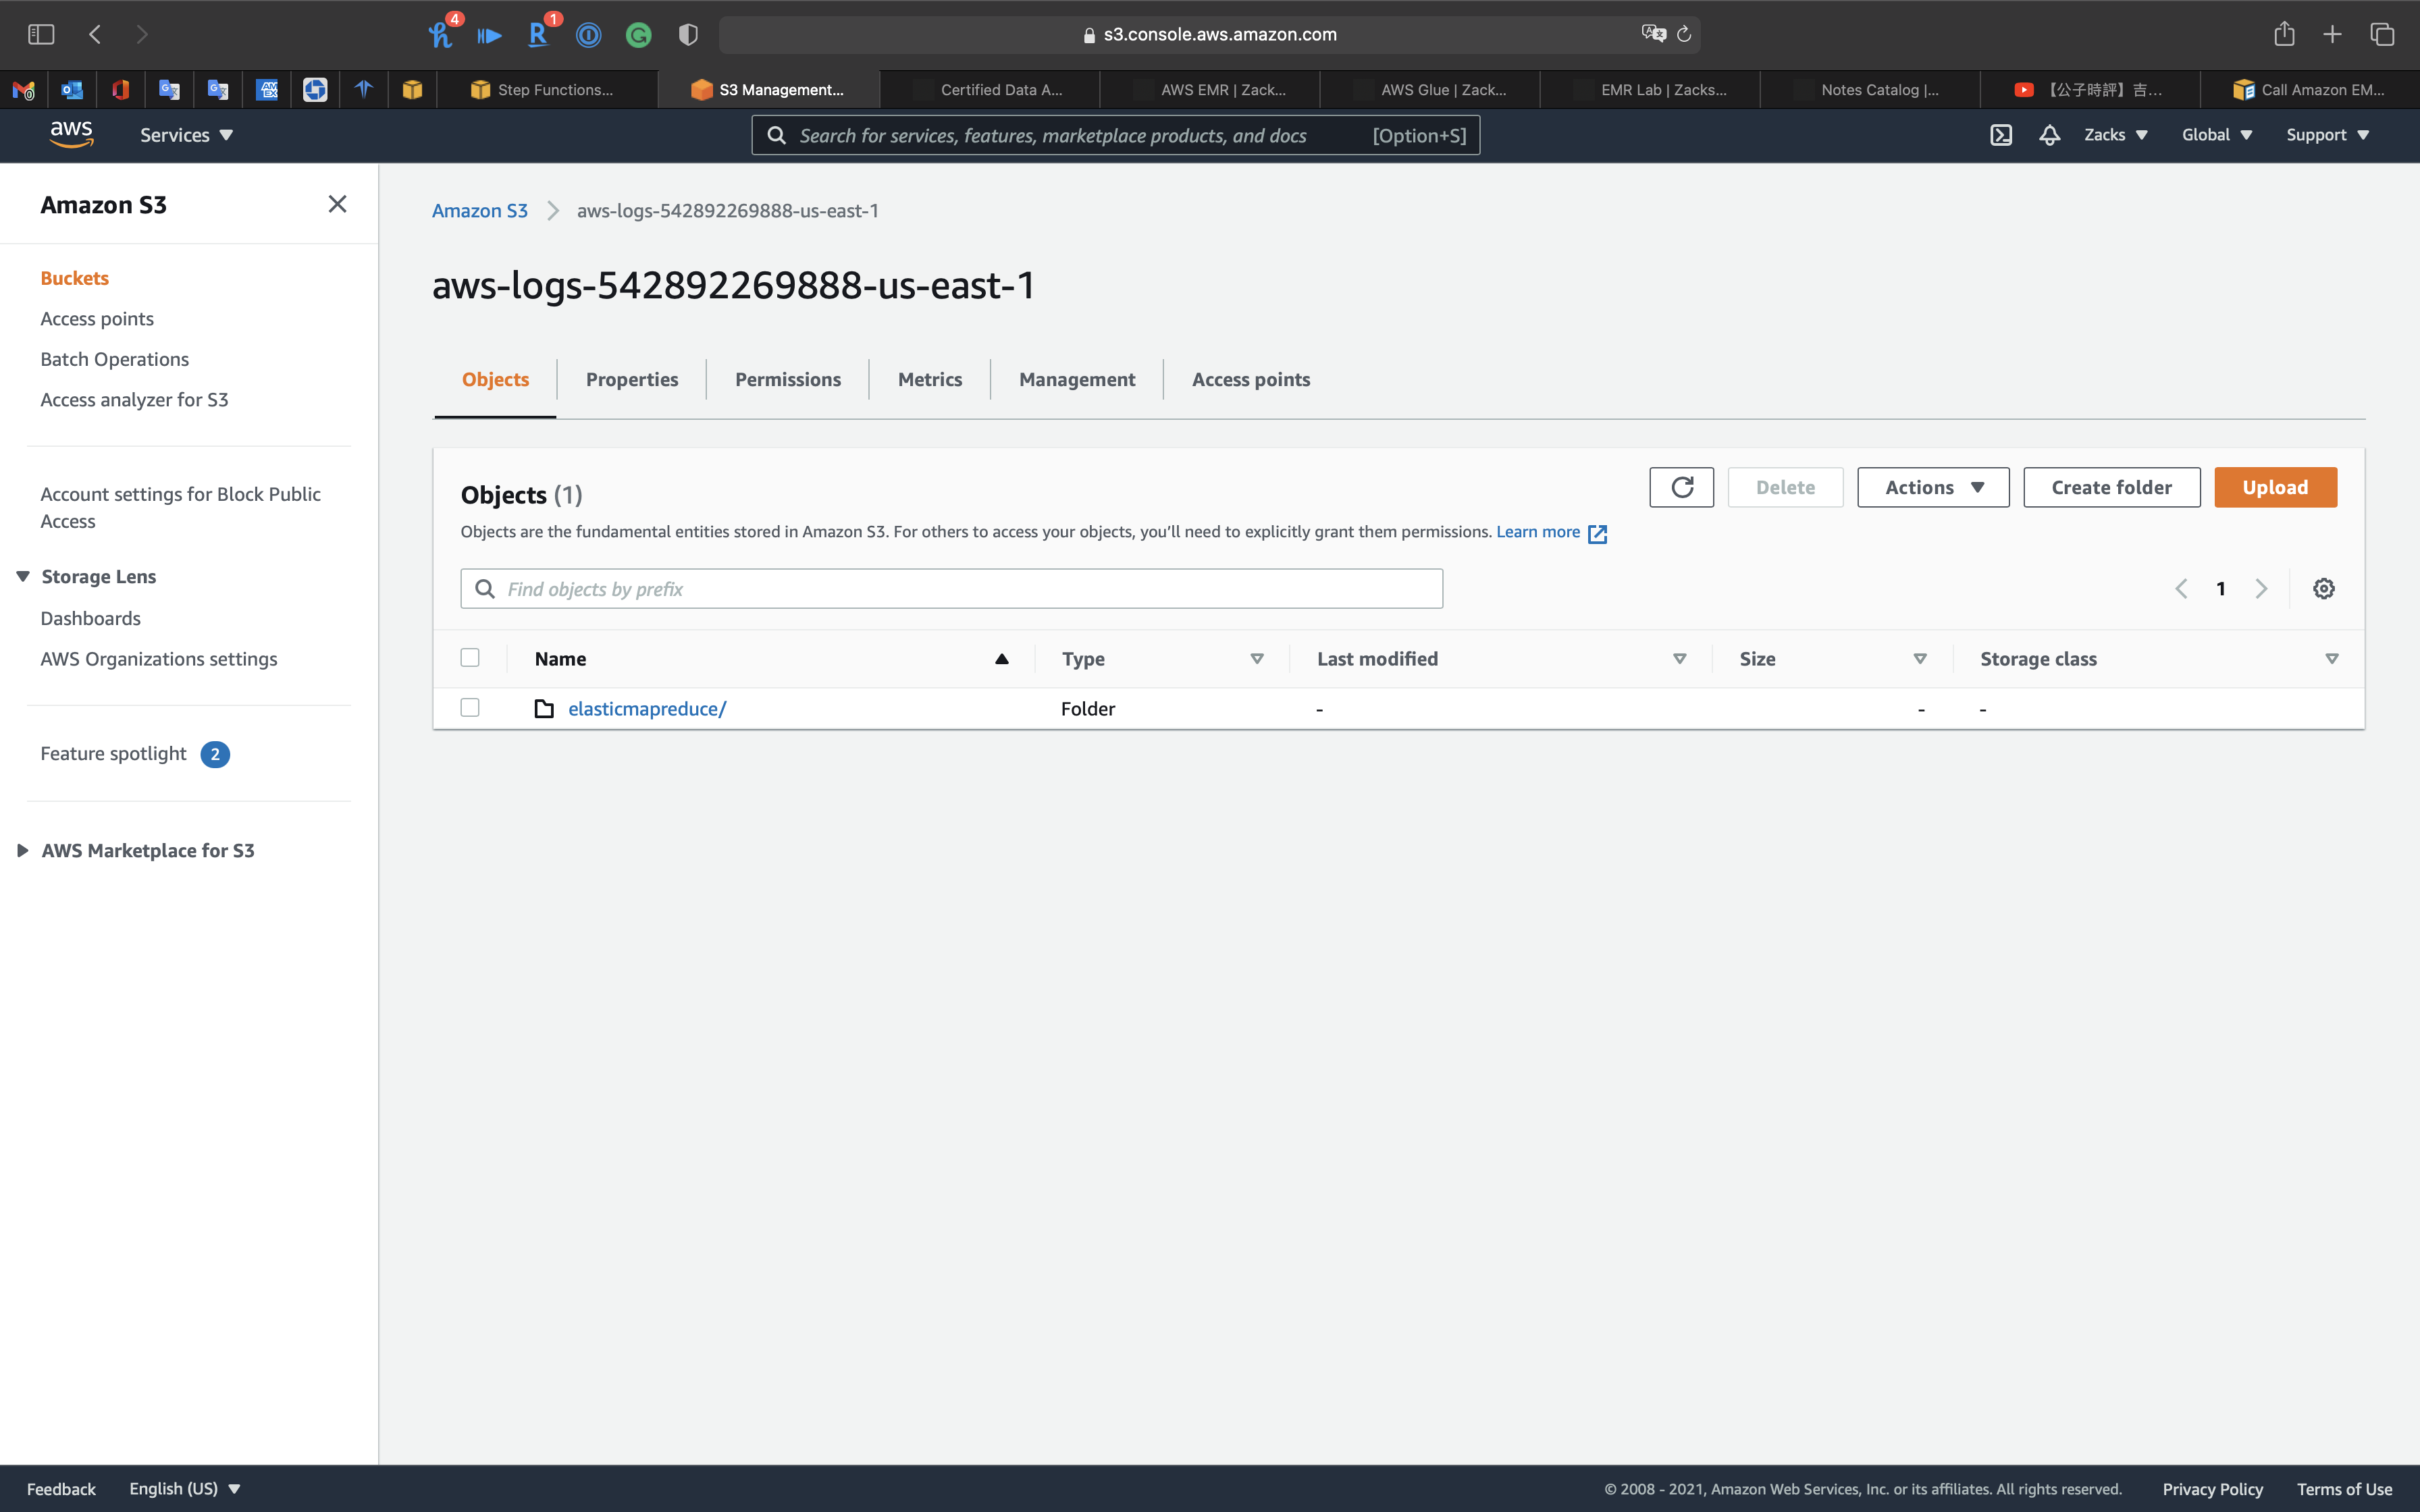
Click on Copy S3 URI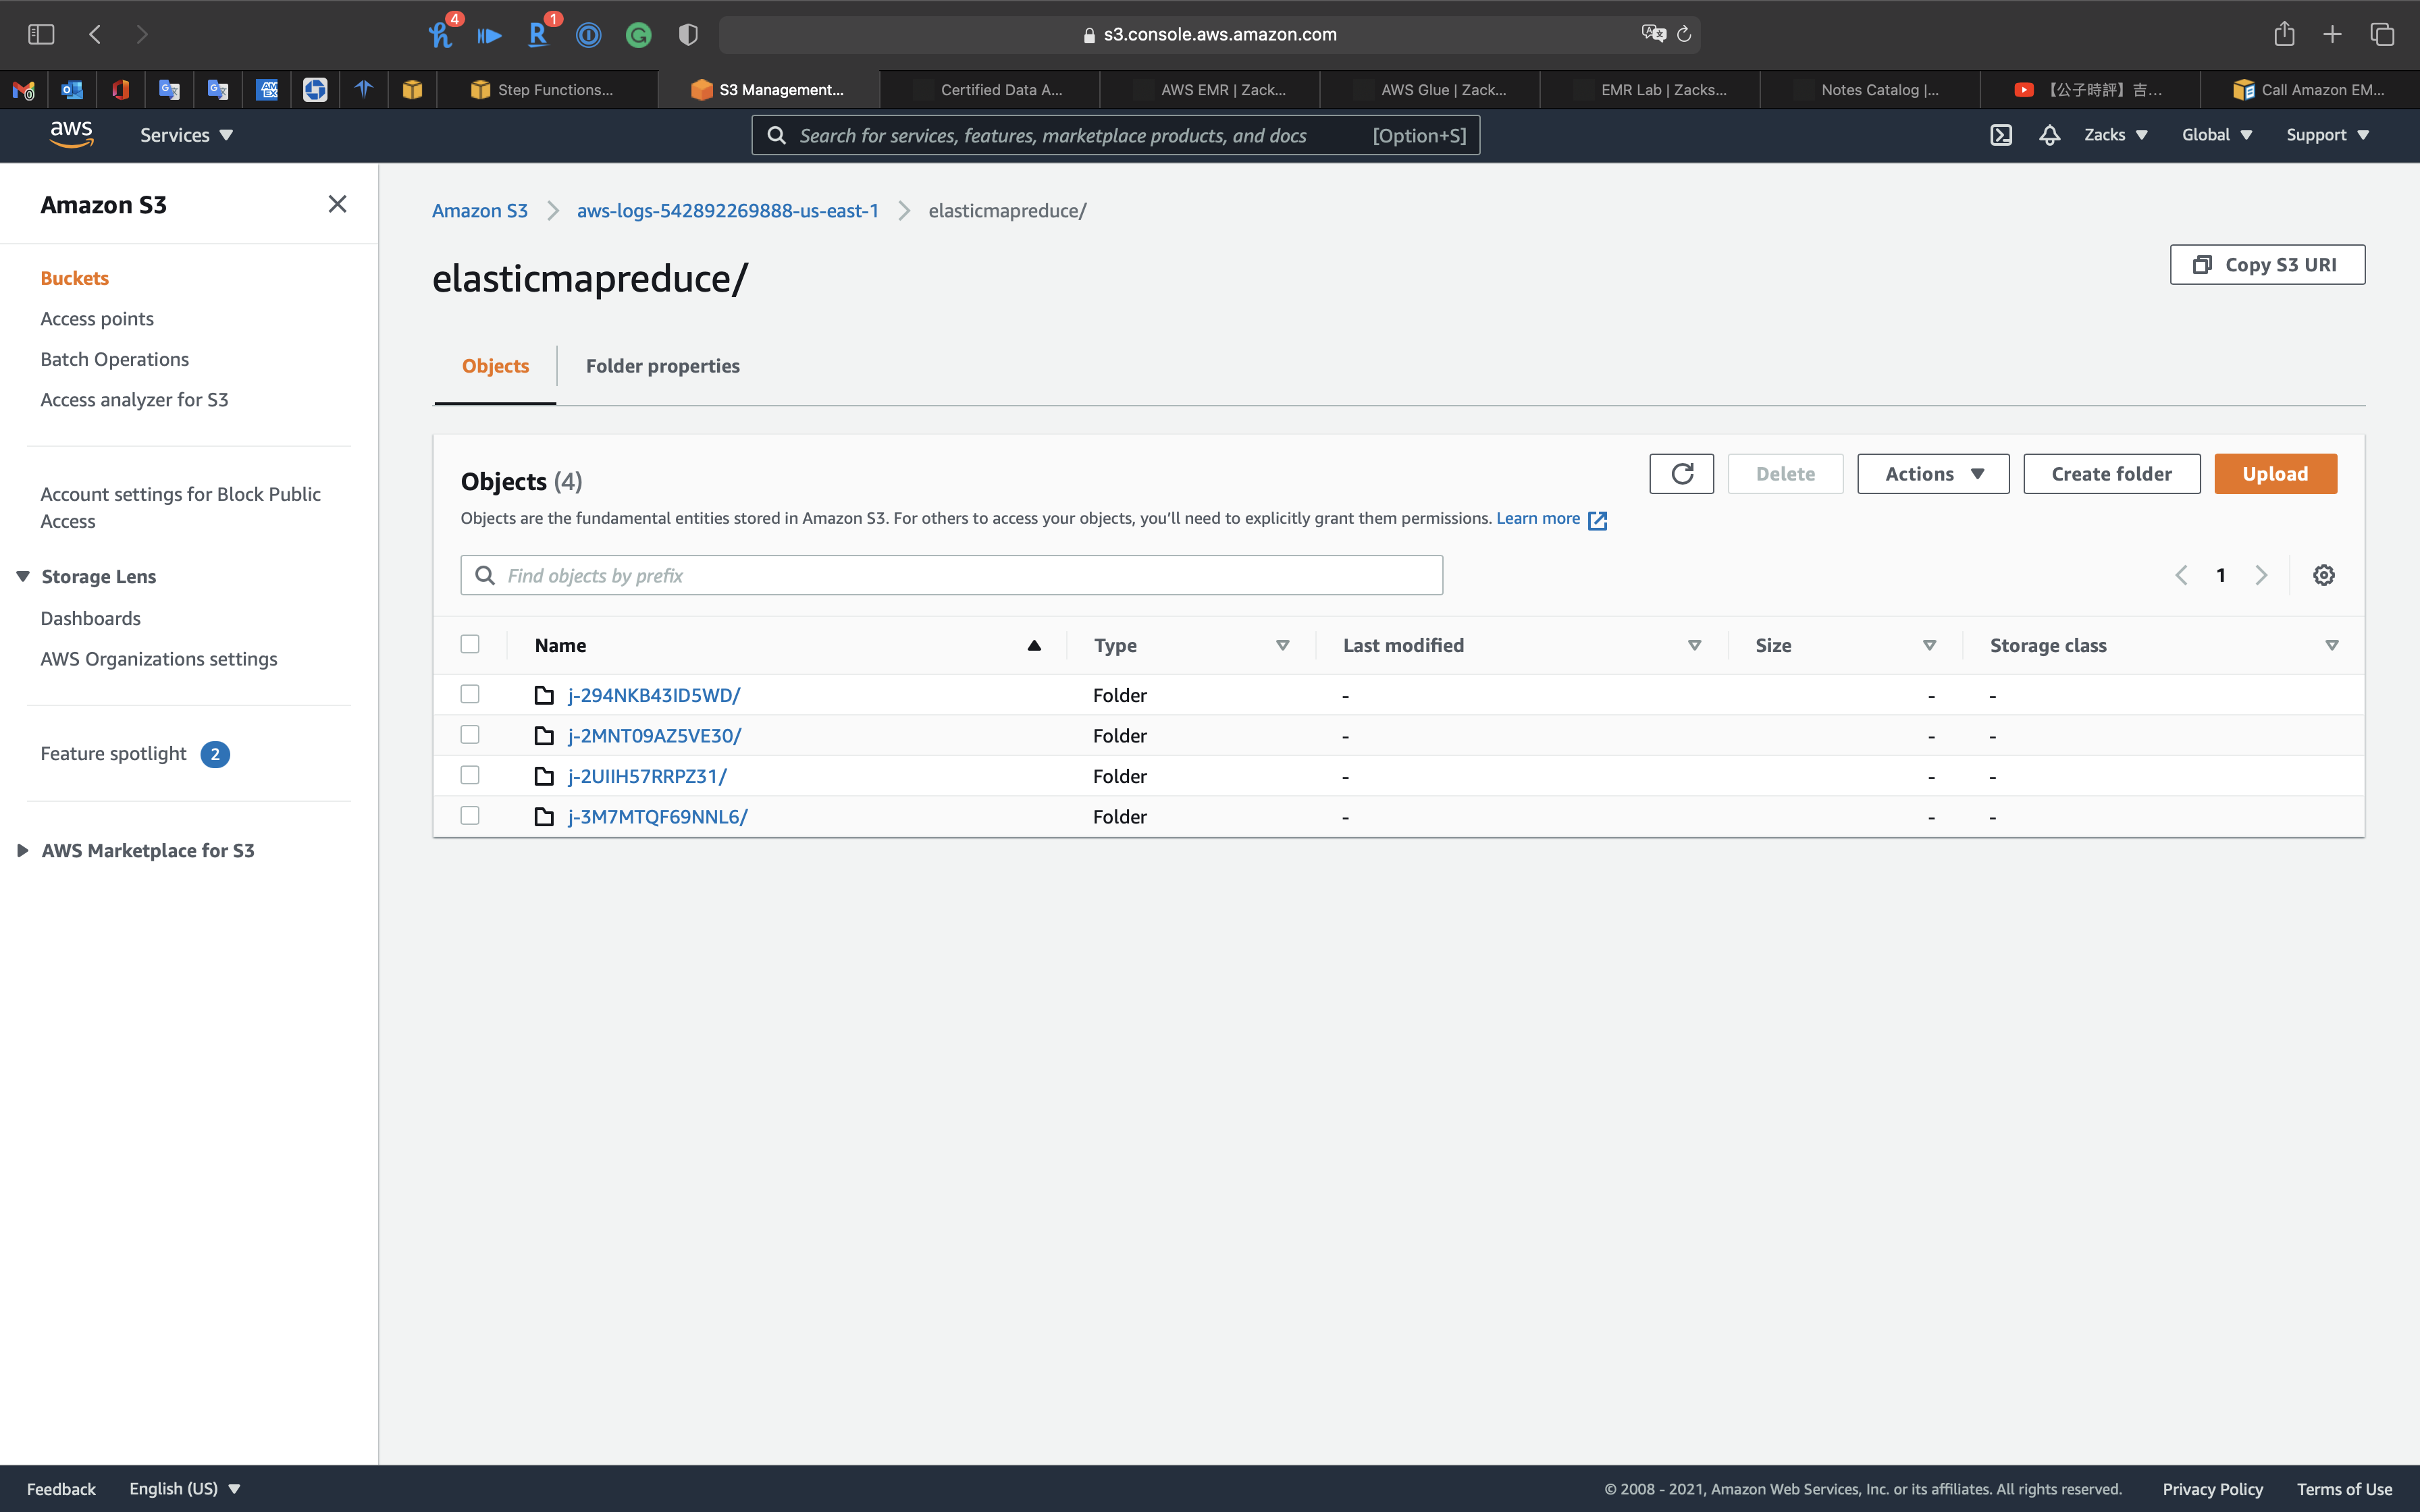
1 | { |
“Hive_Query_One”
Review the following .json code.
Replace or update the following important parameters:
Args
1 | { |
“Hive_Query_Two (async)”
Review the following .json code.
Replace or update the following important parameters:
Args
1 | "Hive_Query_Two (async)": { |
“Hive_Query_Three”
Review the following .json code.
Replace or update the following important parameters:
Args
1 | "Hive_Query_Three": { |
Click on Next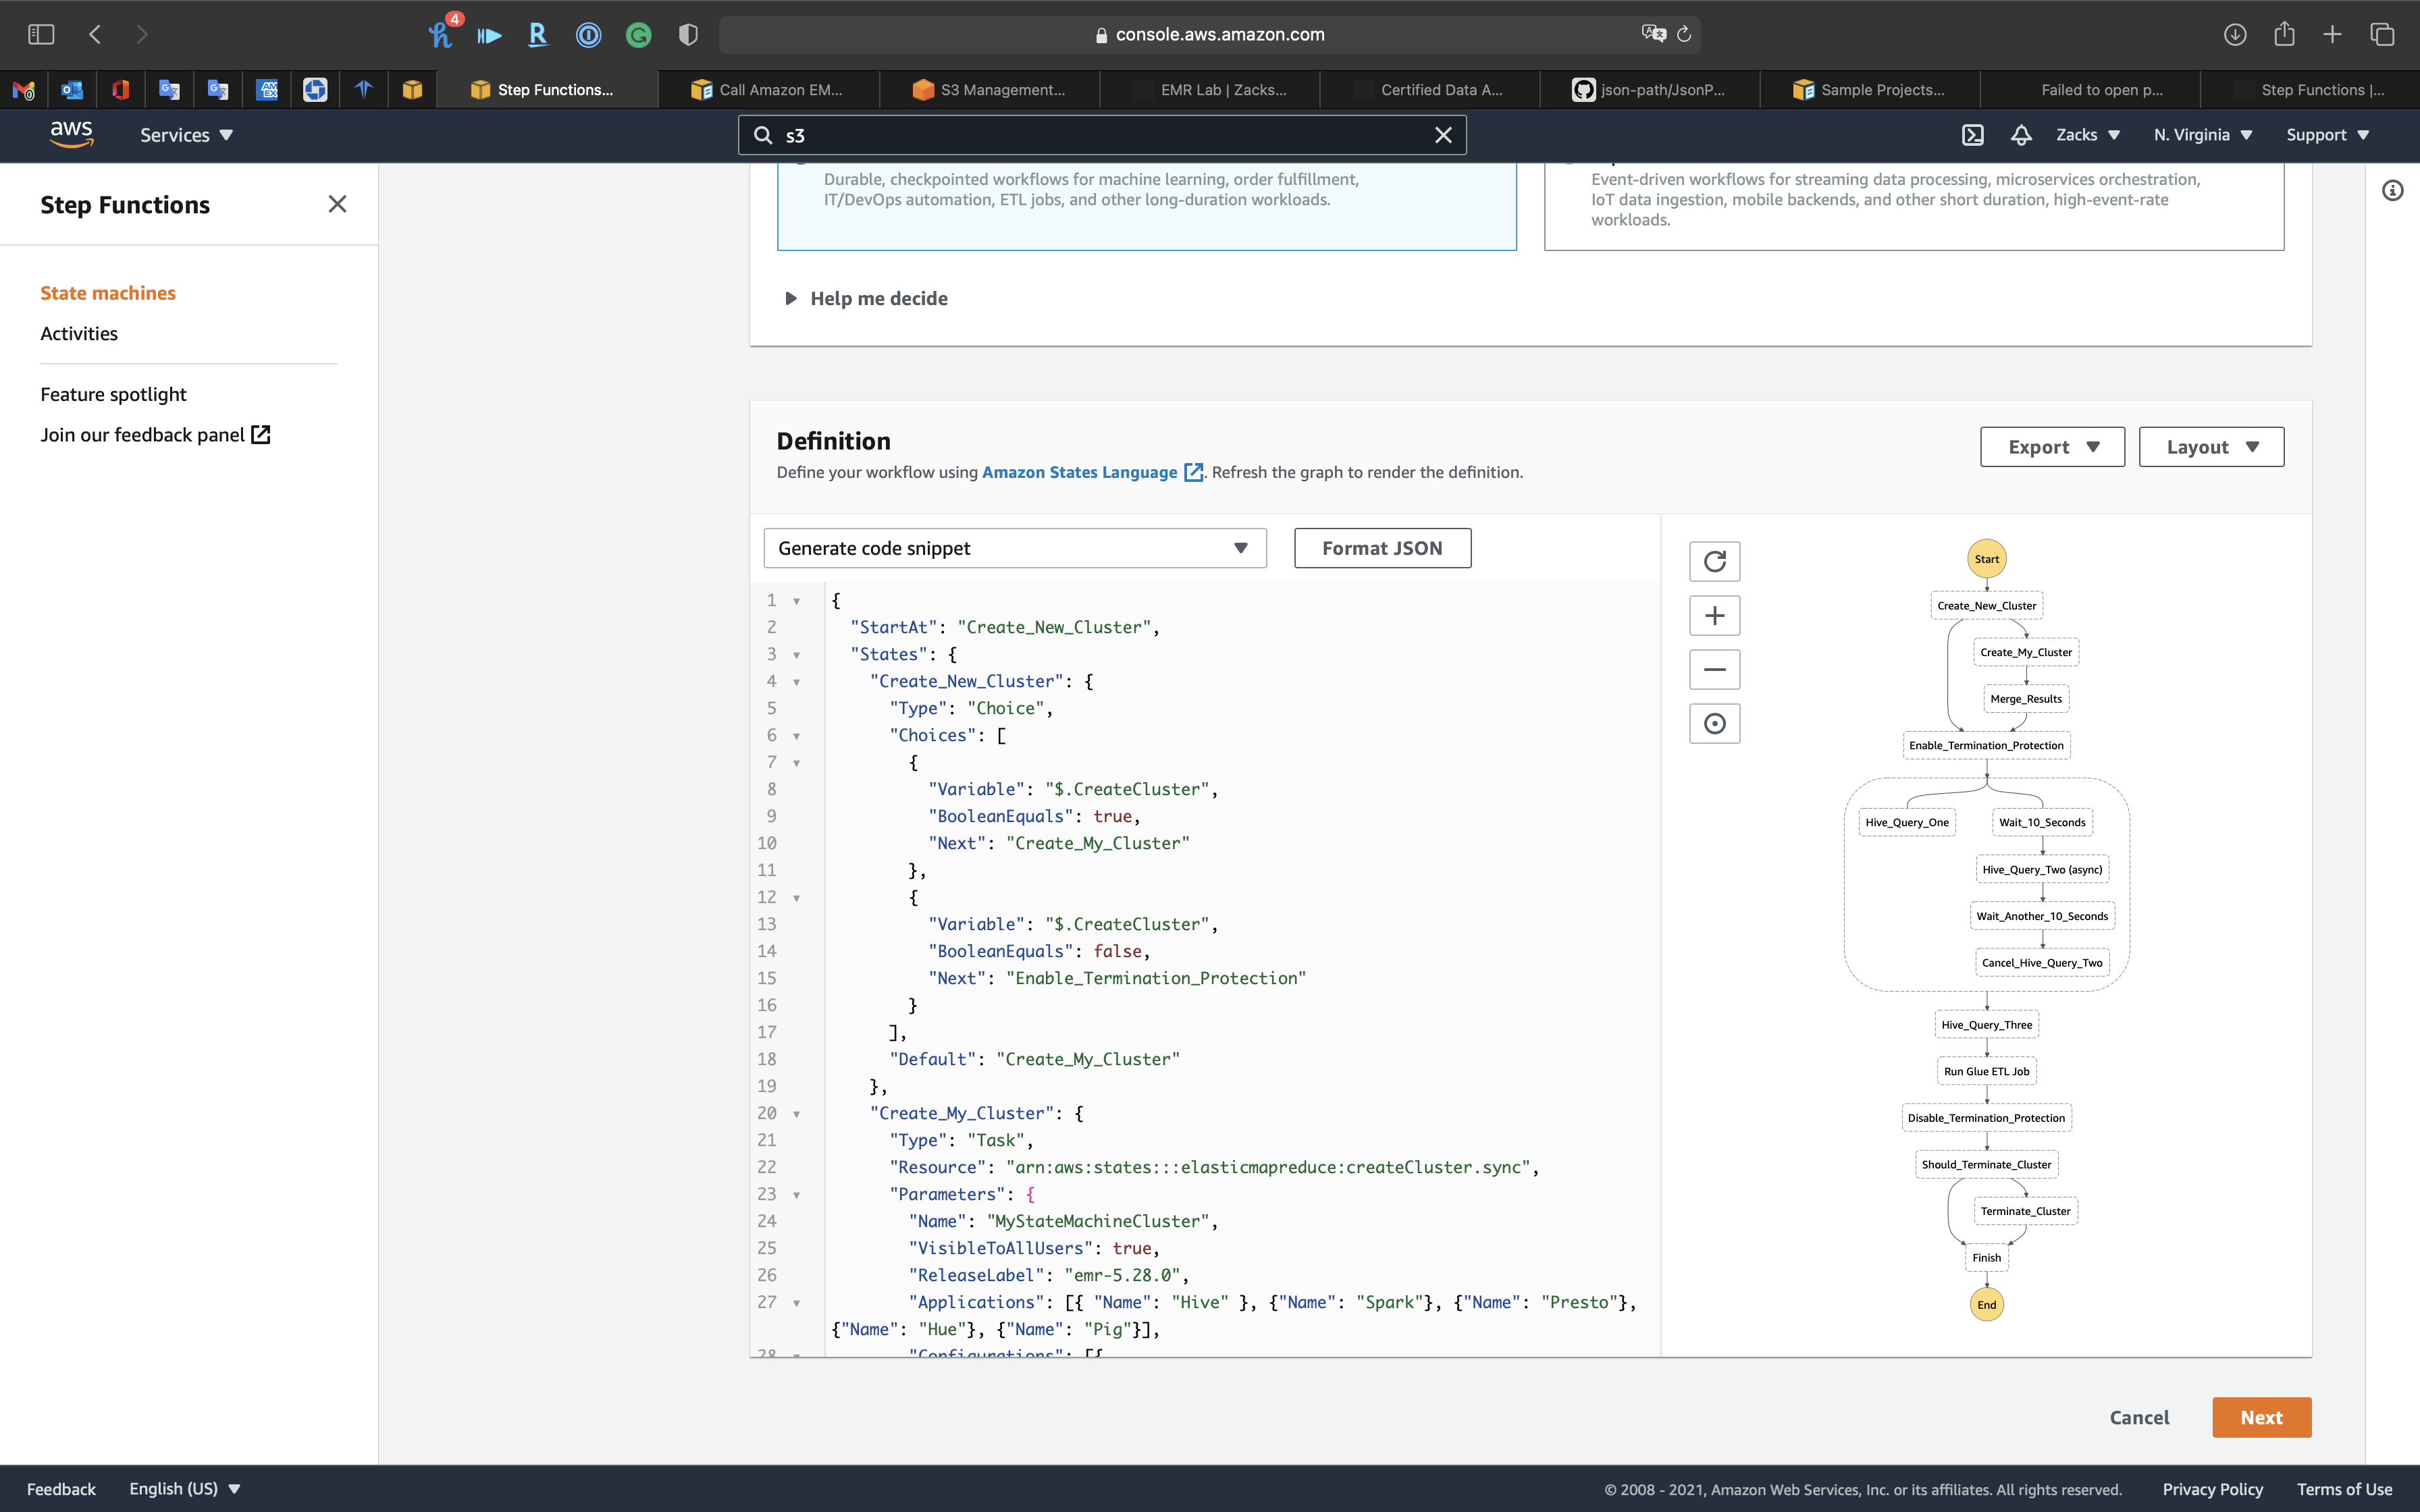
Step 2: Specify details
At Step 1: Define state machine, we modify and paste the sample JSON file that contains many parameters. Now we need to assign the values to them.
Name
- State machine name:
MyStateMachine
Permissions
- Execution role:
Choose an existing role- Existing roles:
StepFunctions-EMR
- Existing roles:

Logging
- Log level:
OFF- ALL: Logging is enabled for all events
- ERROR: Logging is enabled for errors only
- FATAL: Logging is enabled for fatal errors only
- OFF: Logging is disabled
- Include execution data:
- Log execution input, data passed between states, and execution output
- CloudWatch log group:
- Create new log group
- Select existing log group
- Enter existing log group ARN
Tracing
- Enable X-Ray tracing:
Uncheck- Step Functions will send traces to AWS X-Ray for state machine executions, even when a trace ID is not passed by an upstream service.
Click on Create state machine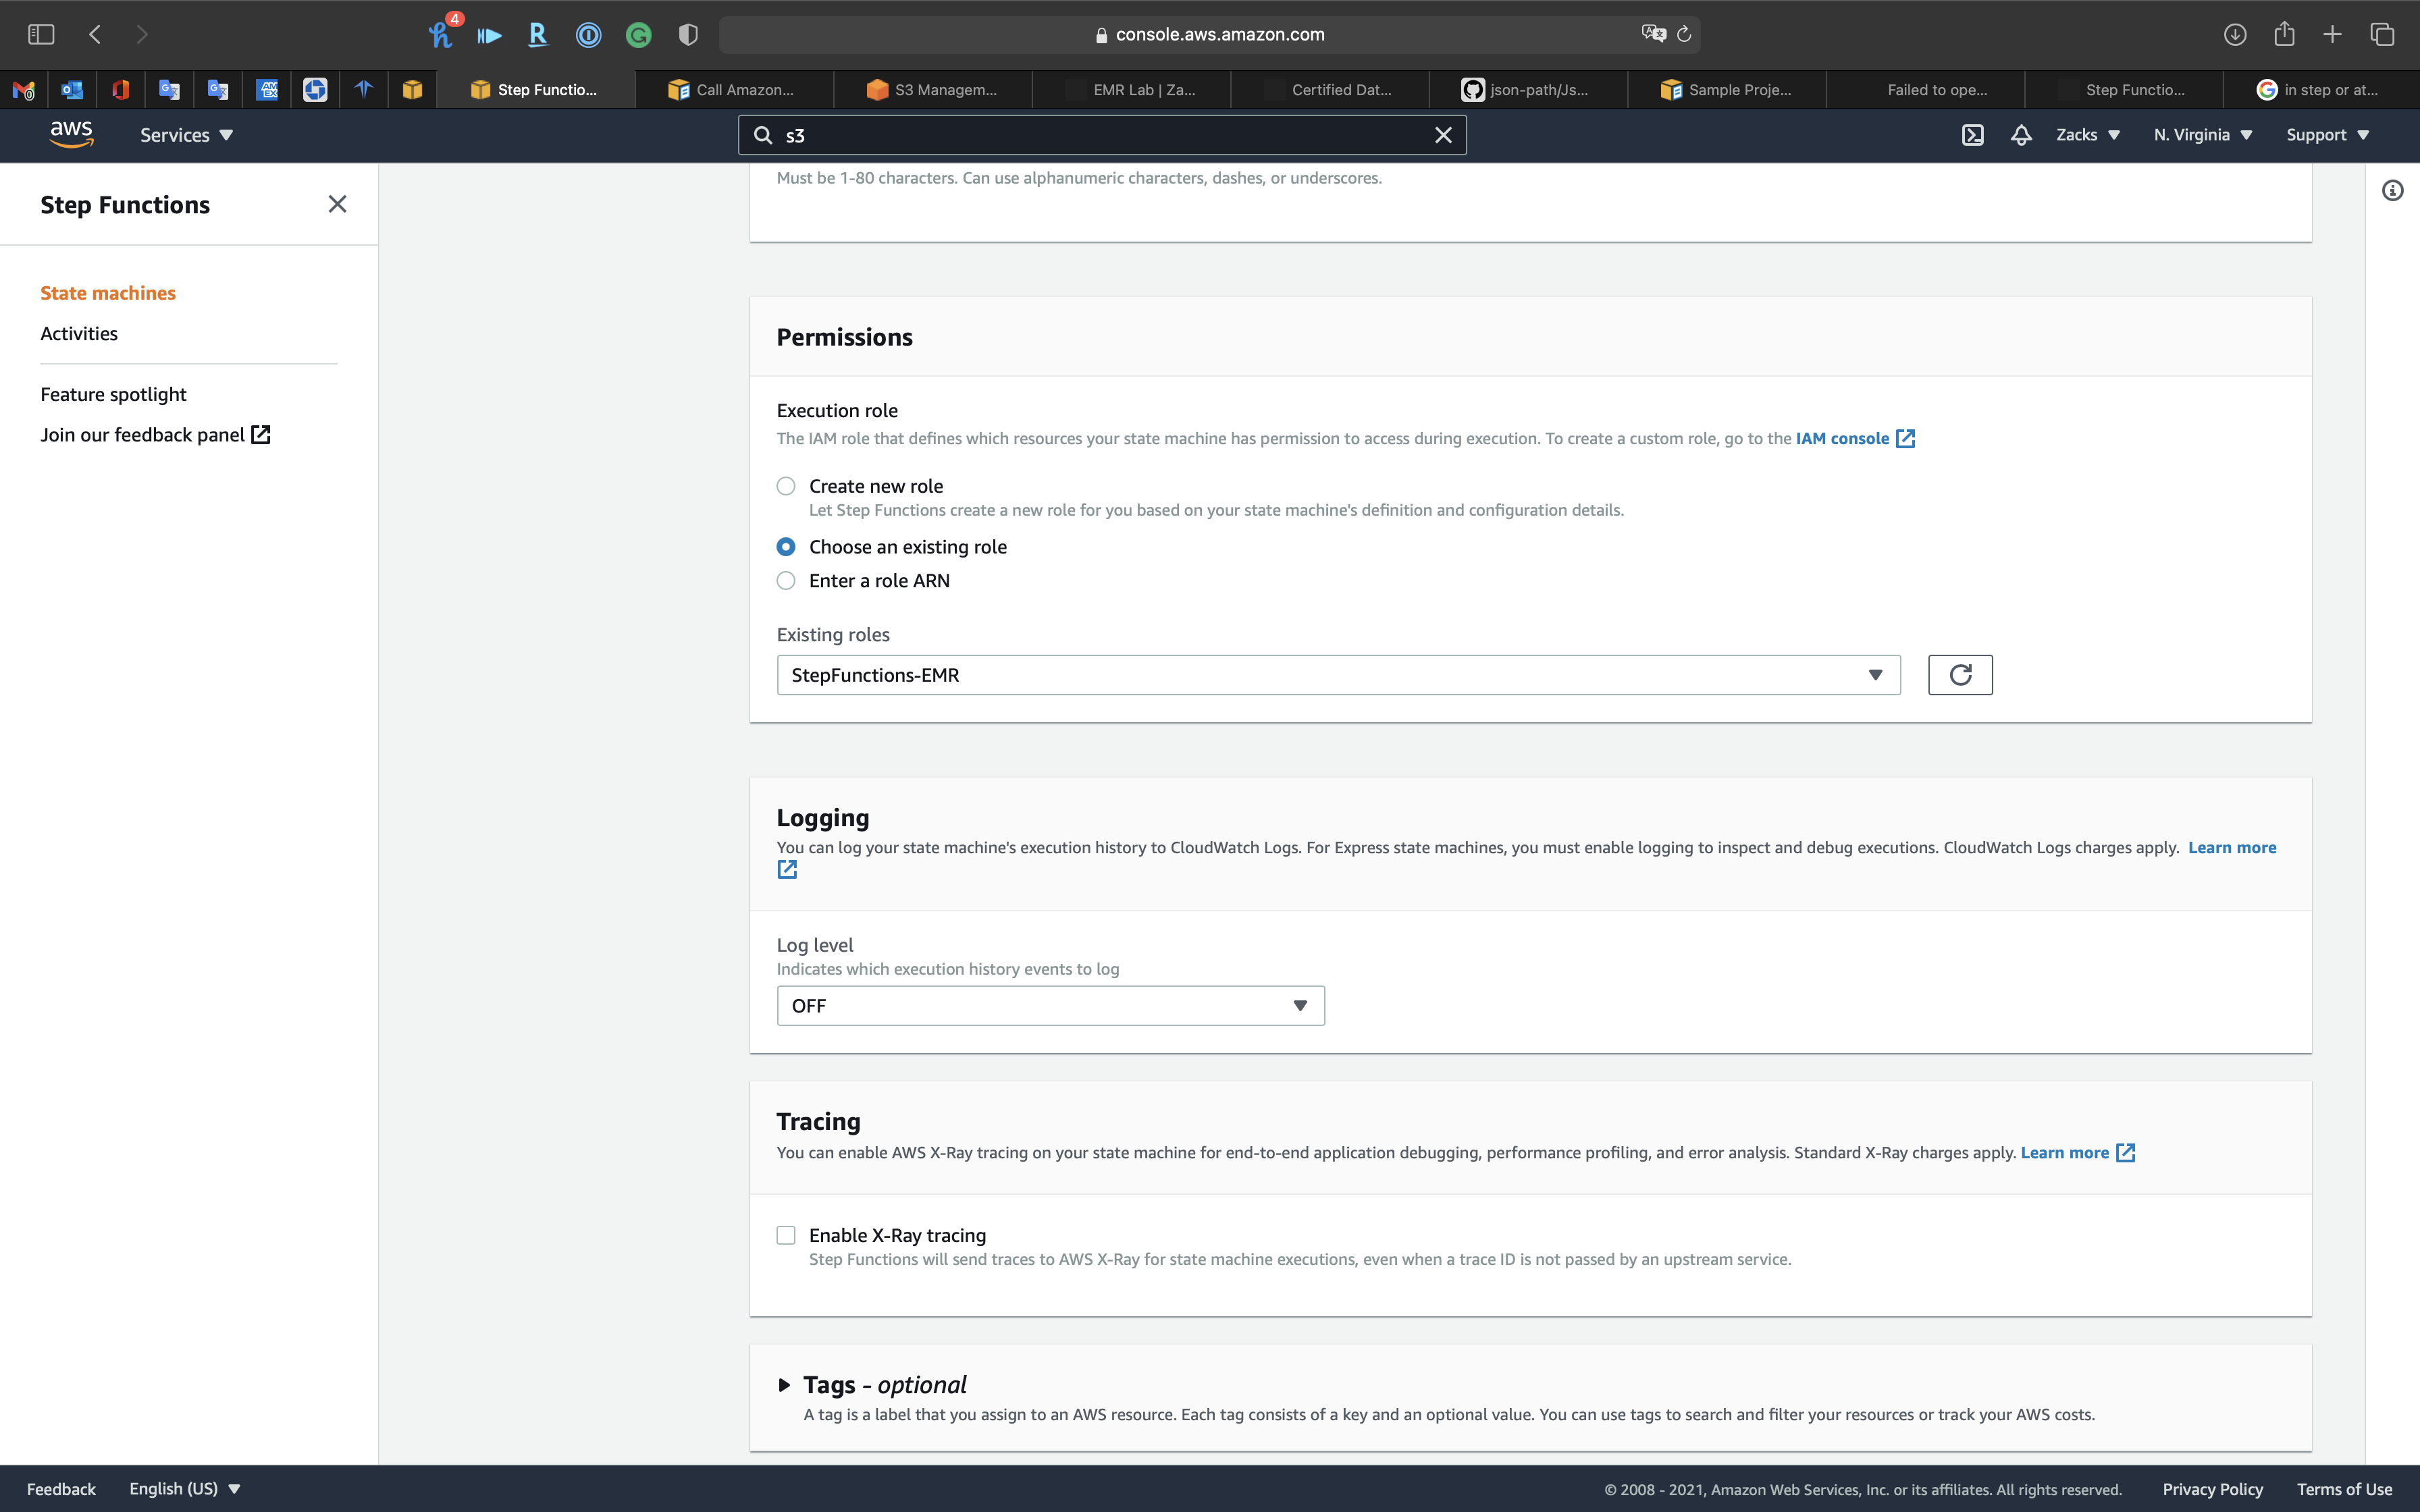
Execute State Machine
Now we have the new state machine.
Click on Start execution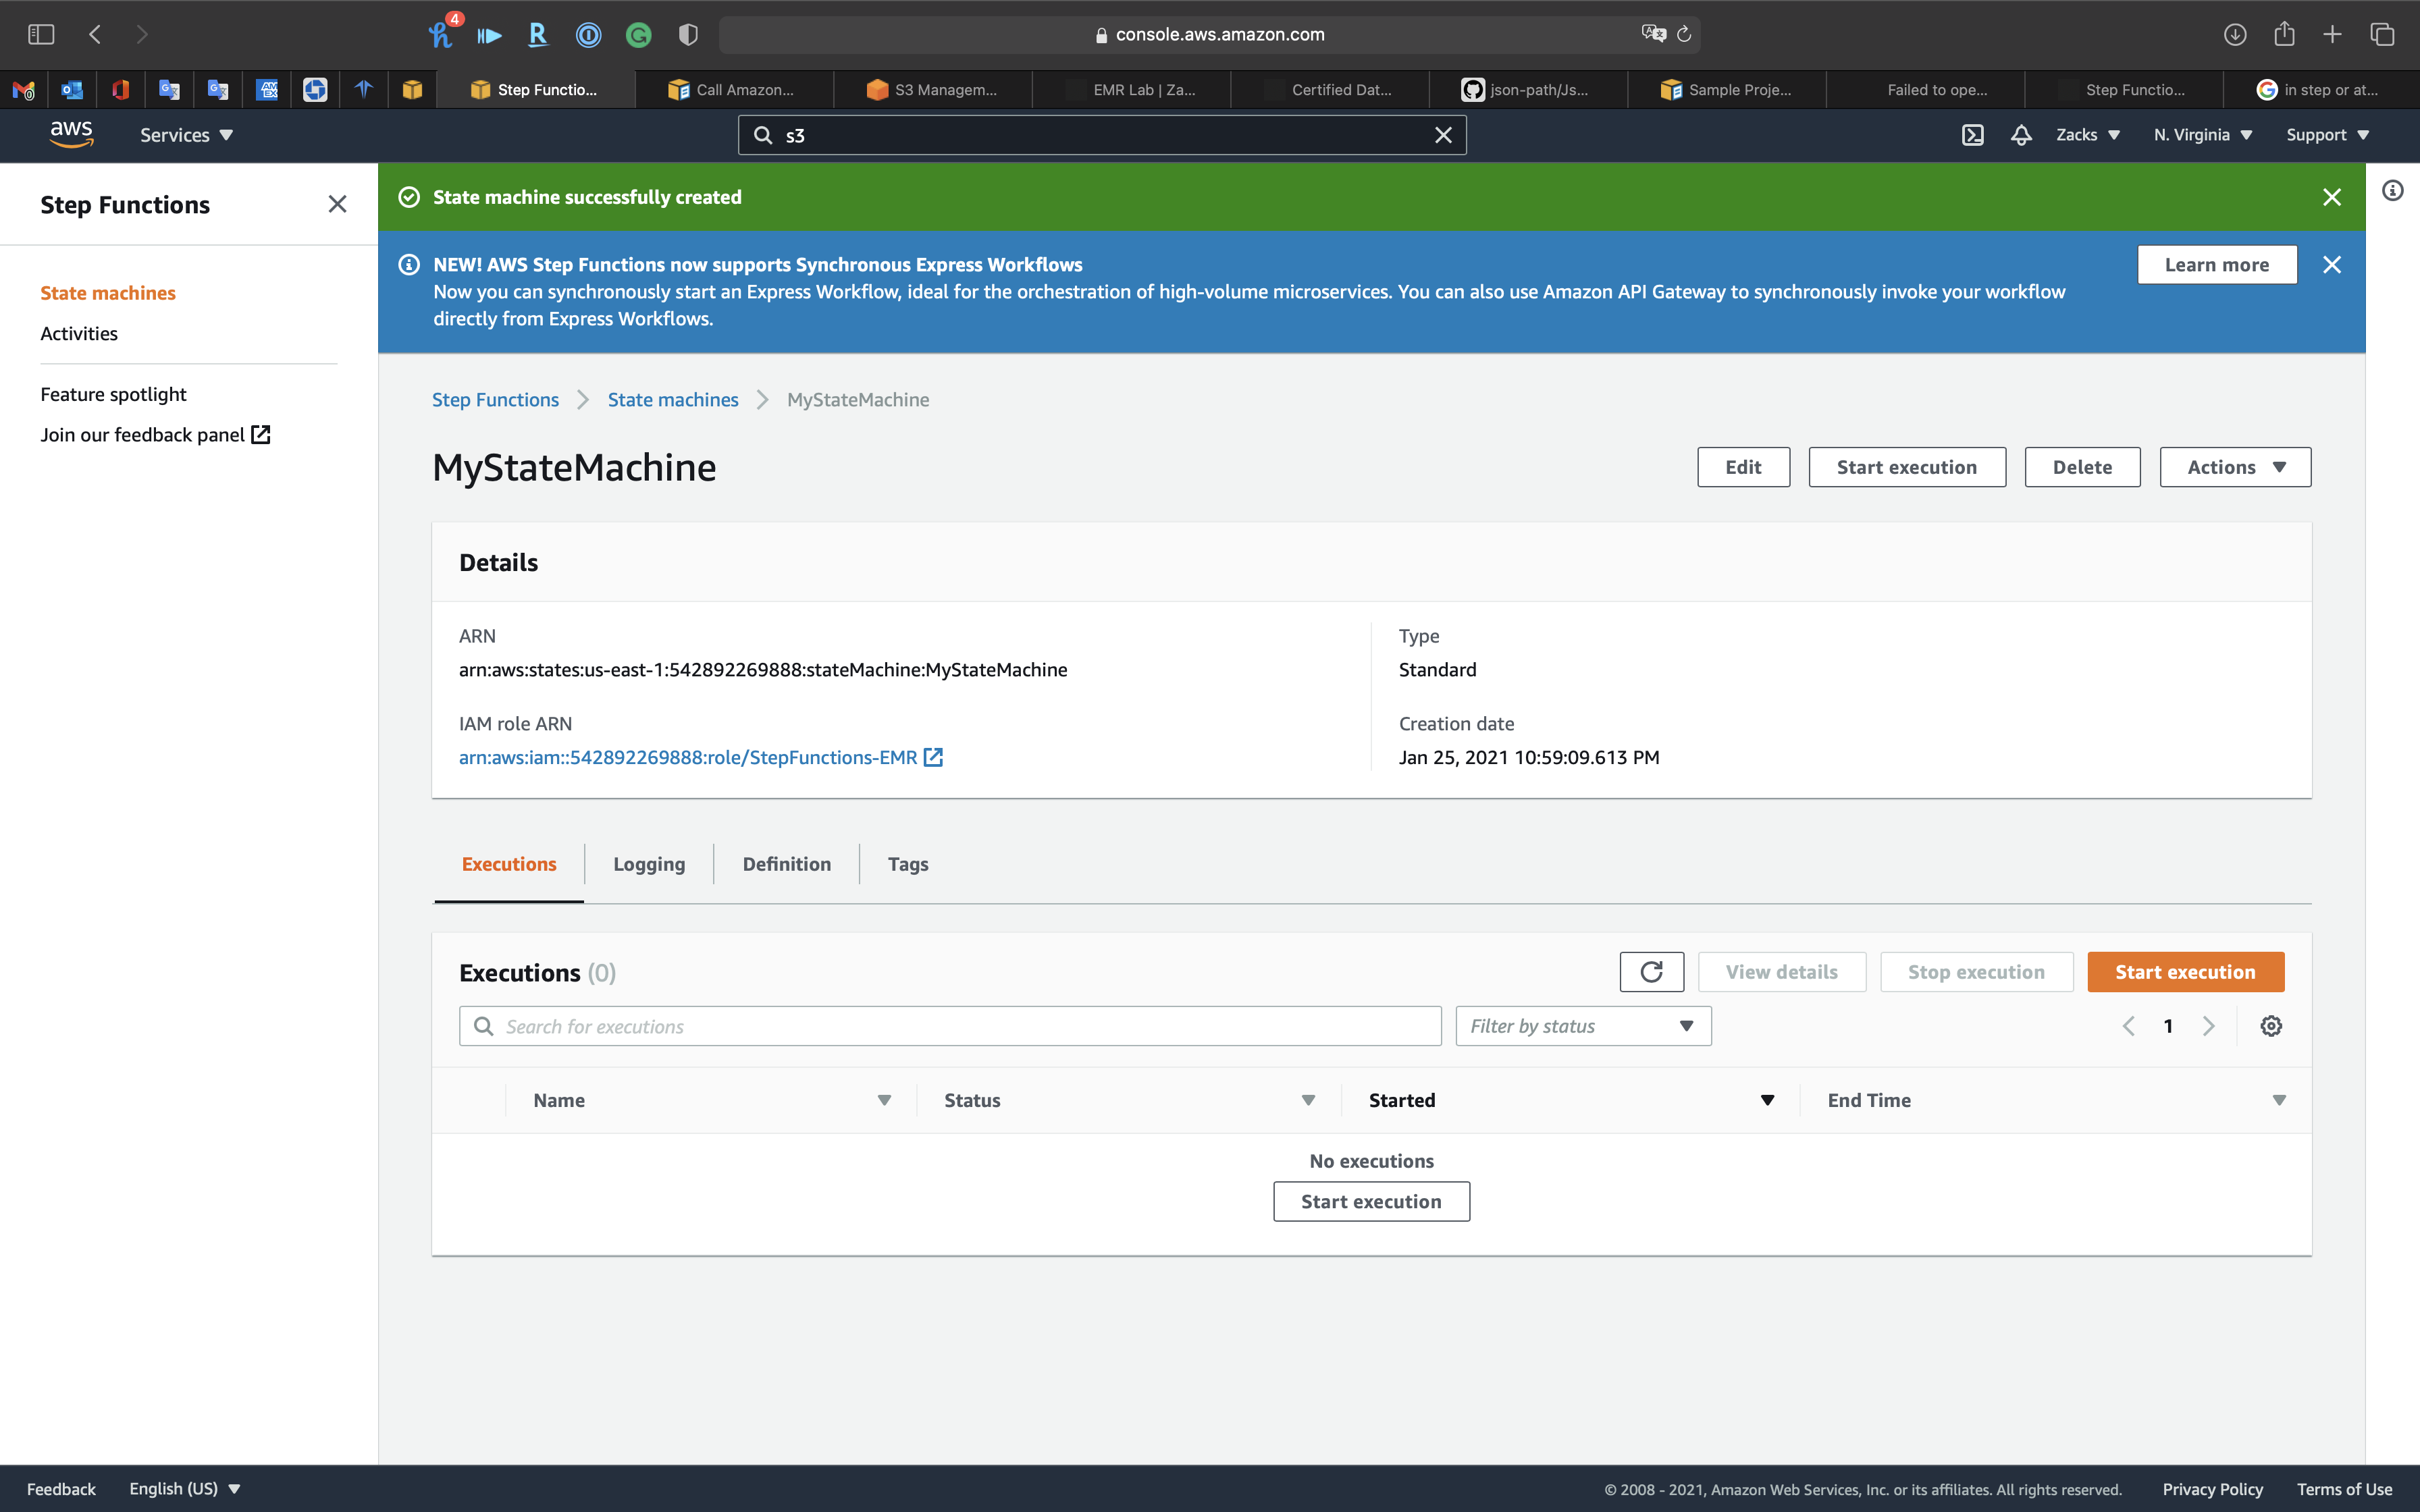
Check Open in a new browser tab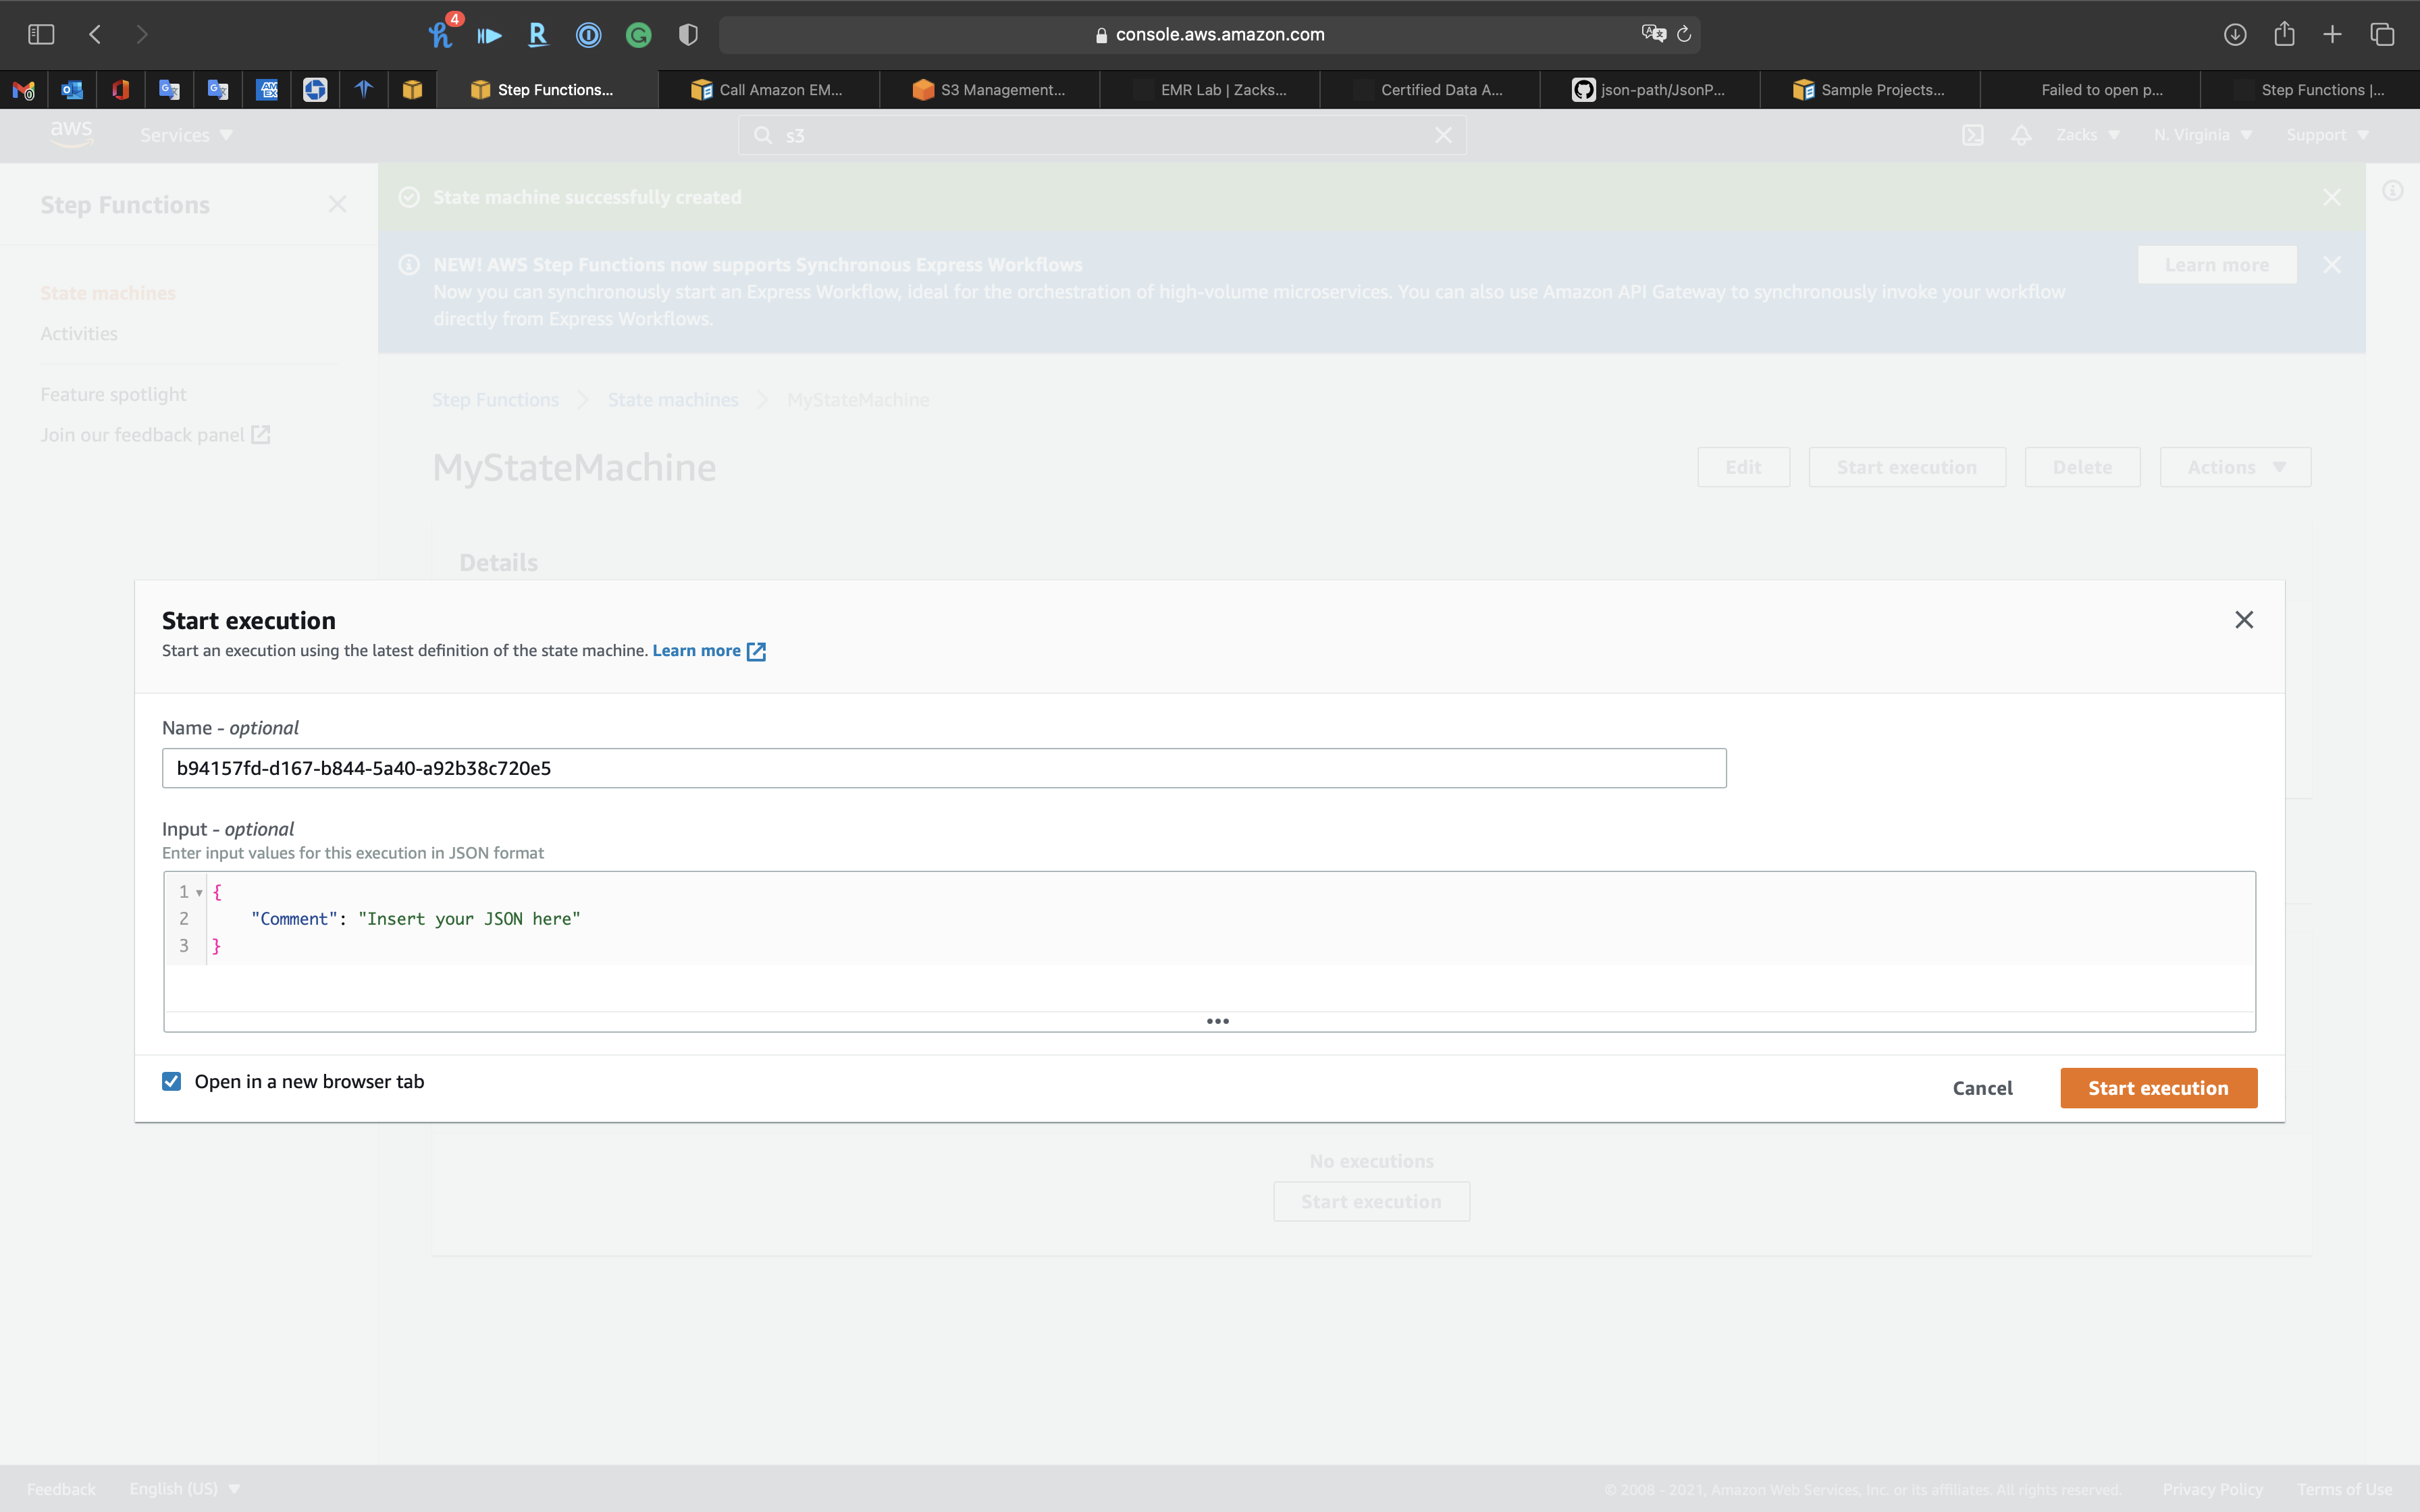
Copy and paste the following code to your input box:
KeyPair: replace it to one of your existing EC2 Key PairGlueJobName: the previous lab ETL job. See EMR New York Taxi
1 | { |
Click on Start execution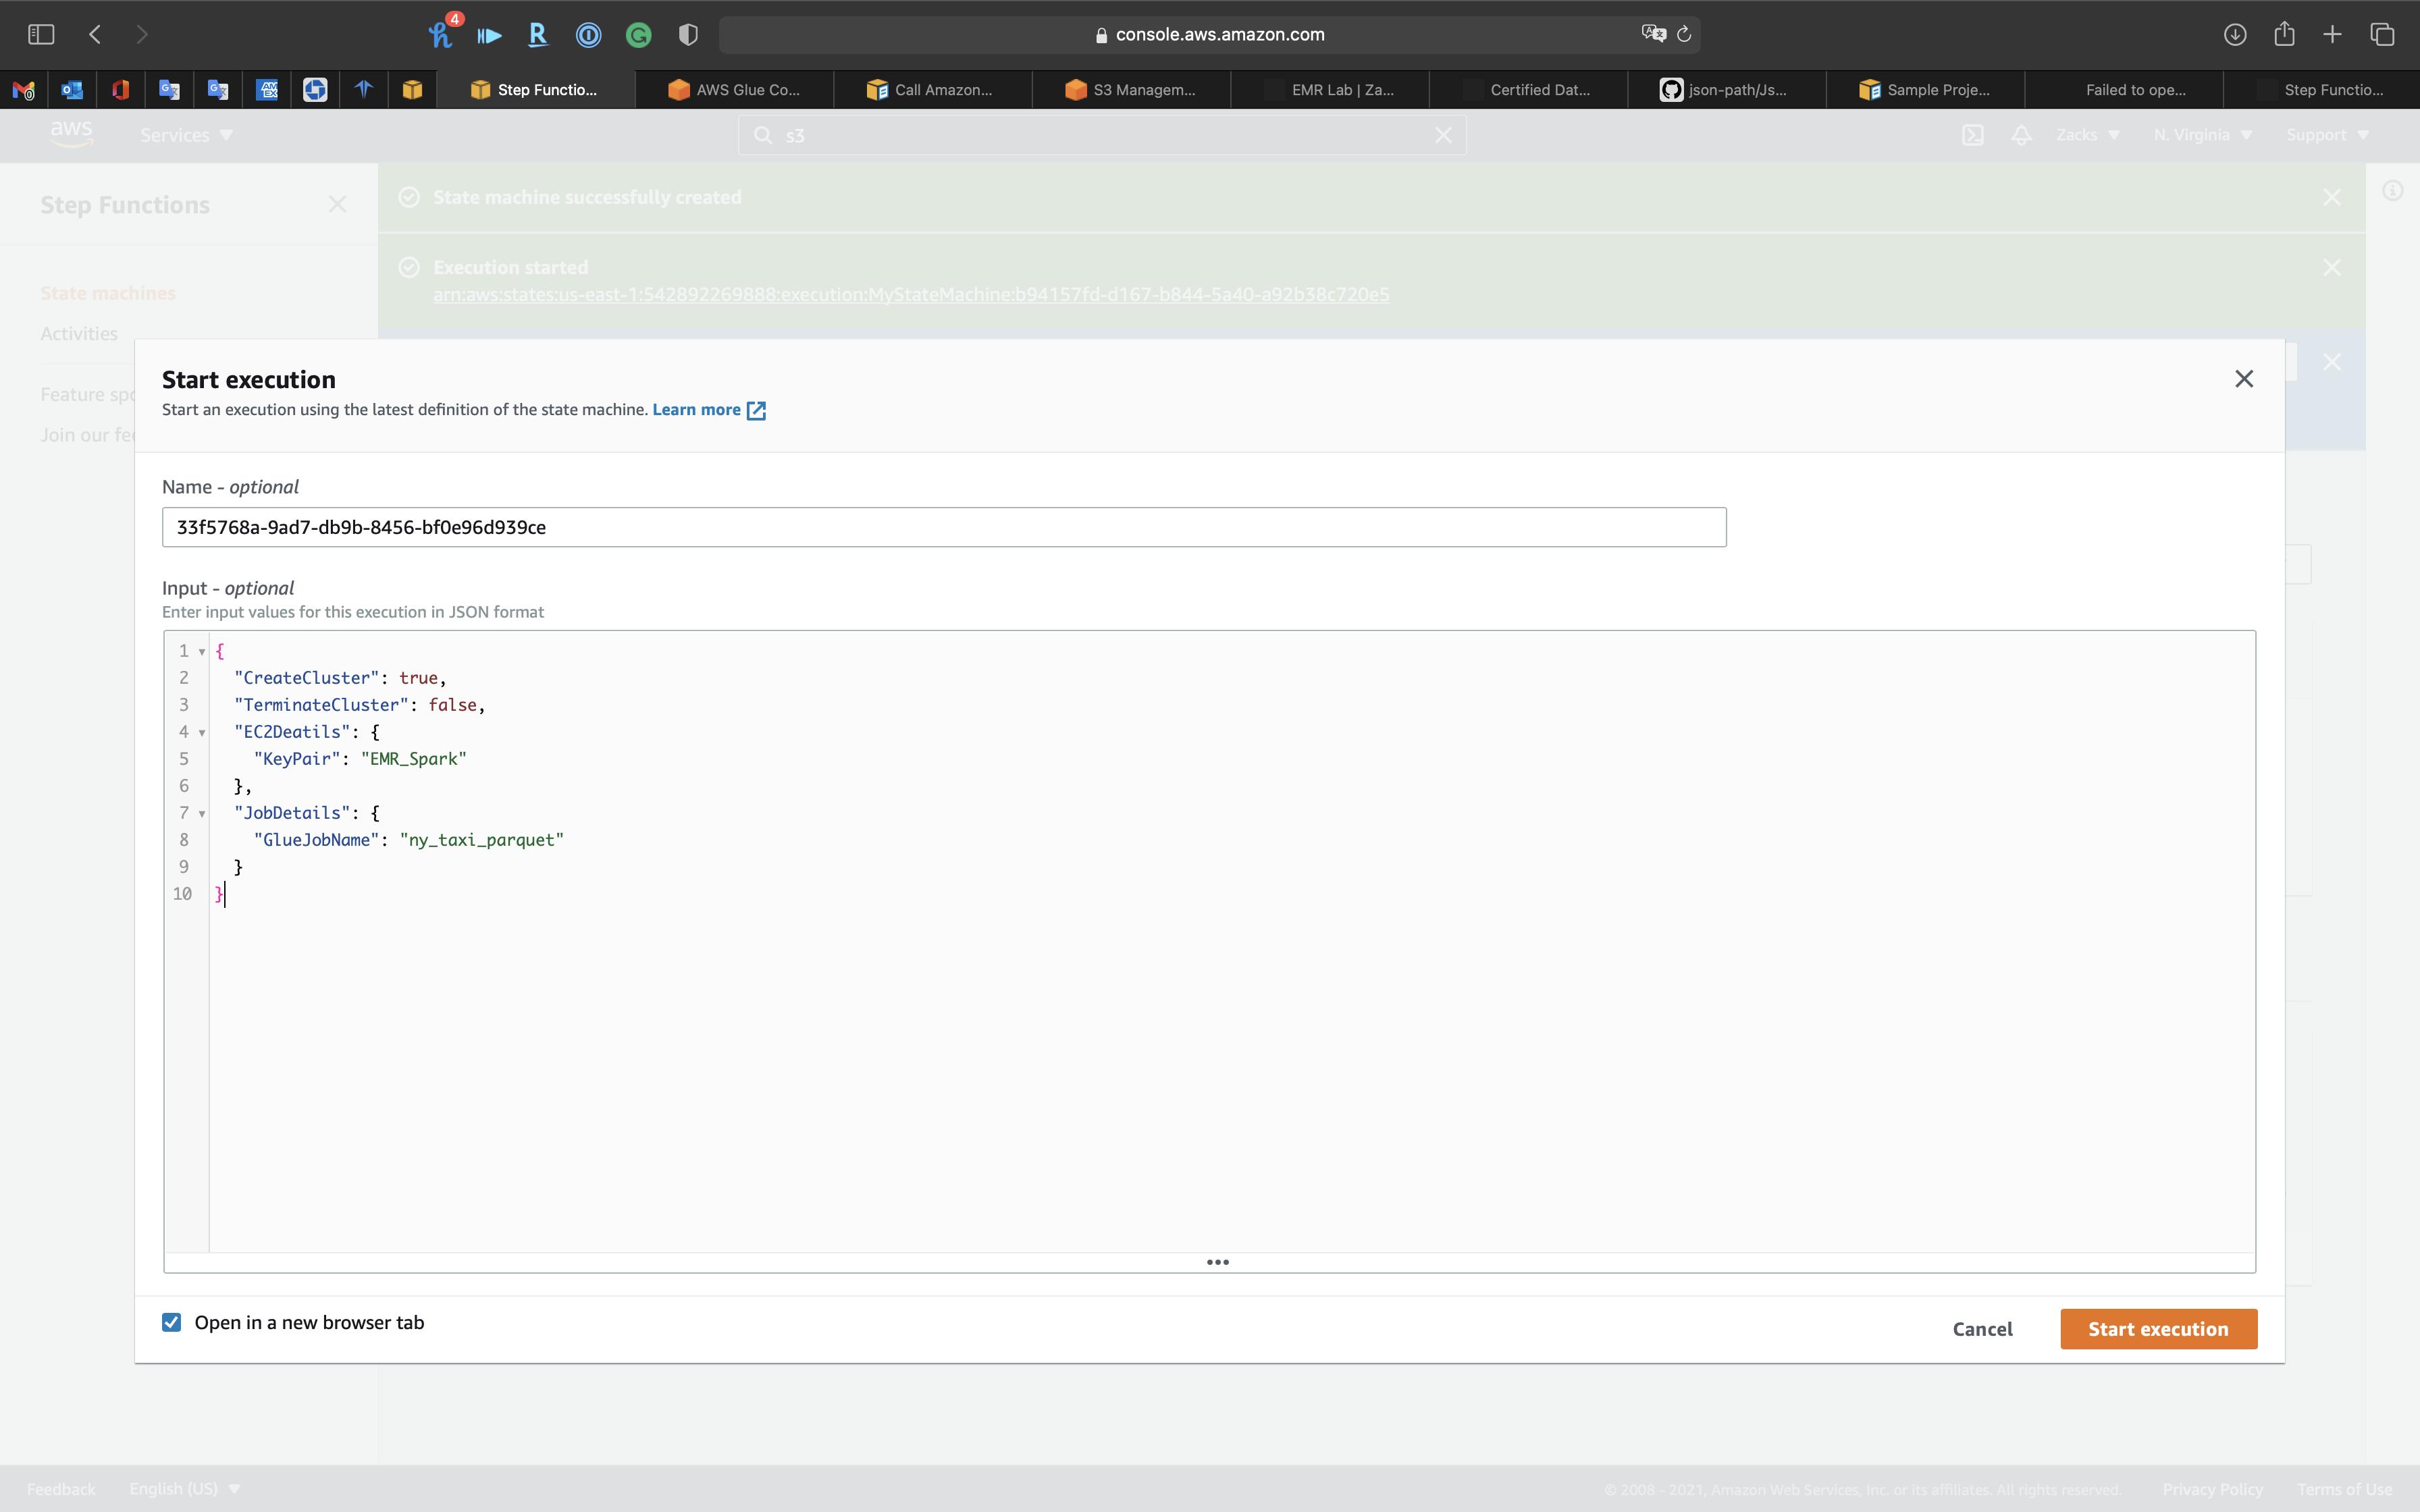
Our State Machine is running.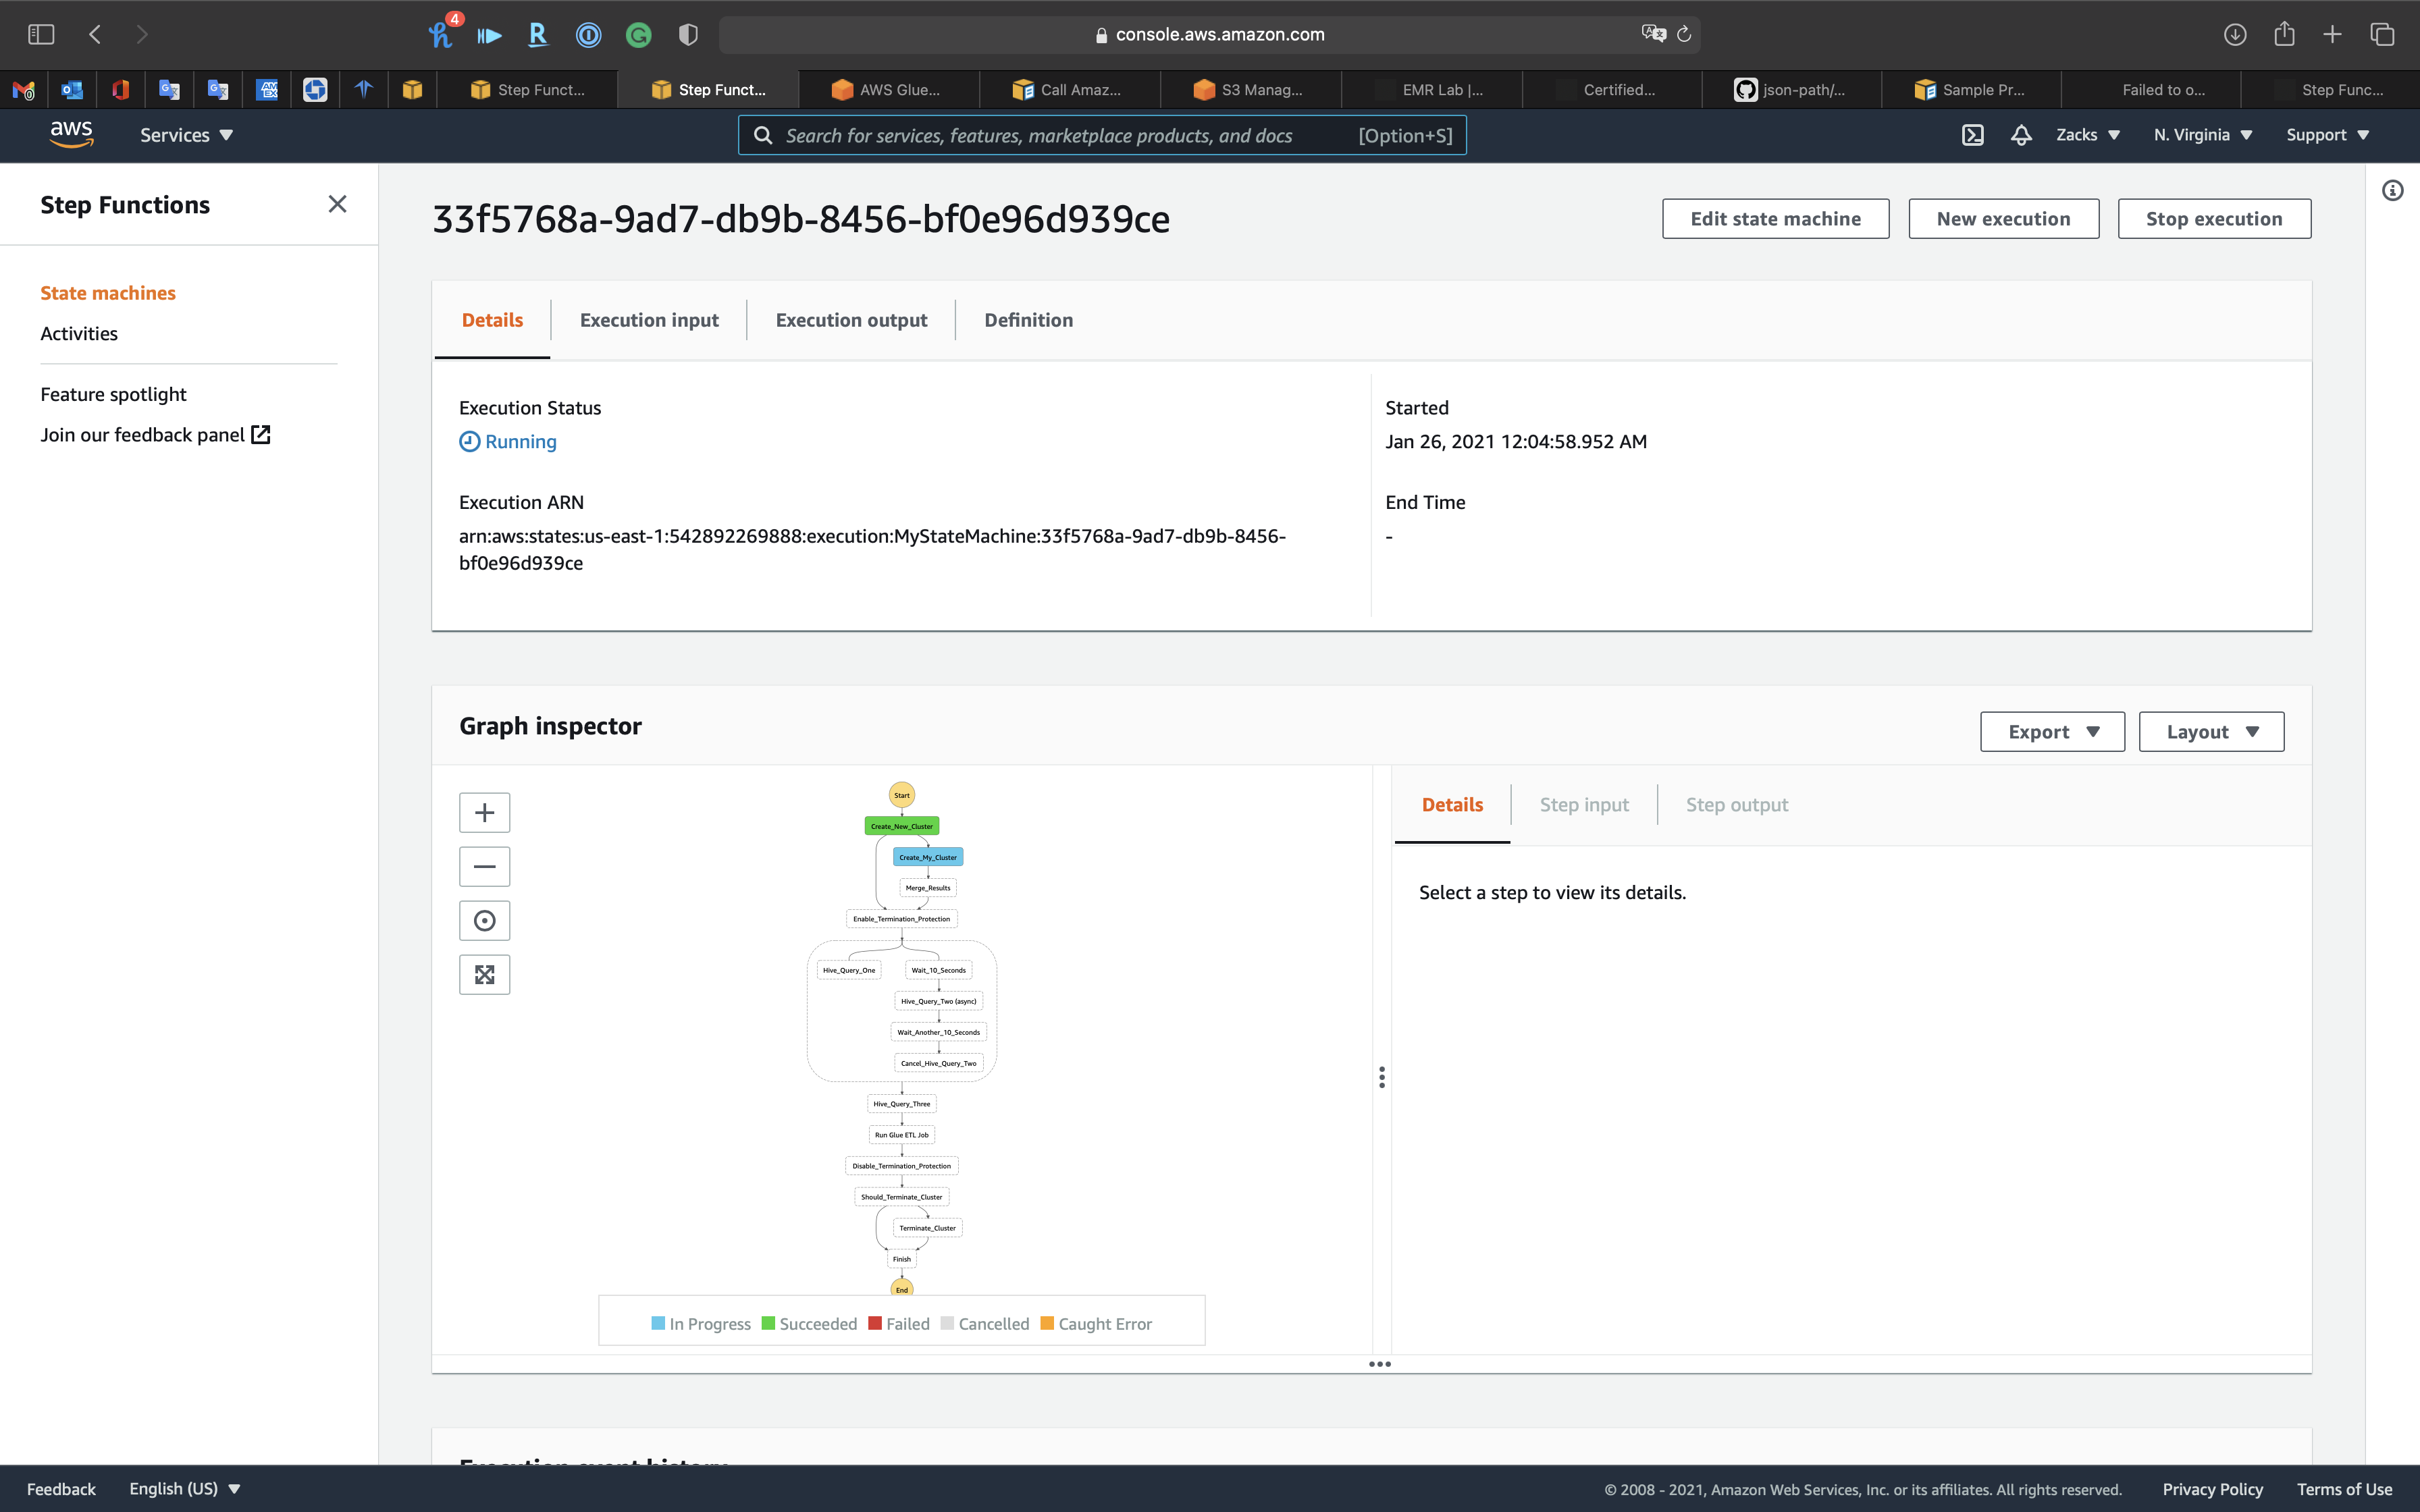
Click on the blue node to see detail of current running node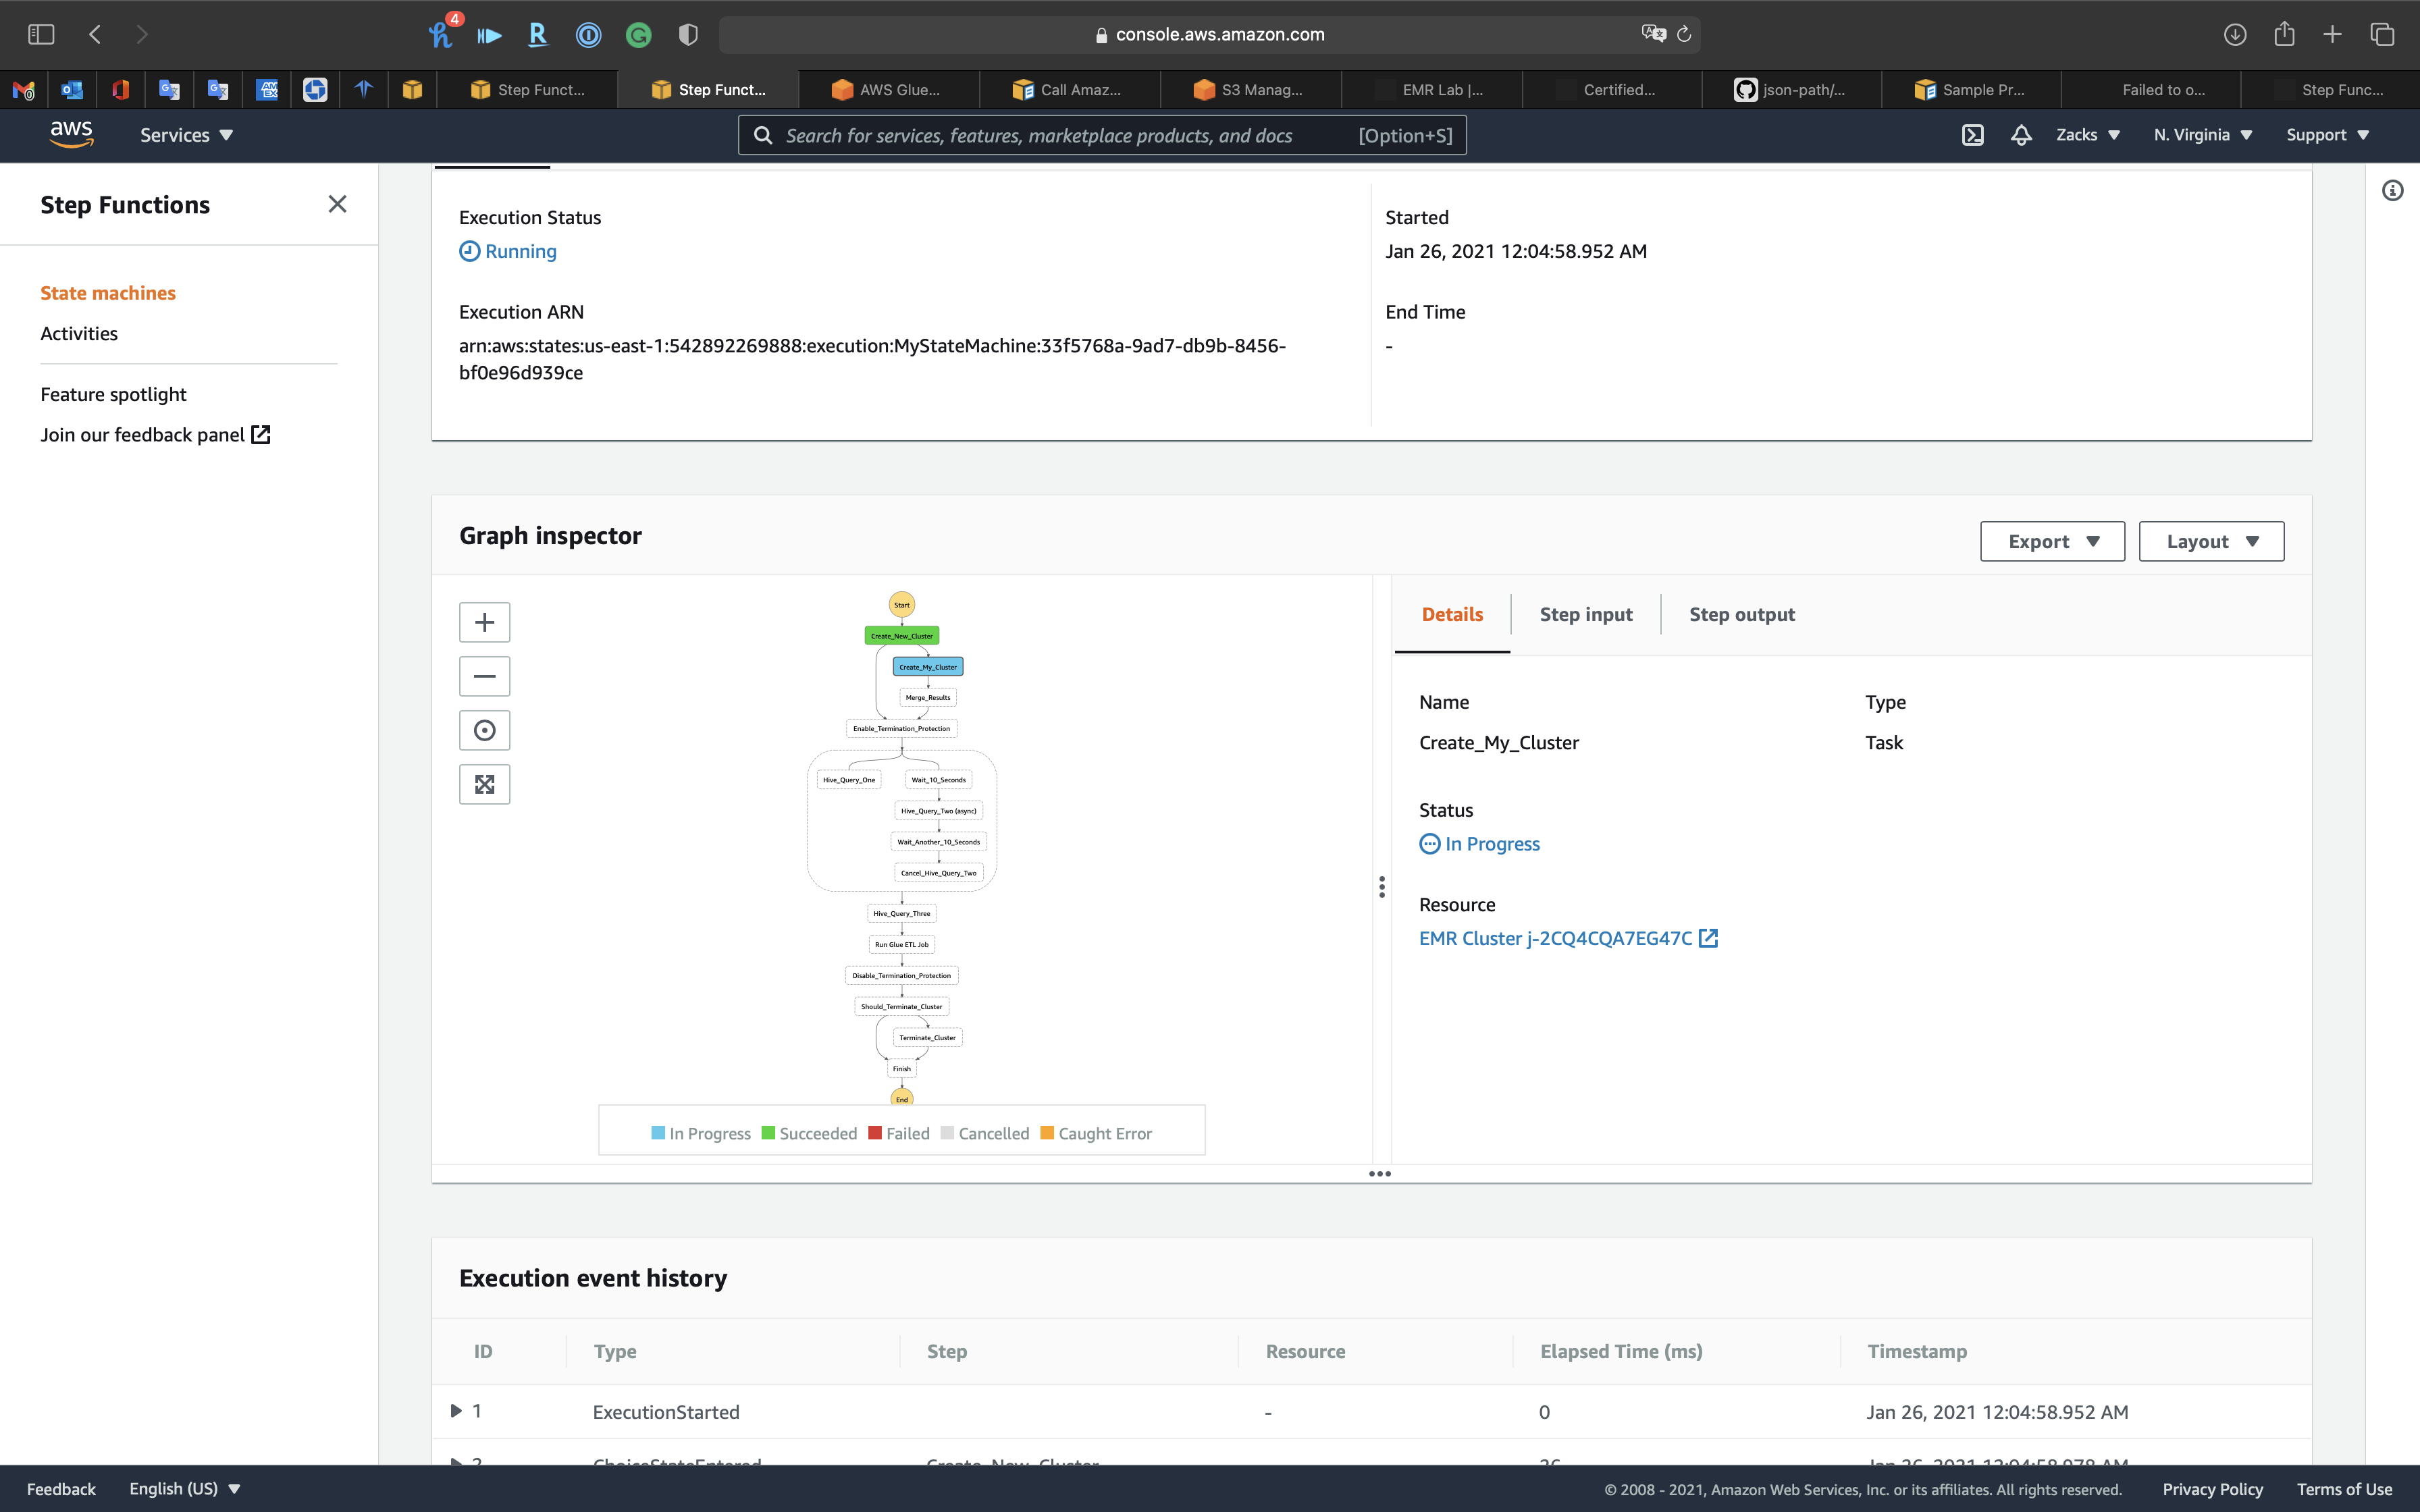
Scroll down to see the Execution event history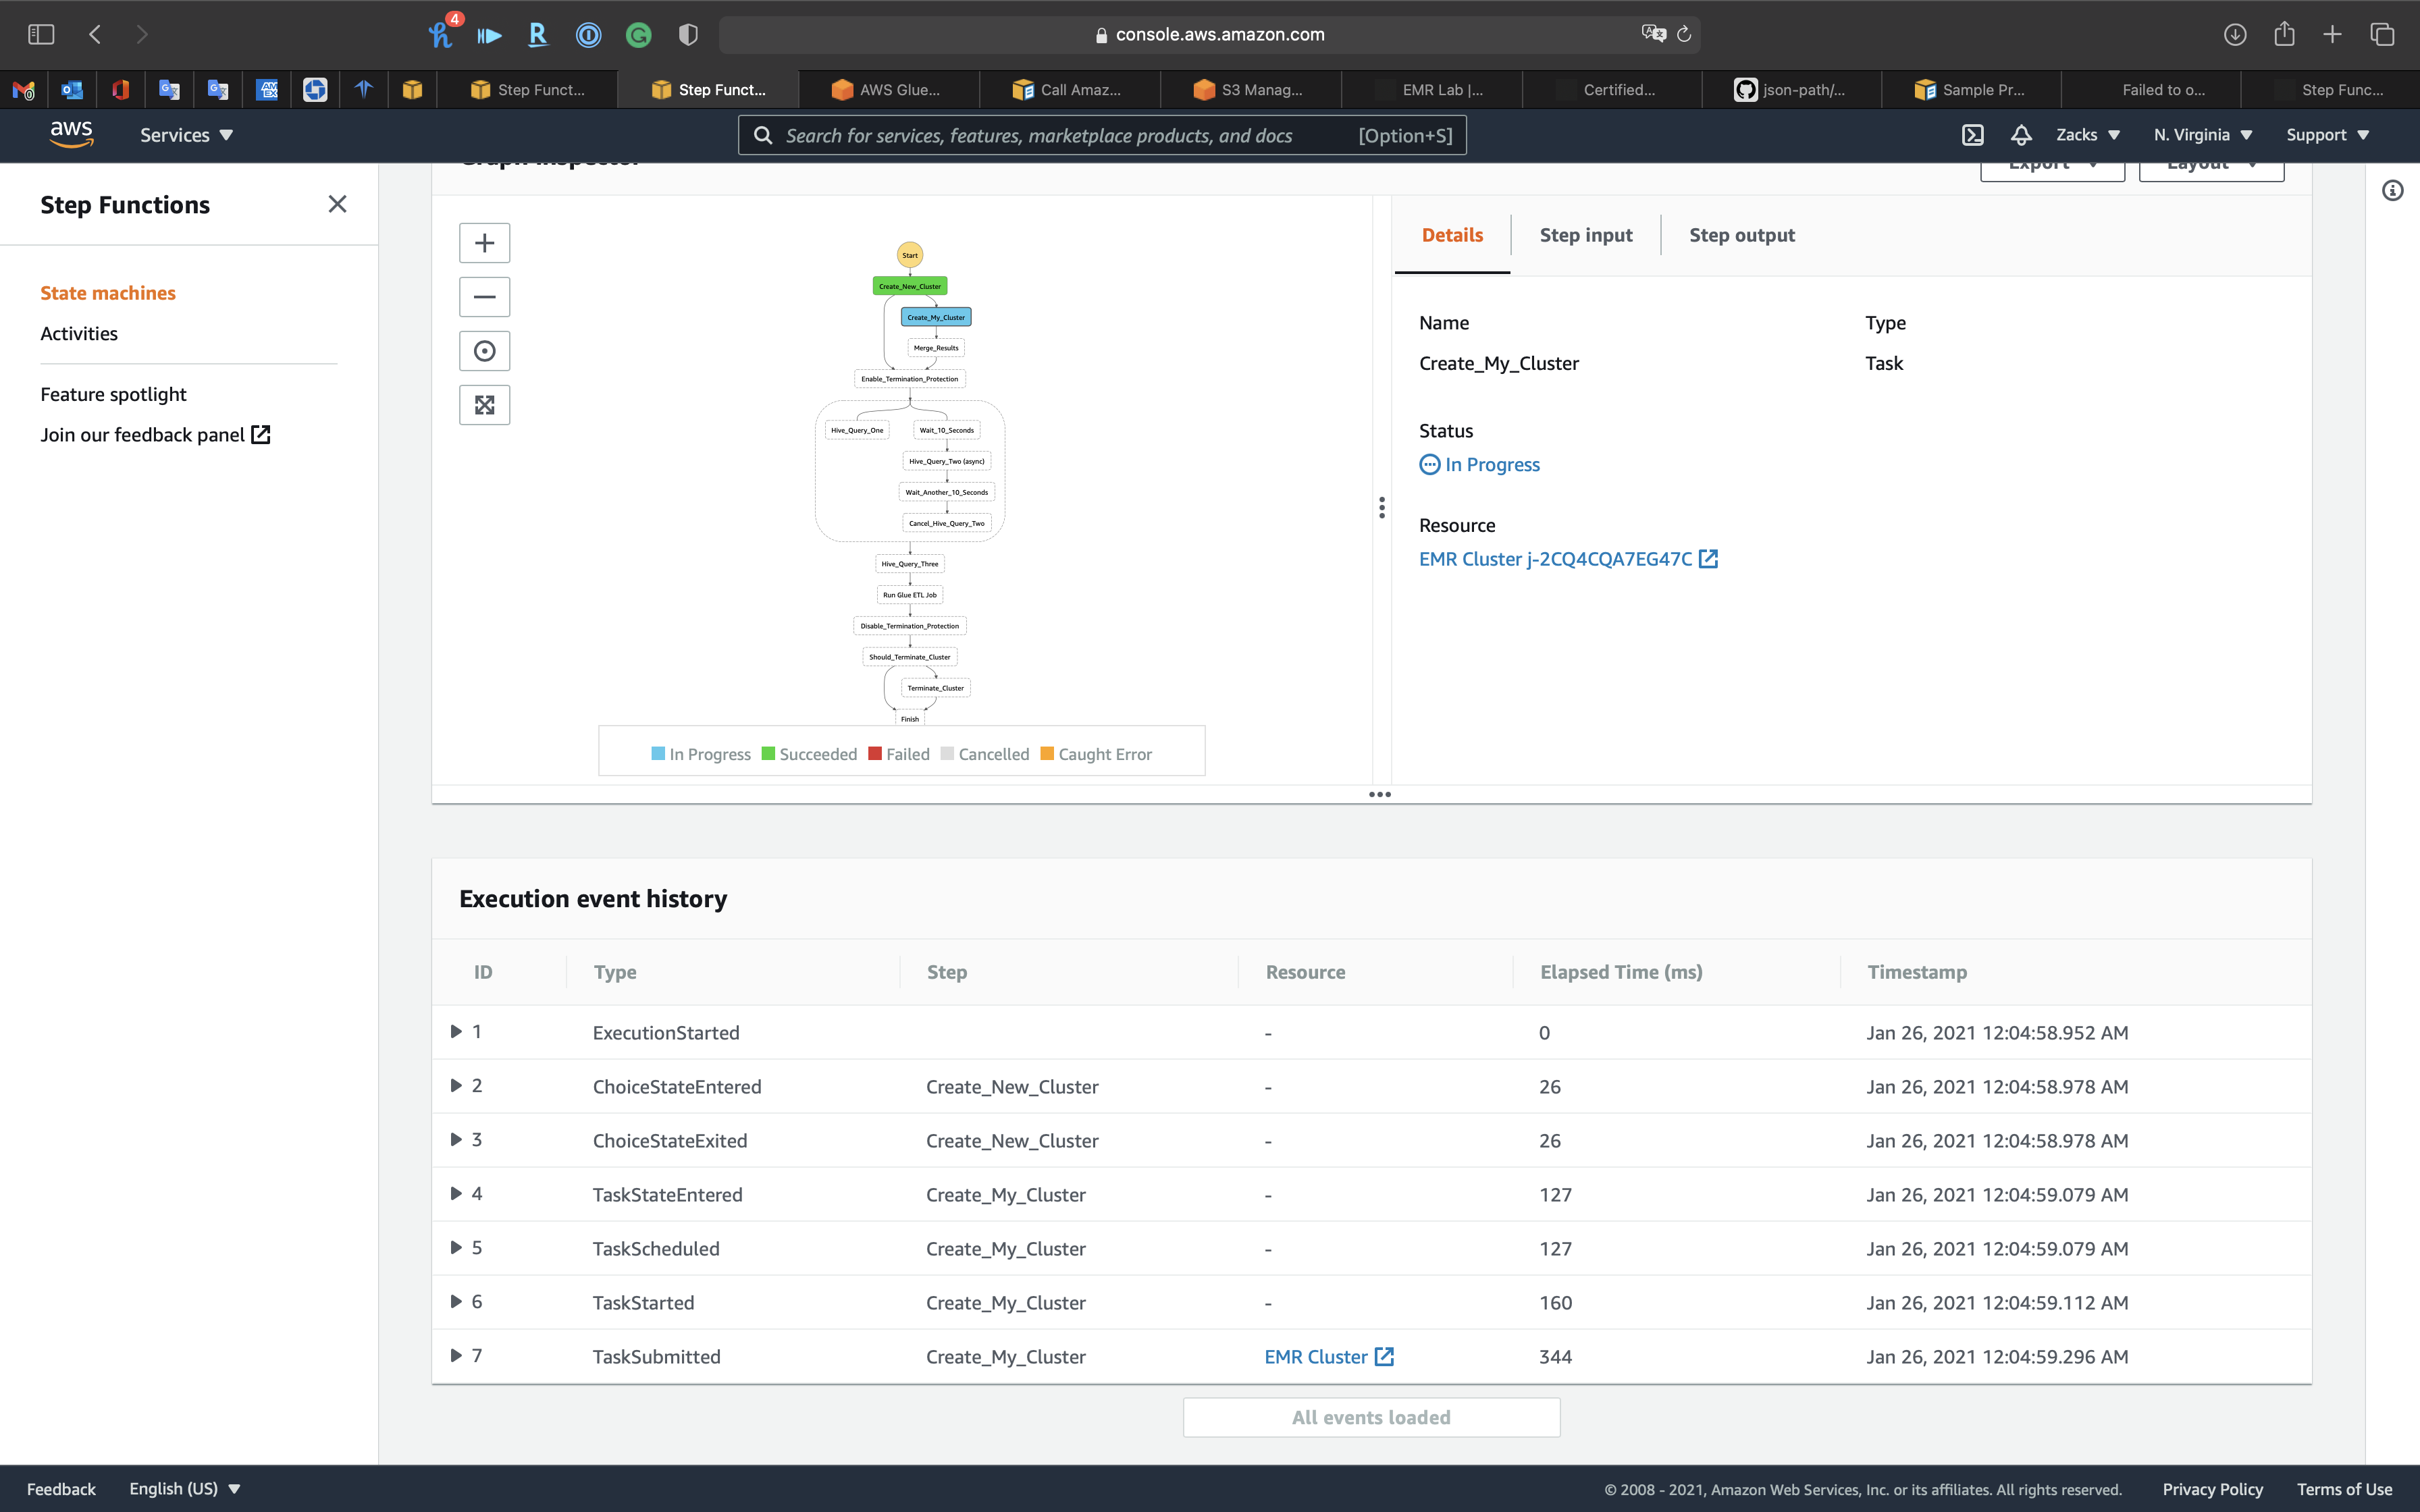
Keep refresh the page to see if the State Machine failed.
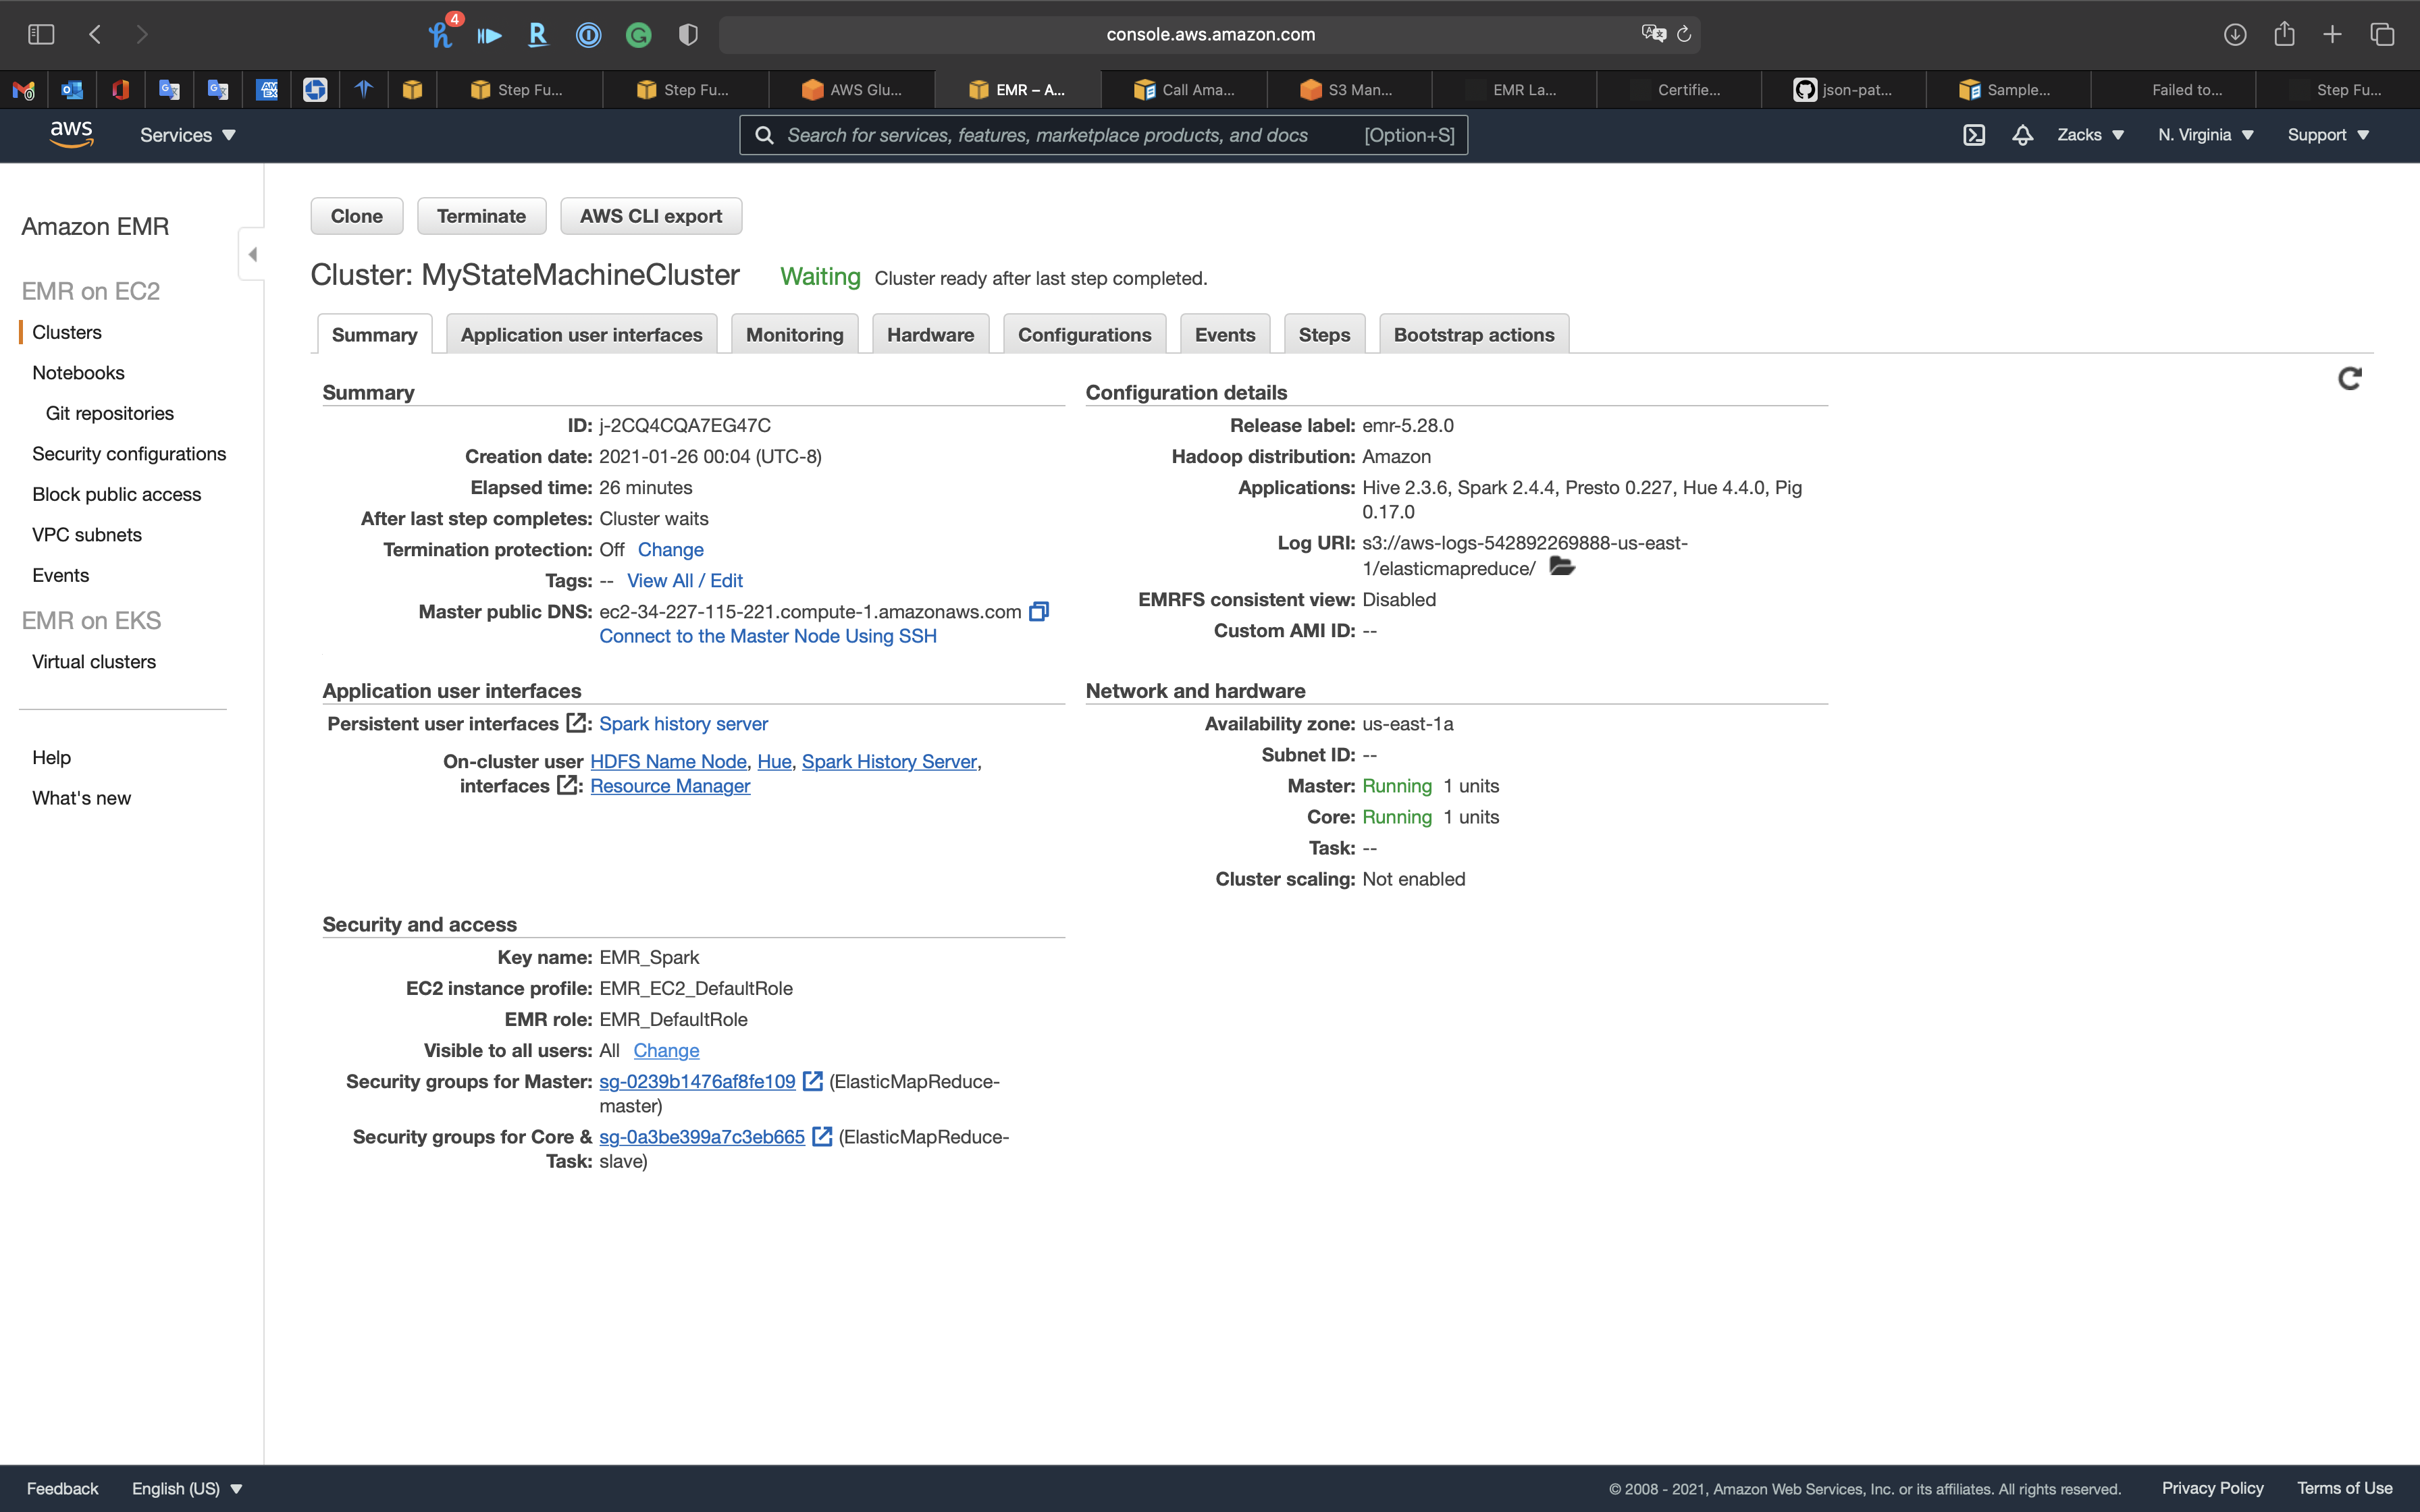
EMR
The Cluster was created by Step Functions successfully.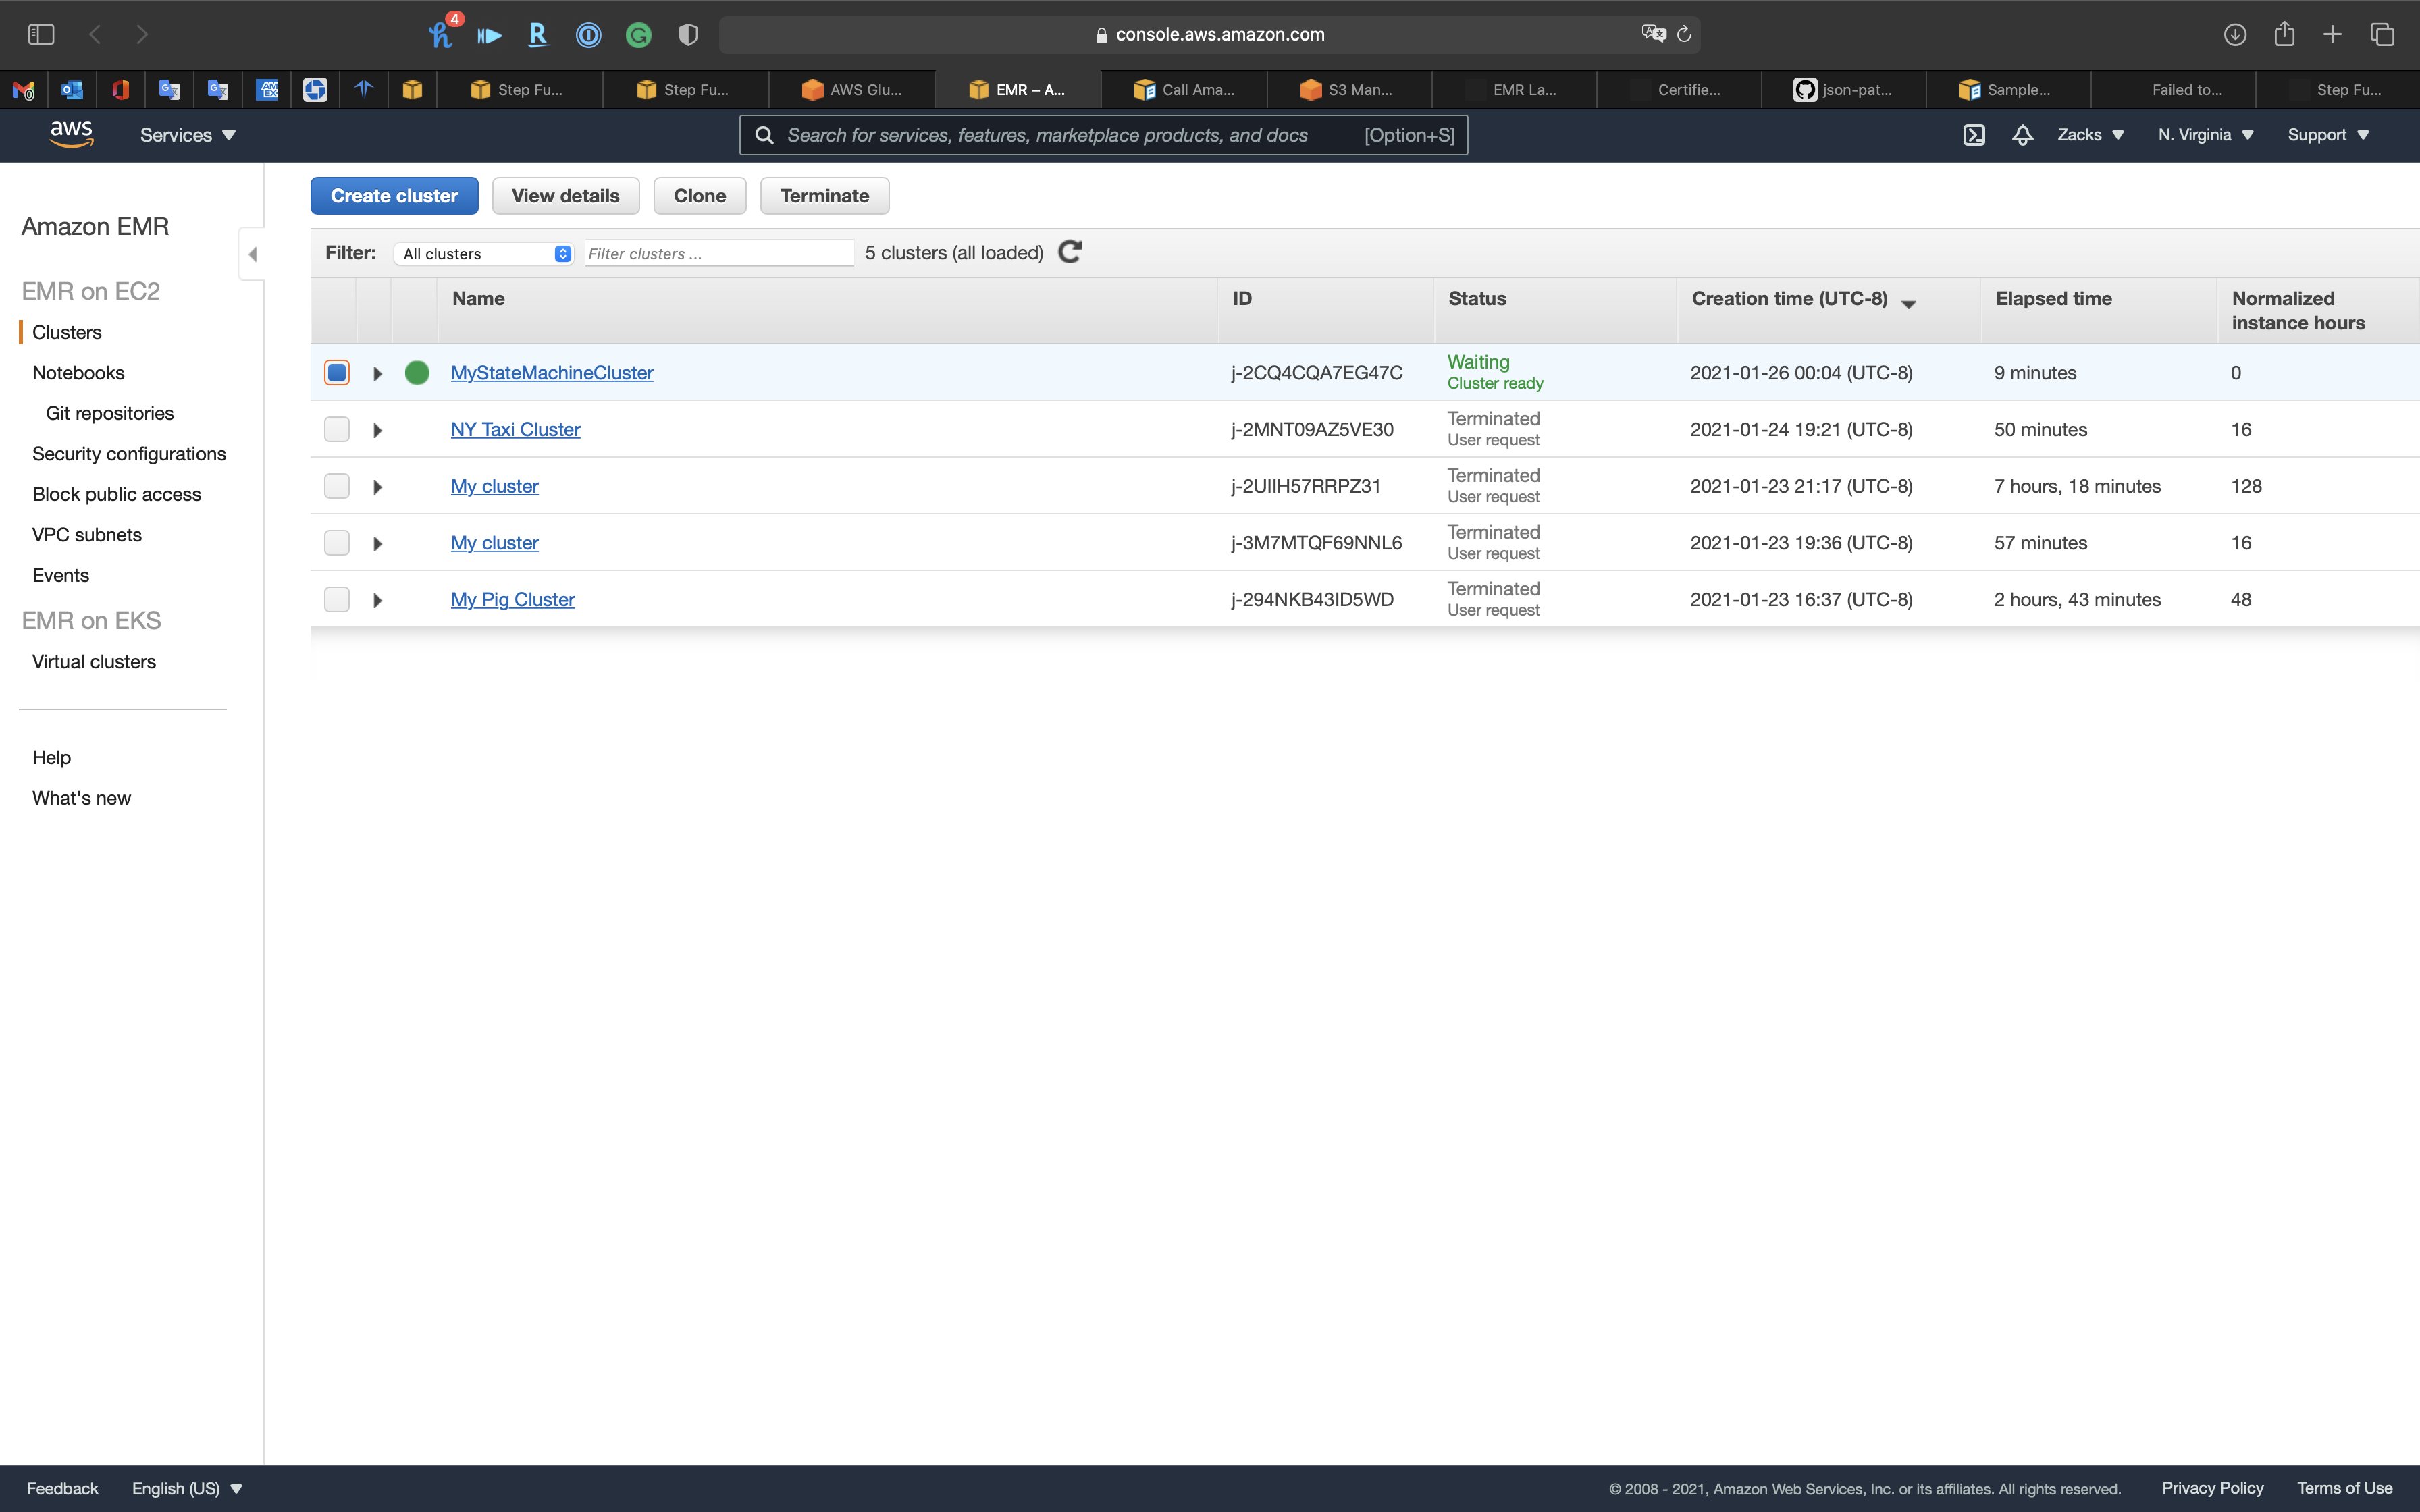
Step Functions
And the State Machine move forward to next task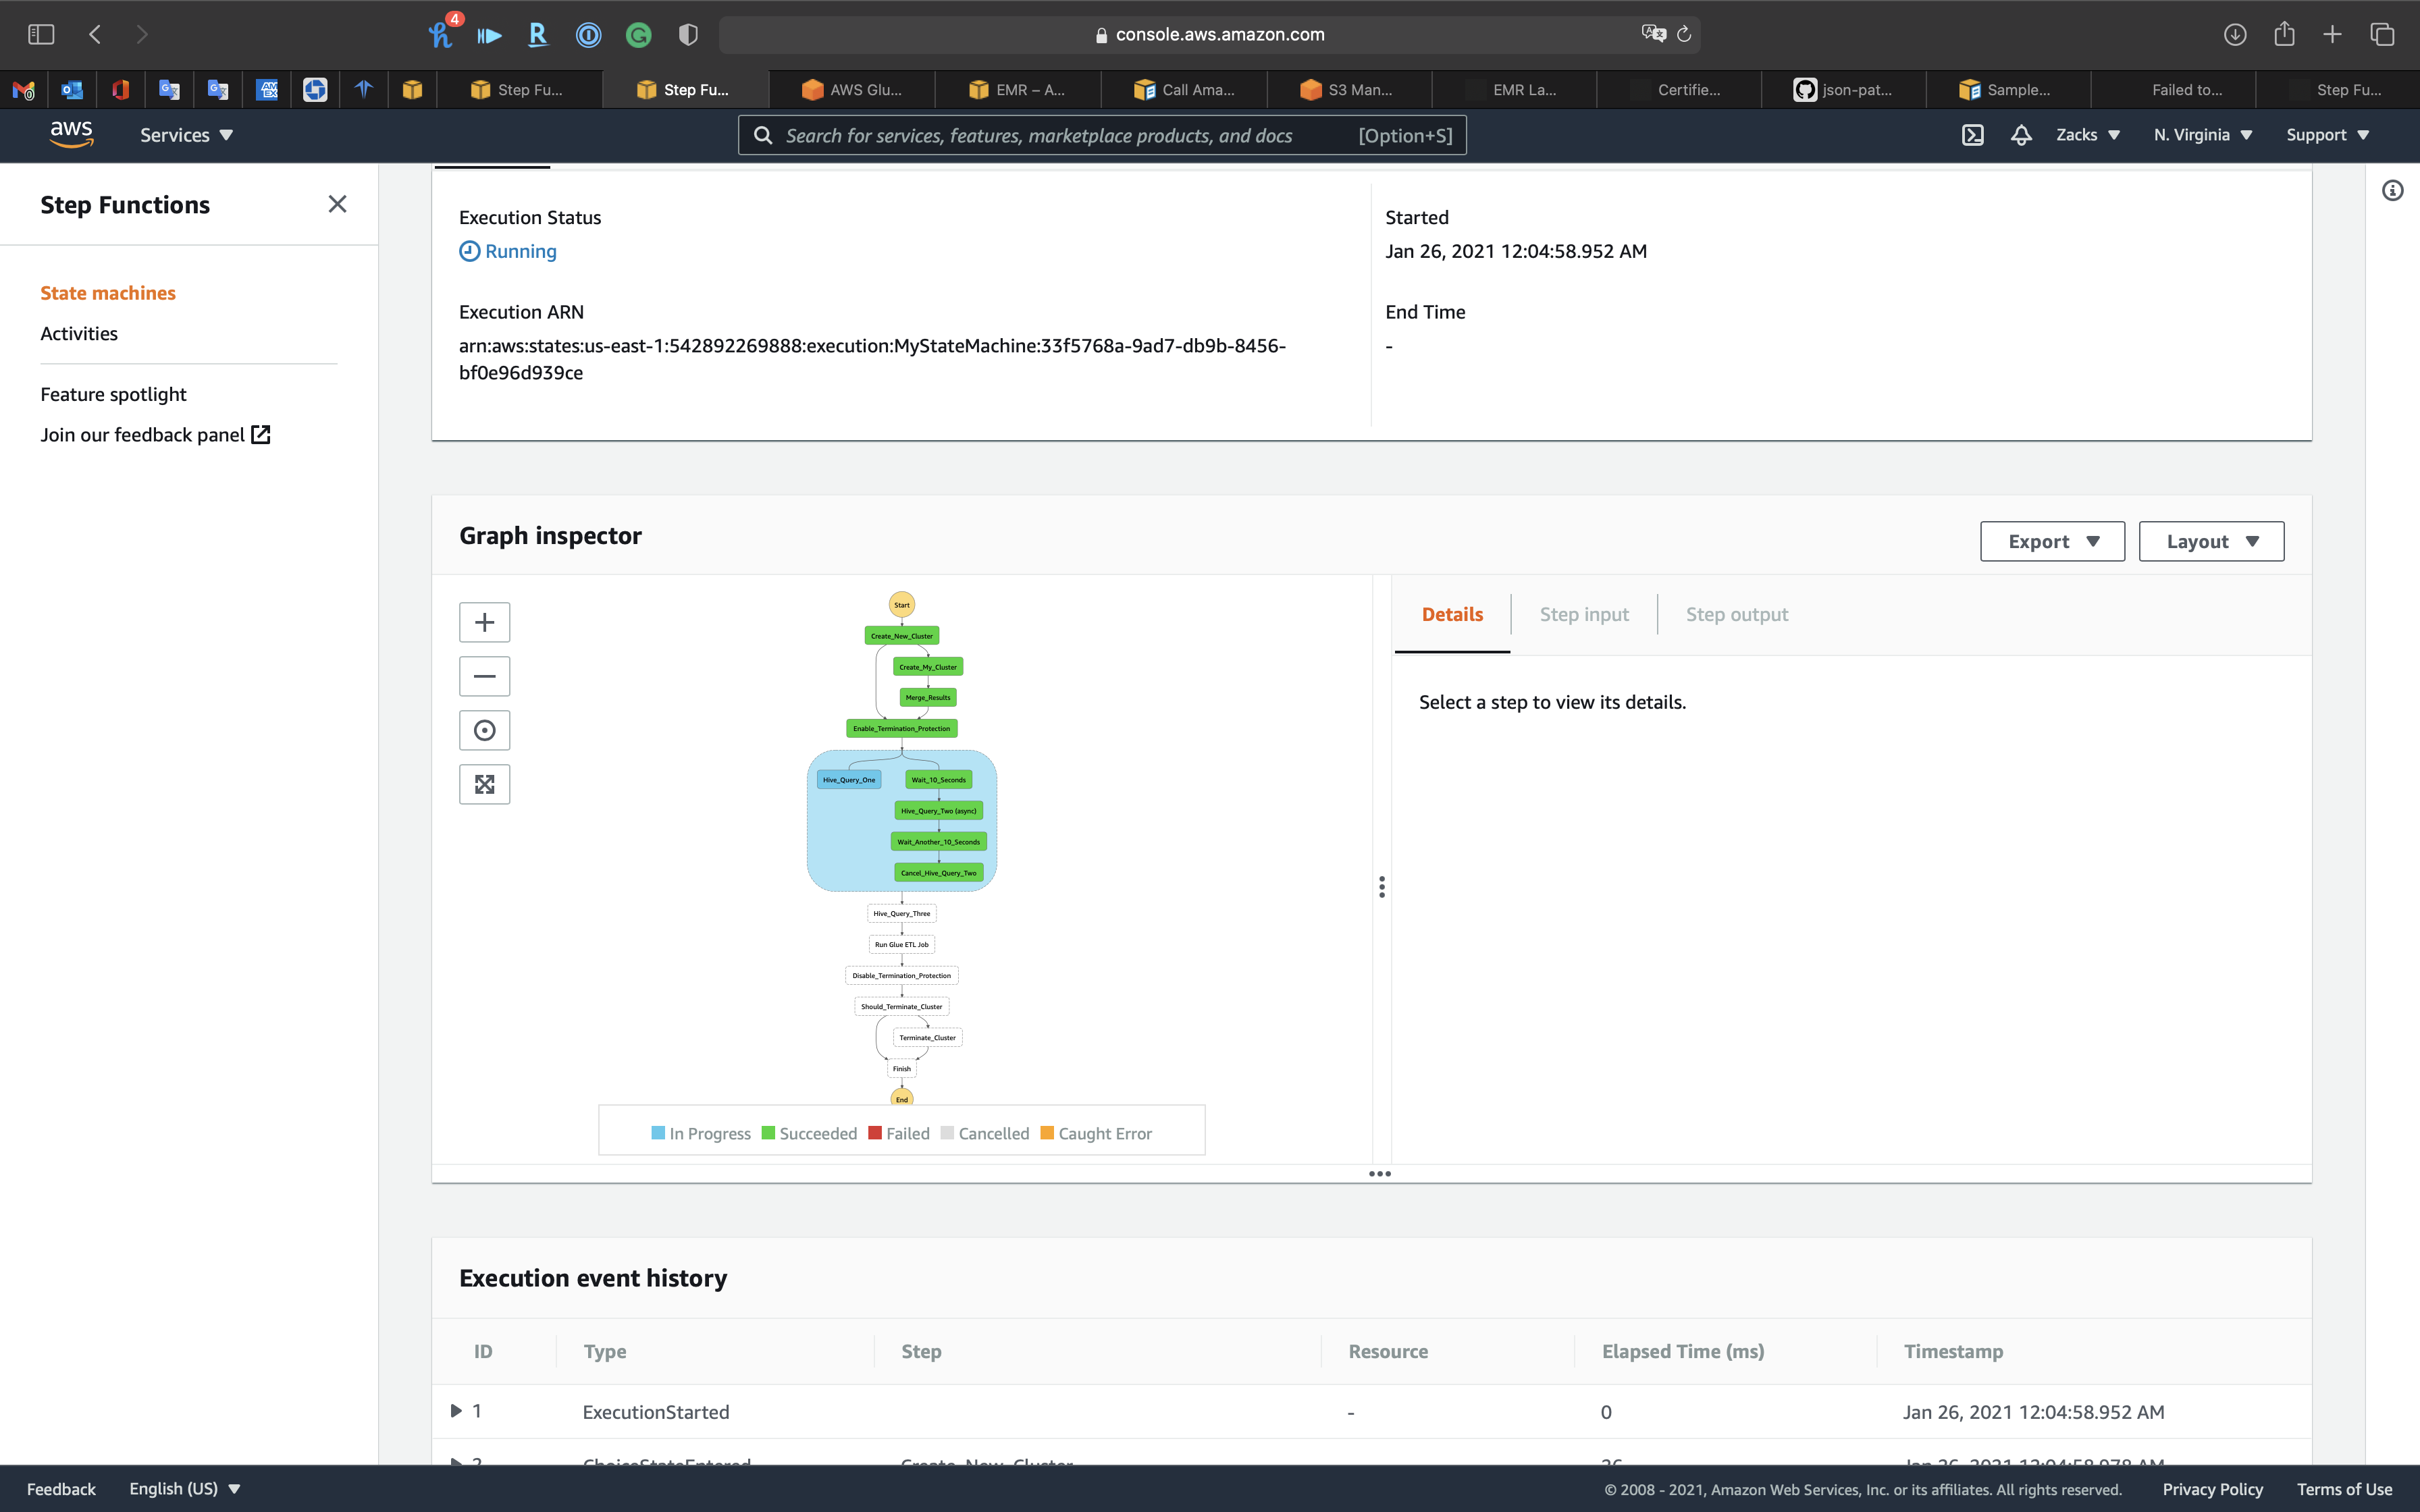
We can see the parallel task are both In Progress
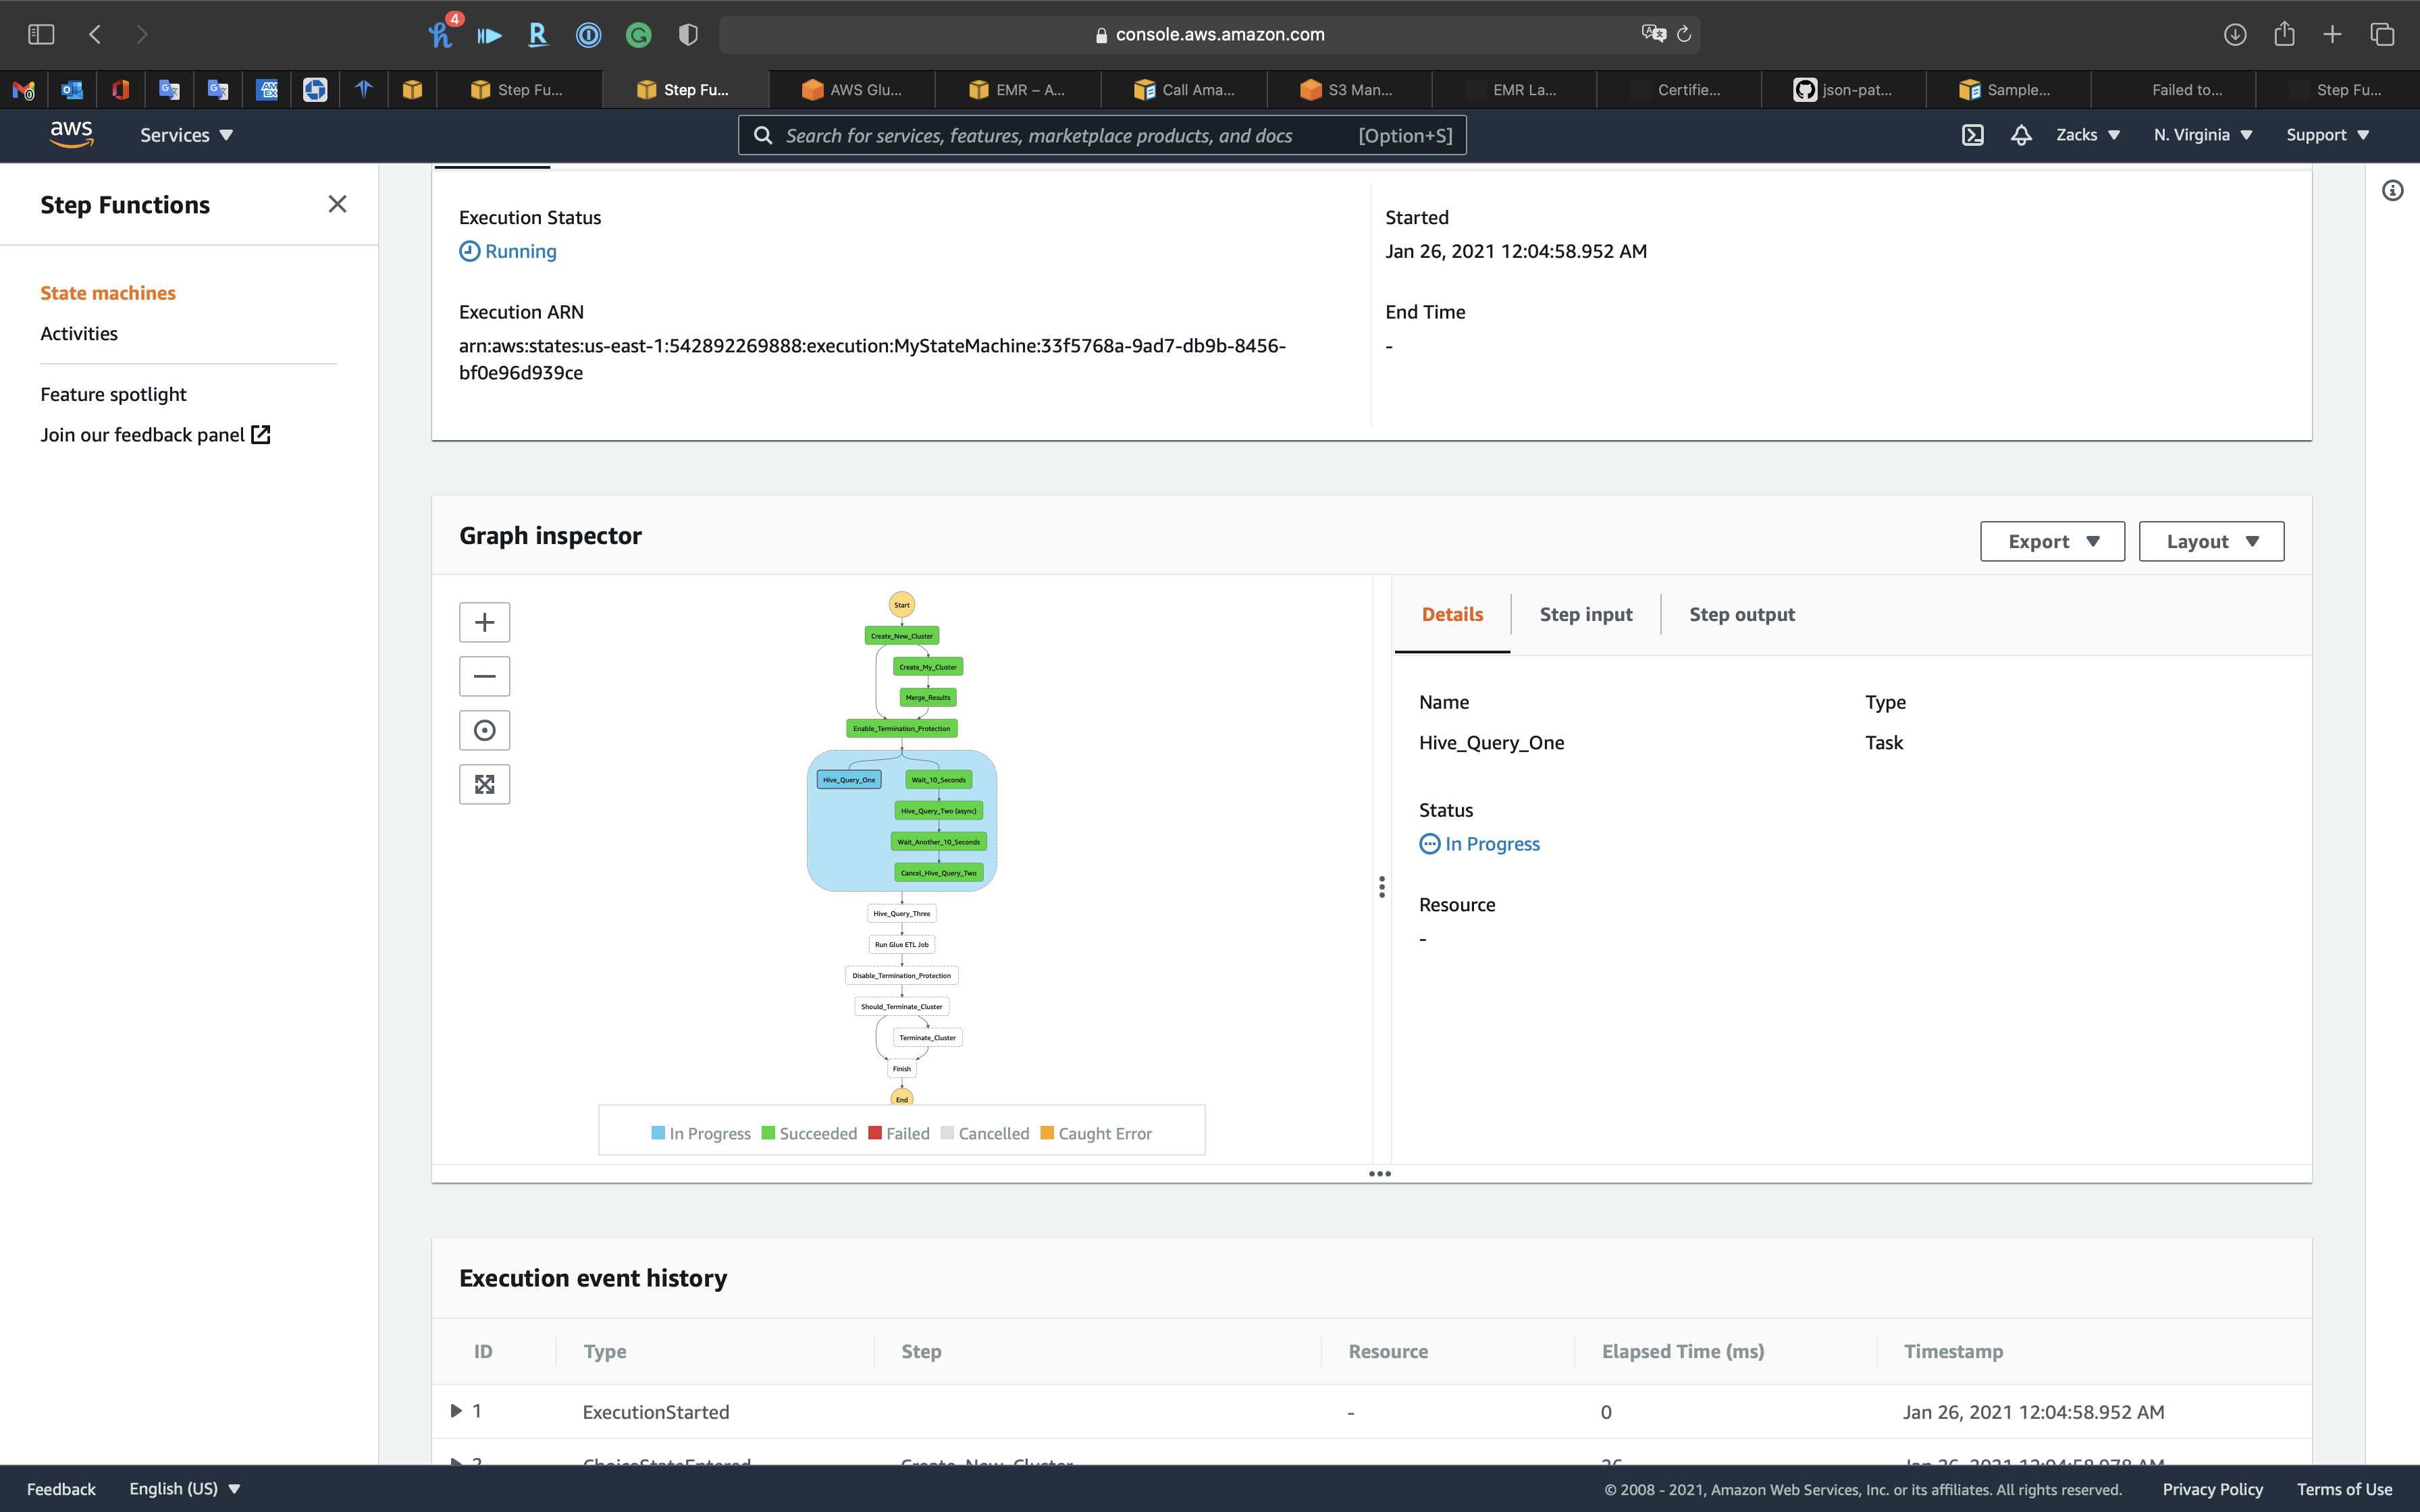
EMR
So the cluster must be running since the State Machine is in the querying task.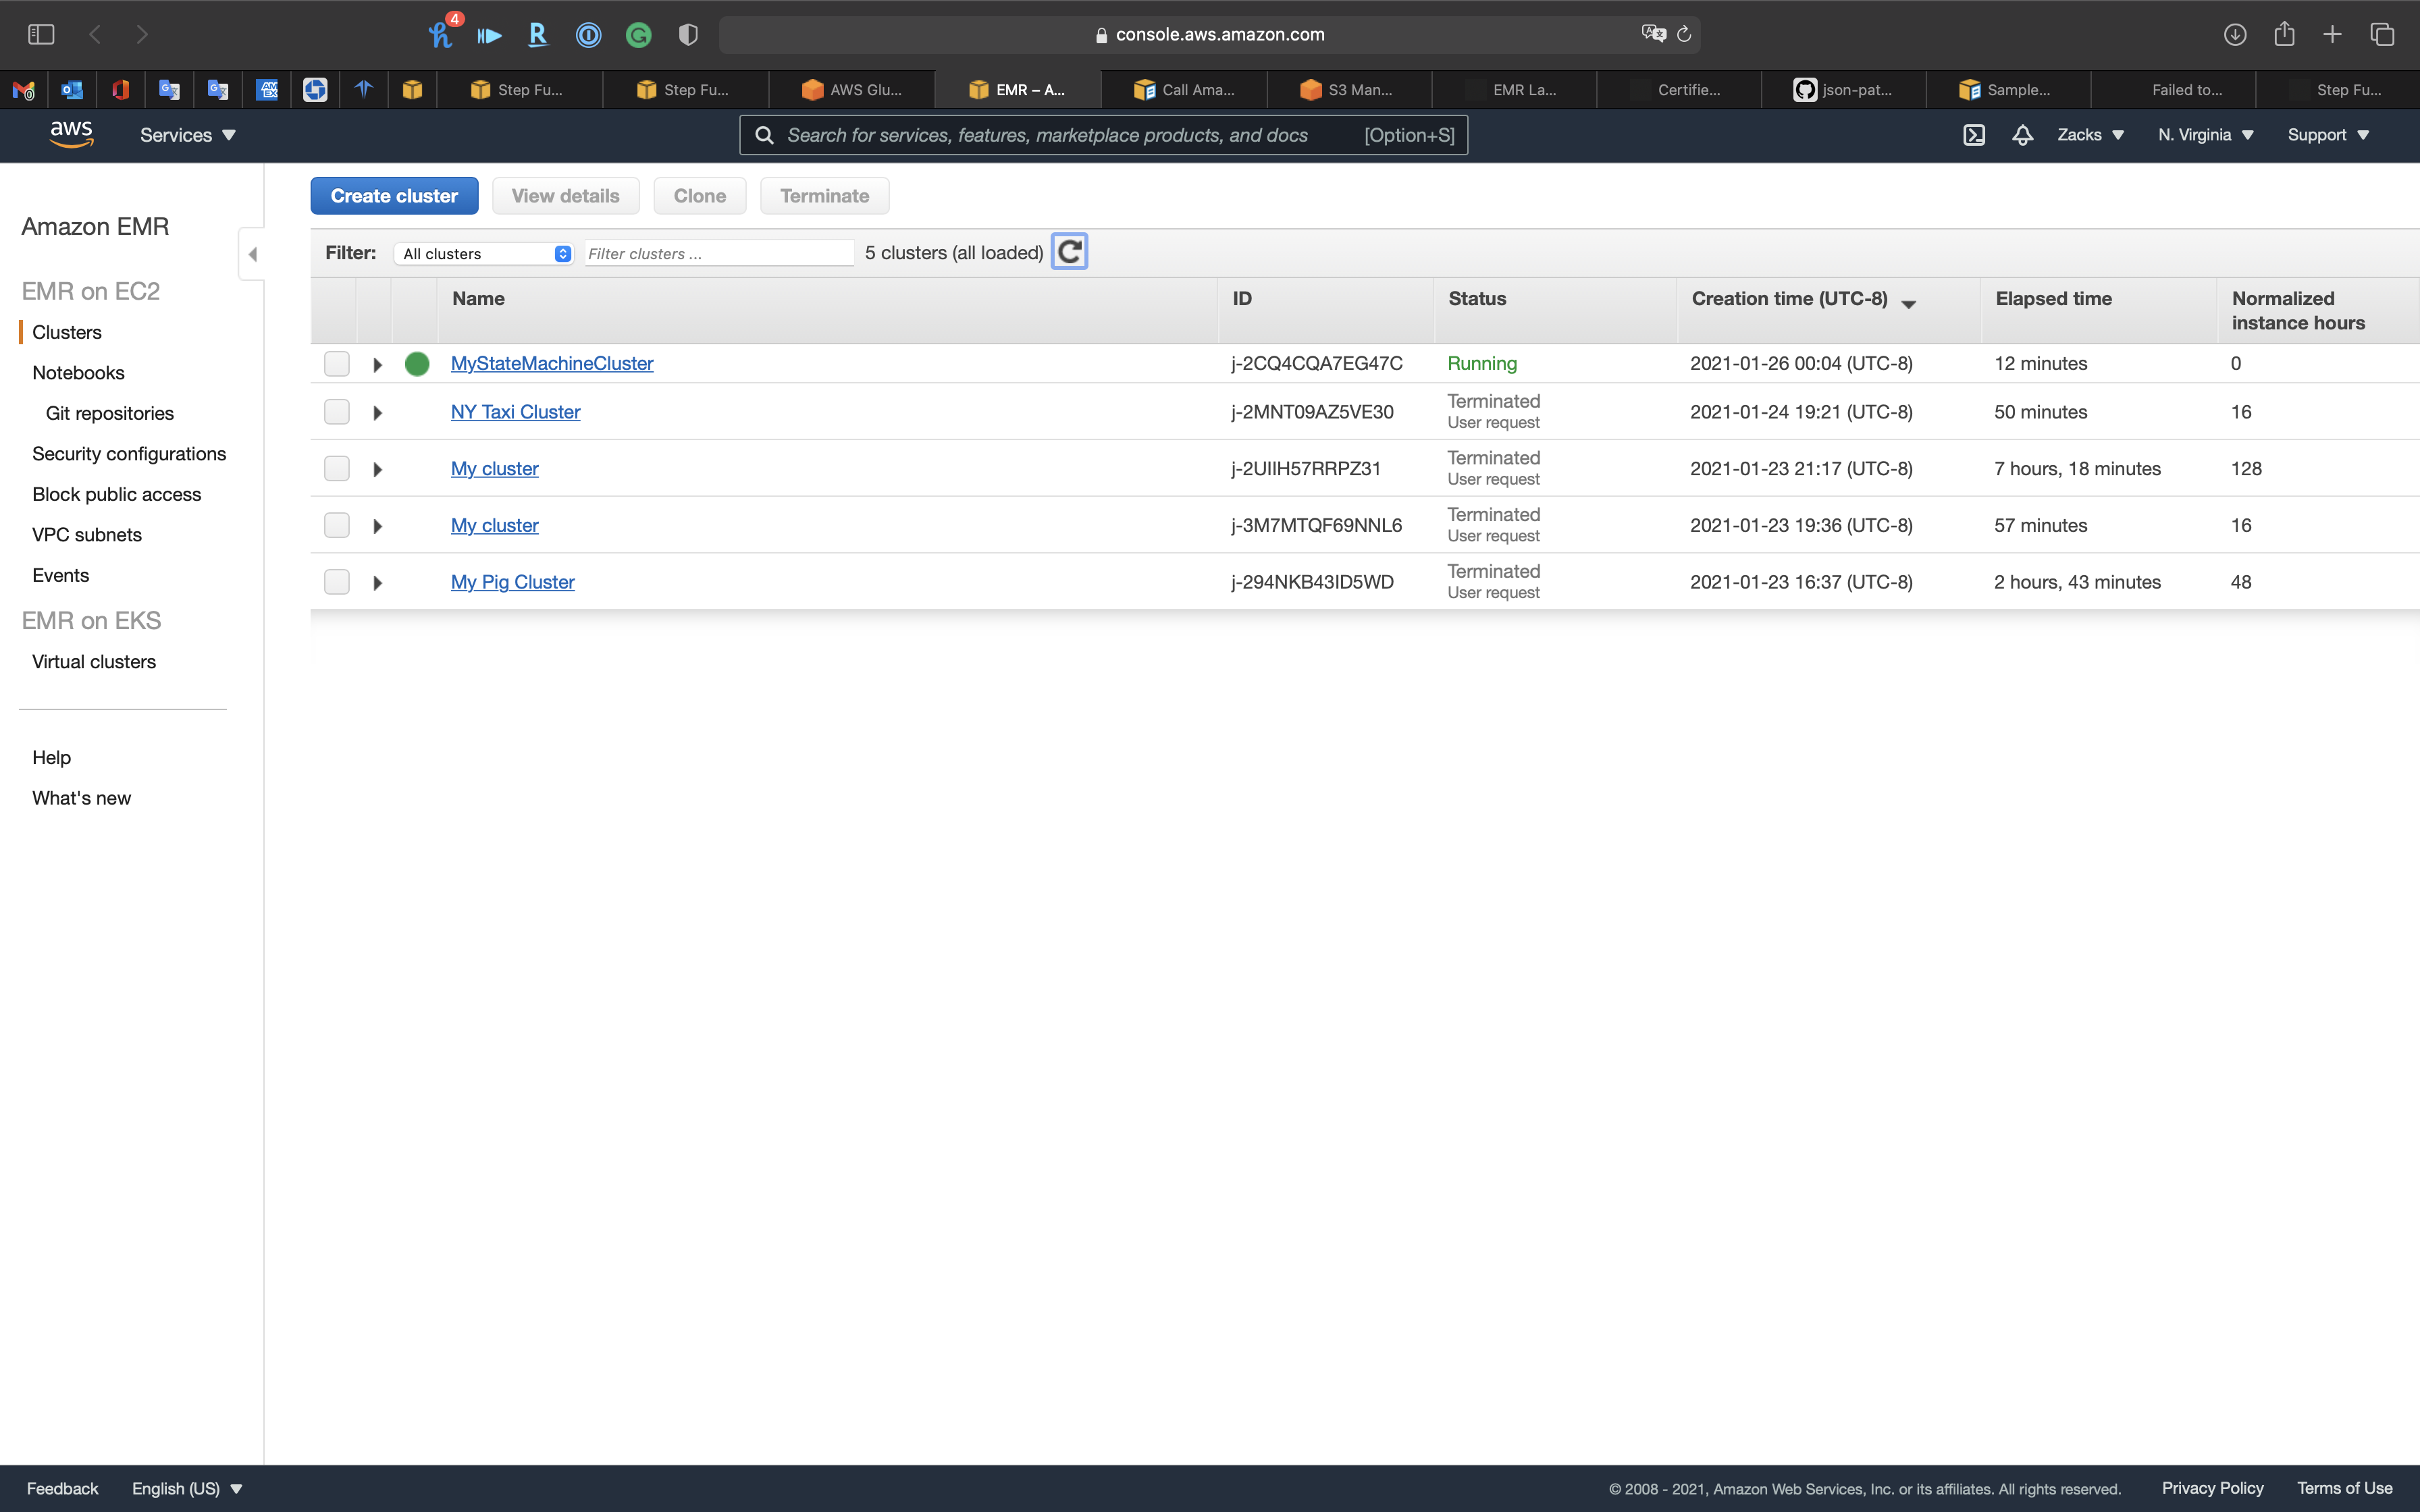
And we can see we have the Termination protection On.
Key pair
Step Functions
The State Machine shows the Glue ETL Job ny_taxi_parquet is running, so go check Glue page.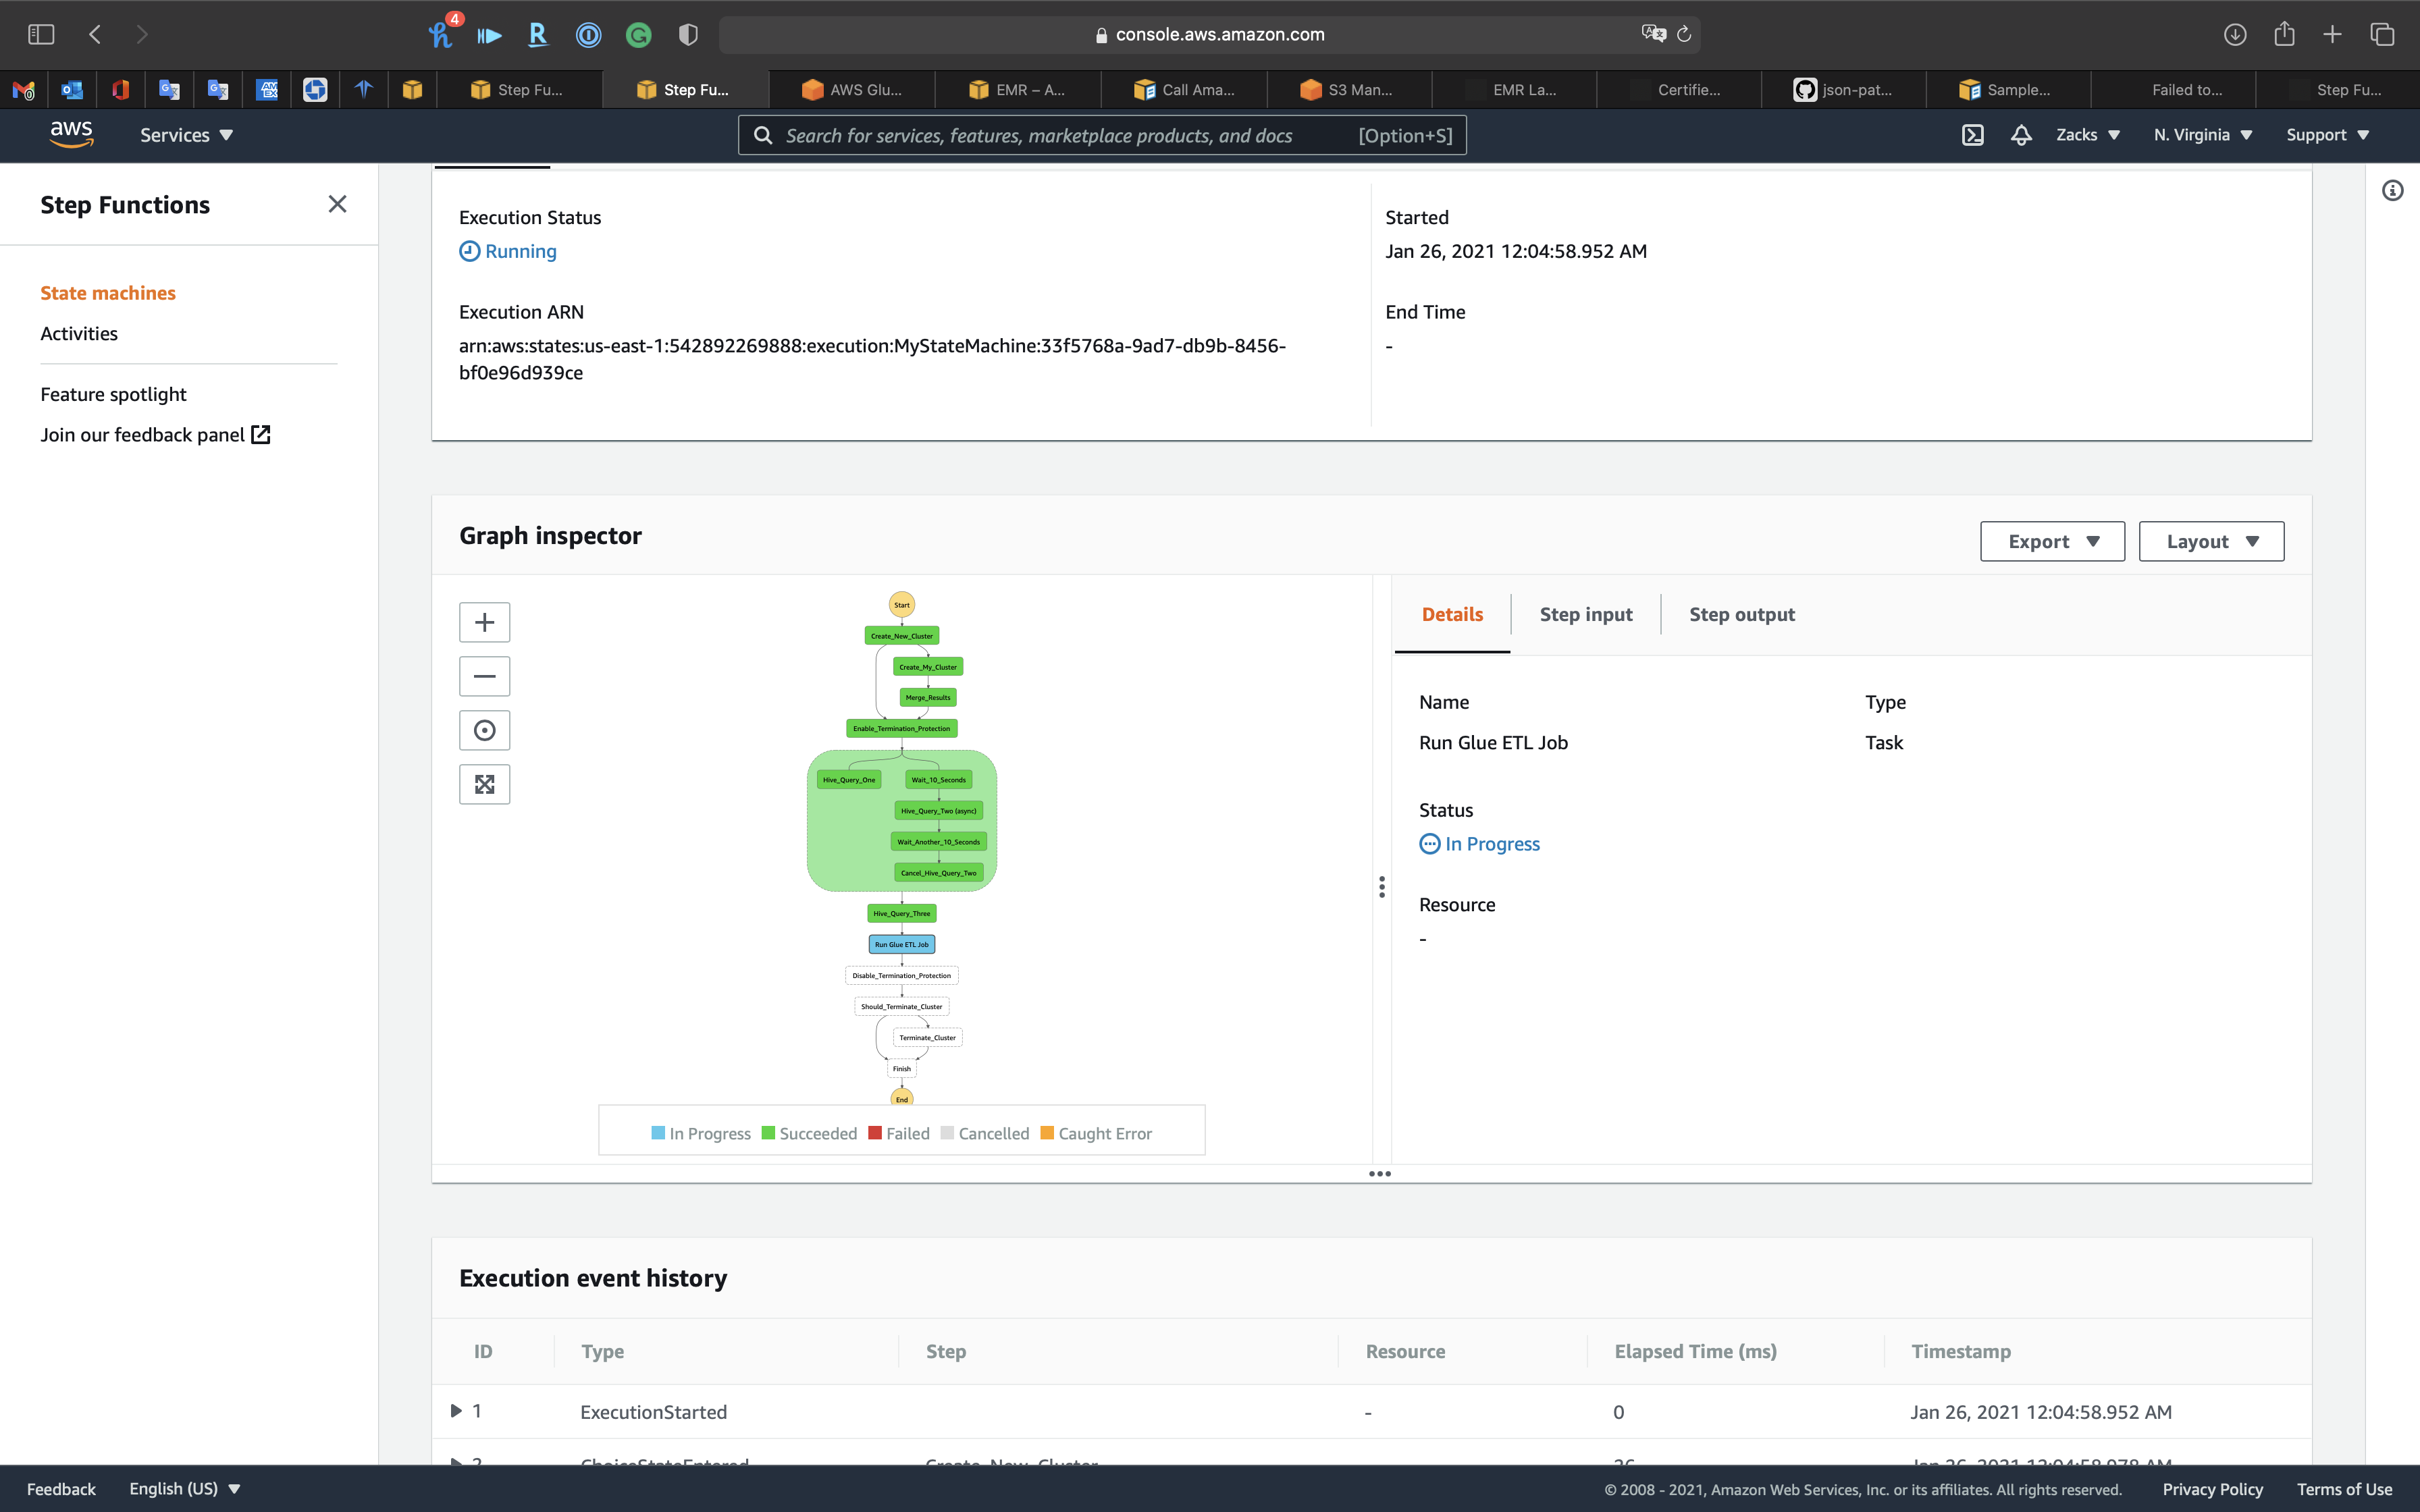
Glue
We can see ny_taxi_parquet just finished, and there’s a log file. Let’s go check the S3 bucket.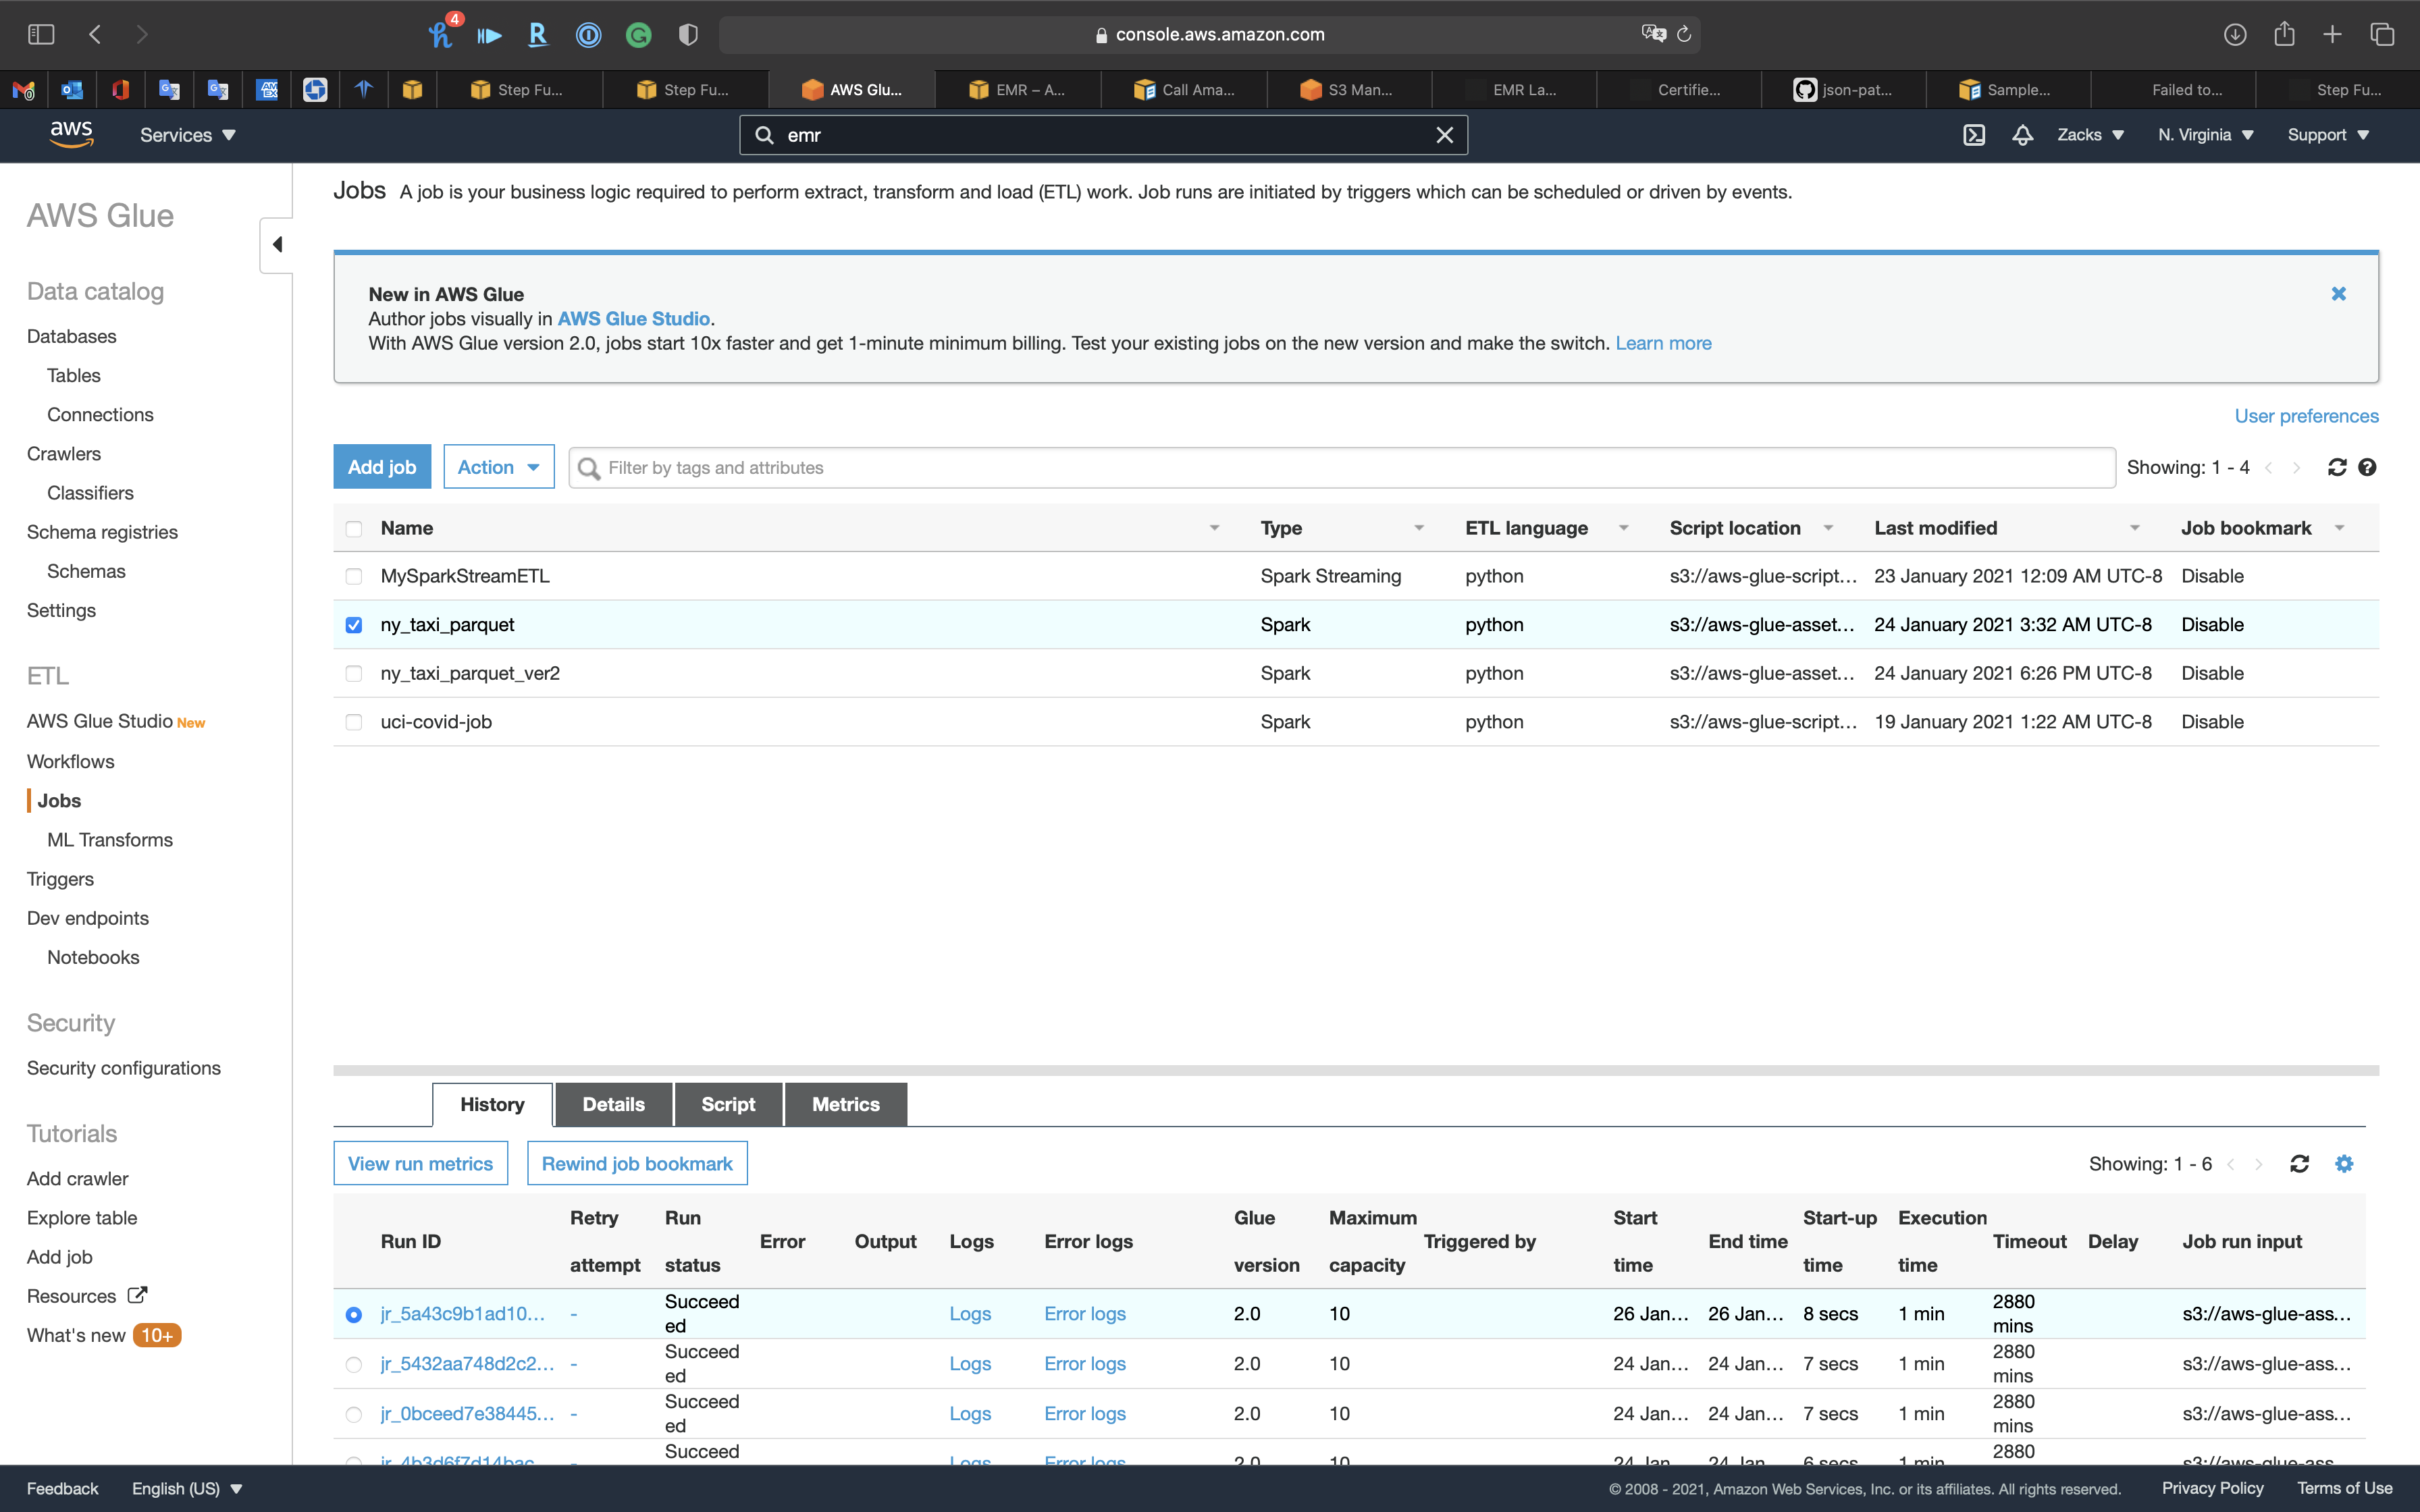
S3
In ny_taxi_parquet folder, we have the 26 .parquet files that just be transformed by Glue ETL Job that controlled by Step Functions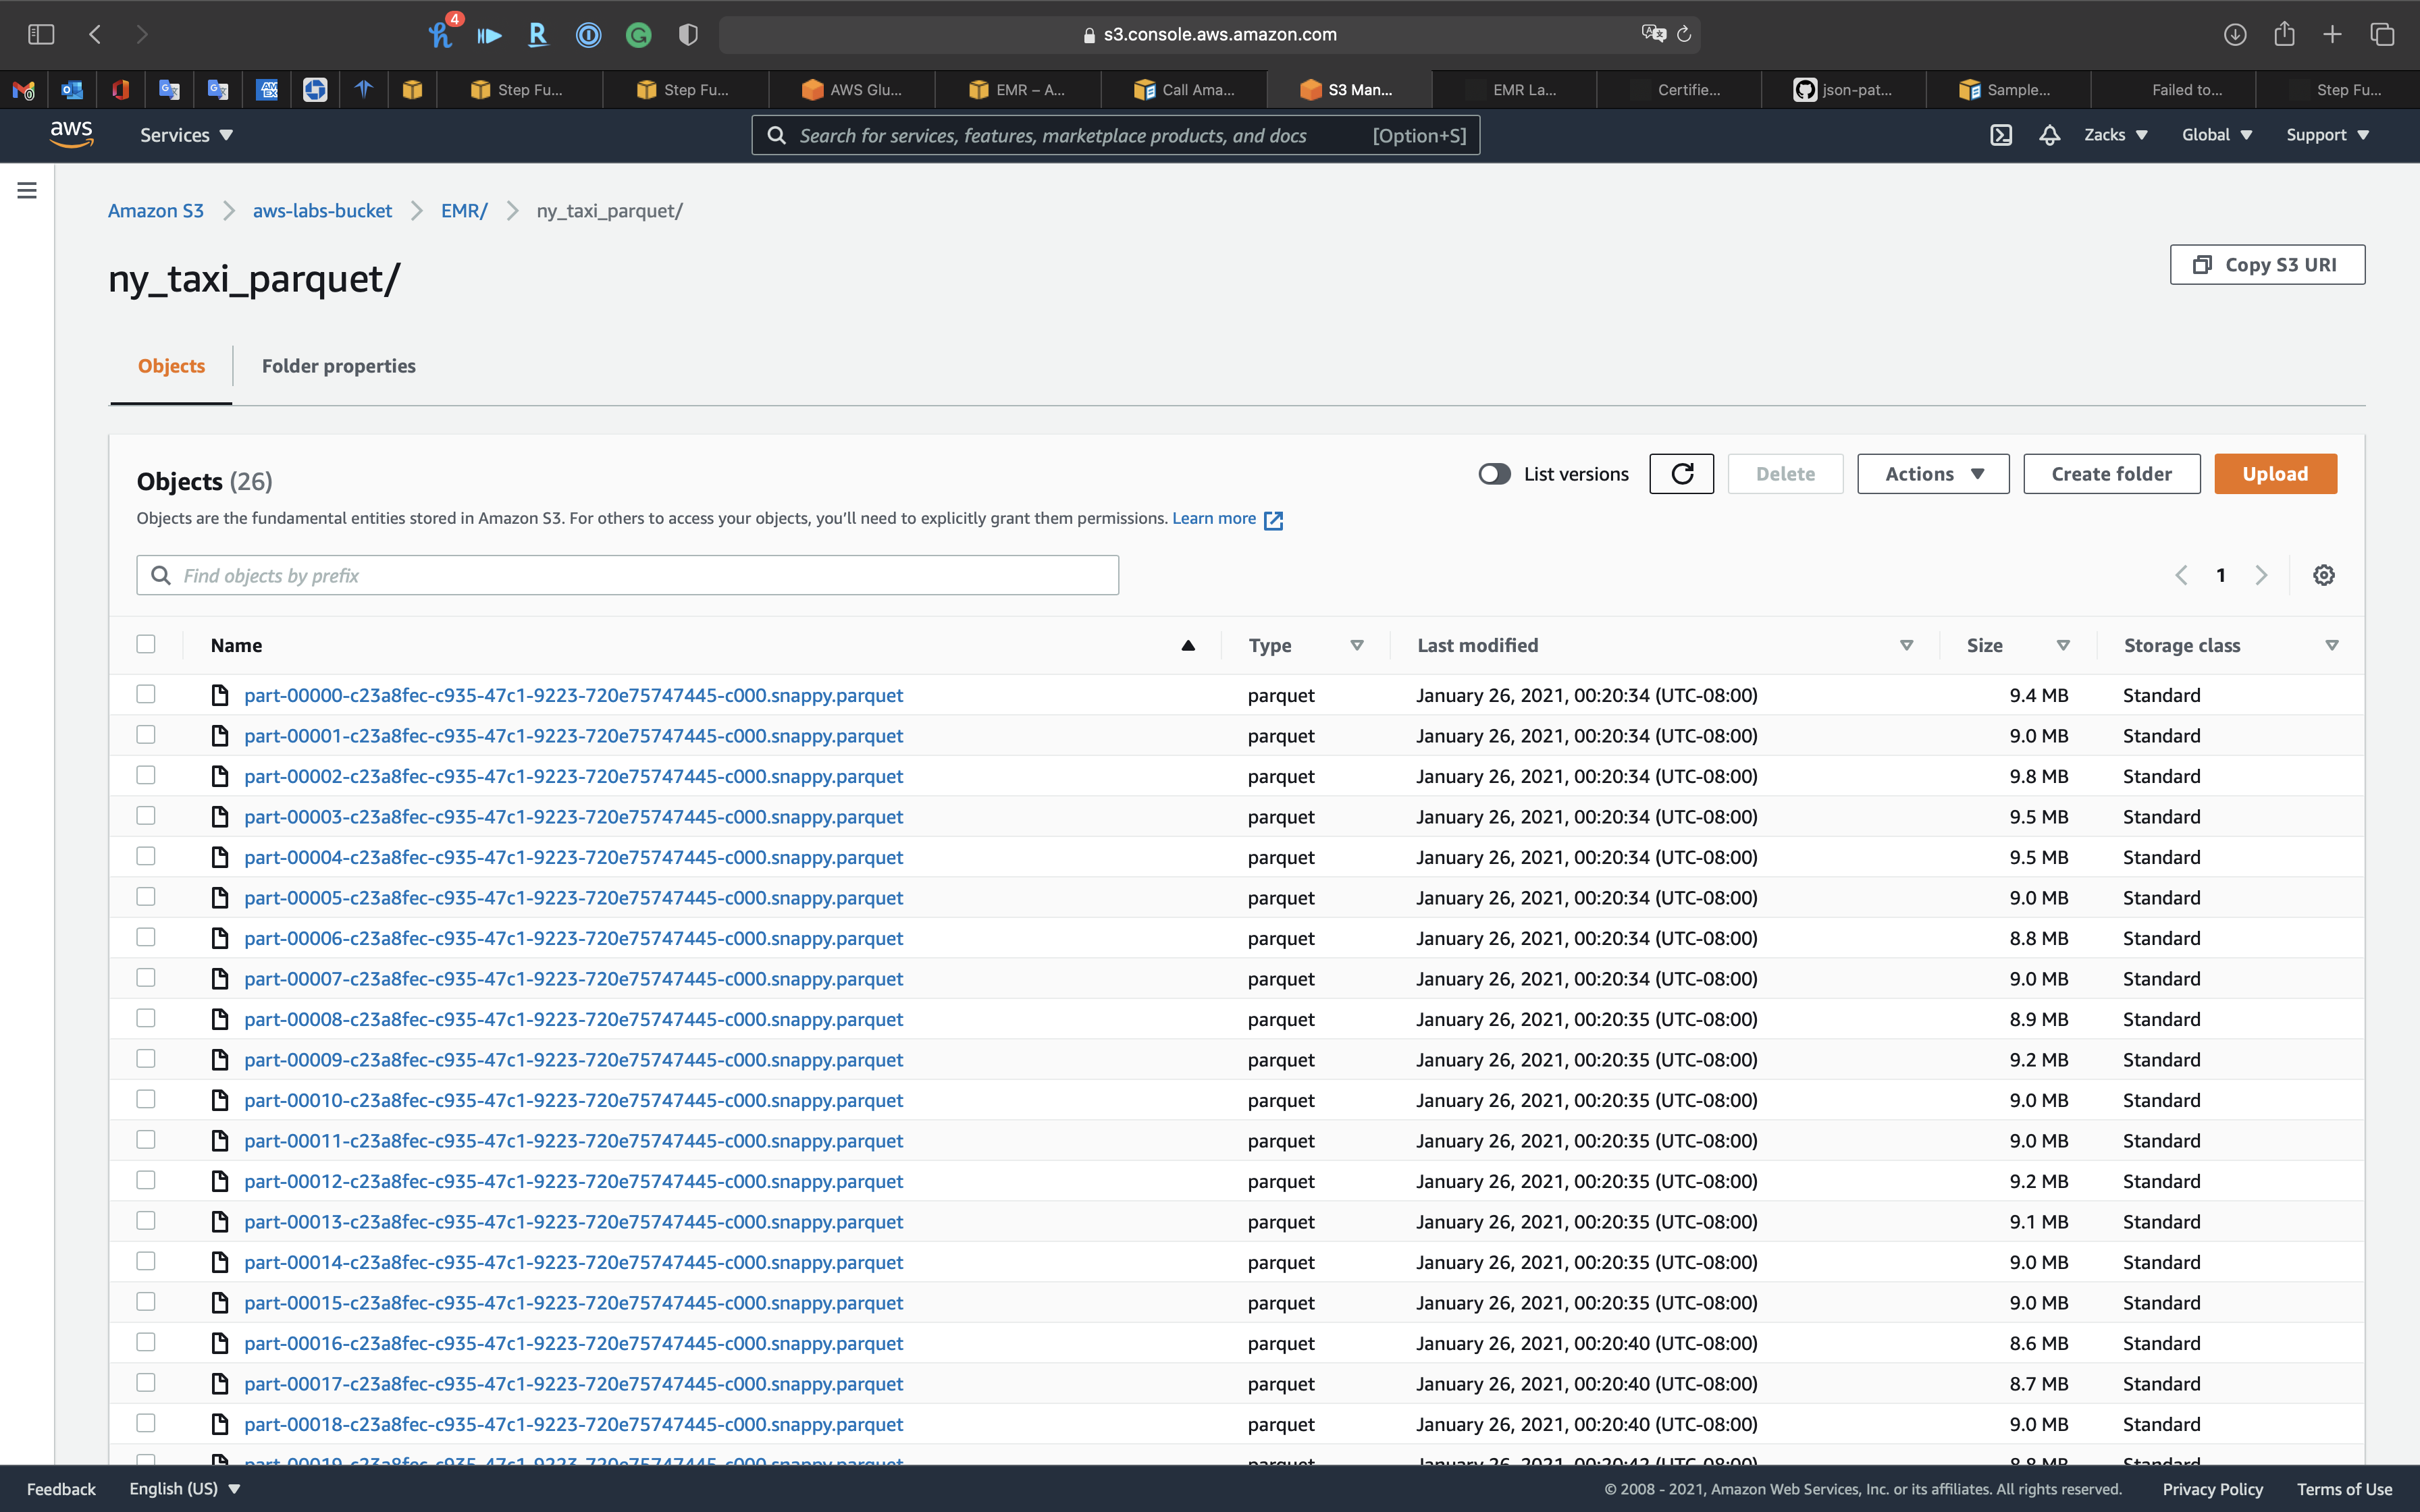
Step Functions
Finished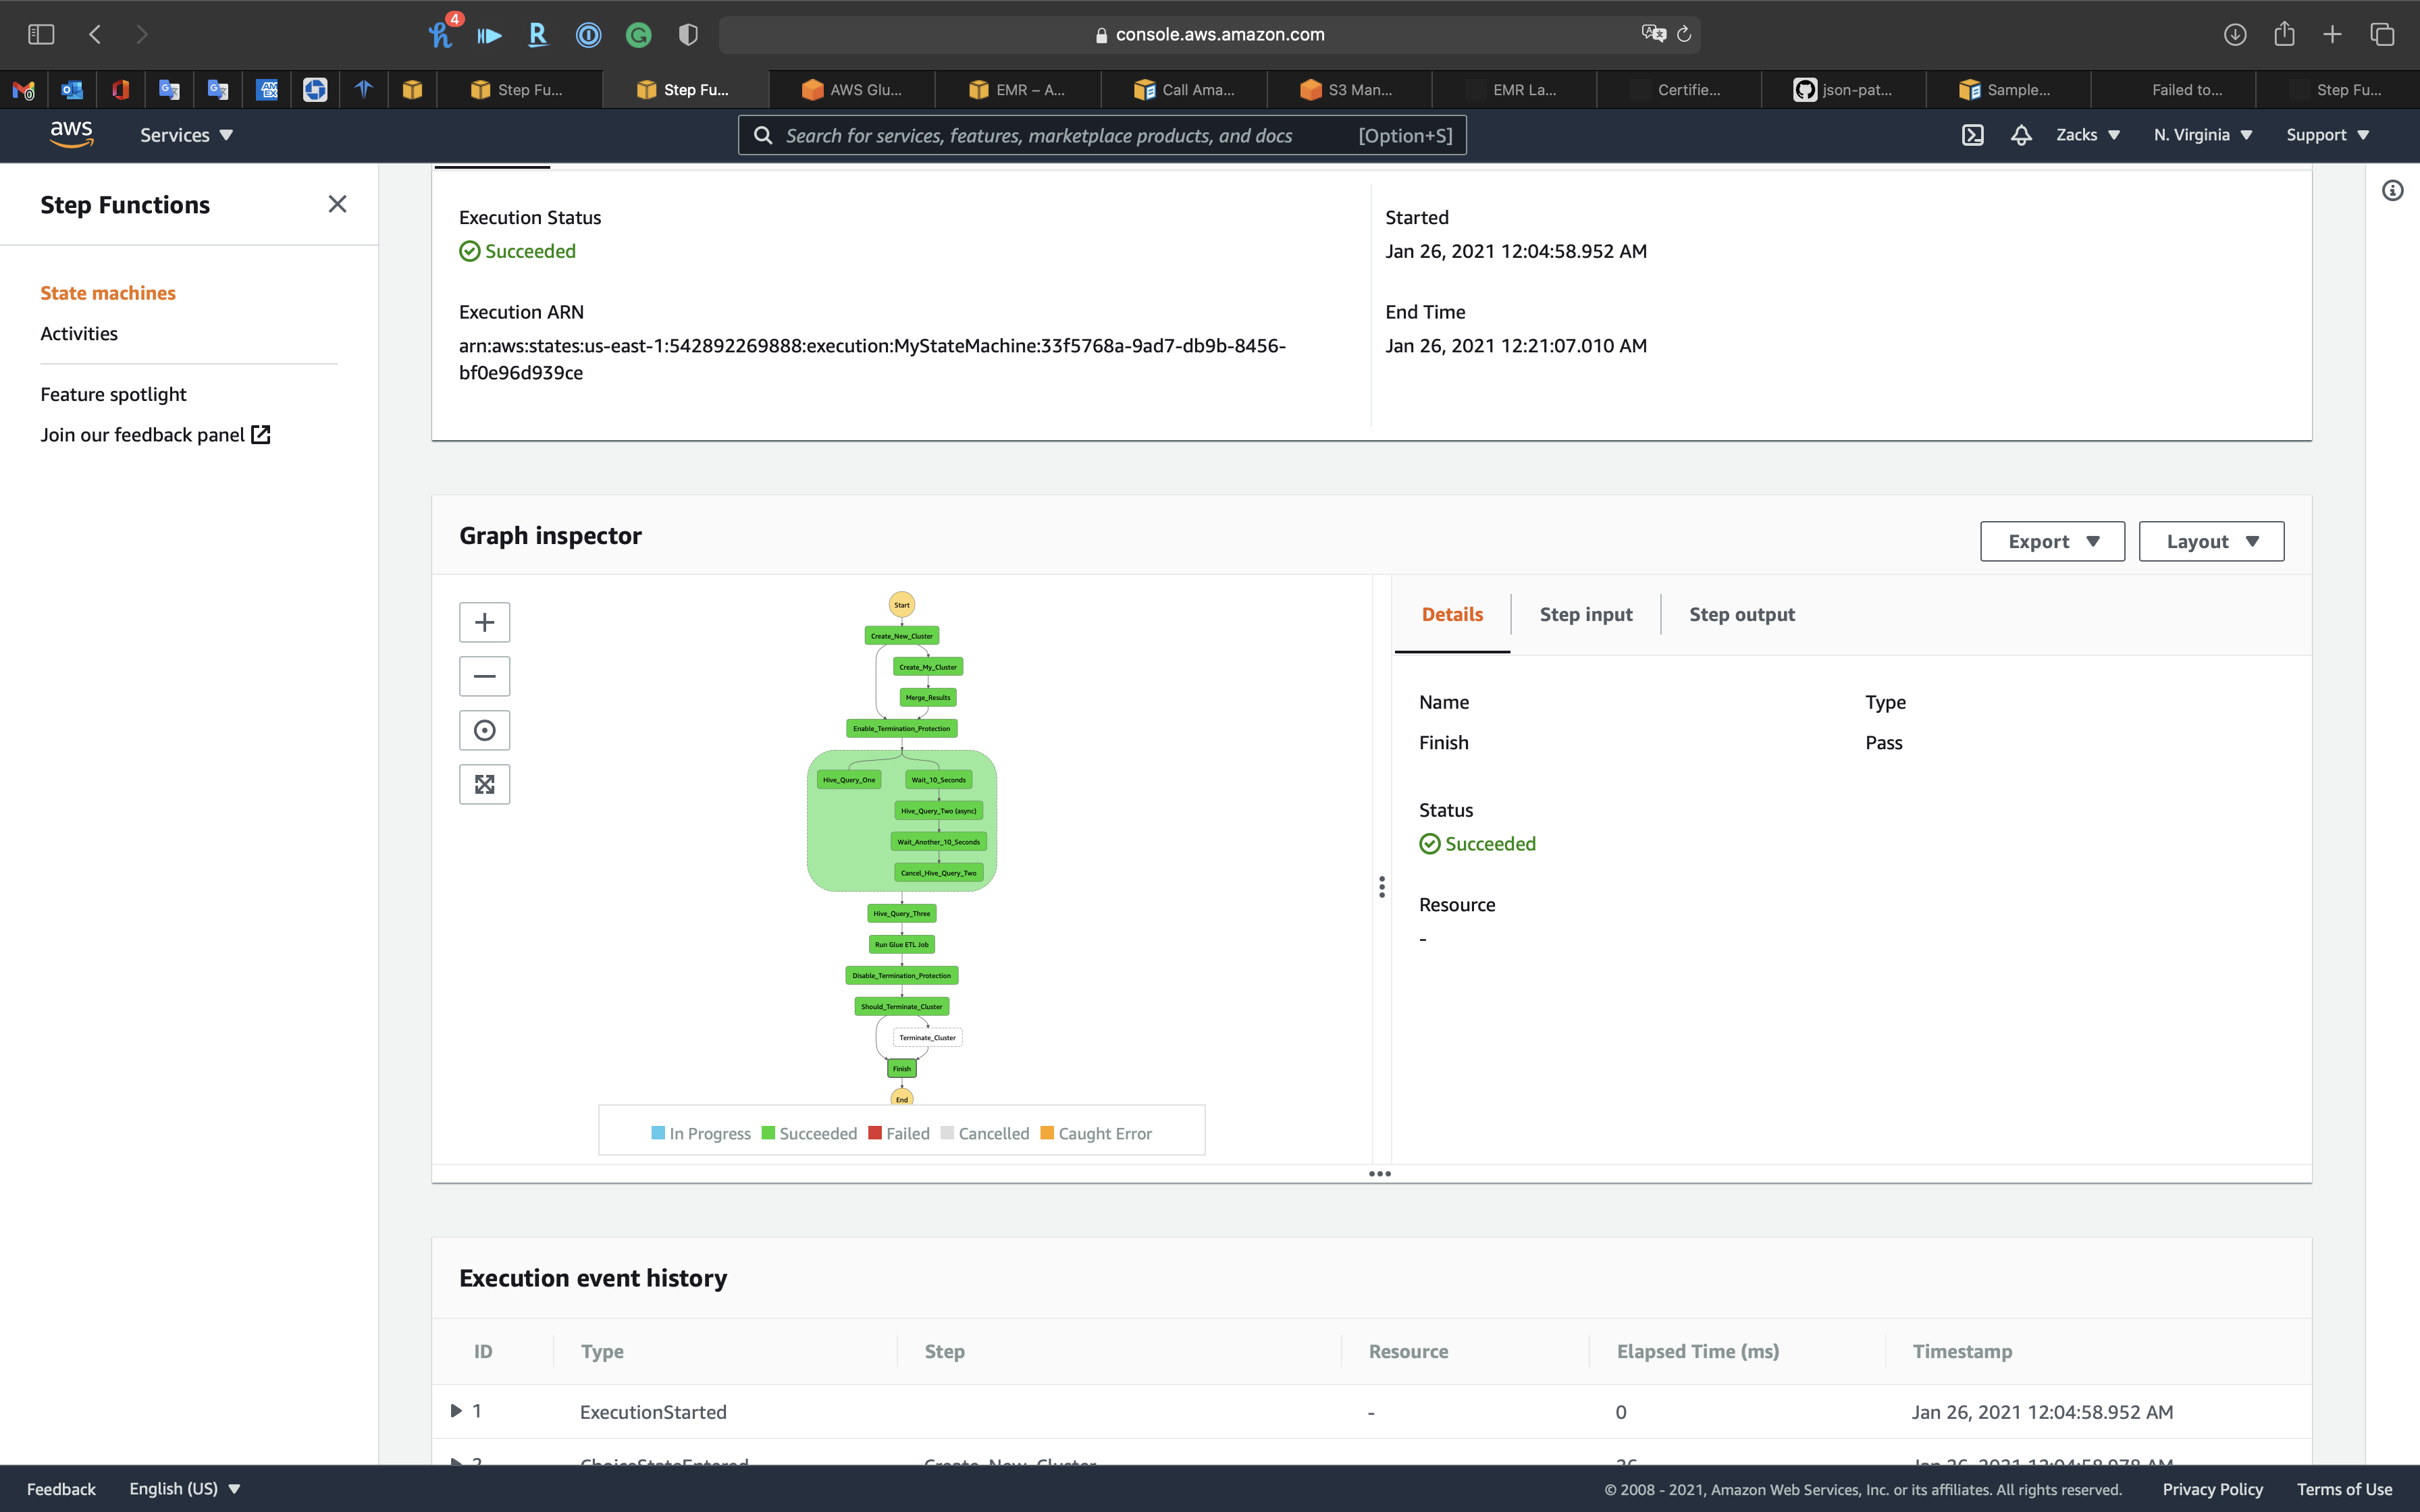
SSH Tunnel Configuration
Before You Connect: Authorize Inbound Traffic
Option 2, Part 1: Set Up an SSH Tunnel to the Master Node Using Dynamic Port Forwarding
Option 2, Part 2: Configure Proxy Settings to View Websites Hosted on the Master Node
We want to visit Hue website from the master node, so we need to set up a FoxyProxy for Google Chrome.
Set up an SSH Tunnel to the Master Node using dynamic port forwarding
Click on your cluster. See Summary.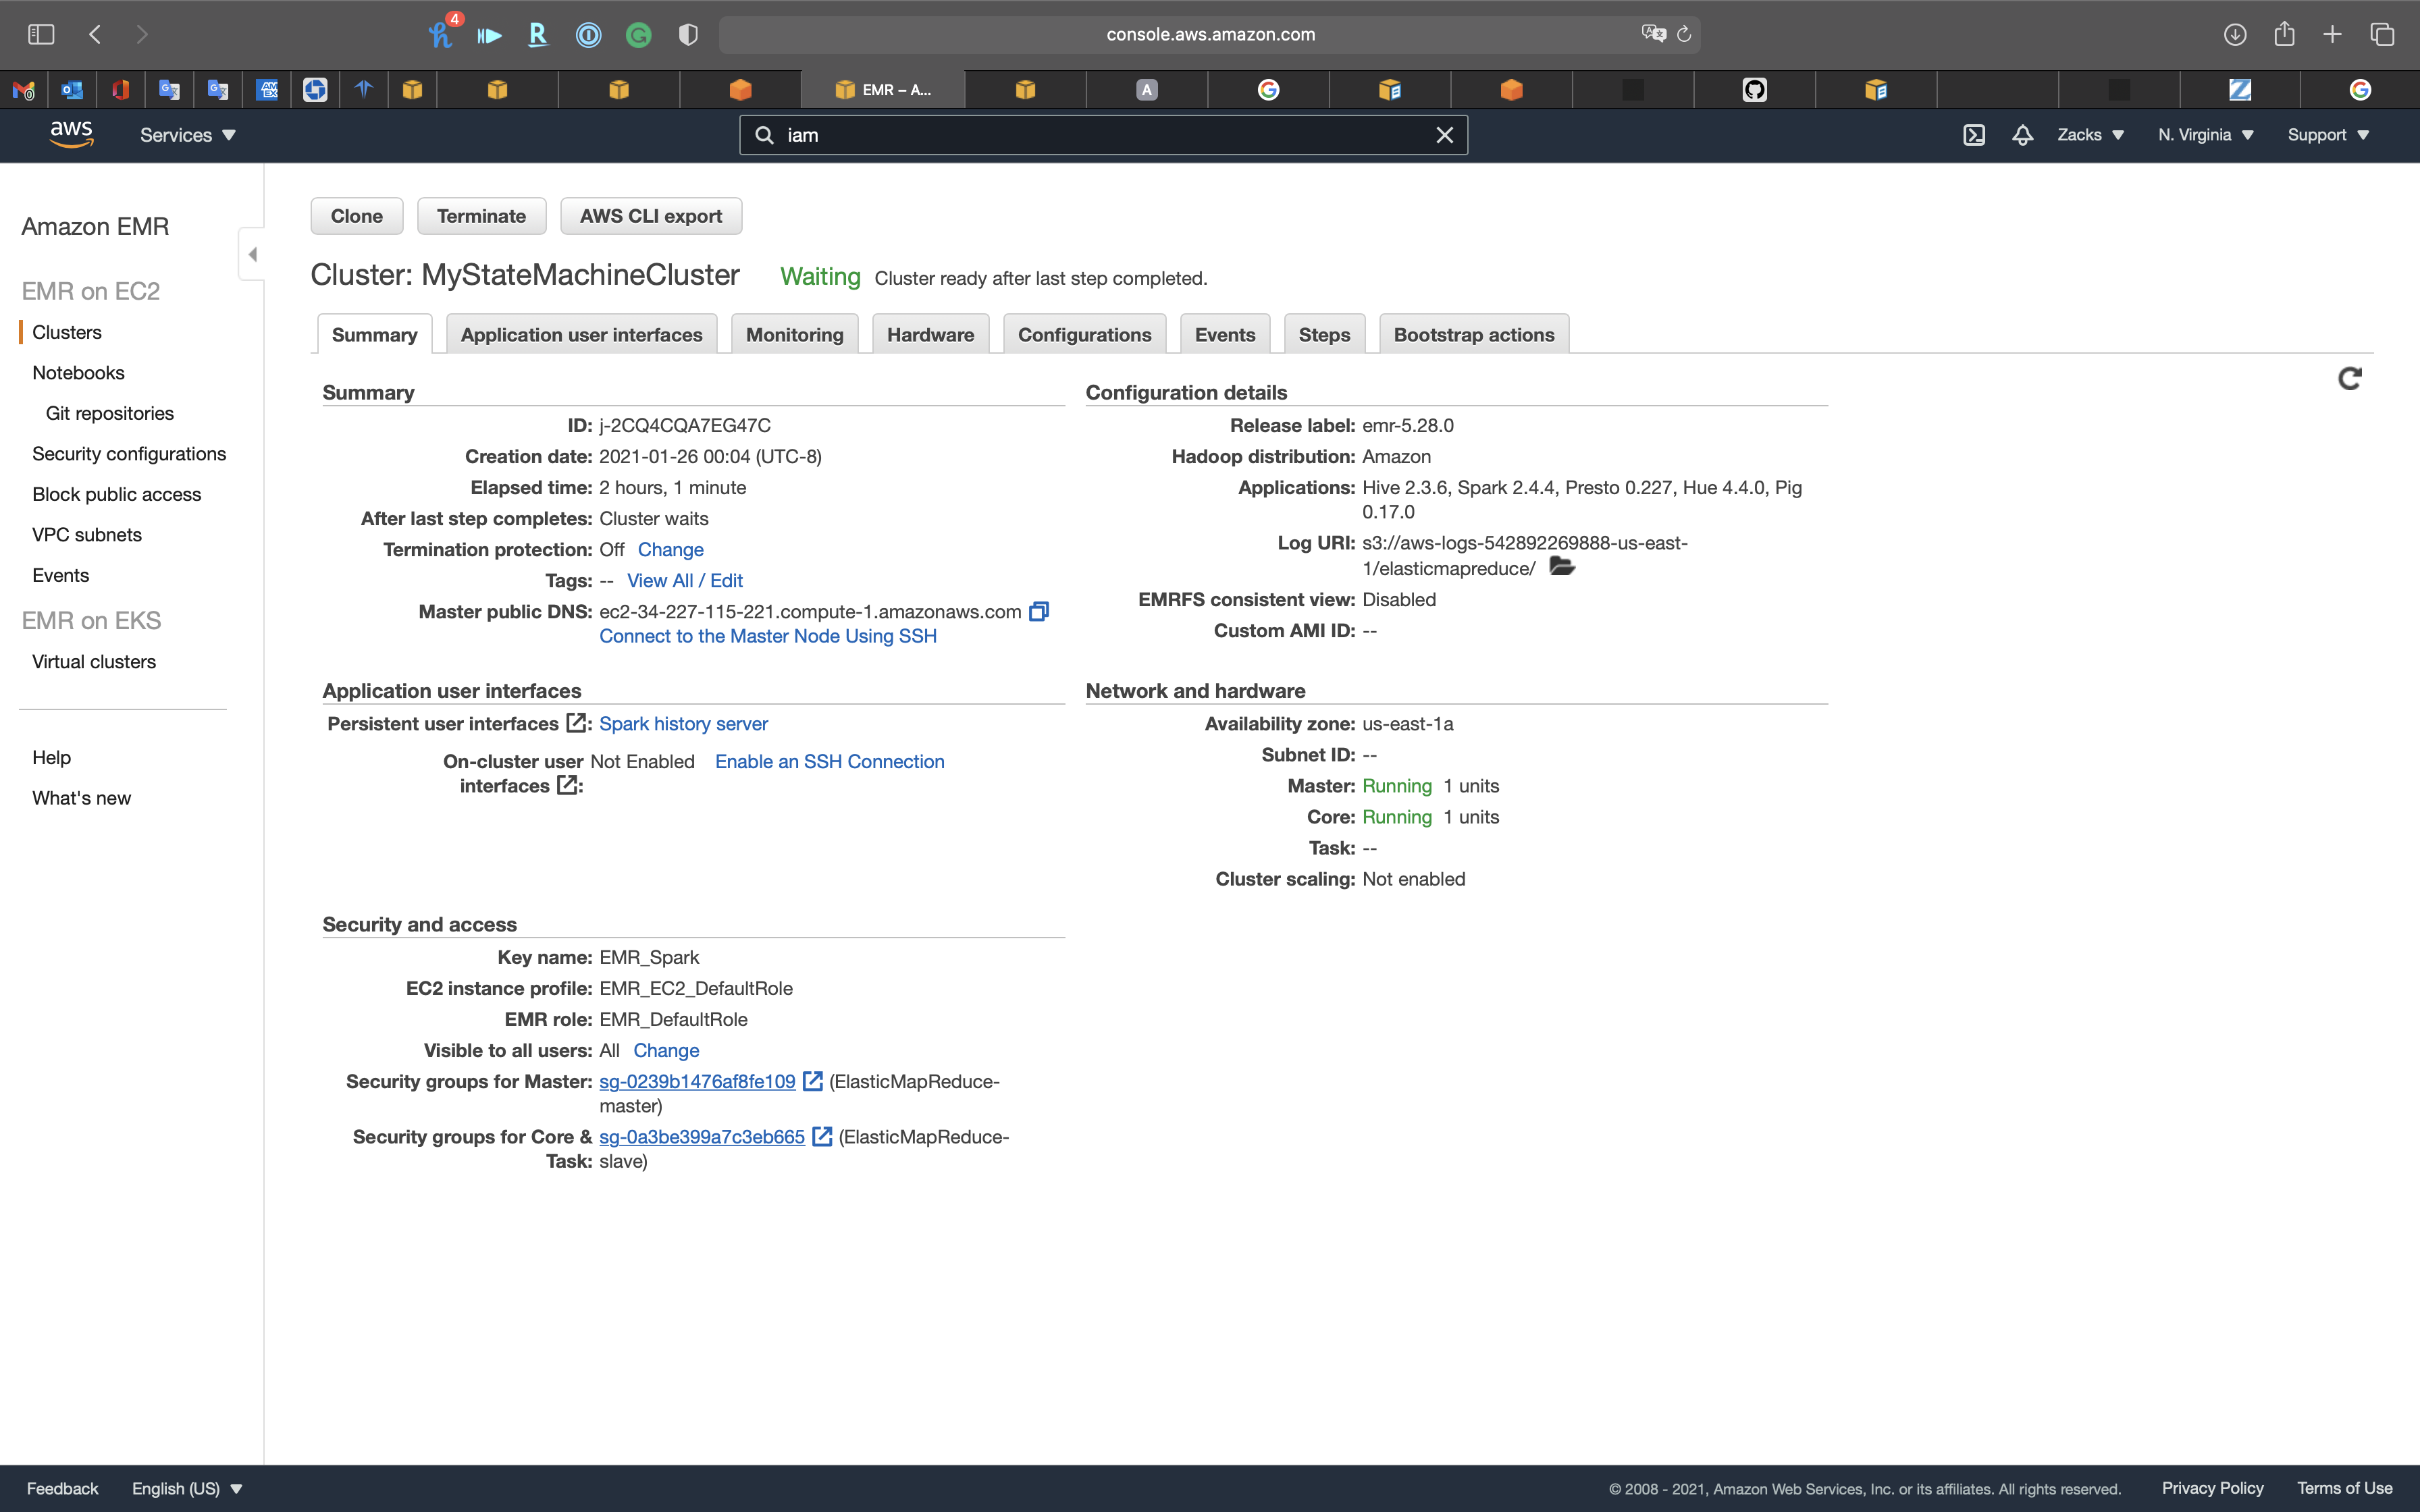
Click on Security groups for Master
Click on the ElasticMapReduce-master
Add SSH
Check for an inbound rule that allows public access with the following settings. If it exists, choose Delete to remove it.
- Type:
SSH - Protocol:
TCP - Port range:
22 - Source:
Custom 0.0.0.0/0
We need to add our IP address, SSH, and port 8157 for SSH forwarding to the white list to the security of EMR Master node.
- Type:
SSH - Protocol:
TCP - Port range:
22 - Source:
My IP
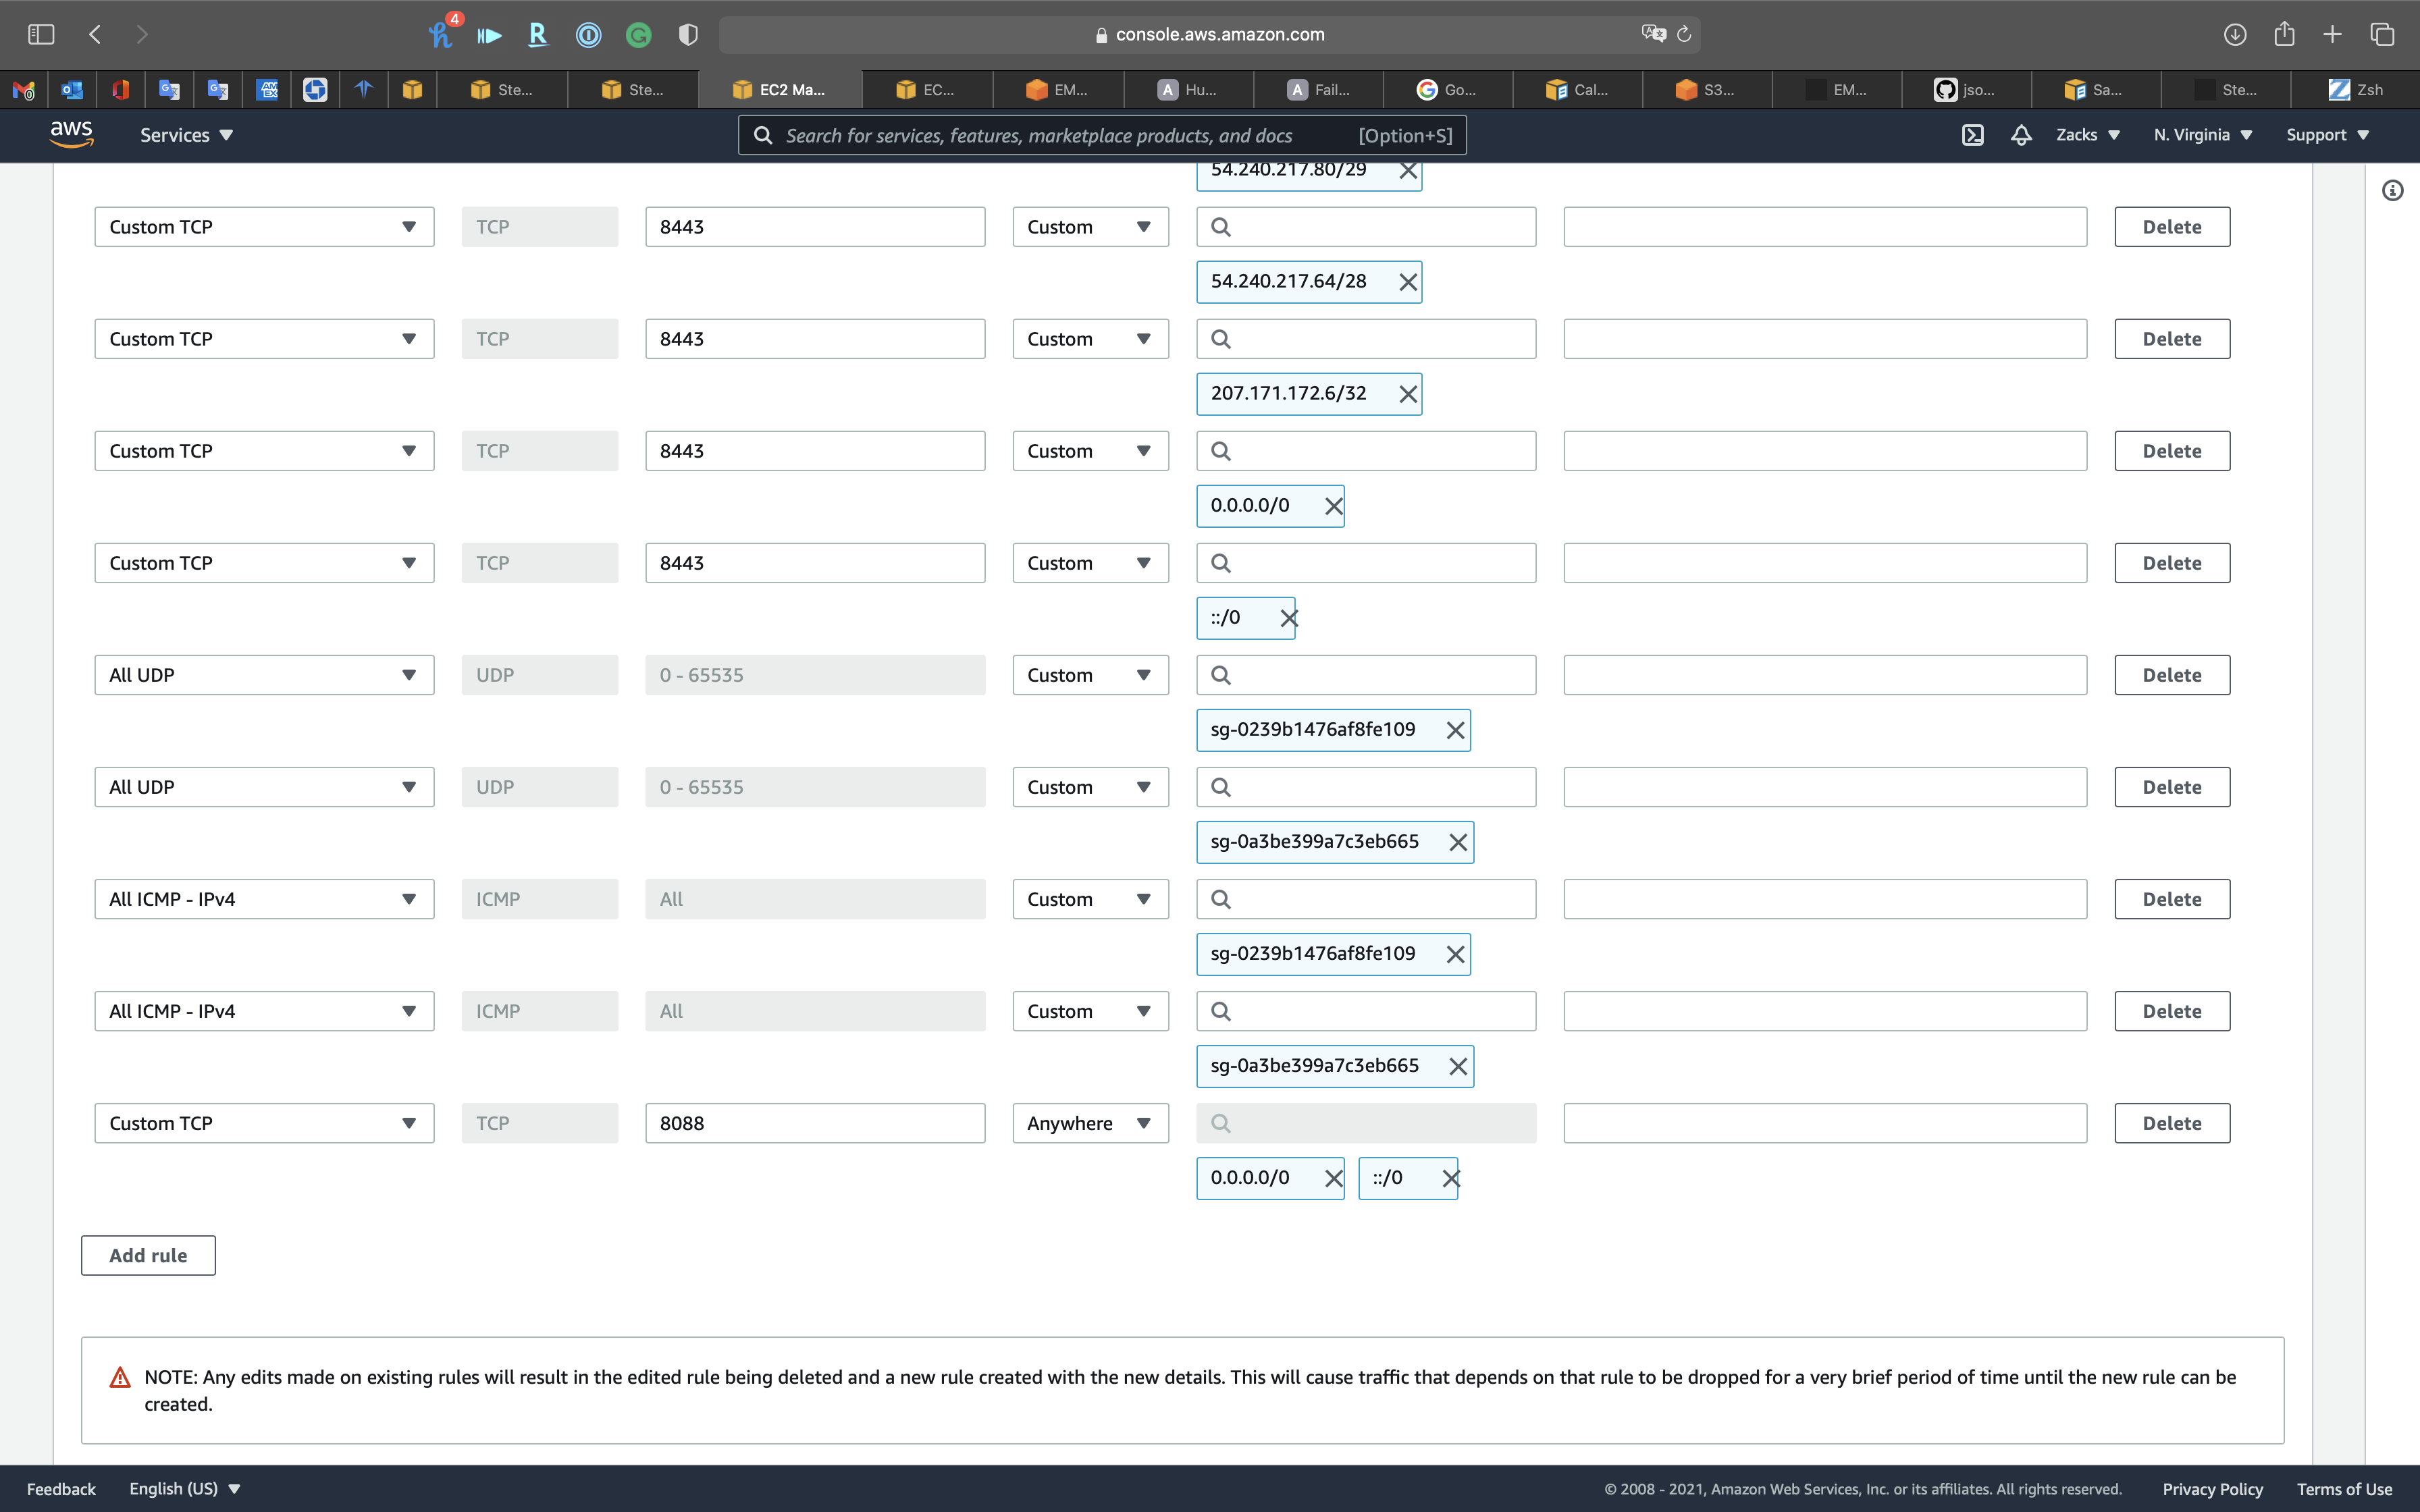
Add Custom 8888 for Hue
Click on Add rule
- Type:
Custom TCP - Protocol:
TCP - Port range:
8888 - Source:
AnywhereorMy IP
Add Custom 8088 for Hadoop Resource Manager
Click on Add rule
- Type:
Custom TCP - Protocol:
TCP - Port range:
8088 - Source:
AnywhereorMy IP
Add Custom 50070 for HDFS Name Node
Click on Add rule
- Type:
Custom TCP - Protocol:
TCP - Port range:
50070 - Source:
AnywhereorMy IP

Add Custom 18080 for Spark History Server
Click on Add rule
- Type:
Custom TCP - Protocol:
TCP - Port range:
18080 - Source:
AnywhereorMy IP
Click on Save rules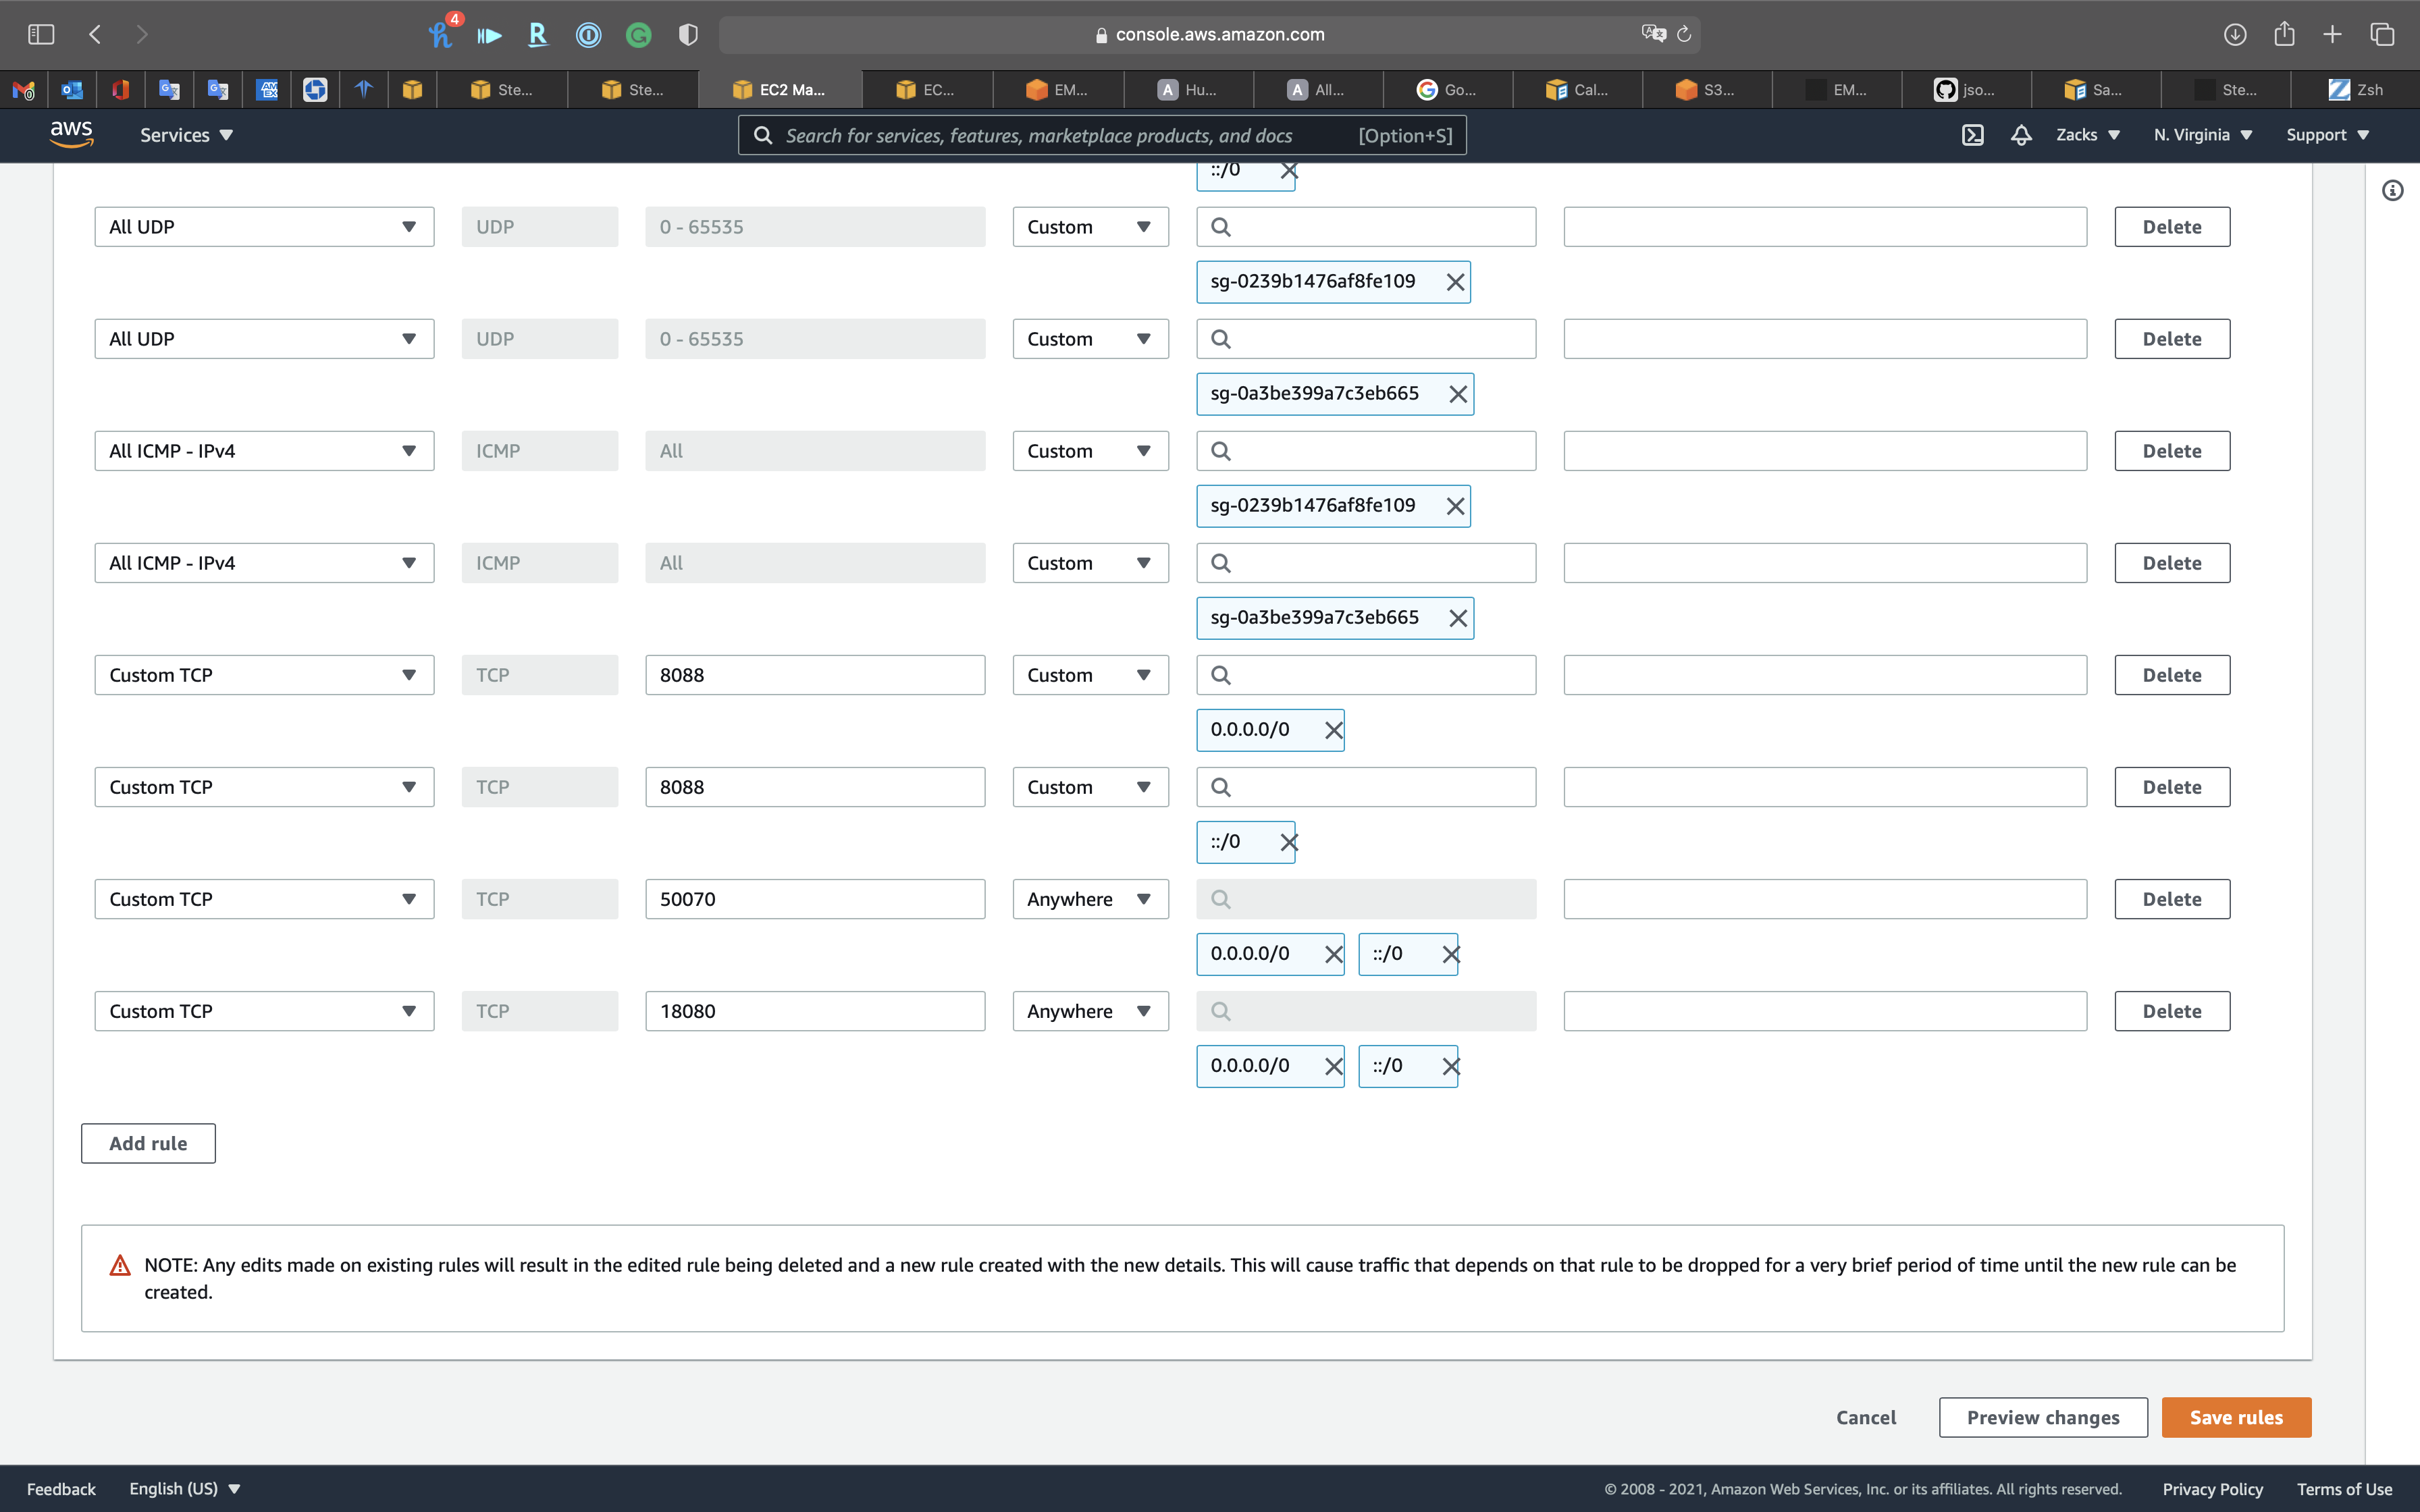
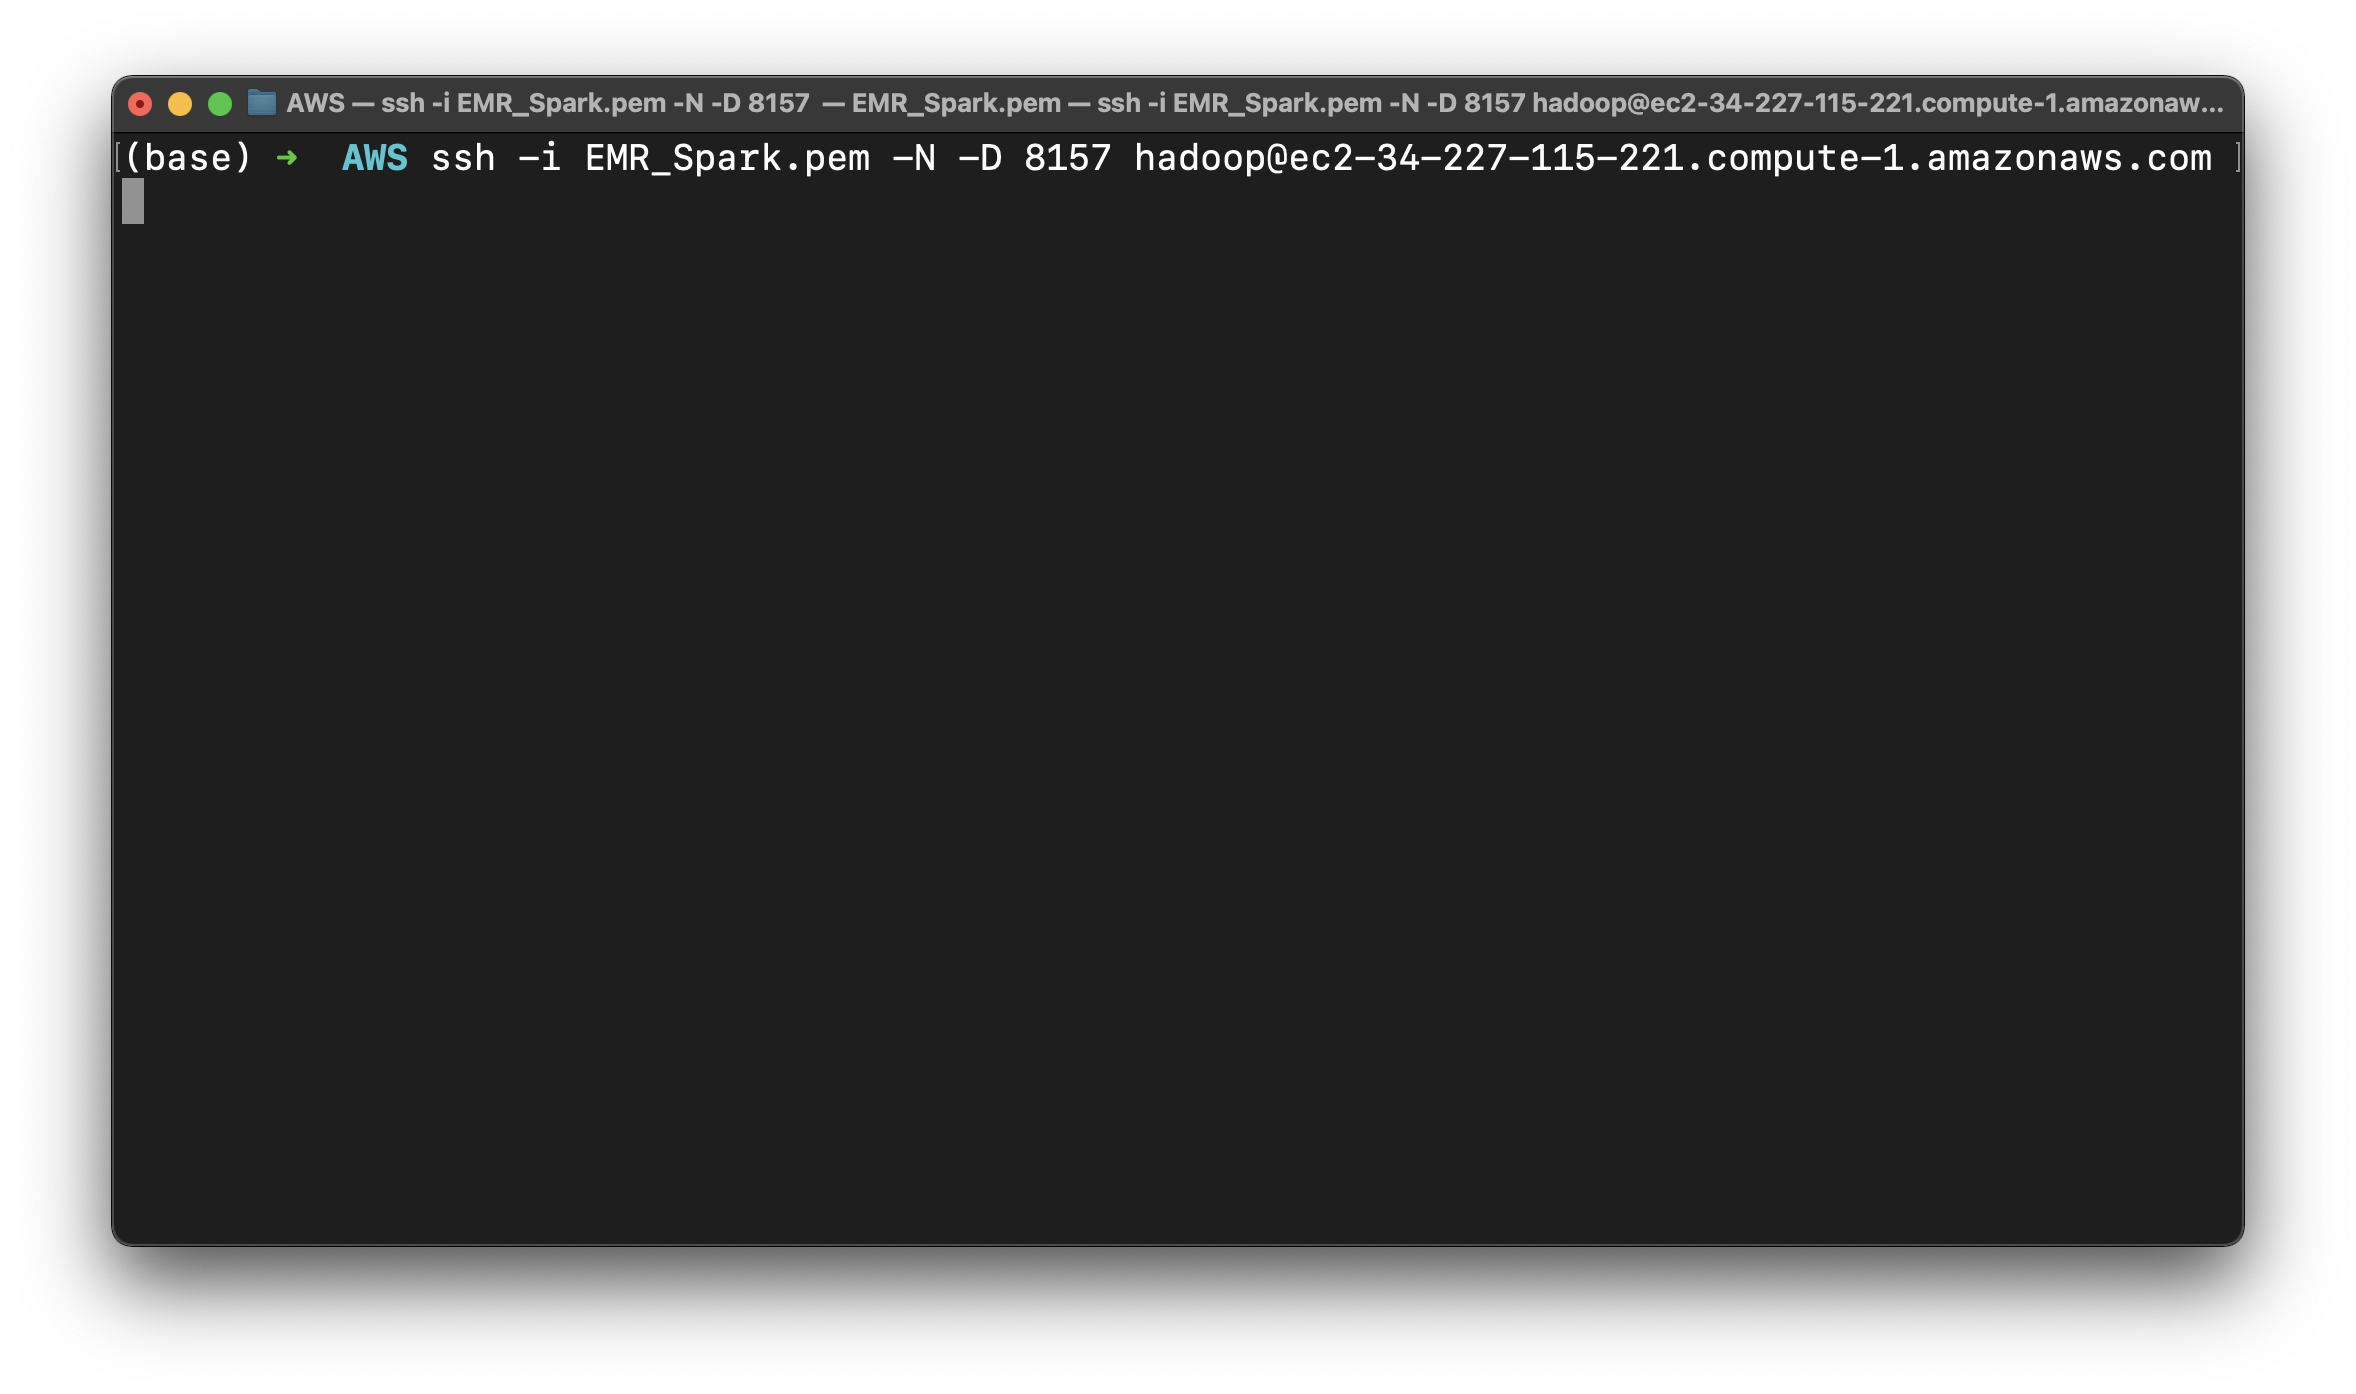
Build SSH Forward
Copy Master public DNS
1 | chmod 0400 EMR_Spark.pem |
It will add a port forward for your request.
Presto
Services -> EMR -> Clusters
Click the cluster created by State Machine.
Basic Reviews & Data Integrity Check
Copy Master public DNS
Click on Connect to the Master Node Using SSH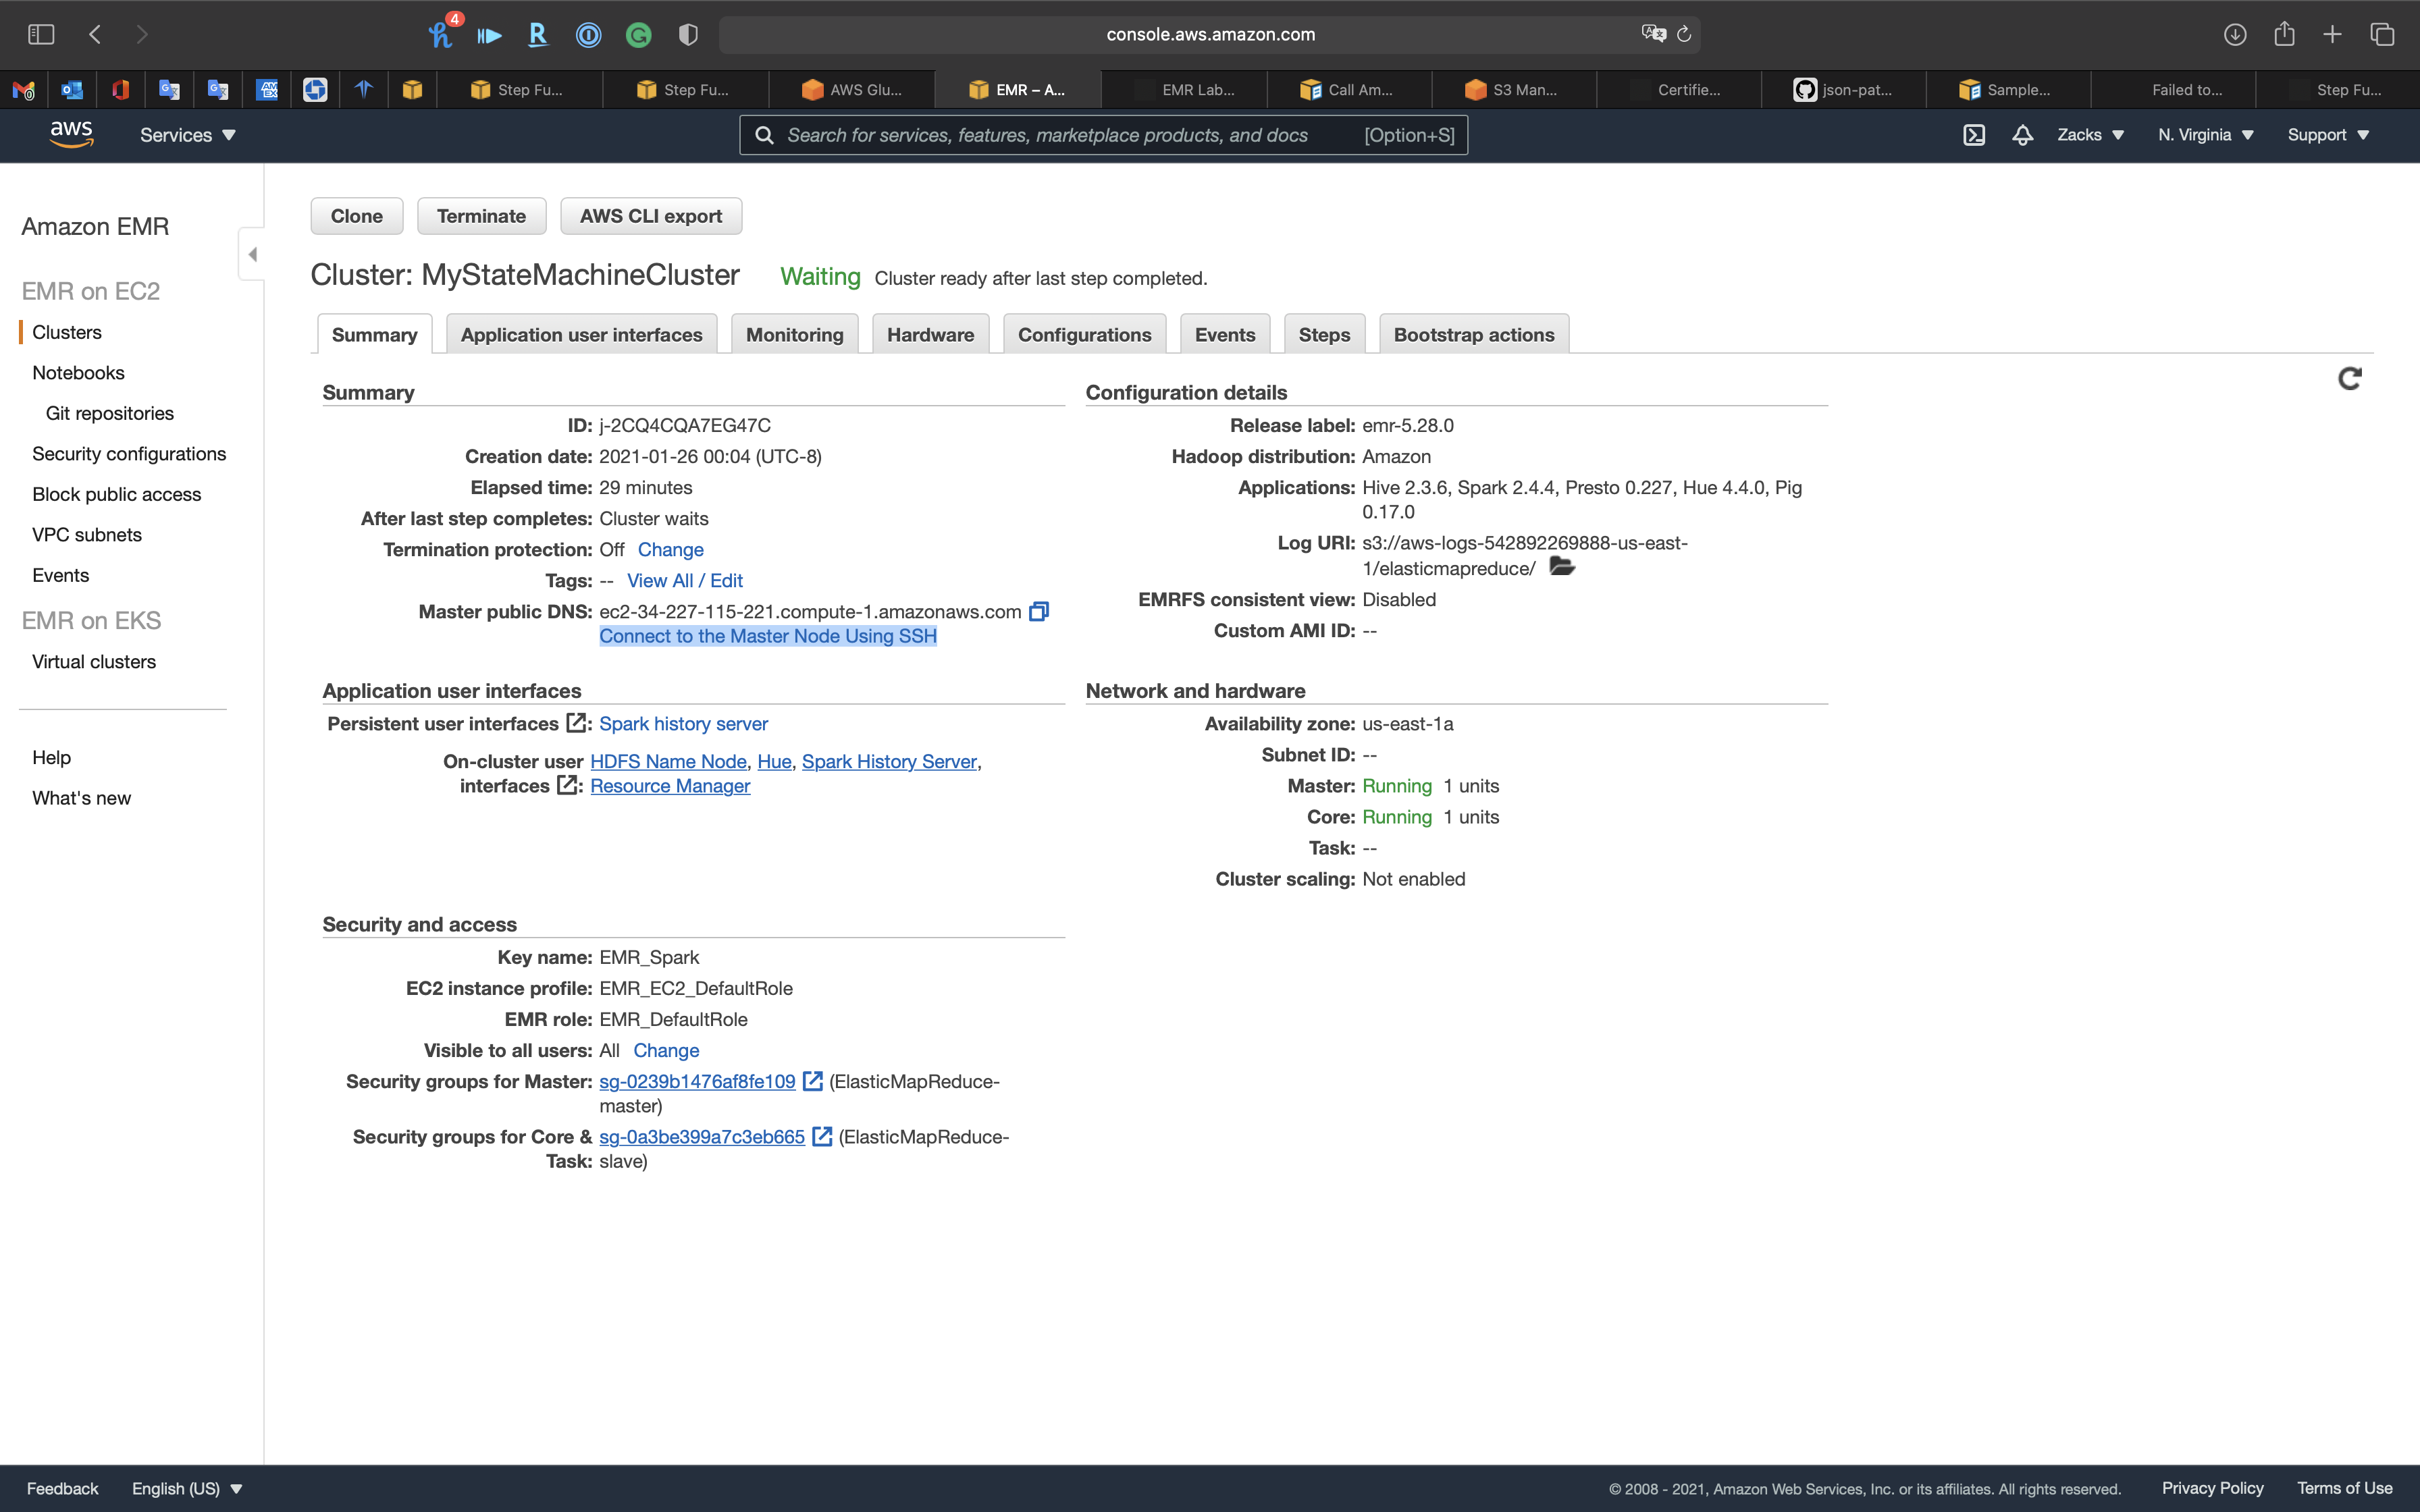
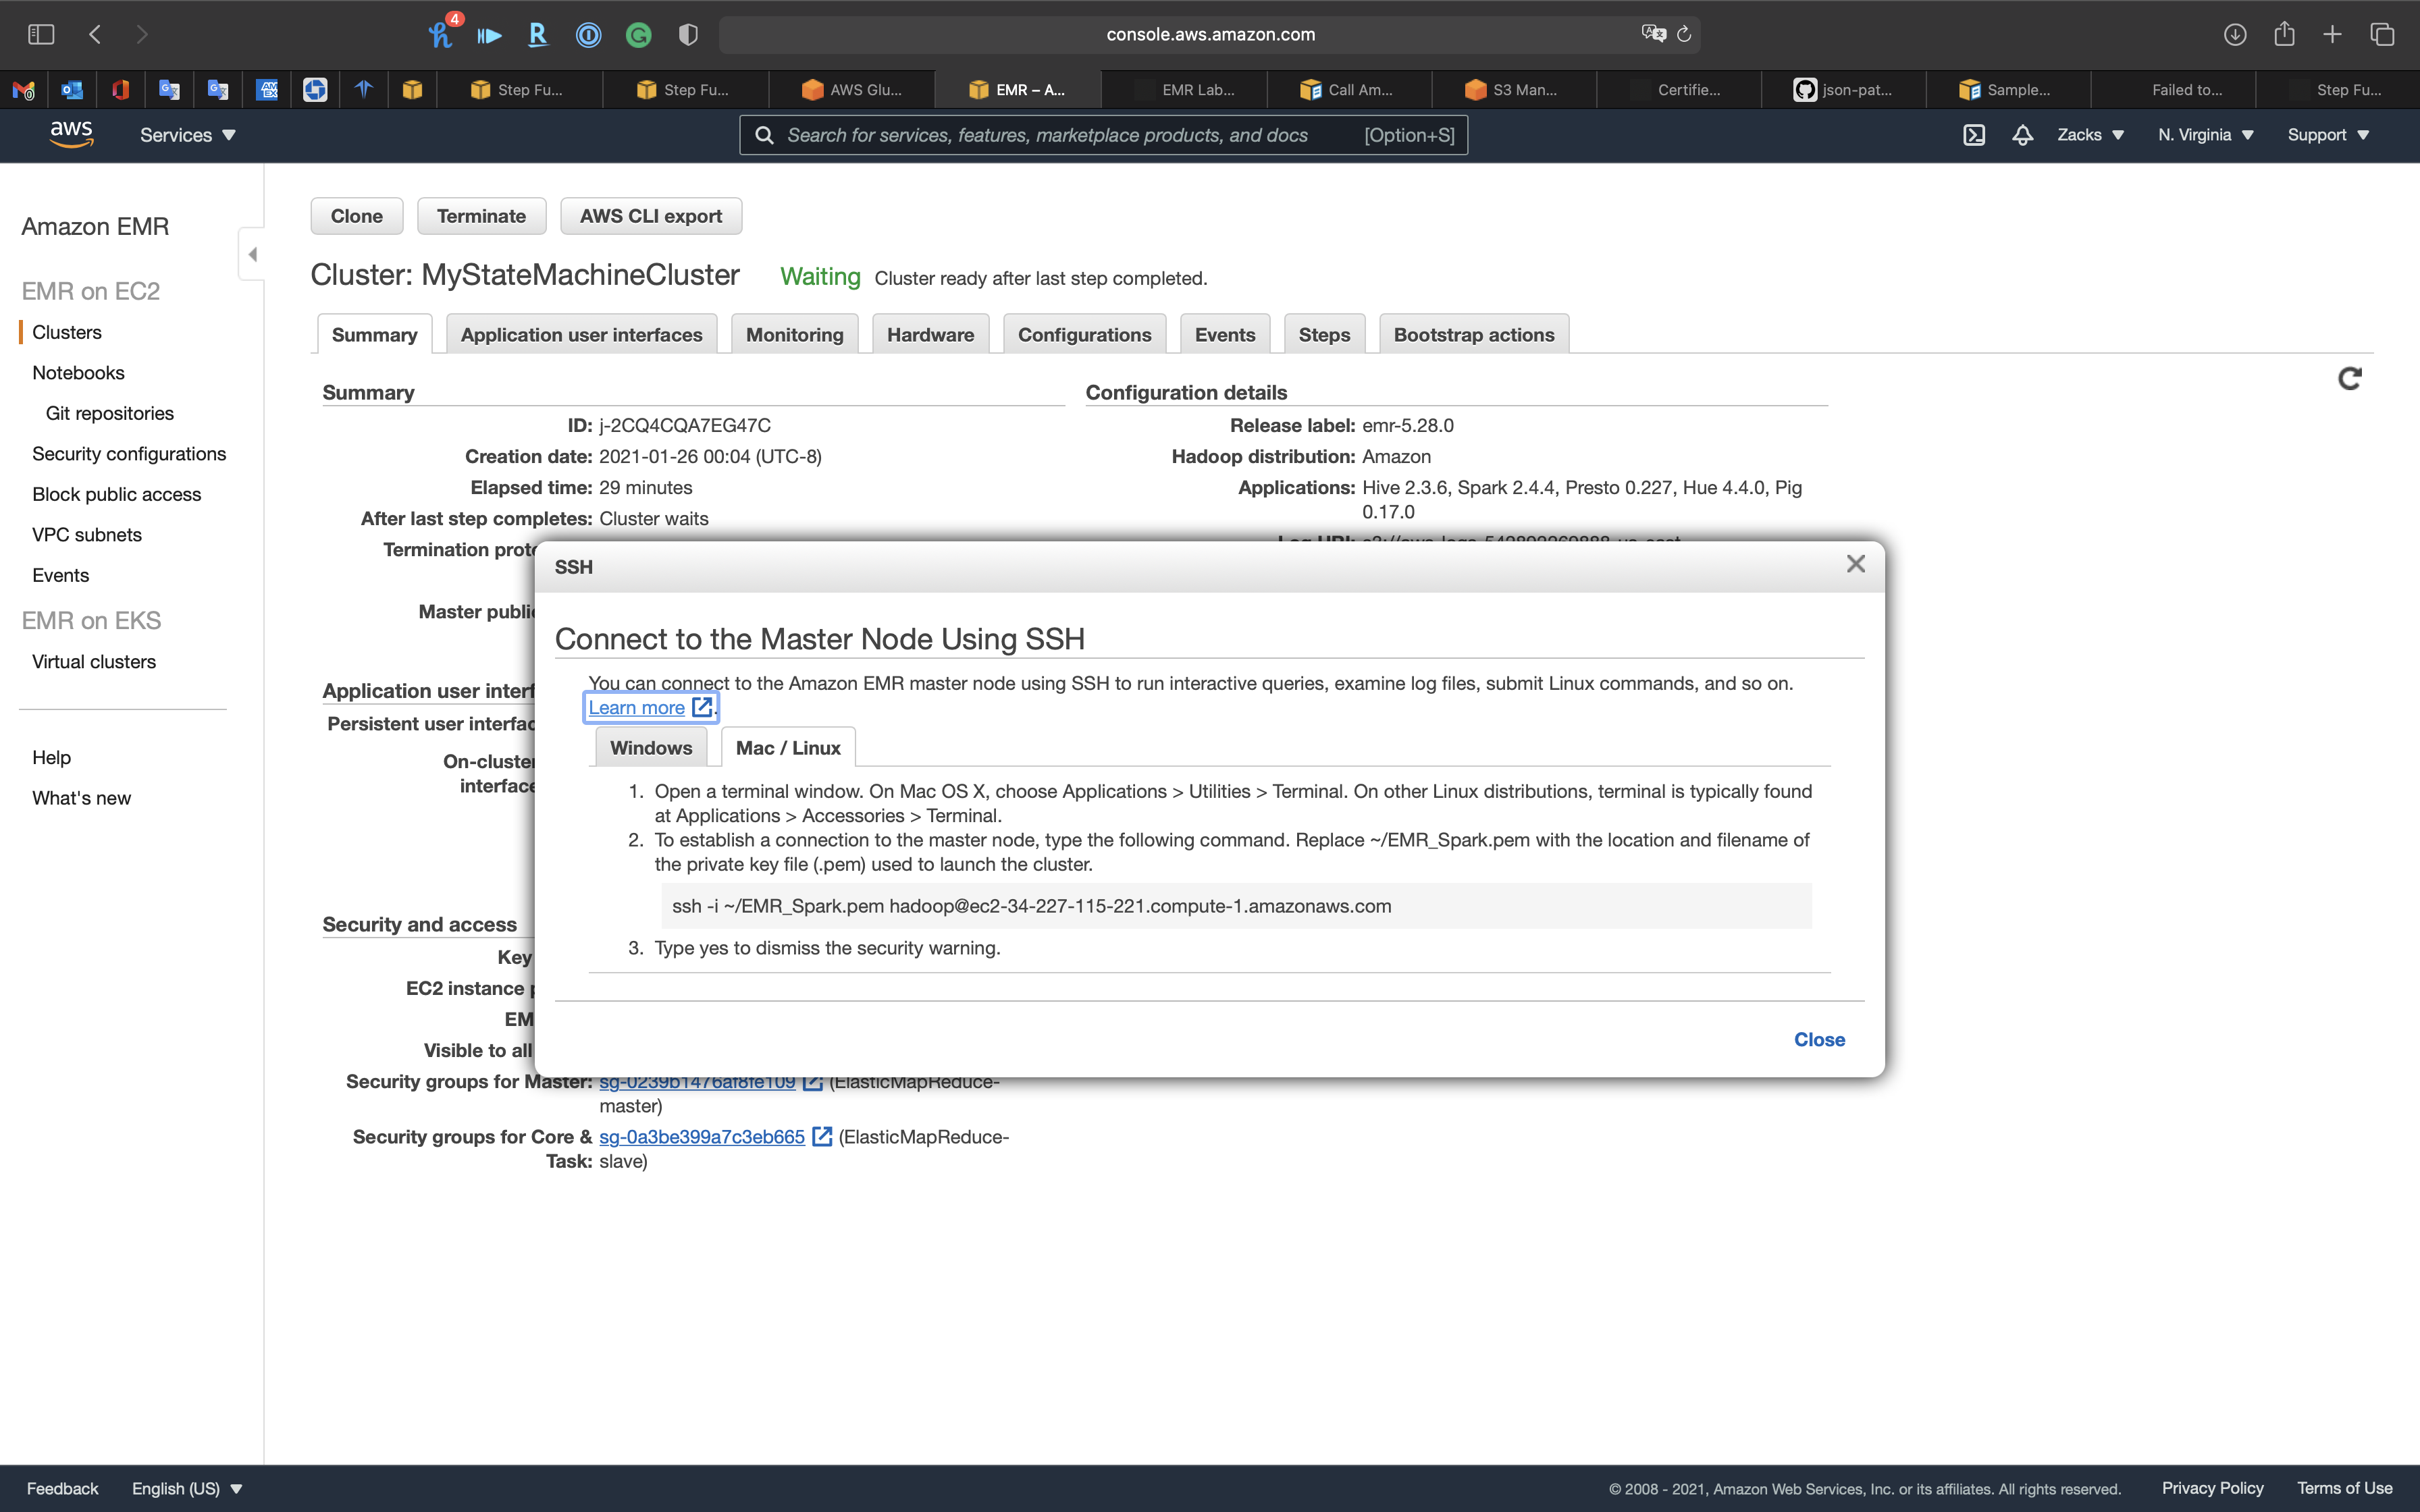
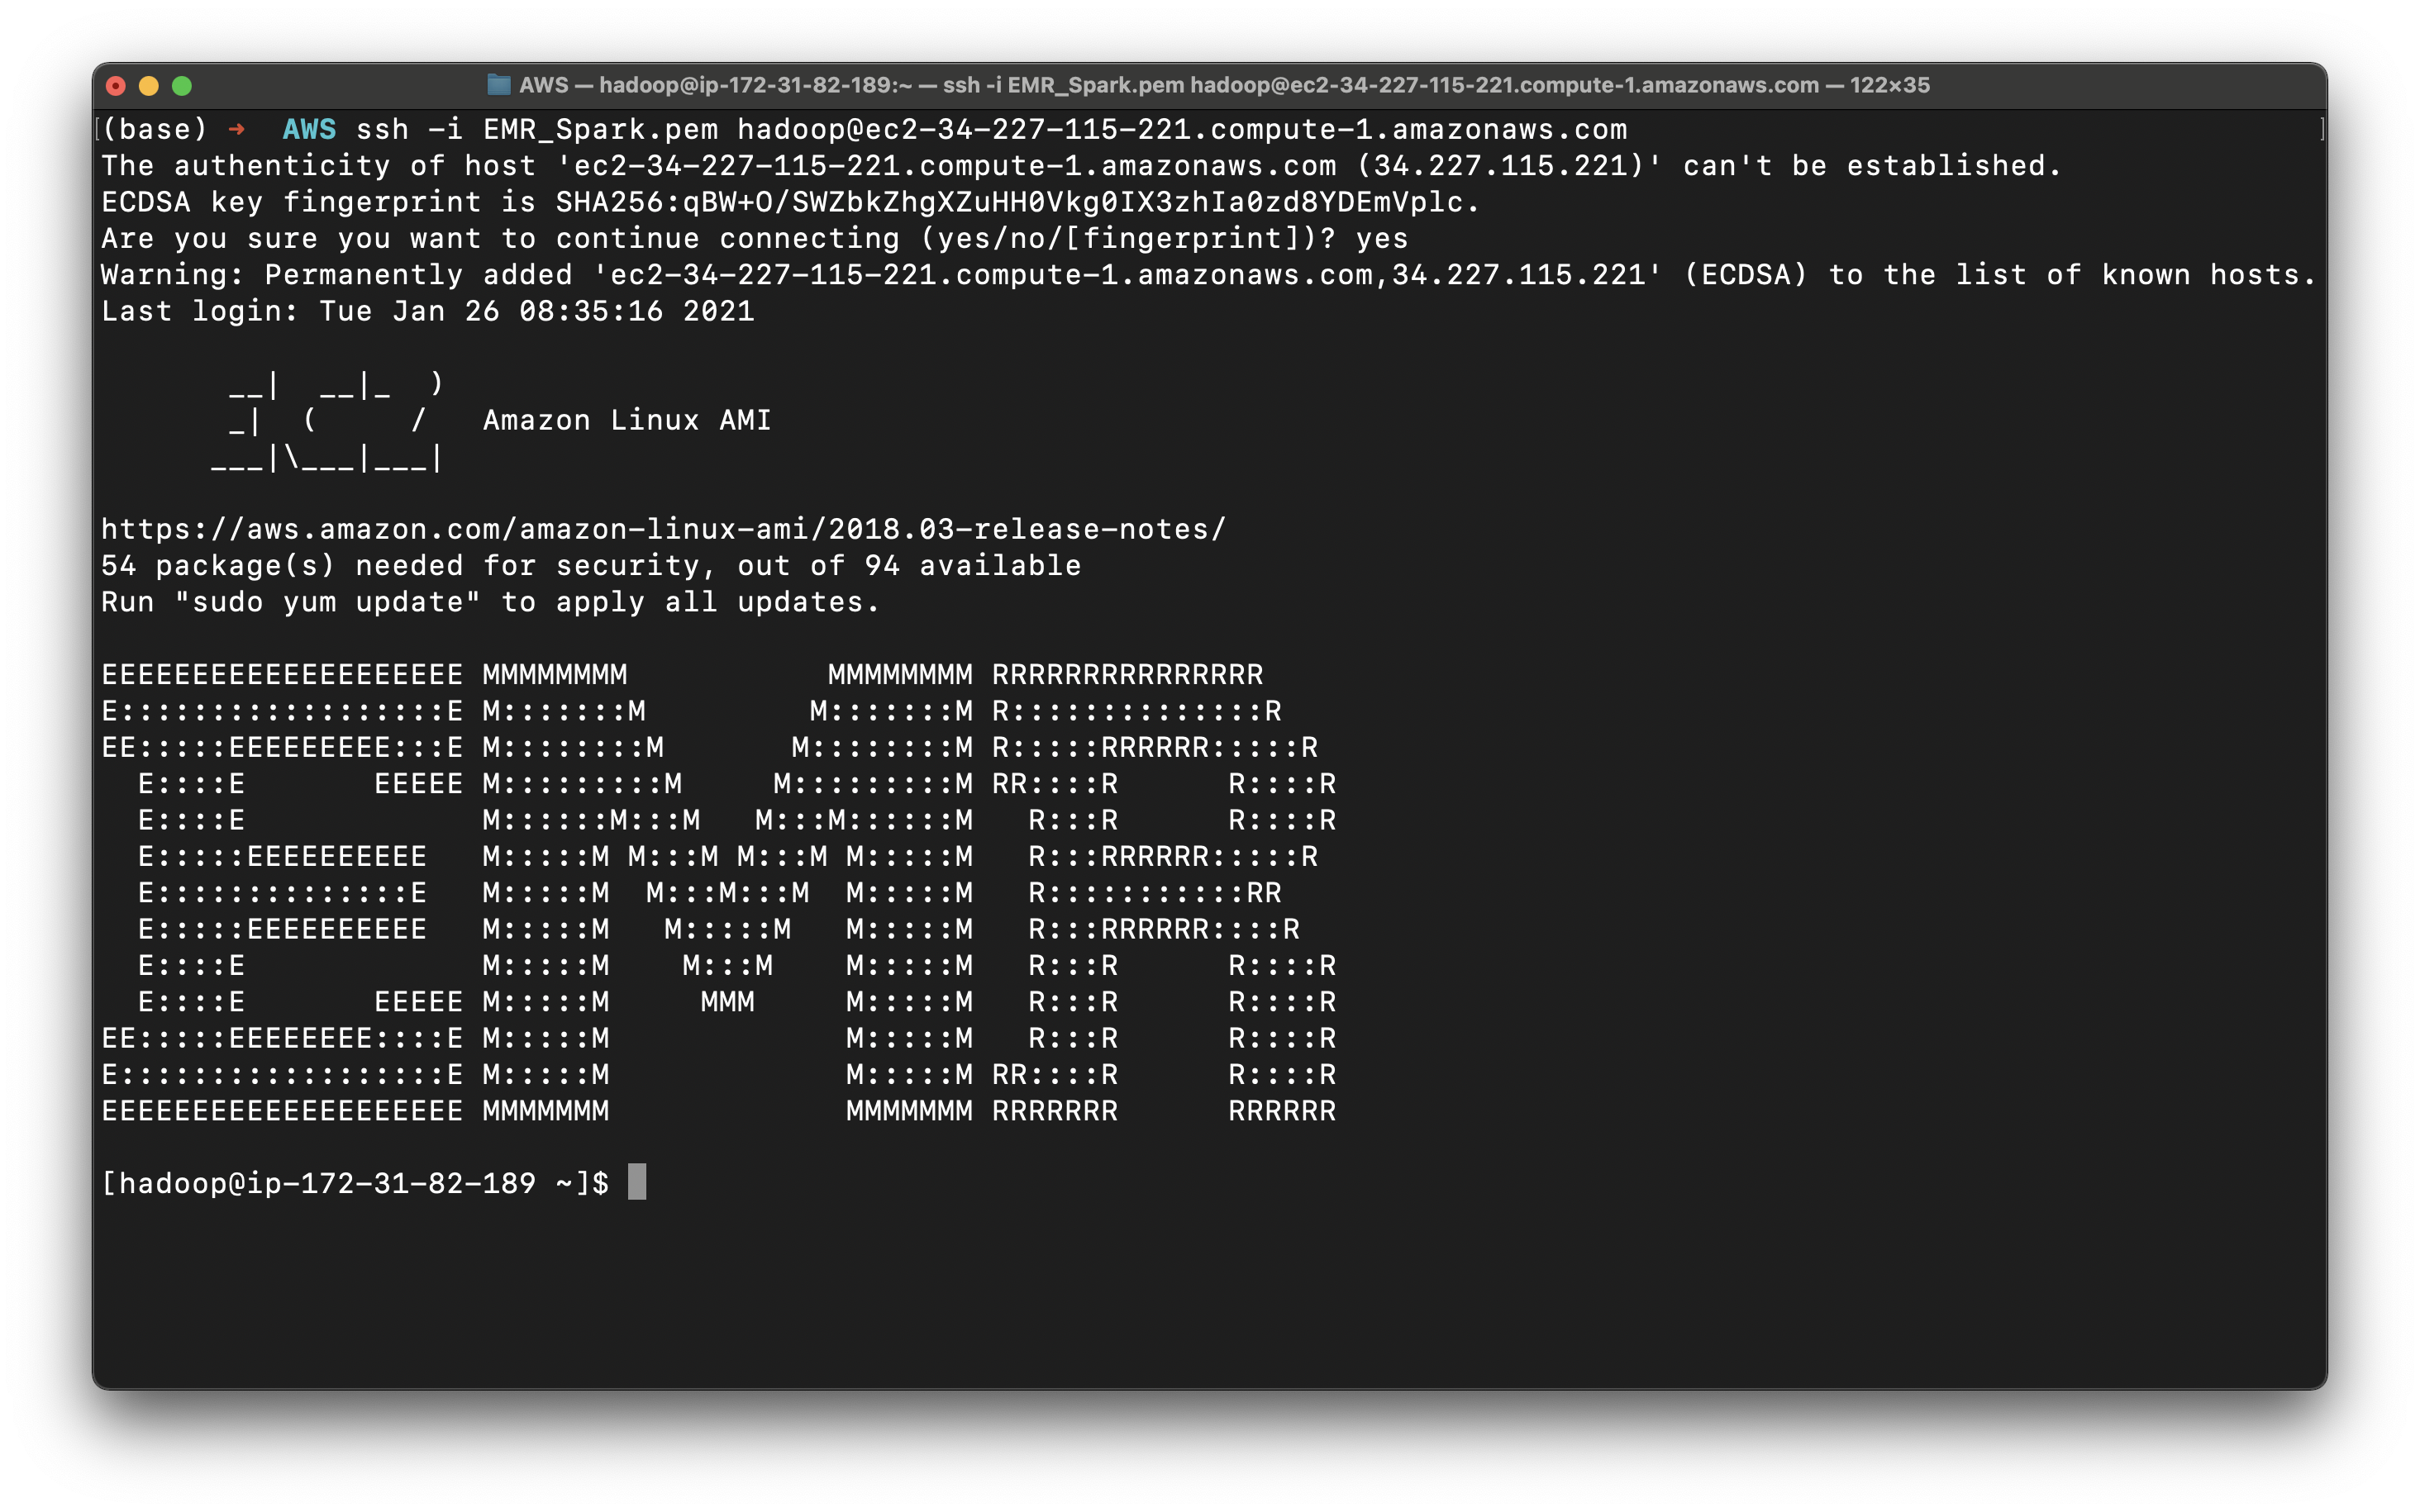
Open another terminal to SSH into the EMR master node.
1 | ssh -i EMR_Spark.pem hadoop@ec2-34-227-115-221.compute-1.amazonaws.com |
1 | presto-cli --catalog hive |
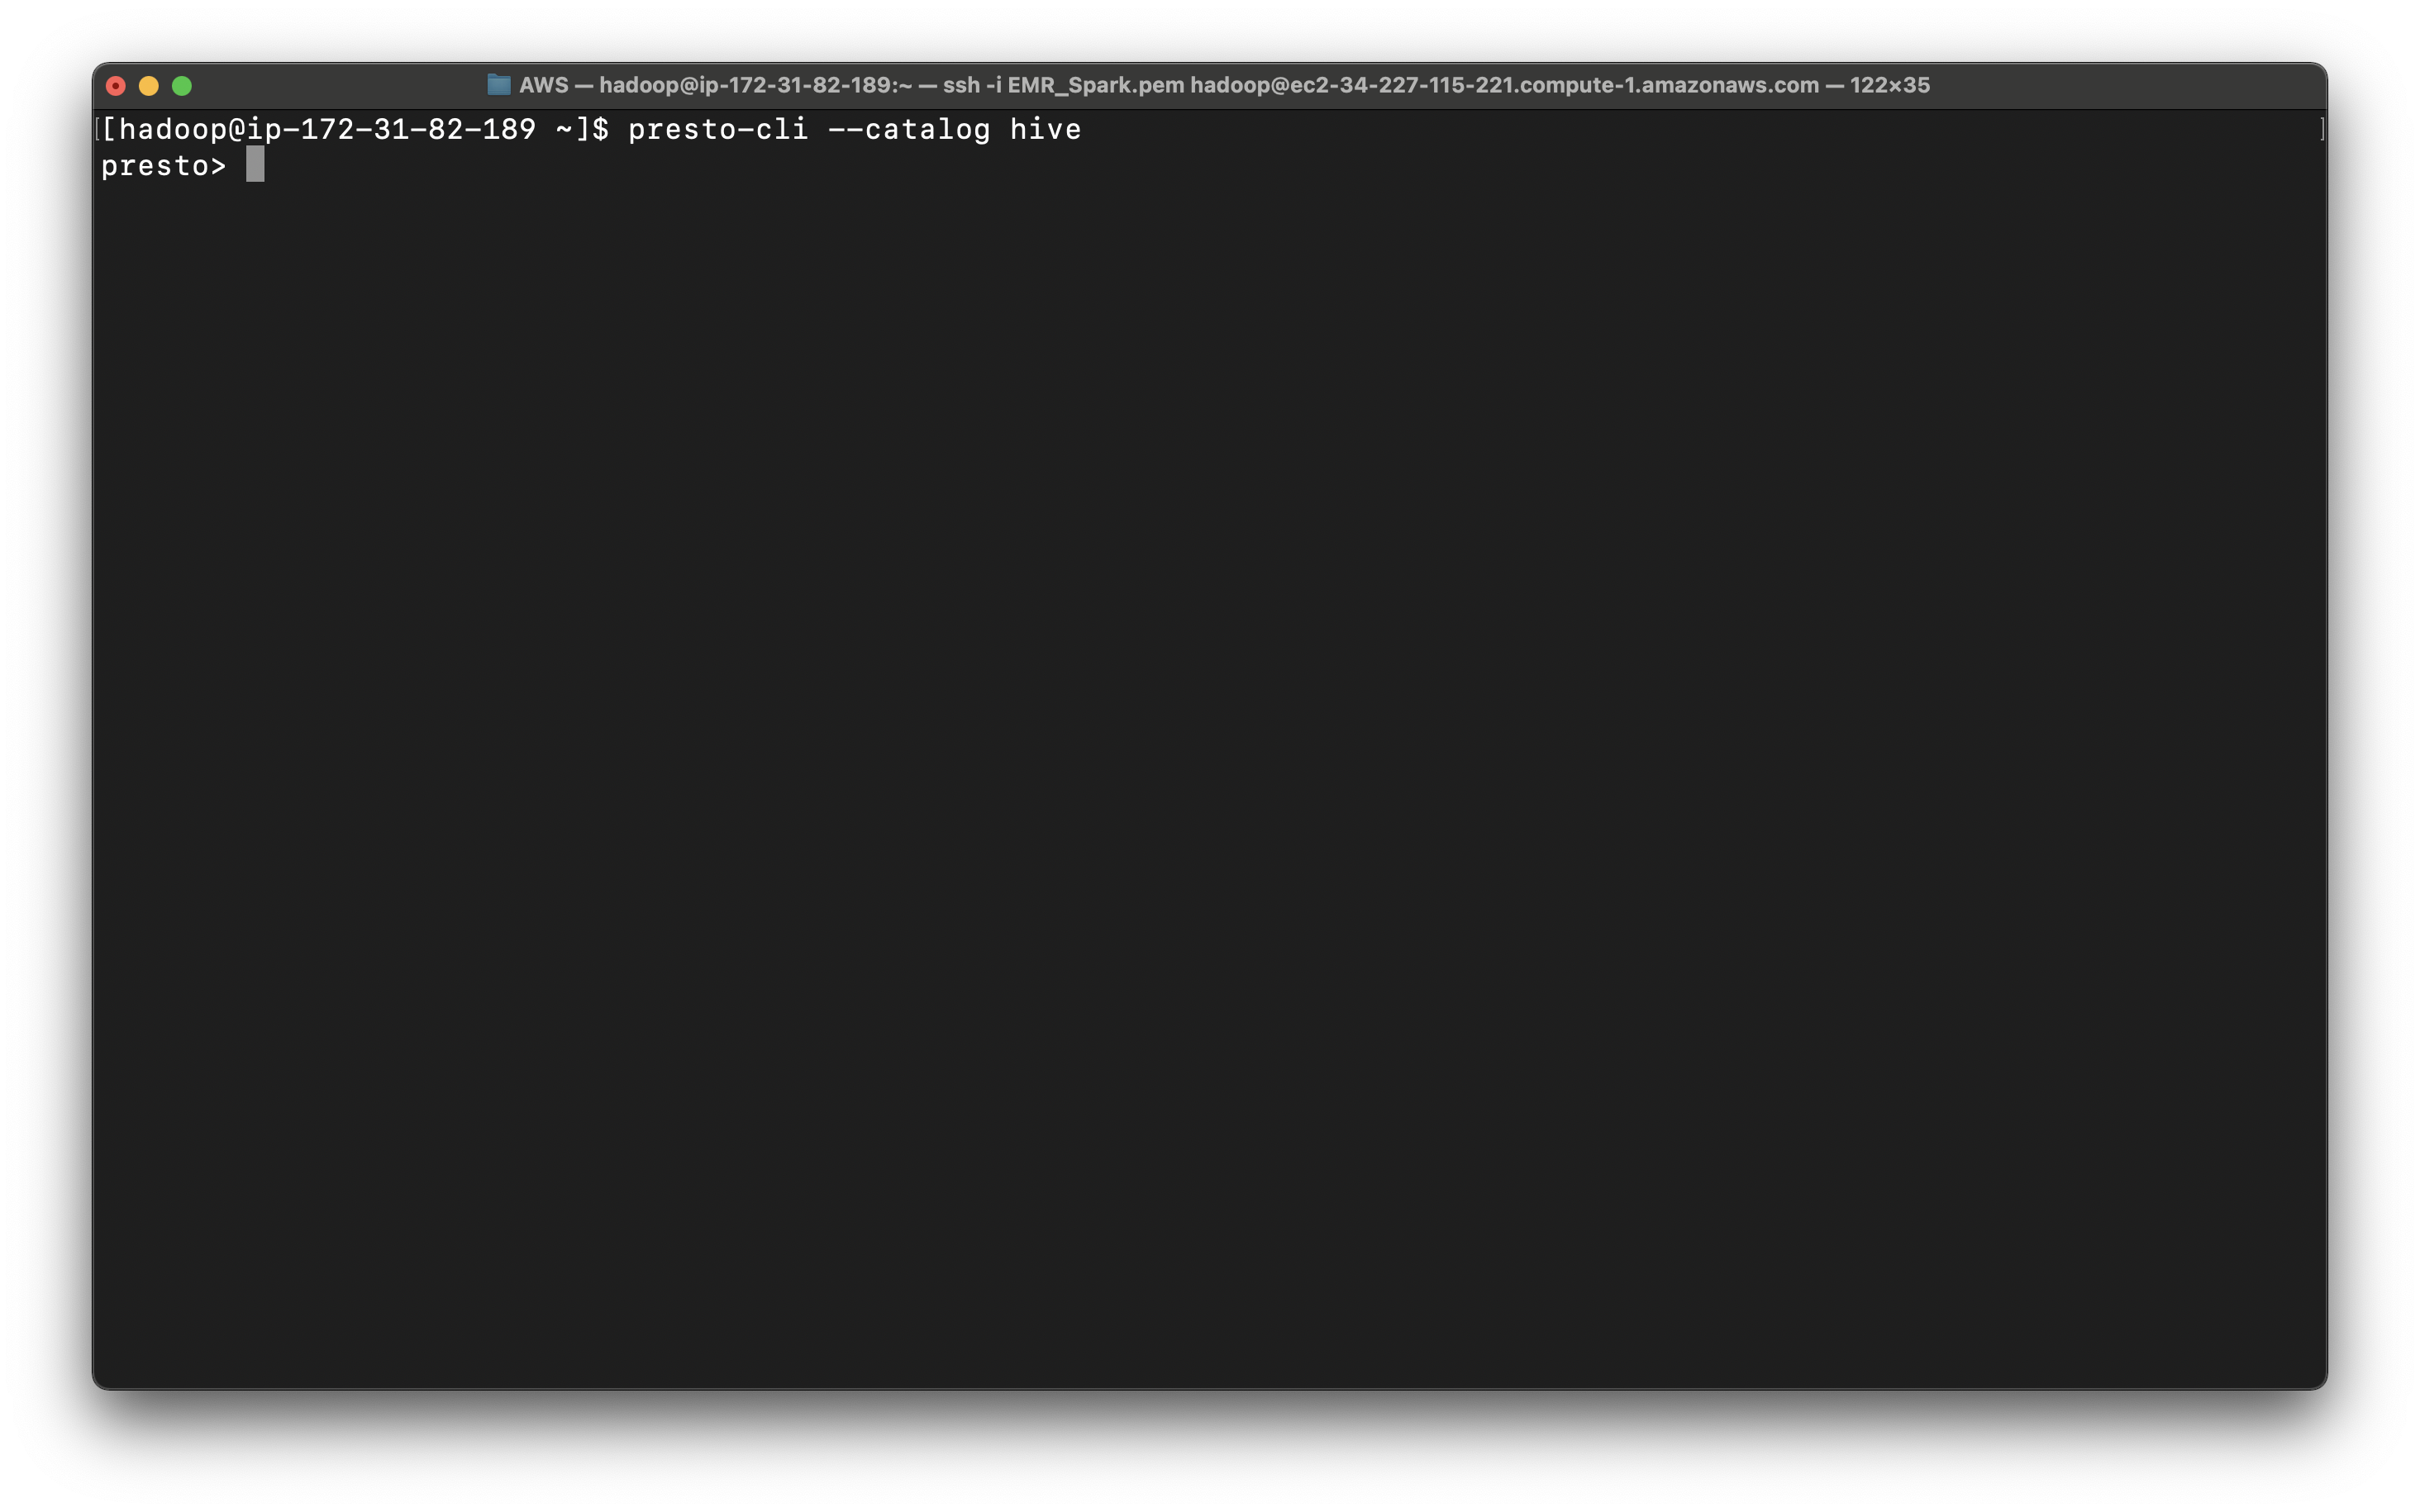
You can see all your databases in AWS Glue.
1 | show schemas; |
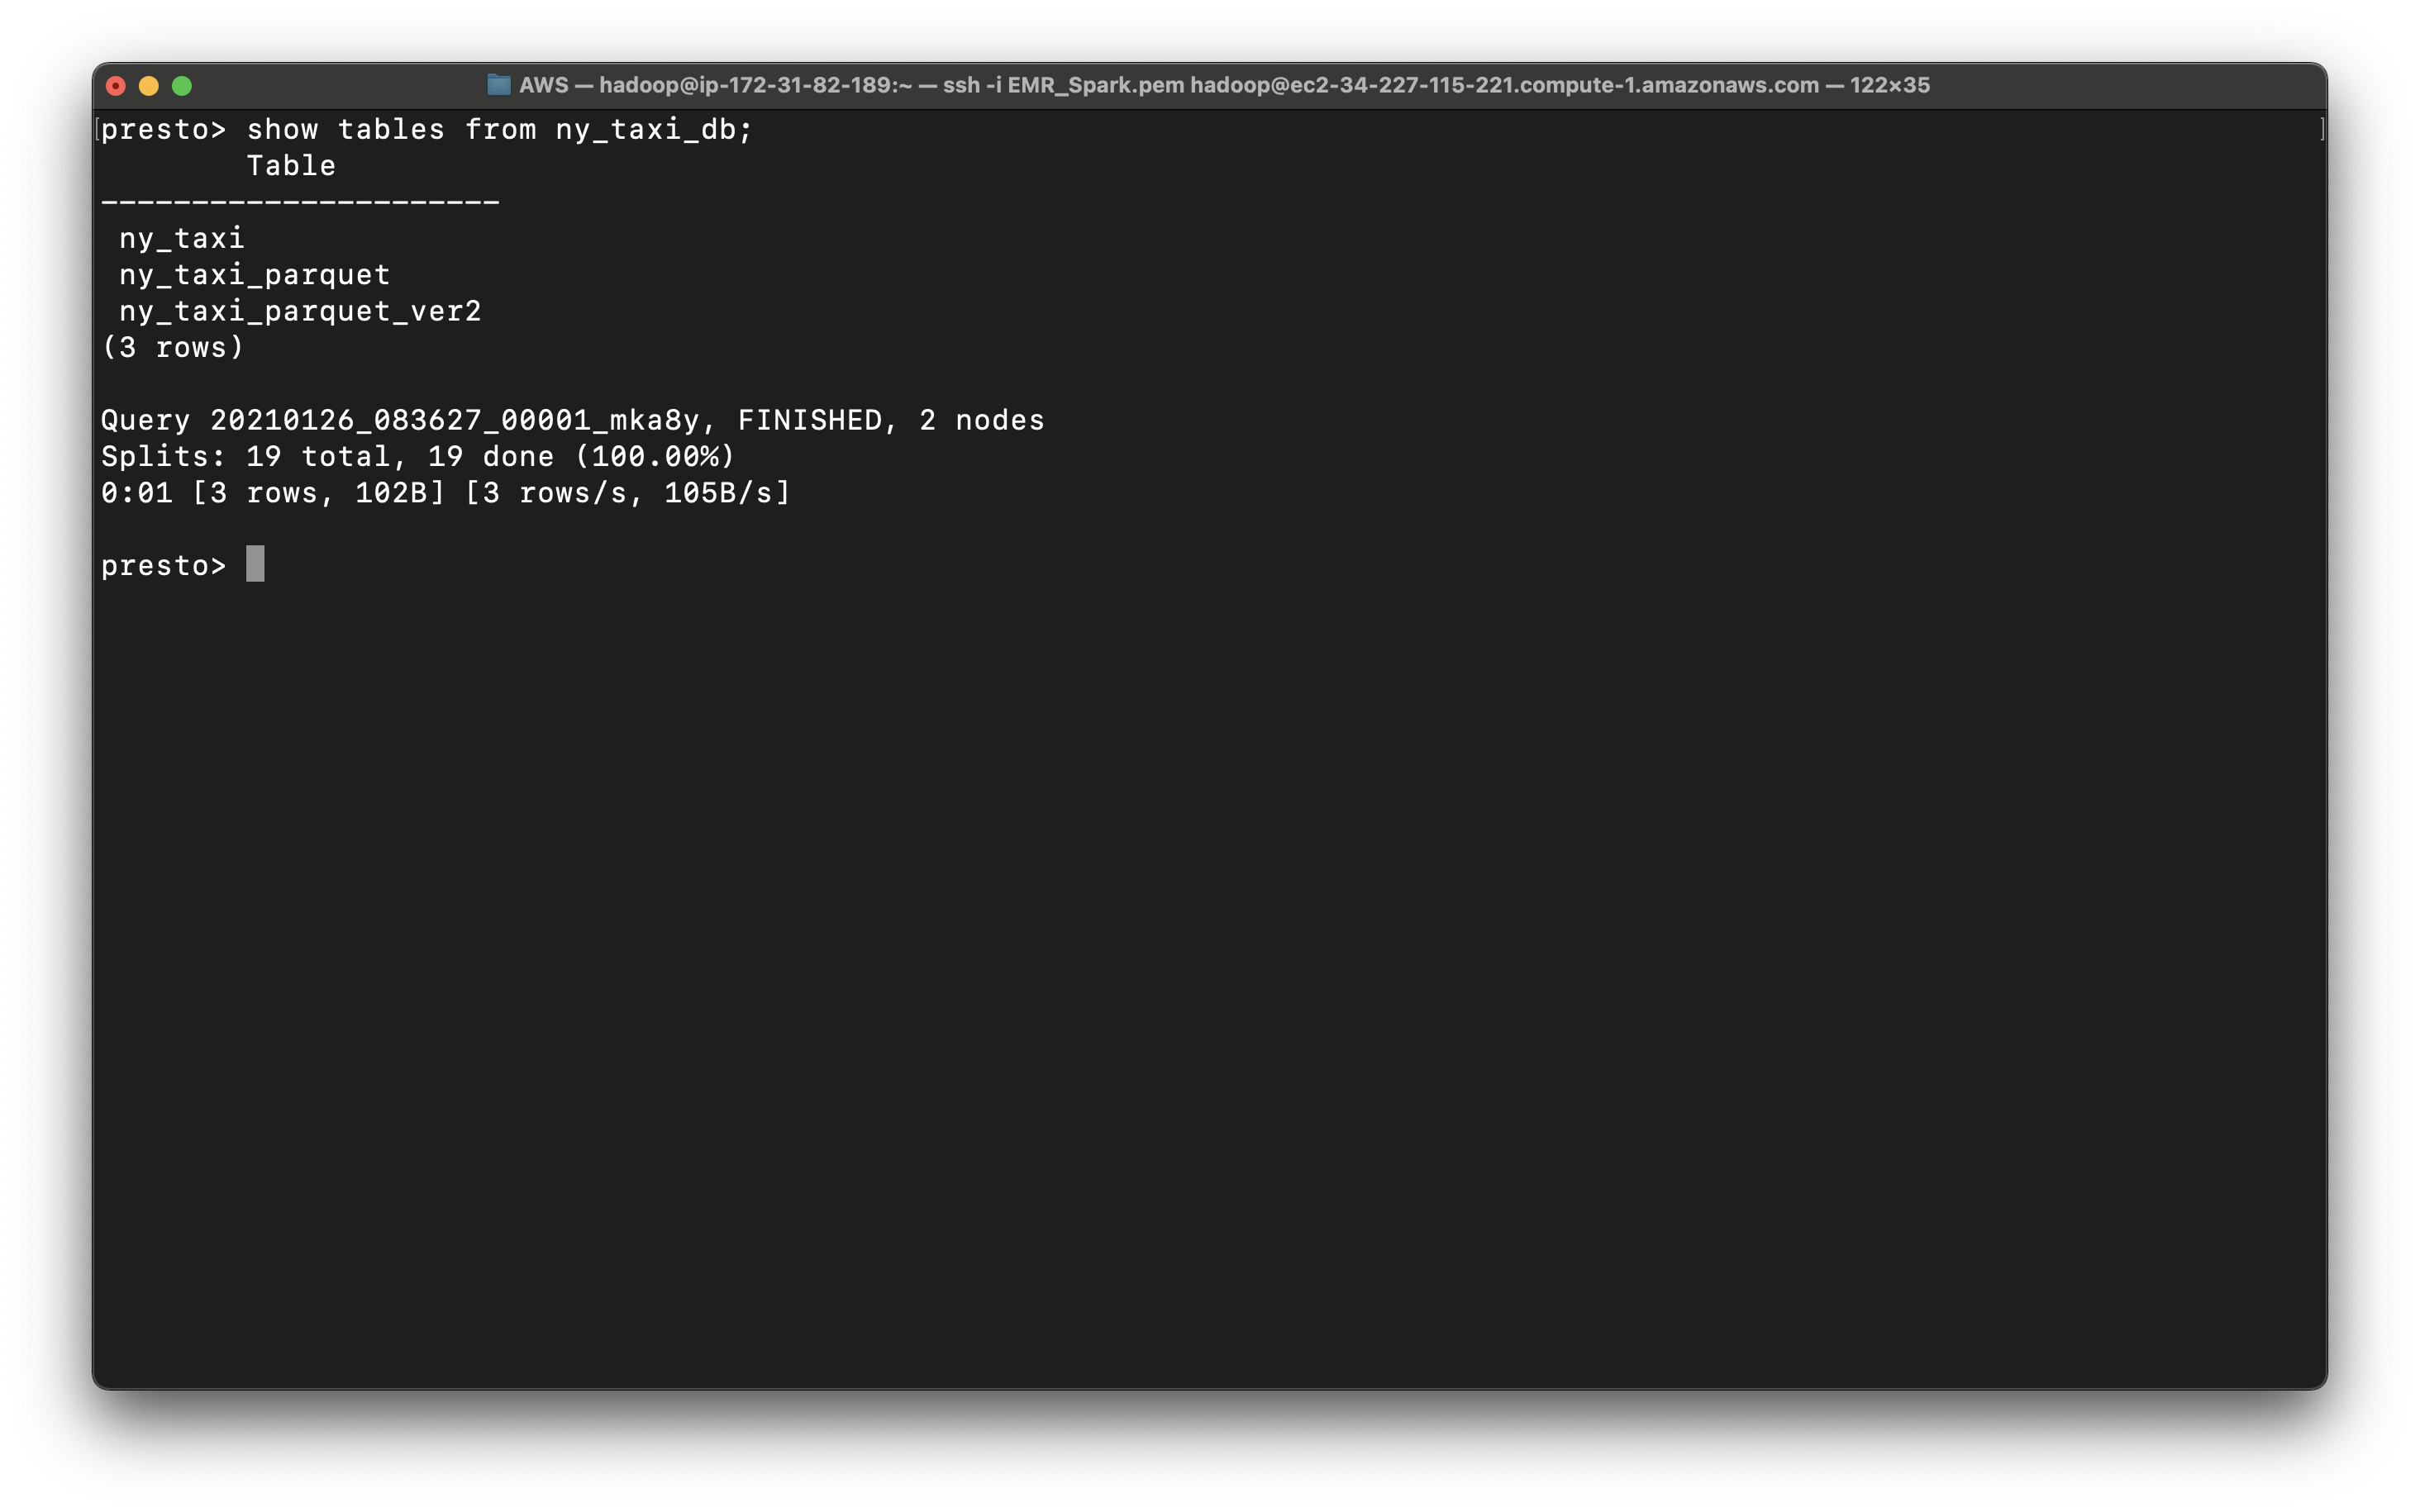
We can see several schemas. They are all come from AWS Glue, since we checked Use for Presto table metadata at the EMR configuration step. And we can see ny_taxi_db

In ny_taxi_db, we have two tables, one is the CSV and another is Parquet.
Actually they are the schemas not the real tables.
However, when we query the data from the tables, the schemas help the database engine locate and extract from S3 directly!
Even we are using SQL statements to query data that is not store in the SQL database!
1 | show tables from ny_taxi_db; |
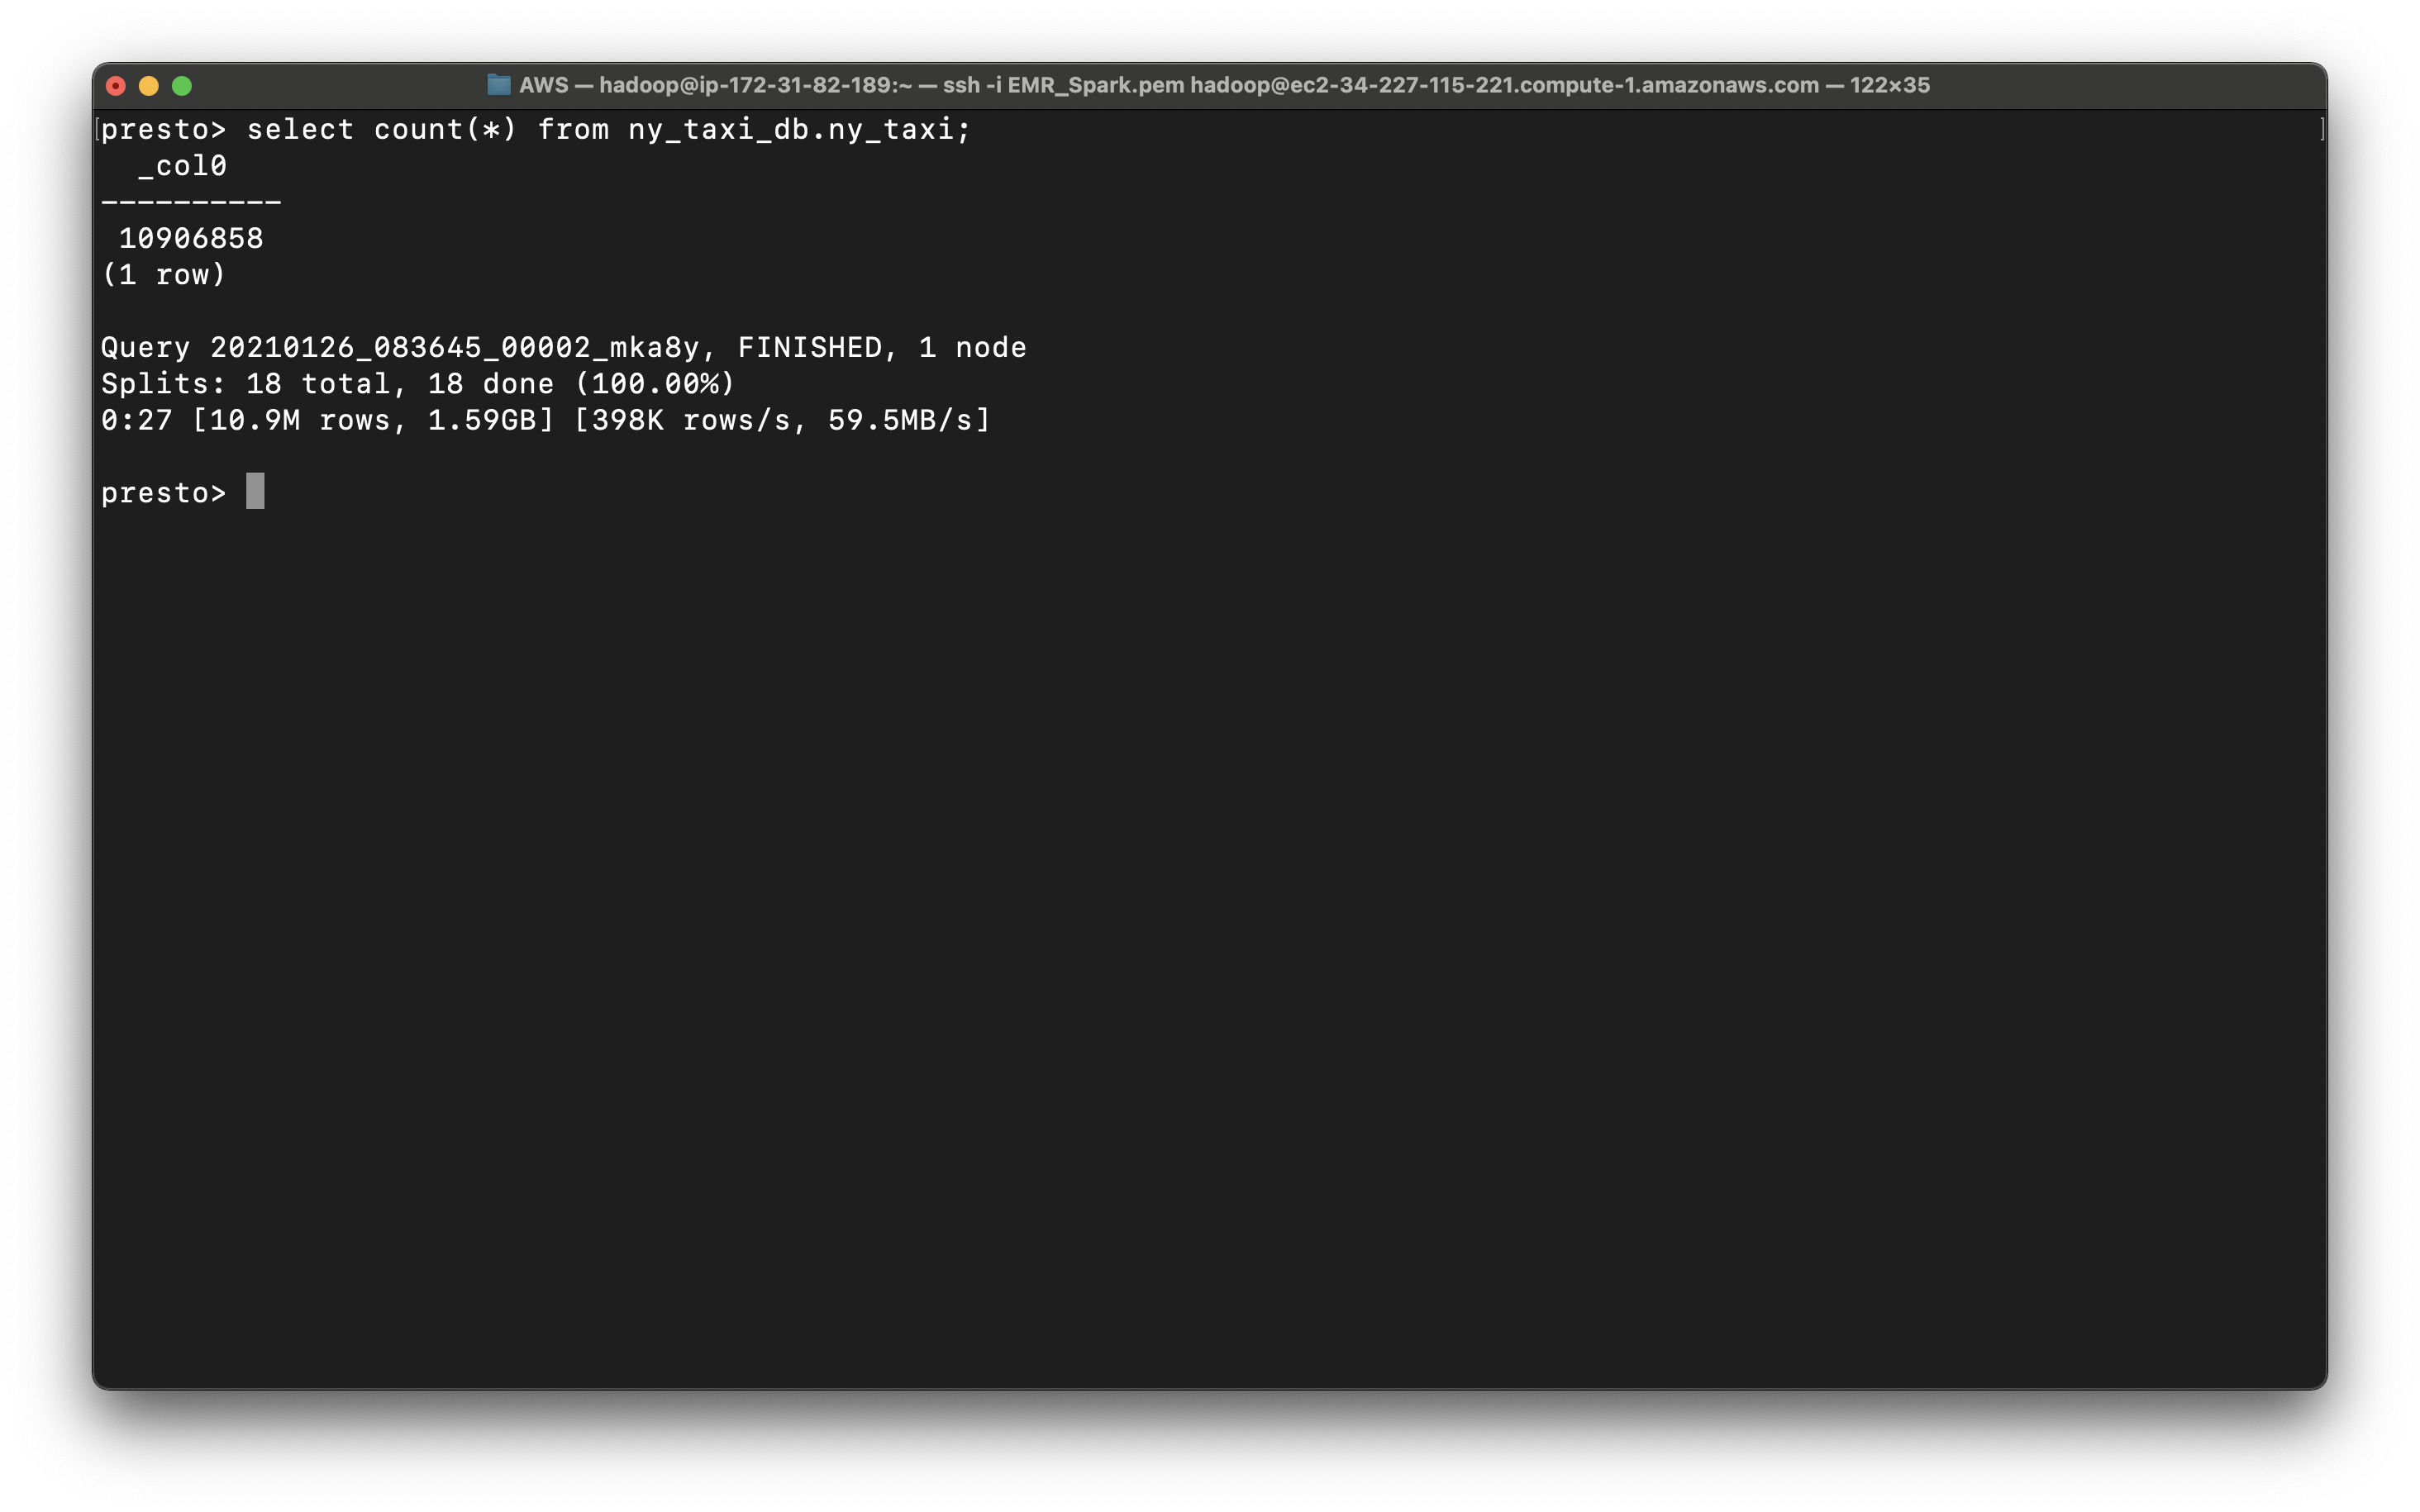
1 | select count(*) from ny_taxi_db.ny_taxi; |
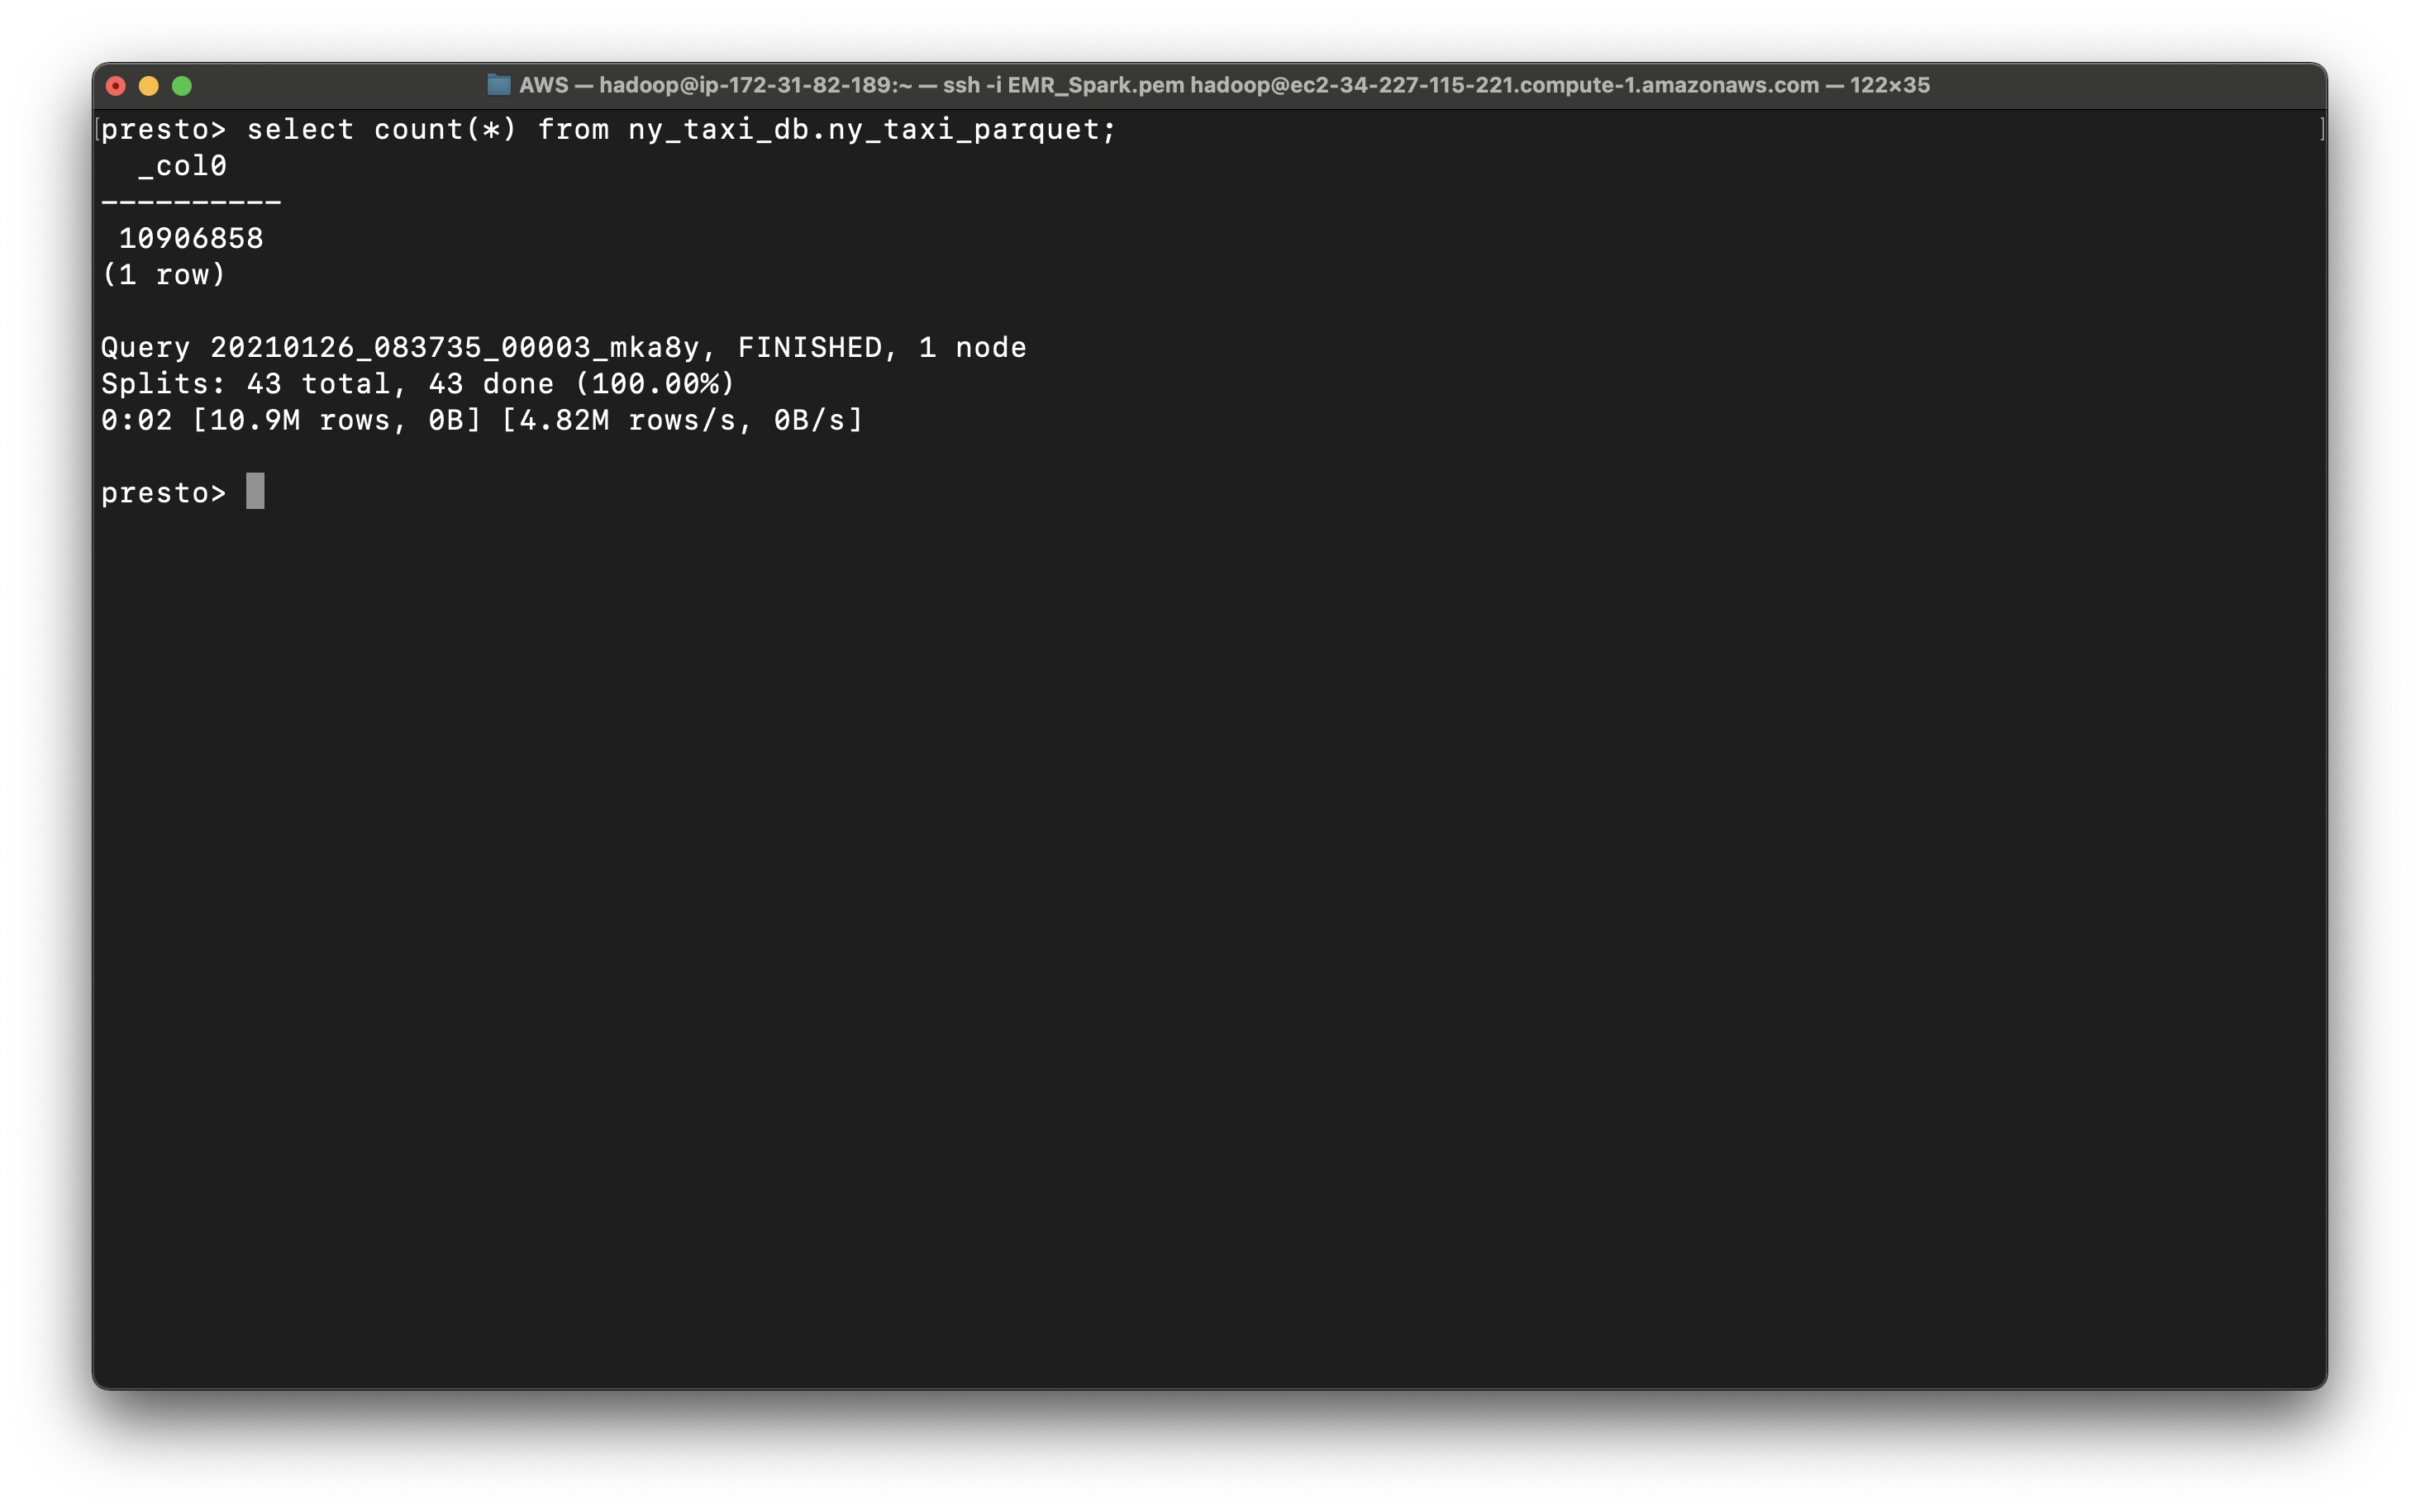
1 | select count(*) from ny_taxi_db.ny_taxi_parquet; |
Notice in ny_taxi table, the datetime is string type, which is hard to extract date and time.
1 | select * from ny_taxi_db.ny_taxi order by tpep_pickup_datetime limit 10; |
Since we use AWS Glue ETL convert the string of datetime in CSV file to timestamp and removed tpep_ prefix.
1 | select * from ny_taxi_db.ny_taxi_parquet order by pickup_date limit 10; |
Presto Query
Use parquet to make time related queries
1 | SELECT EXTRACT (HOUR FROM pickup_date) AS hour, avg(fare_amount) AS average_fare FROM ny_taxi_db.ny_taxi_parquet GROUP BY 1 ORDER BY 1; |
We get the average_fare based on hour.
Conclusion: A taxi driver living in New York could earn the maximum fare during 4 AM to 5 AM.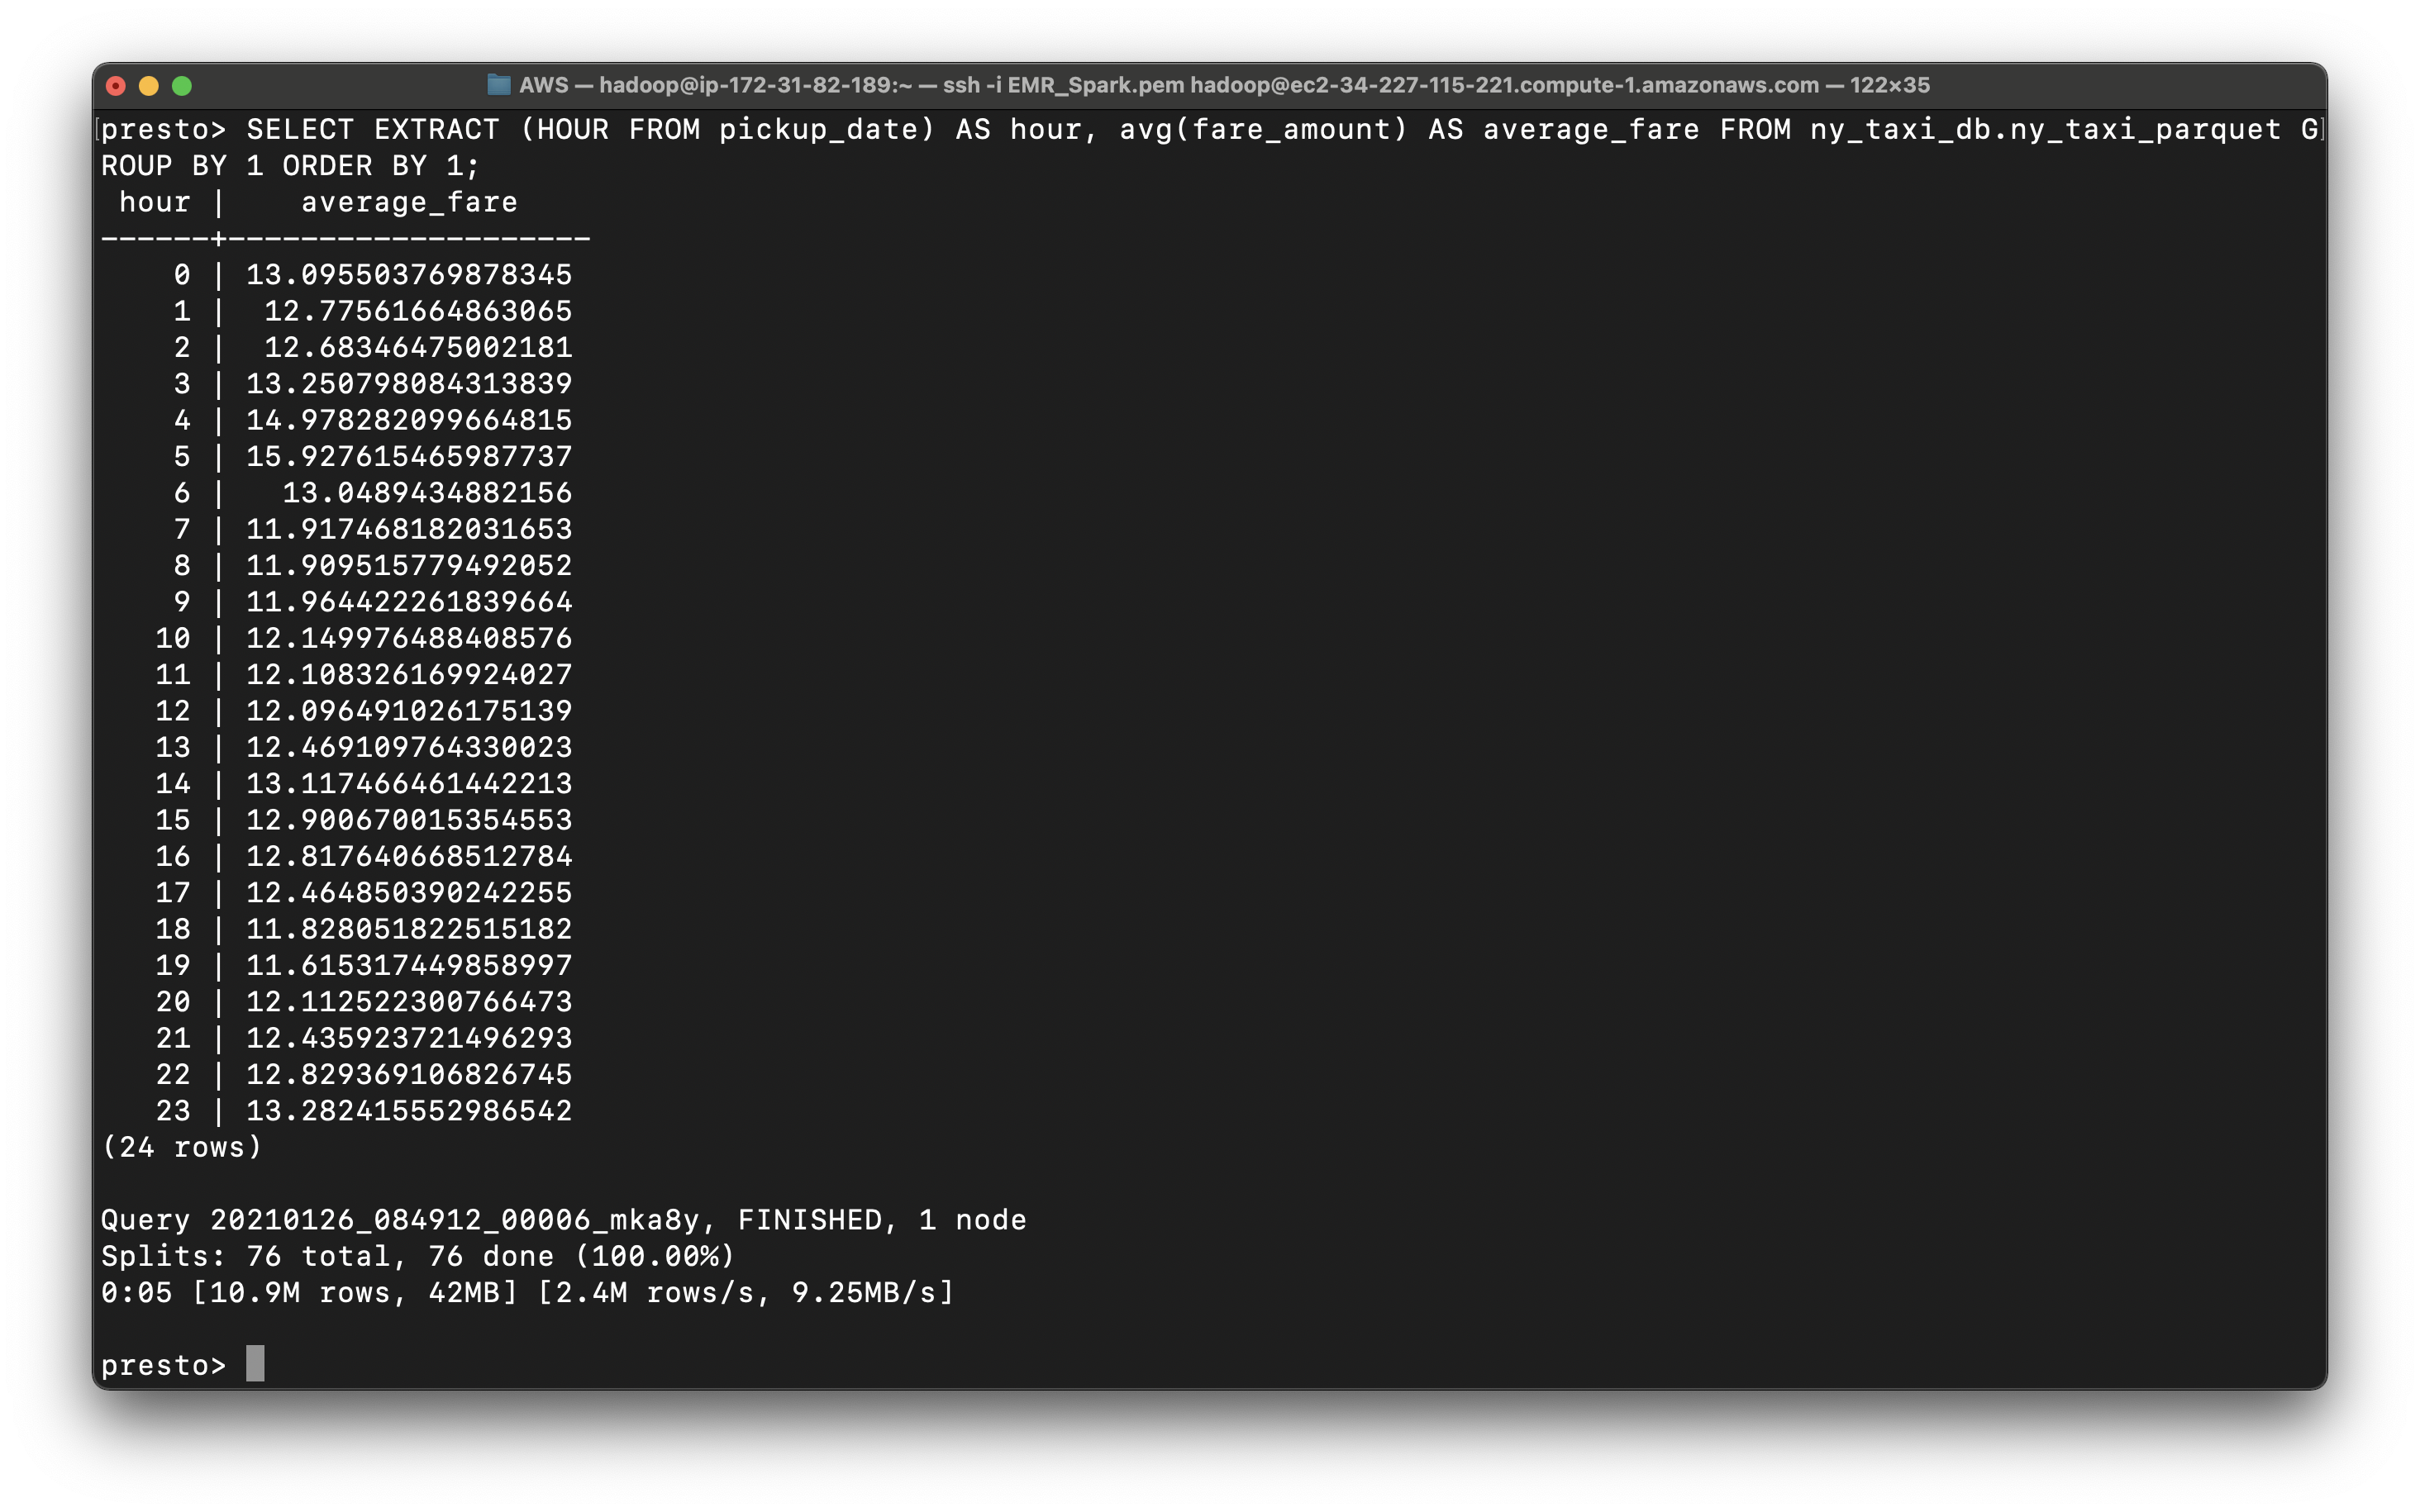
Query the tip percent category
1 | SELECT TipPrctCtgry |
We can m4.xlarge is much slower than m5.xlarge. The latter is 14s.
1 | , (mta_tax / total_amount) as tip_prct |
1 | SELECT TipPrctCtgry |
You can see most trips give 10 percent tips or higher
Hadoop Resource Manager
Services -> EMR -> Clusters
Click on MyStateMachineCluster cluster then click on Application user interfaces tab.
Copy Resource Manager’s url
http://ec2-34-227-115-221.compute-1.amazonaws.com:8088/
Open a new tab on your browser and paste the url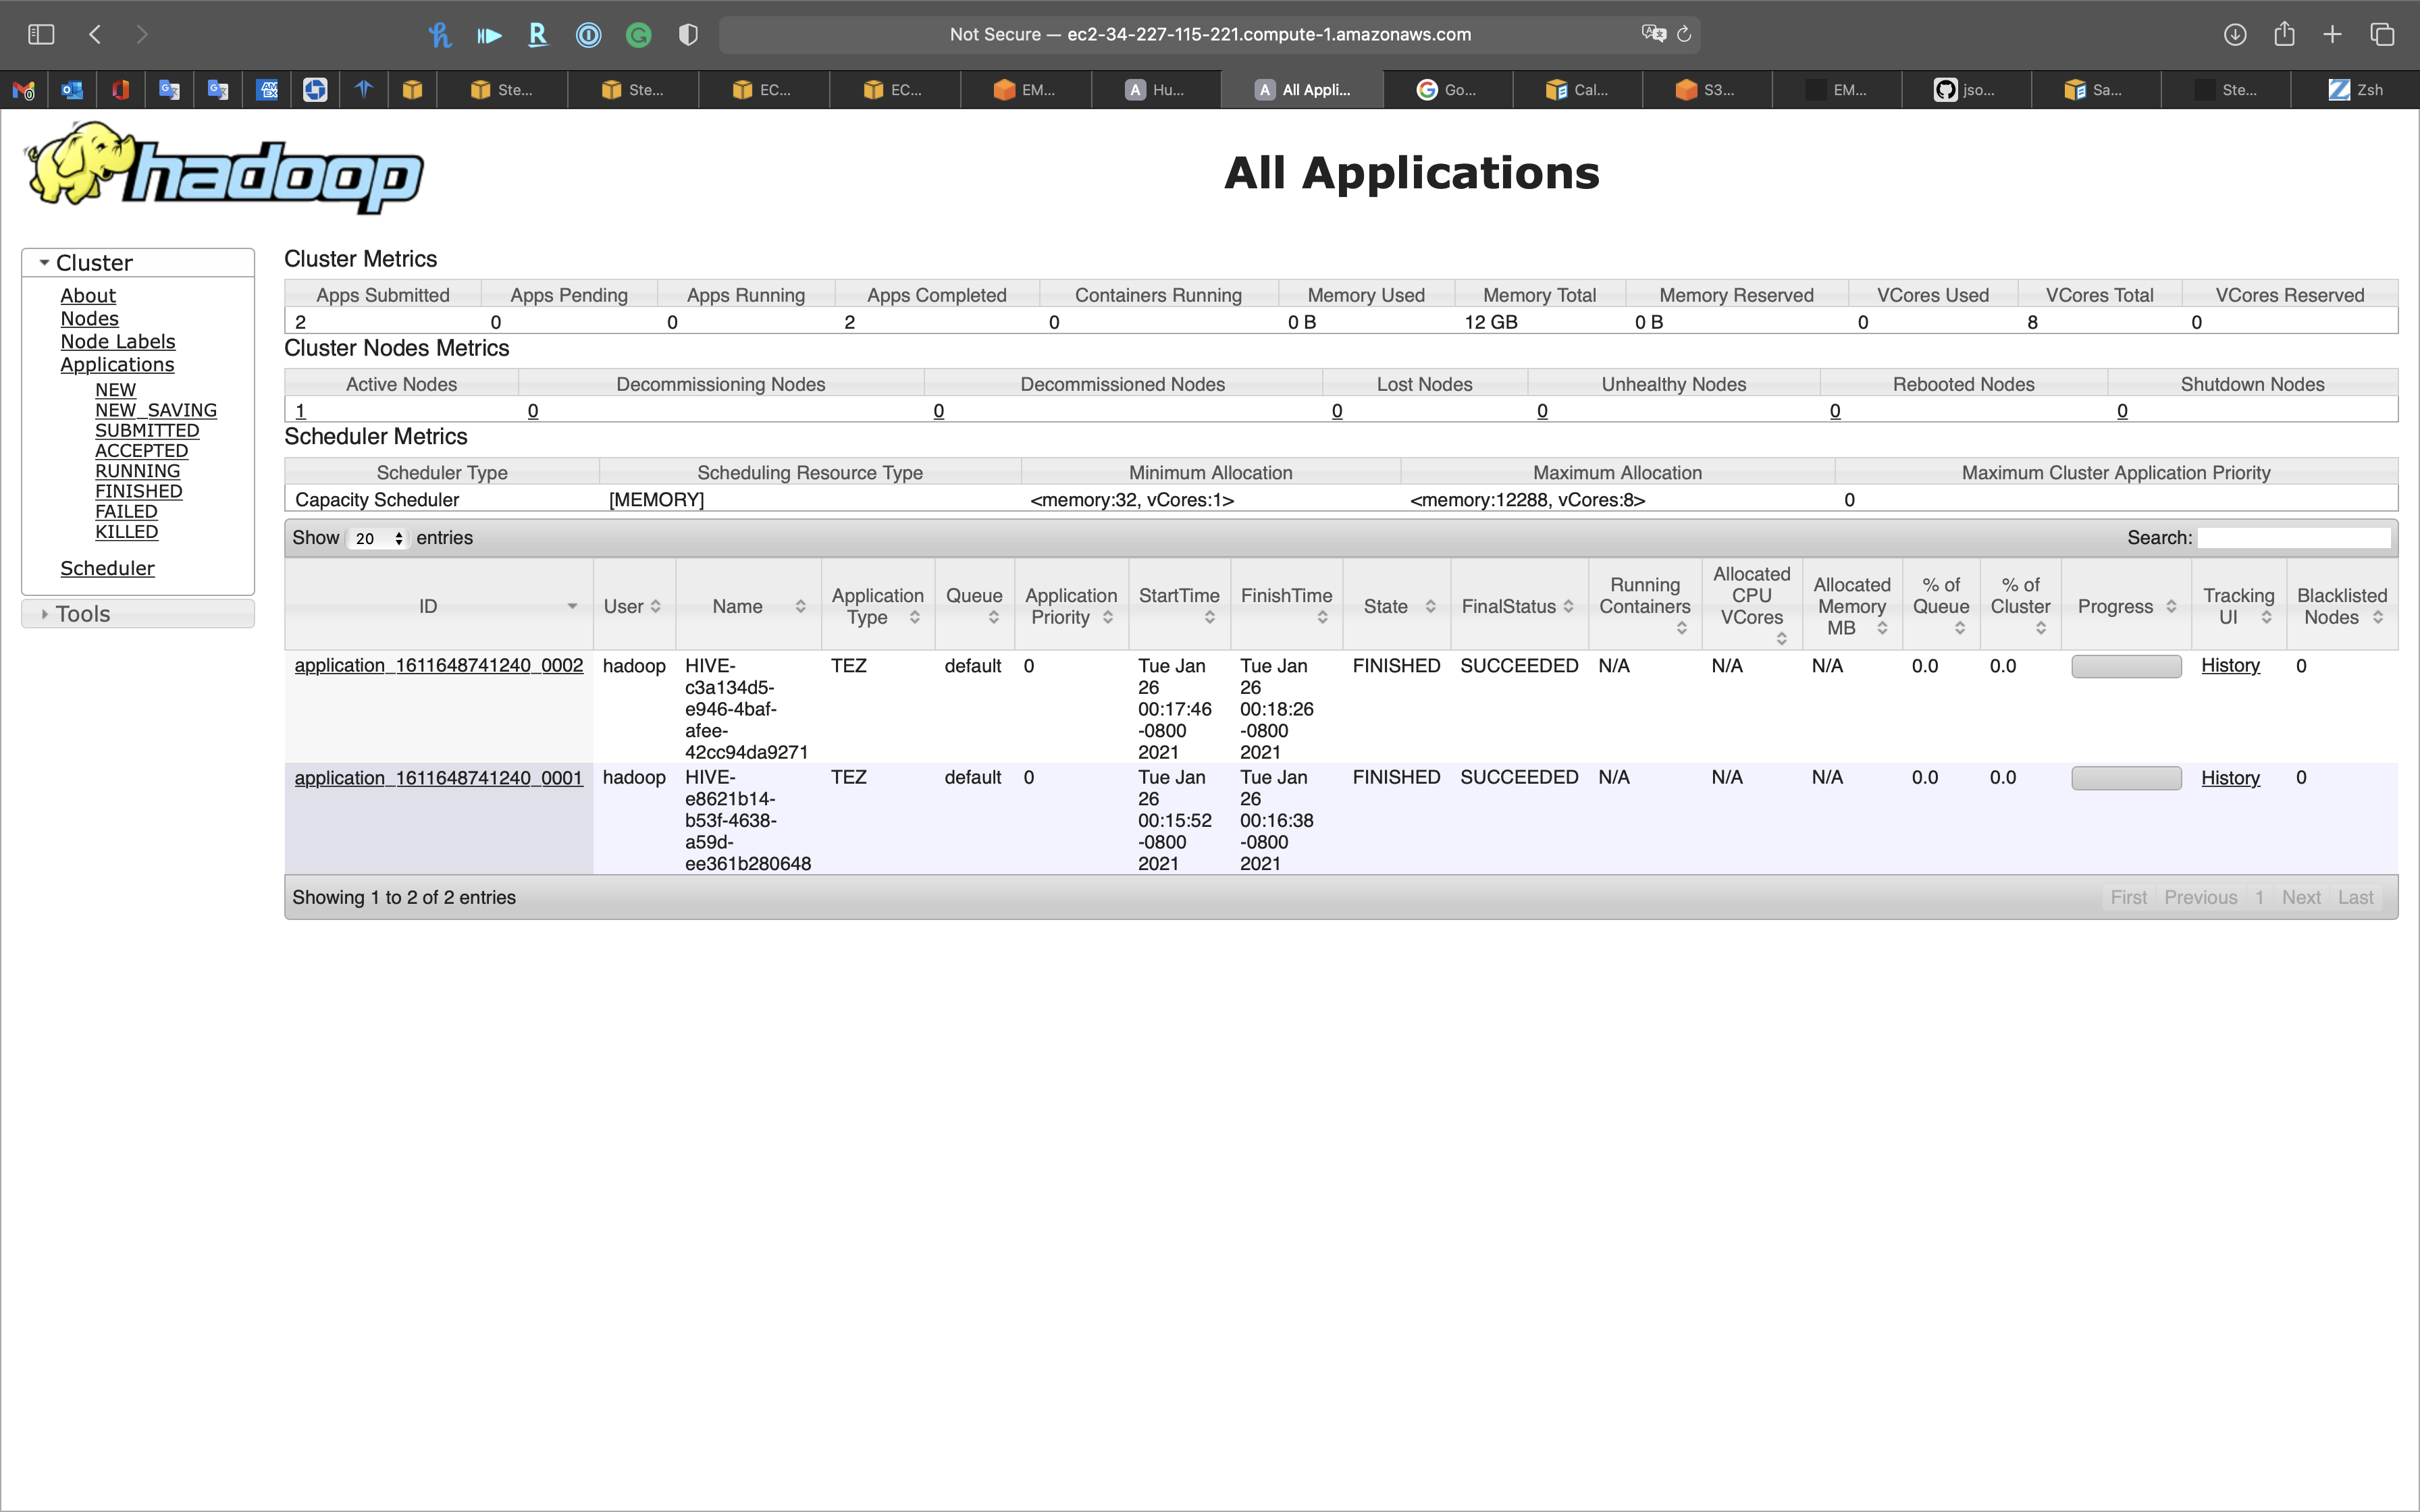
Spark History Server
Services -> EMR -> Clusters
Click on MyStateMachineCluster cluster then click on Application user interfaces tab.
Copy Spark History Server’s url
http://ec2-34-227-115-221.compute-1.amazonaws.com:18080/
Open a new tab on your browser and paste the url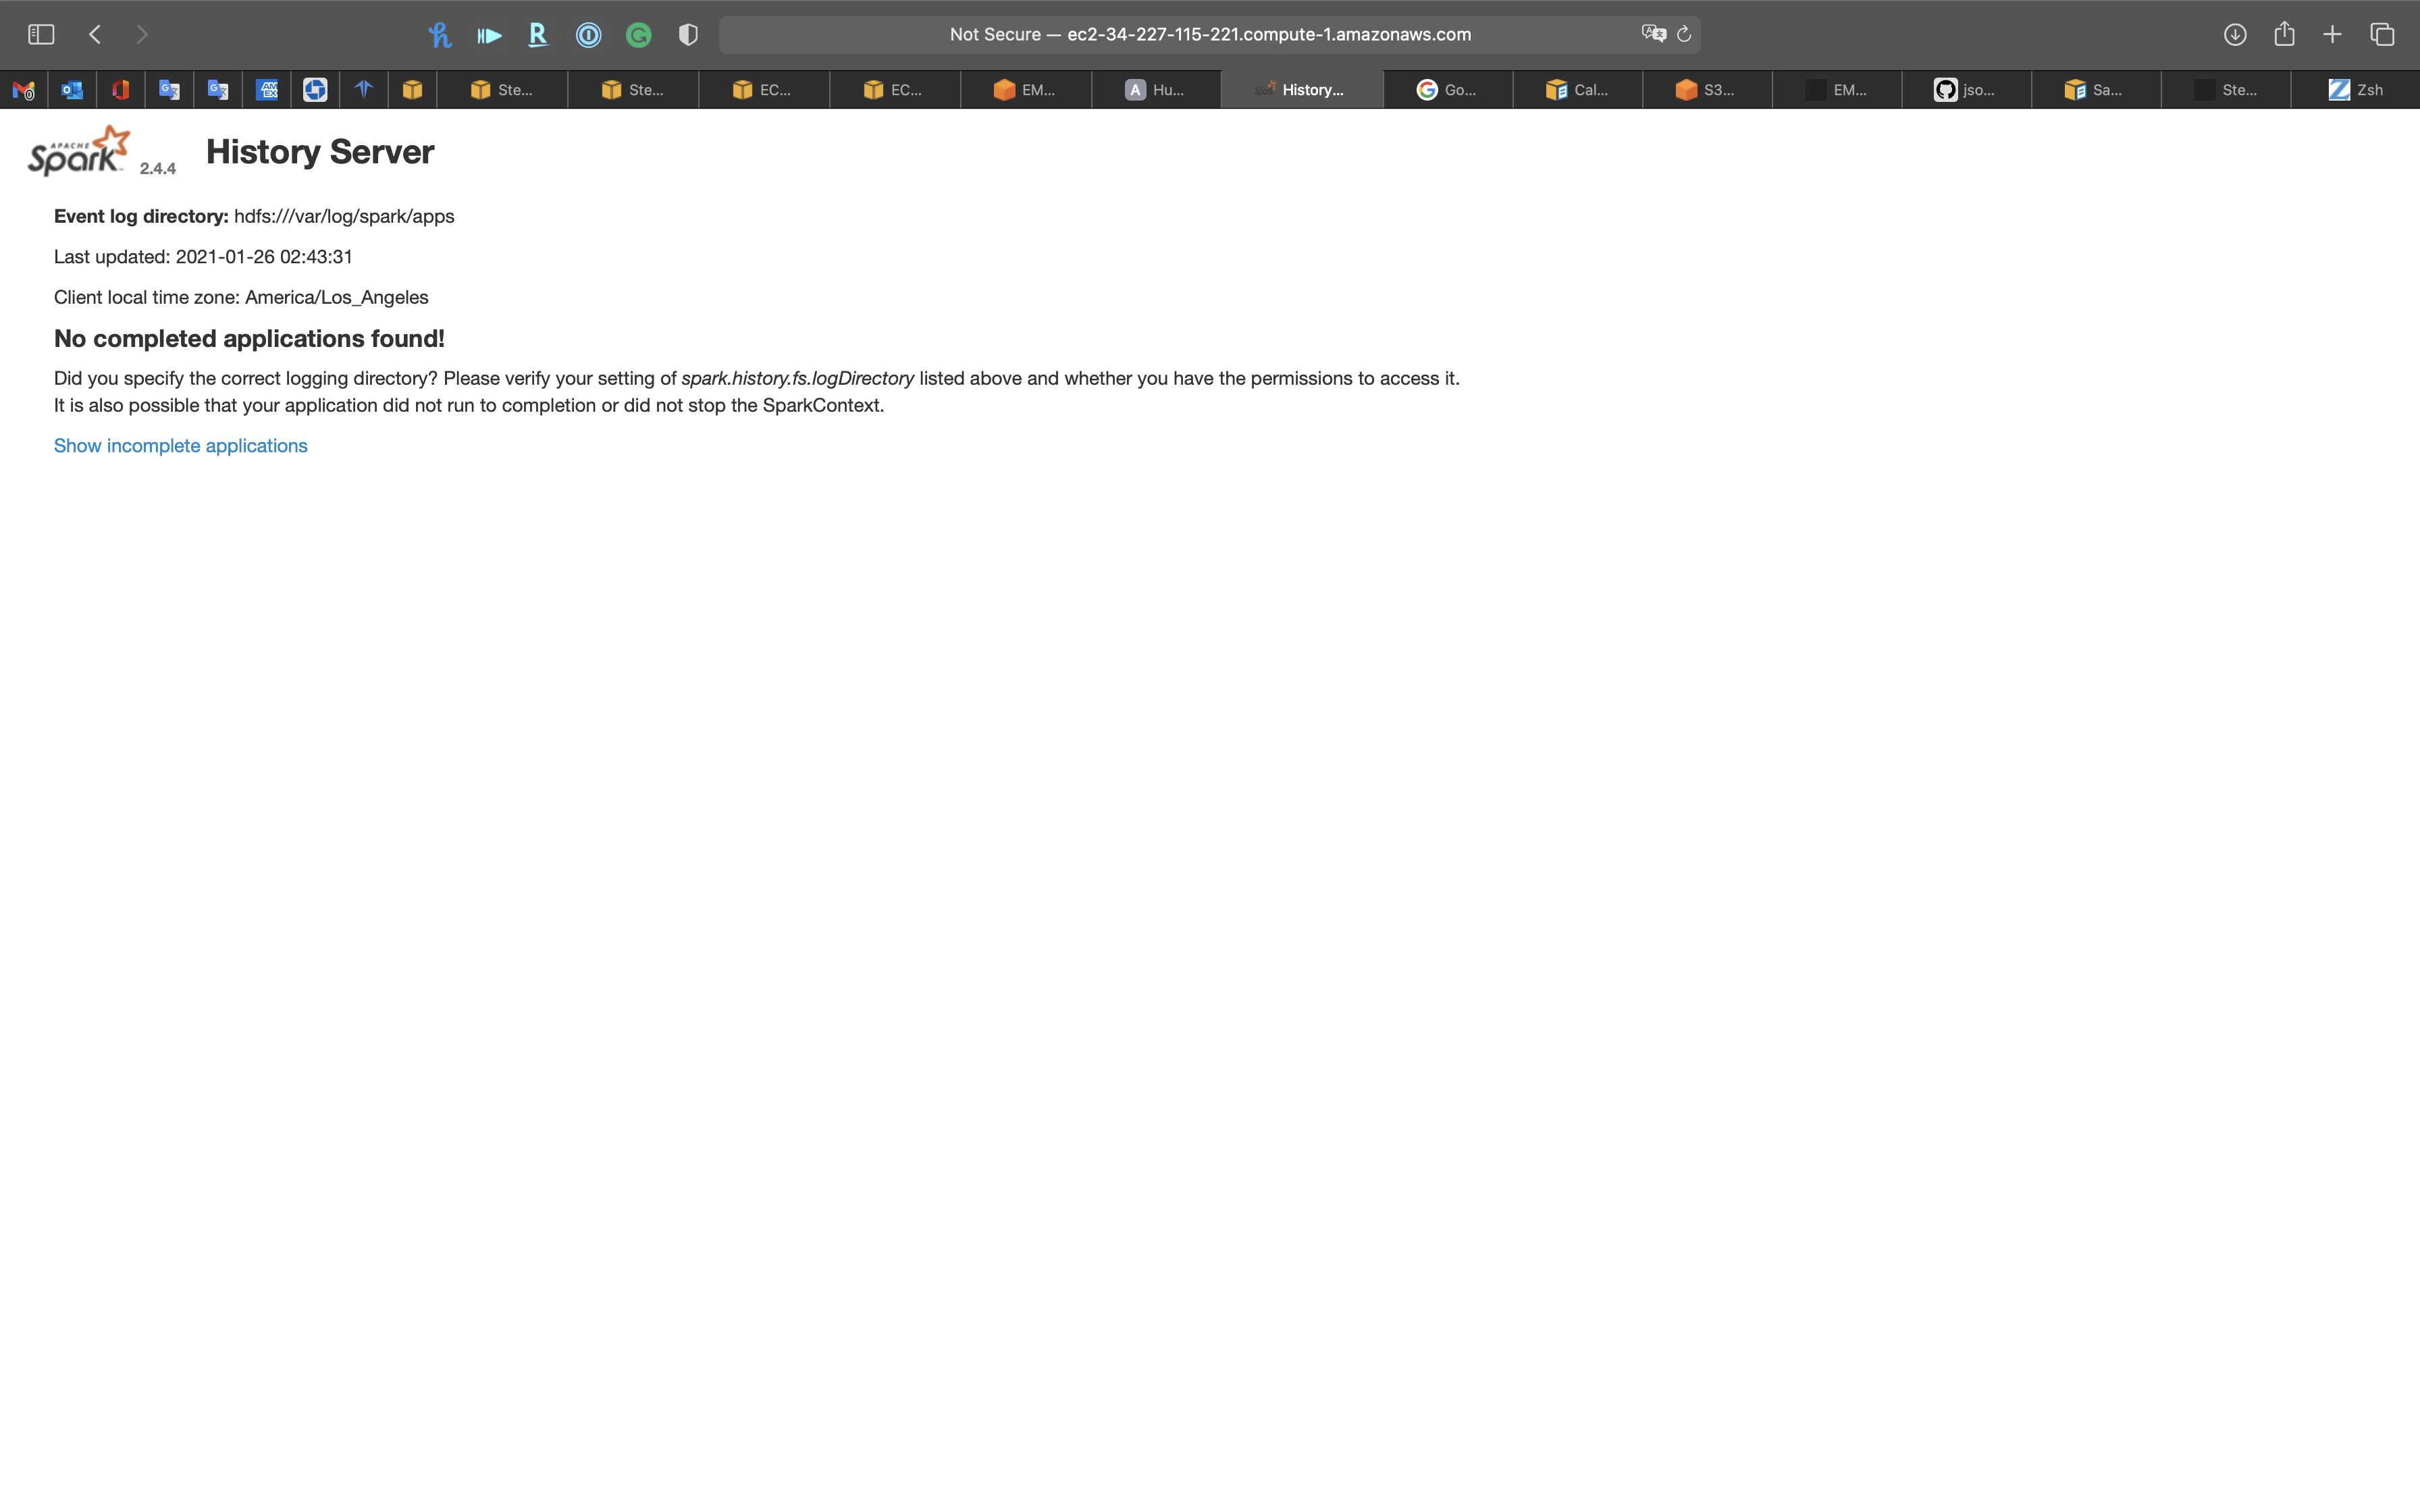
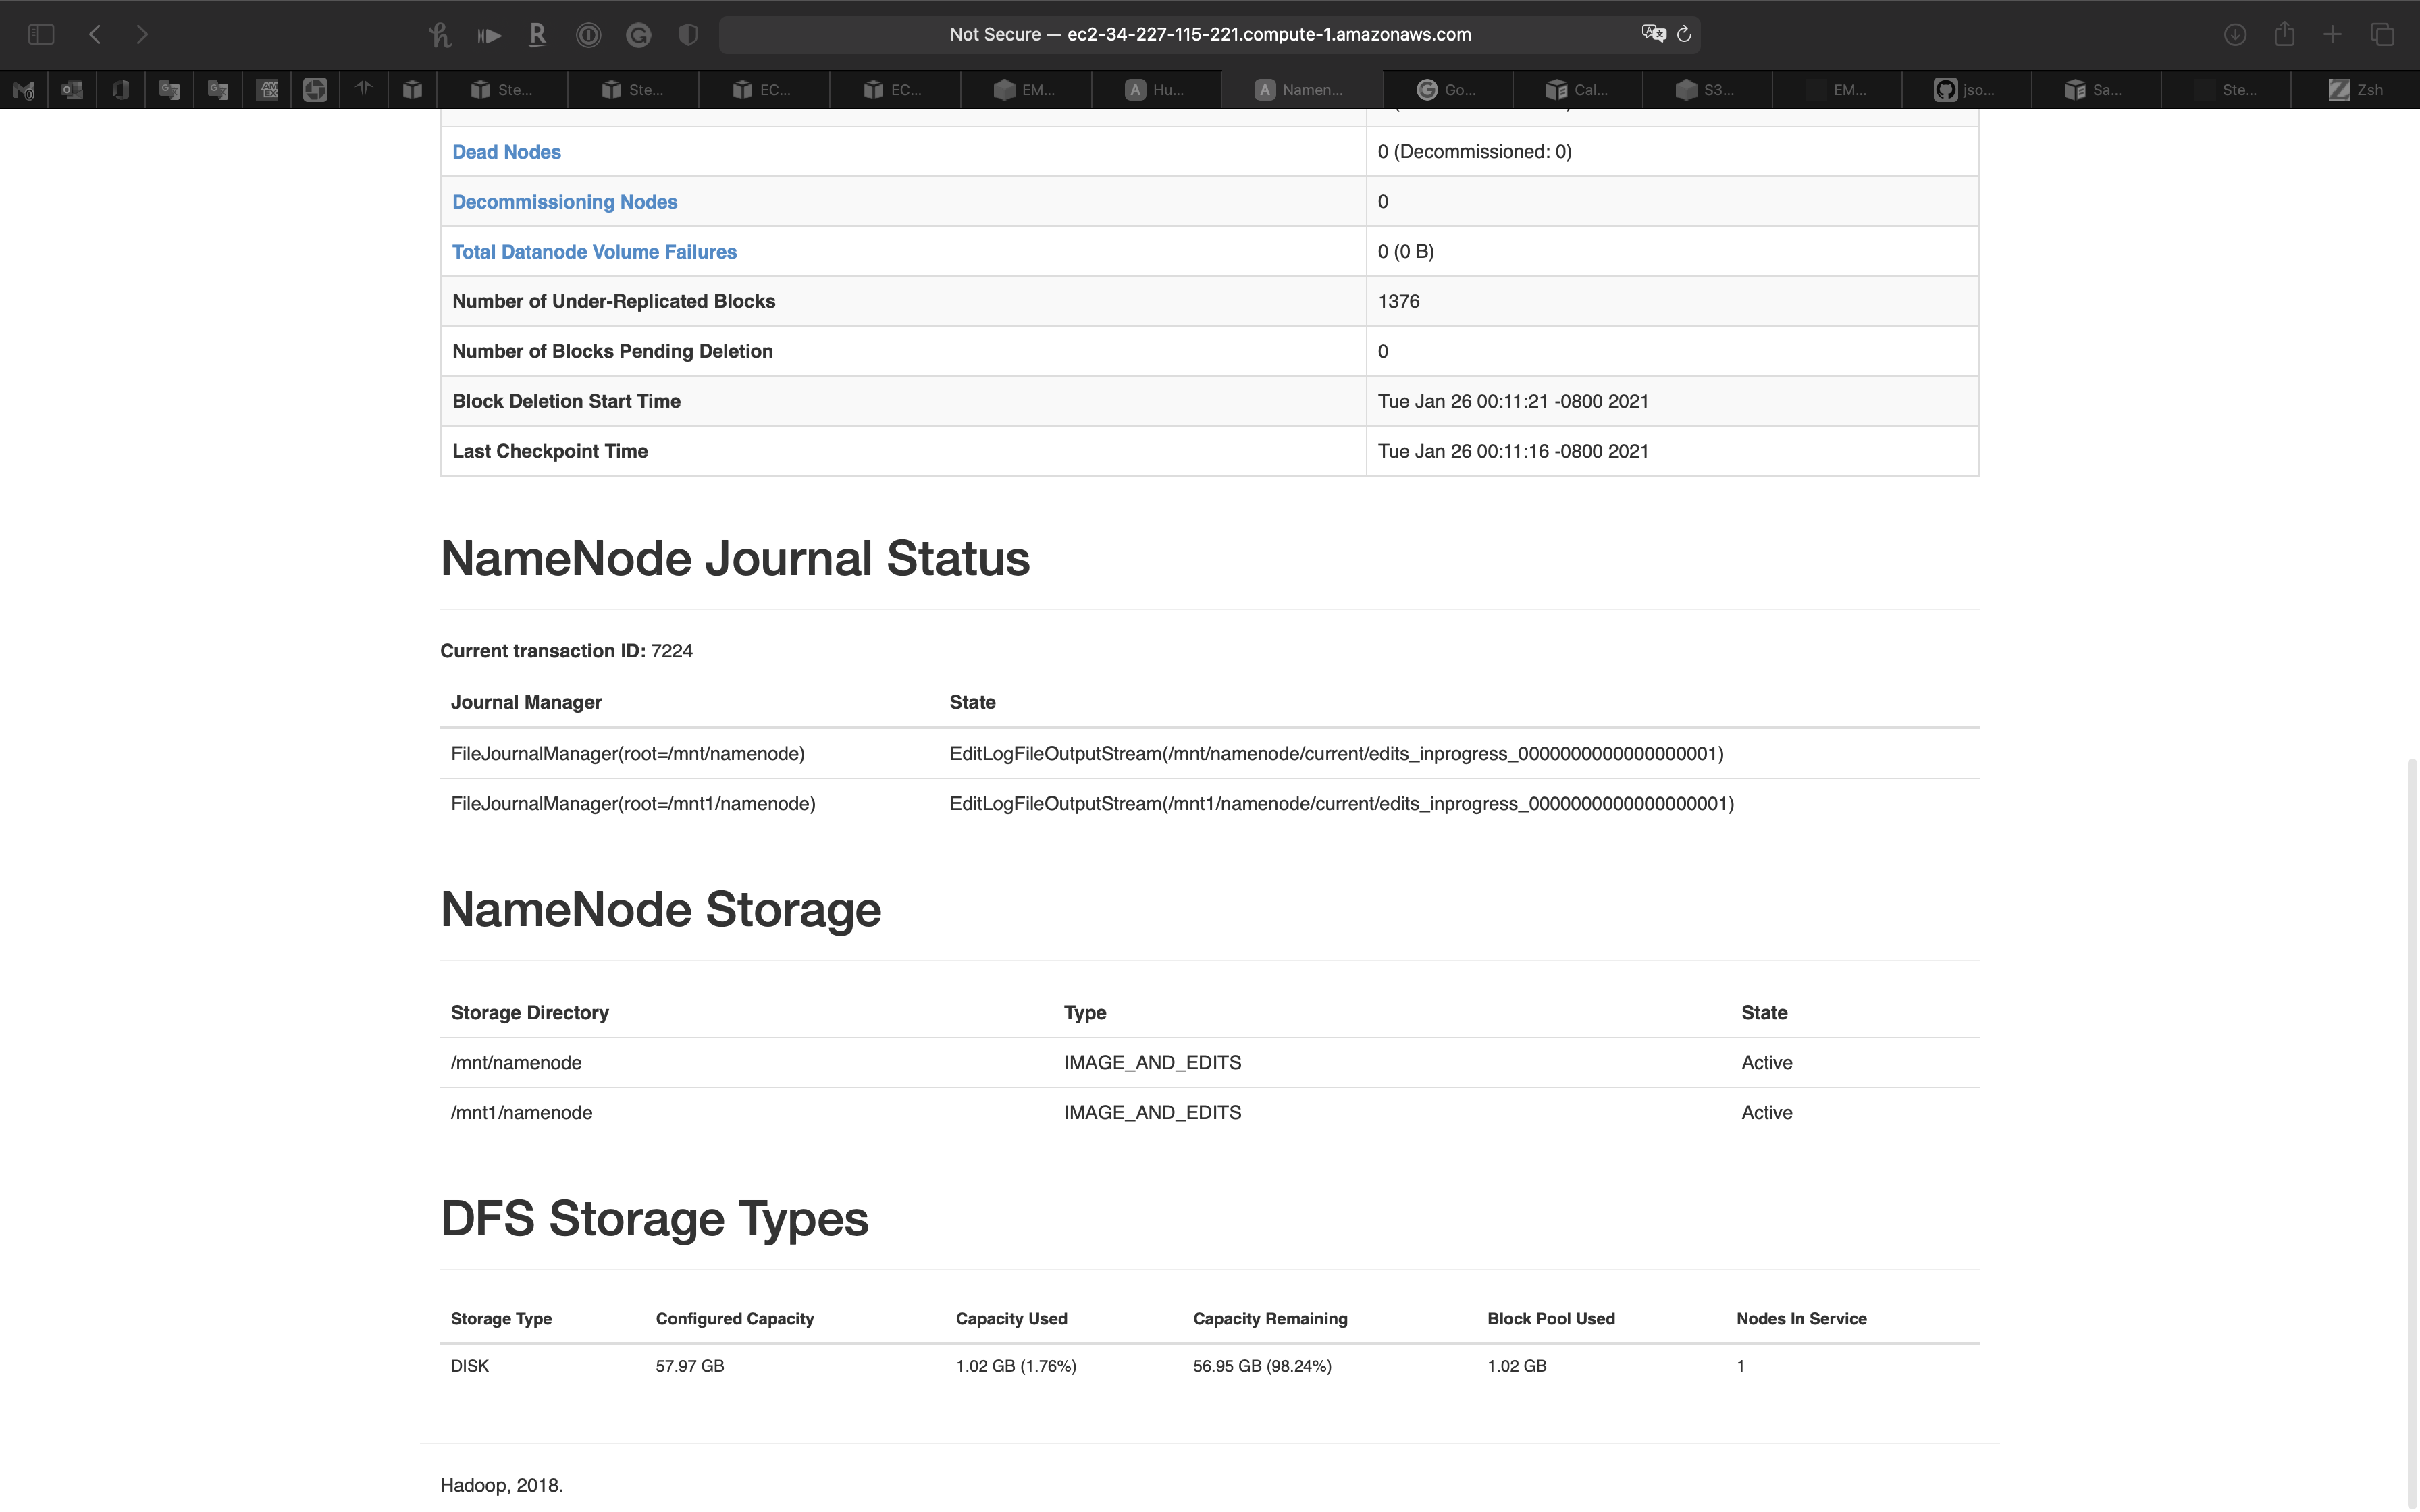
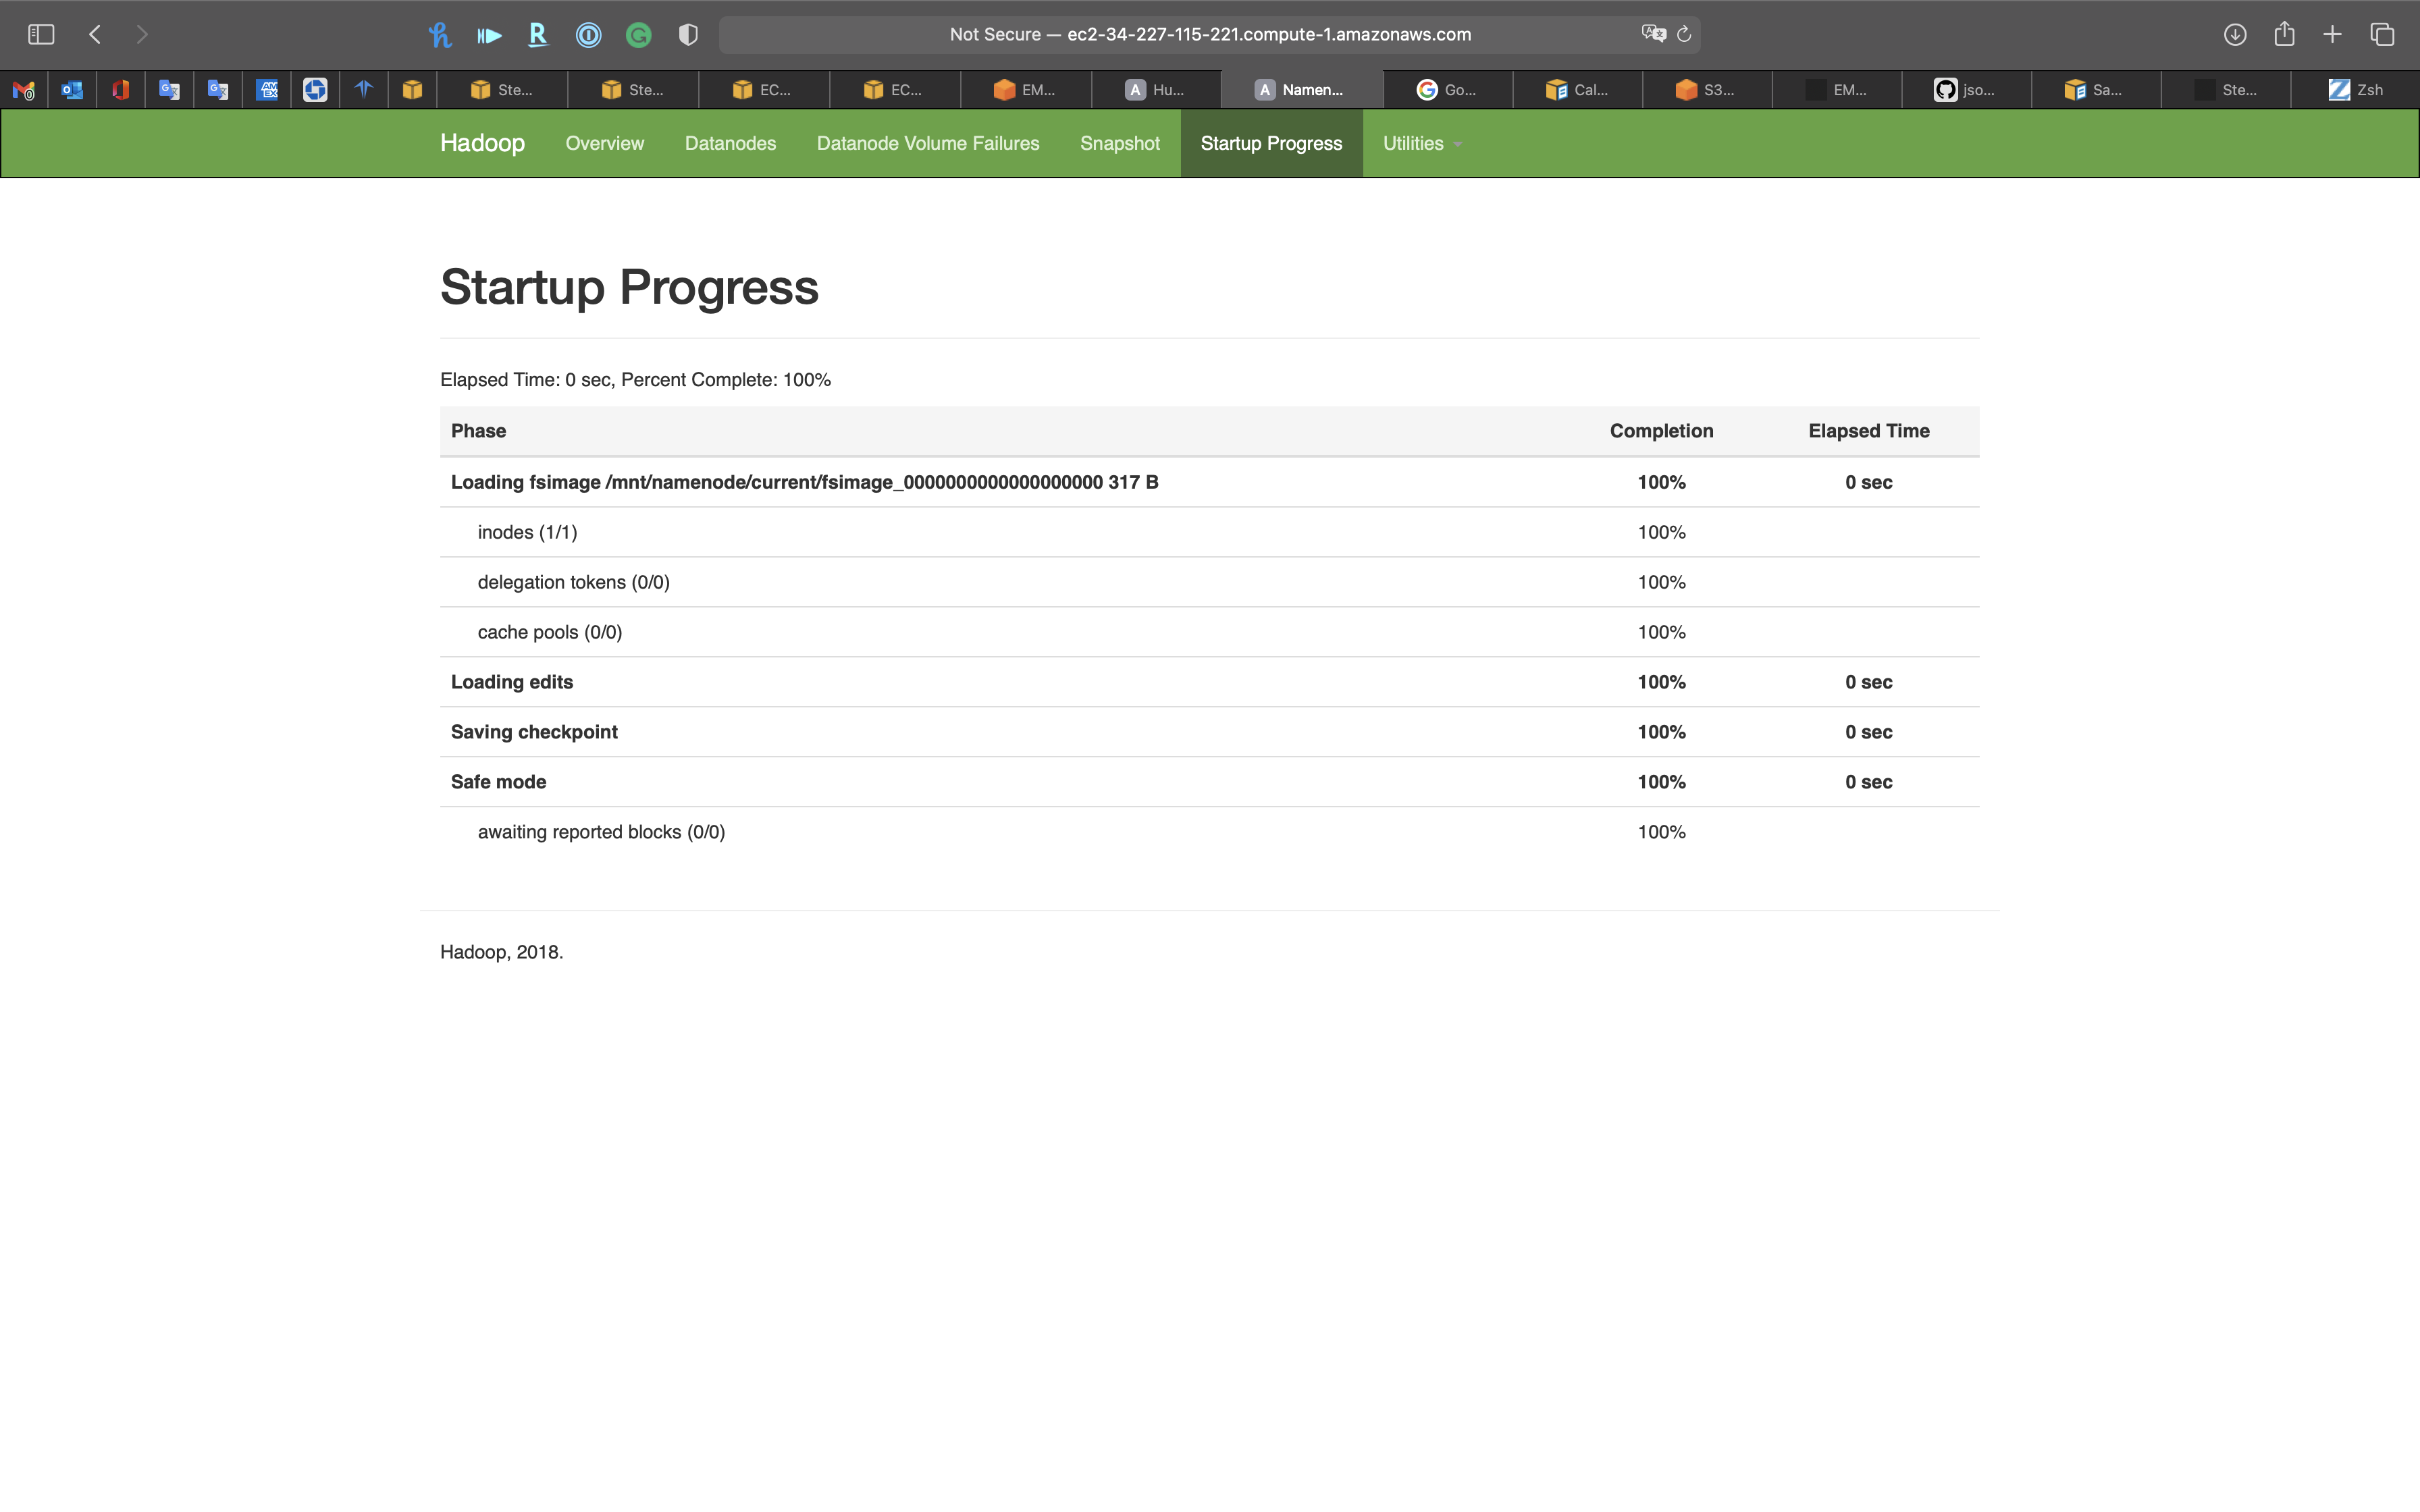
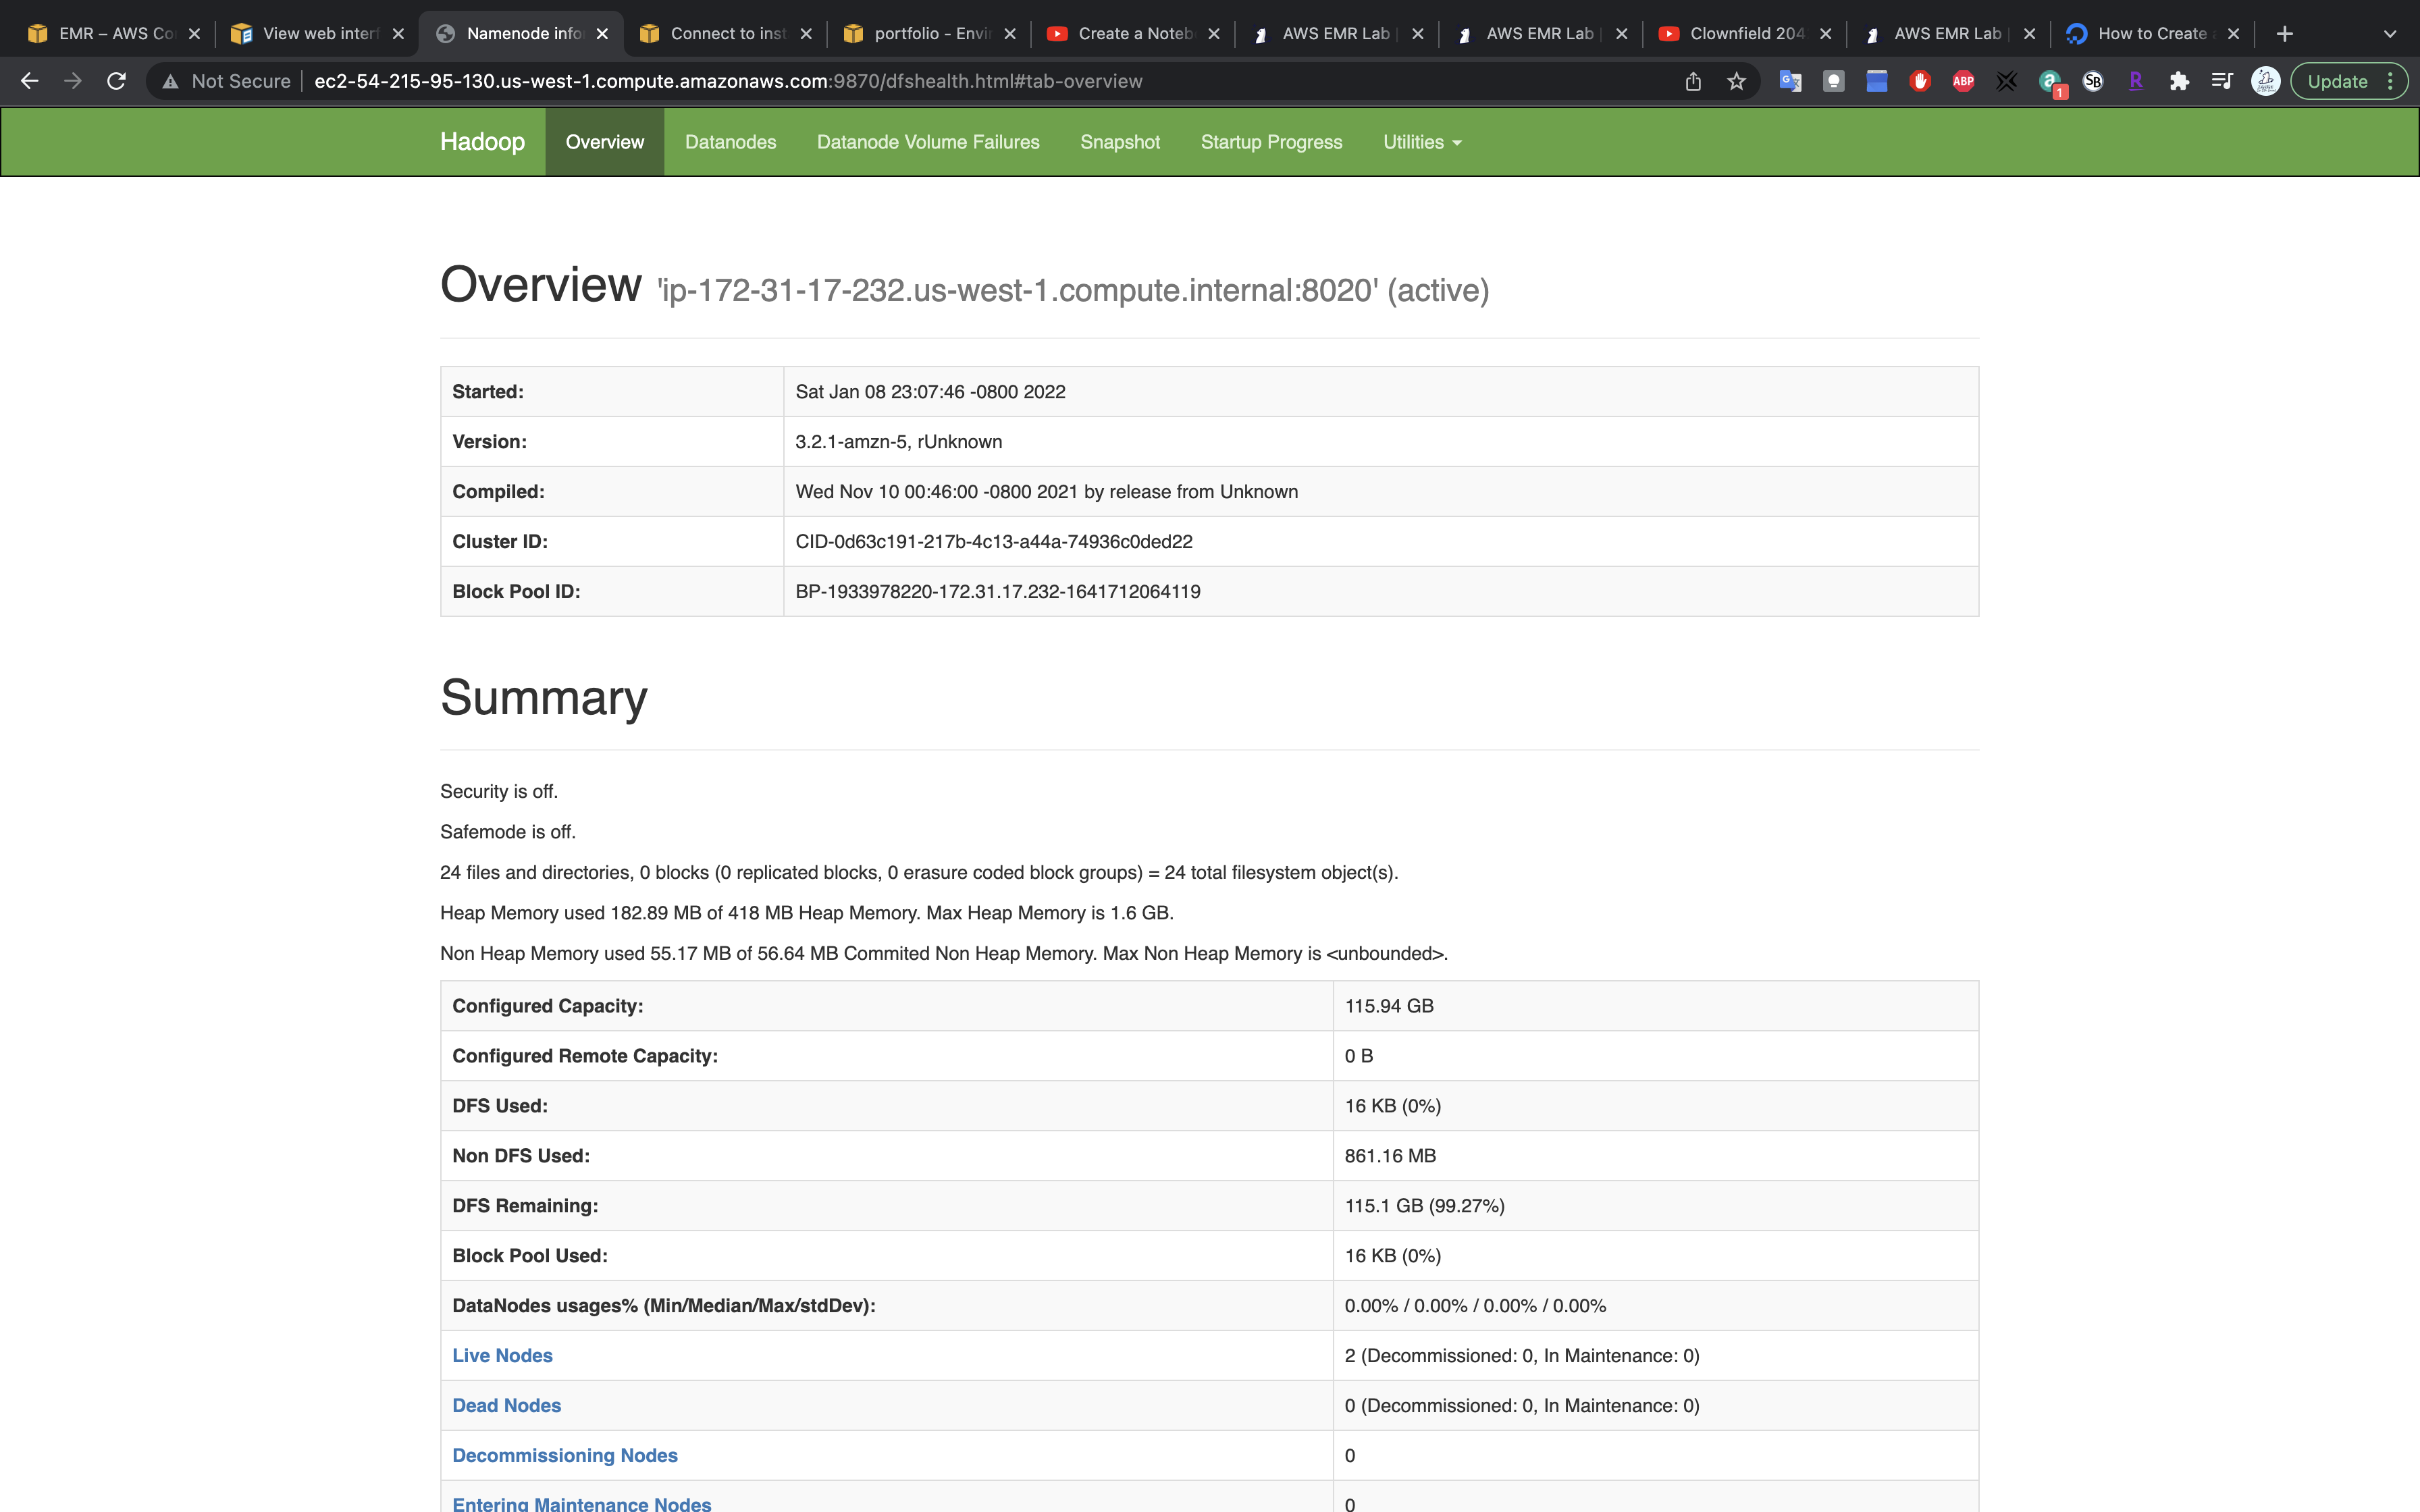
HDFS Name Node
Services -> EMR -> Clusters
Click on MyStateMachineCluster cluster then click on Application user interfaces tab.
Copy HDFS Name Node’s url
http://ec2-34-227-115-221.compute-1.amazonaws.com:50070/
Open a new tab on your browser and paste the url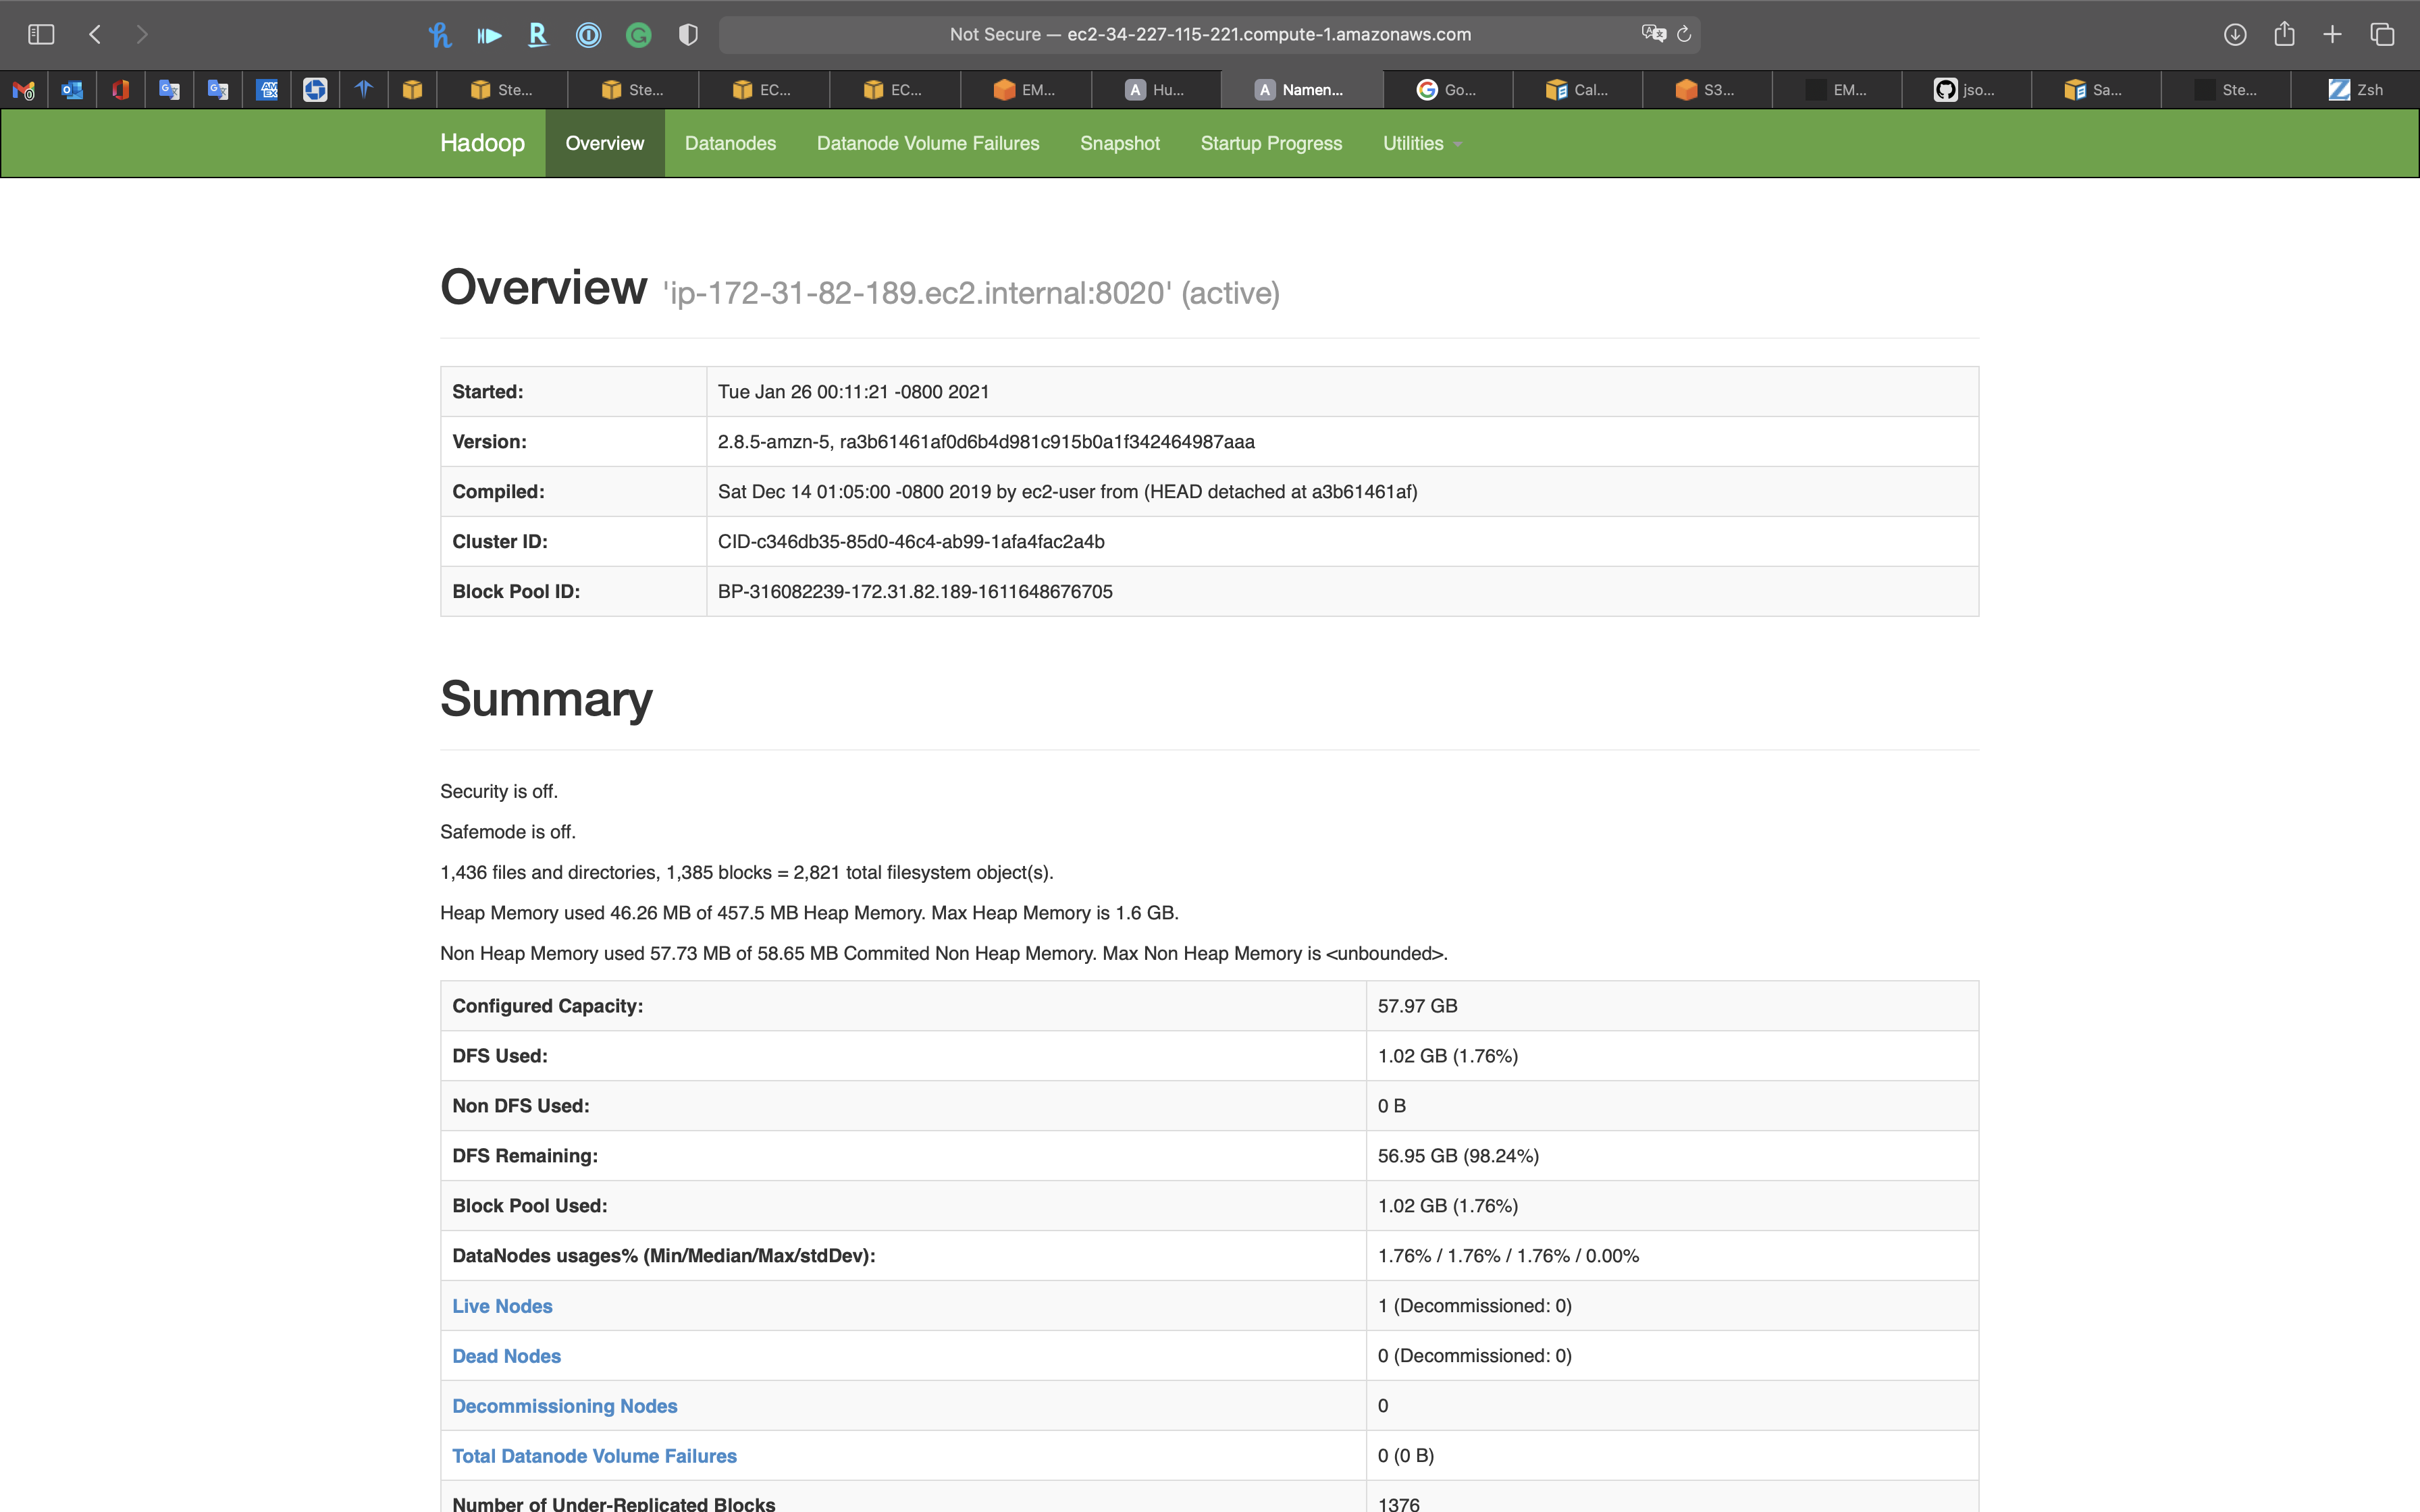
Overview
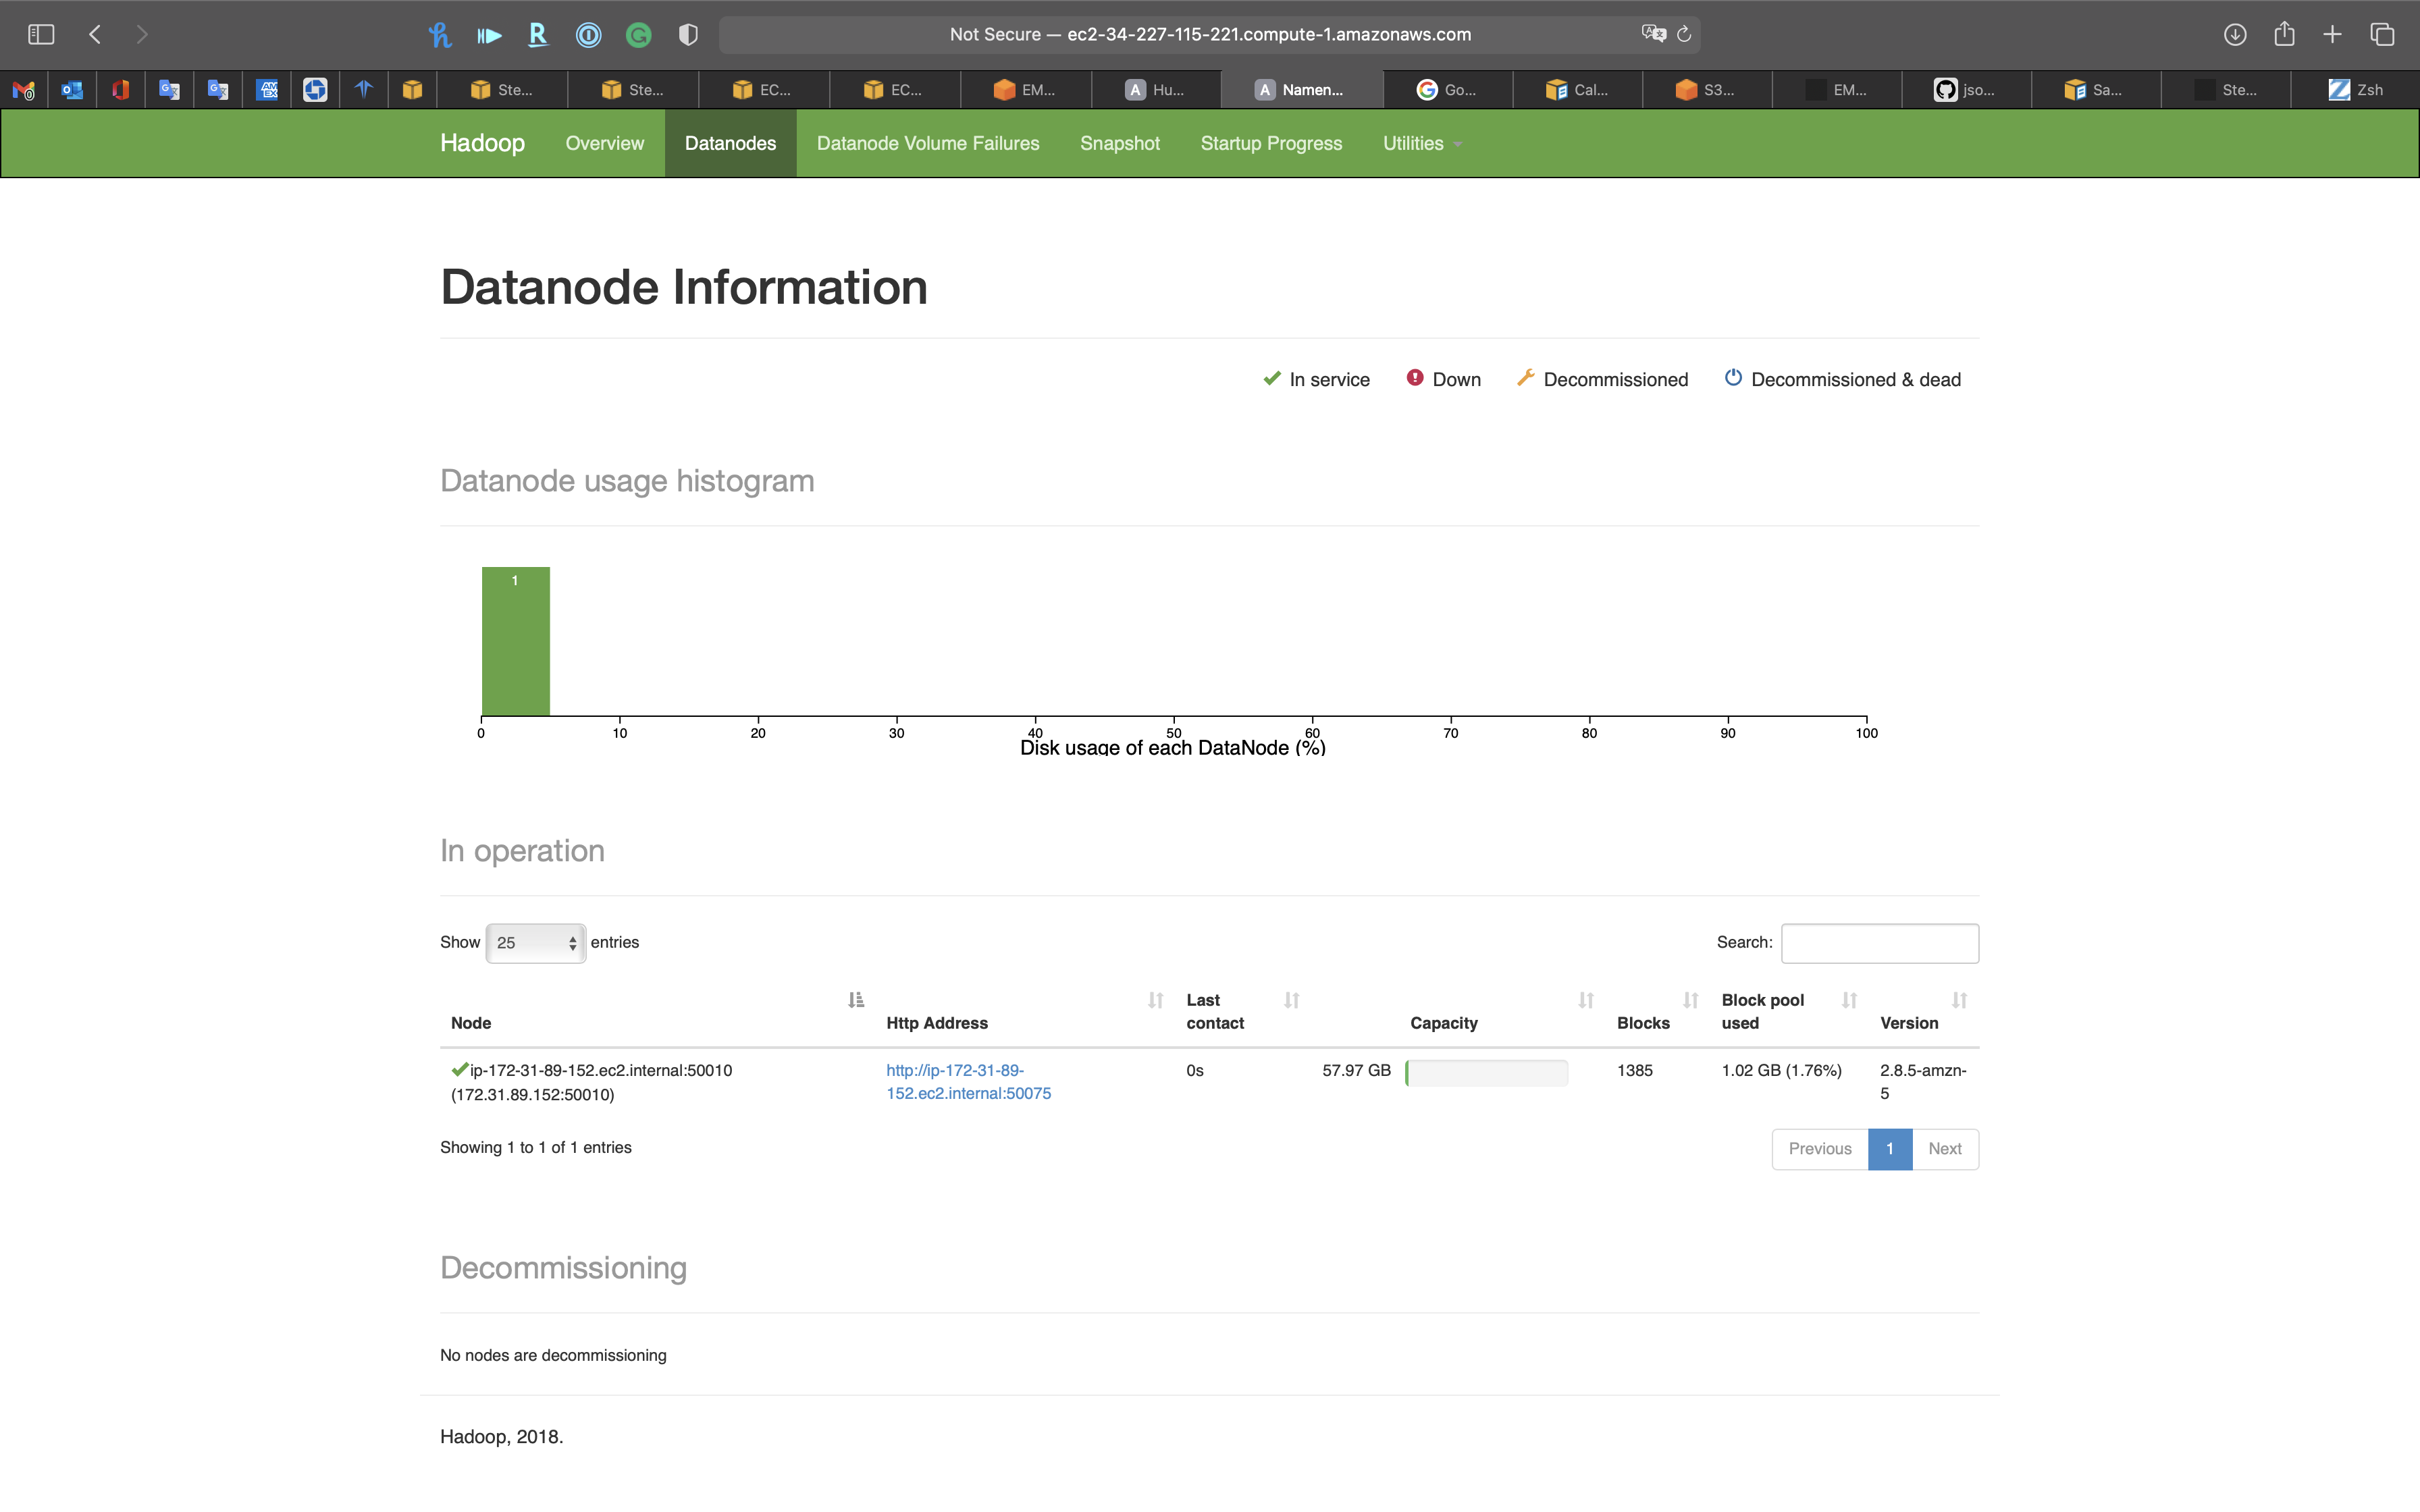
Datanodes
Datanode Volume Failures
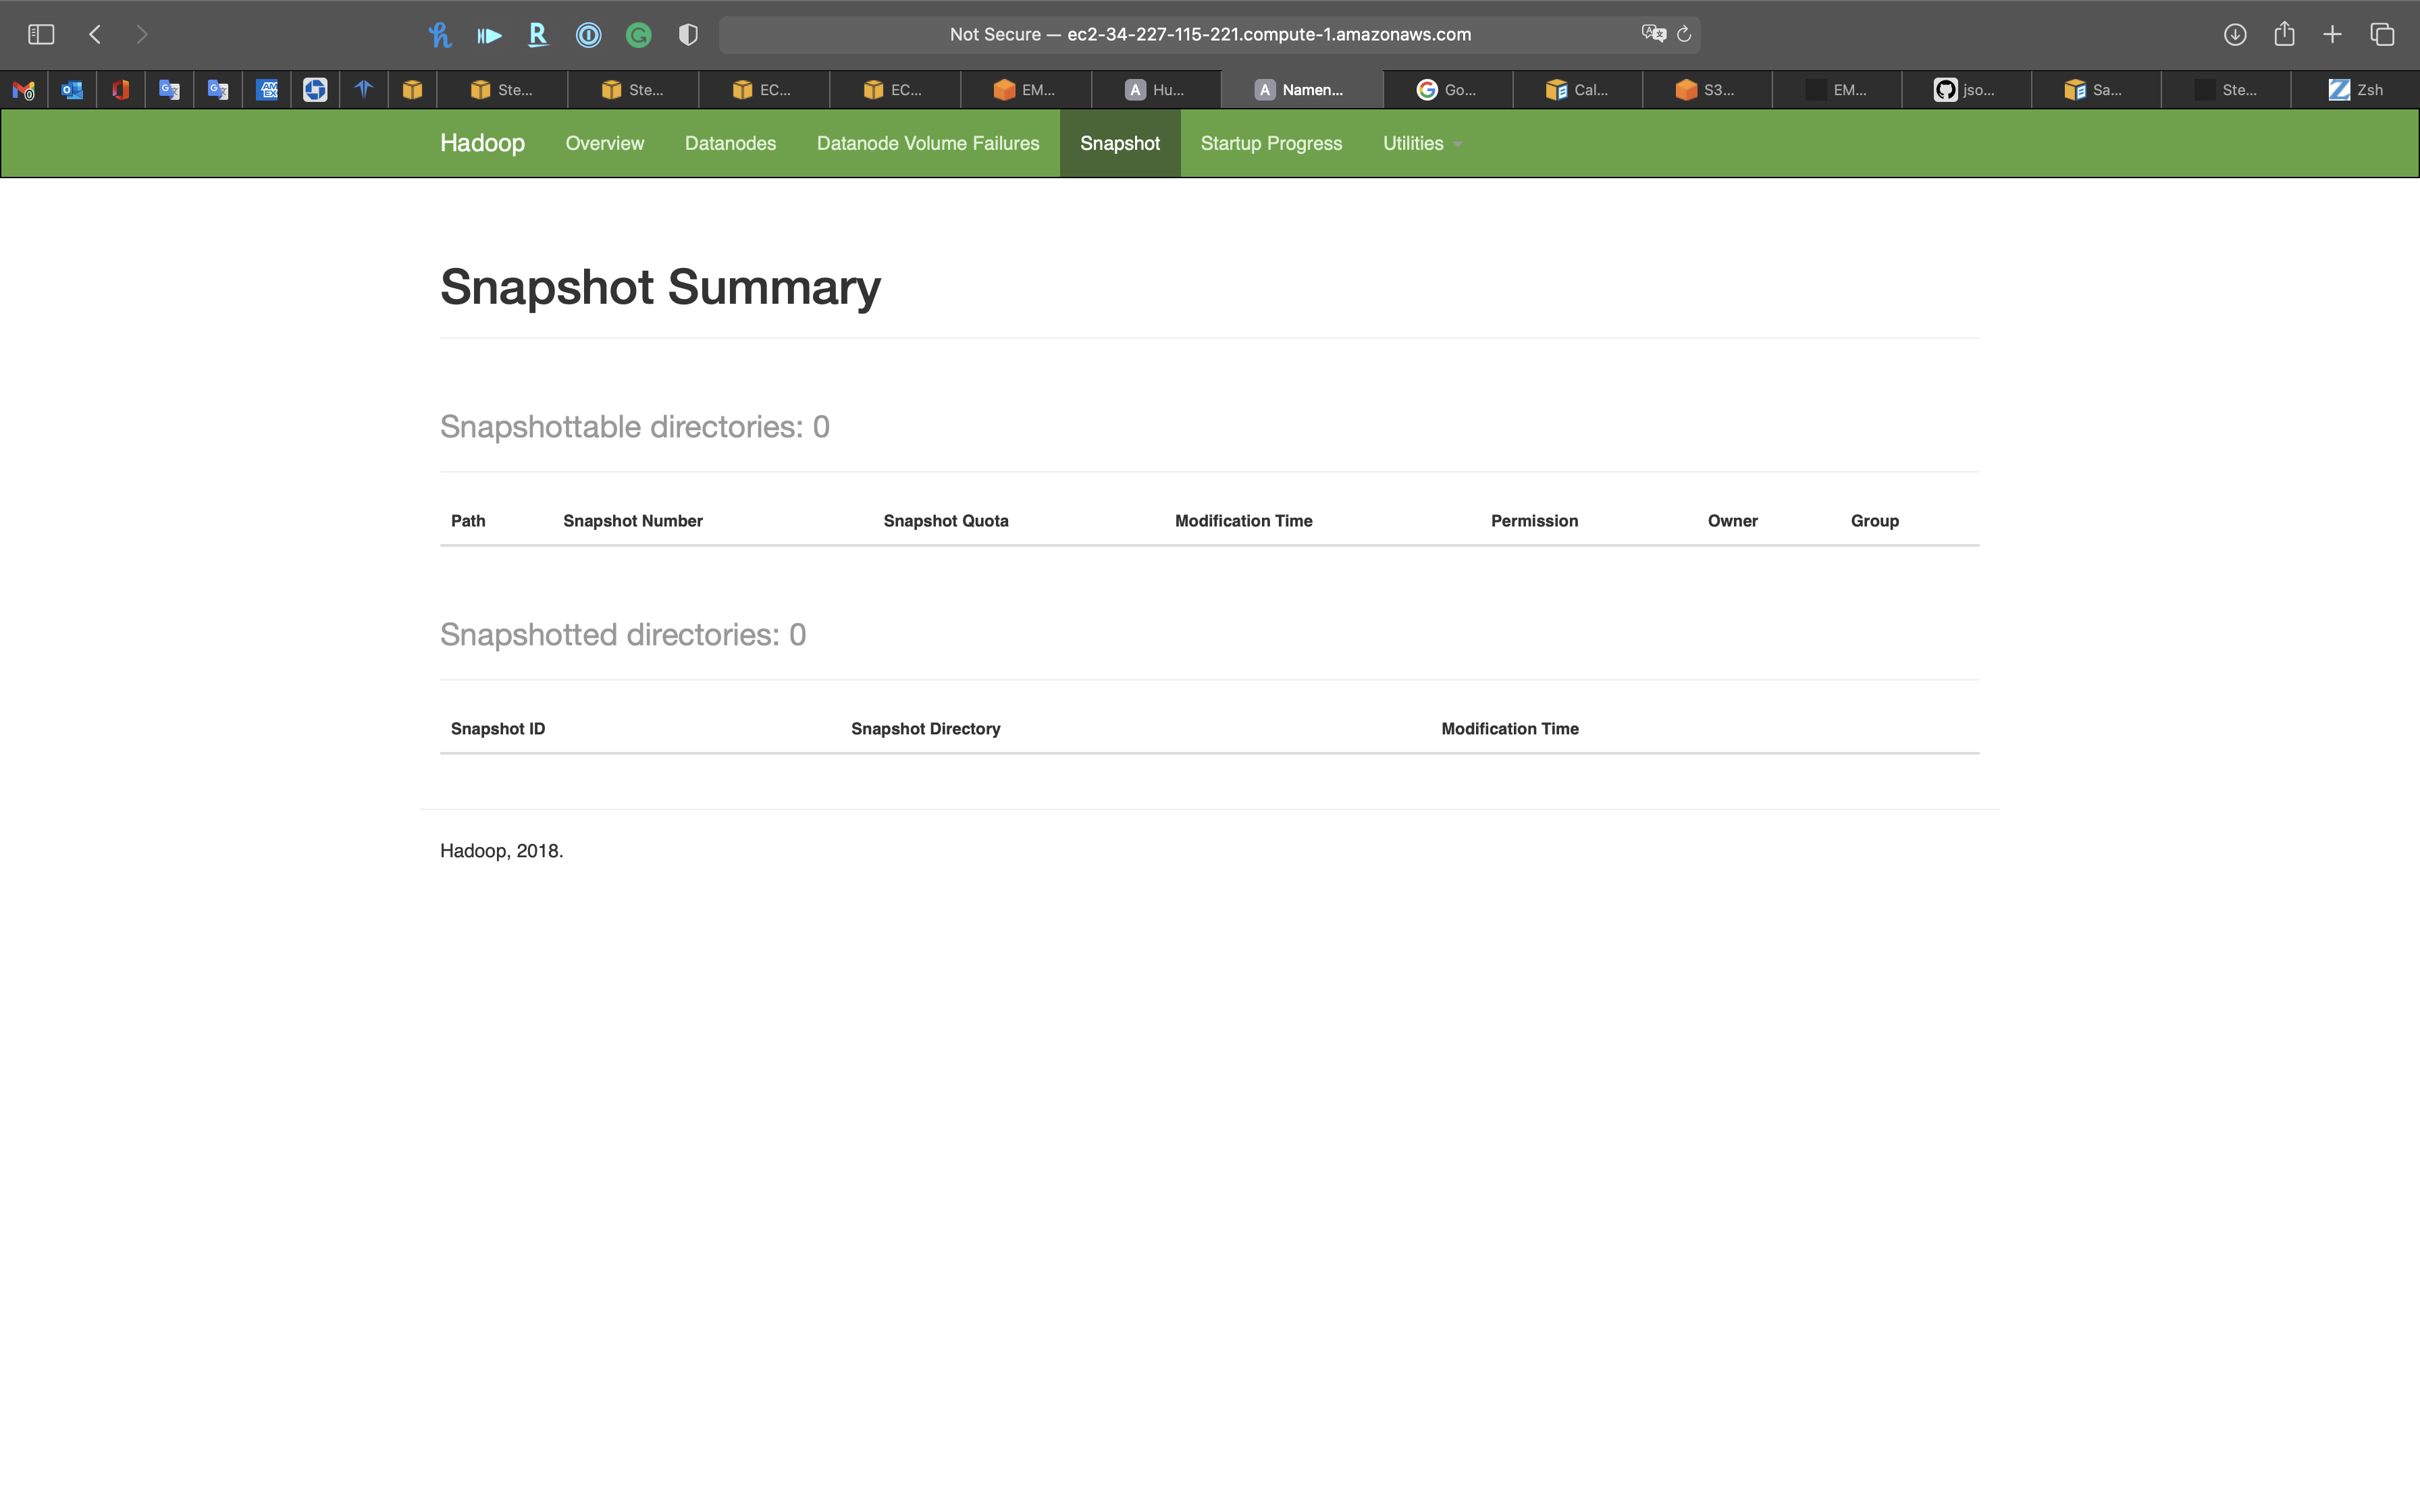
Snapshot
Startup Progress
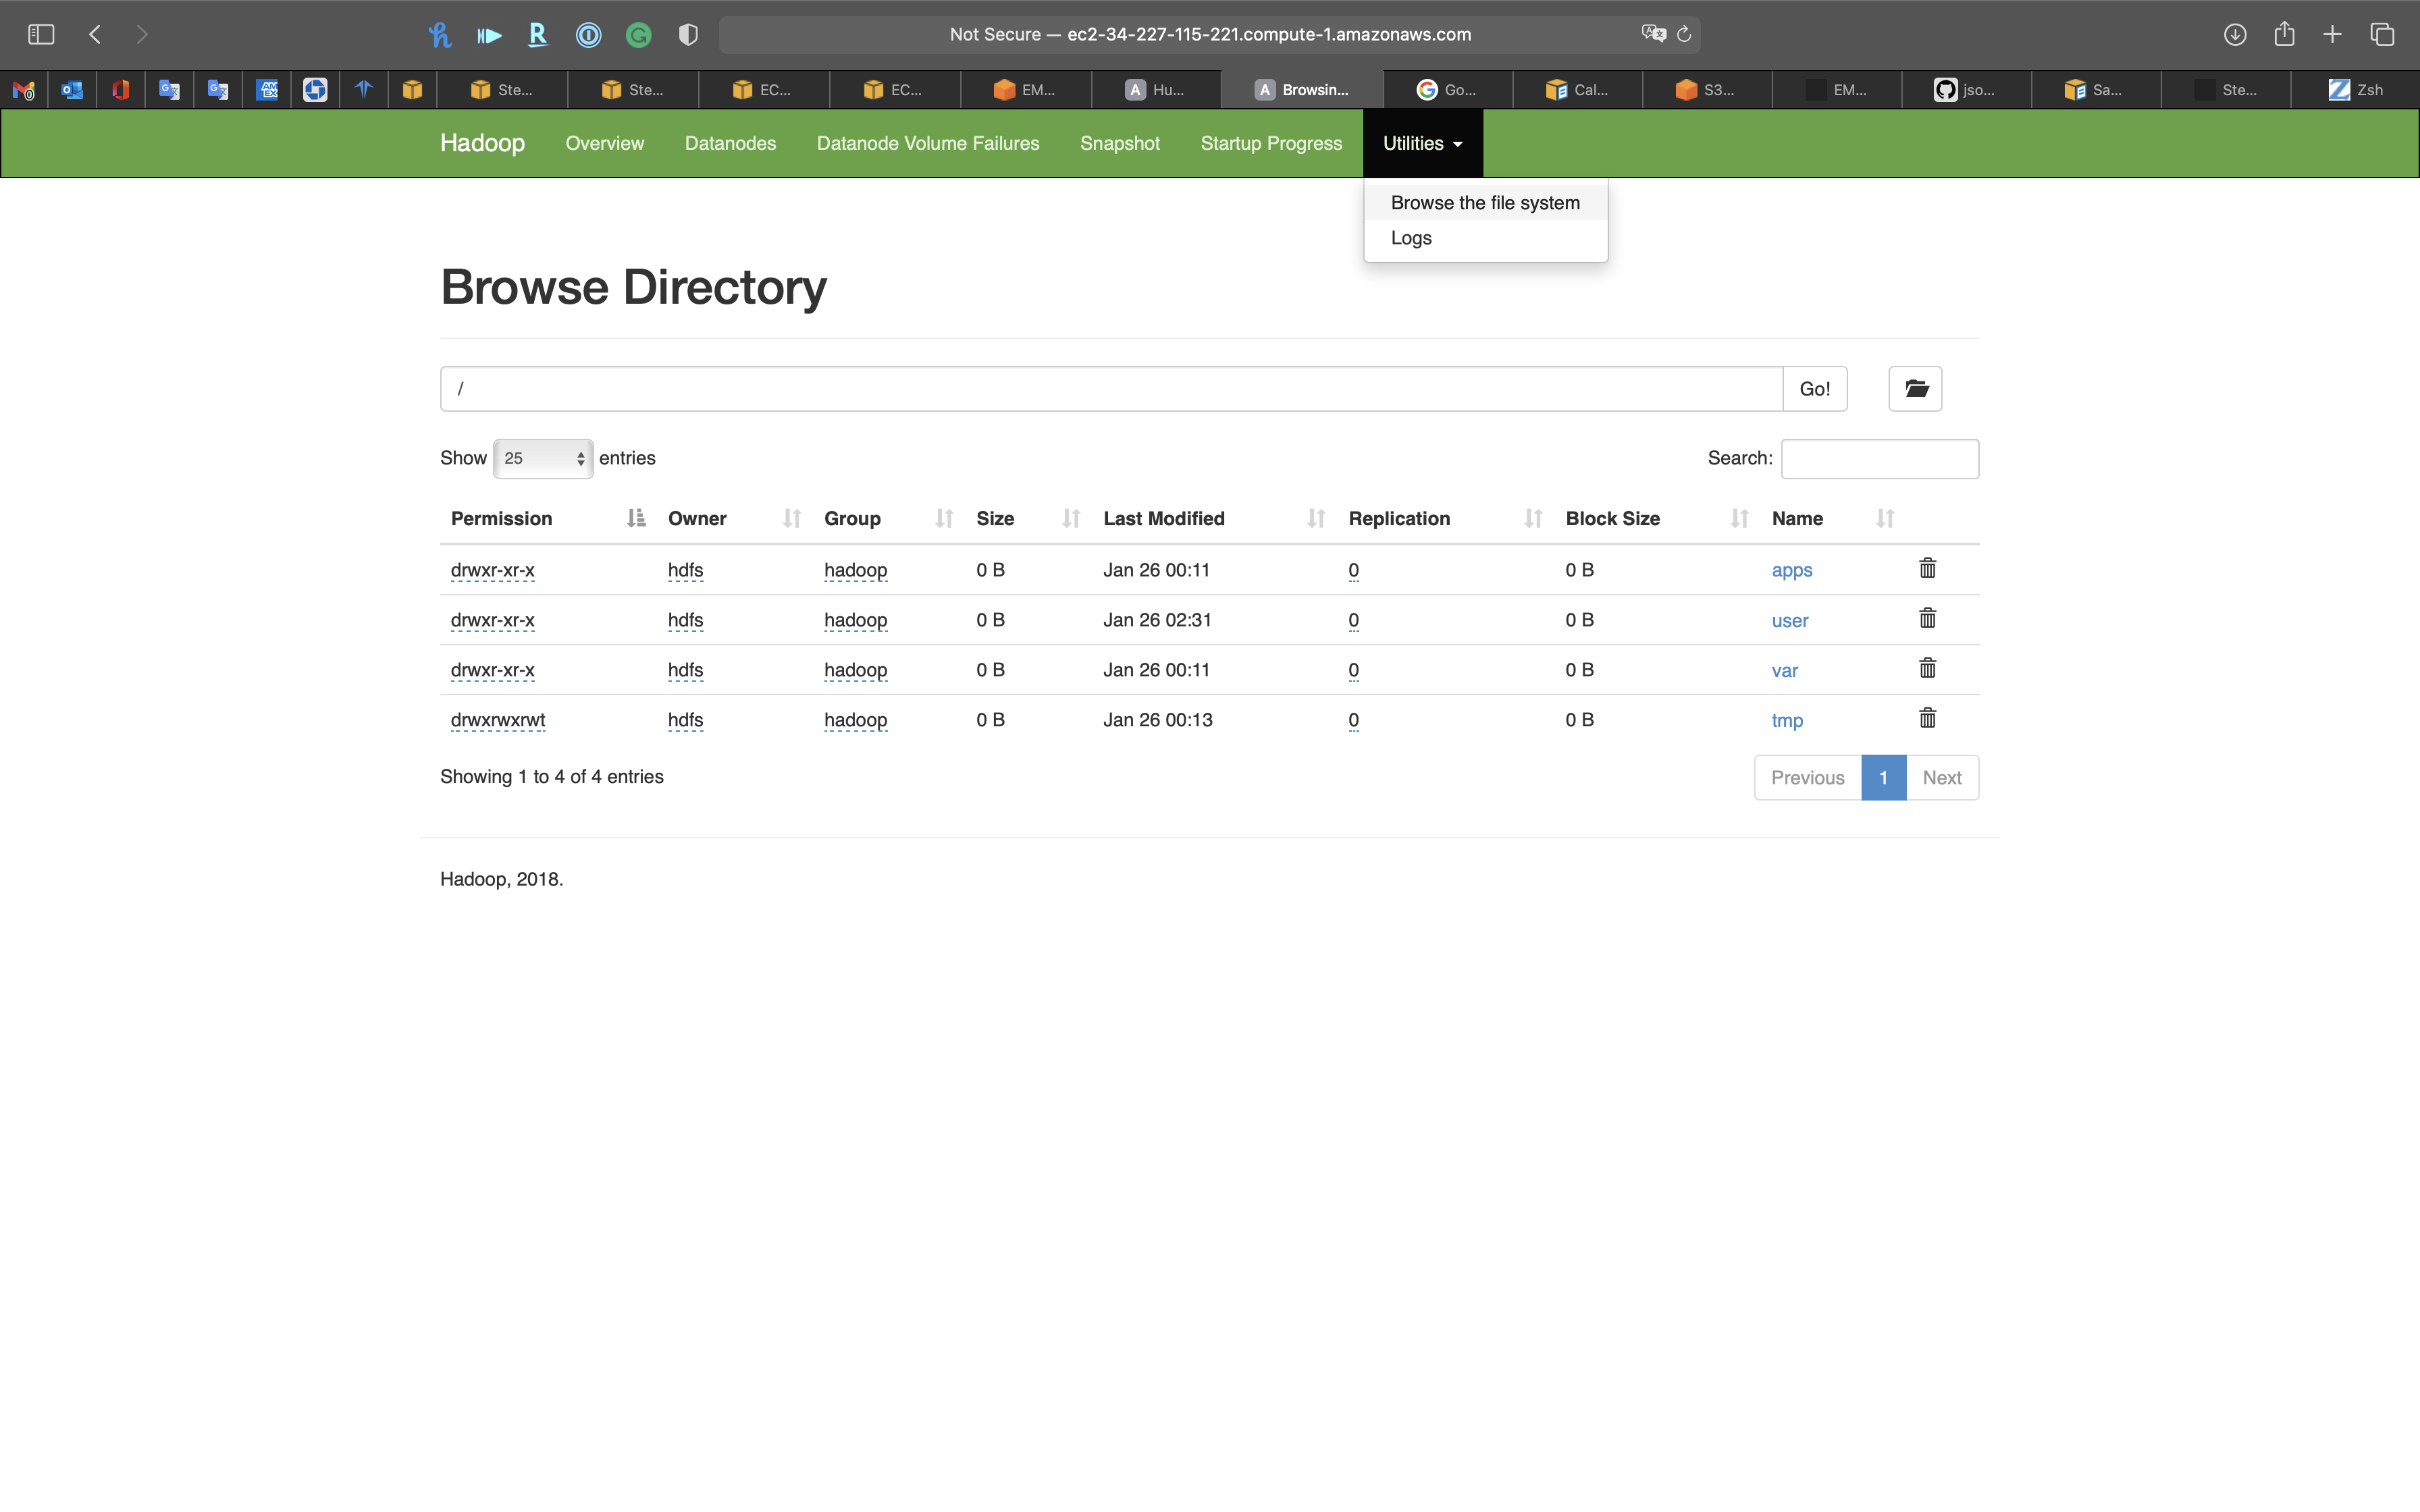
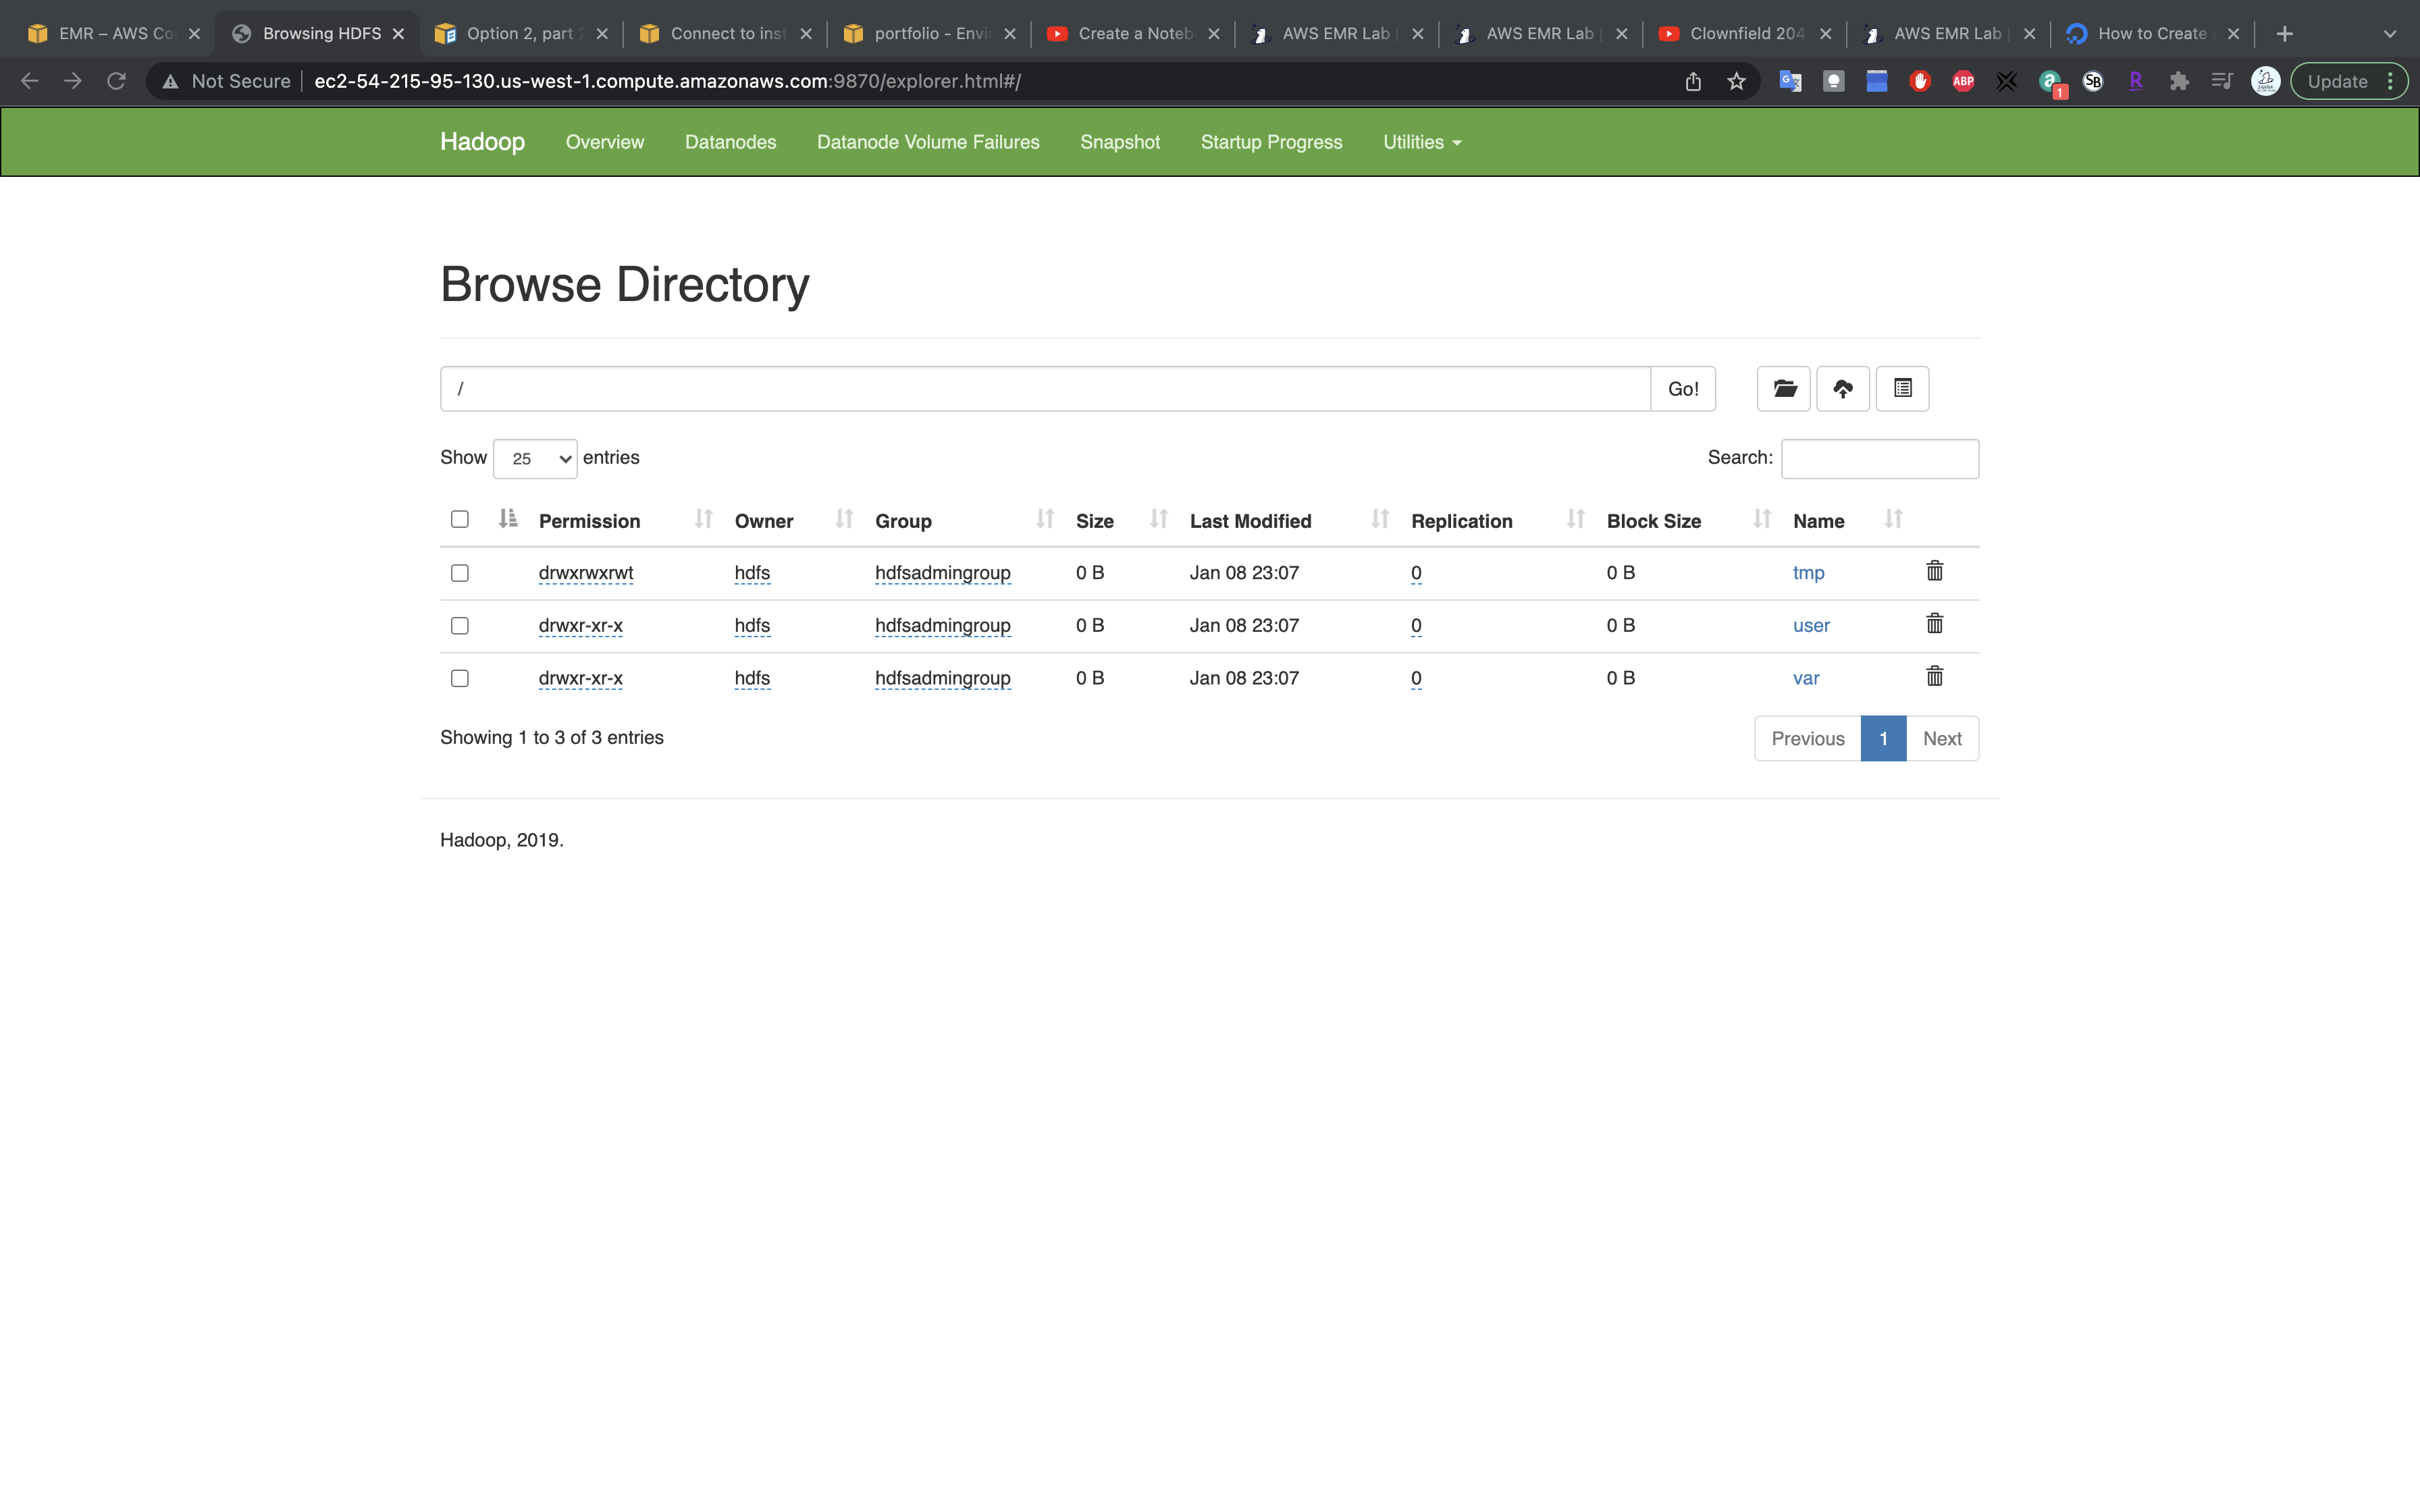
Utilities - Browse the file system
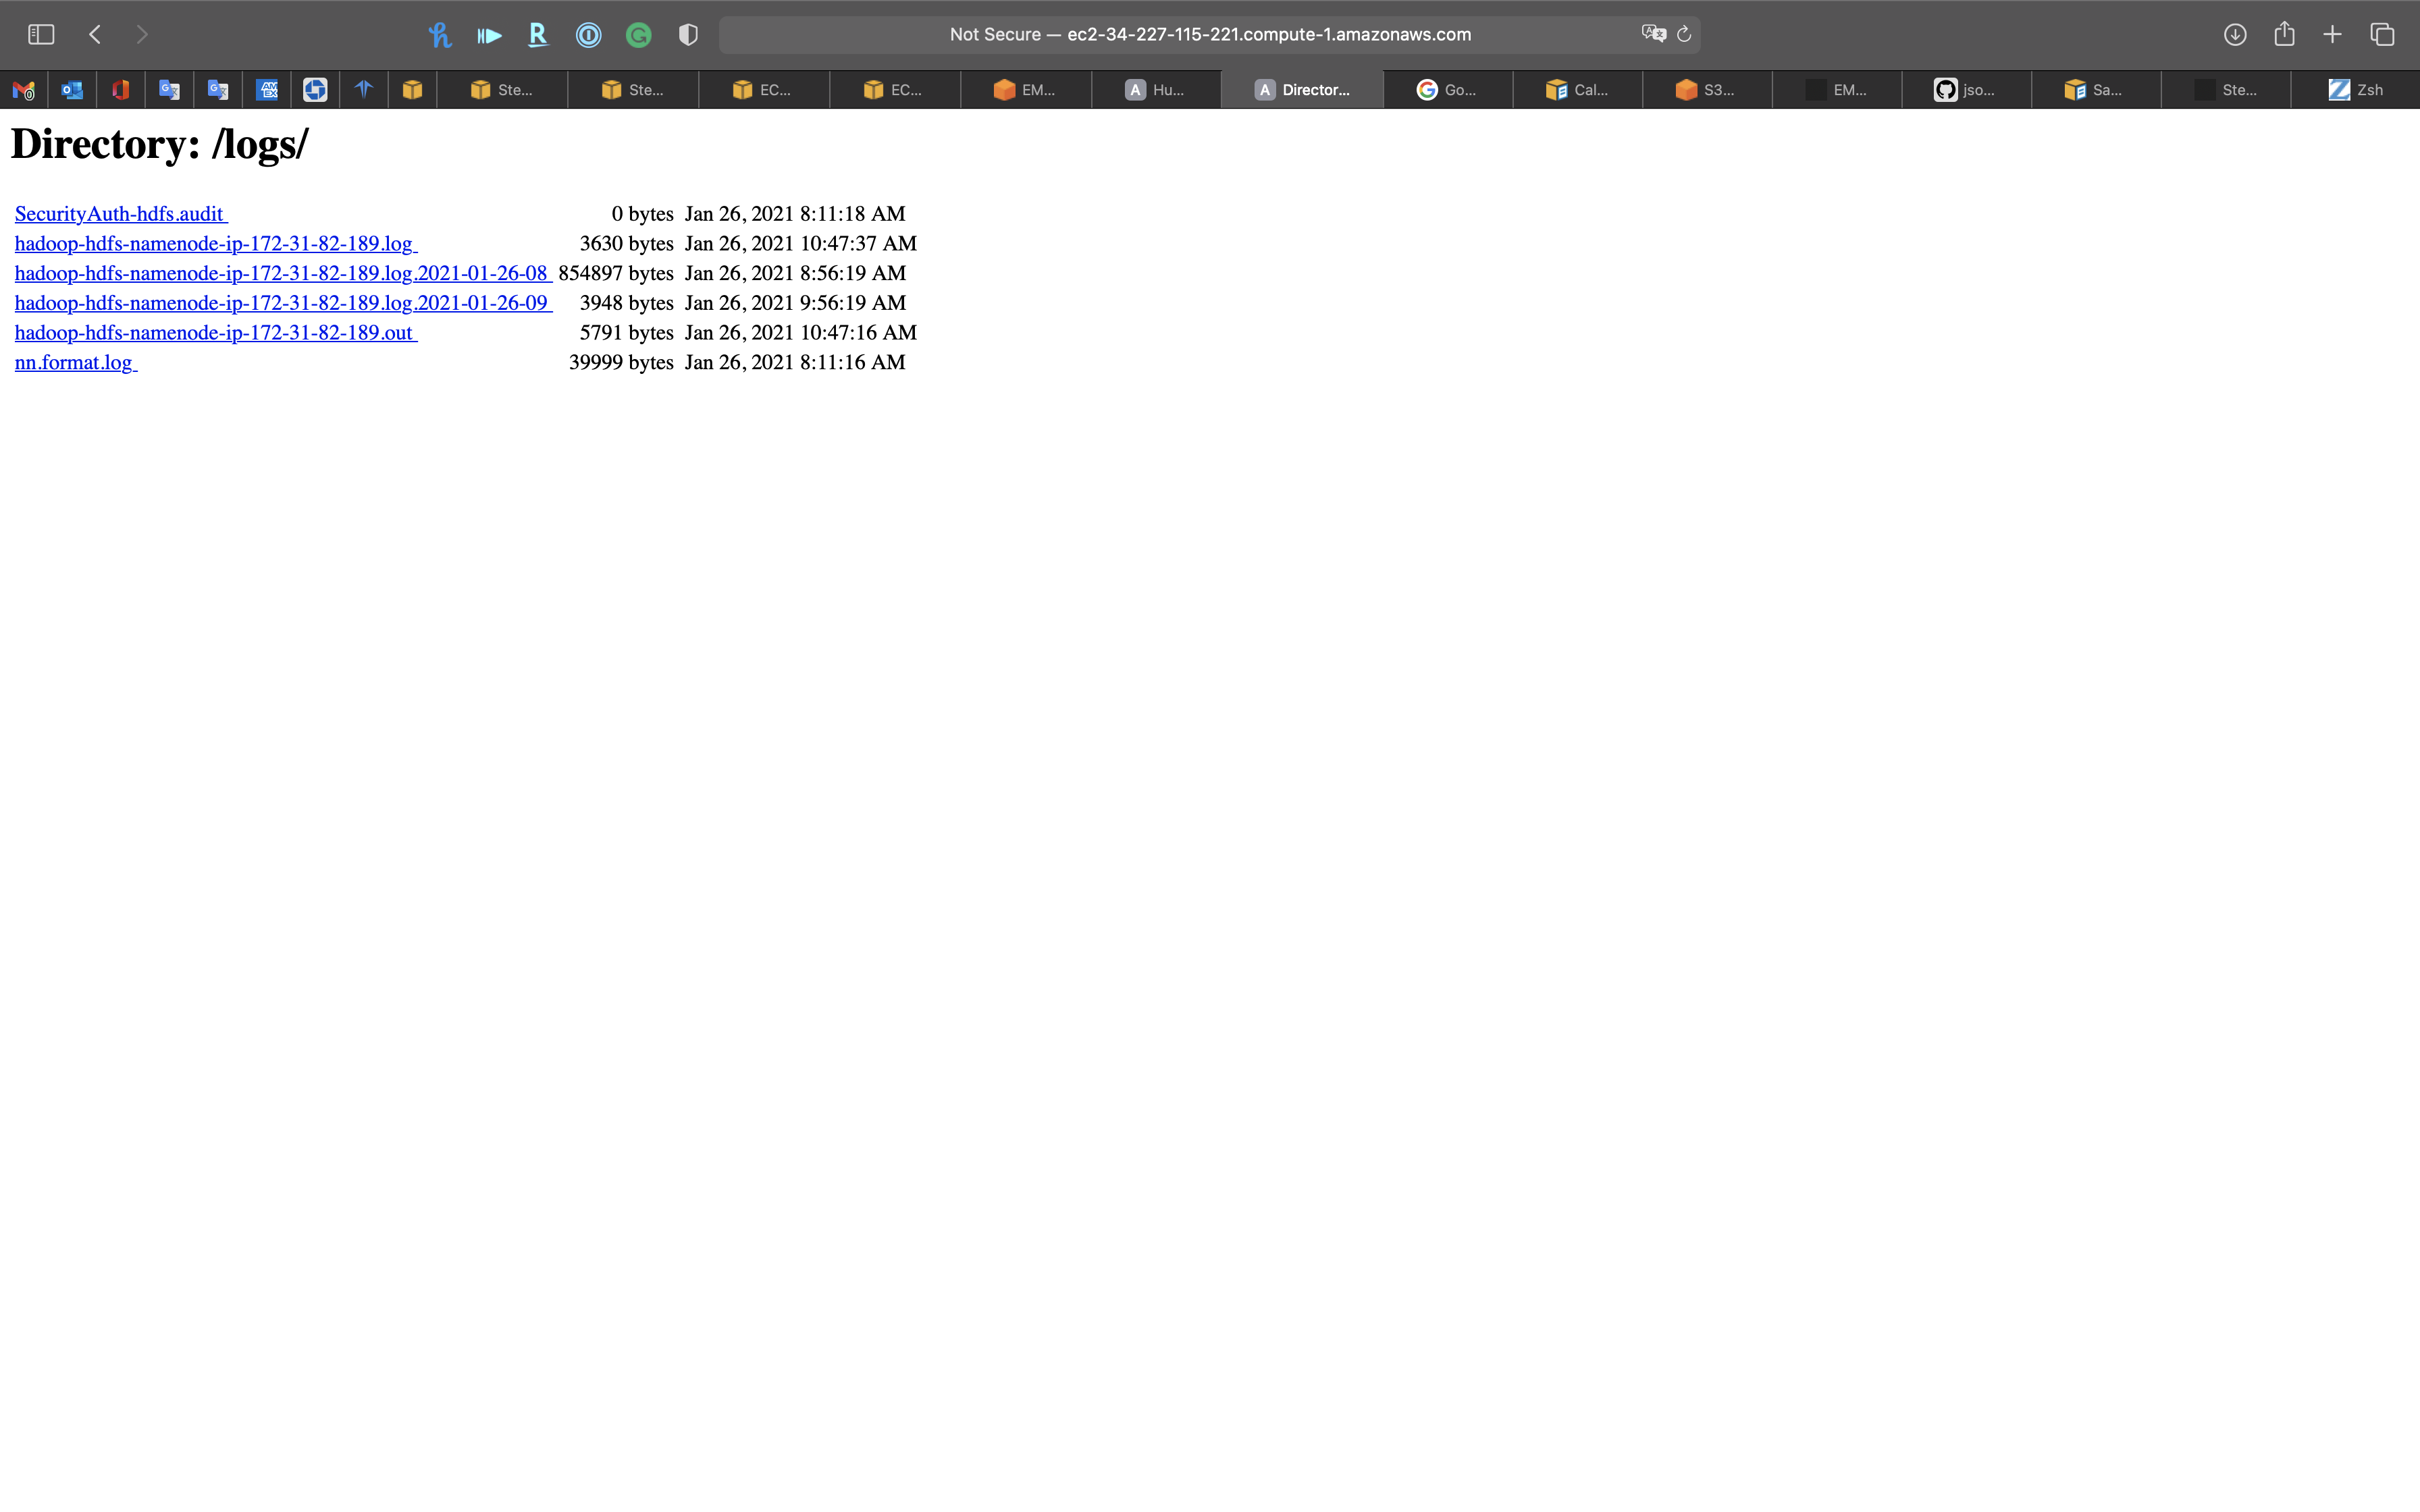
Utilities - Logs
Hue
Use Hue for querying data
Services -> EMR -> Clusters
Click on MyStateMachineCluster cluster then click on Application user interfaces tab.
Copy Hue’s url
http://ec2-34-227-115-221.compute-1.amazonaws.com:8888/
Create an account
- Username
- Password
Script
1 | show schemas |
Show databases
1 | show tables from ny_taxi_db |
Show tables from ny_taxi_db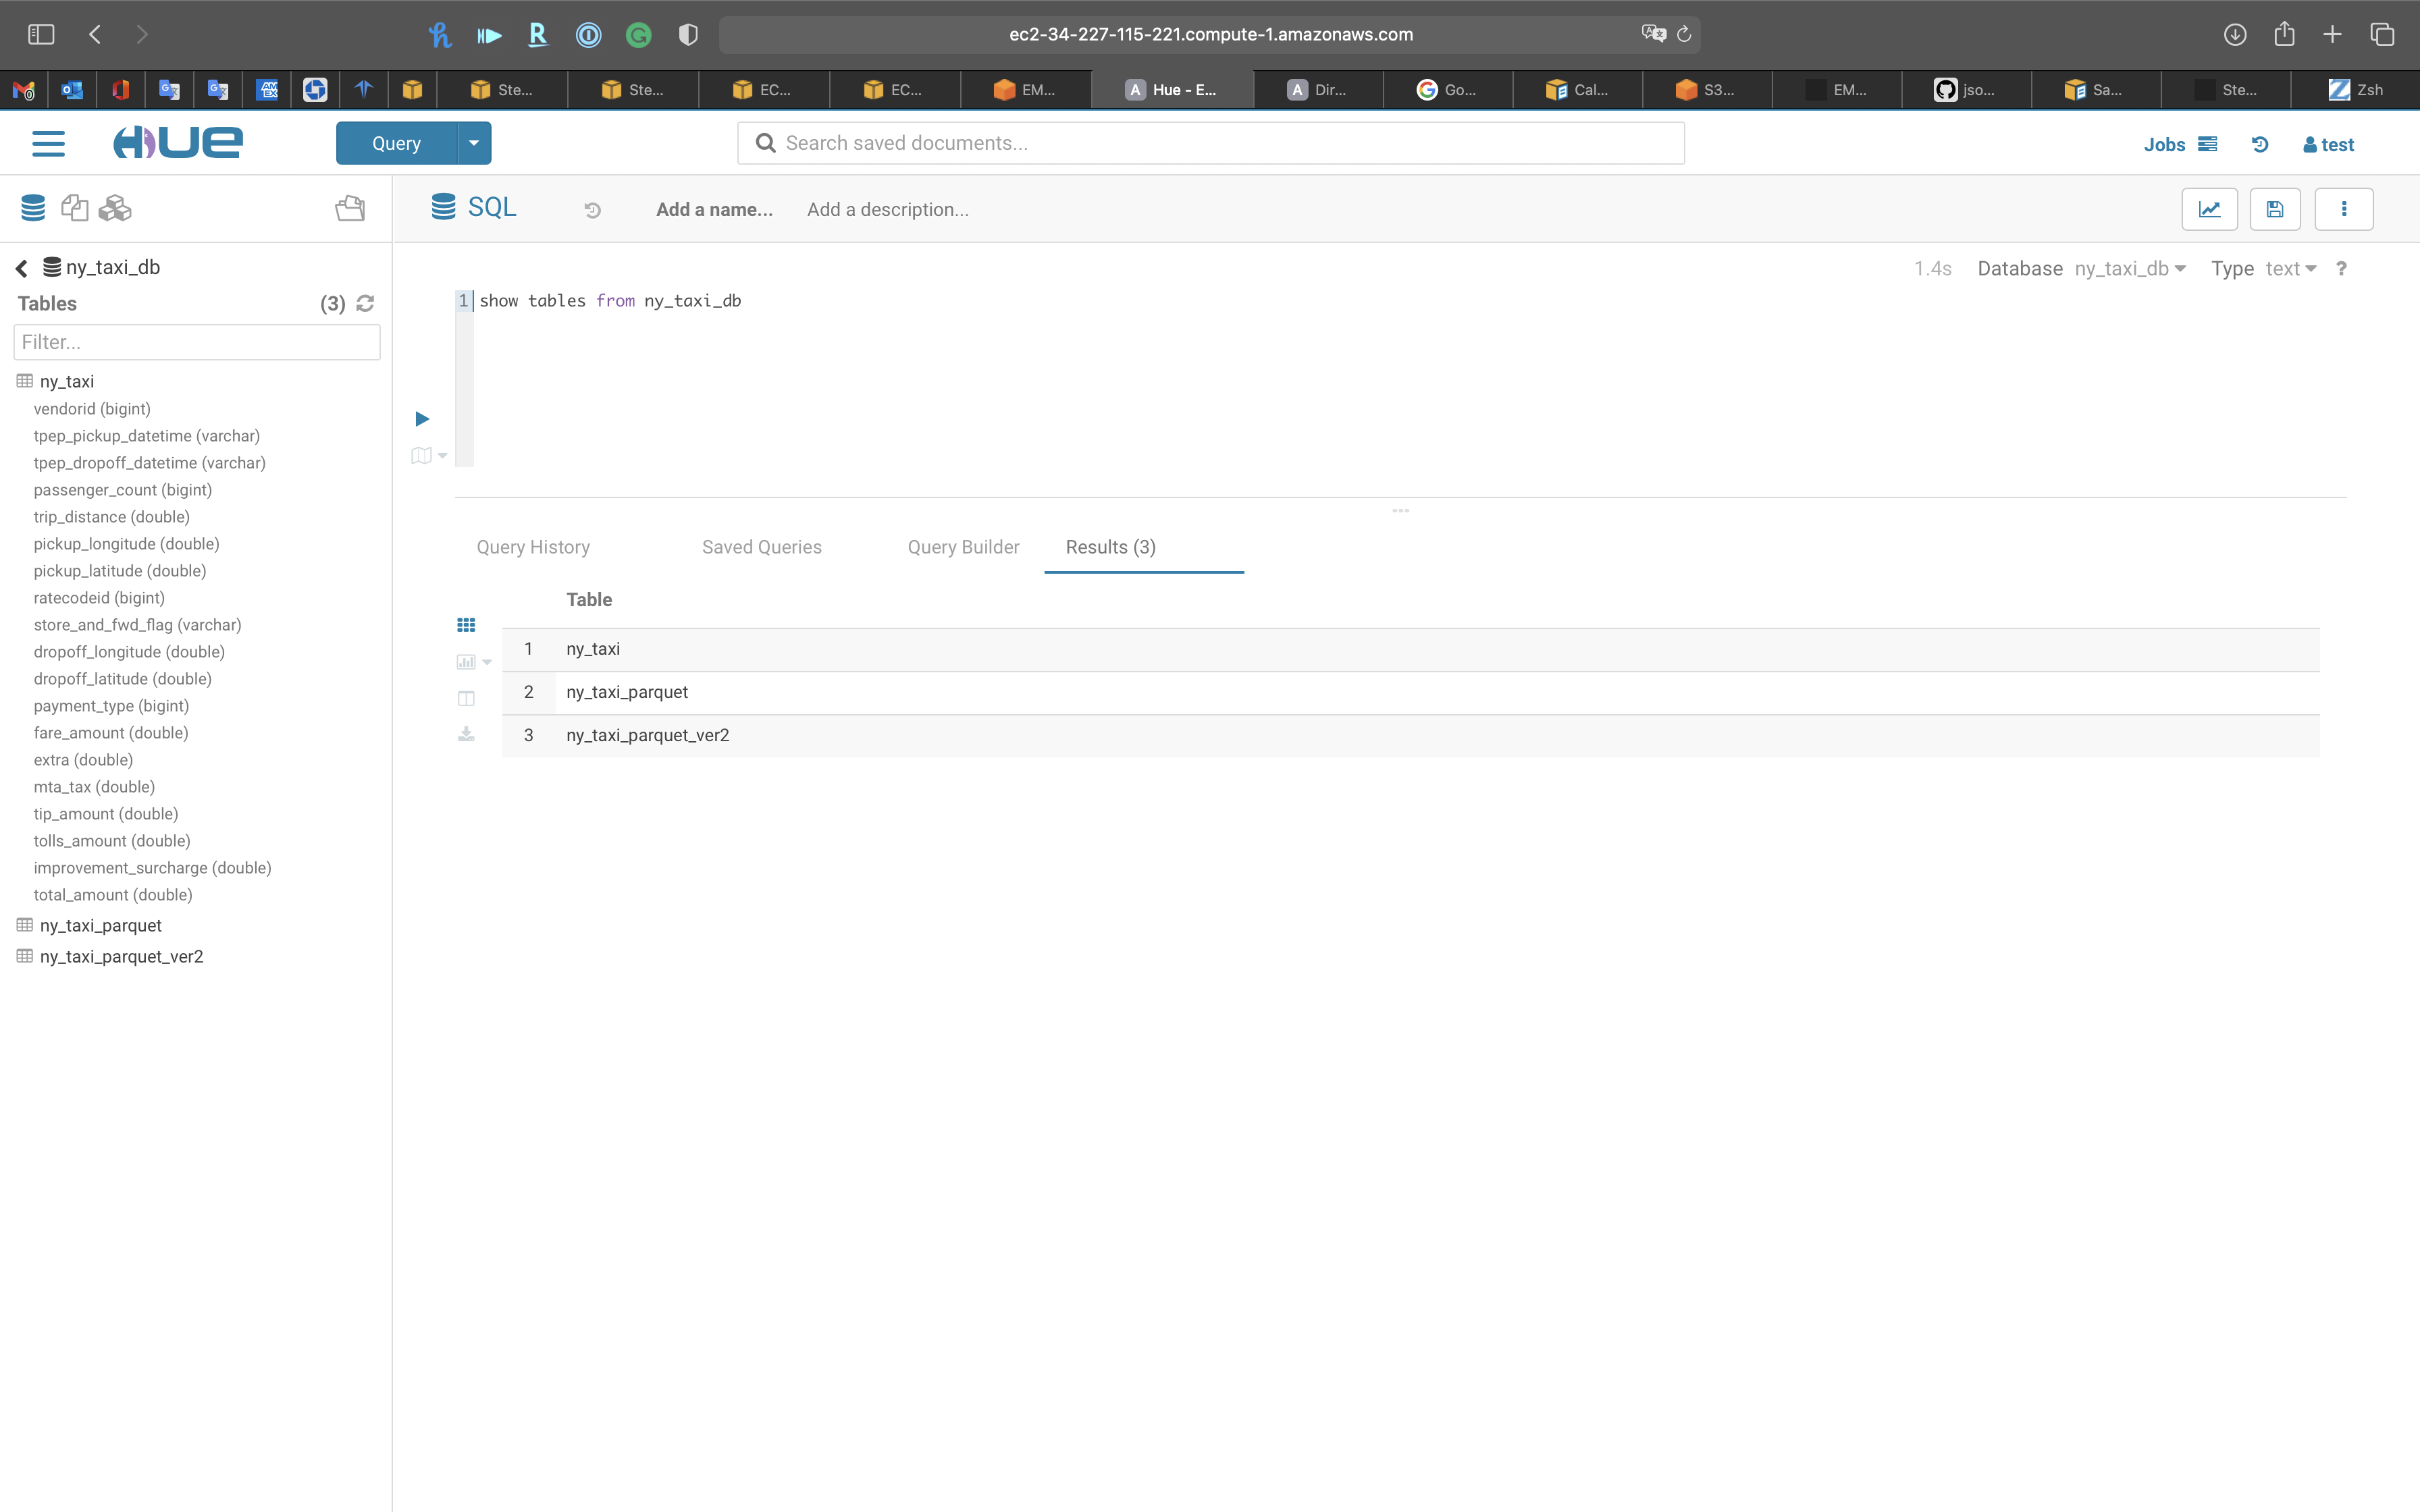
Notice we have finished the steps three times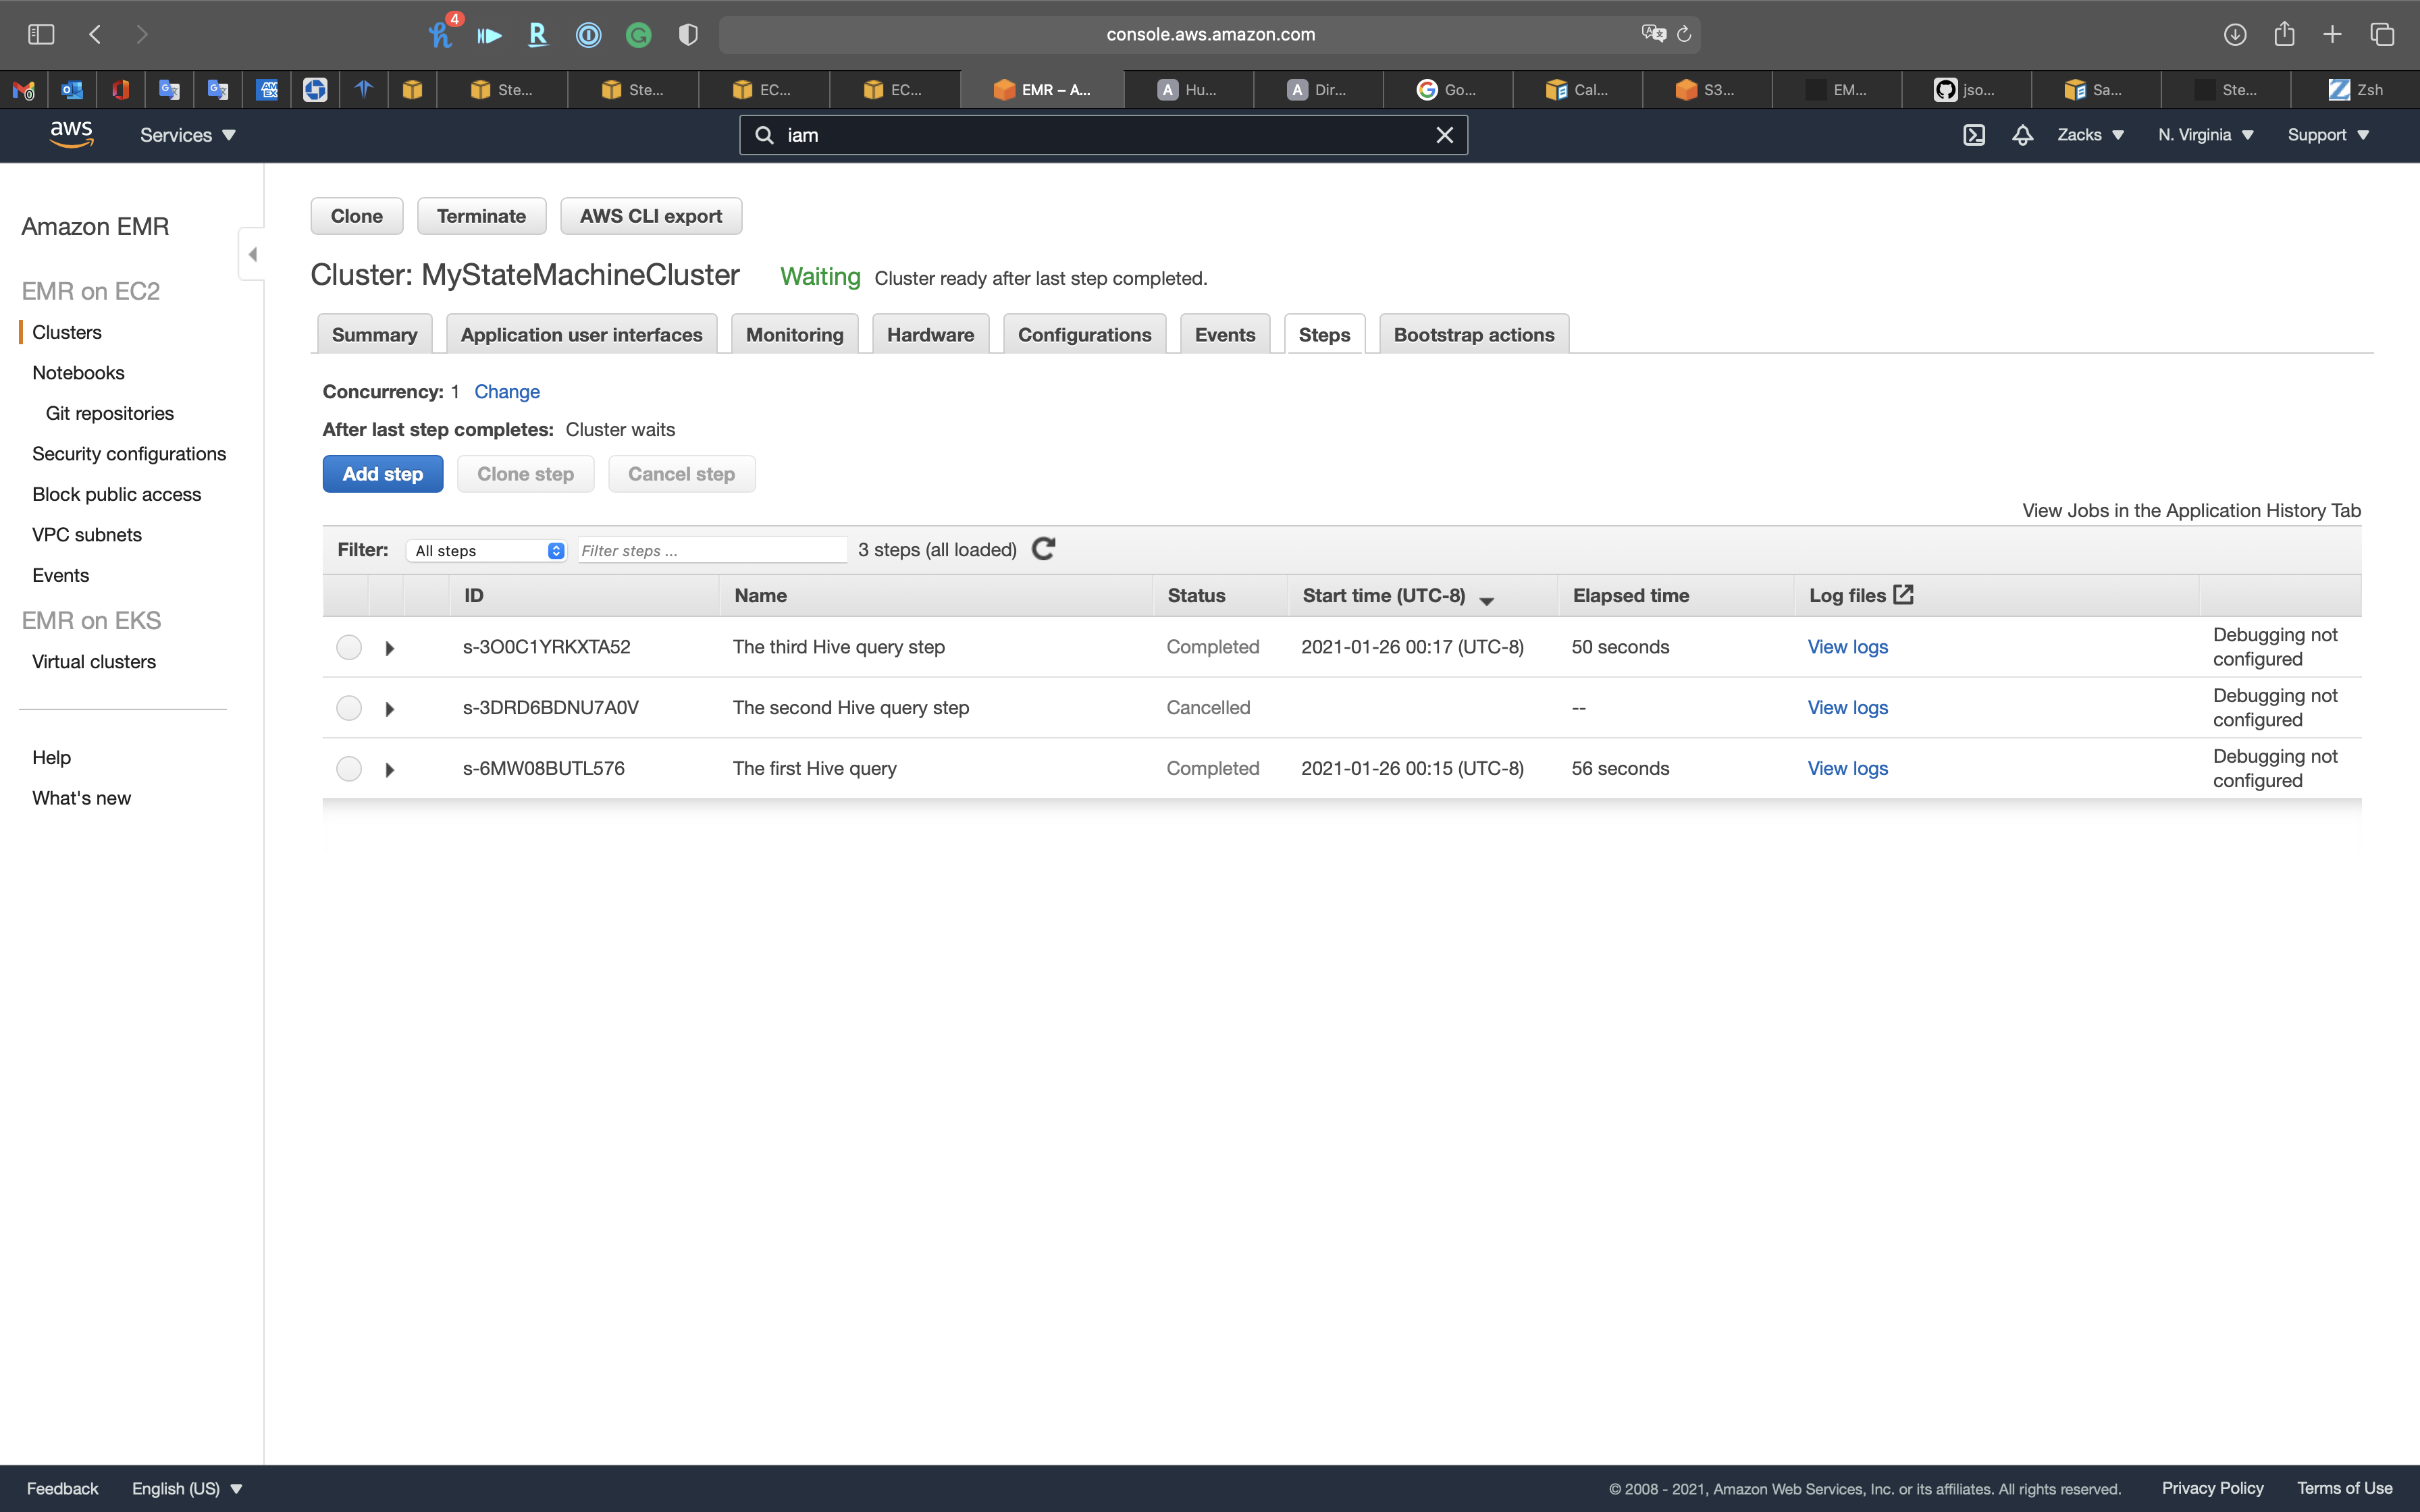
1 | select day_of_week (pickup_date) as day_of_week, avg(tip_amount) as average_tip from ny_taxi_db.ny_taxi_parquet group by 1 order by 1 |
Notice the columns were previewed by Hue automatically
Click on the run button.
Seem like high tip day is Thursday
1 | SELECT TipPrctCtgry |
You can also see query history
Workflow
Documents
Files
S3
You can visit your S3 buckets directly
Tables
Tables in the current Database
Click on Databases to see all the databases(schemas) in AWS Glue
Jobs
Importer
Hive
Services -> S3
Open Step_Functions we created for storing Hive query.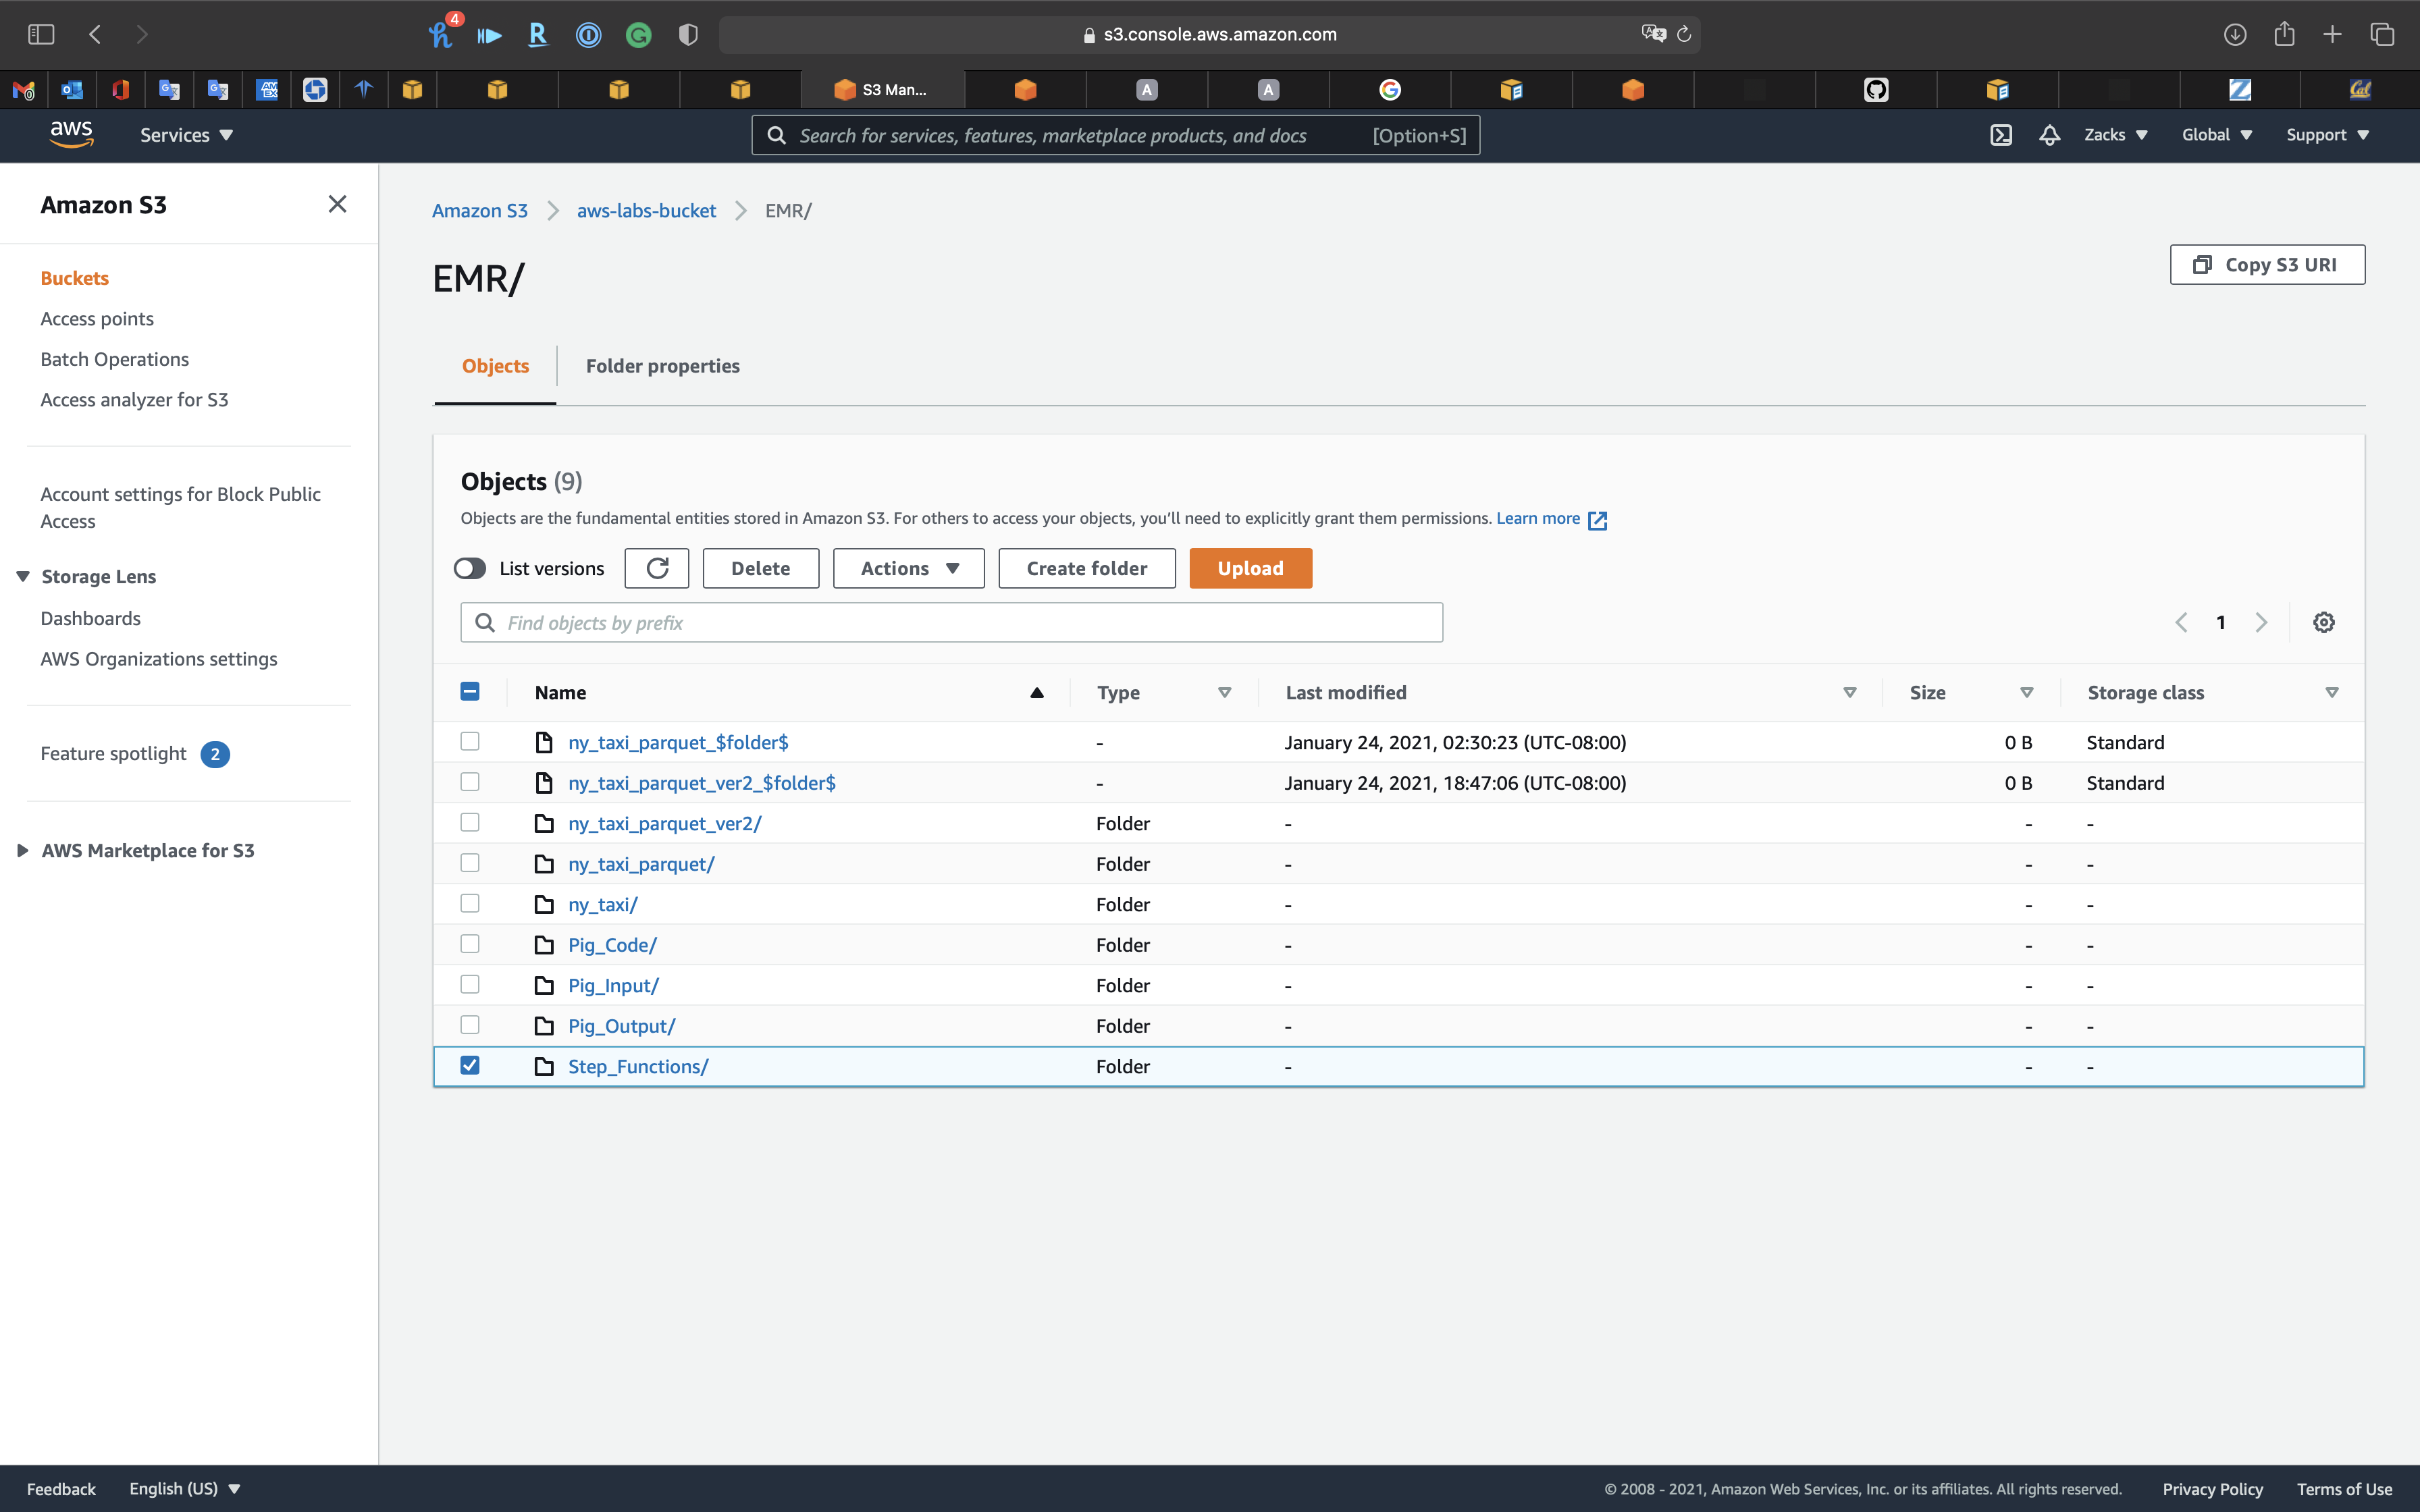
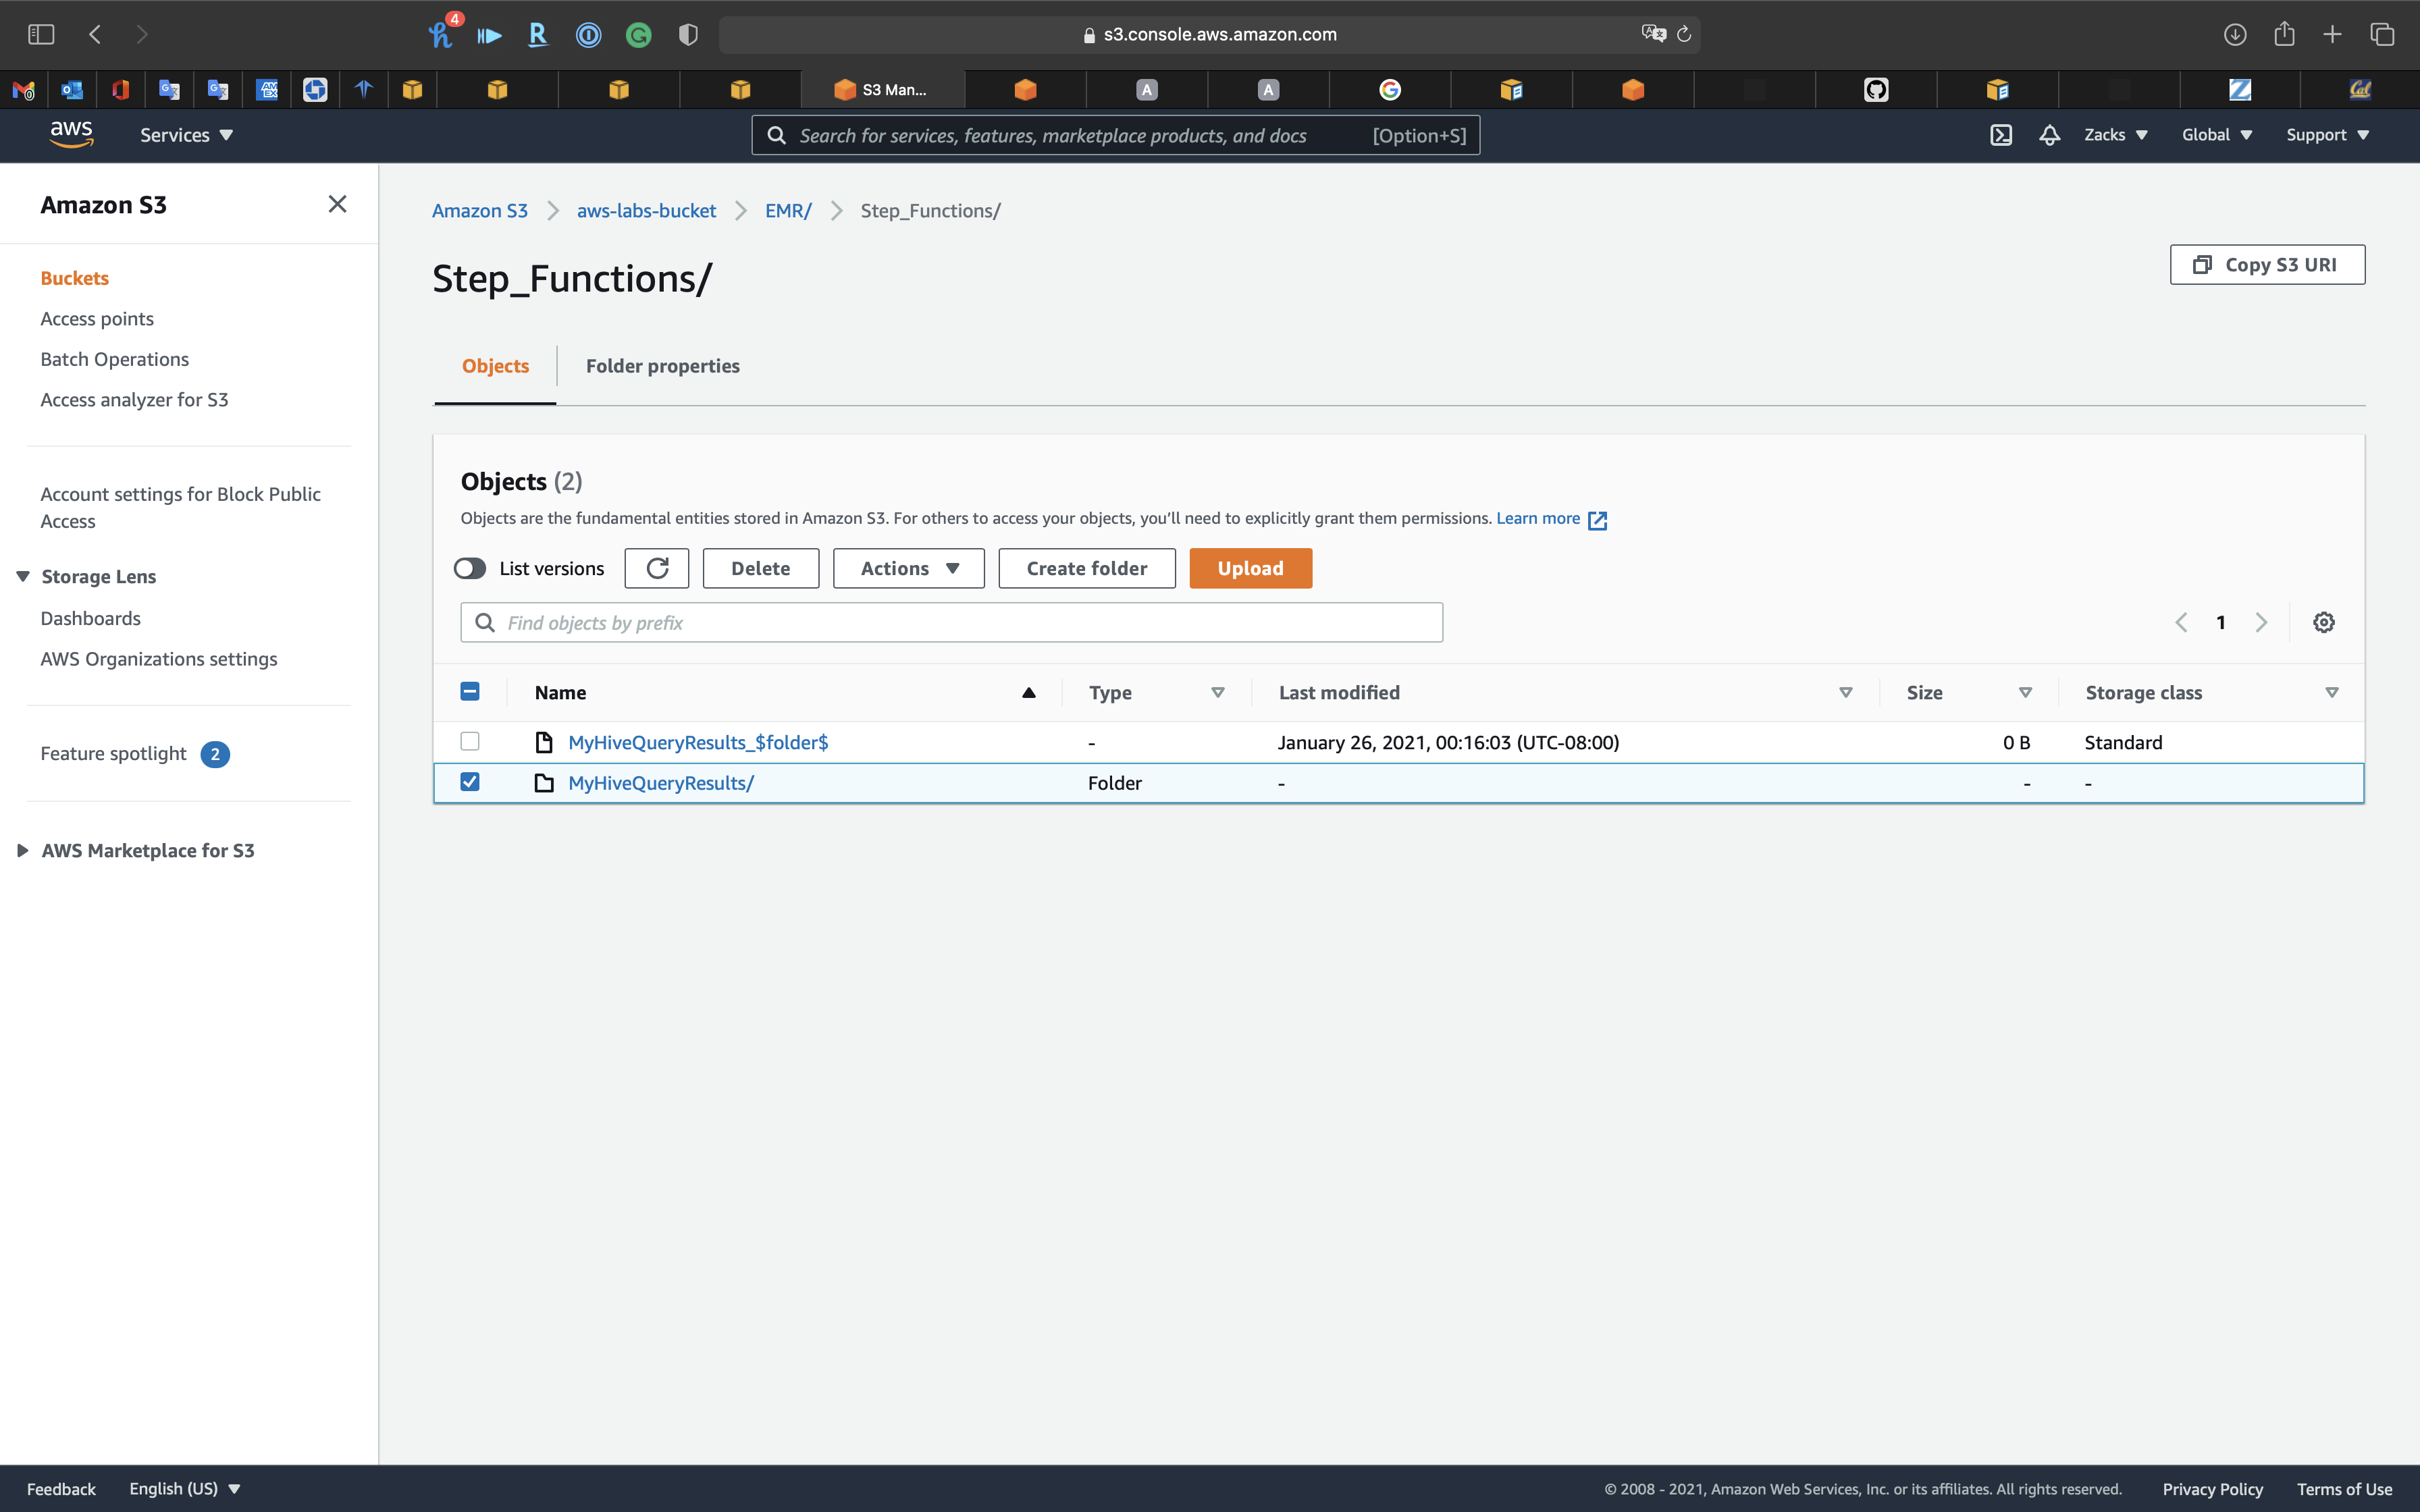
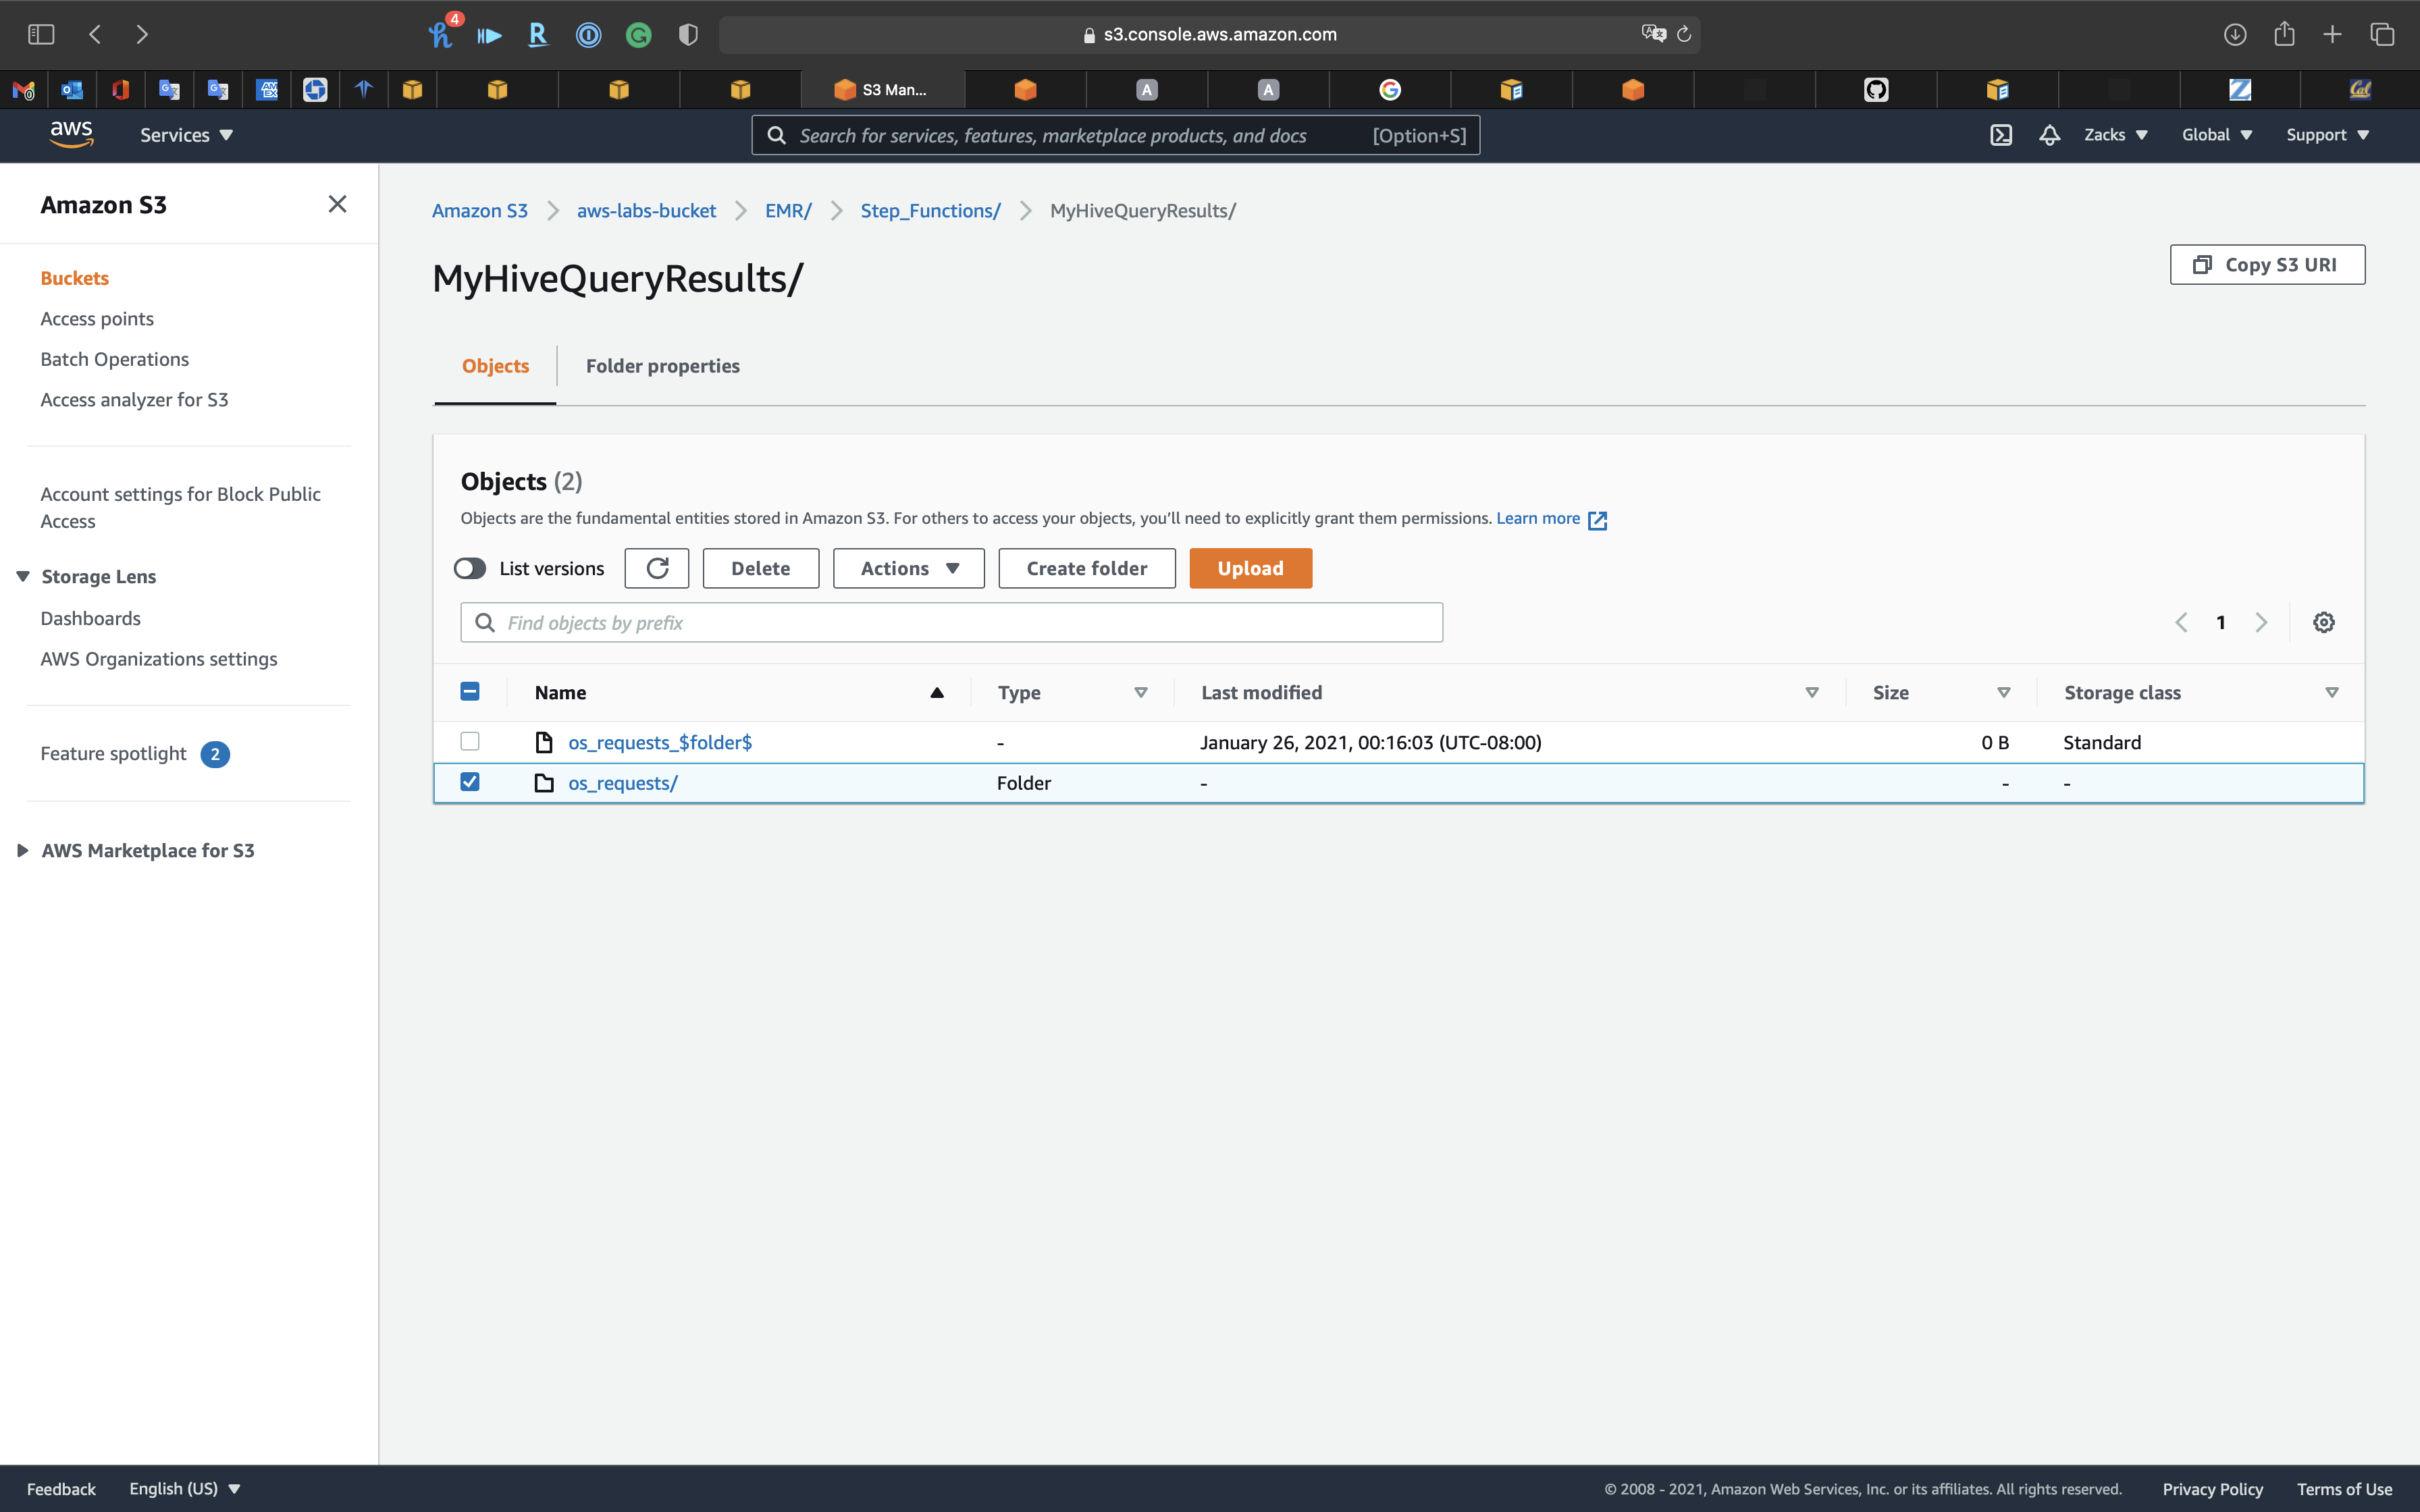
Download the request file.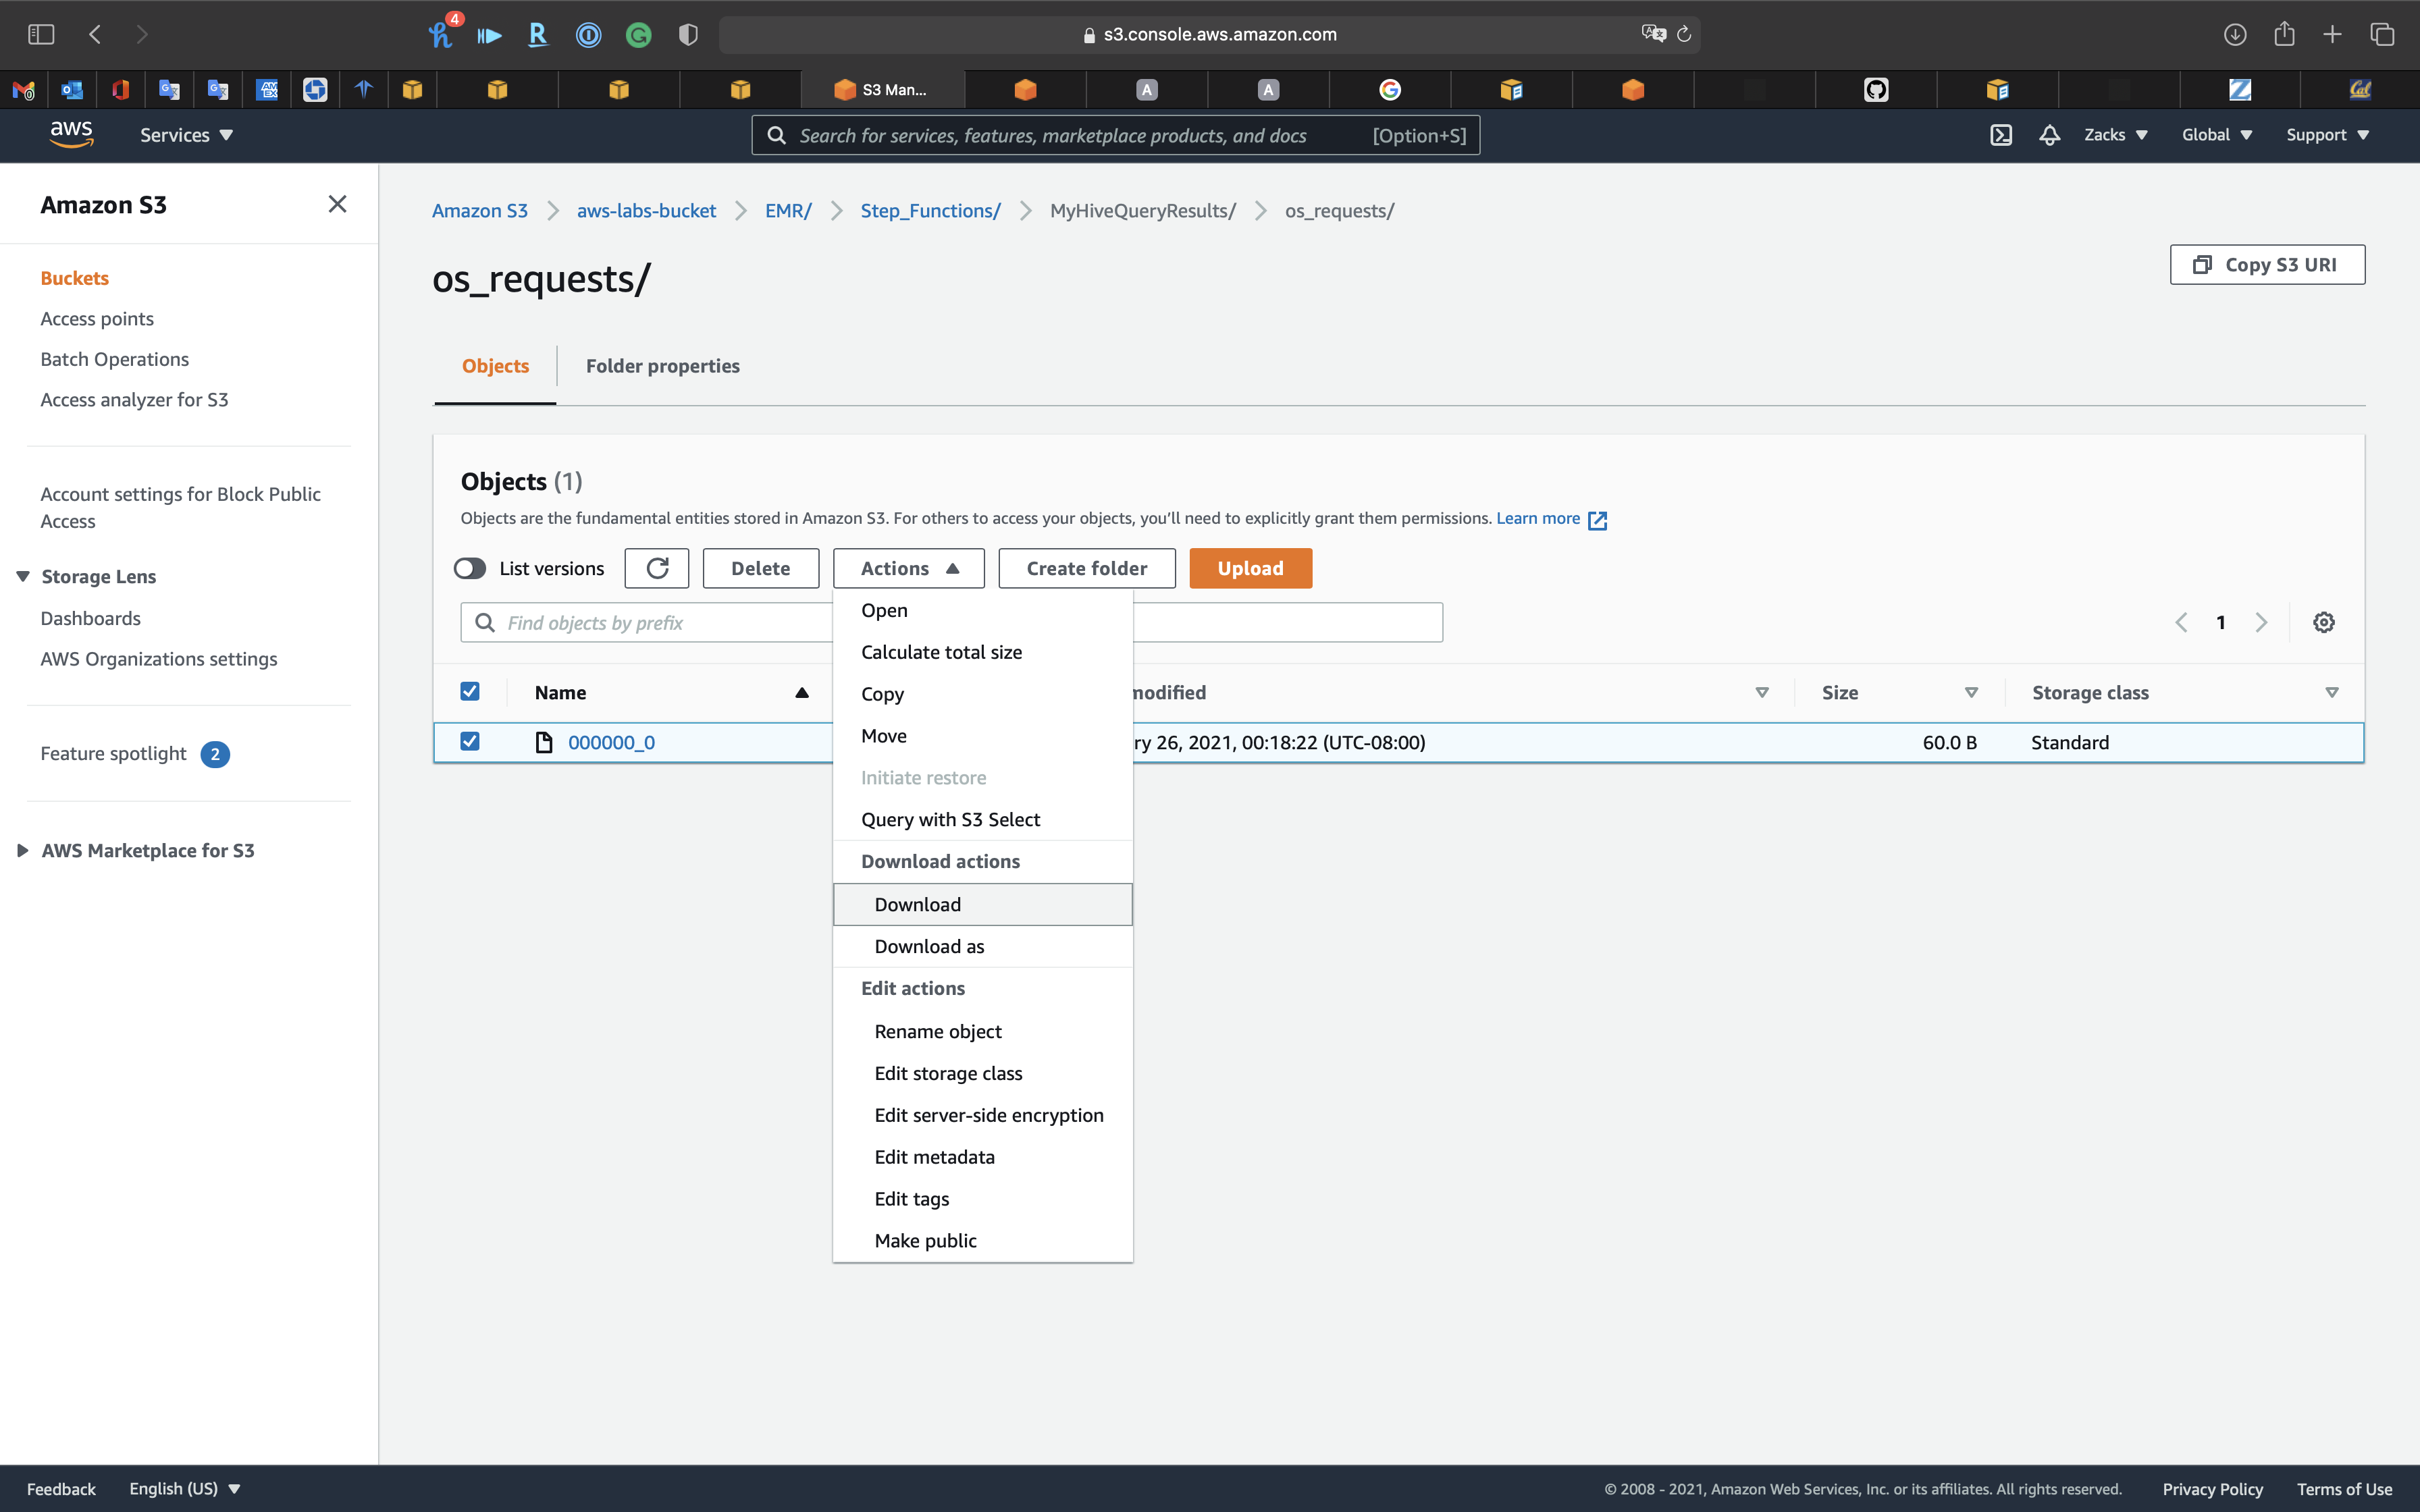
Warning: Terminate the EMR Cluster
Terminate the EMR cluster to avoid bankrupt.
Select your Cluster then click on Terminate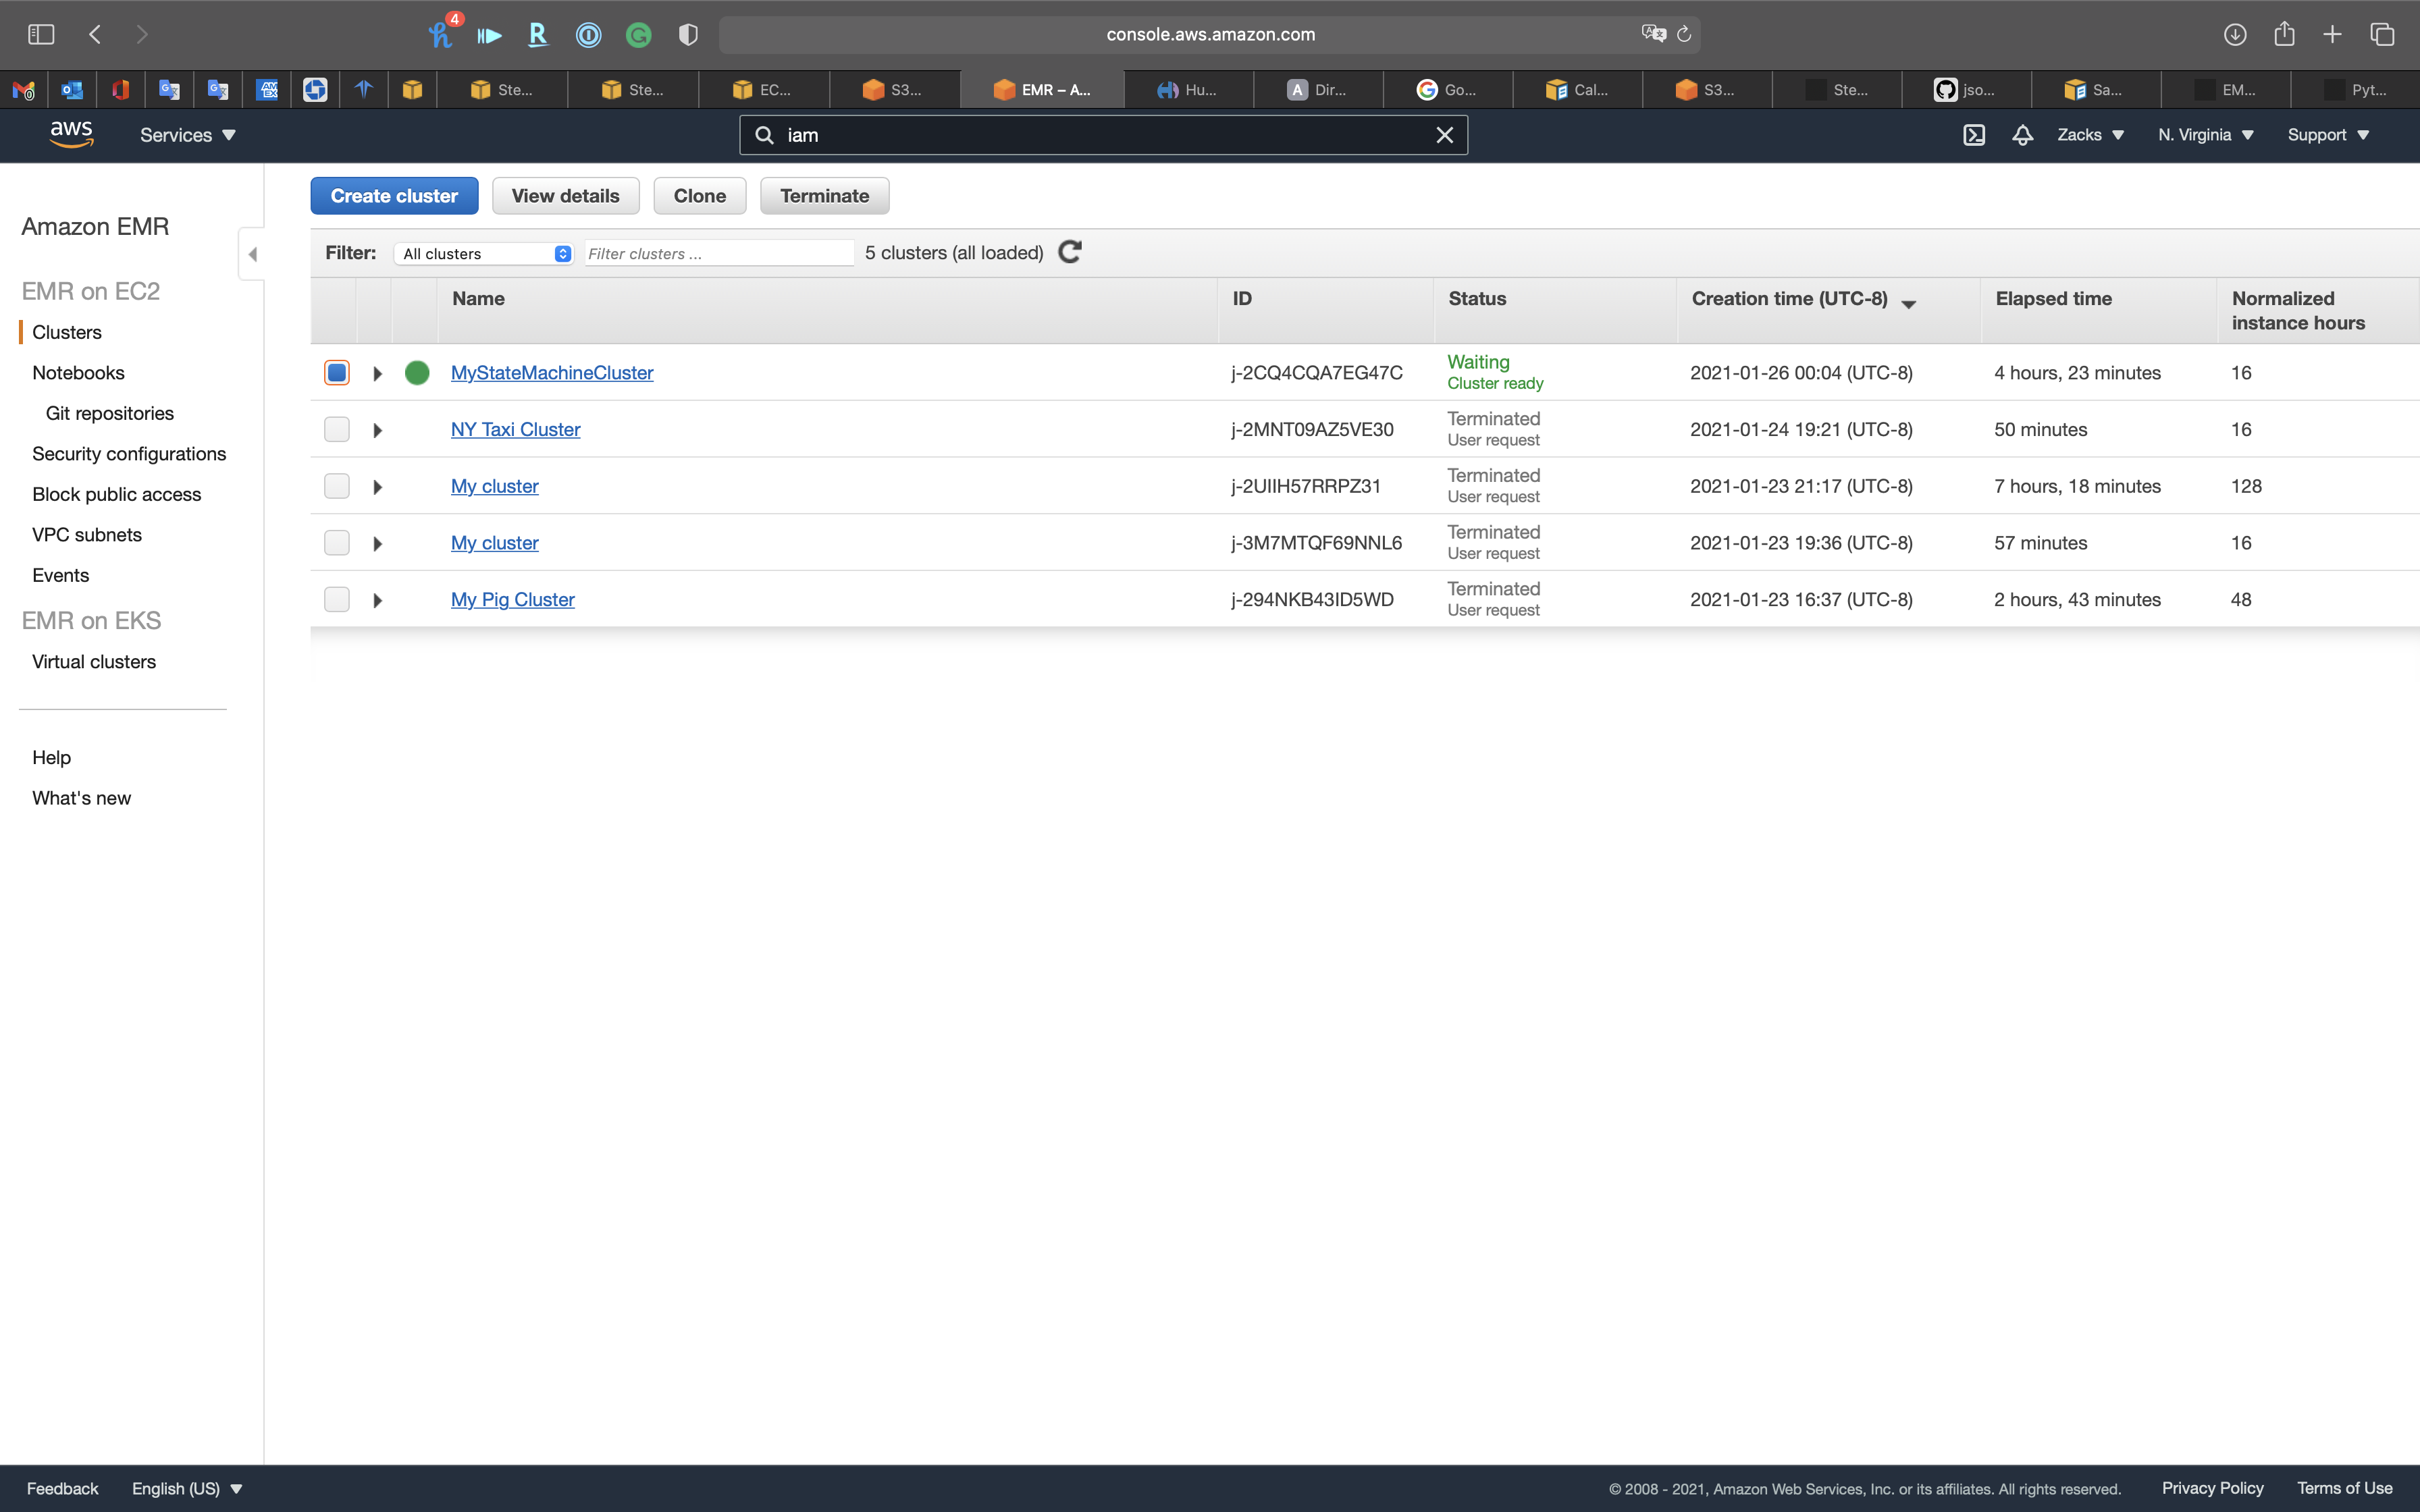
EMR Network Security
EMR VPC Isolation
Example: Create an IPv4 VPC and subnets using the AWS CLI
Tag your Amazon EC2 resources
If you have any AWS CLI permission errors, see AWS CLI
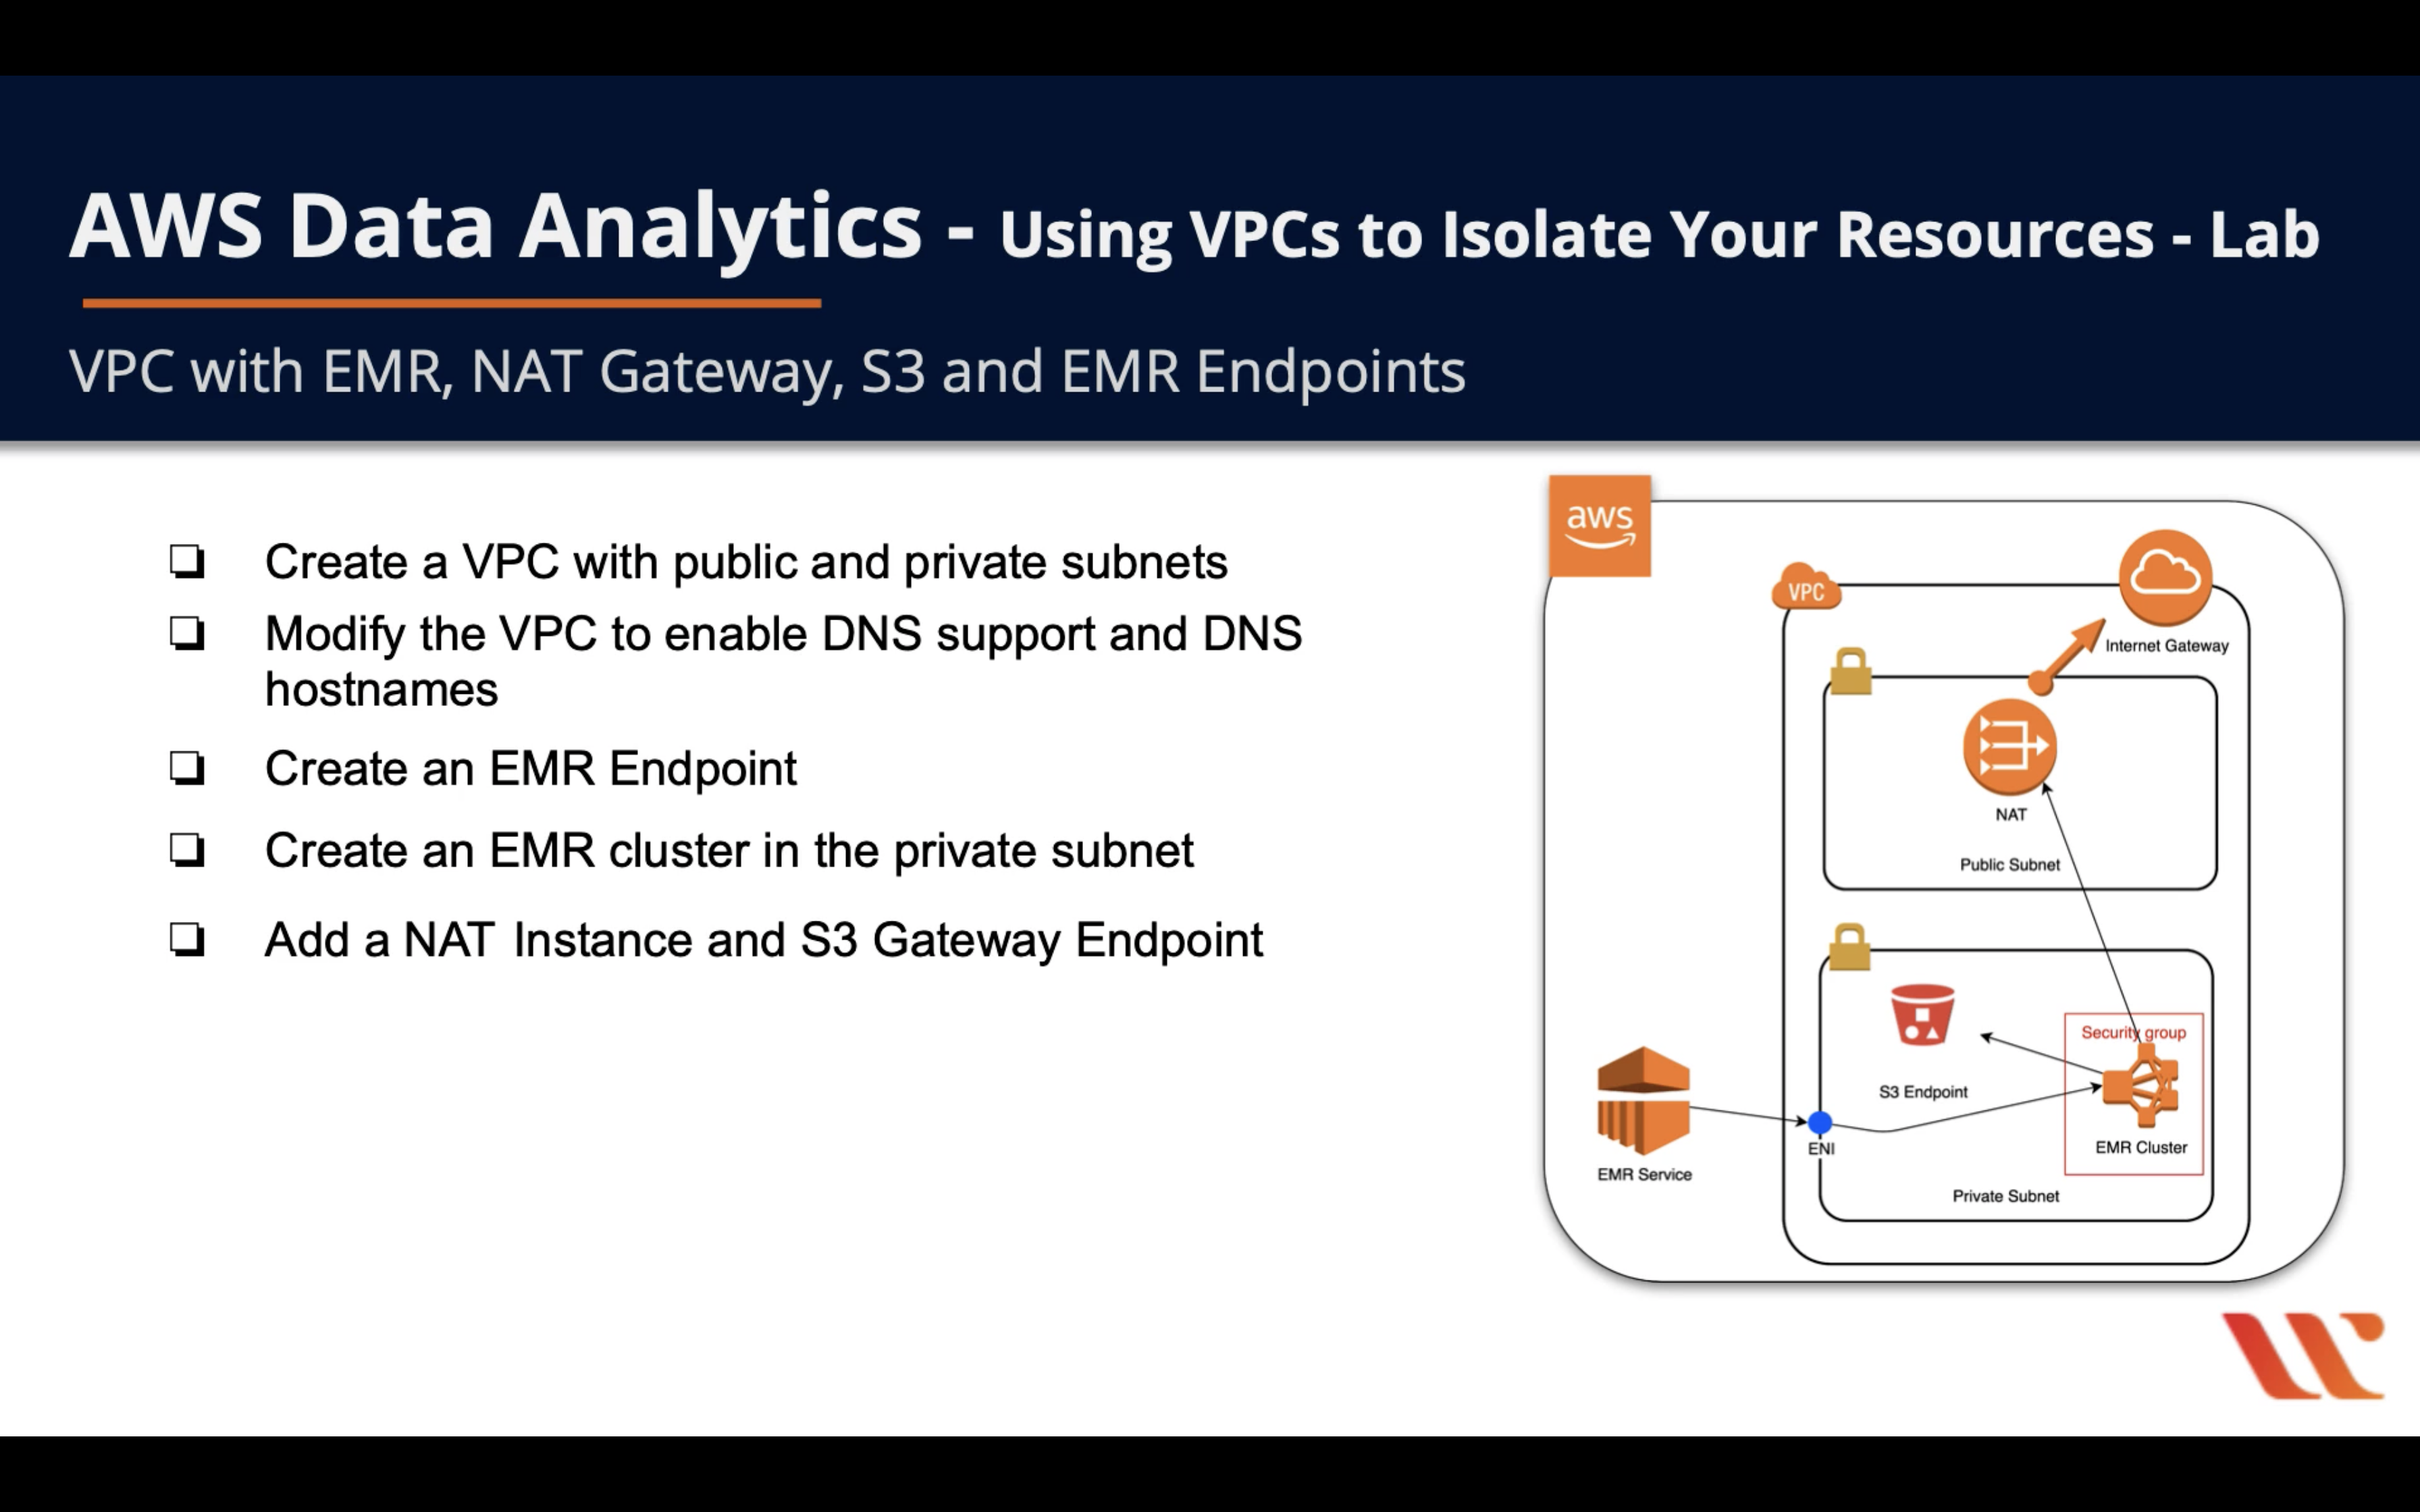
Lab Details
- Create a VPC with public and private subnets
- Modify the VPC to enable DNS support and DNS hostnames
- Create an EMR Endpoint
- Create an EMR cluster in the private subnet
- Add a NAT Instance and S3 Gateway Endpoint
VPC Configuration
Create VPC
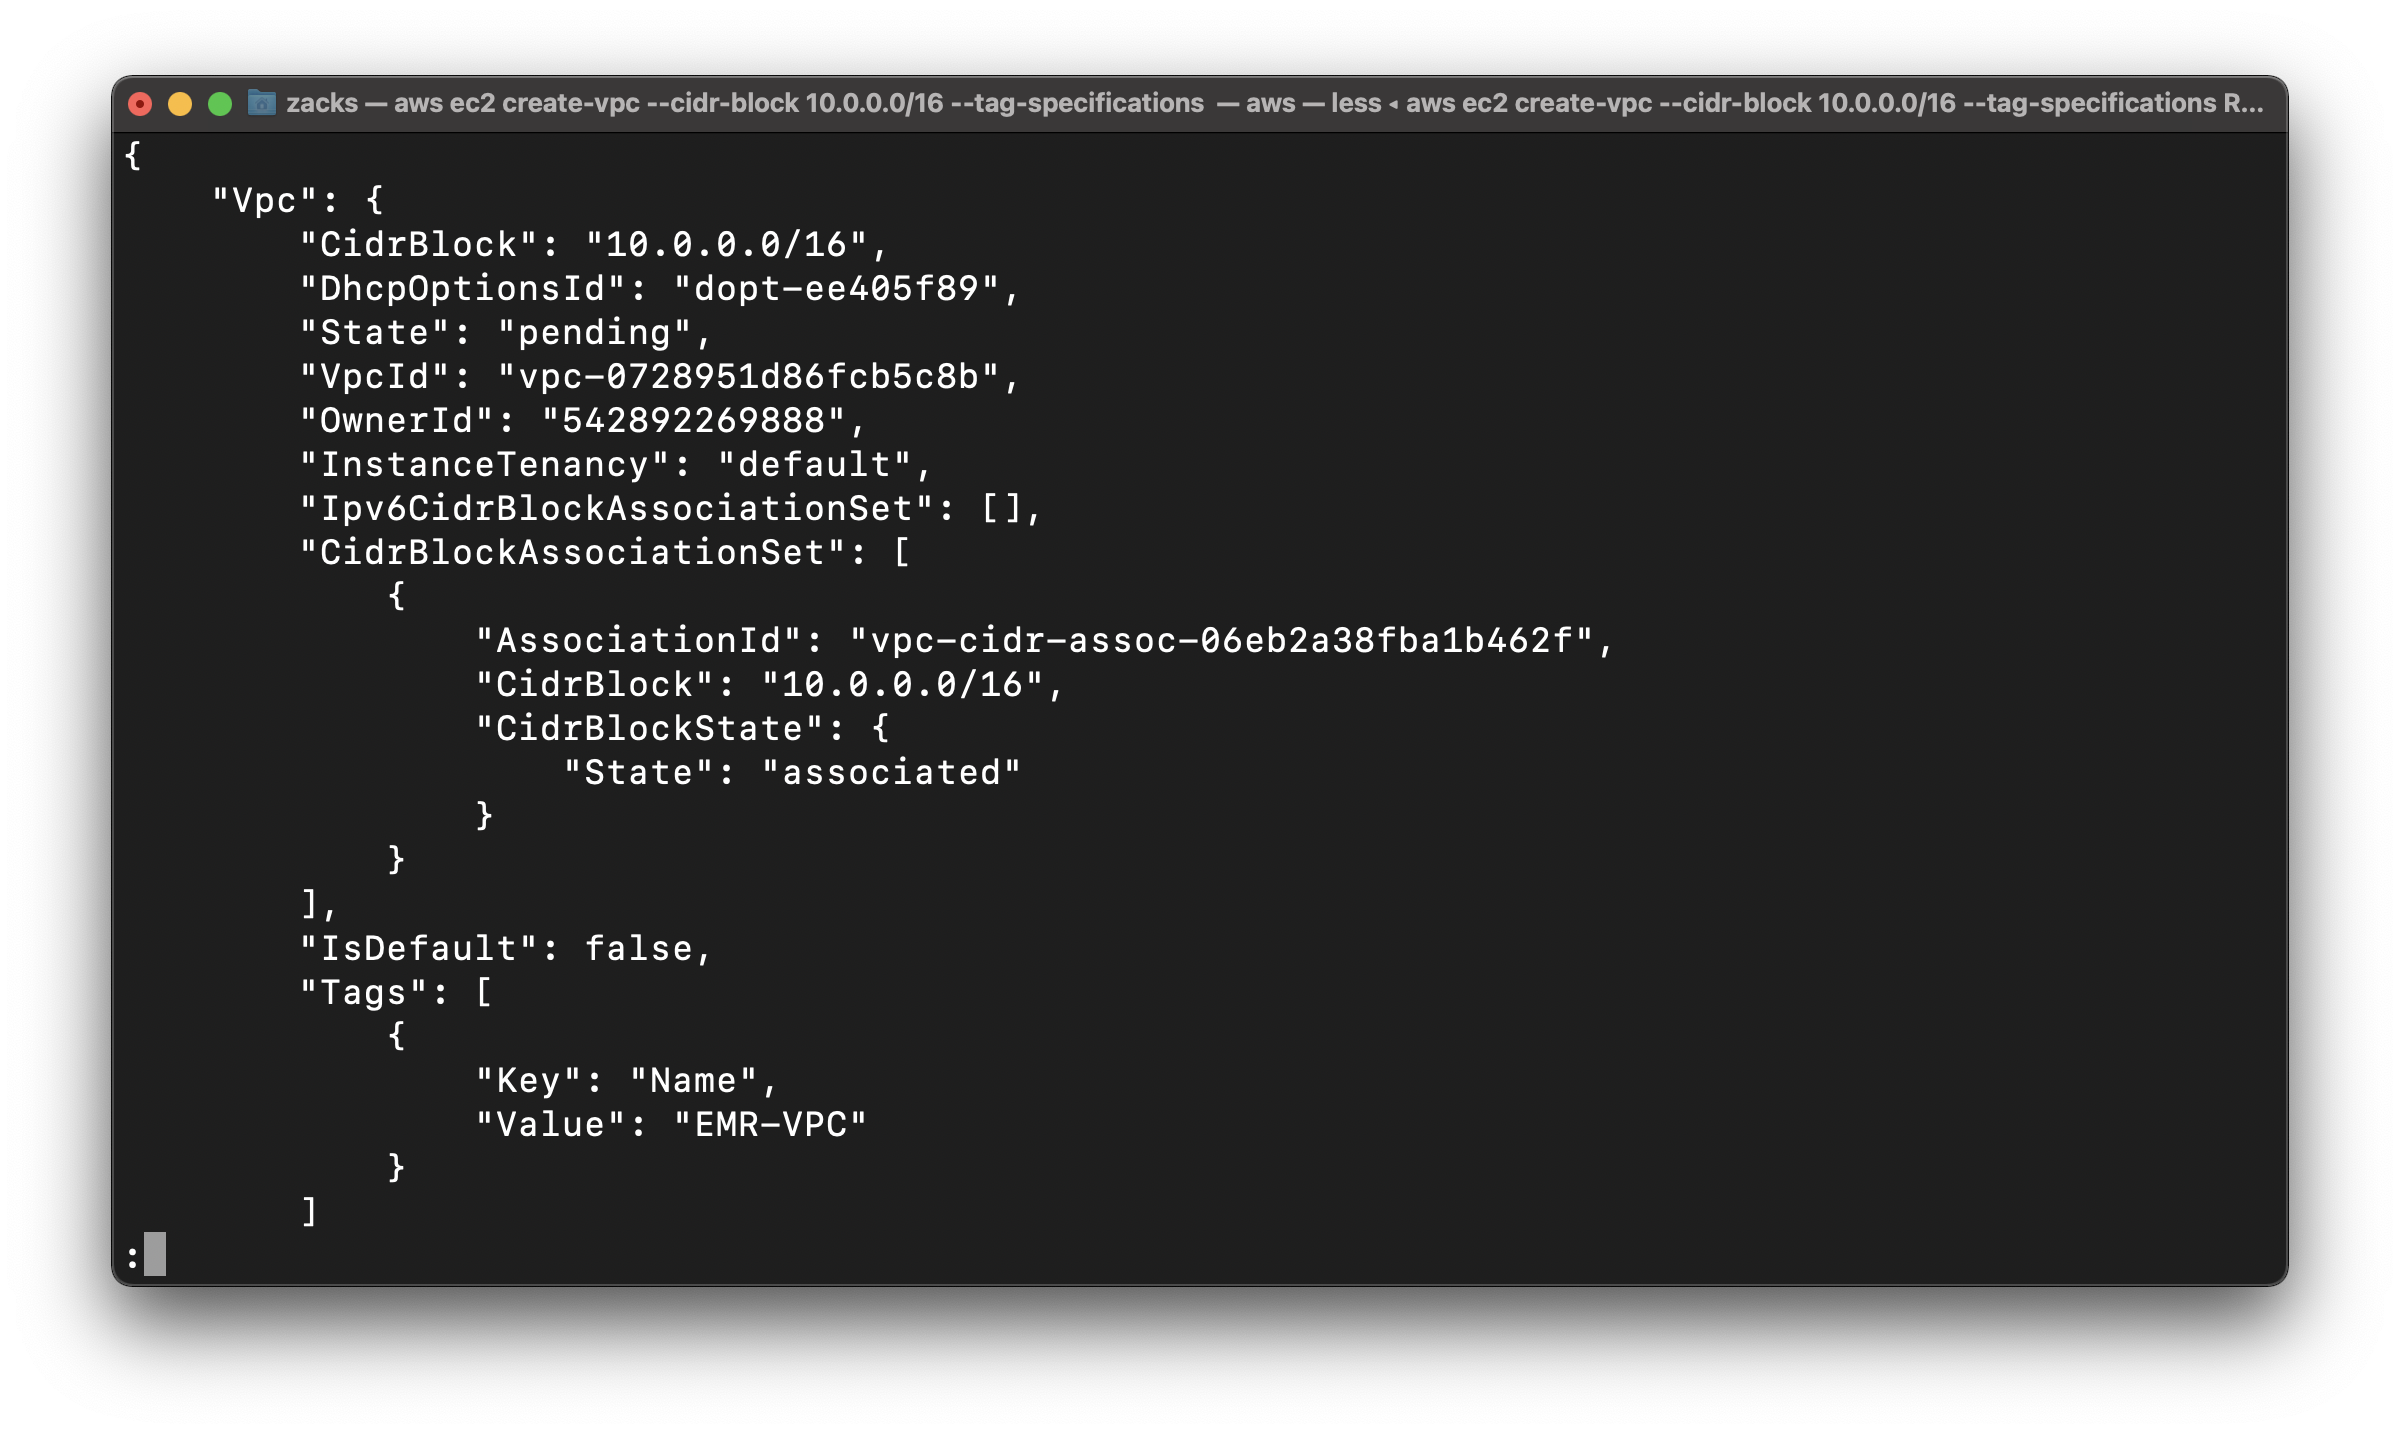
Create a VPC with a 10.0.0.0/16 CIDR block
1 | aws ec2 create-vpc --cidr-block 10.0.0.0/16 --tag-specifications 'ResourceType=vpc, Tags=[{Key=Name,Value=EMR-VPC}]' |
Save your VpcId
vpc-0728951d86fcb5c8b
Create Subnets
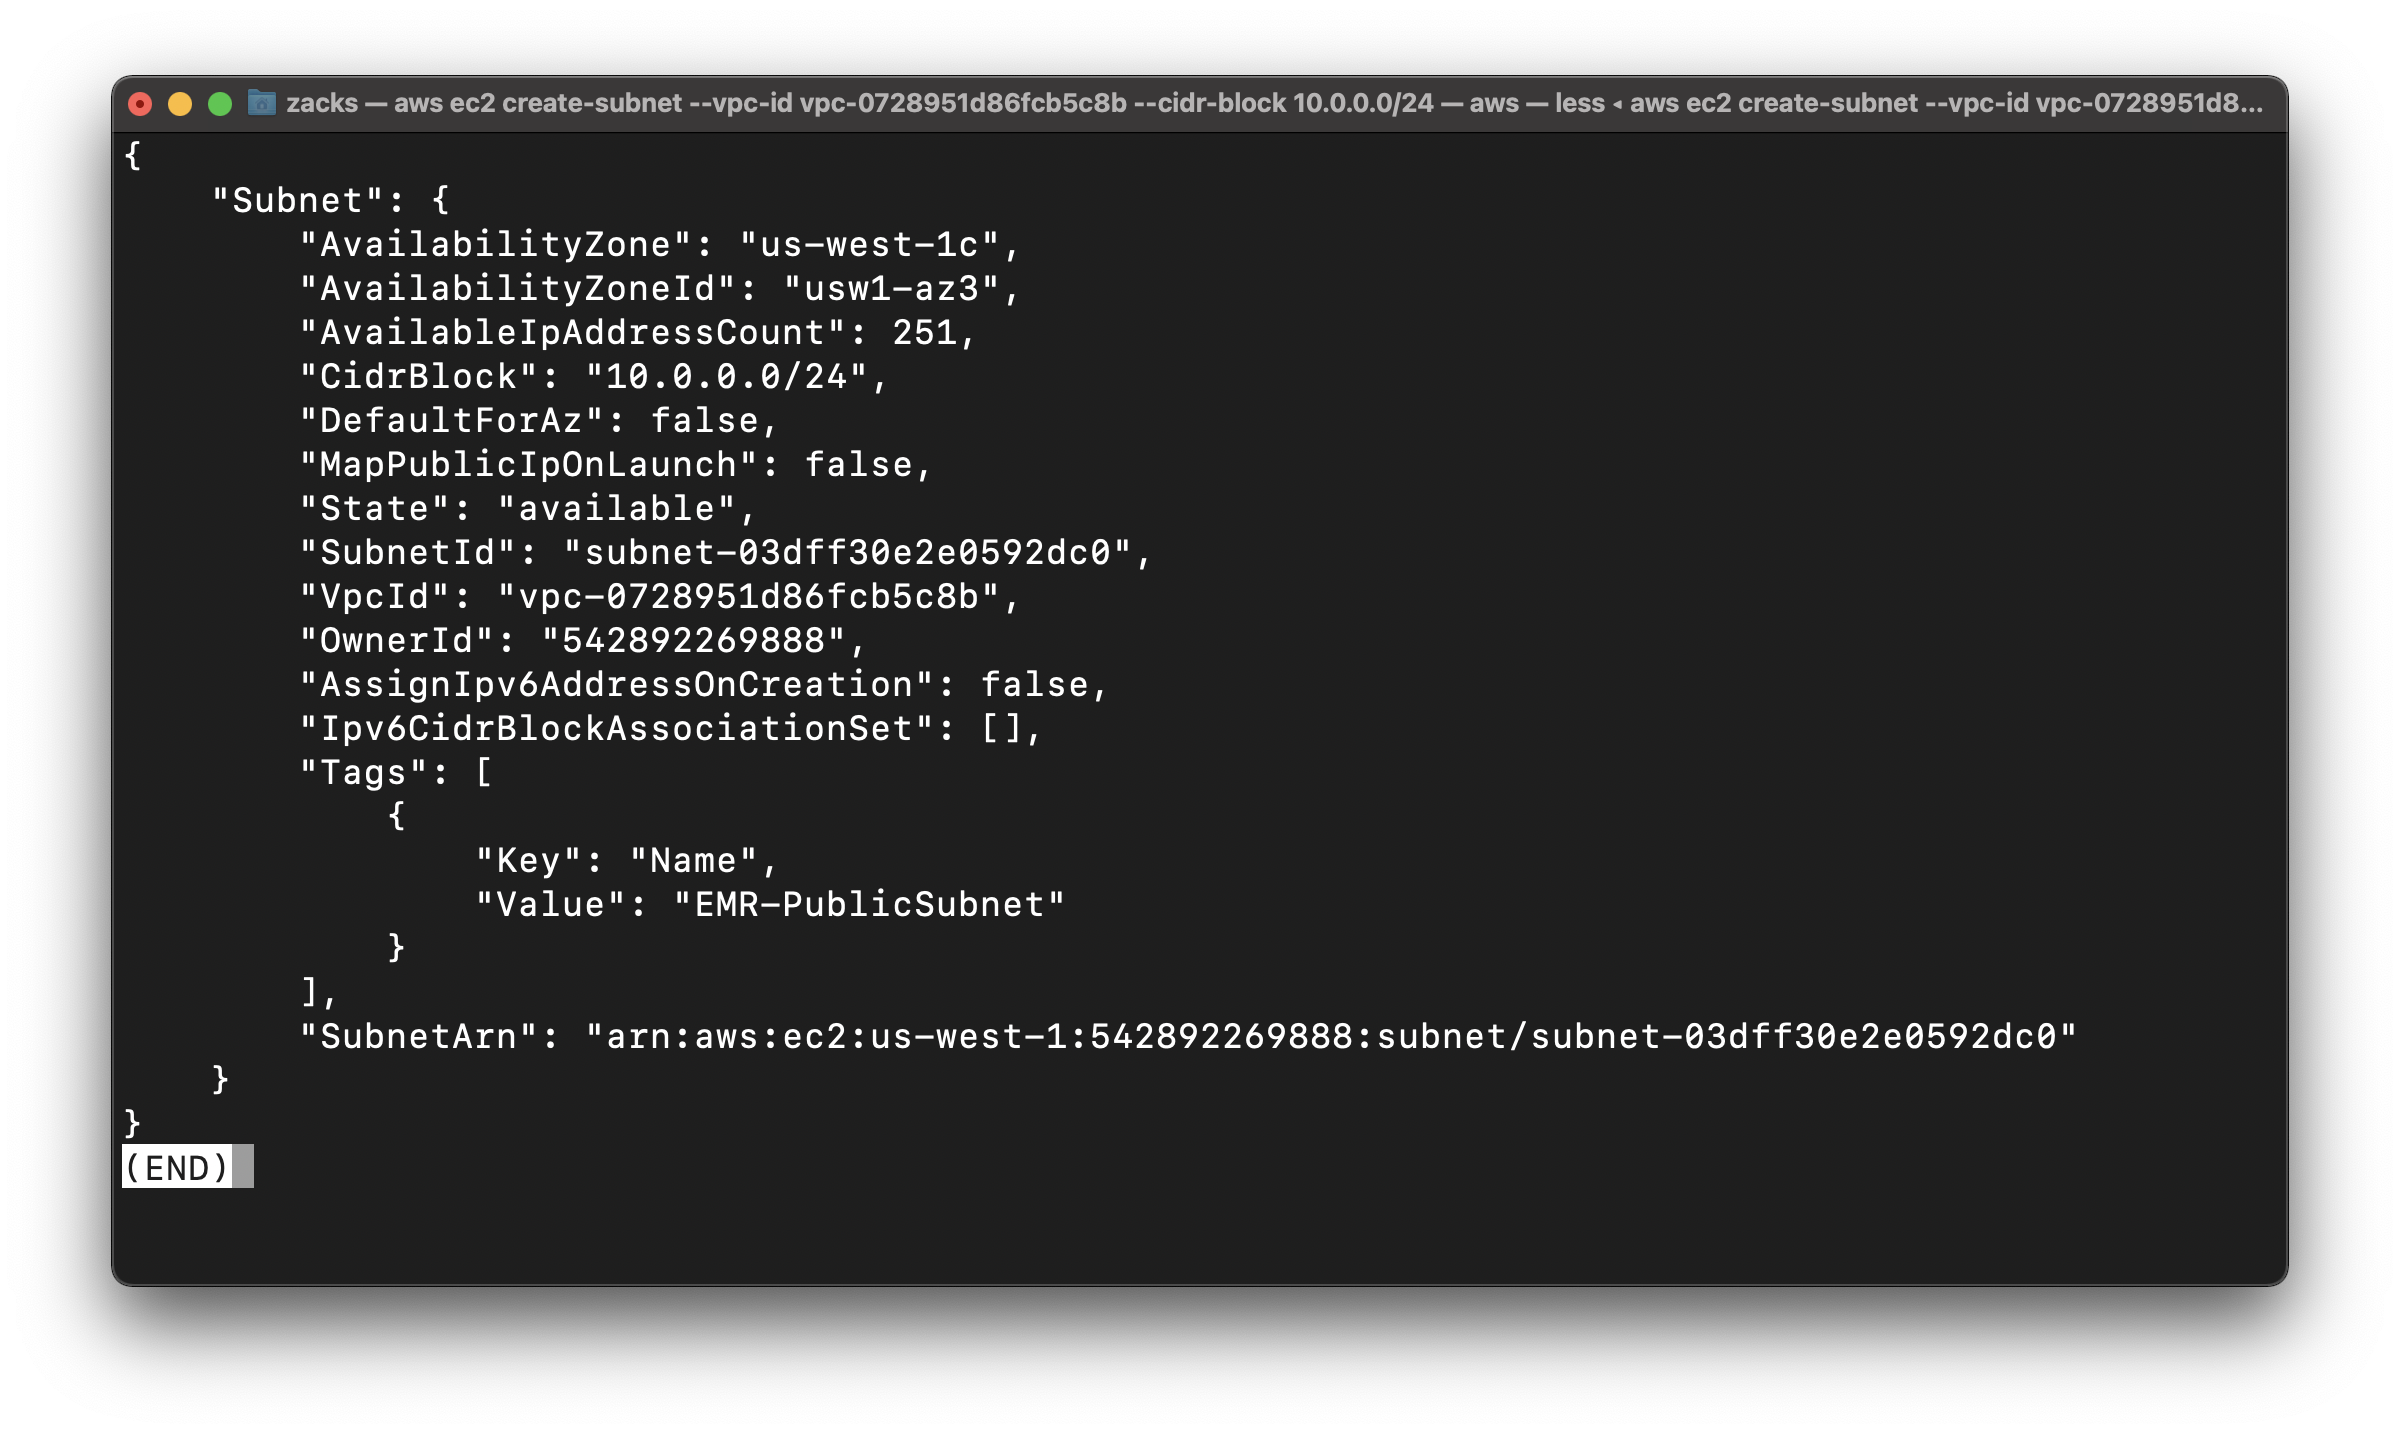
Create Public Subnet
Create a subnet with a 10.0.0.0/24 CIDR block.
Replace the vpc-id to yours.
1 | aws ec2 create-subnet --vpc-id vpc-0728951d86fcb5c8b --cidr-block 10.0.0.0/24 --tag-specifications 'ResourceType=subnet, Tags=[{Key=Name,Value=EMR-PublicSubnet}]' |
Save your SubnetId
subnet-03dff30e2e0592dc0
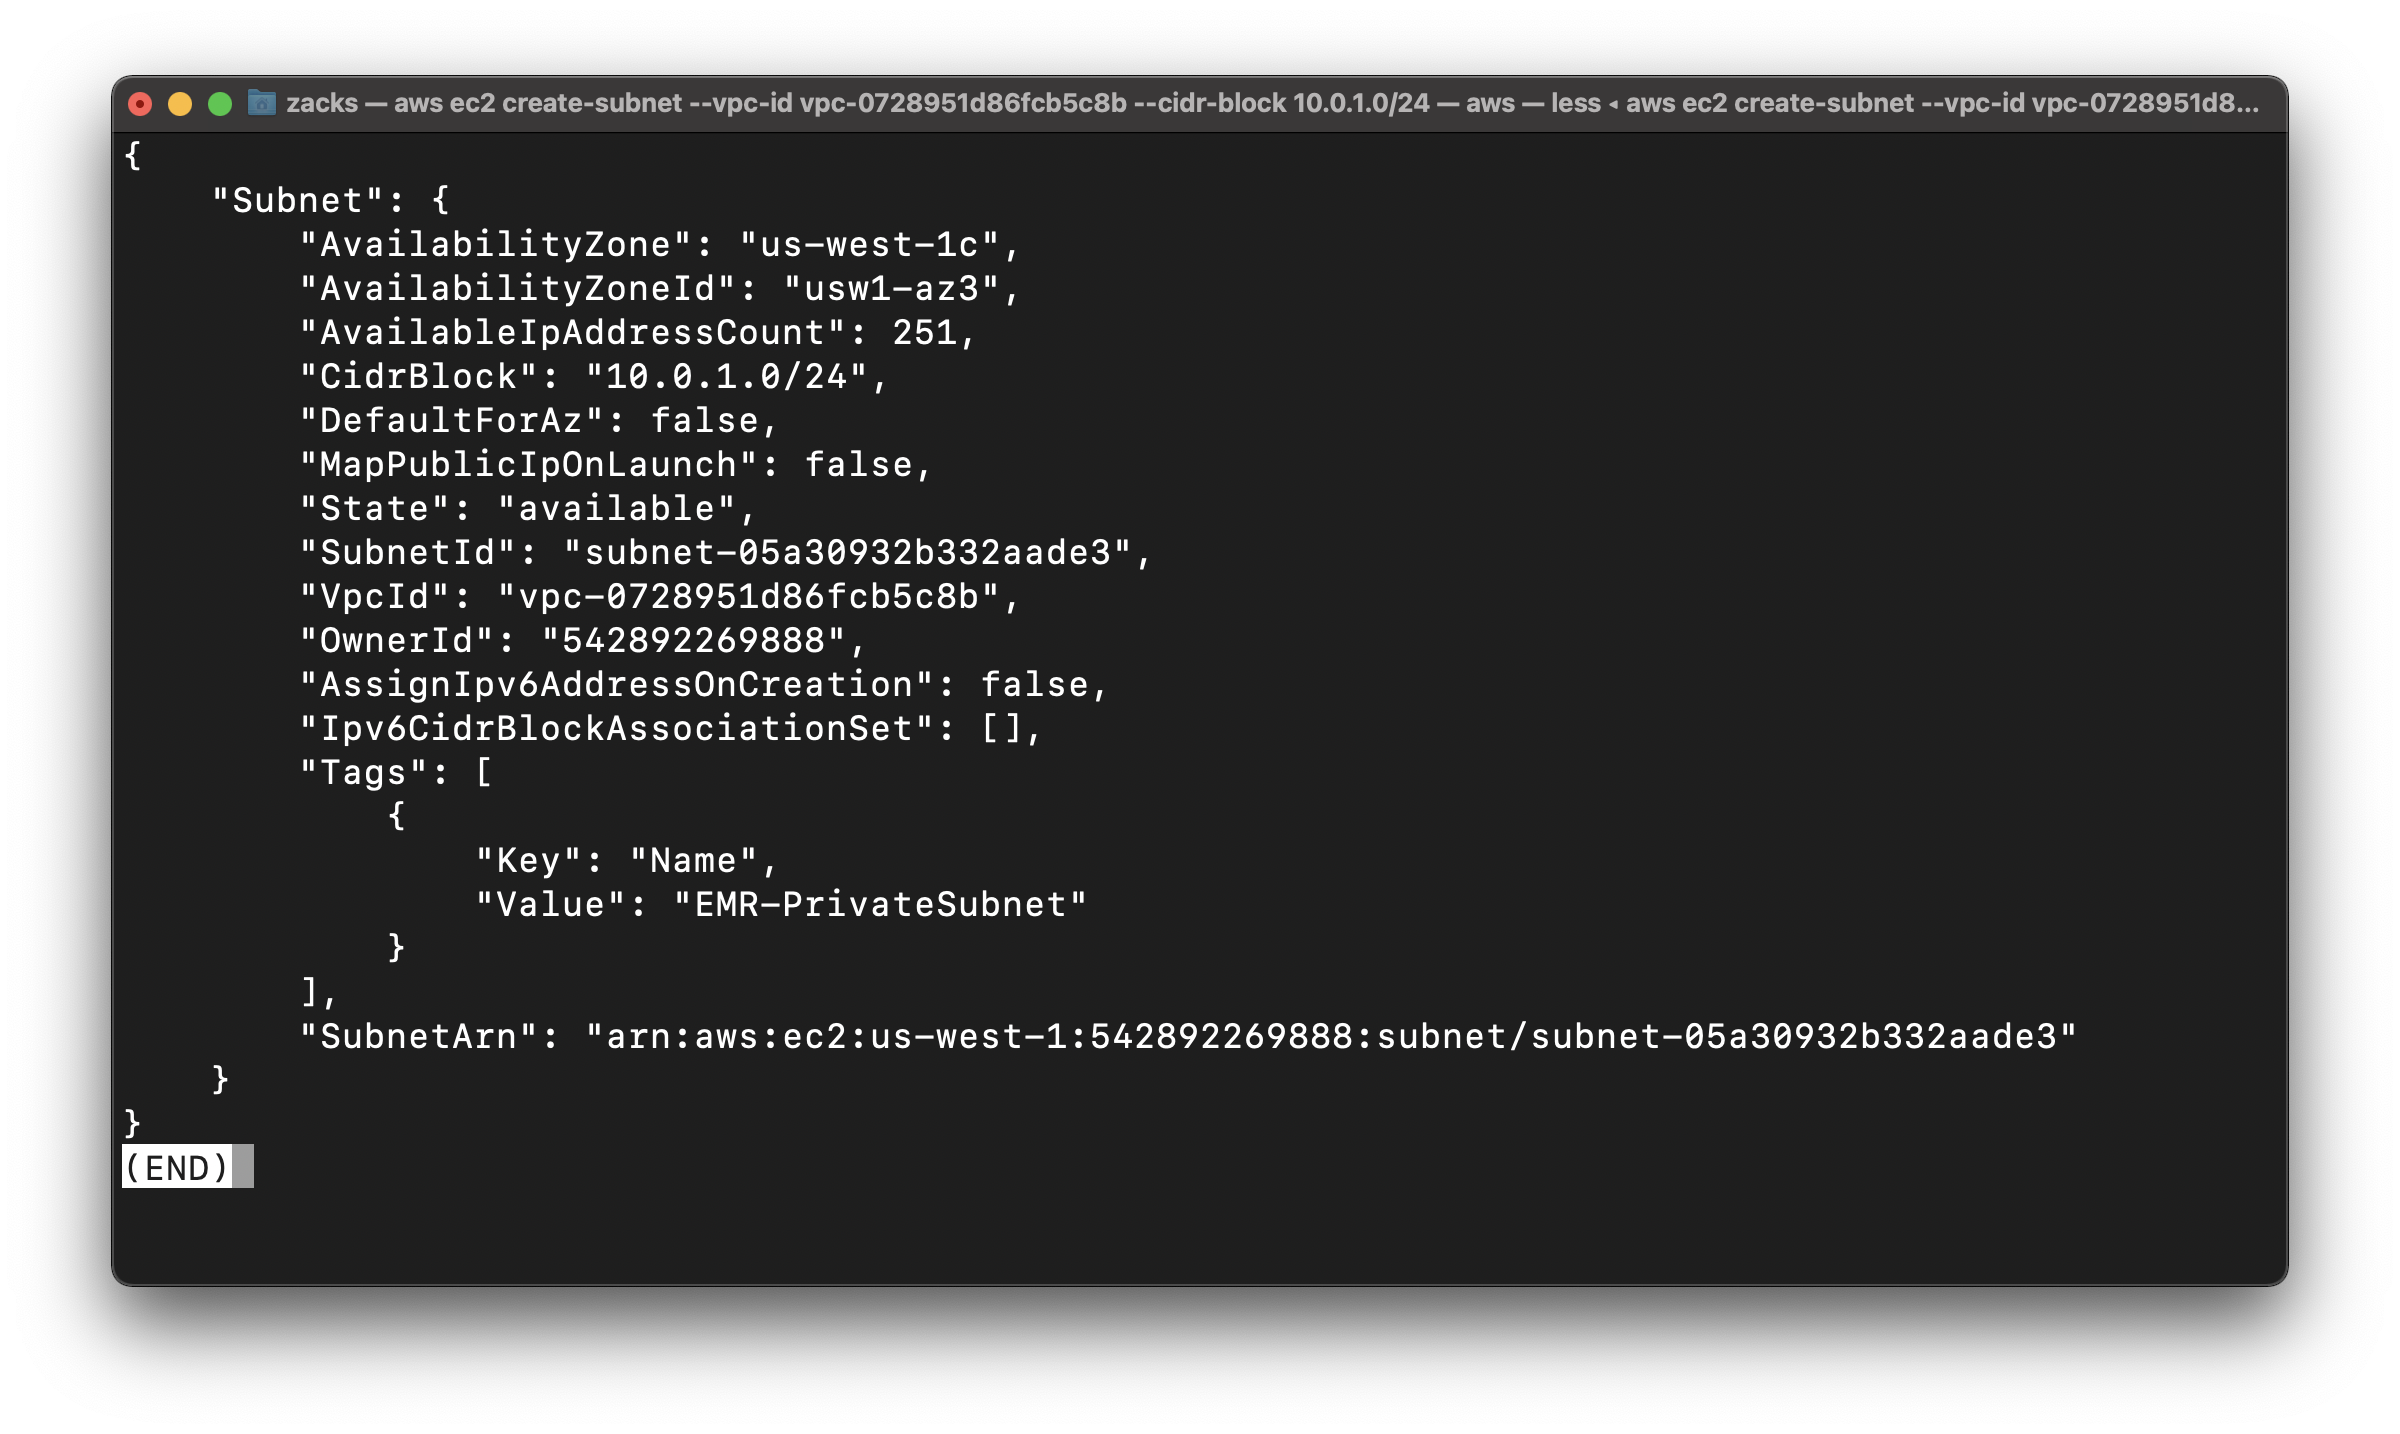
Create Private Subnet
Create a subnet with a 10.0.1.0/24 CIDR block.
Replace the vpc-id to yours.
1 | aws ec2 create-subnet --vpc-id vpc-0728951d86fcb5c8b --cidr-block 10.0.1.0/24 --tag-specifications 'ResourceType=subnet, Tags=[{Key=Name,Value=EMR-PrivateSubnet}]' |
Save your SubnetId
subnet-05a30932b332aade3
EMR-PublicSubnet Configuration
Create an Internet gateway
1 | aws ec2 create-internet-gateway --tag-specifications 'ResourceType=internet-gateway, Tags=[{Key=Name,Value=EMR-IGW}]' |
Copy your InternetGatewayId
igw-0bca4783ee06a0ba1

Attach the Internet gateway to the EMR-PublicSubnet
Replace the vpc-id to yours.
Replace the internet-gateway-id to yours
1 | aws ec2 attach-internet-gateway --vpc-id vpc-0728951d86fcb5c8b --internet-gateway-id igw-0bca4783ee06a0ba1 |
Create Public Route Table for EMR-PublicSubnet
Replace the vpc-id to yours.
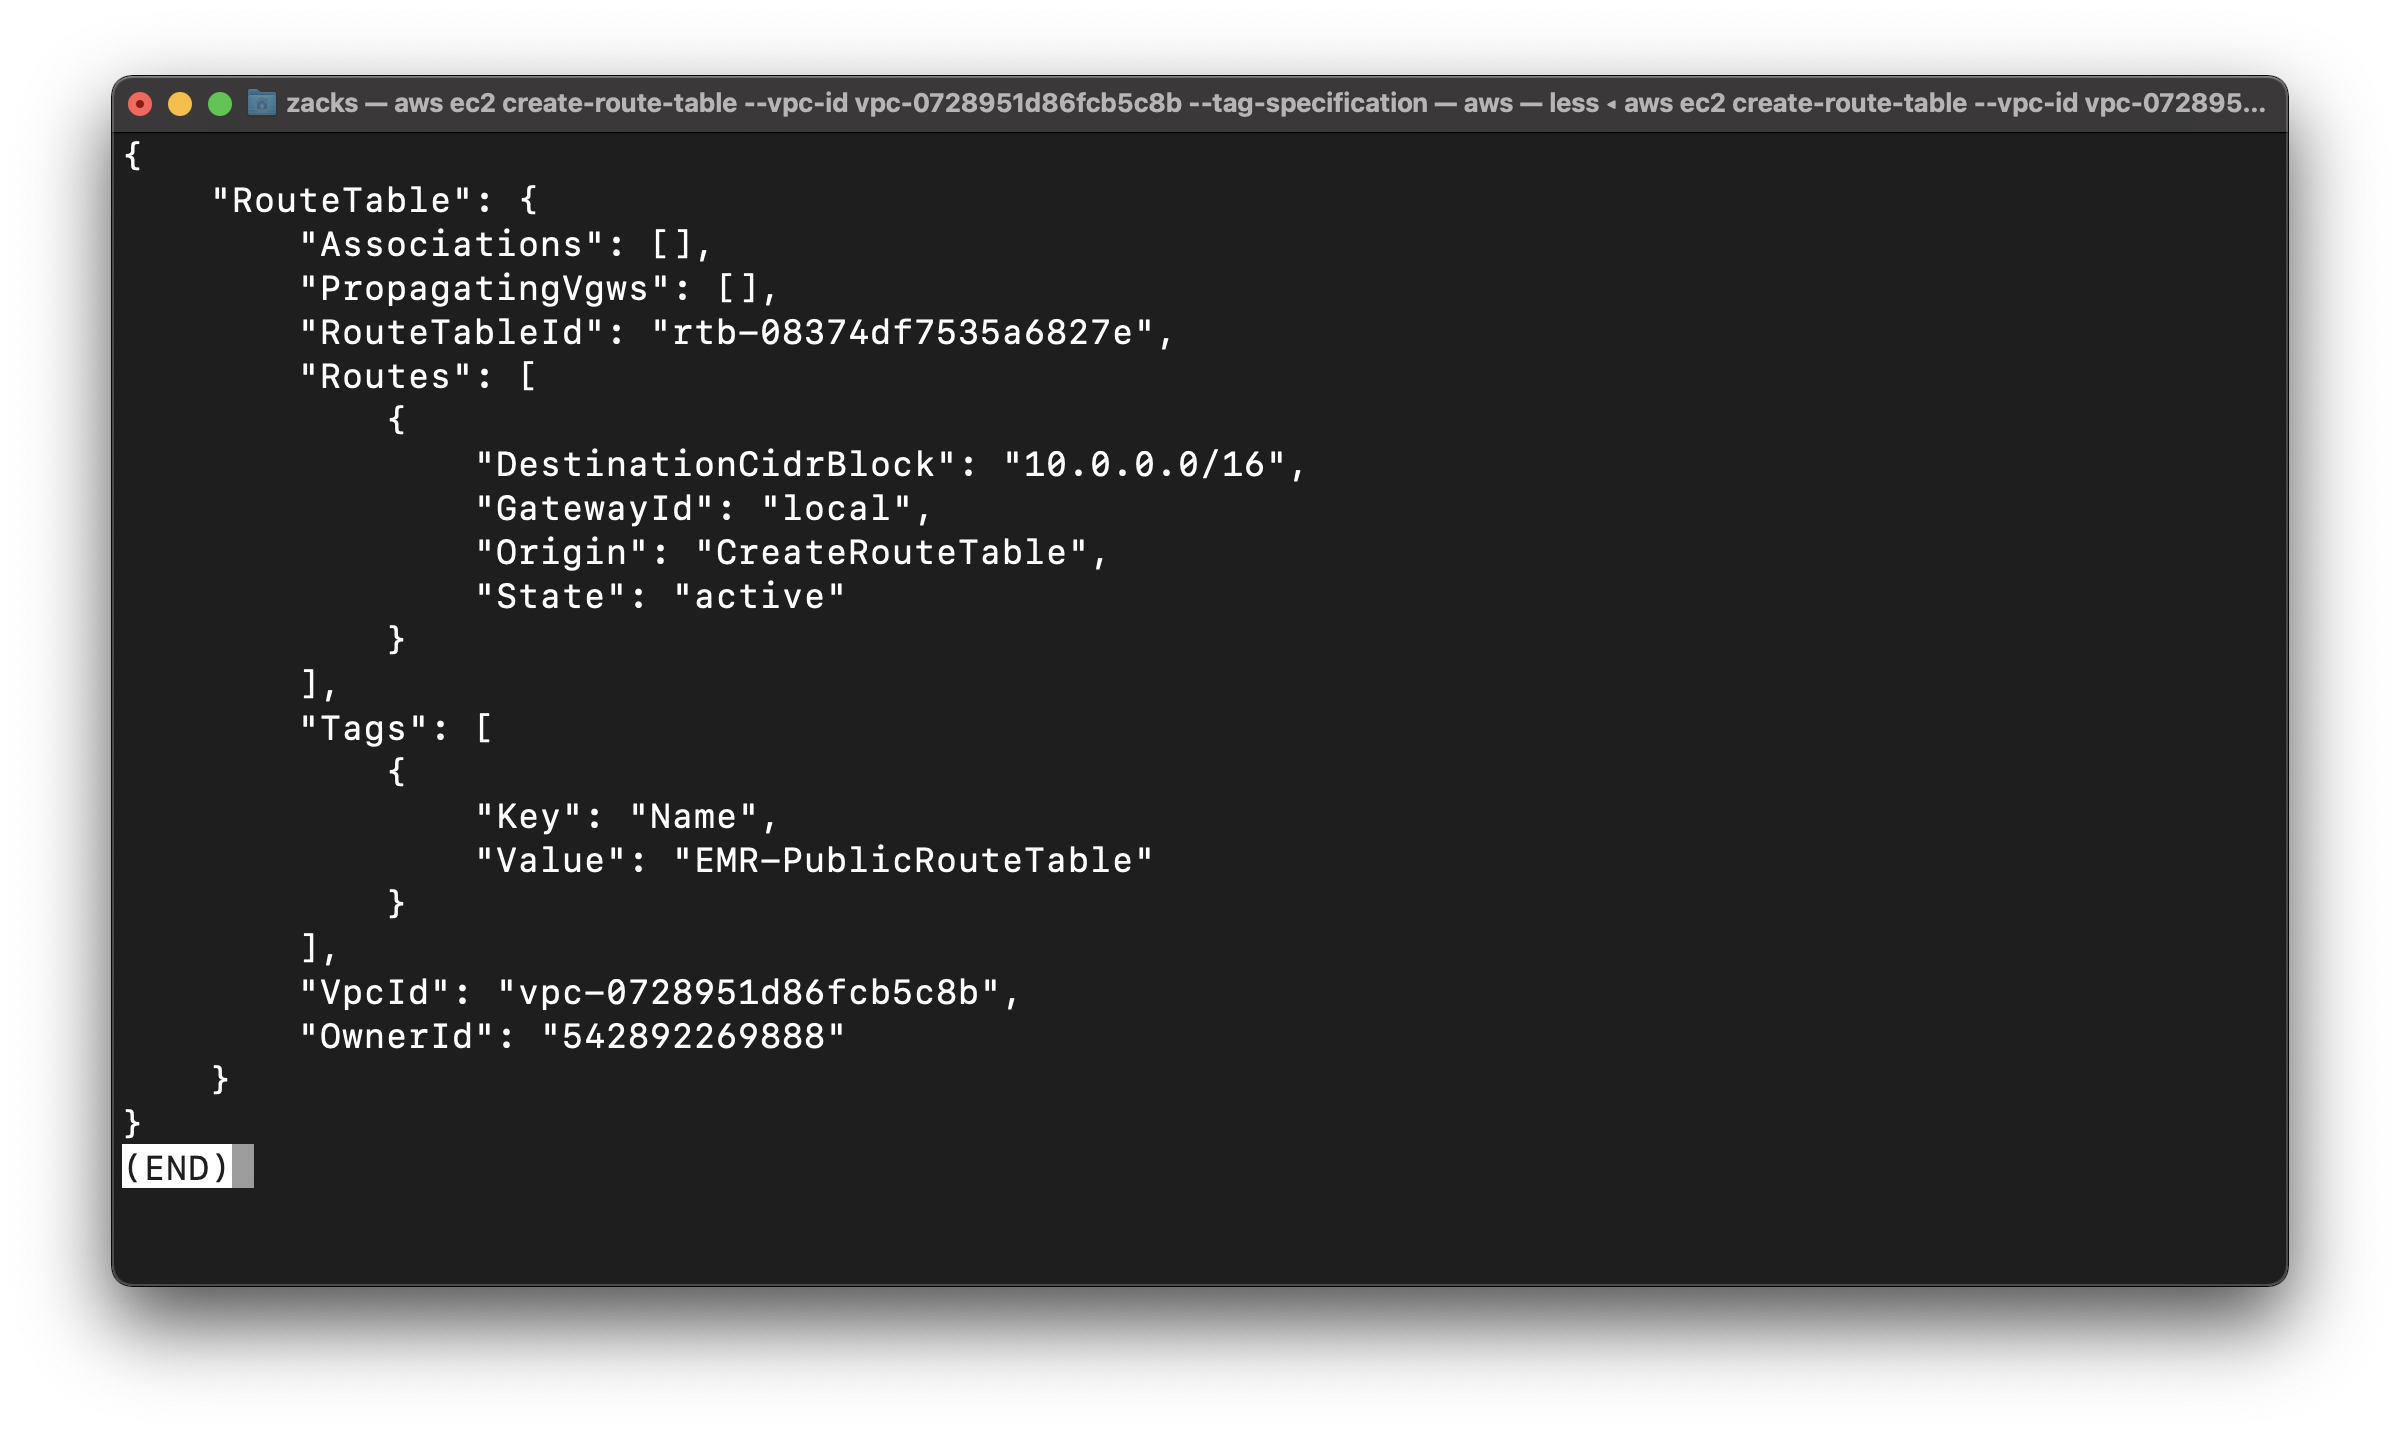
1 | aws ec2 create-route-table --vpc-id vpc-0728951d86fcb5c8b --tag-specifications 'ResourceType=route-table, Tags=[{Key=Name,Value=EMR-PublicRouteTable}]' |
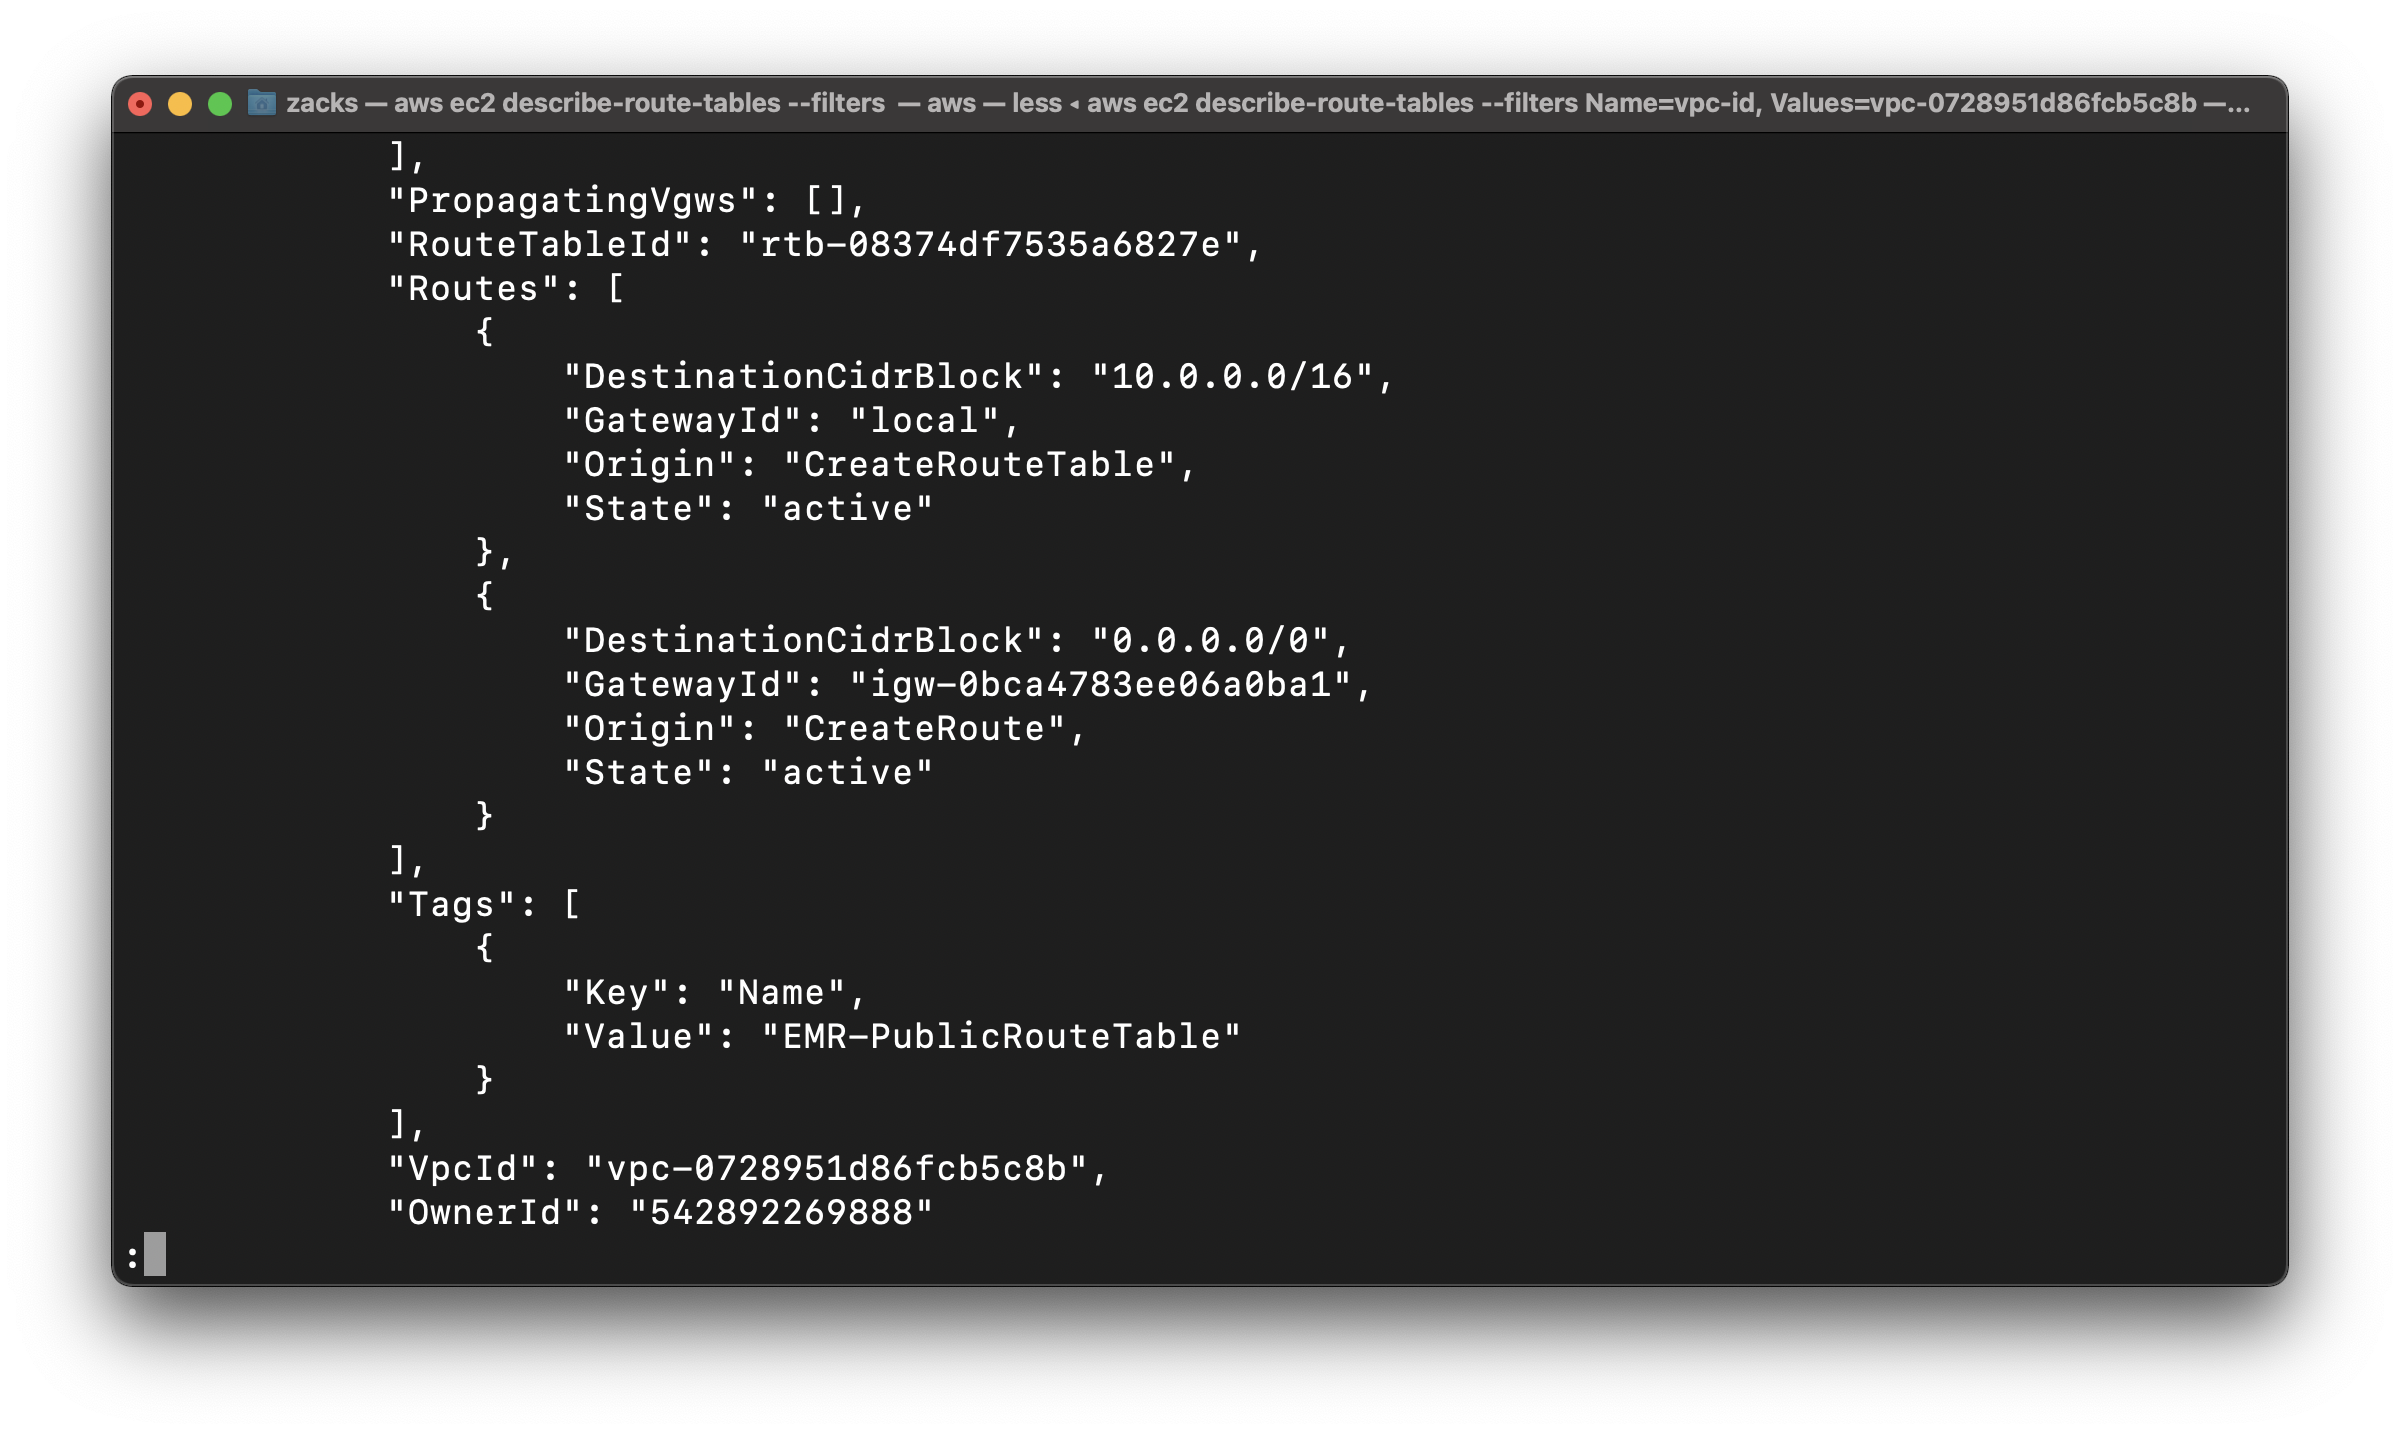
Copy your RouteTableId
rtb-08374df7535a6827e
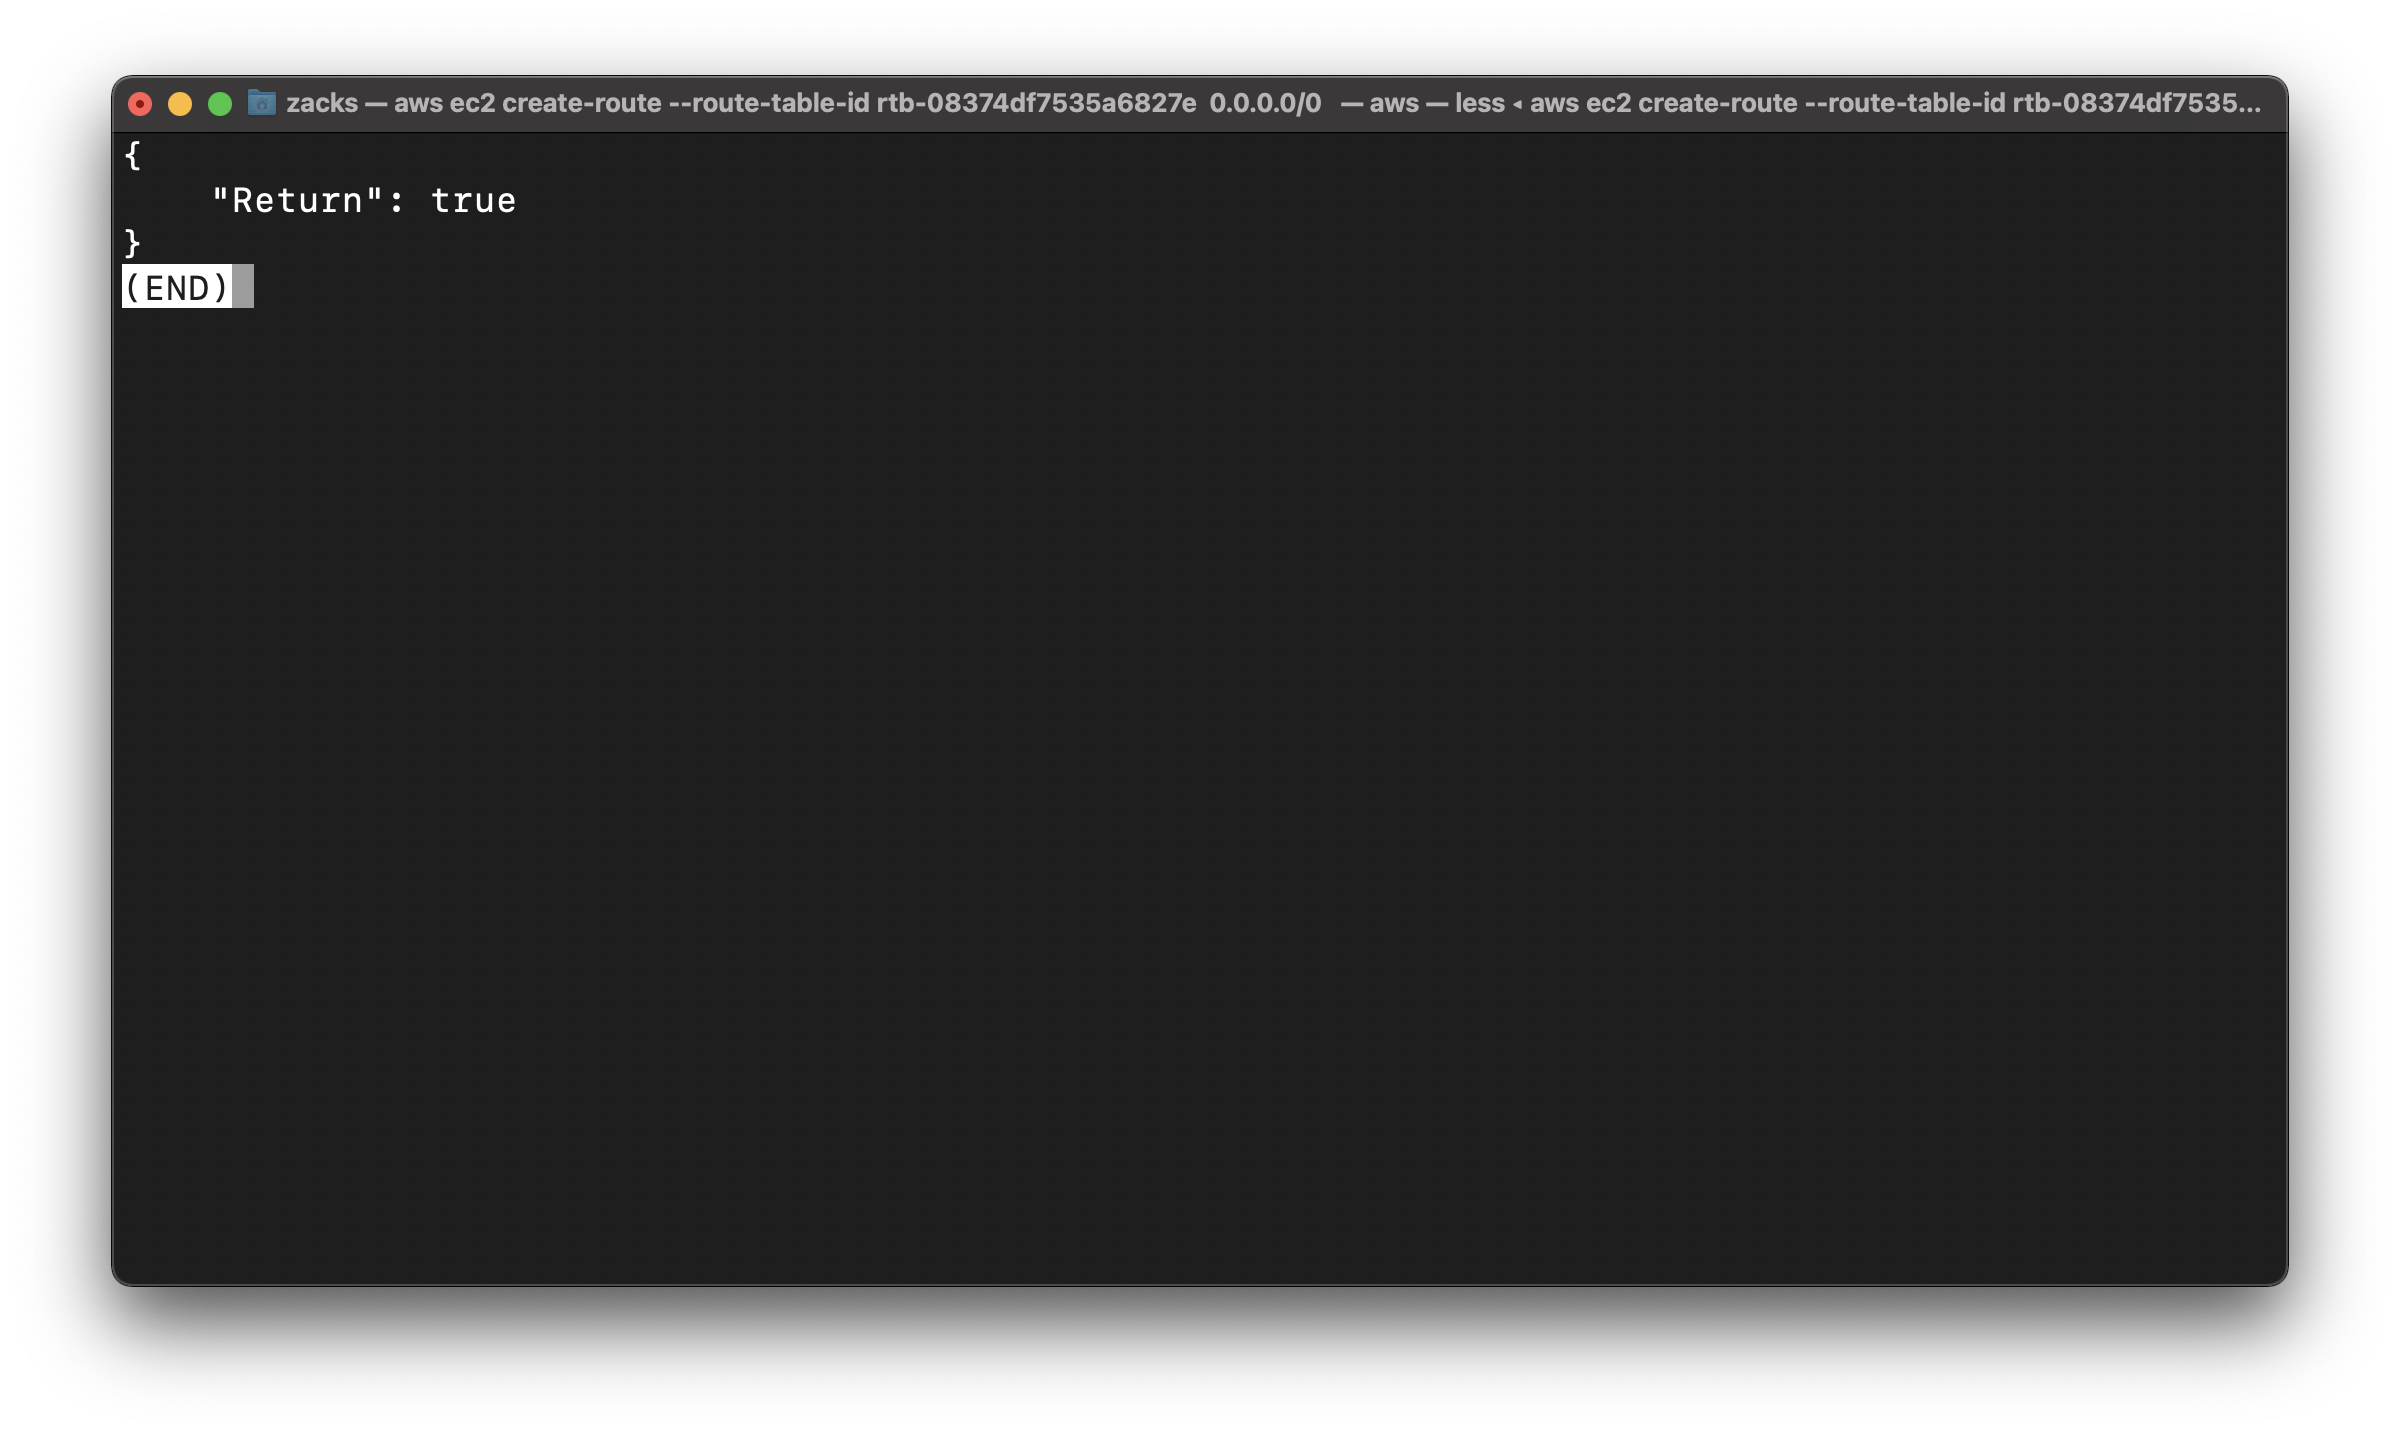
Create default route in EMR-PublicRouteTable
Create a route in EMR-PublicRouteTable that points all traffic (0.0.0.0/0) to the Internet gateway
Replace the route-table-id to yours
Replace the internet-gateway-id to yours
1 | aws ec2 create-route --route-table-id rtb-08374df7535a6827e --destination-cidr-block 0.0.0.0/0 --gateway-id igw-0bca4783ee06a0ba1 |
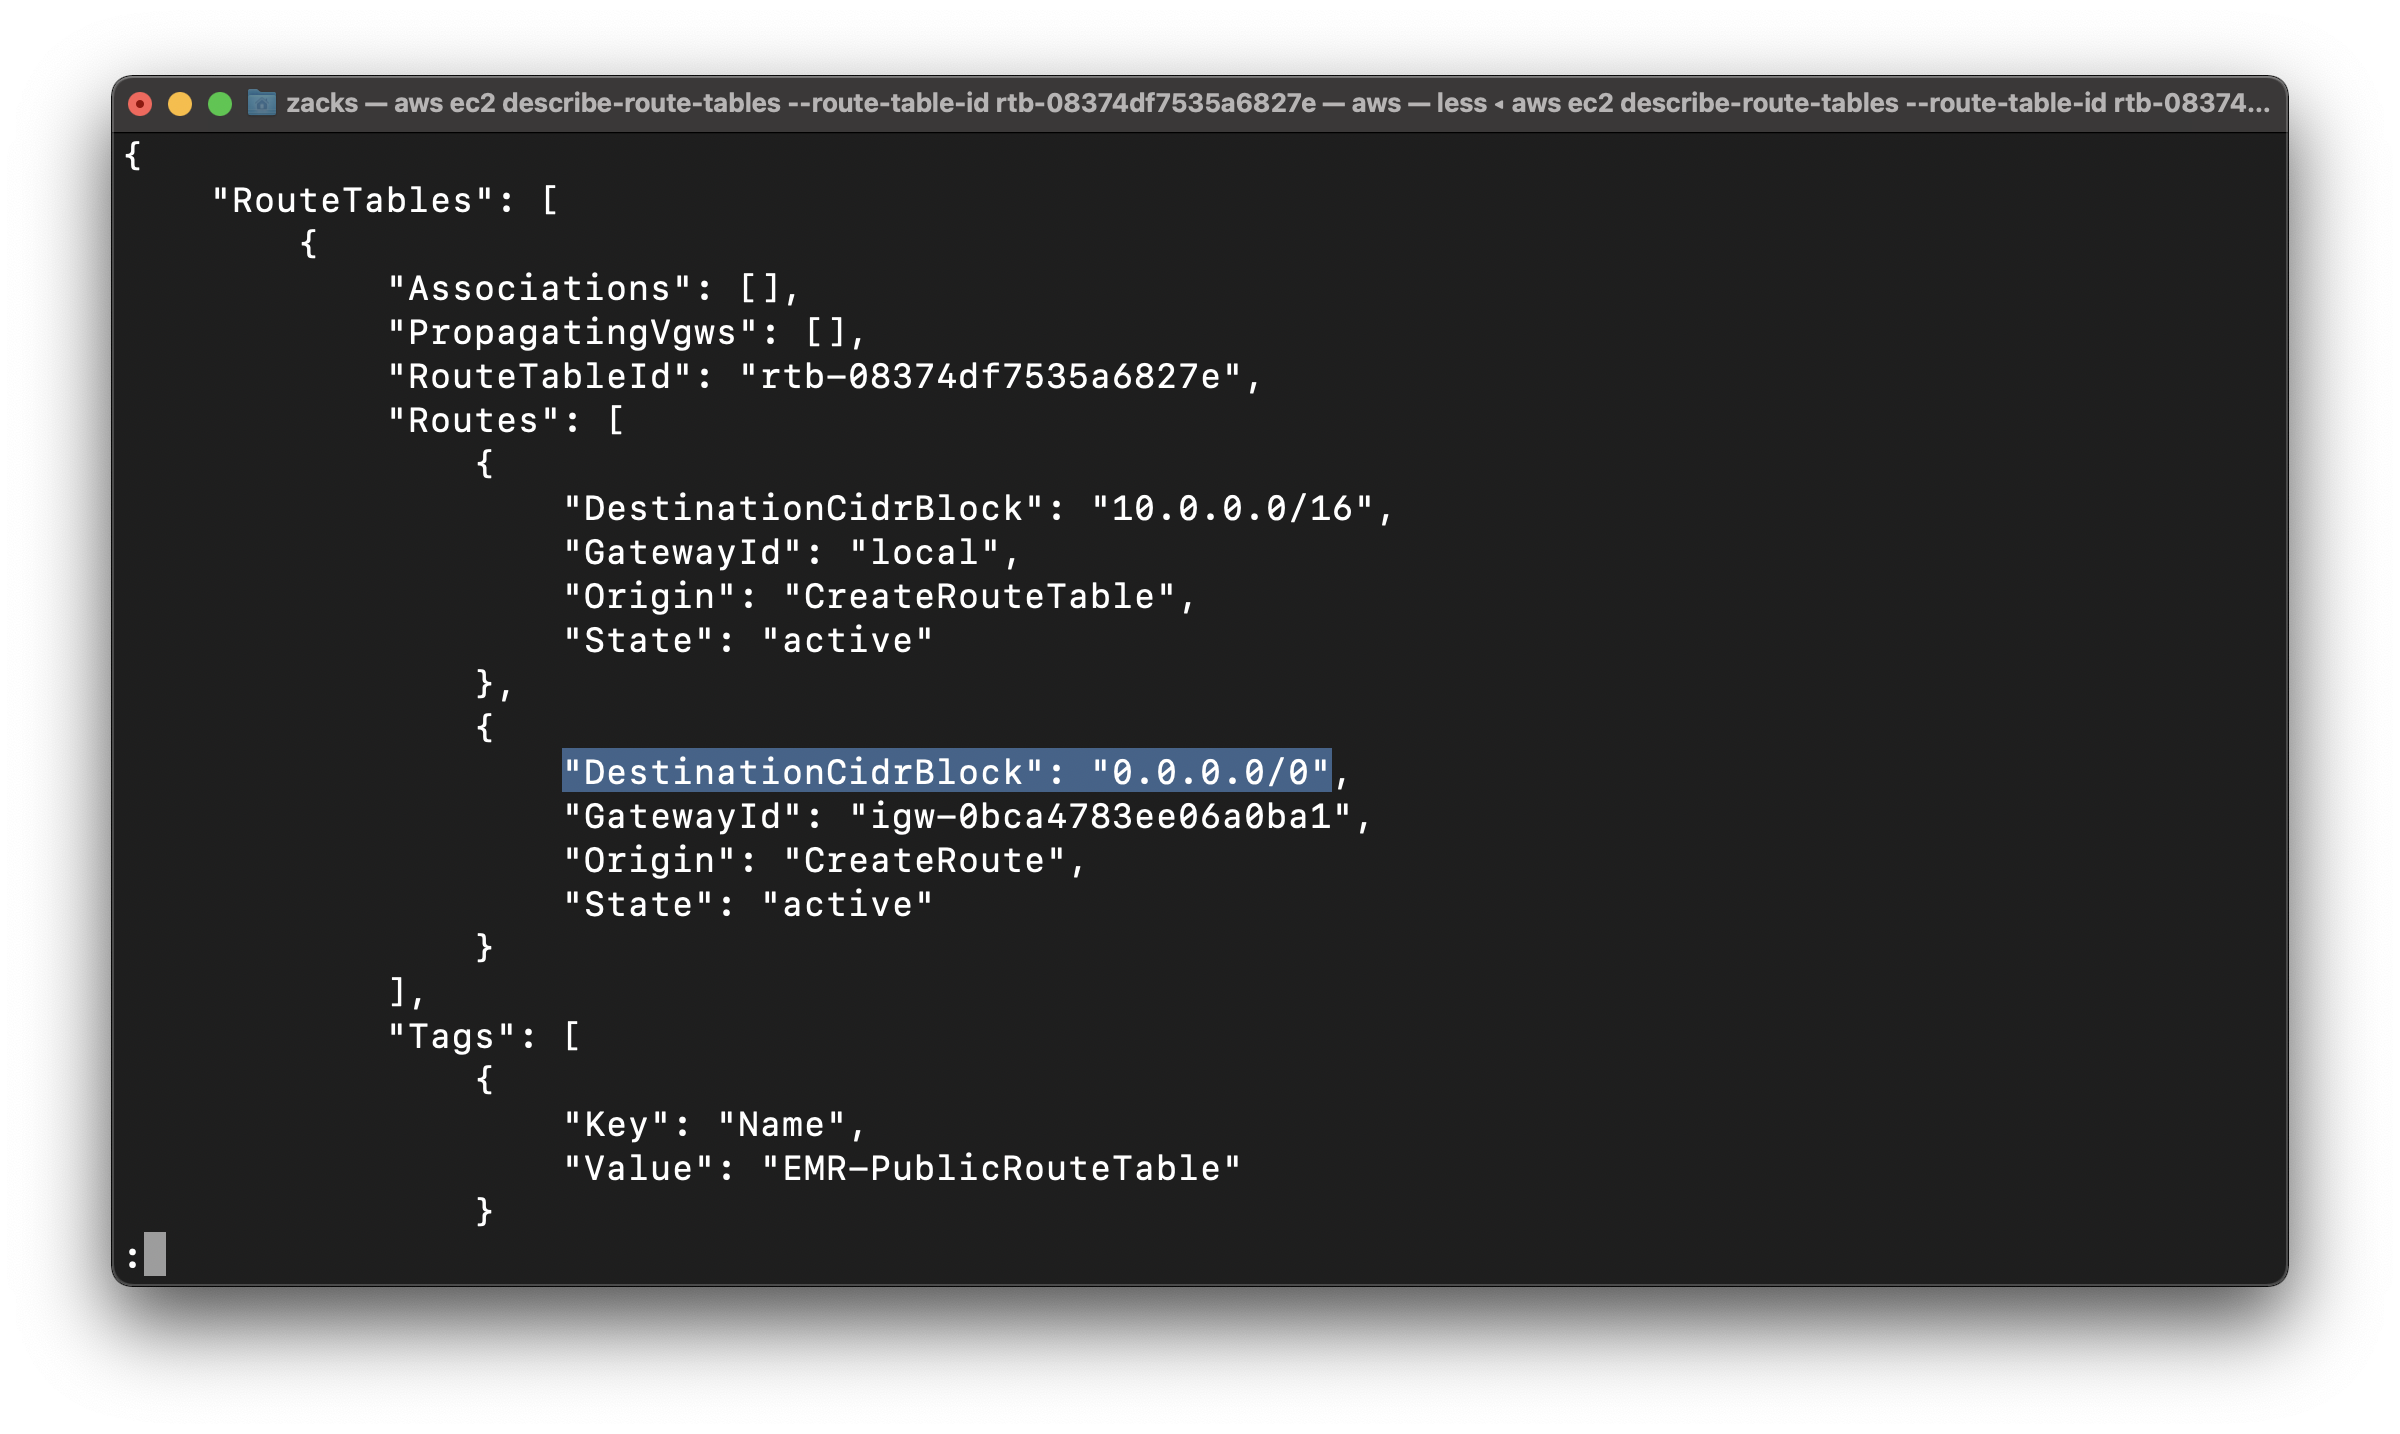
Describe the route table and view the results
Replace the route-table-id to yours
1 | aws ec2 describe-route-tables --route-table-id rtb-08374df7535a6827e |
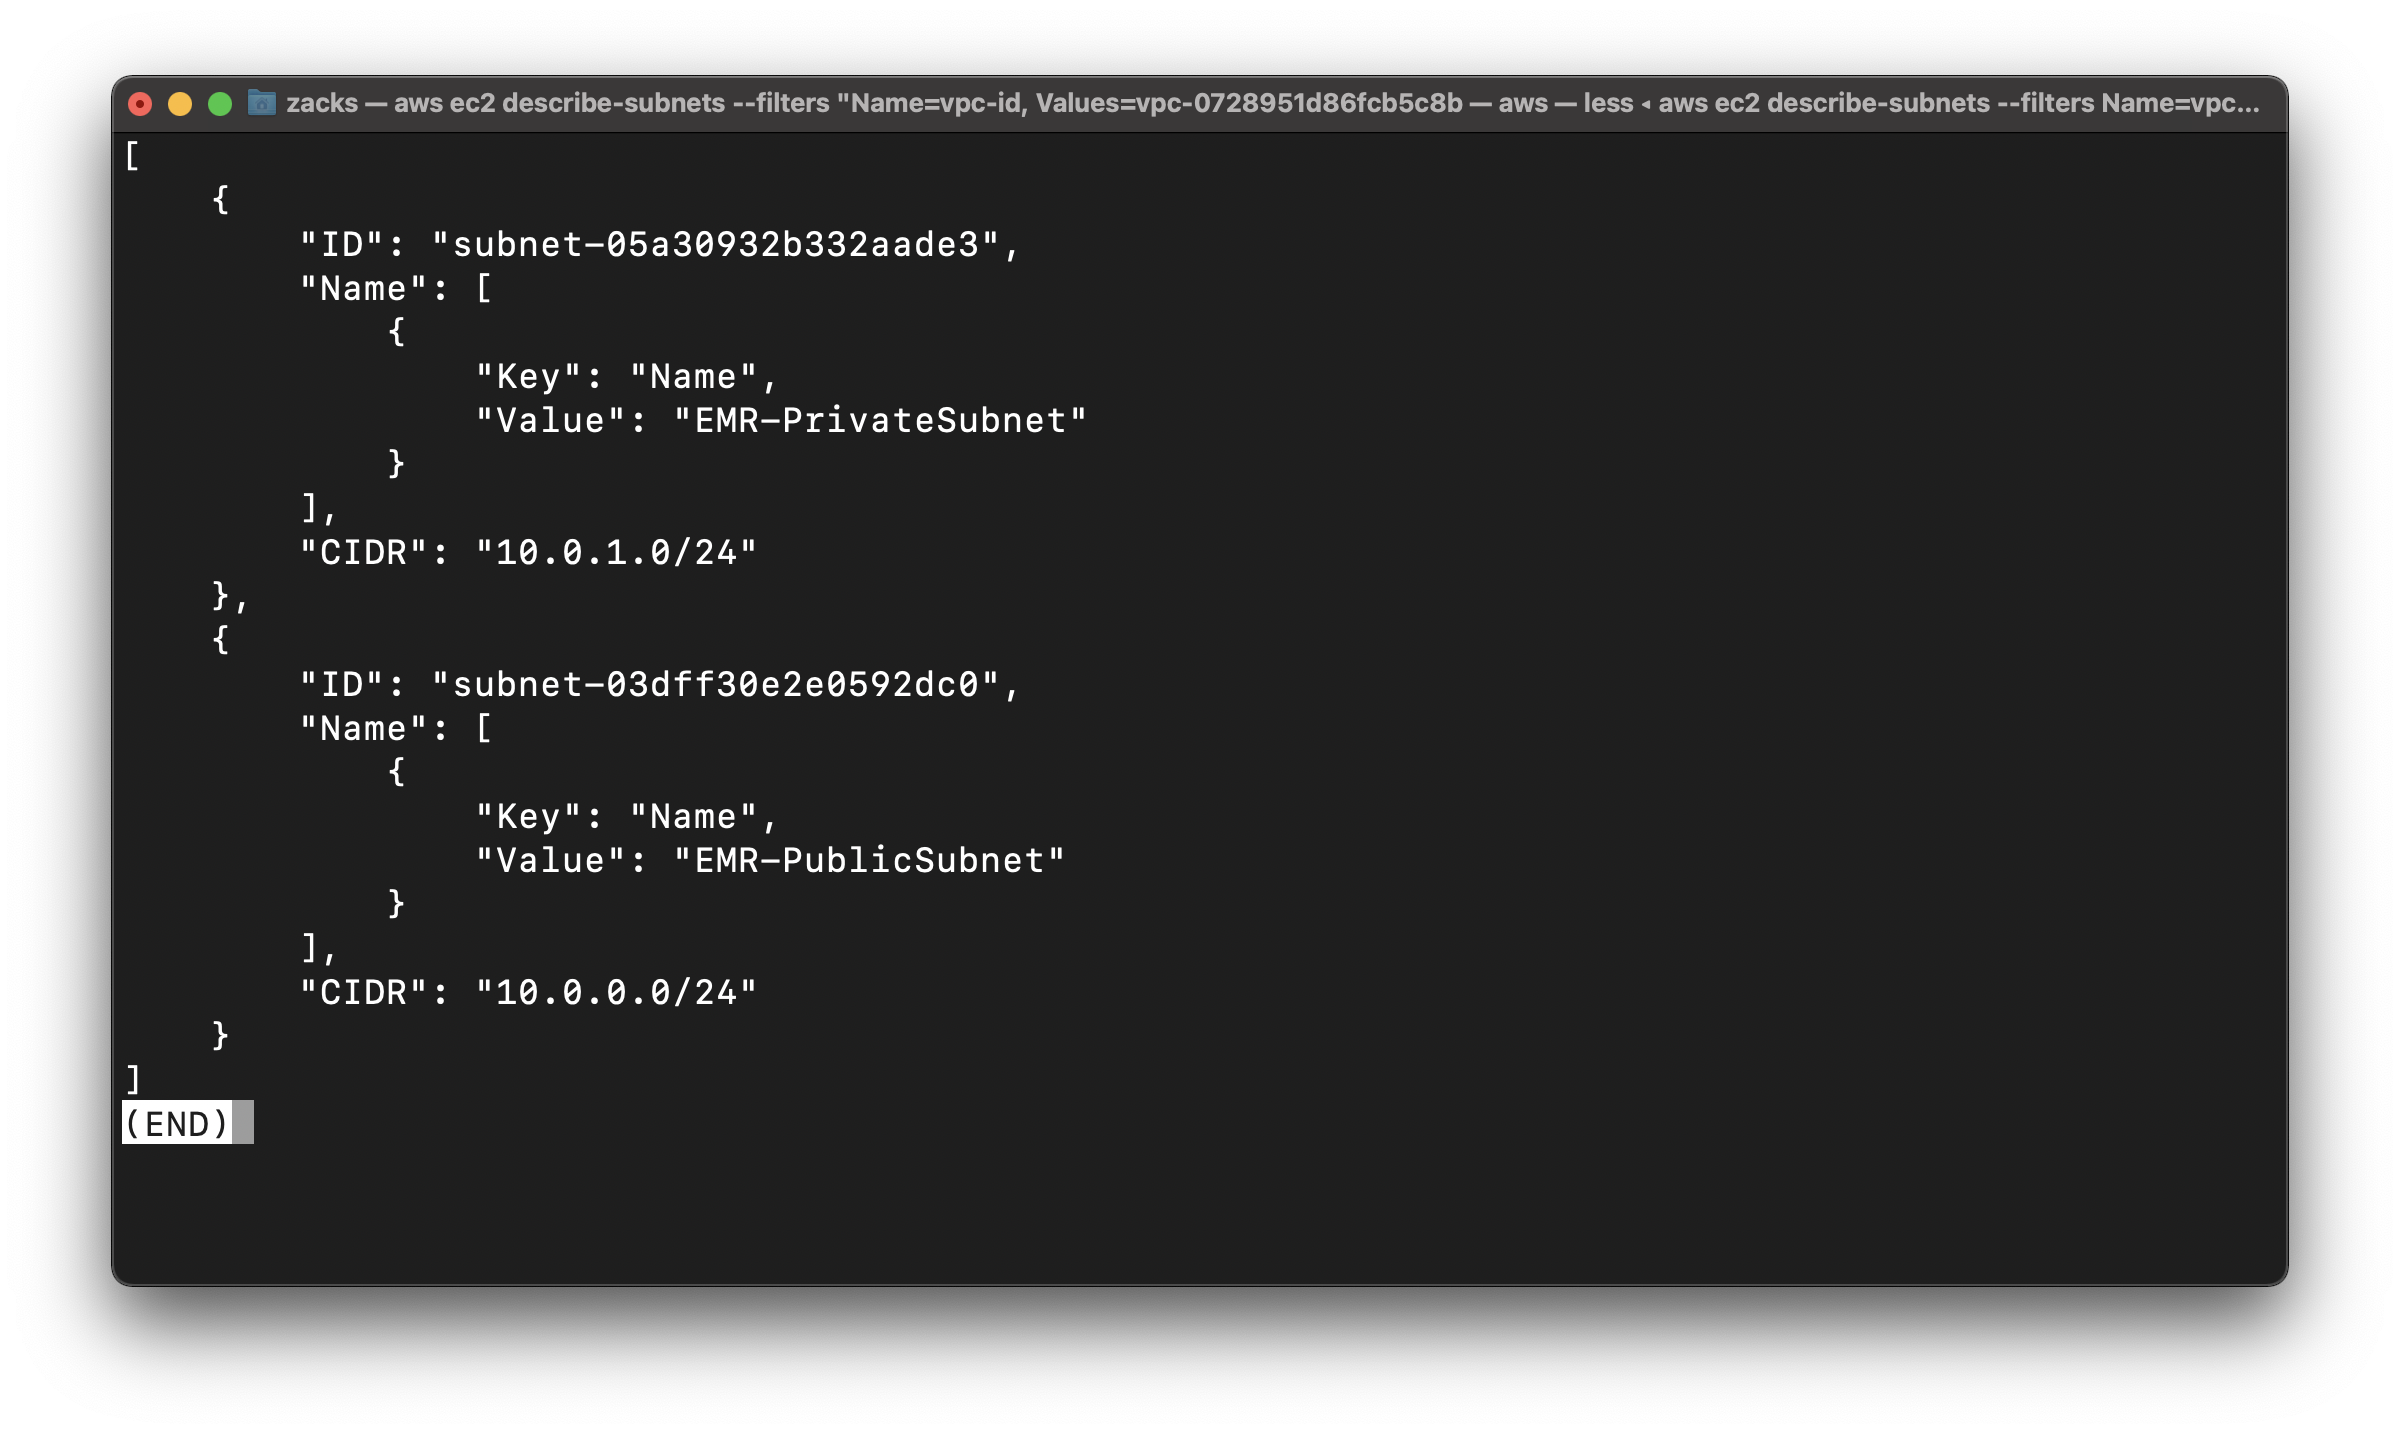
Associate EMR-PublicRouteTable with EMR-PublicSubnet
Use the describe-subnets command to get subnet IDs
Replace the vpc-id to yours
Replace the subnet-id to yours
Replace the route-table-id to yours
1 | aws ec2 describe-subnets --filters "Name=vpc-id, Values=vpc-0728951d86fcb5c8b" --query 'Subnets[*].{ID:SubnetId, Name:Tags, CIDR:CidrBlock}' |
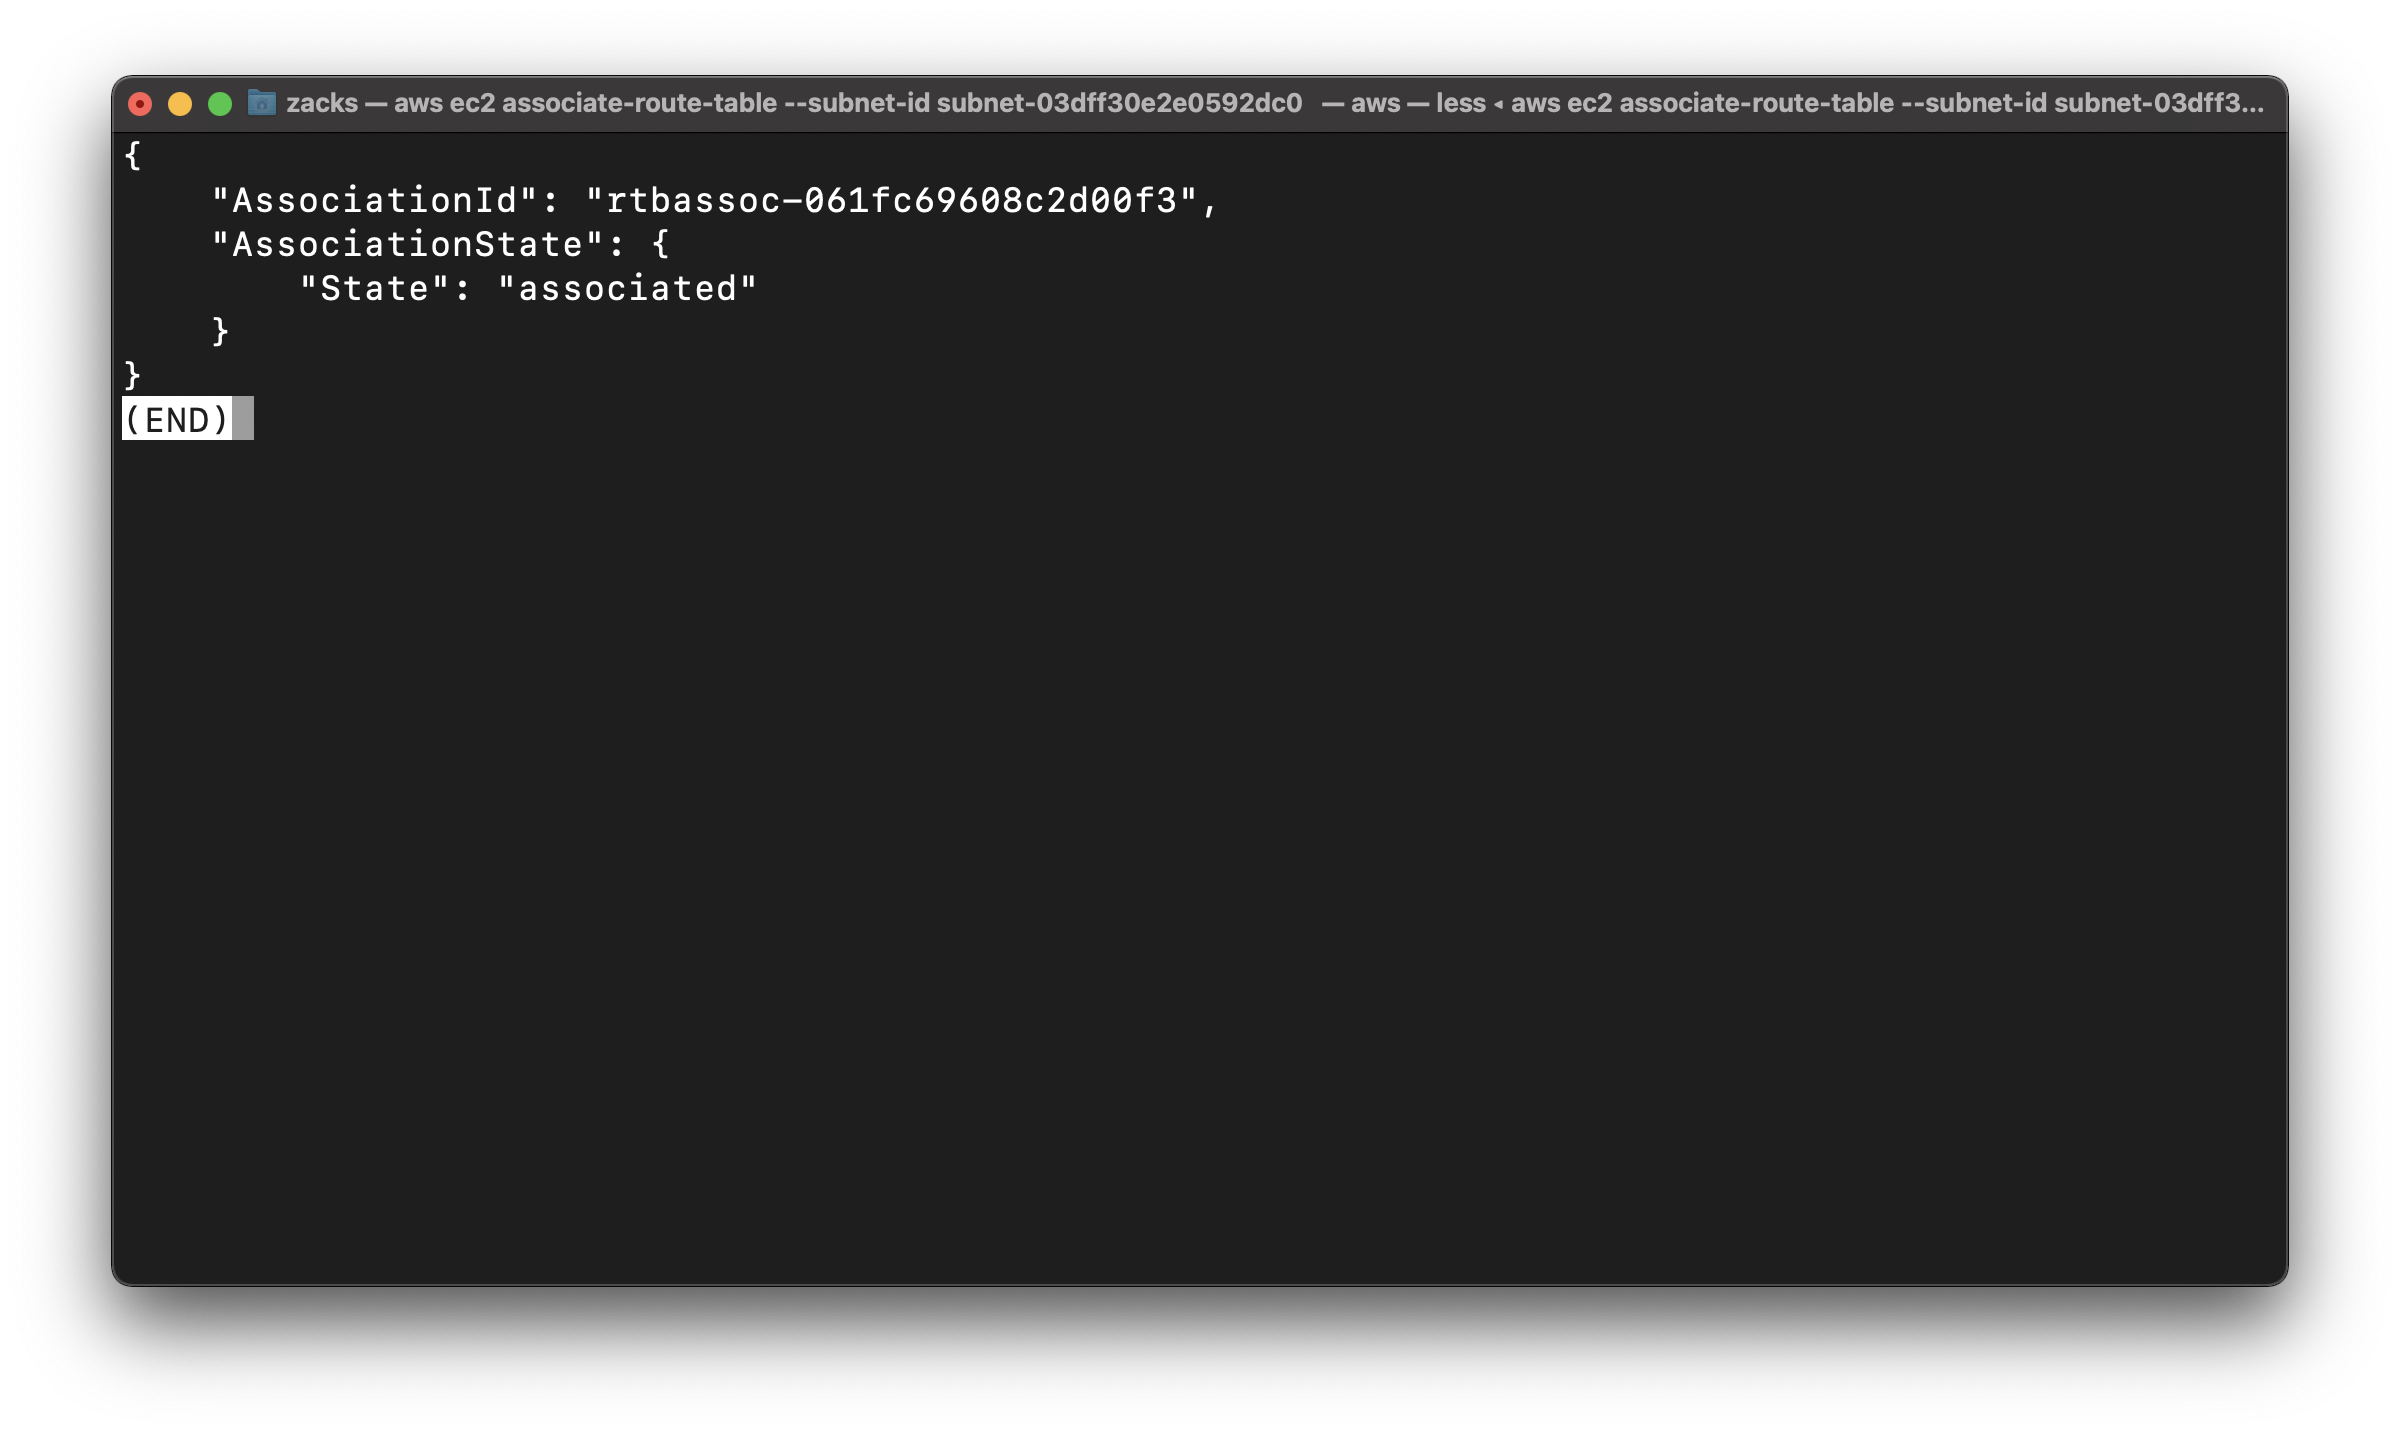
Associate EMR-PublicRouteTable with EMR-PublicSubnet, making the subnet public
Replace the vpc-id to yours
Replace the subnet-id to yours
Replace the route-table-id to yours
1 | aws ec2 associate-route-table --subnet-id subnet-03dff30e2e0592dc0 --route-table-id rtb-08374df7535a6827e |
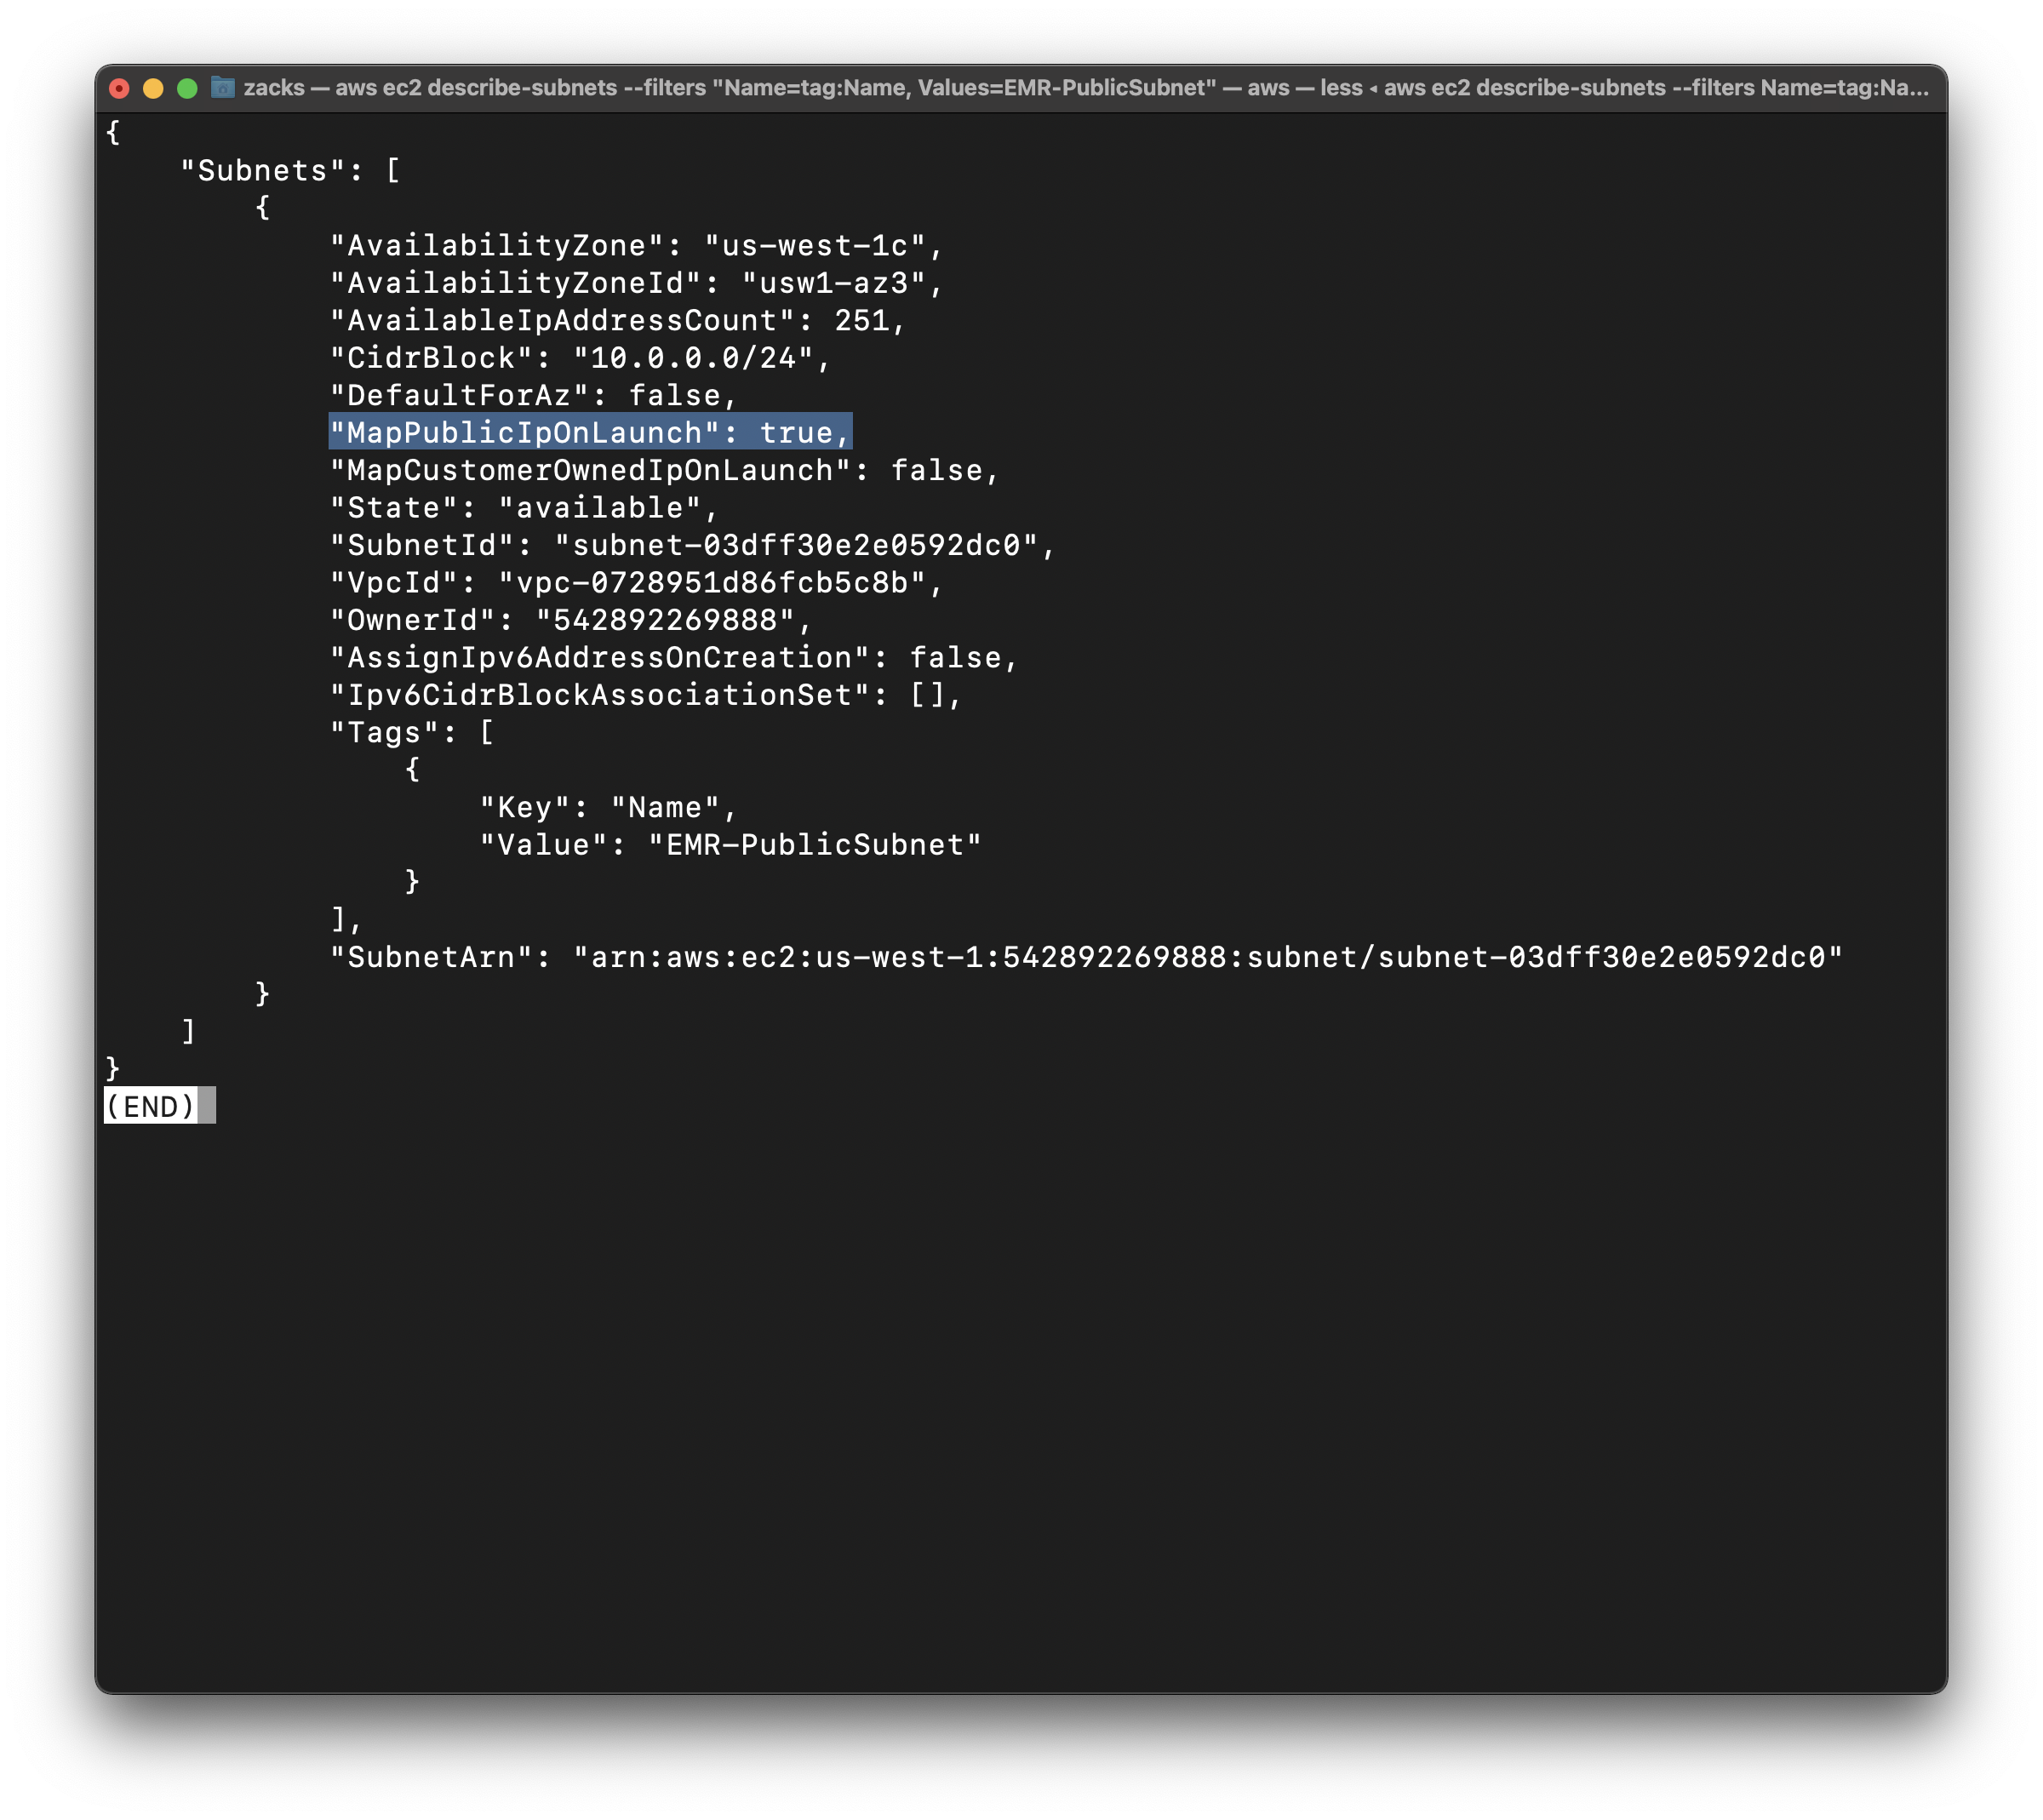
Enable auto-assign Public IP
Modify the public IP addressing behavior of the public subnet so that an instance launched into the subnet automatically receives a public IP address
1 | aws ec2 modify-subnet-attribute --subnet-id subnet-03dff30e2e0592dc0 --map-public-ip-on-launch |
EMR-VPC Configuration
Enable VPC DNS Resolution
Modify the VPC to enable DNS support, needed for EMR Interface Endpoint
Replace vpc-id to yours
1 | aws ec2 modify-vpc-attribute --vpc-id vpc-0728951d86fcb5c8b --enable-dns-support "{\"Value\":true}" |

Enable VPC DNS Hostname
Modify the VPC to enable DNS hostnames, needed for EMR Interface Endpoint
Replace vpc-id to yours
1 | aws ec2 modify-vpc-attribute --vpc-id vpc-0728951d86fcb5c8b --enable-dns-hostnames "{\"Value\":true}" |
Endpoint Configuration
Services -> VPC -> Endpoint
Create a elasticmapreduce endpoint in EMR-PrivateSubnet
Click on Create Endpoint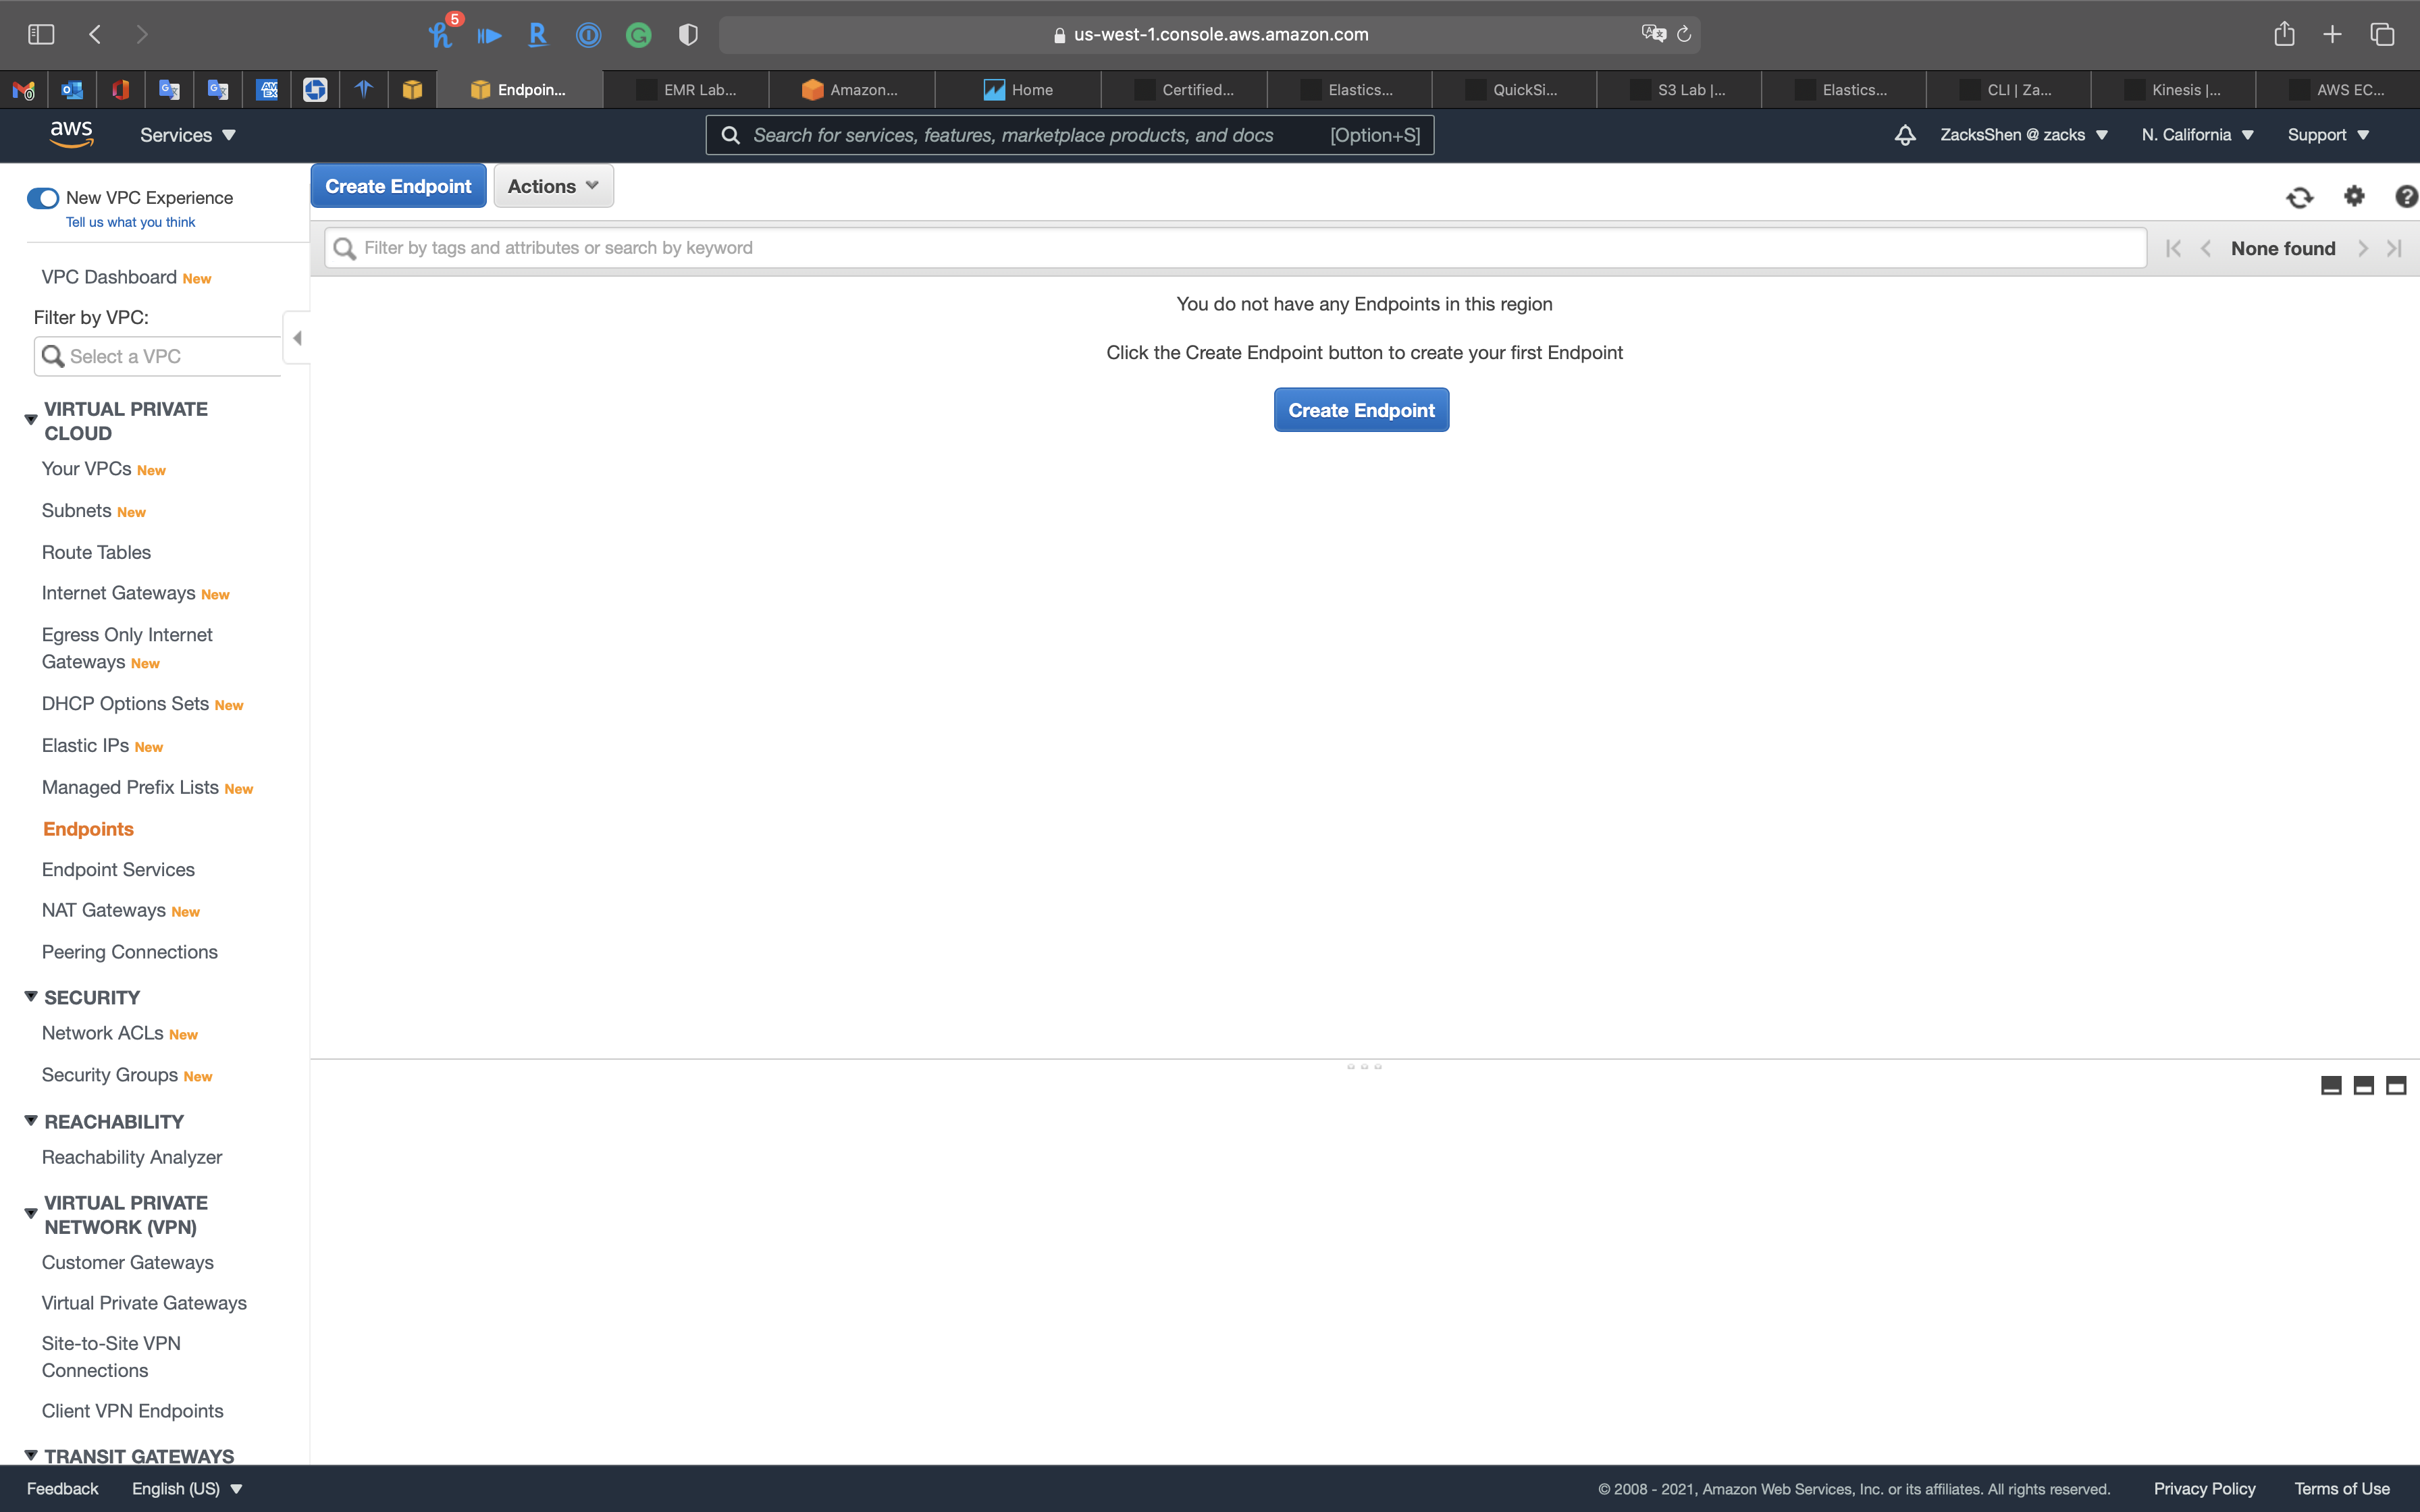
Search for elasticmapreduce
Select com.amazonaws.us-west-1.elasticmapreduce
- VPC:
EMR-VPC - Subnets:
EMR-PrivateSubnet

- Enable DNS name:
Enable for this endpoint
Click on Create endpoint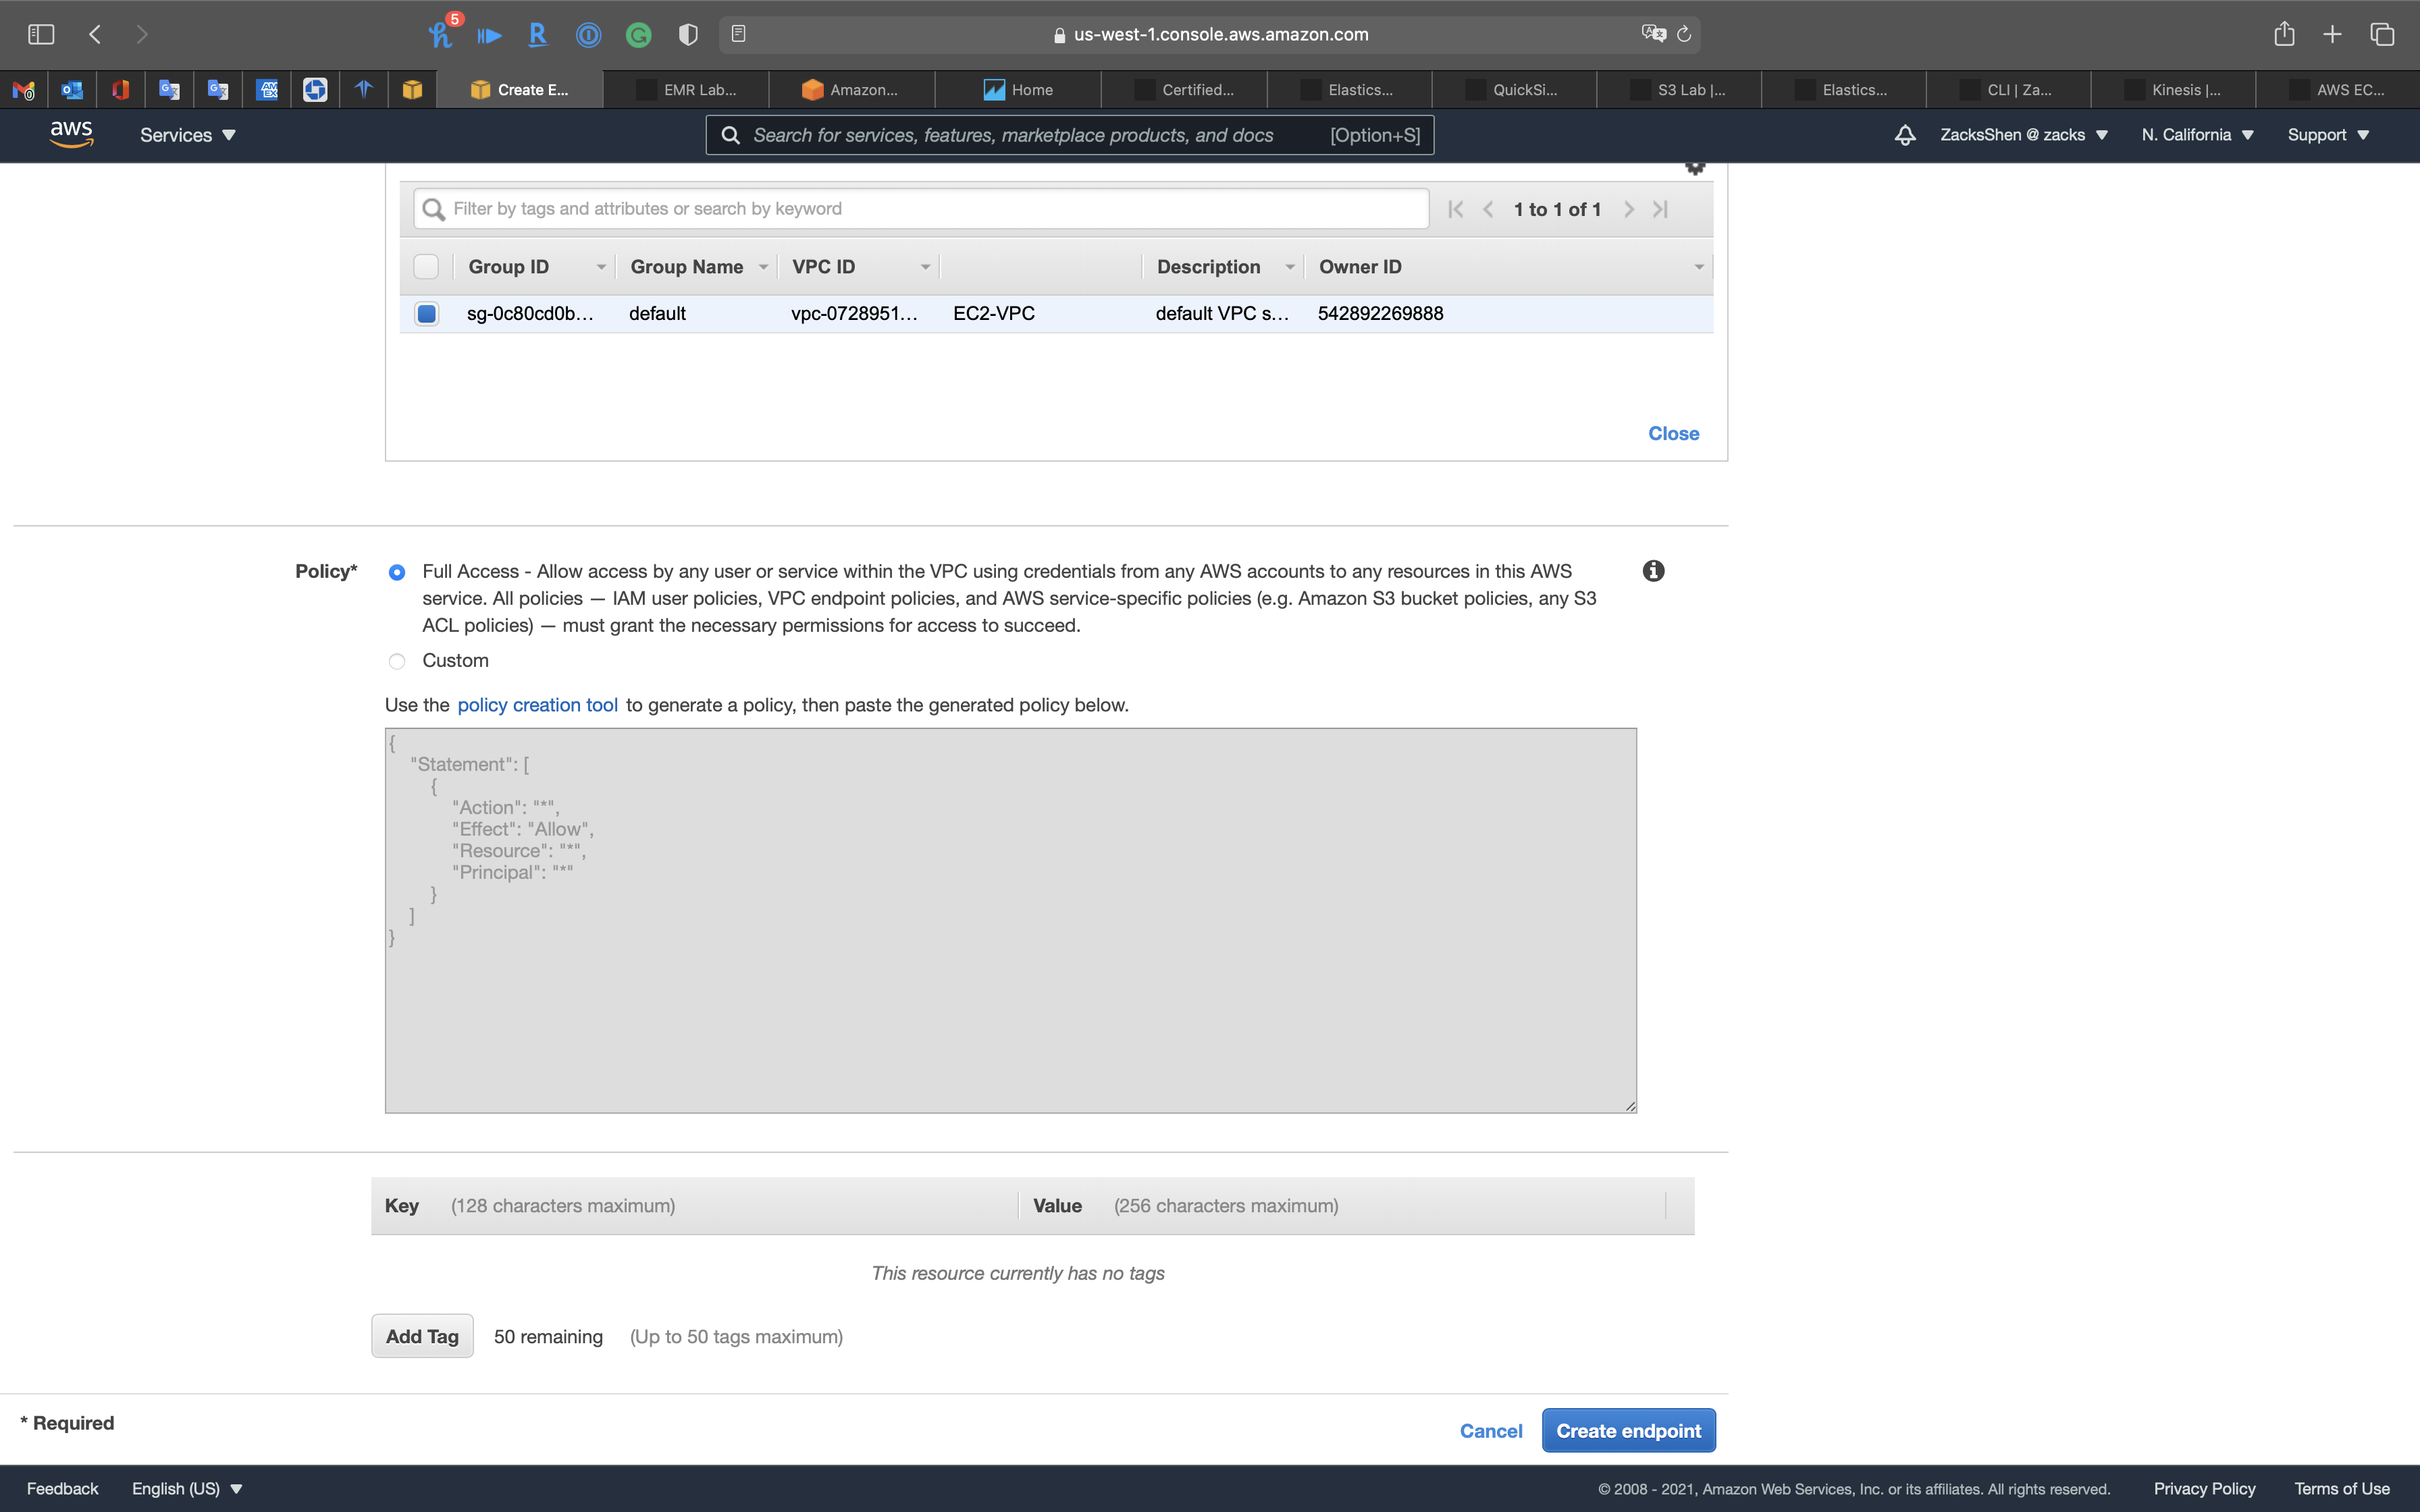
EMR Configuration
Services -> EMR -> Clusters
Click on Create cluster
Create Cluster - Advanced Options
Create a EMR Cluster for running Hadoop and related components.
Click on Go to advanced options on the top of the page.
Step 1: Software and Steps
Software Configuration
- Release
emr-5.32.0 - Hadoop
- Hive
- Presto
- Hue
- Pig
AWS Glue Data Catalog settings (optional)
Use for Presto table metadata(Use the AWS Glue Data Catalog to provide an external Hive metastore for Presto.)
Click on Next
Step 2: Hardware
Networking
- Network:
EMR-VPC - EC2 Subnet:
EMR-PrivateSubnet
Click on Add S3 endpoint and NAT instance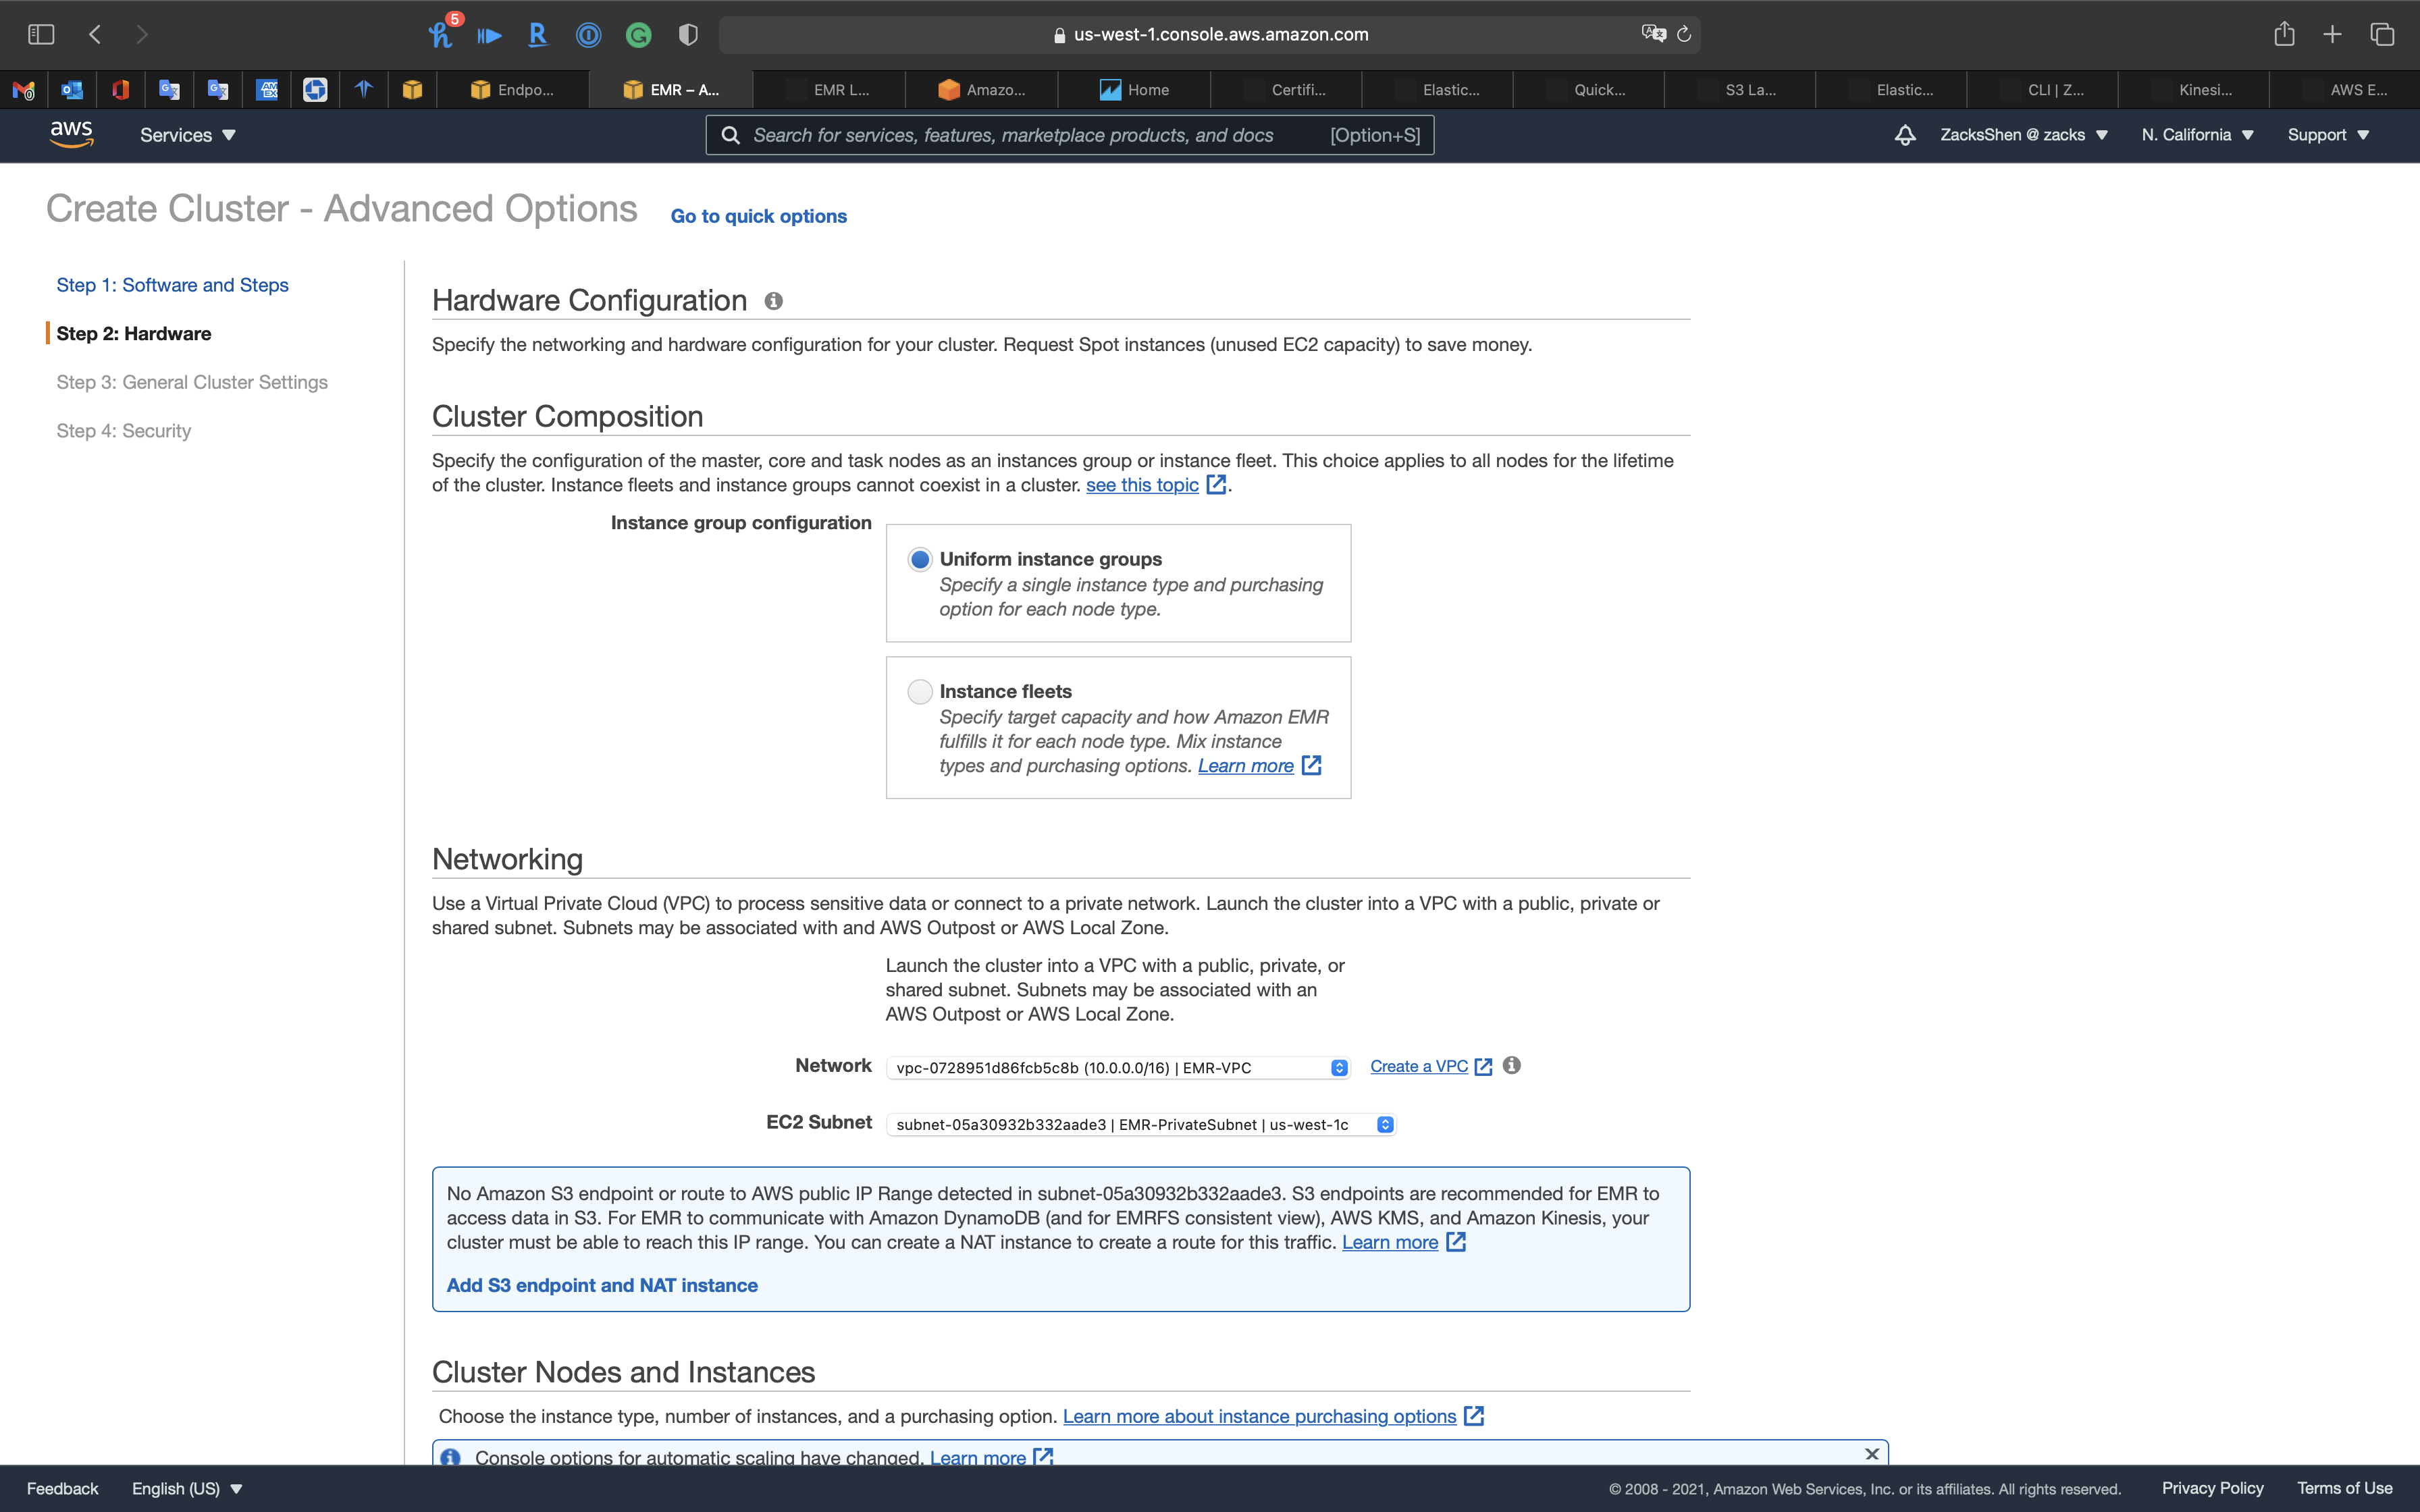
Add S3 endpoint
- Policy:
Full access
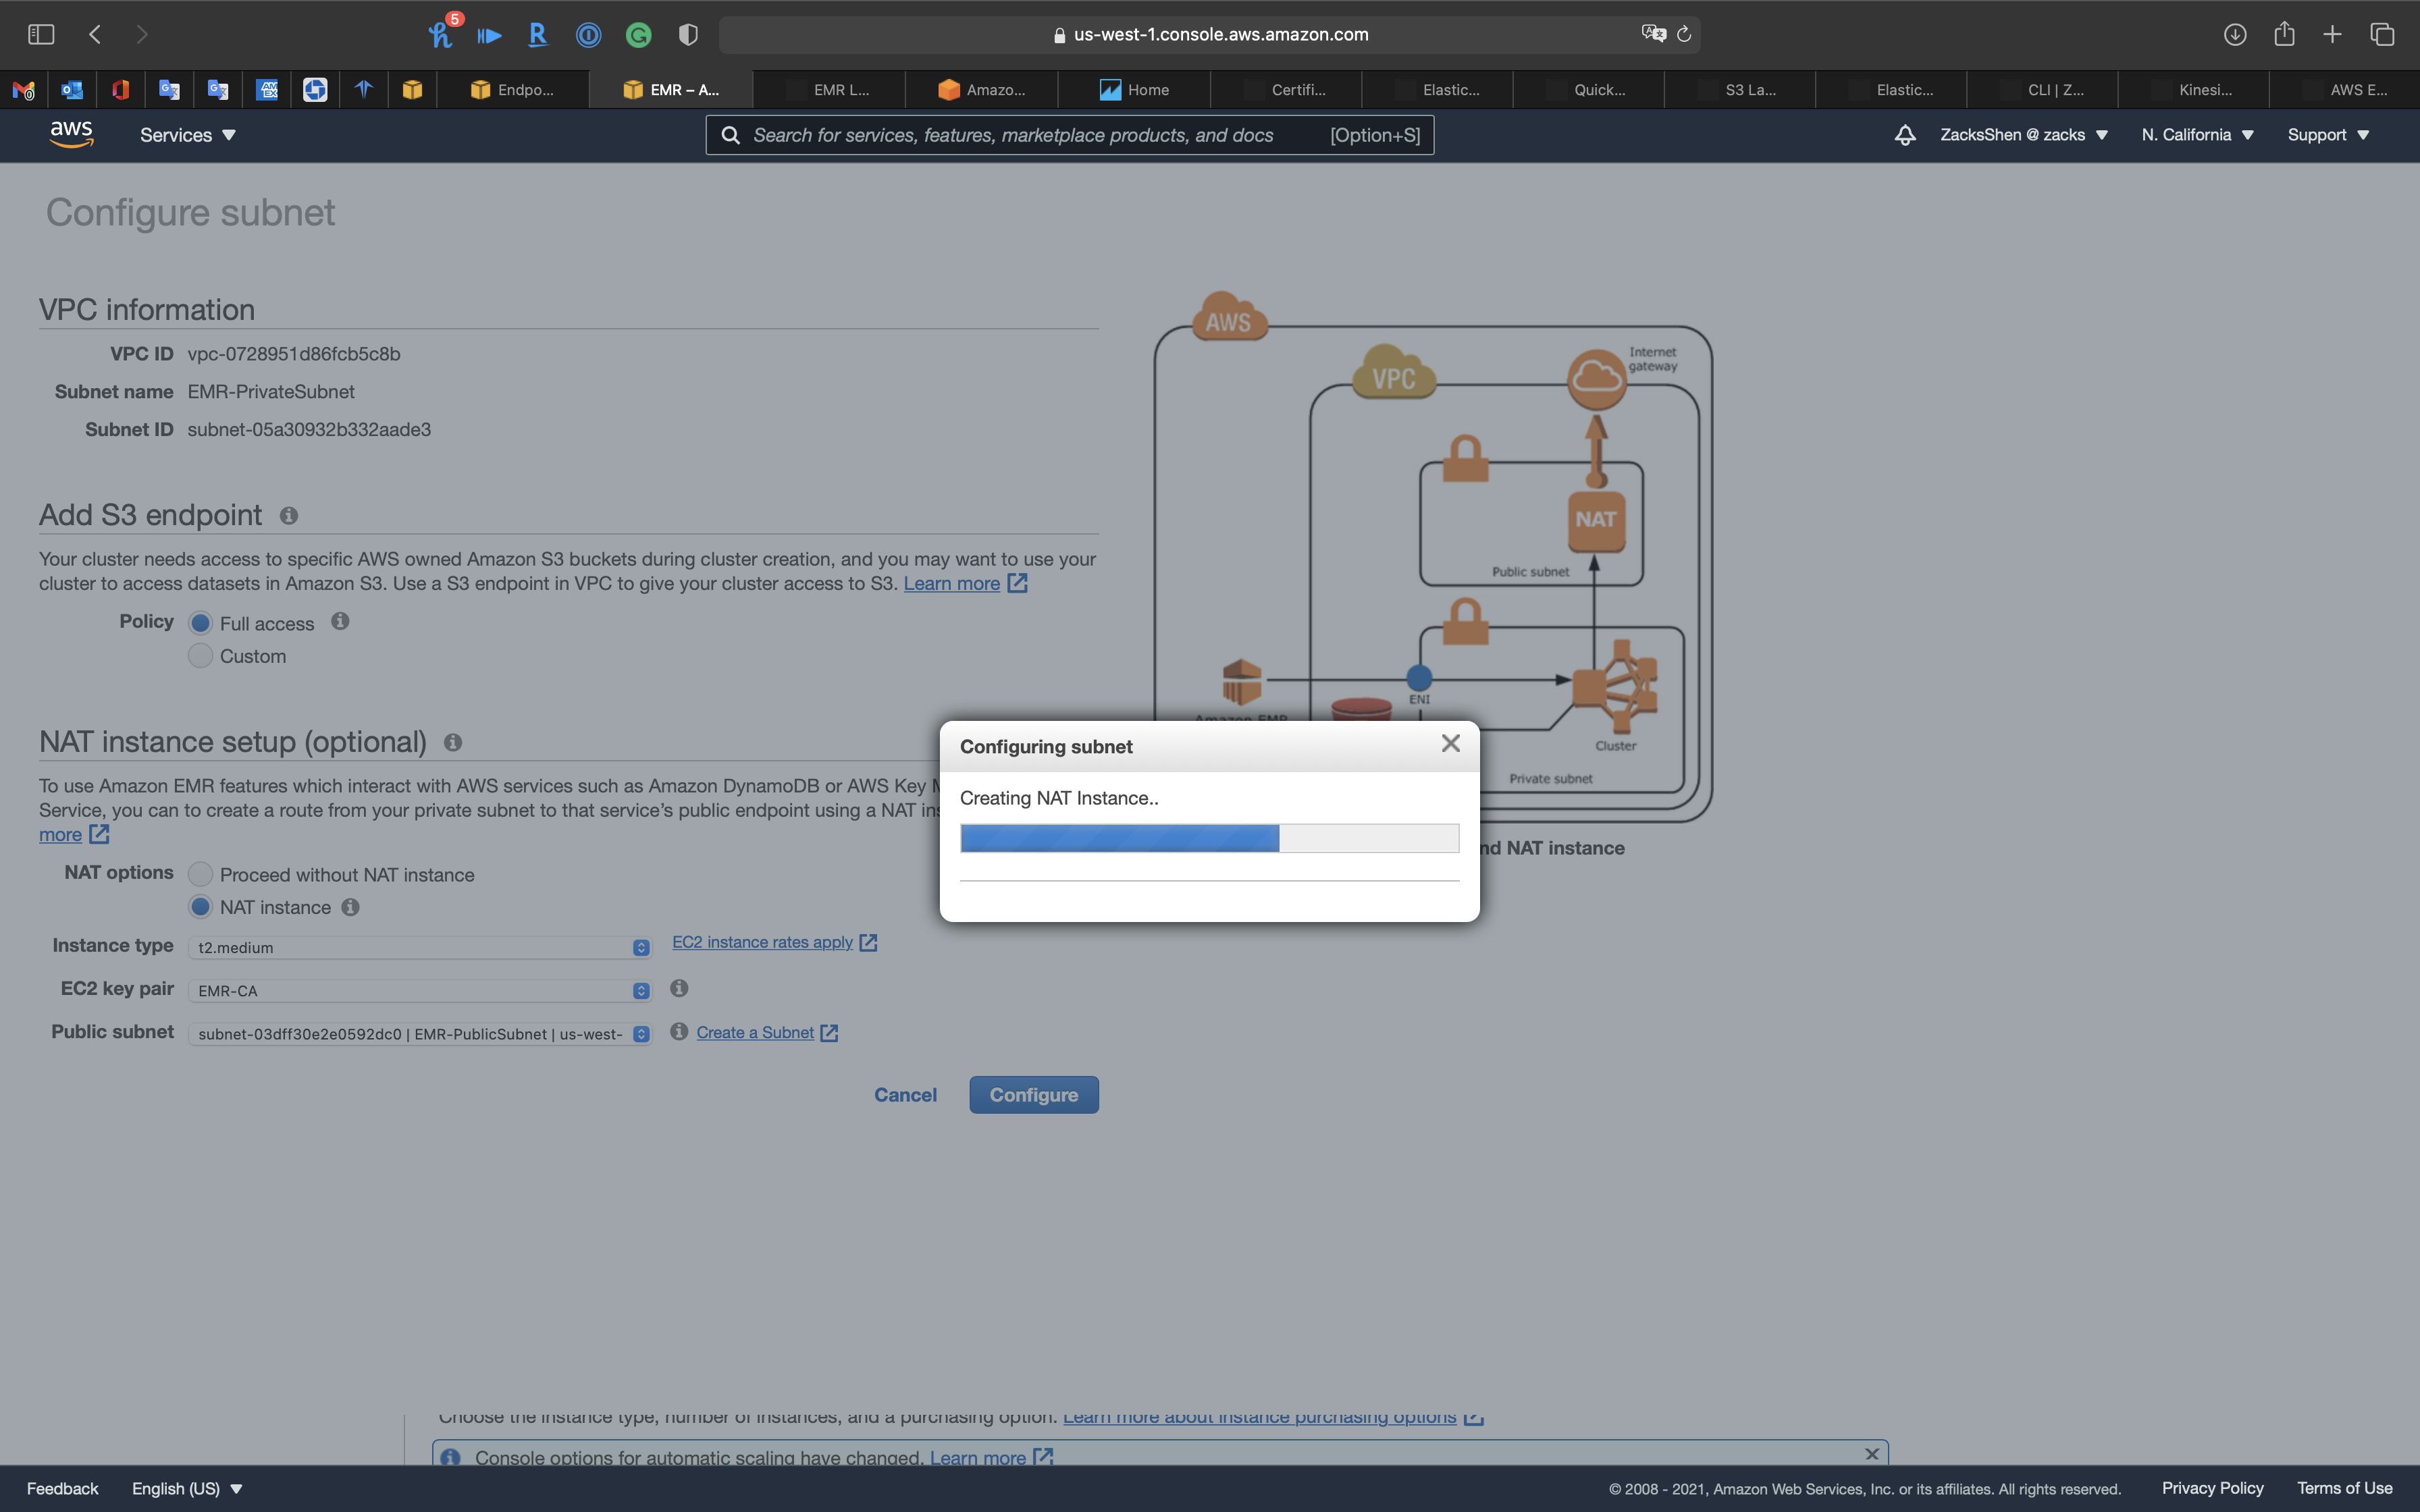
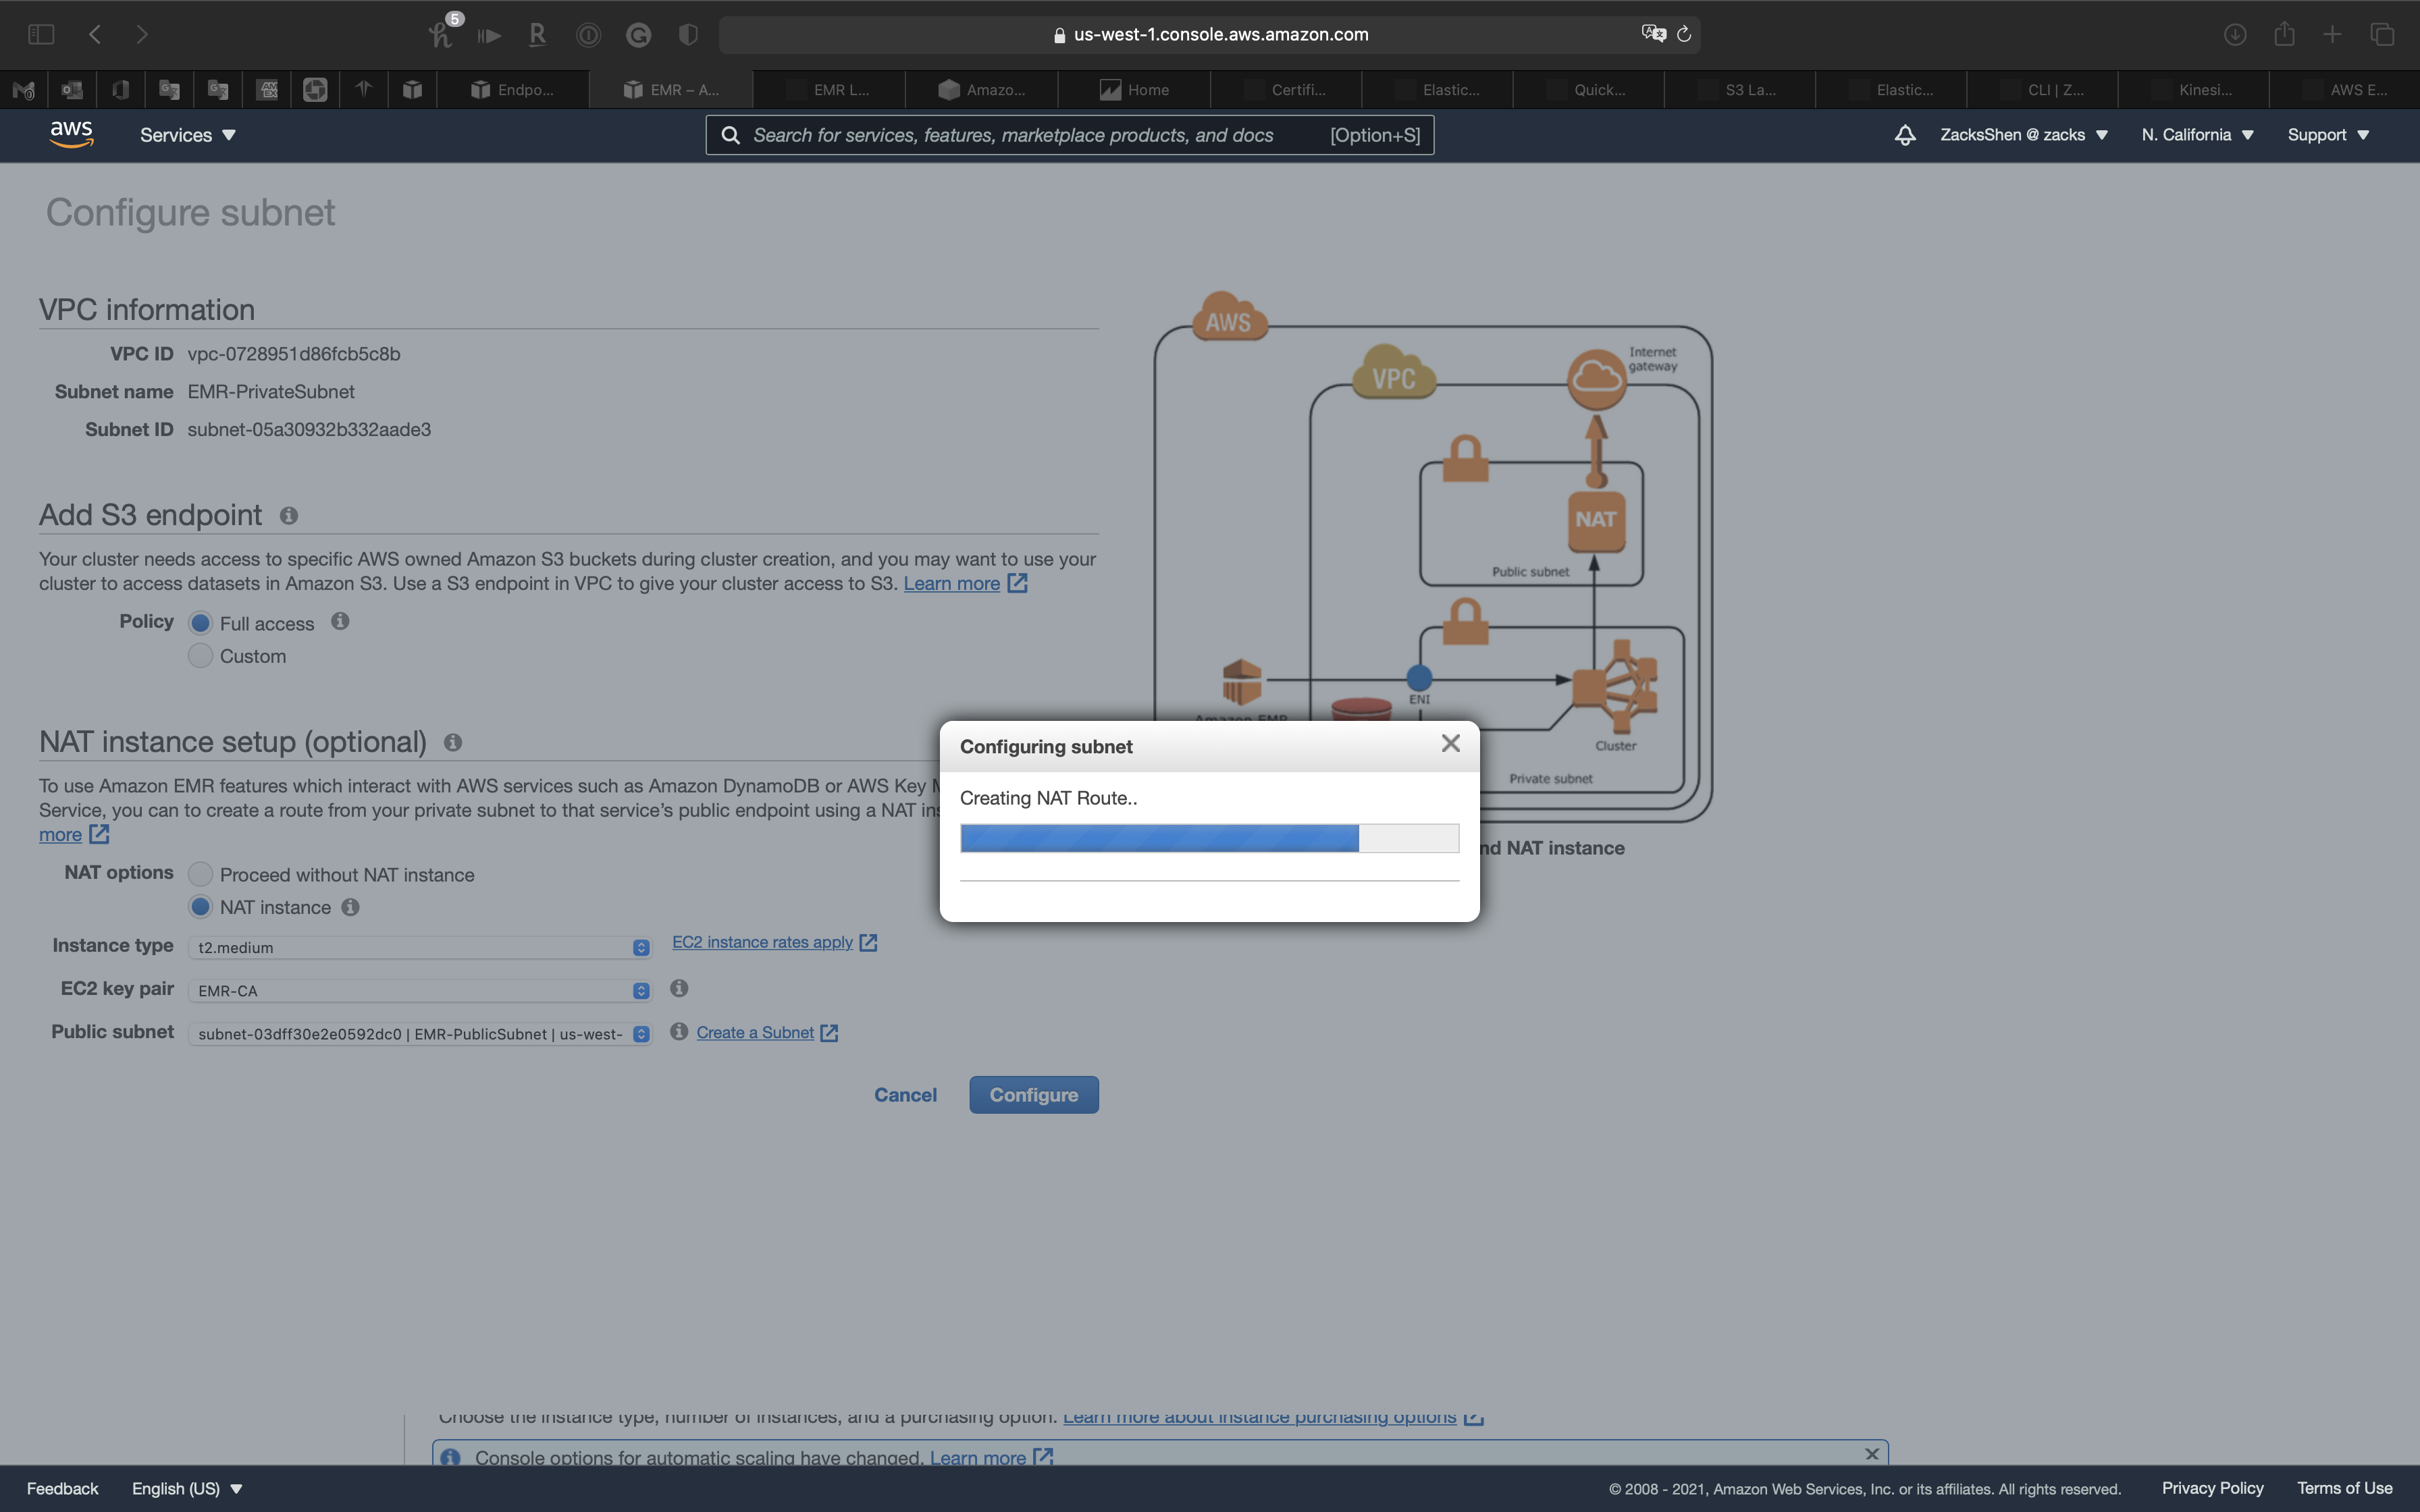
NAT instance setup (optional)
- NAT options:
NAT instance - Instance type:
t2.medium - EC2 key pair: choose one of your previous key pair
- Public subnet:
EMR-PublicSubnet
Carefully review the topology.
Click on Configure.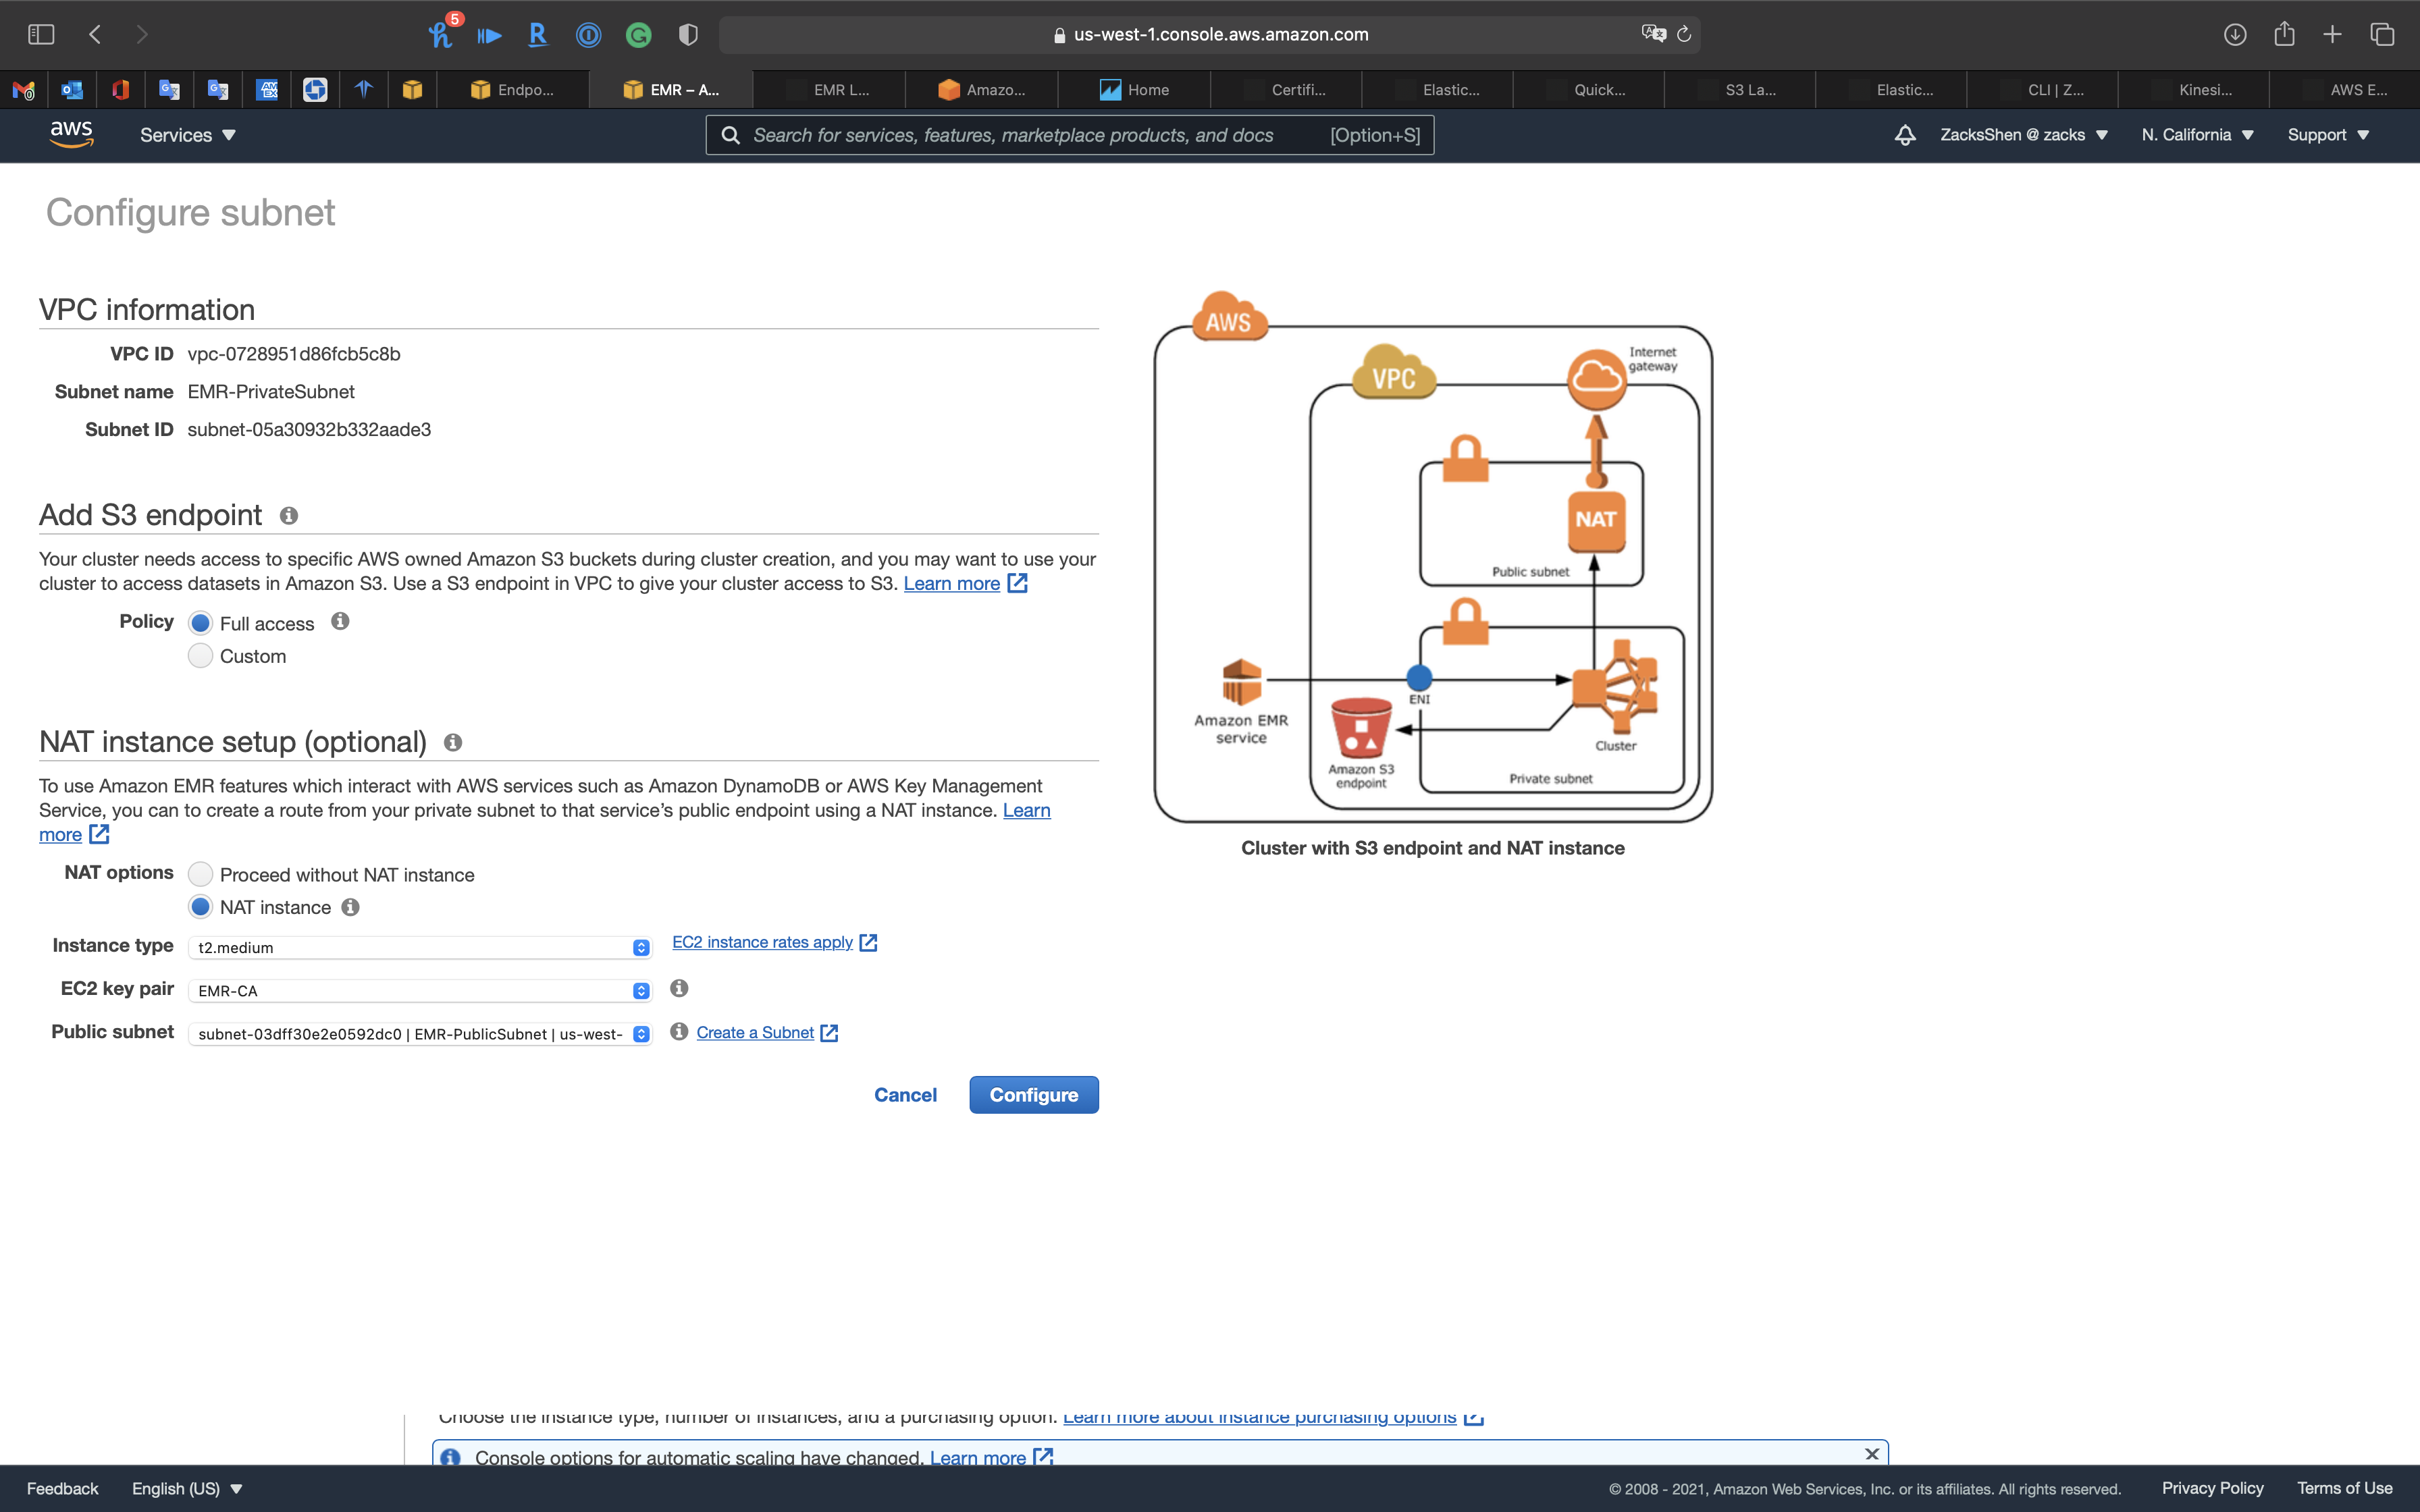

Cluster Nodes and Instances
Node Type
- Master, 1 instance, On-demand
- Core, 2 instance, On-demand
- Task, 0 instance, On-demand
Click on Next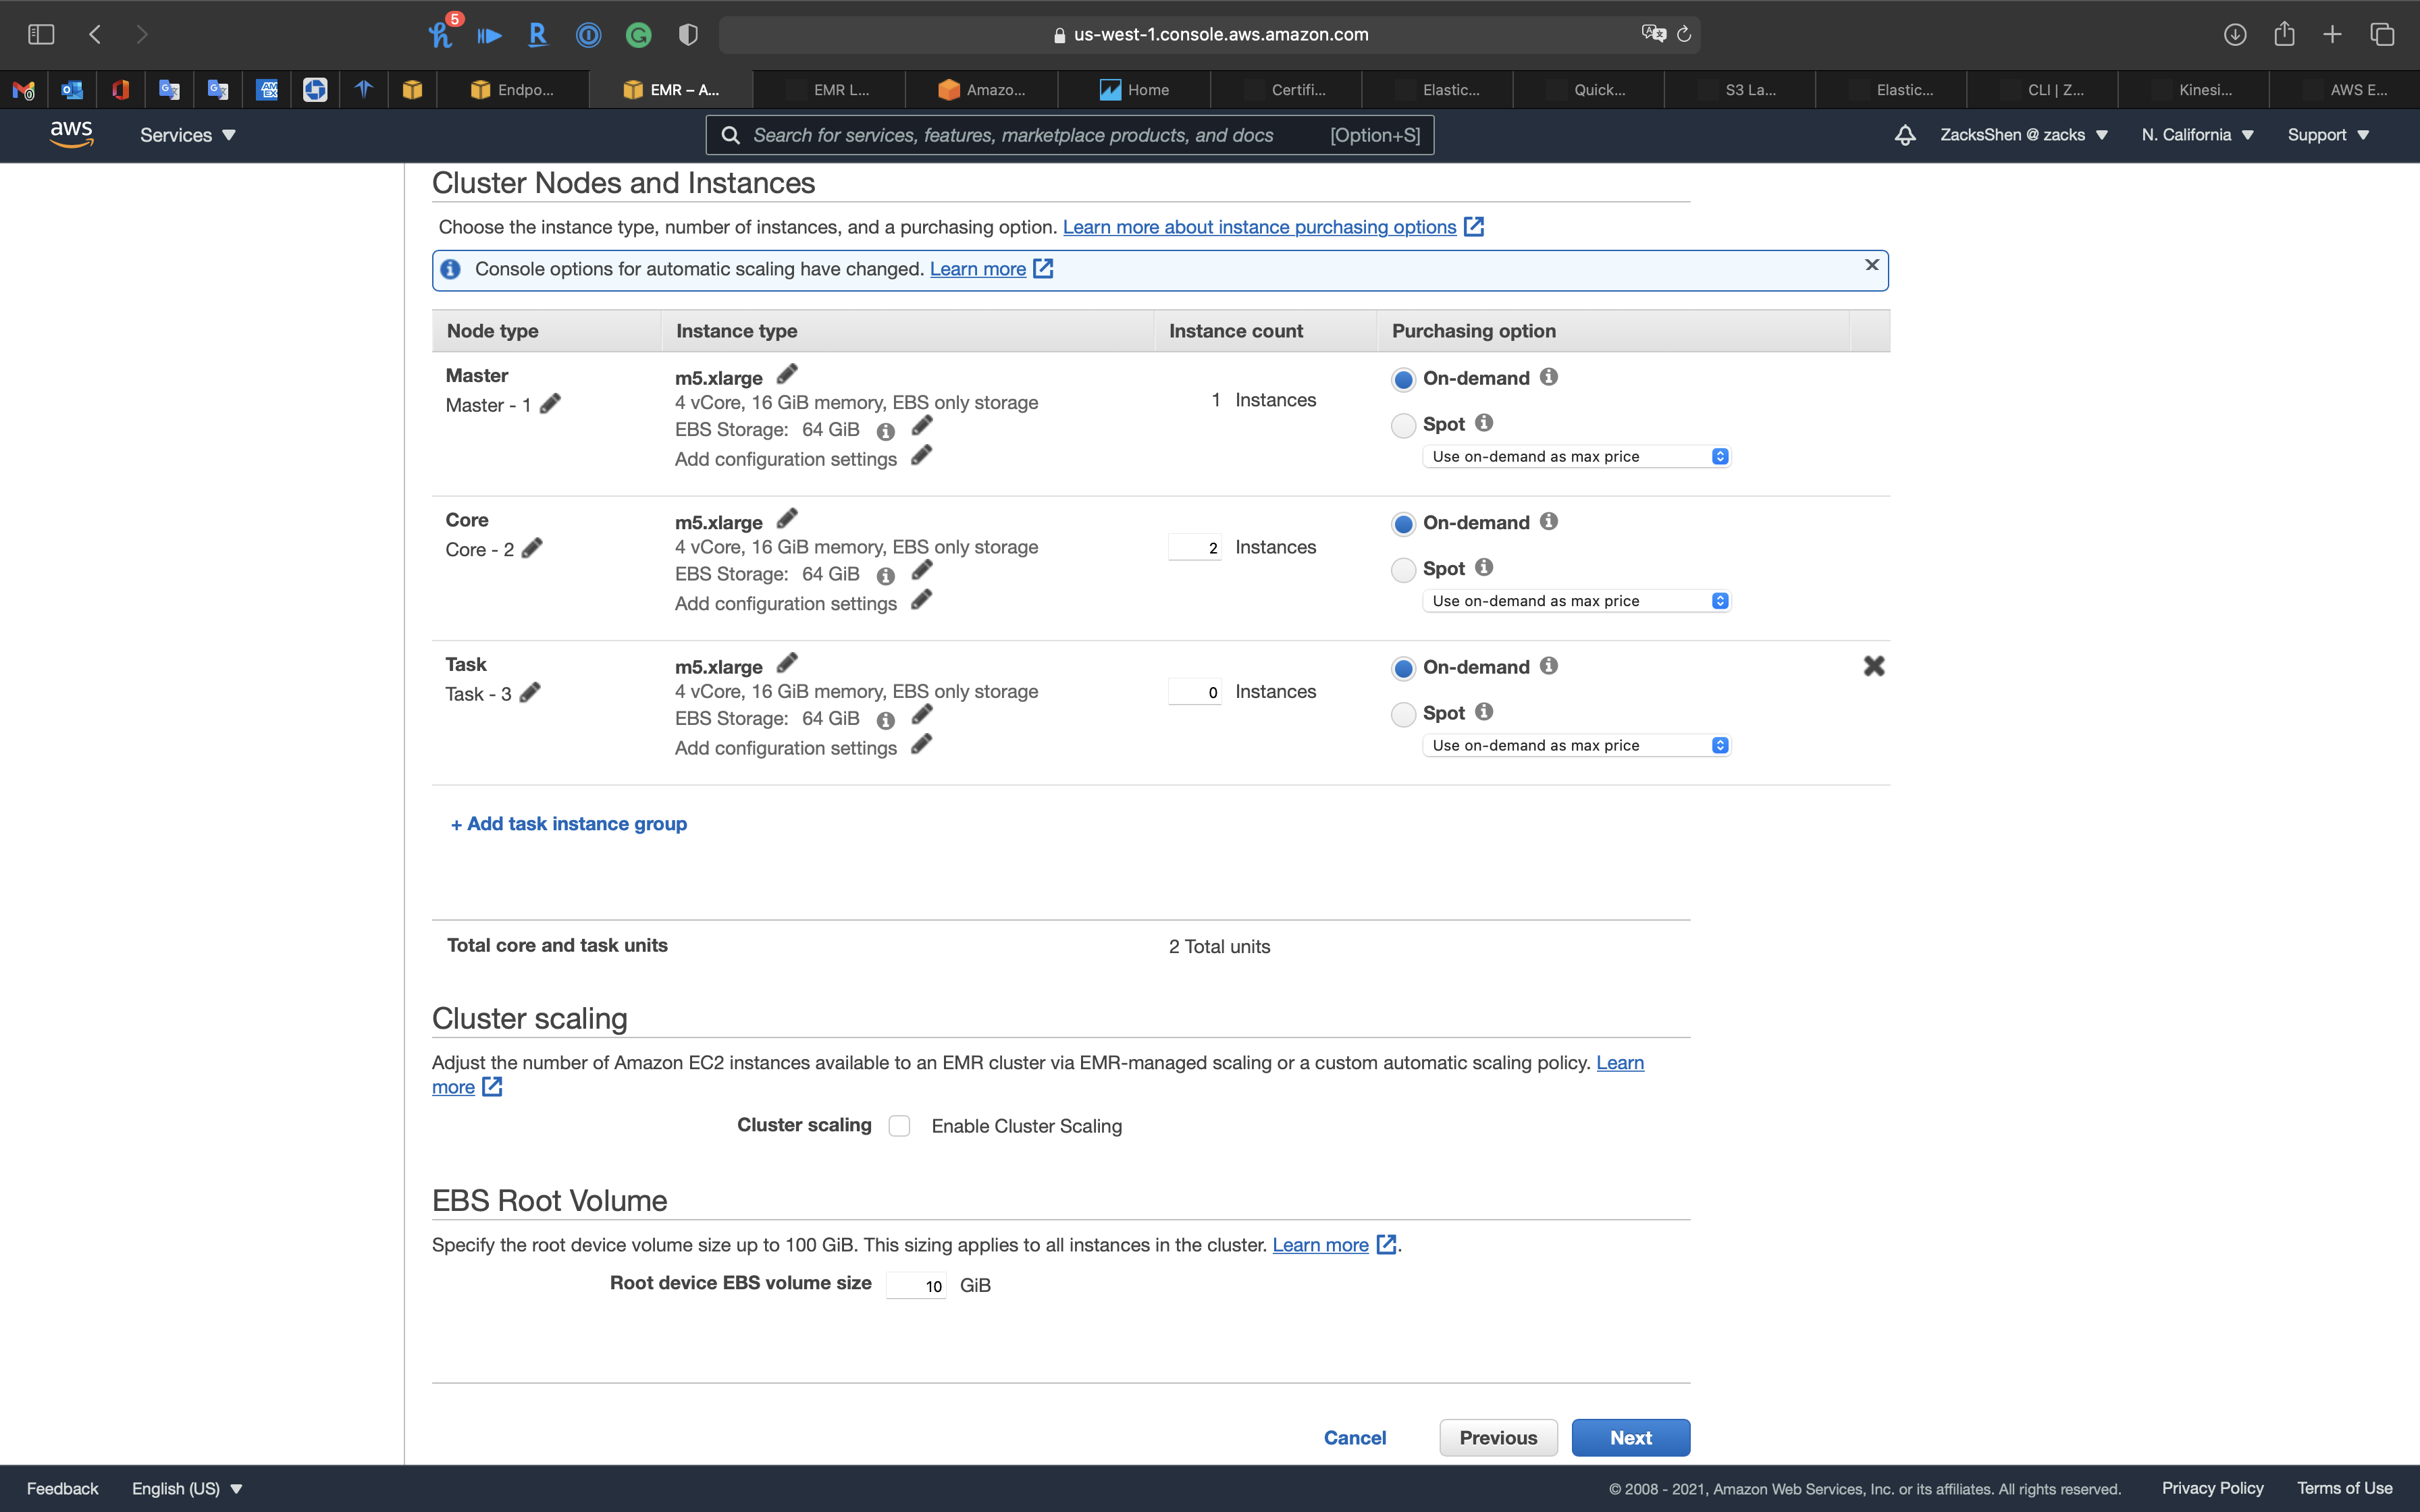
Step 3: General Cluster Settings
- Cluster name:
EMR-PrivateCluster - Termination protection (Prevents accidental termination of the cluster: to shut down the cluster, you must turn off termination protection.)
- Uncheck
Click on Next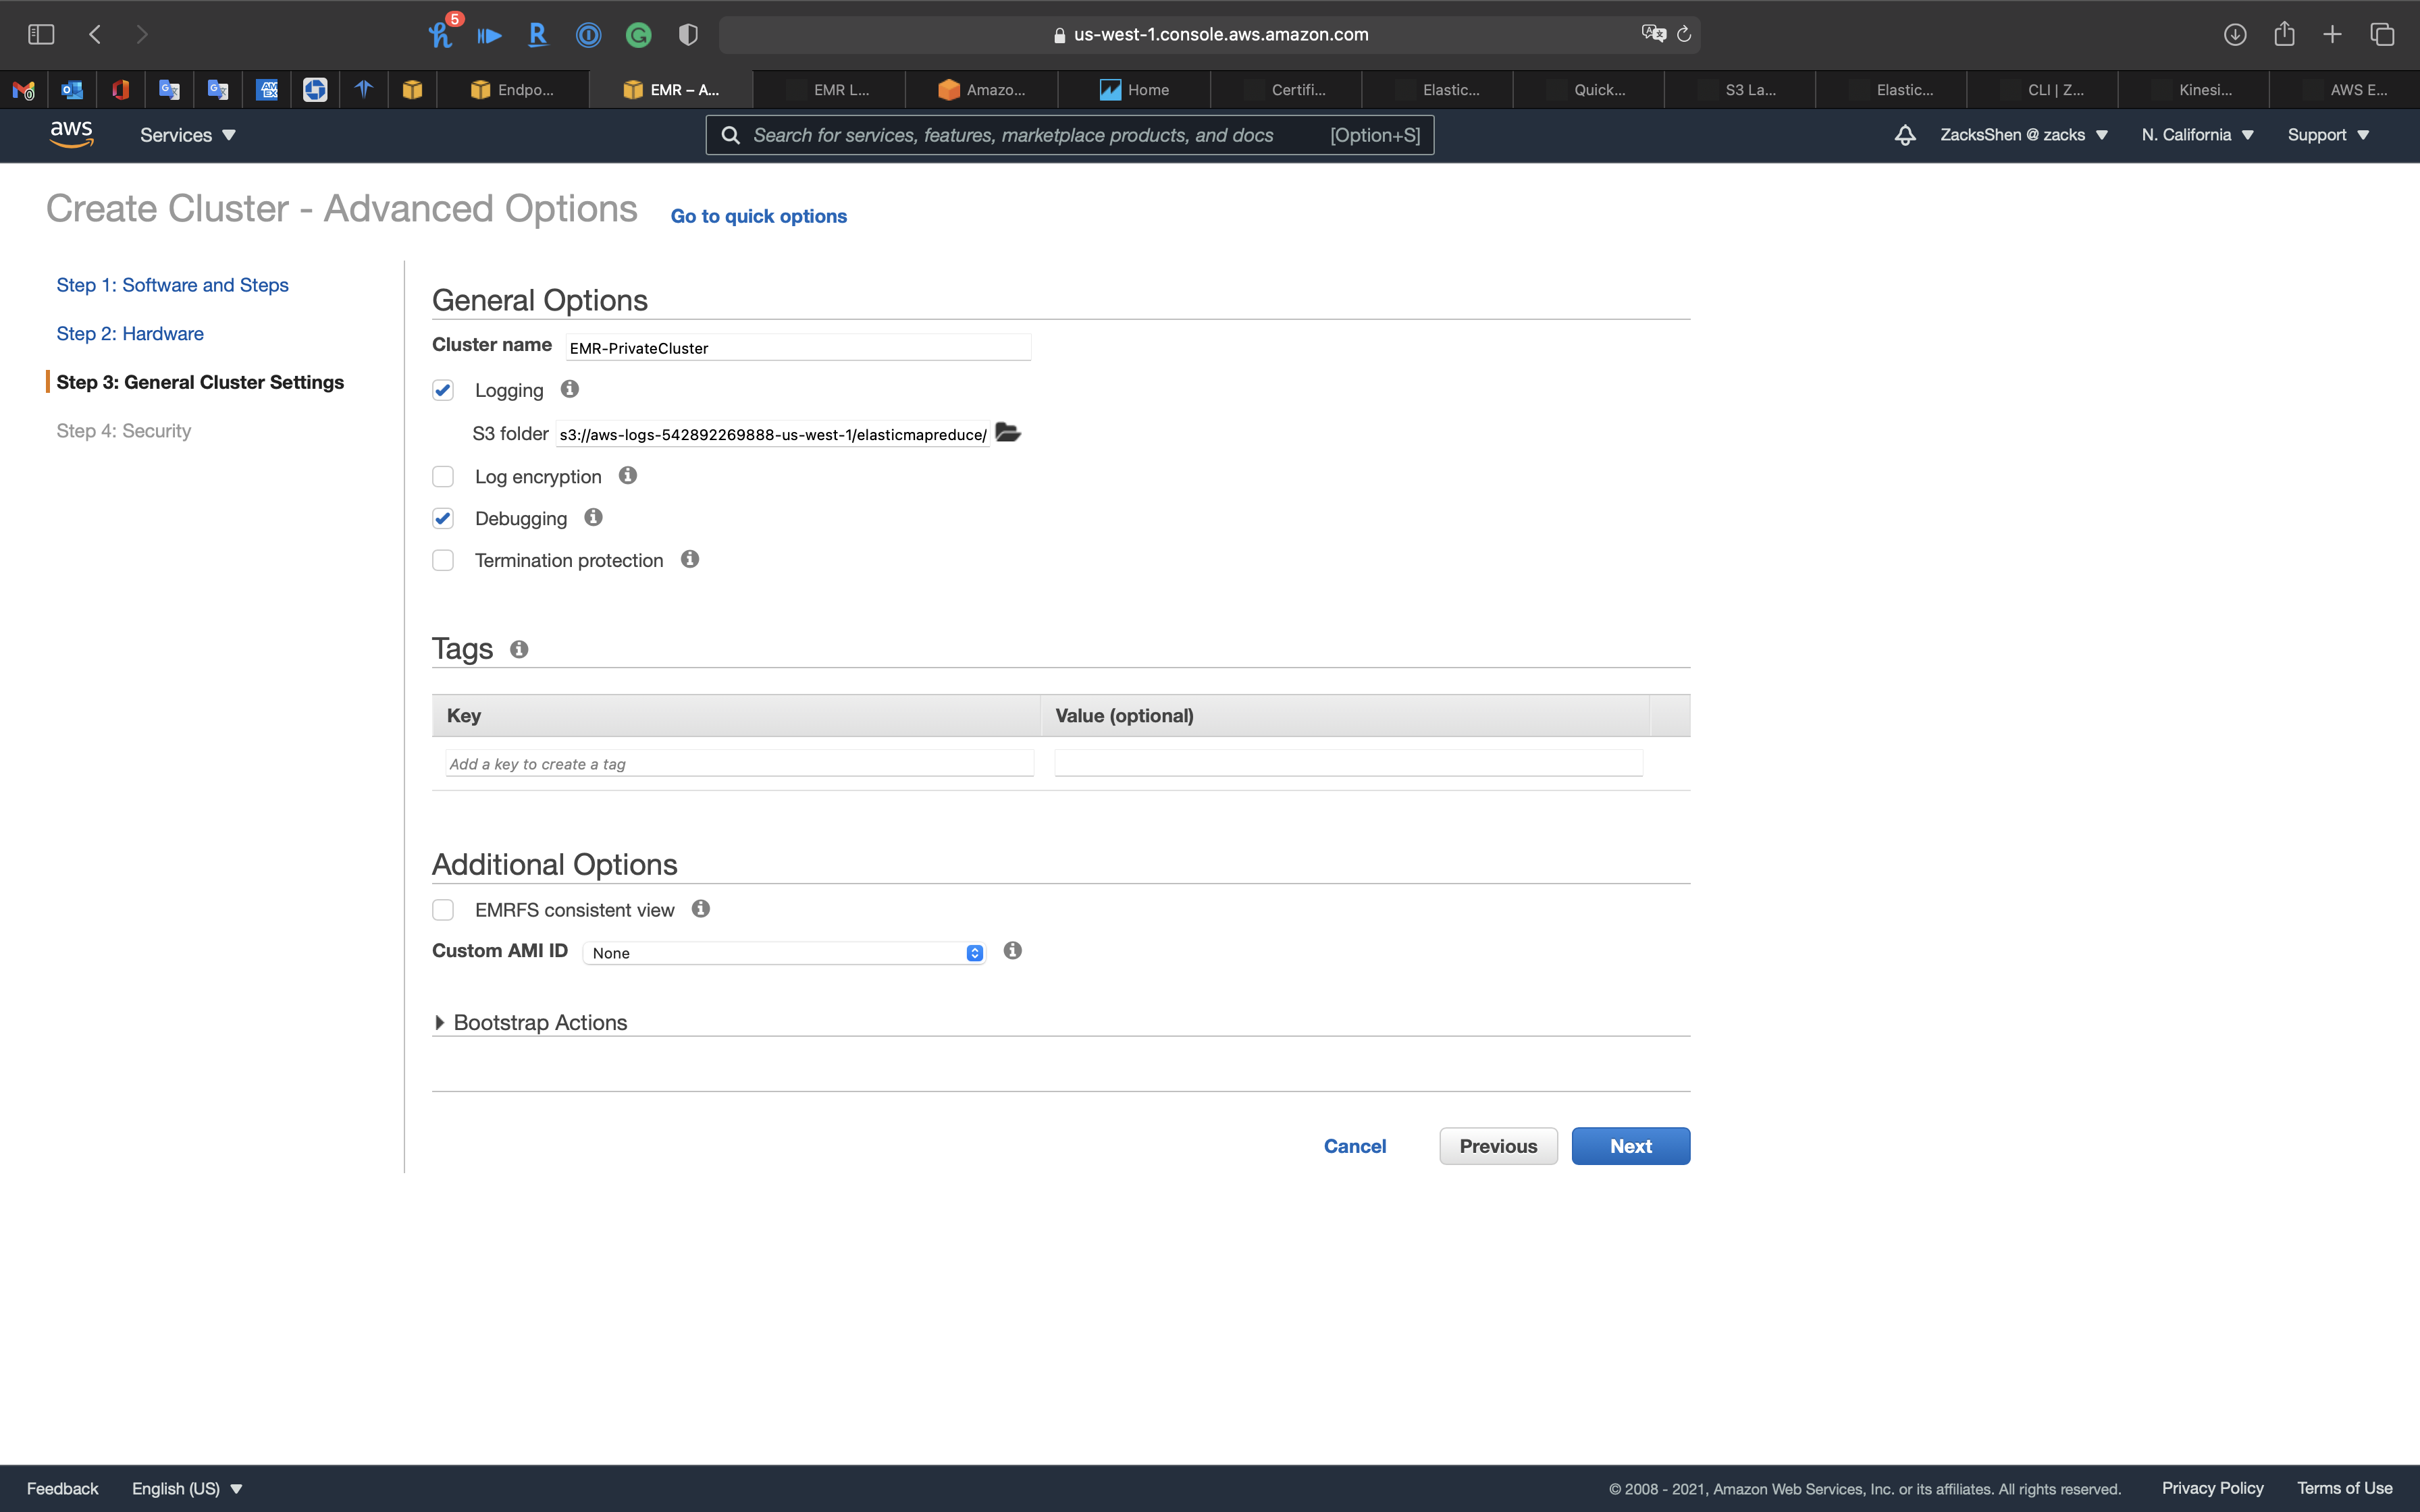
Step 4: Security
Security Options
- EC2 key pair: choose your pervious key pair
EC2 security groups
- Master:
Create ElasticMapReduce-Master-Private - Core & Task:
Create ElasticMapReduce-Slave-Private - Service Access (private subnet):
Create ElasticMapReduce-ServiceAccess
Click on Create cluster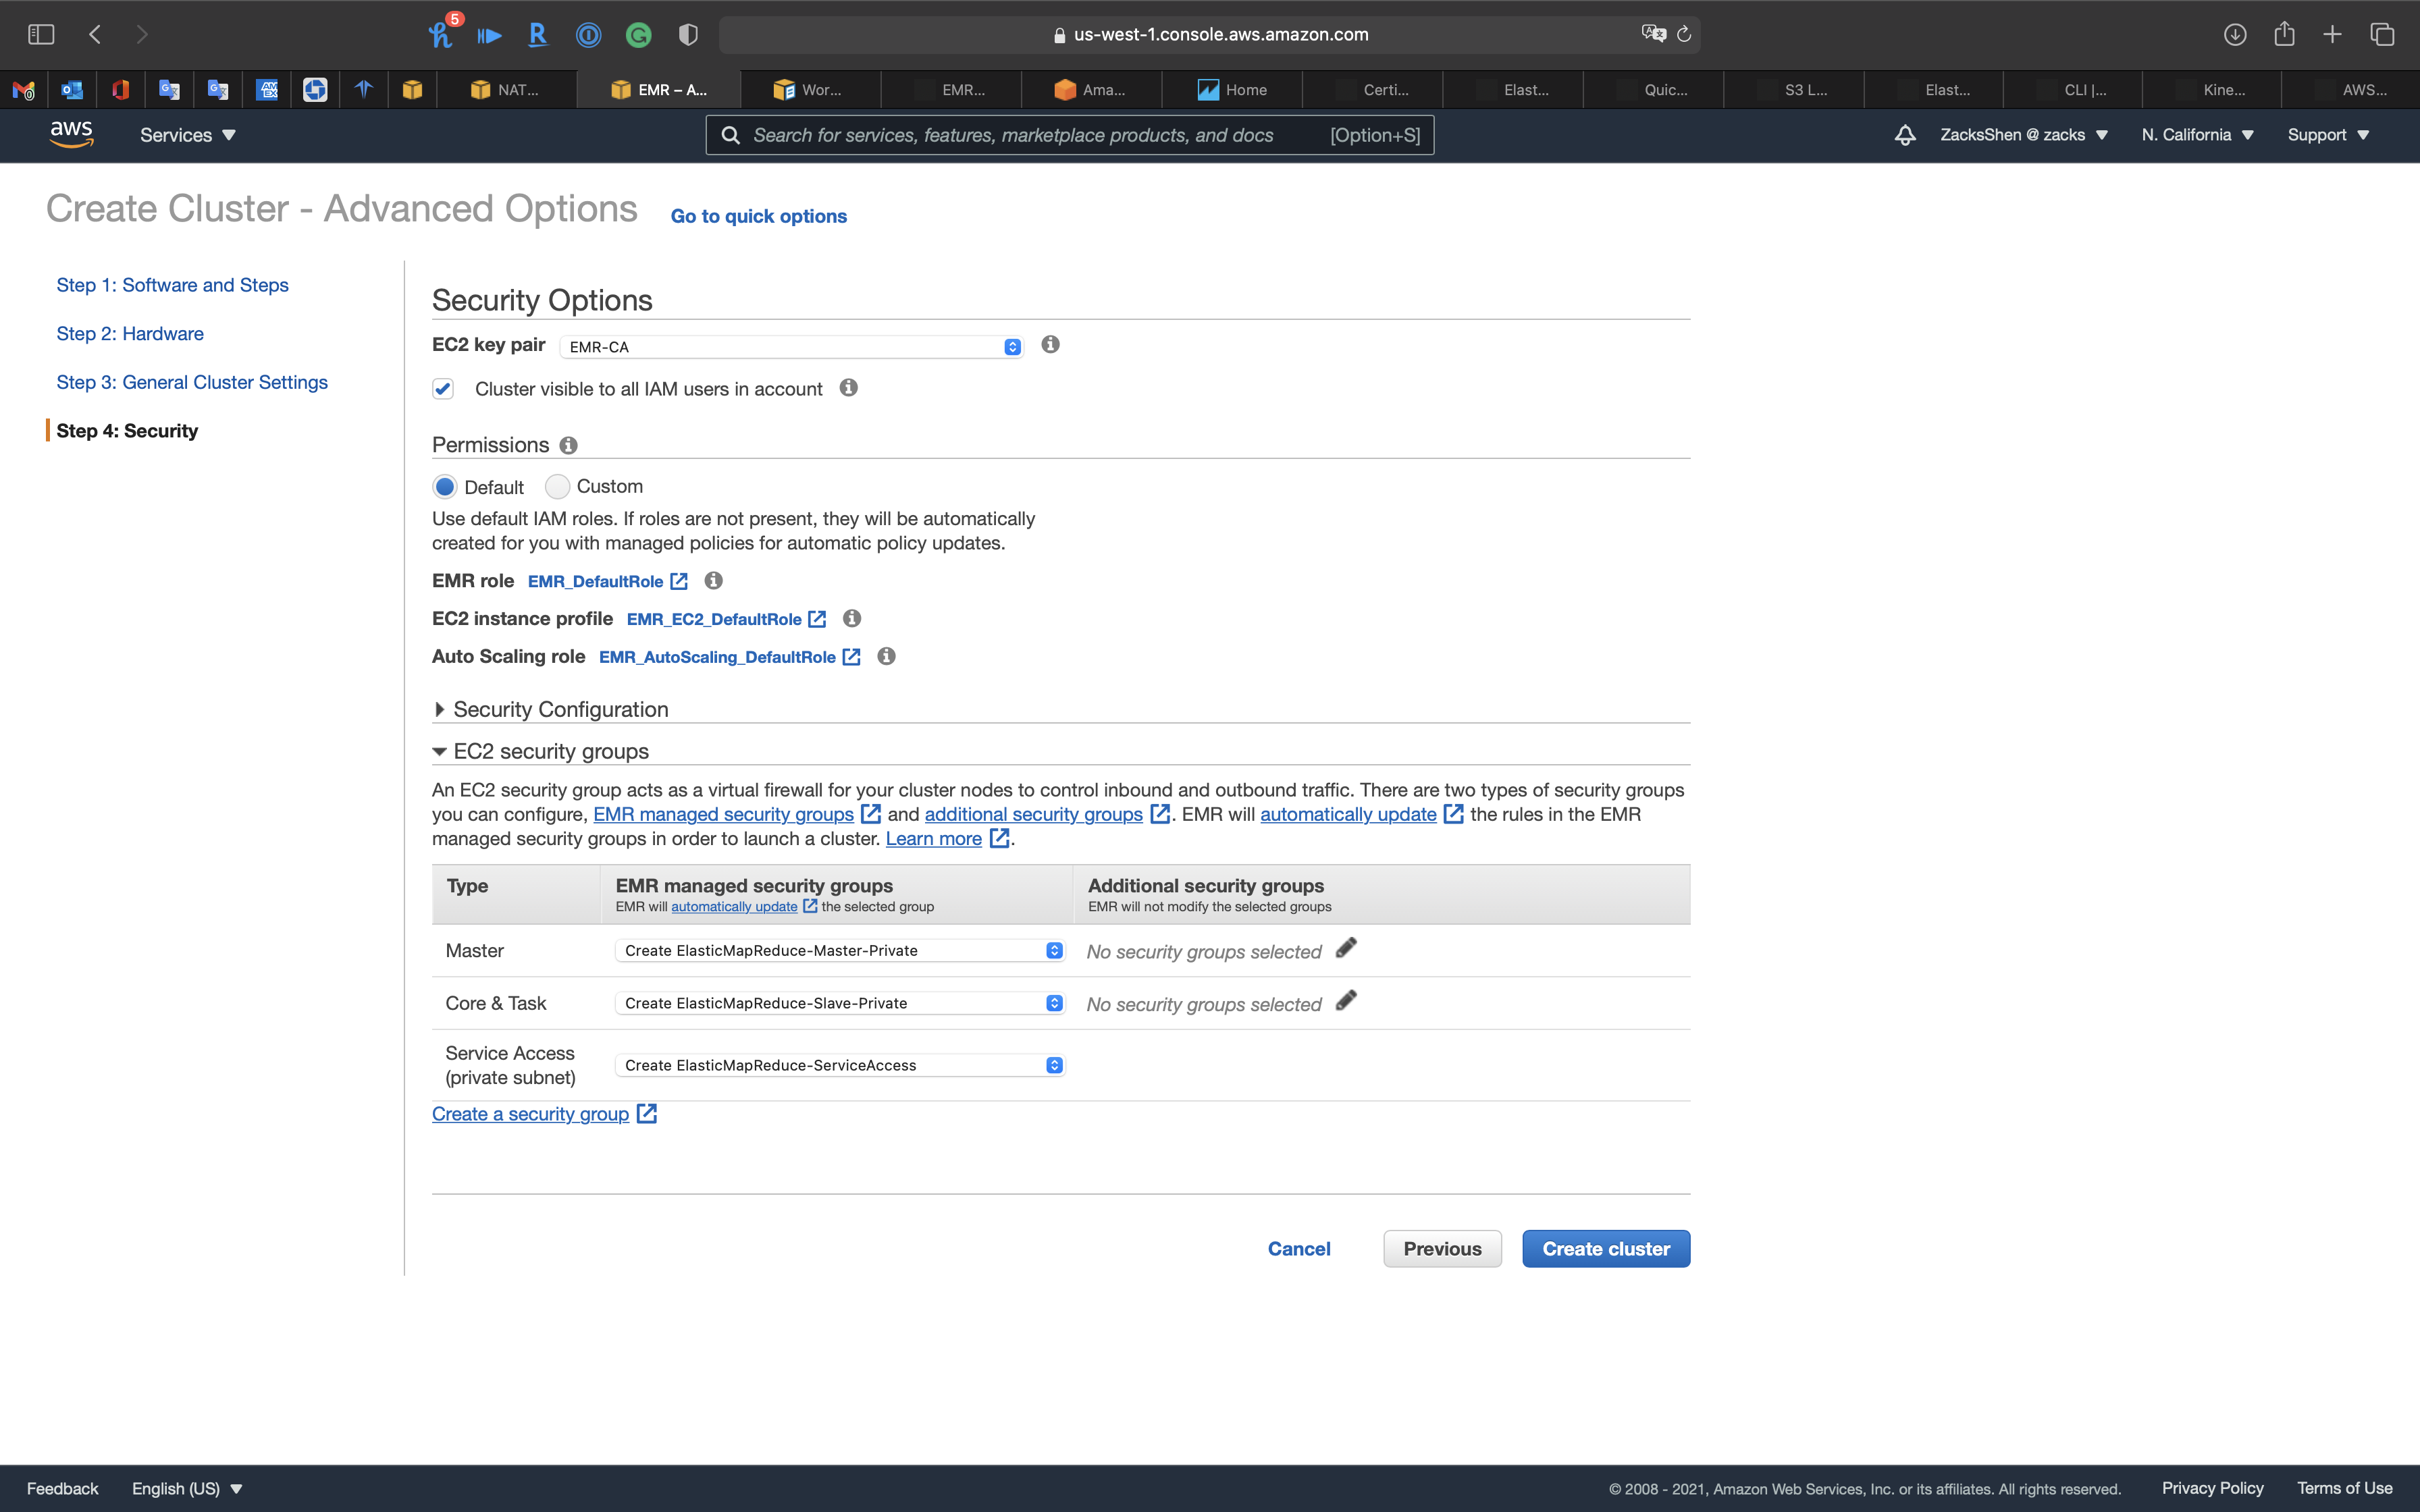
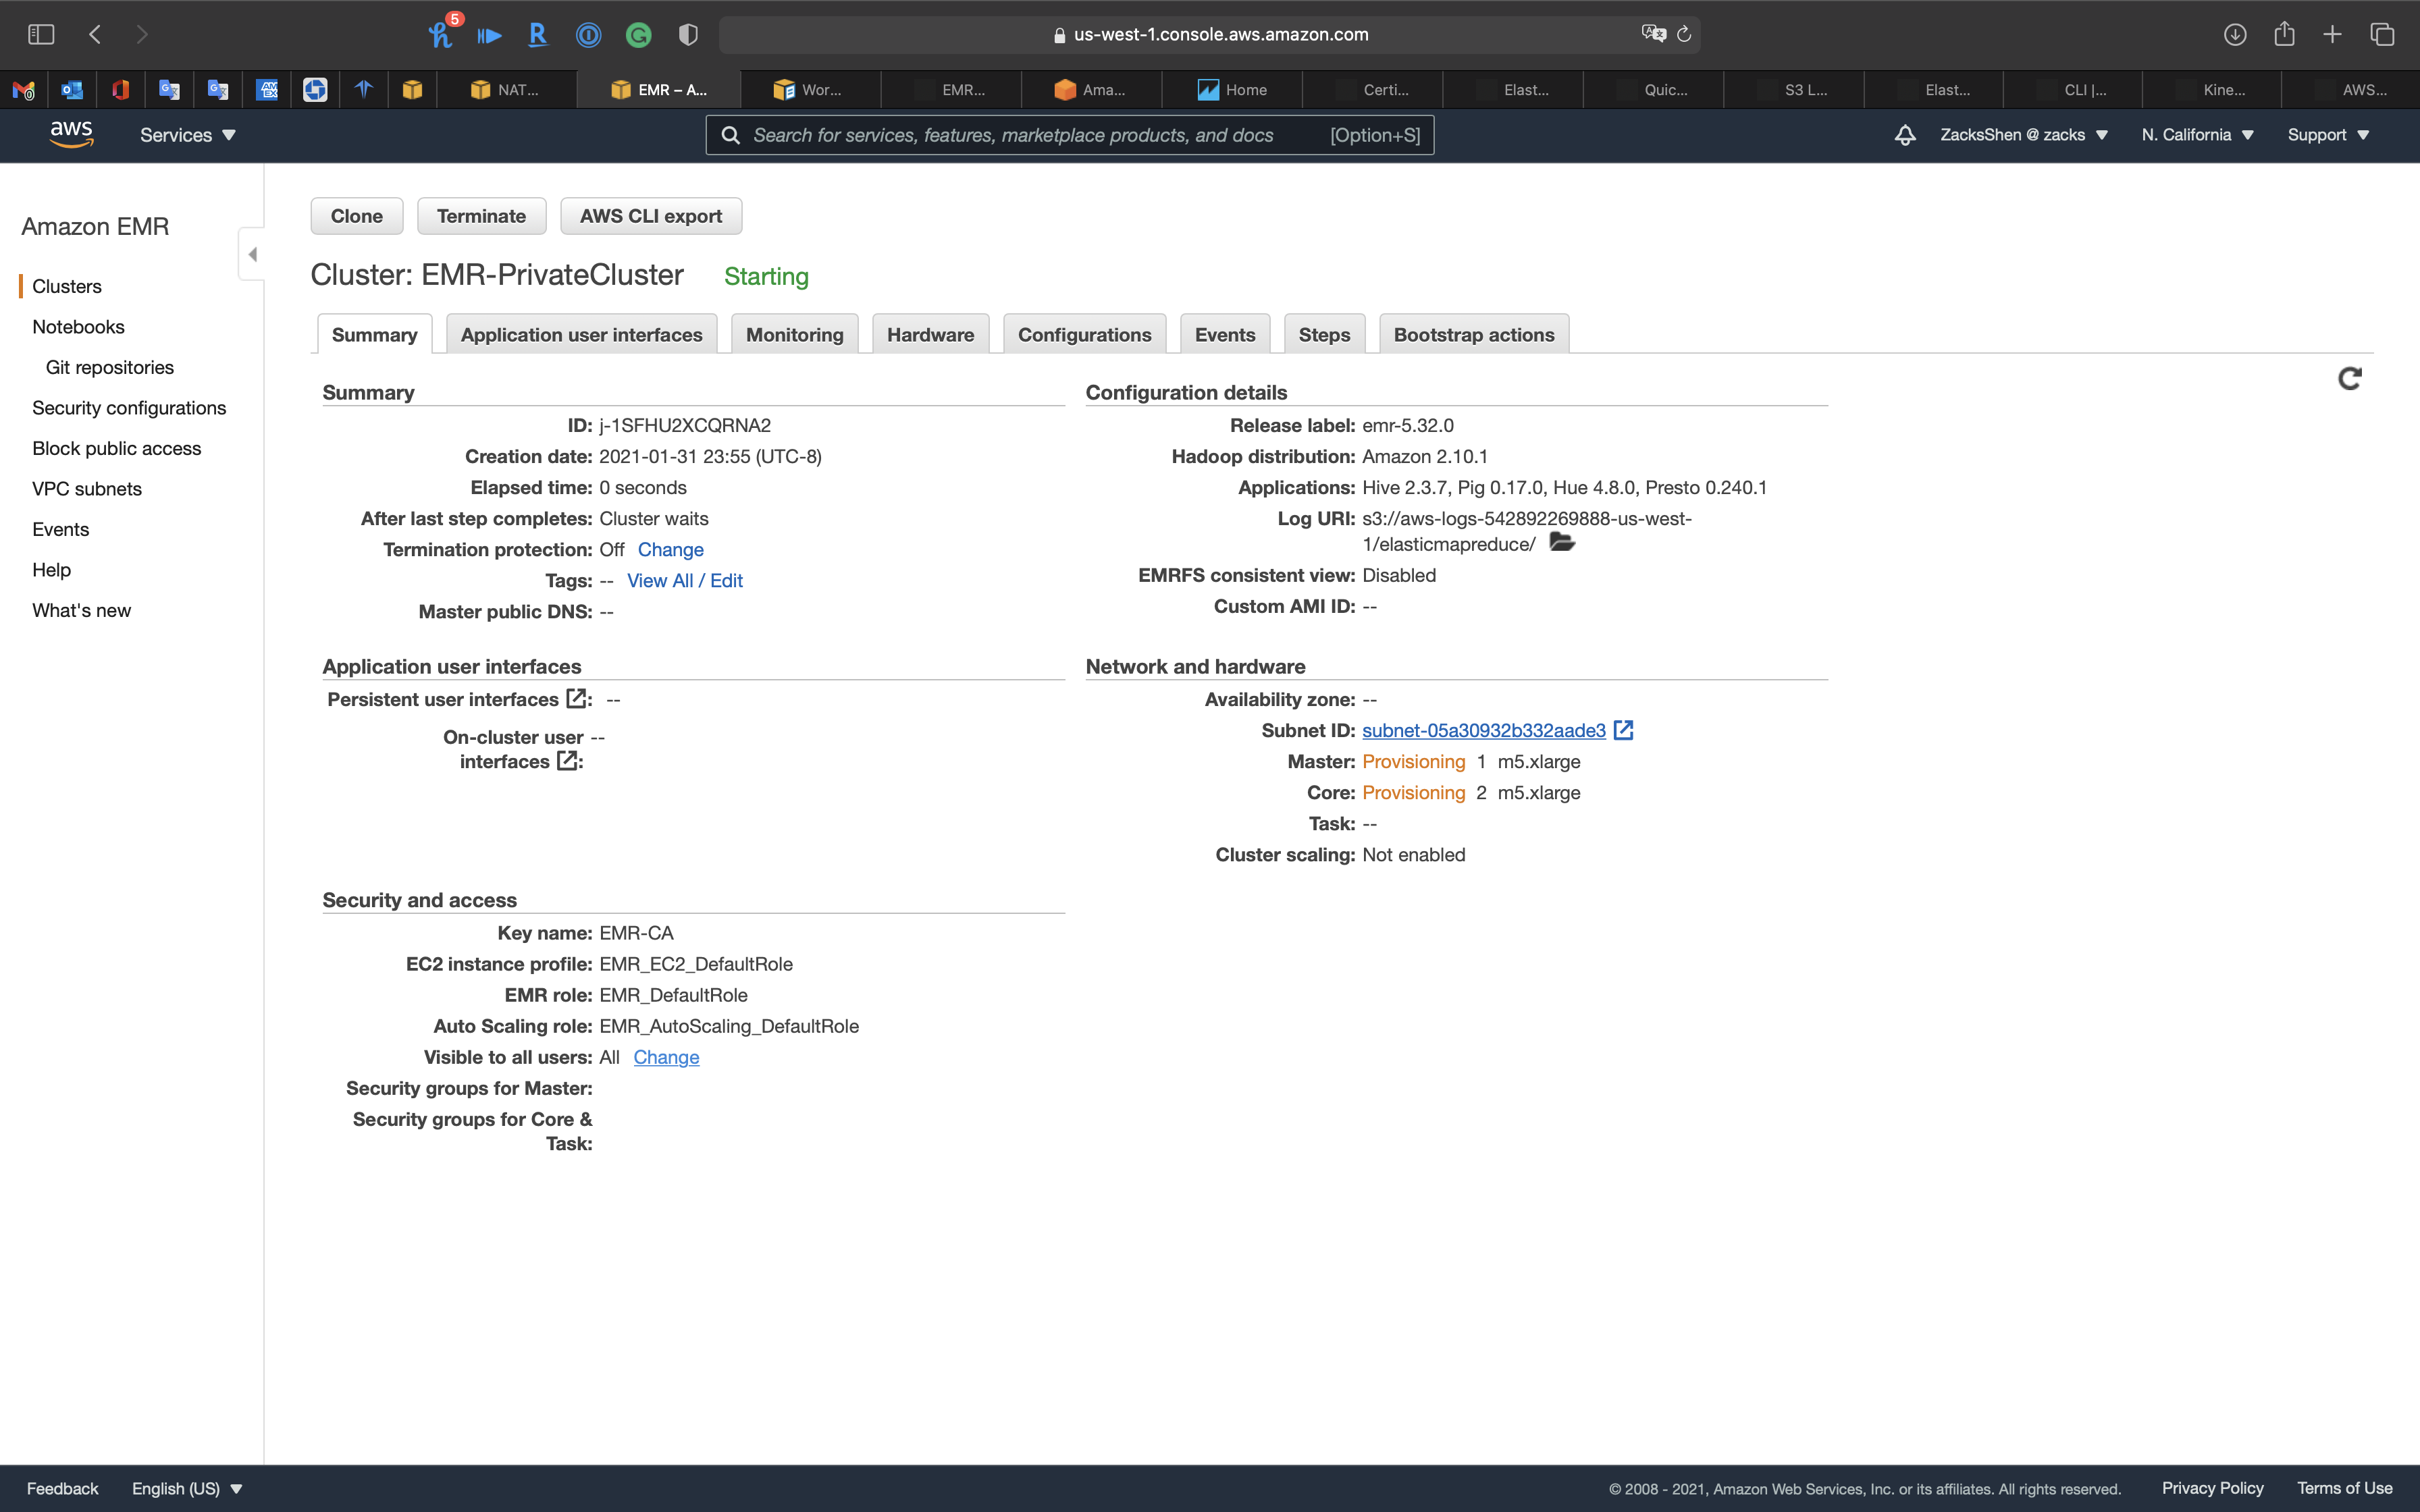
Services -> EC2 -> Instances
You can see our EC2 instances are initializing.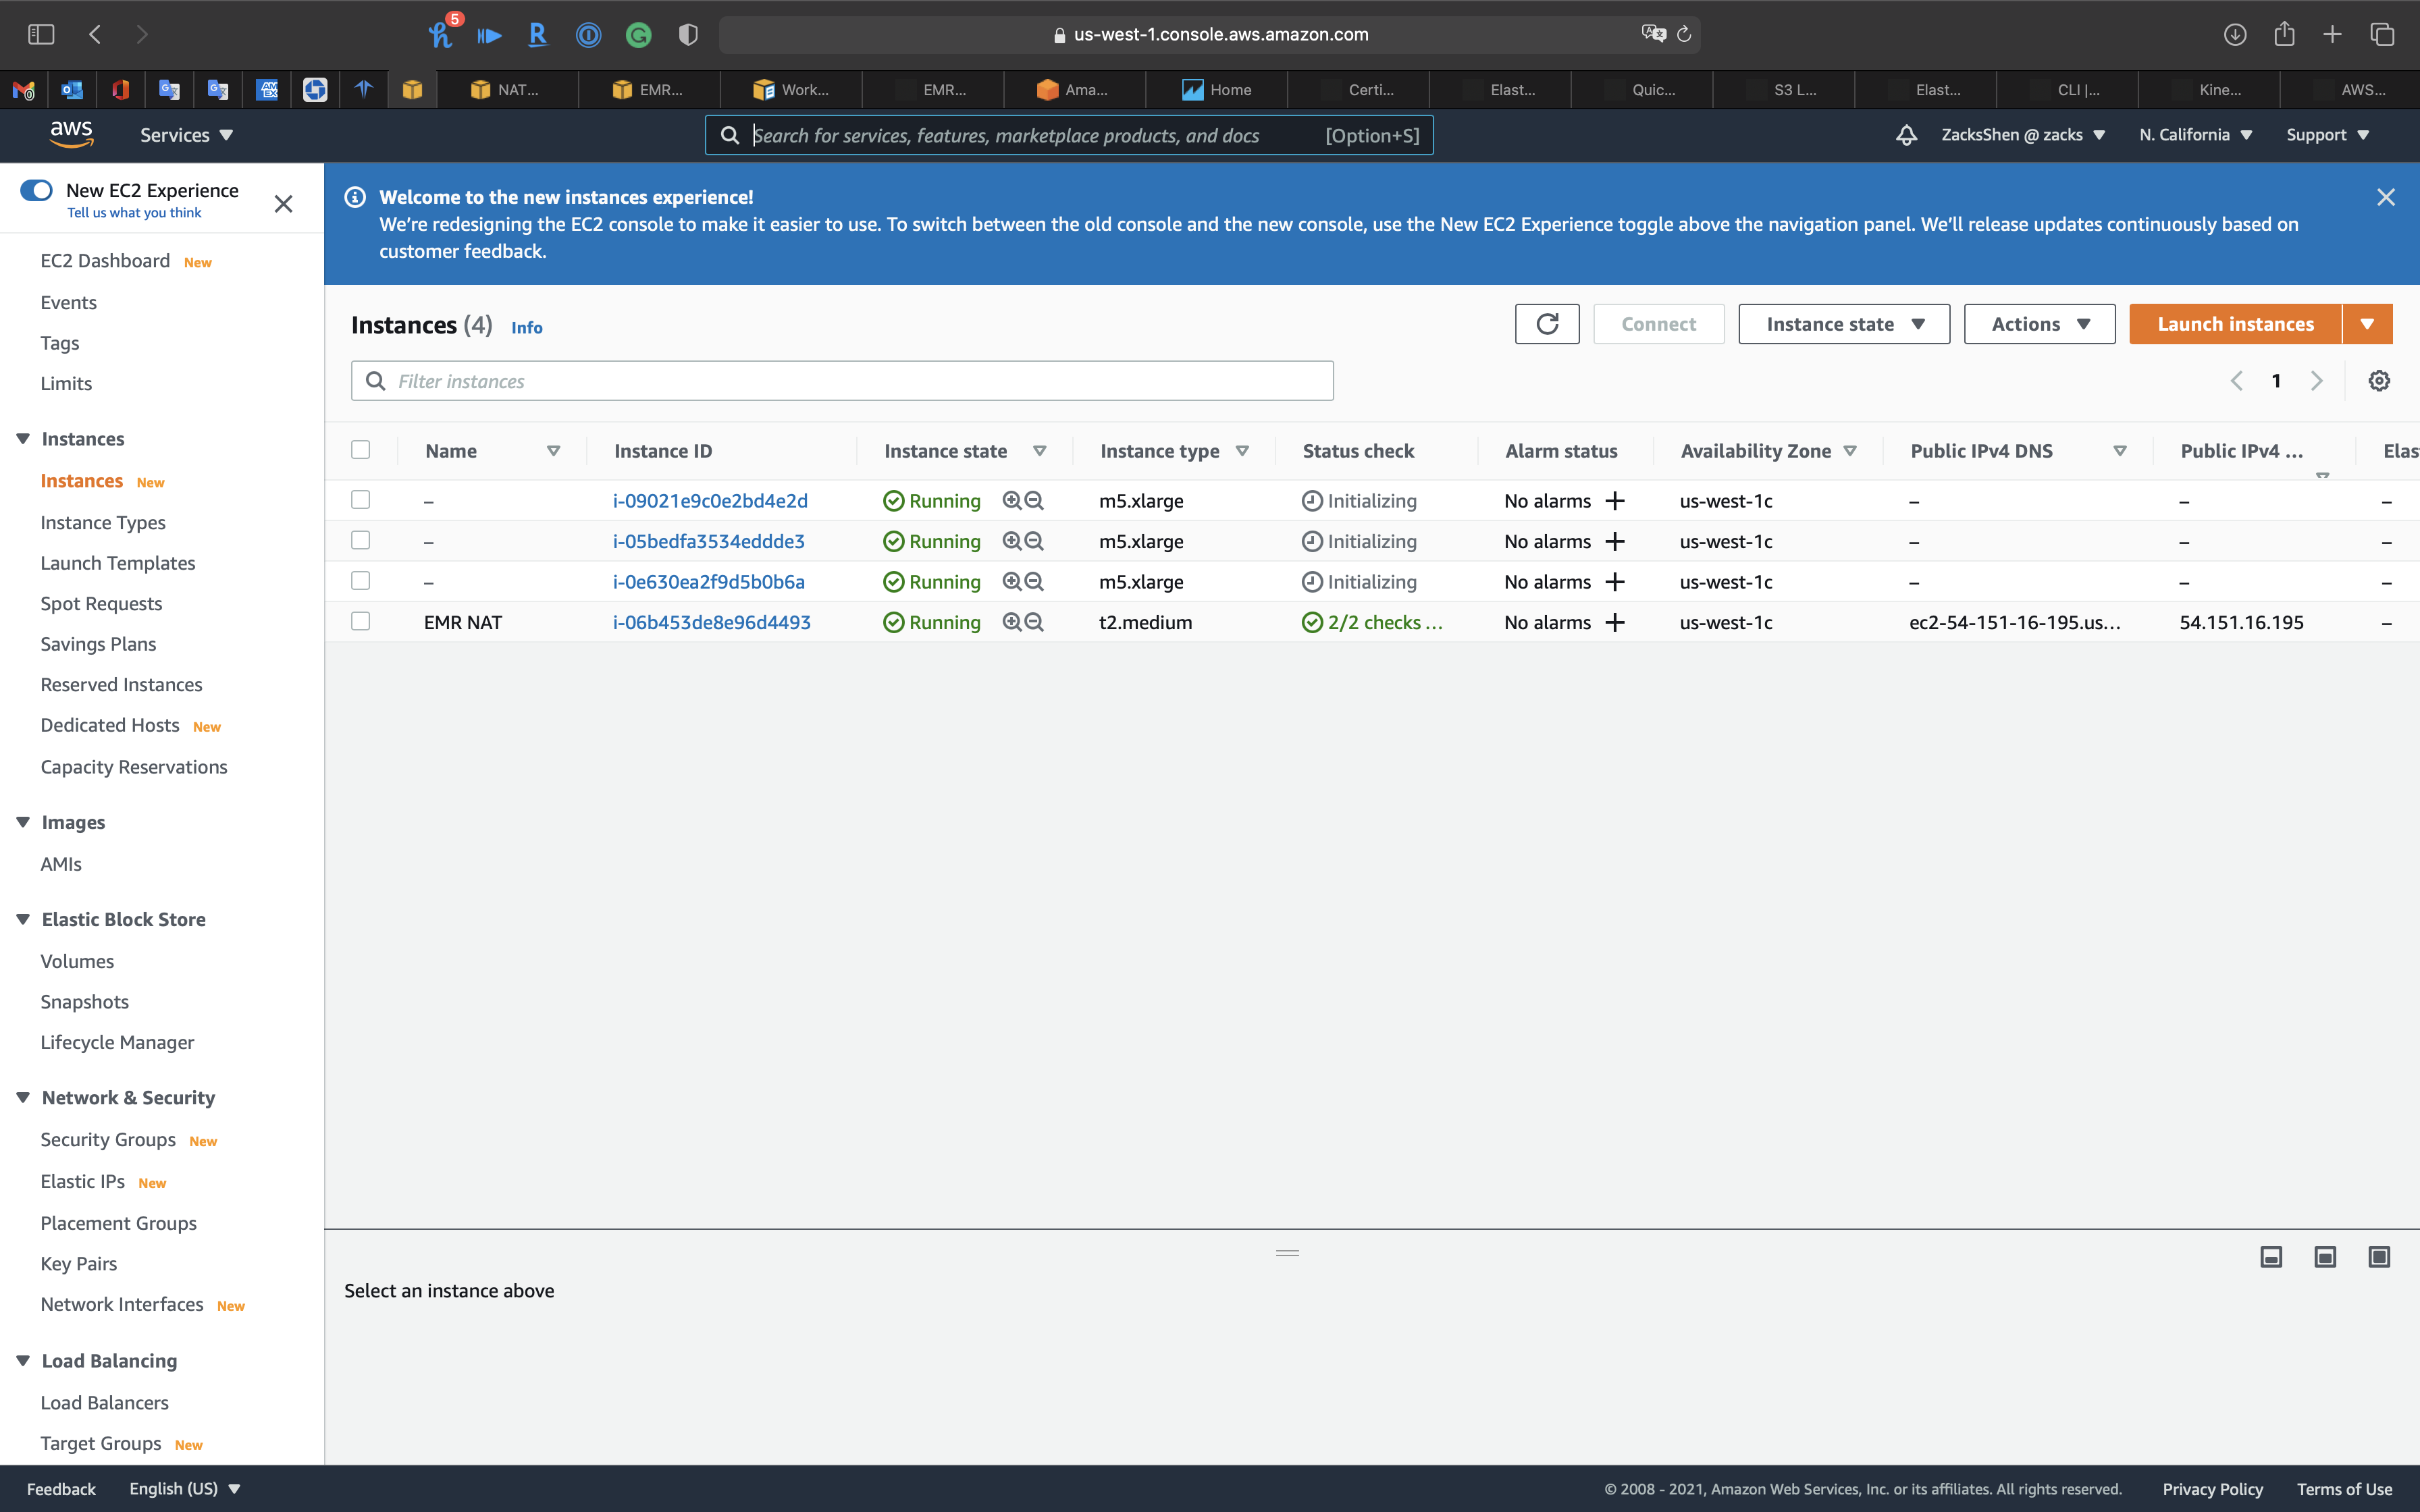
Wait several minutes until the Status check switches to green.
Services -> EMR -> Clusters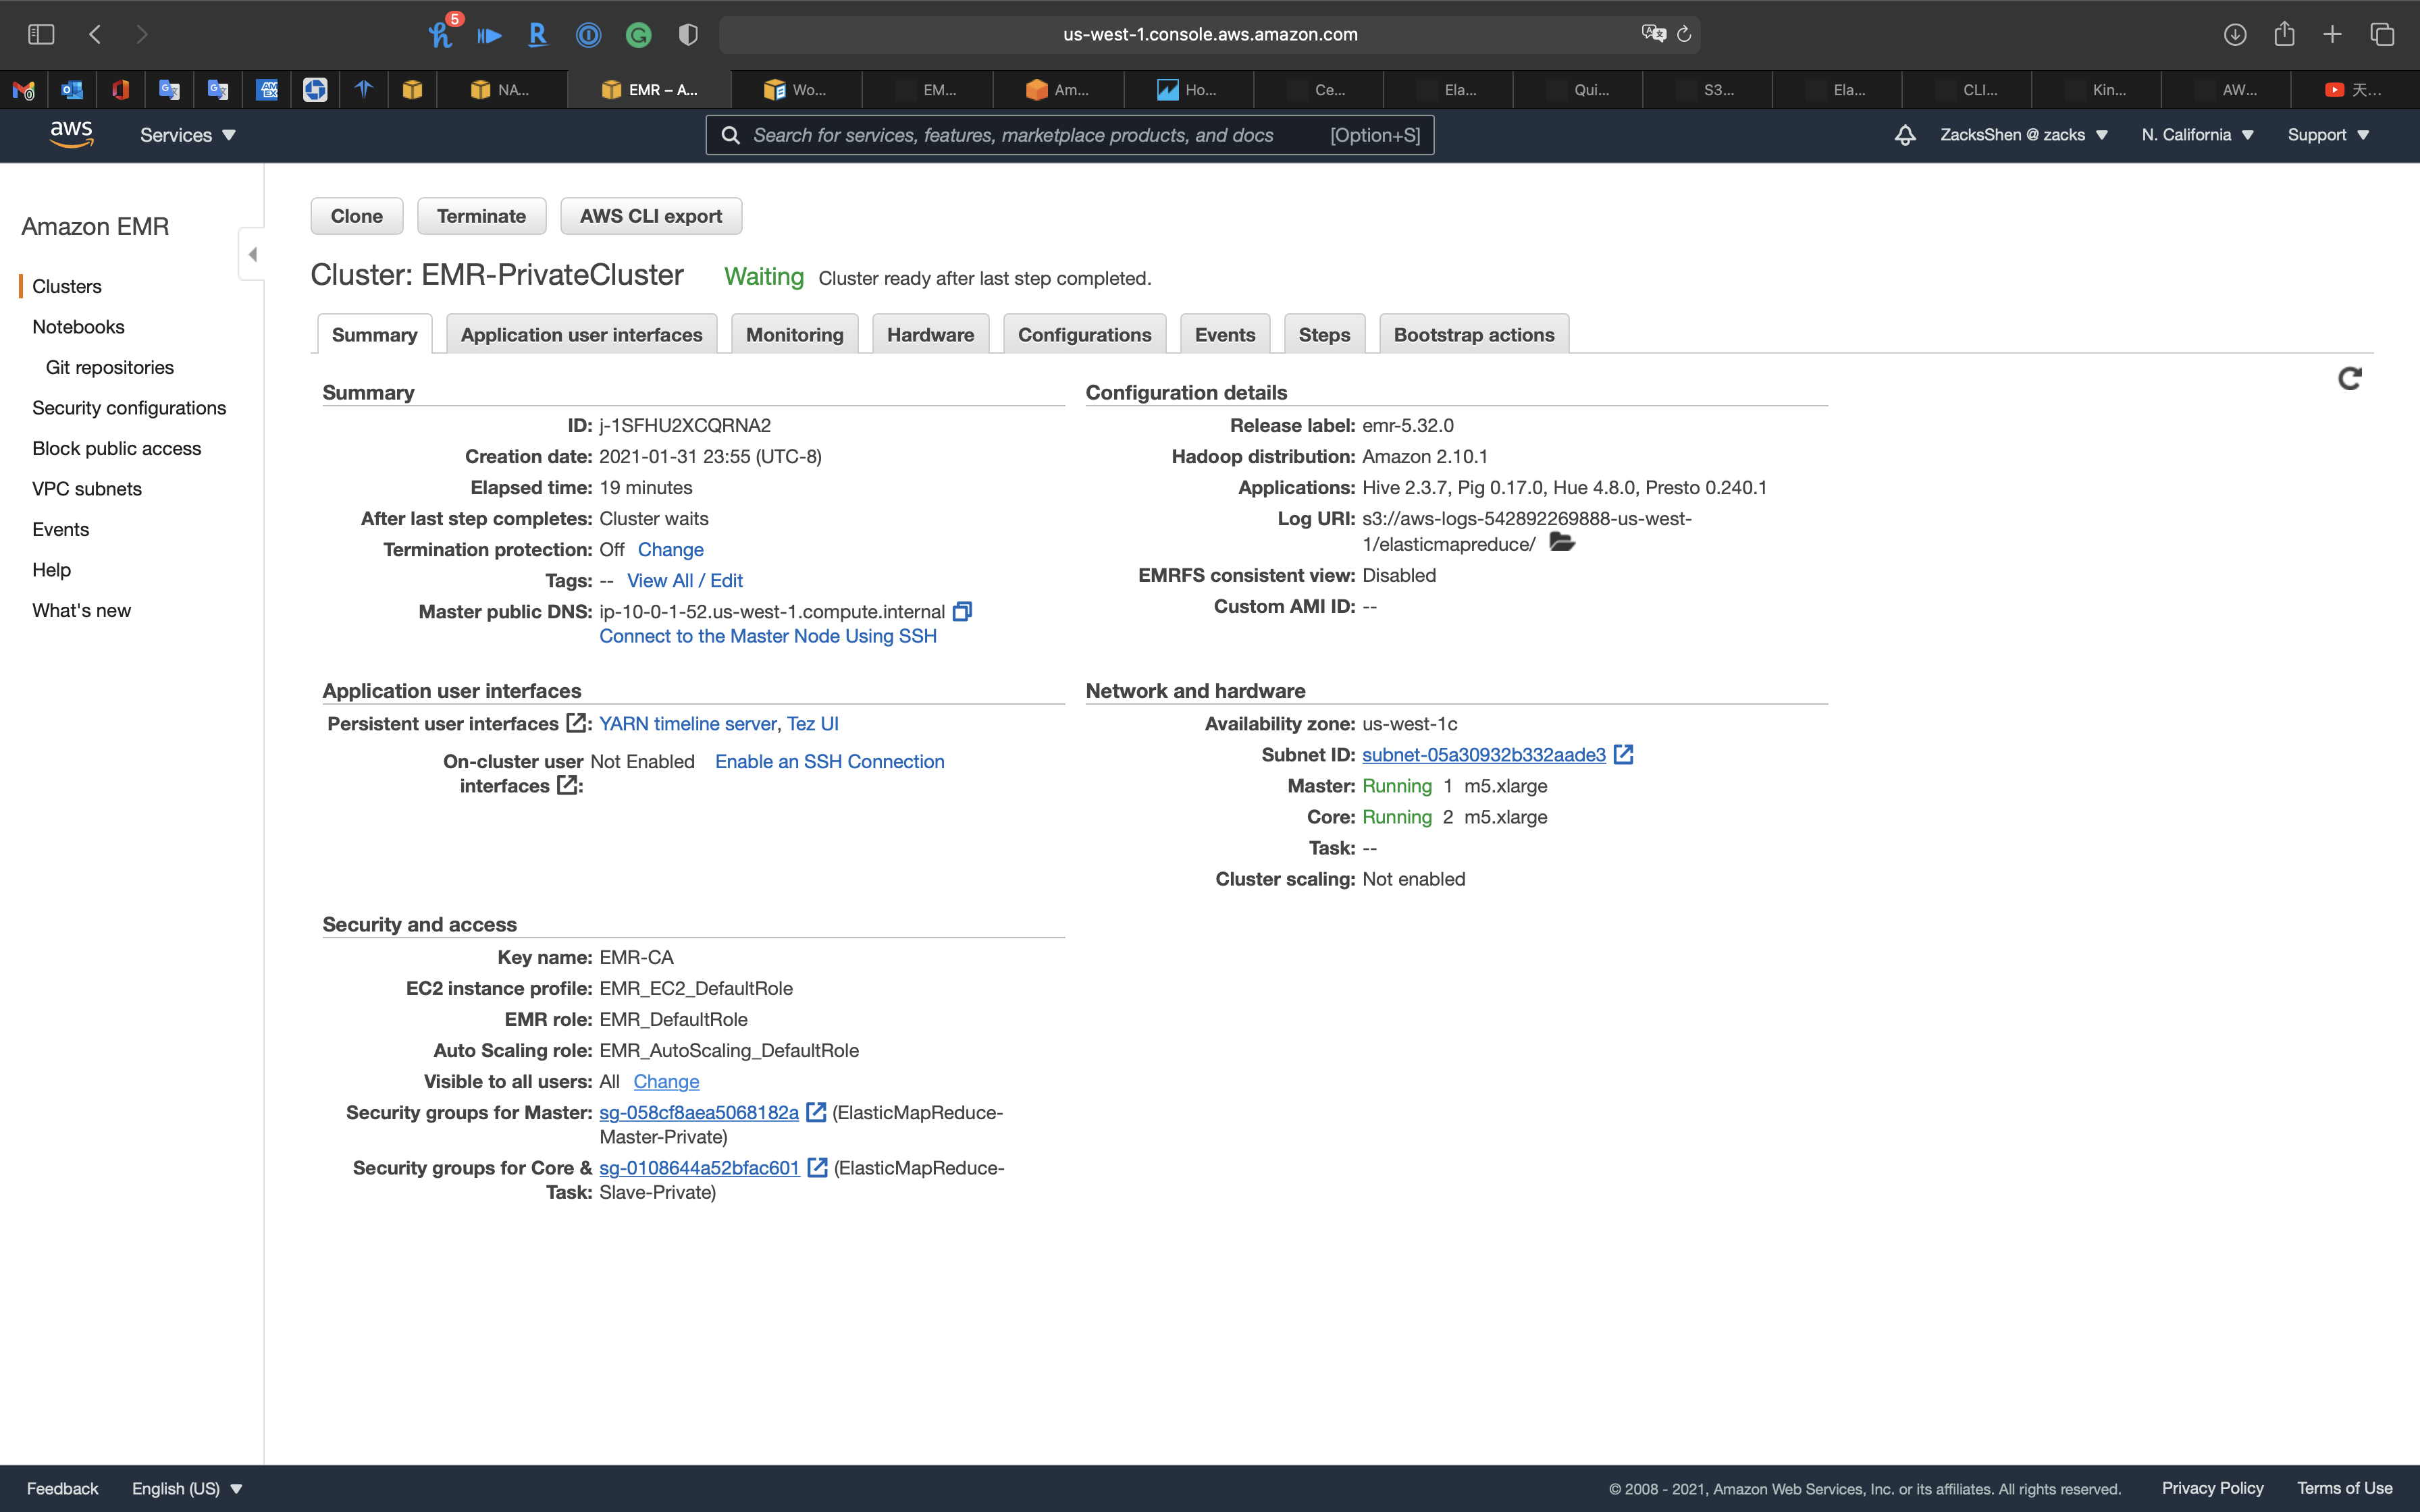
Warning
Delete all resources especially the NAT instance and EMR cluster to avoid bankrupt.
Terminate EMR Cluster
Services -> EMR -> Clusters
Select EMR-PrivateCluster
Click on Terminate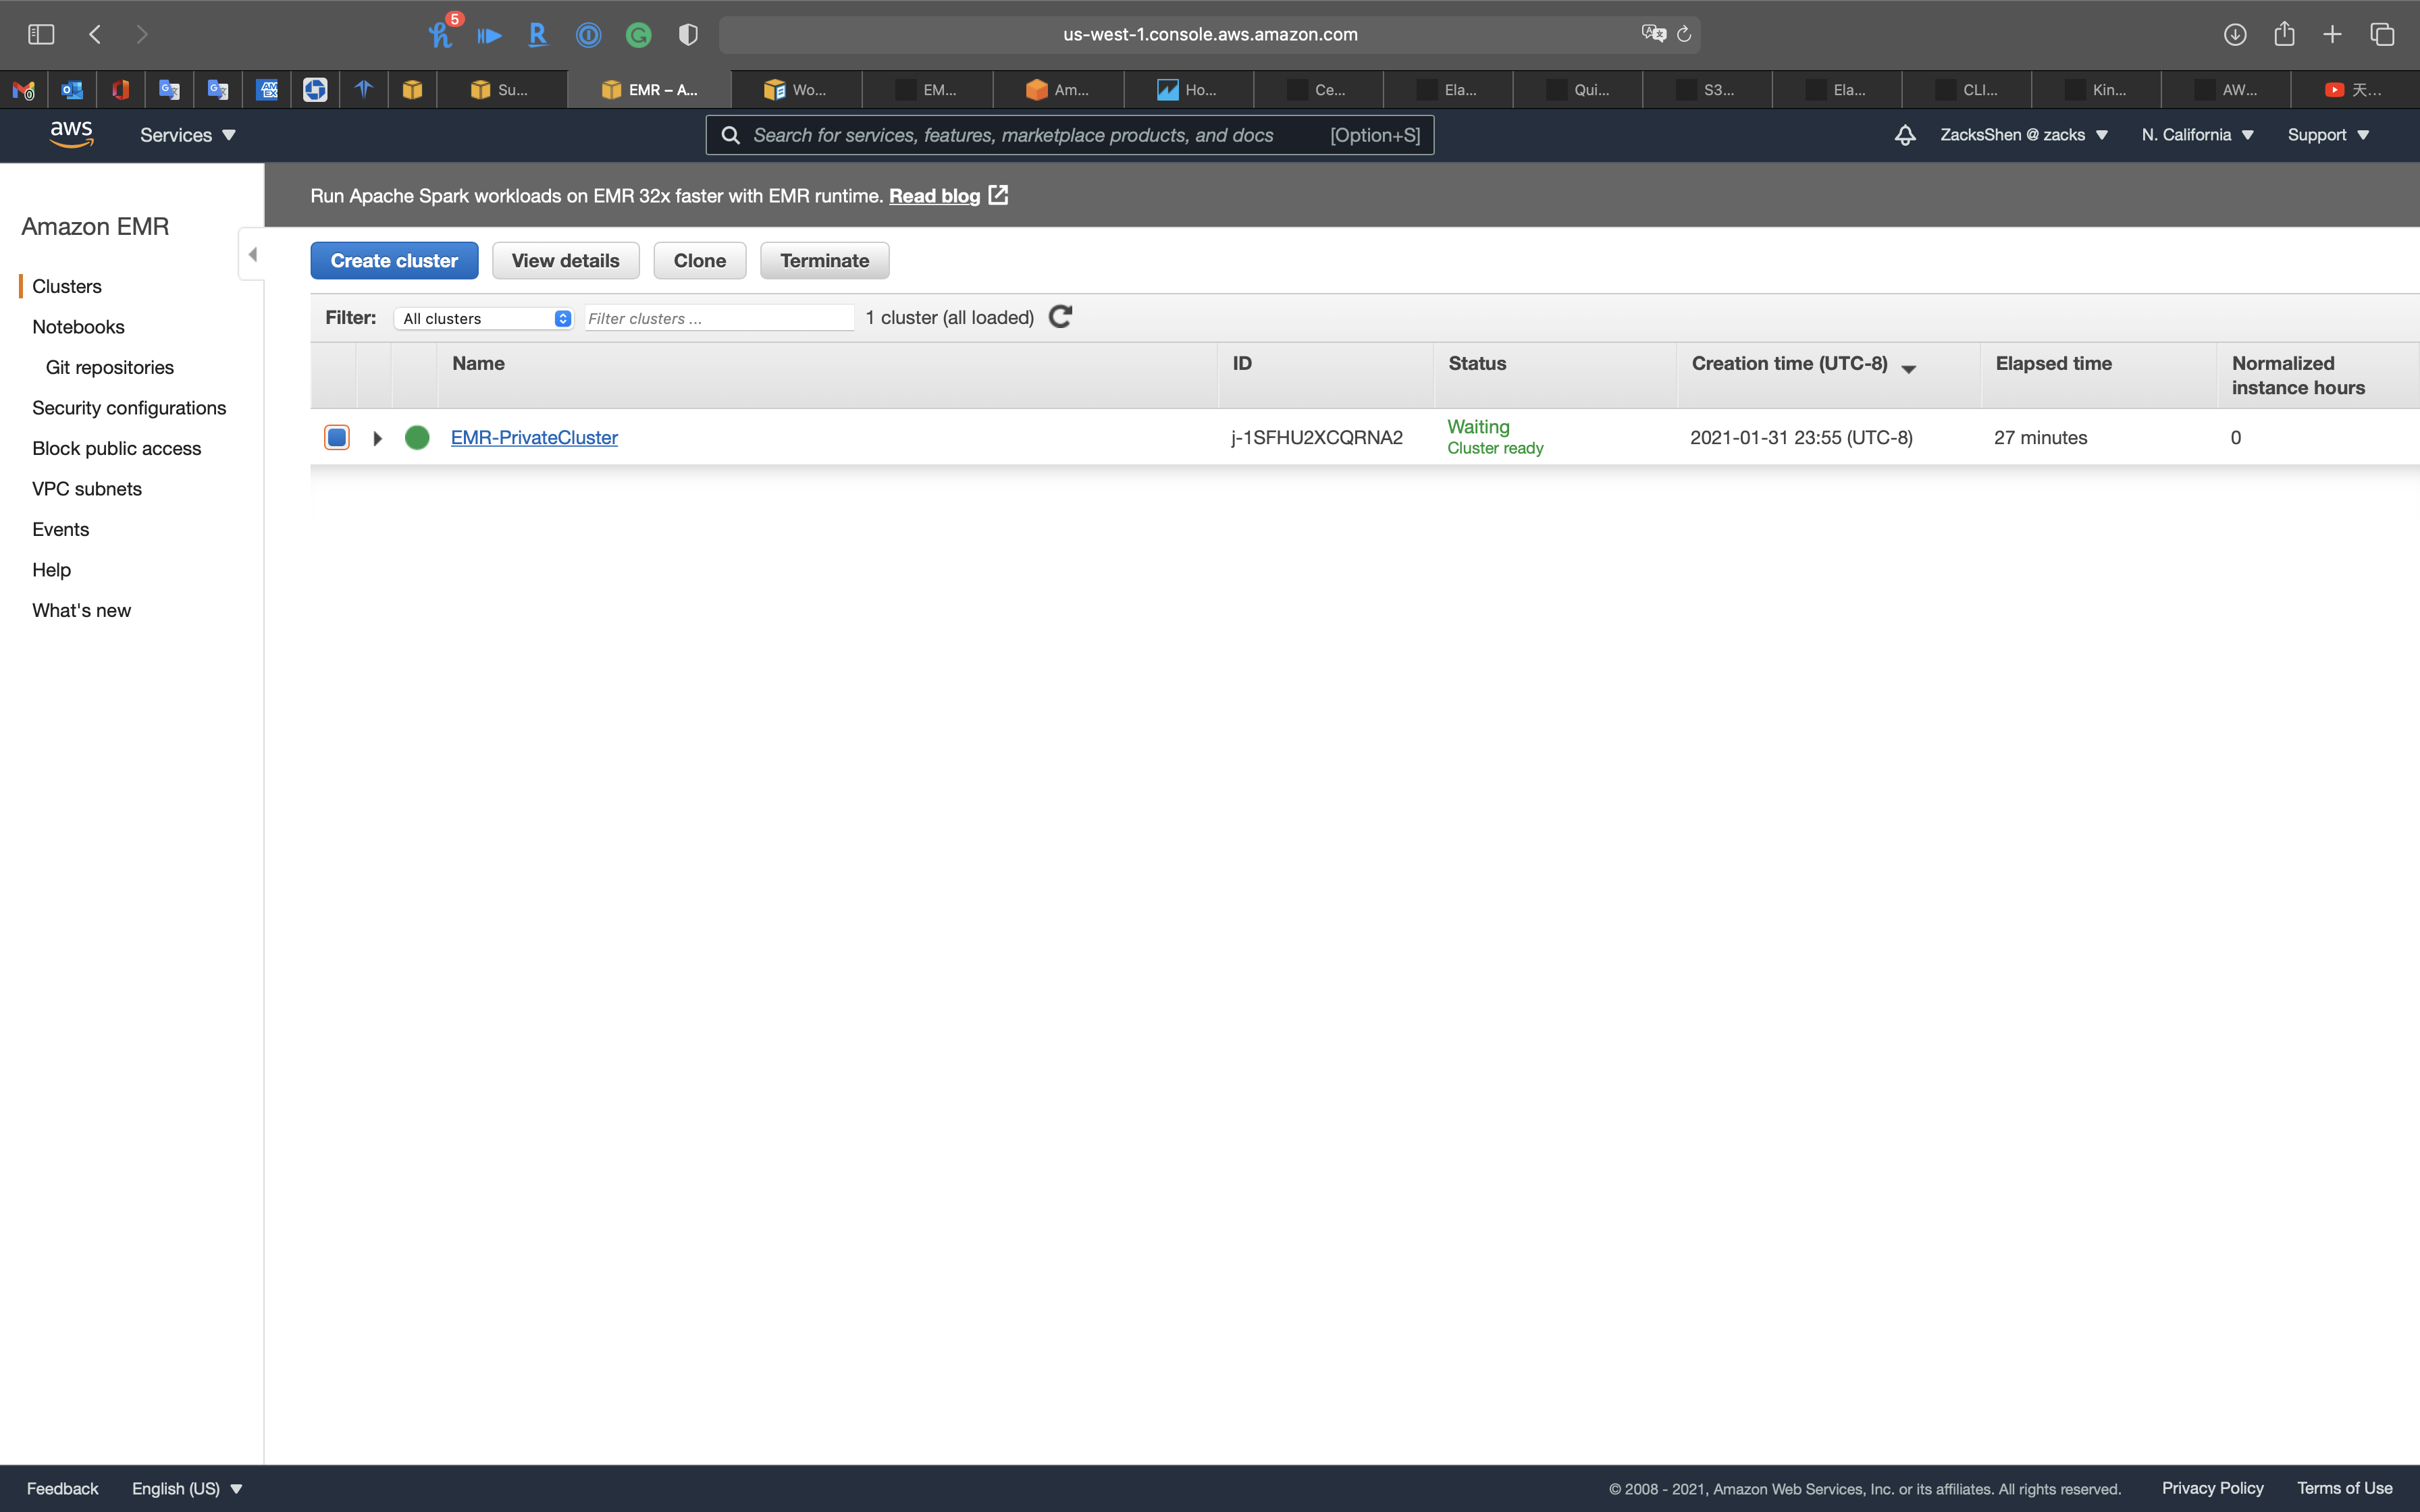
Click on Terminate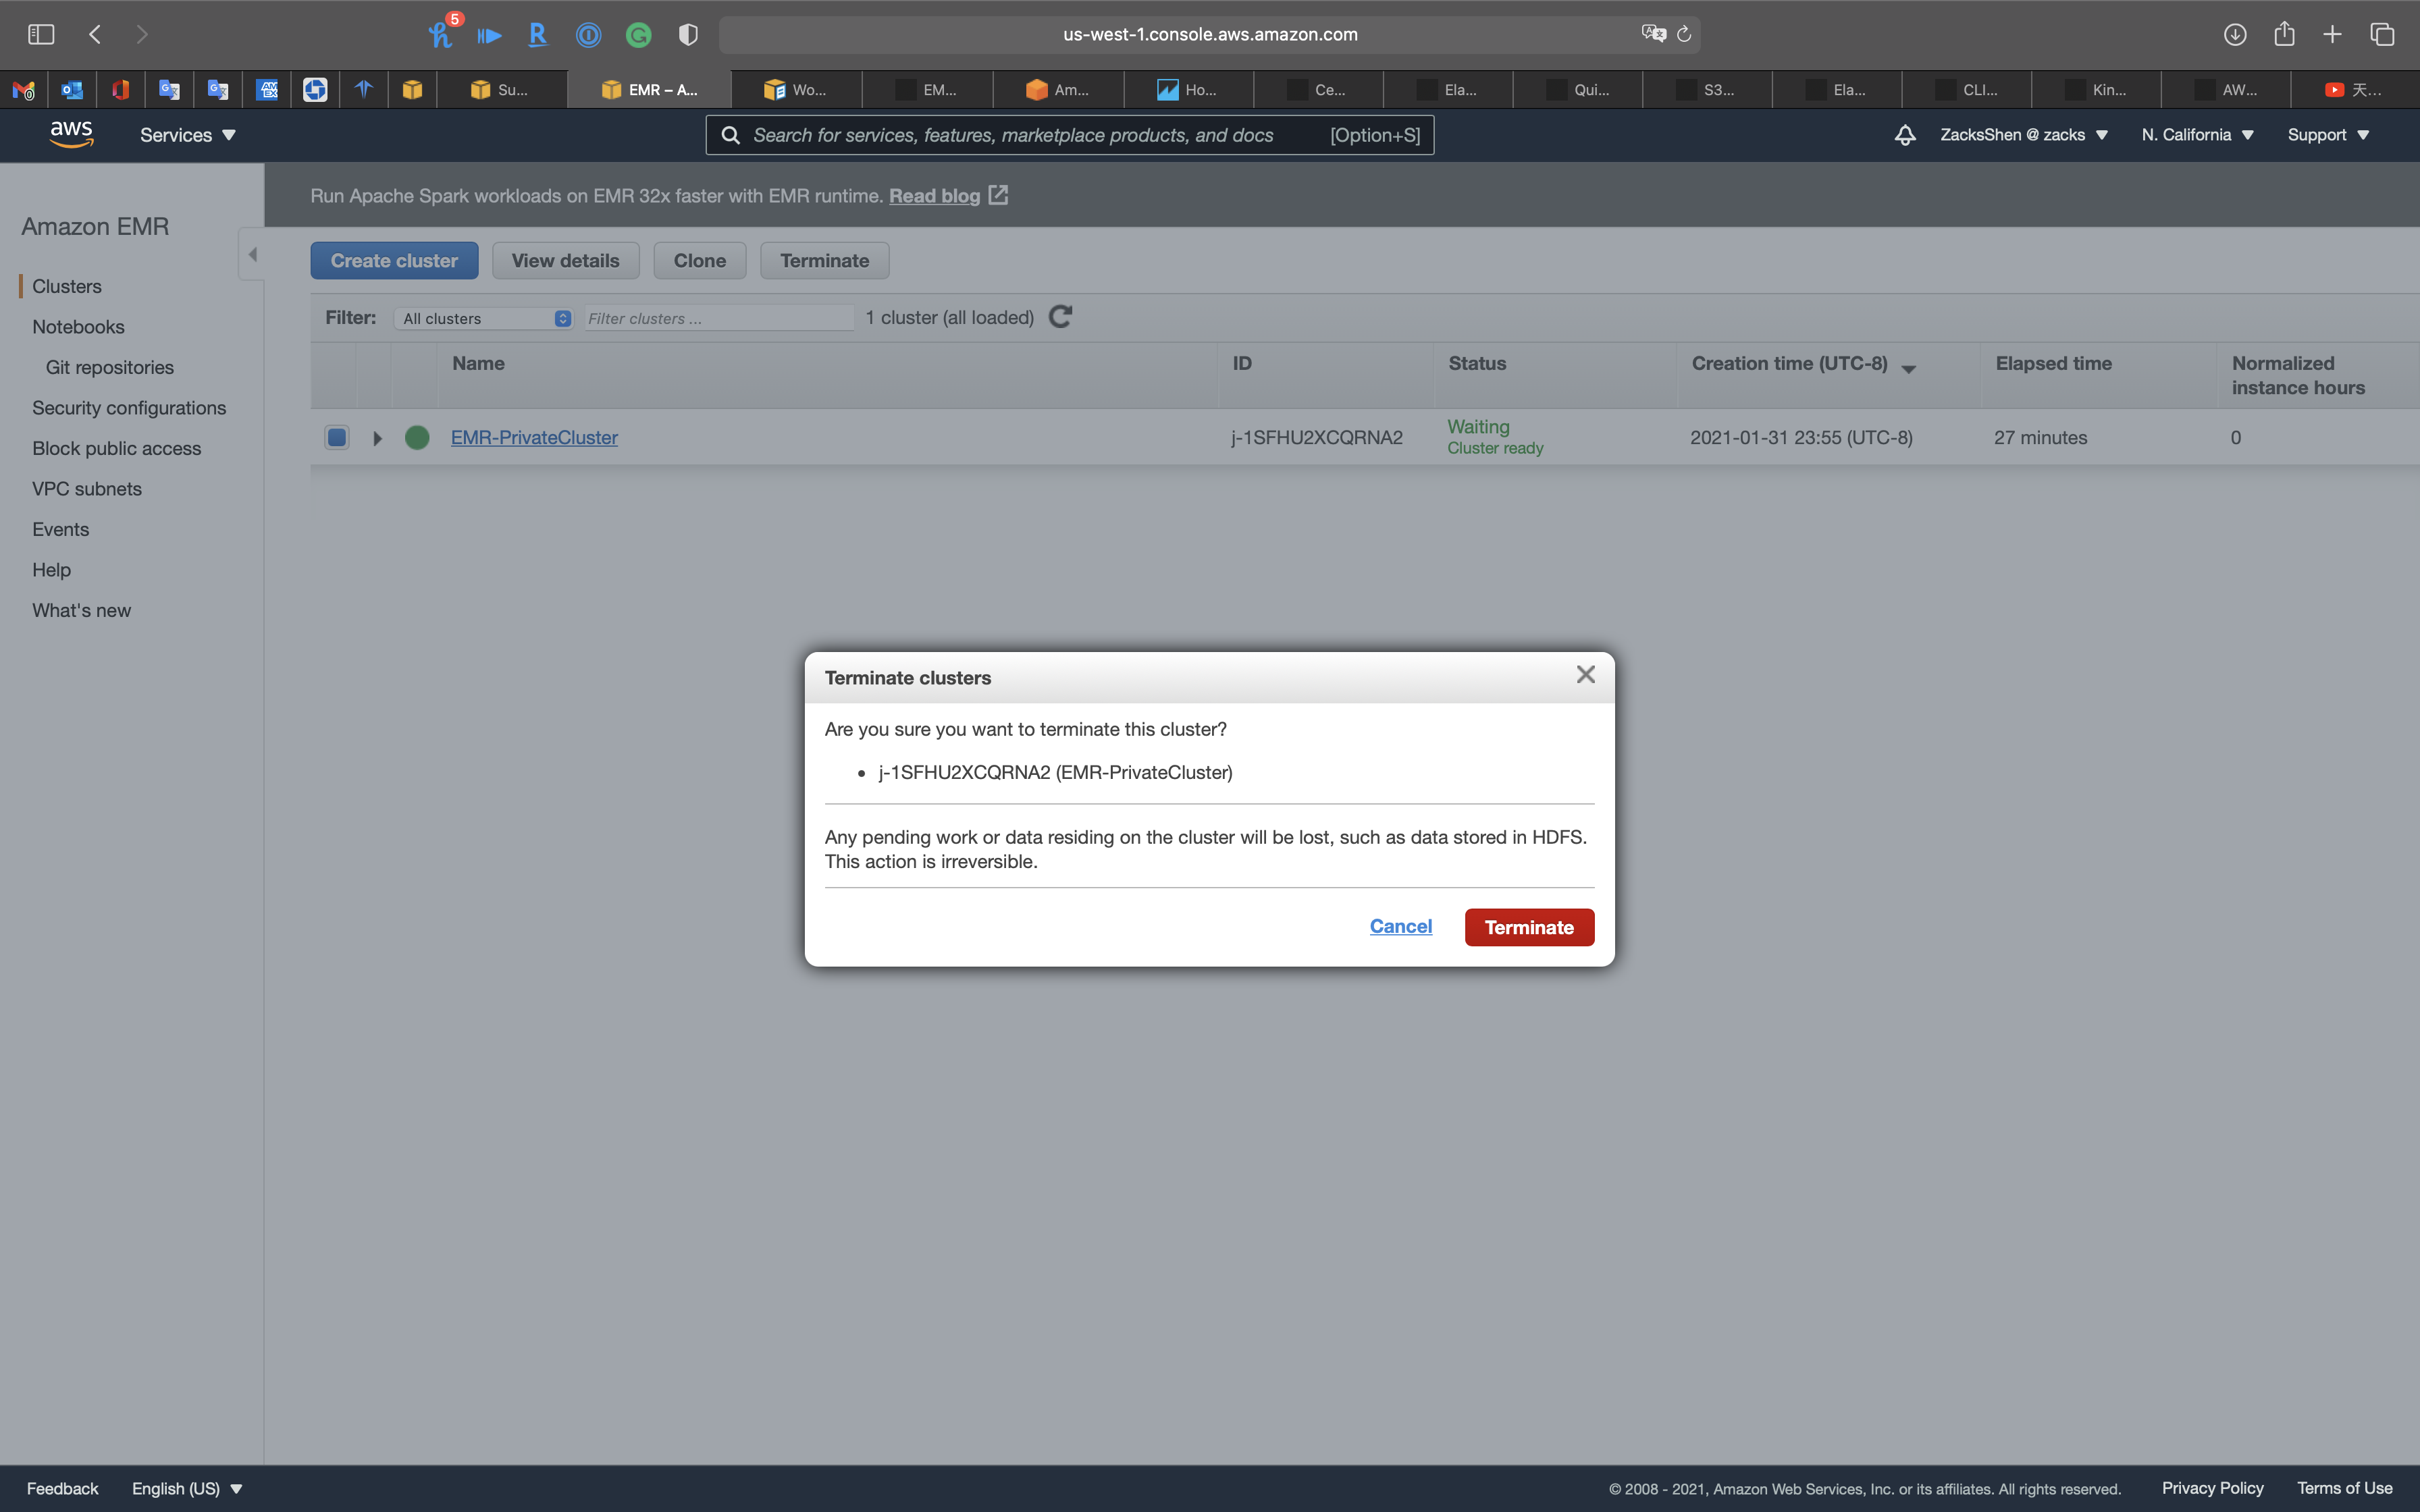
Terminate NAT Instance
Services -> EC2 -> Instances
Select EMR NAT
Click on Instance state -> Terminate instance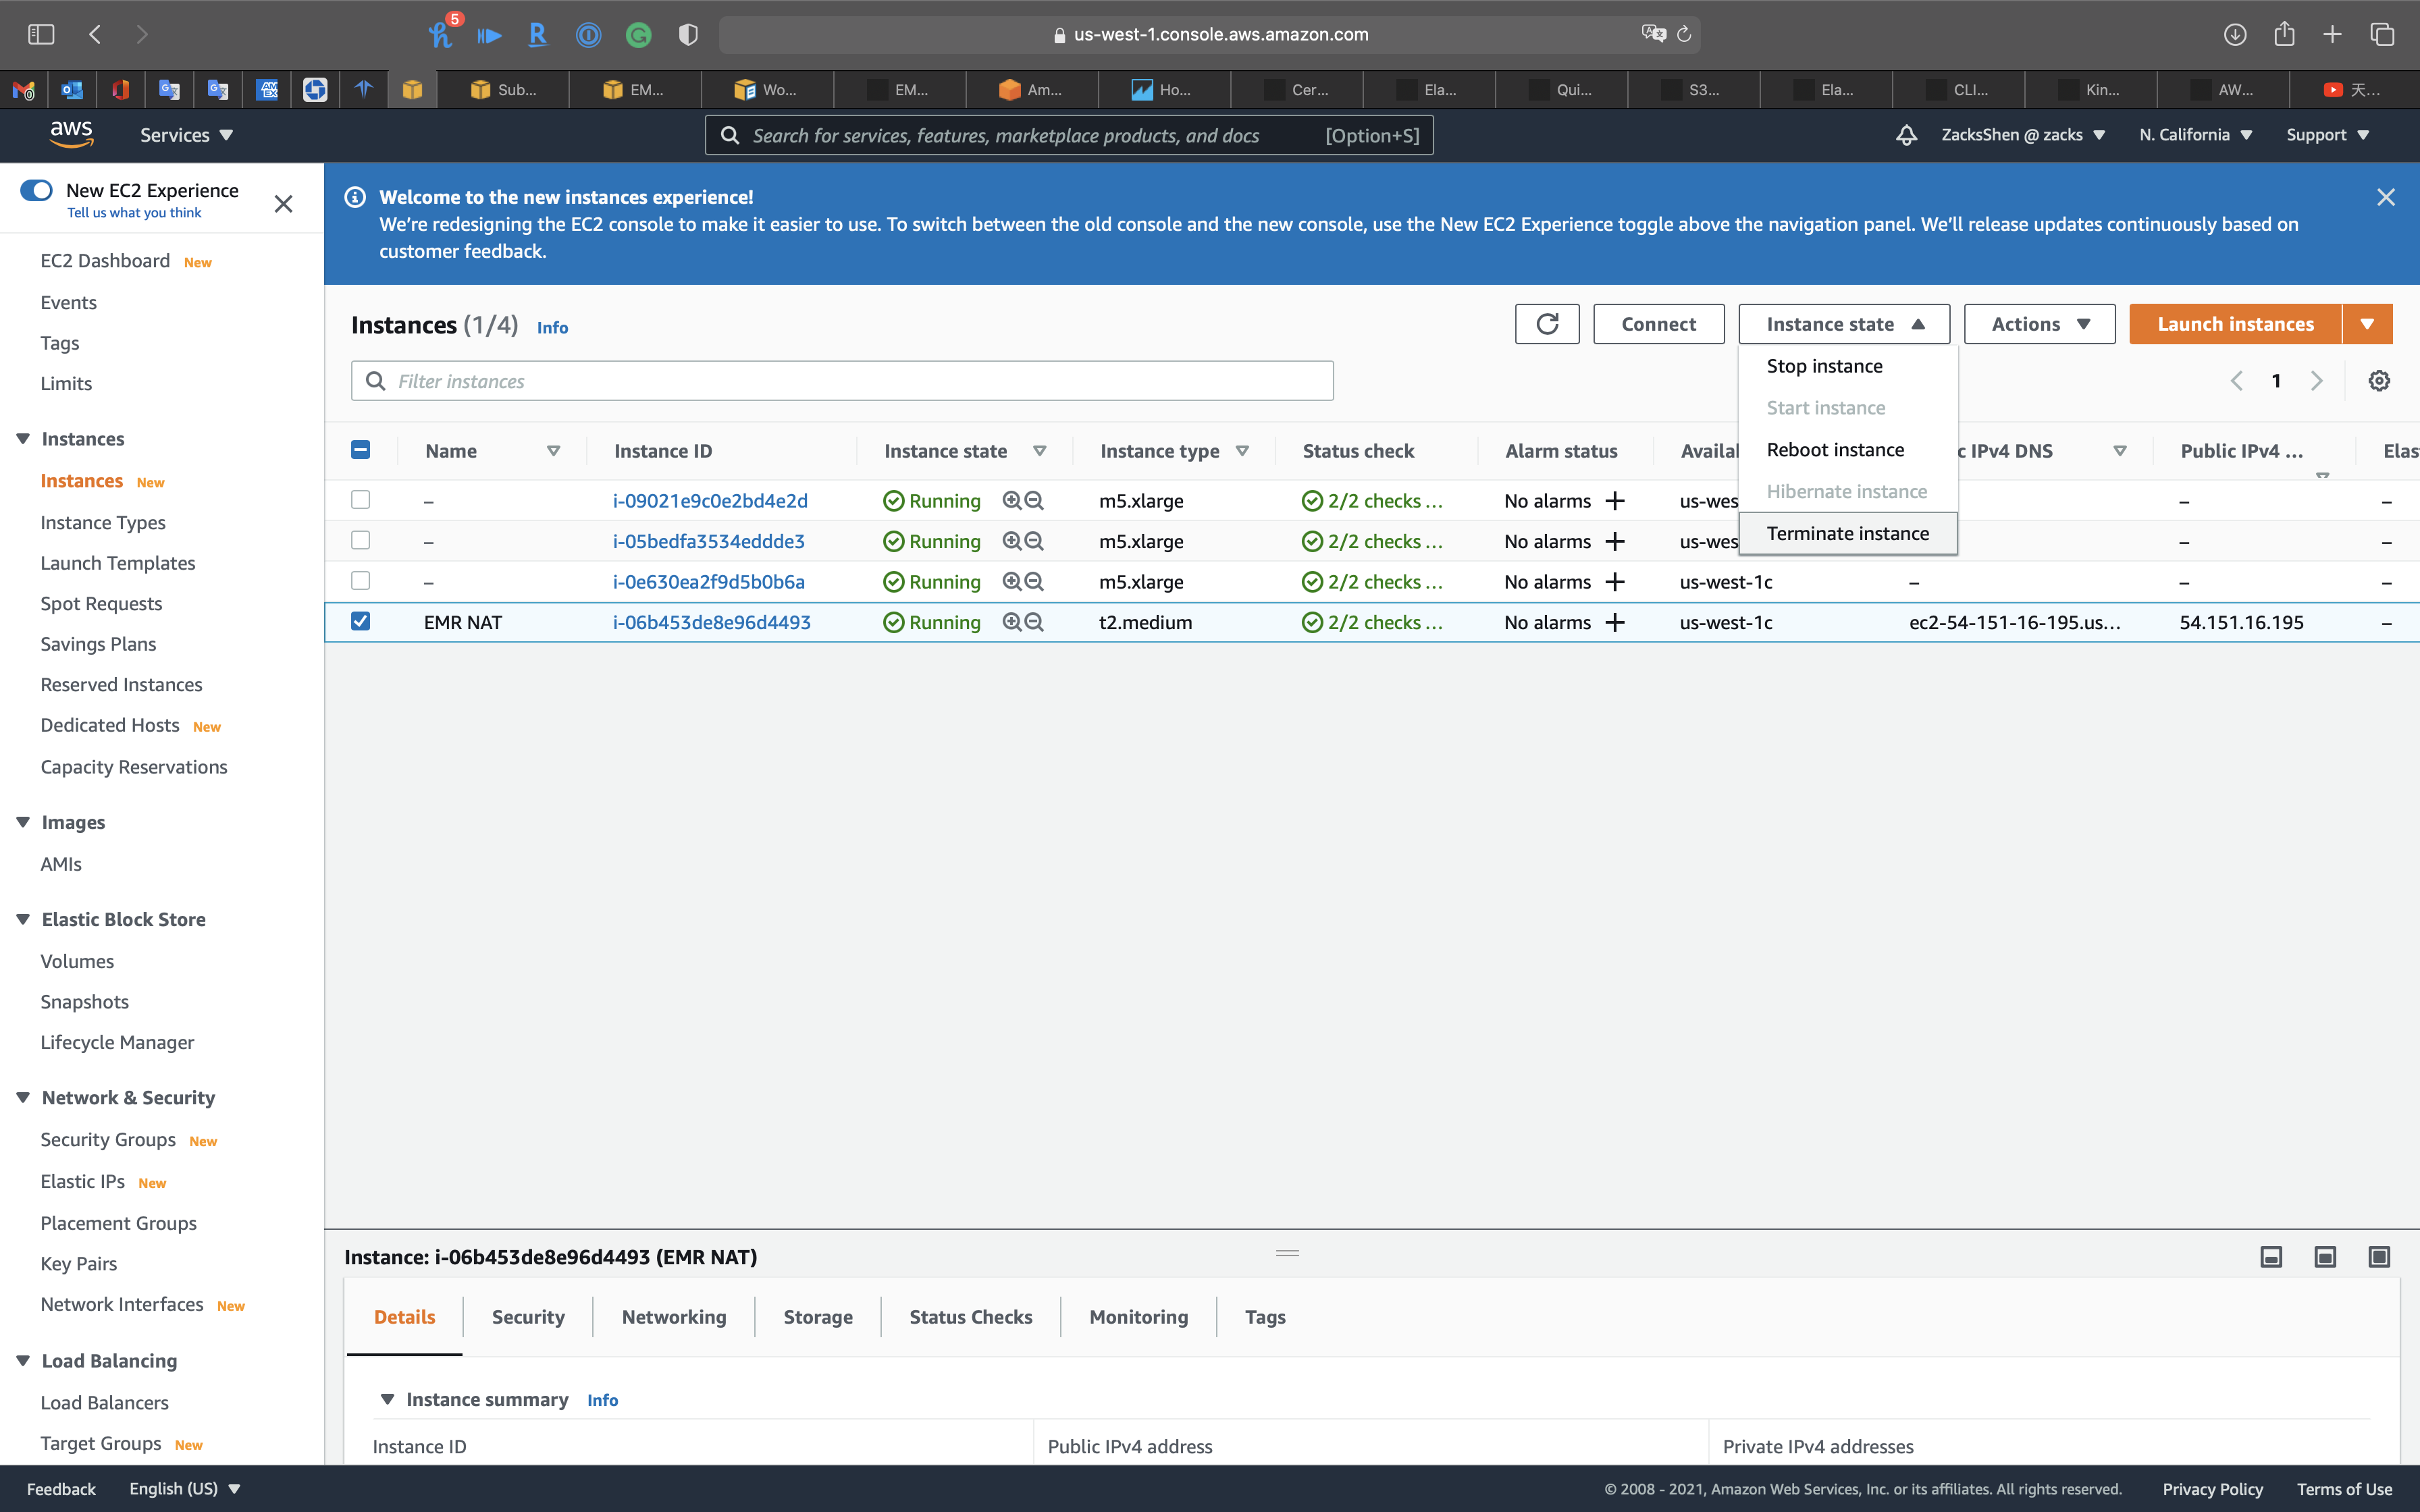
Click on Terminate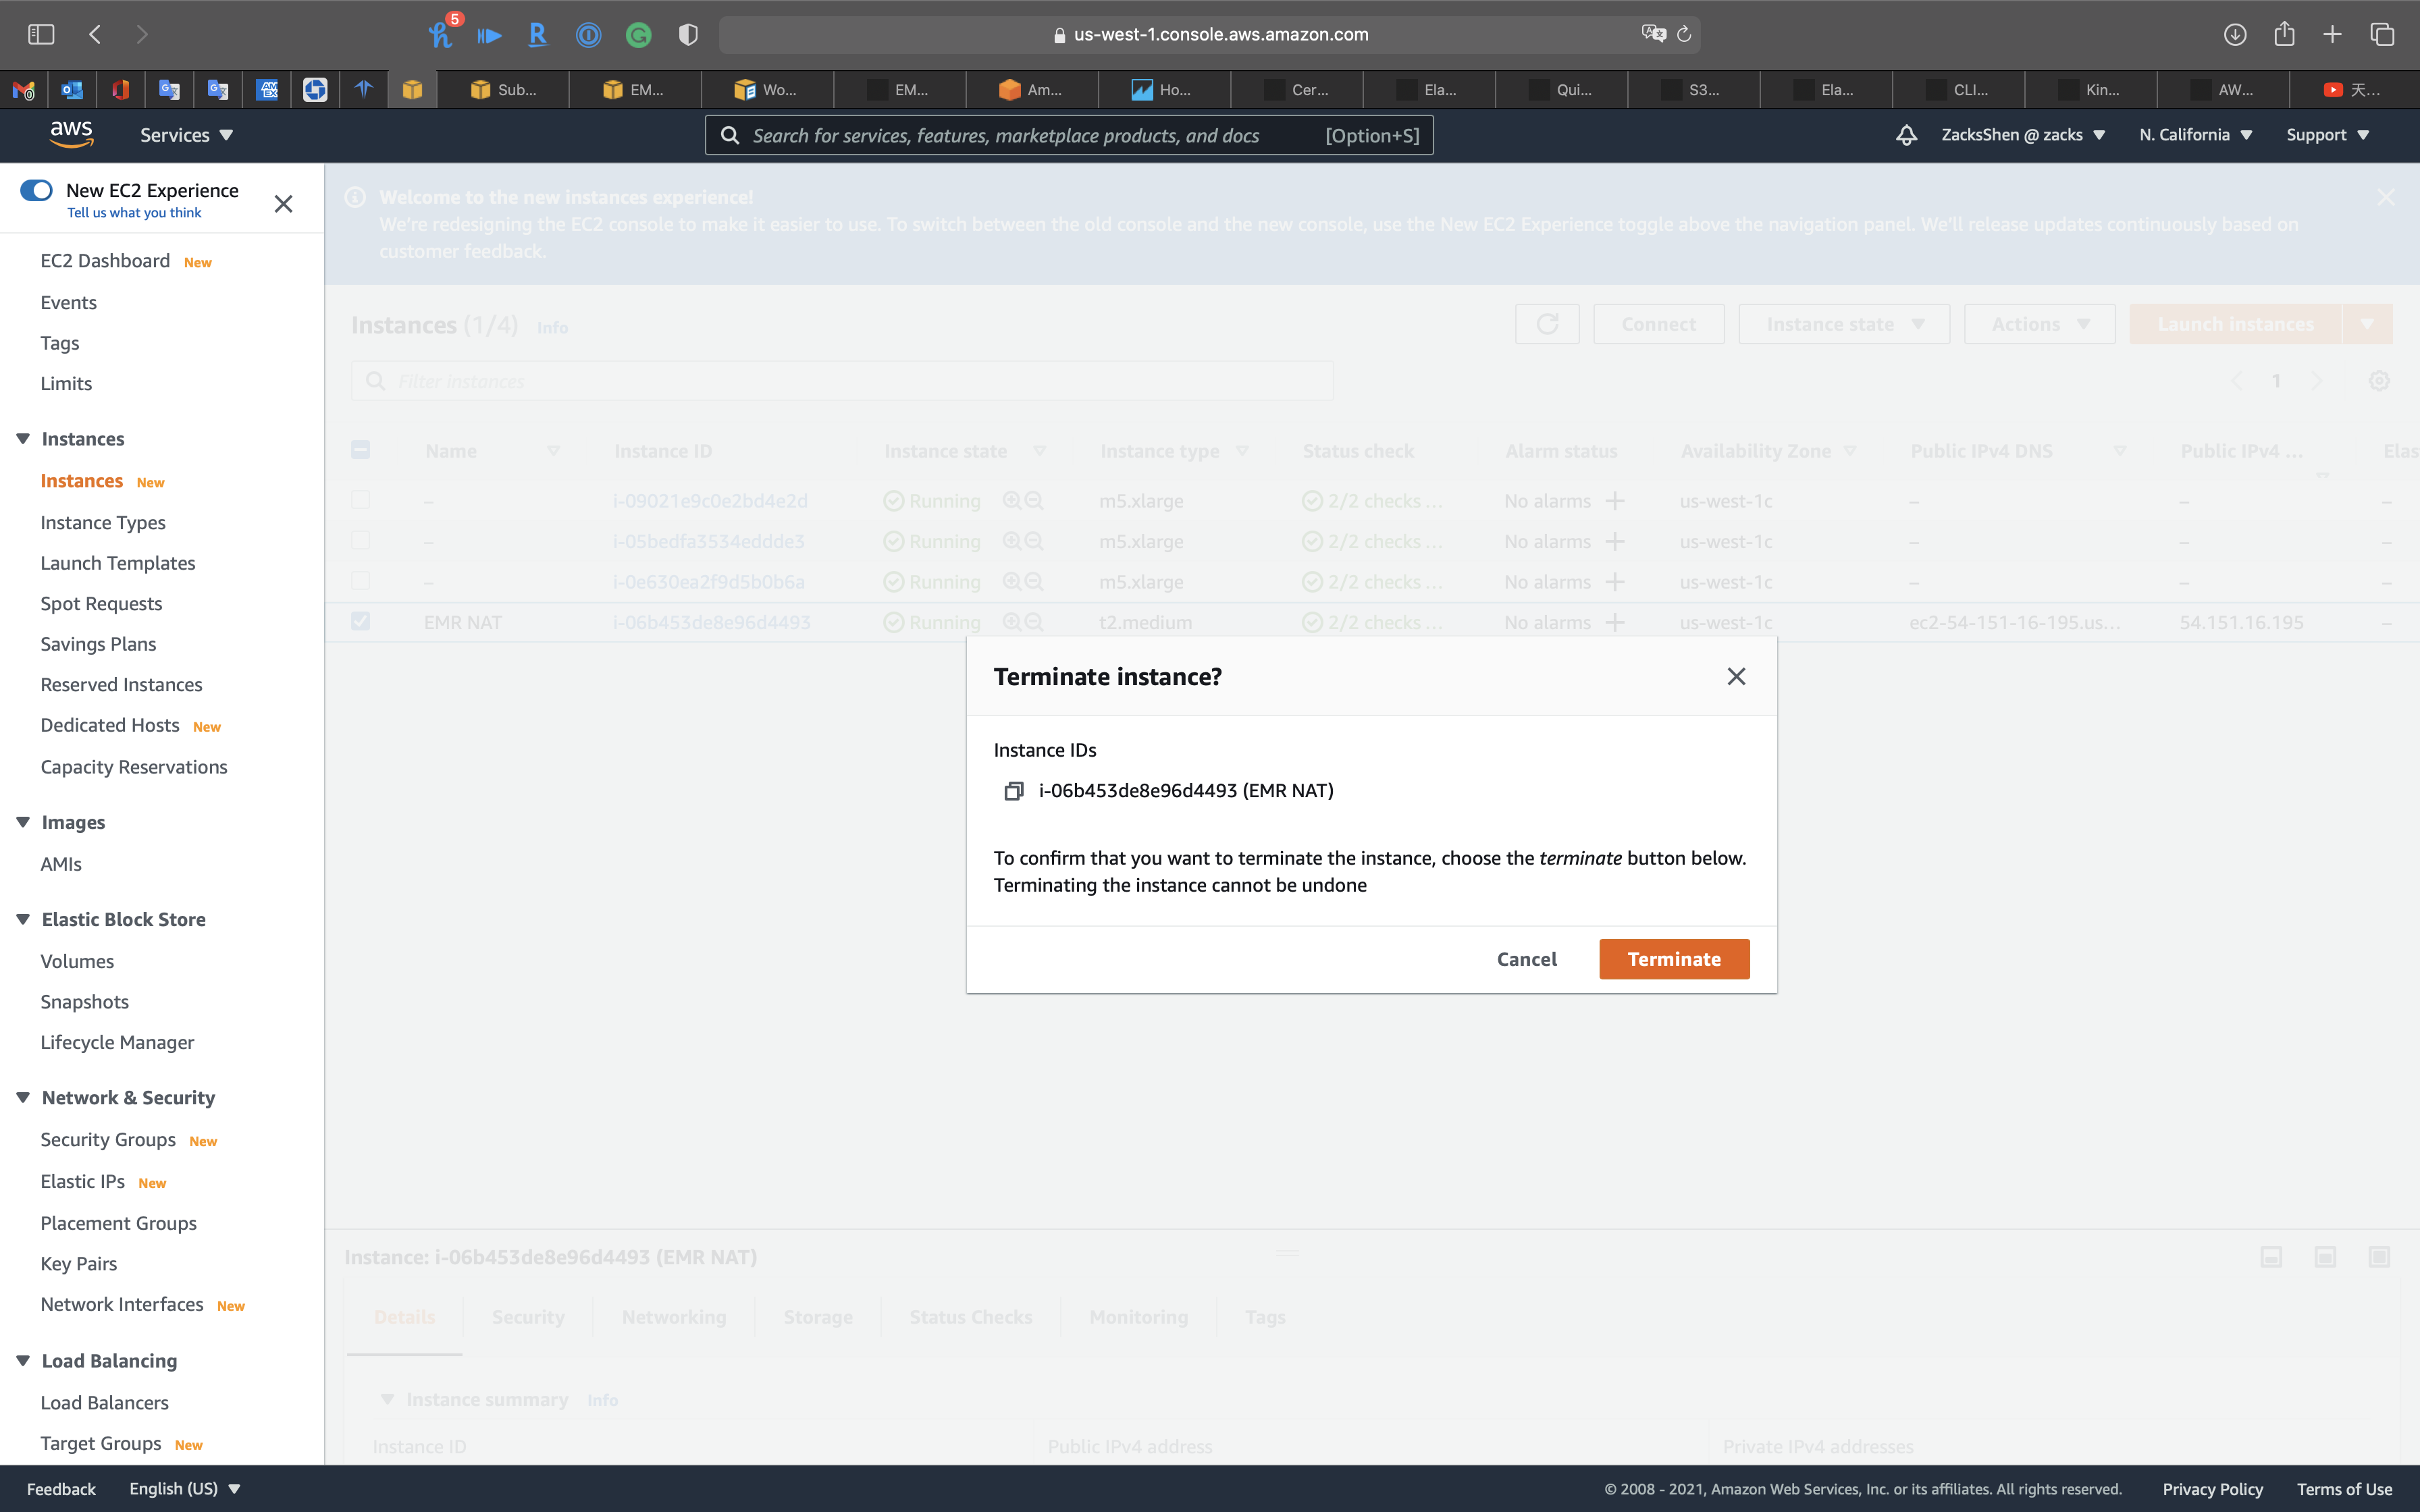
Refresh the page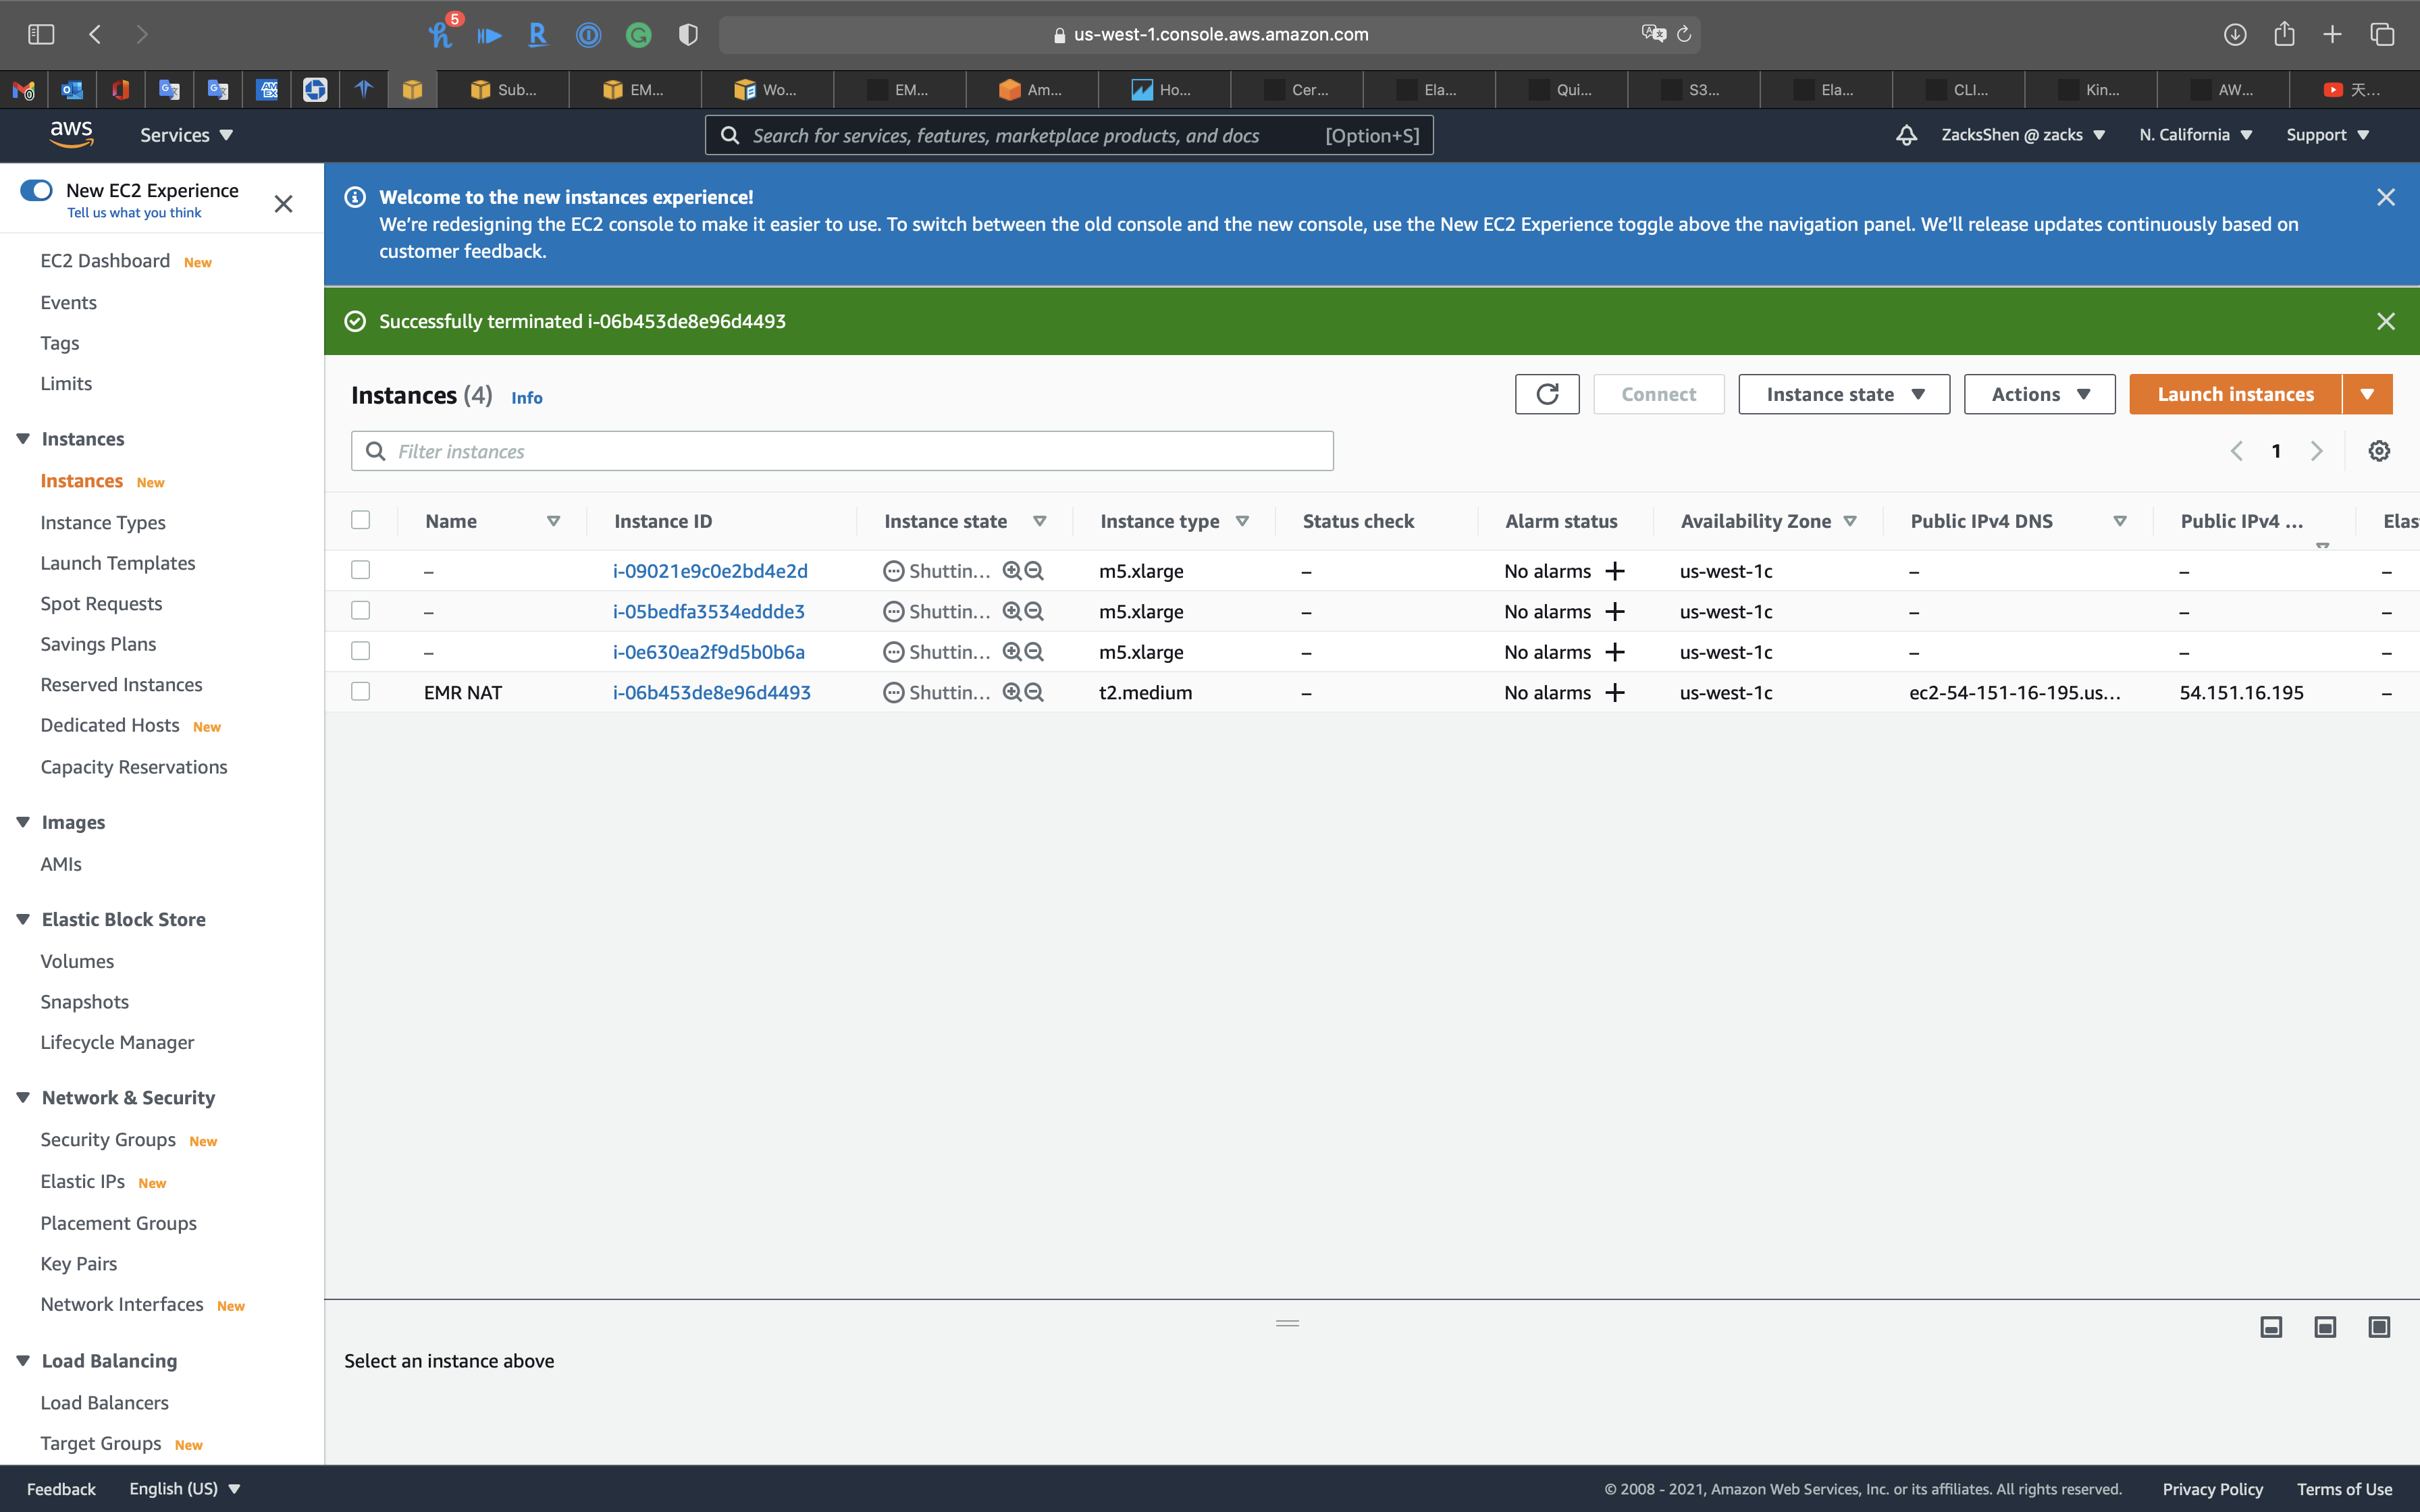
Delete VPC Resources
Delete EMR Endpoints
Services -> VPC -> Endpoints
Select one endpoint and click on Actions -> Delete Endpoint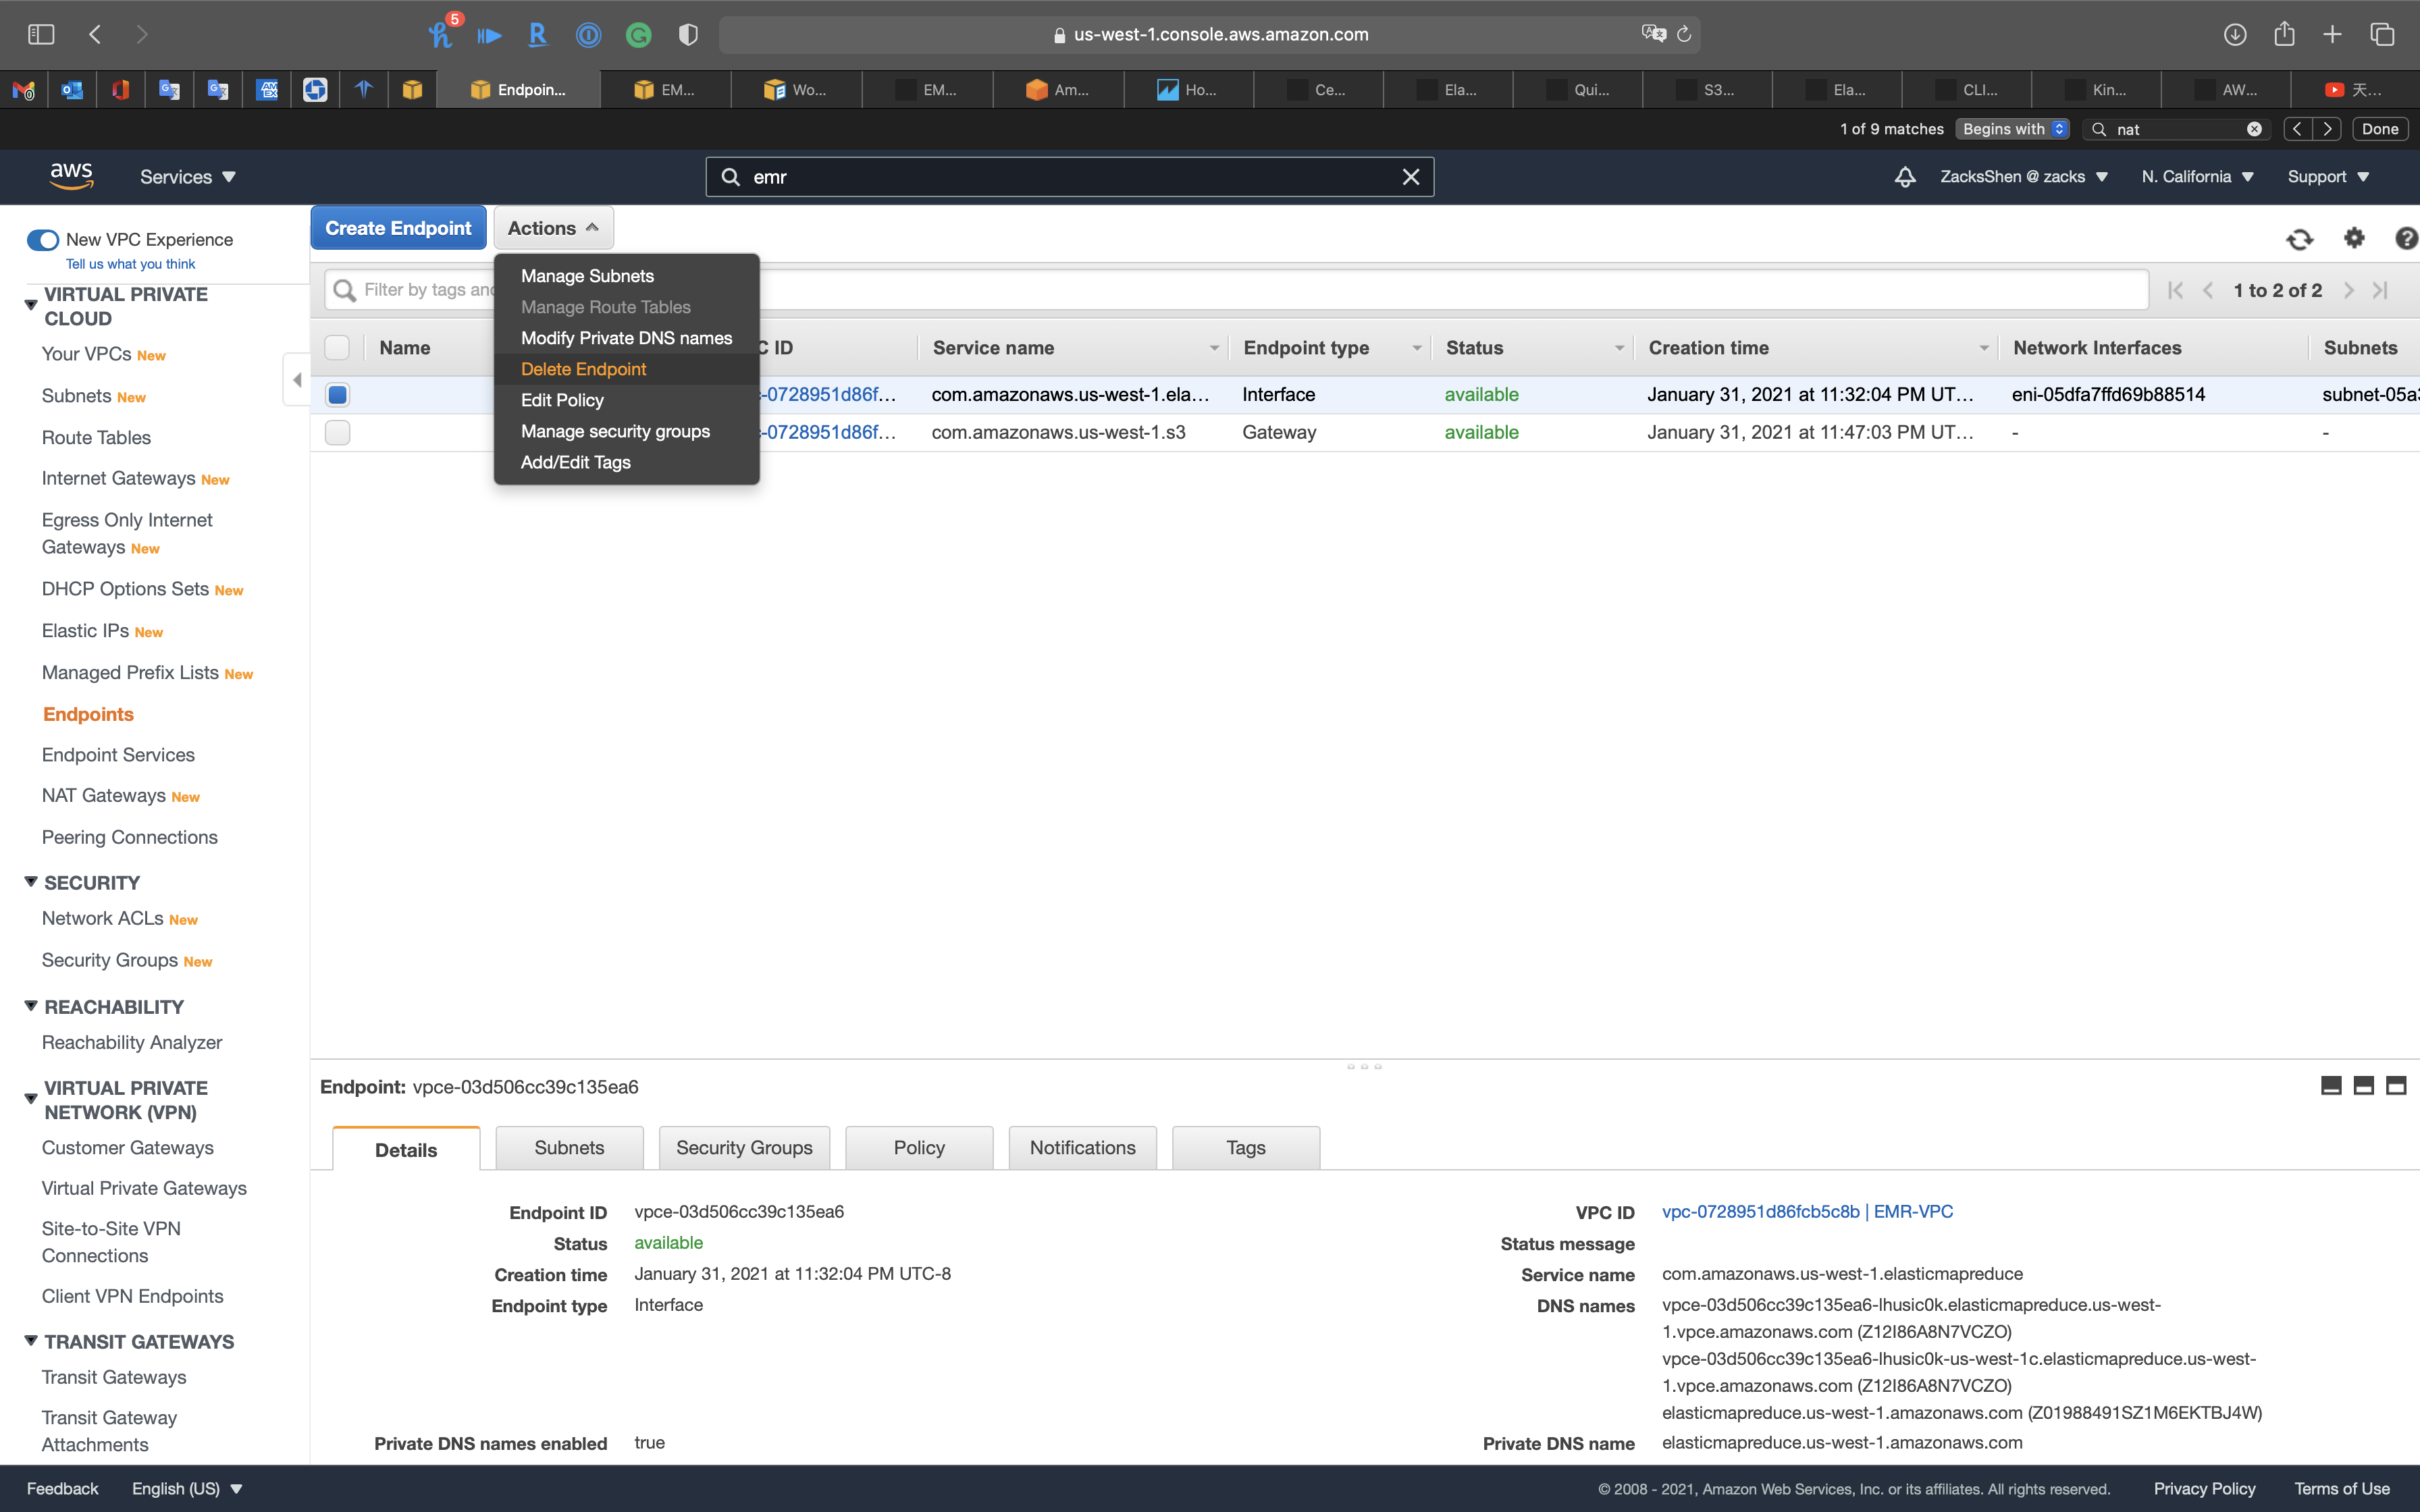
Click on Yes, Delete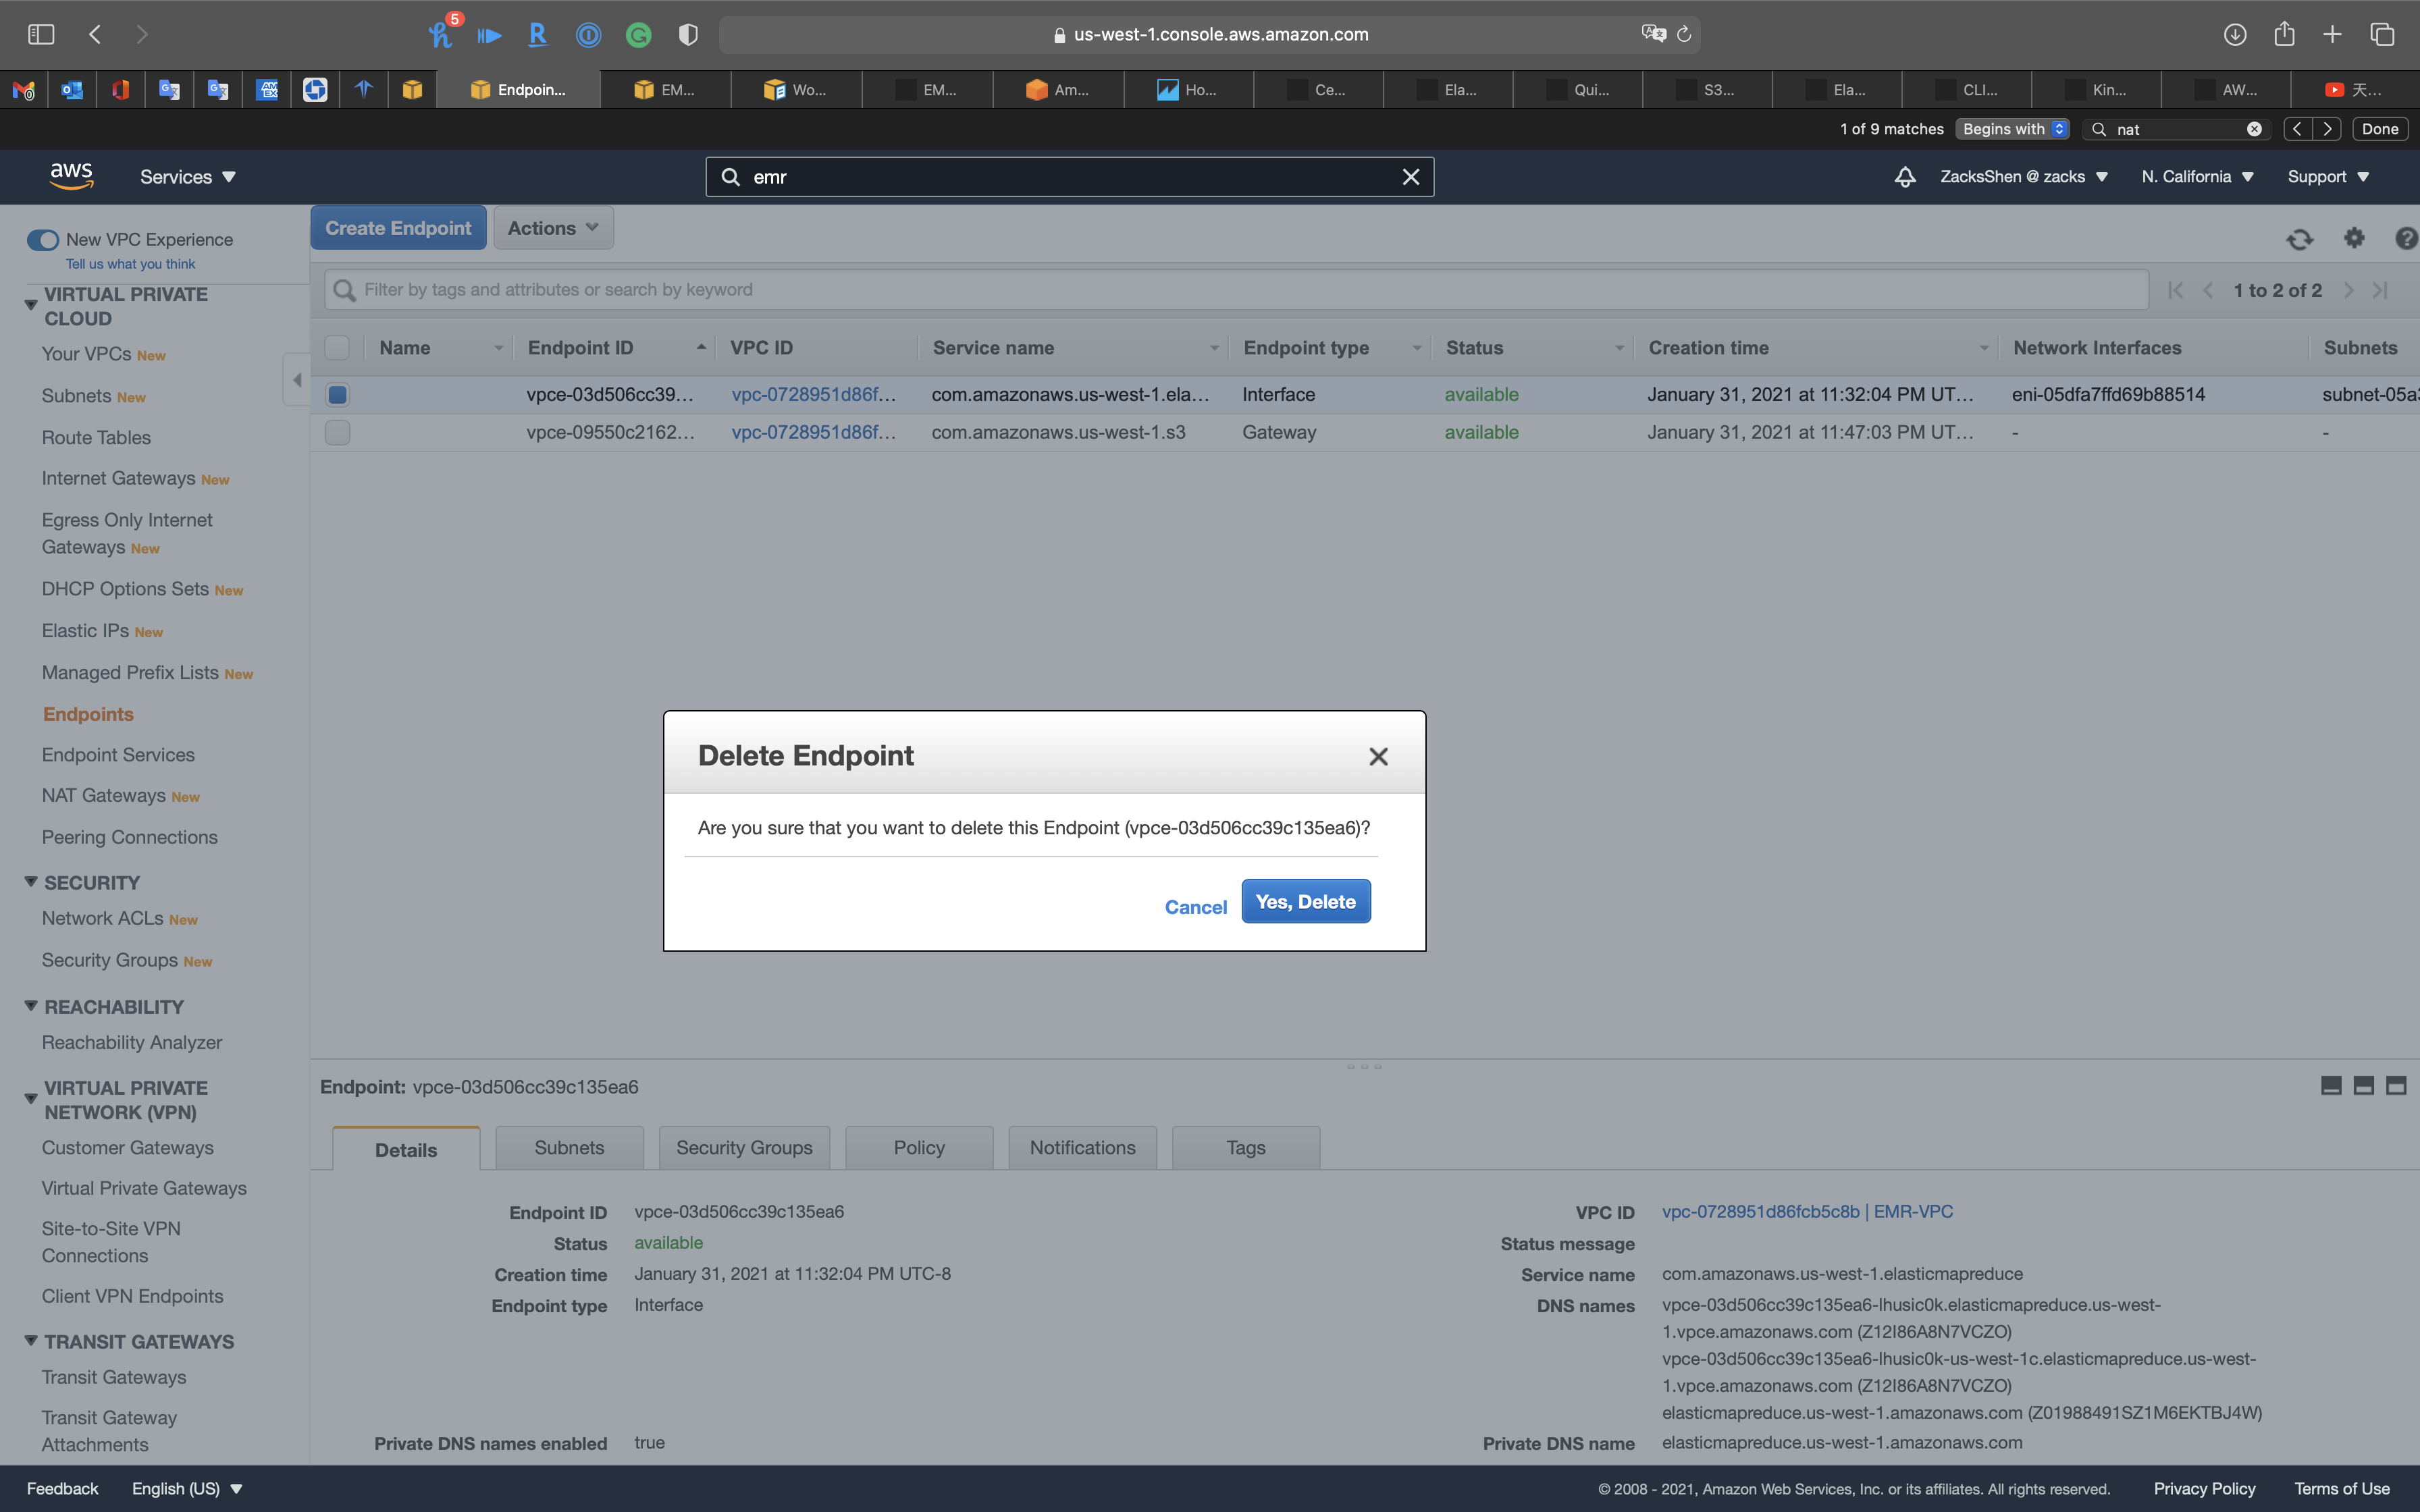
Select another endpoint and click on Actions -> Delete Endpoint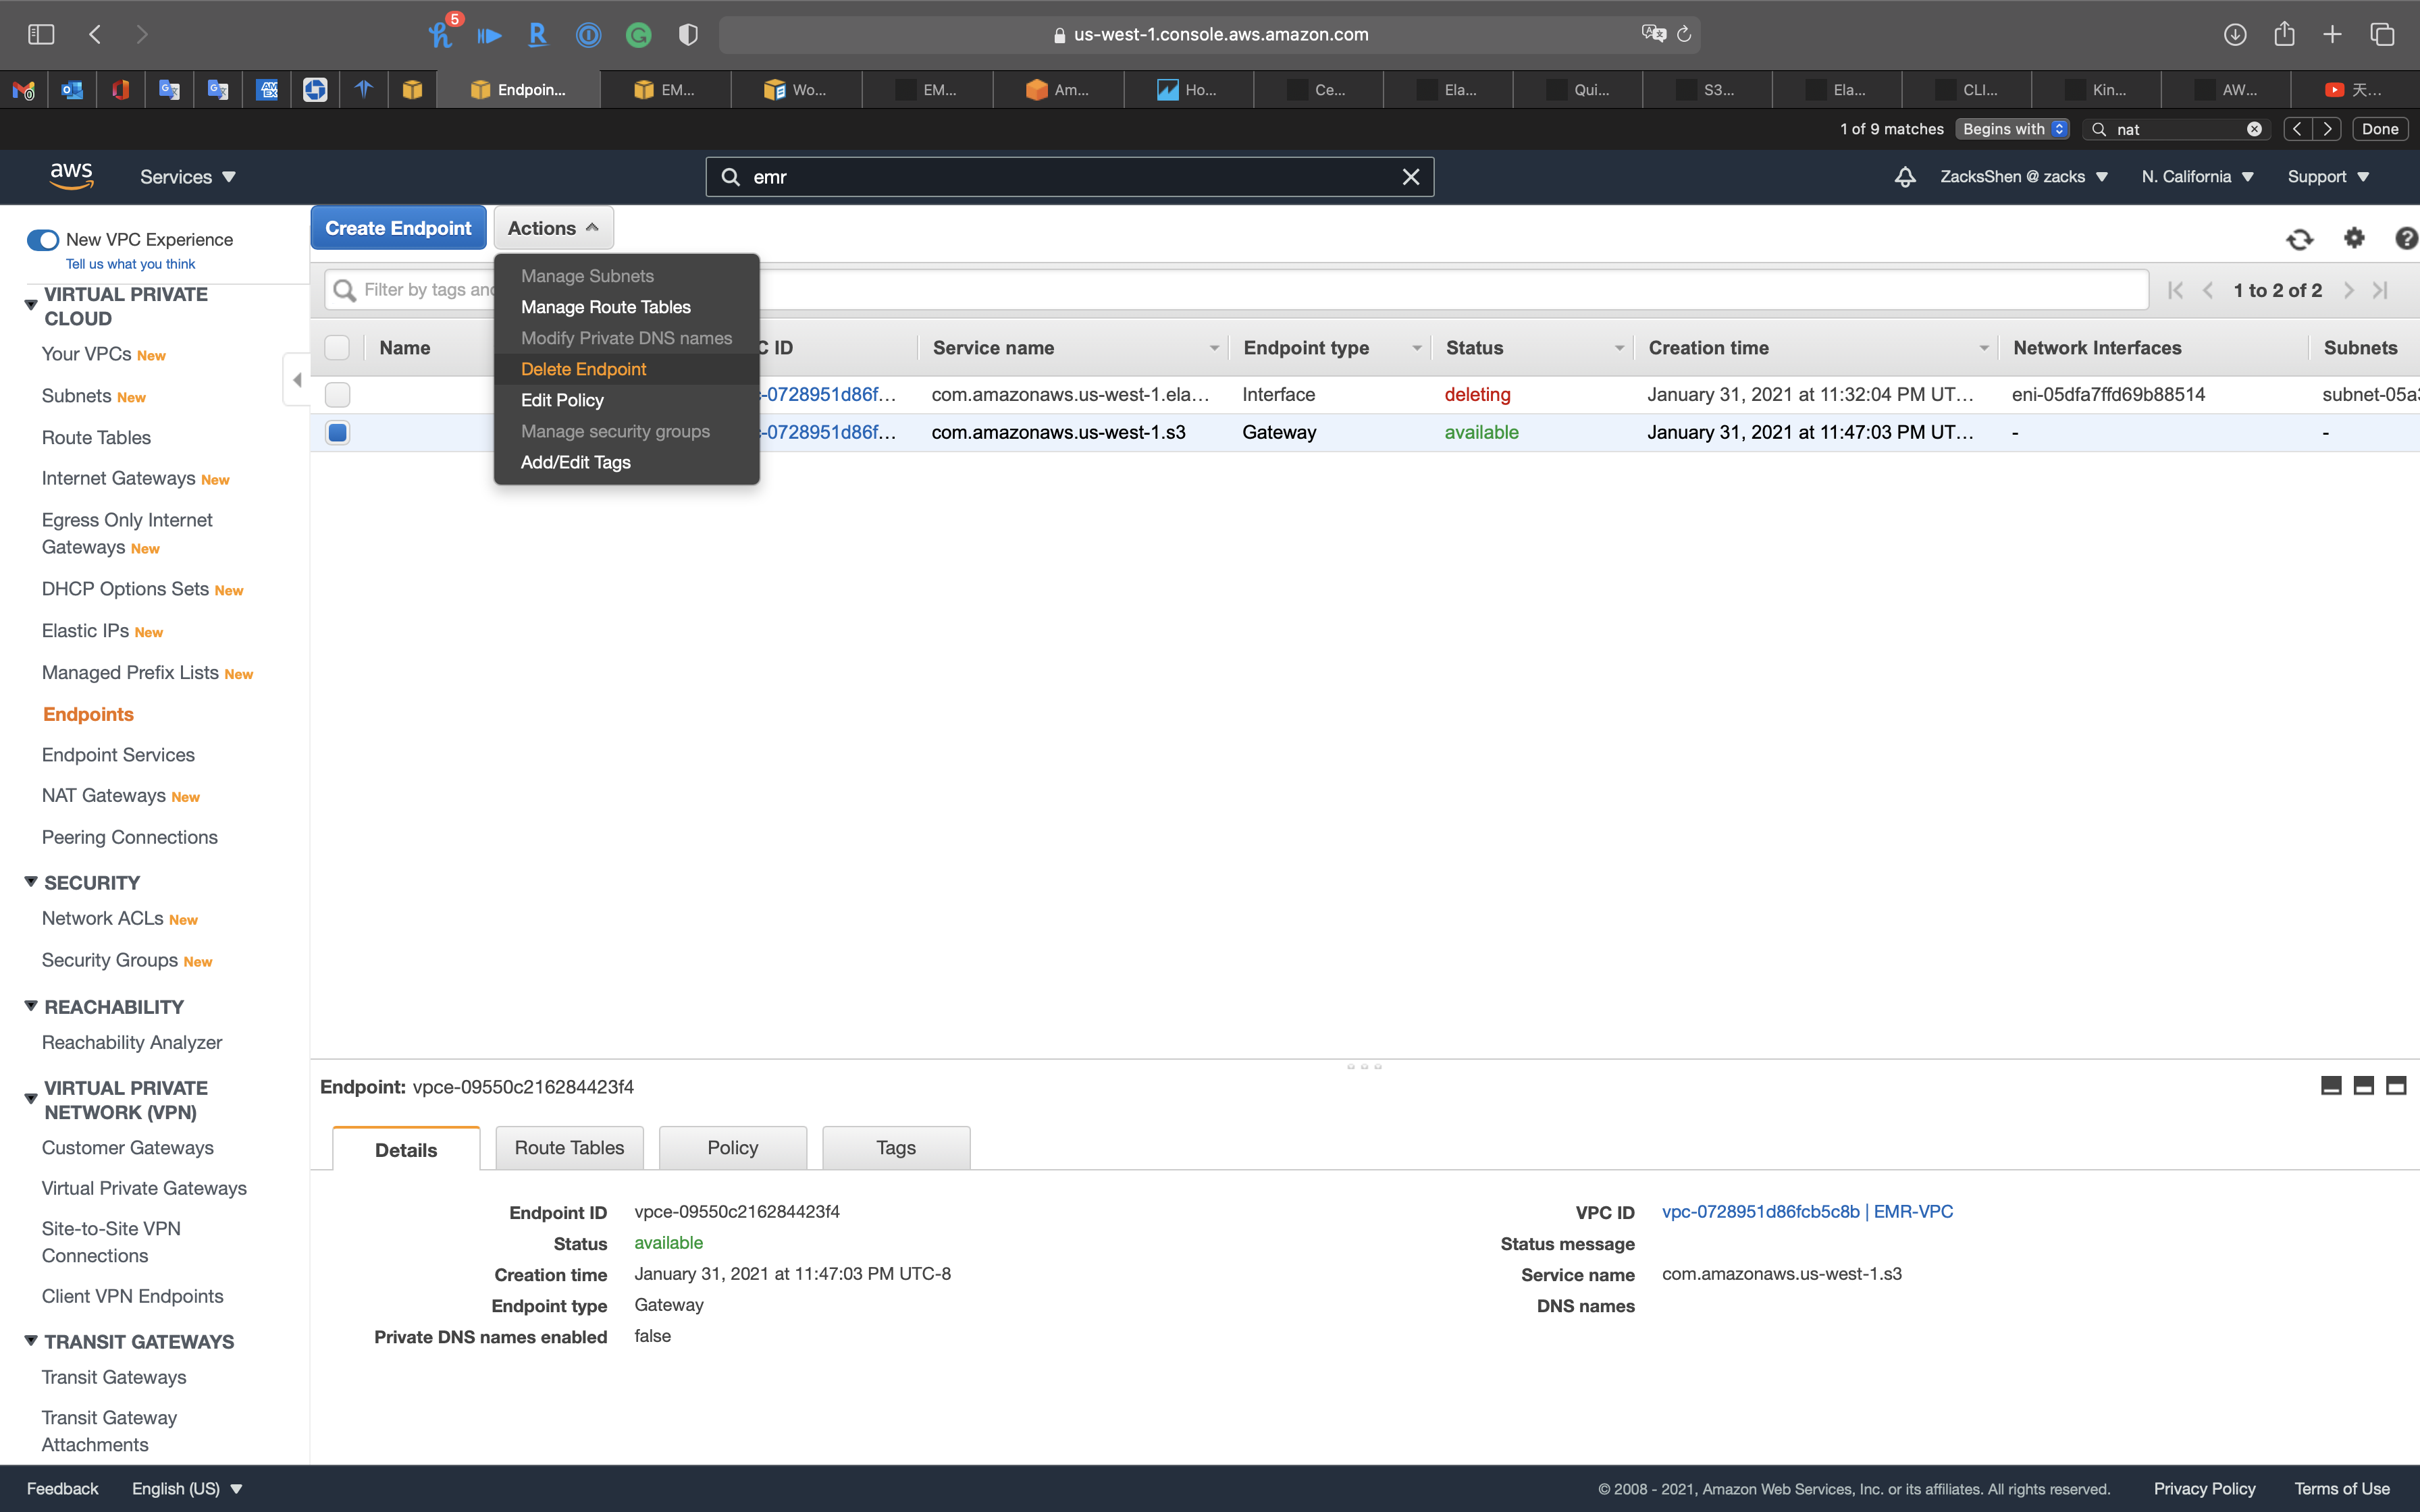
Click on Yes, Delete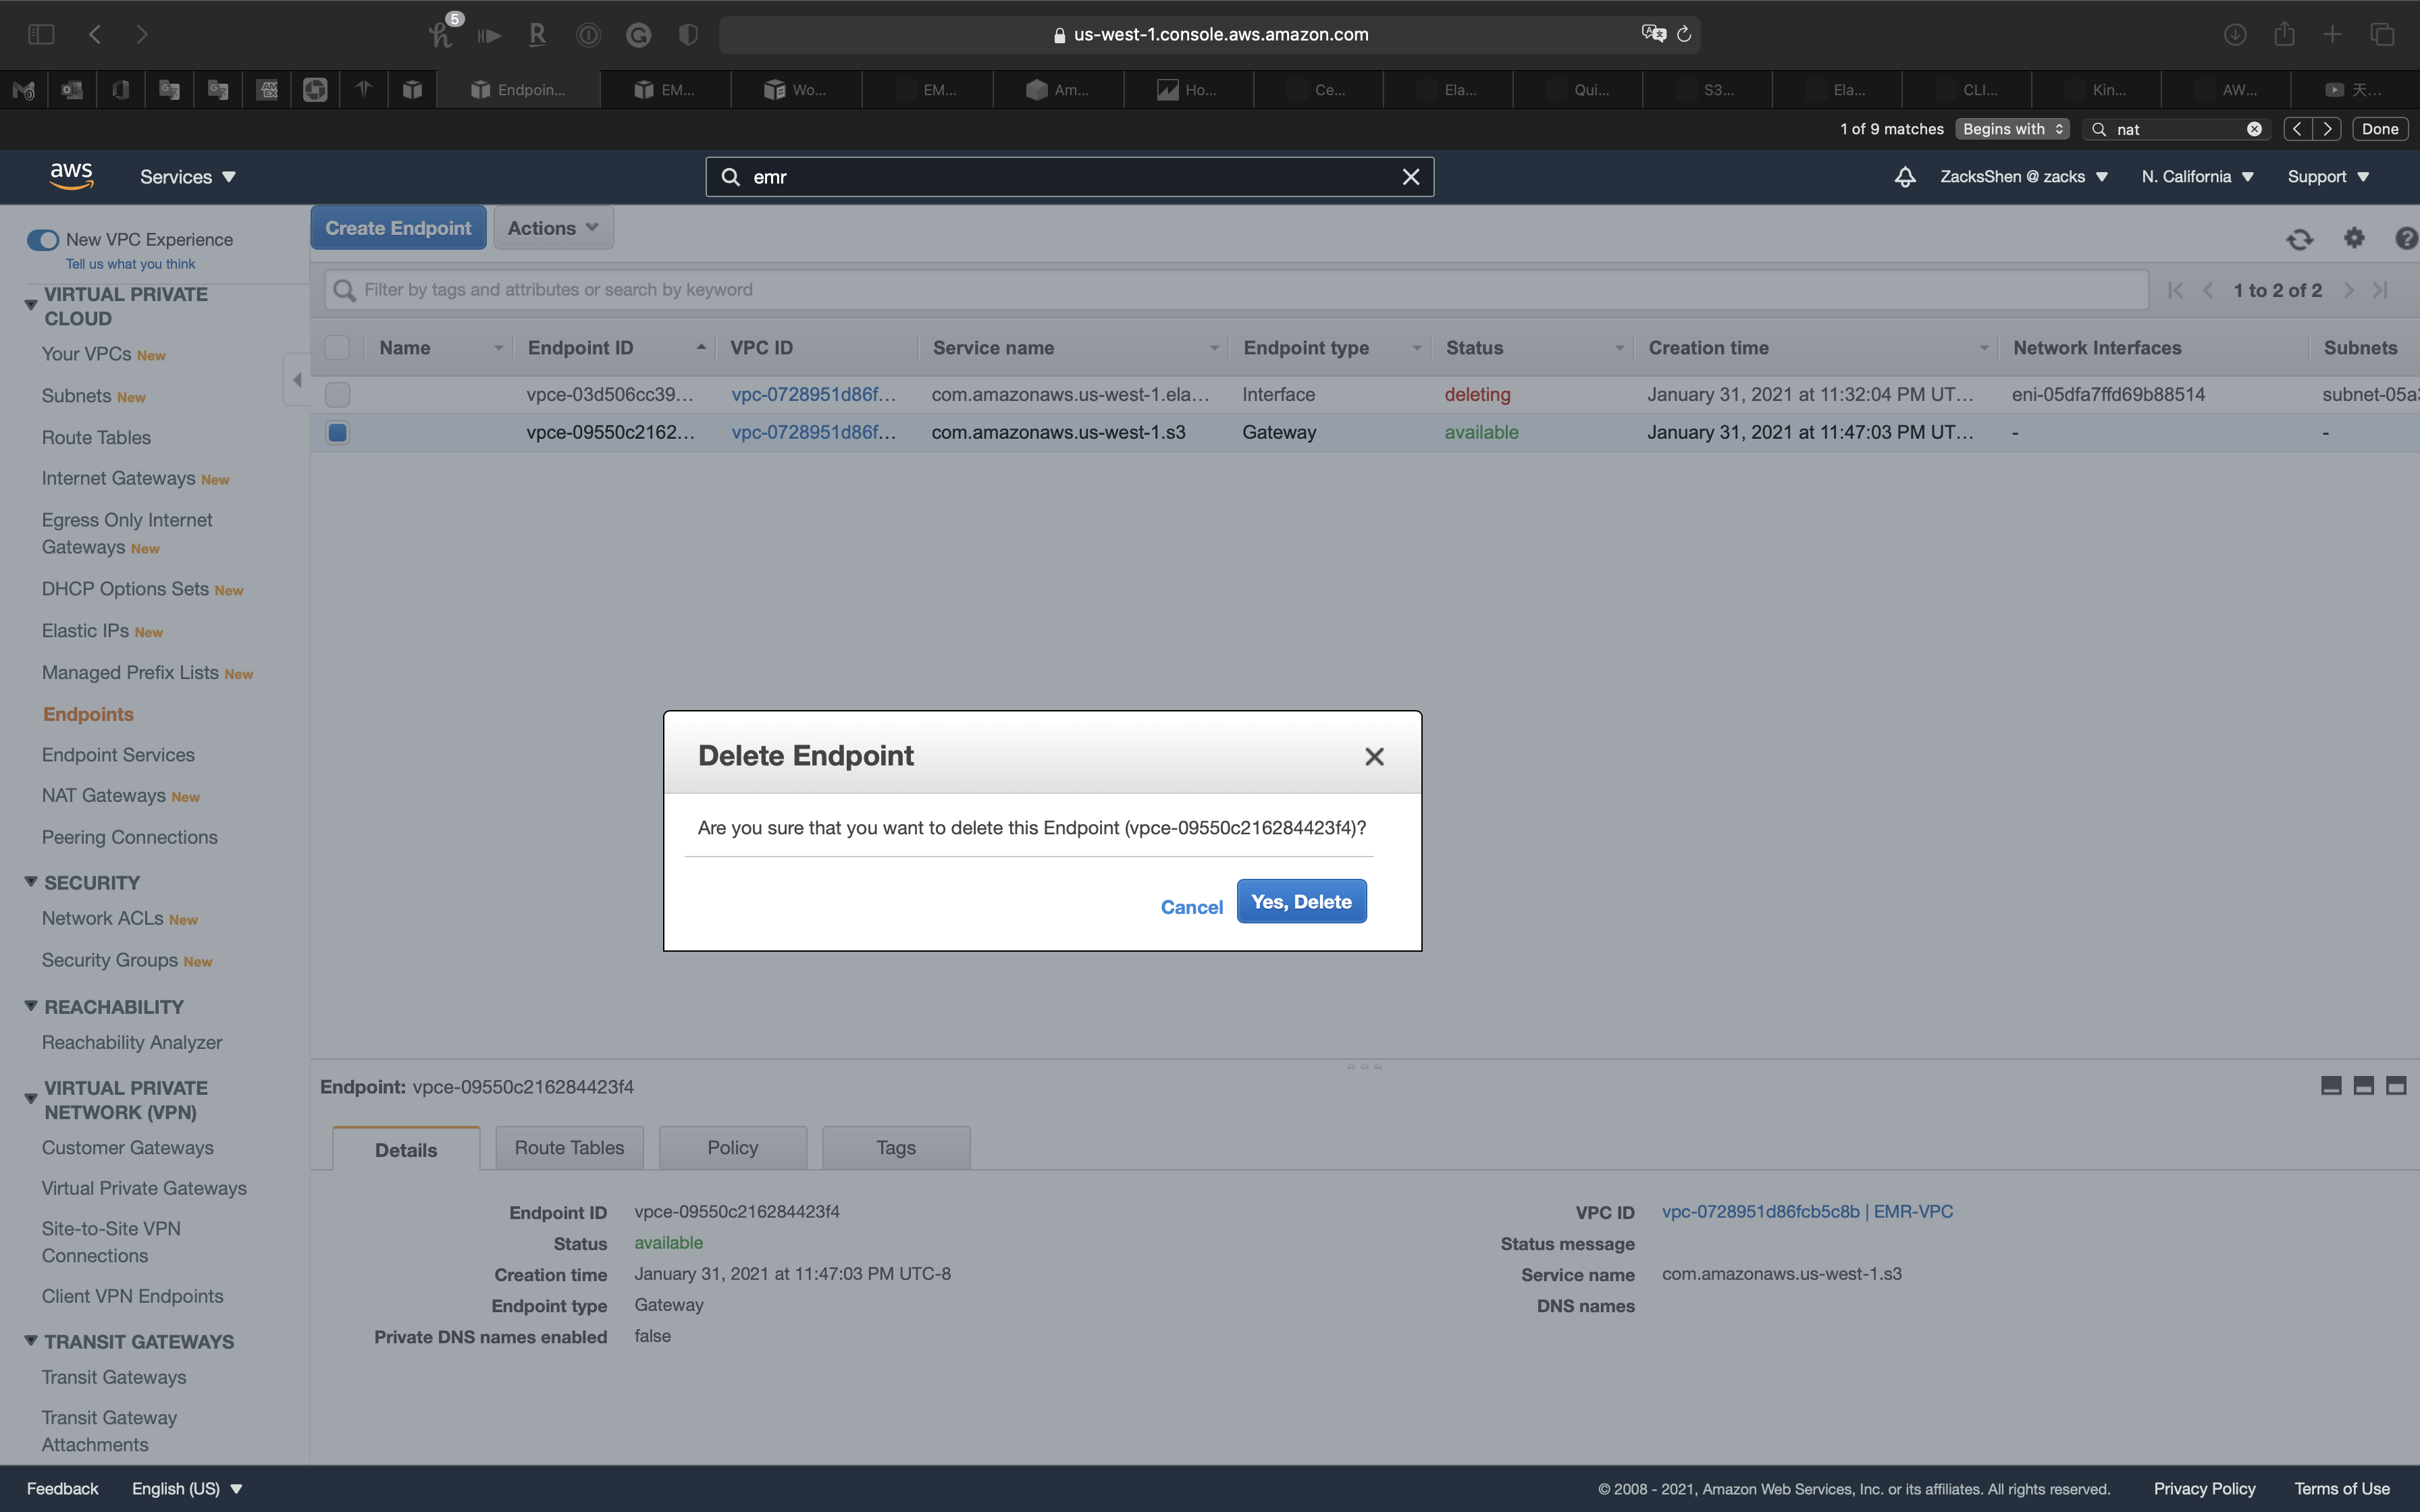
Delete Internet Gateways
Services -> VPC -> Security Groups
Select EMR-IGW then click on Actions -> Detach from VPC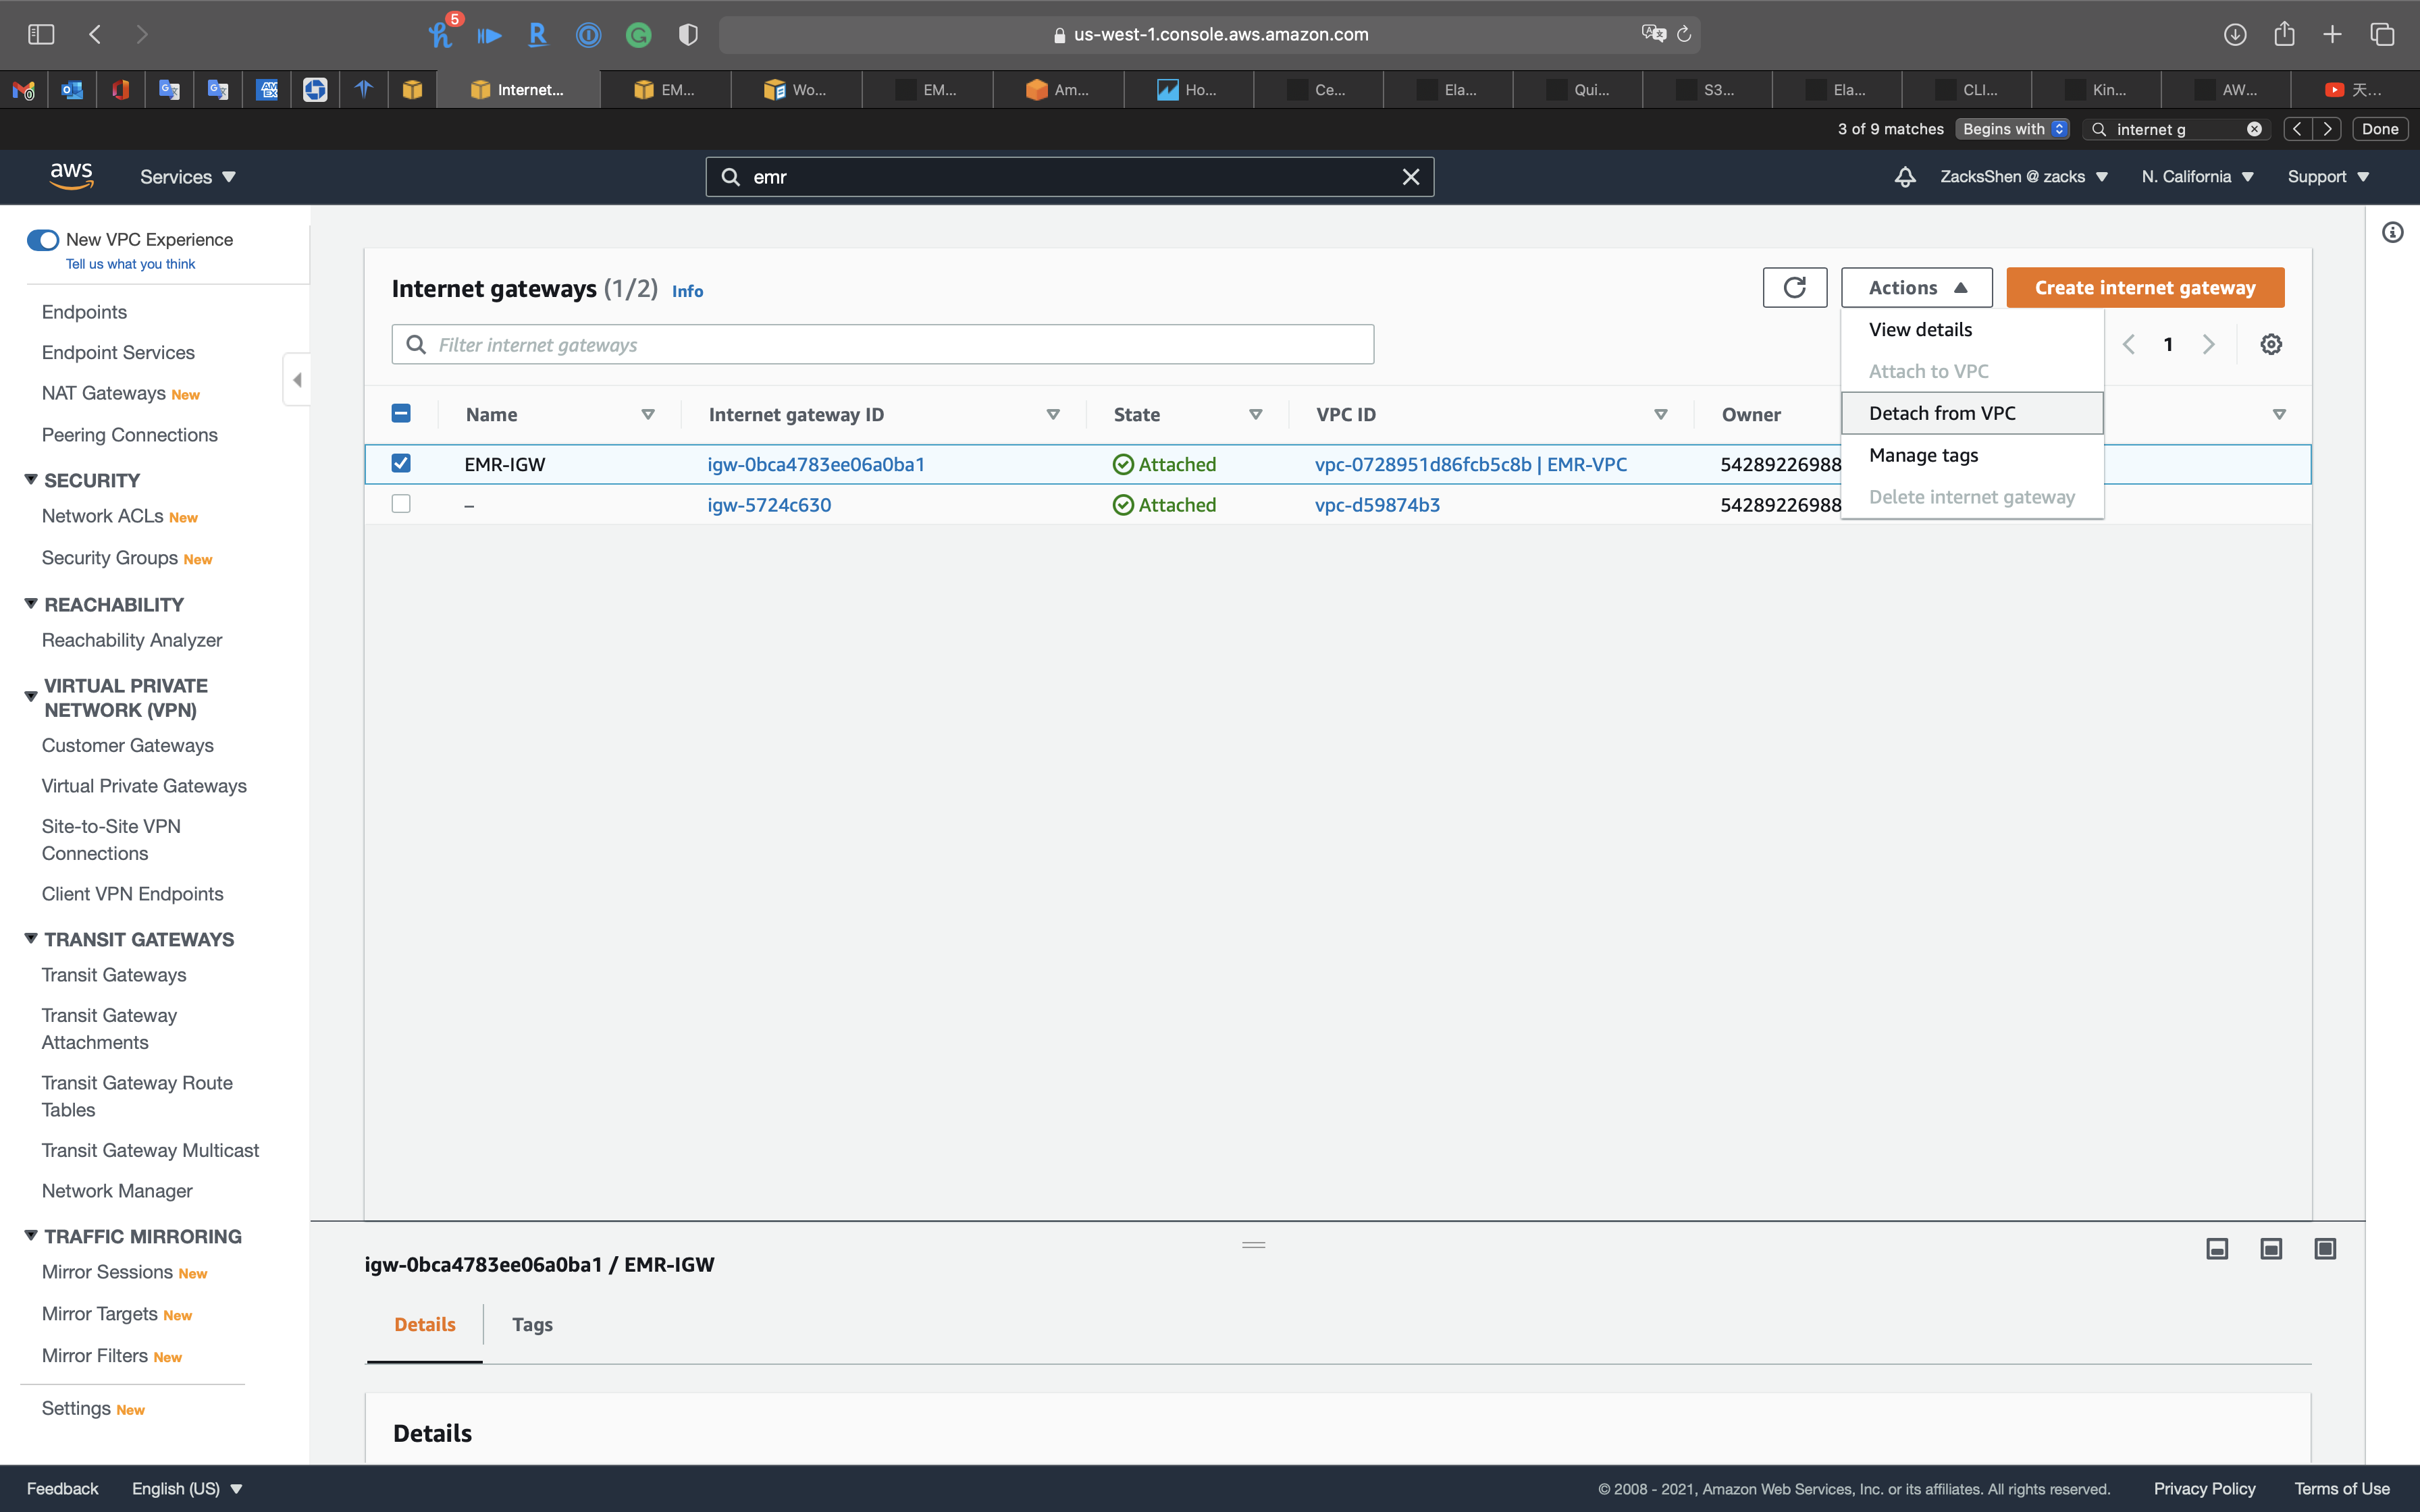
Click on Detach internet gateway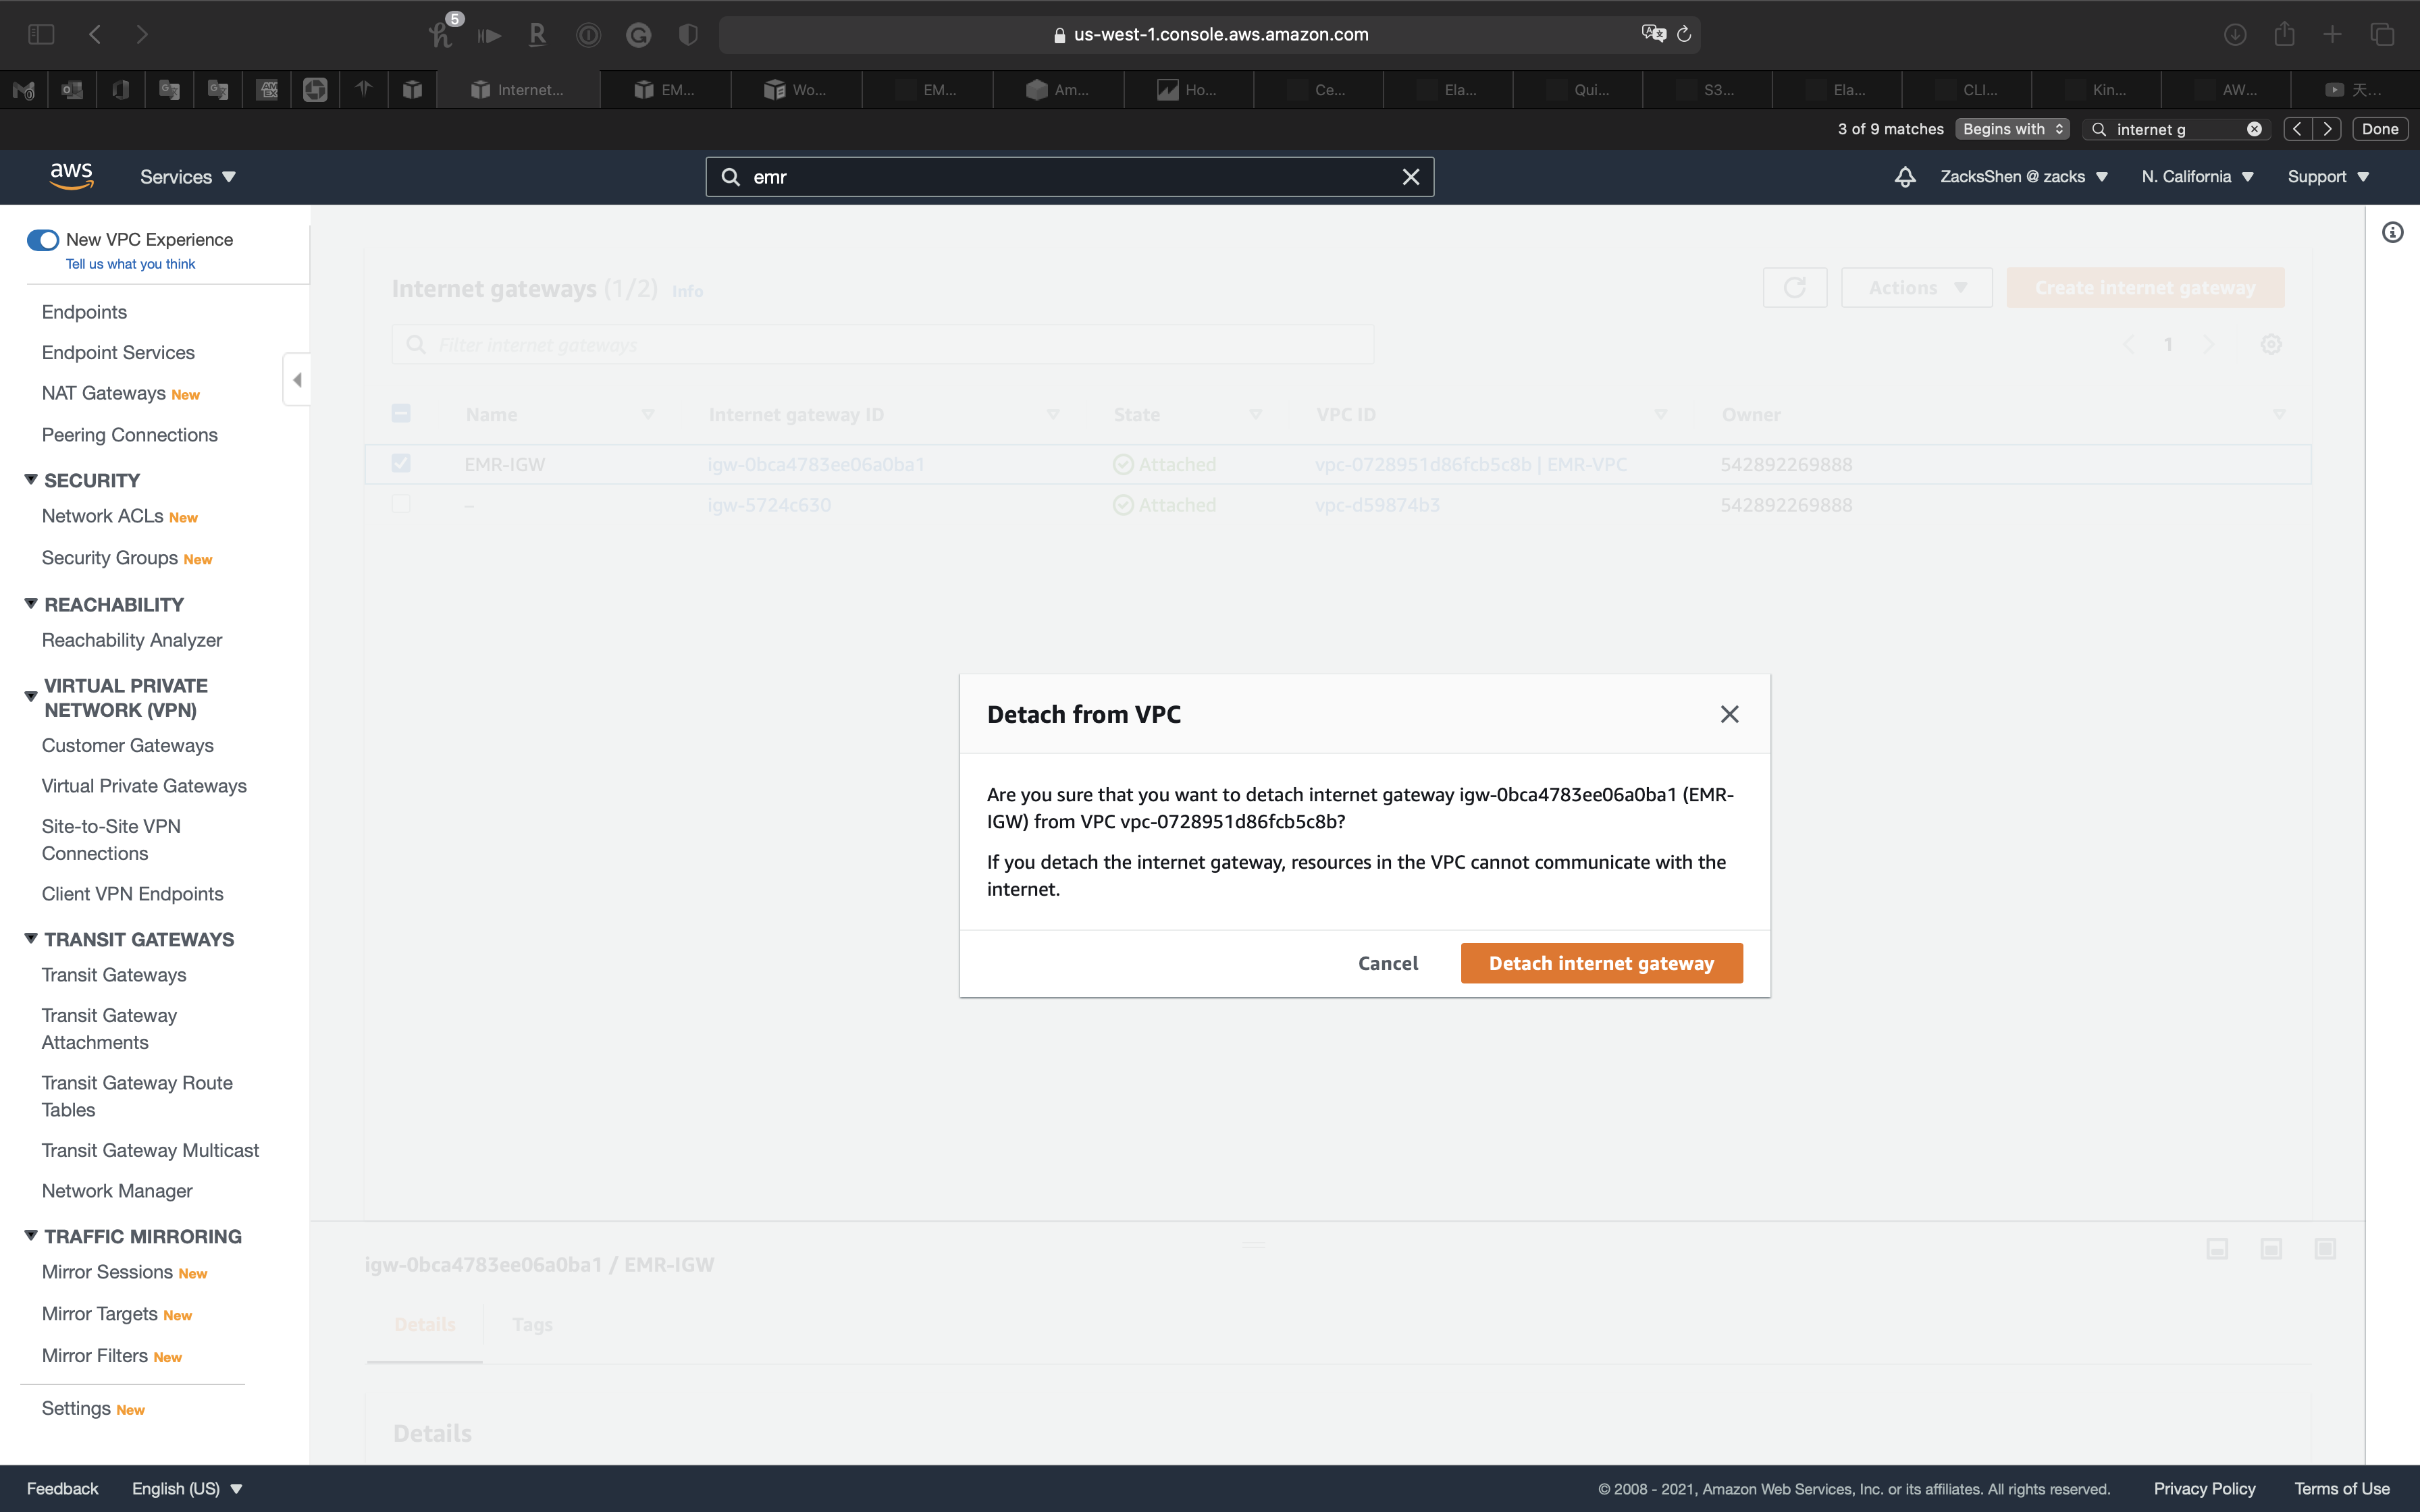
Select EMR-IGW then click on Actions -> Delete internet gateway
Type delete then click on Delete internet gateway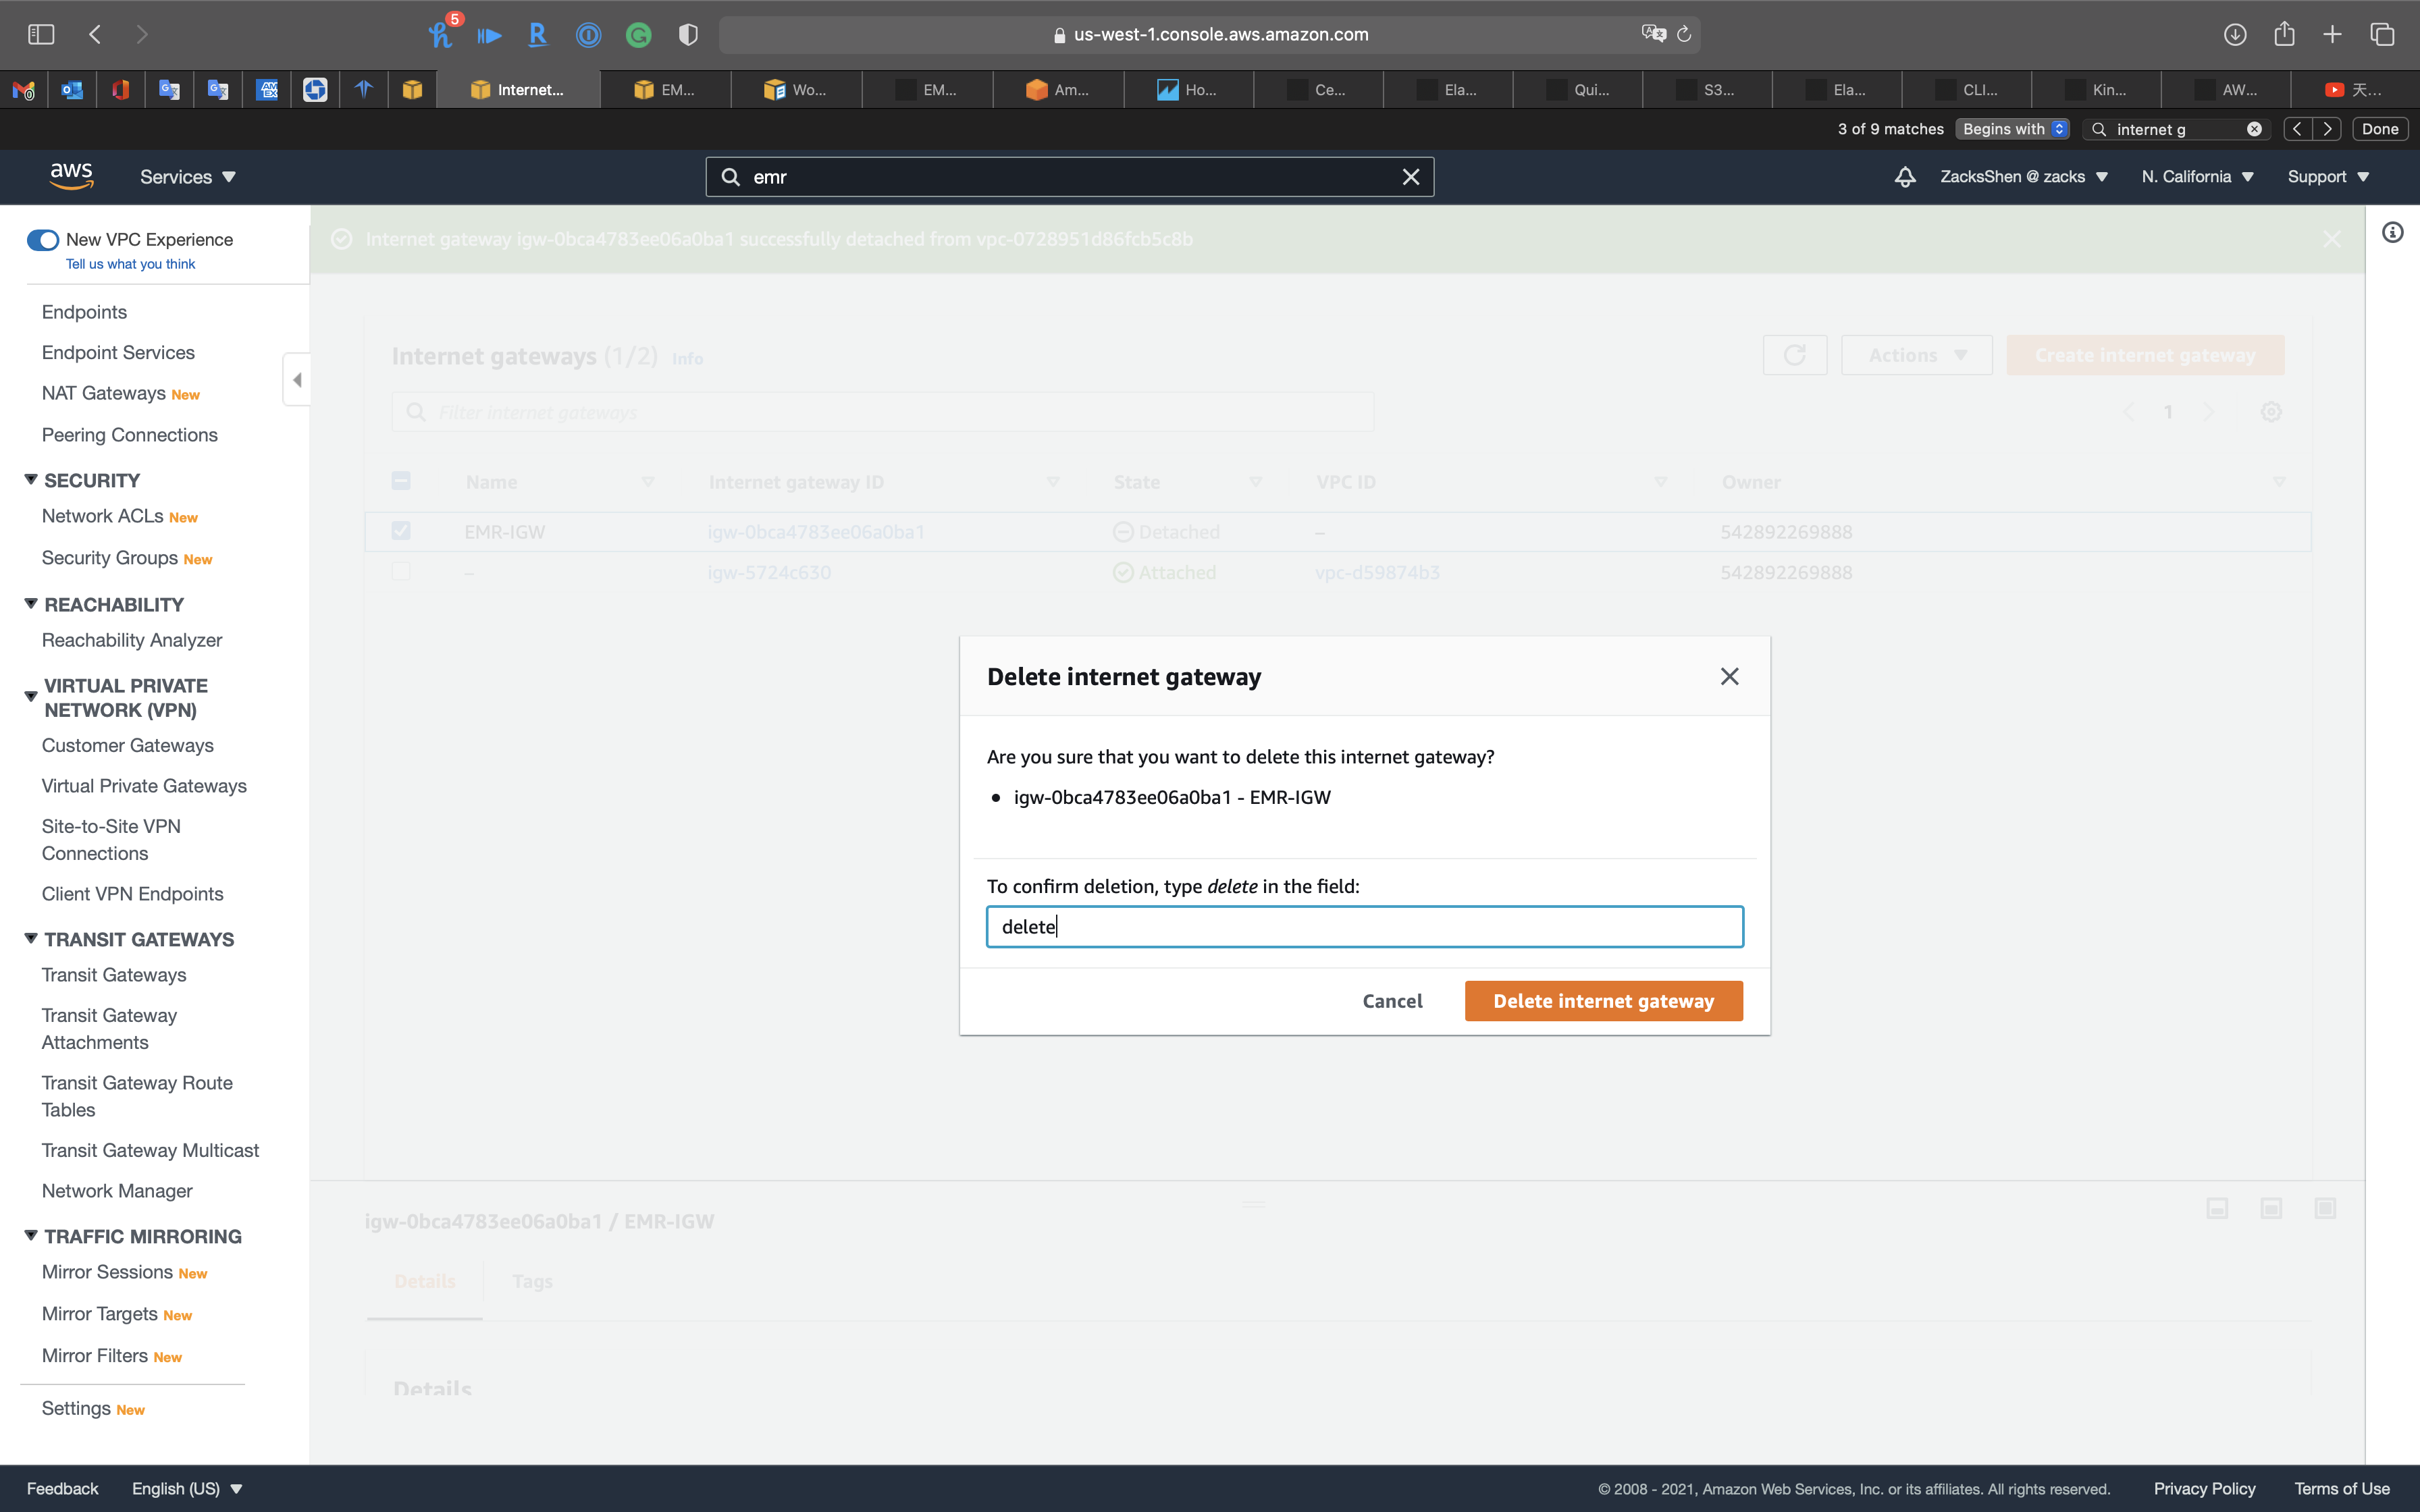
Delete Route Tables
Services -> VPC -> Route Tables
Select EMR-PublicRouteTable then click on Subnet Associations tab
Click on Edit subnet associations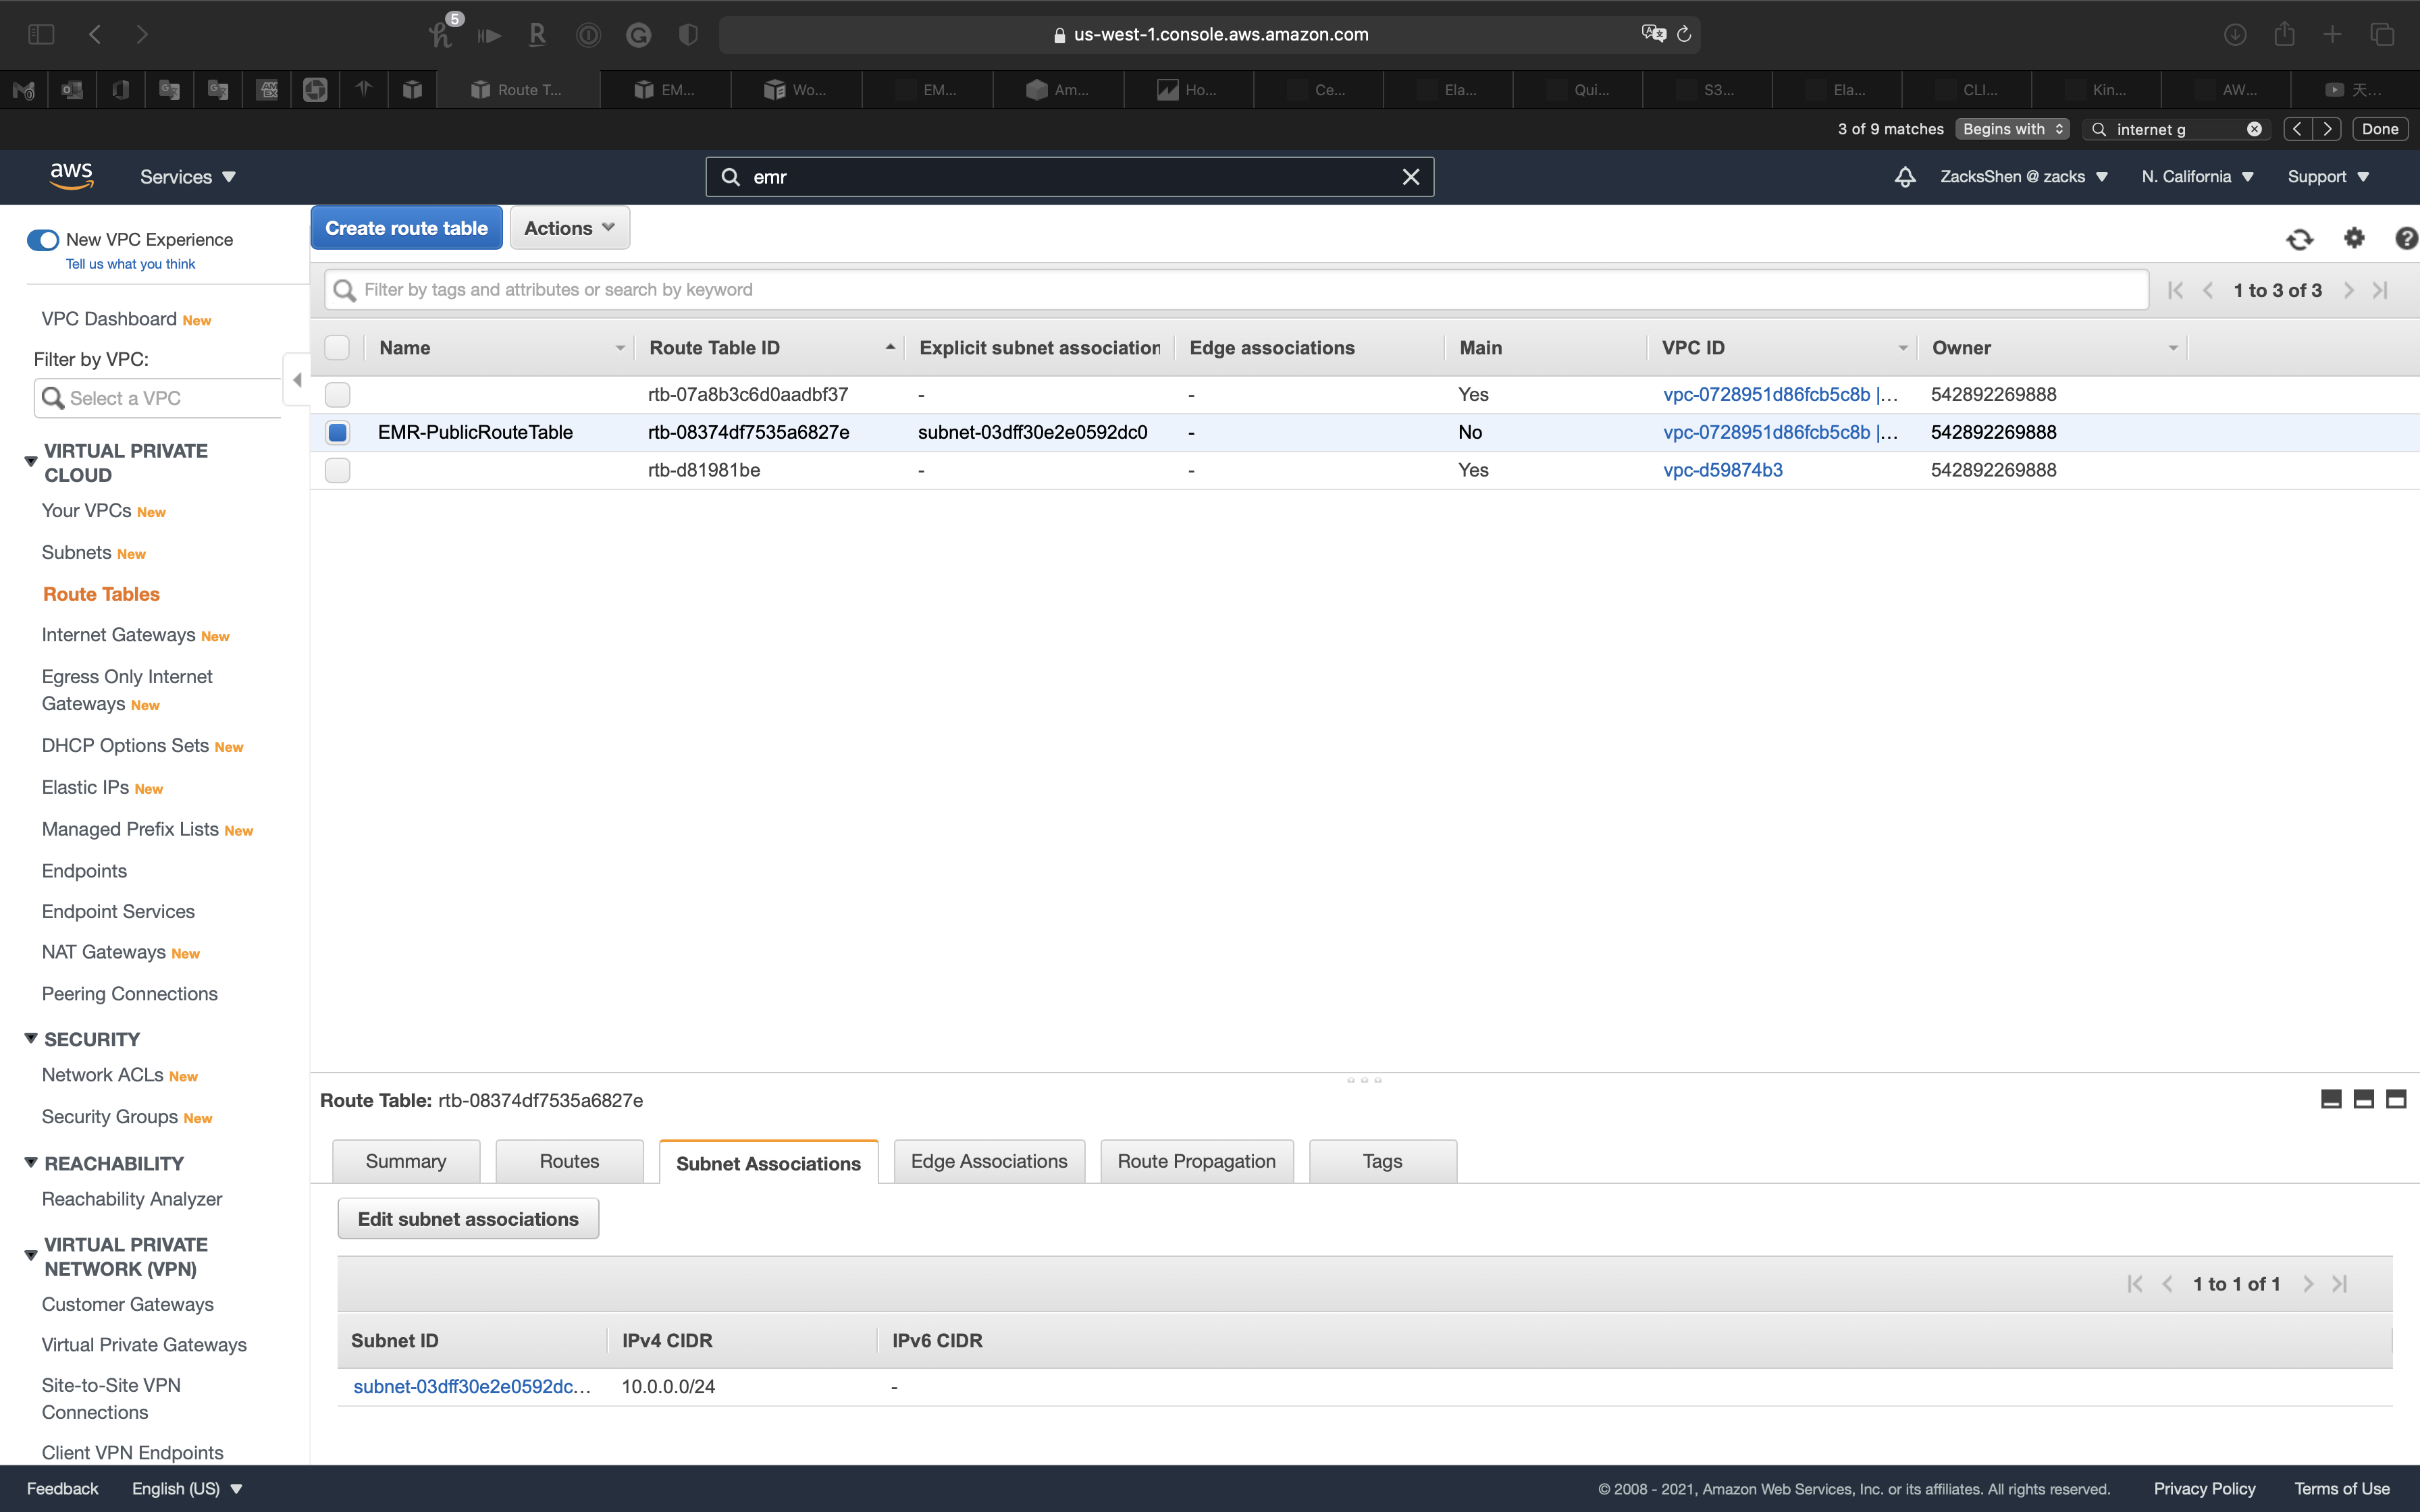
Uncheck EMR-PublicSubnet
Click on Save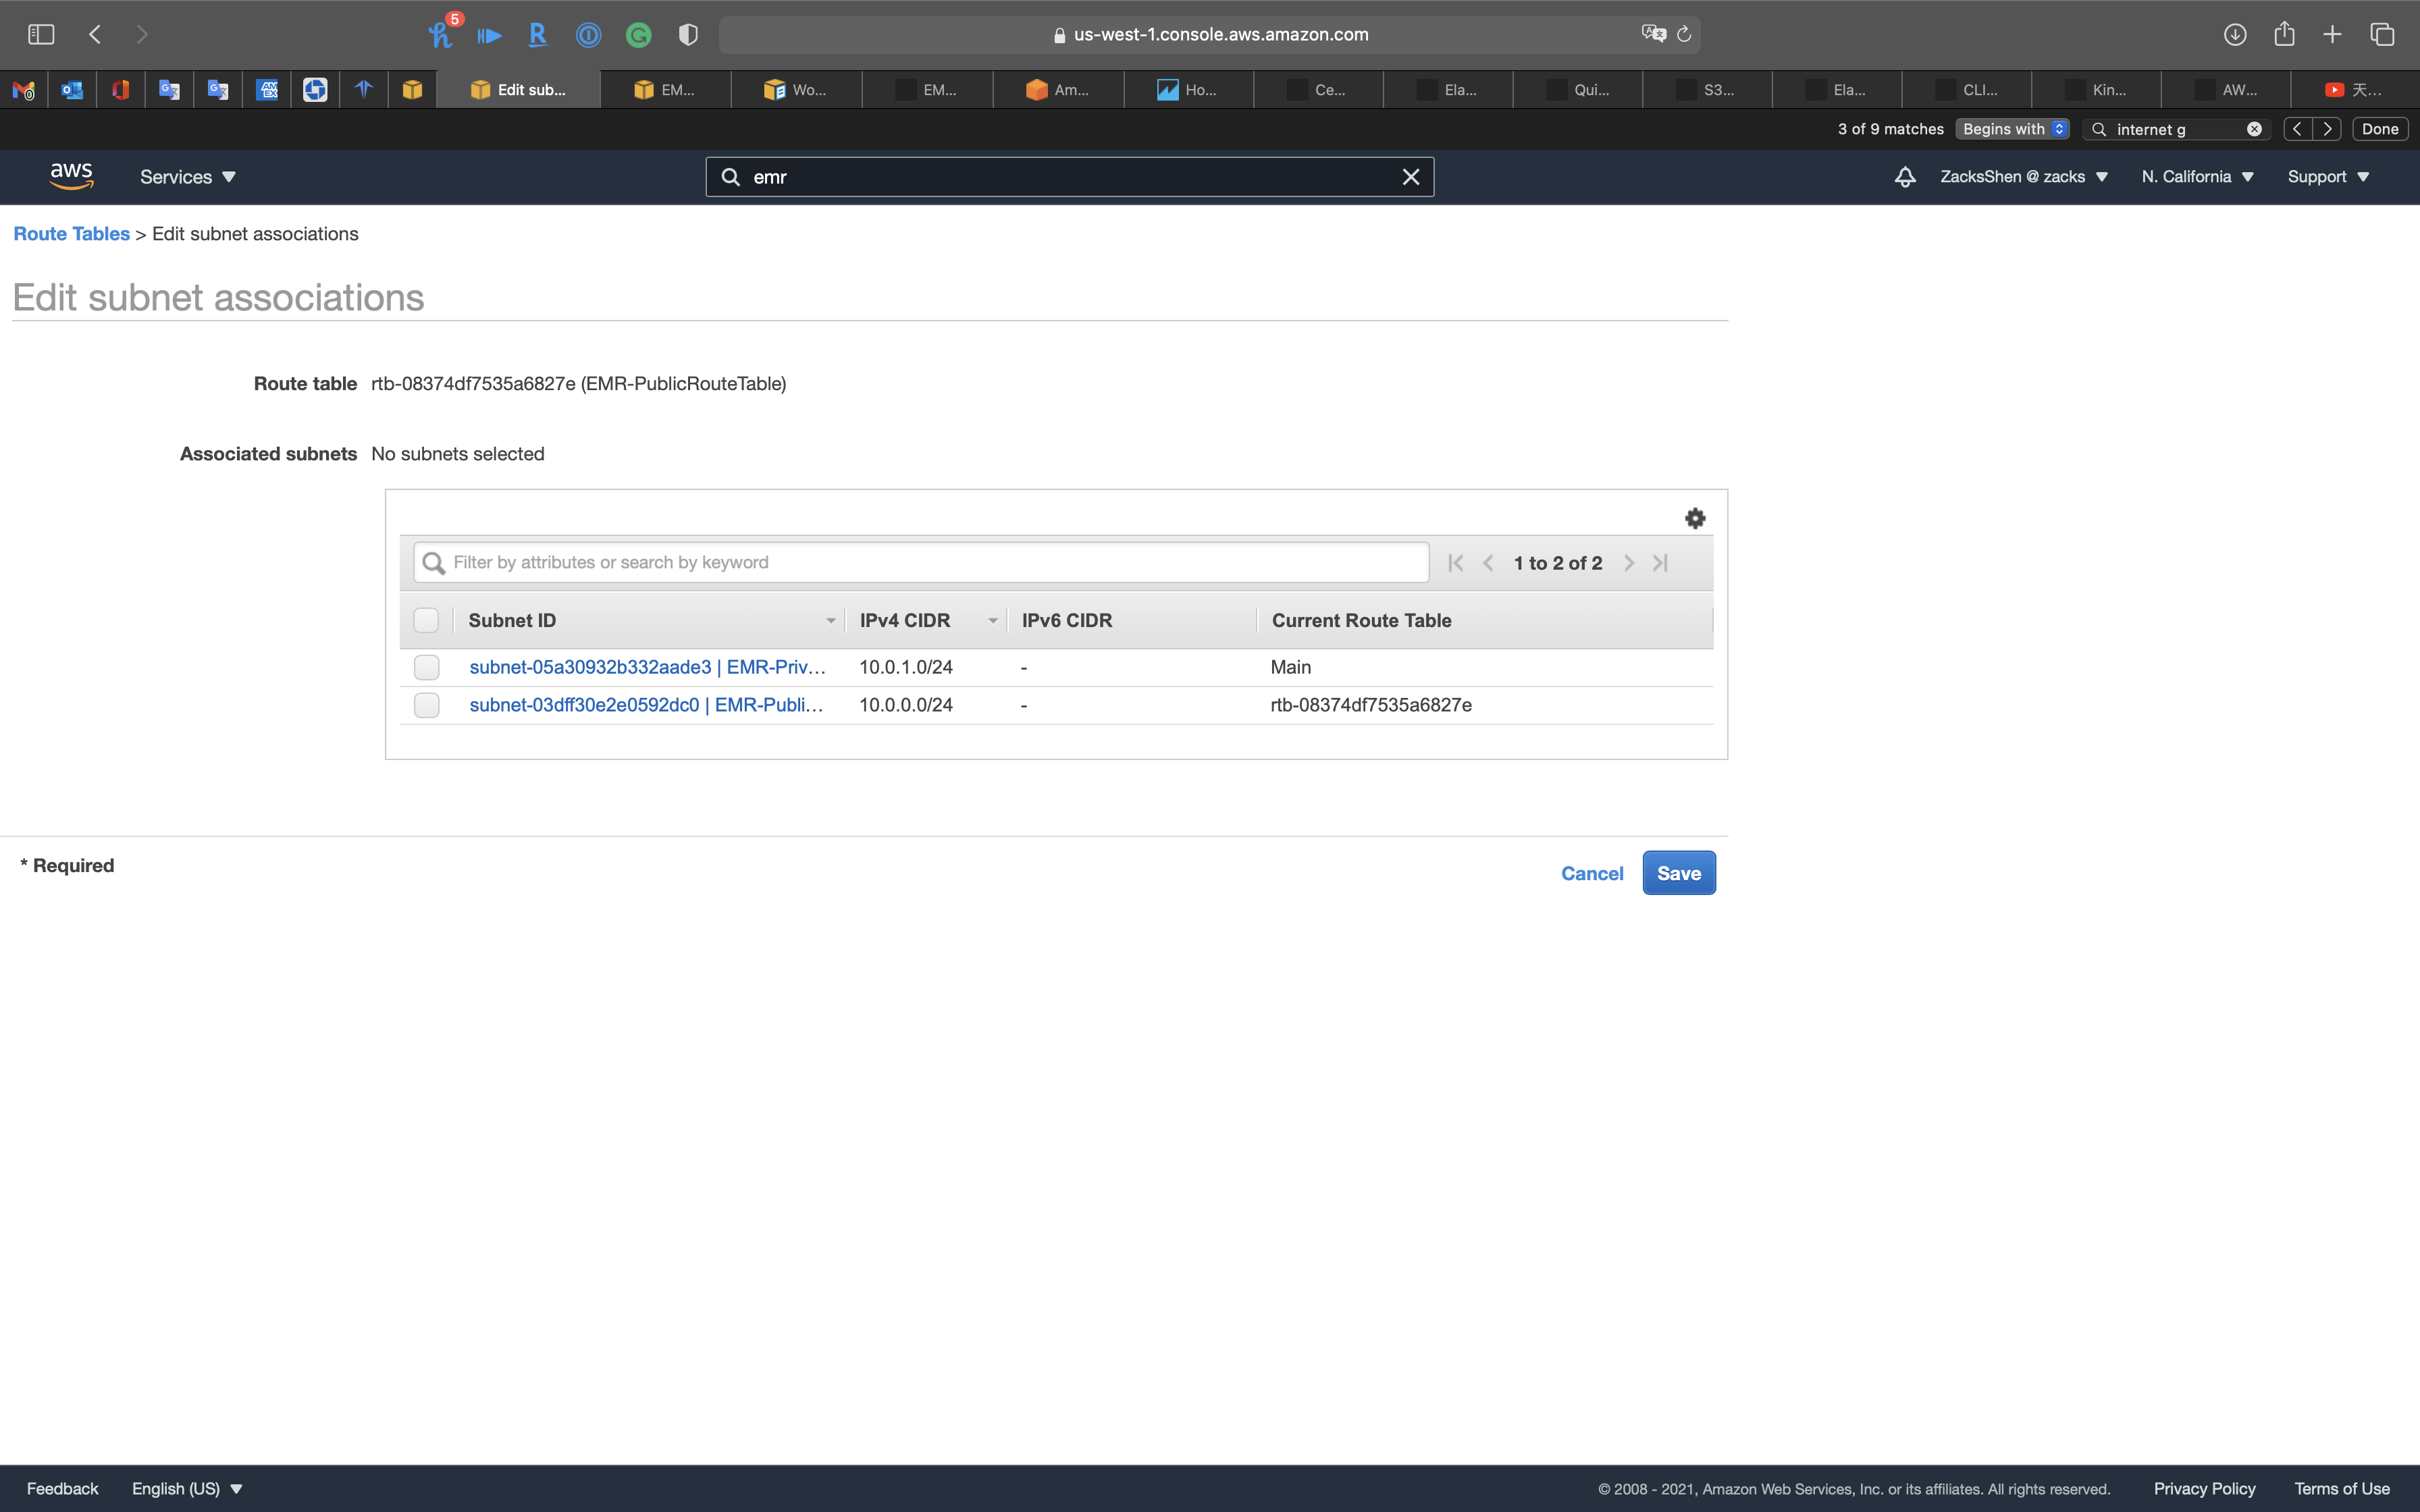
Select EMR-PublicRouteTable then click on Actions -> Delete Route Table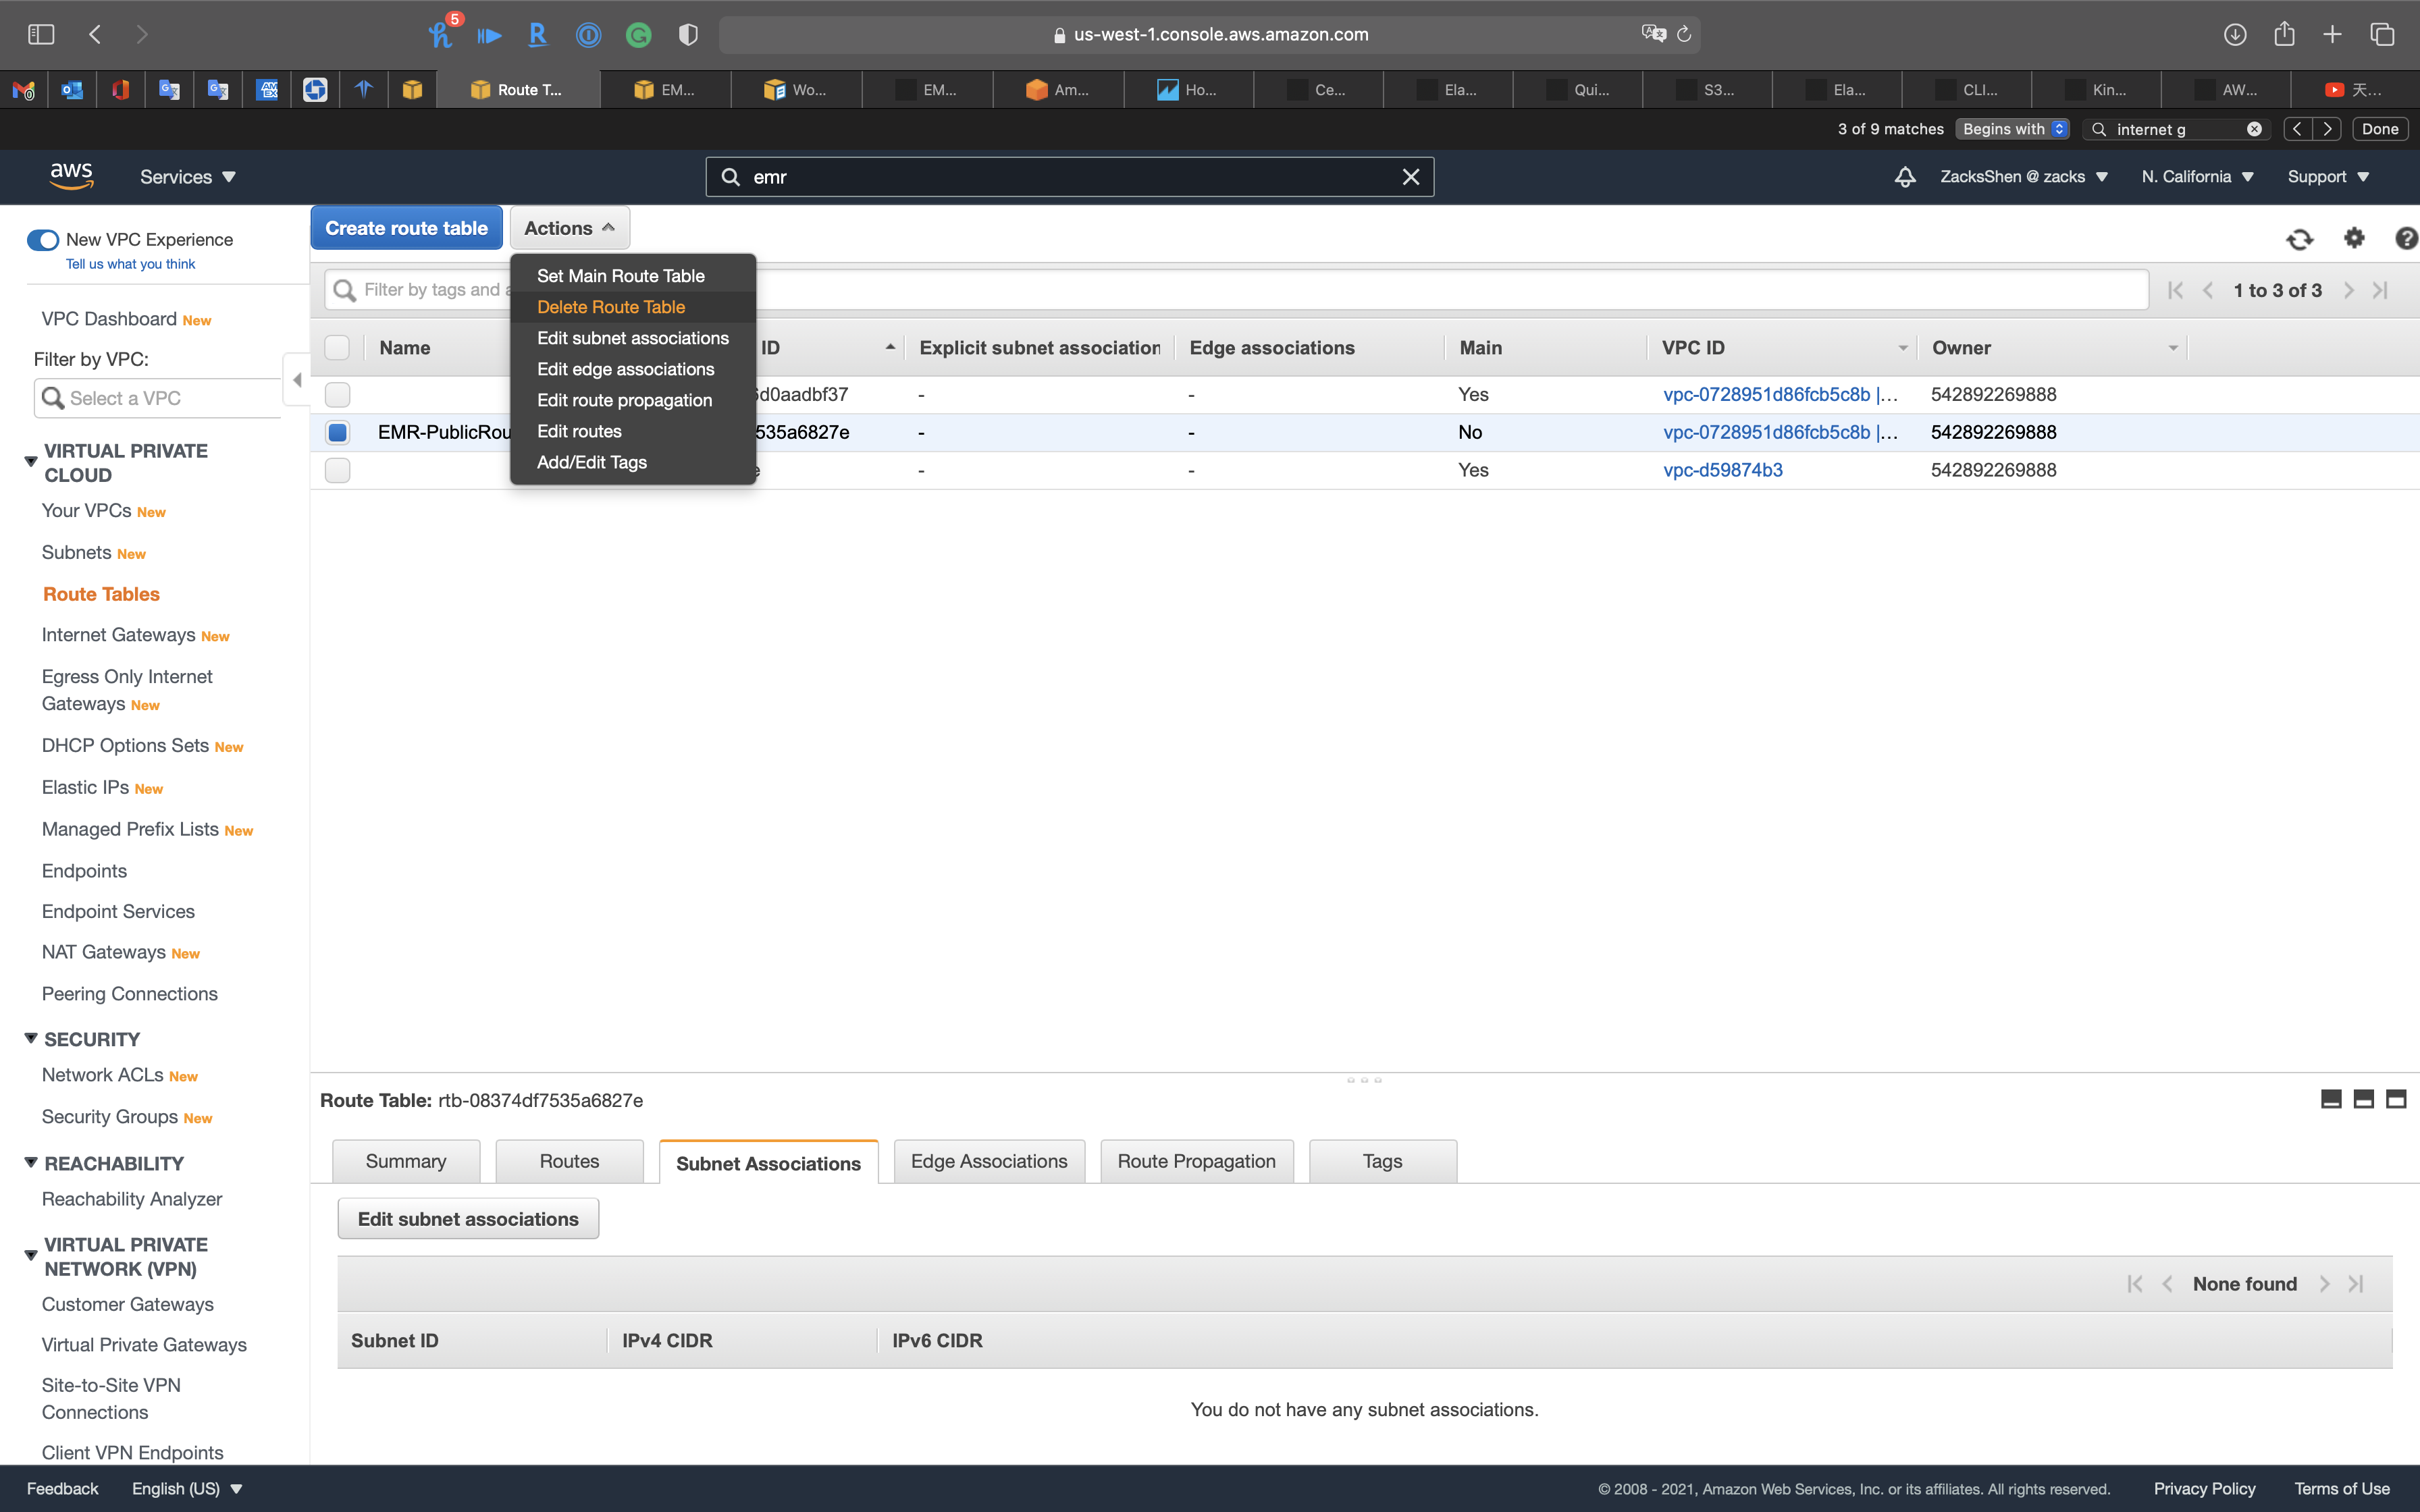
Click on Delete route table
Click on Close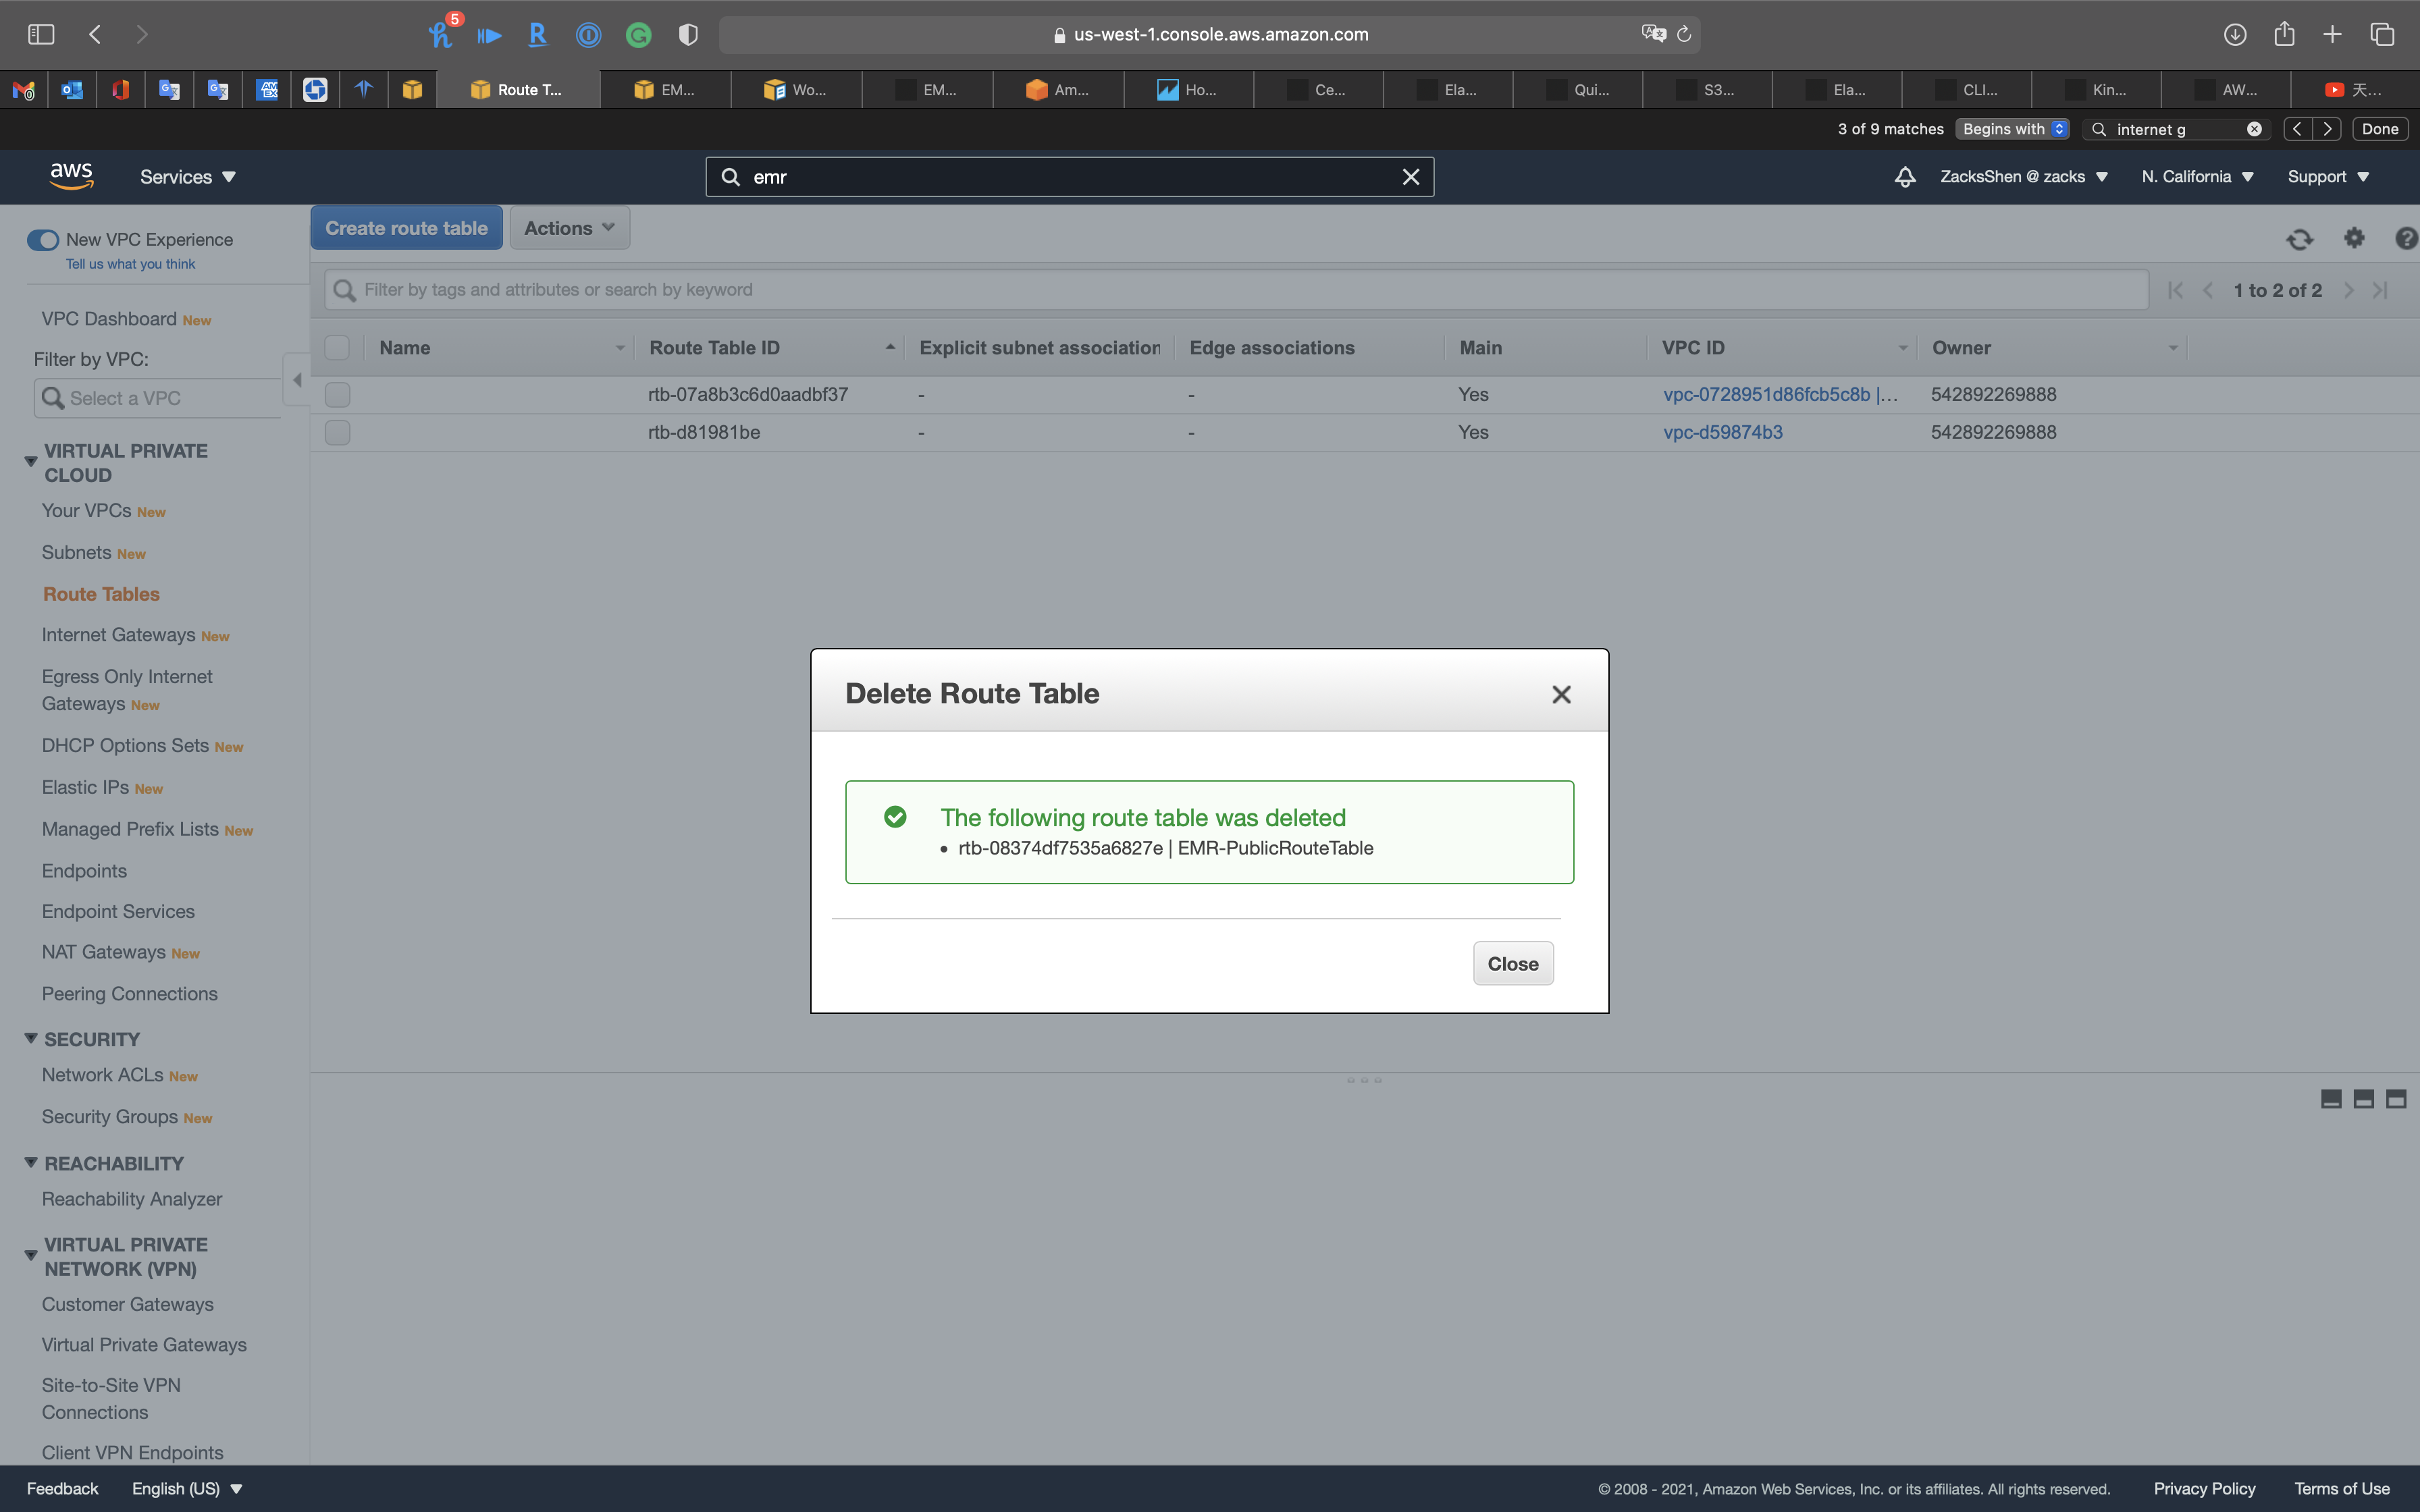
Delete Subnets
Services -> VPC -> Subnets
Select EMR-PrivateSubnet and EMR-PublicSubnet then click on Actions -> Delete subnet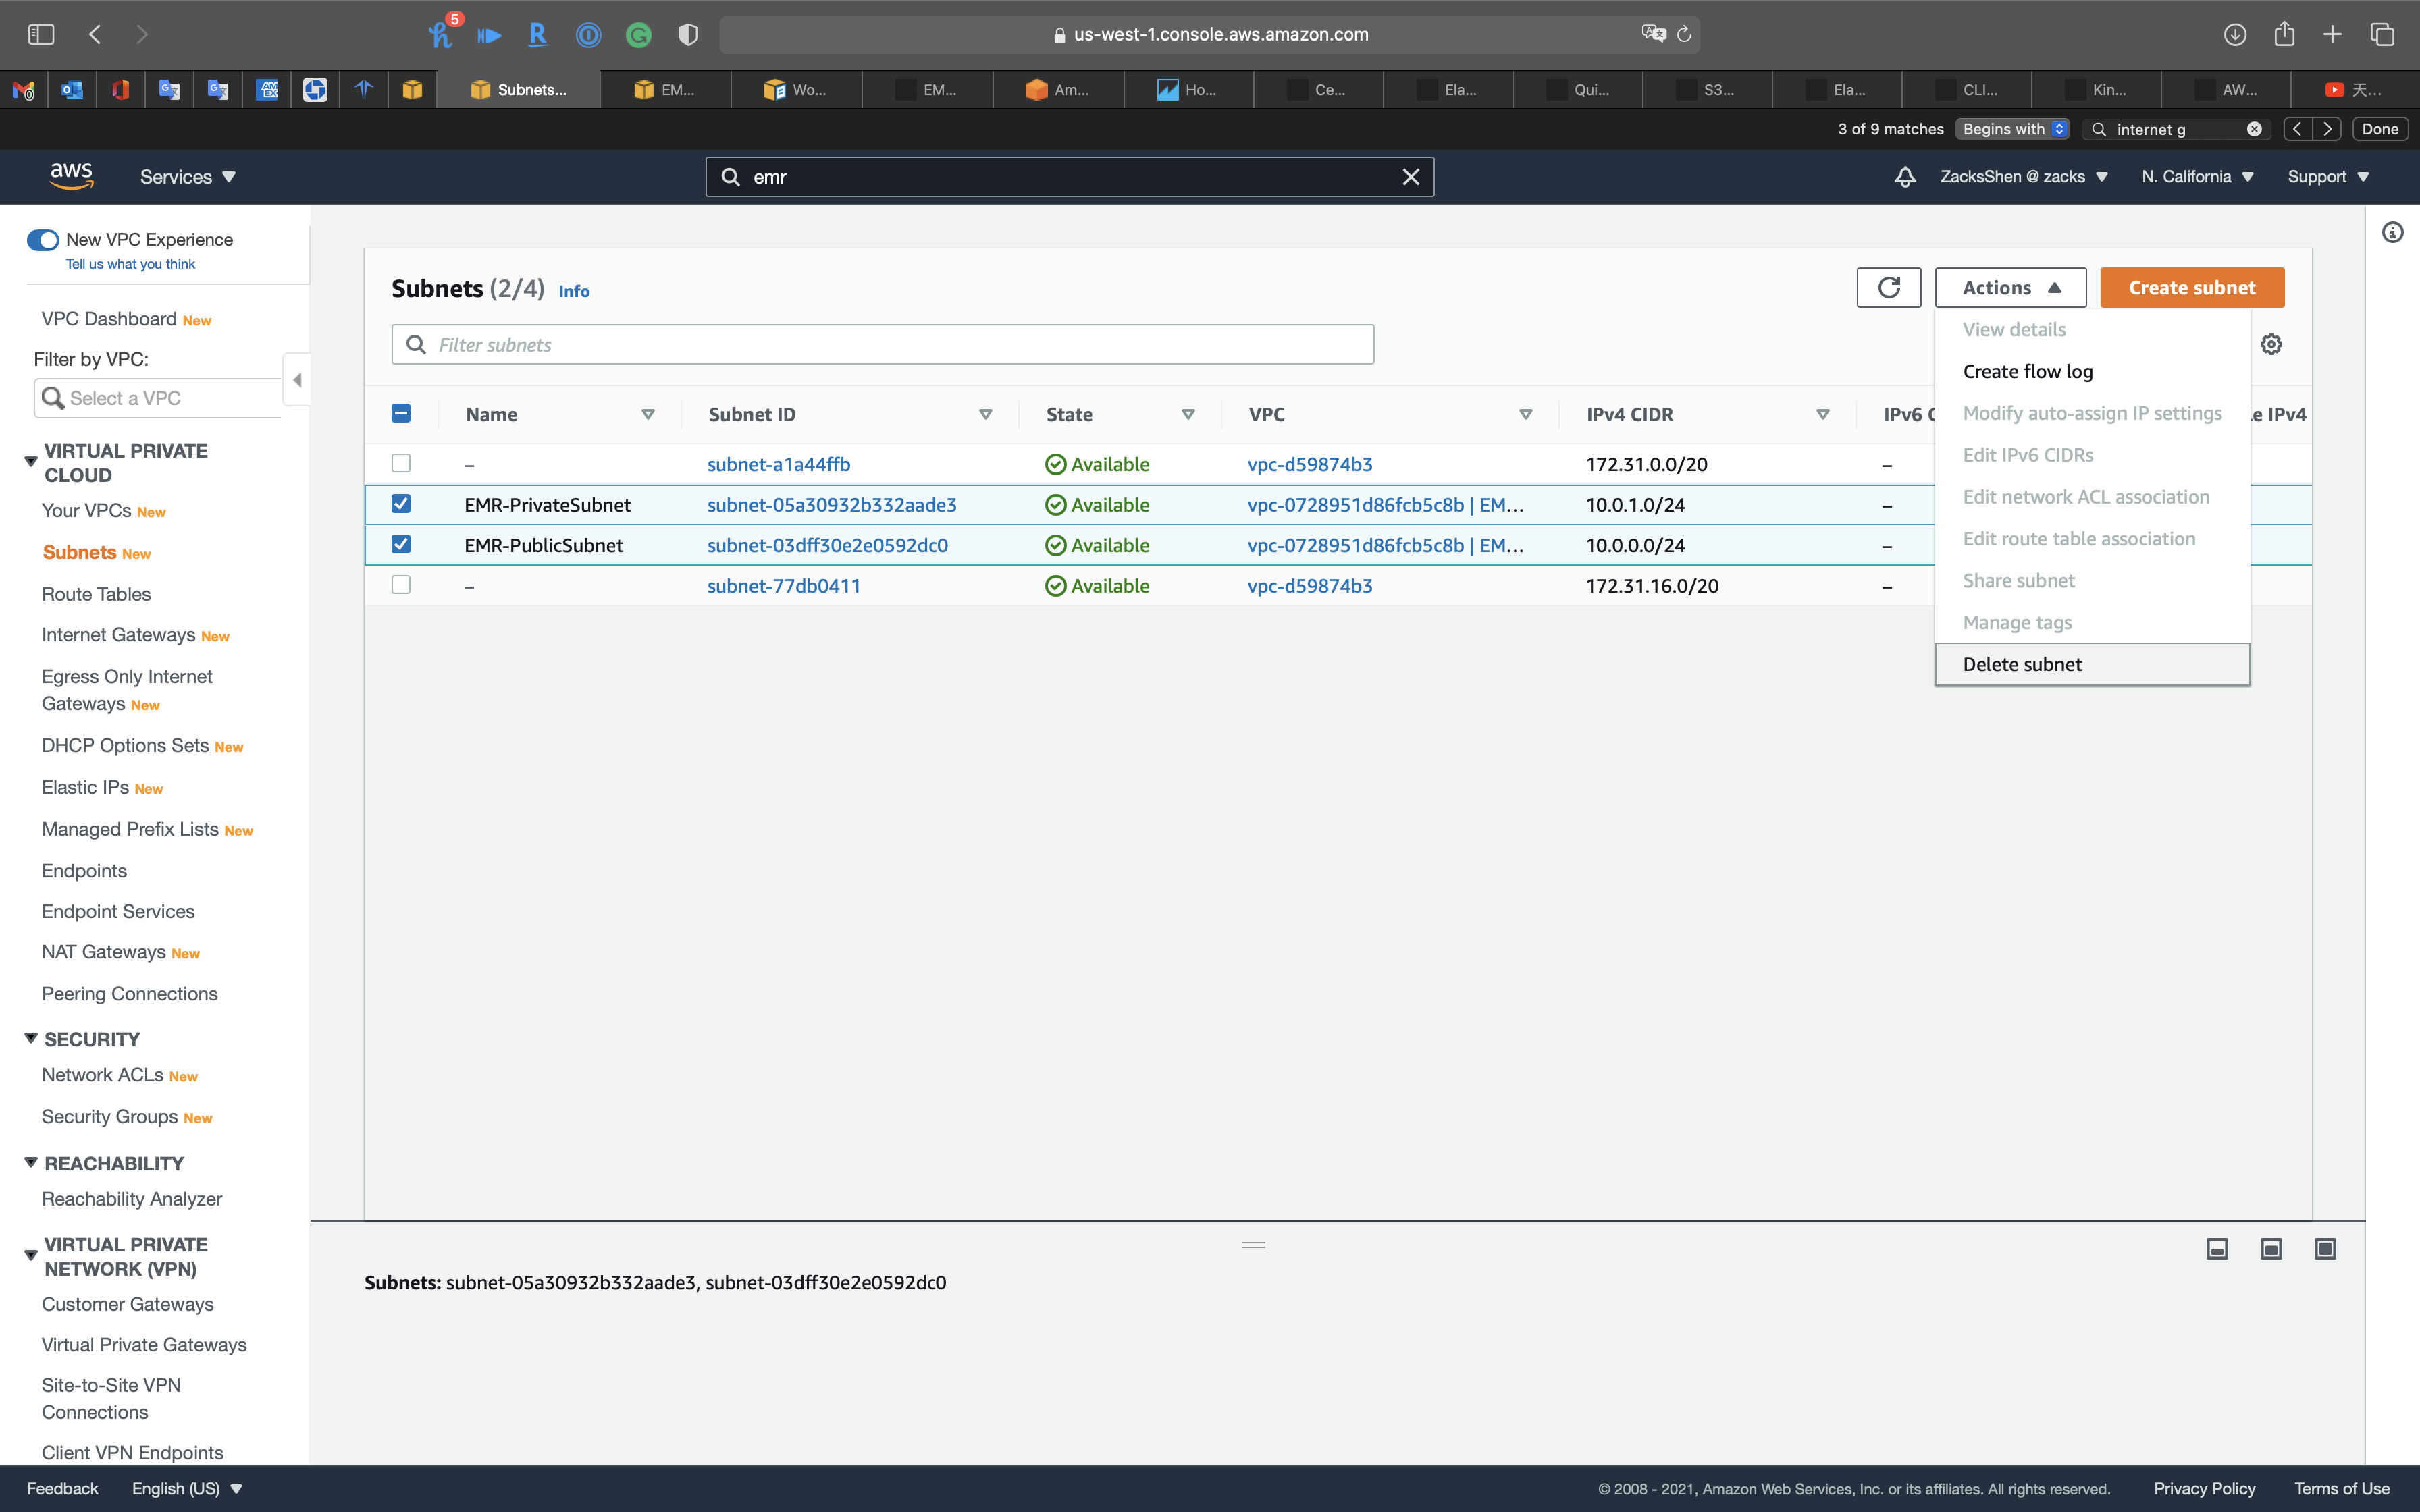
Type delete and click on Delete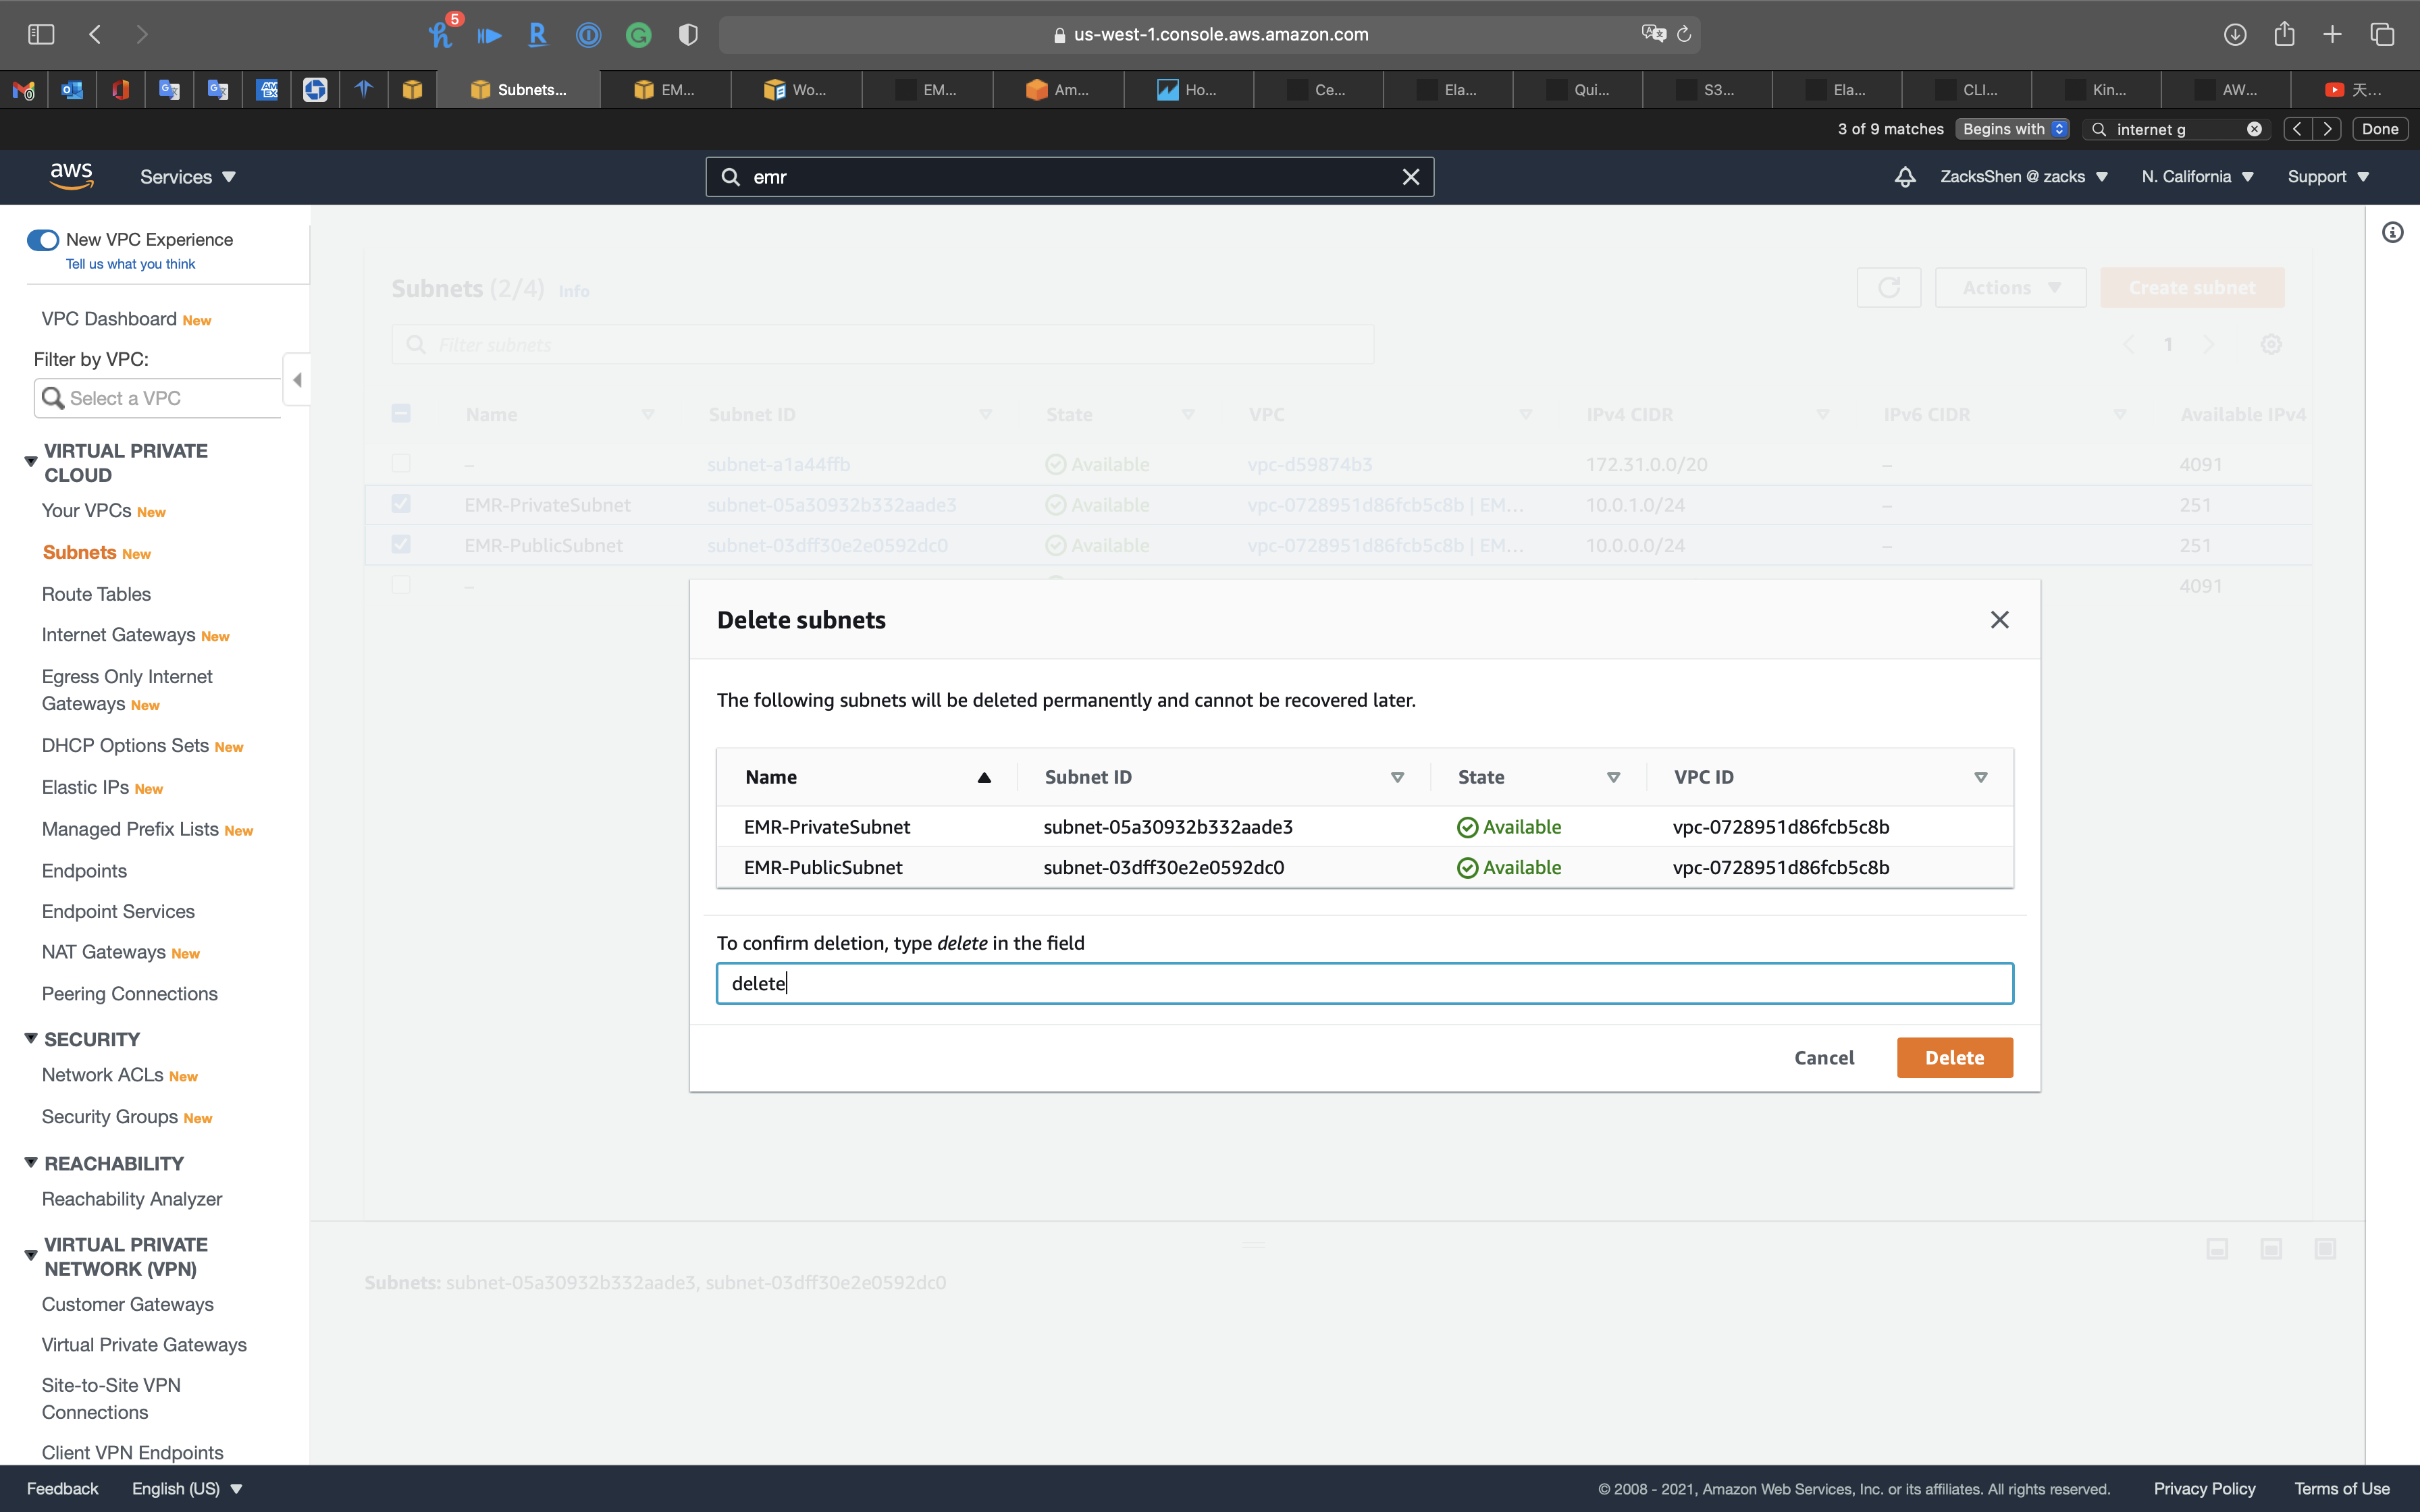
Delete VPC
Services -> VPC -> Your VPCs
Select EMR-VPC then click on Actions -> Delete VPC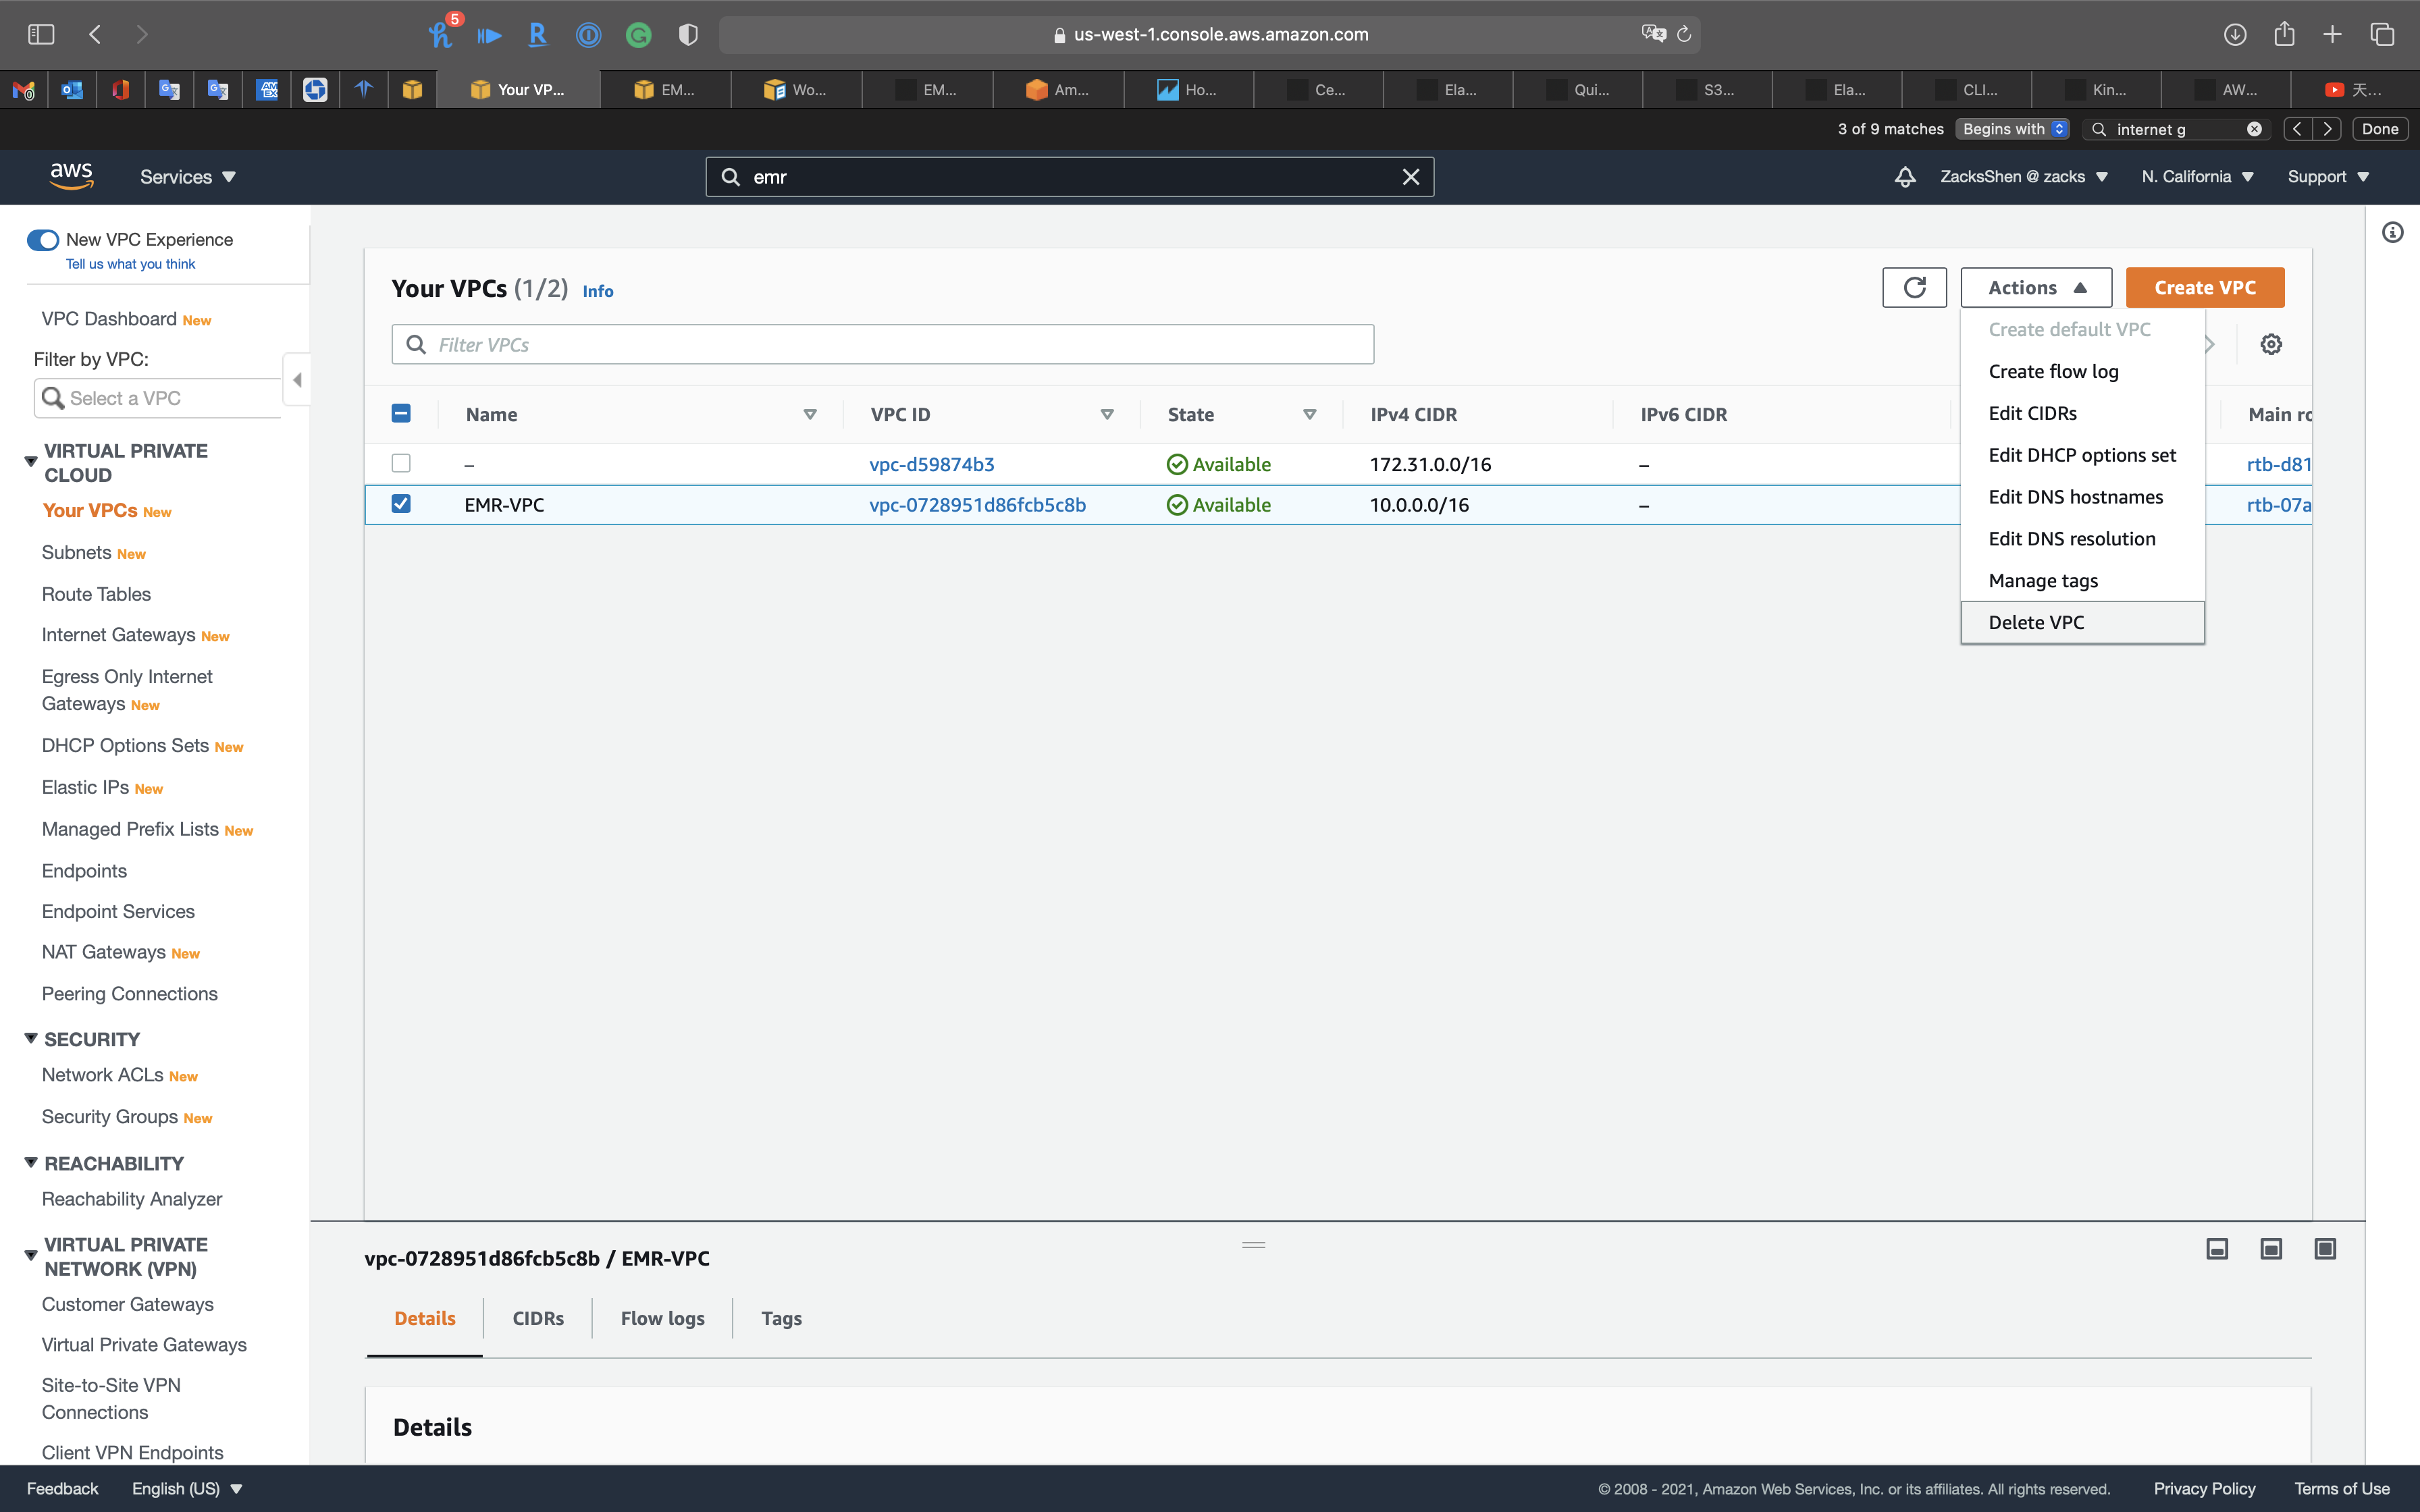
Type delete and click on Delete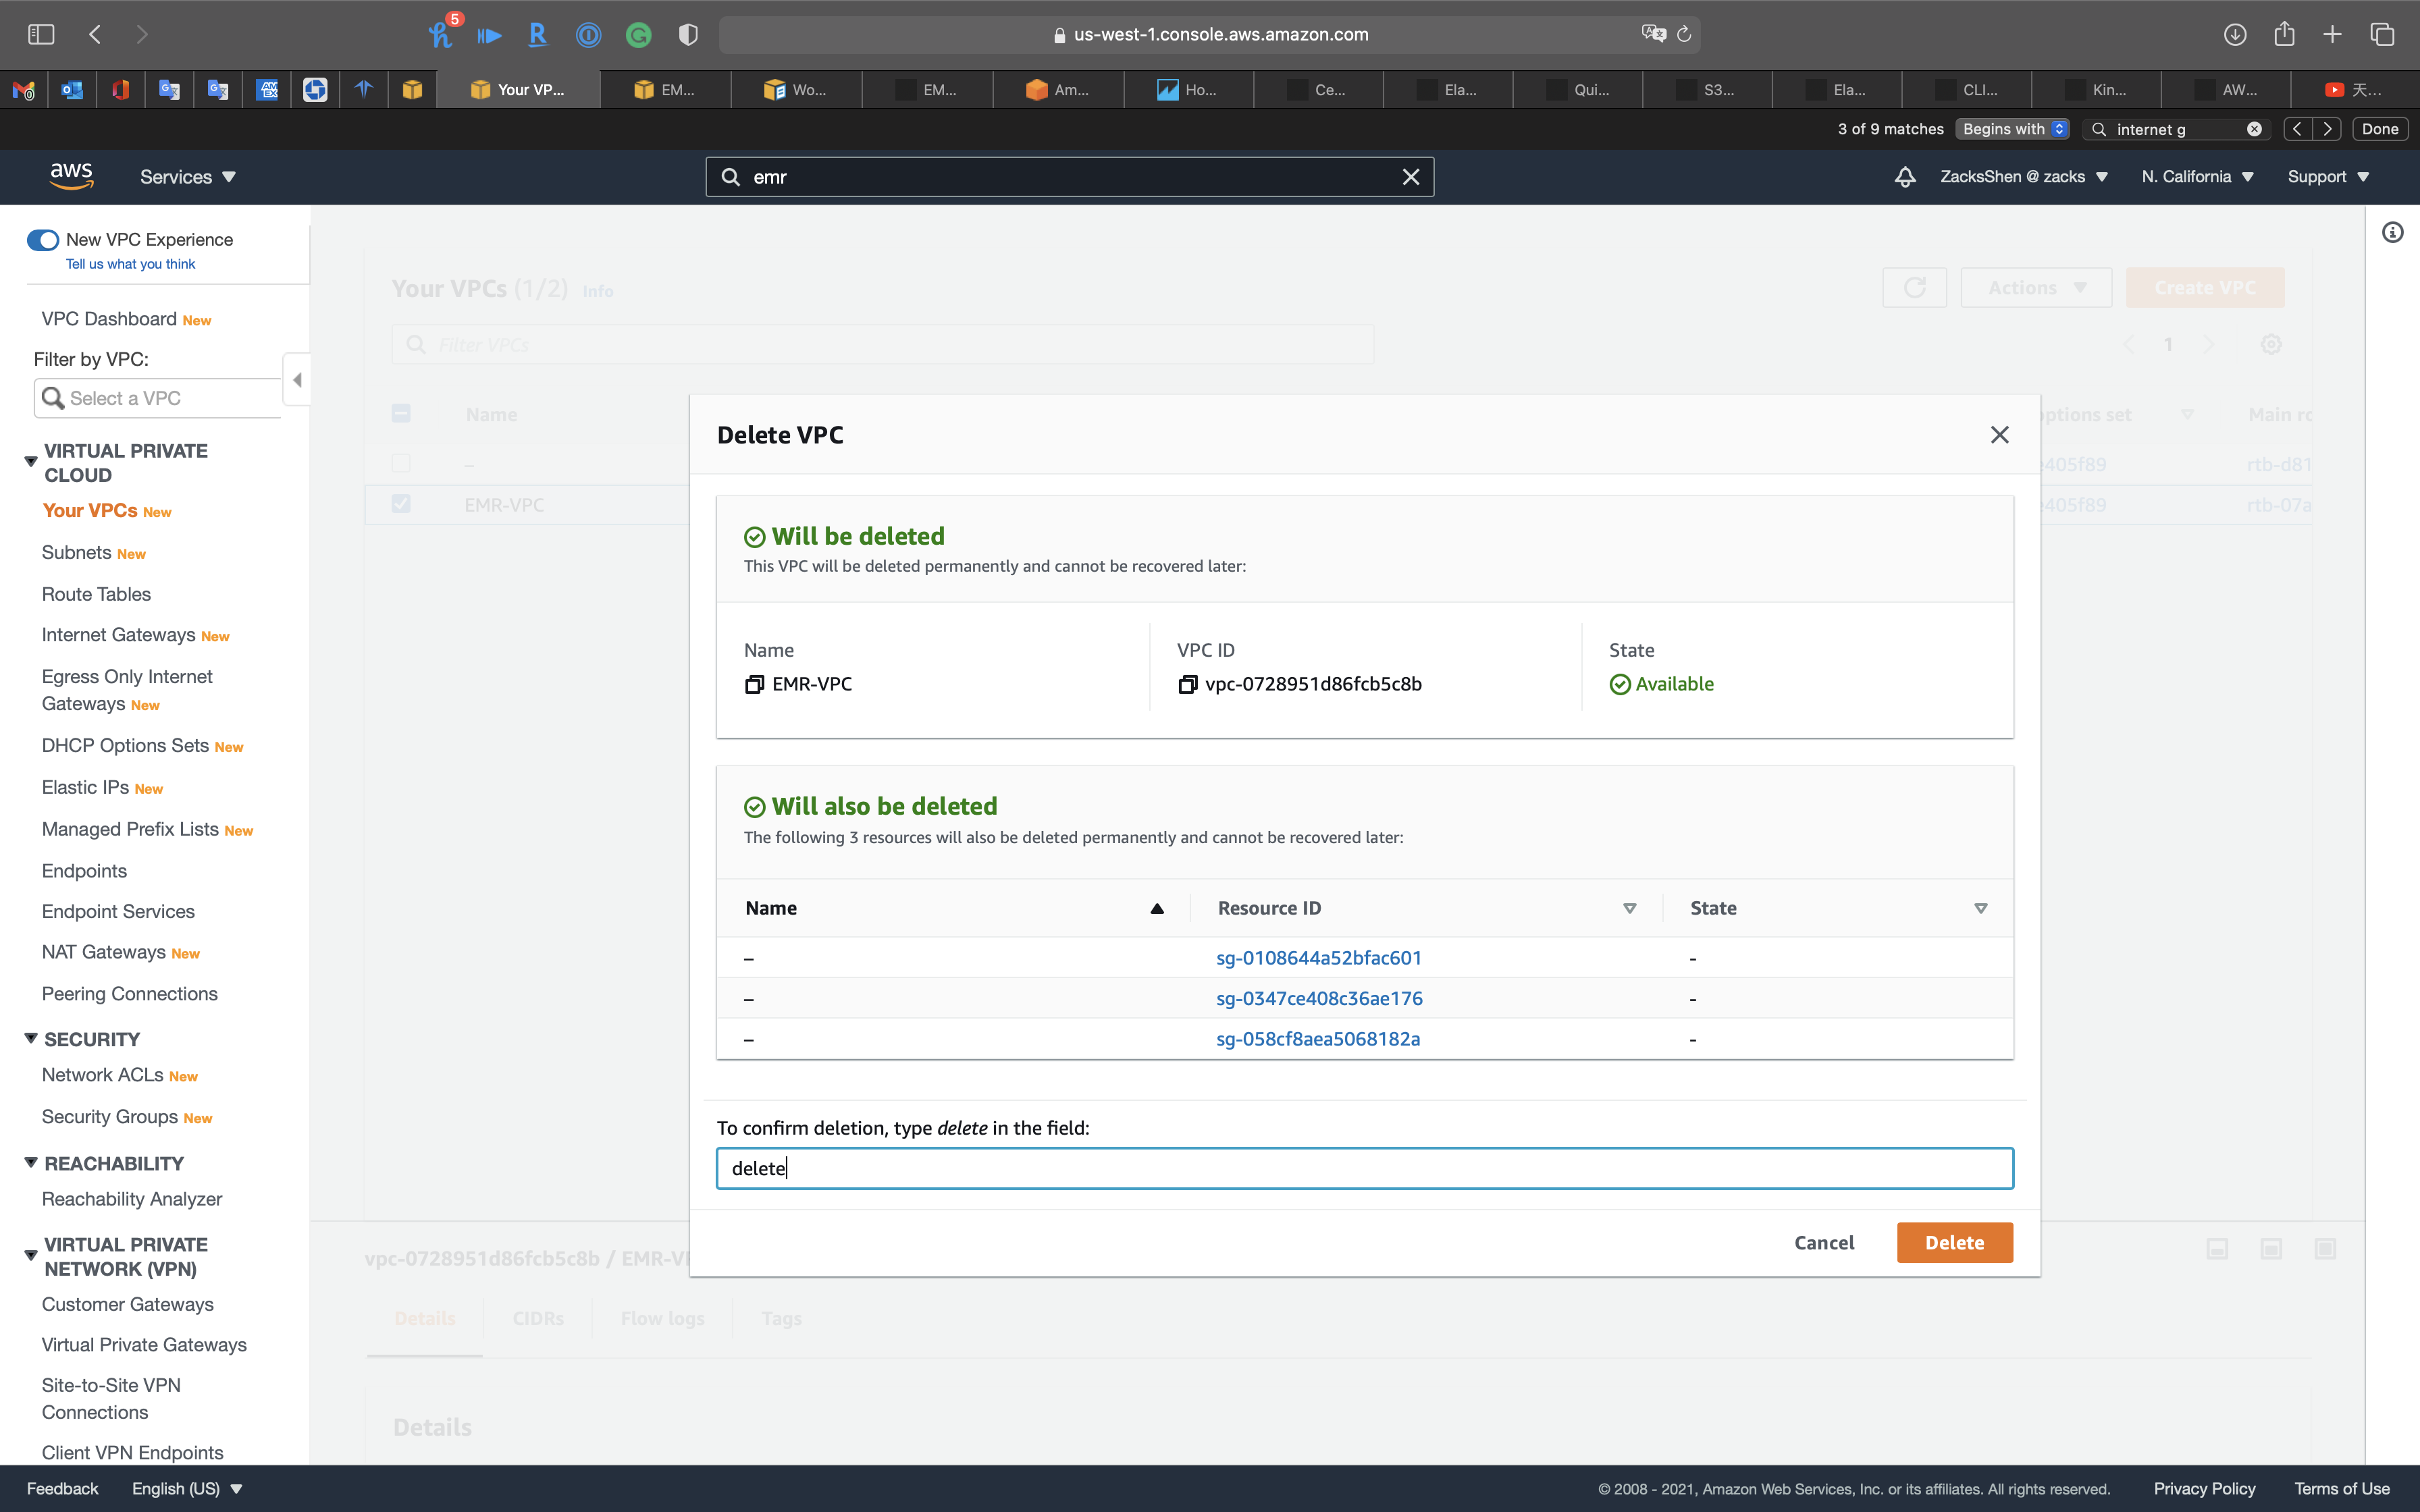
Delete the security groups
Services -> VPC -> Security Groups
Select EMR-NAT security group.
Click on Actions -> Delete security group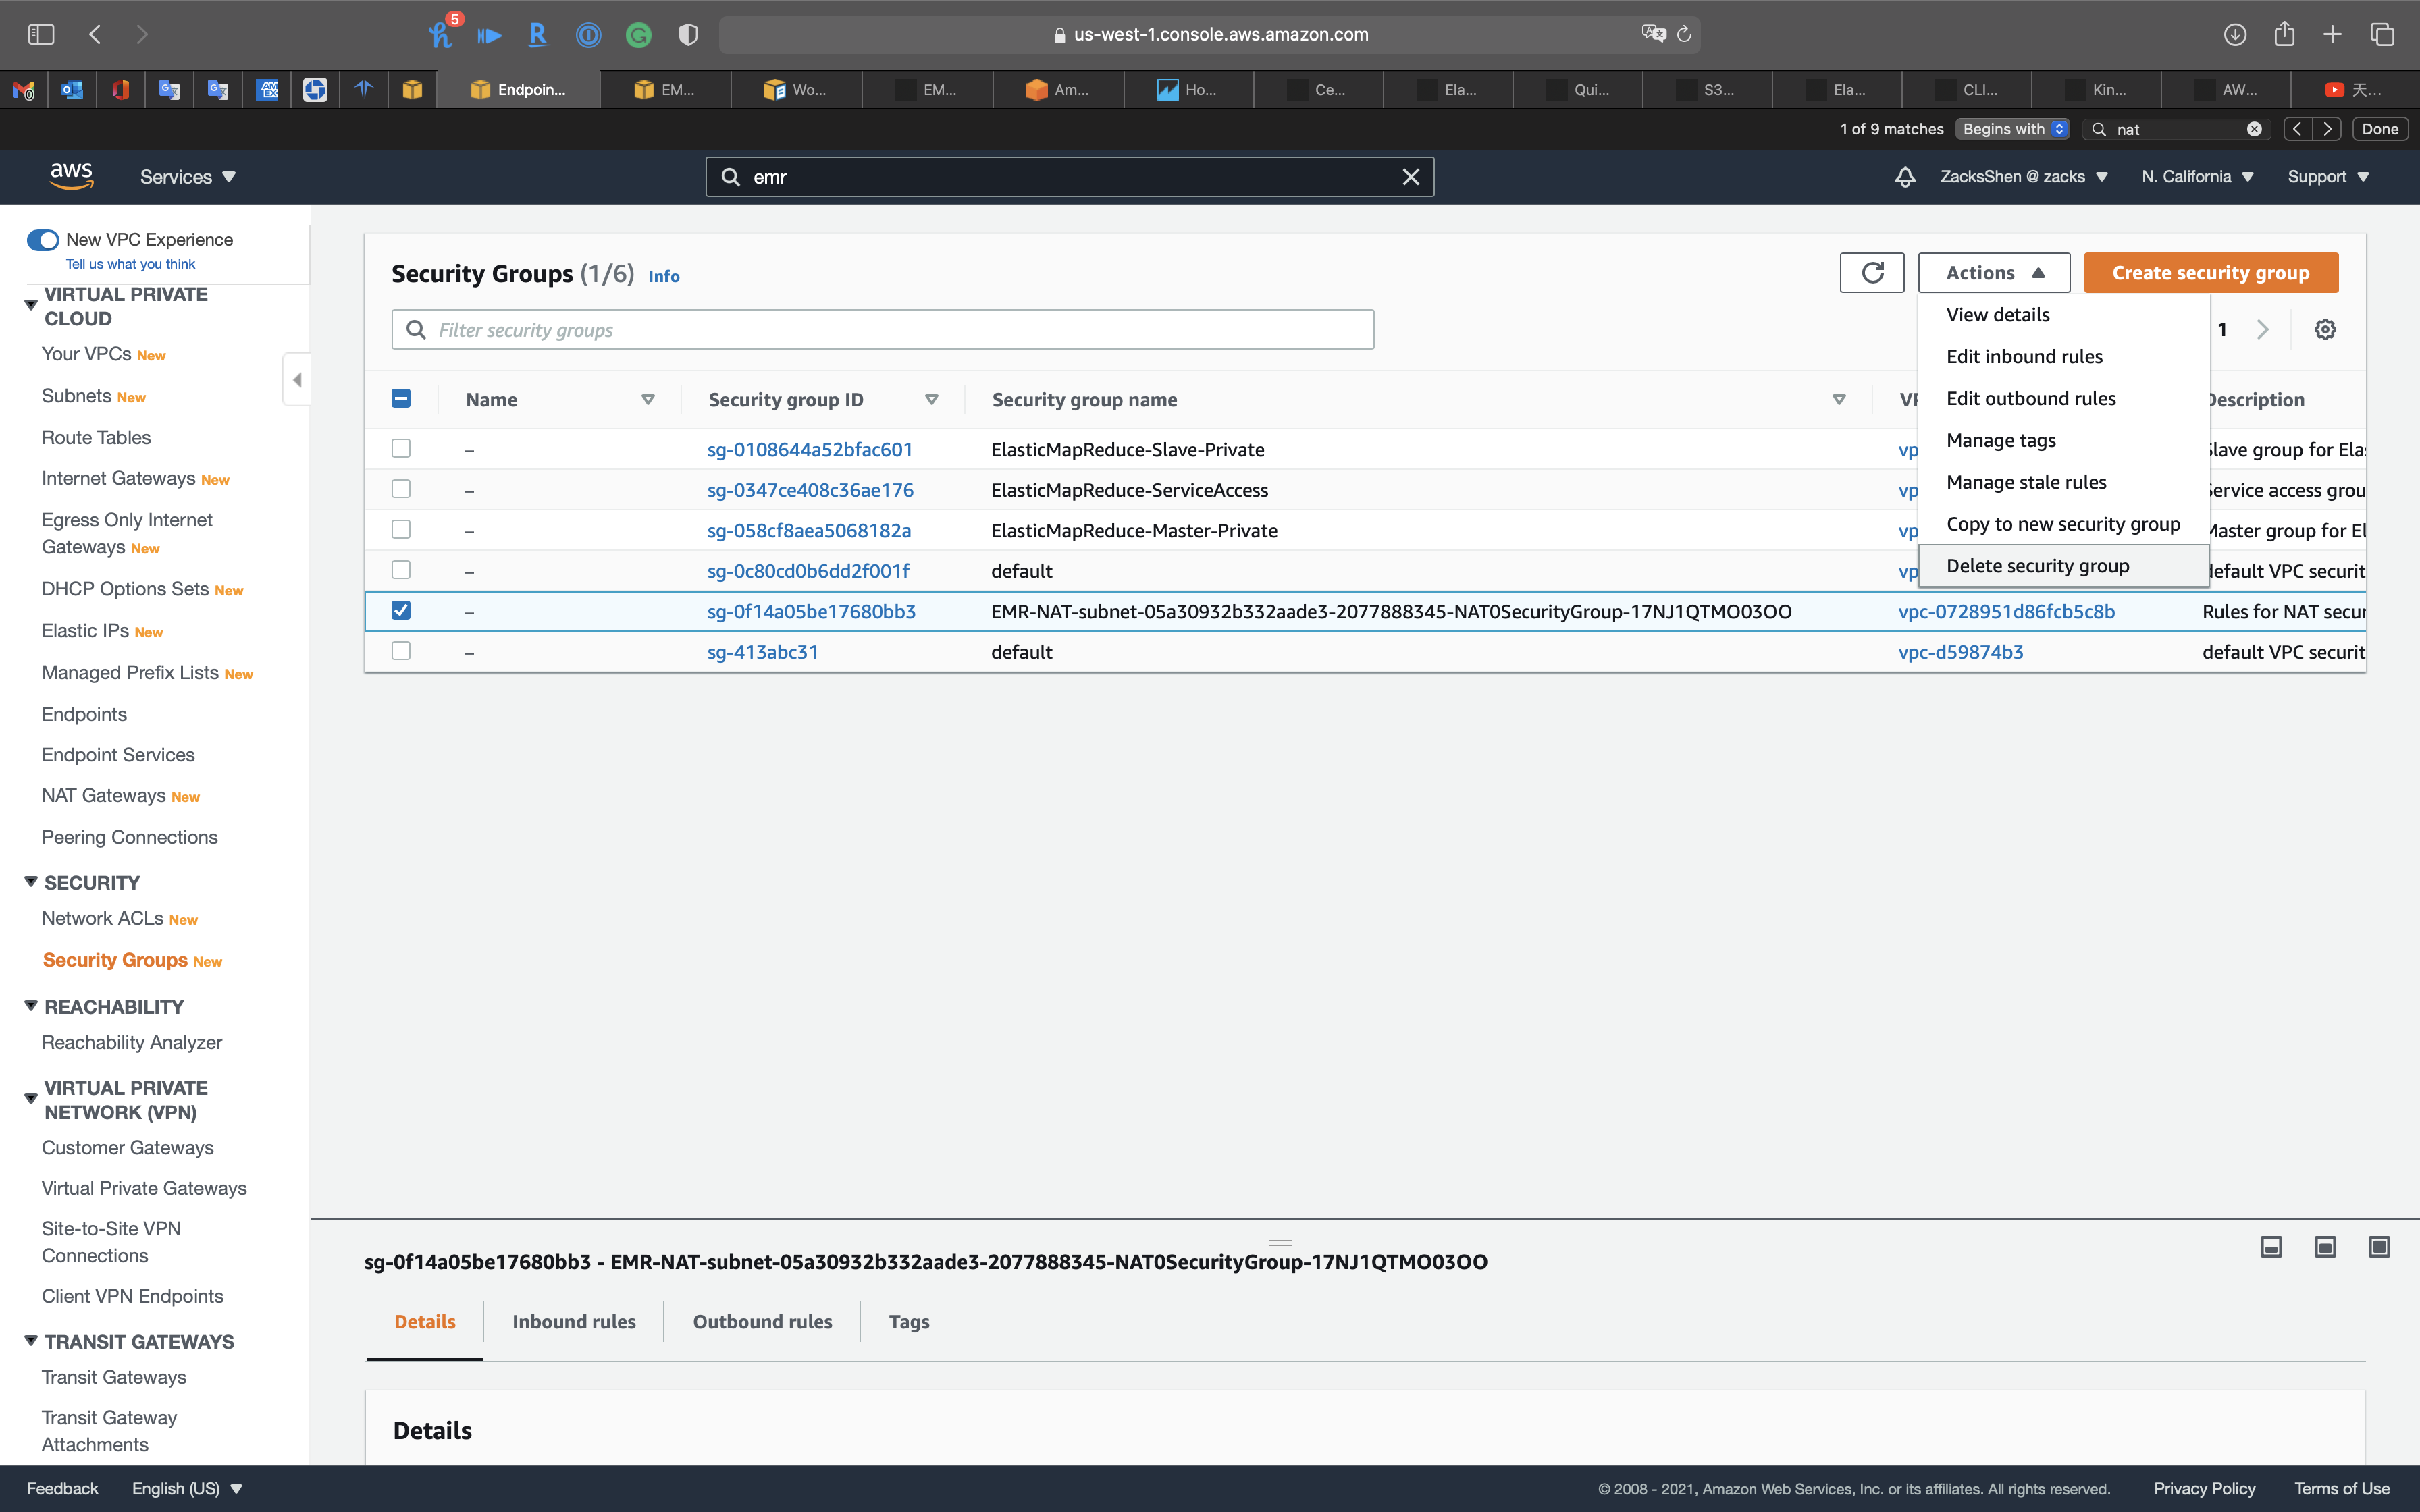
Click on Delete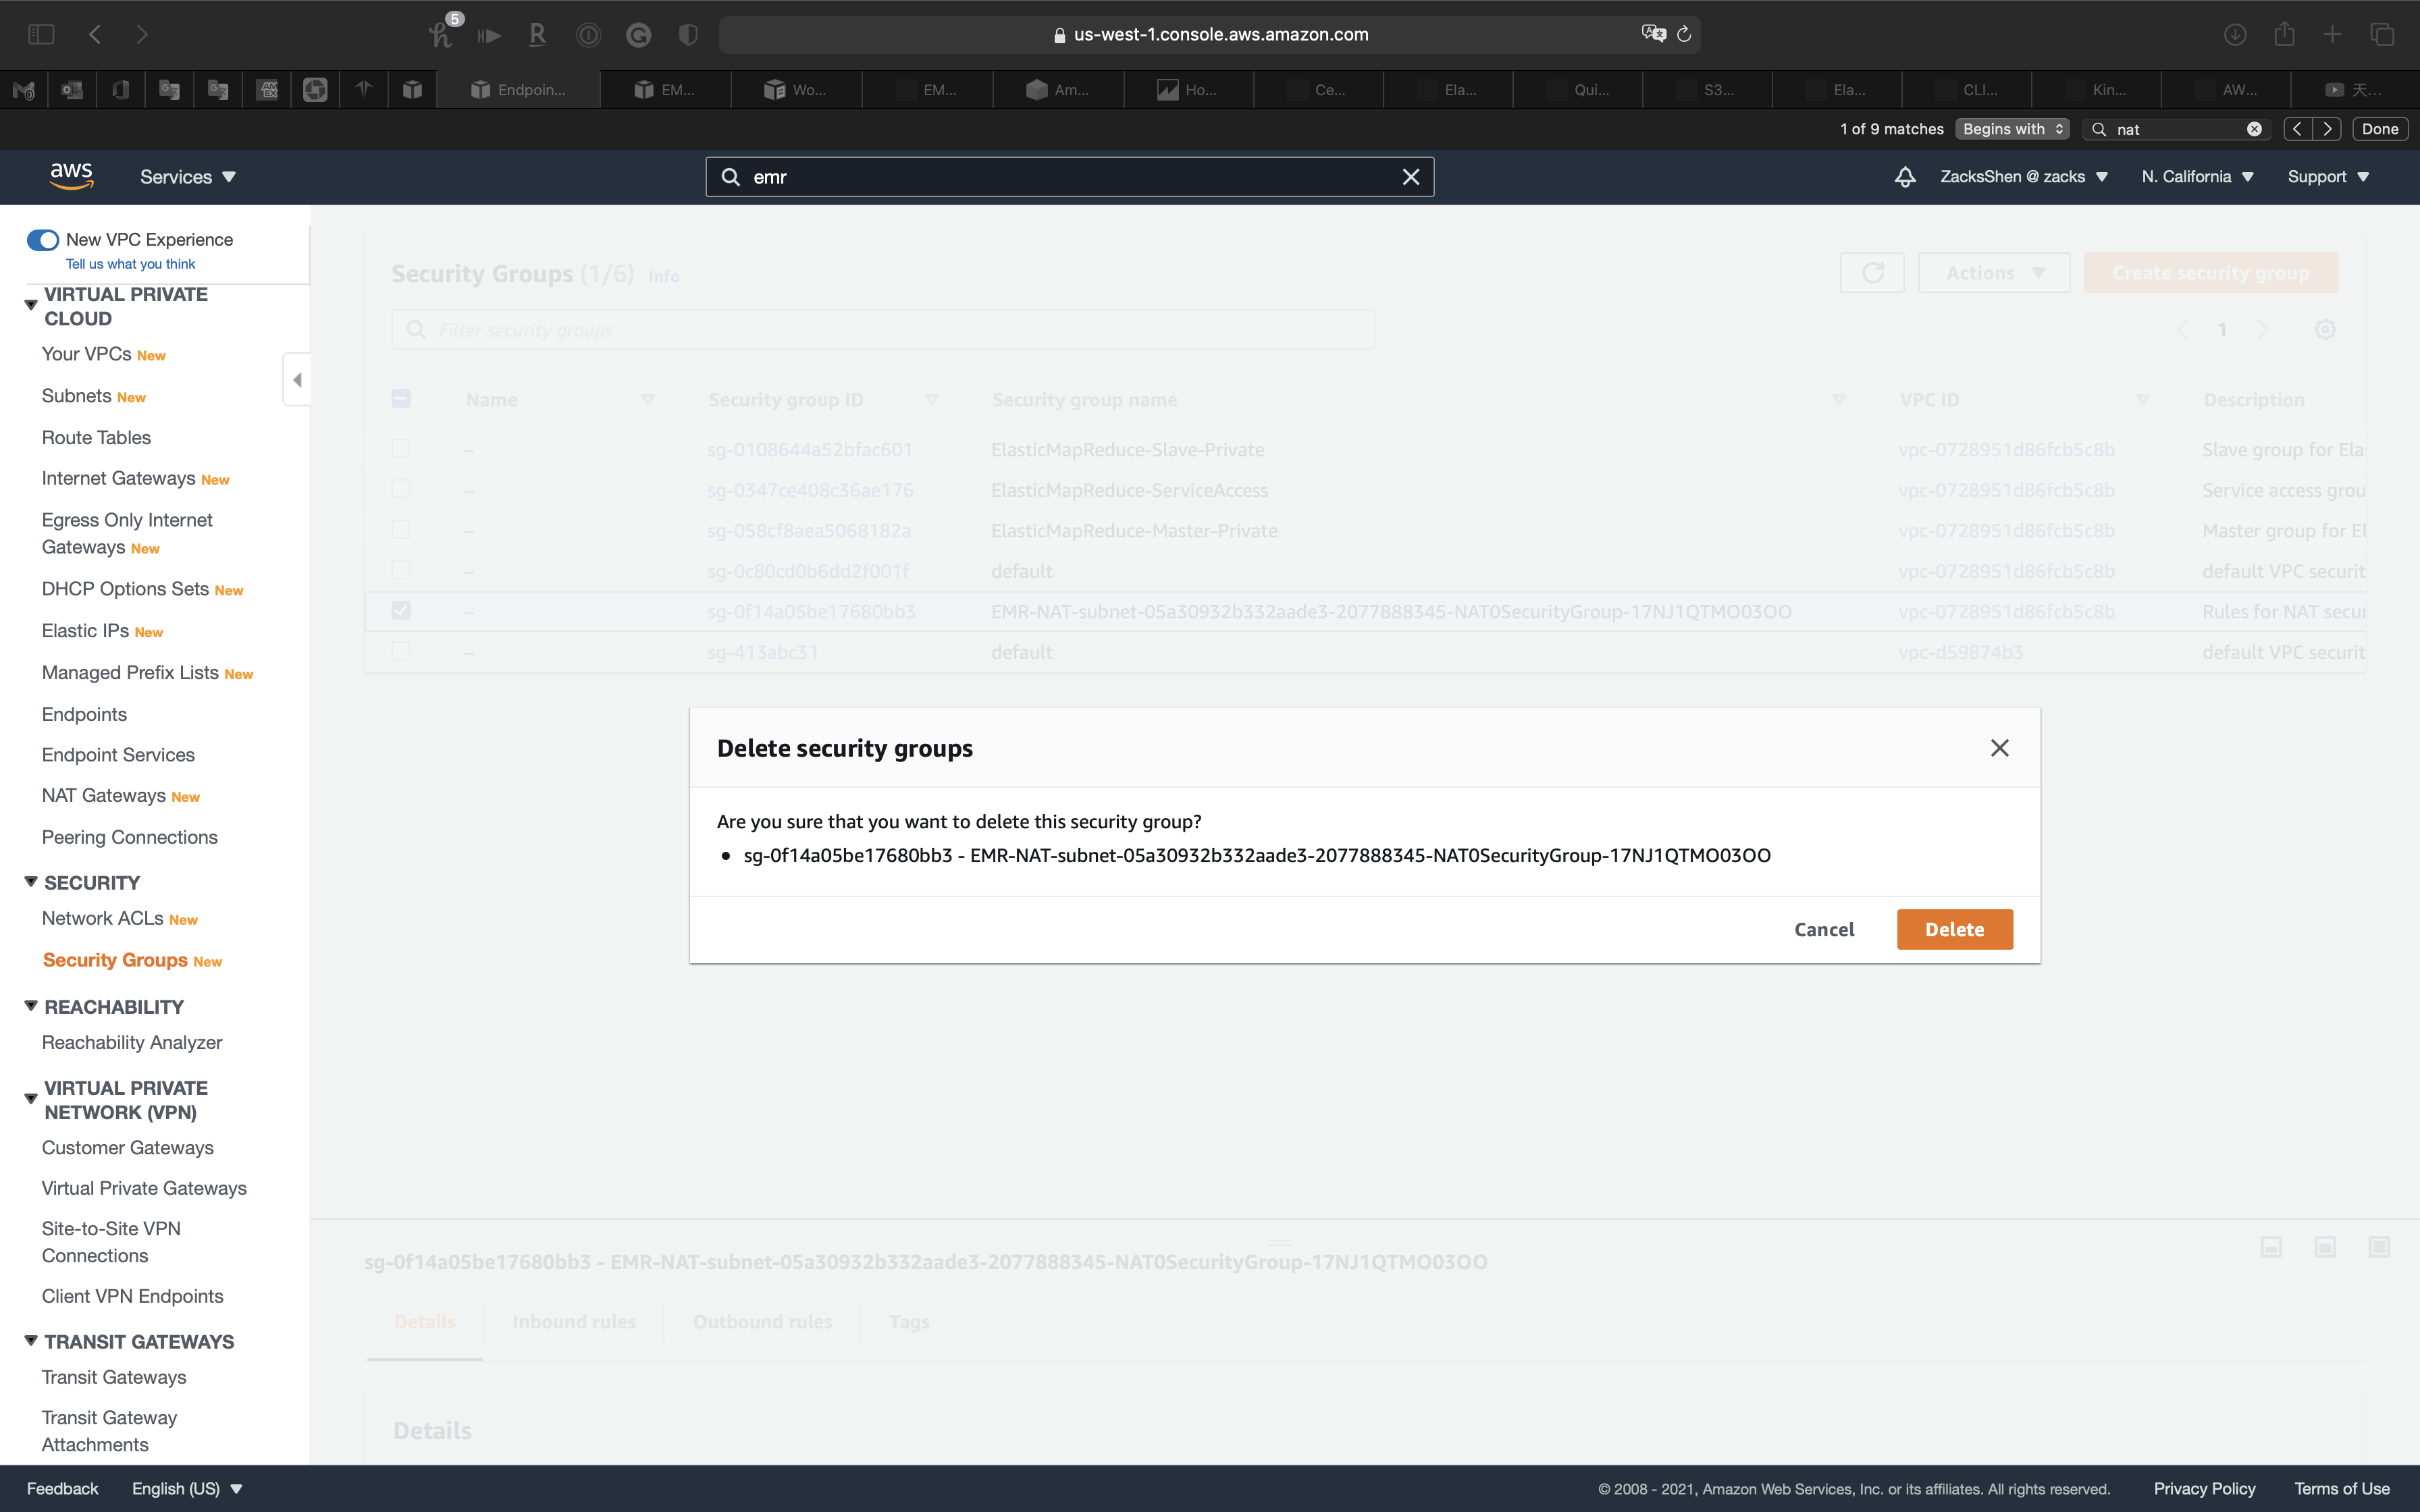
Select ElasticMapReduce-Slave-Private, ElasticMapReduce-ServiceAccess, and ElasticMapReduce-Master-Private security groups.
Click on Actions -> Delete security group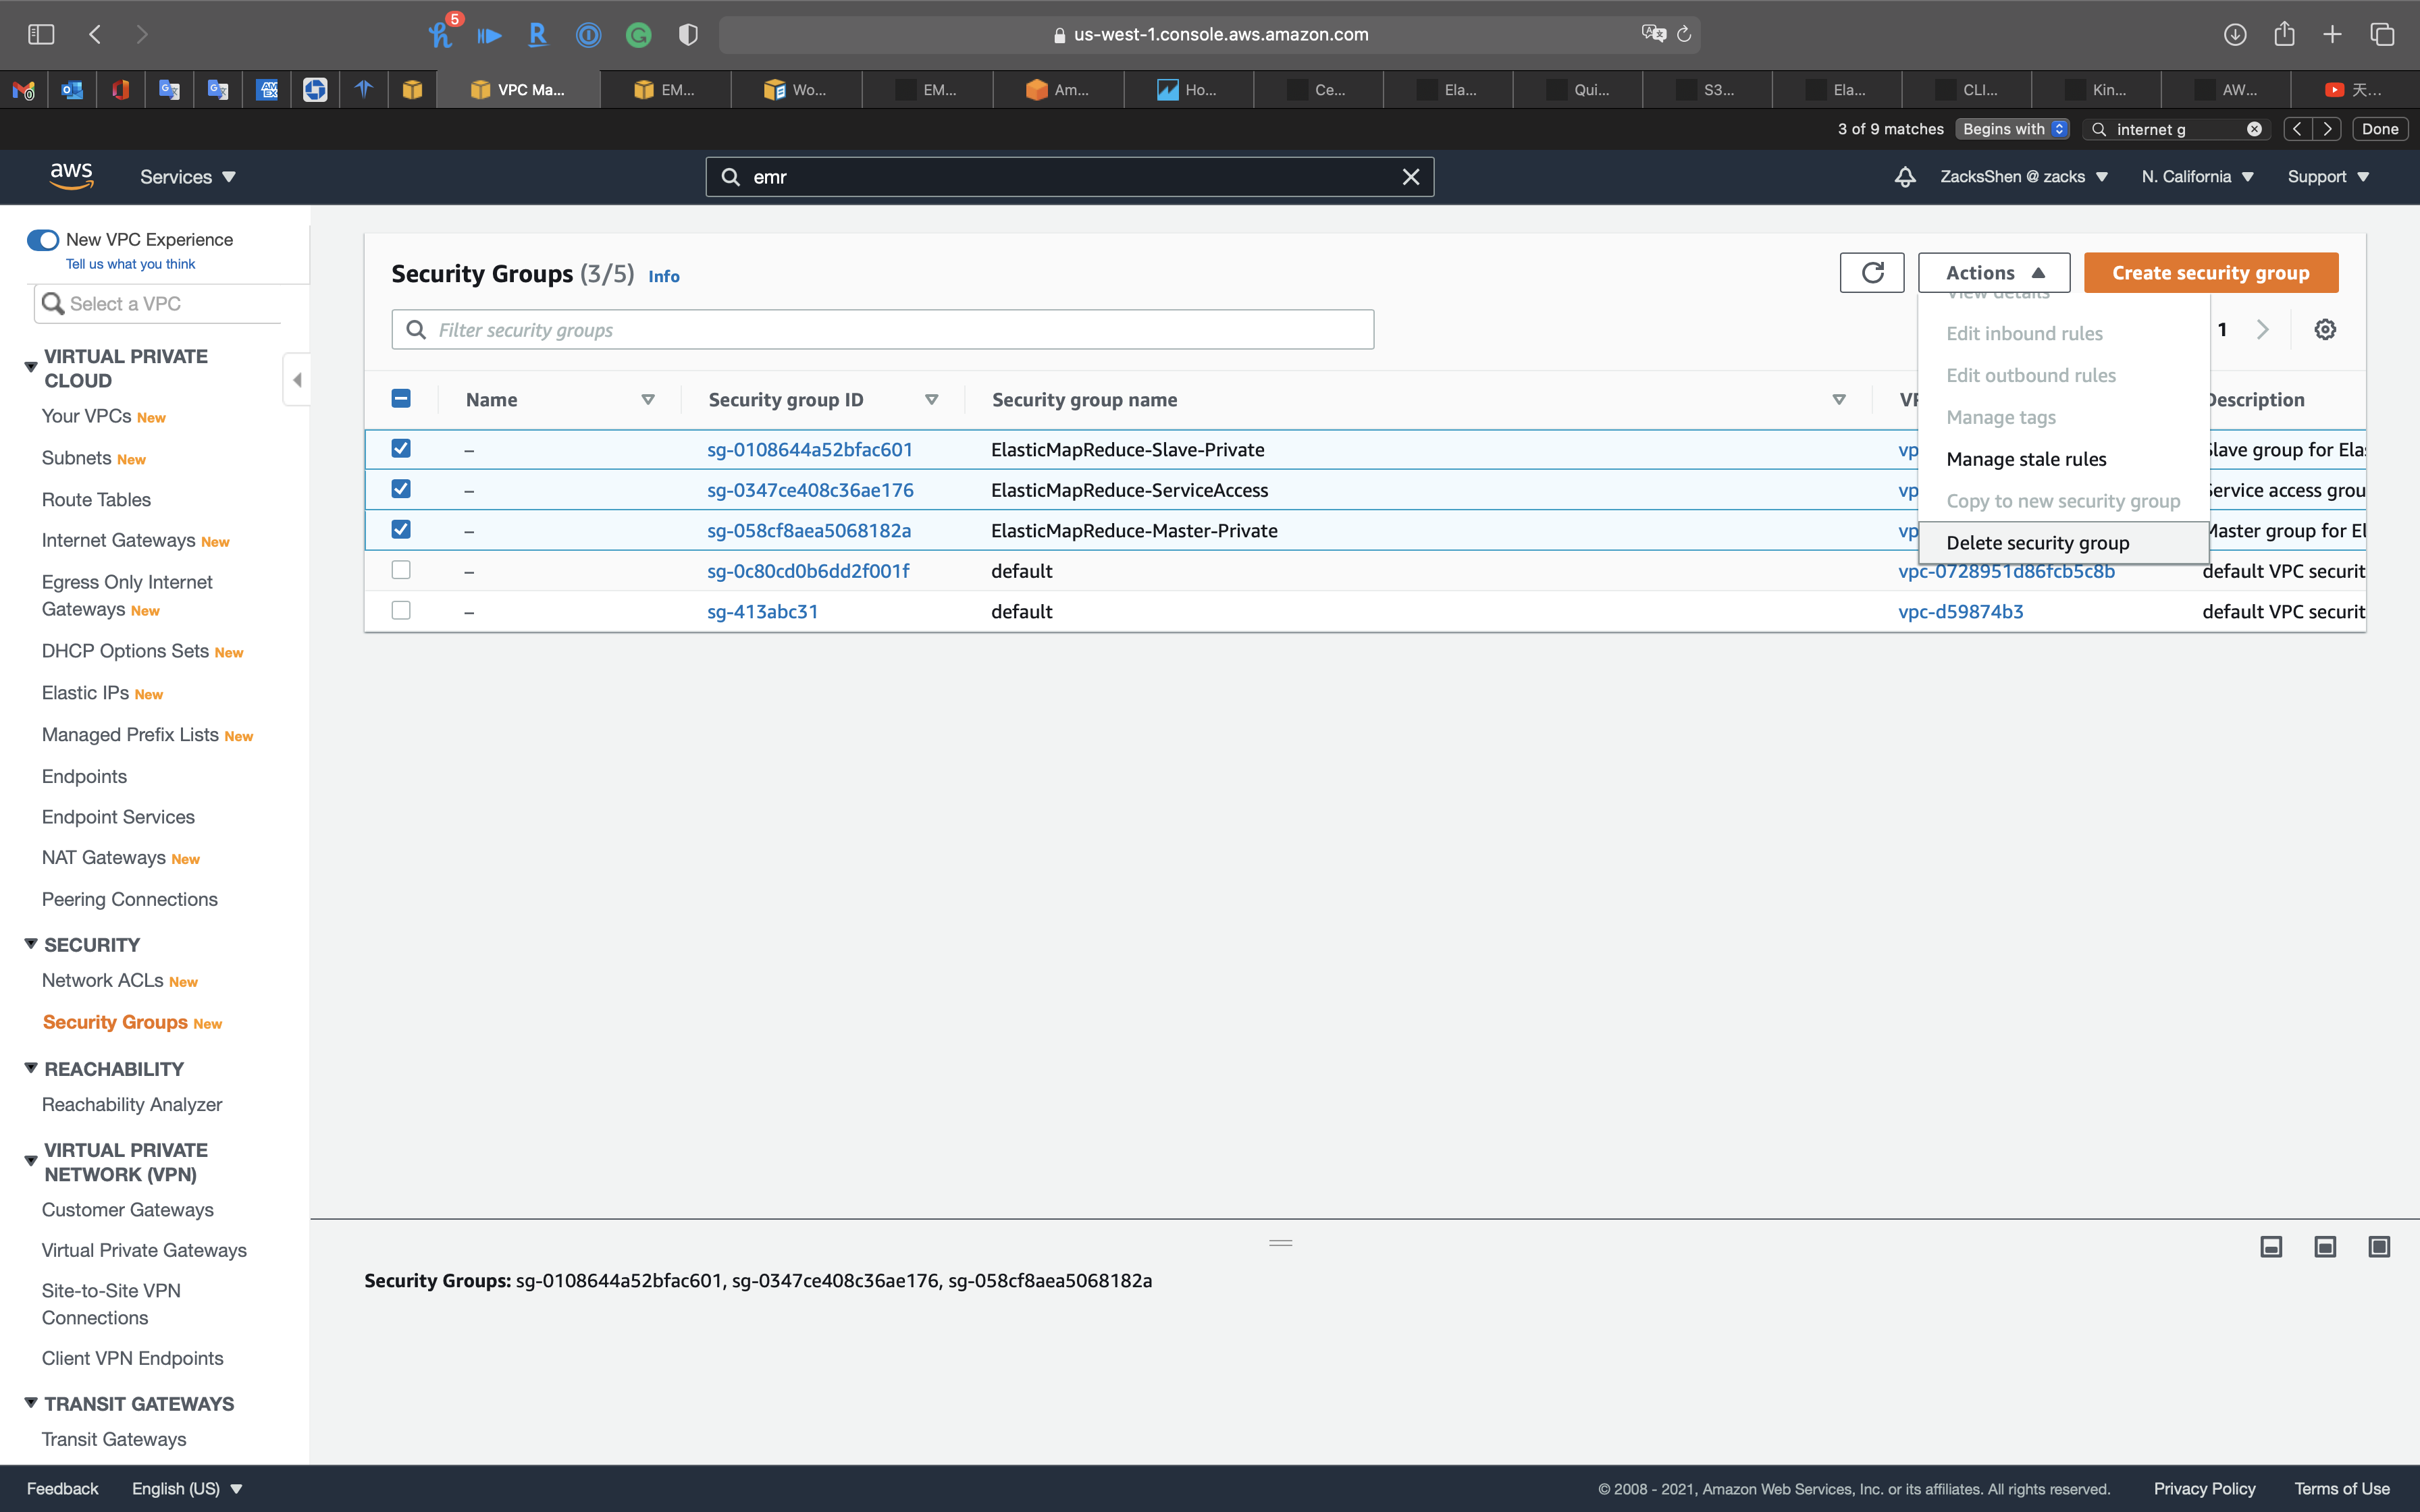
Type delete and click on Delete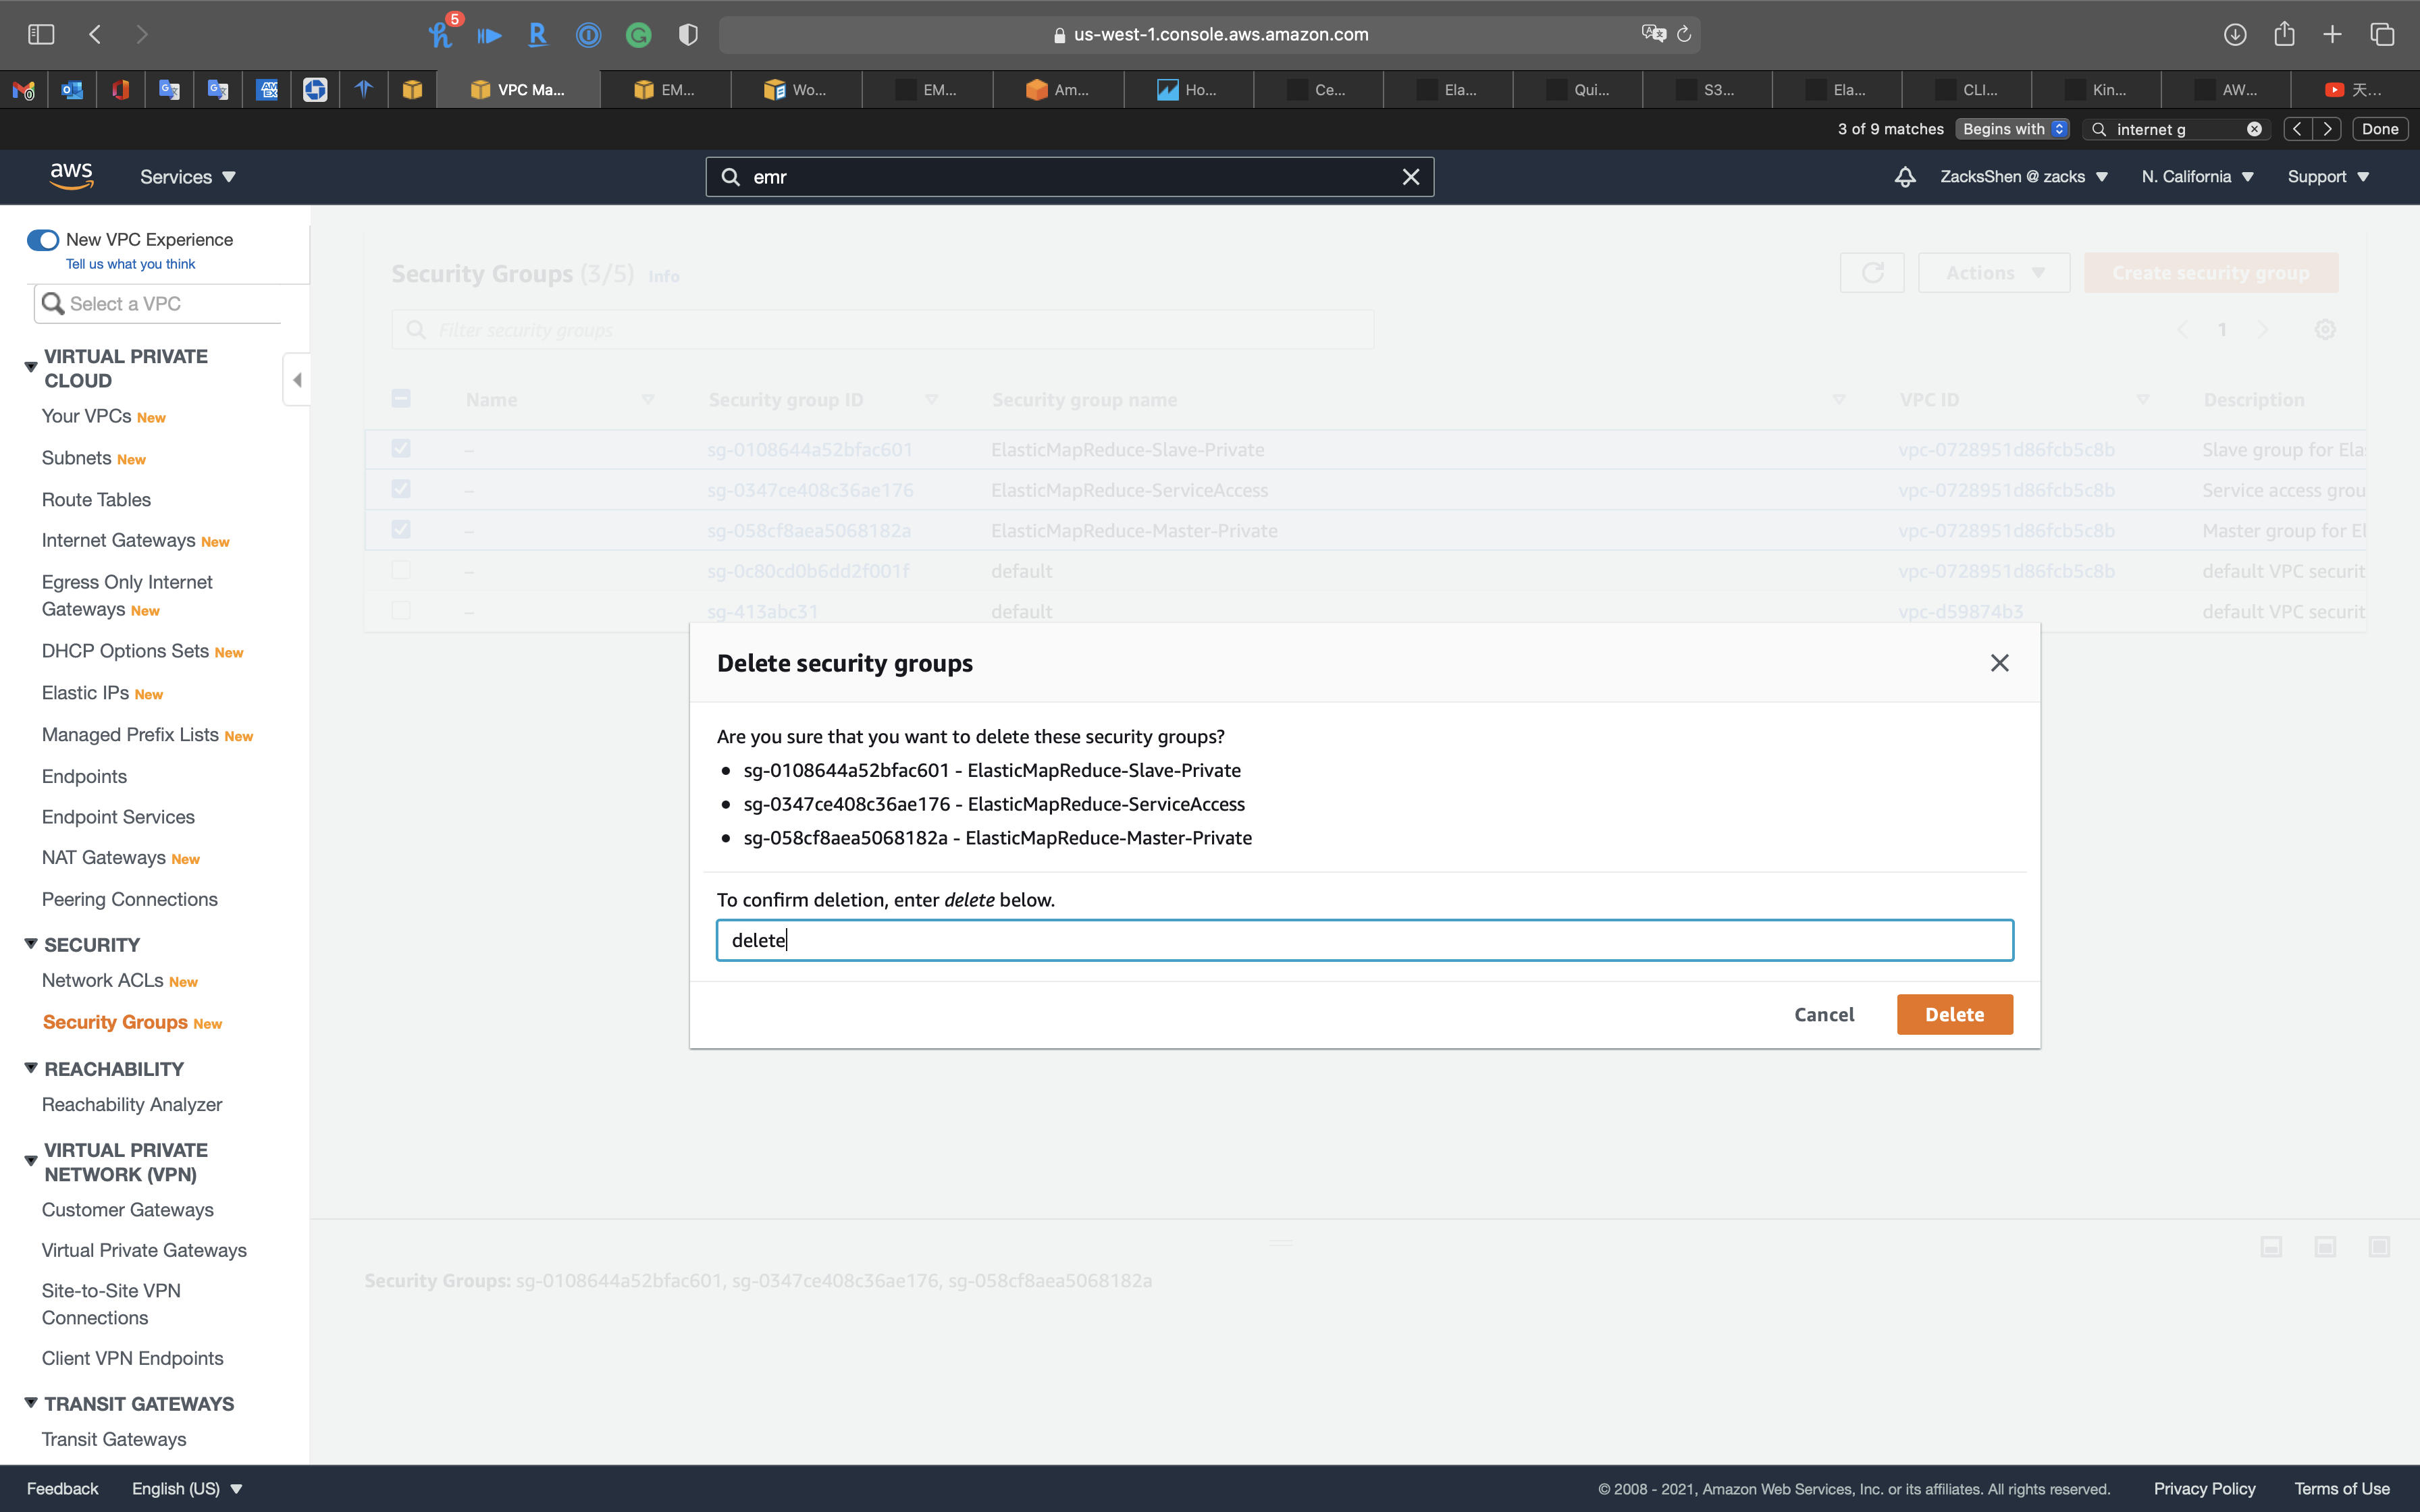
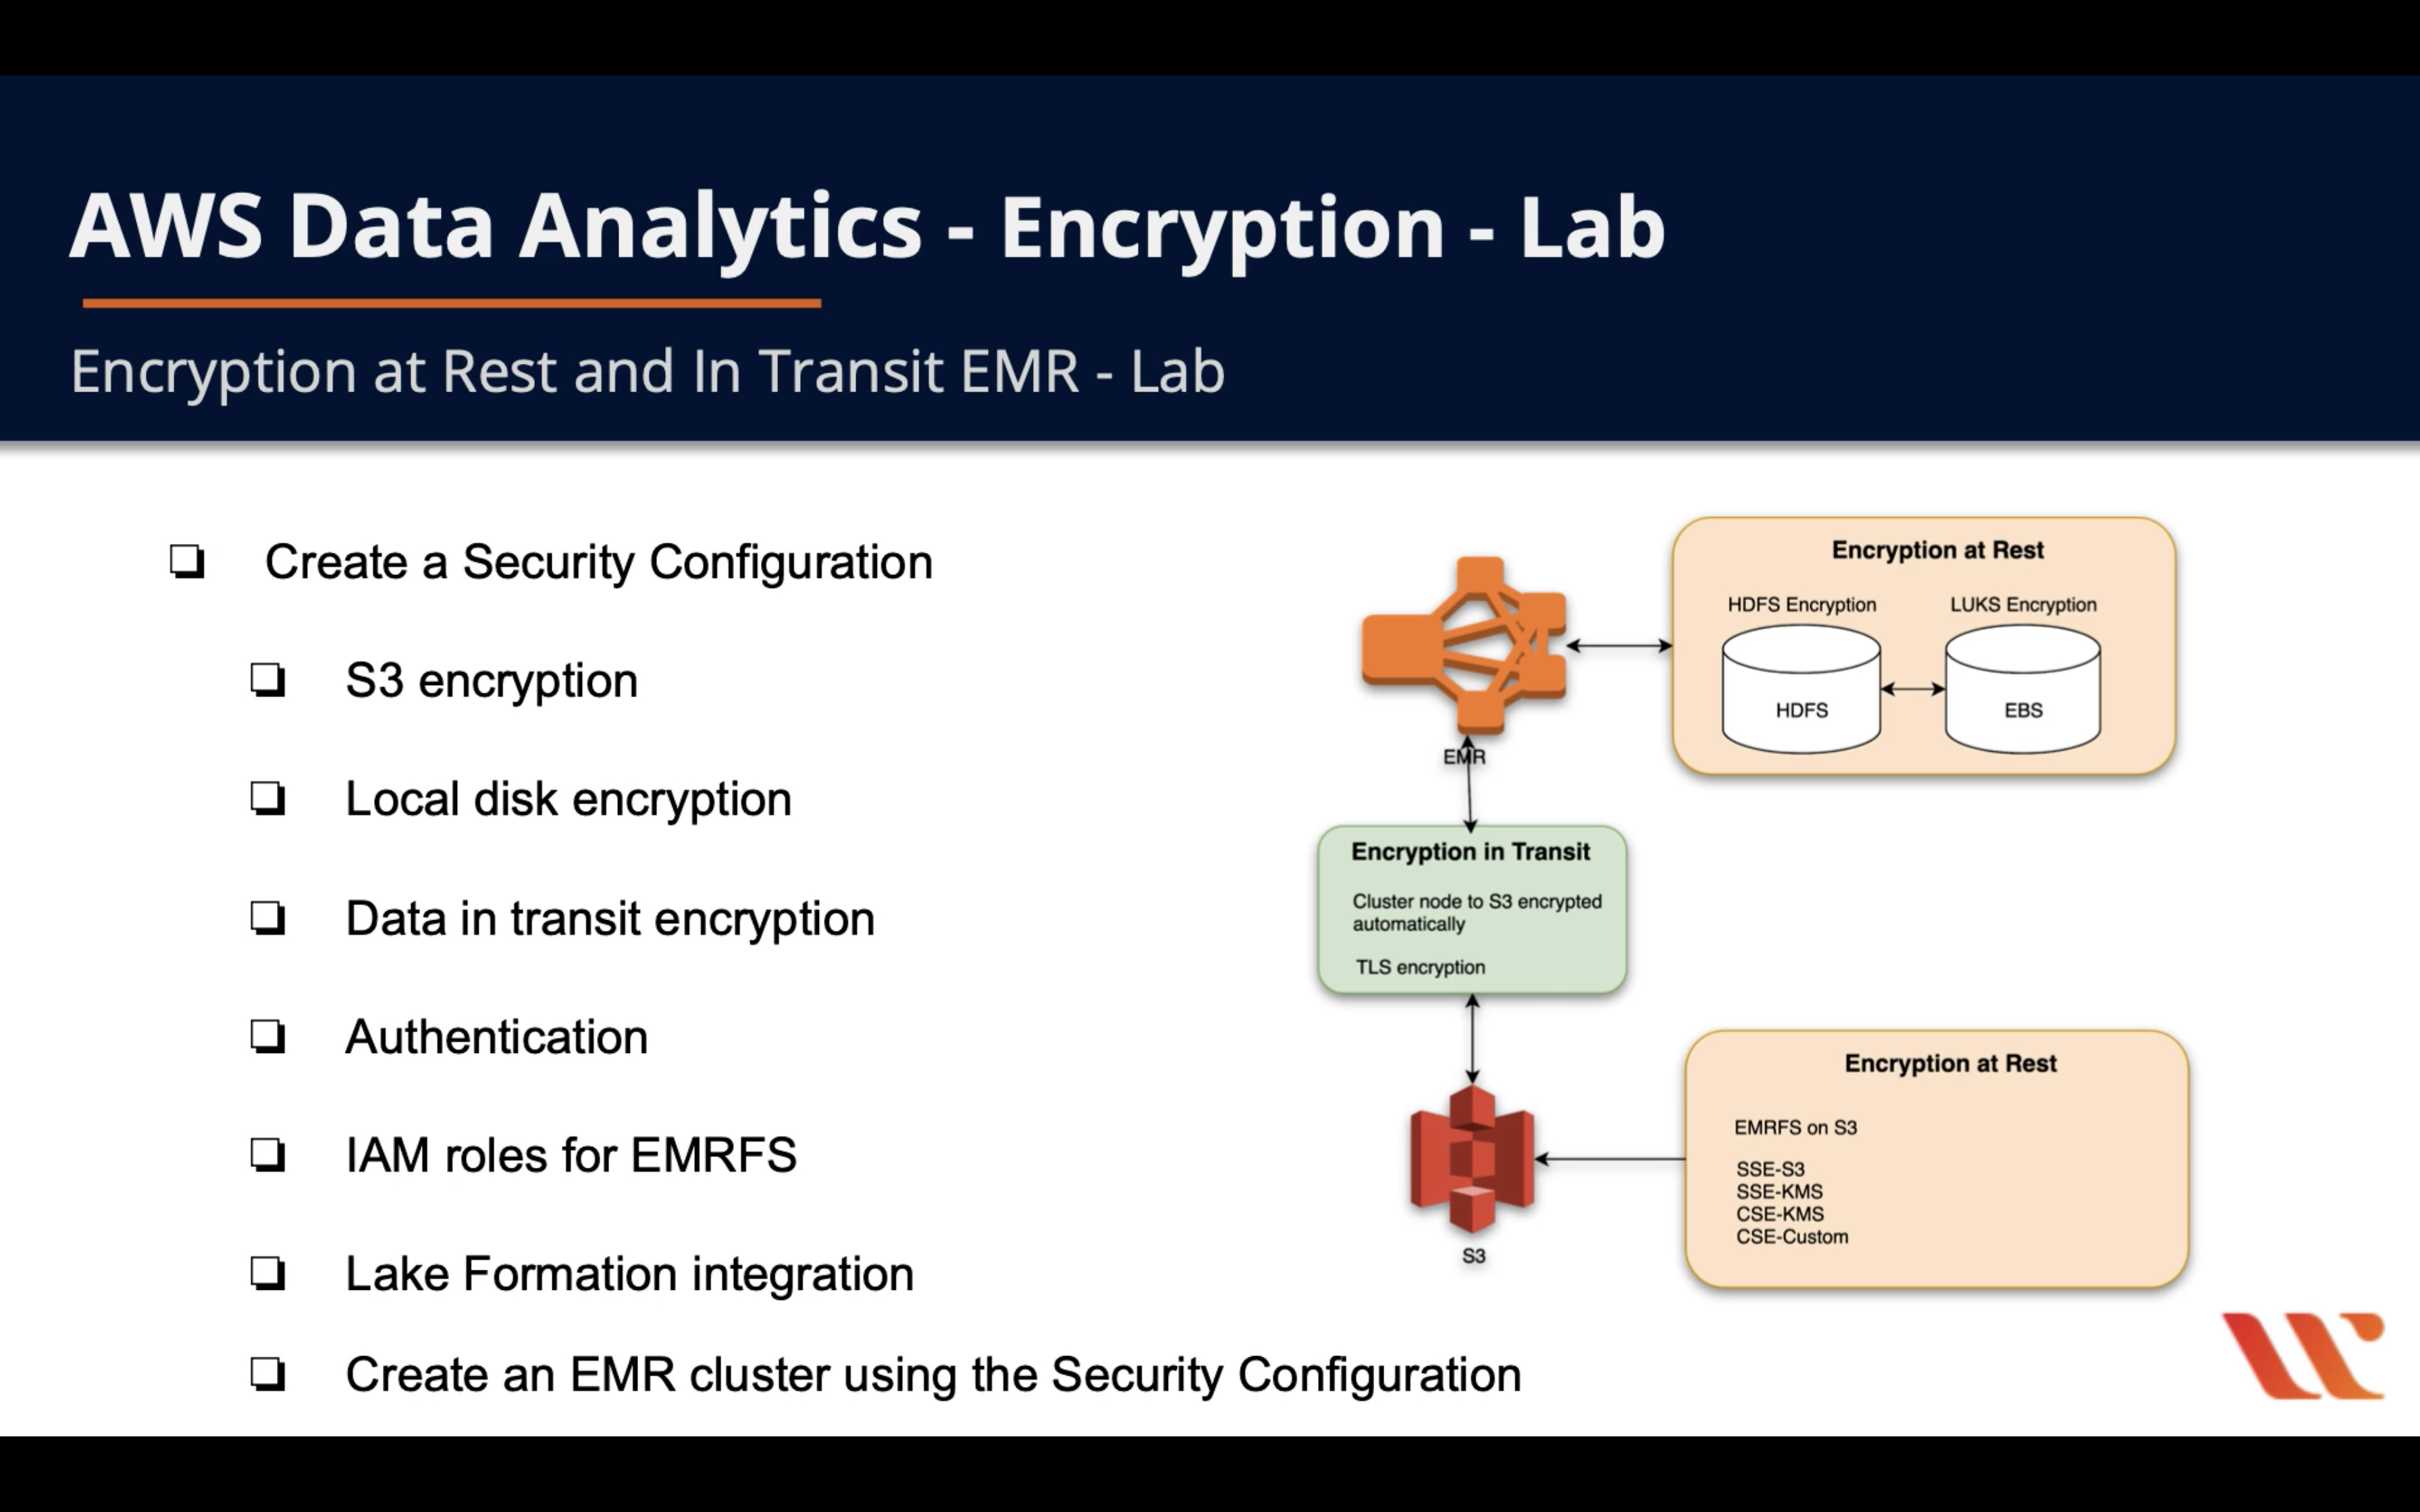
EMR Encryption
Encryption at Rest and In Transit EMR
How do I resolve the error “Failed to start the job flow due to an internal error” in Amazon EMR?
Enabling EBS Encryption by Providing Additional Permissions for AWS KMS CMKs
Lab Details
- Create an KMS key
- Create an Security Configuration
- S3 encryption
- Local disk encryption
- Data in transit encryption - CSE-KMS
- Authentication
- IAM roles for EMRFS
- Lake Formation integration or Apache Ranger integration
- Create an EMR cluster using the Security Configuration
KMS Configuration
Services -> Key Management Service
Create a CSE-KMS for encrypting data in transit.
Create a Customer managed key
Click on Create a key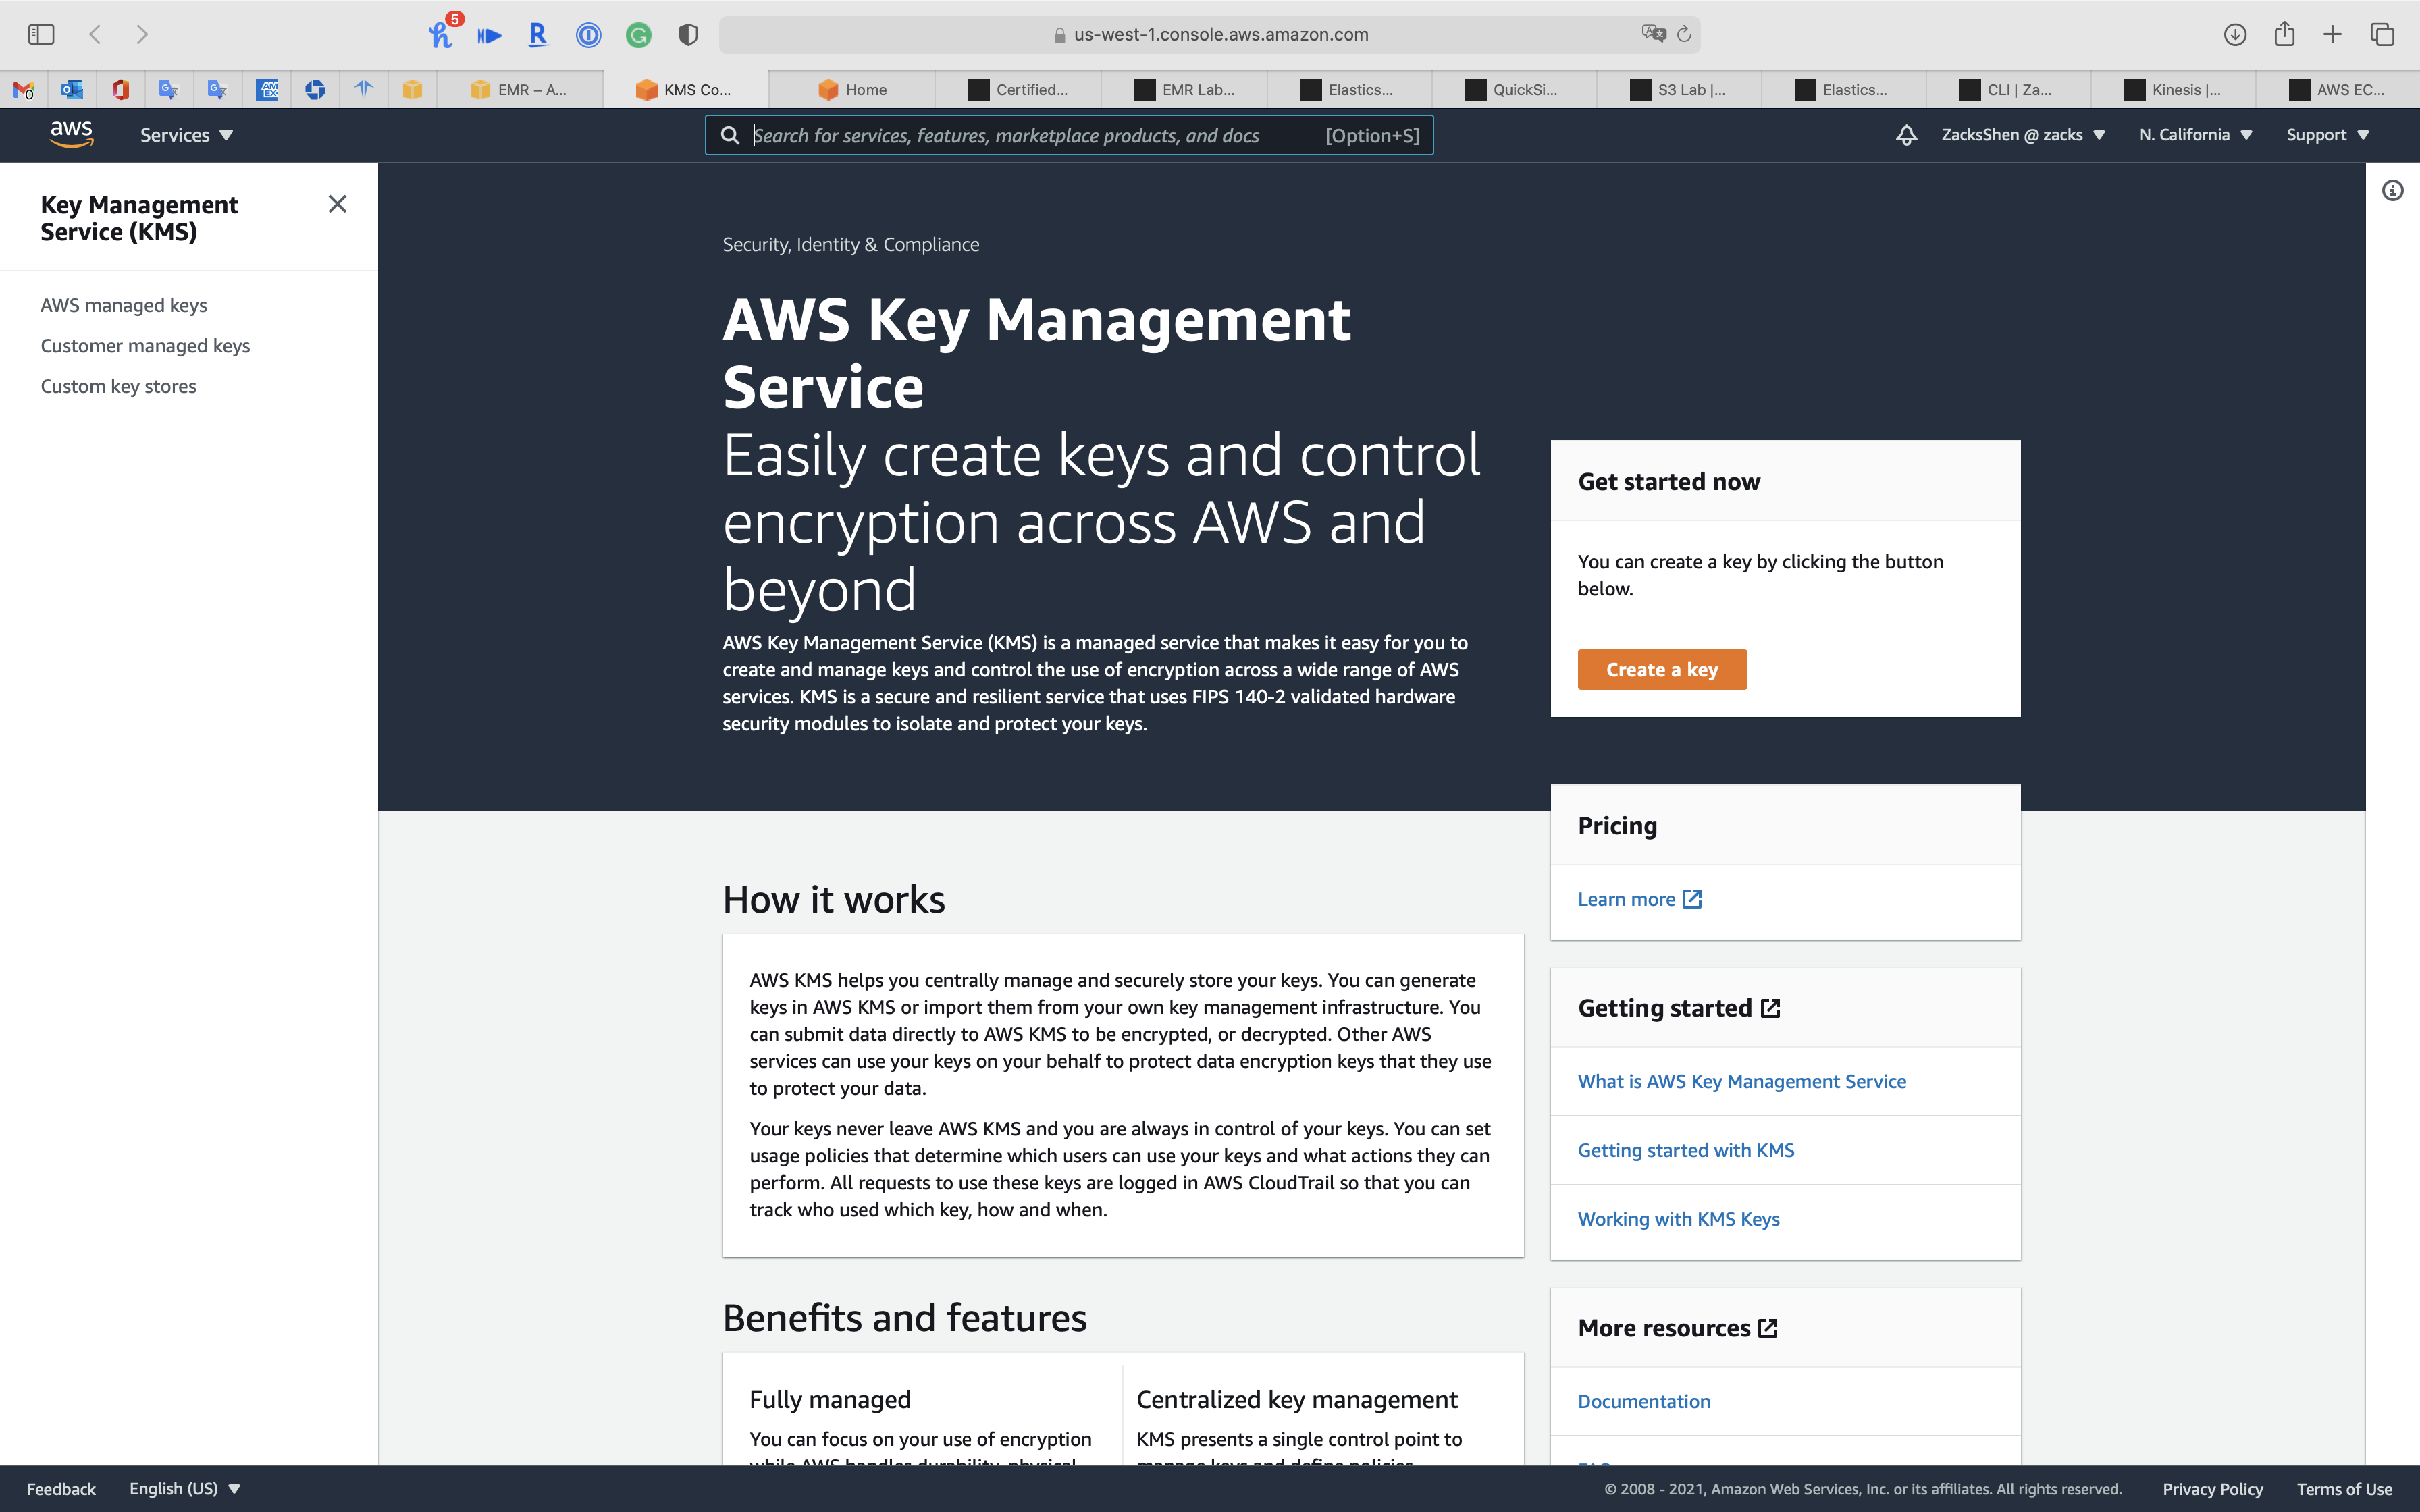
Step 1: Configure key
- Key type:
Symmetric - Key material origin:
KMS
Click on Next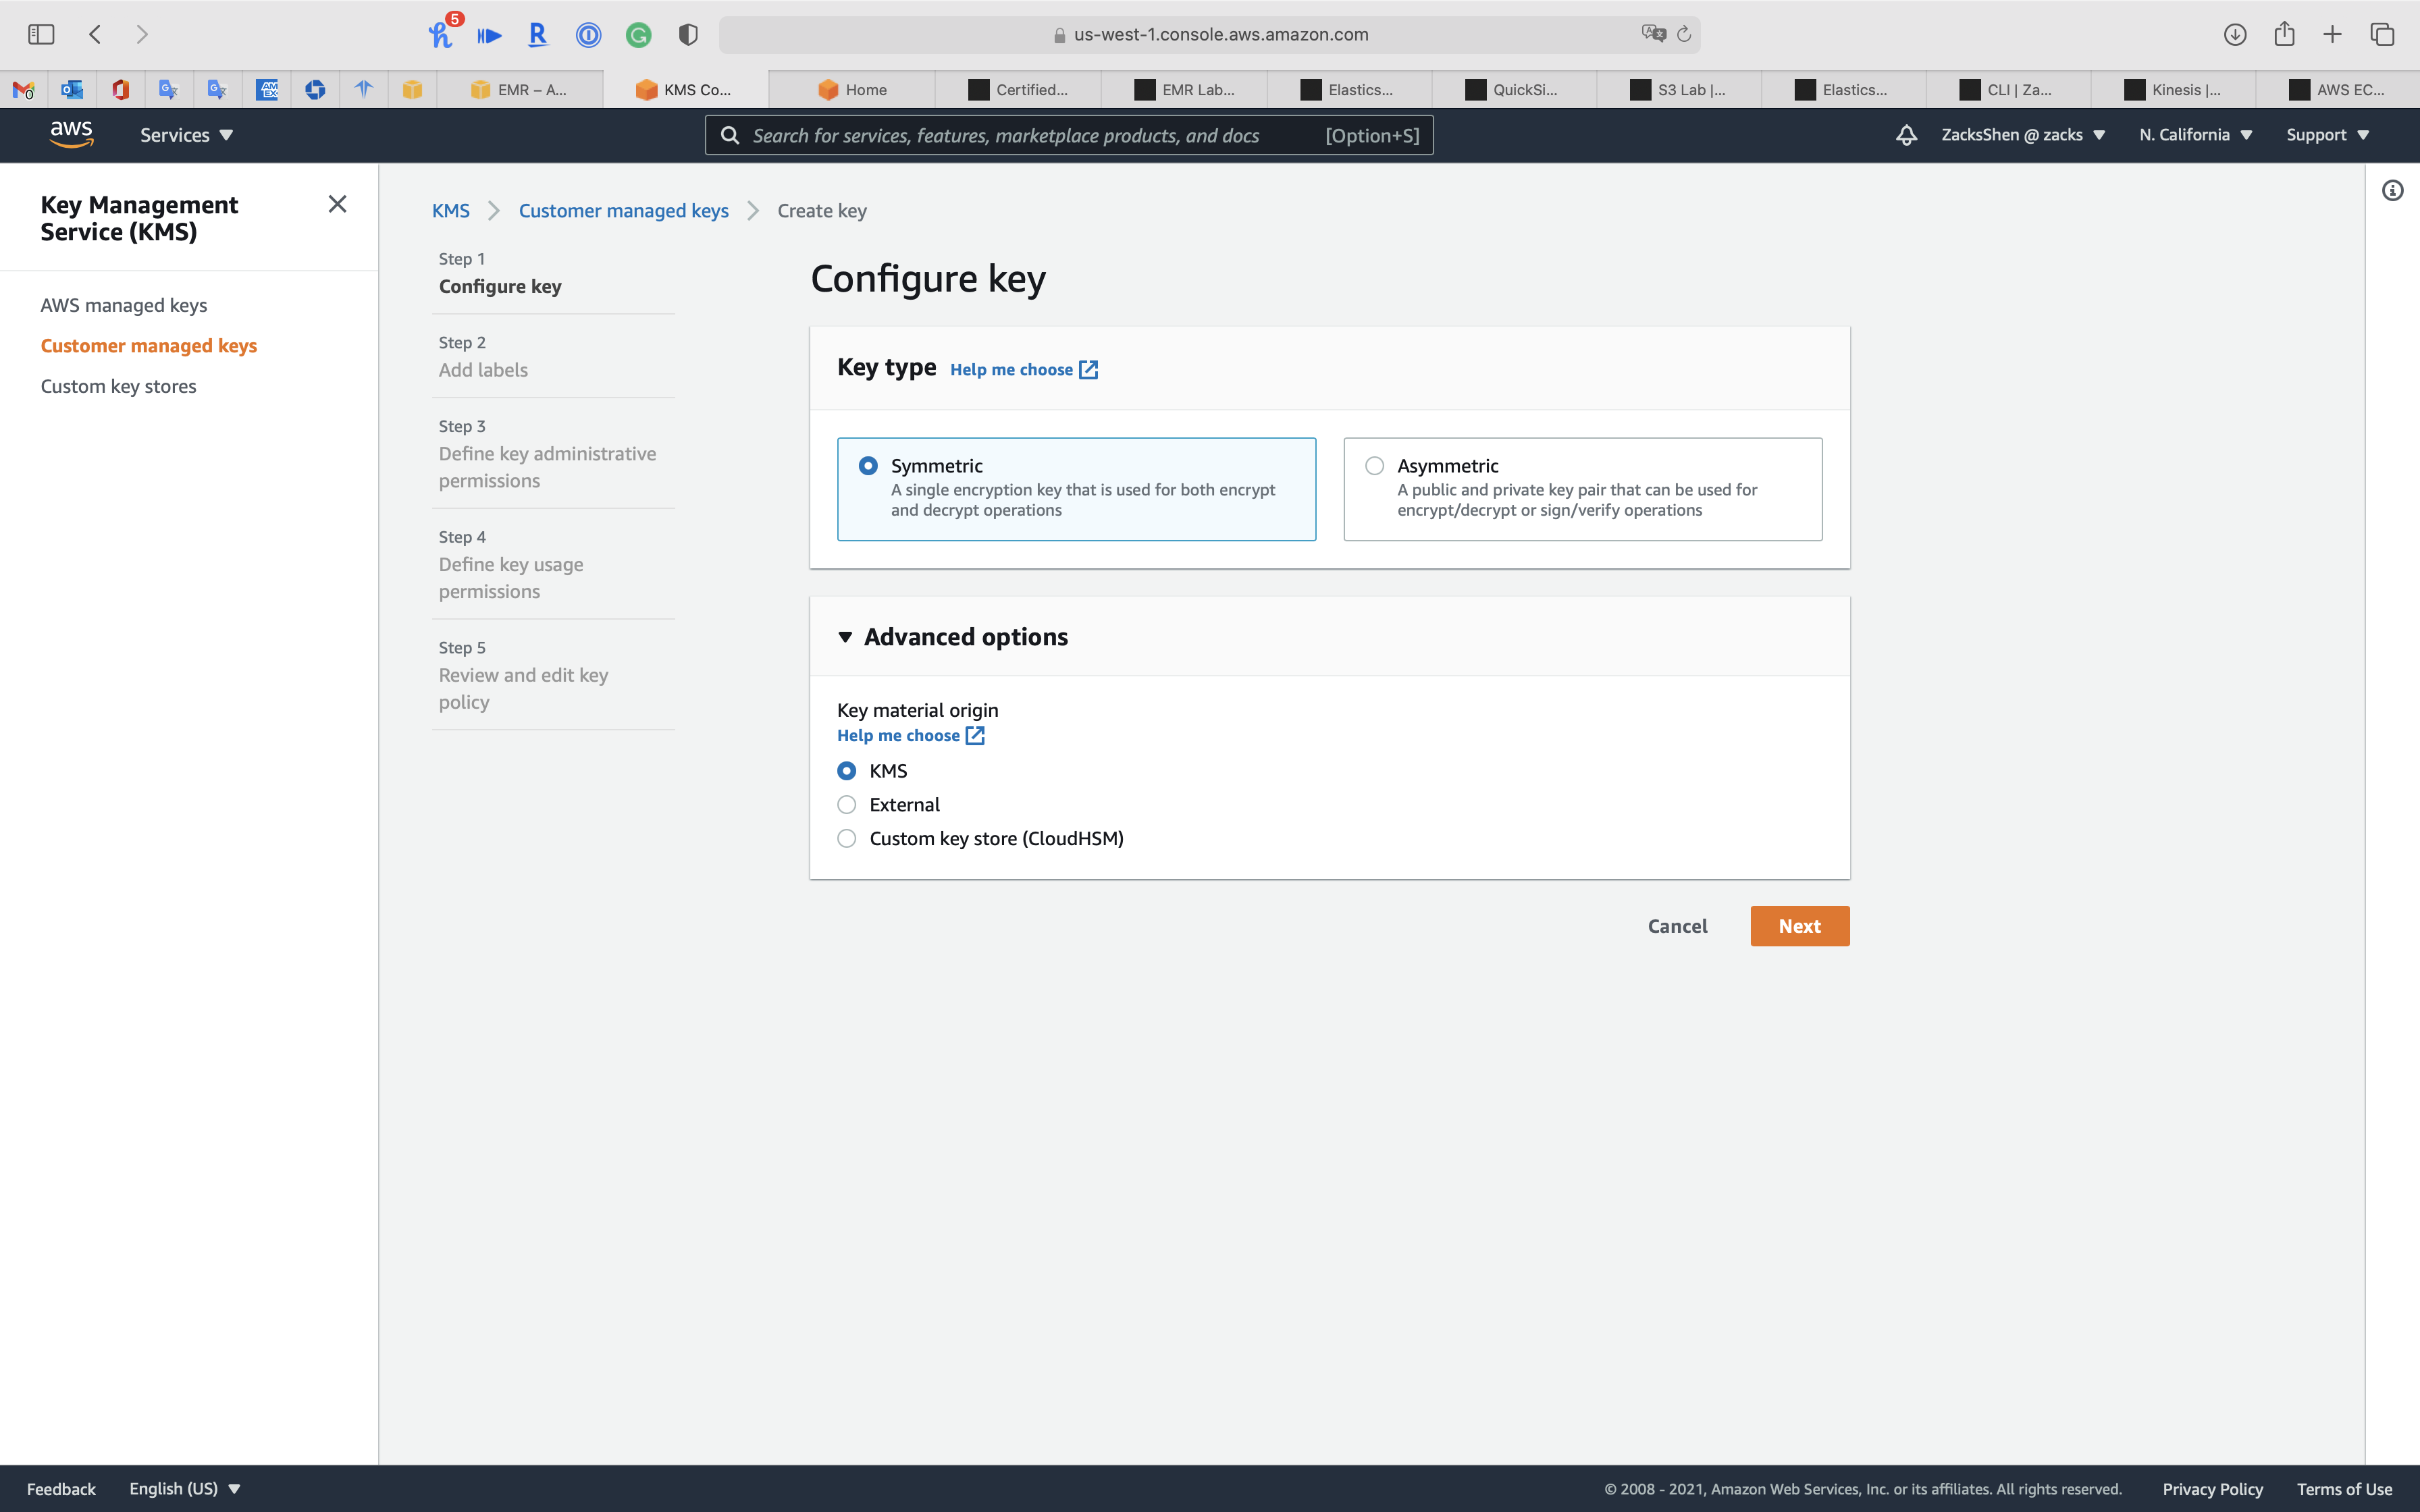
Step 2: Add labels
- Alias:
EMR-SecurityGroupKey
Click on Next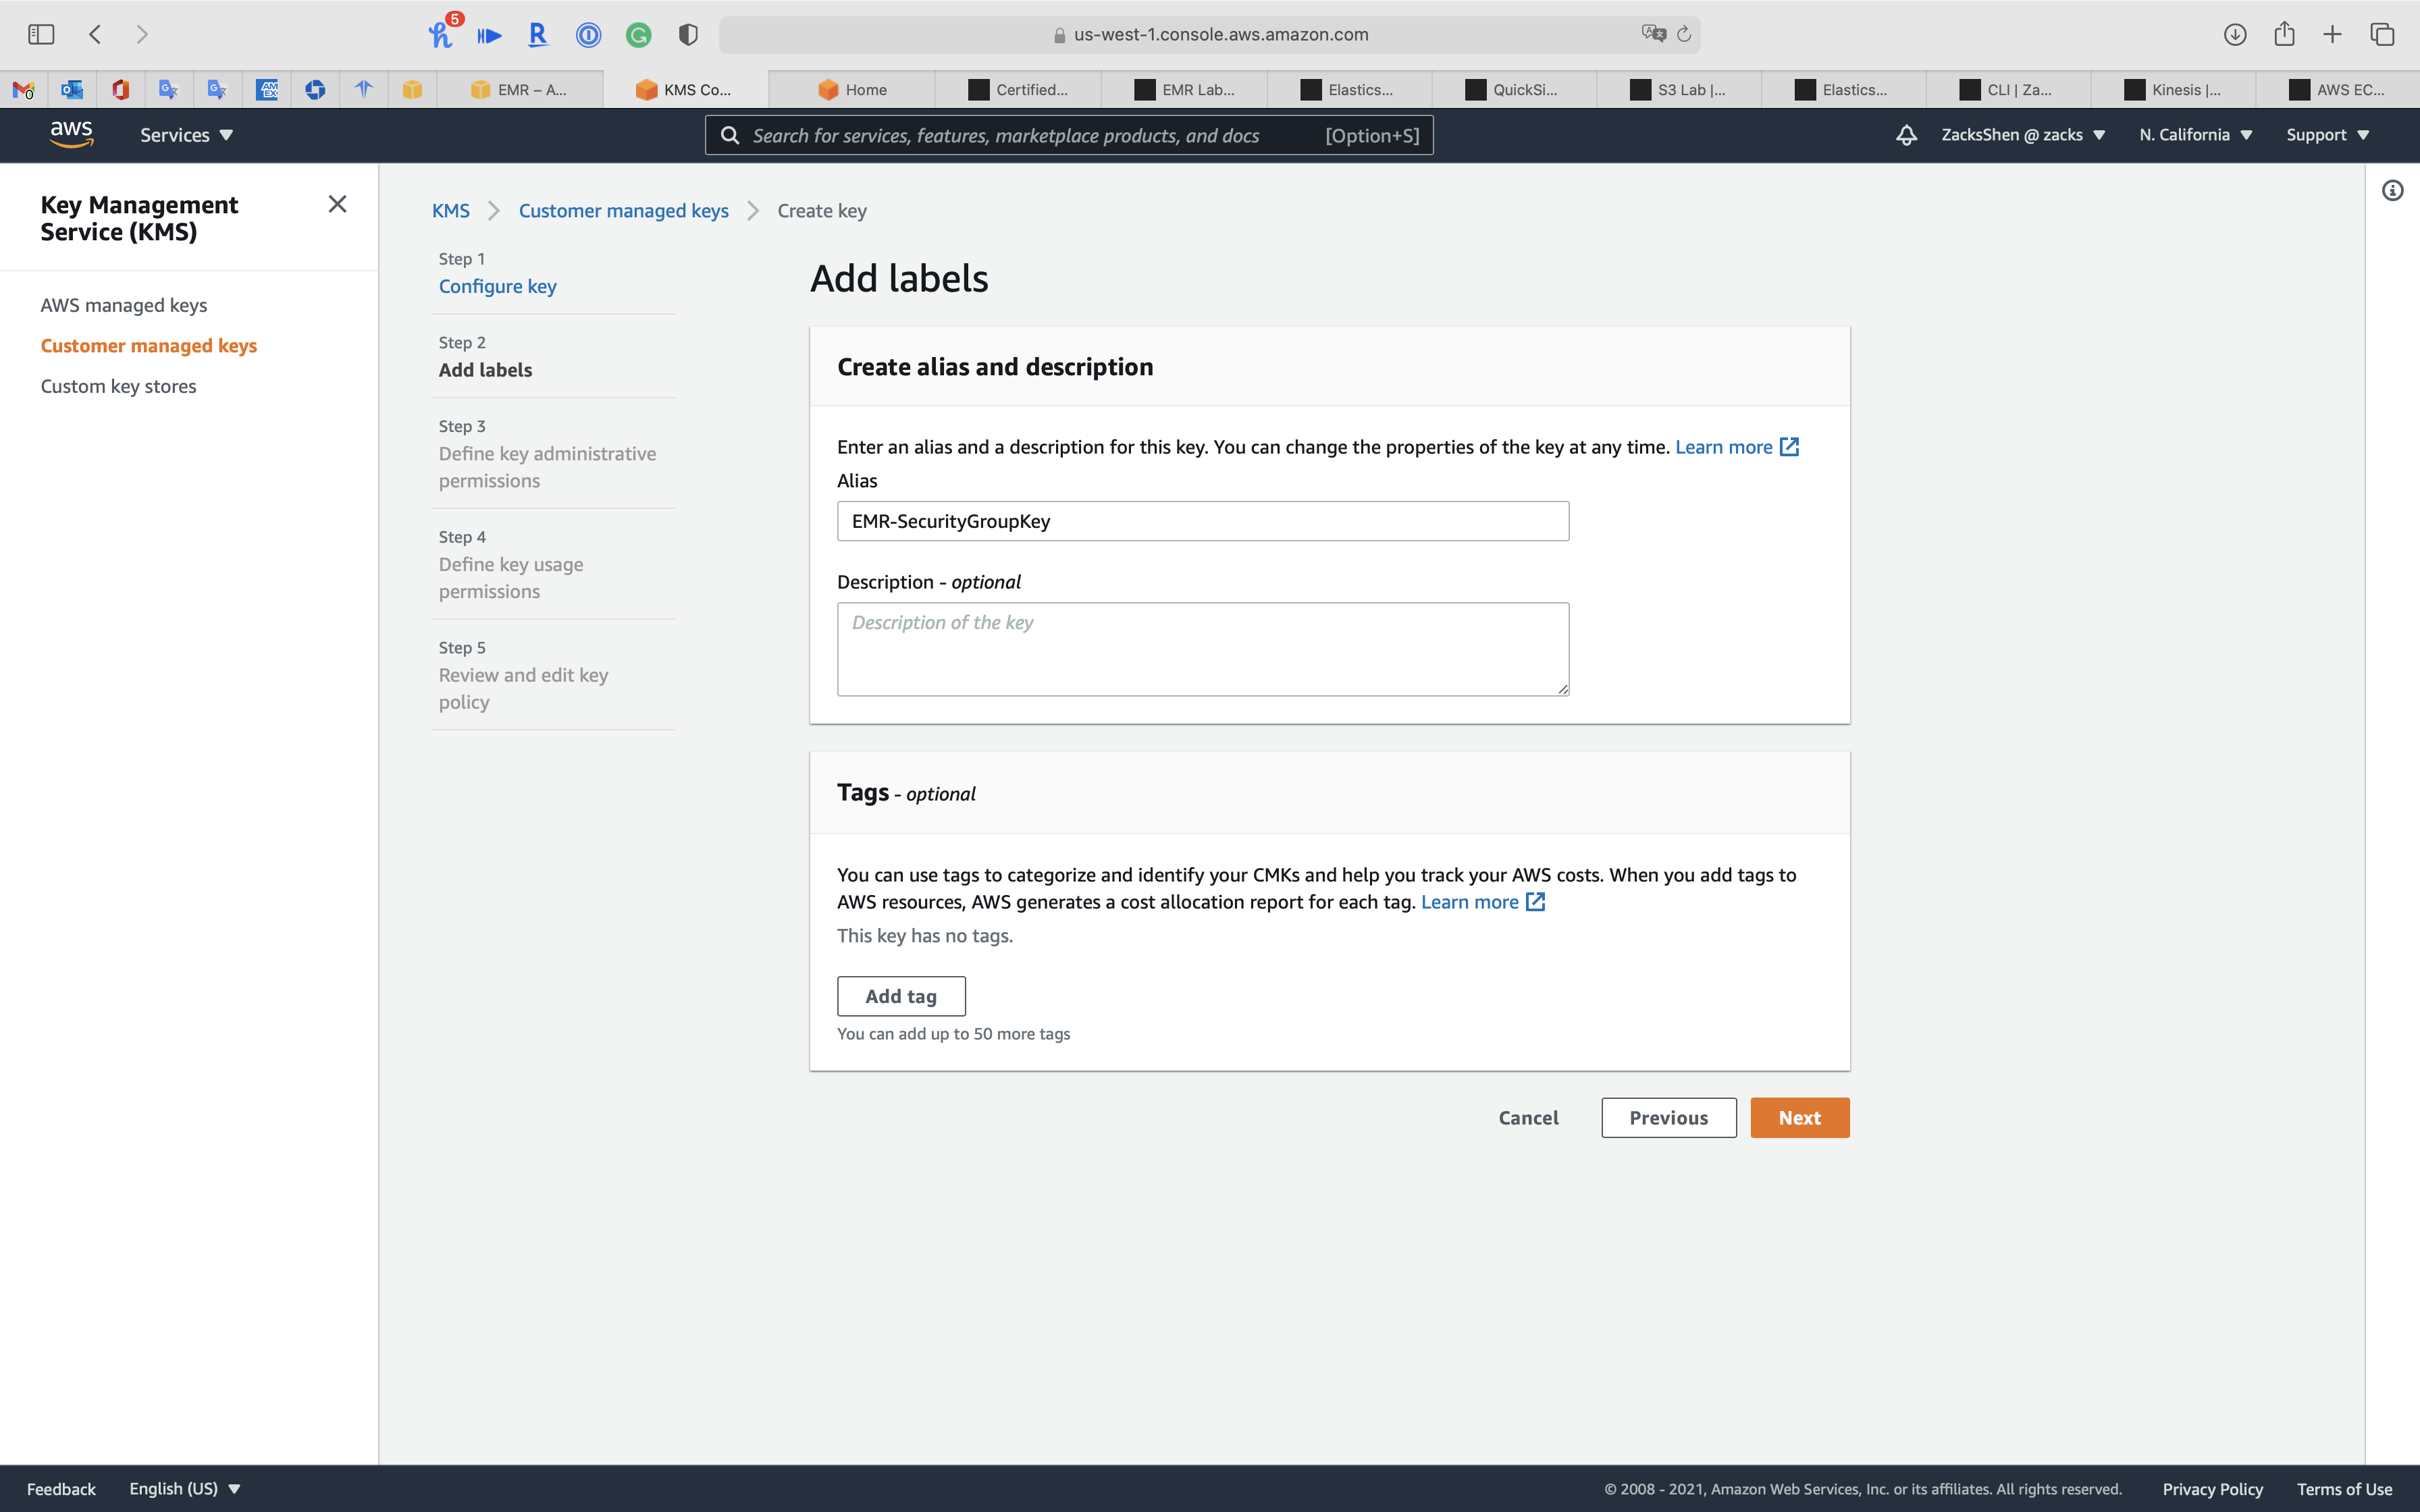
Step 3: Define key administrative permissions
Choose the IAM users and roles who can administer this key through the KMS API. You may need to add additional permissions for the users or roles to administer this key from this console
- Key administrators:
- Choose your administrator account
EMR_DefaultRoleEMR_EC2_DefaultRole
- Key deletion:
Allow key administrators to delete this key.
Click on Next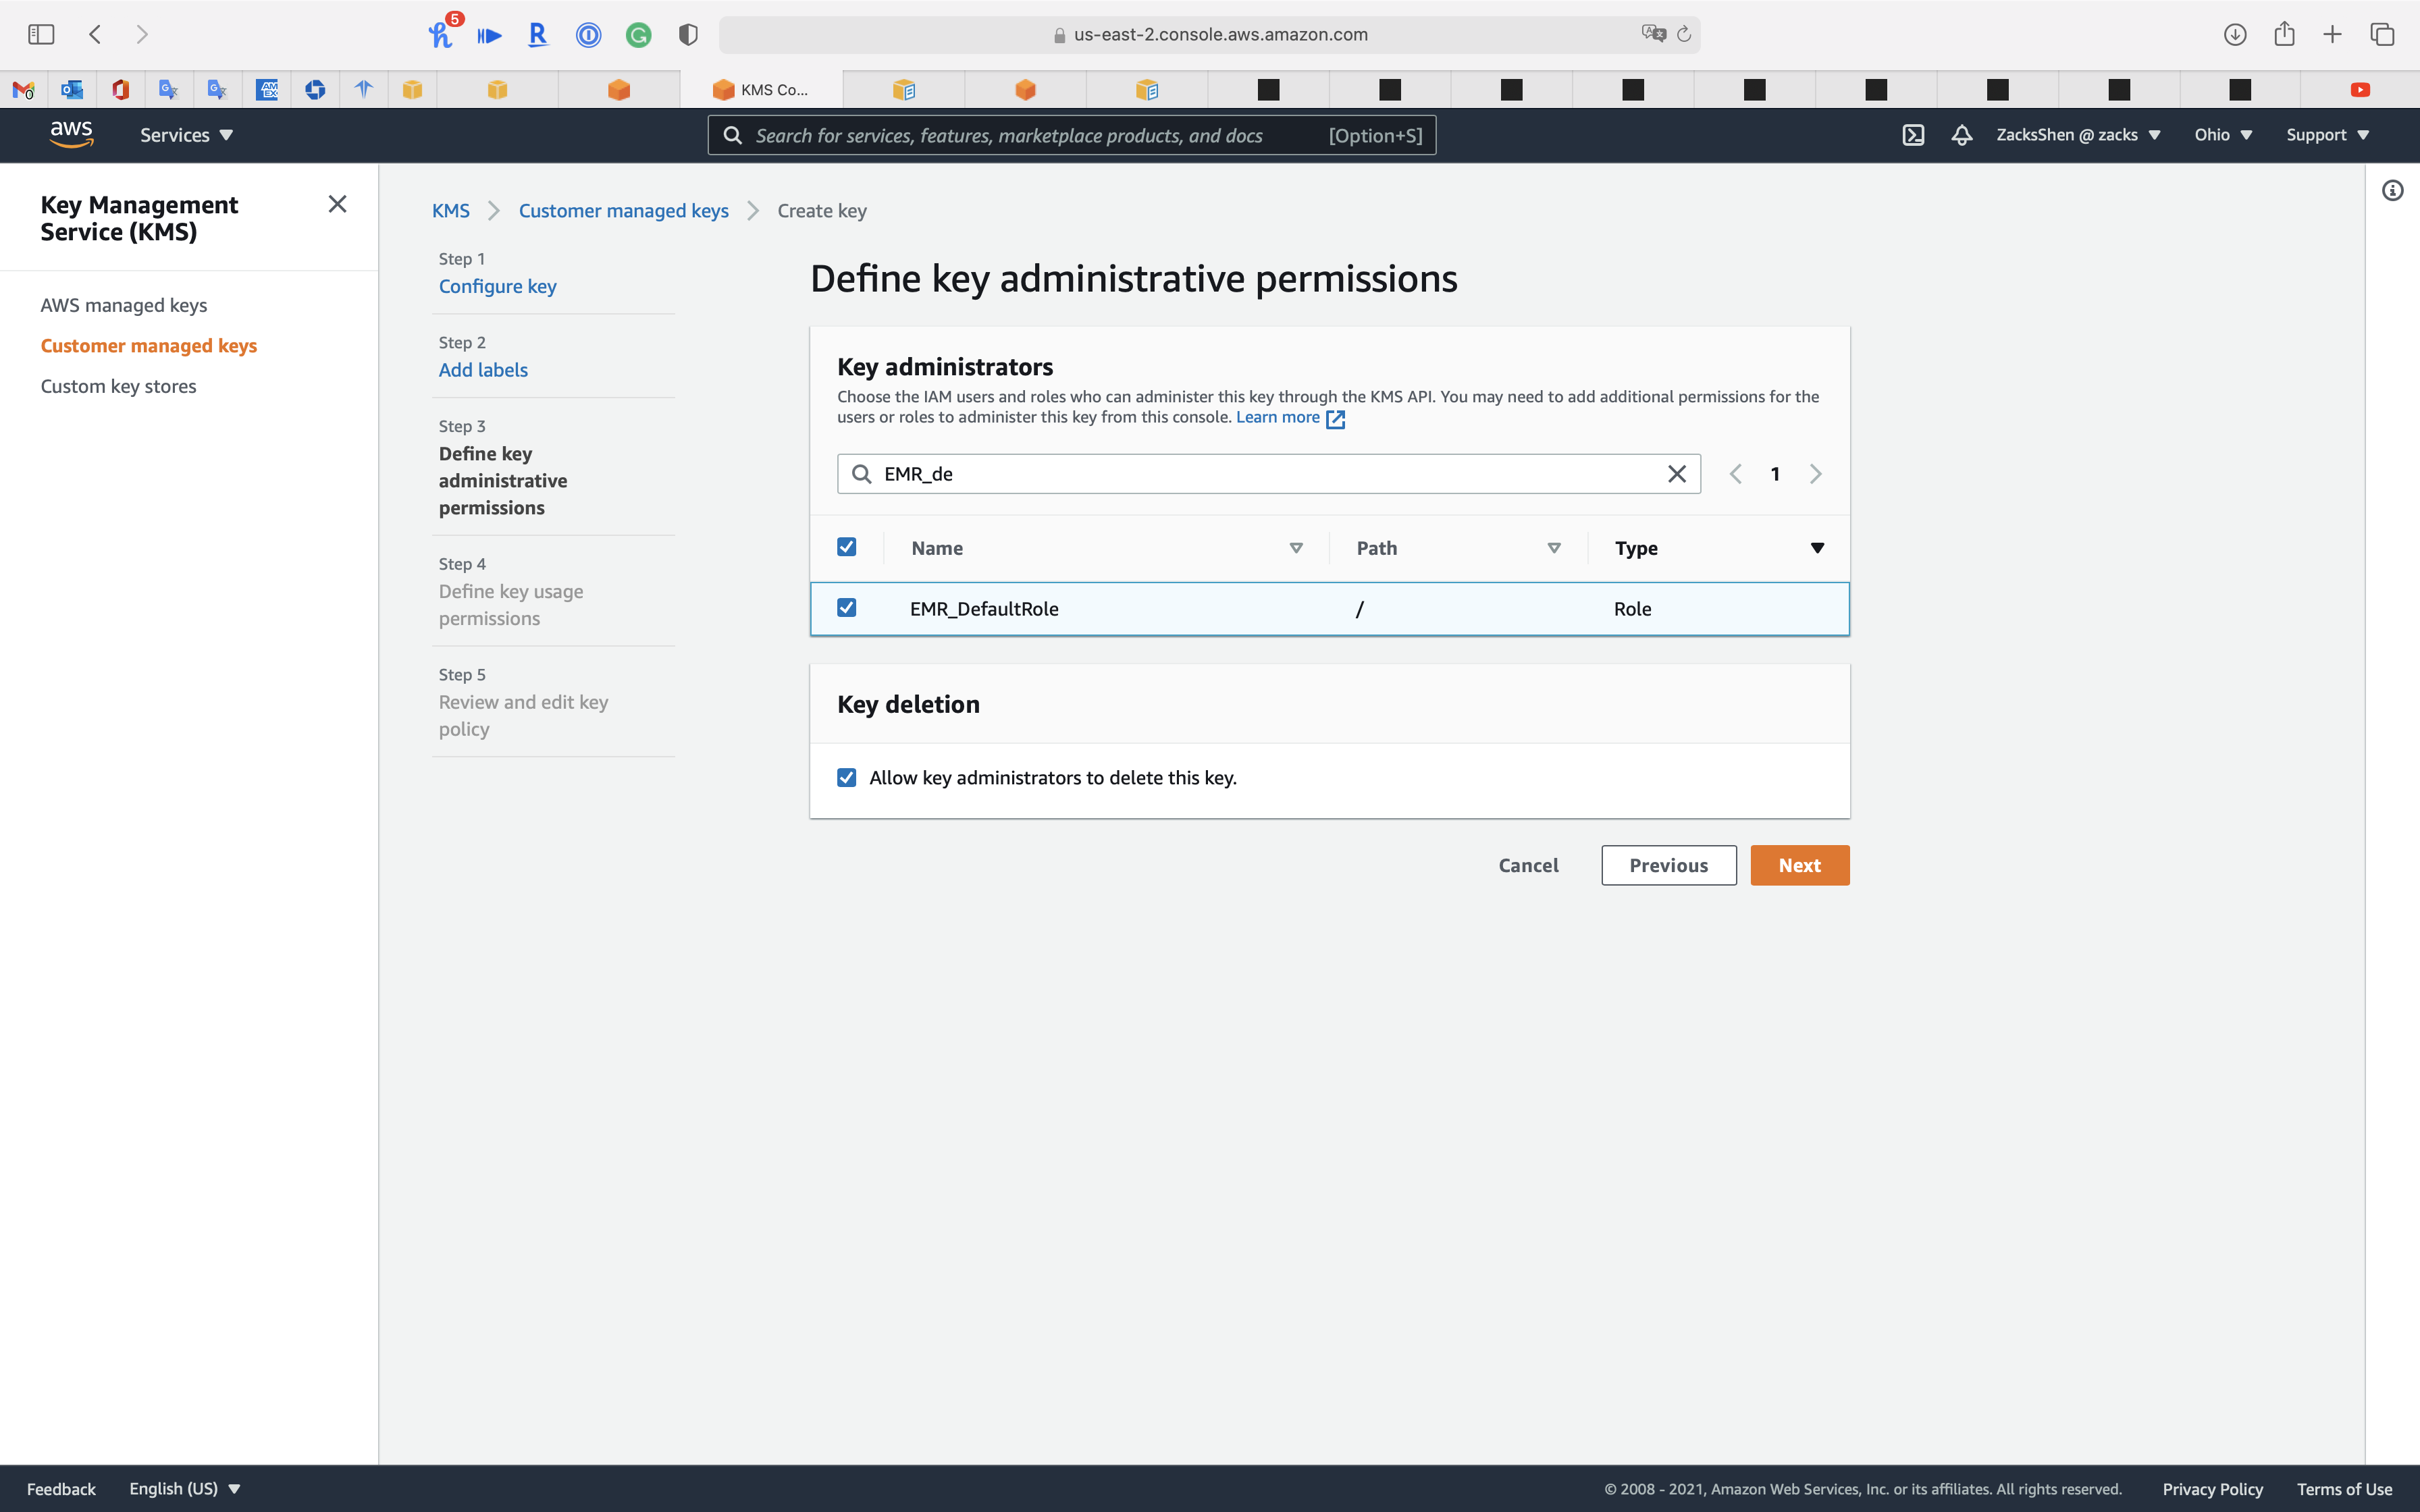
Step 4: Define key usage permissions
Enabling EBS Encryption by Providing Additional Permissions for AWS KMS CMKs
Beginning with Amazon EMR version 5.24.0, you can encrypt EBS root device and storage volumes by using a security configuration option. To enable such option, you must specify AWS KMS as your key provider. Additionally, you must grant the EMR service role EMR_DefaultRole with permissions to use the customer master key (CMK) that you specify.
You can use the AWS Management Console to add the EMR service role to the list of key users for the specified AWS KMS CMK, or you can use the AWS CLI or an AWS SDK to attach an appropriate key policy.
The procedure below describes how to add the default EMR service role, EMR_DefaultRole as a key user using the AWS Management Console. It assumes that you have already created a CMK. To create a new CMK, see Creating Keys in the AWS Key Management Service Developer Guide.
Select the IAM users and roles that can use the CMK in cryptographic operations.
- This account:
- Choose which account will use this key
EMR_DefaultRoleEMR_EC2_DefaultRole
Click on Next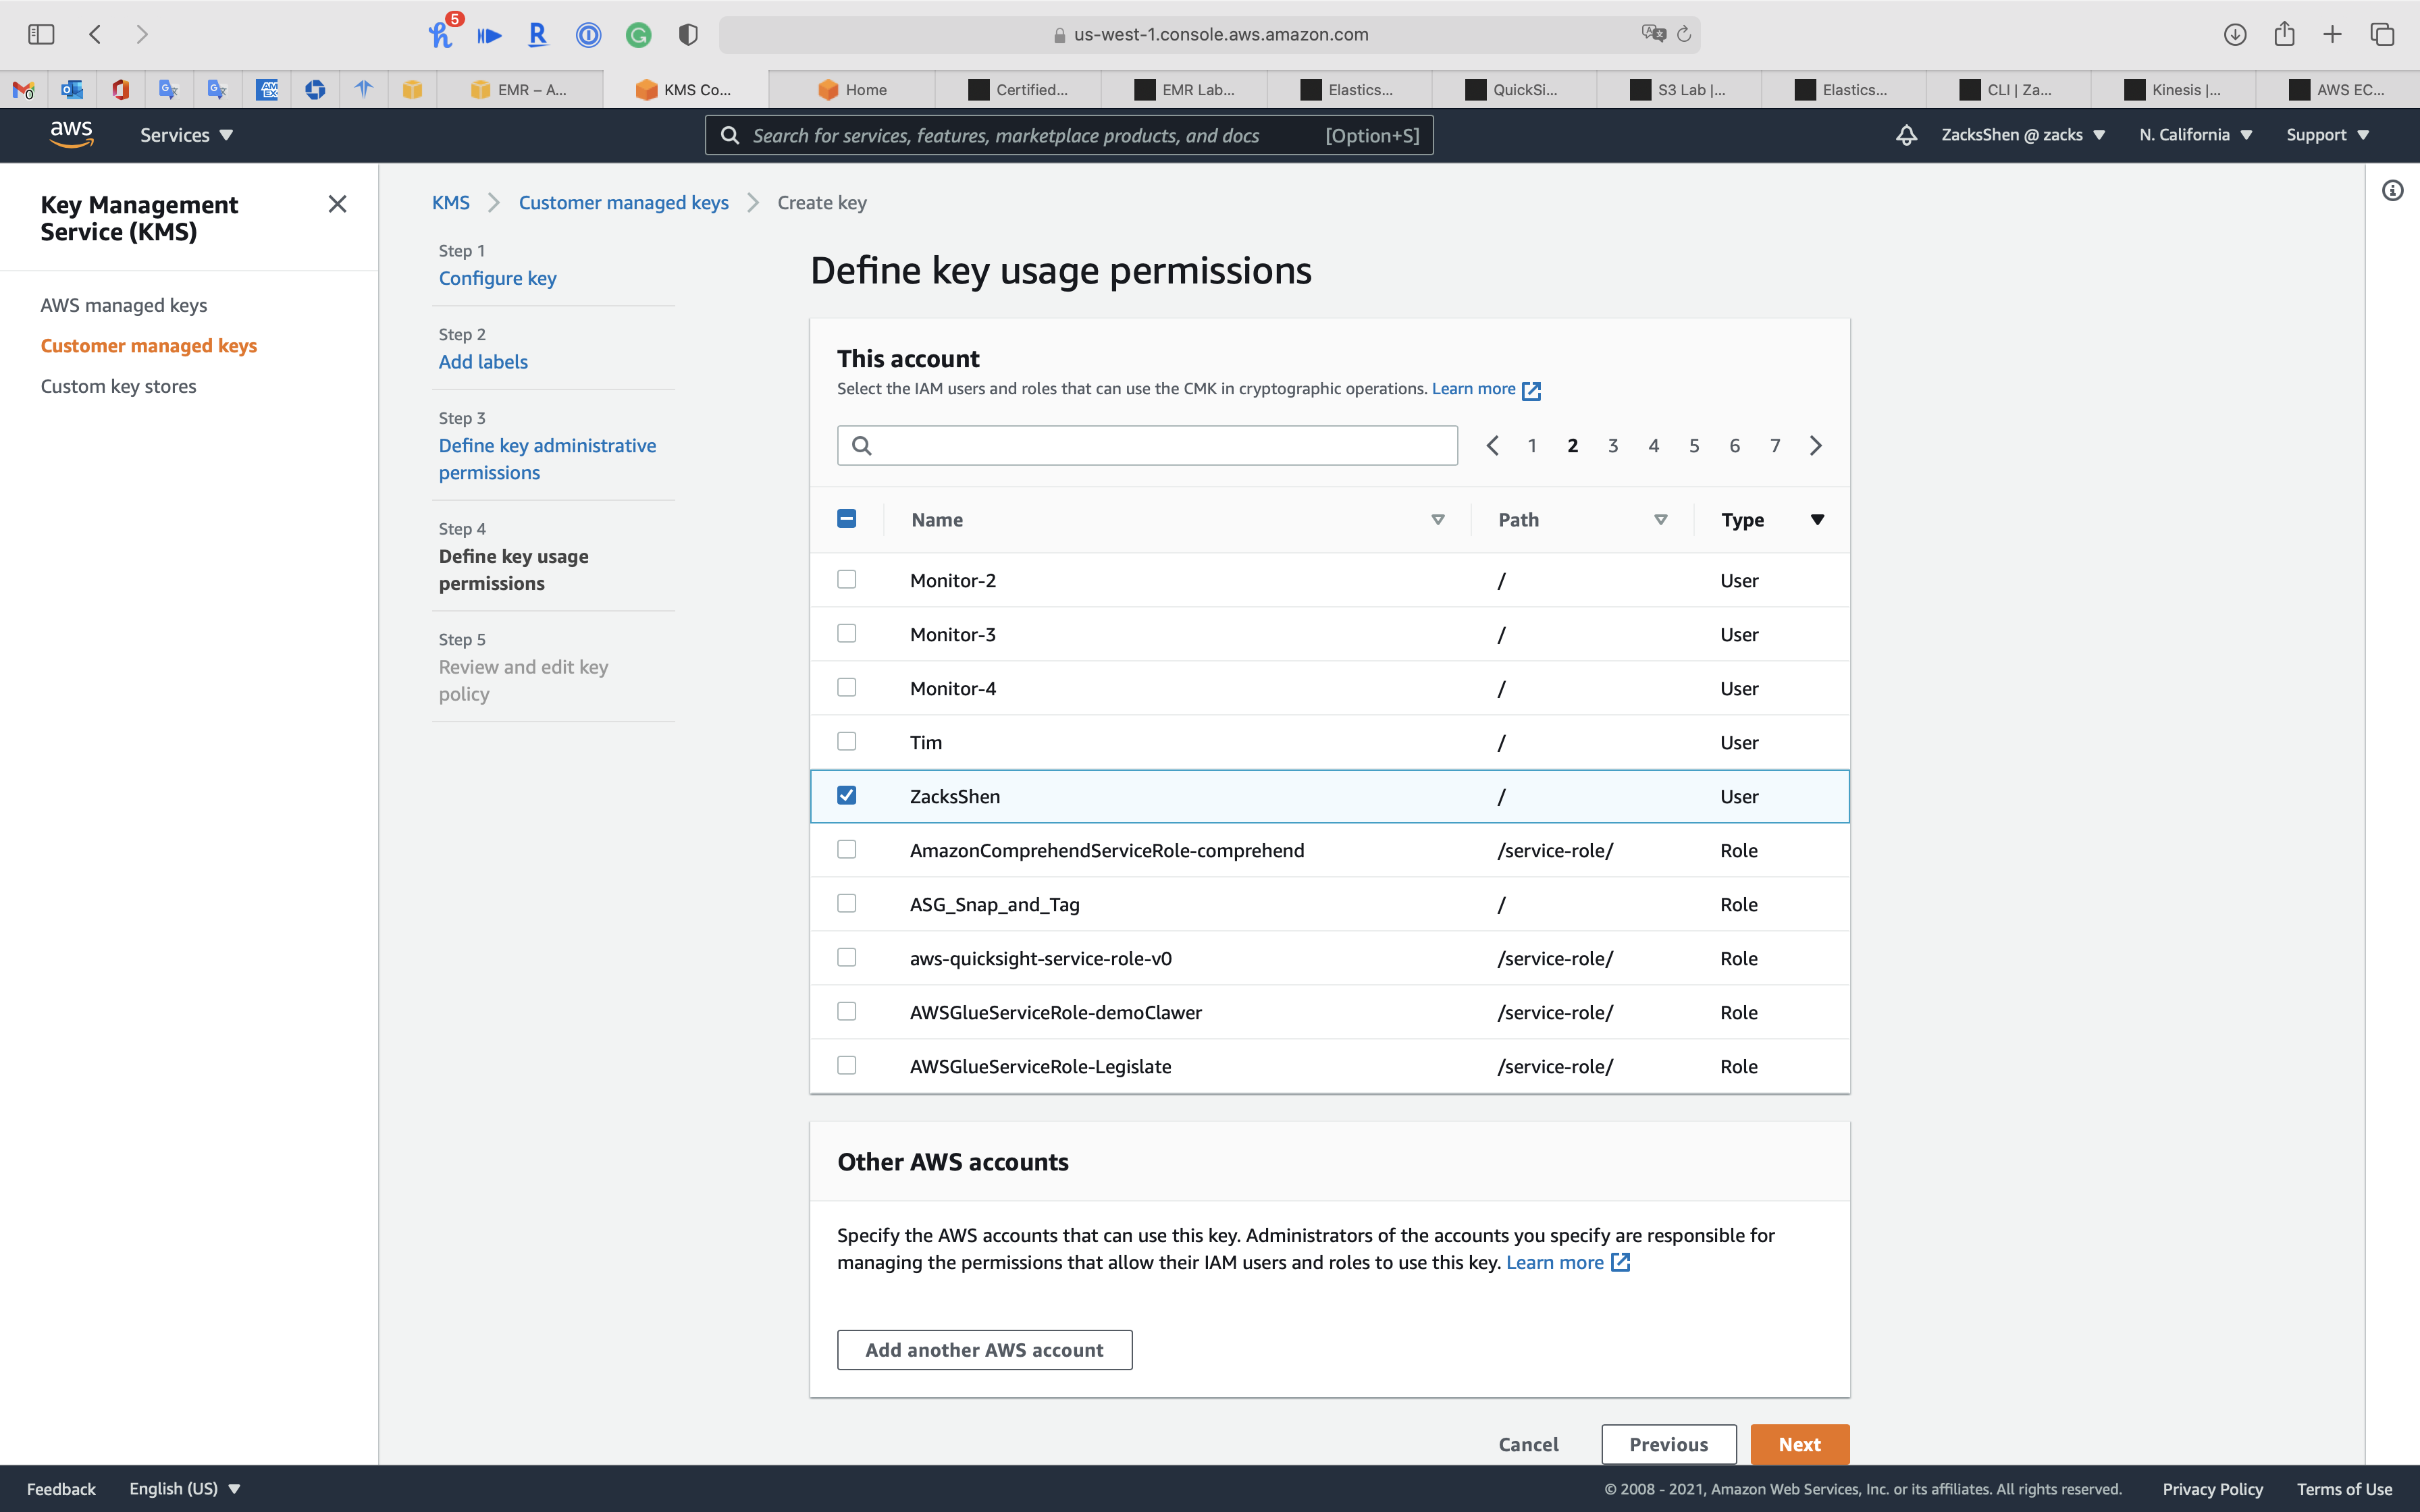
Step 5: Review and edit key policy
1 | { |
Click on Finish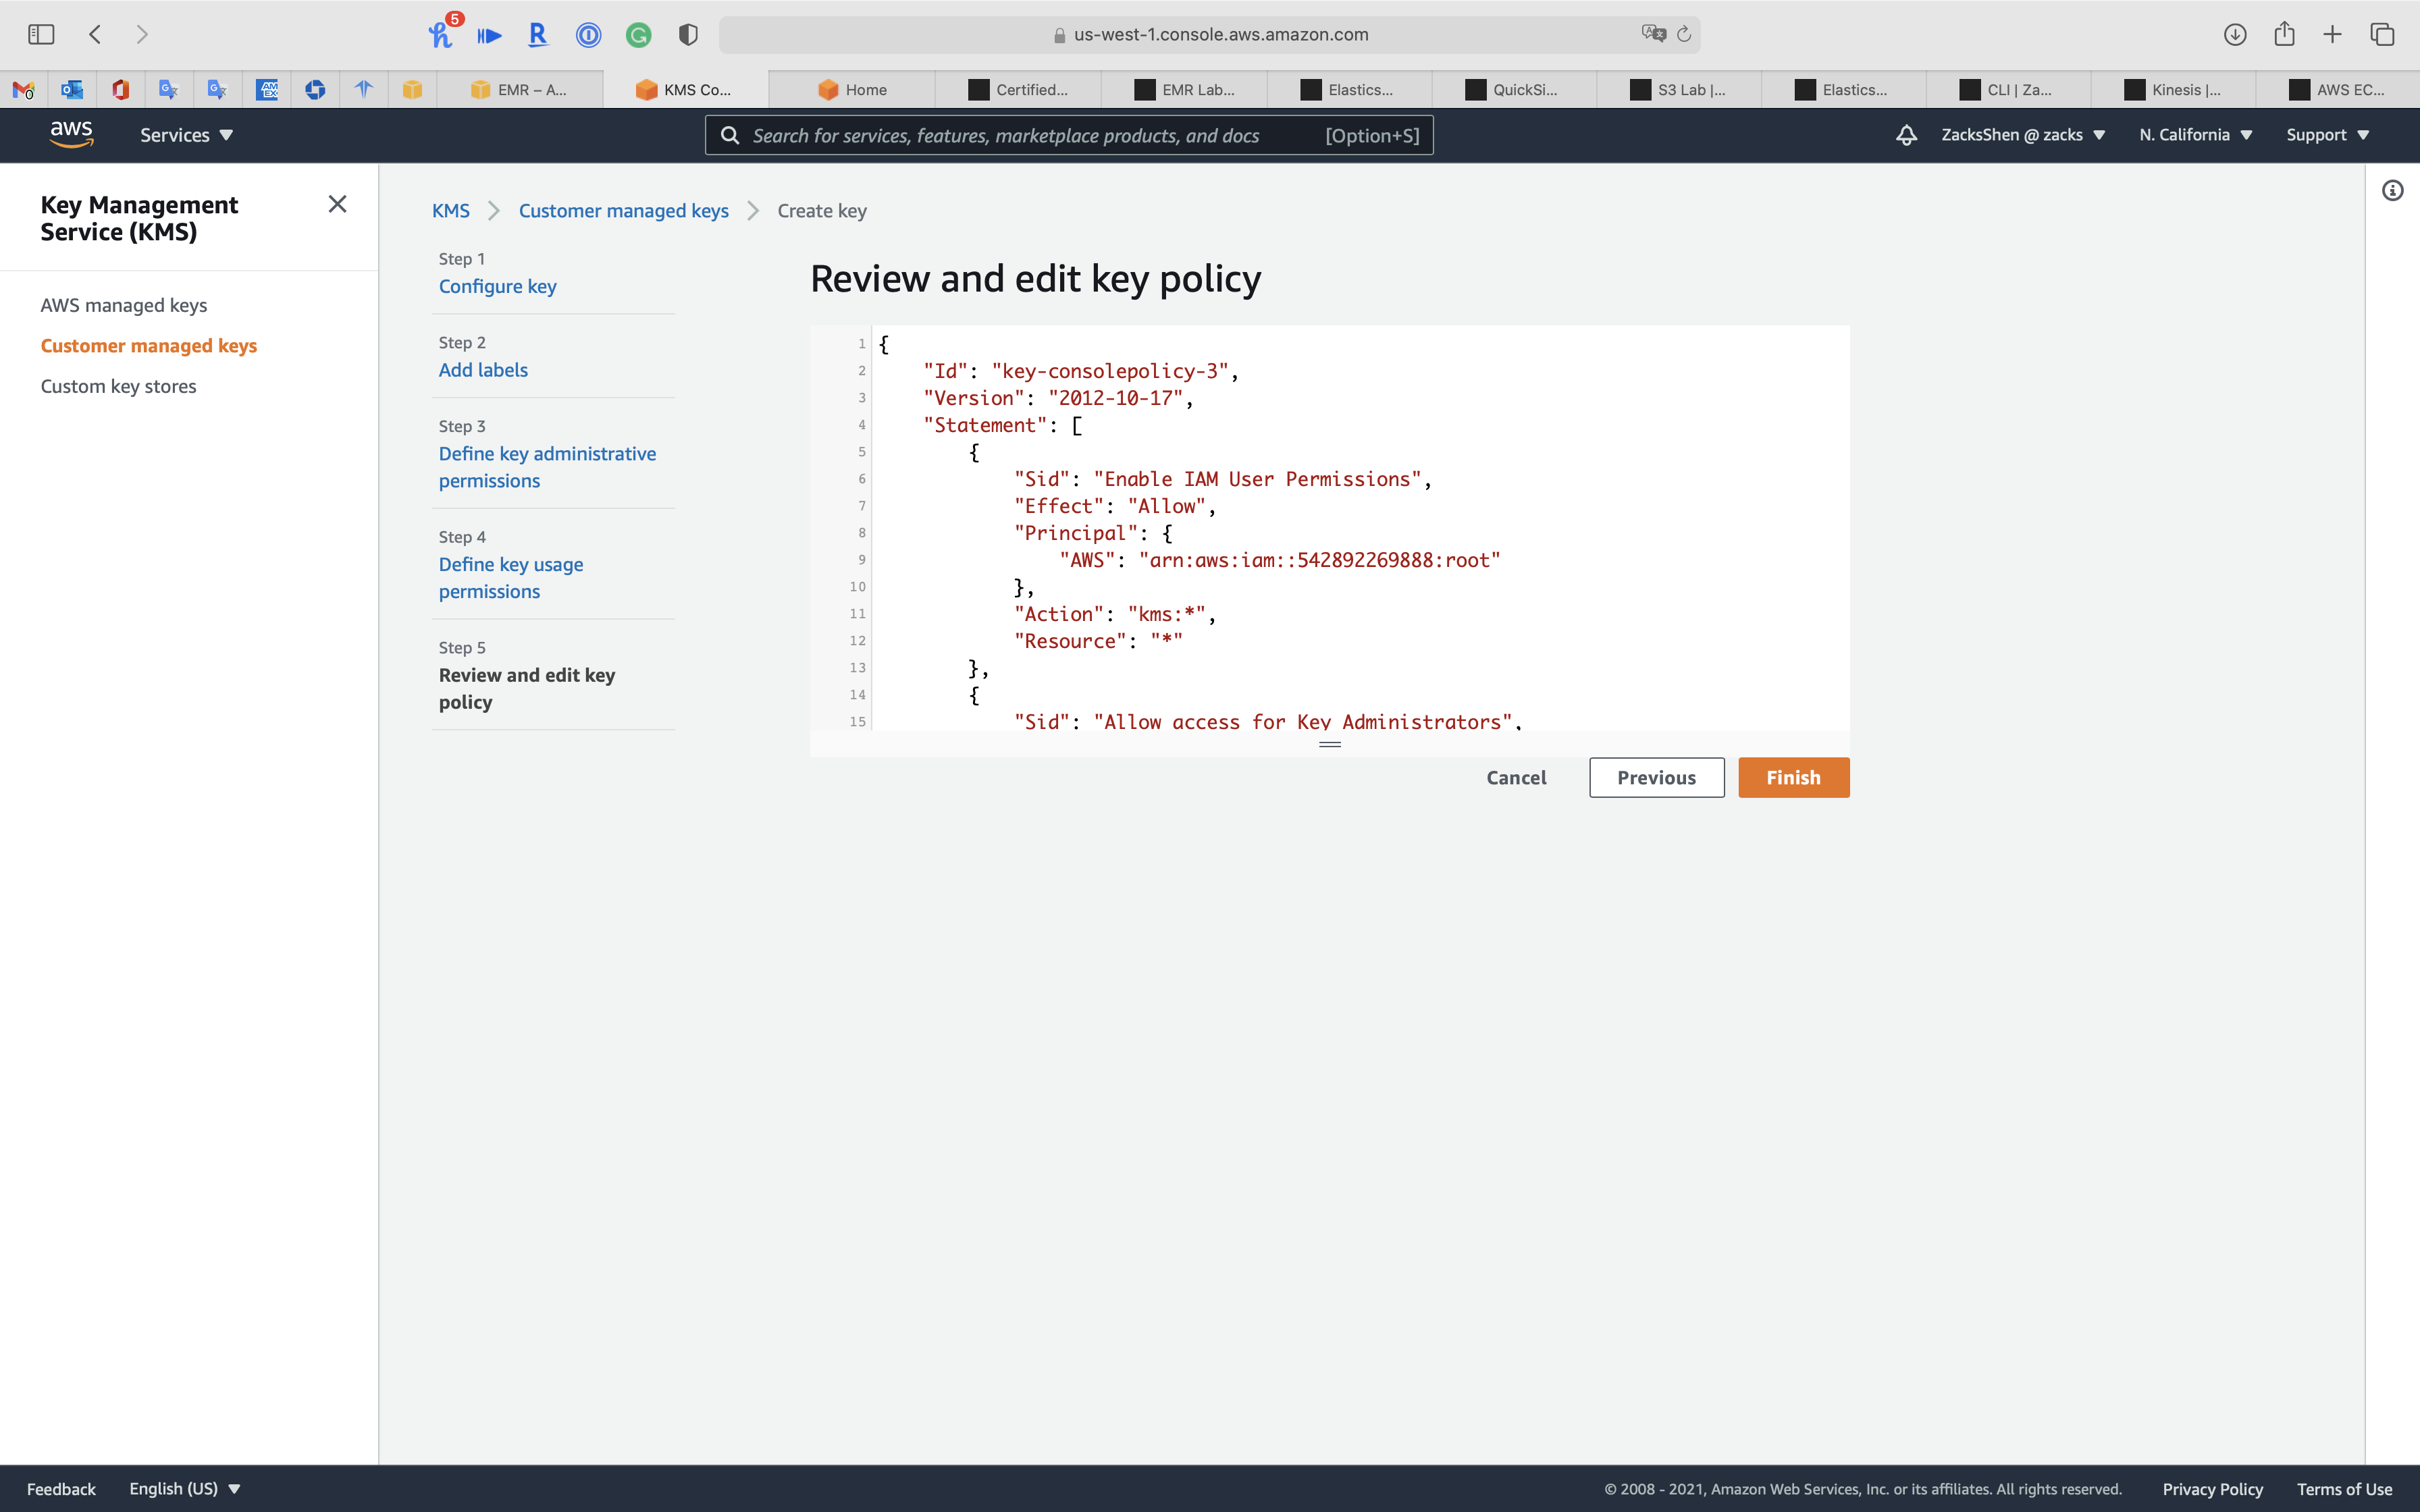
Click on EMR-SecurityGroupKey you just created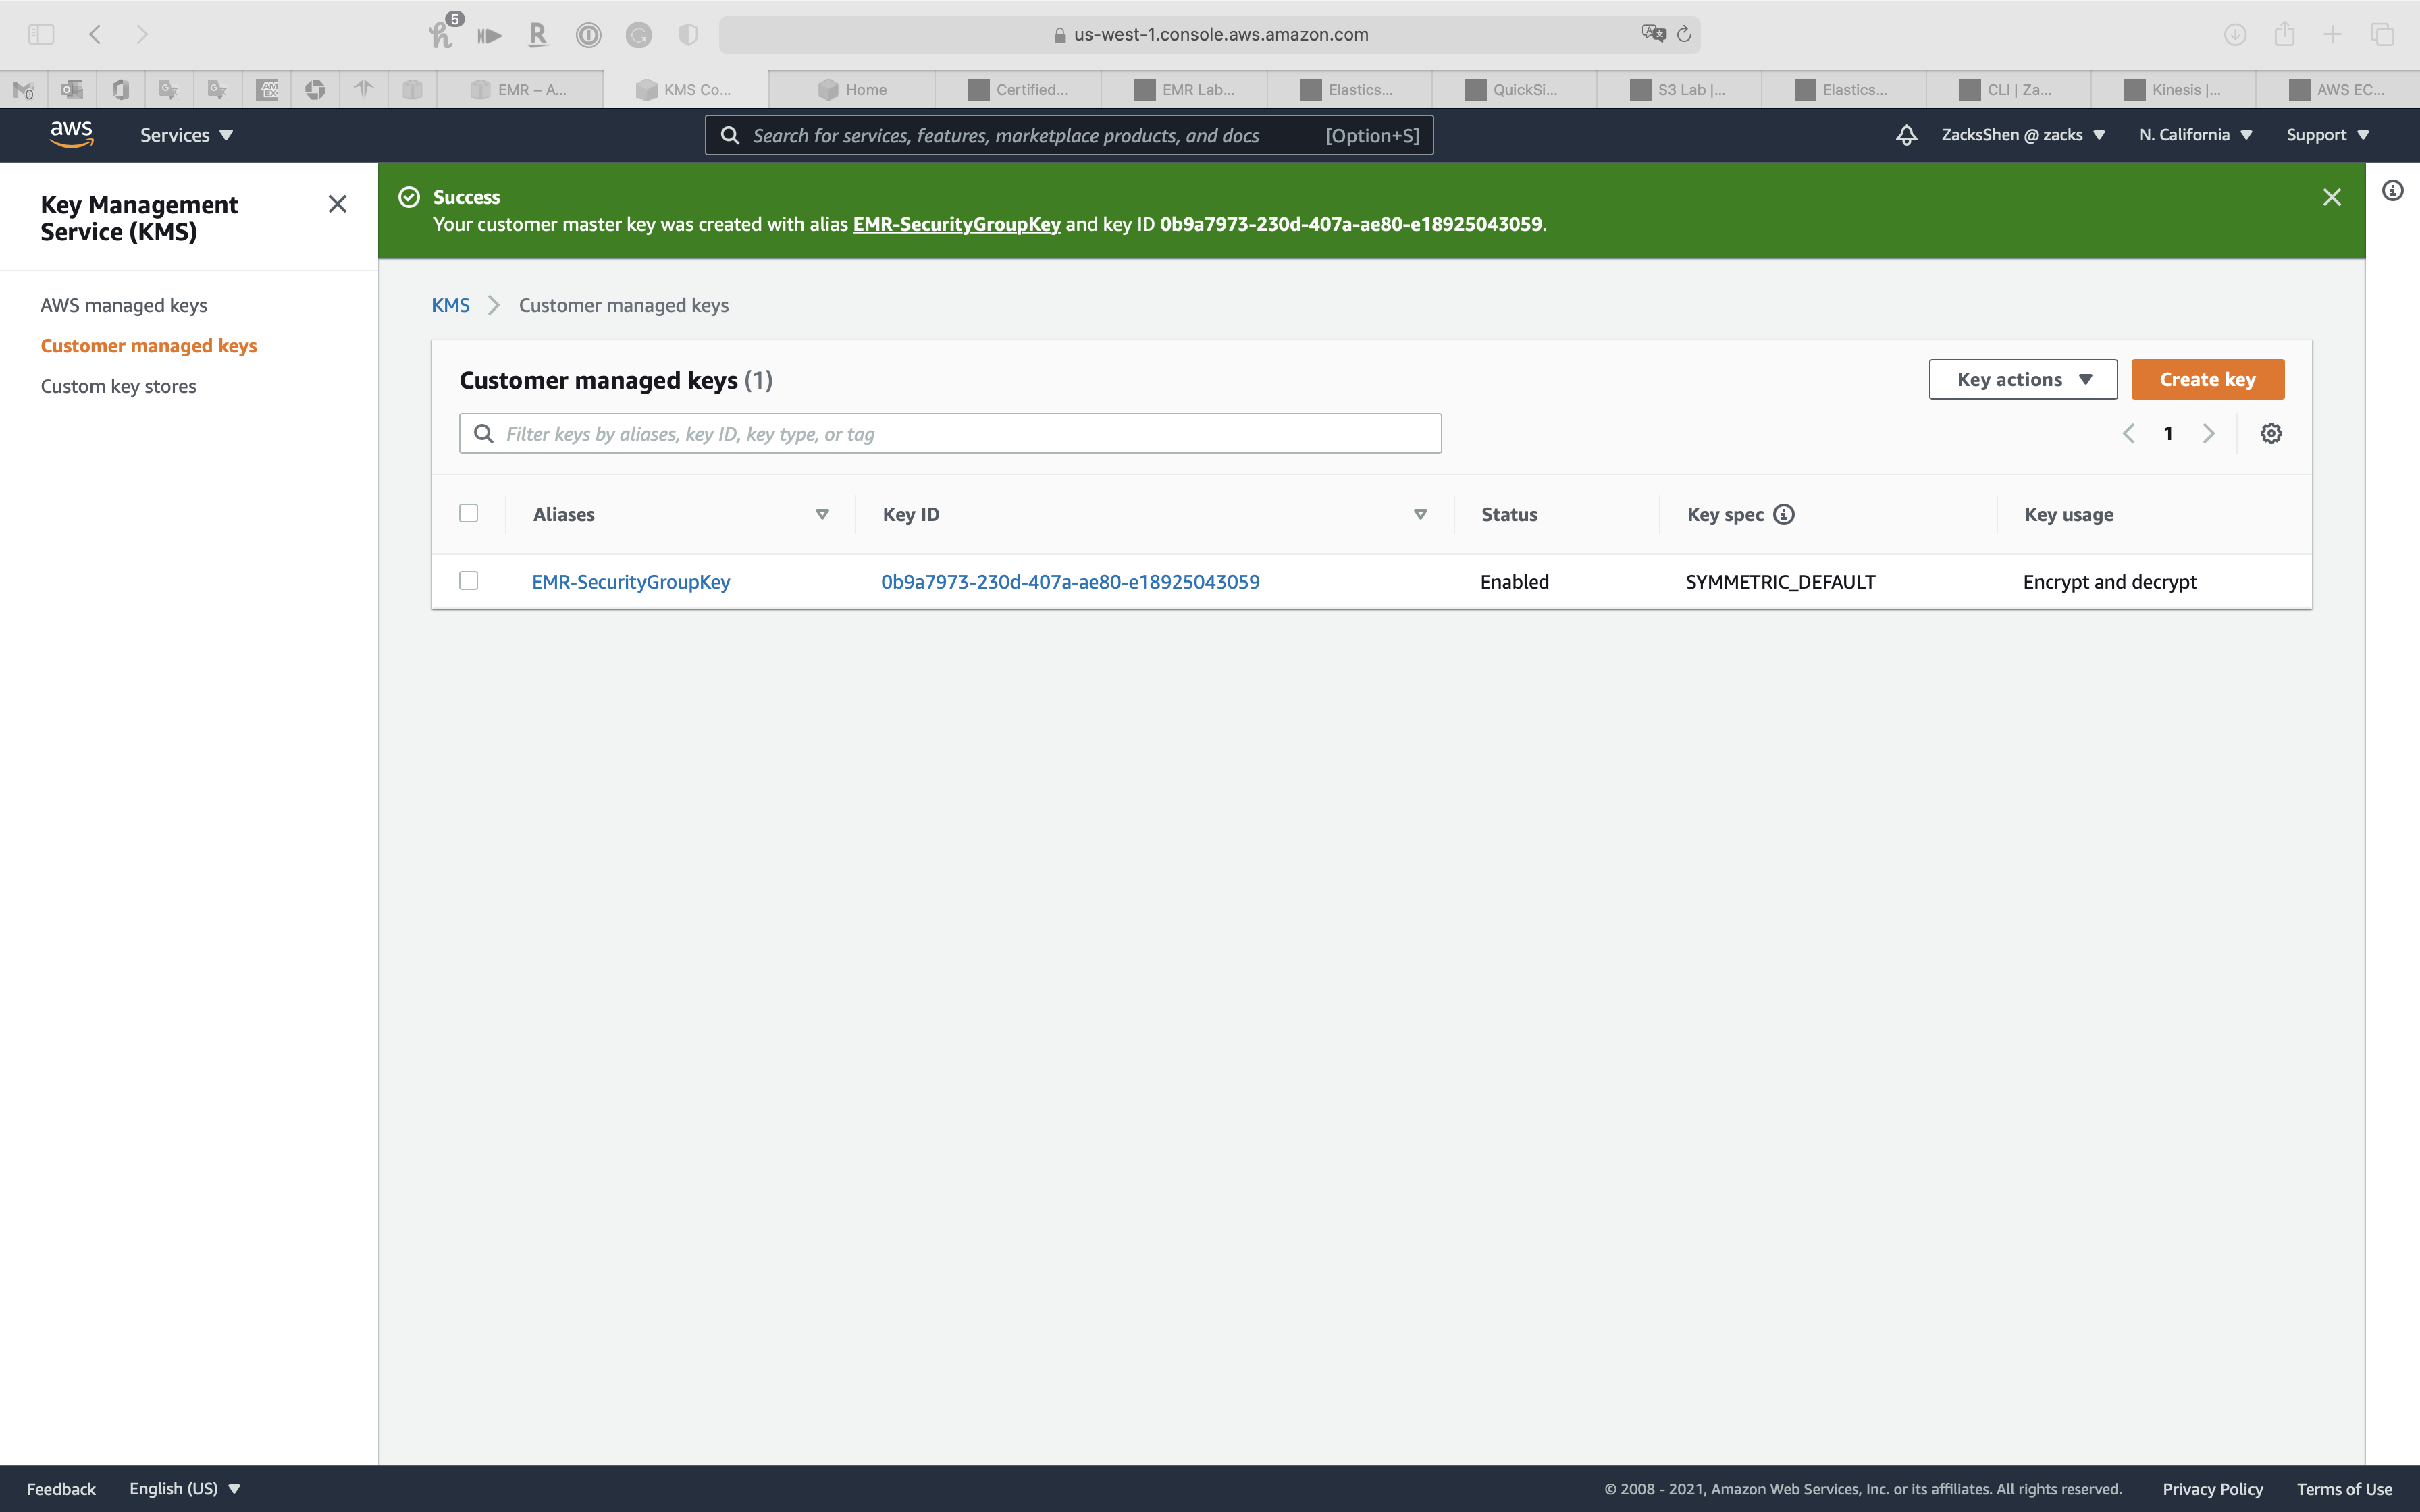
Copy ARN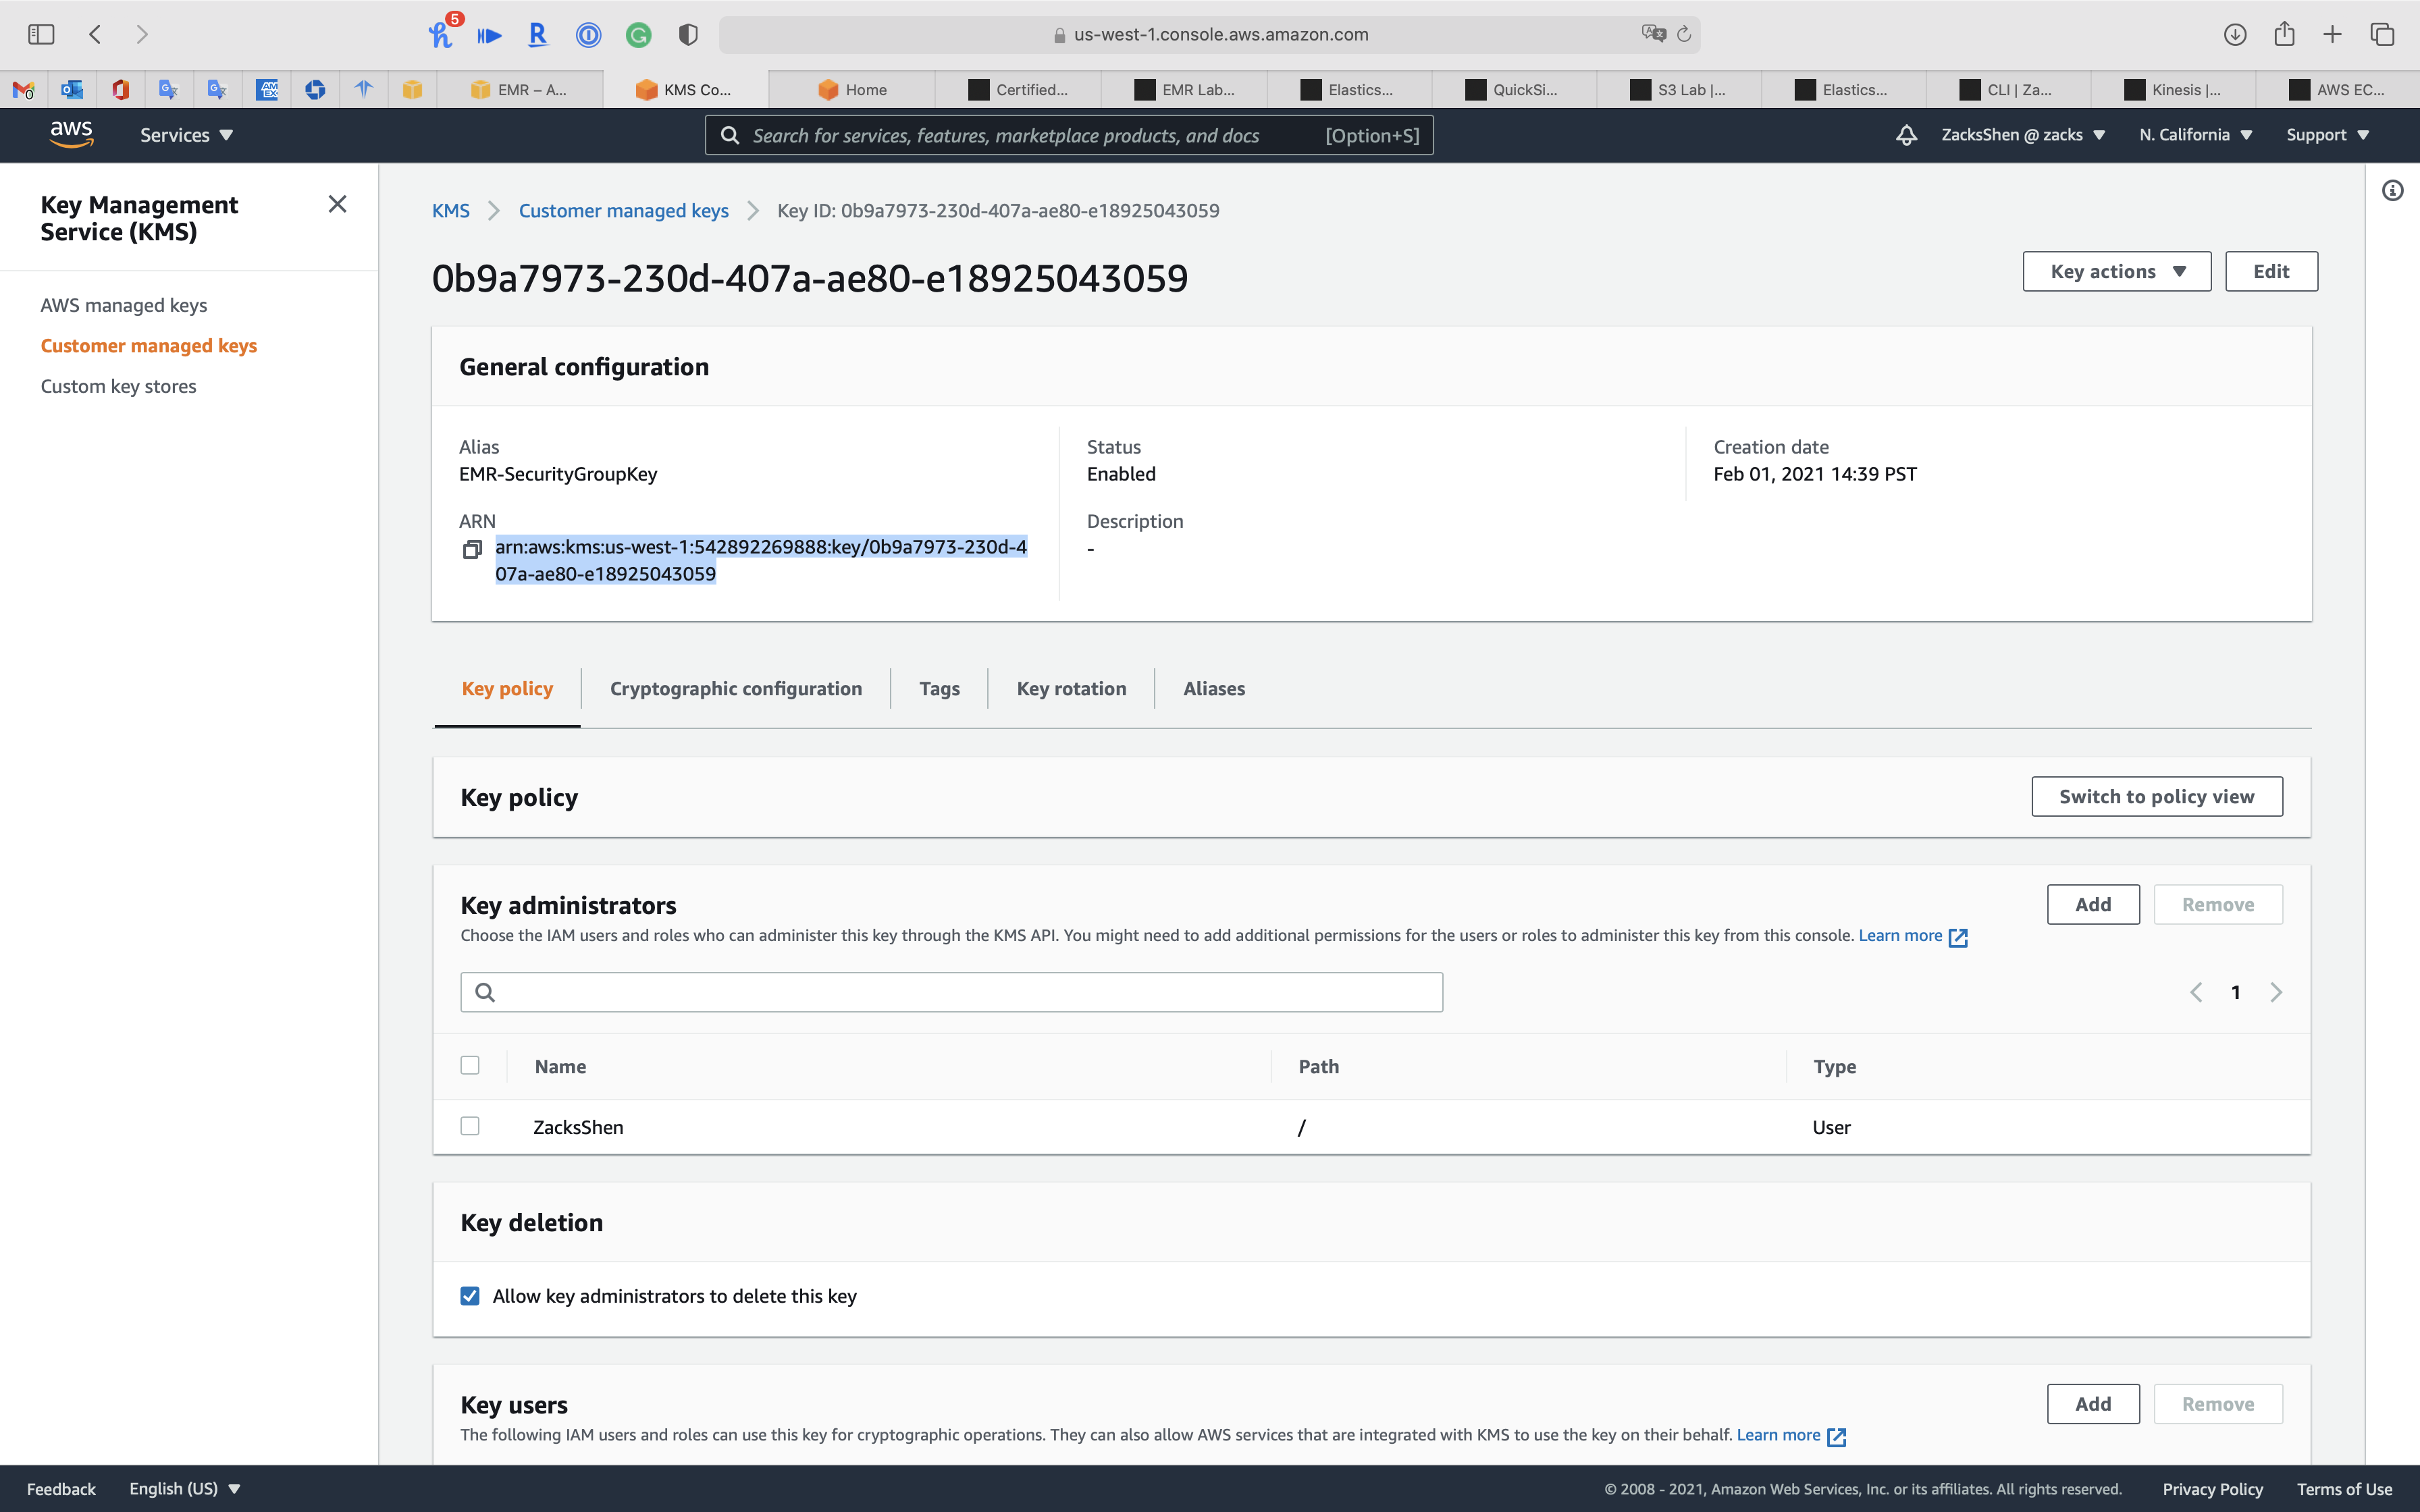
OpenSSL Configuration
Use OpenSSL to create a private key and public key
Preview openssl req manual
1 | openssl req -help |
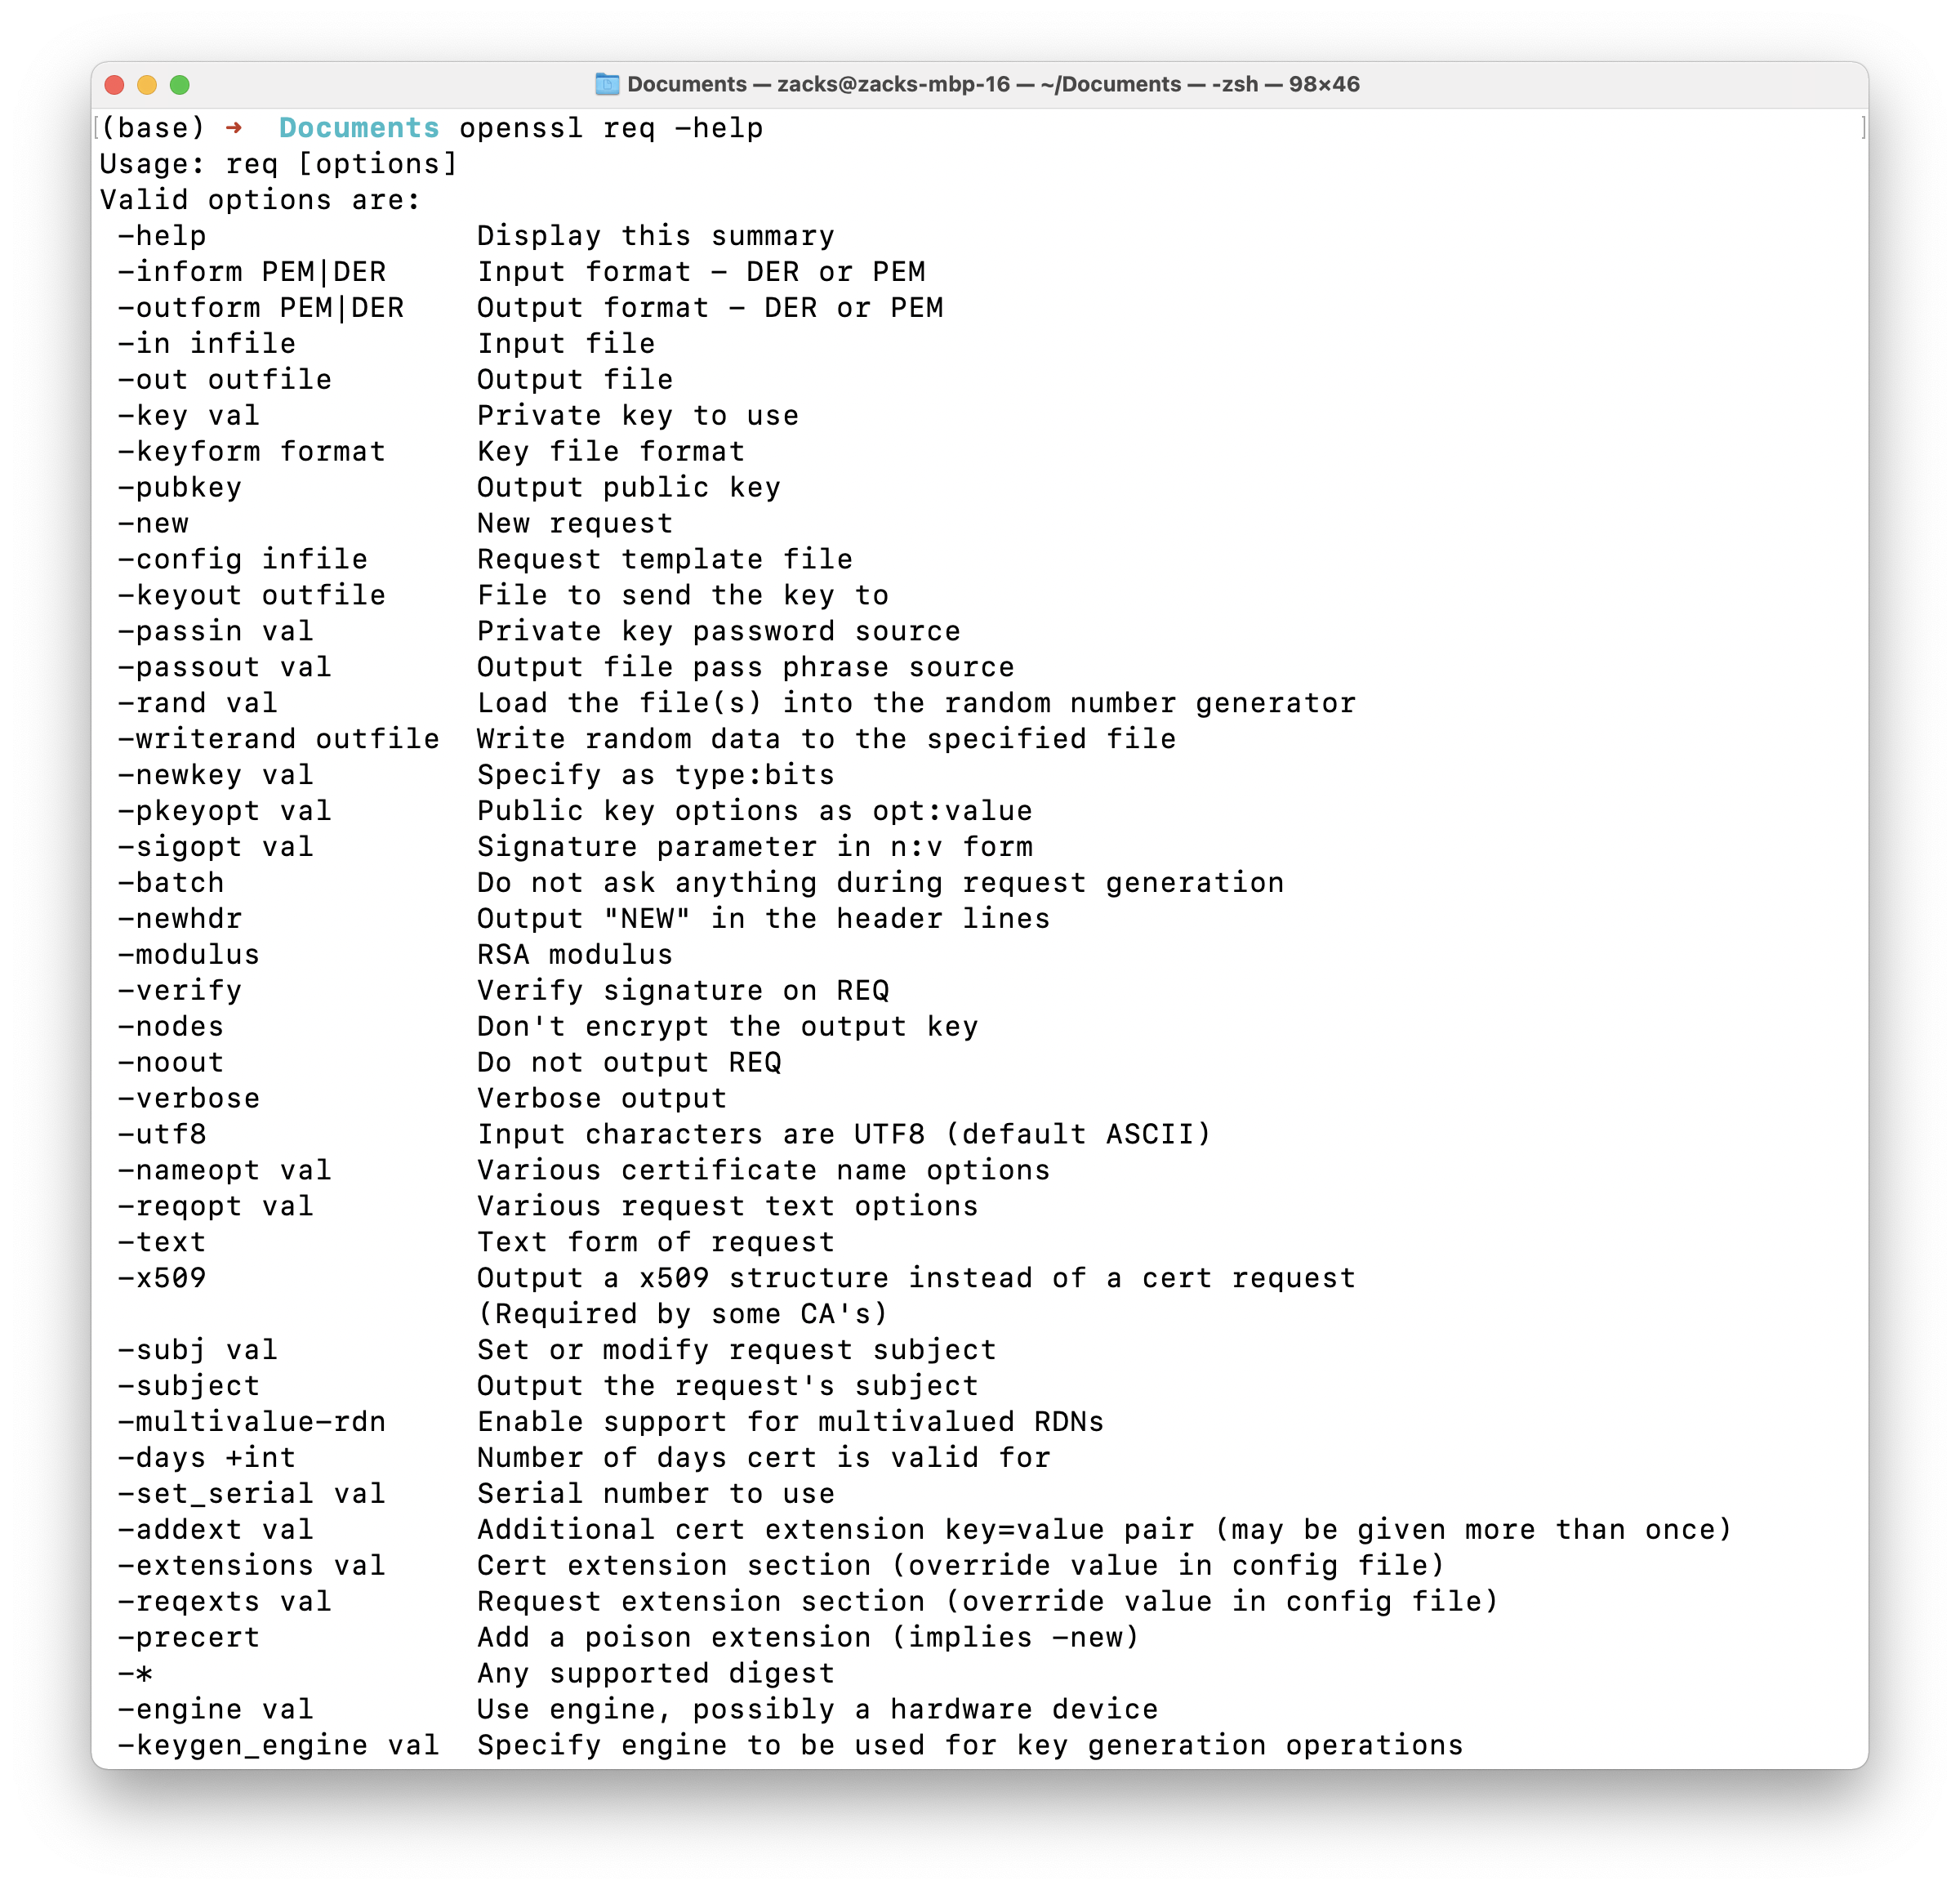
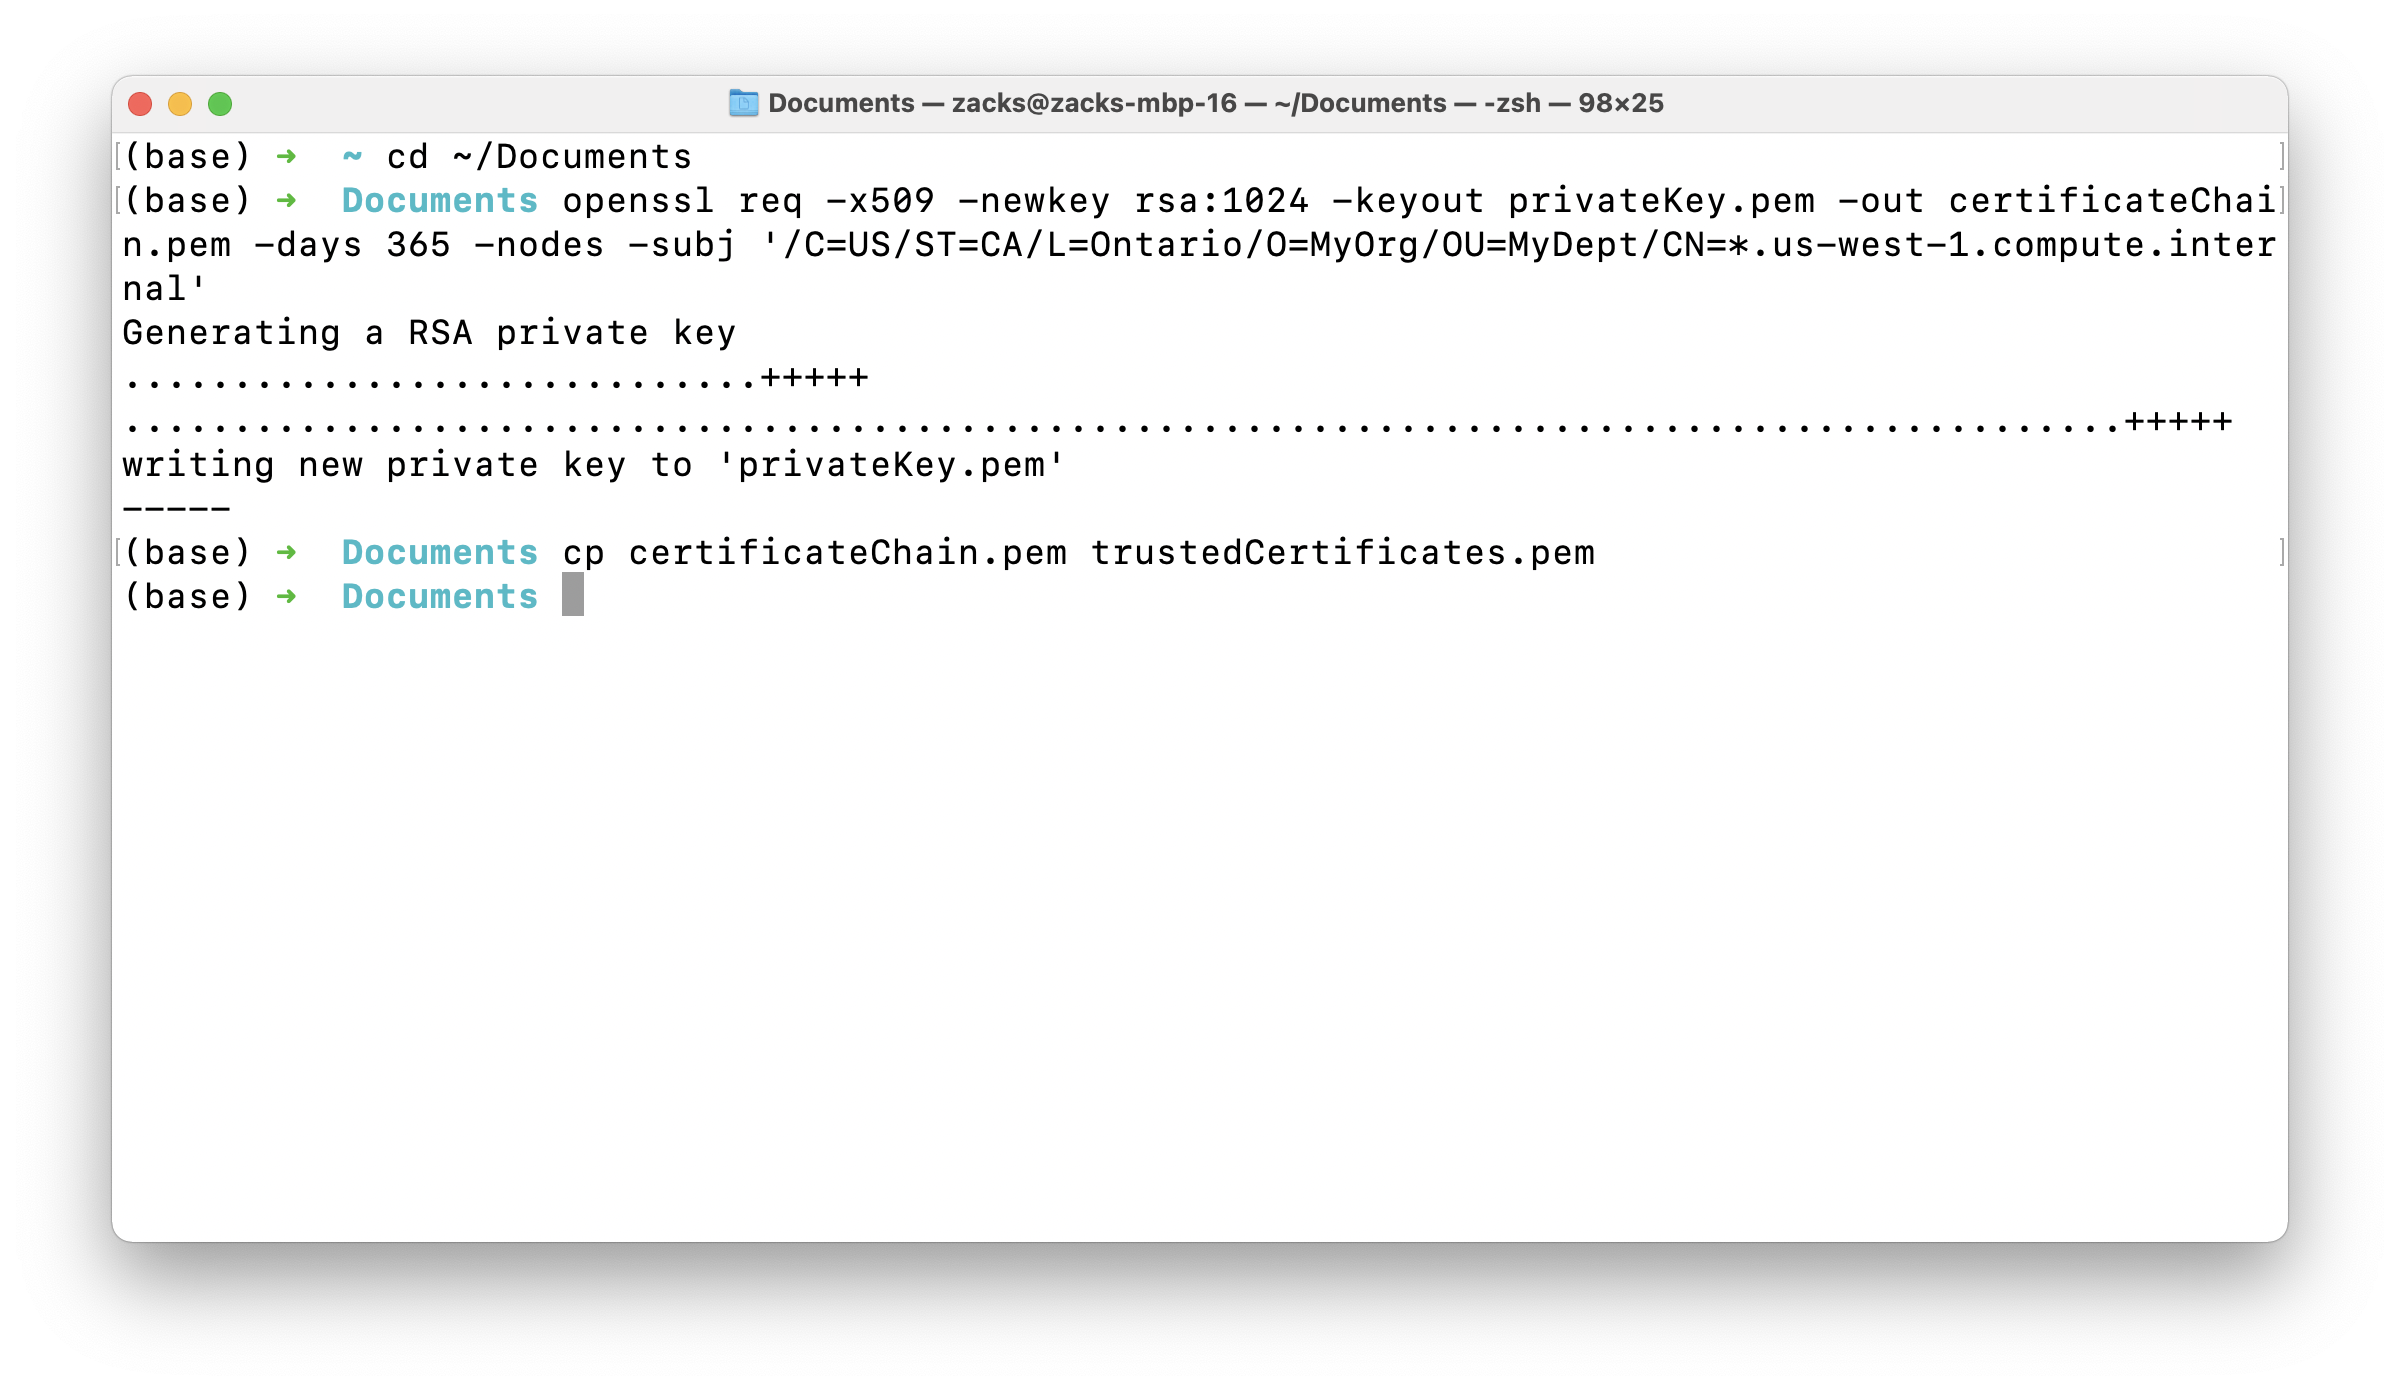
Create a self-signed certificate
- -x509: Output a x509 structure instead of a cert request (Required by some CA’s)
- -newkey val: Specify as type:bits
- -keyout outfile: File to send the key to
- -out outfile: Output file
- -days +int: Number of days cert is valid for
- -nodes: Don’t encrypt the output key
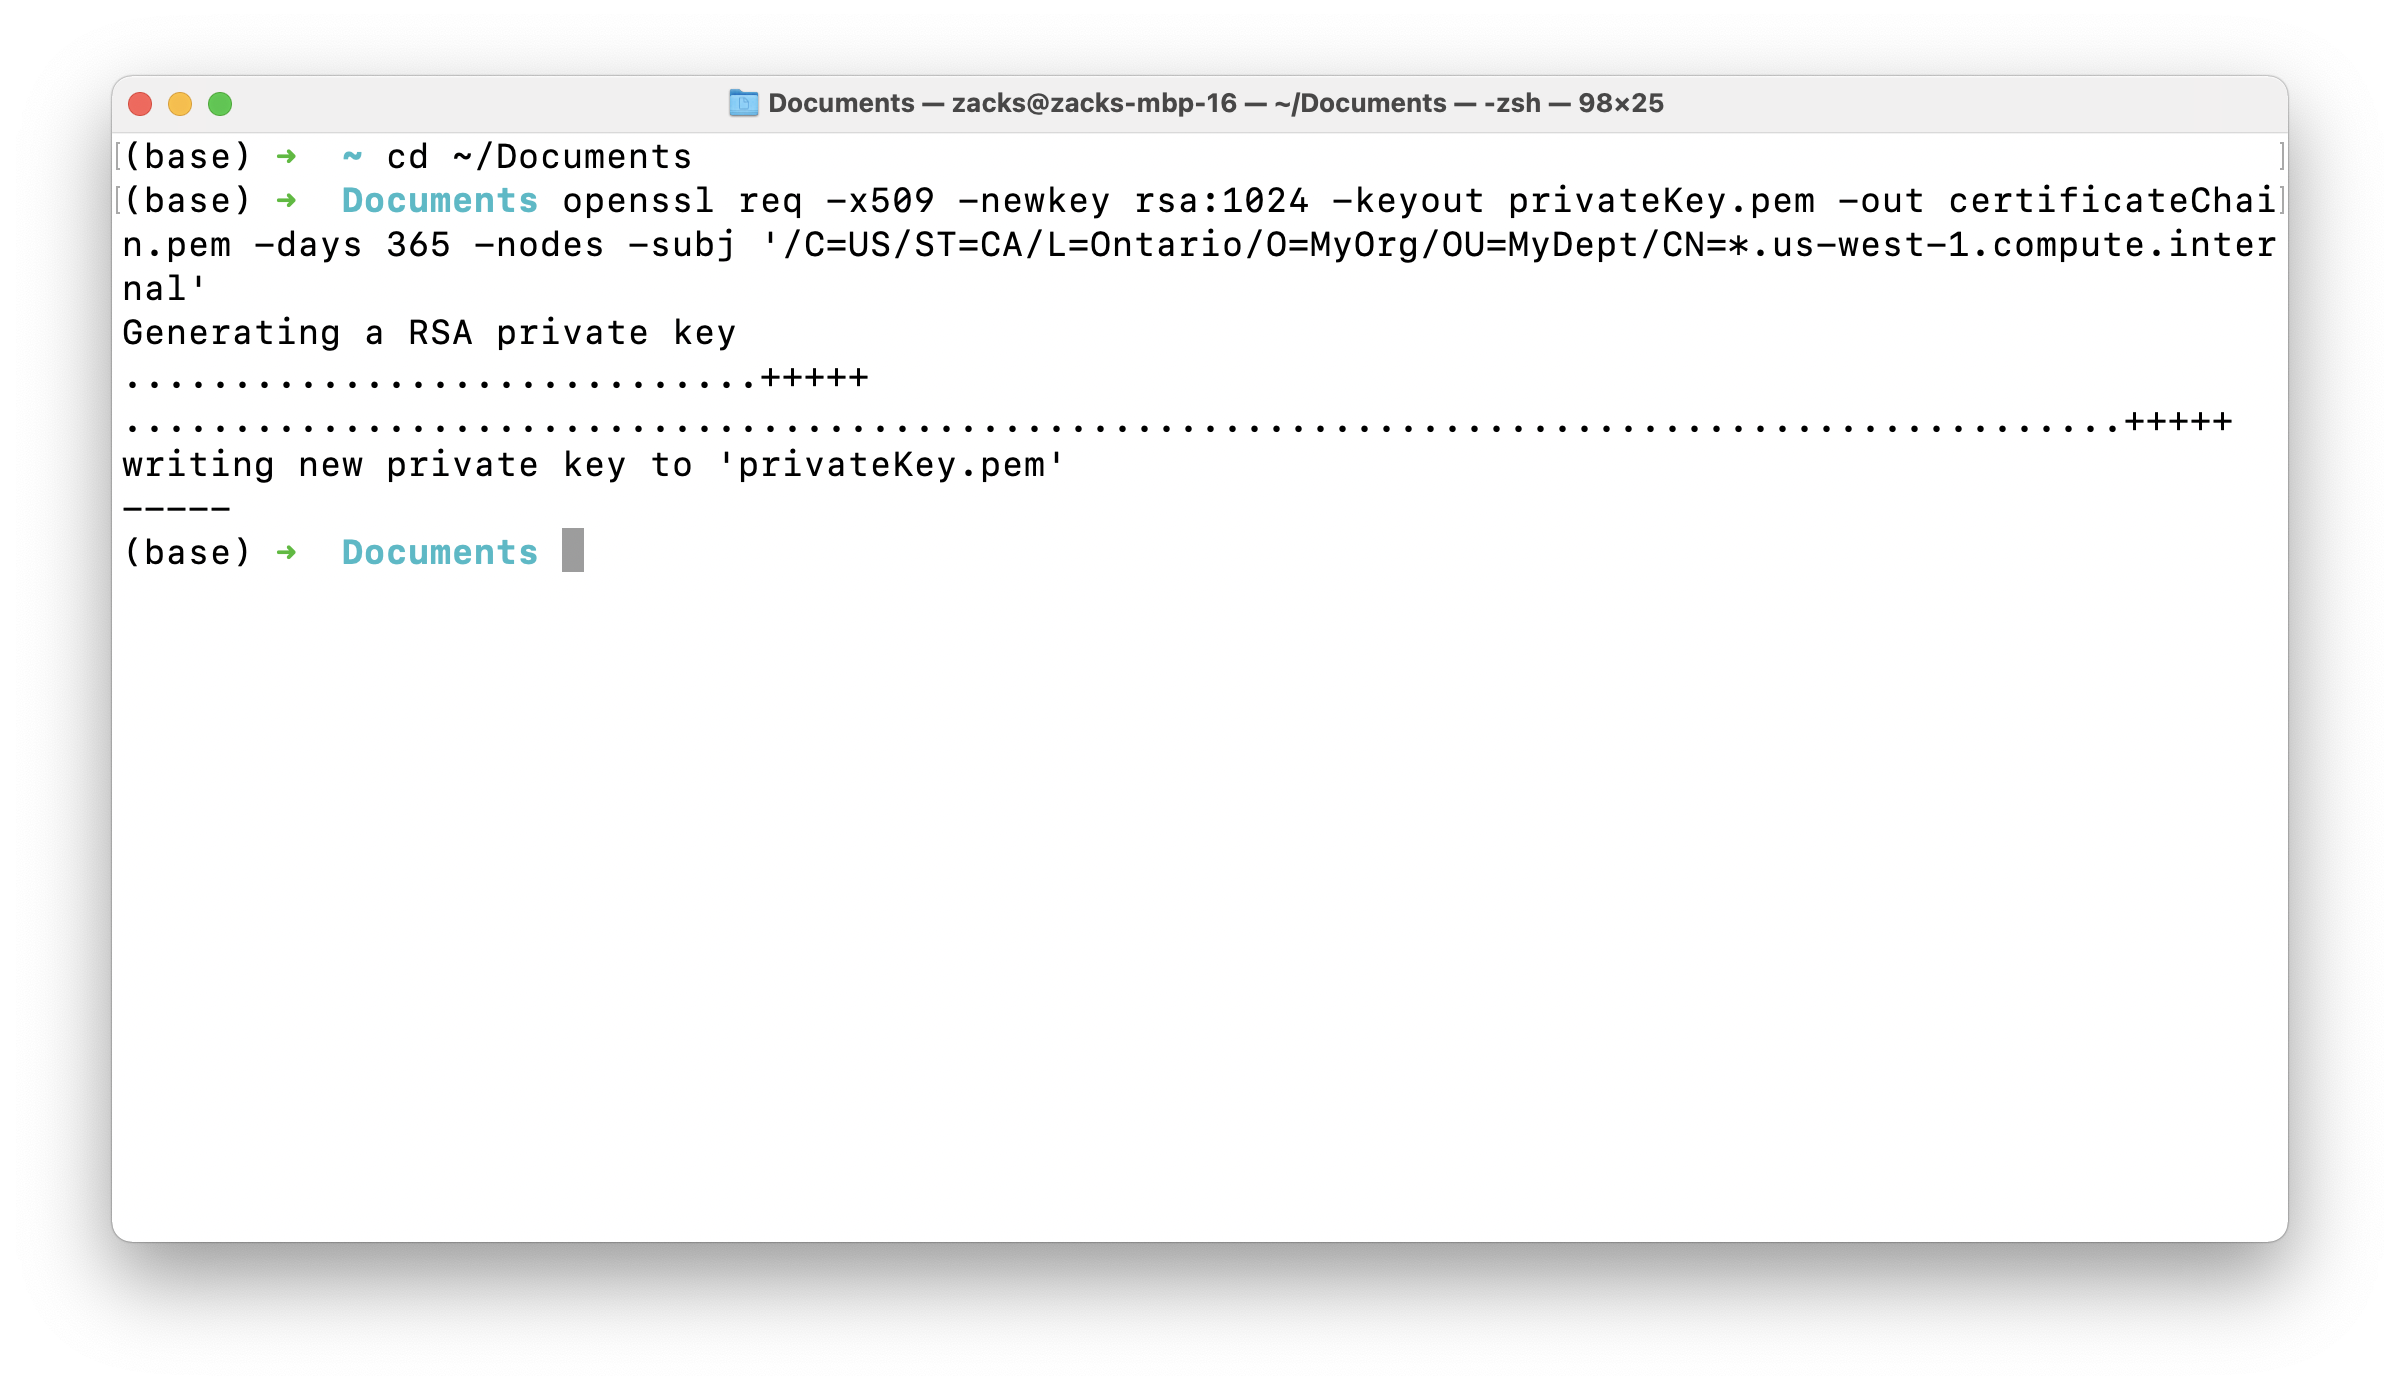
- -subj val: Set or modify request subject
1 | cd ~/Documents |
1 | cp certificateChain.pem trustedCertificates.pem |
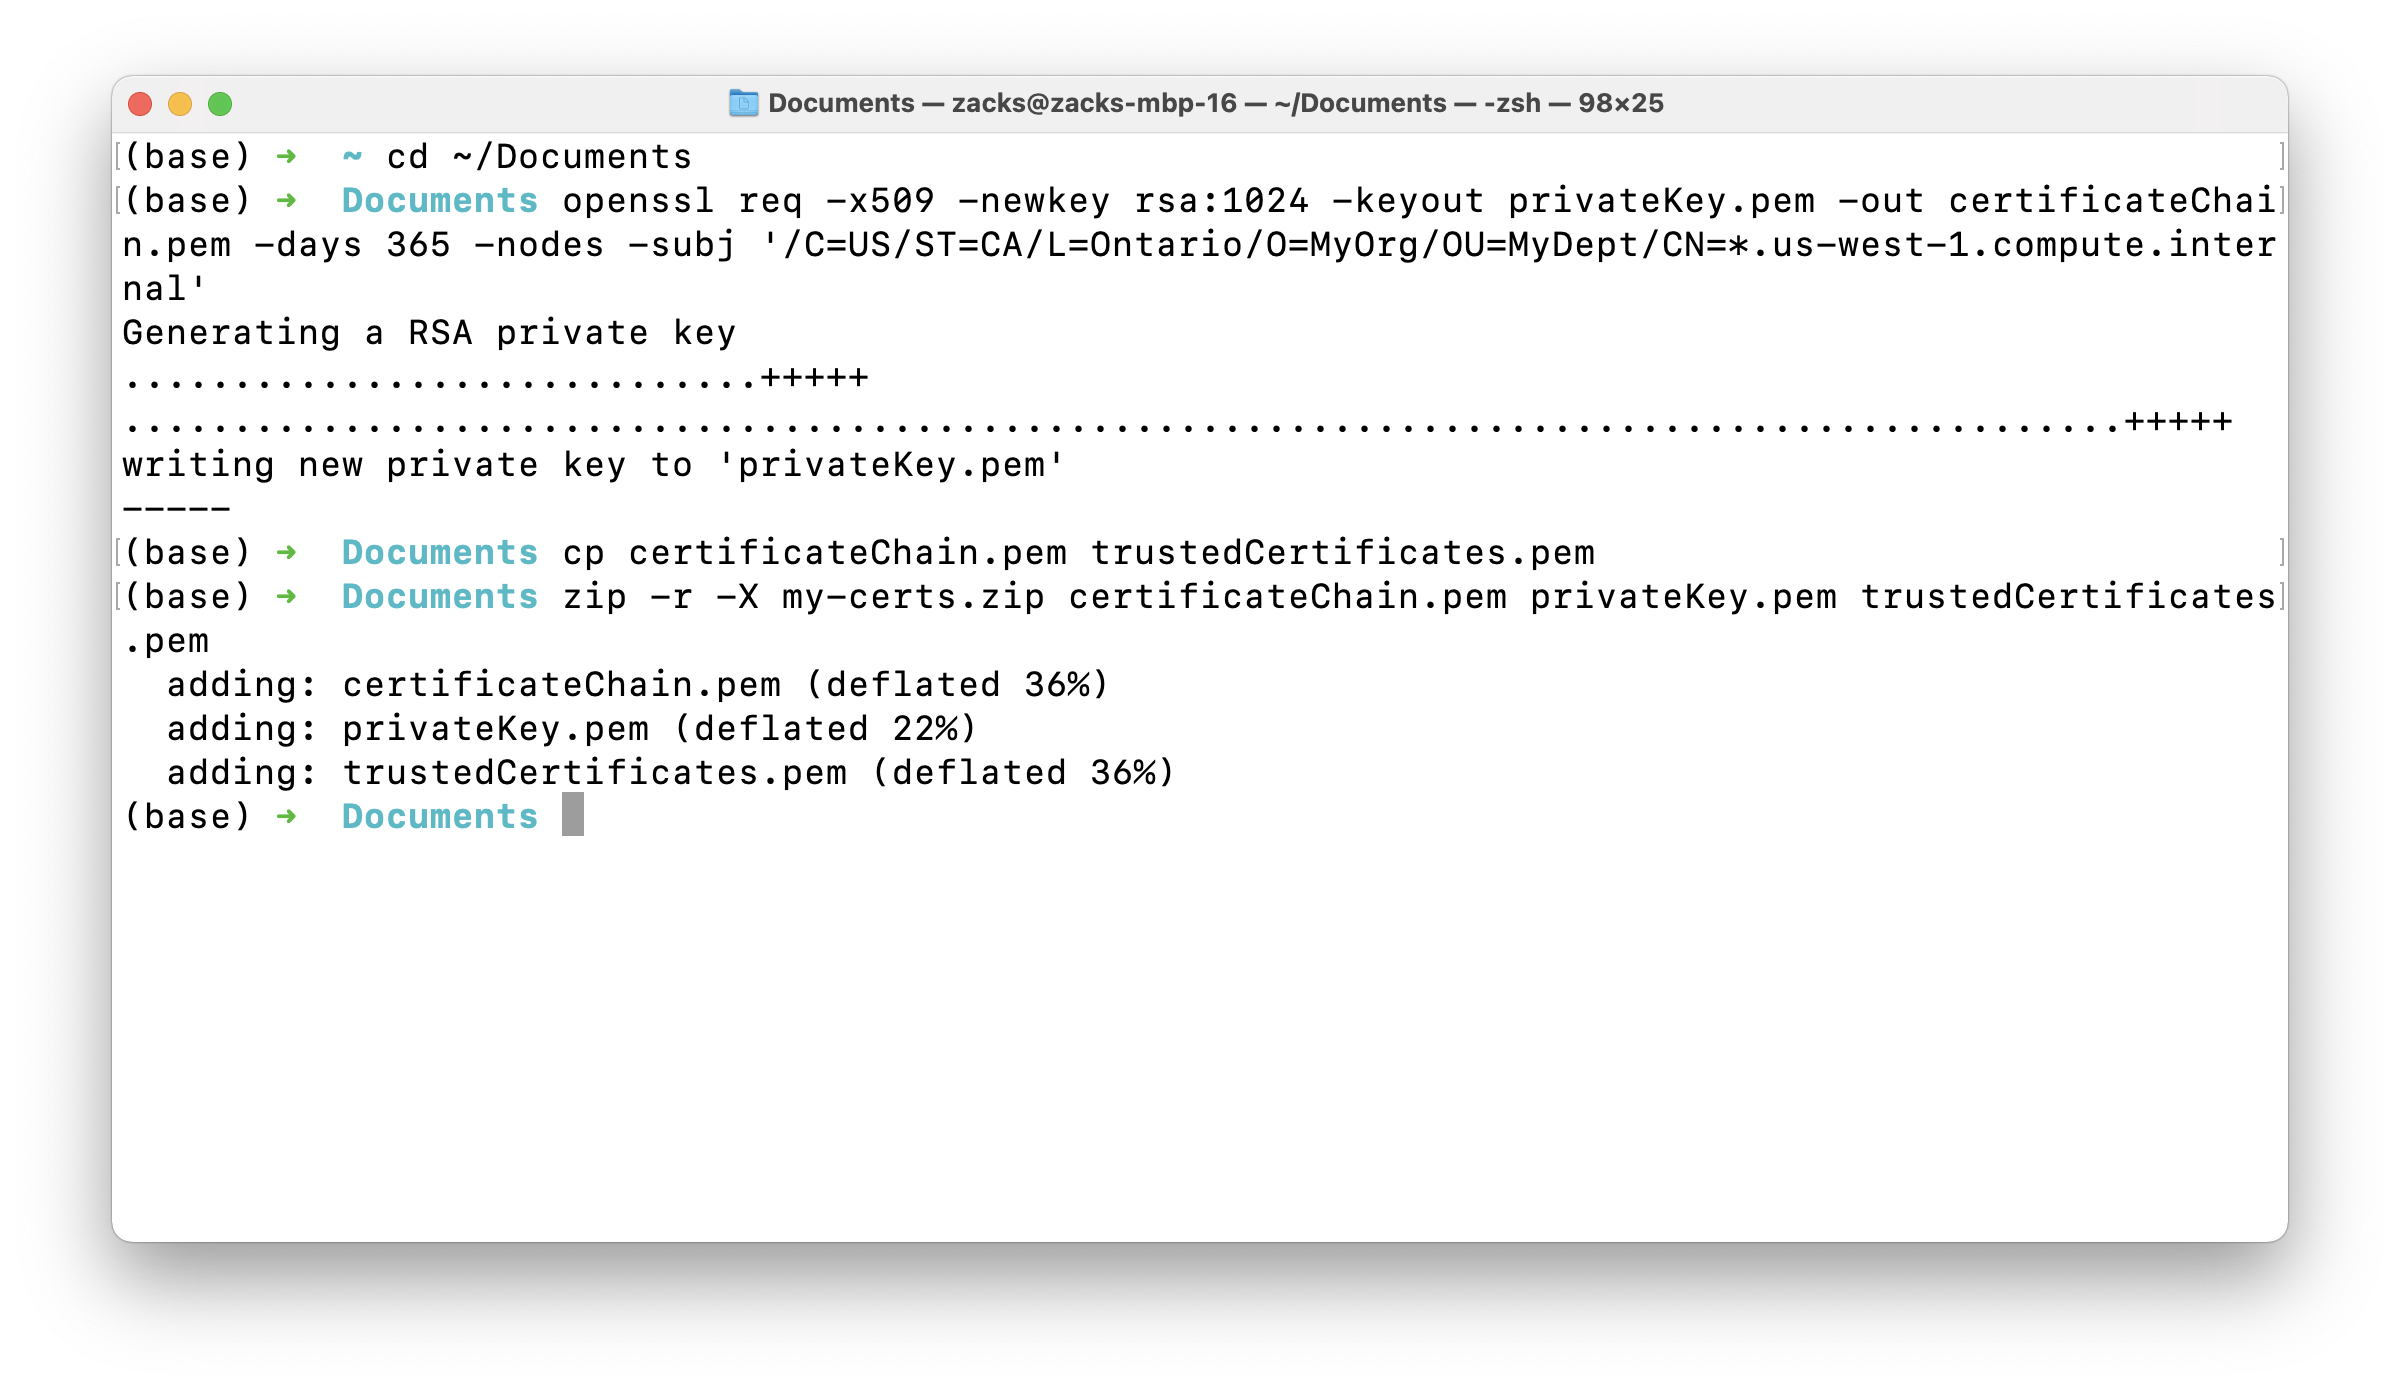
Compress the three keys
Review zip manual
1 | zip --help |

Compress certificateChain.pem, privateKey.pem, and trustedCertificates.pem as my-certs.zip
- -r: recurse into directories
- -X: eXclude eXtra file attributes
1 | zip -r -X my-certs.zip certificateChain.pem privateKey.pem trustedCertificates.pem |
Upload the .zip file to your S3 bucket
Services -> S3
Create a proper folder to upload the .zip file.
Select my-certs.zip and click on Choose for Upload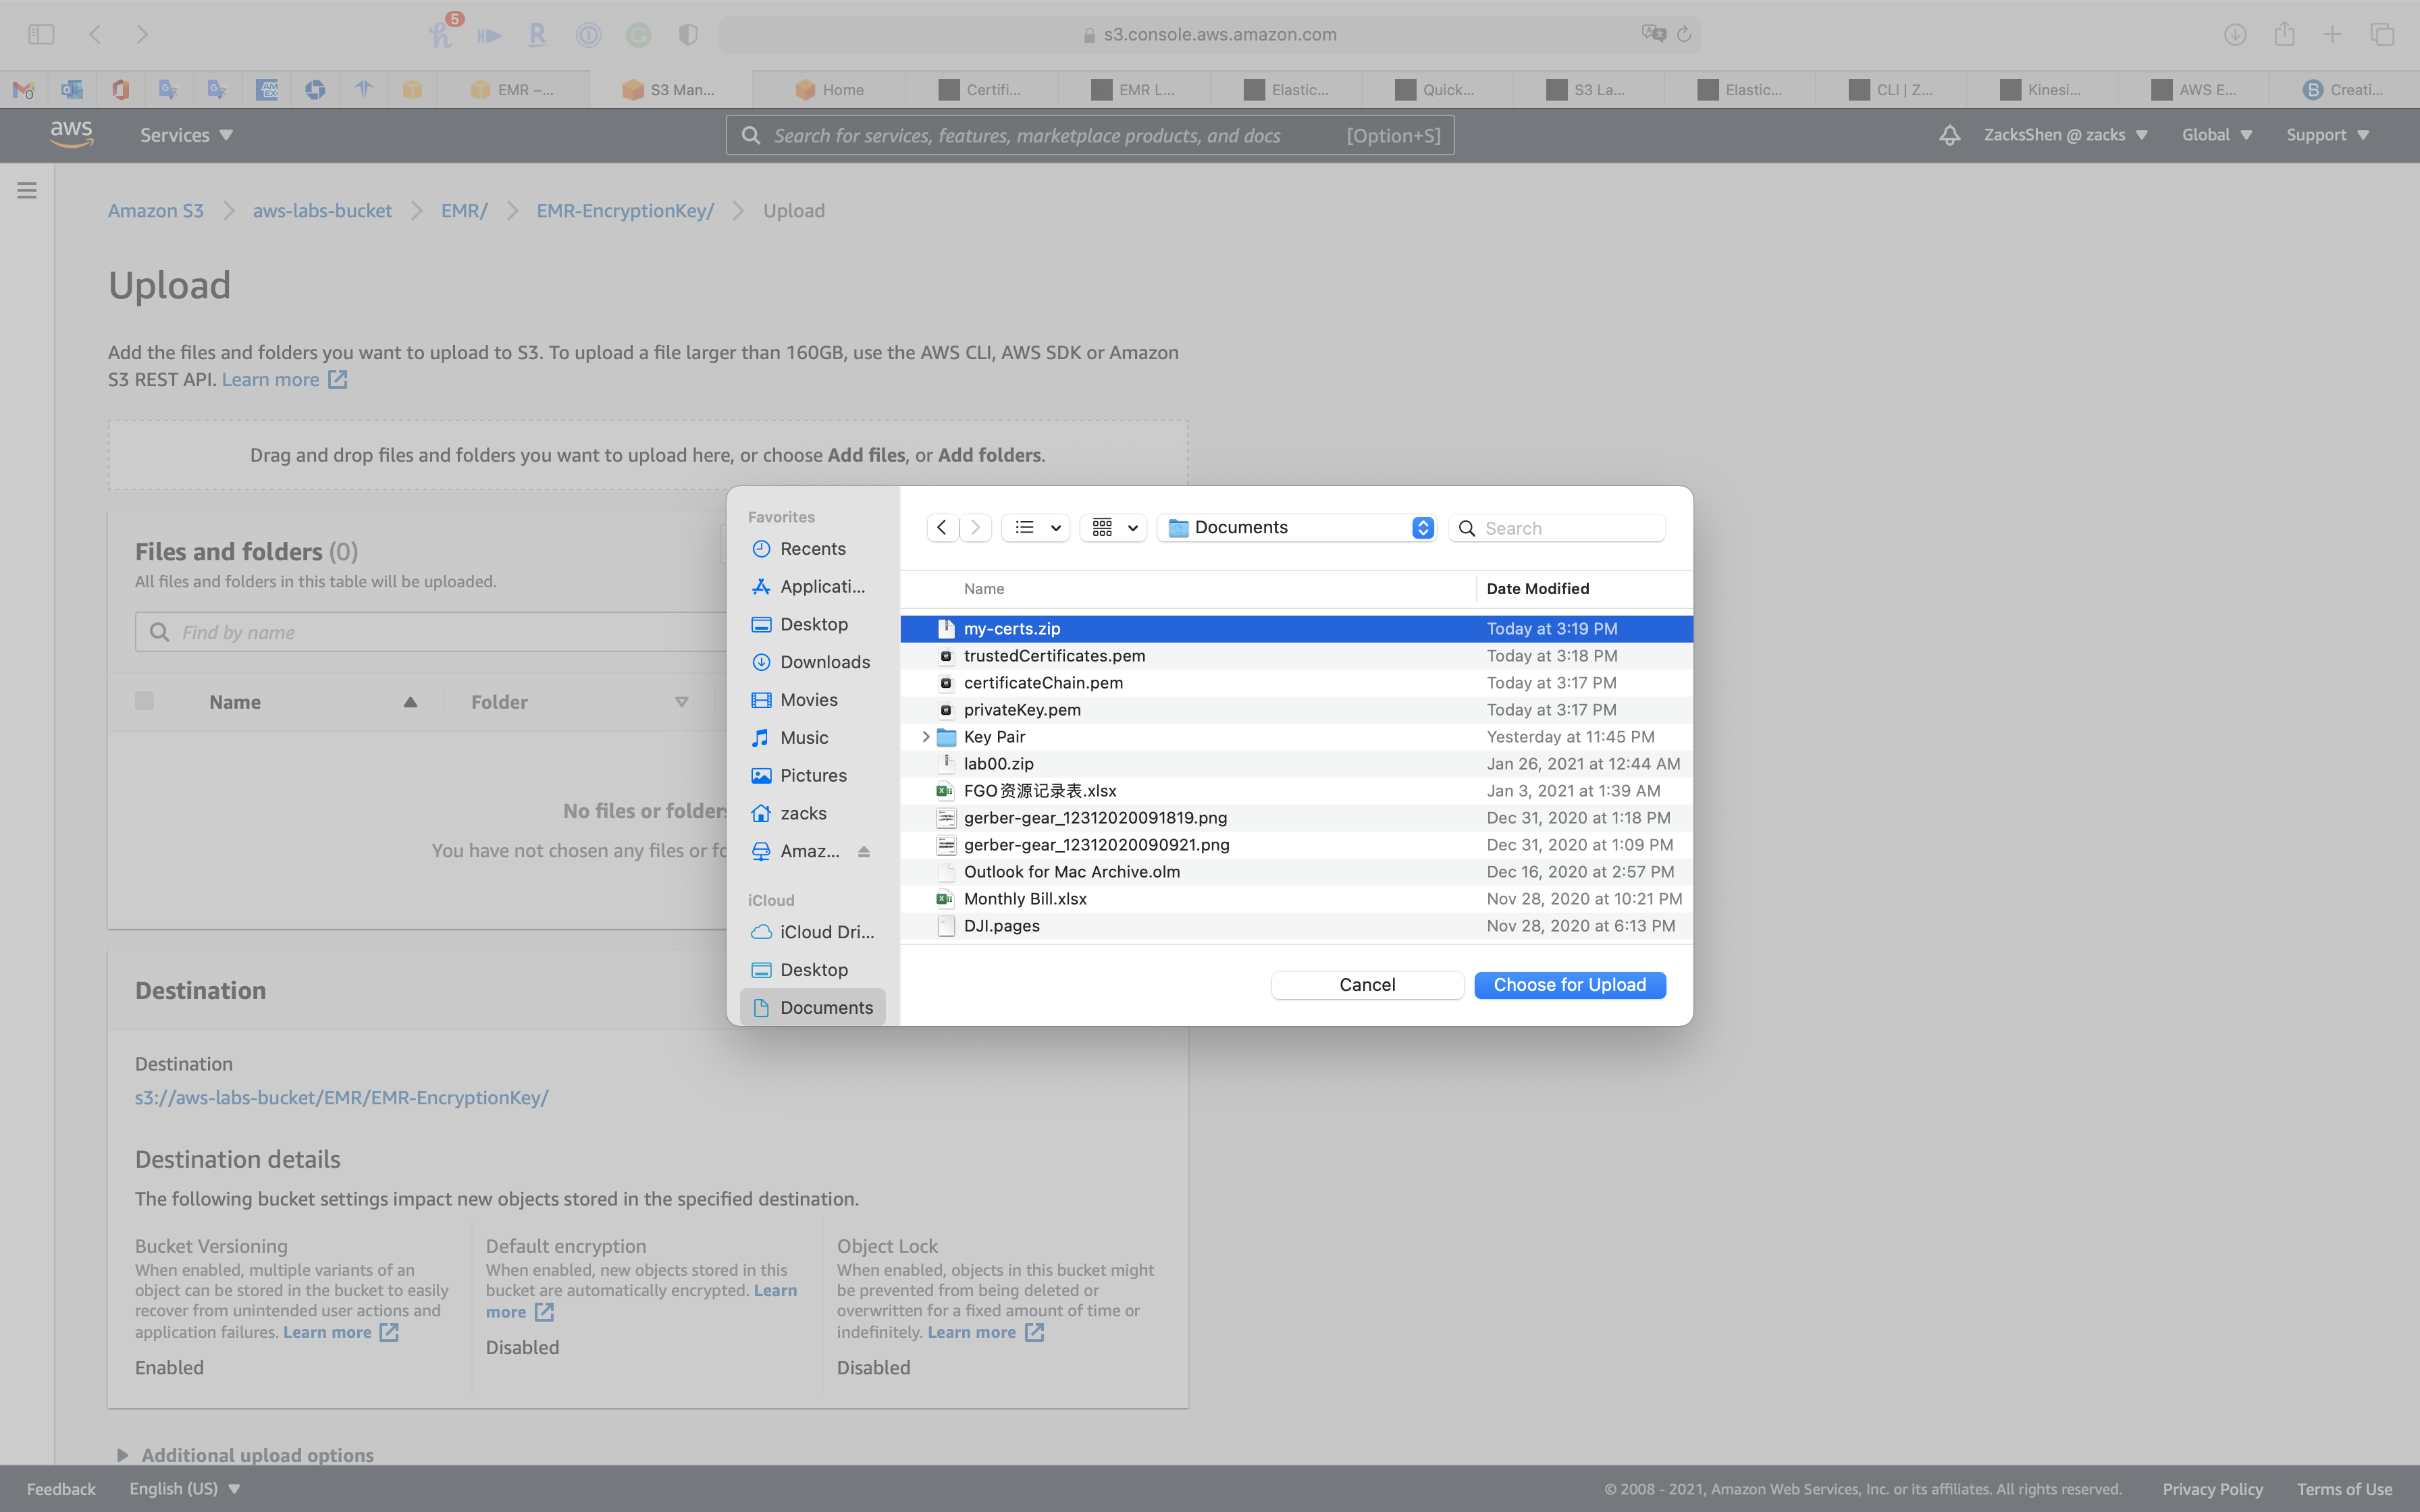
Click on Upload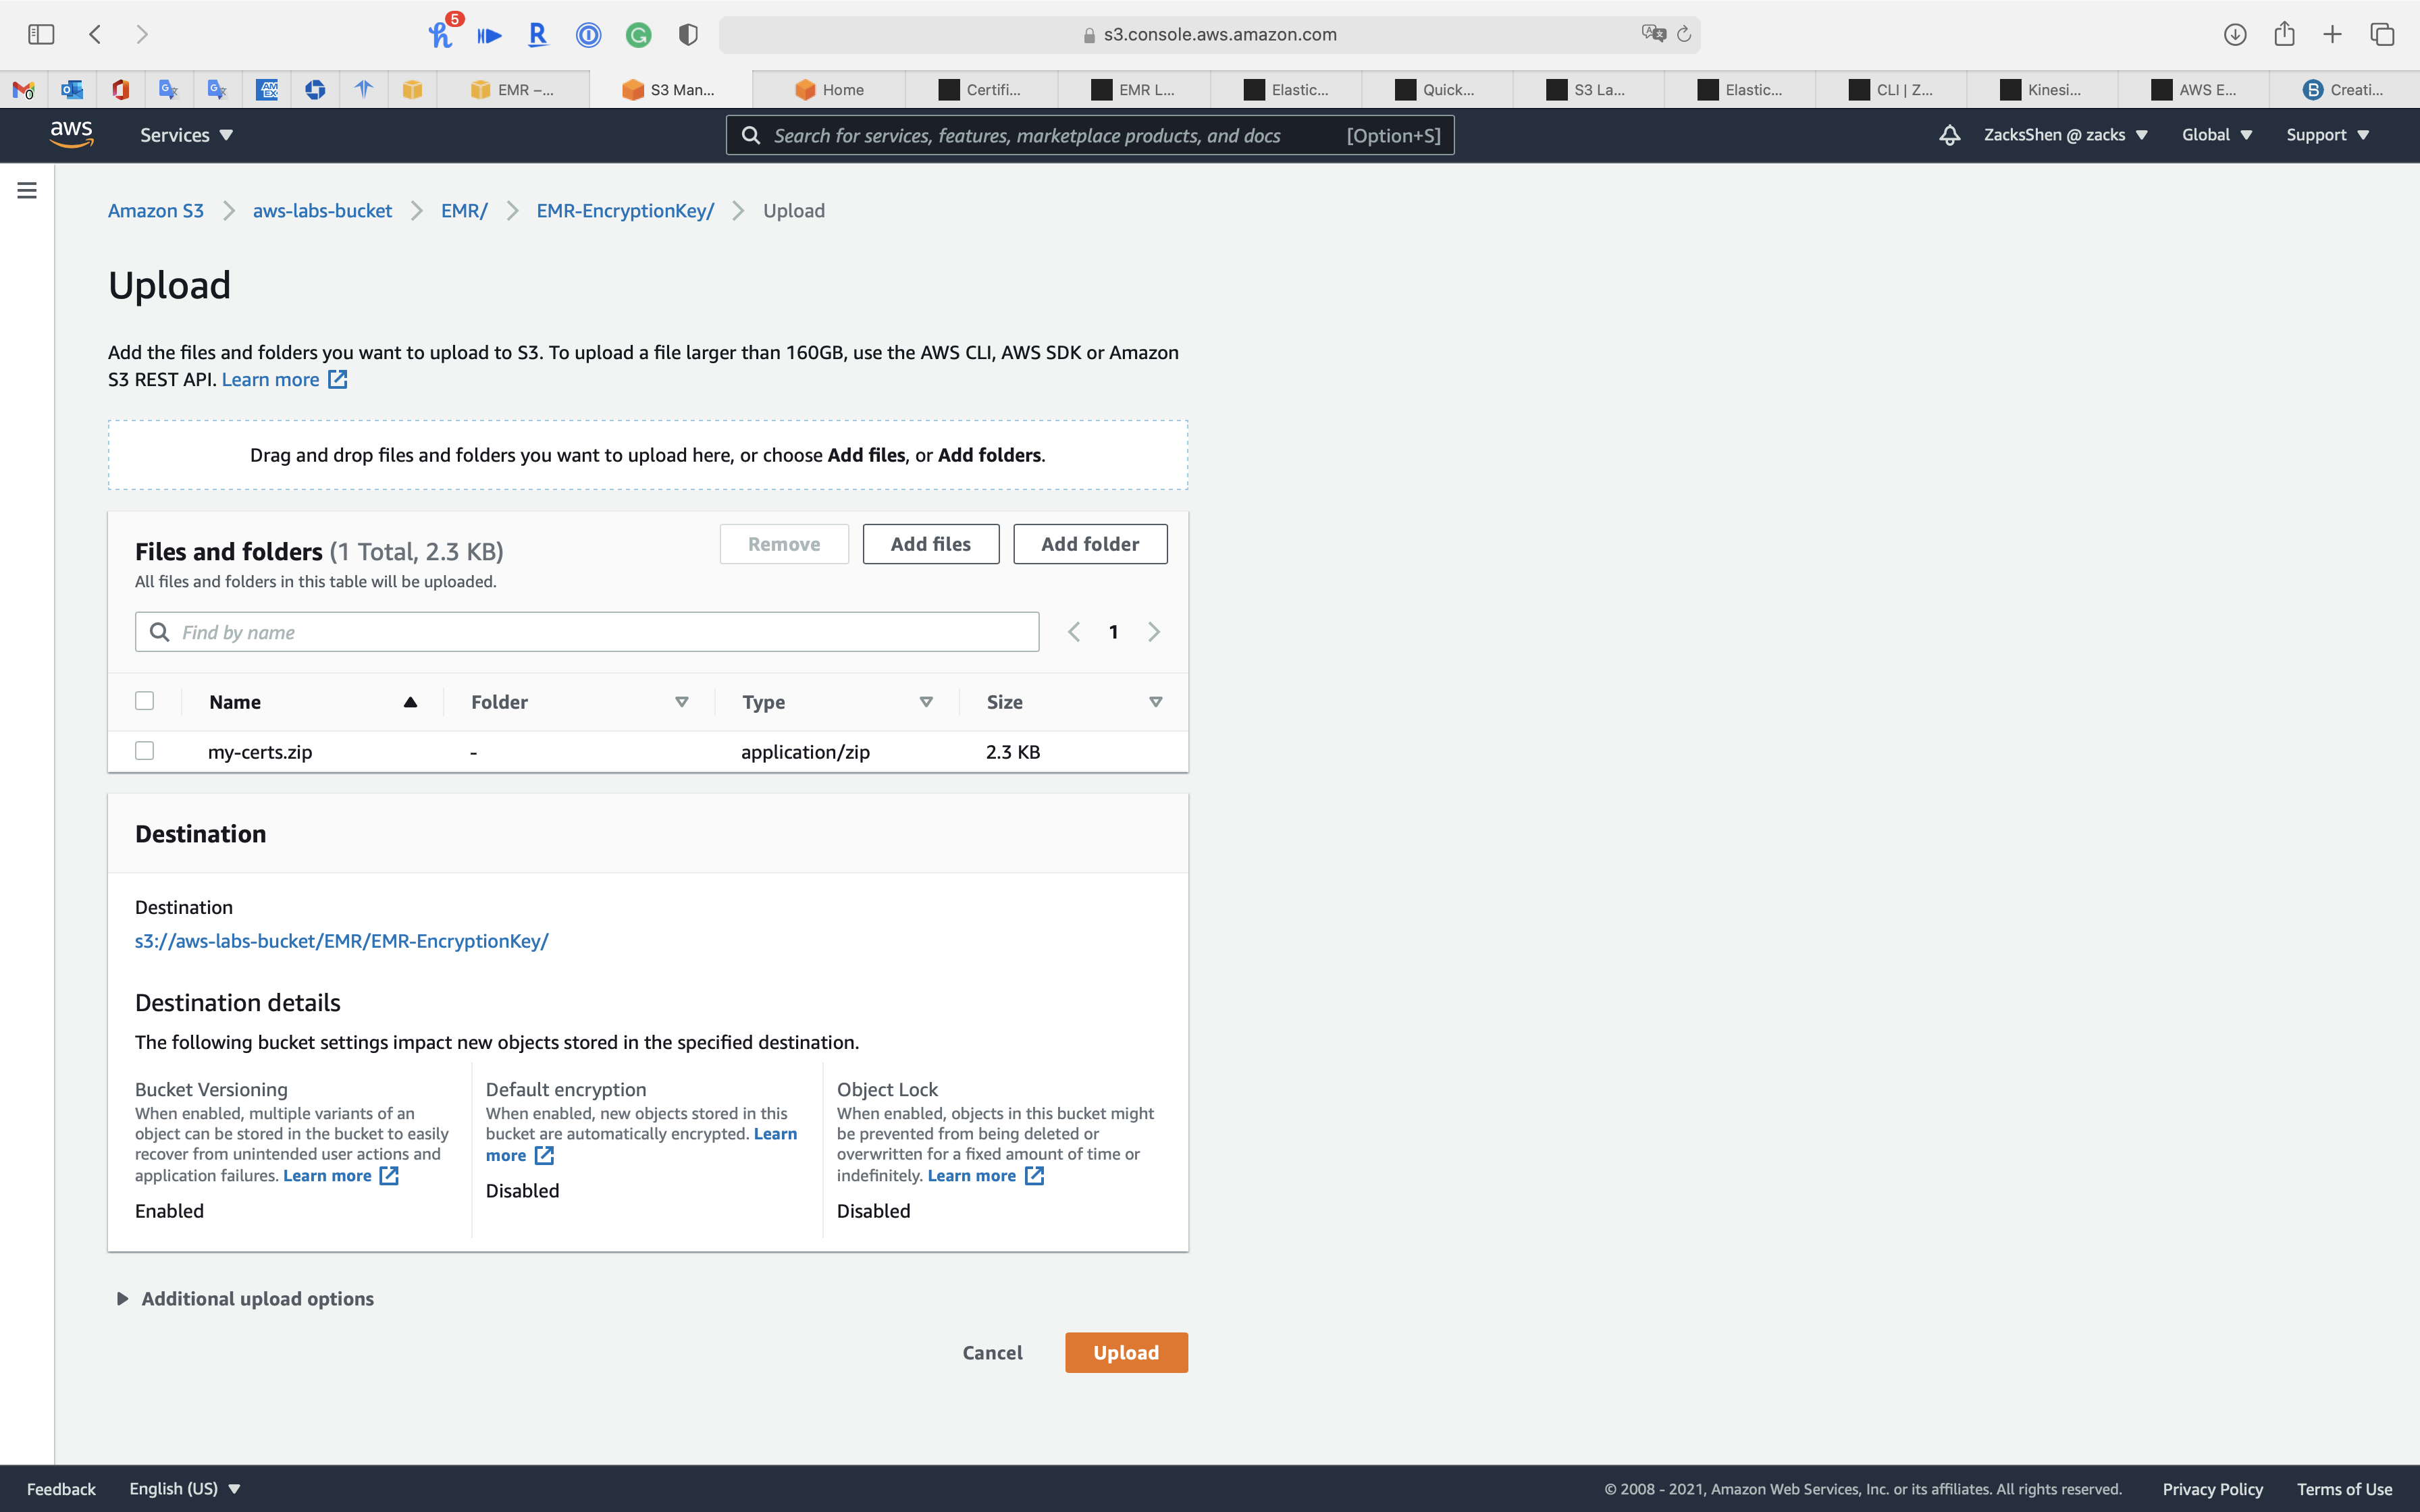
Click on my-certs.zip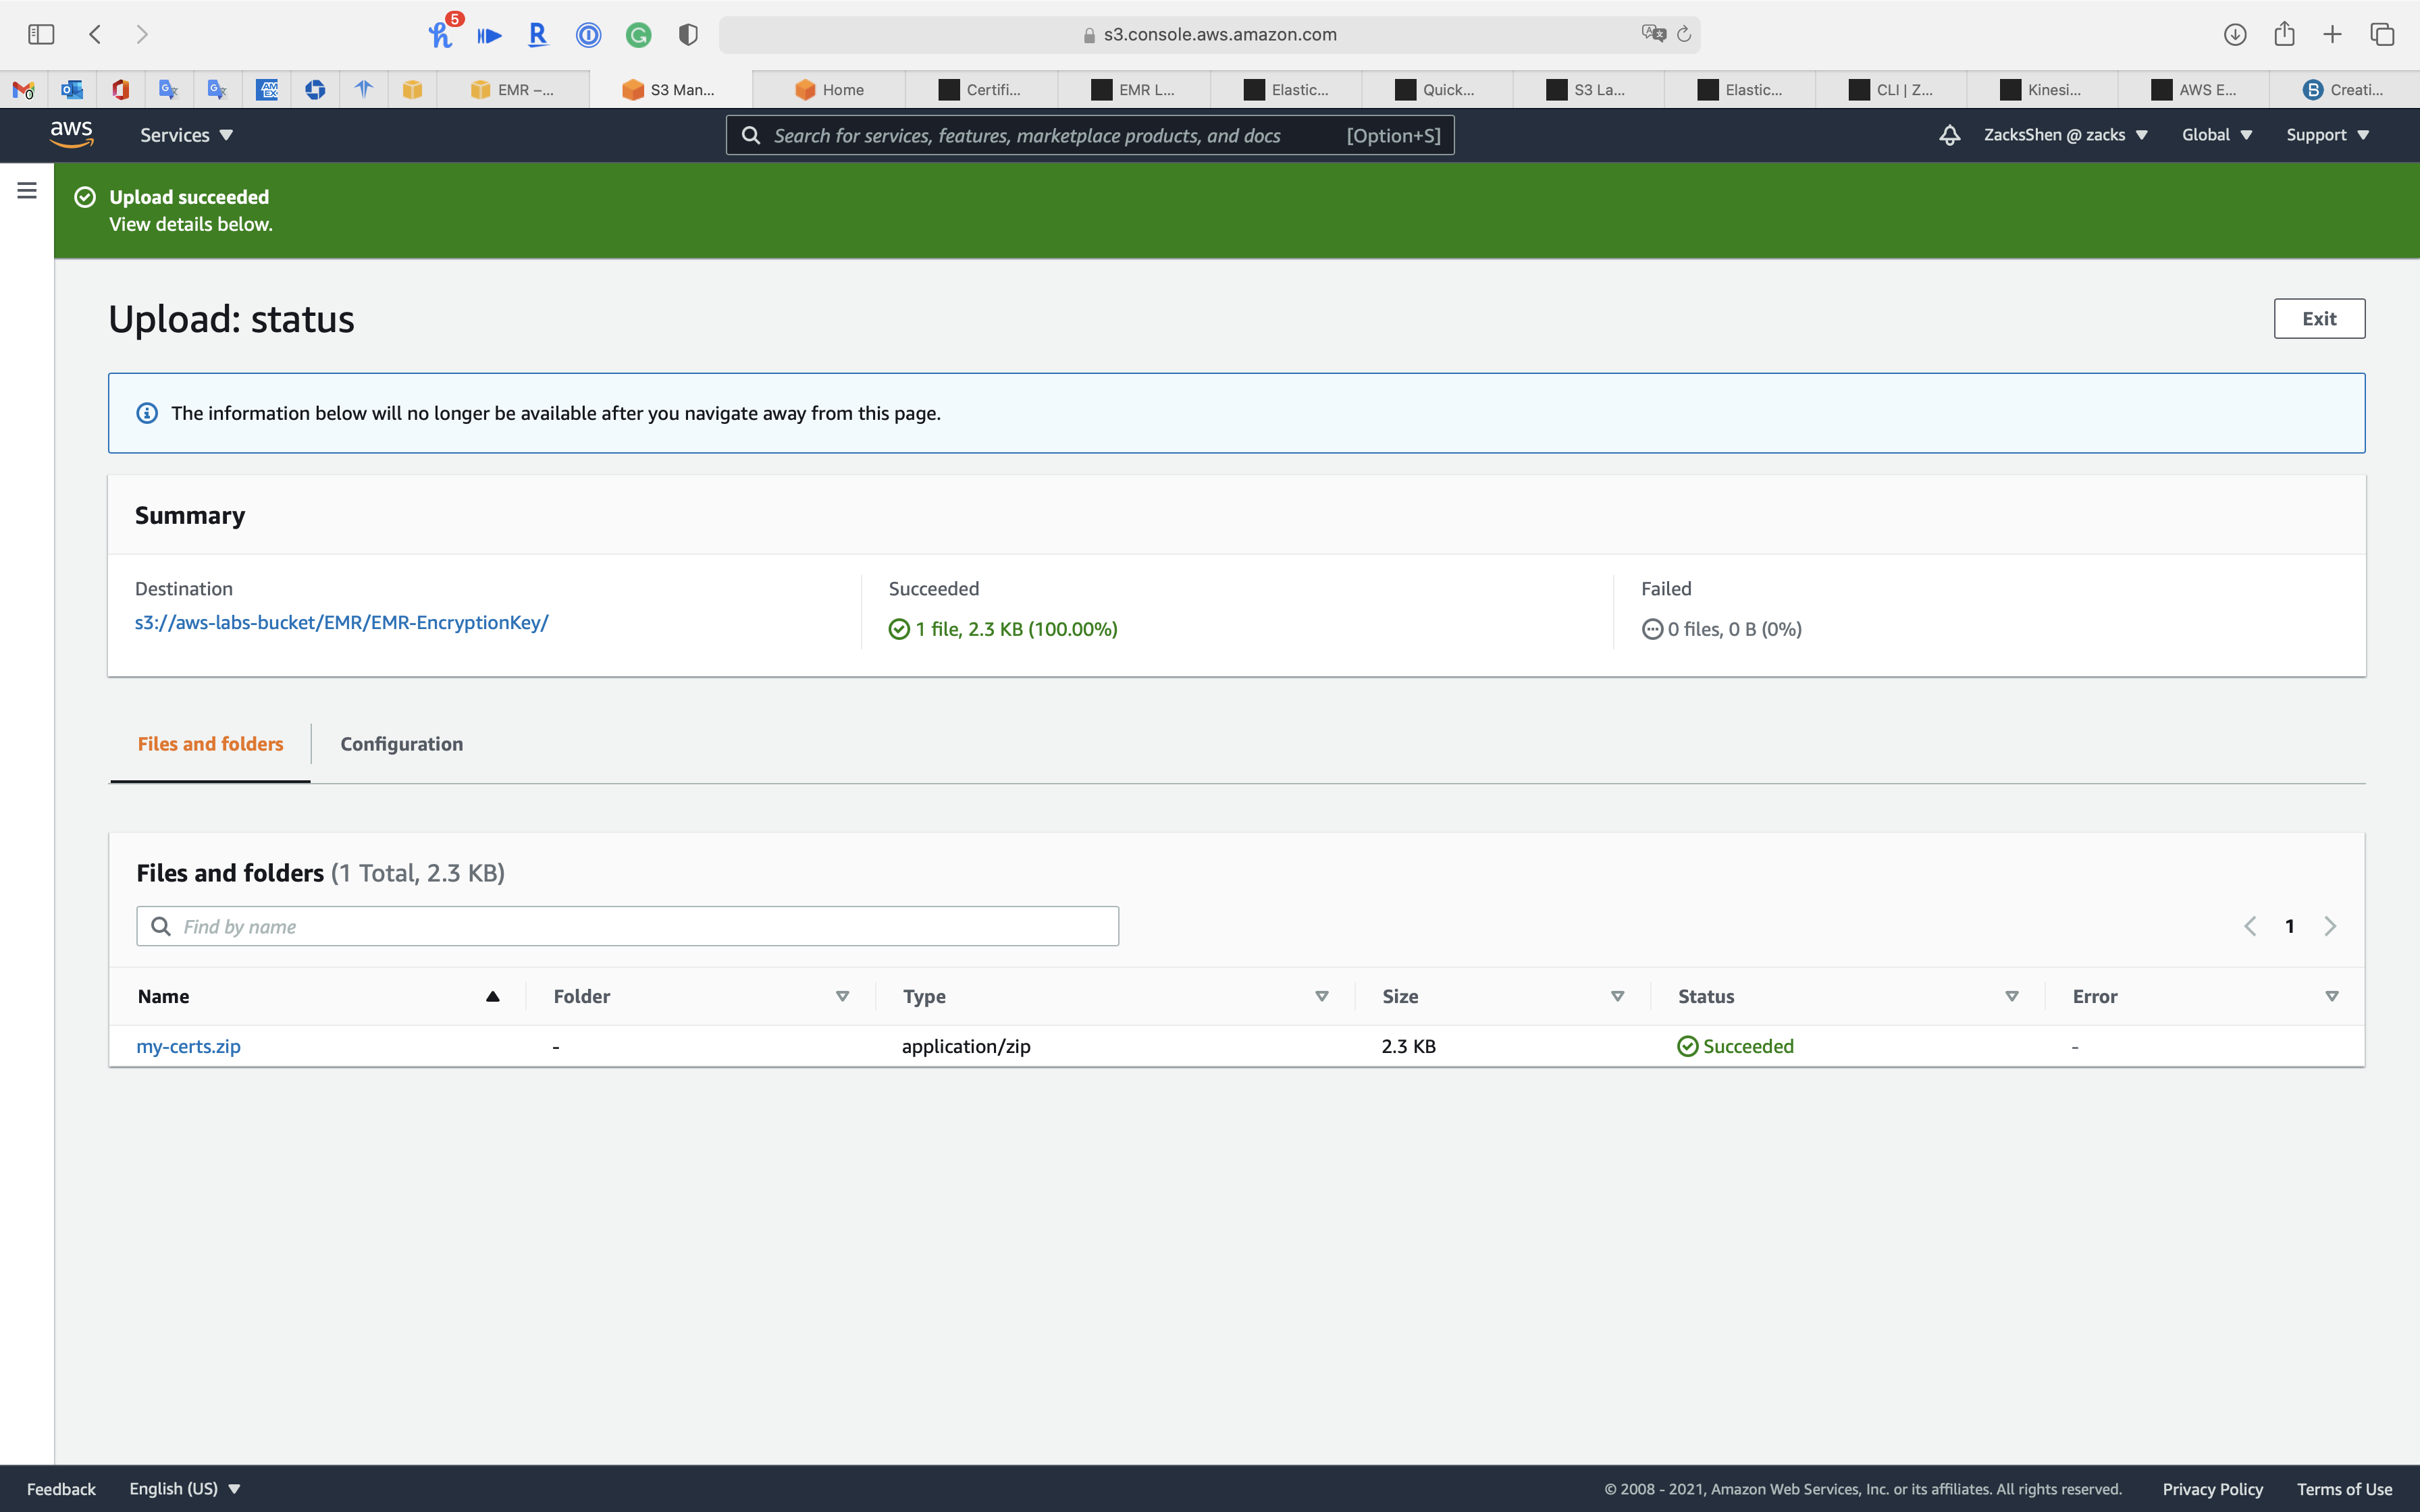
Copy object S3 URI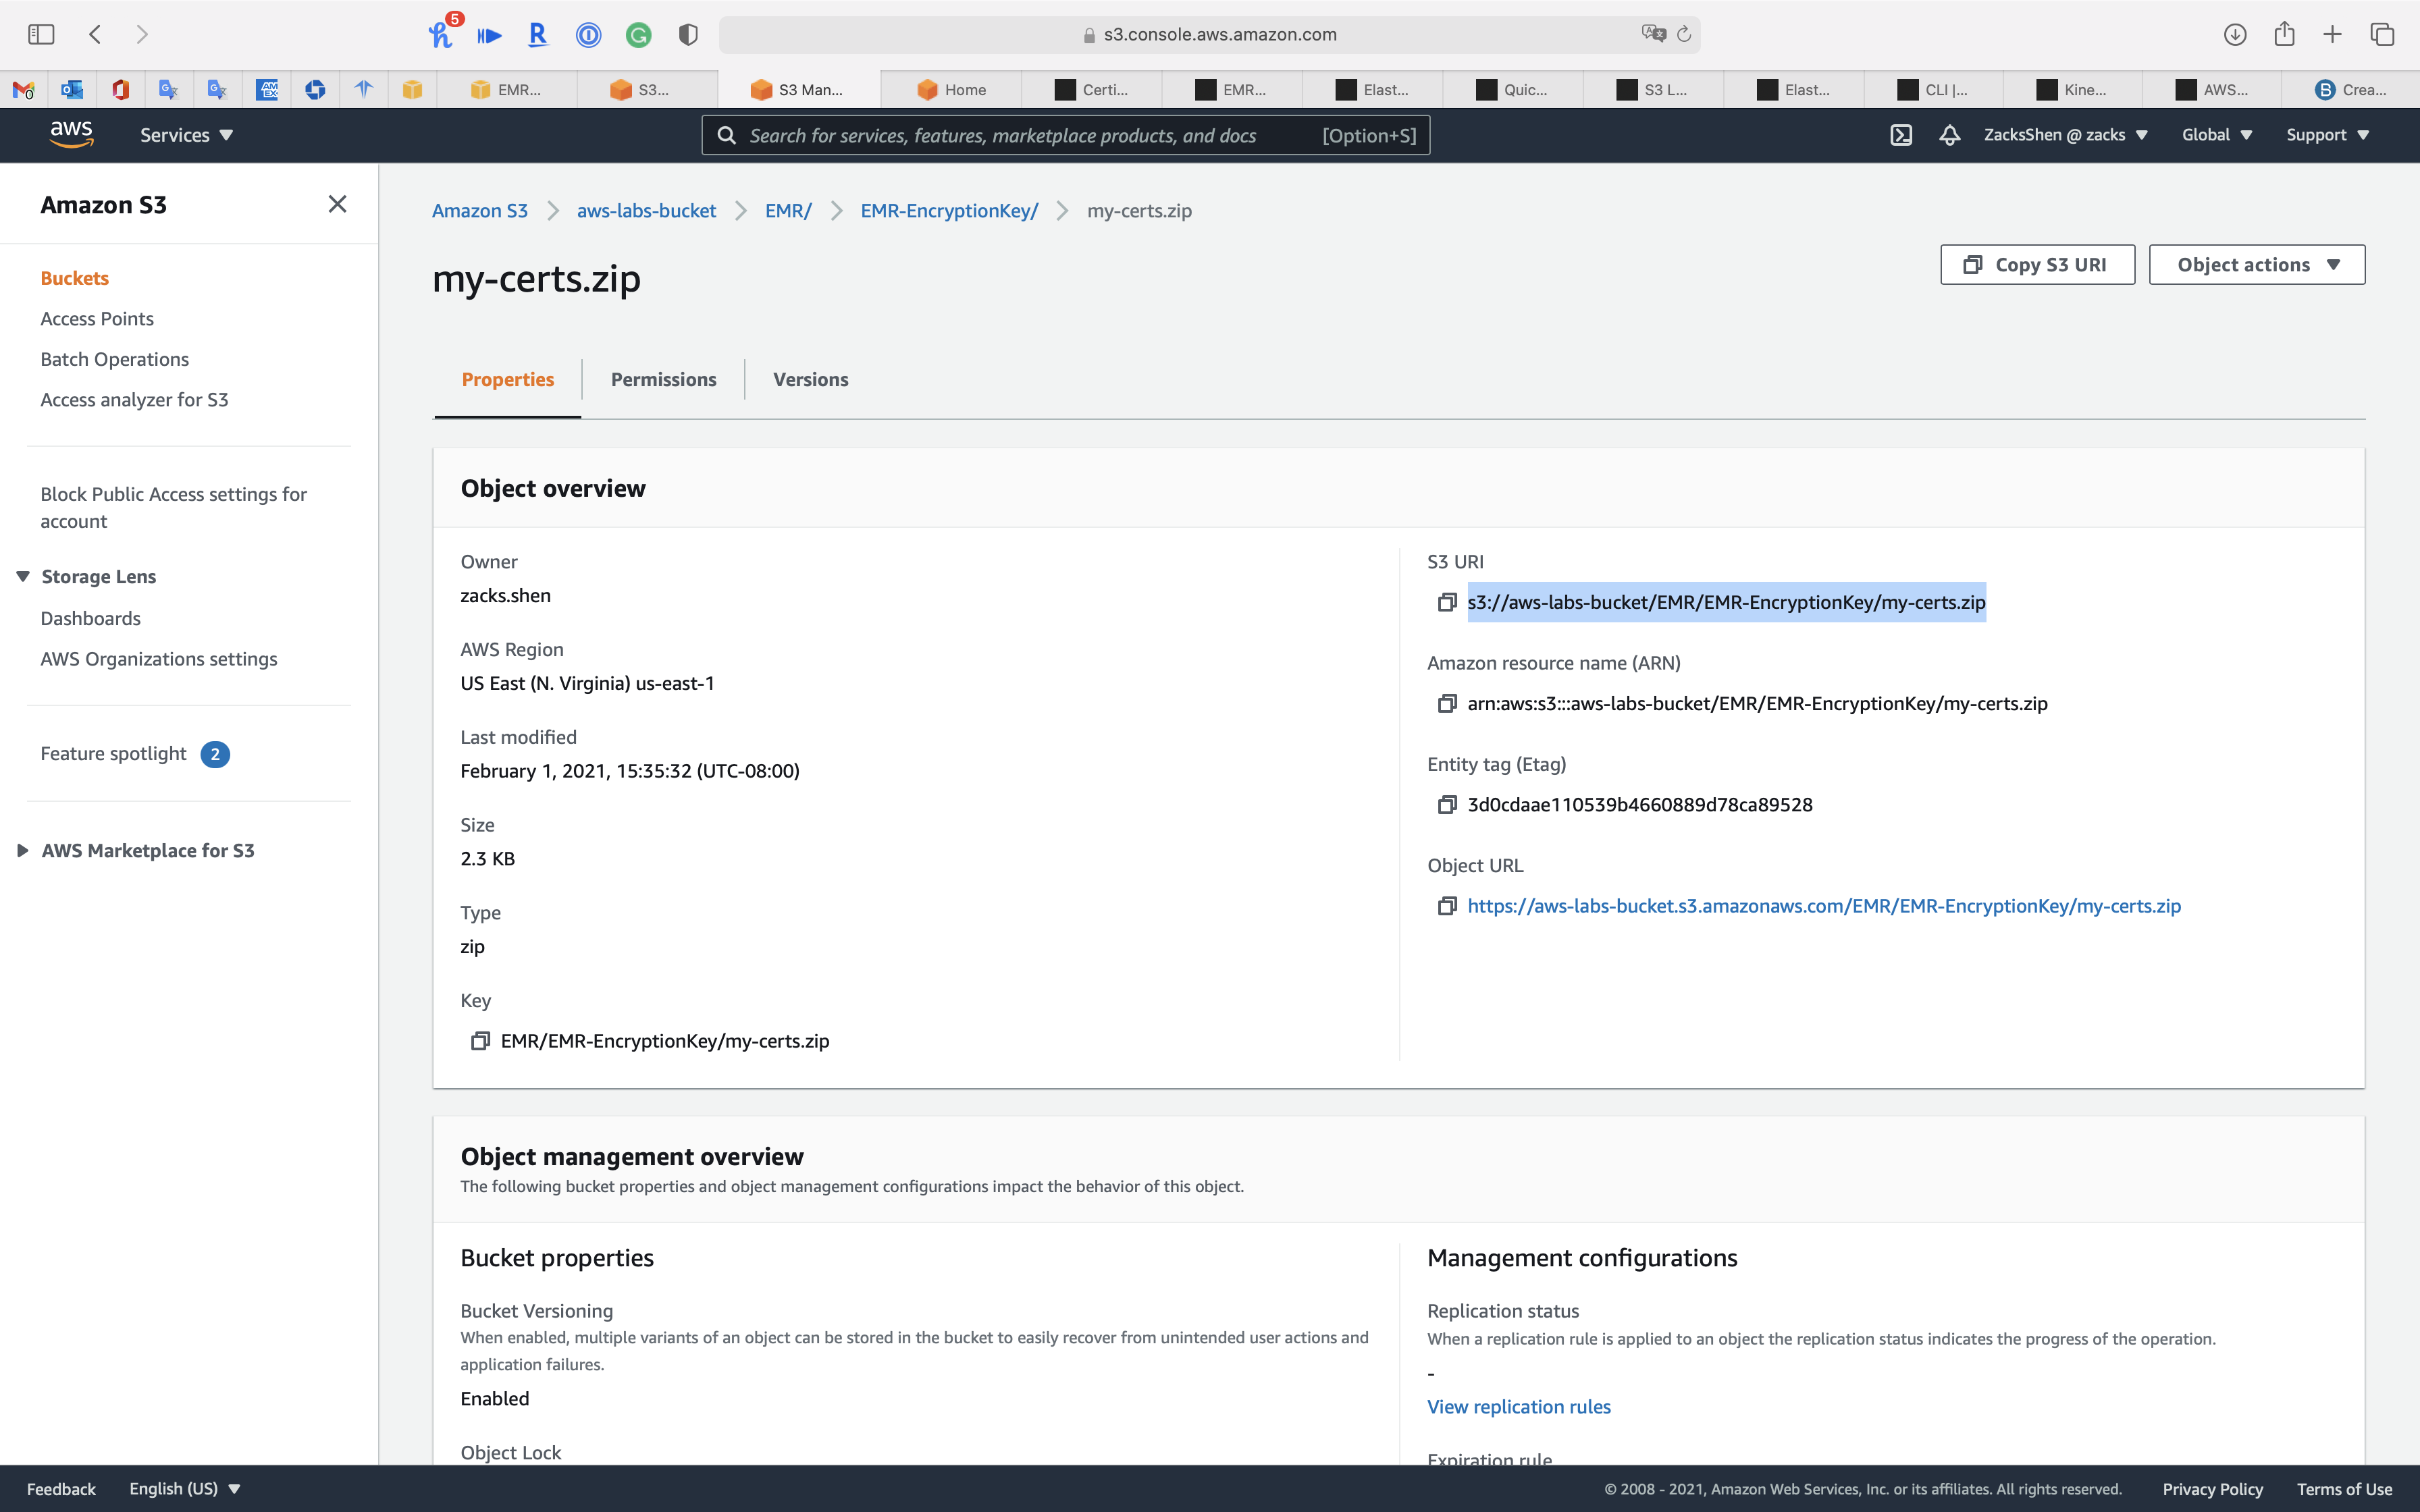
EMR Configuration
Create Security Configuration
Services -> EMR -> Security configurations
Click on Create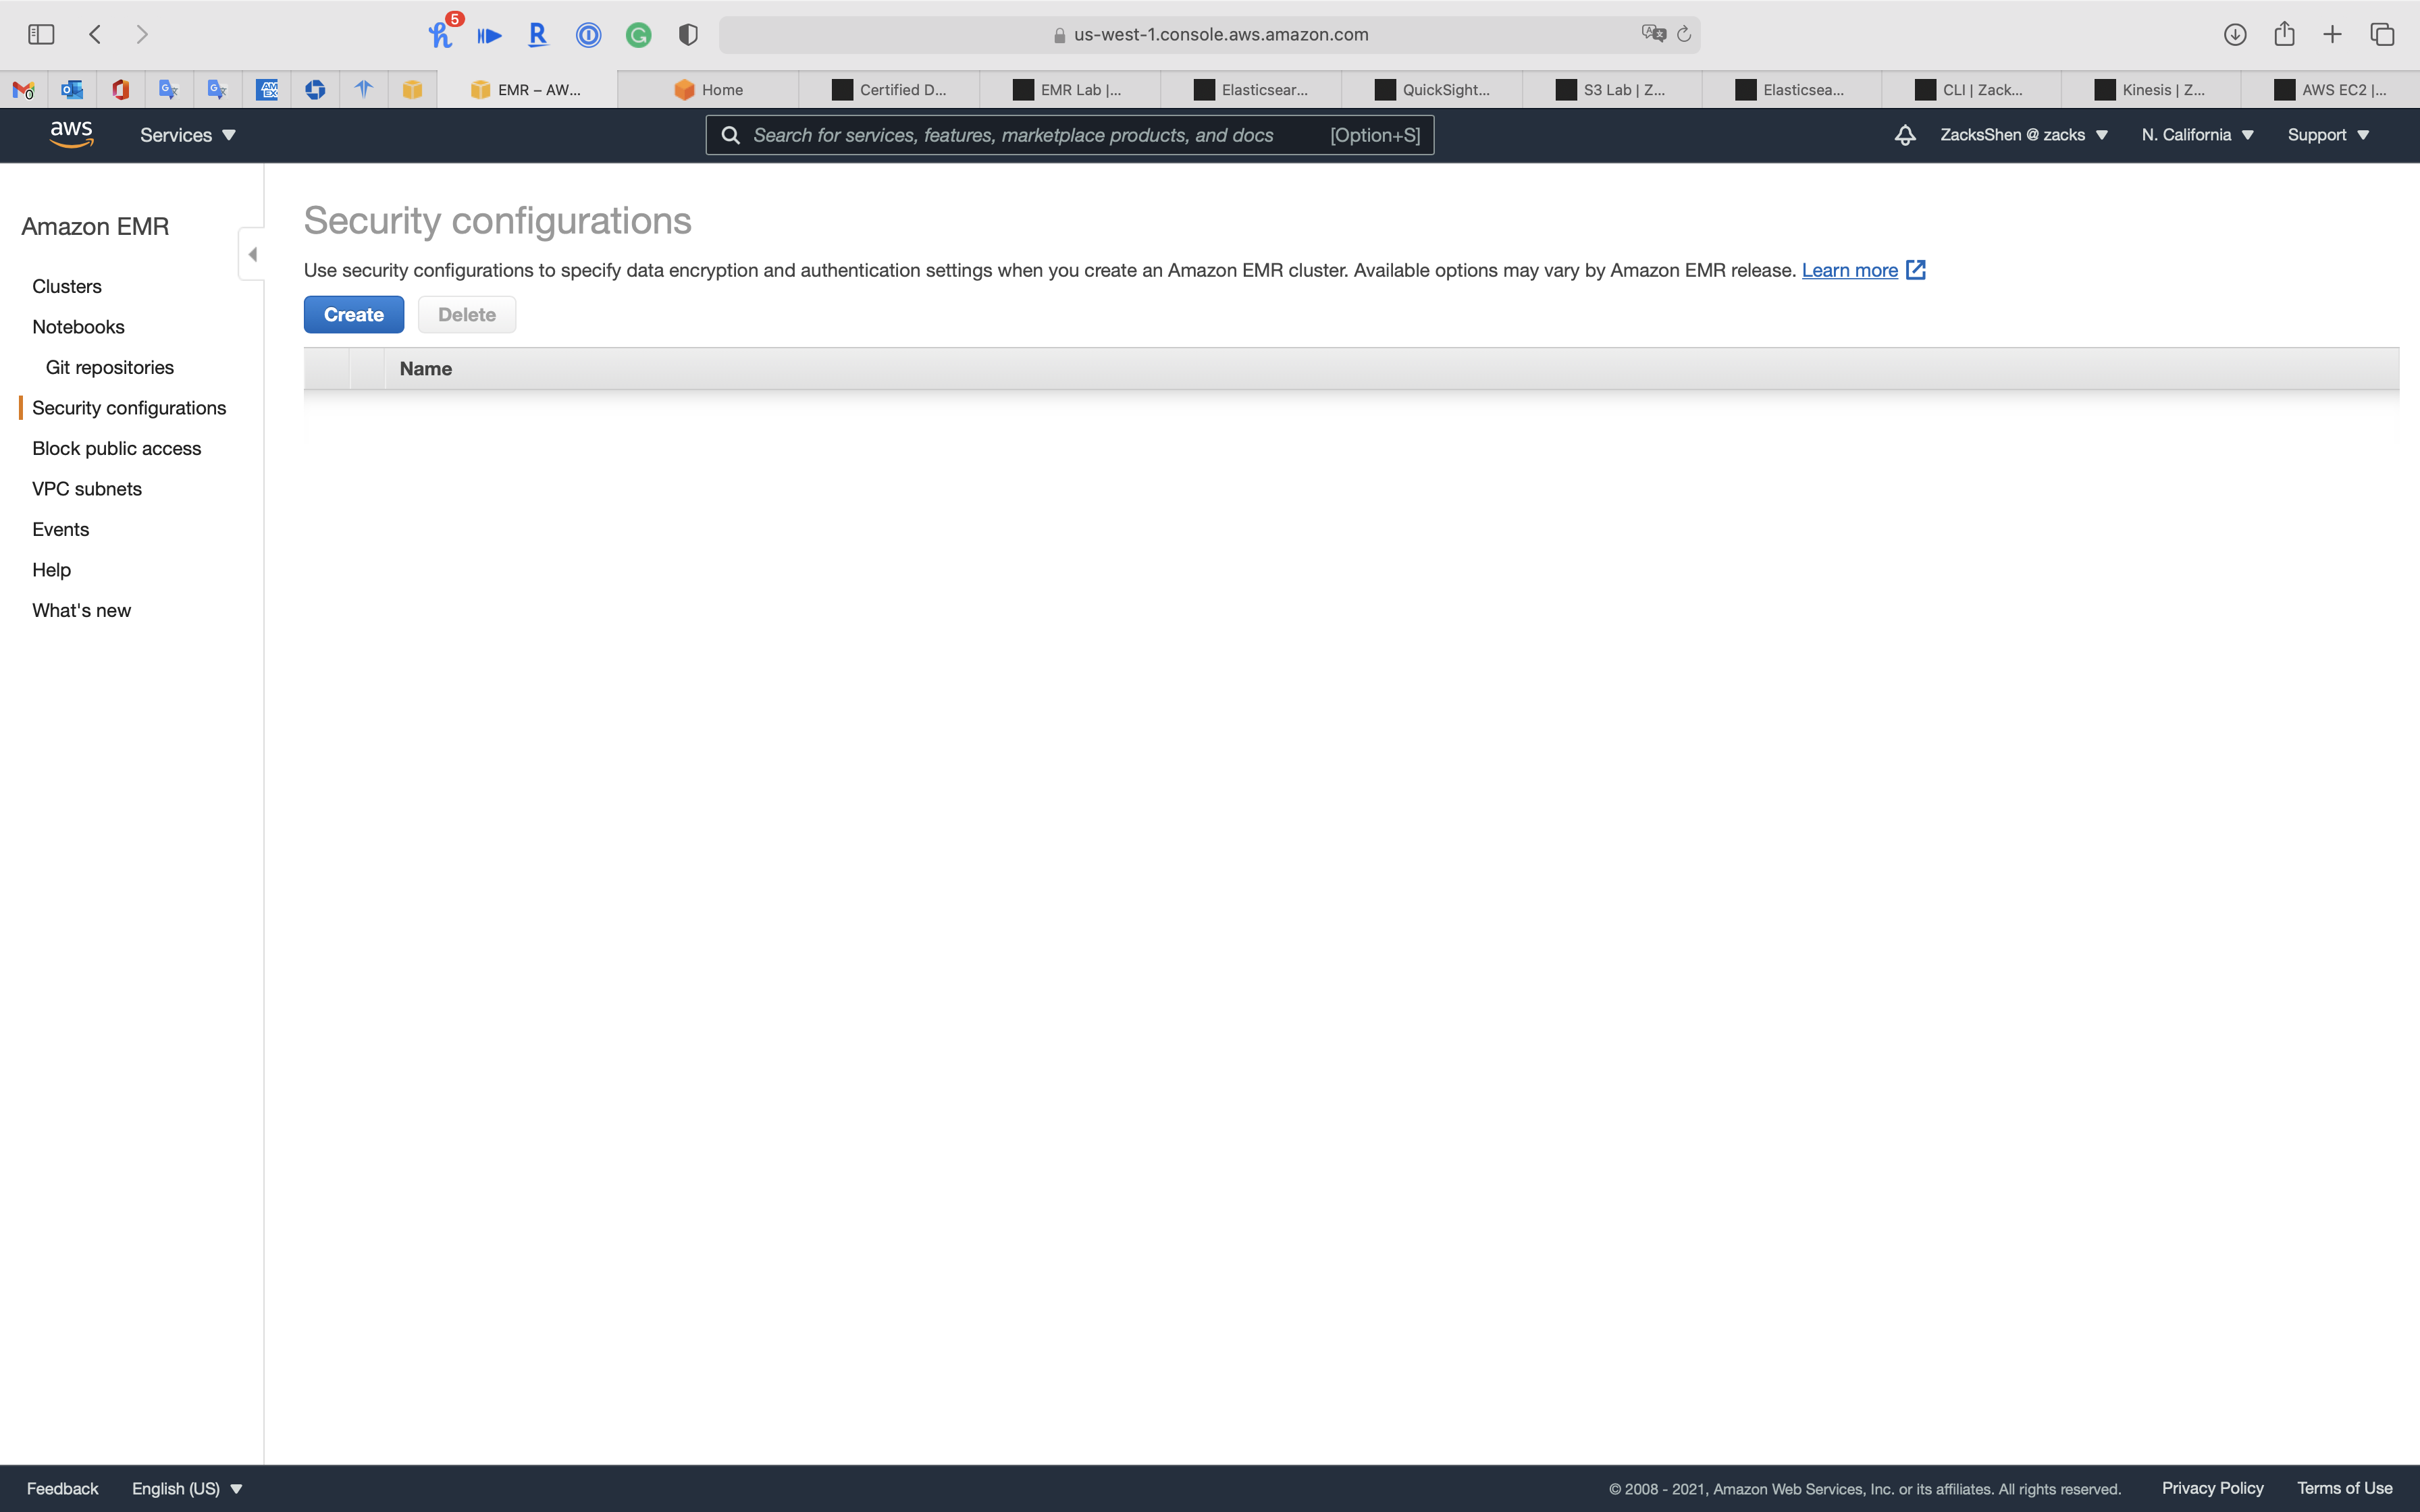
- Name:
EMR-SecurityConfig
Encryption
Data encryption helps prevent unauthorized users from reading data on a cluster and associated data storage systems. This includes data saved to persistent media, known as data at rest, and data that may be intercepted as it travels the network, known as data in transit.
S3 encryption
Amazon S3 encryption works with EMR File System (EMRFS) objects read from and written to Amazon S3. Specify server-side encryption (SSE) or client-side encryption (CSE).
- Check
Enable at-rest encryption for EMRFS data in Amazon S3- Default encryption mode:
SSE-S3- SSE-S3
- SSE-KMS
- CSE-KMS
- CSE-Custom
- Default encryption mode:
You can click on Per bucket encryption overrides -> Add bucket override for customize each S3 bucket encryption mode
But in this lab, we don’t need Per bucket encryption overrides, so click on X to close it.

Local disk encryption
Amazon EC2 instance store volumes and the attached Amazon Elastic Block Store (EBS) storage volumes are encrypted using Linux Unified Key Setup (LUKS). Alternatively, when using AWS KMS as your key provider, you can choose to turn on EBS encryption to encrypt EBS root device and storage volumes. AWS KMS customer master keys (CMKs) require additional permissions for EBS encryption
- Check
Enable at-rest encryption for local disks- Key provide type:
AWS KMS - AWS KMS customer master key:
EMR-SecurityGroupKey - Check EBS Encryption instead of LUKS encryption
- Key provide type:
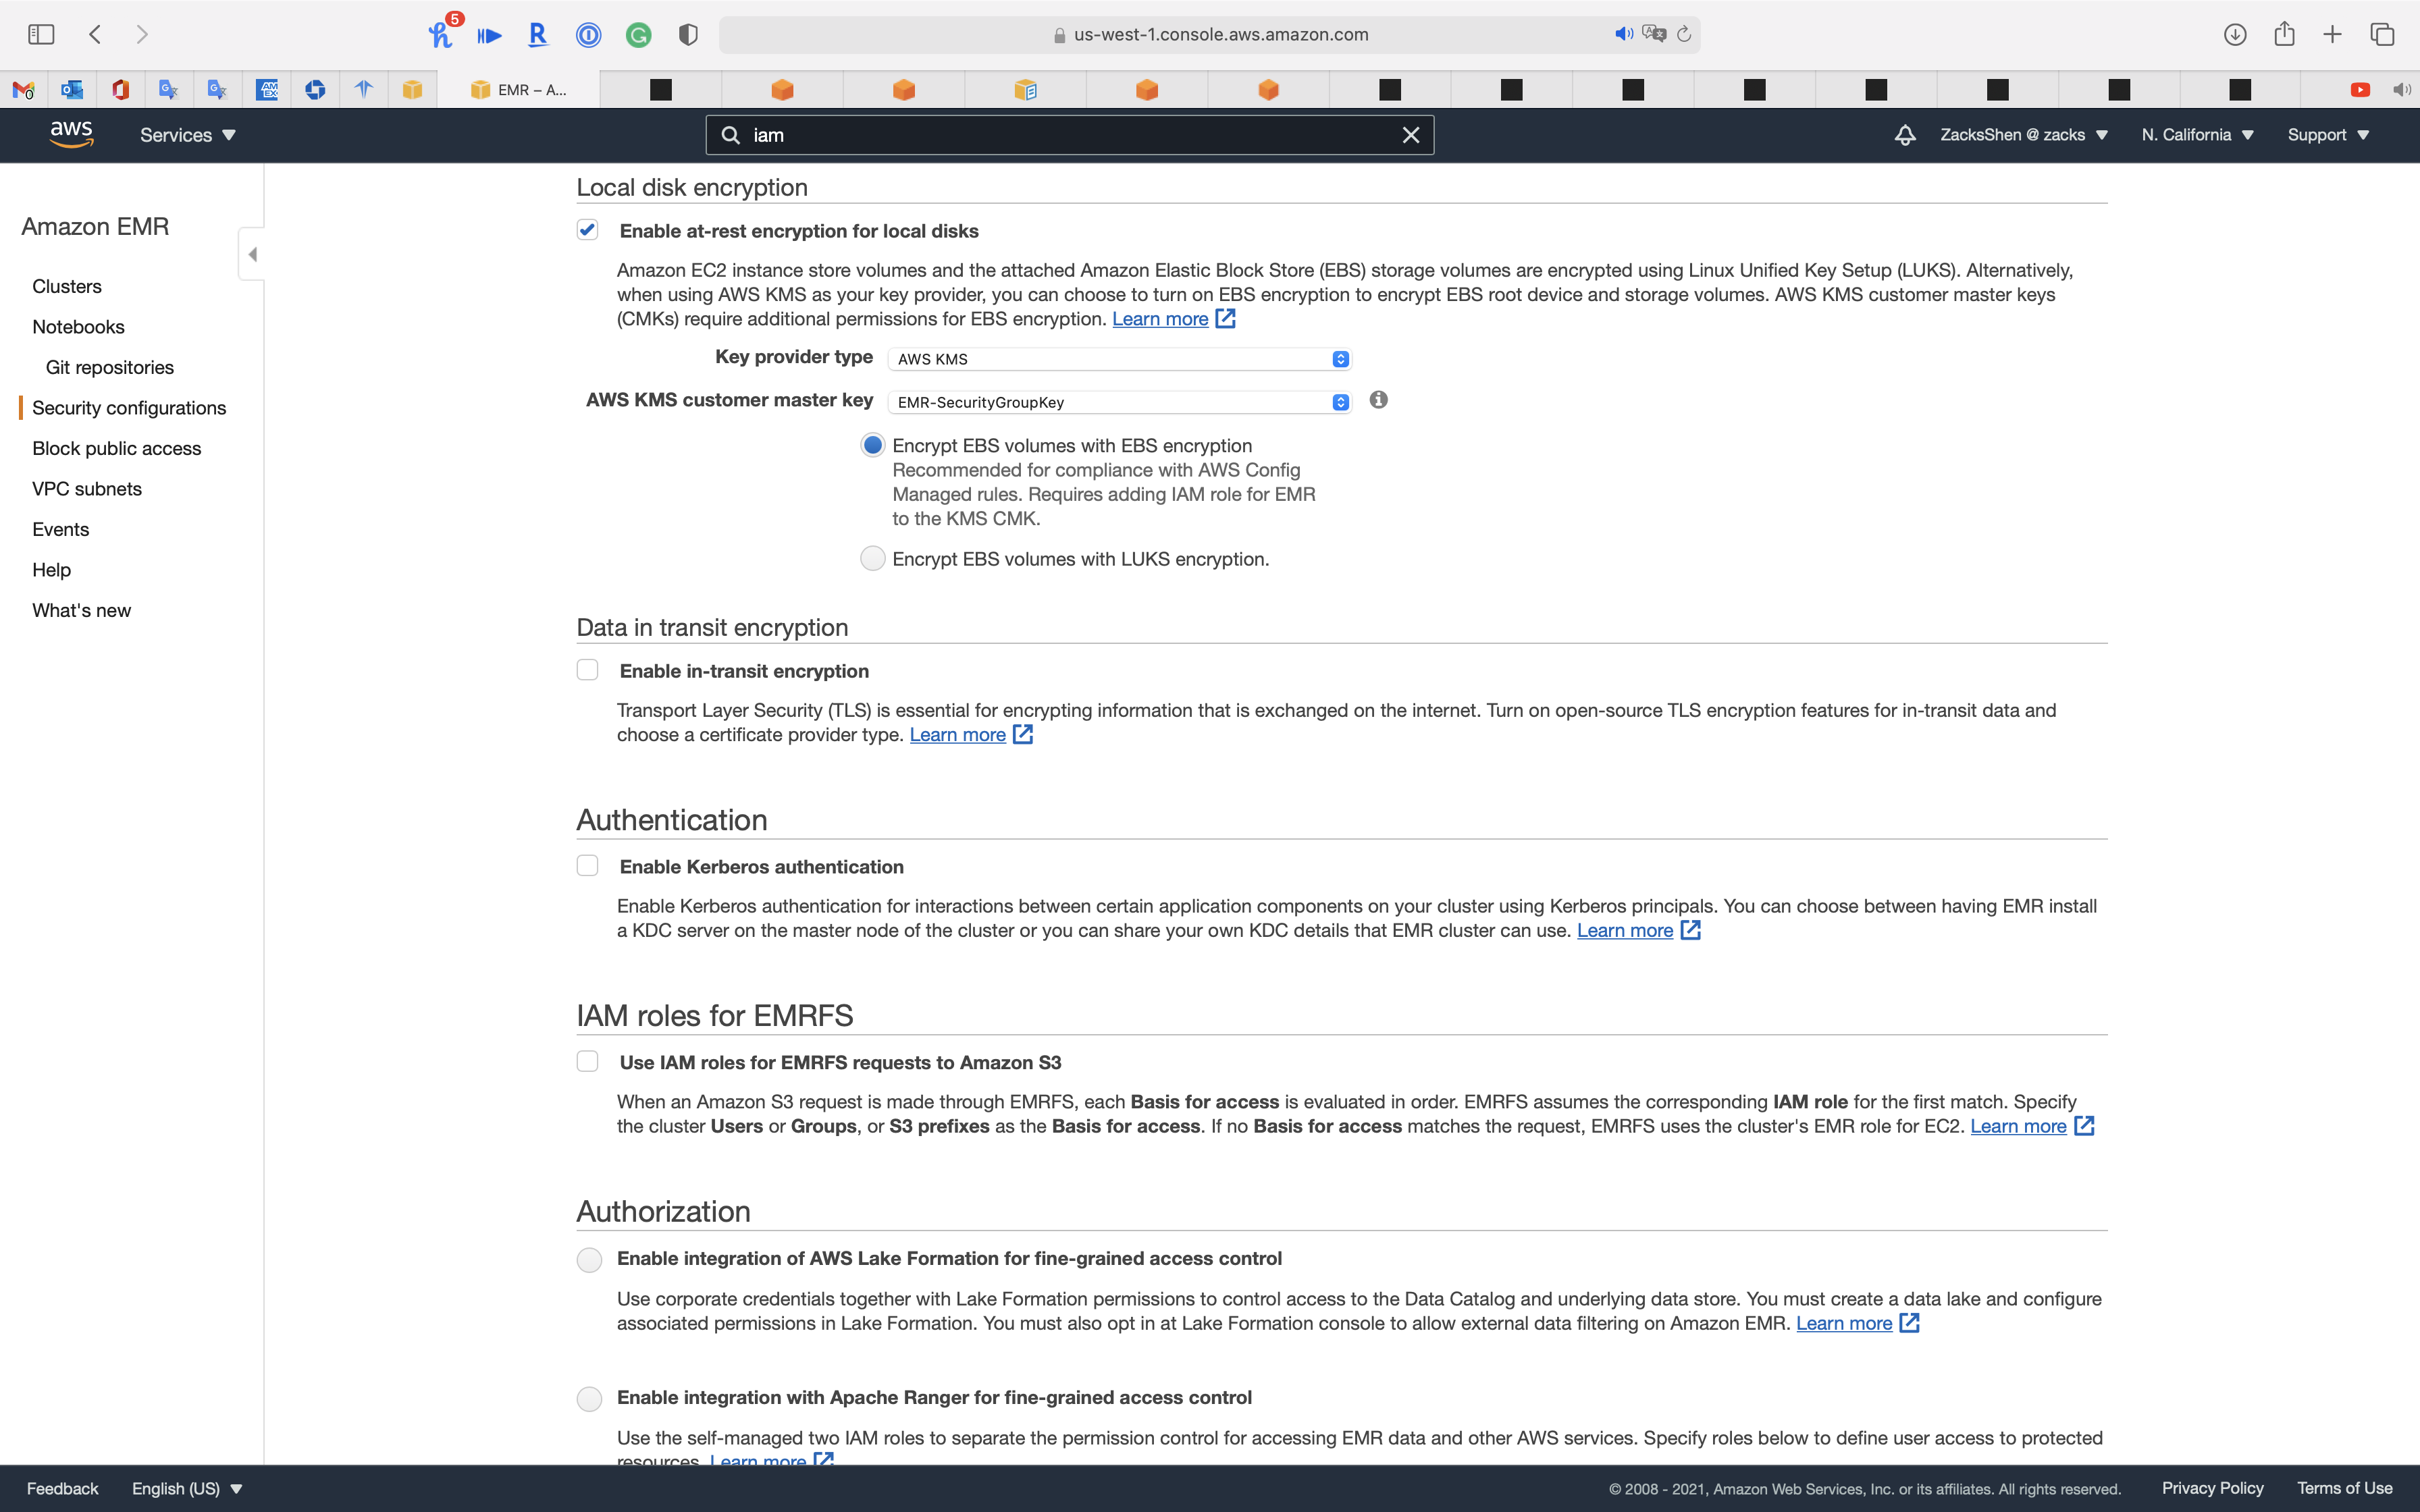
Data in transit encryption
Transport Layer Security (TLS) is essential for encrypting information that is exchanged on the internet. Turn on open-source TLS encryption features for in-transit data and choose a certificate provider type.
- Check
Enable in-transit encryption- Certificate provider type:
PEM - Custom key provider location: paste your
my-certs.zipobject S3 URI
- Certificate provider type:
Notice S3 and EMR Cluster must be the same region!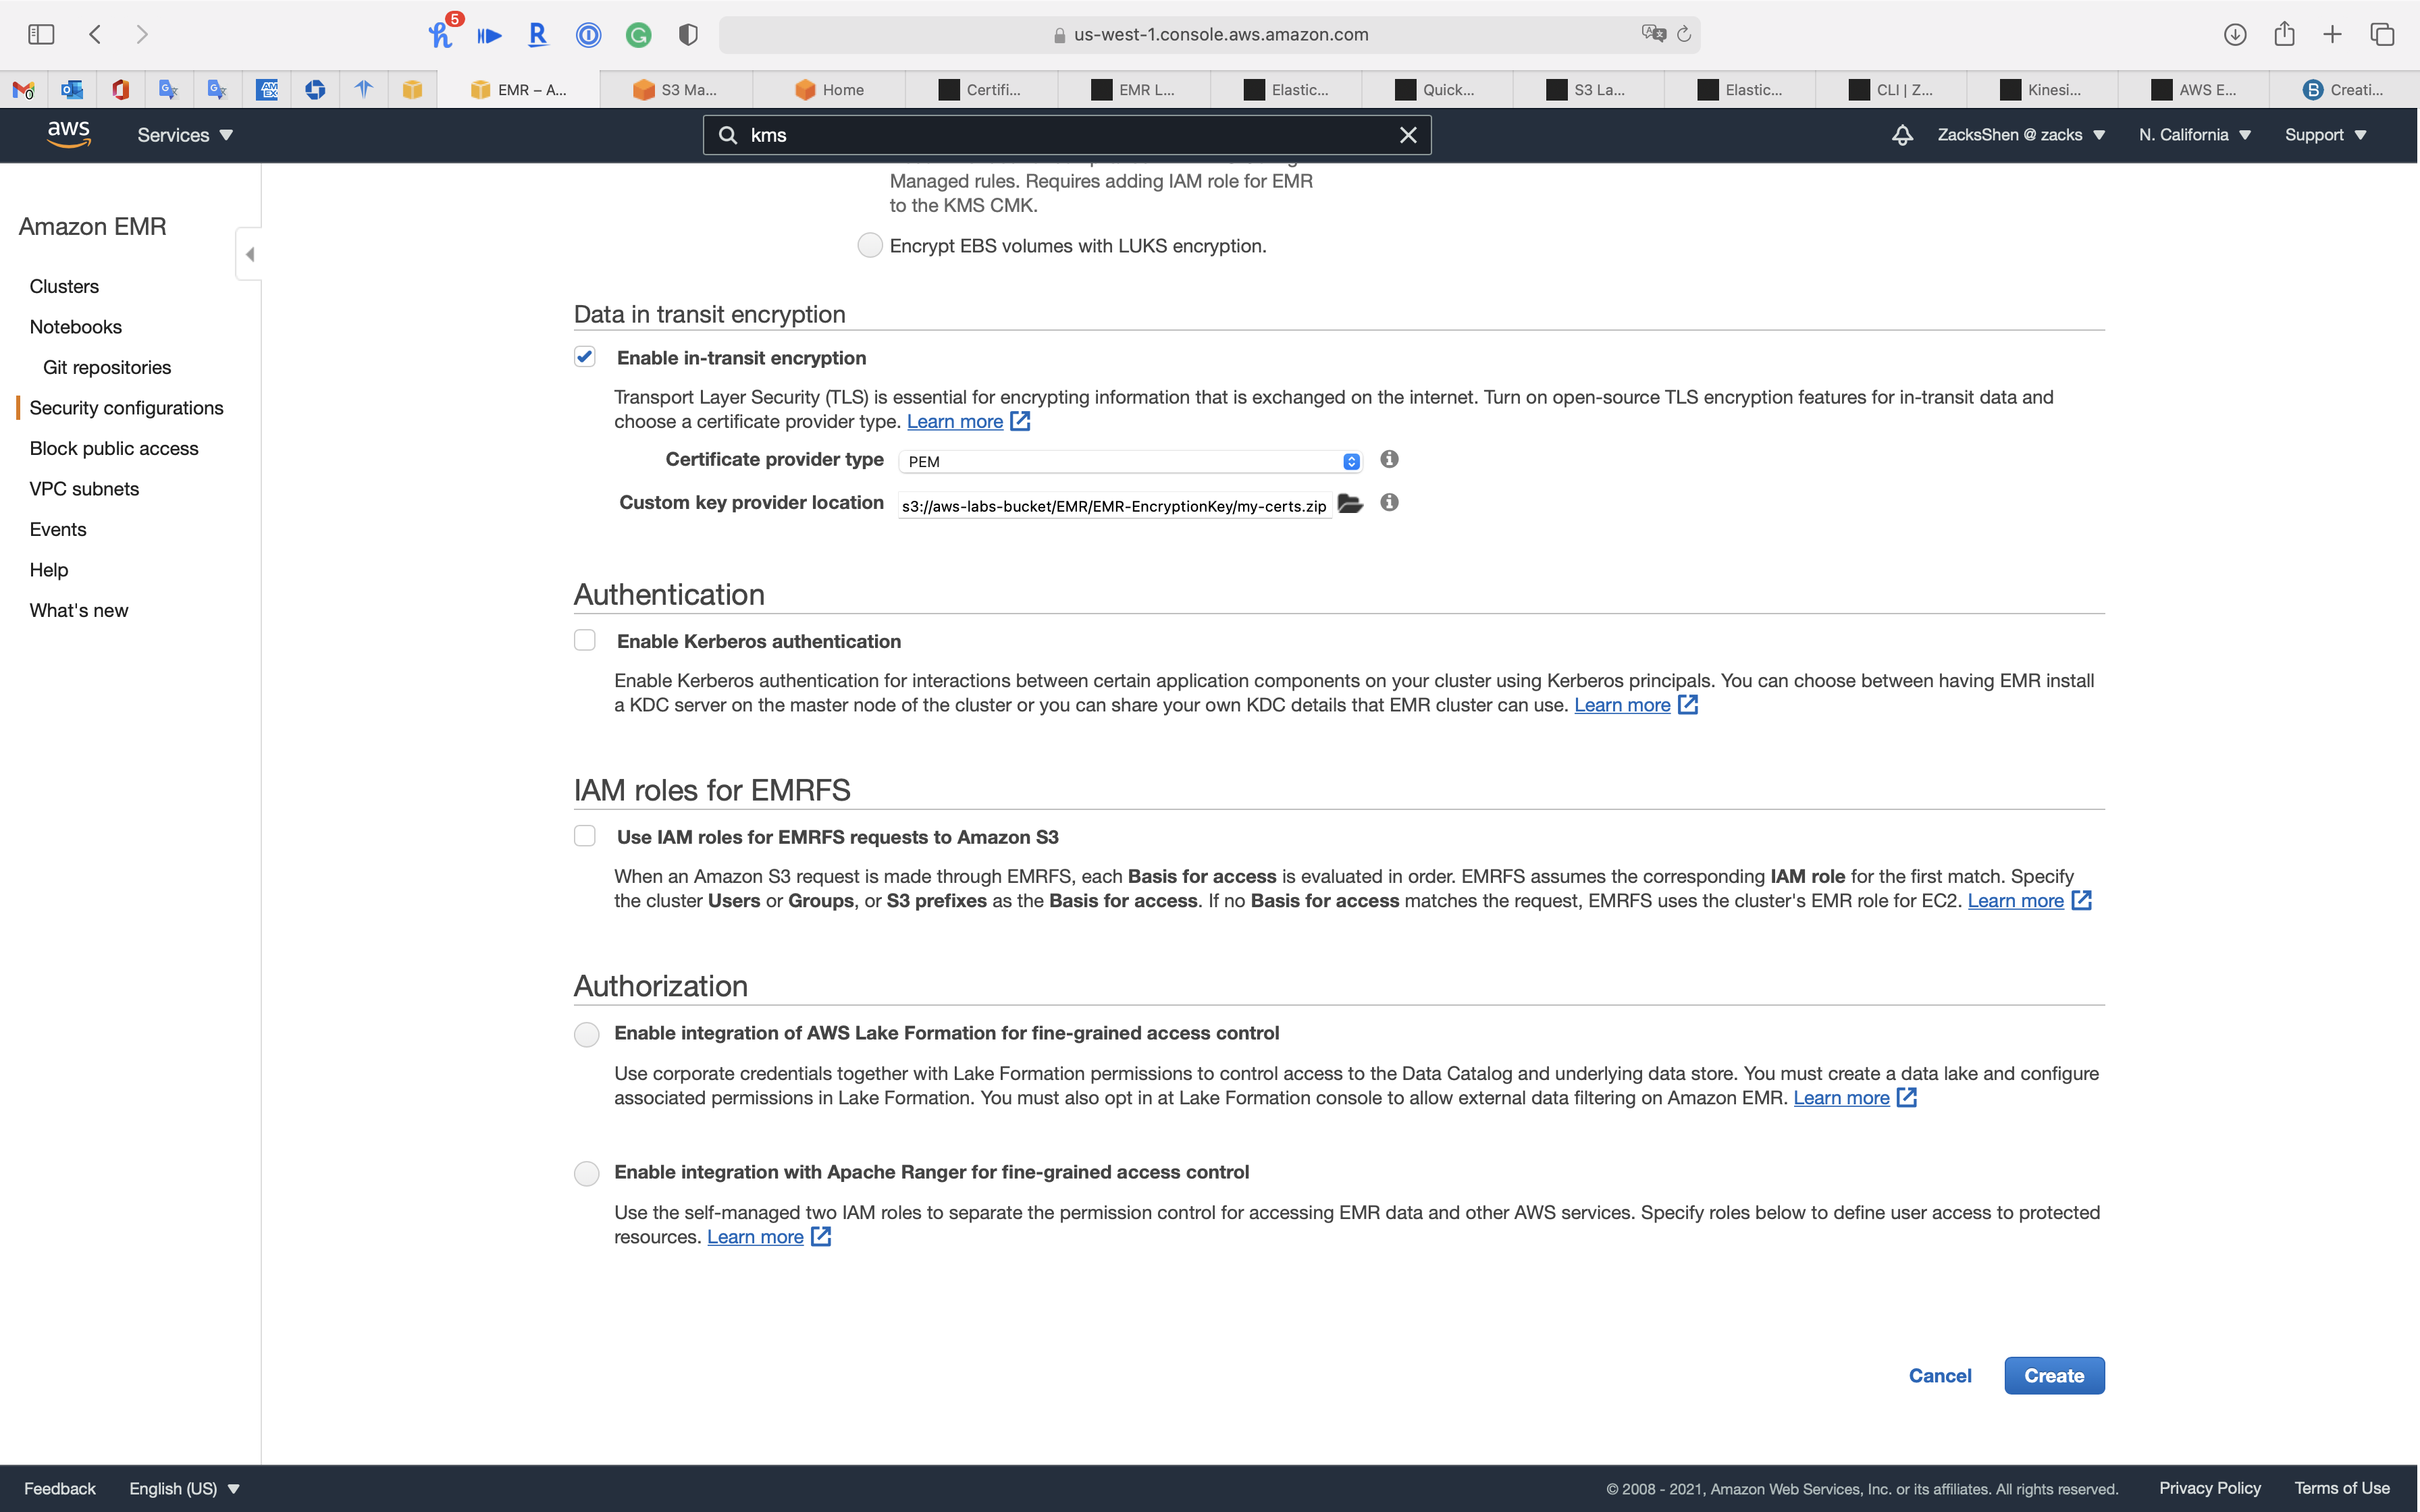
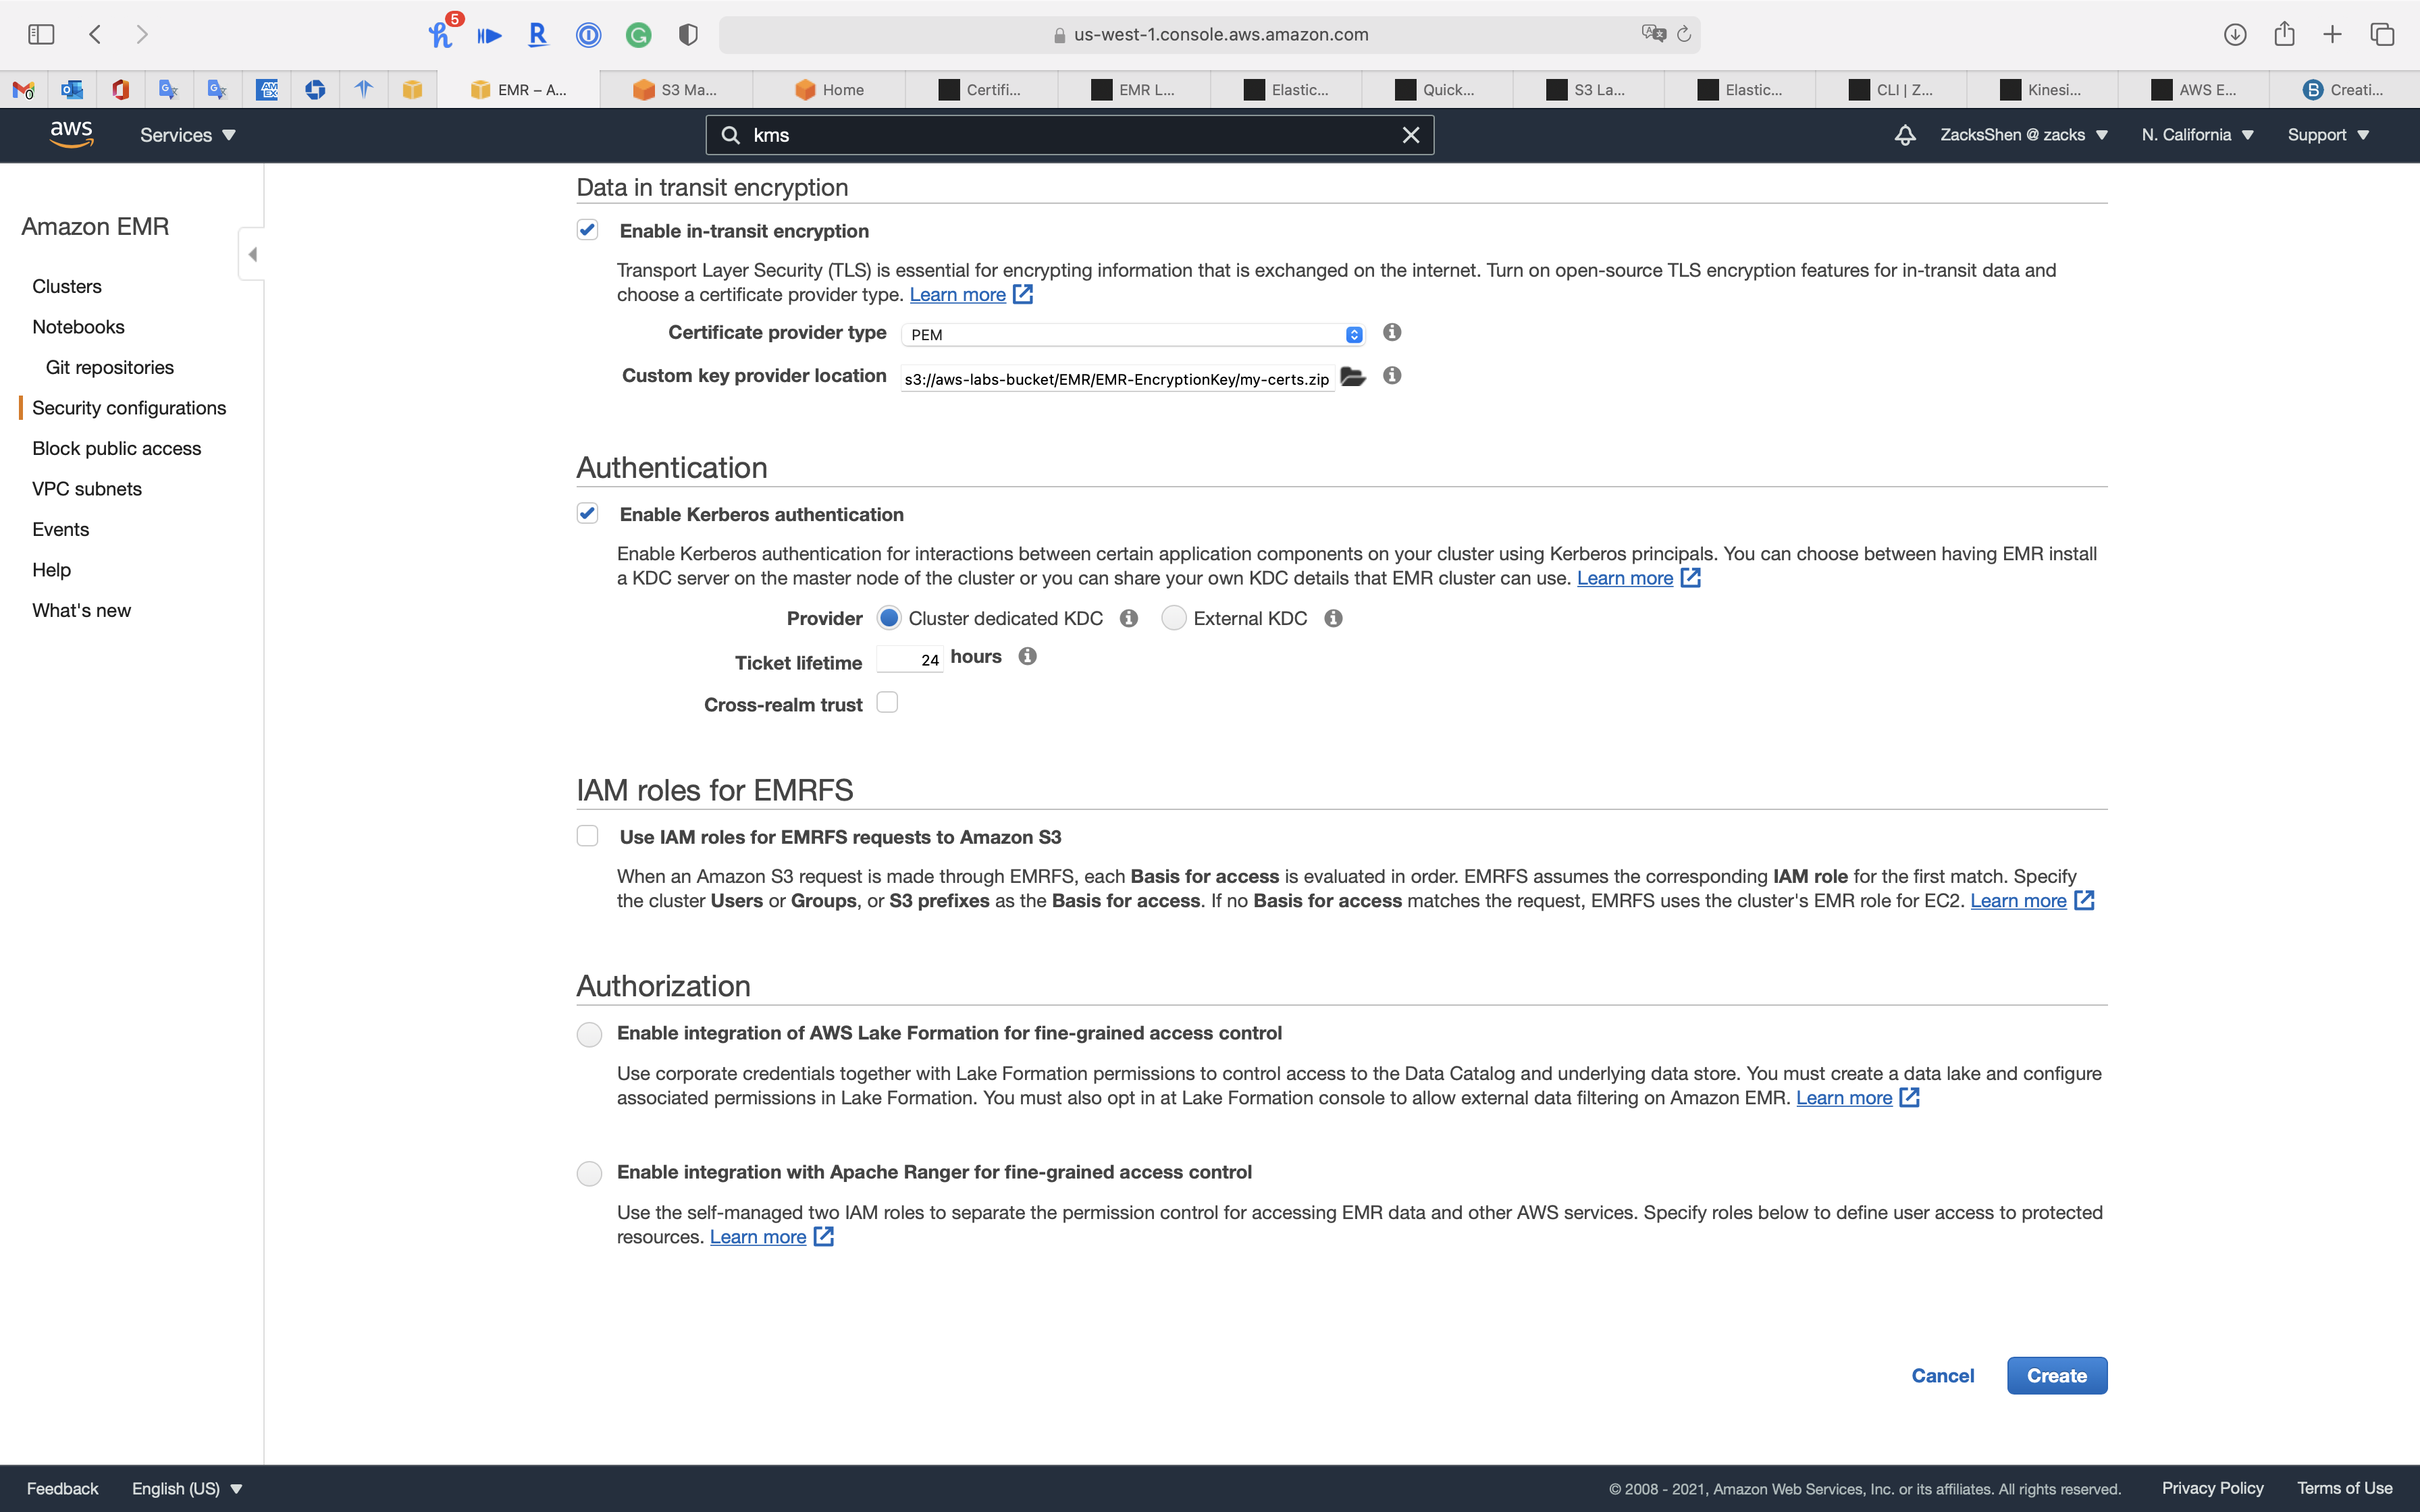
Authentication
Enable Kerberos authentication for interactions between certain application components on your cluster using Kerberos principals. You can choose between having EMR install a KDC server on the master node of the cluster or you can share your own KDC details that EMR cluster can use.
KDC: A Kerberos Key Distribution Center (KDC) is installed on the master node of your cluster.
- Check
Enable Kerberos authentication- Provider:
Cluster dedicated KDC - Ticket lifetime:
24 hours
- Provider:
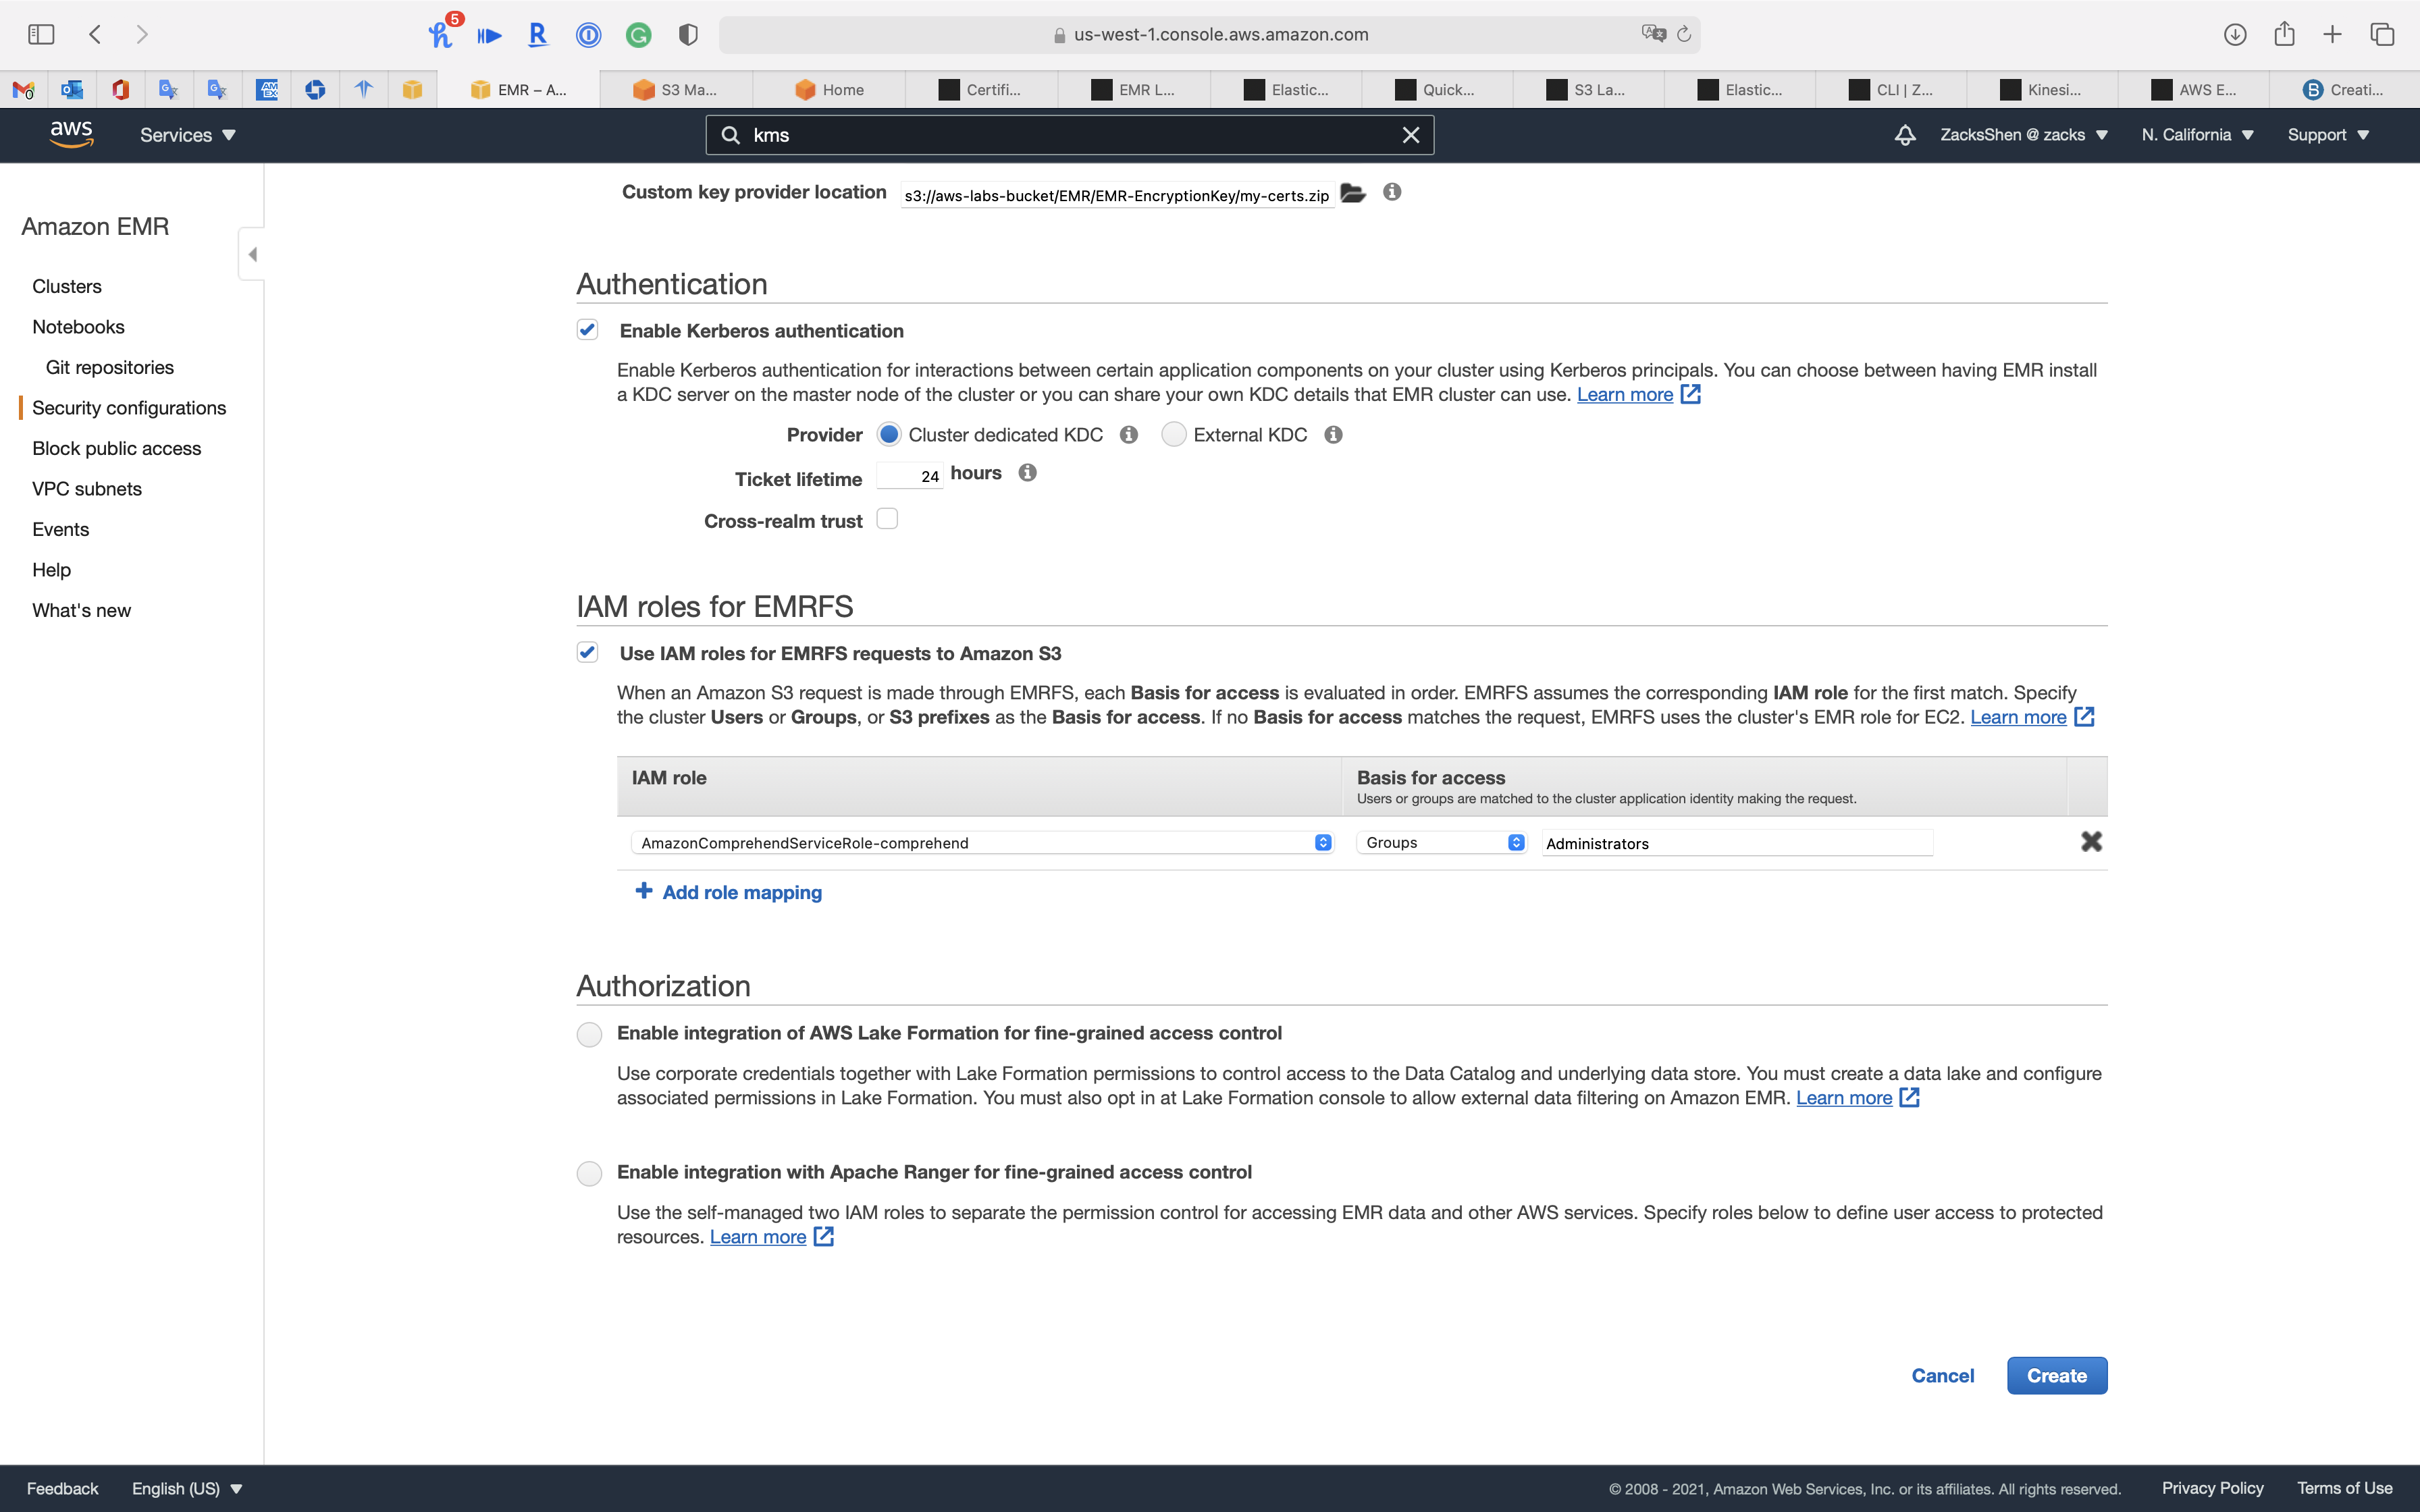
IAM roles for EMRFS
When an Amazon S3 request is made through EMRFS, each Basis for access is evaluated in order. EMRFS assumes the corresponding IAM role for the first match. Specify the cluster Users or Groups, or S3 prefixes as the Basis for access. If no Basis for access matches the request, EMRFS uses the cluster’s EMR role for EC2.
Go to Services -> IAM to see if you have appropriate groups, users, or roles to give the EMRFS permission.
- IAM role: default (allow EMR create a IAM role)
- Basis for access:
Groups(if you have Administrator group, else chooseUsers)- Choose your Administrator group (if you don’t have, choose your Administrator user)
Authorization
- Enable integration of AWS Lake Formation for fine-grained access control: Use corporate credentials together with Lake Formation permissions to control access to the Data Catalog and underlying data store. You must create a data lake and configure associated permissions in Lake Formation. You must also opt in at Lake Formation console to allow external data filtering on Amazon EMR.
- IAM role for AWS Lake Formation: Enter the role that federated users assume when they access a Lake Formation data lake using EMR.
- IAM role for other AWS services: Enter the role that federated users assume when they use EMR to access AWS resources through other AWS services. Do not attach permissions that Lake Formation manages to this role.
- Identity provider (IdP) metadata: Enter the location of the file that contains your Identity provider (IdP) metadata.
- Enable integration with Apache Ranger for fine-grained access control: Use the self-managed two IAM roles to separate the permission control for accessing EMR data and other AWS services. Specify roles below to define user access to protected resources
- IAM role for Apache RangerProvide an IAM role for access governed by Apache Ranger access control policies.
- IAM role for other AWS Services: Provide an IAM role for access governed by IAM permission only.
Click on Create
Now we have EMR-SecurityConfig.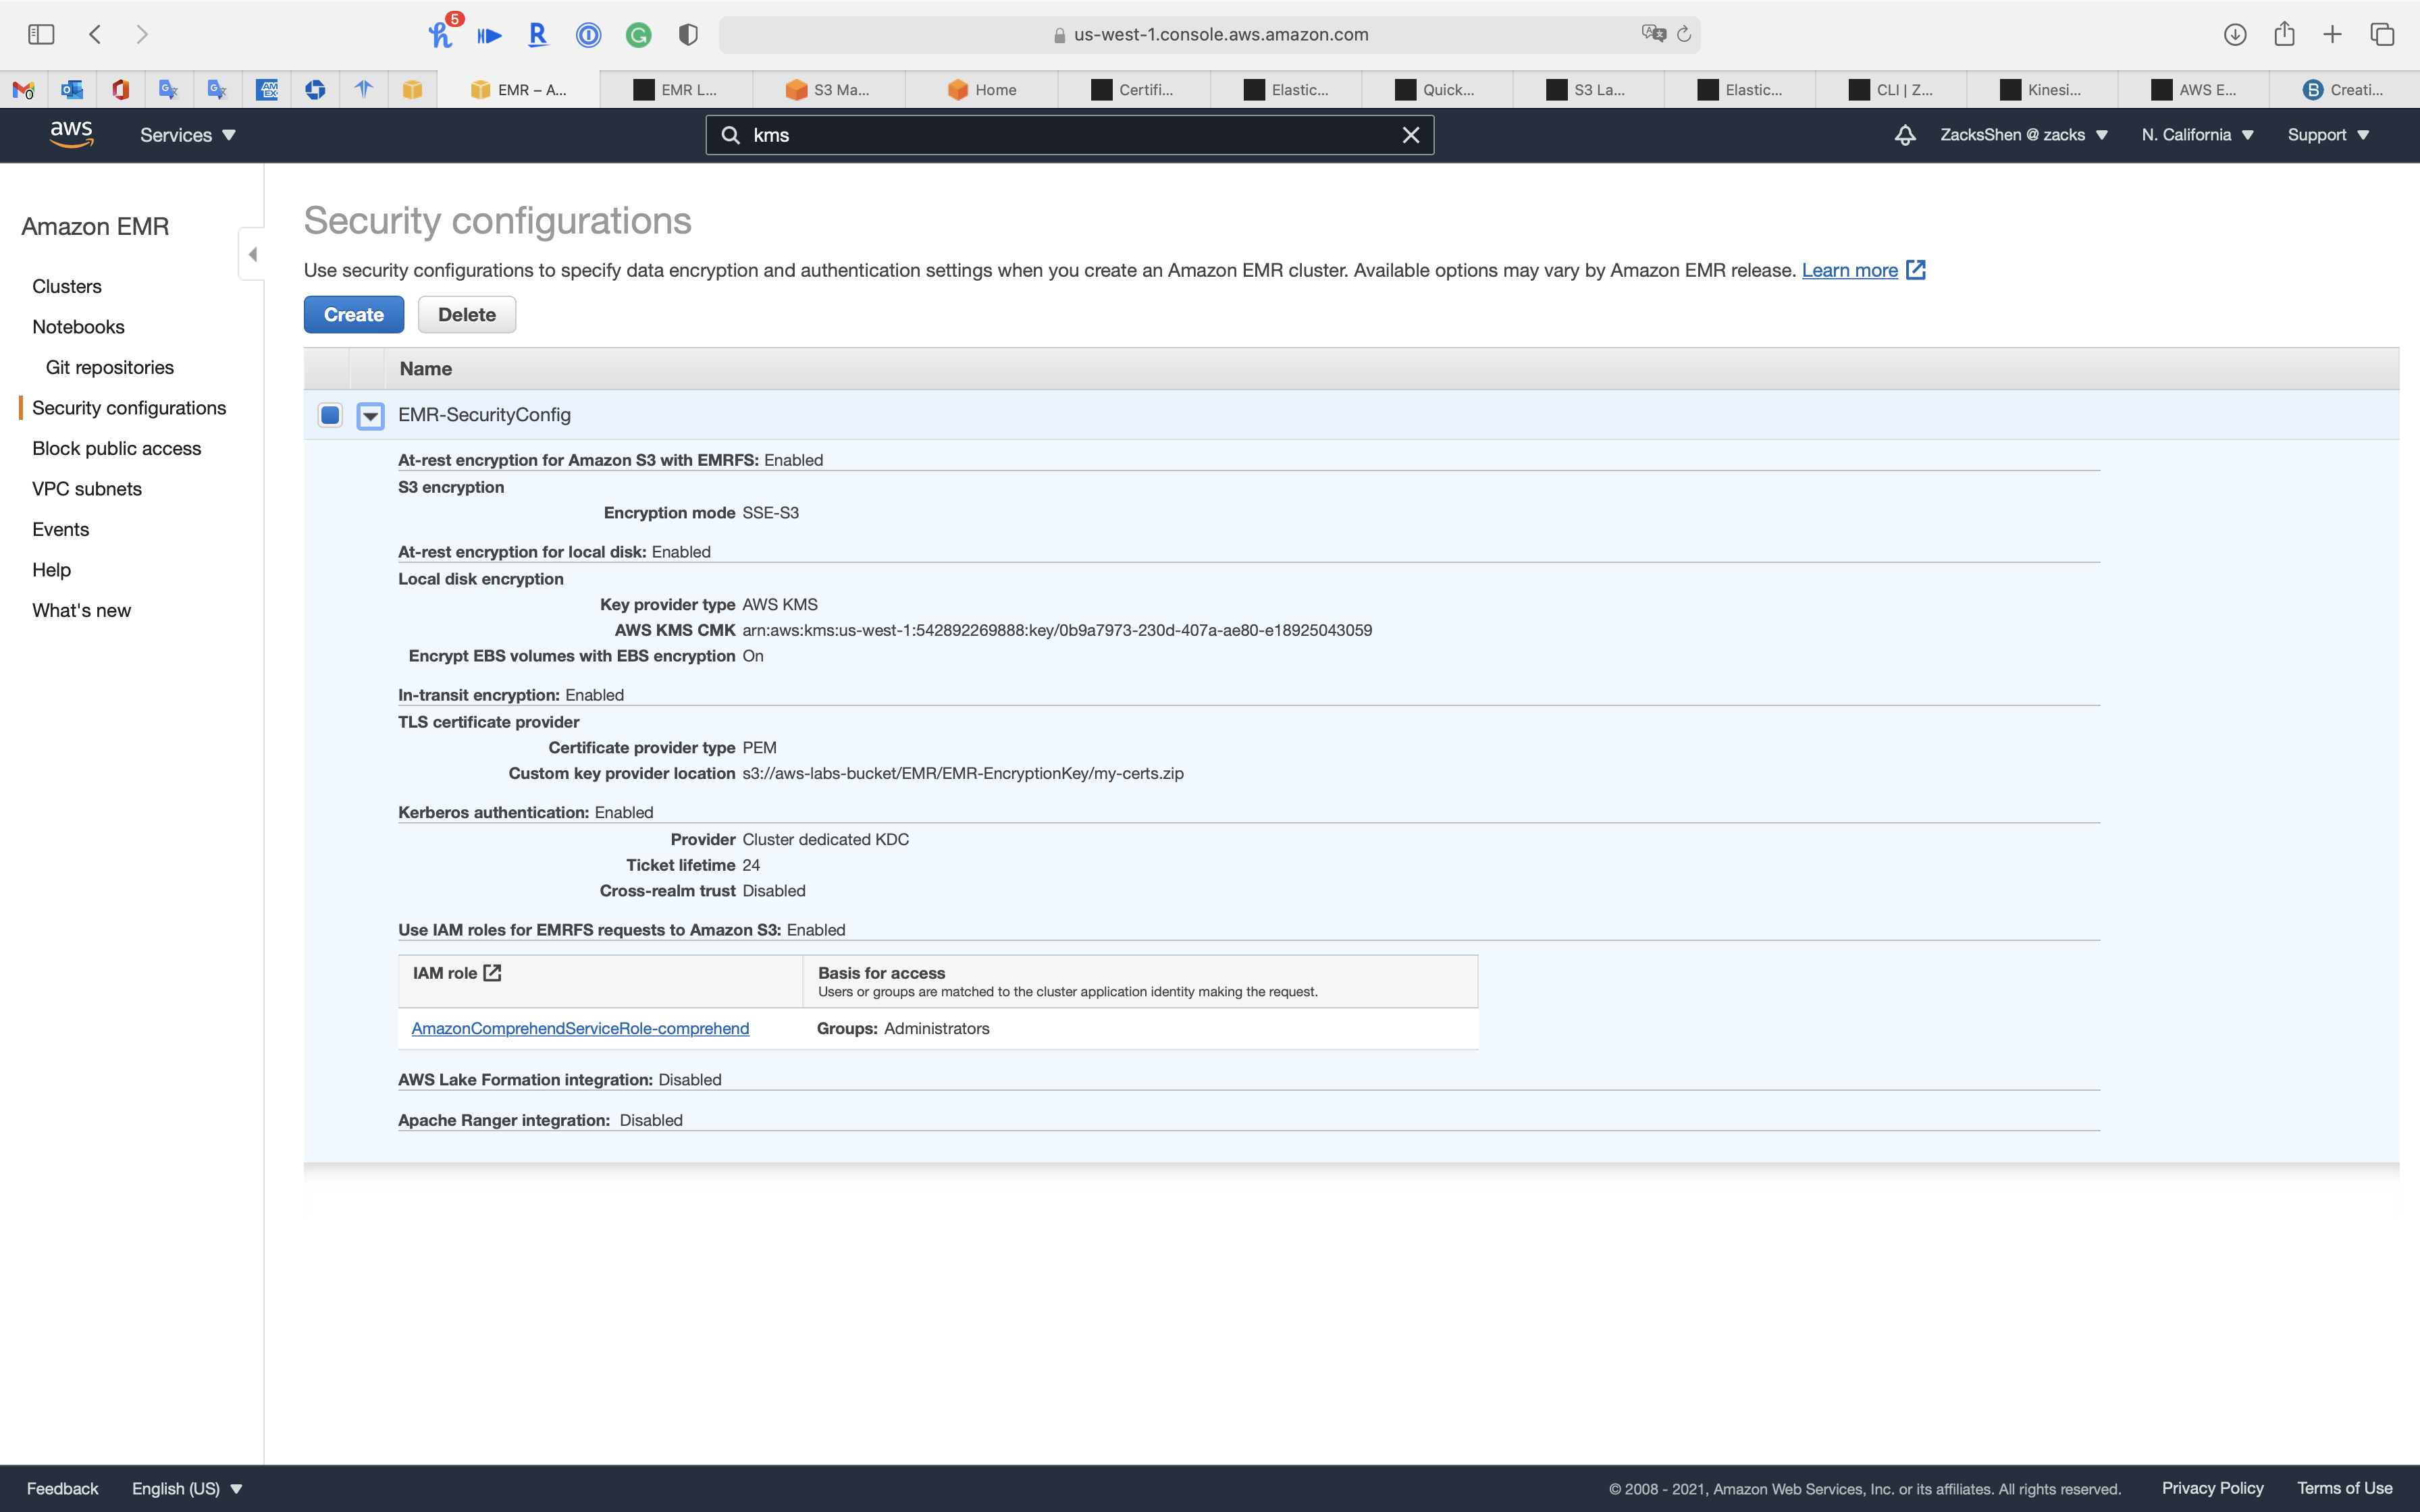
Create Cluster - Advanced Options
Services -> EMR -> Clusters
Click on Create cluster
Create a EMR Cluster for running Hadoop and related components.
Click on Go to advanced options on the top of the page.
Step 1: Software and Steps
Software Configuration
- Release
emr-5.32.0 - Hadoop
- Hive
- Presto
- Hue
- Pig
AWS Glue Data Catalog settings (optional)
Use for Presto table metadata(Use the AWS Glue Data Catalog to provide an external Hive metastore for Presto.)
Click on Next
Step 2: Hardware
Networking
- Network:
default - EC2 Subnet:
default
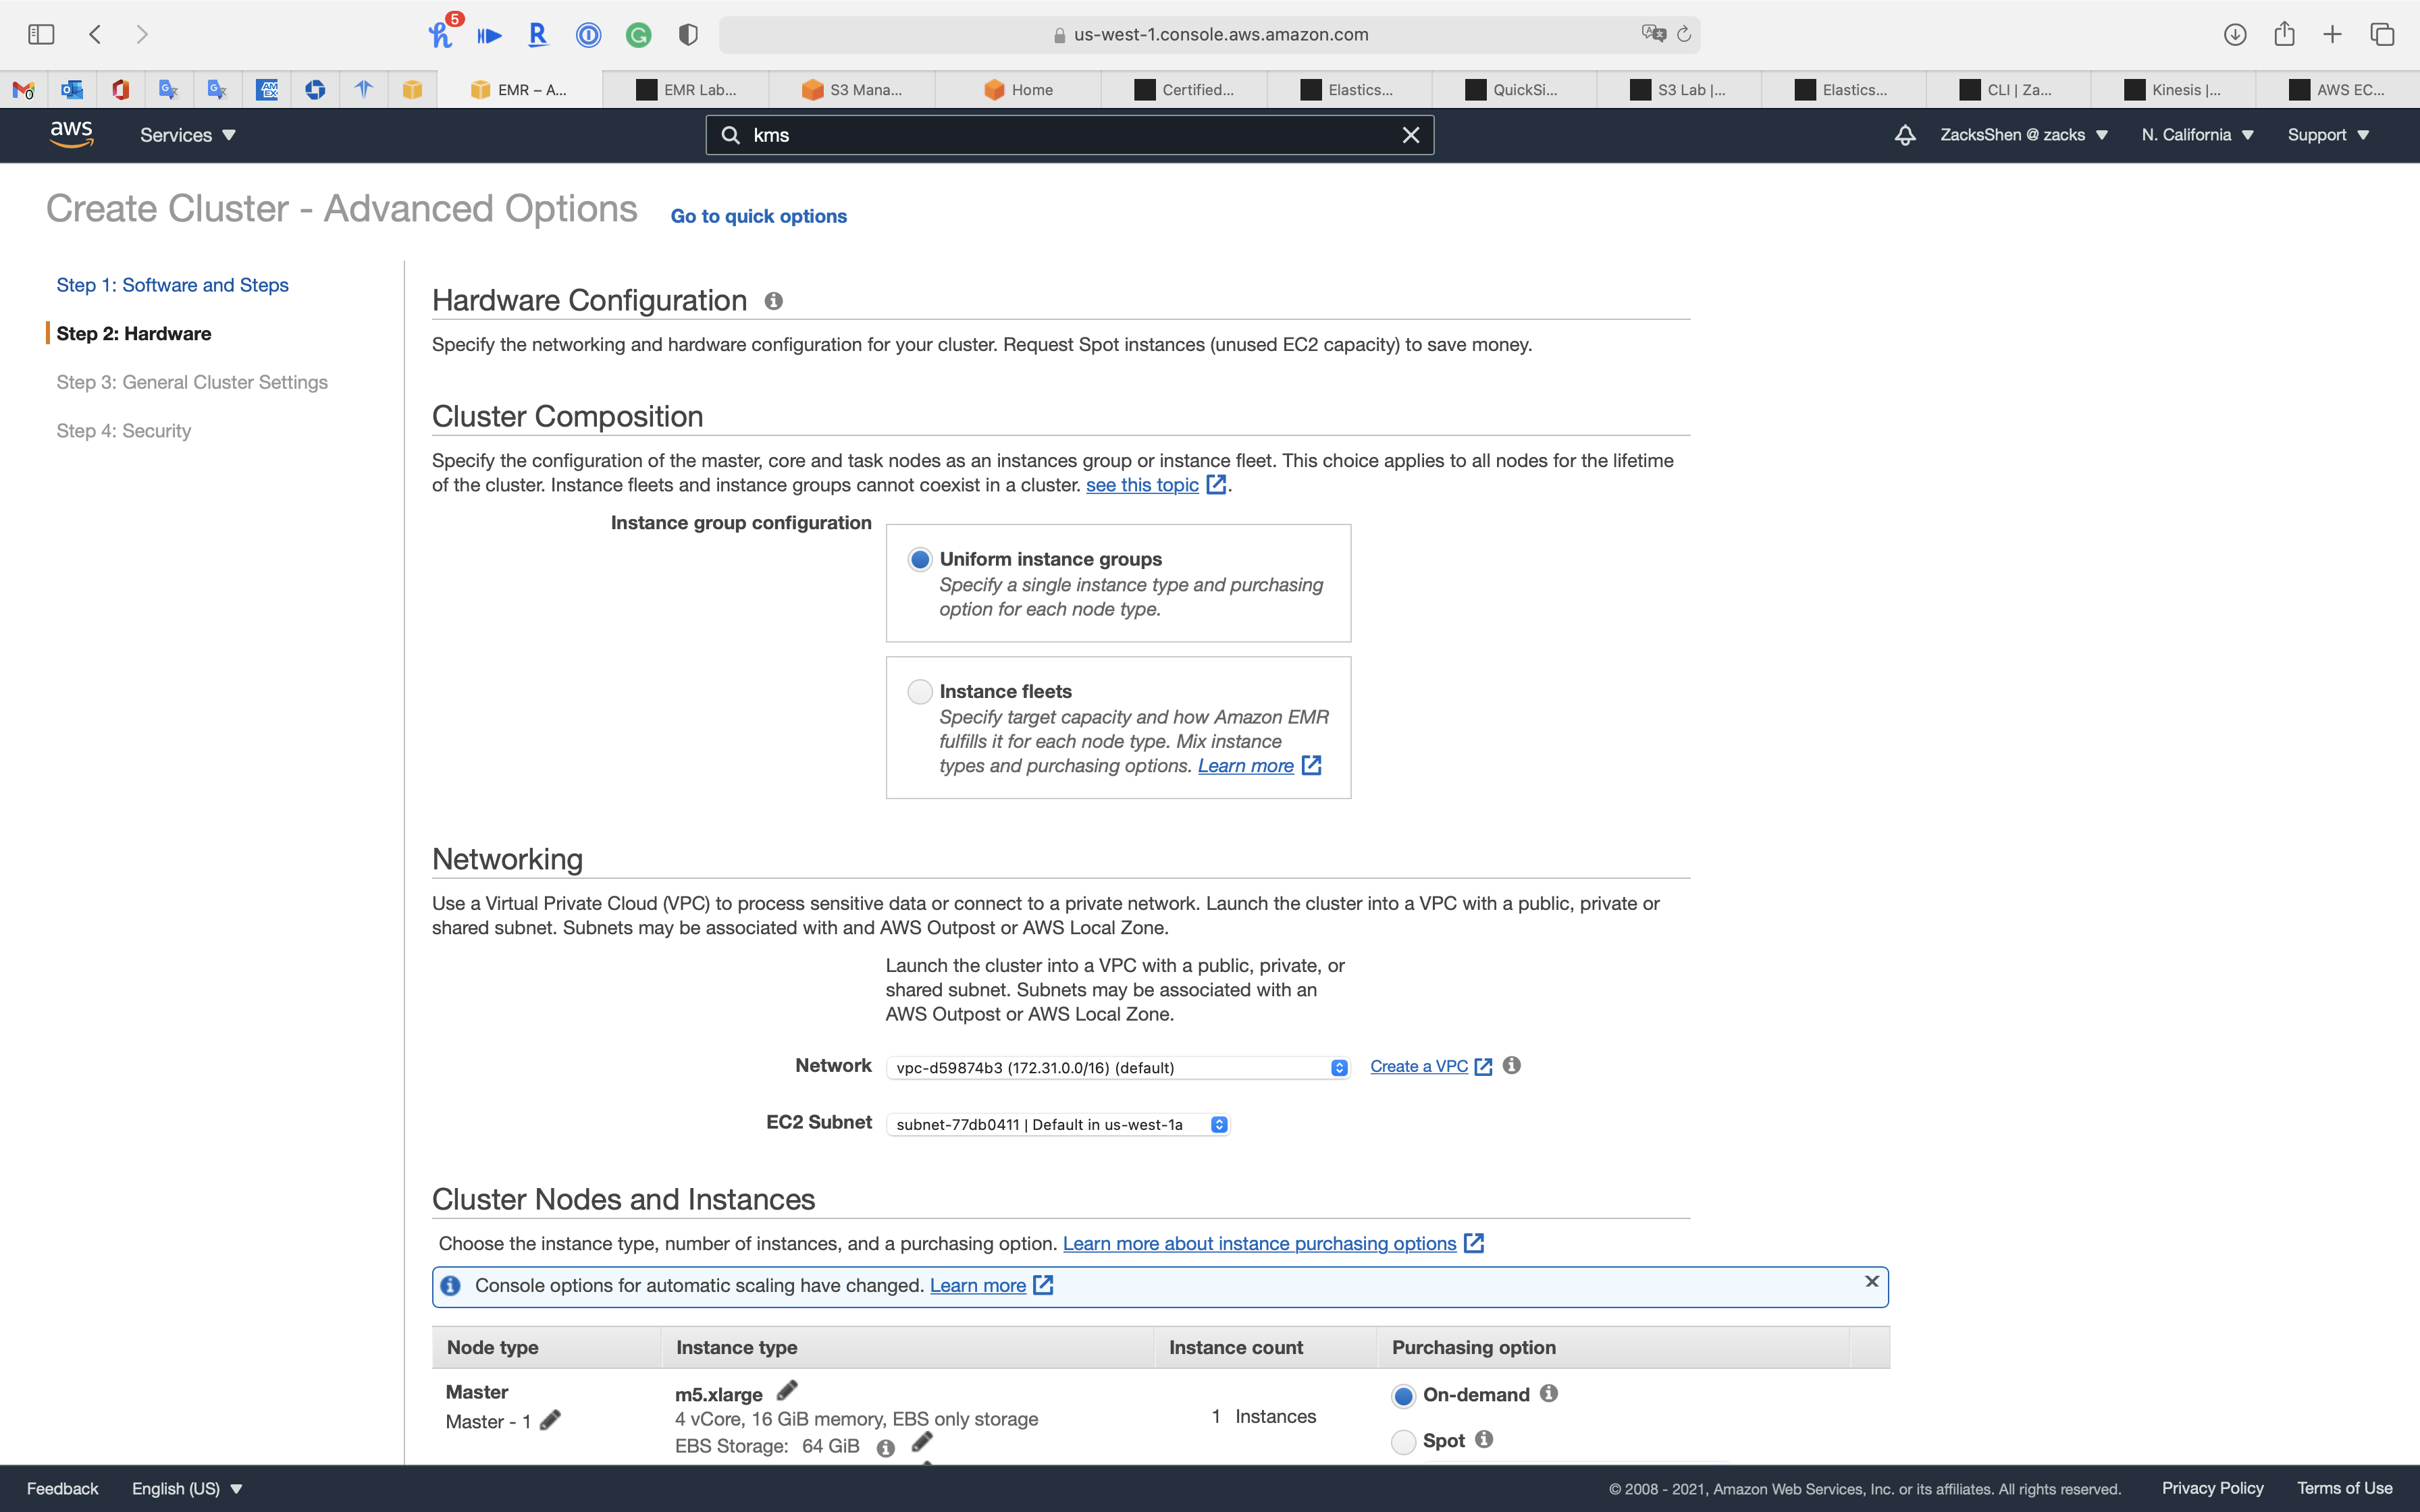
Cluster Nodes and Instances
Node Type
- Master, 1 instance, On-demand
- Core, 2 instance, On-demand
- Task, 0 instance, On-demand
Click on Next
Step 3: General Cluster Settings
- Cluster name:
EMR-SecureCluster - Termination protection (Prevents accidental termination of the cluster: to shut down the cluster, you must turn off termination protection.)
- Uncheck
Click on Next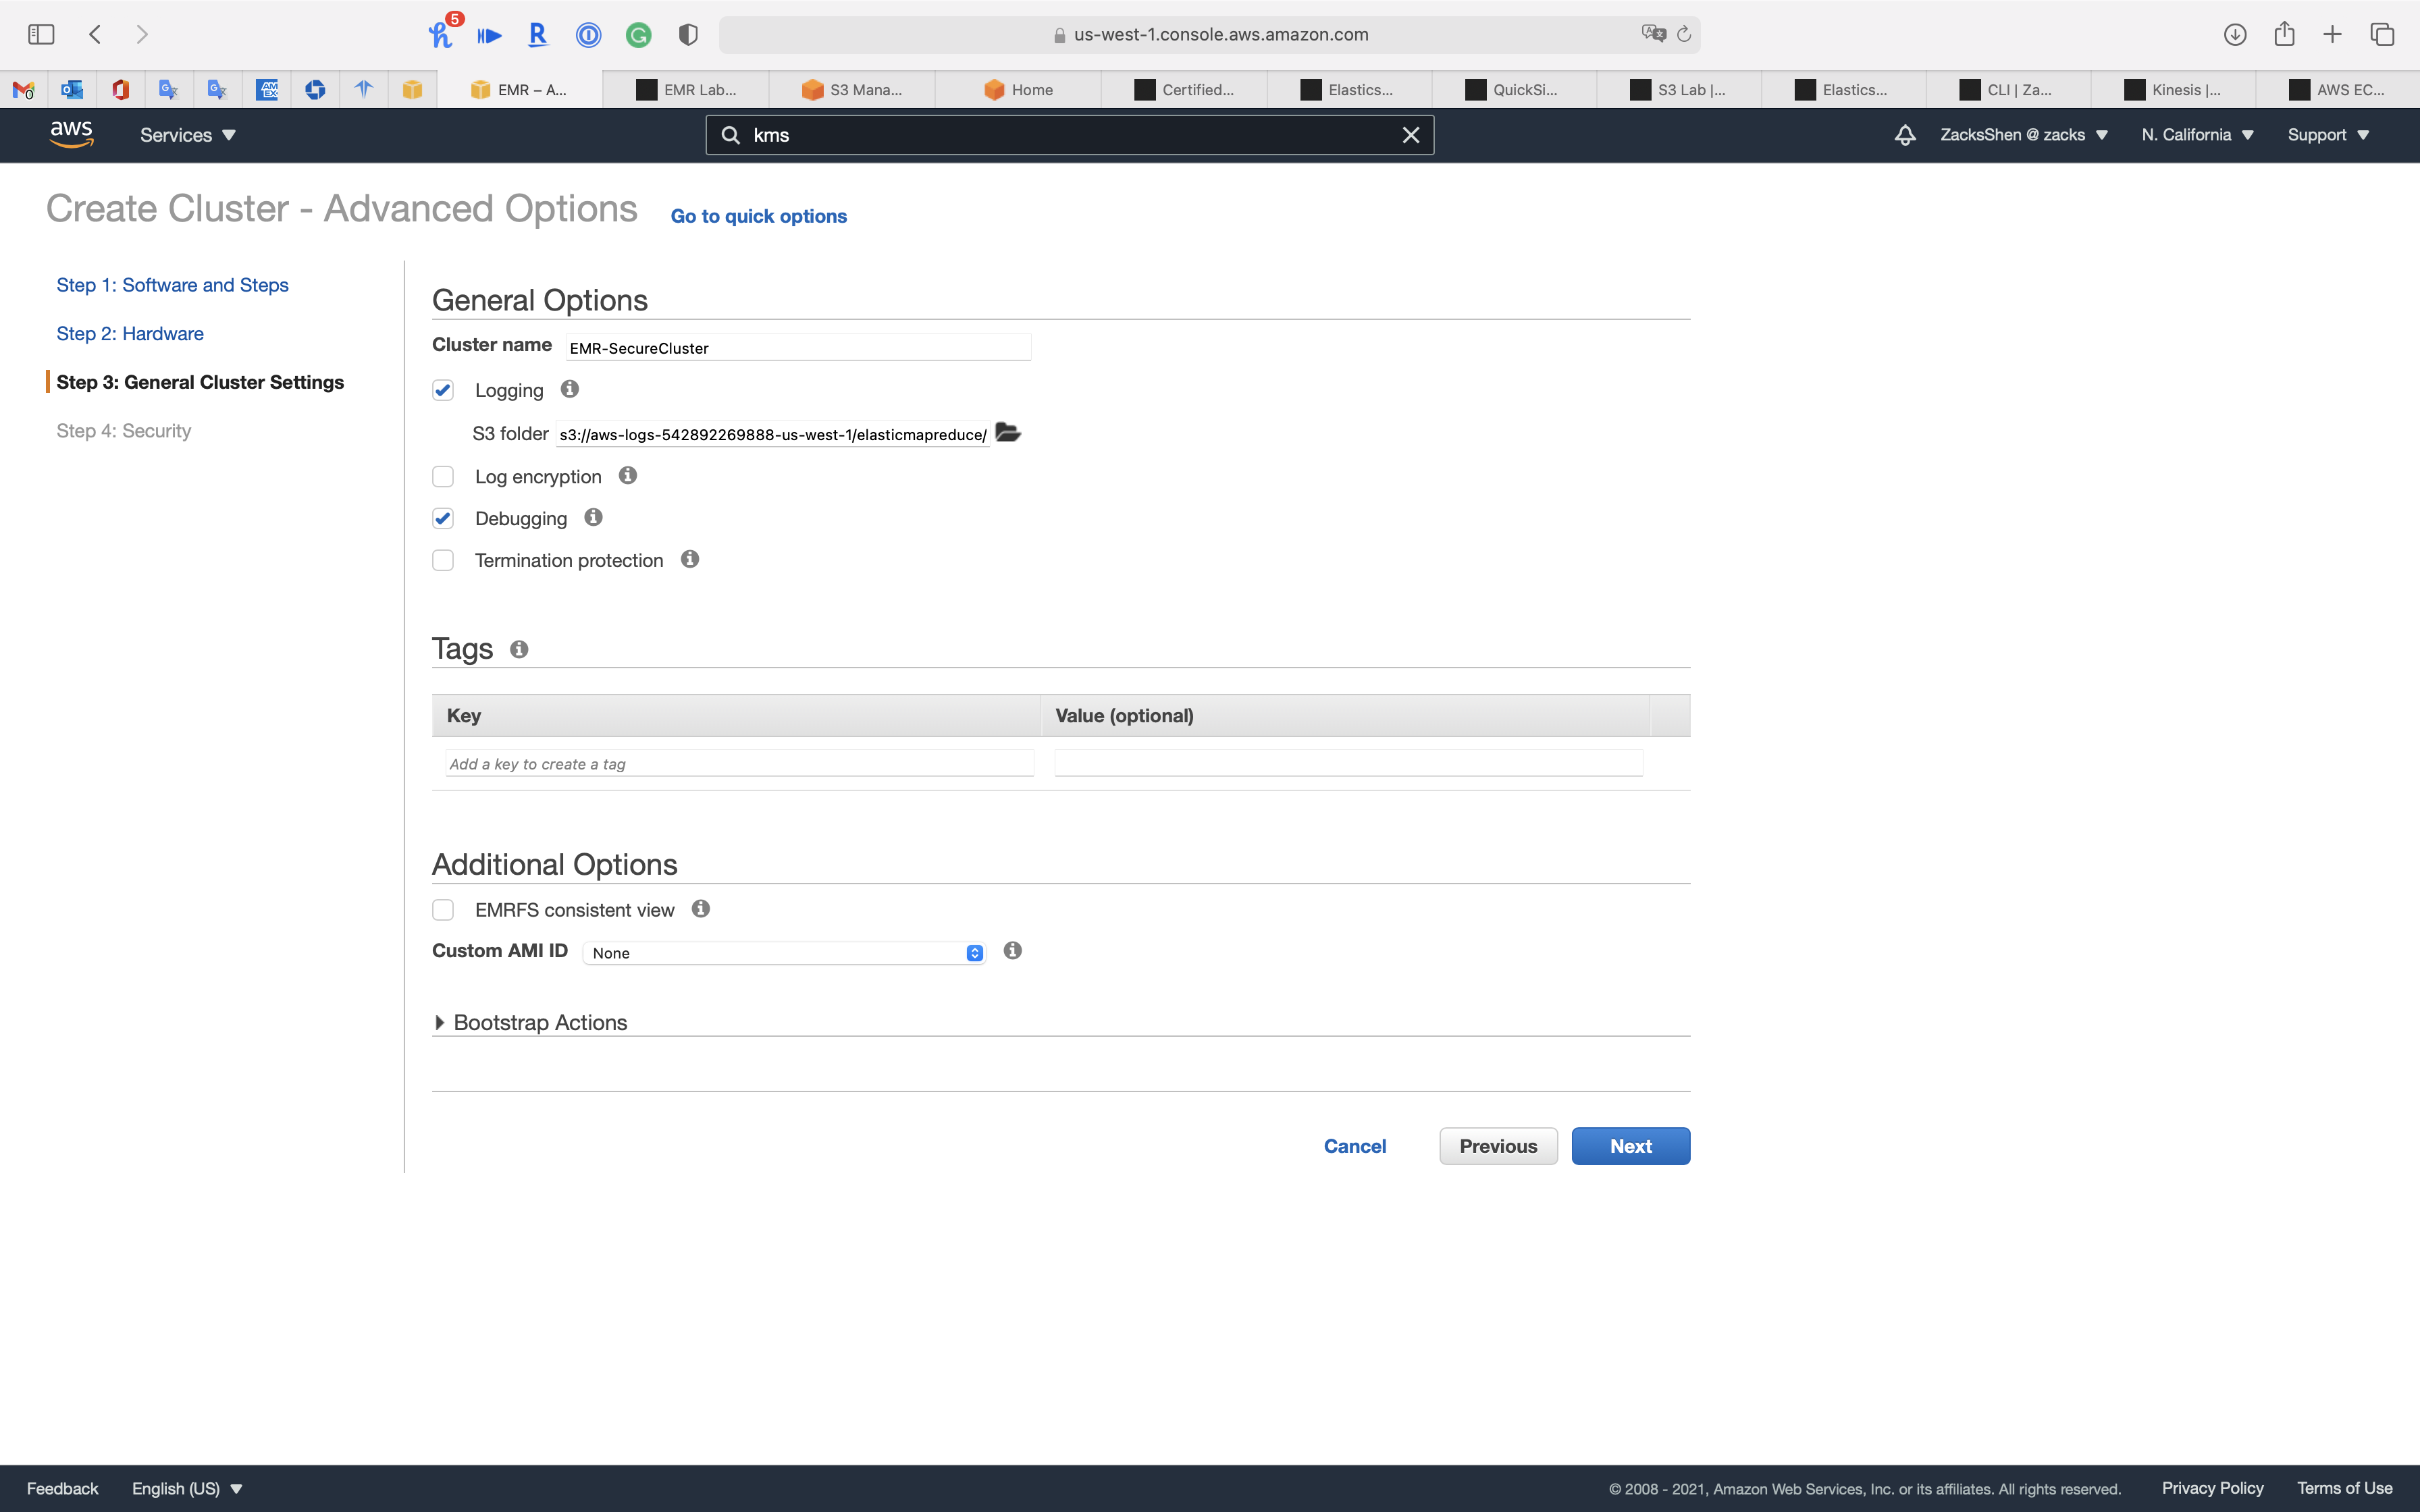
Step 4: Security
Security Options
- EC2 key pair: choose your pervious key pair
Security Configuration
- Security configuration:
EMR-SecurityConfig - Realm:
EMR-SECURECLUSTER.COM- The name of the Kerberos realm to which all nodes in a cluster belong. The default value is the text, in uppercase, of the cluster‘s domain.
- KDC admin password: input your password
- The password used within the cluster for the kadmin service.
EC2 security groups
- Master:
Create ElasticMapReduce-Master-Private - Core & Task:
Create ElasticMapReduce-Slave-Private
Click on Create cluster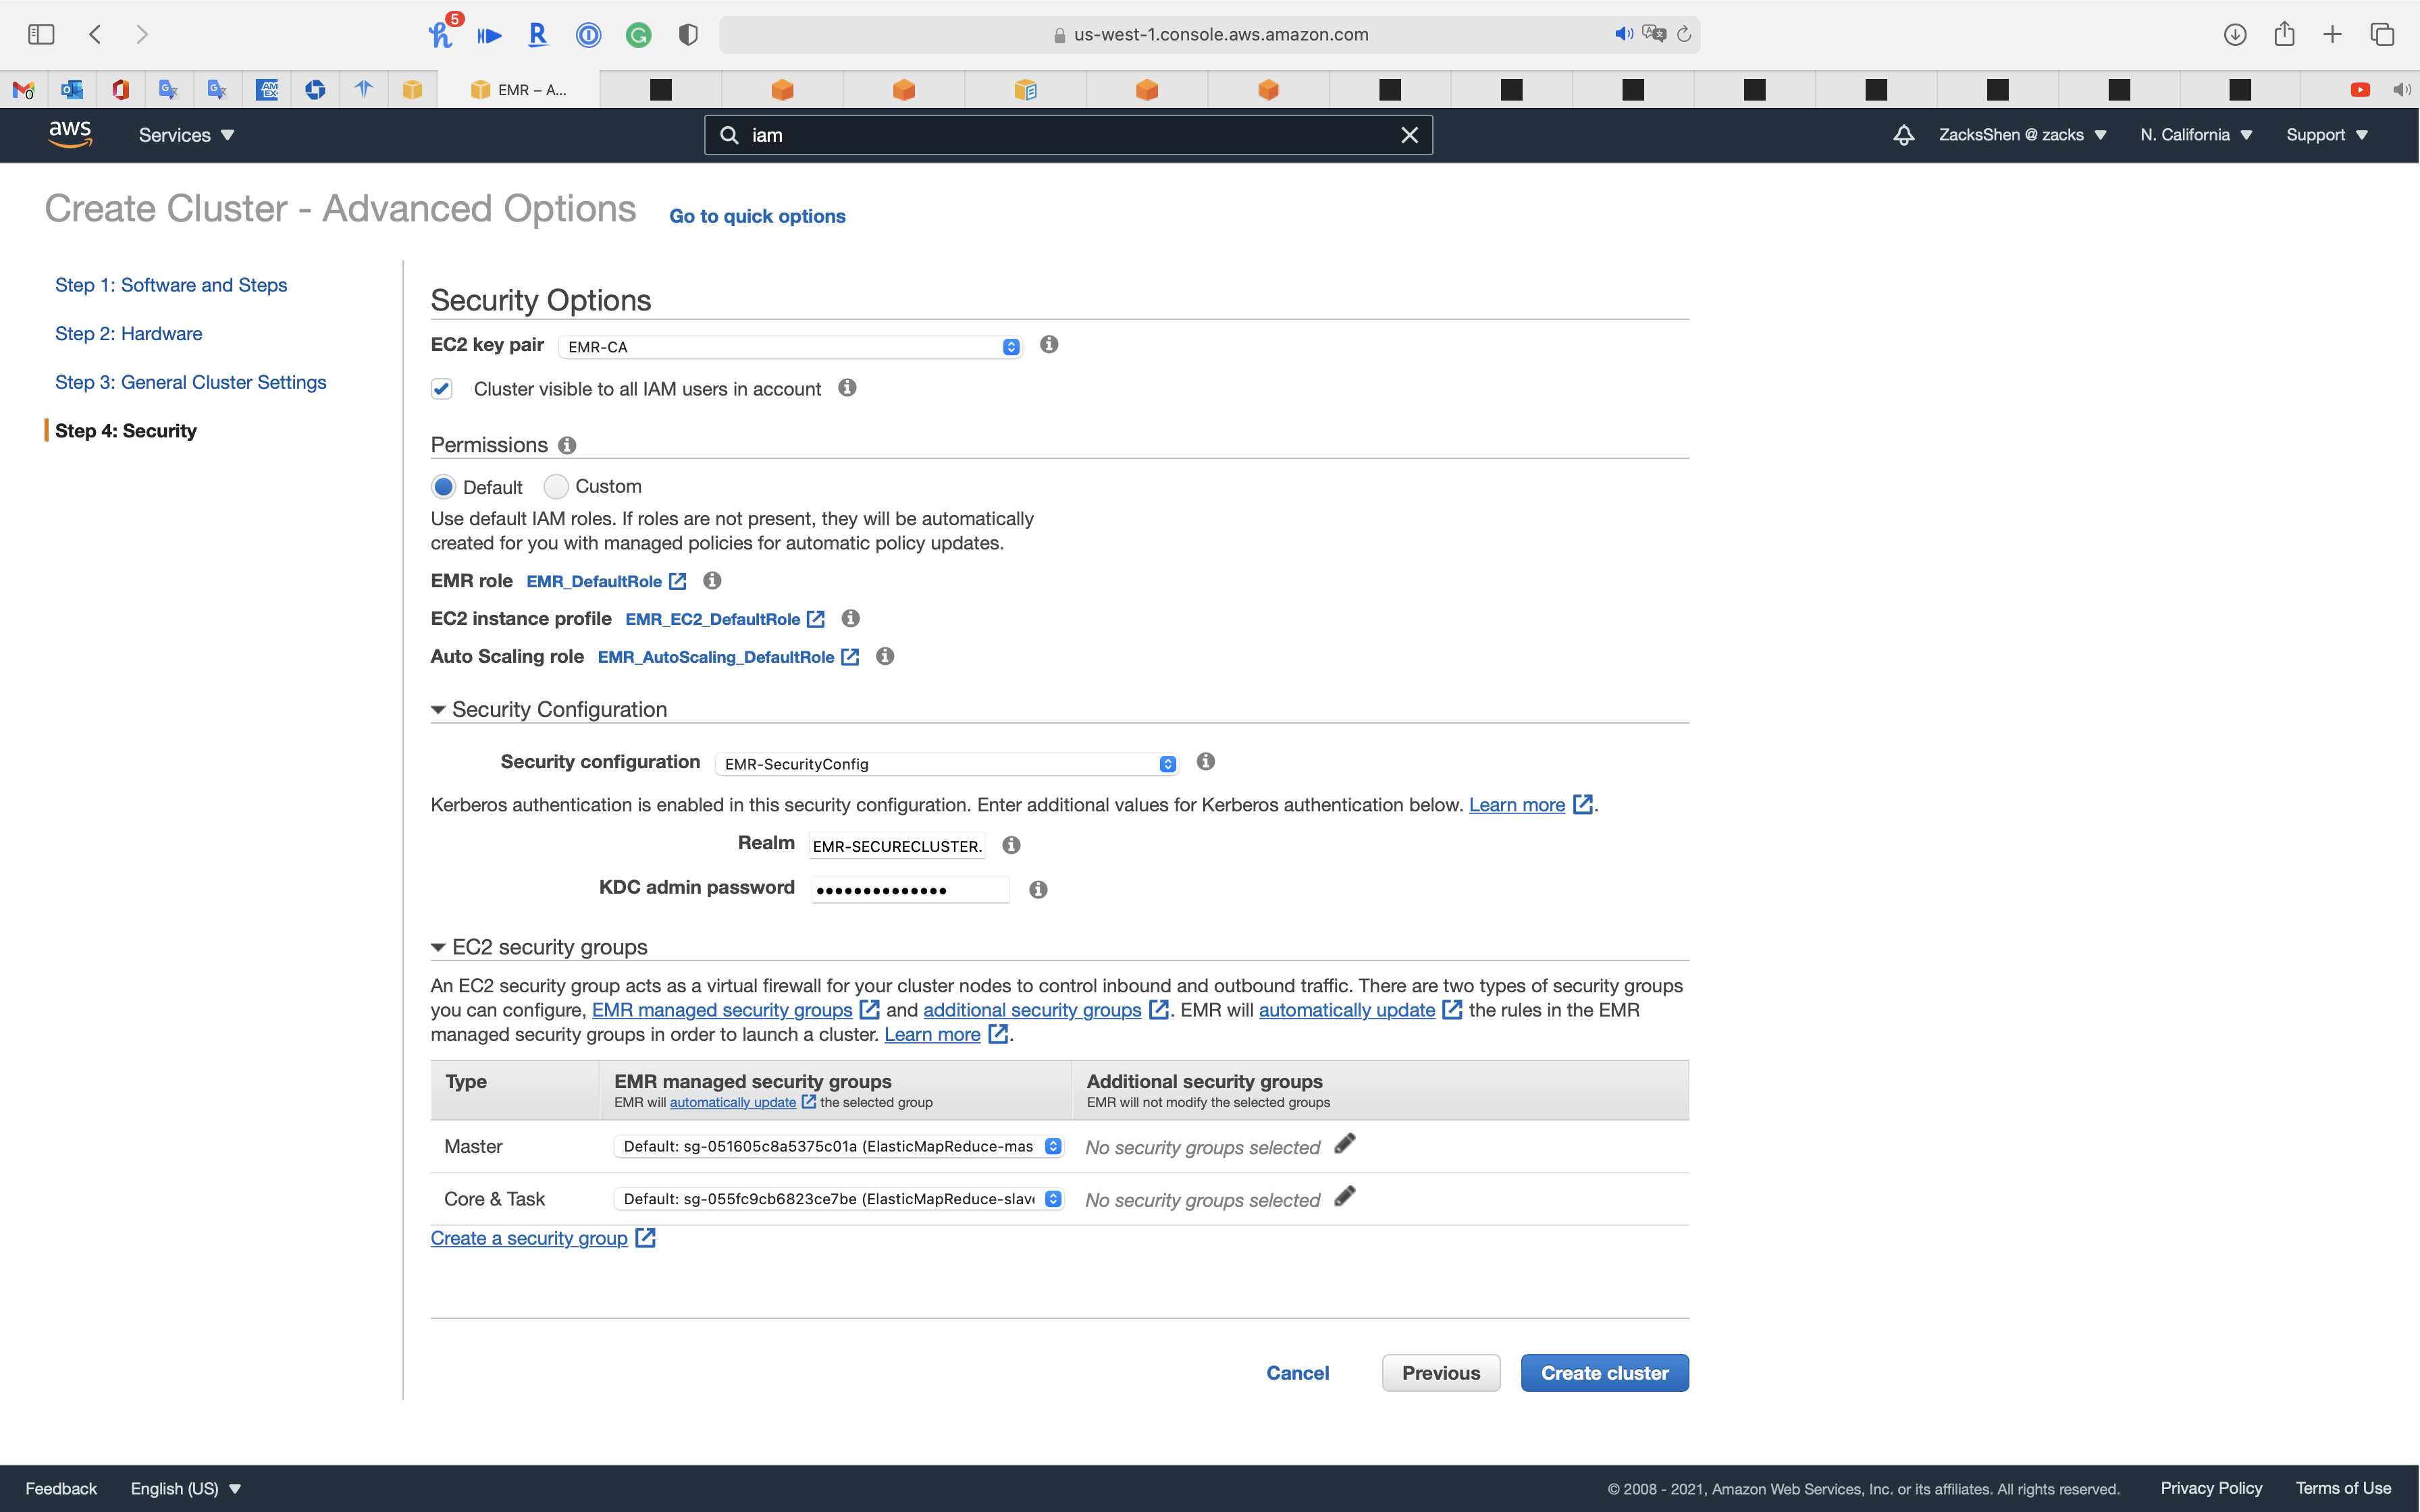
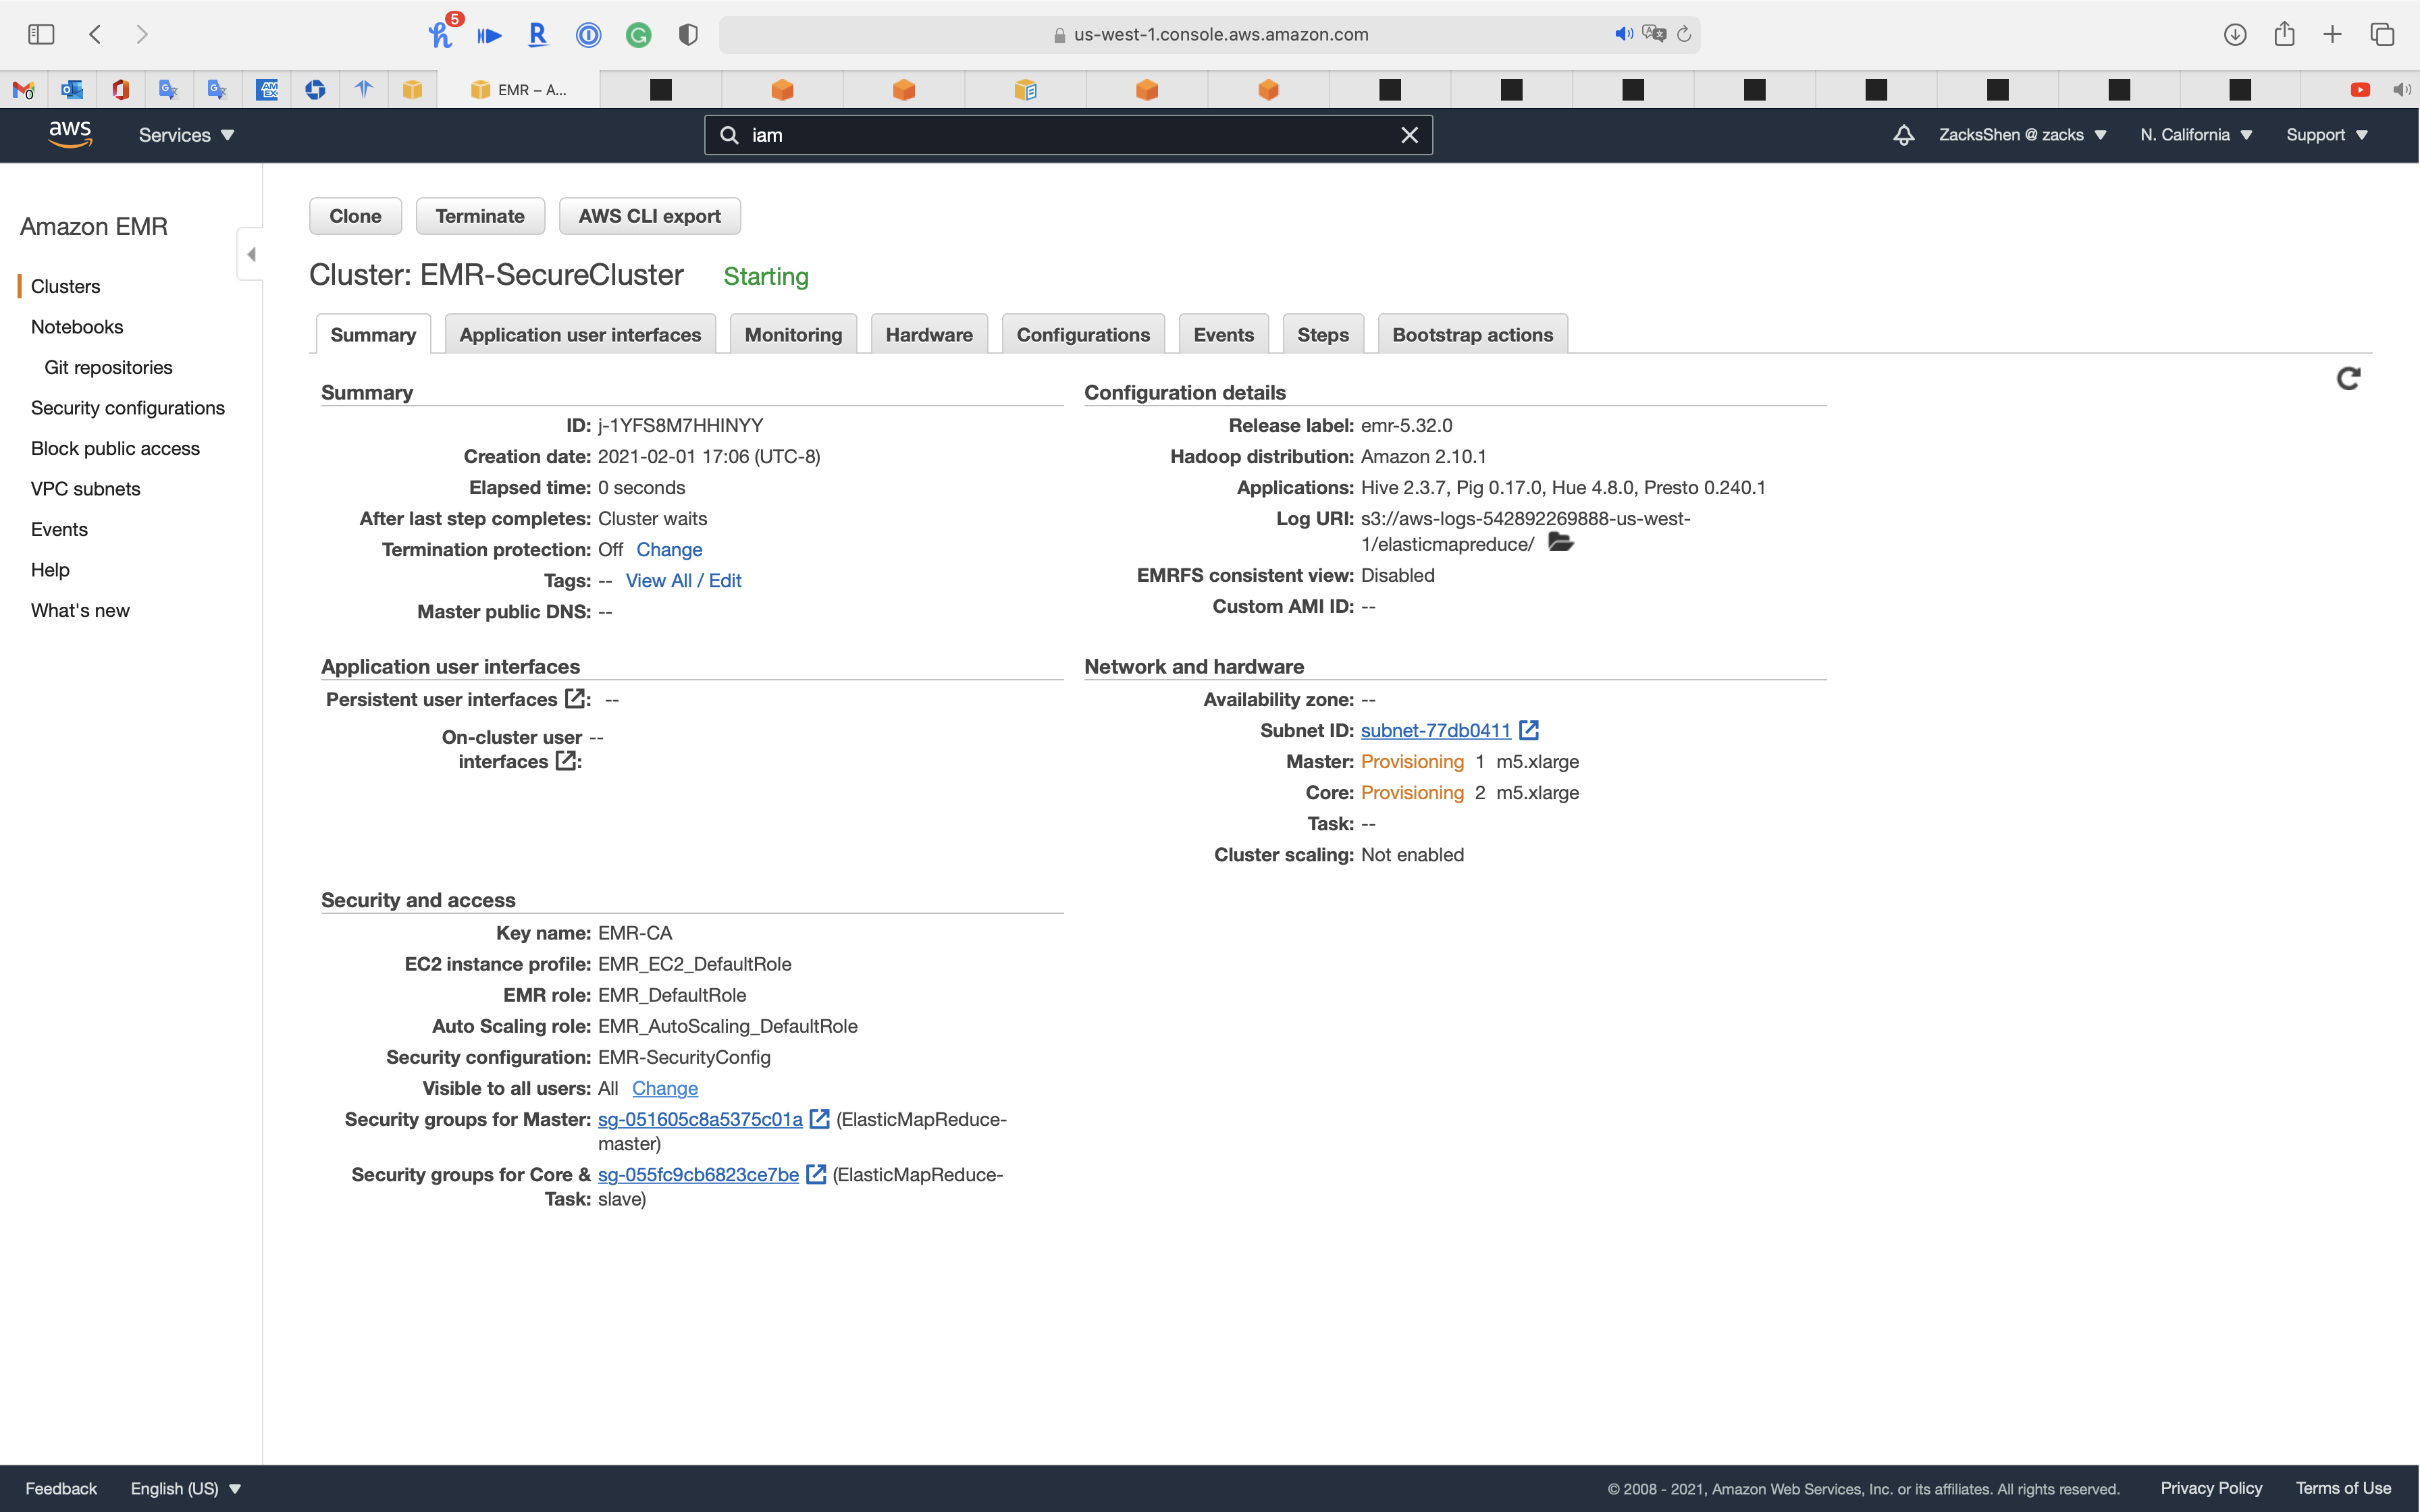
Services -> EC2 -> Instances
You can see our EC2 instances are initializing.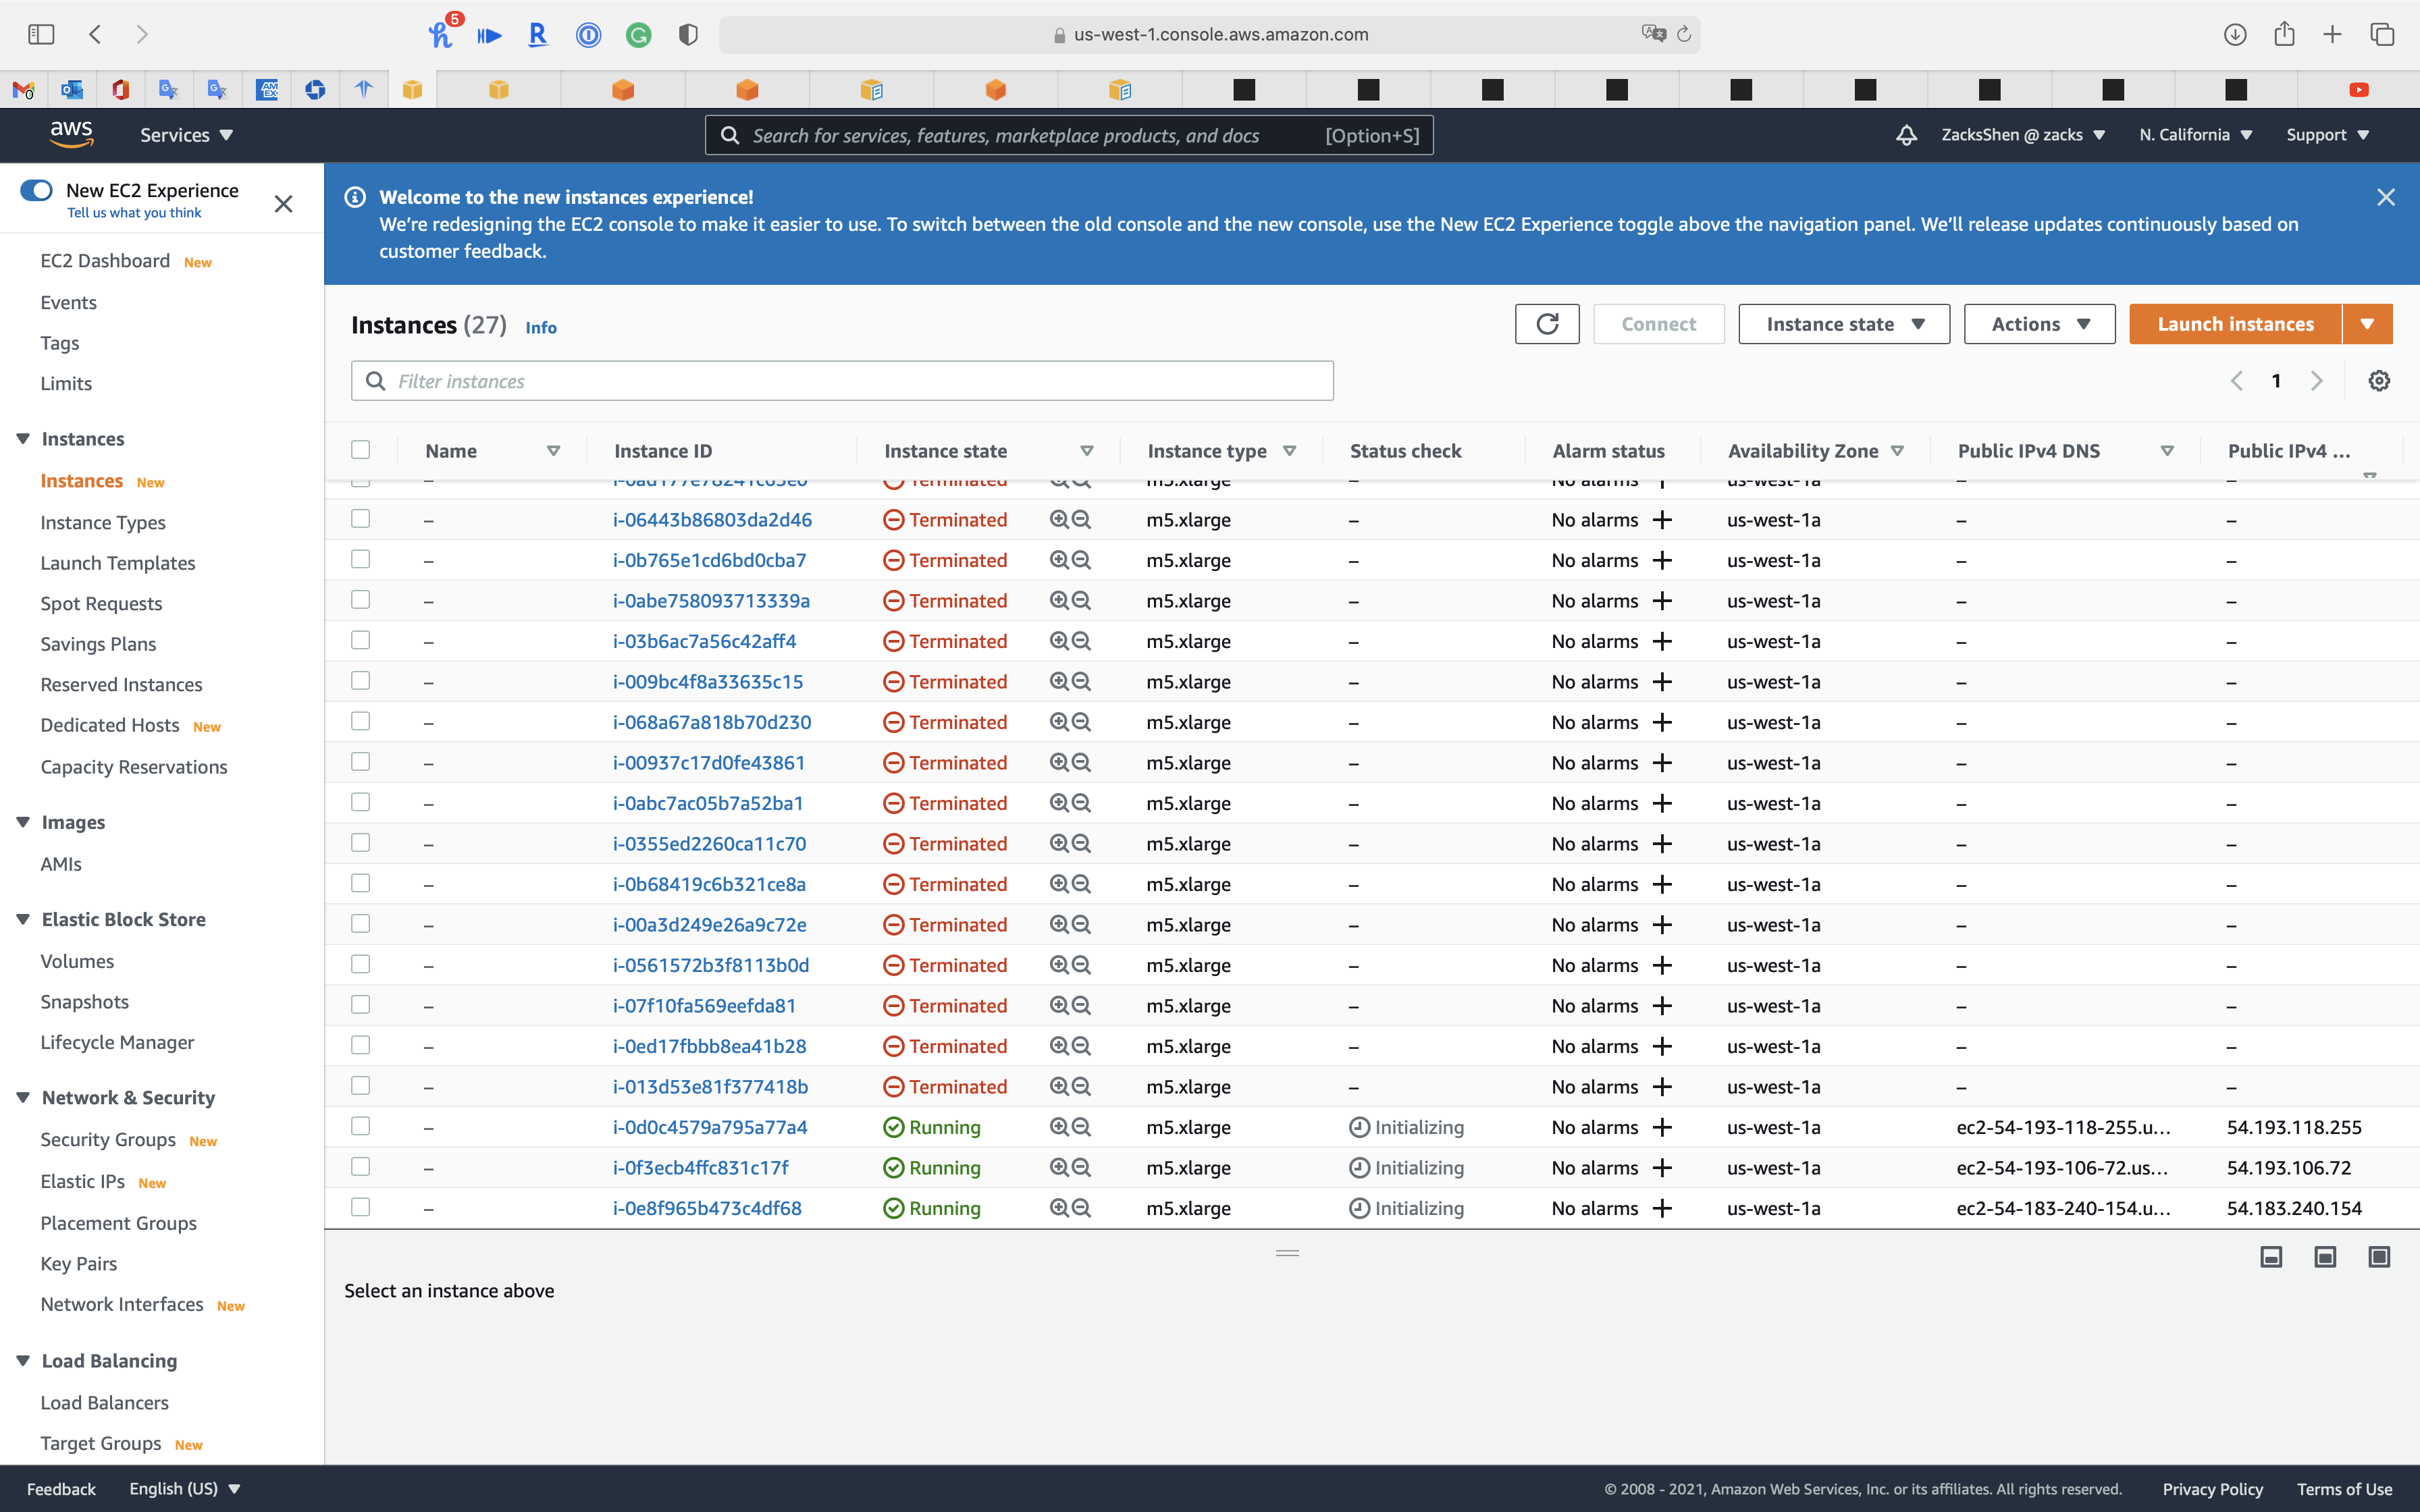
Wait several minutes until the Status check switches to green.
Services -> EMR -> Clusters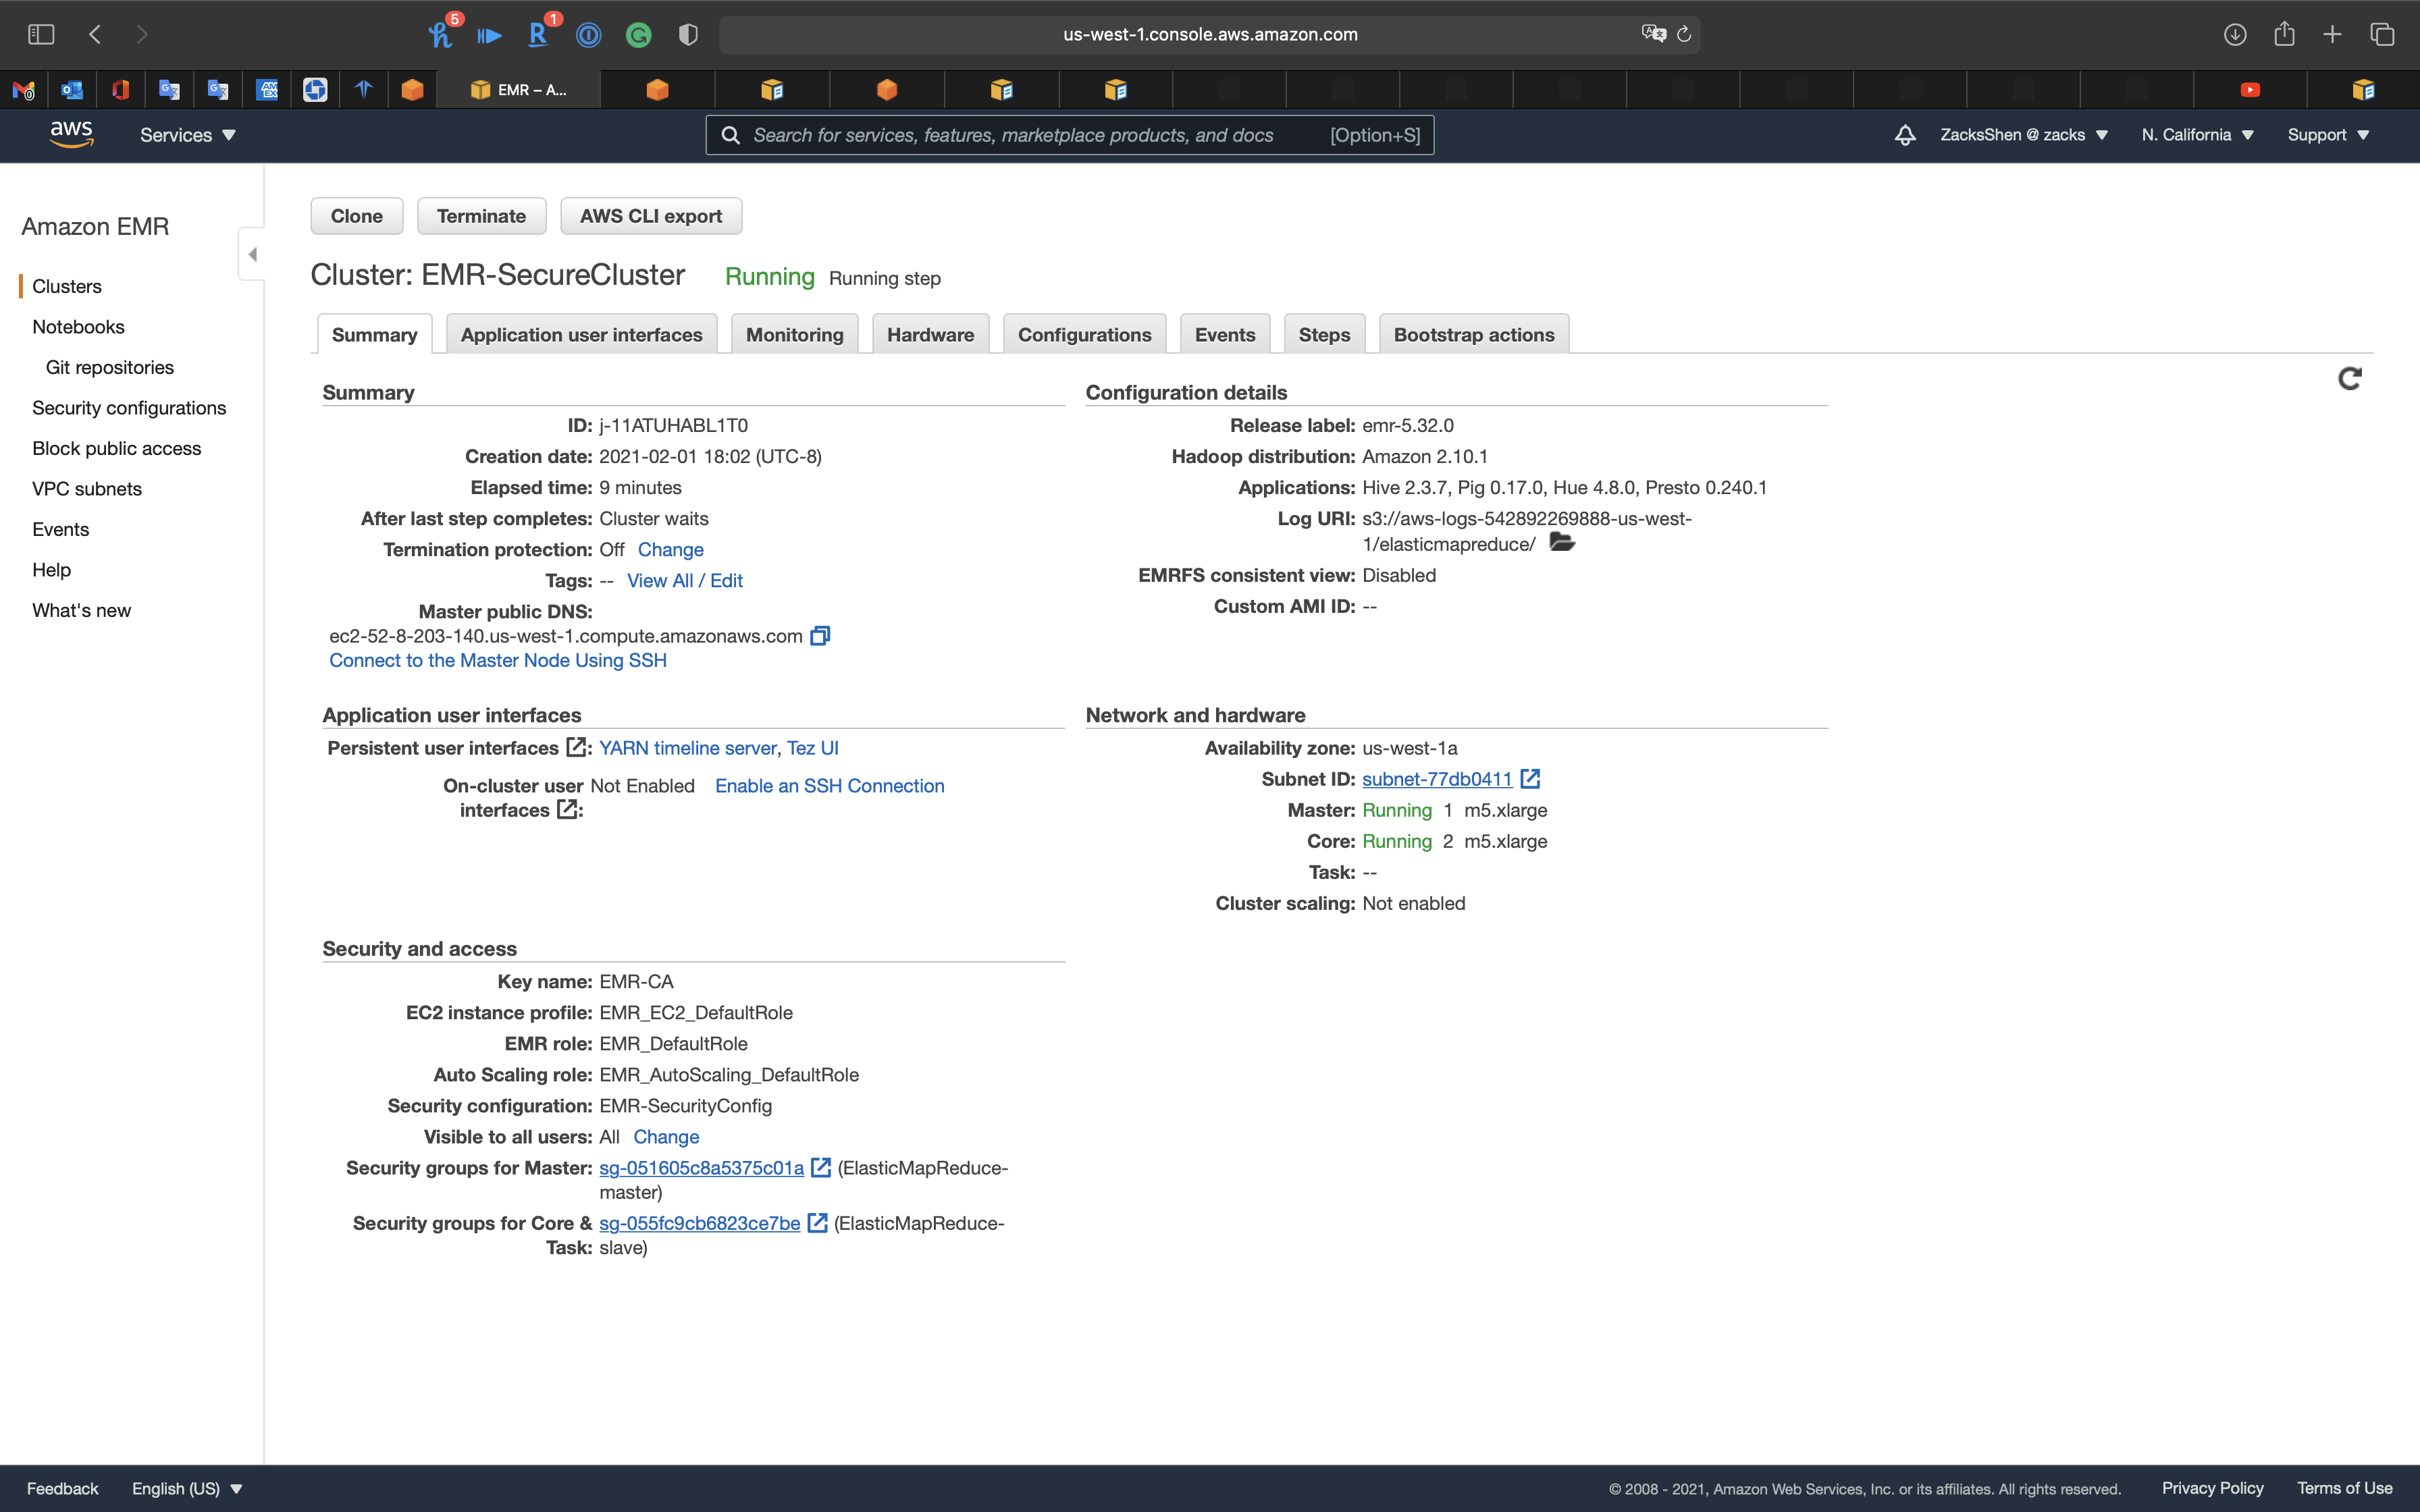
Warning: Terminate the EMR Cluster
Terminate the EMR cluster to avoid bankrupt.
Select your Cluster then click on Terminate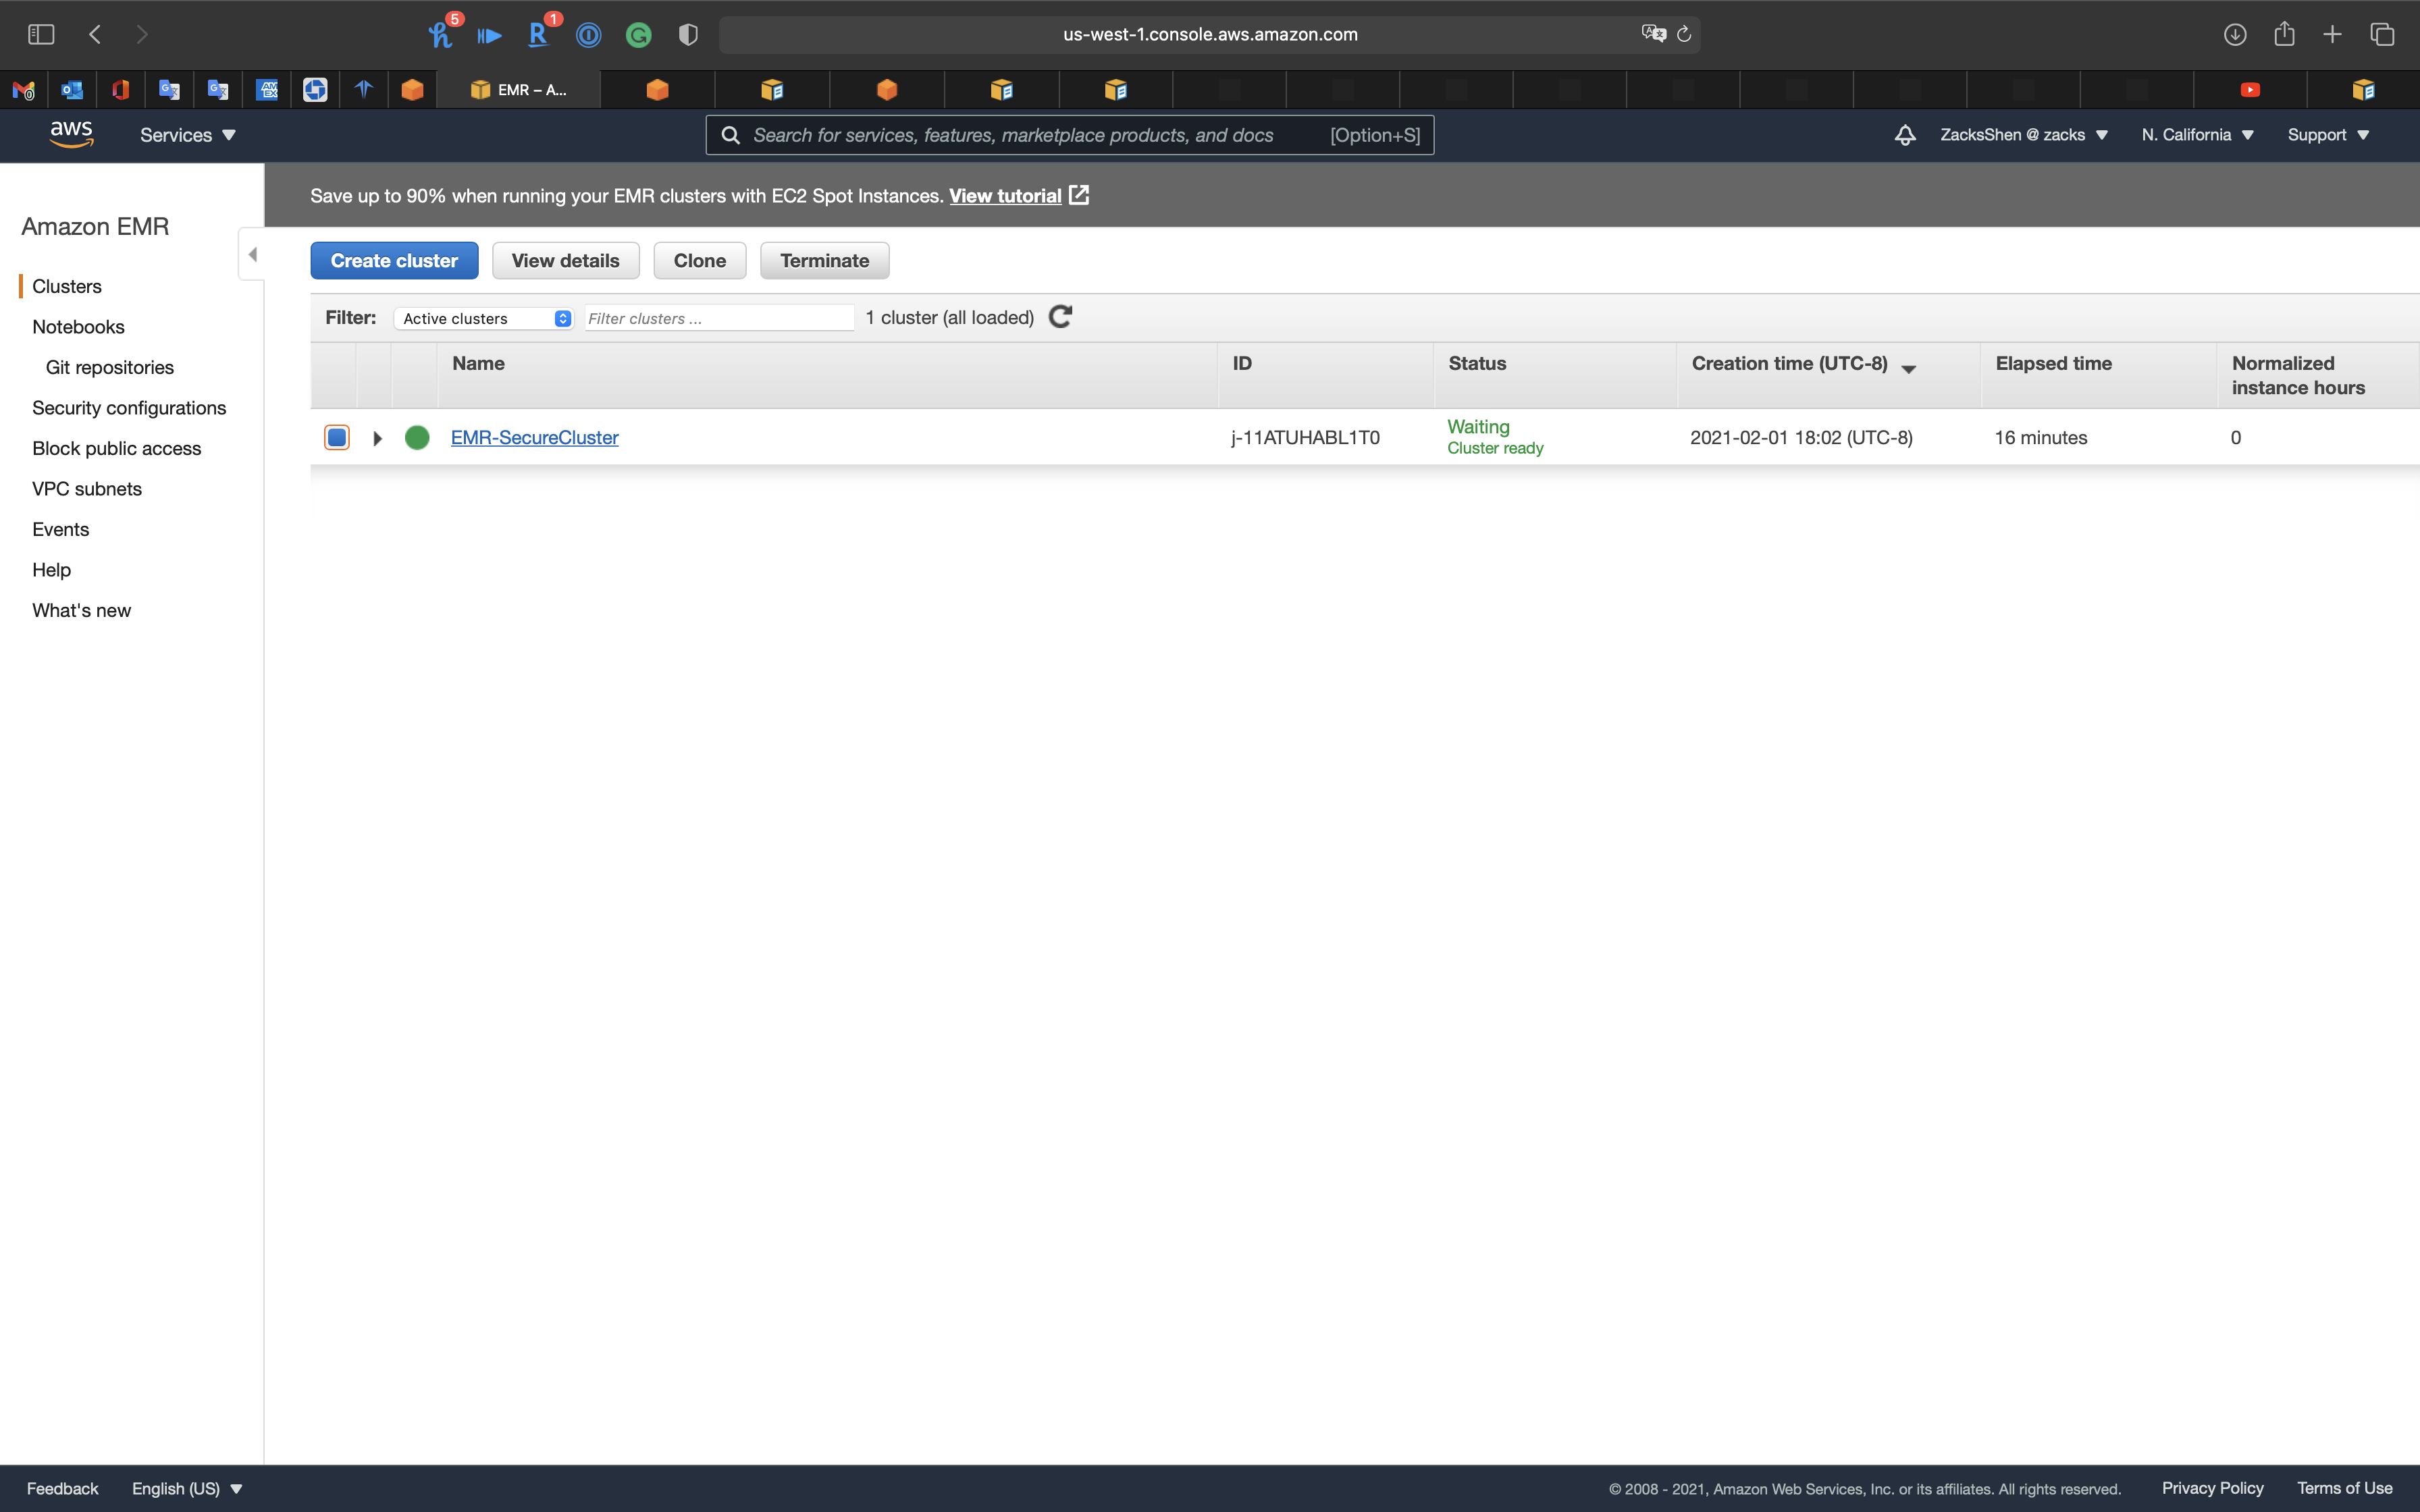
EMR CLI
Create an EMR Cluster using AWS CLI
Task Details
- Set up related environments and permissions. (AWS CLI, IAM Role, Security Groups, and etc)
- Launch an EMR cluster through AWS CLI.
- Enable dynamic forwarding.
Prerequisite
AWS CLI - Install AWS CLI on your local computer. Refer to the AWS instructions to install/update AWS CLI (version 2) based on your underlying OS.
Set up Access credentials using AWS IAM - Generate and save a new Access key (access key ID, and a secret key) locally in your system, which will allow your CLI to create an EMR cluster. You will have to configure the environment variables so that the
aws configurecommand can run properly.EC2 Login Key-Pair - You should have an EC2 login key-pair to access your EC2 instances in the cluster. You can generate a key-pair from the EC2 dashboard. Remember, a key-pair is a pair of (encrypted) public and (unencrypted PEM encoded) private keys. The public key is placed automatically on the instance, and the private key is made available to the user, just once. Suppose, your private key file name is AWS_EC2_Demo.pem, then you should use only “AWS_EC2_Demo“ in the script below, with the option
--ec2-attributes.
EMR Configuration
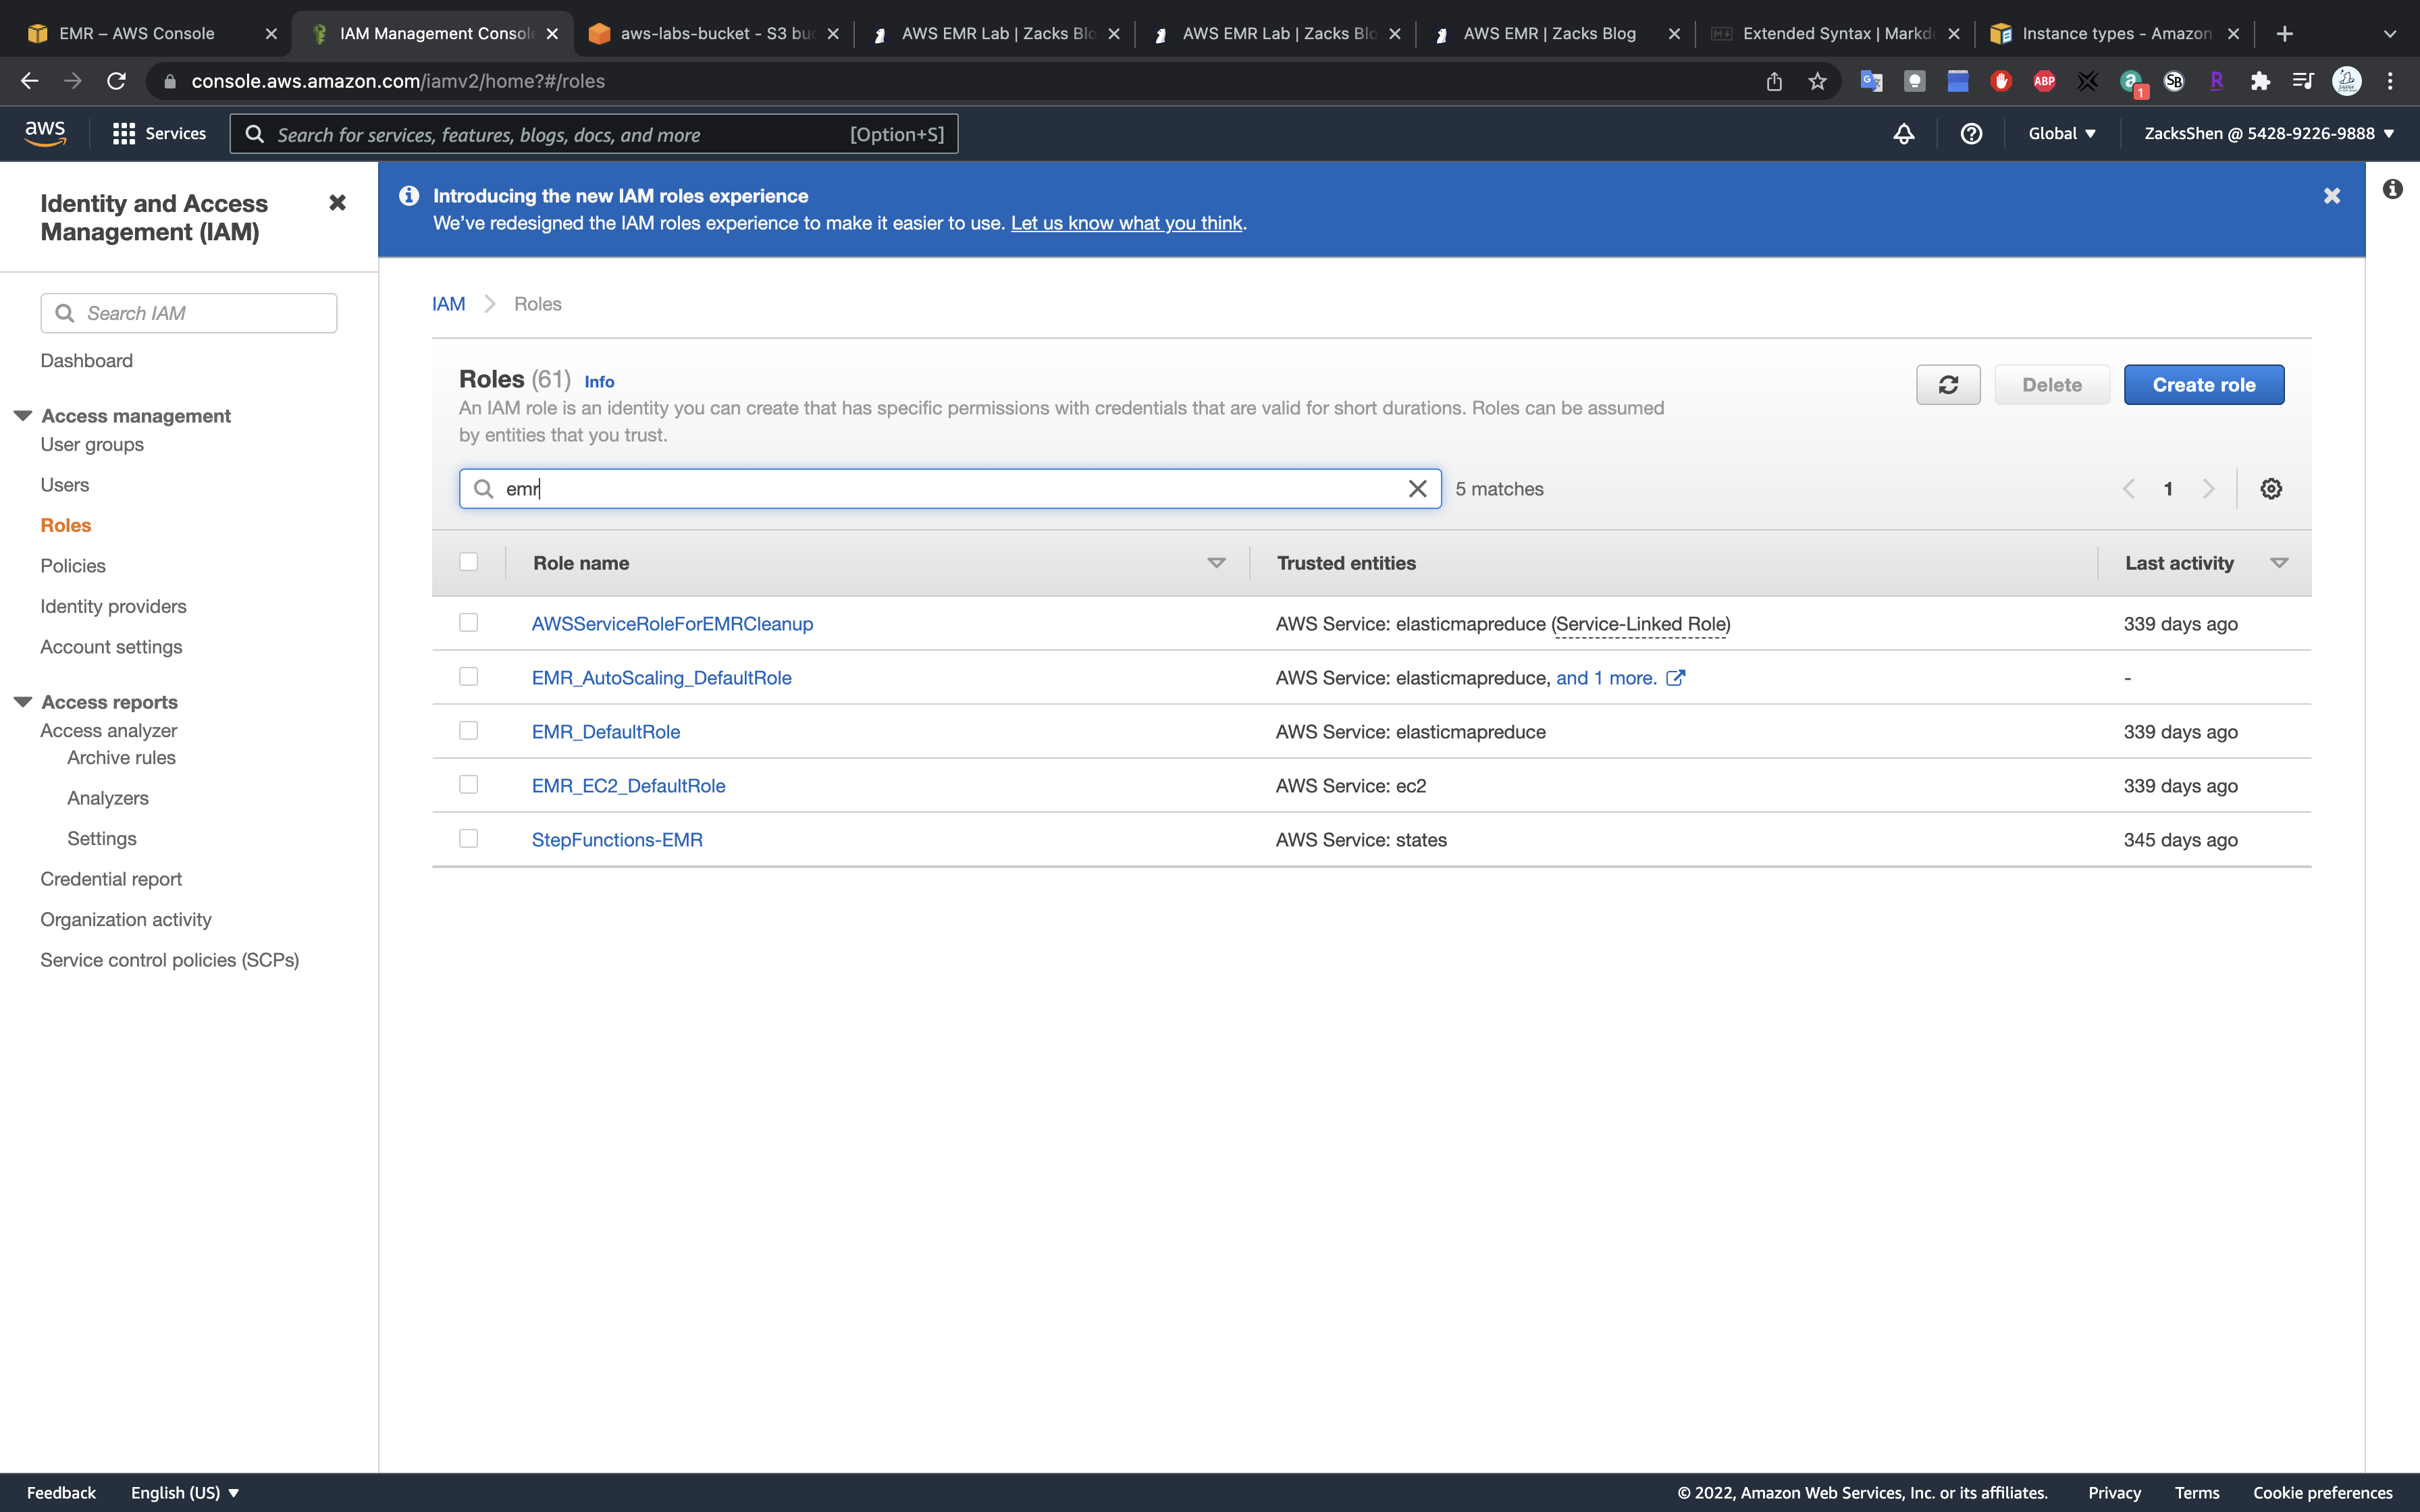
IAM Role
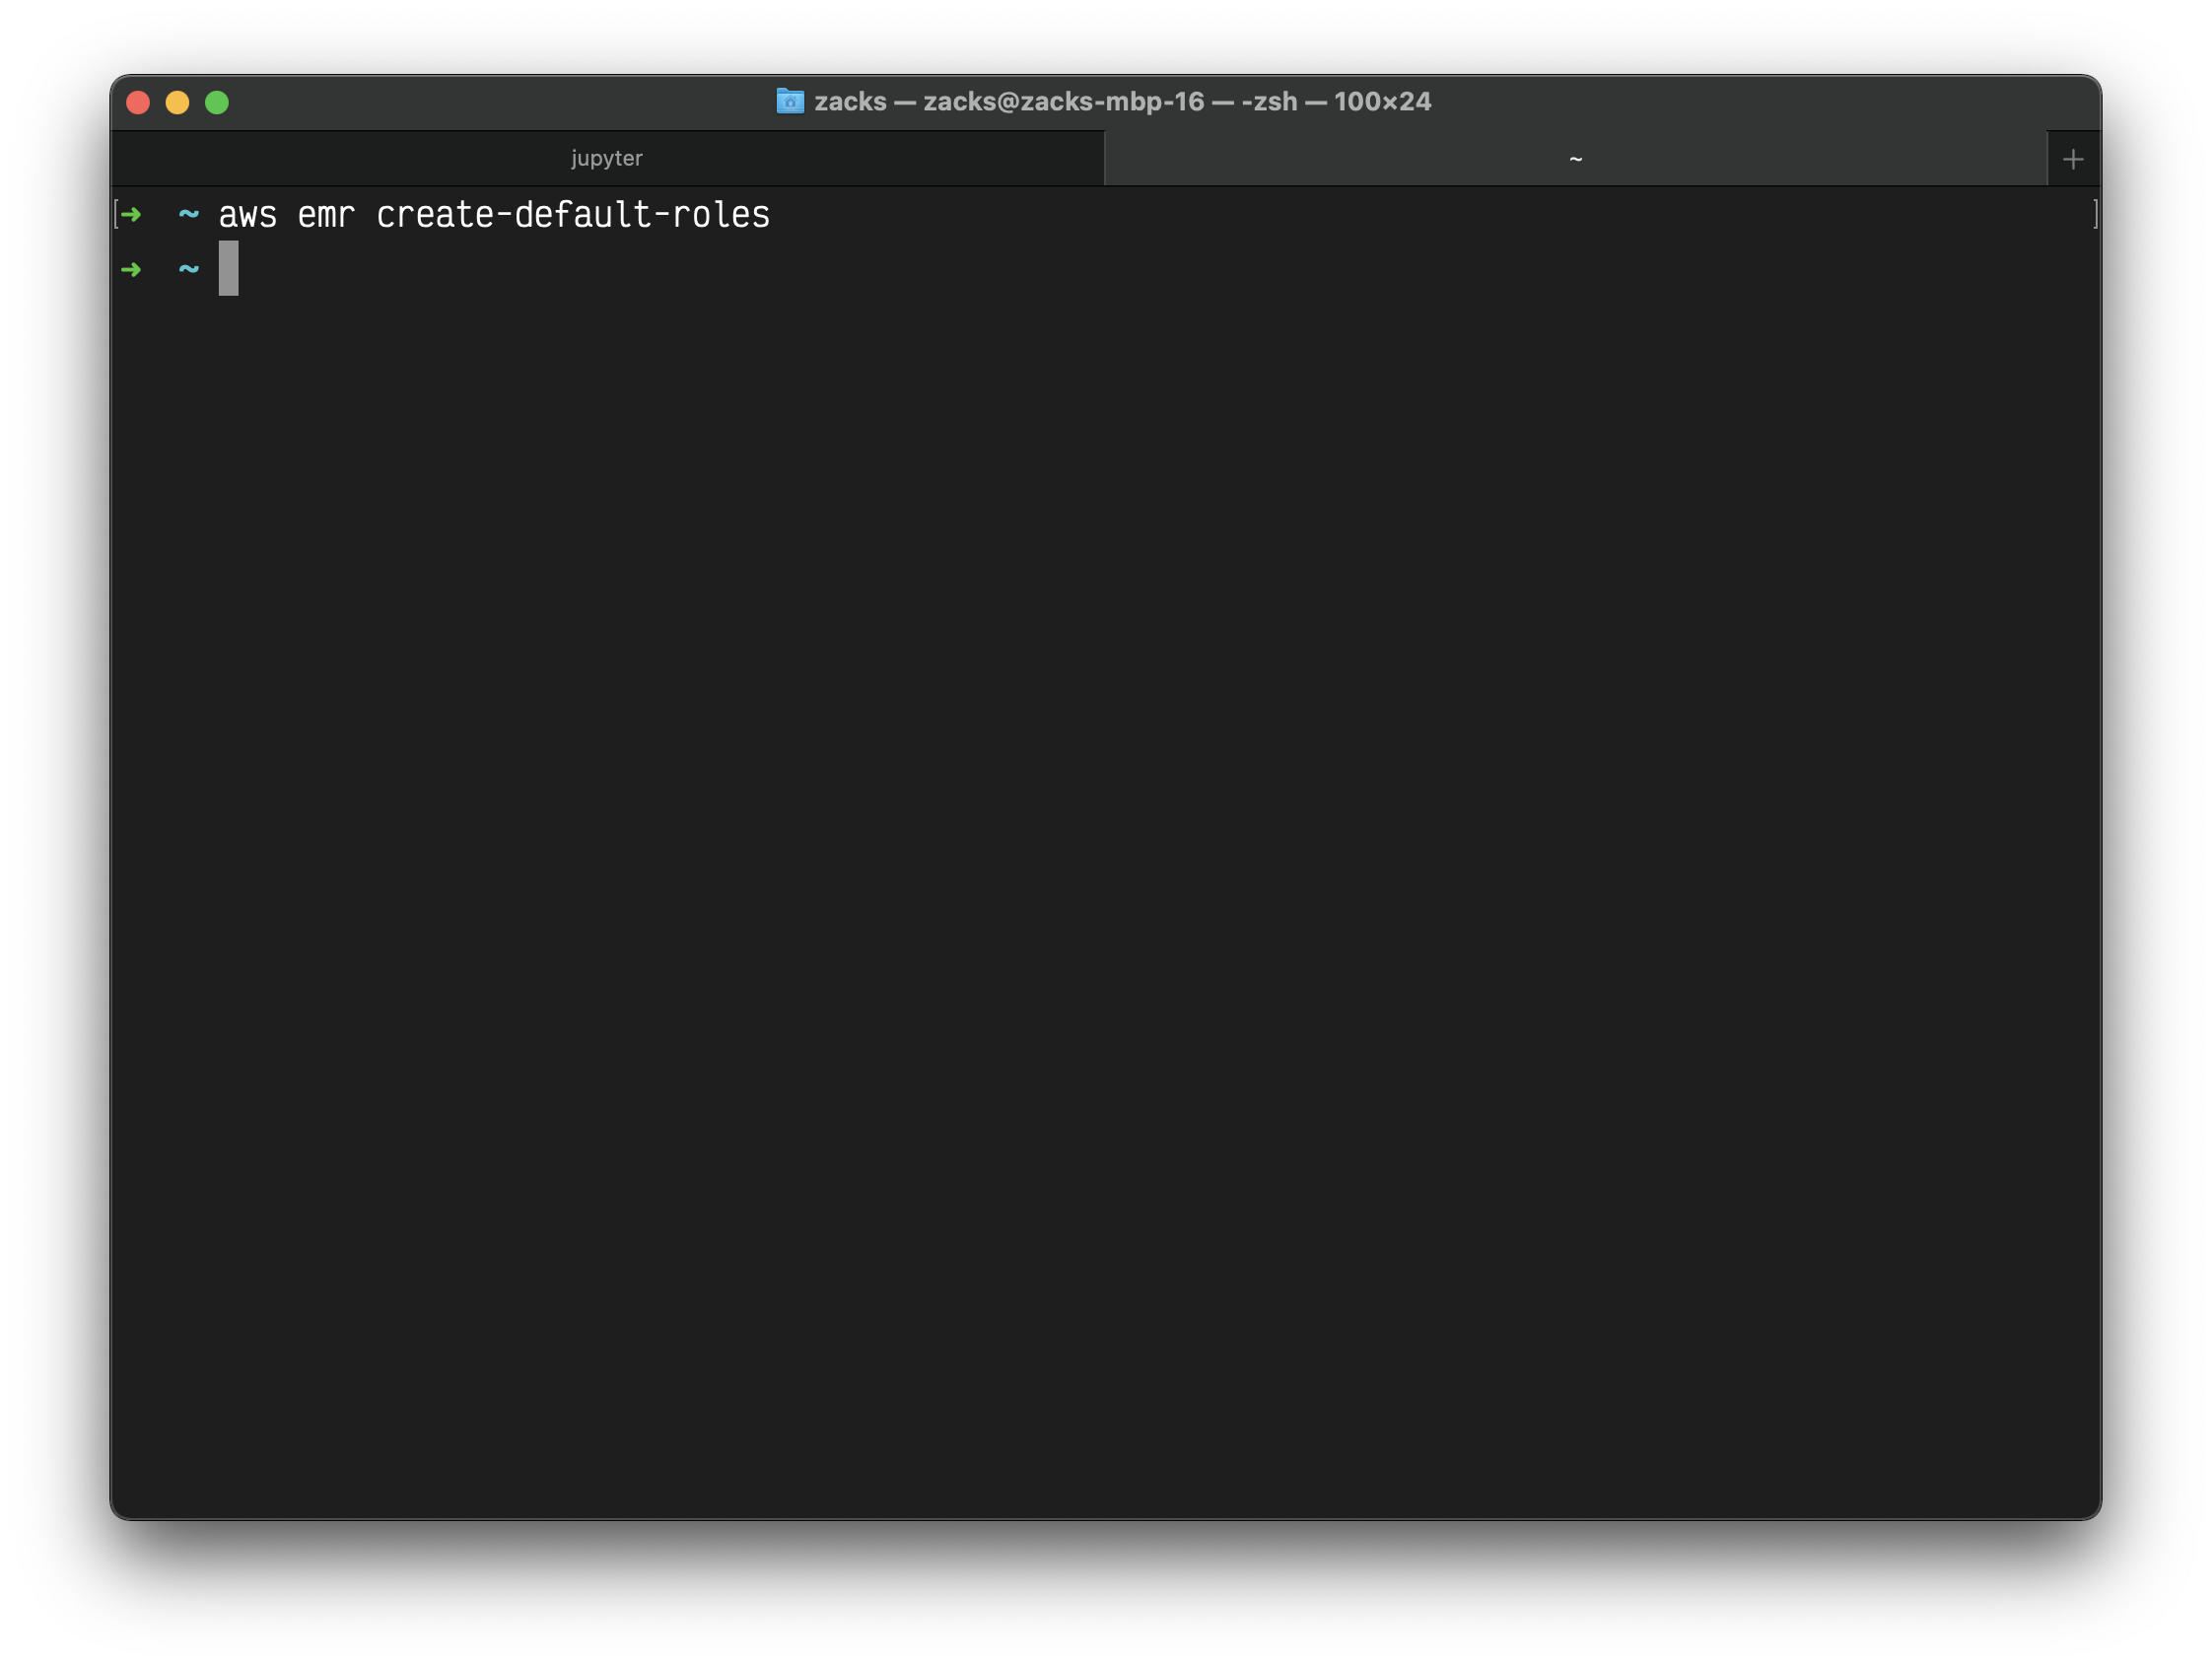
Create default roles in IAM - Before you run the aws emr create-cluster command, make sure to have the necessary roles created in your account. Use the following command.
1 | aws emr create-default-roles --profile <profile-name> |
This command will create EMR_EC2_DefaultRole and _EMR_DefaultRole_ in your account. If the role already exists then the command returns nothing.
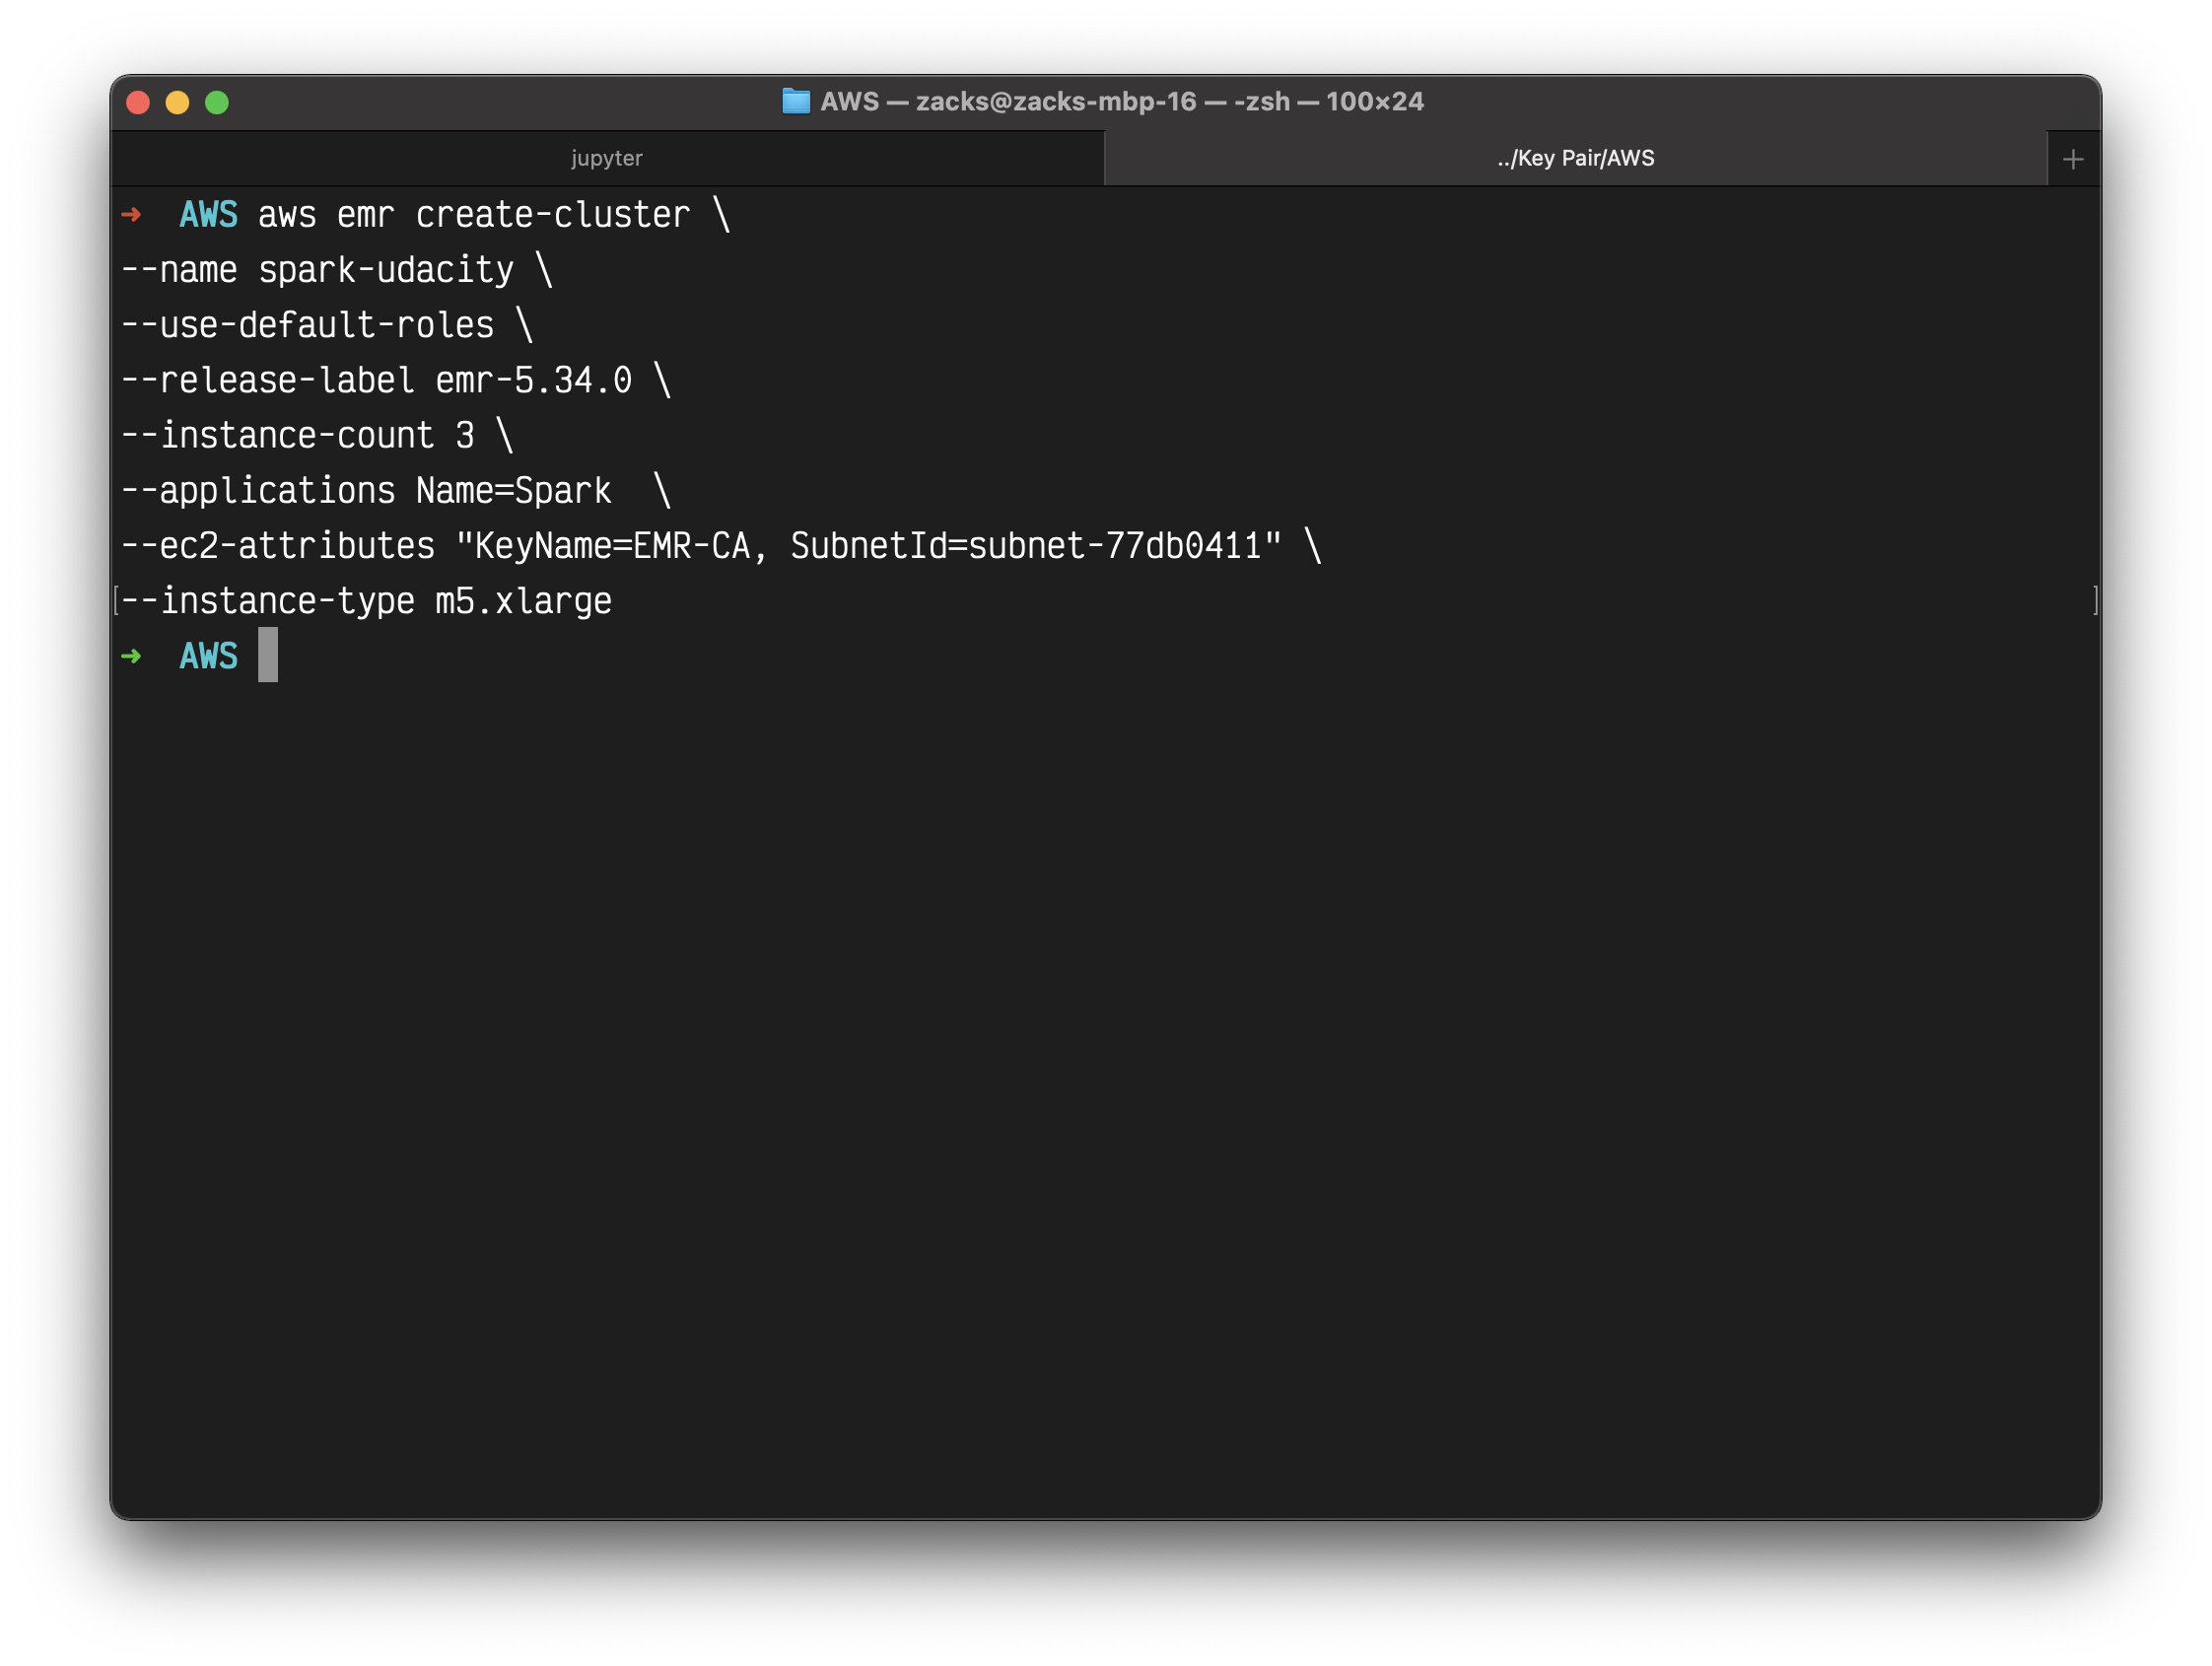
Create cluster
Launch your cluster - Run the script below to launch your cluster. Be sure to replace the appropriate names within the <> in the command below.
1 | # Provide cluster name, EC2 private key file name, and profile name |
Notice two things in the command above.
- One, we have added the
--auto-terminateoption to terminate the cluster after completing all the steps because EMR clusters are costly. However, you can ignore this option, and terminate the cluster manually after your job is done. - Two, we haven’t specified the
--bootstrap-actionsoption. This step is optional. - [Optional] Specify your bootstrap file - You should save an executable (bootstrap_emr.sh file) in an accessible S3 location. You can specify this option as, for example,
--bootstrap-actions Path=s3://mybucket/bootstrap_emr.shin the command below. A sample file is provided in the Github repo here.
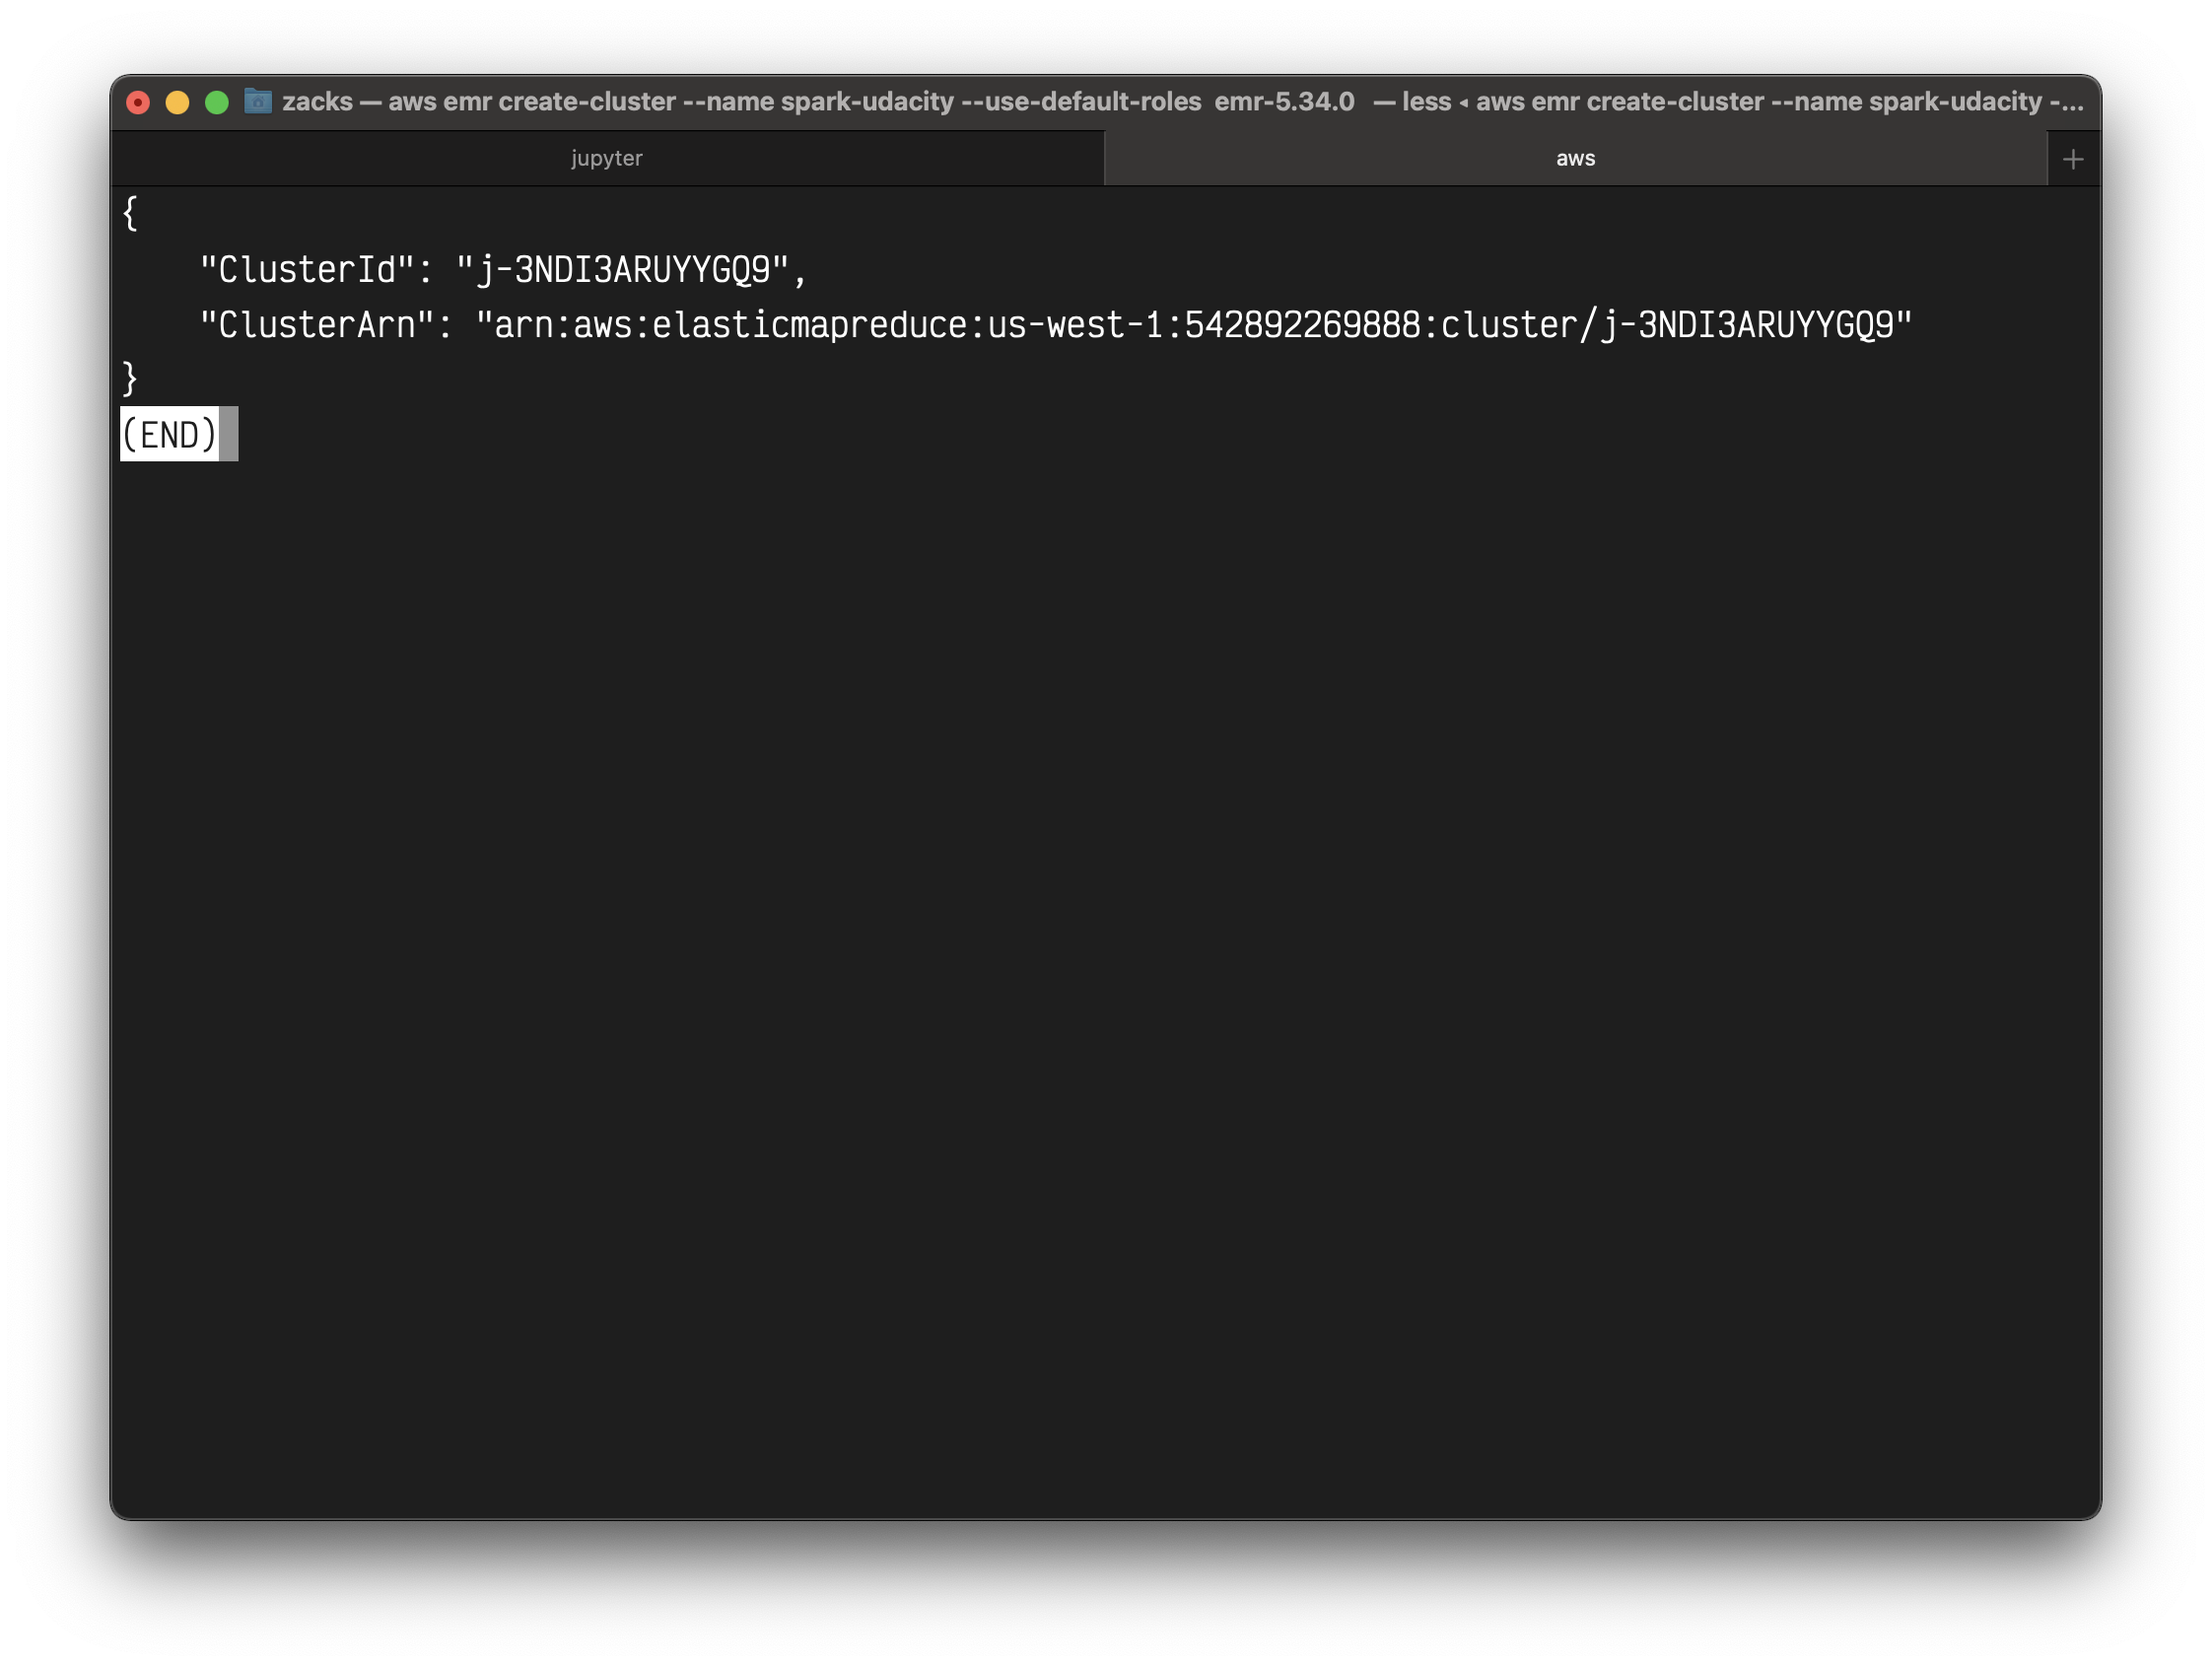
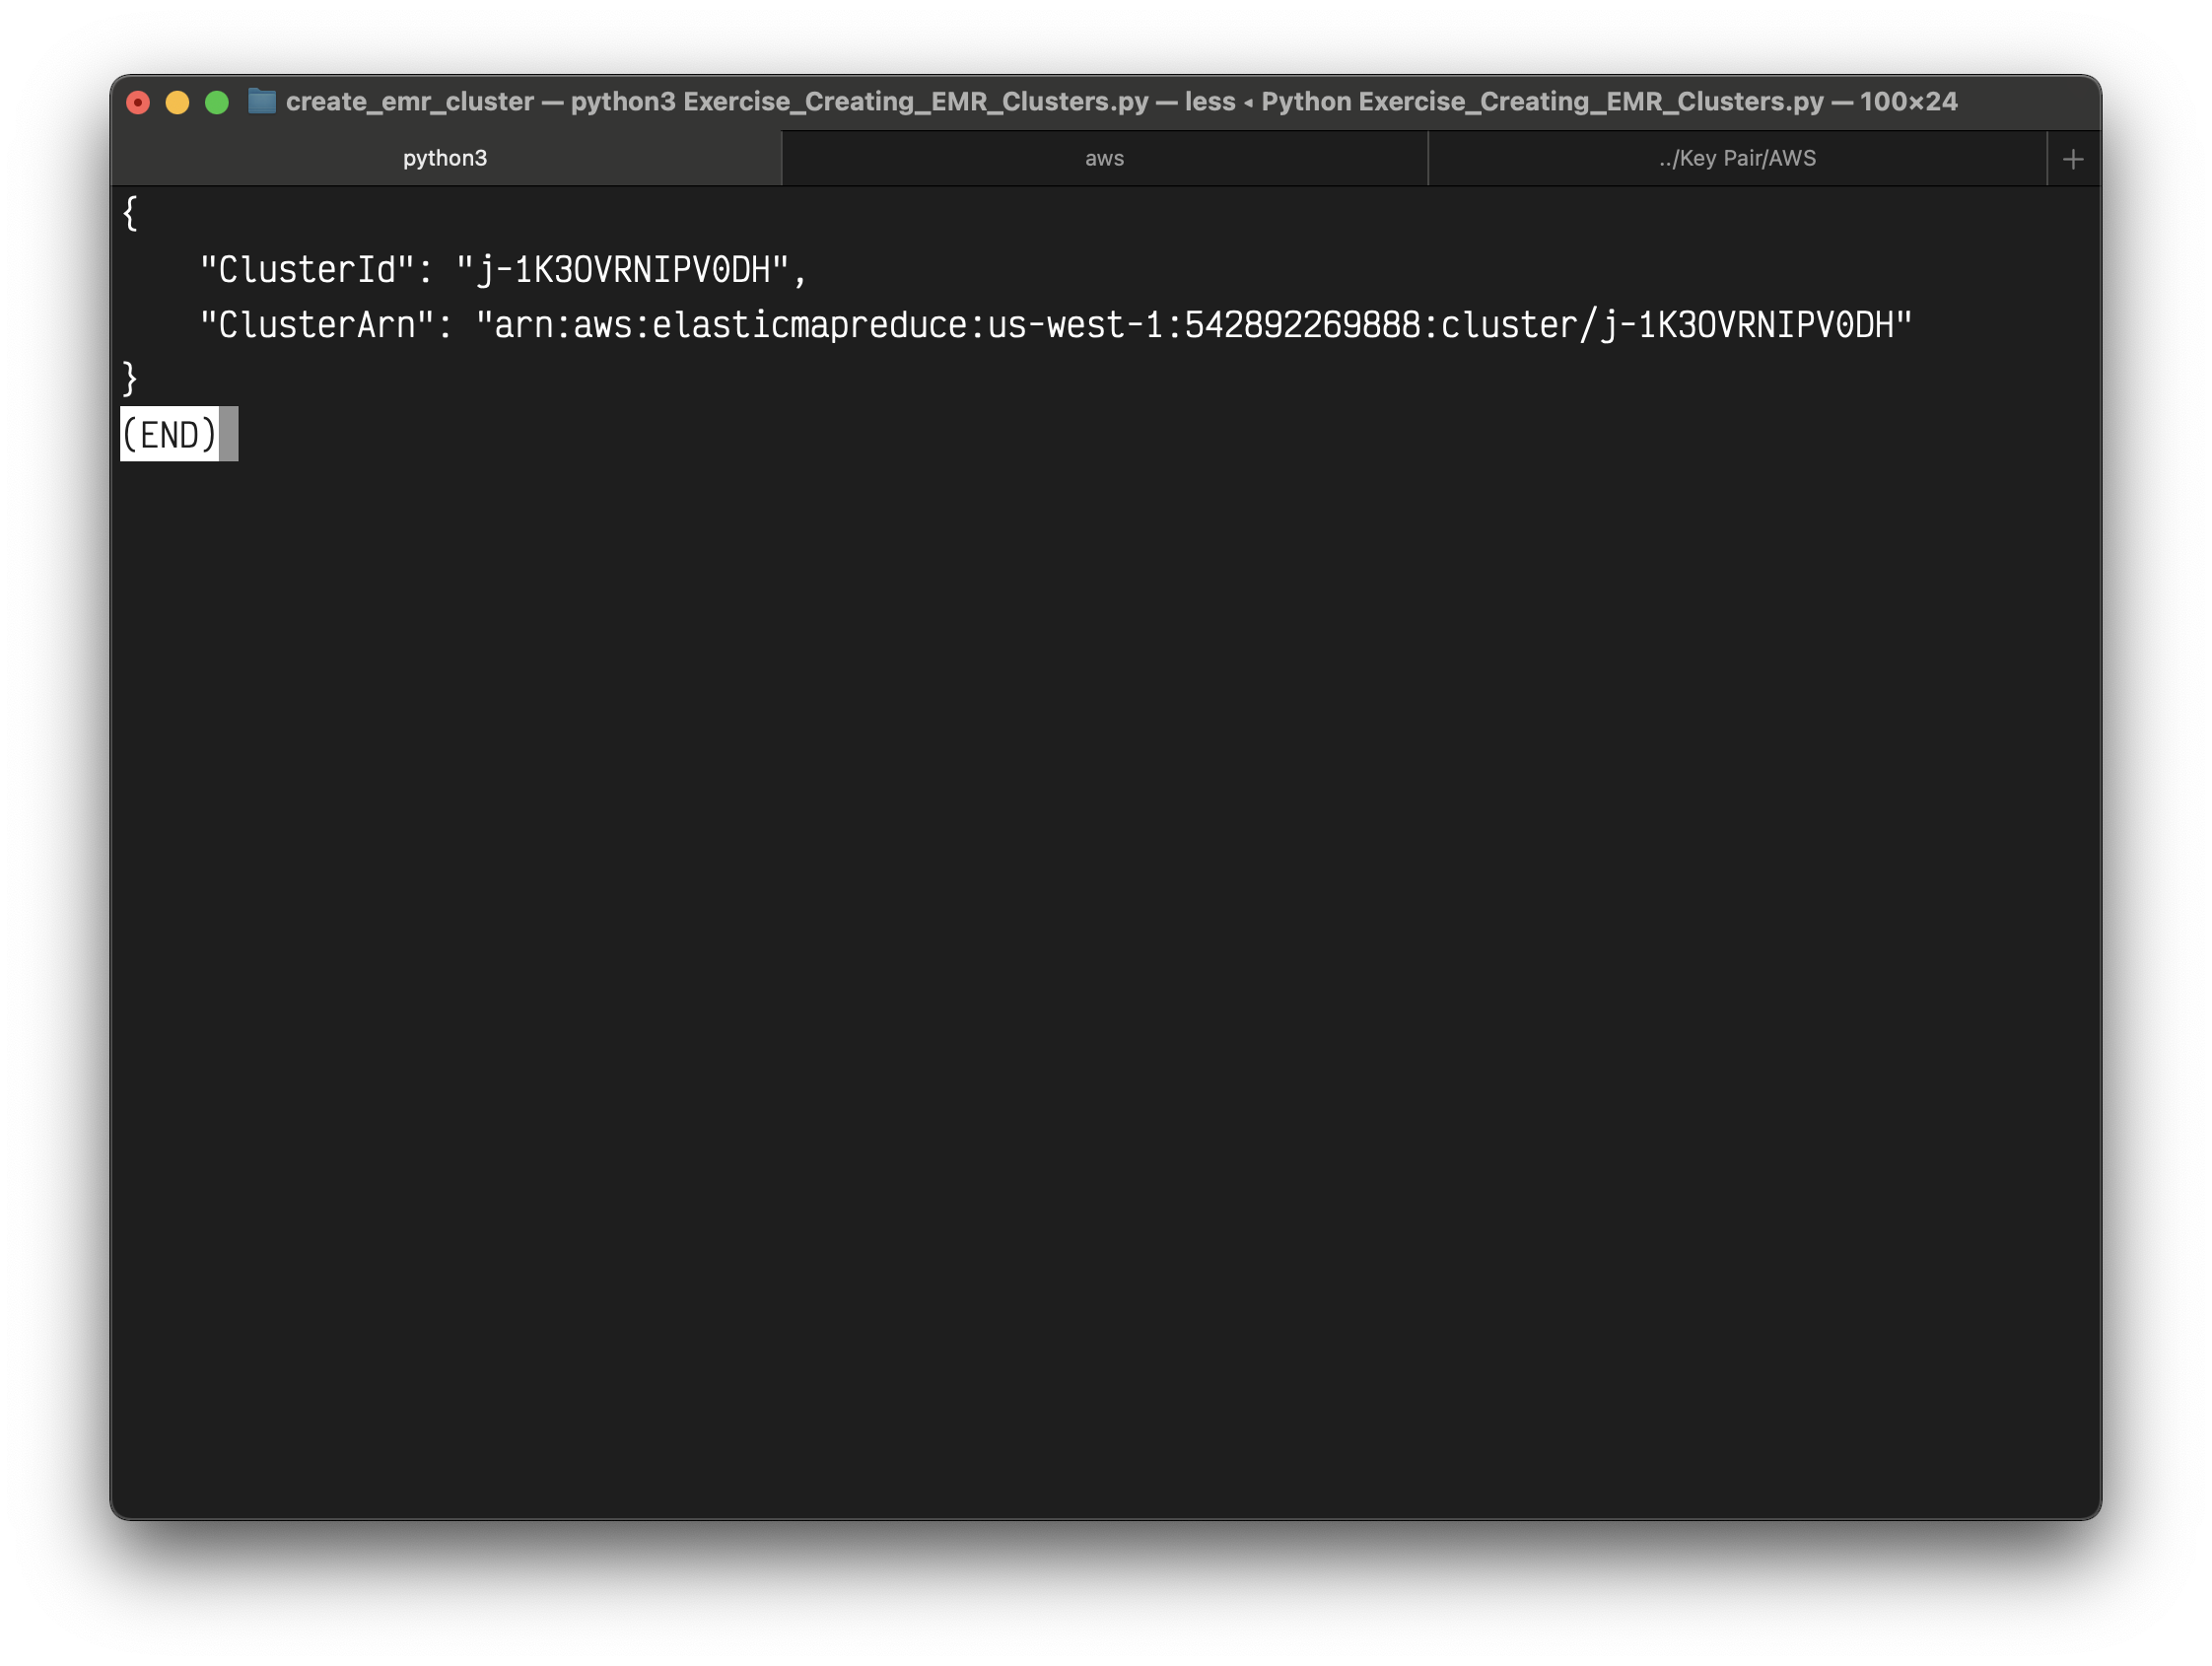
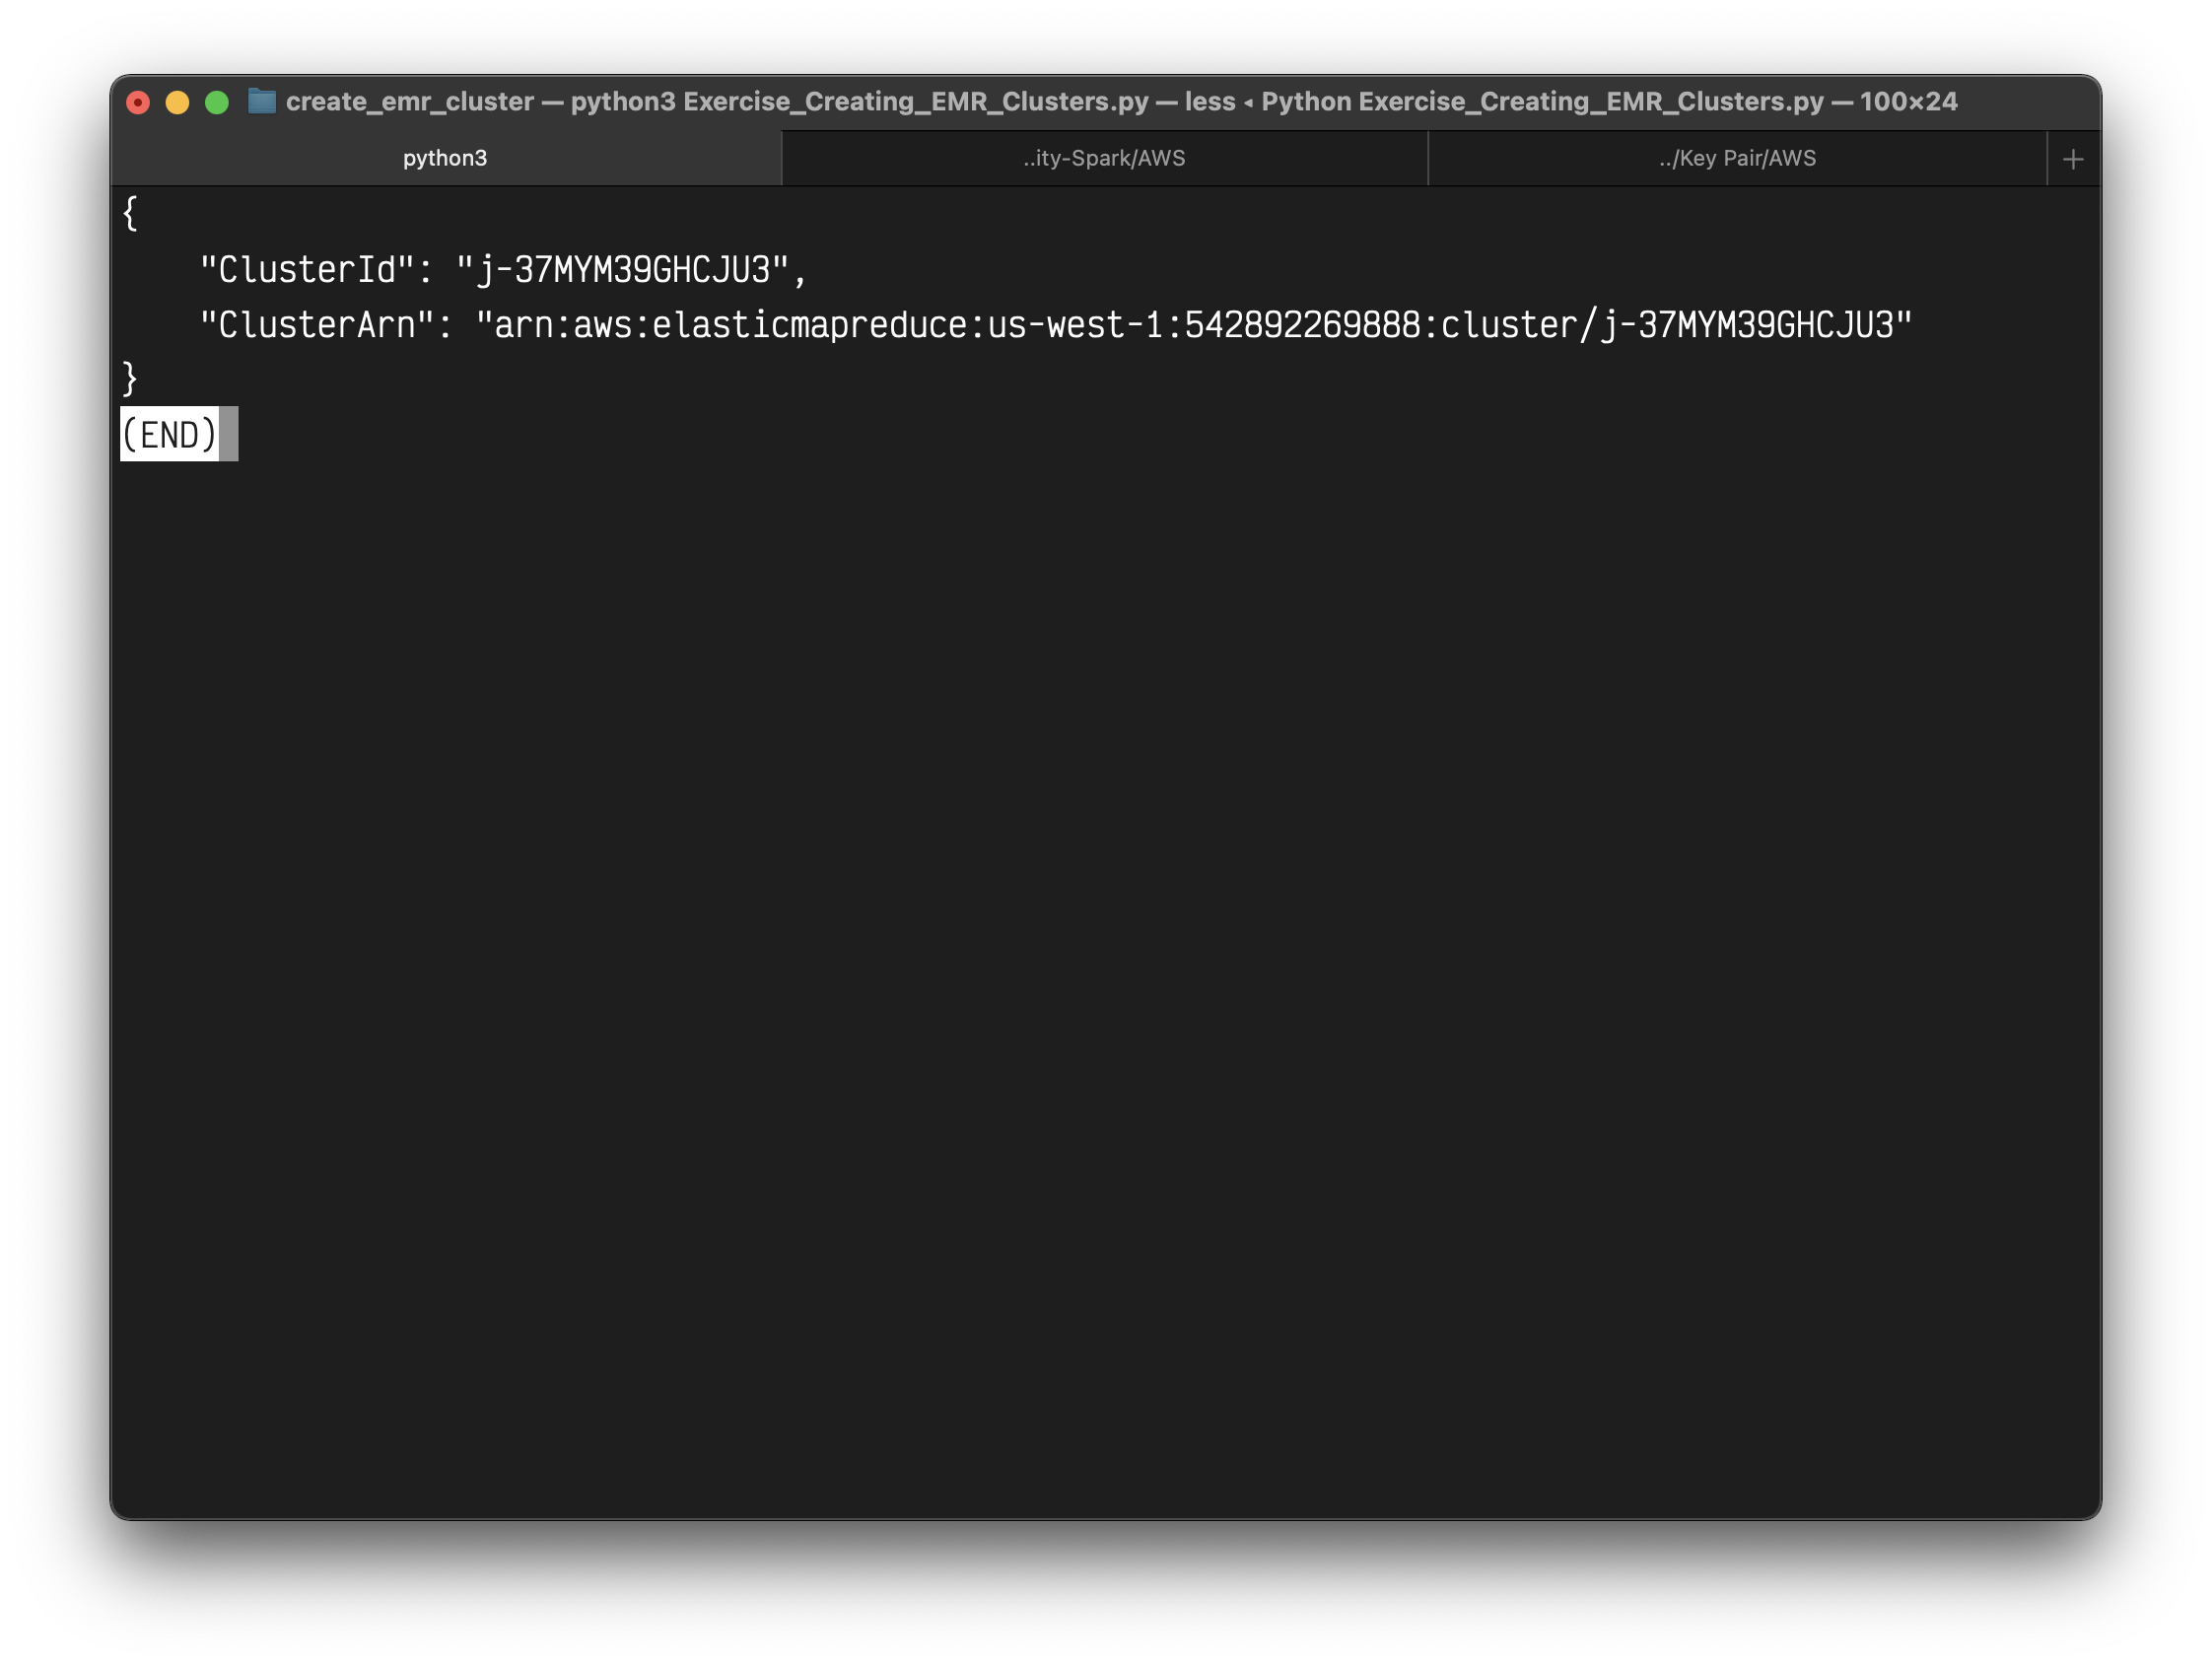
The expected output should look similar to this:
1 | "ClusterId": "j-2PZ79NHXO7YYX", |
My screenshots
1 | aws emr create-cluster \ |
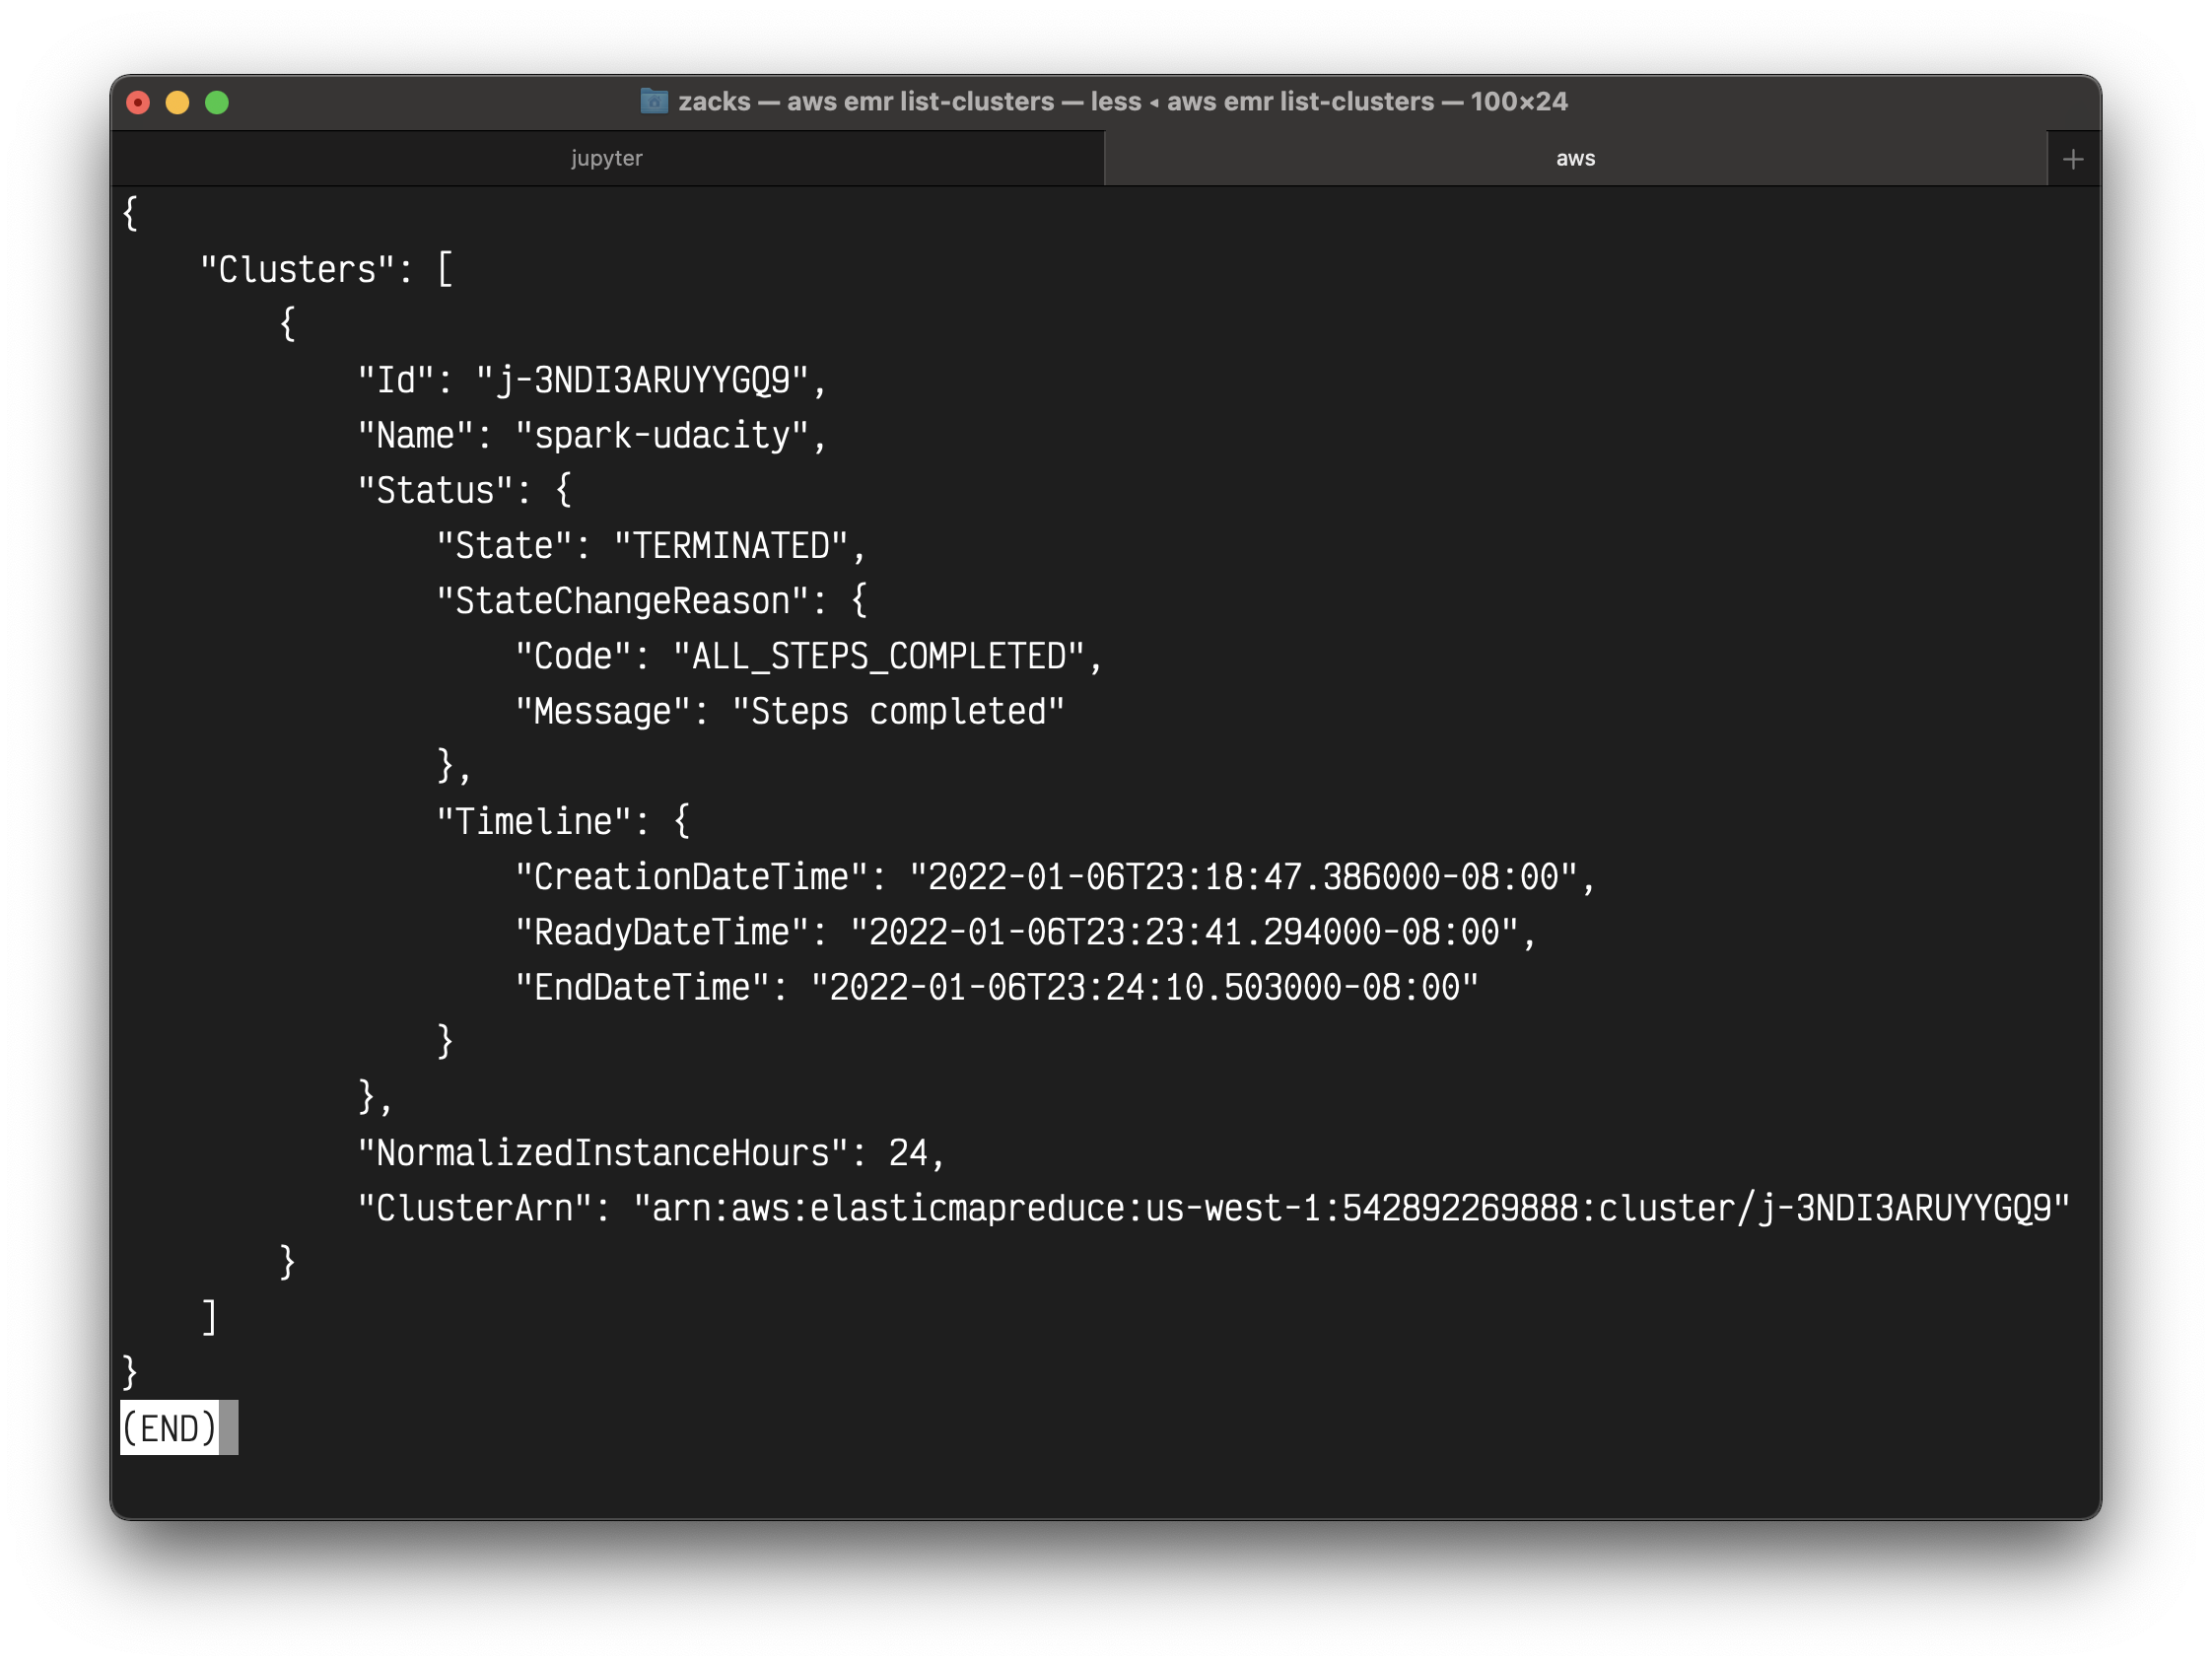
Validation
You can either go to AWS EMR console from your web browser or run the command below to verify if the cluster is created successfully.
1 | aws emr list-clusters |
The following command provides more information.
1 | # Provide cluster ID and the profile name |
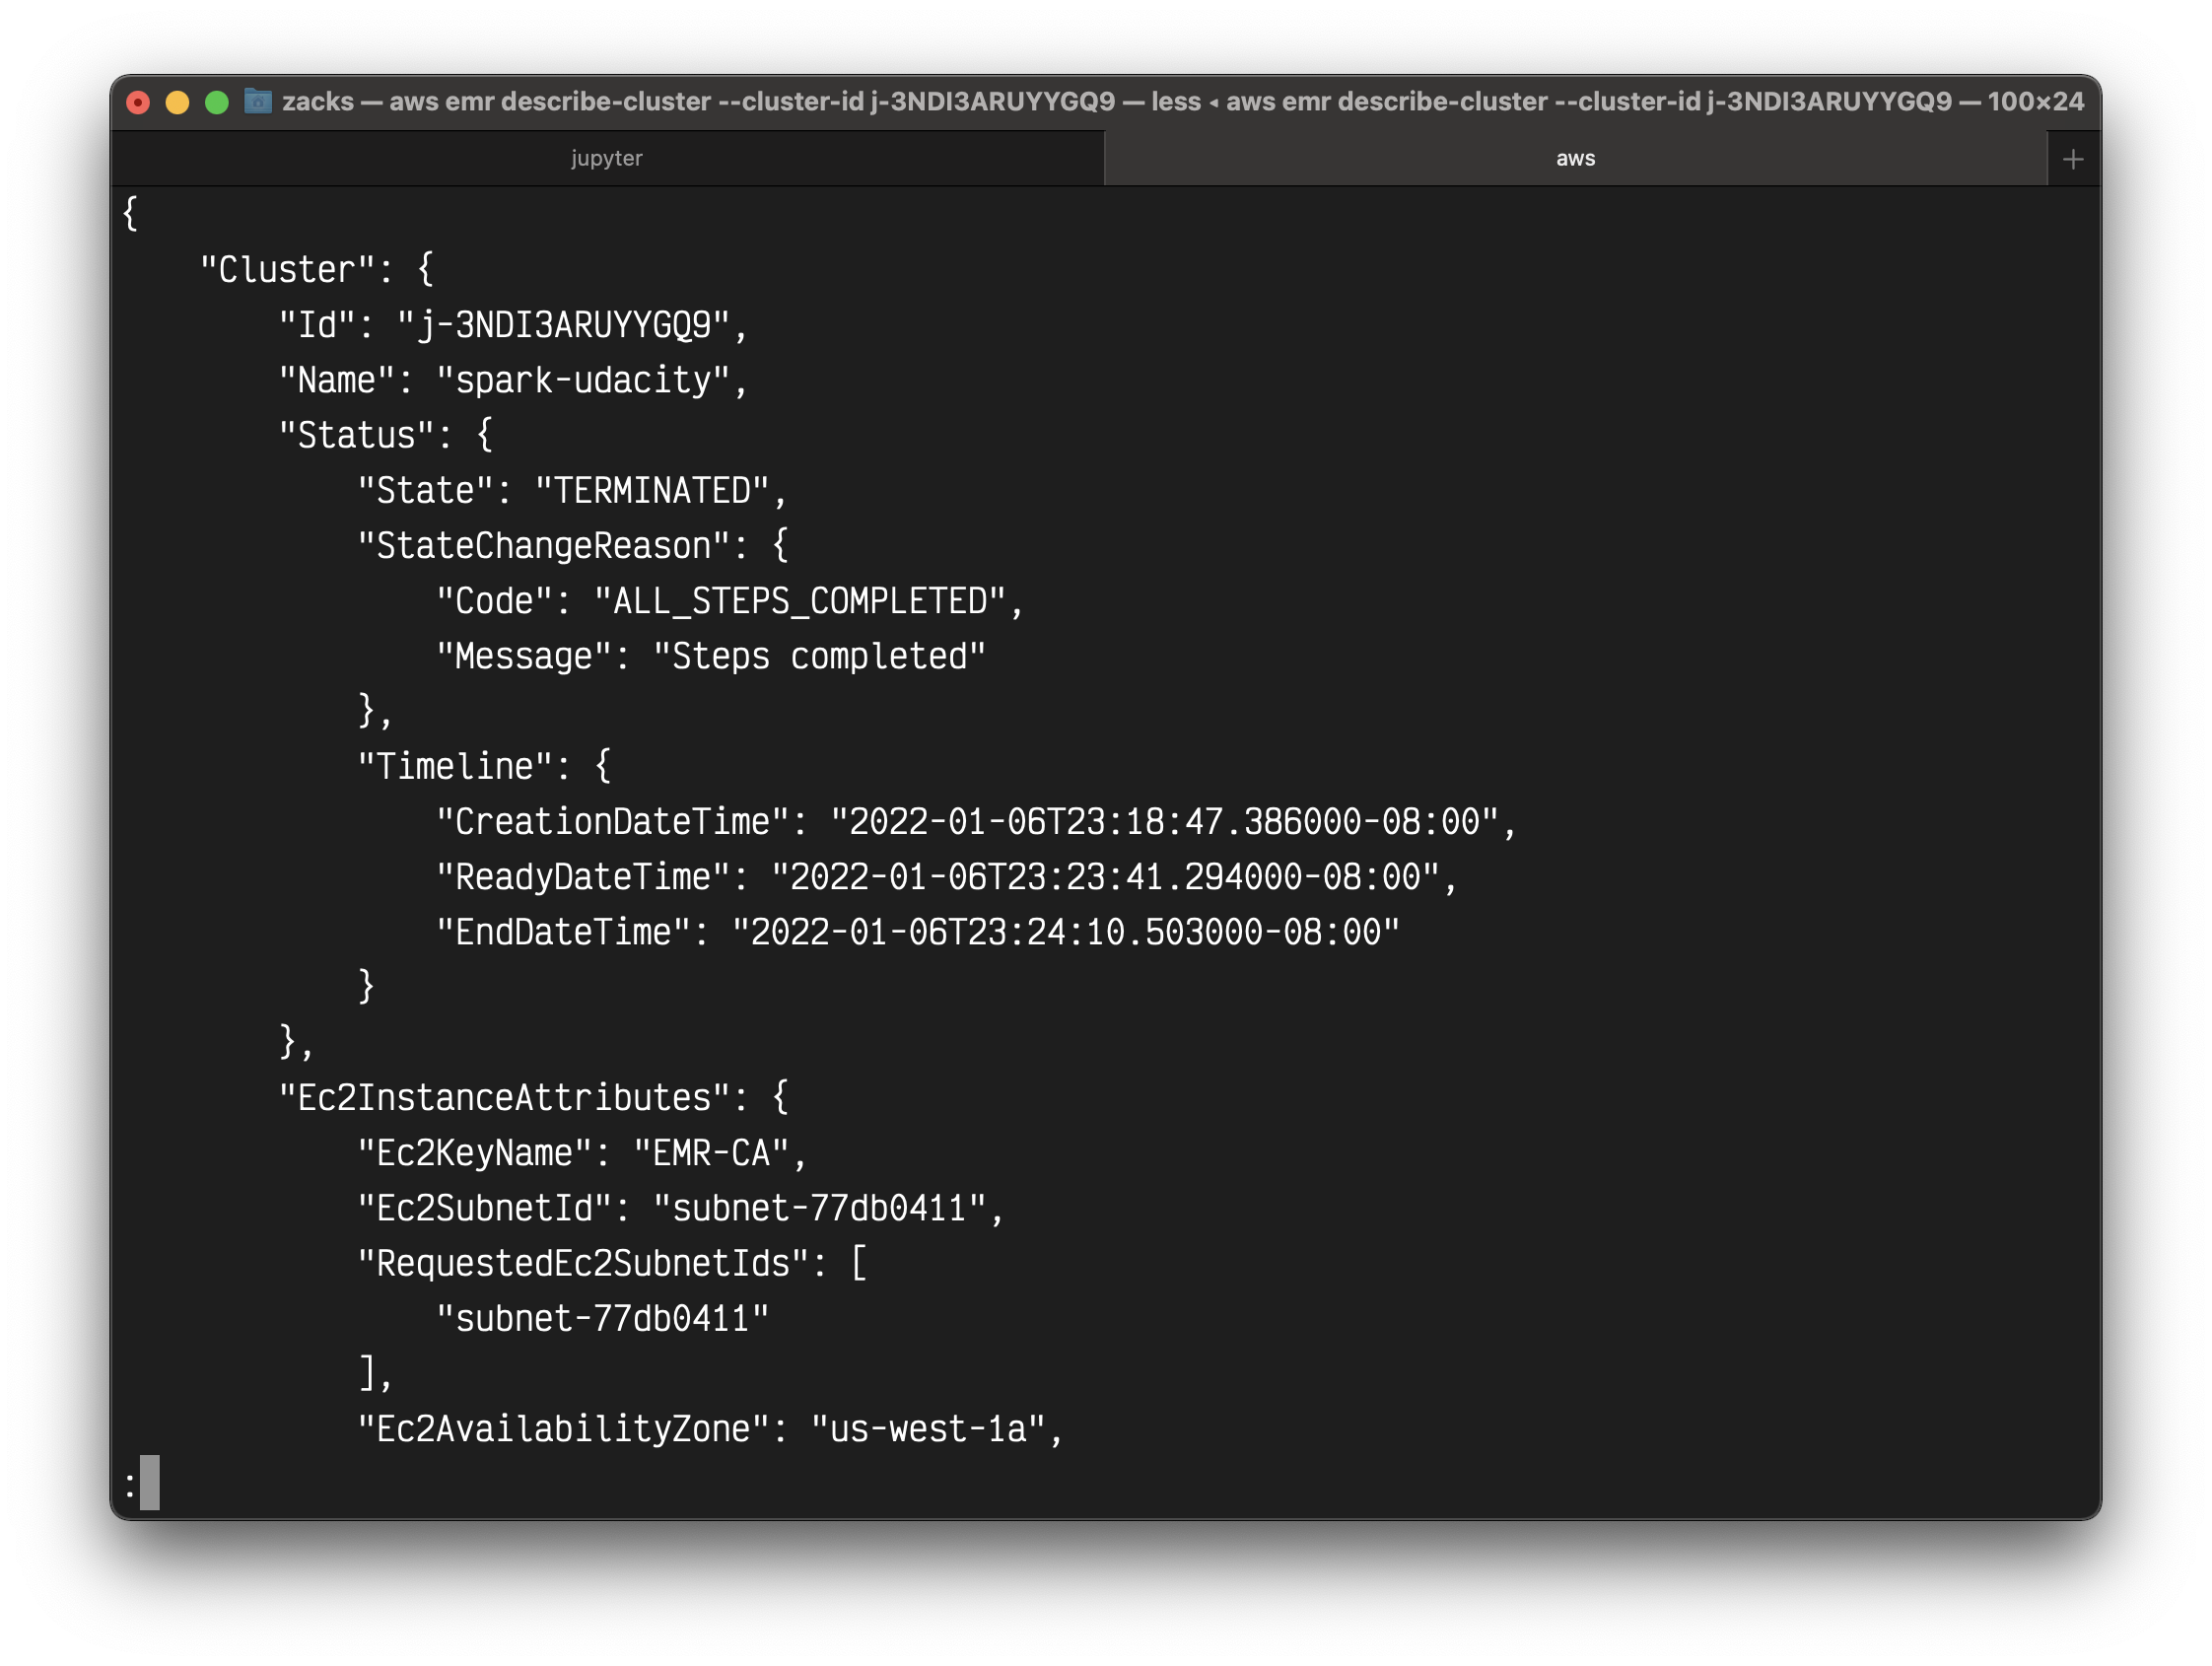
A copy of the exercises are also available in the lesson git repo: Link to Github
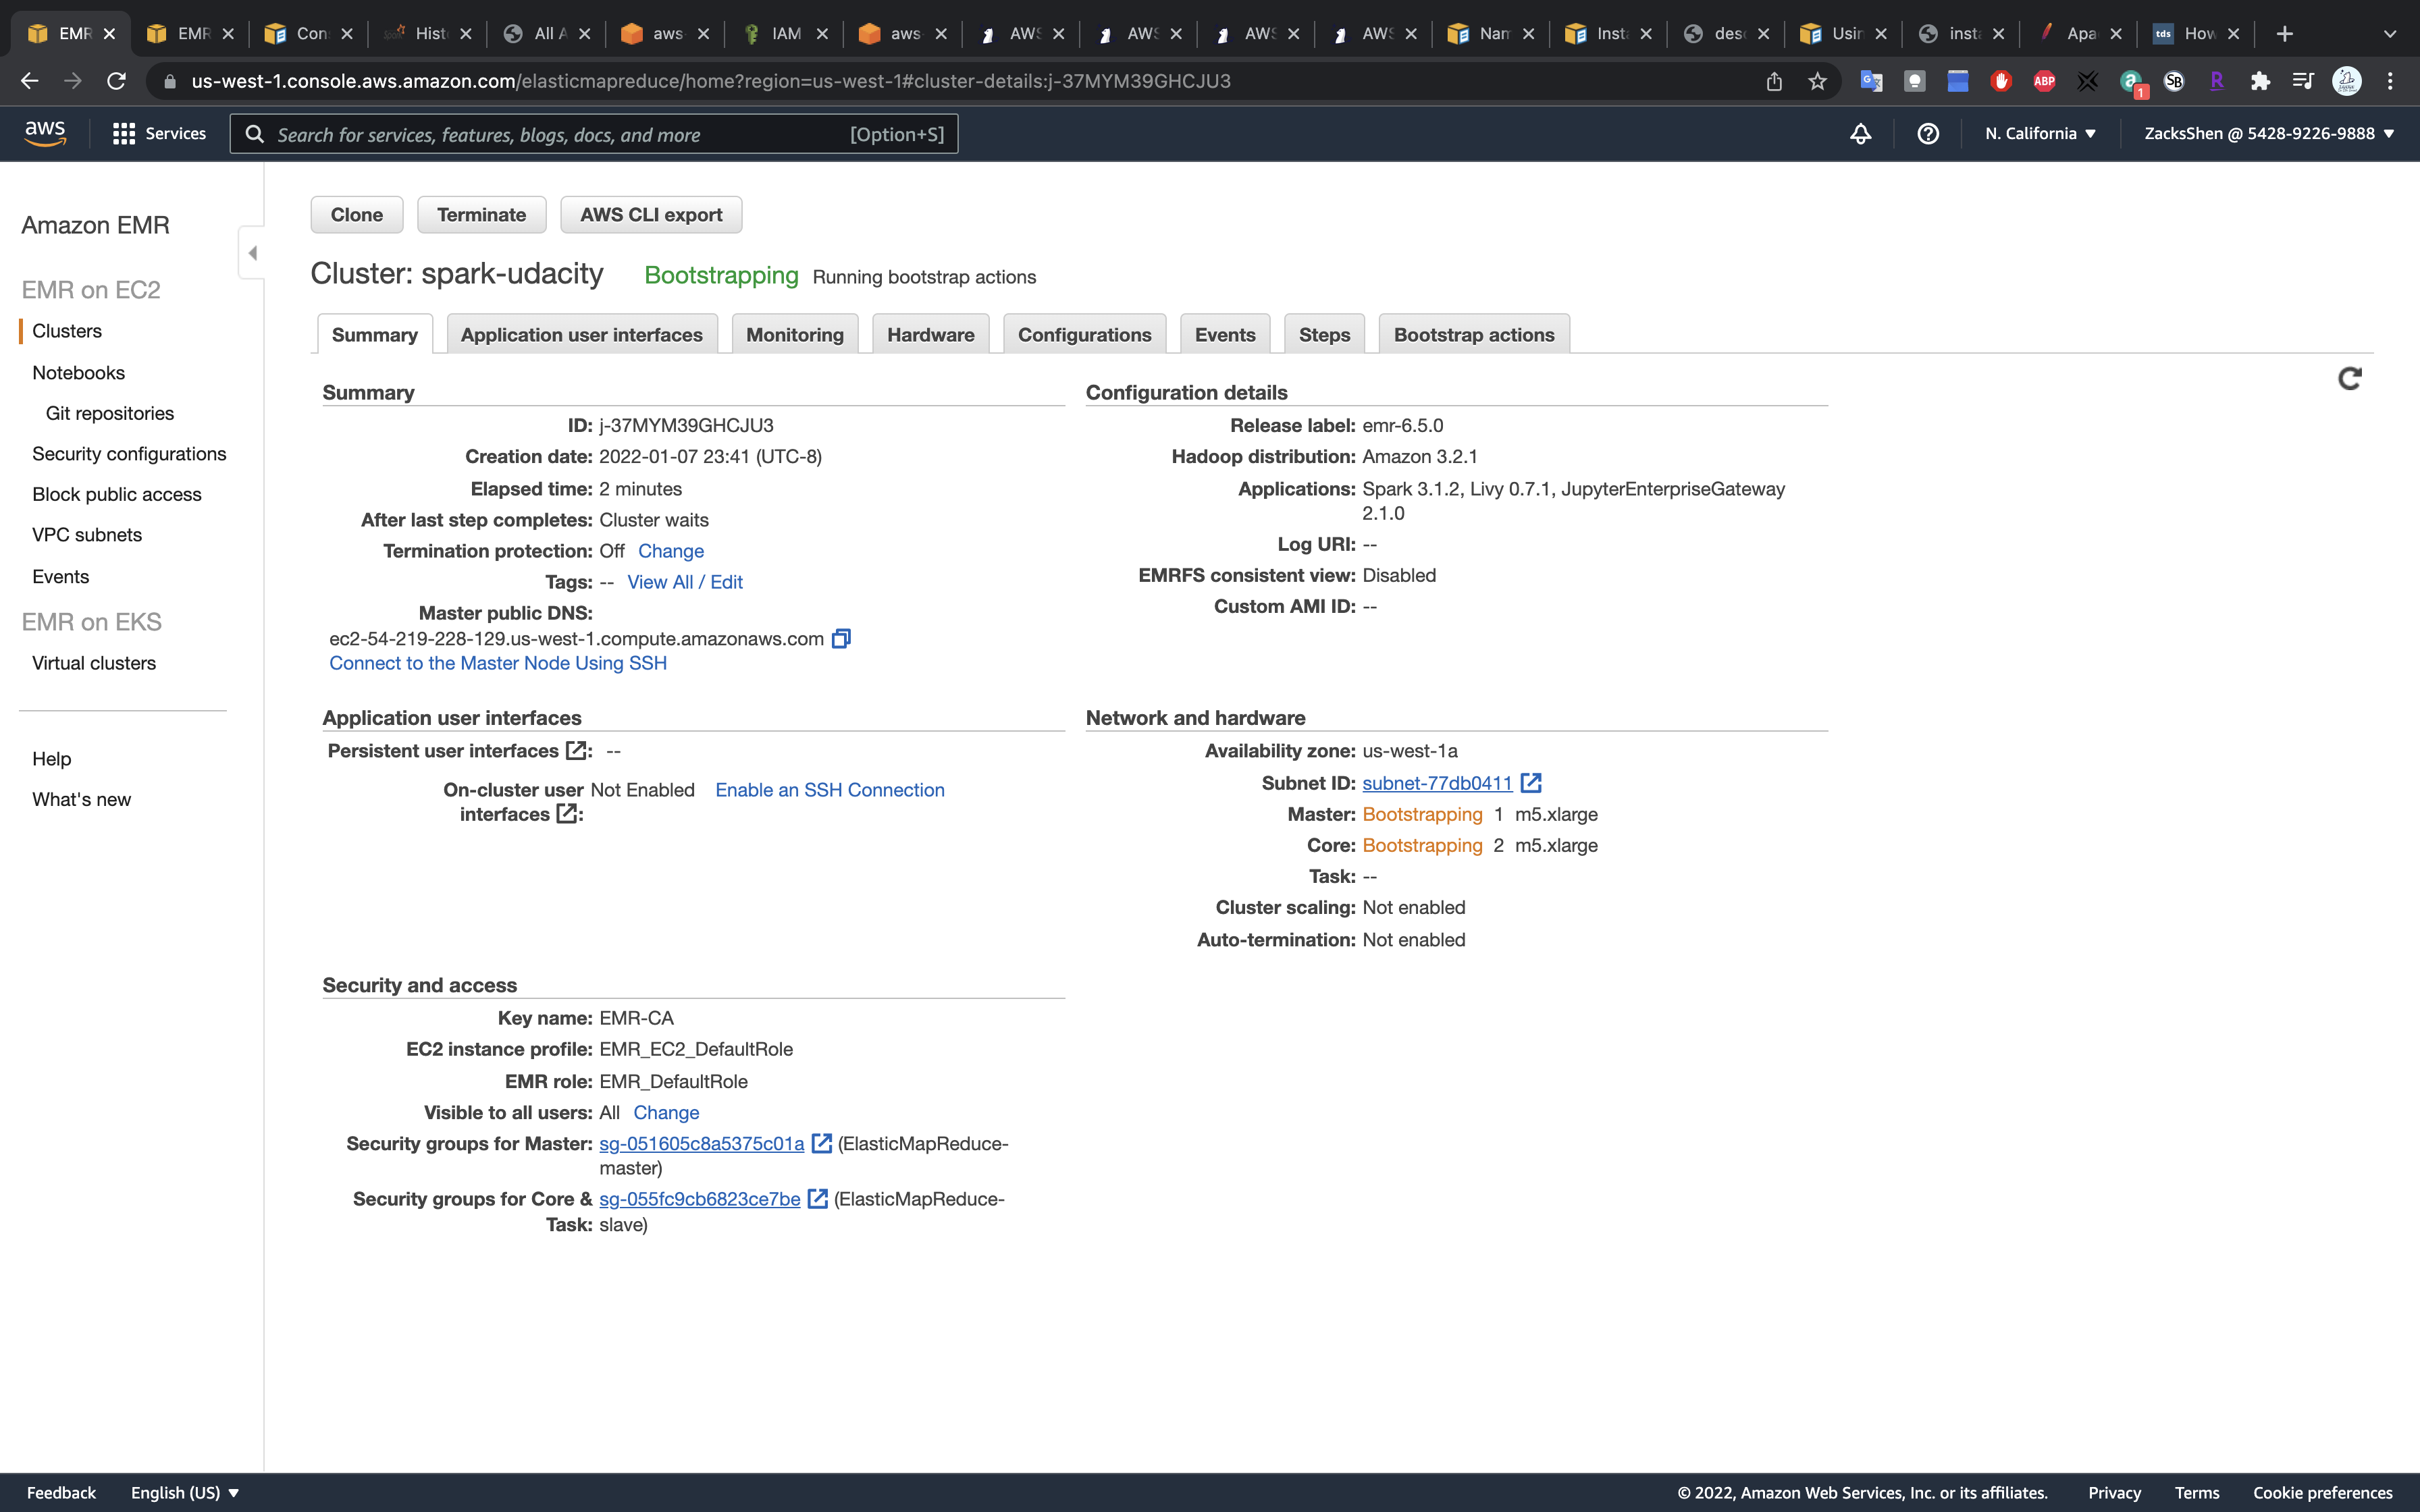
Summary of the newly created cluster. The next set of steps are also highlighted above.
Troubleshoot
Refer here if you get “EMR_DefaultRole is invalid” or “EMR_EC2_DefaultRole is invalid” error.
SSH Configuration
Authorize inbound traffic
Connect to the Master Node Using SSH
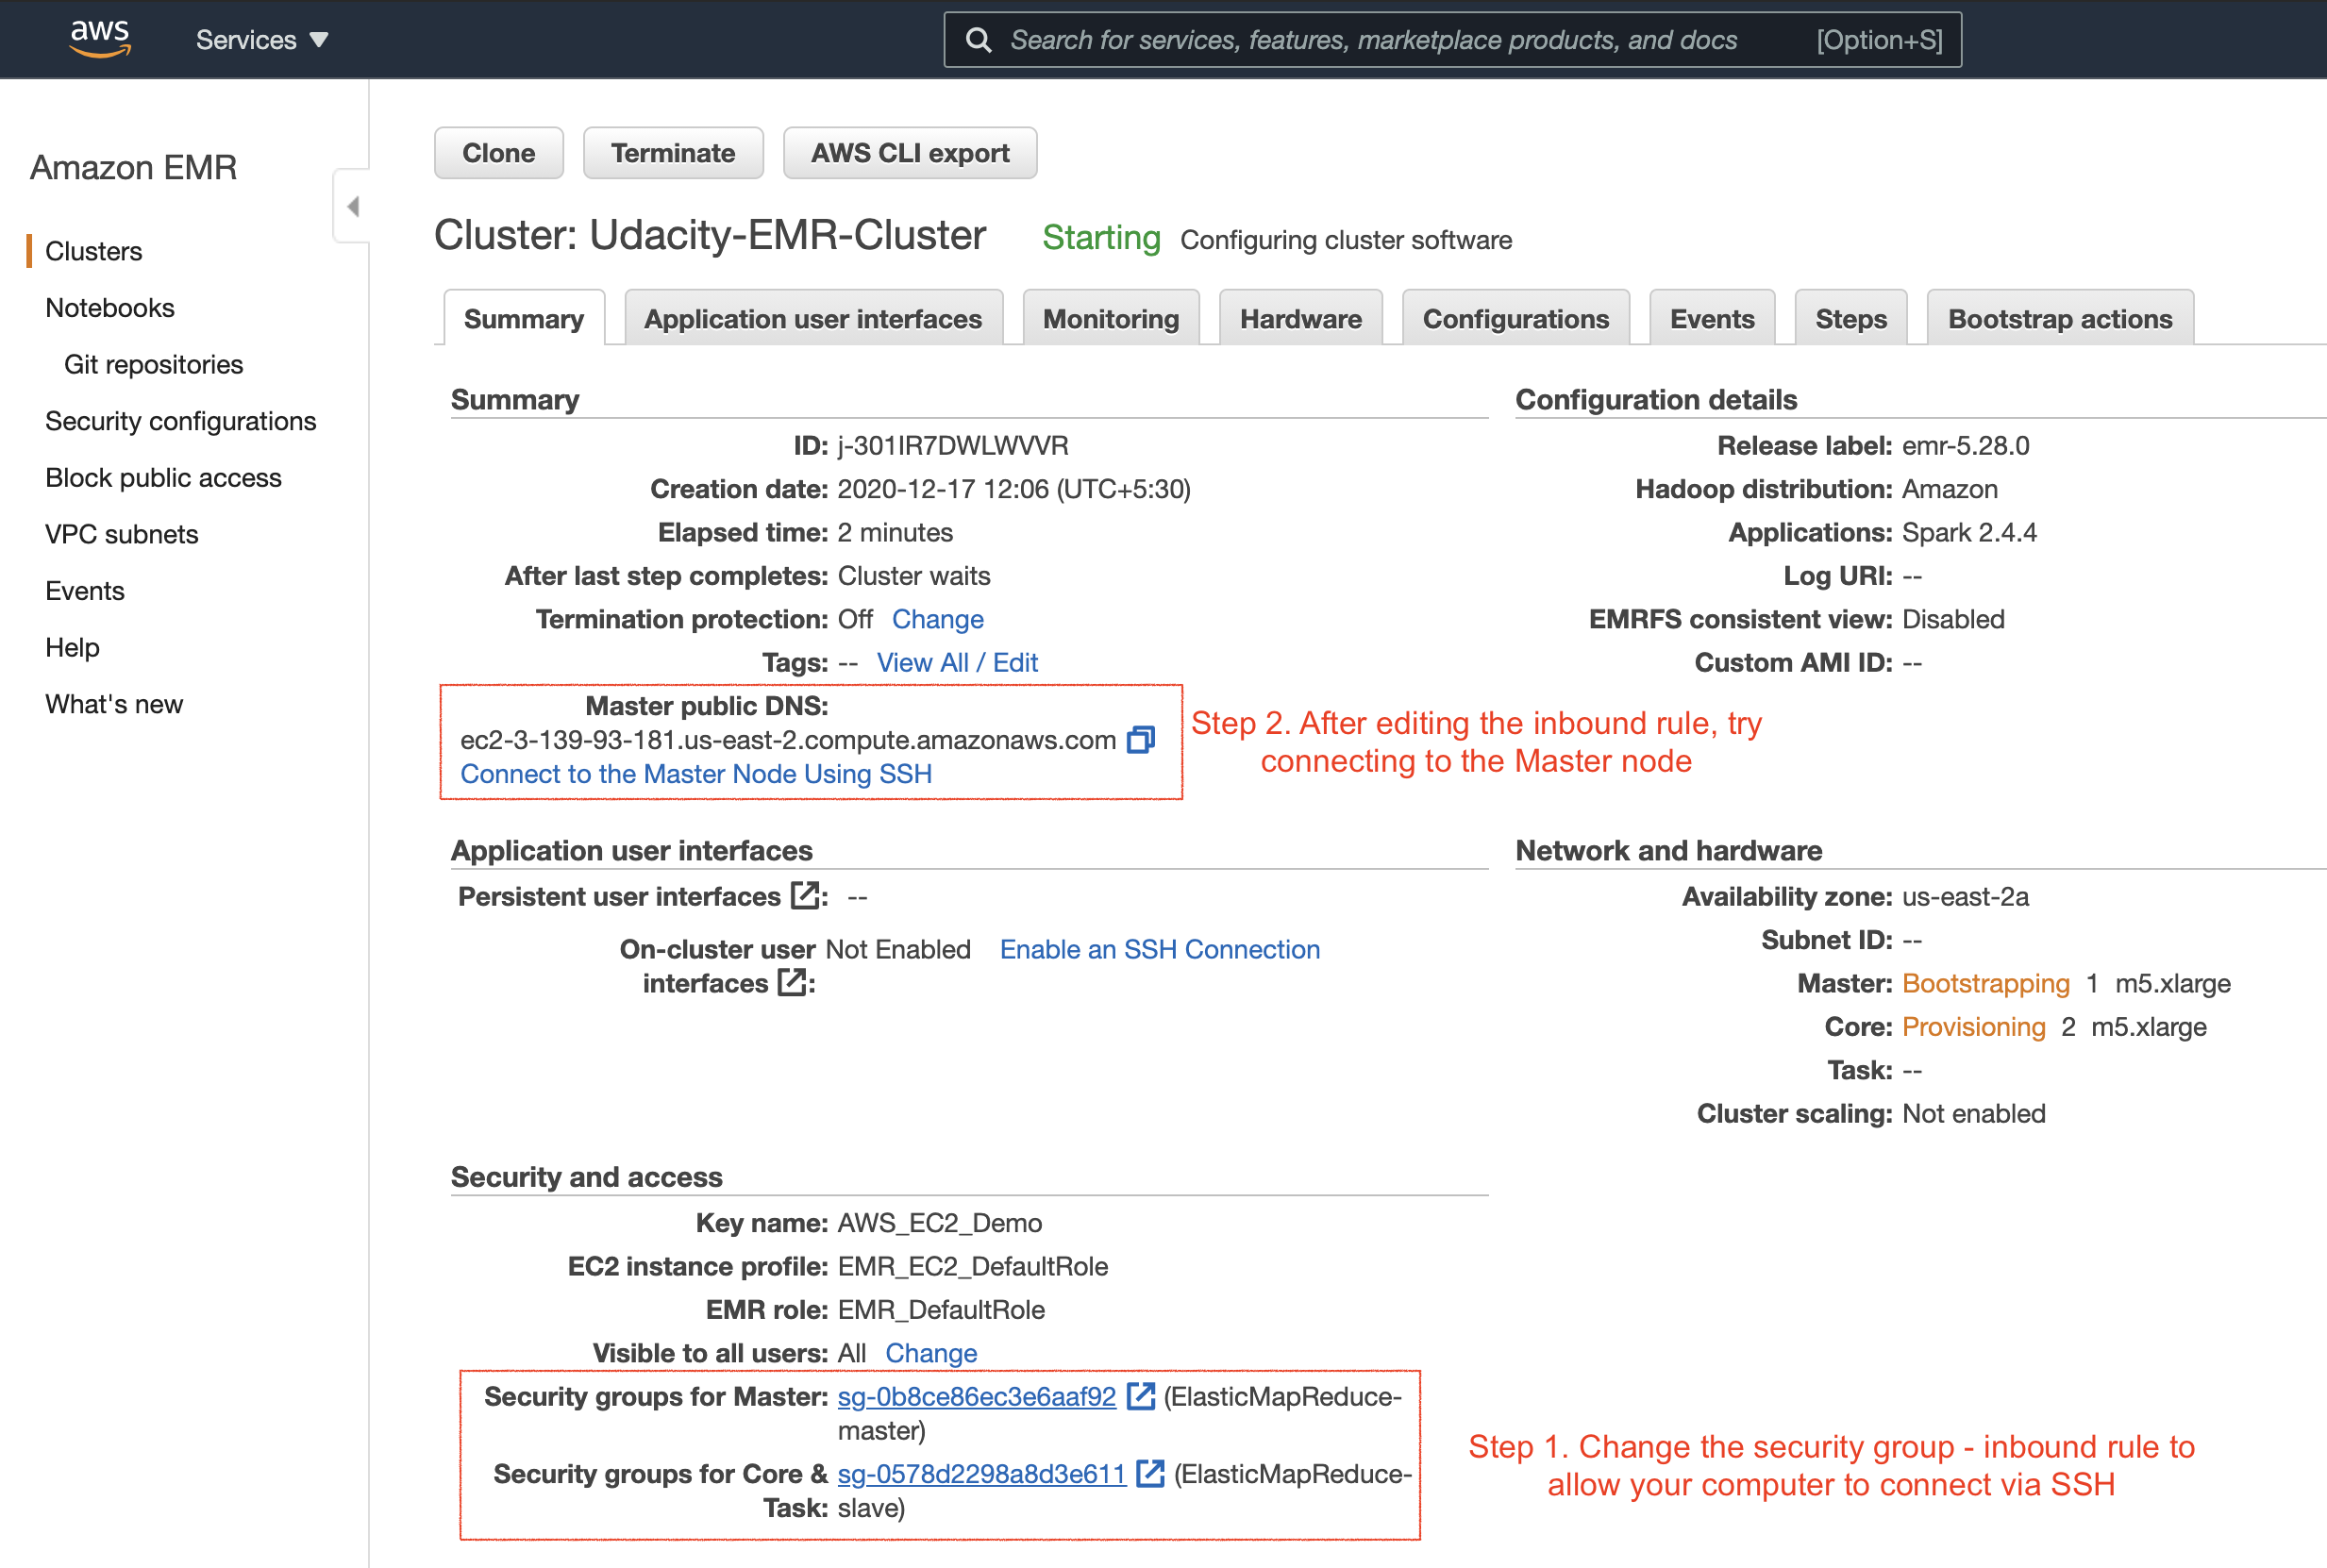
Update Security Groups
After successfully launching the EMR cluster, the master and core (slave) EC2 instances will launch automatically. Next, we will try to log in to the master EC2 instance on the EMR cluster using the SSH protocol (allows secure remote login). Therefore, you’ll need to enable the Security Groups setting of the master EC2 instance to accept incoming SSH protocol from your local computer.
The master and slave nodes are associated with a separate security group. You can view the security group ID either in the EMR console → Clusters or you can go to the EC2 dashboard → Security Groups service, as shown below.
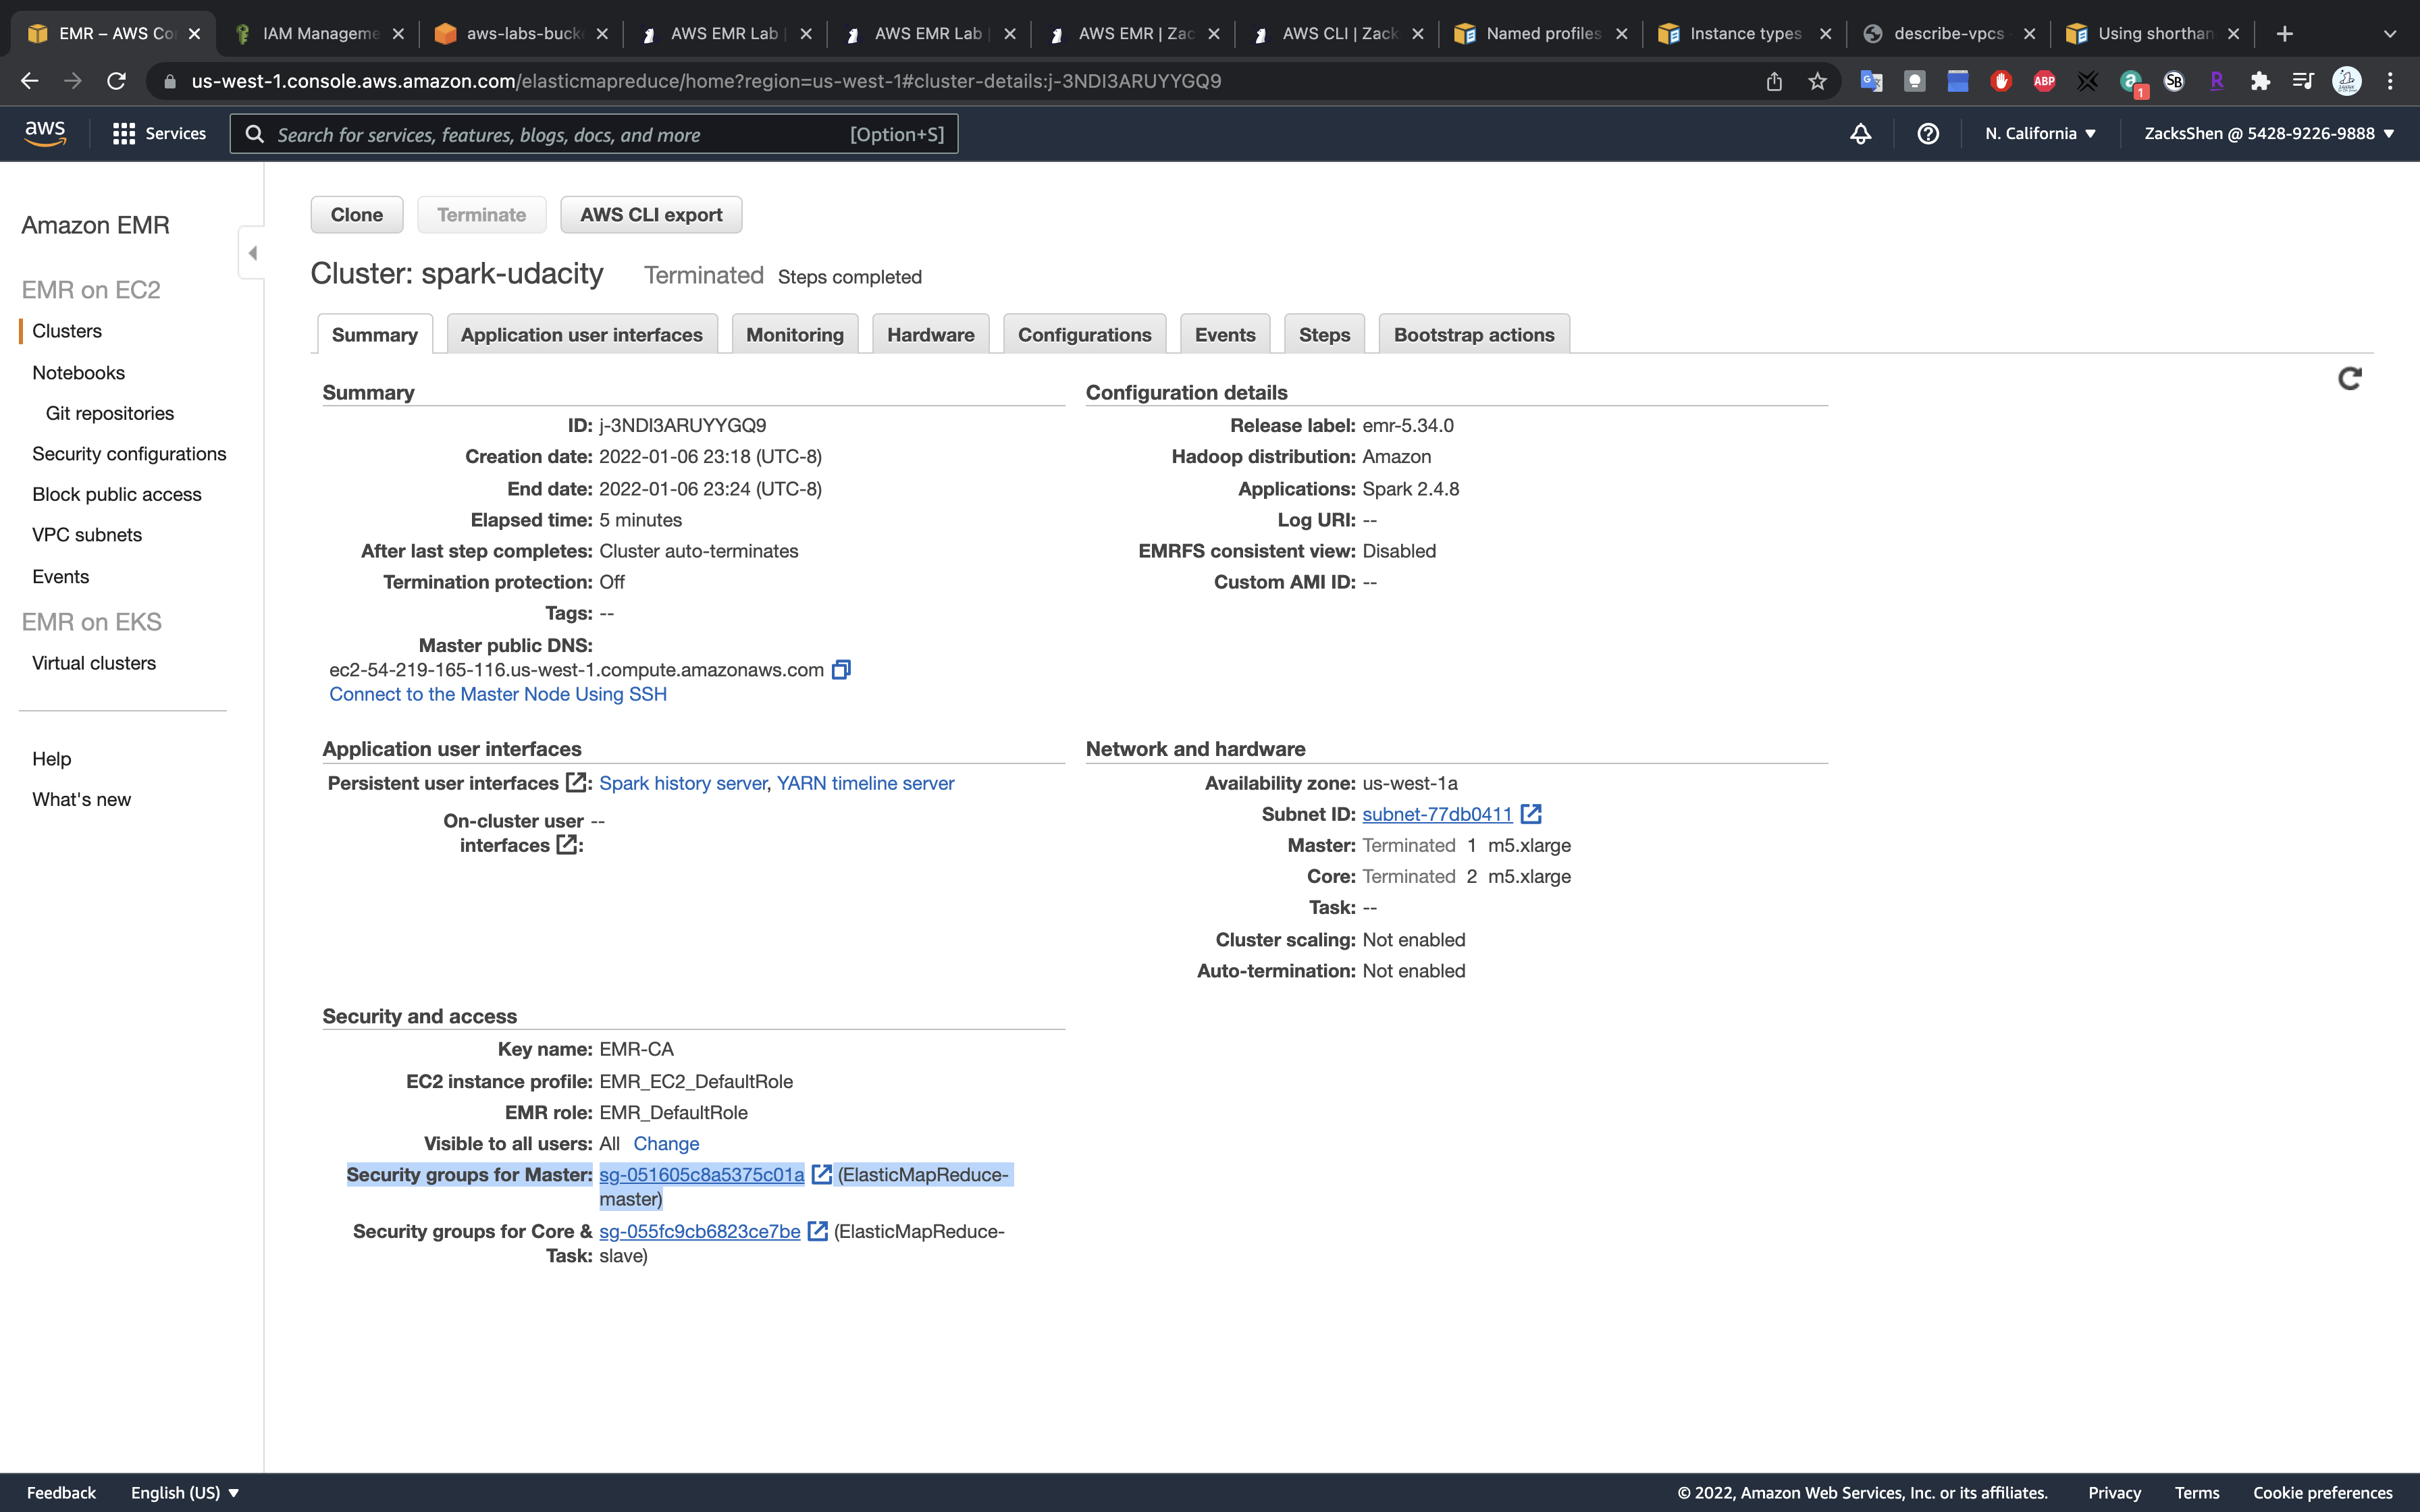
Select the security group associated with the master
Edit the security group to authorize inbound SSH traffic (port 22) from your local computer.
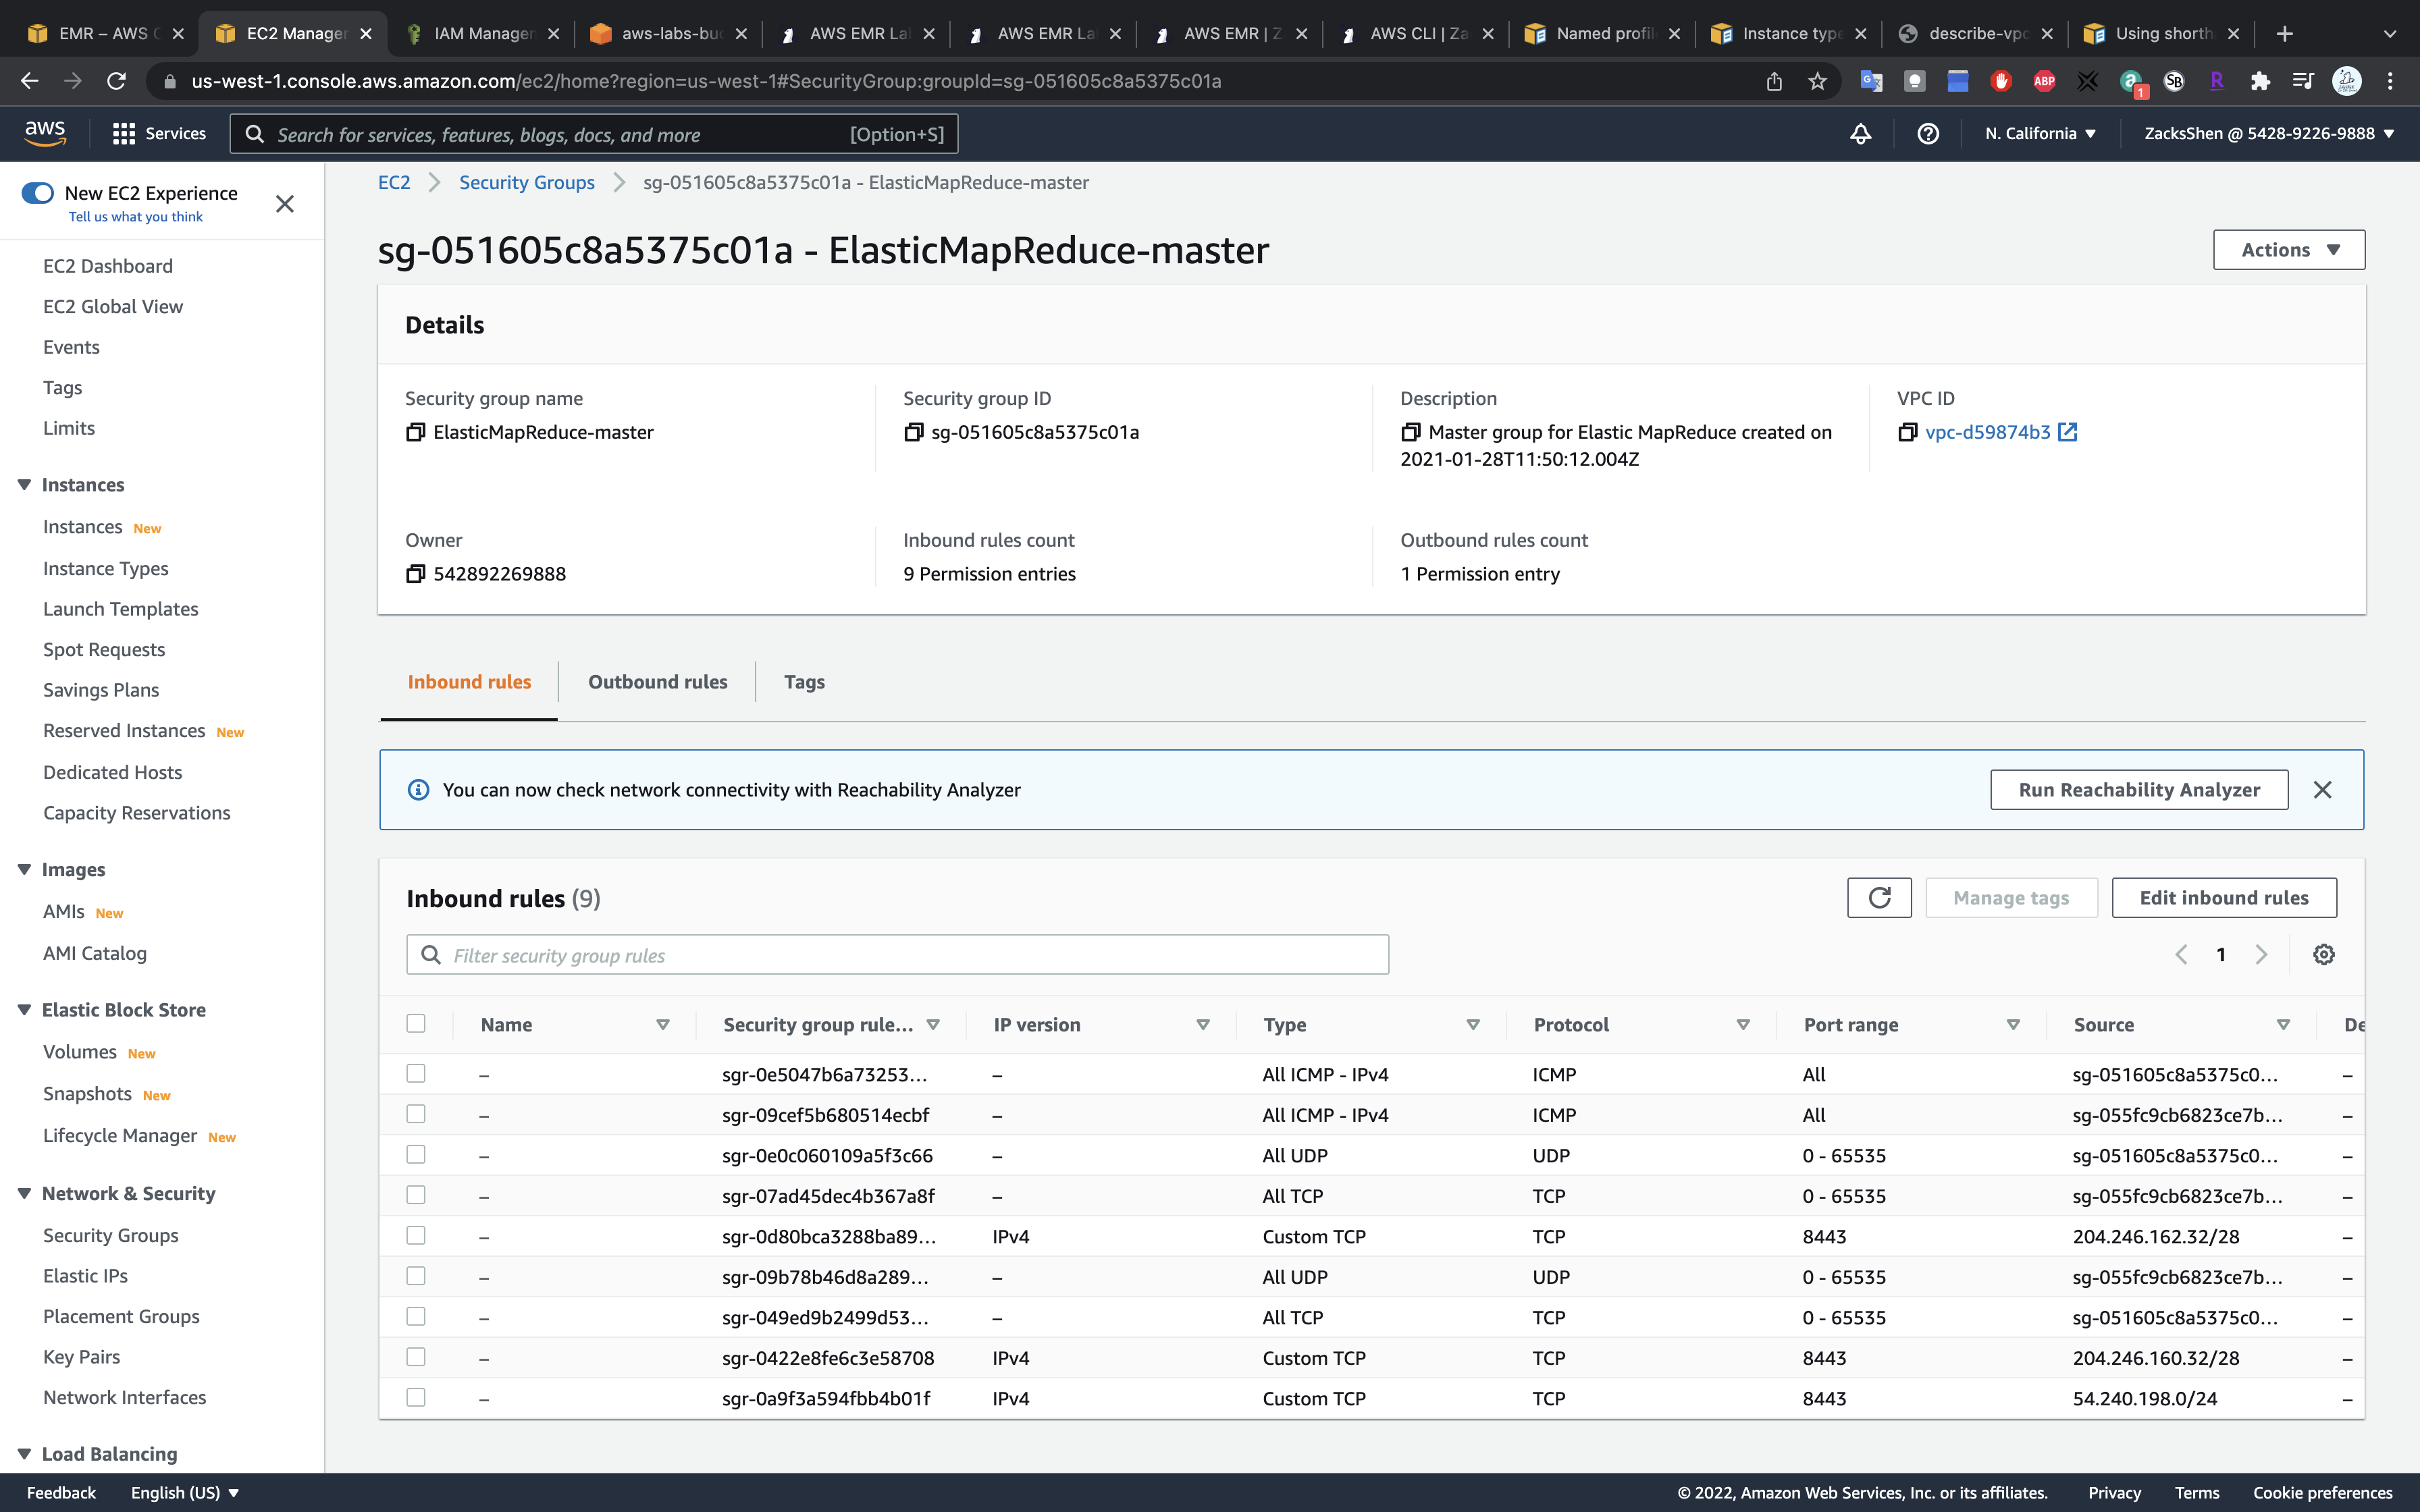
Click on Edit inbound rules
Add SSH for My IP

Click on Save rules
Validation
Go to the EMR dashboard, click on Connect to the Master Node Using SSH
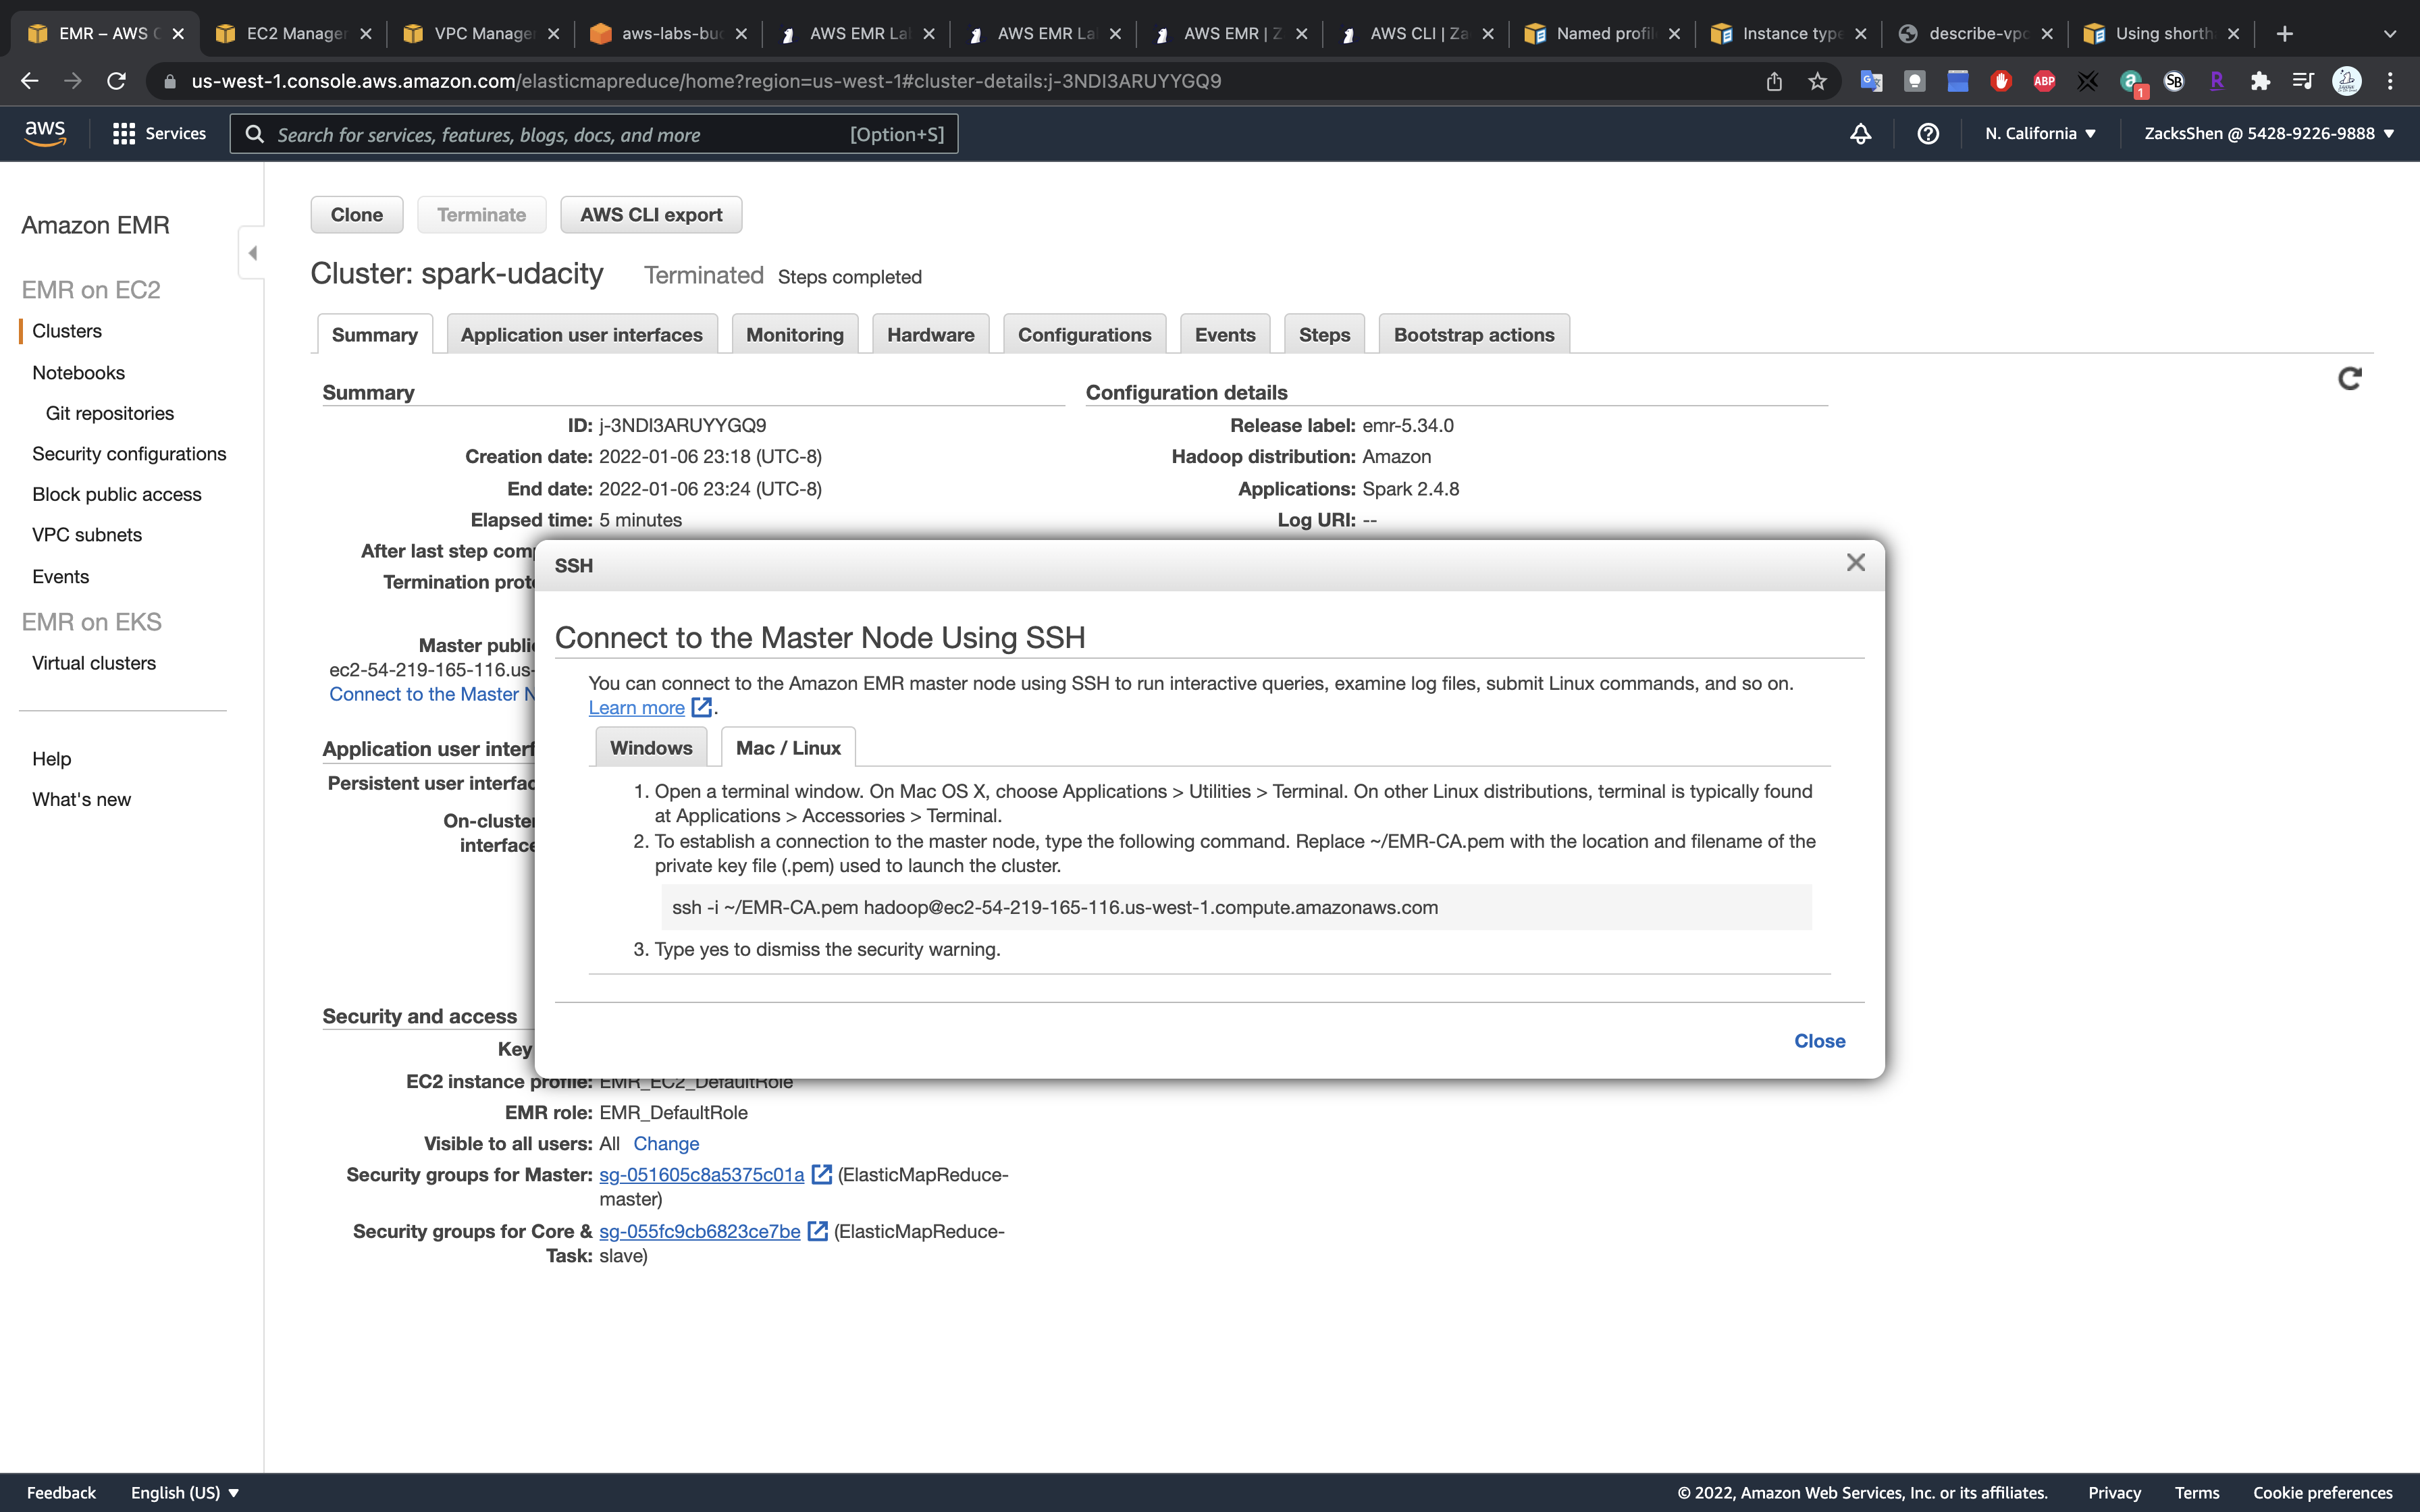
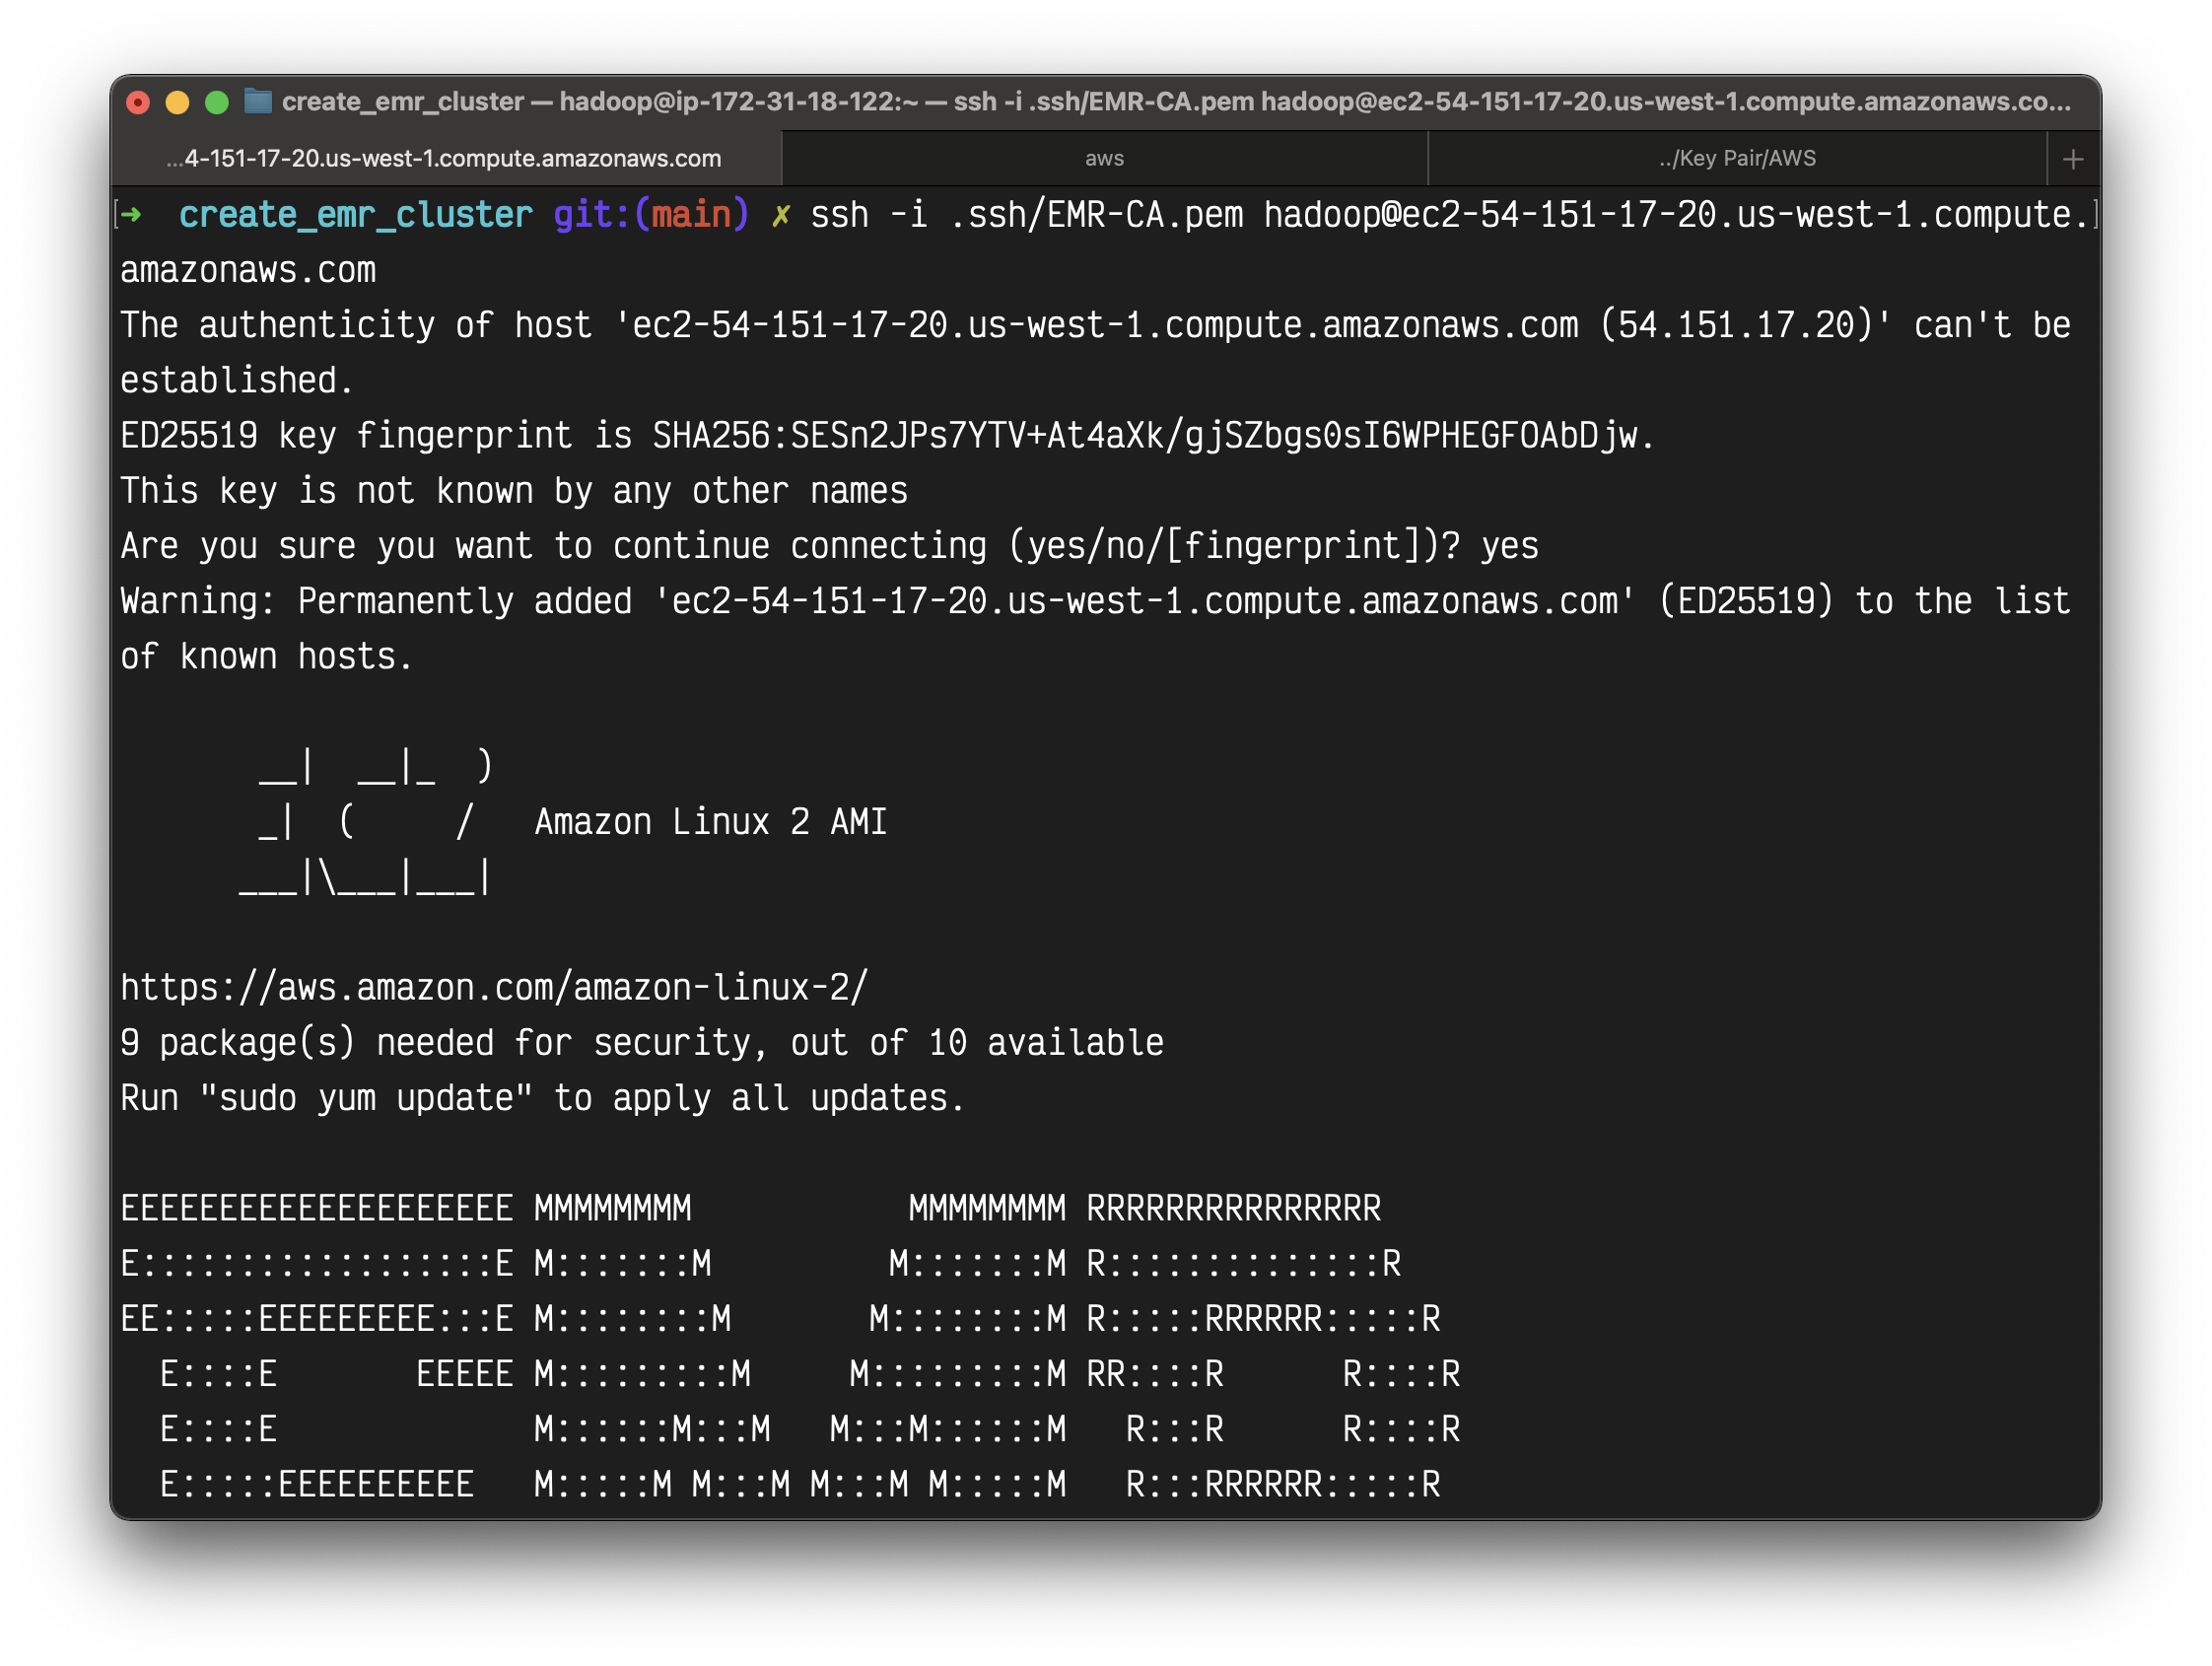
Connect using the SSH protocol. You can run the commands shown in the figure below in your terminal.
Note - In the snapshot below, the user name to log in is not root. Instead, you must use hadoop.
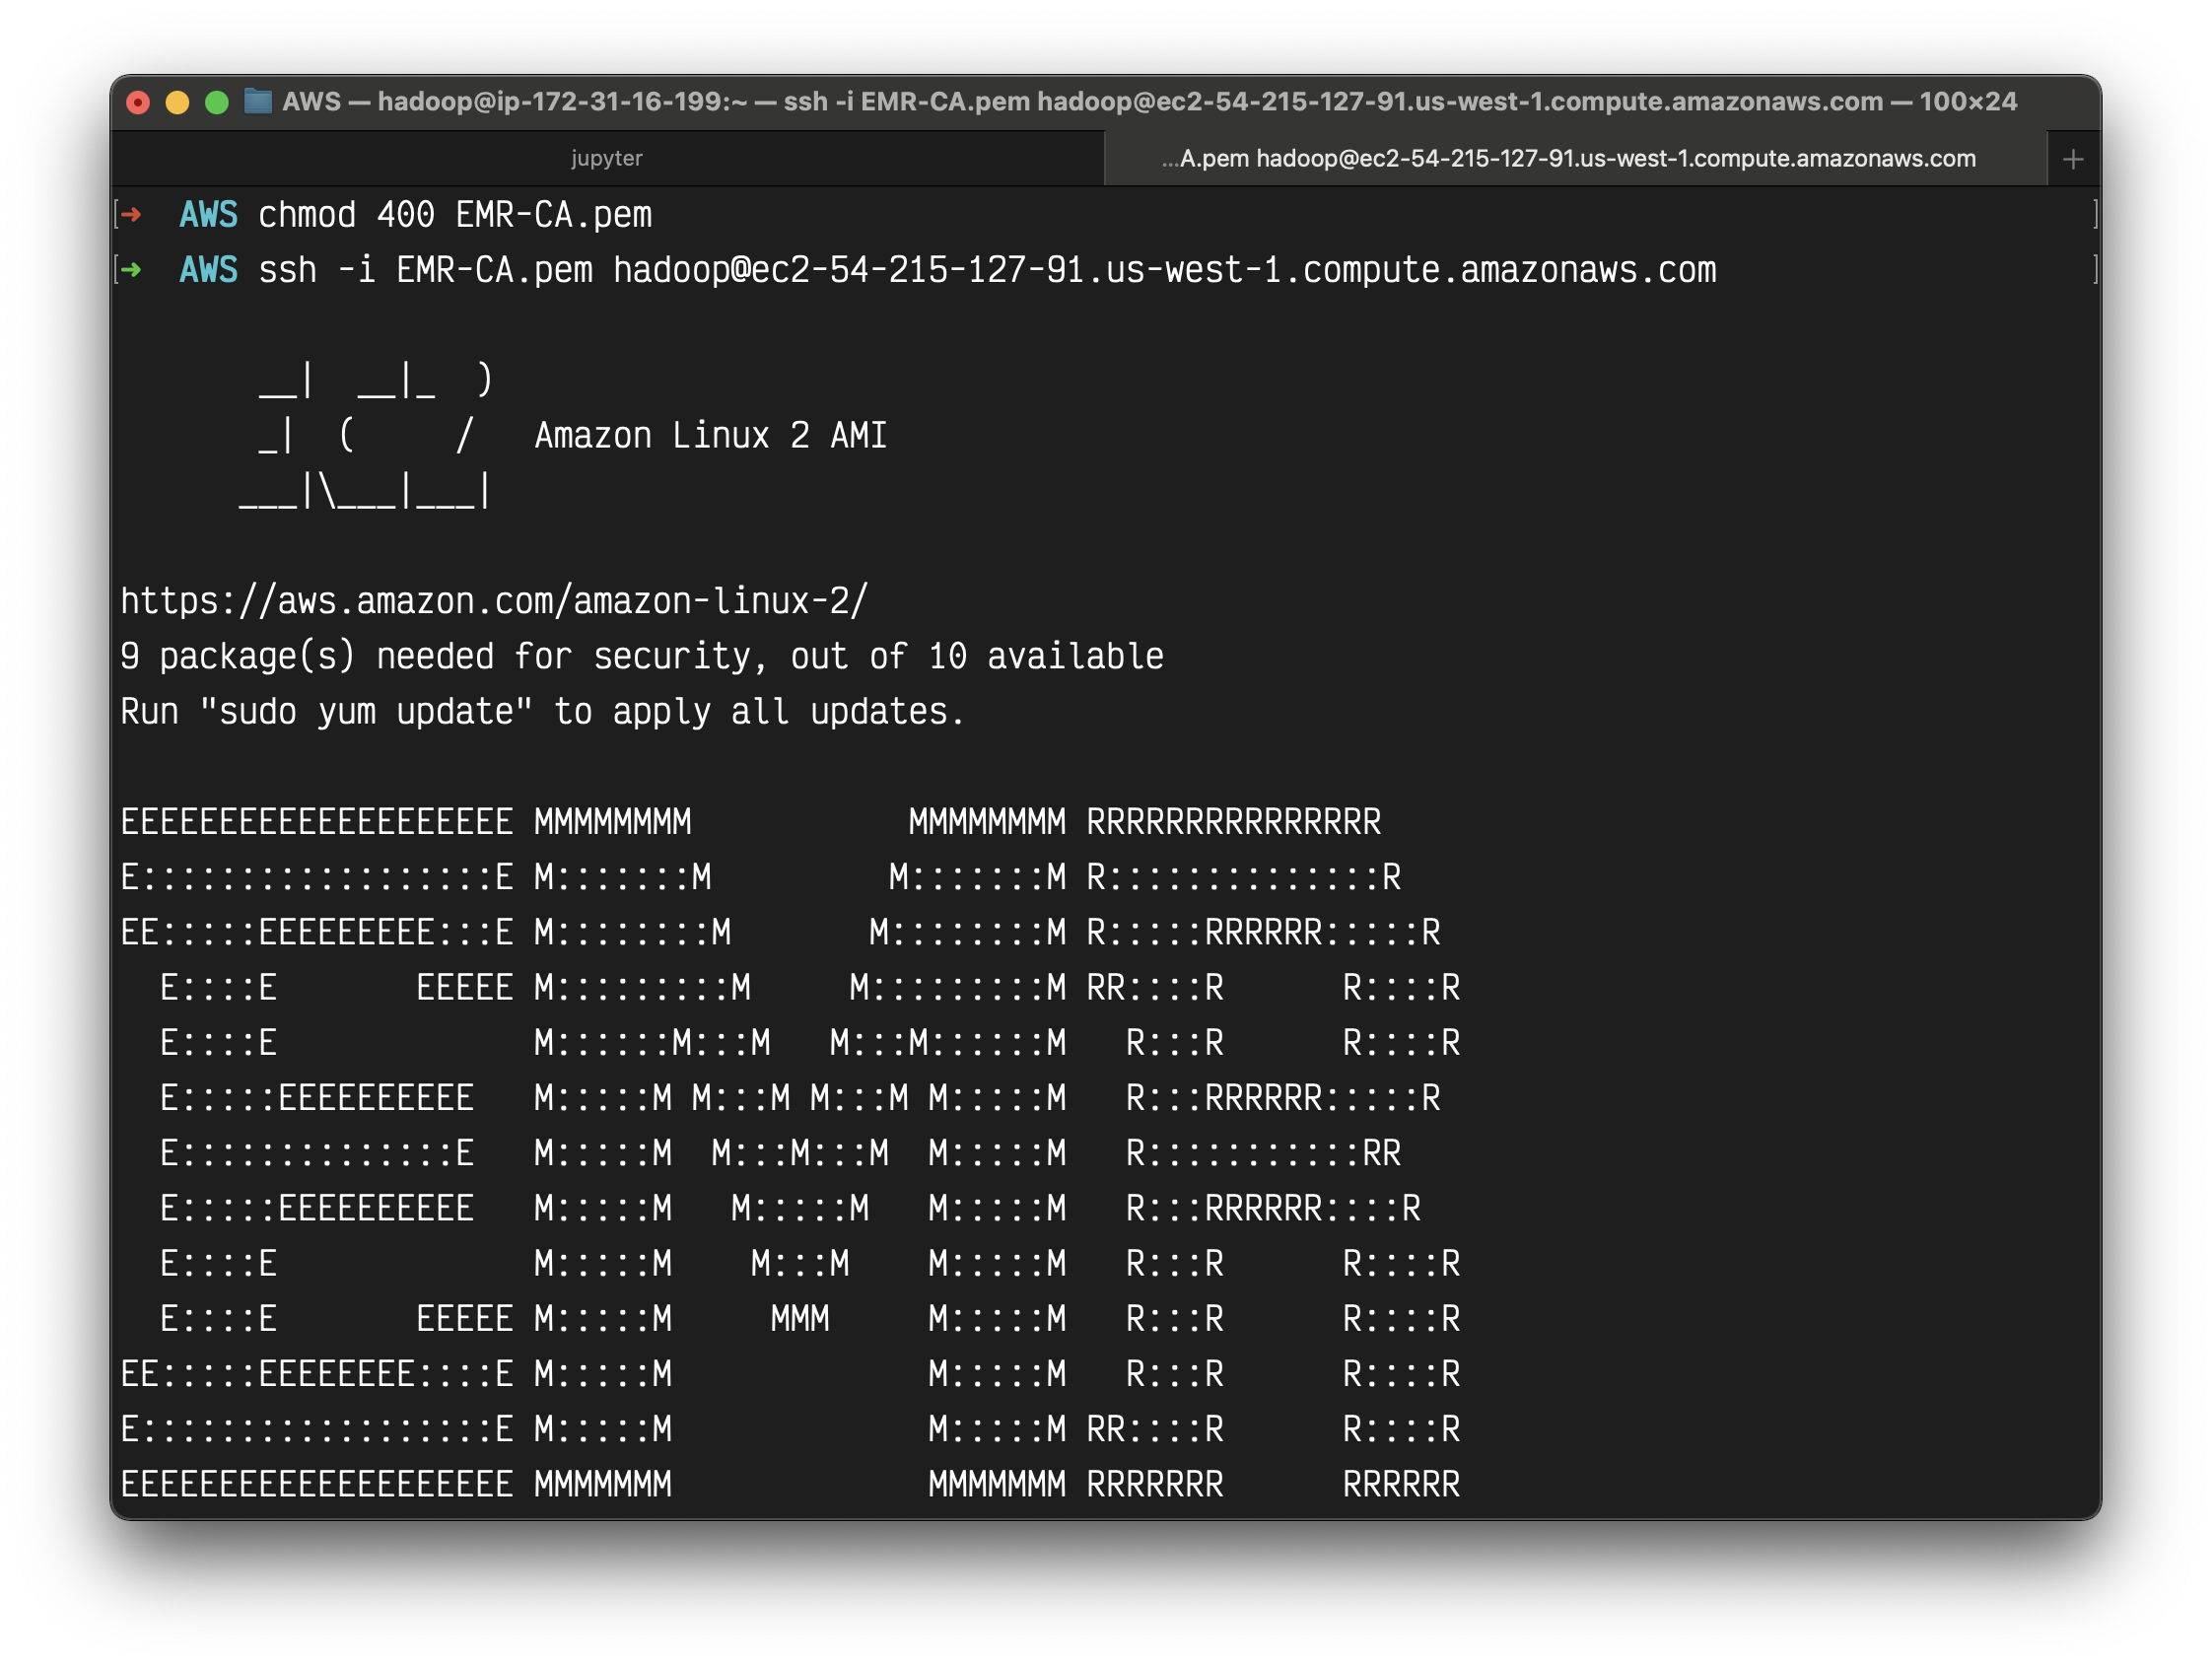
You need to change your key pair permission before connecting to your master node.
1 | chmod 400 your_key_pair.pem |
1 | ssh -i EMR-CA.pem hadoop@ec2-54-215-127-91.us-west-1.compute.amazonaws.com |
Spark Configuration
View Spark UI hosted on the EMR Clusters
Step 1. Set Up an SSH Tunnel to the Master Node Using Dynamic Port Forwarding
Part 1: Set Up an SSH Tunnel to the Master Node Using Dynamic Port Forwarding
One last thing to do before using the Jupyter Notebook, or even browsing the Spark UI, is to set up a proxy in your browser. It is a two-step process.
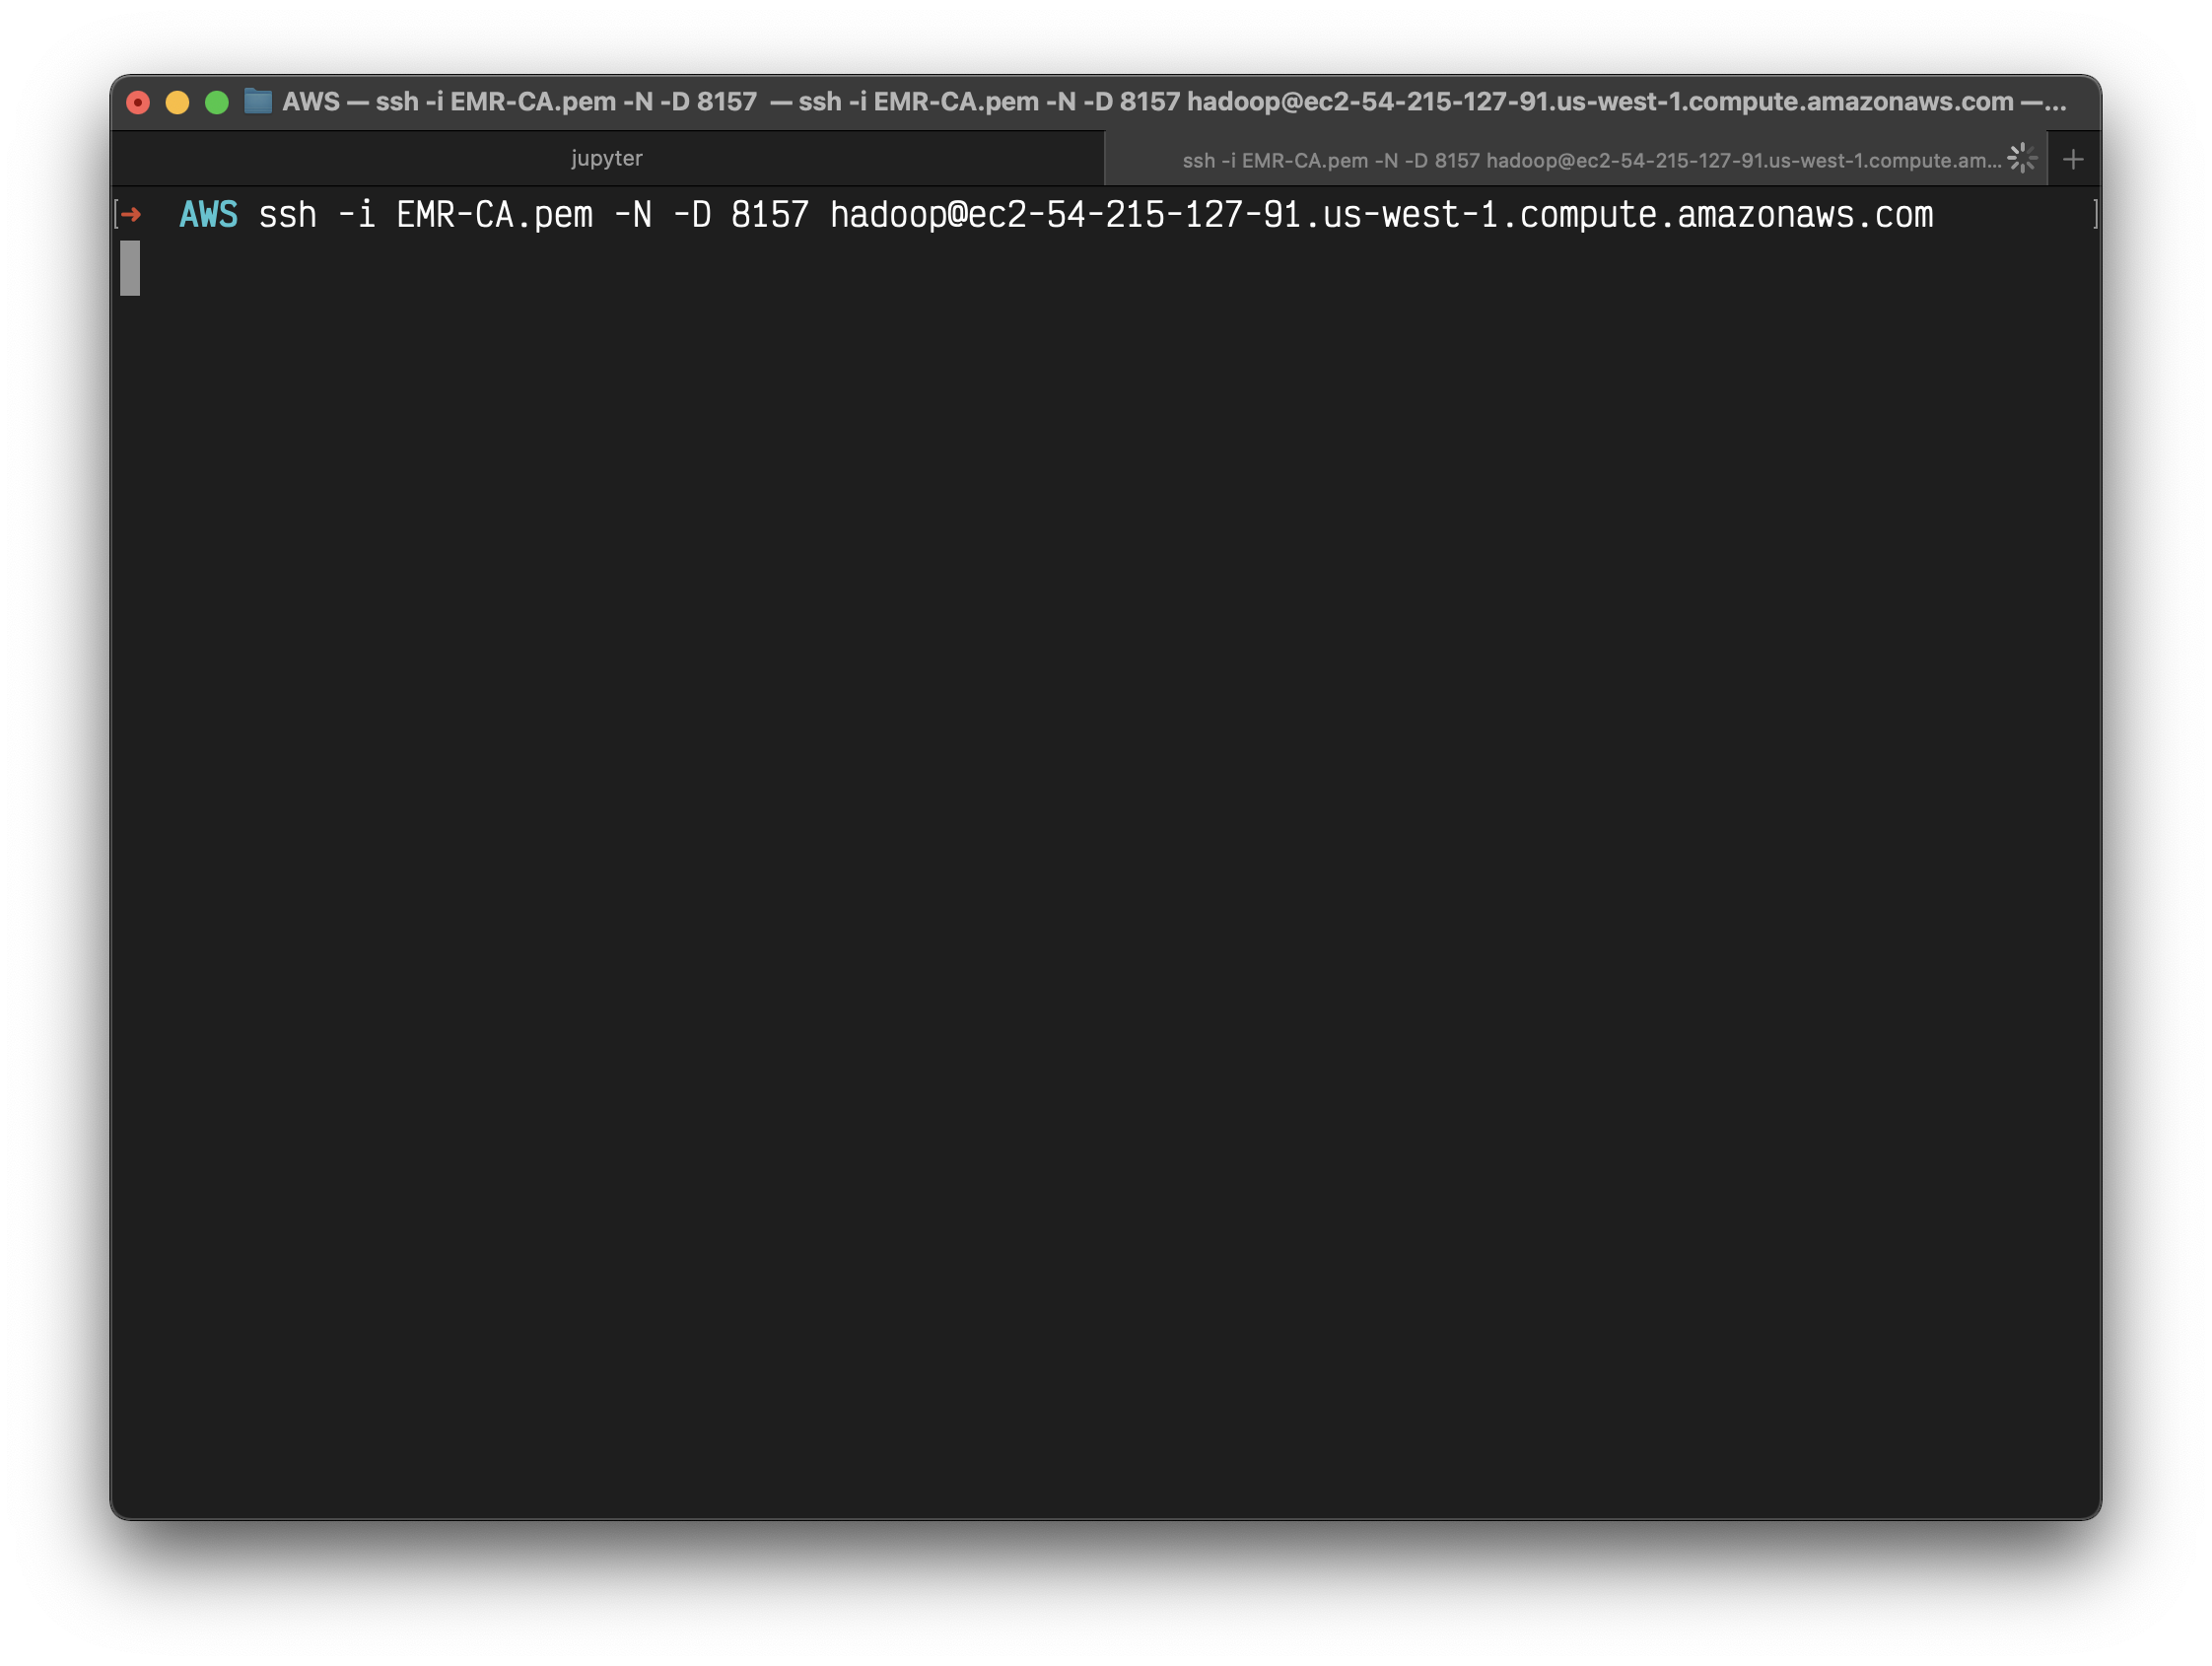
Step 1. Set Up an SSH Tunnel to the Master Node Using Dynamic Port Forwarding
Enable the dynamic port forwarding using the command. This command does not returns a response.
1 | exit |
Replace the .pem file name and the master node public DNS for you. In the above example, the .pem is residing in the present working folder. If your .pem is placed in any different folder, you can provide the complete path.
In the command above, the -D option is used for specifying a local port (8157) to forward data to all remote ports on the master node’s web server.
After you issue this command, the terminal remains open and does not return a response.
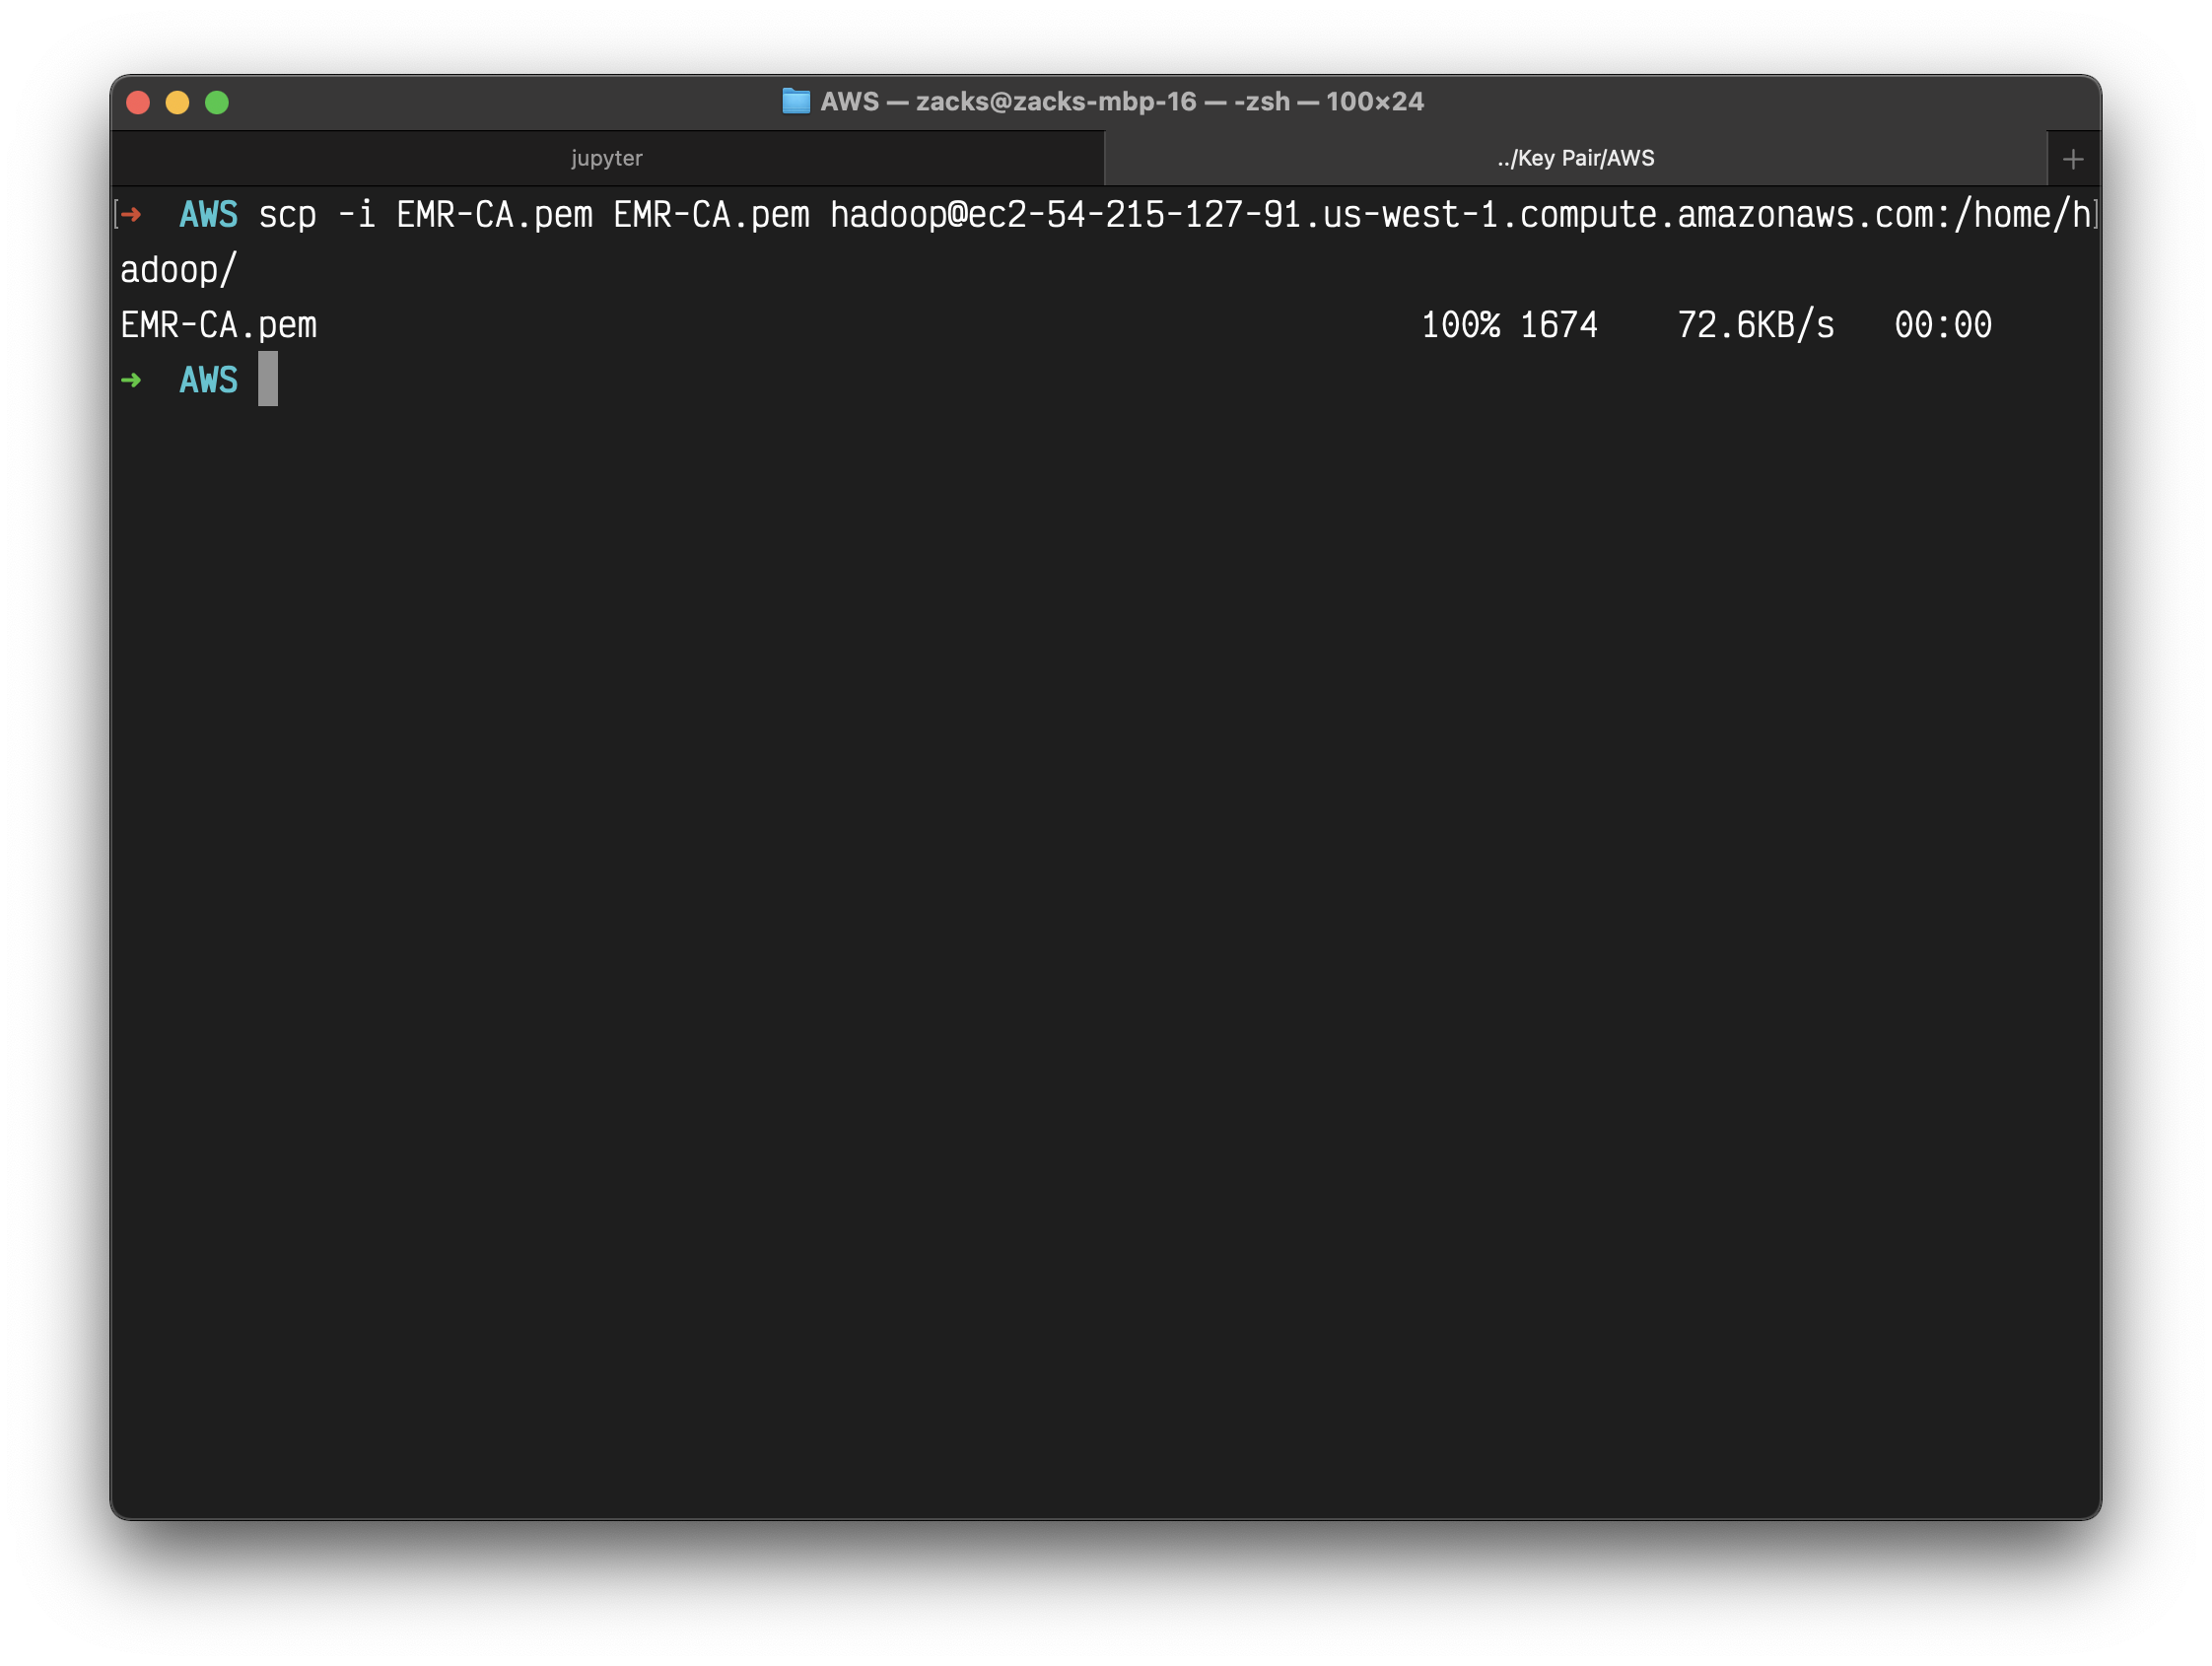
Open another terminal.
Now, you’d want to copy your .pem file (EC2 log in private key) to the master node. You can securely copy your .pem file from your local computer to the master node, using:
1 | scp -i EMR-CA.pem EMR-CA.pem hadoop@ec2-54-215-127-91.us-west-1.compute.amazonaws.com:/home/hadoop/ |
You can use a similar command to copy any other script, if required.
Step 2. Configure Proxy Settings in your Local Computer
Part 2: Configure Proxy Settings to View Websites Hosted on the Master Node
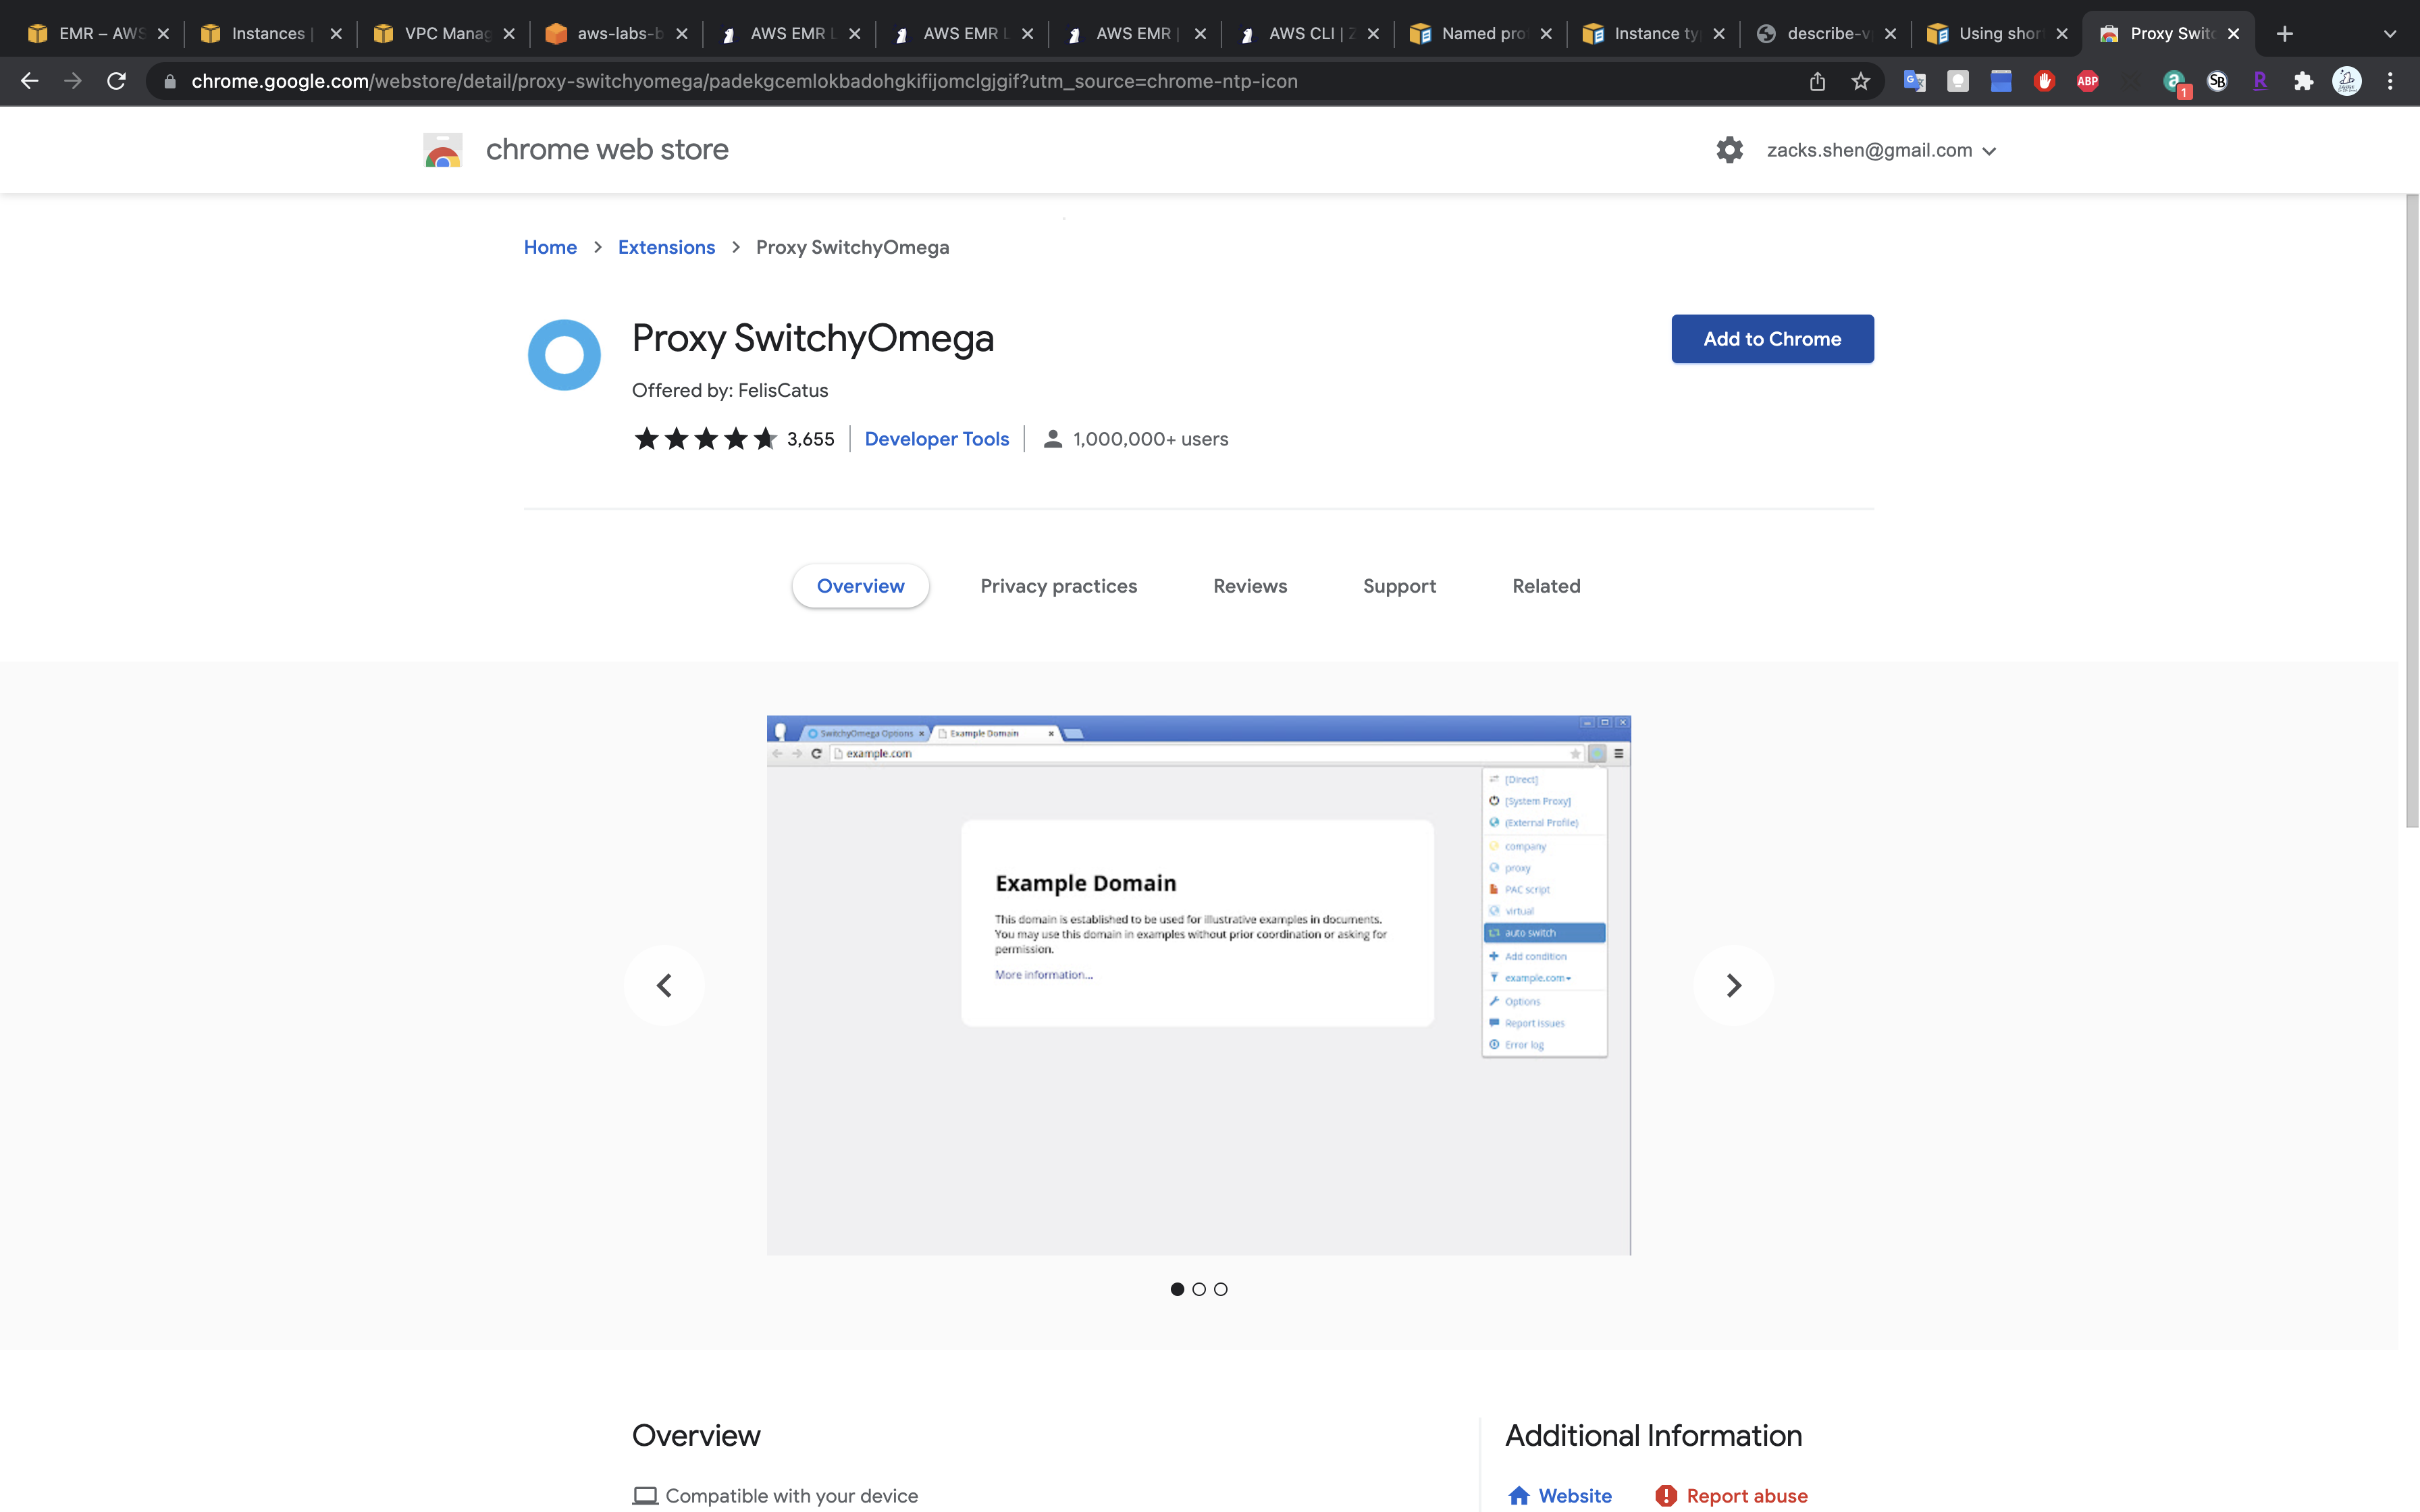
To do this, you’ll need to install an extension in your browser. Here are the options:
- Chrome -
SwitchyOmegaorFoxyProxy - Firefox -
FoxyProxy
The snapshots below present the step for the Chrome browser. For other browsers, you can follow the reference link present at the end of the section.
Go to the https://chrome.google.com/webstore/category/extensions, and add for Proxy SwitchyOmega extension to your Chrome browser.
Create a new profile with name emr-socks-proxy and select PAC profile type.

Save the following profile script in your new profile:
1 | function FindProxyForURL(url, host) { |
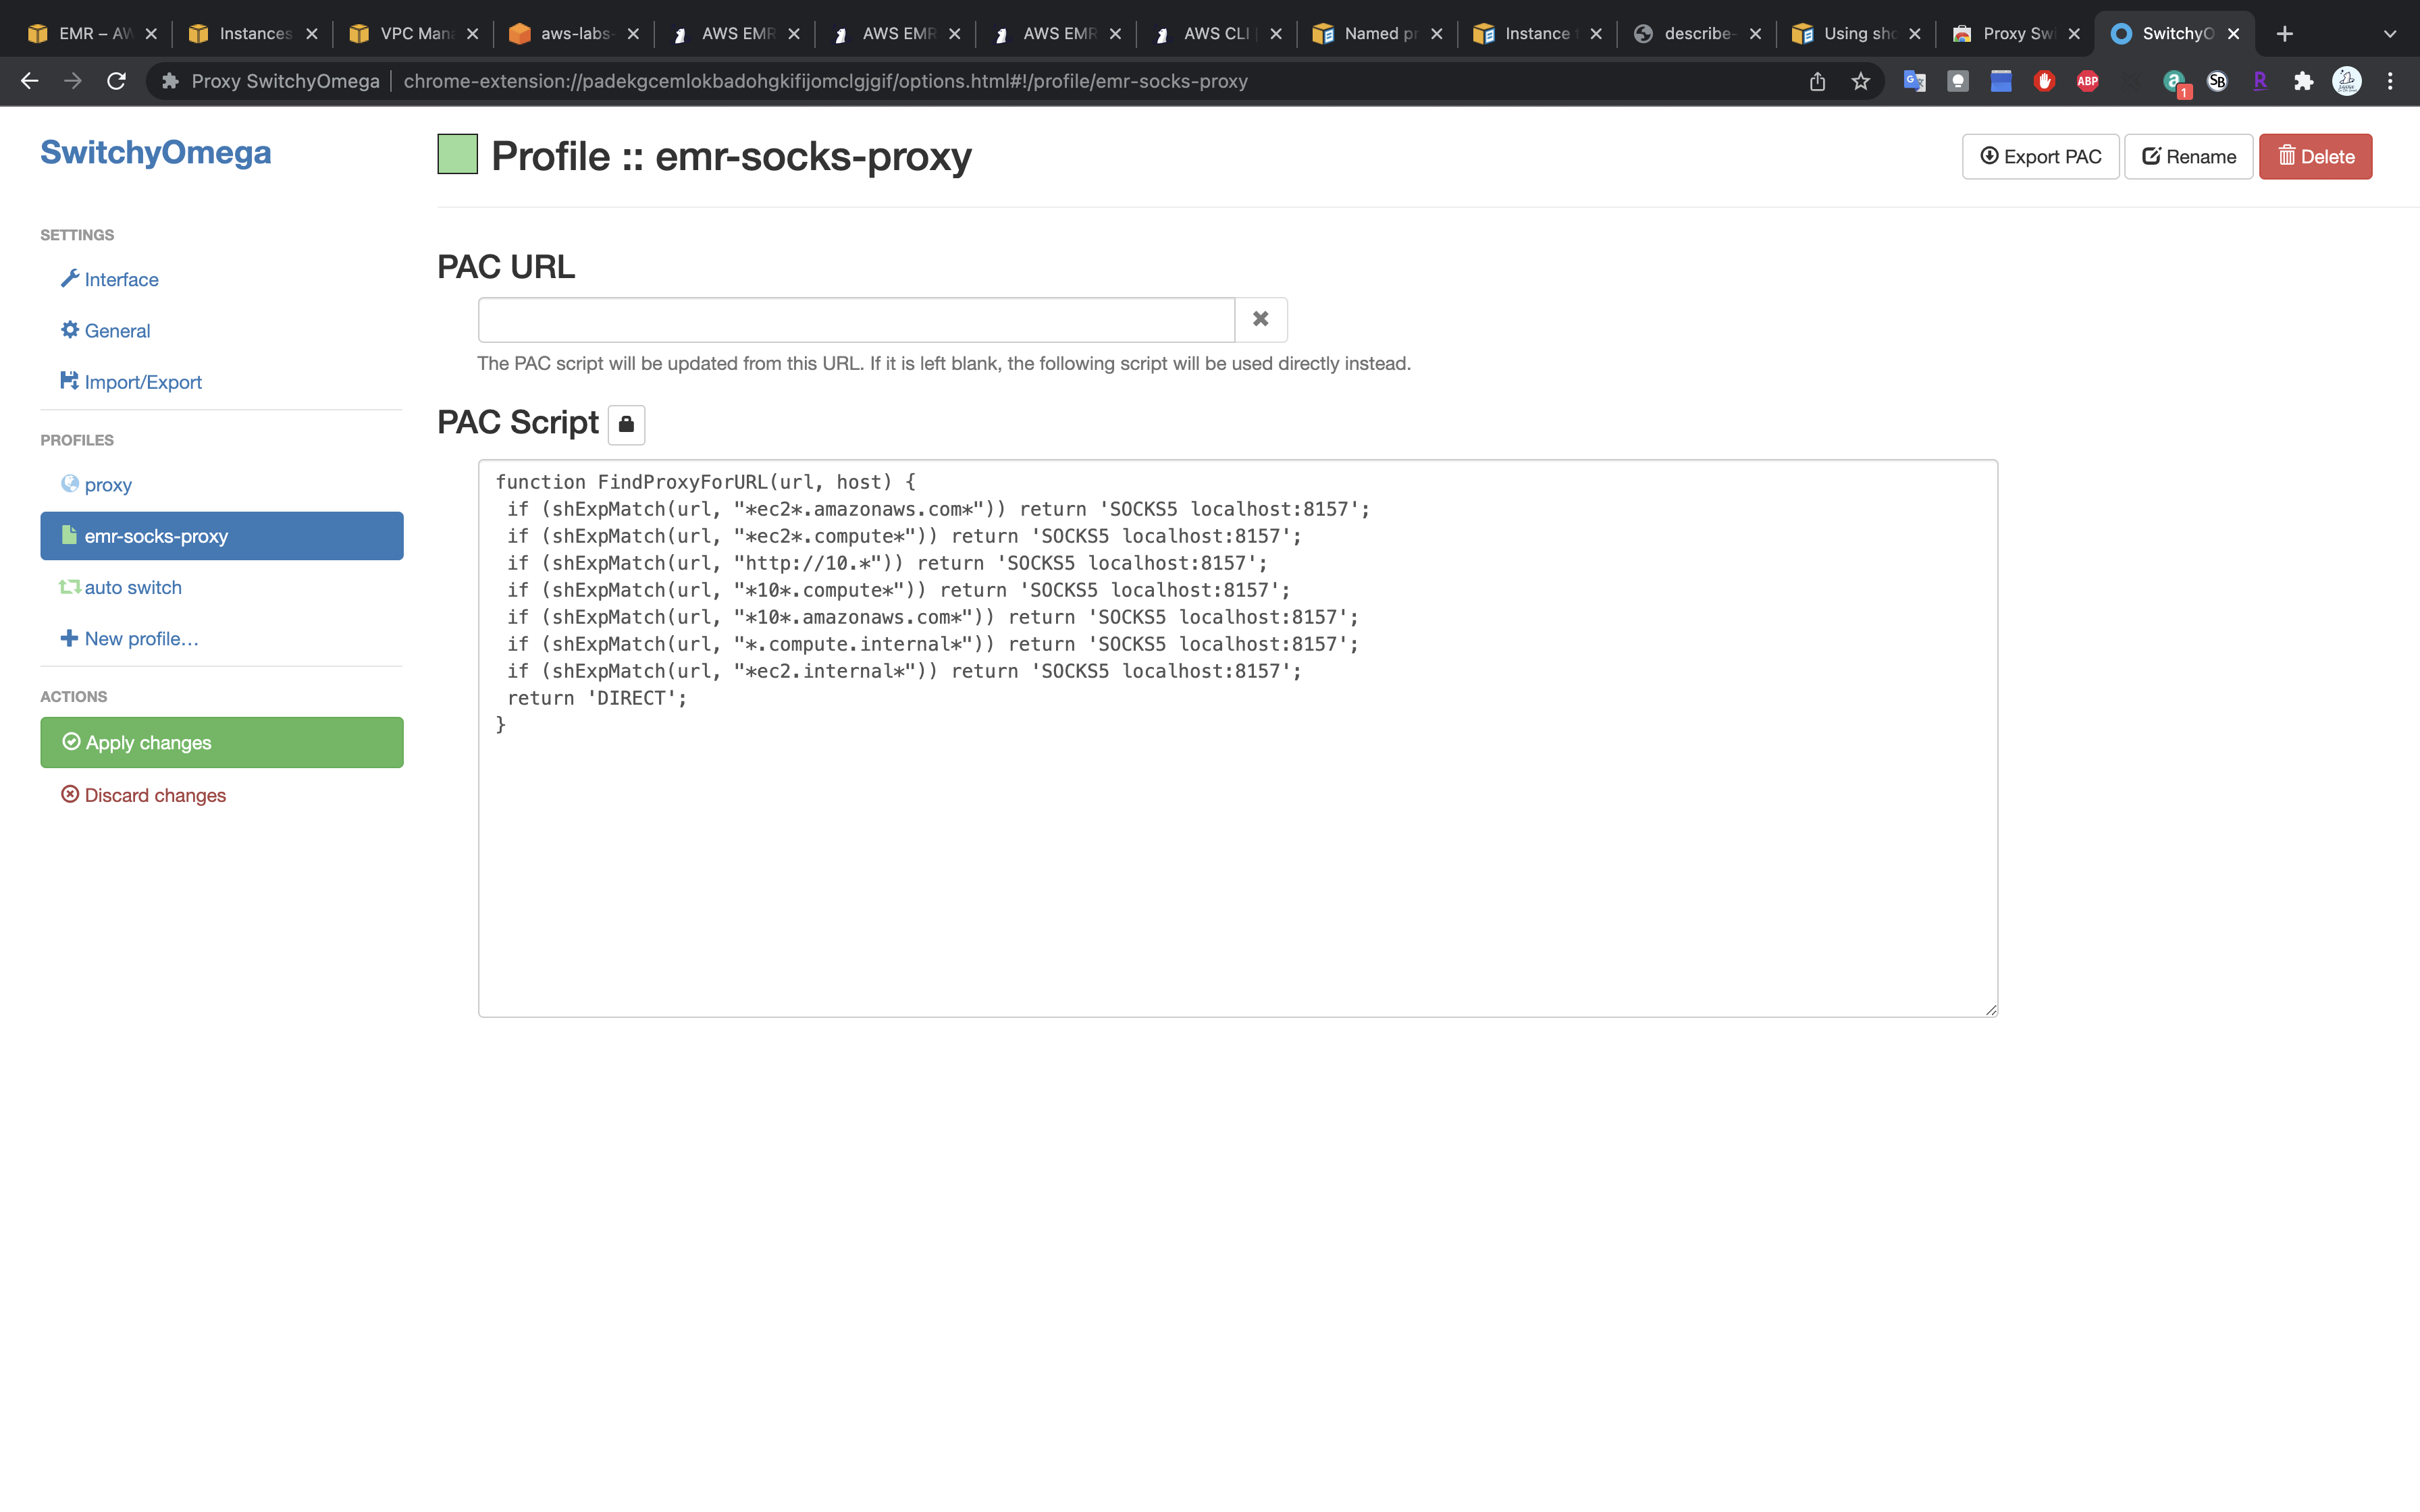
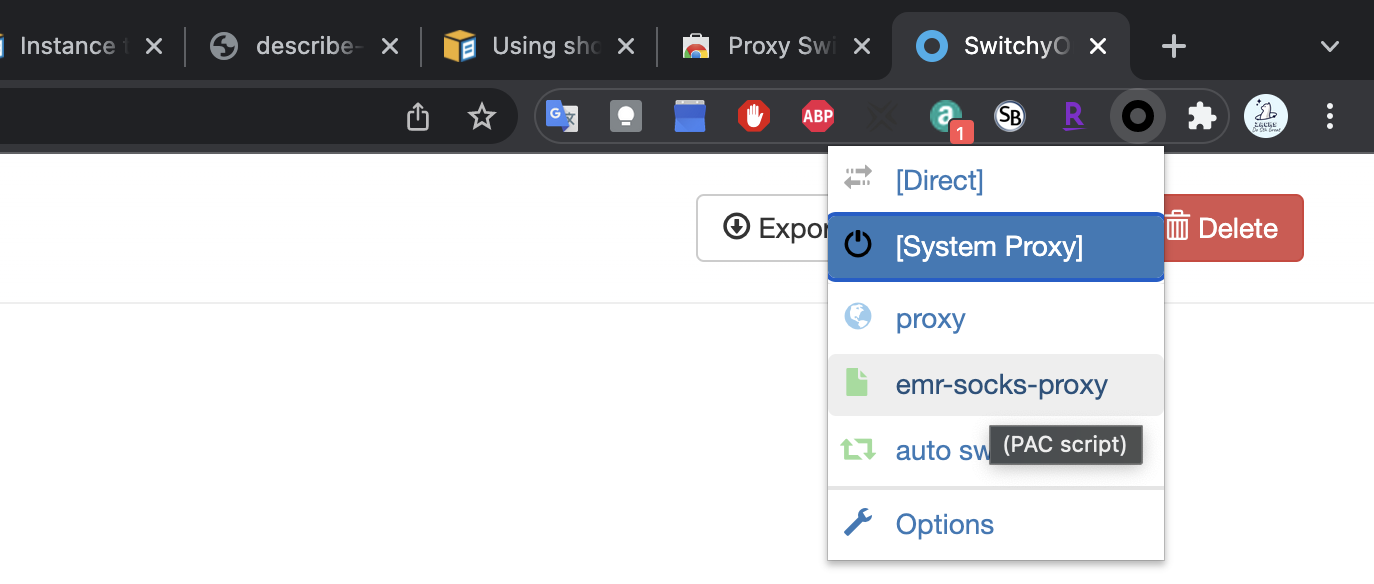
Click on Apply changes
Enable the emr-socks-proxy profile.
Once, you have configured the proxy, you can access the Spark UI using the command (replace the master node public DNS for you):
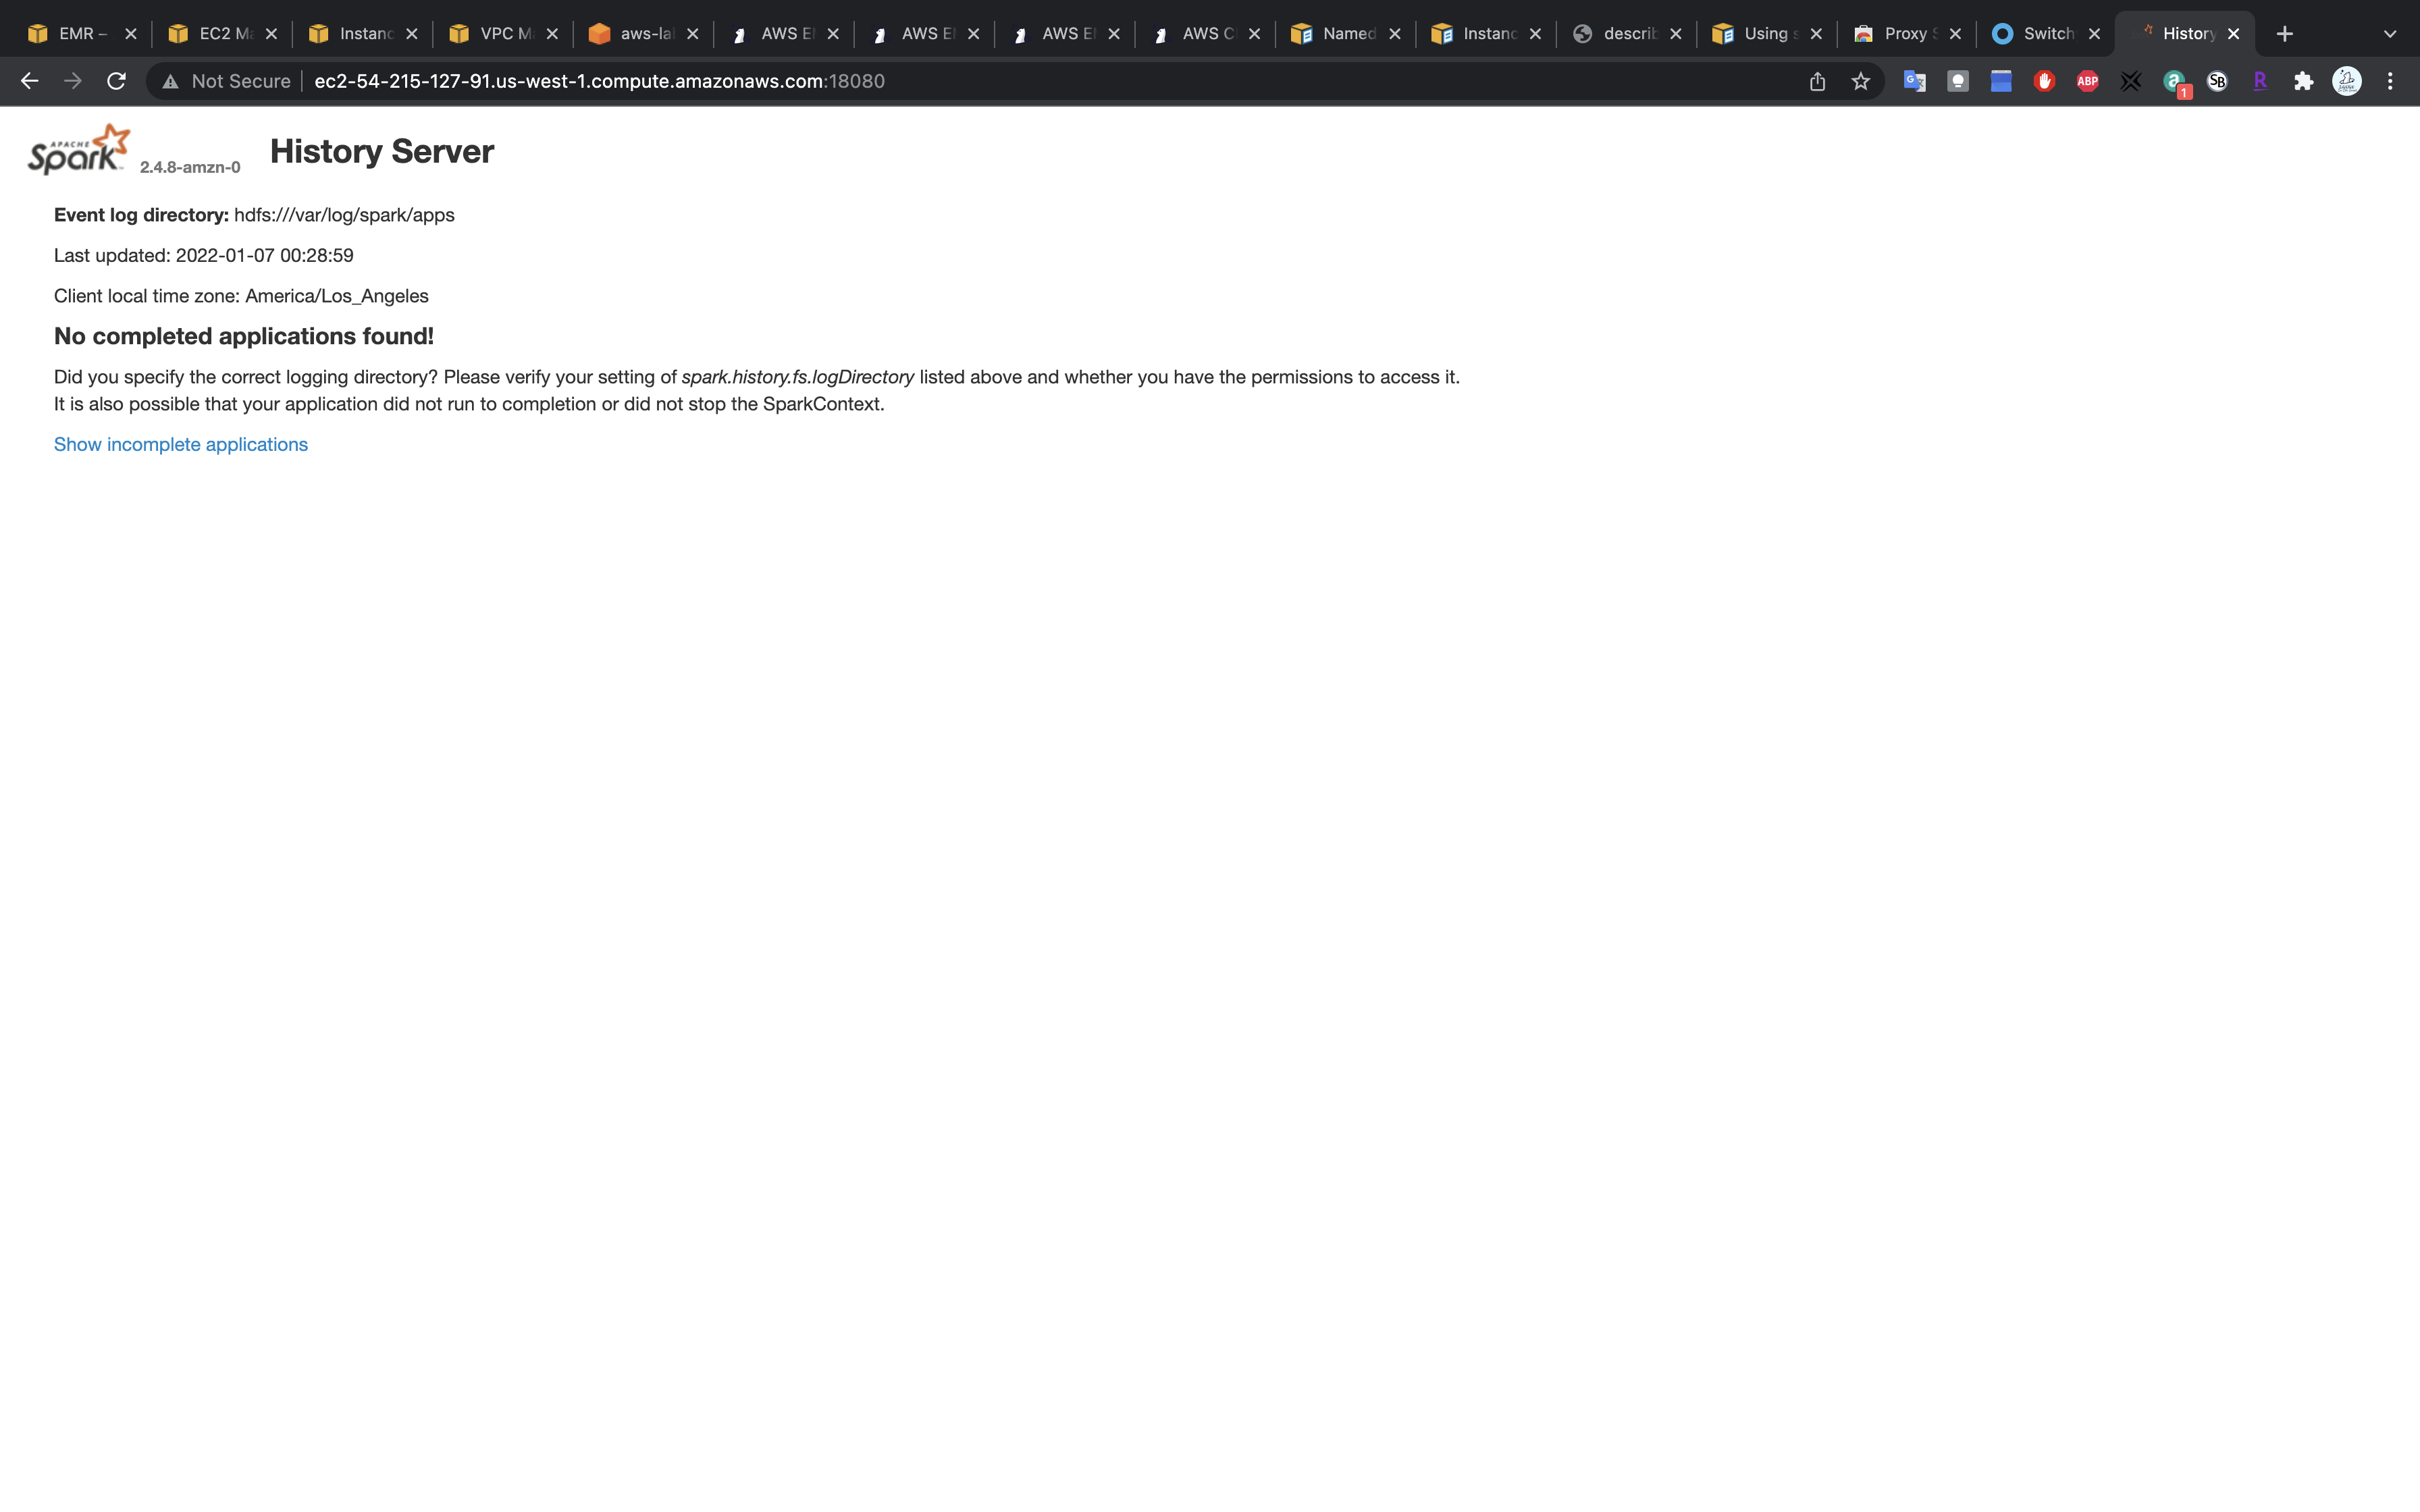
Spark UI, accessed from the CLI (note the URL above). Though, you can access the same Spark UI by selecting the cluster summary from the EMR console → Clusters, and clicking on the Persistent user interface hyperlink.
Note - Do not forget to Terminate your EMR cluster after your exercise is finished.
Submitting Spark Scripts
Task Details
- Upload files to S3
- Launch a EMR cluster with Bootstrap action and Jupyter Notebook compatibility.
- Submit a Spark application on your master node.
S3 Configuration
Make a bucket
Upload csv file to S3
Here is the link to the GitHub repo where a copy of the exercise instructions are located along with cities.csv file.
Download the cities.csv dataset to your local machine.
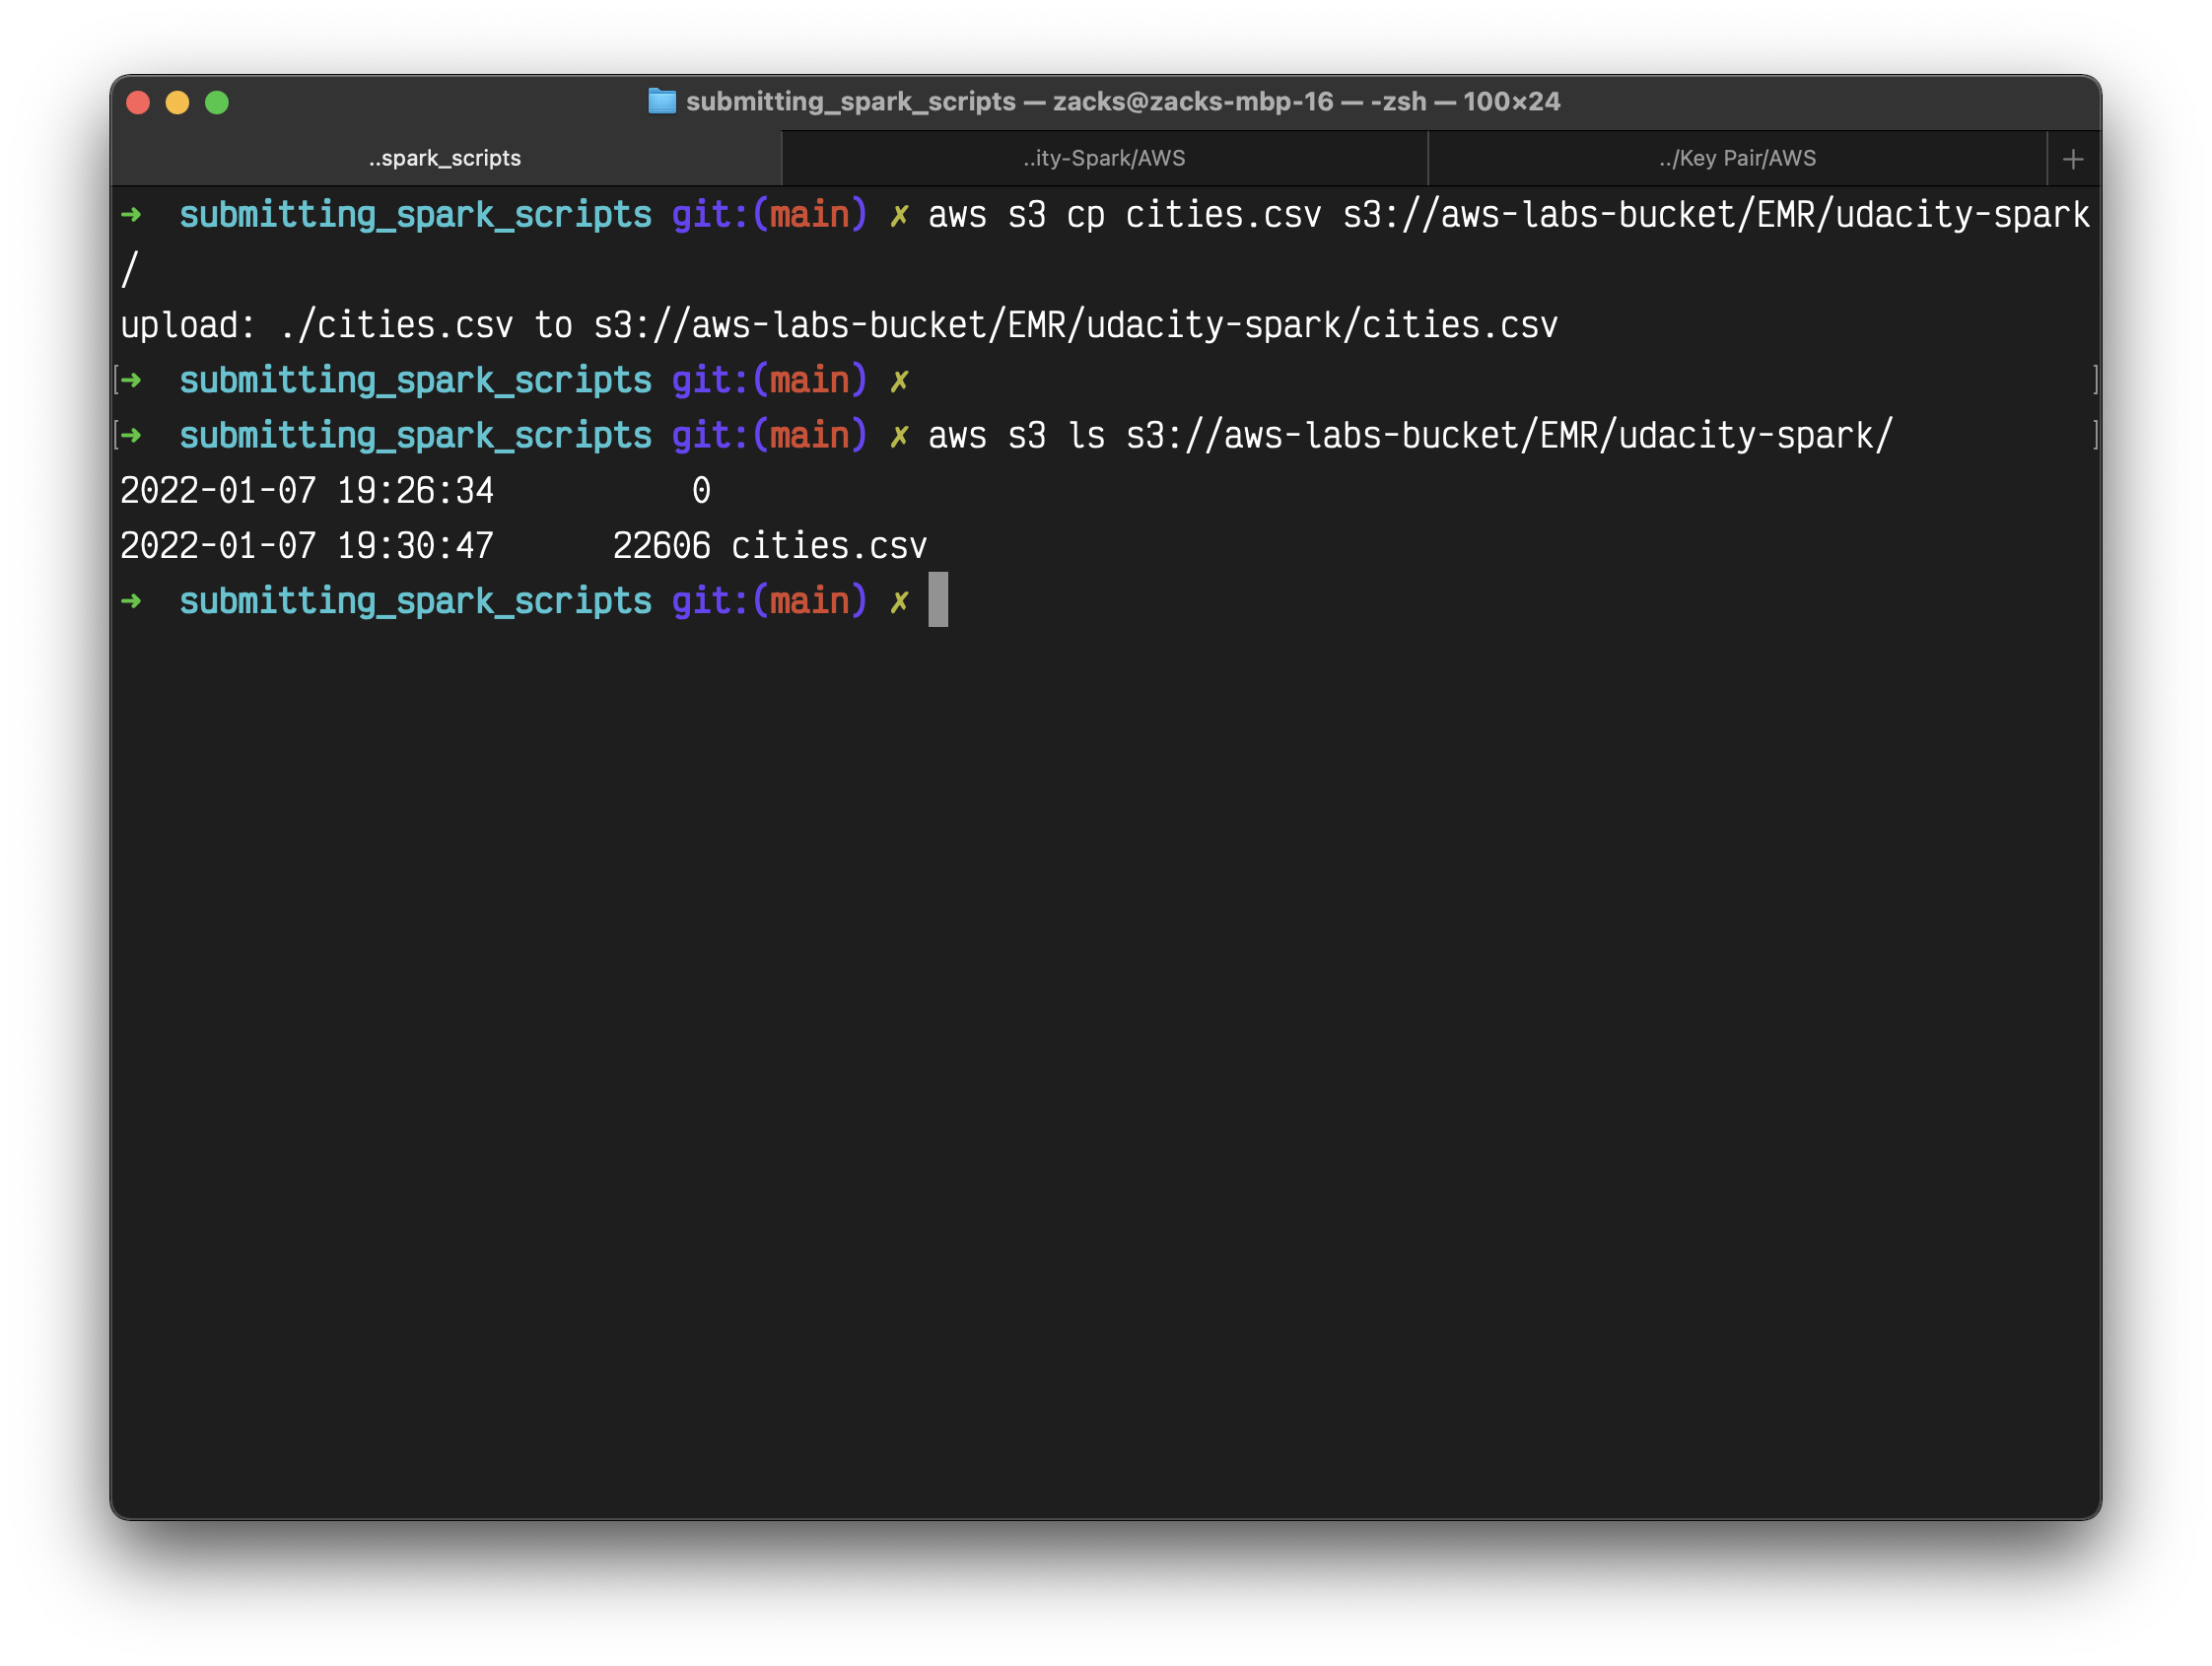
Upload a file into an S3 location using the AWS S3 console, or you can use the AWS CLI command, like aws s3 cp <your current file location>/<filename> s3://<bucket_name>.
1 | aws s3 cp cities.csv s3://aws-labs-bucket/EMR/spark-udacity/ |
List your bucket
1 | aws s3 ls s3://aws-labs-bucket/EMR/spark-udacity/ |
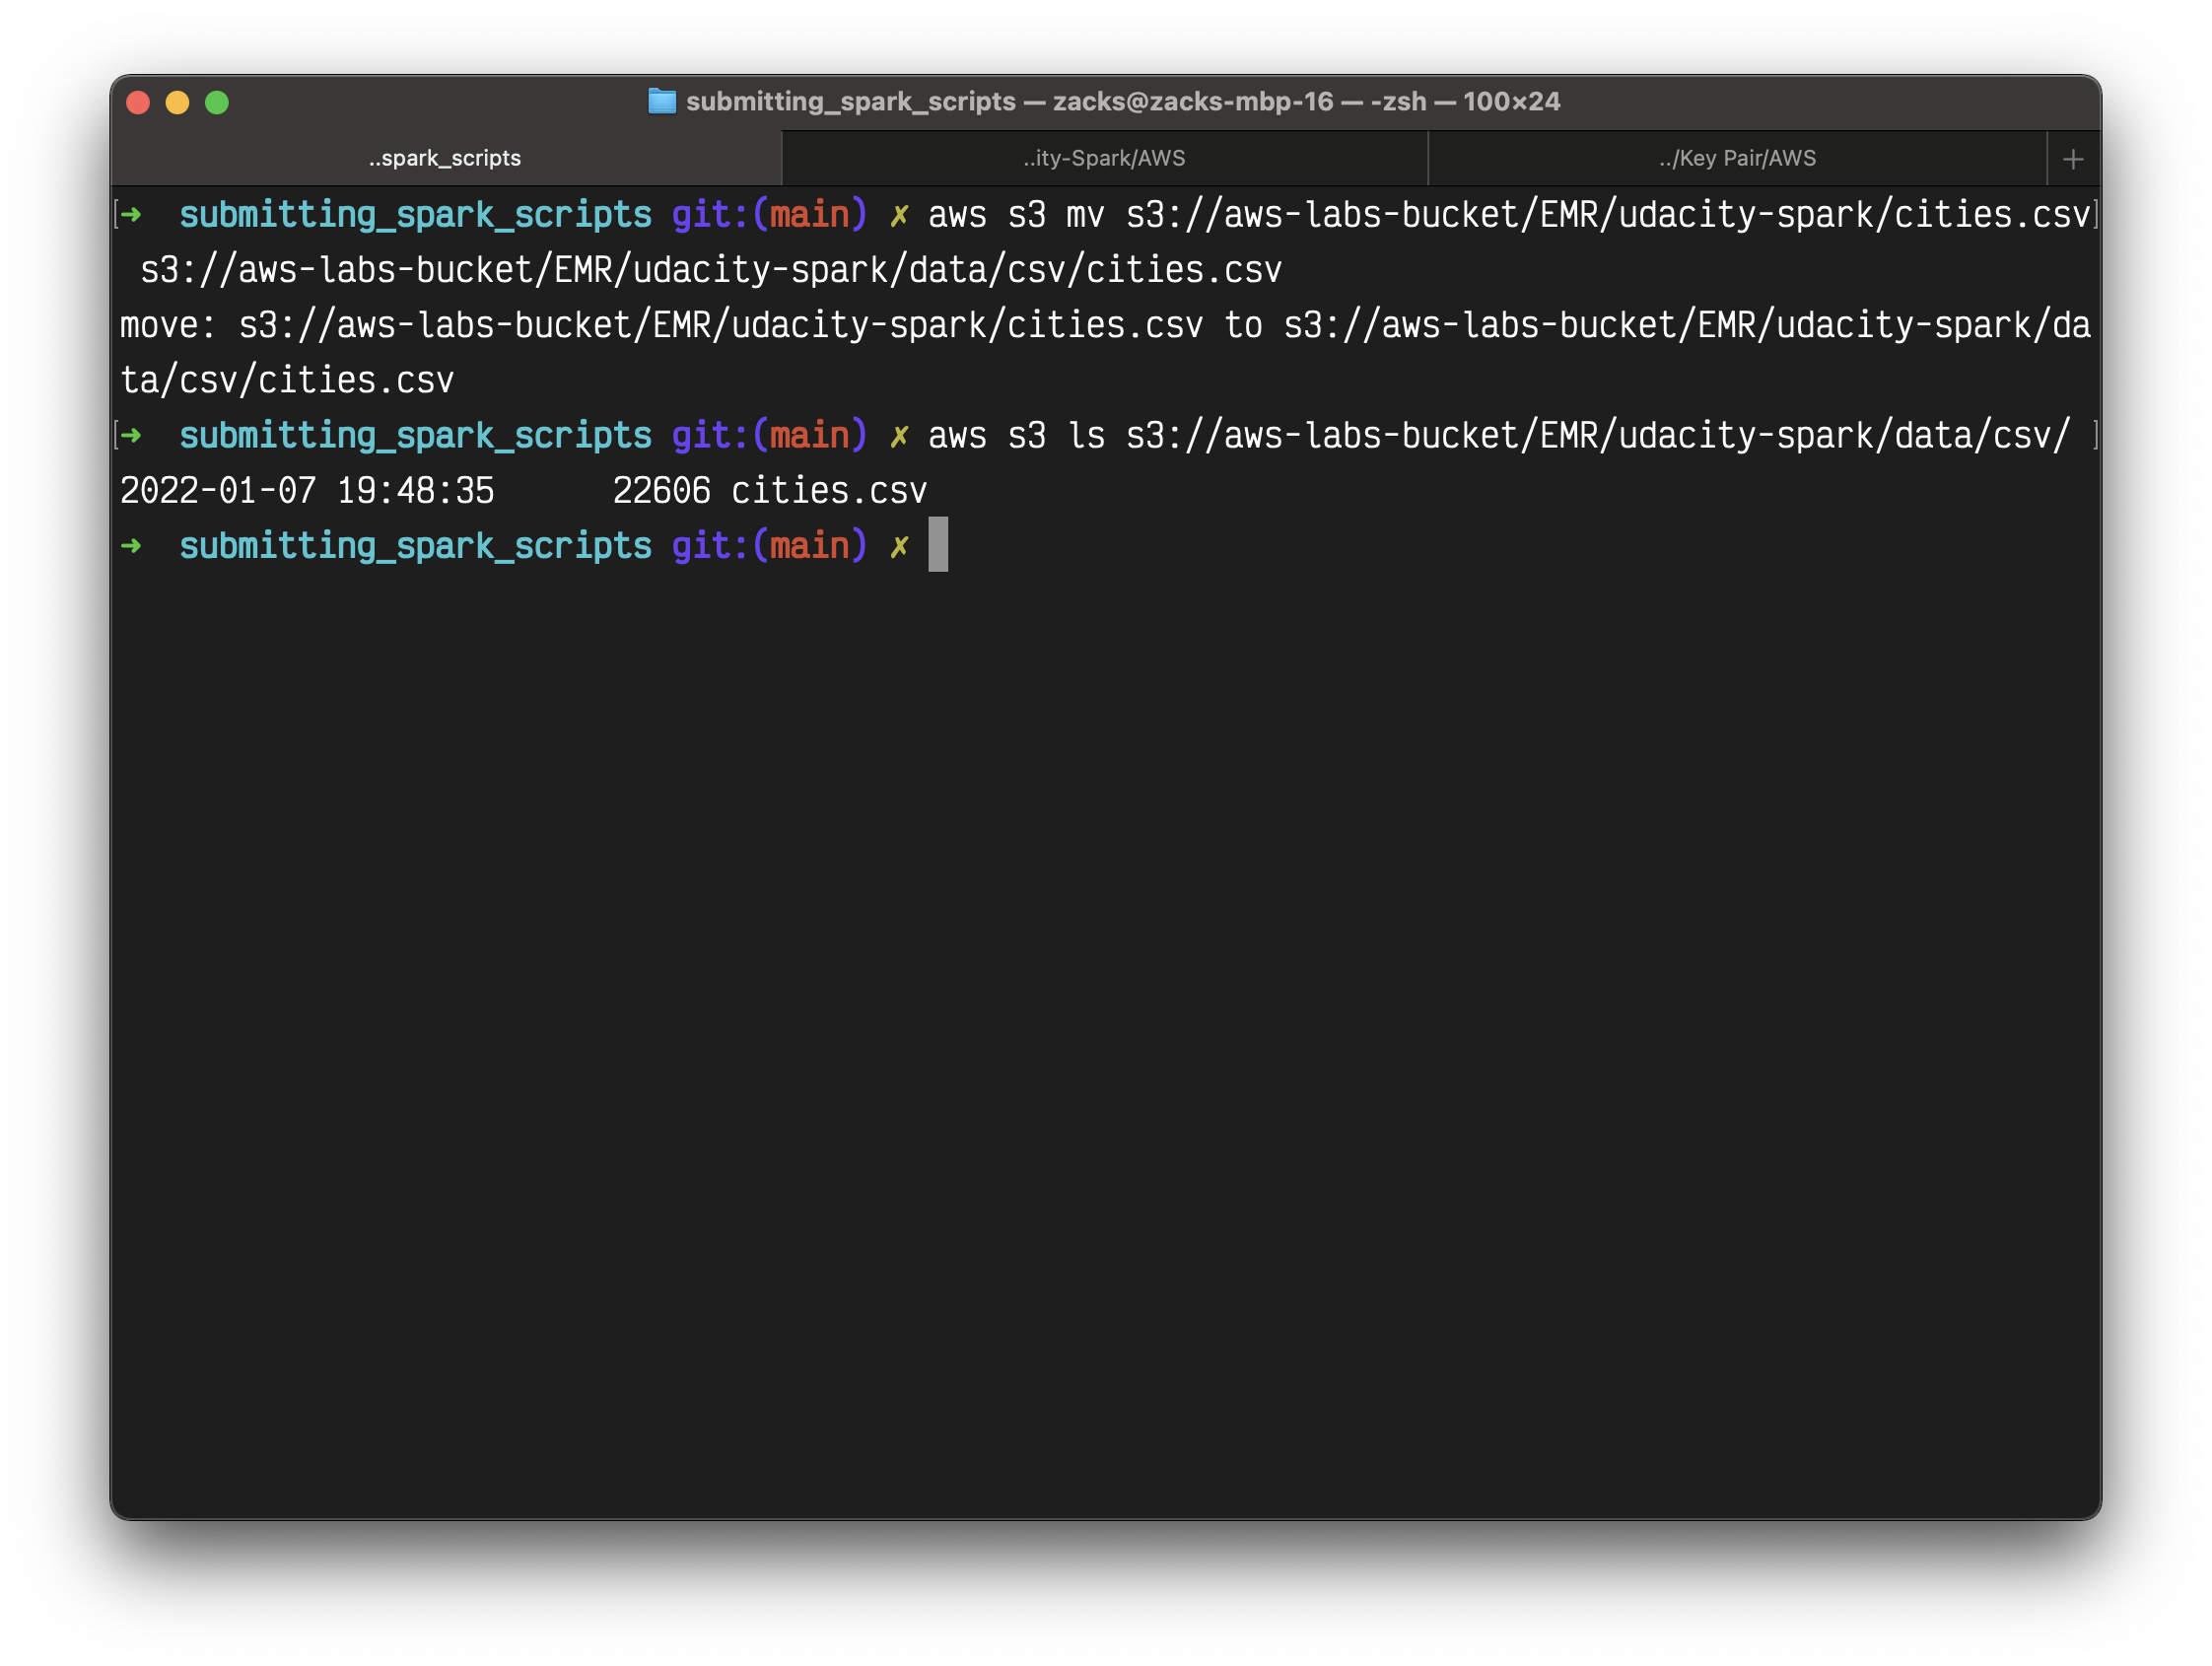
You can also move the file to another directory through AWS CLI. If the directory does not exist, AWS will create one.
For example, here I moved cities.csv from spark-udacity to spark-udacity/data/csv/
1 | aws s3 mv s3://aws-labs-bucket/EMR/spark-udacity/cities.csv s3://aws-labs-bucket/EMR/spark-udacity/data/csv/cities.csv |
List your bucket
1 | aws s3 ls s3://aws-labs-bucket/EMR/spark-udacity/data/csv/ |
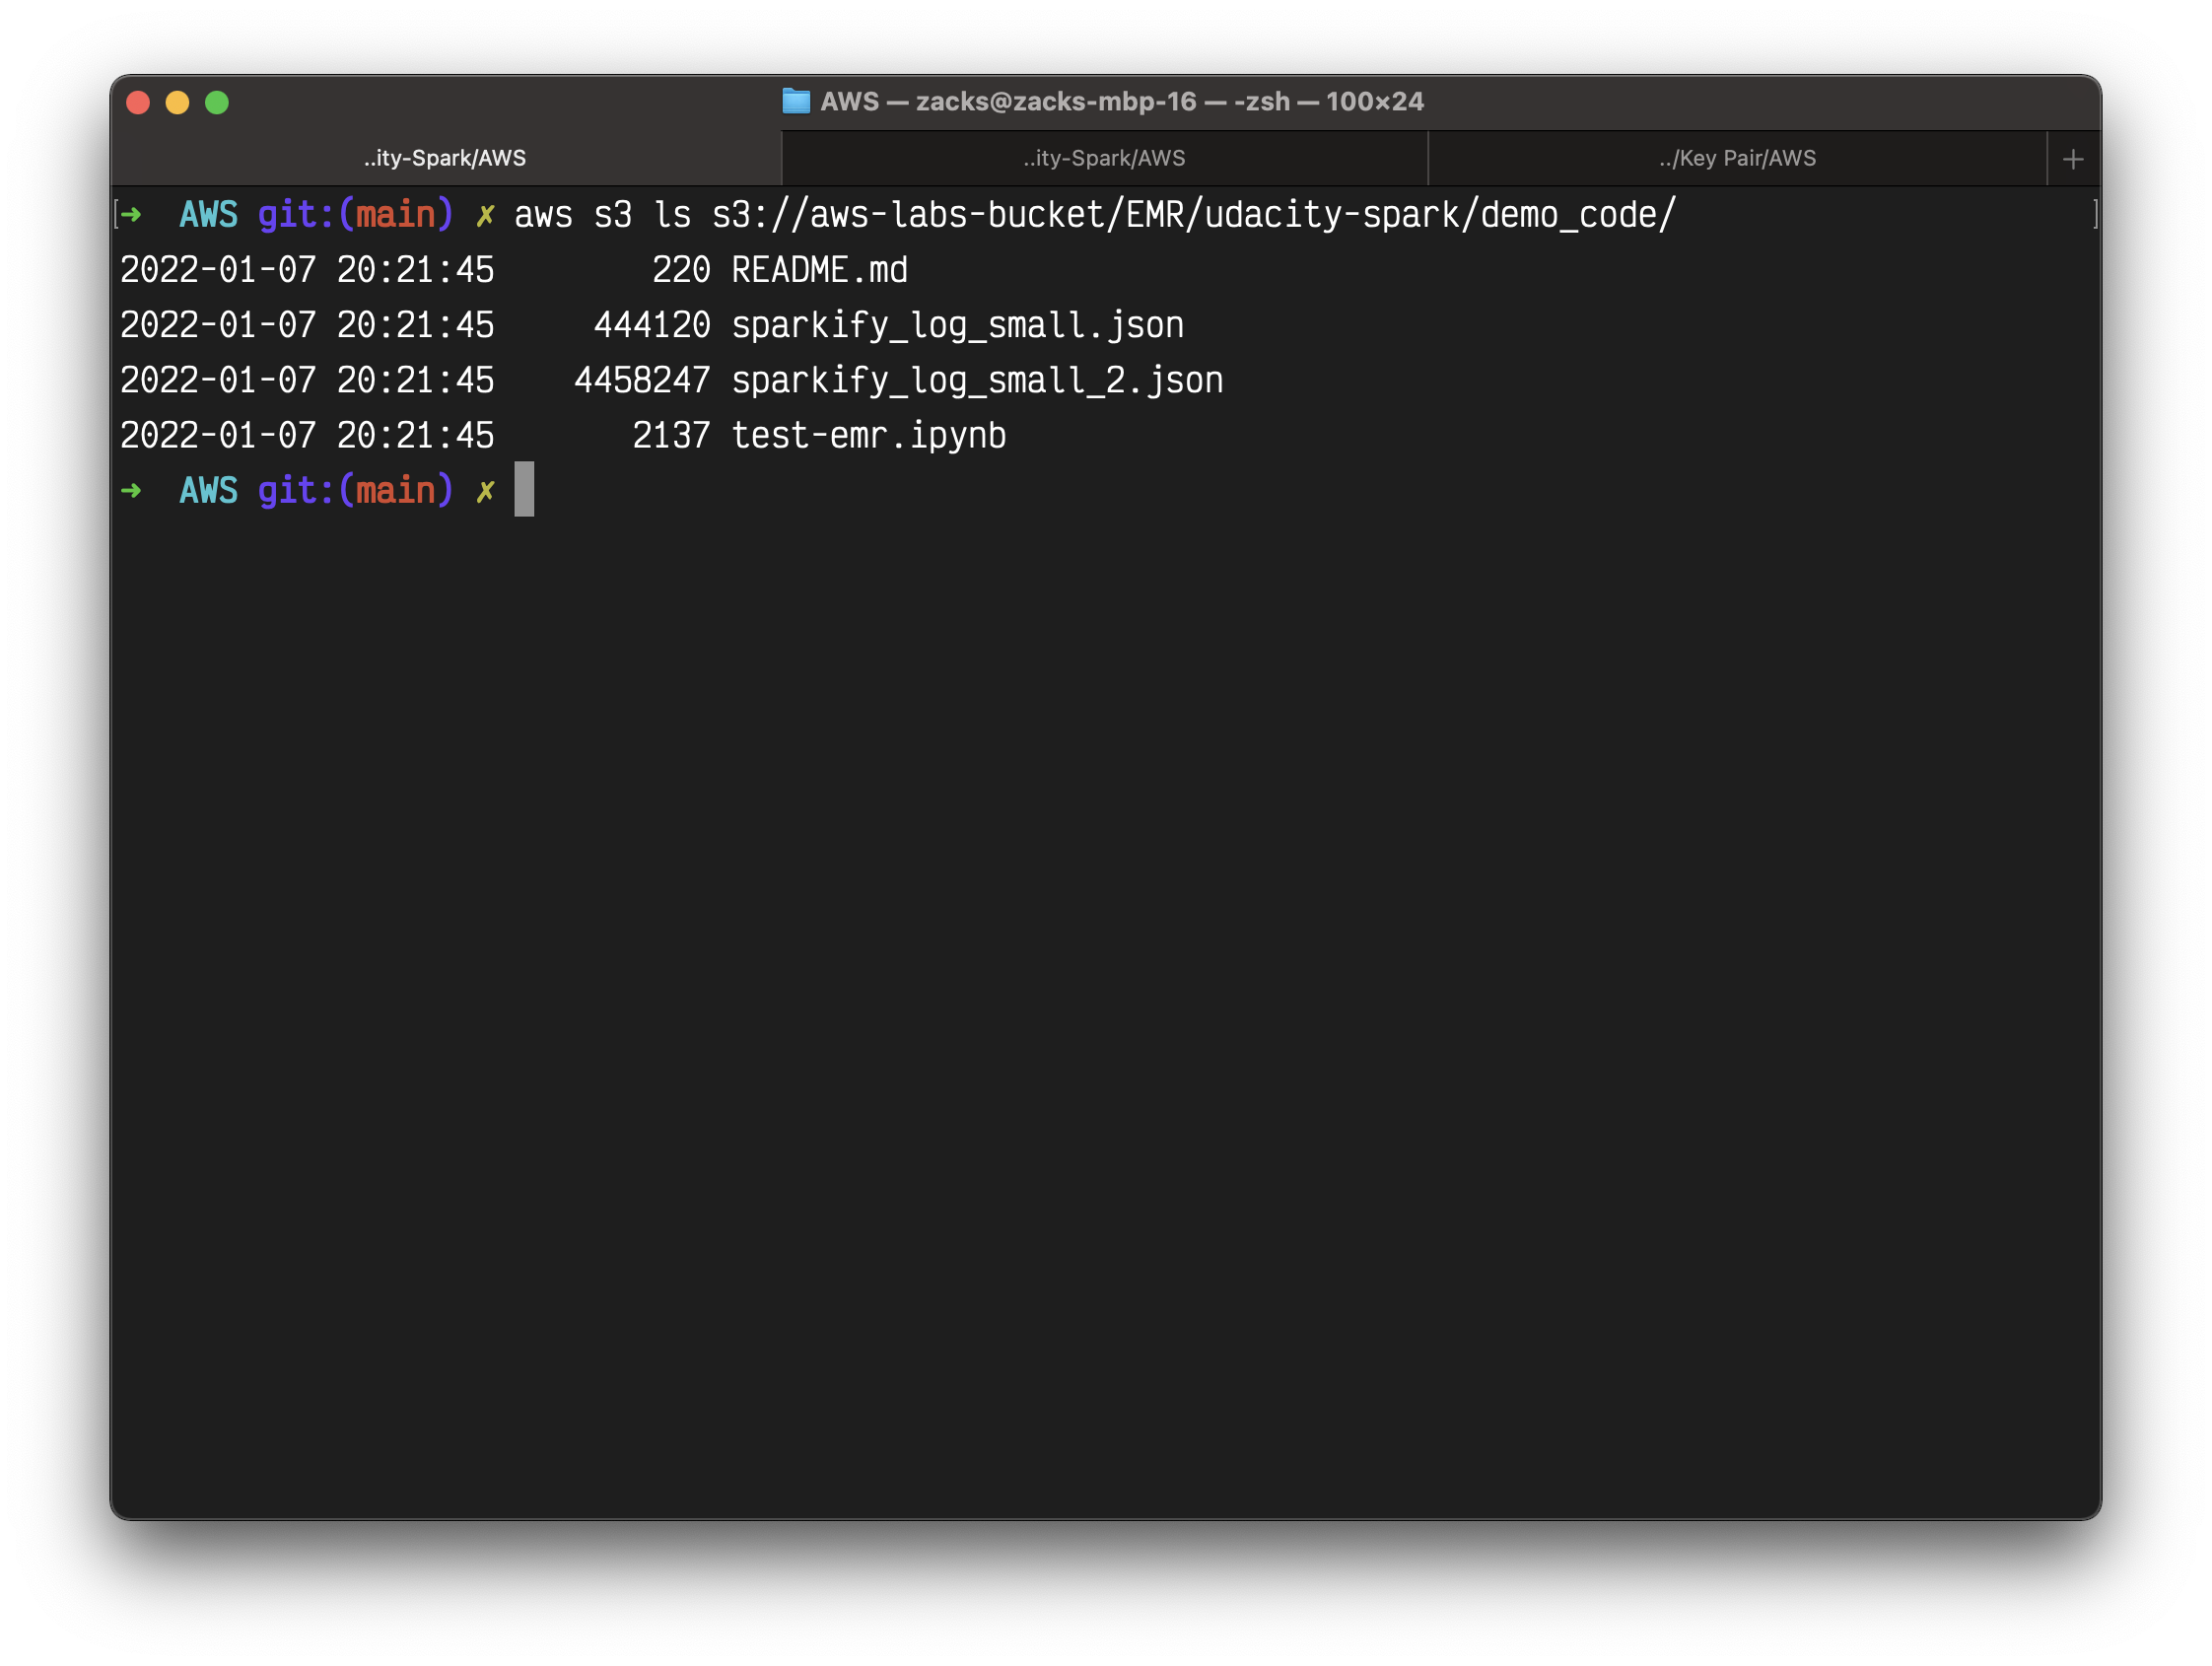
Upload the demo_code to S3
Upload the demo_code directory.
1 | aws s3 cp demo_code s3://aws-labs-bucket/EMR/spark-udacity/demo_code --recursive |

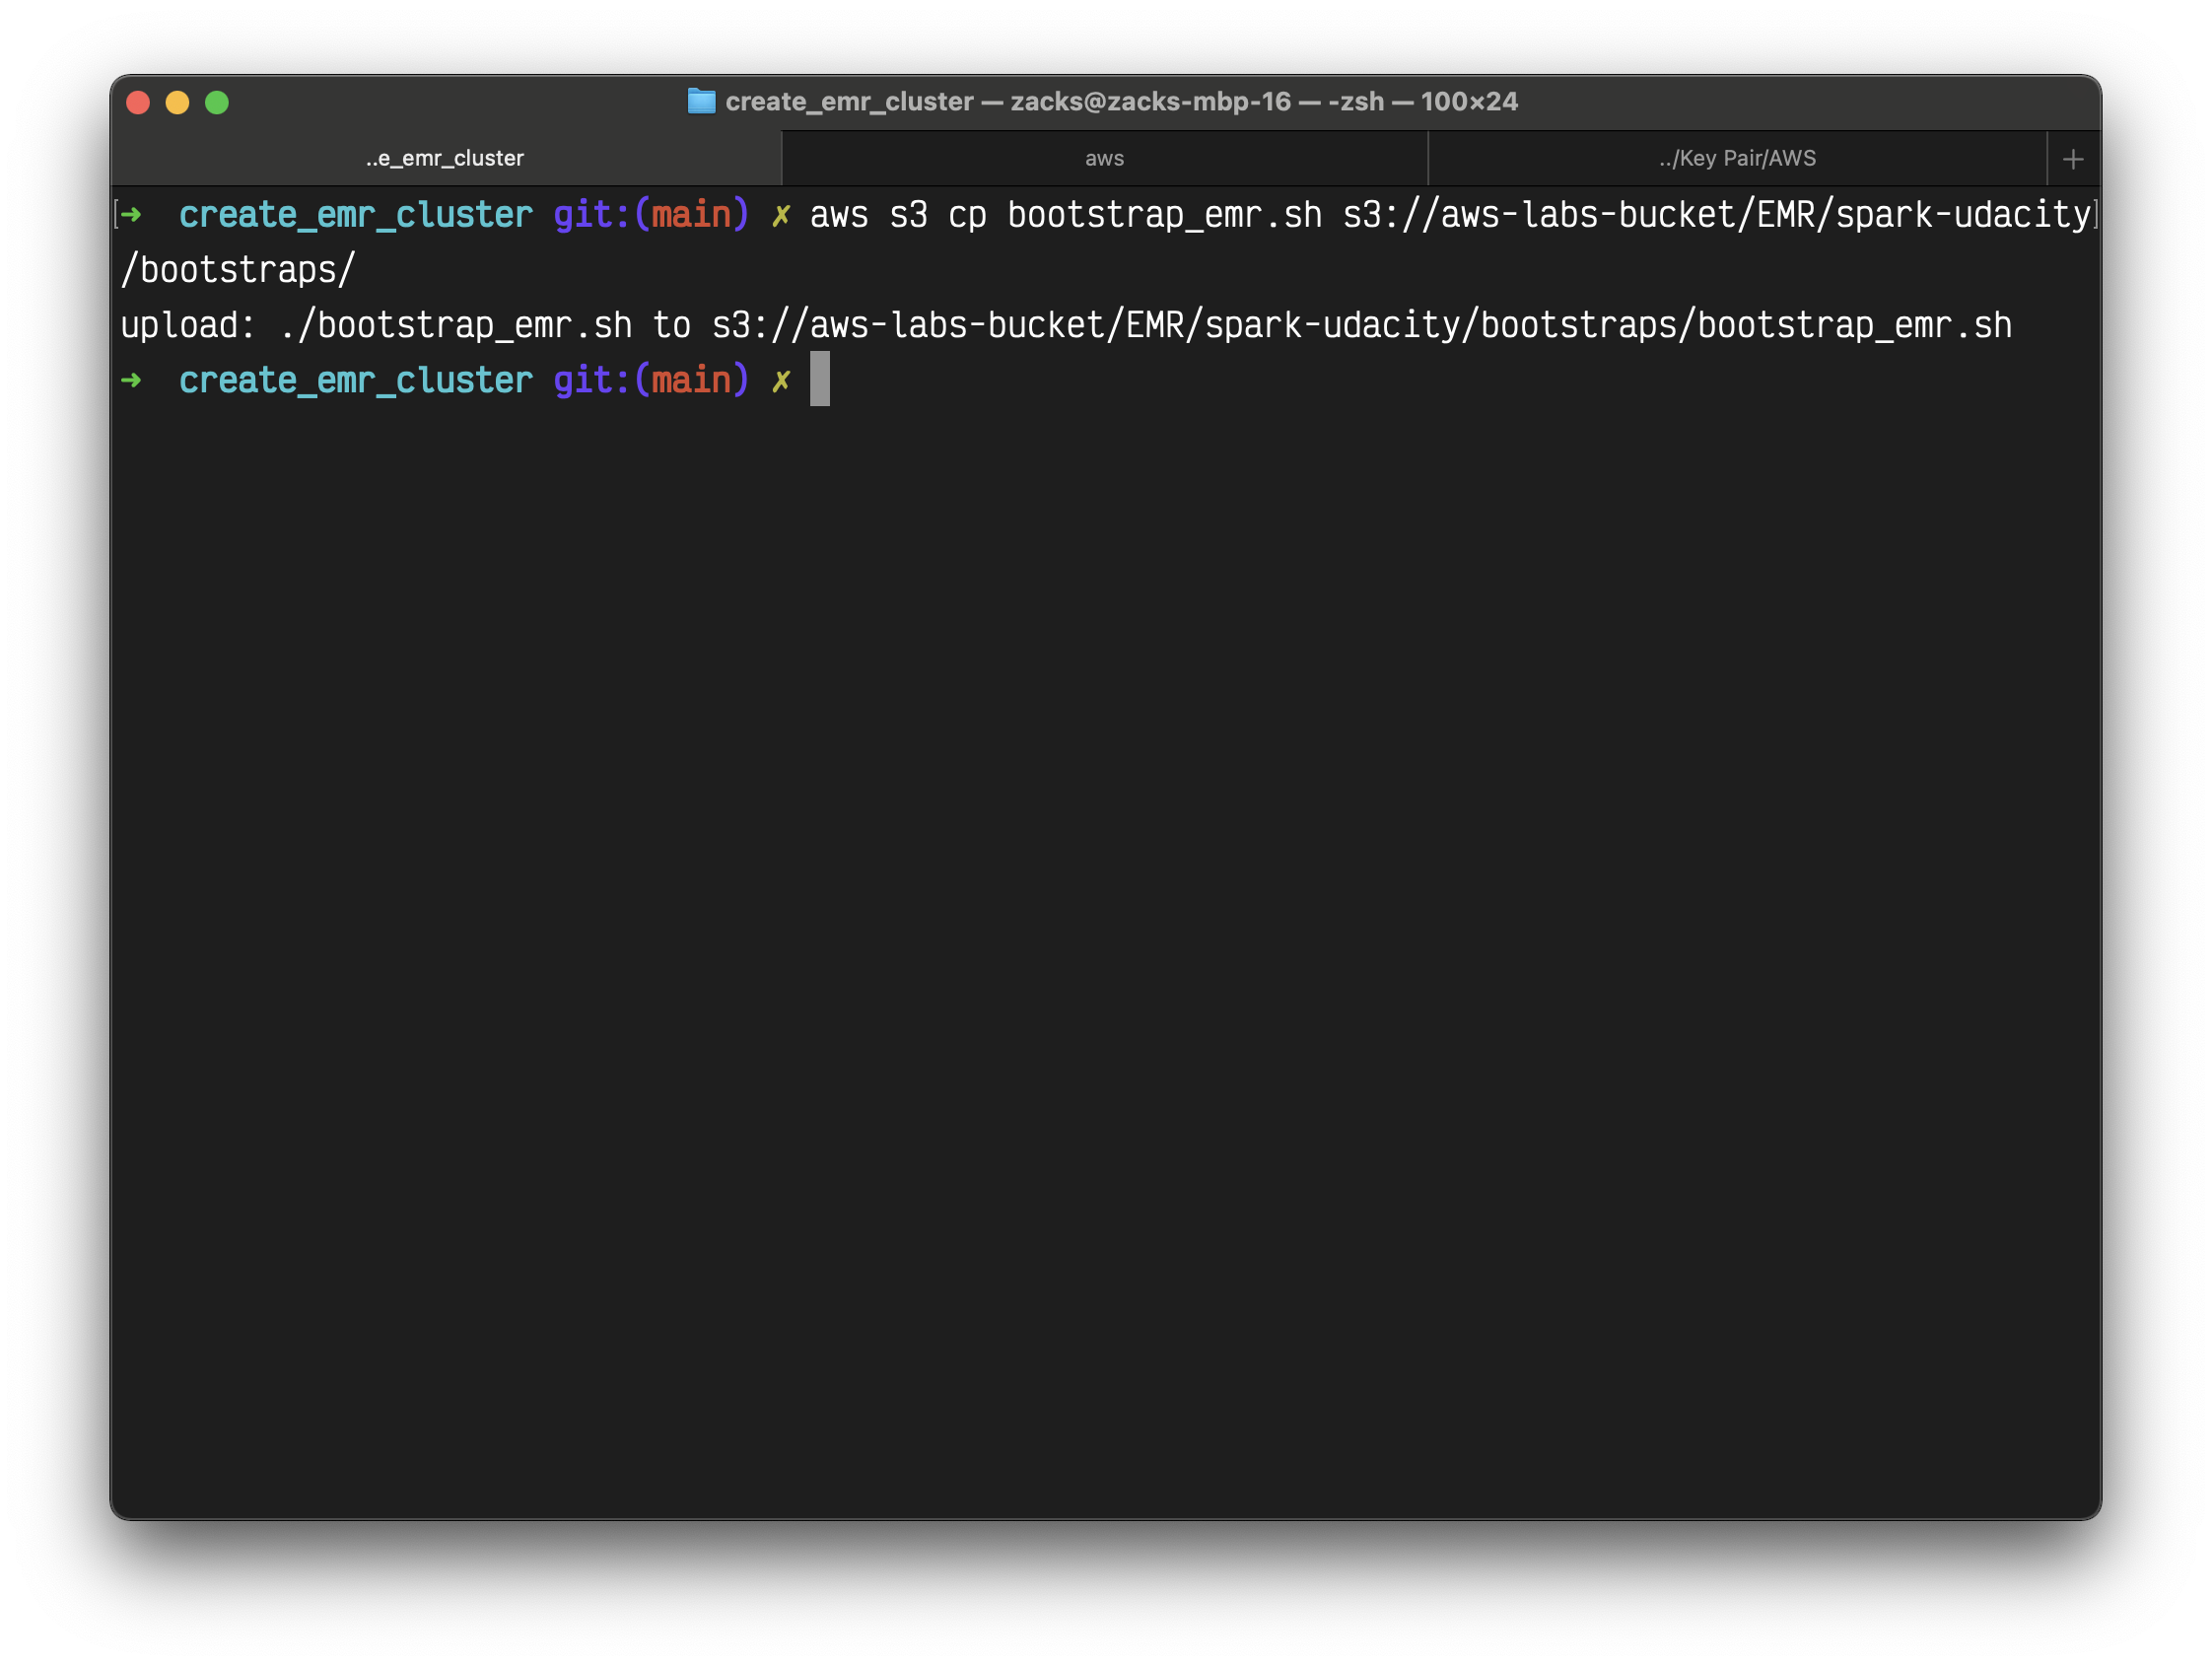
Upload Bootstrap file to S3
1 |
|
Replace s3://<YOUR_BUCKET>/users/<YOUR_NAME>/bootstraps with your bucket name.
Then save above code with name bootstrap_emr.sh.
Upload it to S3.
1 | aws s3 cp bootstrap_emr.sh s3://aws-labs-bucket/EMR/spark-udacity/bootstraps/ |
Validation
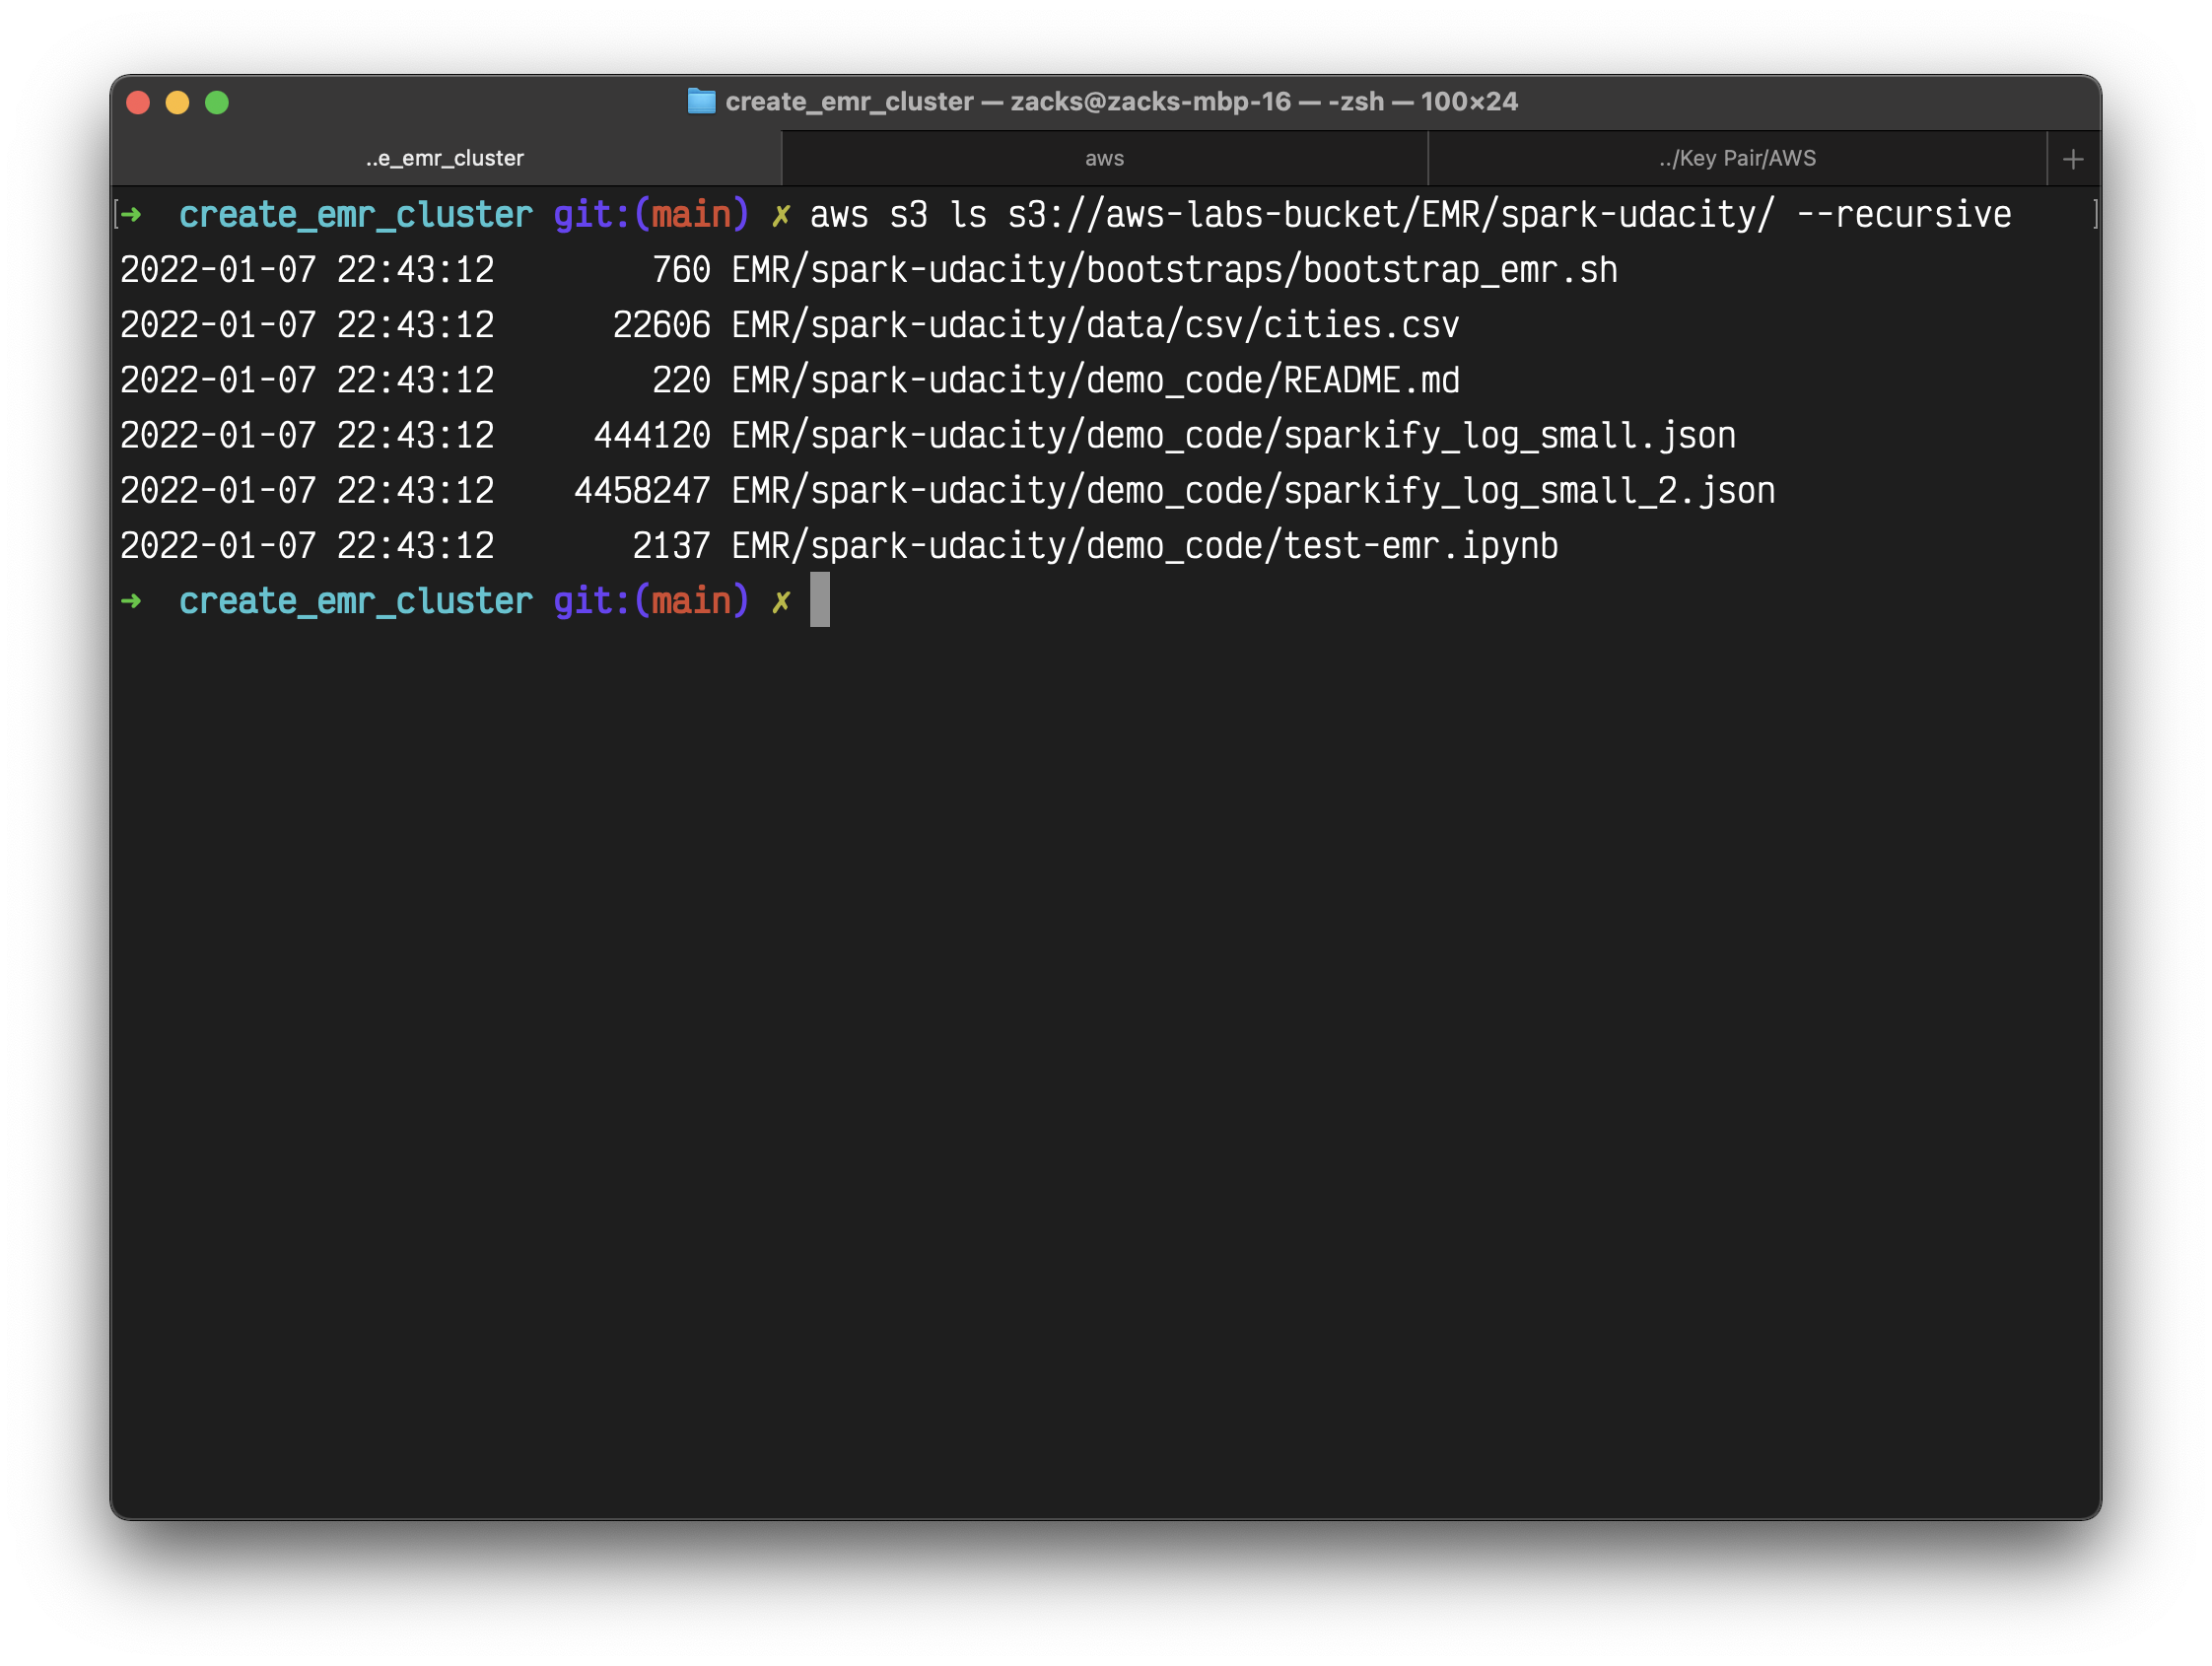
Now we should have the following files on S3.
1 | aws s3 ls s3://aws-labs-bucket/EMR/spark-udacity/ --recursive |
EMR Configuration
1 | #!/usr/bin/env python3 |
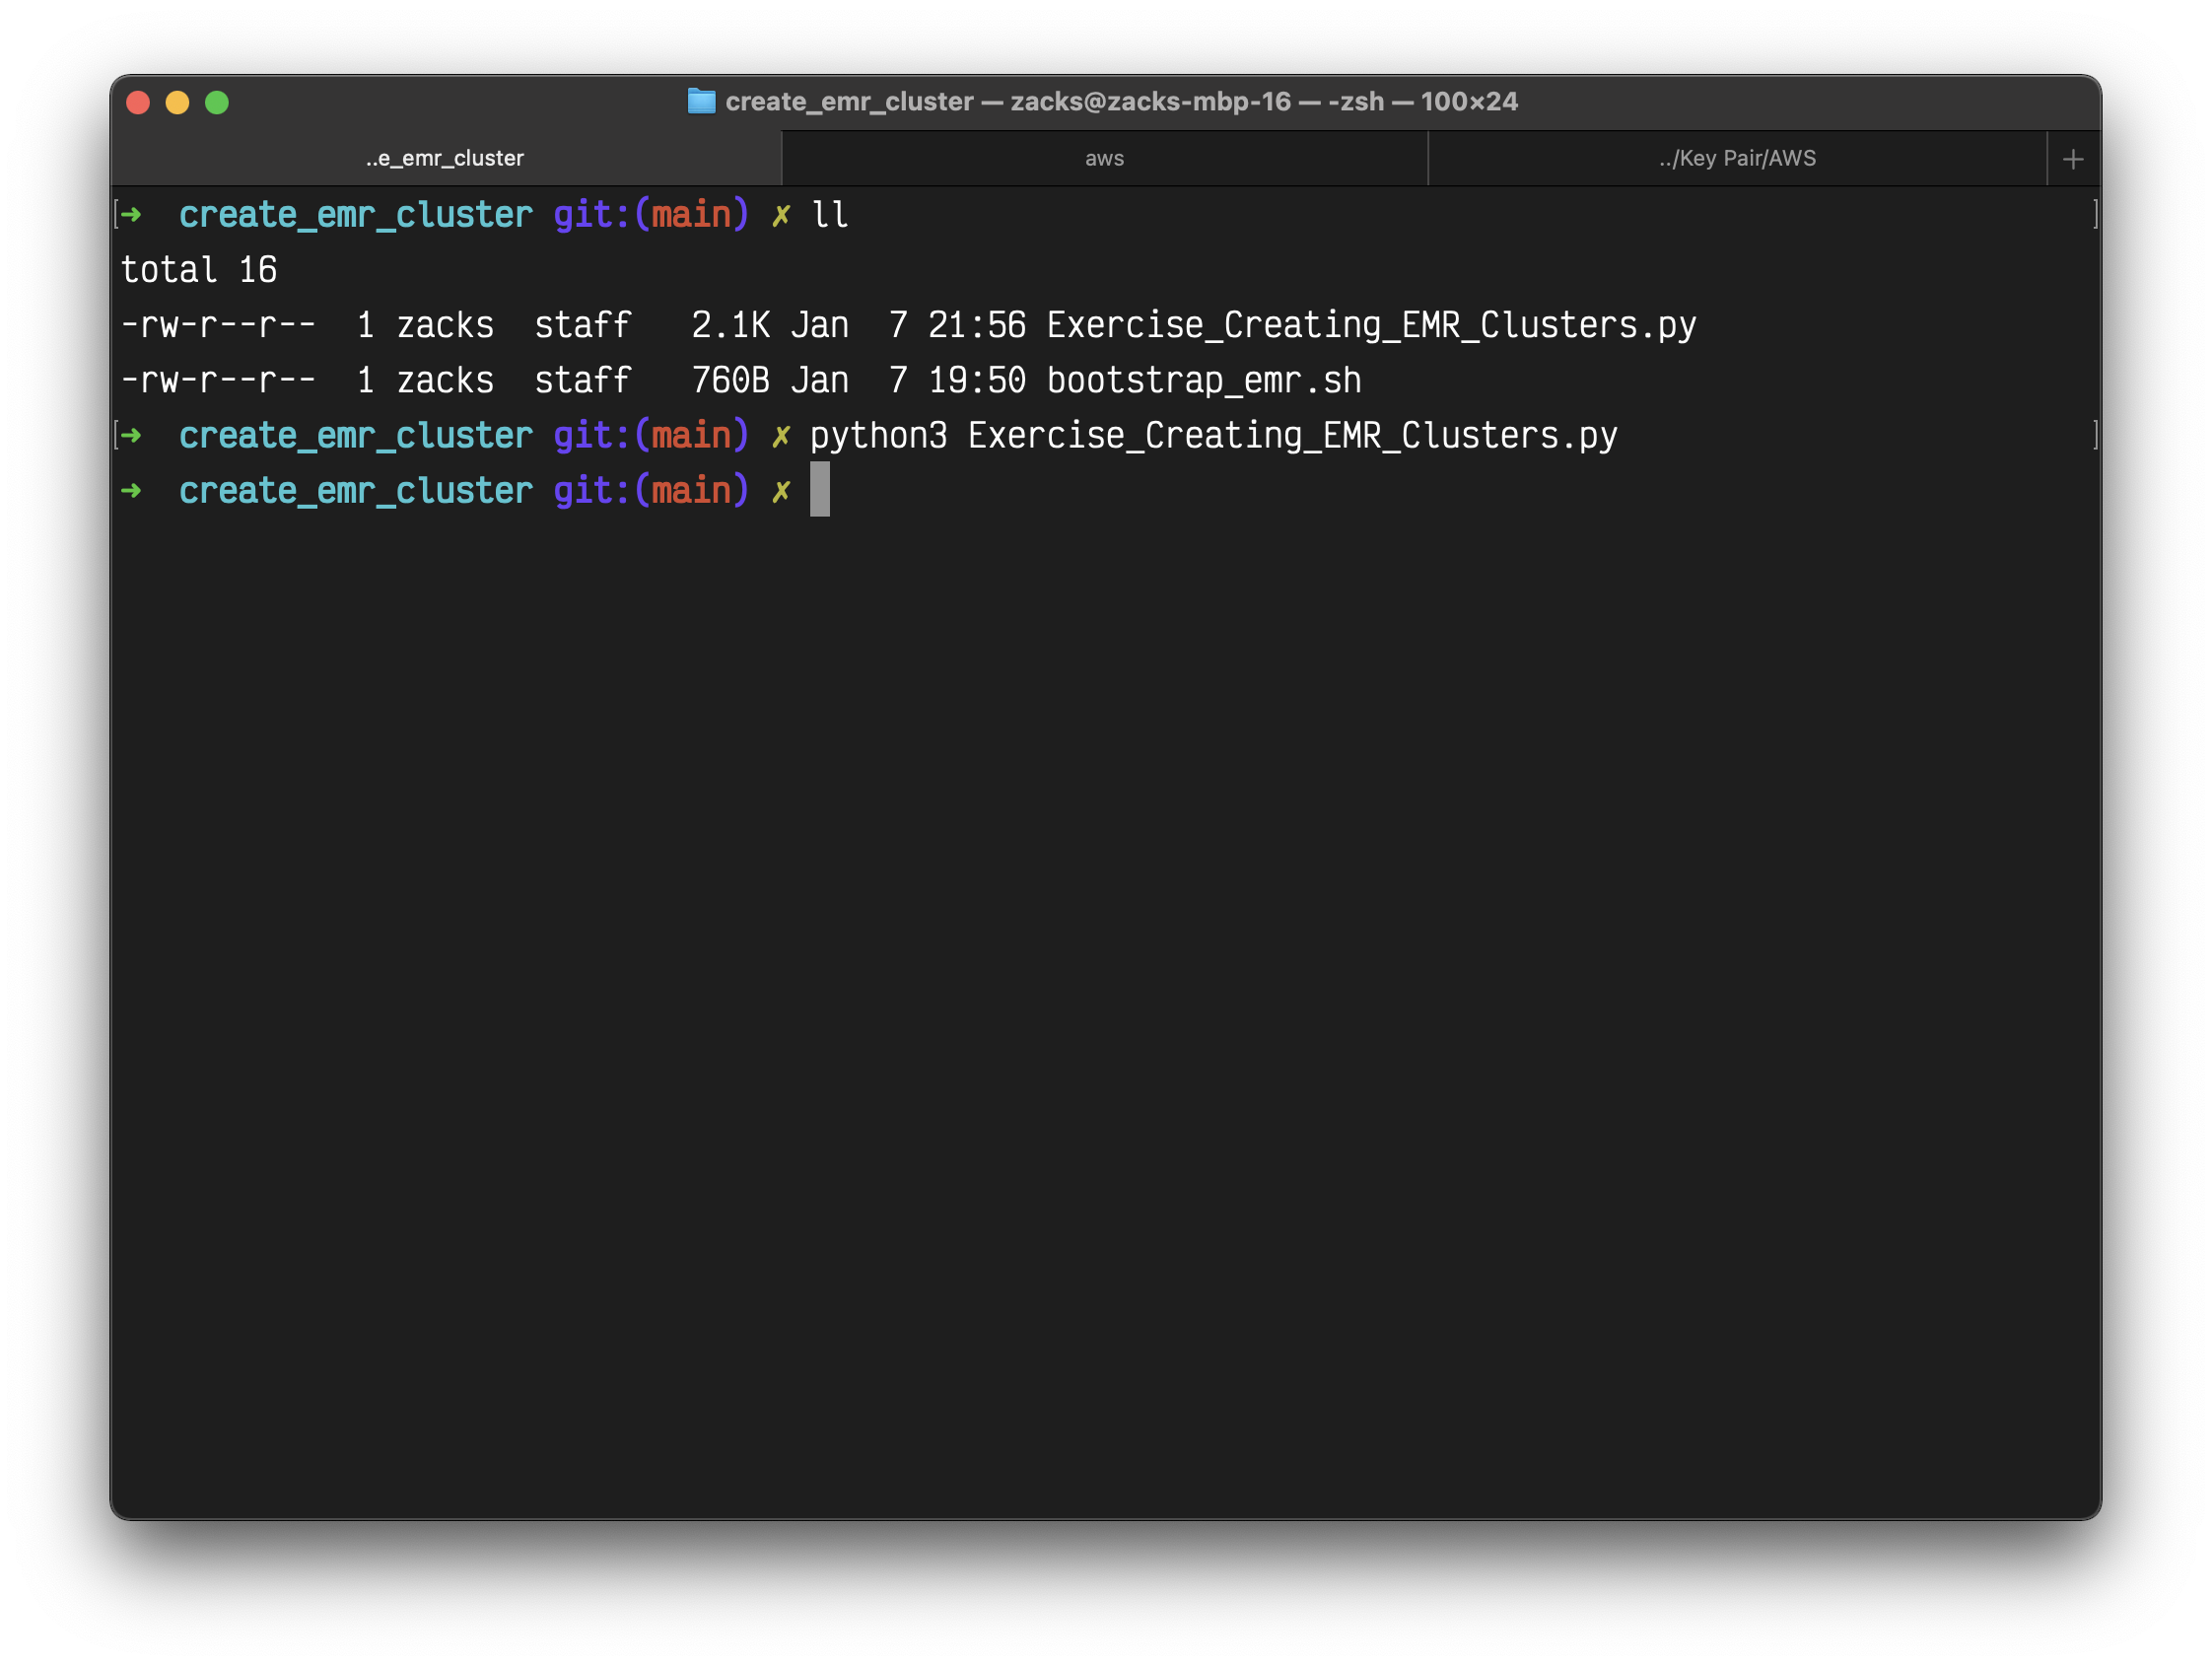
Replace the variables with your settings.
Save the above code with name Exercise_Creating_EMR_Clusters.py
Waiting until the Status change from Starting to Bootstrapping to Waiting
Validation
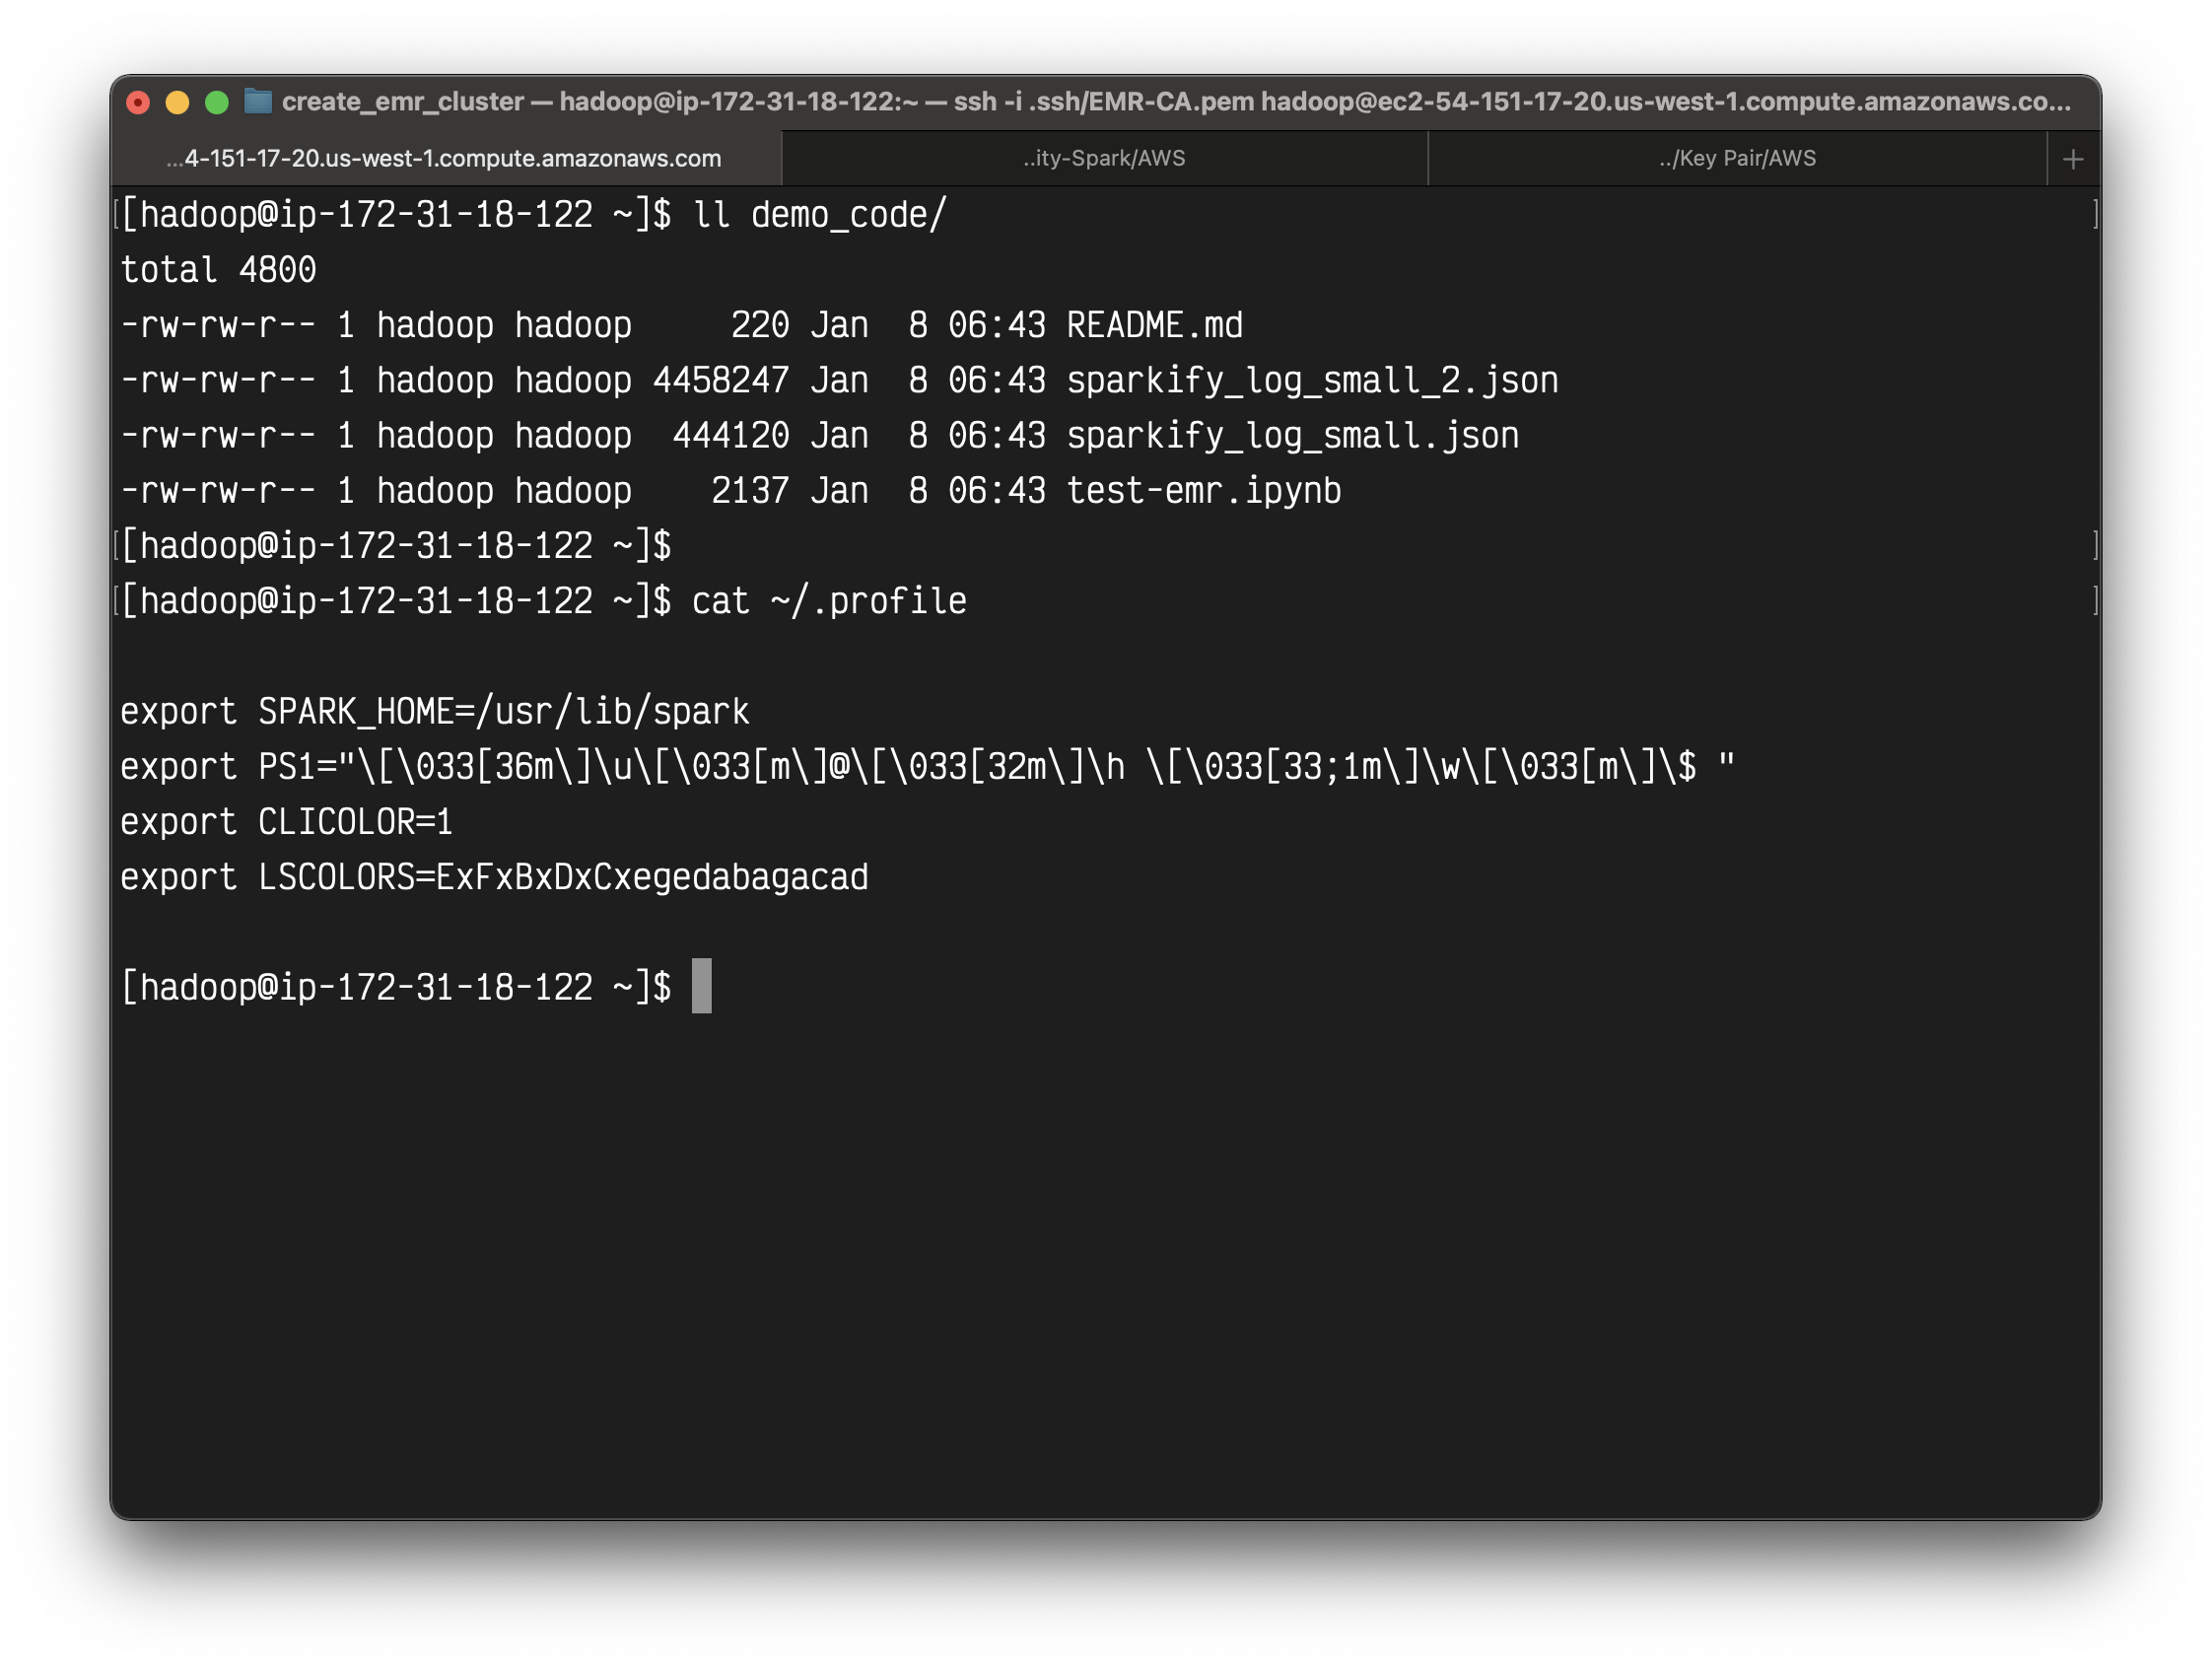
Connect with your master node through ssh.
Check if the bootstrap-actions was executed correctly.
Install Applications (Optional)
Configure applications
Reconfigure an instance group in a running cluster
You can install Apache application after you created your EMR cluster.
Some EMR release may not supported.
1 | aws emr install-applications --applications Name=hadoop Name=livy --cluster-id j-1K3OVRNIPV0DH |
Jupyter Notebook
- The cluster must be launched with Hadoop, Spark, and Livy installed. Other applications may be installed, but EMR Notebooks currently supports Spark clusters only.
- For EMR release versions 5.32.0 and later, or 6.2.0 and later, your cluster must also be running the Jupyter Enterprise Gateway application in order to work with EMR Notebooks.
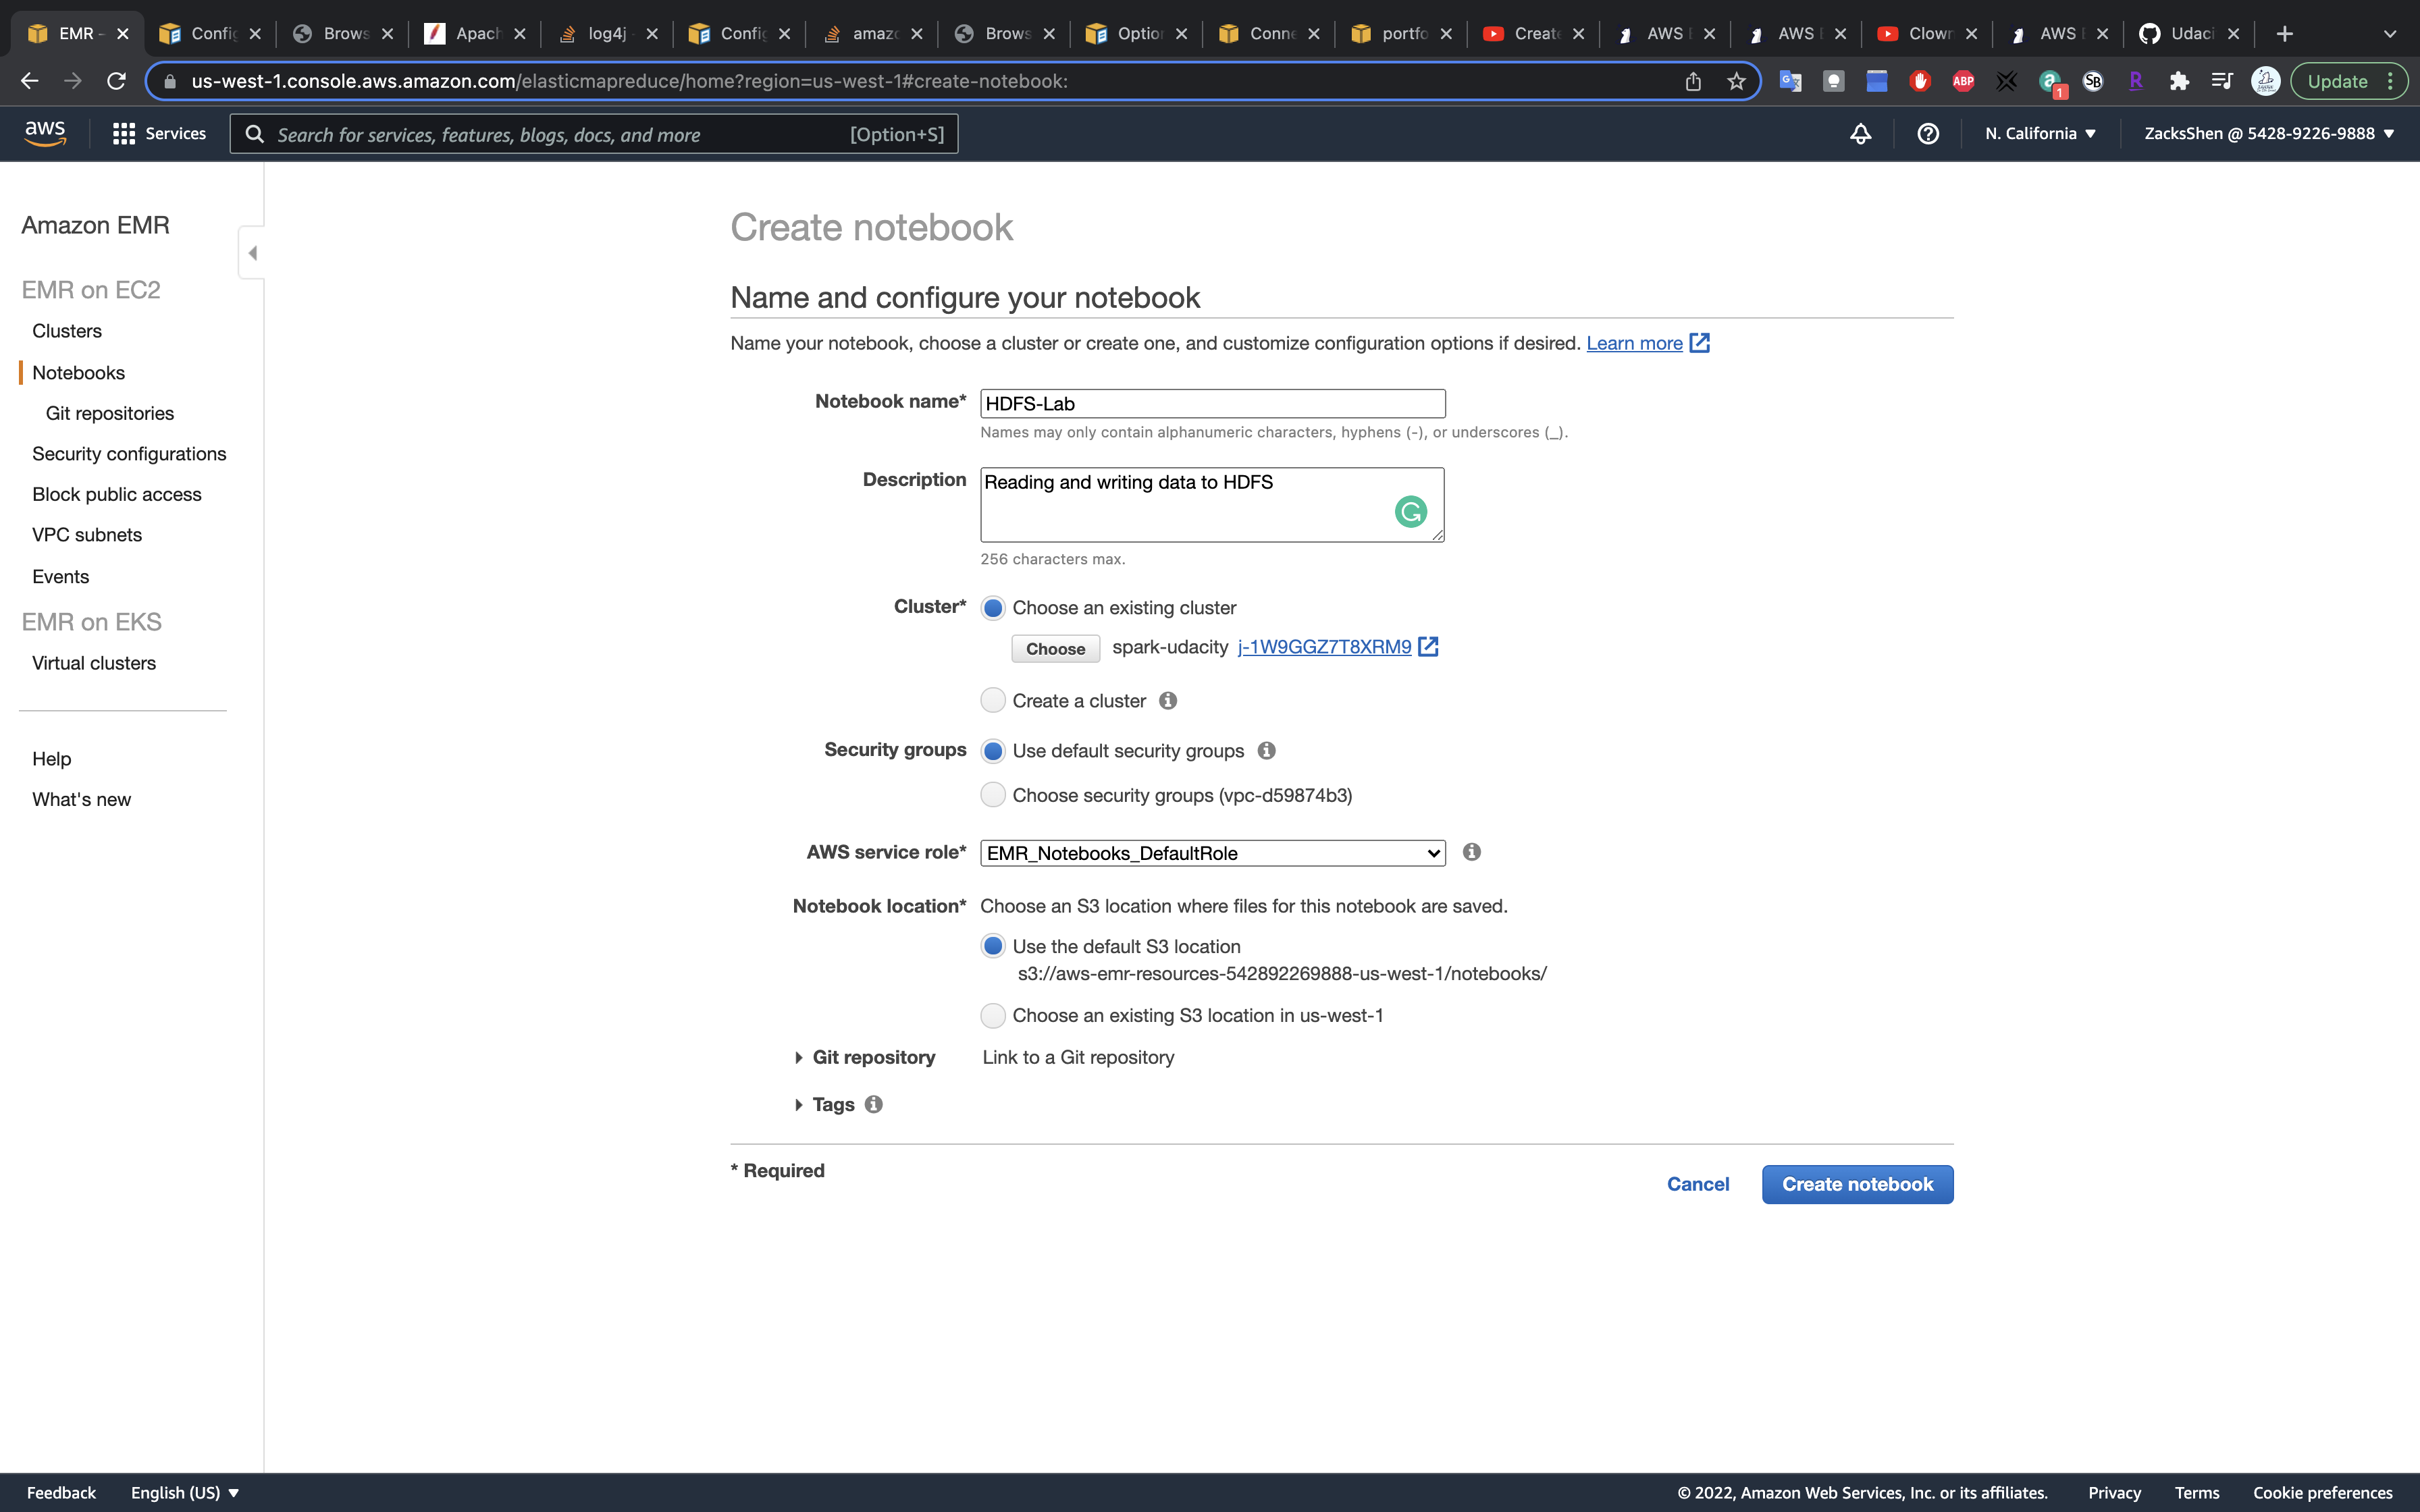
Click on Create notebook

- Notebook name:
test-emr - Cluster: choose the one you just created
- AWS service role:
Create default roleorEMR_Notebooks_DefaultRole
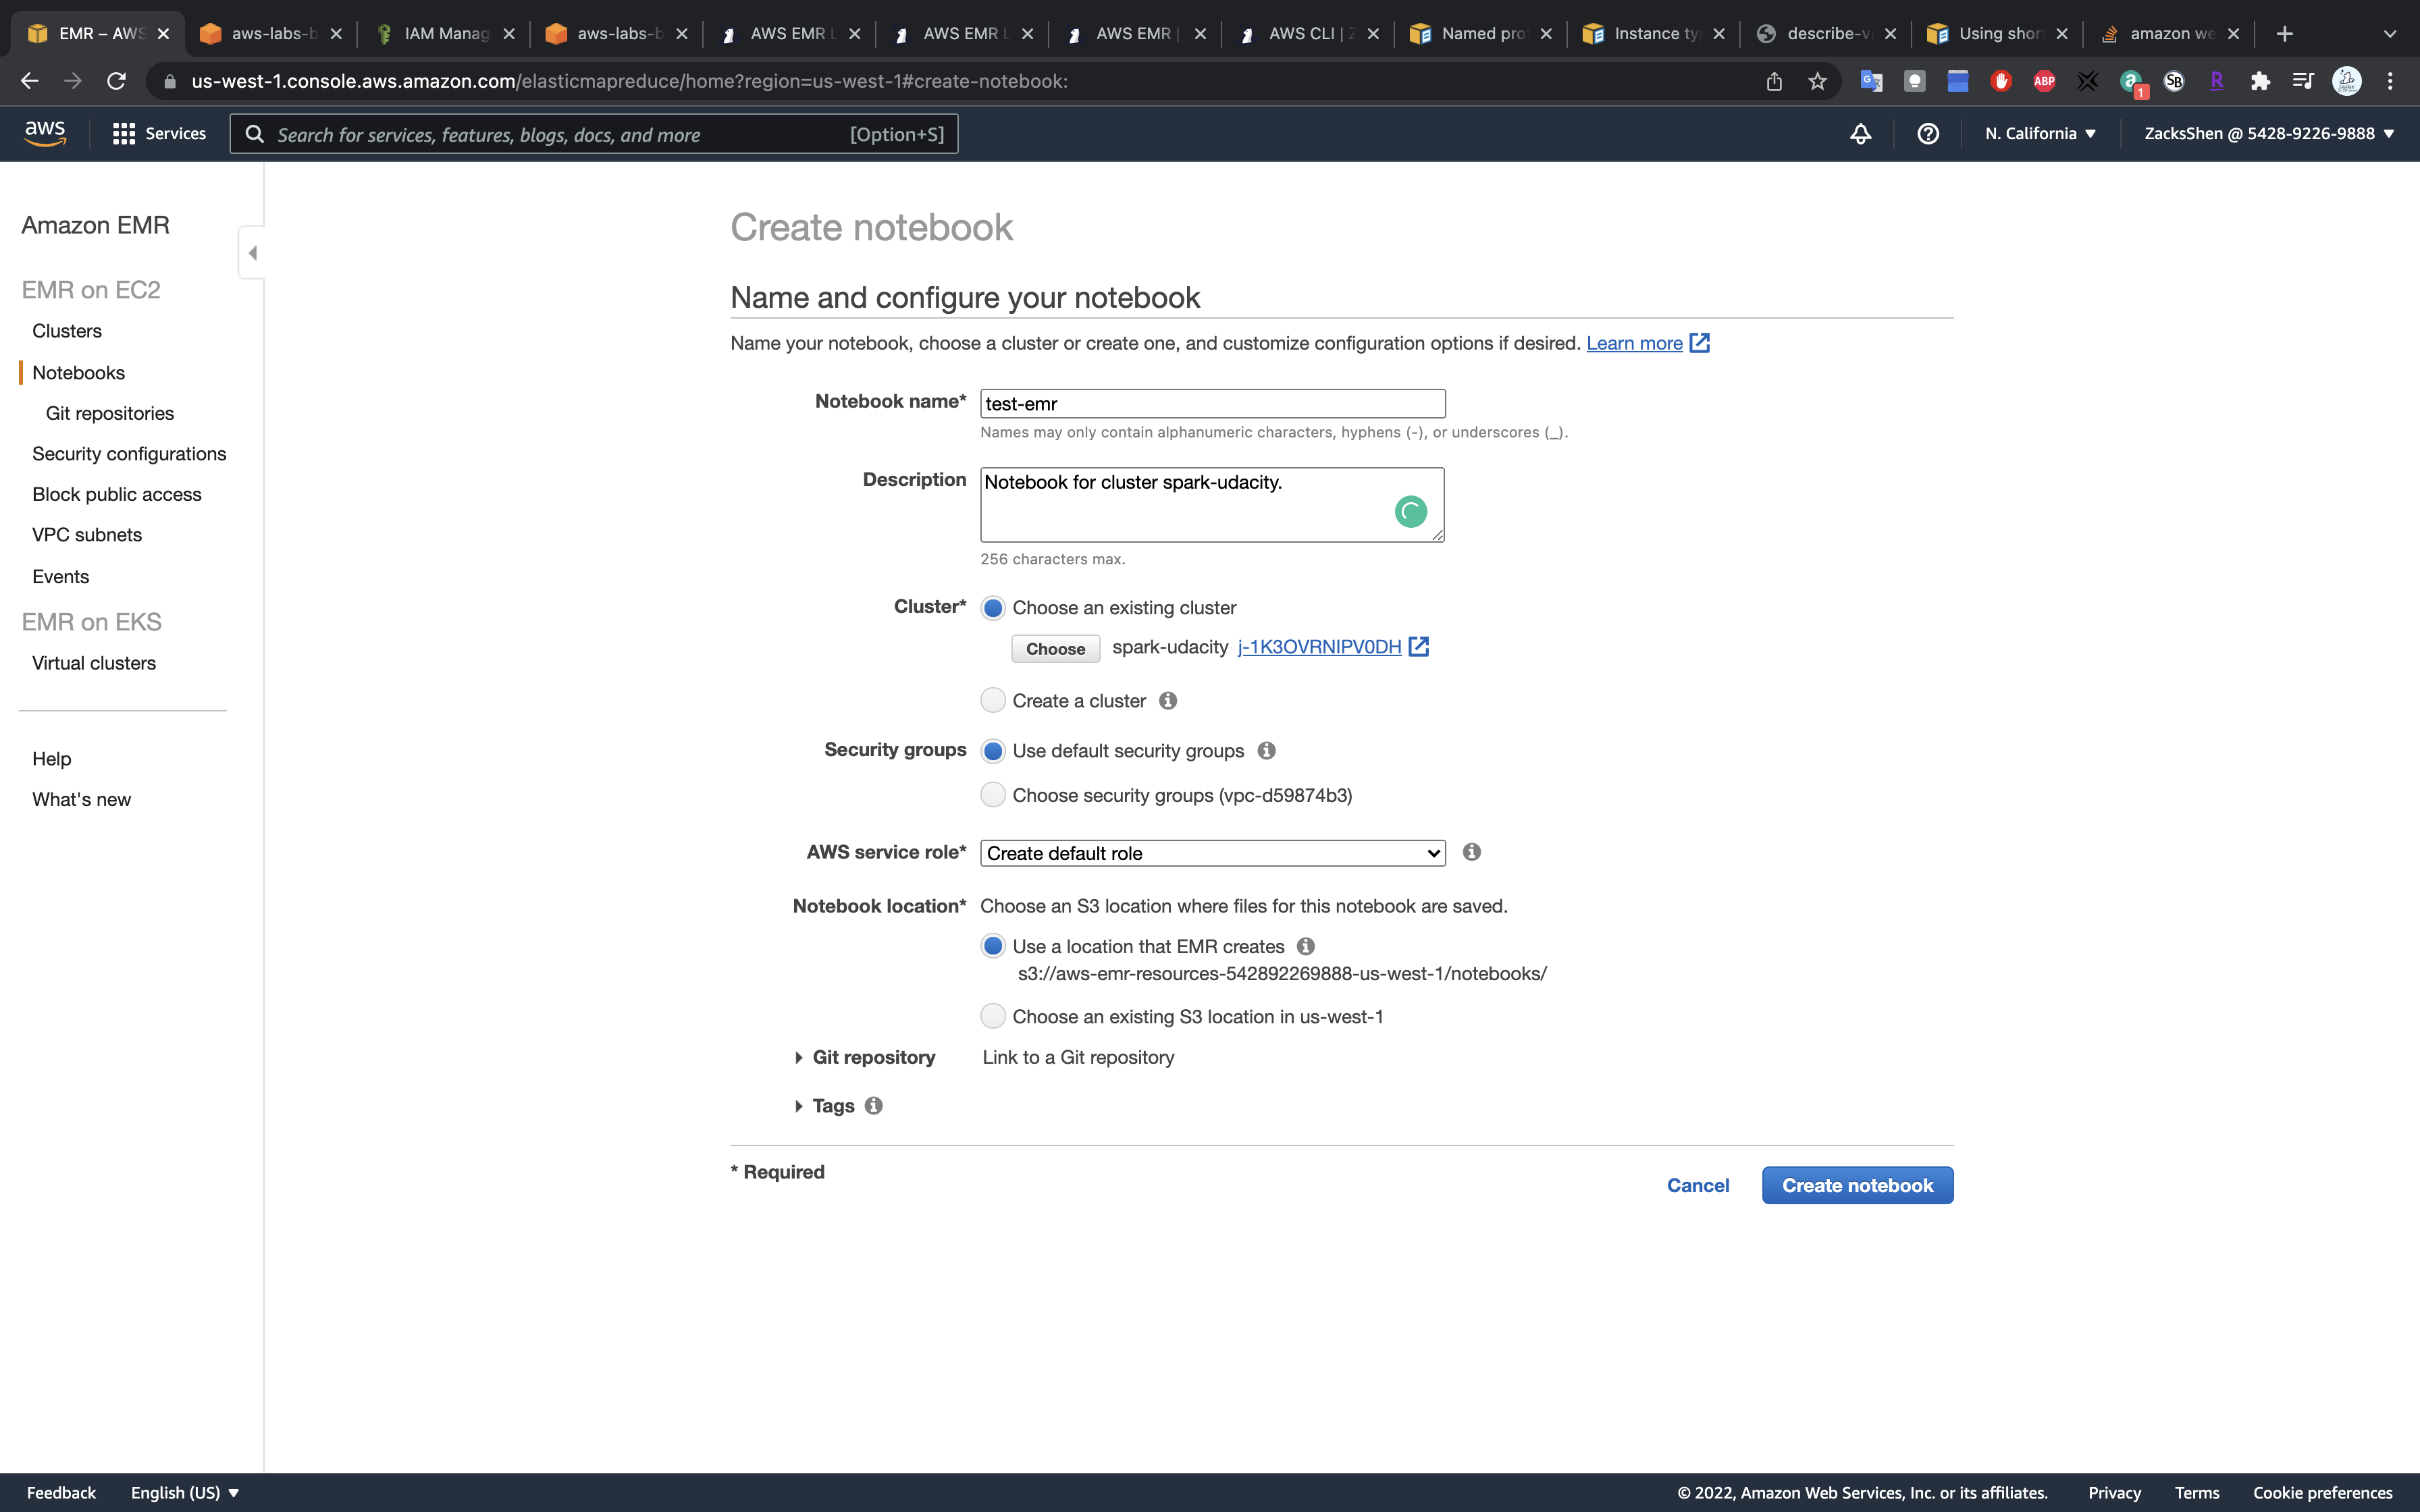
Click on Create notebook
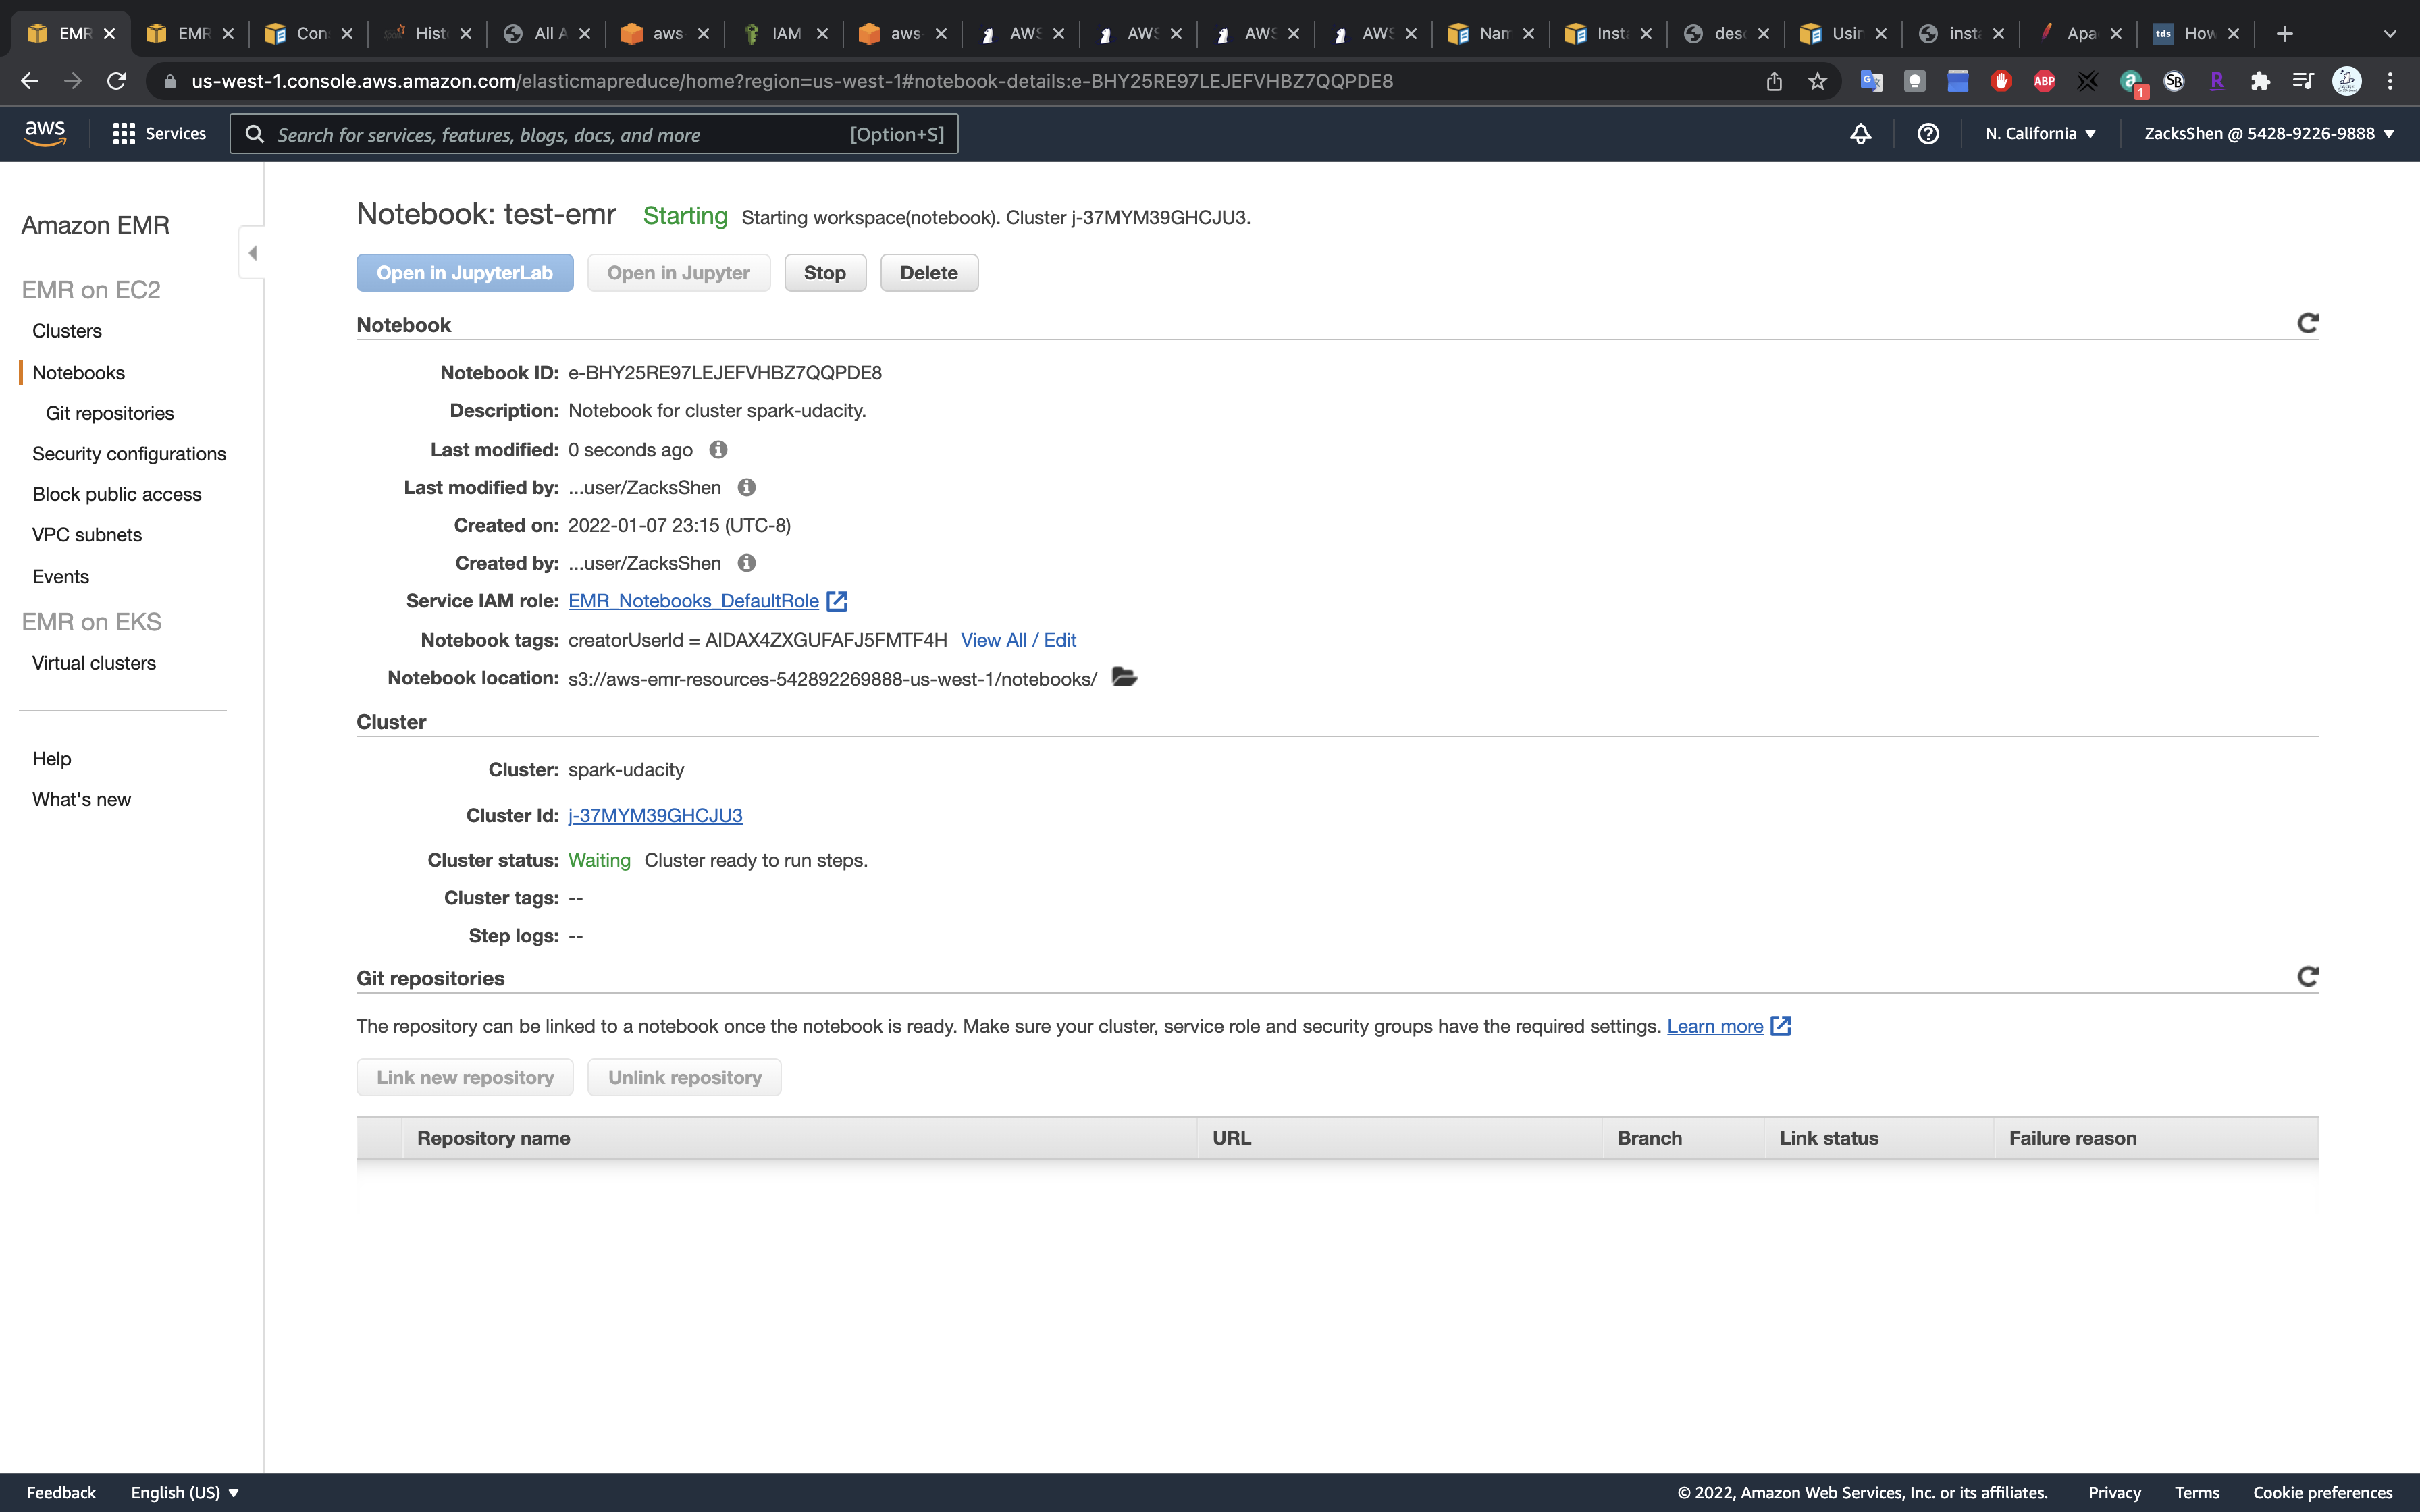
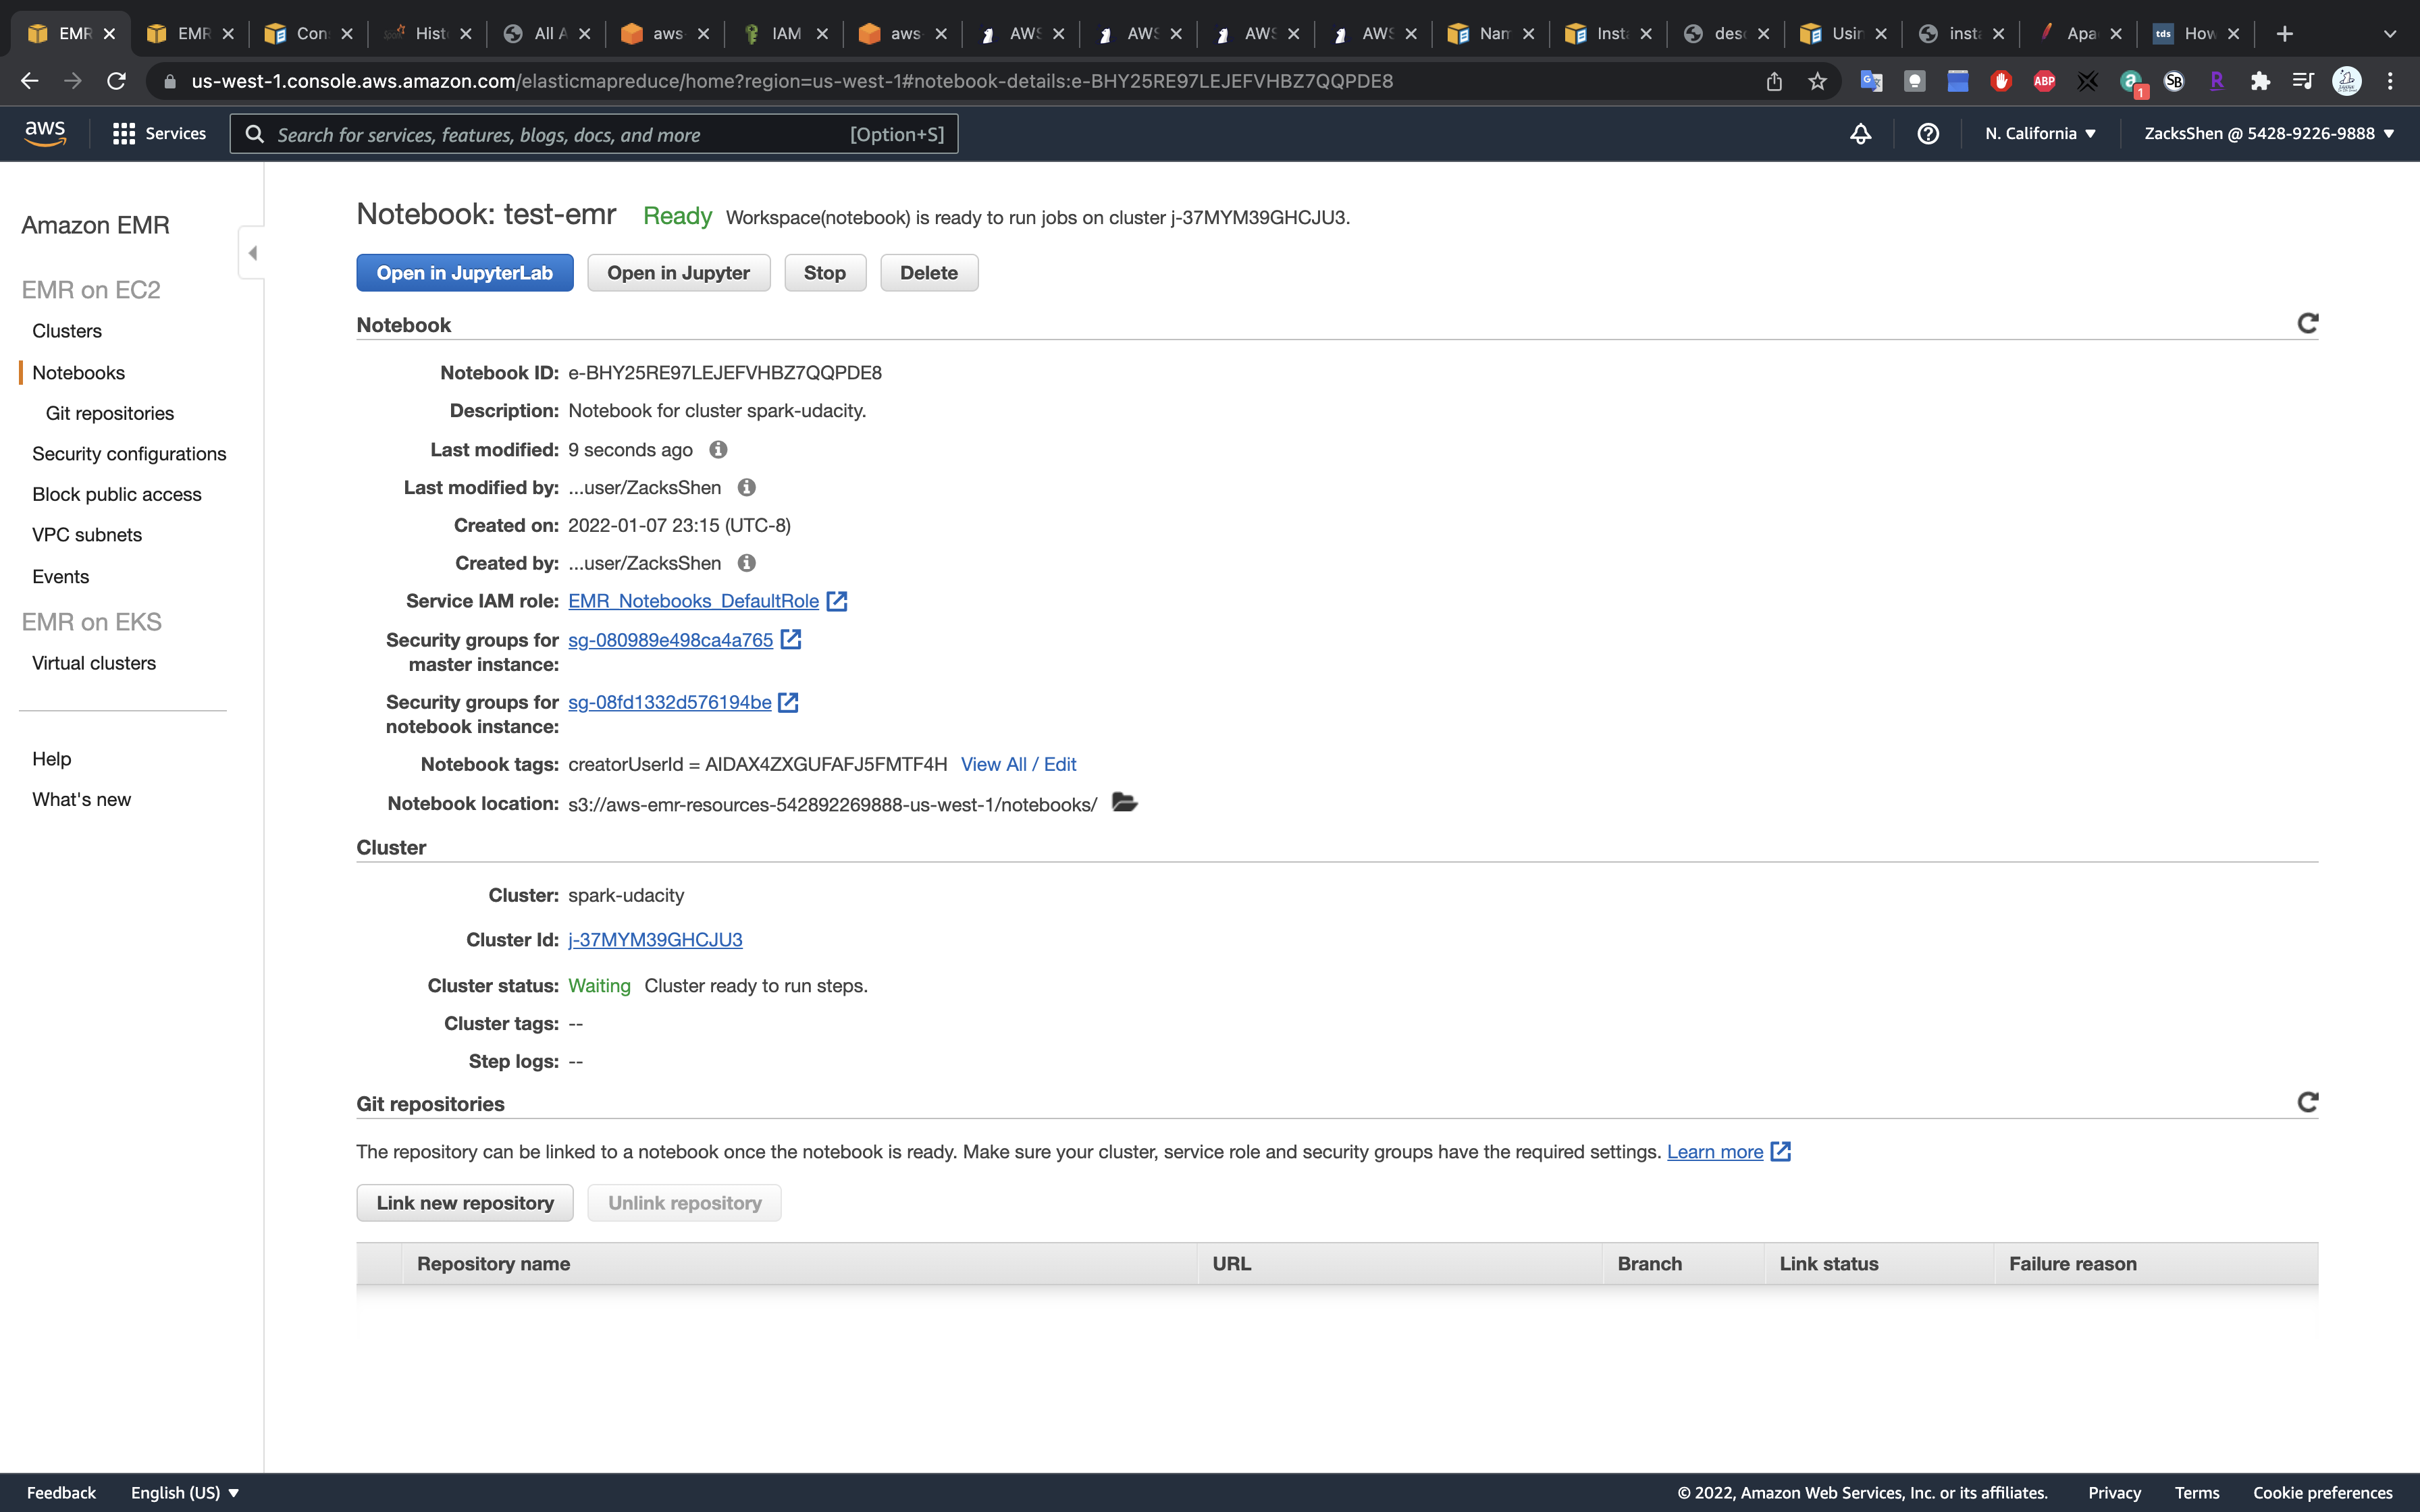
Click on Open in JupyterLab
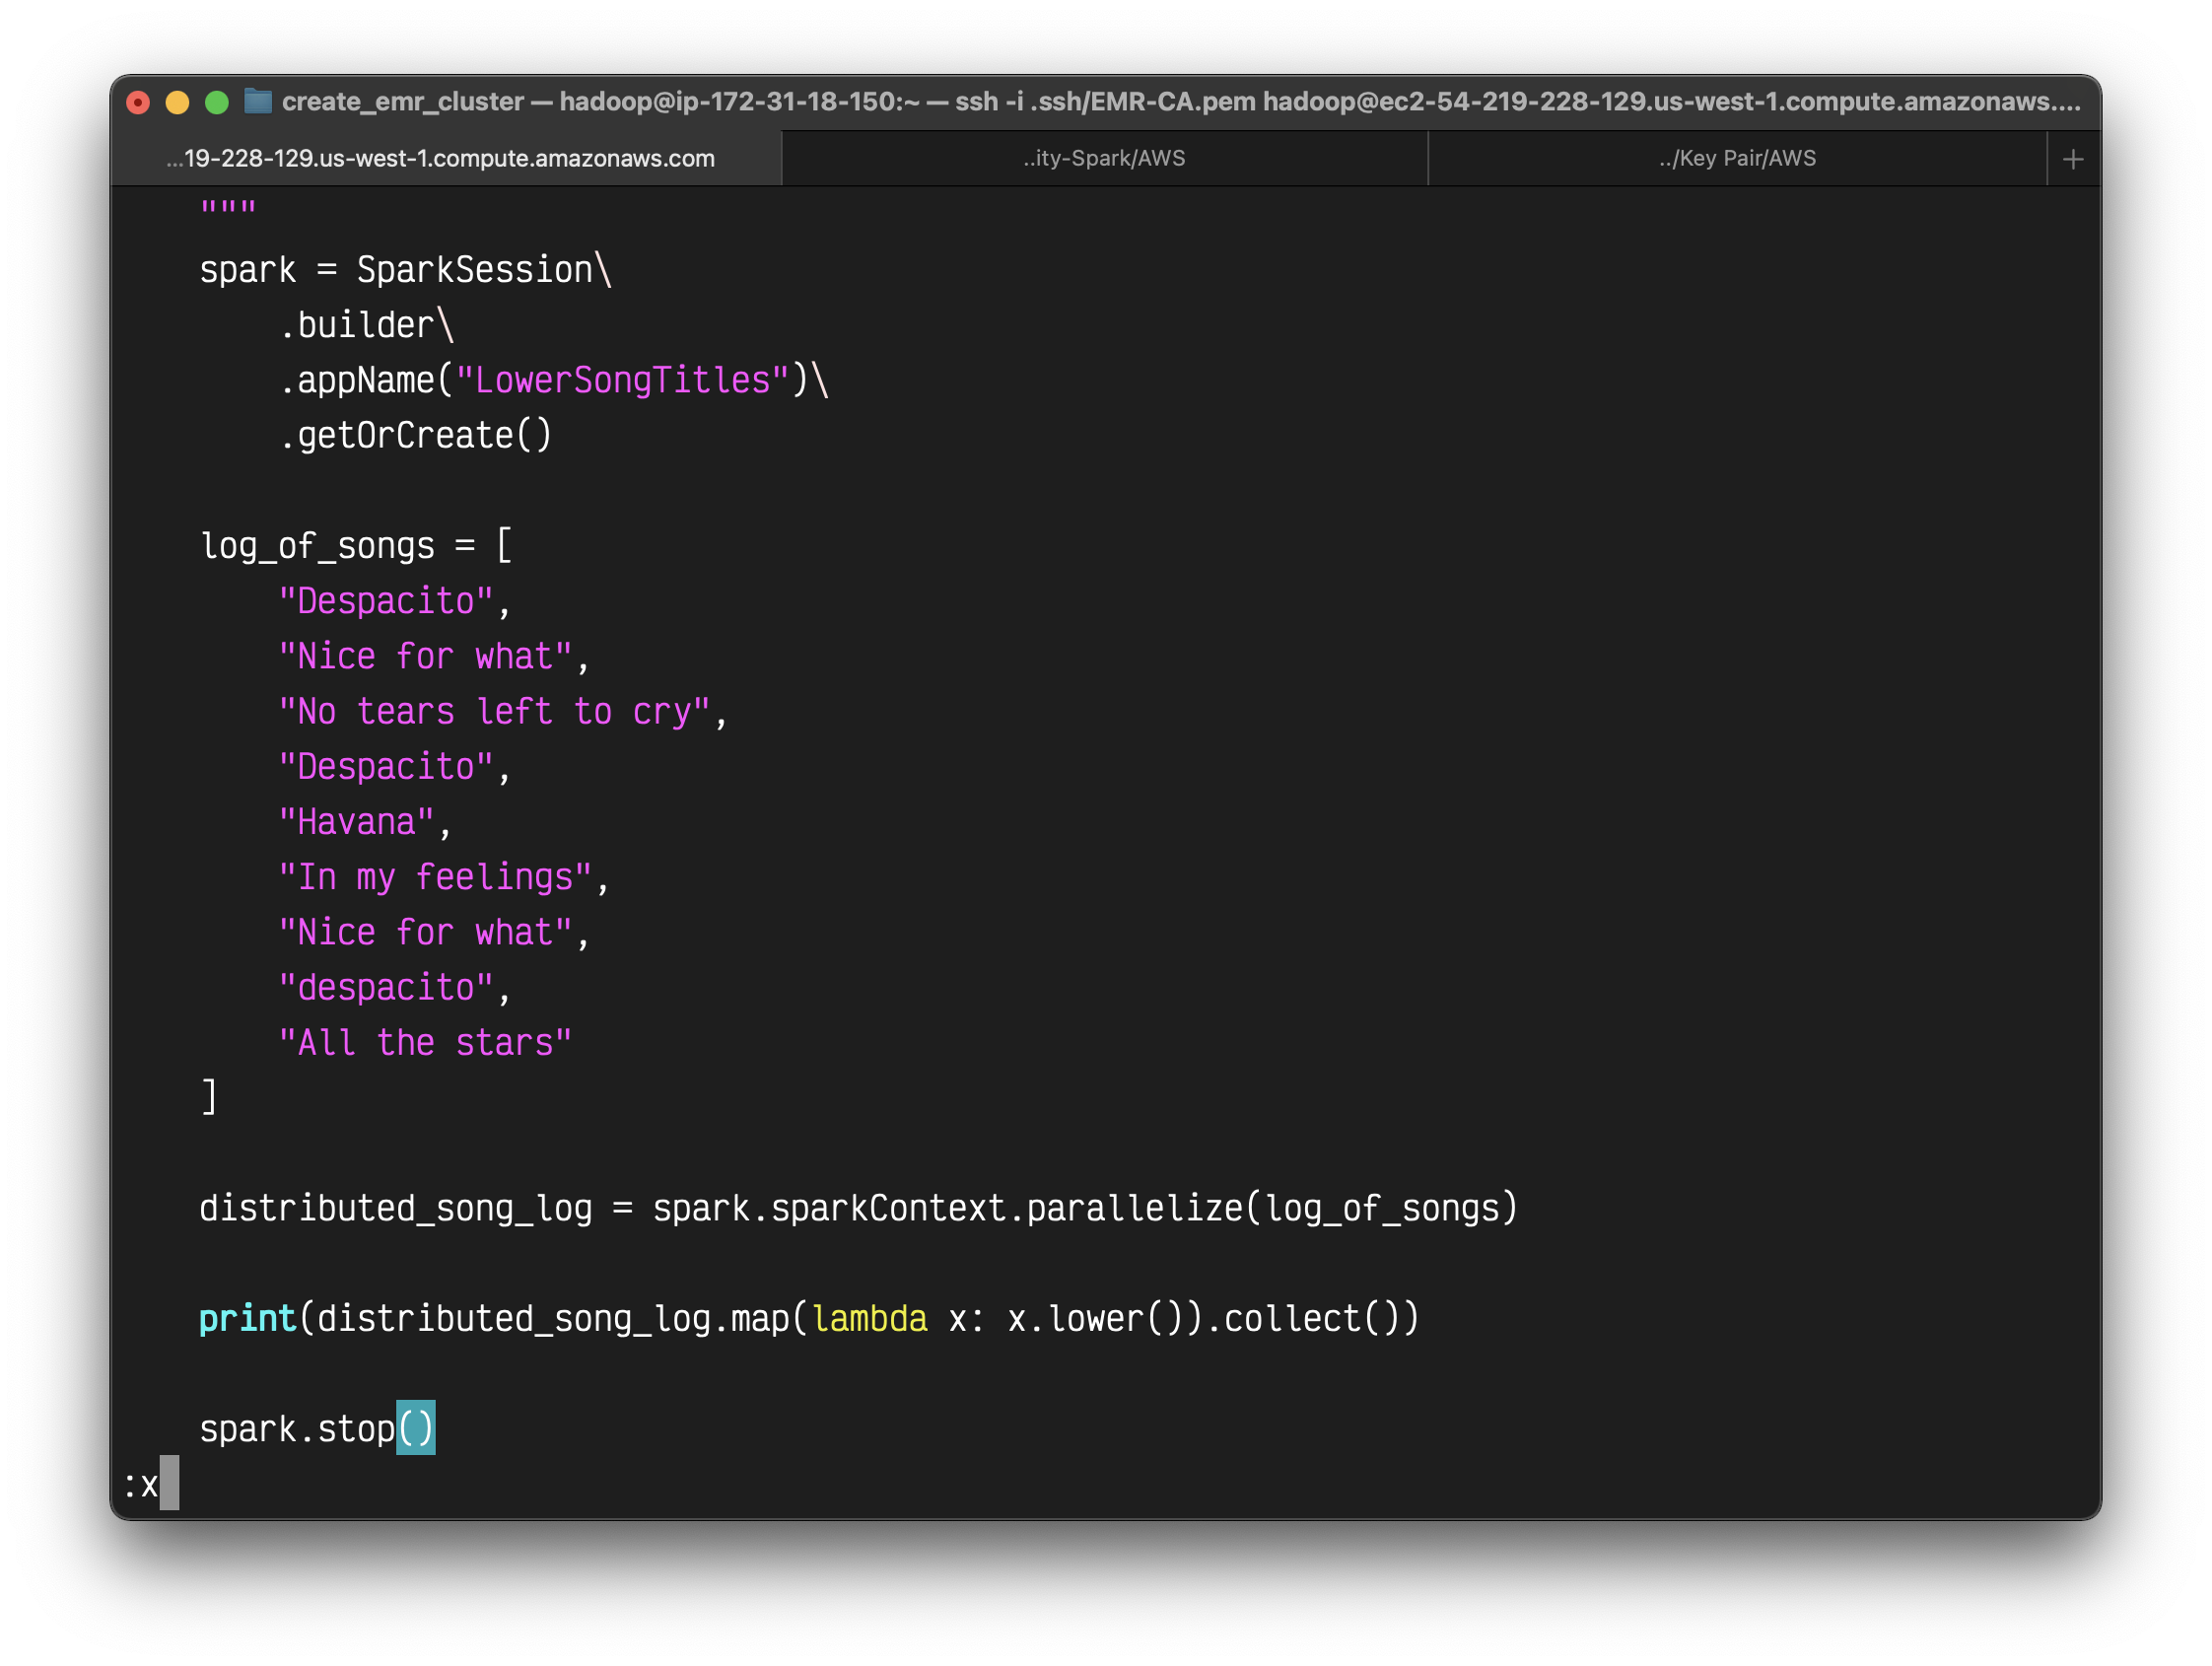
Spark Application
Create a Spark application
1 | from pyspark.sql import SparkSession |
Create a Python script with the above code and named it as lower_songs.py in directory demo_code.
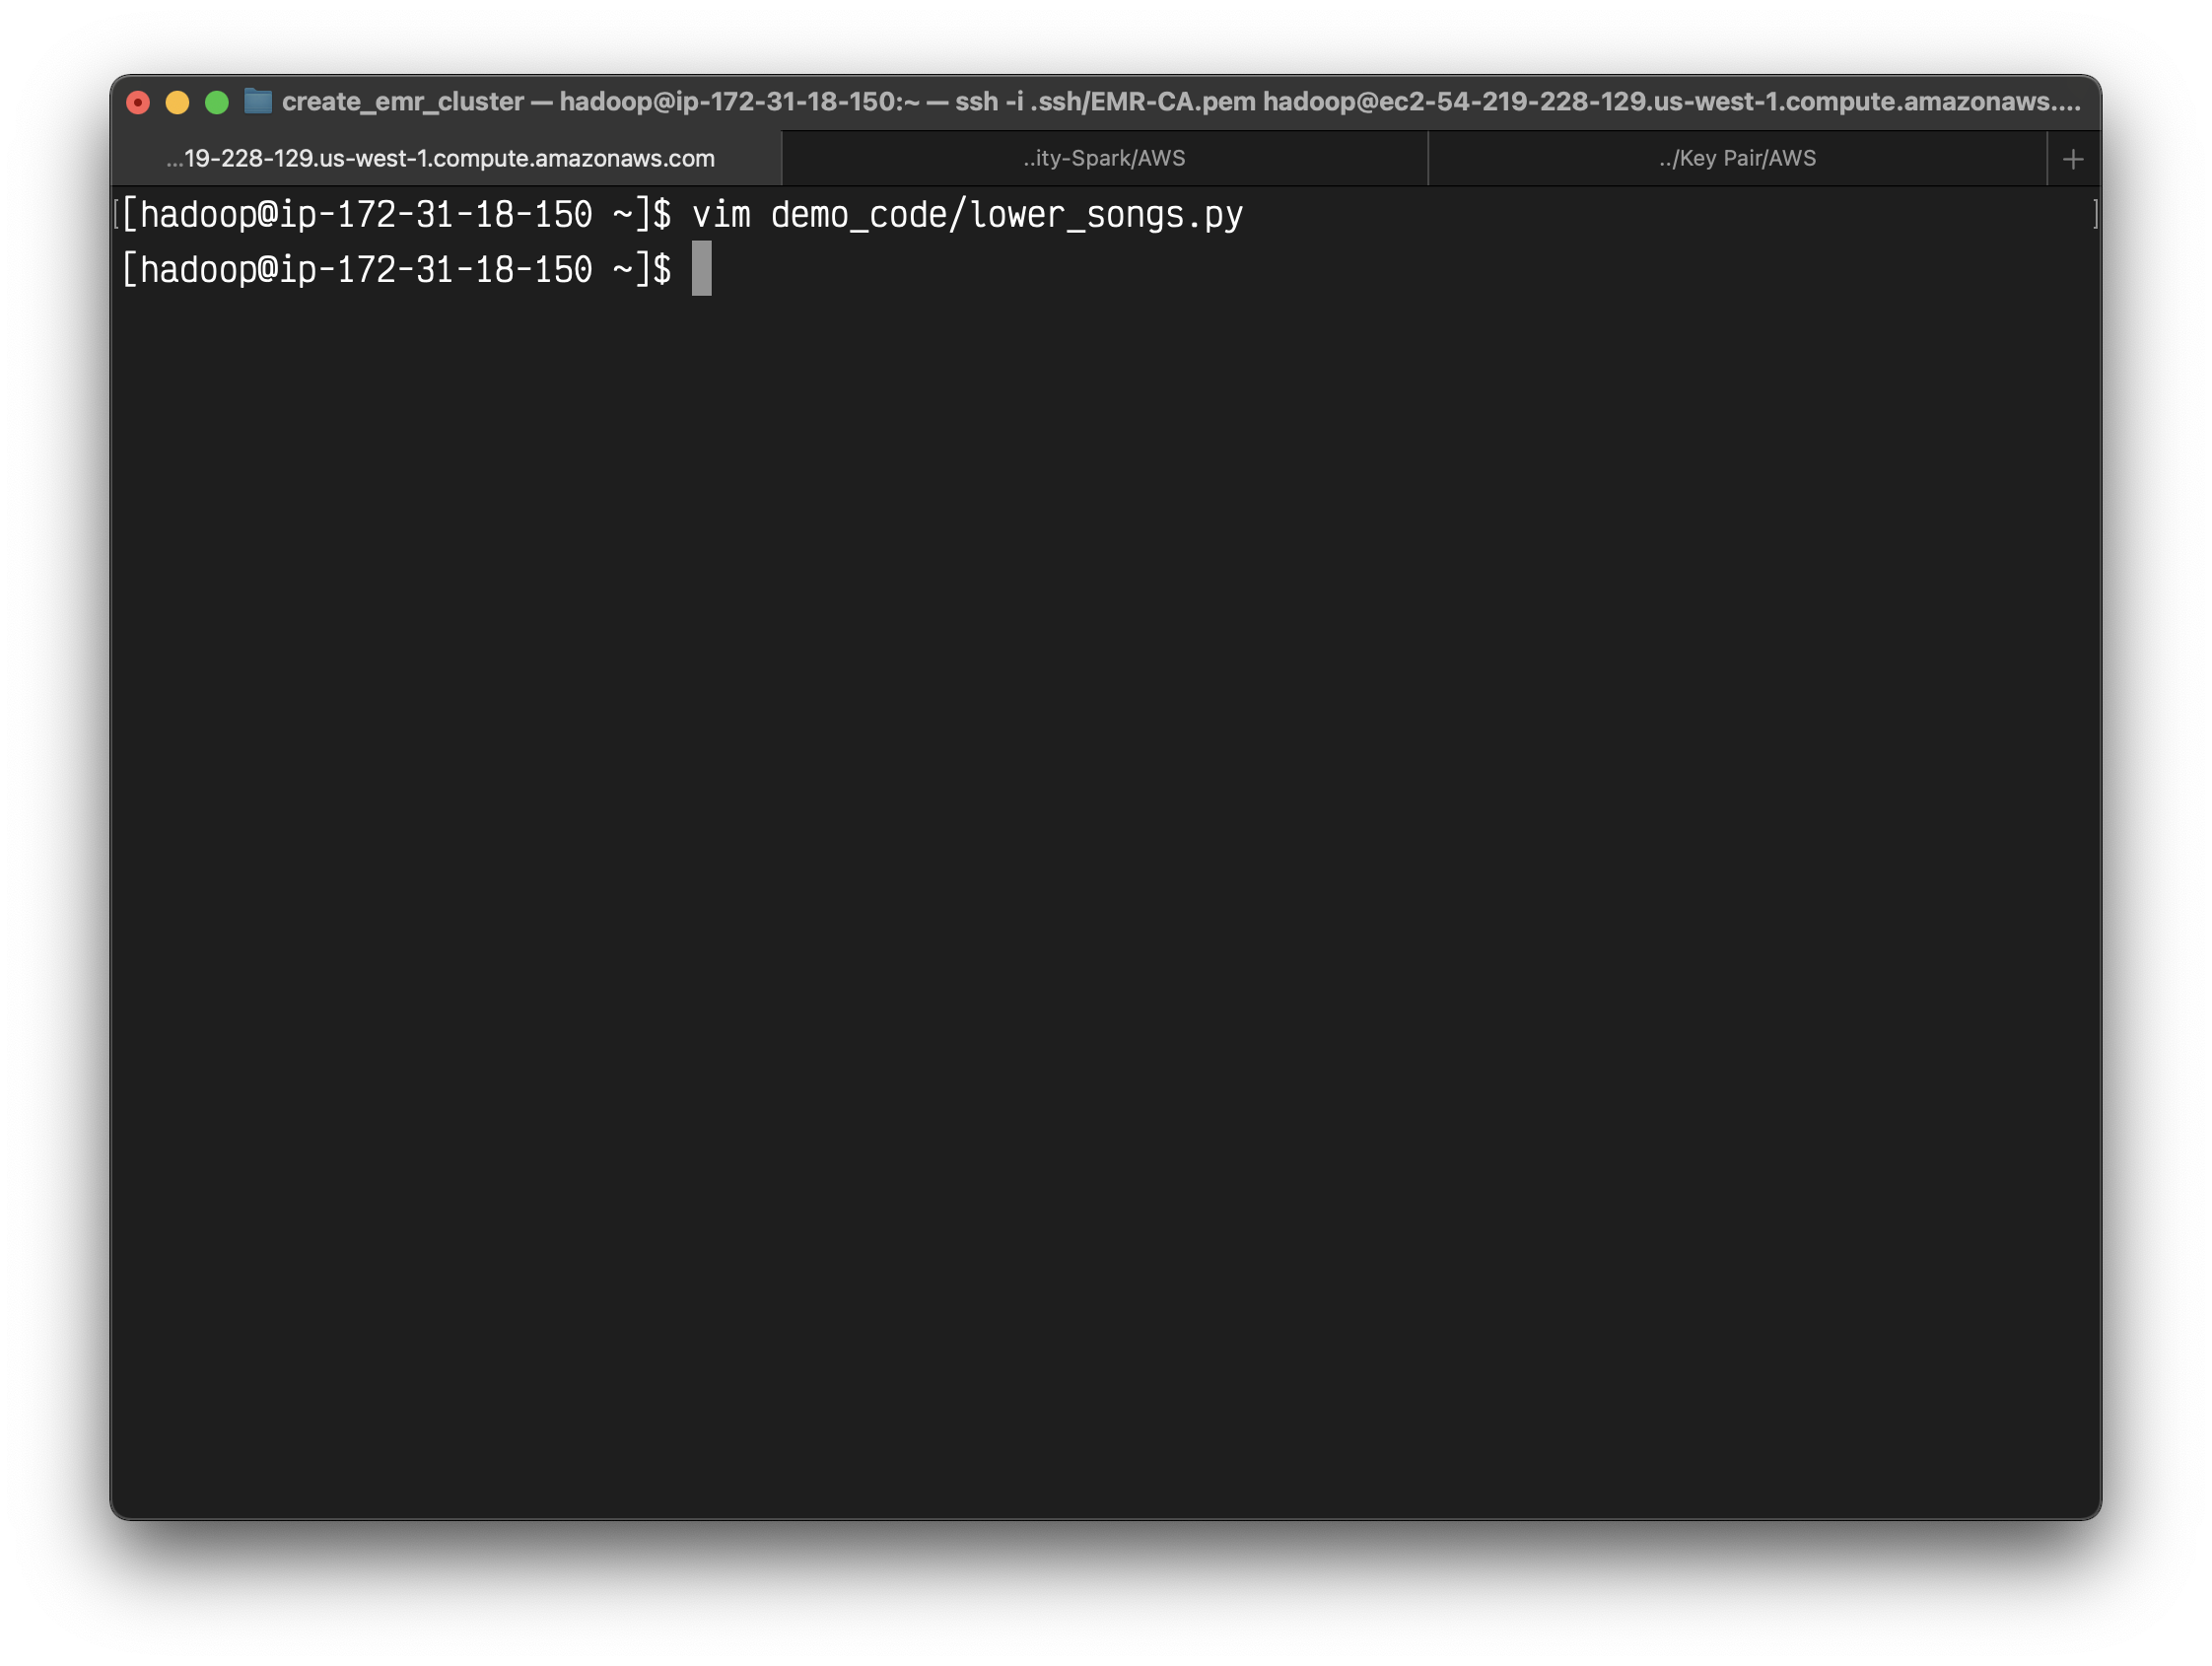
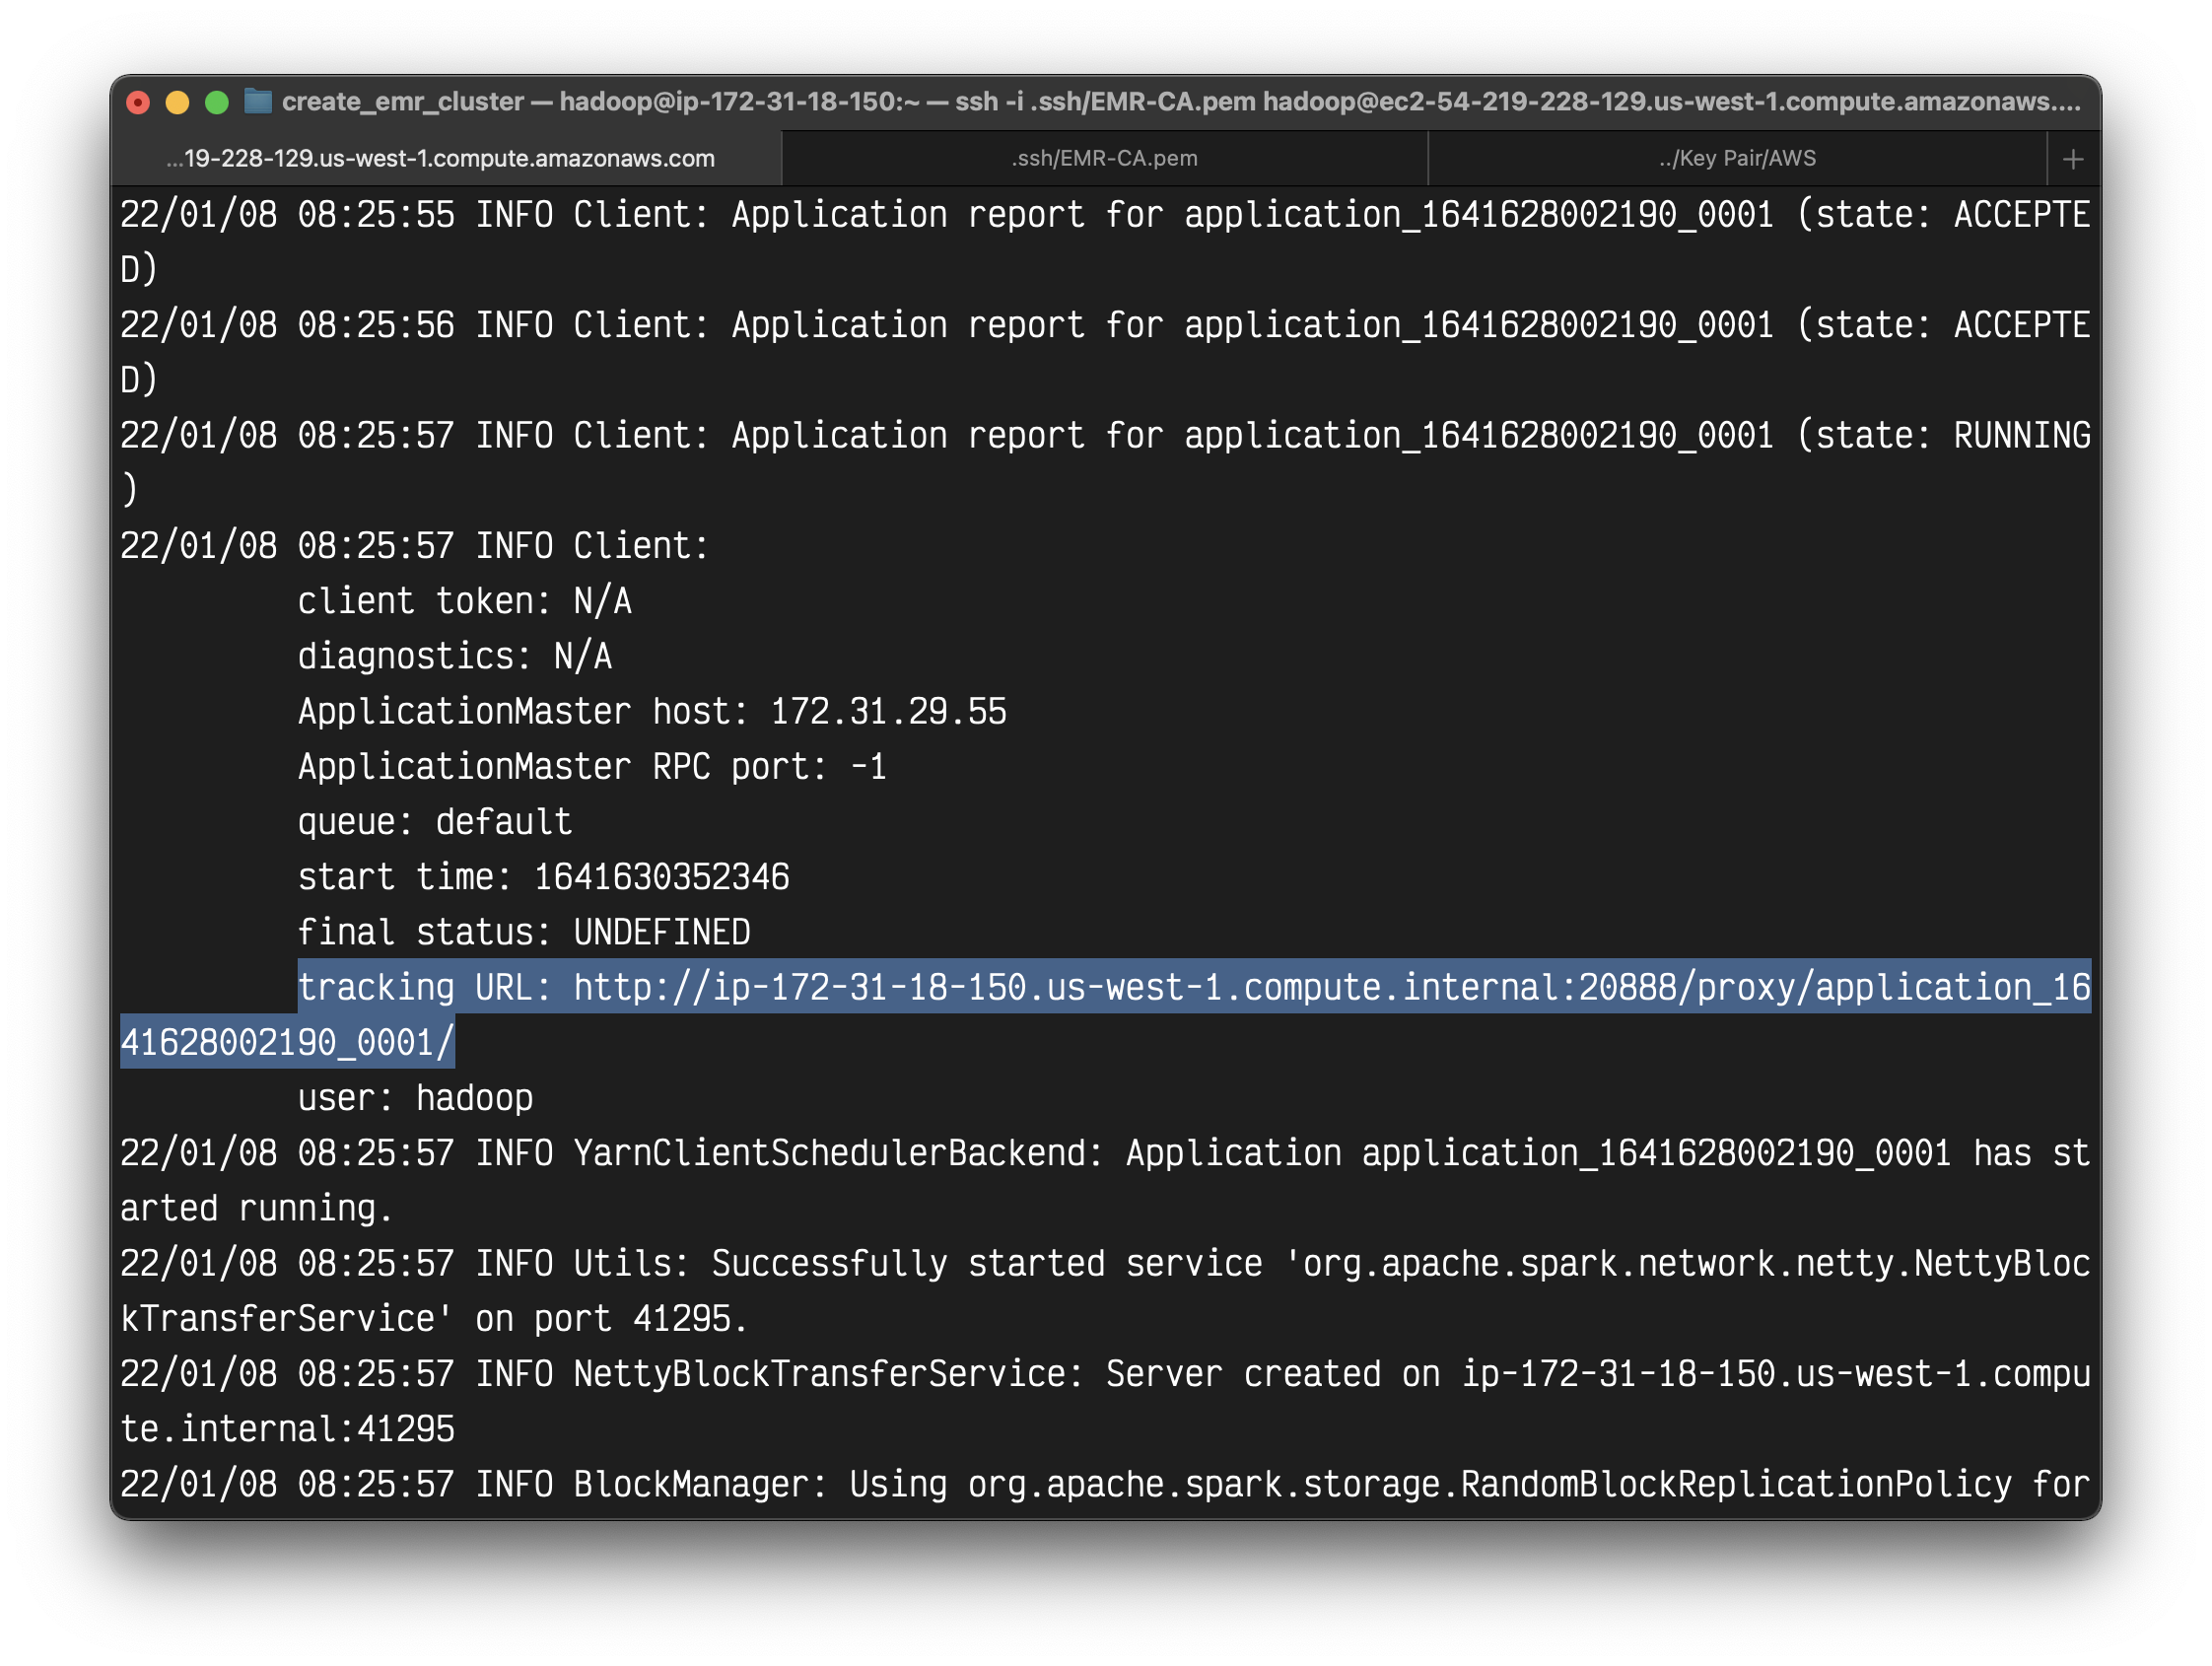
Submit your application
1 | spark-submit --master yarn demo_code/lower_songs.py |
You can see a lot of info.
Here is the output.
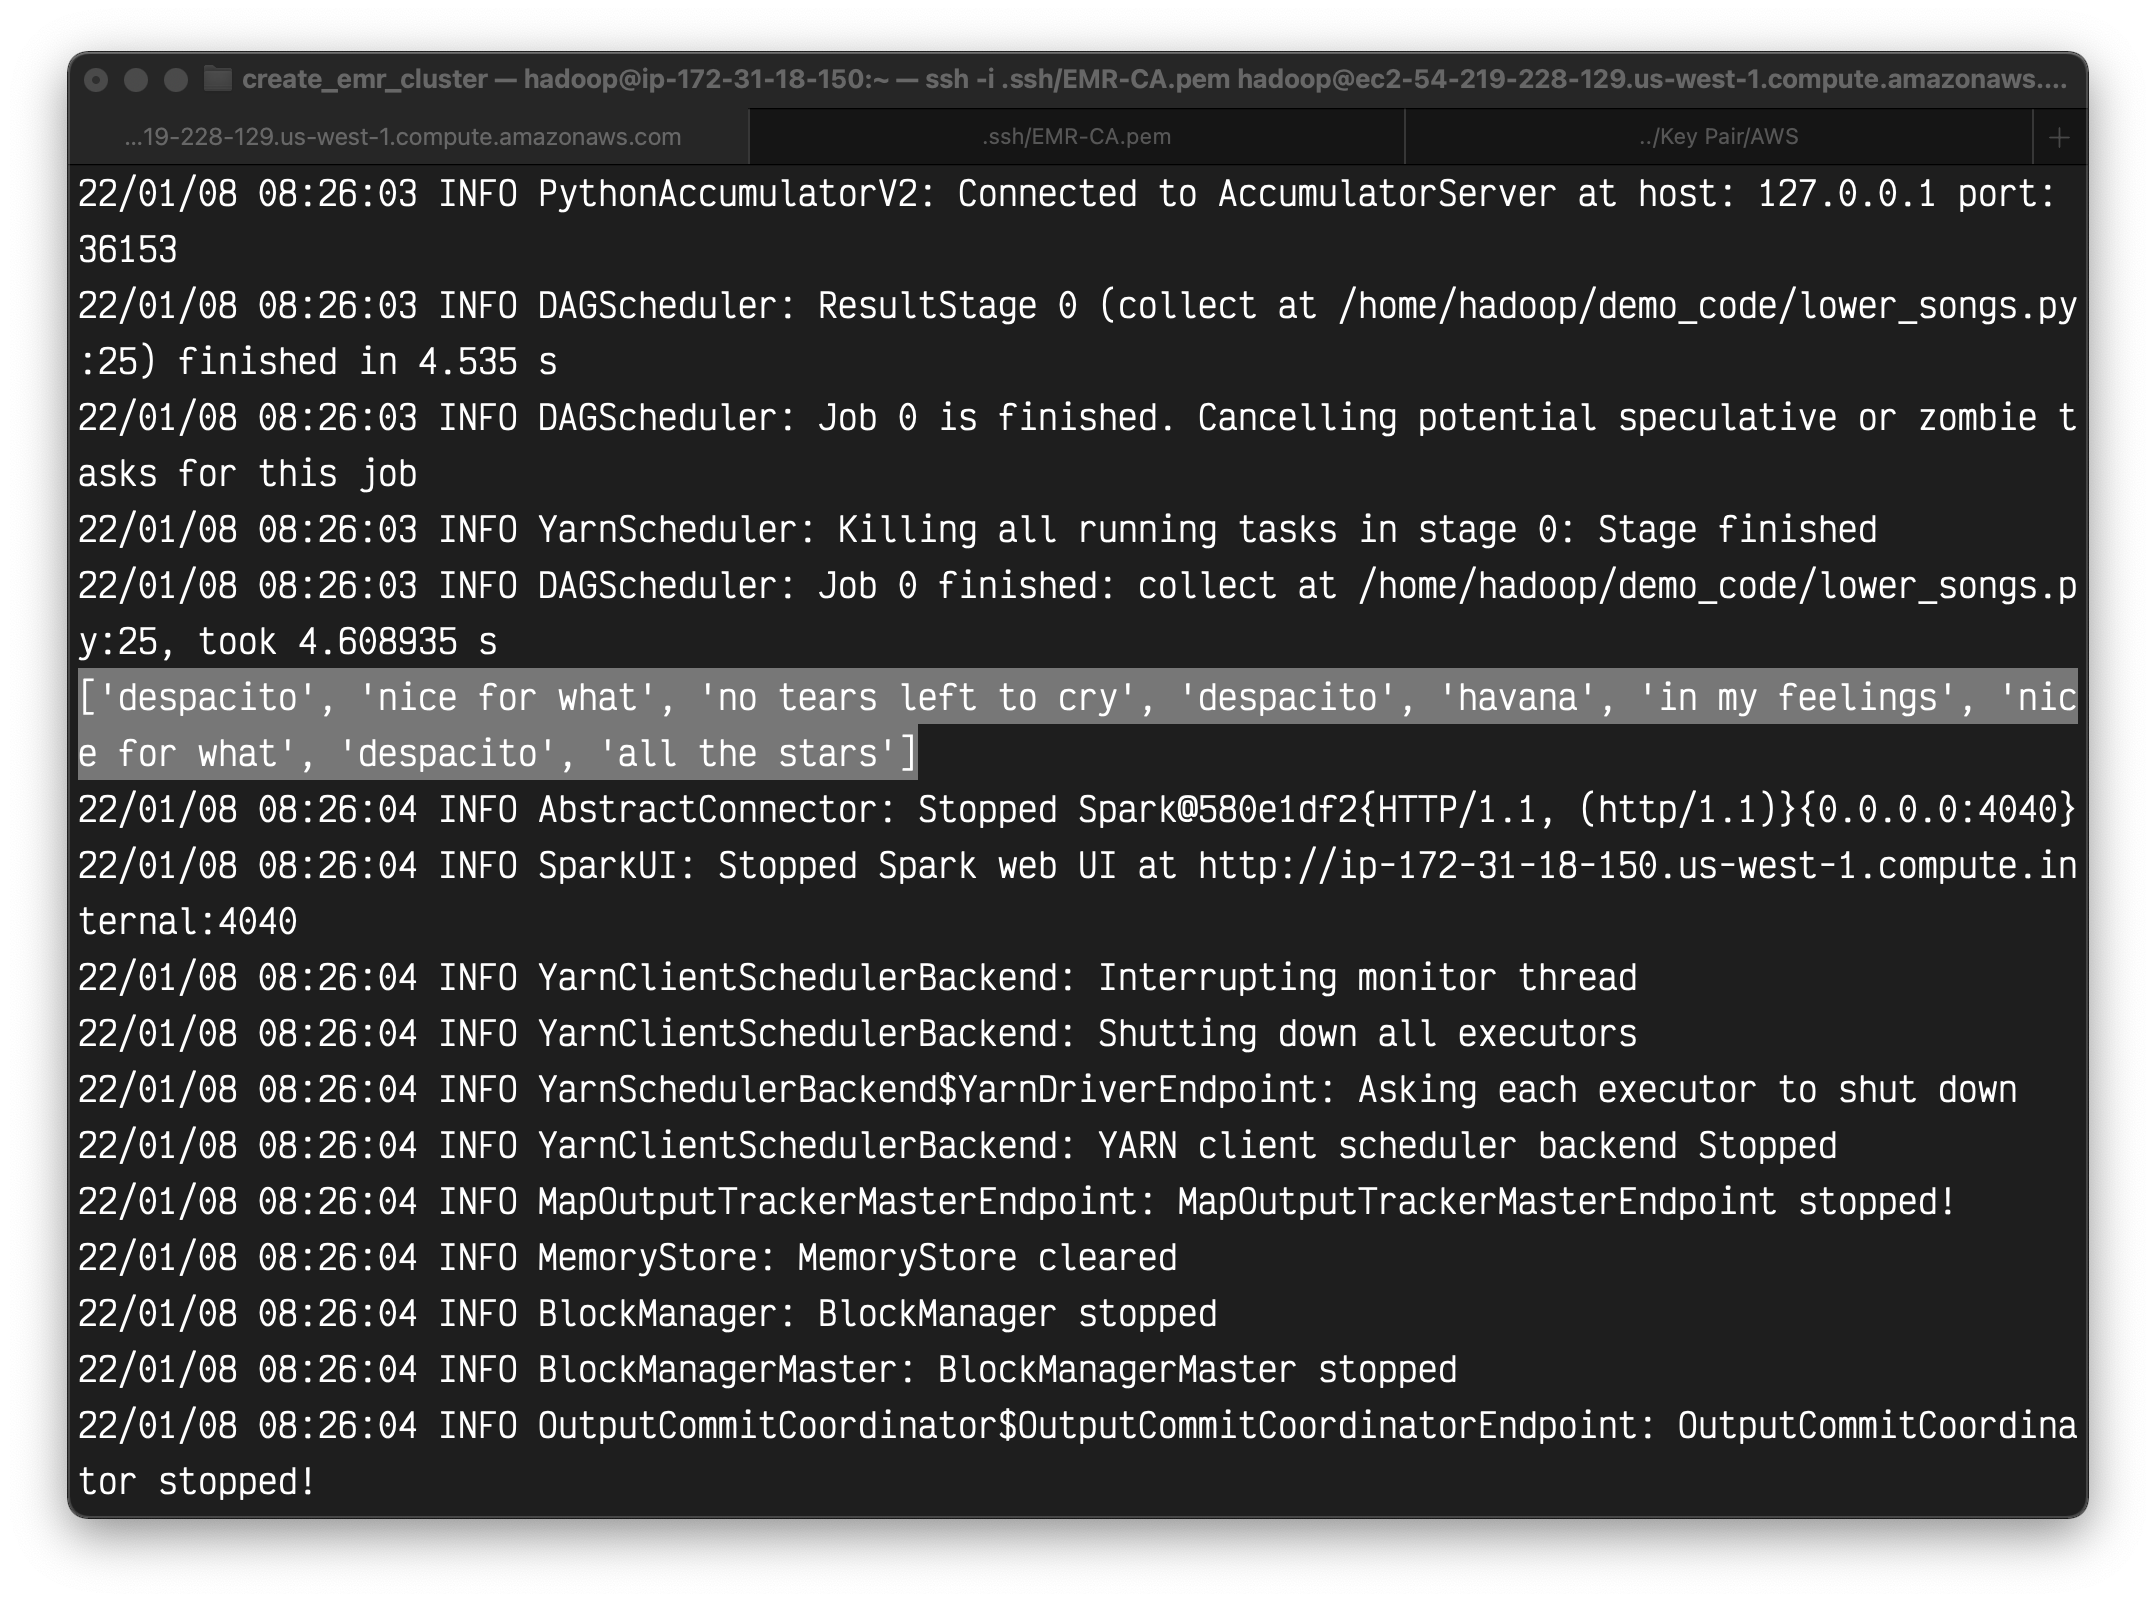
An easy way to review the output is write the result into a file instead of printing it.
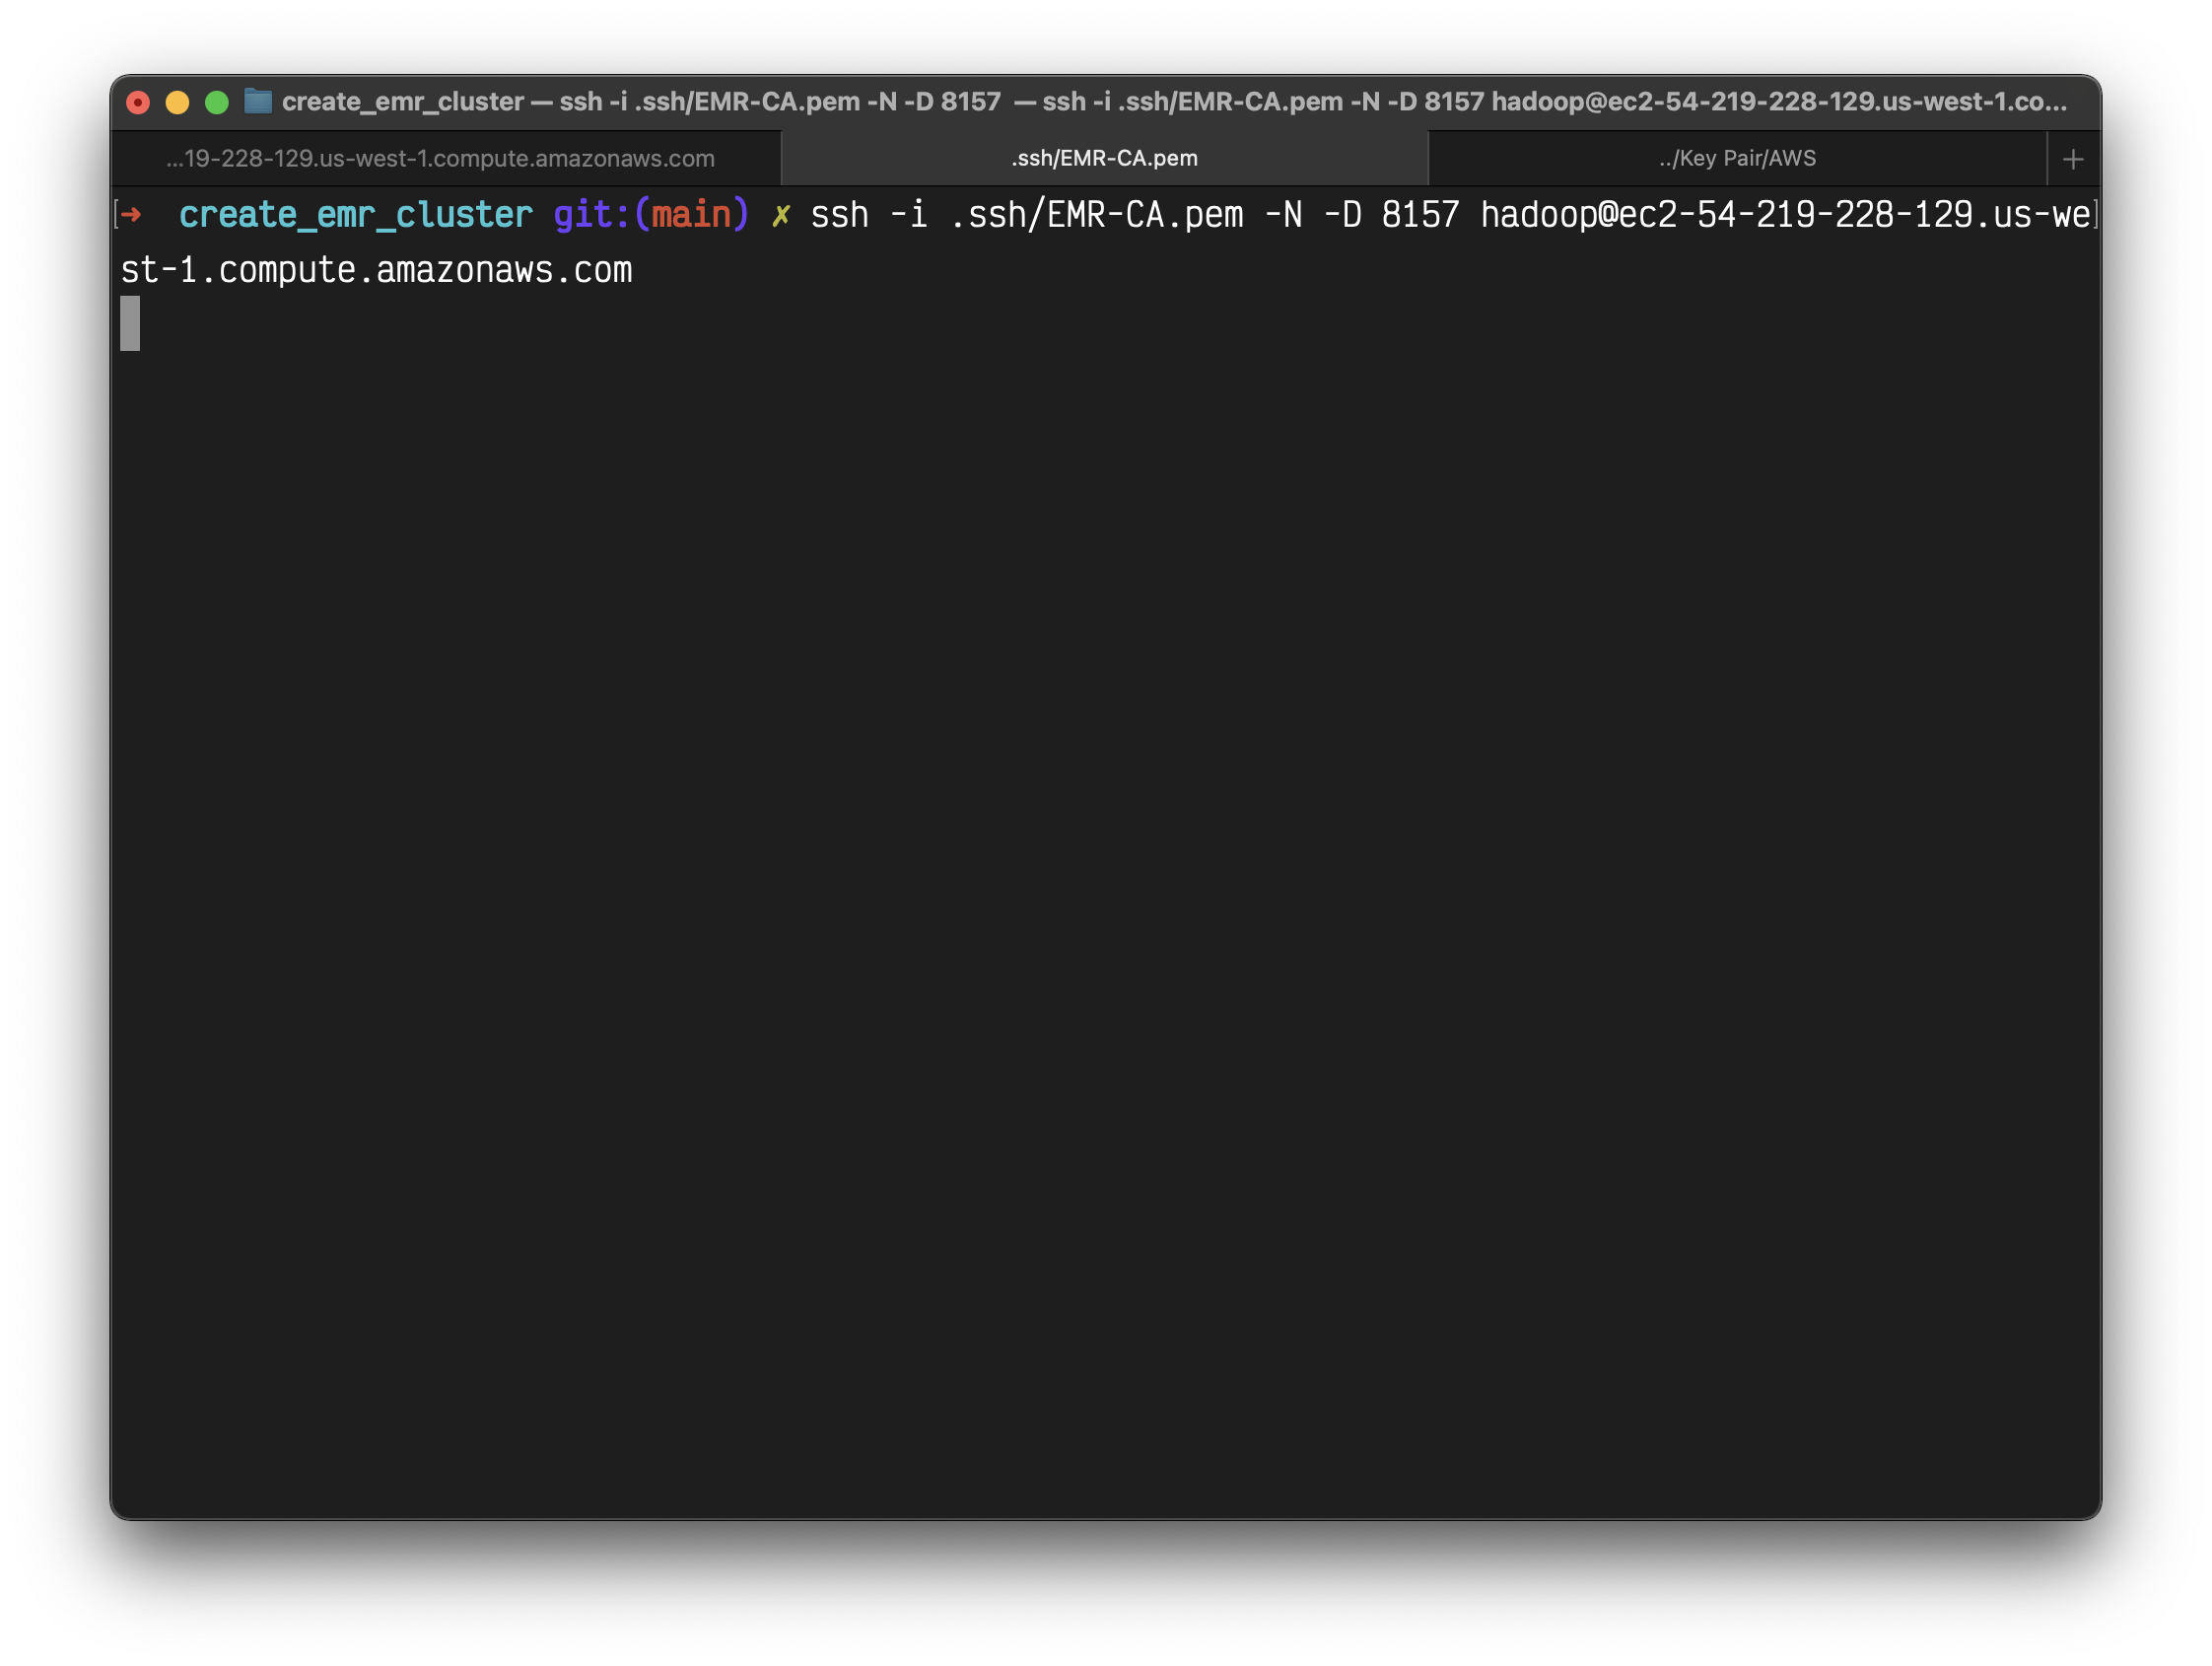
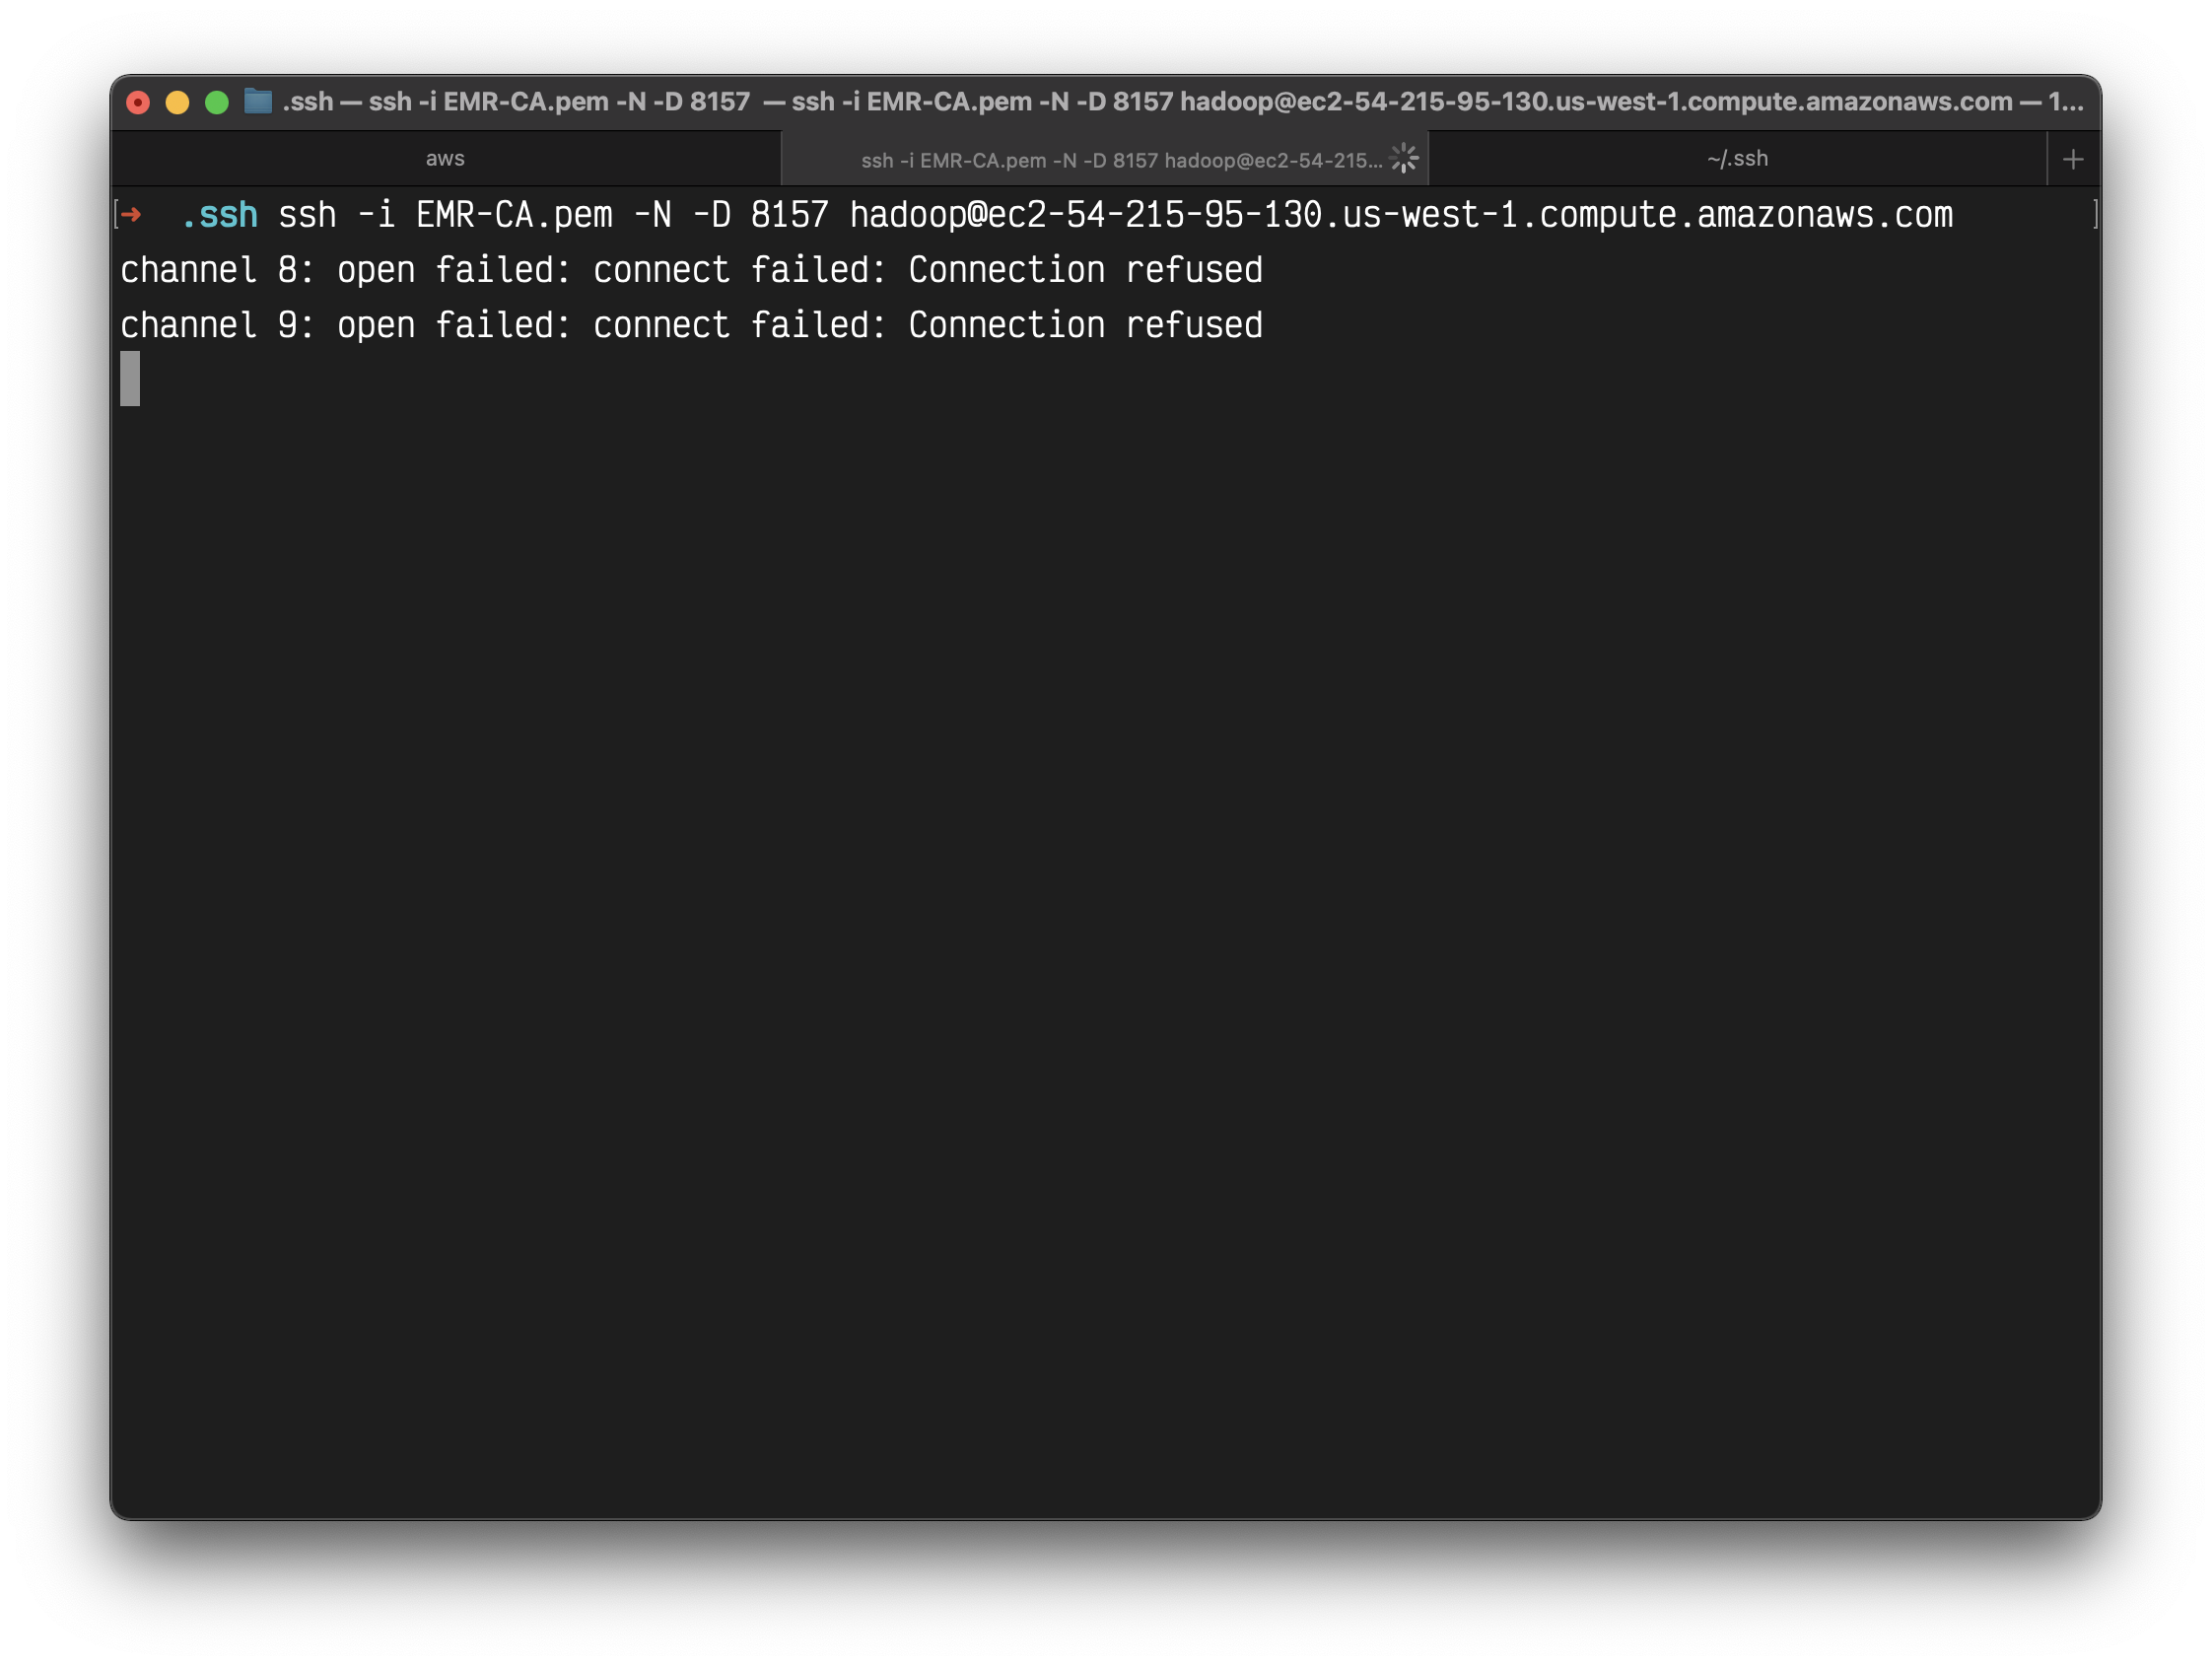
Enable fast-forwarding
1 | ssh -i .ssh/EMR-CA.pem -N -D 8157 hadoop@ec2-54-219-228-129.us-west-1.compute.amazonaws.com |
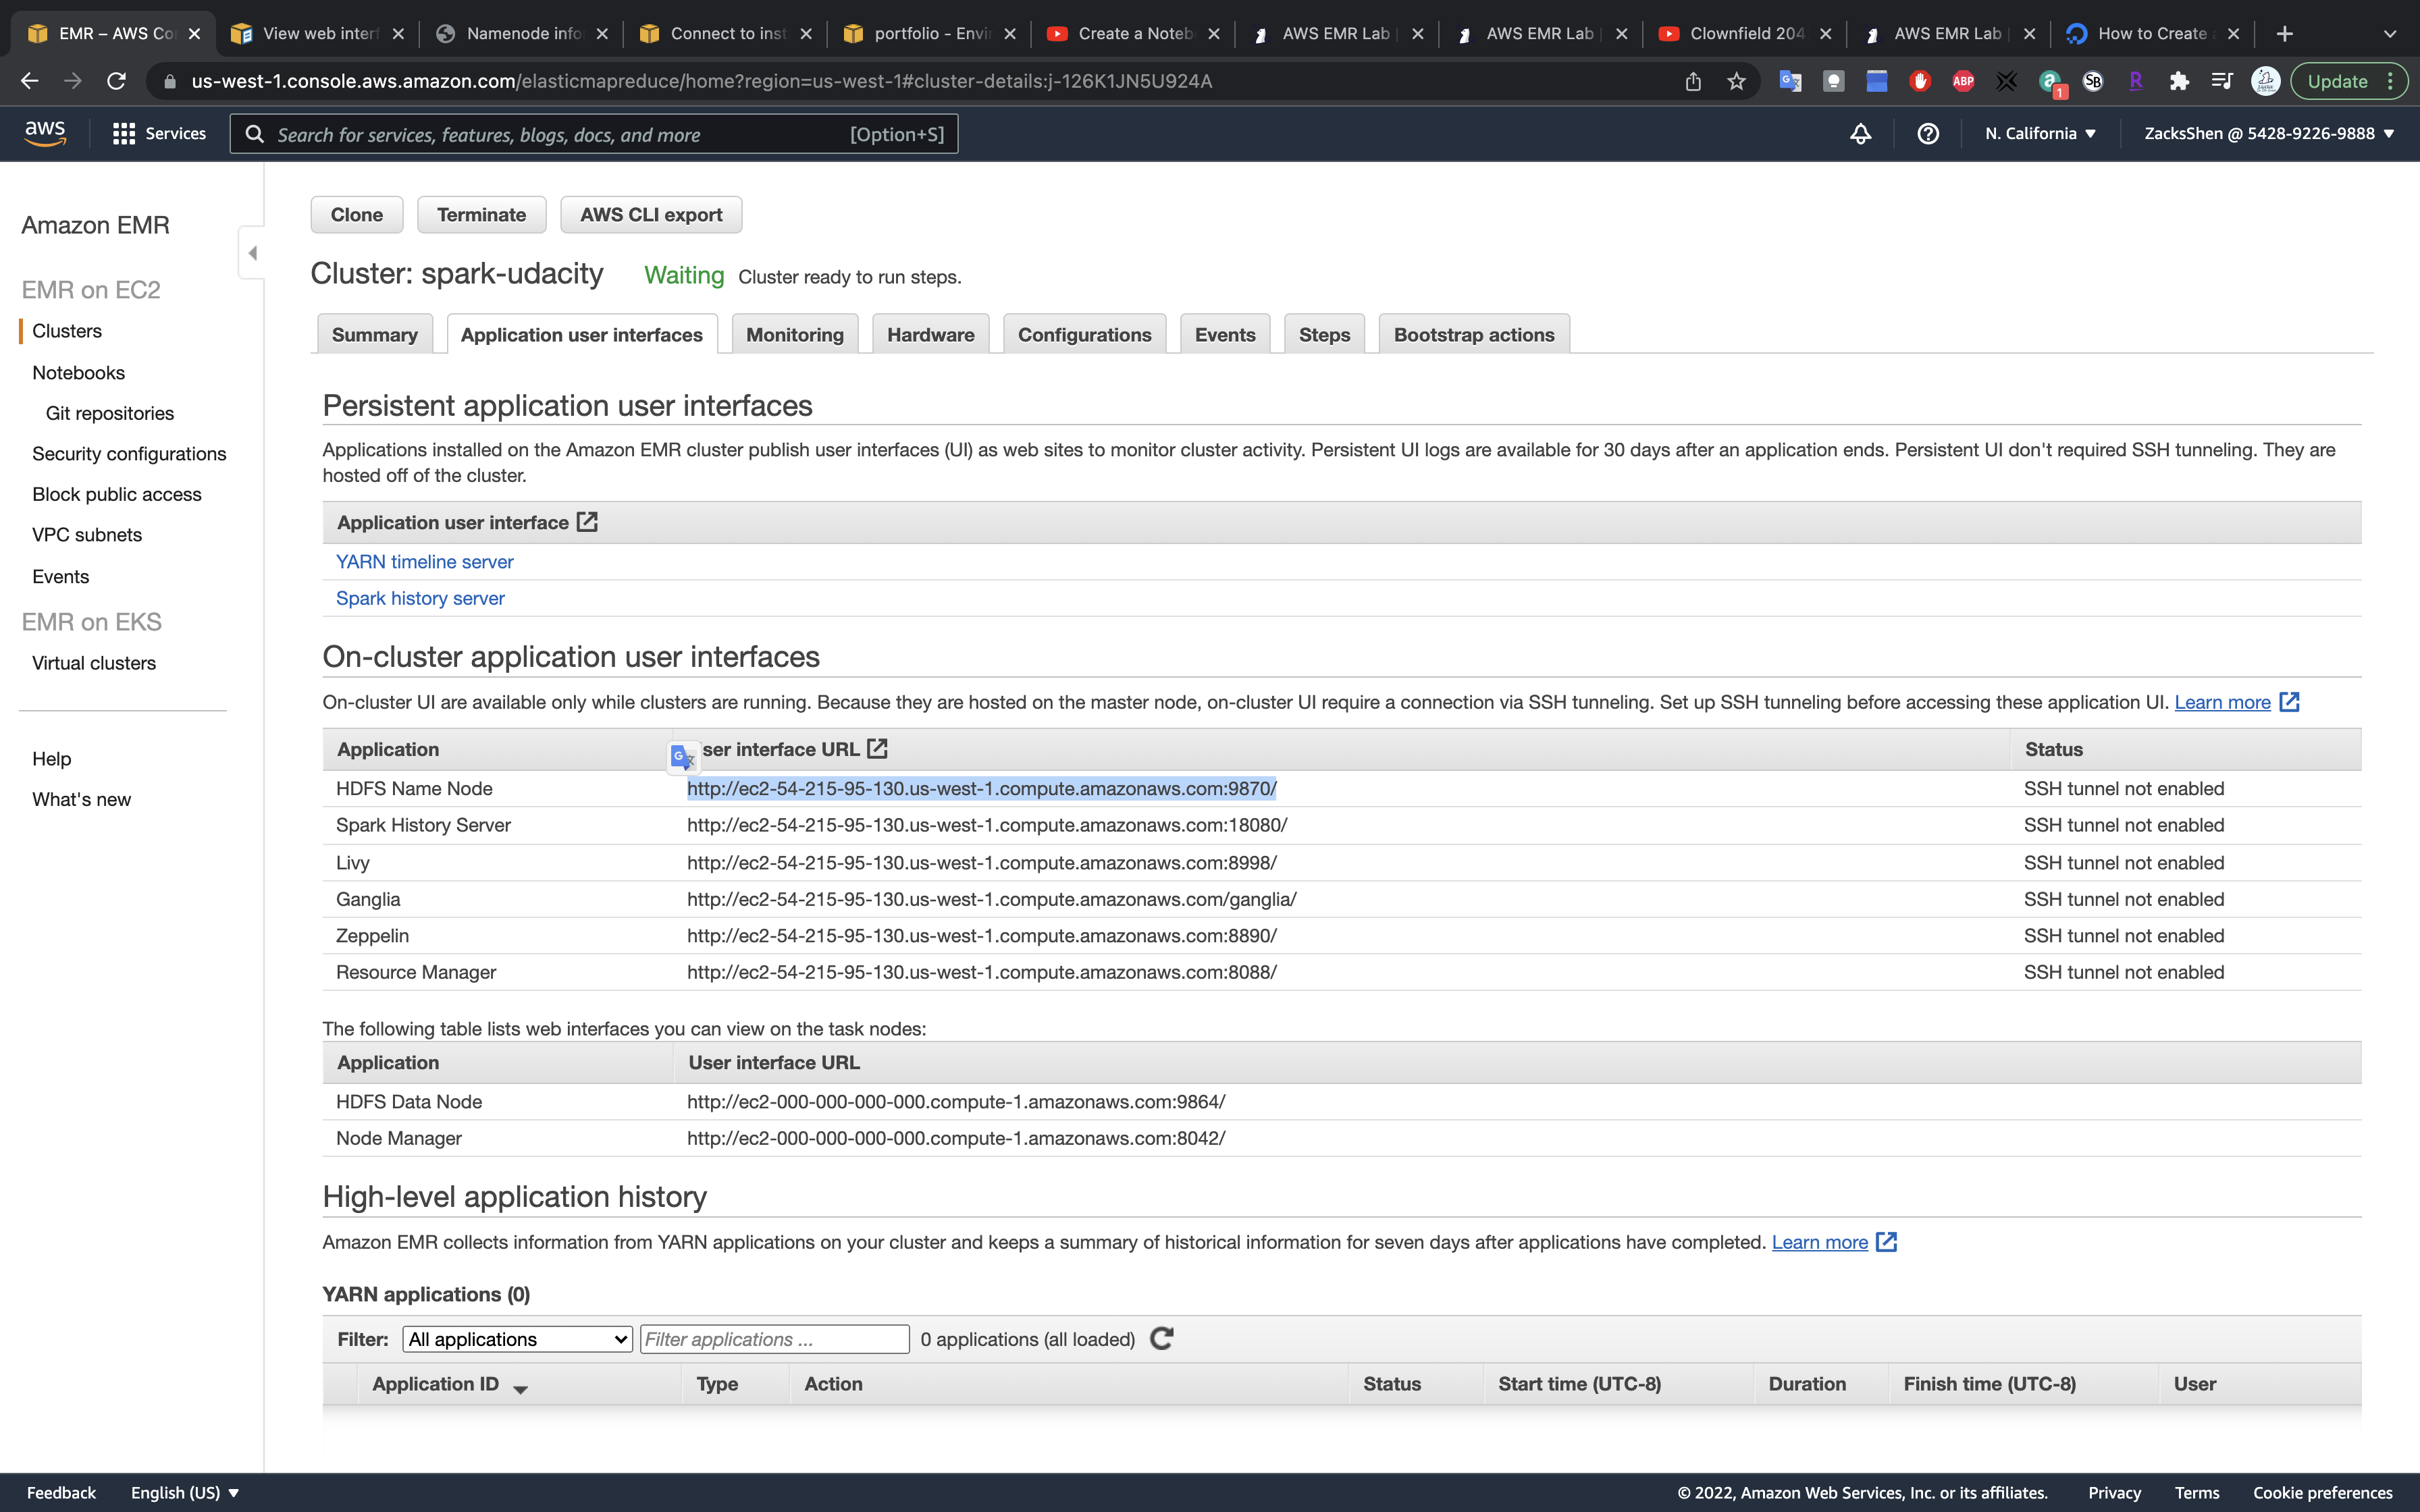
Spark UI - History Server
Visit the website then you can see the applicaiton you just submitted. (e.g. http://ec2-54-219-228-129.us-west-1.compute.amazonaws.com:18080/)
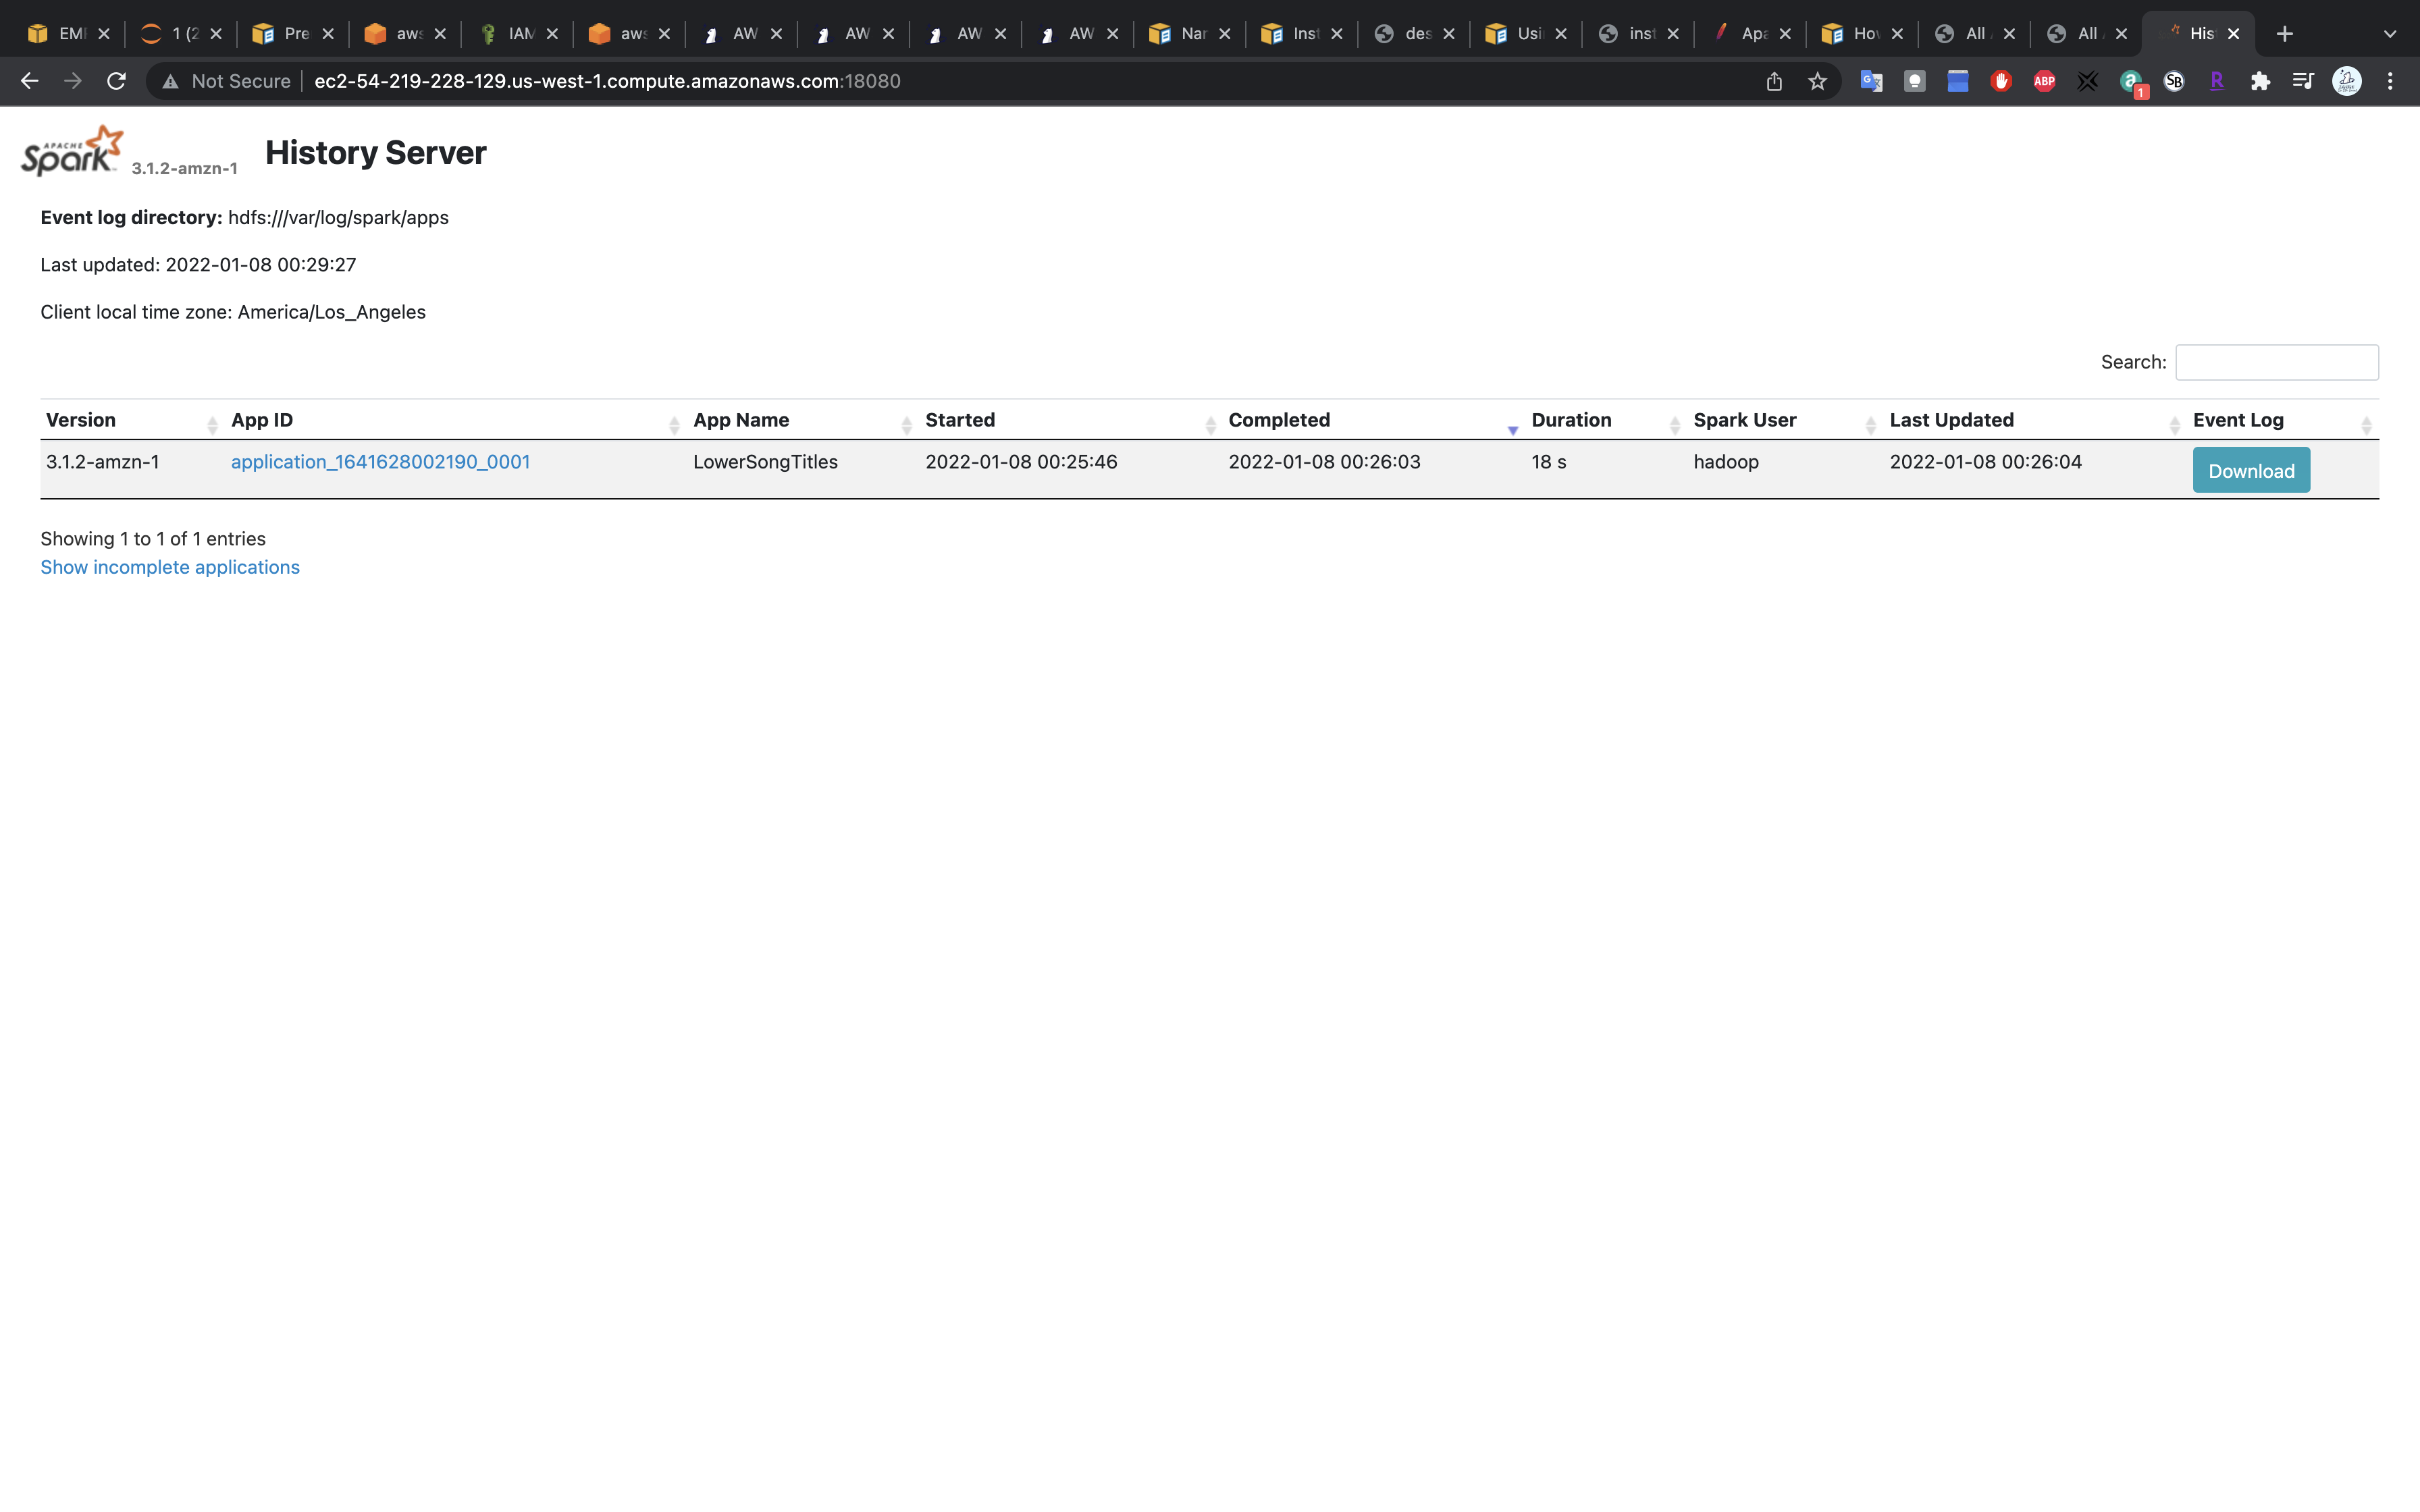
Click on the applicaiton.
You can see Spark jobs.
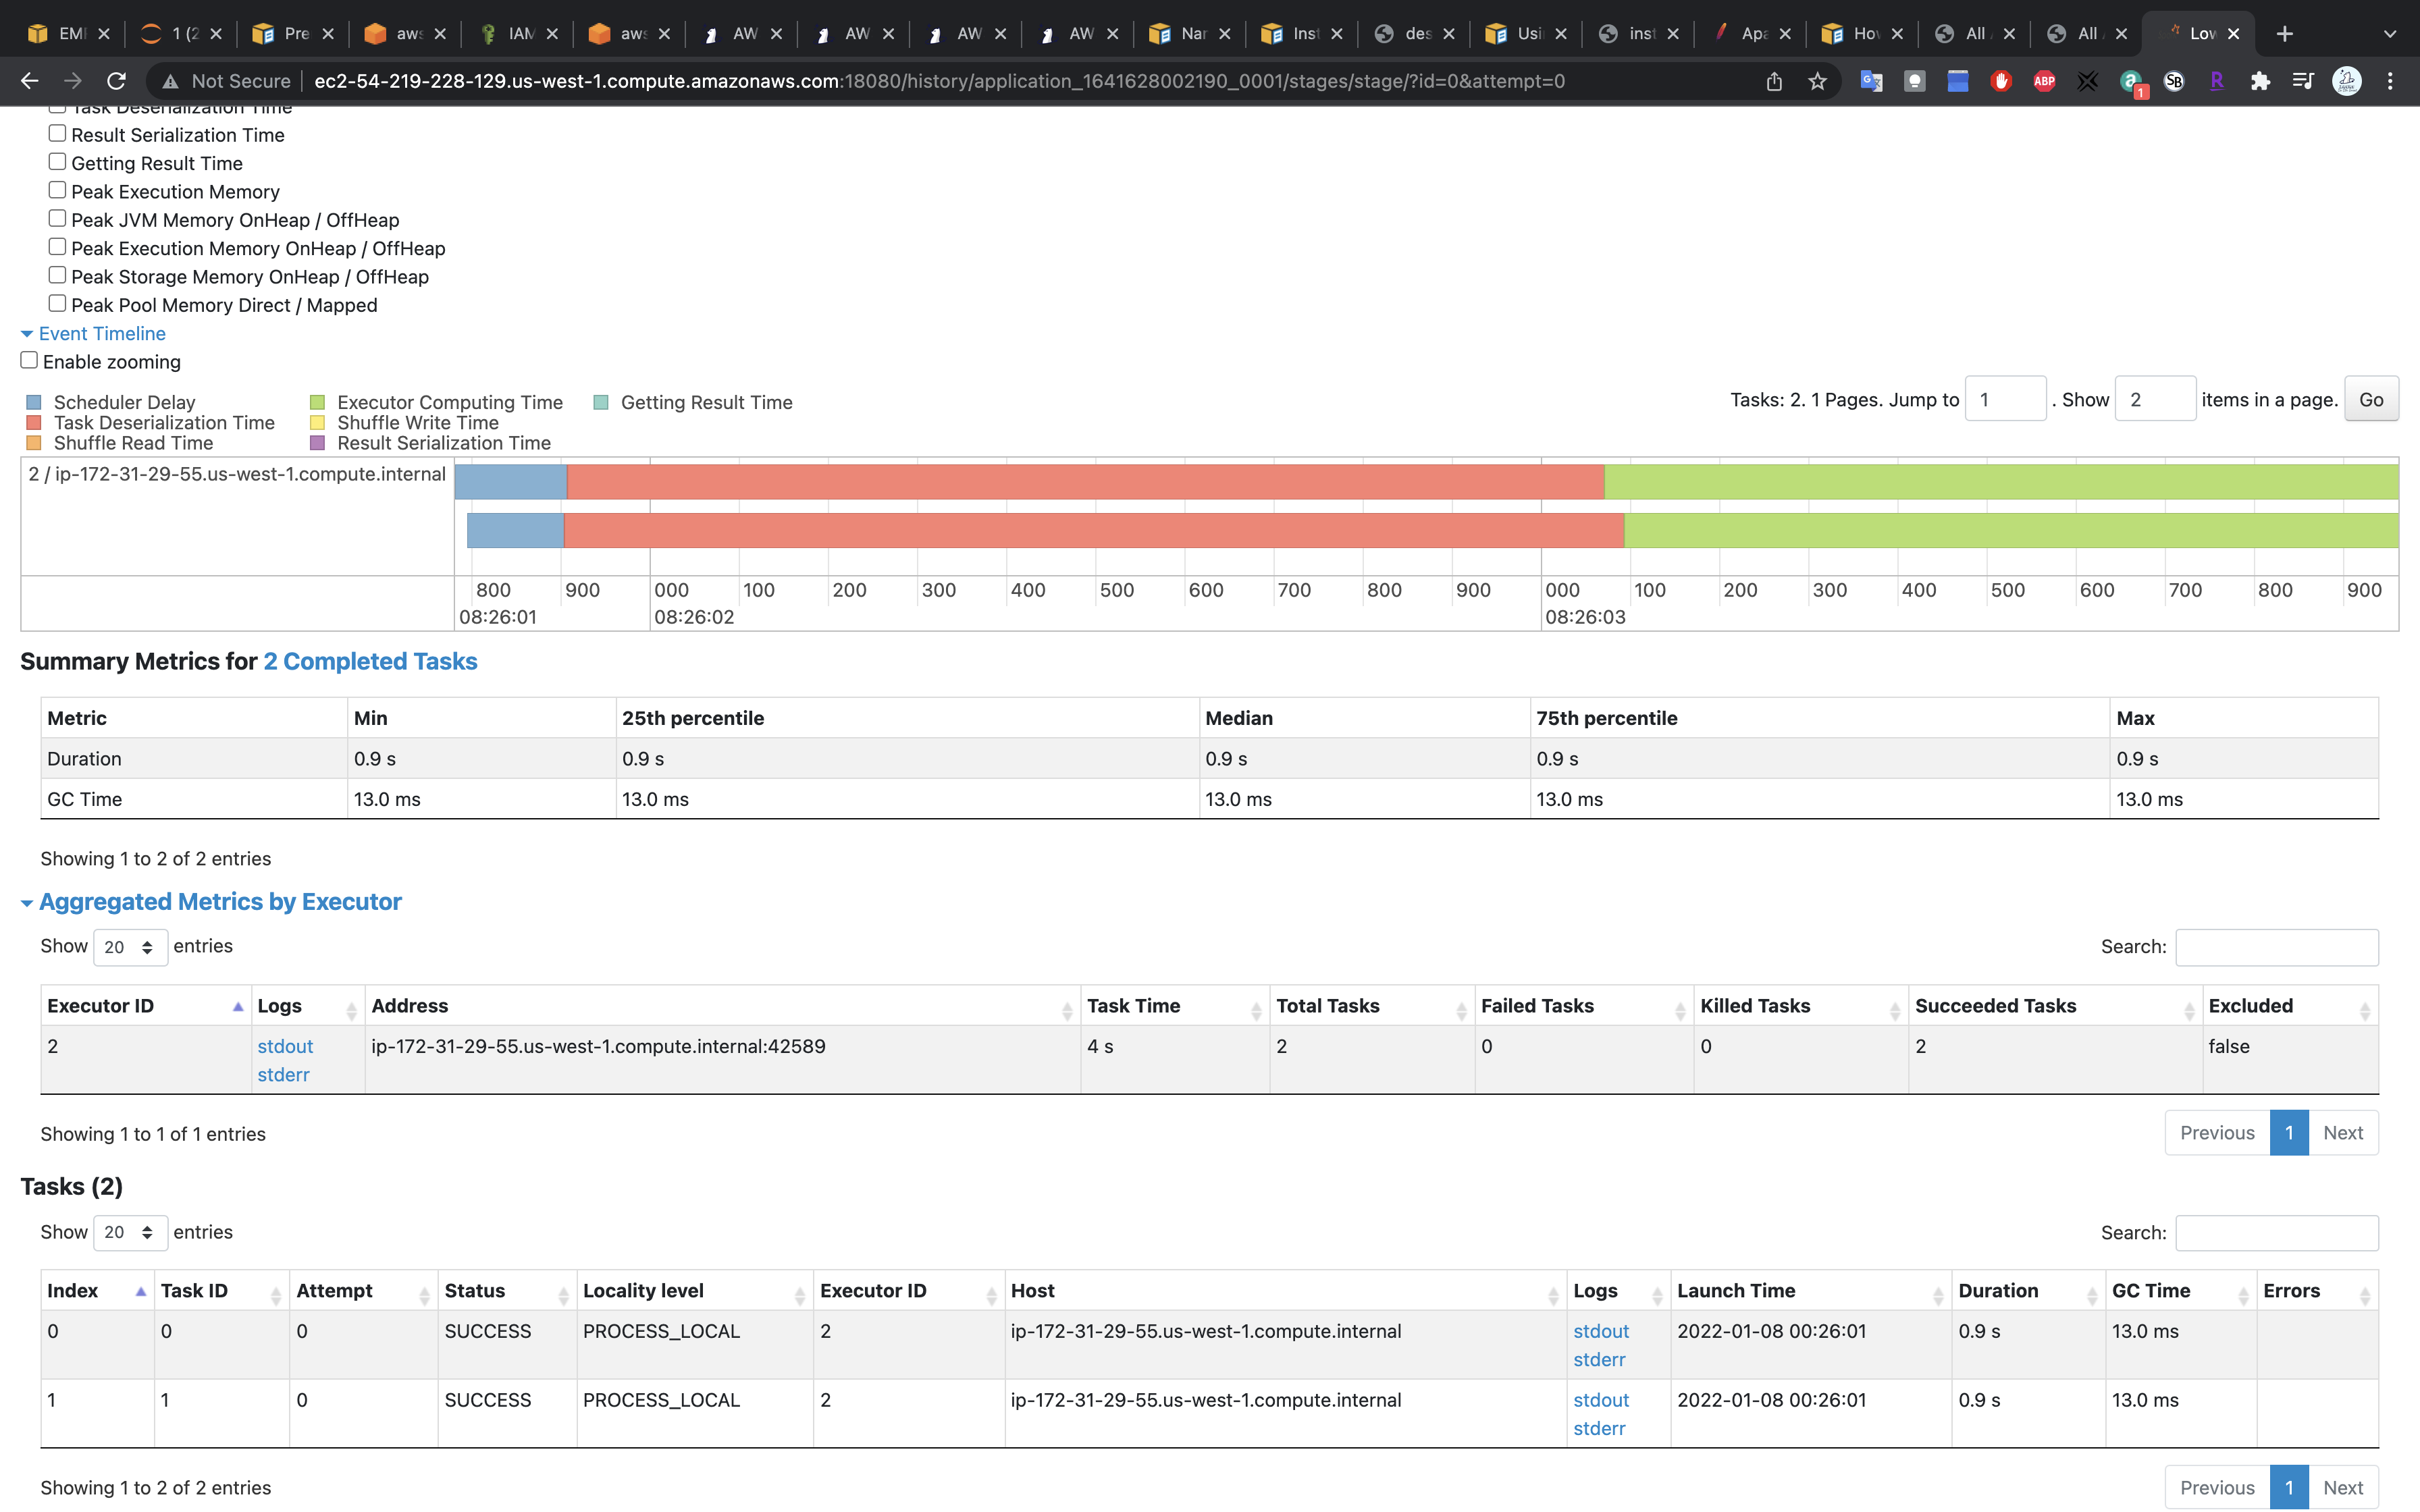
Spark UI - Spark Jobs
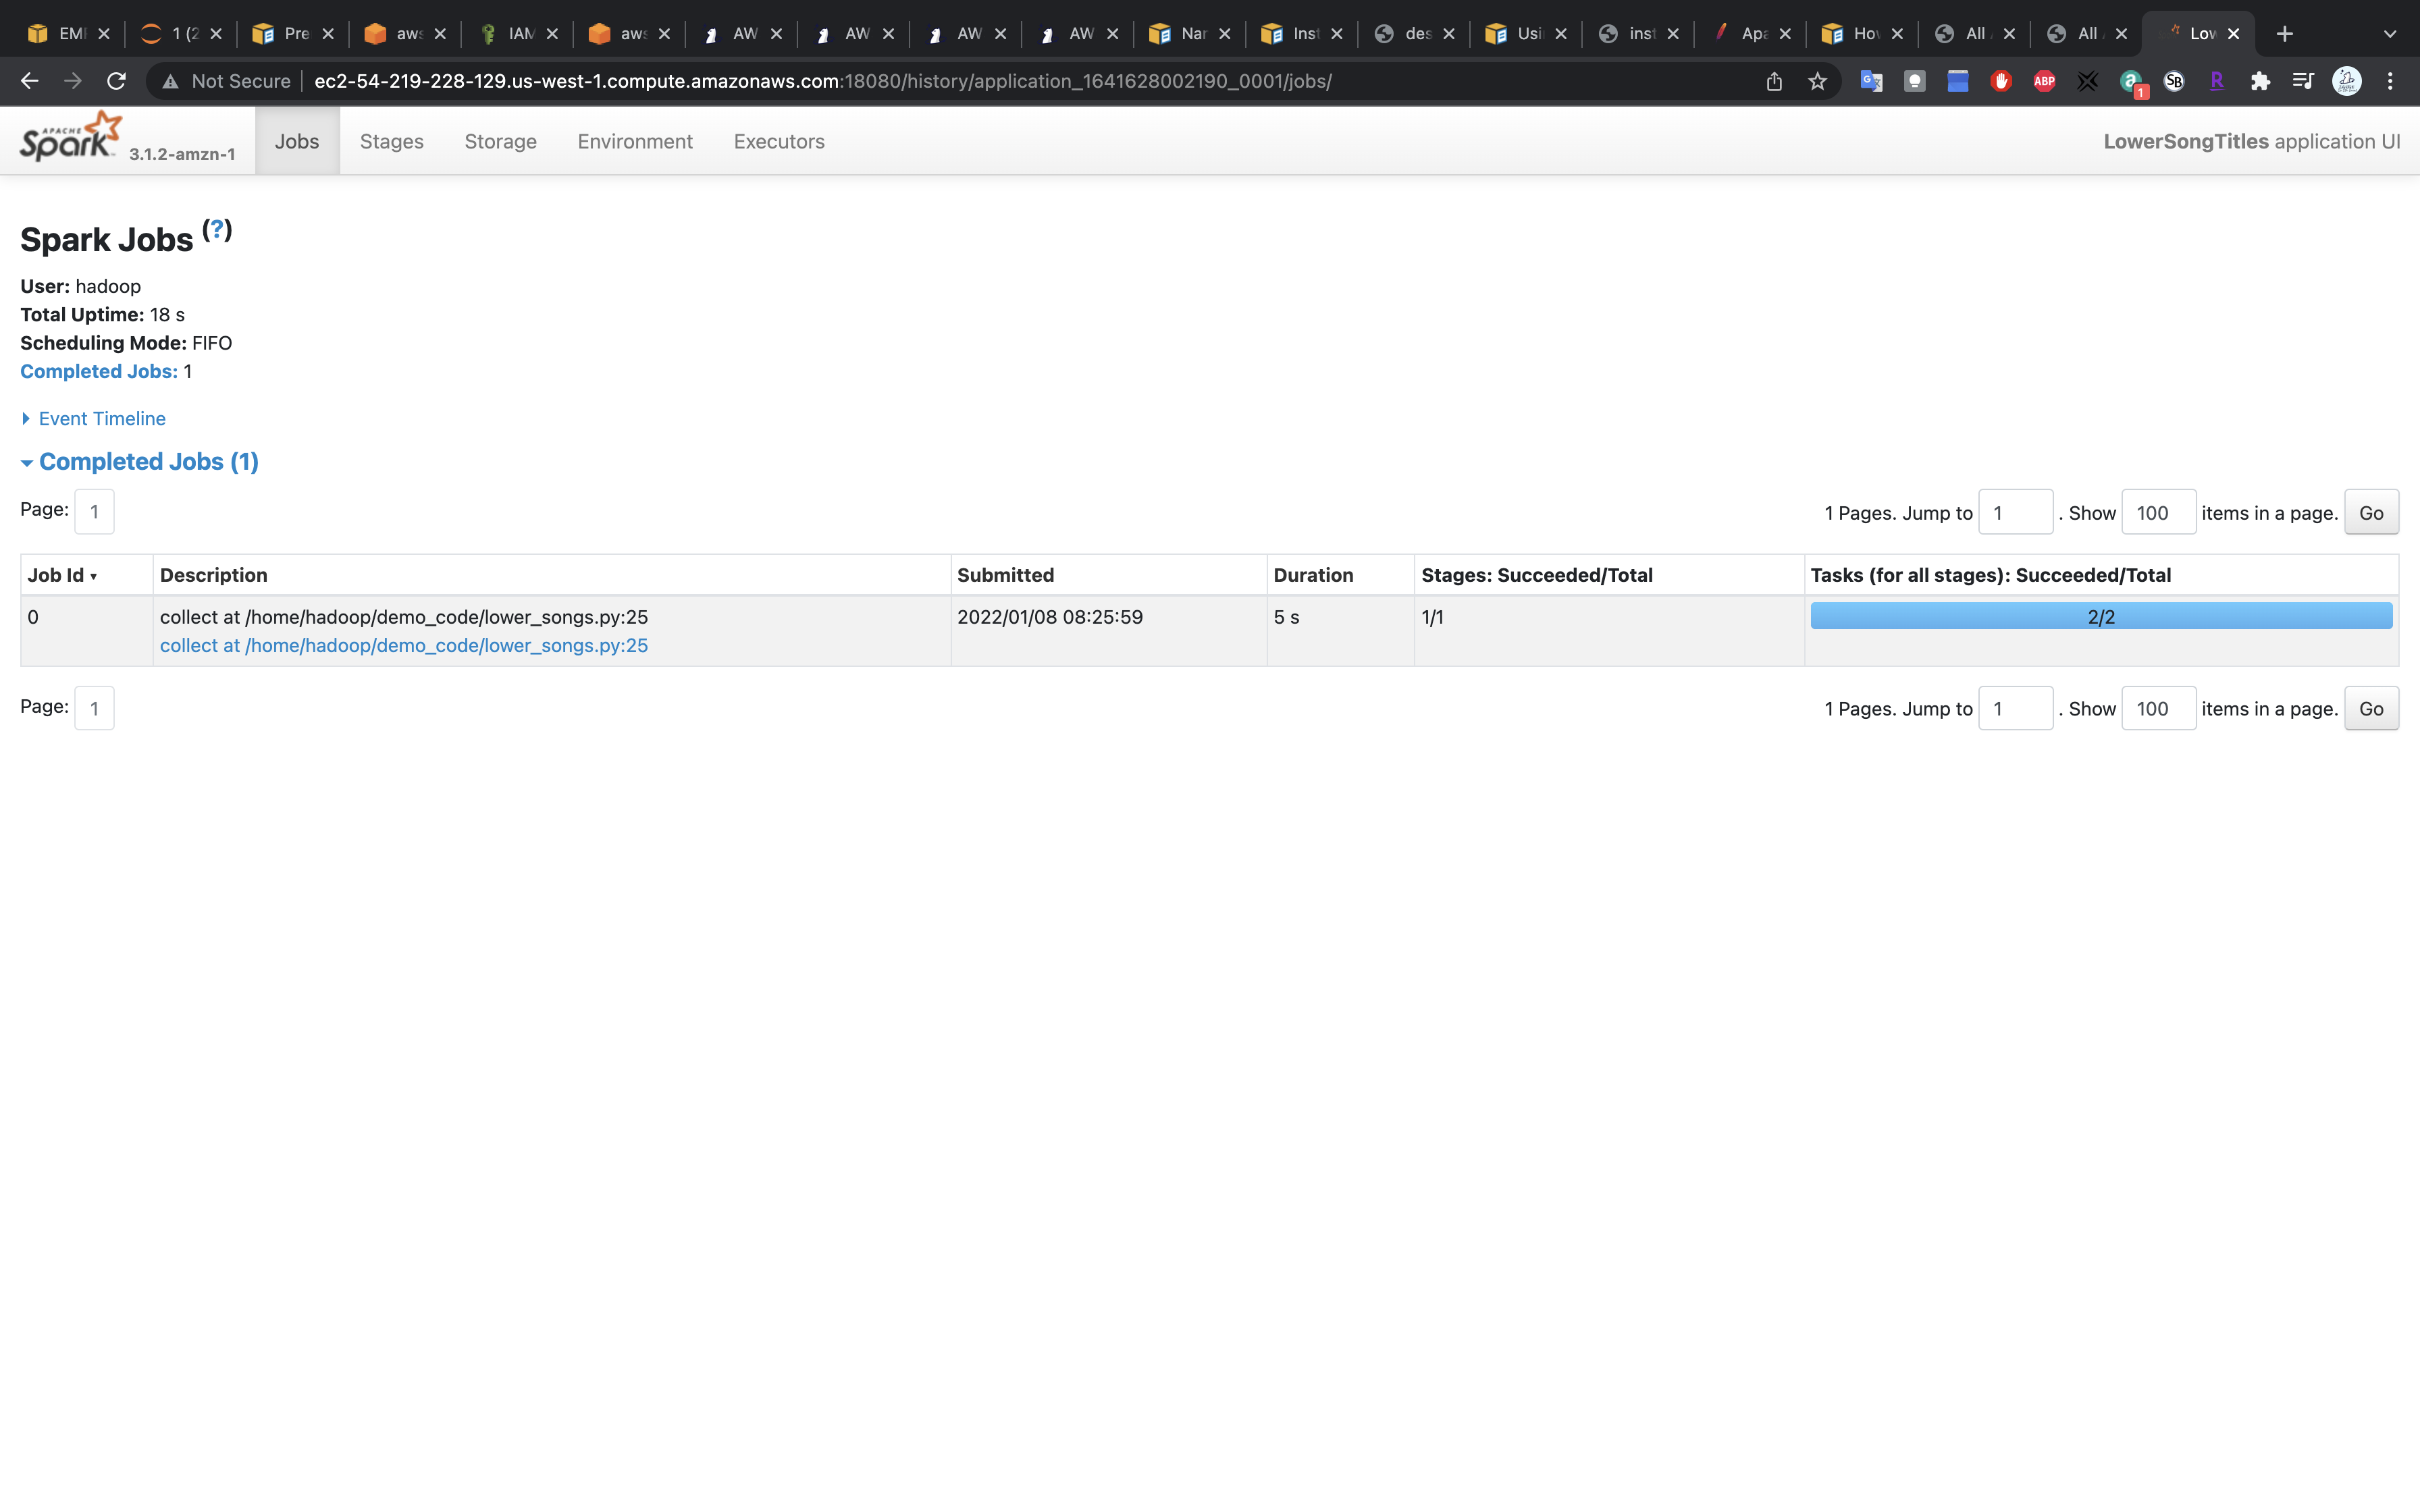
Details
Click on collect at /home/hadoop/demo_code/lower_songs.py:25
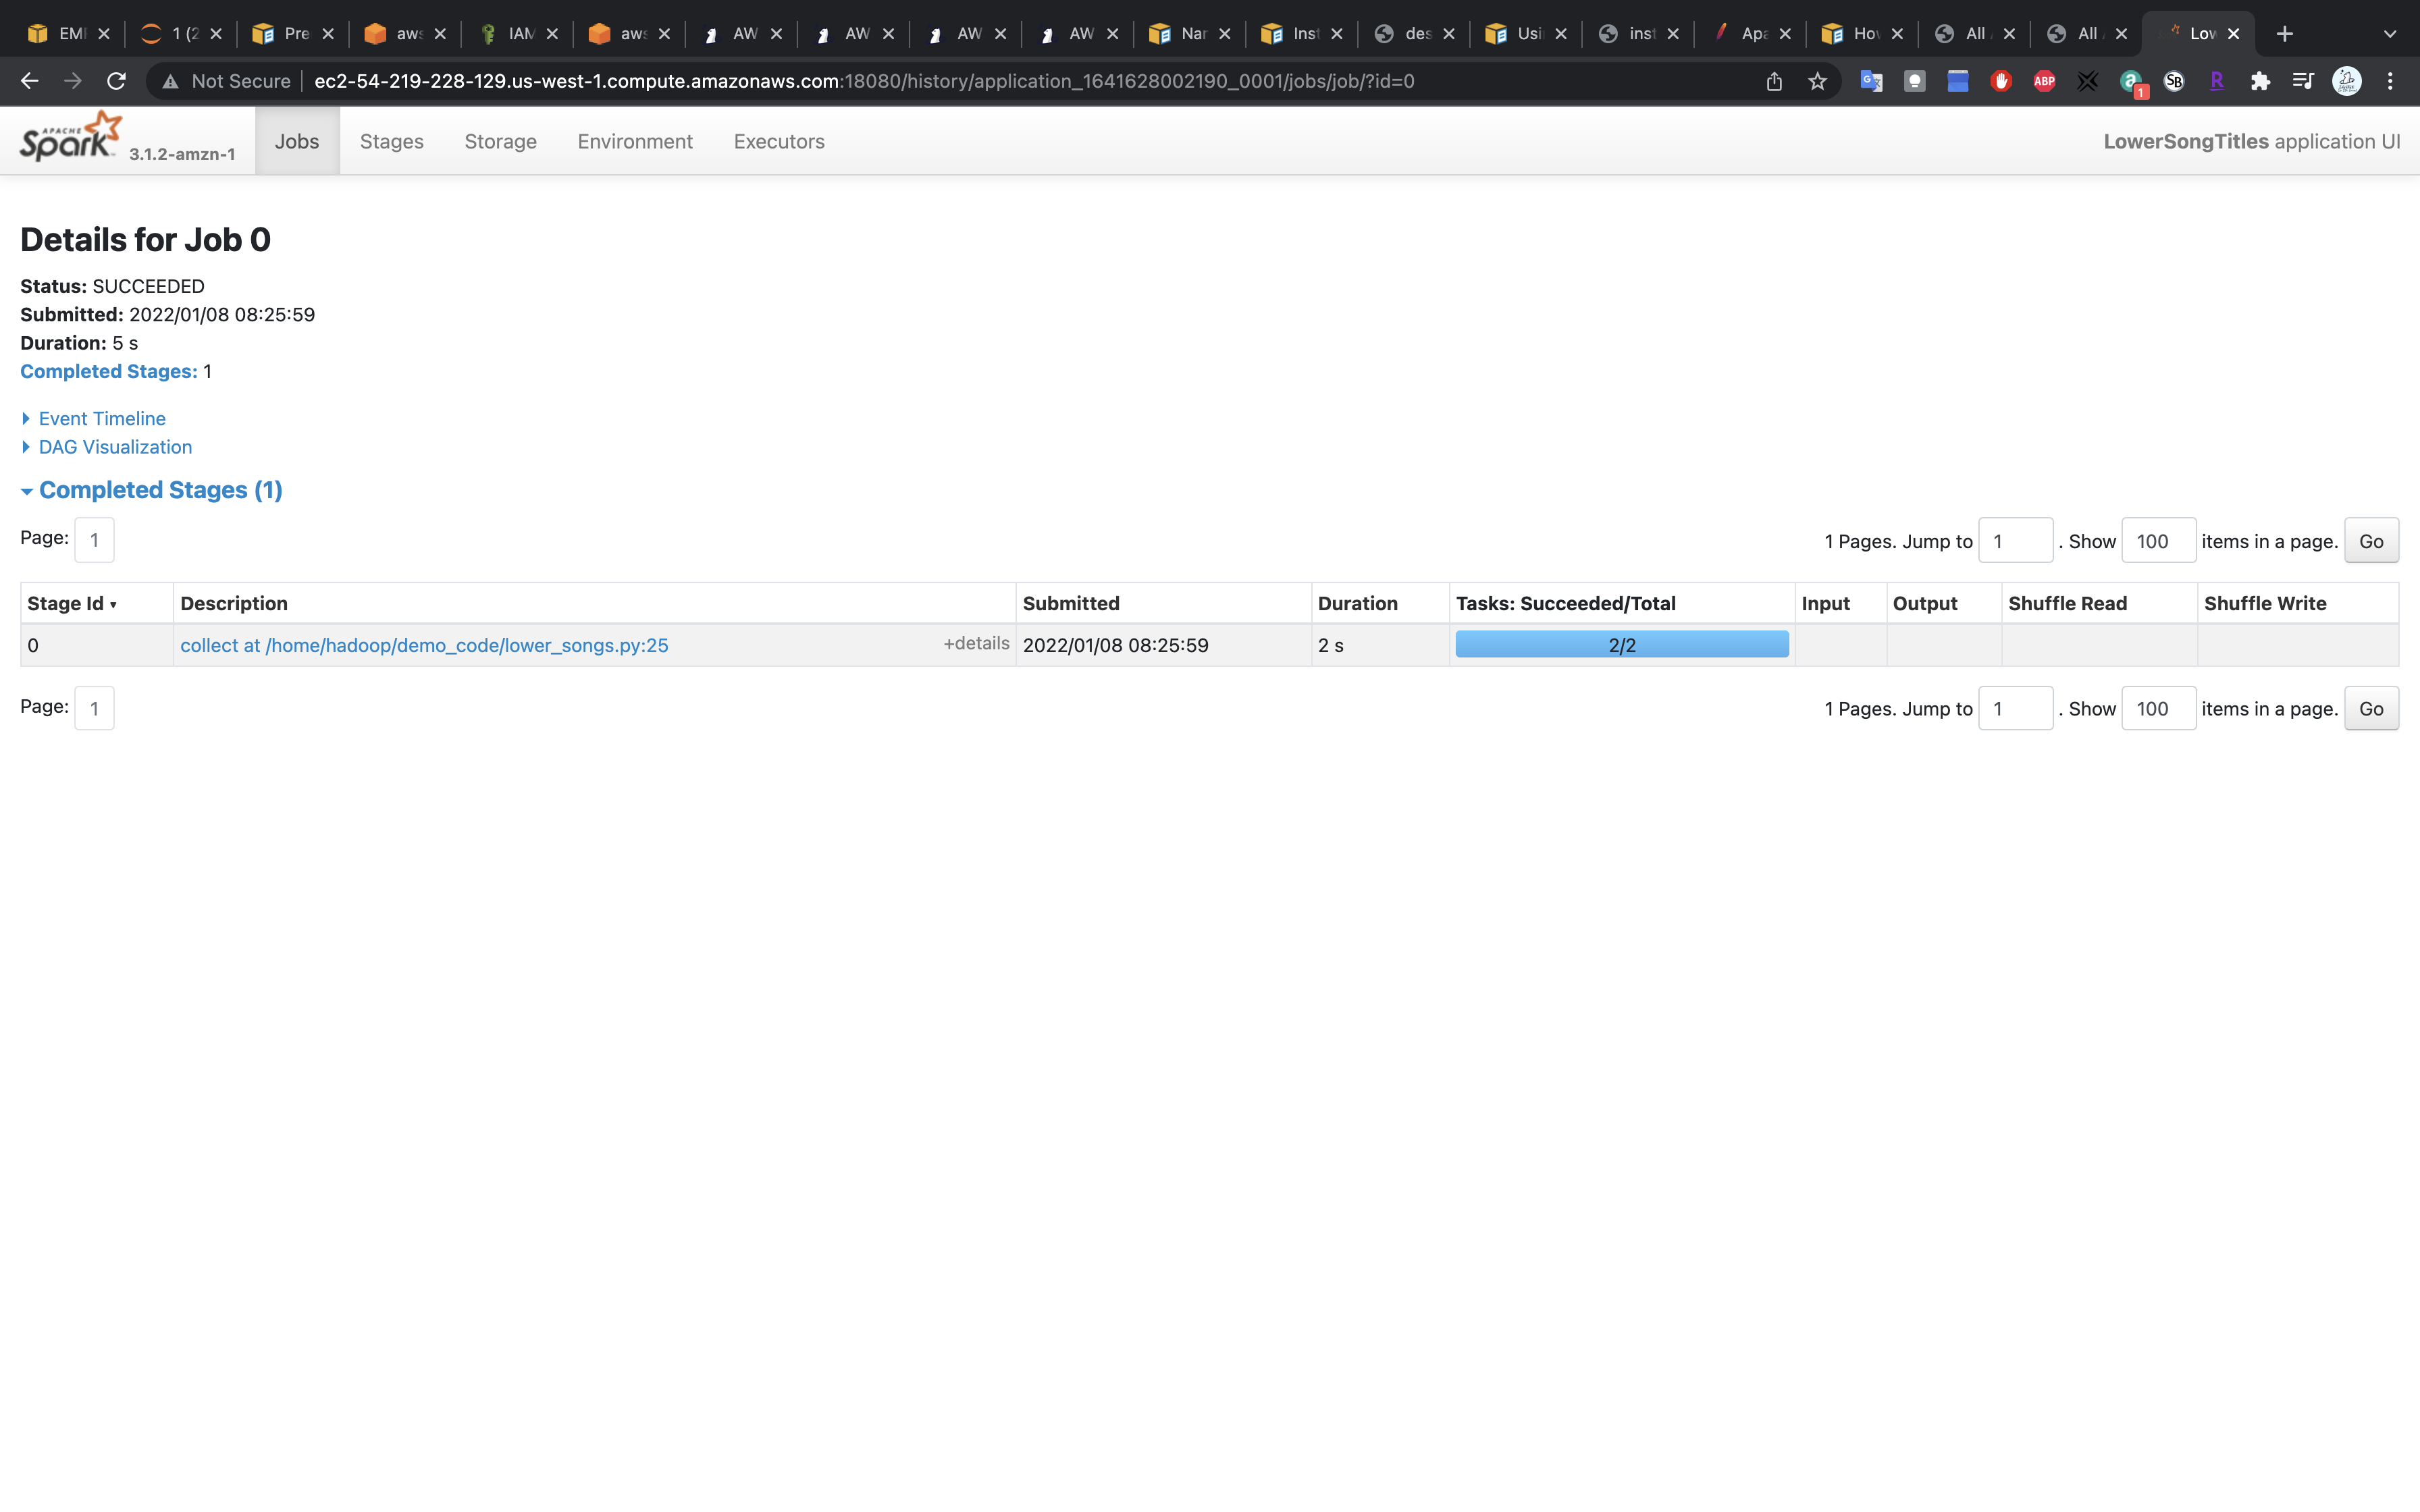
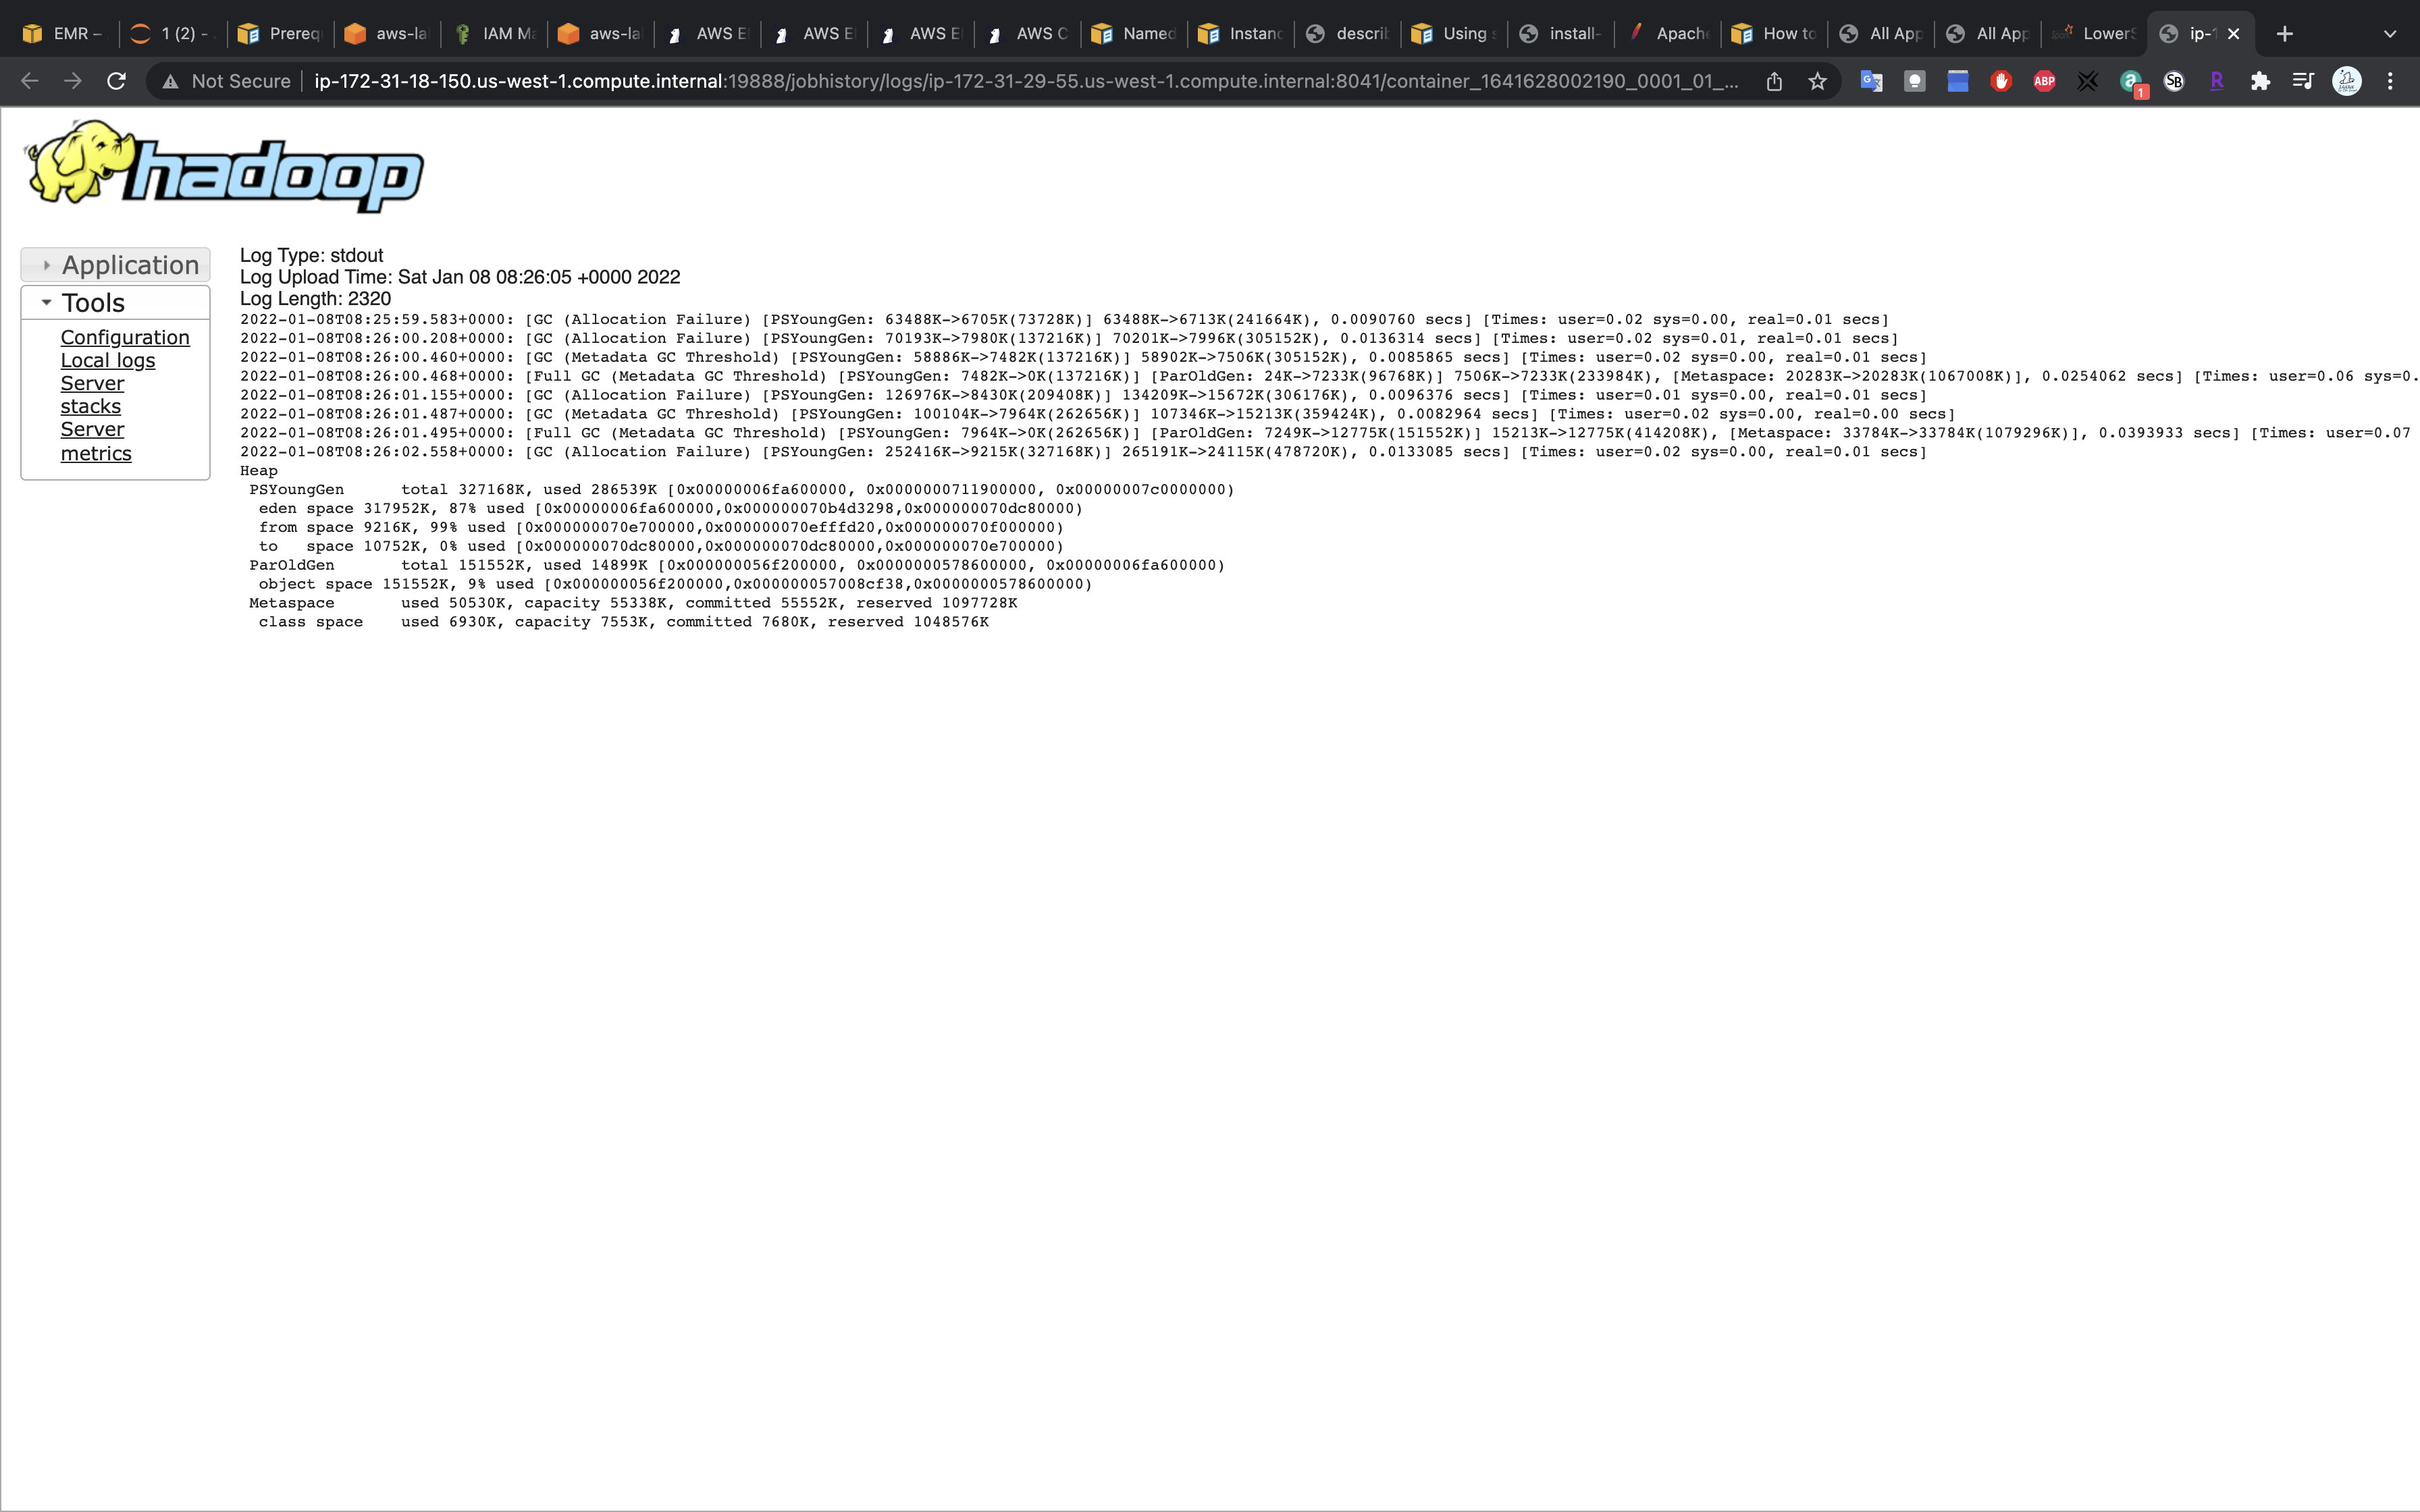
More Details
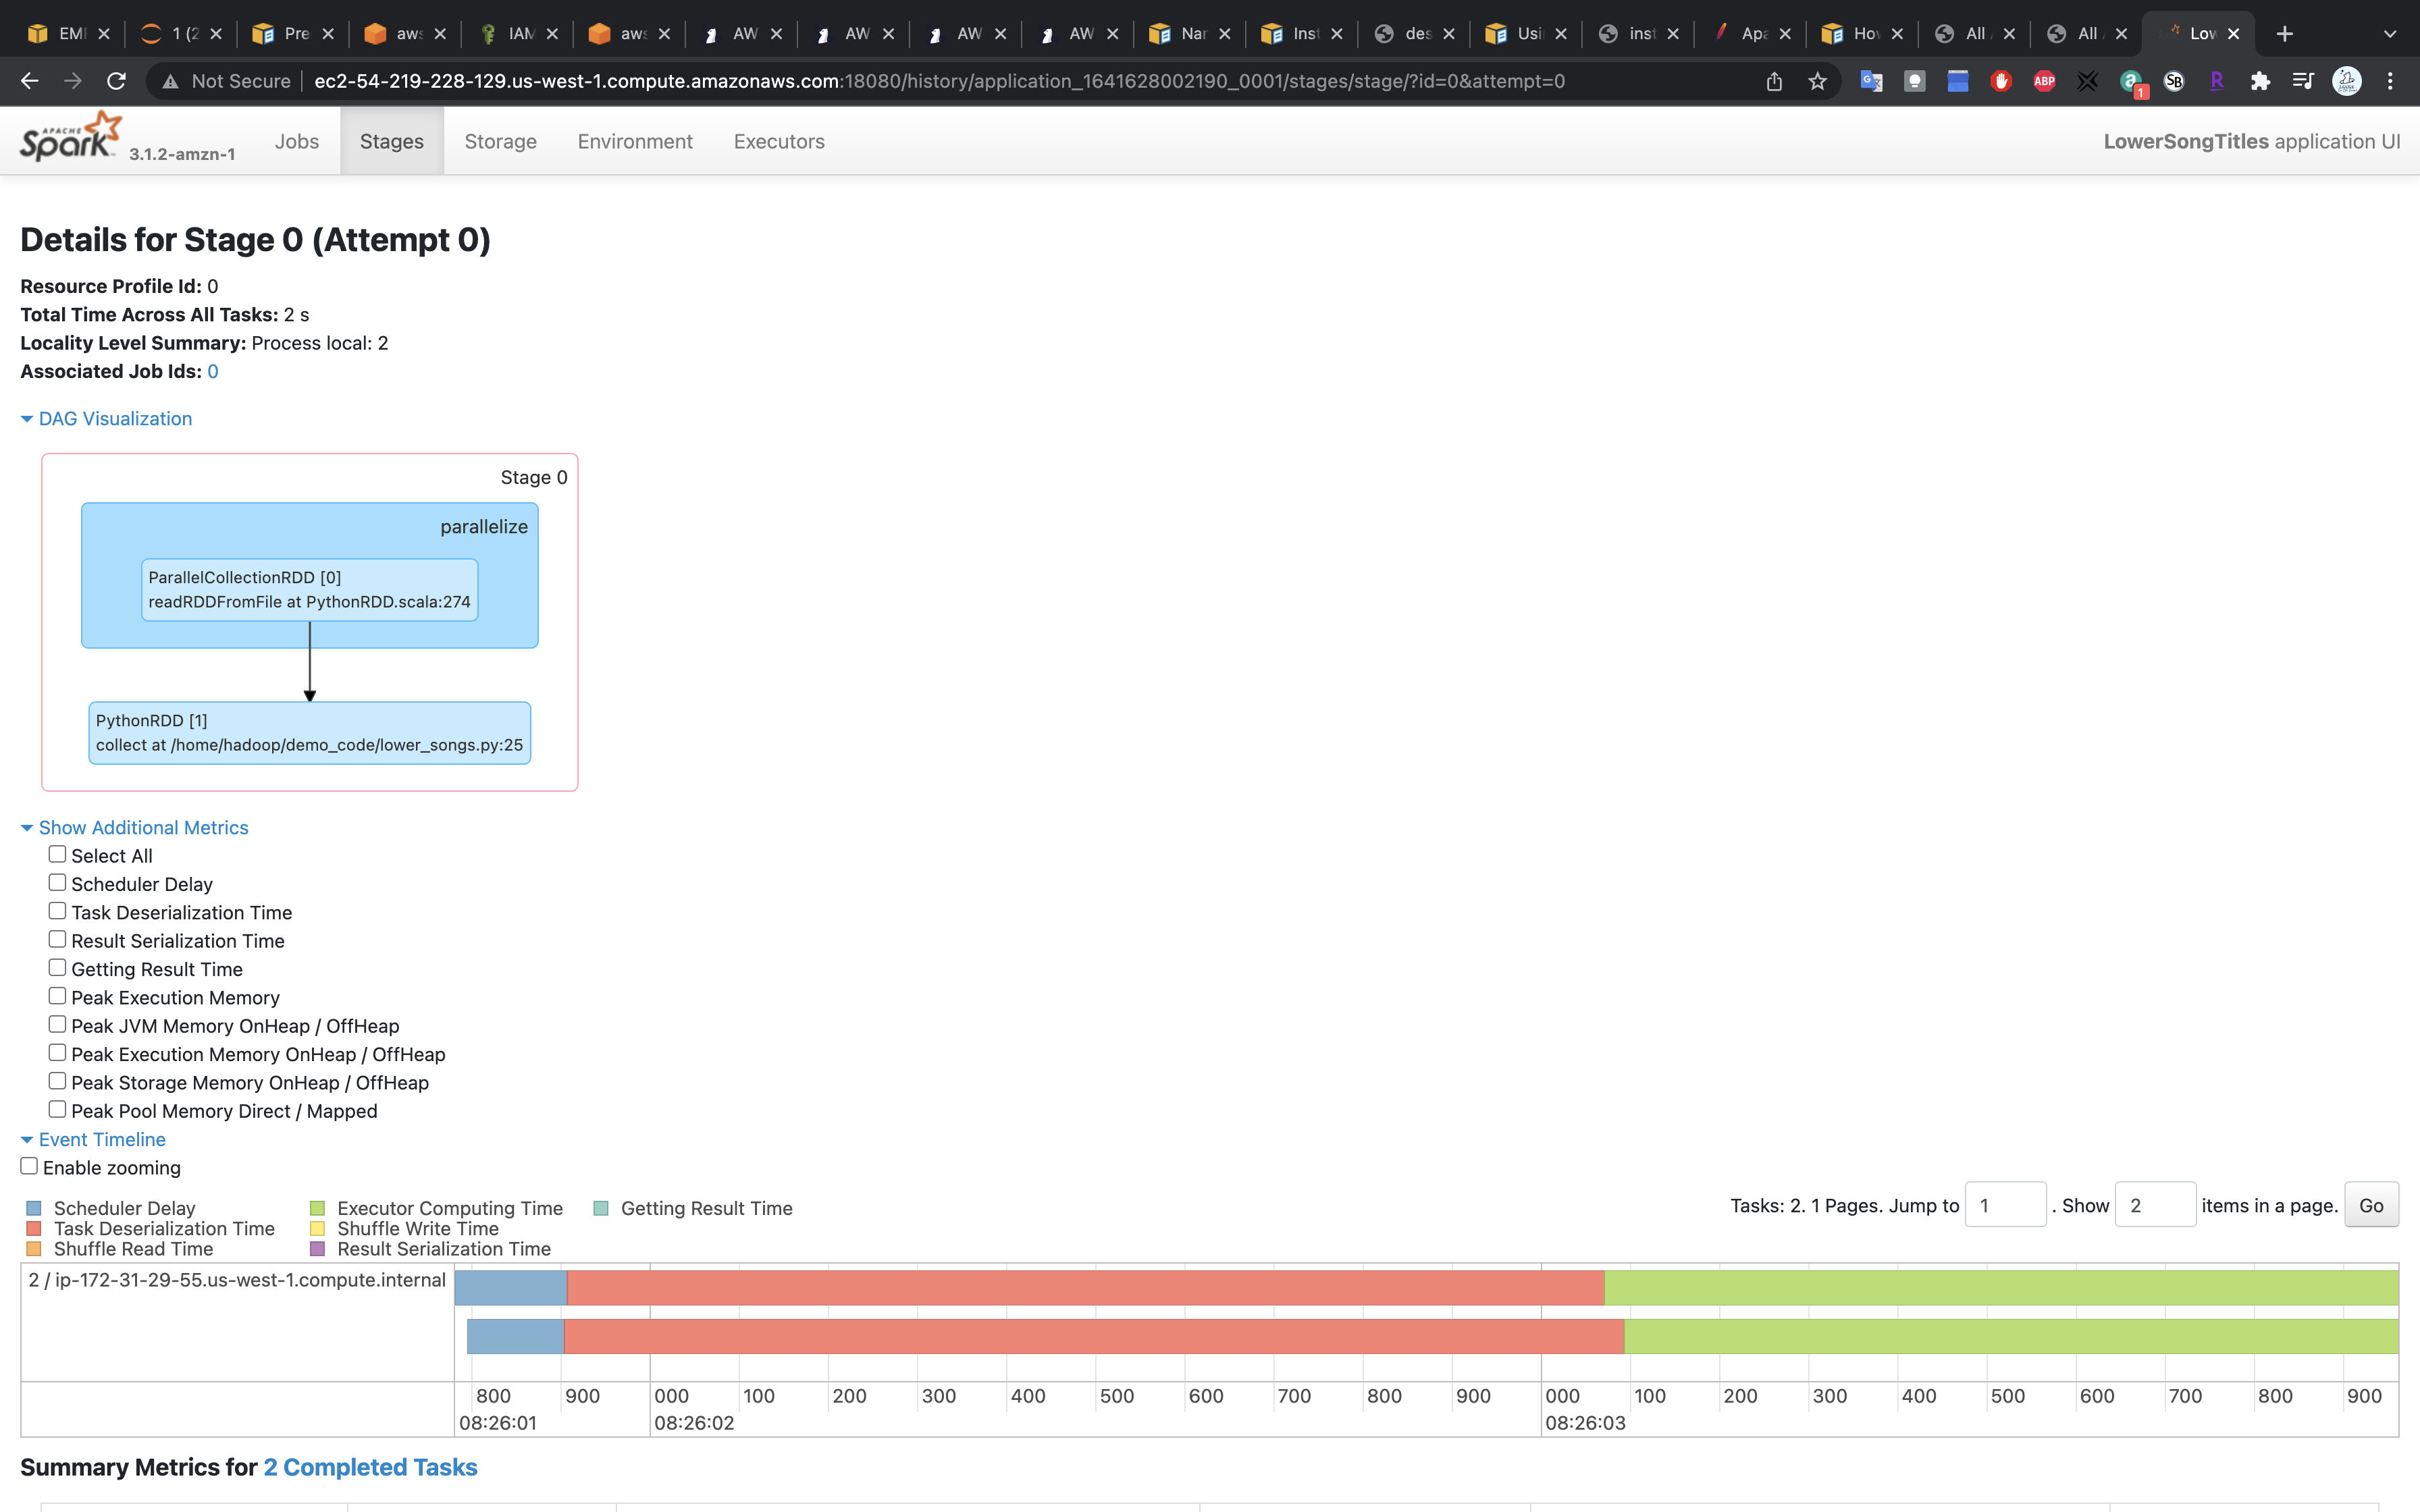
Click on stdout
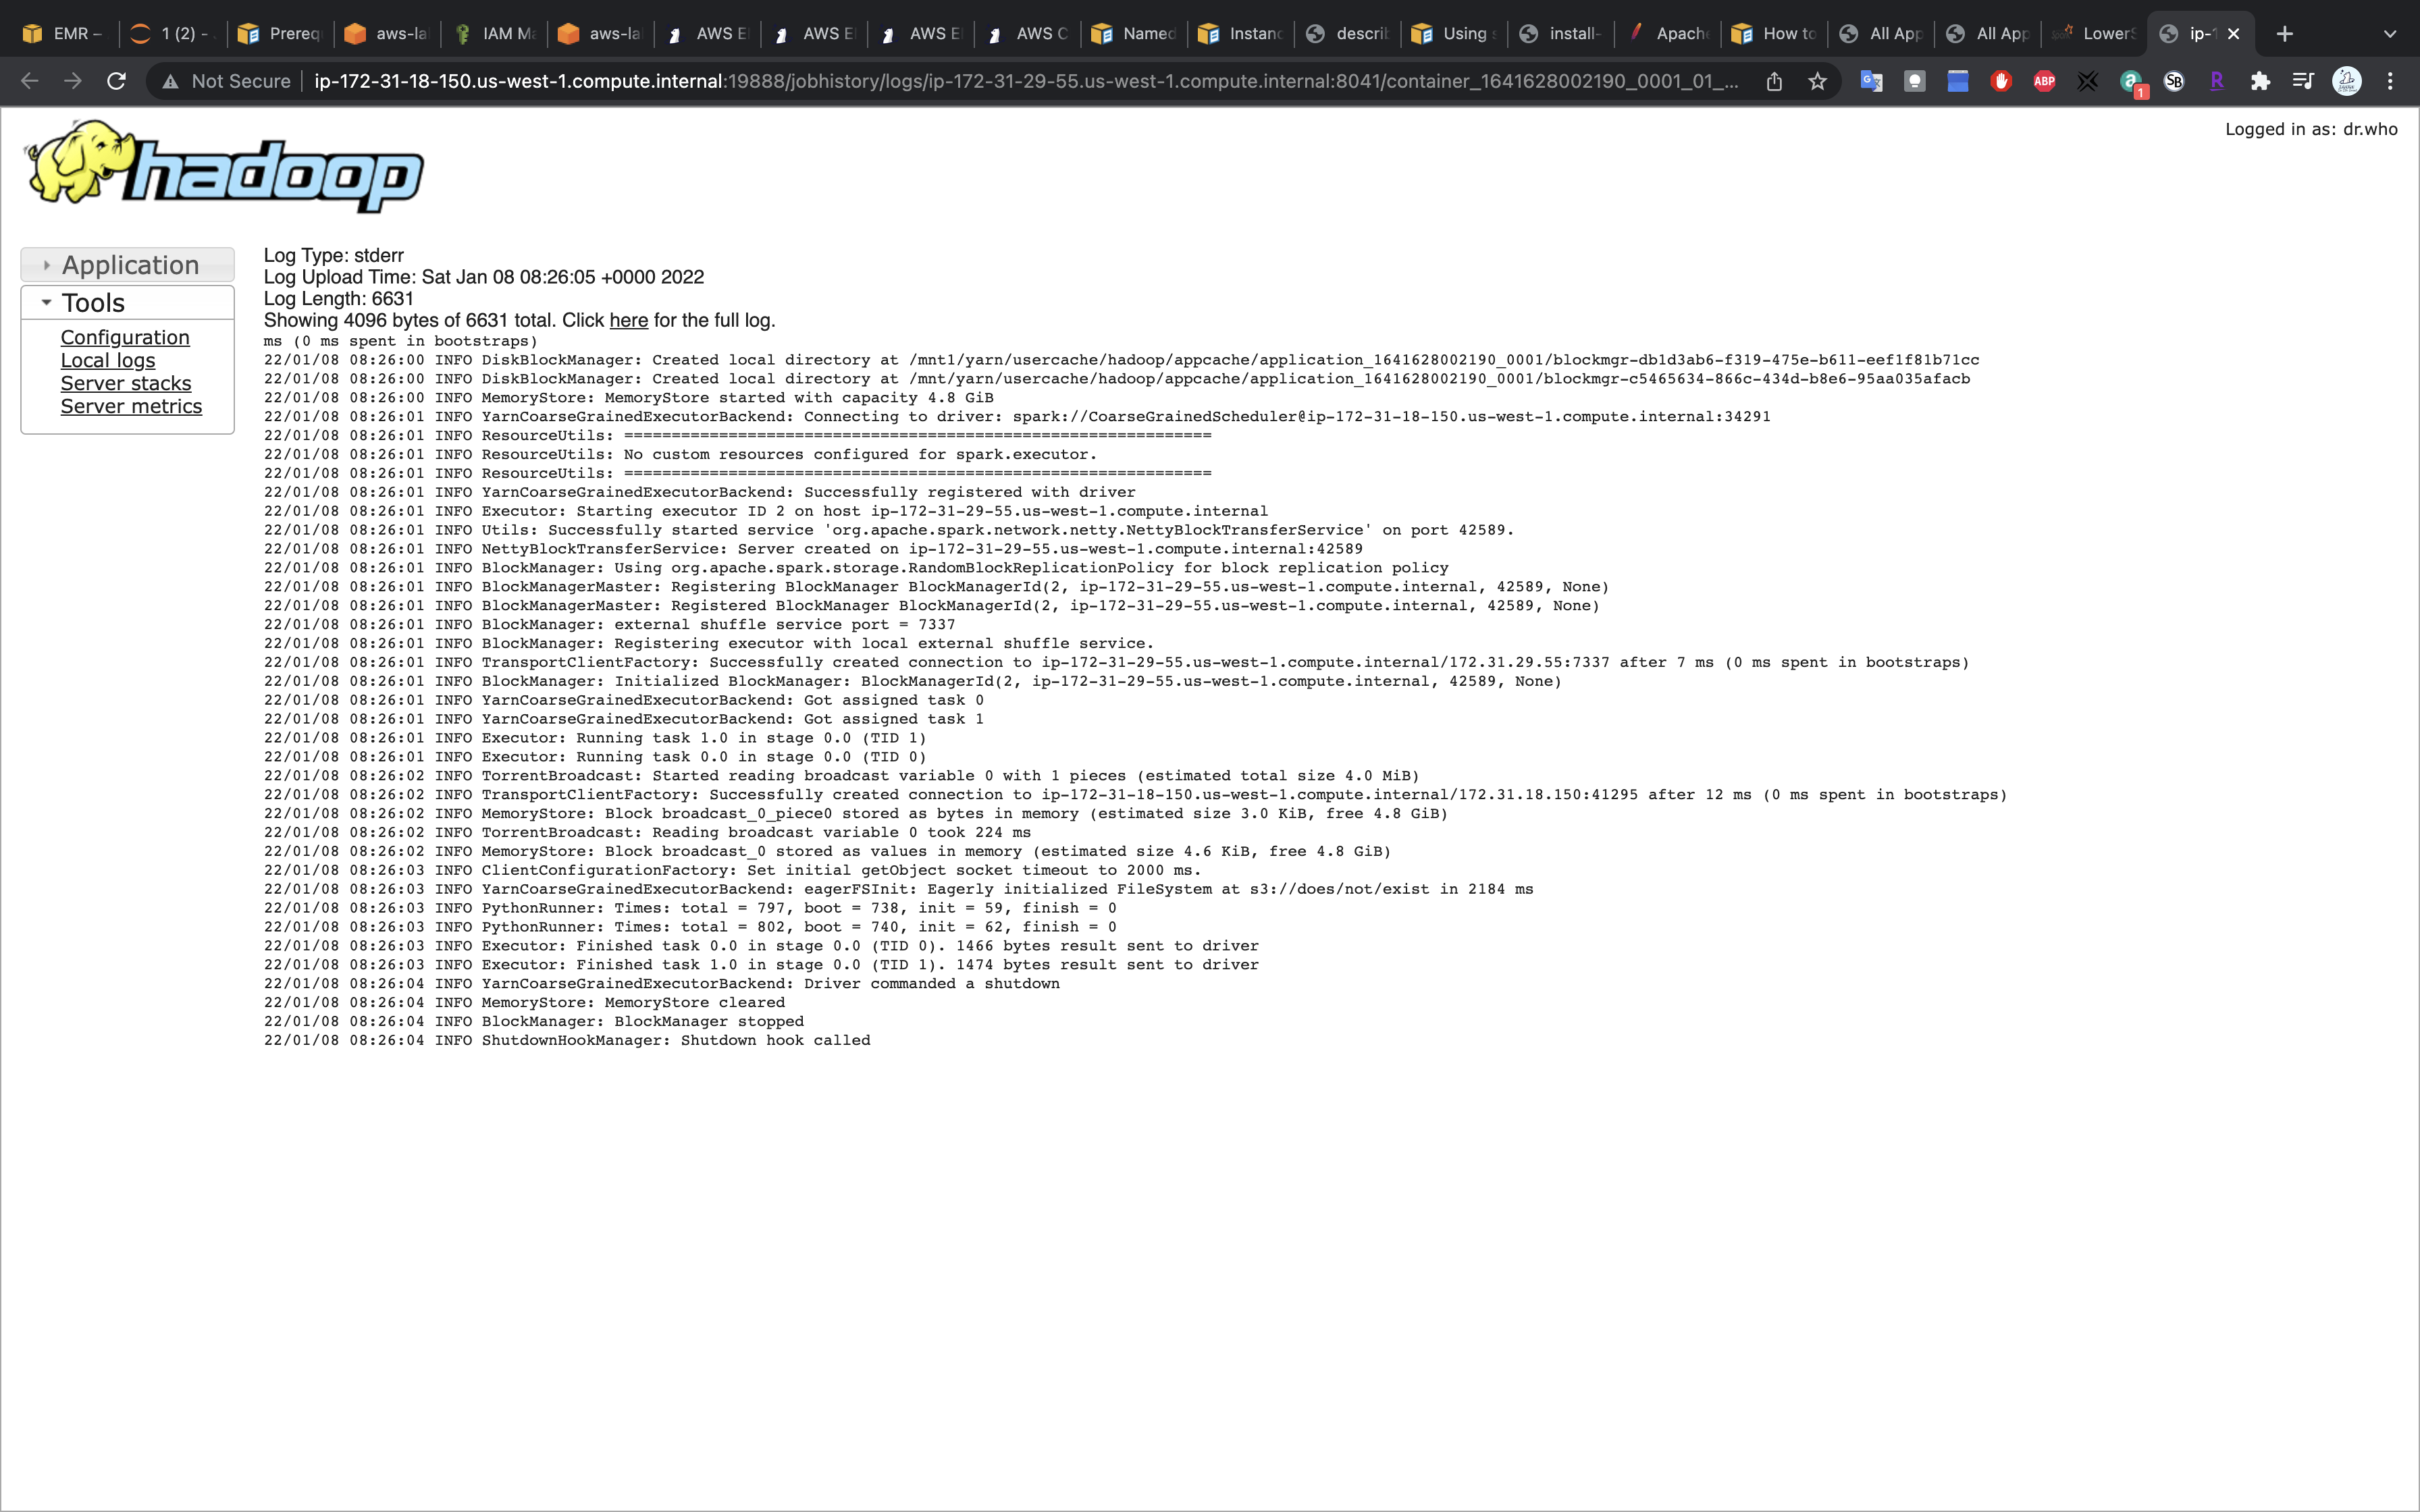
Click on stderror
Terminate
Terminate your cluster after you finish the lab.
EMR S3
Reading and Writing Data to Amazon S3
Task Details
- Launch an Jupyter notebook on EMR Cluster with Internet connection.
- Create an VPC with a public subnet and a private subnet.
- Associte the public subnet with an IGW and assoicate the private subnet with NGW.
- Add a Git repository. Then link your notebook to the git repo.
- Read and write data to Amazon S3.
VPC Configuration
Since EMR Cluster must running on a private subnet that has an public subnet associated for Internet access, we neet to create a VPC and dual-stack subnets.
Create a dual-stack VPC and subnets using the AWS CLI
The security groups for your notebook must include an outbound rule that allows the notebook to route traffic to the internet from the cluster. We recommend that you create your own security groups. For more information, see Specifying EC2 security groups for EMR Notebooks.
Create an VPC and query its VPC ID.
1 | aws ec2 create-vpc --cidr-block 10.0.0.0/16 --query Vpc.VpcId --output text |
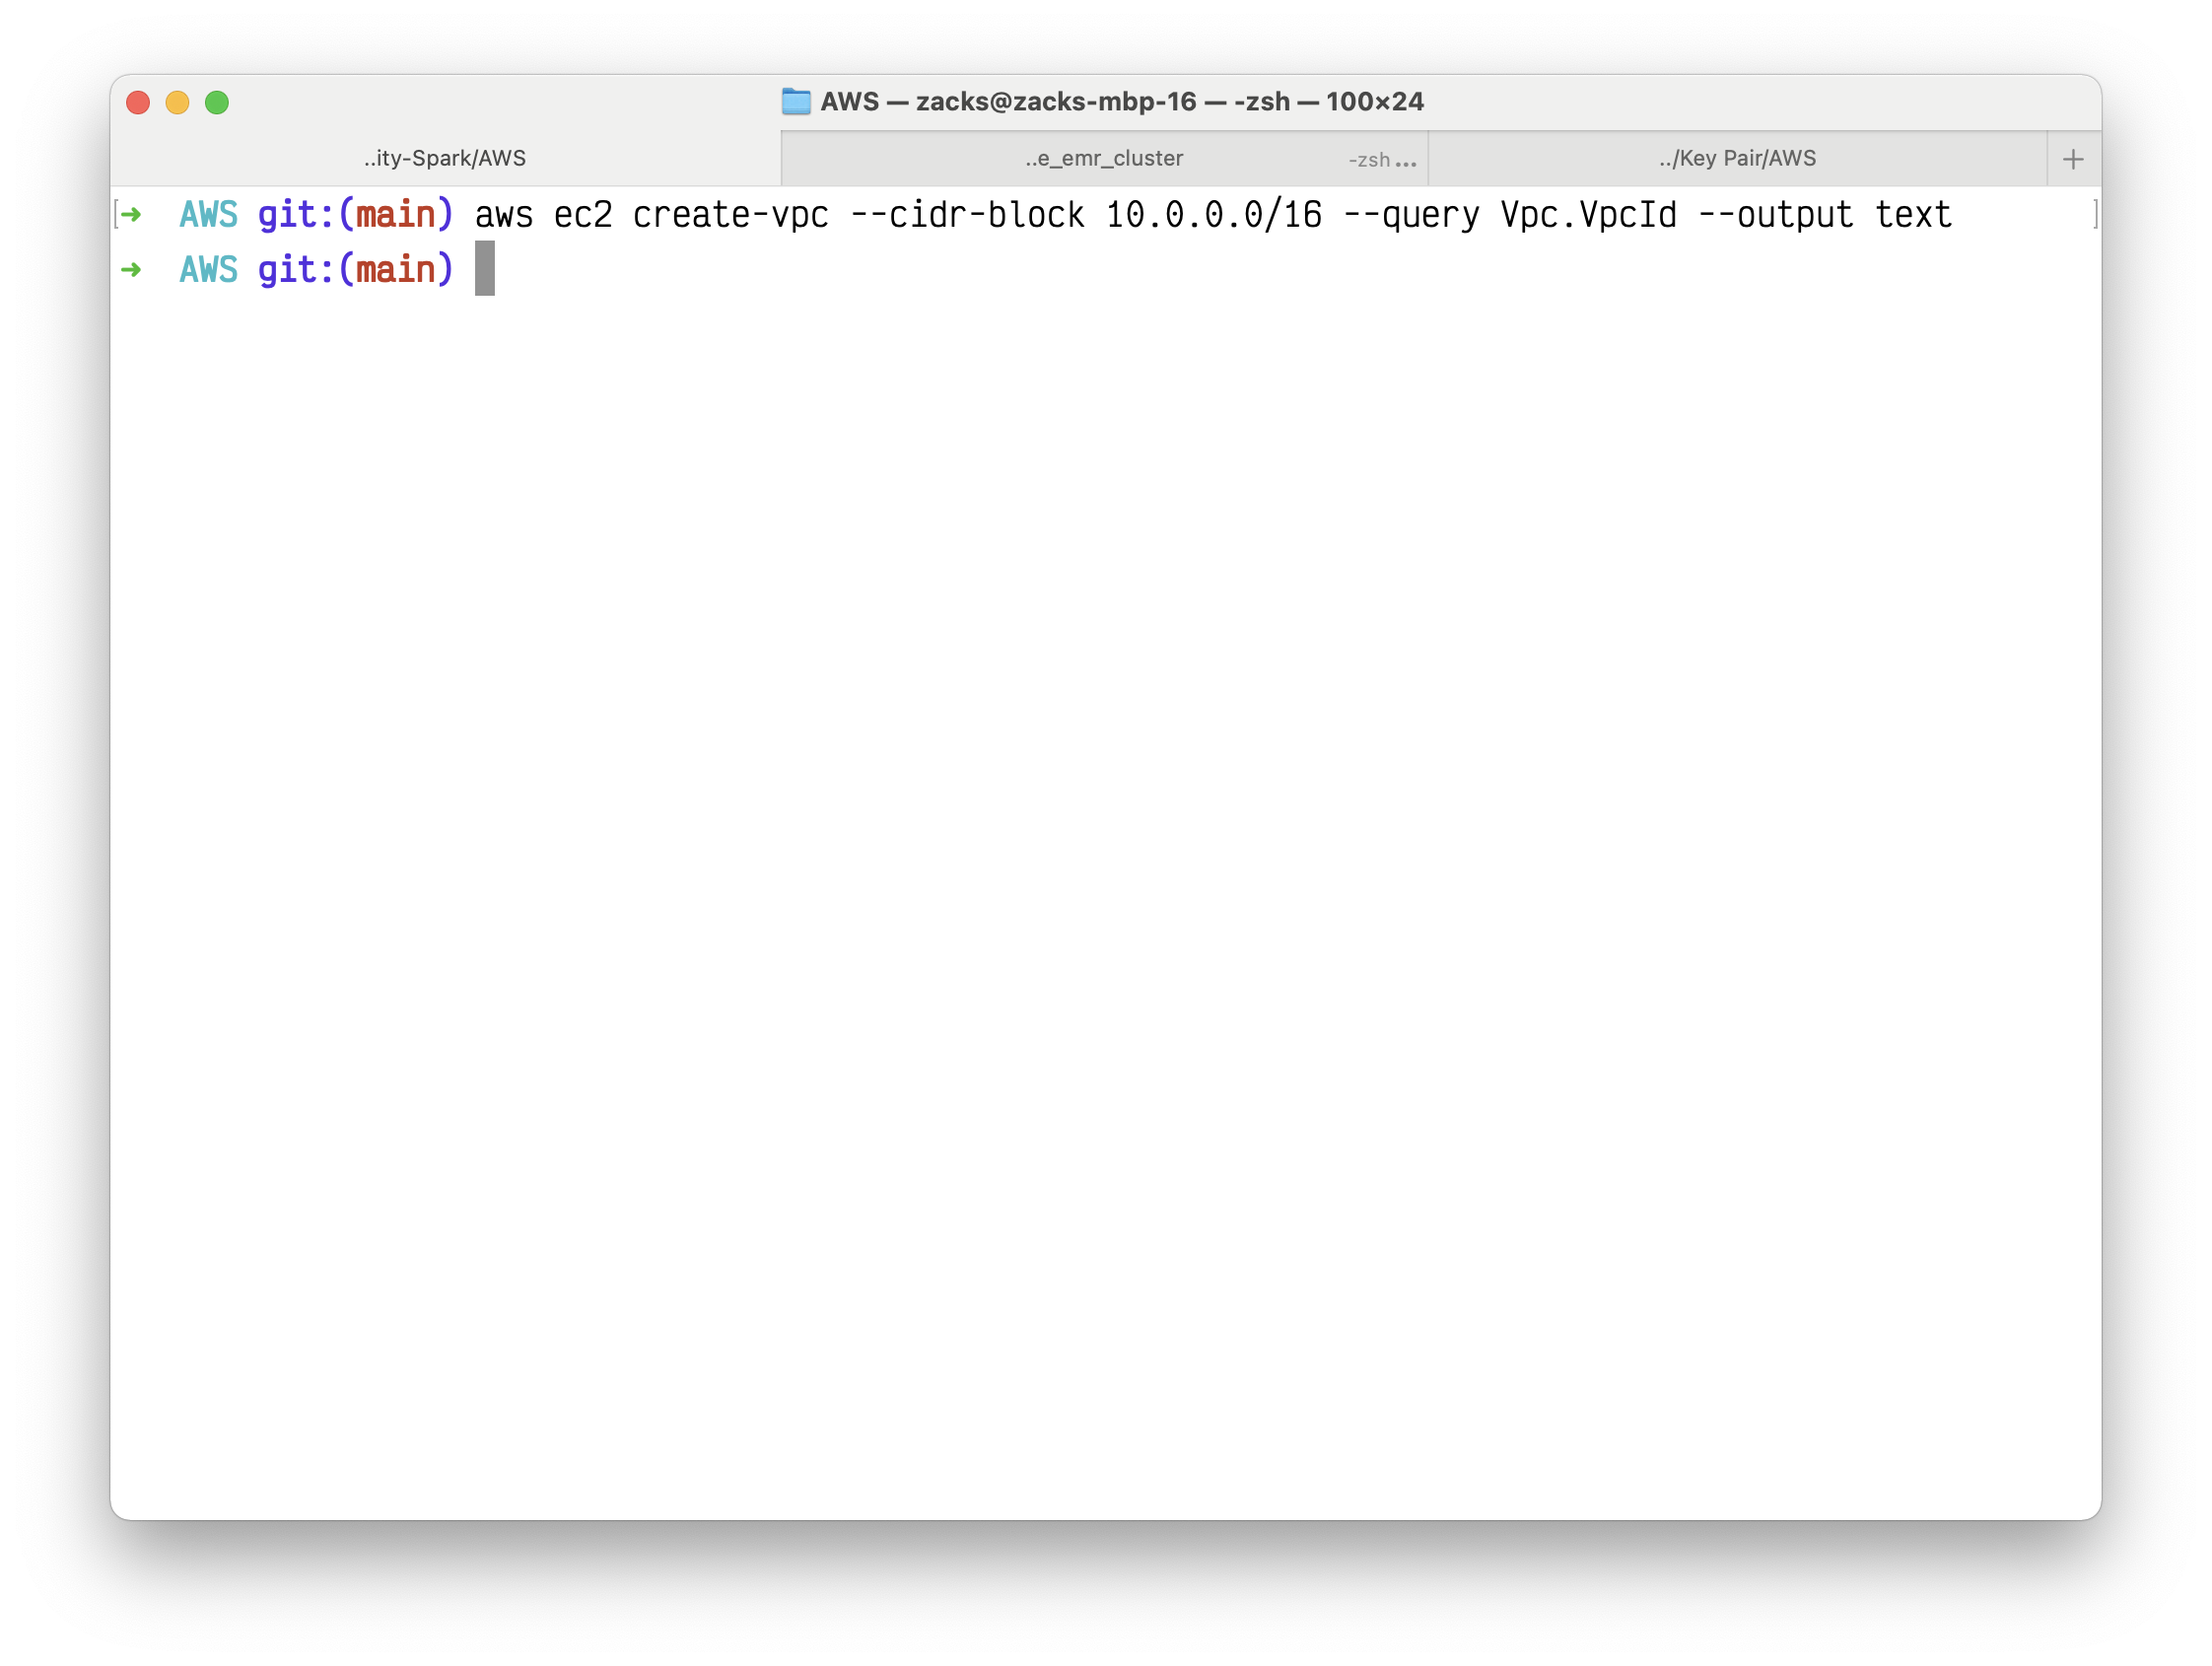

Your VPC ID should like this vpc-03d84fd18abefdb61
Copy the VPC ID.
You can also run aws ec2 describe-vpcs to get your VPCs info.
Using the VPC ID from the previous step, create a subnet with a 10.0.0.0/24 CIDR block as the public subnet using the following create-subnet command.
1 | aws ec2 create-subnet --vpc-id vpc-03d84fd18abefdb61 --cidr-block 10.0.0.0/24 |
Create a second subnet as the private subnet in your VPC with a 10.0.1.0/24 CIDR block.
1 | aws ec2 create-subnet --vpc-id vpc-03d84fd18abefdb61 --cidr-block 10.0.1.0/24 |
Configure a public subnet
After you’ve created the VPC and subnets, you can make one of the subnets a public subnet by attaching an internet gateway to your VPC, creating a custom route table, and configuring routing for the subnet to the internet gateway.
Create an internet gateway using the following create-internet-gateway command.
1 | aws ec2 create-internet-gateway --query InternetGateway.InternetGatewayId --output text |

Copy the IGW ID.
Using the ID from the previous step, attach the internet gateway to your VPC using the following attach-internet-gateway command.
1 | aws ec2 attach-internet-gateway --vpc-id vpc-03d84fd18abefdb61 --internet-gateway-id igw-0fd421770a6260574 |

Create a custom route table for your VPC using the following create-route-table command.
1 | aws ec2 create-route-table --vpc-id vpc-03d84fd18abefdb61 --query RouteTable.RouteTableId --output text |
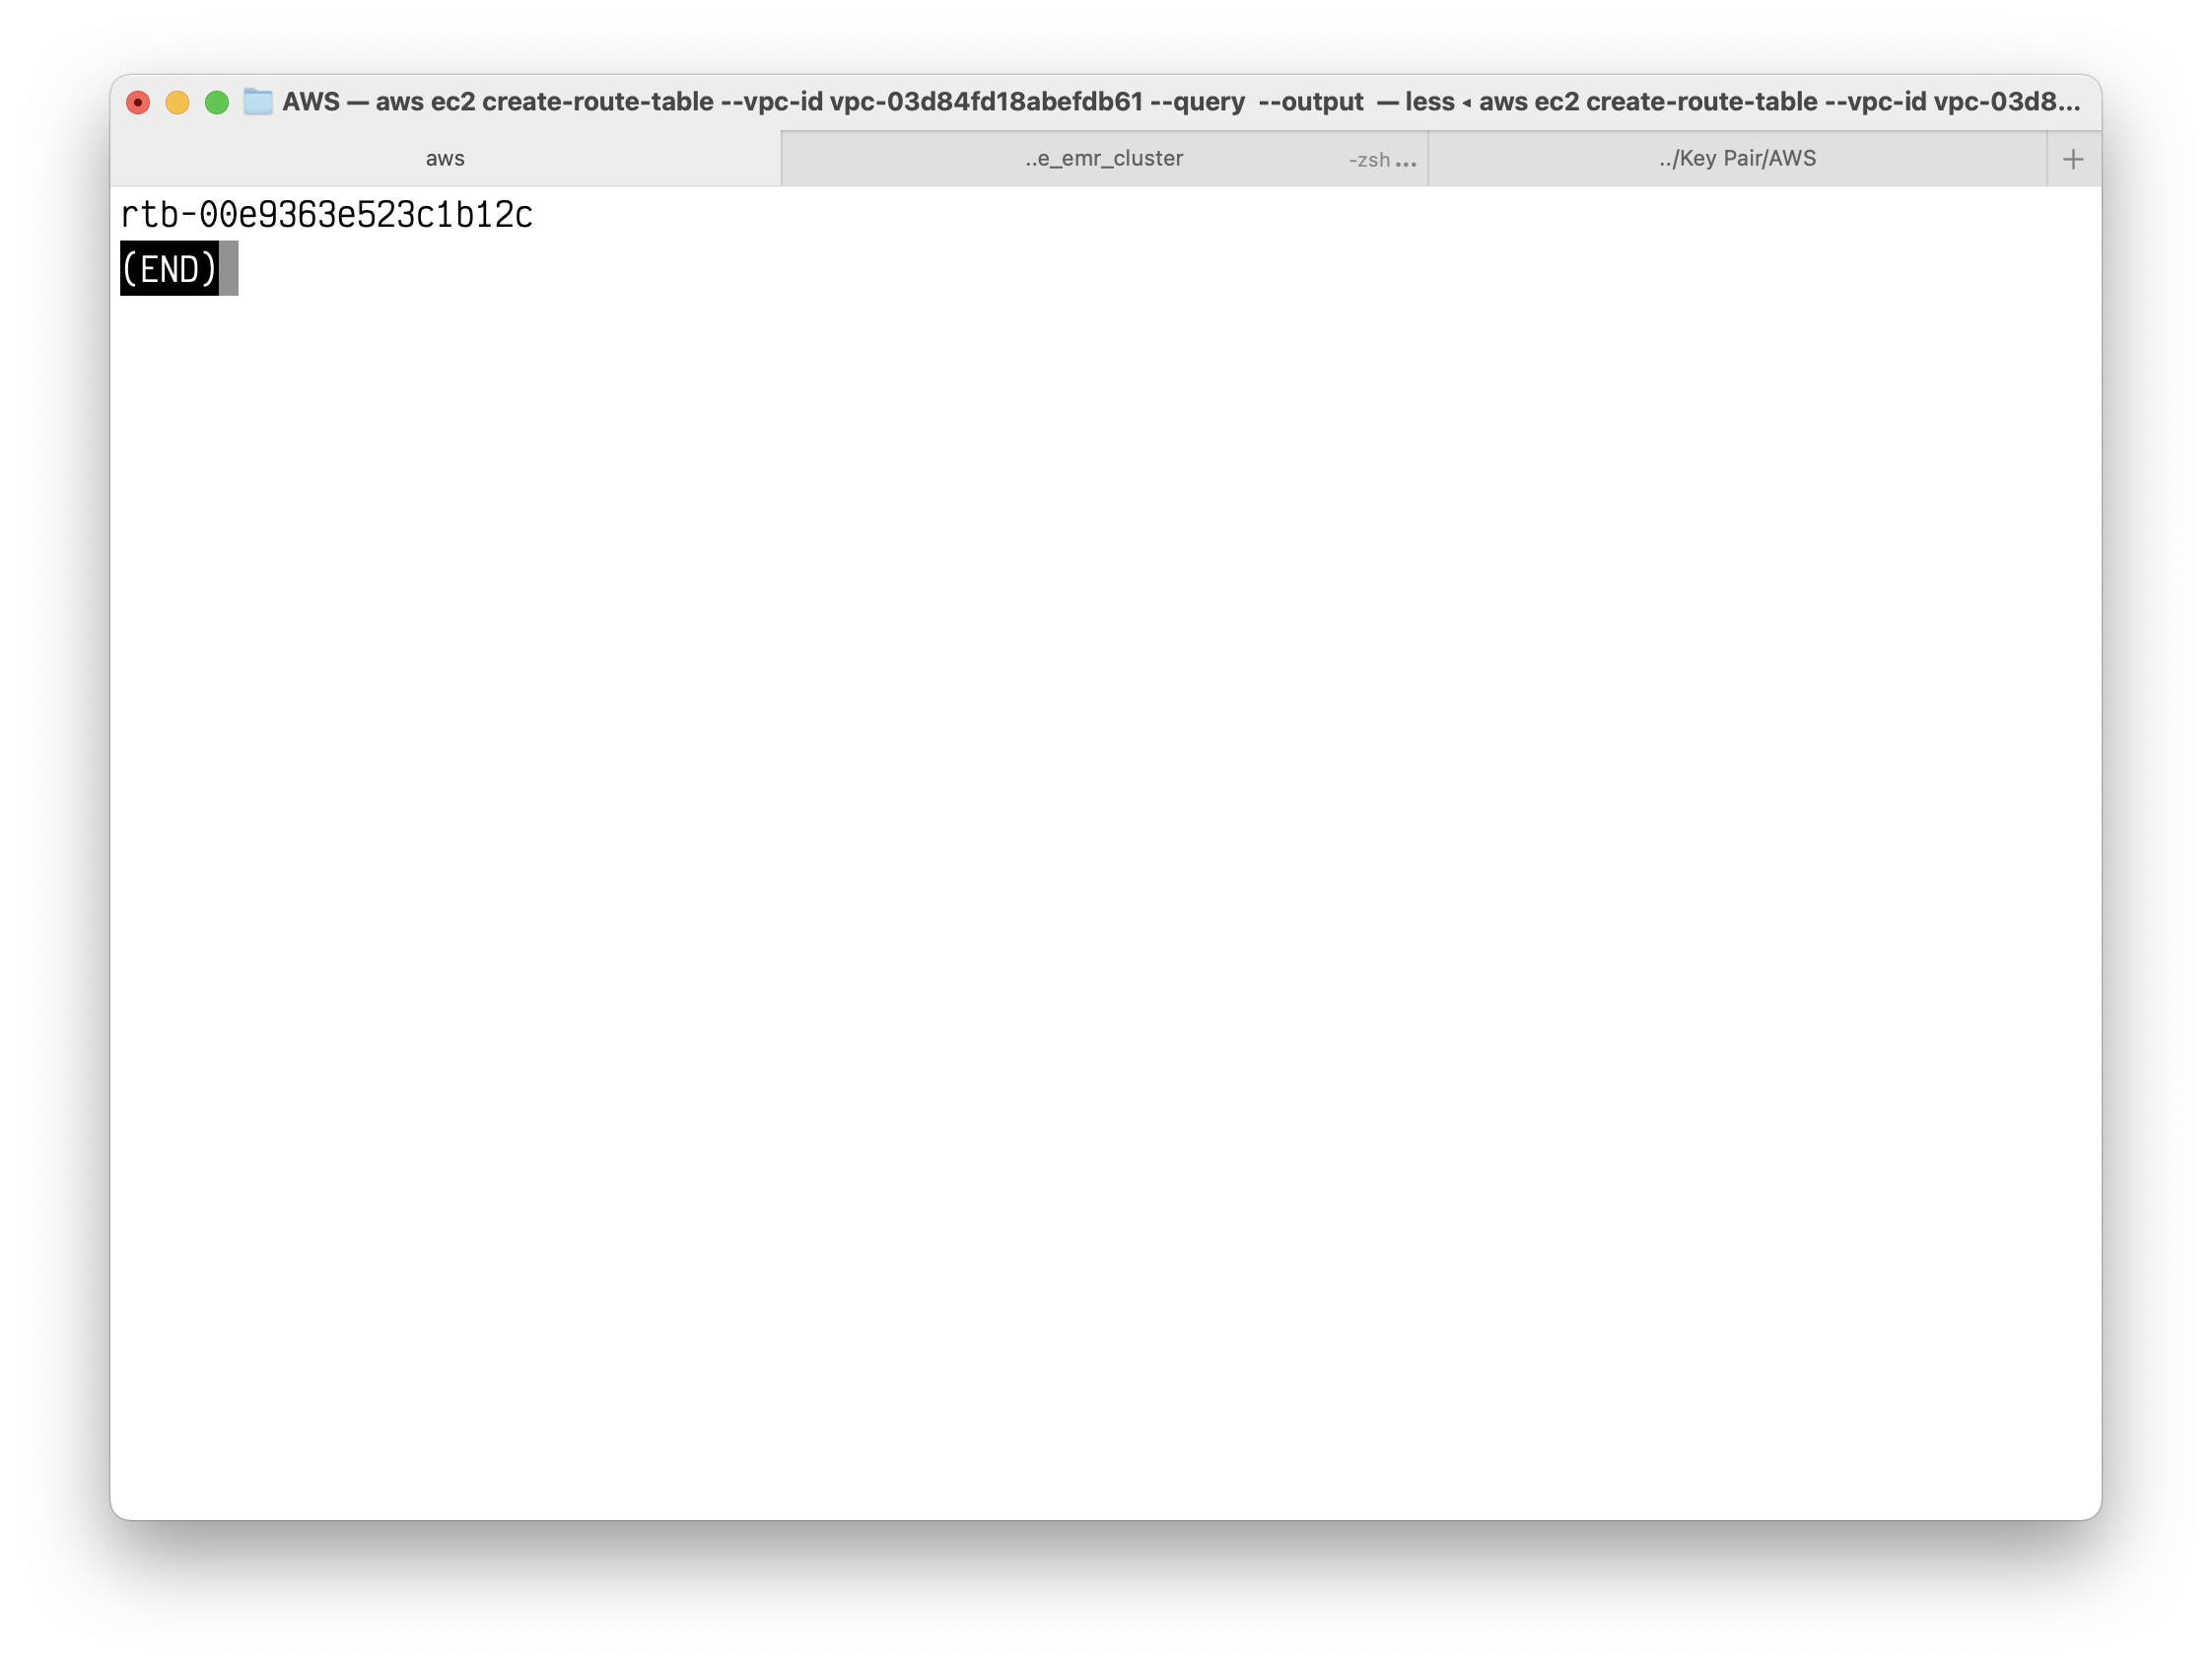
Copy your route table ID.
Create a route in the route table that points all traffic (0.0.0.0/0) to the internet gateway using the following create-route command.
1 | aws ec2 create-route --route-table-id rtb-00e9363e523c1b12c --destination-cidr-block 0.0.0.0/0 --gateway-id igw-0fd421770a6260574 |

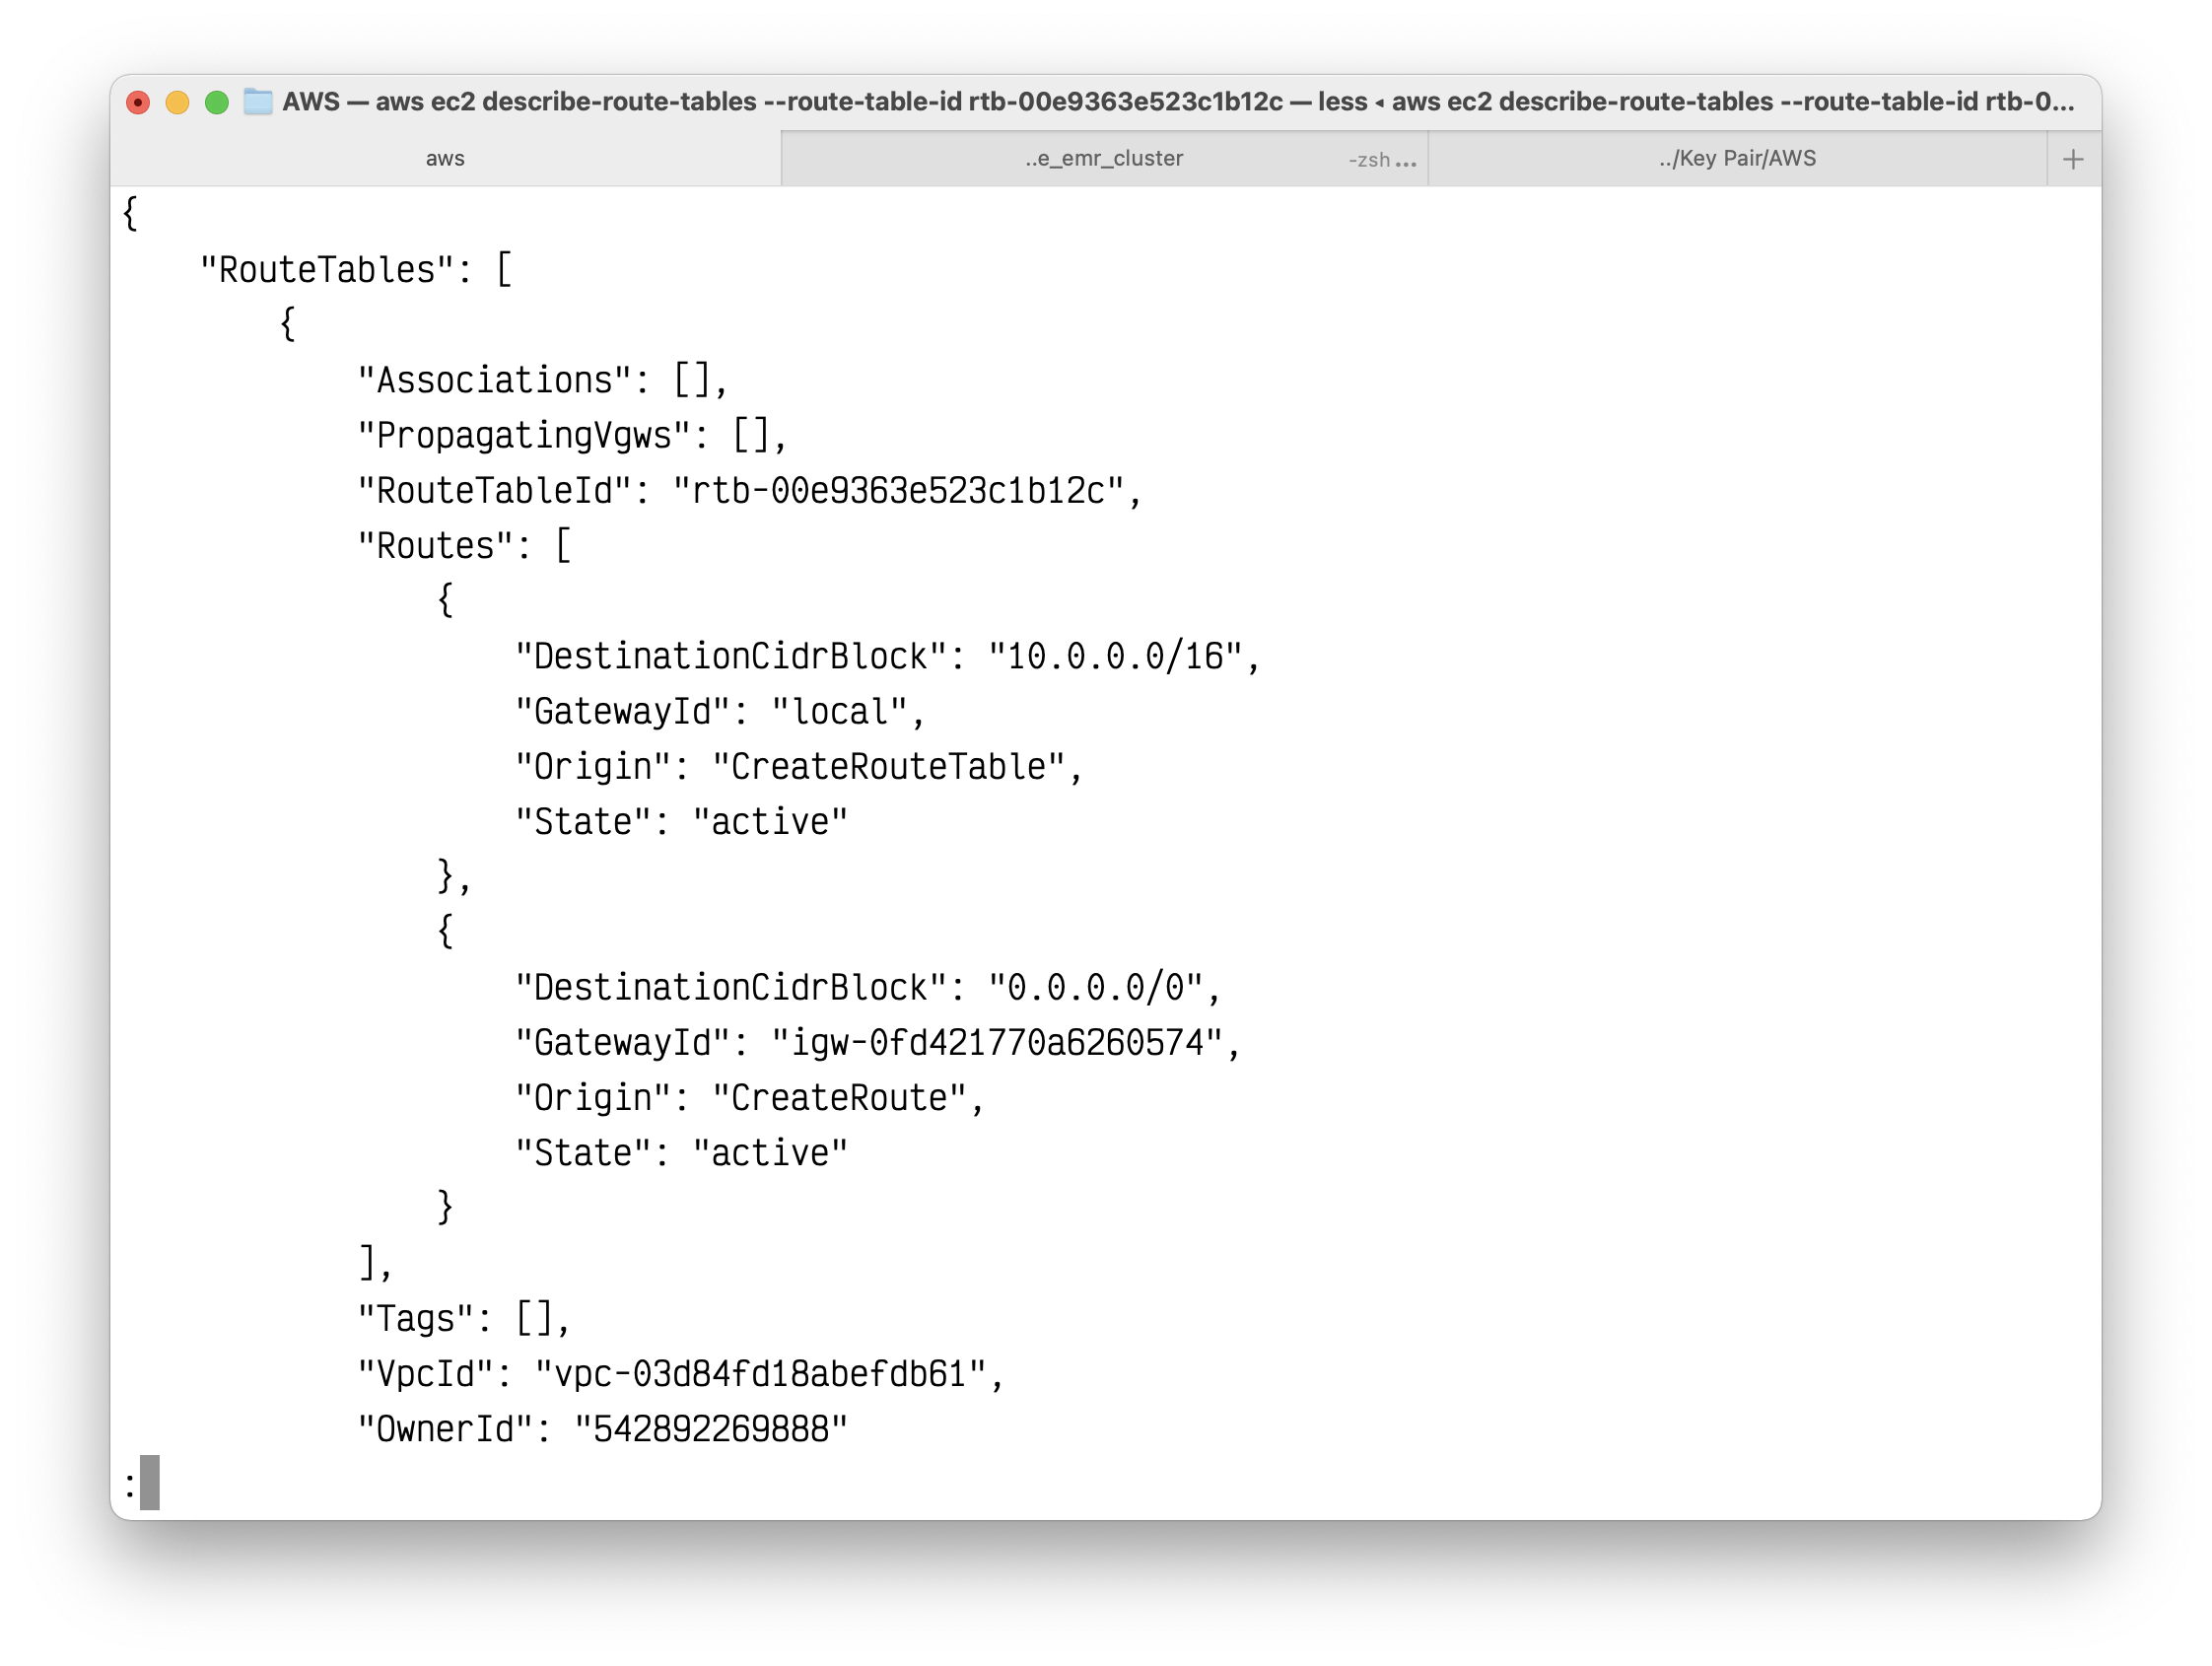
(Optional) To confirm that your route has been created and is active, you can describe the route table using the following describe-route-tables command.
1 | aws ec2 describe-route-tables --route-table-id rtb-00e9363e523c1b12c |
The route table is currently not associated with any subnet. You need to associate it with a subnet in your VPC so that traffic from that subnet is routed to the internet gateway. Use the following describe-subnets command to get the subnet IDs. The --filter option restricts the subnets to your new VPC only, and the --query option returns only the subnet IDs and their CIDR blocks.
1 | aws ec2 describe-subnets --filters "Name=vpc-id,Values=vpc-03d84fd18abefdb61" --query "Subnets[*].{ID:SubnetId,CIDR:CidrBlock}" |
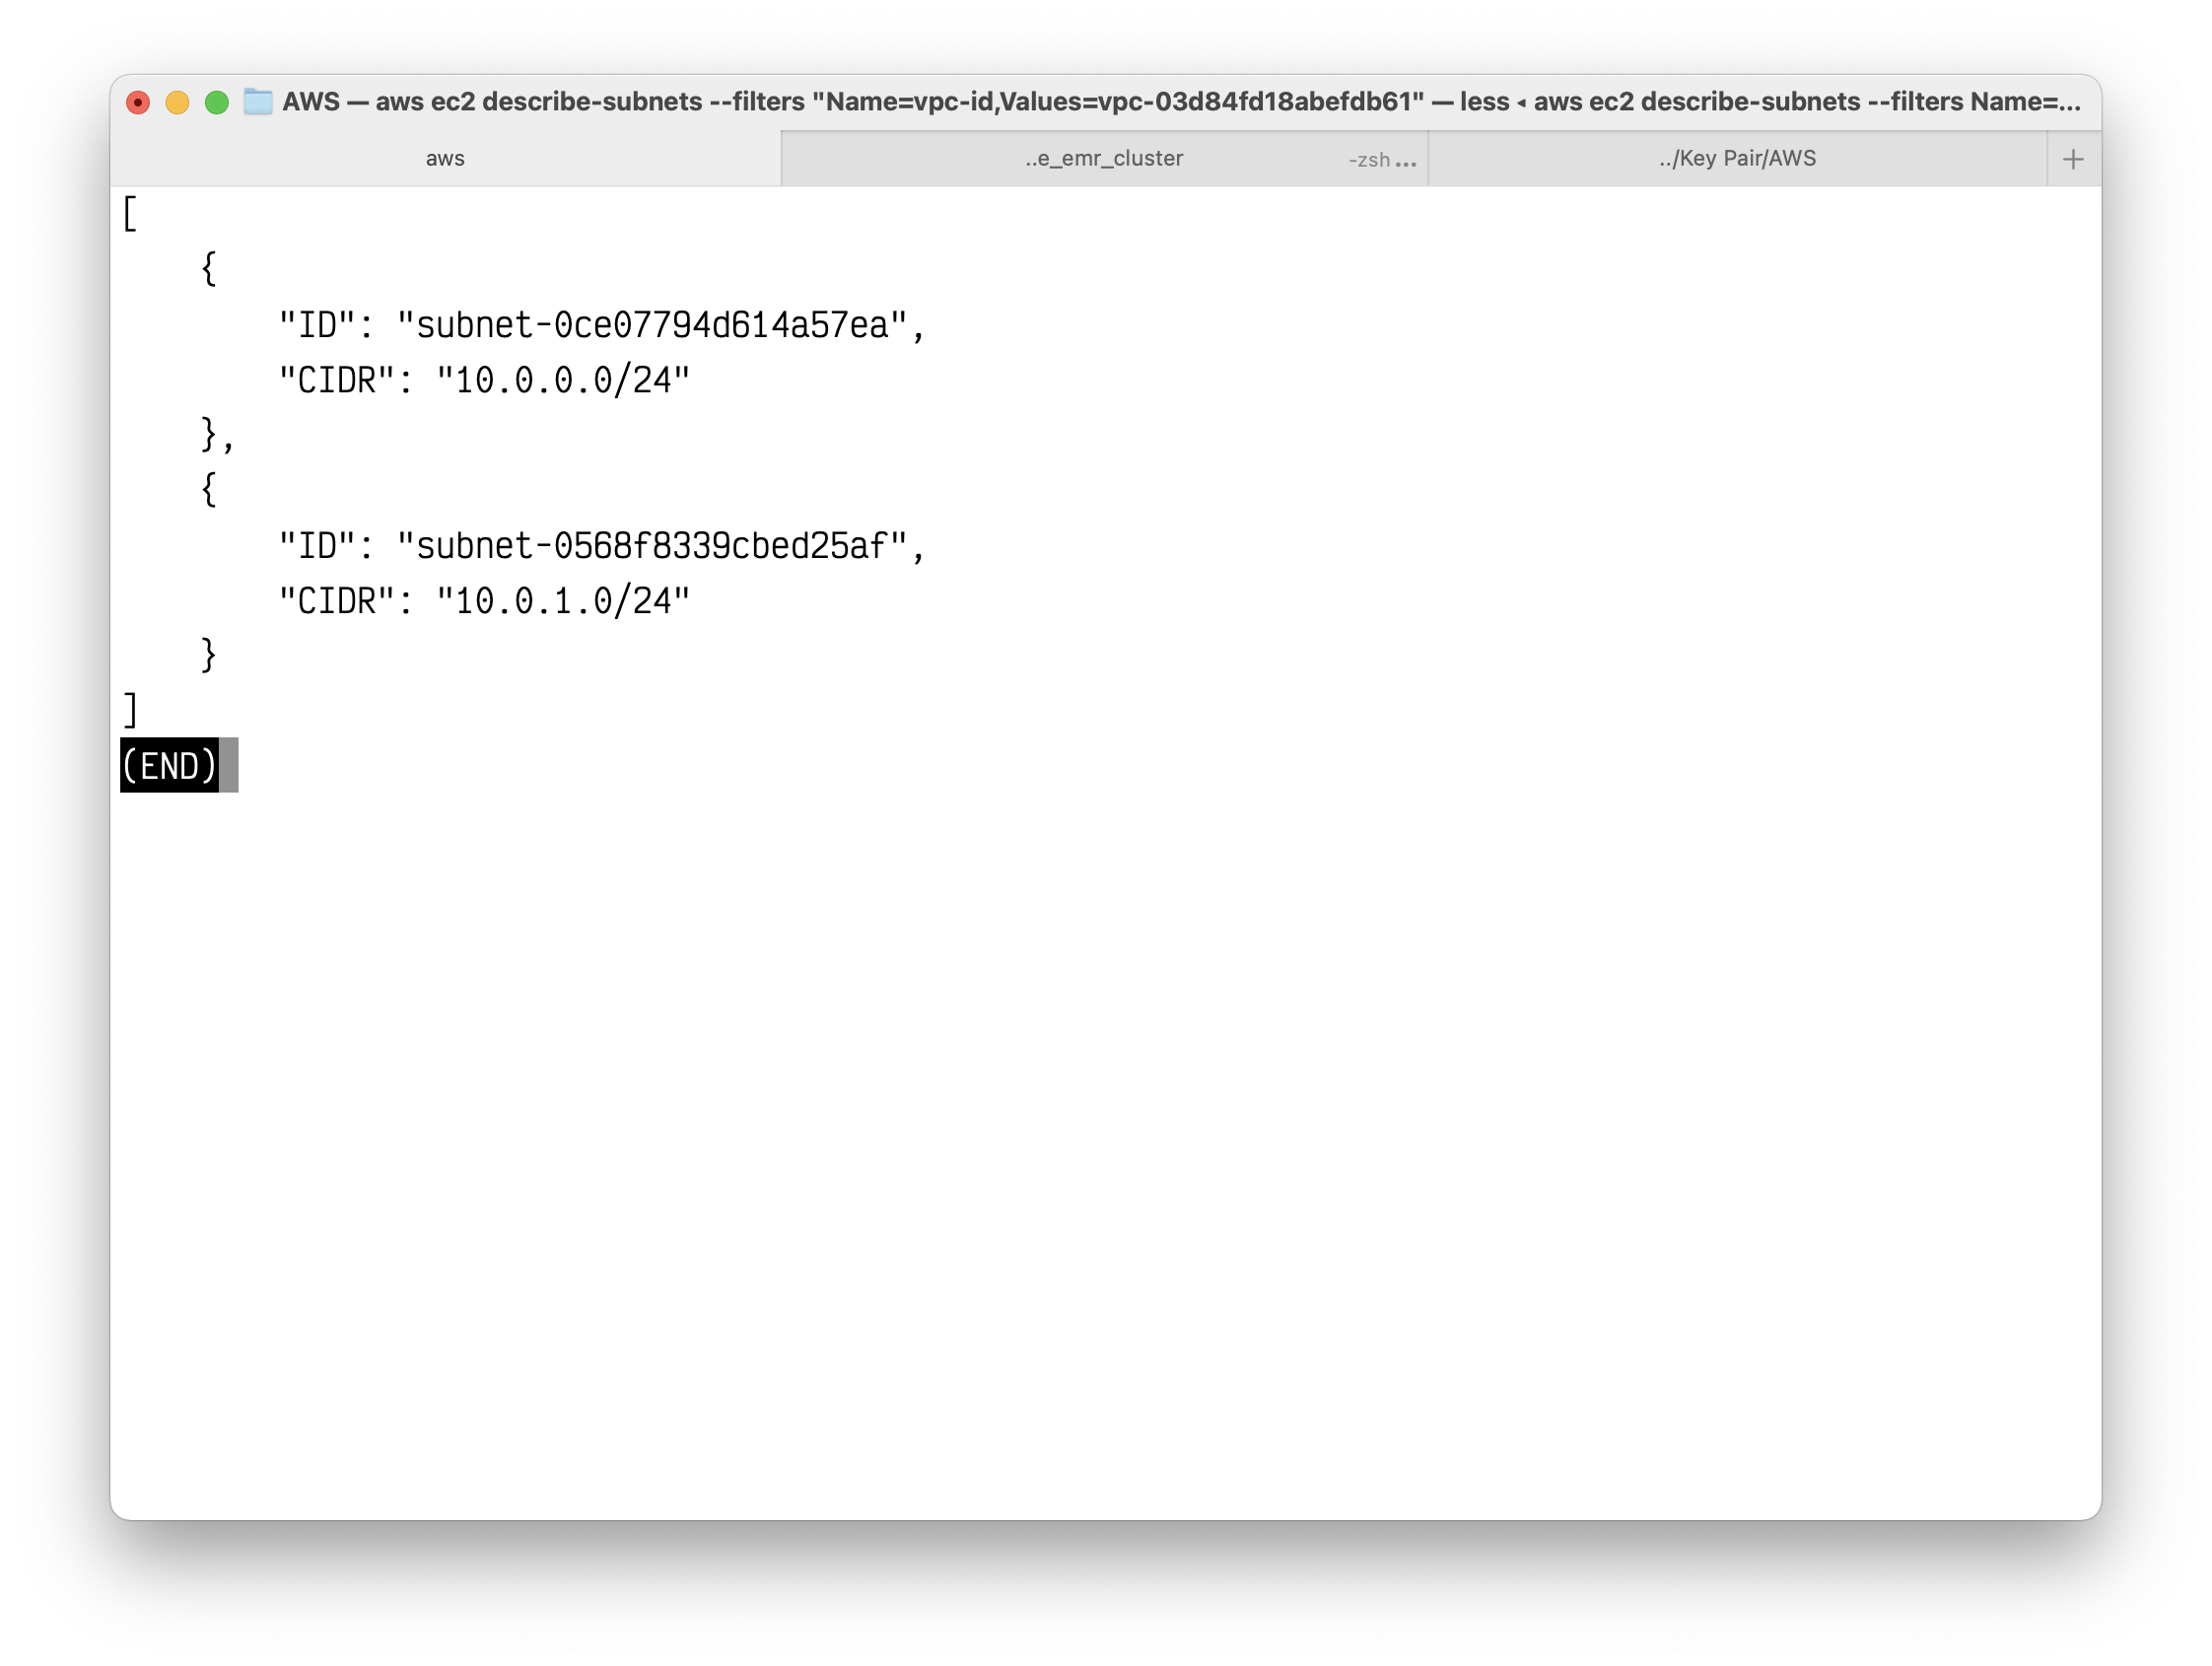
Copy your two subnets ID.
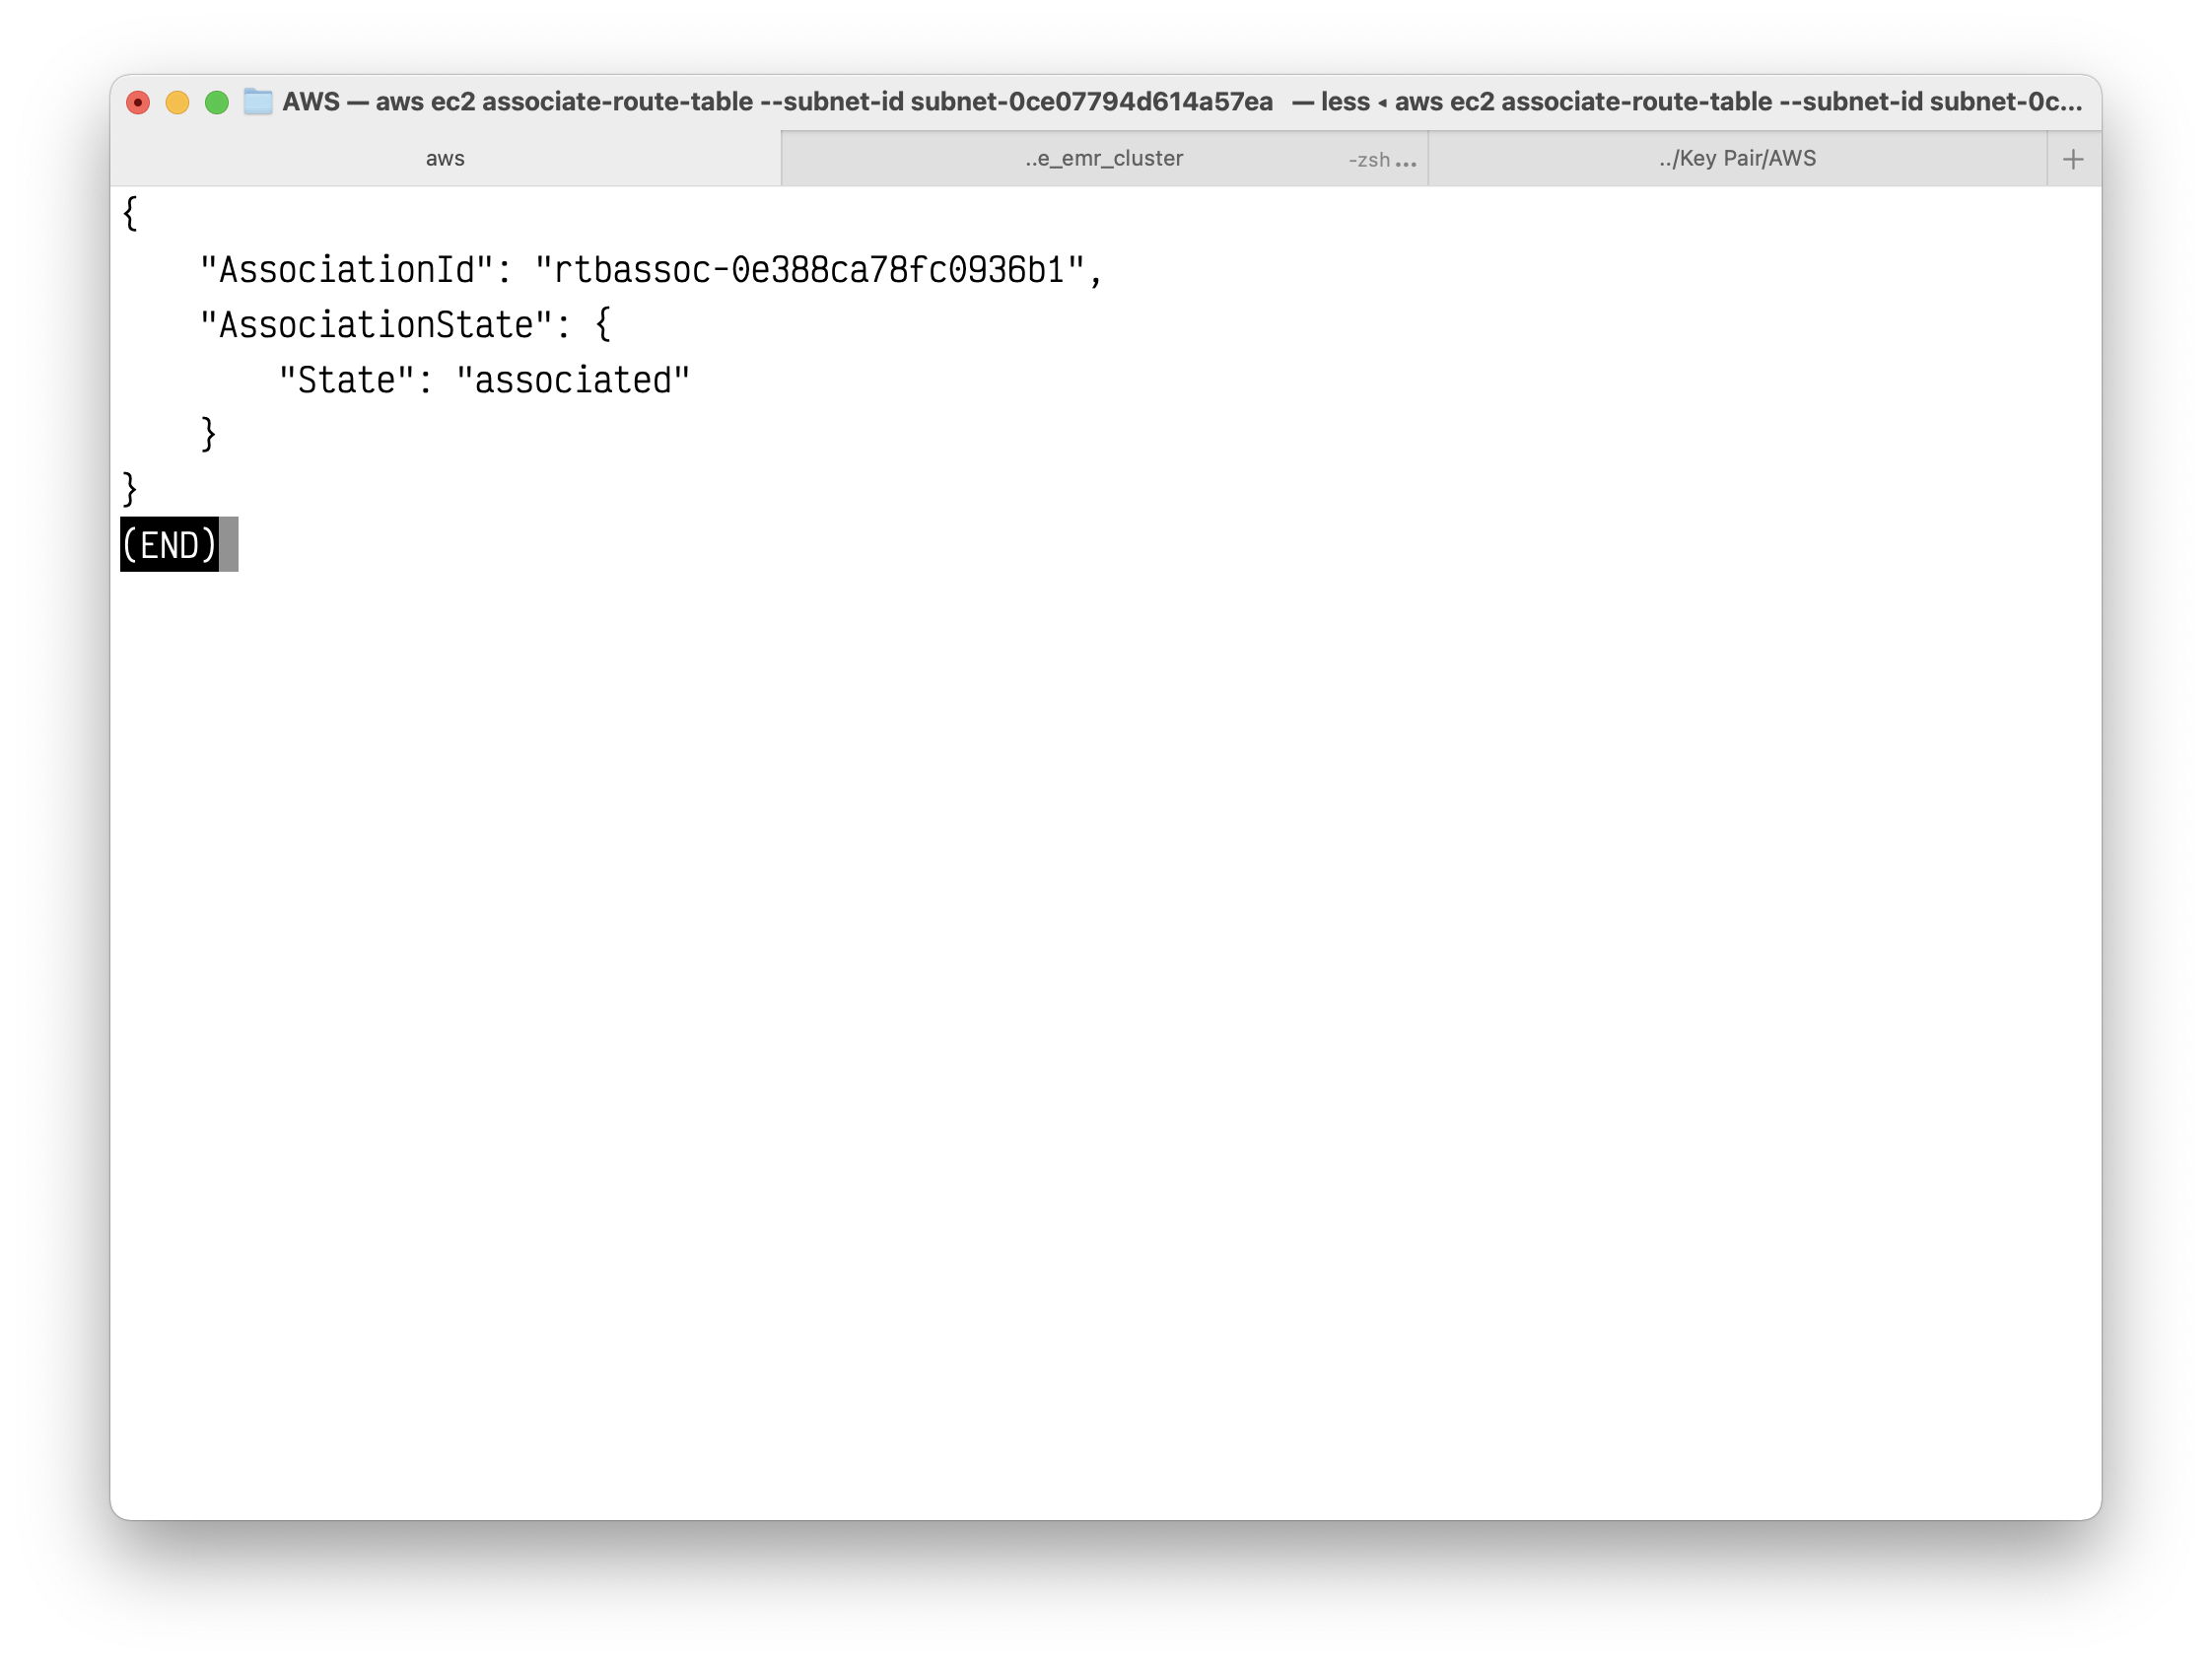
You can choose which subnet to associate with the custom route table, for example, subnet-b46032ec, and associate it using the associate-route-table command. This subnet is your public subnet.
Here I choose the subnet with CIDR Block 10.0.0.0/24 as the public subnet.
1 | aws ec2 associate-route-table --subnet-id subnet-0ce07794d614a57ea --route-table-id rtb-00e9363e523c1b12c |
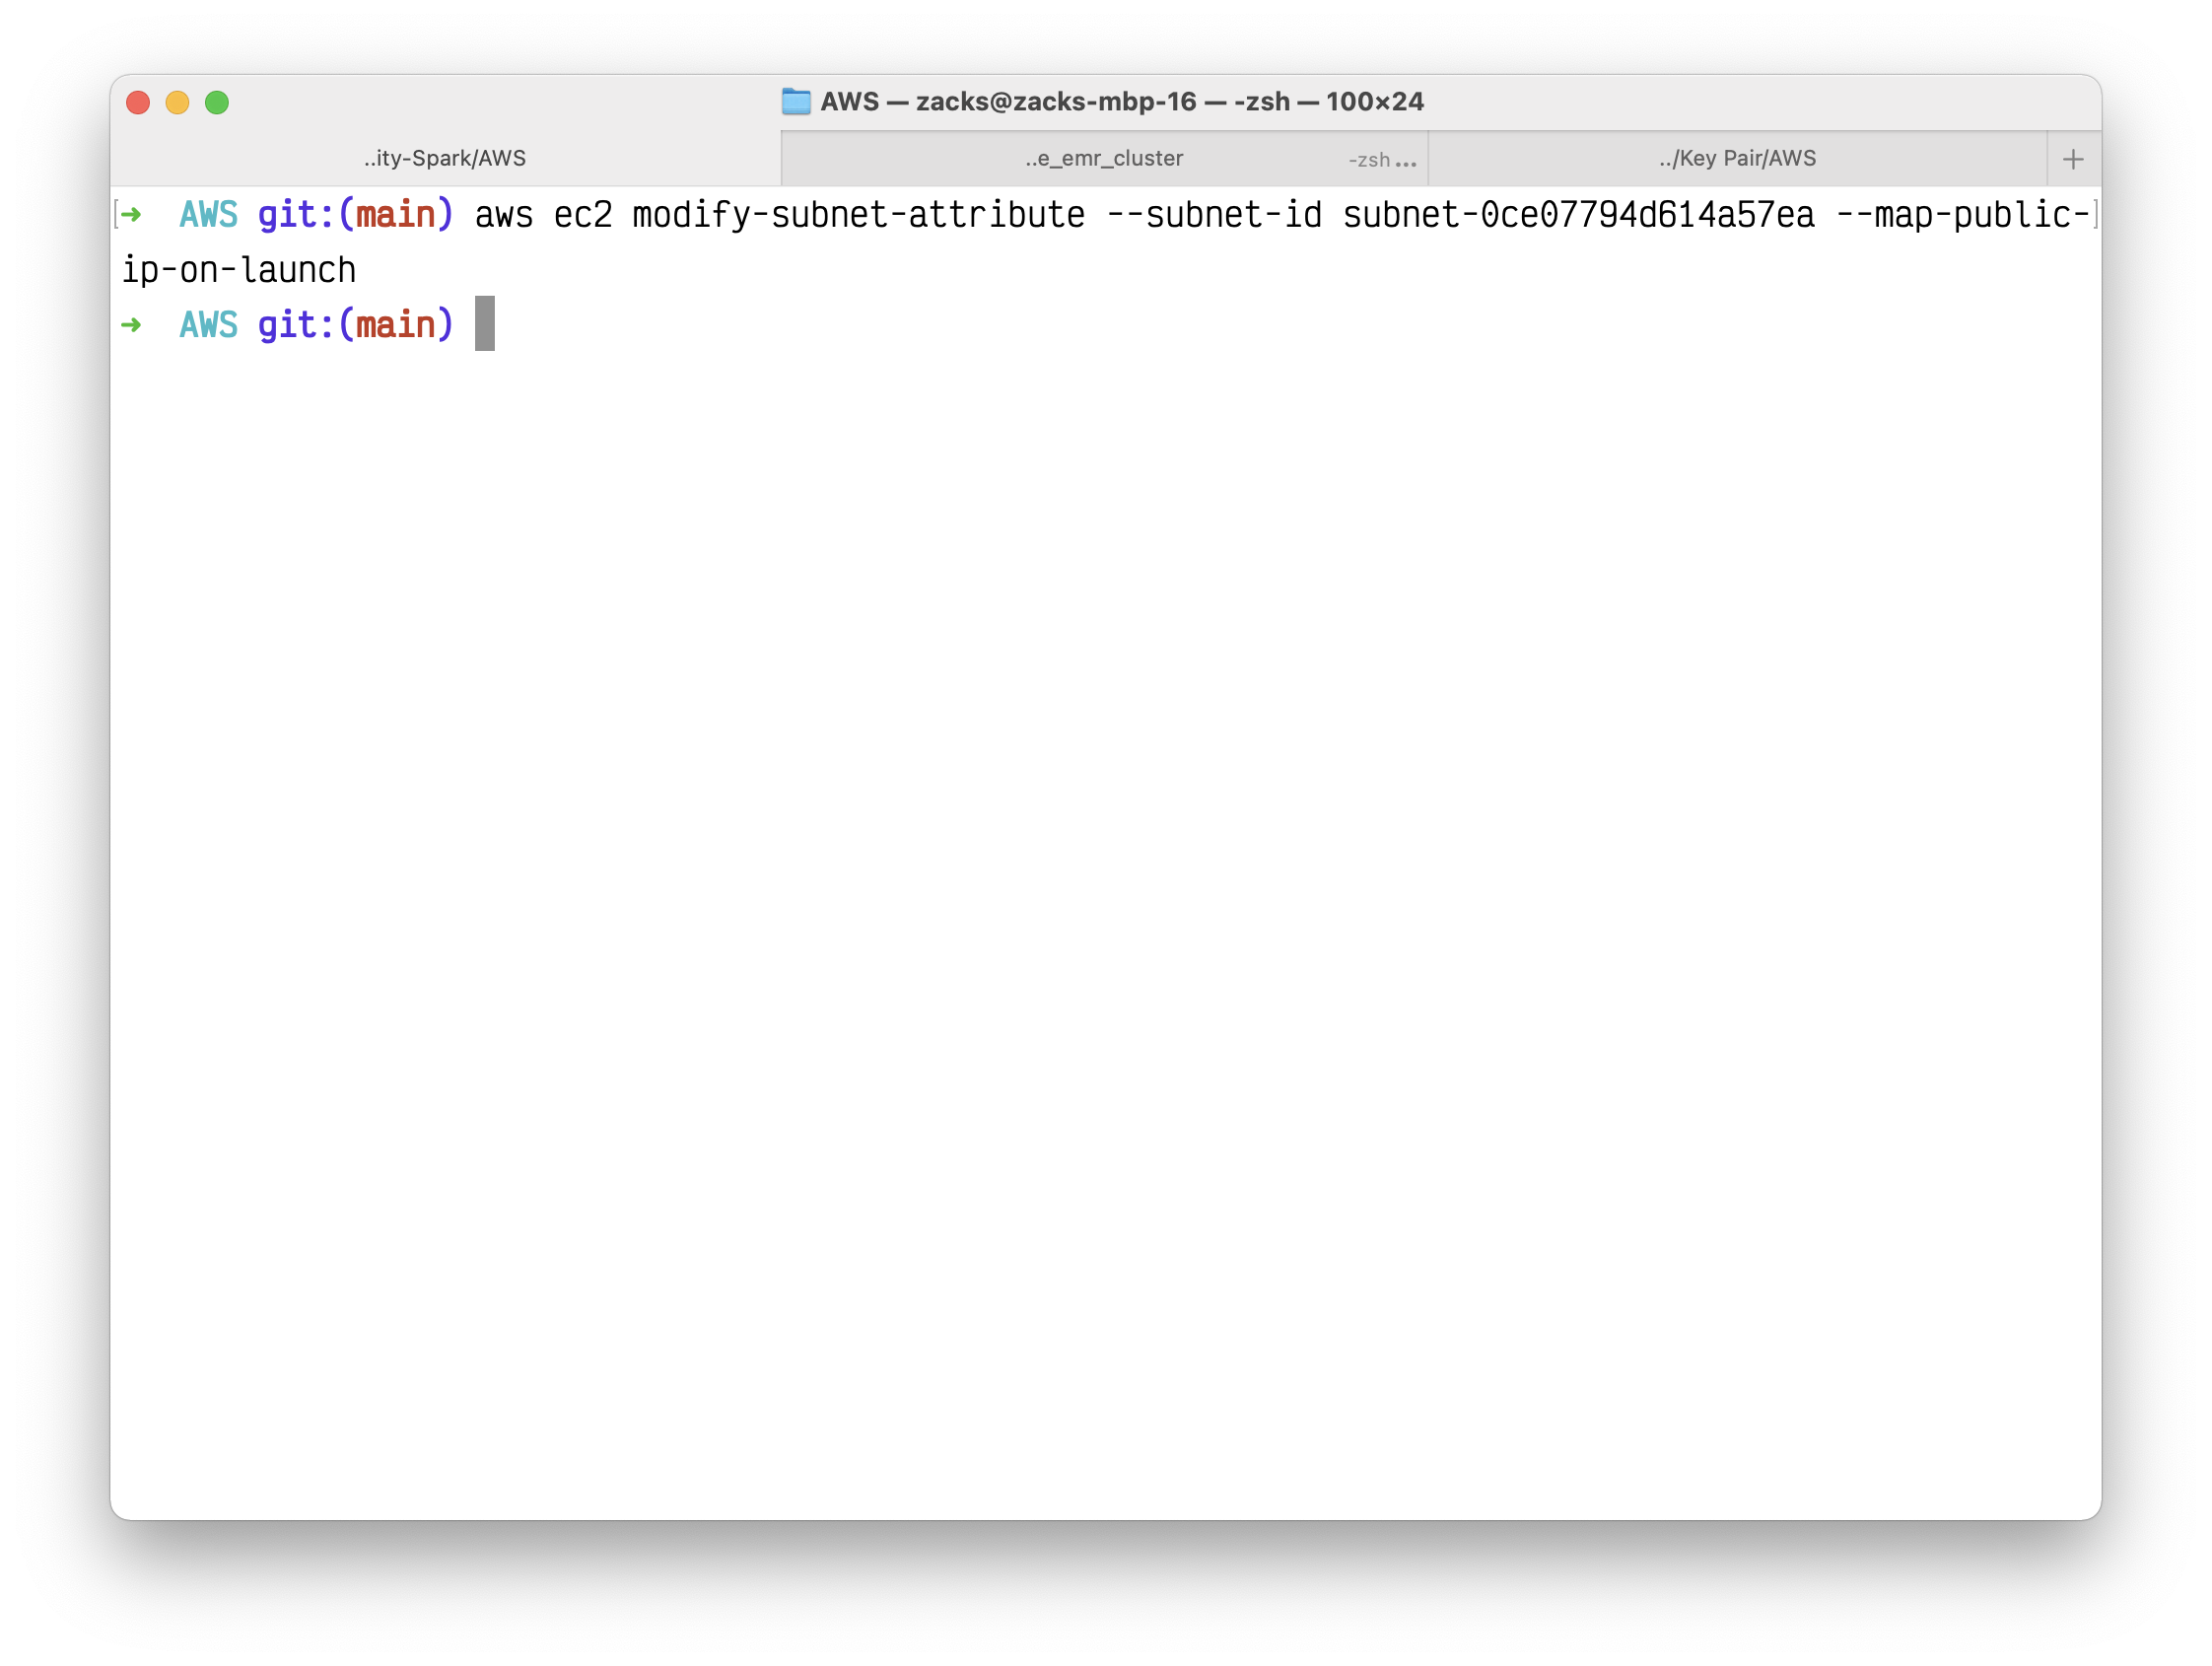
You can modify the public IP addressing behavior of your subnet so that an instance launched into the subnet automatically receives a public IP address using the following modify-subnet-attribute command. Otherwise, associate an Elastic IP address with your instance after launch so that the instance is reachable from the internet.
1 | aws ec2 modify-subnet-attribute --subnet-id subnet-0ce07794d614a57ea --map-public-ip-on-launch |
Configure an private subnet
You can configure the second subnet in your VPC to be an IPv4 private subnet. Instances that are launched in this subnet are able to access the internet over IPv4 (for example, to get software updates) through the associated public subnet.
Allocate an elastic IP address for your NAT Gateway.
1 | aws ec2 allocate-address |
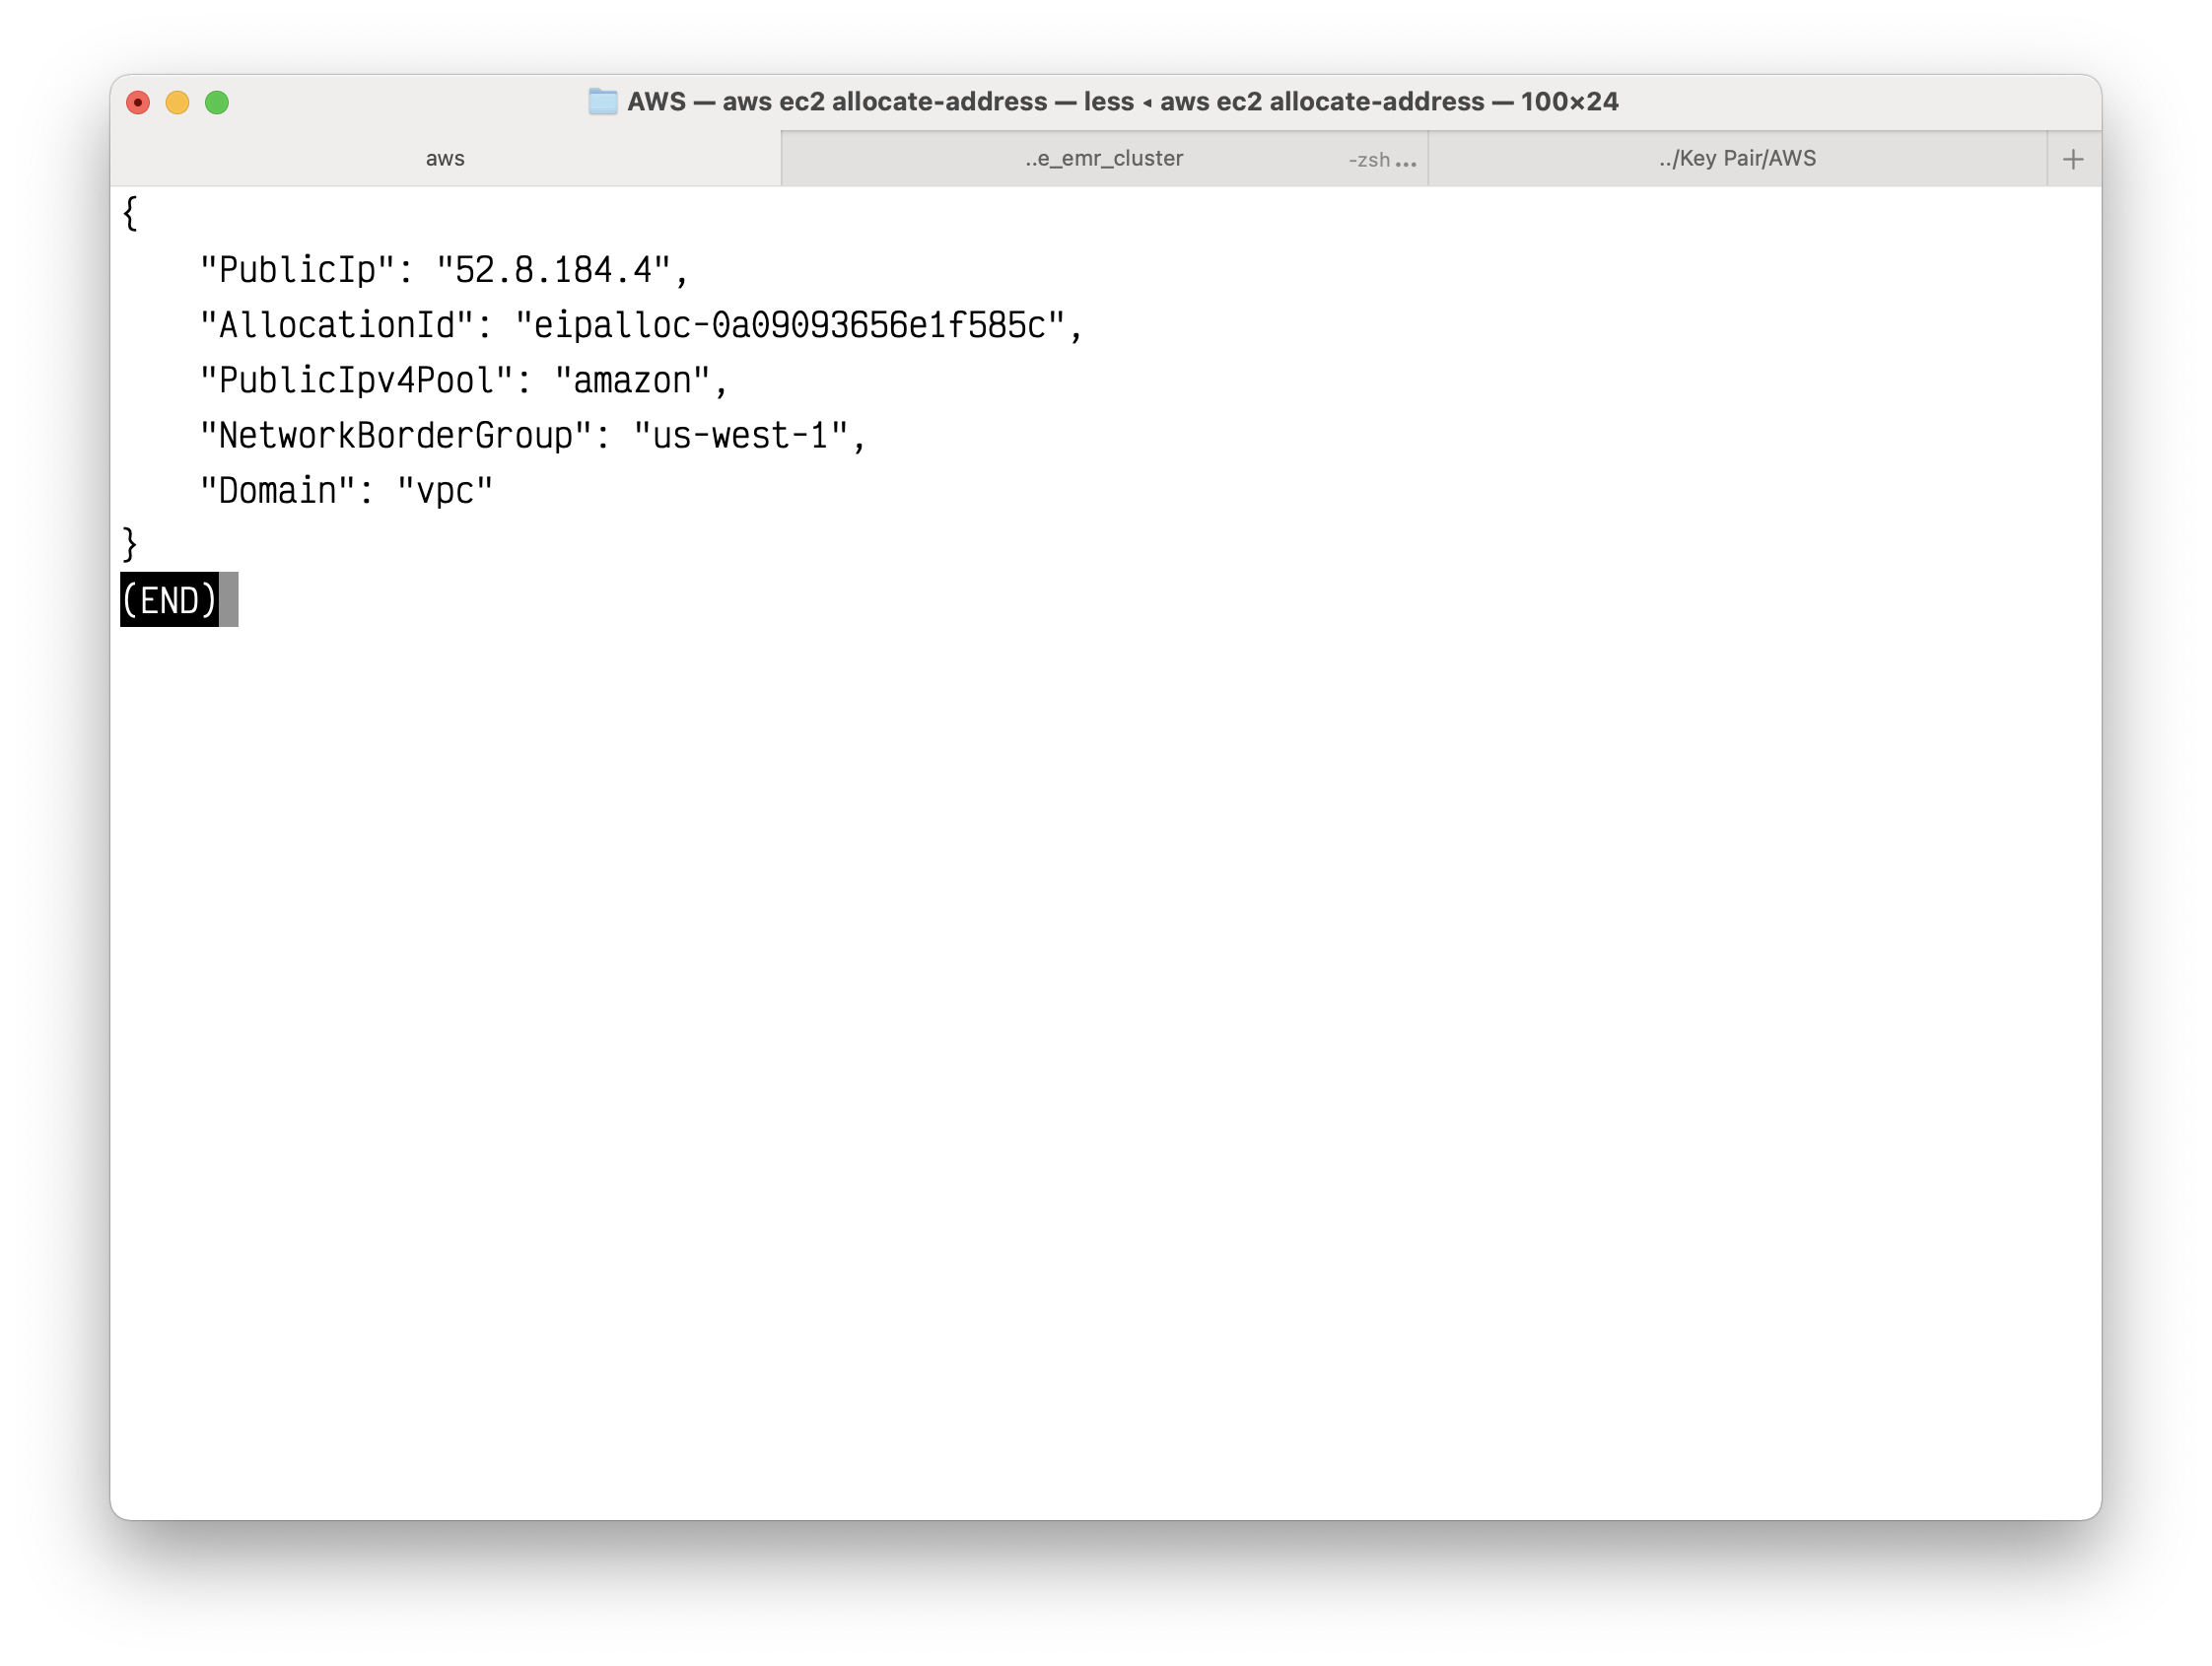
Copy the AllocationId.
Creat an Public NAT gateway for your private subnet.
The NAT gateway is in the public subnet.
1 | aws ec2 create-nat-gateway --subnet-id subnet-0ce07794d614a57ea --allocation-id eipalloc-0a09093656e1f585c |
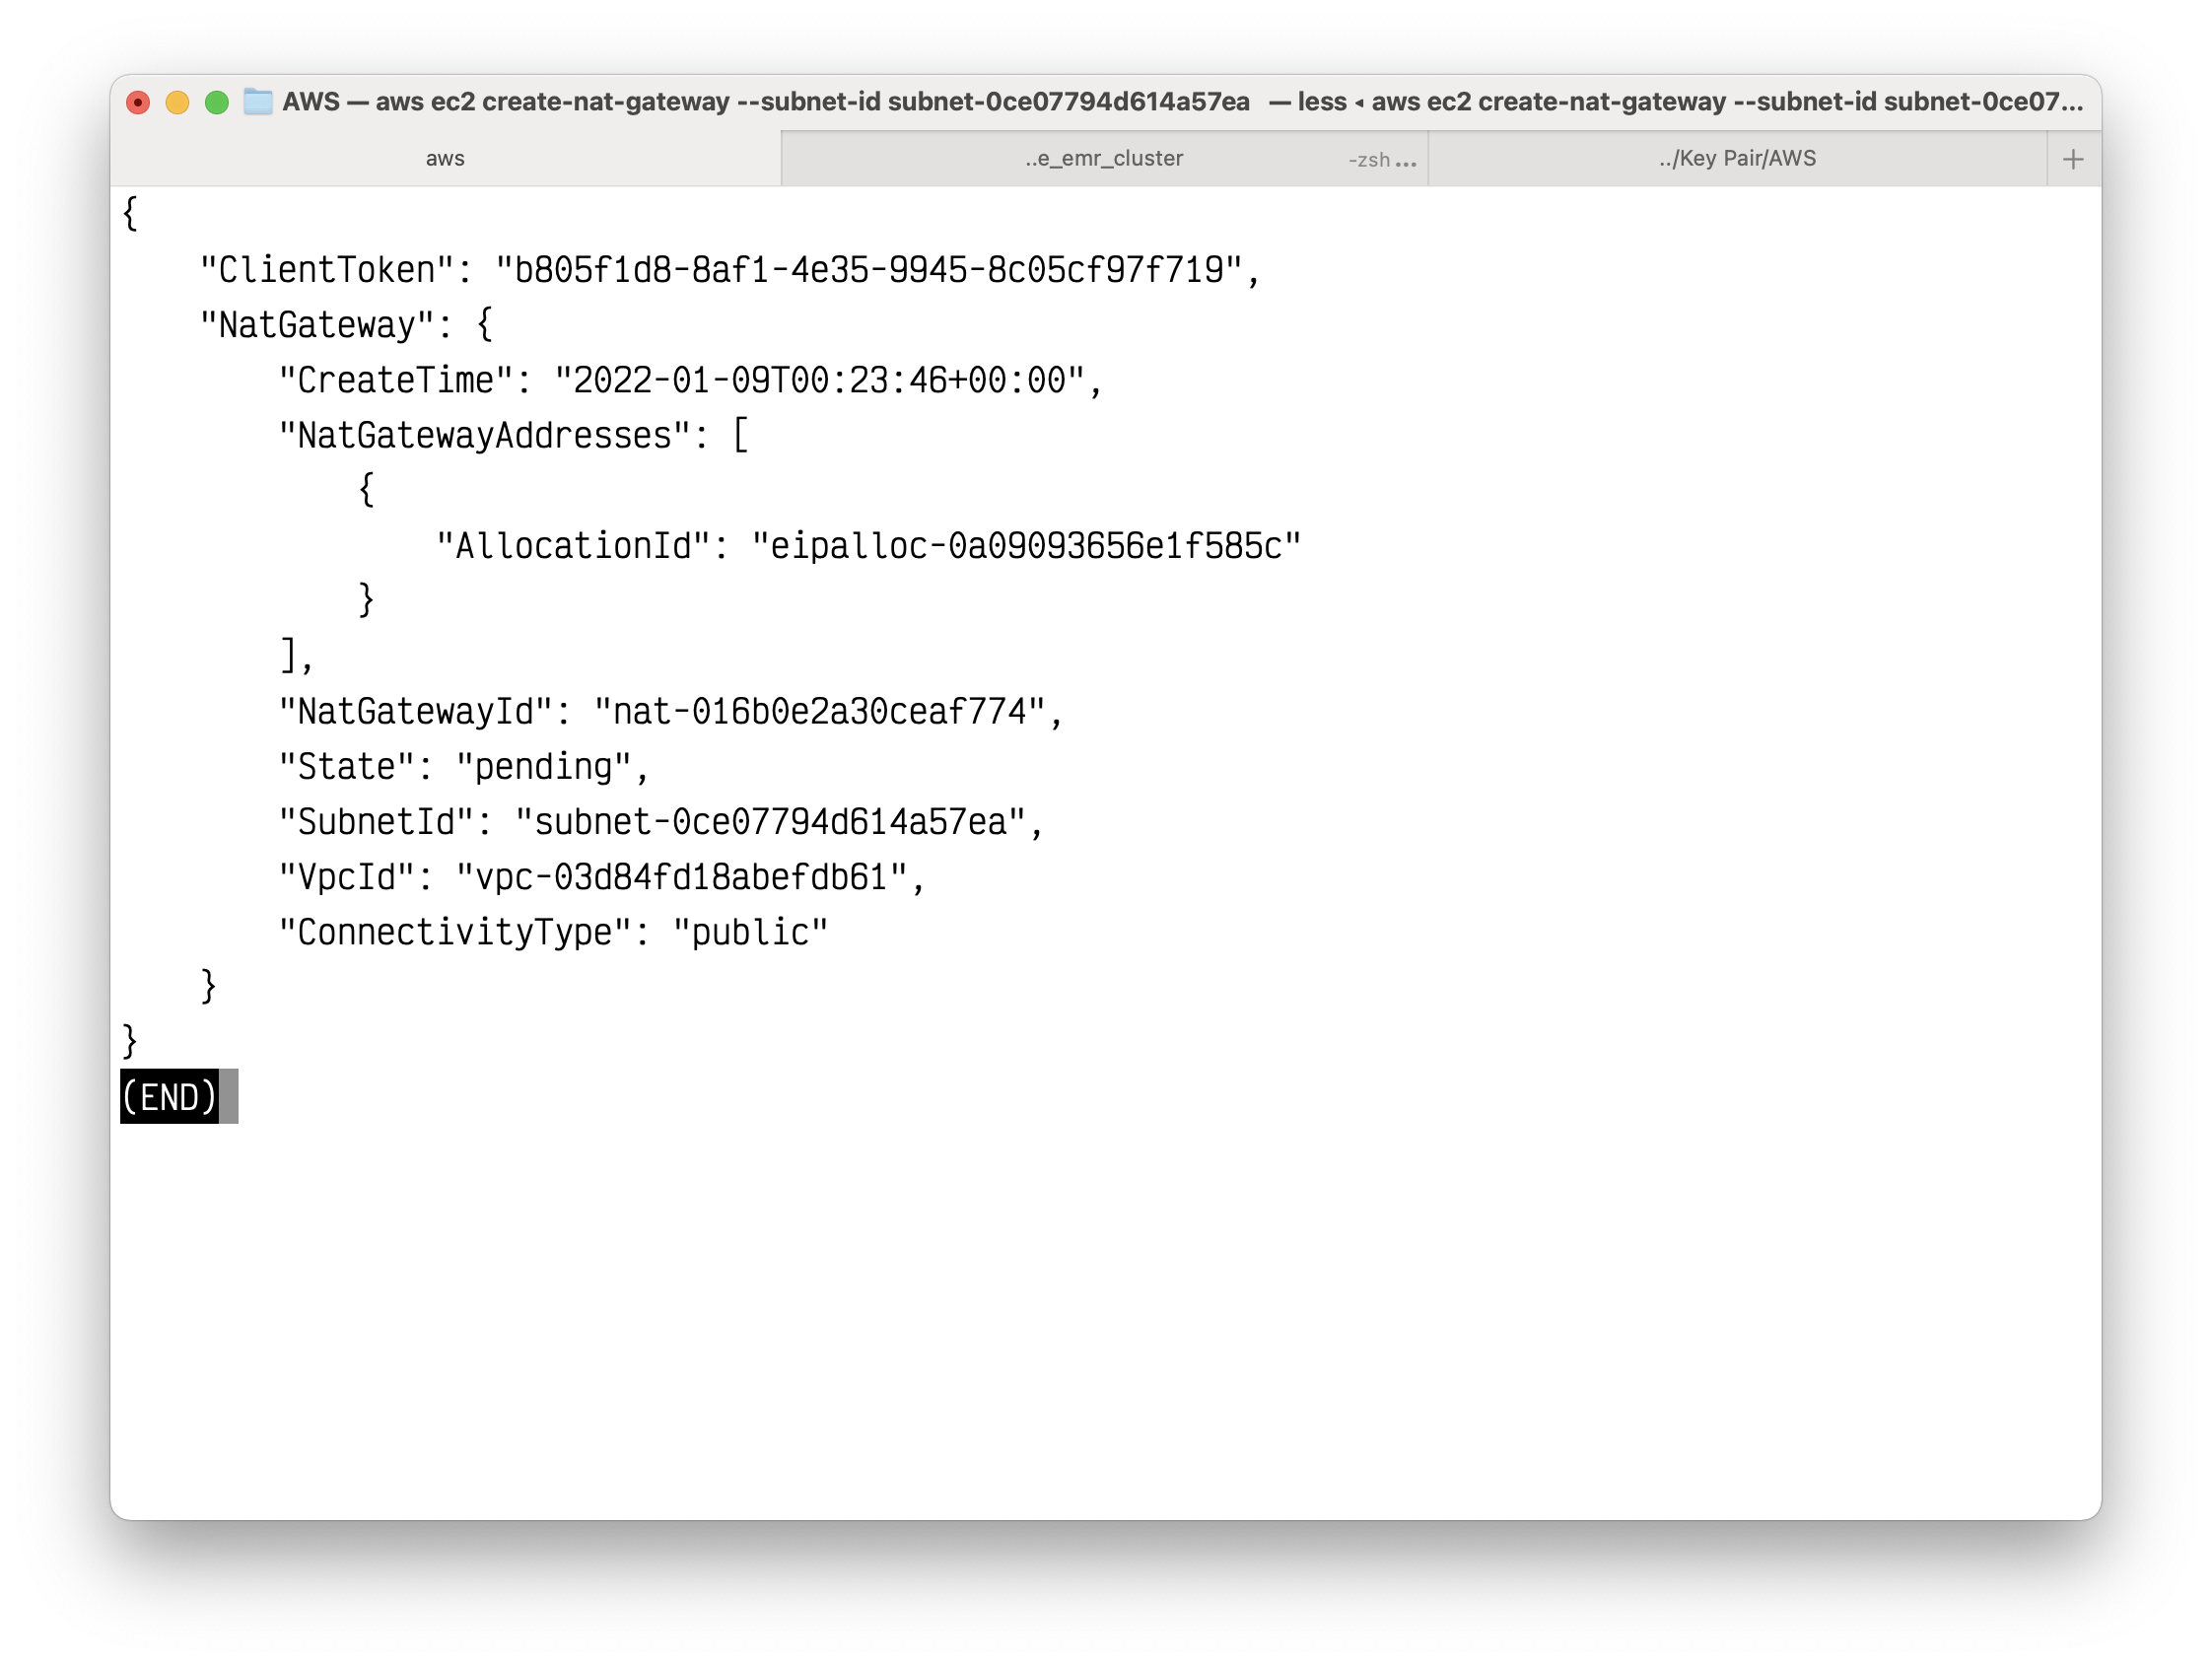
Copy your NatGatewayId.
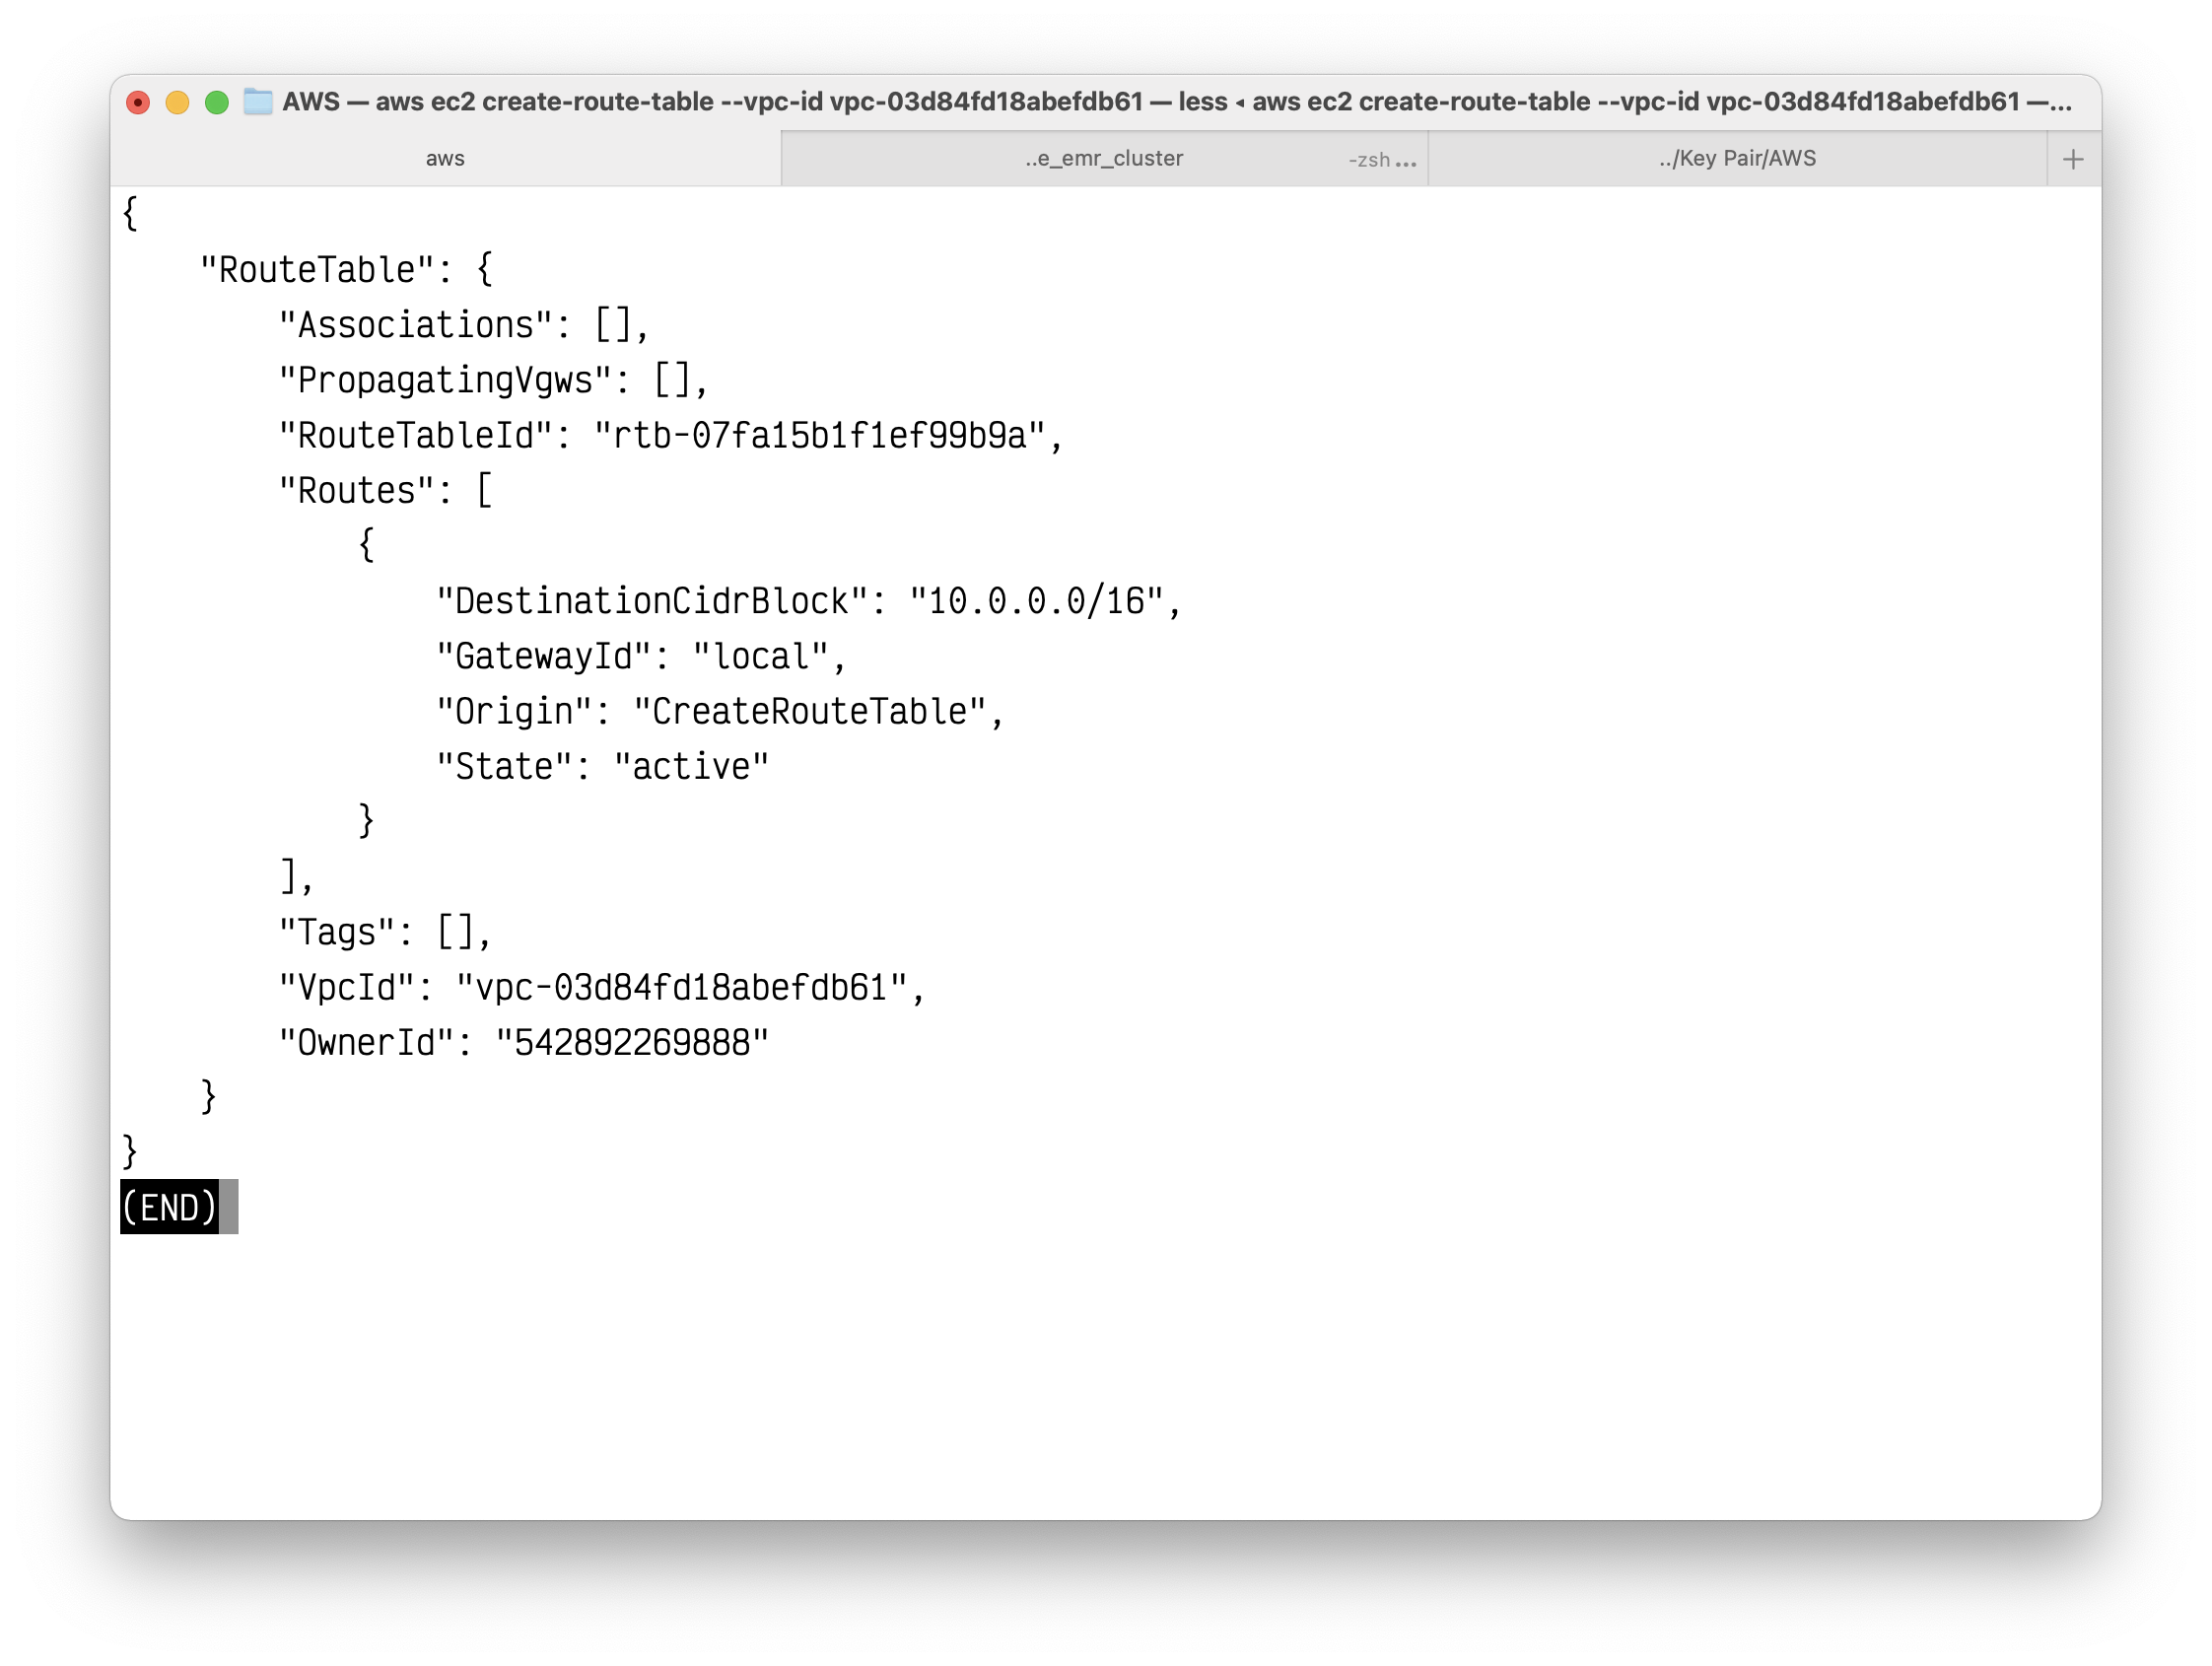
Create the second route table for your private subnet.
1 | aws ec2 create-route-table --vpc-id vpc-03d84fd18abefdb61 |
Copy your route table ID.
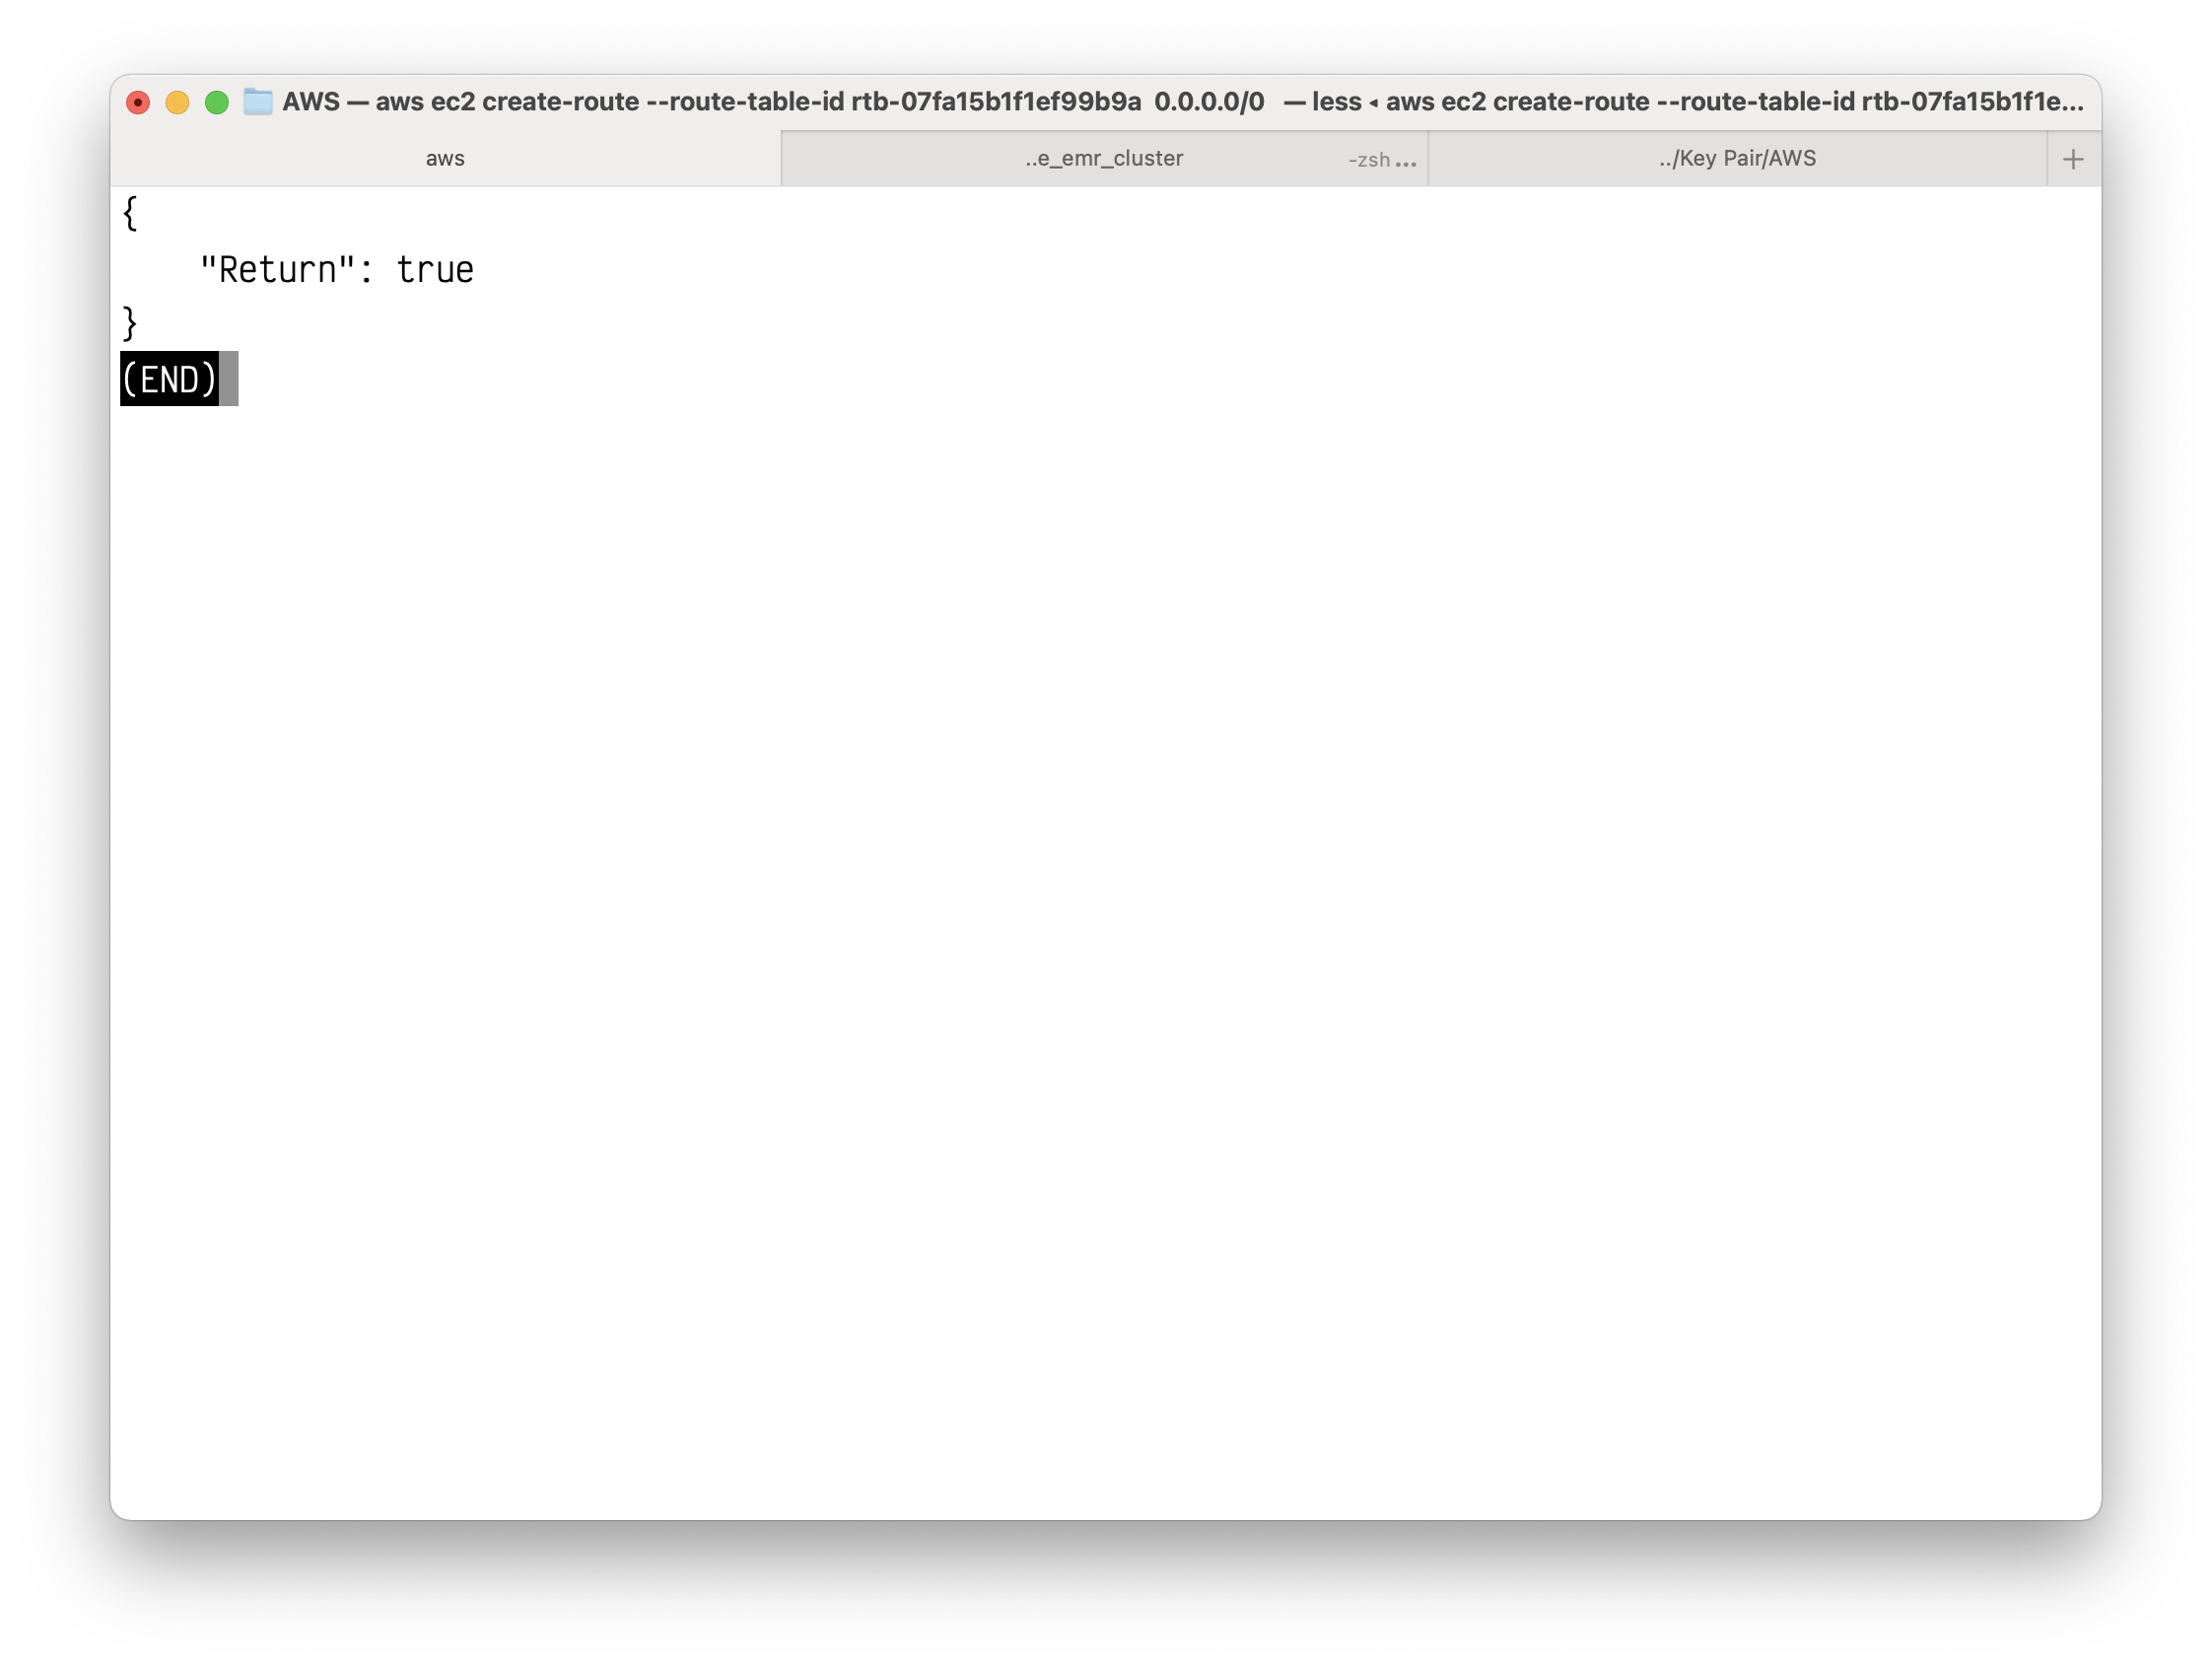
Create a route in the route table that points all IPv4 traffic to the NAT Gateway.
1 | aws ec2 create-route --route-table-id rtb-07fa15b1f1ef99b9a --destination-cidr-block 0.0.0.0/0 --gateway-id nat-016b0e2a30ceaf774 |
Associate your privte route table to your private subnet.
1 | aws ec2 associate-route-table --subnet-id subnet-0568f8339cbed25af --route-table-id rtb-07fa15b1f1ef99b9a |

EMR Configuration
Create an EMR cluster
Services -> EMR -> Cluster
Click on Create cluster
Click on Go to advanced options
- Release:
6.5.0 - Softwares:
Hadoop,Spark,JupyterEnterpriseGateway,Livy,Hive,Hue,Pig
Click on Next
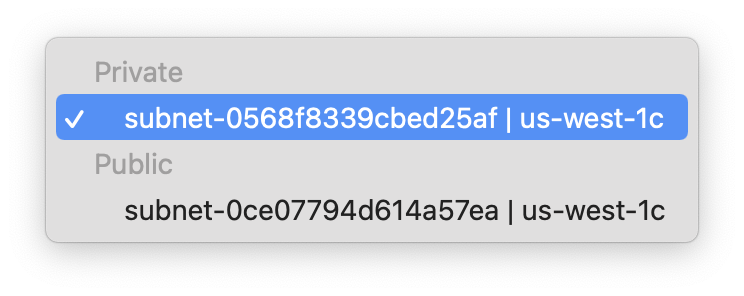
- Network:
10.0.0.0/16 - EC2 Subnet: the private subnet
Click on Next
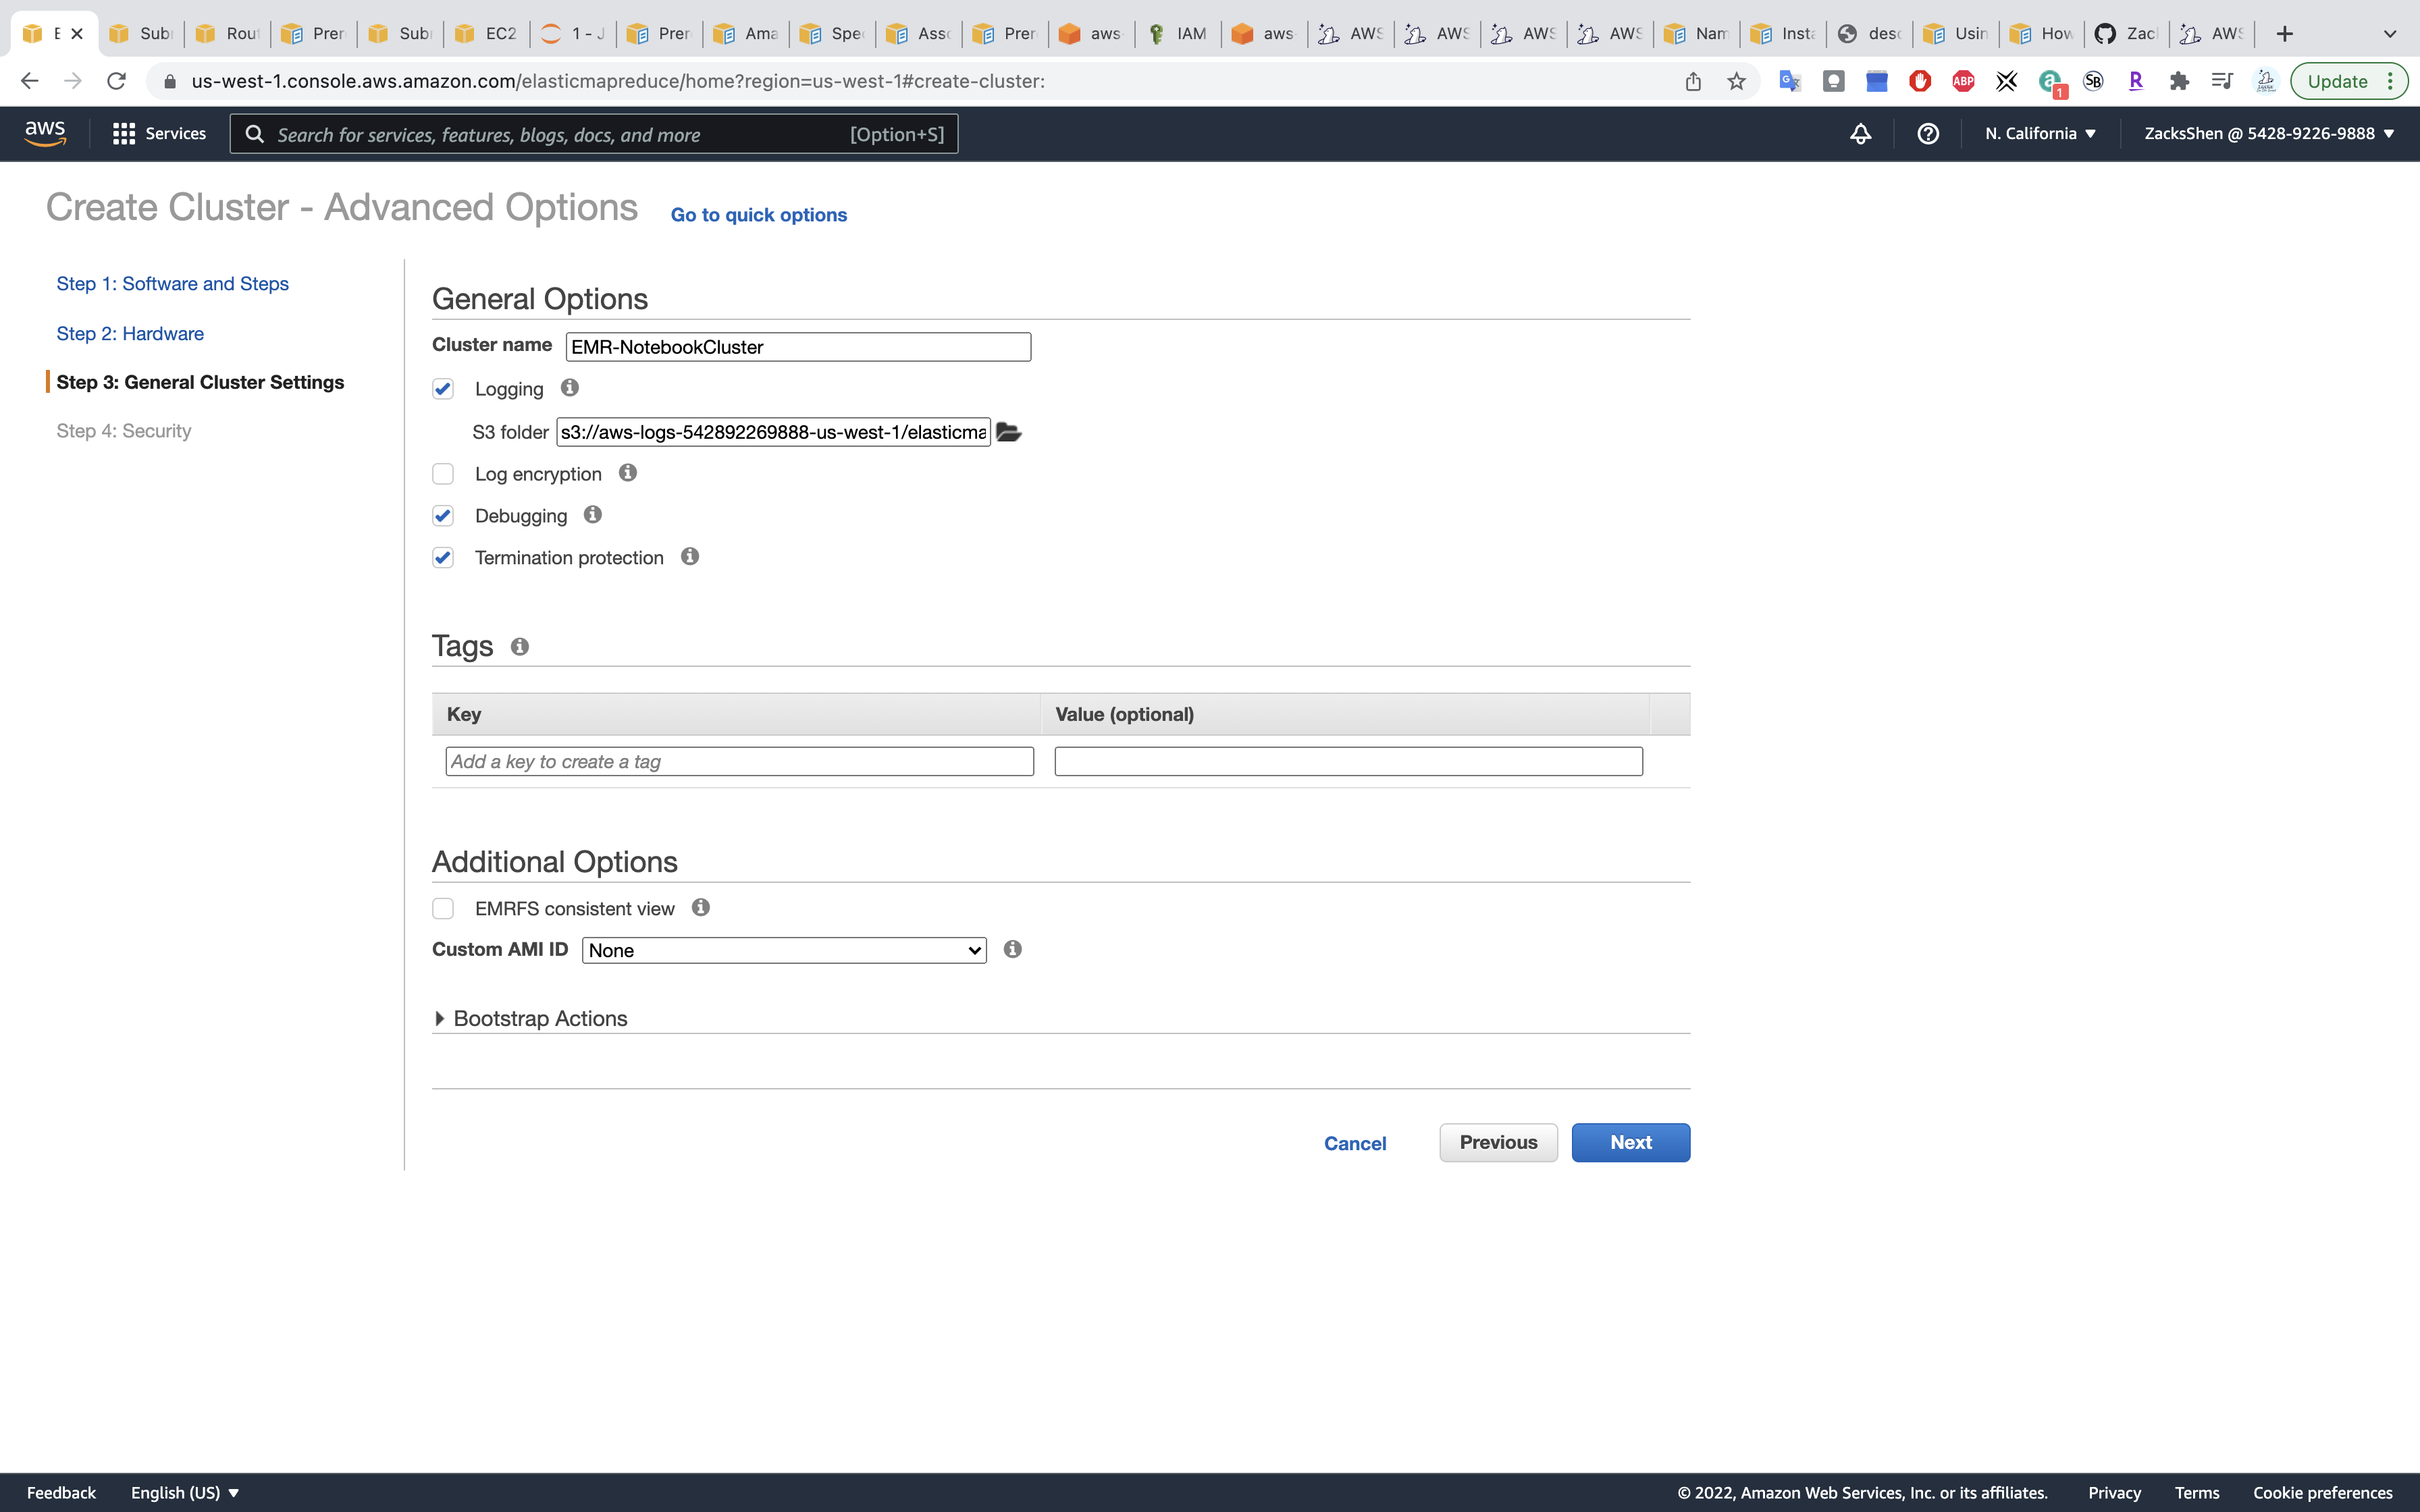
- Cluster name:
EMR-NotebookCluster
Click on Next
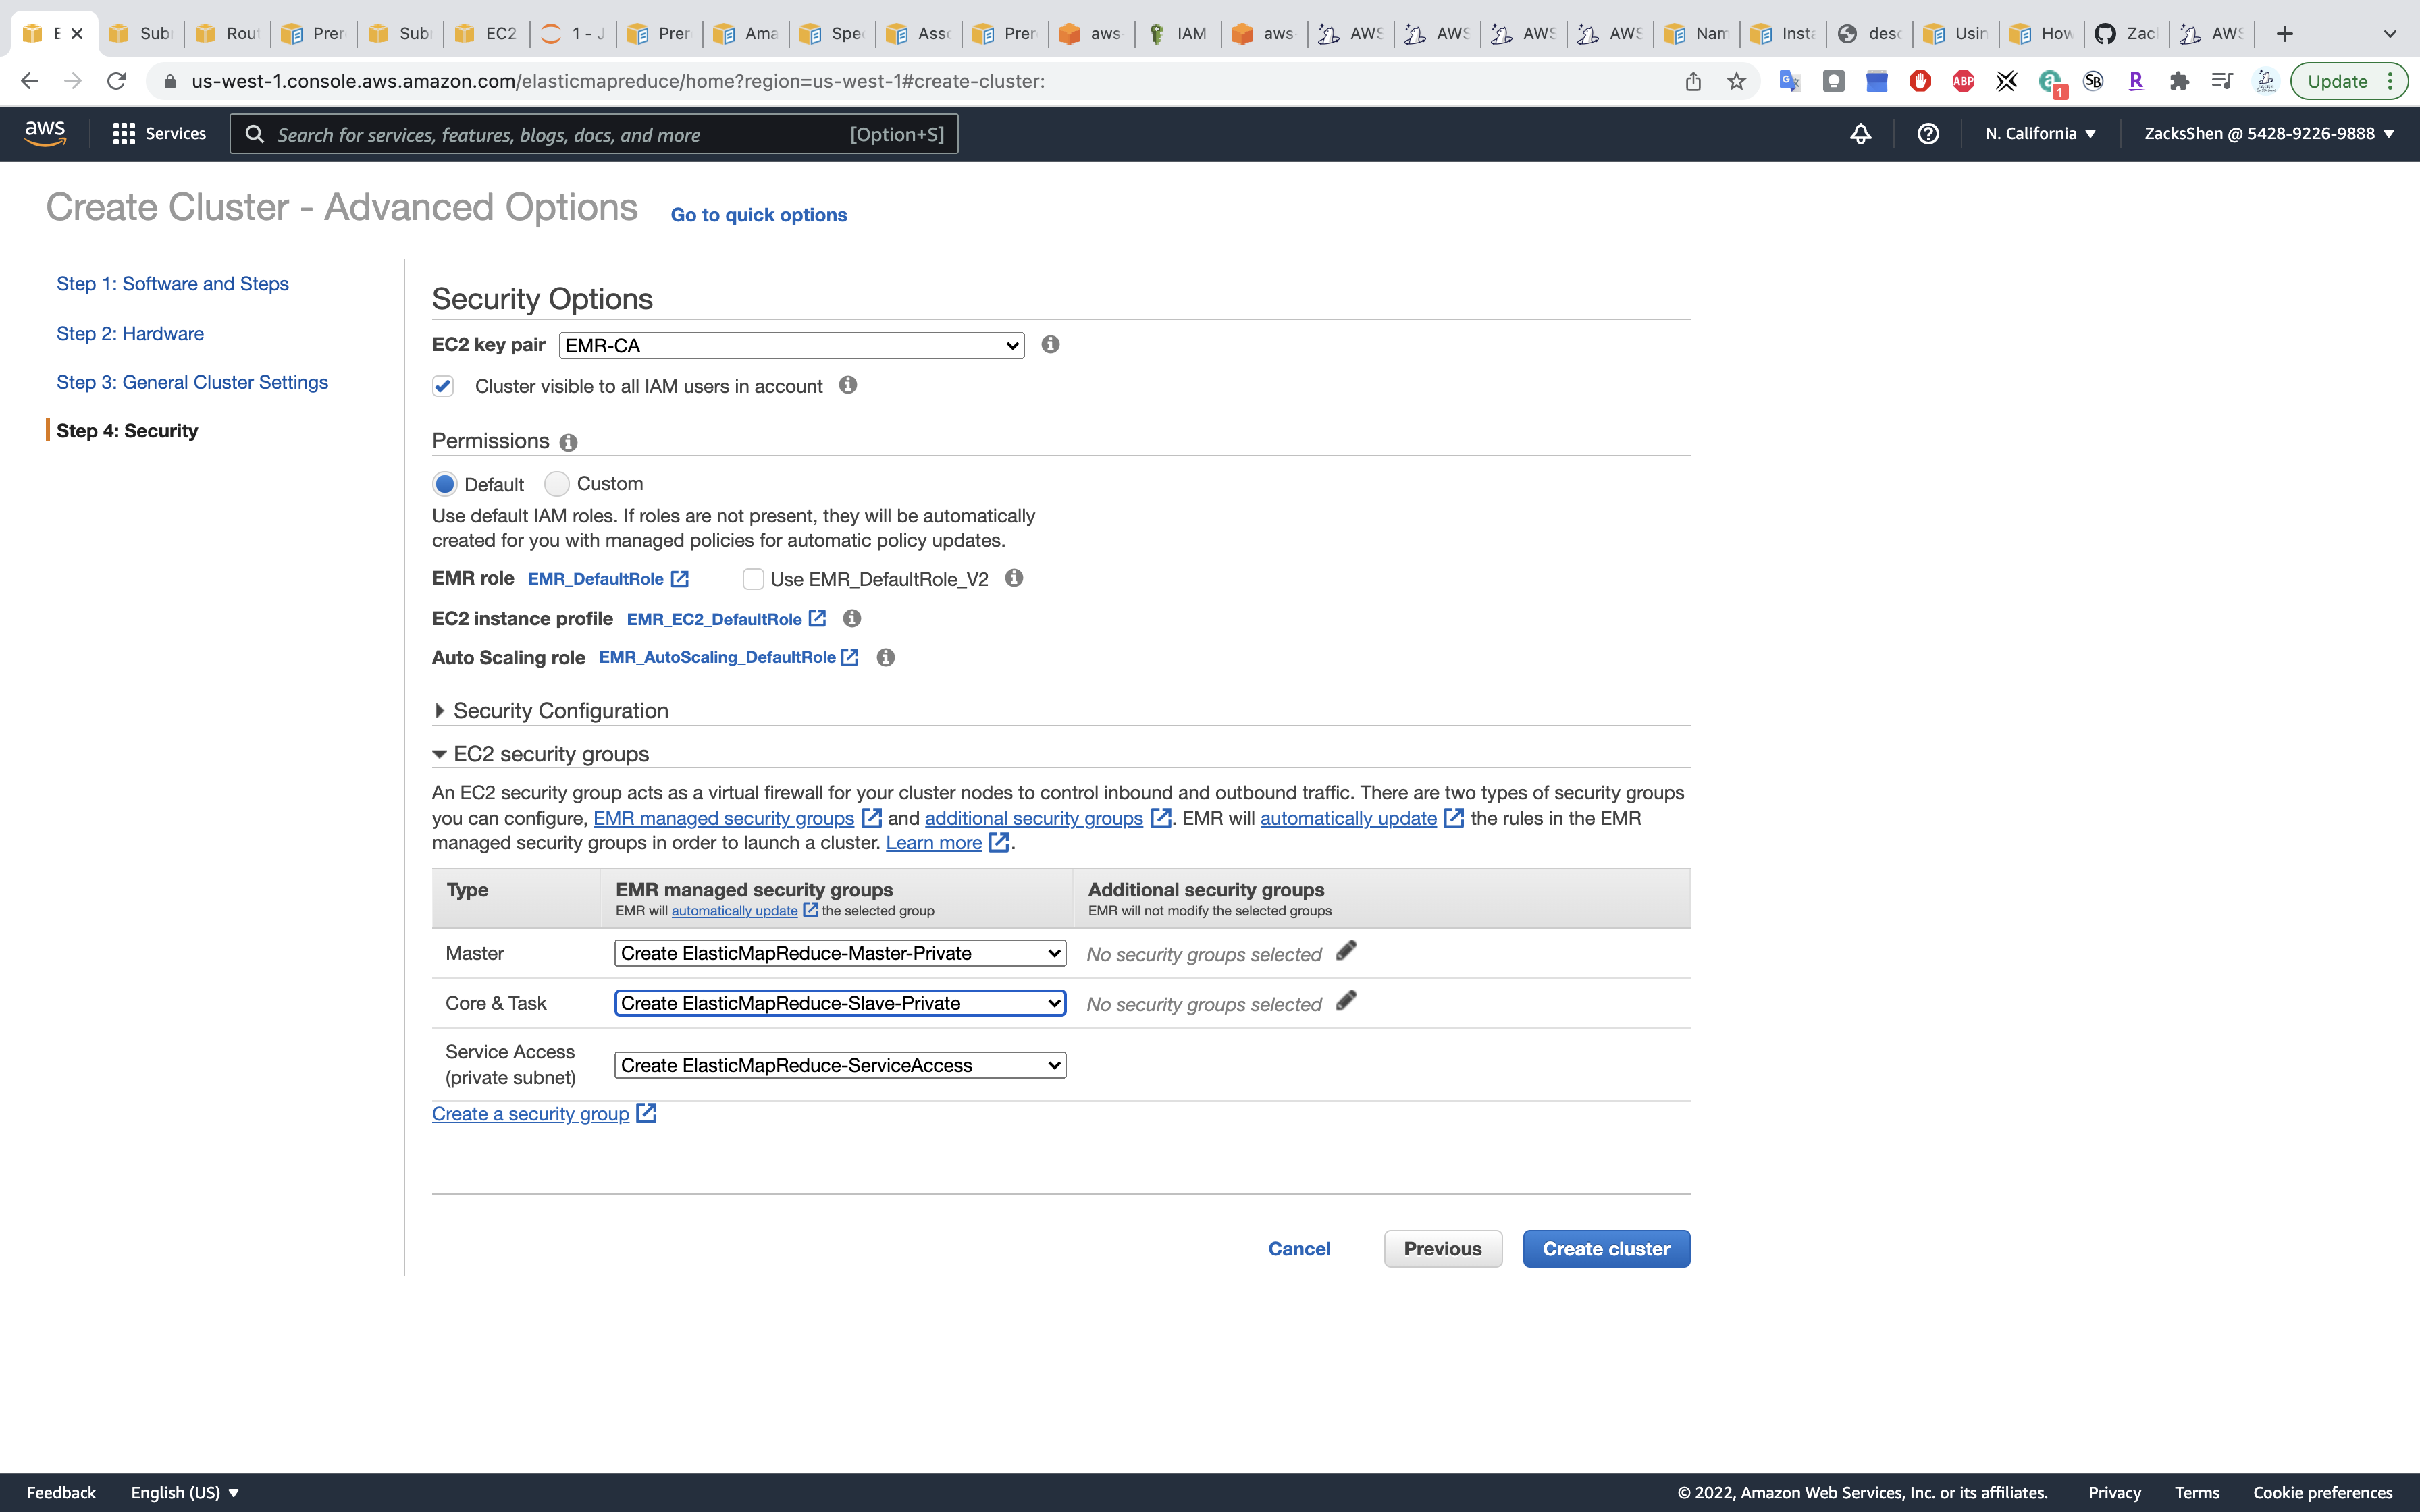
- EC2 key pair: choose your key pair
Click on Create cluster
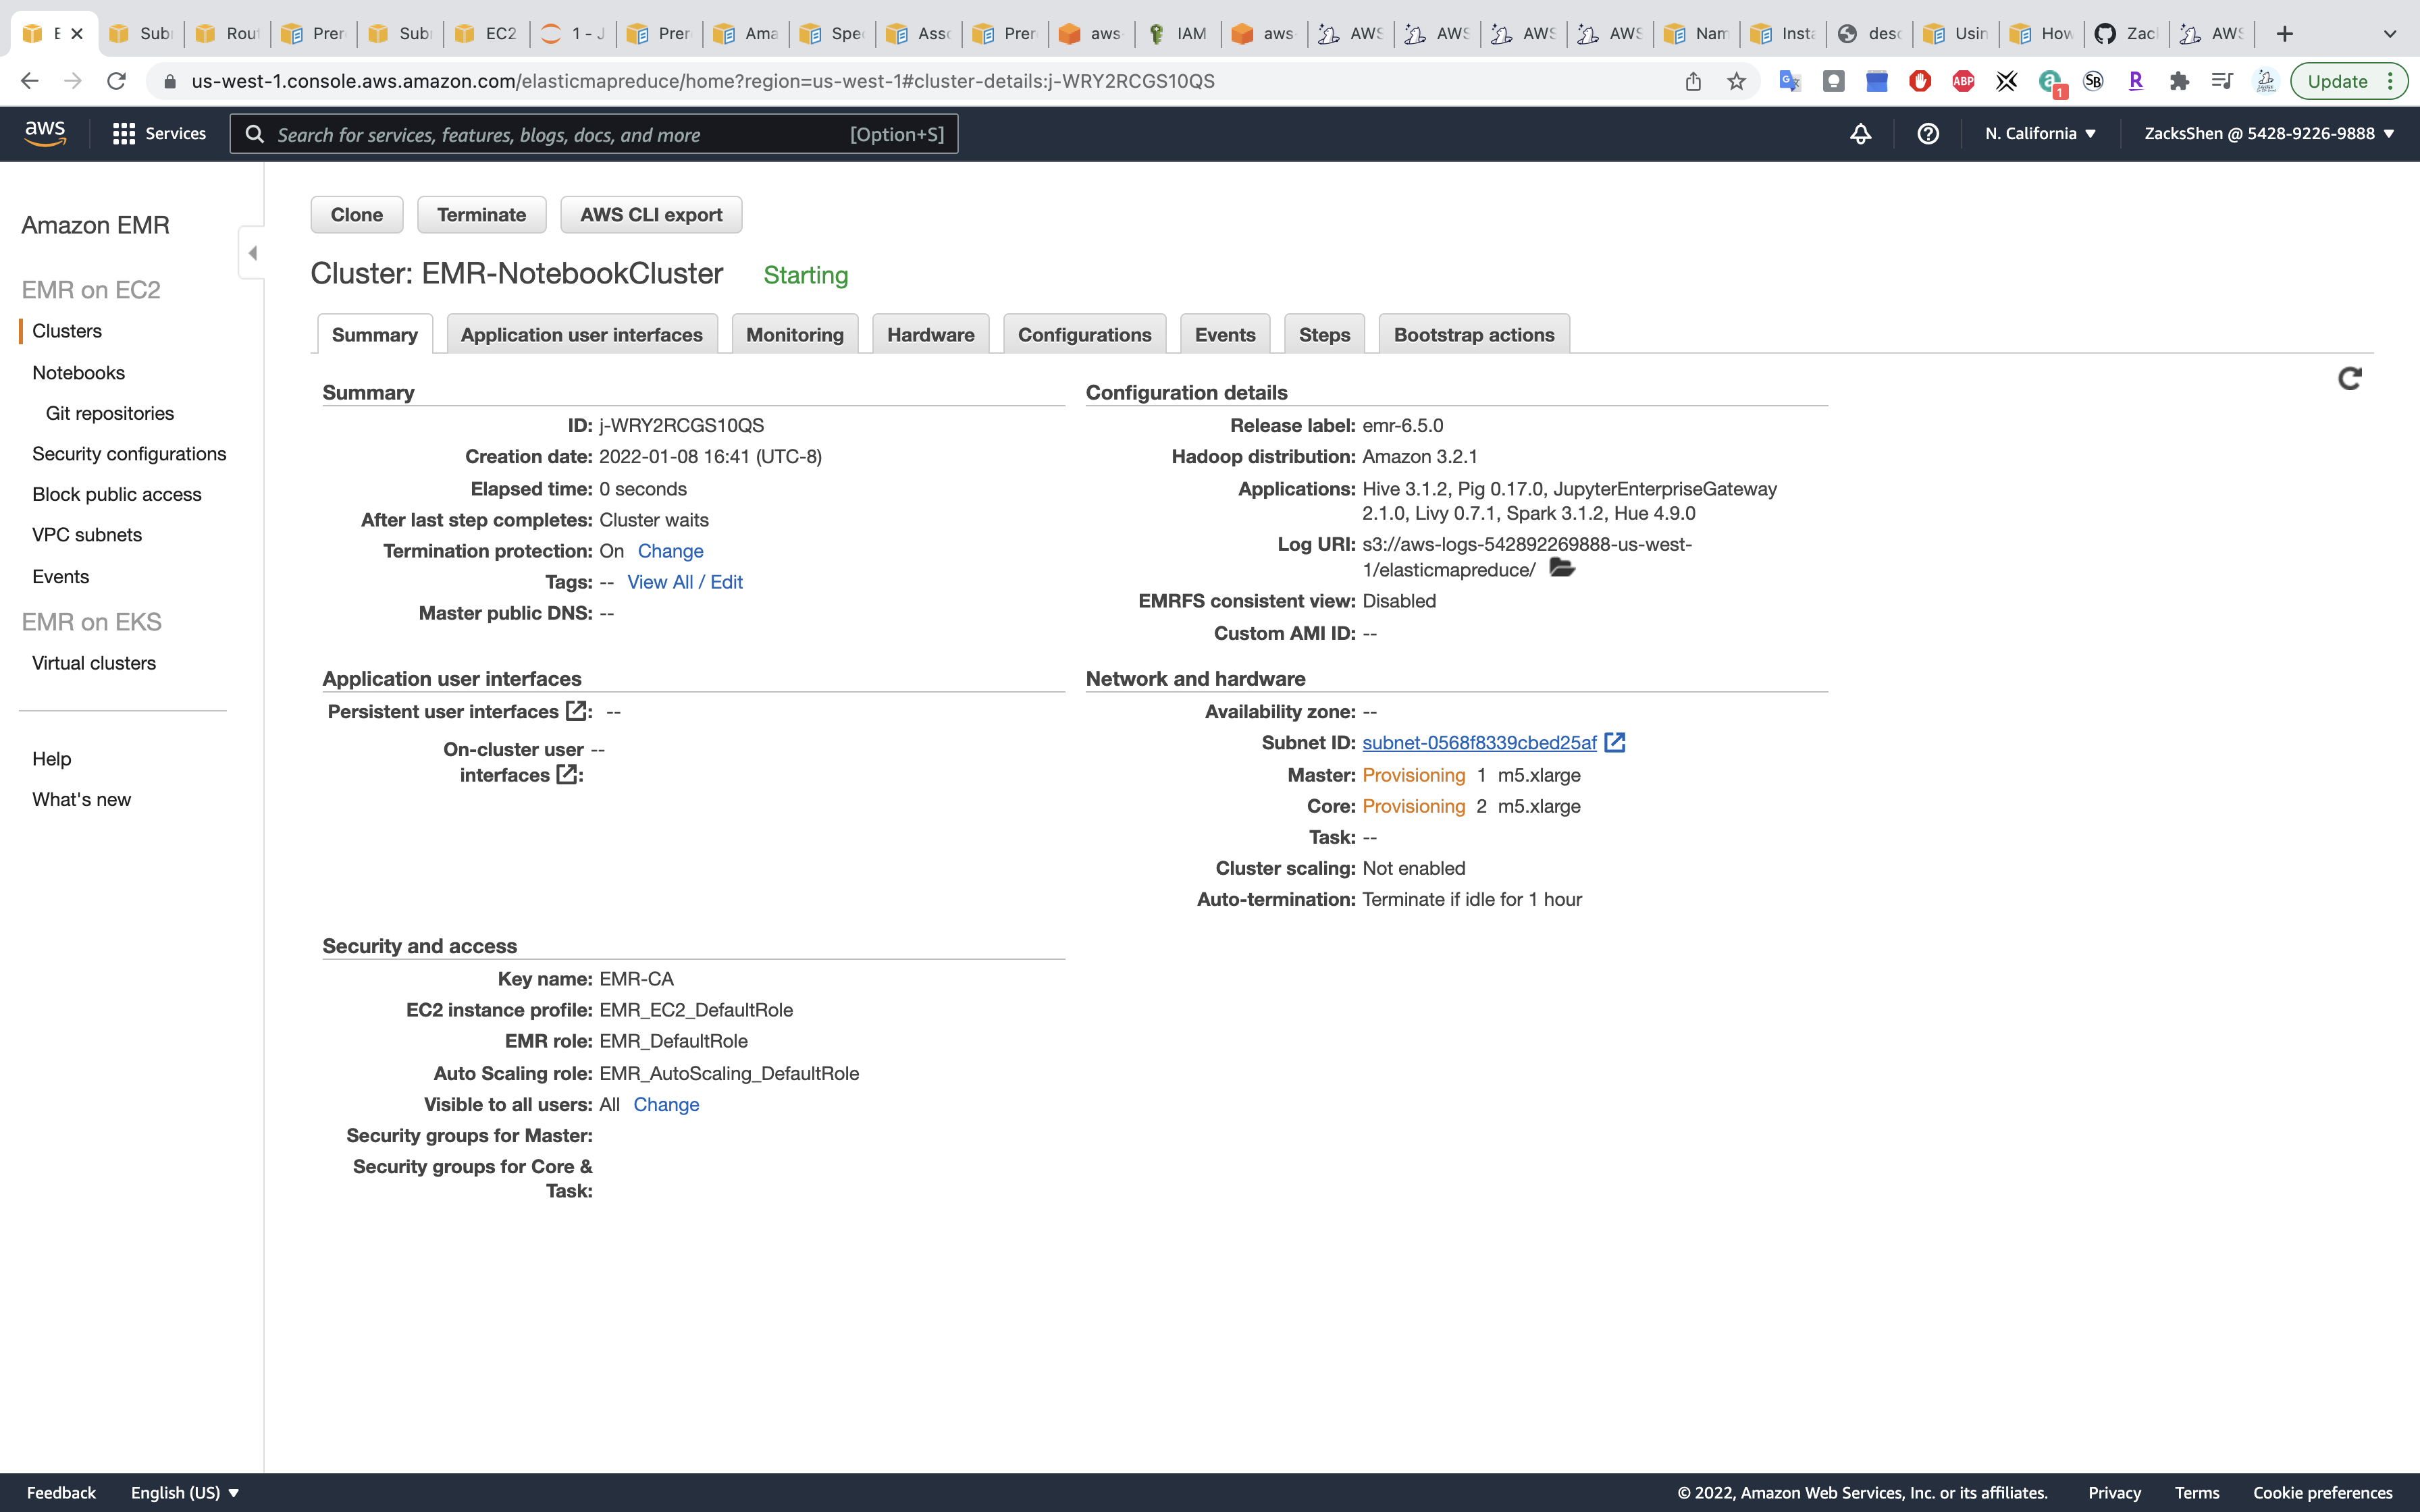
Wait unitl the Status change from Starting to Waiting.
Create a notebook
Services -> EMR -> Notebook
- Notebook name: any
- Cluster:
EMR-NotebookCluster - AWS service role:
EMR_Notebooks_DefaultRole
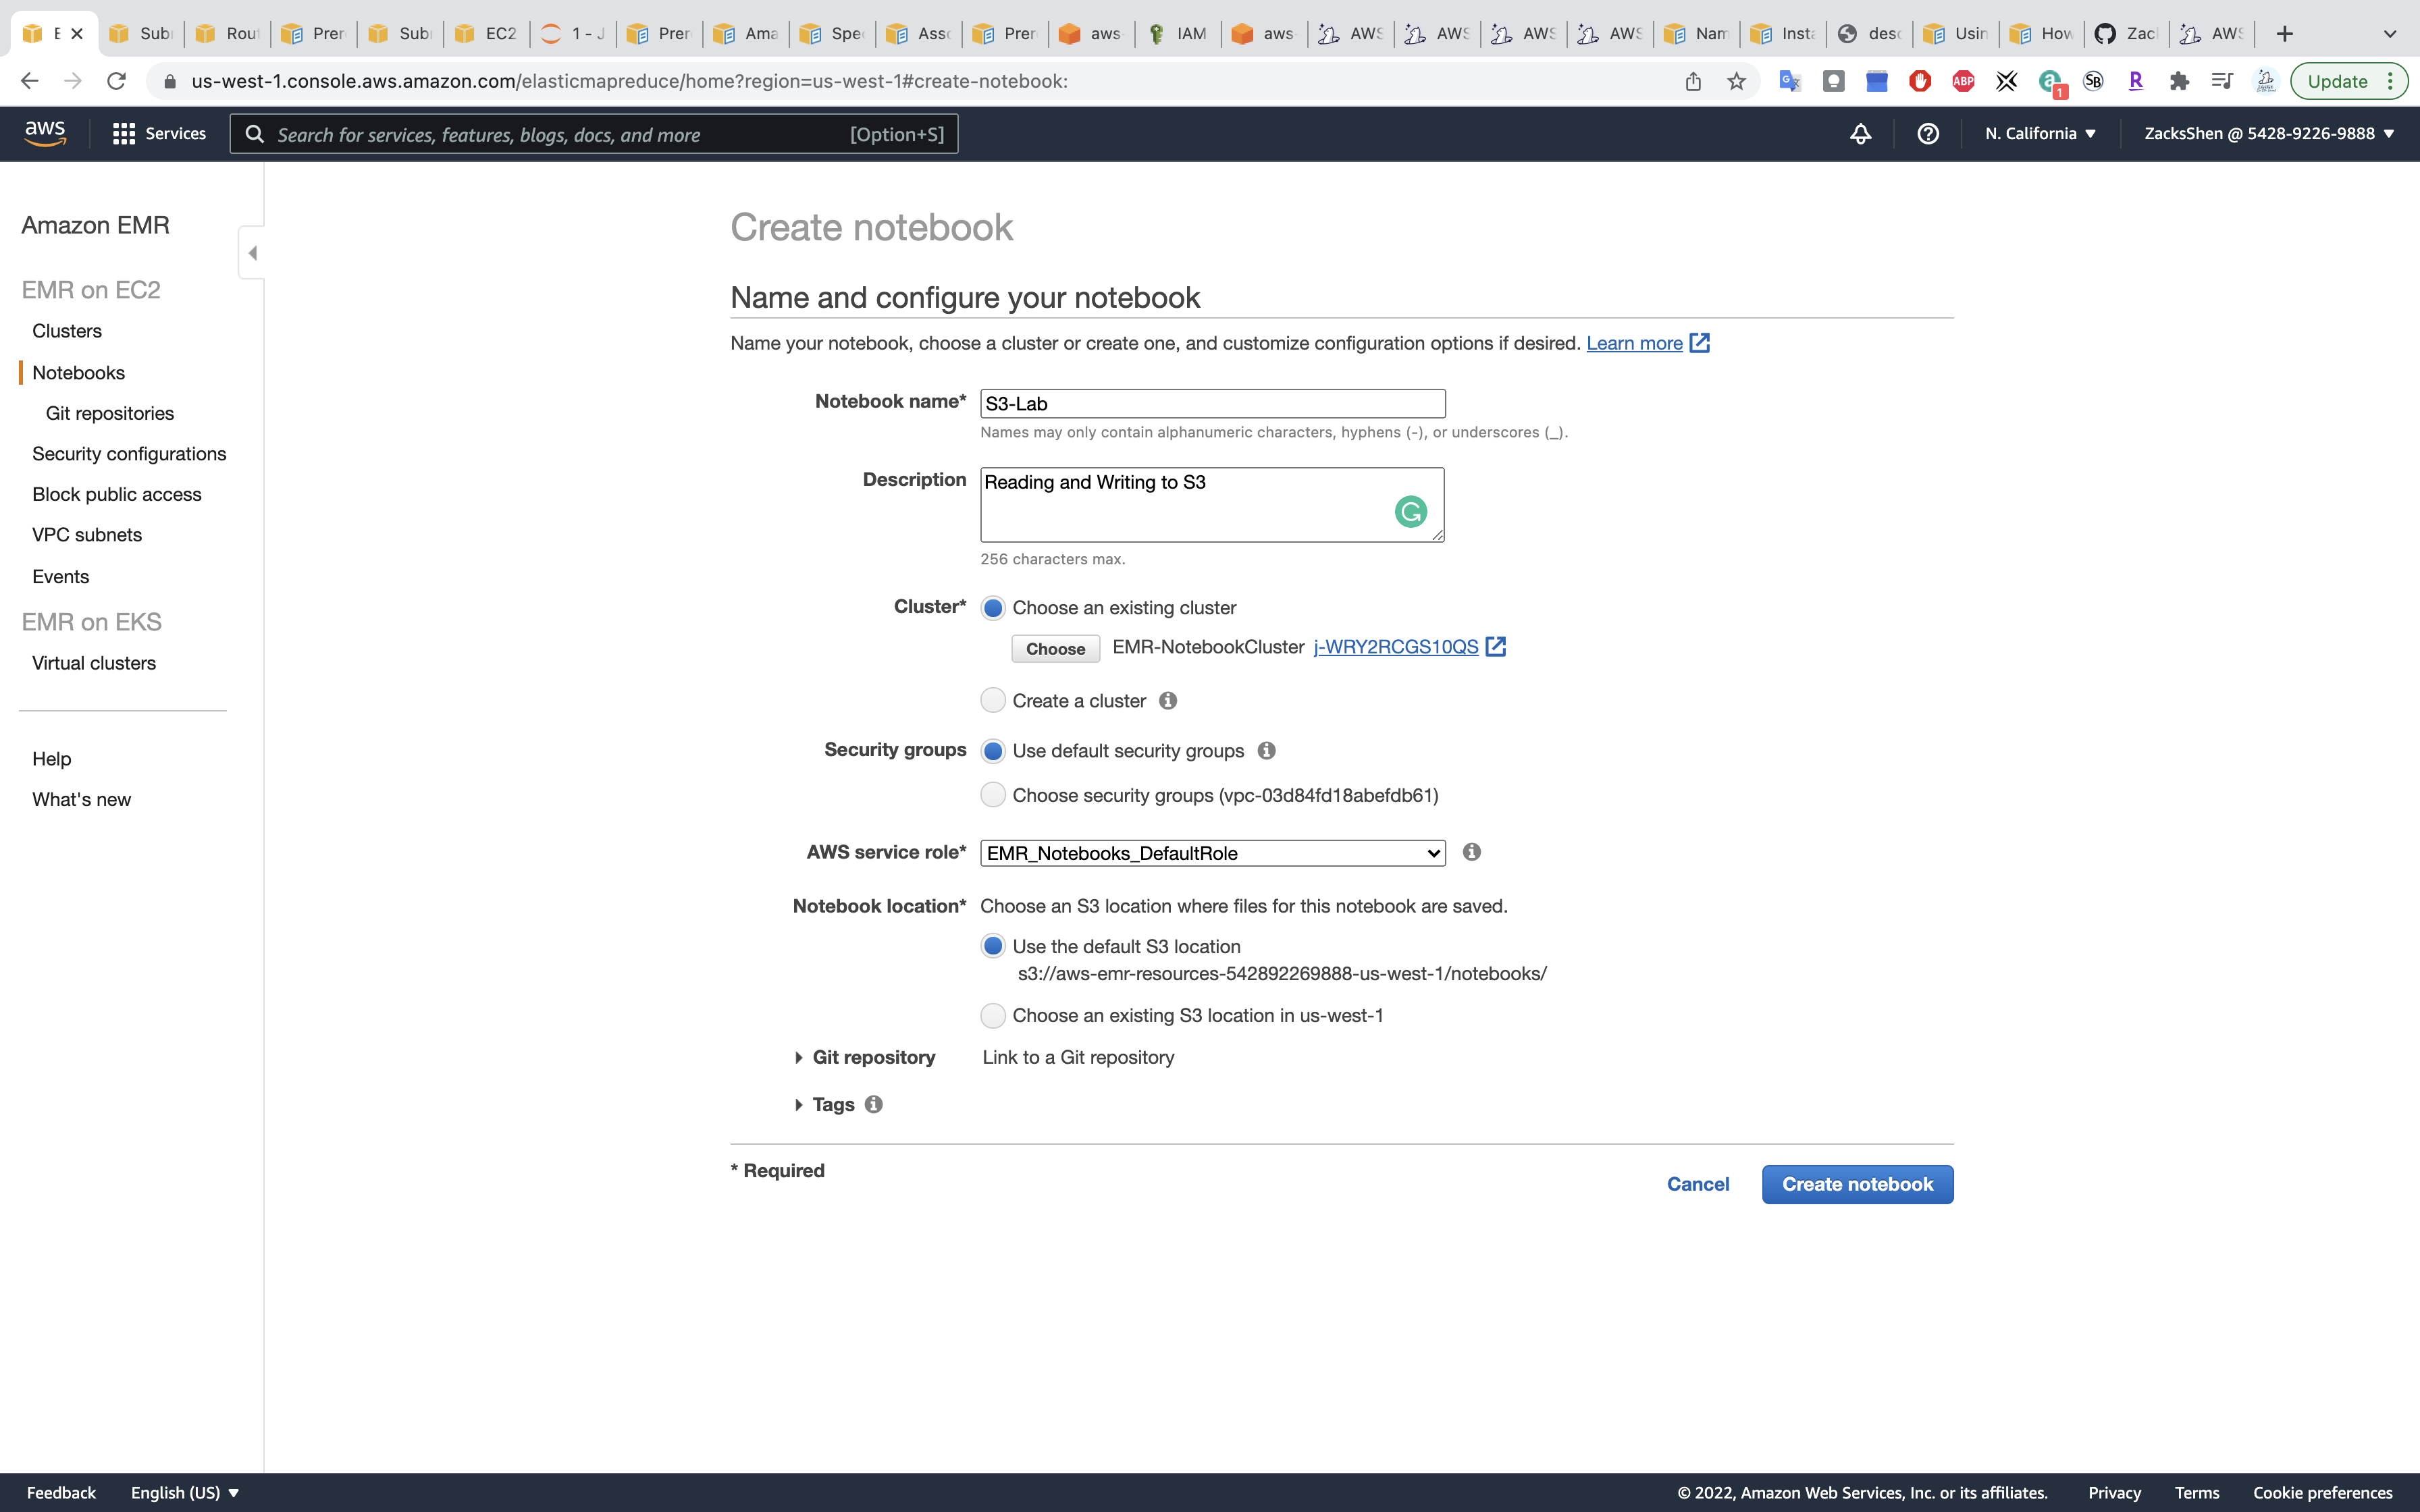
Click on Create notebook
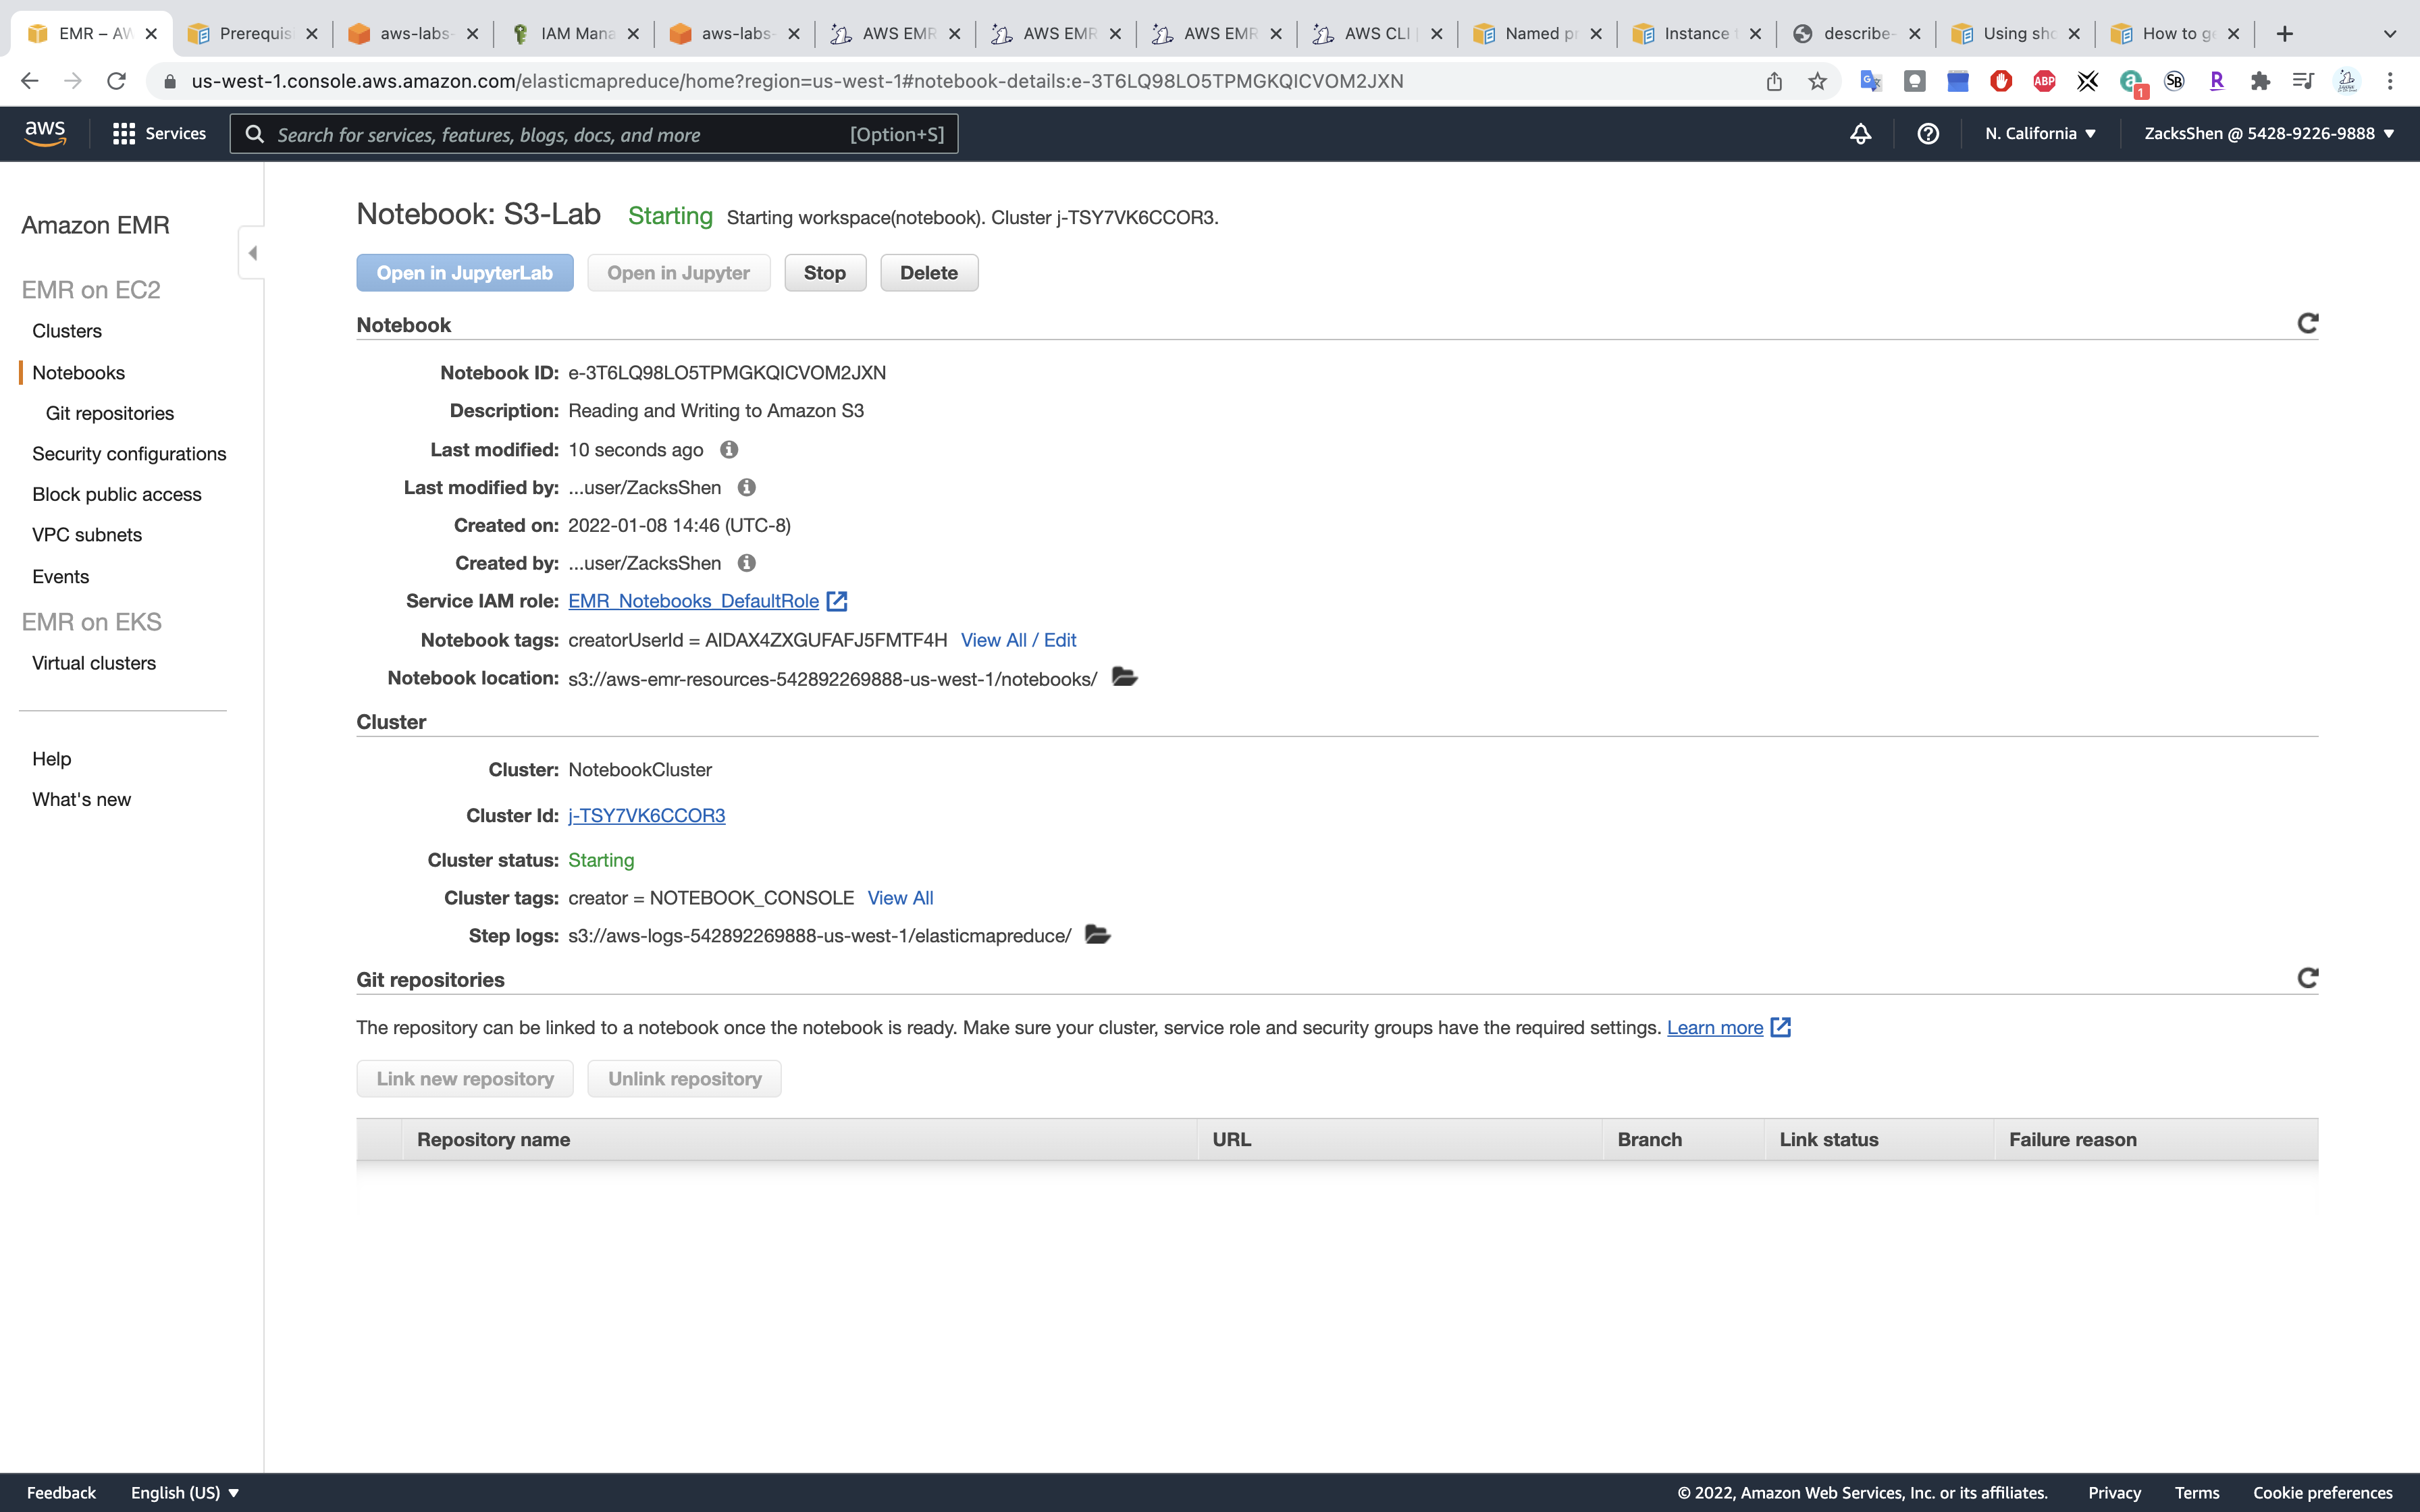
Wait unitl the Status change from Starting to Ready.
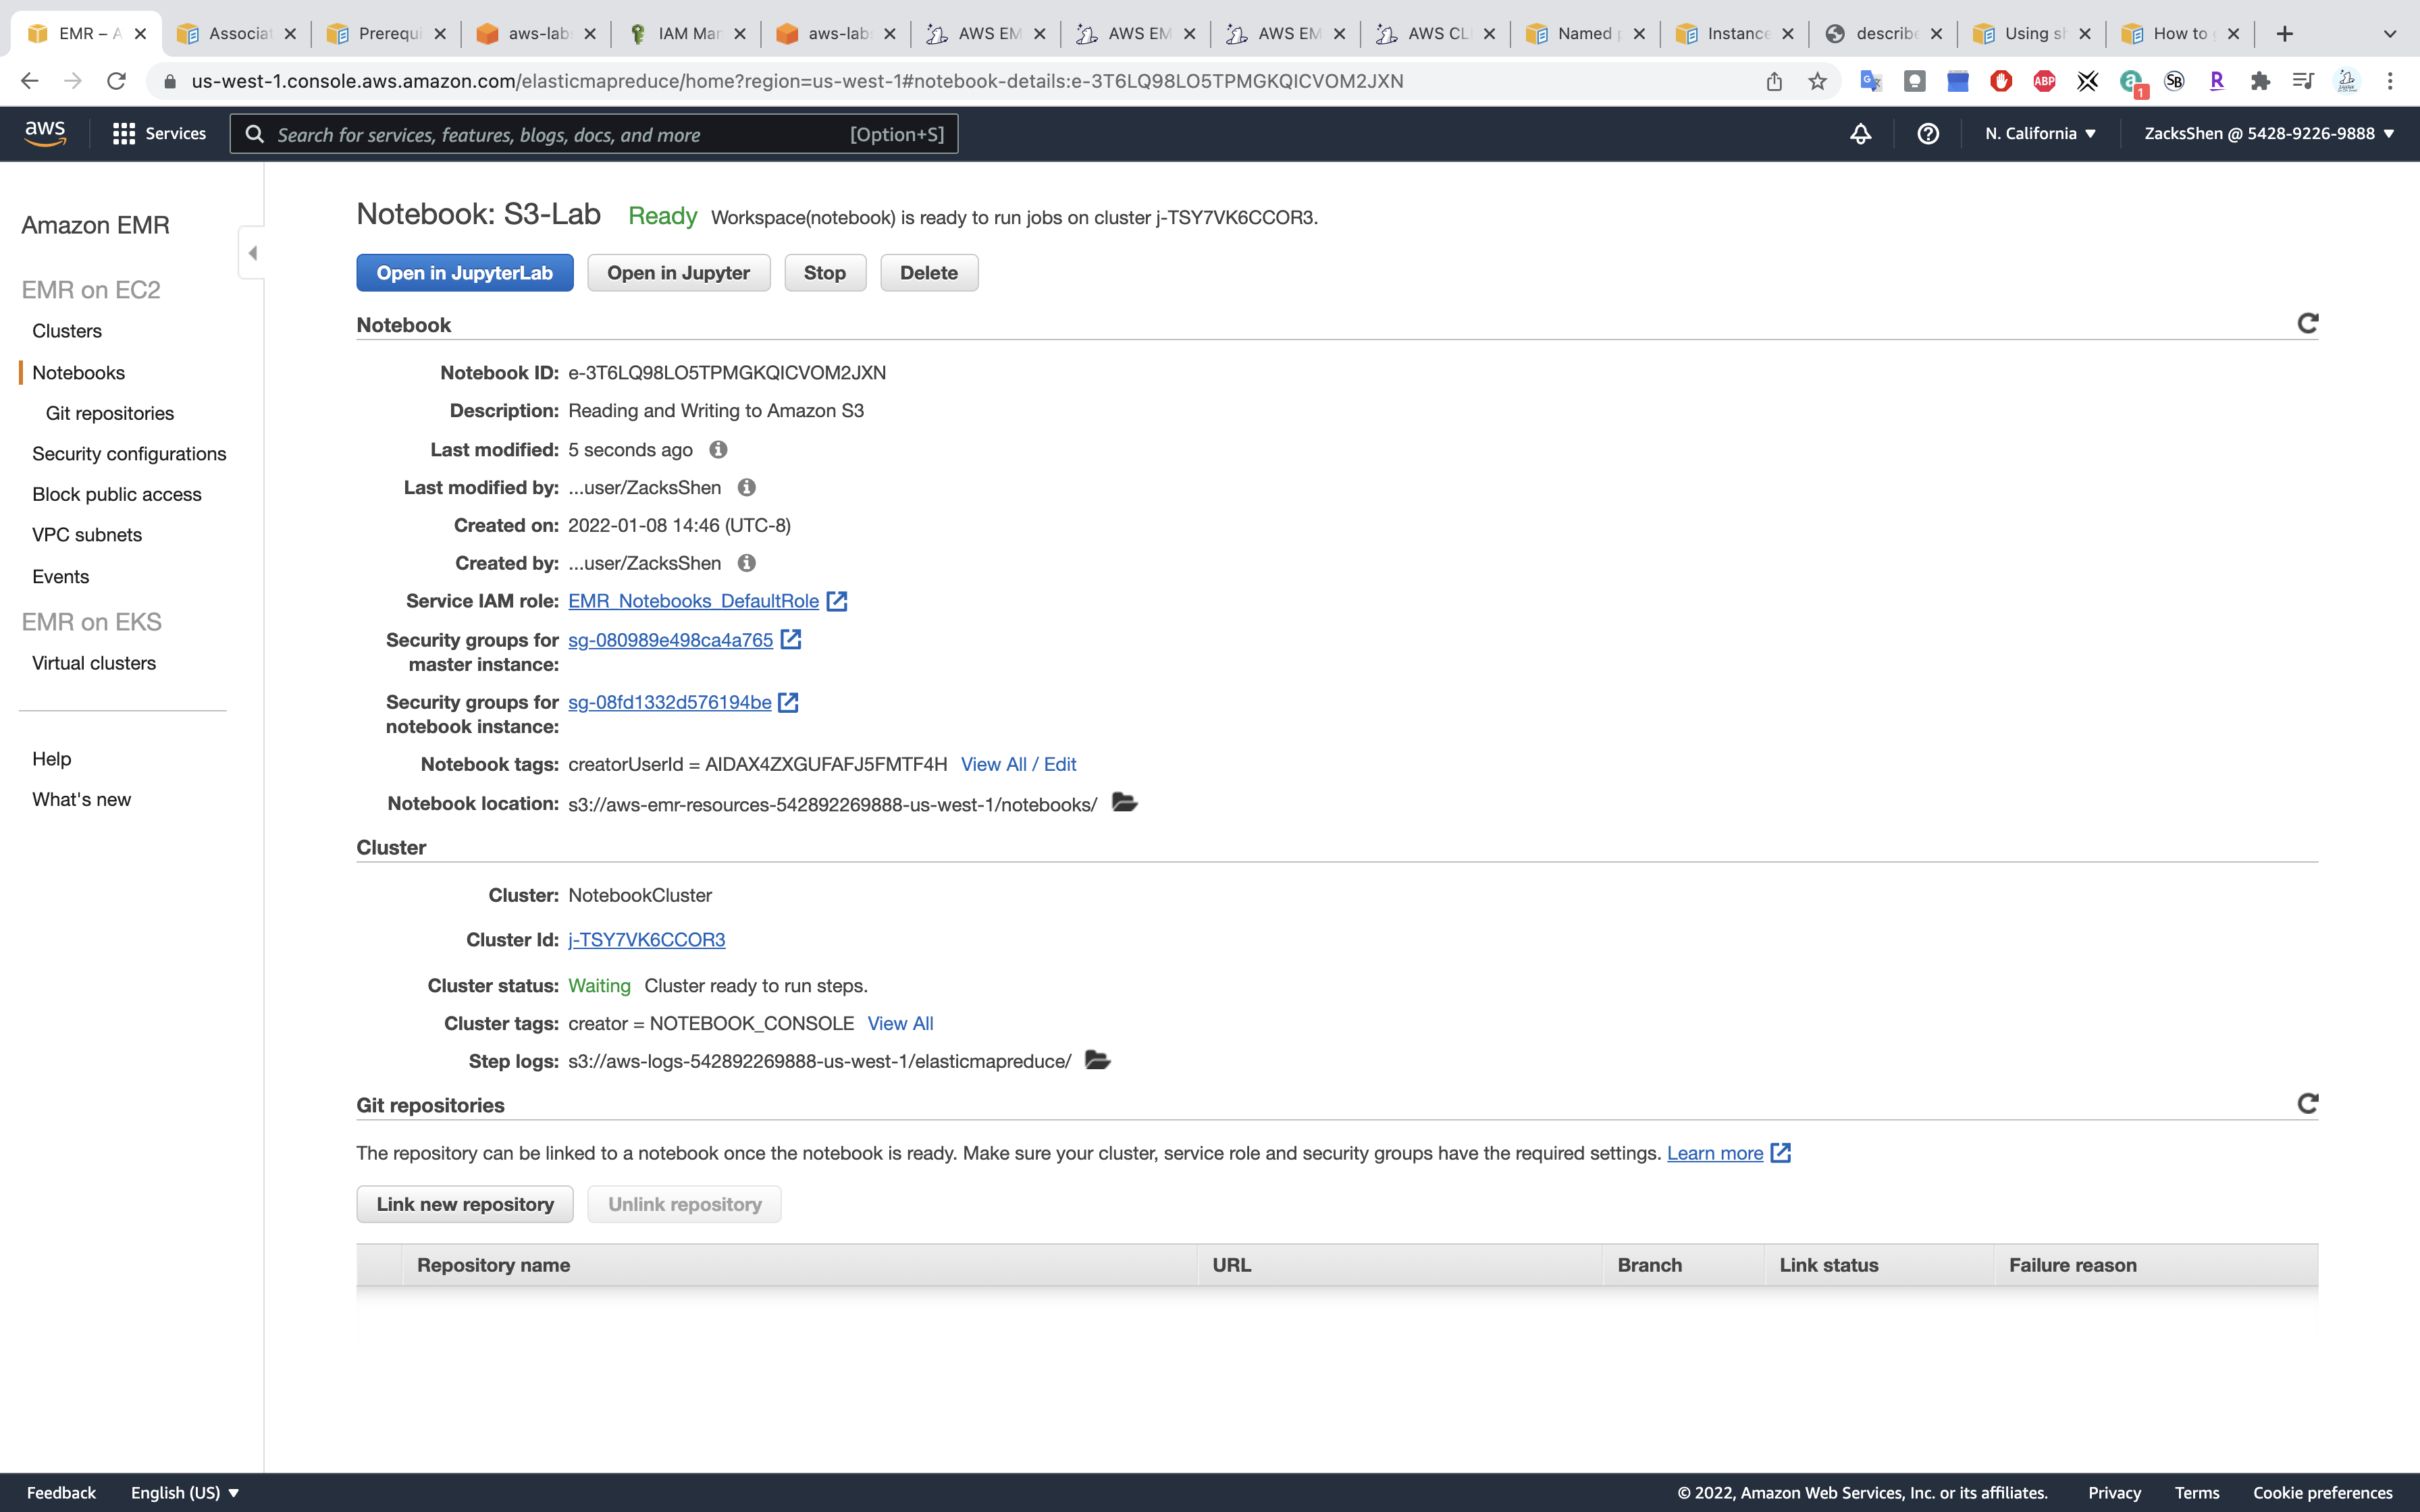
Add Git repository
Services -> EMR -> Git repositories
Associating Git-based repositories with EMR Notebooks
Add a Git-based repository to Amazon EMR
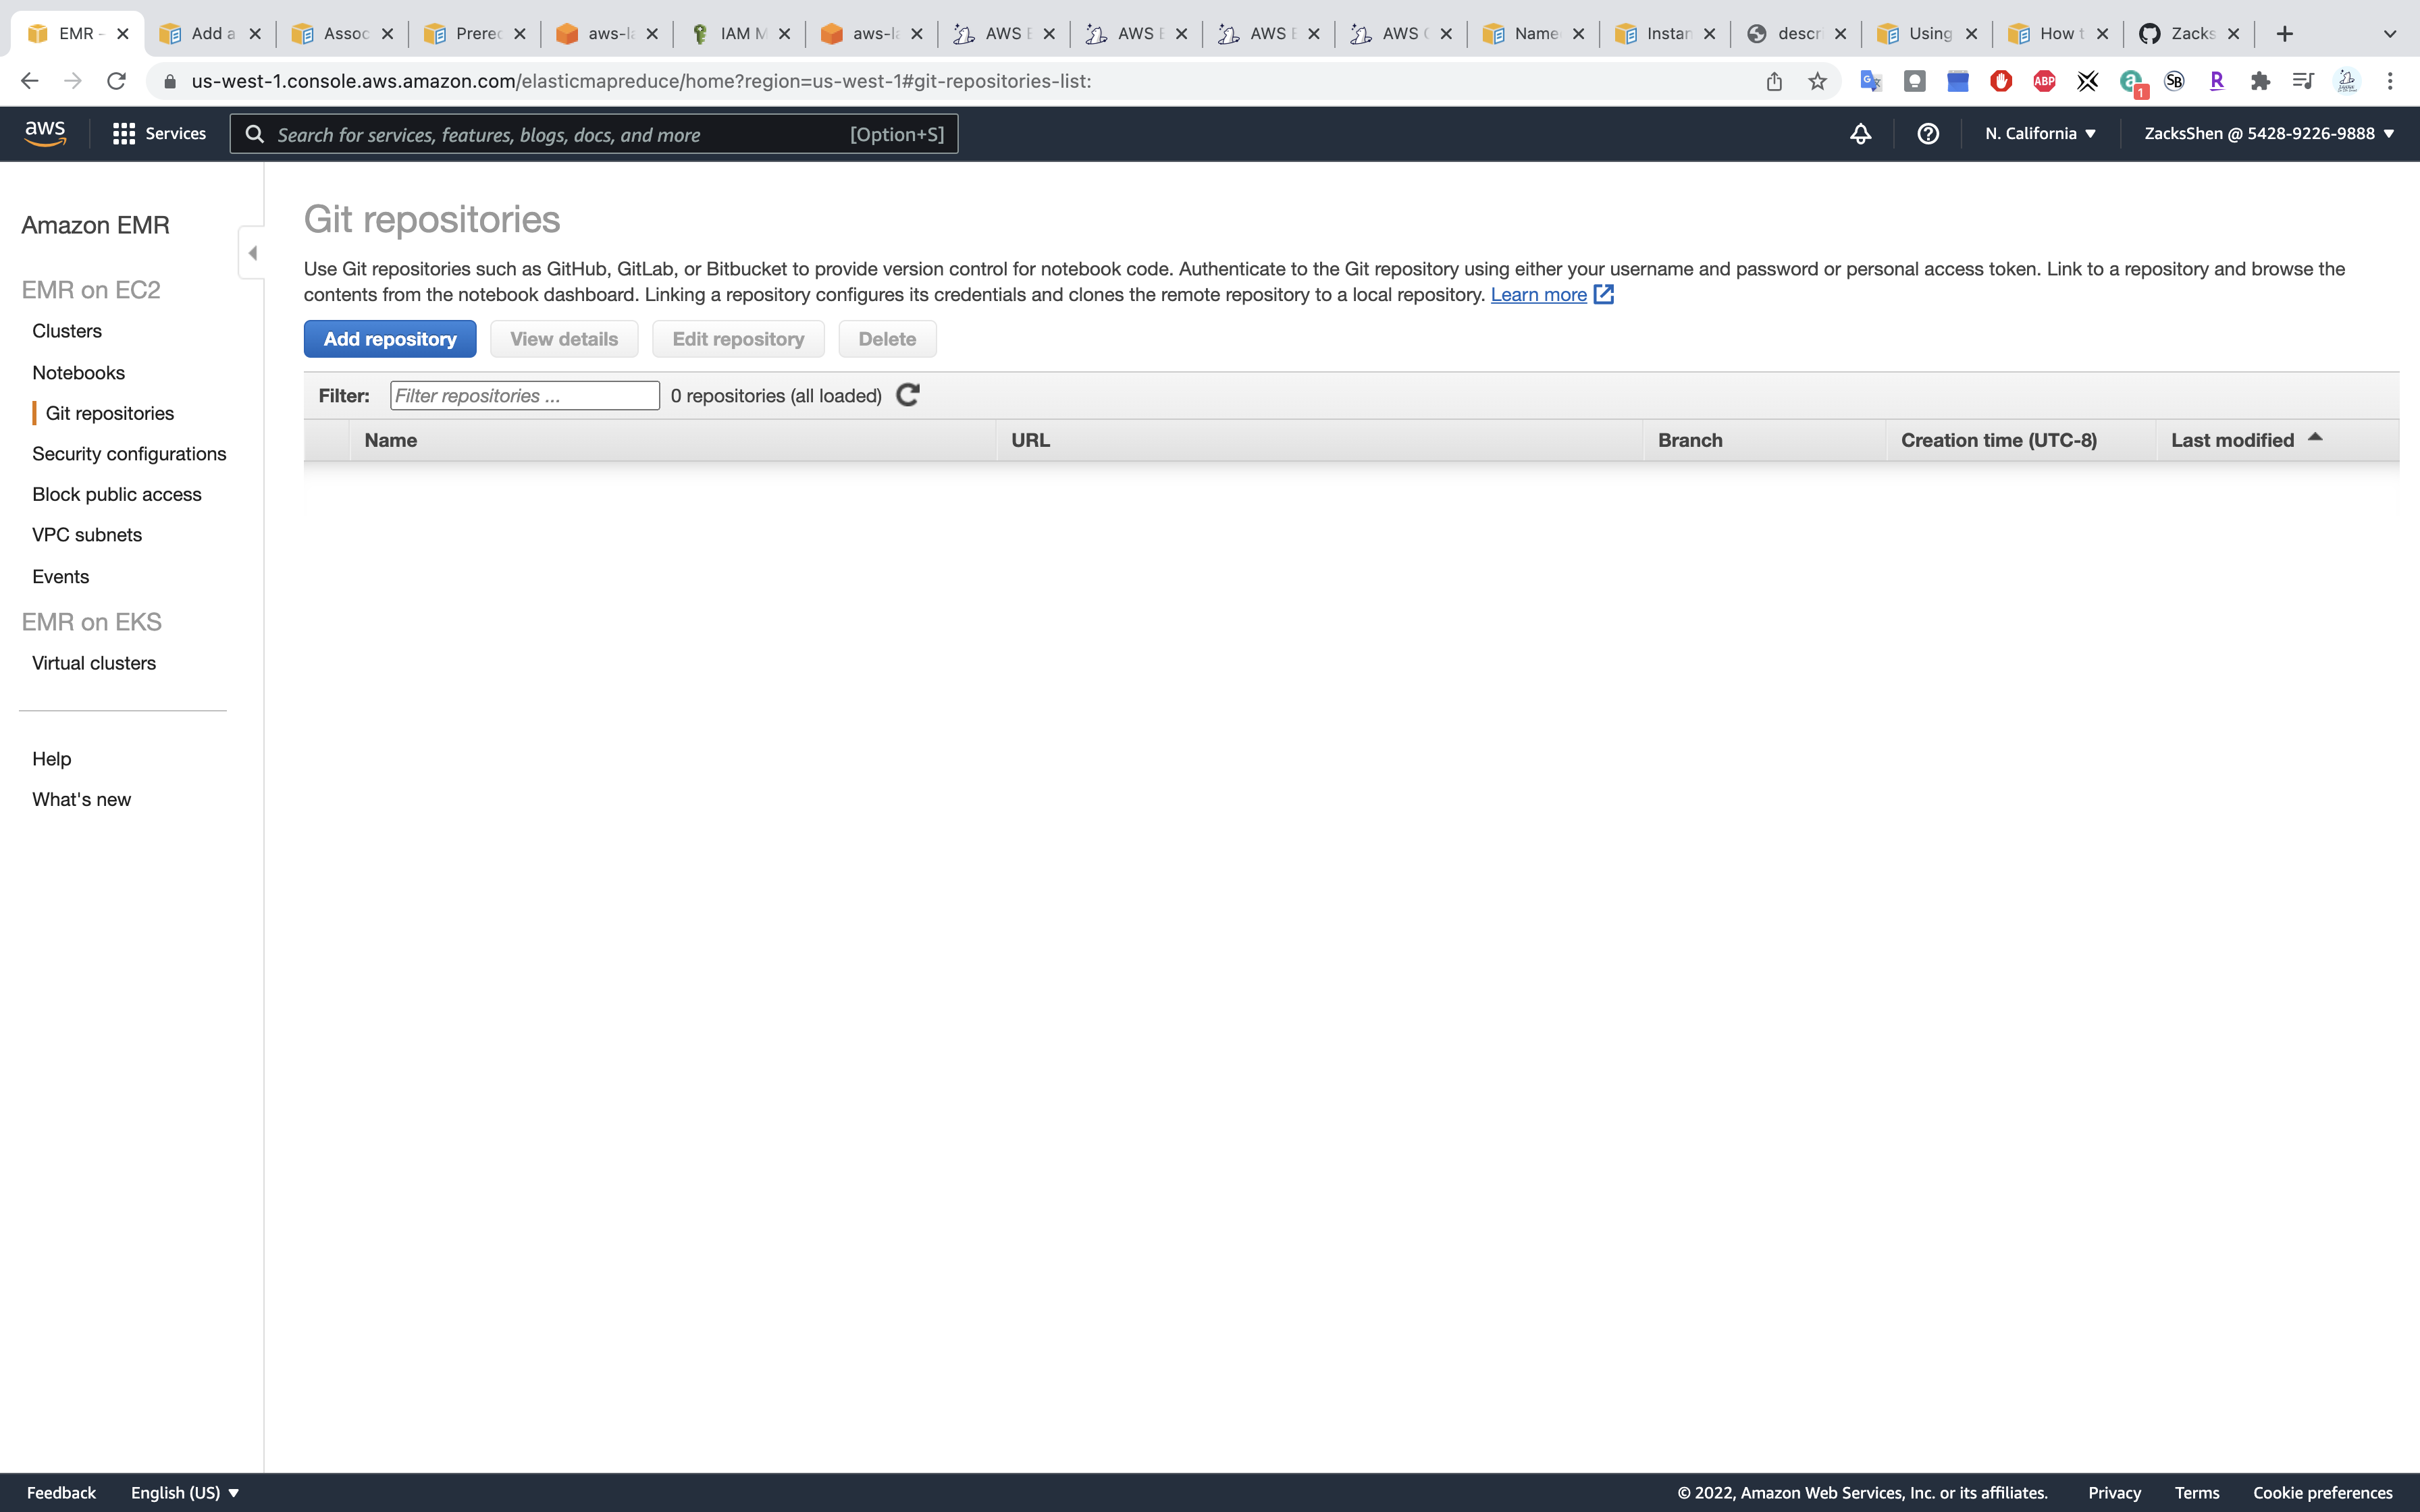
Click on Add repository
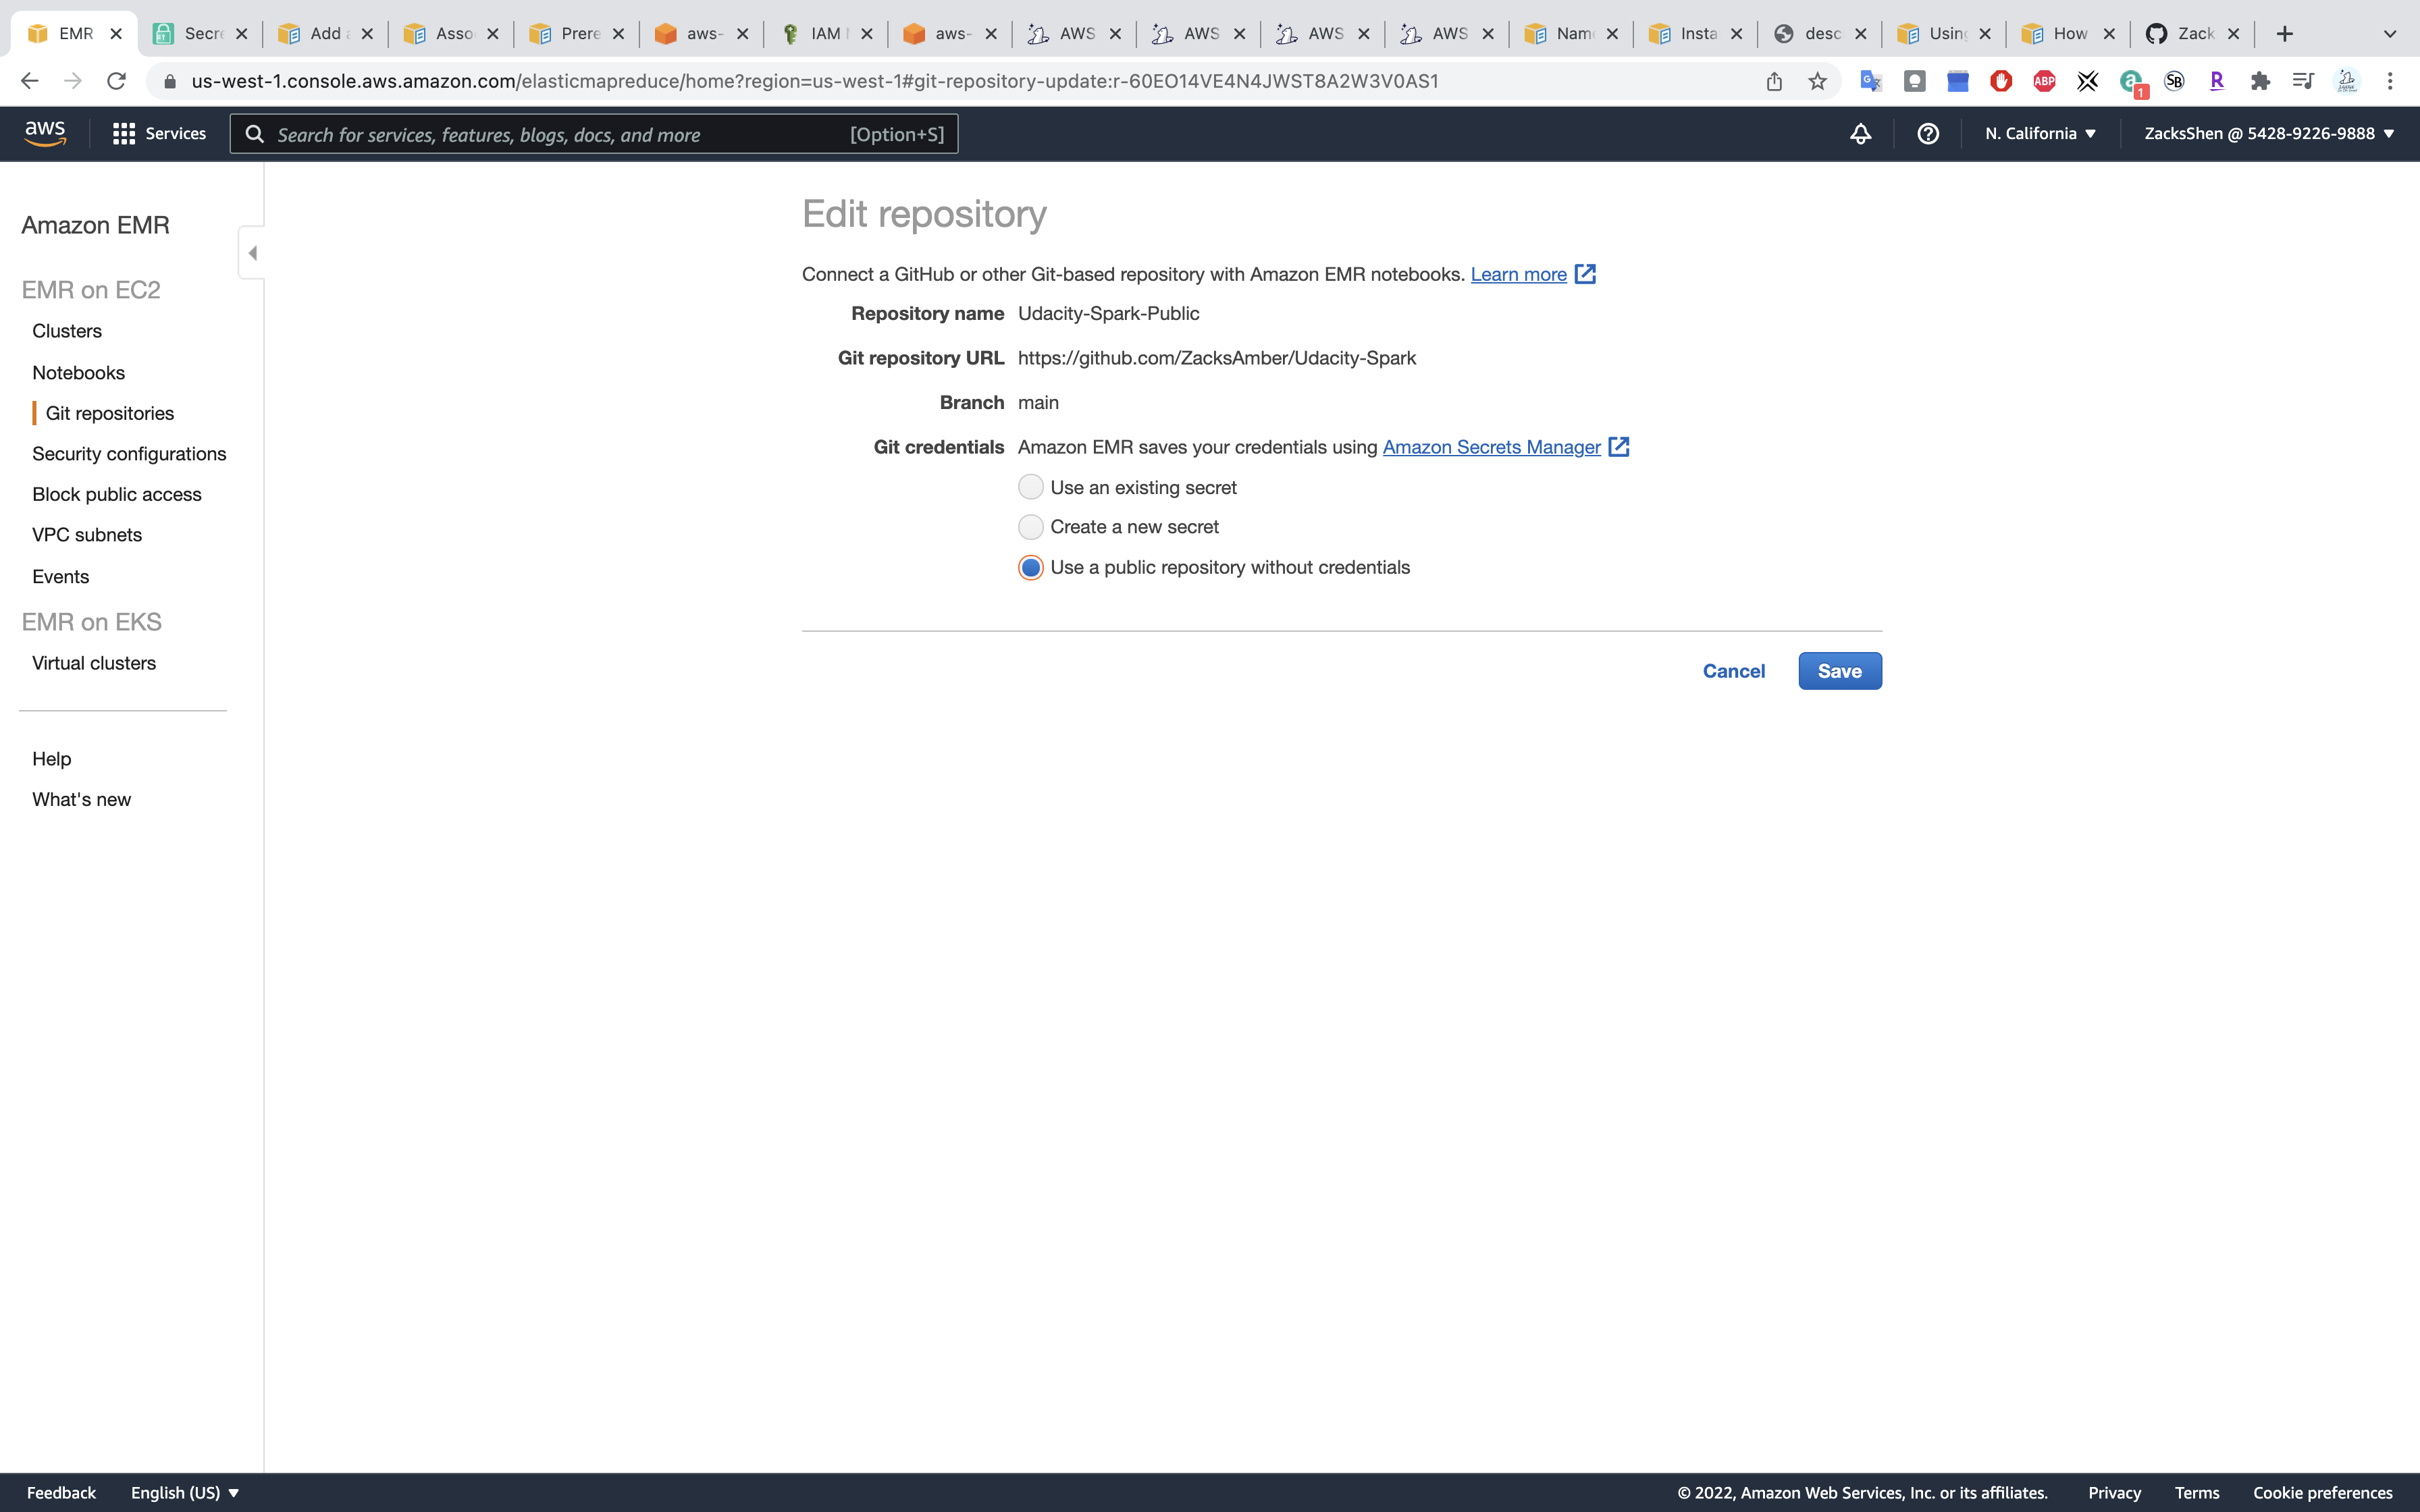
- Repository name:
Udacity-Spark-Public - Git repository URL:
https://github.com/ZacksAmber/Udacity-Sparkor your repository - Git credentials:
Use a public repository without credentialsfor public access or other two options for private access.
Link the notebook to GitHub
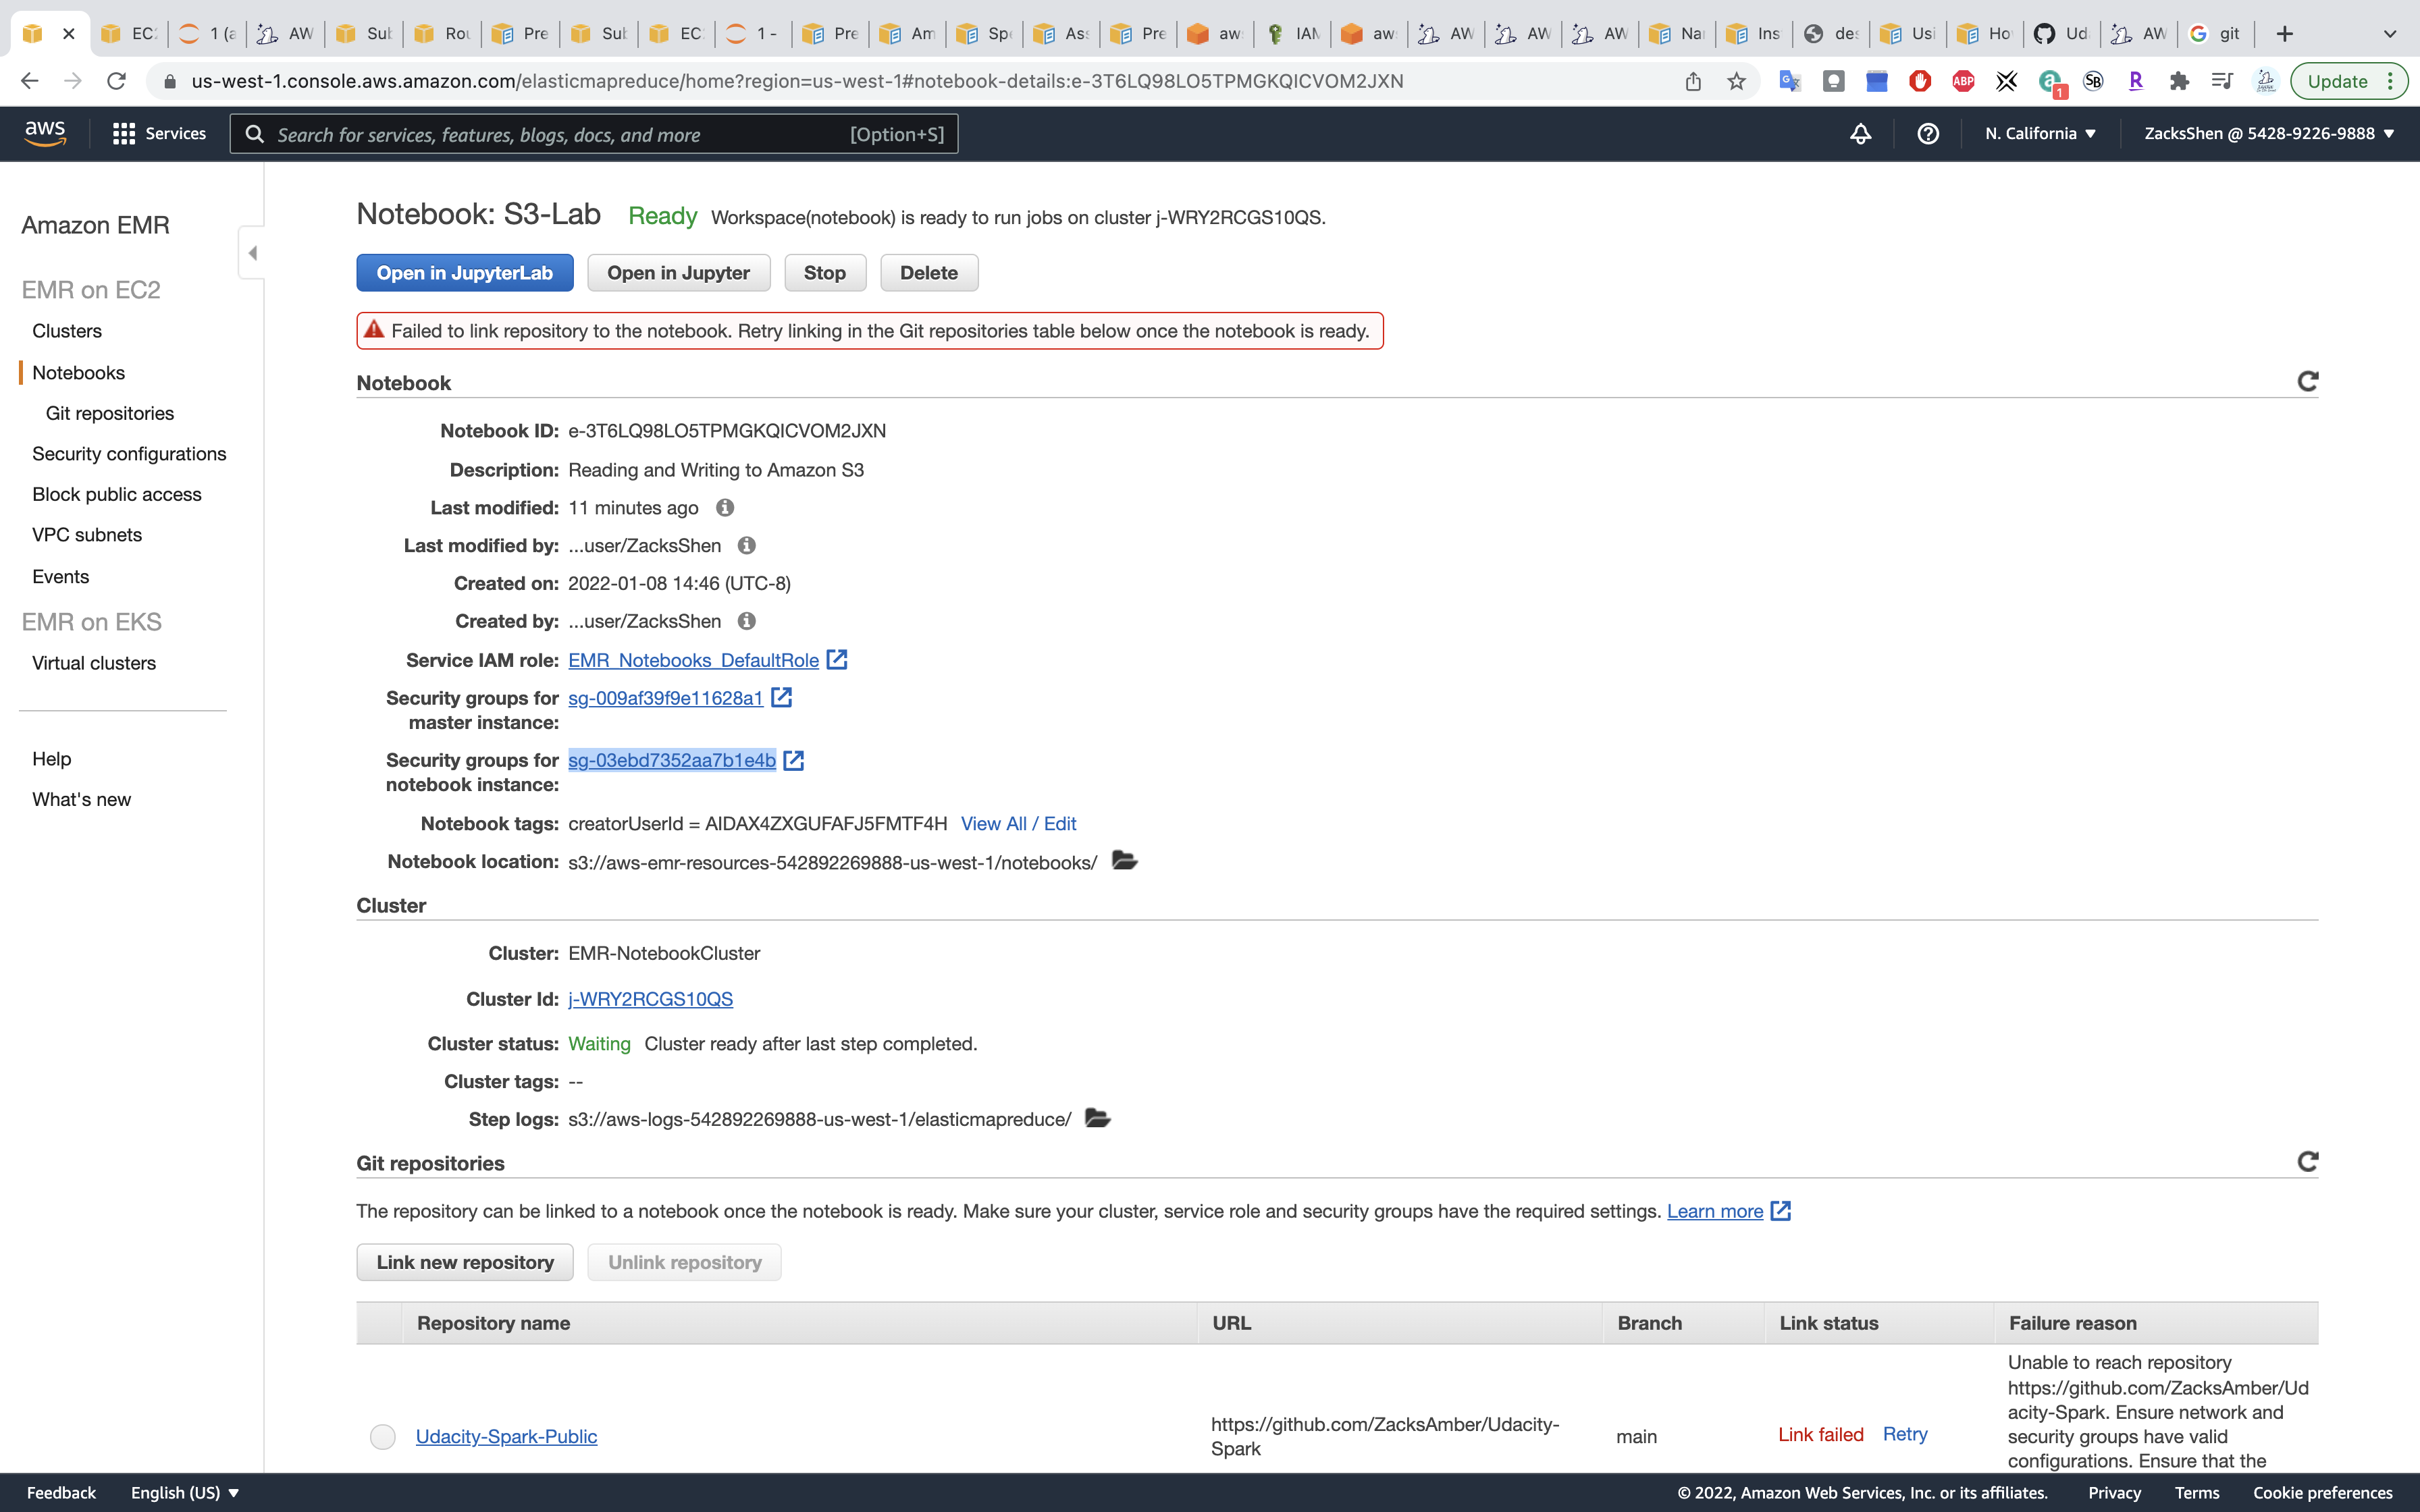
Click on Security groups for notebook instance:
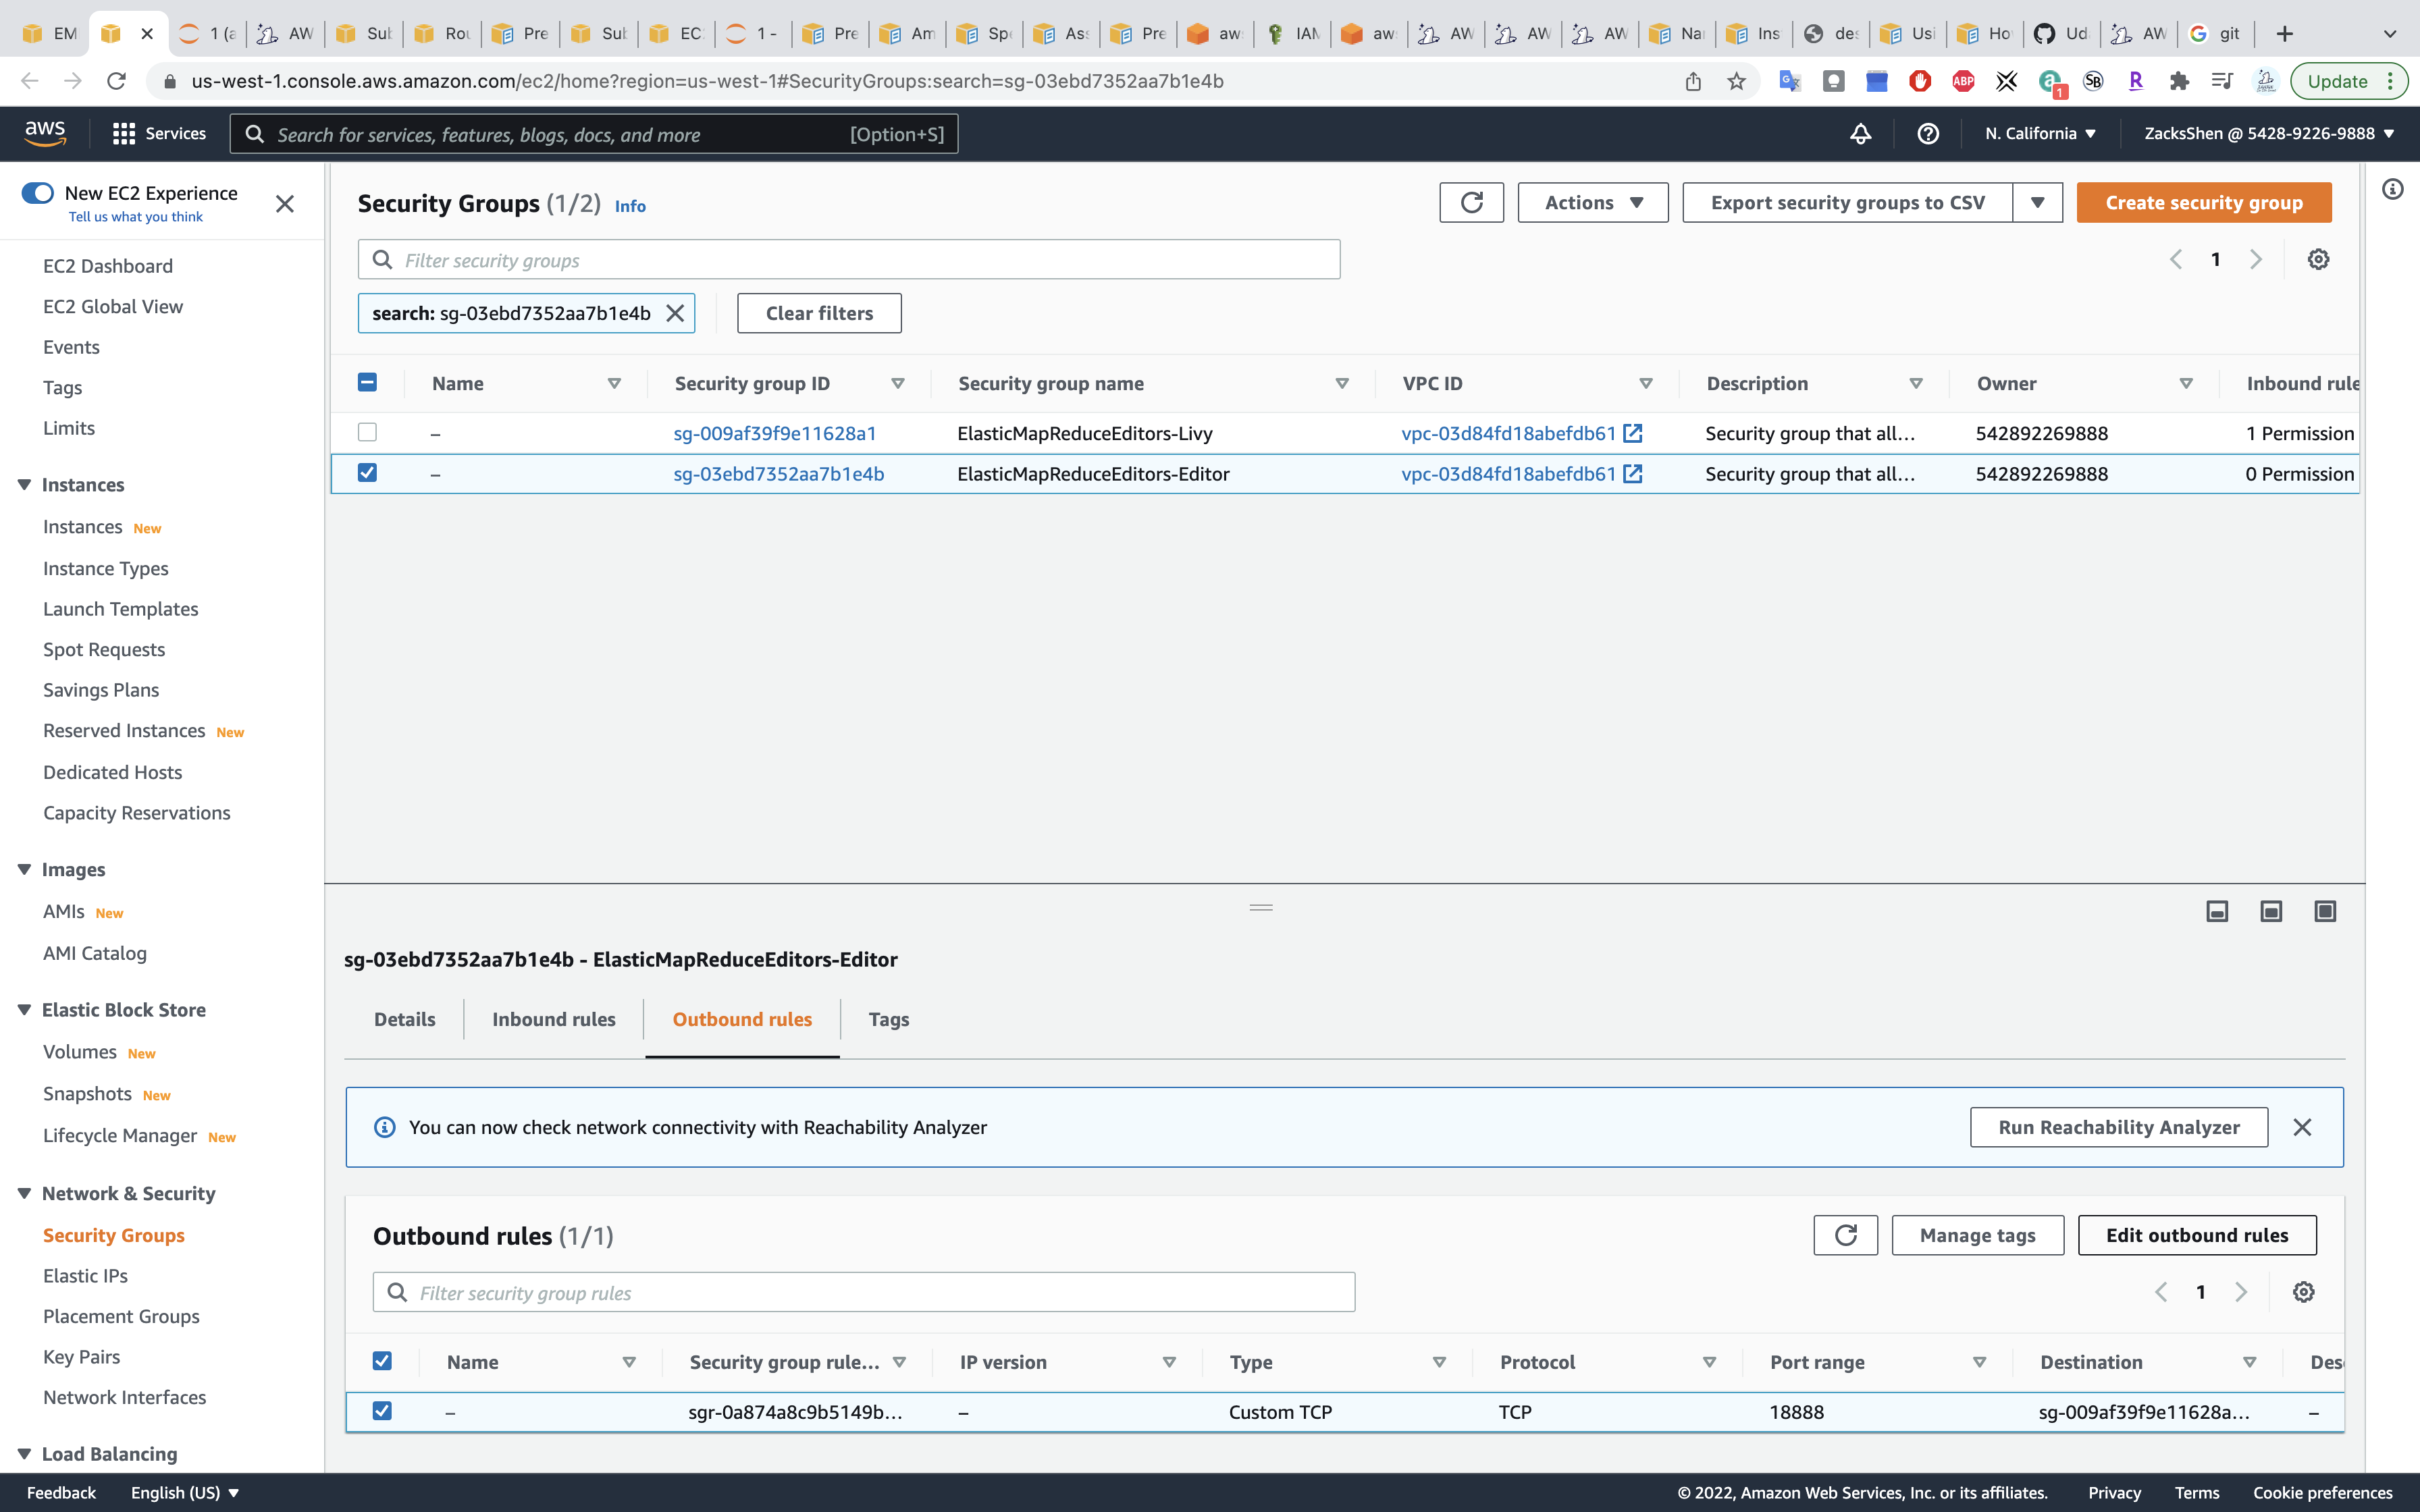
Click on Edit outbound rules
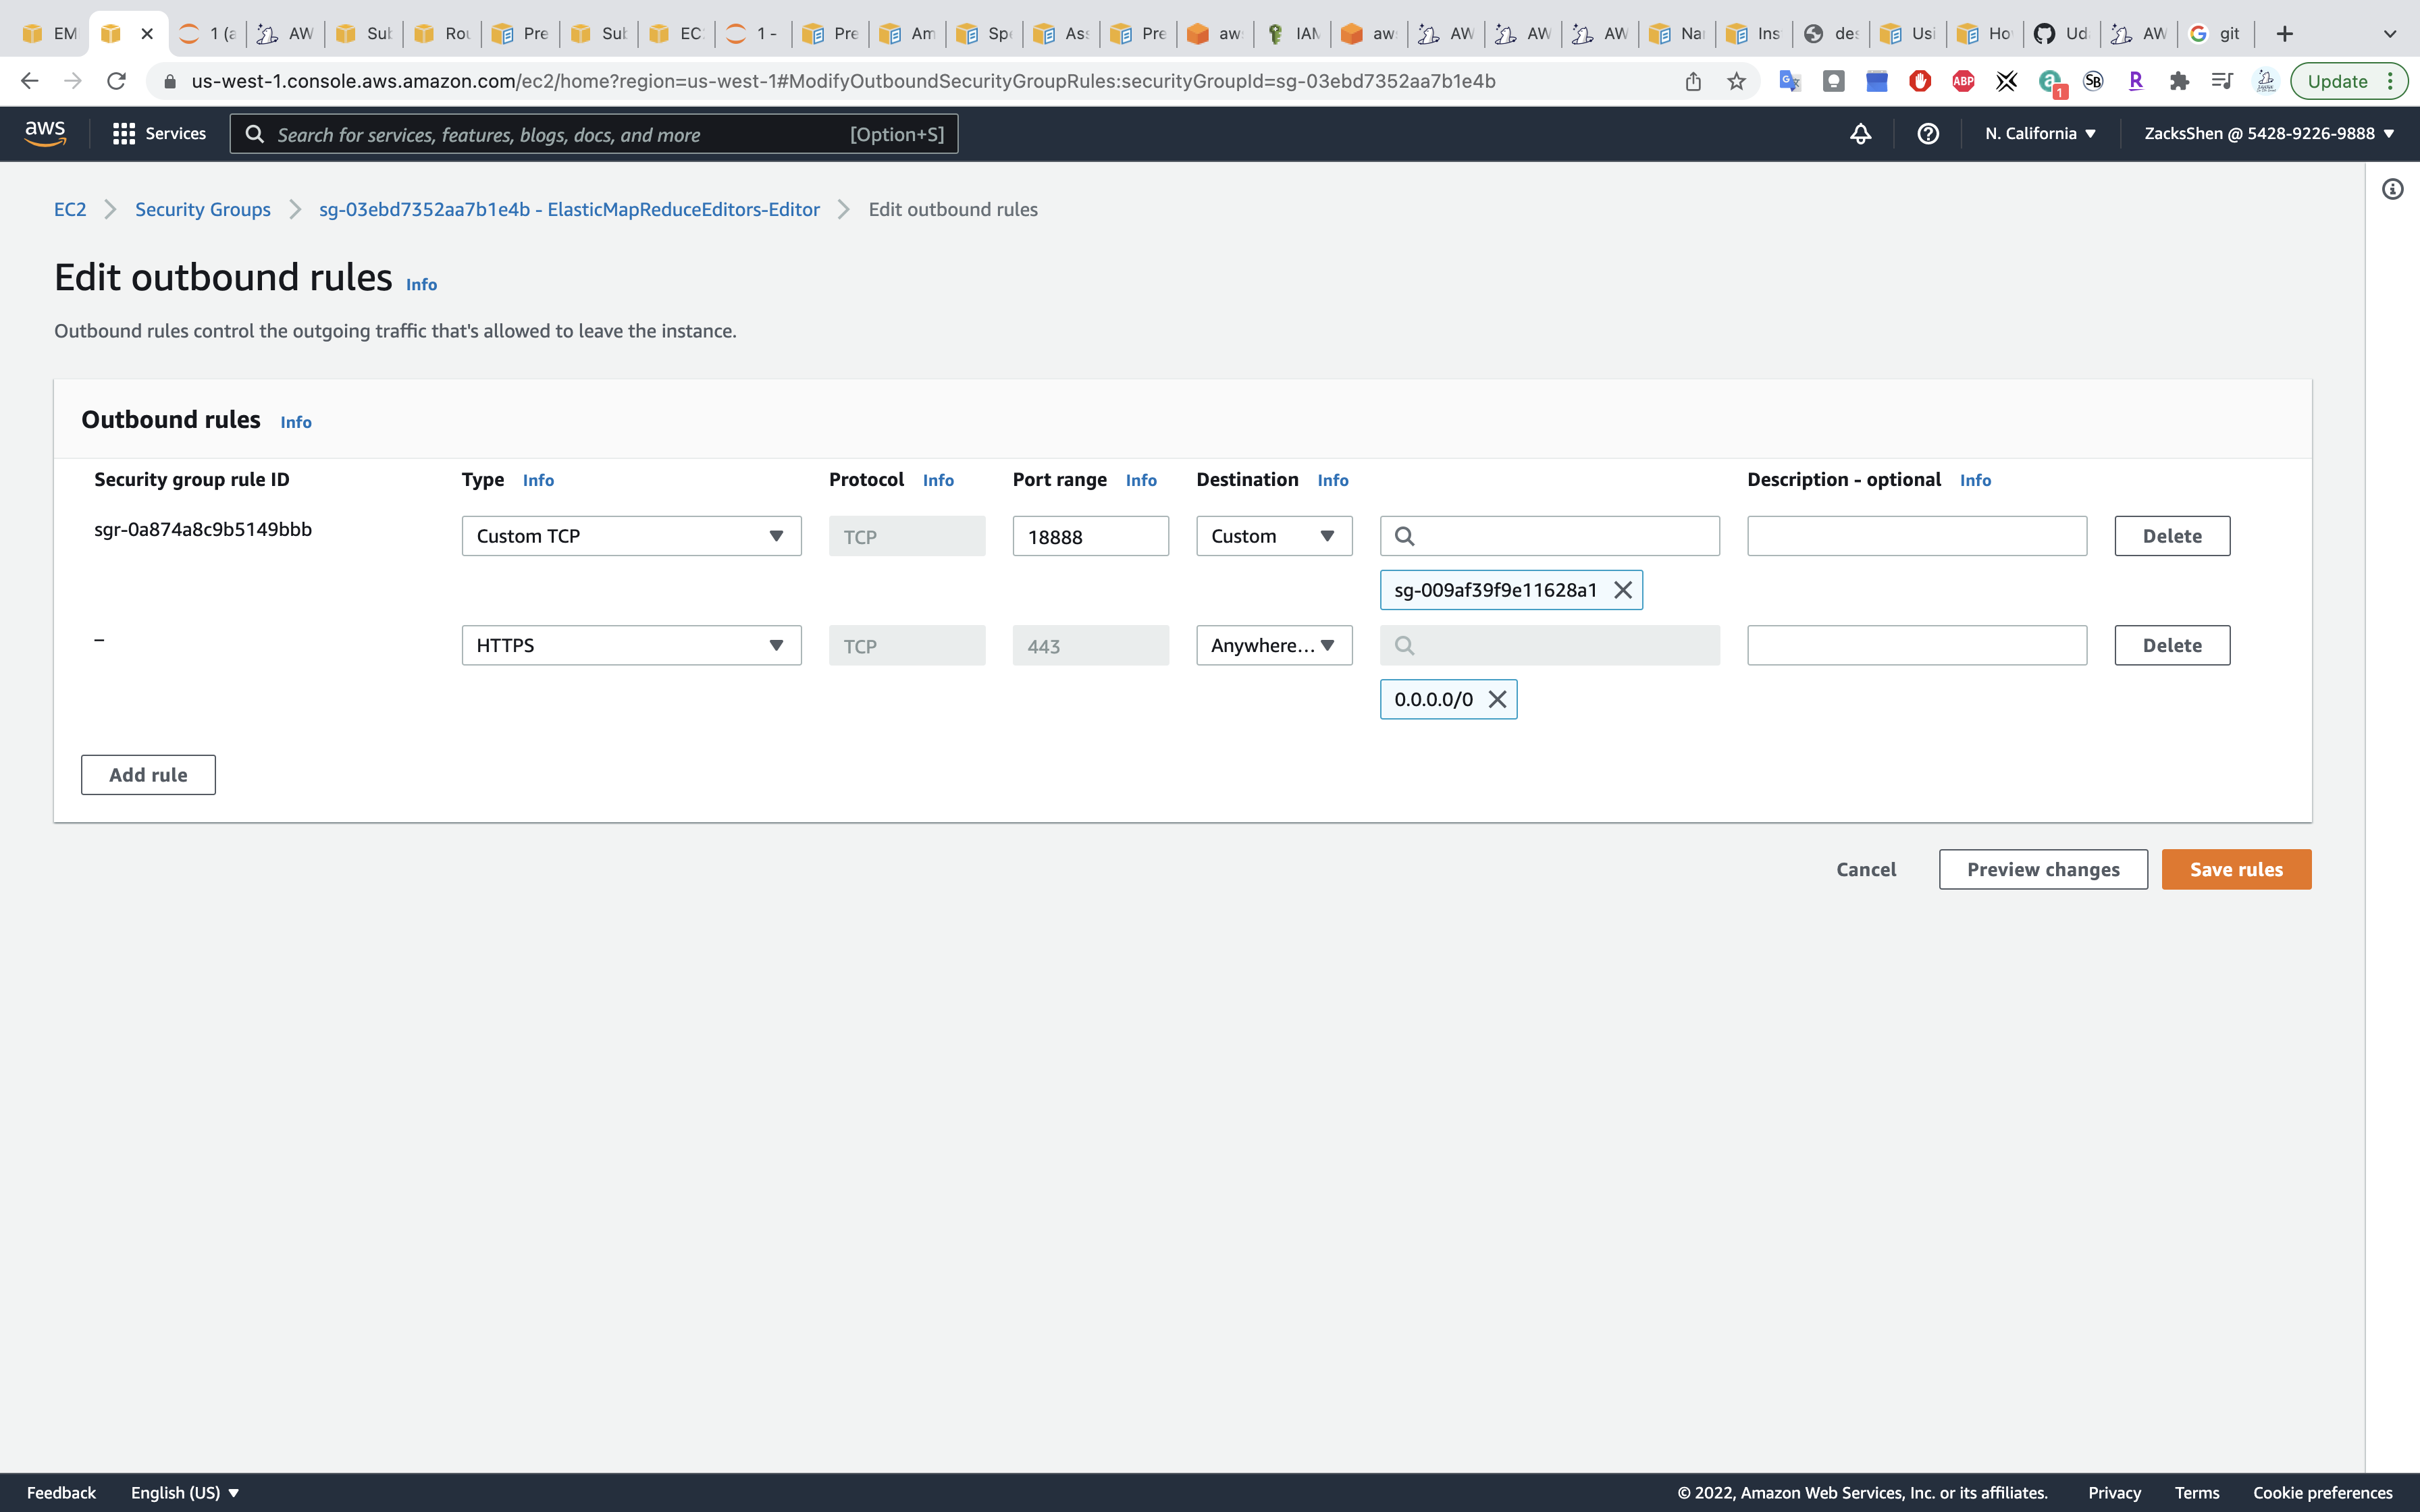
Add Type HTTPS with Destination Anywhere.
Click Save rules
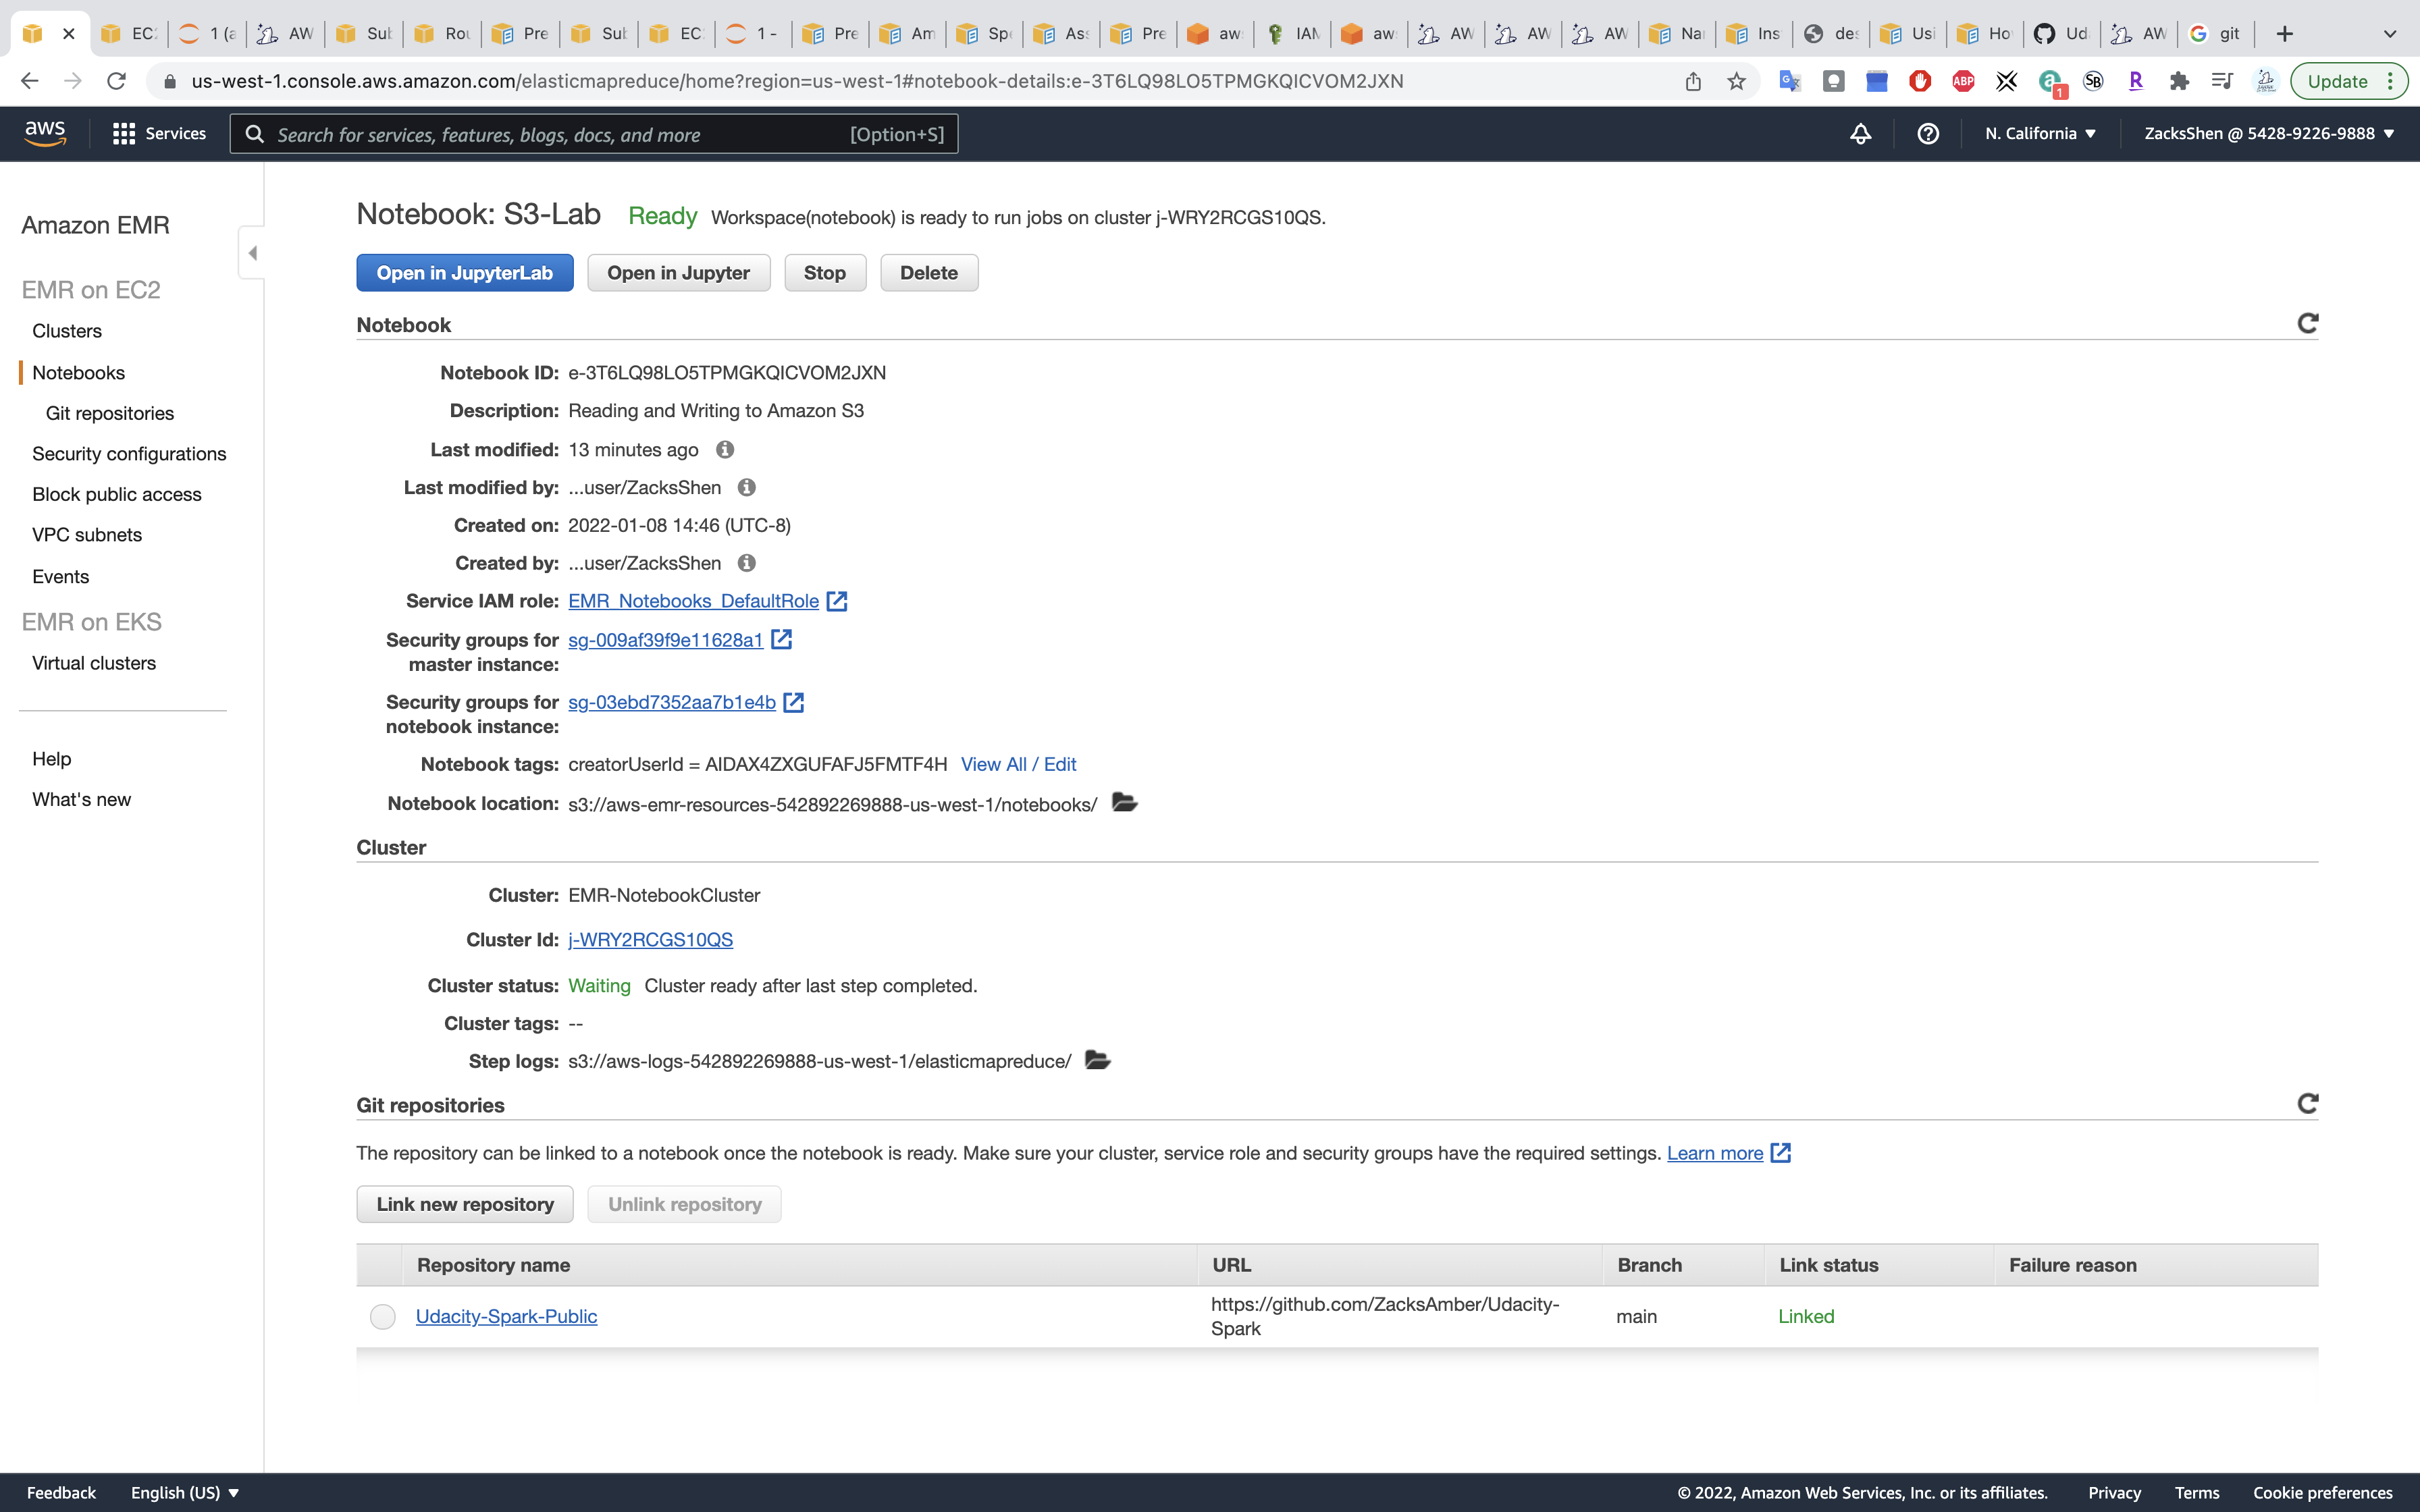
Click on Link new repository.

Choose your repo name then click on Link repository
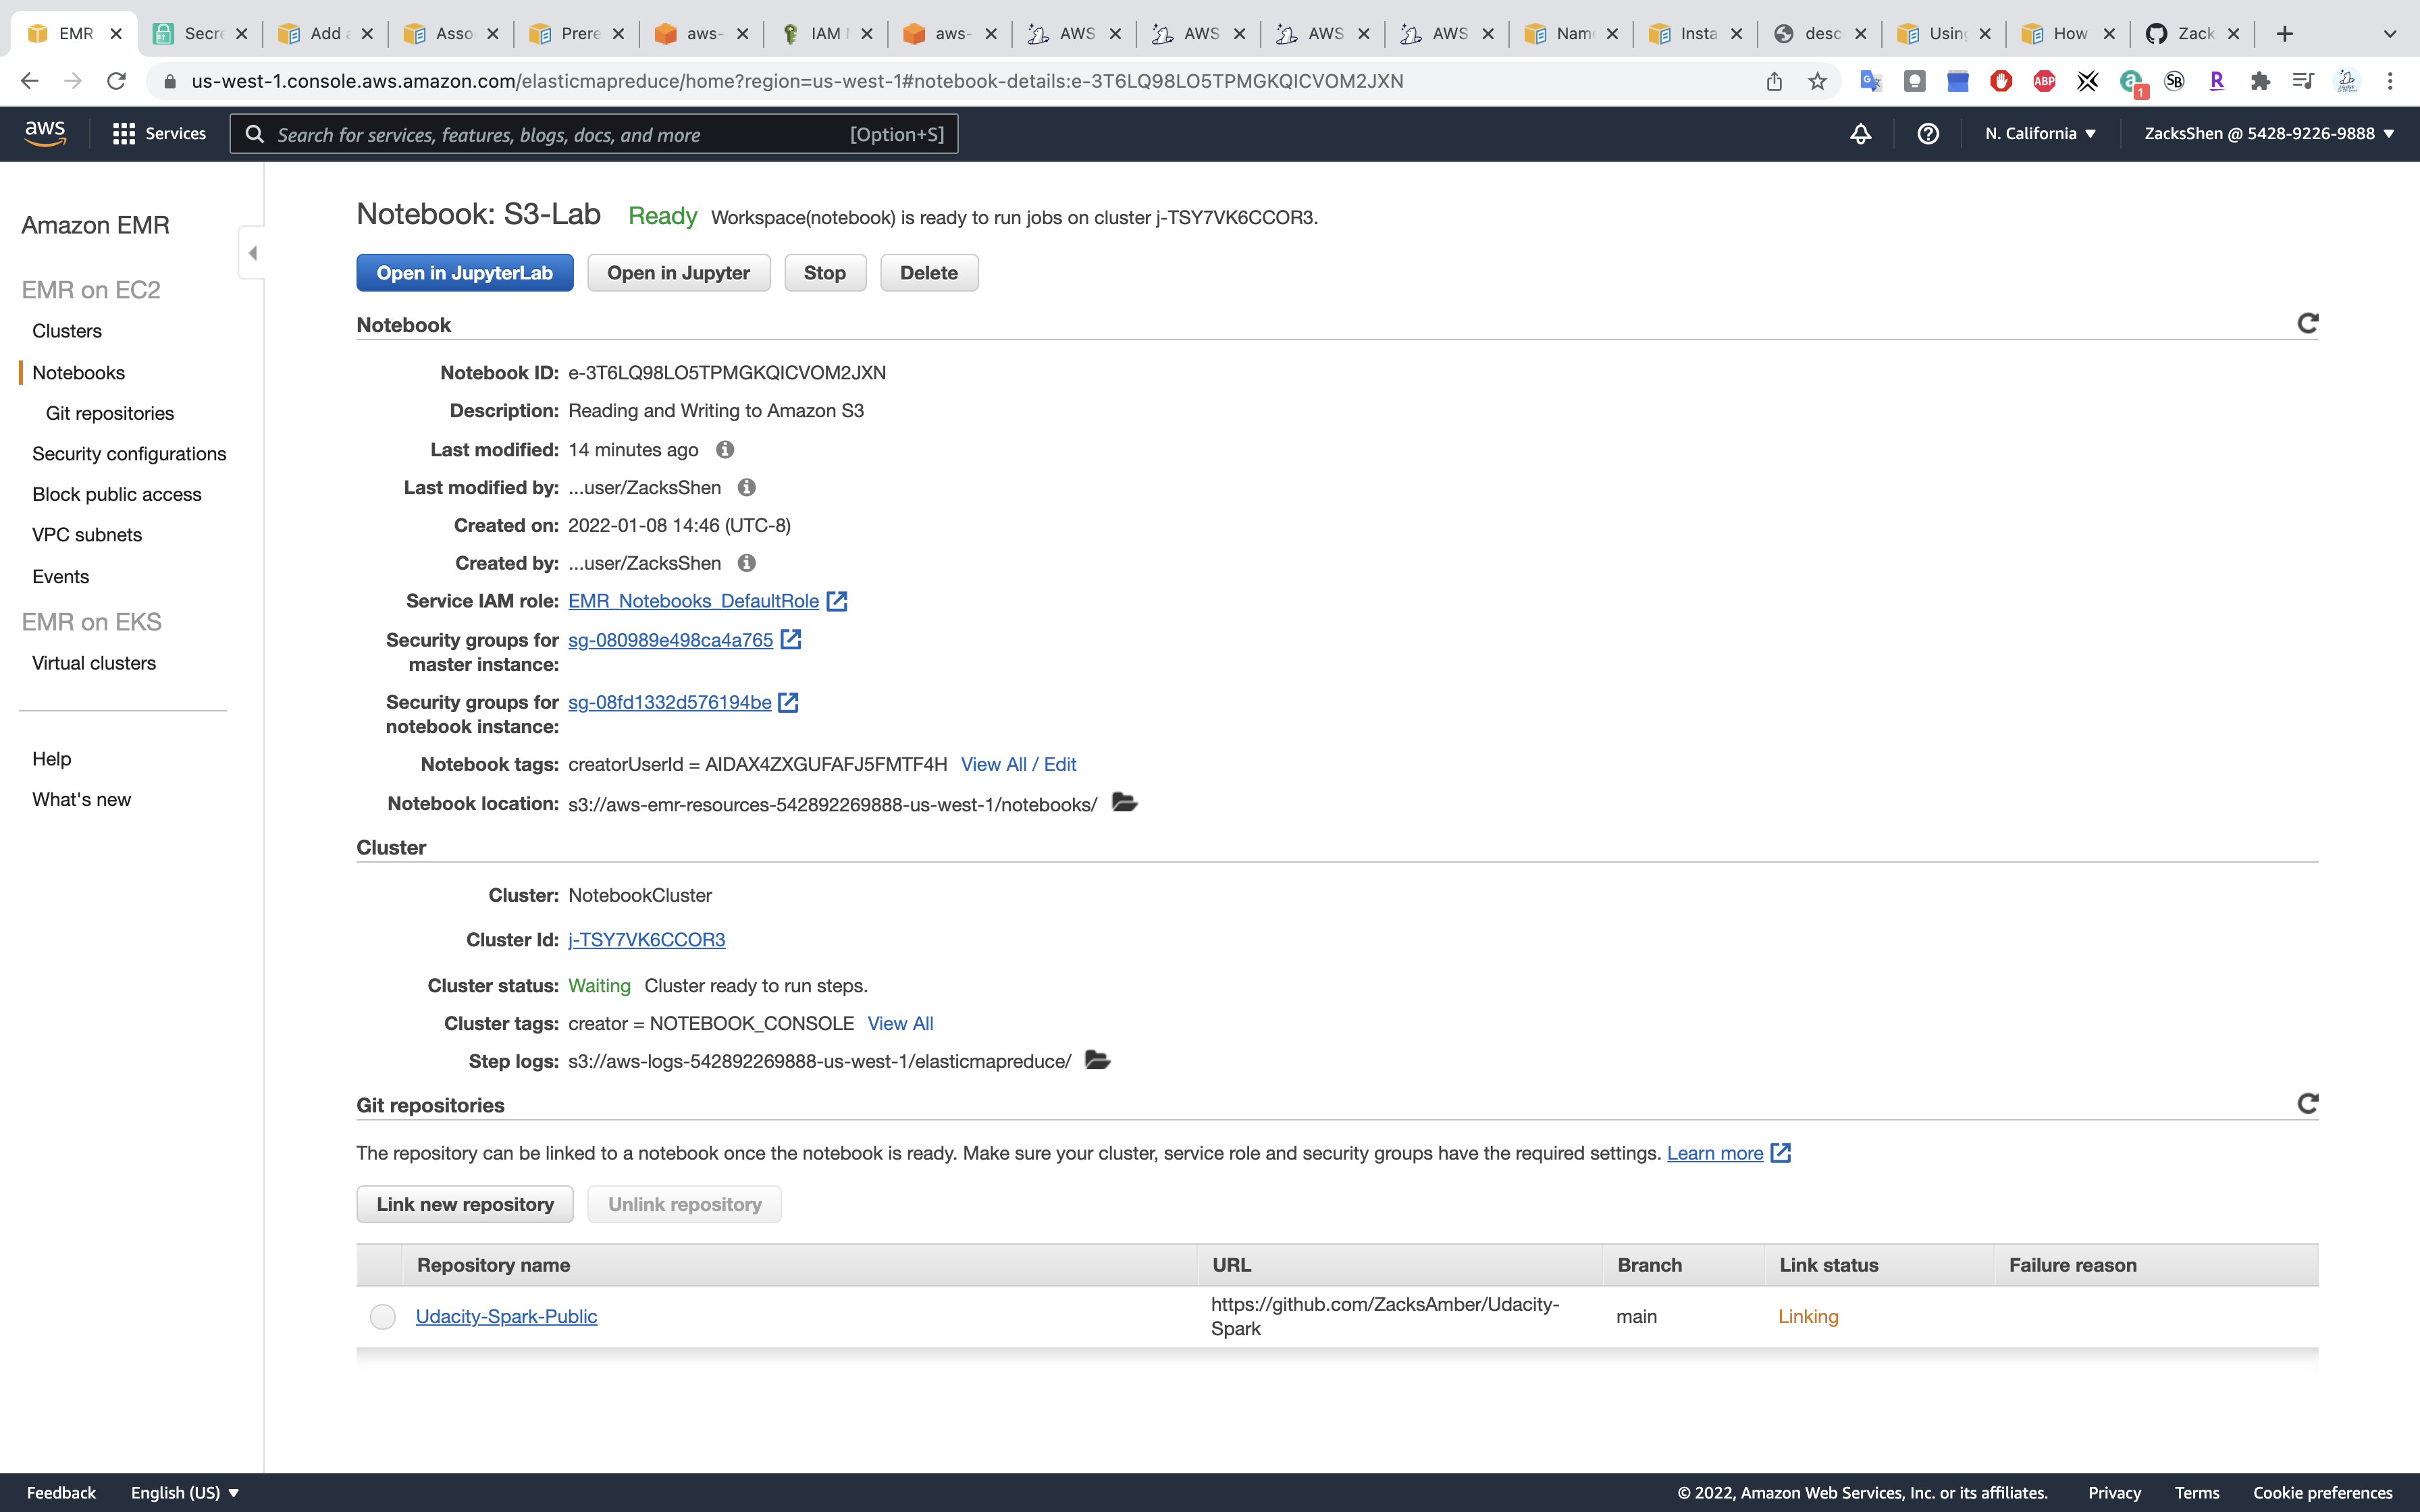
Refresh the page.
Wait until the Link status change from Linking to Linked
Click Open in JupyterLab
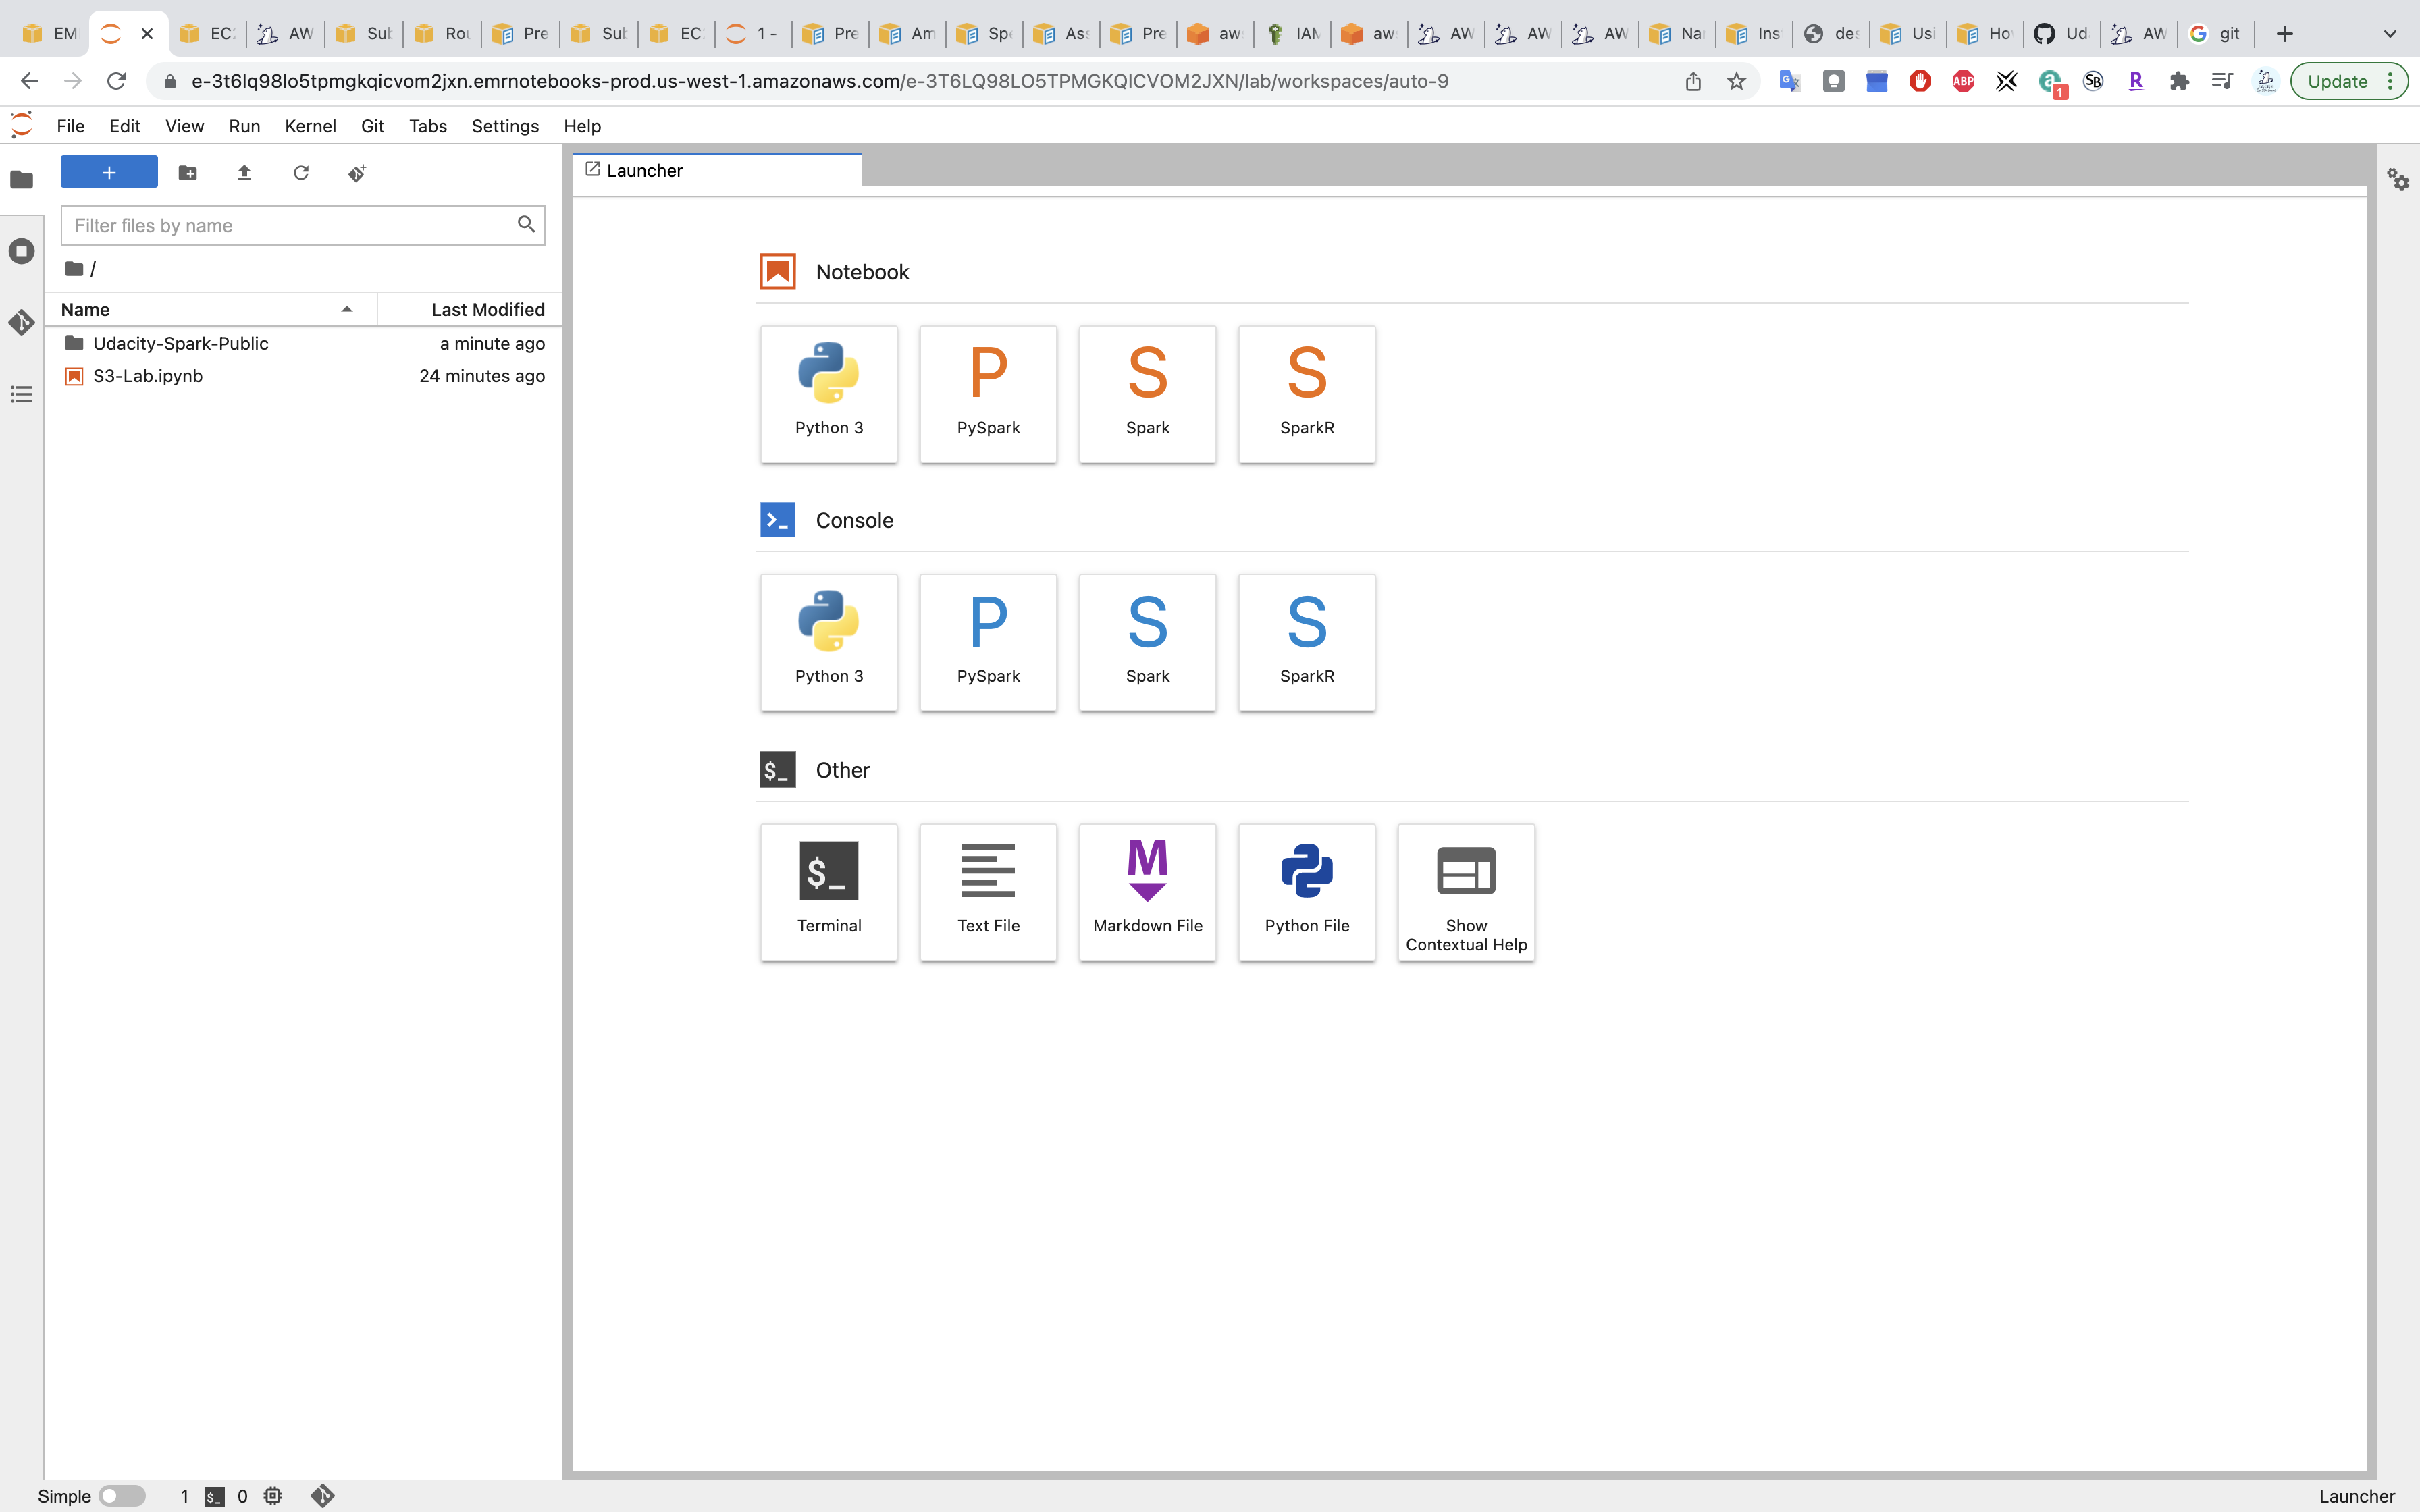
You can see the GitHub Repository on the left.
Jupyter Notebook
Run 1st job
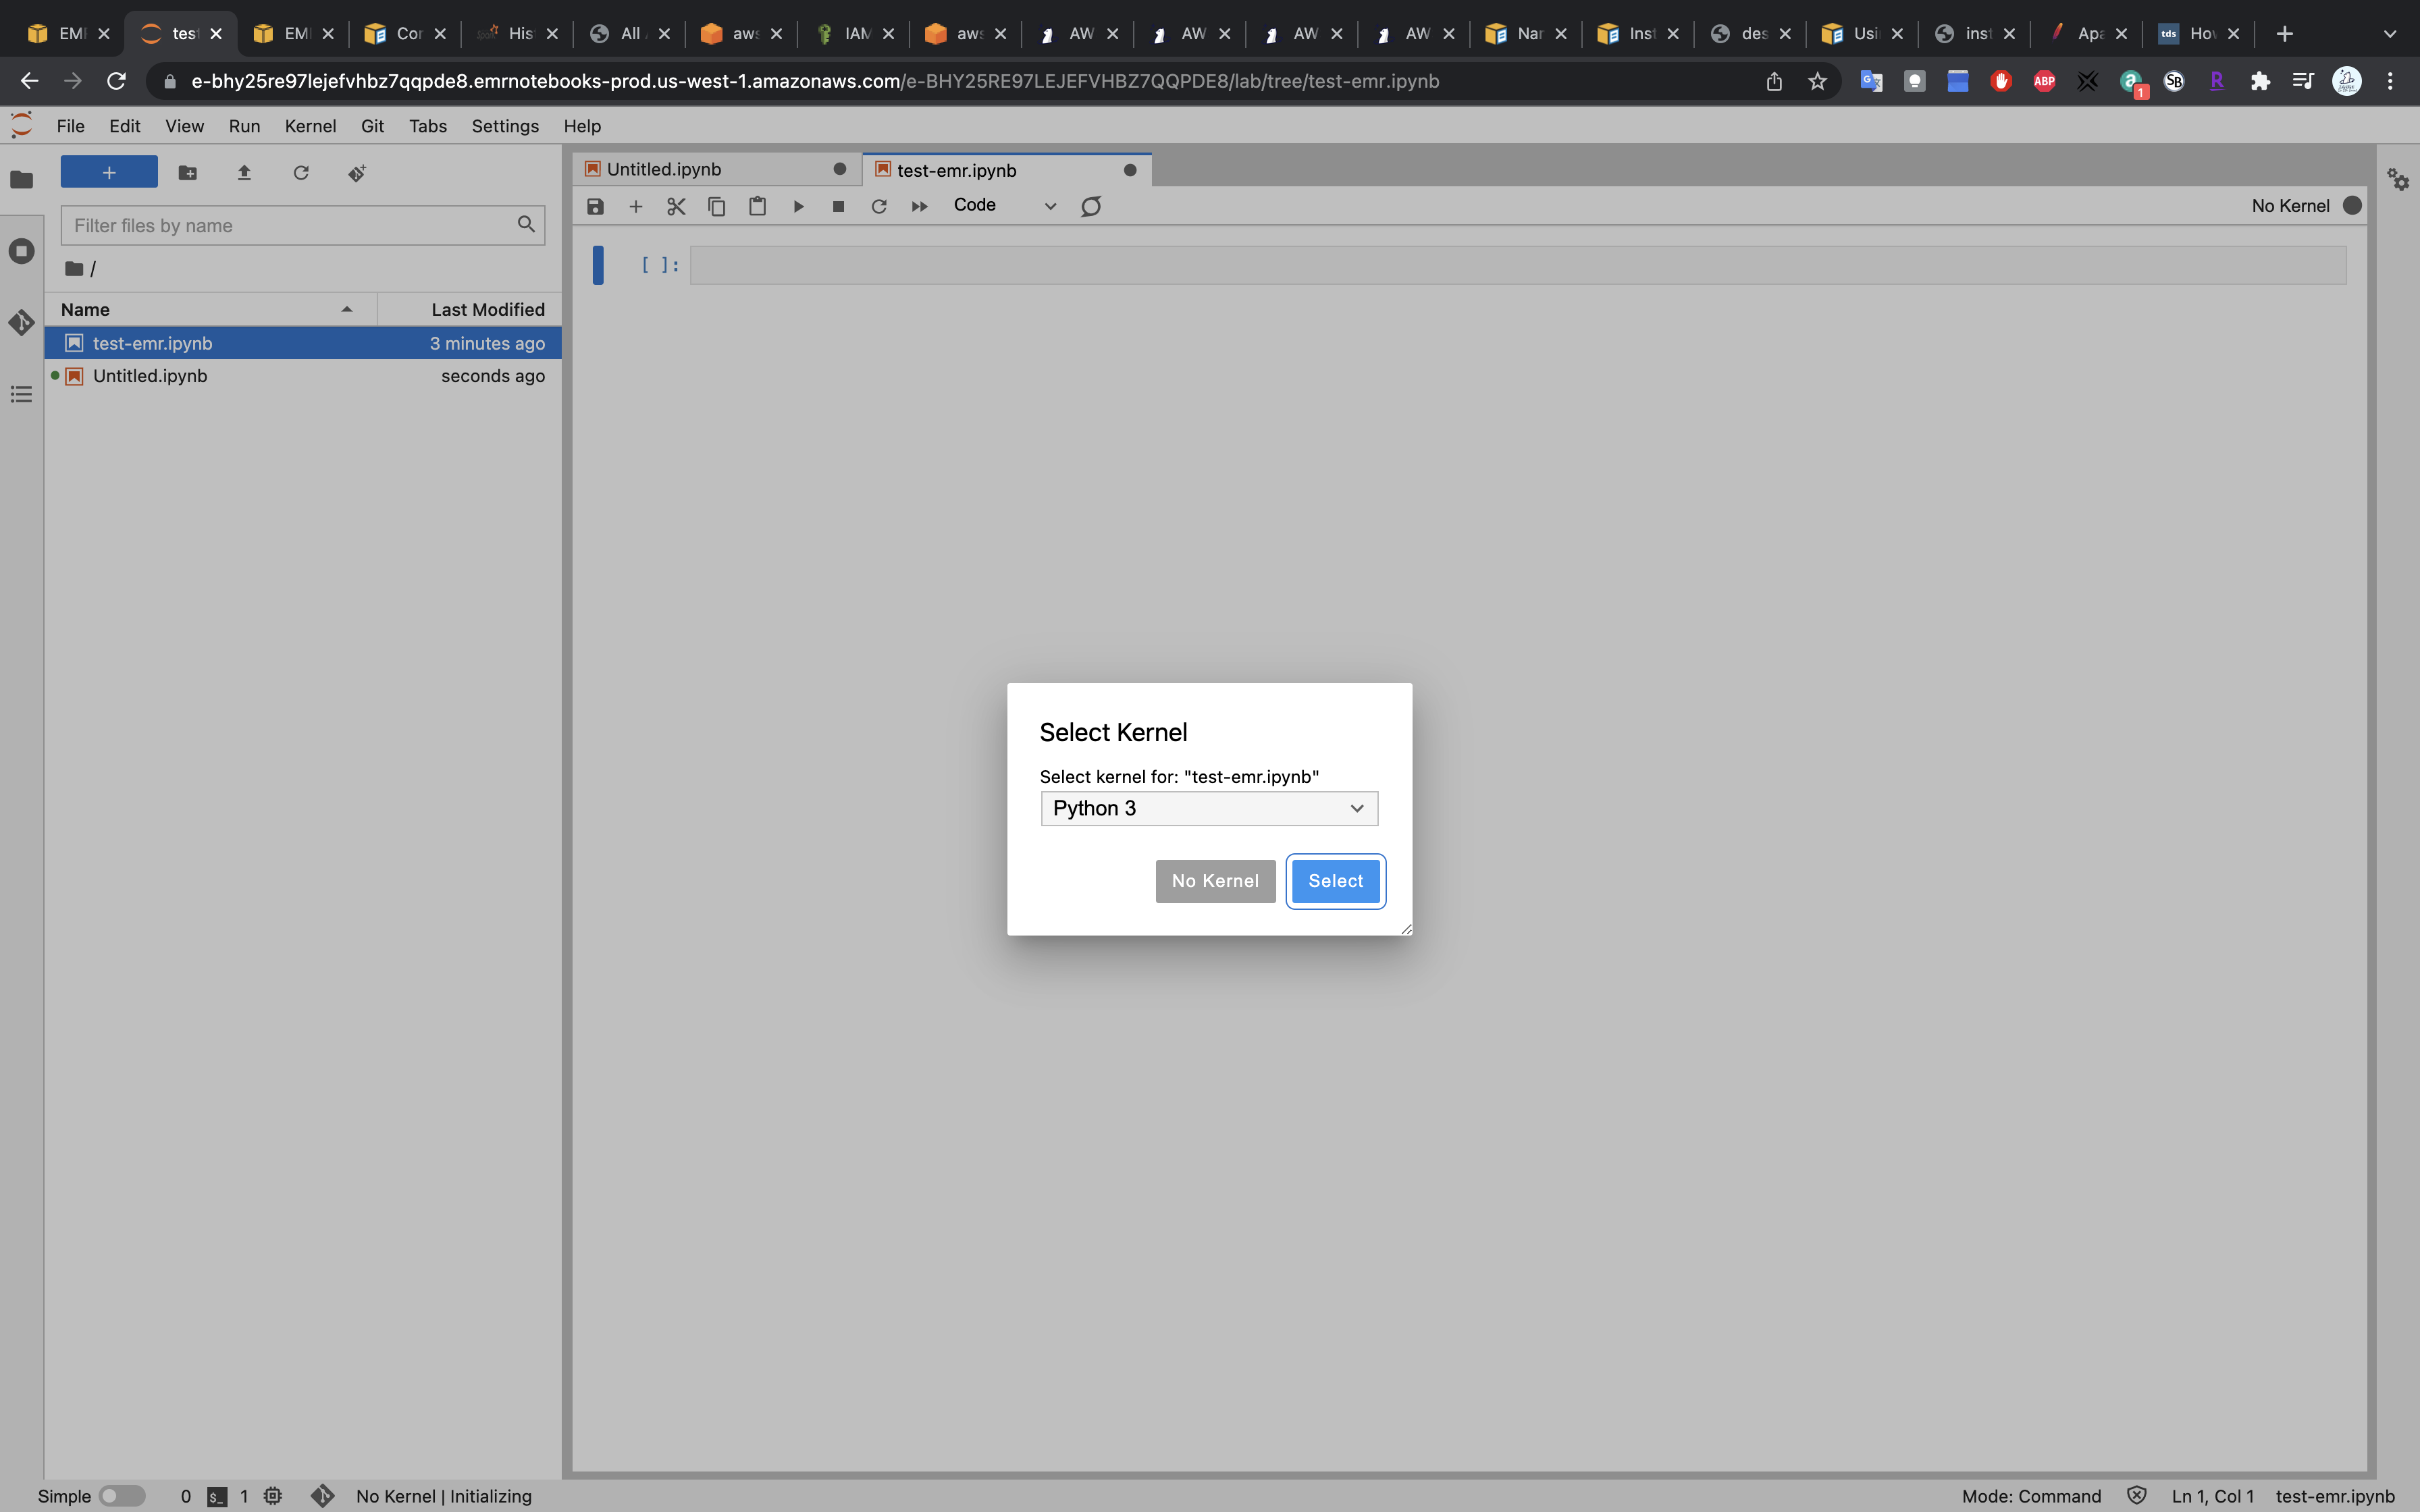
Under Udacity-Spark/AWS/demo-code/, click on test-emr.ipynb
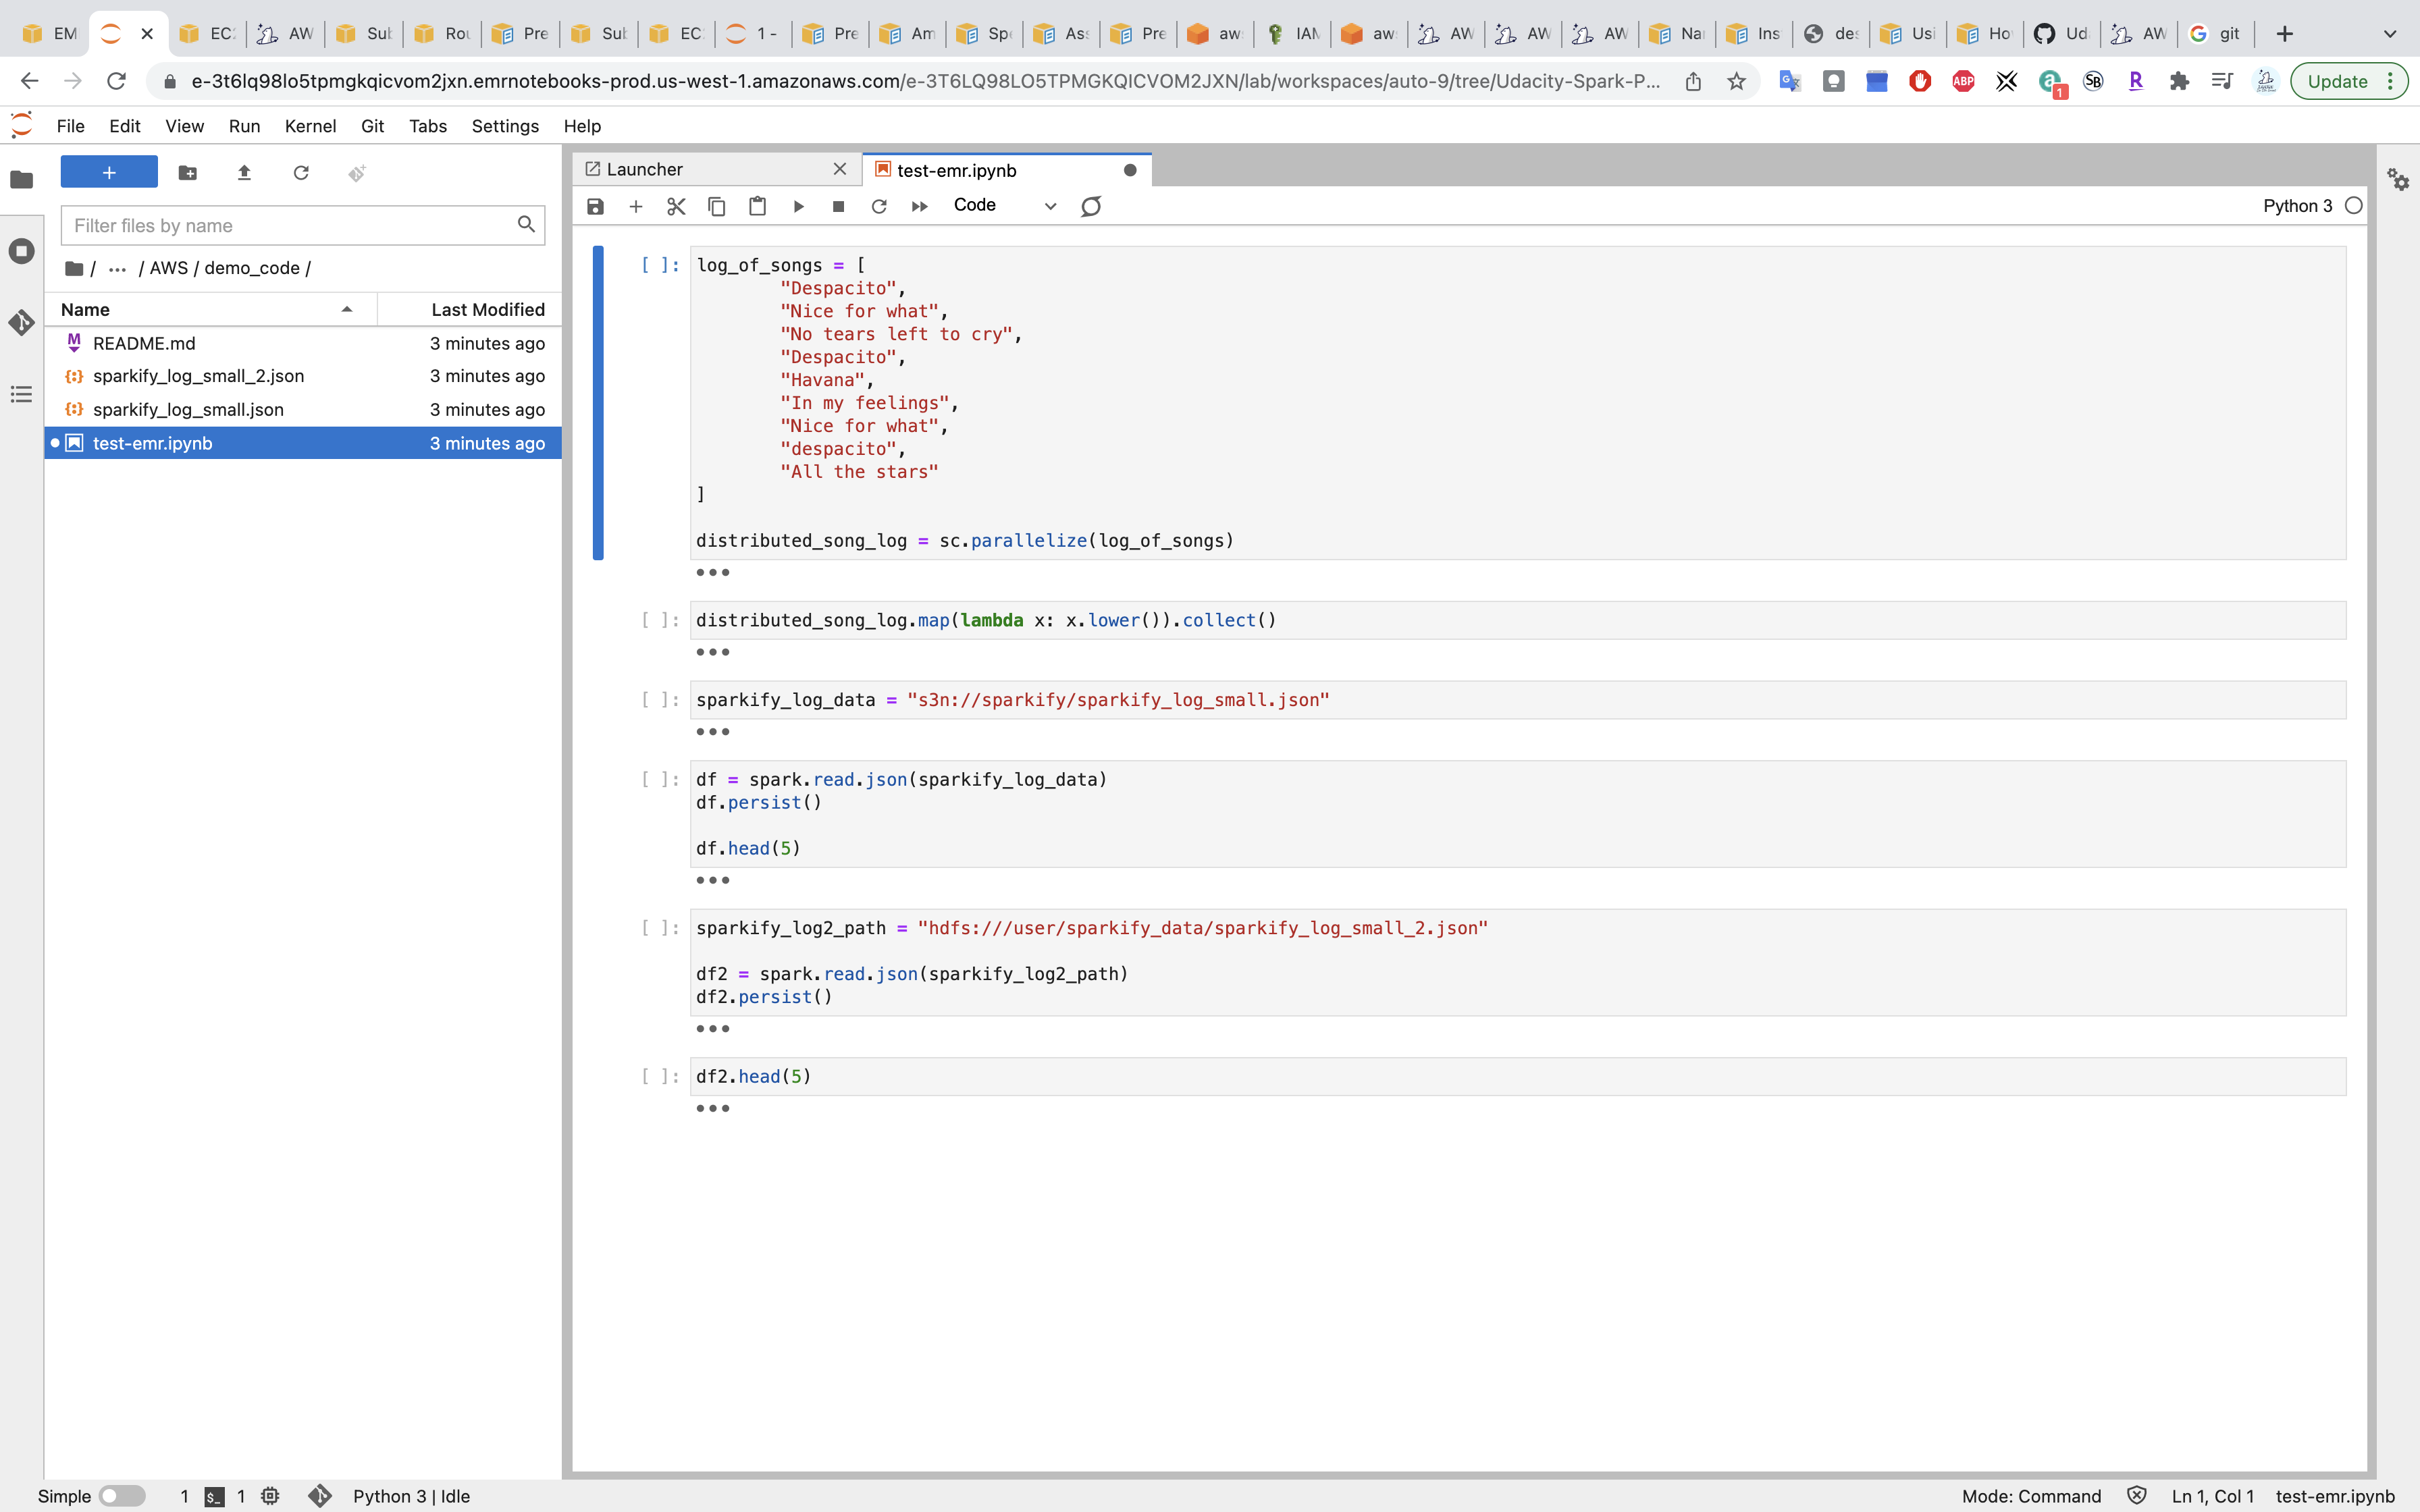
Select kernel PySpark
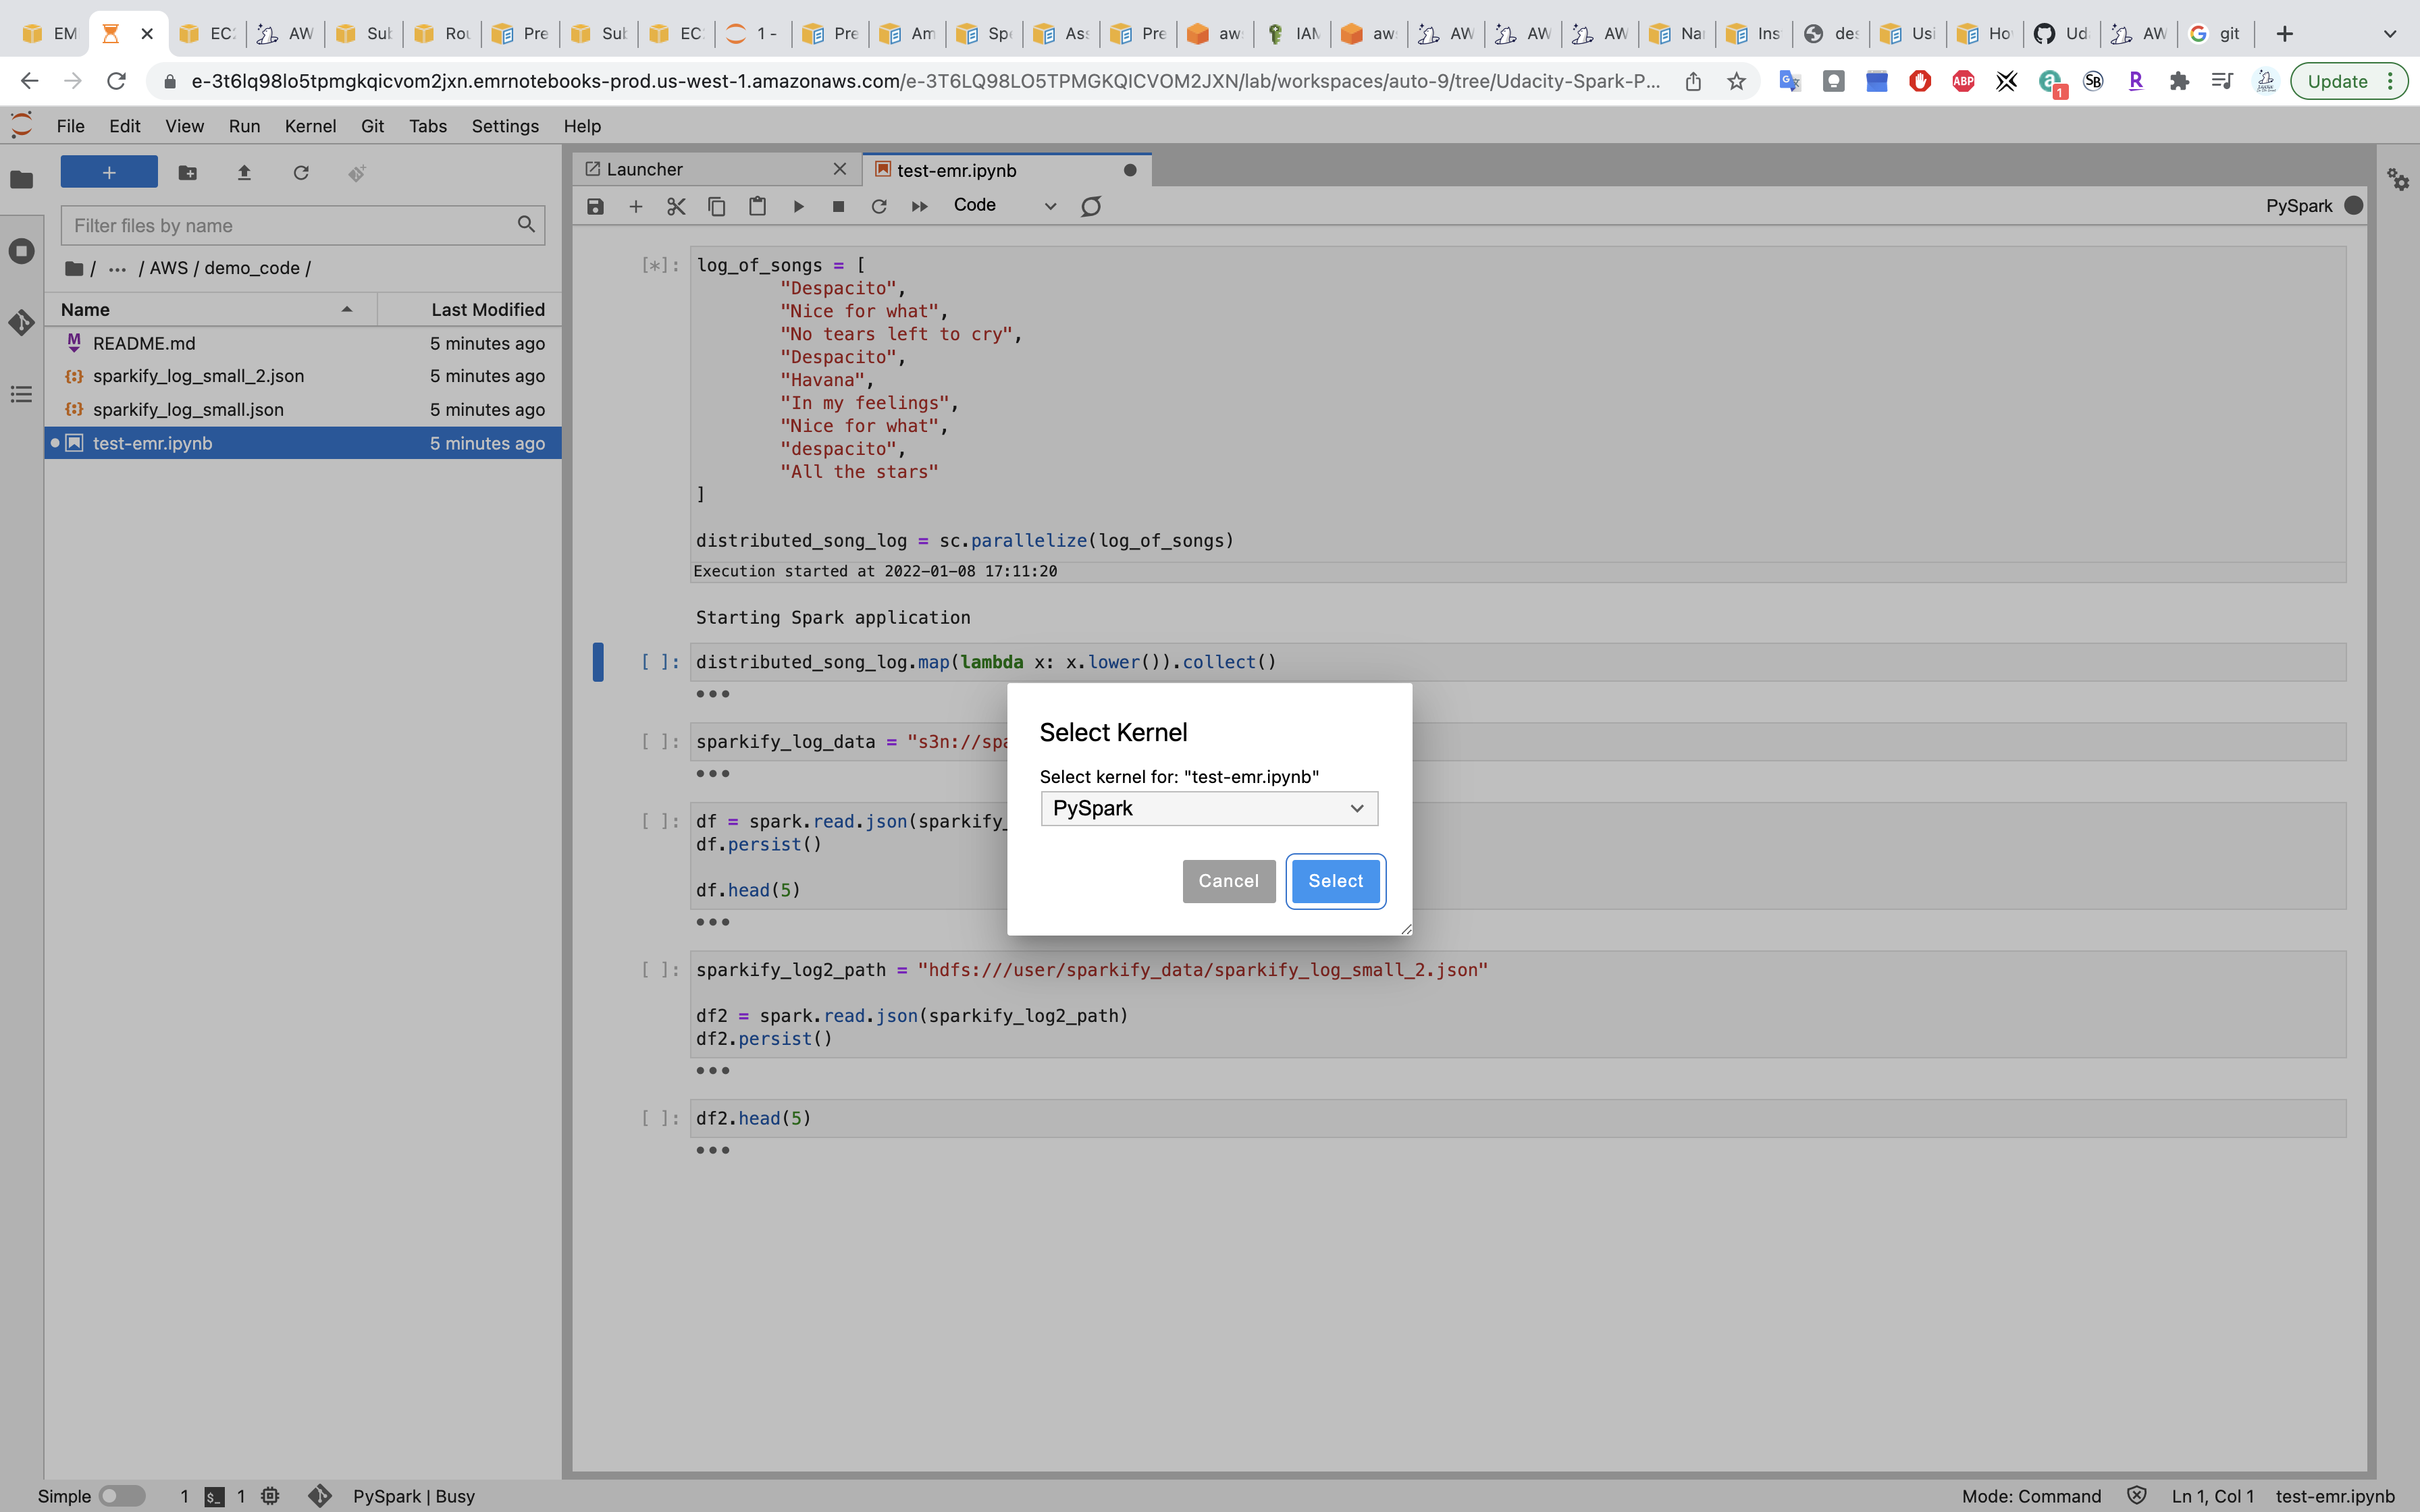
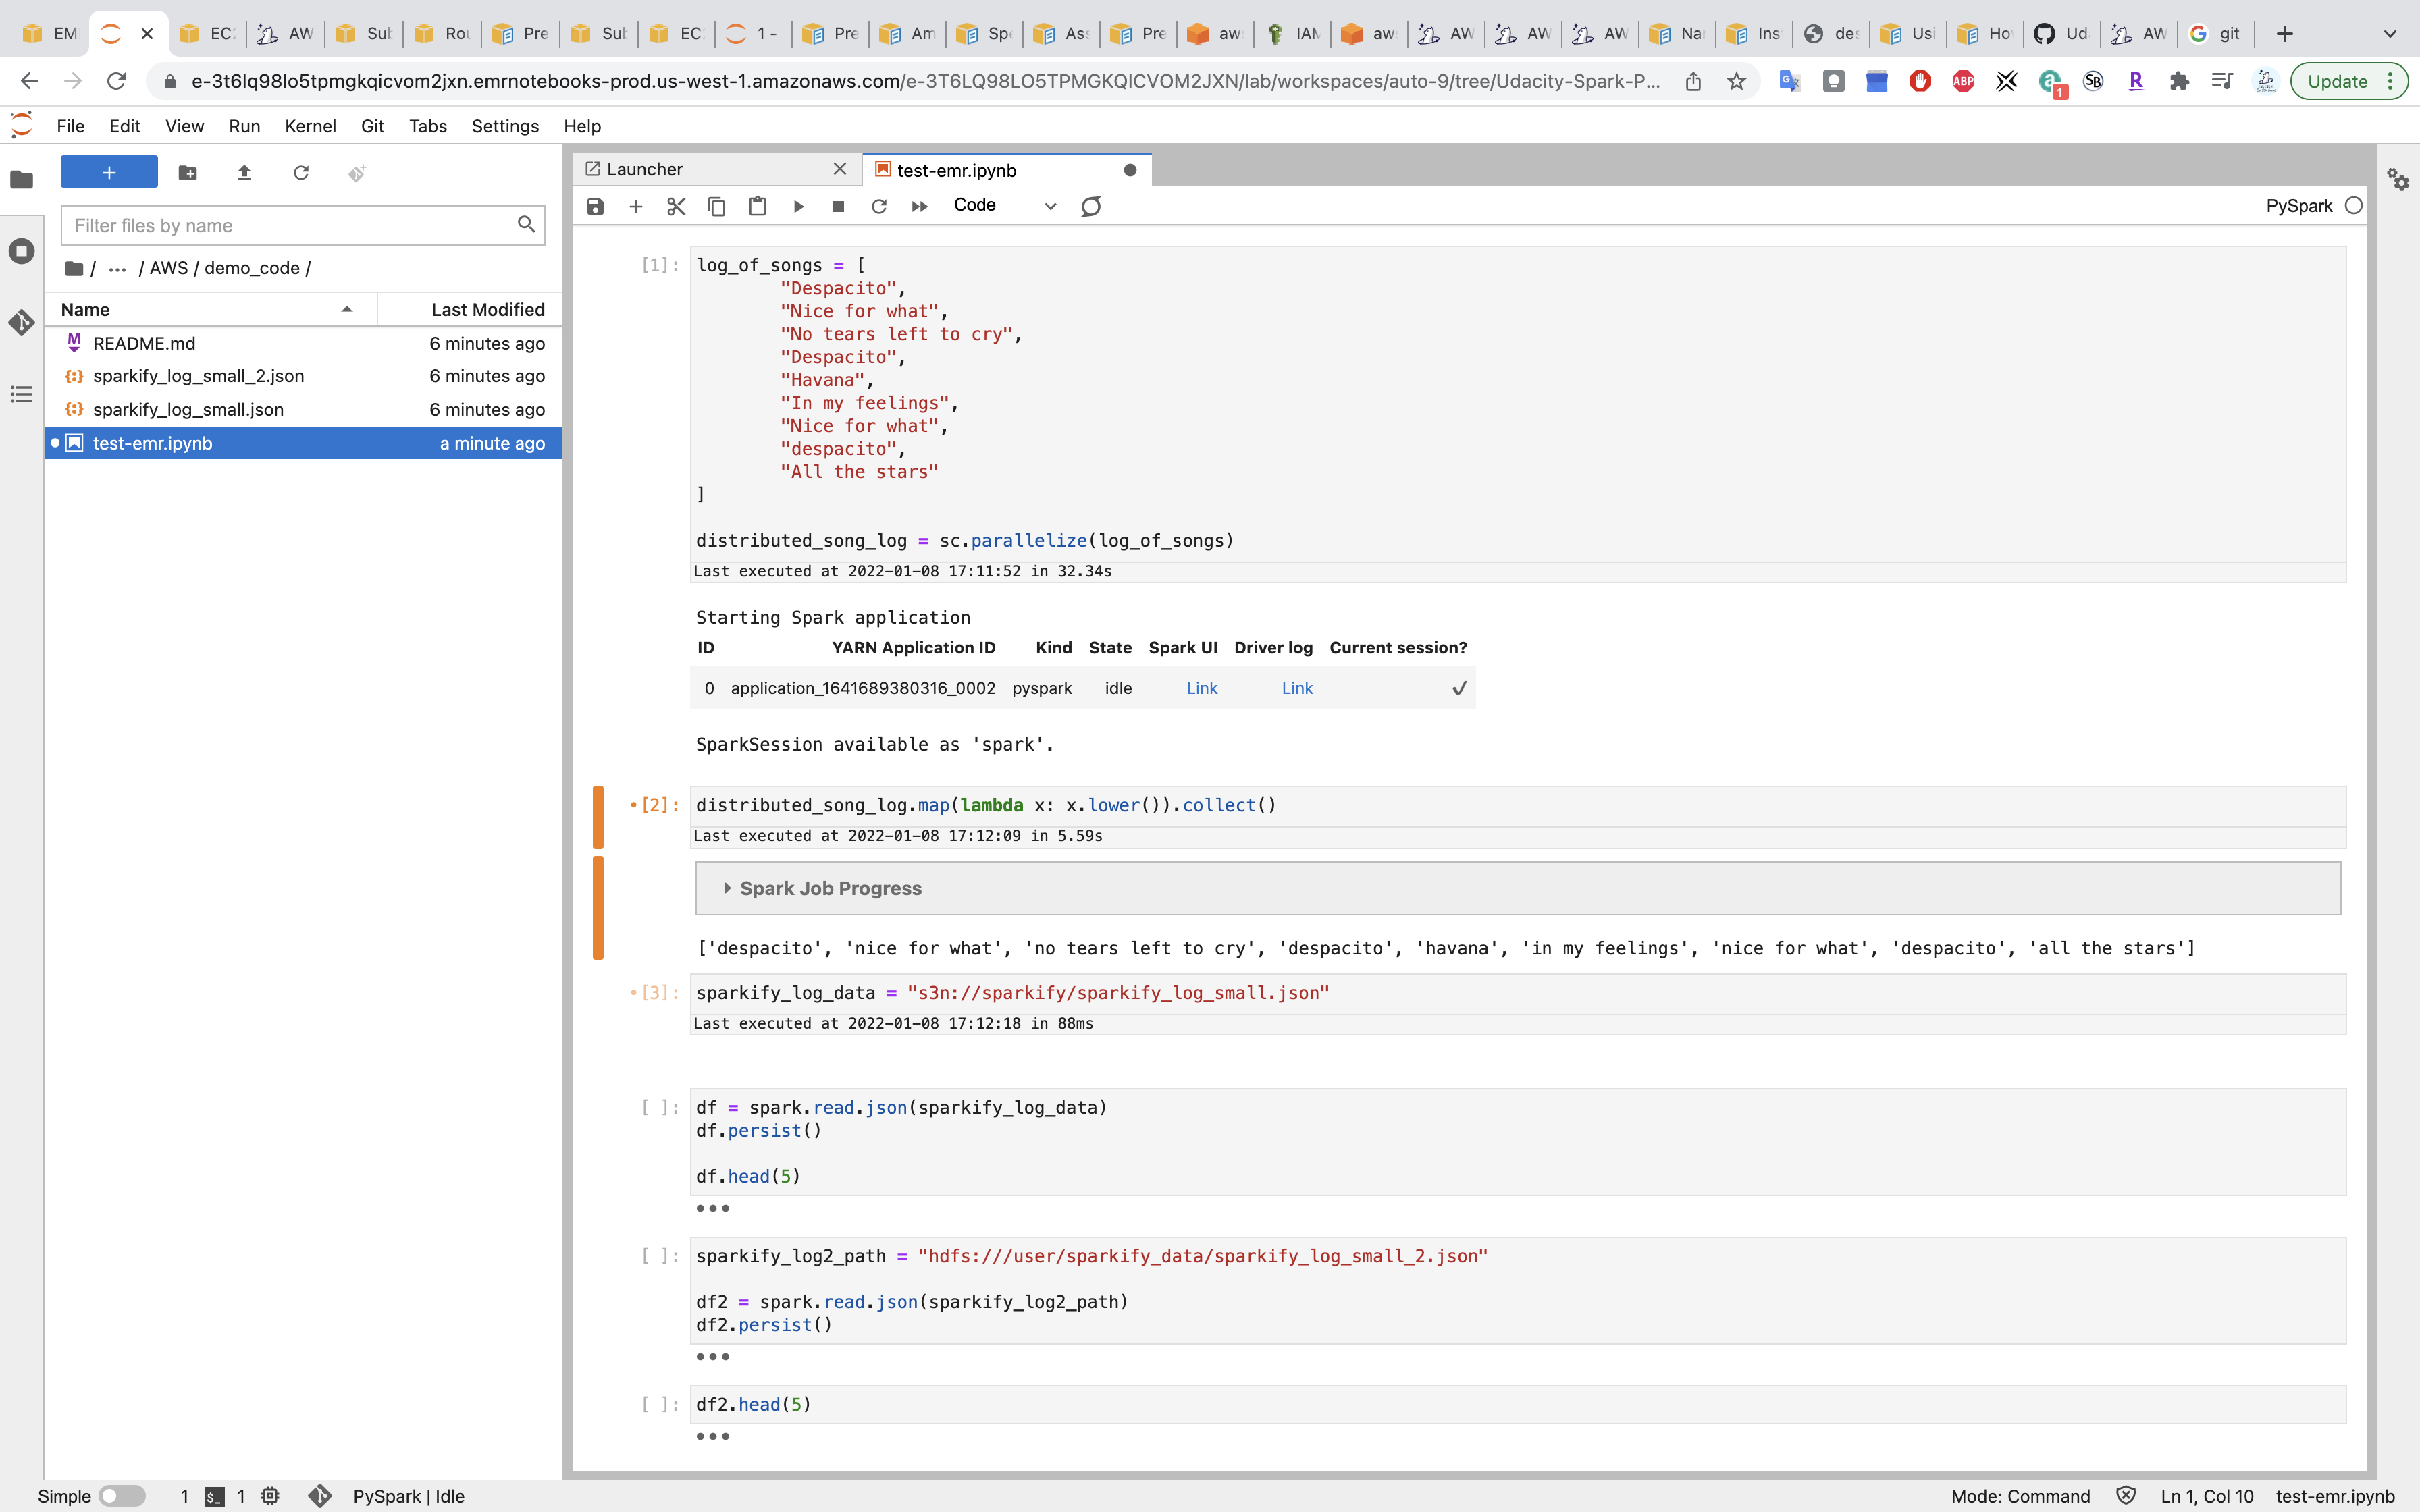
Run the notebook.
Install Packages
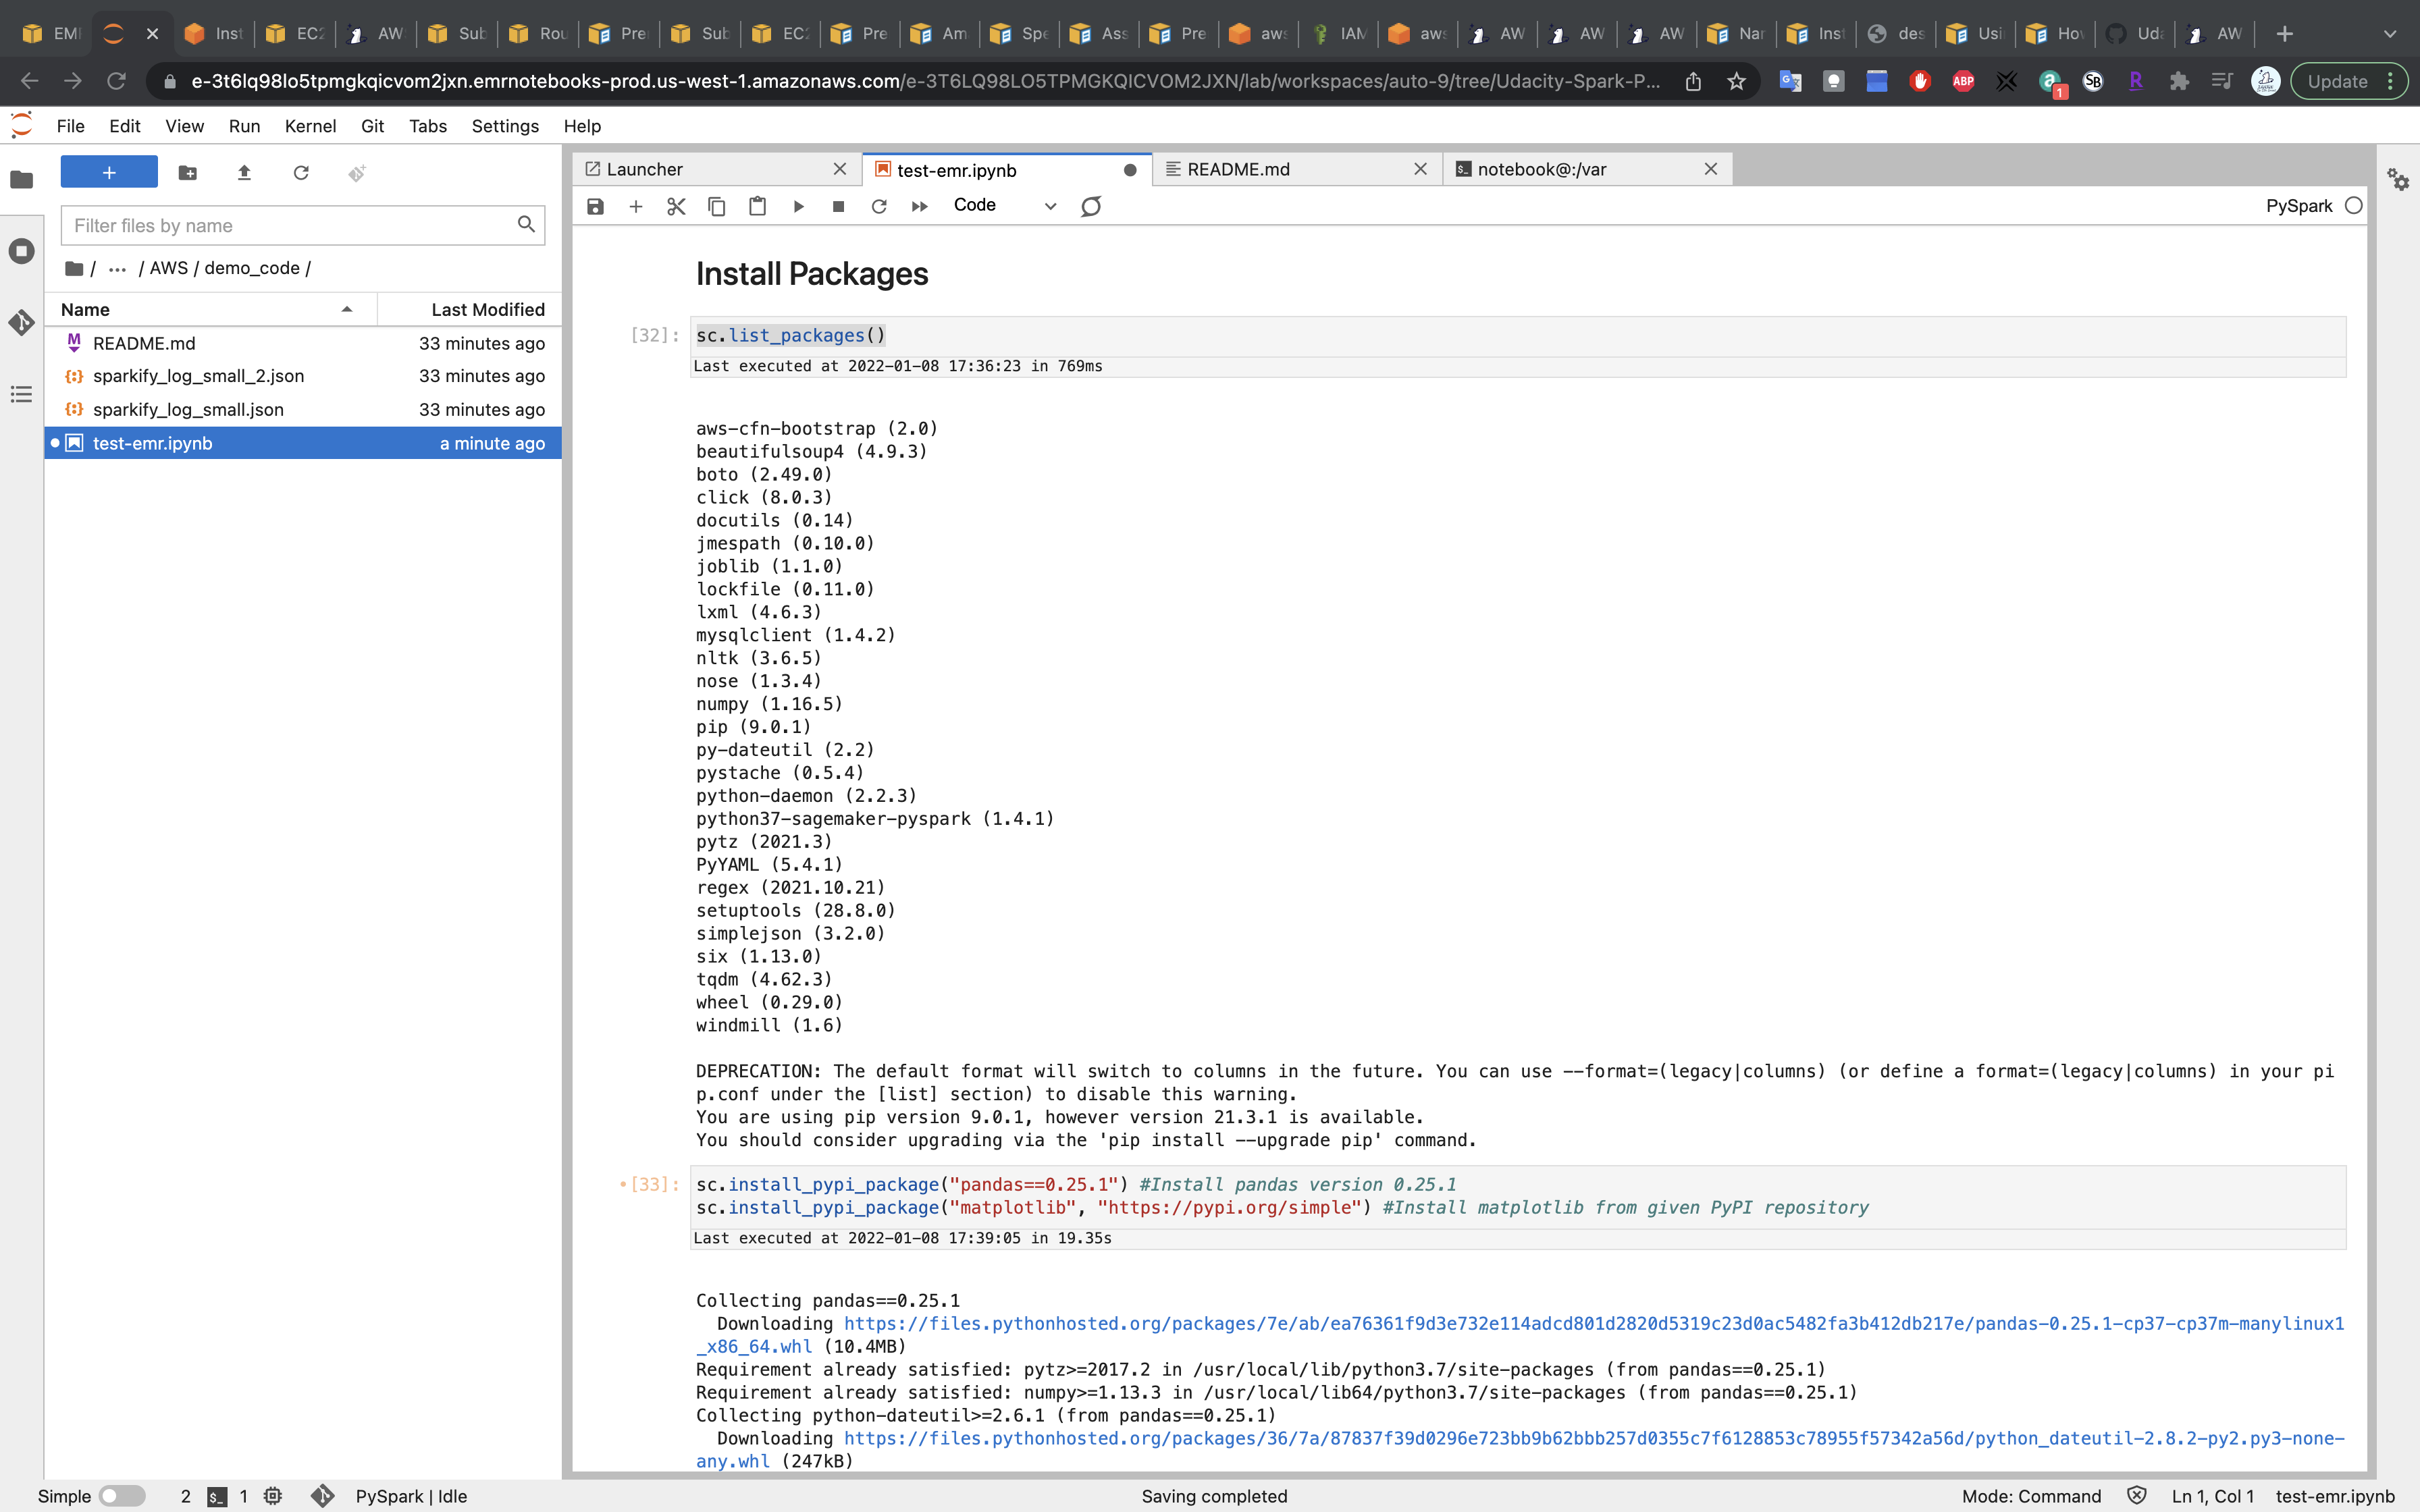
Install Python libraries on a running cluster with EMR Notebooks
List Spark Installed Packges.
Note, the packages are not the same as packages installed by Pip.
1 | sc.list_packages() |
Install packages.
1 | sc.install_pypi_package("pandas==0.25.1") #Install pandas version 0.25.1 |
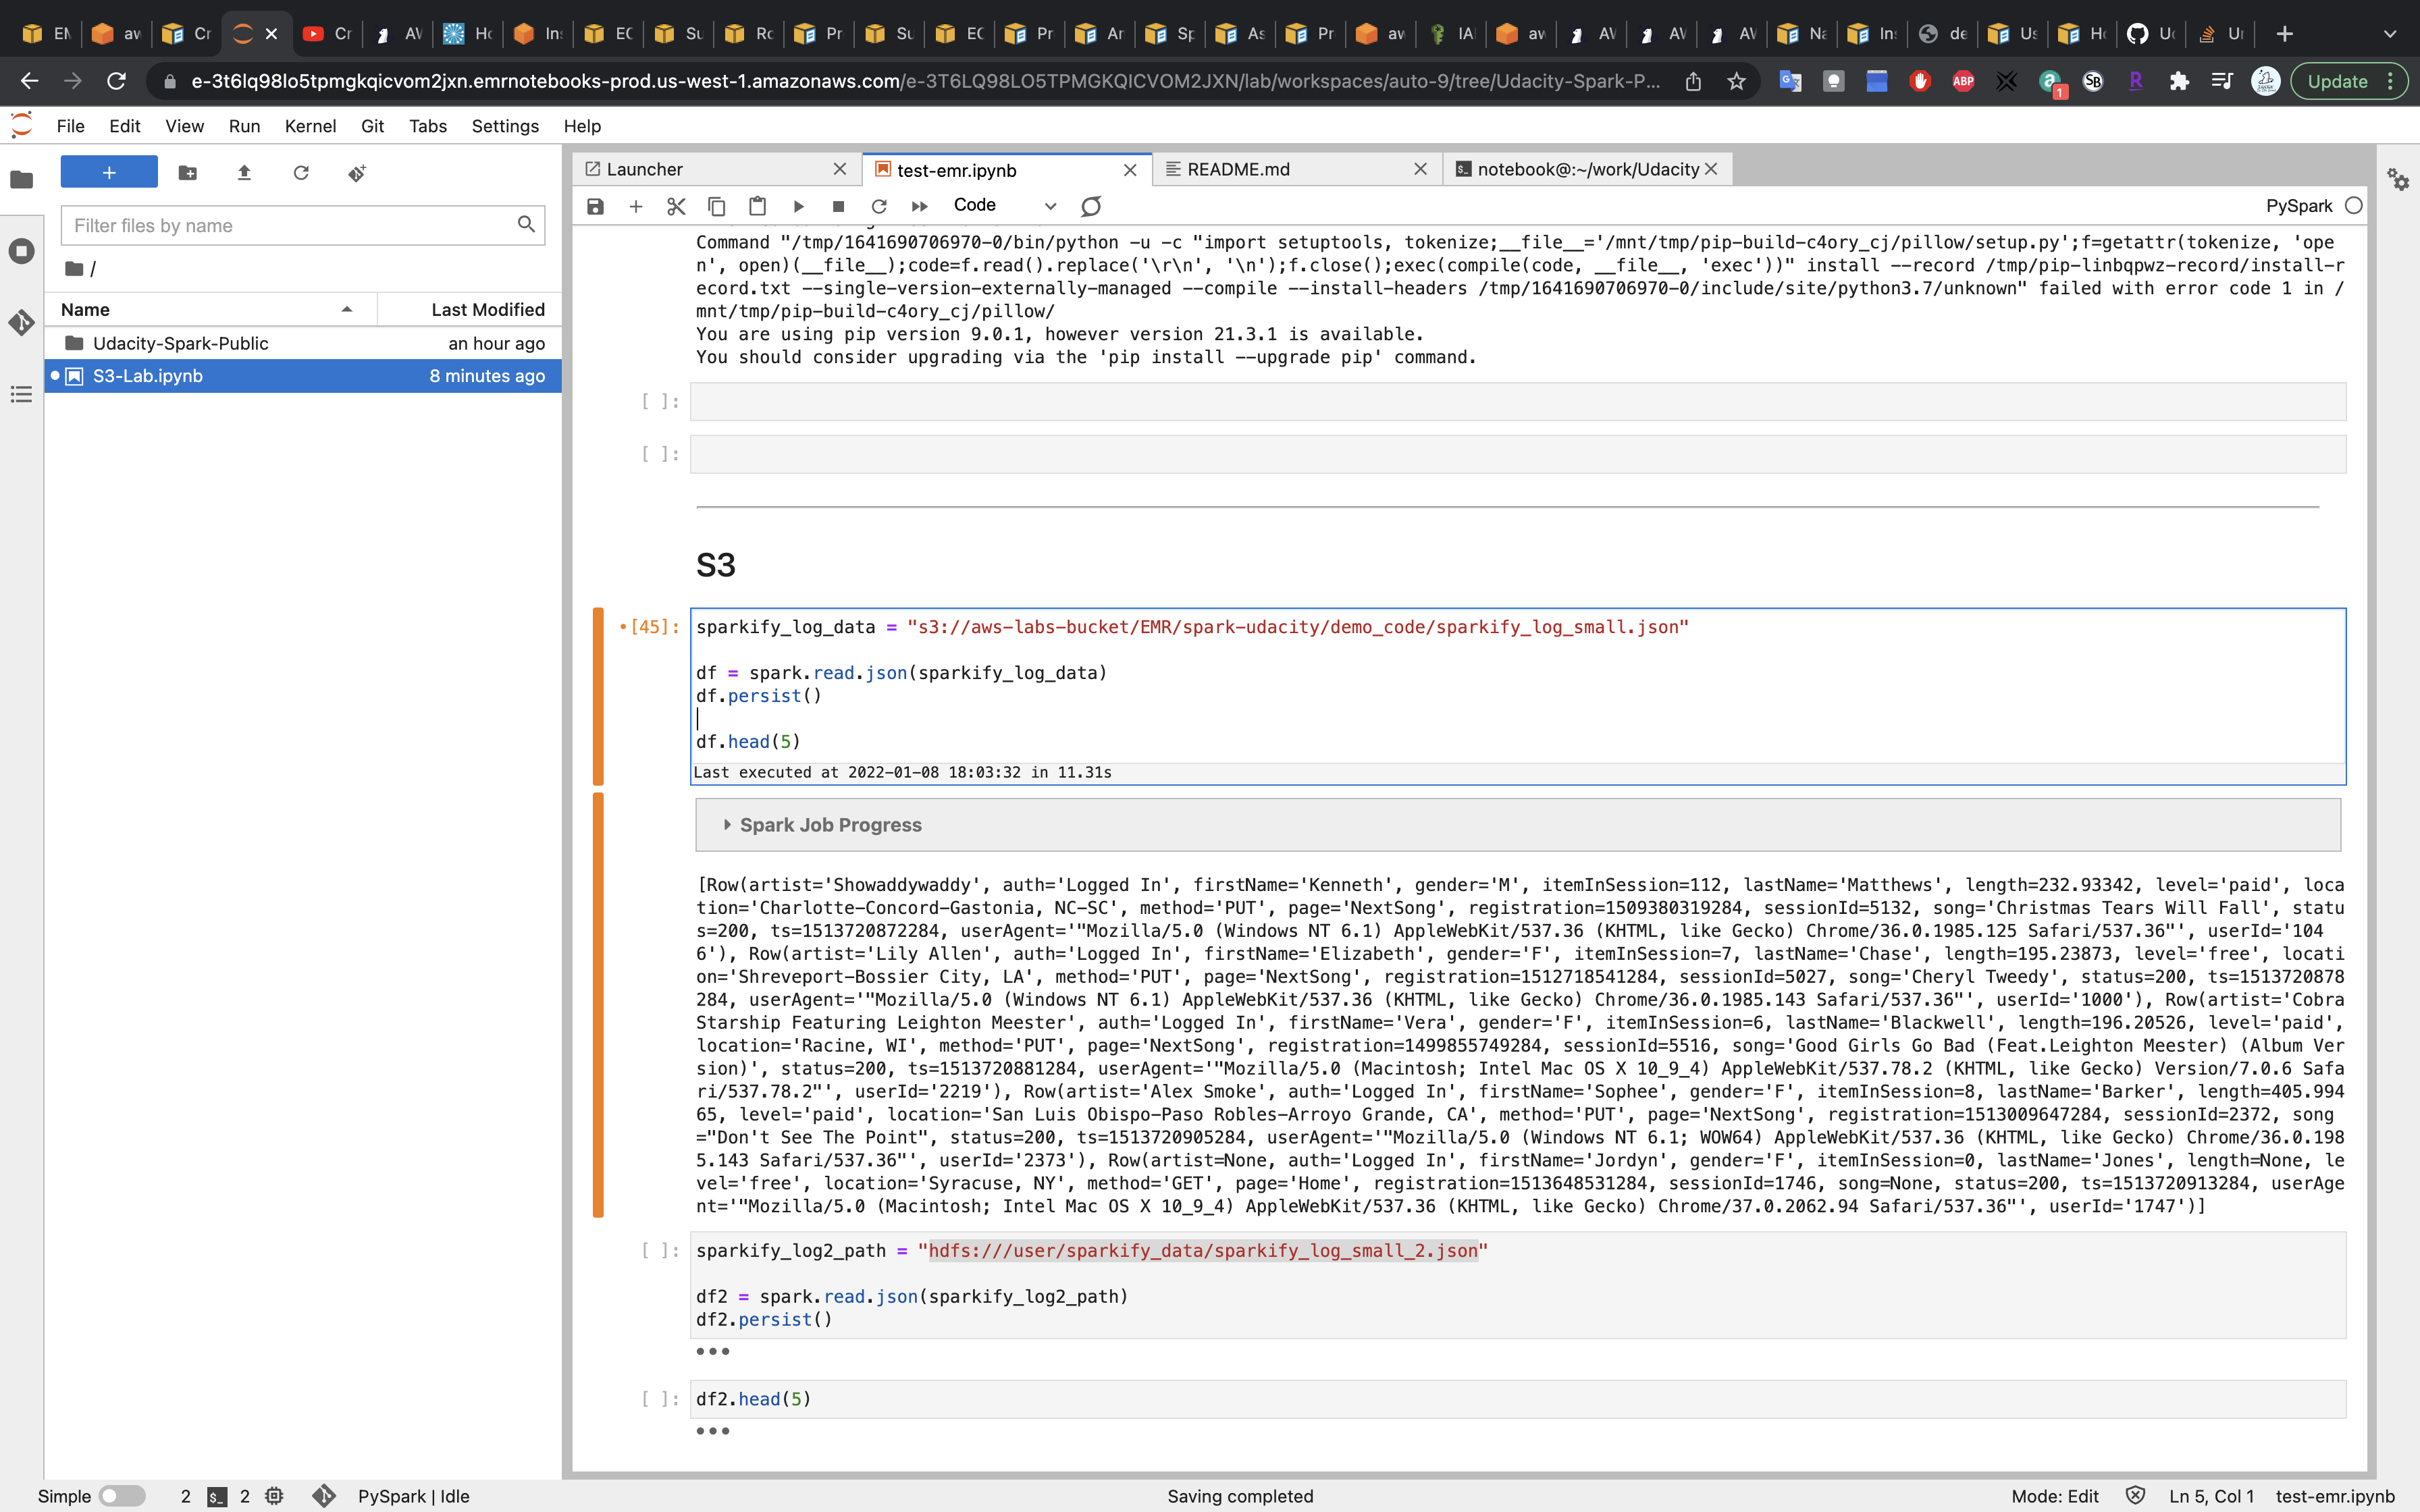
Writing and Loading to S3
1 | sparkify_log_data = "s3://aws-labs-bucket/EMR/spark-udacity/demo_code/sparkify_log_small.json" |
Replace the URL with your S3 URI.
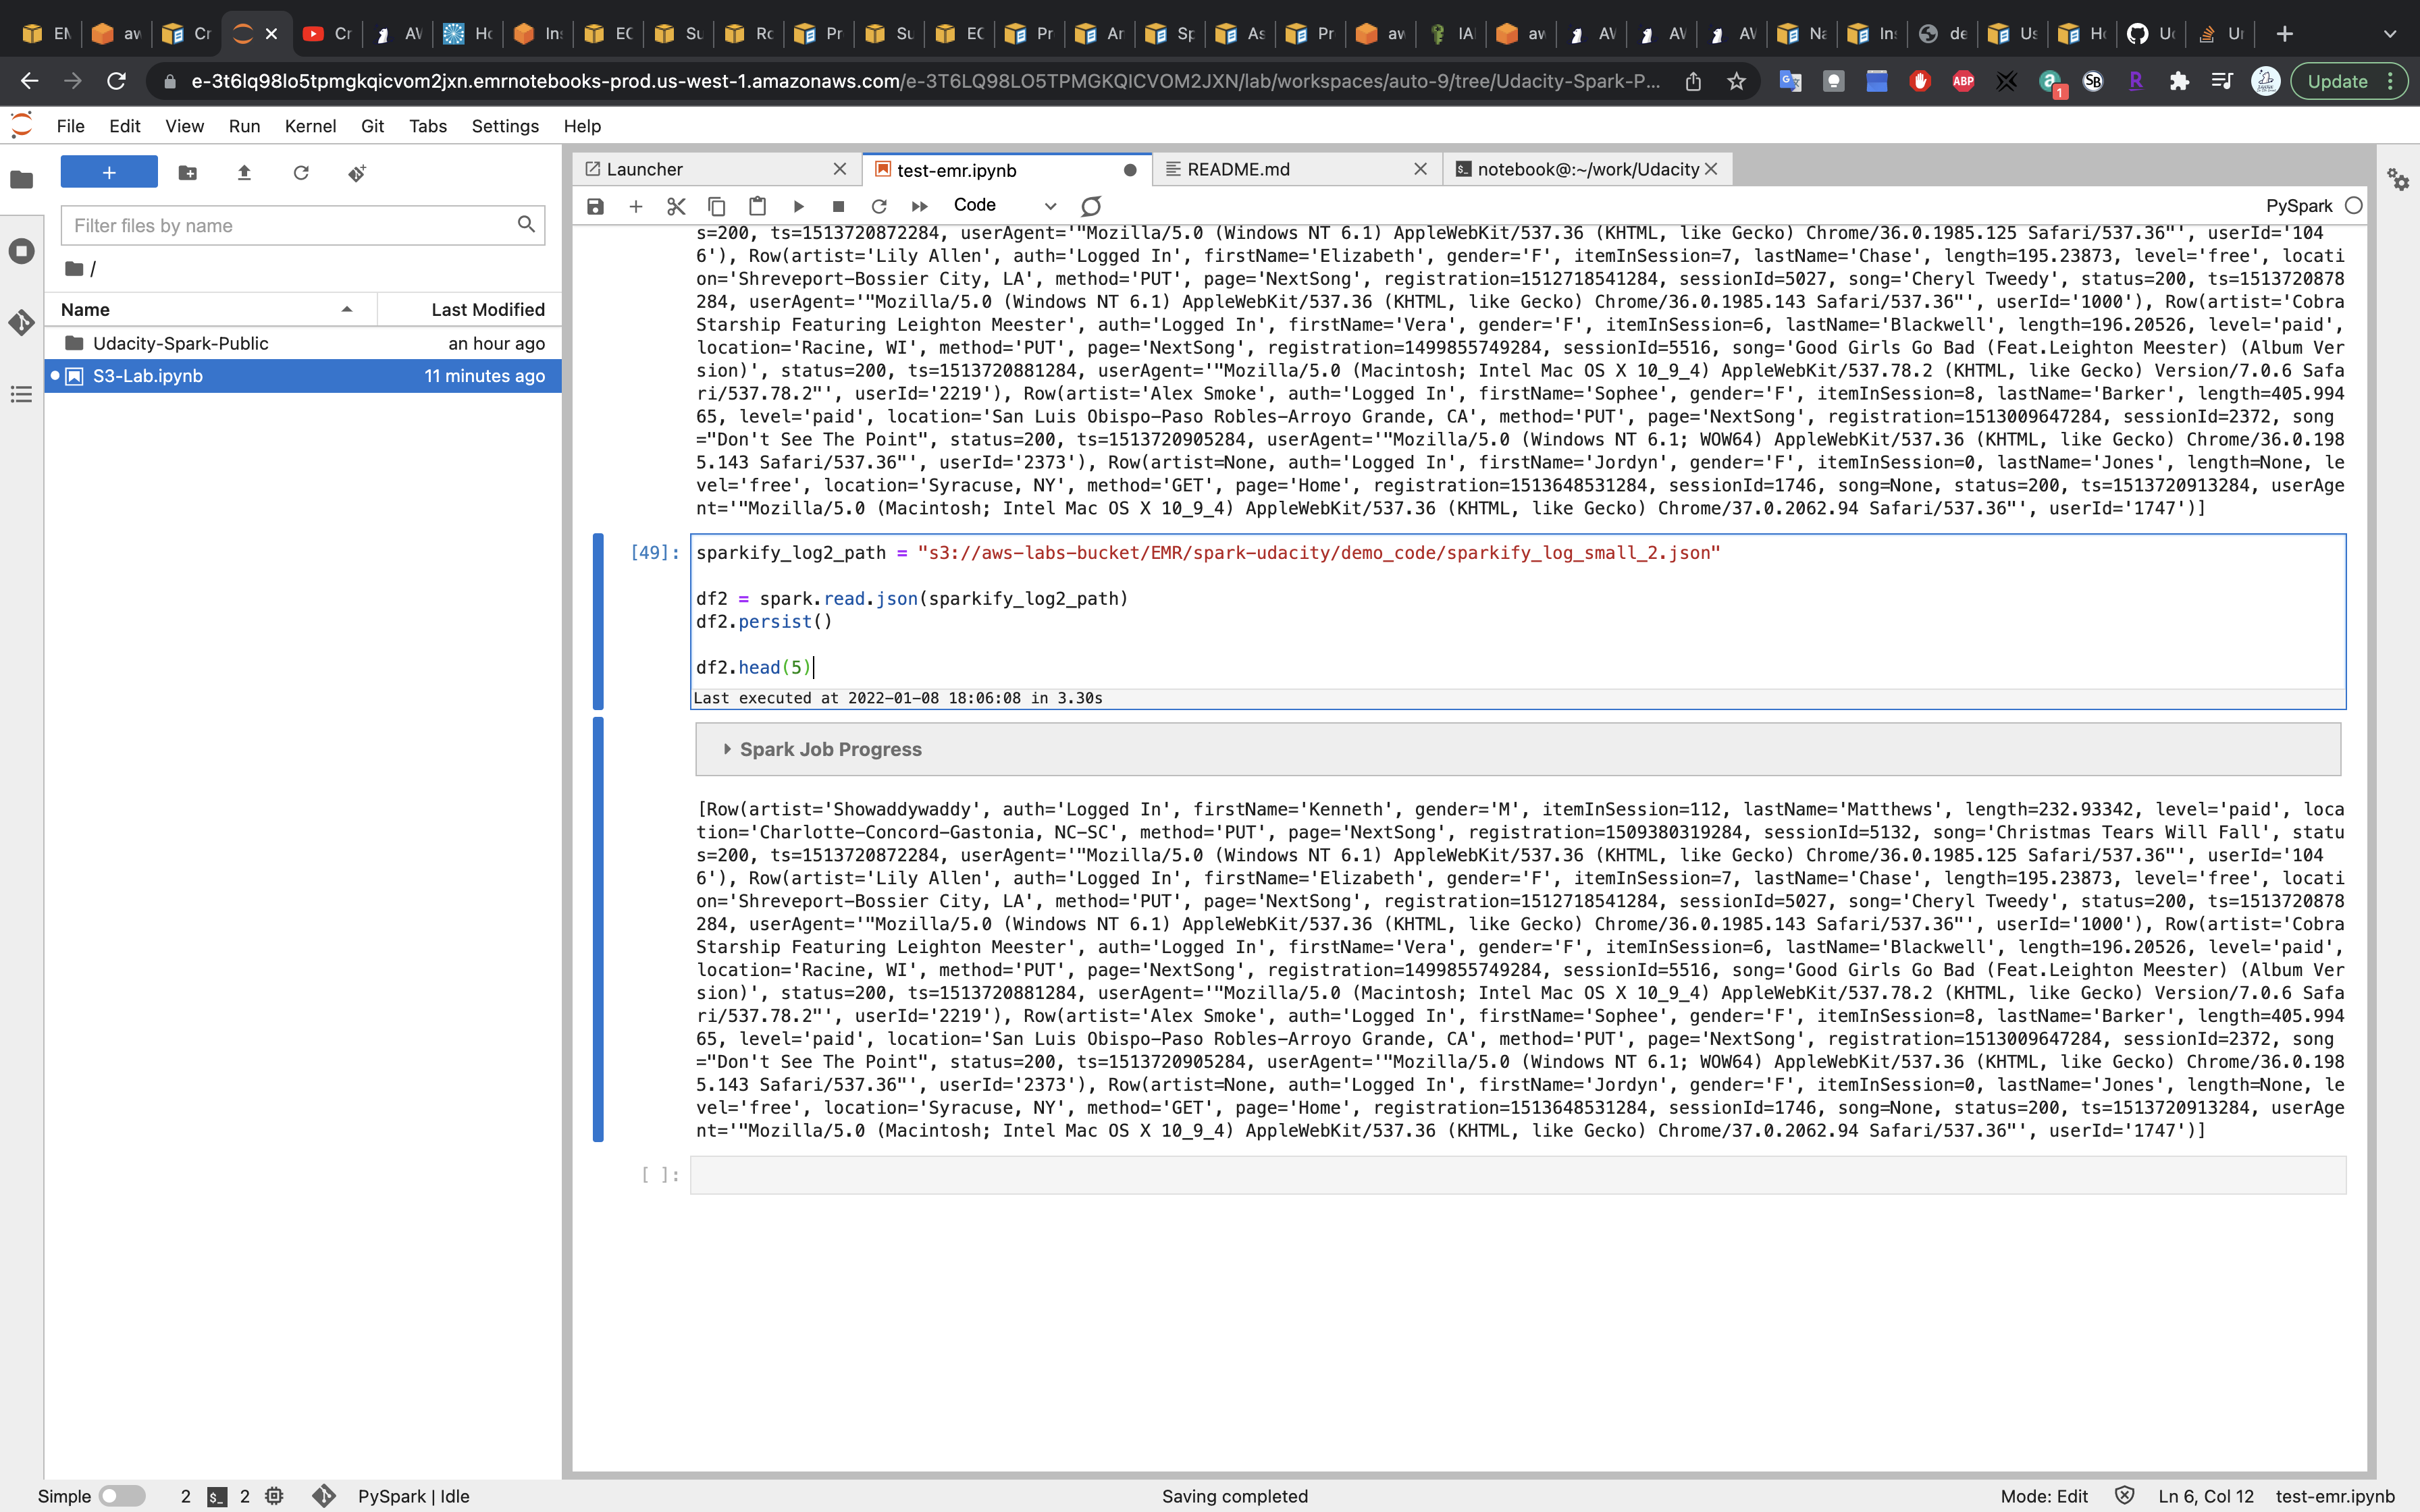
1 | sparkify_log2_path = "s3://aws-labs-bucket/EMR/spark-udacity/demo_code/sparkify_log_small_2.json" |
Replace the URL with your S3 URI.
Clean UP
- Terminate your cluster.
- Delete your NAT Gateway.
- Elease your elastic IP address associated with the NAT gateway.
Reading and Writing Data to HDFS
Task Details
- Launch a EMR cluster quickly through AWS CLI.
- Upload files from your local machine to EMR master node.
- Copy files from EMR master node to HDFS.
- Run a notebook on the EMR cluster then read and write data to HDFS.
EMR Configuration
Create an EMR Cluster
1 | aws emr create-cluster \ |
Replace KeyName and SubnetId with yours and run the command.
Enable Fast Forwarding
1 | ssh -i EMR-CA.pem -N -D 8157 hadoop@ec2-54-183-200-92.us-west-1.compute.amazonaws.com |
Enable Fast Forwarding.
HDFS
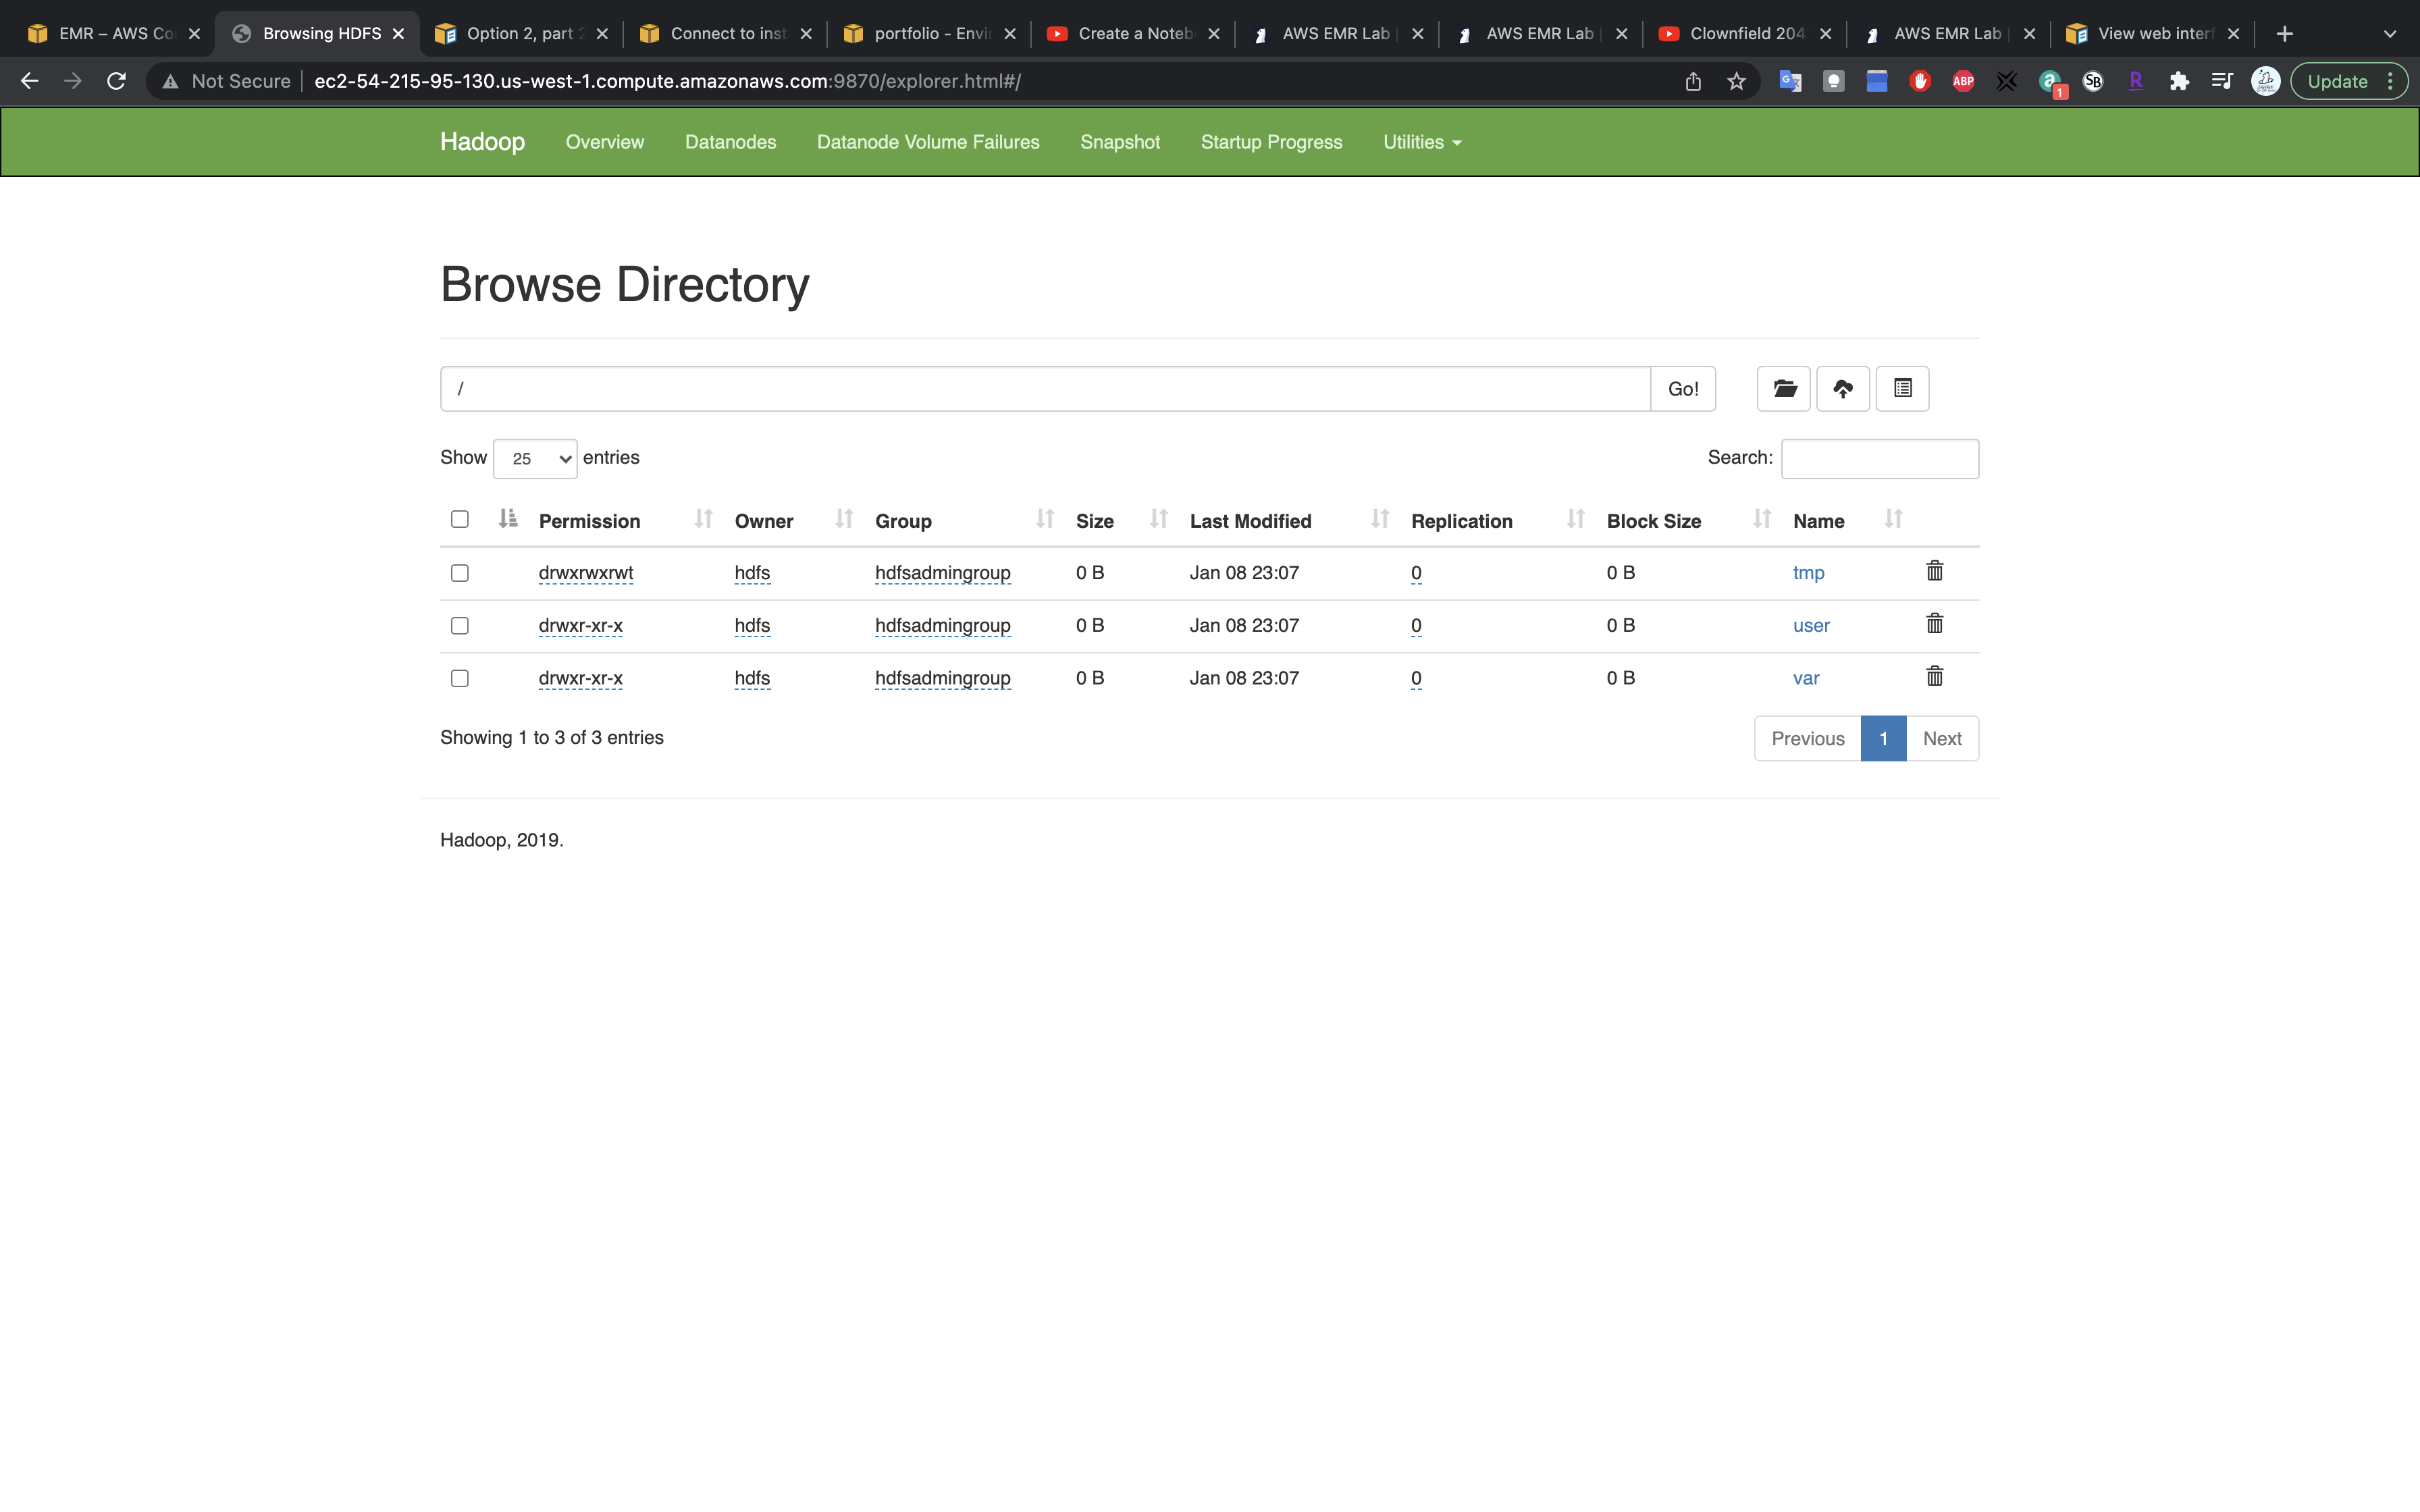
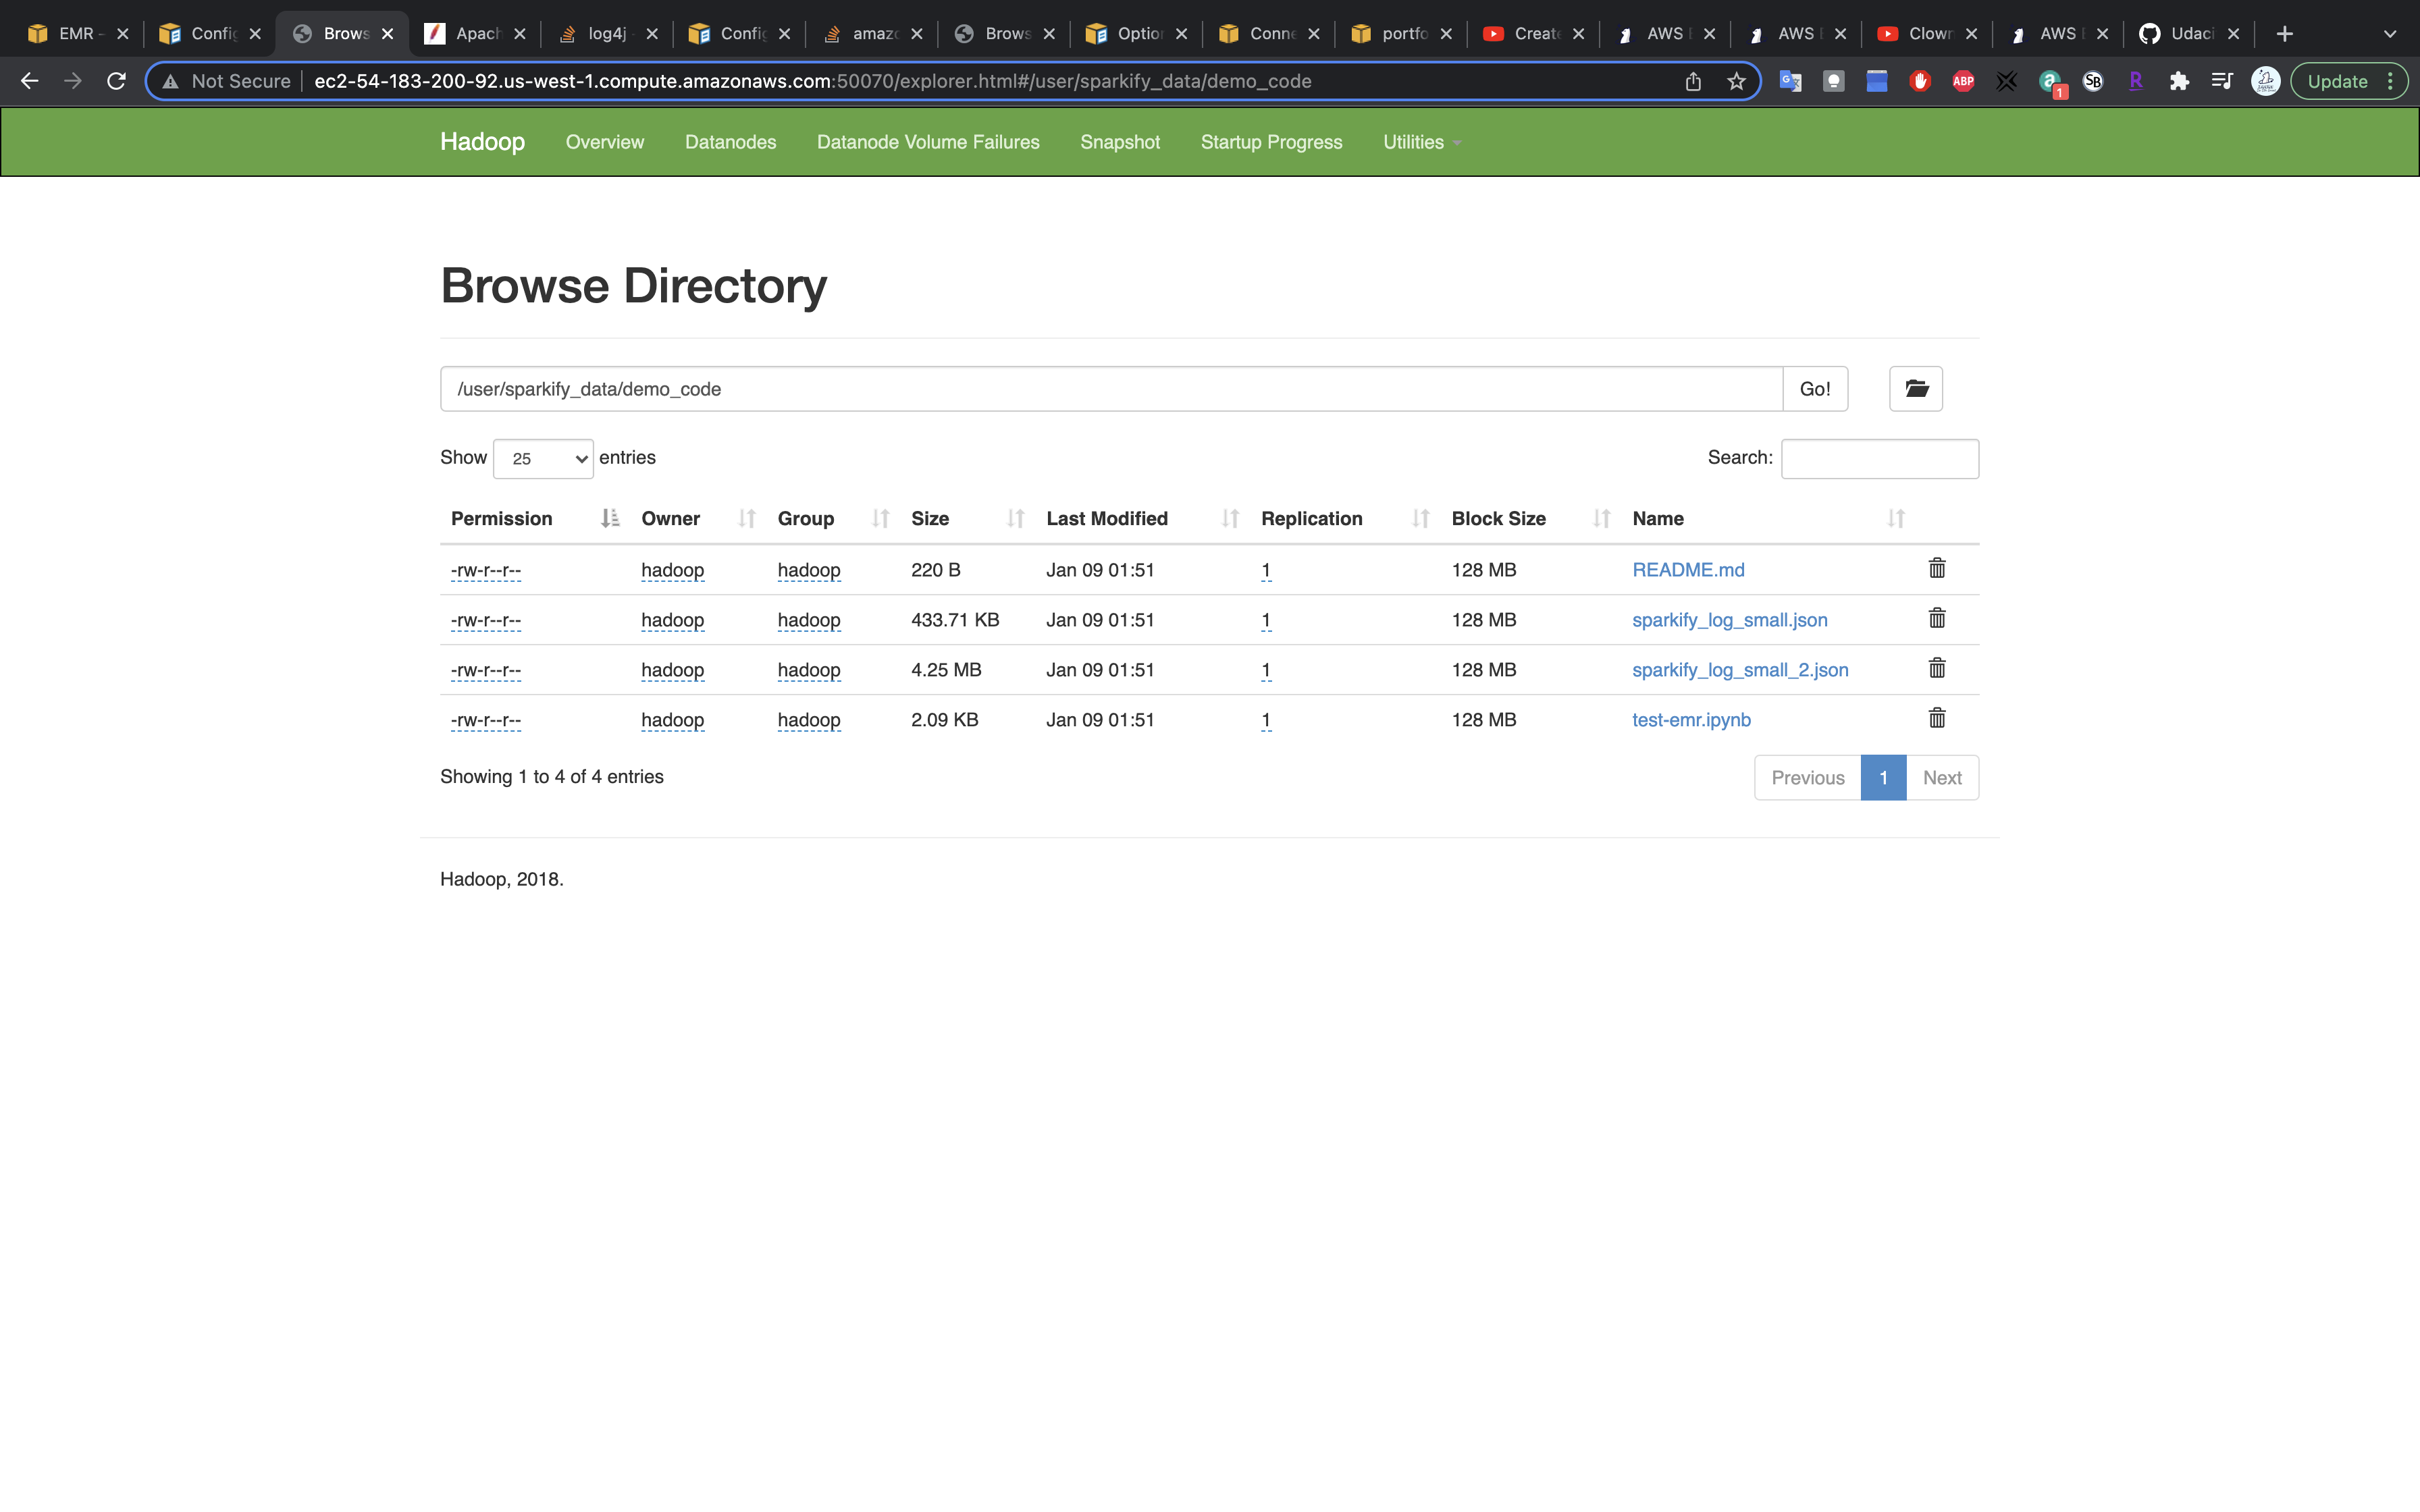
Visit HDFS Name Node
Under Utilities click on Browse the file system
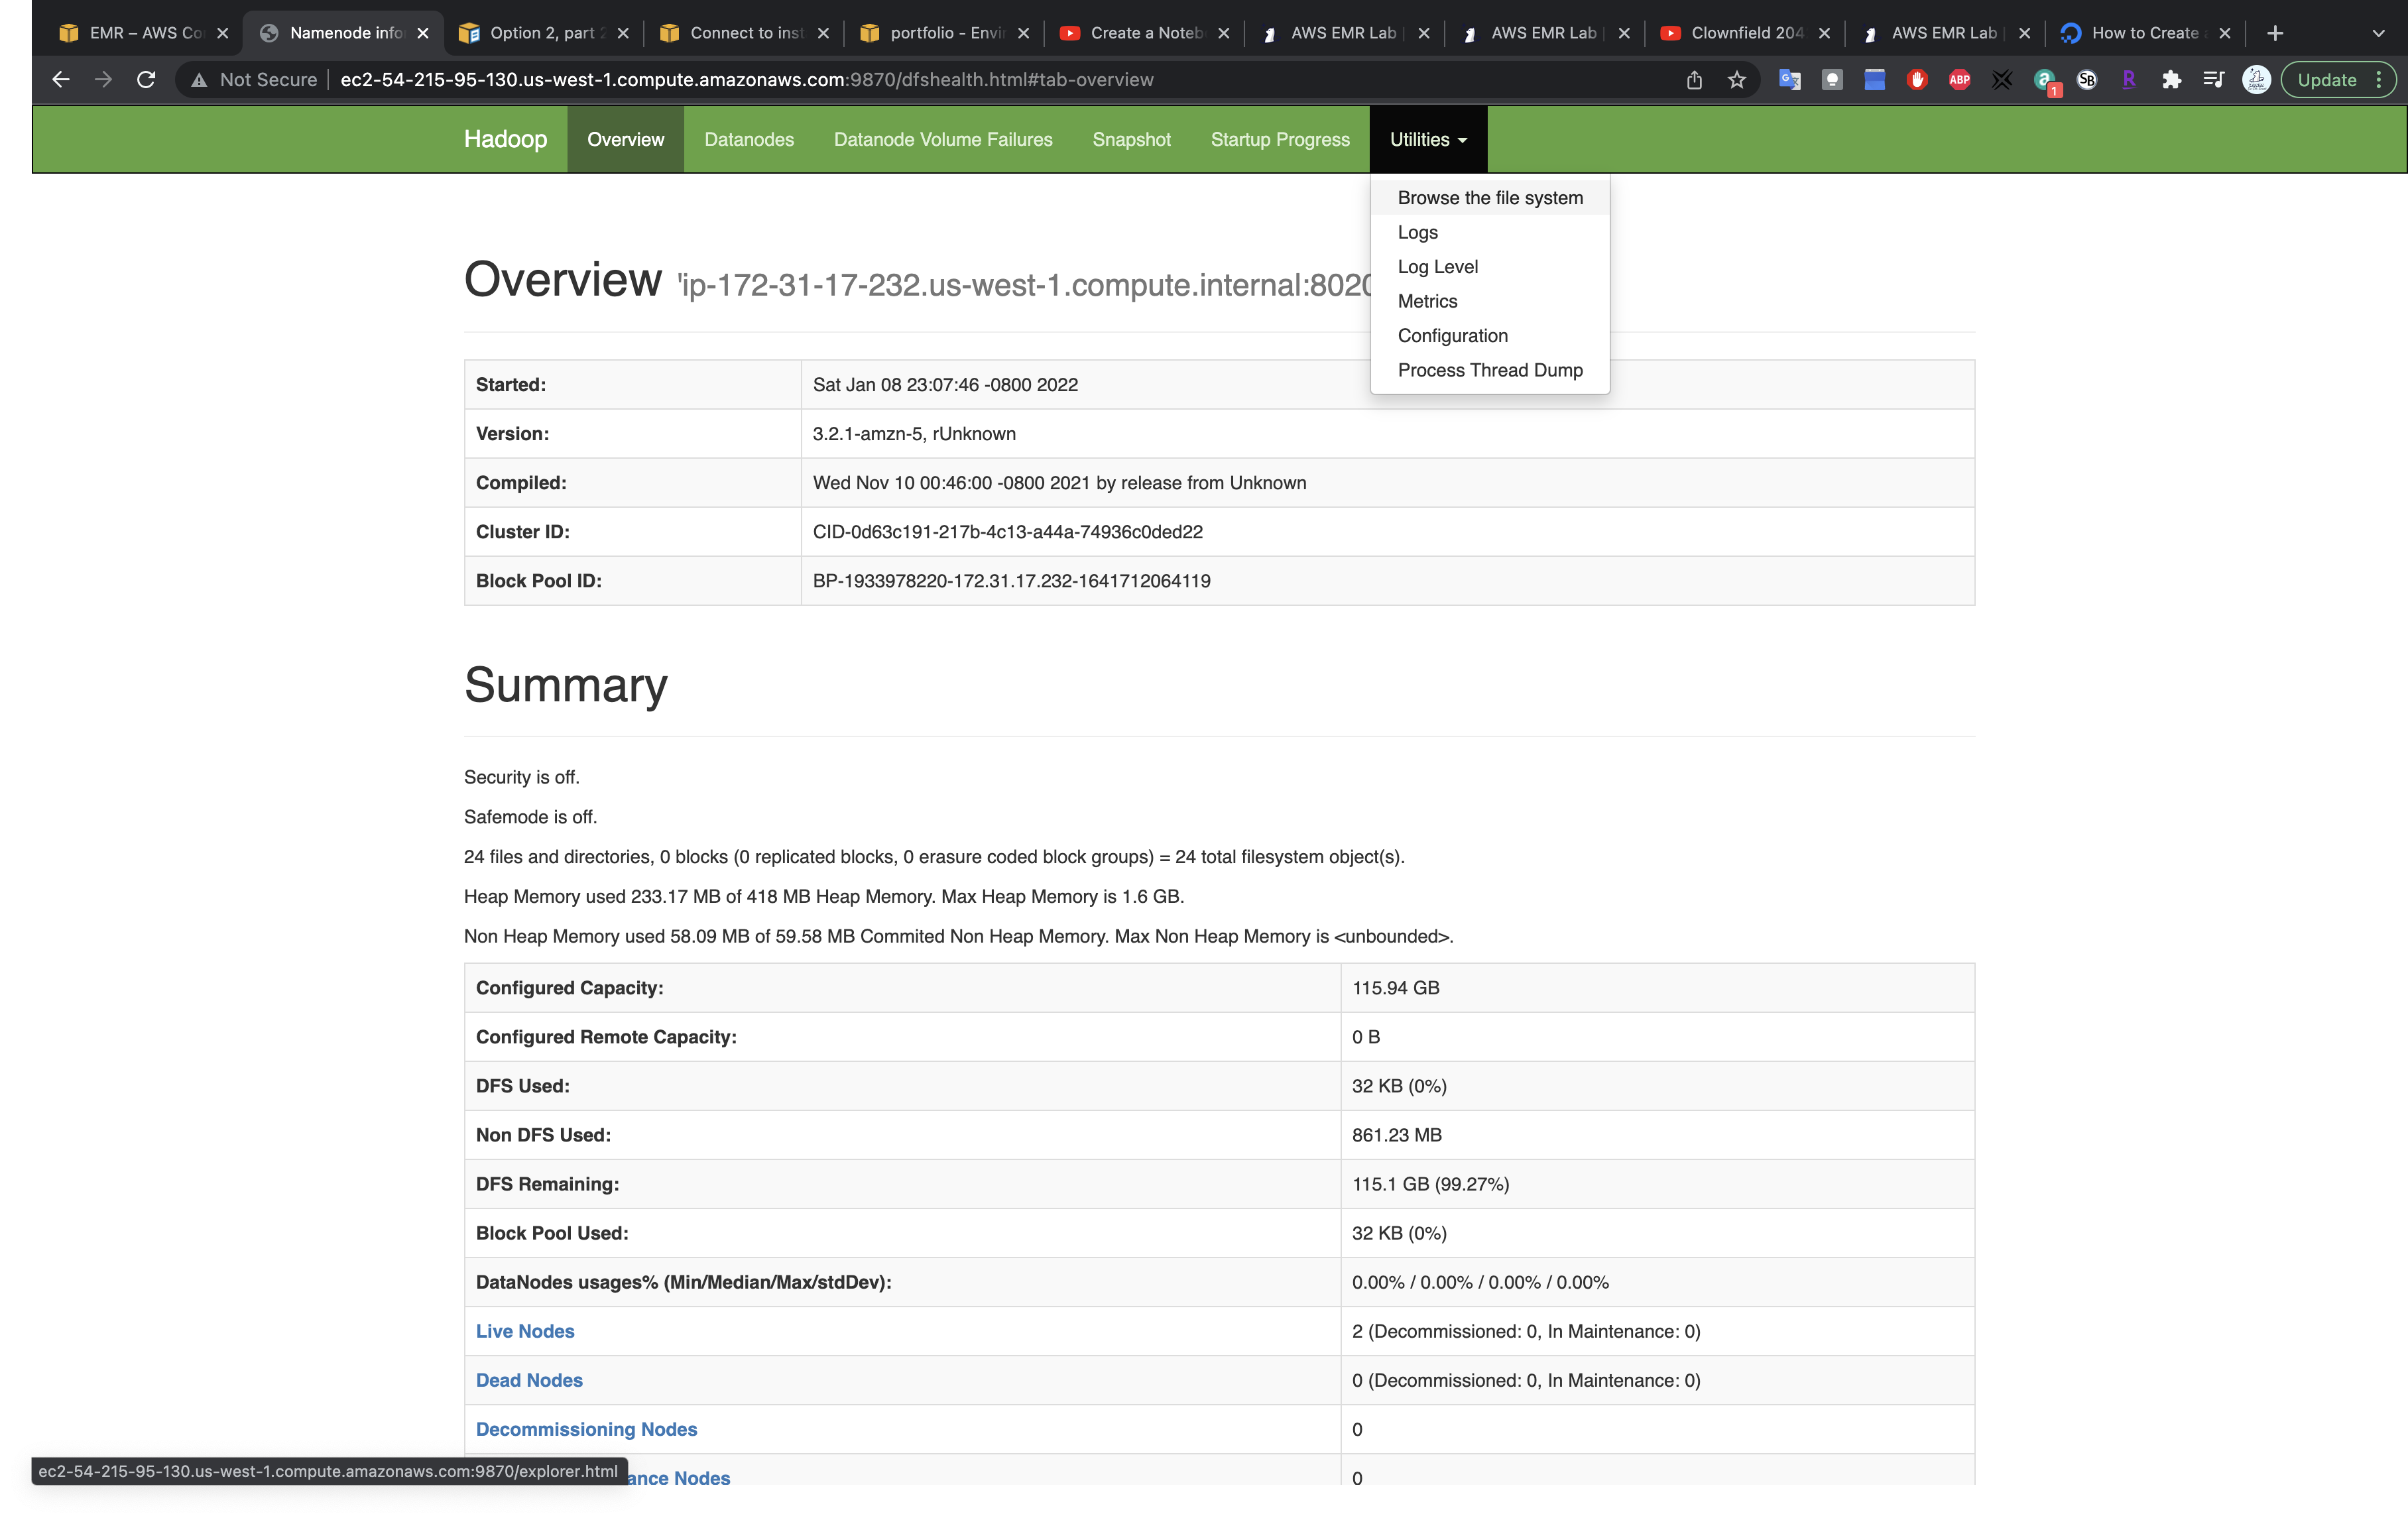
You can upload files through this page. But here we use CLI for the same mission.
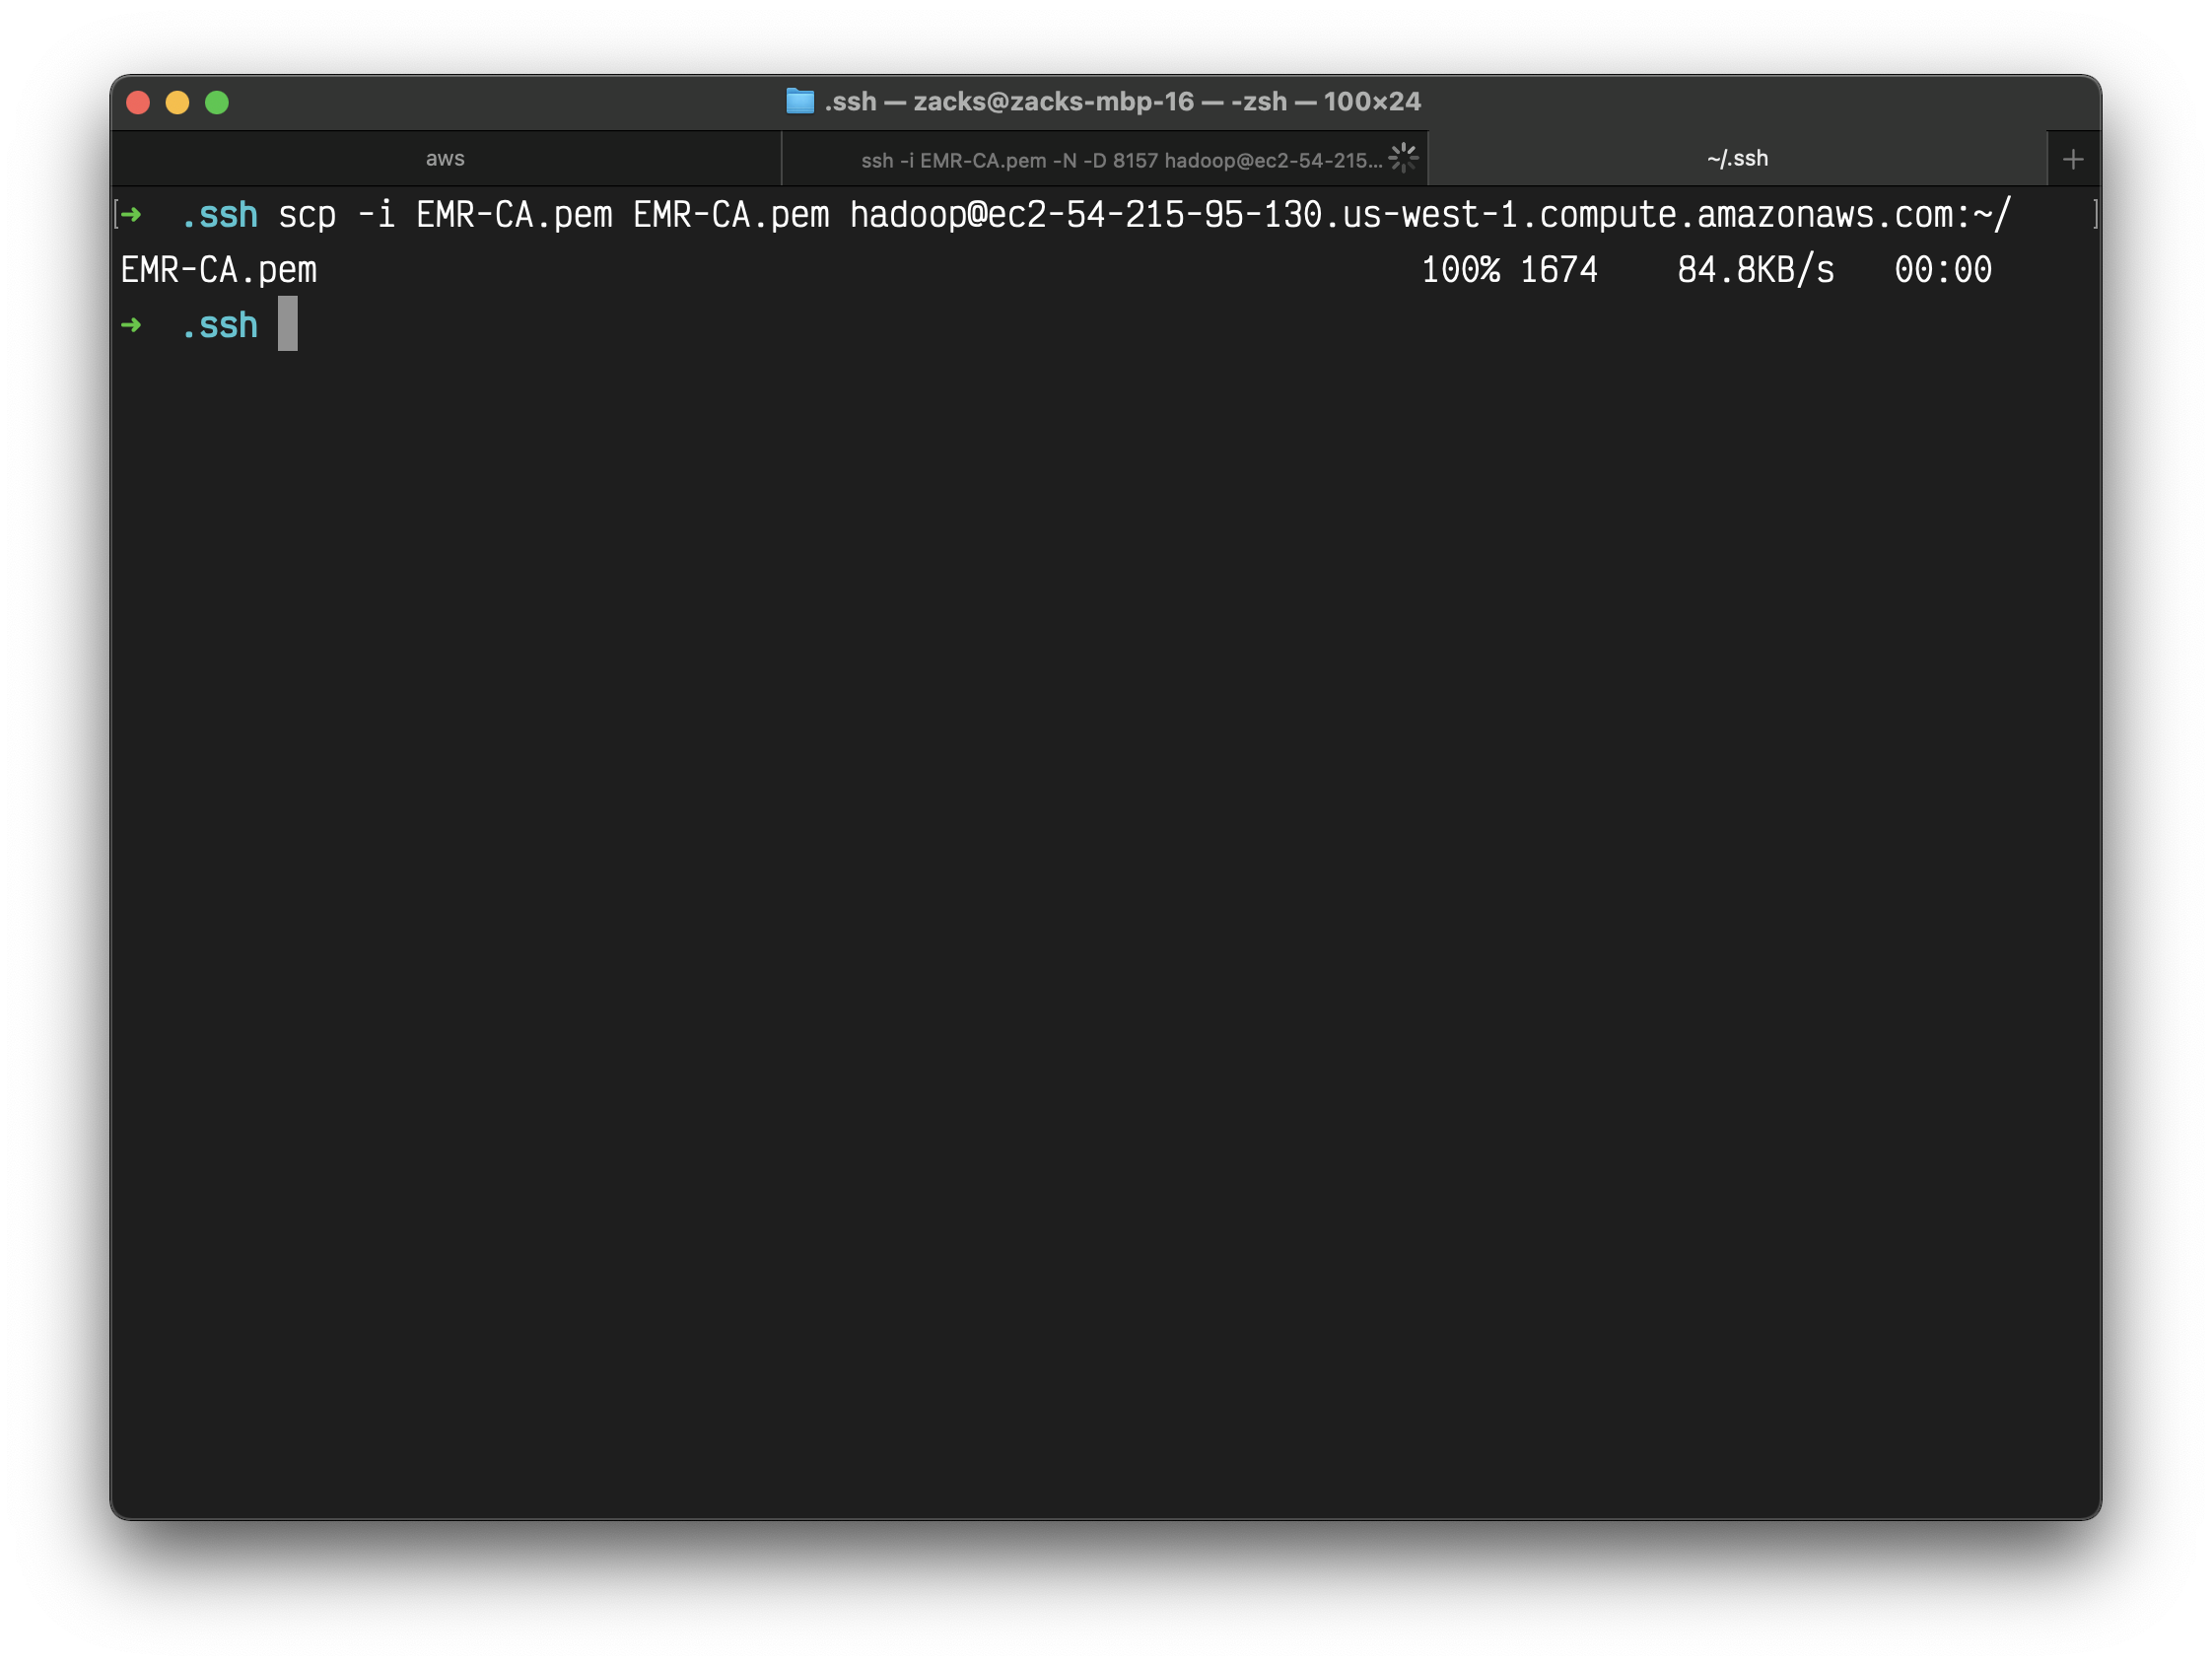
SCP
1 | scp -i EMR-CA.pem EMR-CA.pem hadoop@ec2-54-183-200-92.us-west-1.compute.amazonaws.com:~/ |
Use scp to upload a file from your local machine to your master node.
Here I upload file EMR-CA.pem to my cluster home directory.
1 | ssh -i EMR-CA.pem hadoop@ec2-54-183-200-92.us-west-1.compute.amazonaws.com |
Connect to your master node through ssh.
1 | ll |
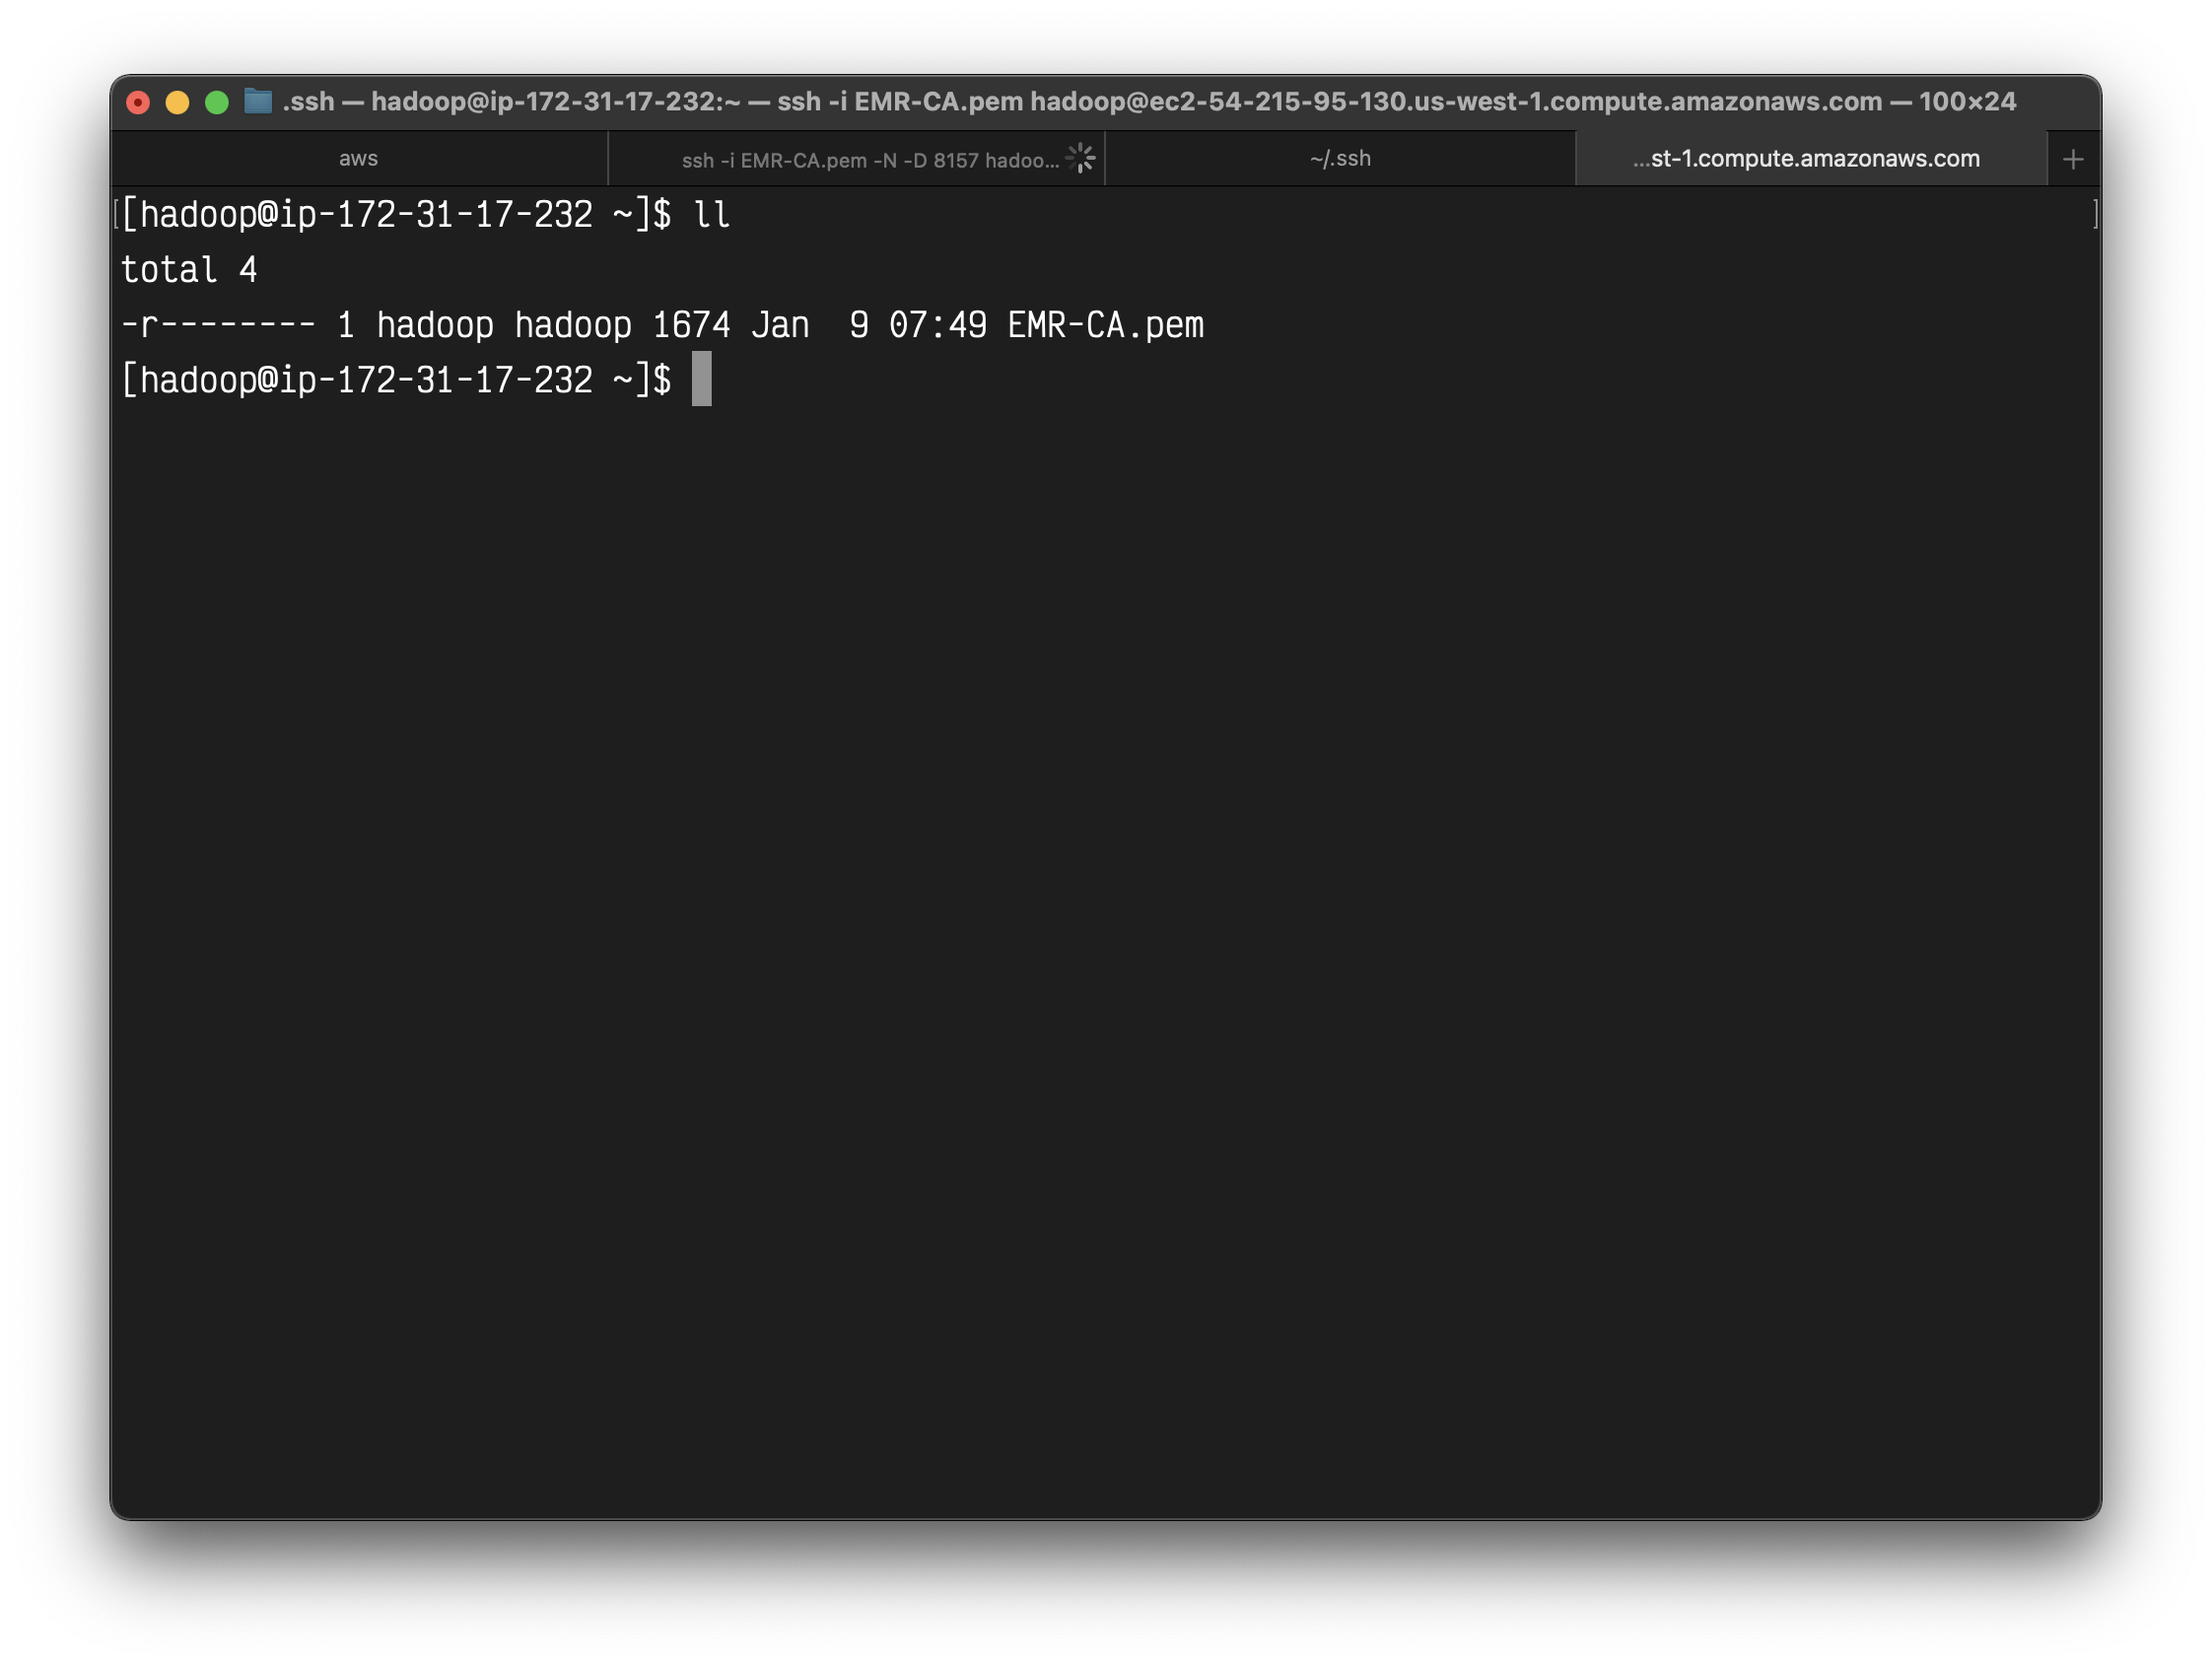
We can see the file is now on the cluster.
However we cannot see the file in HDFS.
HDFS
Checking dependencies using the Amazon EMR artifact repository
How to suppress INFO messages for spark-sql running on EMR?
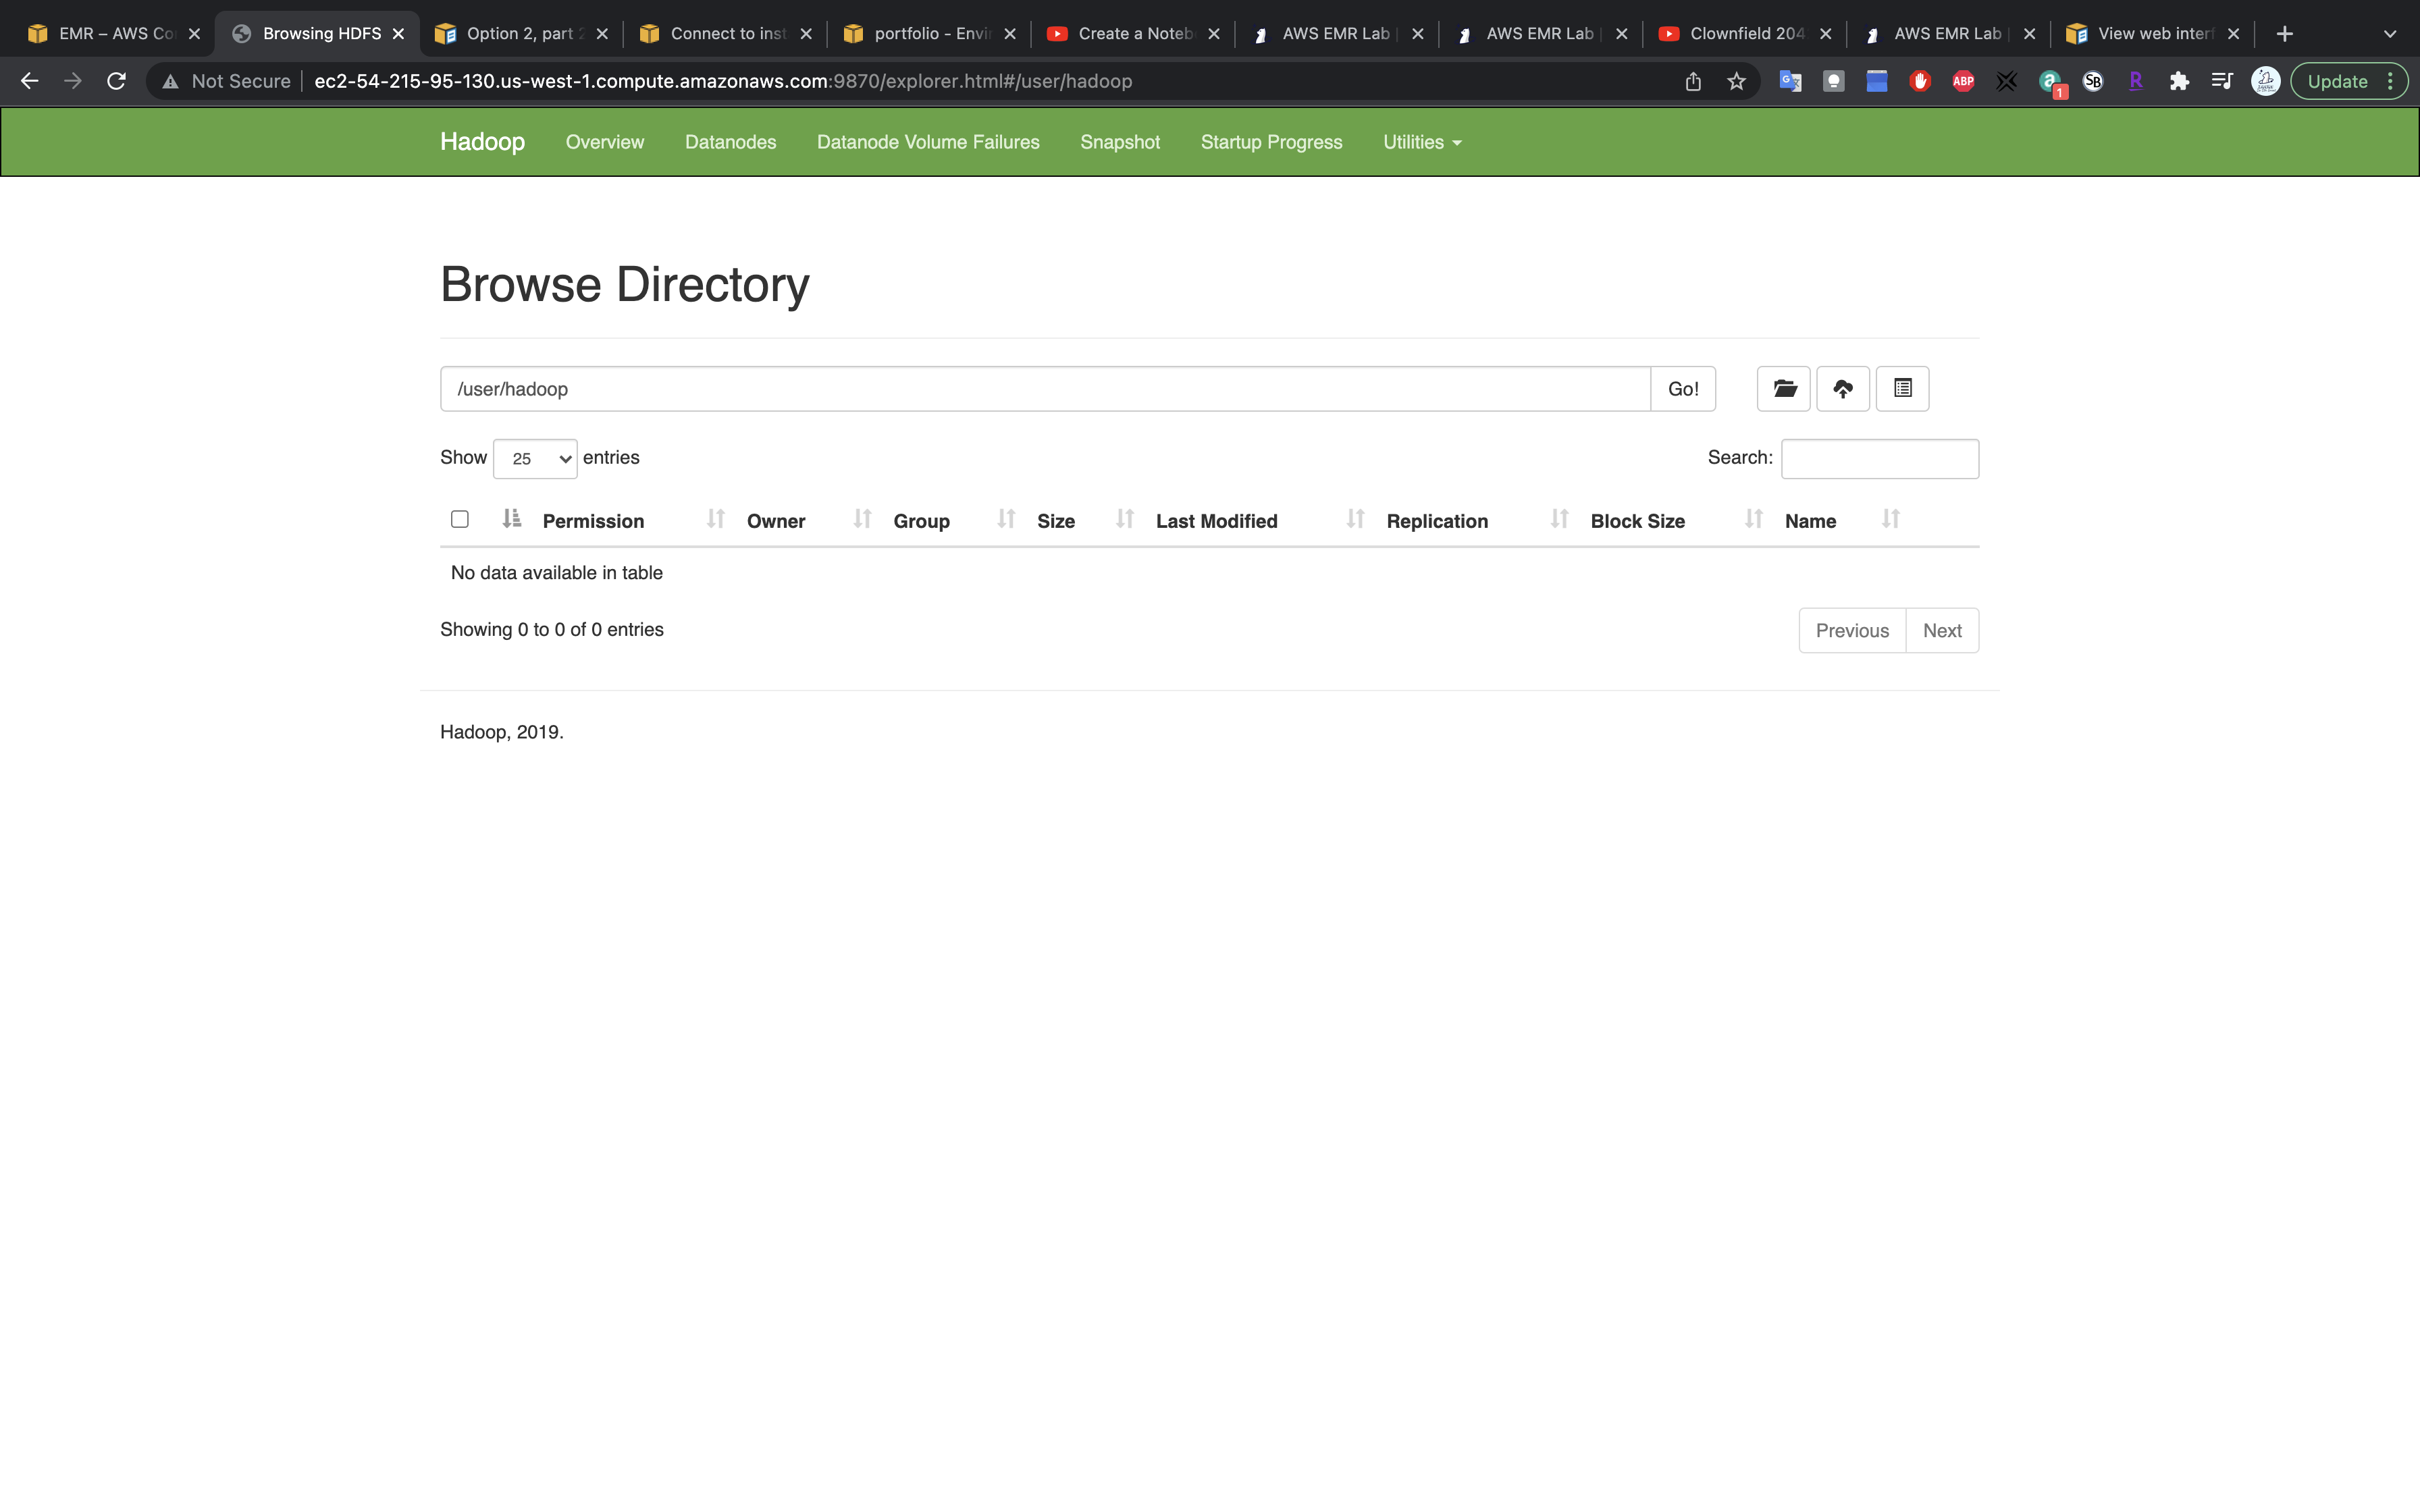
1 | hdfs dfs -mkdir /user/sparkify_data |
Let’s make a directory under /user/ to store the files.
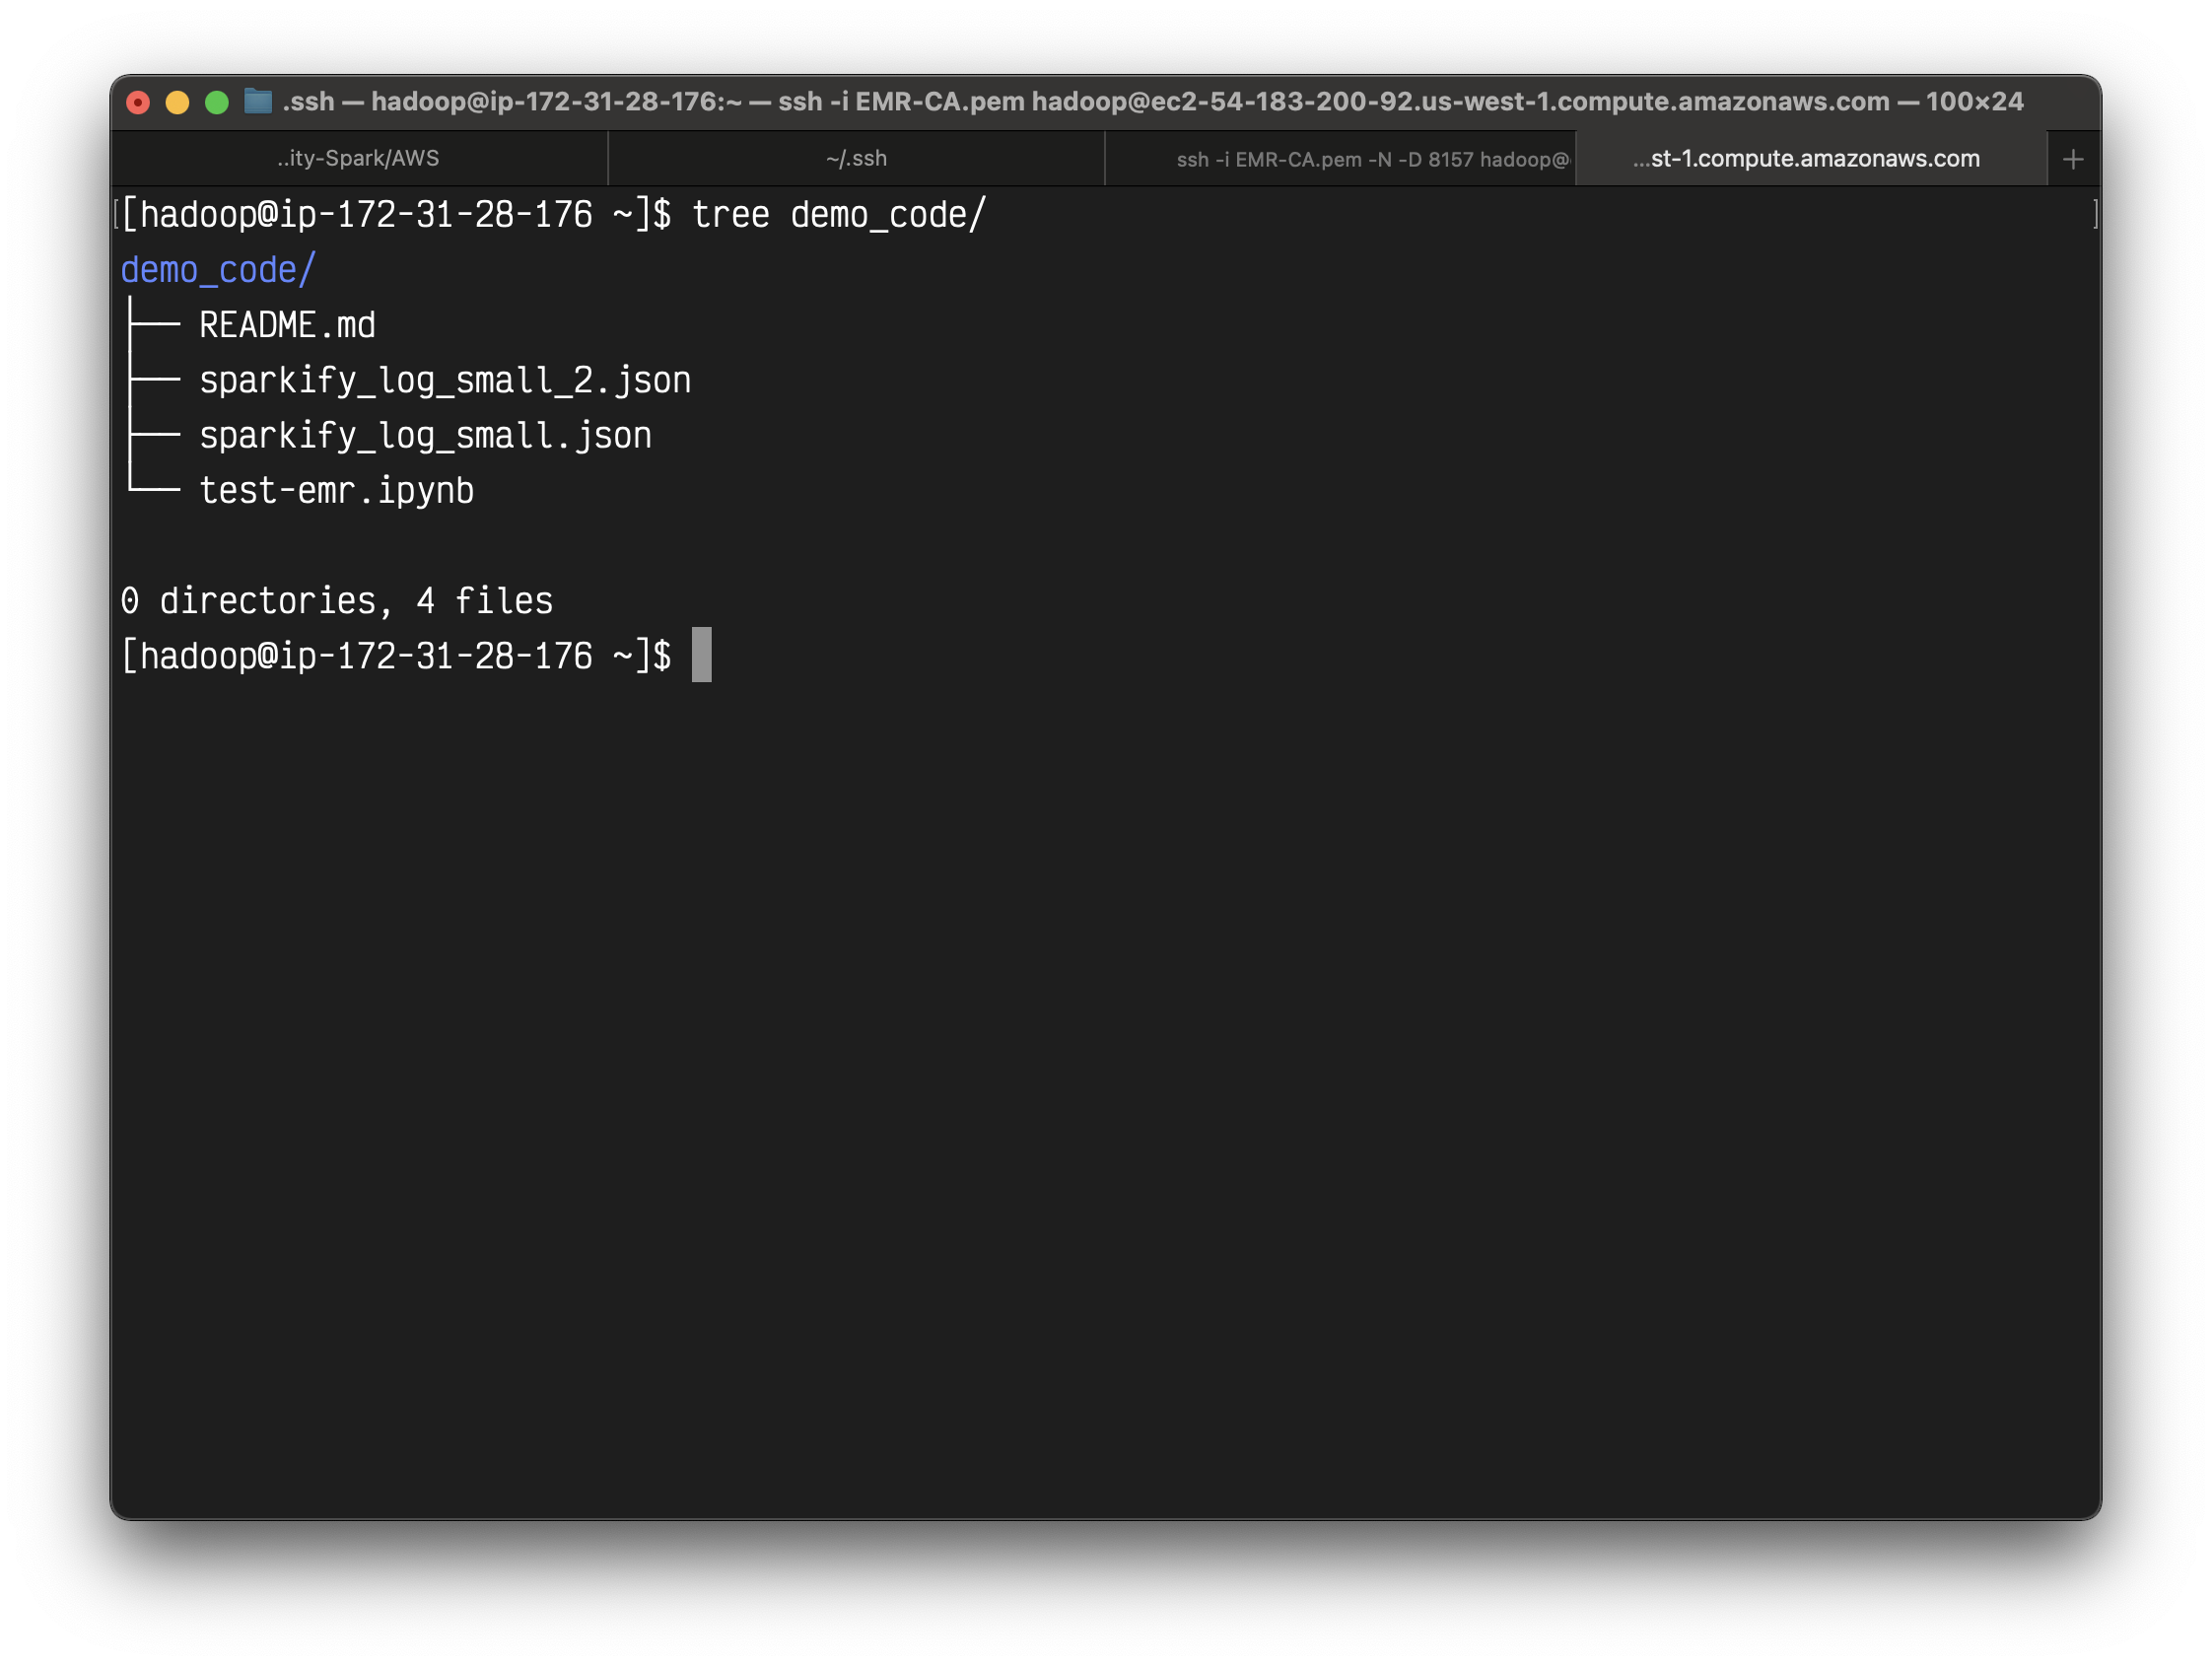
1 | scp -i ~/.ssh/EMR-CA.pem -r demo_code hadoop@ec2-54-183-200-92.us-west-1.compute.amazonaws.com:~/ |
Upload the demo_code directory to master node.
The files are here.
We can see the directory on the master node.
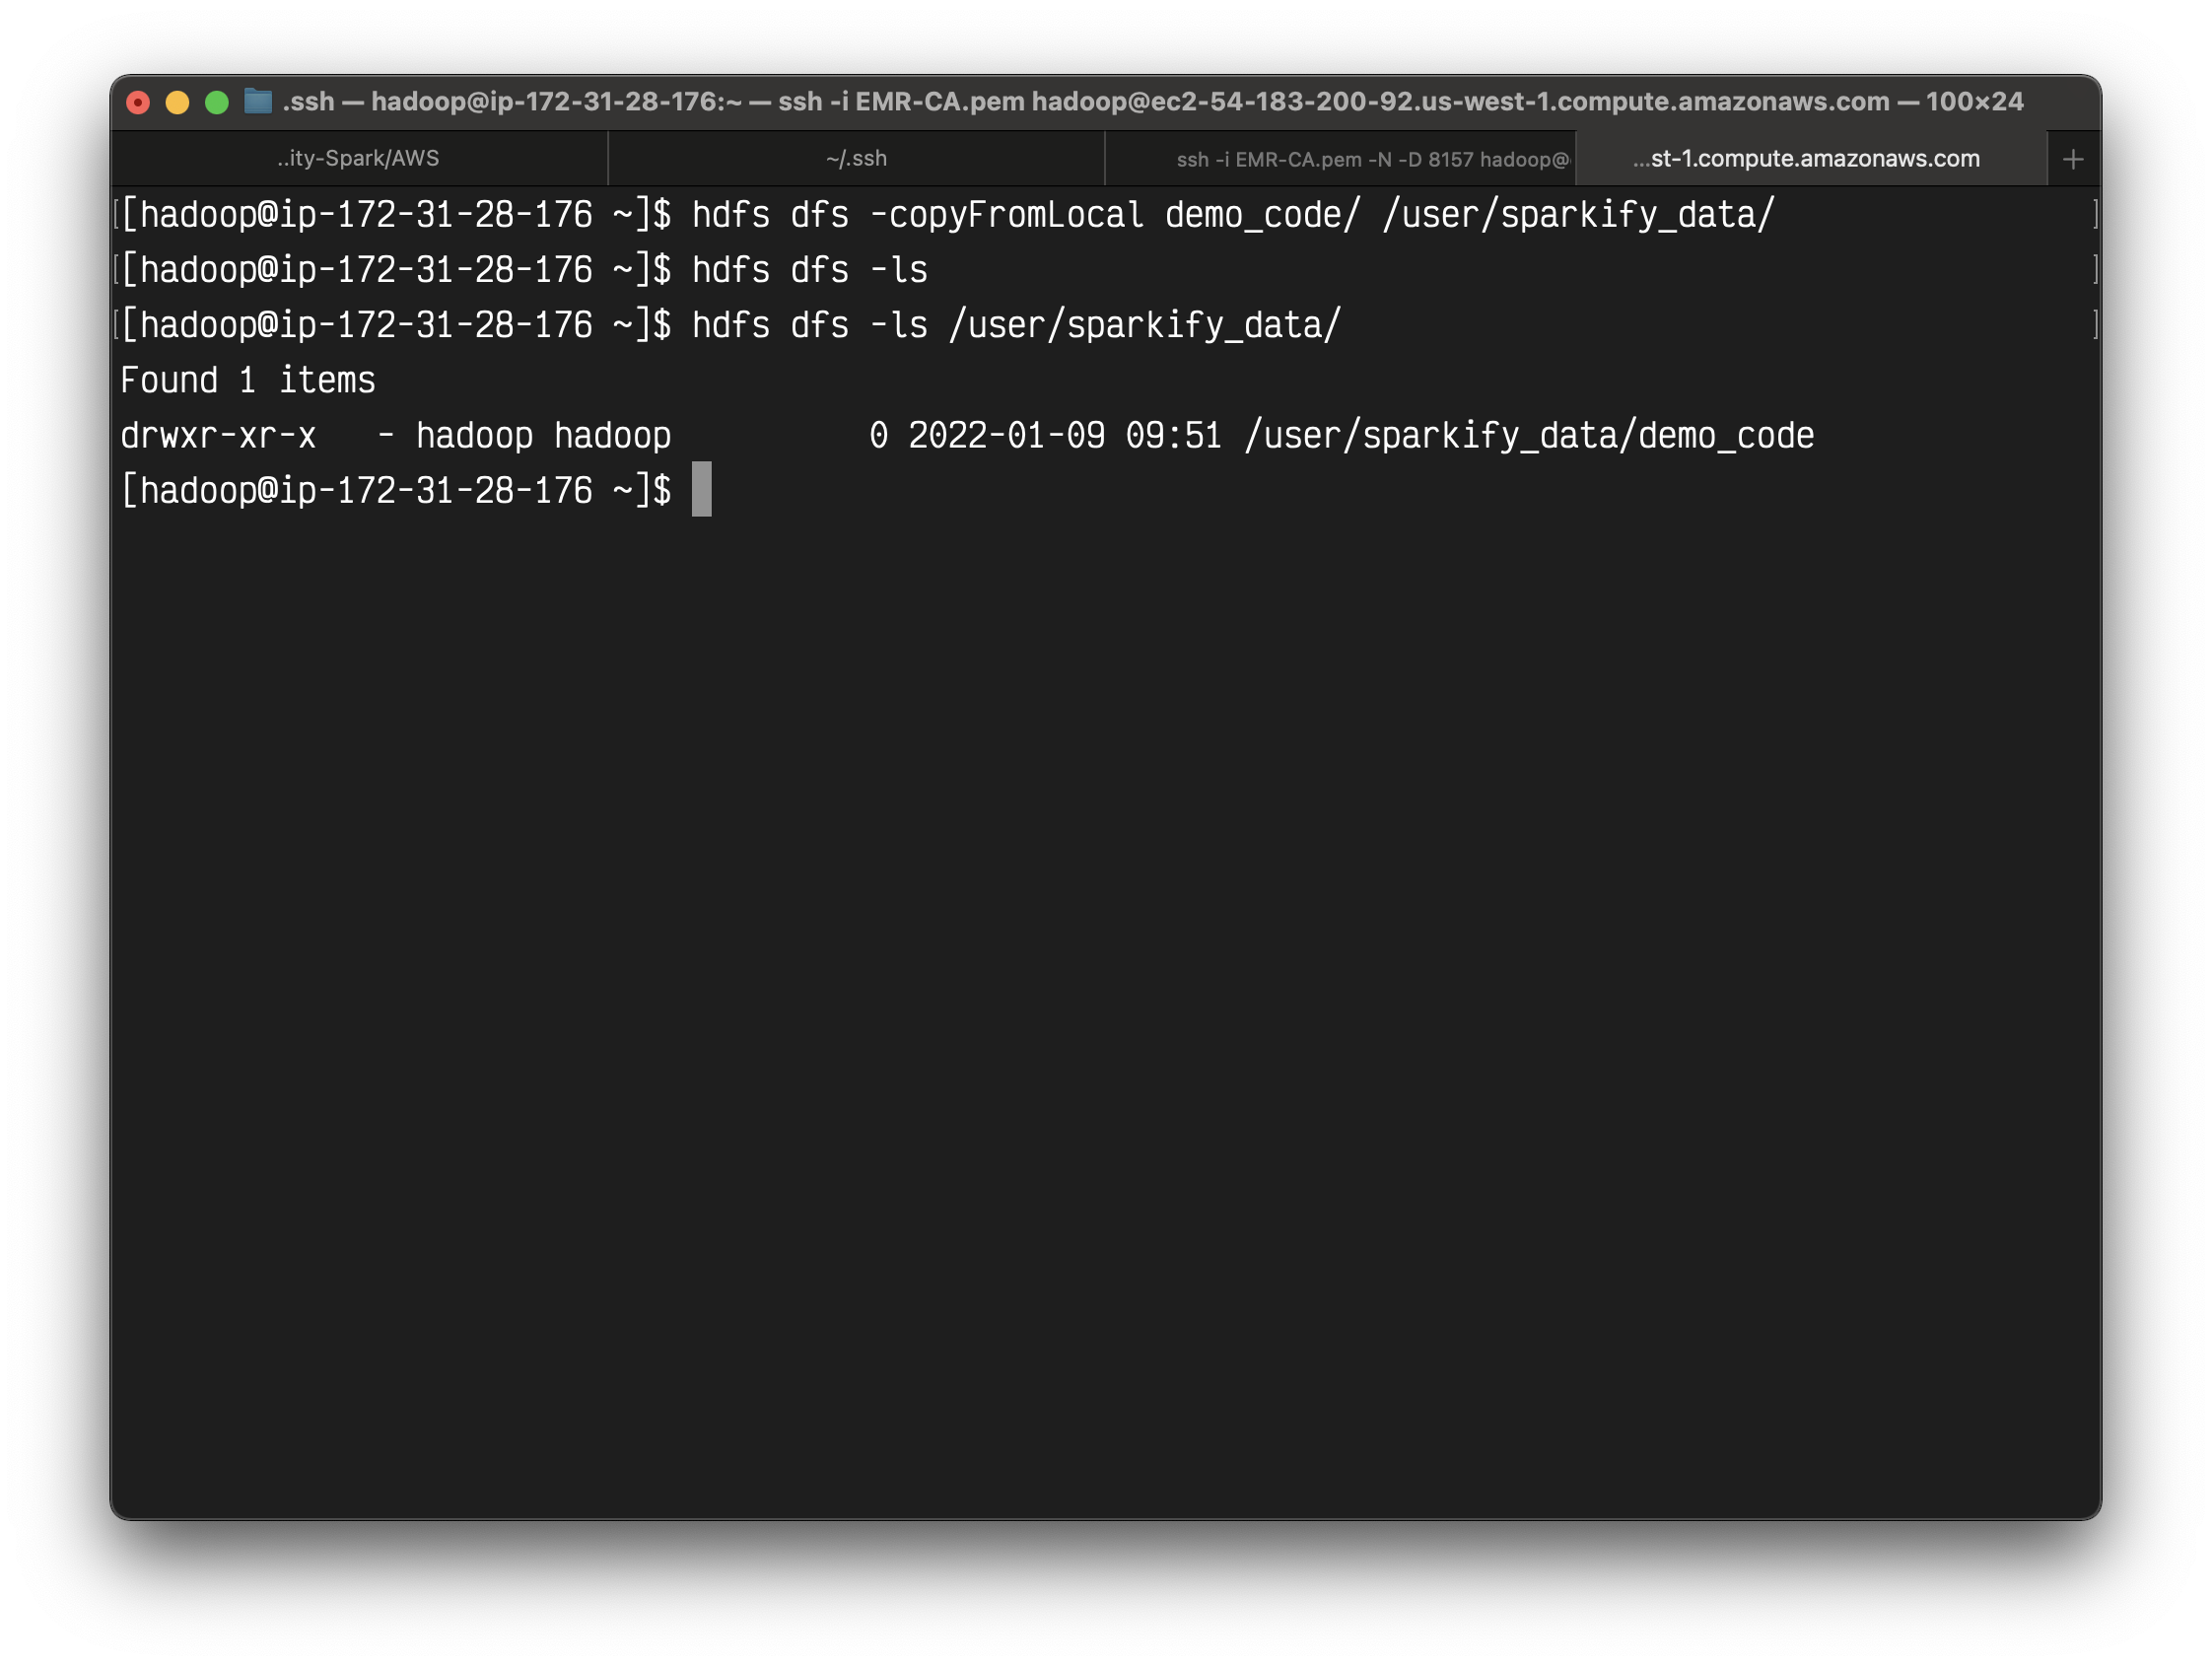
1 | hdfs dfs -copyFromLocal demo_code/ /user/sparkify_data/ |
Copy files from master node to HDFS.
You can also see it on user interface.
Notebook
Create a Jupyter notebook on the EMR cluster.
- Kernel:
PySpark
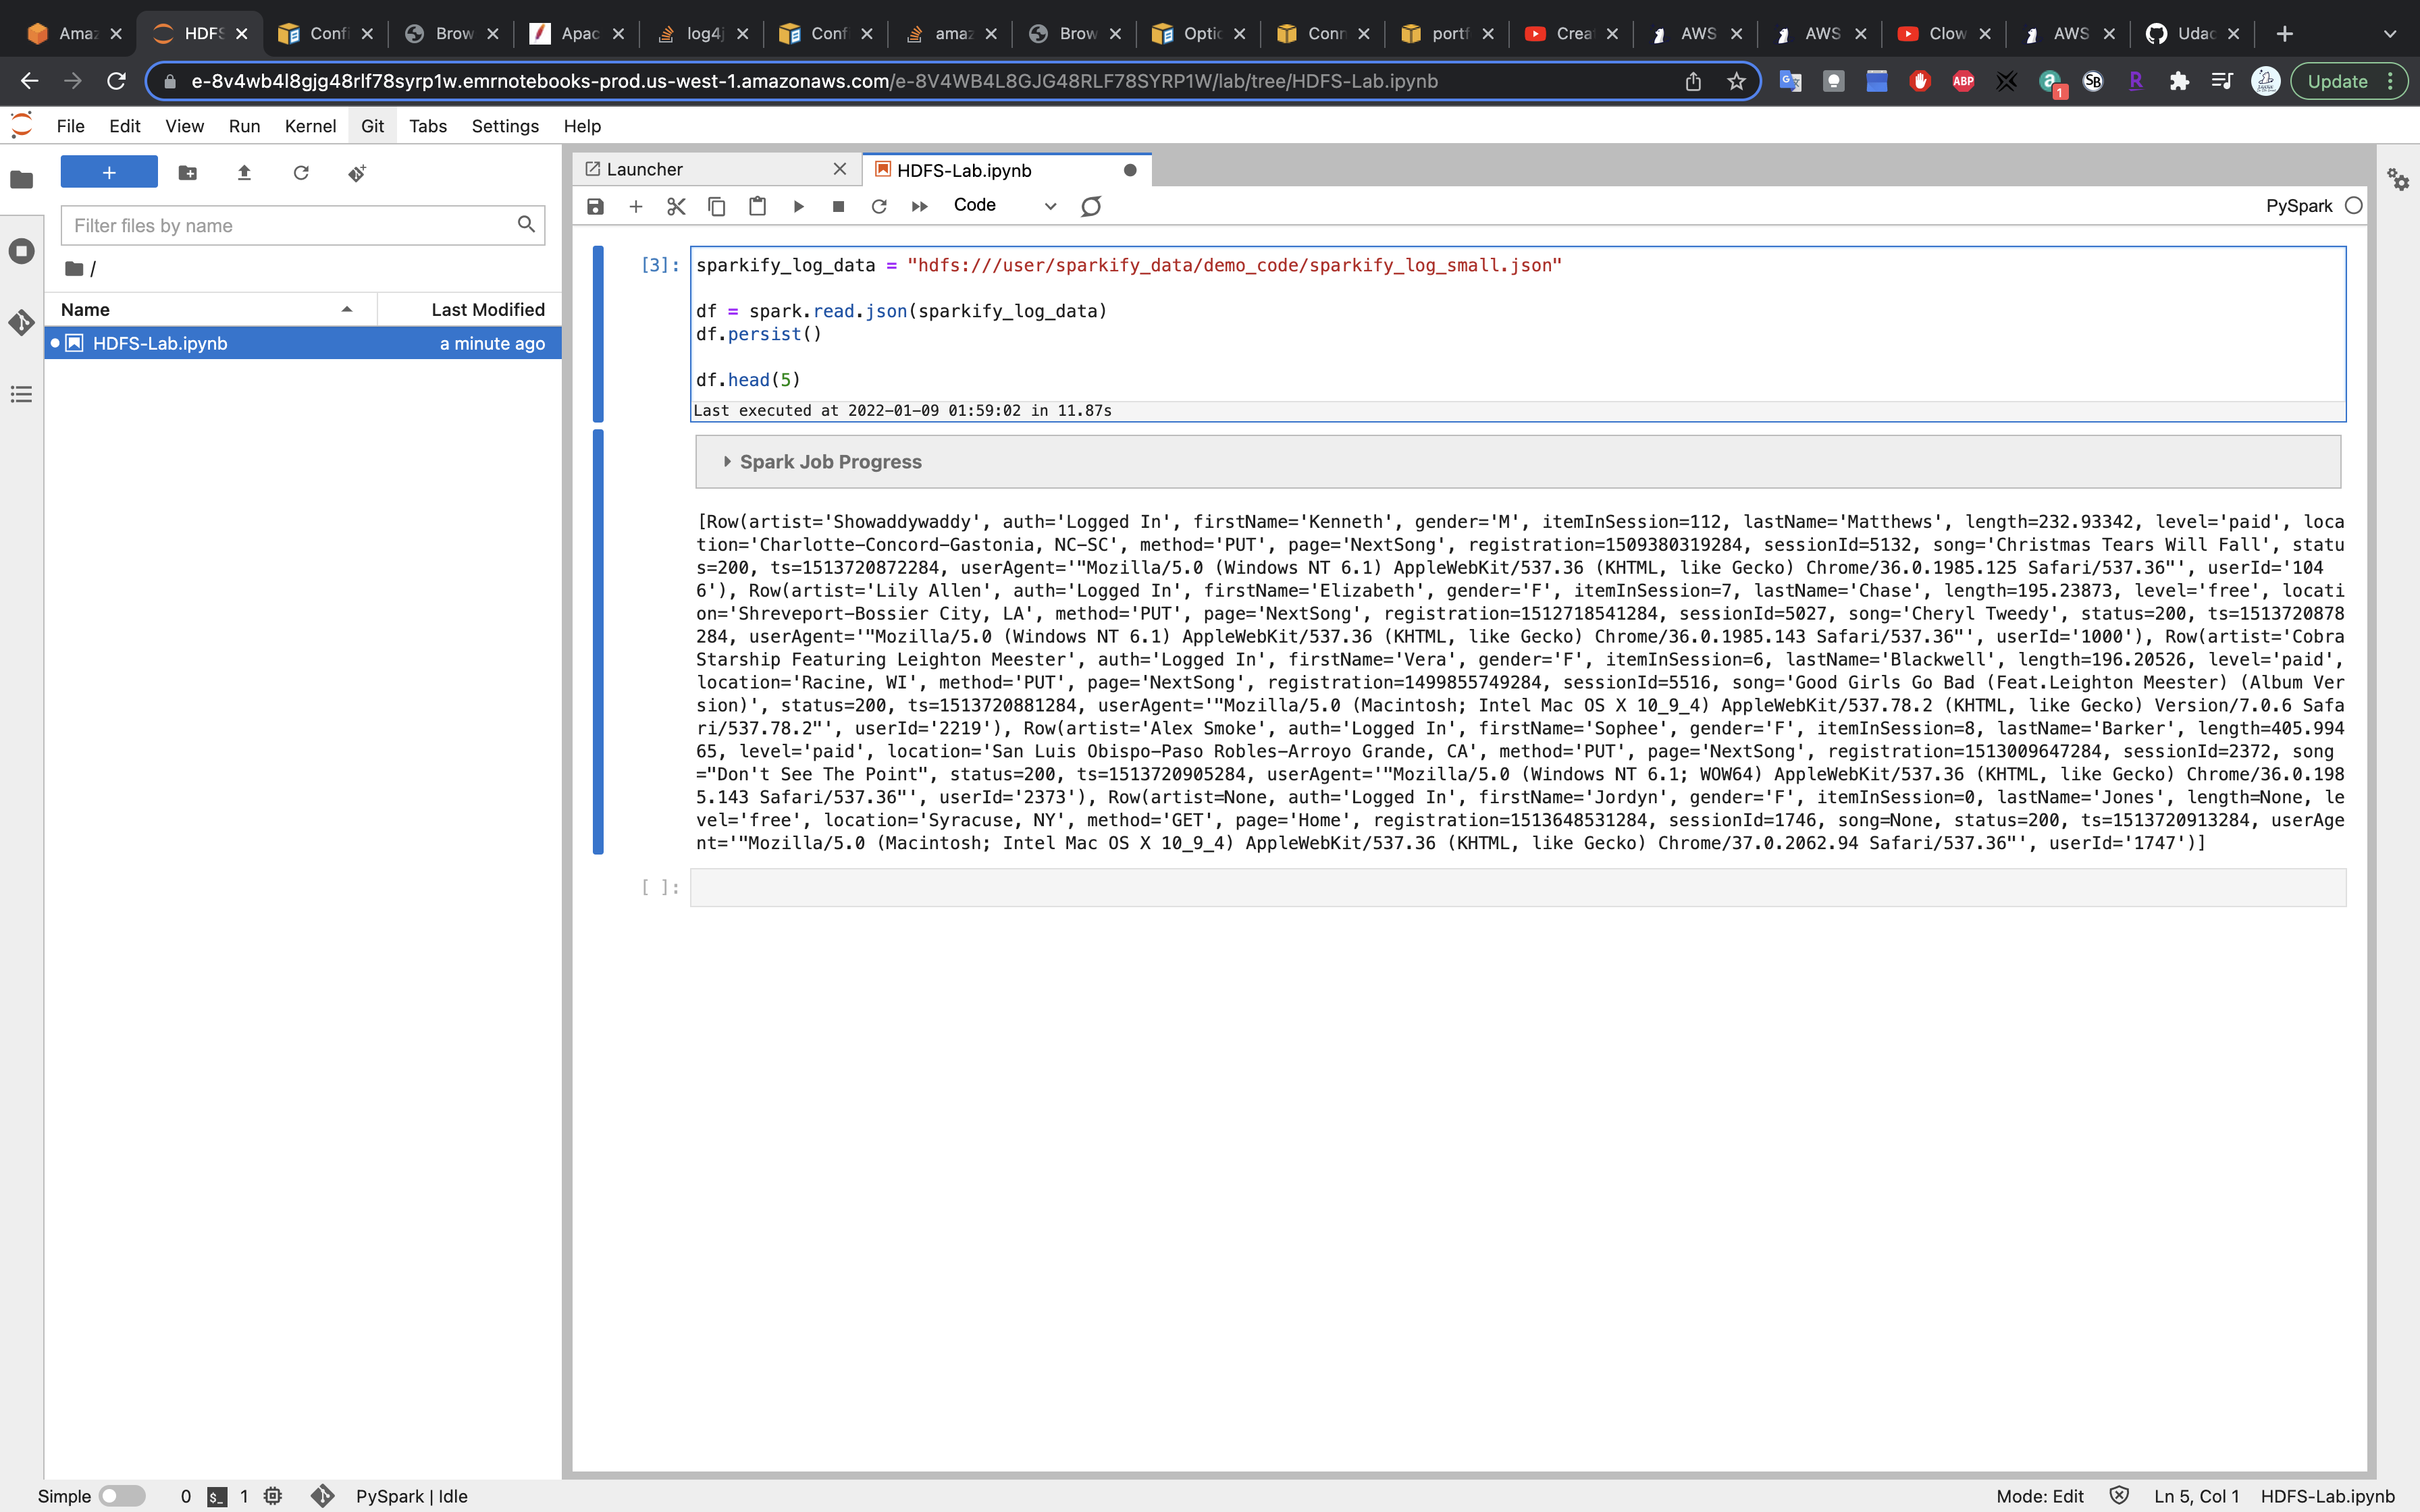
1 | sparkify_log_data = "hdfs:///user/sparkify_data/demo_code/sparkify_log_small.json" |
Run the above code and we successfully load files from the HDFS.
Clean UP
- Stop your notebook.
- Terminate your cluster.