AWS Database Lab
SQL Database
Introduction to AWS Relational Database Service (RDS)
https://play.whizlabs.com/site/task_details?lab_type=1&task_id=12&quest_id=35
Lab Details
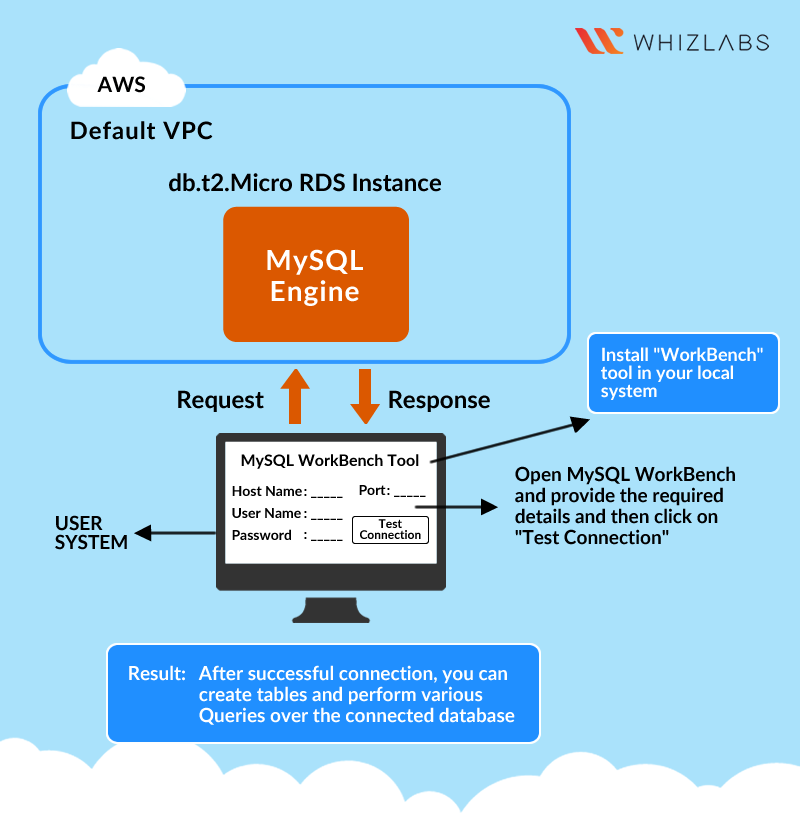
- This lab walks you through to the creation and testing of an Amazon Relational Database Service (Amazon RDS) database. We will create an RDS MySql Database and test the connection using MySQL Workbench.
Task Details
- Create RDS Database Instance
- Connecting to RDS Database on a DB Instance using the MySQL Workbench
- Test Connection
Prerequisites
For testing this lab, it is necessary to download the MySql GUI Tool, To download it, go to the Download MySQL Workbench page. Based on your OS, select the respective option under Generally Available (GA) Releases. Download and Install.
RDS
Services -> RDS
Region: N.Virginia
Create RDS Database Instance
Click on Database in the left navigation.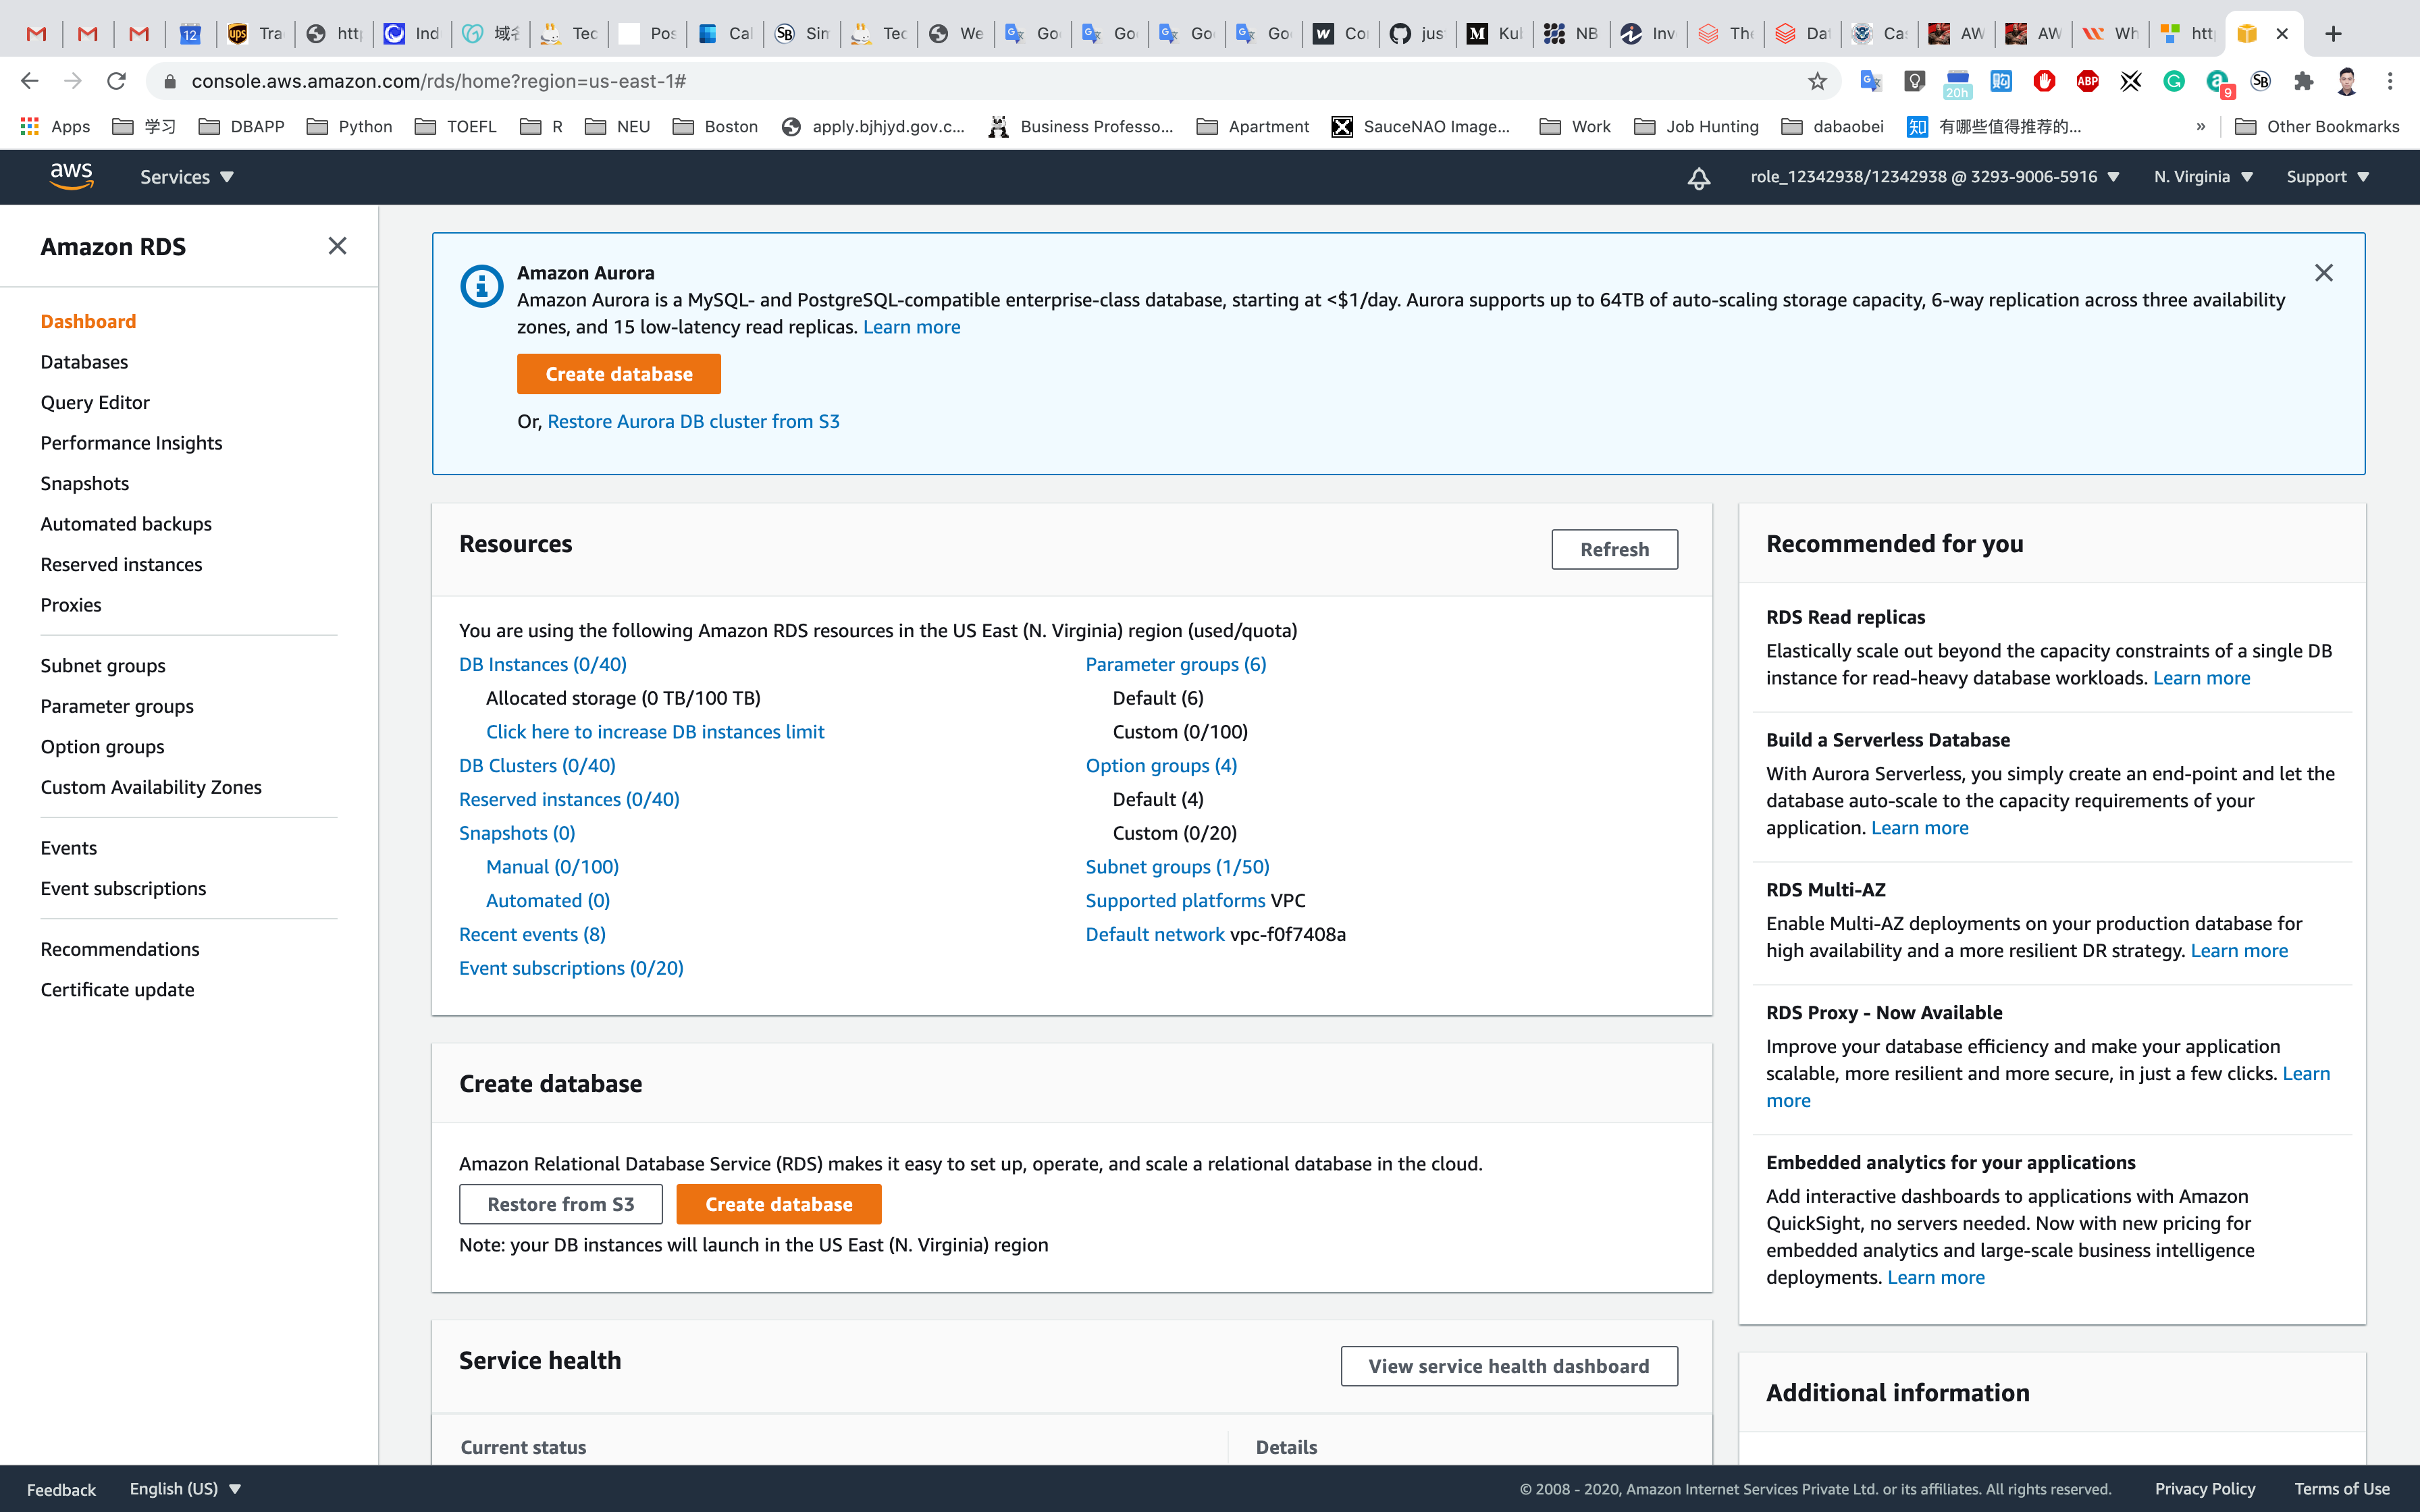
Click on Create Database.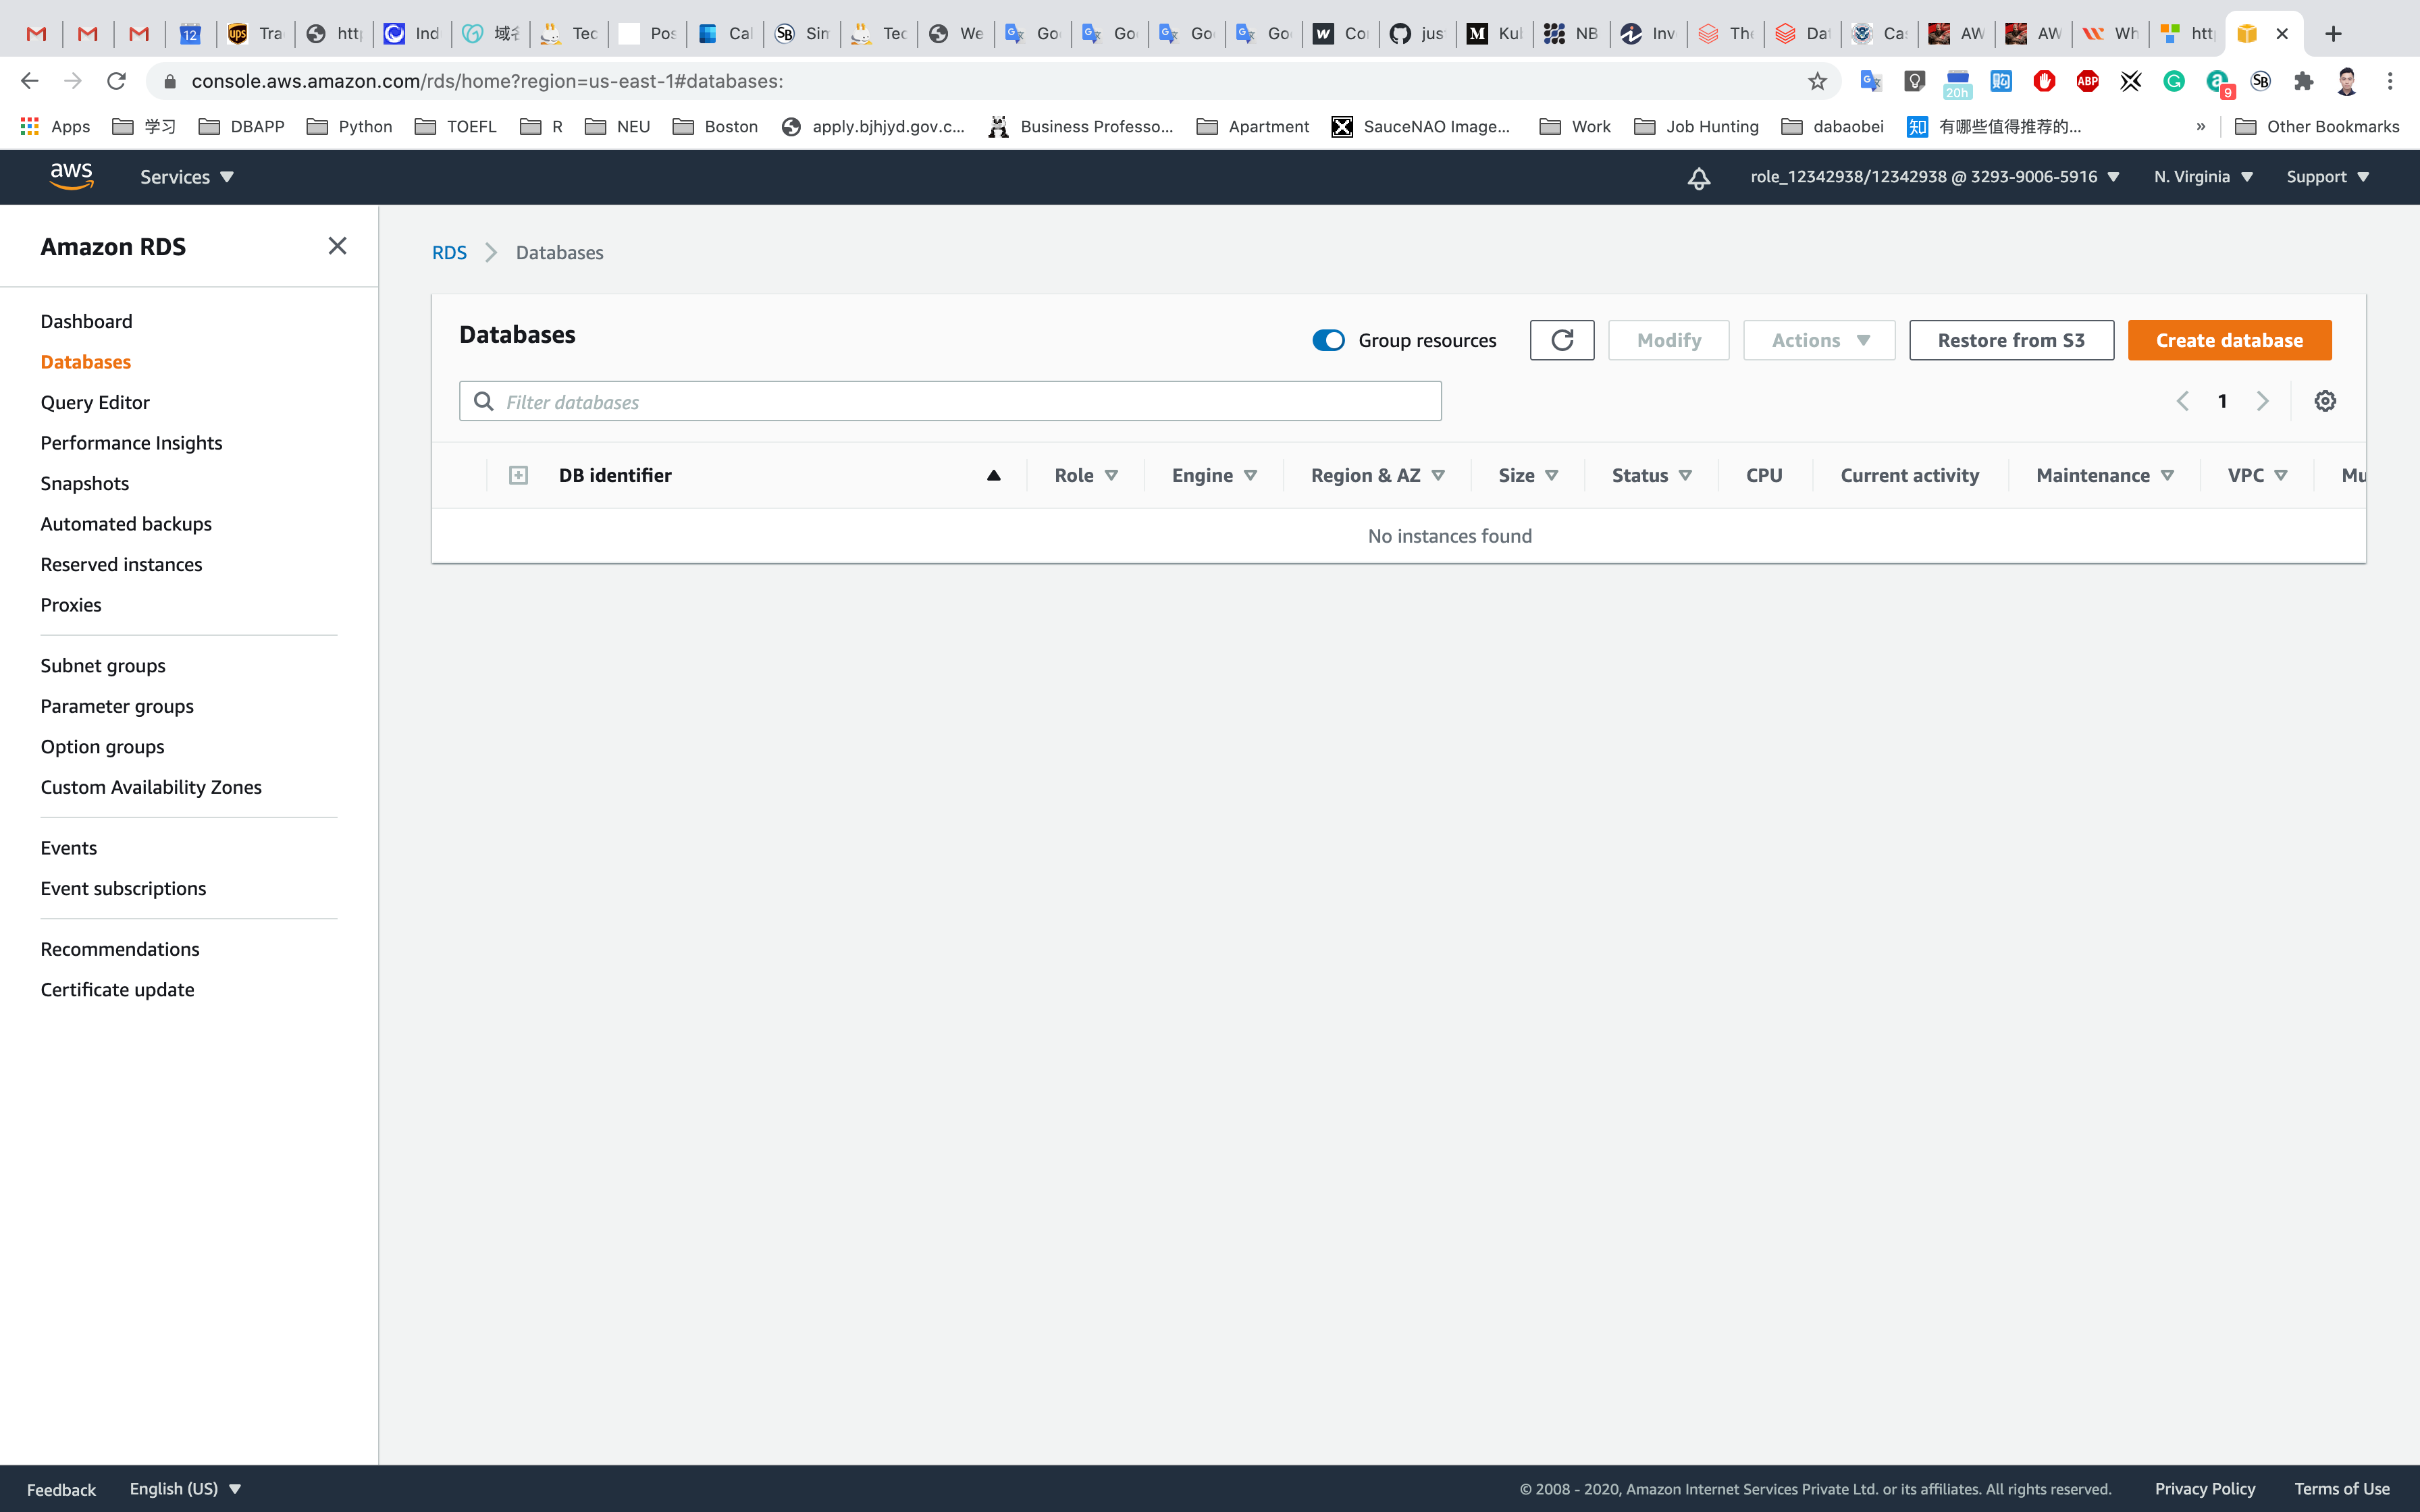
Click on Switch to your original interface on top of your screen.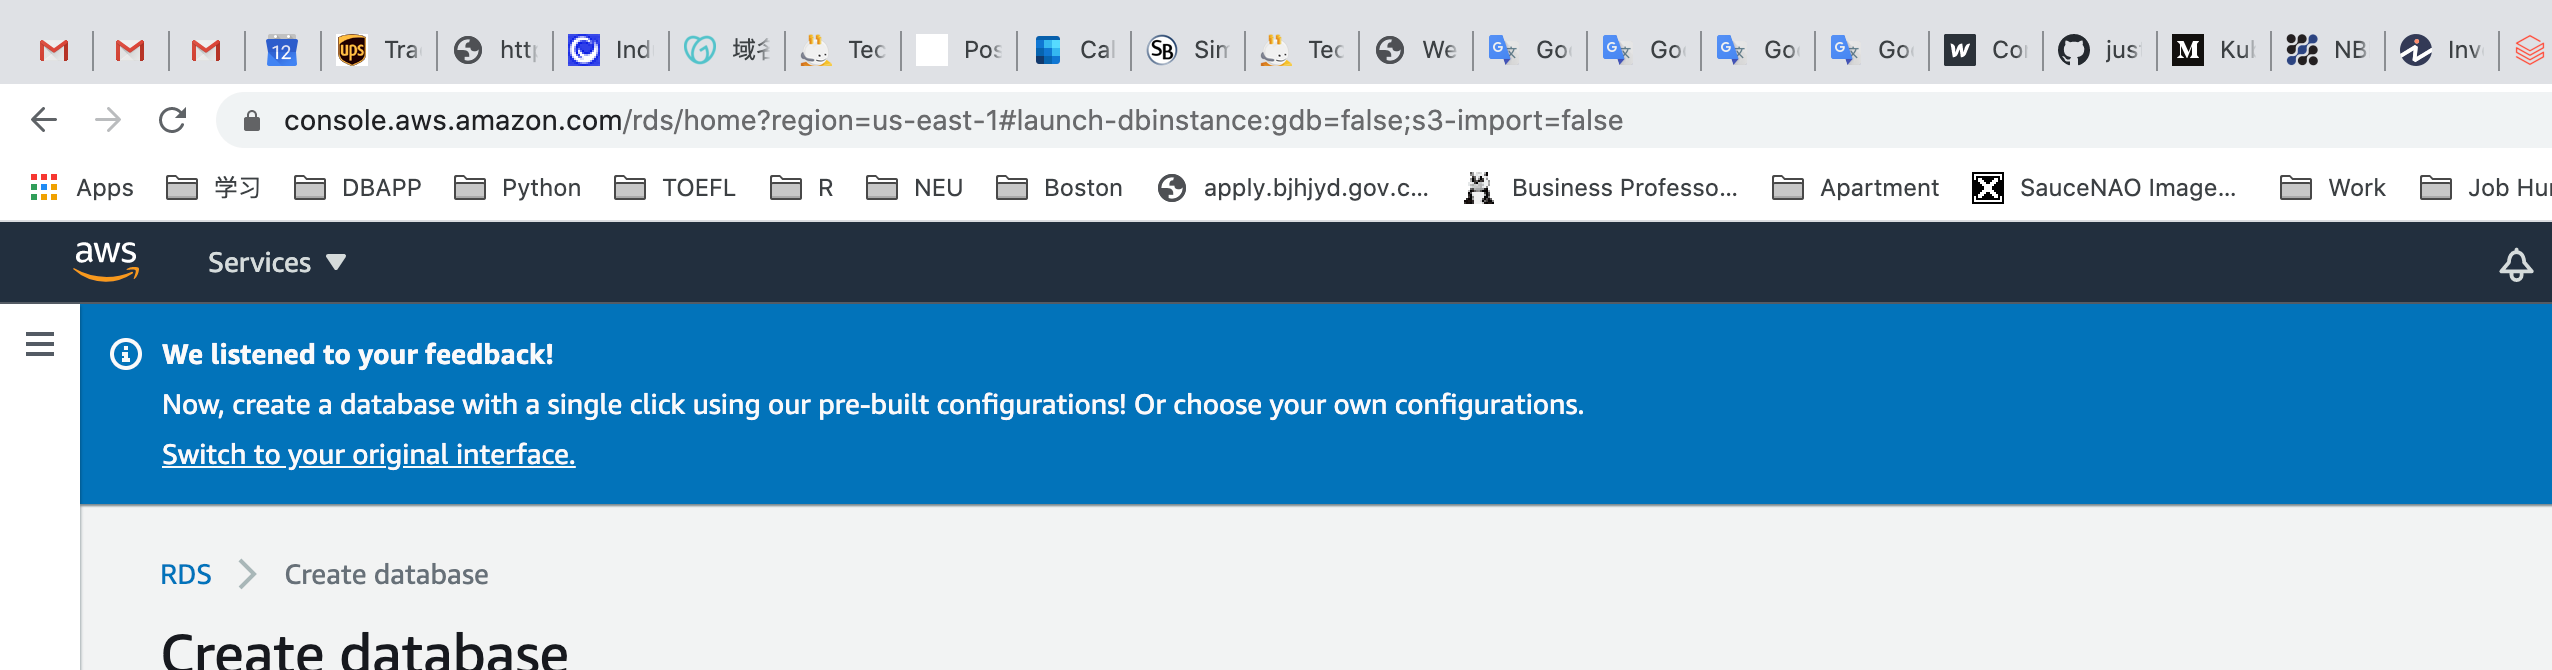
Select Engine:
MySQL
Select the checkbox in the bottom of the page to see only those settings available under the Free Tier: Only enable options eligible for RDS Free Usage Tier
Click on Next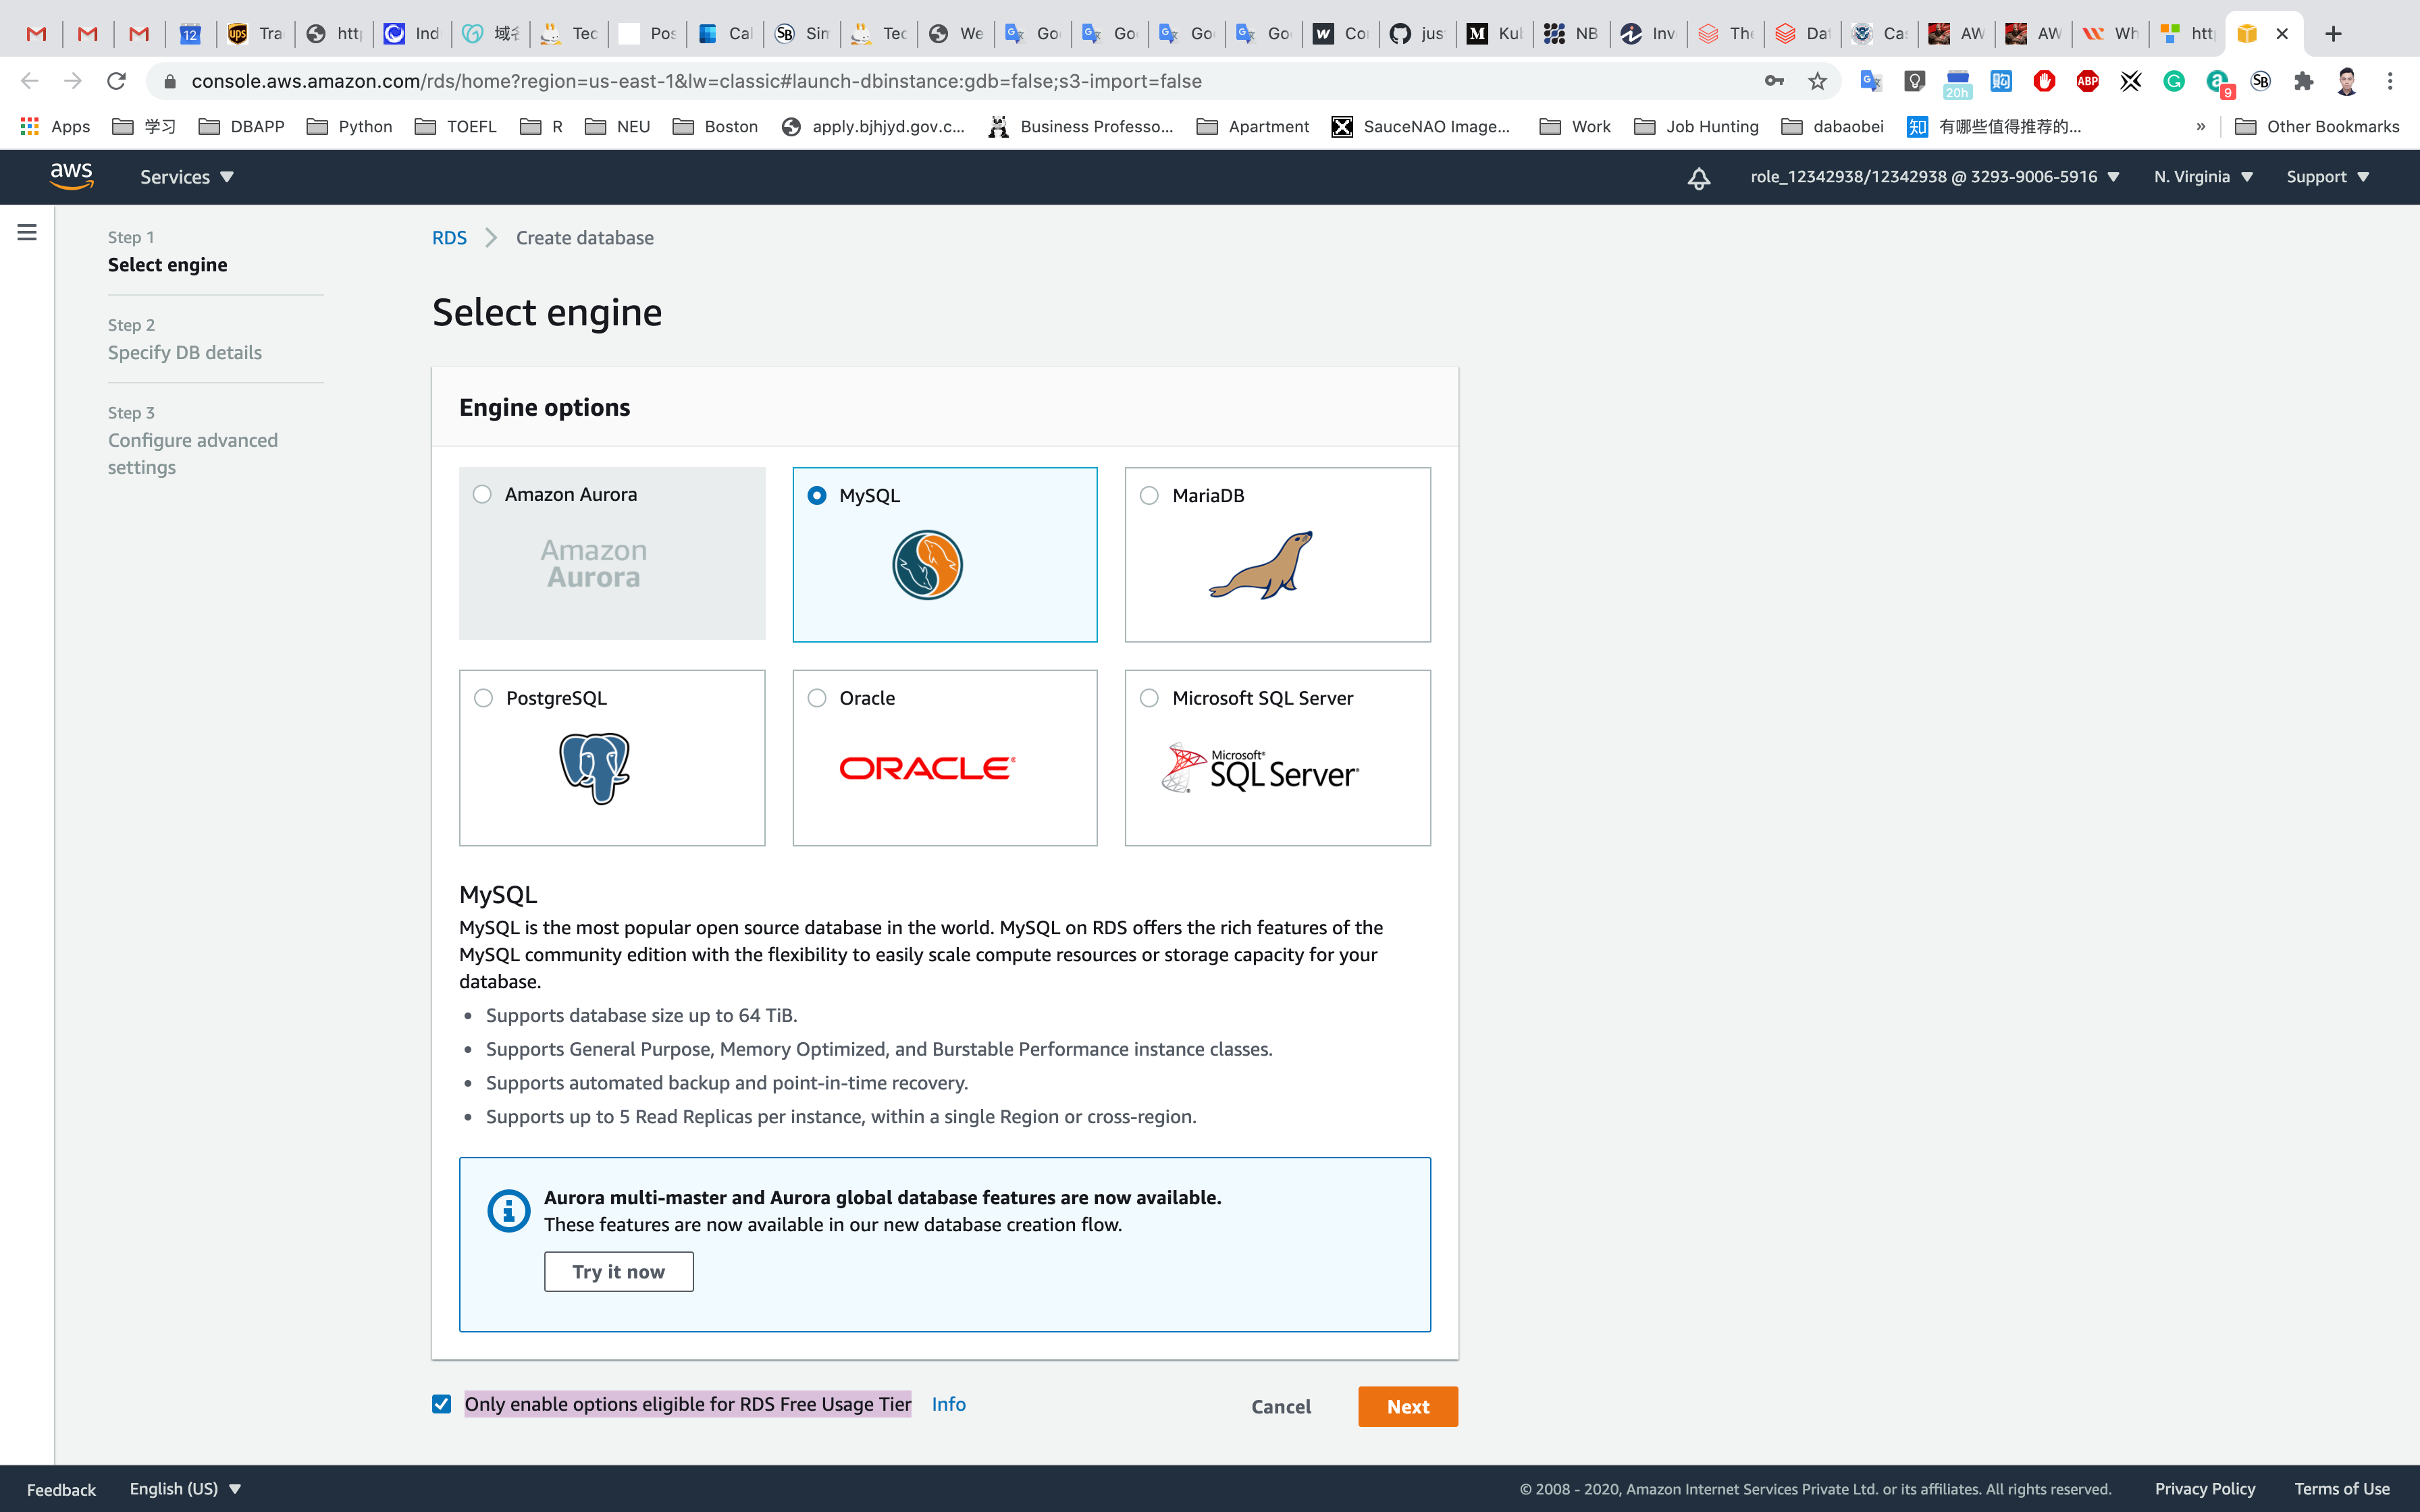
Specify DB Details
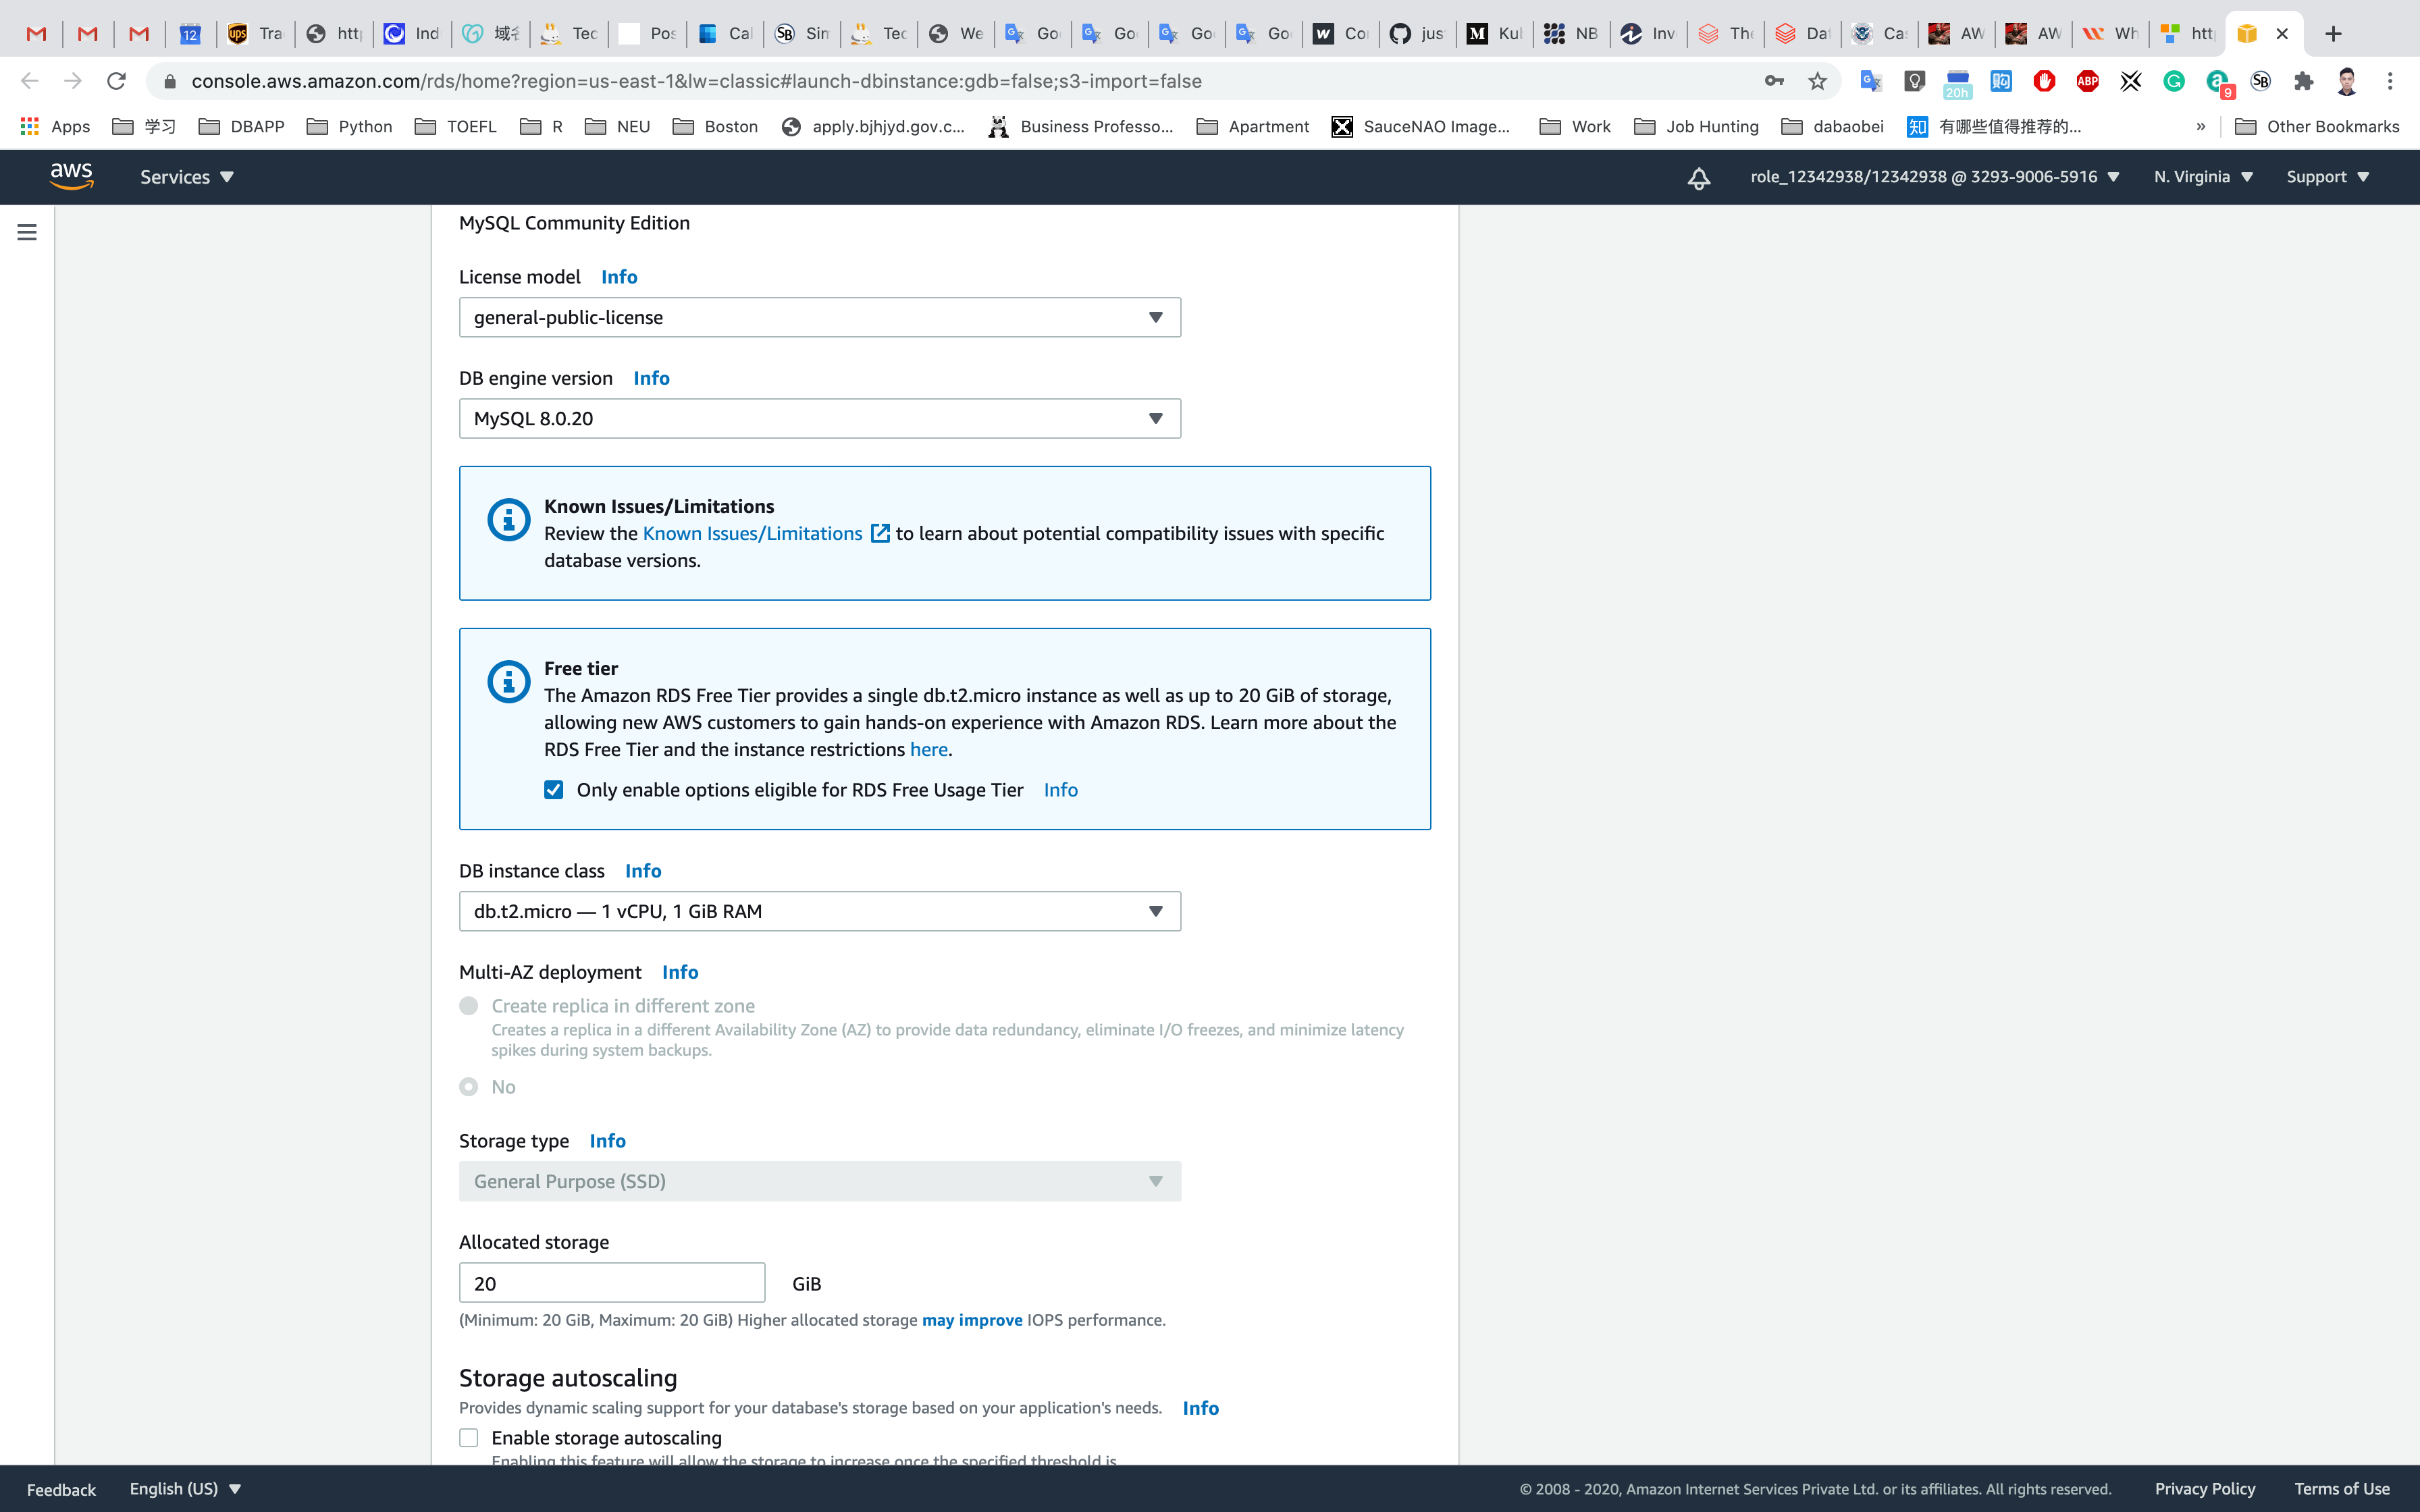
- Instance specifications
- License model:
general-public-license - DB engine version: Leave it as default version.
- DB instance class:
db.t2.micro — 1 vCPU, 1 GiB RAM - Multi-AZ deployment: default No.
- Storage type:
General Purpose (SSD) - Allocated storage:
20 (default) - Enable storage autoscaling: Uncheck
- License model:
- Settings
- DB instance identifier:
mydatabaseinstance - Master username:
mydatabaseuser- Note: This is the username you used to log into the database the very first time.
- Master password and Confirm password:
mydatabasepassword, type the password again in the Confirm Password box.- Note: This is the username/password combo used to log onto your database. Please make note of them somewhere safe
- DB instance identifier:
Click on Next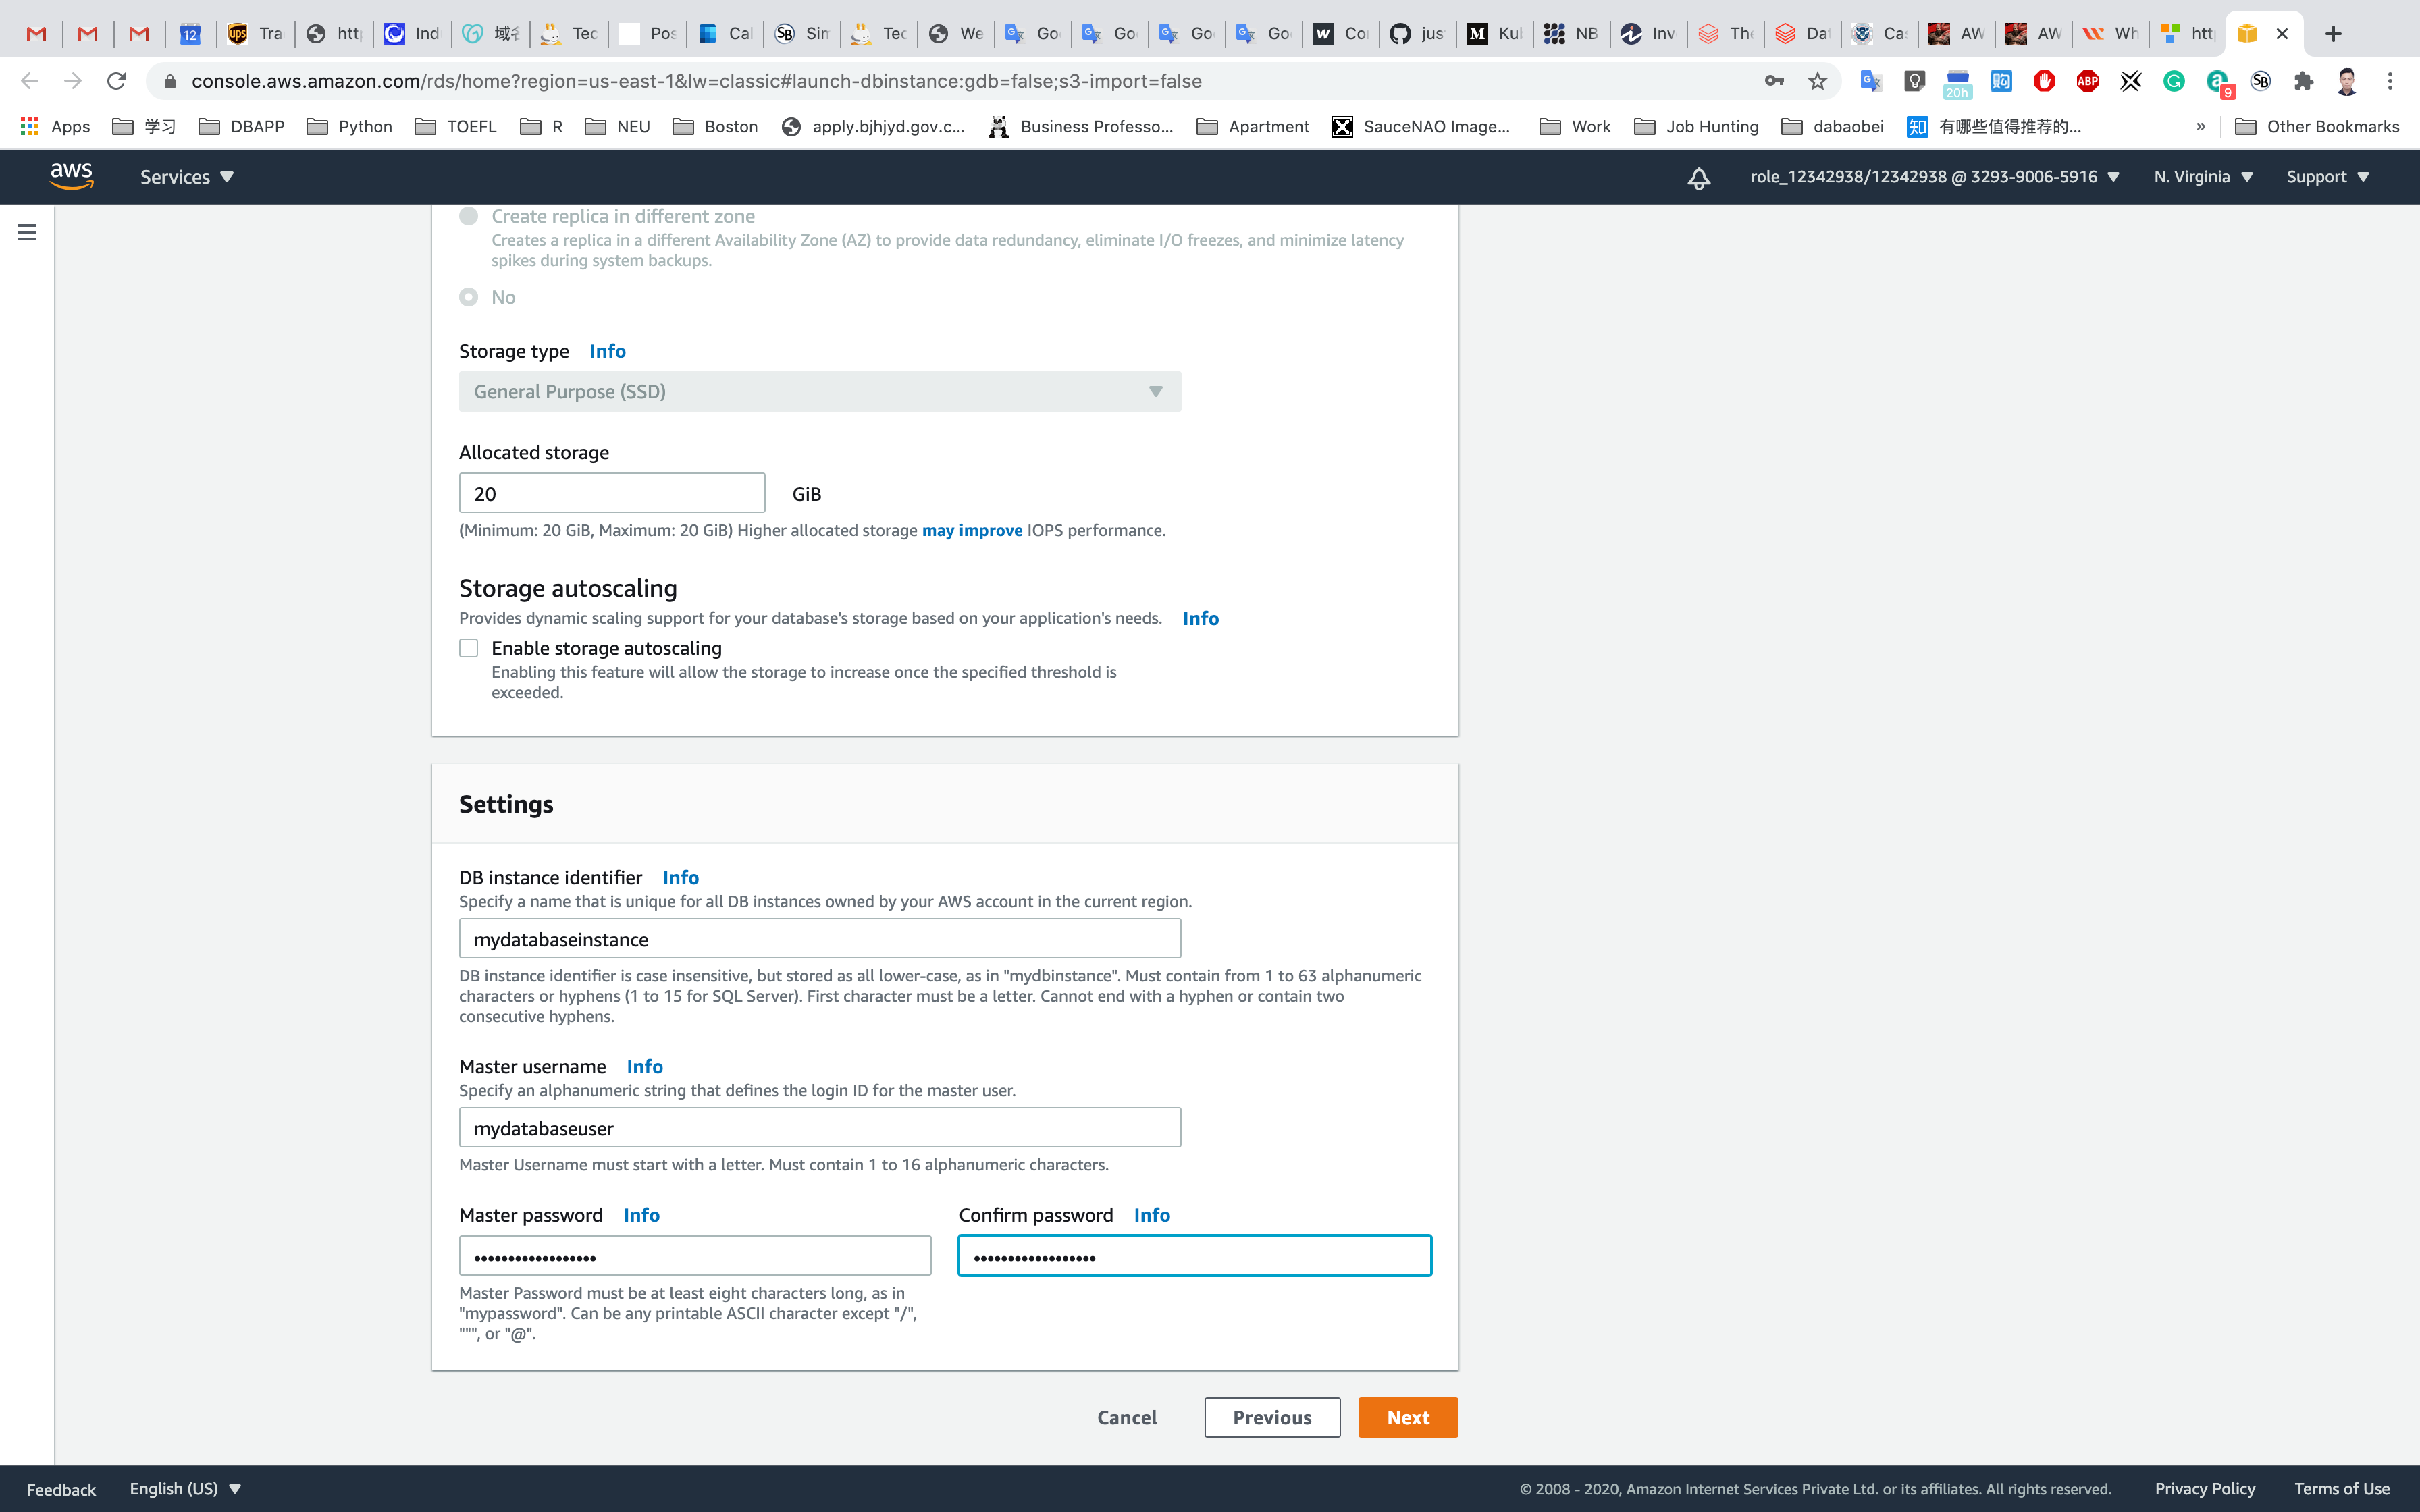
Configure advanced settings:
- Network & Security
- Virtual Private Cloud (VPC):
default VPC - Subnet group:
default - Public accessibility: Choose
Yes - Availability zone: default
No Preference - VPC security groups: Choose
Create new VPC security group
- Virtual Private Cloud (VPC):
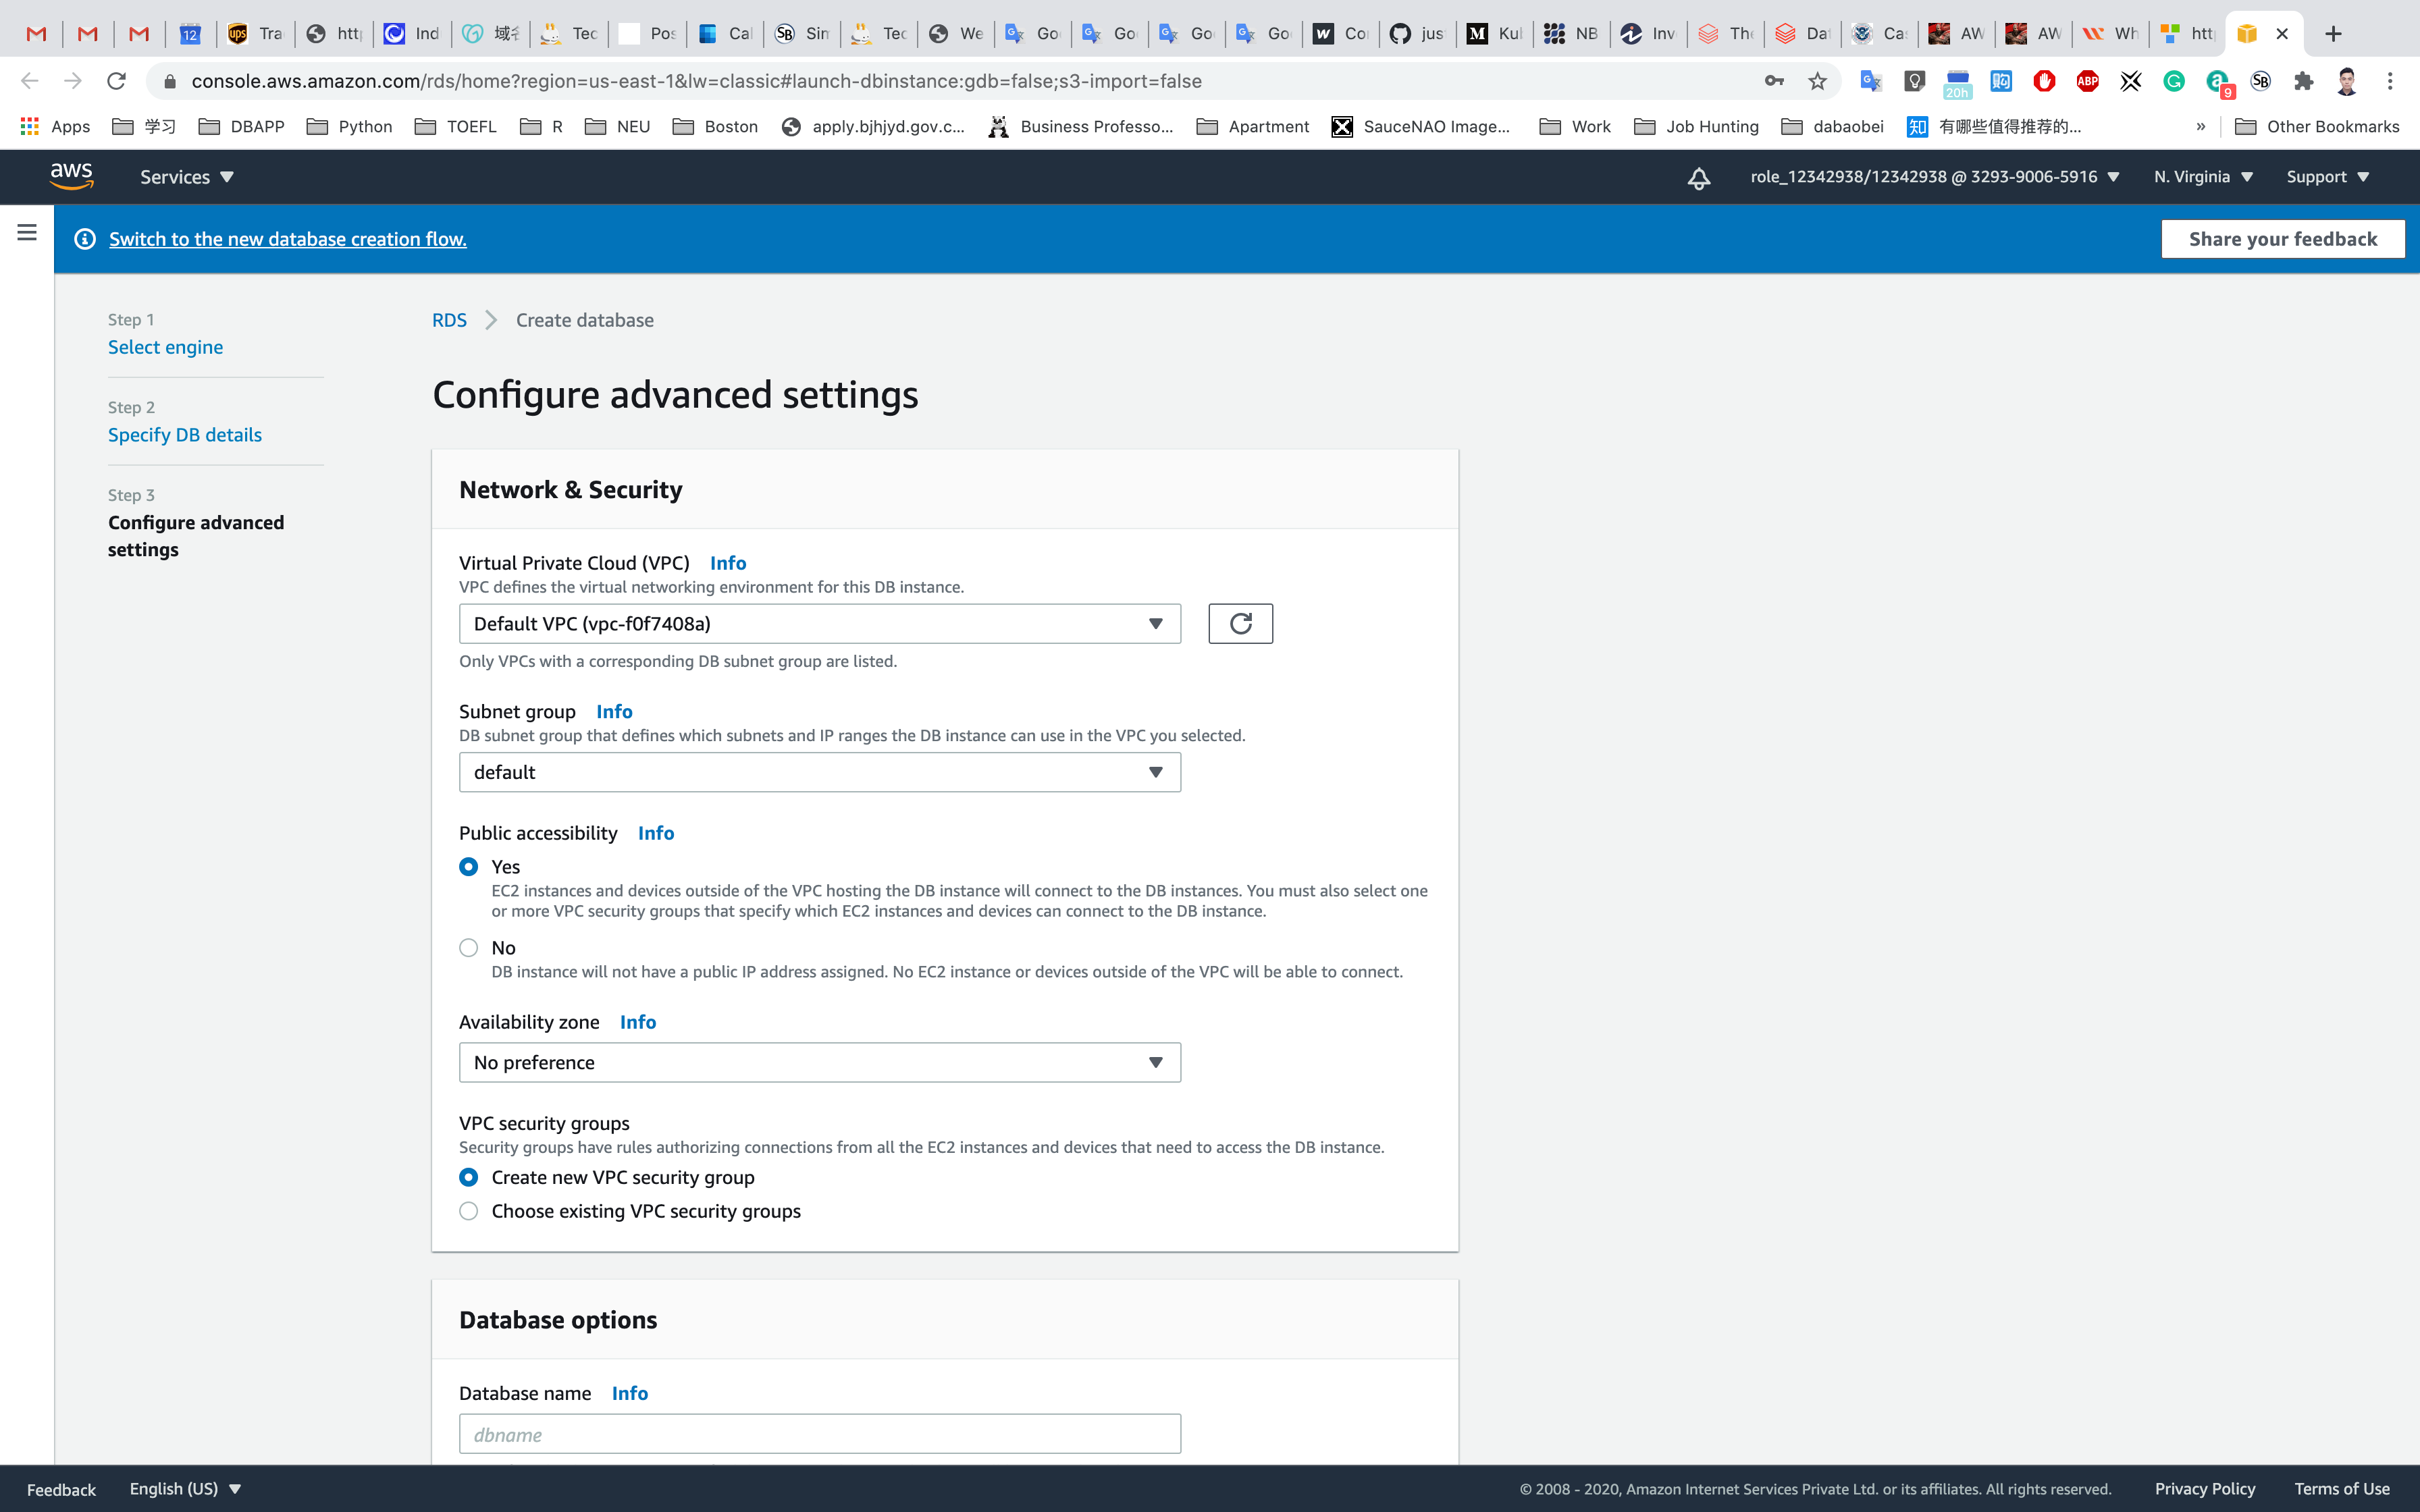
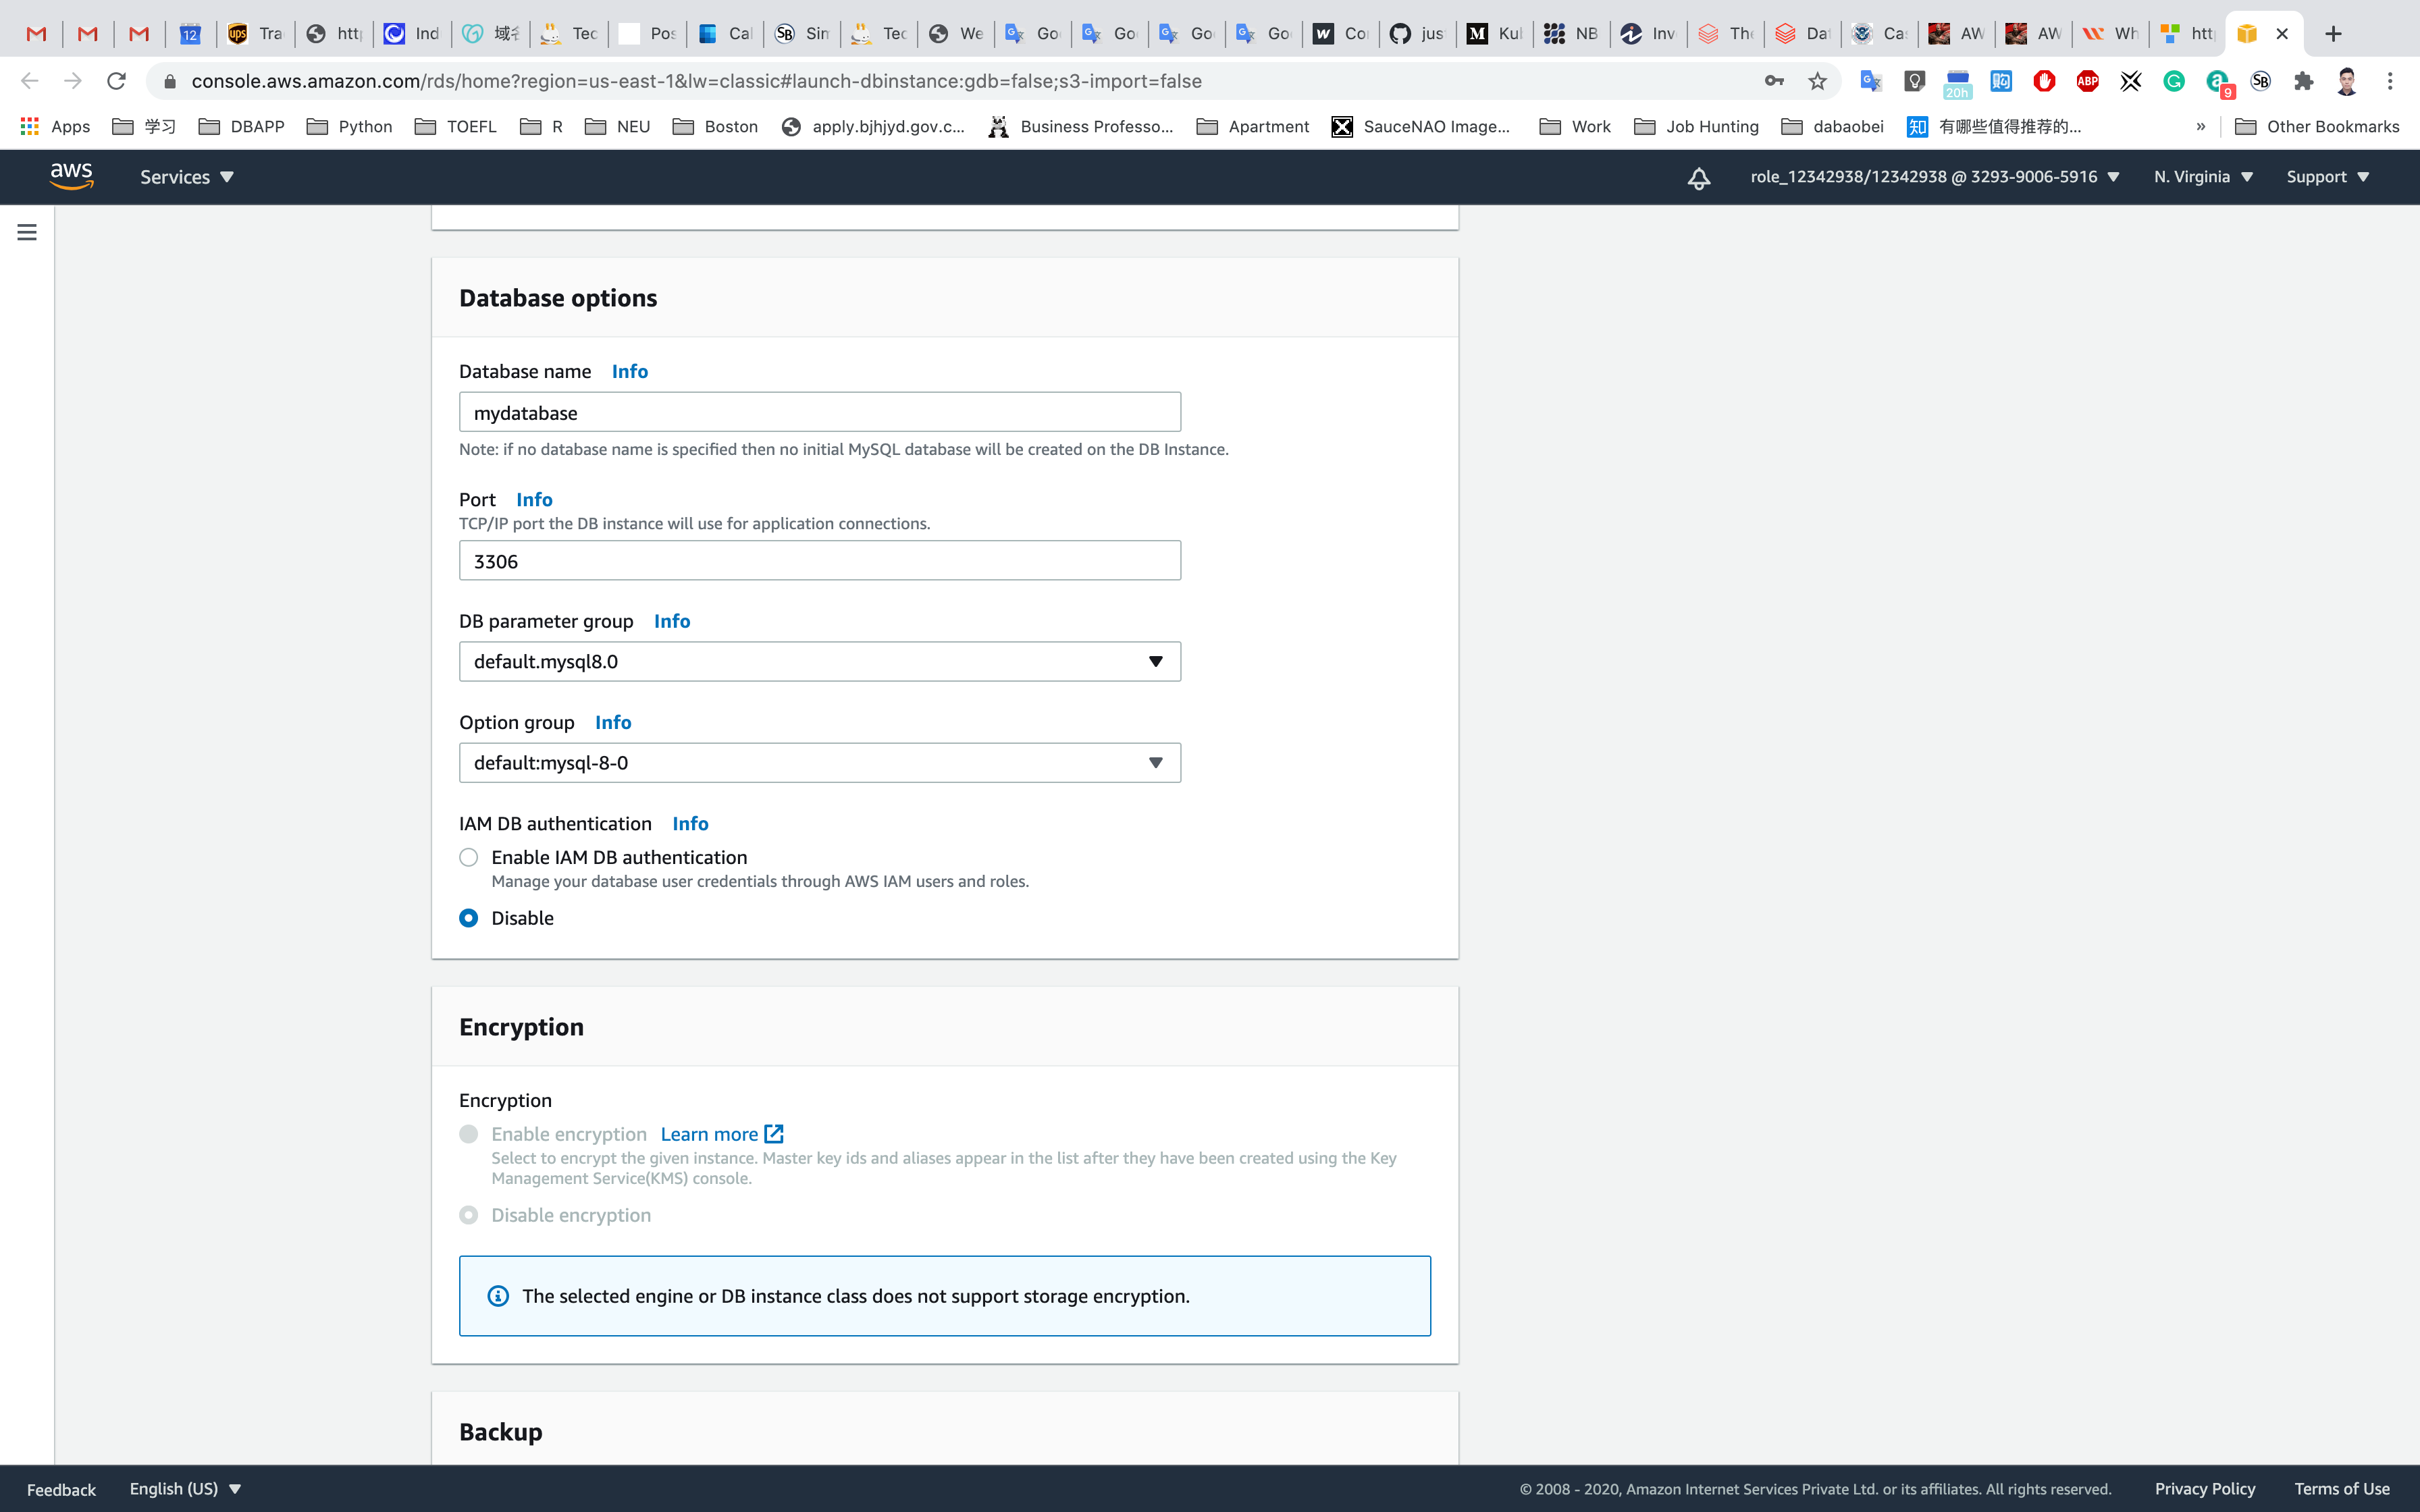
- Database Options
- Database name:
mydatabase- Keep a note of this database name.
- Database port: default
3306 - DB parameter group: default
- Option group: default
- IAM DB authentication: default
Disable
- Database name:
- Encryption
- Leave it default setting
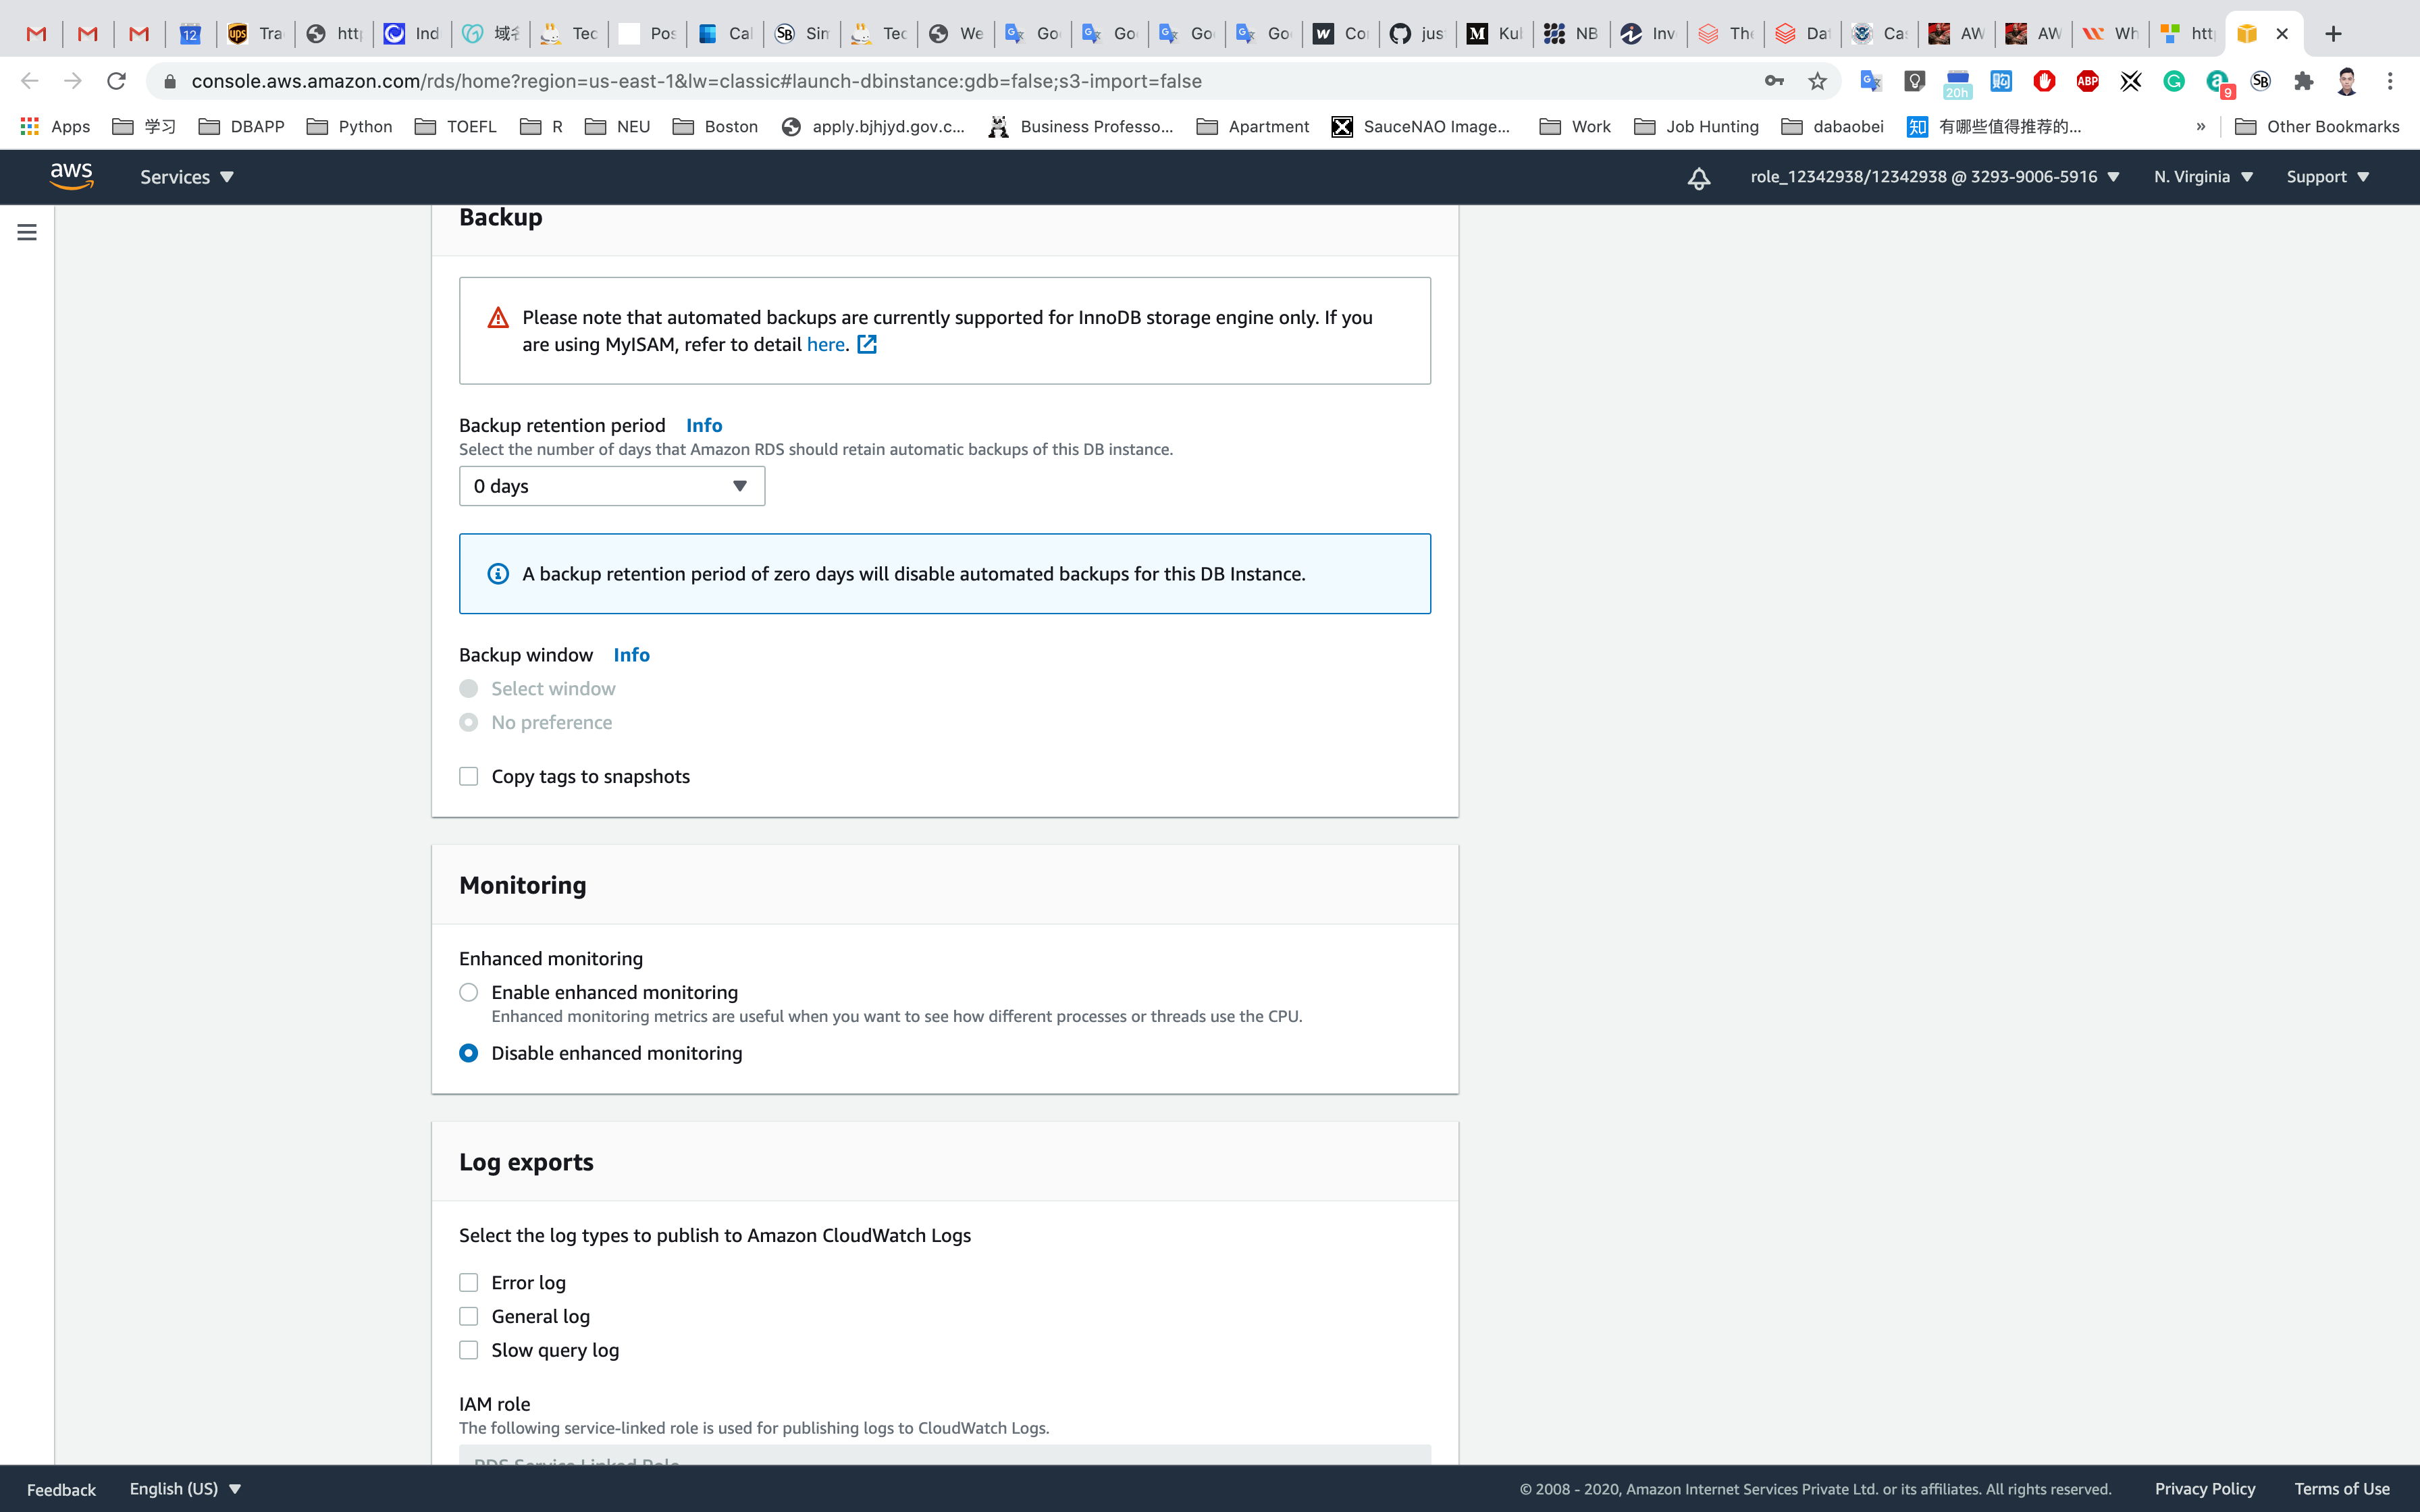
- Backup
- Backup retention period:
0 - Backup window: disabled by default
- Copy tags To snapshots: uncheck
- Backup retention period:
- Monitoring
- Enhanced monitoring: Choose
Disable enhanced monitoring
- Enhanced monitoring: Choose
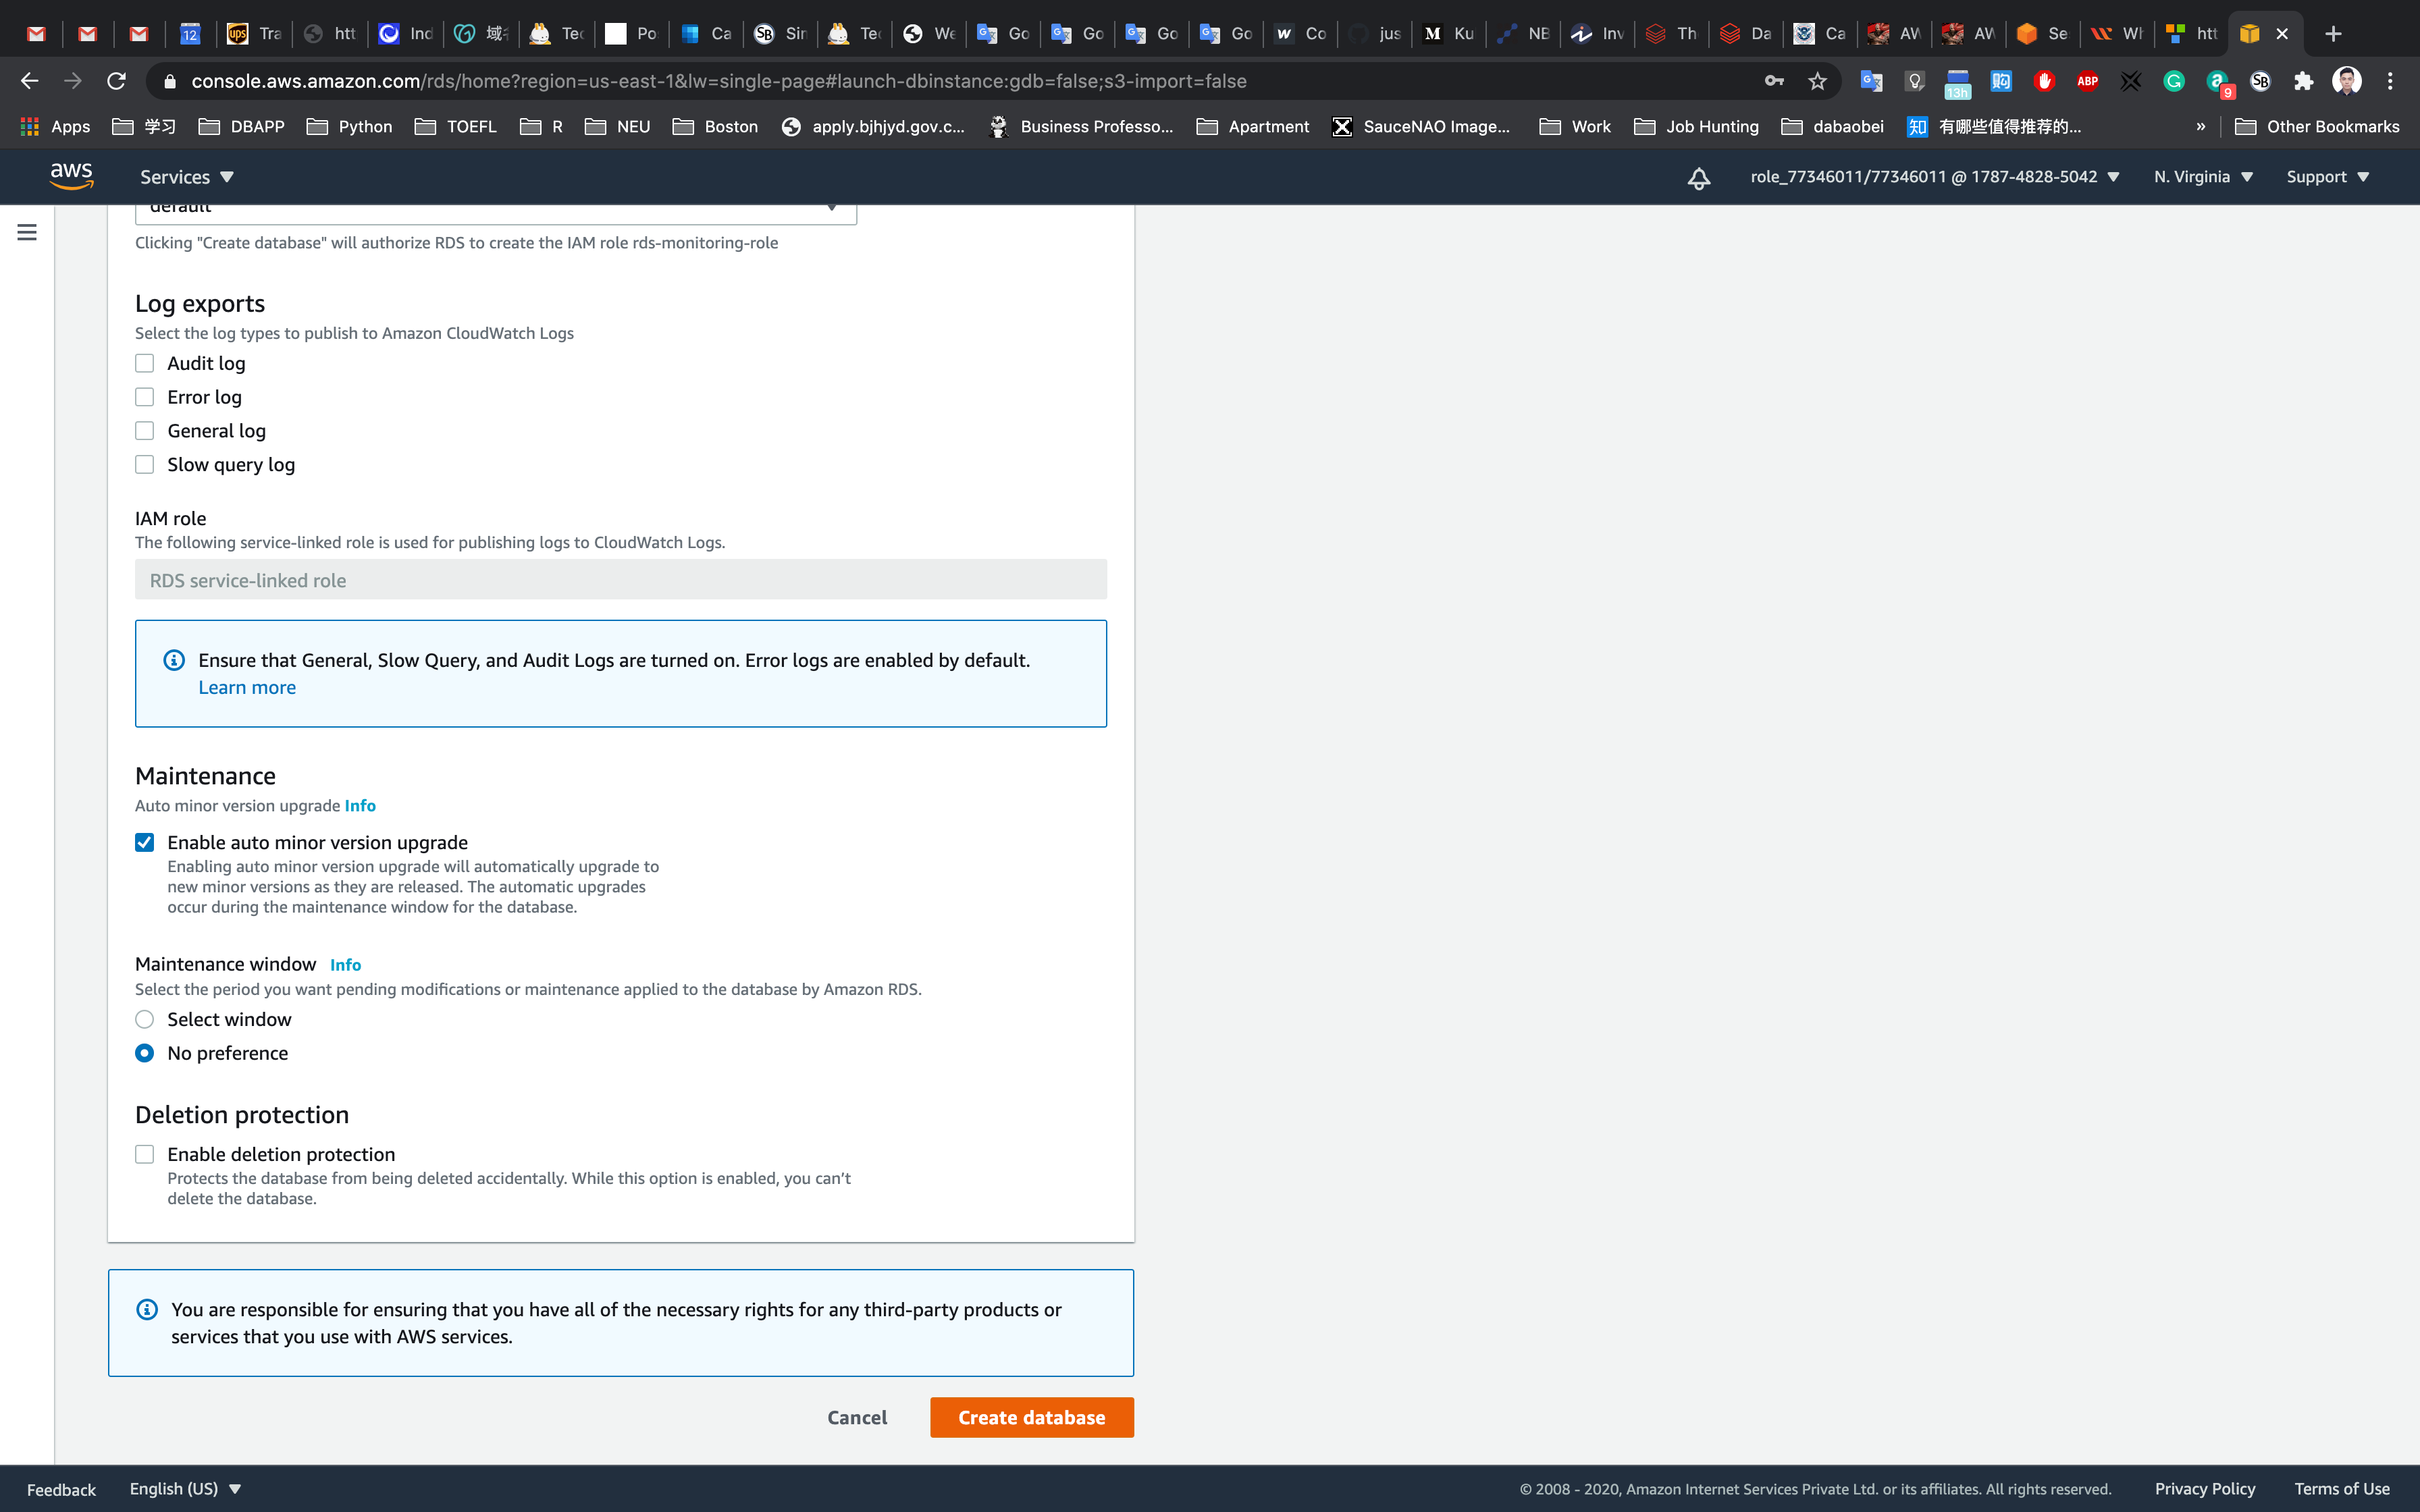
- Log Exports
- Not needed for the purpose of this lab.
- Maintenance
- Auto minor version upgrade: Choose
Disable auto minor version upgrade - Maintenance window: Choose
No Preference
- Auto minor version upgrade: Choose
- Deletion Protection
- Deletion protection: Uncheck
Once all the configurations are done properly, click on Create database.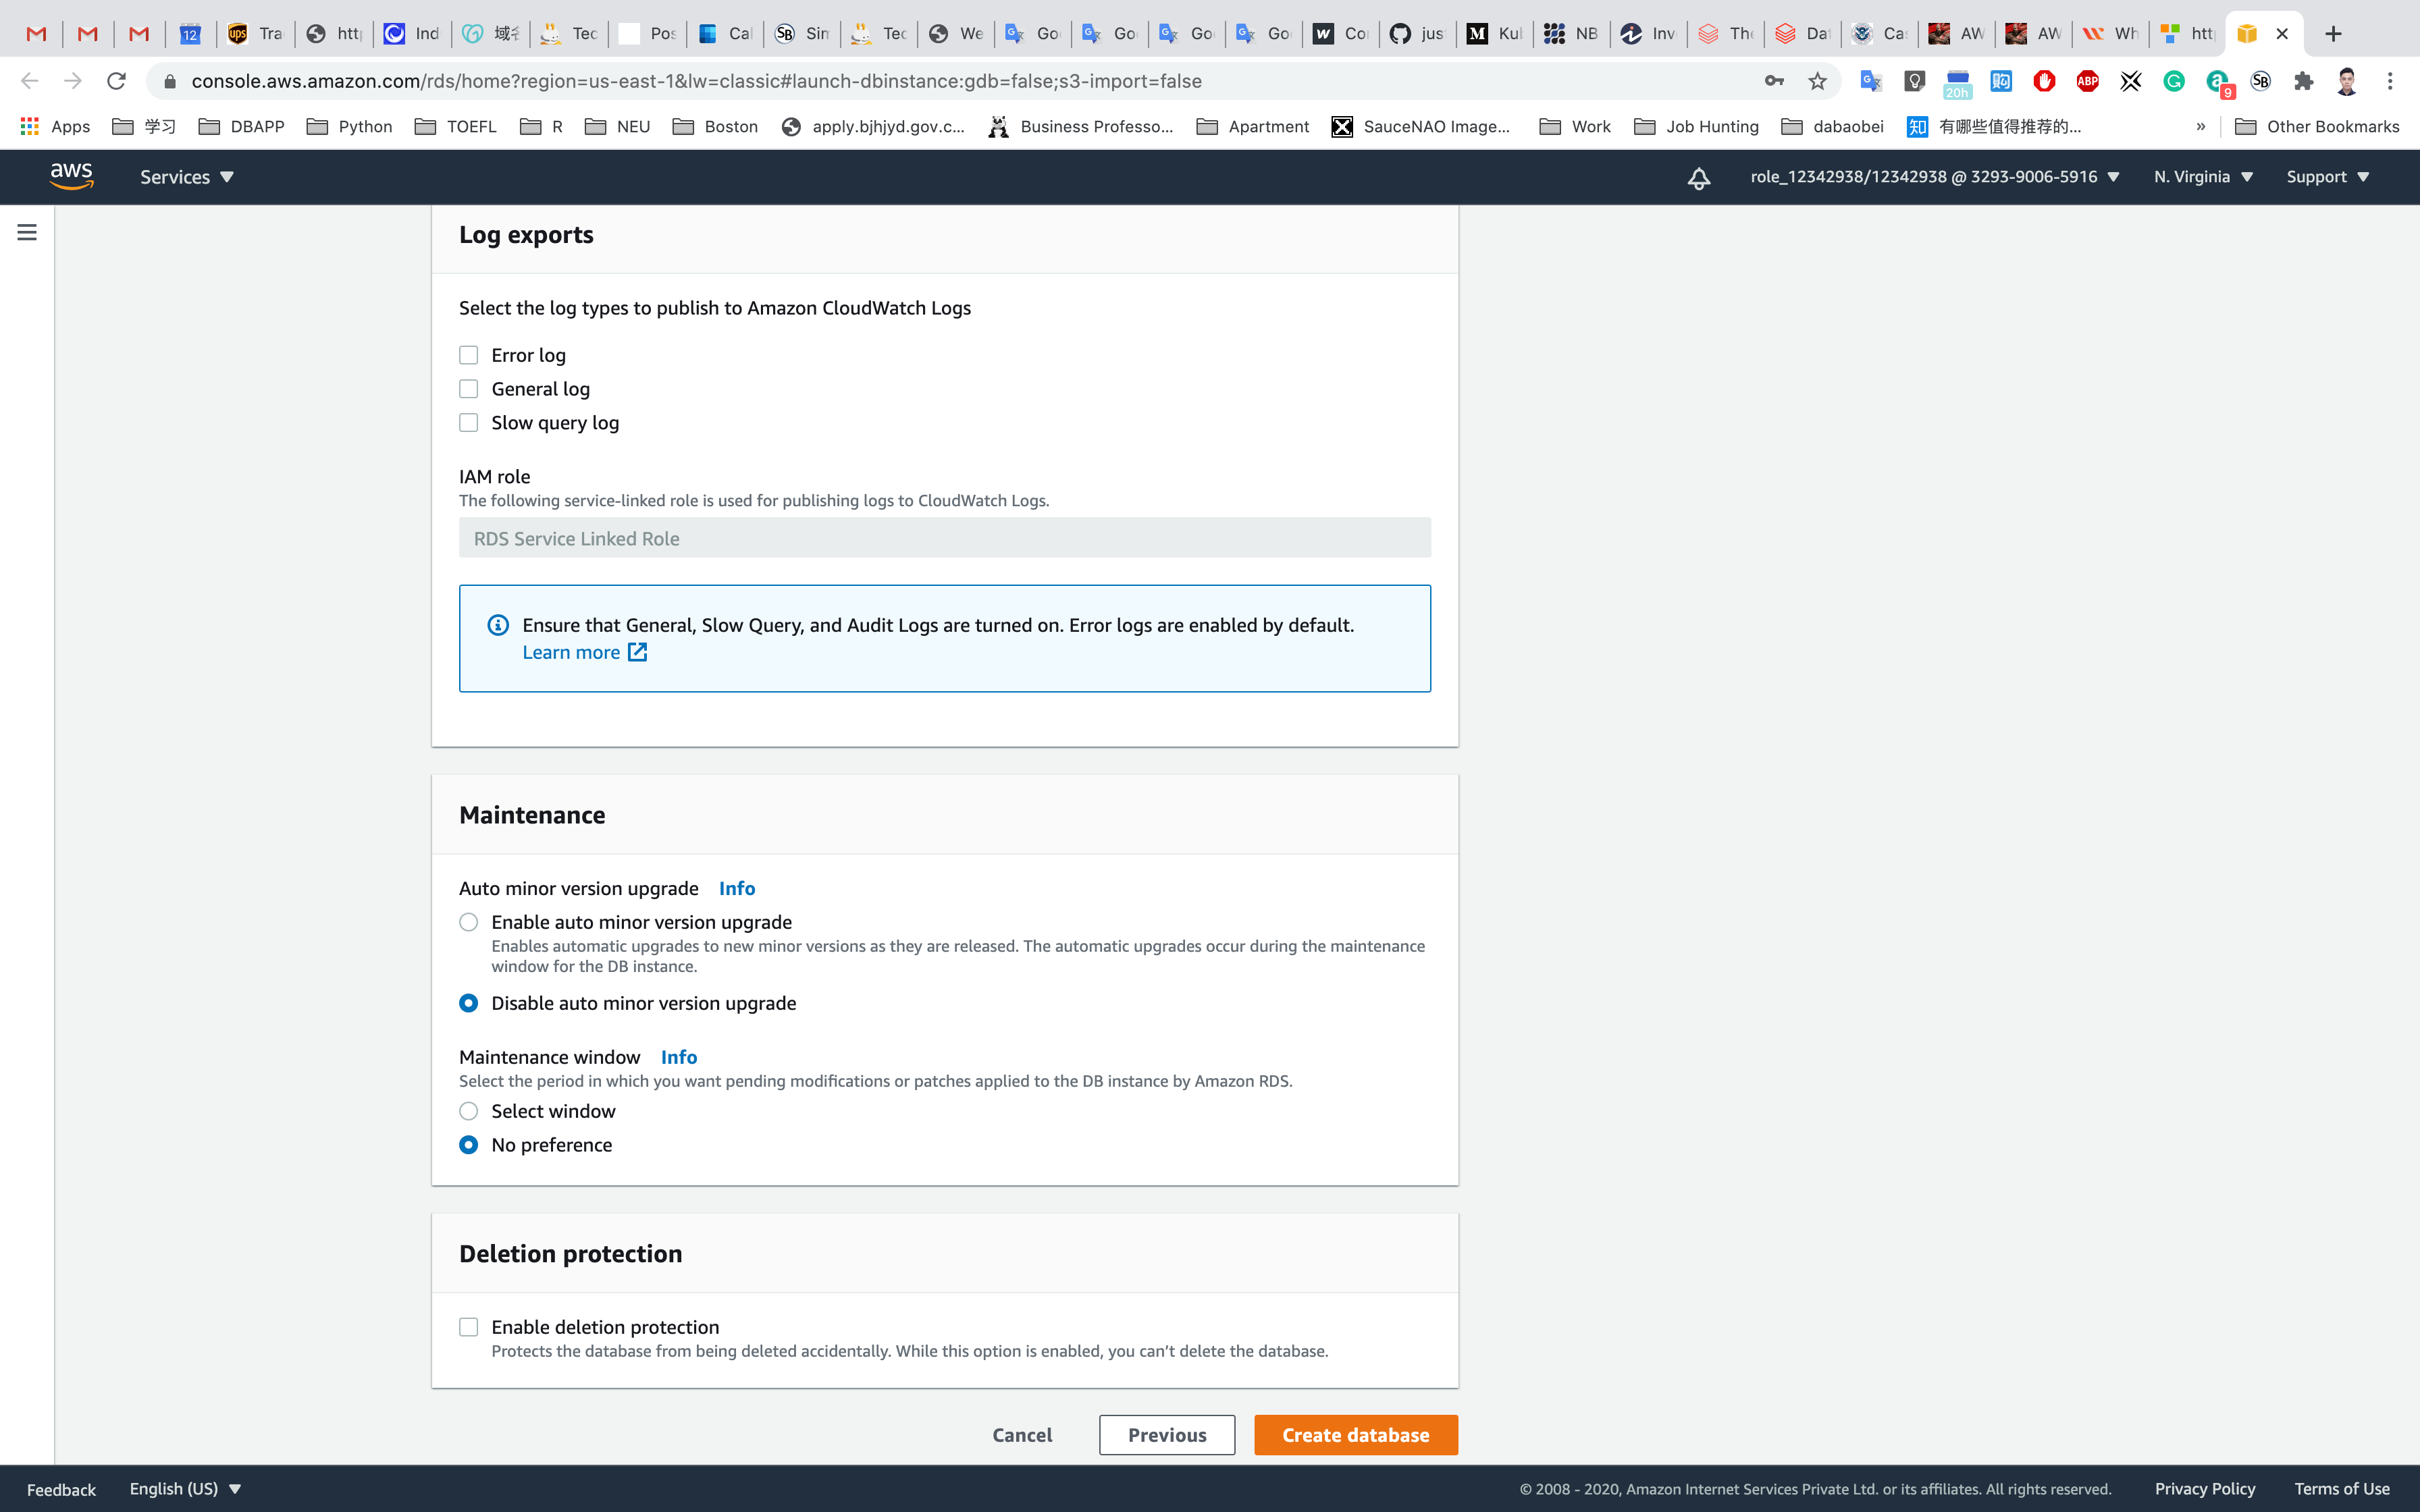
Security Group Settings
Click on All DB instances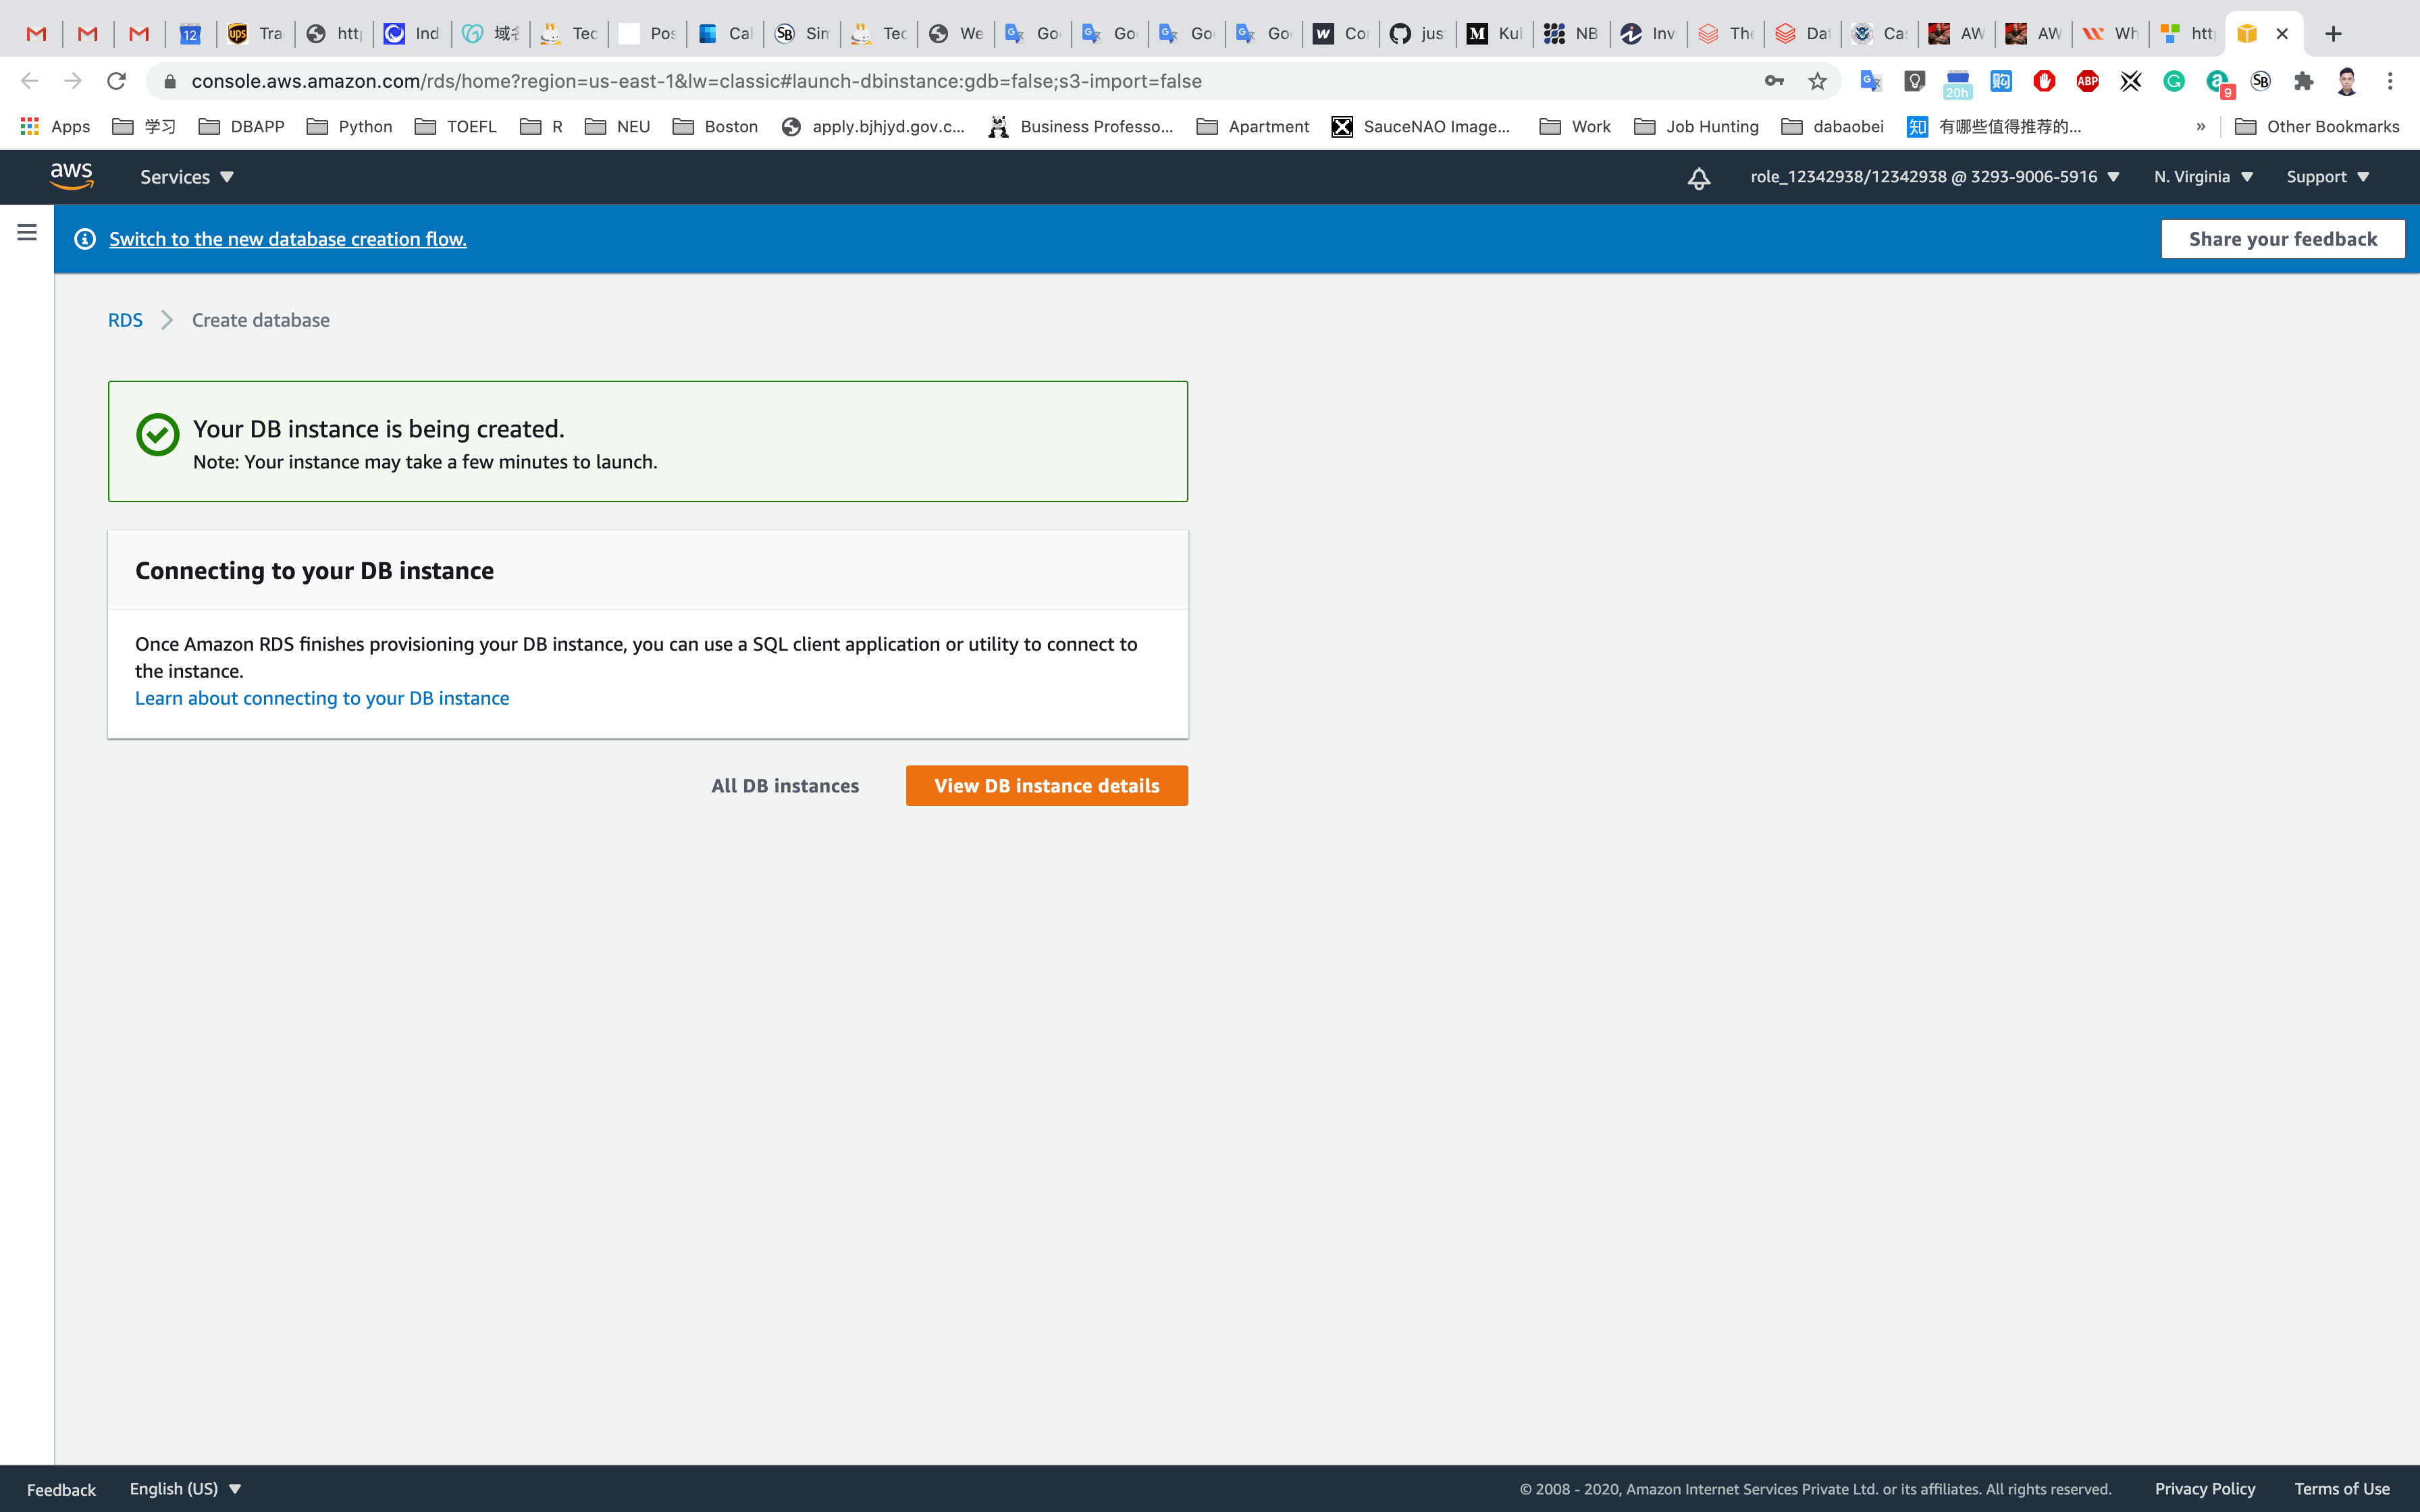
Wait until the status change to Available
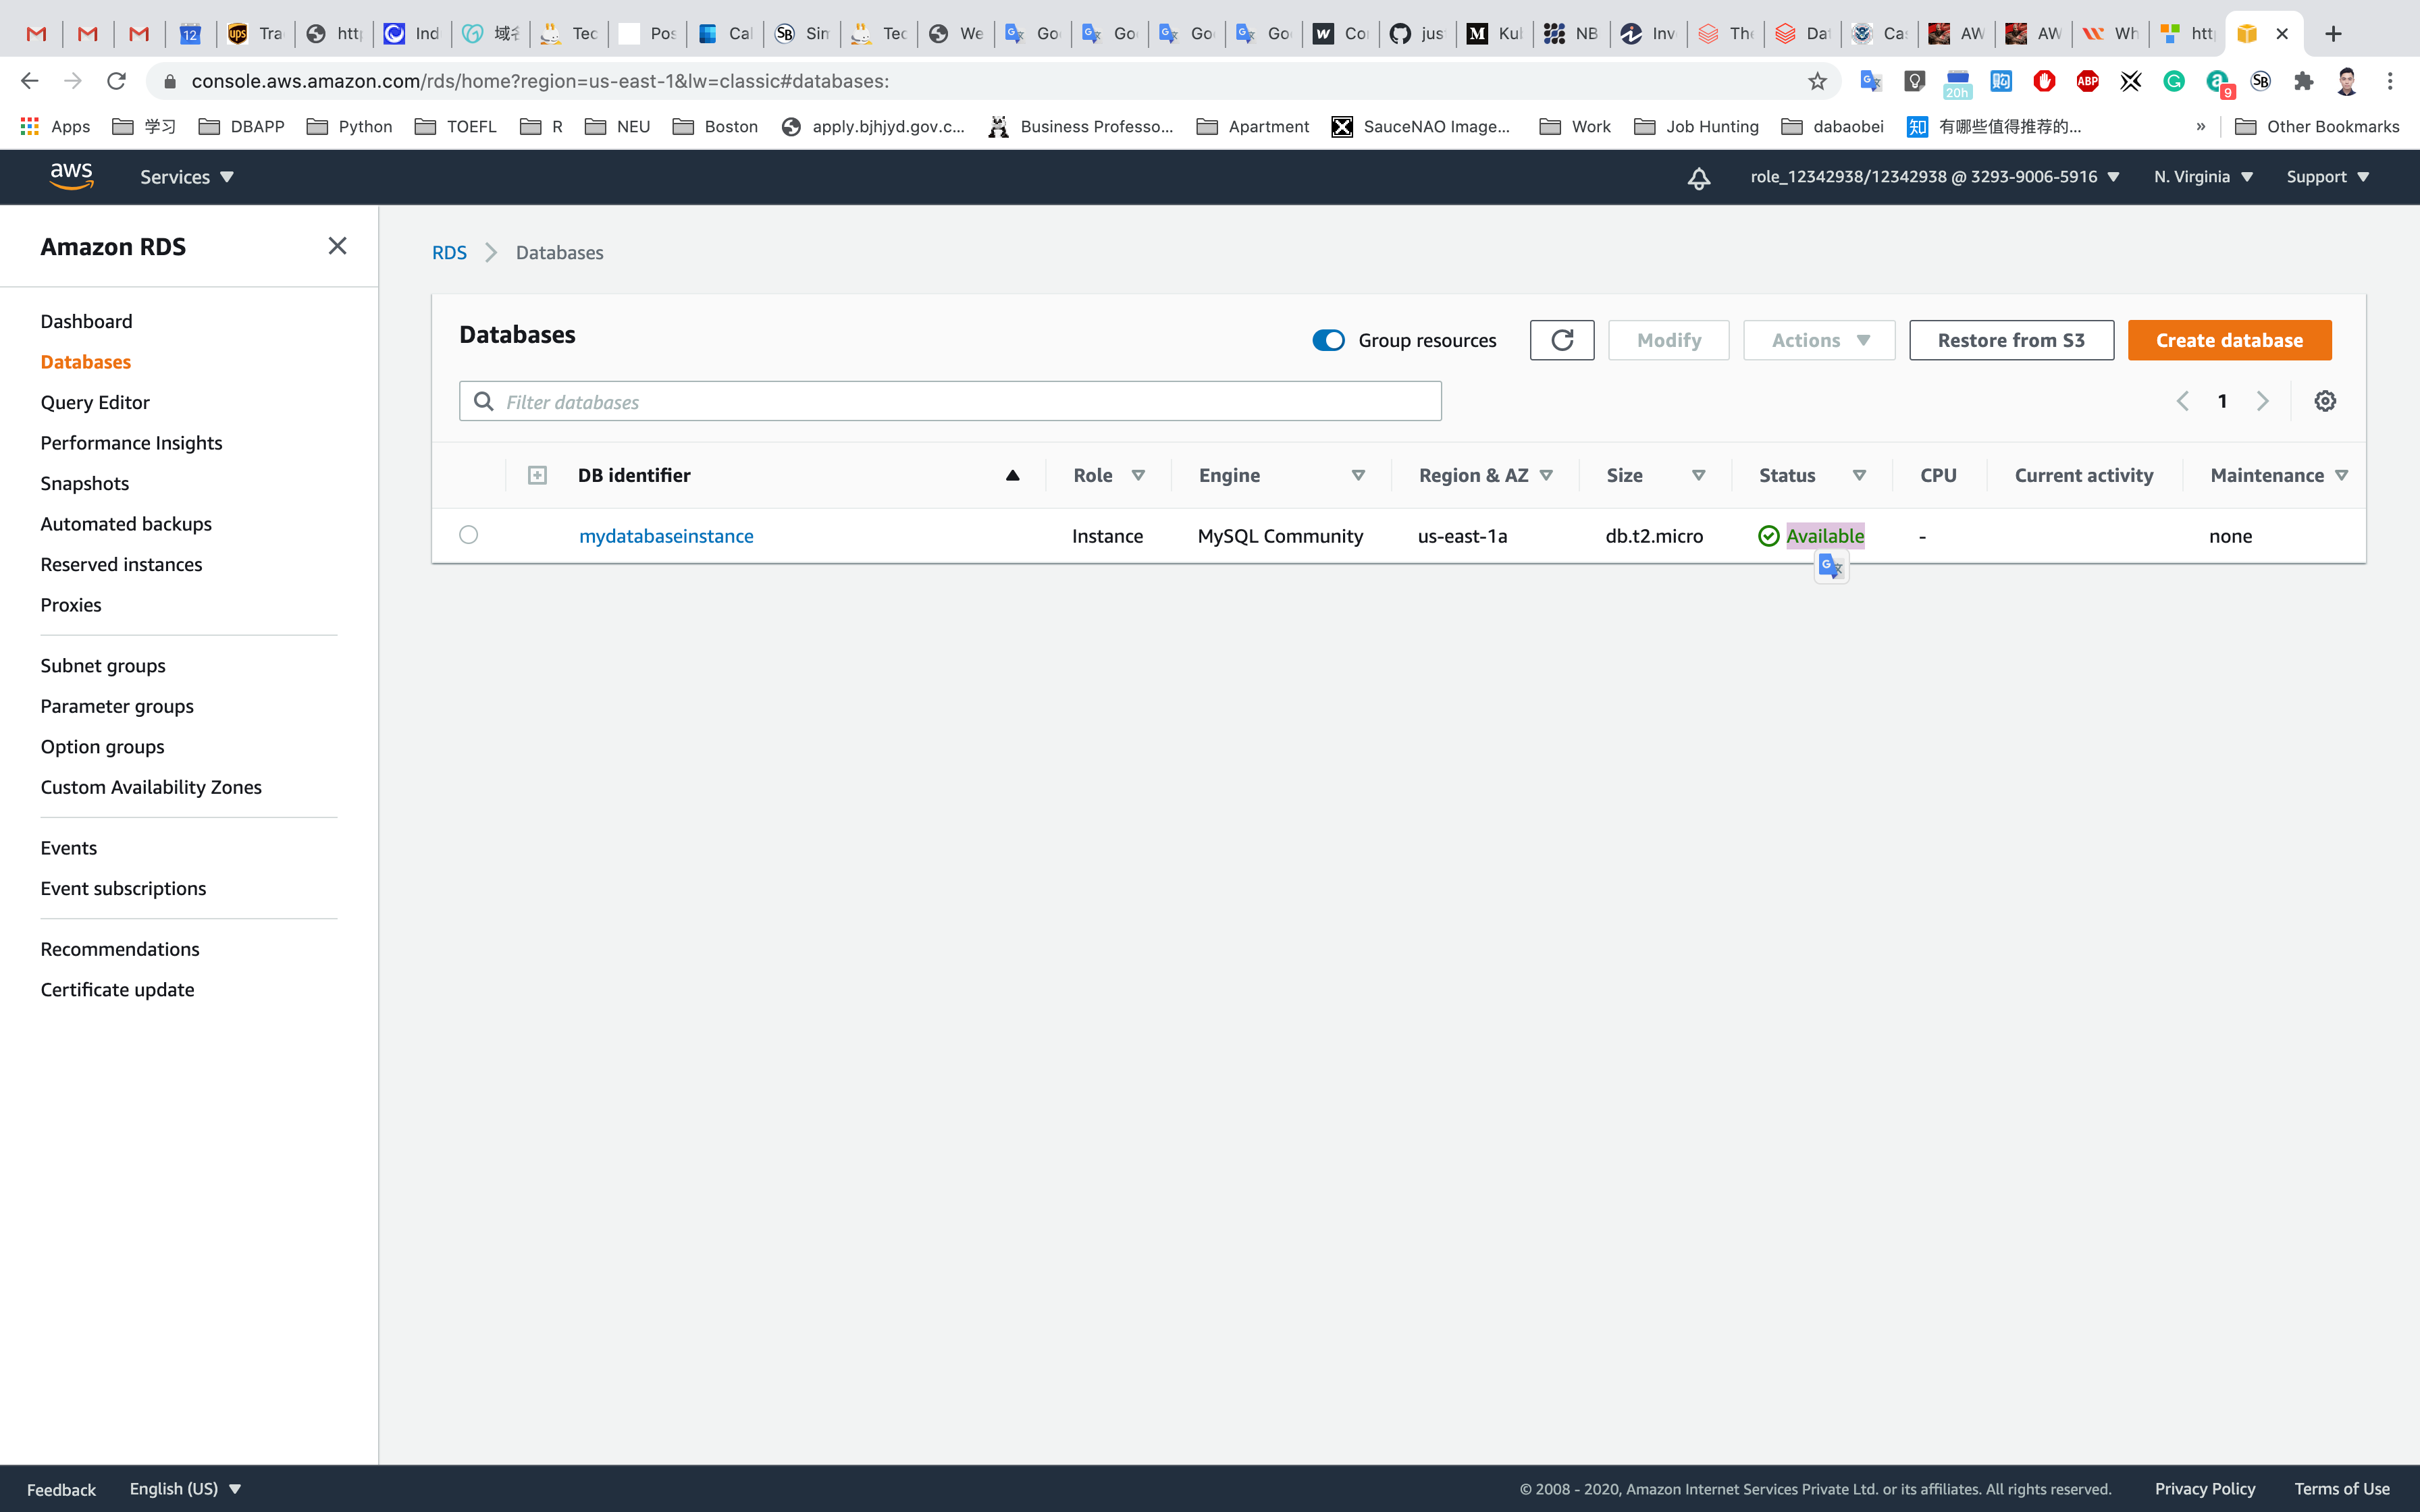
Click on the database you created. Under Connectivity and Security, click the VPC Security groups.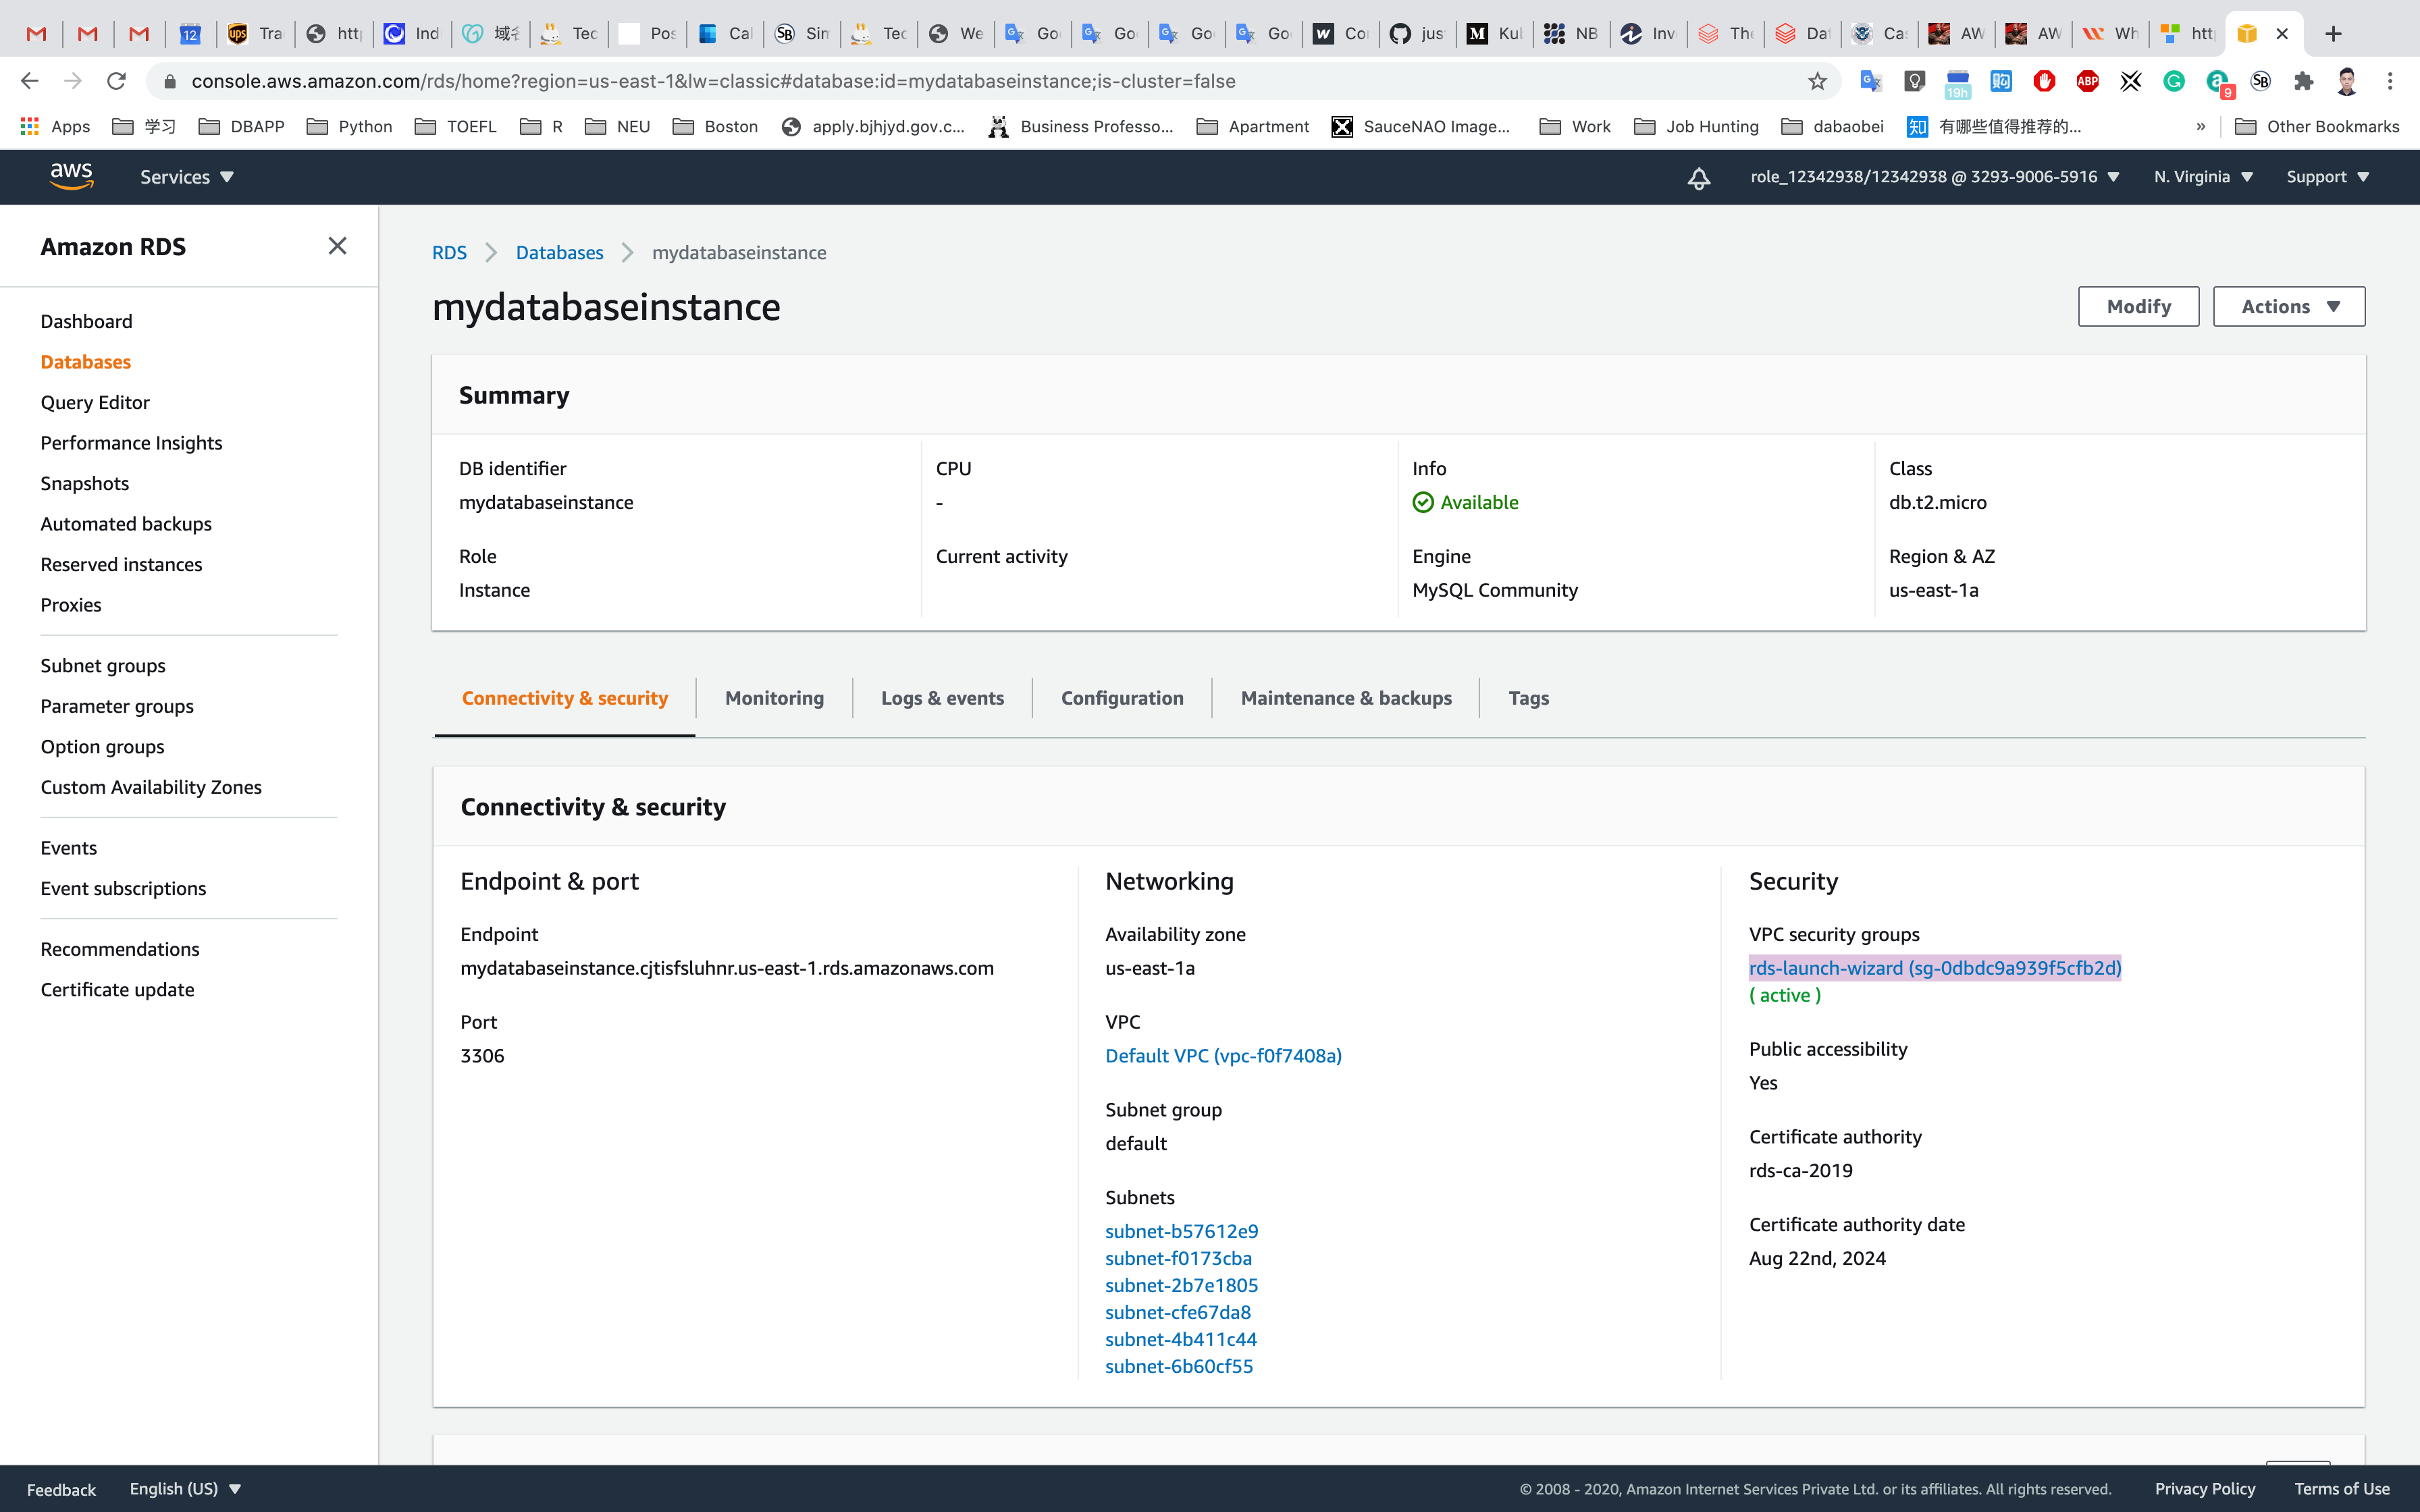
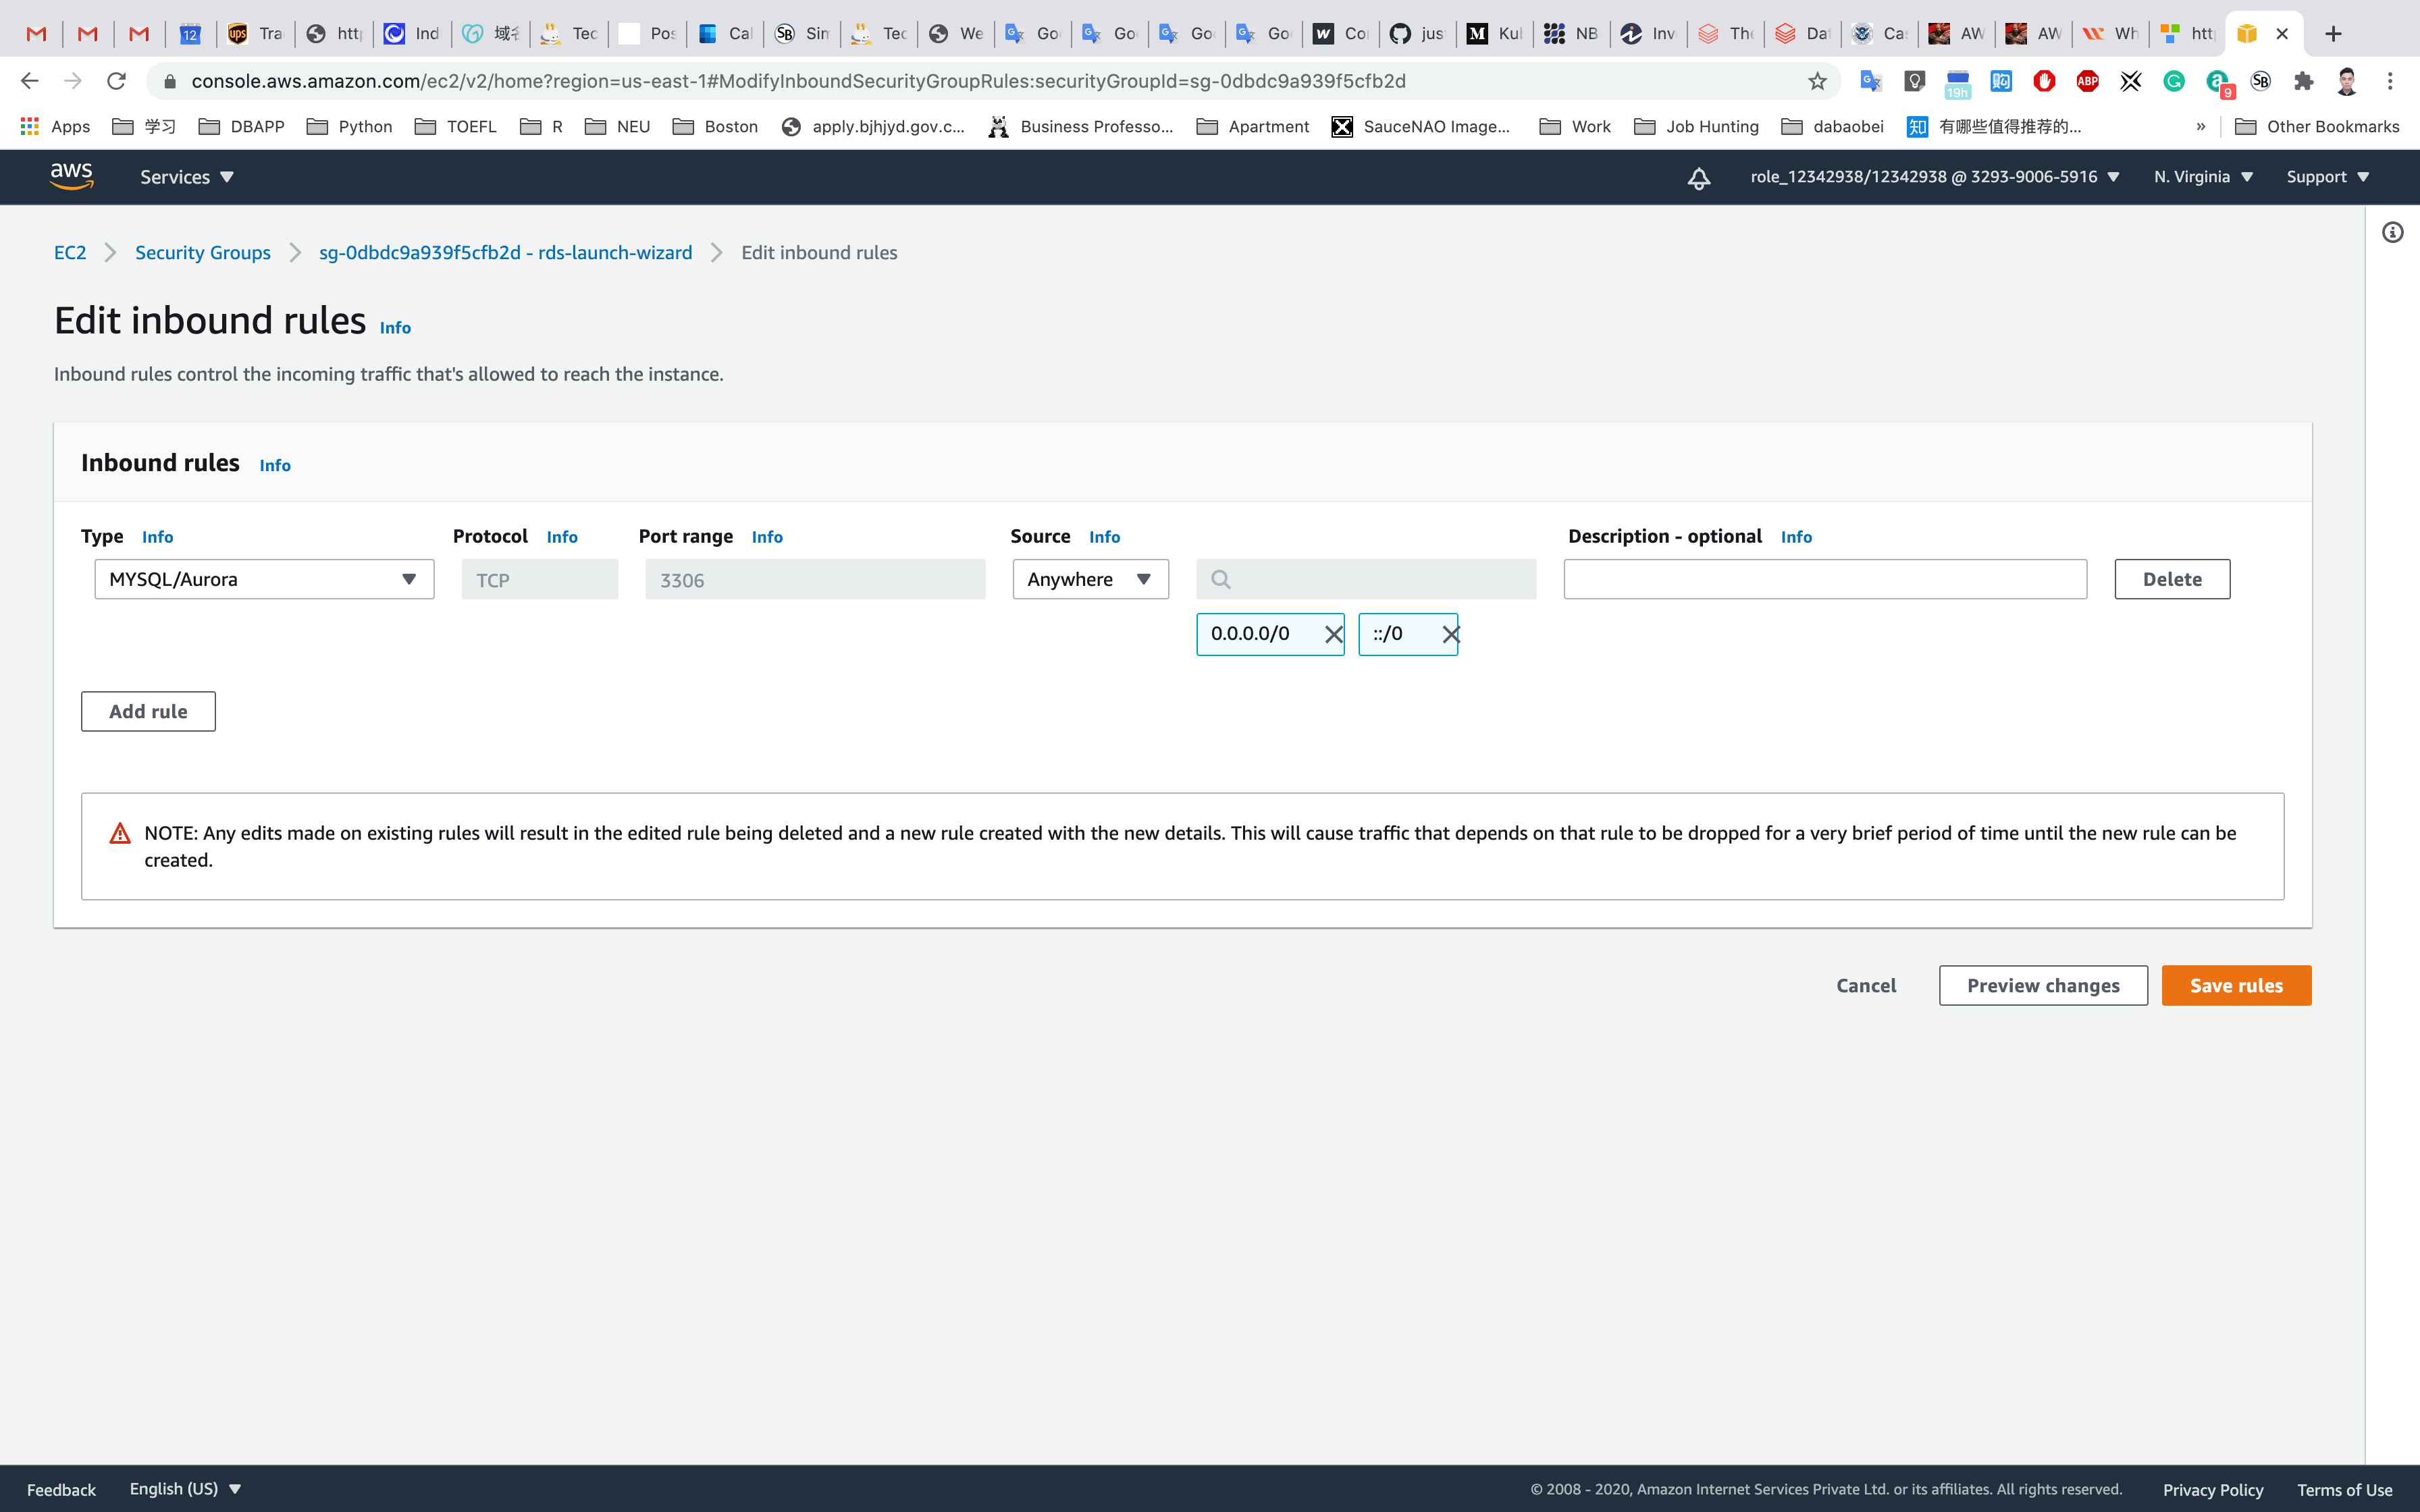
Choose the Inbound Rules and click on Edit Inbound Rules.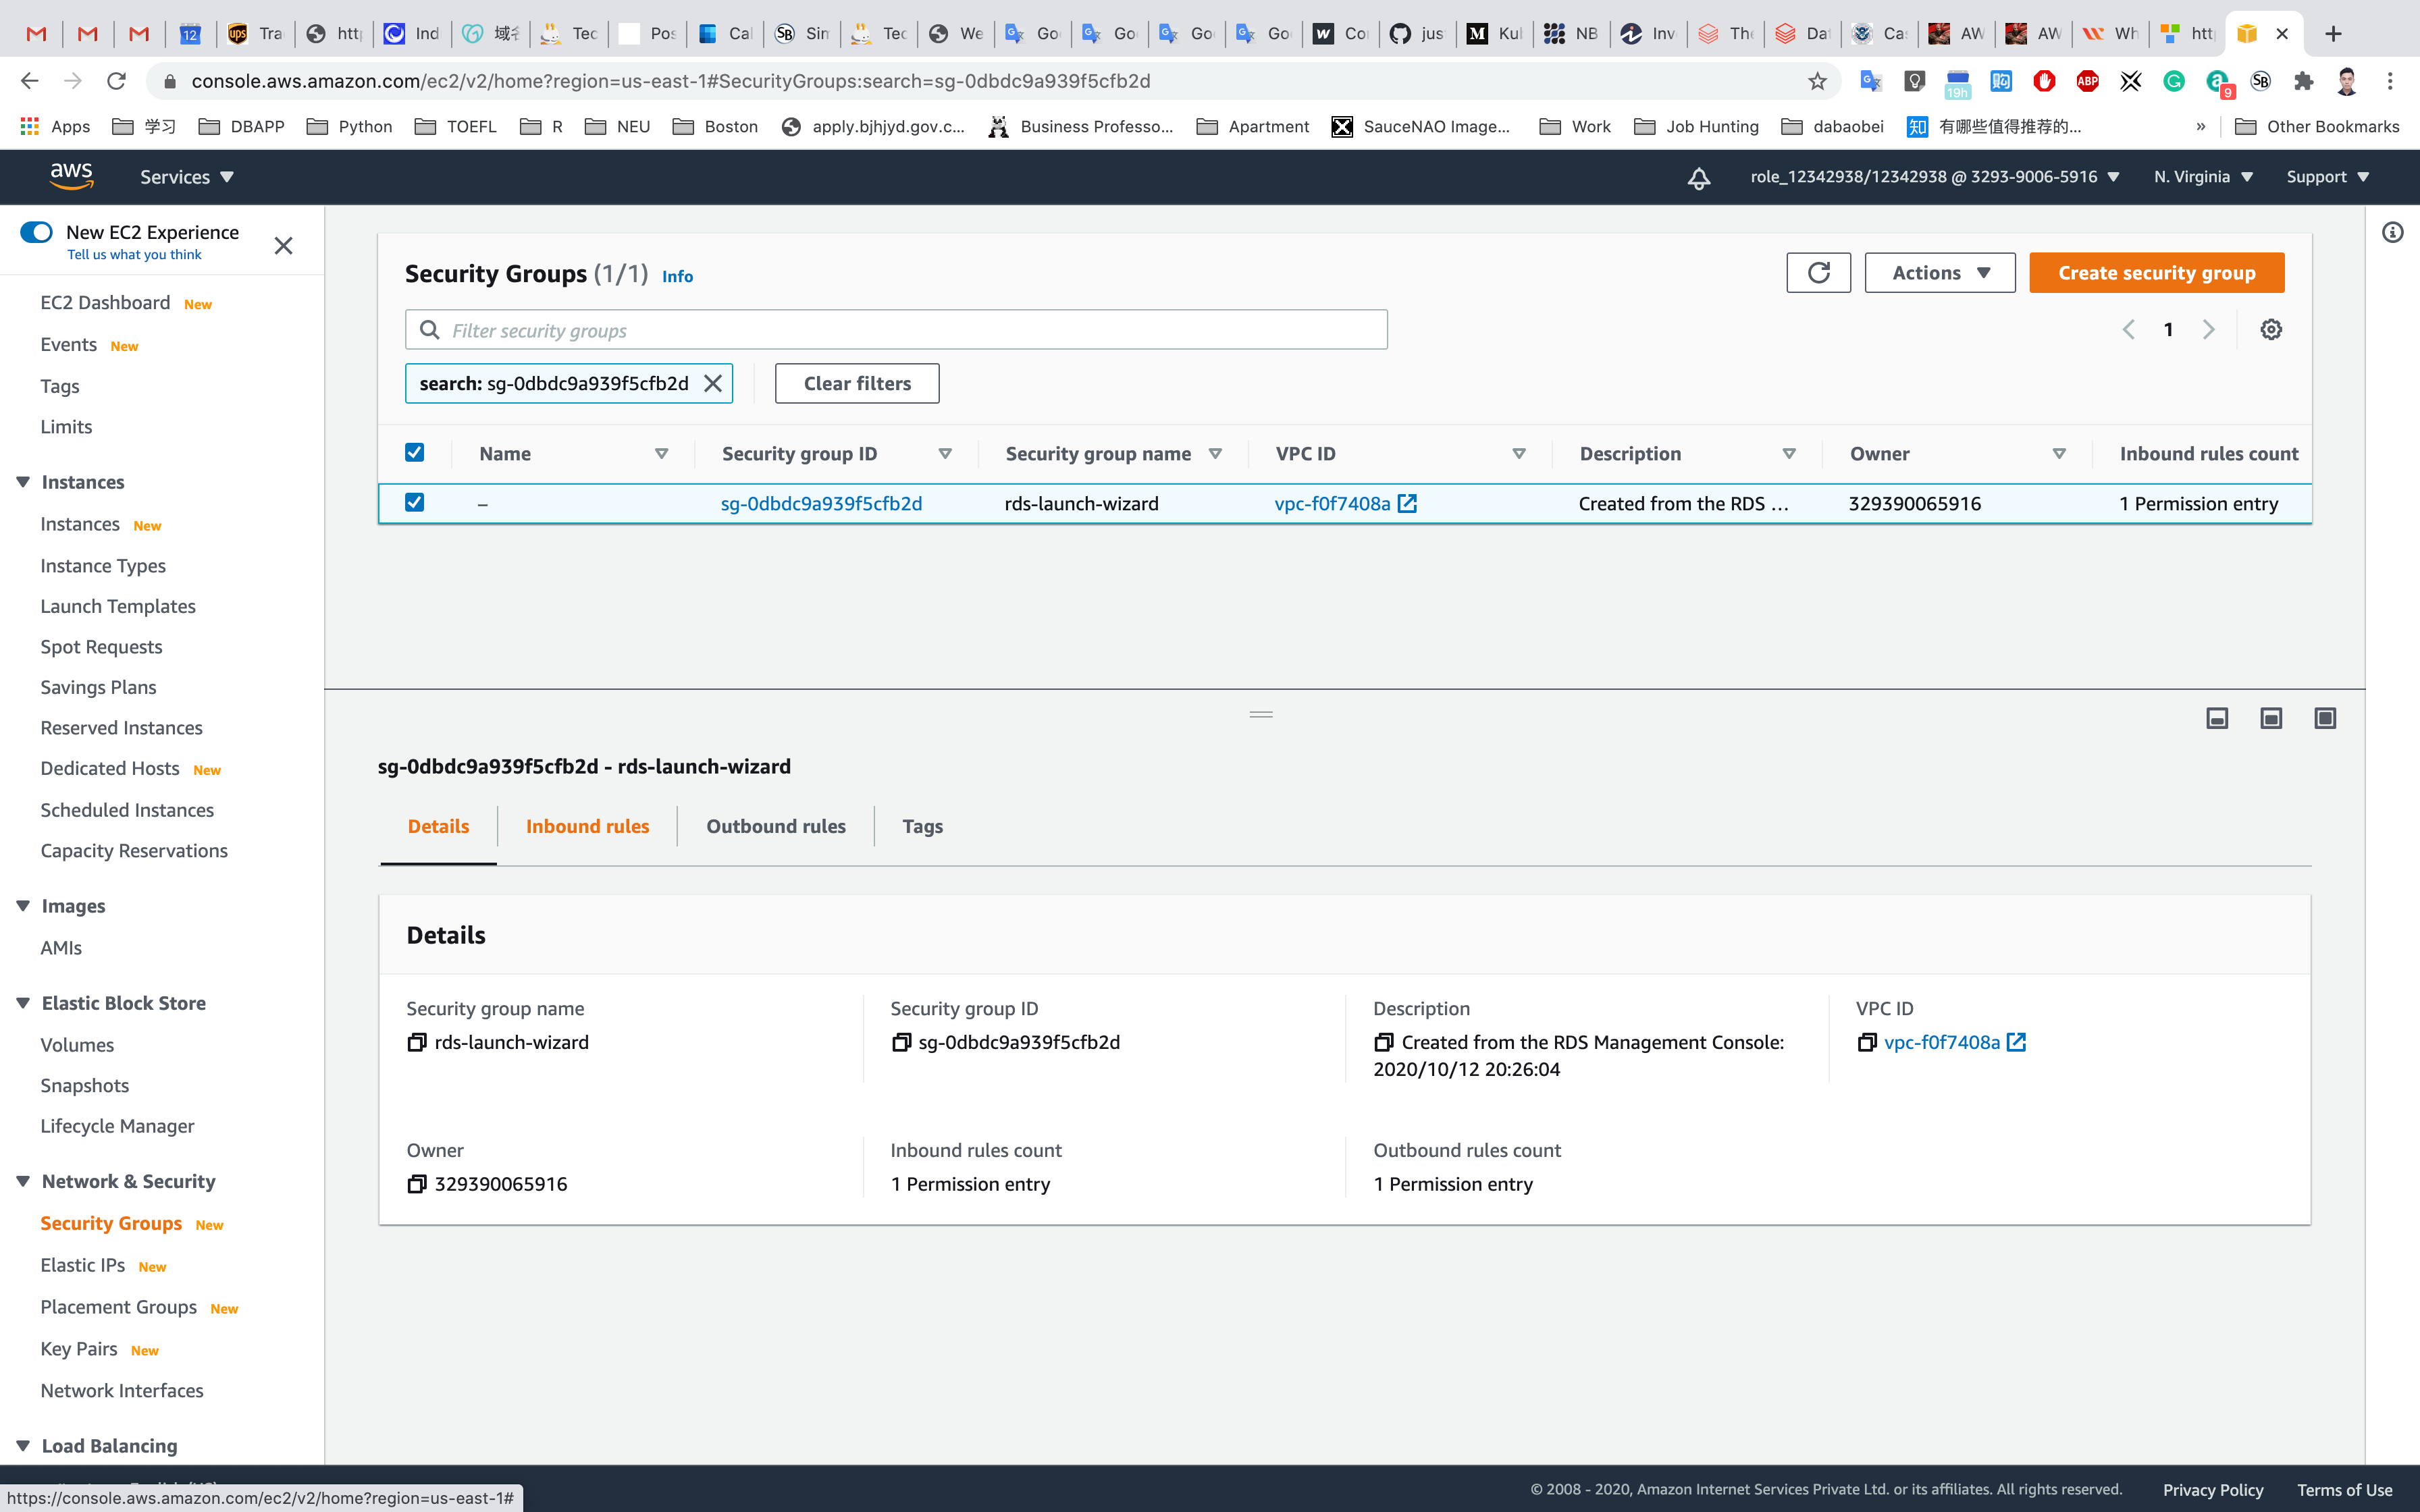
Remove the source of IP address and select Anywhere (0.0.0.0/0) and click on Save rules.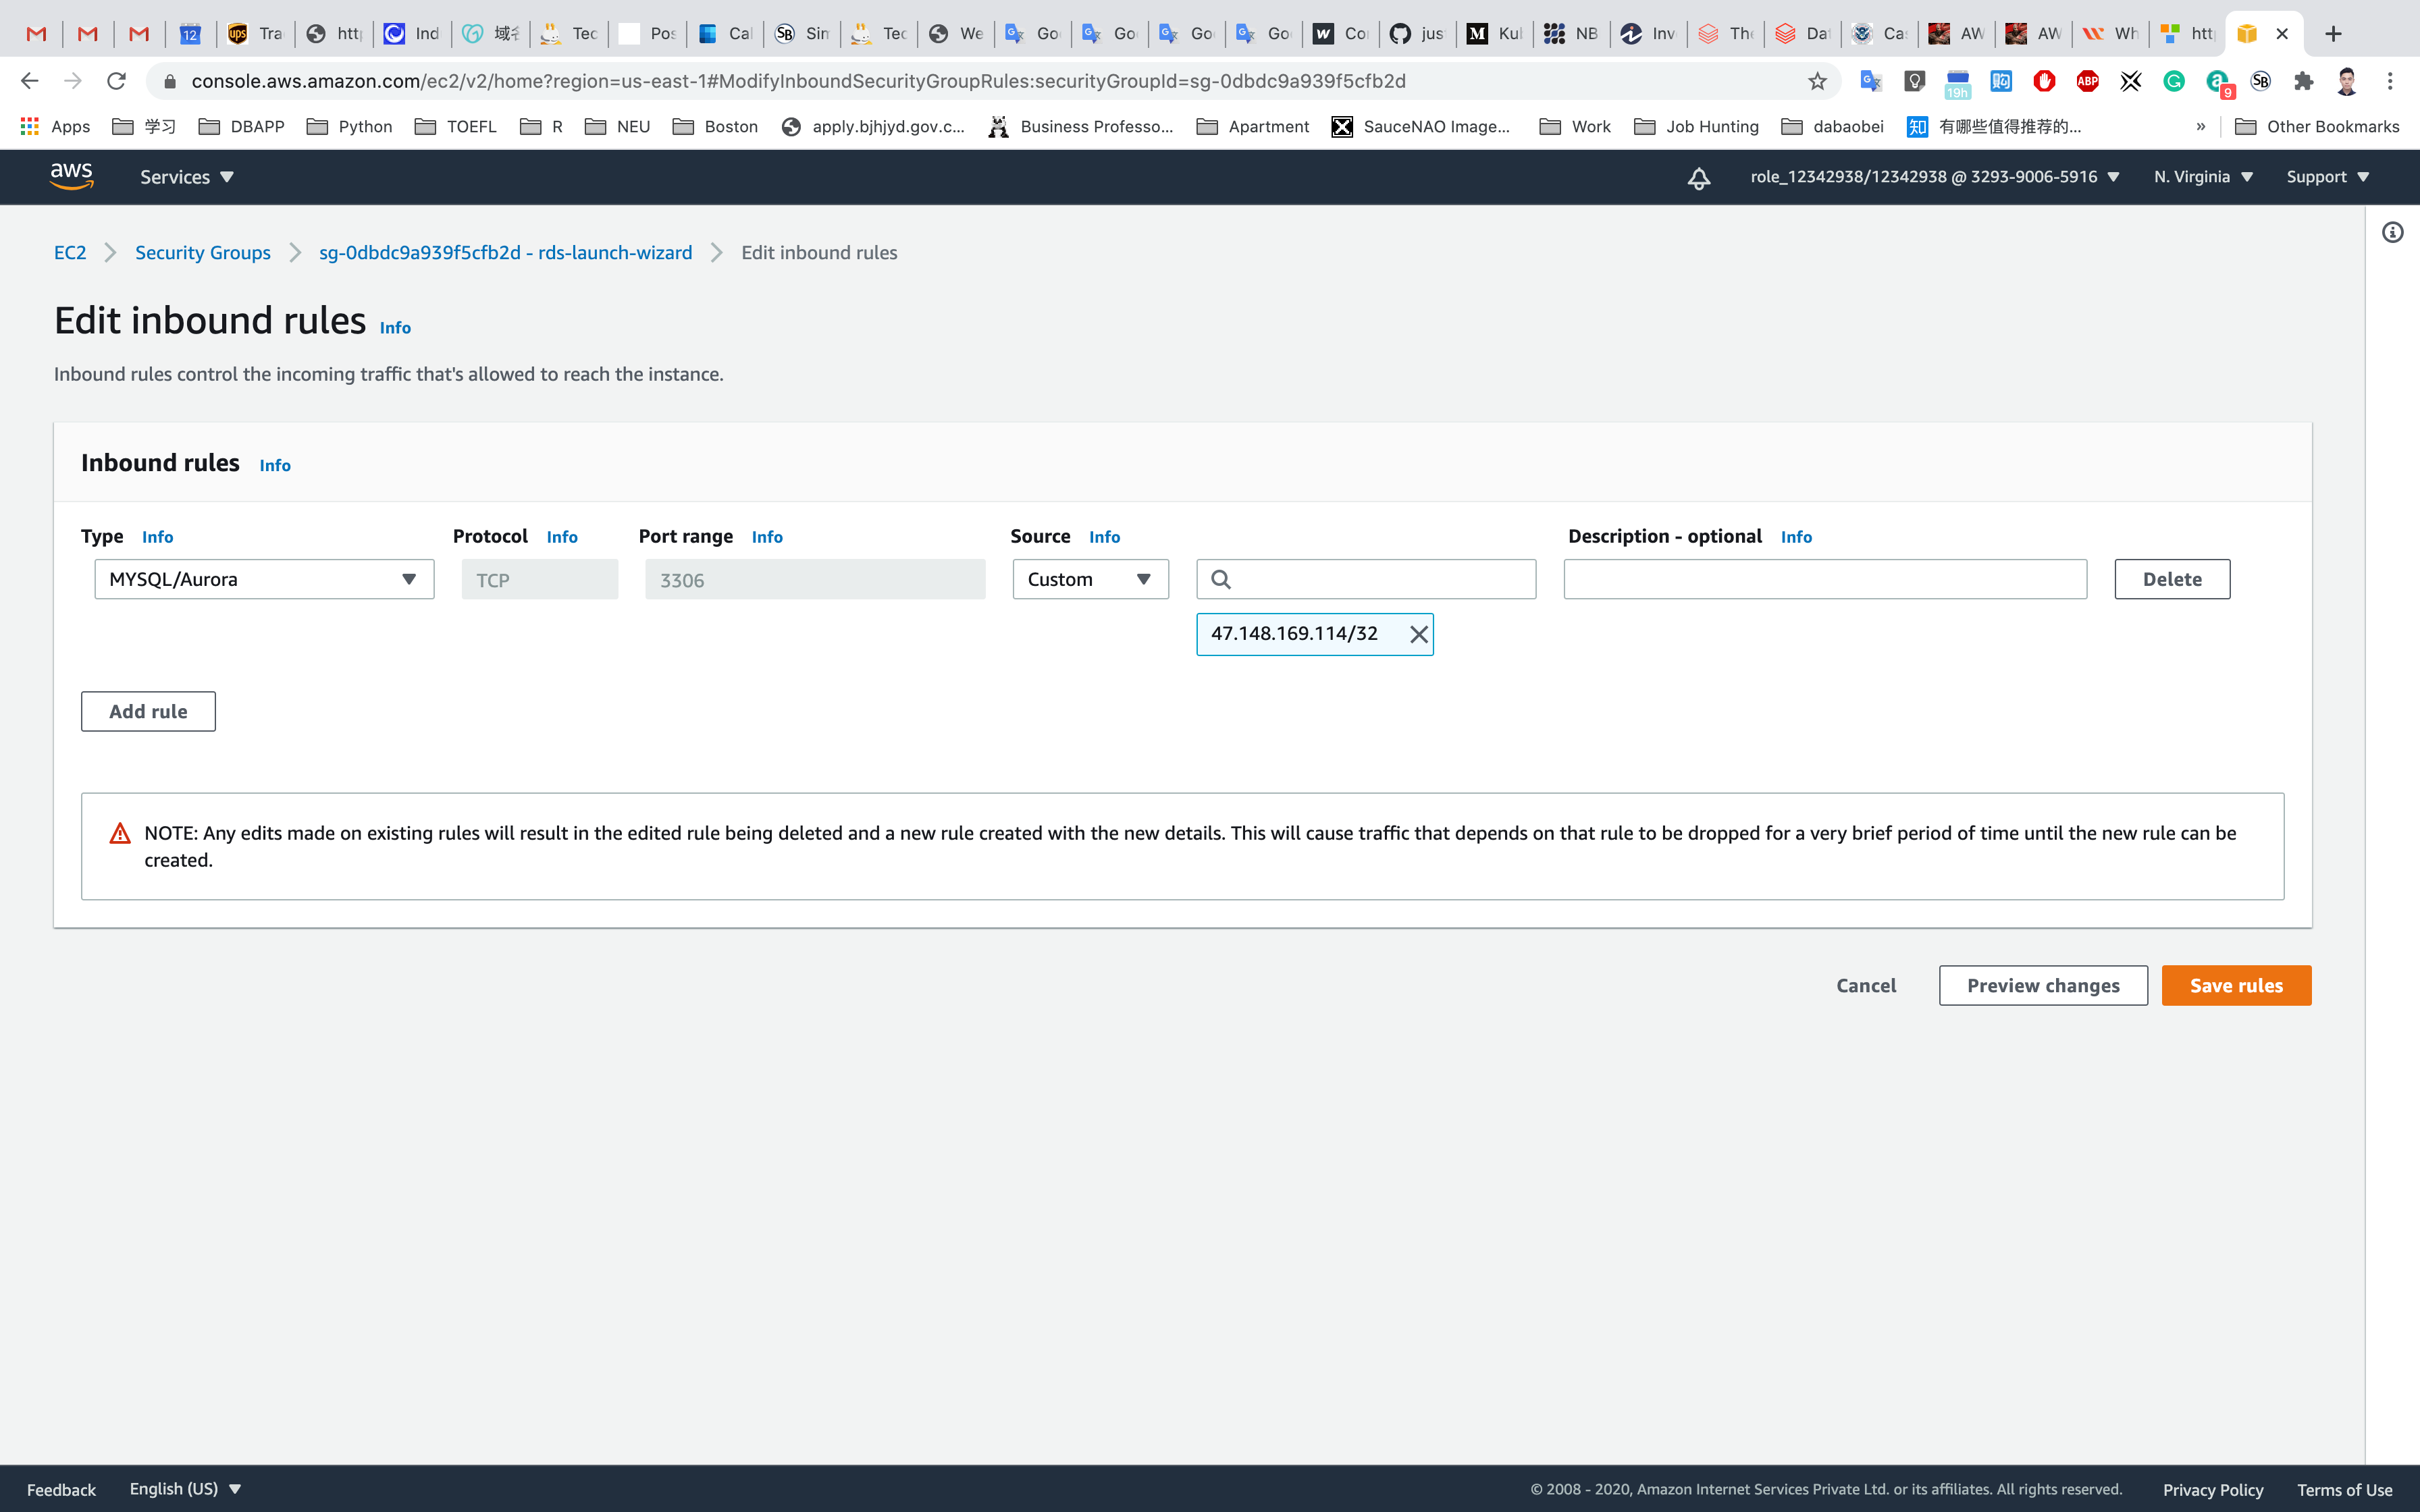
Connecting to RDS Database on a DB Instance using the MySQL Workbench
Services -> RDS
In this example, we will connect to a database on a MySQL DB instance using MySQL monitor commands. One GUI-based application you can use to connect is MySQL workbench, which you have already downloaded and installed based on instructions in the prerequisite section.
Click on Databases on the left navigation panel.
Click on the database you created.
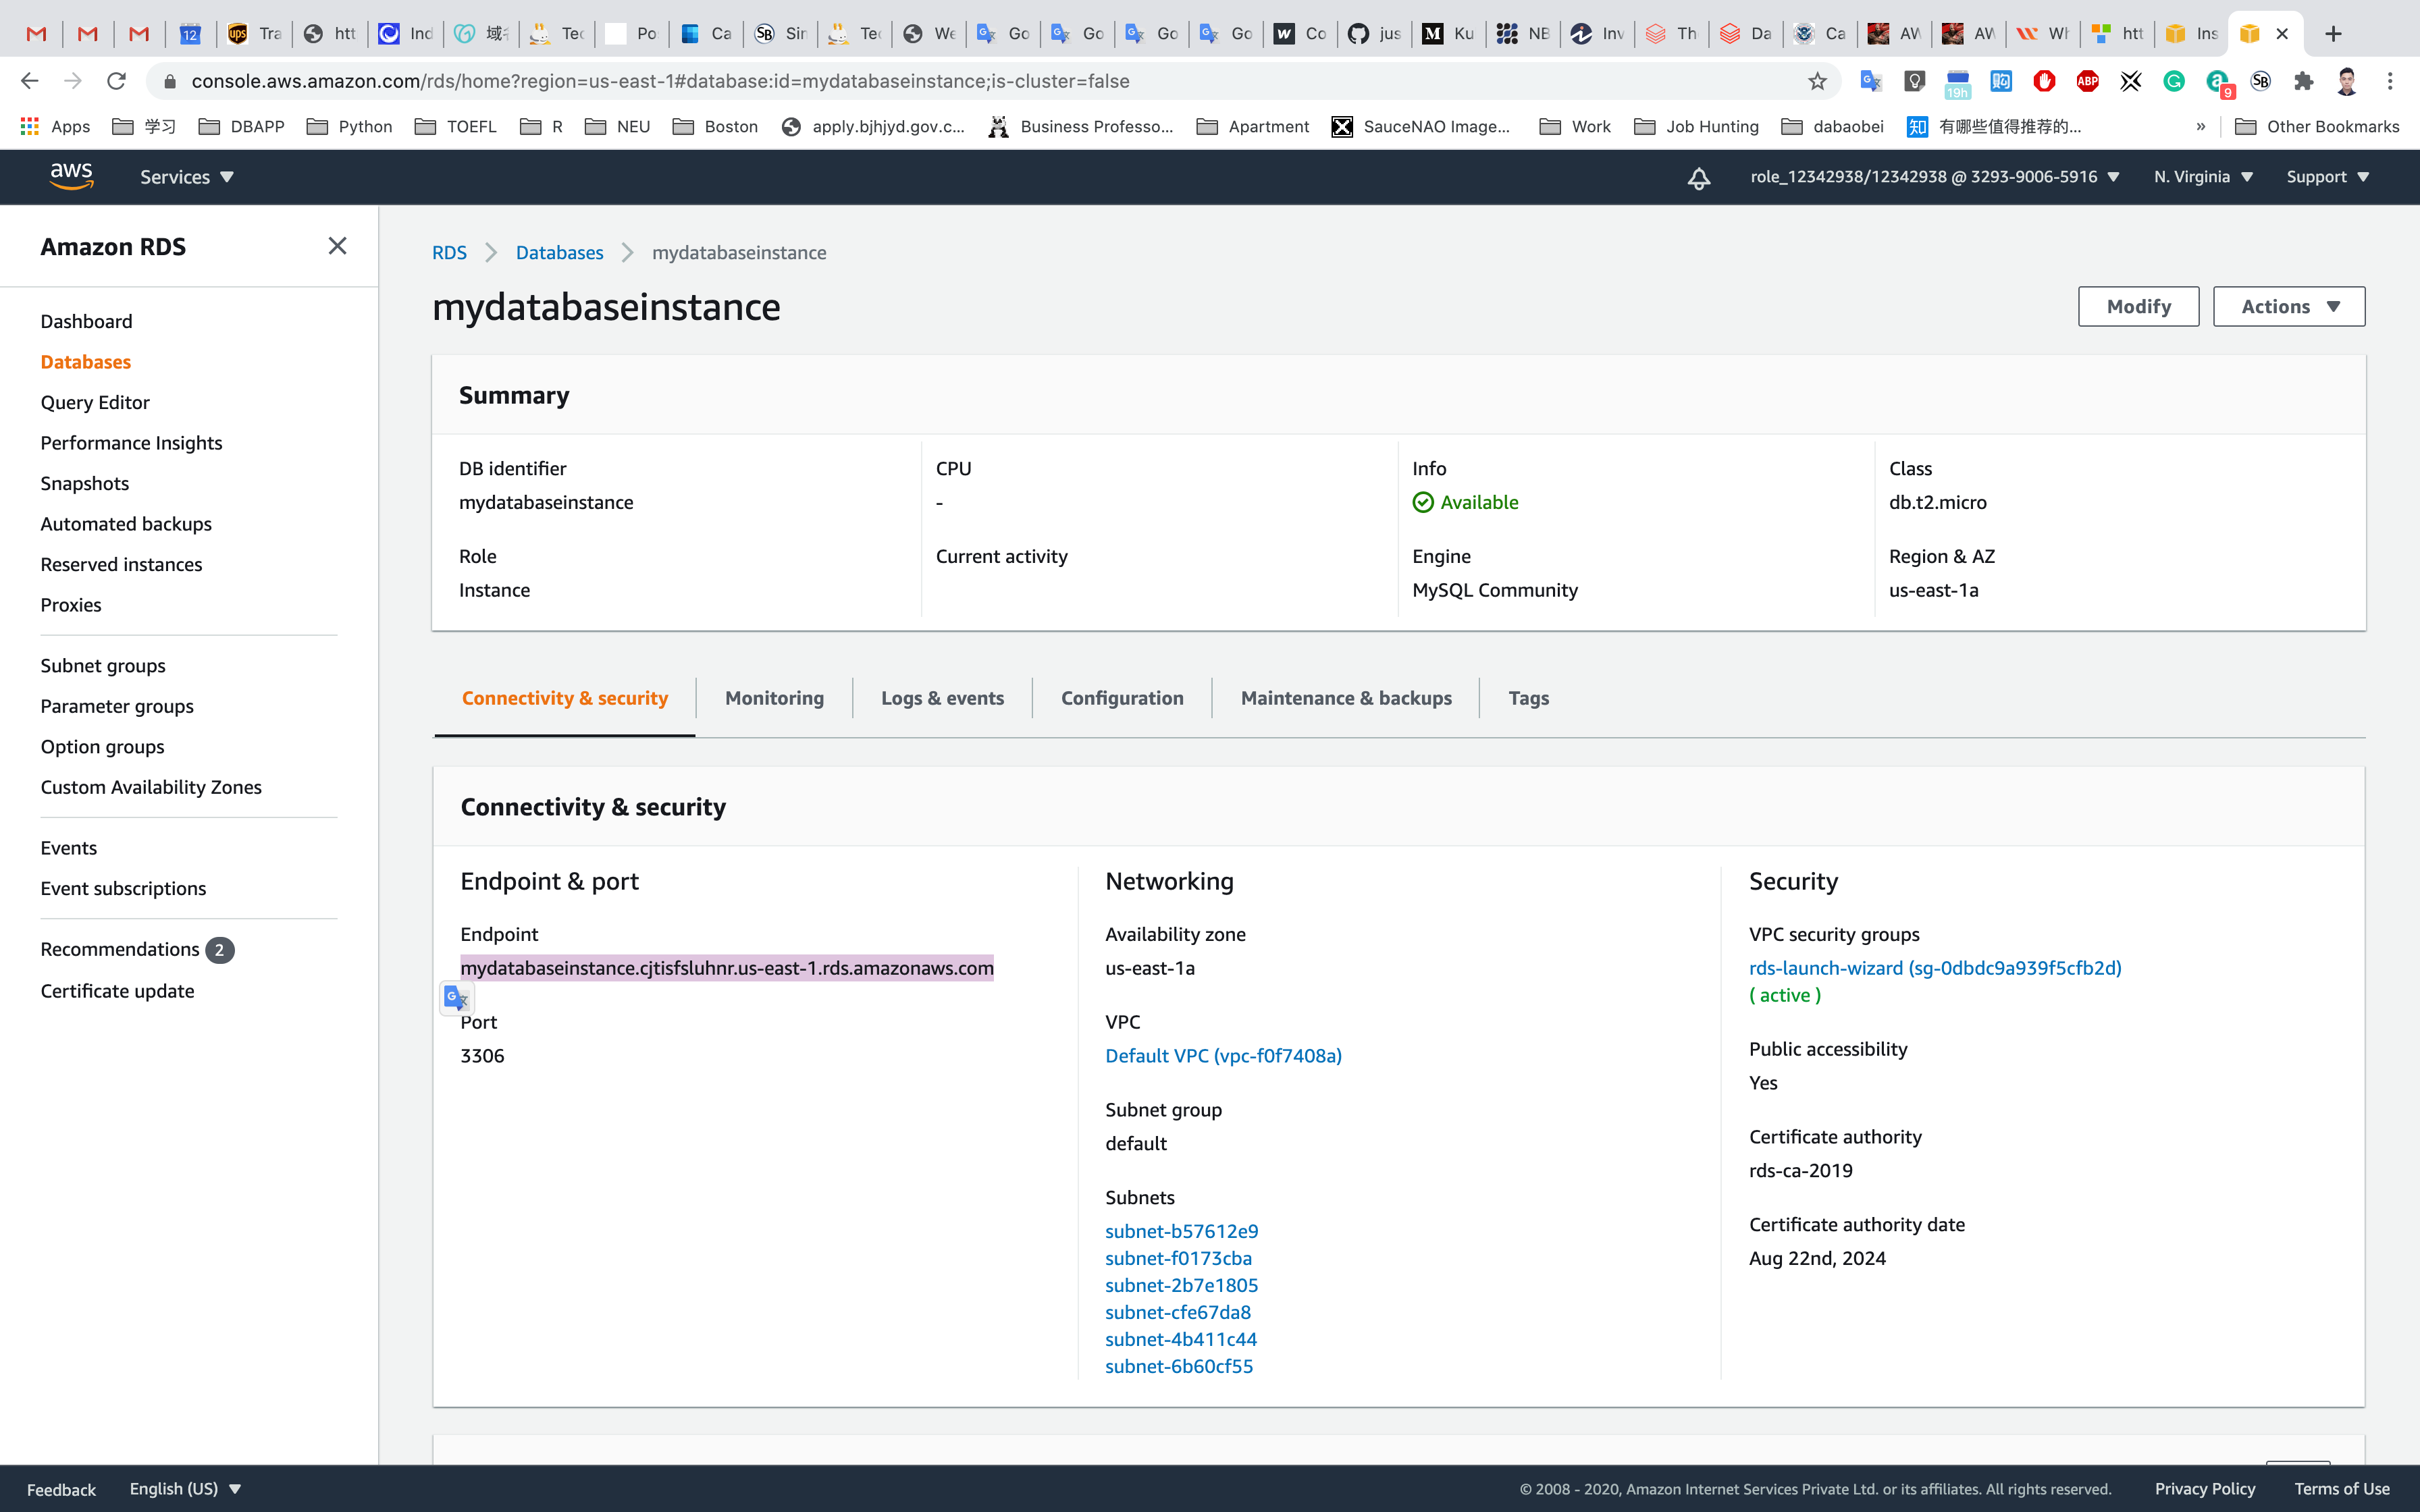
To connect to a database on a DB instance using MySQL monitor, find the endpoint (DNS name) and port number for your DB Instance.
Under Connectivity & security section, copy and note the endpoint and port.
- Endpoint:
mydatabaseinstance.cjtisfsluhnr.us-east-1.rds.amazonaws.com - Port:
3306 - You need both the endpoint and the port number to connect to the DB instance.
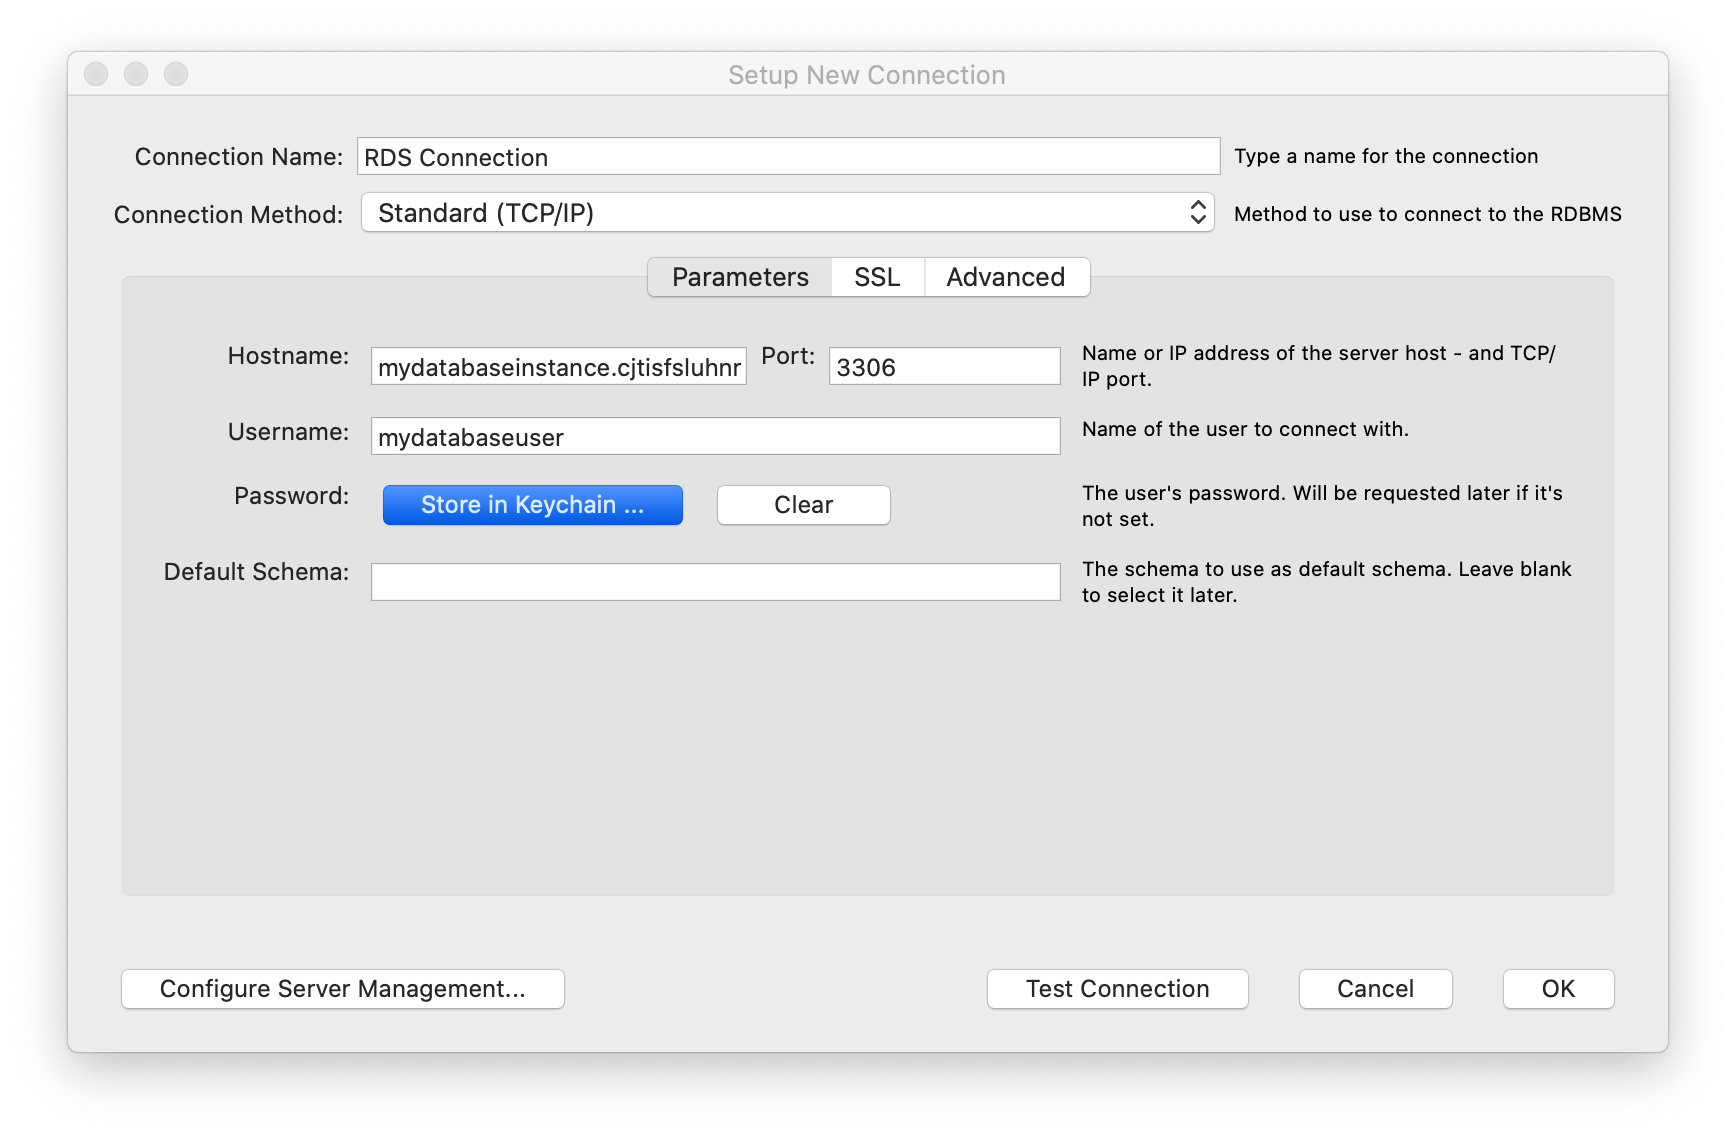
Open MySQL Workbench. Click on the plus icon on the right of MySQL Connections.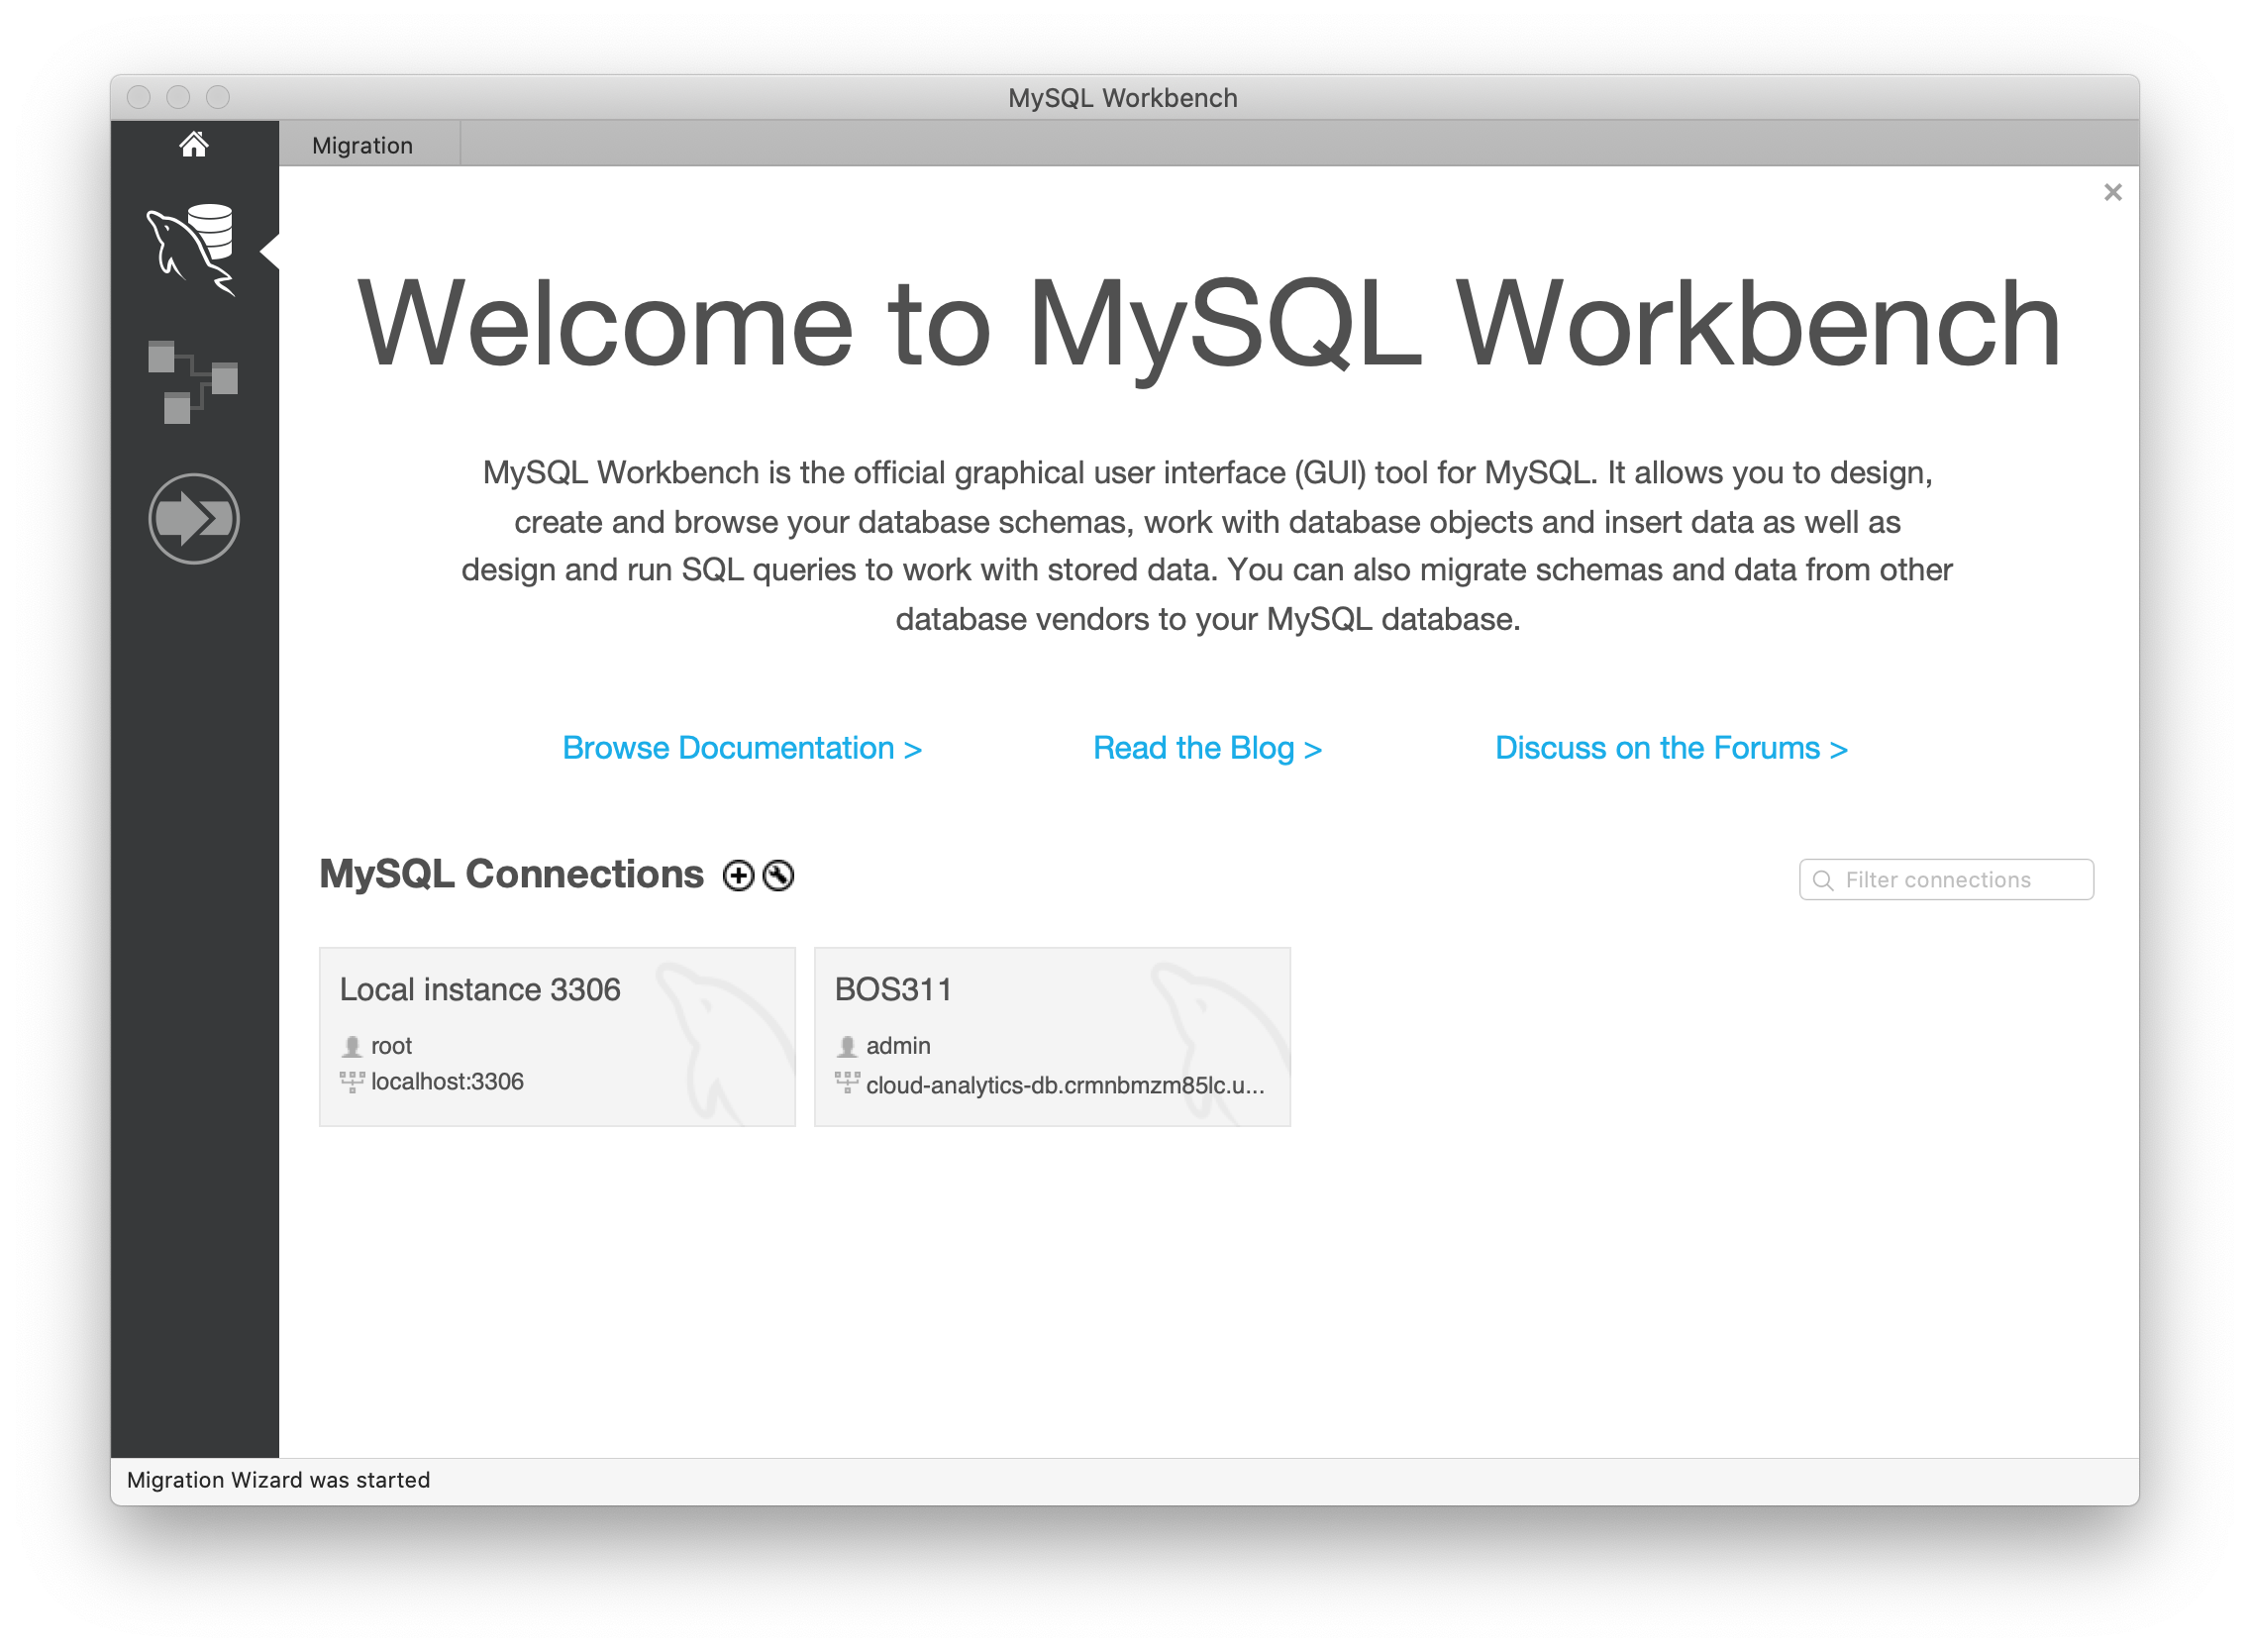
- Connection Name: Enter a sample name like
RDS Connection - Host Name: Enter your endpoint → e.g,
mydatabaseinstance.cjtisfsluhnr.us-east-1.rds.amazonaws.com - Port:
3306 - Username:
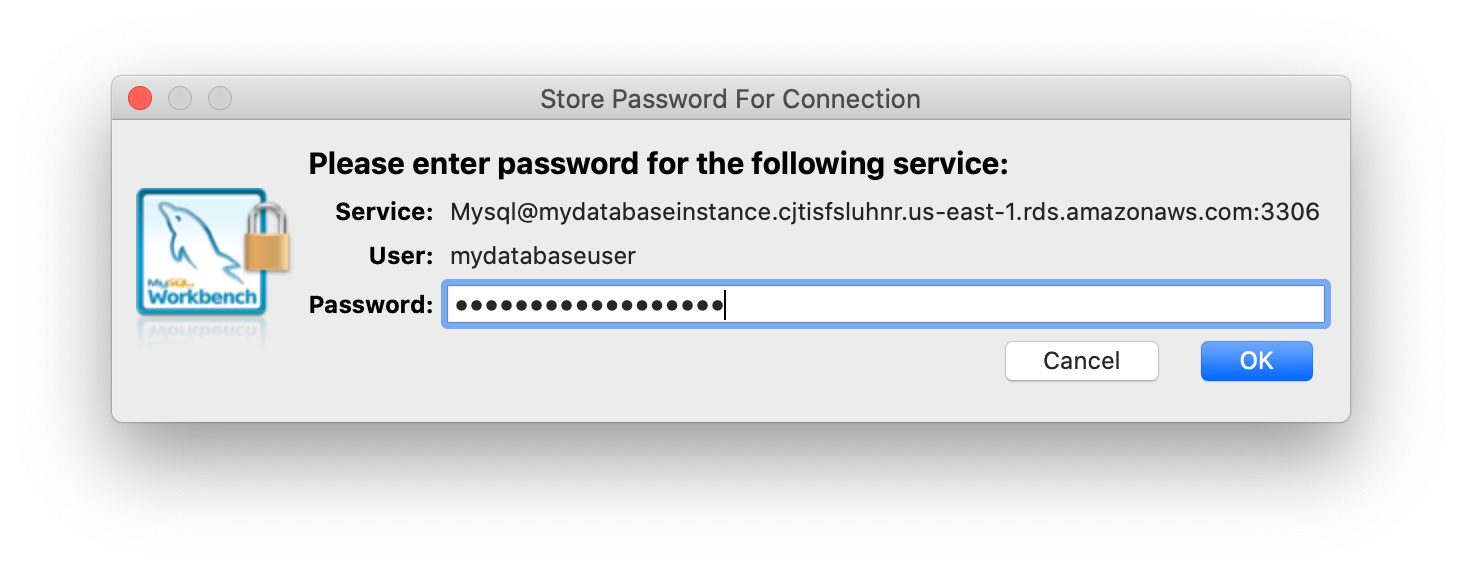
mydatabaseuser - Password: Click on Store in keychain and enter password
mydatabasepassword.
Click on Test Connection to make sure that you are able to connect to the database properly.
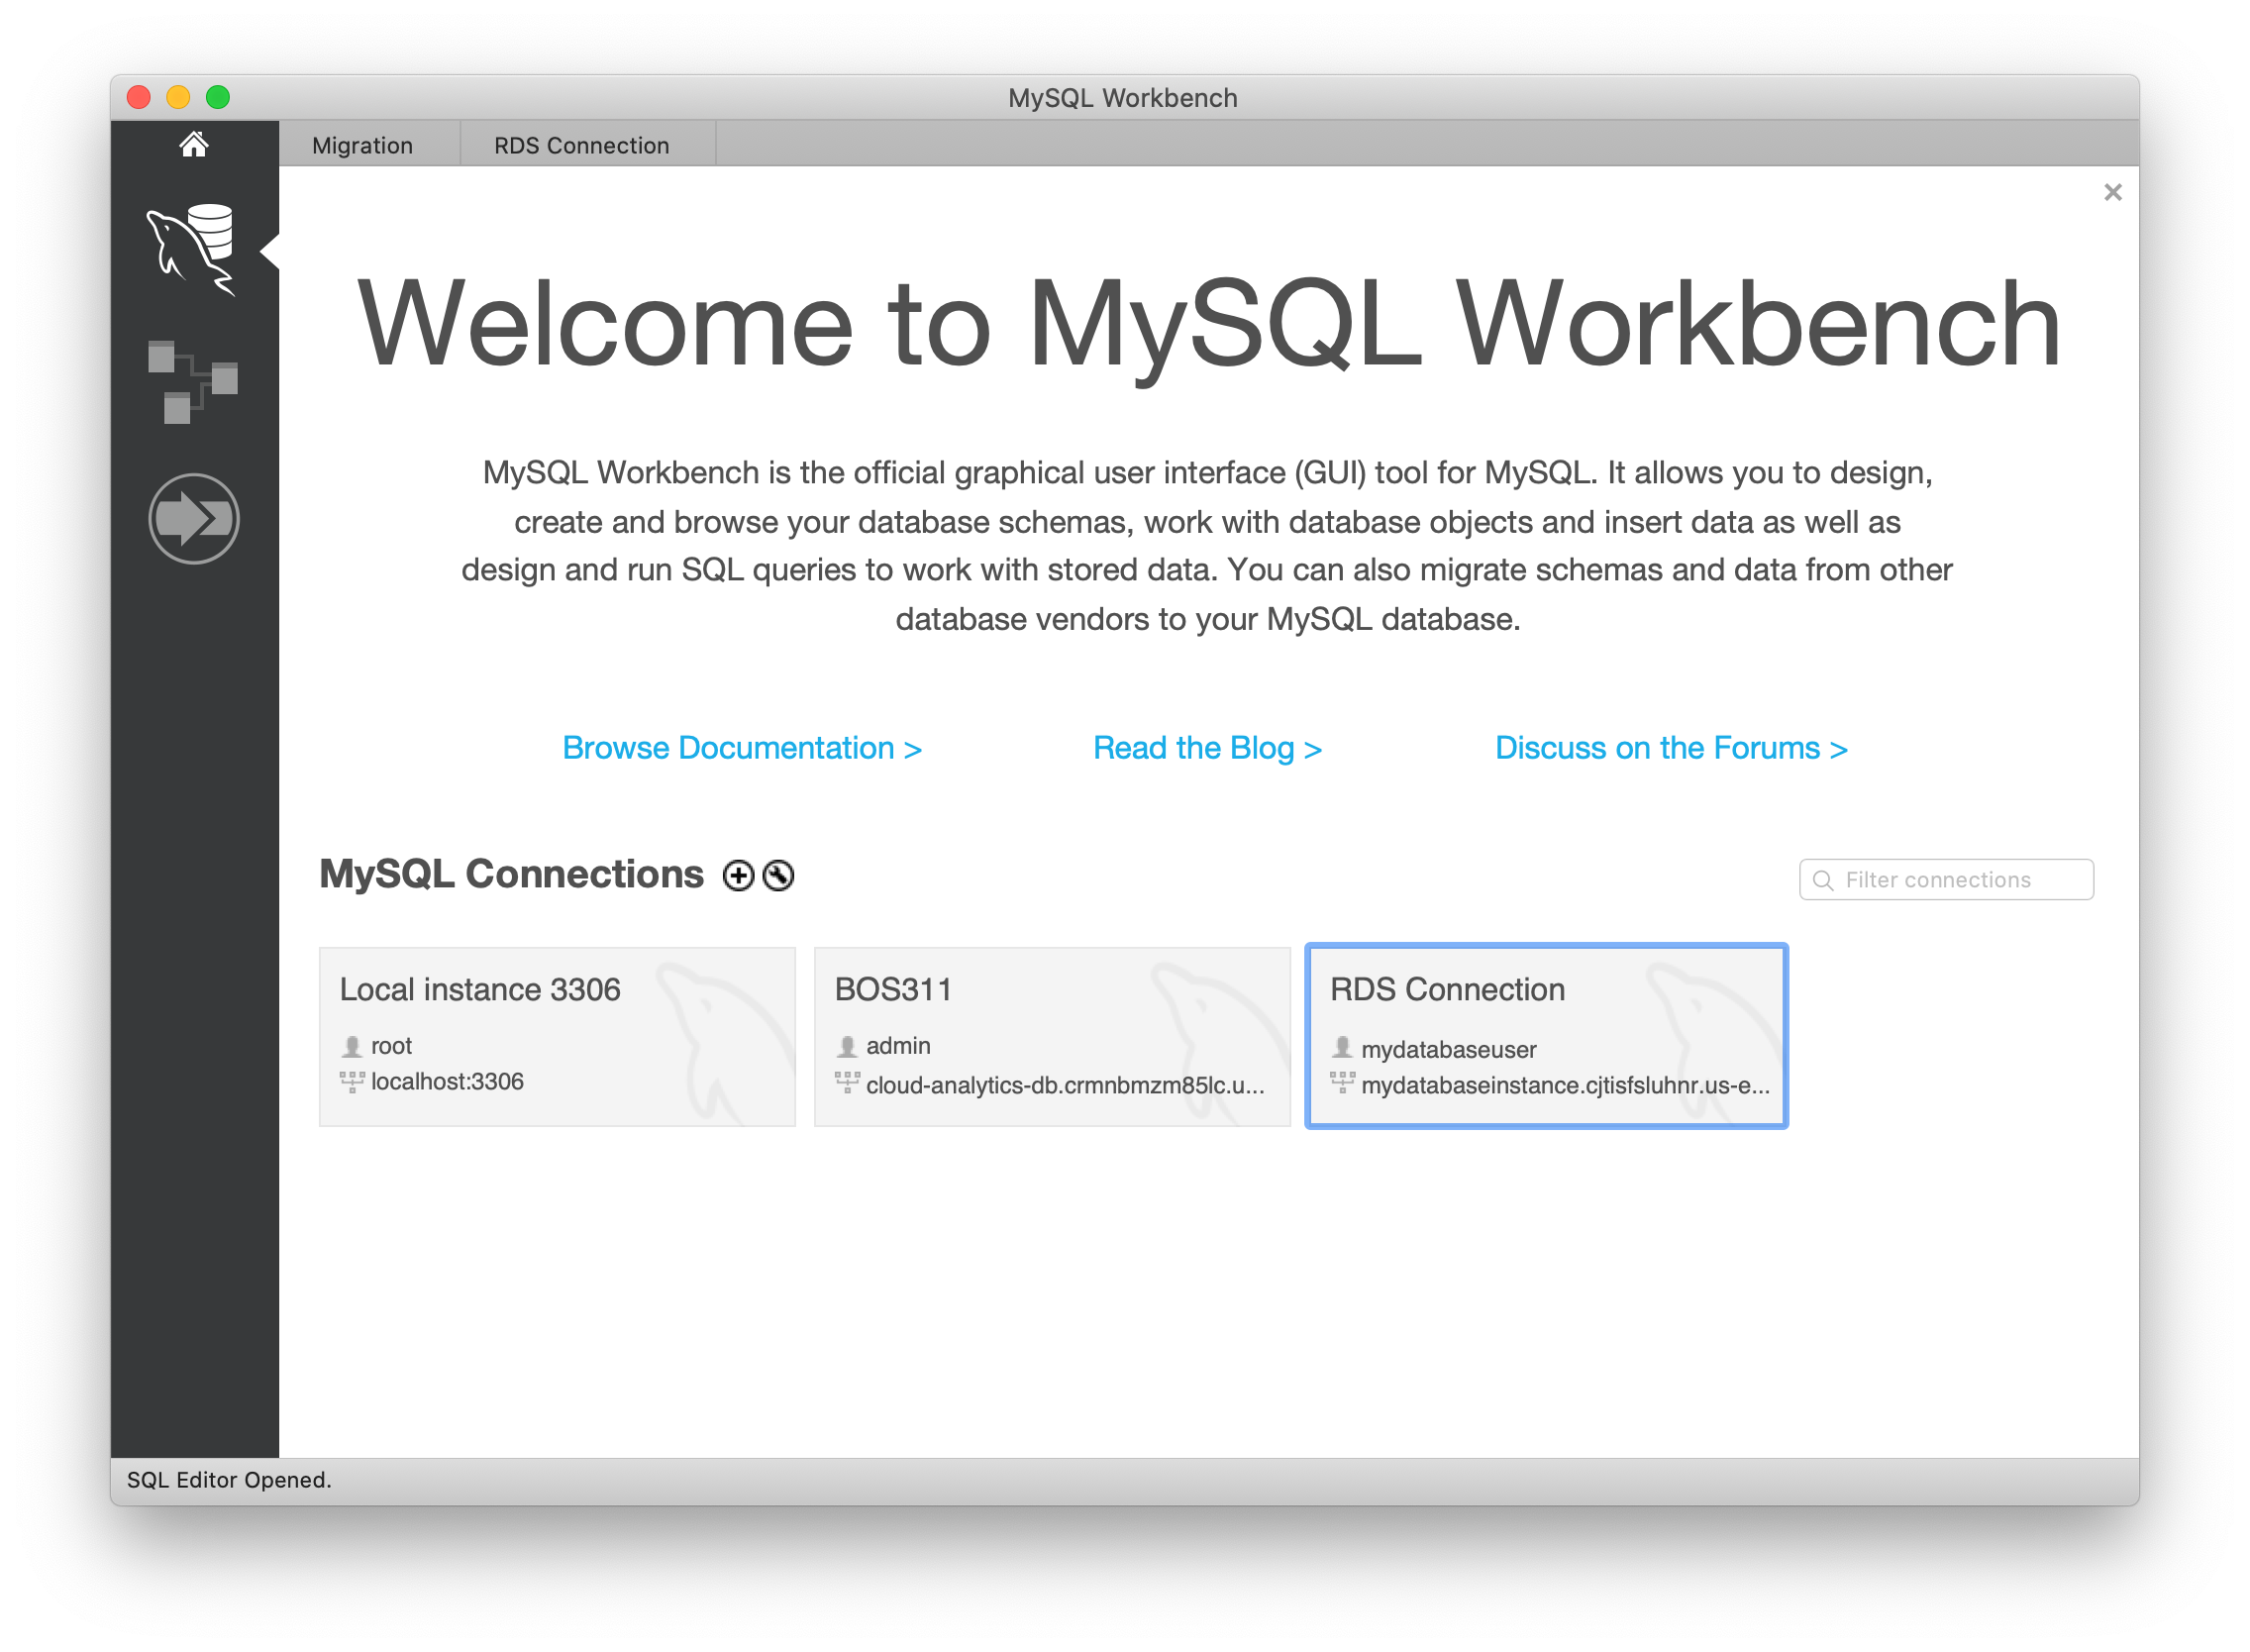
Click on OK and OK again to save the connection.
A database connection will be created in MySQL Workbench
Validate Test
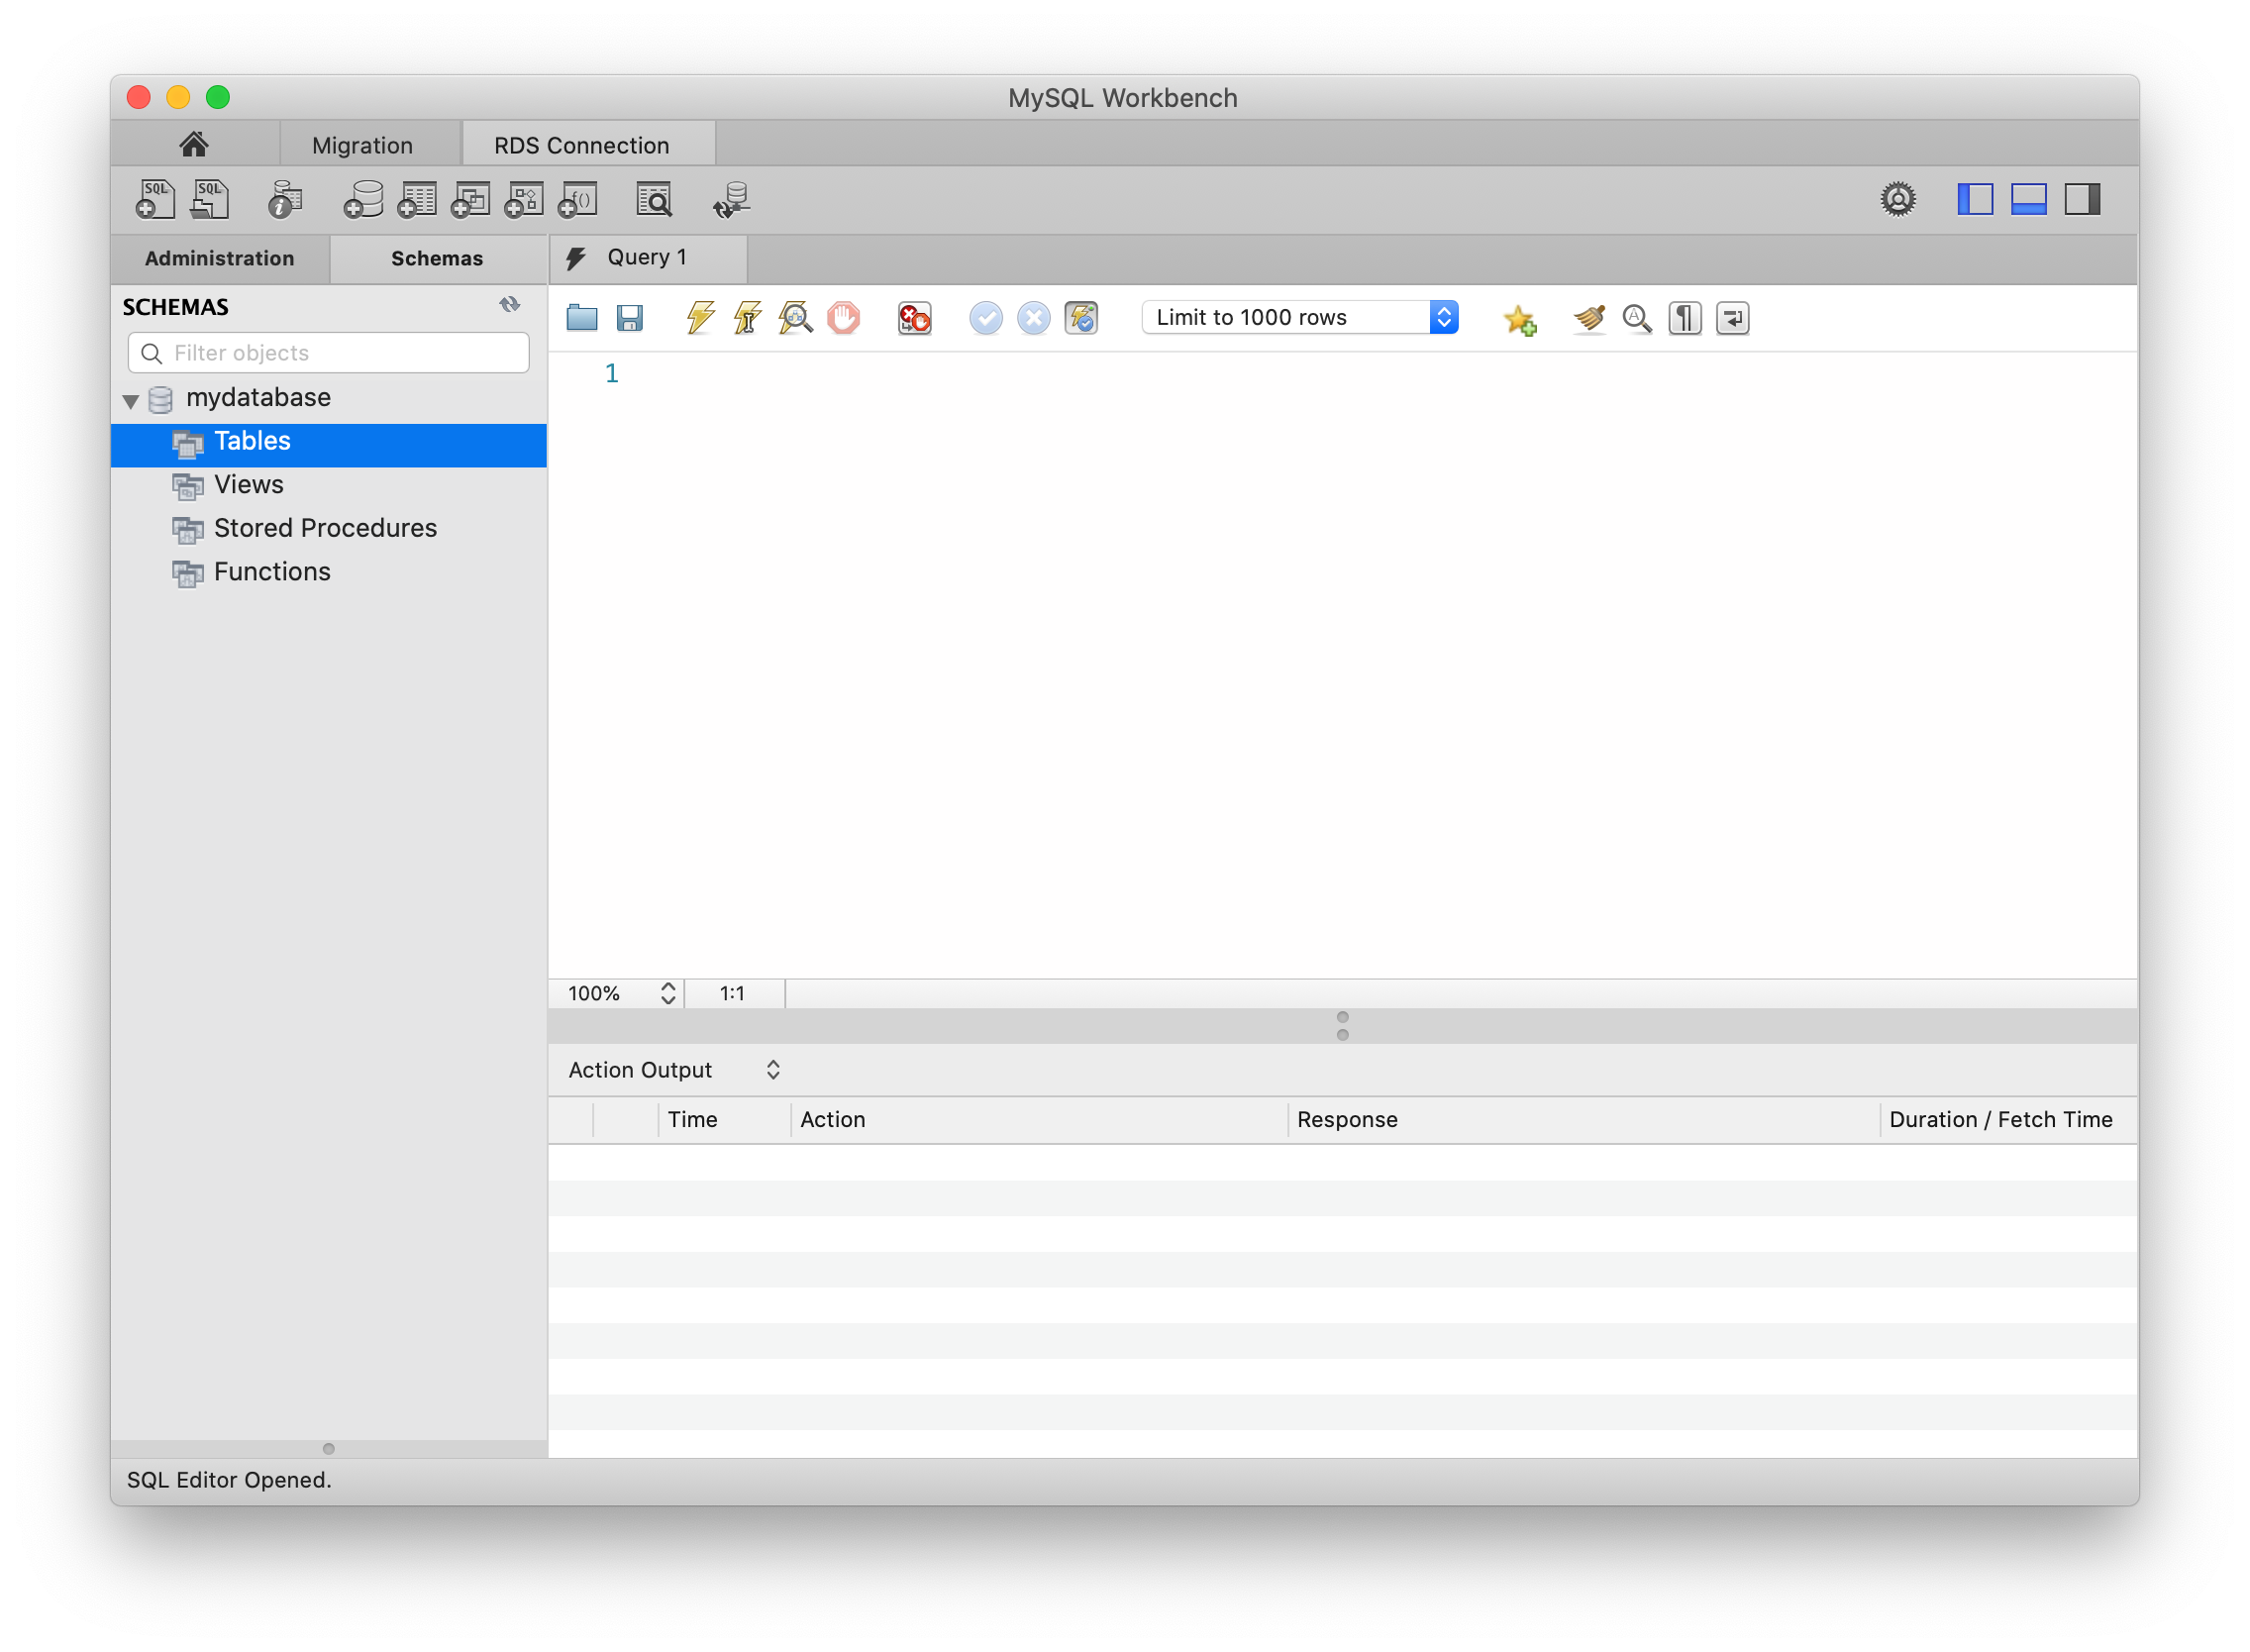
Double click on the connection you just created to open the database. Enter the database password if prompted.
After successfully connecting and opening the database, you can create tables and perform various queries over the connected database.
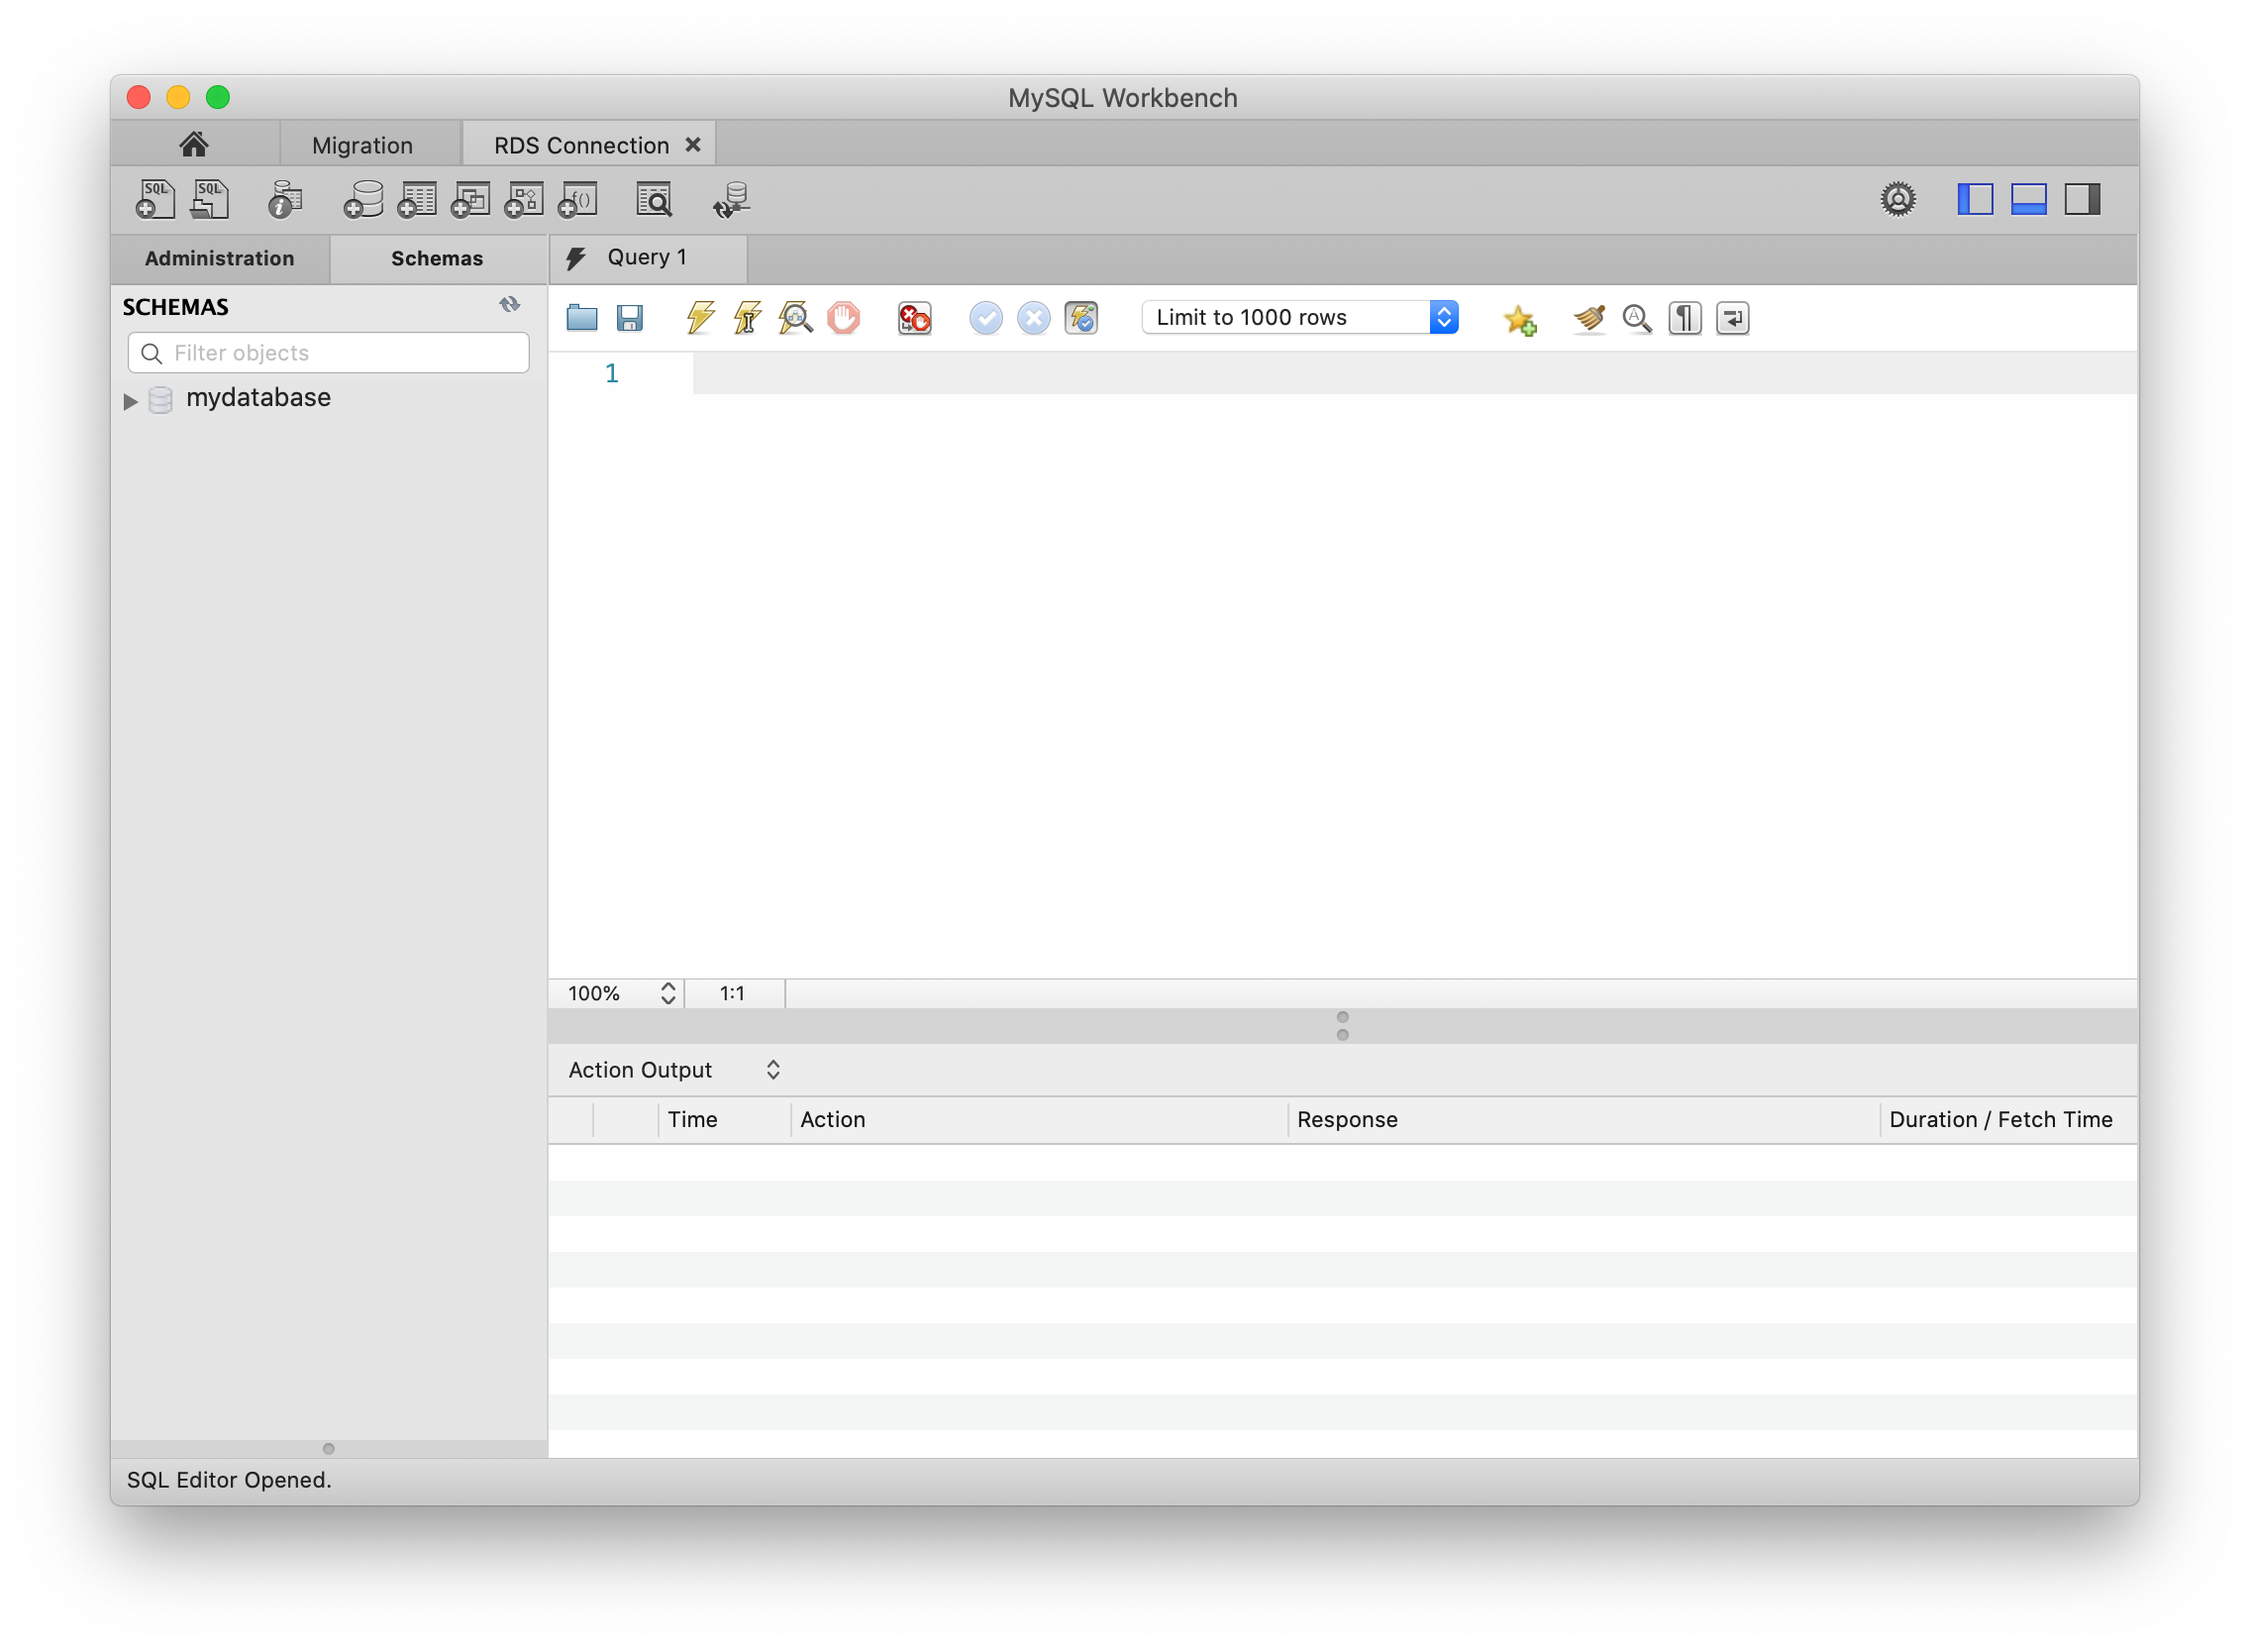
Navigate to the Schemas tab to see databases available to start doing database operations. More details on database operations are available here.
Completion and Conclusion
- You have successfully used AWS management console to create RDS MySQL database instance.
- You have configured the details while creating the Amazon RDS instance.
- You have used the GUI tool MySQL Workbench to connect to the Amazon RDS instance created.
Deploying Amazon RDS Multi-AZ and Read Replica, Simulate Failover
https://play.whizlabs.com/site/task_details?lab_type=1&task_id=39&quest_id=35
Lab Details
- This lab walks you through the steps to launch an Amazon Aurora RDS DB instance with multi-AZ enabled. We will also simulate a database failover from one AZ to another.
- You will practice using Amazon Aurora.
Lab Tasks
- In this lab session, first we are going to launch an Amazon Aurora RDS DB instance with Multi-AZ enabled.
- Connect to the RDS database instance (using its endpoint) from your local machine.
- Create a test database and table in your Master RDS DB instance.
- Force the Master DB instance to failover.
- After Failover, Master will change to Reader and Reader will change to Master
- Connect to the new Master to test the database replication.
Architecture Diagram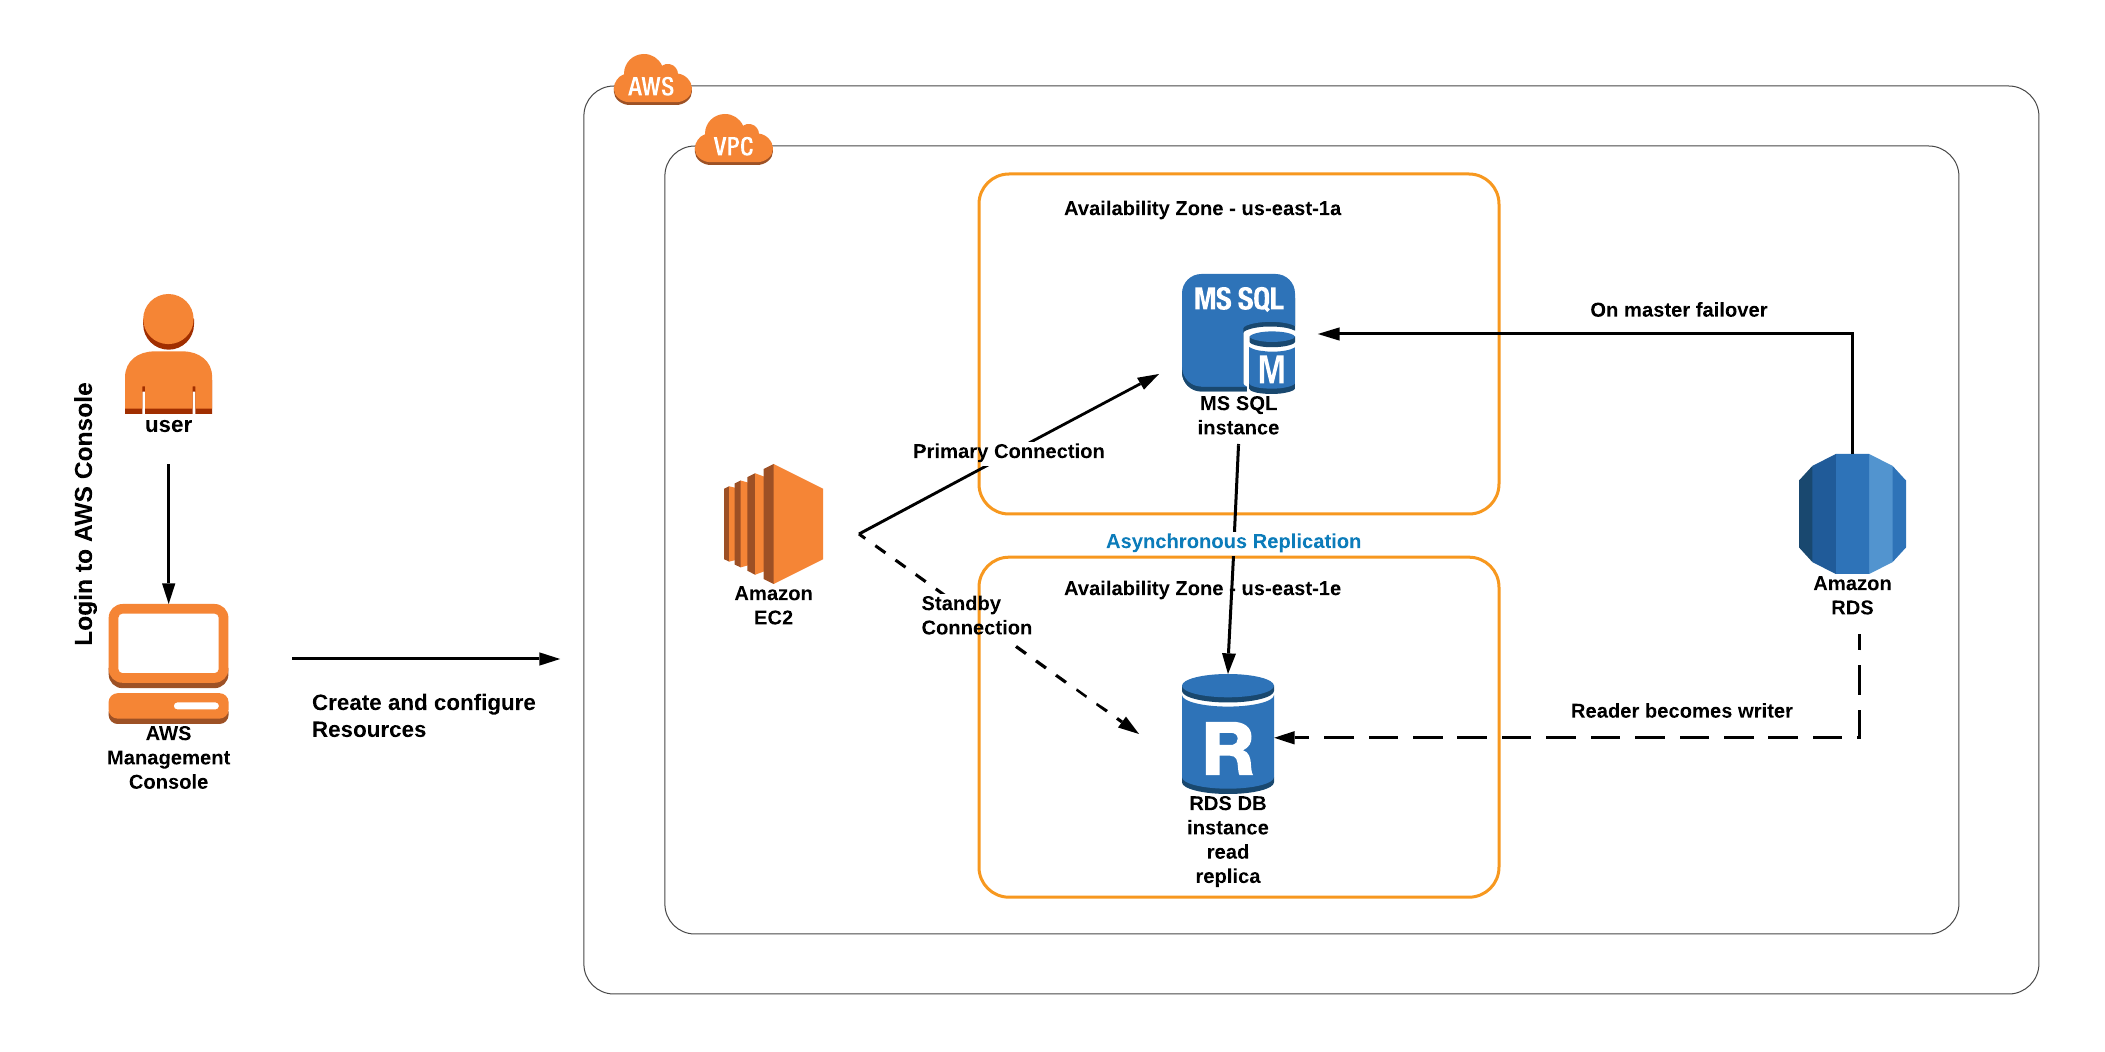
RDS Configuration
Create a Security Group for RDS instance
Service -> EC2 -> Security Groups
Region: N.Virginia
Click on the Create security group button.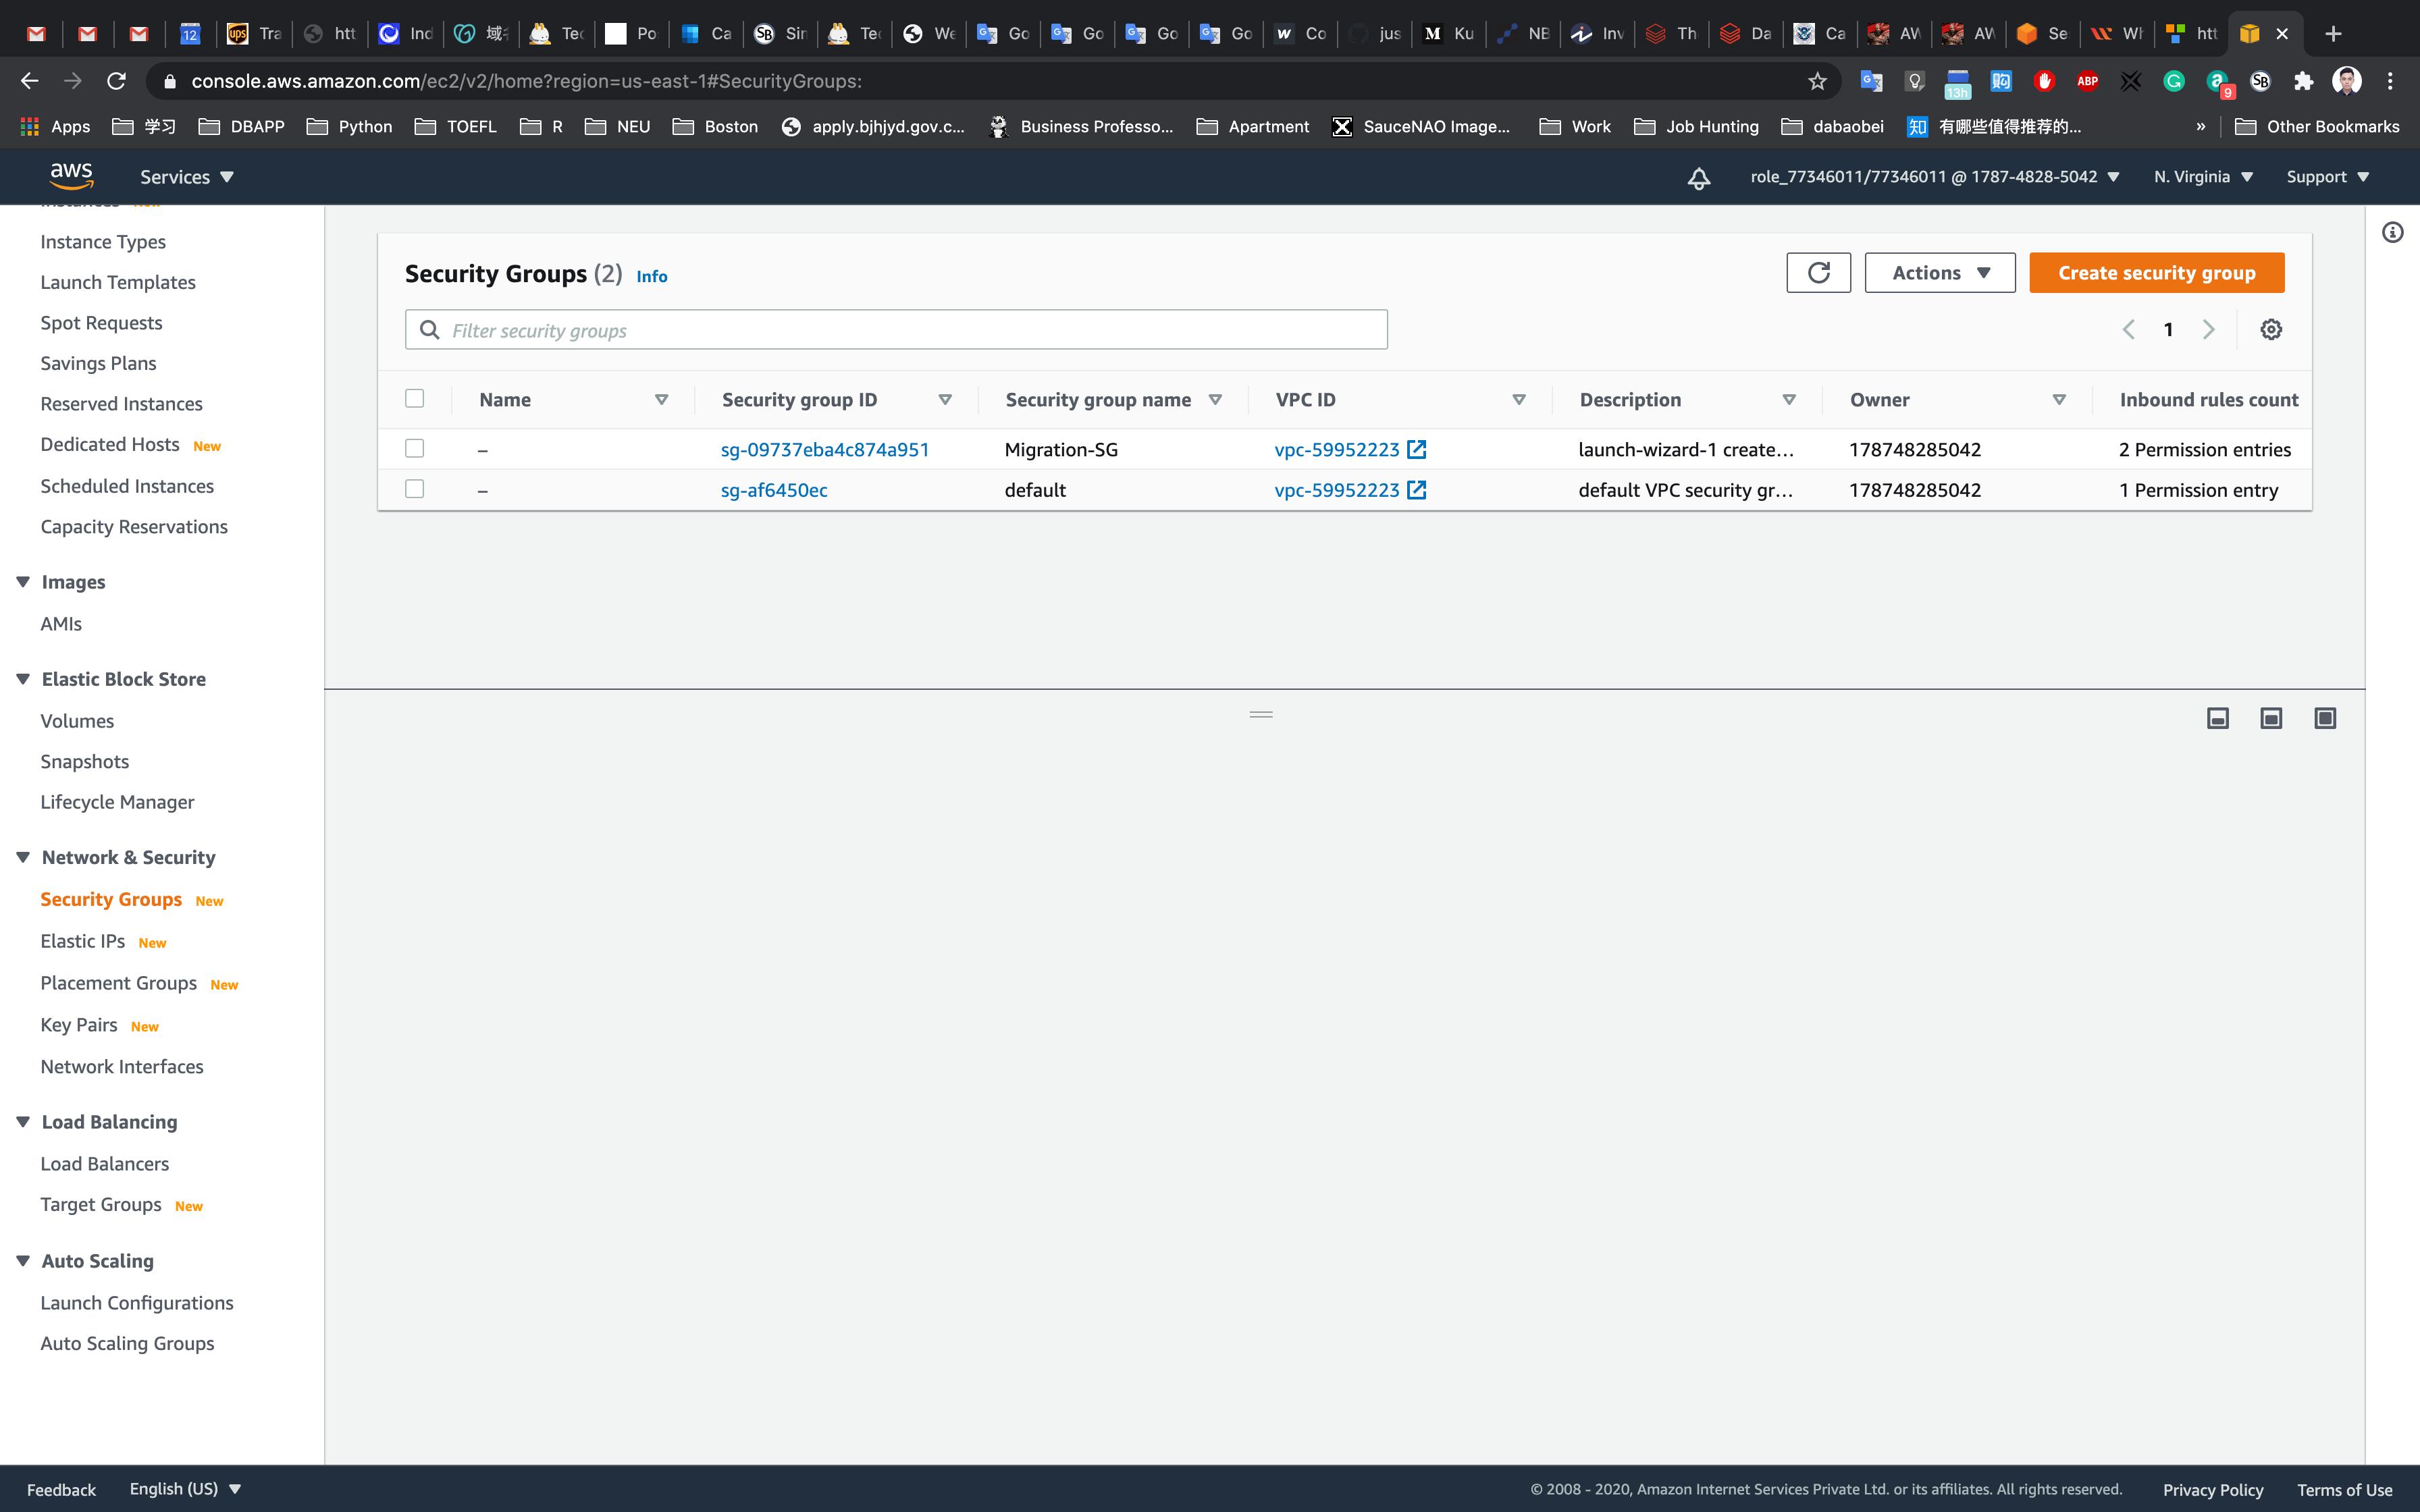
We are going to create a Security group for RDS with 3306 port number enabled.
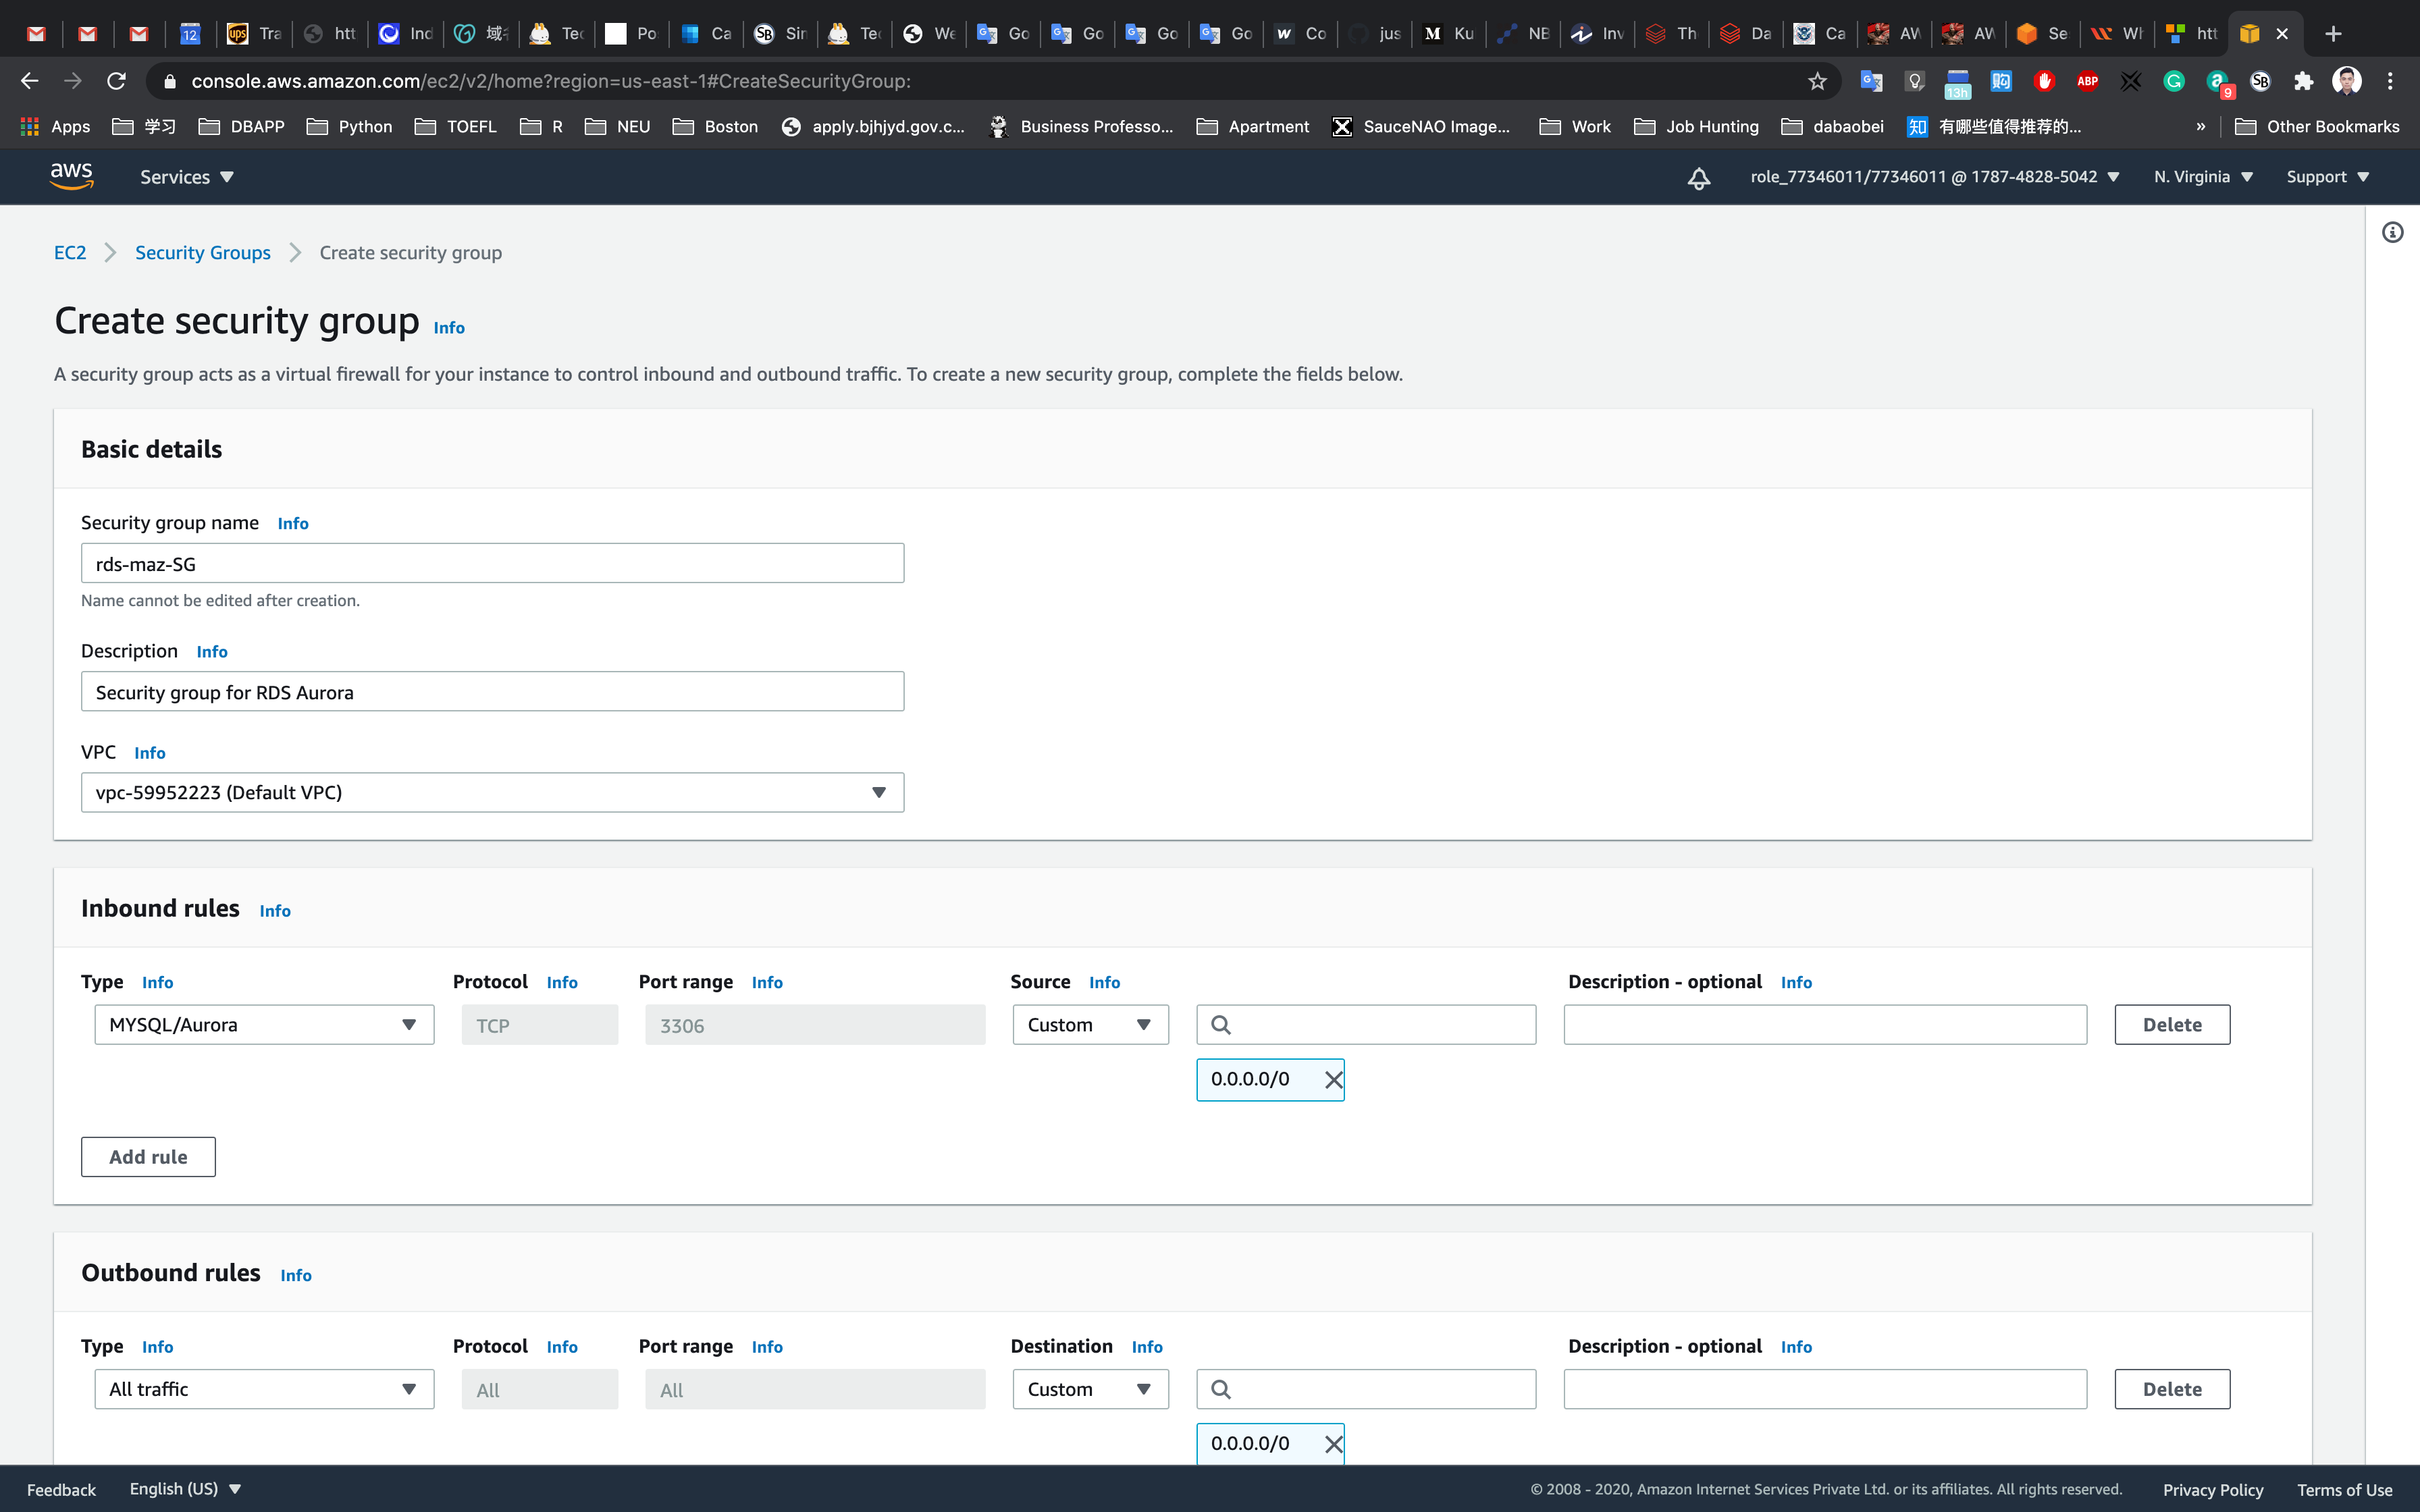
- Security group name : Enter
rds-maz-SG(RDS-Multi-AZ-Security-Group) - Description : Enter
Security group for RDS Aurora - VPC : Select Default VPC
Click on the Add rule button under Inbound rules.
- In the textbox add
0.0.0.0/0 - Source : Select
Custom - Type : Select
MYSQL/Aurora
Leave everything as default and click on the Create security group button.
Create an Amazon Aurora database with Multi-AZ enabled
Service -> RDS
Click on Databases in the left Panel.
Click on Create database.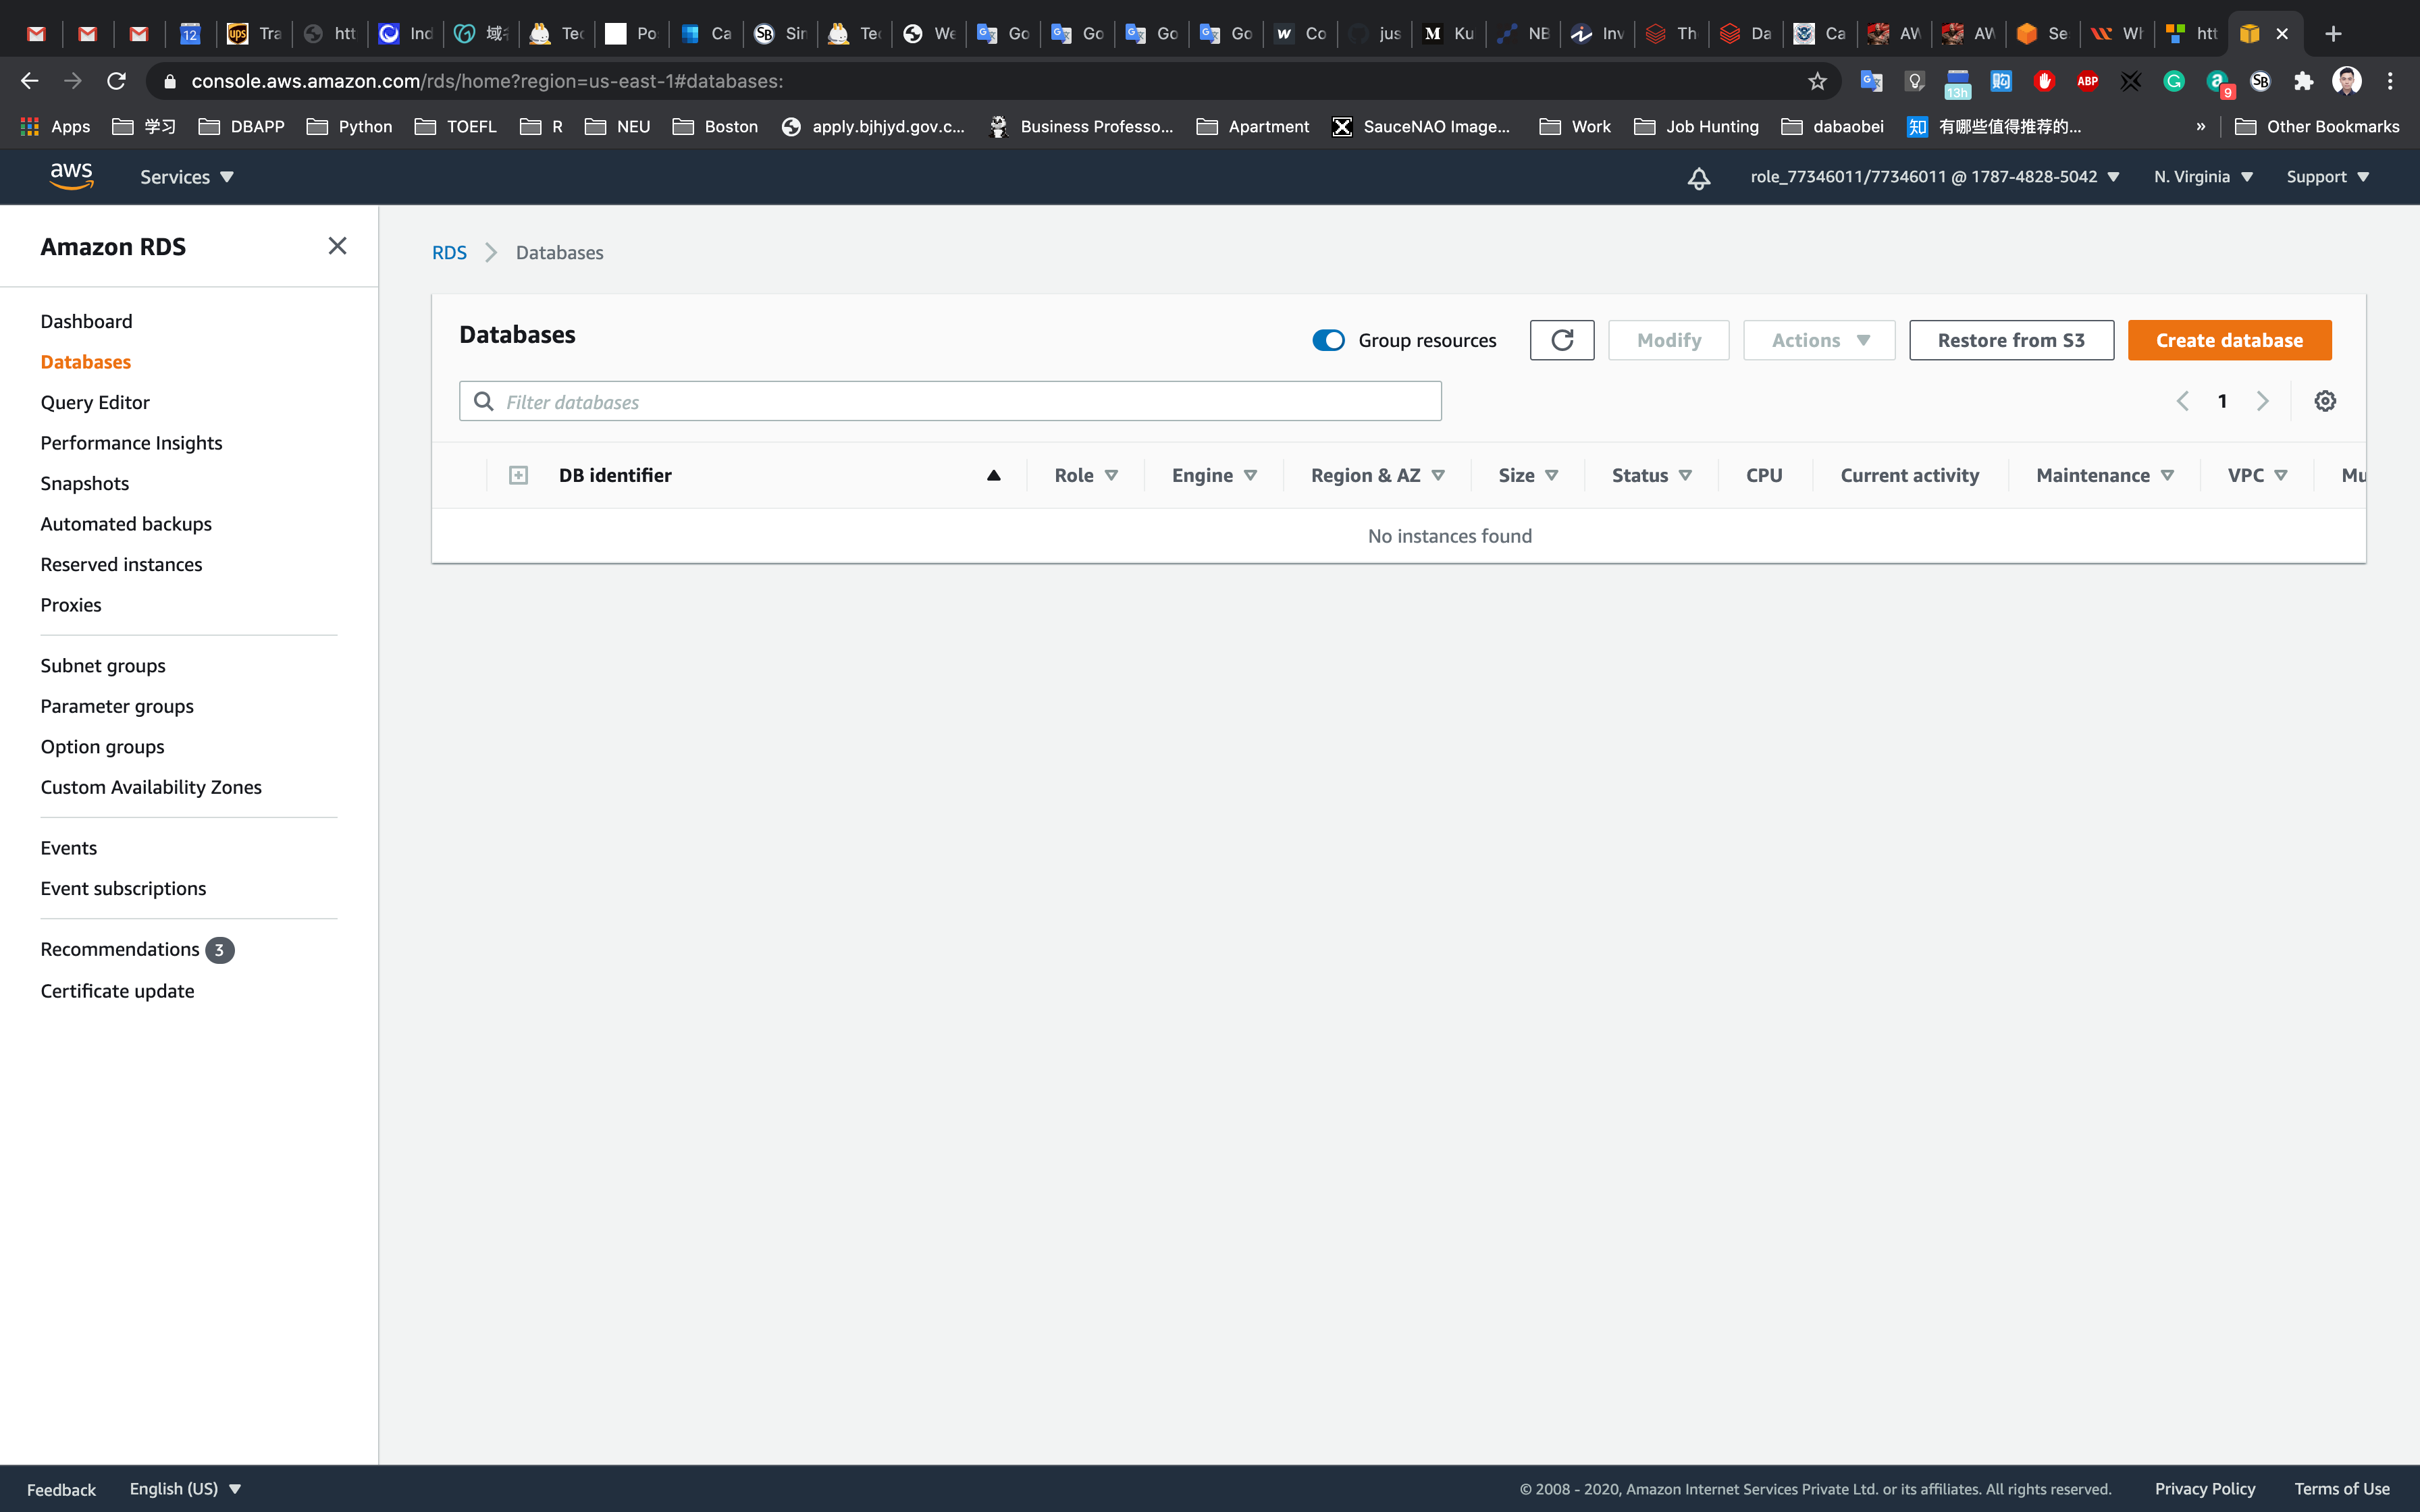
Note: If you are in the original interface, make sure to click on the Switch to the new database creation flow as shown below.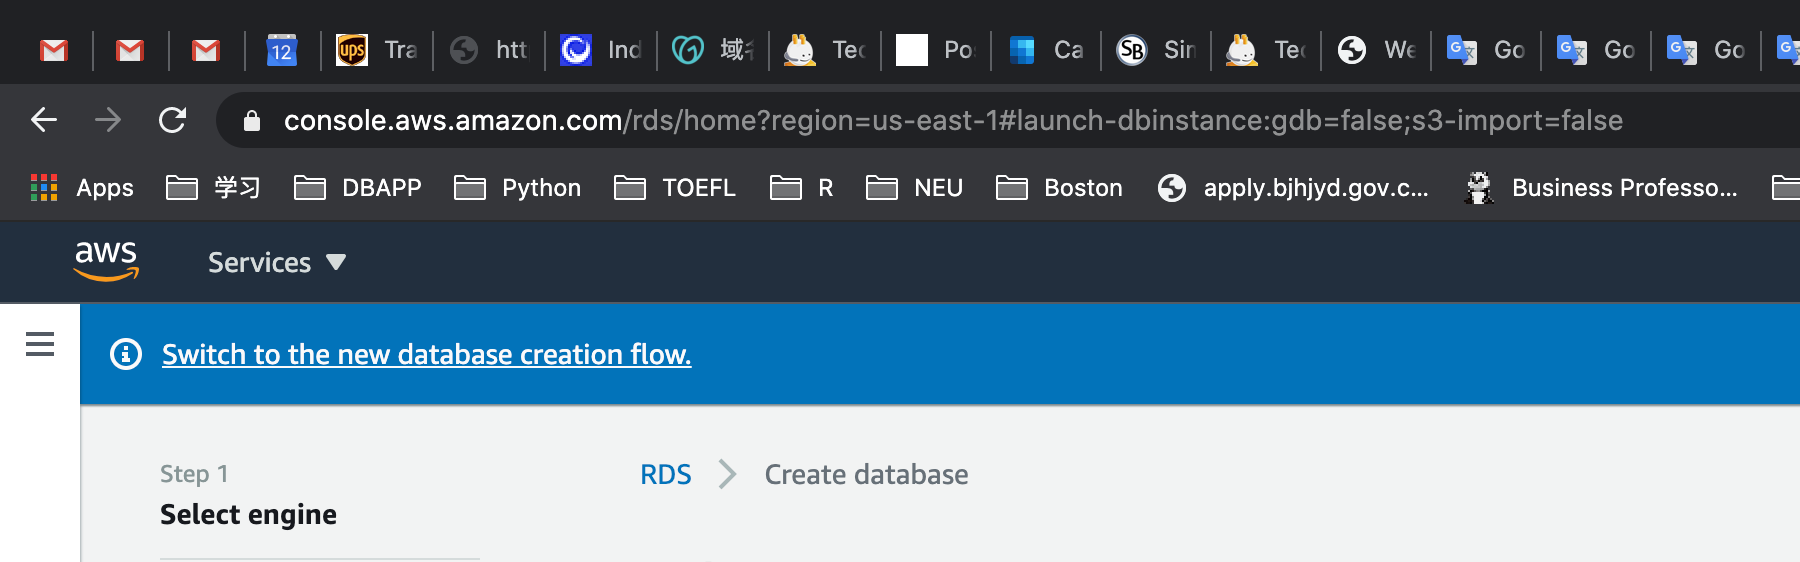
Next we’ll configure the database on the Create Database Page
- Choose a Database Creation Method:
- Select Standard Create
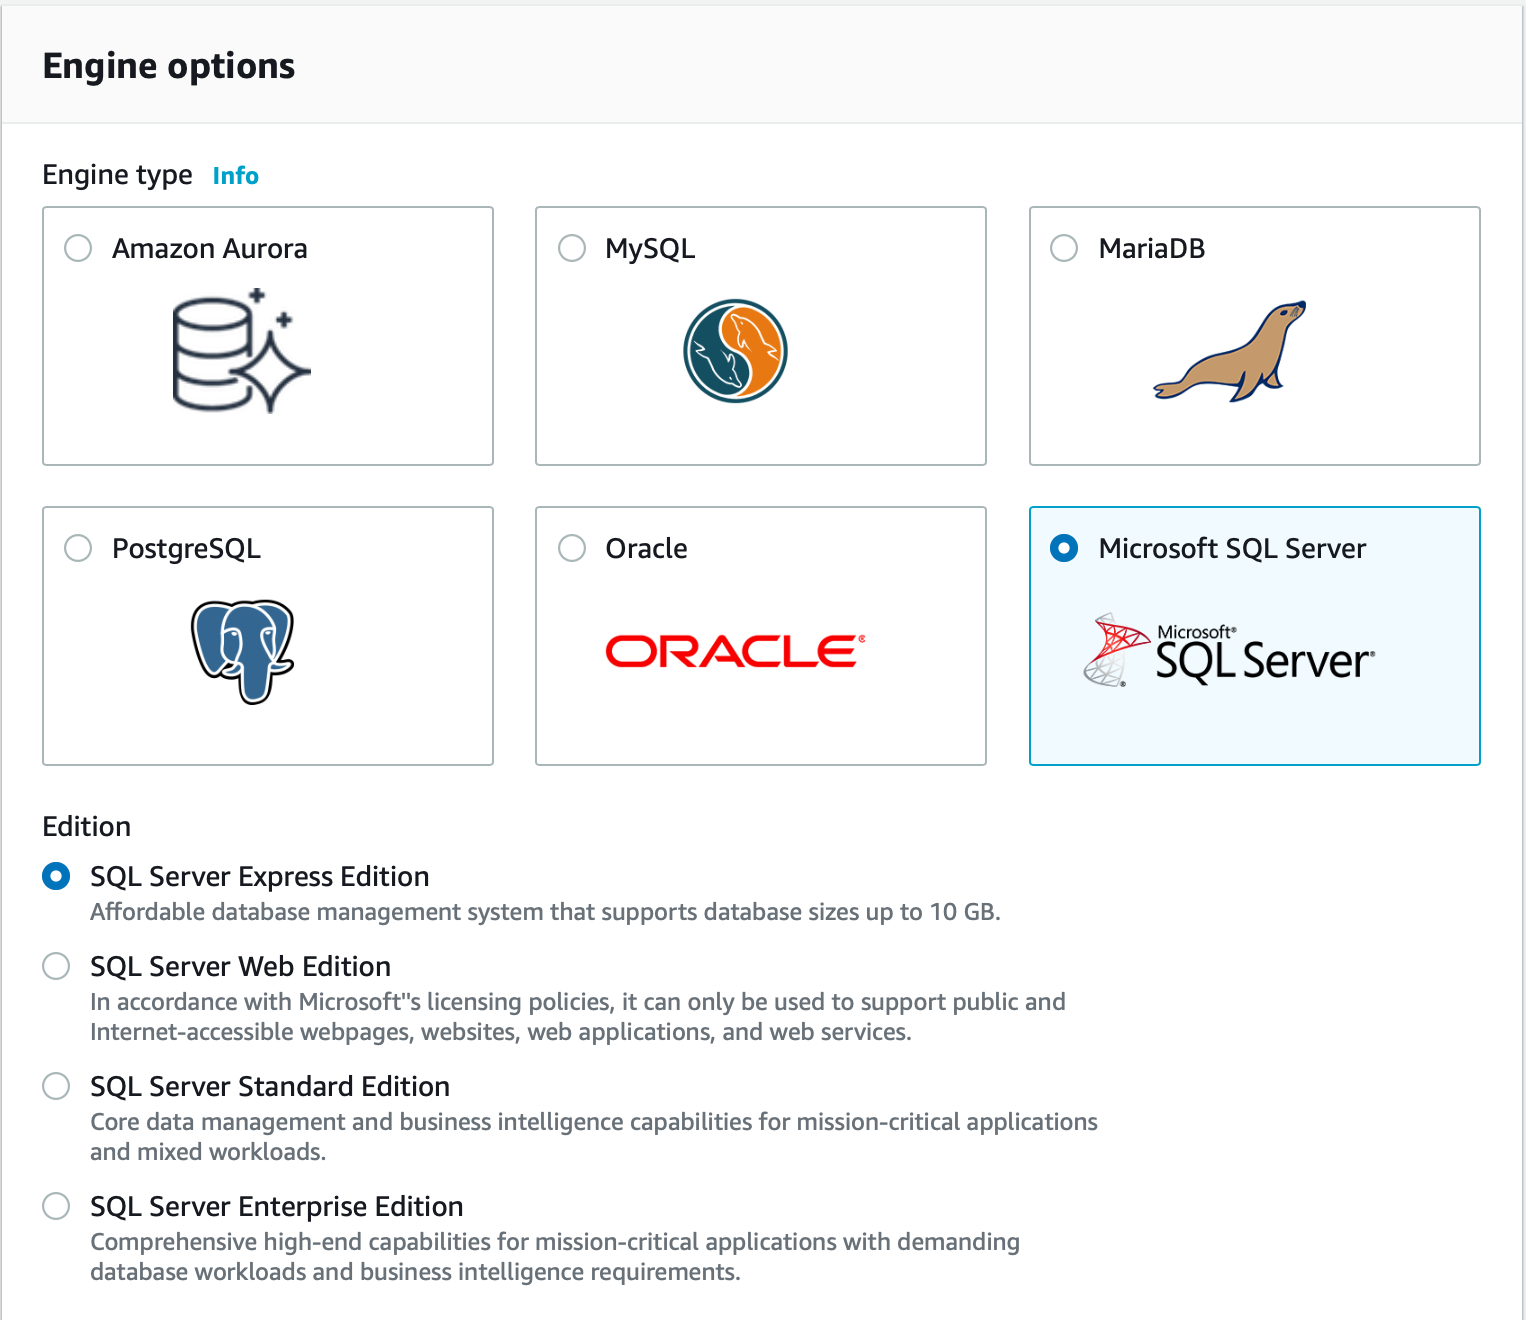
- In Engine options:
- Engine type: Choose
Amazon Aurora - Edition: Choose
Amazon Aurora with MySQL compatibility
- Engine type: Choose
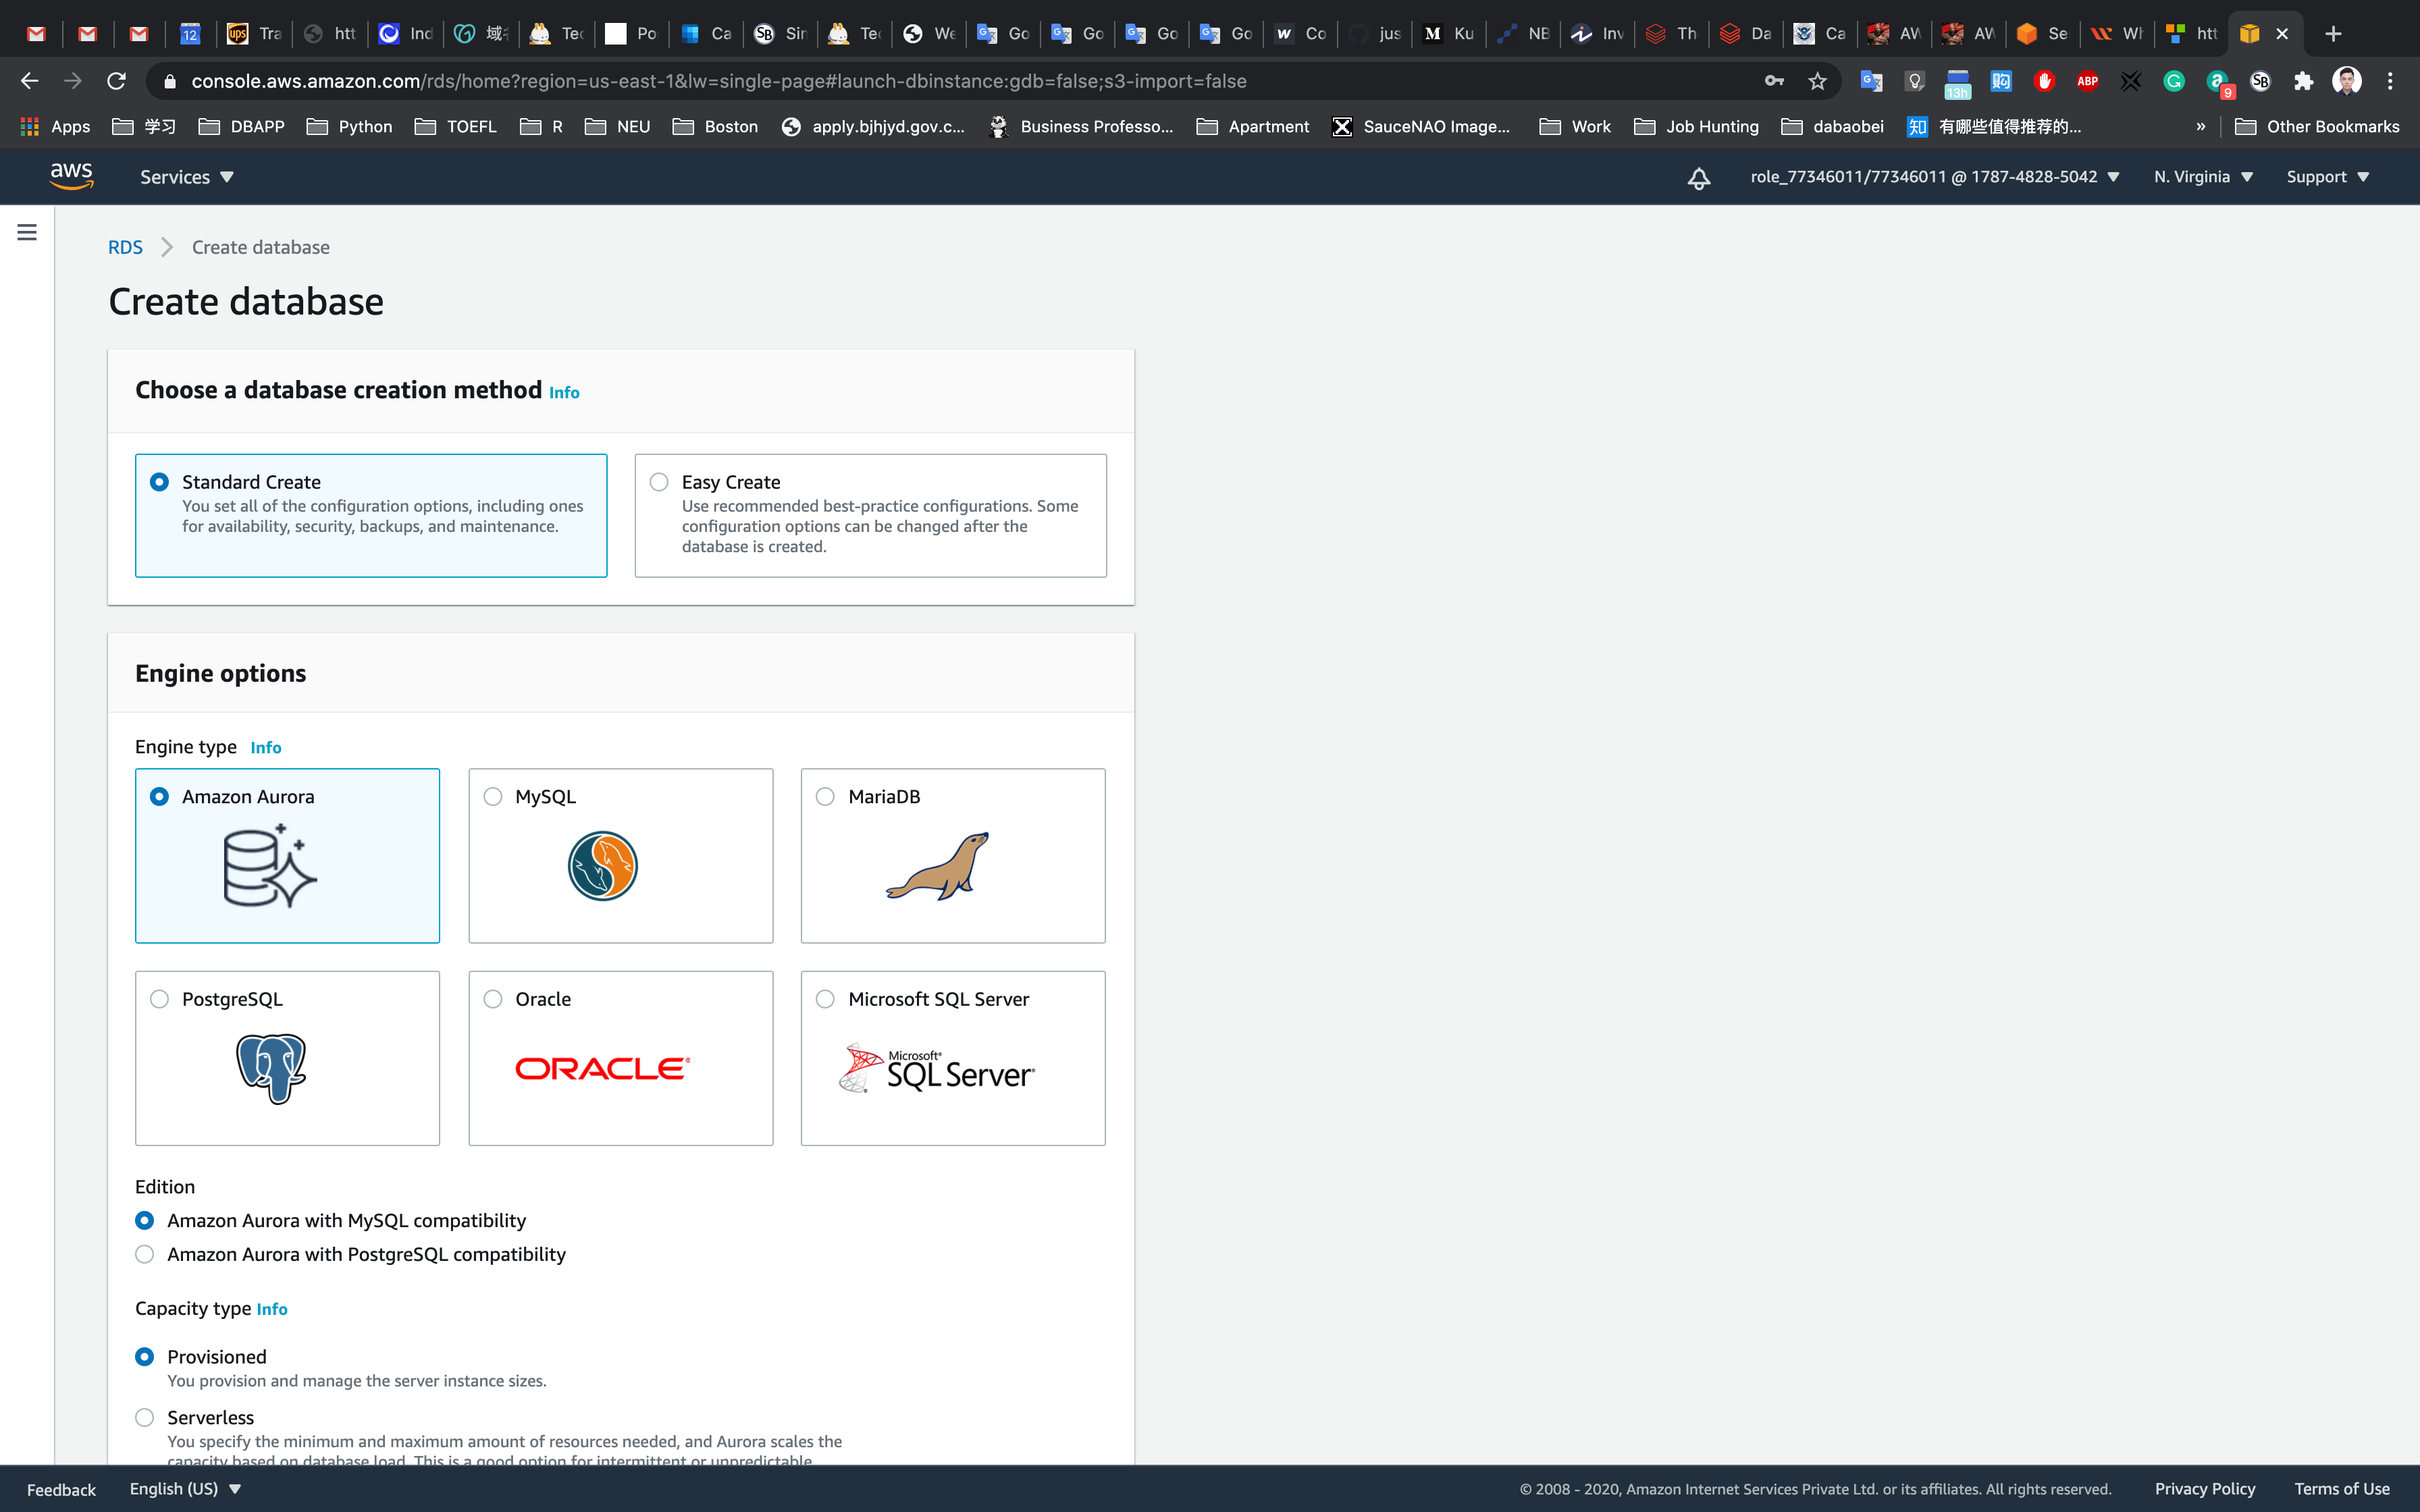
- In Engine options:
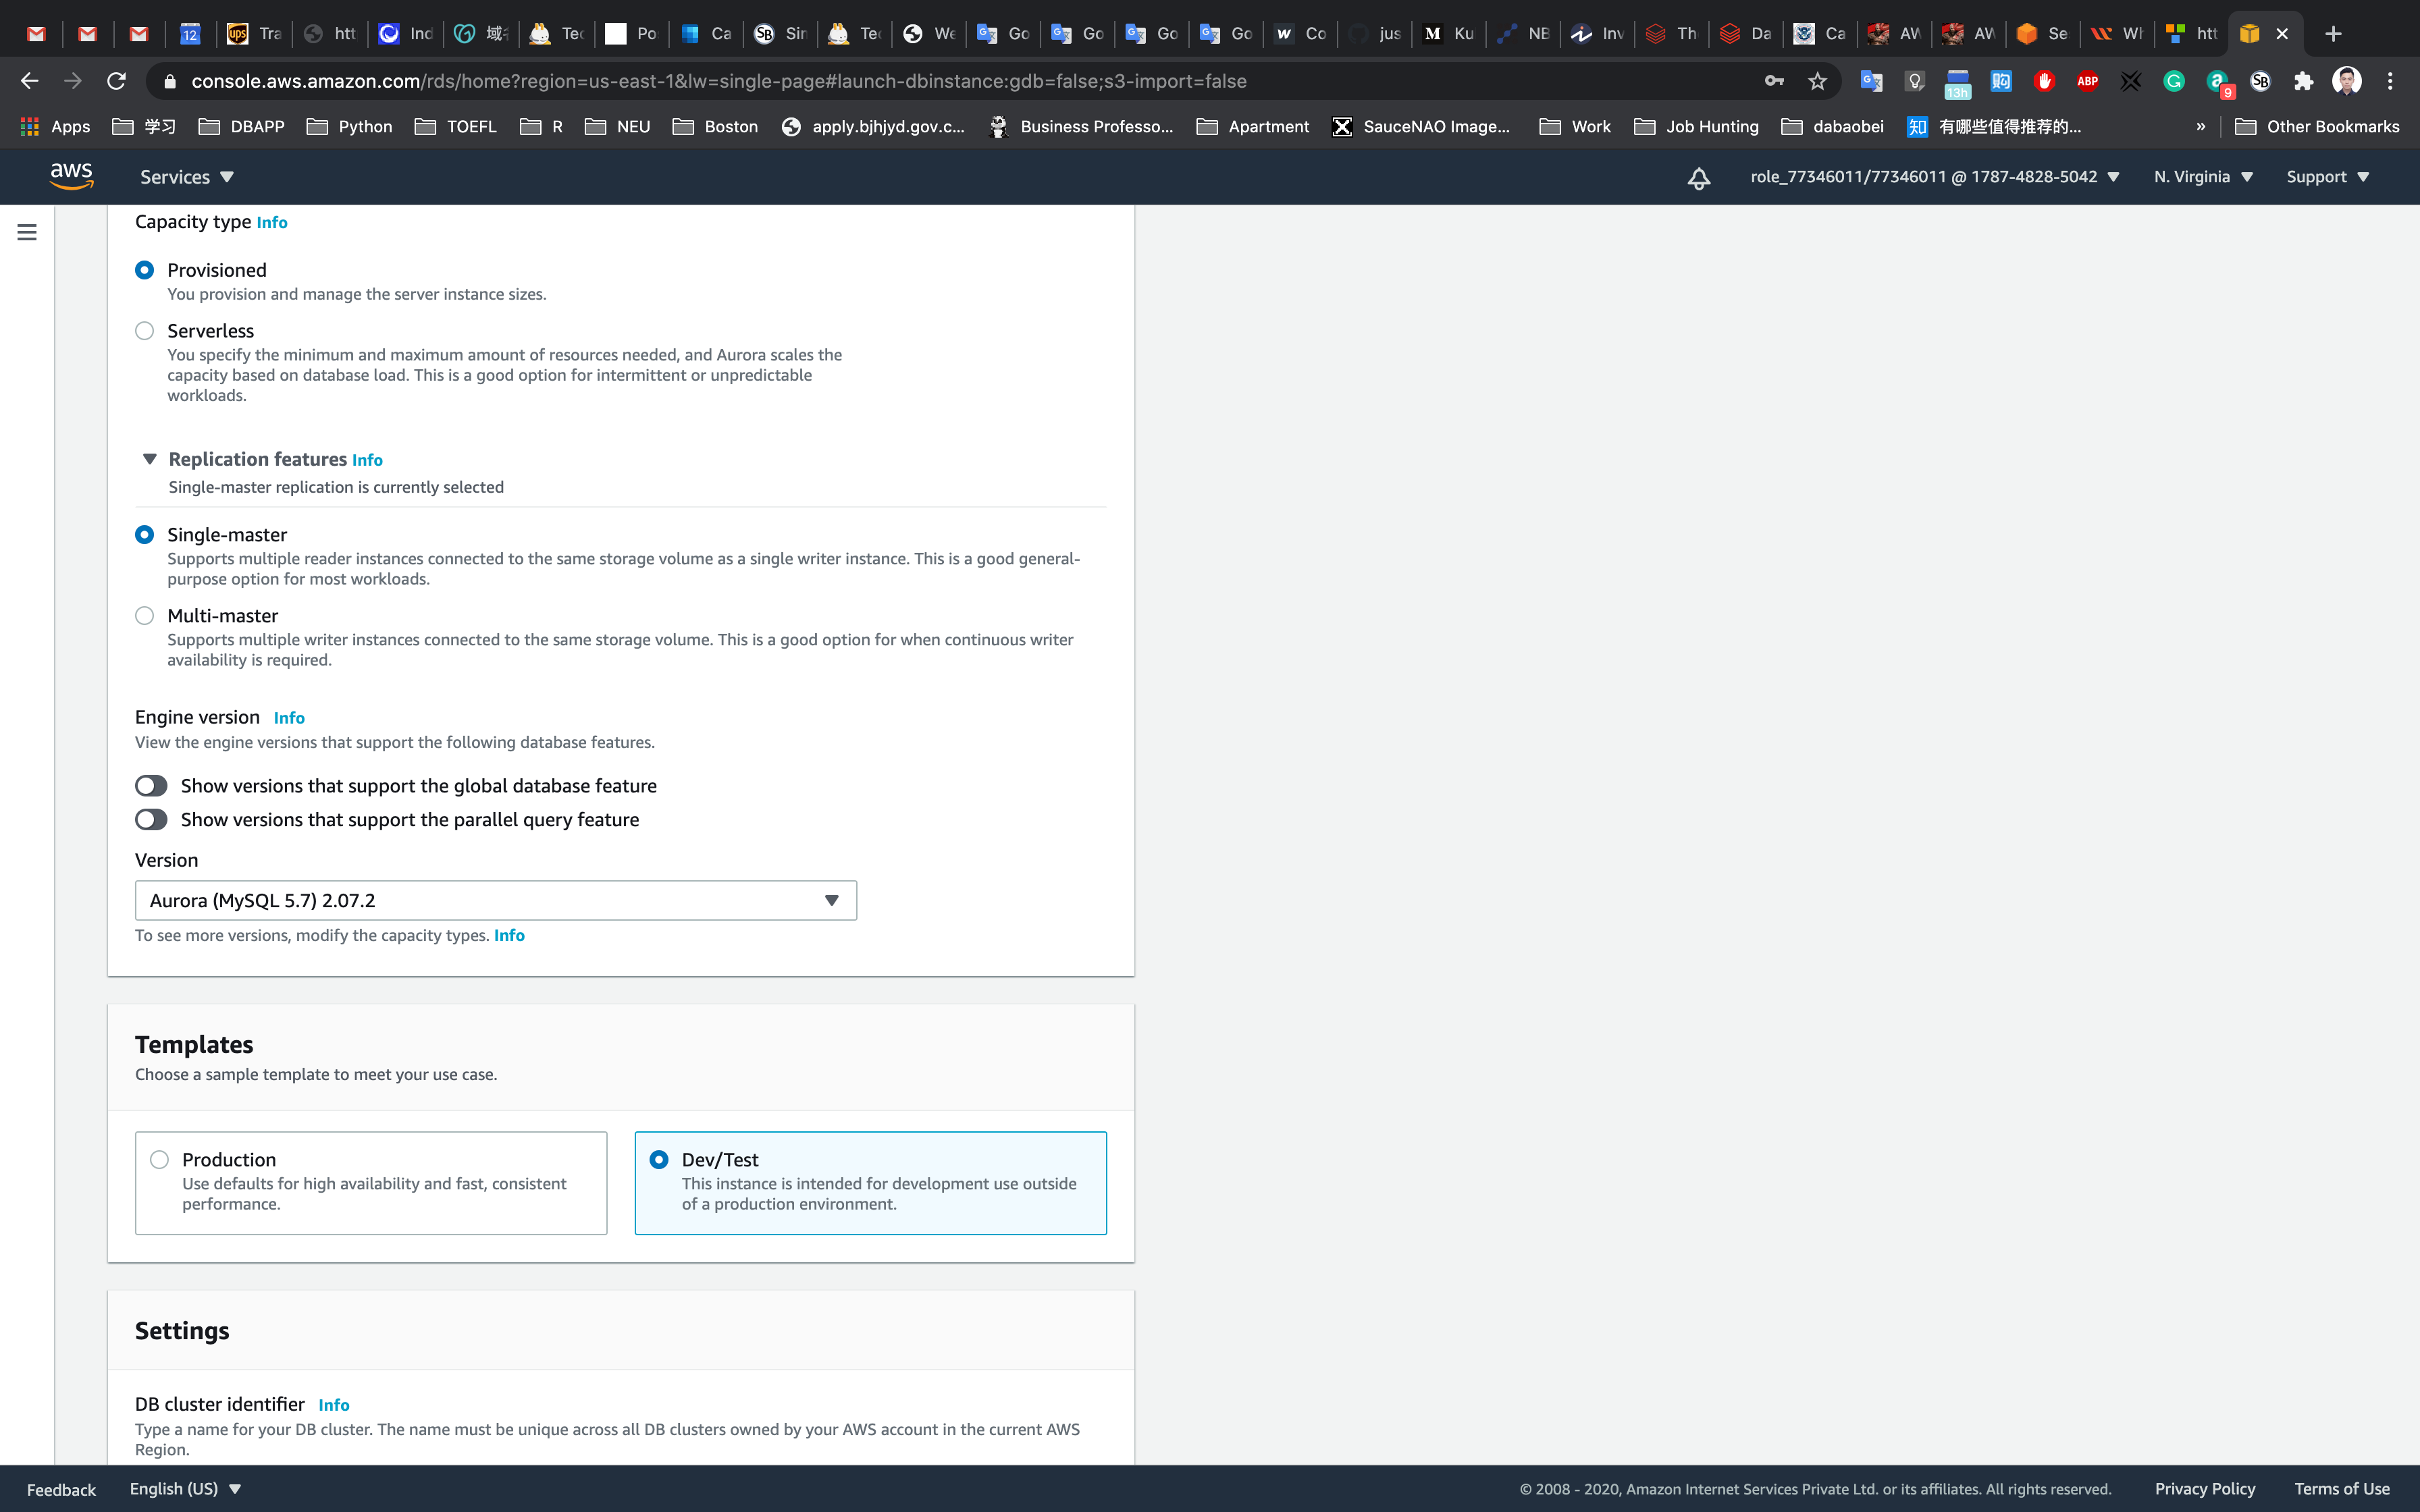
- Capacity Type:
Provisioned - Replication features:
- Select
Single-master (default)
- Select
- Version: Default
(Aurora (MYSQL 5.7) 2.07.2)
- Capacity Type:
- Choose Template:
Dev/Test
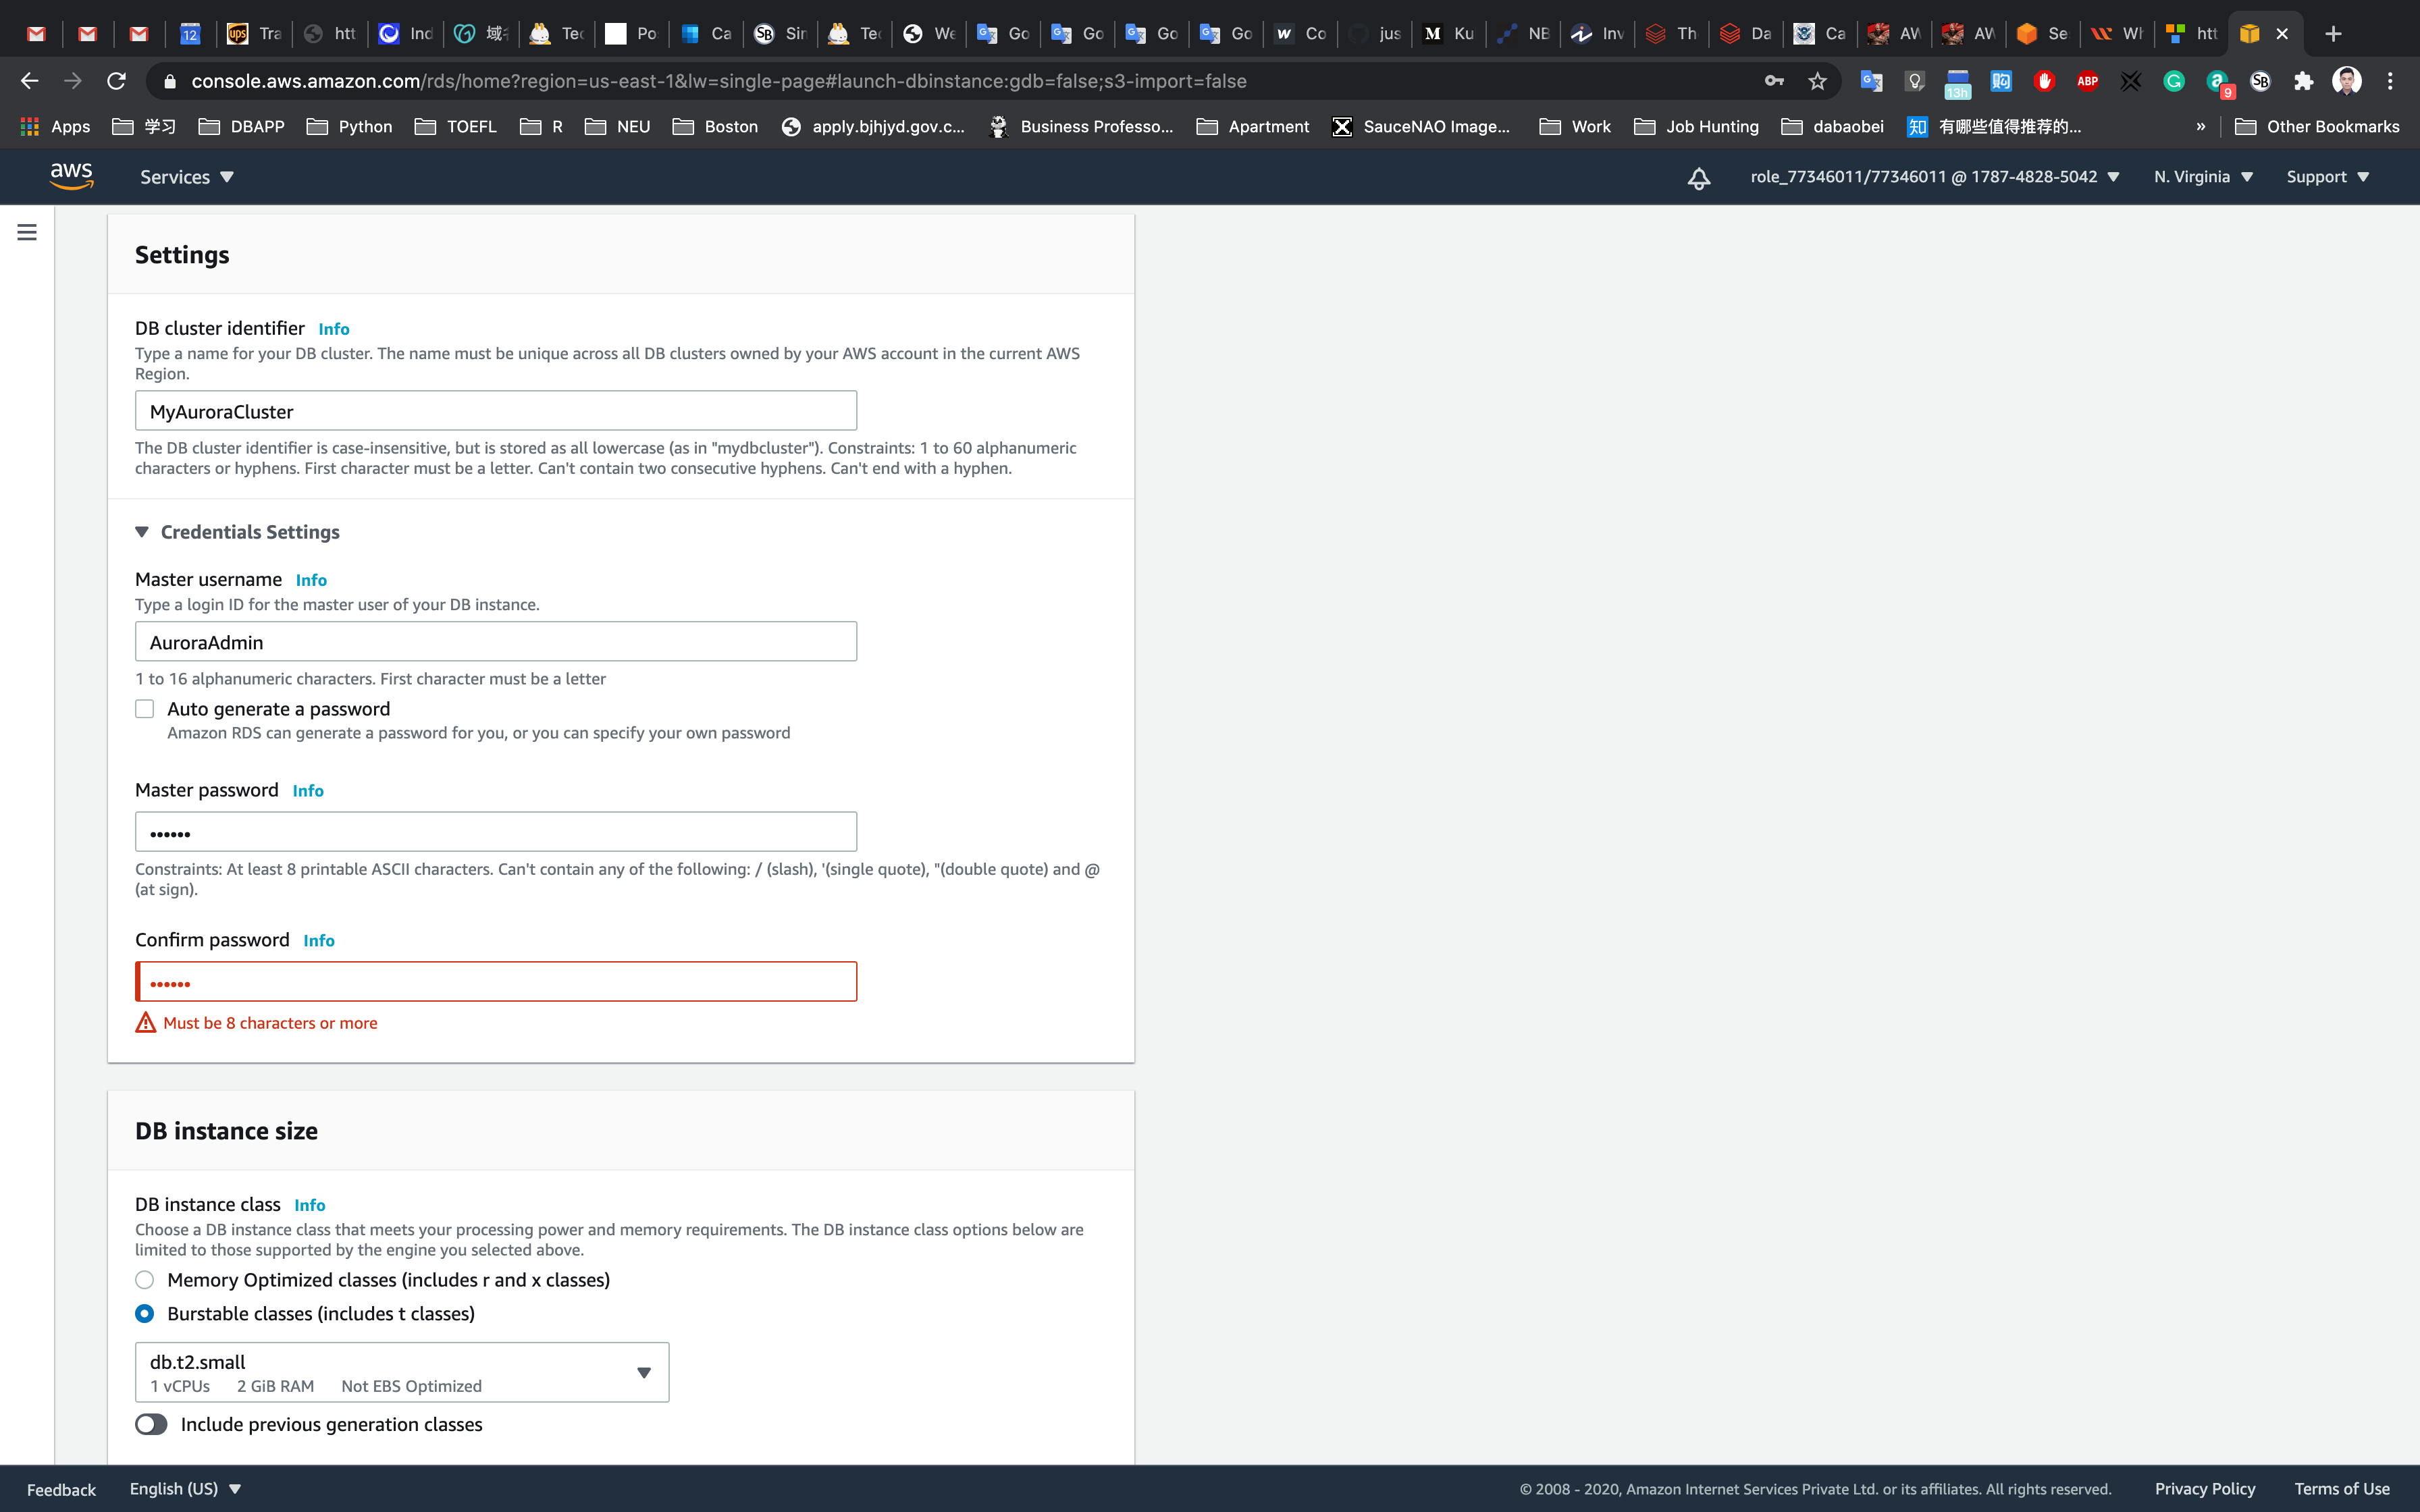
Fill in the required details for the database (Aurora Cluster Settings)
- DB cluster identifier: Specify cluster name
MyAuroraCluster- Give the following details in the credential settings
- Master Username:
AuroraAdmin - Master password:
password - Confirm password:
password
Note: This is the username and password used to log into your database. Please make note of them.
- Choosing DB instance size:
Burstable classes (includes t classes)
- Availability and Durability :
Create an Aurora Replica or Reader node in a different AZ (recommended for scaled availability) - Connectivity: Choose the Default VPC
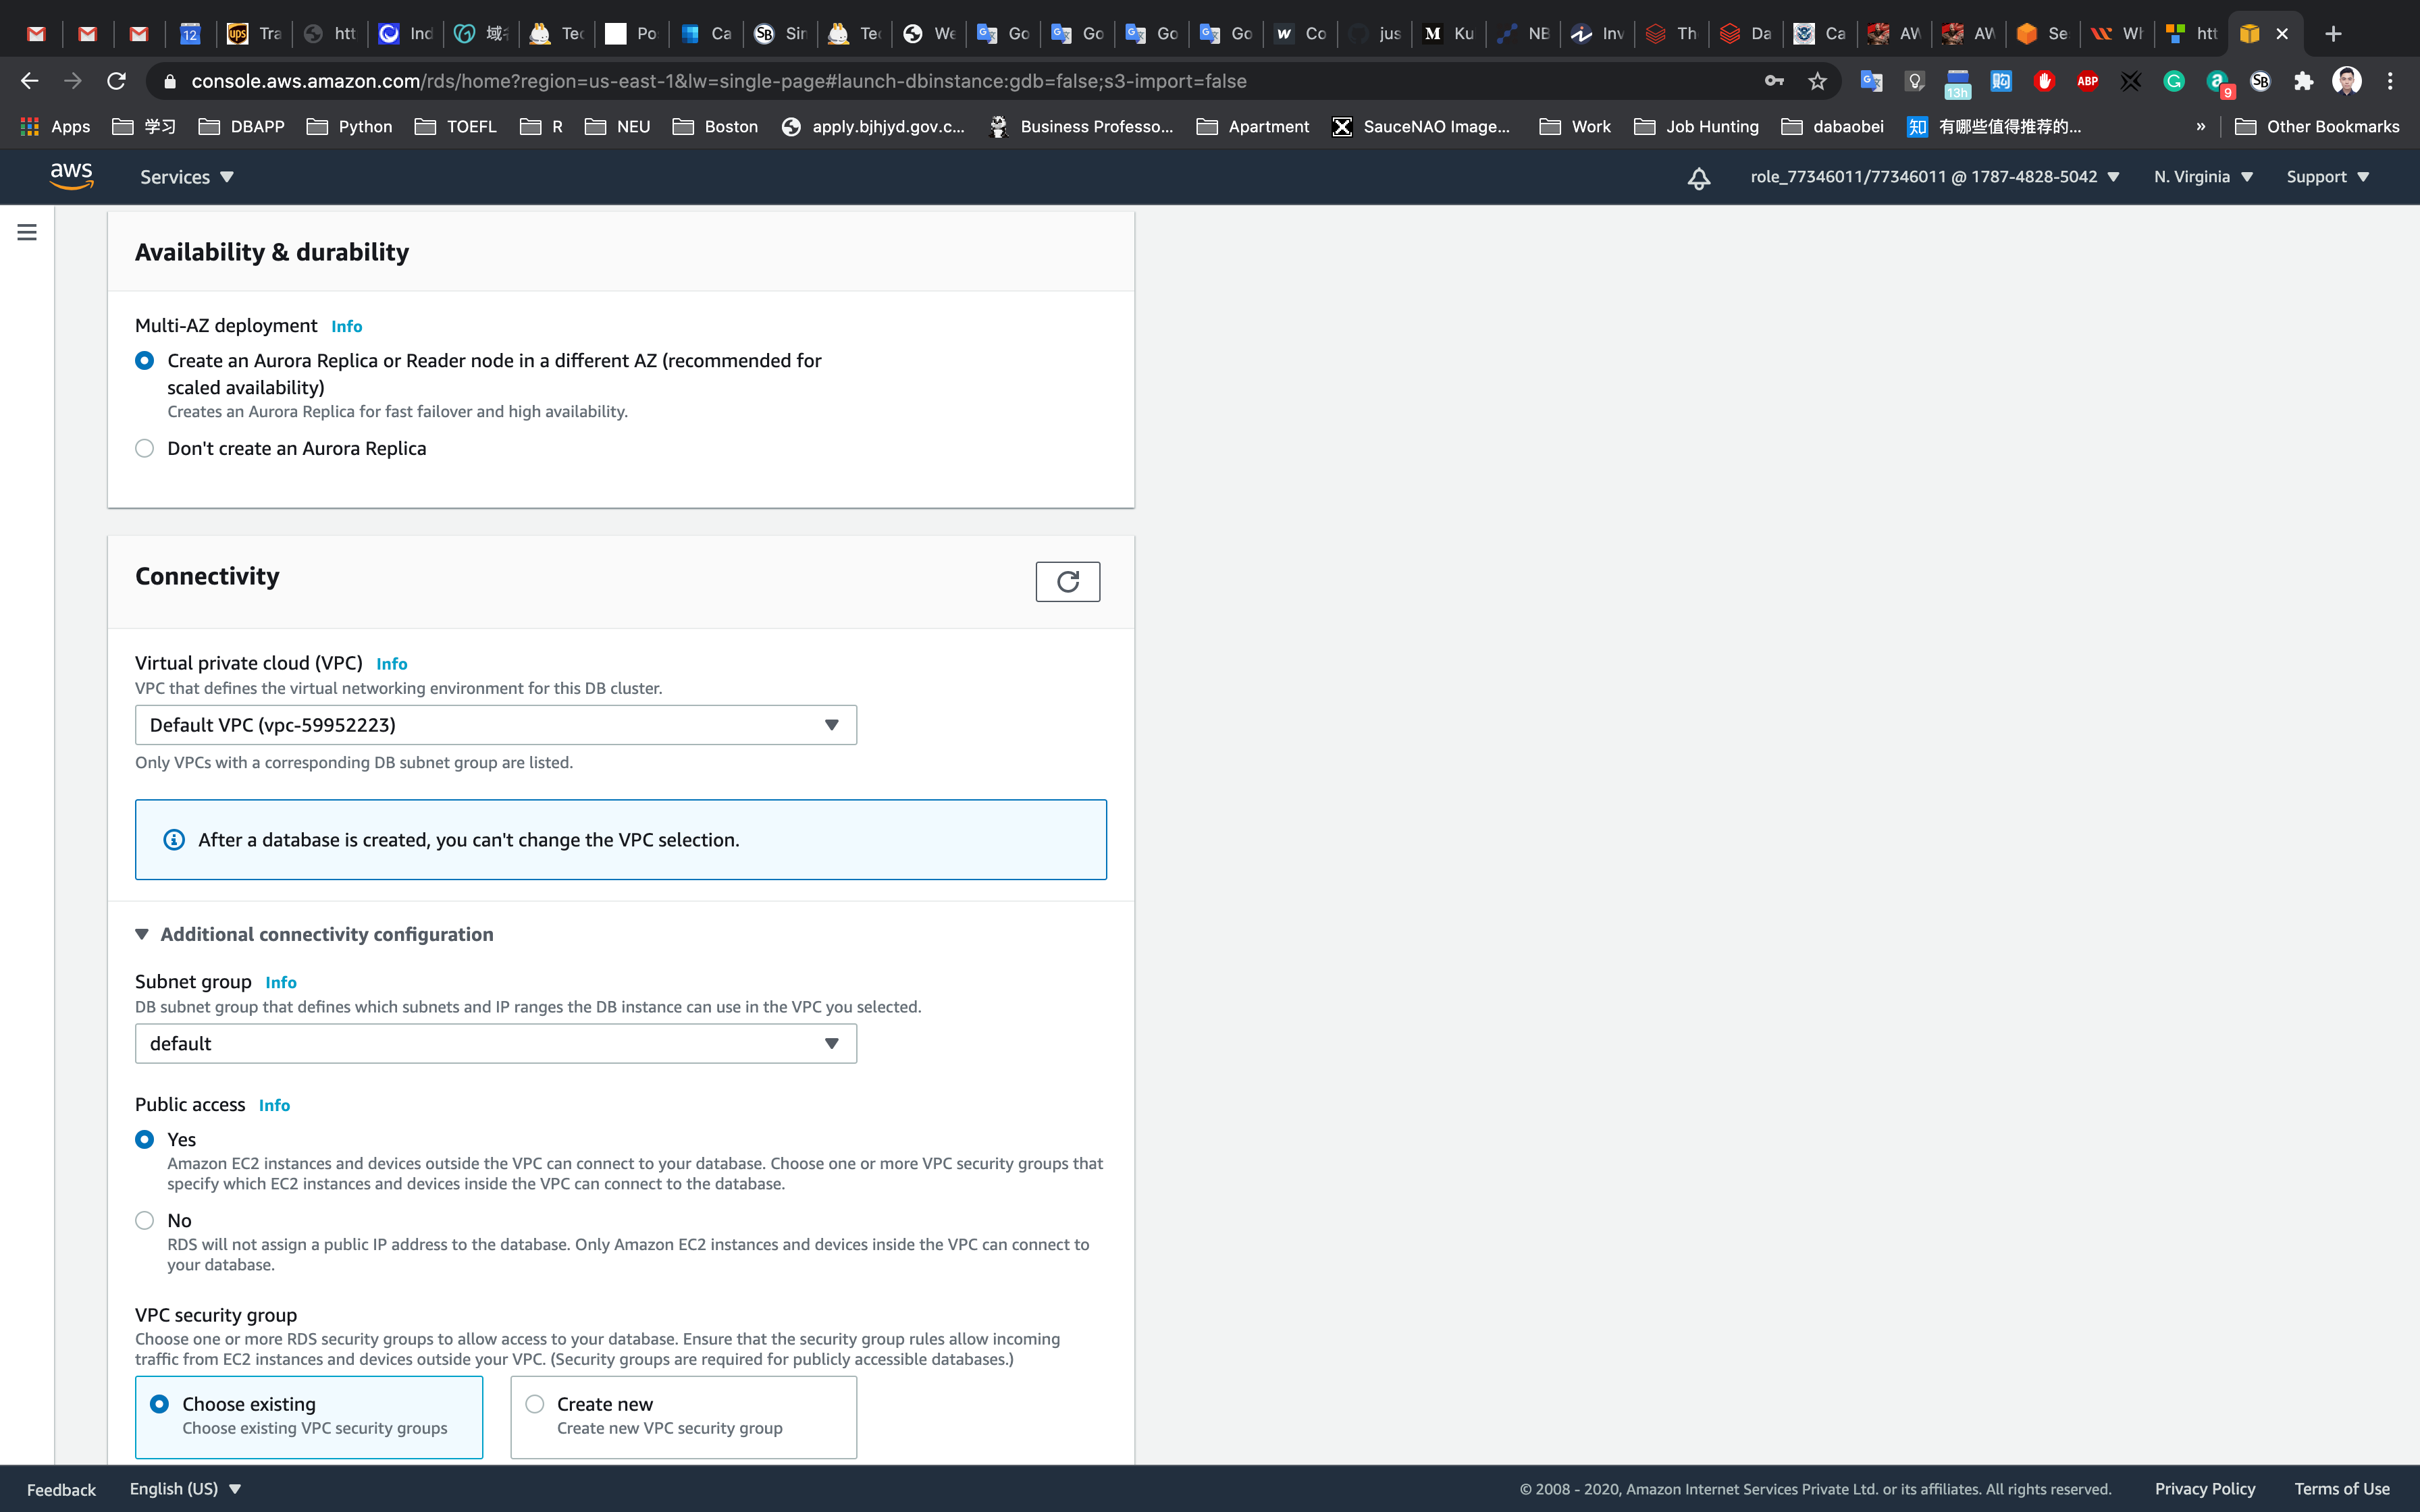
- Additional connectivity configuration
- Subnet group:
default - Publicly accessible:
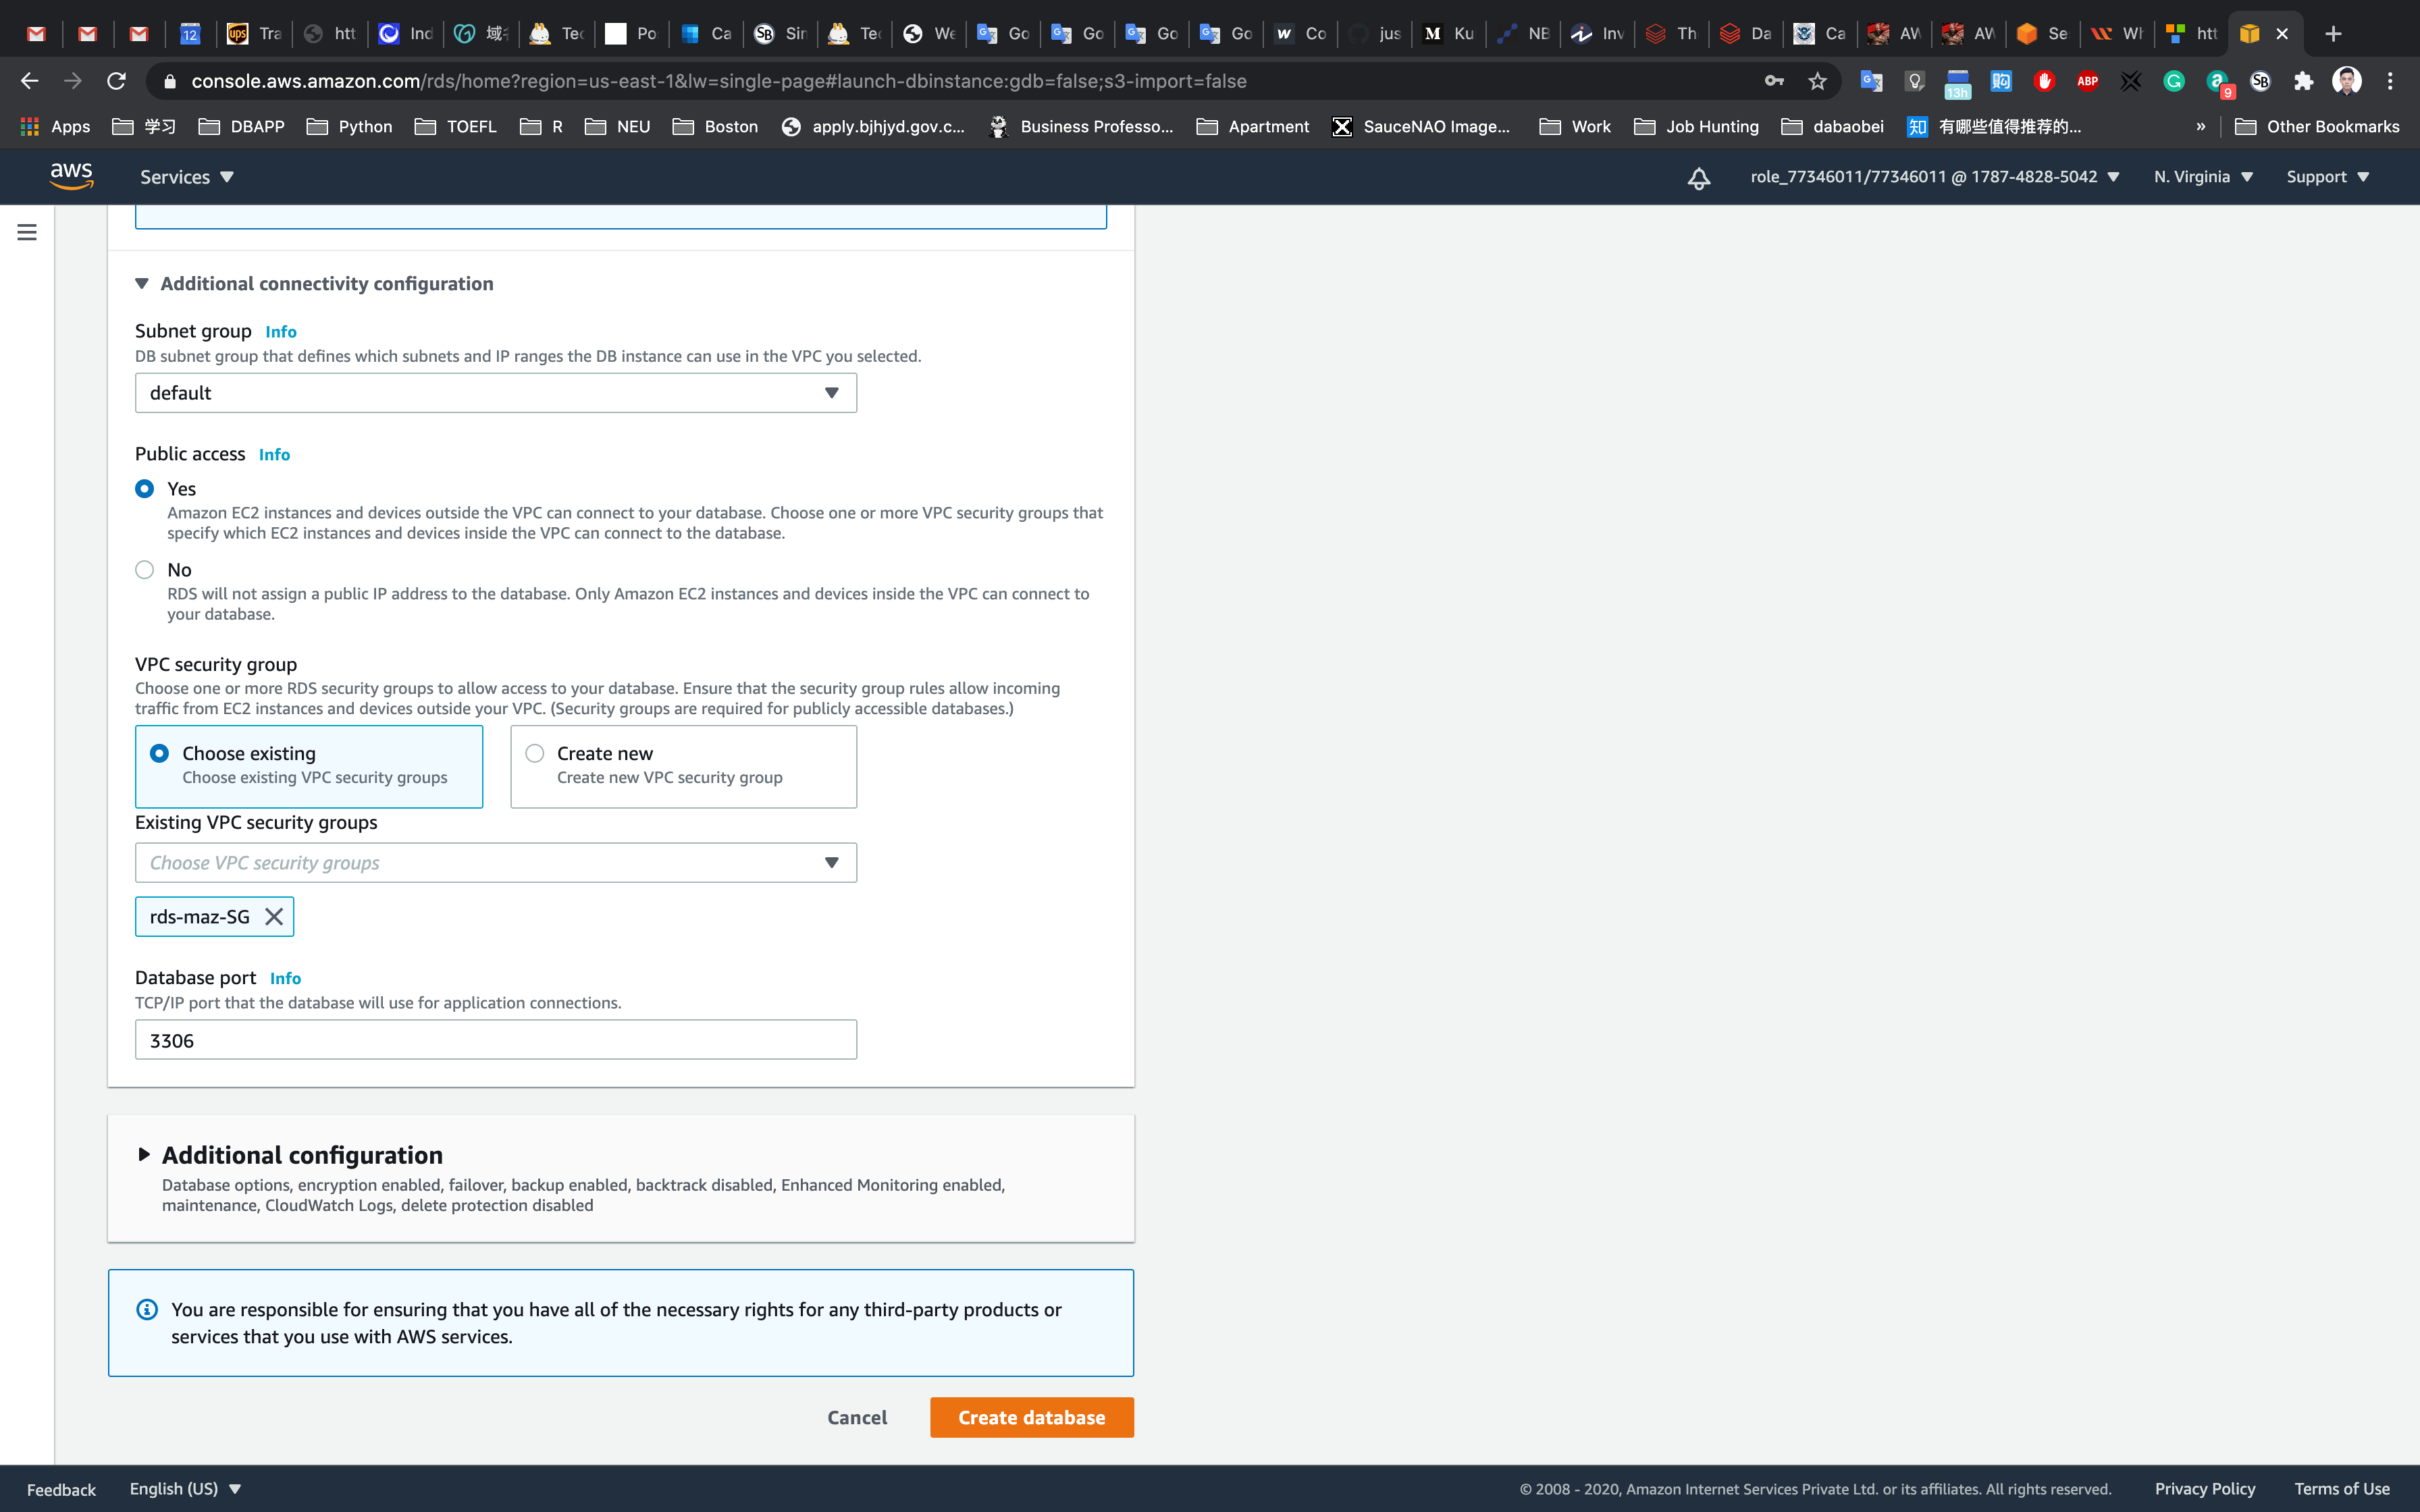
Yes - Existing VPC security groups:
- Remove the Default security group, which is selected by default.
- Select
rds-maz-SGfor the dropdown.(This is the security group which you have created in the beginning)
- Database port:
3306
- Subnet group:
- Additional configuration:
- Database options
- Initial database name:
auroralab - Encryption : Uncheck
- Initial database name:
- Database options
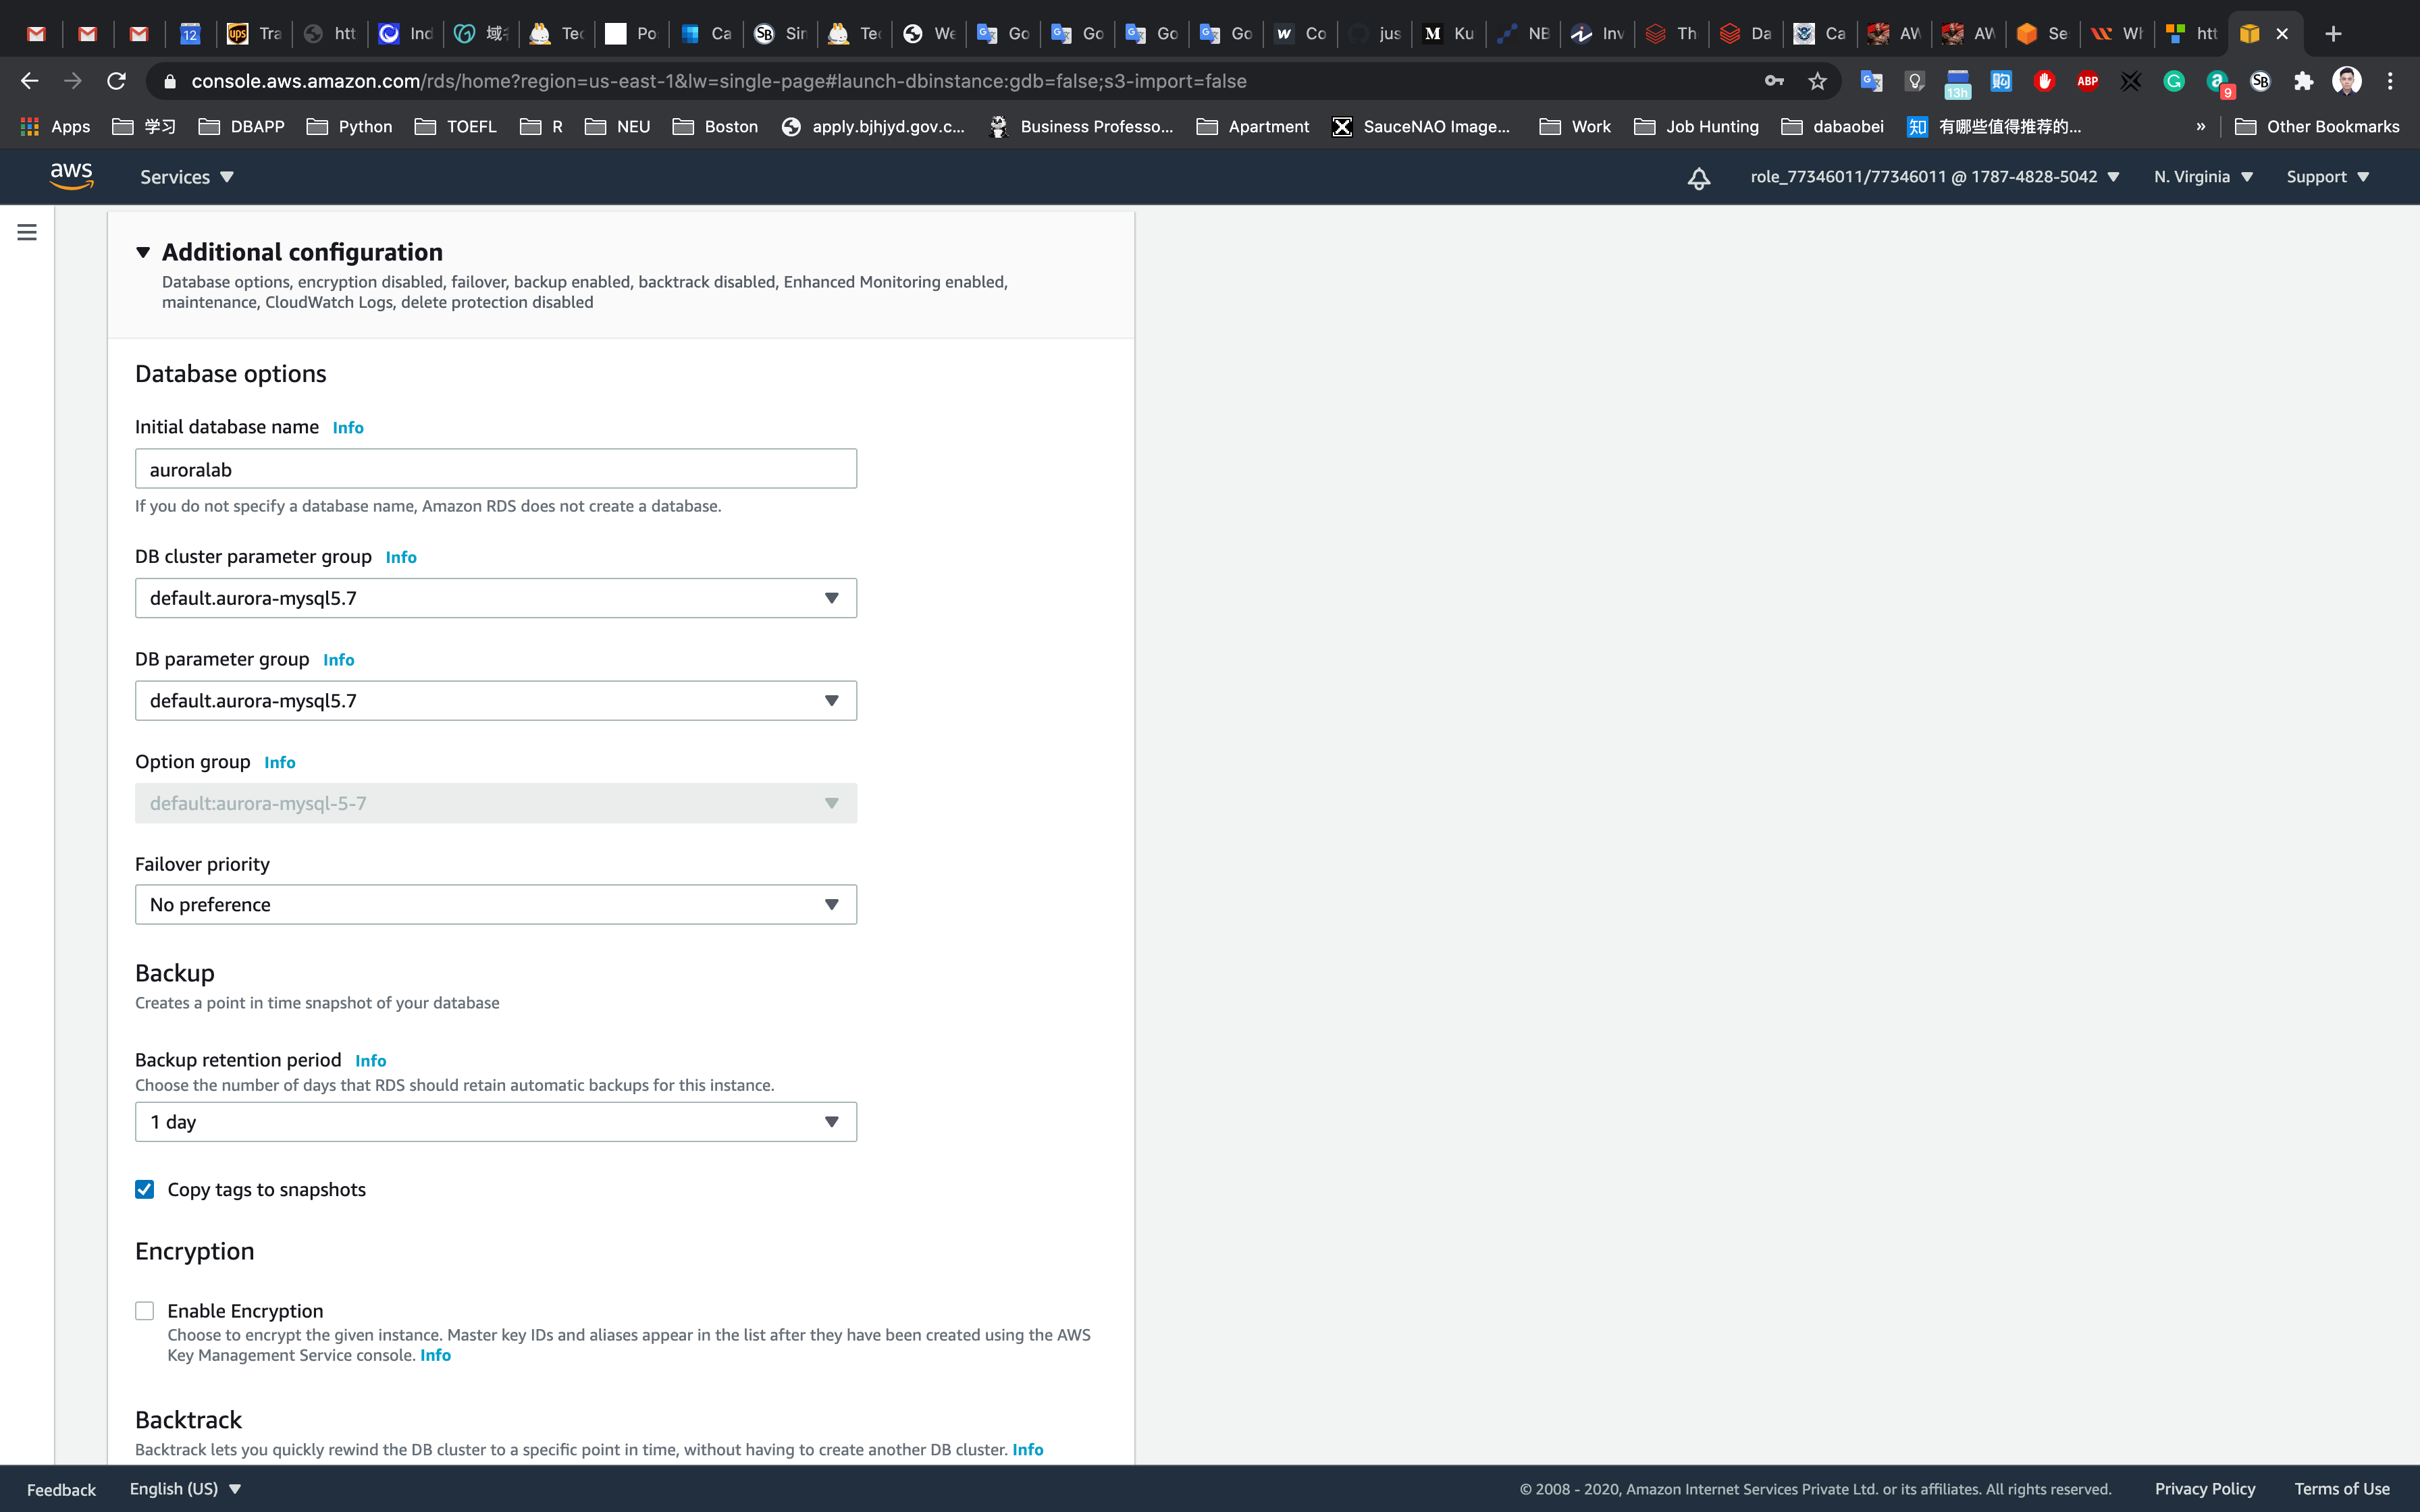
Leave other settings as default
One the details above have been filled in, click on Create database.
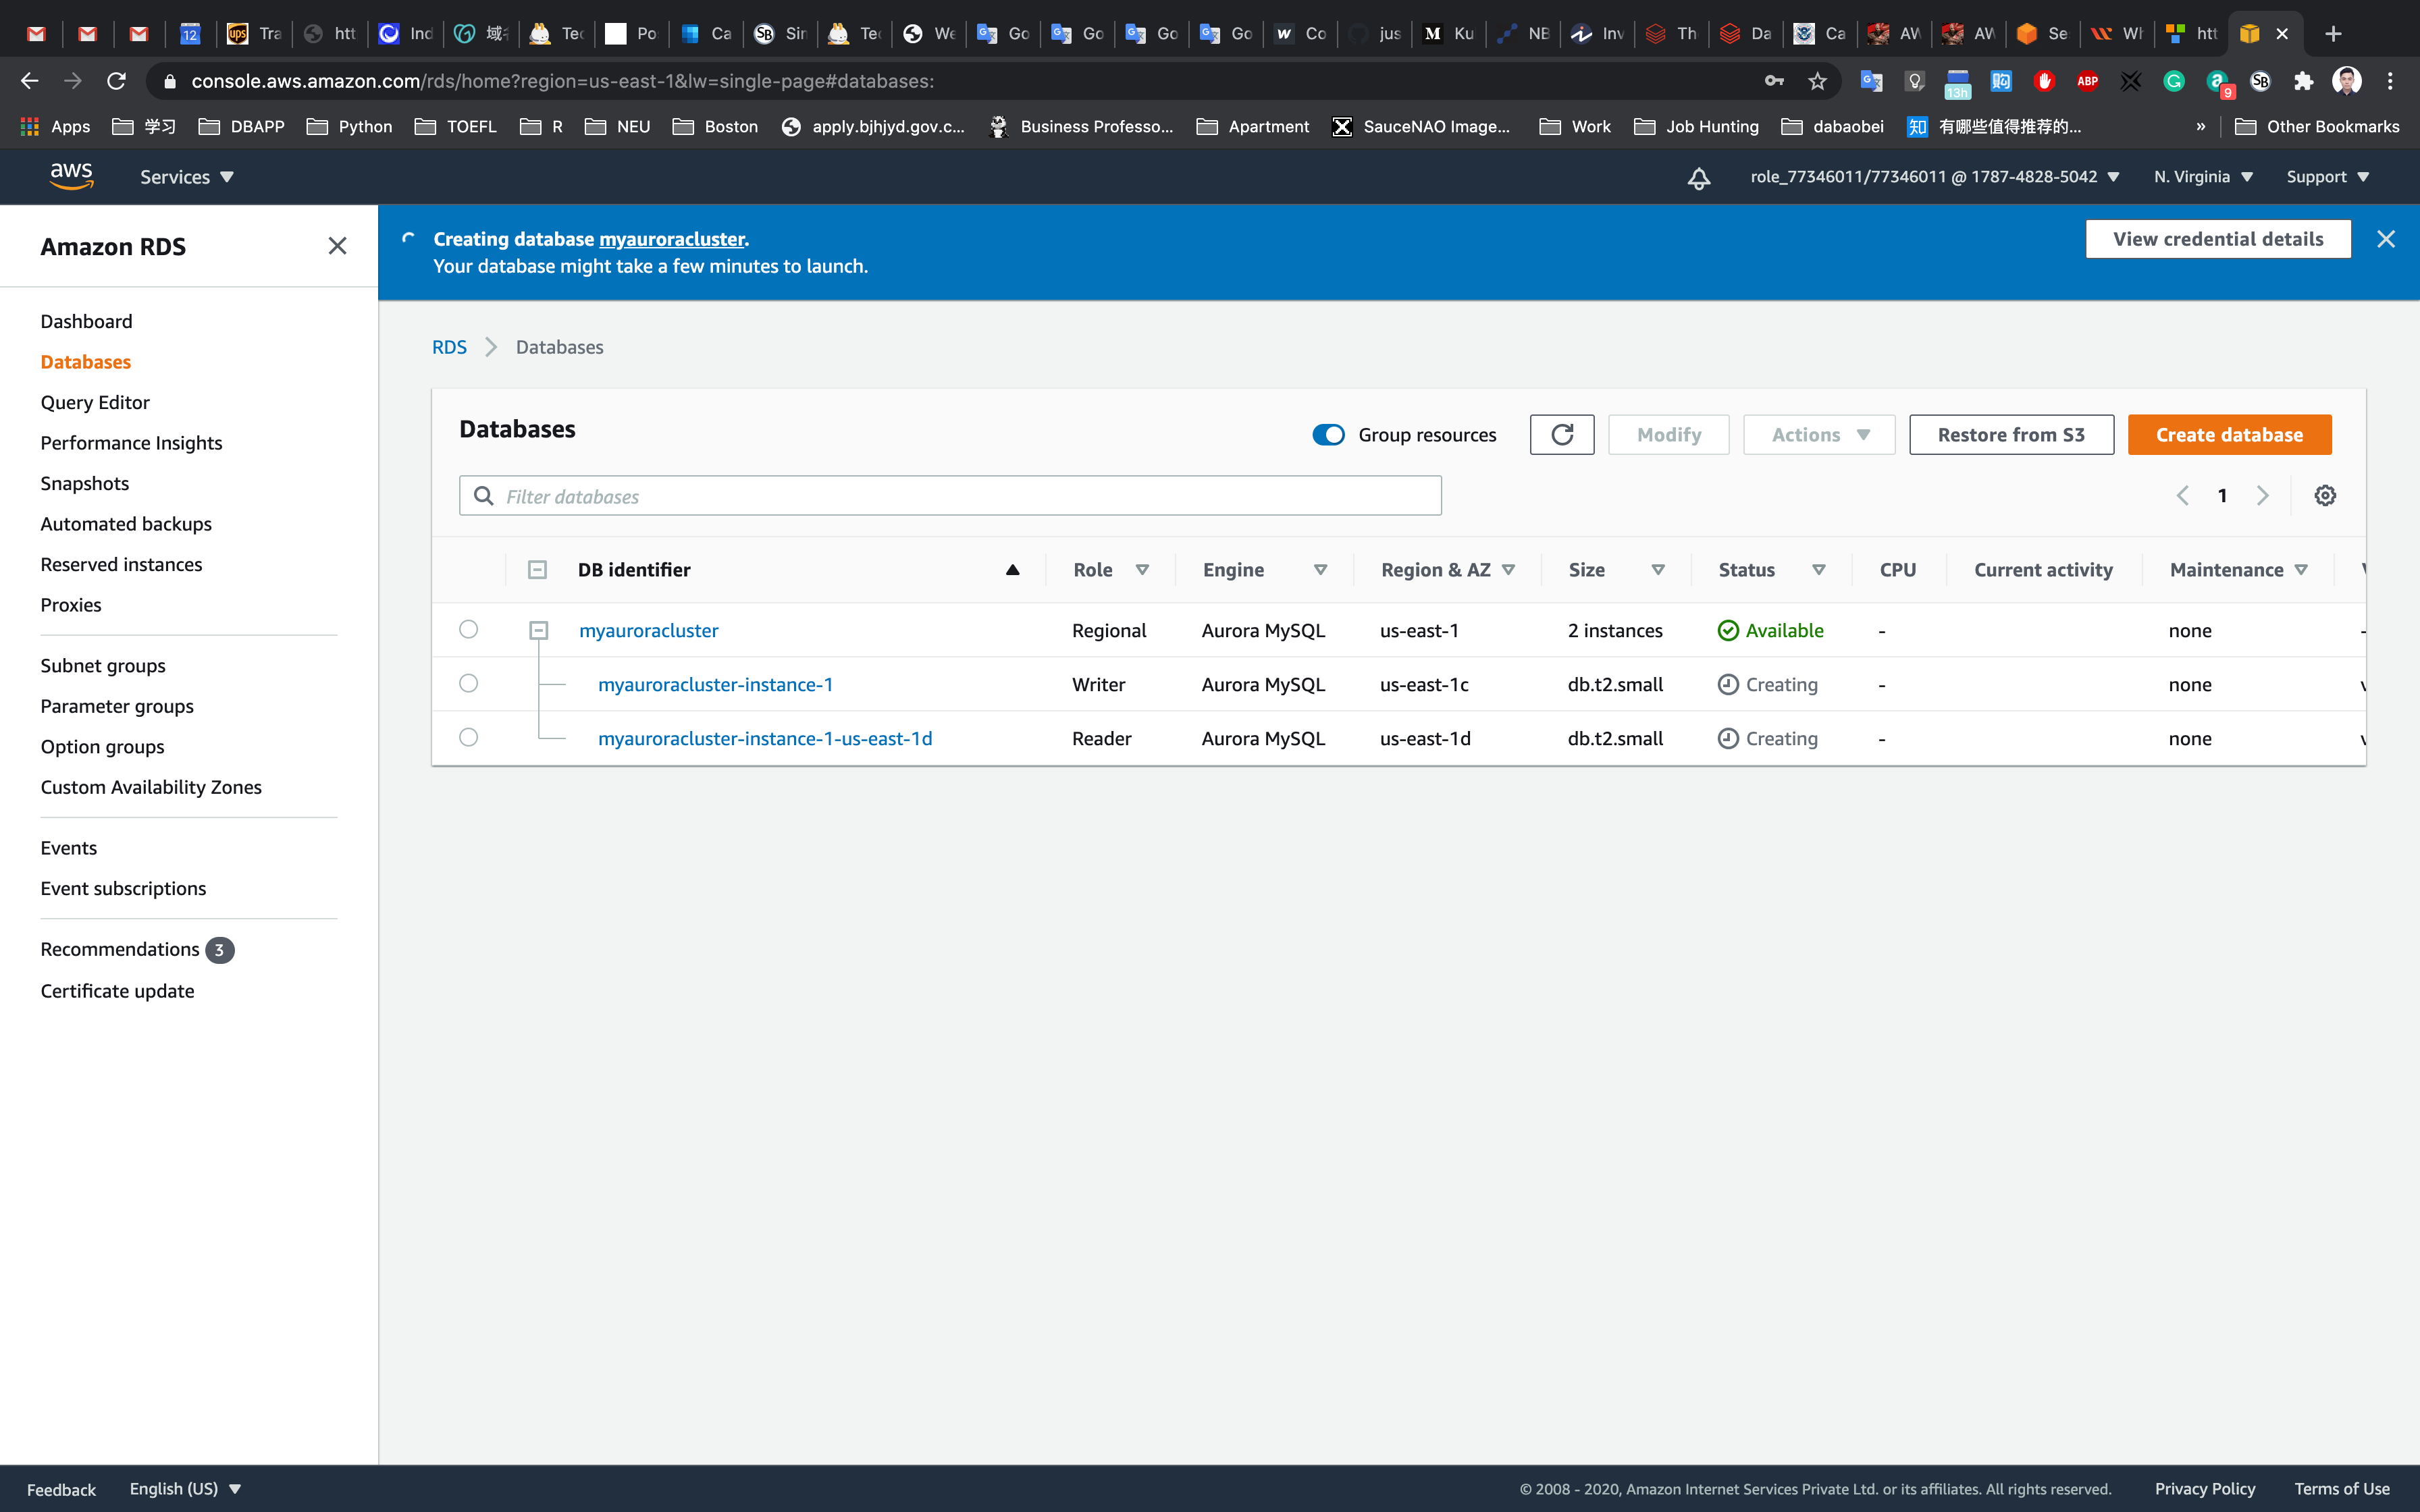
It will take around 10-15 minutes for the database to be created. Please wait until database status changes from creating to available.
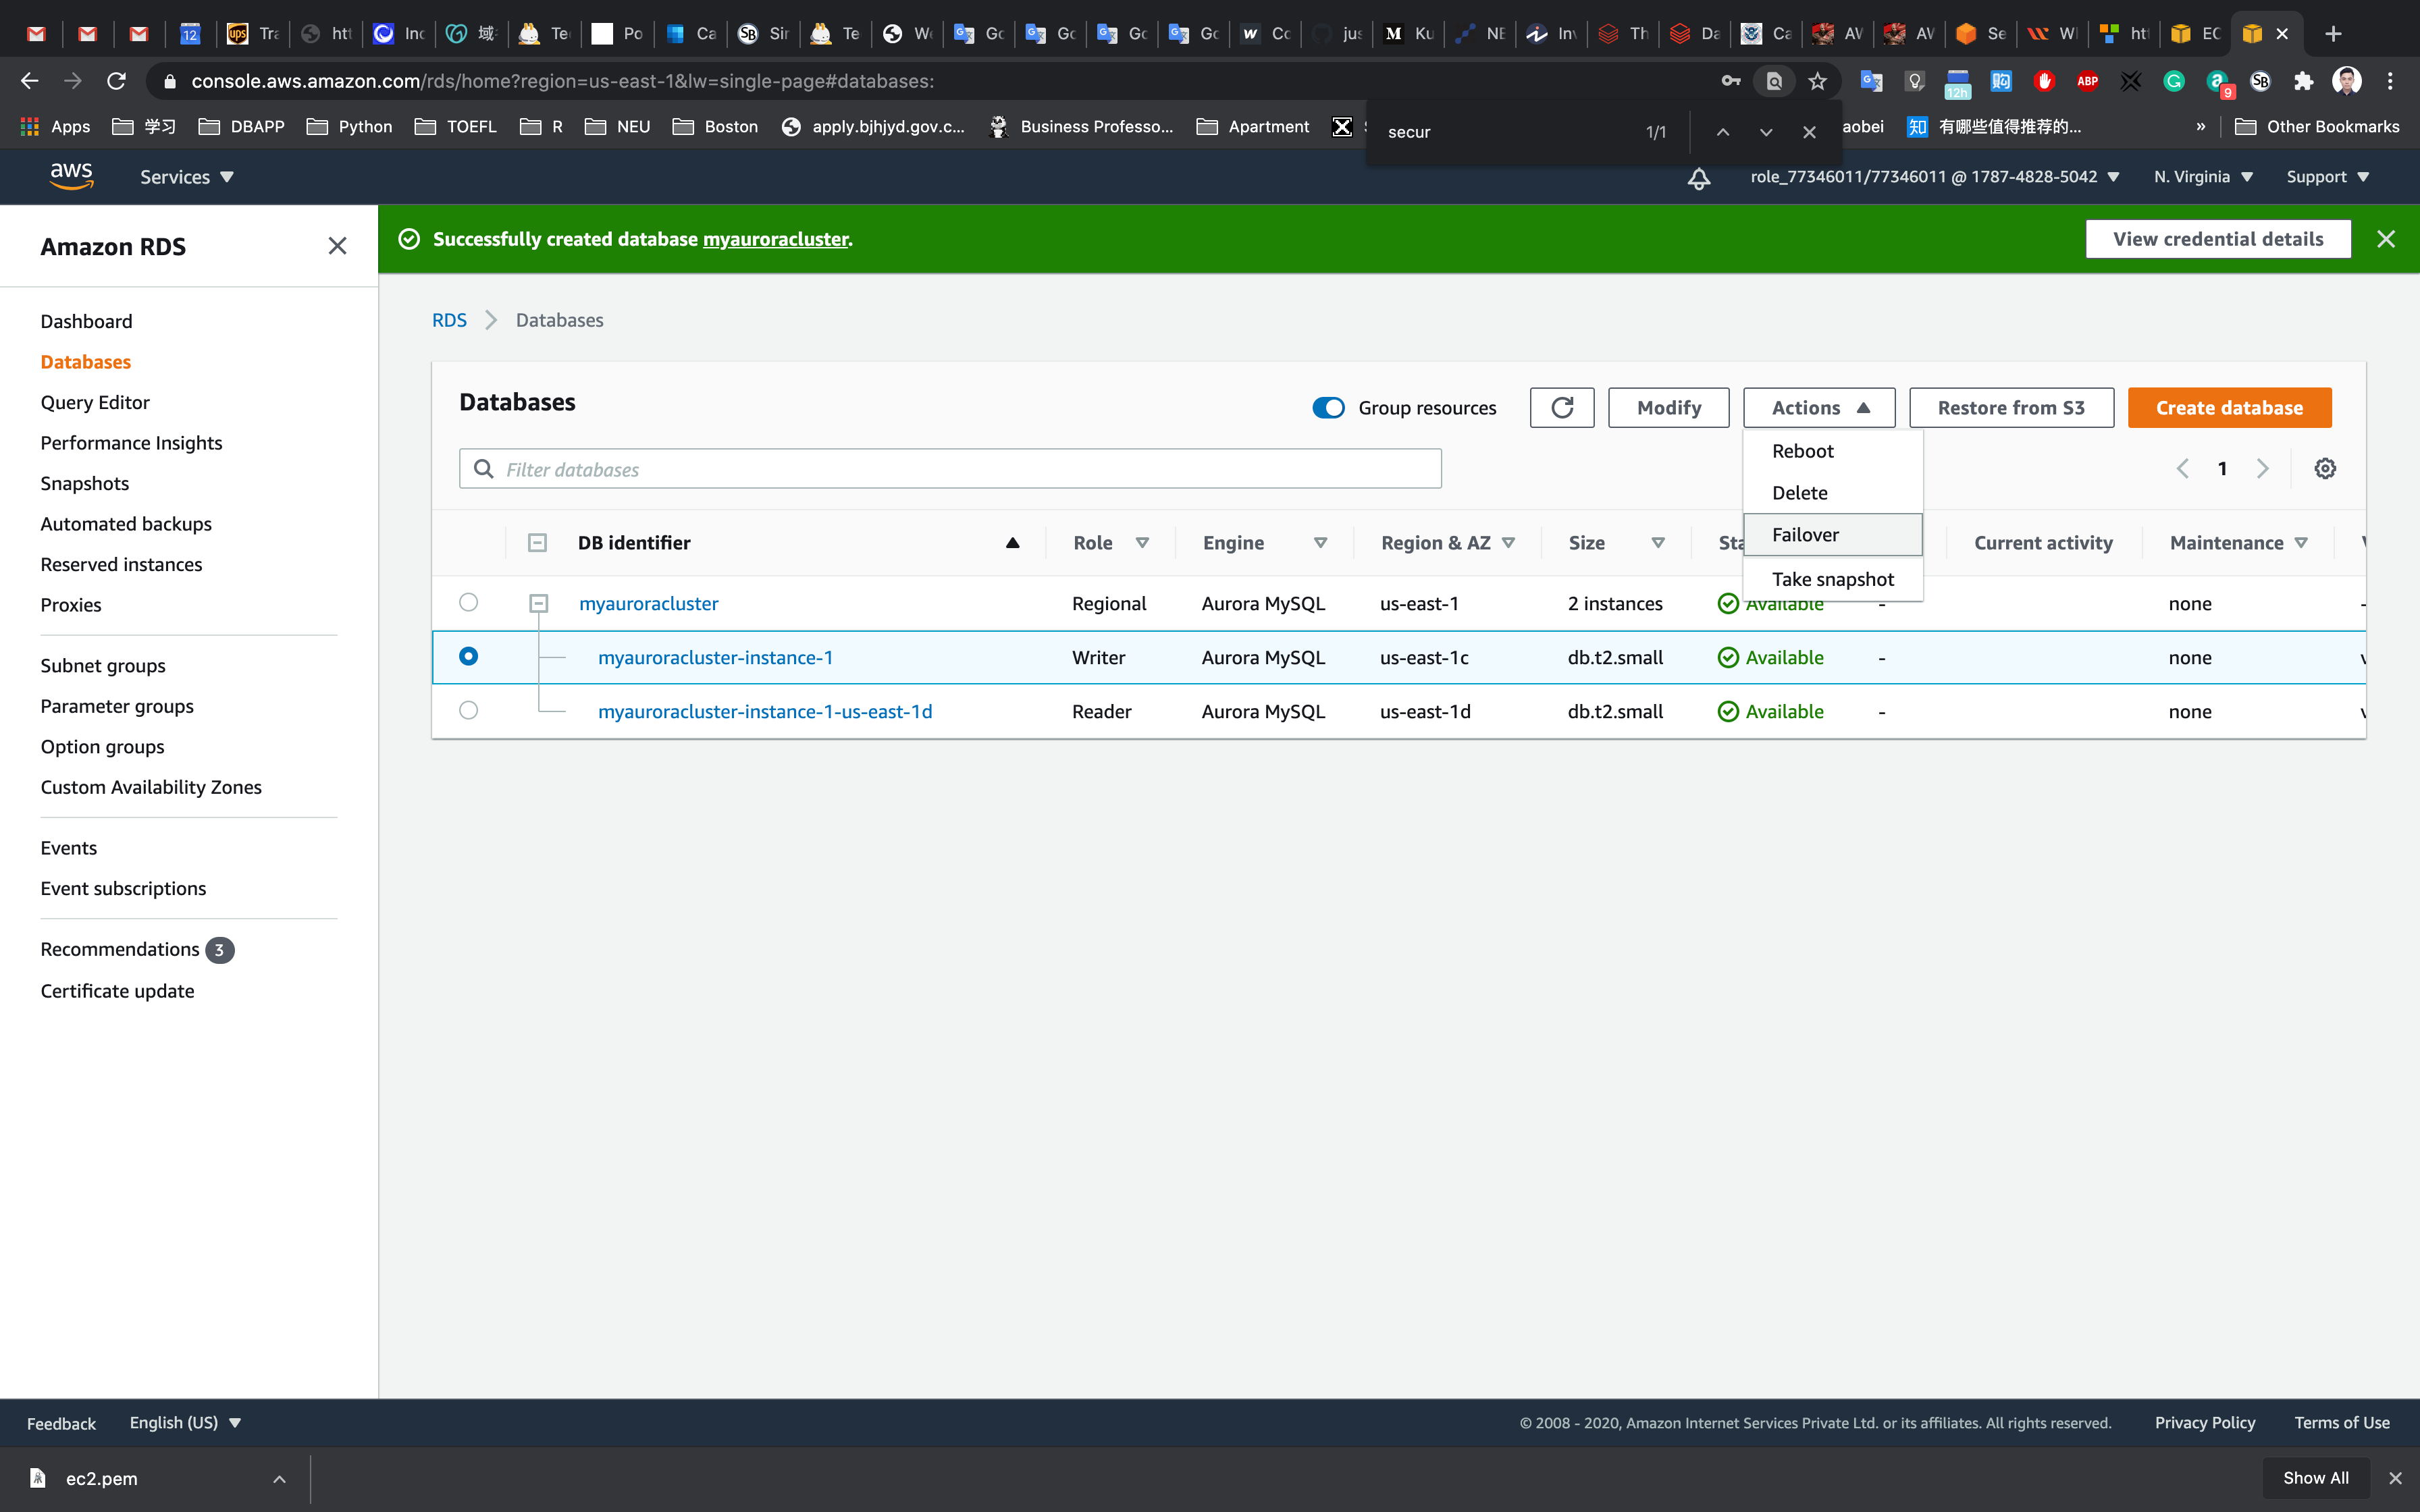
Once the database has been created, you should see the following page:
Similar to the screenshot, you should be able to see that our database launched in multiple AZs, namely us-east-1c and us-east-1d
Connecting to the Aurora (MySQL) database on RDS
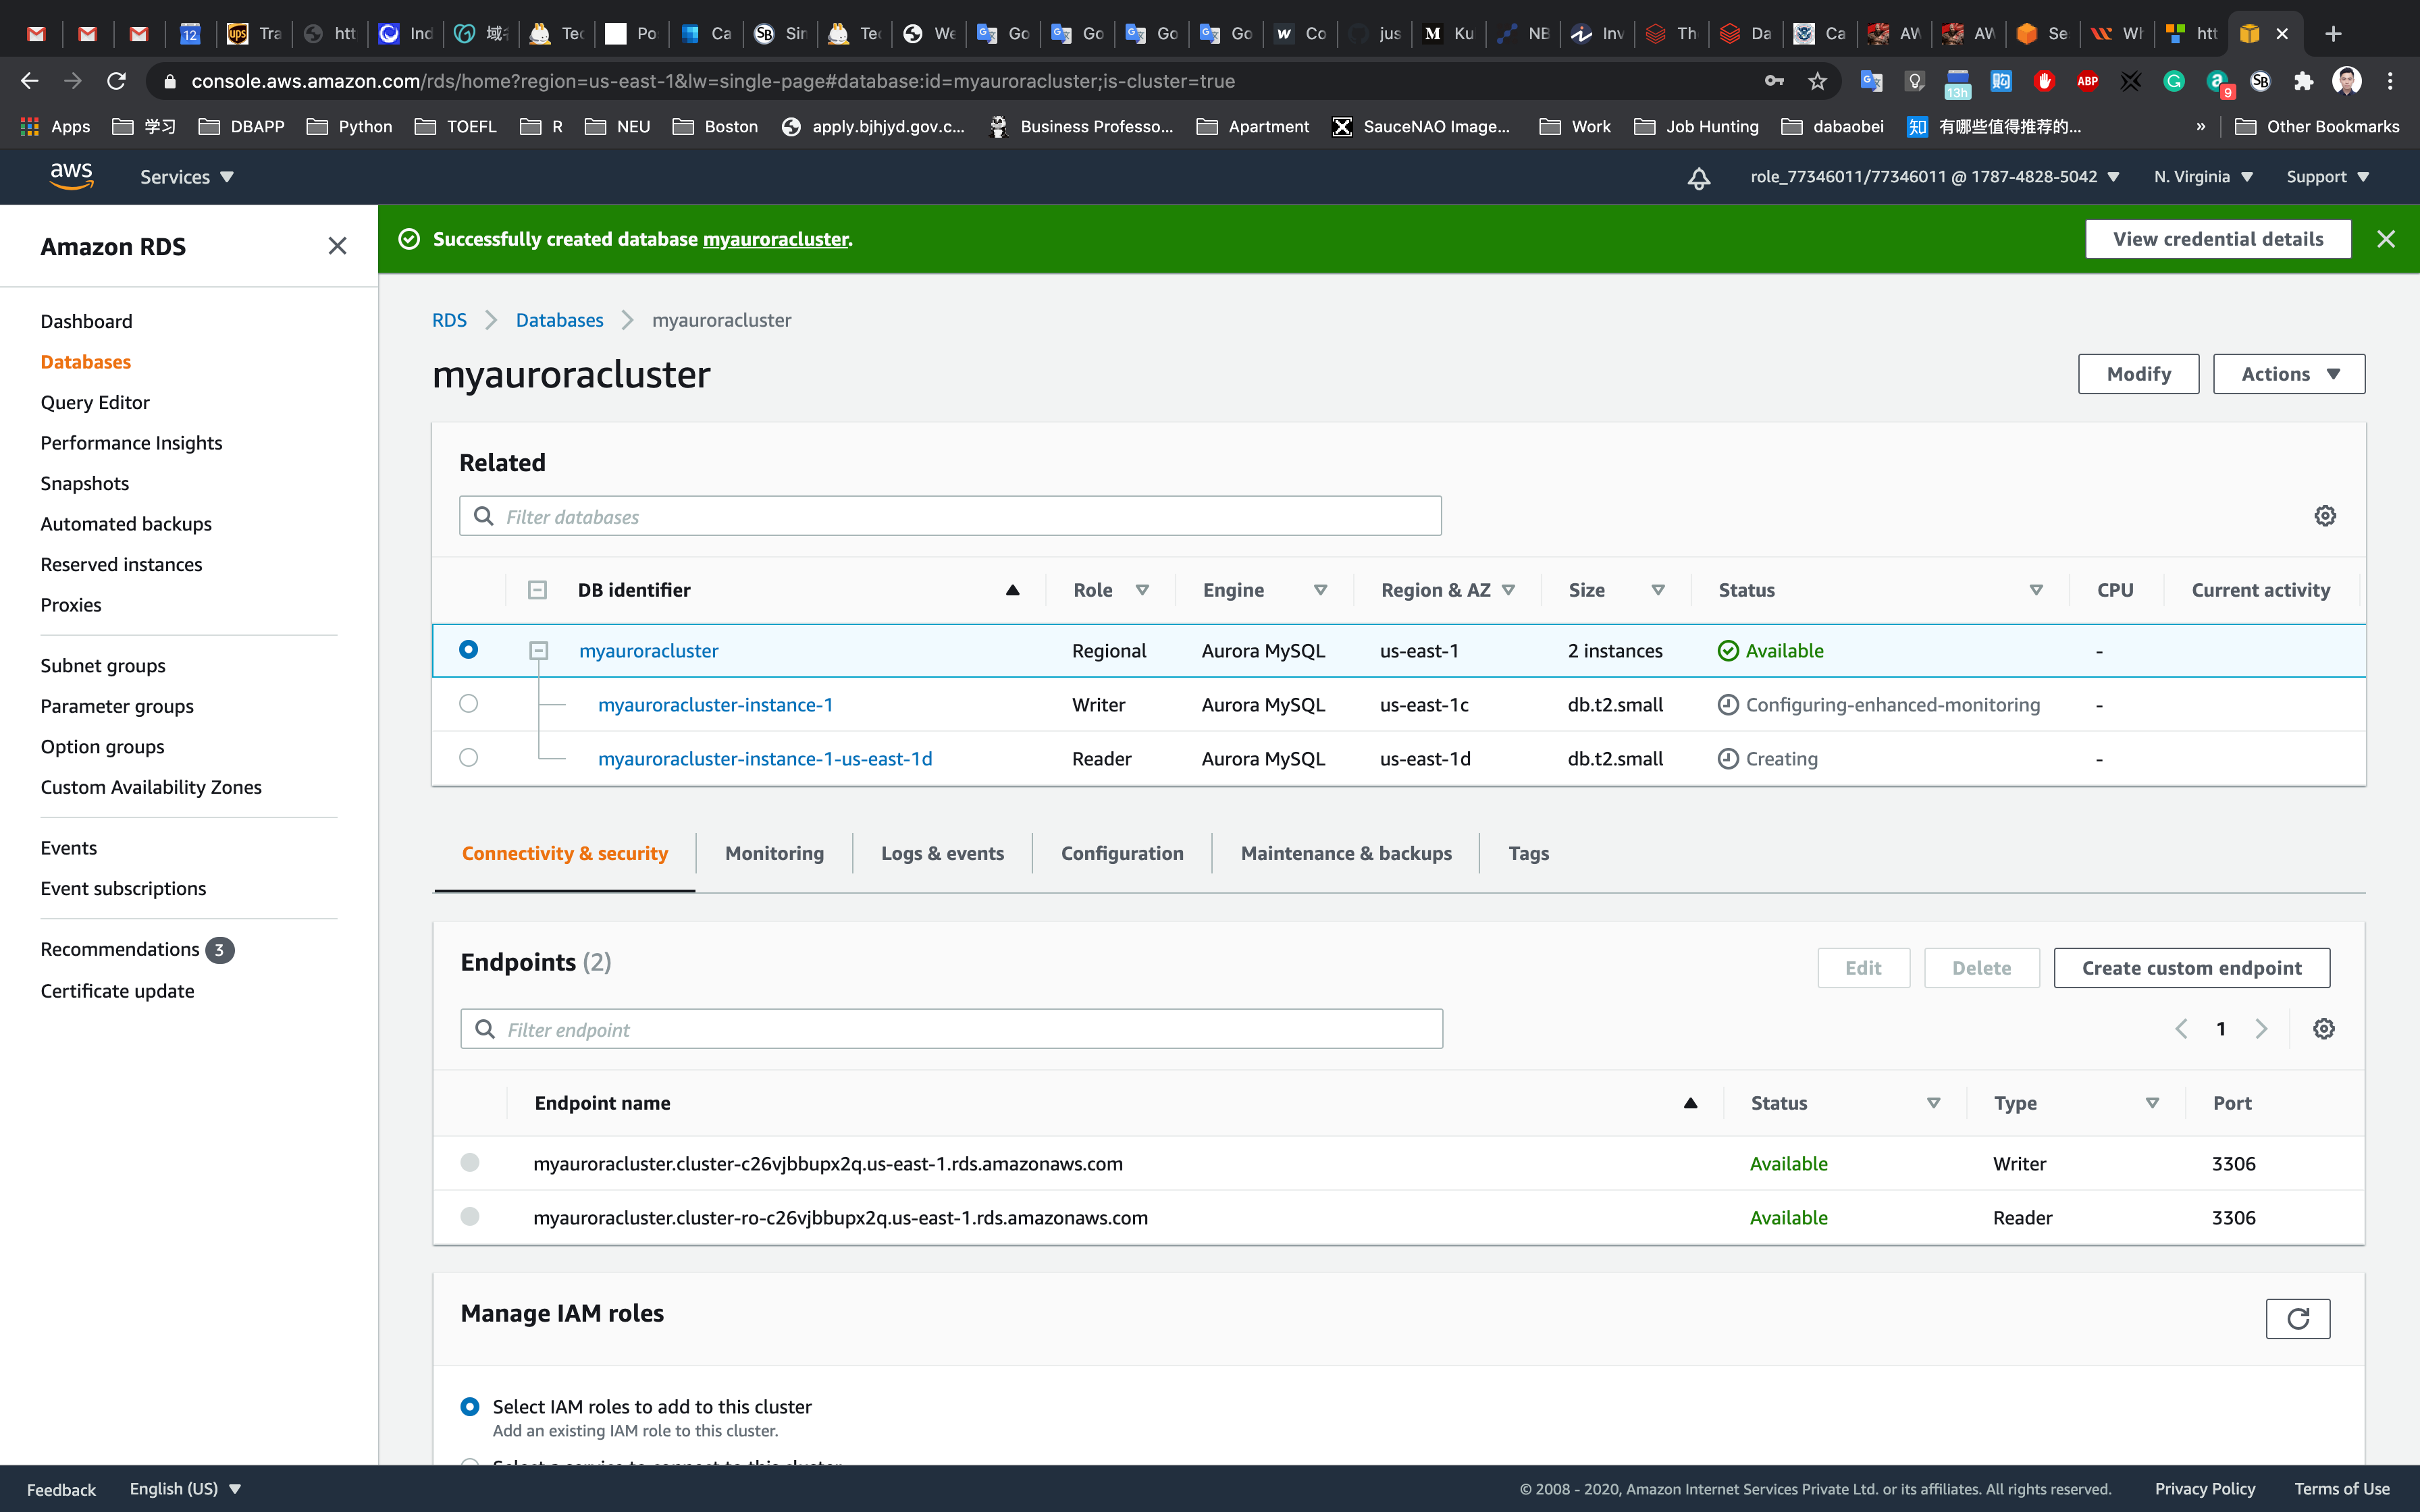
Now we have successfully launched Aurora RDS with Multi-AZ enabled. To connect to the new Aurora database, we need the endpoint.
Click on the RDS cluster name and then navigate to Connectivity & security tab to find the endpoint of your Master(Writer) and Reader instances, with which you can connect to your DB instance.
The endpoints you see to be similar to these examples:
- Master(Writer): myauroracluster.cluster-cpoz6c7903cx.us-east-1.rds.amazonaws.com
- Reader: myauroracluster.cluster-ro-cpoz6c7903cx.us-east-1.rds.amazonaws.com
Note: Please carefully look at the role of the DB instance (reader vs Master(Writer)) and their respective availability zones. ( here us-east-1c and us-east-1d)
To get the endpoint of the RDS instances, click on the name of the cluster. Then you should click on Endpoints. This will expose the read and write endpoints for the database. See the example below:
EC2 Configuration
Creating an EC2 Instance
Service -> EC2 -> Instances
Click on Launch instances
Choose an Amazon Machine Image (AMI): Search for Amazon Linux 2 AMI in the search box and click on the select button.
Choose an Instance Type: Select t2.micro and then click on the Next: Configure Instance Details.
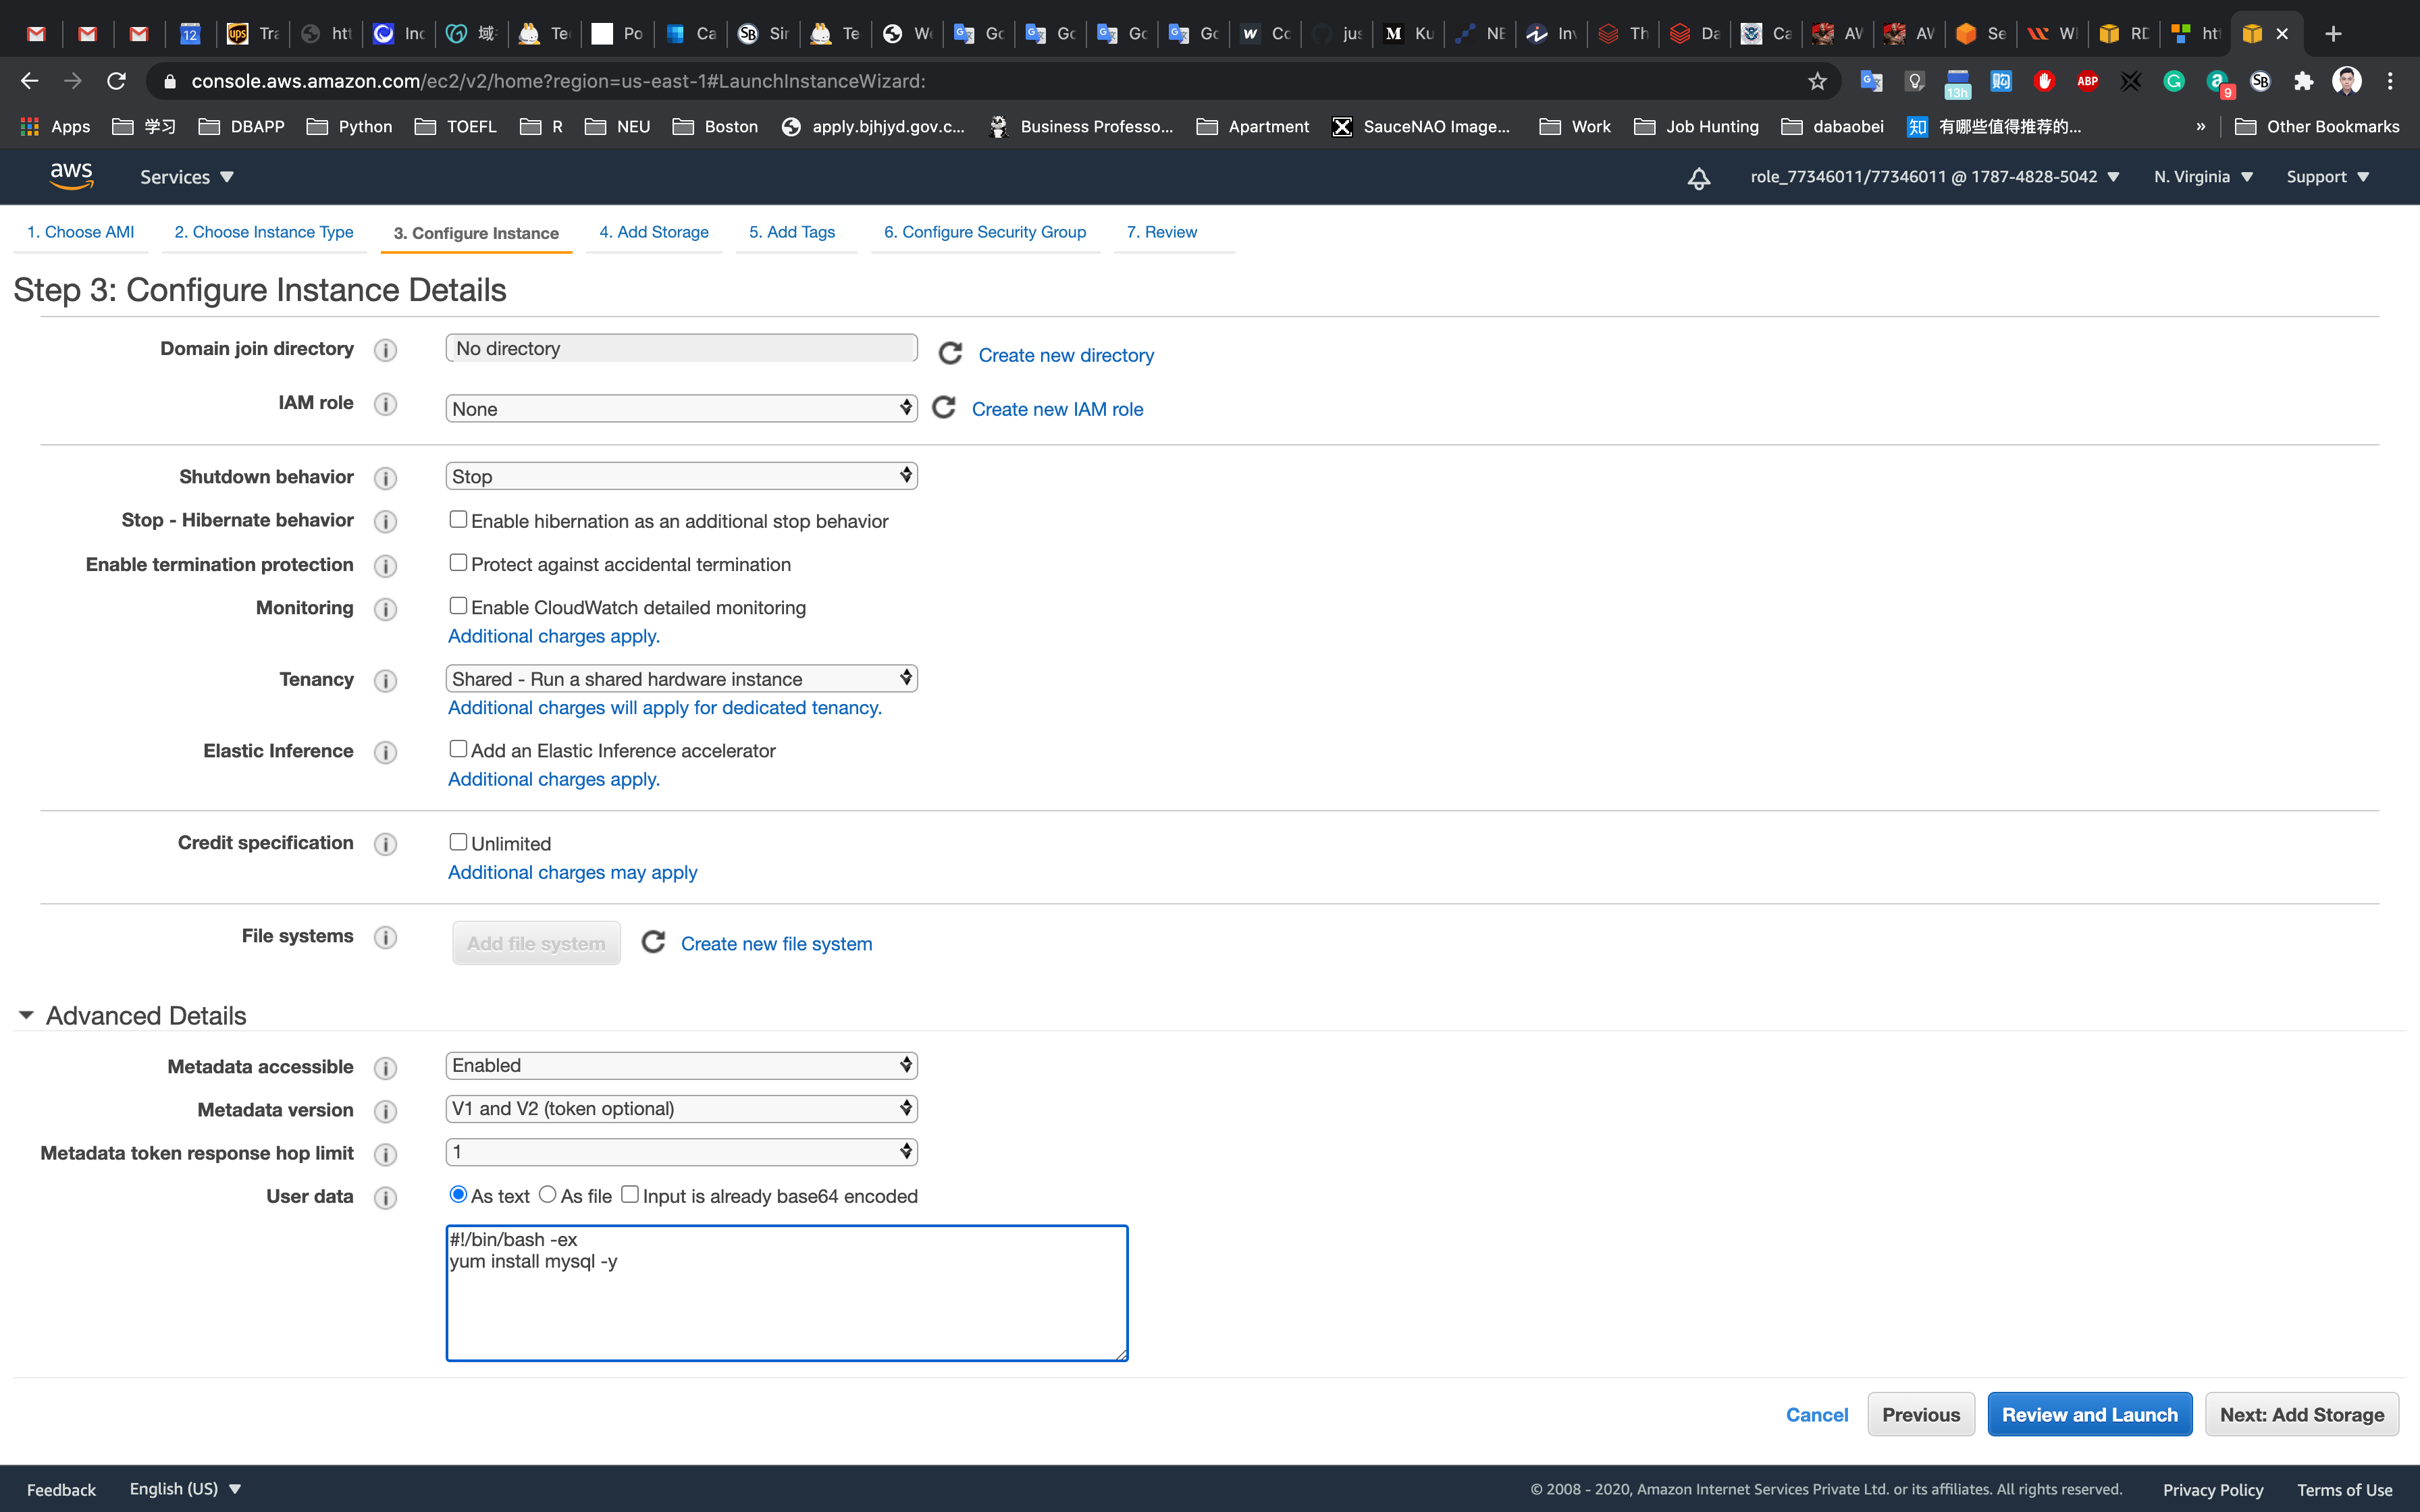
On the Configure Instance Details page:
- Network: Select default available VPC
- Subnet: Default selected
- Auto-assign Public IP :
Enable- It should be enabled because the public IP is needed for connecting to EC2 via SSH.
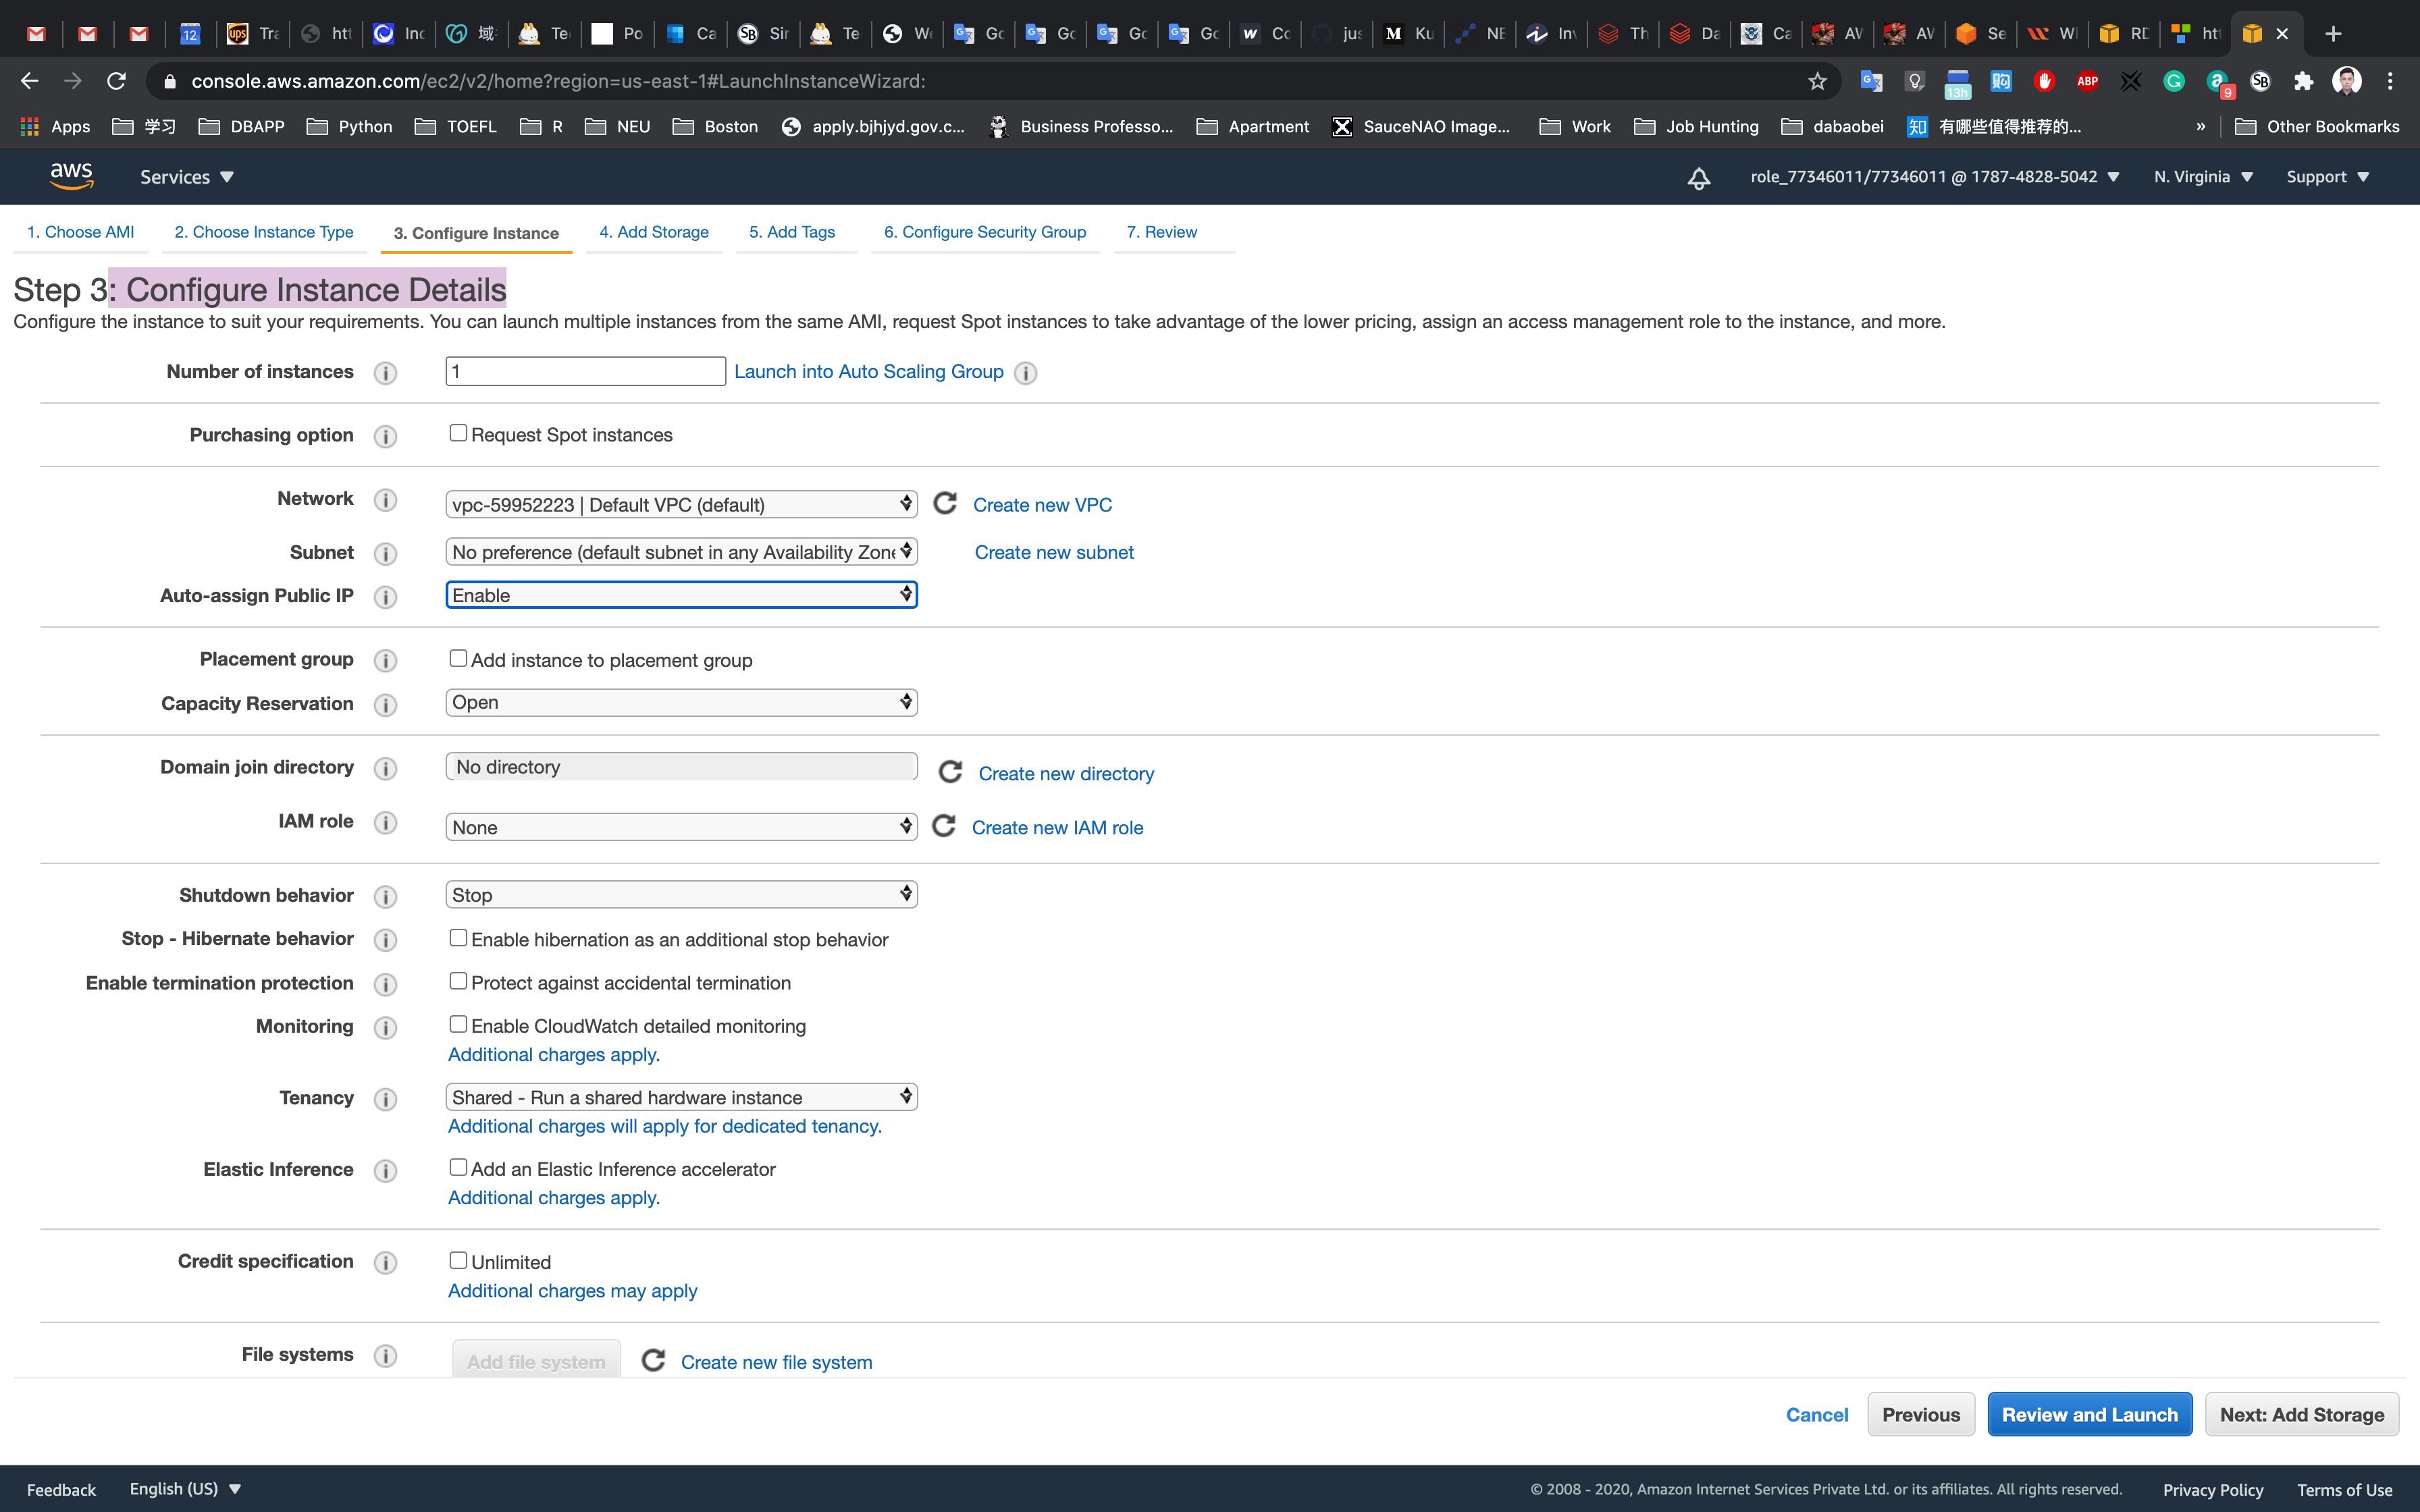
Click on Advanced Details.
Under the User data section, enter the following script, (which installs MySQL):
1 |
|
Click on Next: Add Storage
Add Storage Page : No need to change anything in this step. Click on Next: Add Tags.
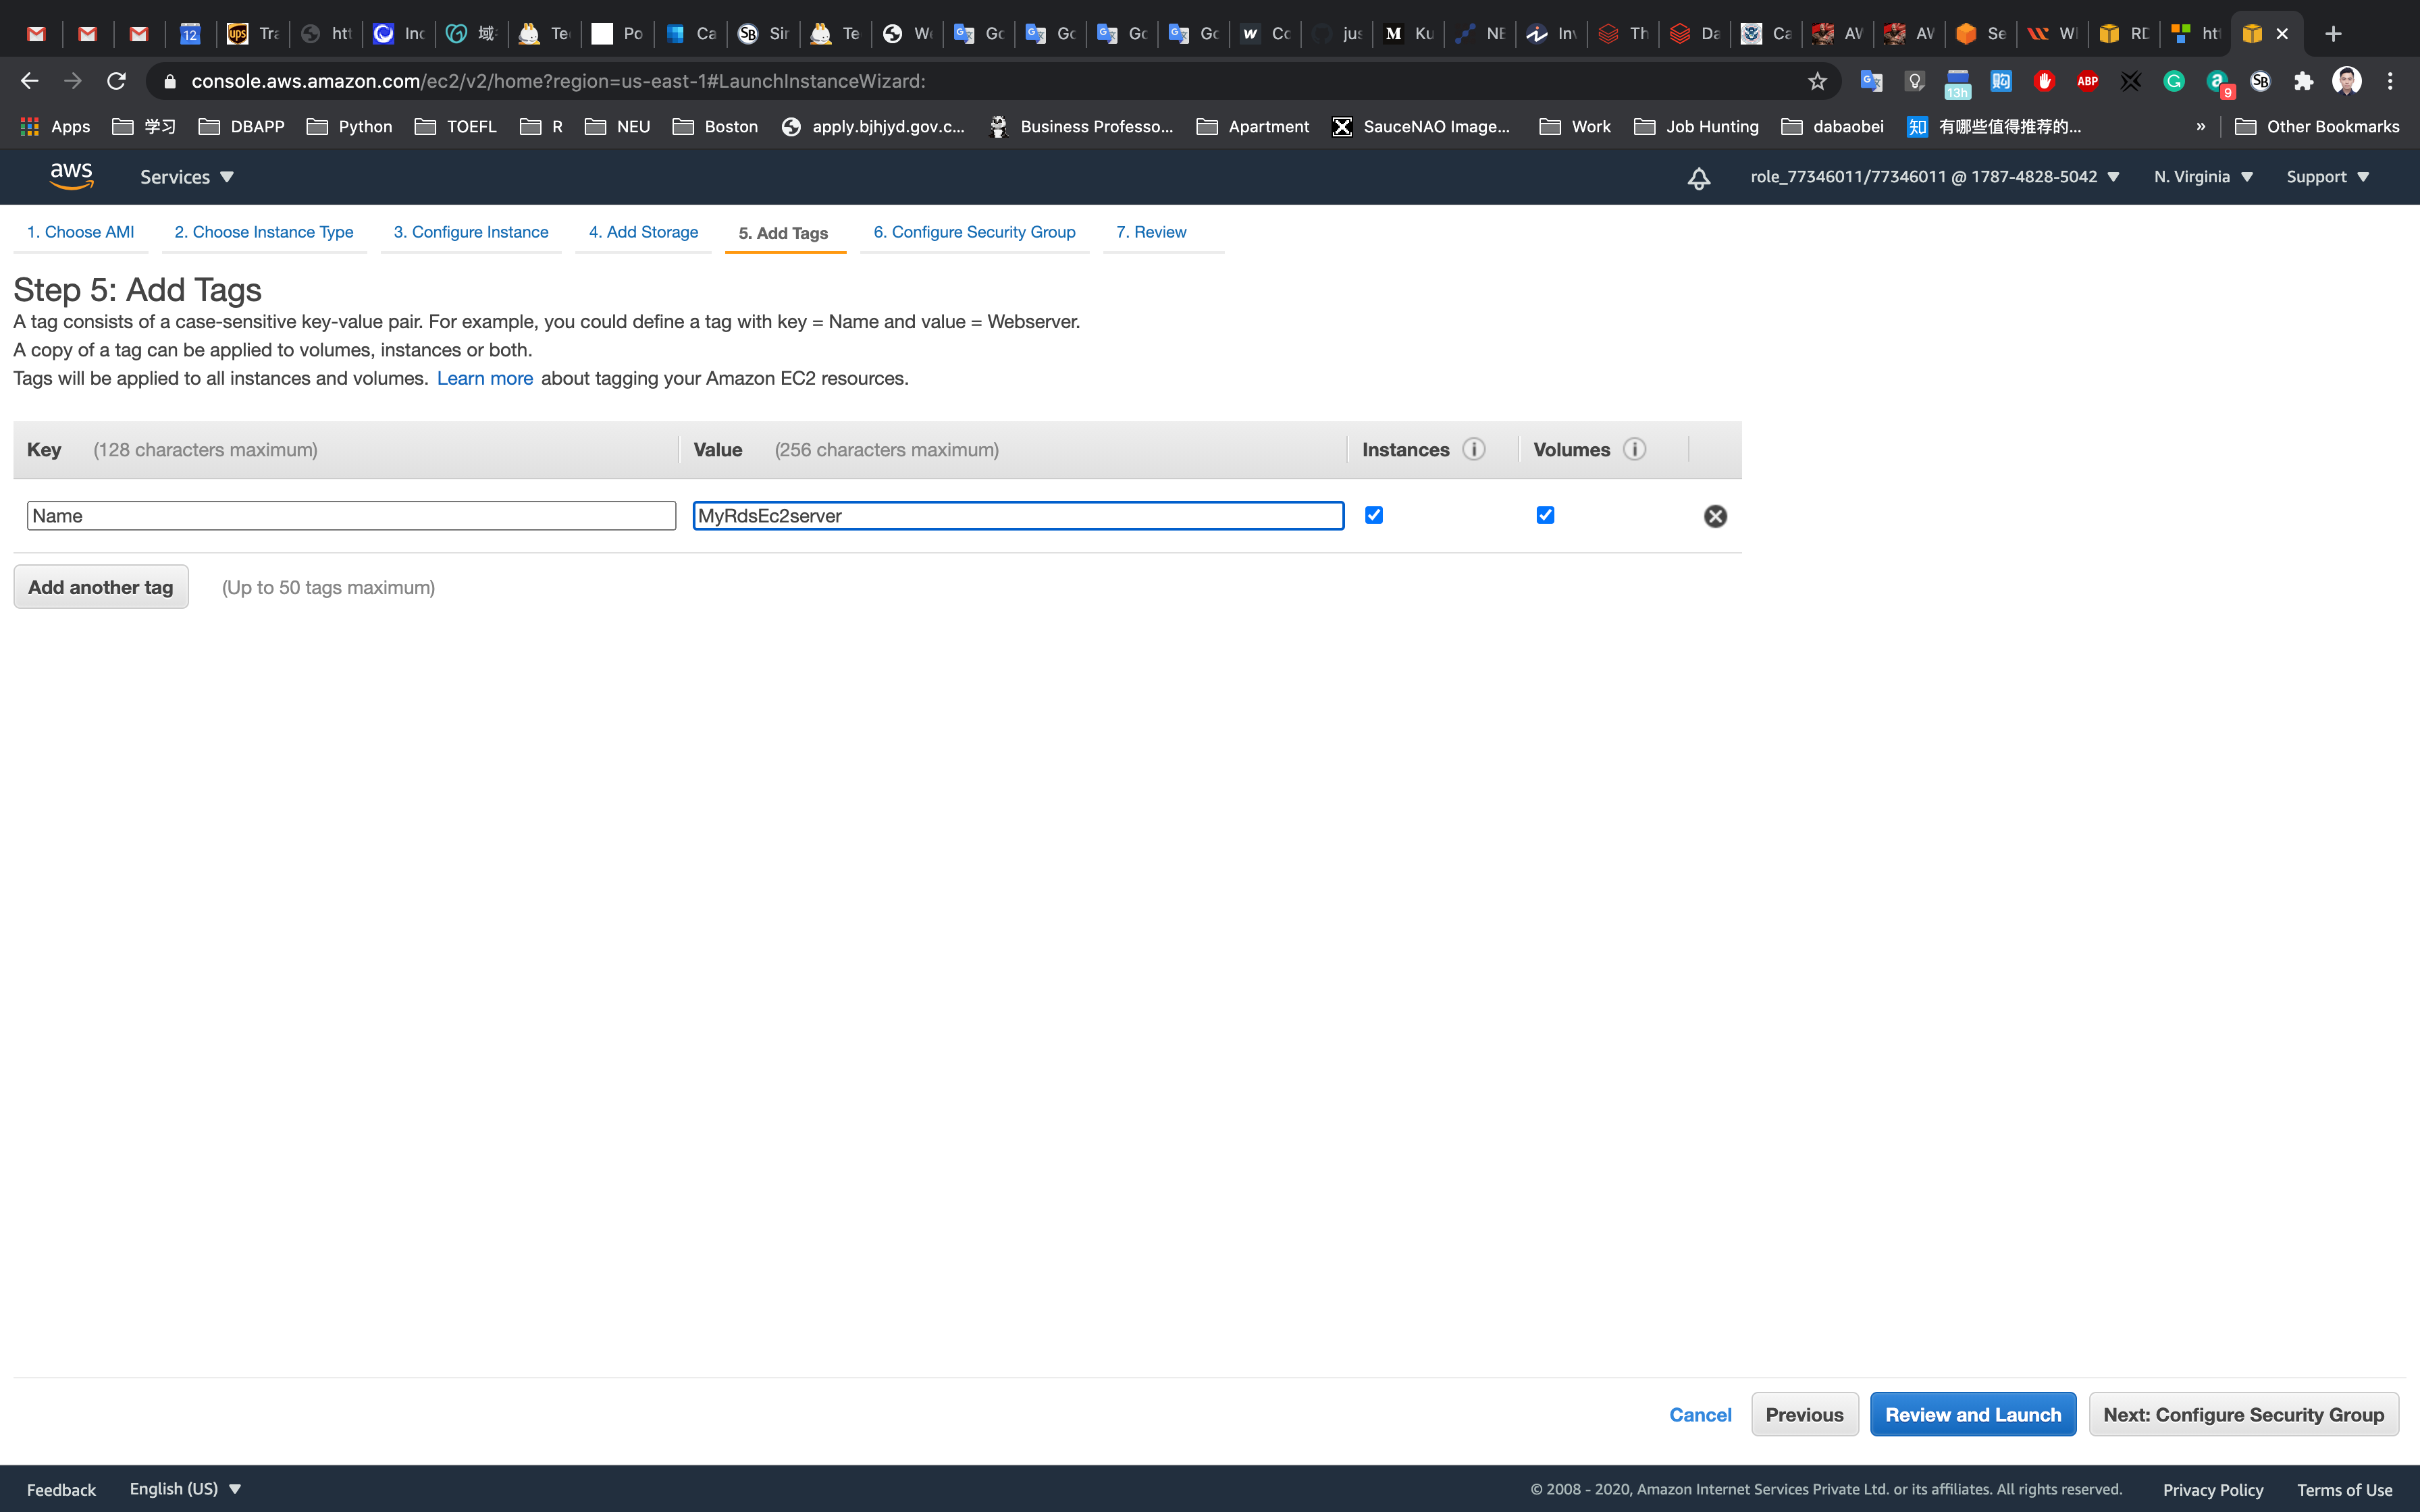
Add Tags Page
Click on Add Tag
- Key:
Name - Value:
MyRdsEc2server
Click on Next: Configure Security Group
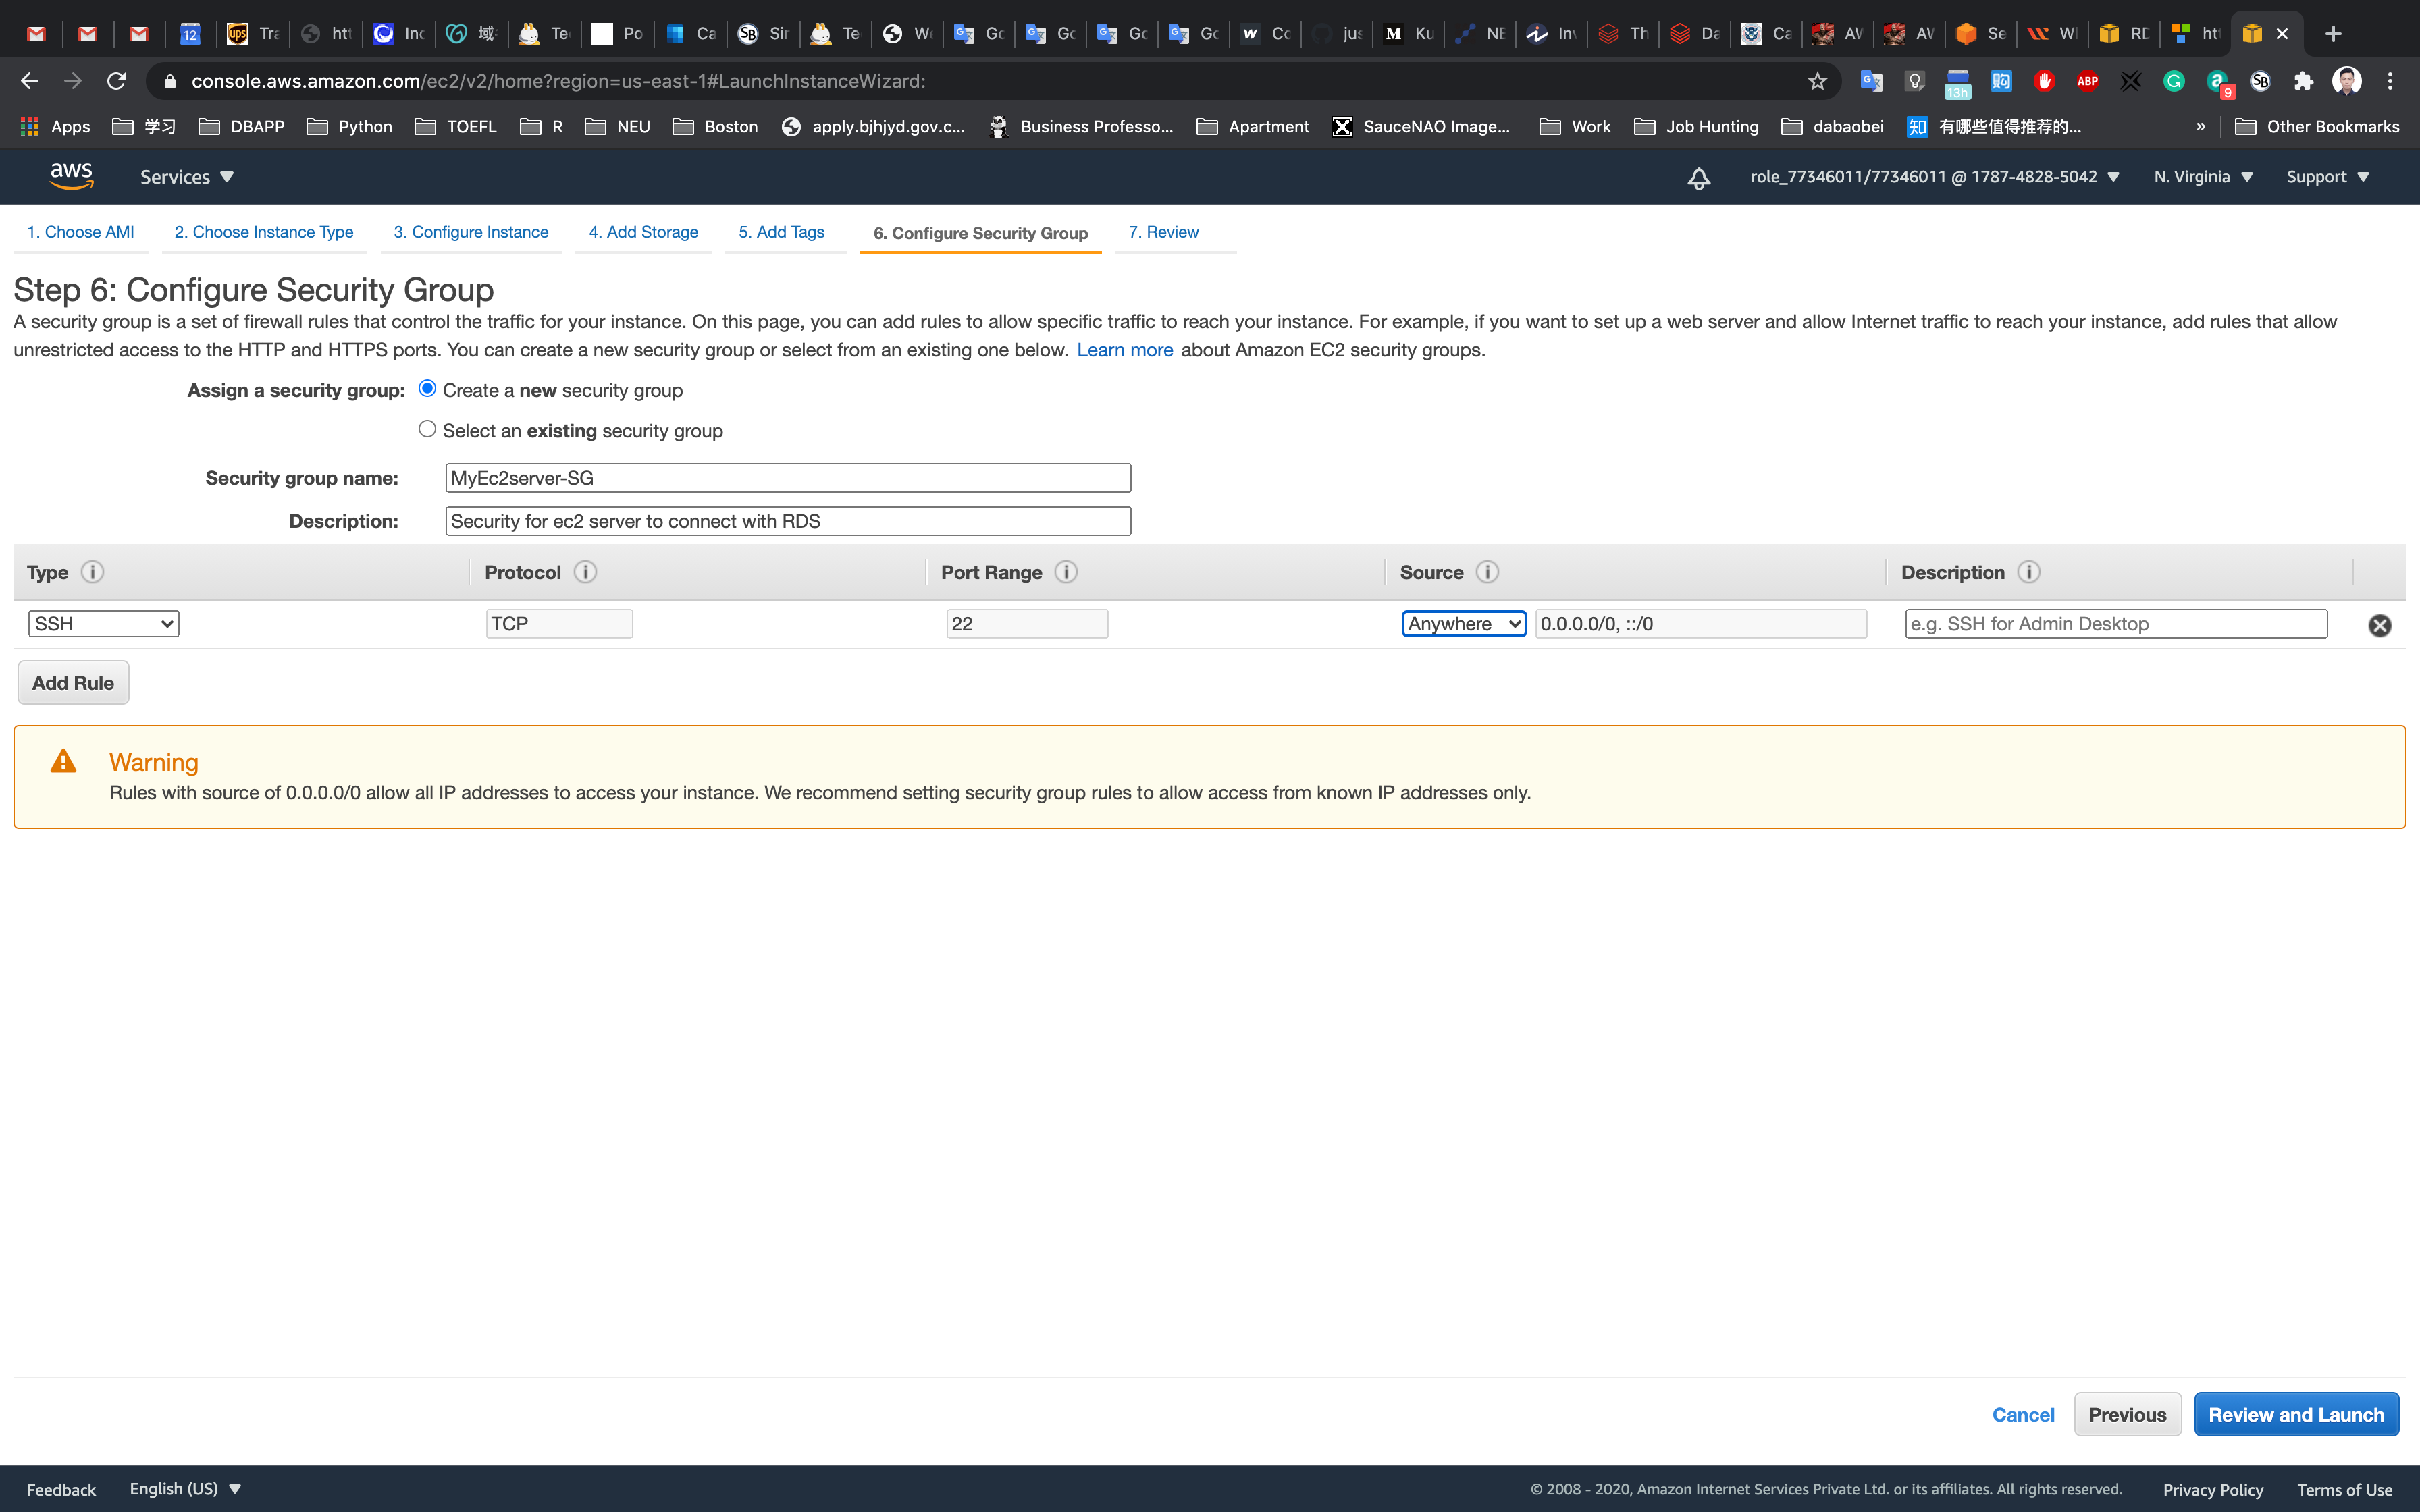
On the Configure Security Group page:
- Assign a security group:
Create a new security group - Security group name:
MyEc2server-SG - Description:
Security for ec2 server to connect with RDS
To add SSH:
- Choose Type:
SSH - Source: Custom Enter
0.0.0.0/0in the textbox or select Anywhere.
Click on Review and Launch
Review and Launch : Review all your settings and click on launch.
Click on Launch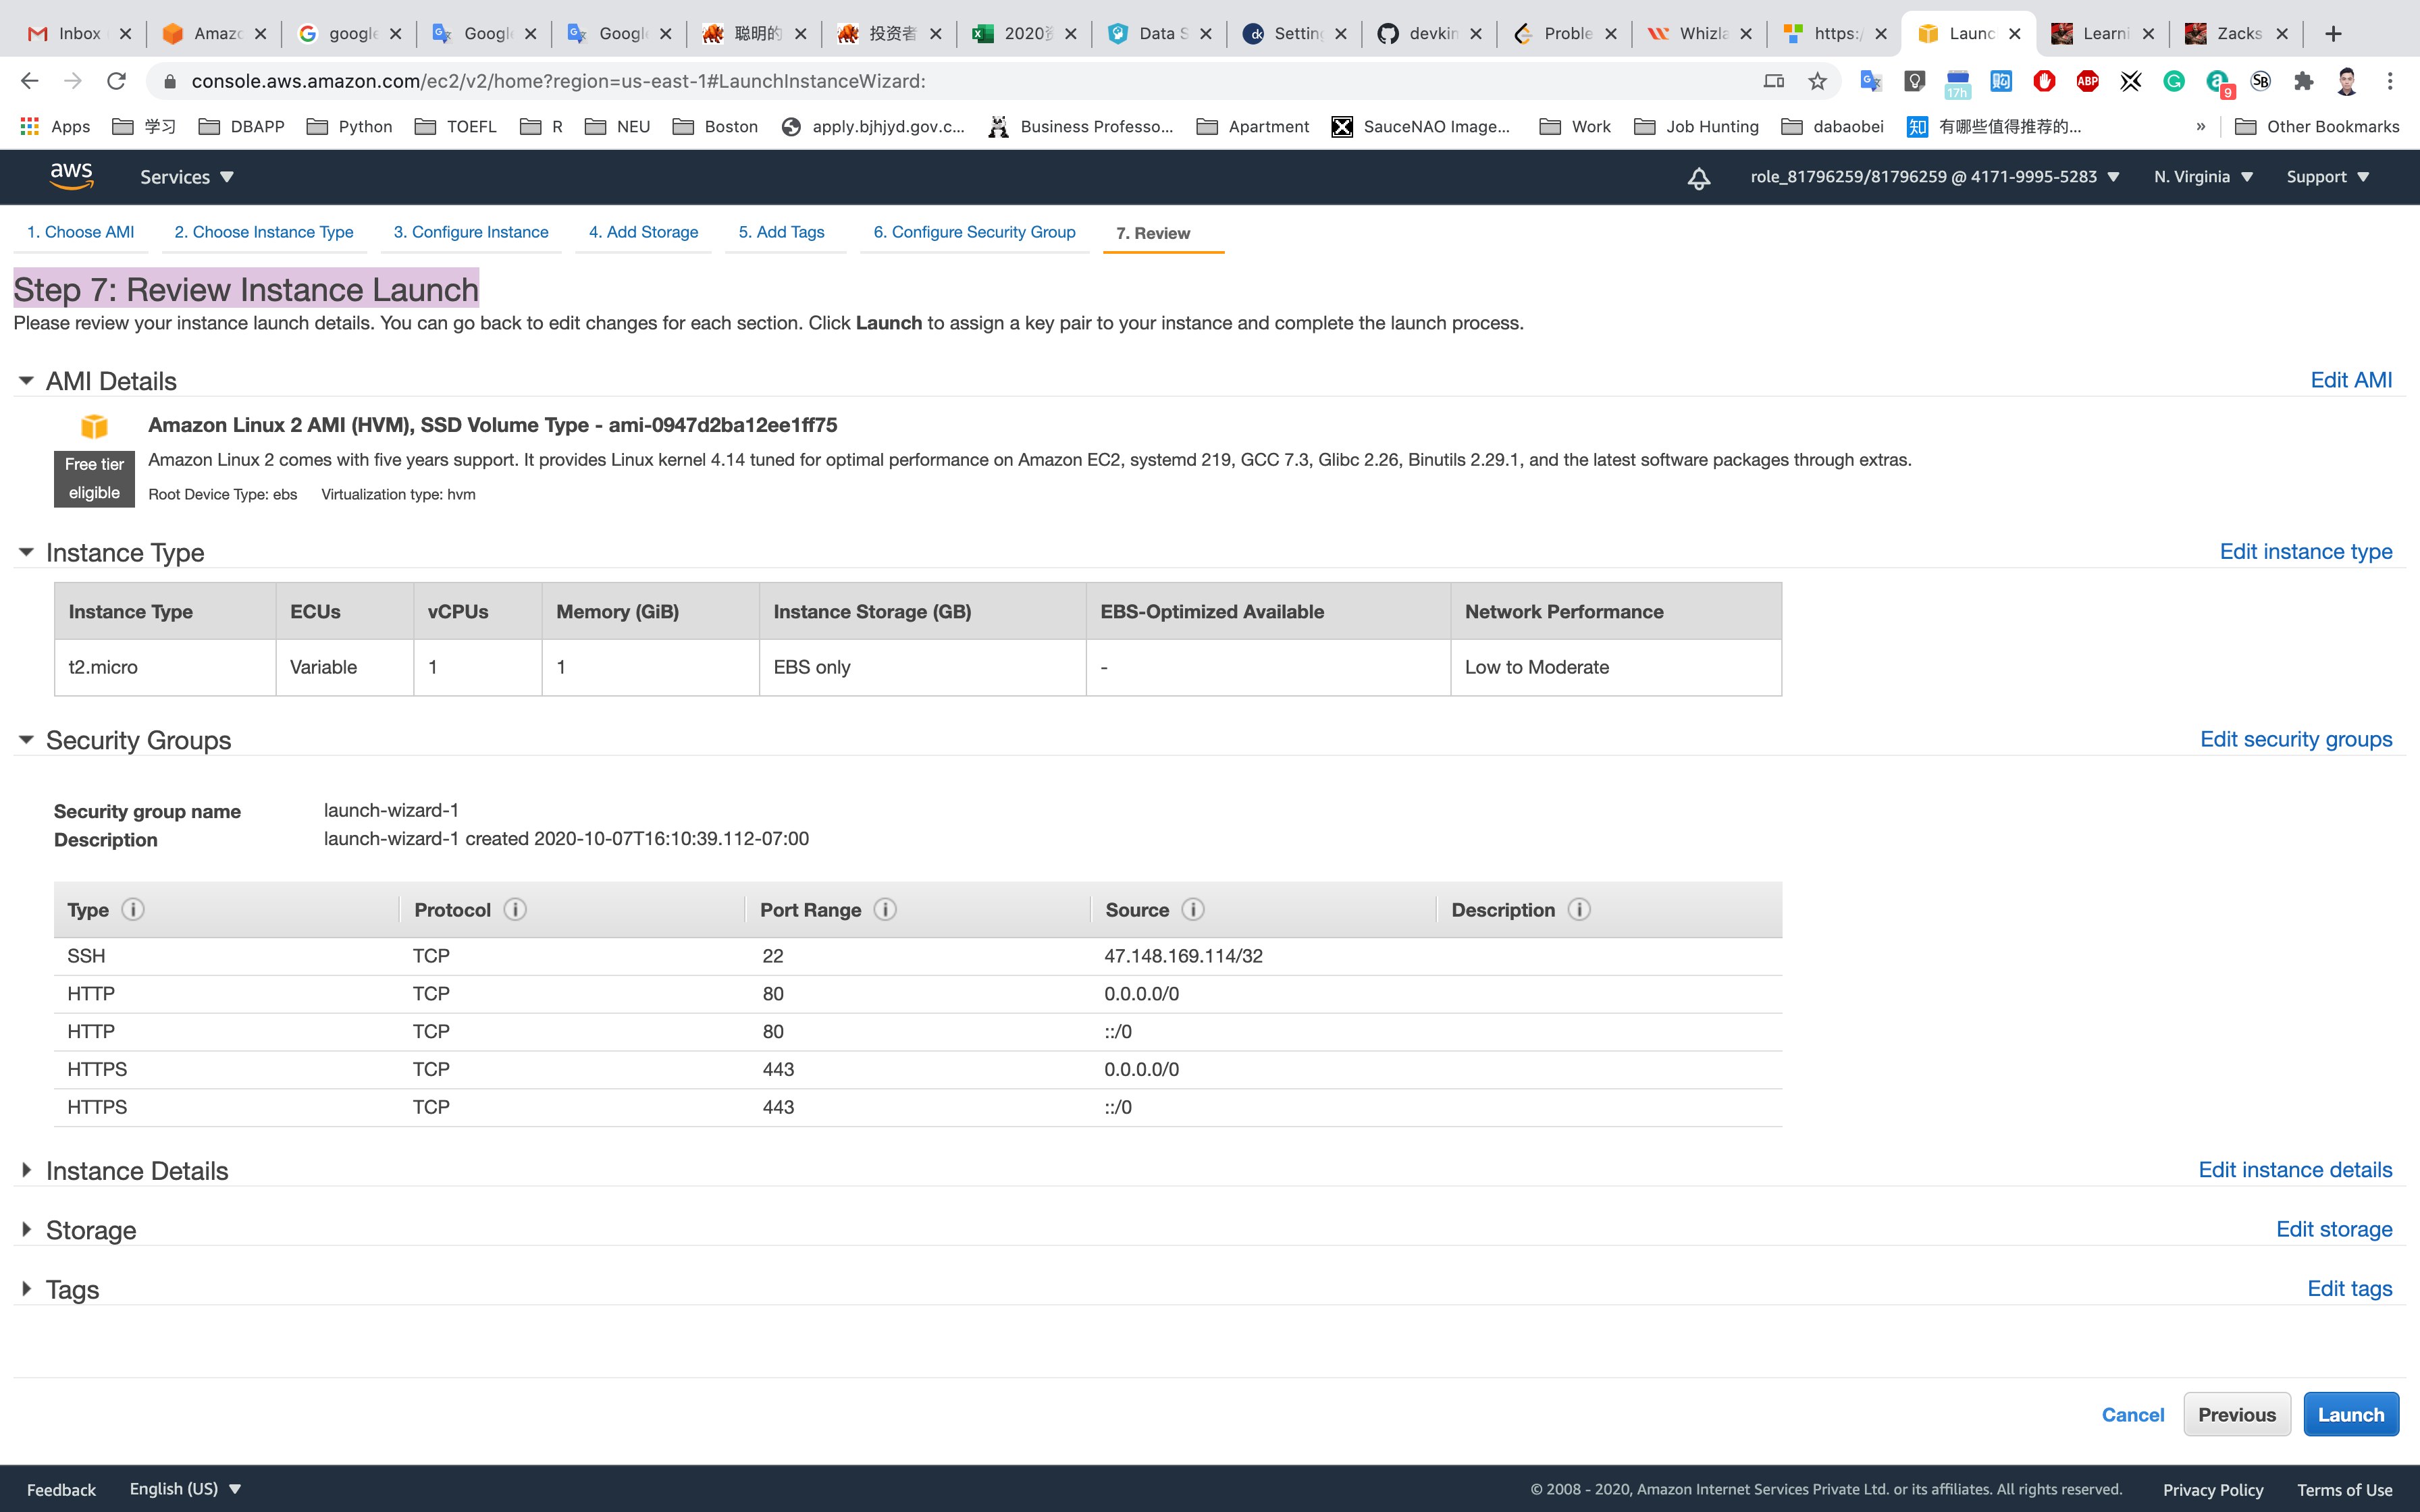
Select Create a new key pair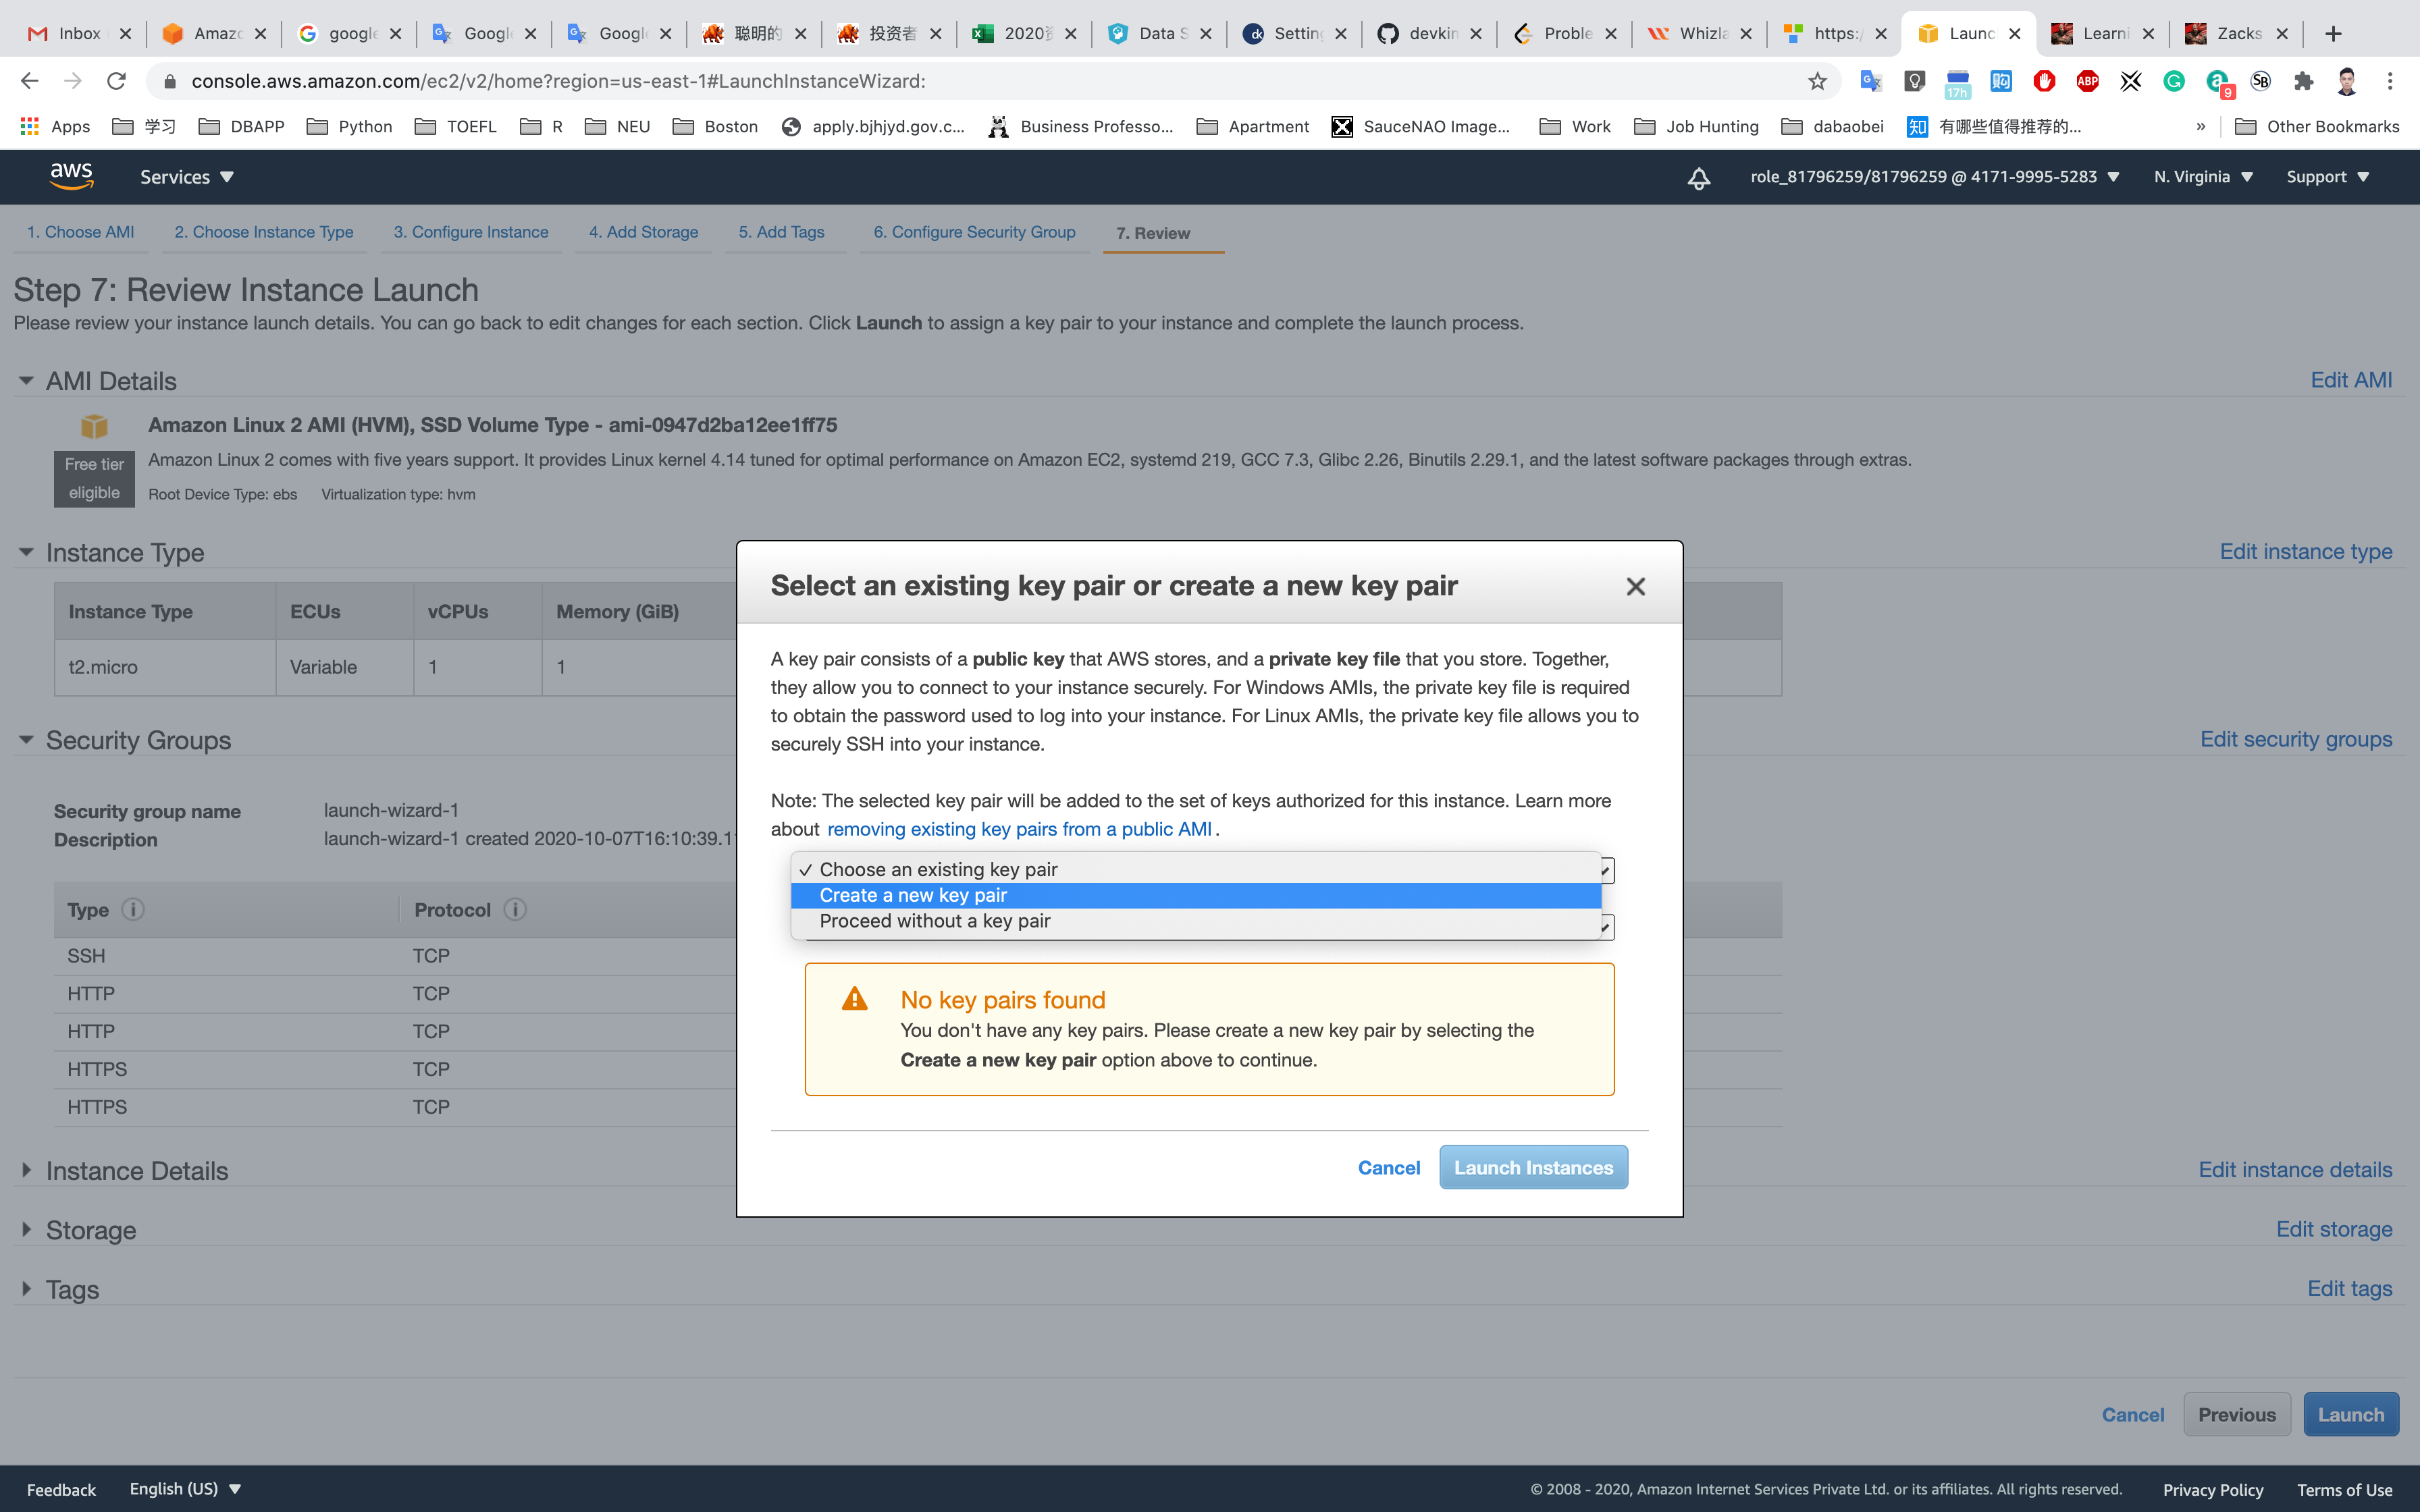
Set up the key pair name ec2
Click on Download Key Pair
See the left bottom of the screenshot, we have the file named ec2.pem
Click on Launch Instances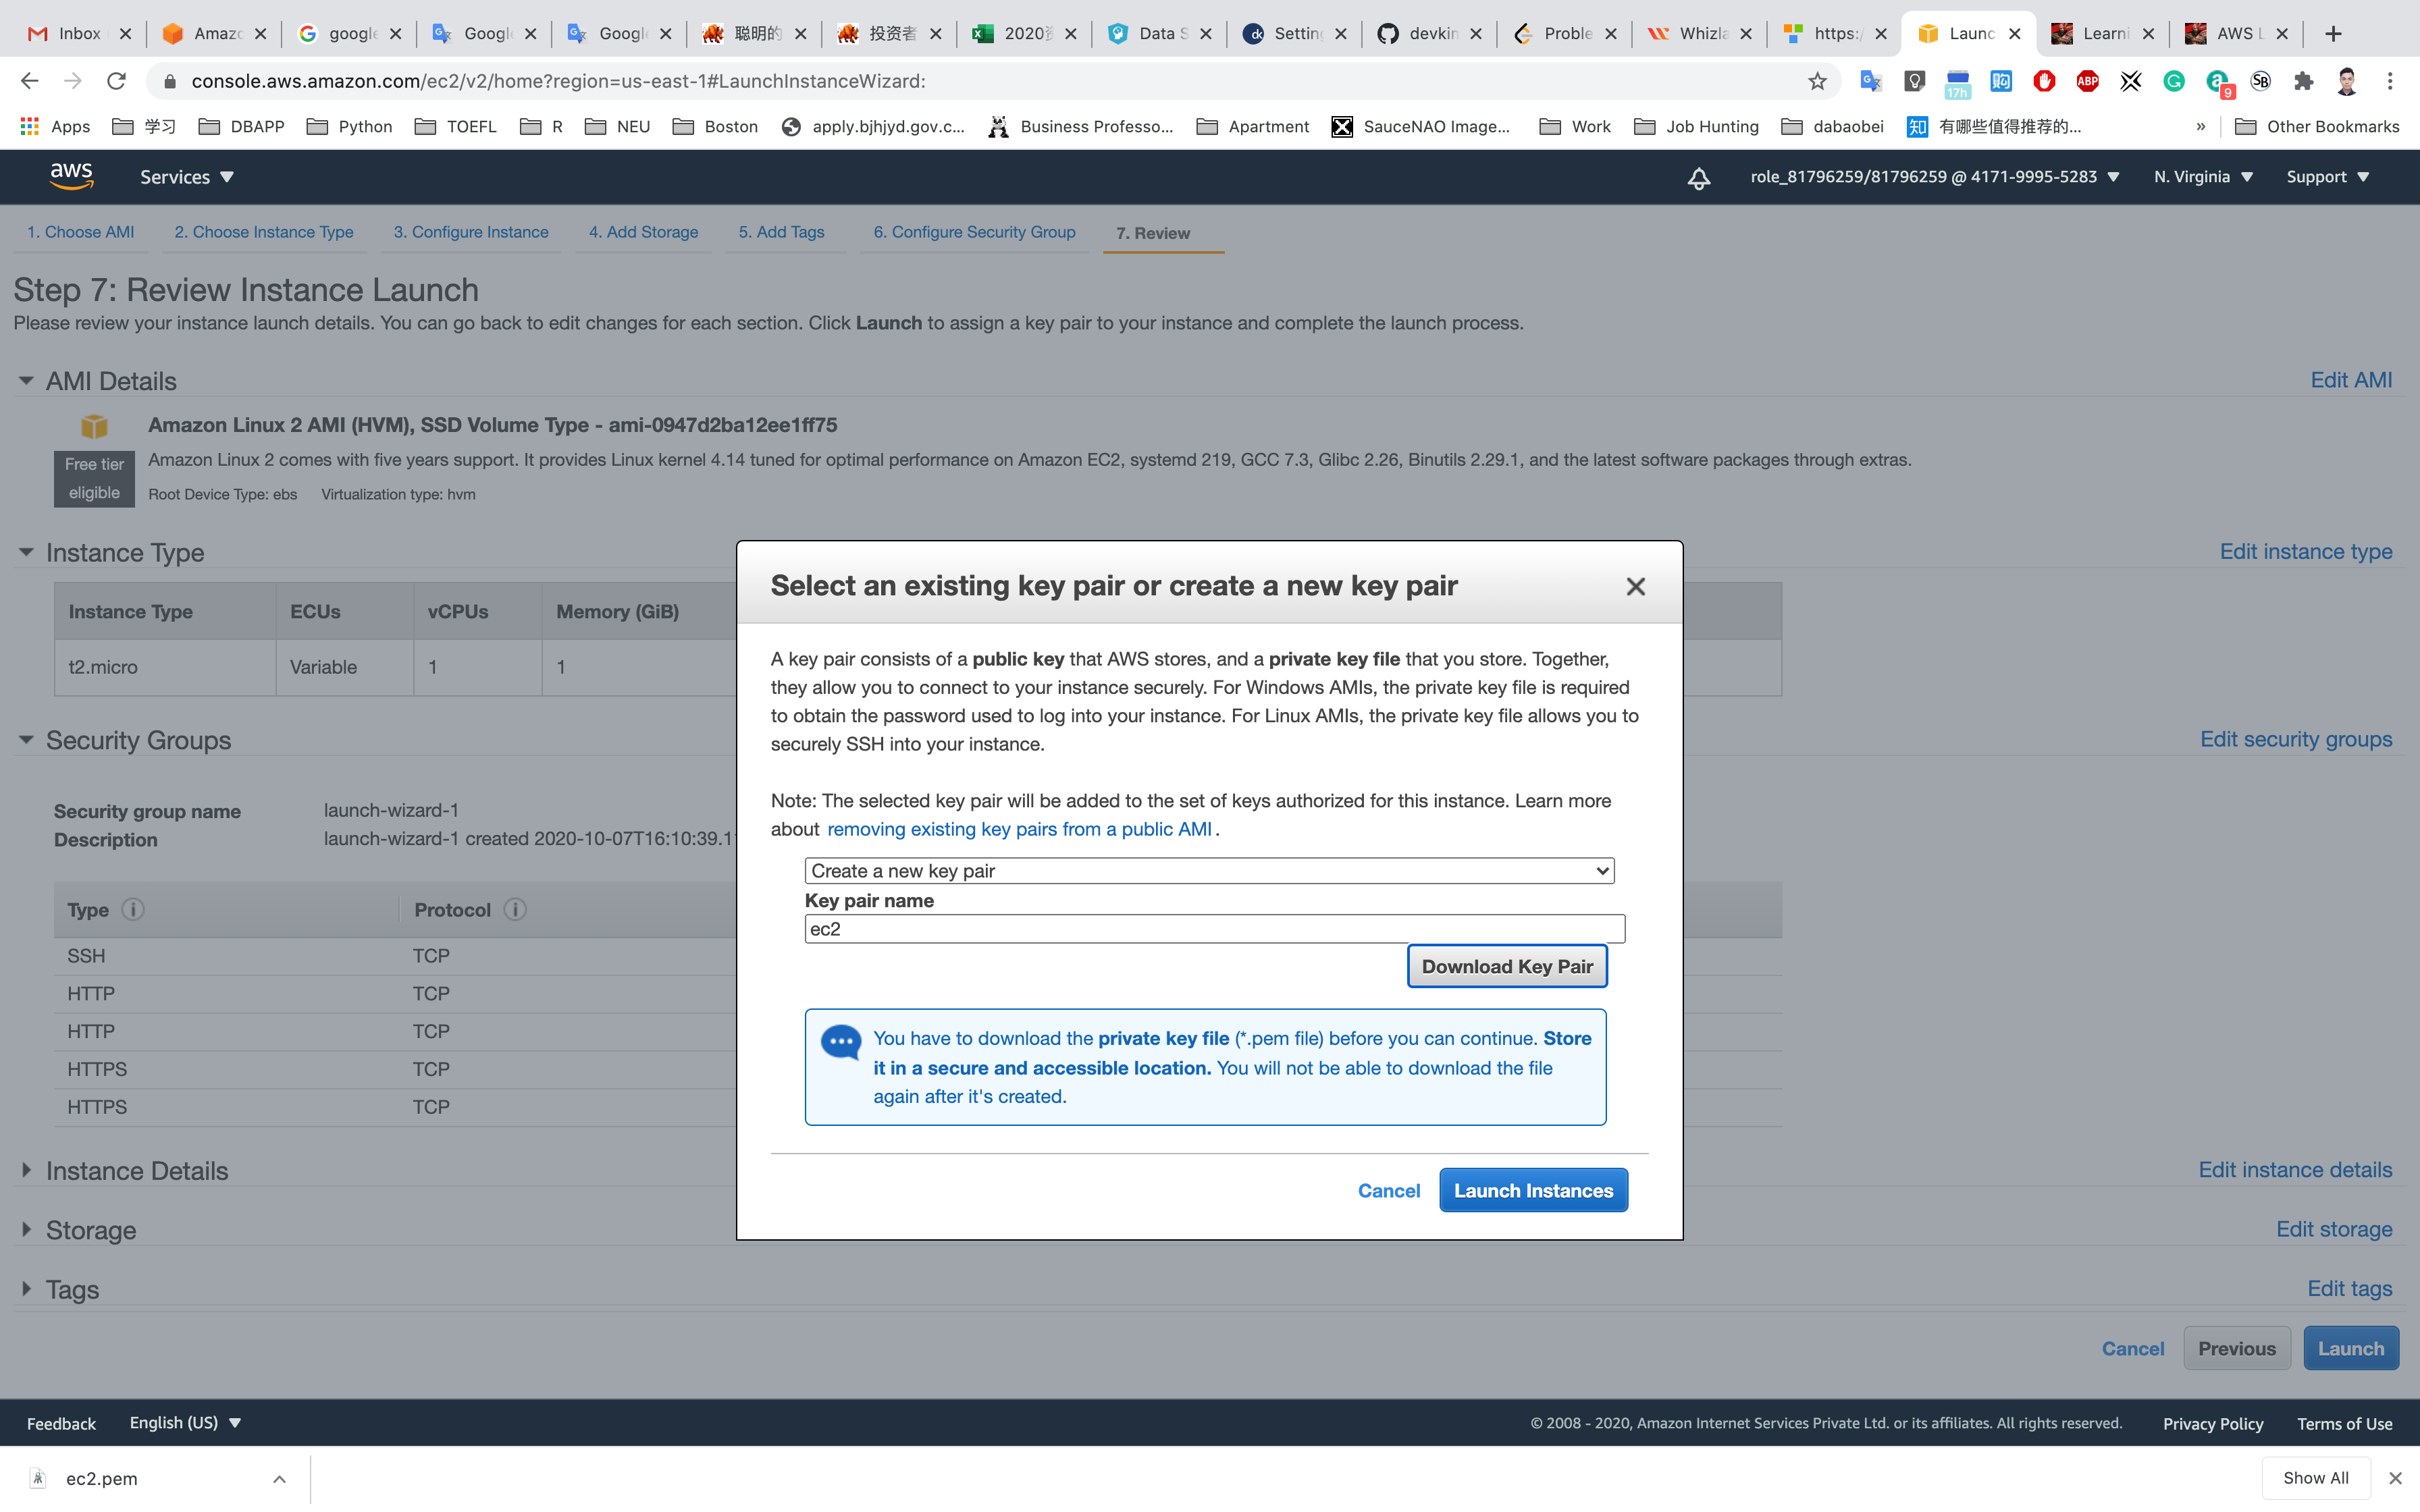
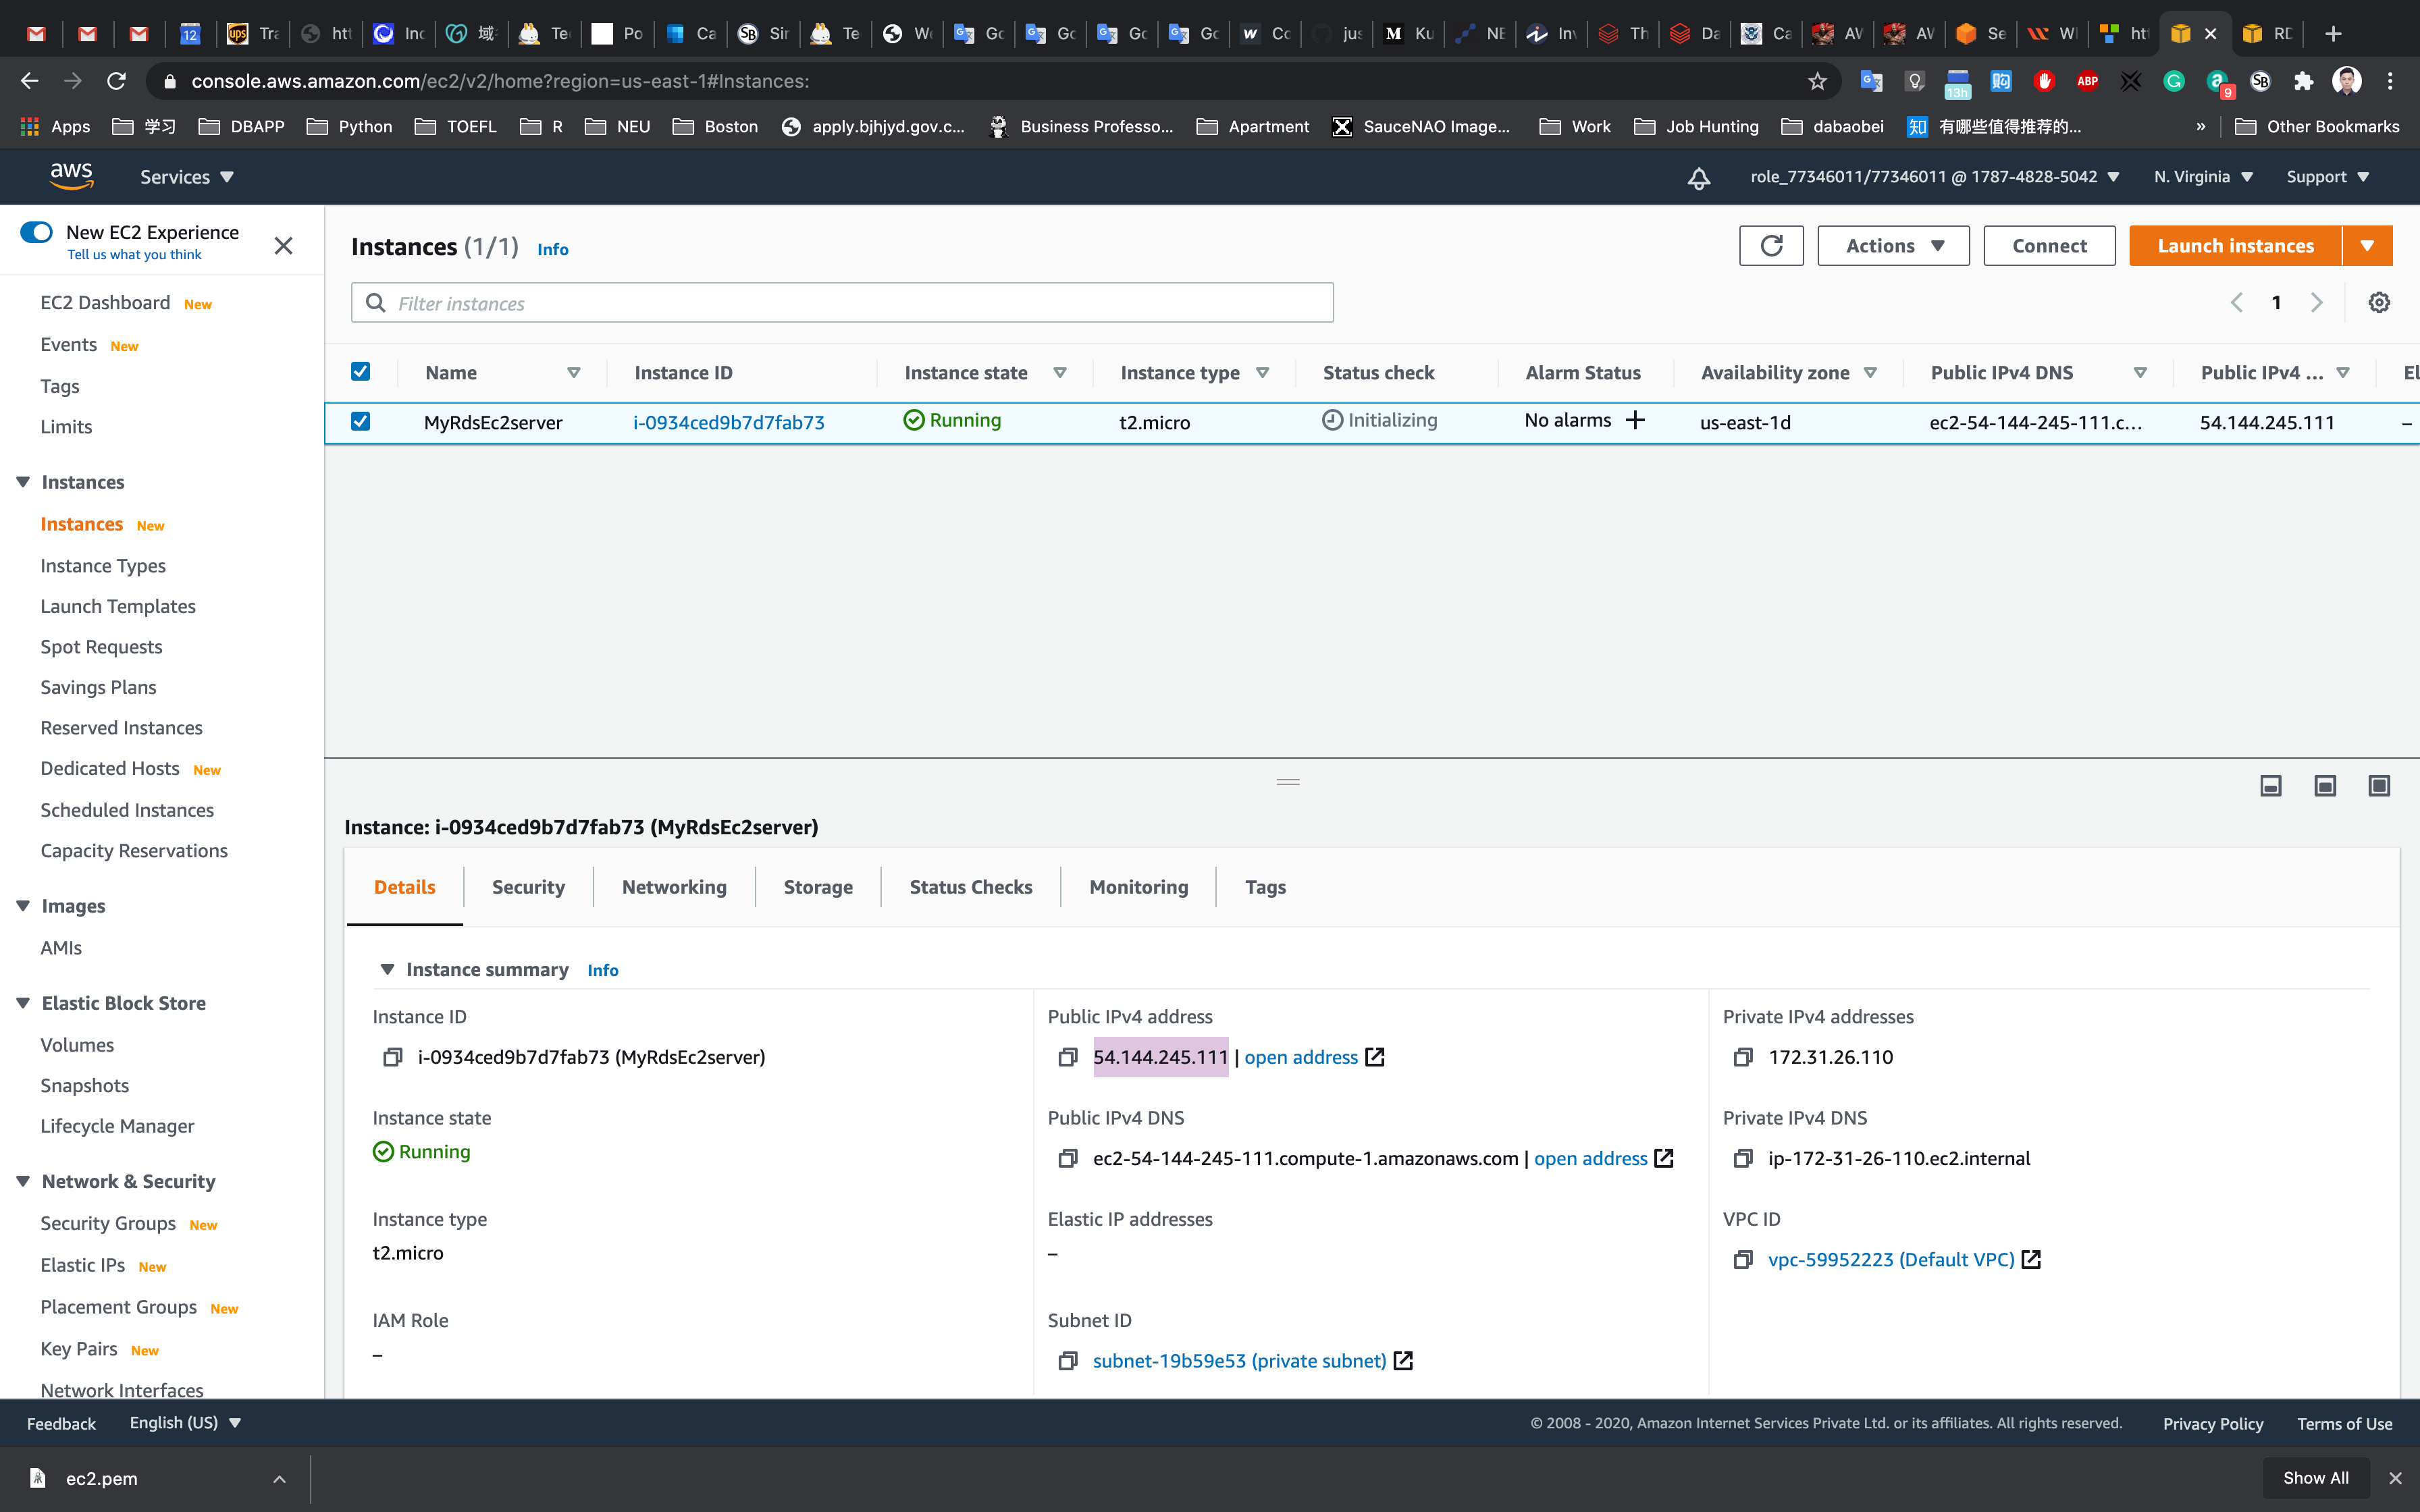
Click on View Instances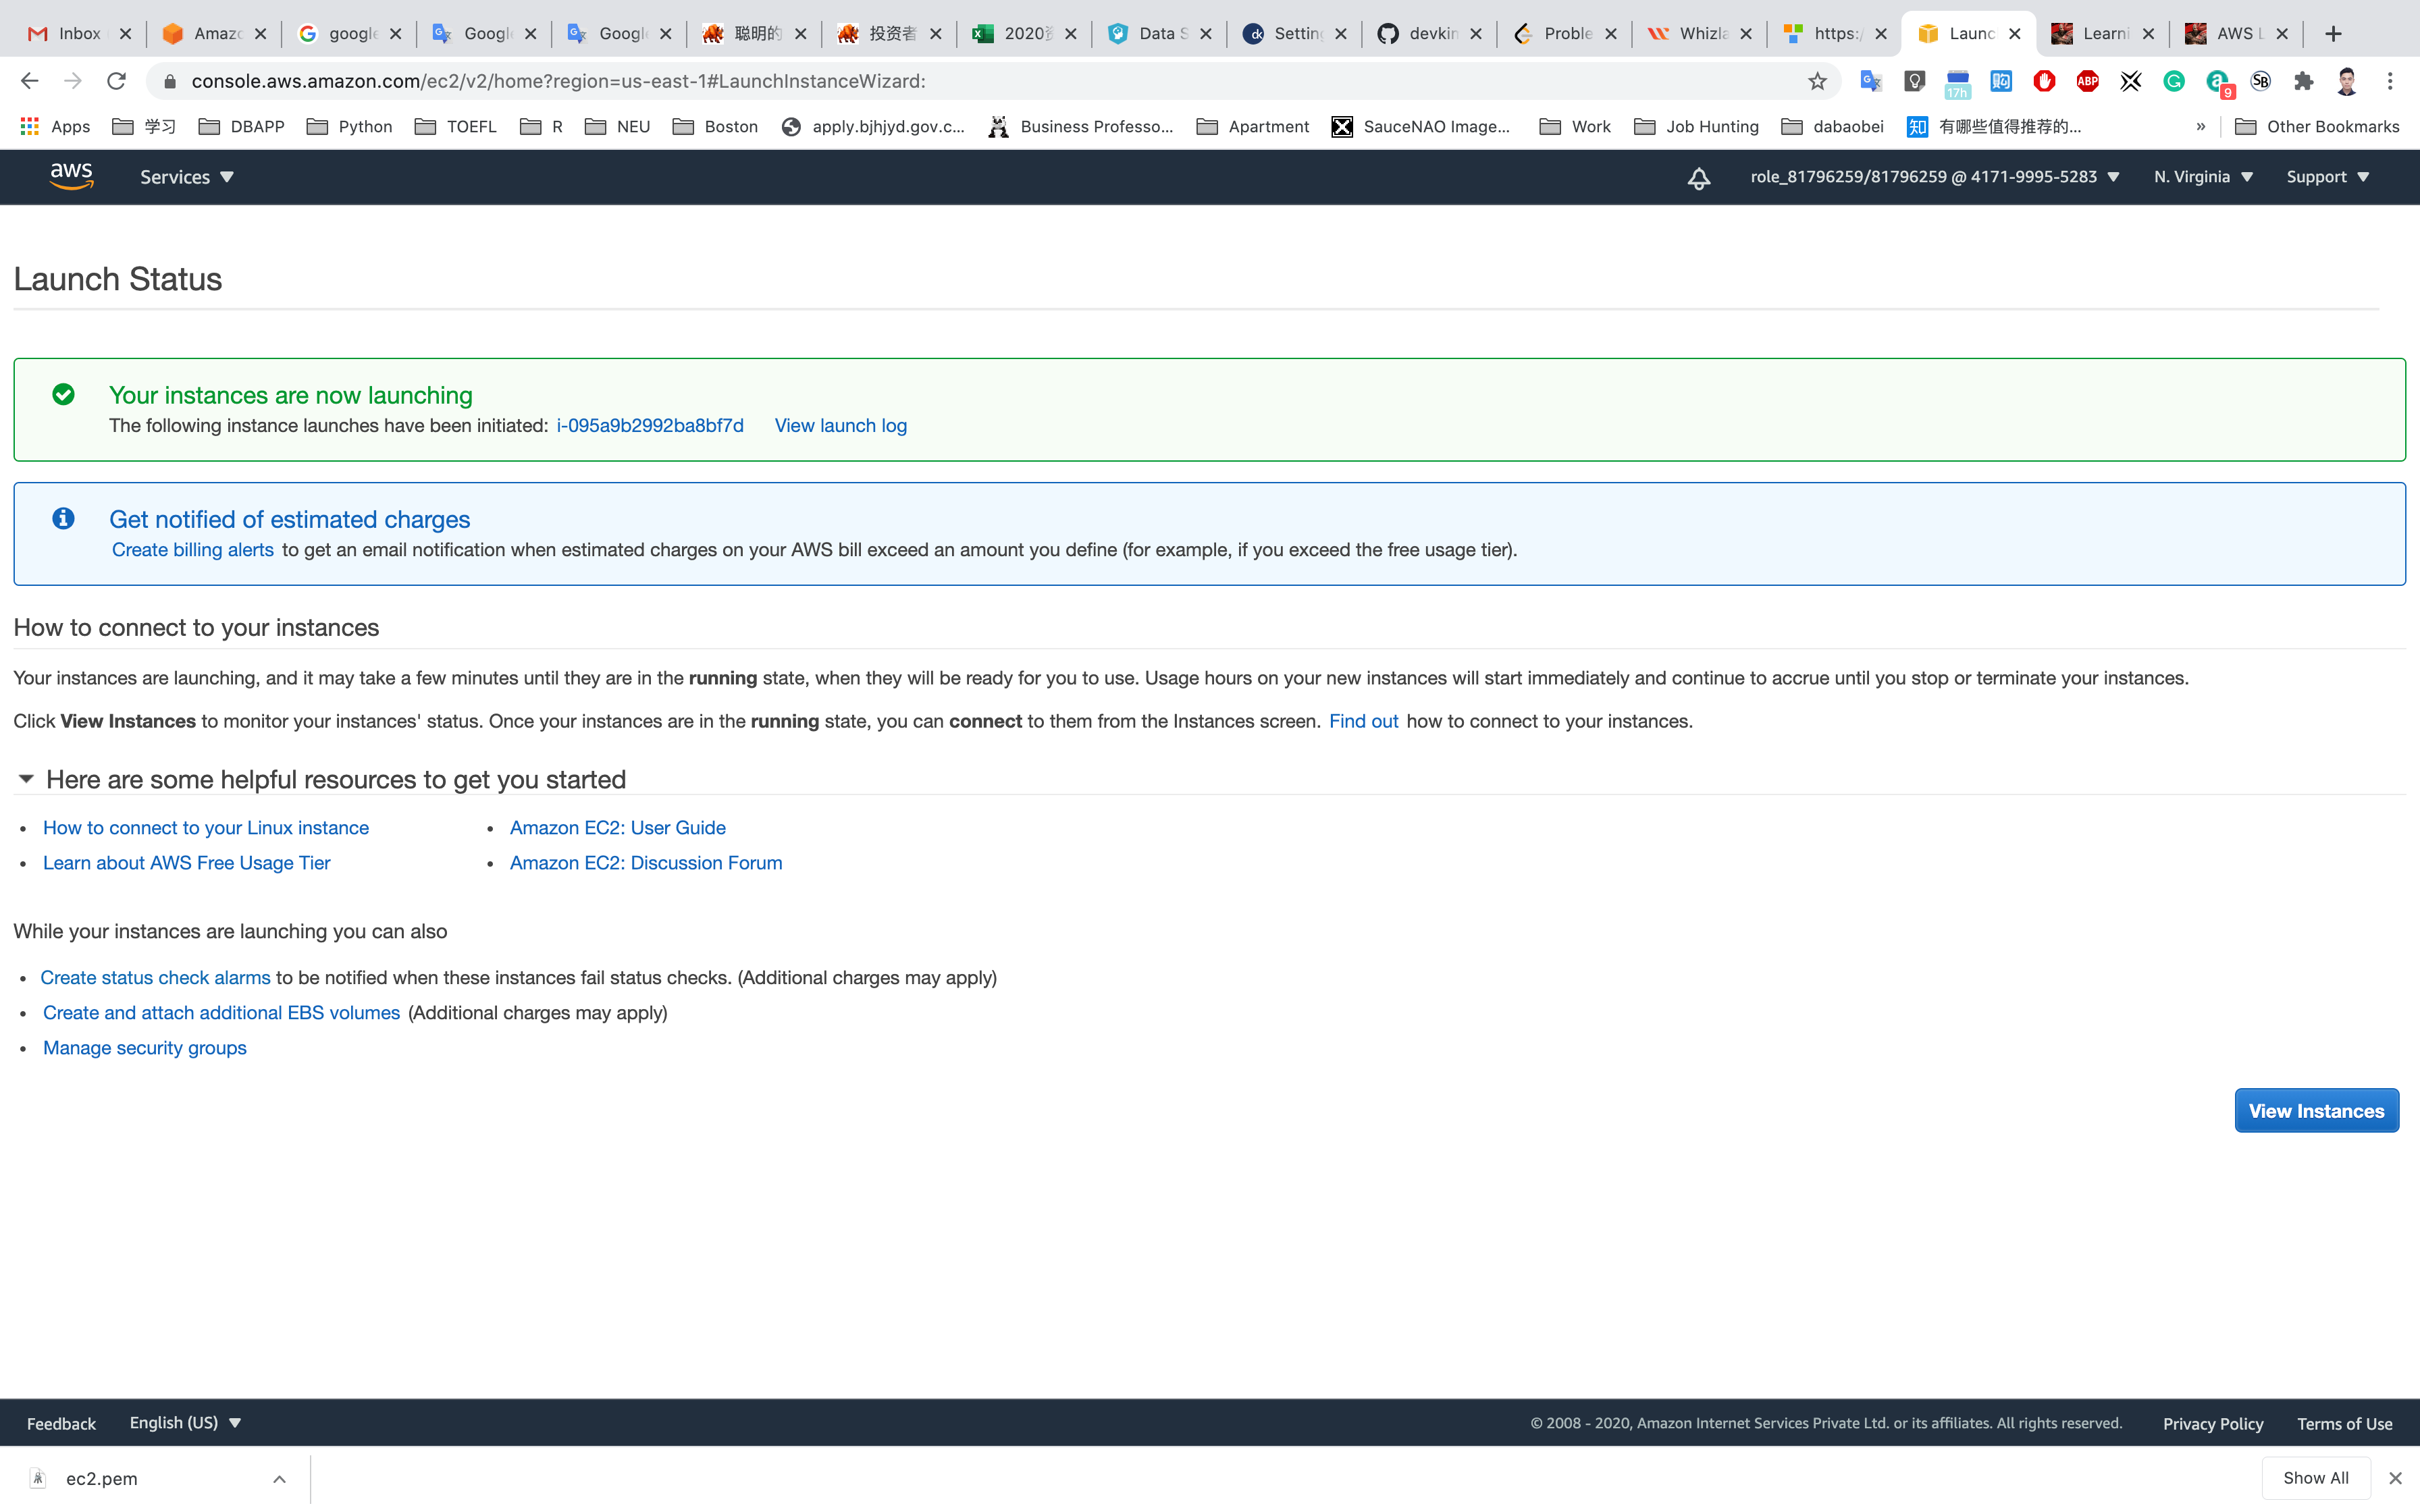
Waiting until the Instance state switch to Running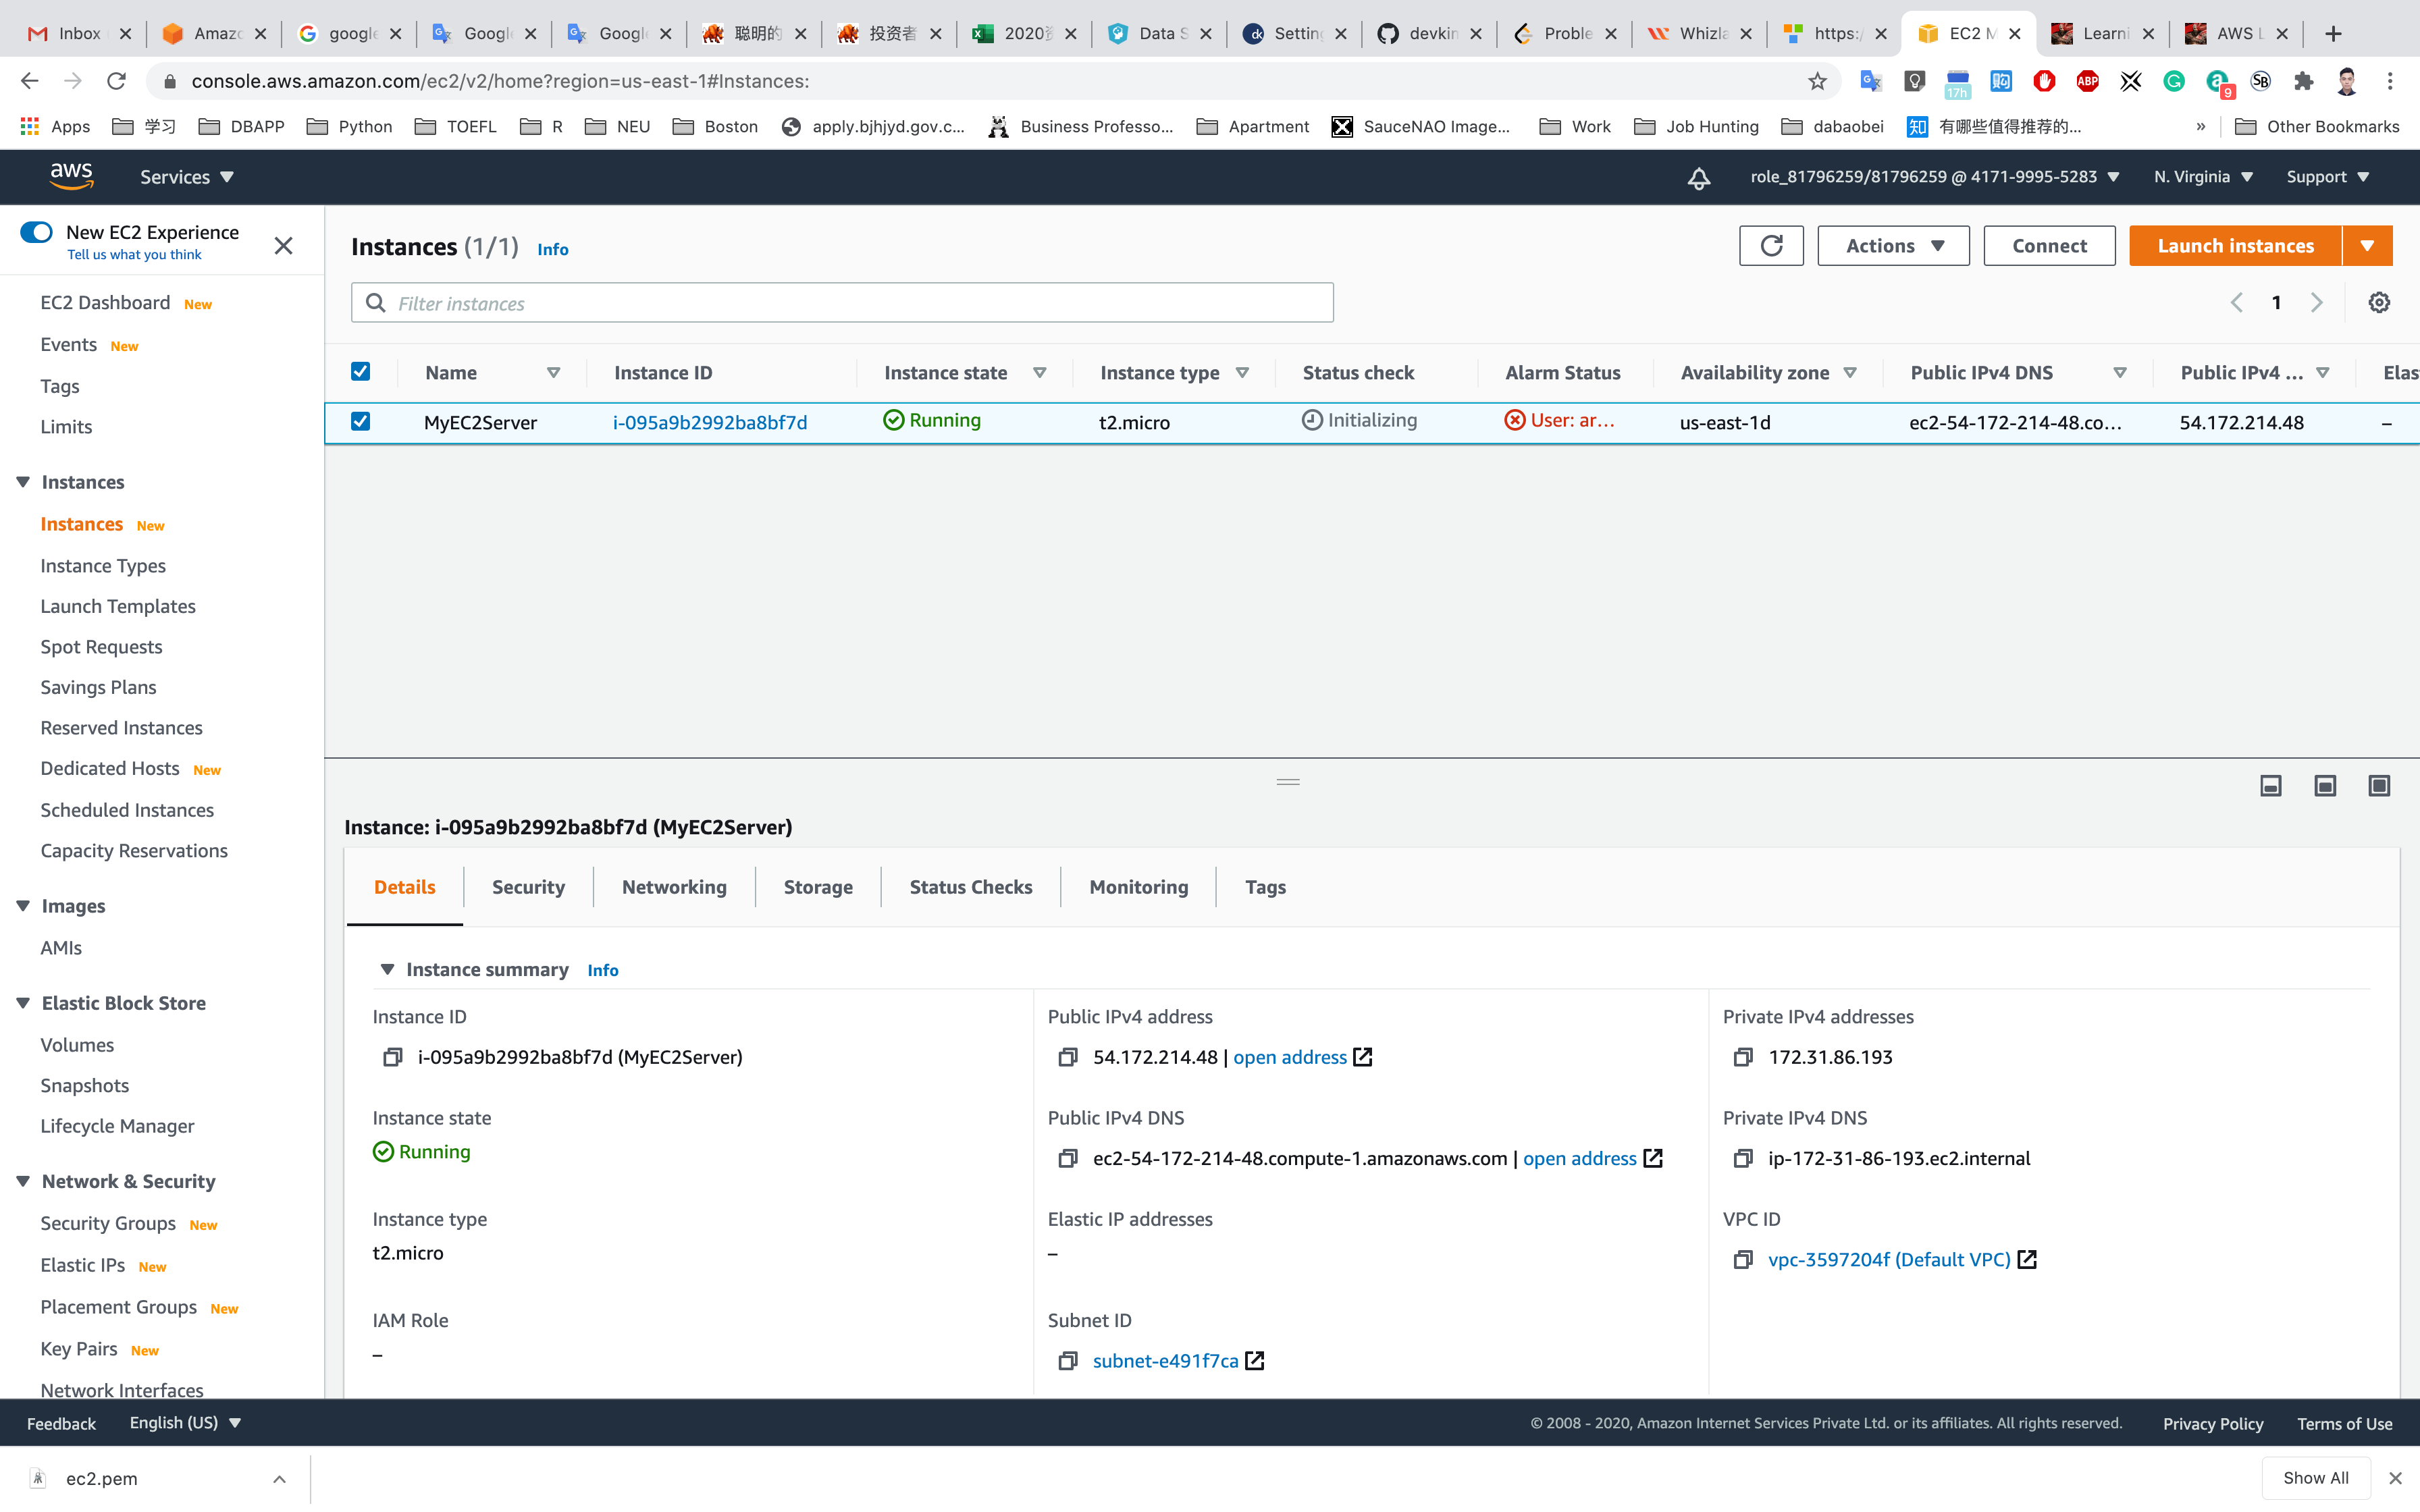
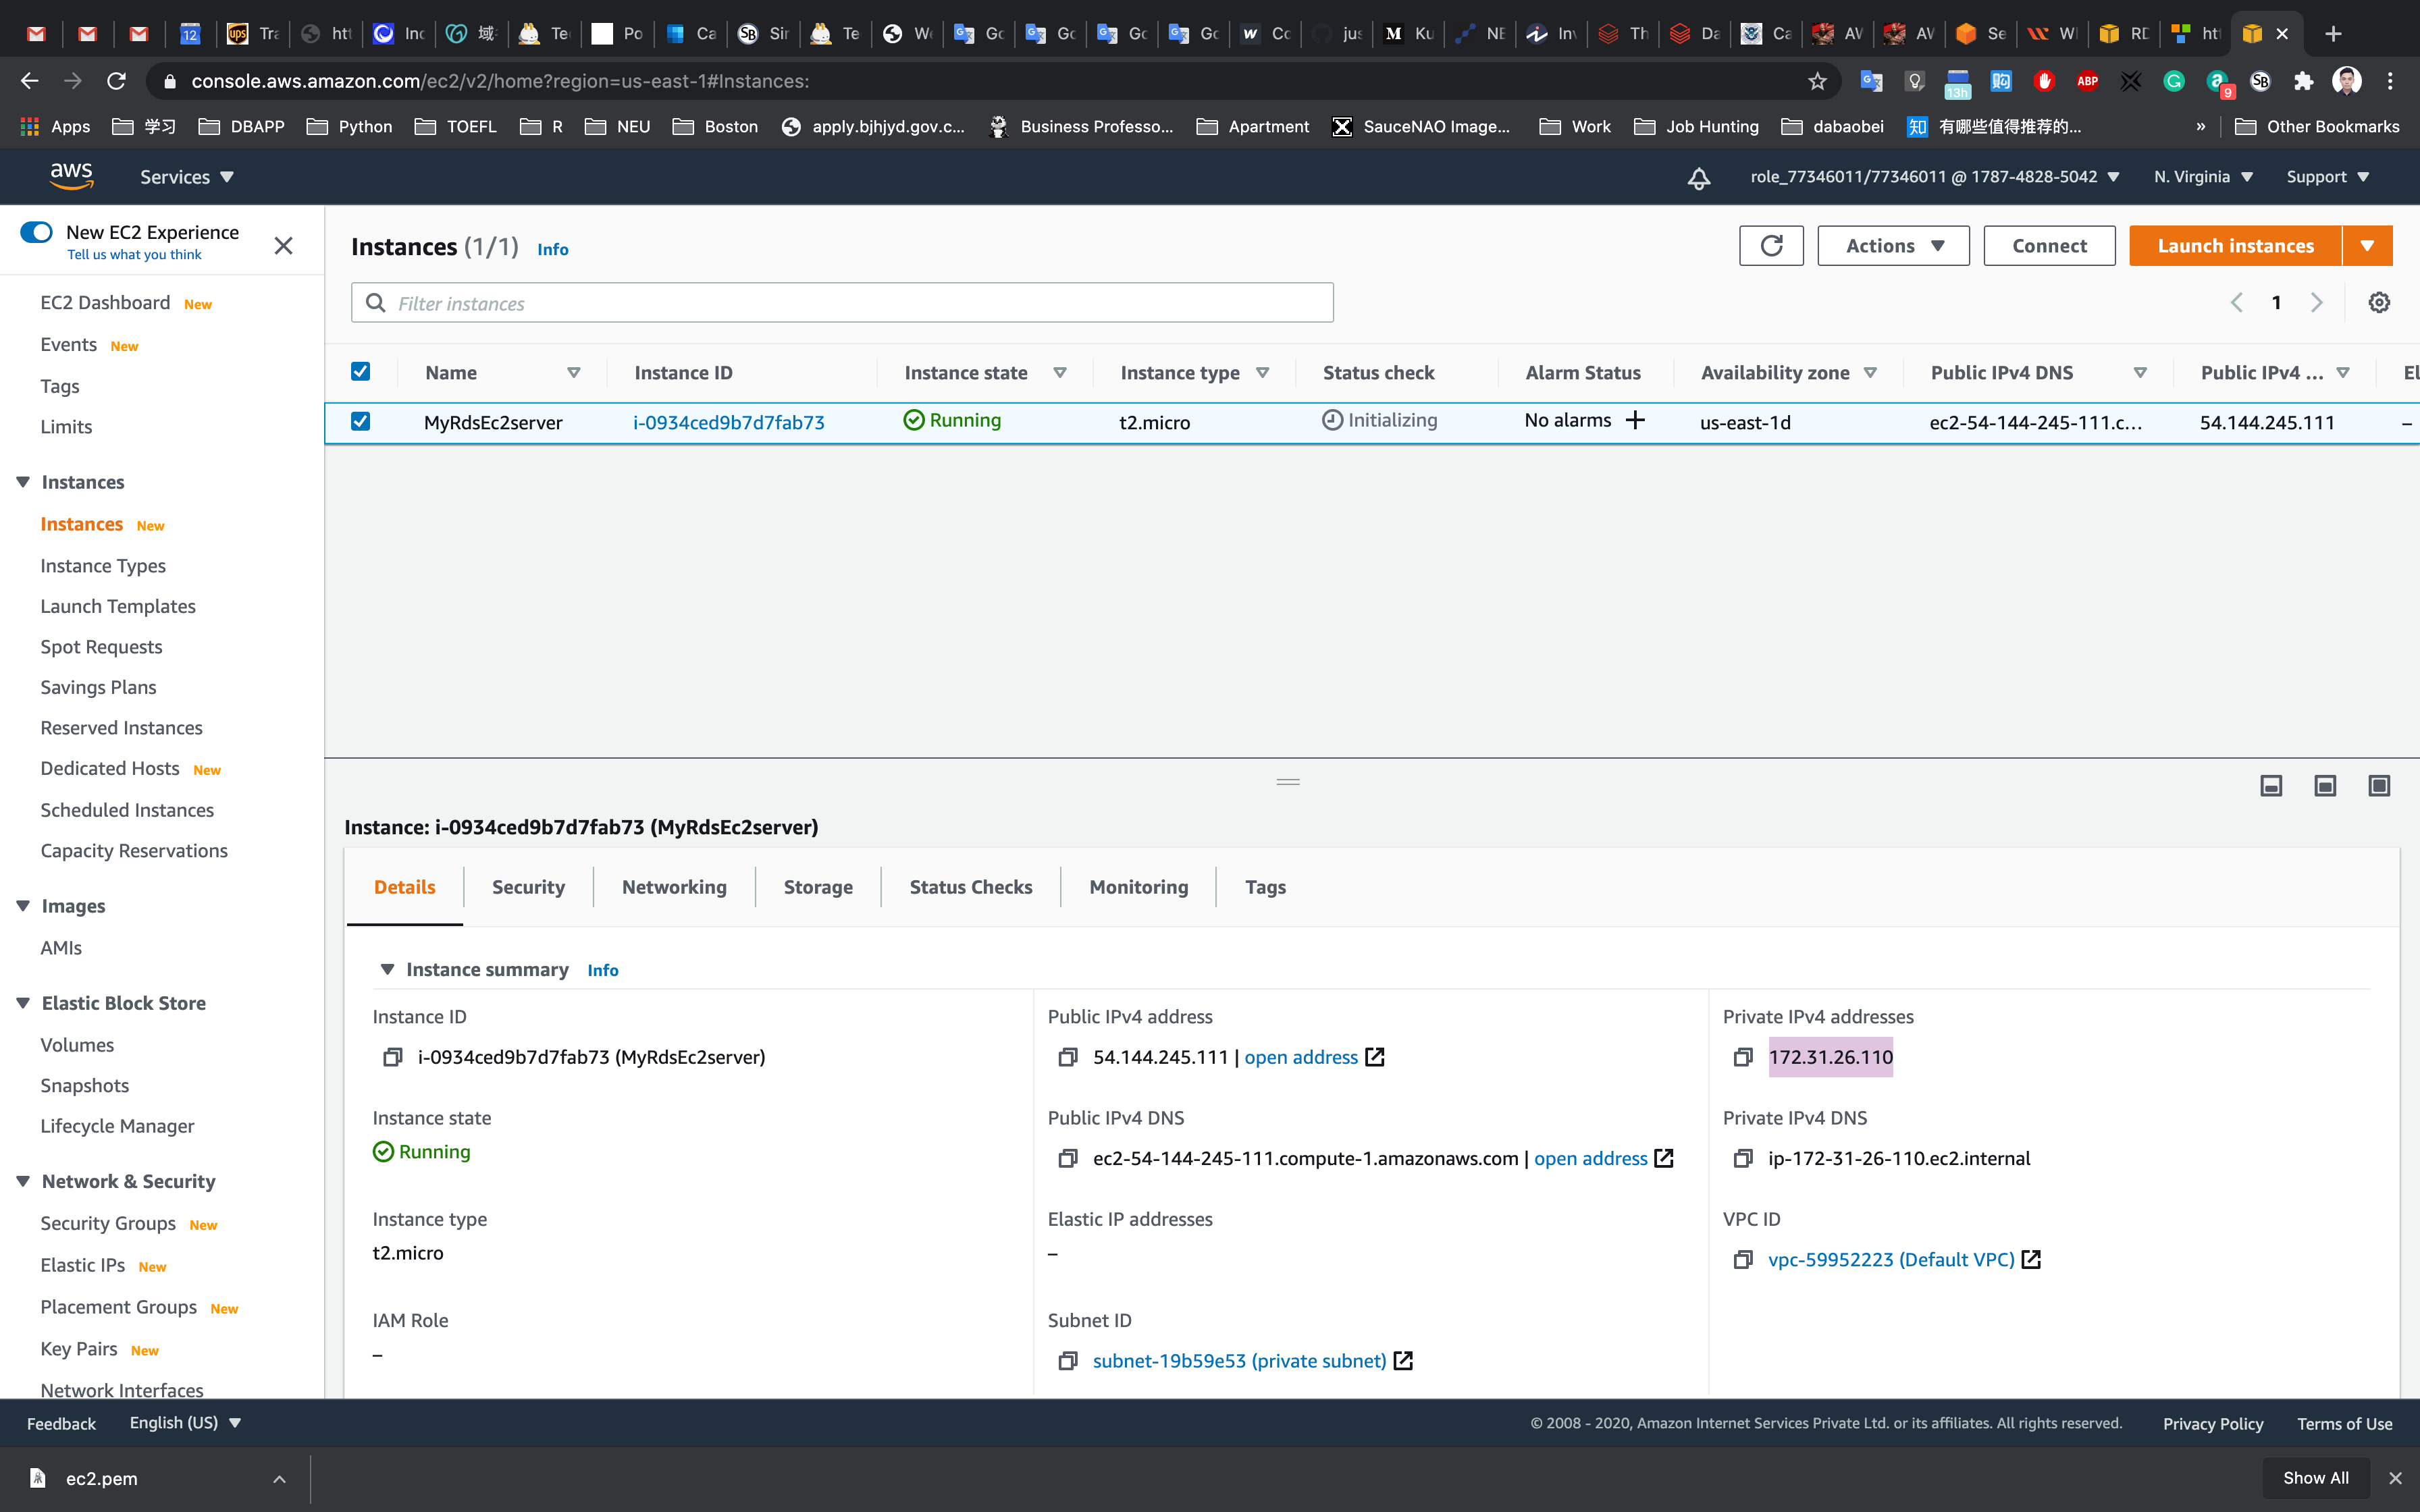
You can Click on Instance ID like i-095a9b2992ba8bf7d to see the instance detail.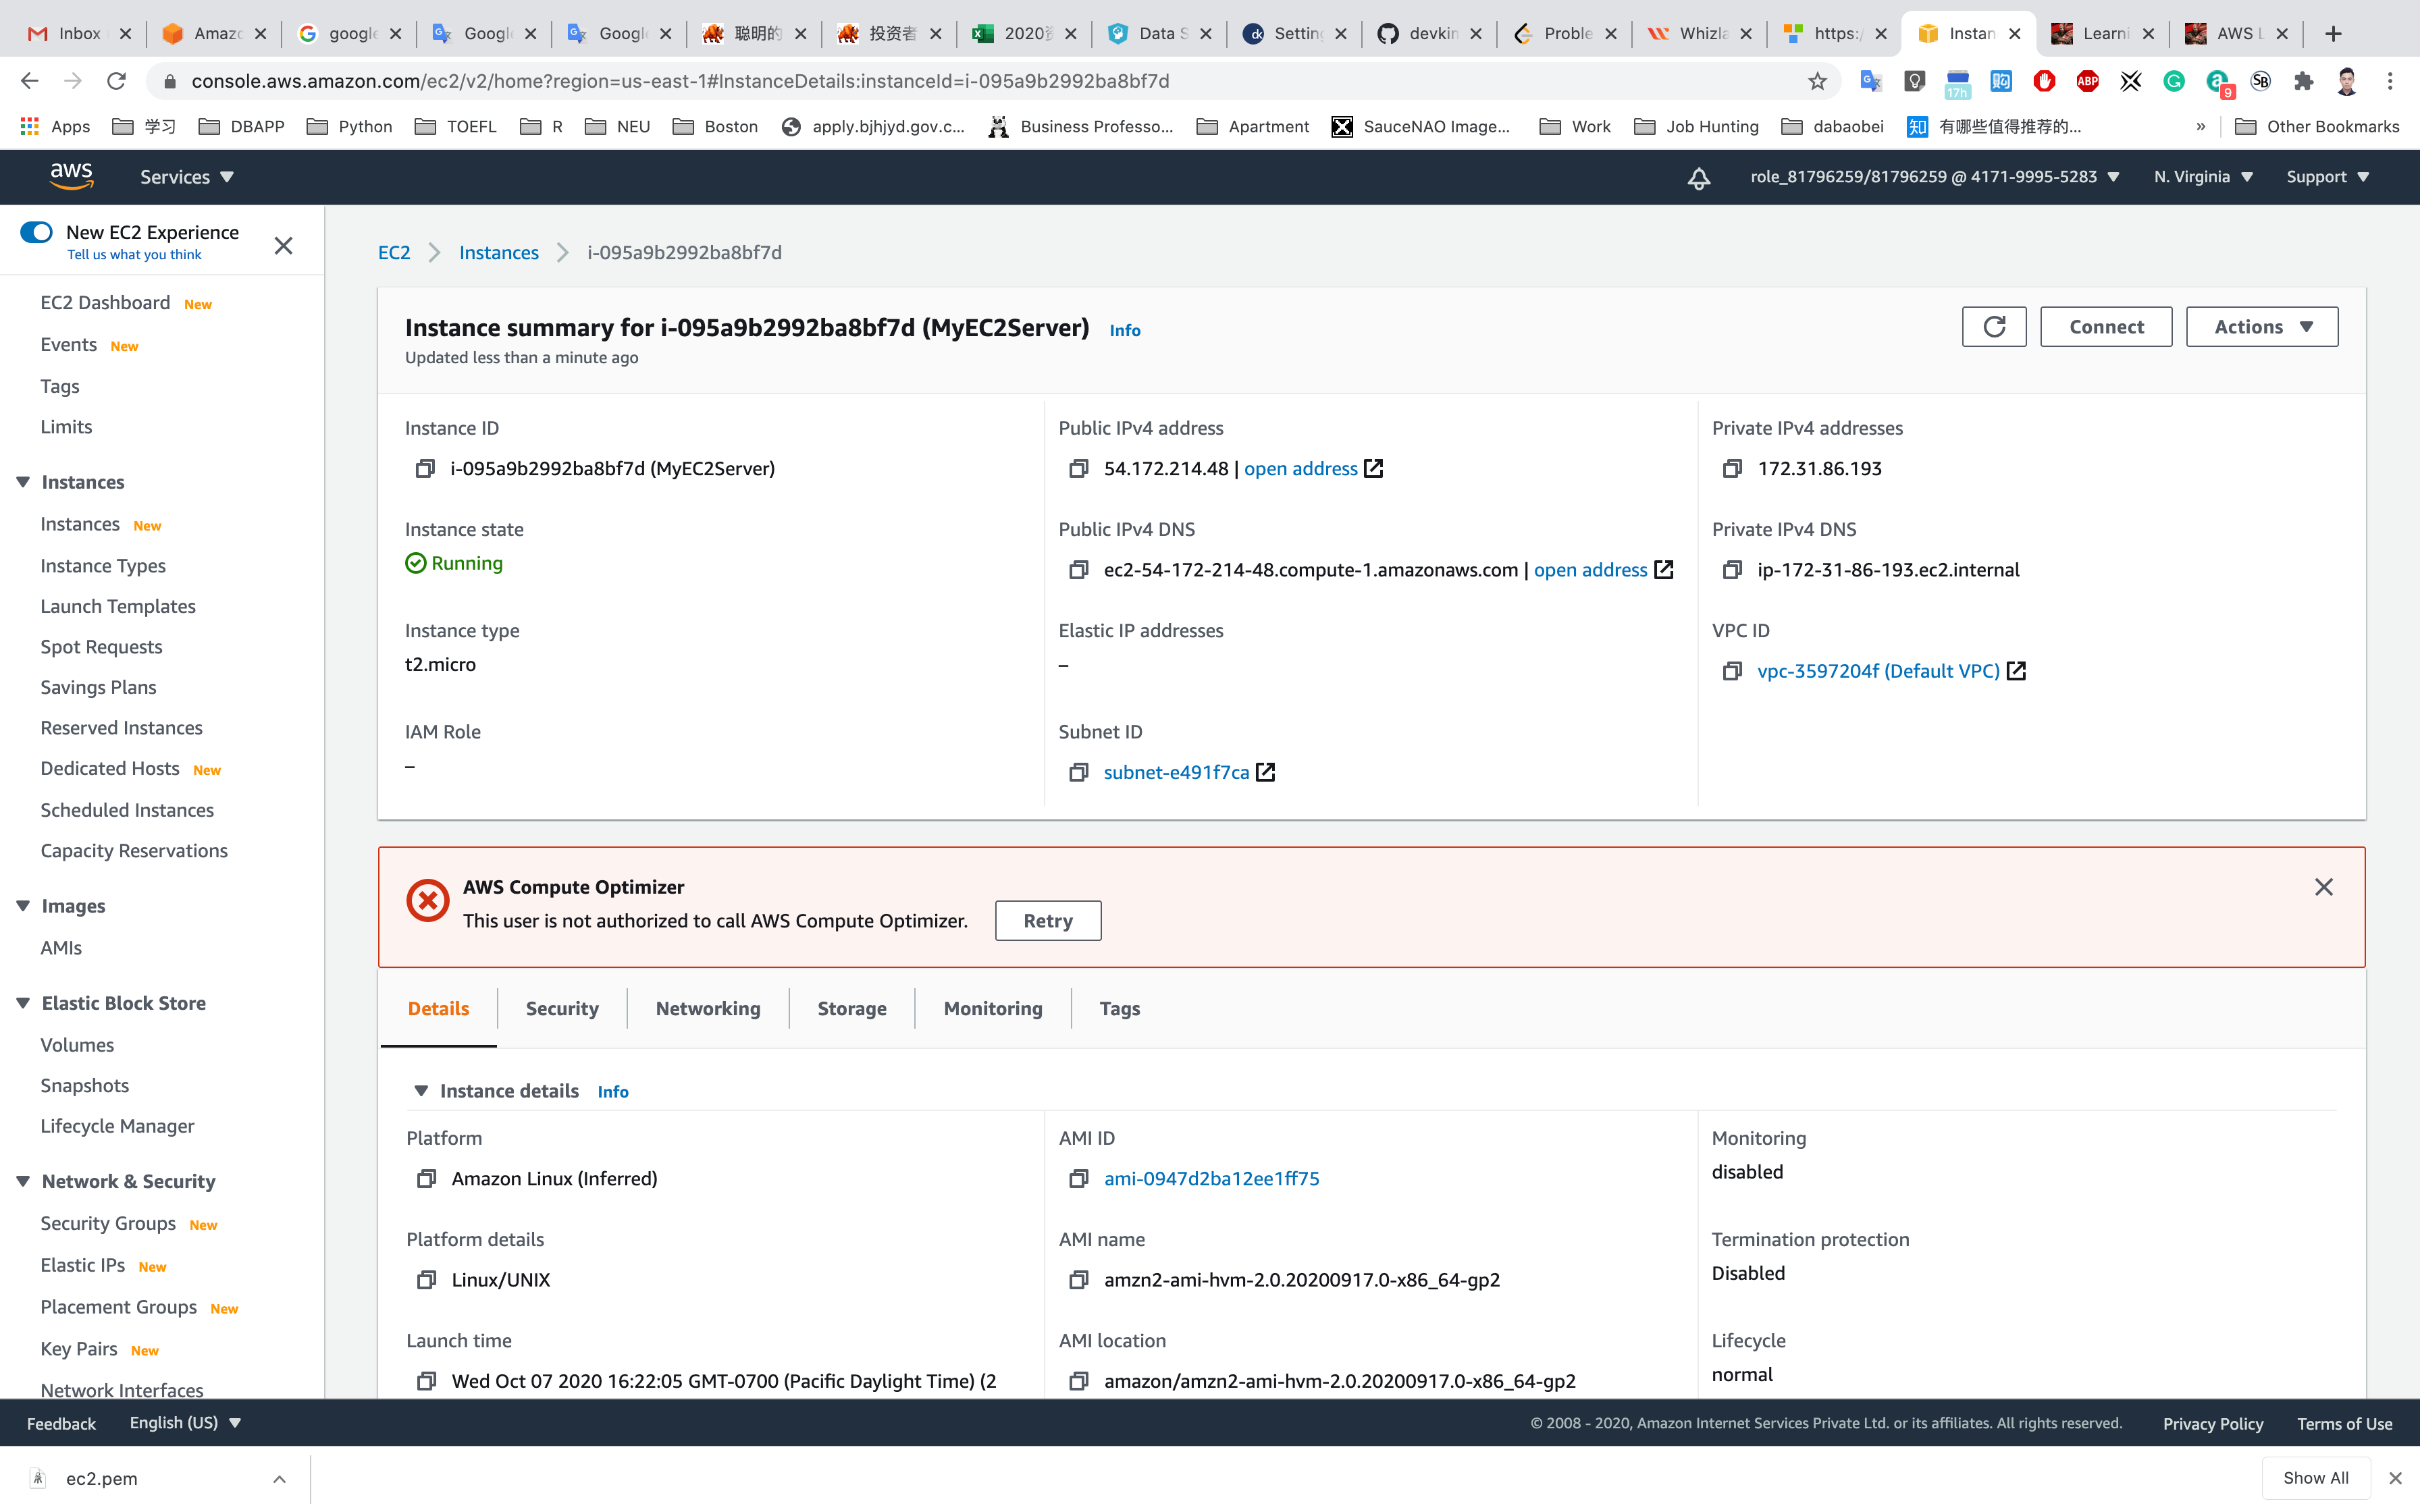
Copy the public IP address
Navigate to the EC2 Dashboard and look in the instance details, copy IPv4 Private IP address in your text editor.
Connecting the EC2 Server to RDS:
Now we need to connect the RDS with ec2 server in order to eventually connect with the Aurora database.
Navigate to RDS available under the database section of the Services menu.
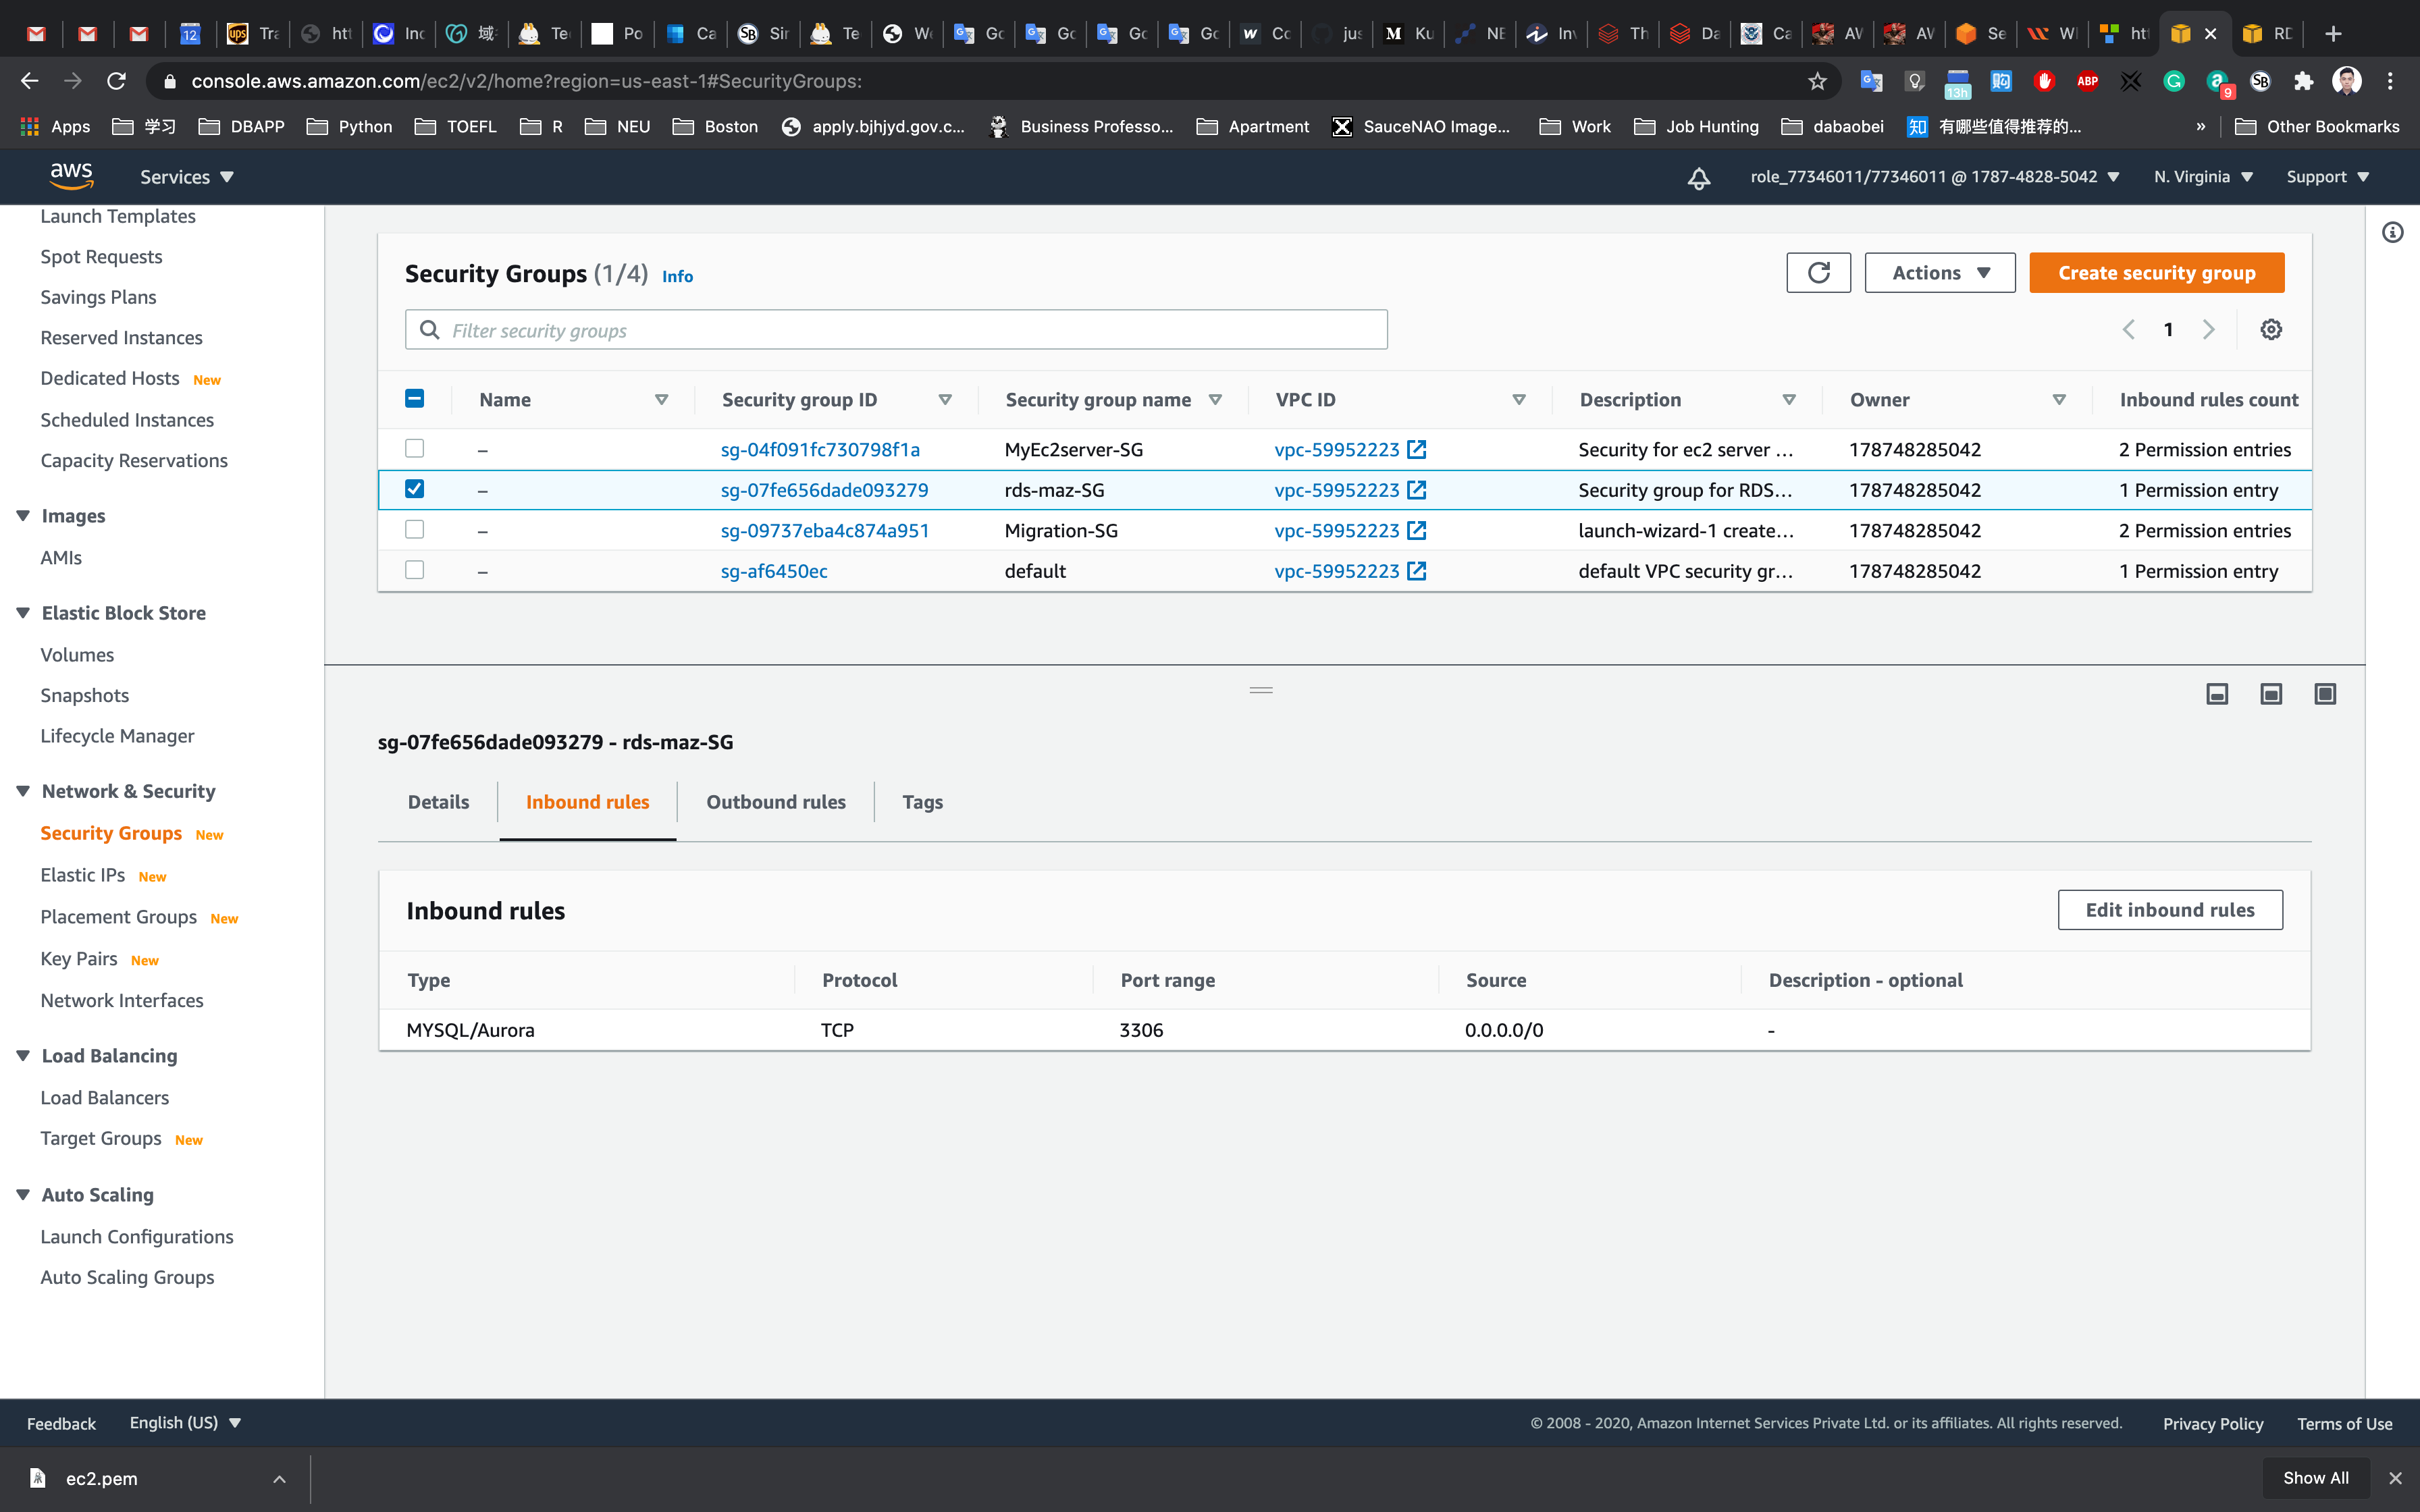
Click on Master (writer) database and click on the security group name in this example it is rds-maz-SG under VPC security groups as shown below:
OR Service -> EC2 -> Security Groups
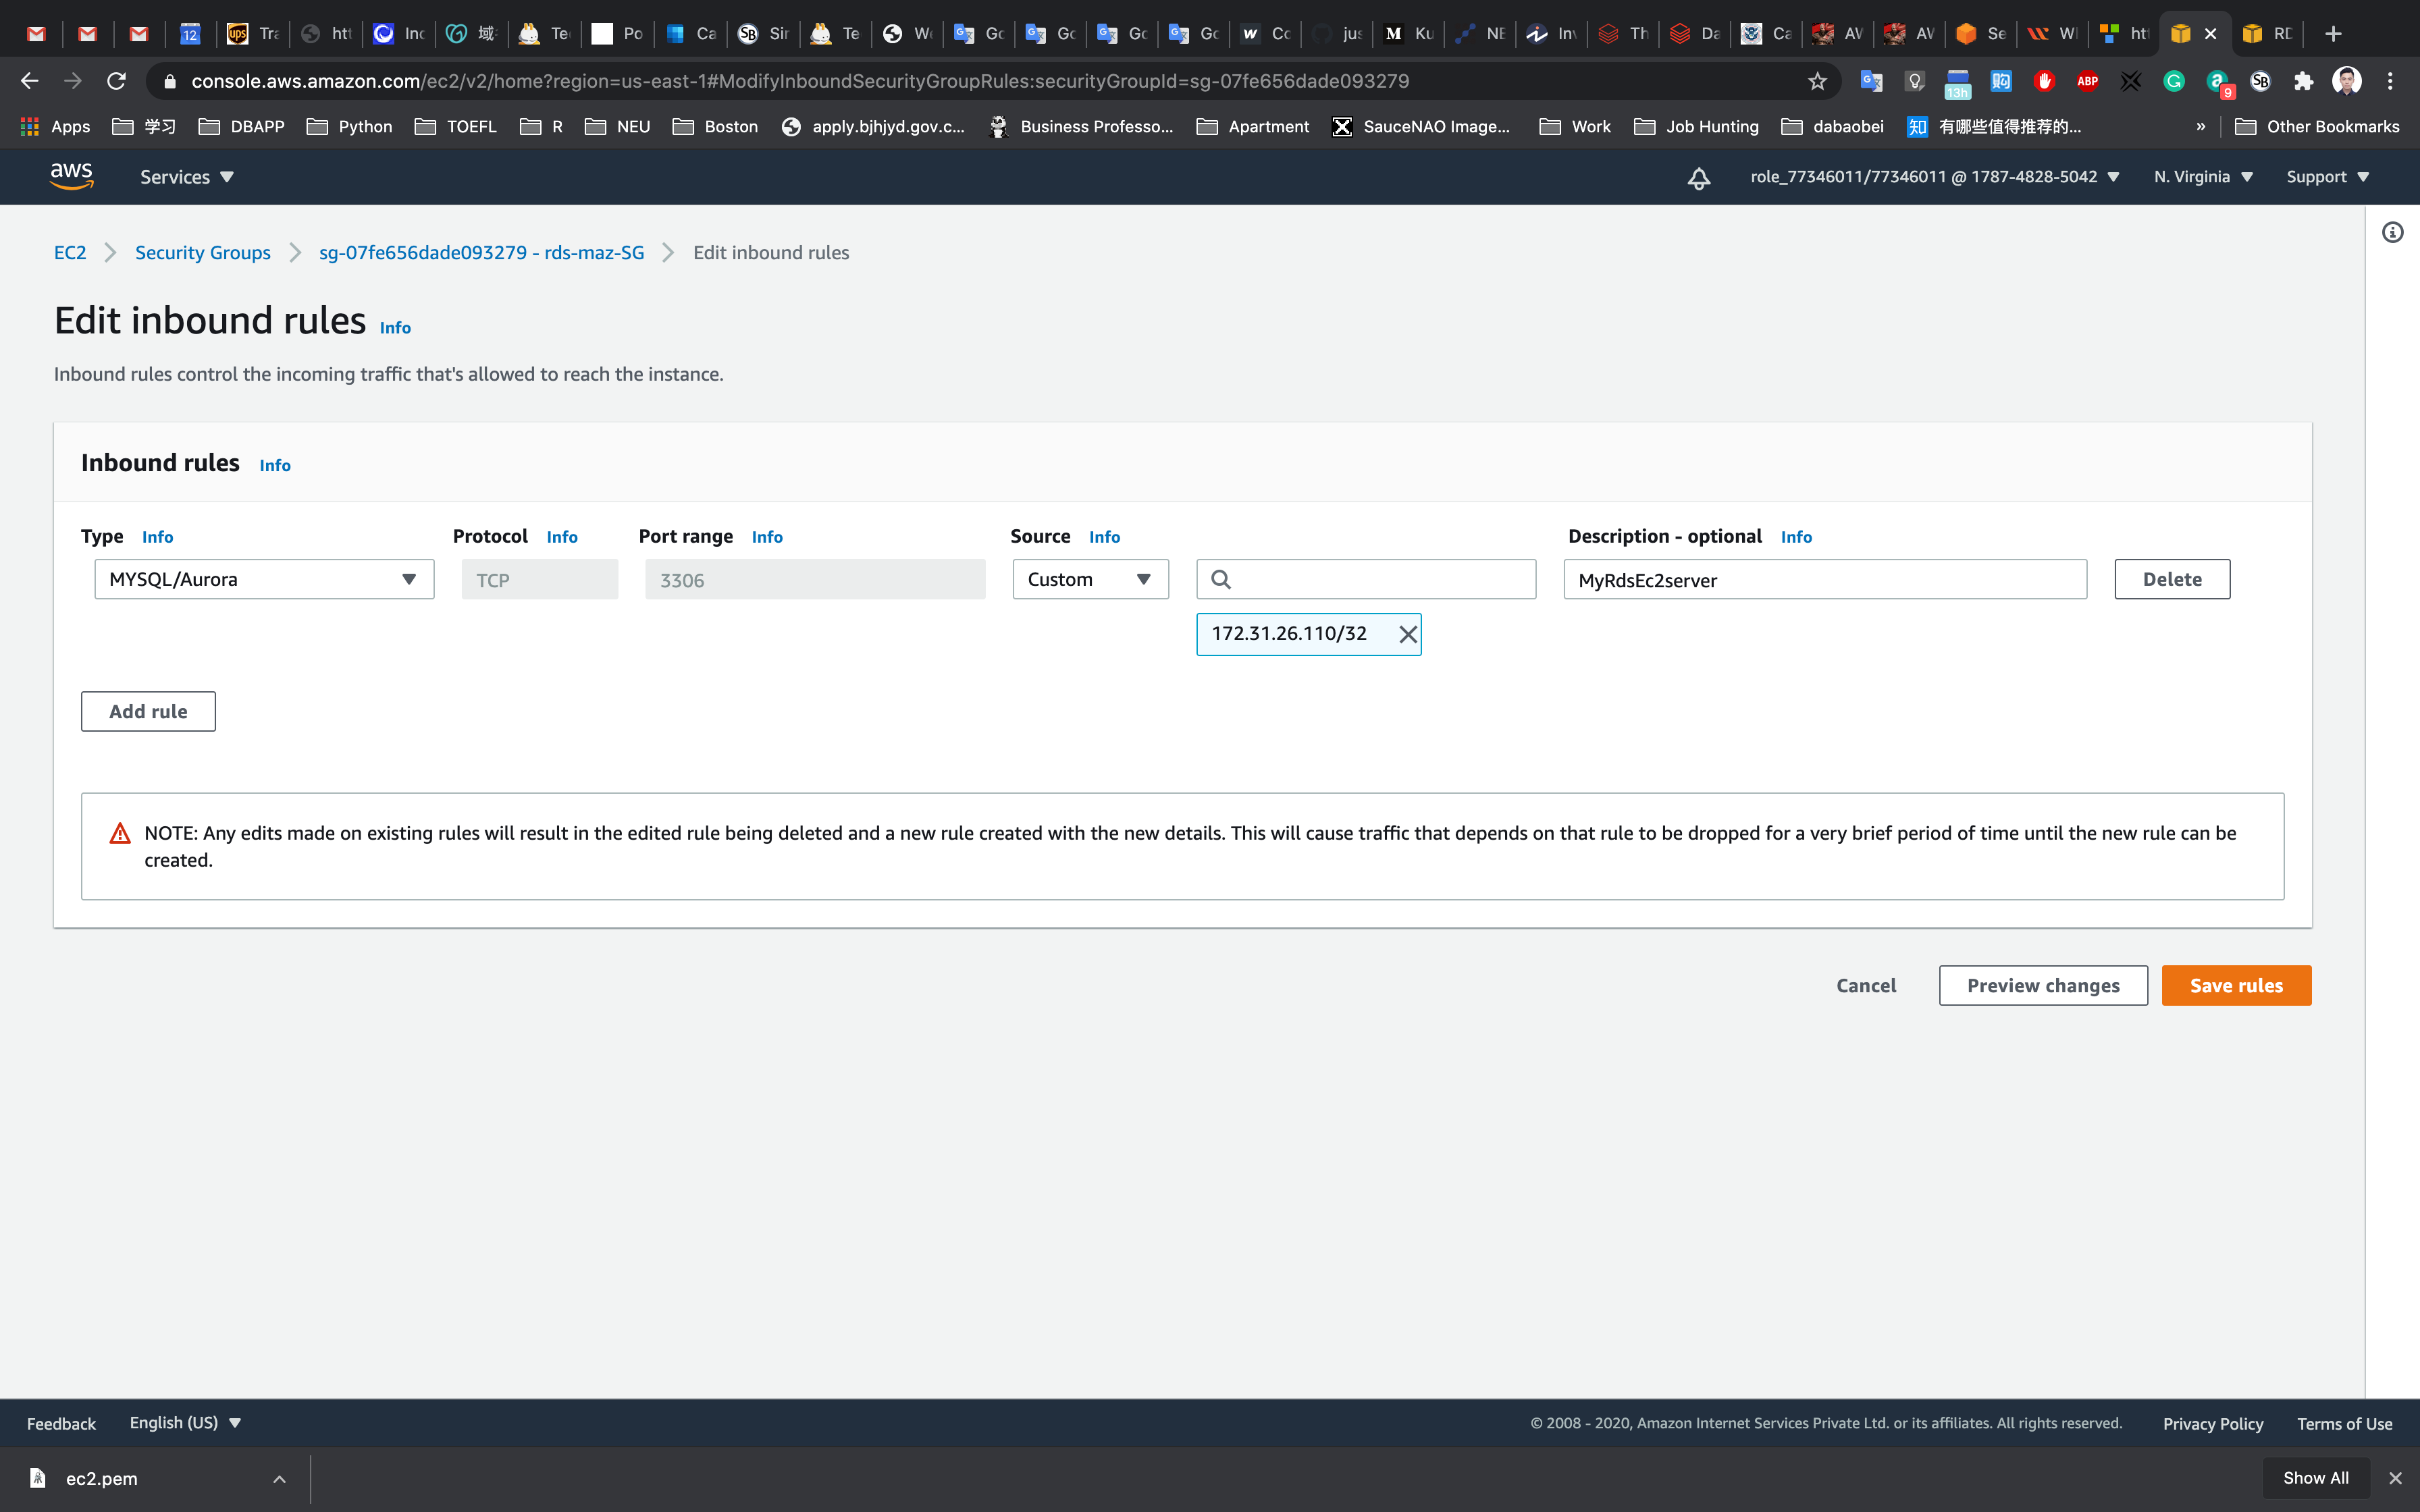
It will open the Security Group page. Click on InBound.
The MySQL rule will already exists.
Under source, delete any pre-populated IP Address and enter the private IP of your MyRdsEc2server EC2 instance with CIDR/32 (EC2 instance Private IP) and then click Save as shown below:
Execute Database Operations via SSH
Copy the IPv4 Public IP address, navigate to the EC2 Dashboard and look in the instance details.
SSH into the EC2 instance we just created through the following steps in SSH into EC2 Instance.
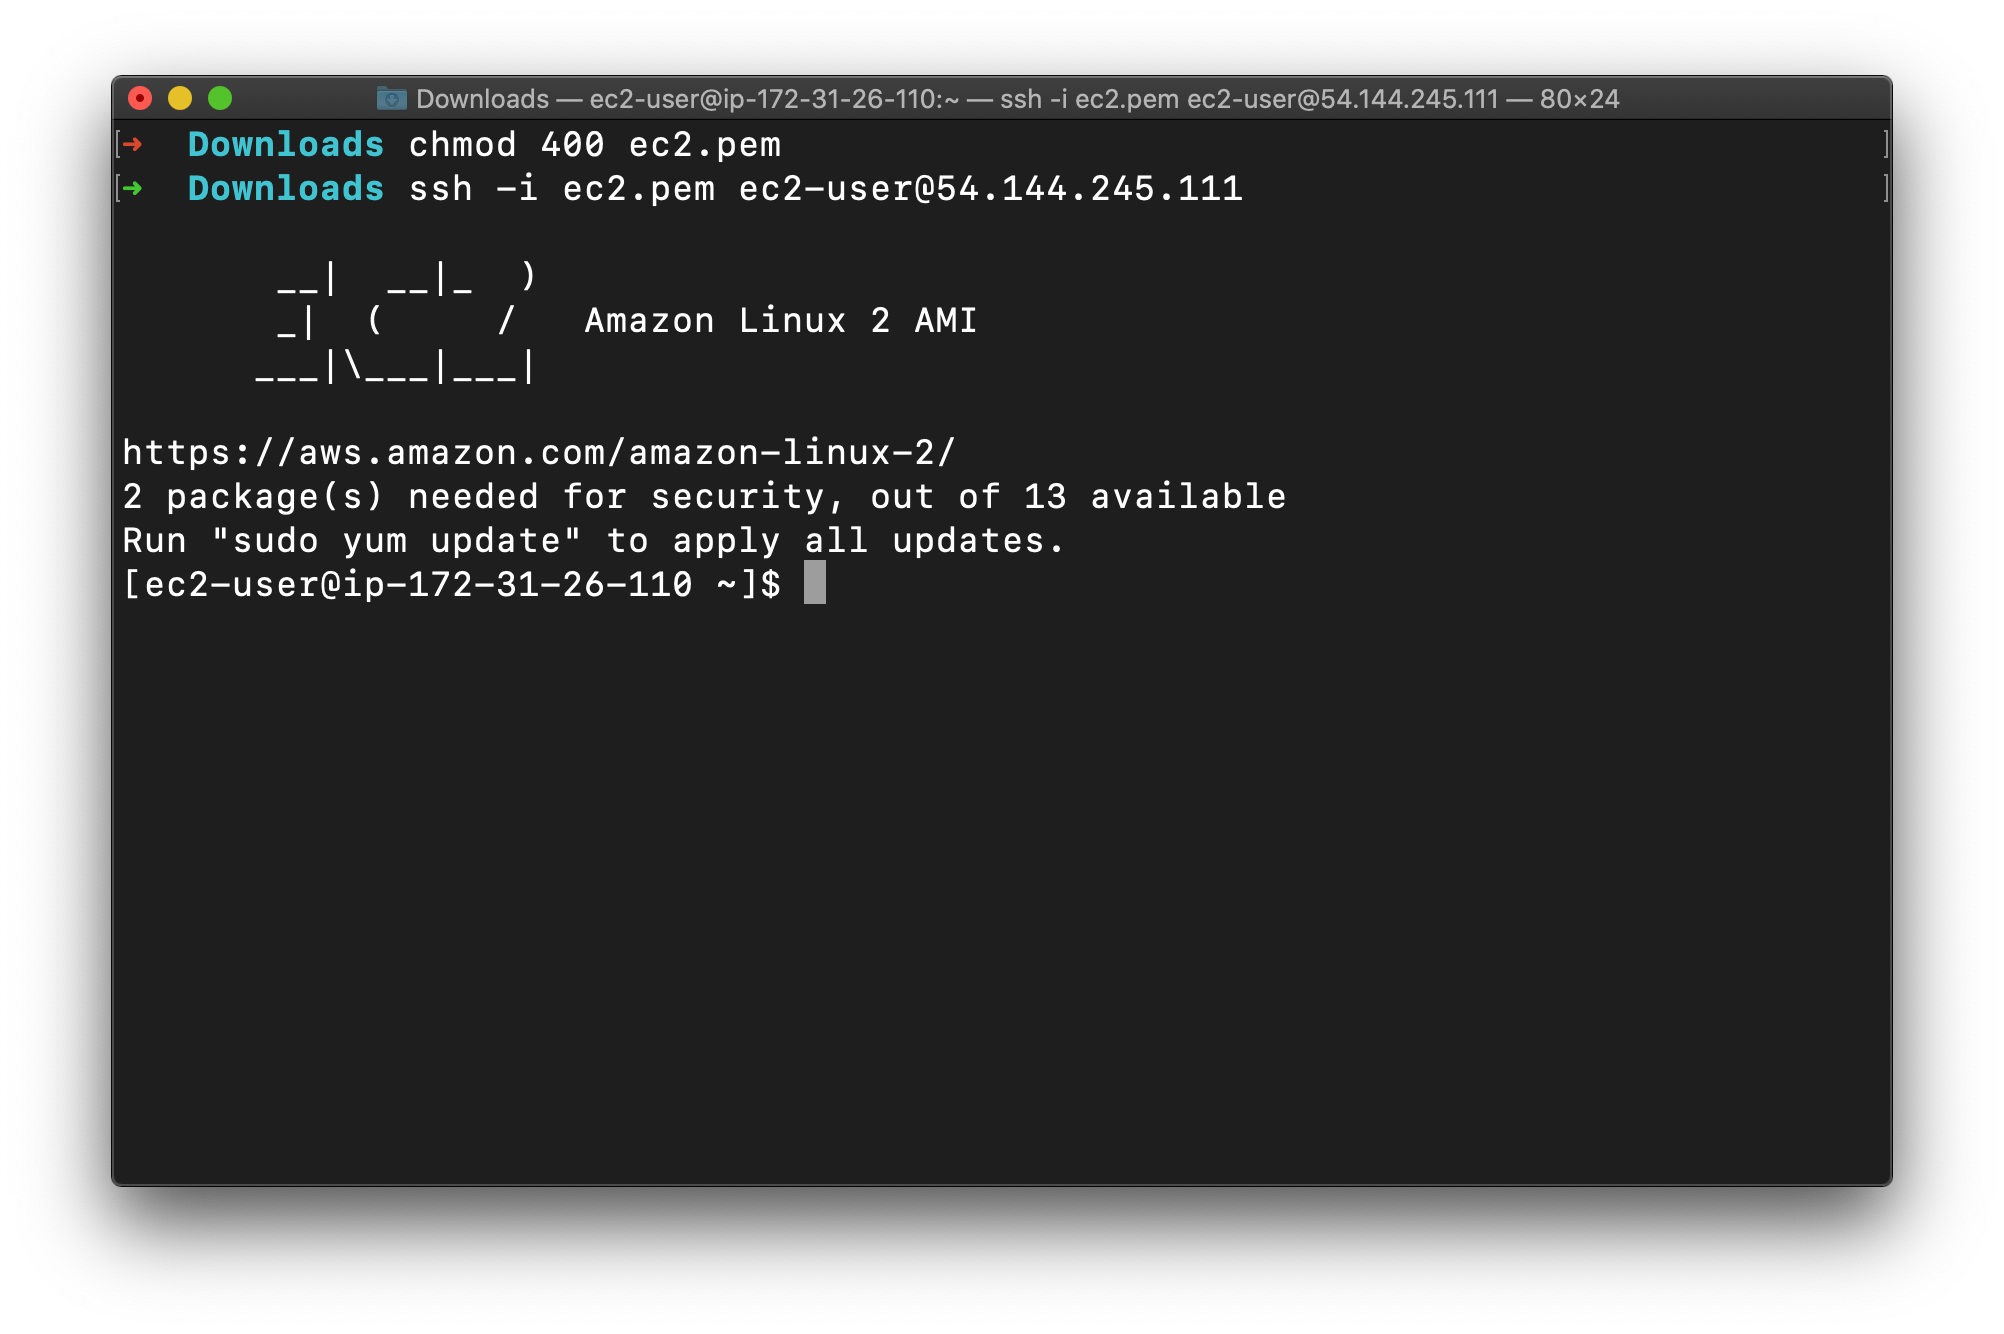
Switch to the root user using the command :
1 | sudo -s |
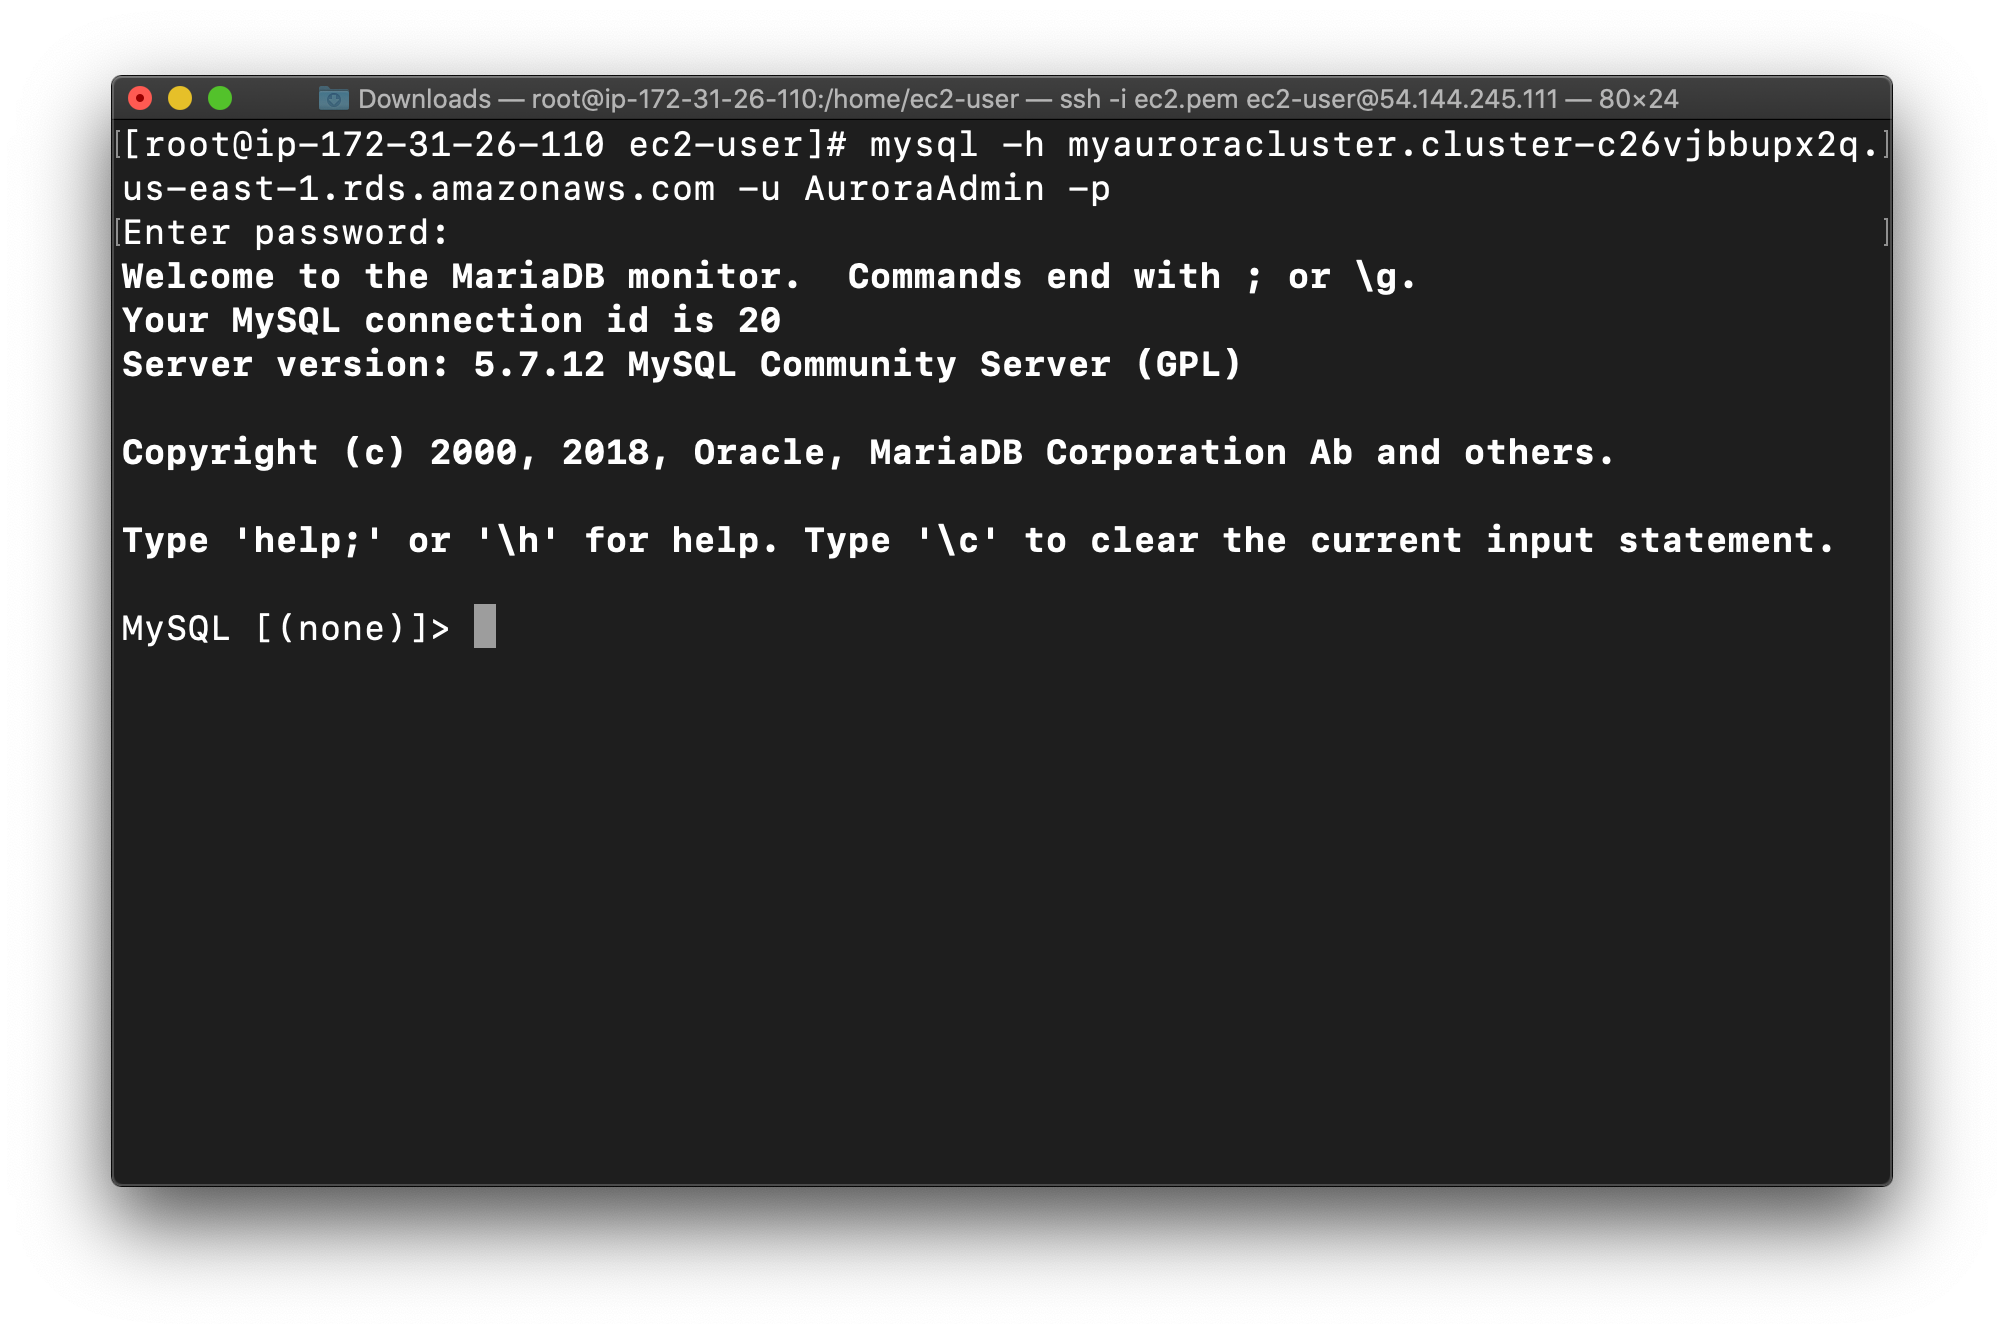
Copy your database endpoint
Log into the RDS instance using the below command:
- Syntax:
mysql -h <Hostname> -u <username> -p
1 | mysql -h myauroracluster.cluster-c26vjbbupx2q.us-east-1.rds.amazonaws.com -u AuroraAdmin -p |
Note: Make sure to change the above Master(Writer)Cluster endpoint and Username with your’s. The below are my settings.
- Username :
AuroraAdmin - Password :
password - Database name :
auroralab
You should now be able to log into the database, as shown below:
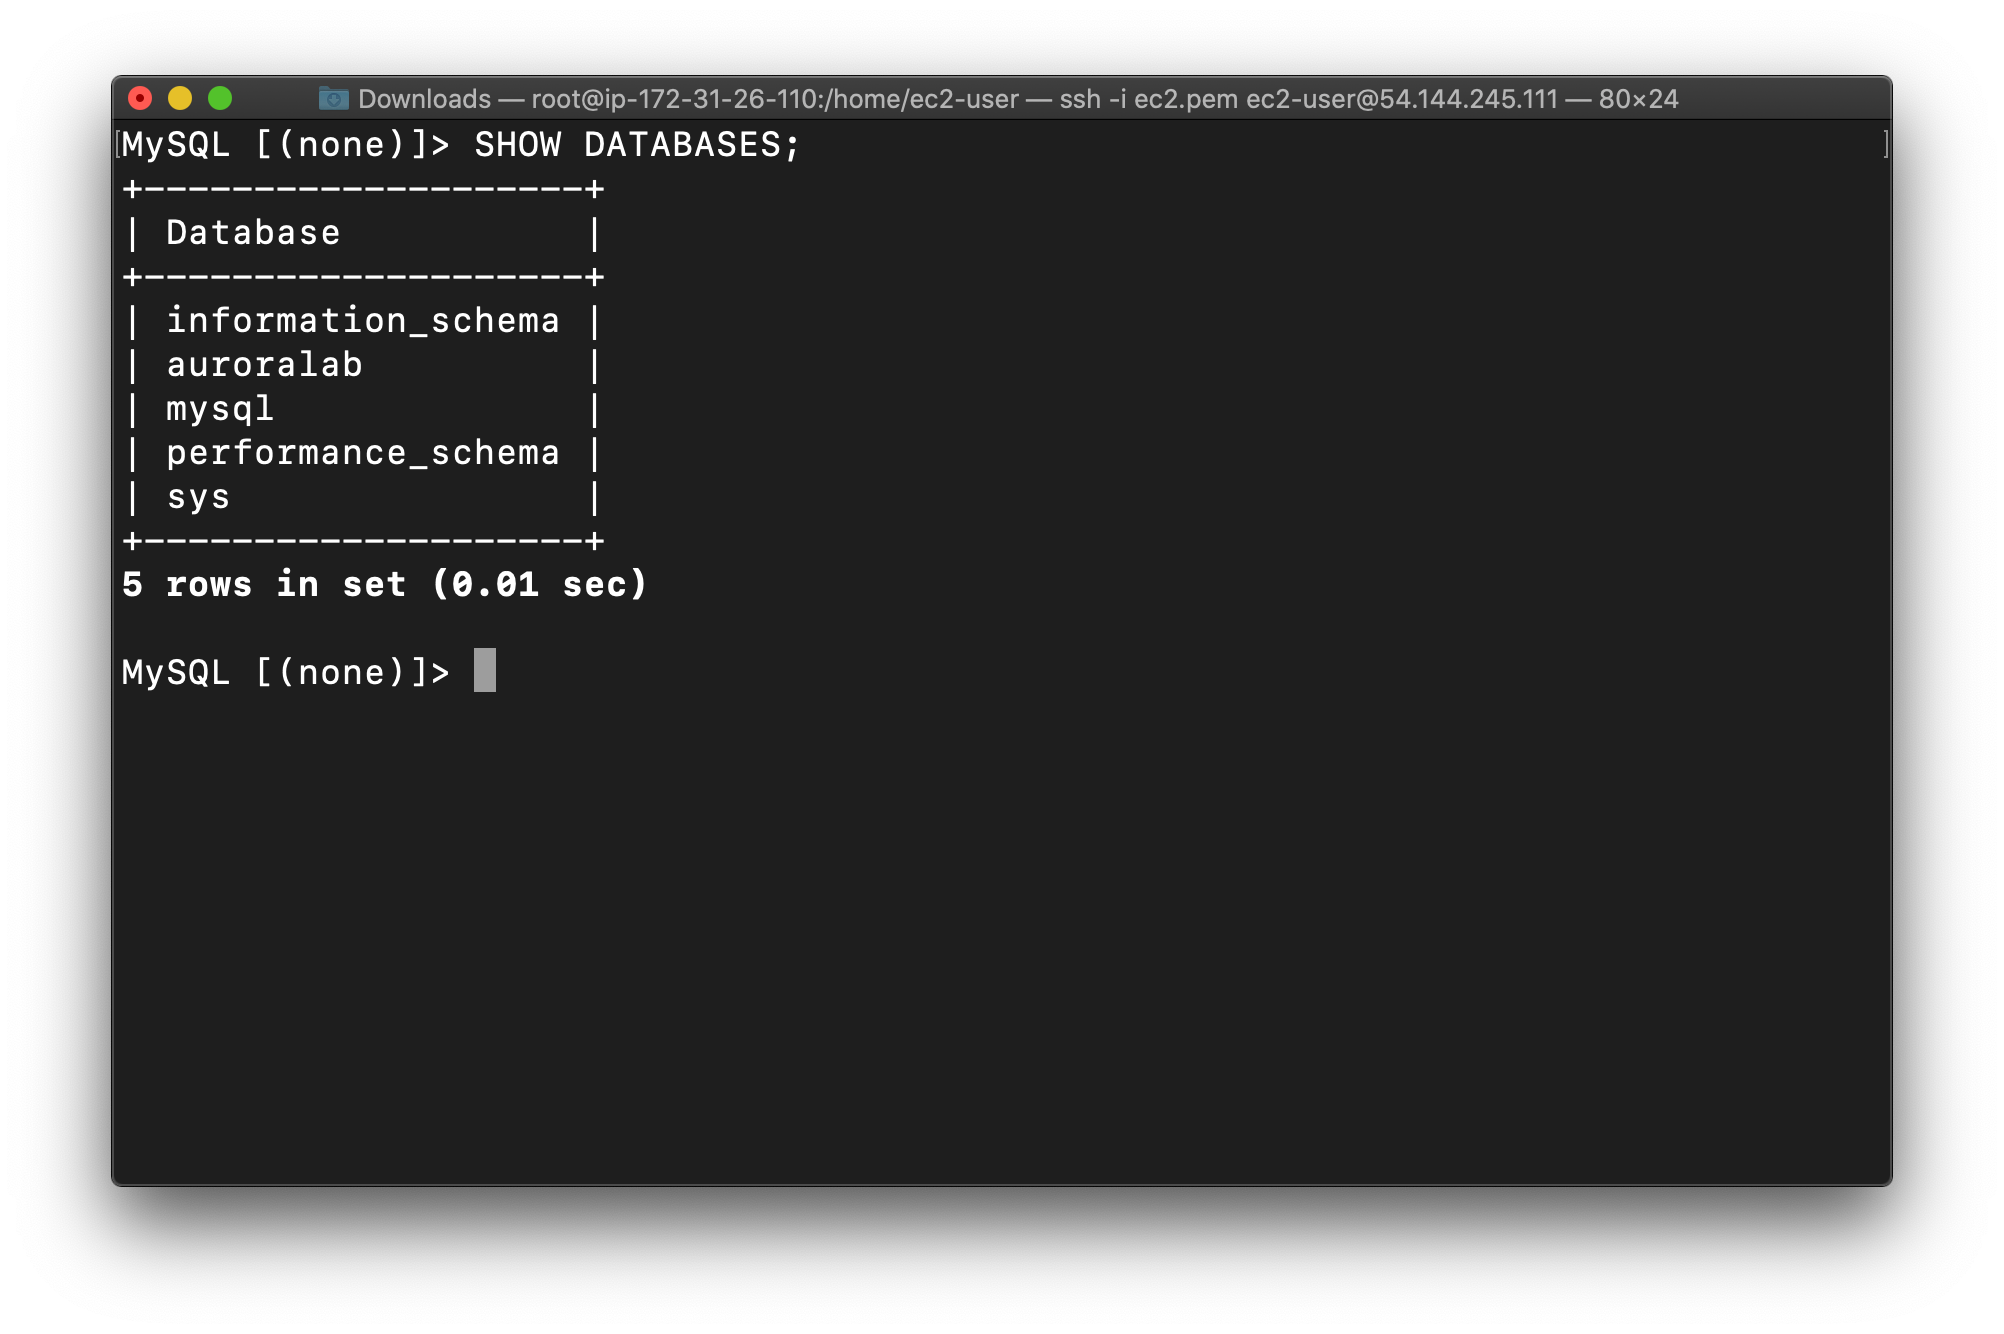
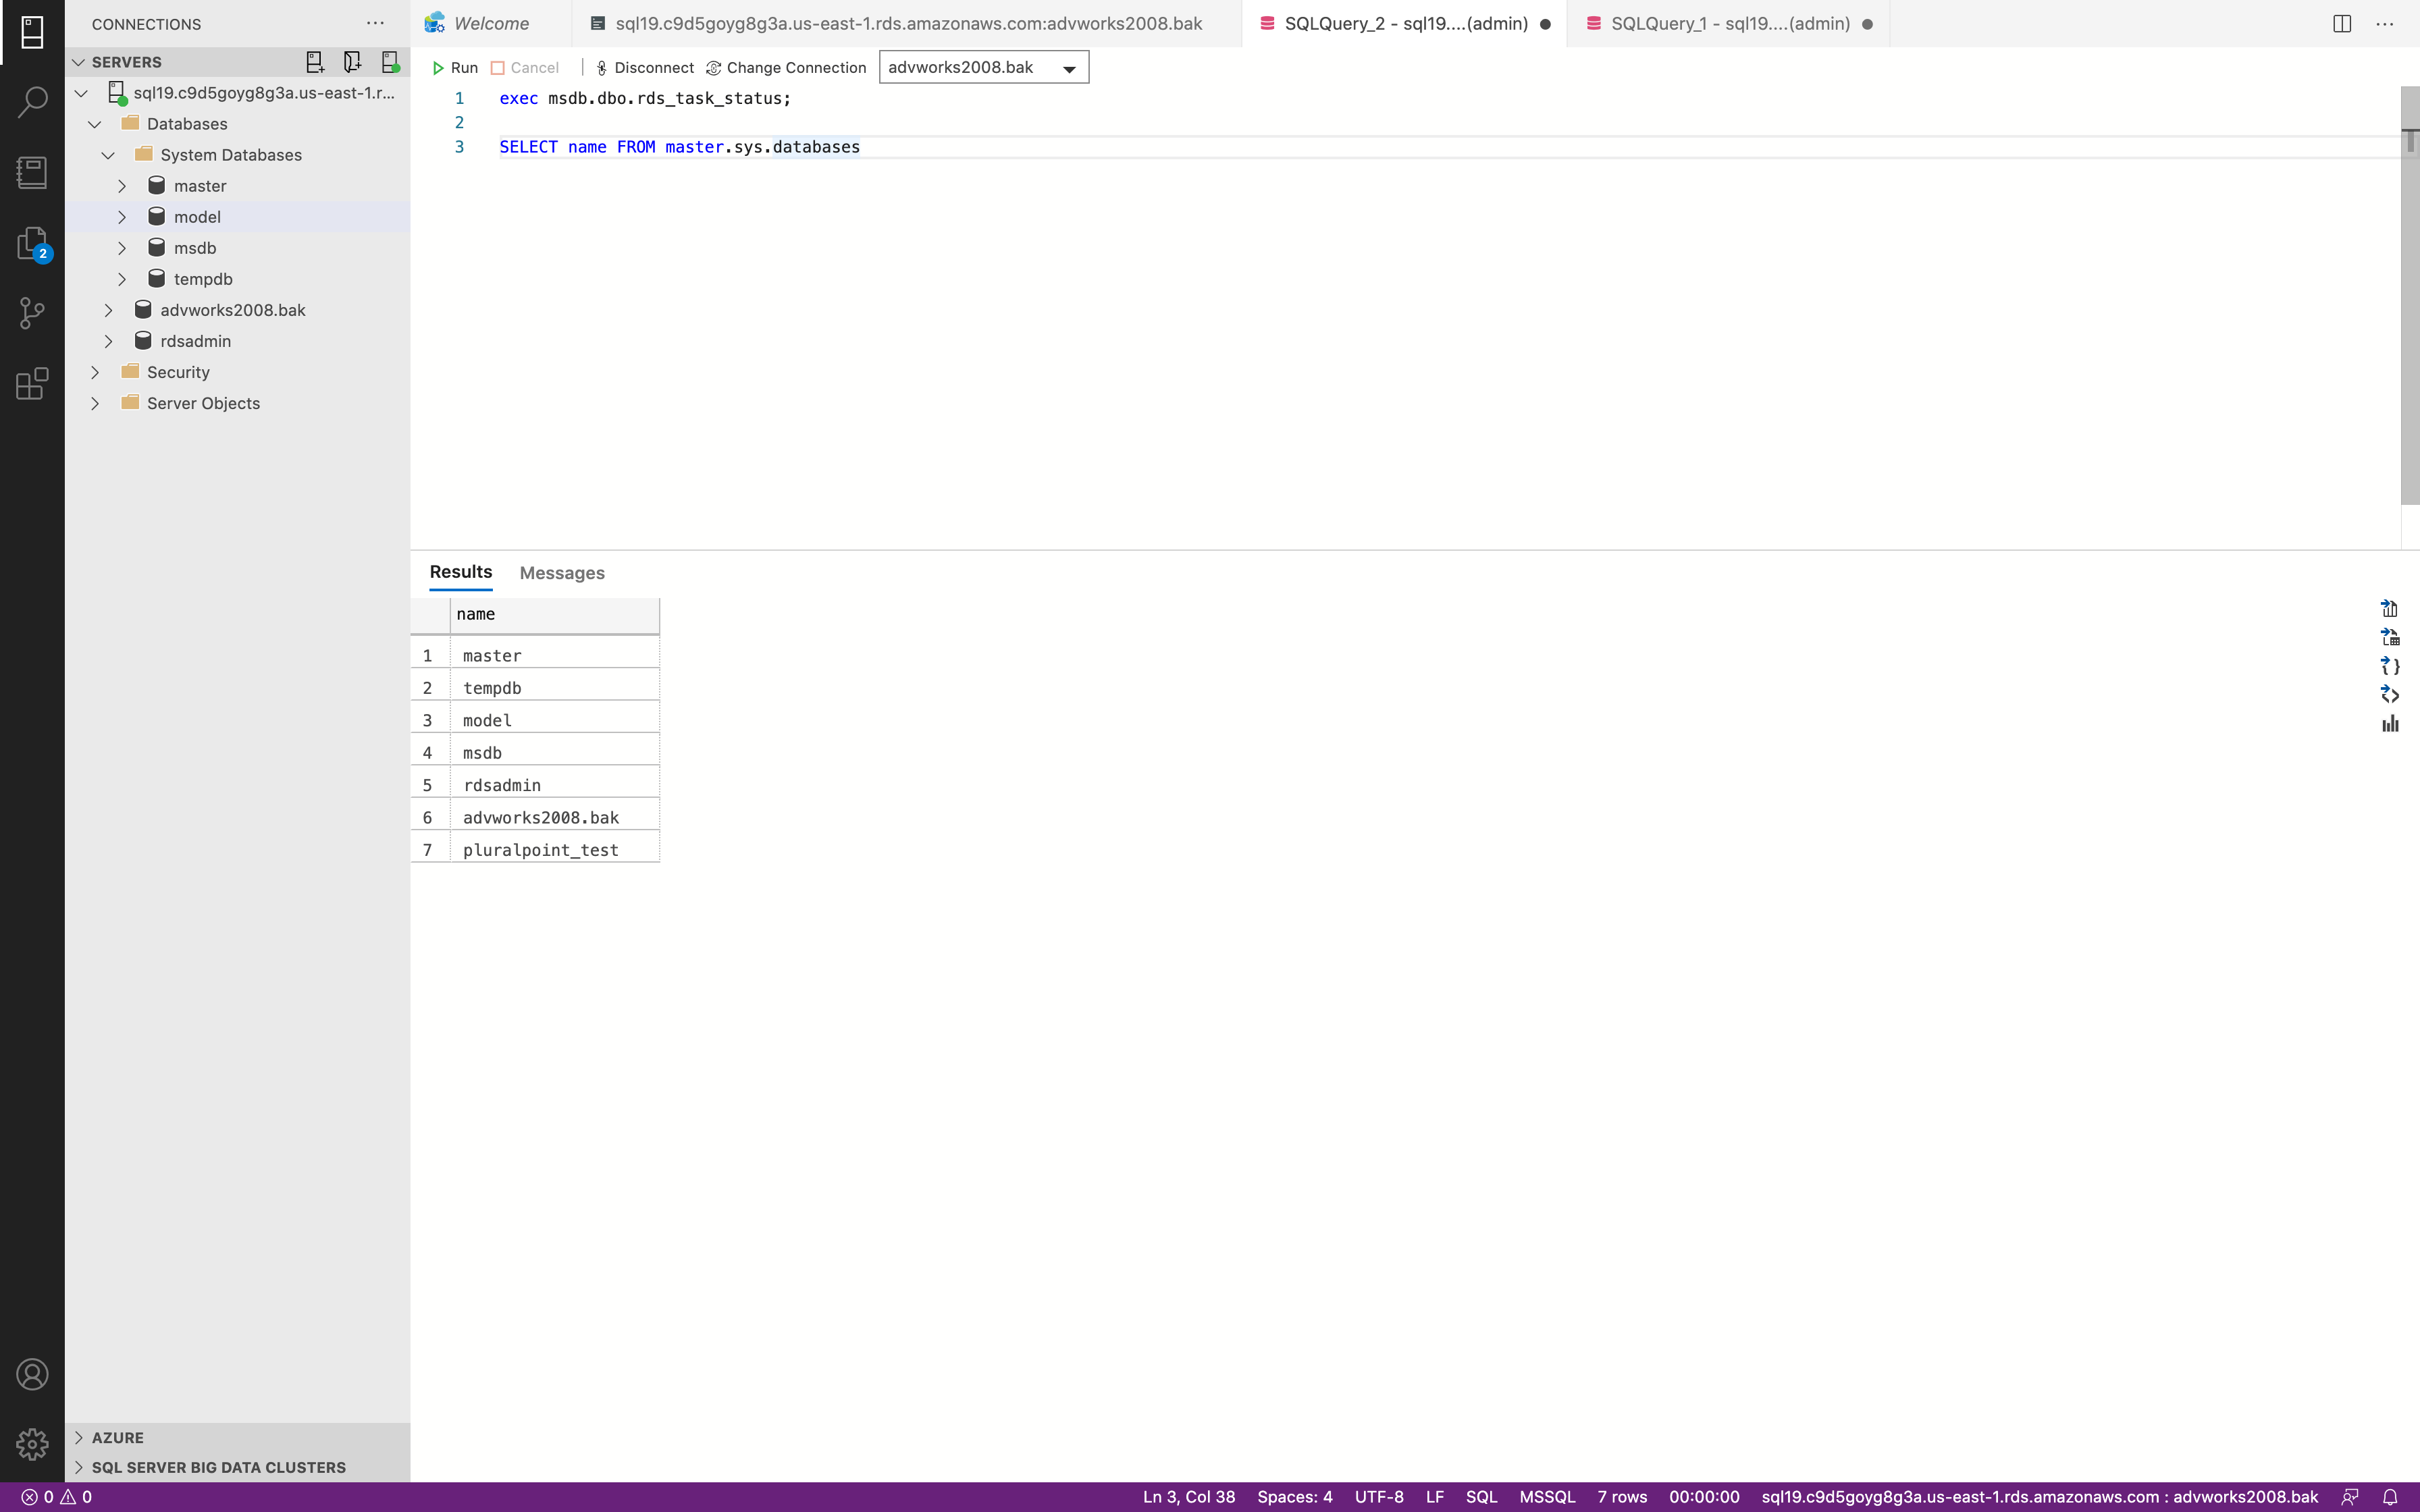
List all Databases:
1 | SHOW DATABASES; |
Now you will see the database auroralab created while launching the RDS cluster.
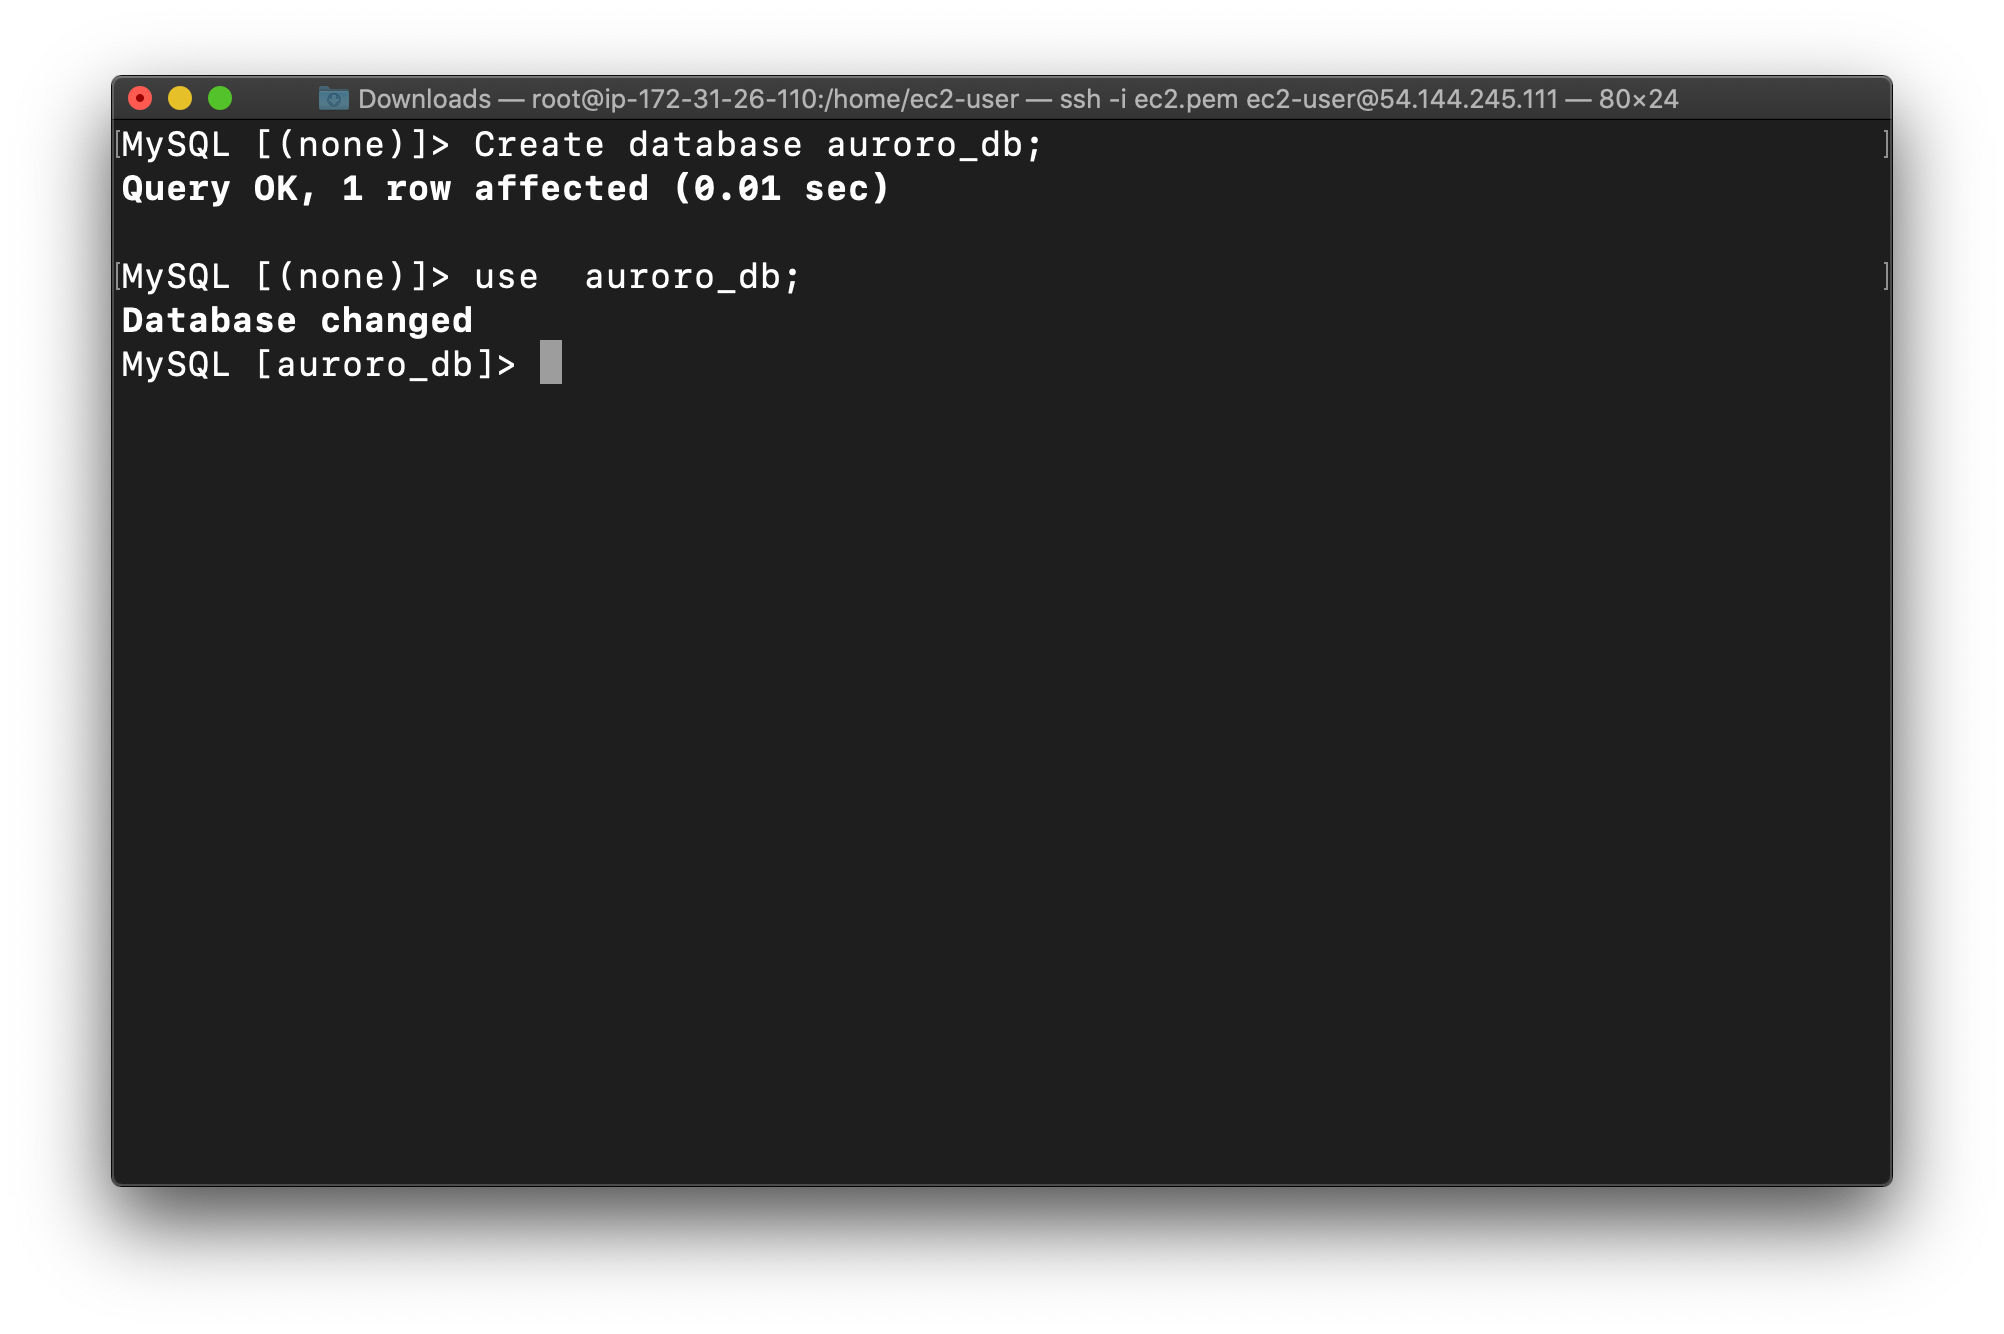
Now create the database in the Master(Writer) RDS as given in the screenshot. We’ll create a demo database named auroro_db.
1 | CREATE DATABASE auroro_db; |
Select the newly-created database:
1 | USE auroro_db; |
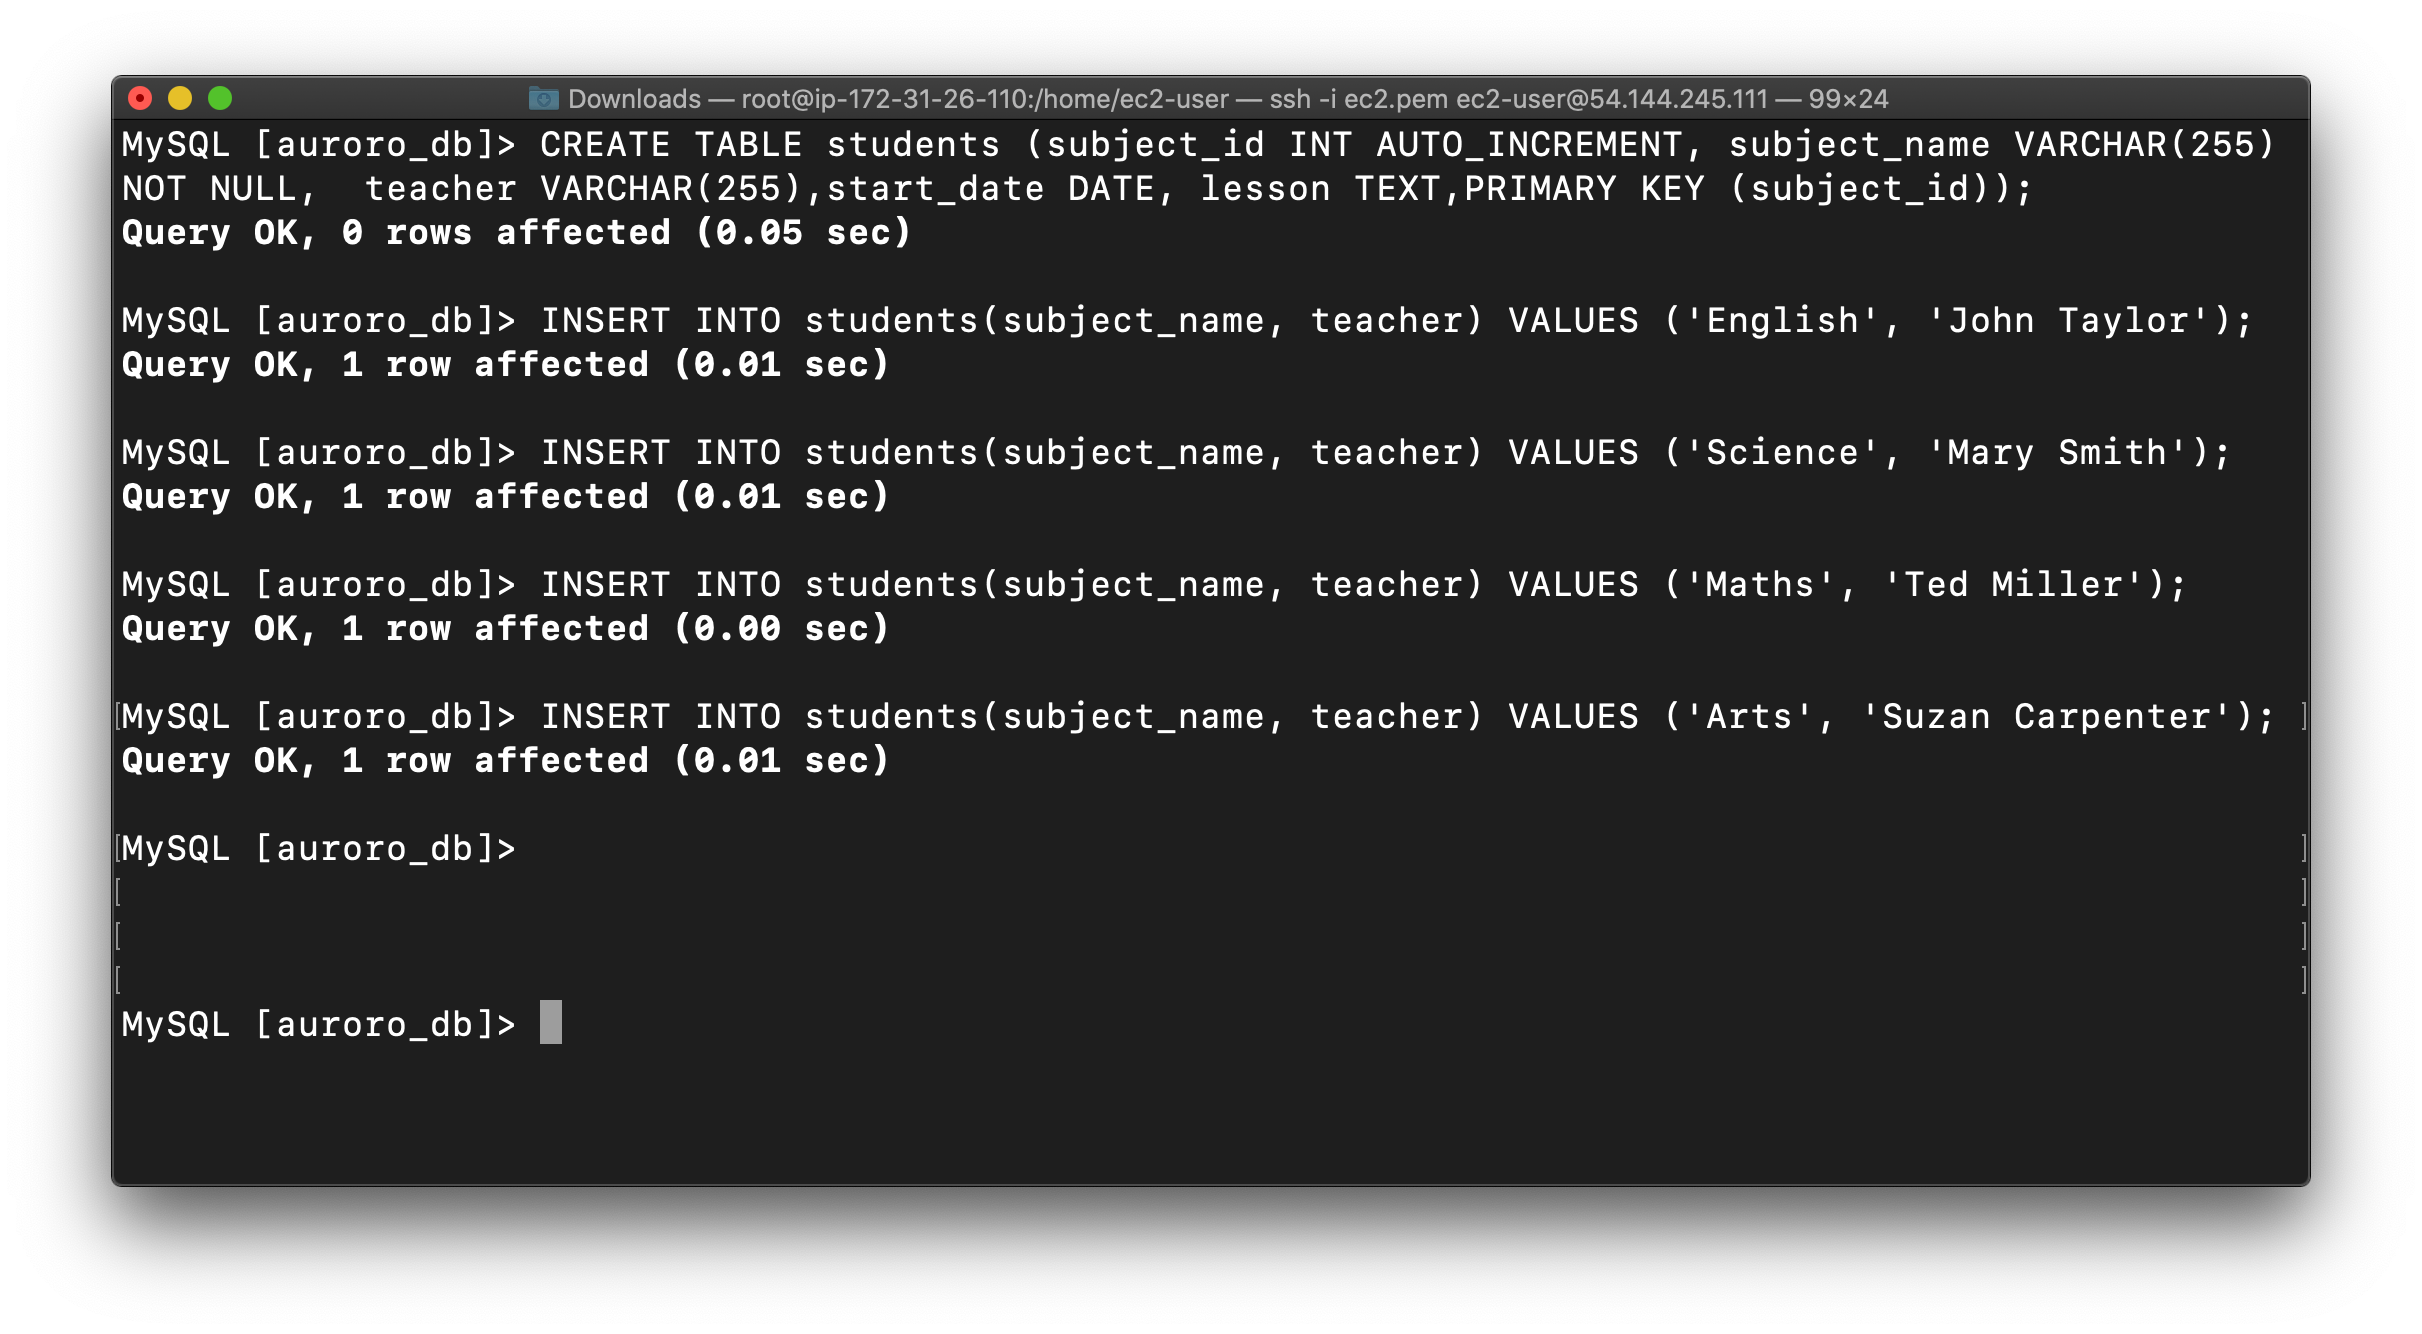
Next we’ll create a table named students and insert few rows of data using list of commands:
1 | CREATE TABLE students (subject_id INT AUTO_INCREMENT, subject_name VARCHAR(255) NOT NULL, teacher VARCHAR(255),start_date DATE, lesson TEXT,PRIMARY KEY (subject_id)); |
Insert data into the table:
1 | INSERT INTO students(subject_name, teacher) VALUES ('English', 'John Taylor'); |
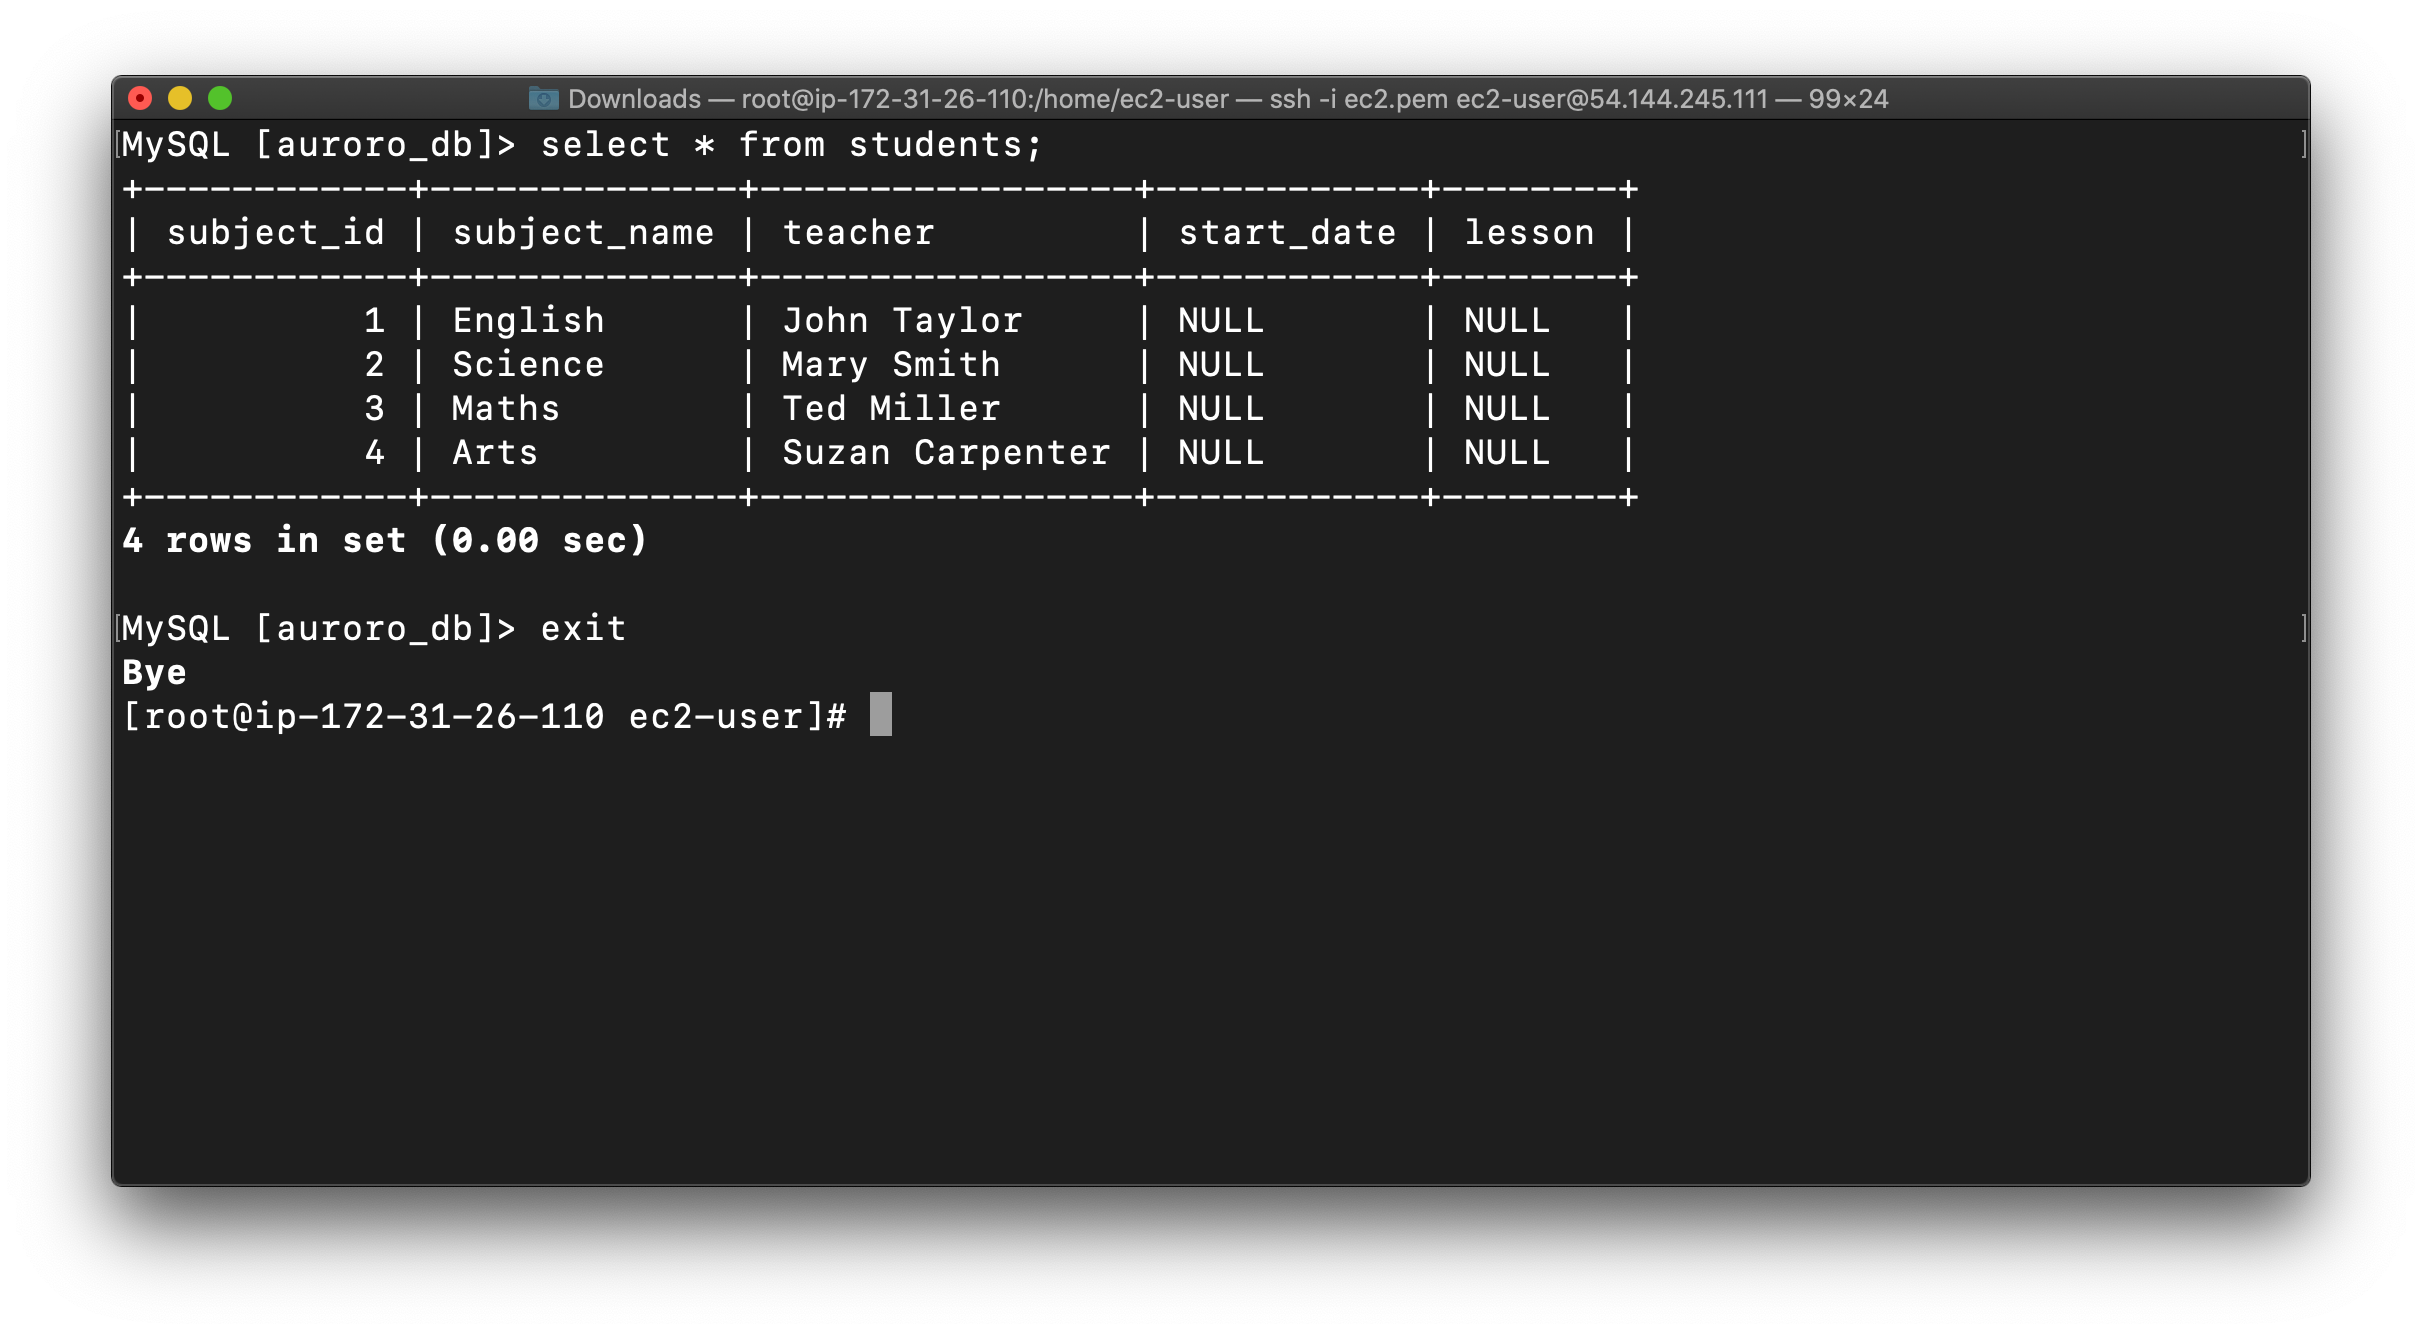
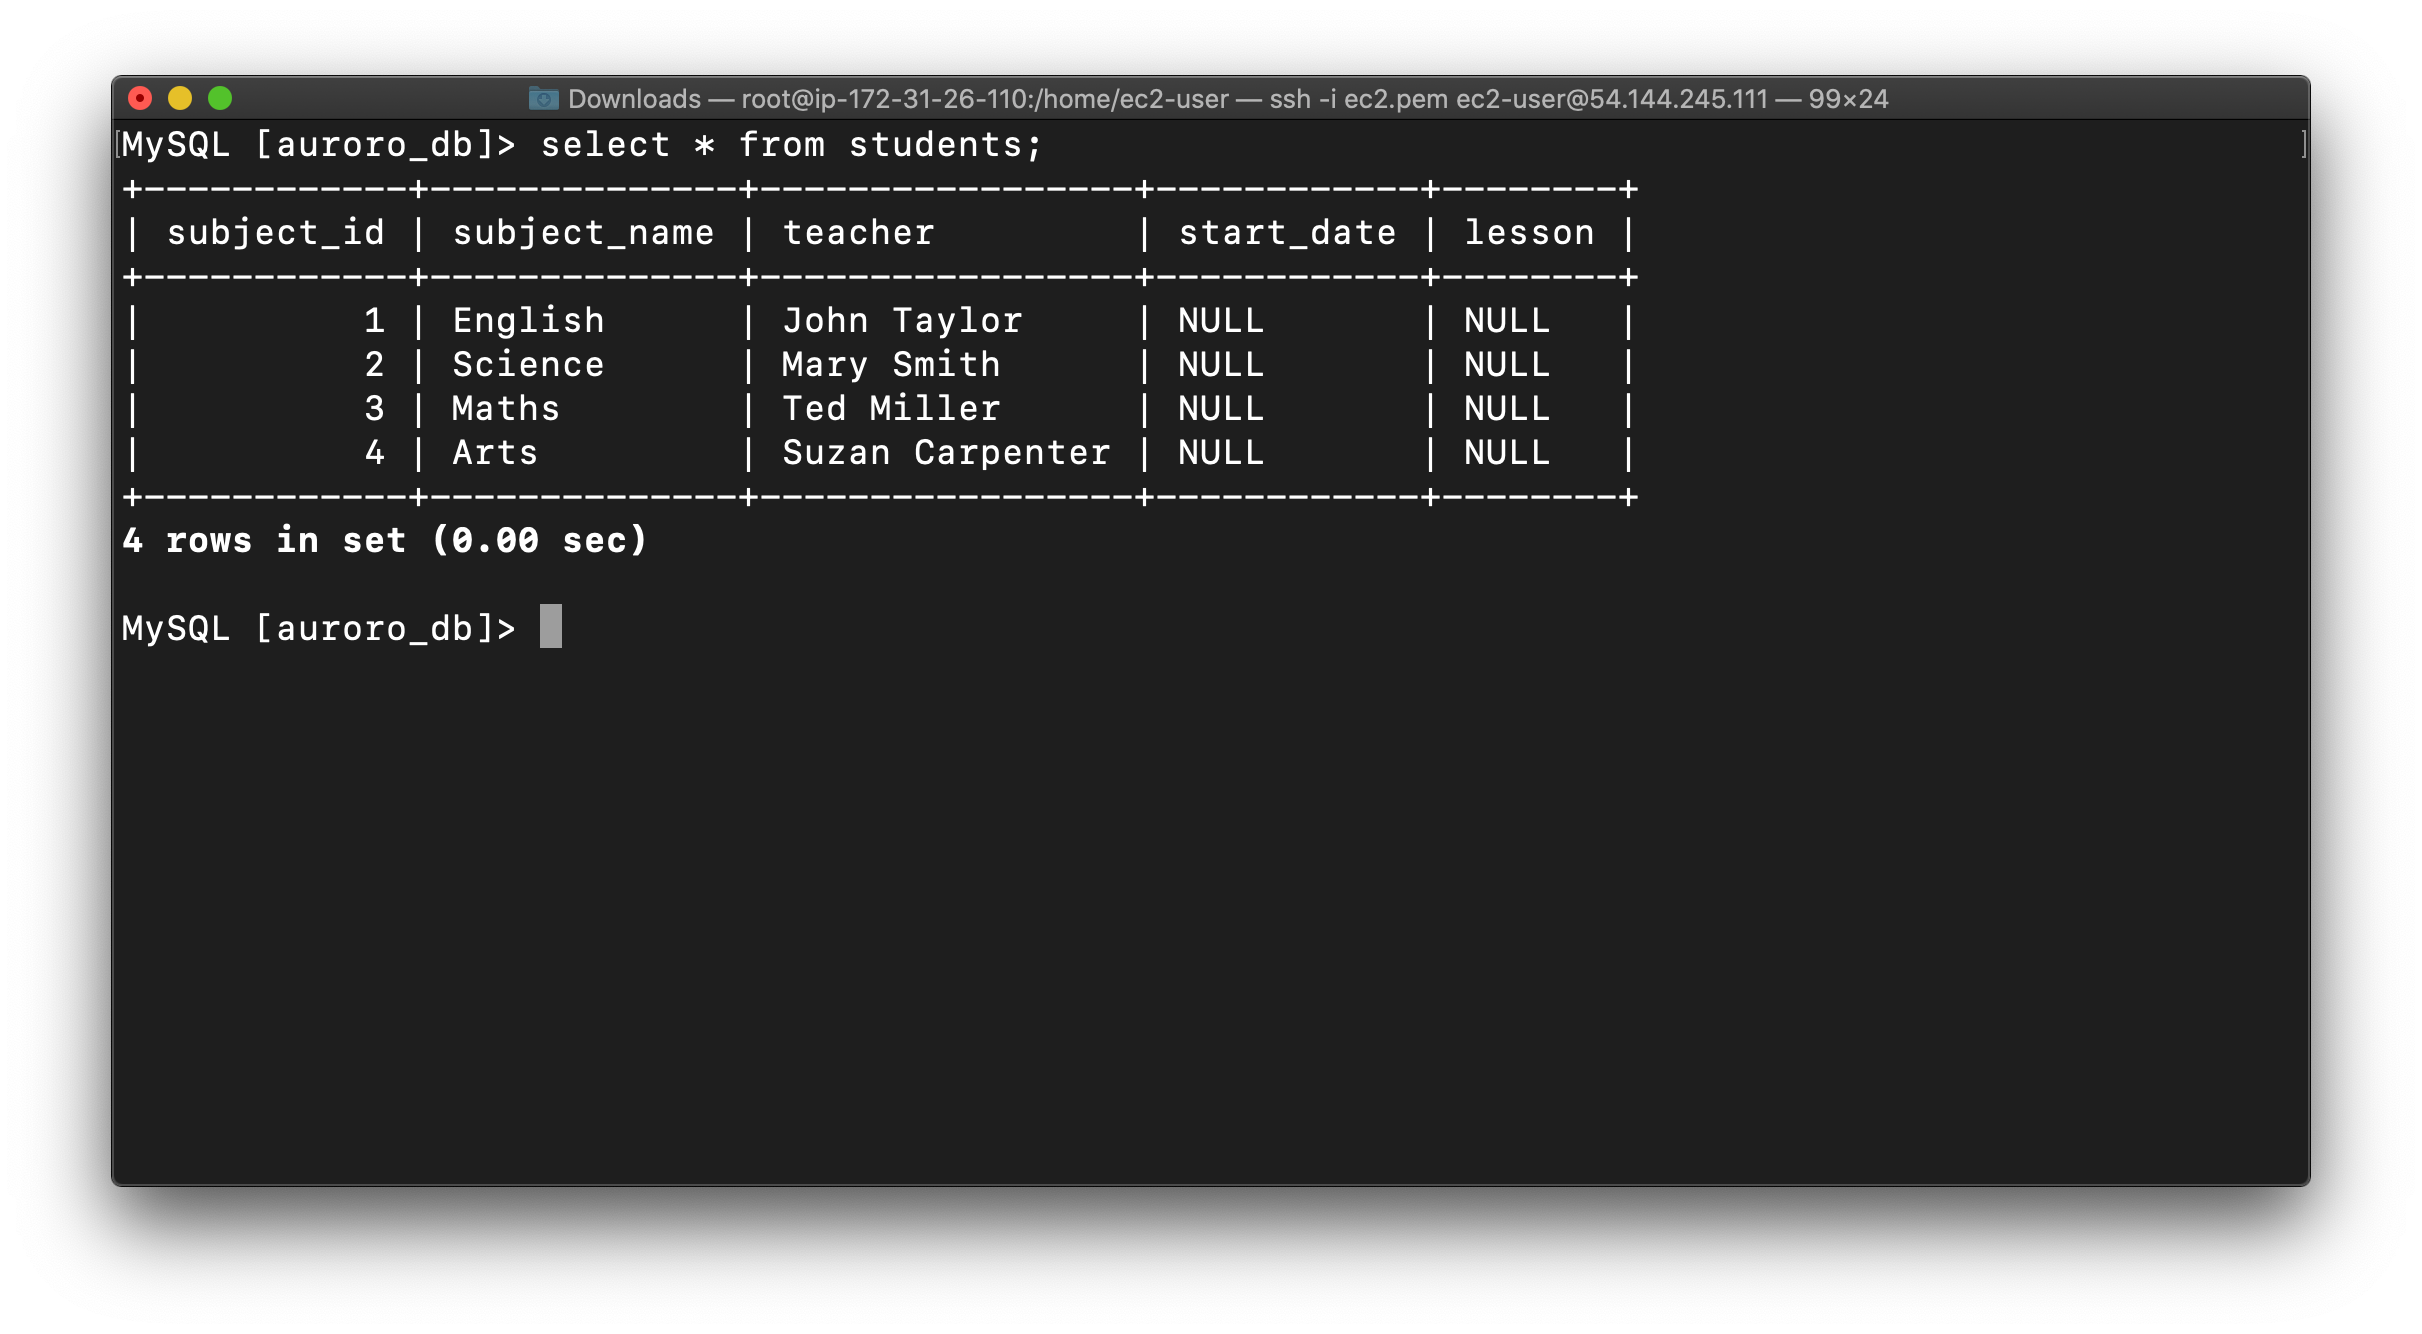
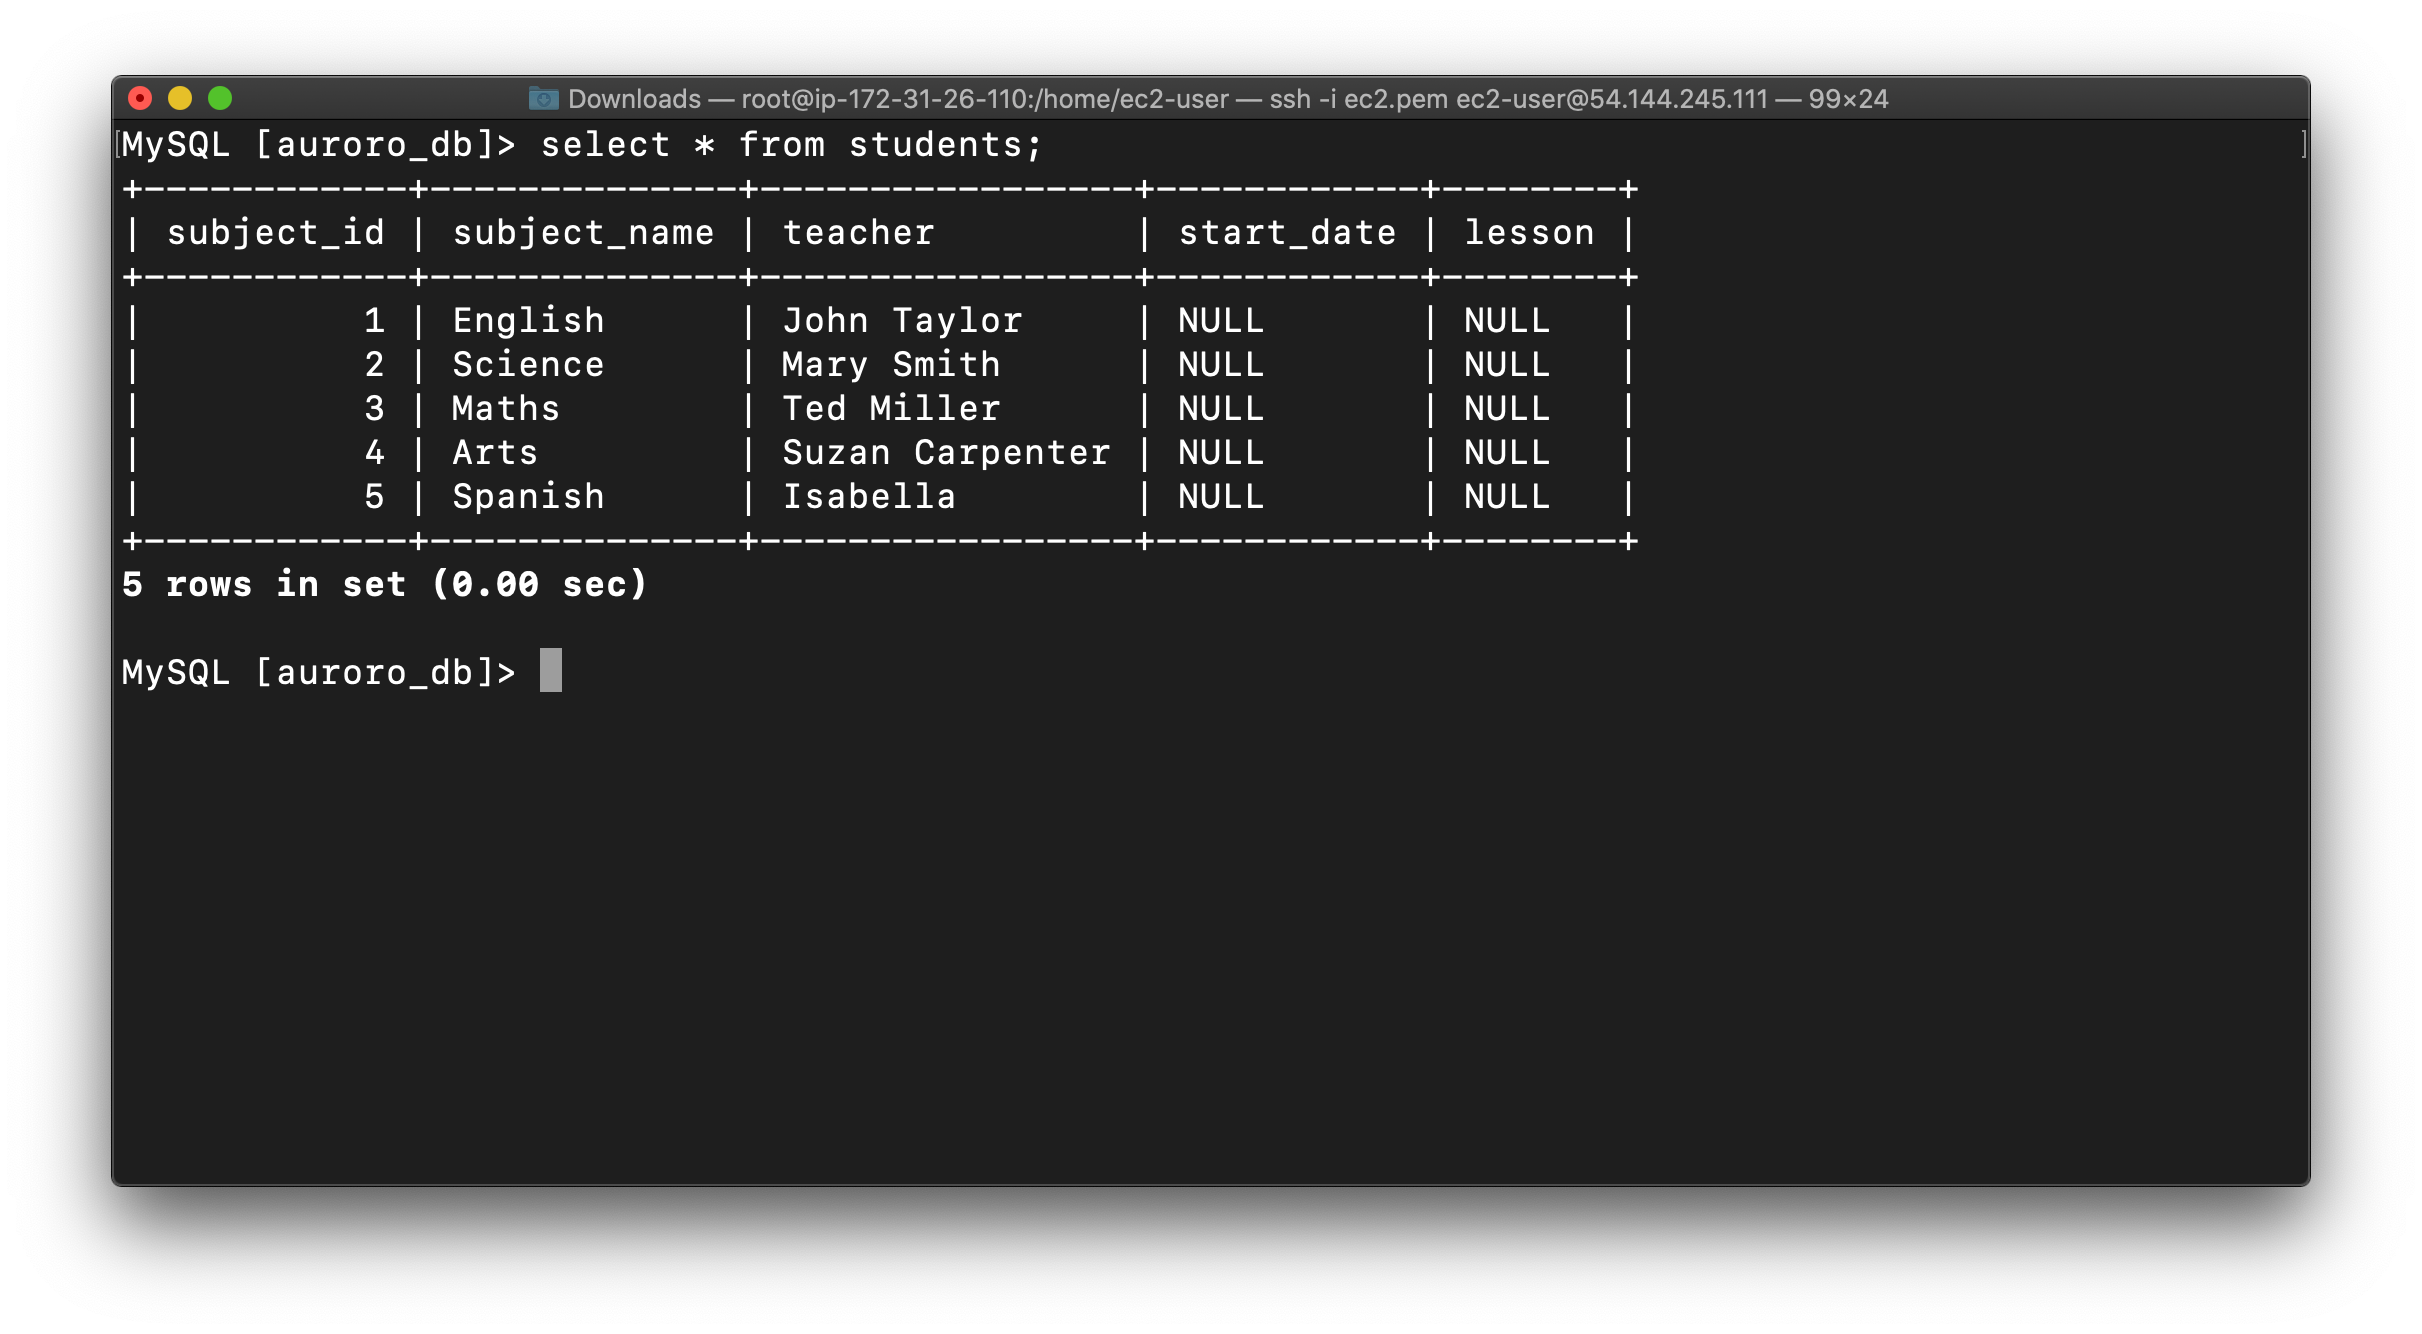
Now you can view the contents of the table student using the below command:
1 | SELECT * FROM students; |

Exit from mysql console use the below command:
1 | EXIT |
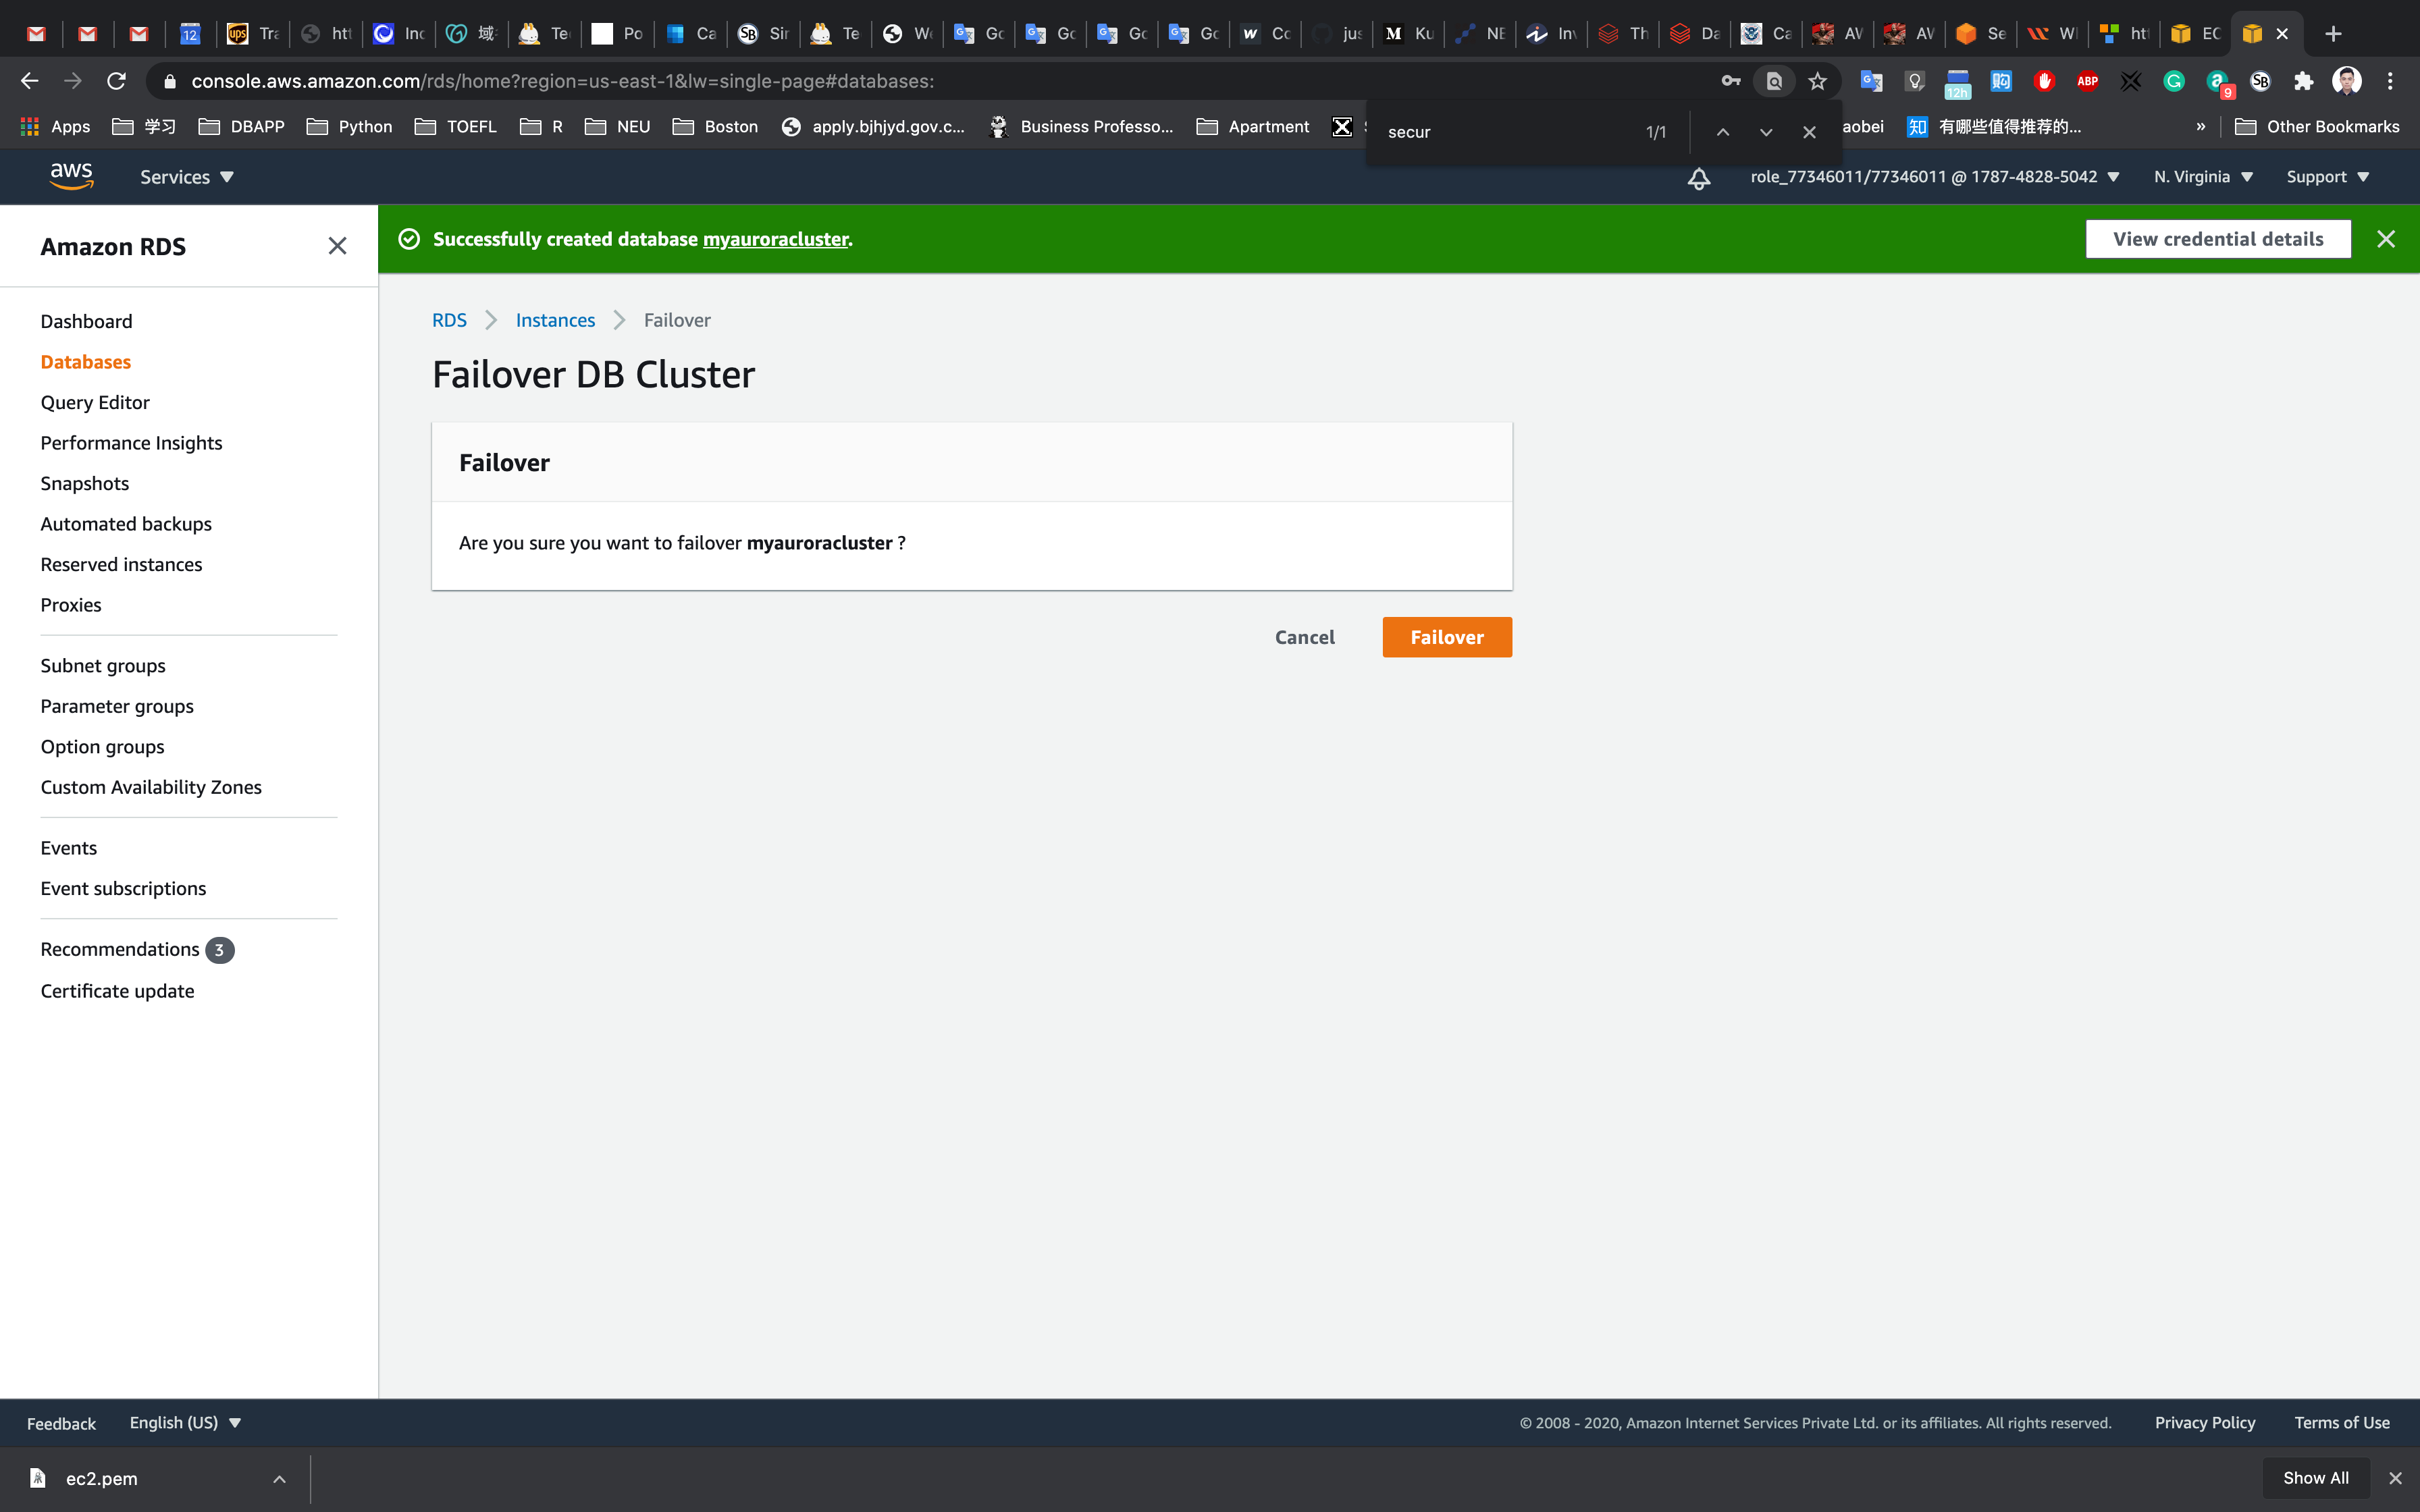
Forcing a Failover to Test Multi-AZ
To test if Multi-AZ is working, we will create a situation where master fails and the read replica has to become the new Master(Writer).
On the next screen, confirm the Failover.
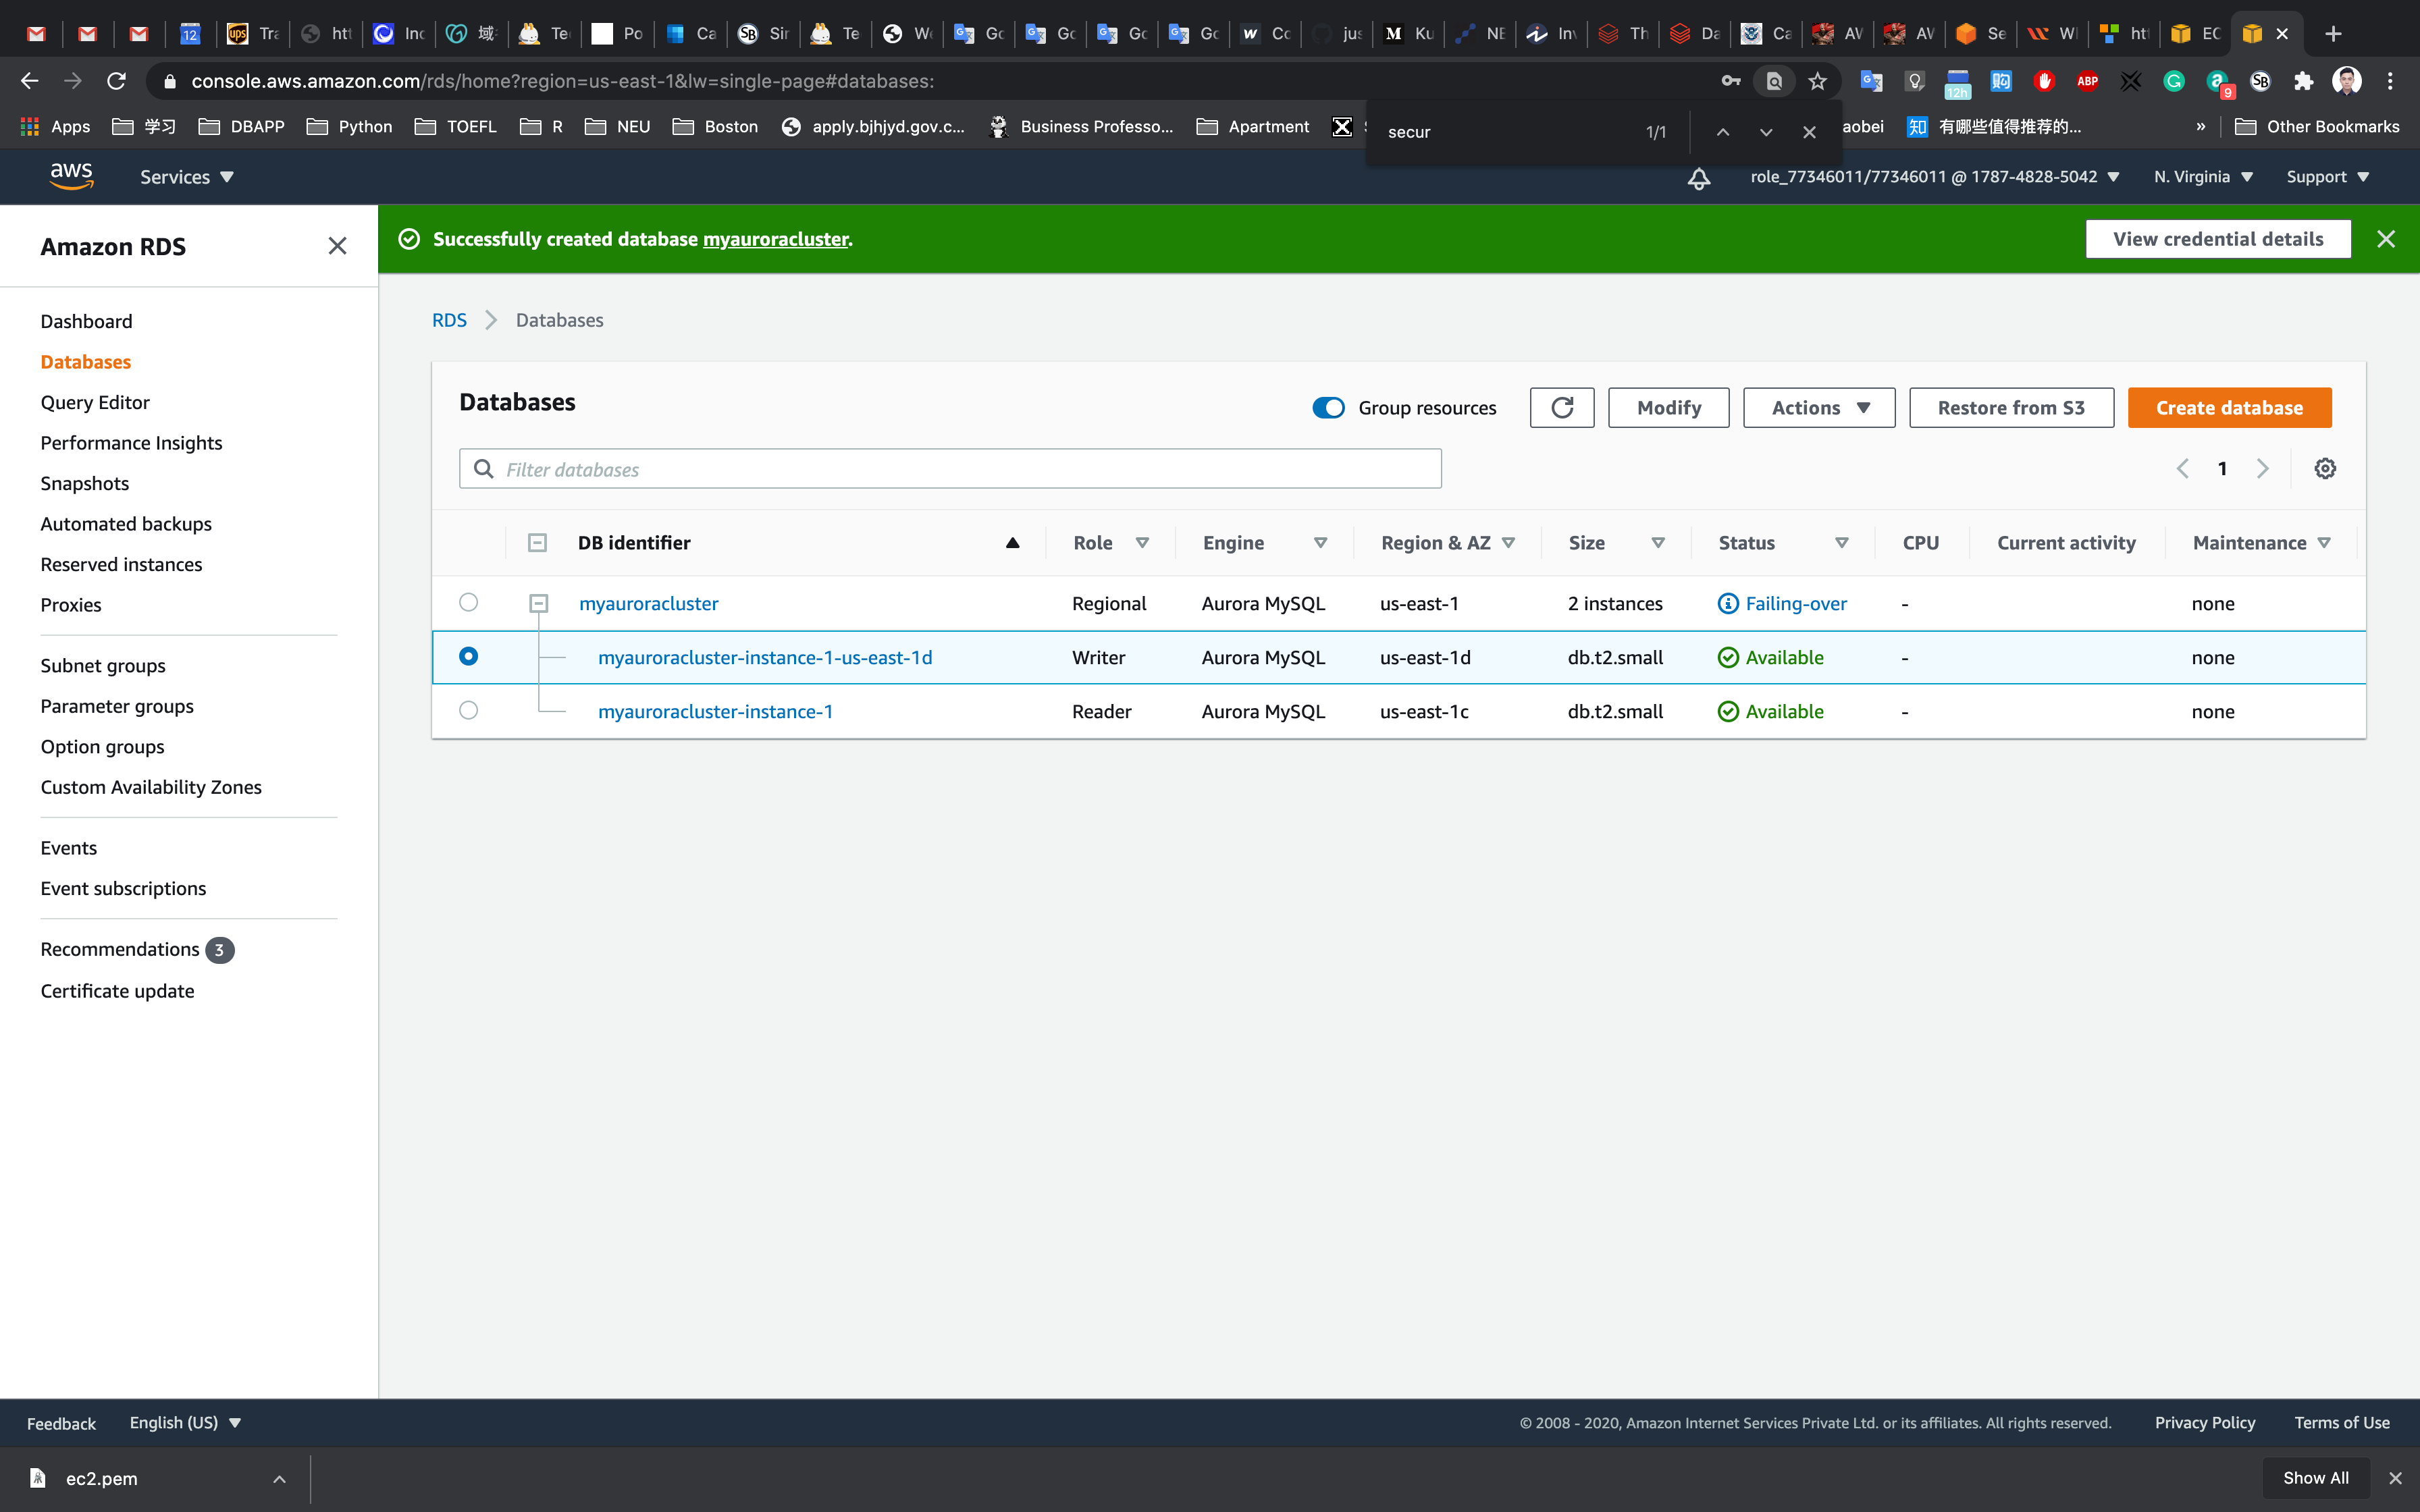
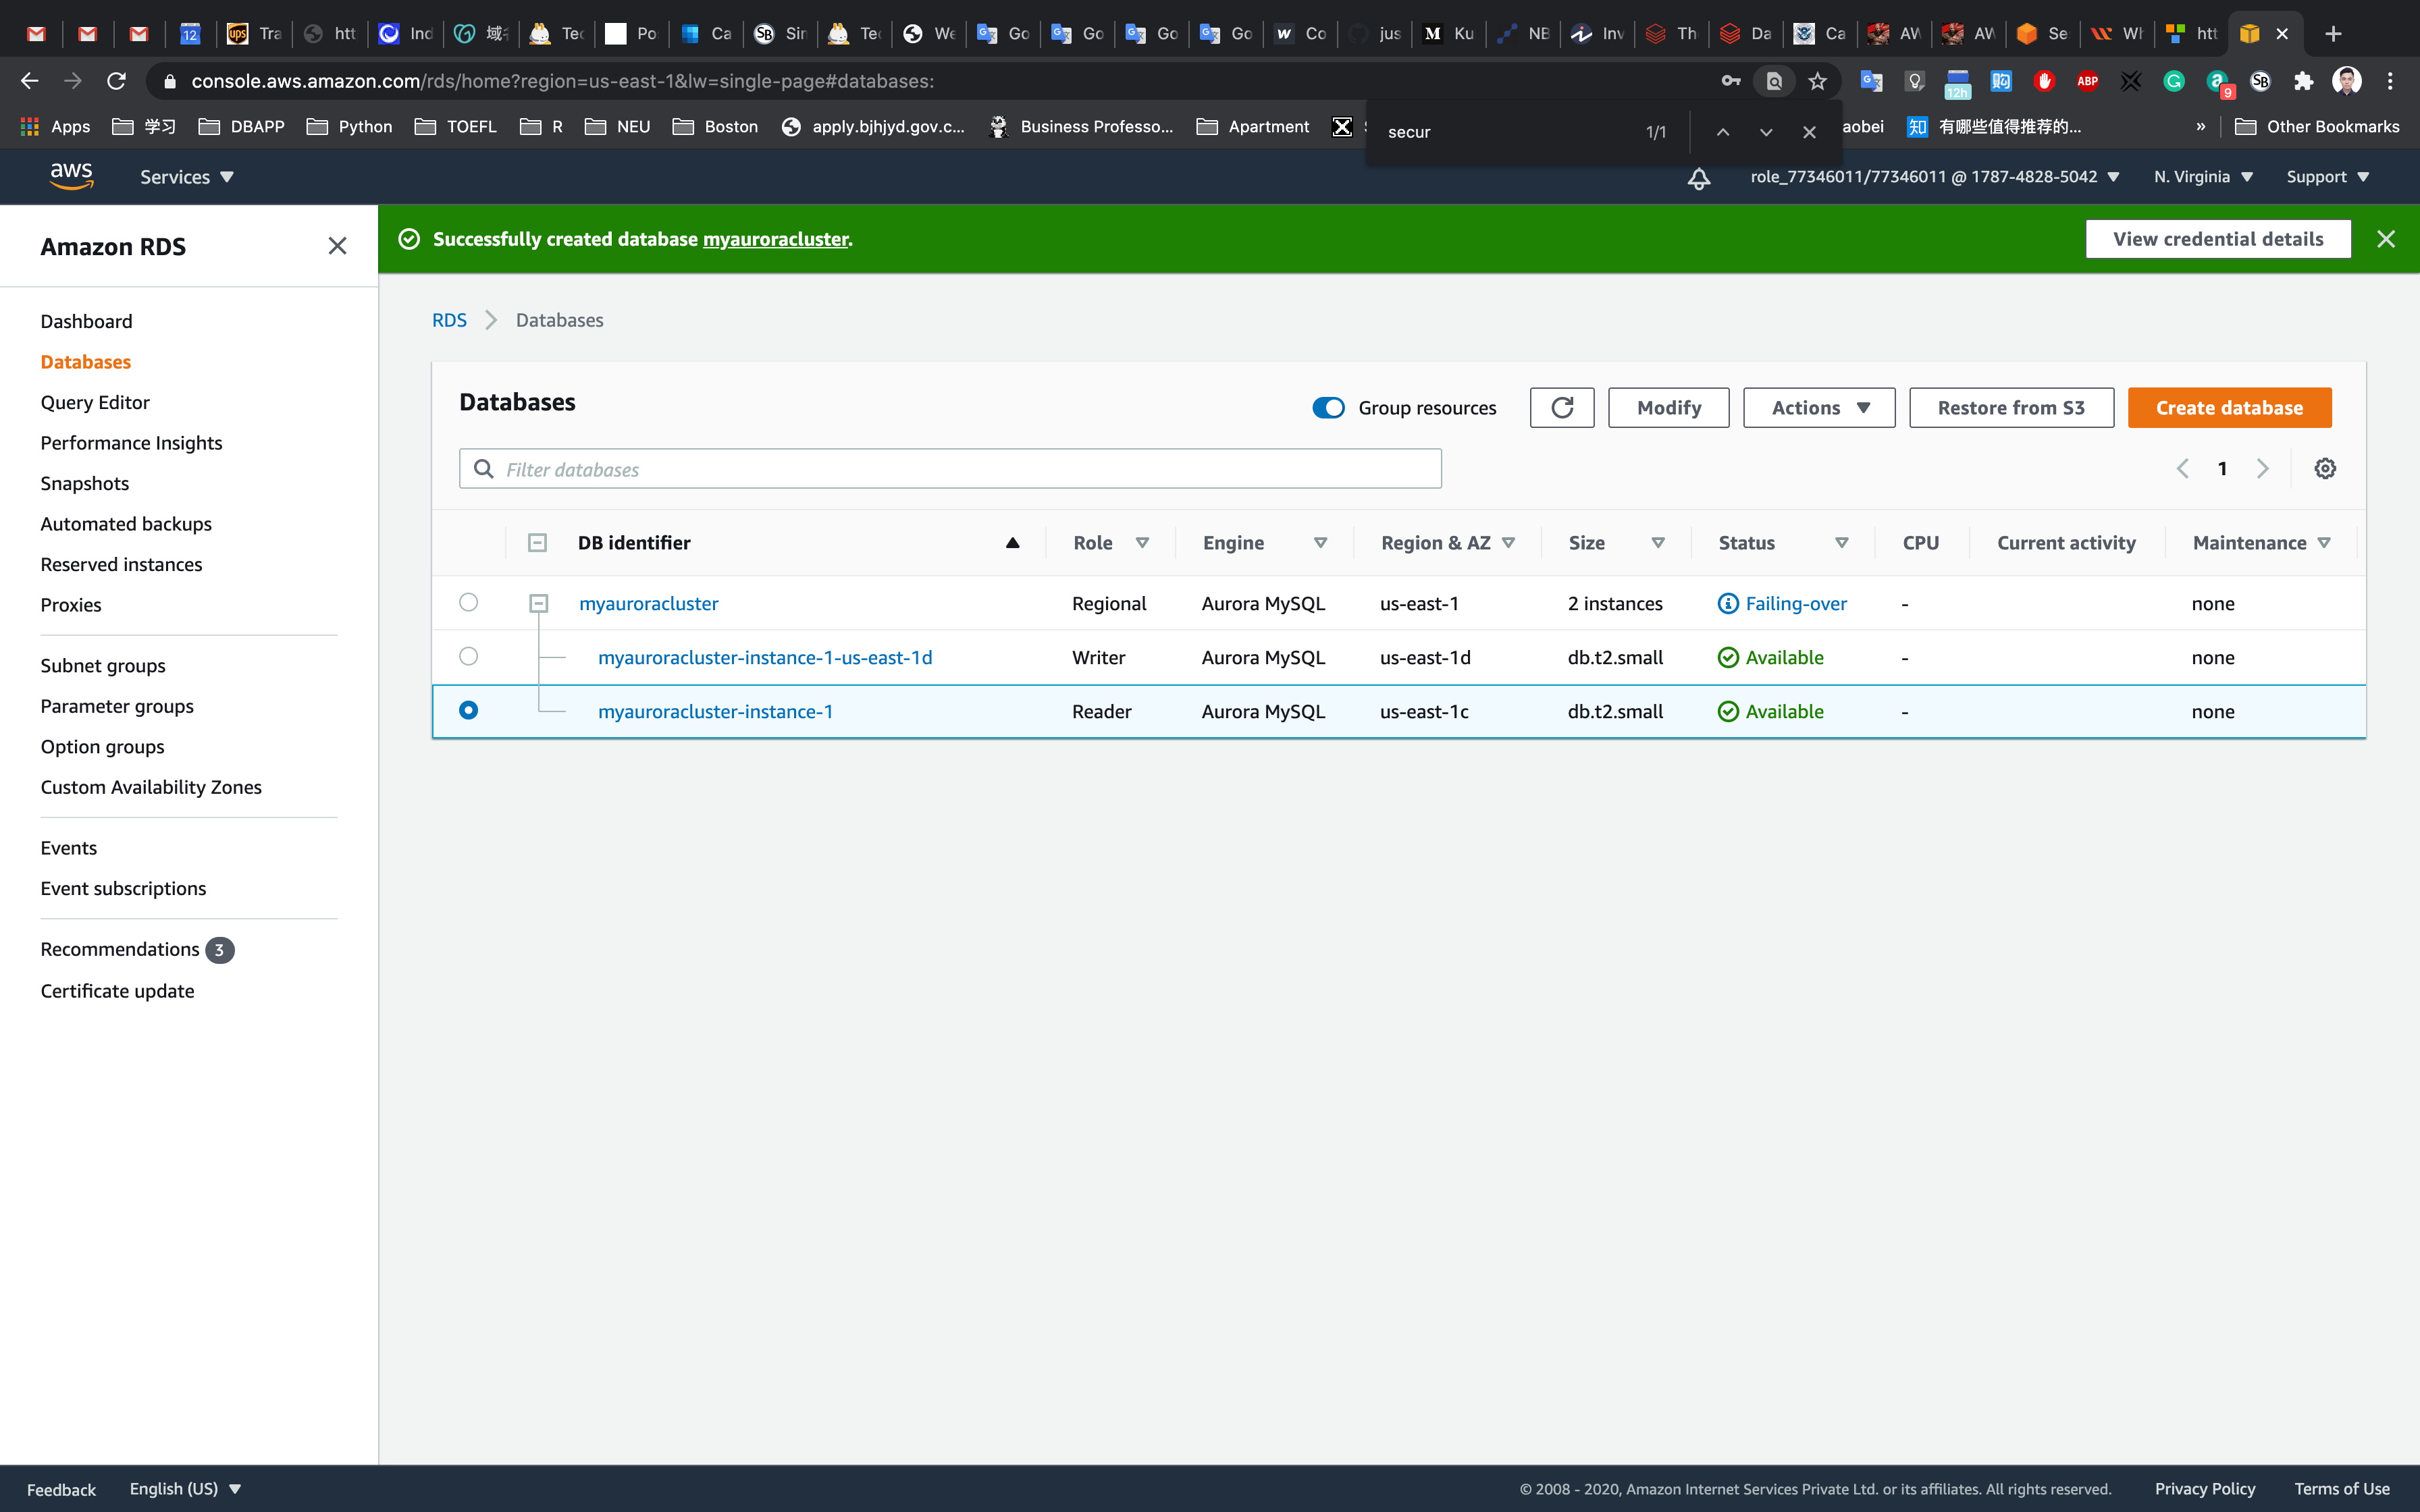
Wait for a few minutes for the RDS instances to failover.
(i.e Master(Writer) becomes Reader and Reader becomes Master(Writer) as shown below )
Testing the Failover Condition
Now connect to RDS with new Master endpoint
Copy the endpoint of the new Master(Writer)cluster and replace it with your endpoint link.
1 | mysql -h <endpoint> -u <username> -p |
You will be able to Log into MySQL and check for the database and table created in the master DB instance before the failover.
You can notice the resources created on the original master db are present, implying that the Failover worked successfully.
1 | SHOW DATABASES; |
Now check the existence of table named students and data (that we created earlier in the lab):
1 | SHOW TABLES; |
Now if you want you can insert new data into the table students.
1 | INSERT INTO students(subject_name, teacher) VALUES ('Spanish', 'Isabella'); |
Completion and Conclusion
- You have successfully used AWS management console to create Amazon Aurora MySQL database with Multi-Az enabled.
- You have created an Amazon Aurora database on RDS.
- You have successfully connected to the Amazon Aurora database and tested the failover condition with Multi-AZ enabled.
Restore & Backup RDS SQL Instance to S3
https://docs.aws.amazon.com/AmazonRDS/latest/UserGuide/SQLServer.Procedural.Importing.html
Prerequisite
- A MS SQL instance
- A S3 bucket with all default settings
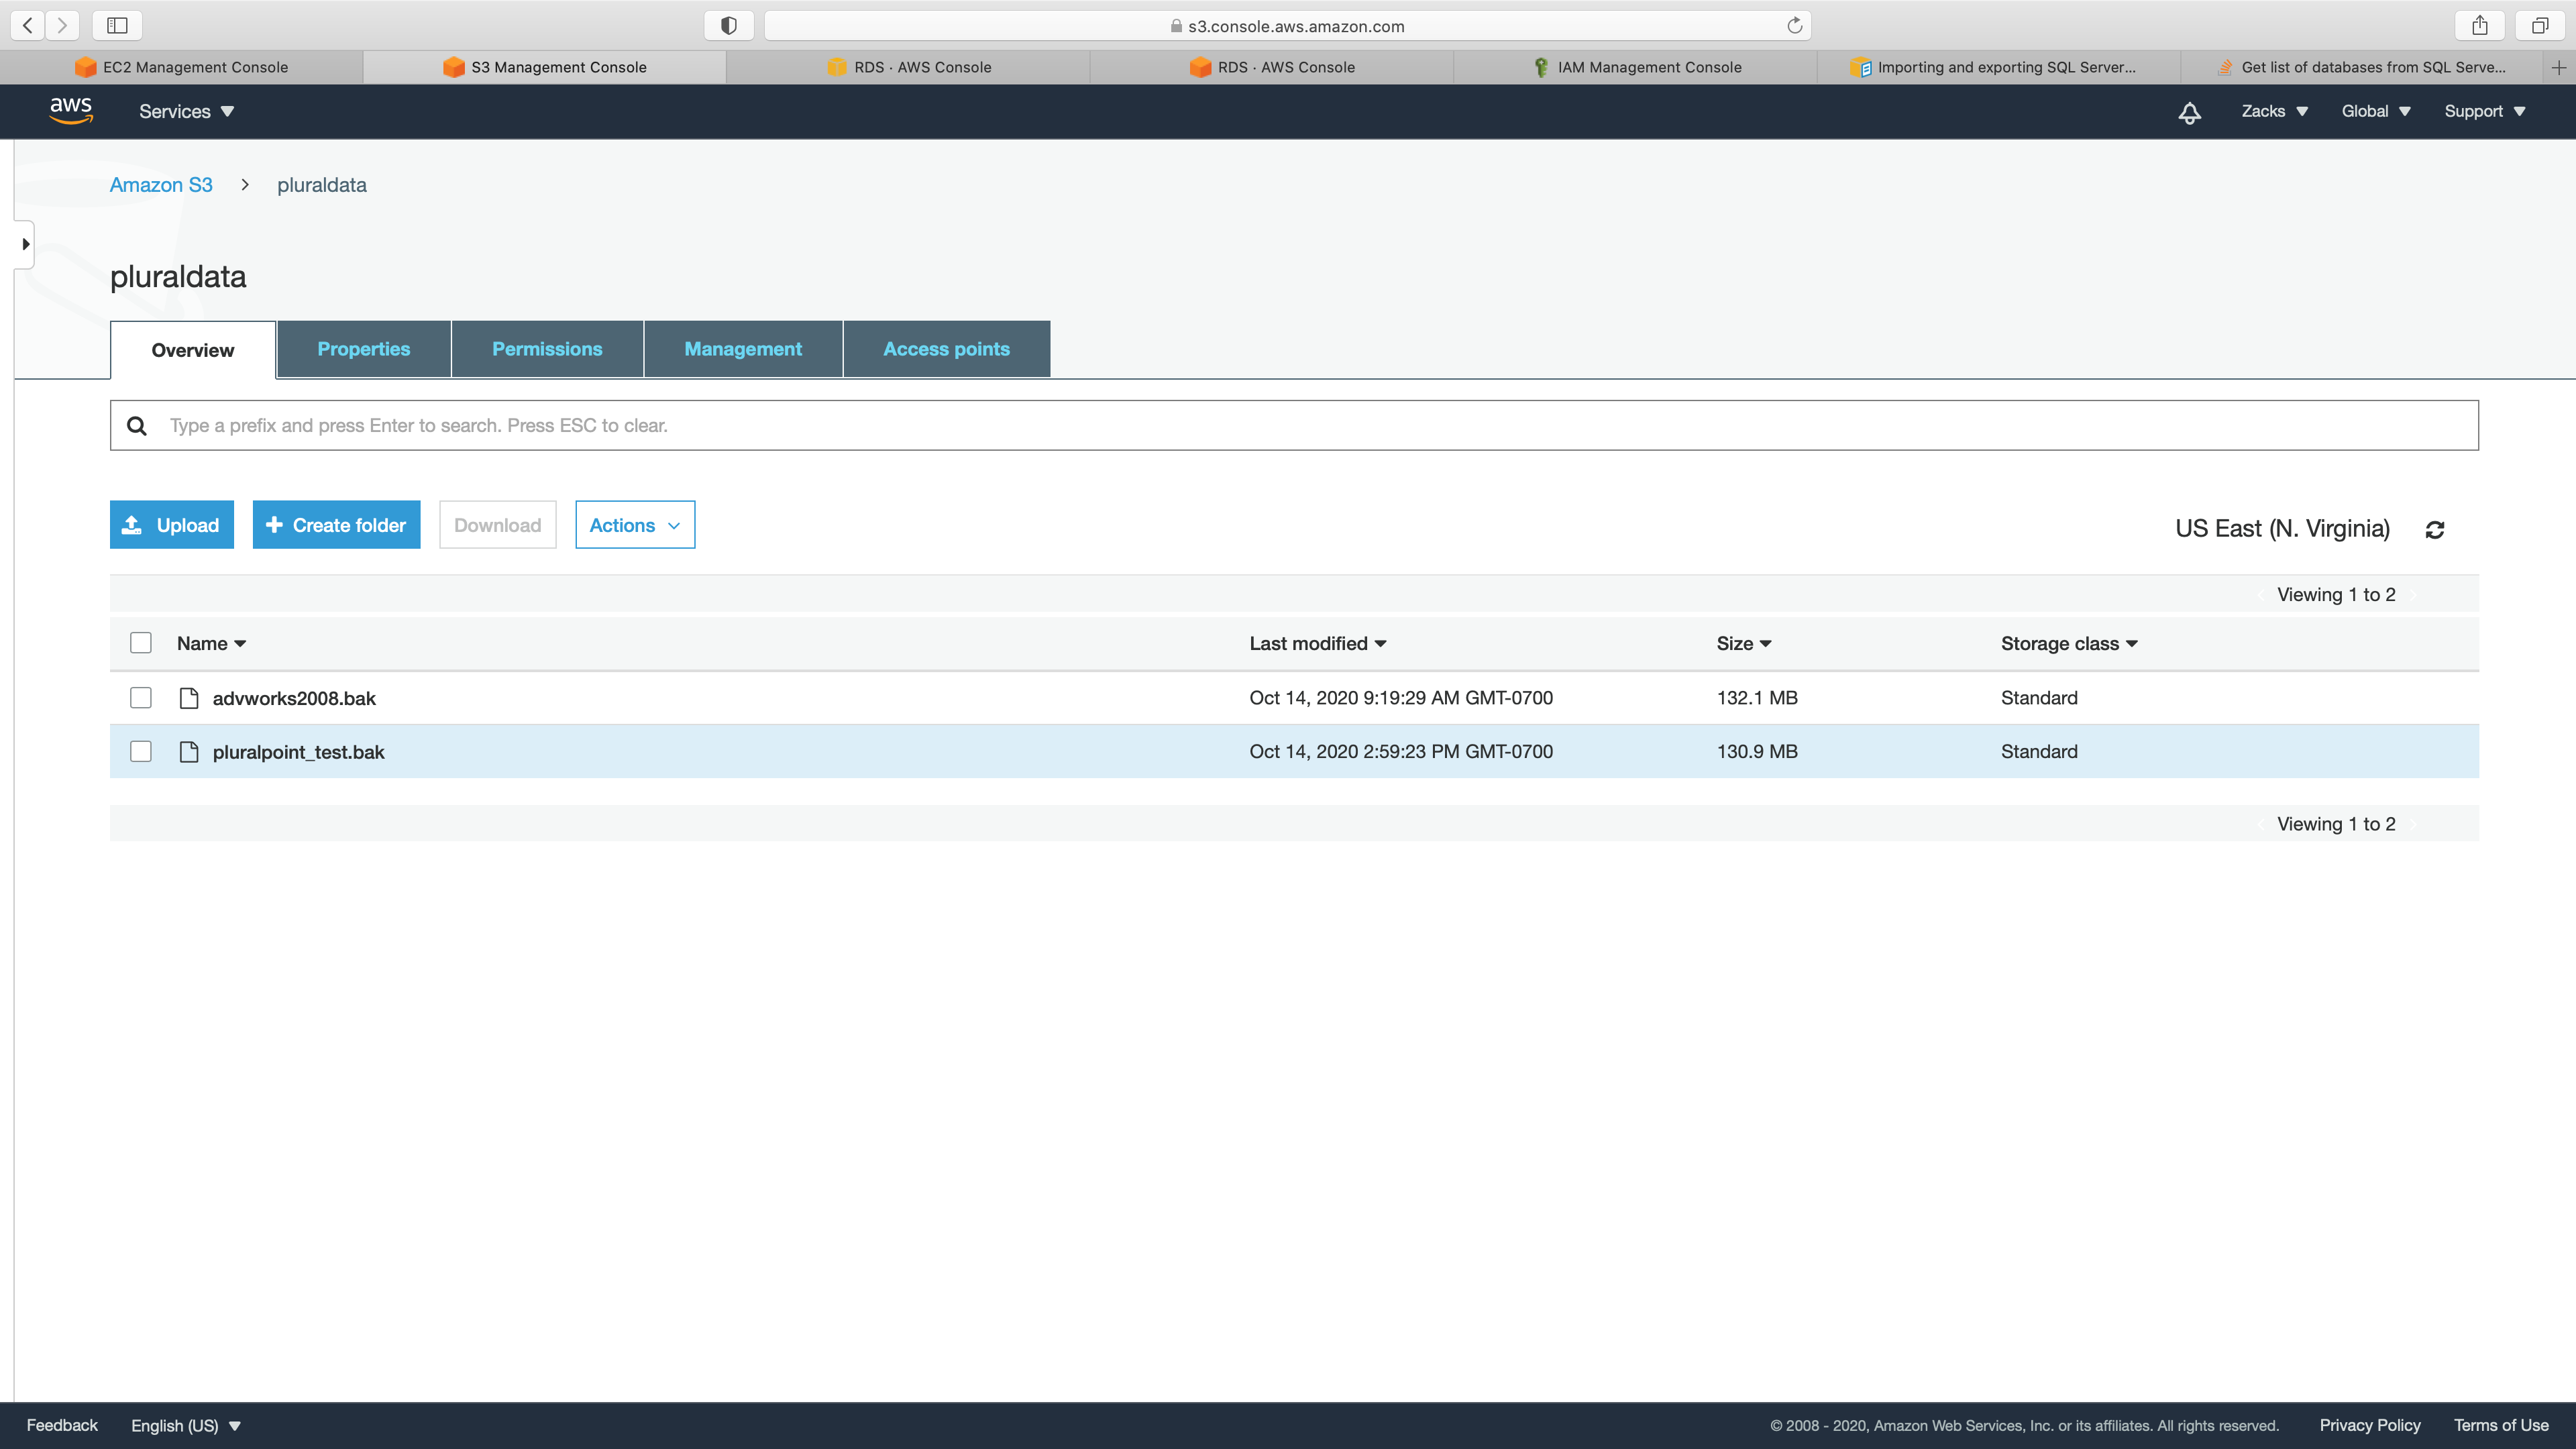
- .bak stored in your S3 bucket.
MS SQL Instance Configuration
Service -> RDS -> Instances
Take a look of your SQL instance.
Note your database instance Engine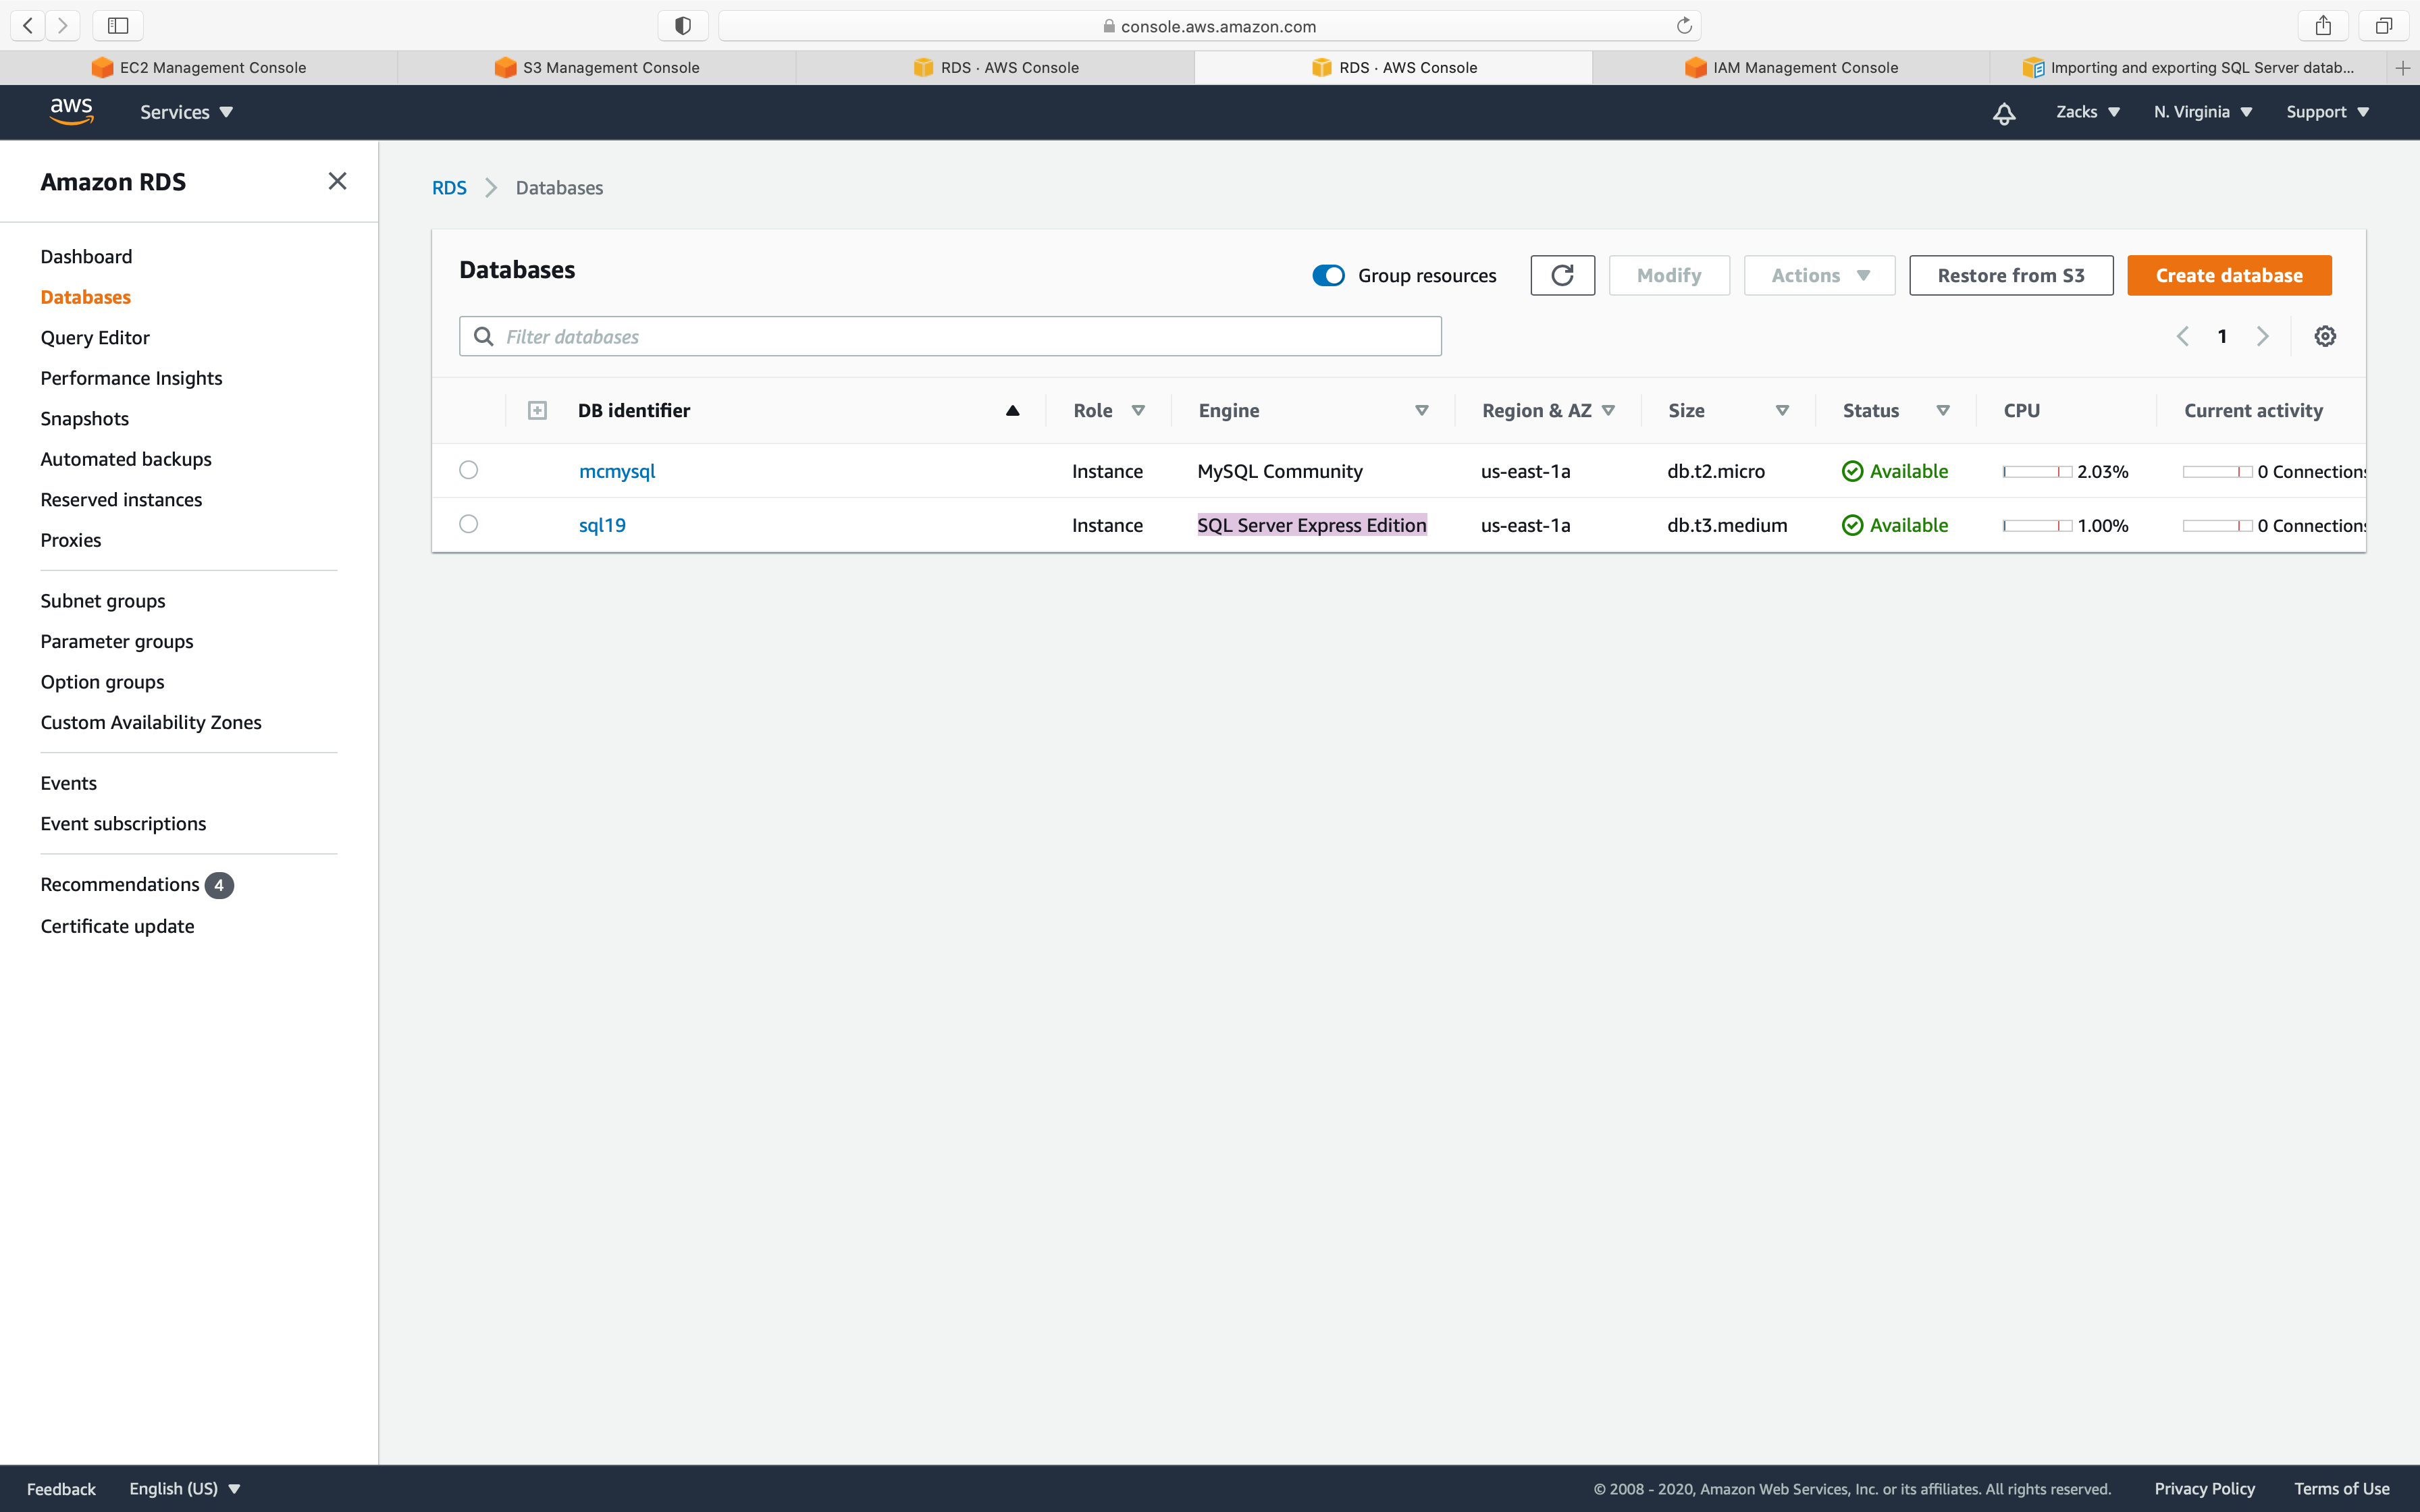
Click on your Database instance and click on Modify button.
Note your database instance DB engine version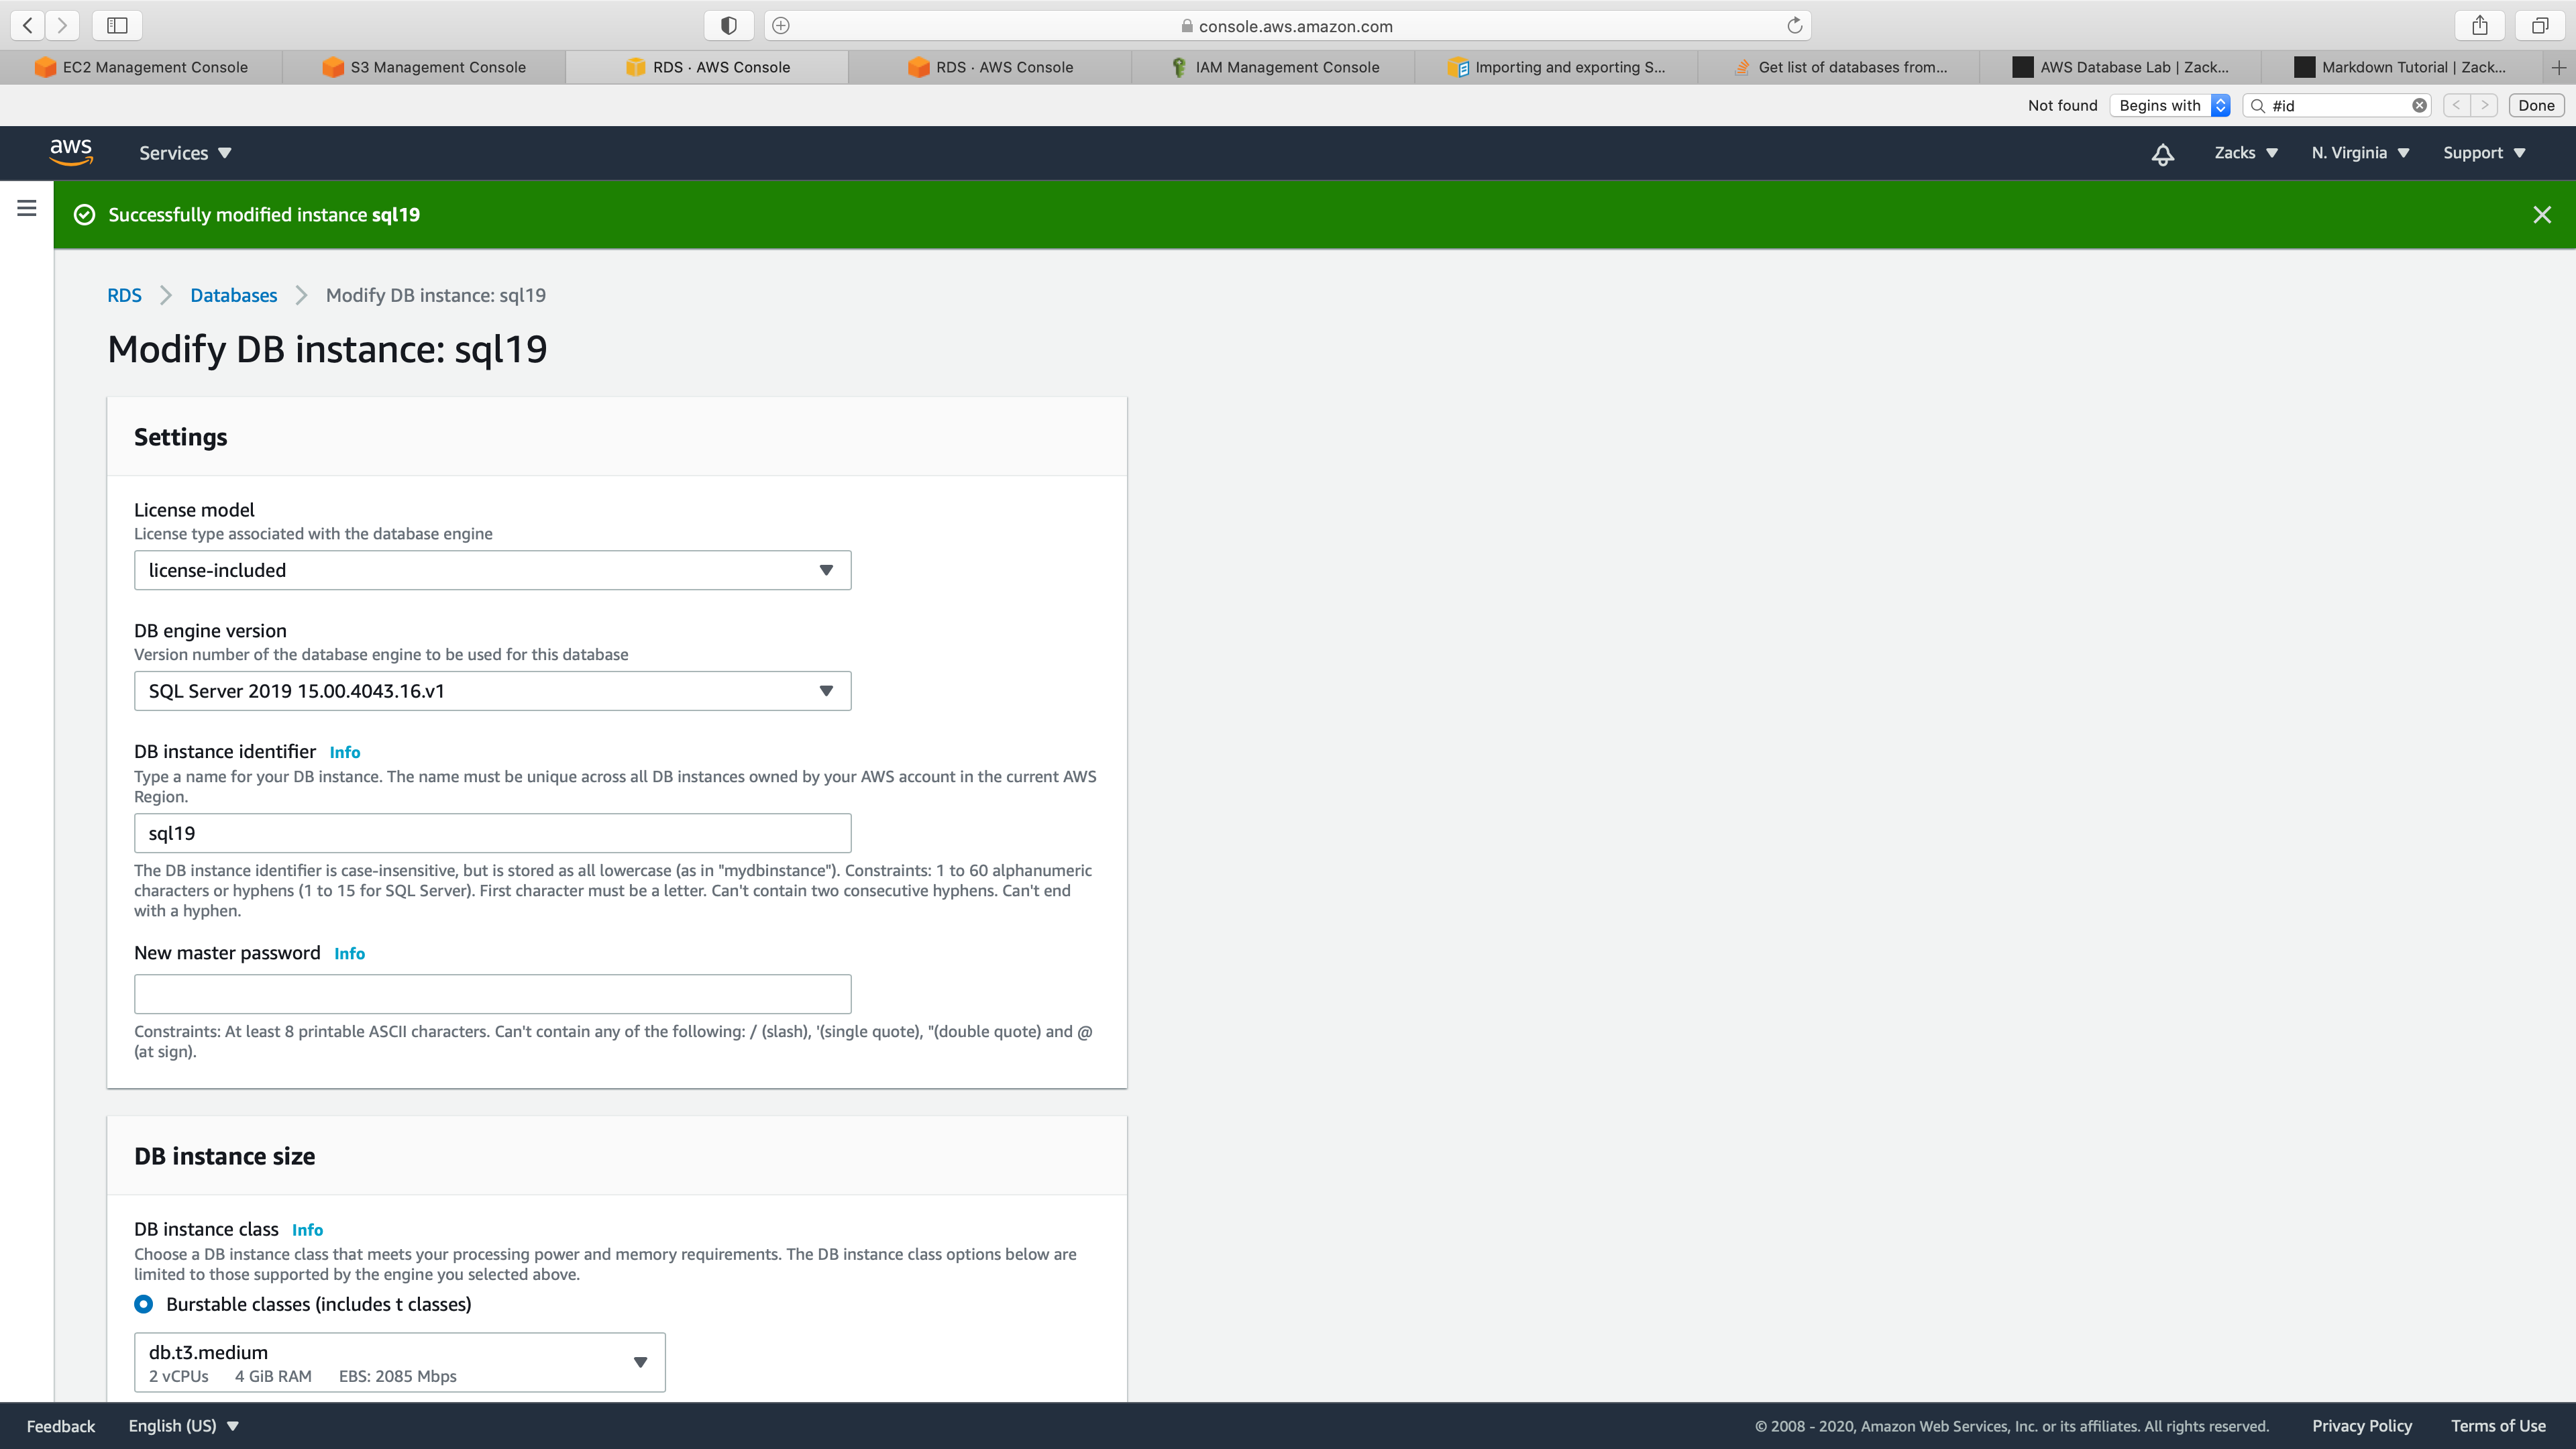
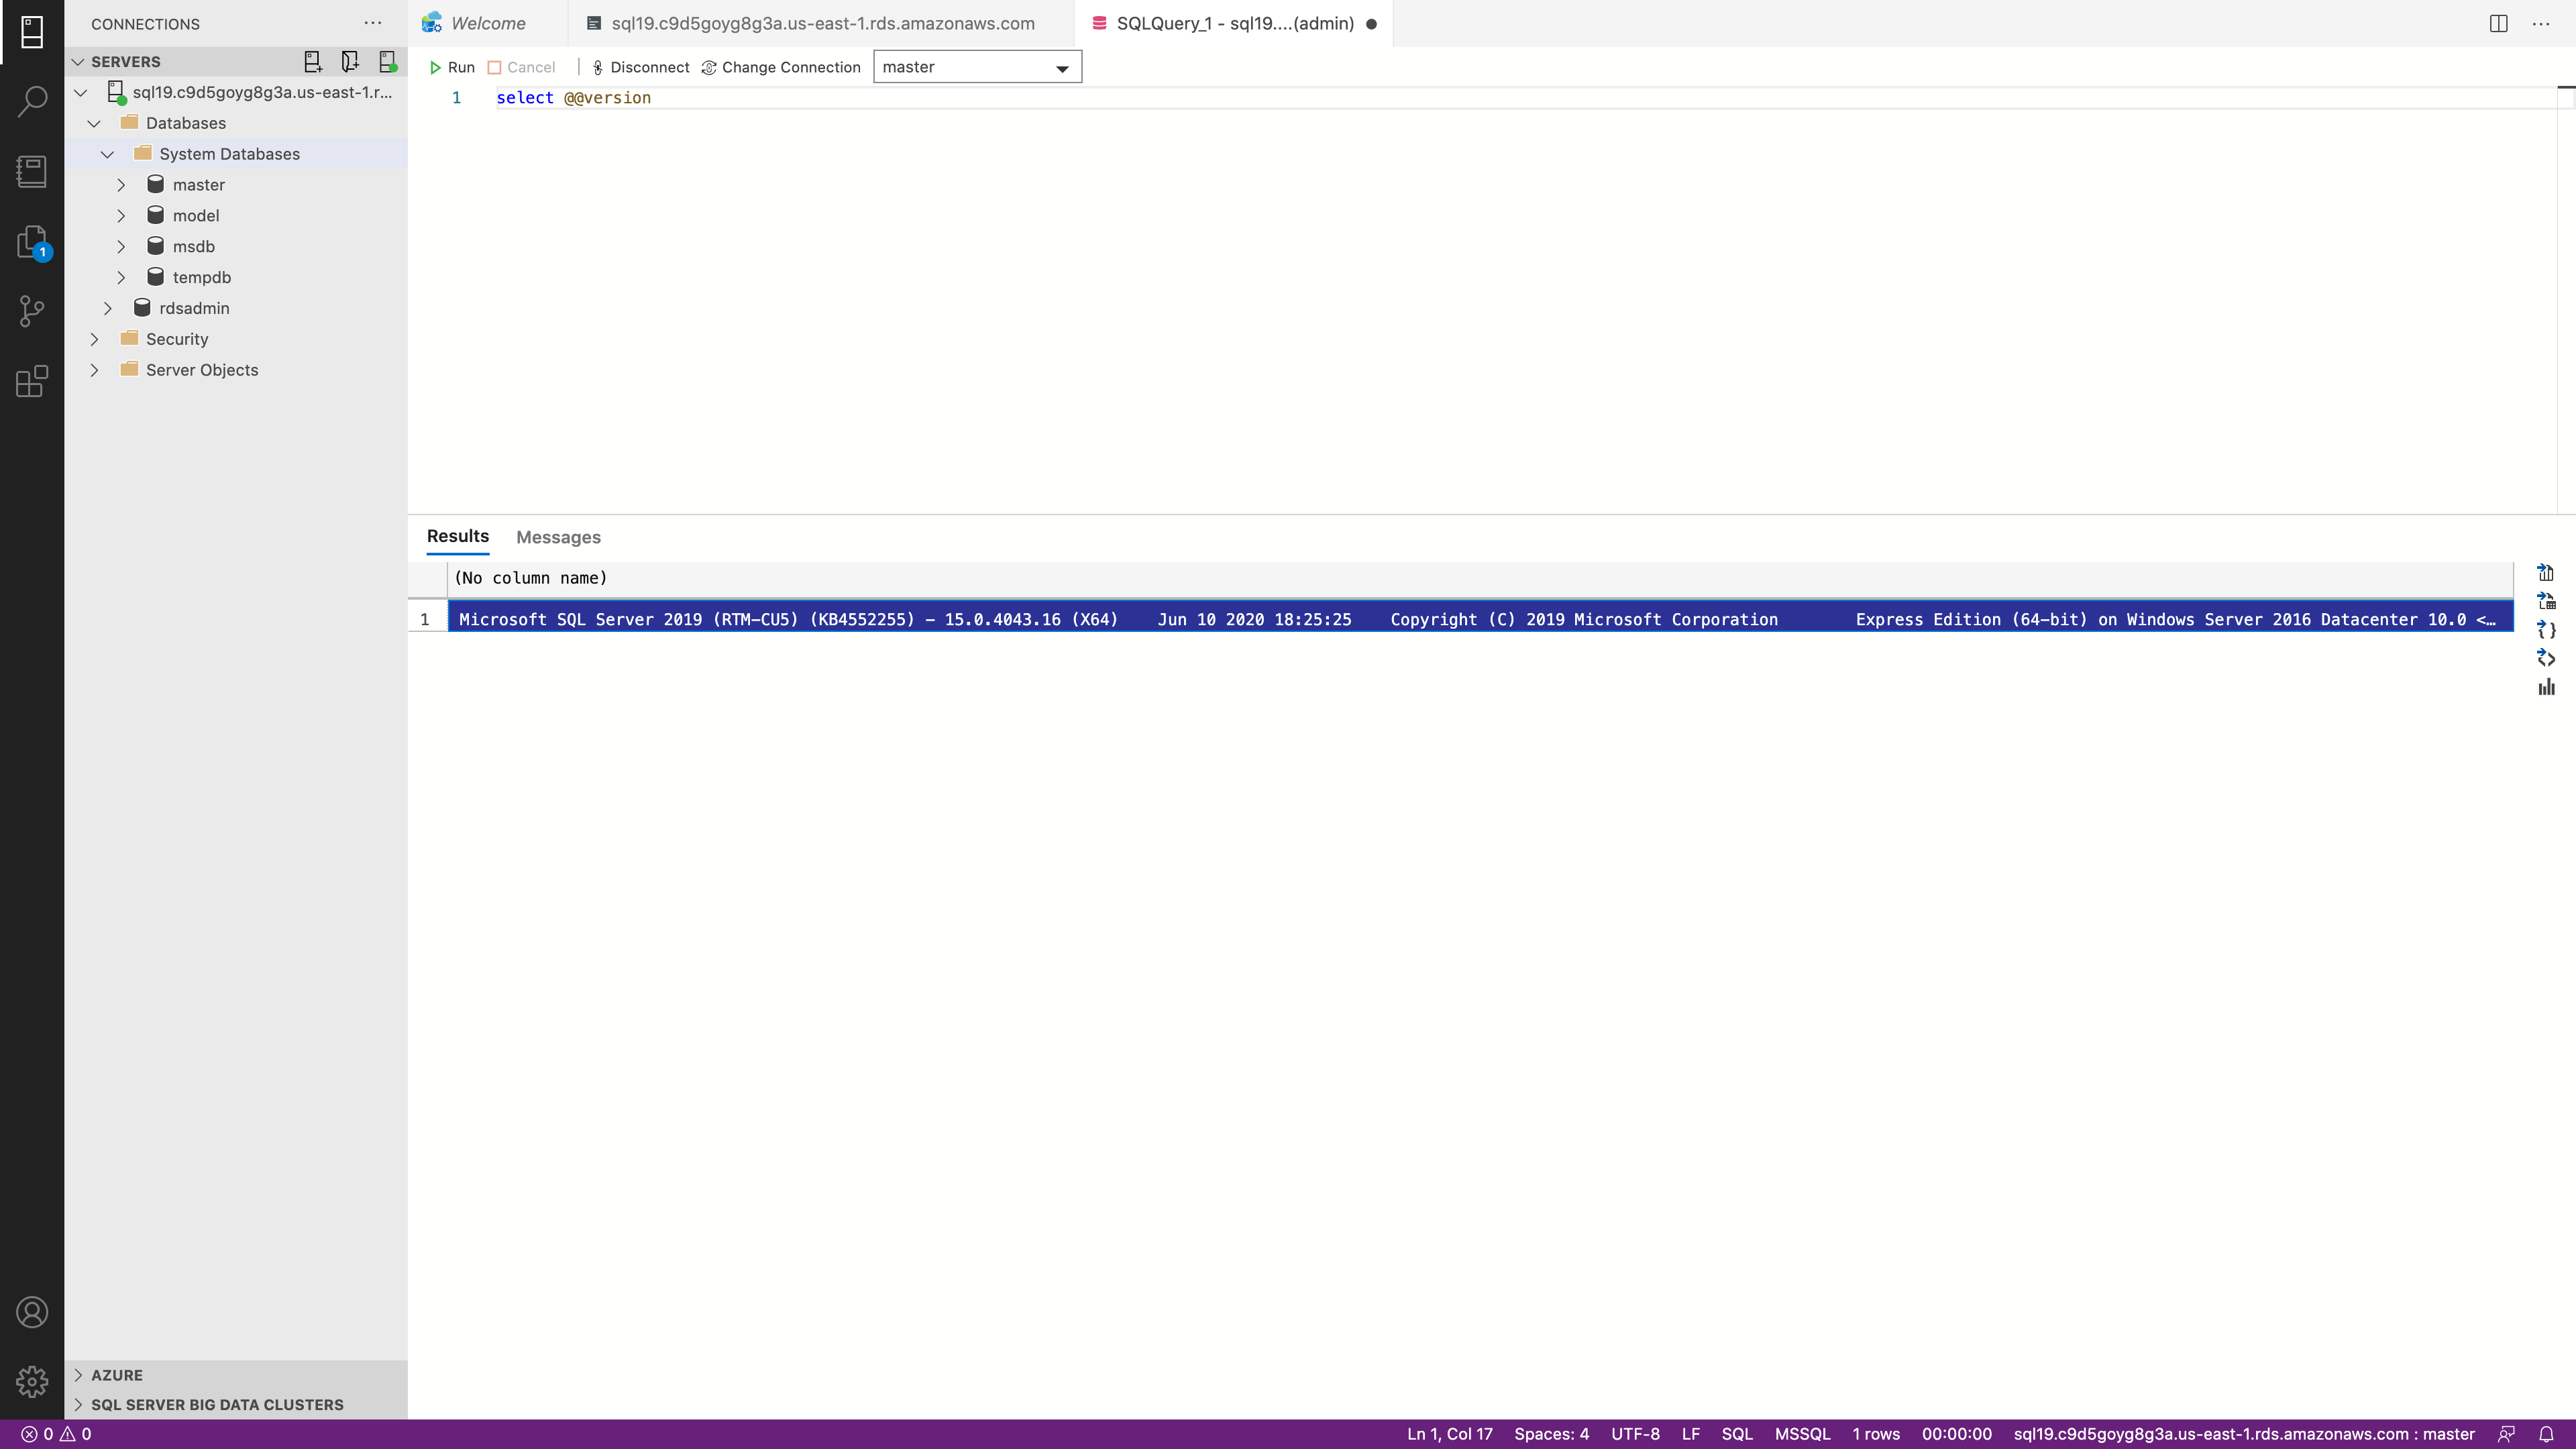
You can also login your RDS MS SQL, then input the below command to see your Engine and DB engine version:
1 | SELECT @@version |
Create Option Groups
Service -> RDS -> Option groups
Click on Create group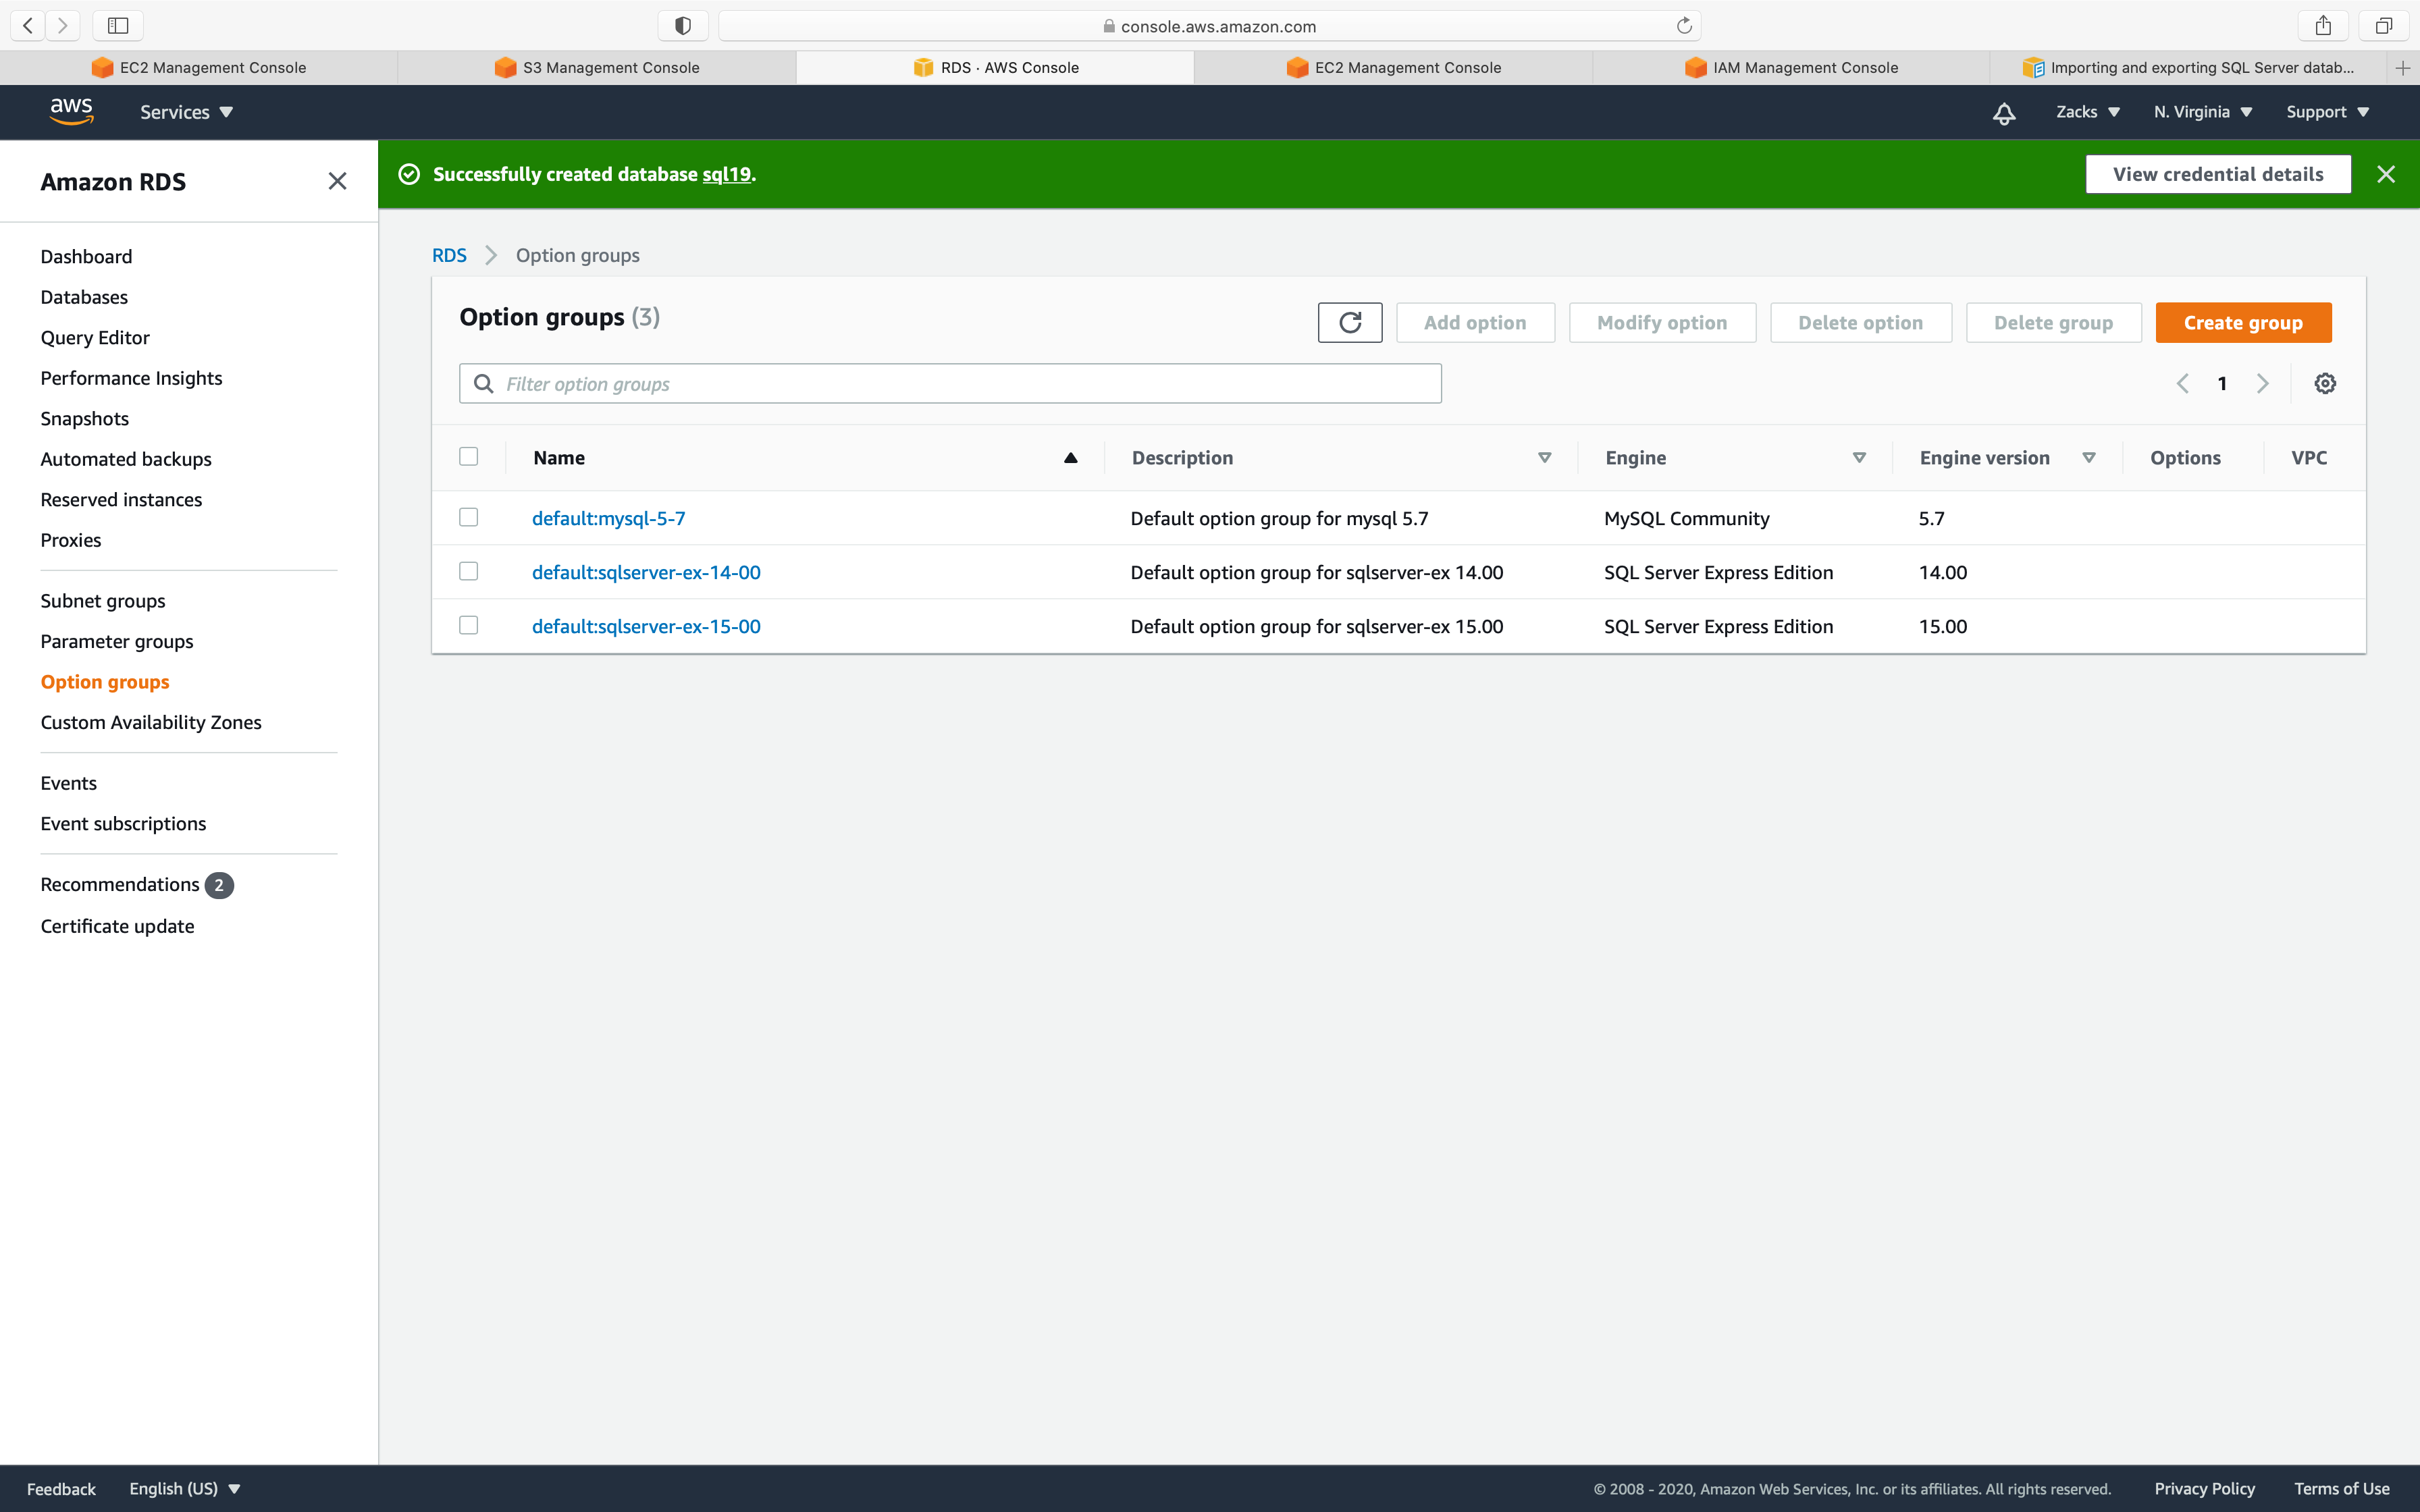
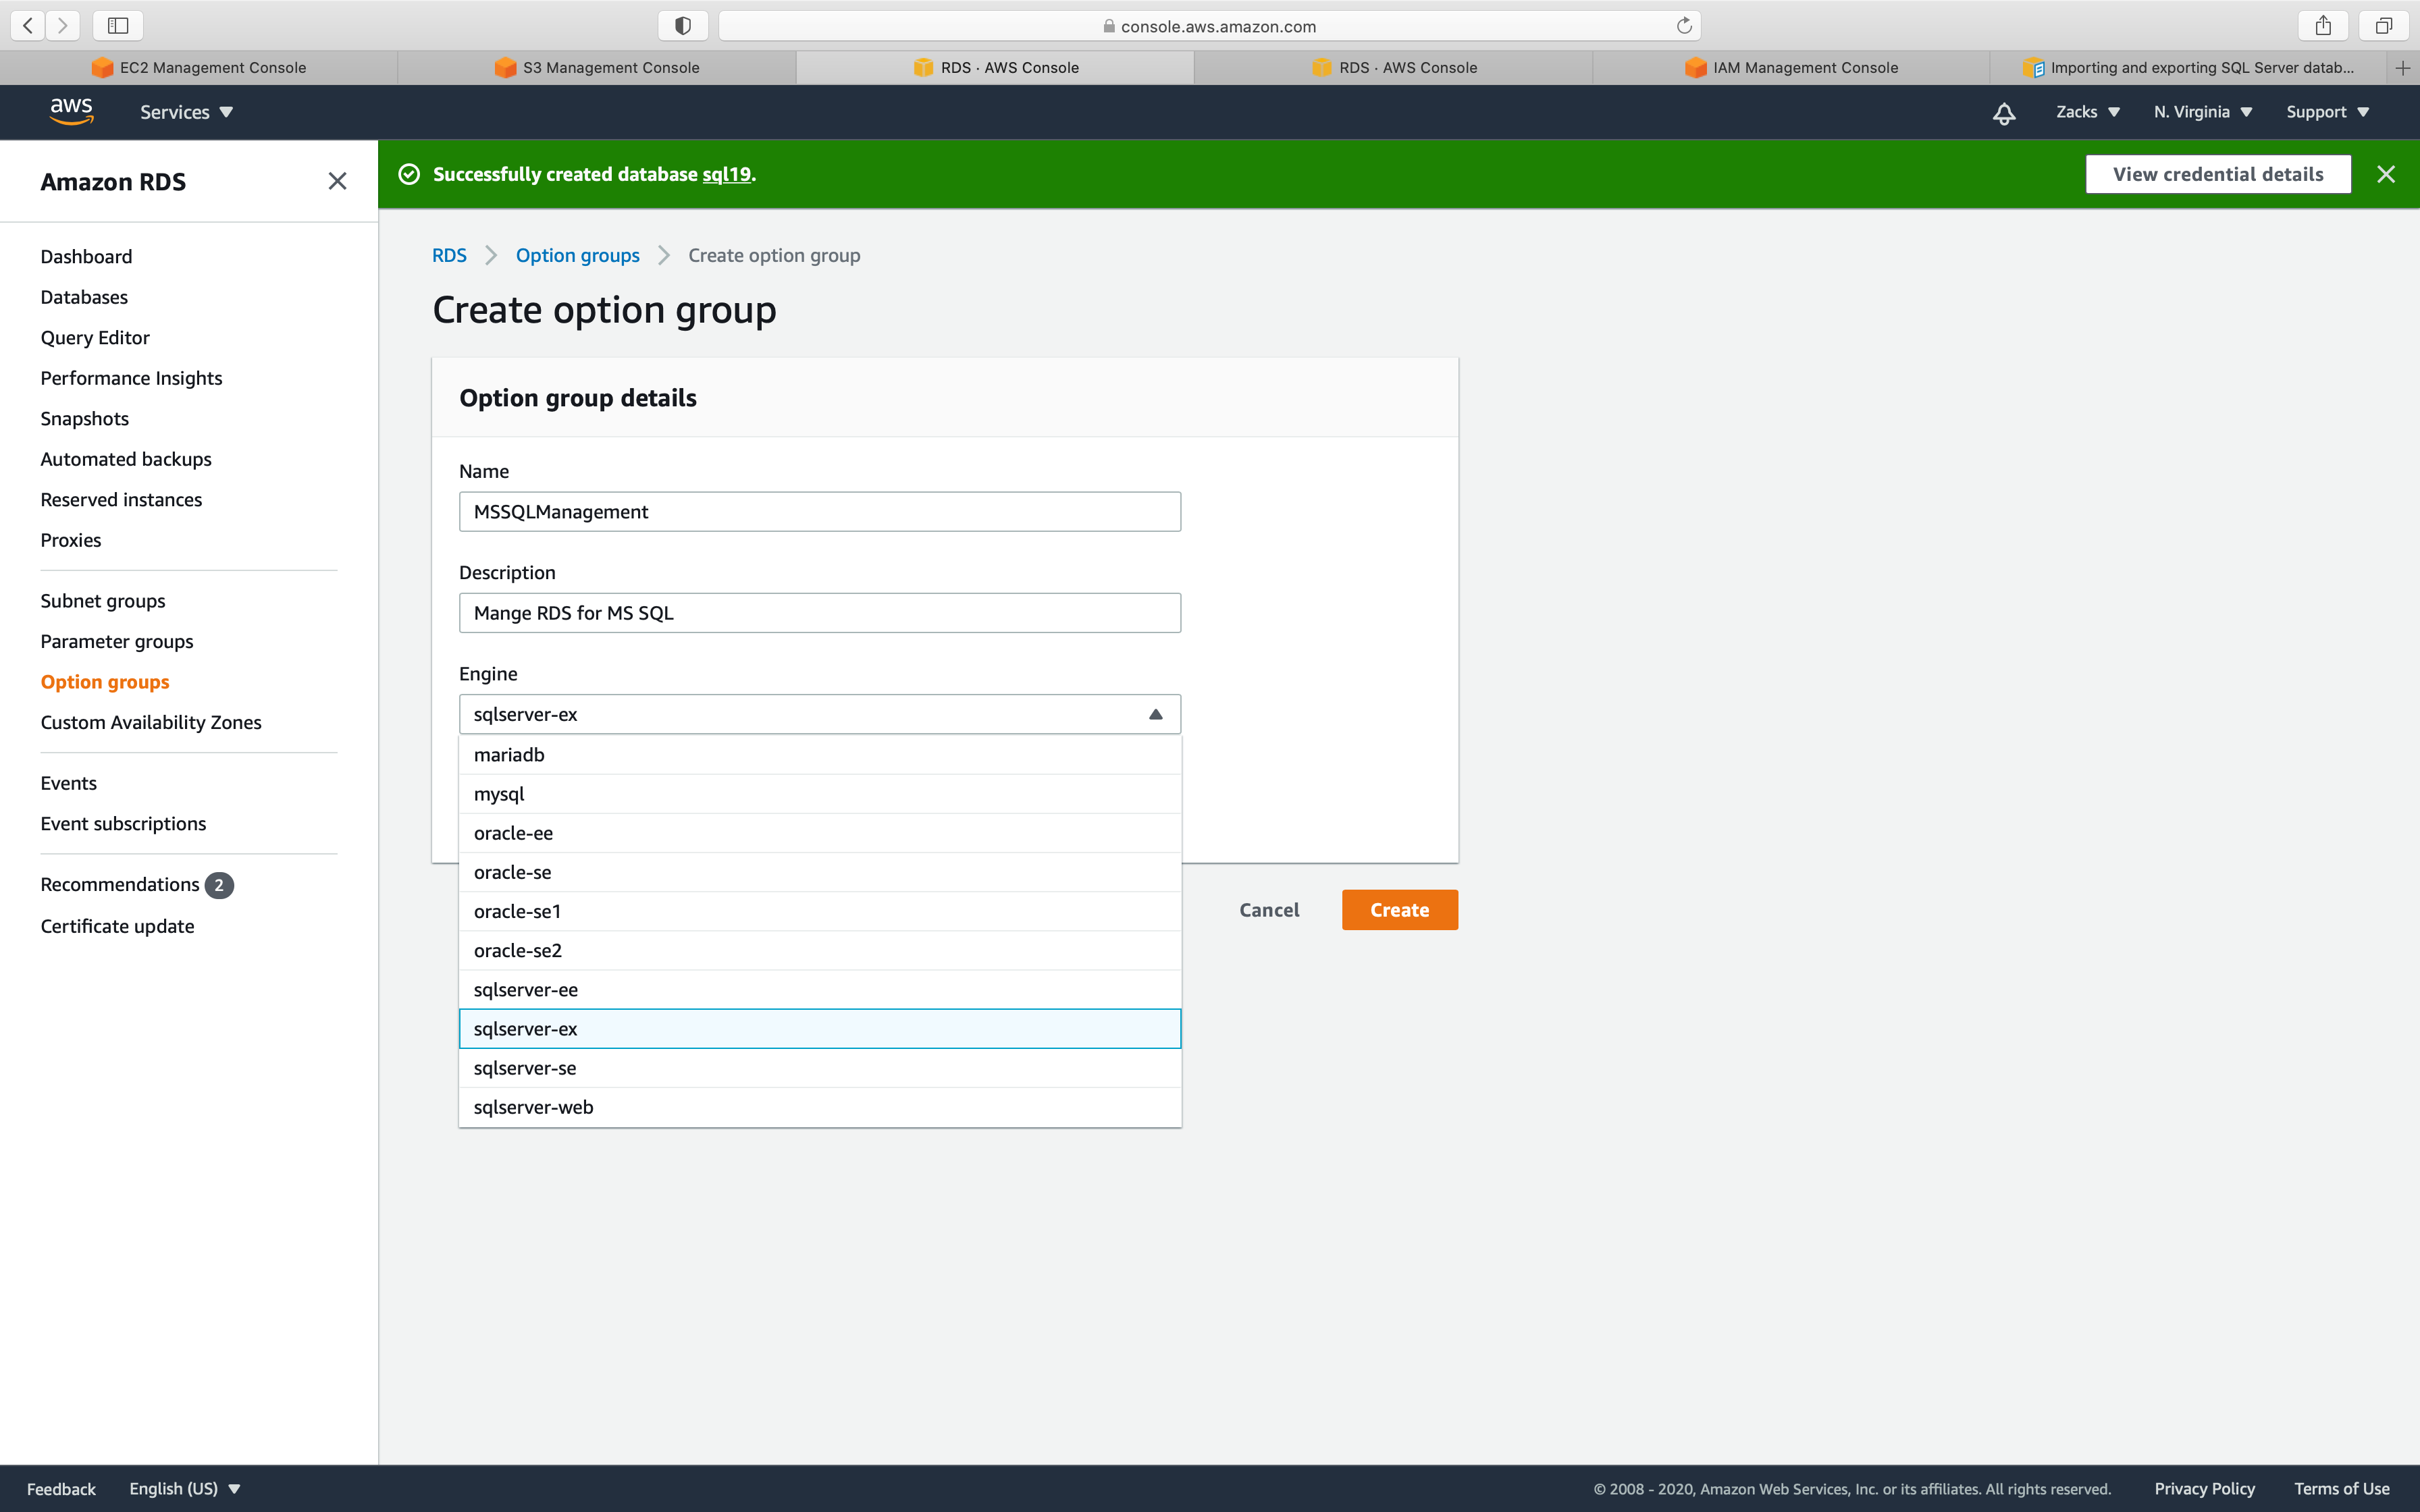
- Name: input
yourOptionGroupName - Description: input
yourDescription - Engine: input your engine
- Major engine version: input your engine version
For Engine:
- Express Edition:
ex - Web Edition:
web - Standard Edition:
se - Enterprise Edition:
ee
Click on Create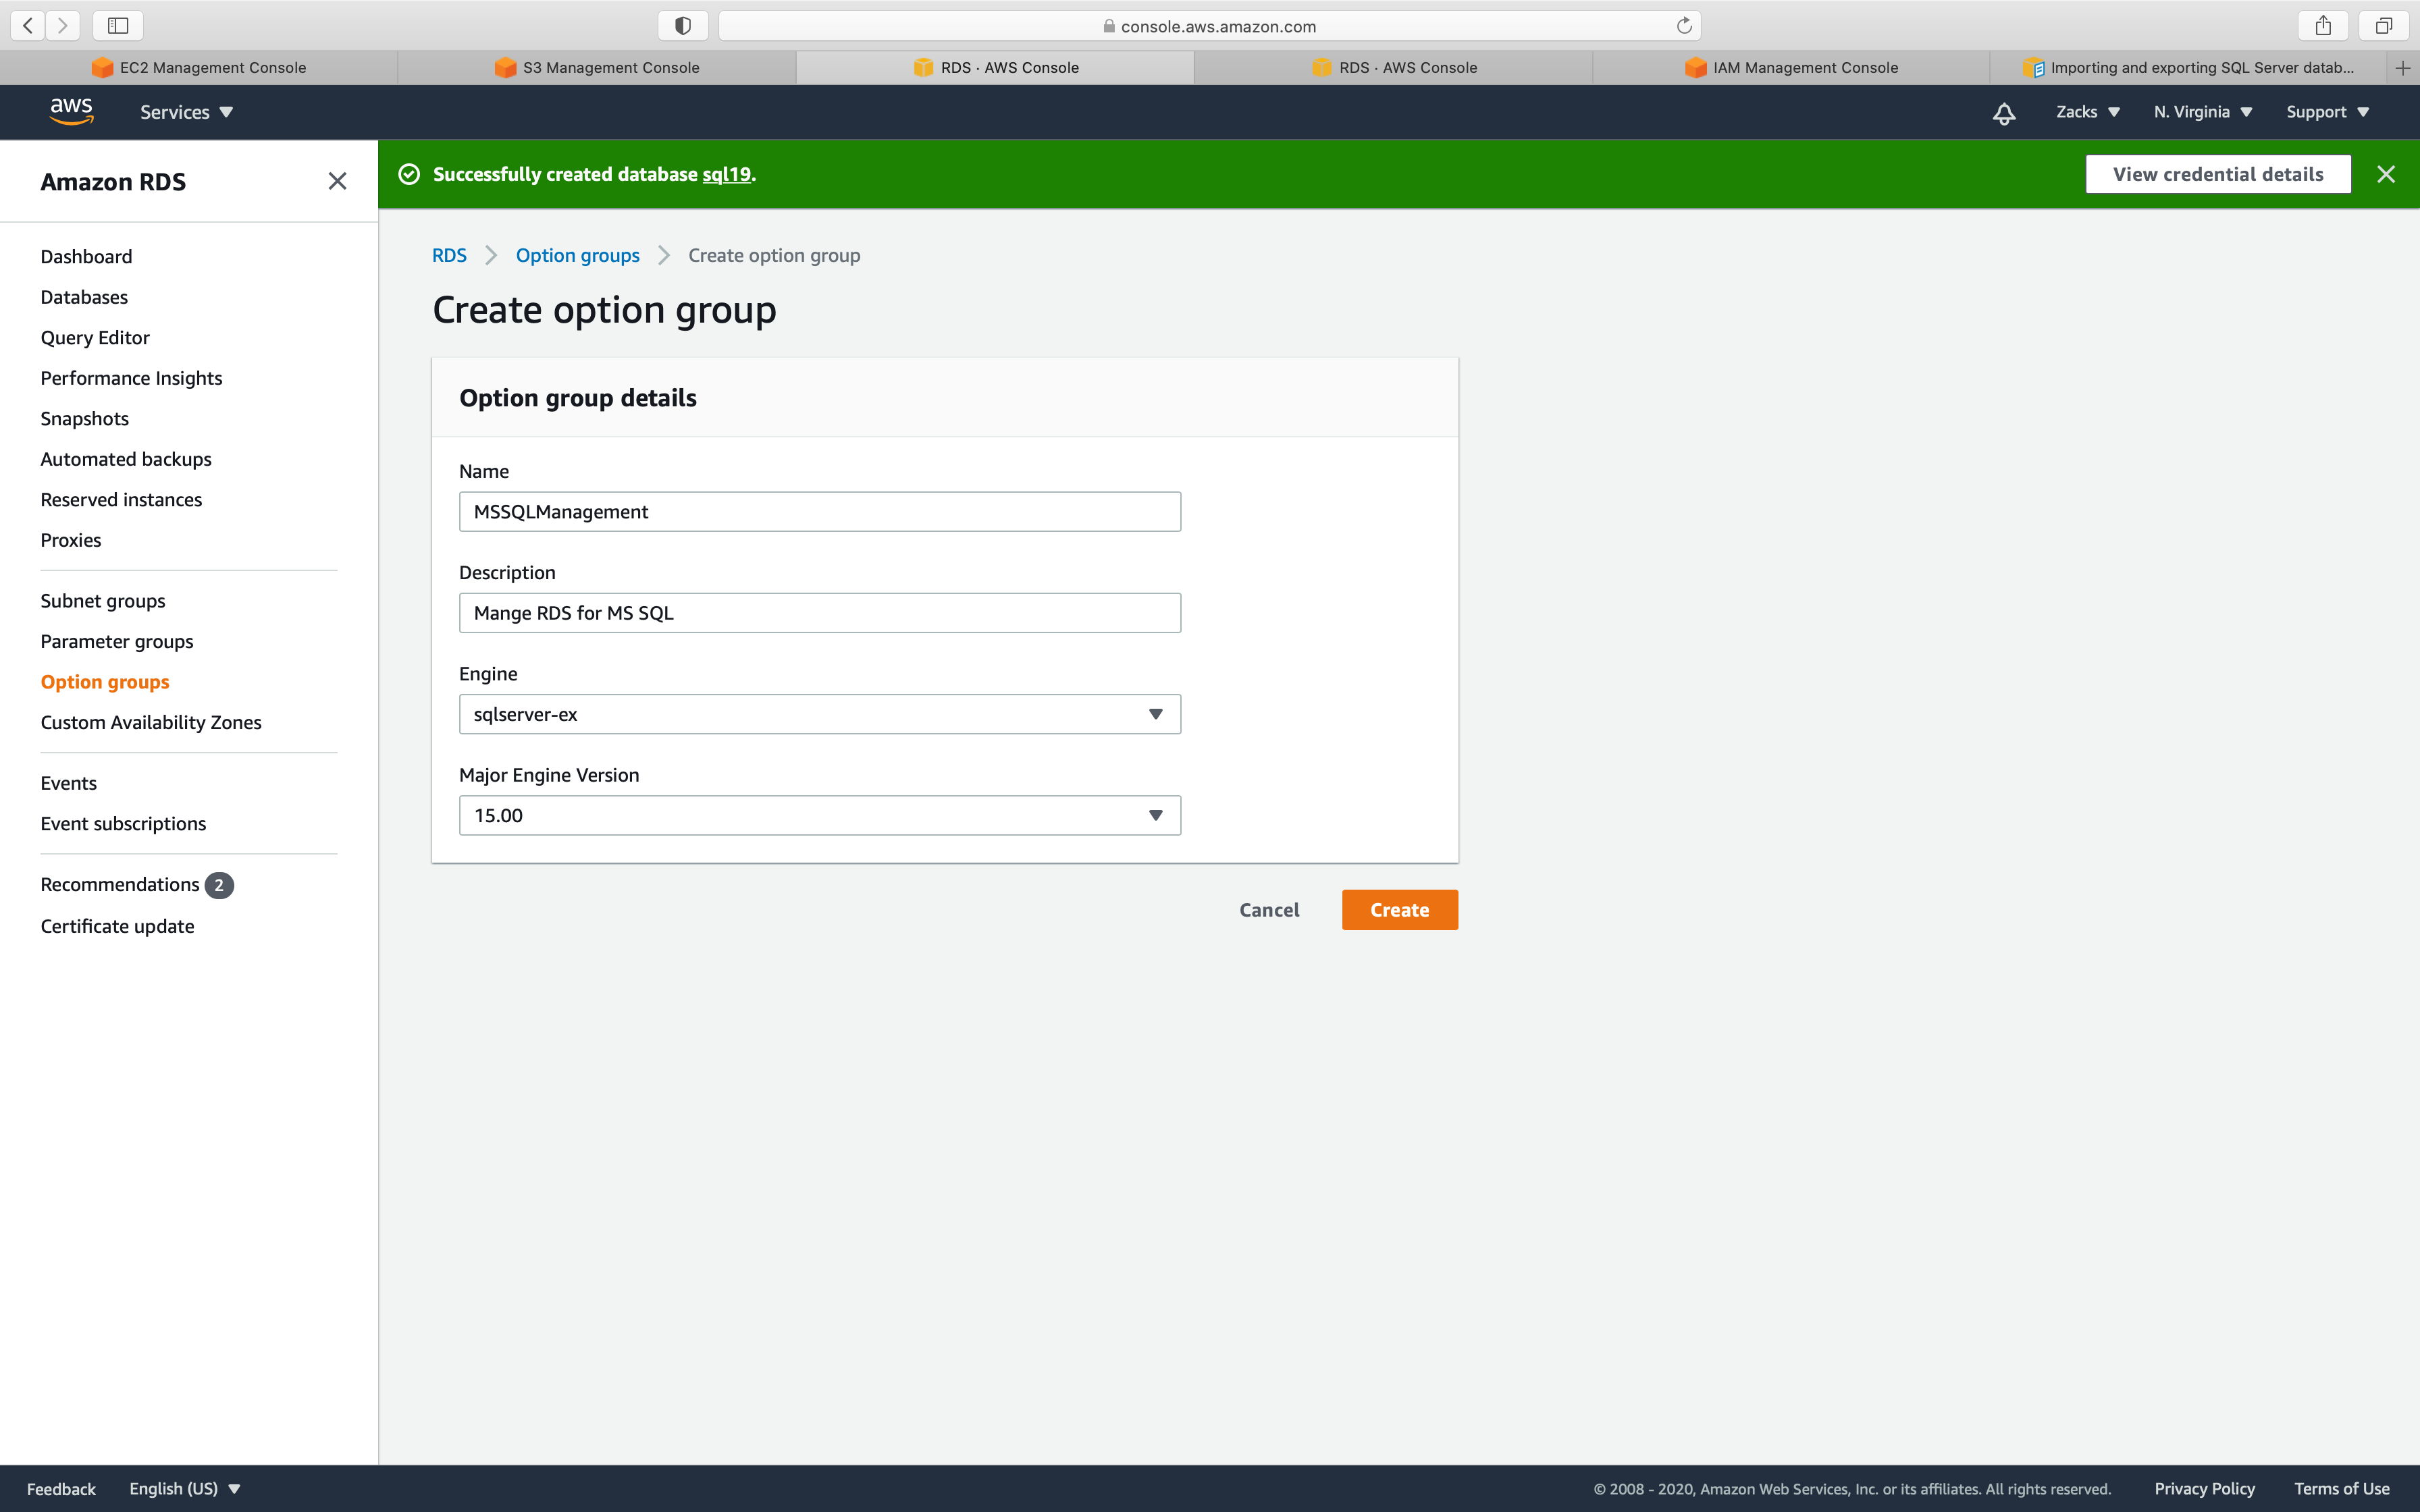
Now you can see your new Option group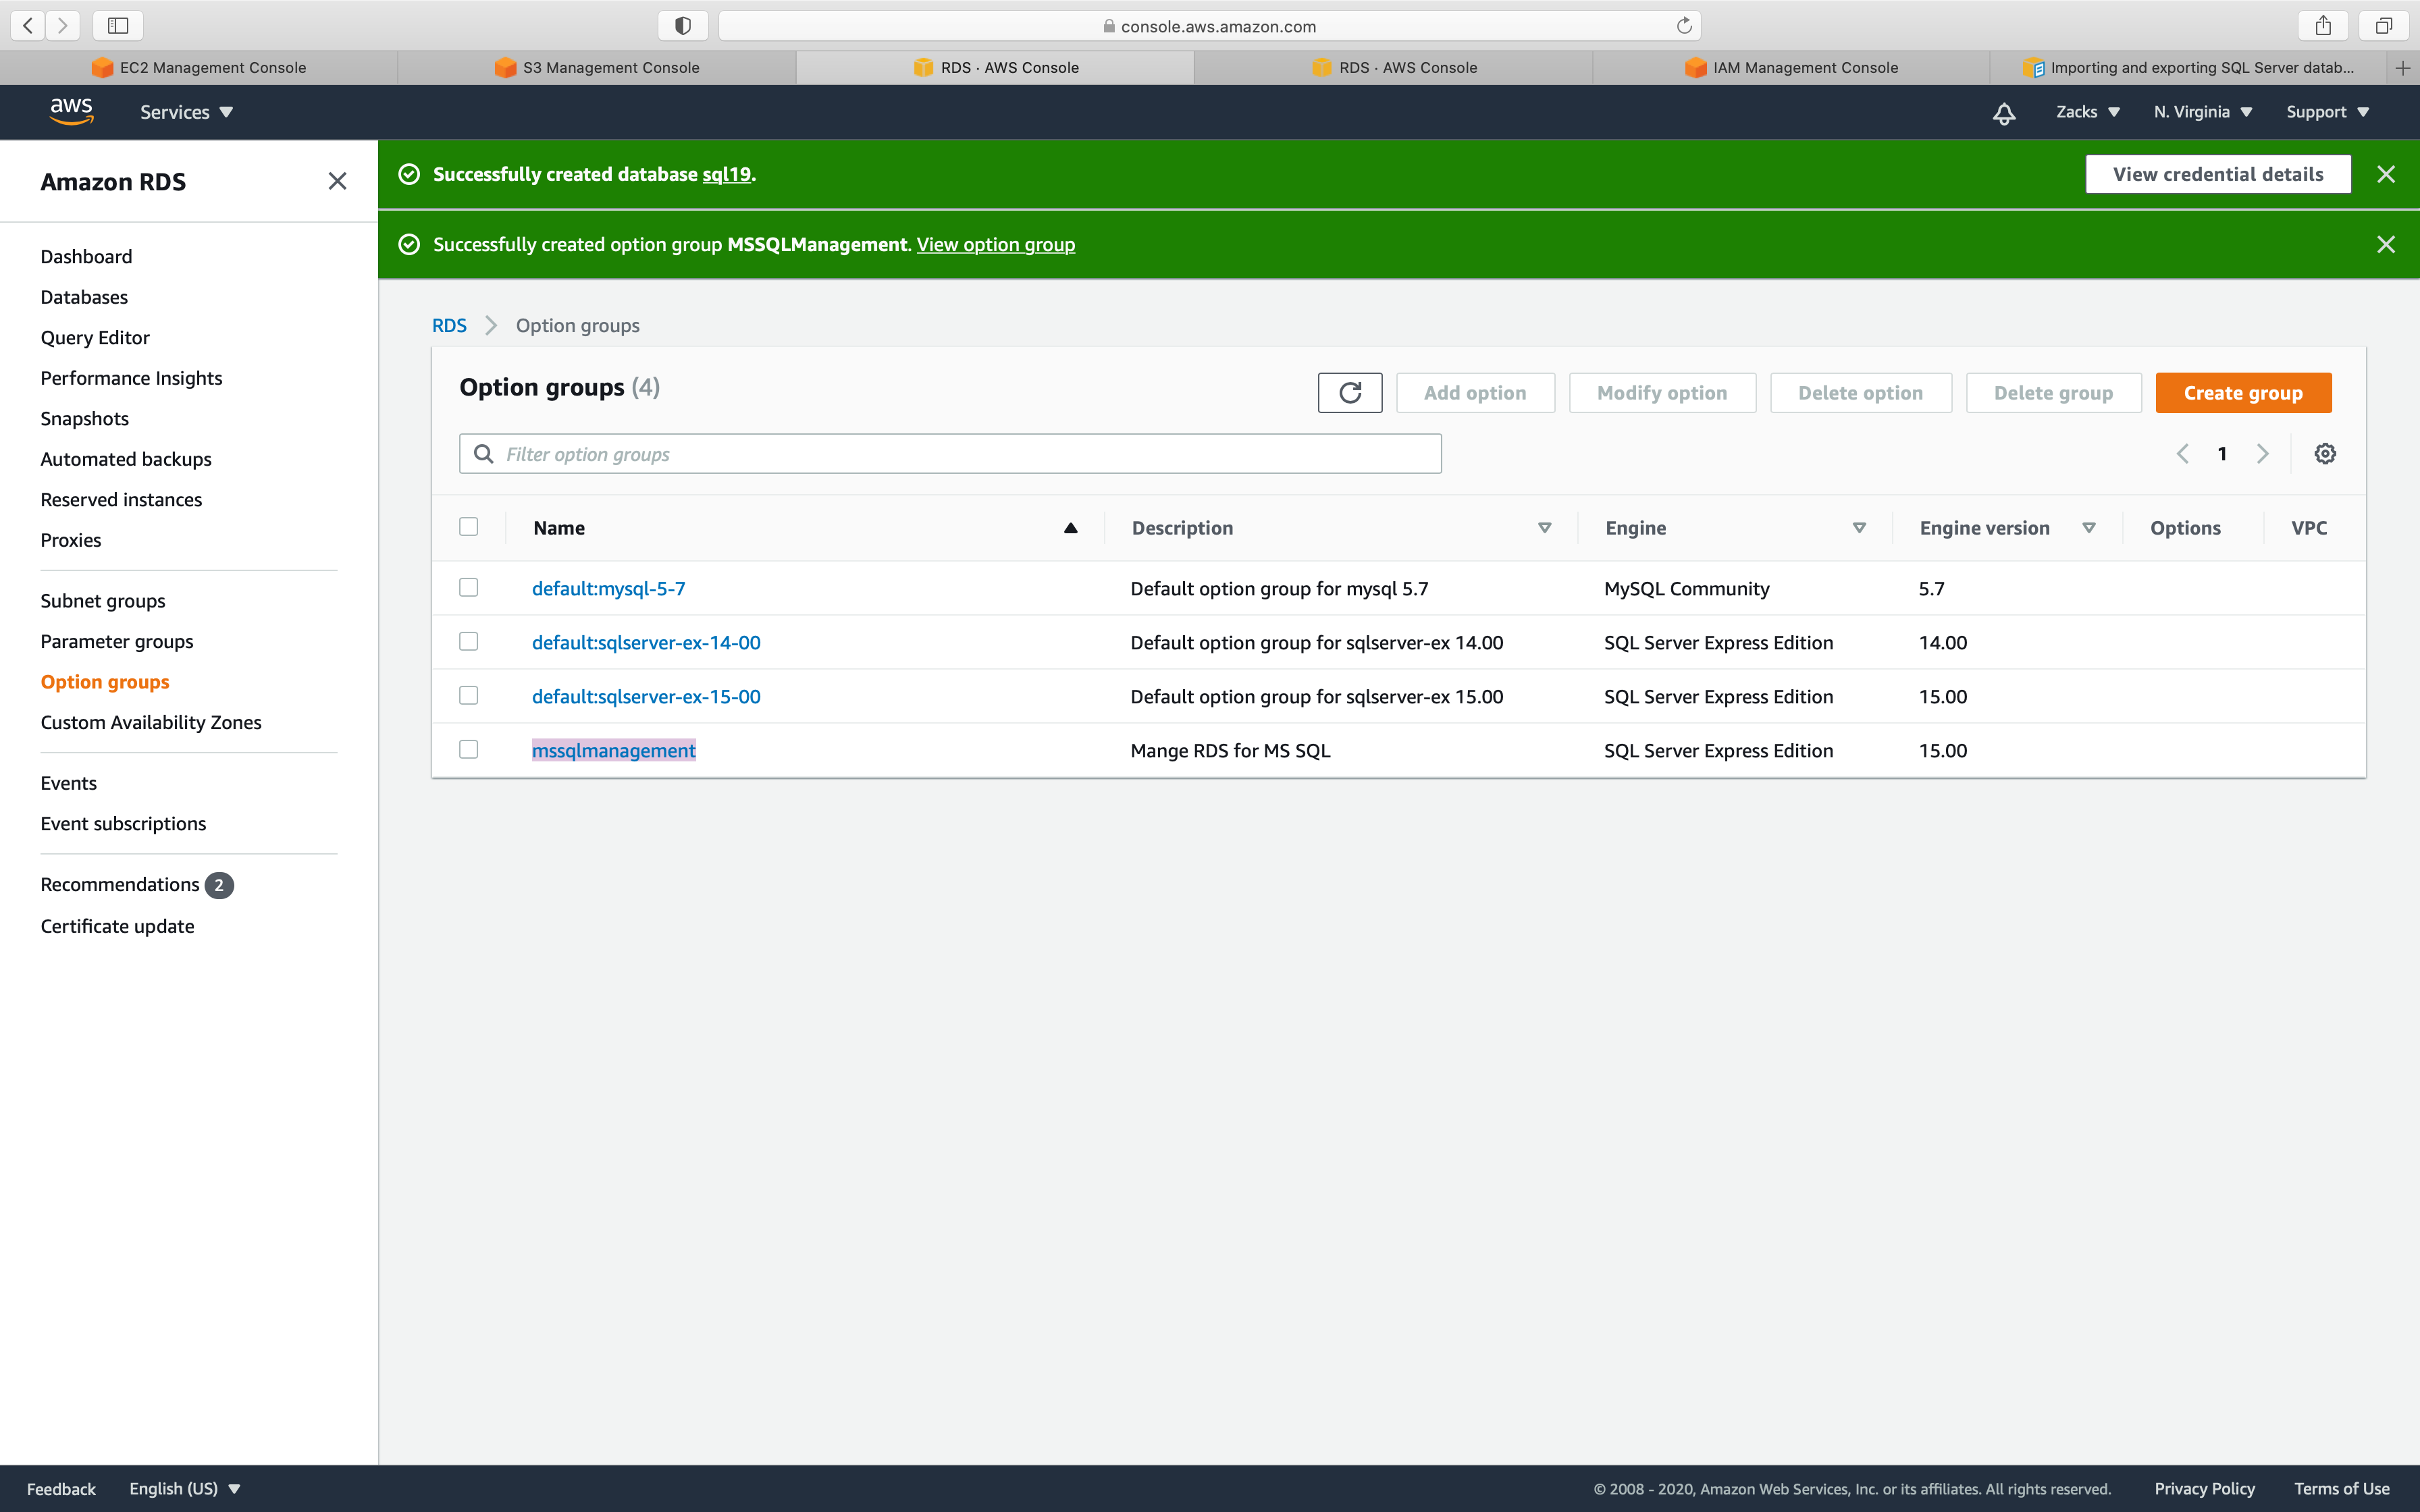
Add Option
Select your new Option group, then click on Add option button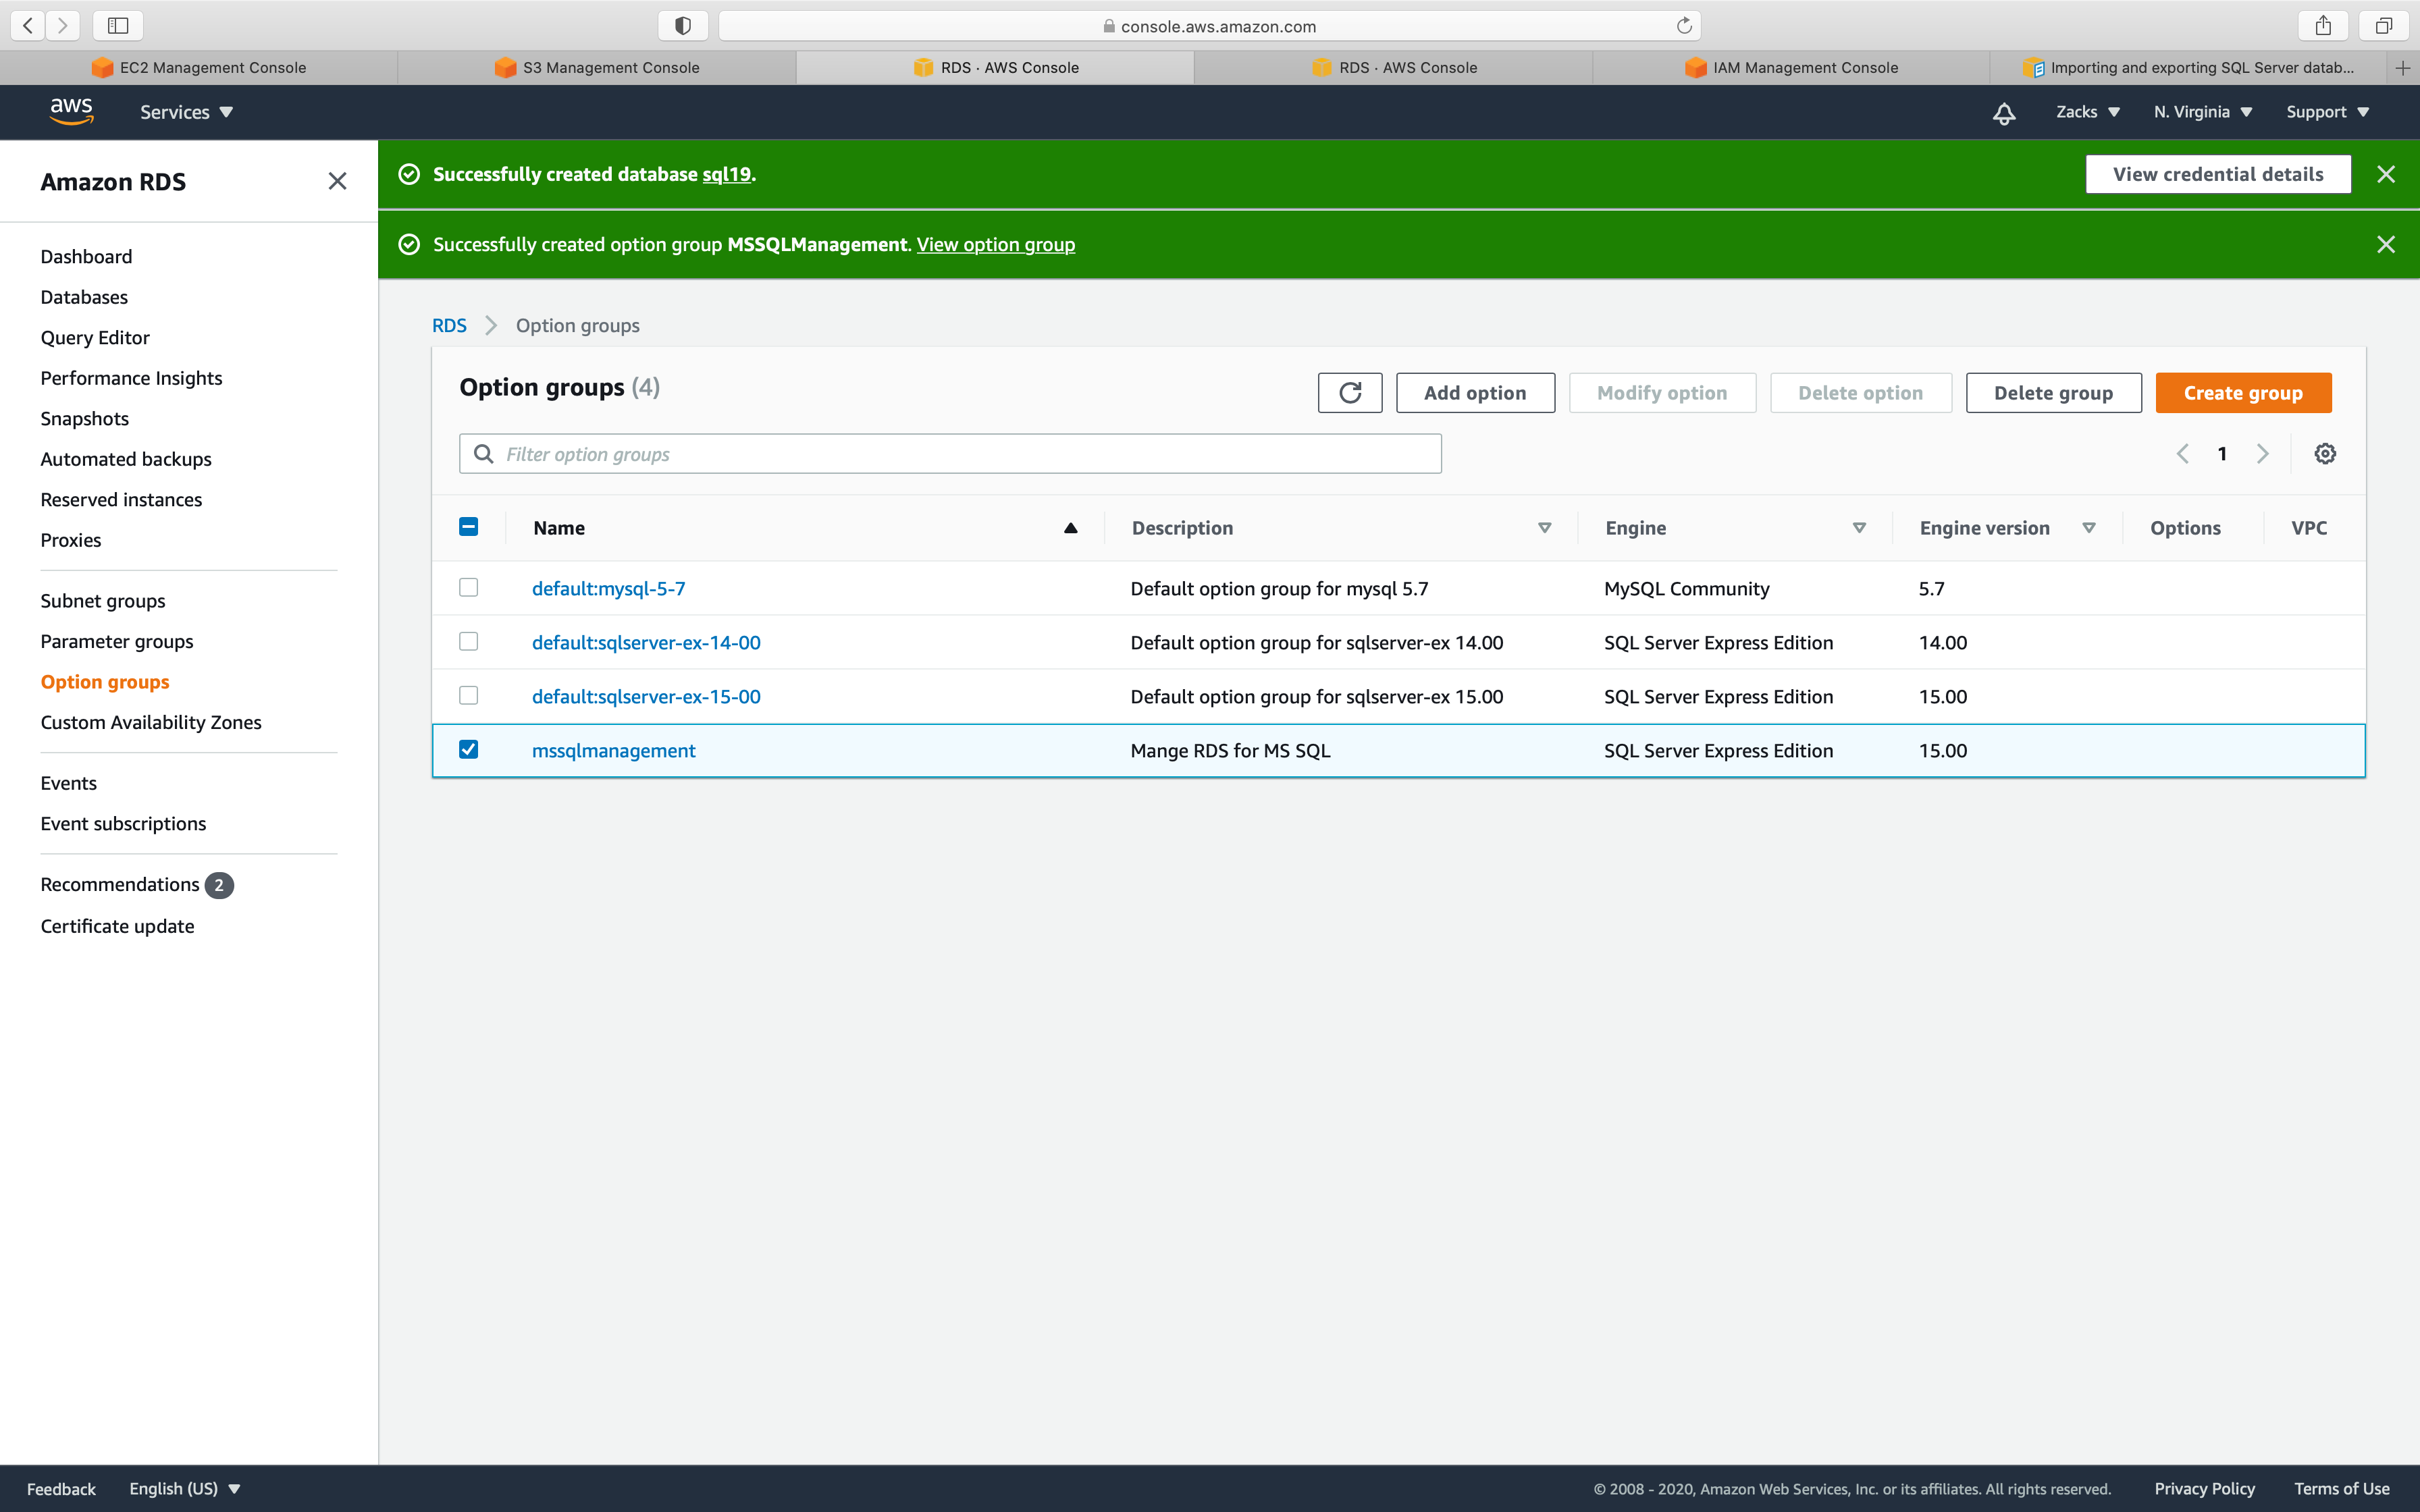
Option name:
- select
SQLSERVER_BACK_RESTORE
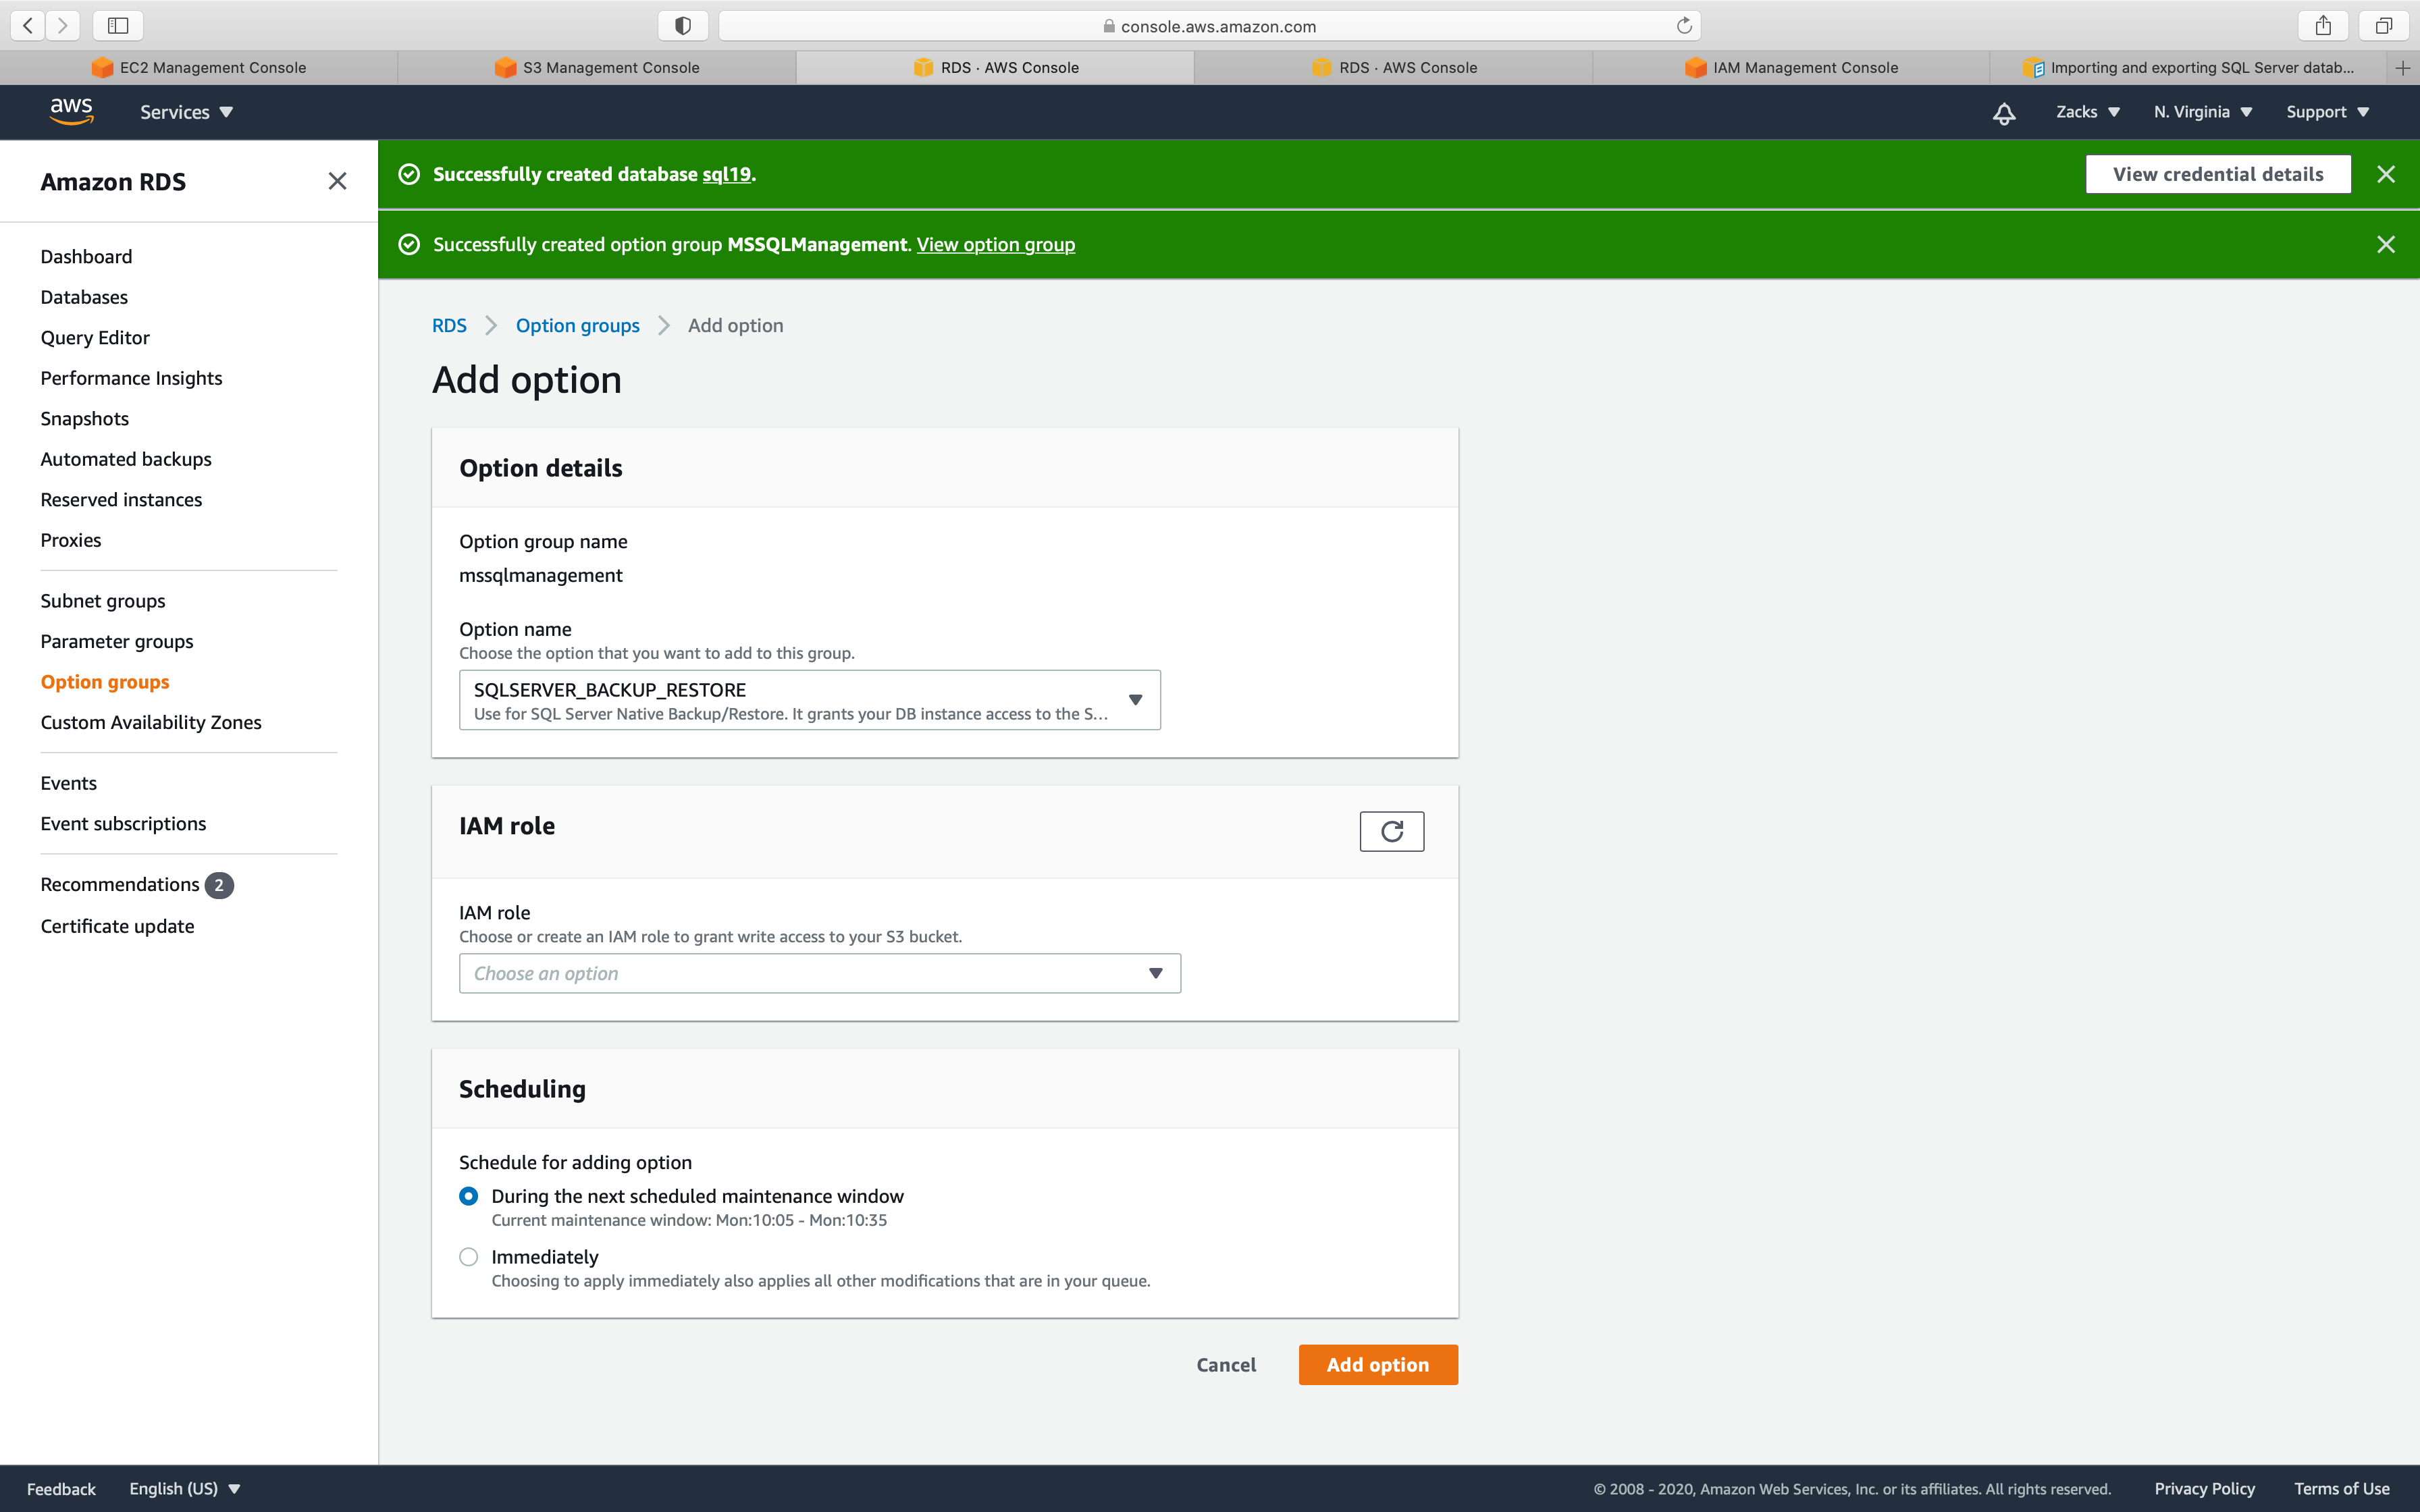
IAM role:
- if you don’t have a proper IAM role with
S3FullAccess, selectCreate a new role, and name it.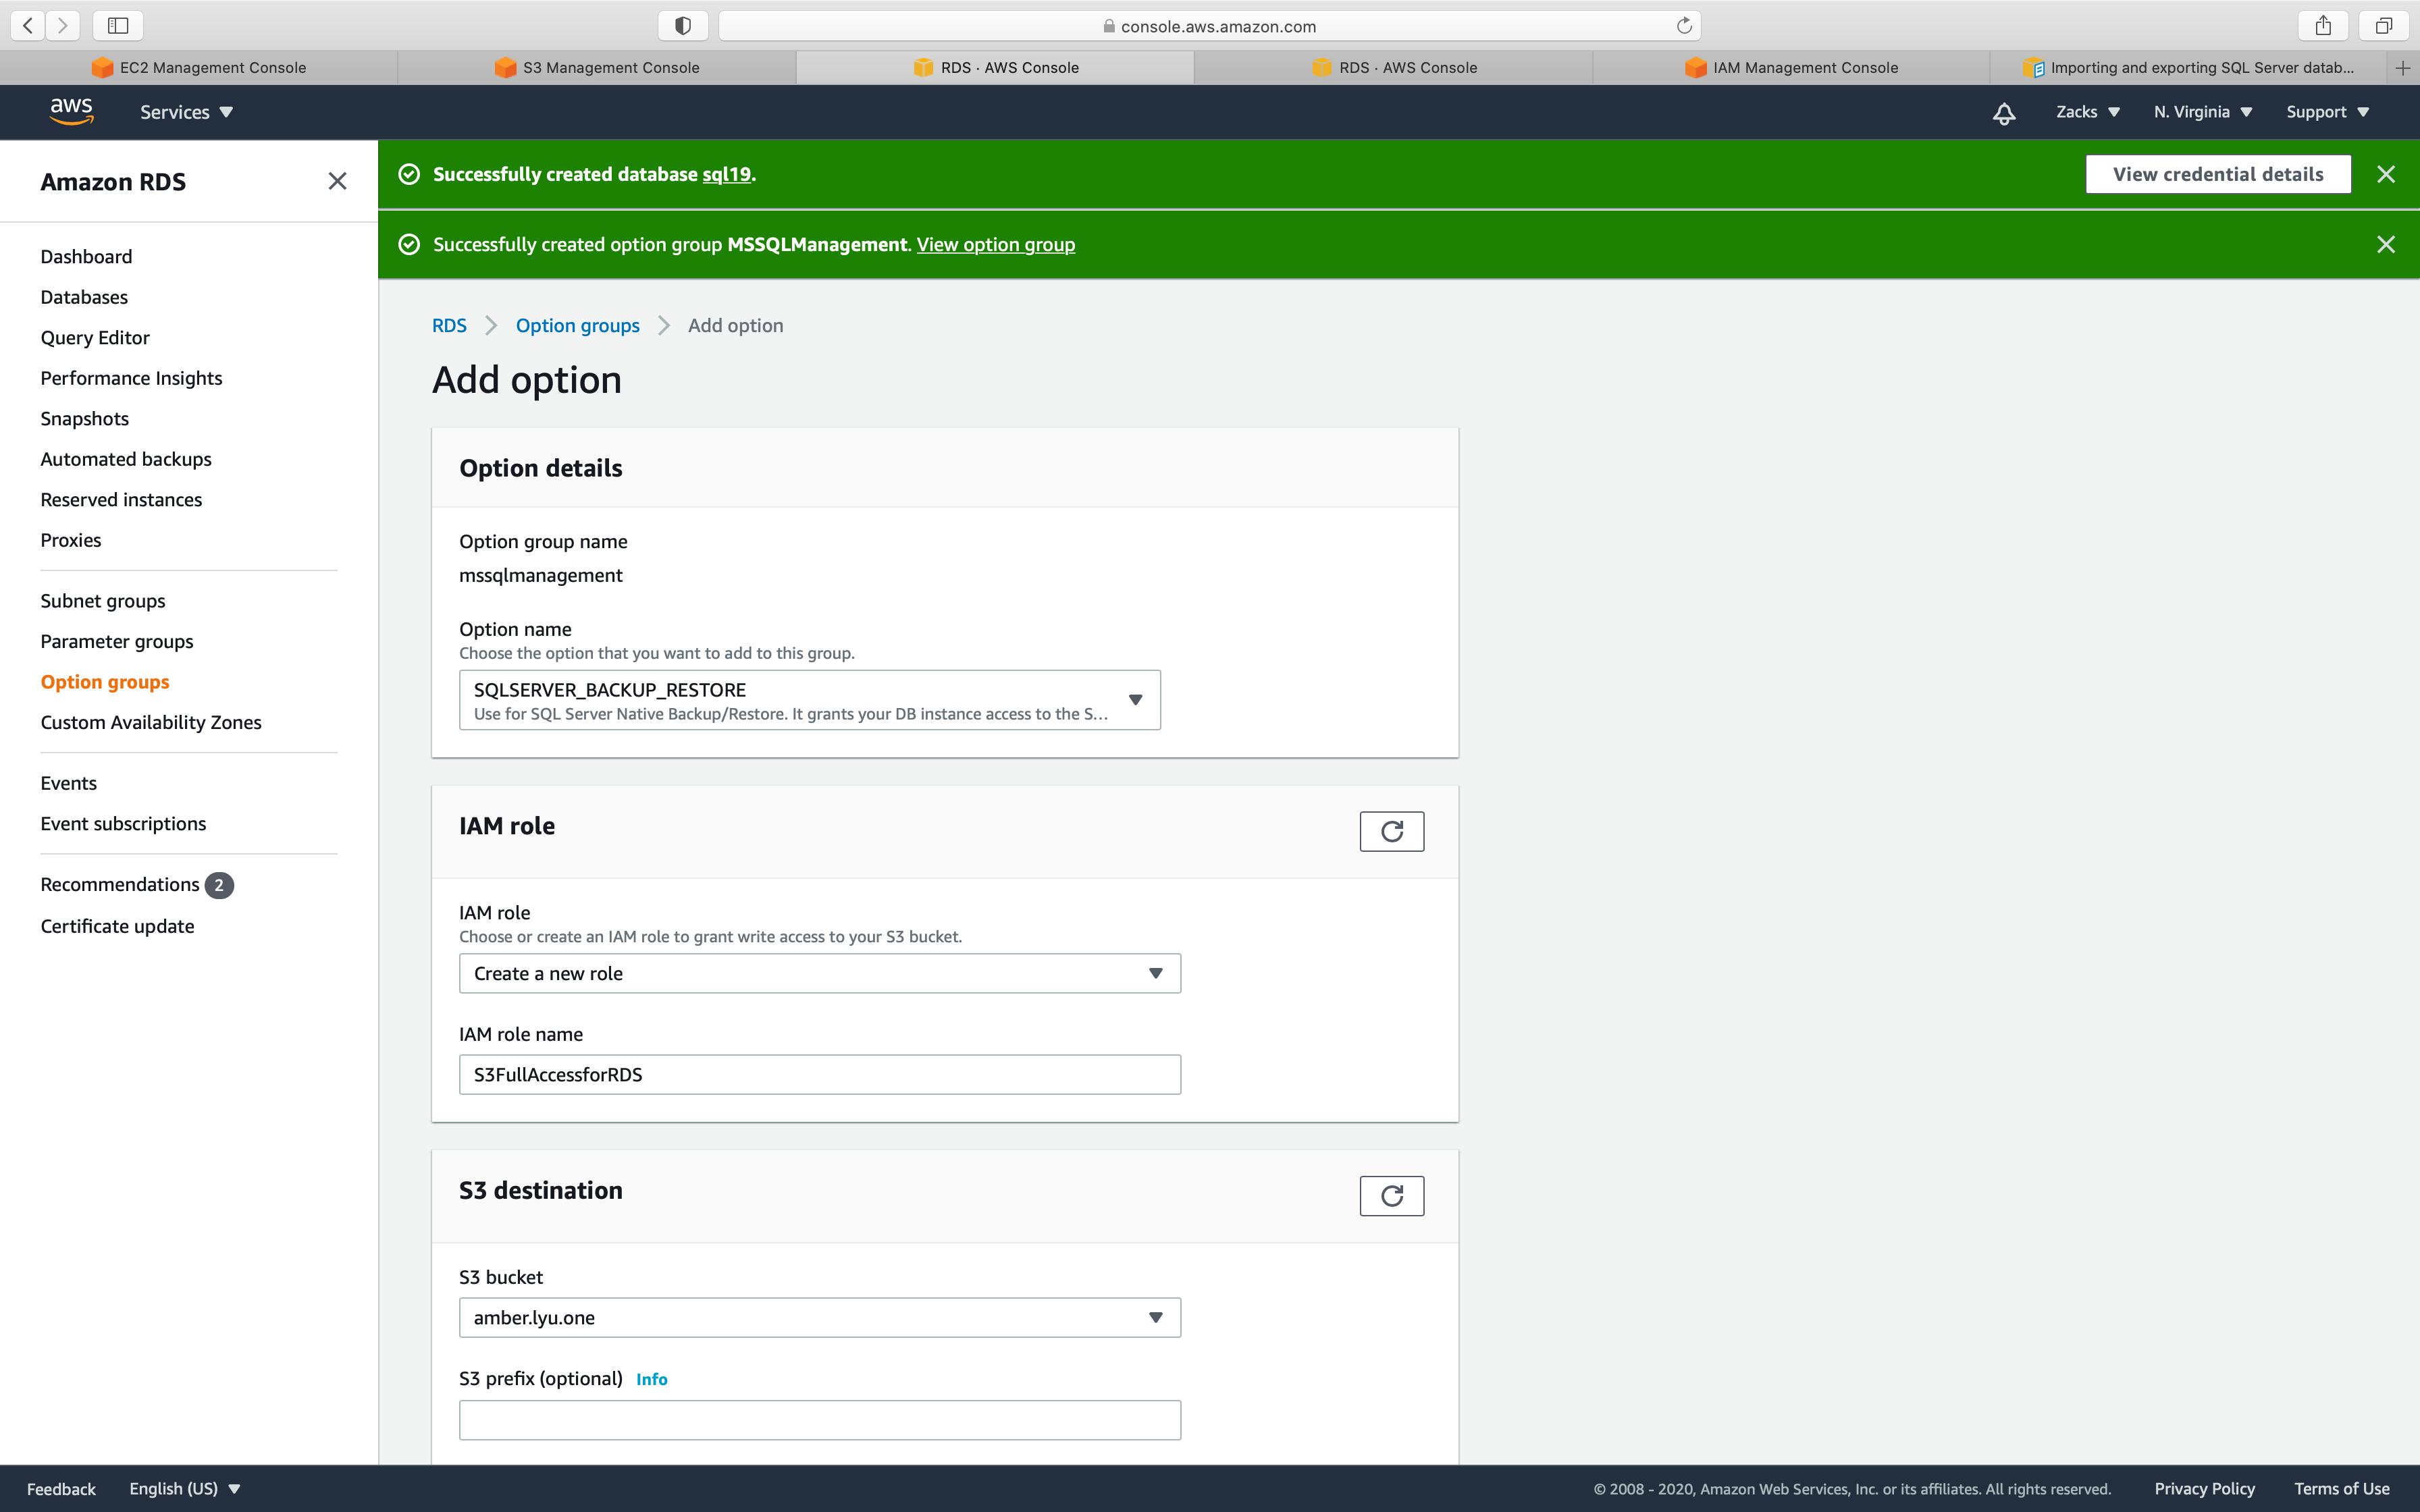
S3 destination
- Select the bucket that stores your .bak file.
Encryption
- Uncheck
Scheduling
- Select
Immediately
Click on Add option
Go back to the Instances page, click on your option group.
You will see the new option.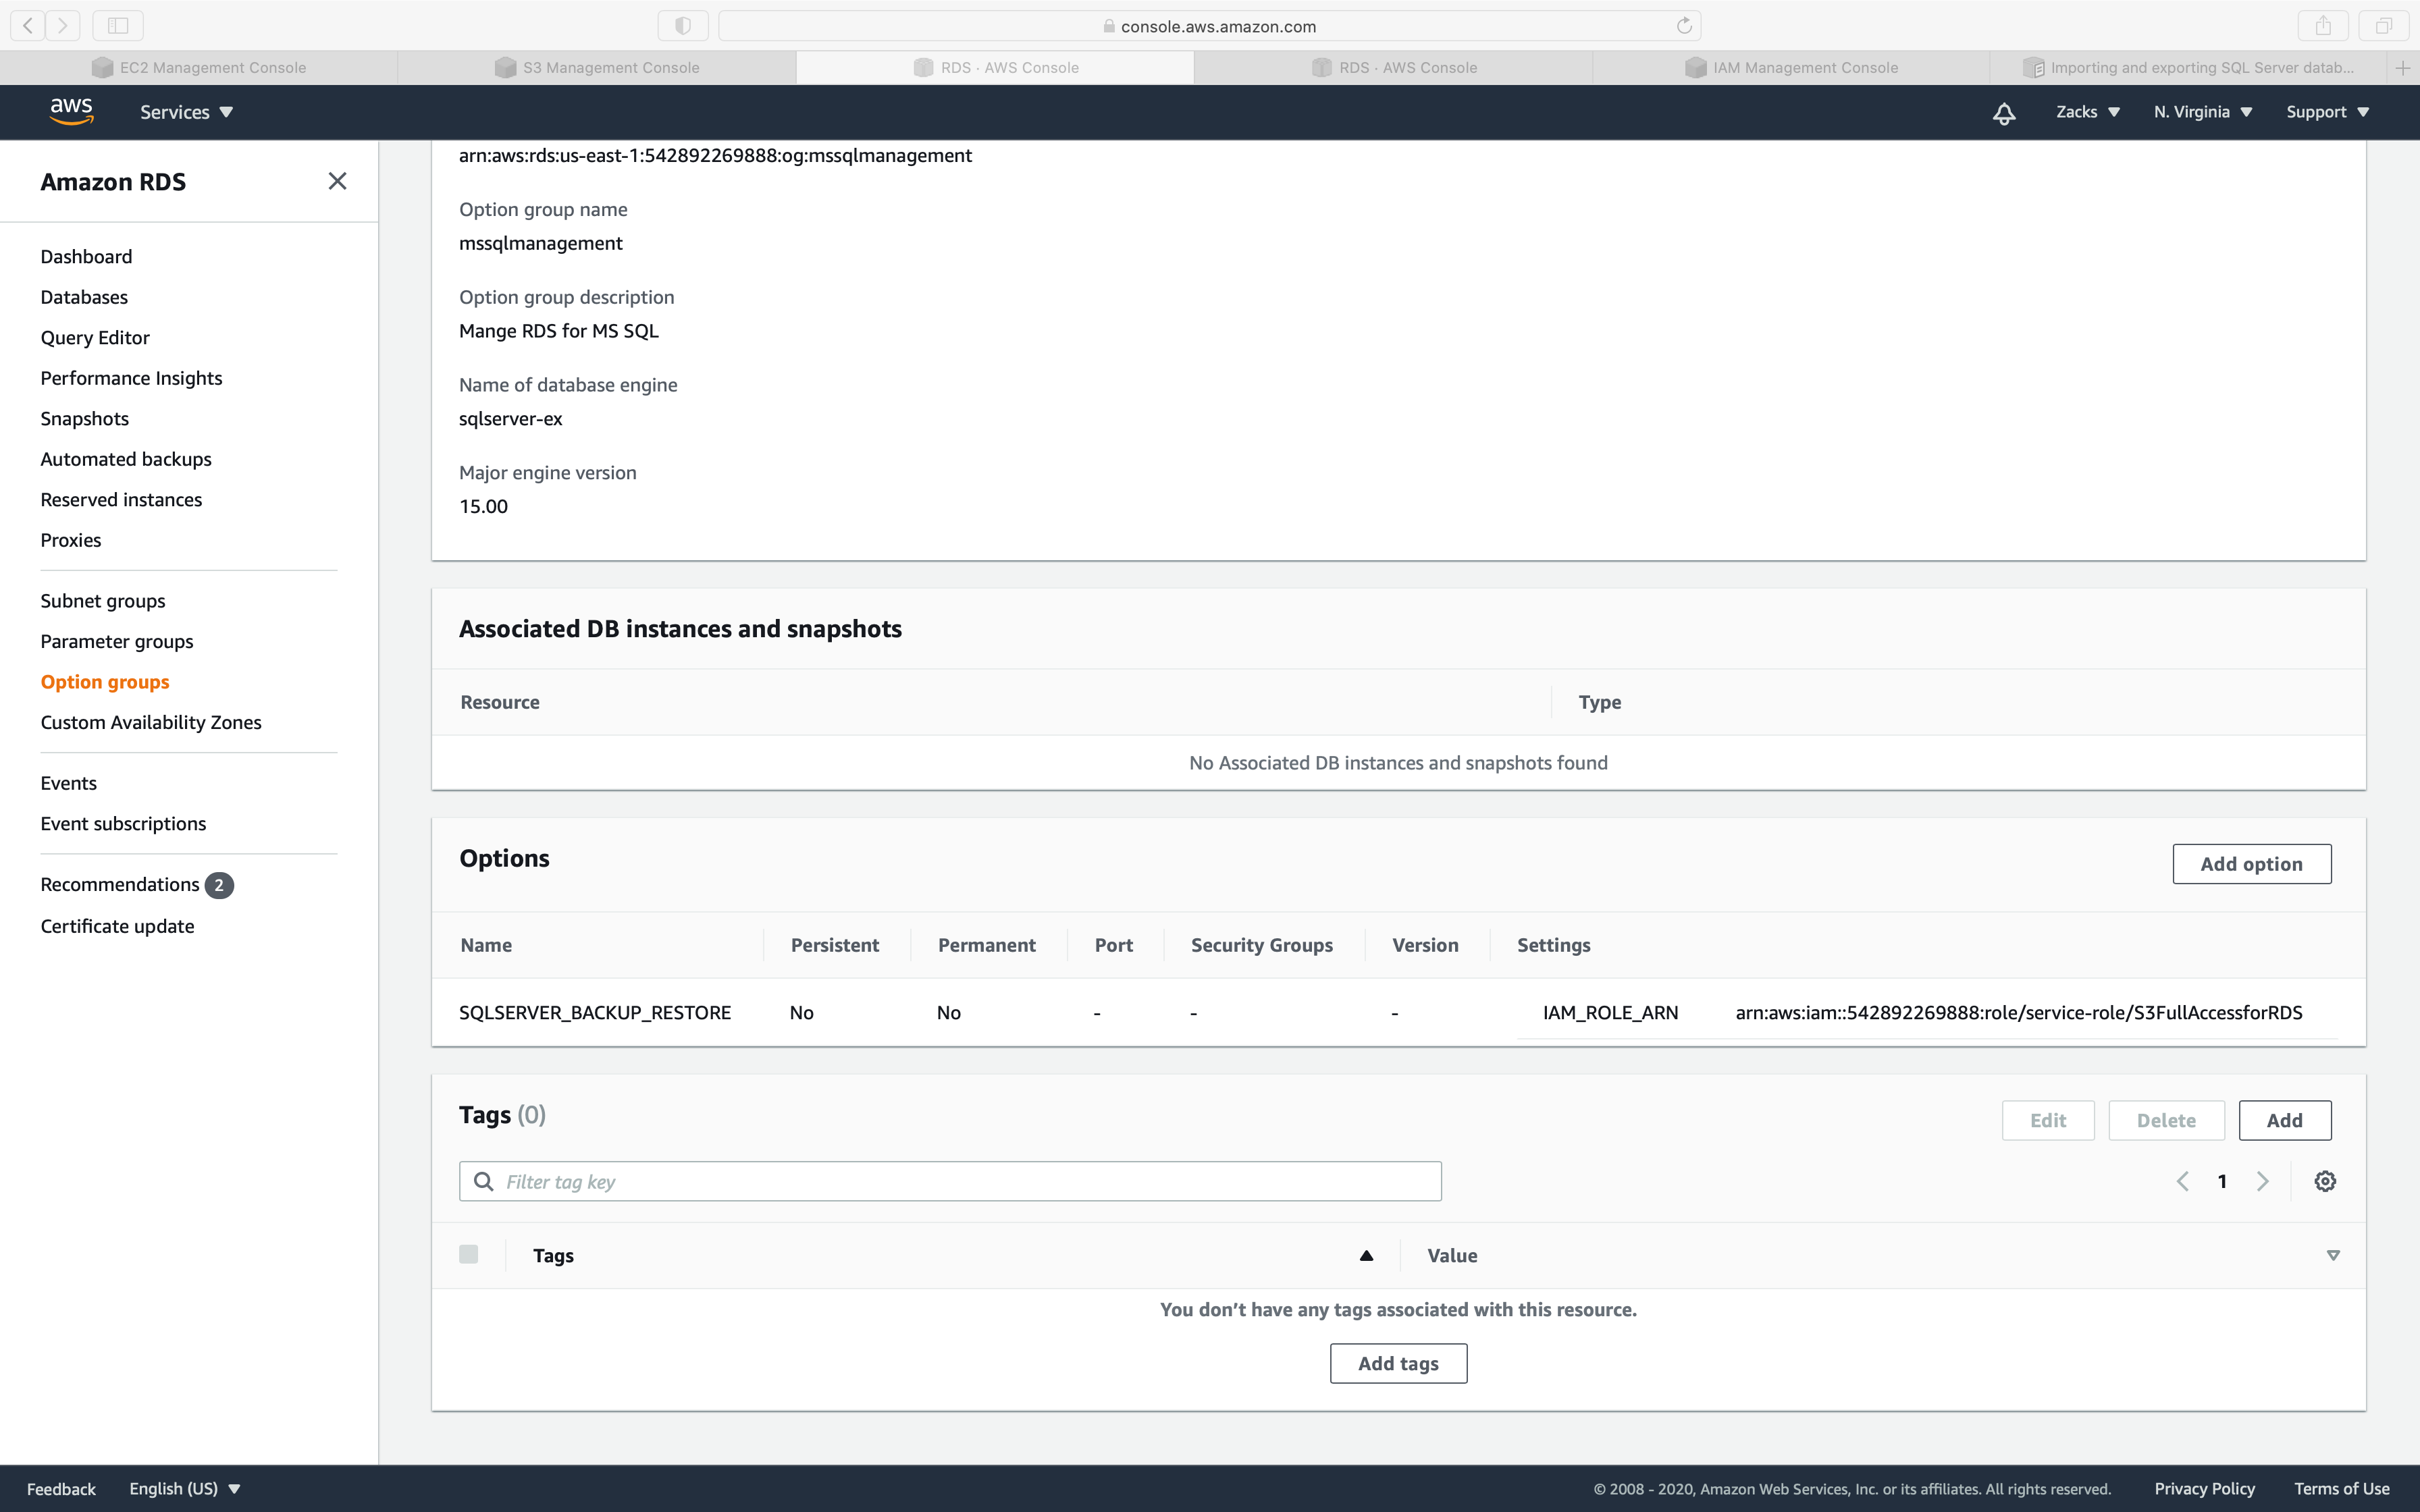
IAM Configuration
Services -> IAM -> Roles
Click on the IAM role you just created.
Click on Attach policies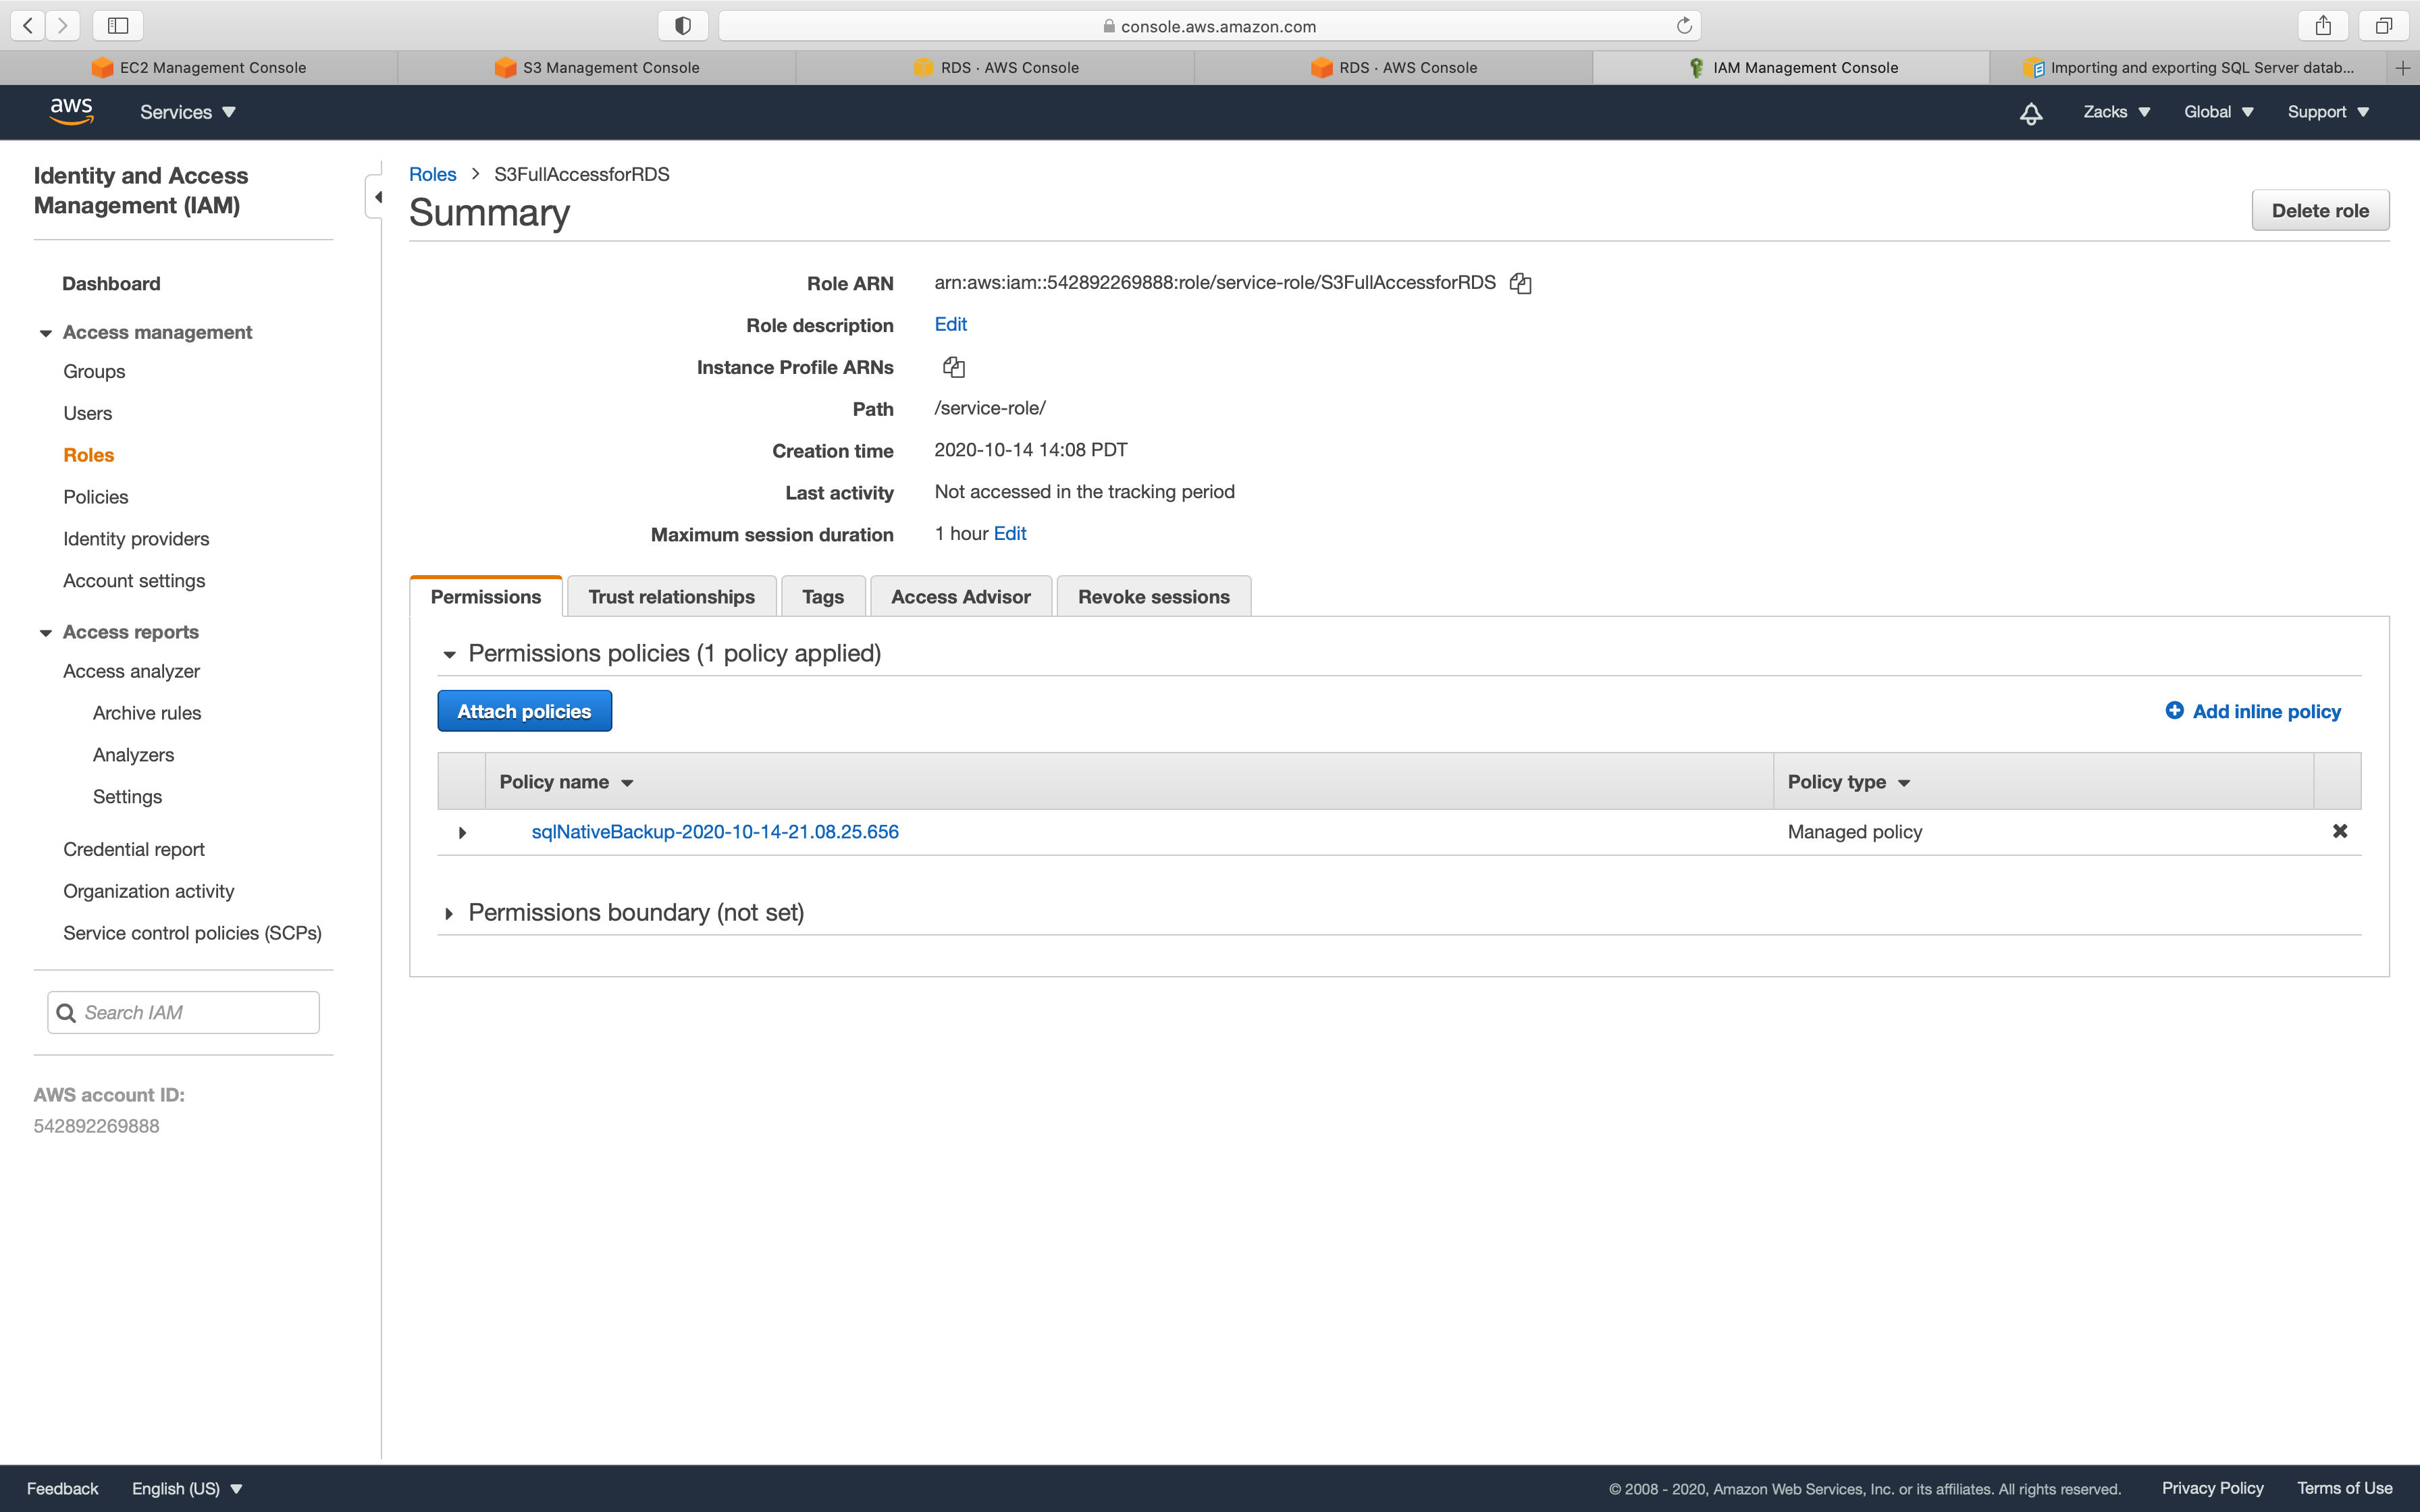
In the JSON editor, paste the following content.
1 | { |
MS SQL Instance Configuration
Service -> RDS -> Instances
Click on your MS SQL Instance
Click on Modify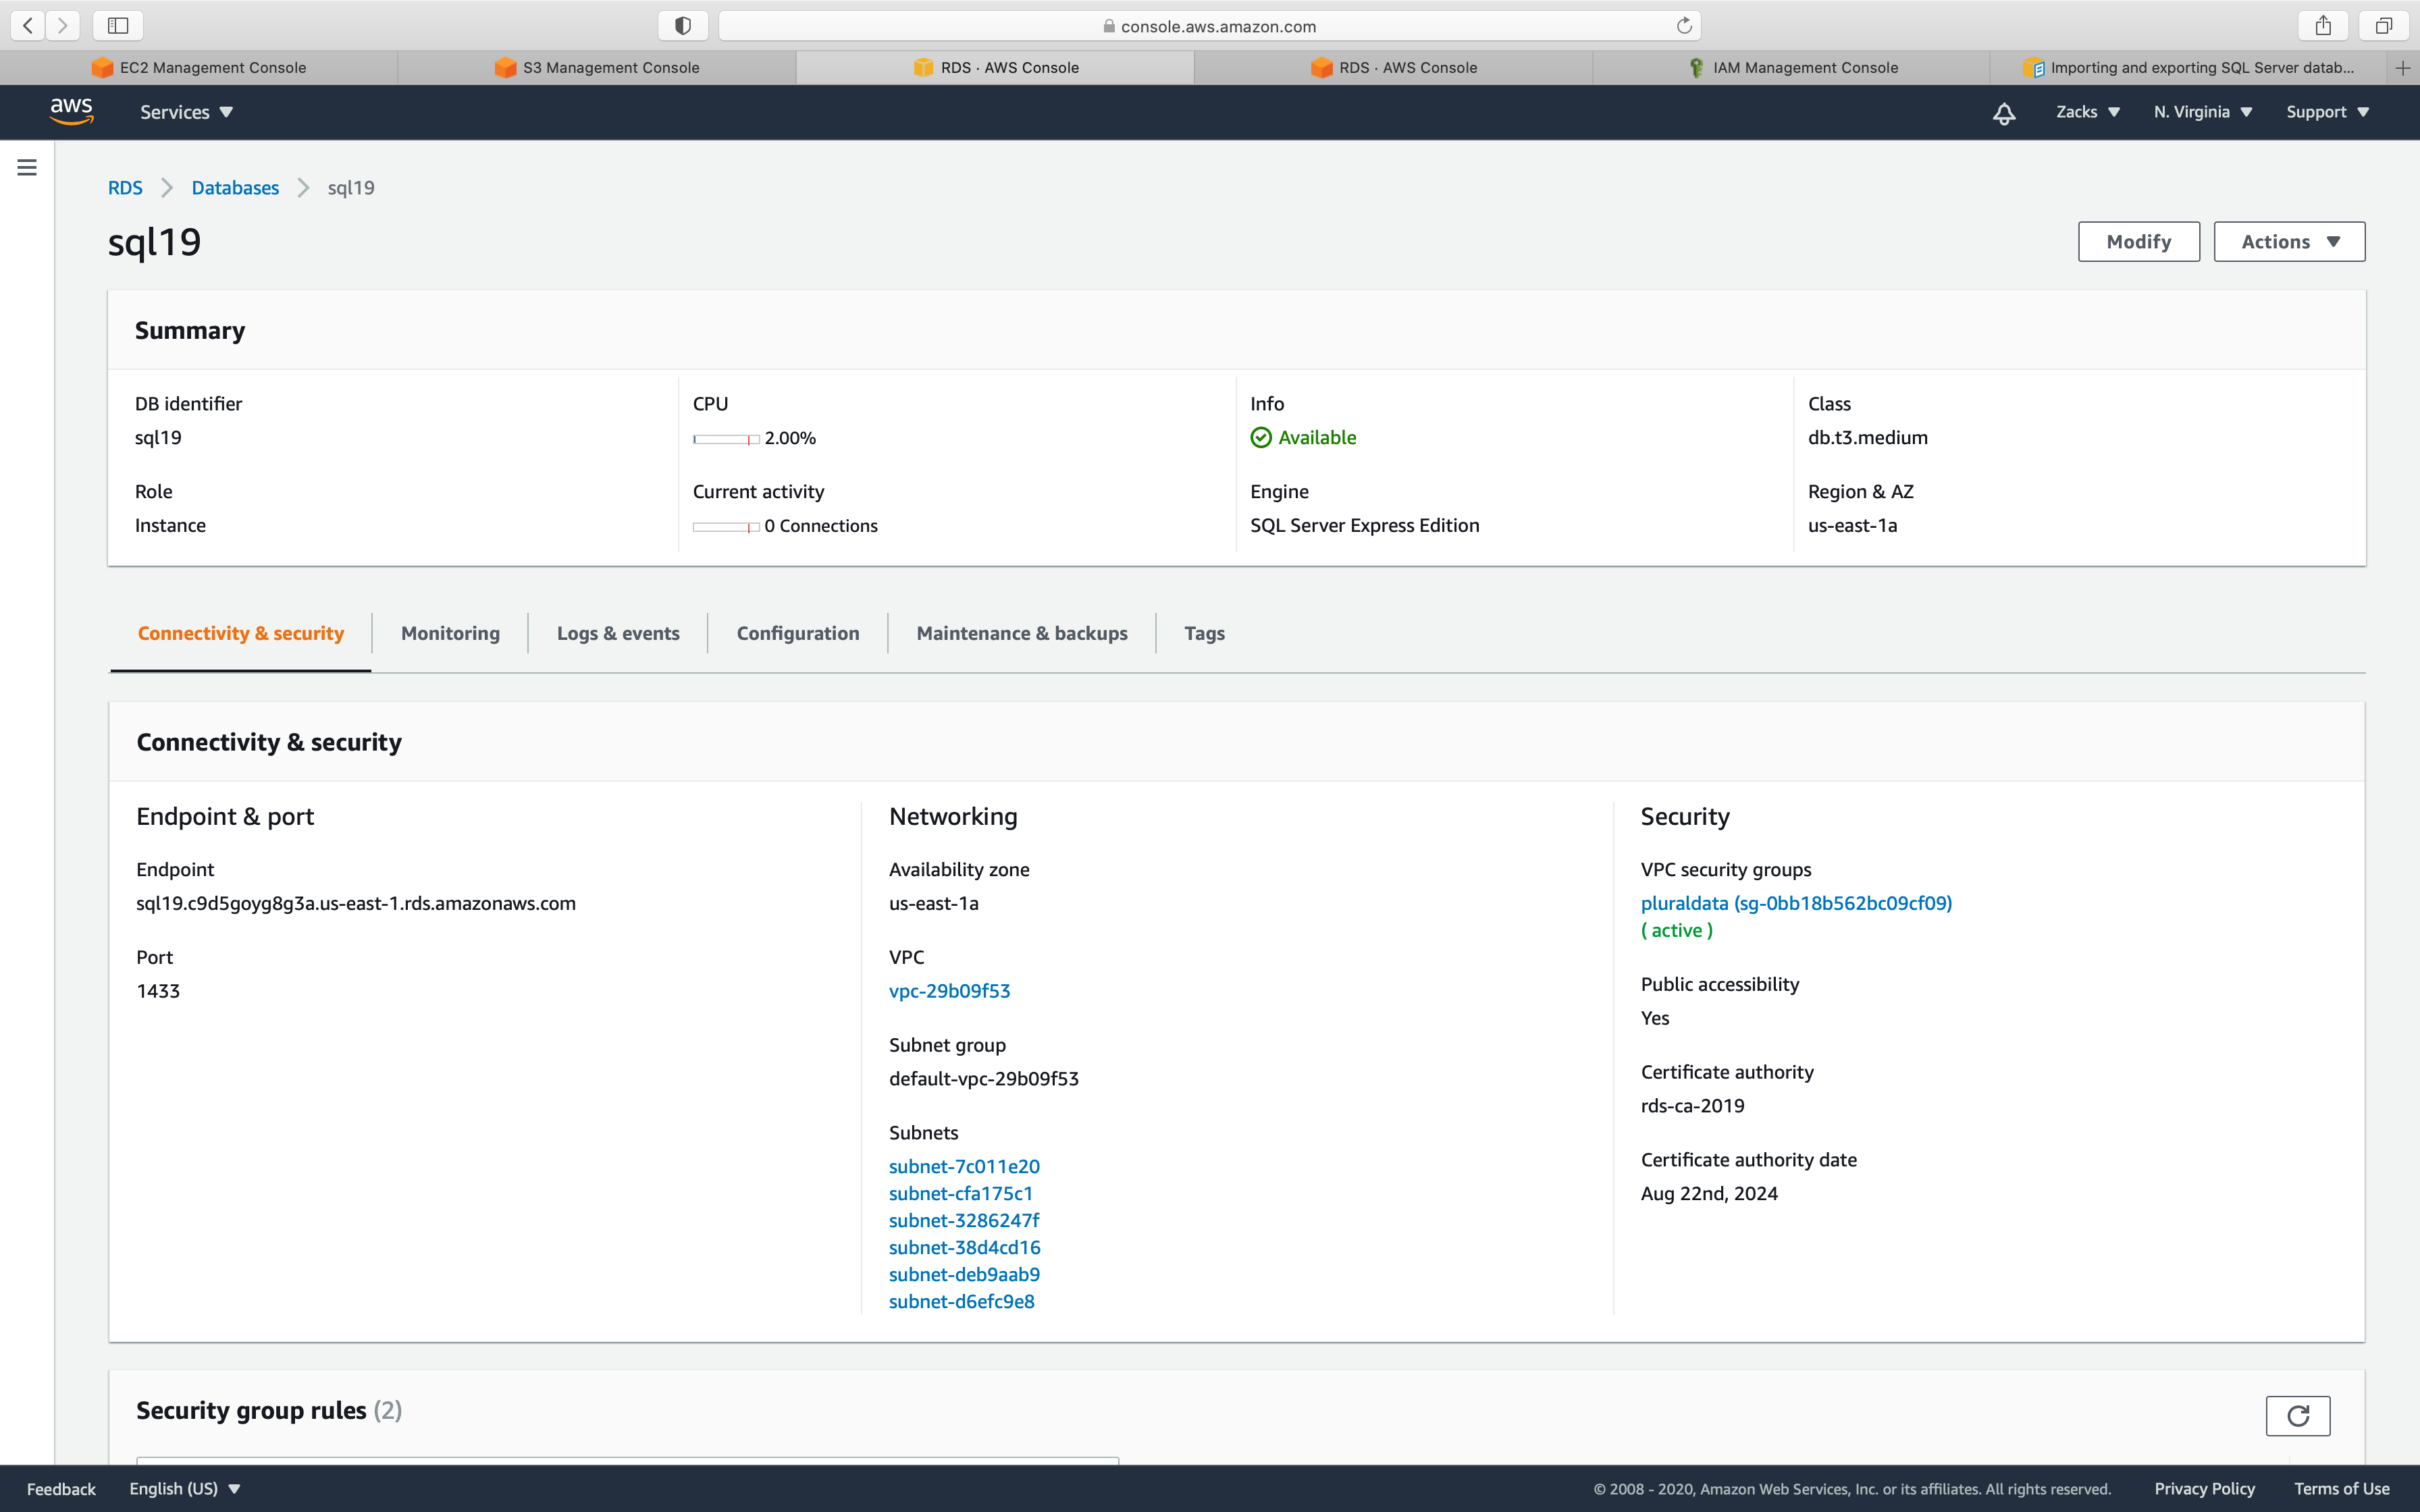
Change your default option group to the one you created.
Click on Continue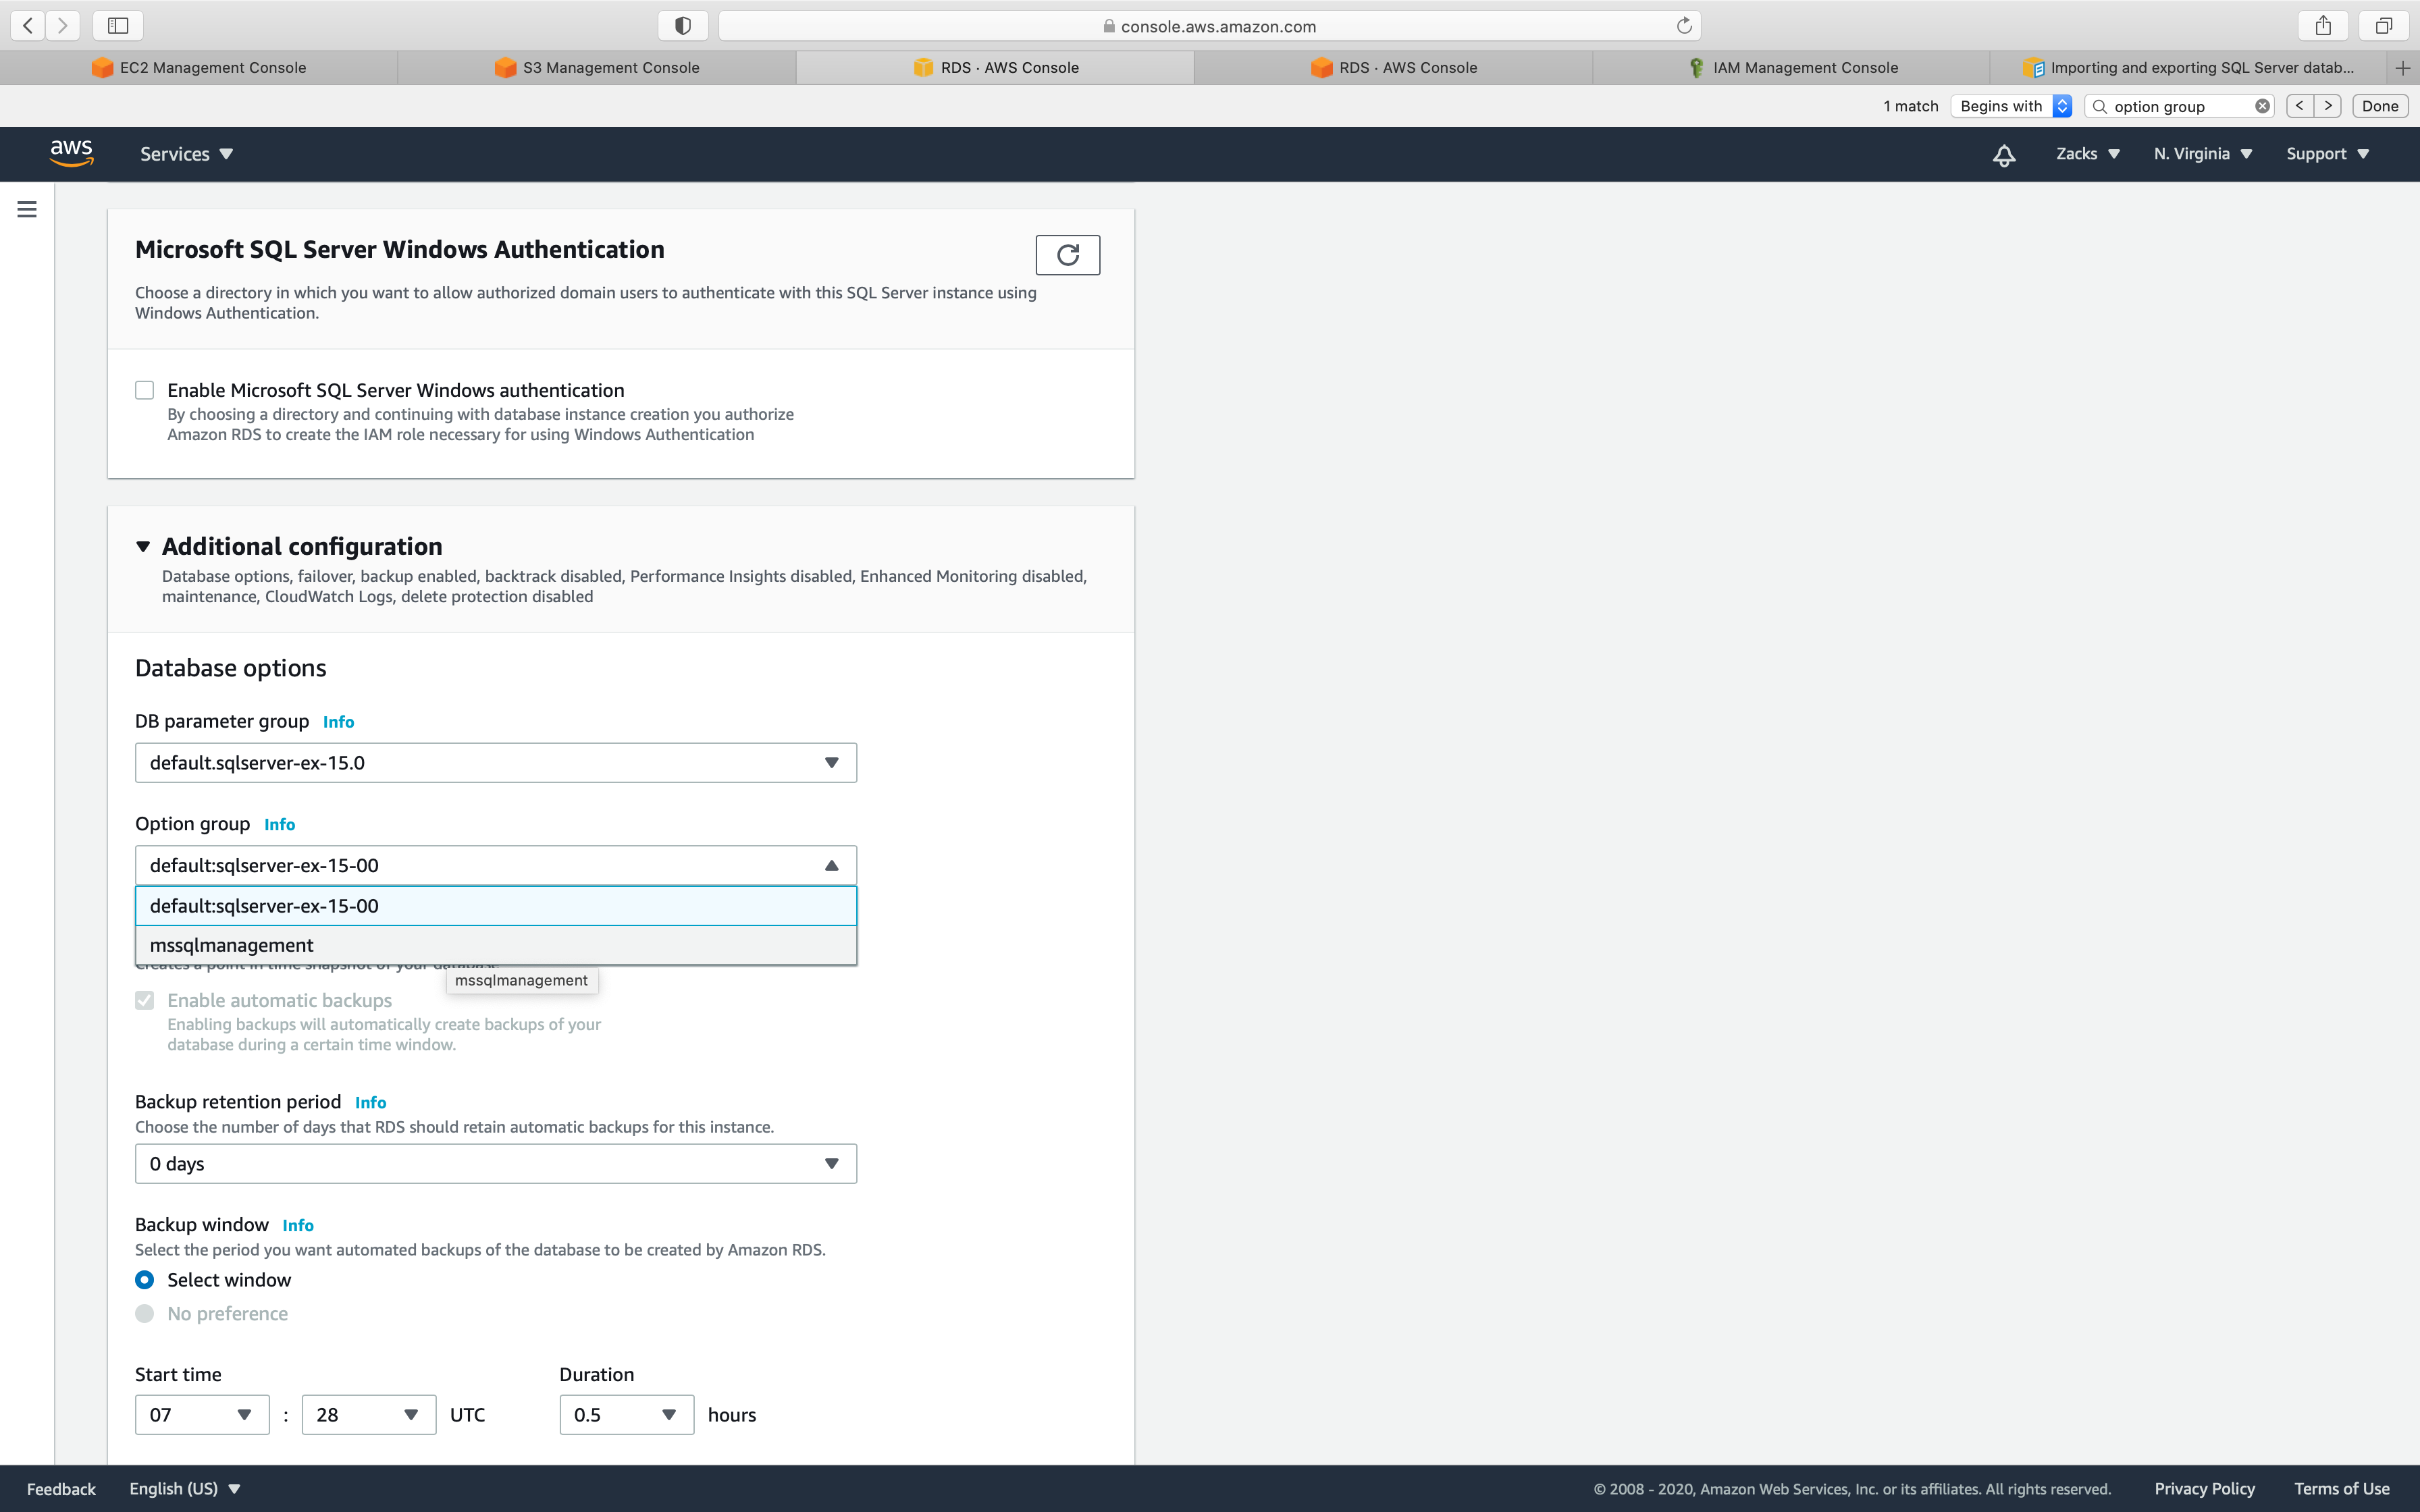
Select Apply immediately
Click on Modify DB instance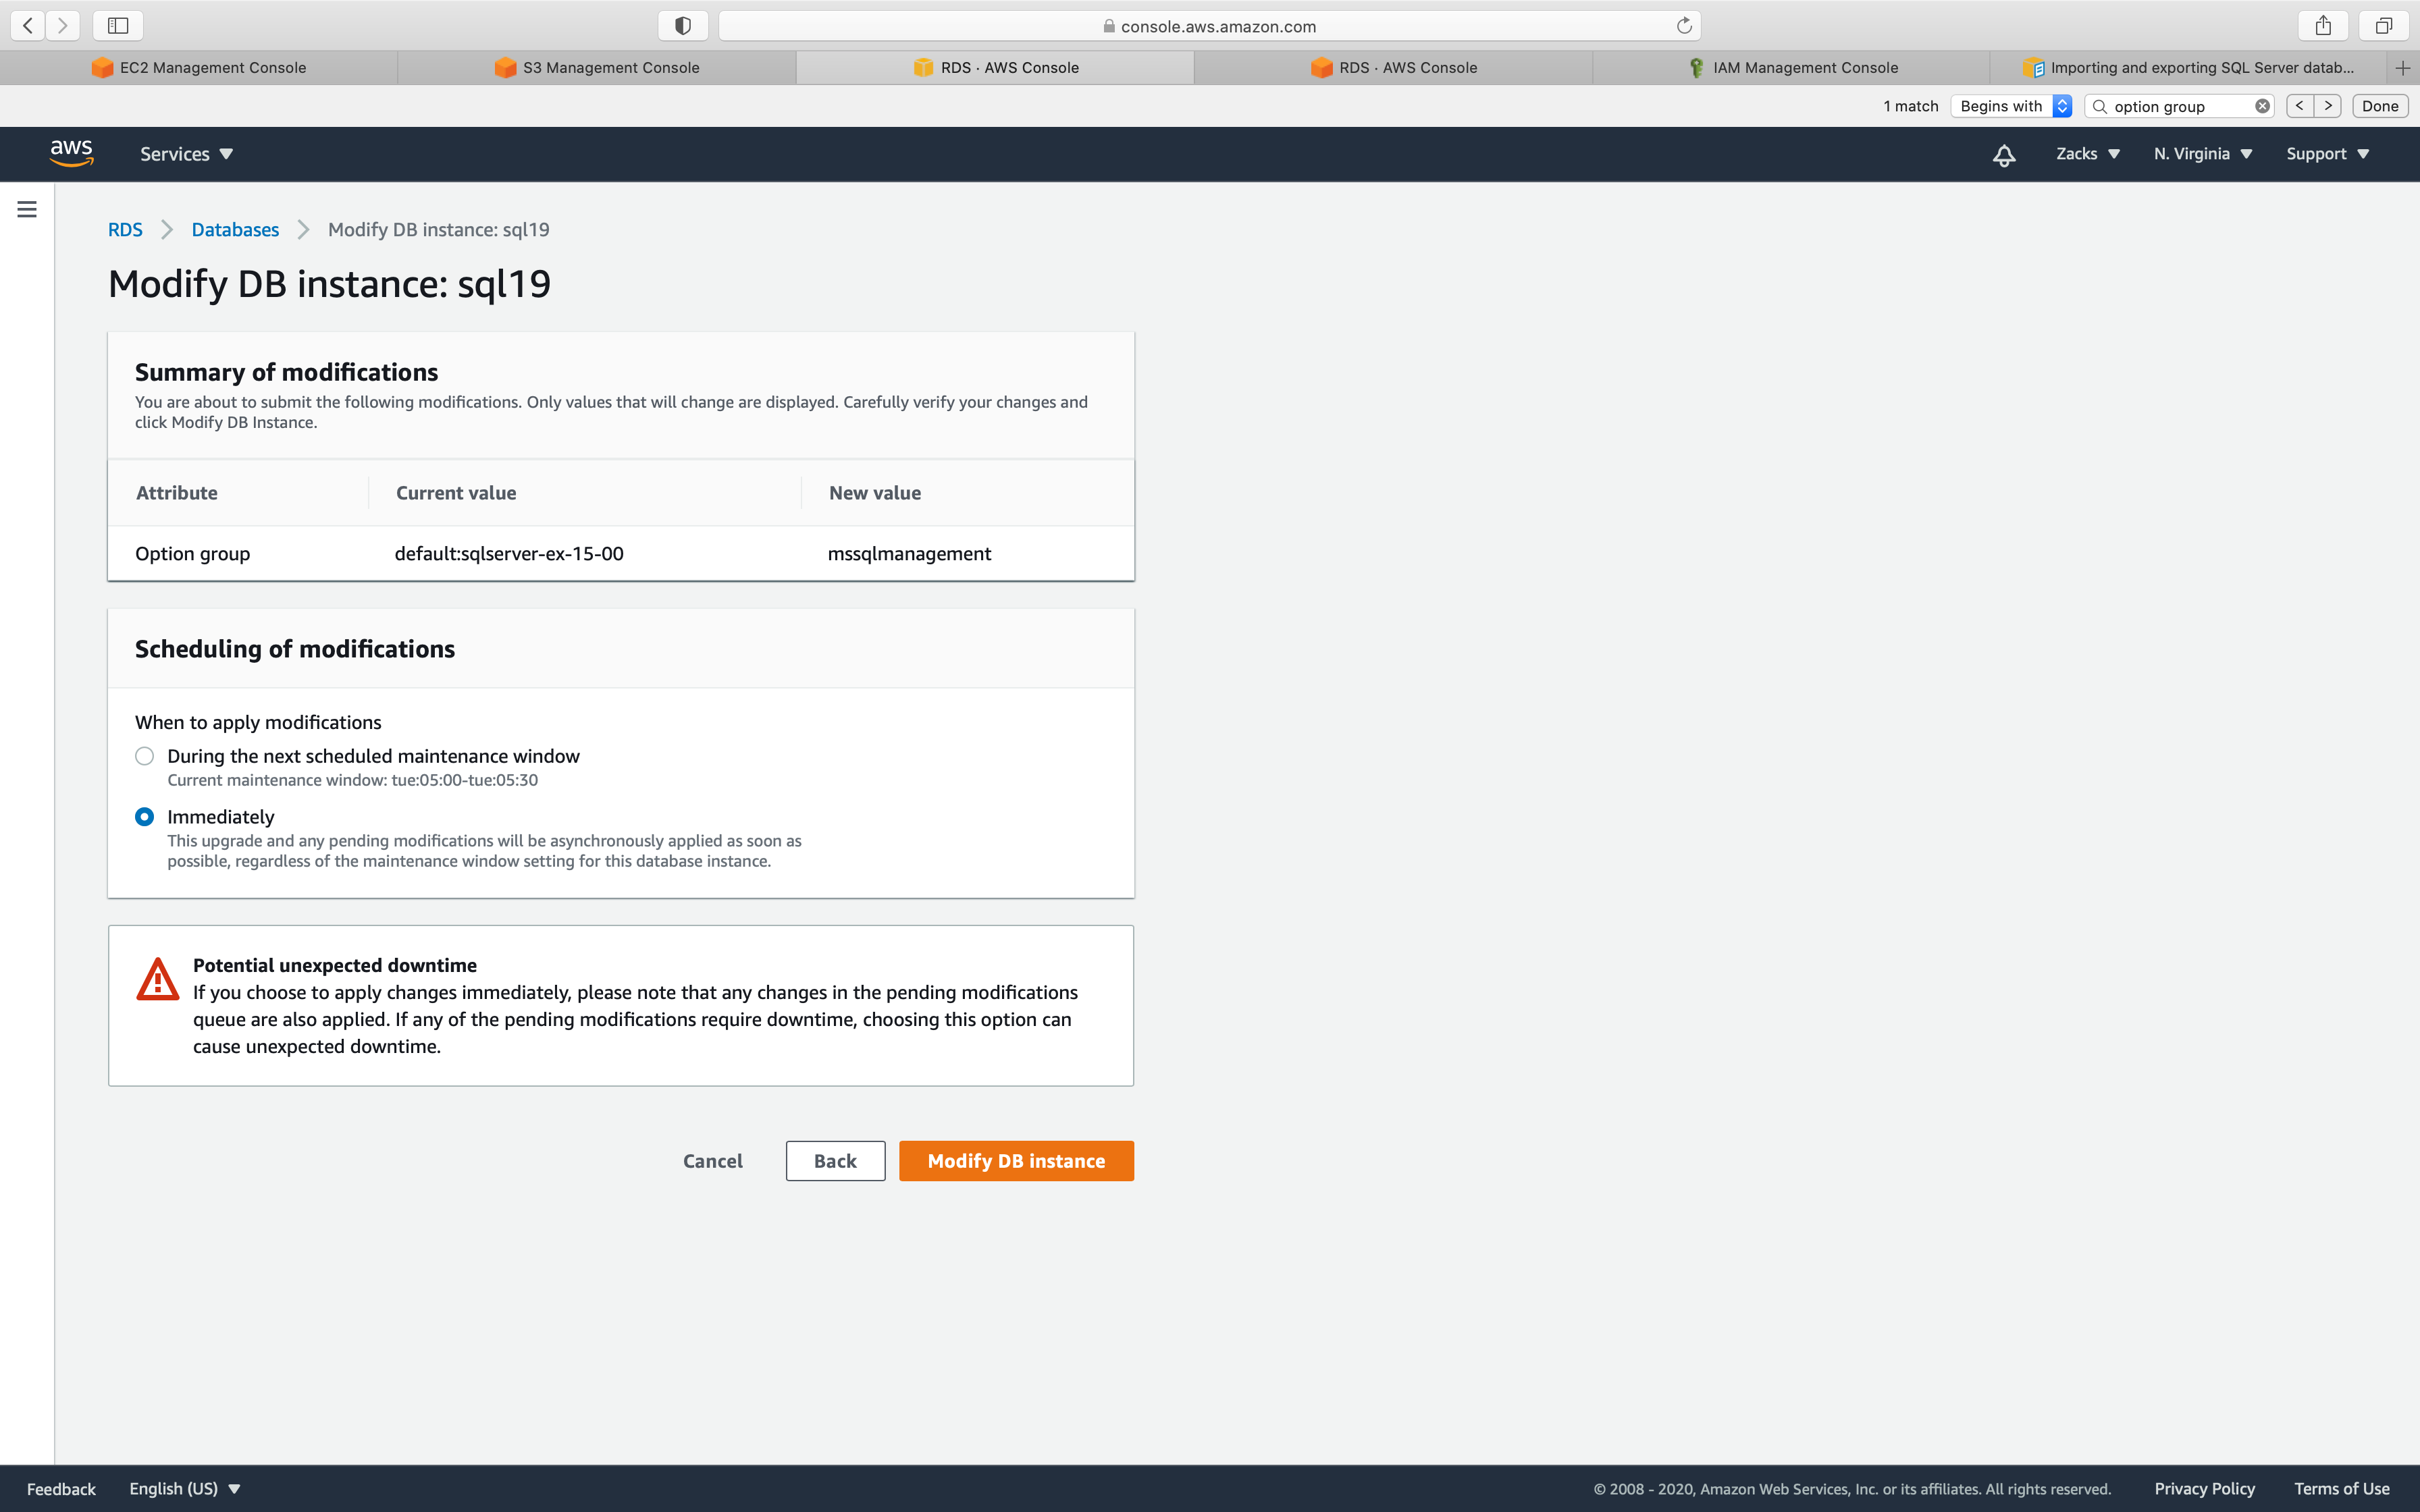
Refresh the instance page until the Status switch to available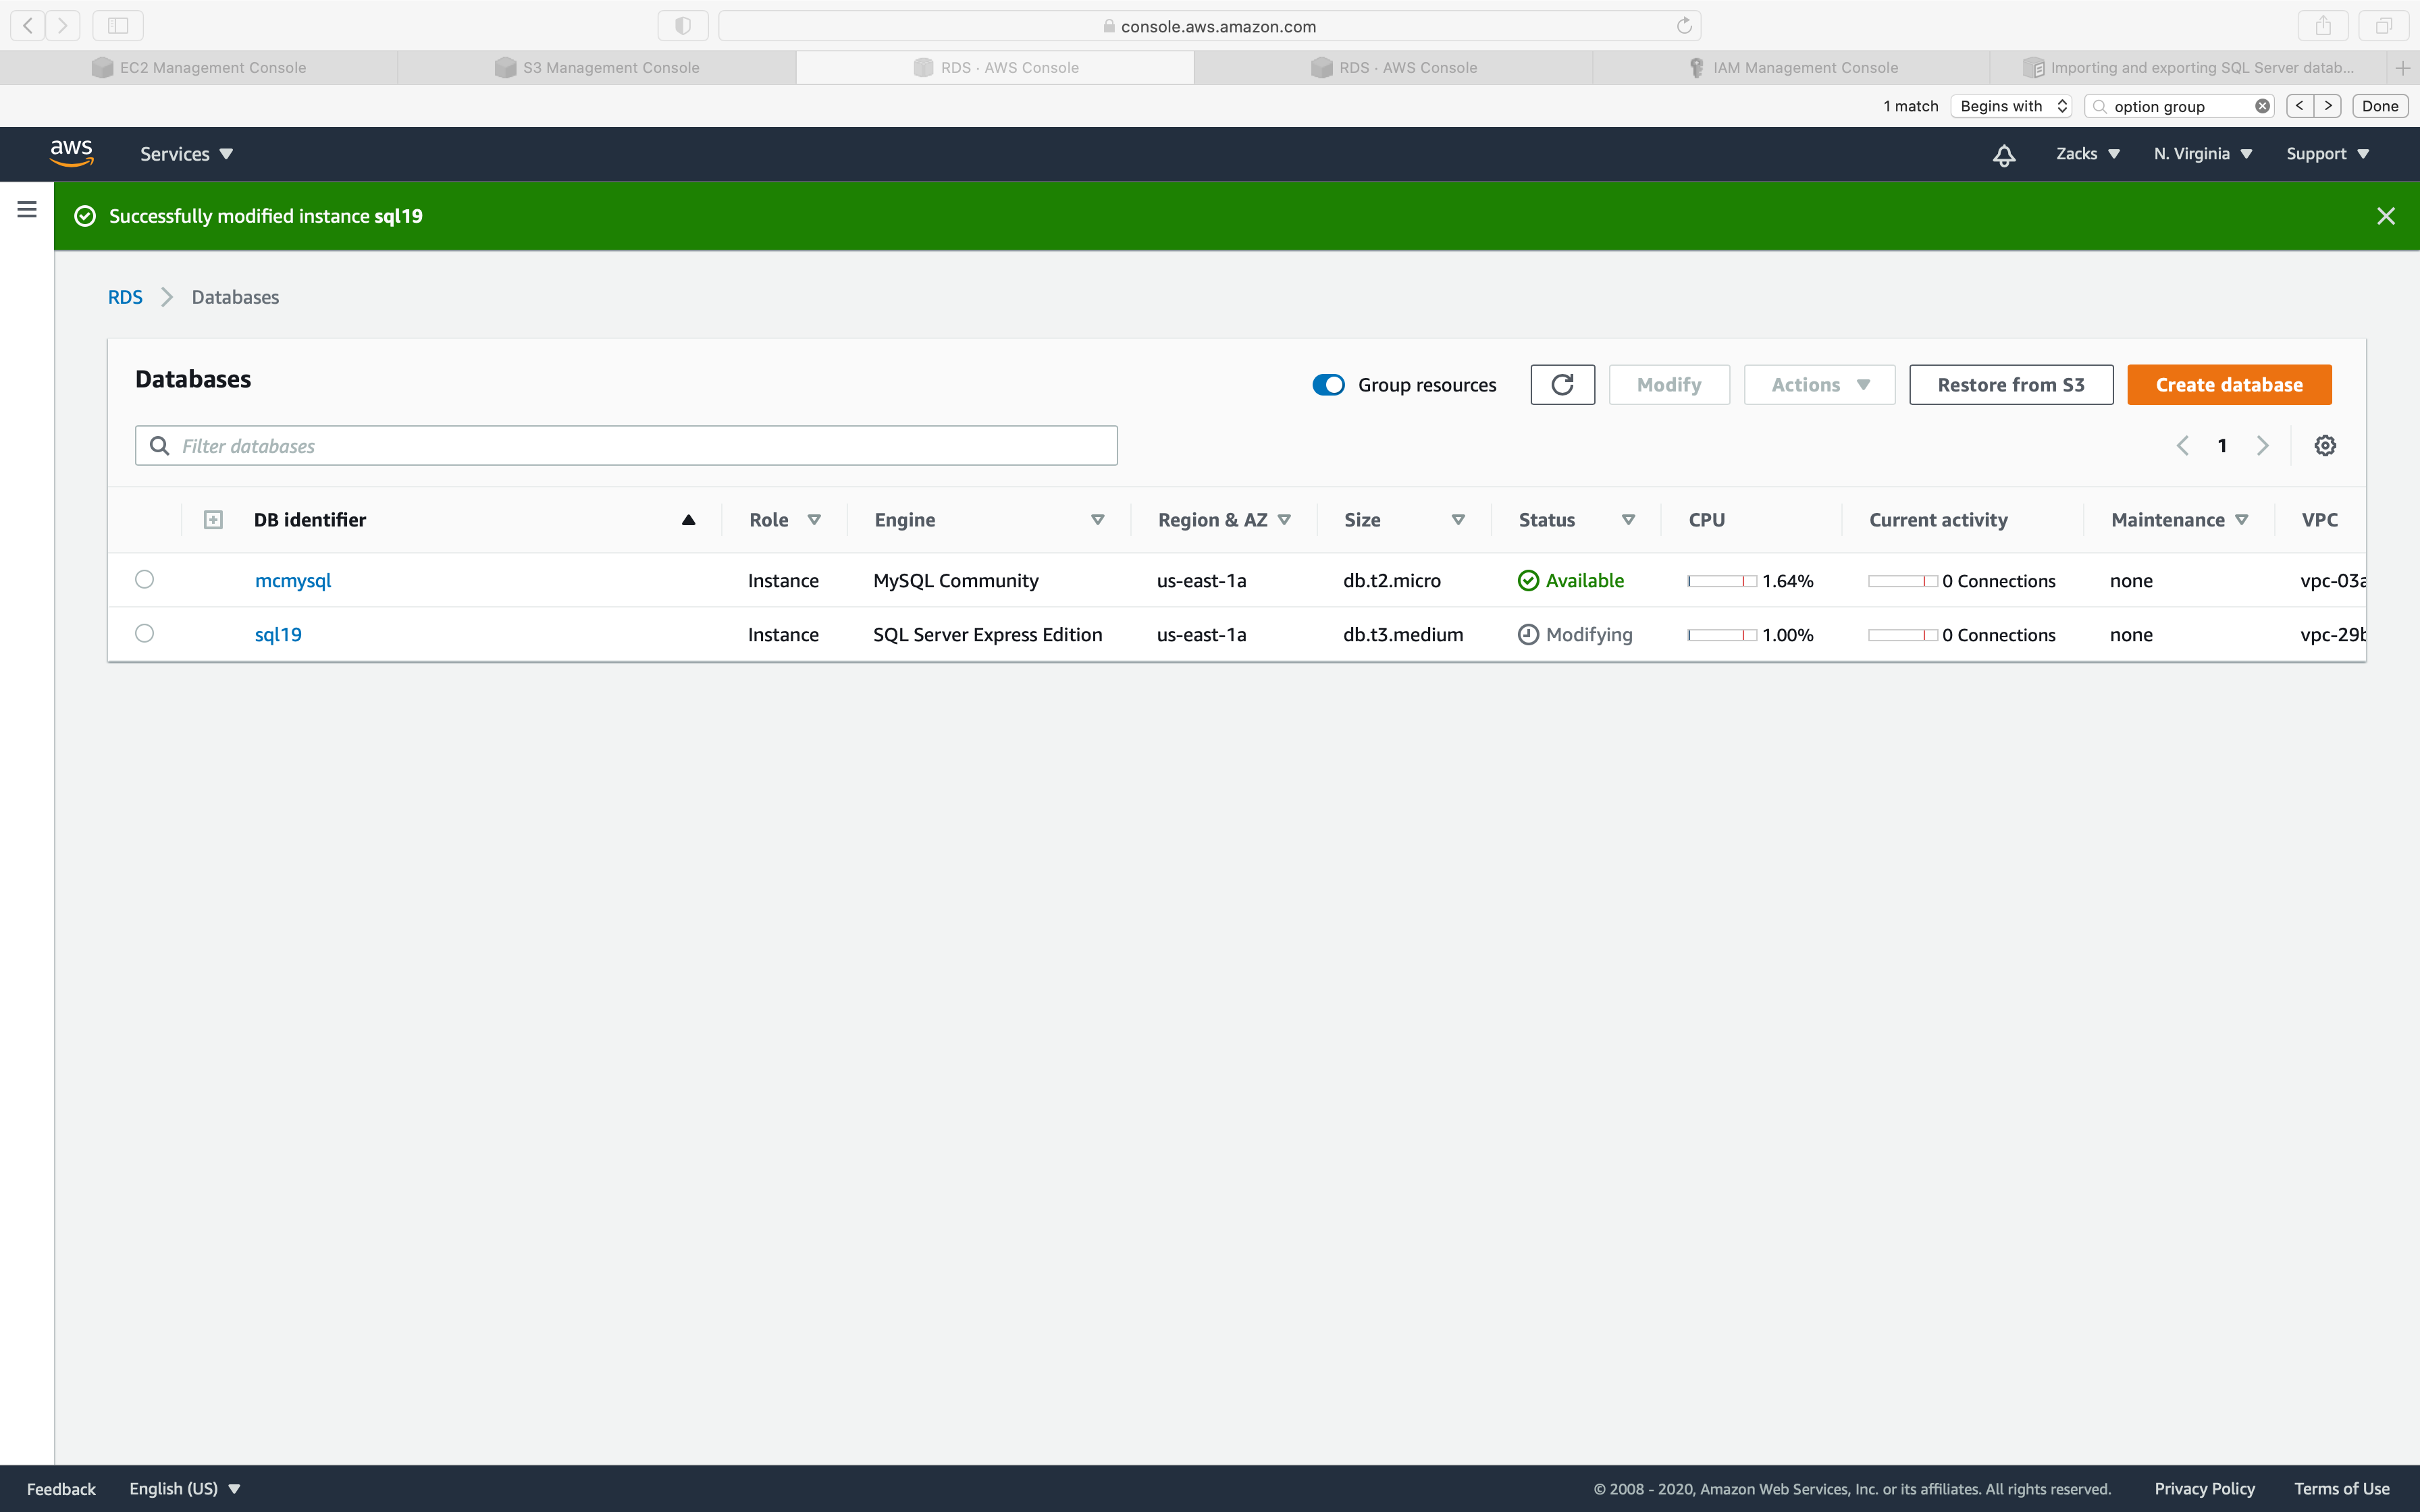
SQL Editor
Login your SQL instance.
Then input the following command:
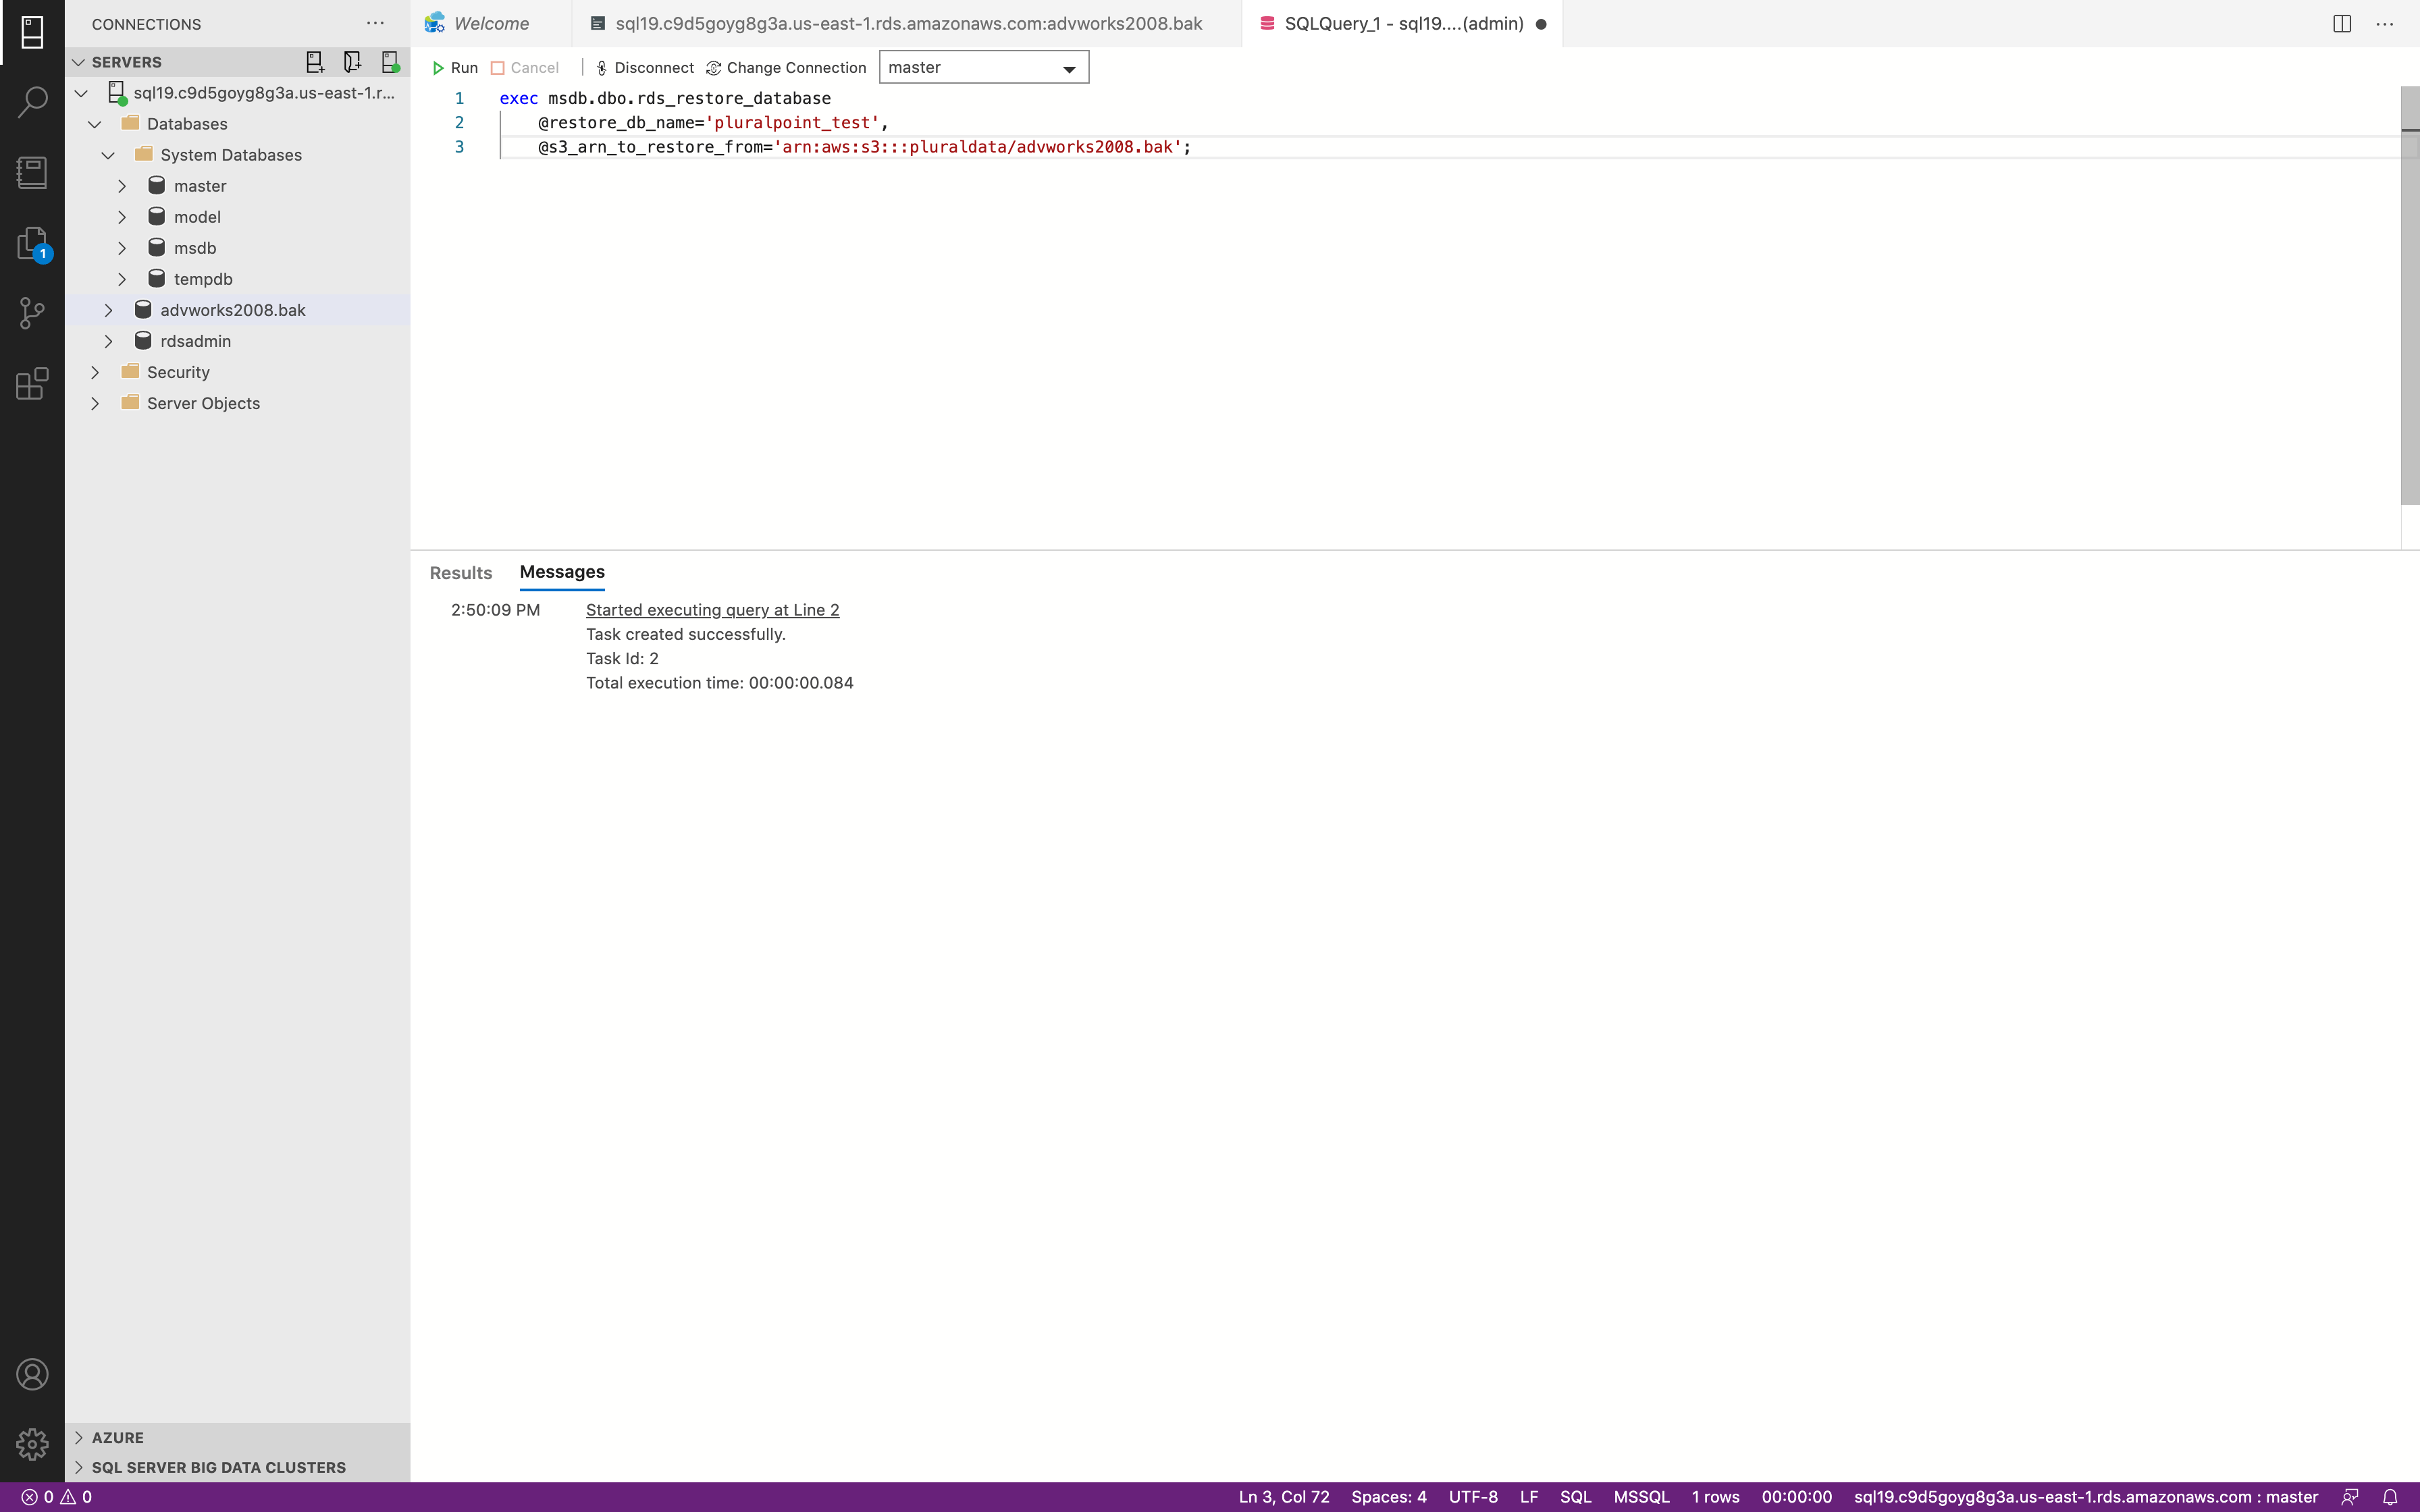
Restore
1 | exec msdb.dbo.rds_restore_database |
My .bak name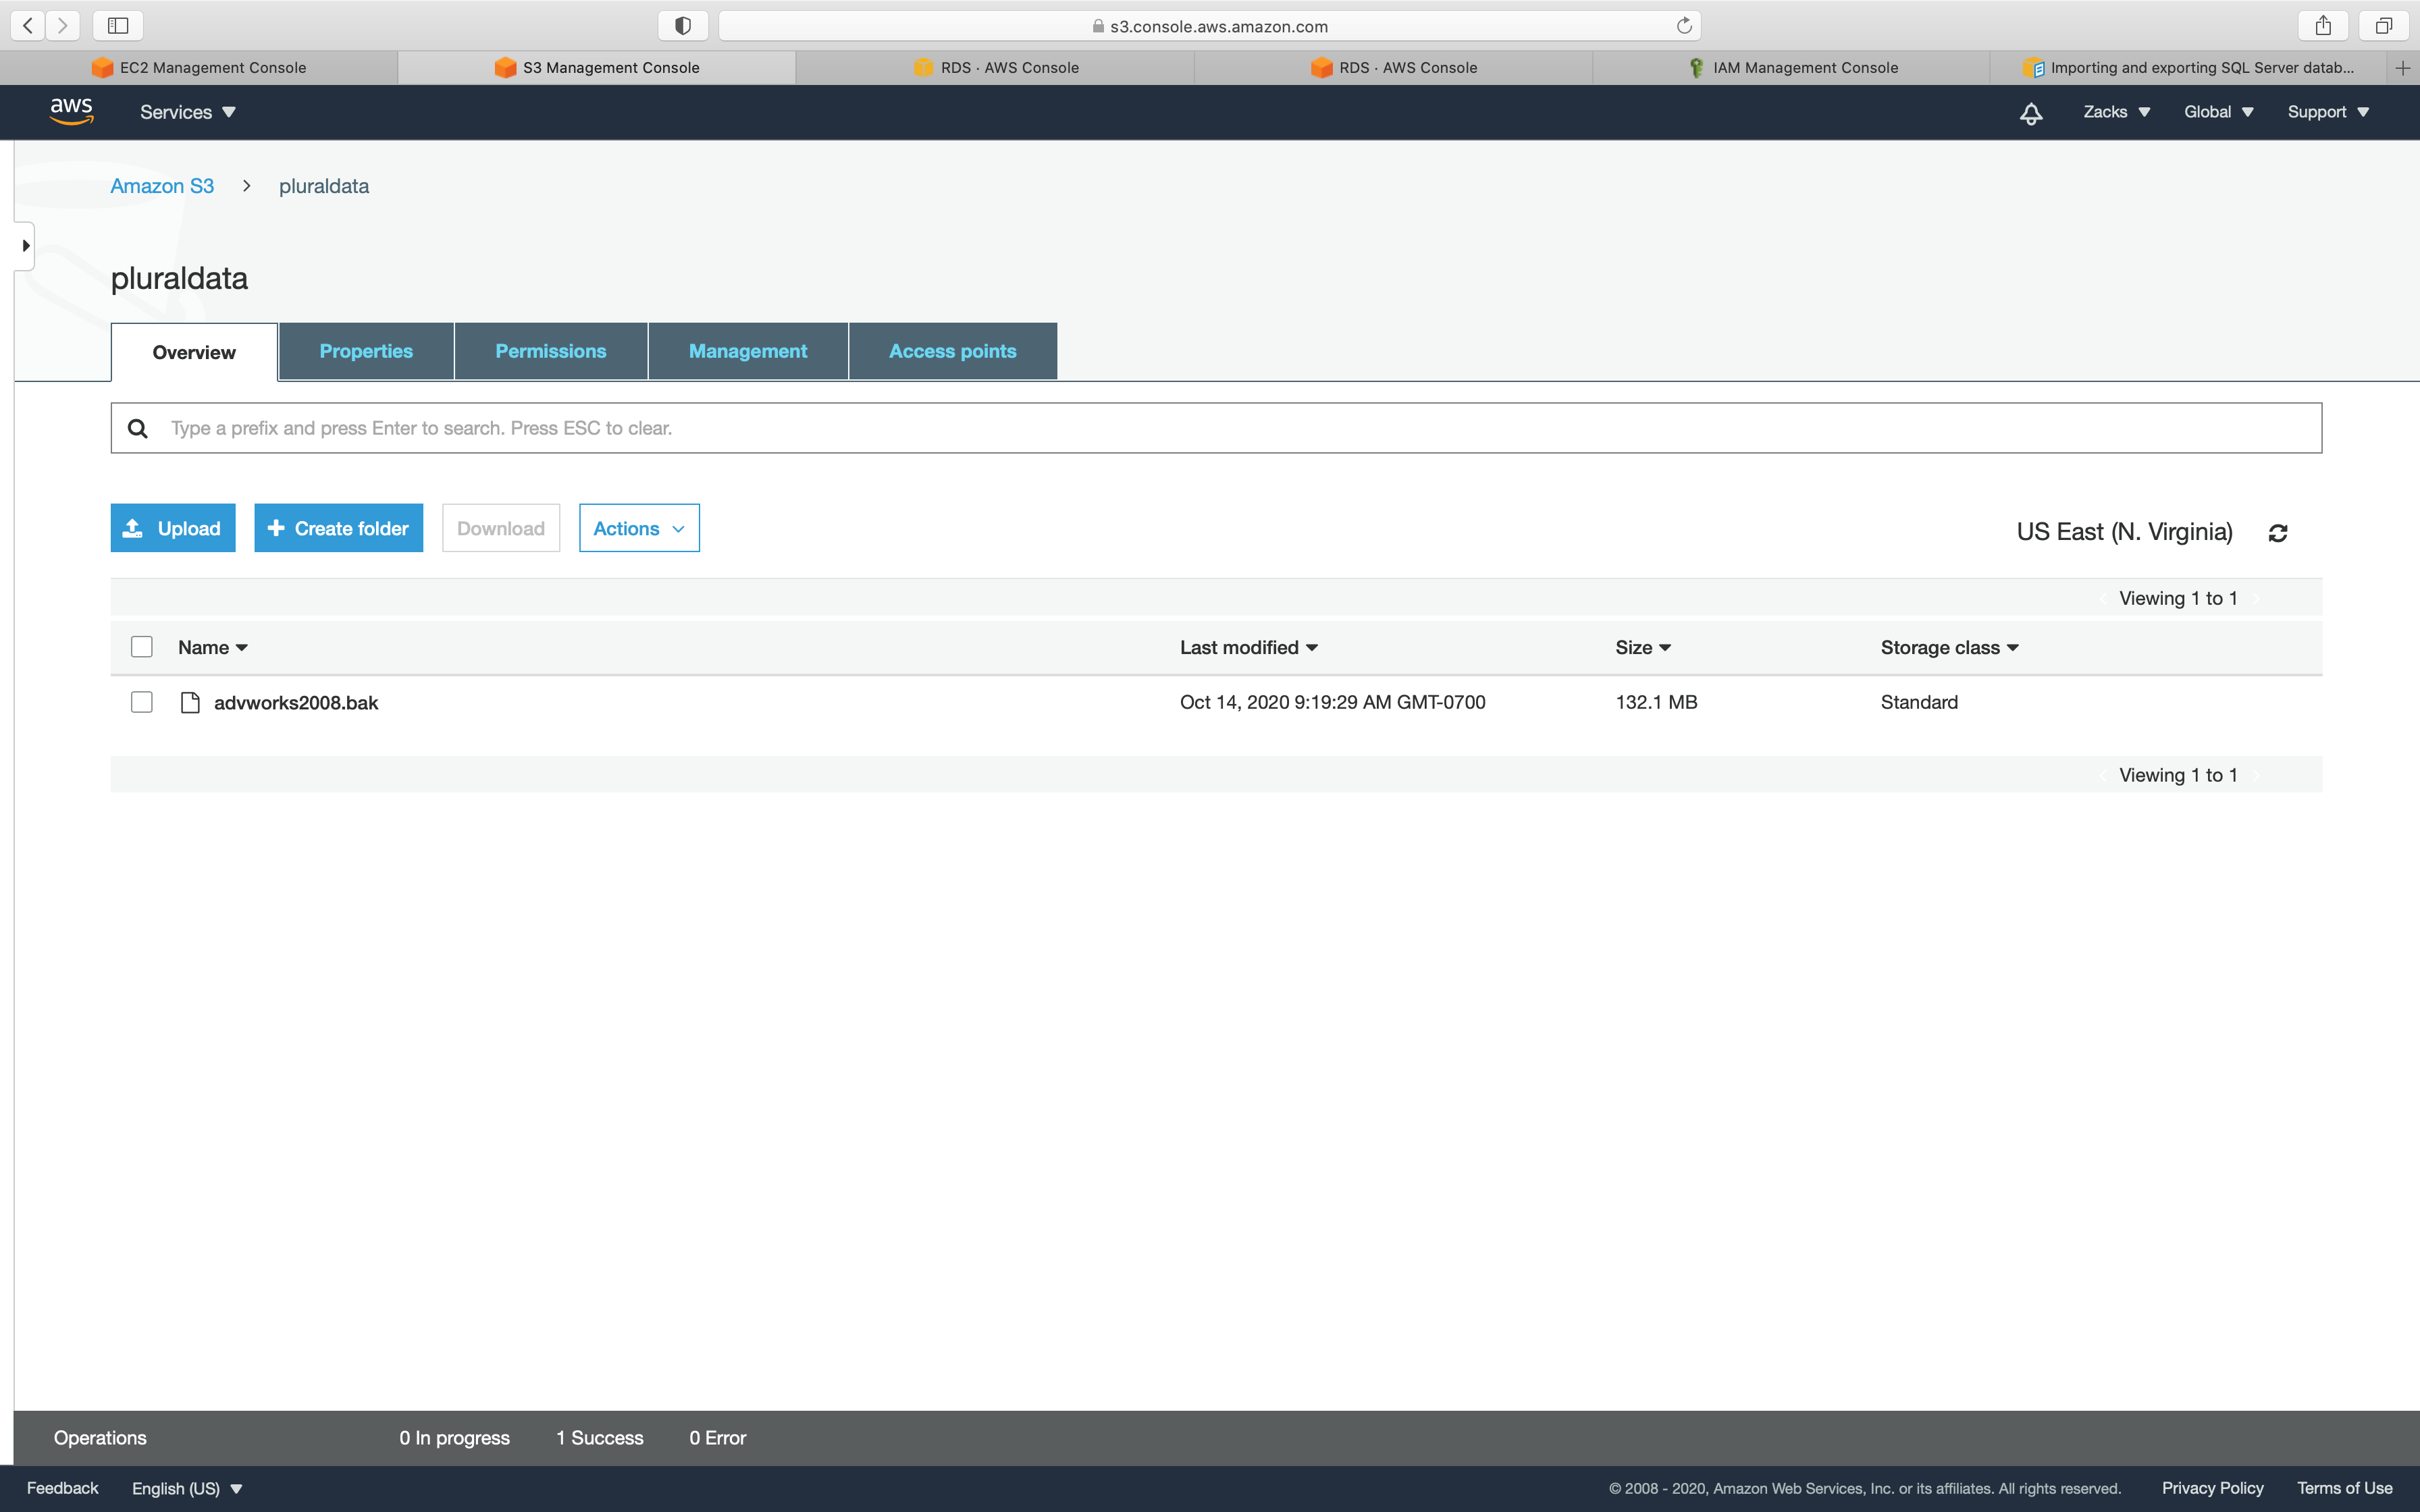
Check RDS Status
1 | exec msdb.dbo.rds_task_status |
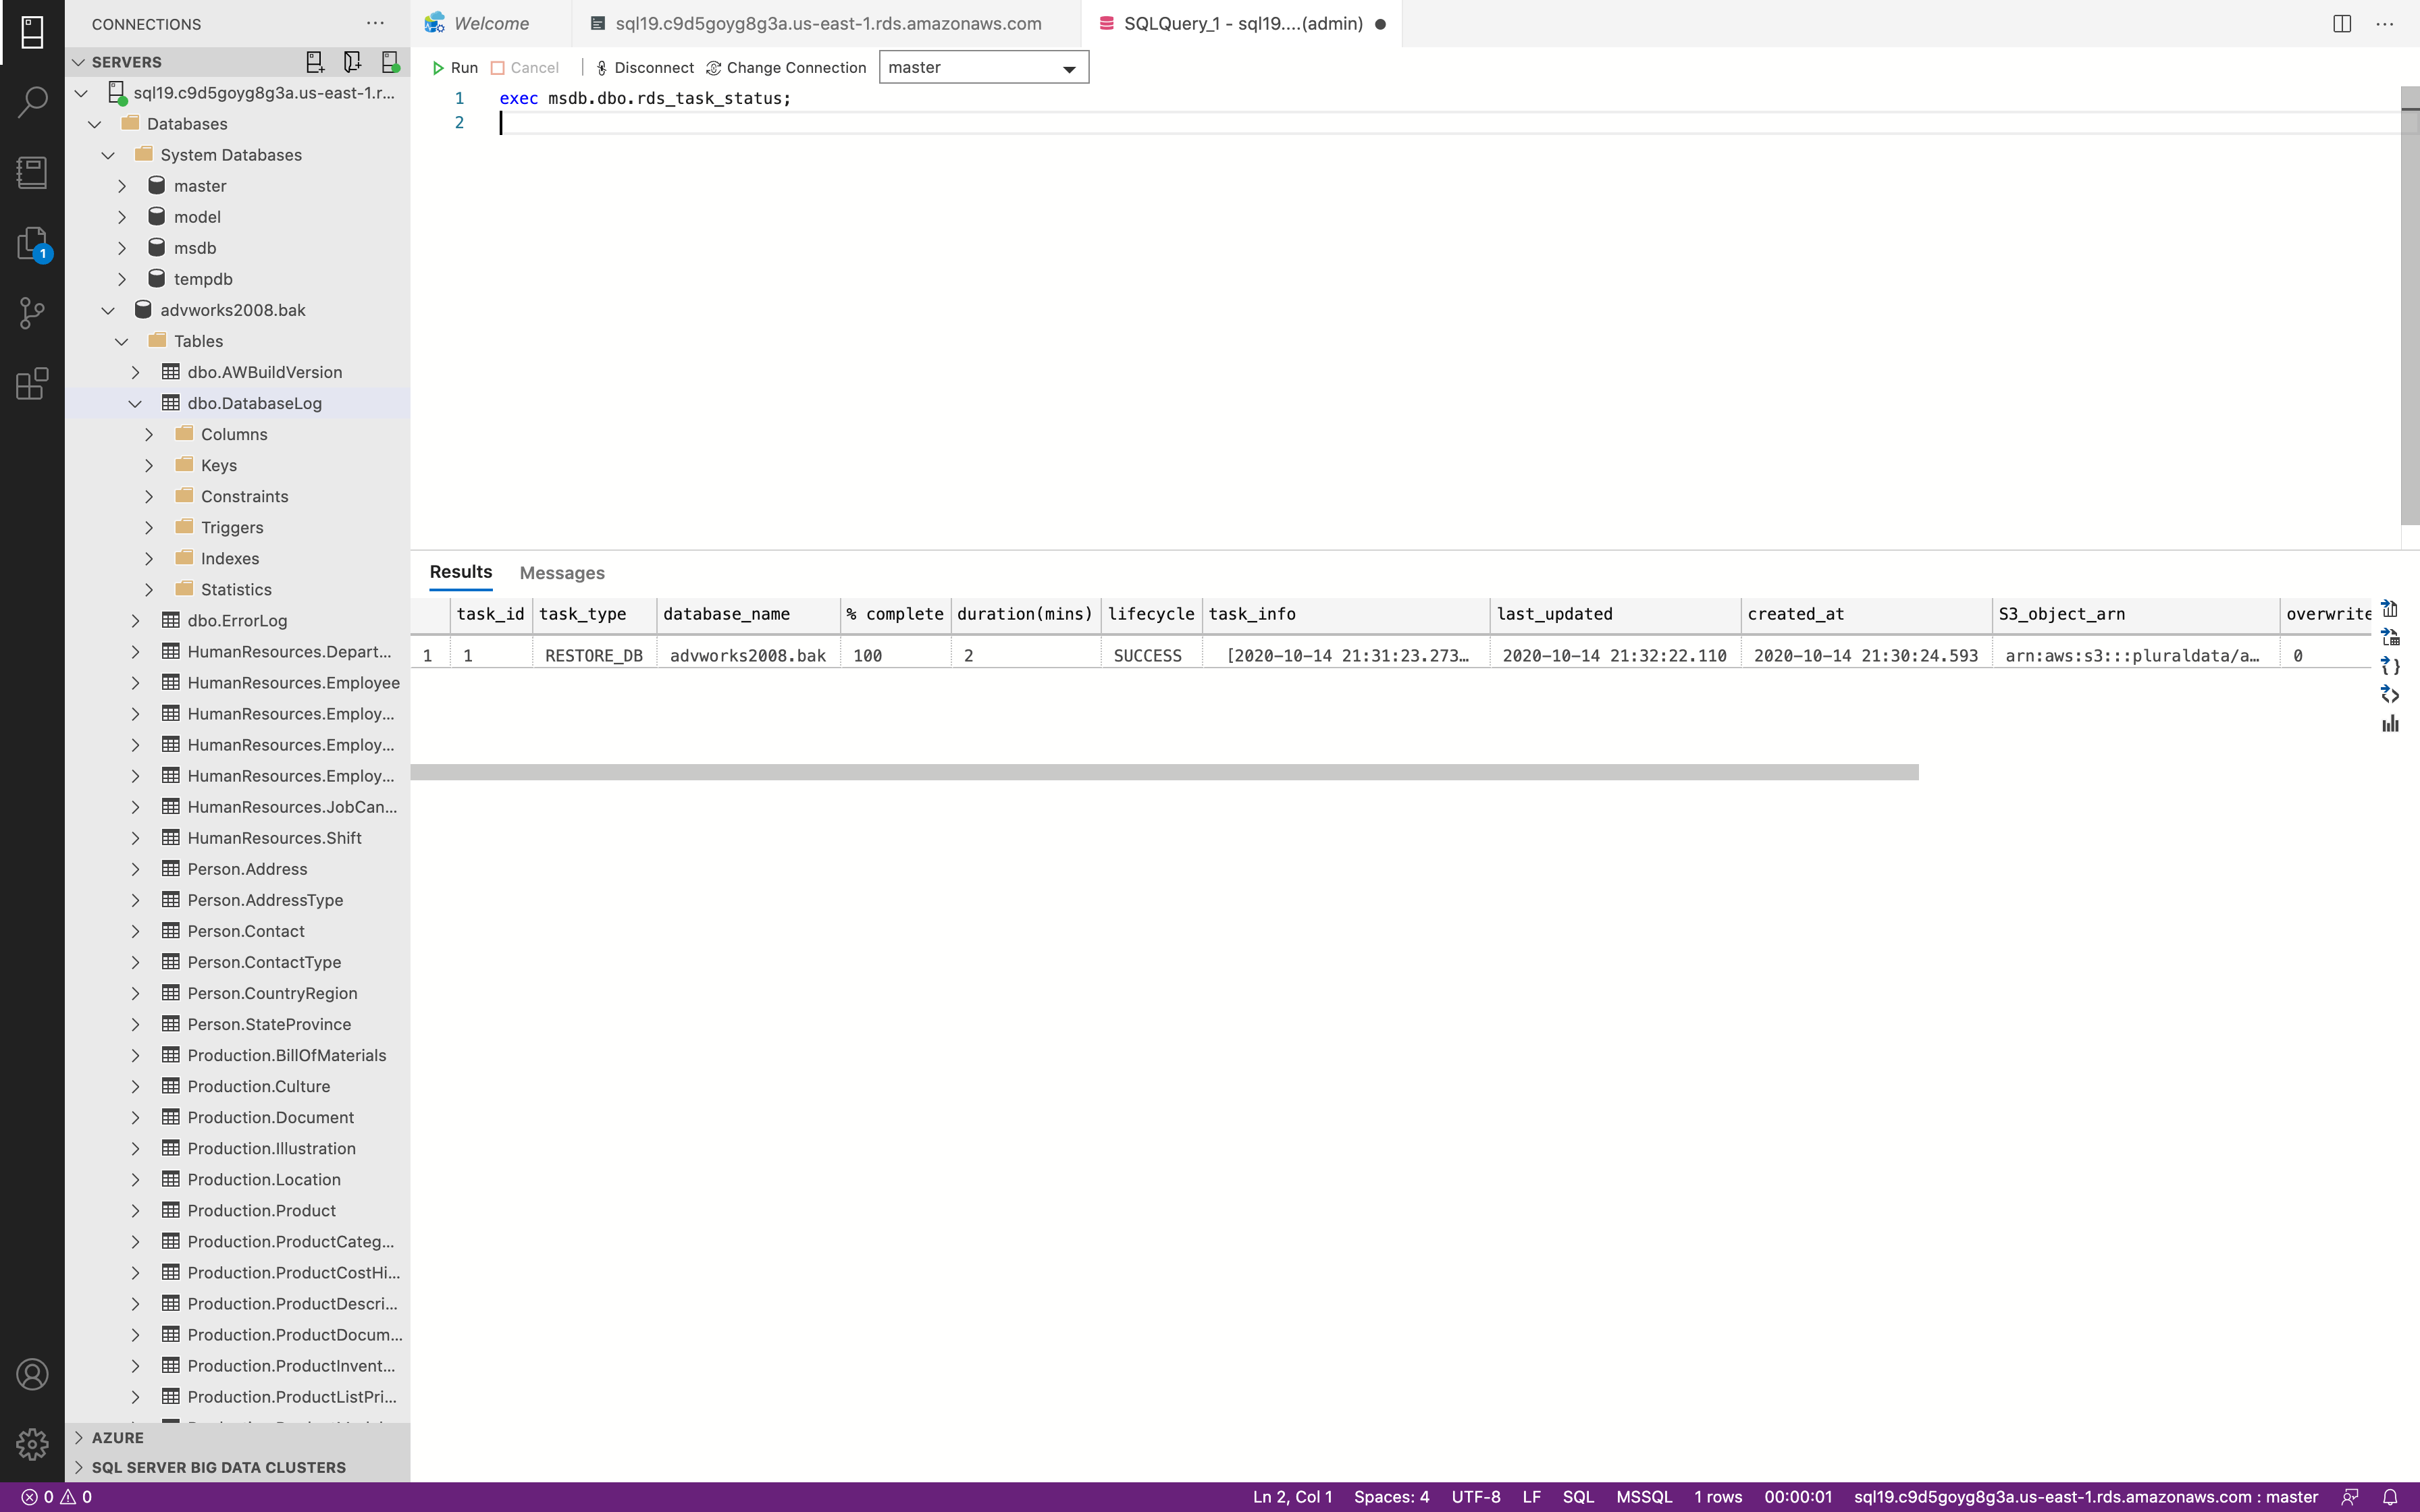
Backup
1 | exec msdb.dbo.rds_backup_database |

It may take some time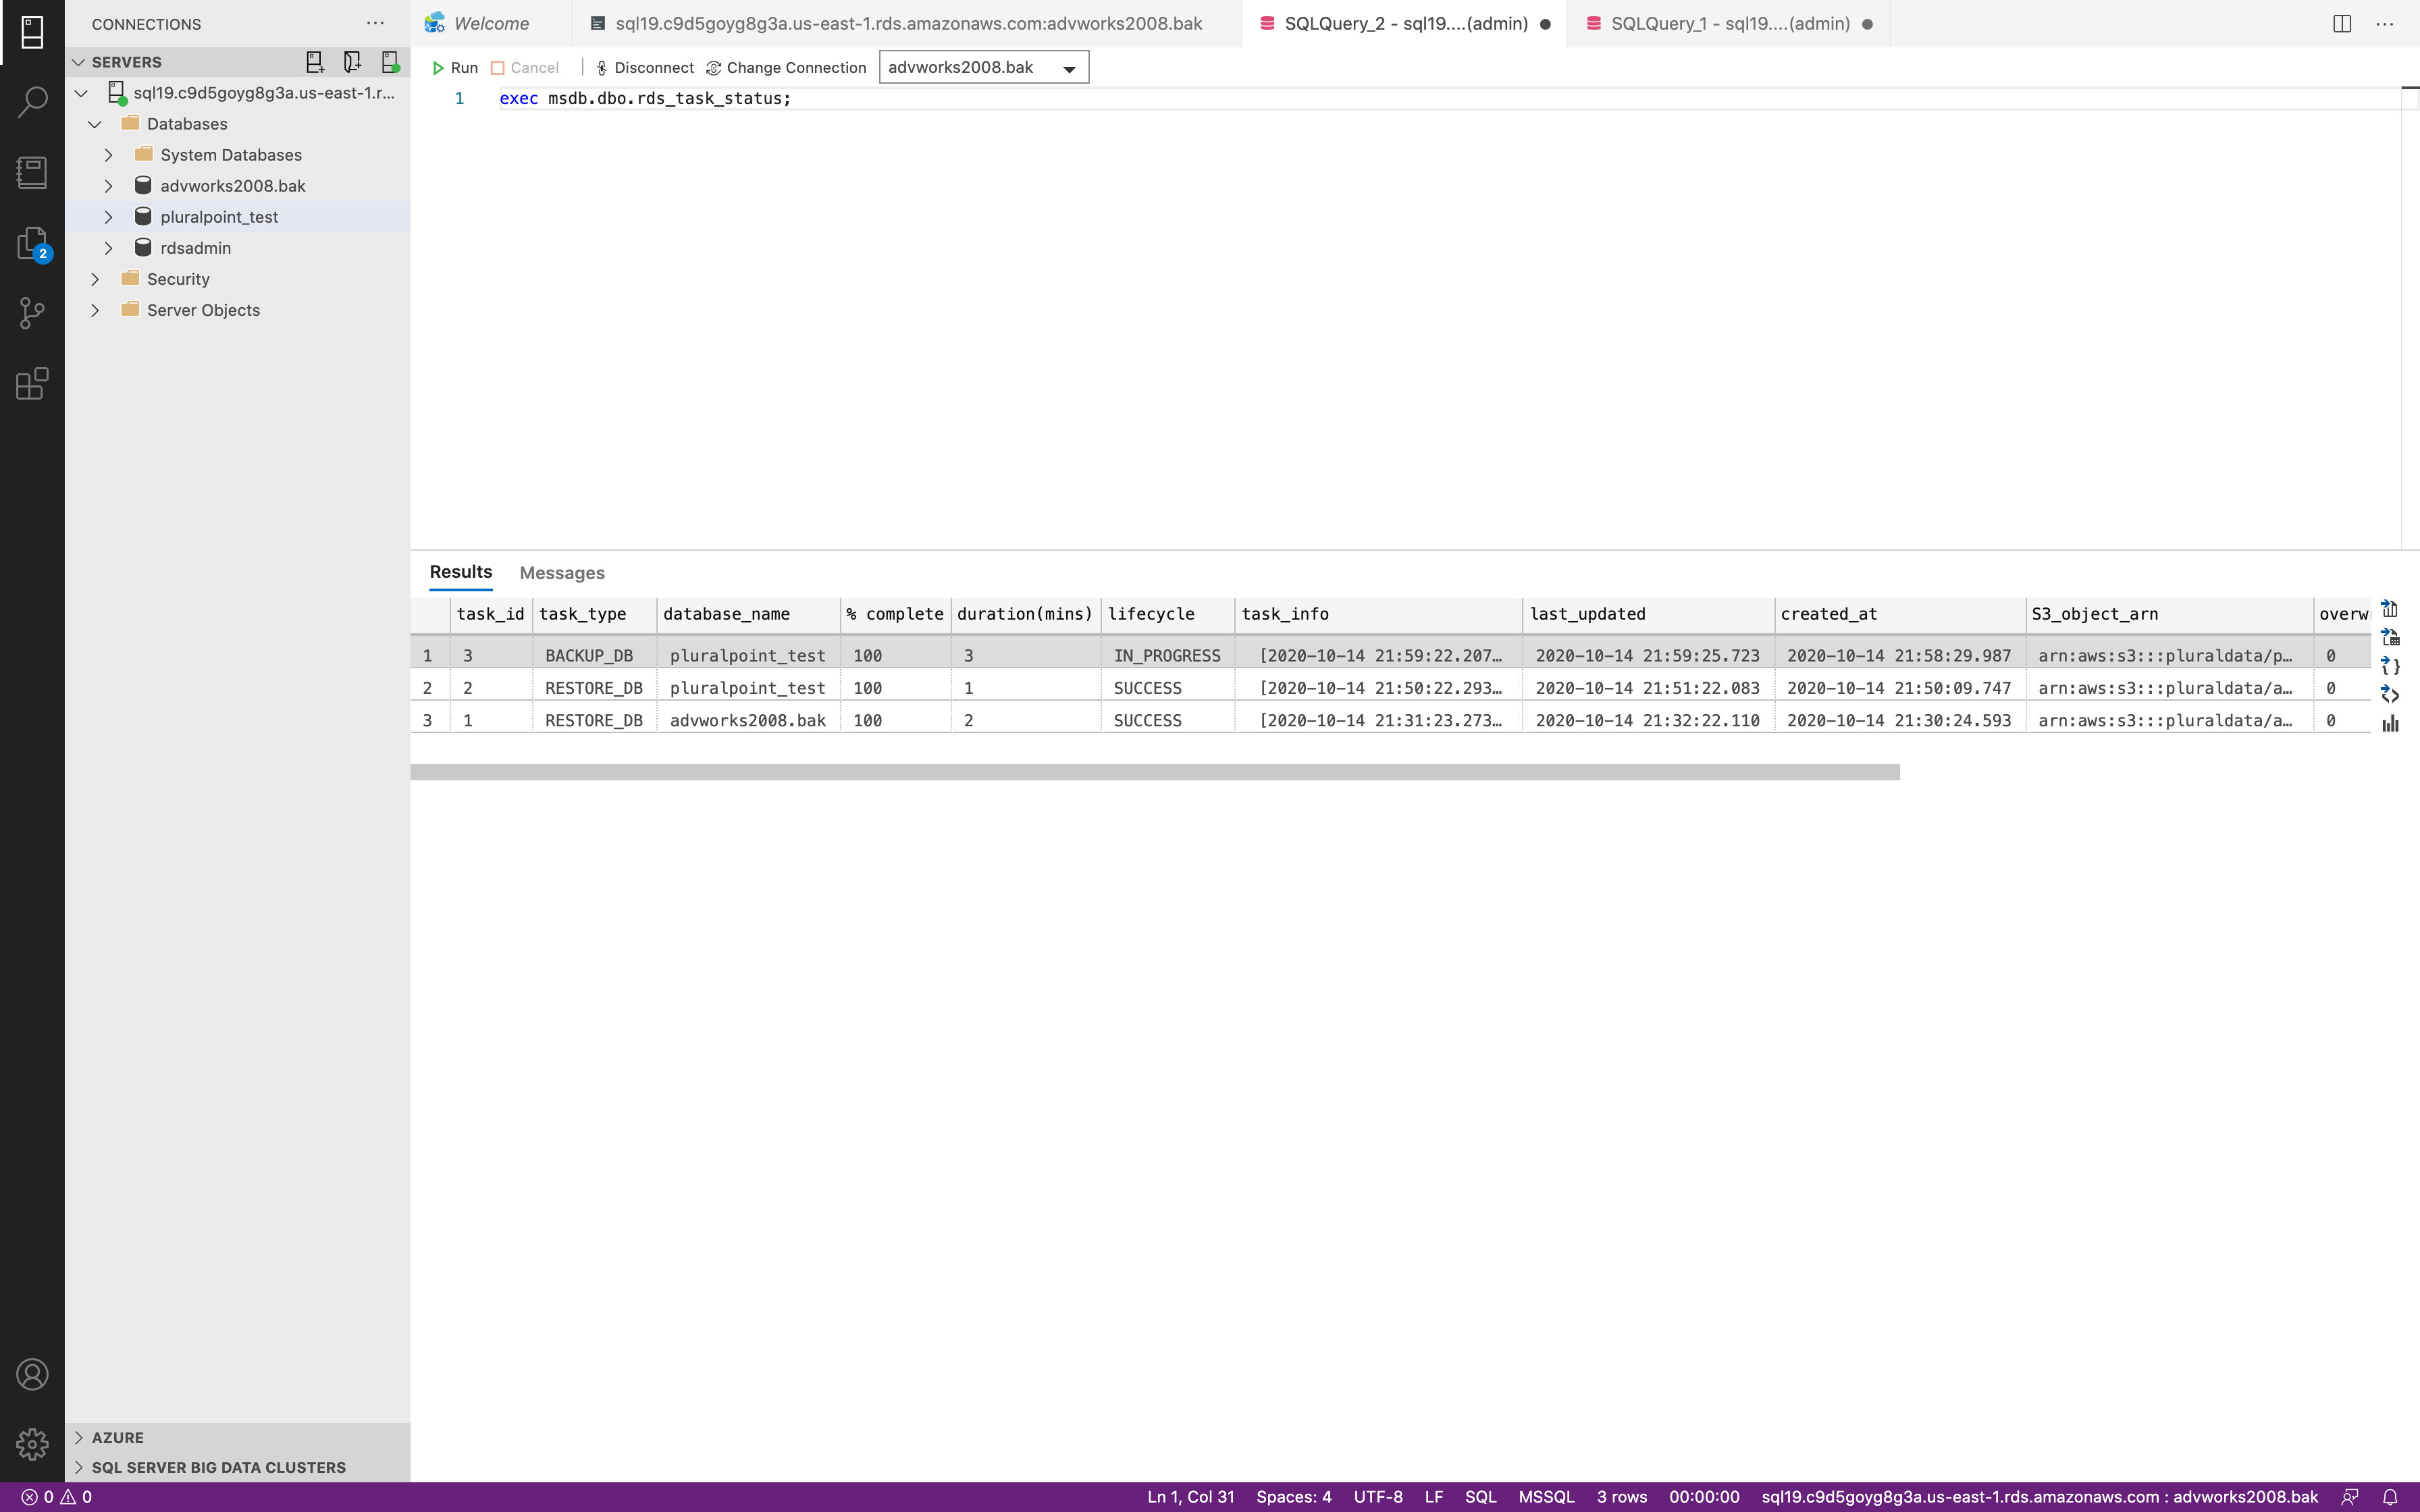
Success. Now we could check our S3 bucket.
Success.