AWS CloudFront Lab
CloudFront
Introduction to Amazon CloudFront
https://play.whizlabs.com/site/task_details?lab_type=1&task_id=9&quest_id=35
Lab Details
- This lab walks you through to Amazon CloudFront creation and working. In this lab you will create an Amazon CloudFront distribution. It will distribute a publicly accessible image file stored in an Amazon S3 bucket.
- Understand Custom Error Pages and Geo-Restriction.
Task Details
- Log into AWS Management Console.
- Create a S3 Bucket and upload an image to the sample S3 bucket provided.
- Create Custom Error pages.
- Make the image Publicly accessible.
- Create a new Amazon CloudFront distribution.
- Link the CloudFront distribution to serve the image in S3 bucket.
- Test the distribution.
- Update Distribution with Custom Error Pages and test.
- Create a Geo-Restriction.
- Test Geo-Restriction.
Architecture Diagram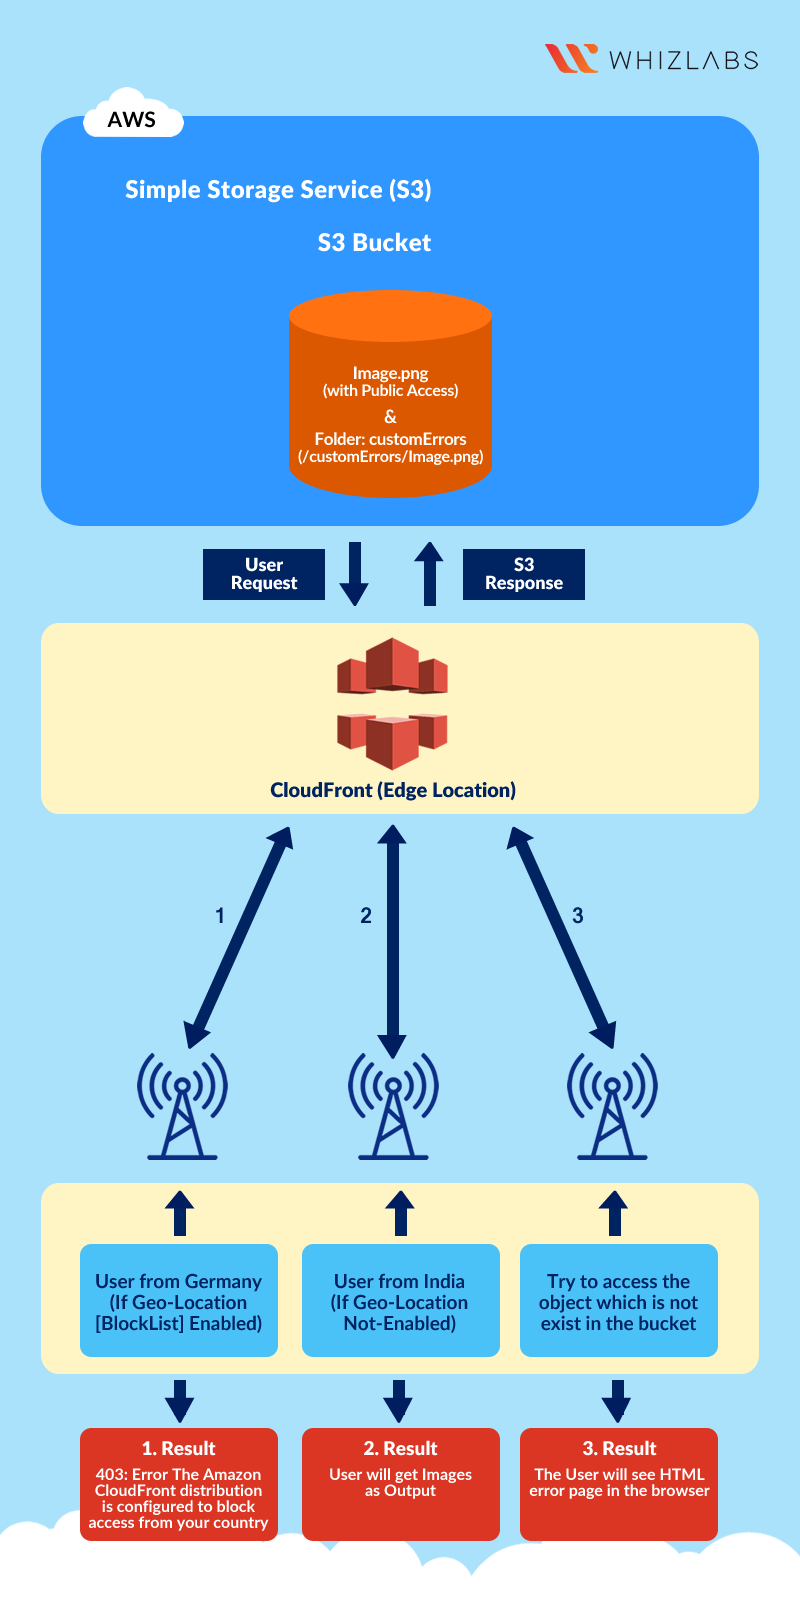
S3 Configuration
Service -> S3
Create an S3 Bucket
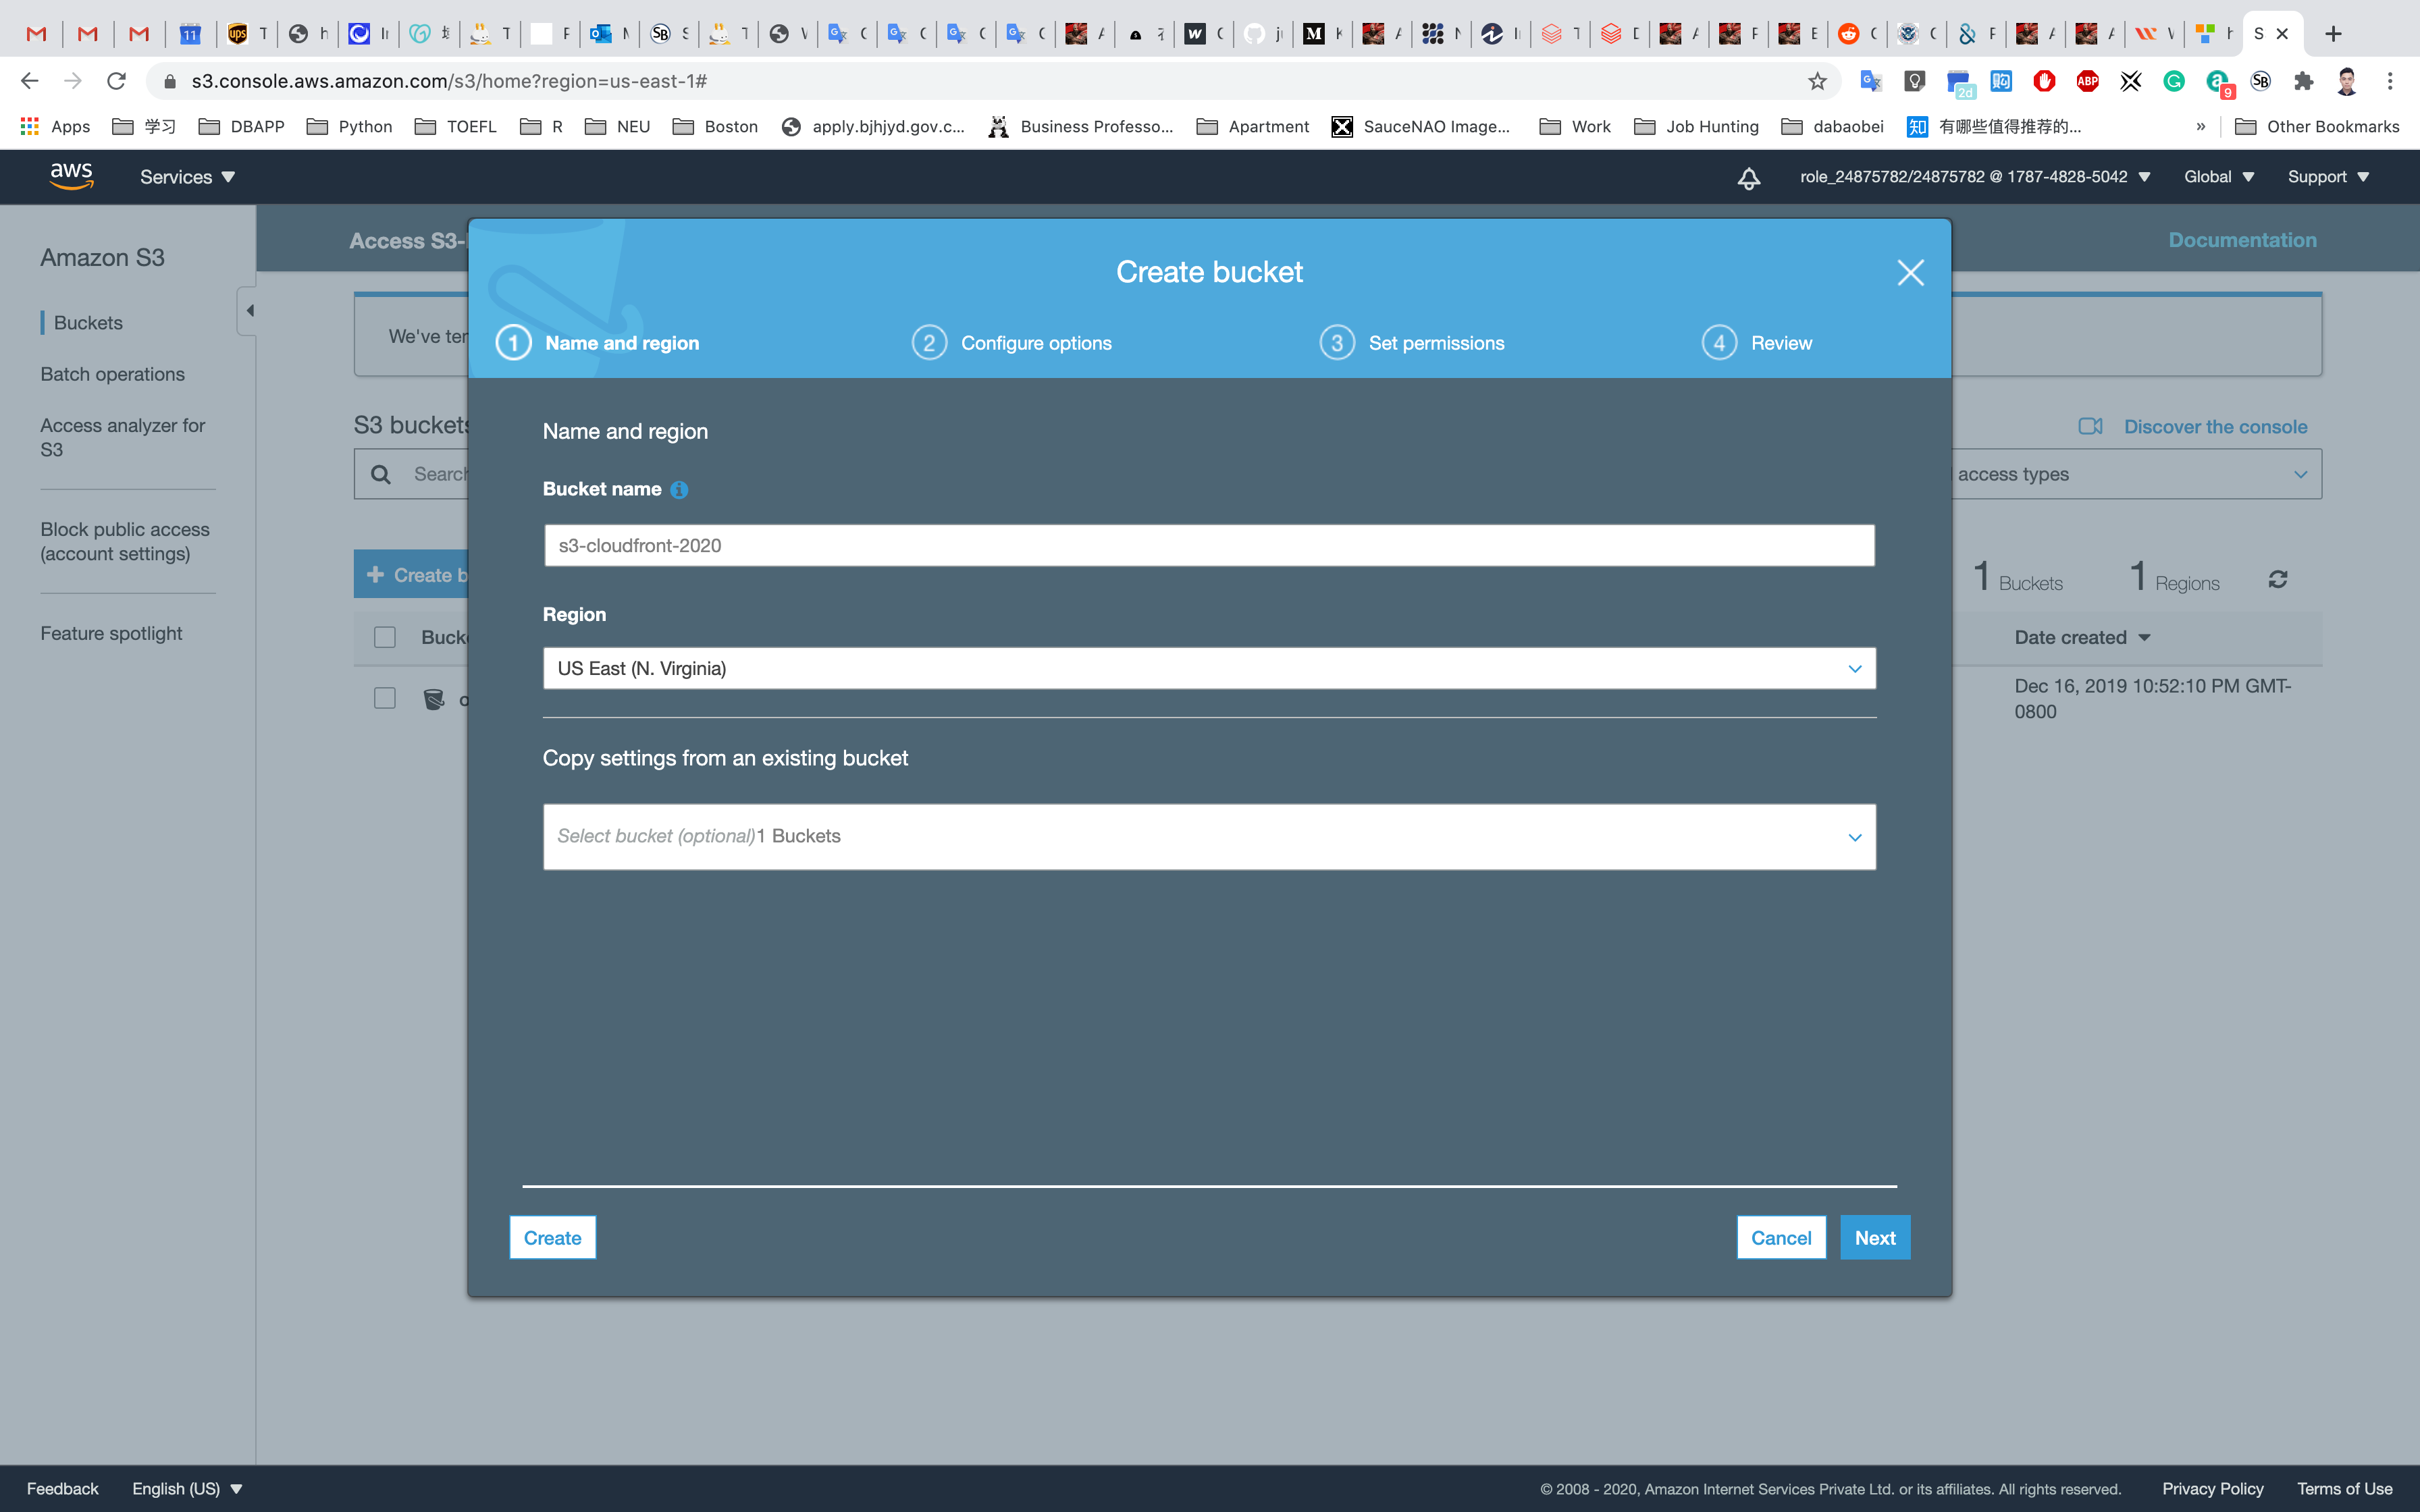
On the S3 dashboard, click on Create bucket and fill in the bucket details.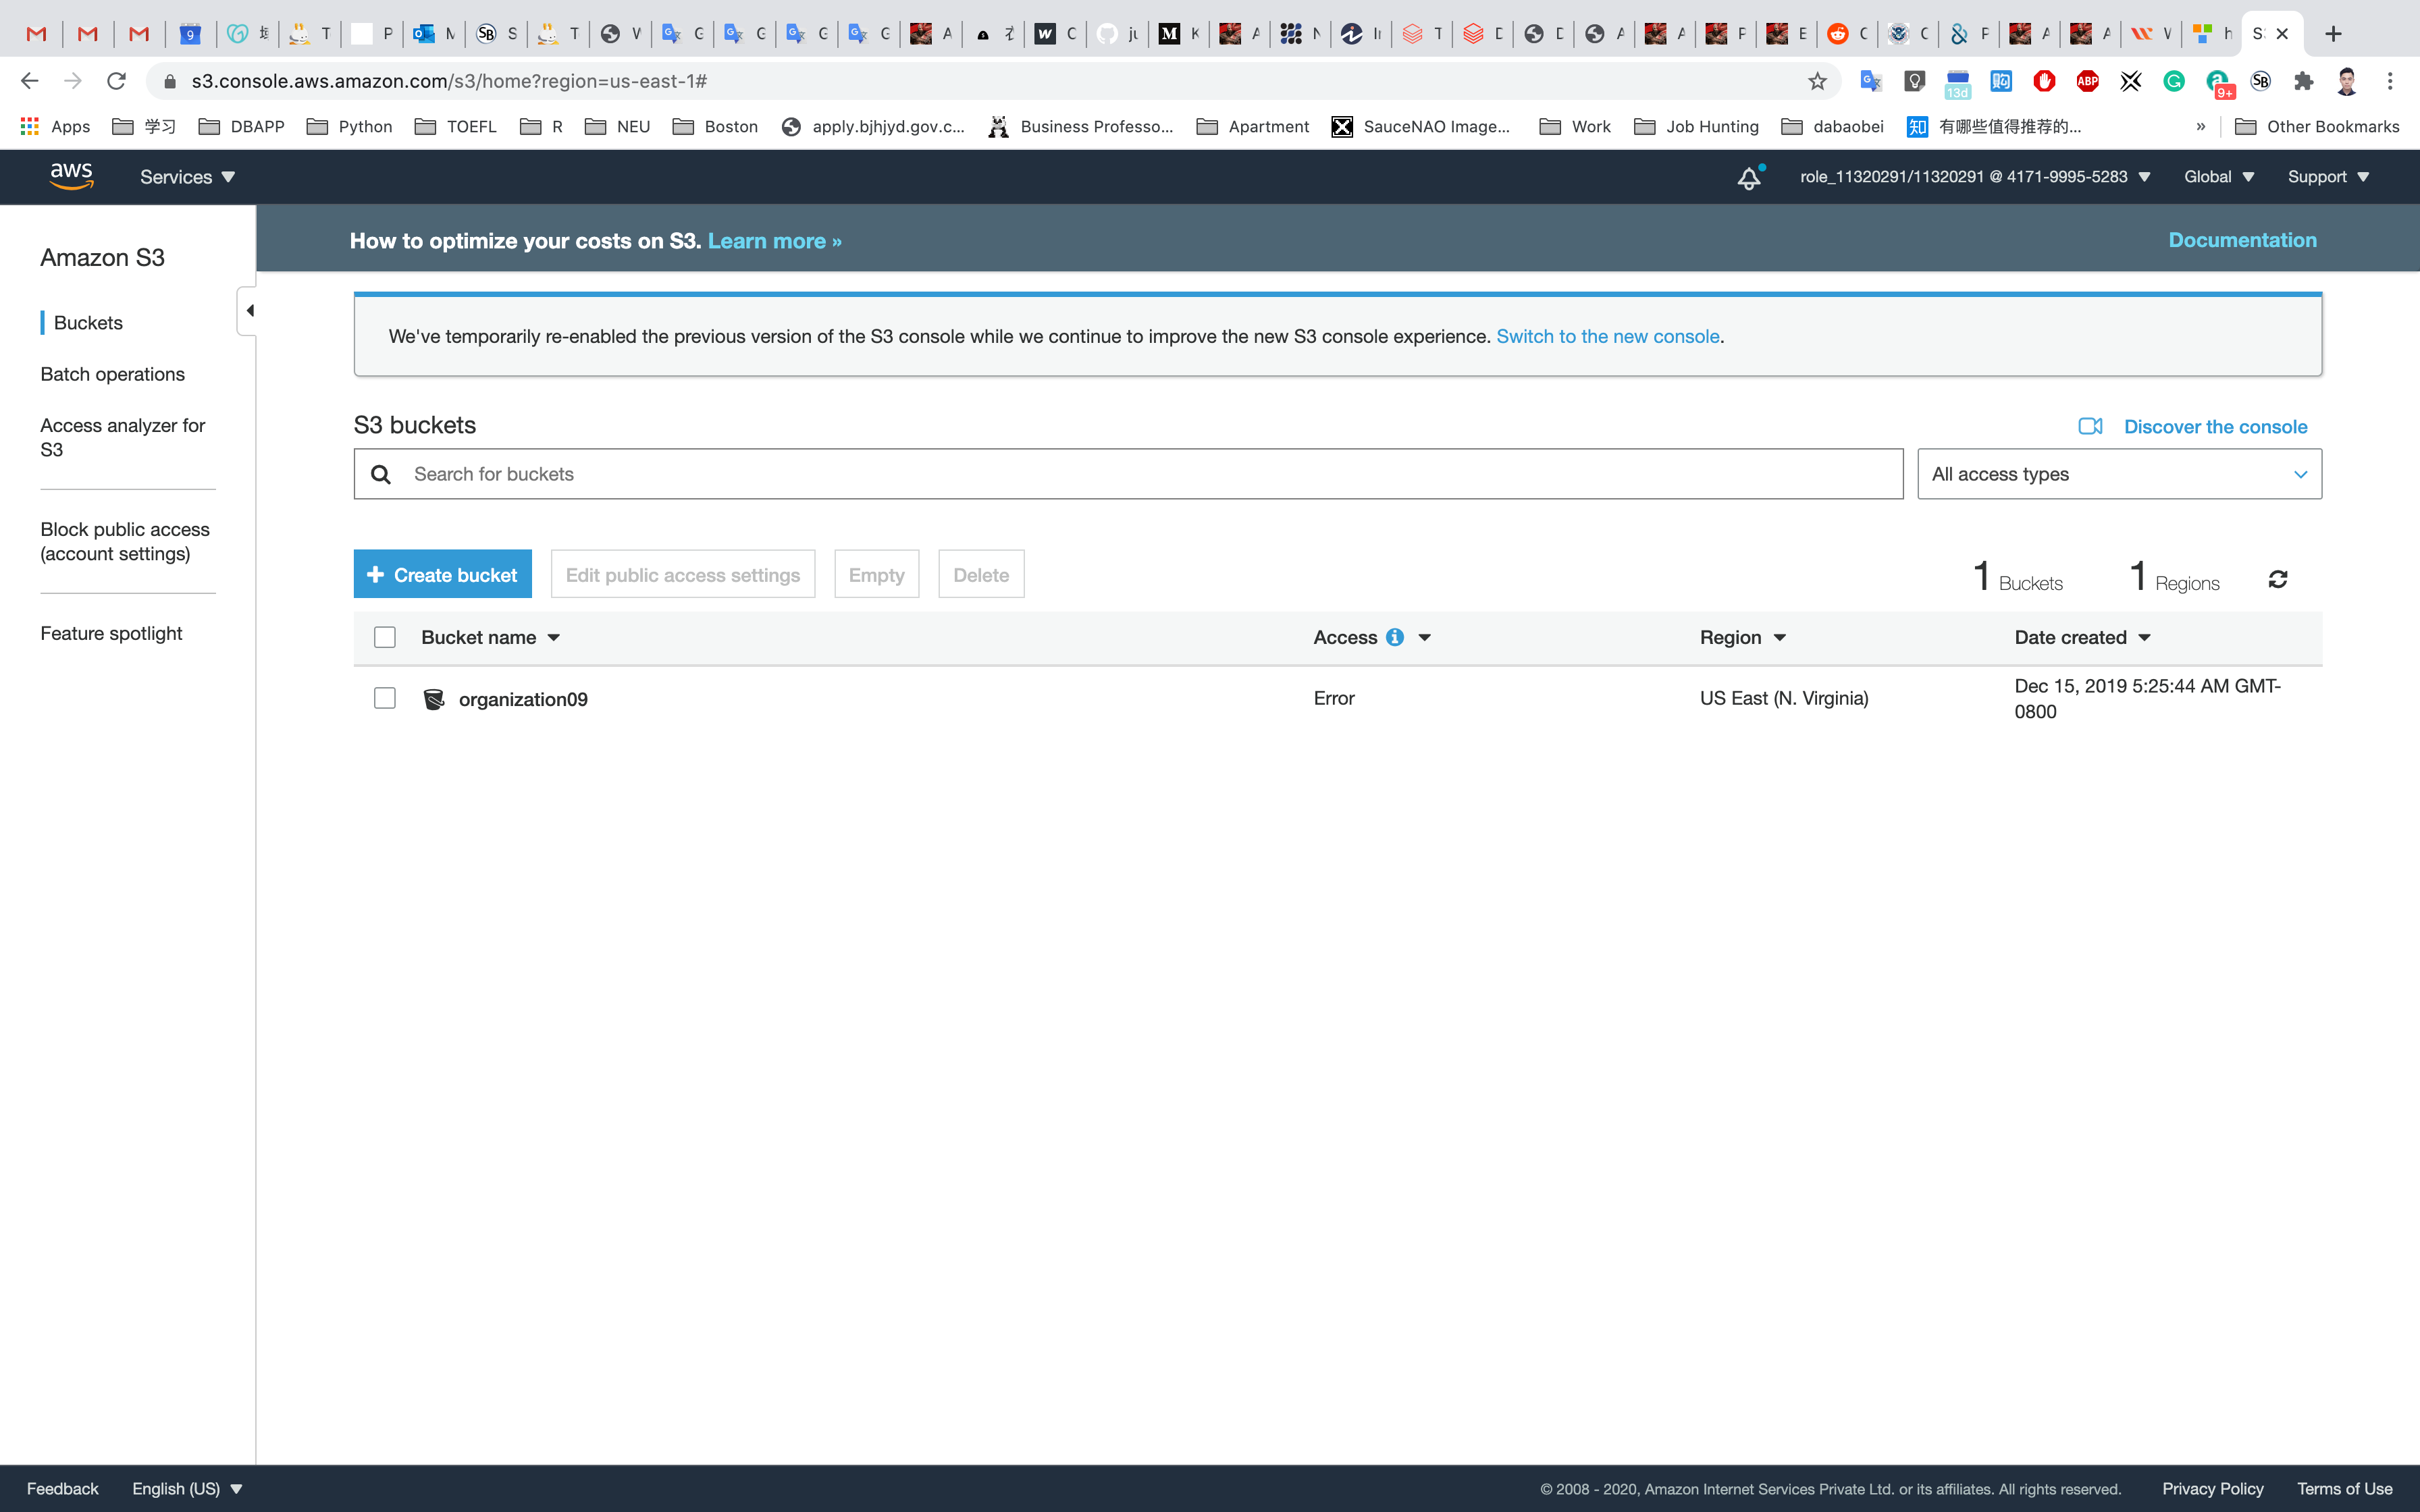
- Bucket name:
yourBucketName- Note: S3 bucket names are globally unique, choose a name which is available.
- Region: Select
US East (N. Virginia) - Leave other settings as default.
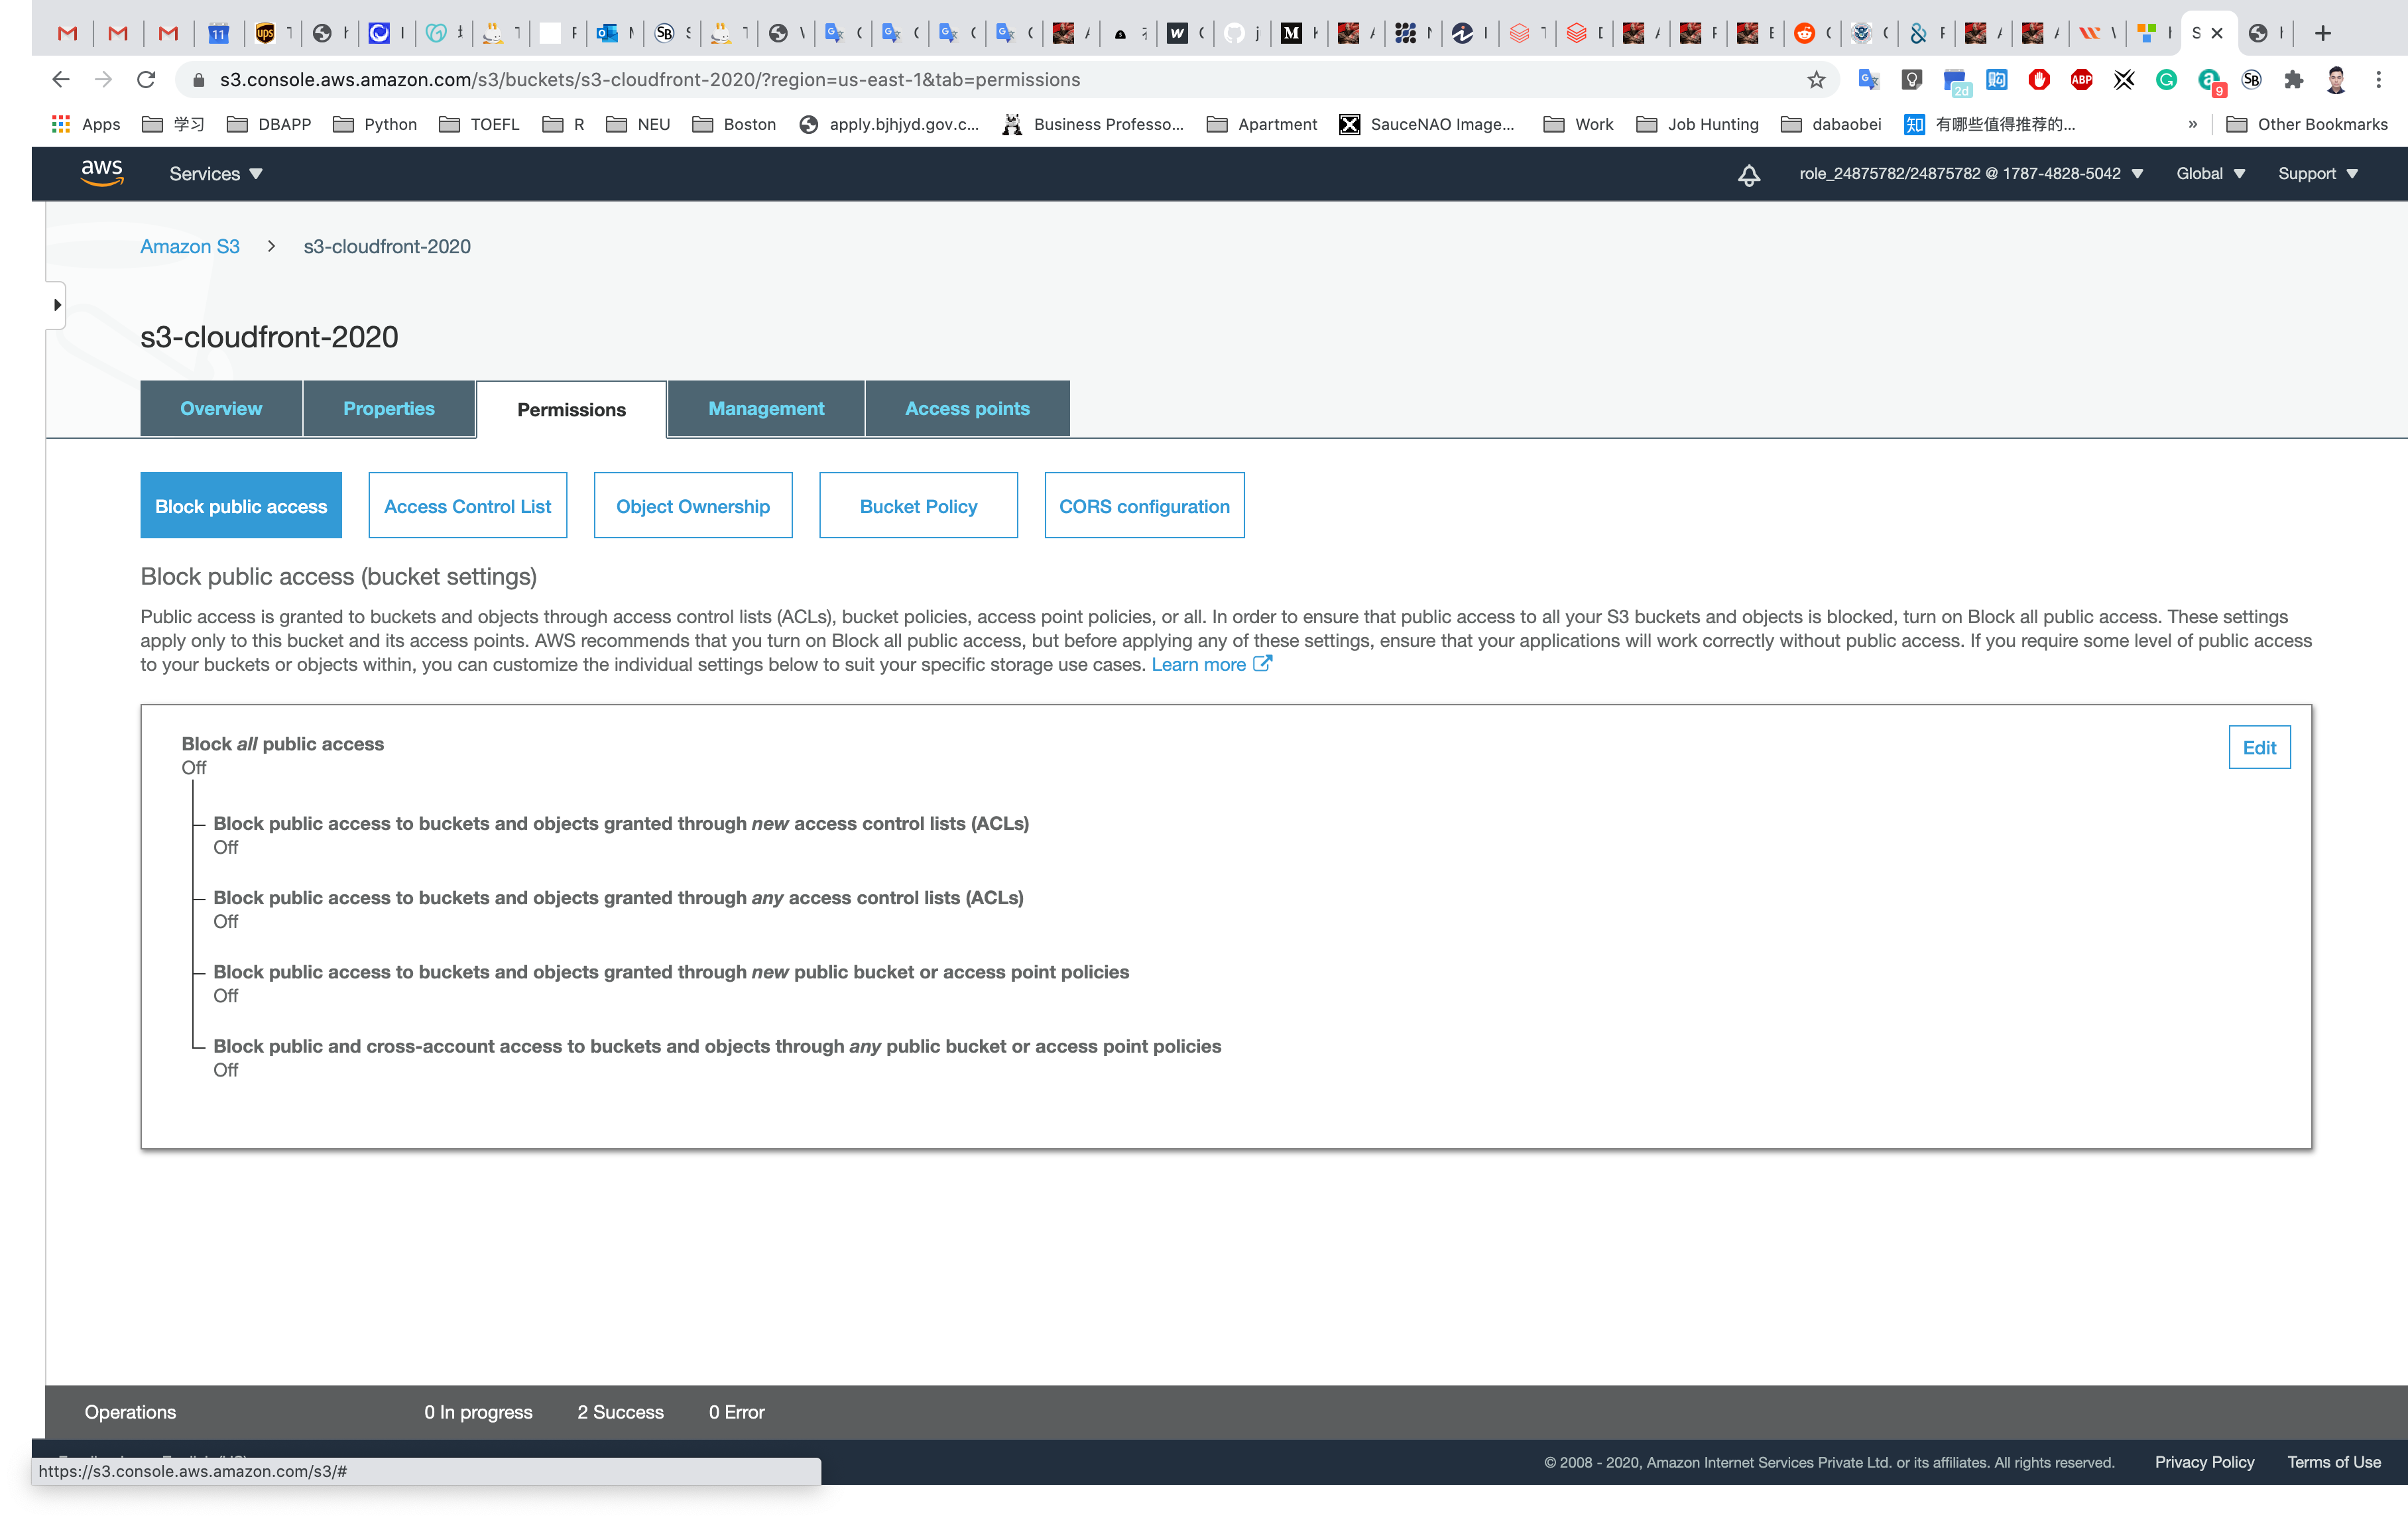
Click Next then Next and go to the permissions and Uncheck the Block all Public Access and acknowledge the change.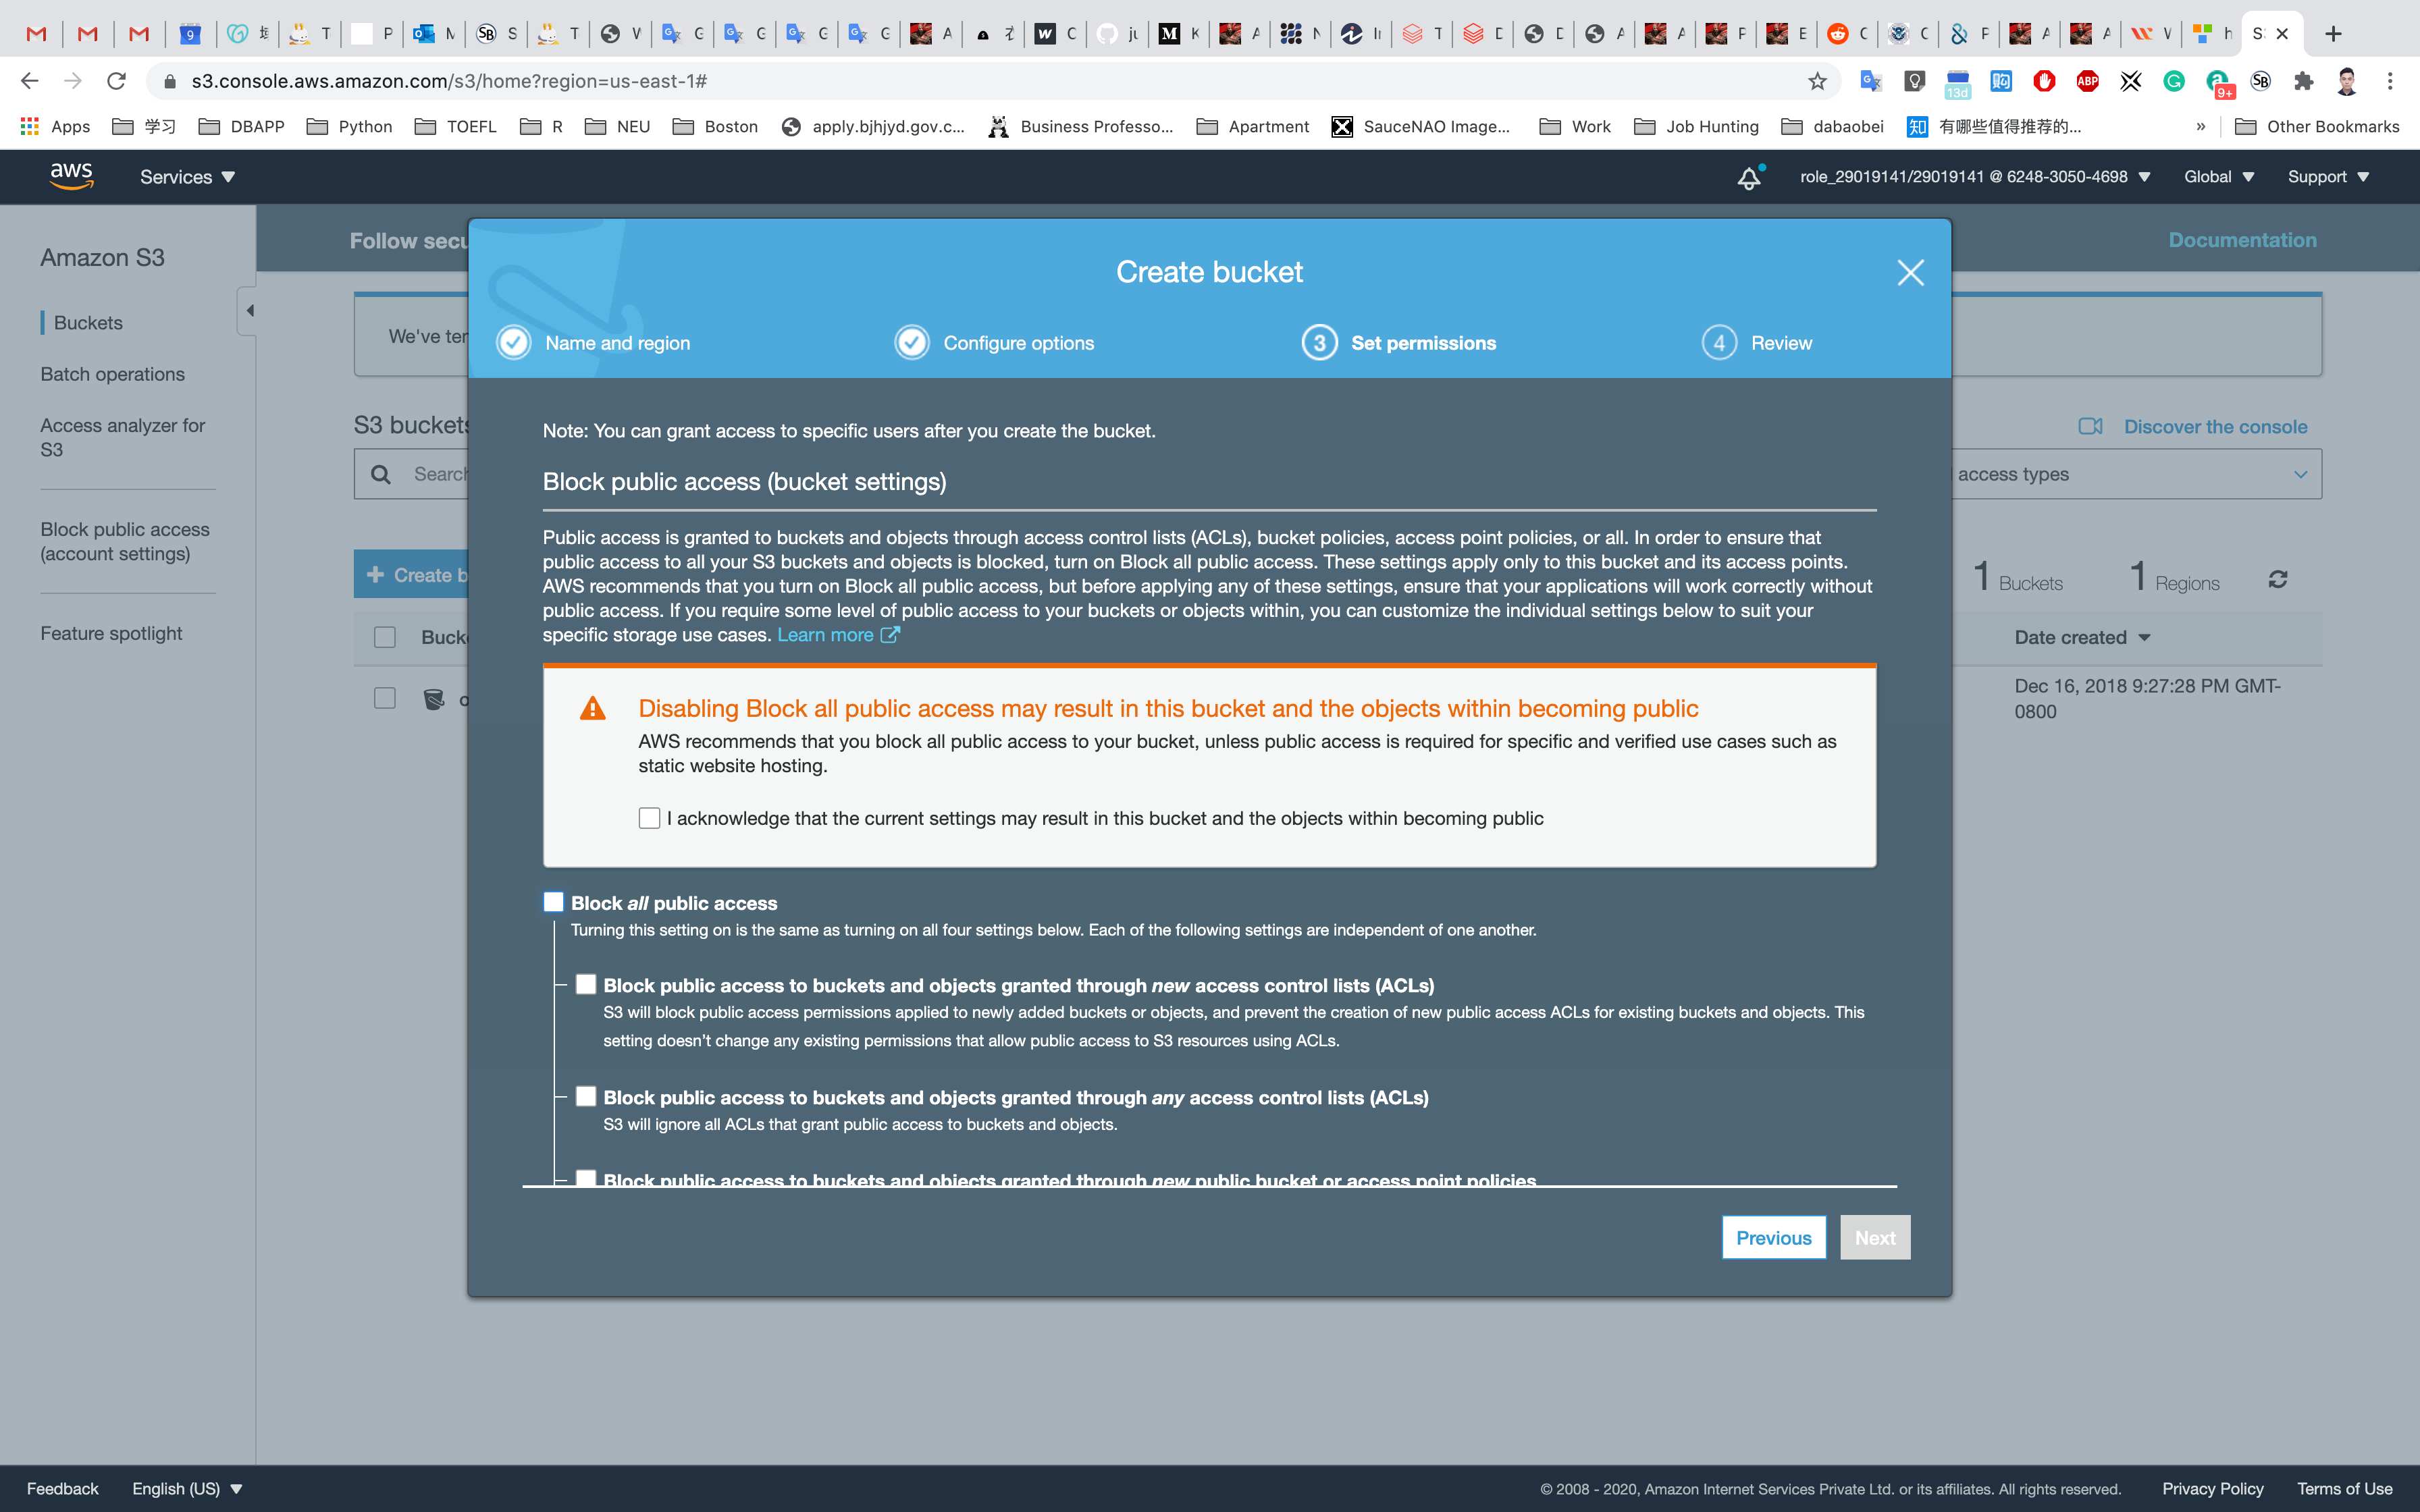
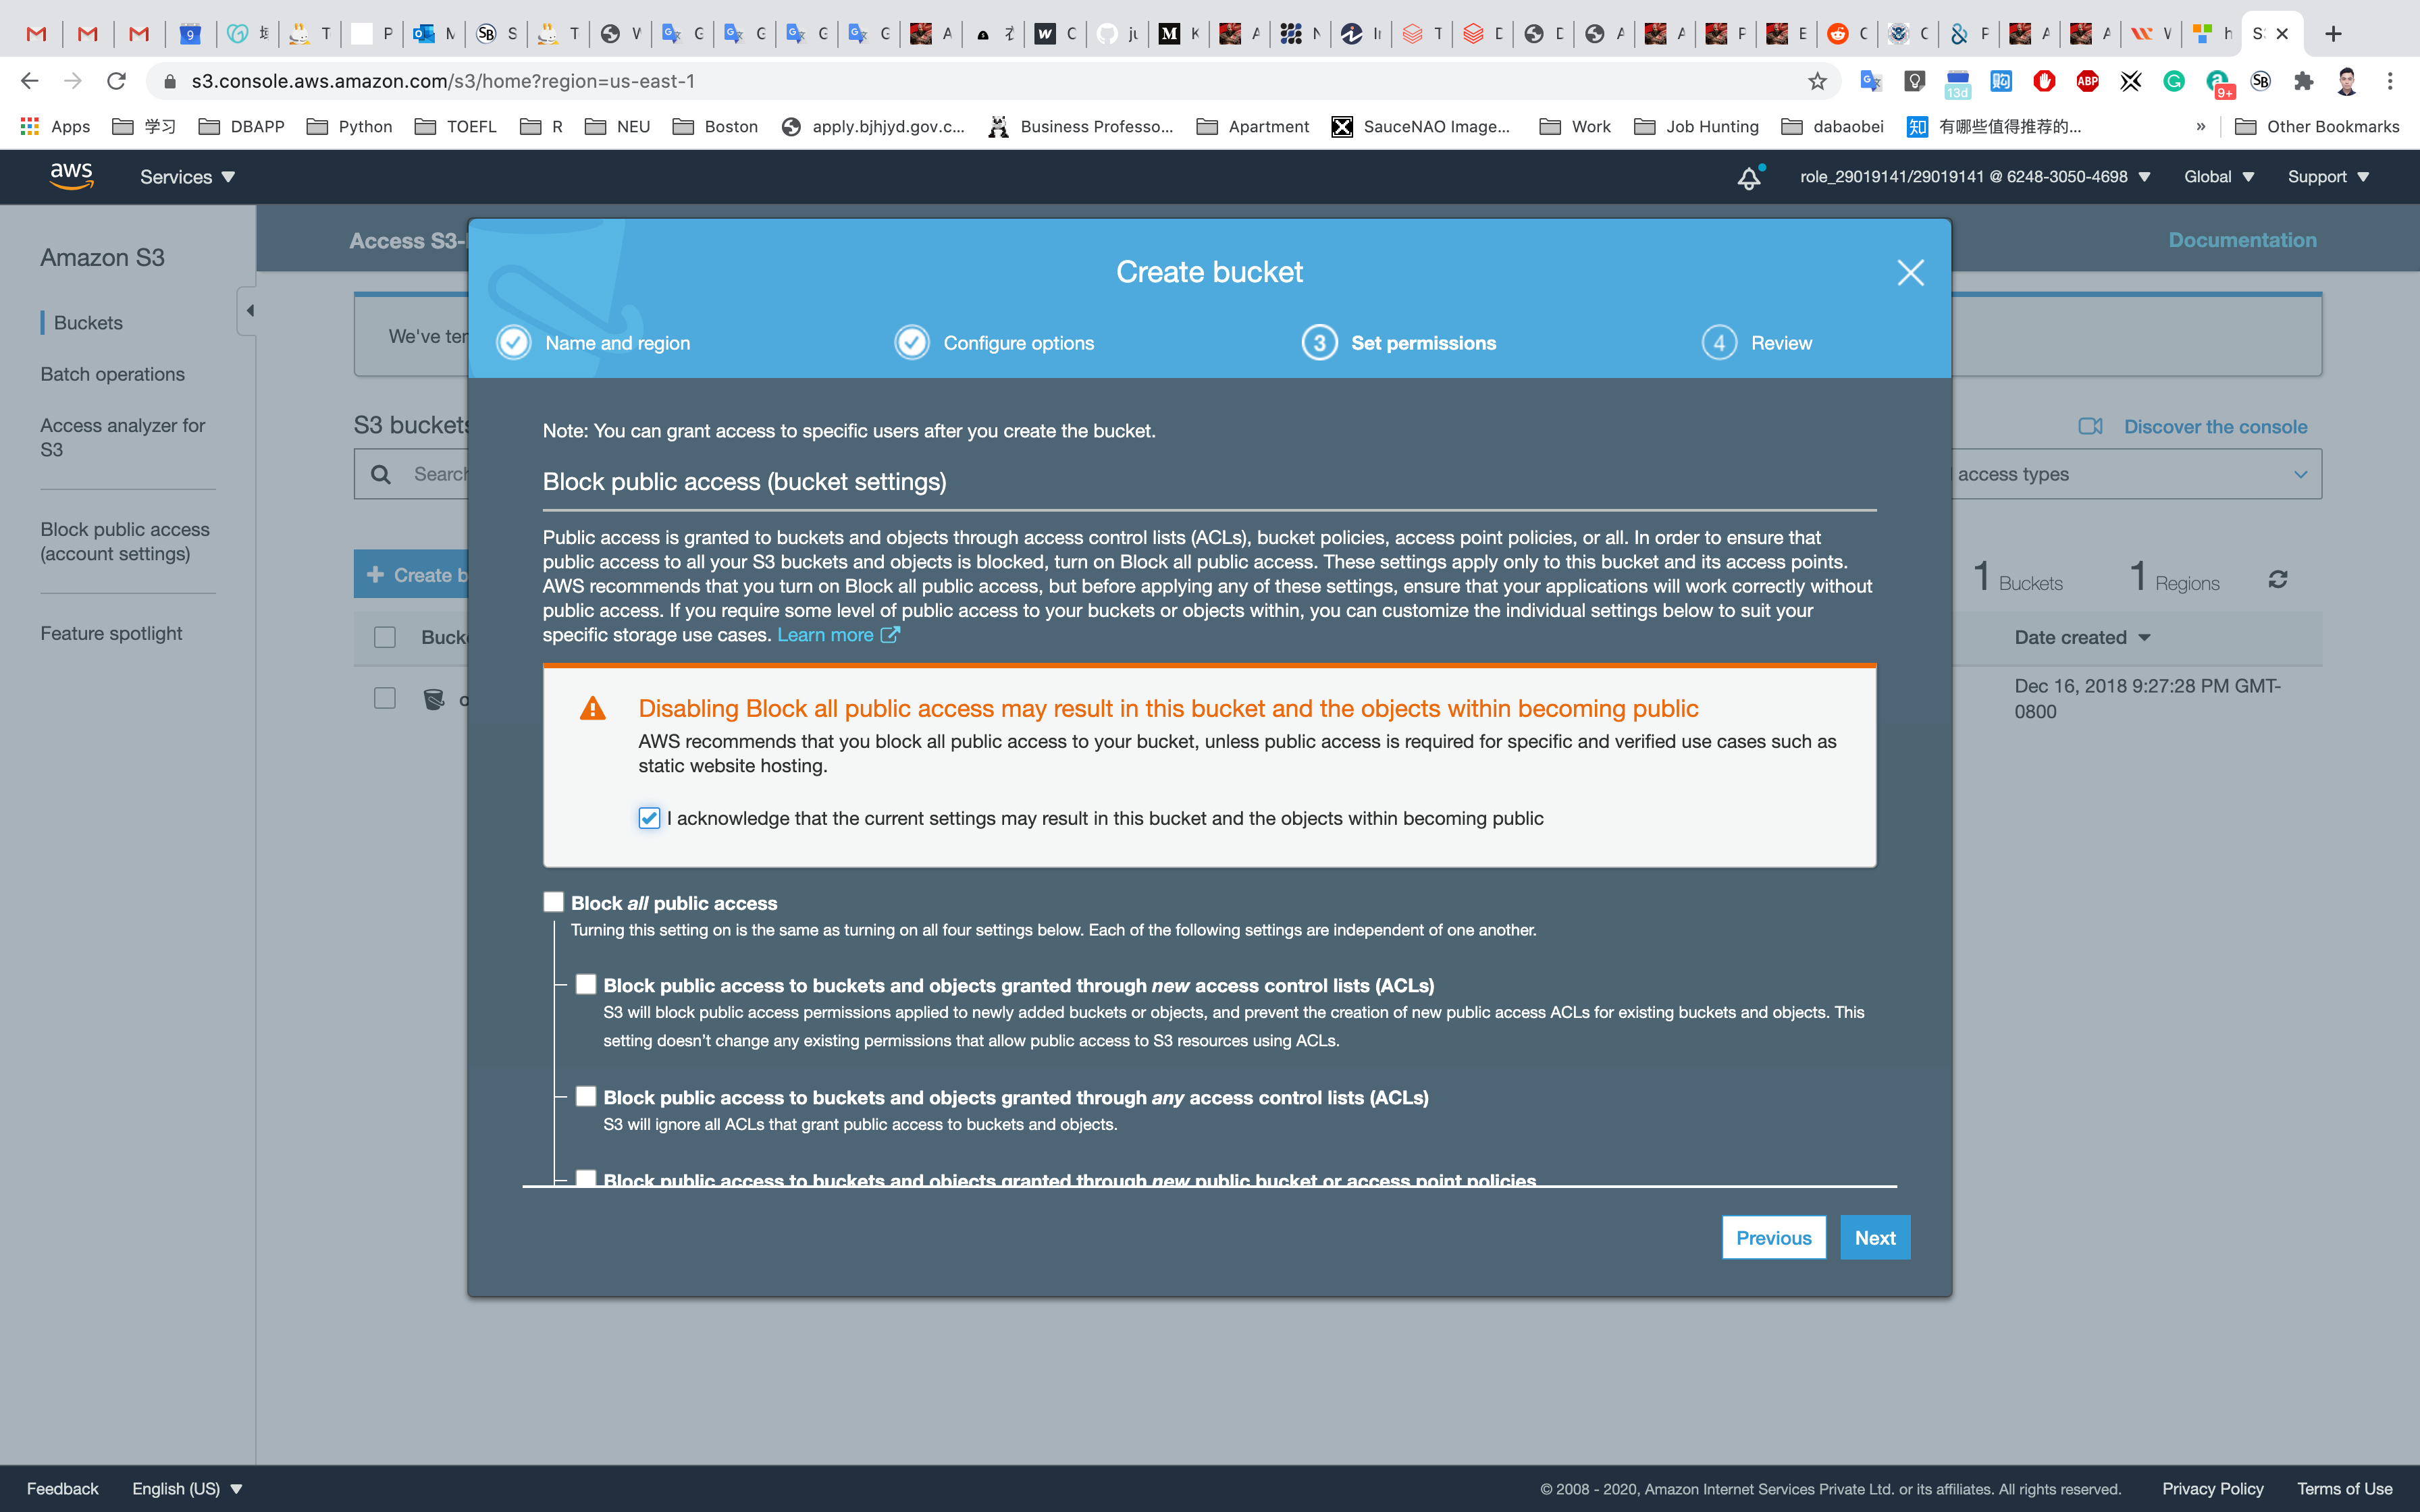
Click on Next and Create bucket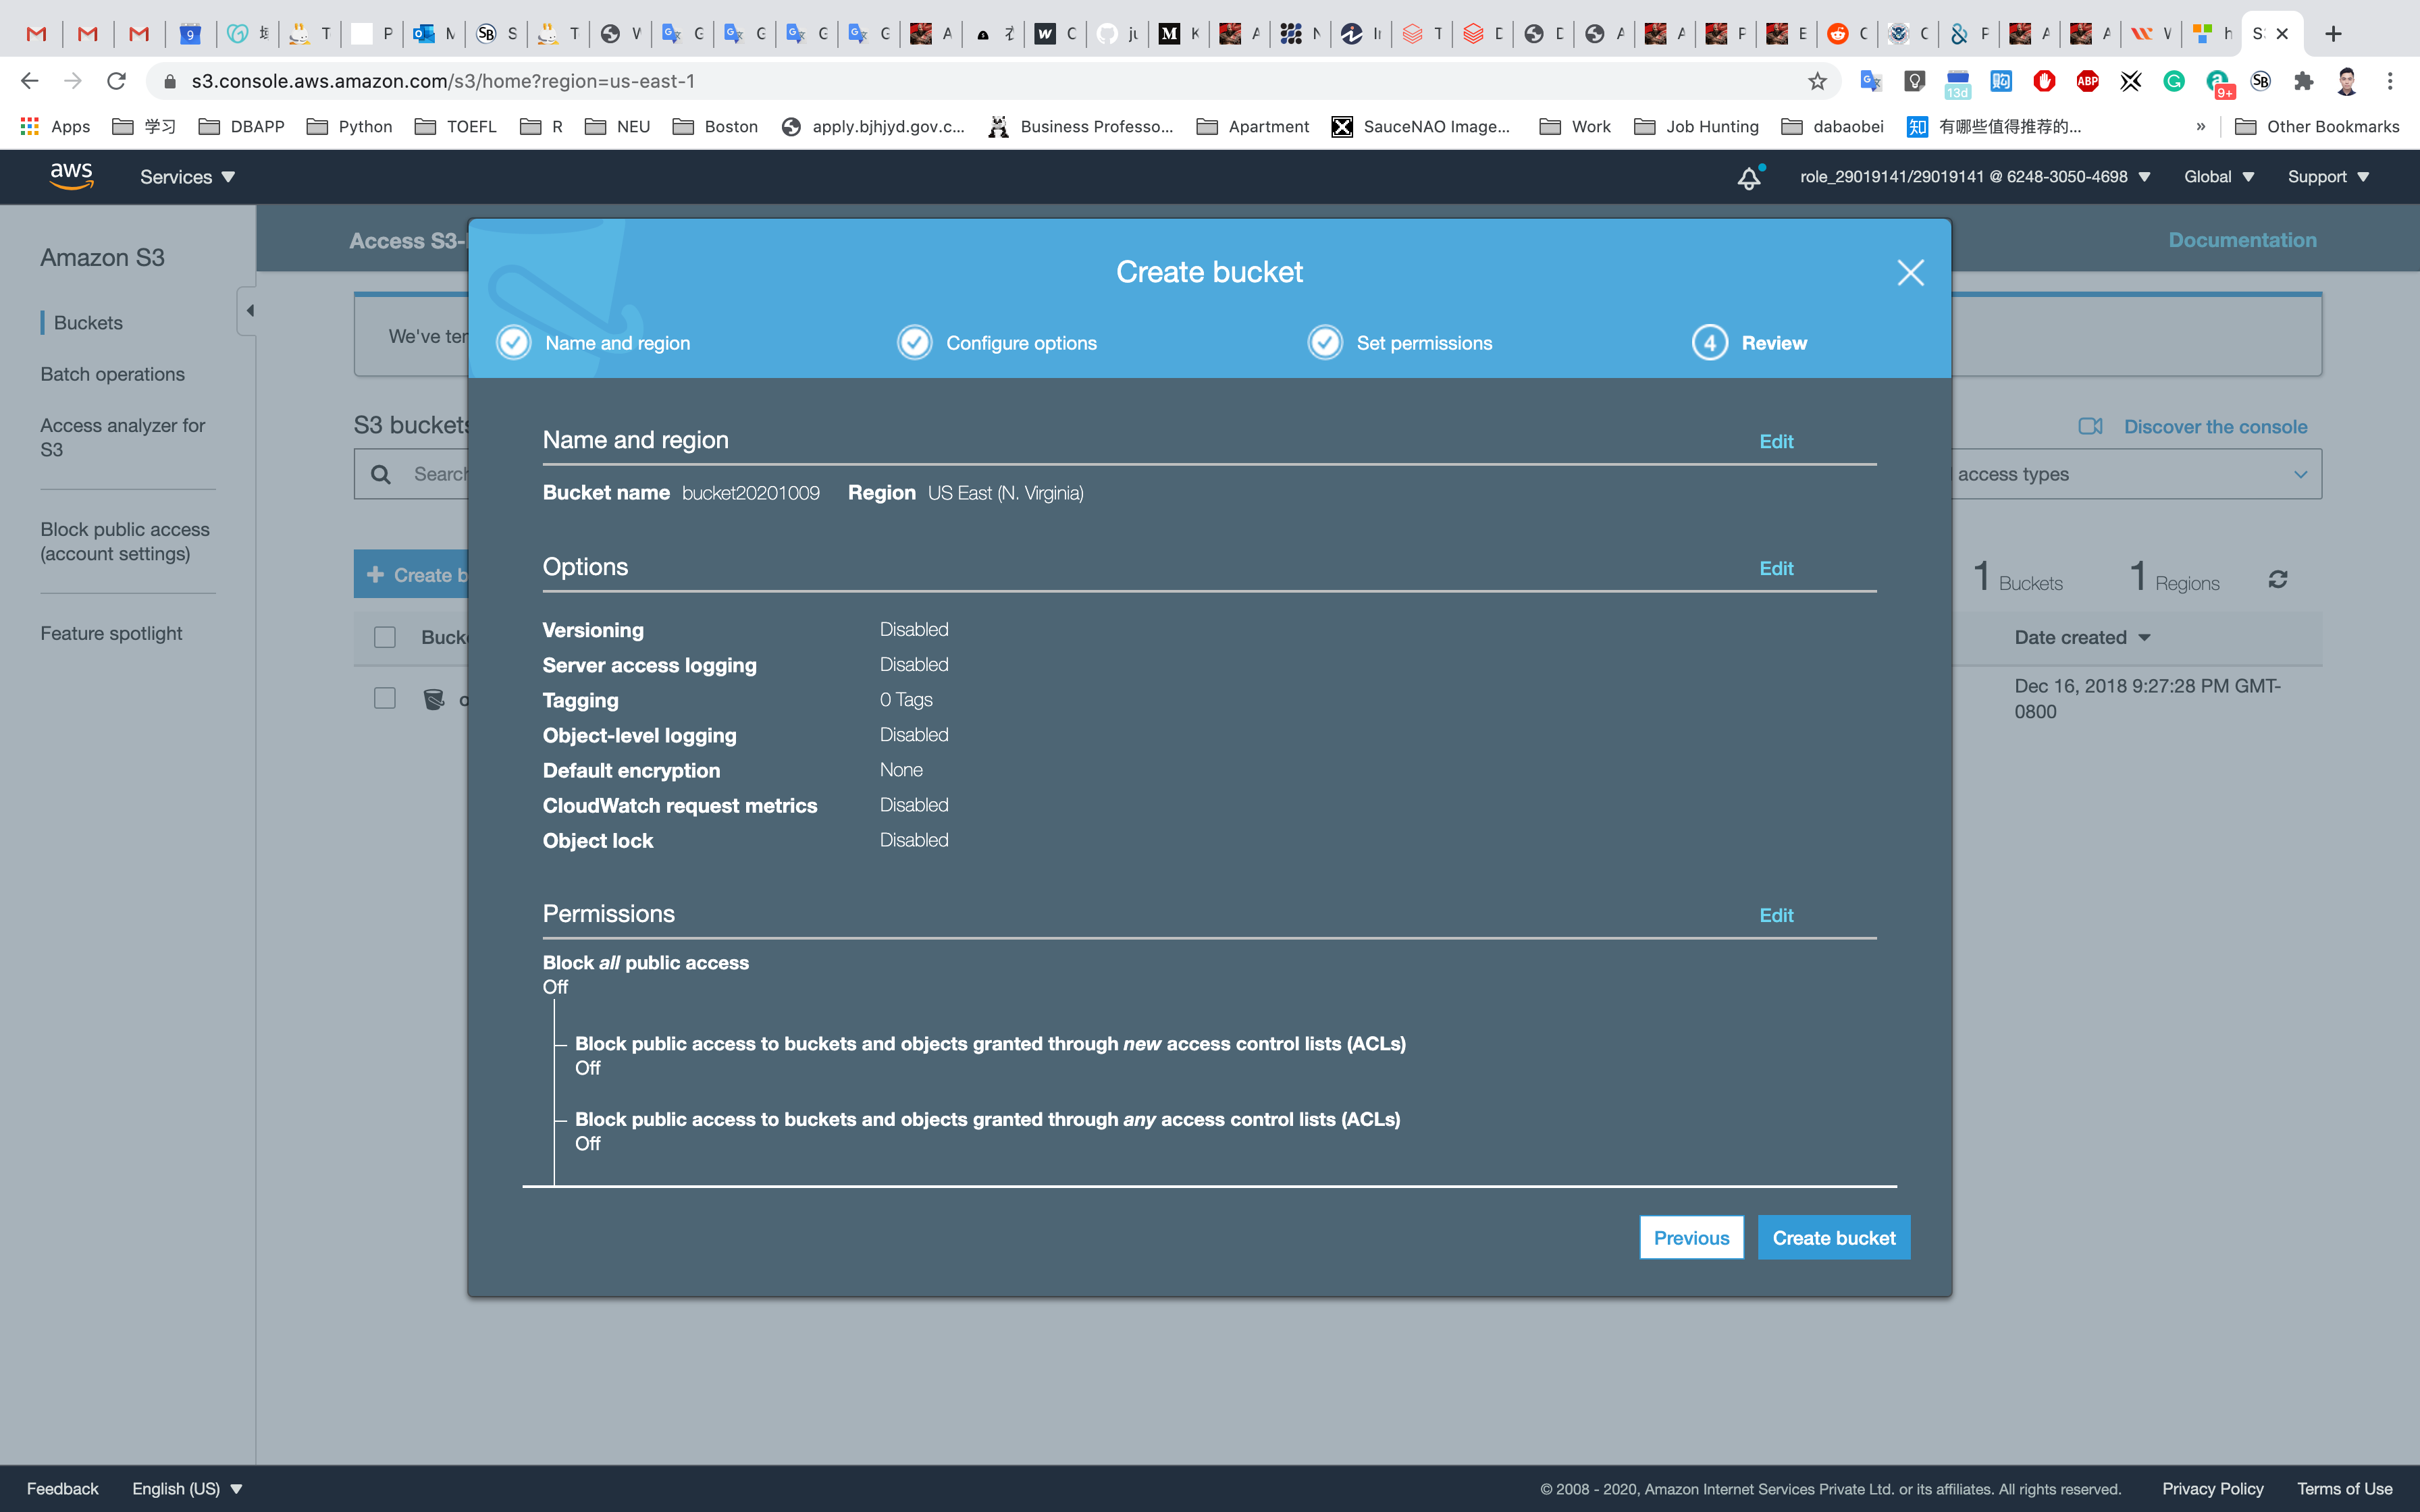
Upload an object
Now upload an Object (.txt or .png). to your source bucket (the first one that located in N.Virginia)
Upload any file from your local machine.
On the S3 Buck list page, Click on youBucketName
Click on Overview tab.
Click on the Upload button.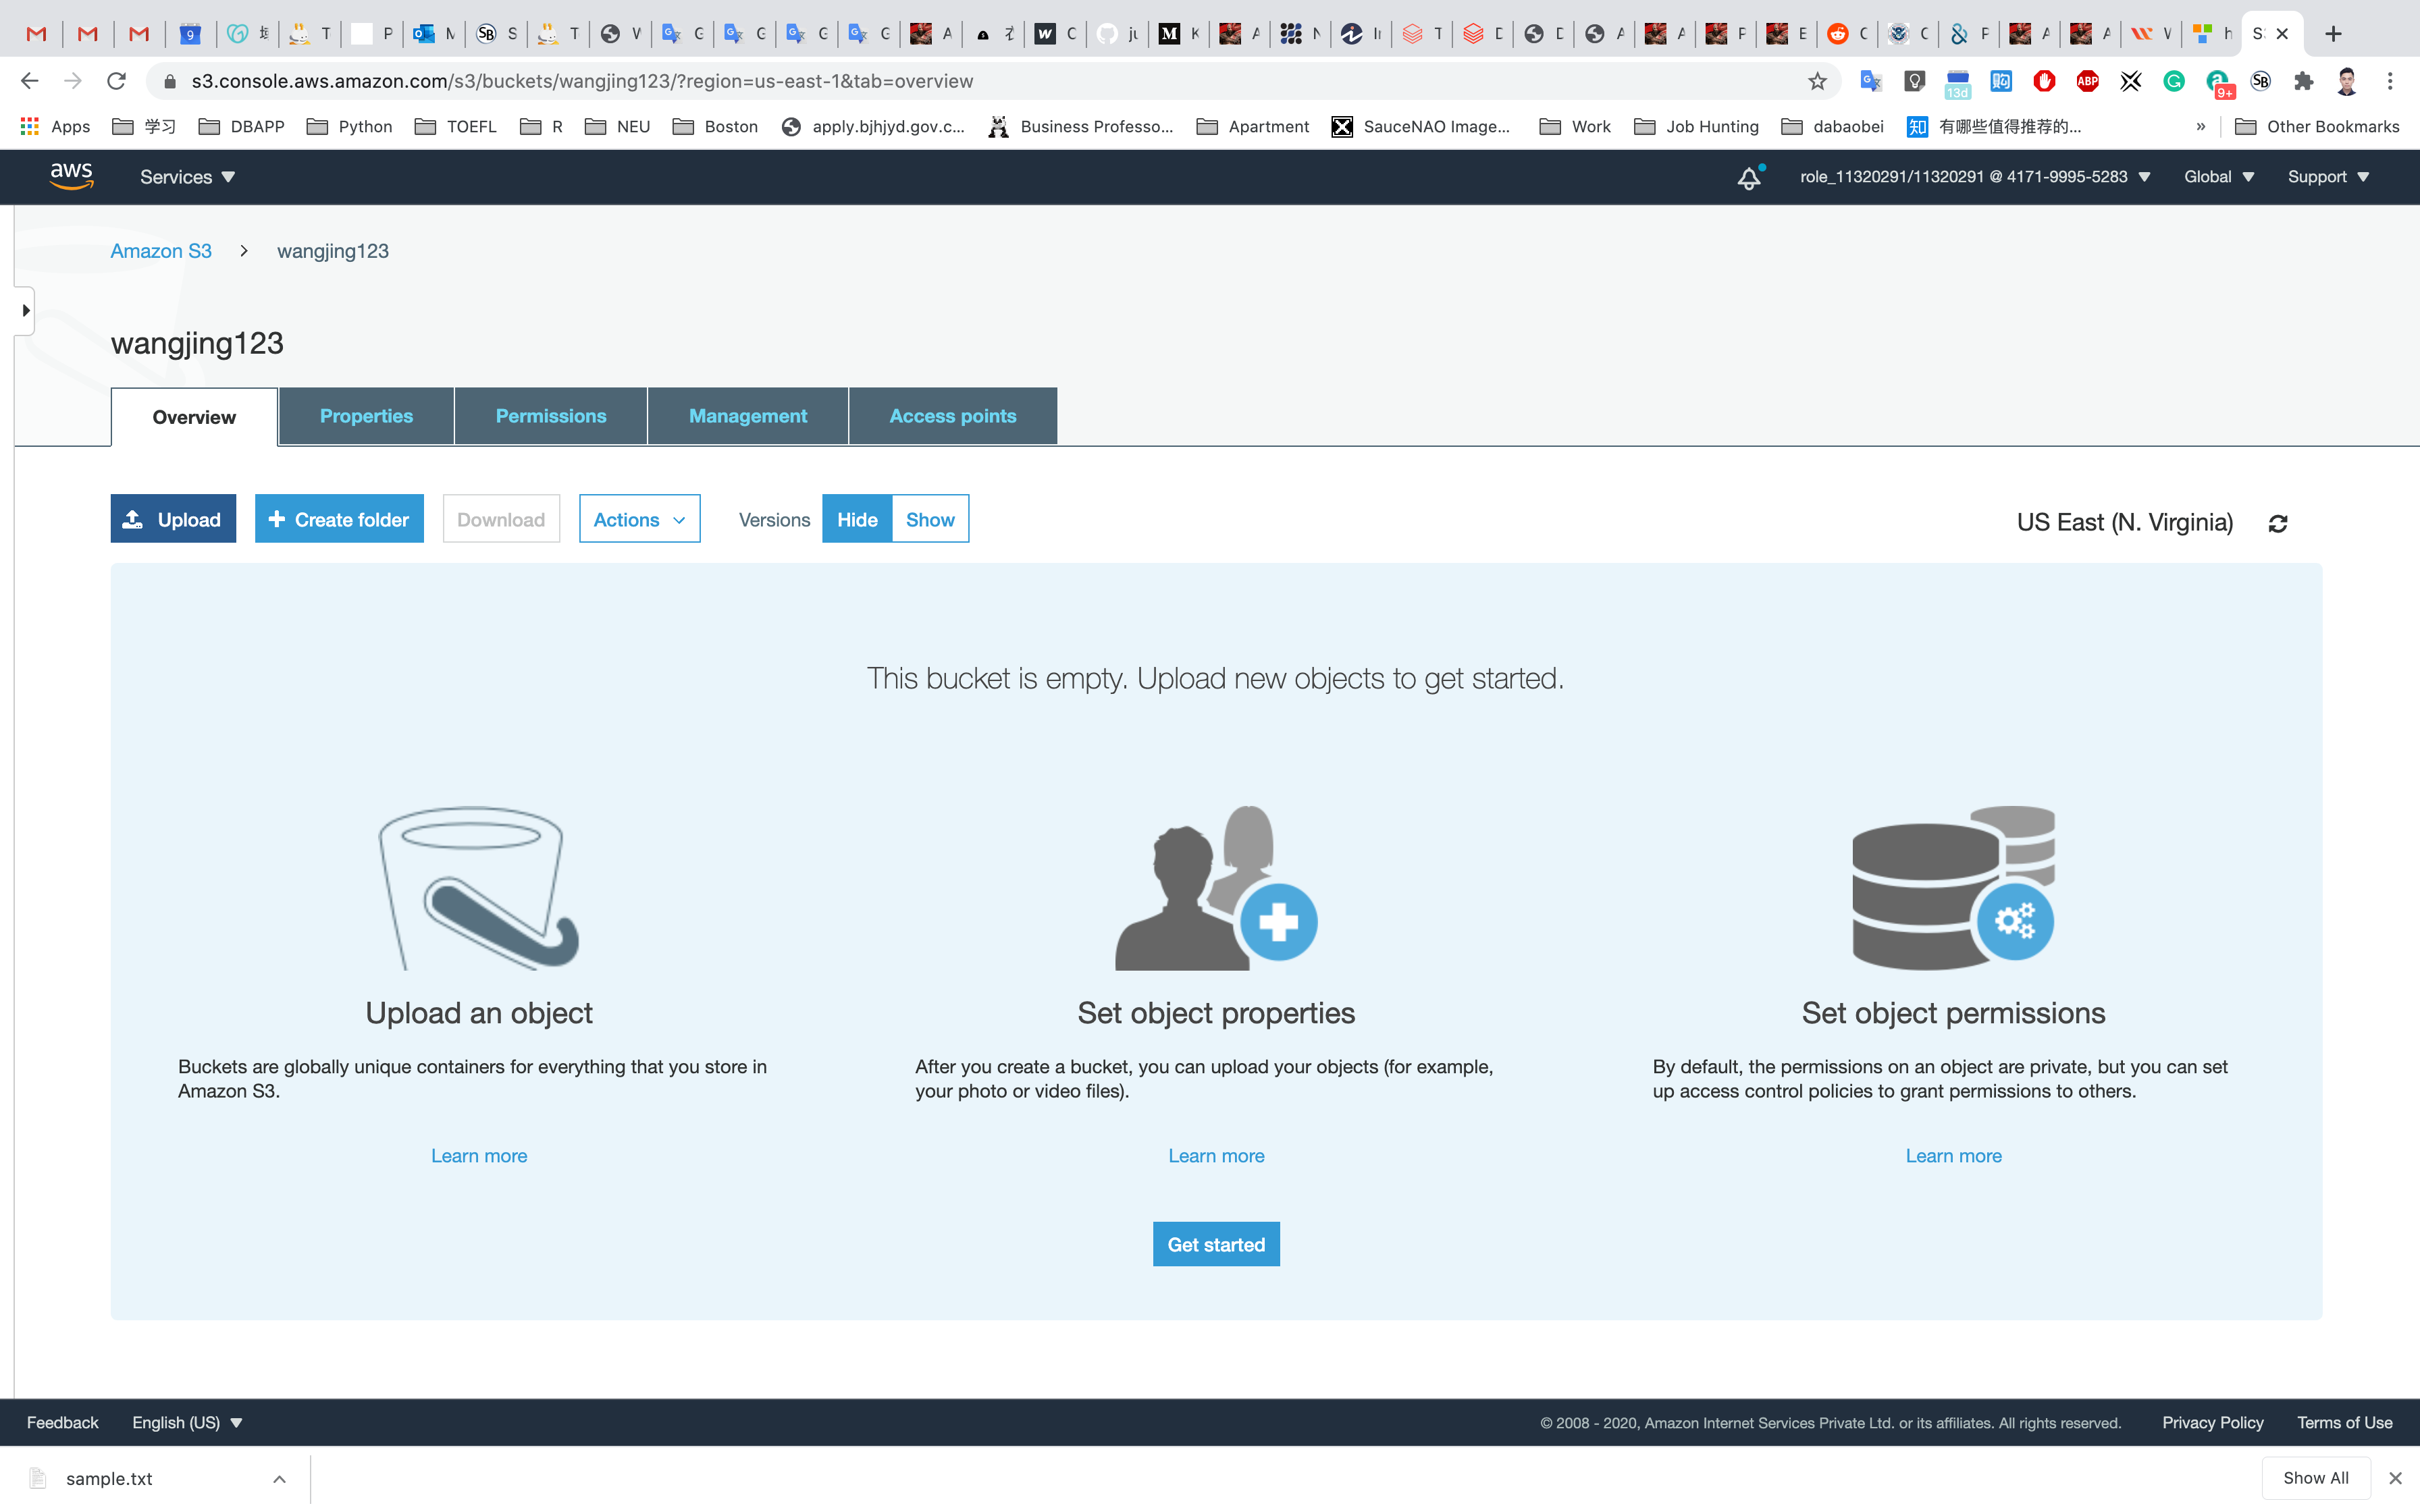
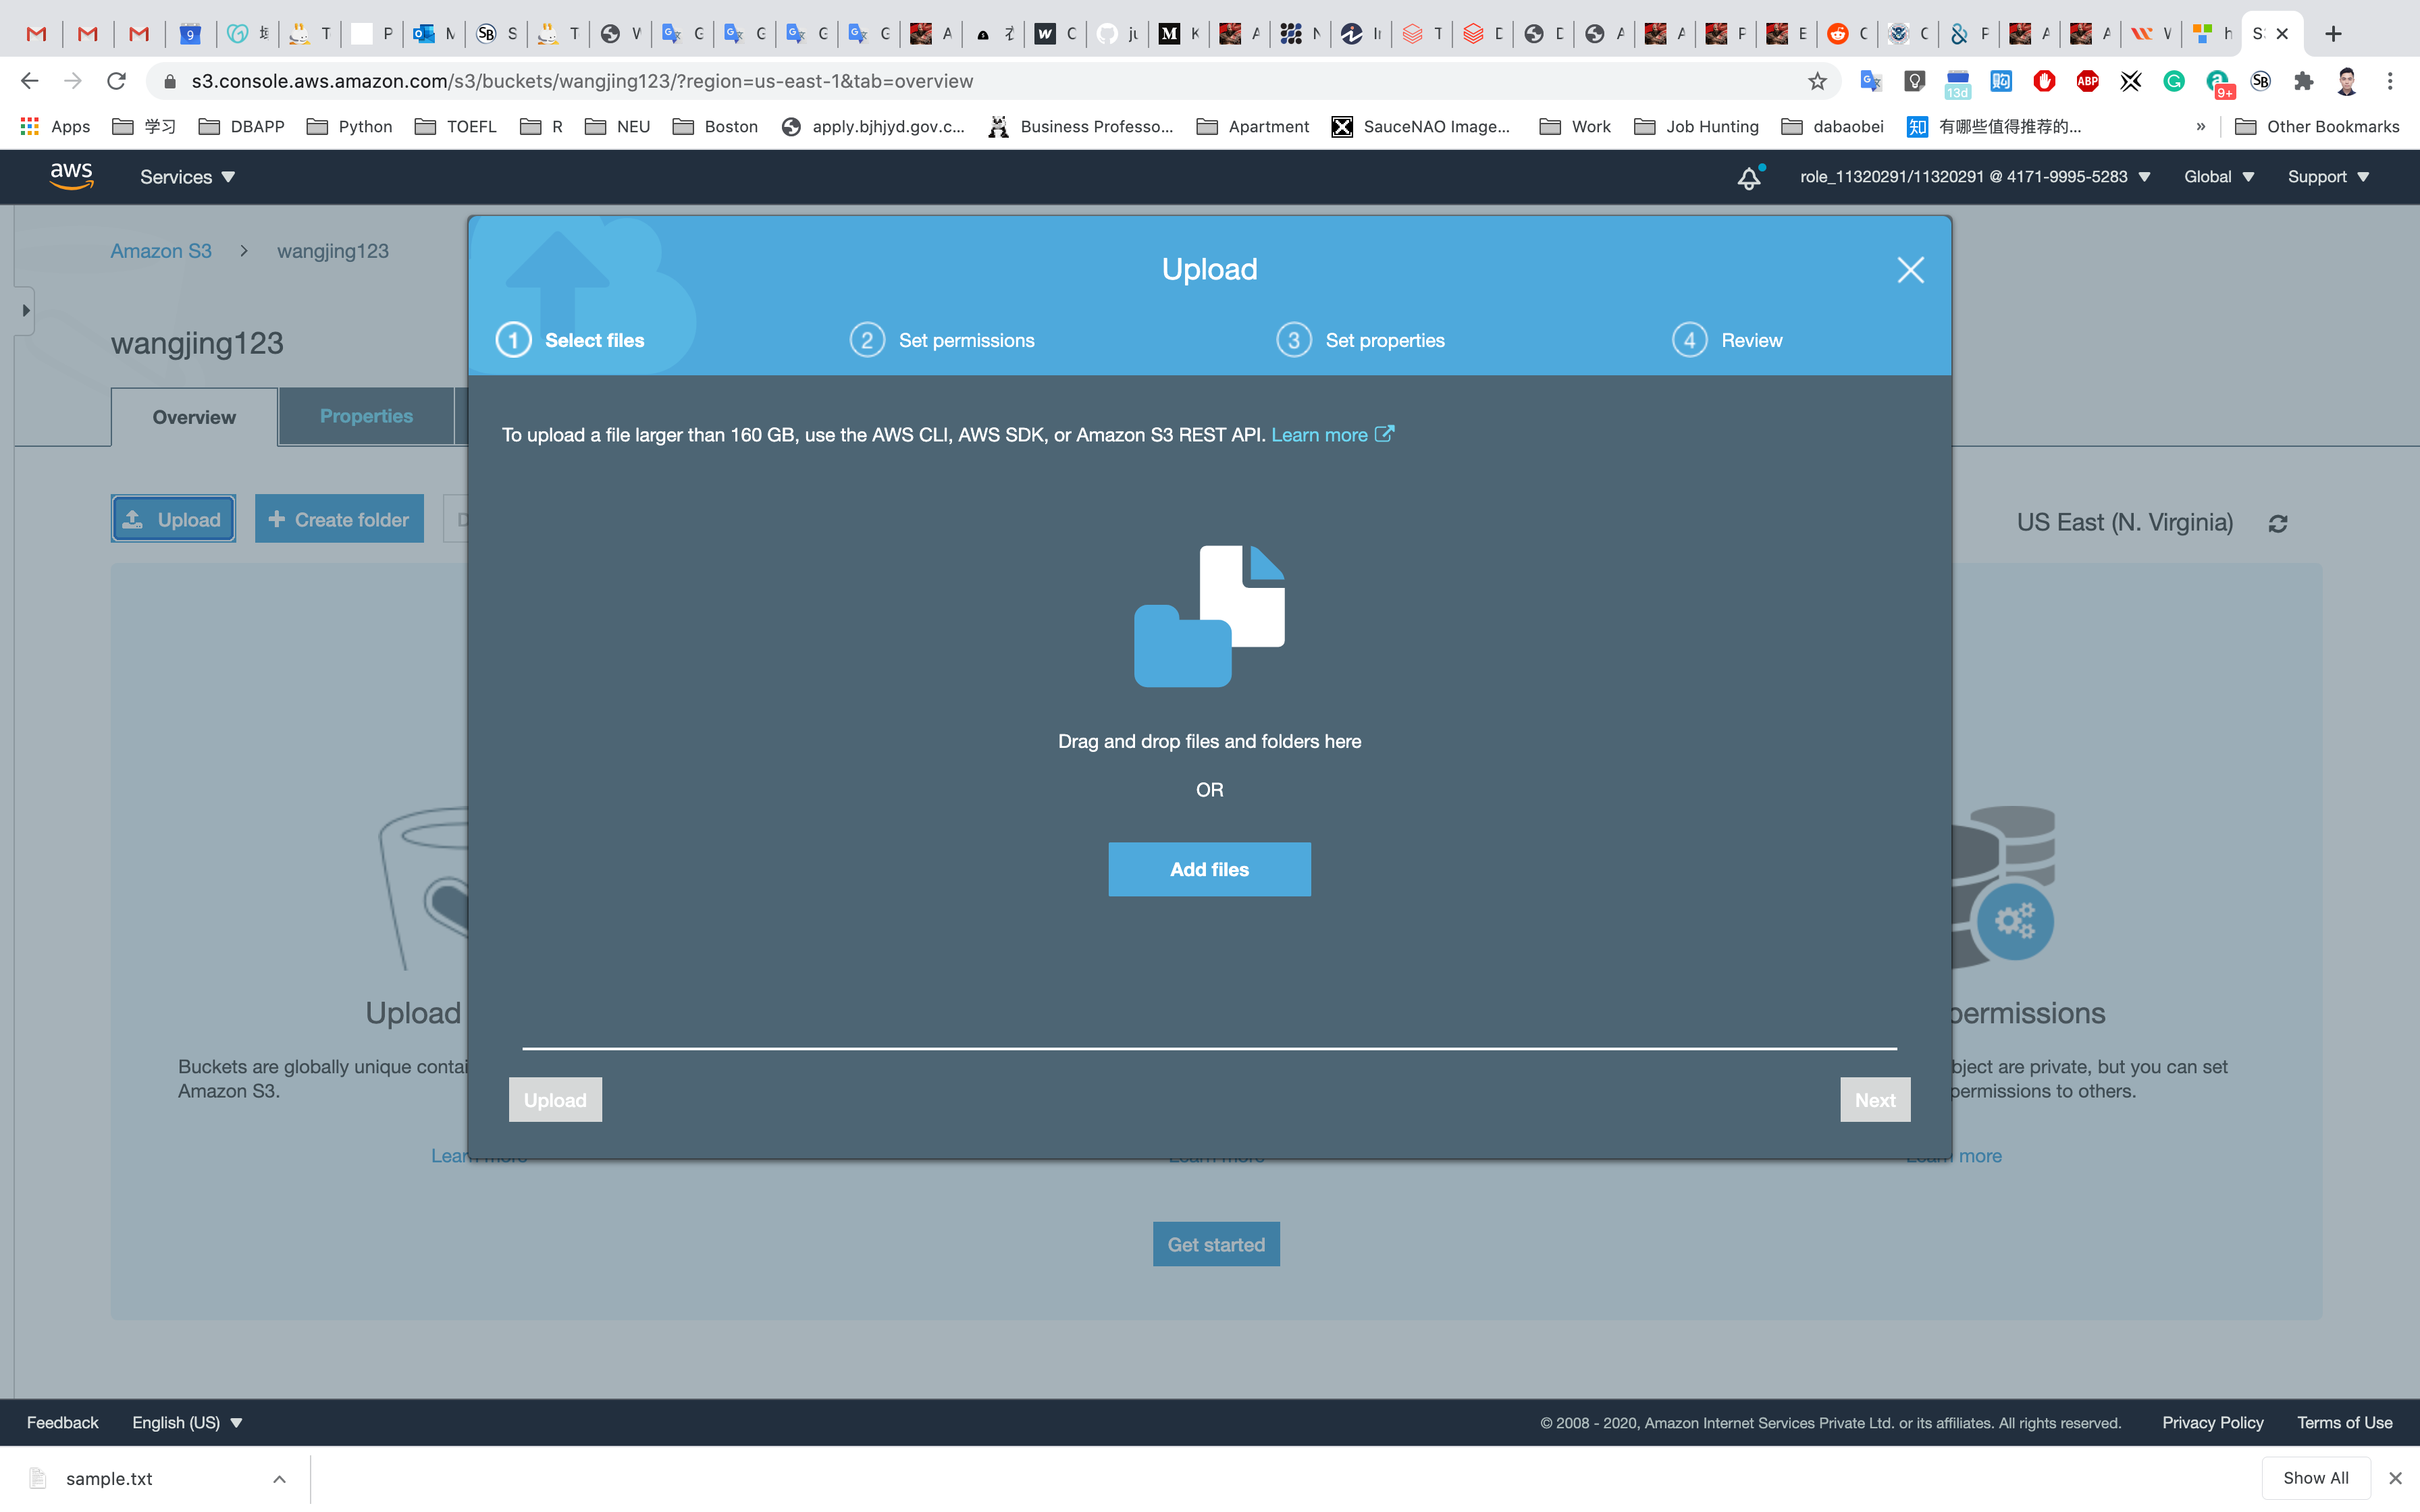
Click on the Add files button.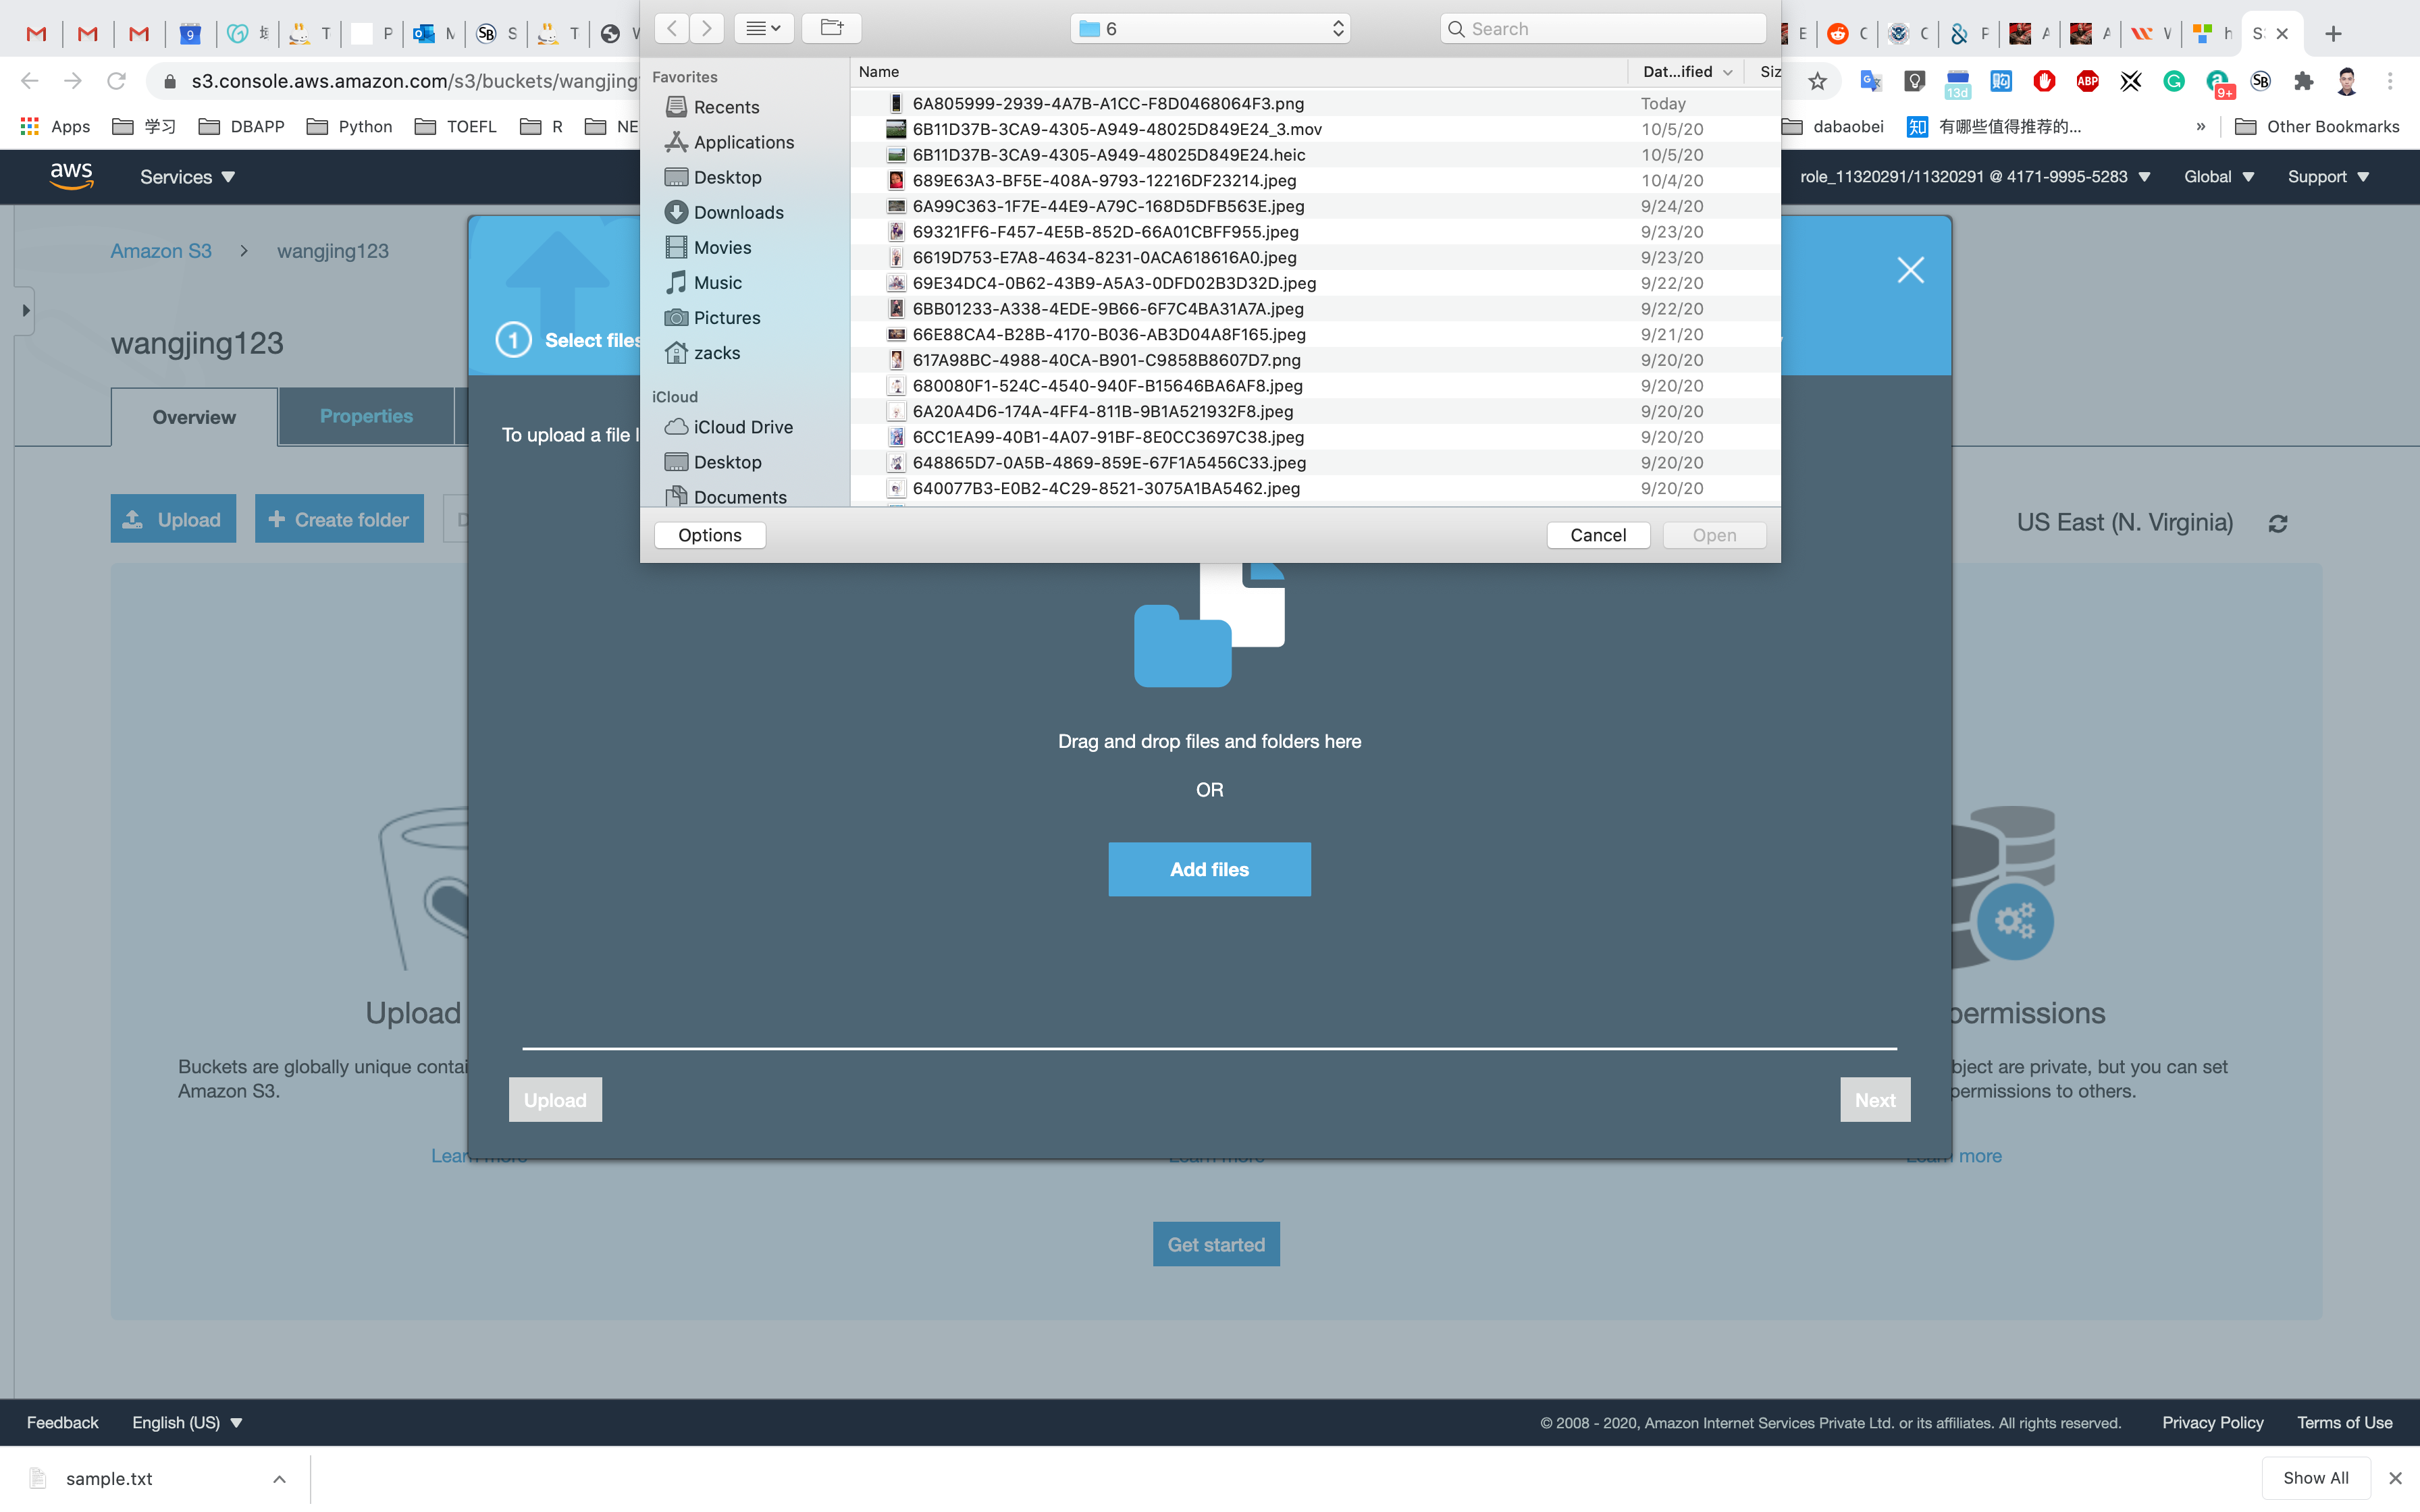
Browse for the file you want to upload.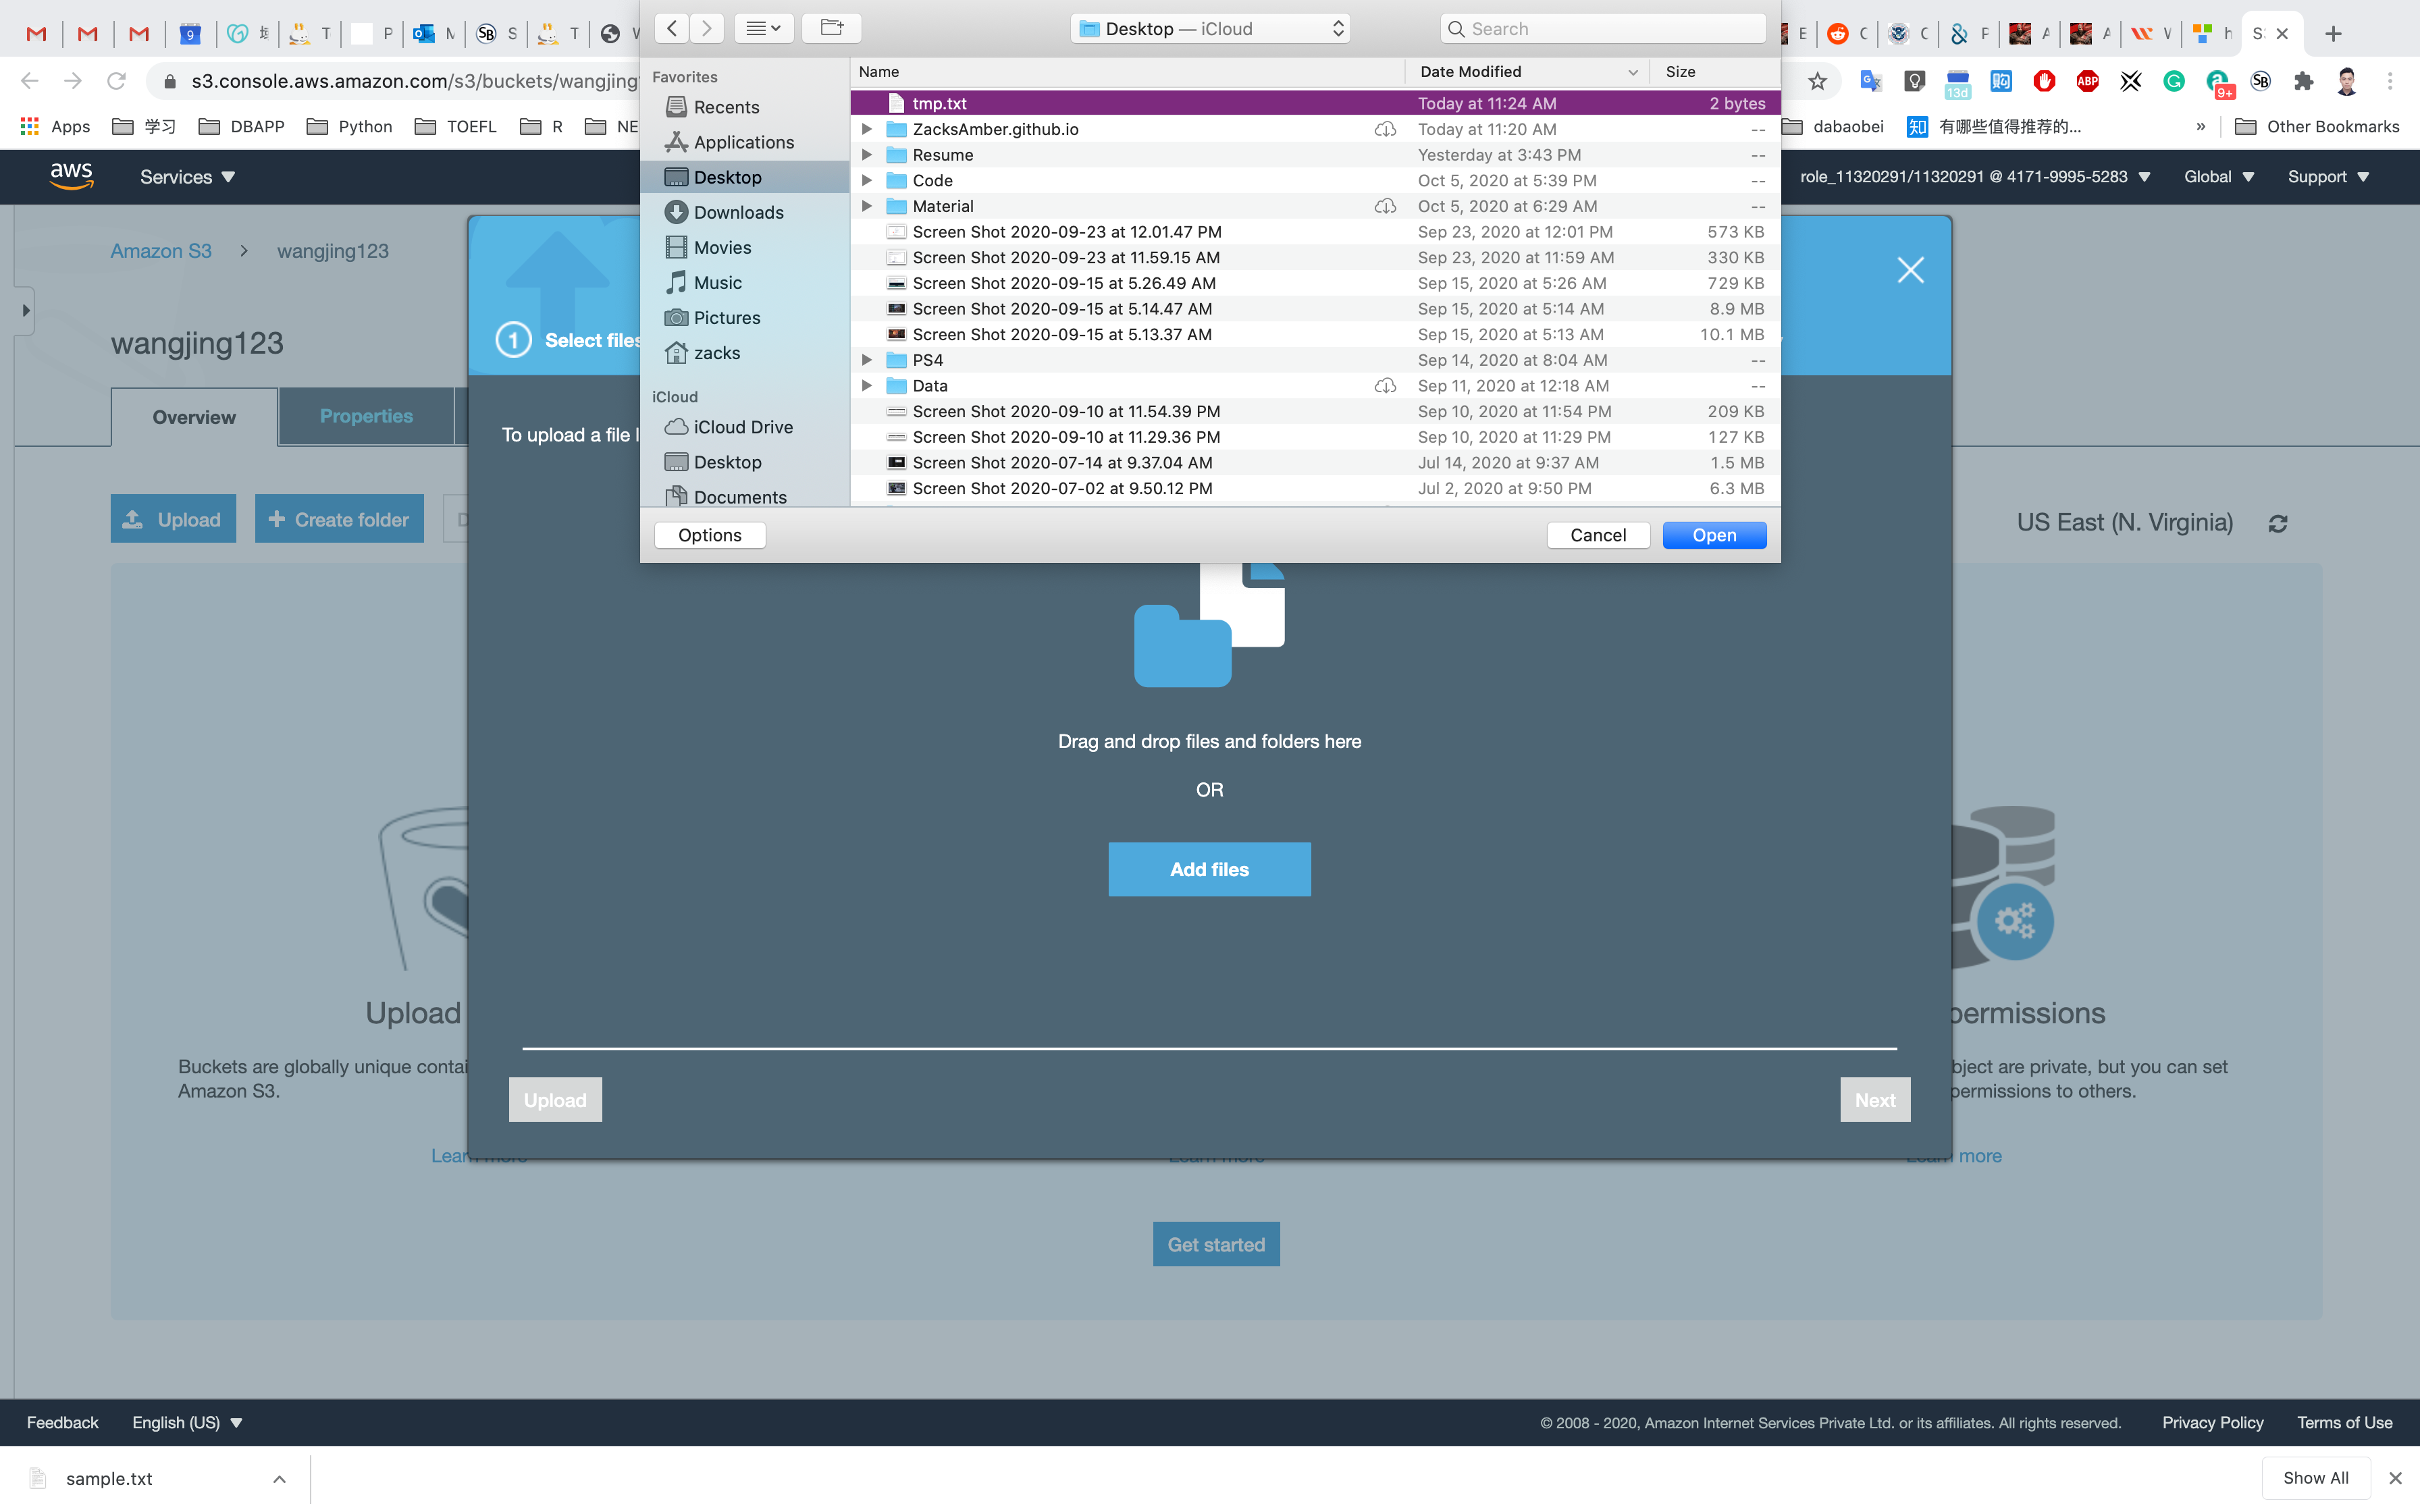
Click on Upload button.
You can watch the progress of the upload from within the transfer panel at the bottom of the screen. If it’s a small file, you might not see the transfer. Once your file has been uploaded, it will be displayed in the bucket.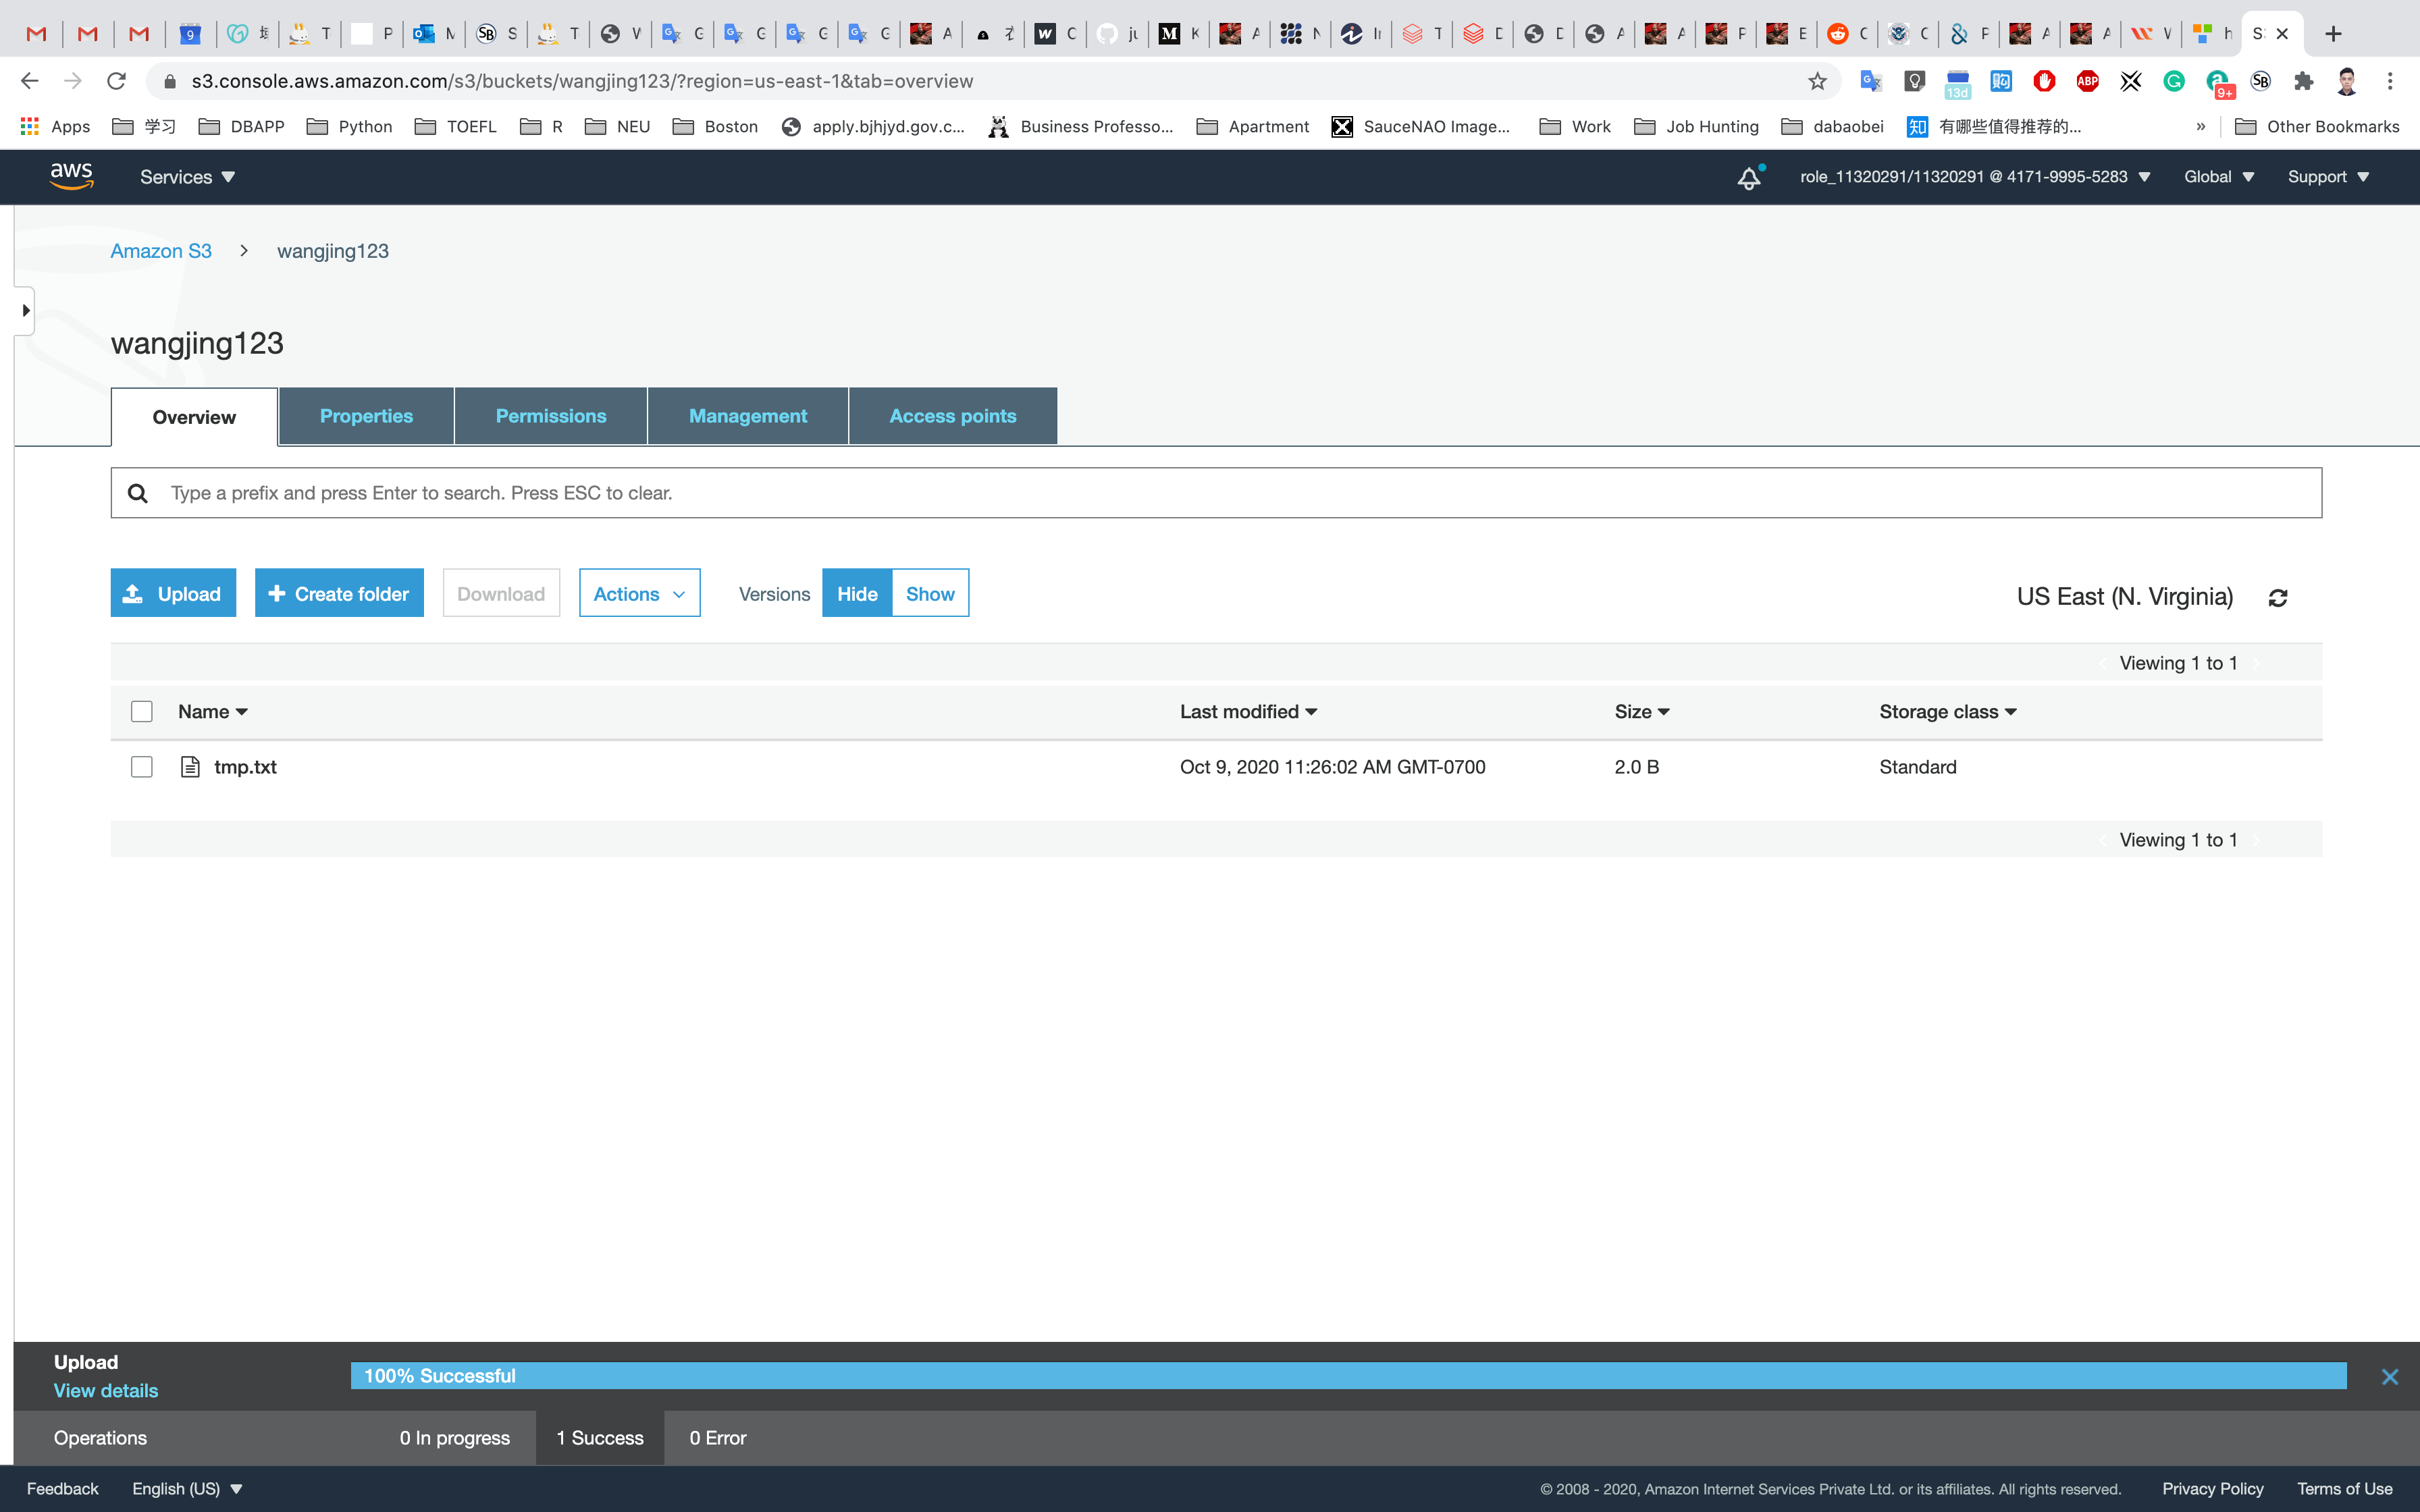
Click on the file just uploaded.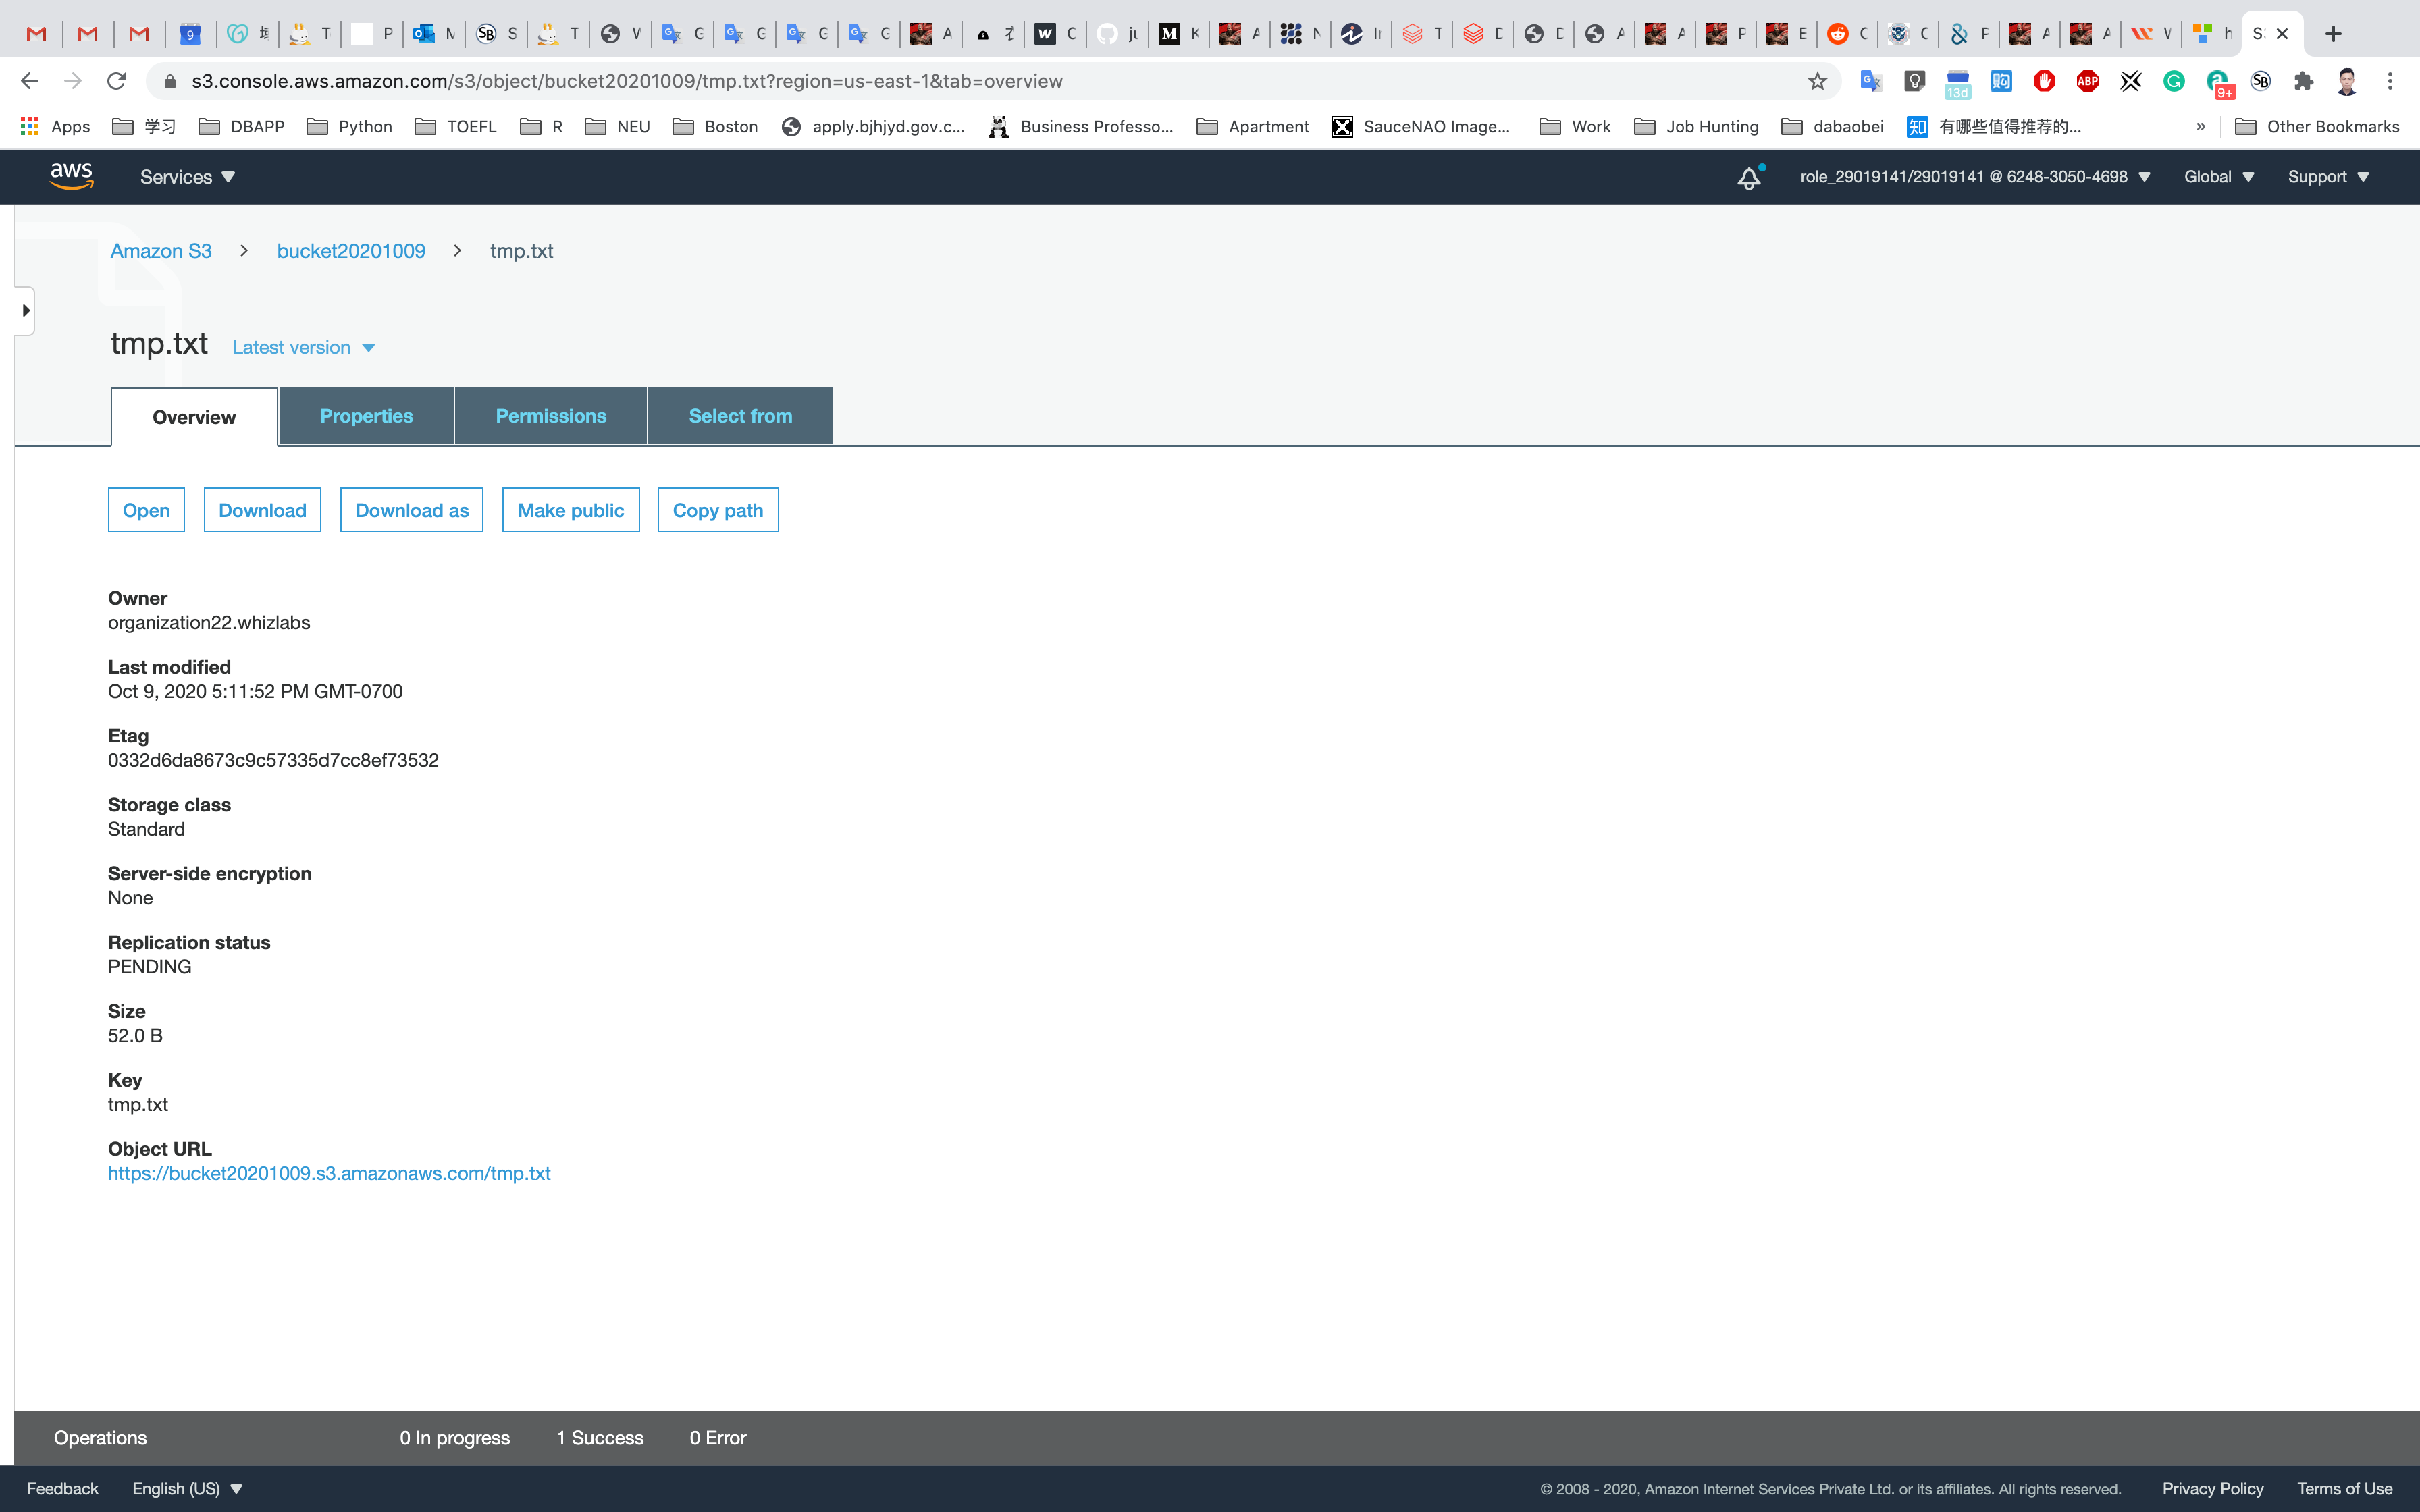
Click on the Object URL.
Notice the URL.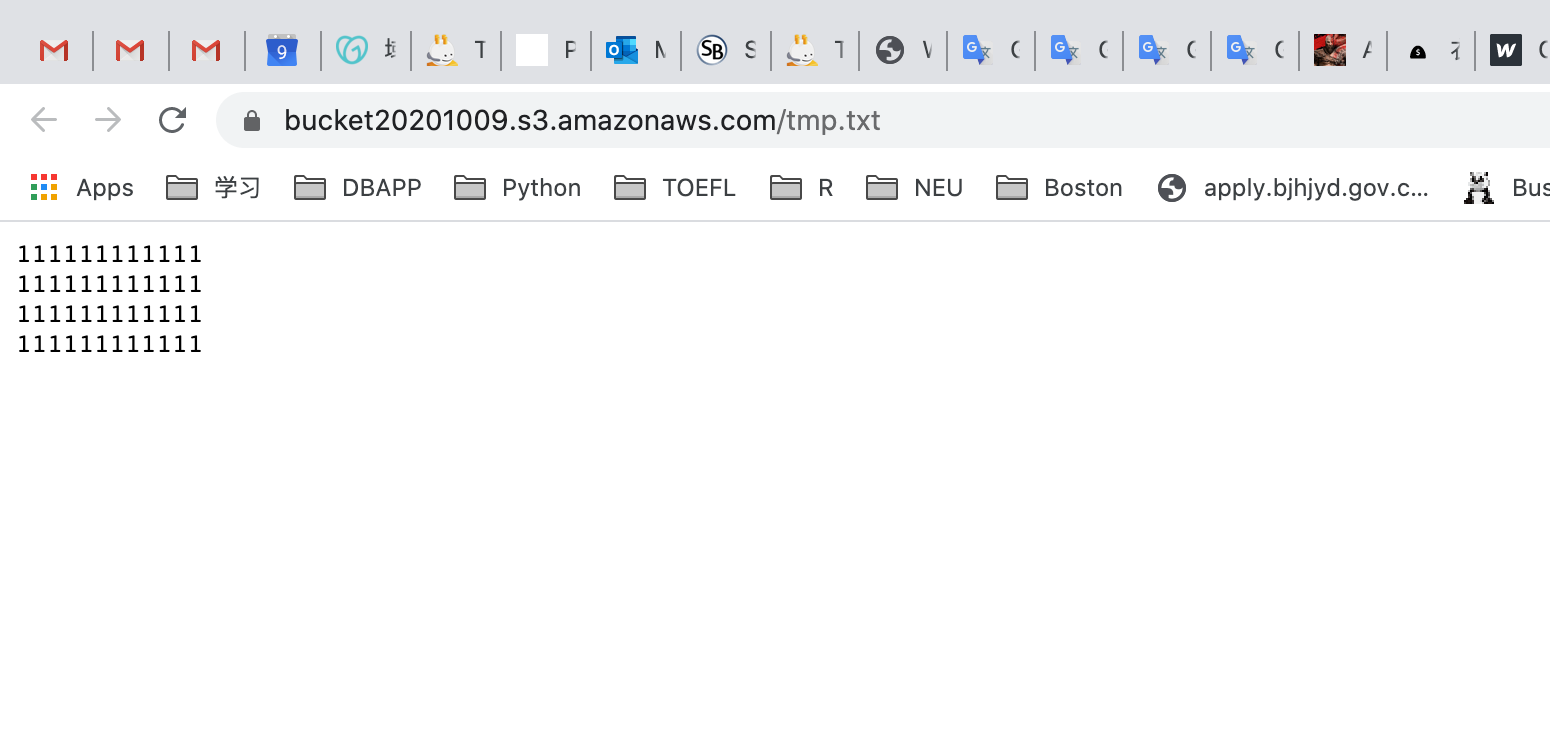
Creating Custom Error Pages
We can create custom error pages for CloudFront to return when origin returns HTTP 4xx or 5xx errors. For this, we have to save the error pages in a location that is accessible to CloudFront.
We will be using the same S3 bucket to create the error pages.
To configure a custom error page, select your S3 bucket
Click on Create folder and create a folder by name CustomErrors
Click on Save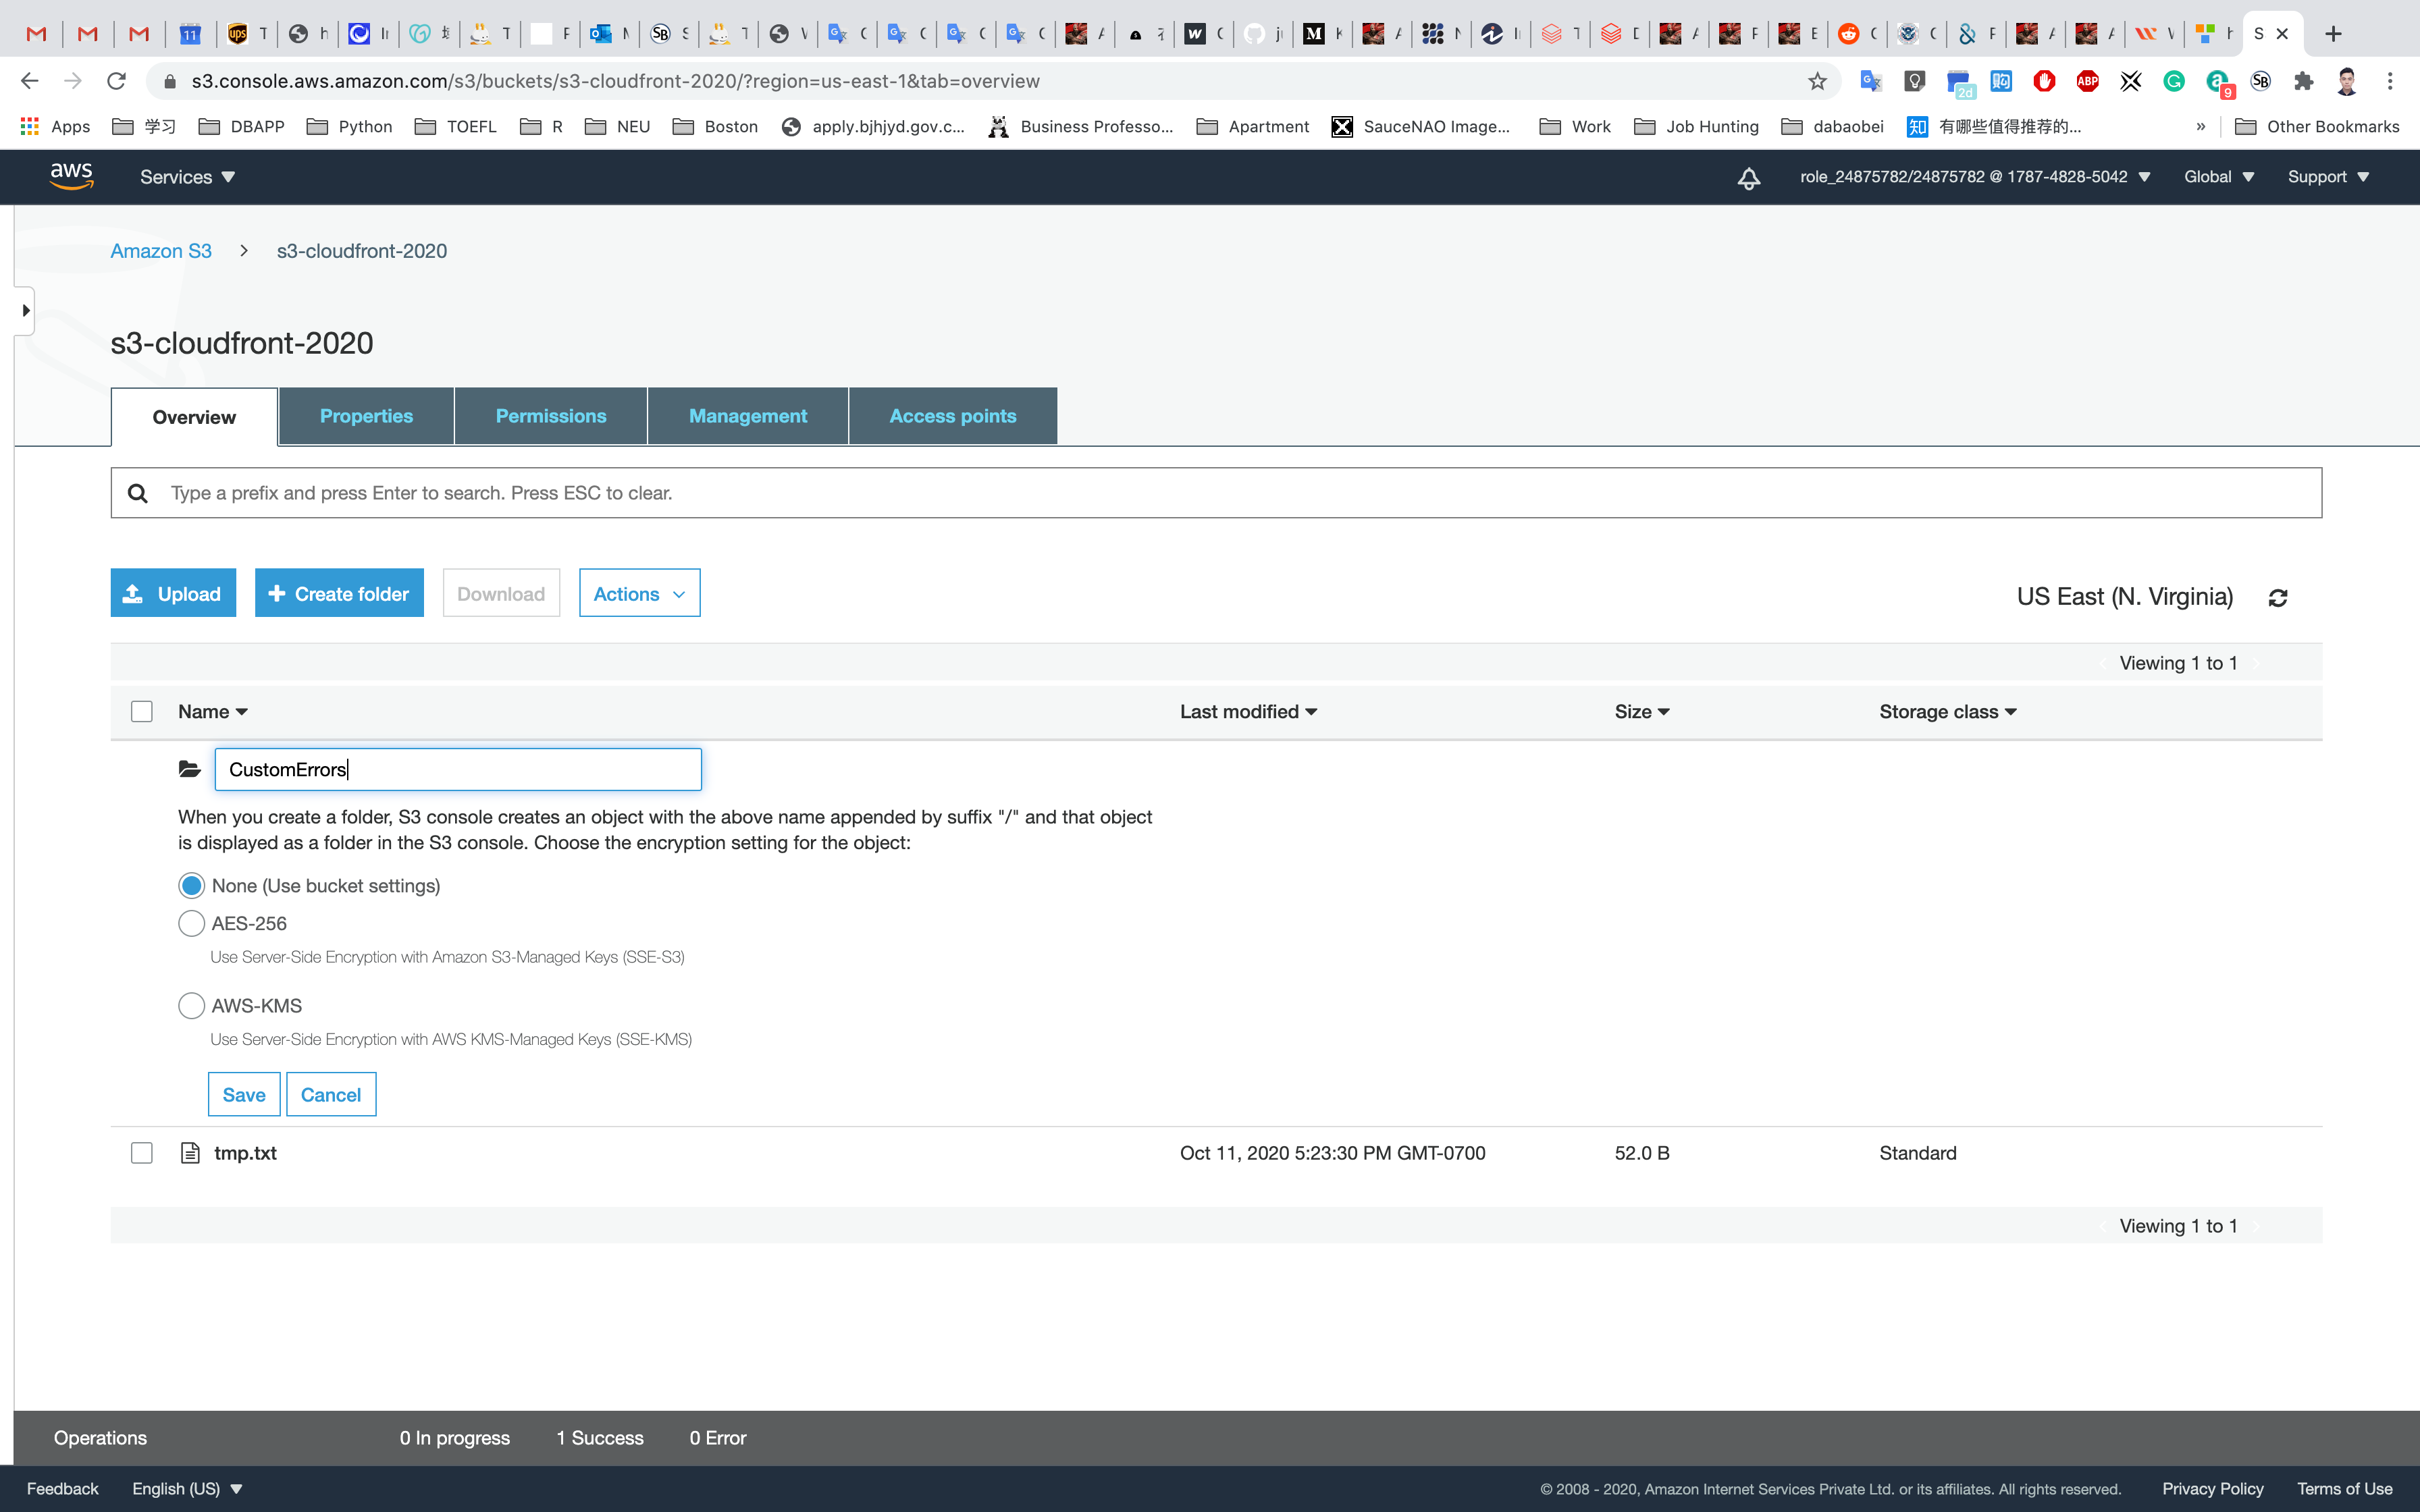
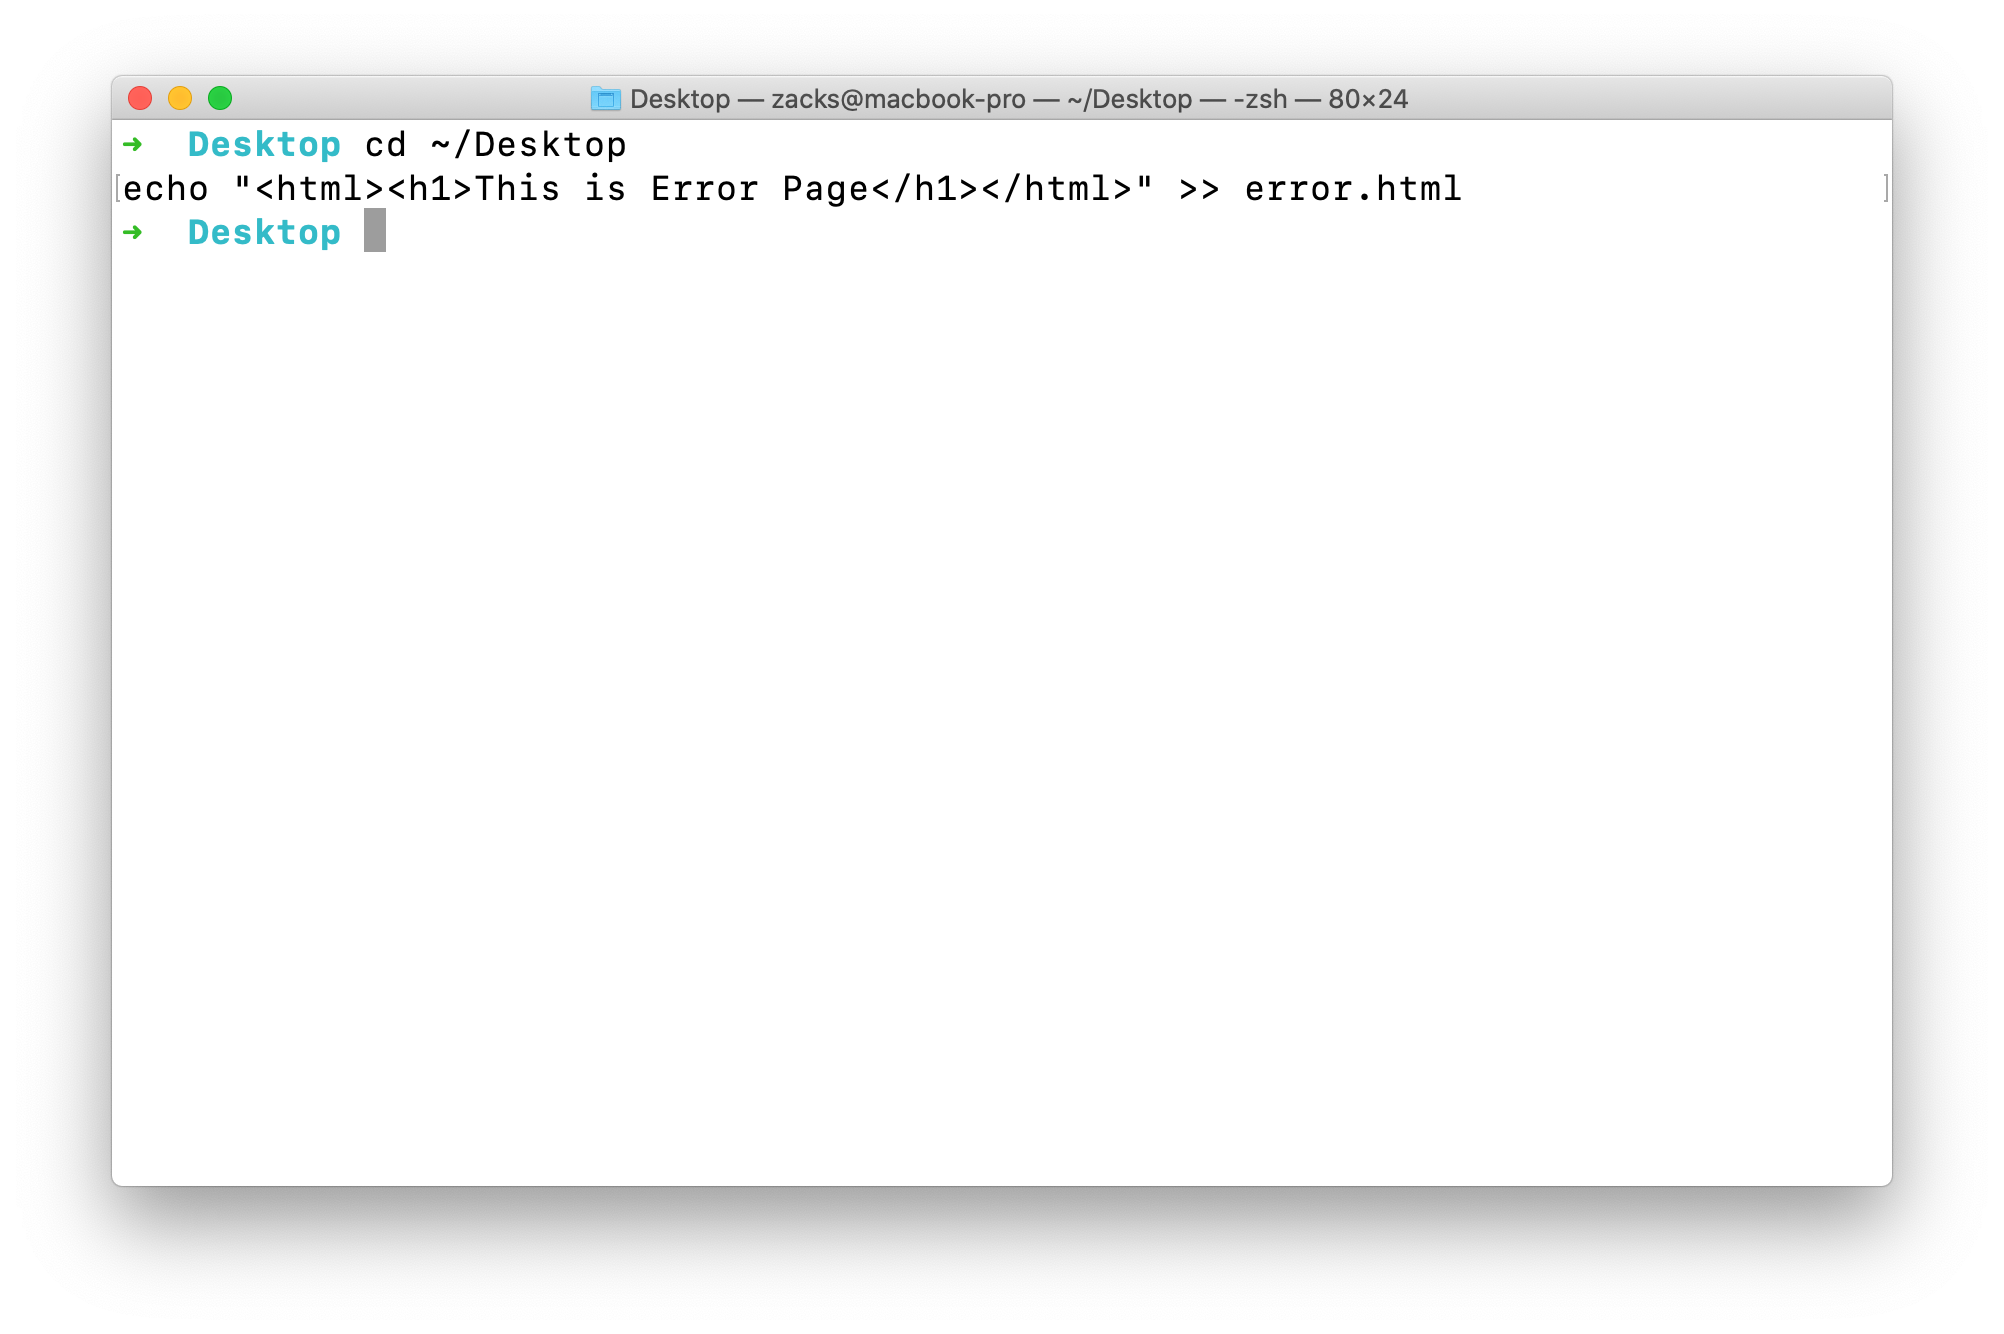
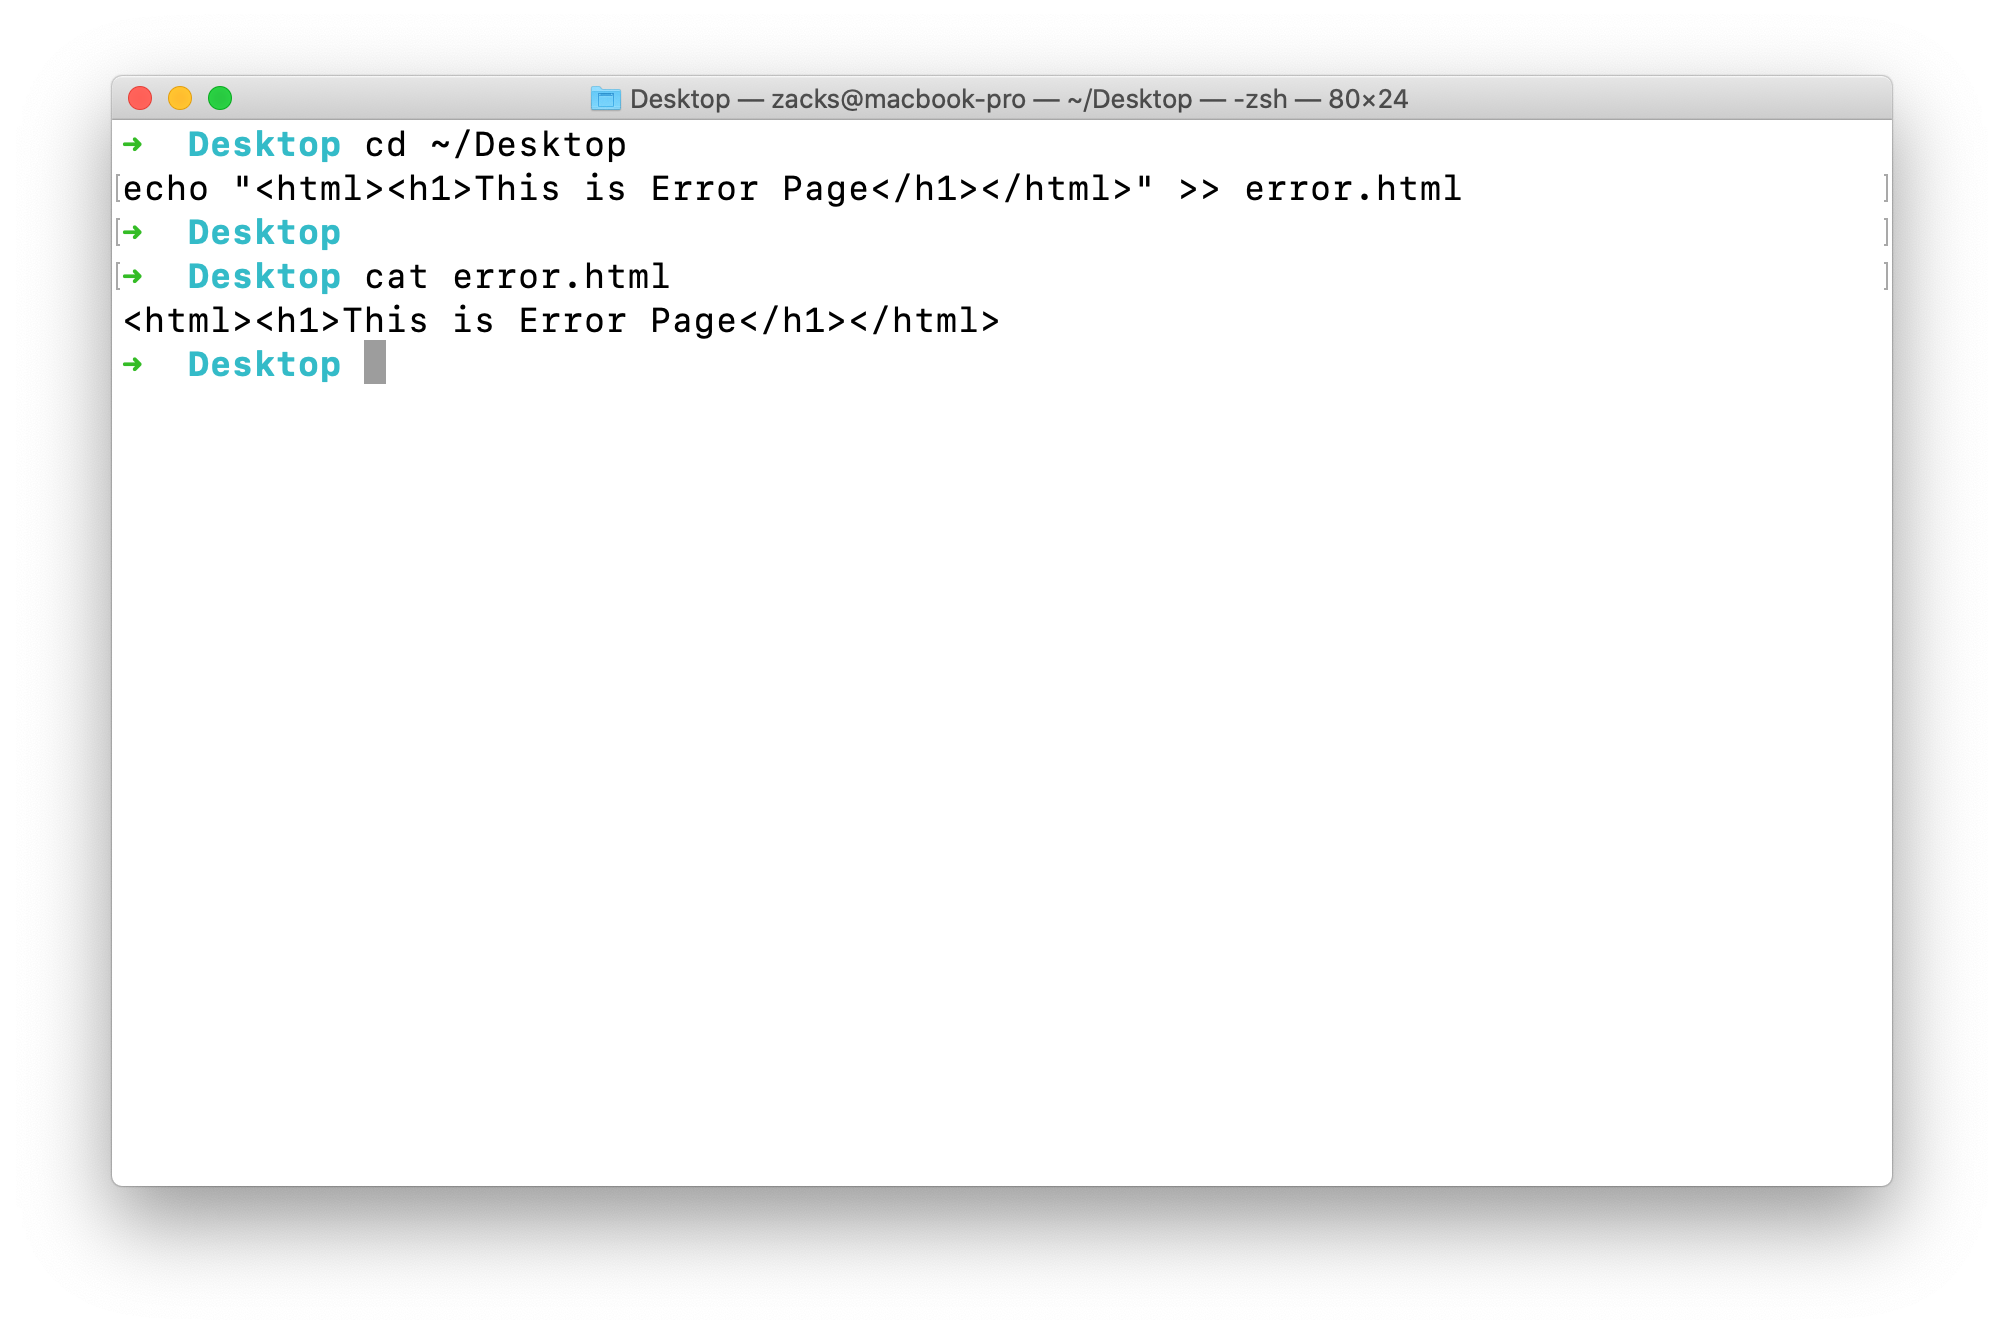
Creating error.html
- Create an
error.htmlfile in your local machine and using terminal. - This custom HTML page will be used for showing errors in CloudFront.
- Sample error.html content:
1 | <html><h1>This is Error Page</h1></html> |
Copy the below command and paste on your terminal, and press Enter
1 | cd ~/Desktop |
See the error.html
1 | cat error.html |
Creating block.html
- Create a
block.htmlfile in your local machine and using terminal. - This custom HTML page will be used for showing geo-restrictions of your content in CloudFront.
- Sample block.html content:
1 | <html><h1>This content is blocked in your location</h1></html> |
Copy the below command and paste on your terminal, and press Enter
1 | cd ~/Desktop |
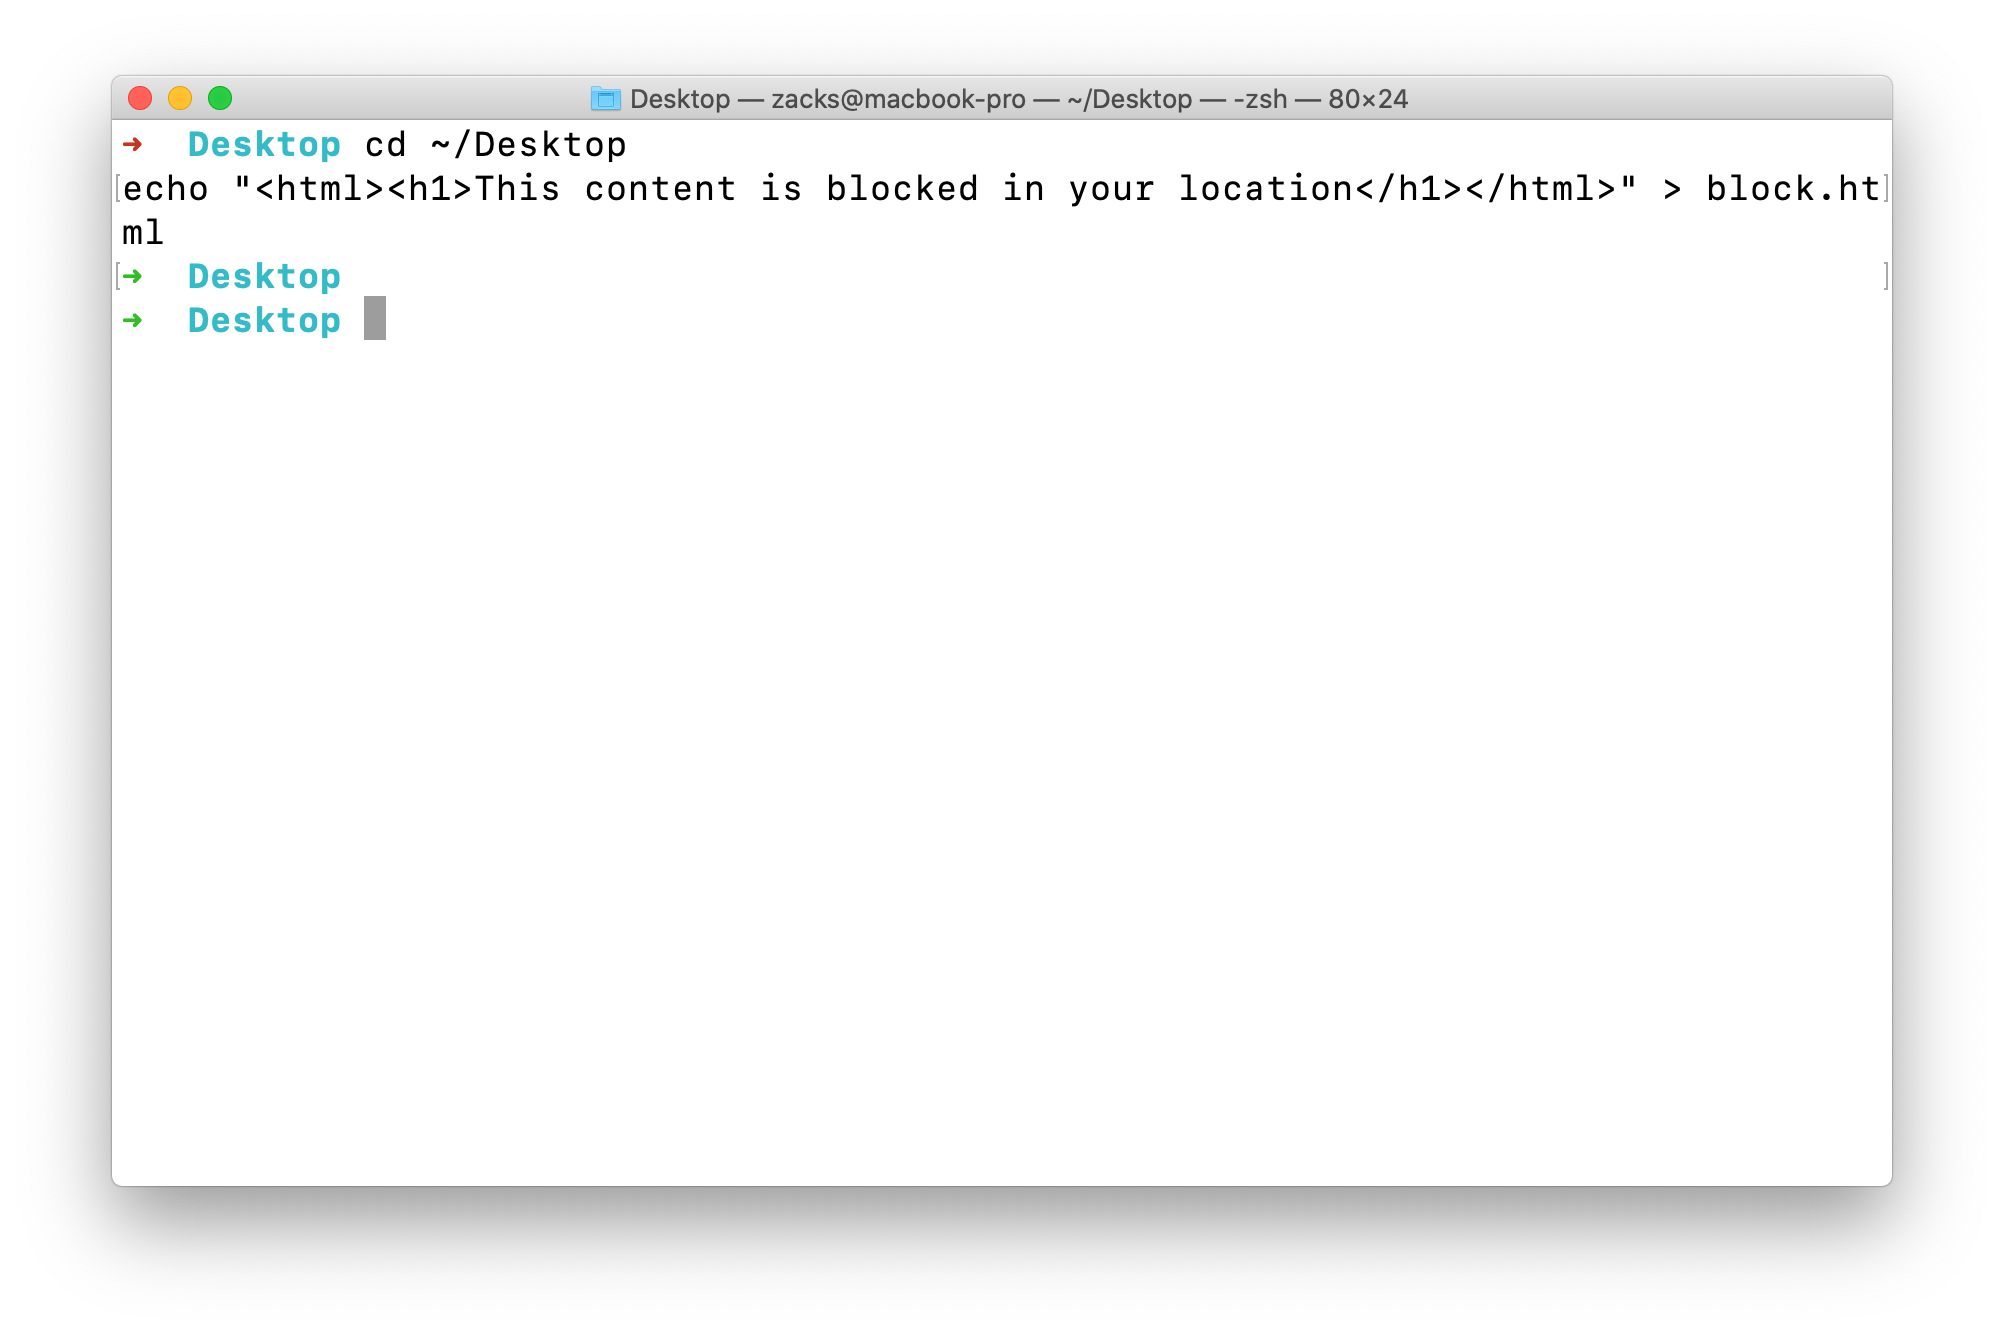
See the block.html
1 | cat block.html |

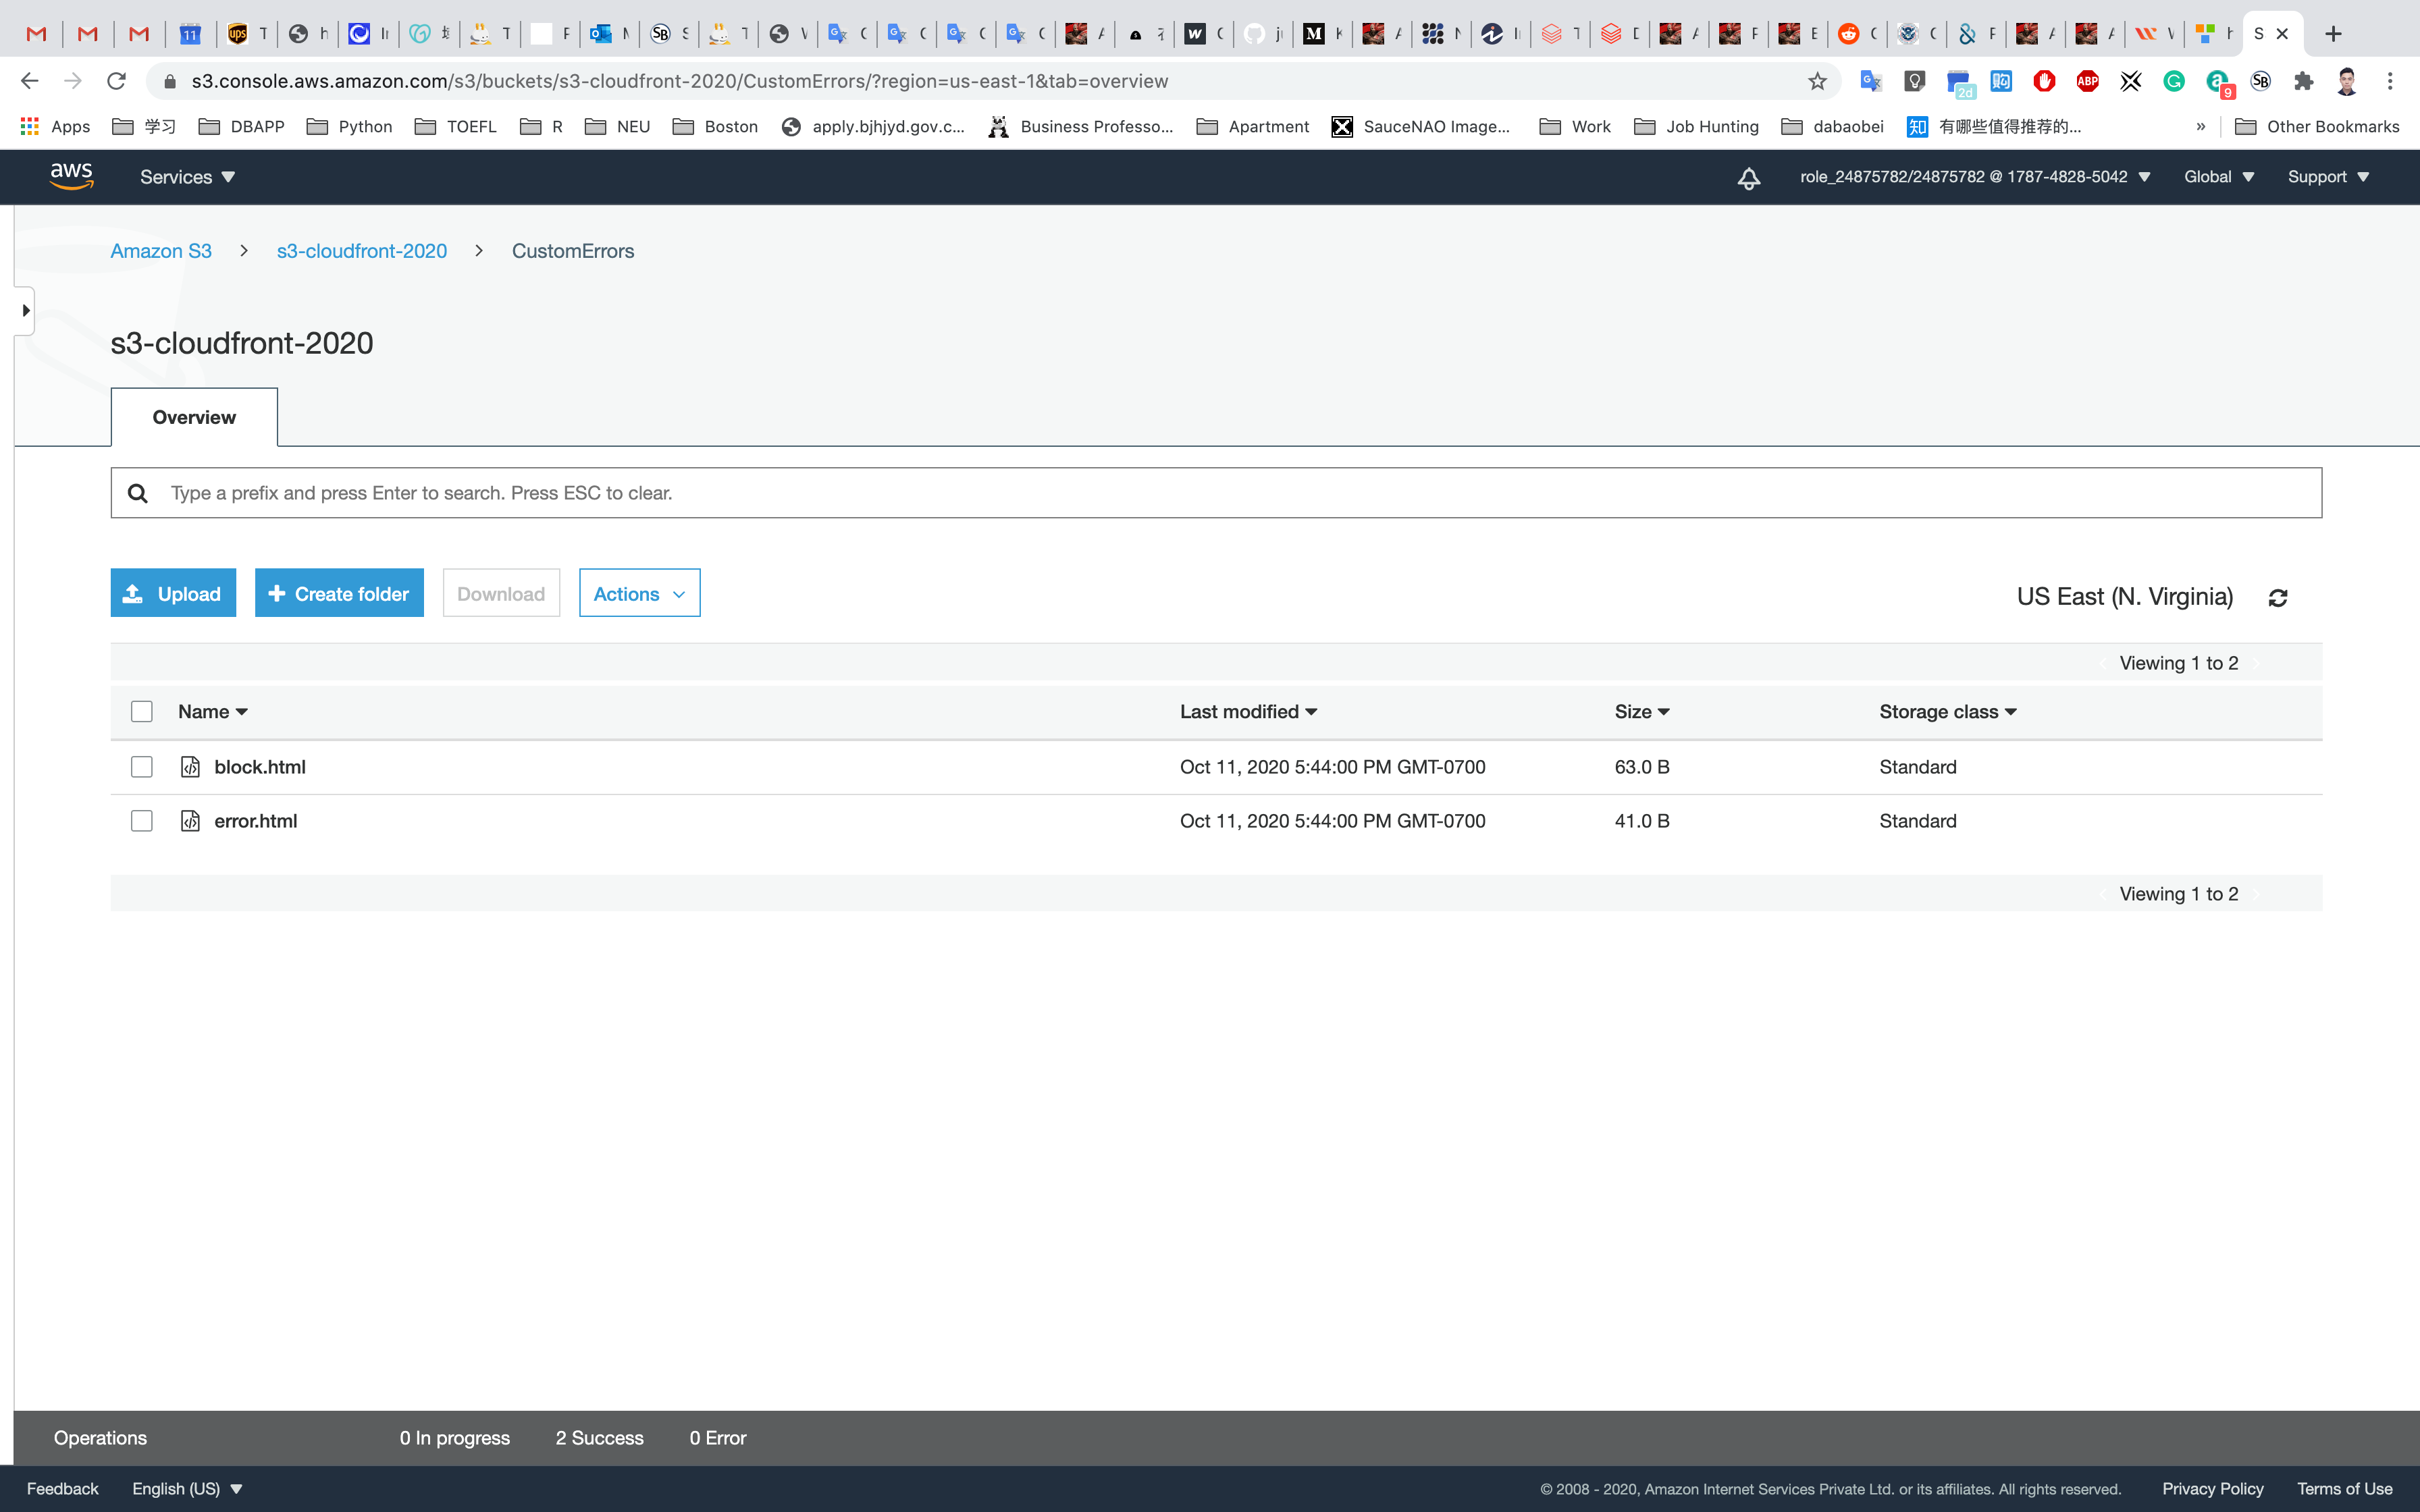
Upload the two files to your CustomErrors folder.
Click on new CustomErrors folder.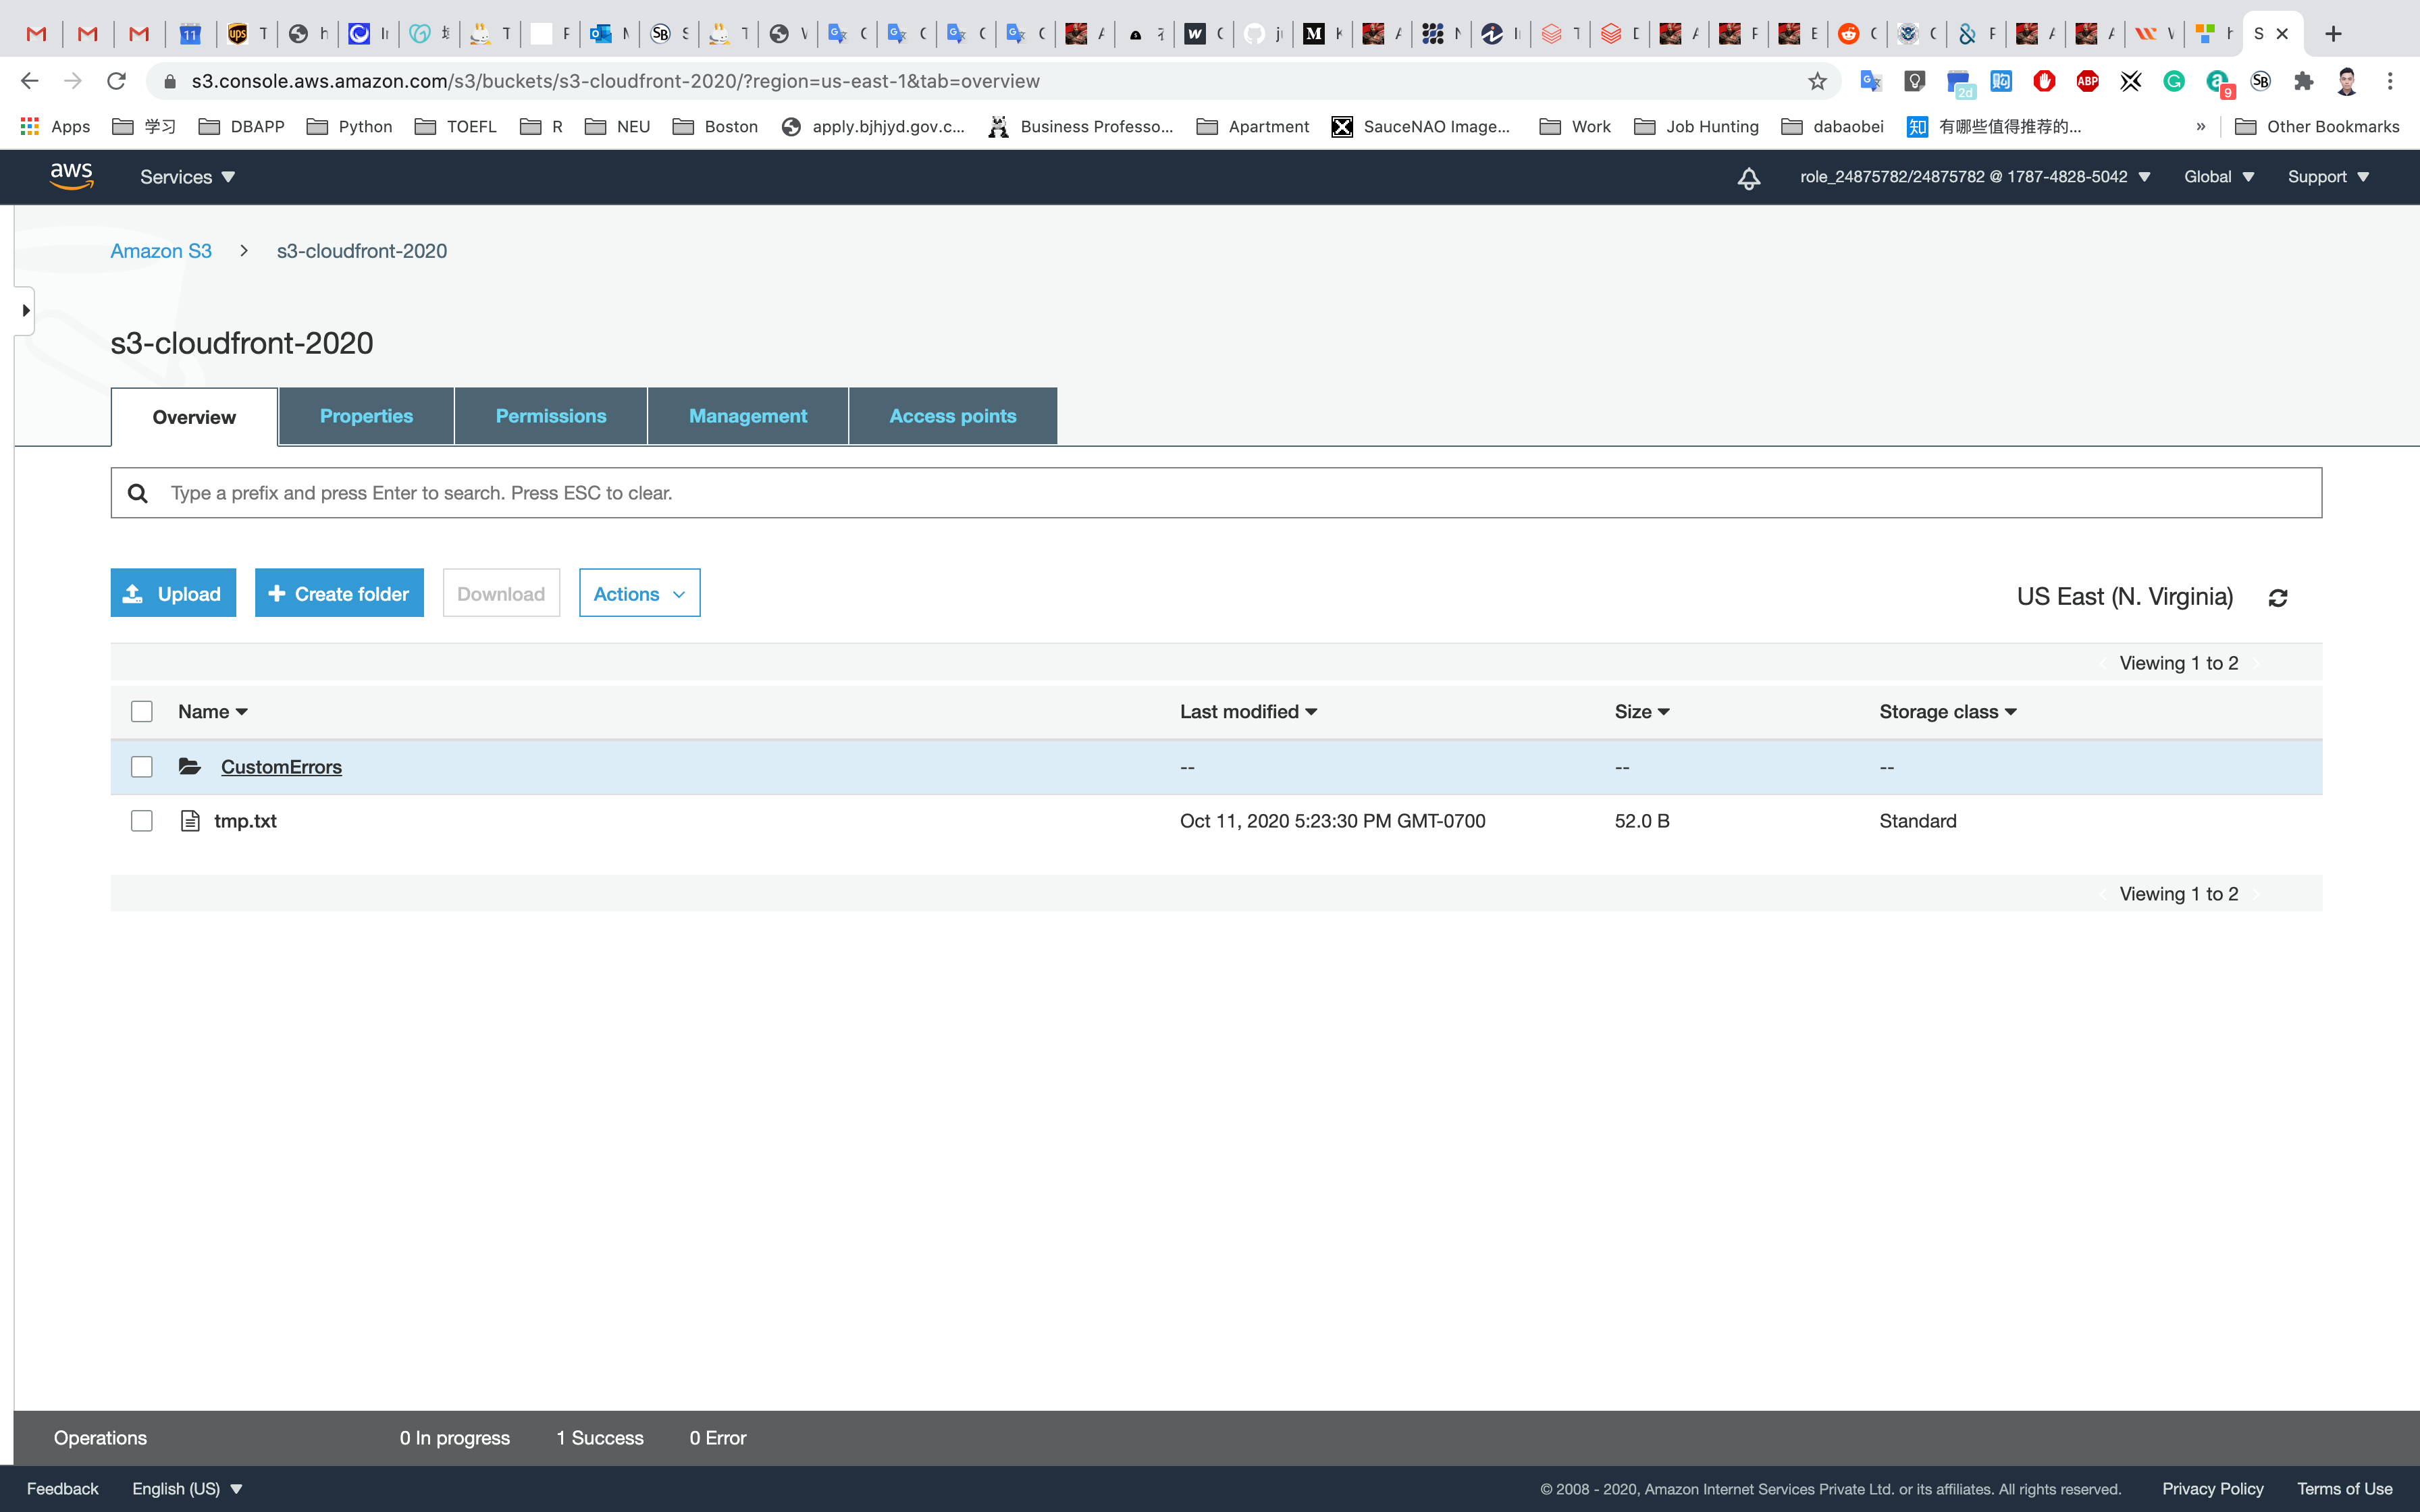
Click on Upload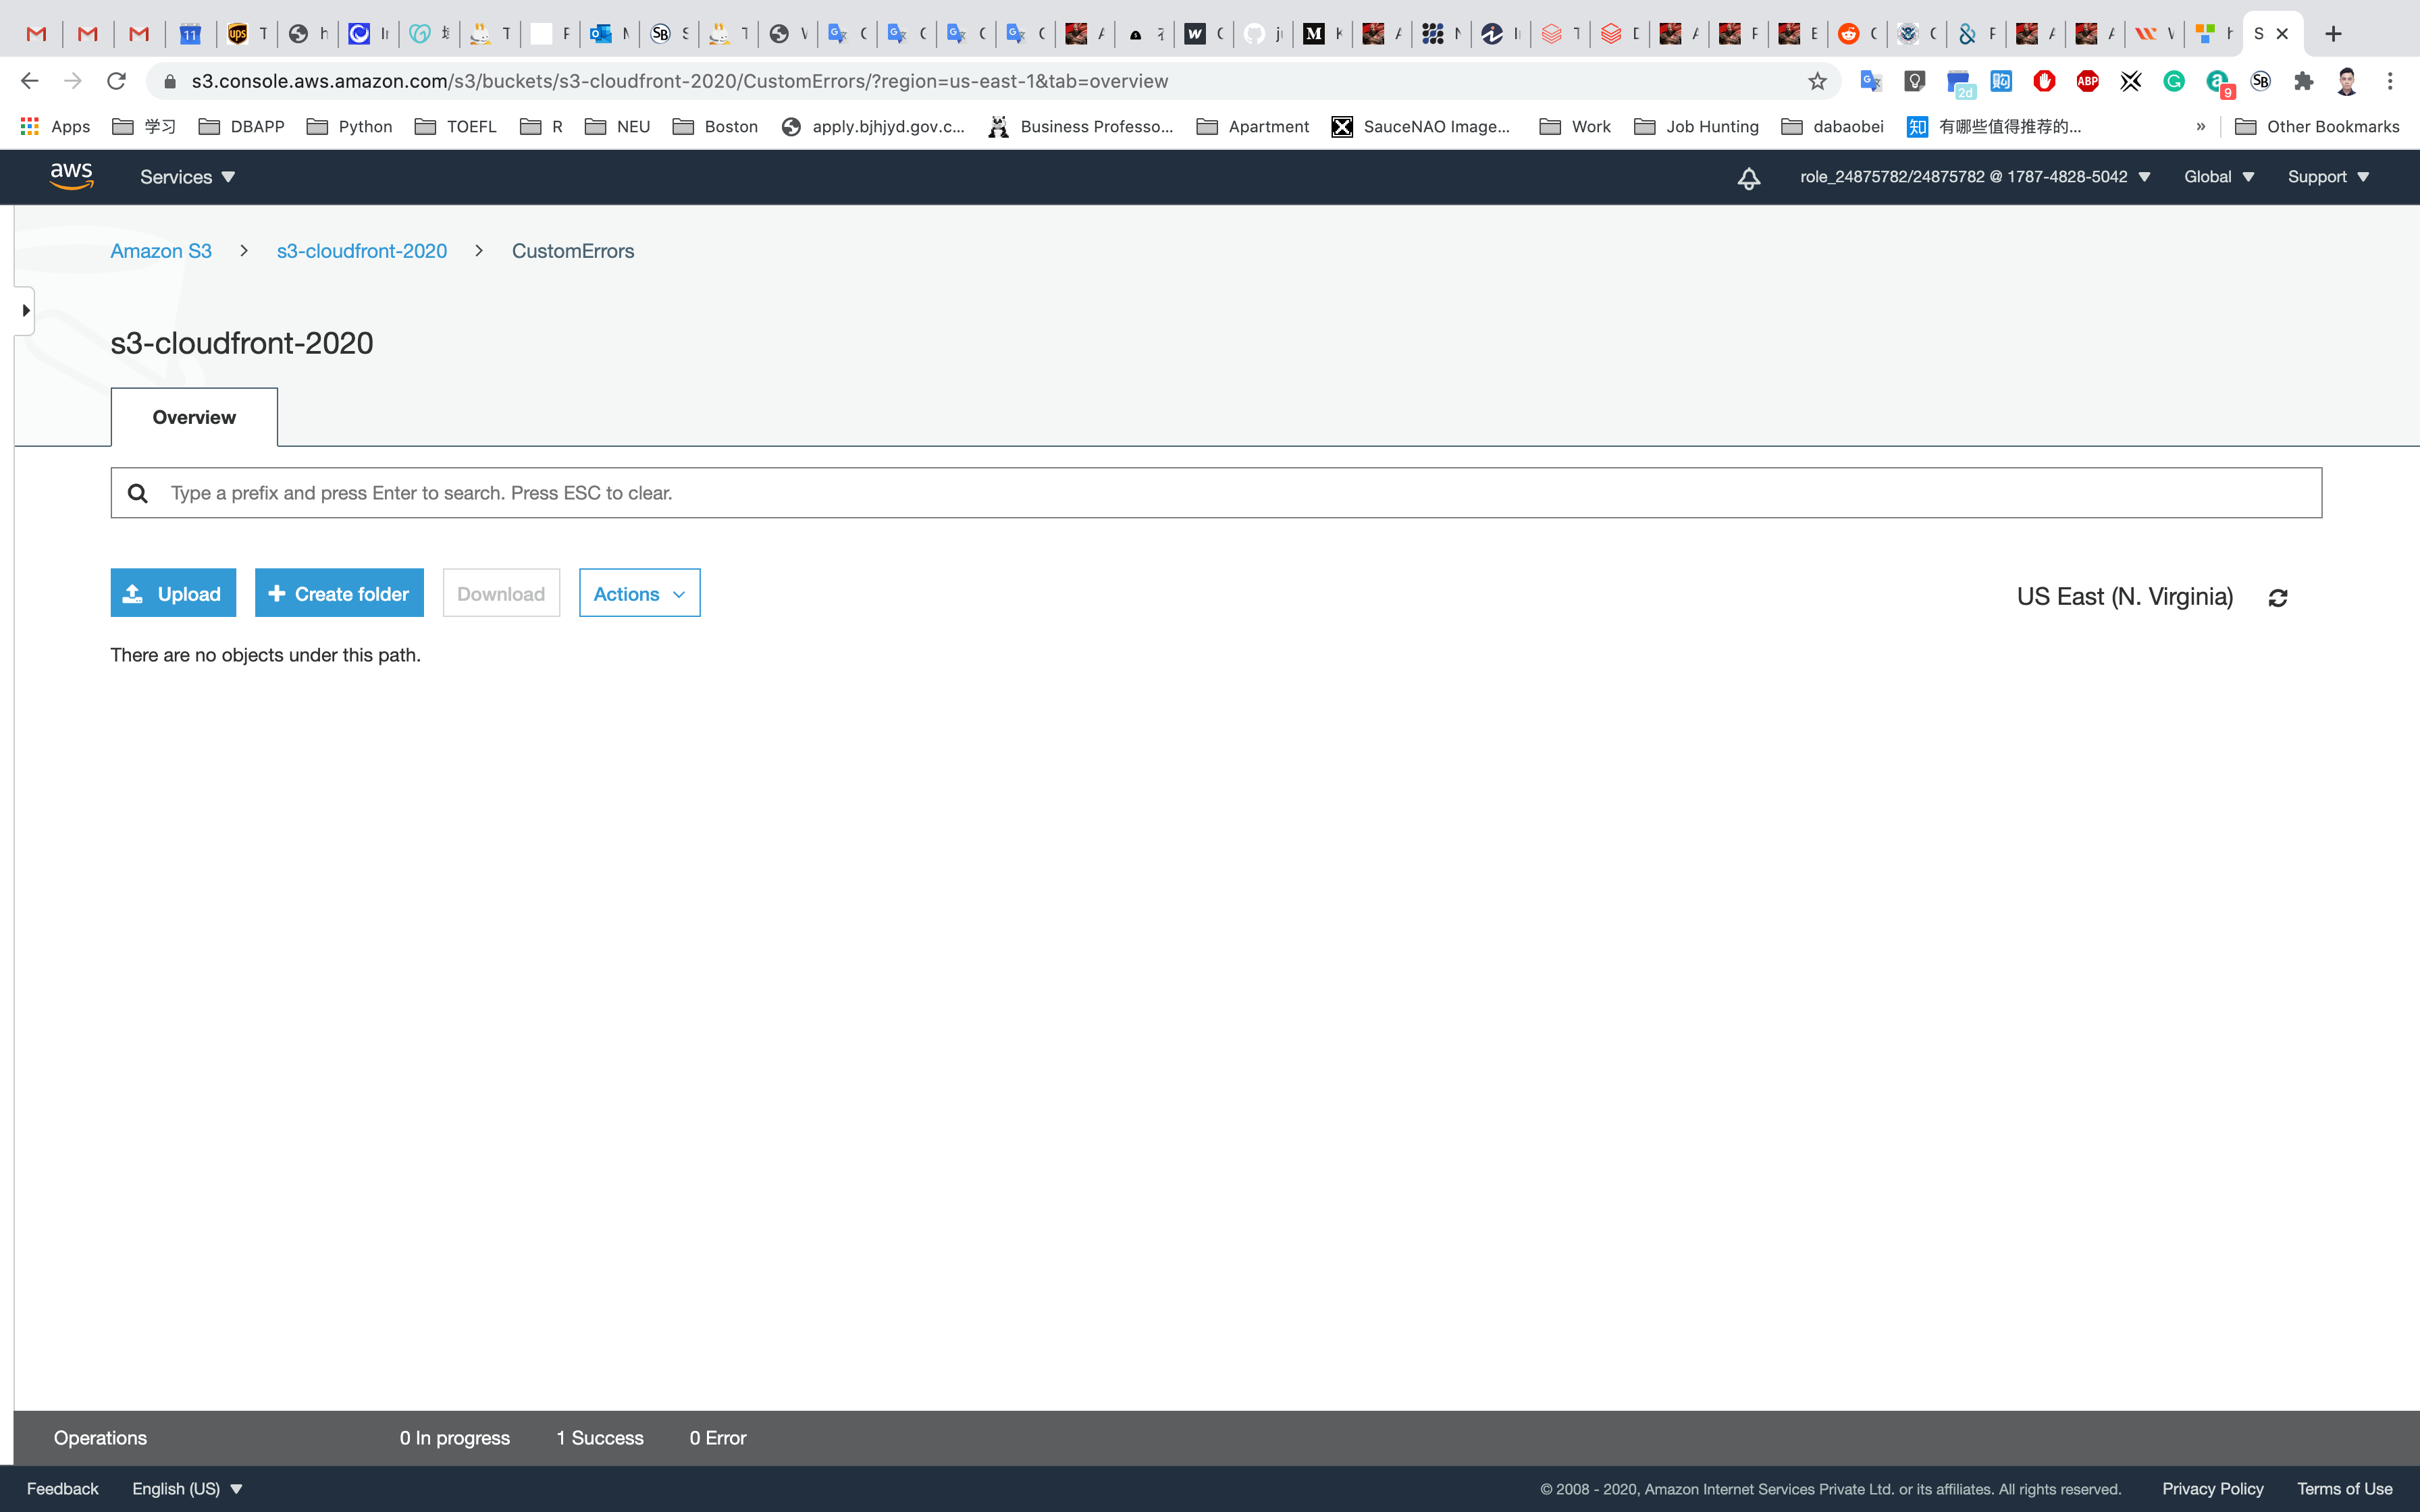
Click on Add files
Go to your Desktop and select error.html and block.html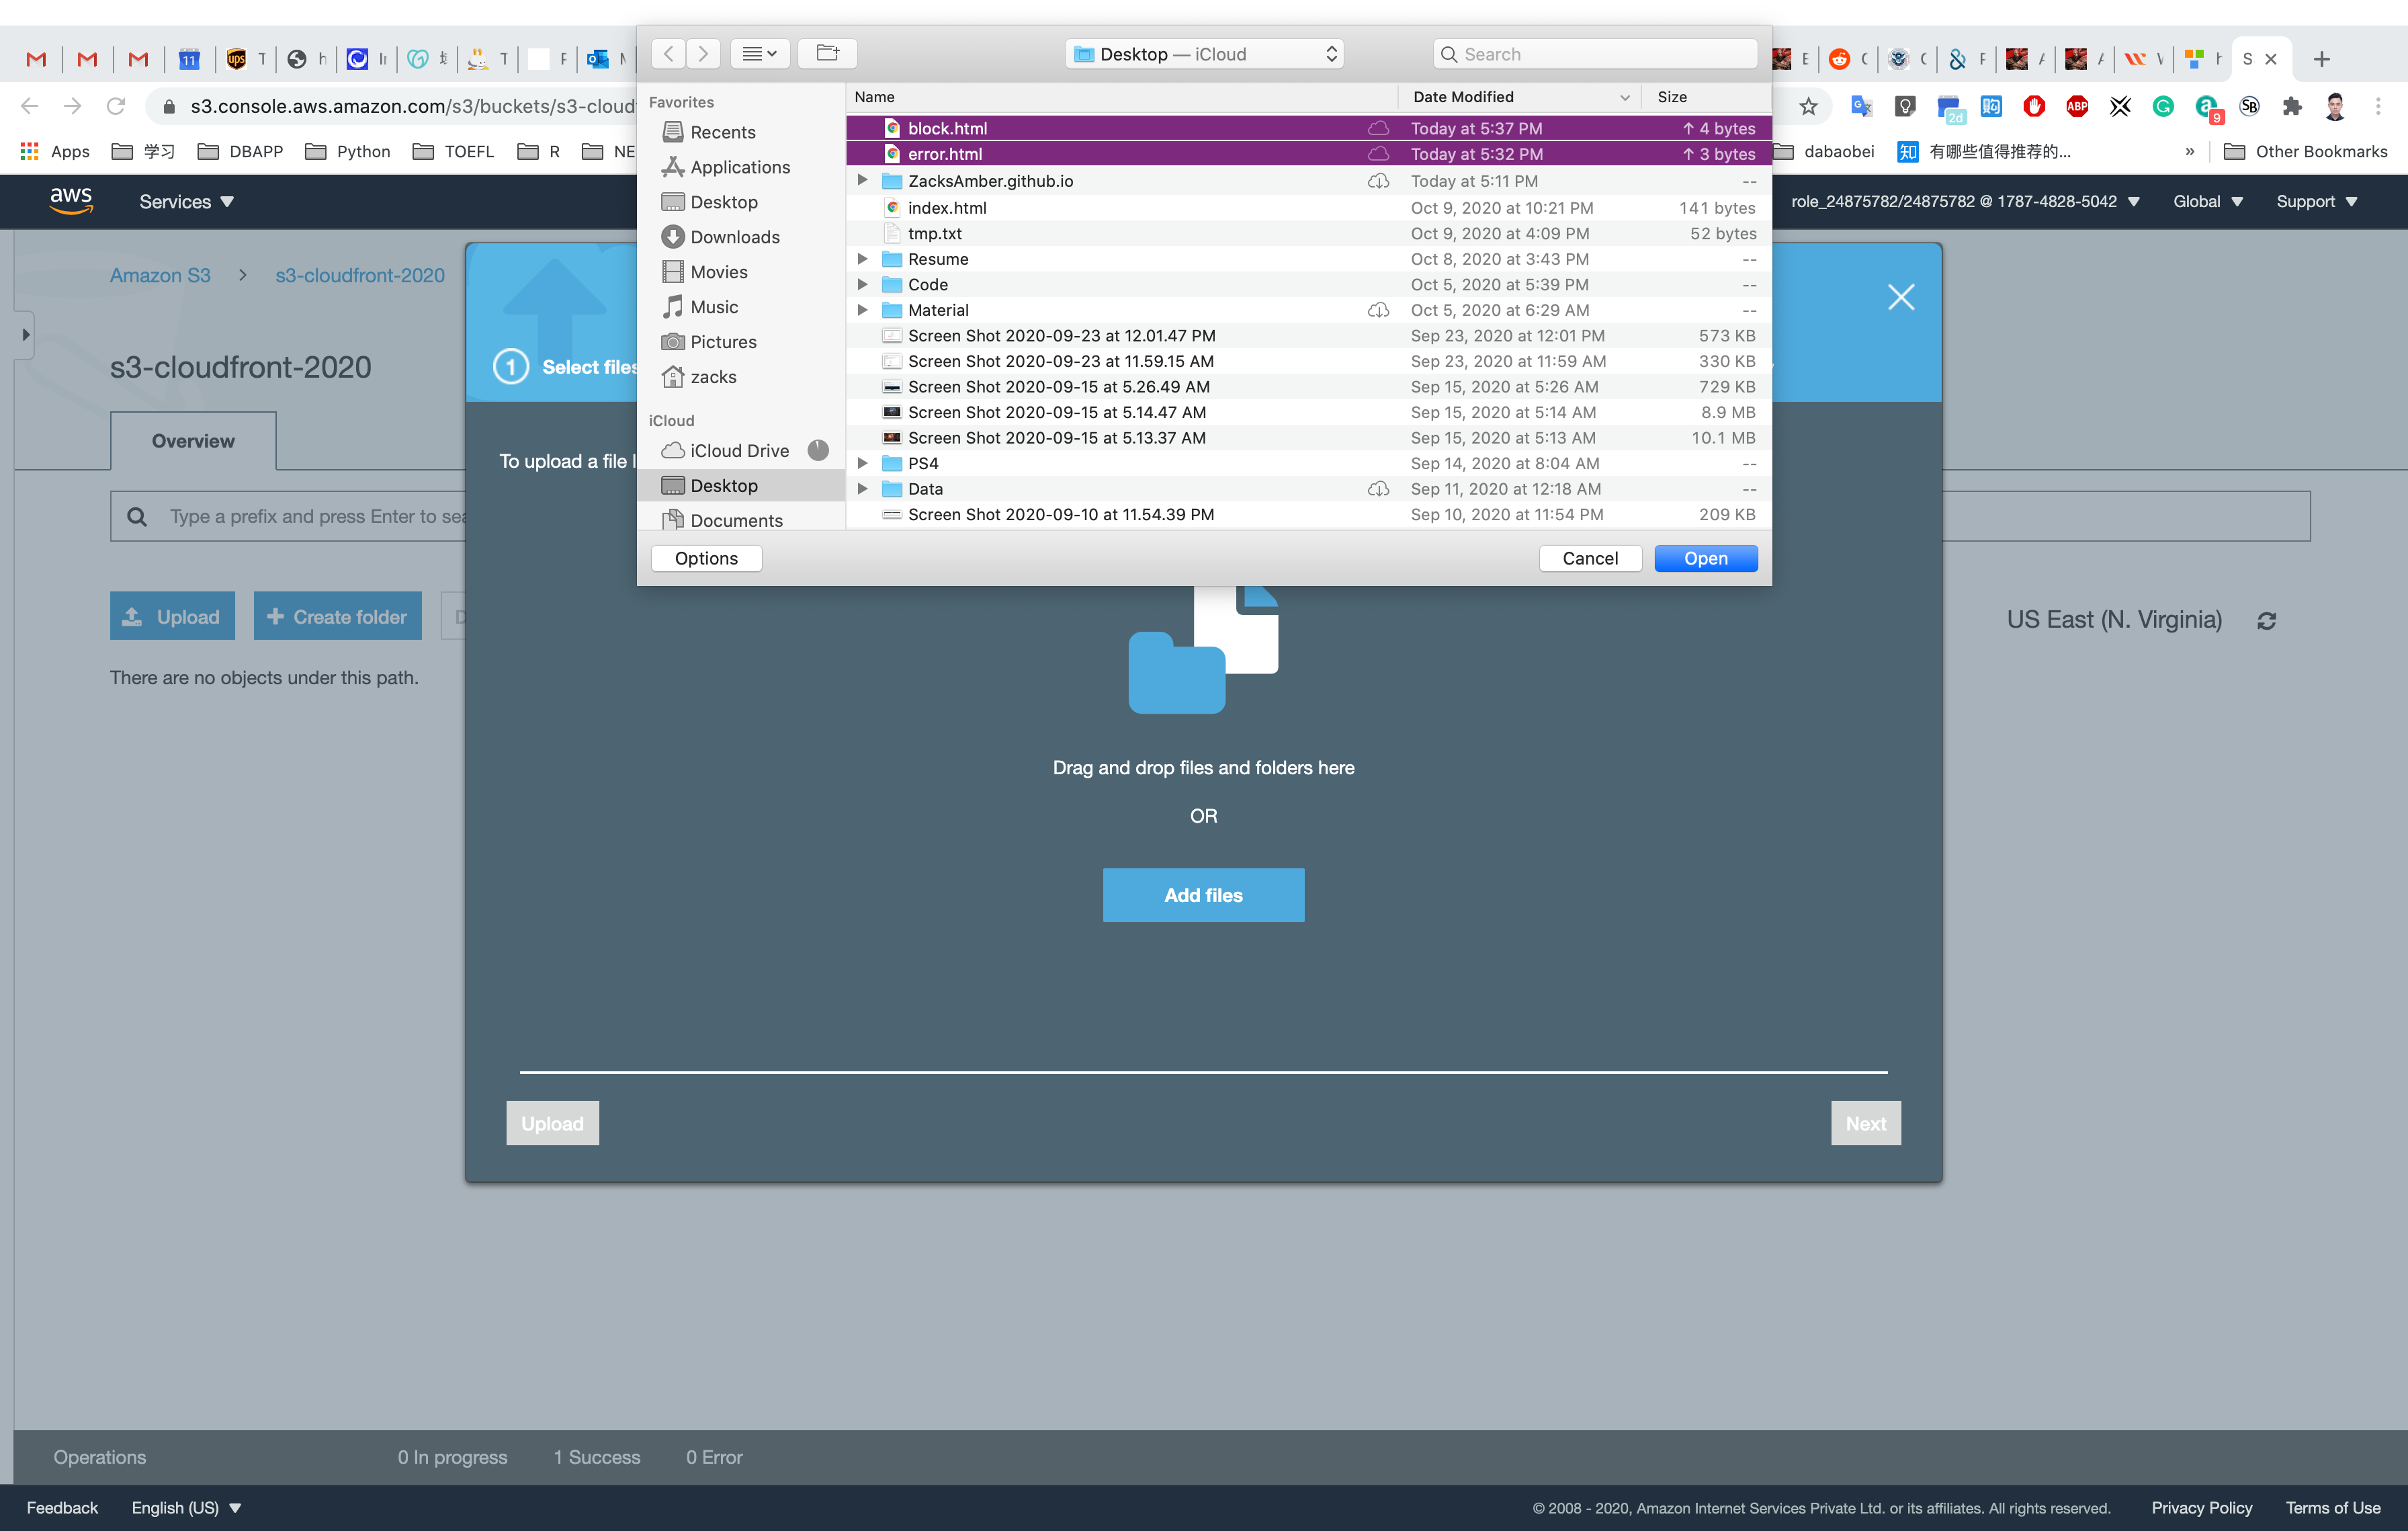
Click on Upload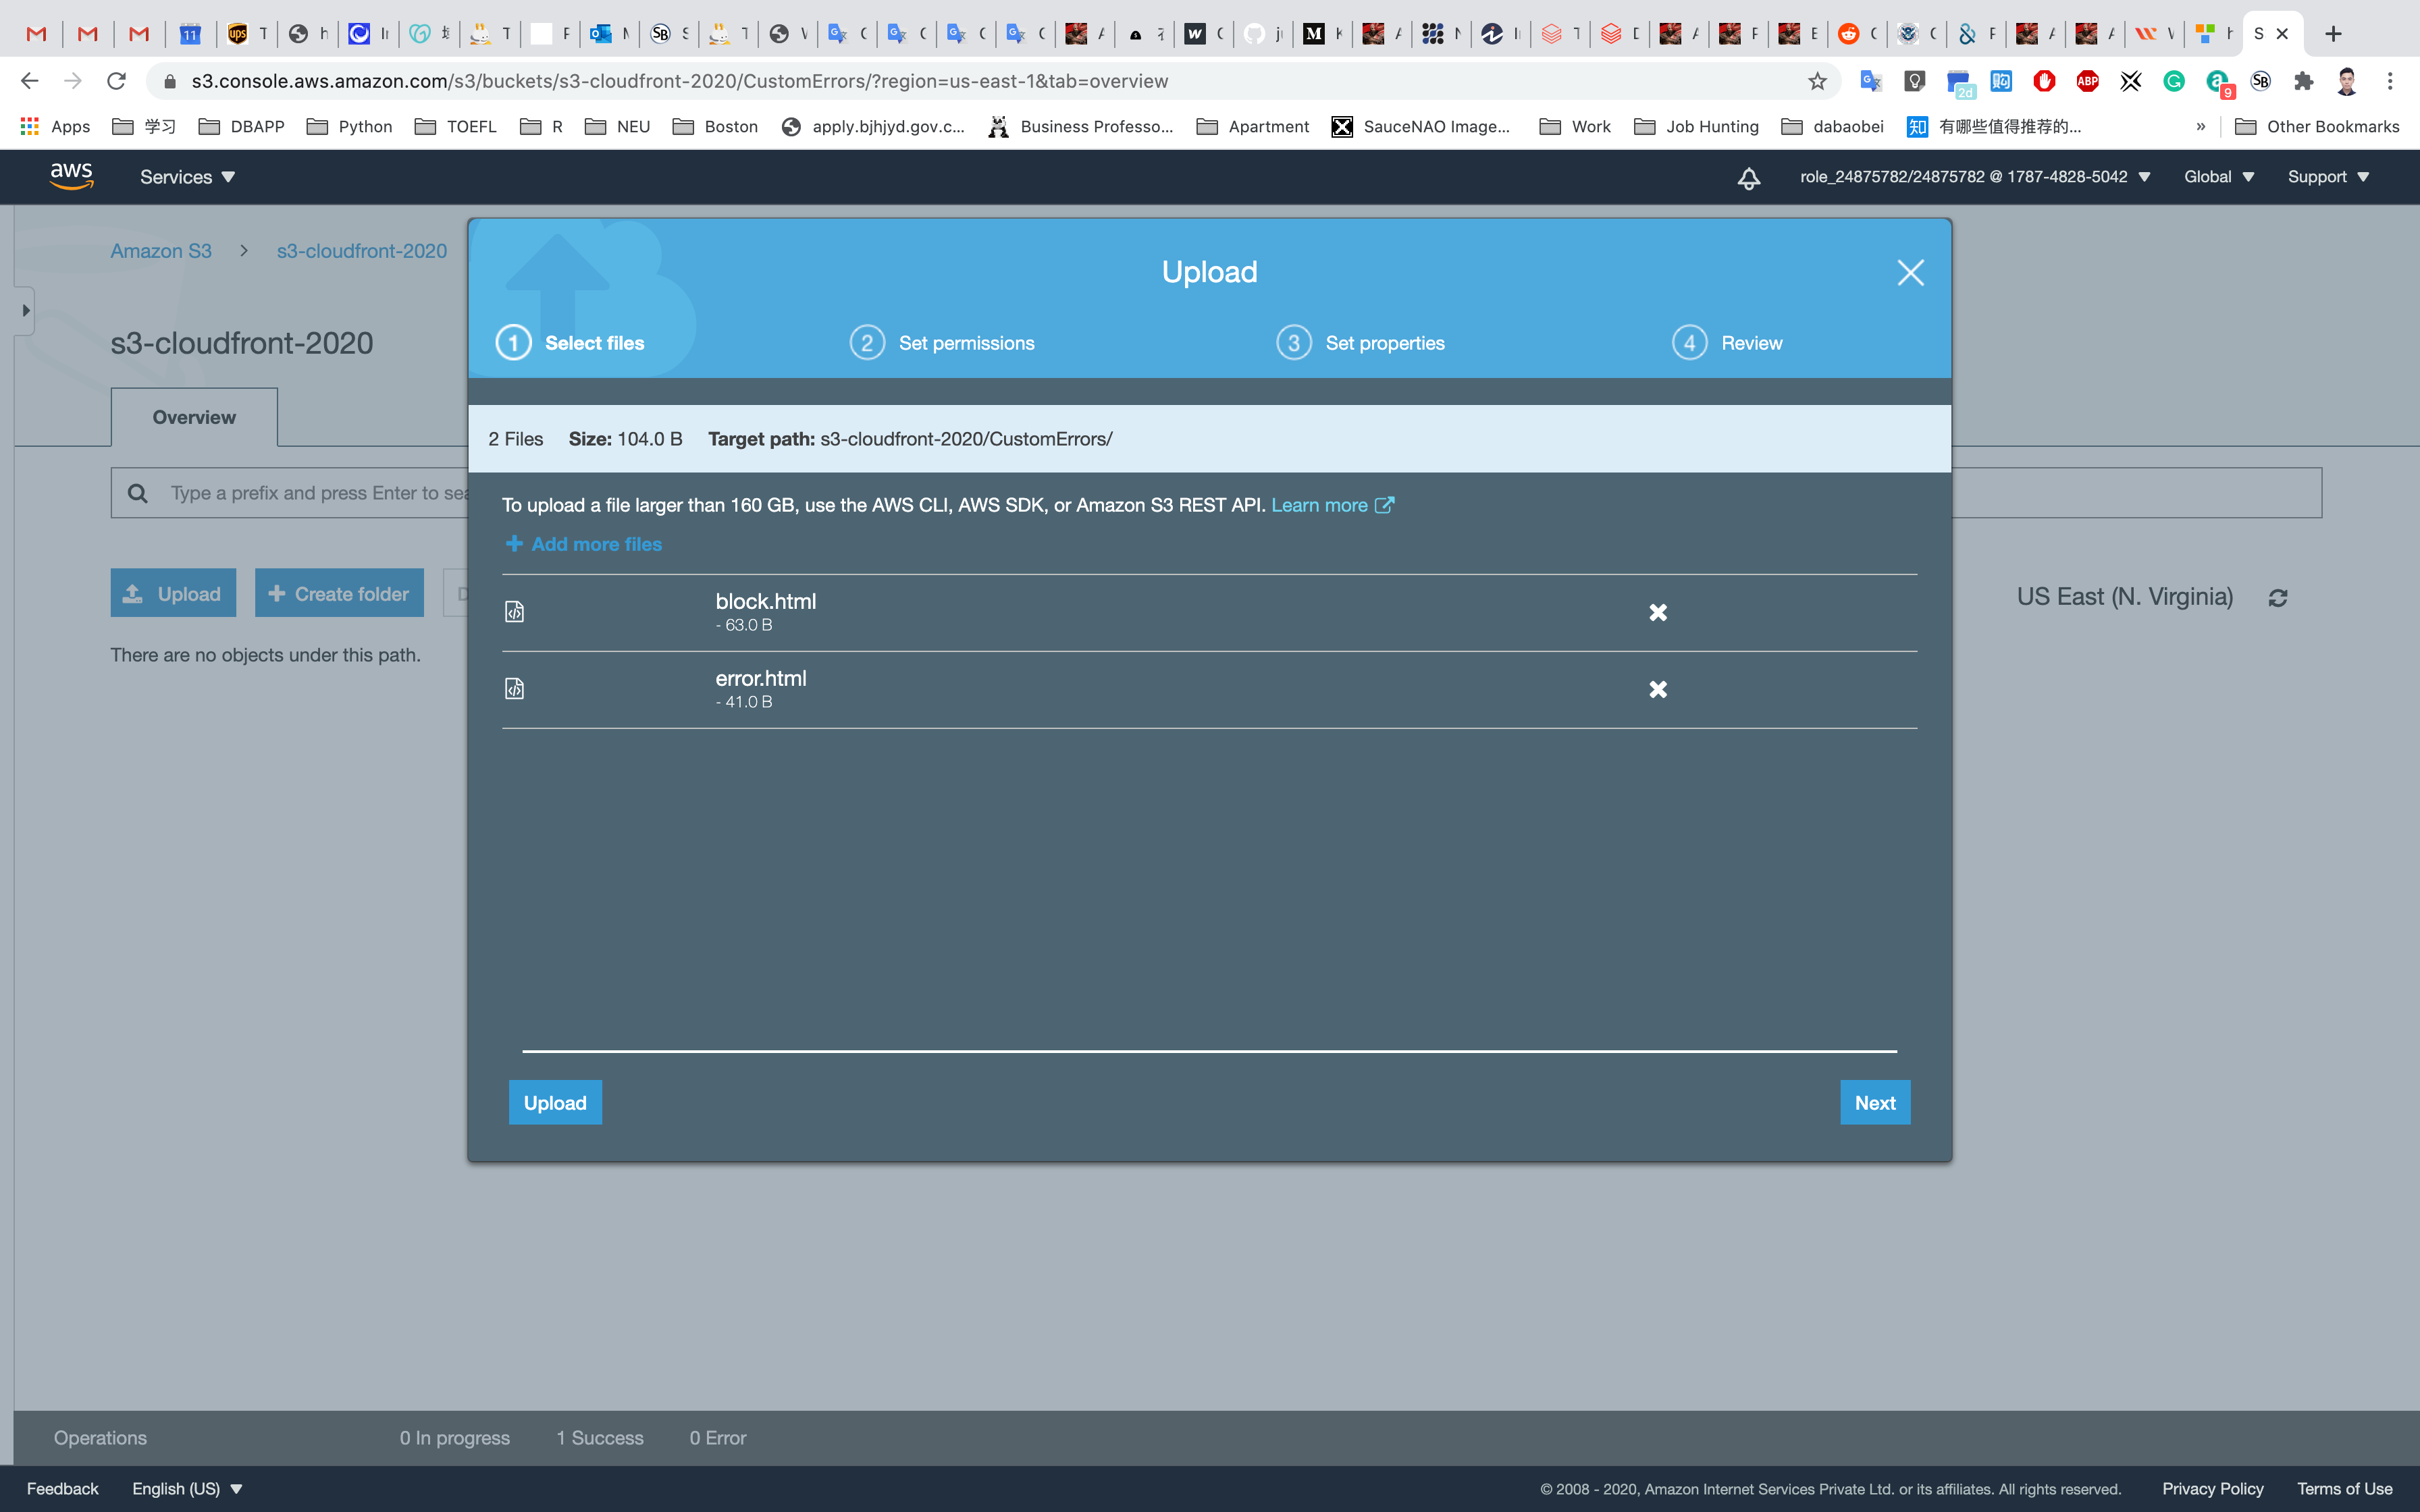
Making the objects public
Click on the file that you uploaded to the root directory of the bucket. You can see the image details like Owner, size, link, etc.
Open the file Link in a new tab.
A sample URL: https://s3-cloudfront-2020.s3.amazonaws.com/tmp.txt
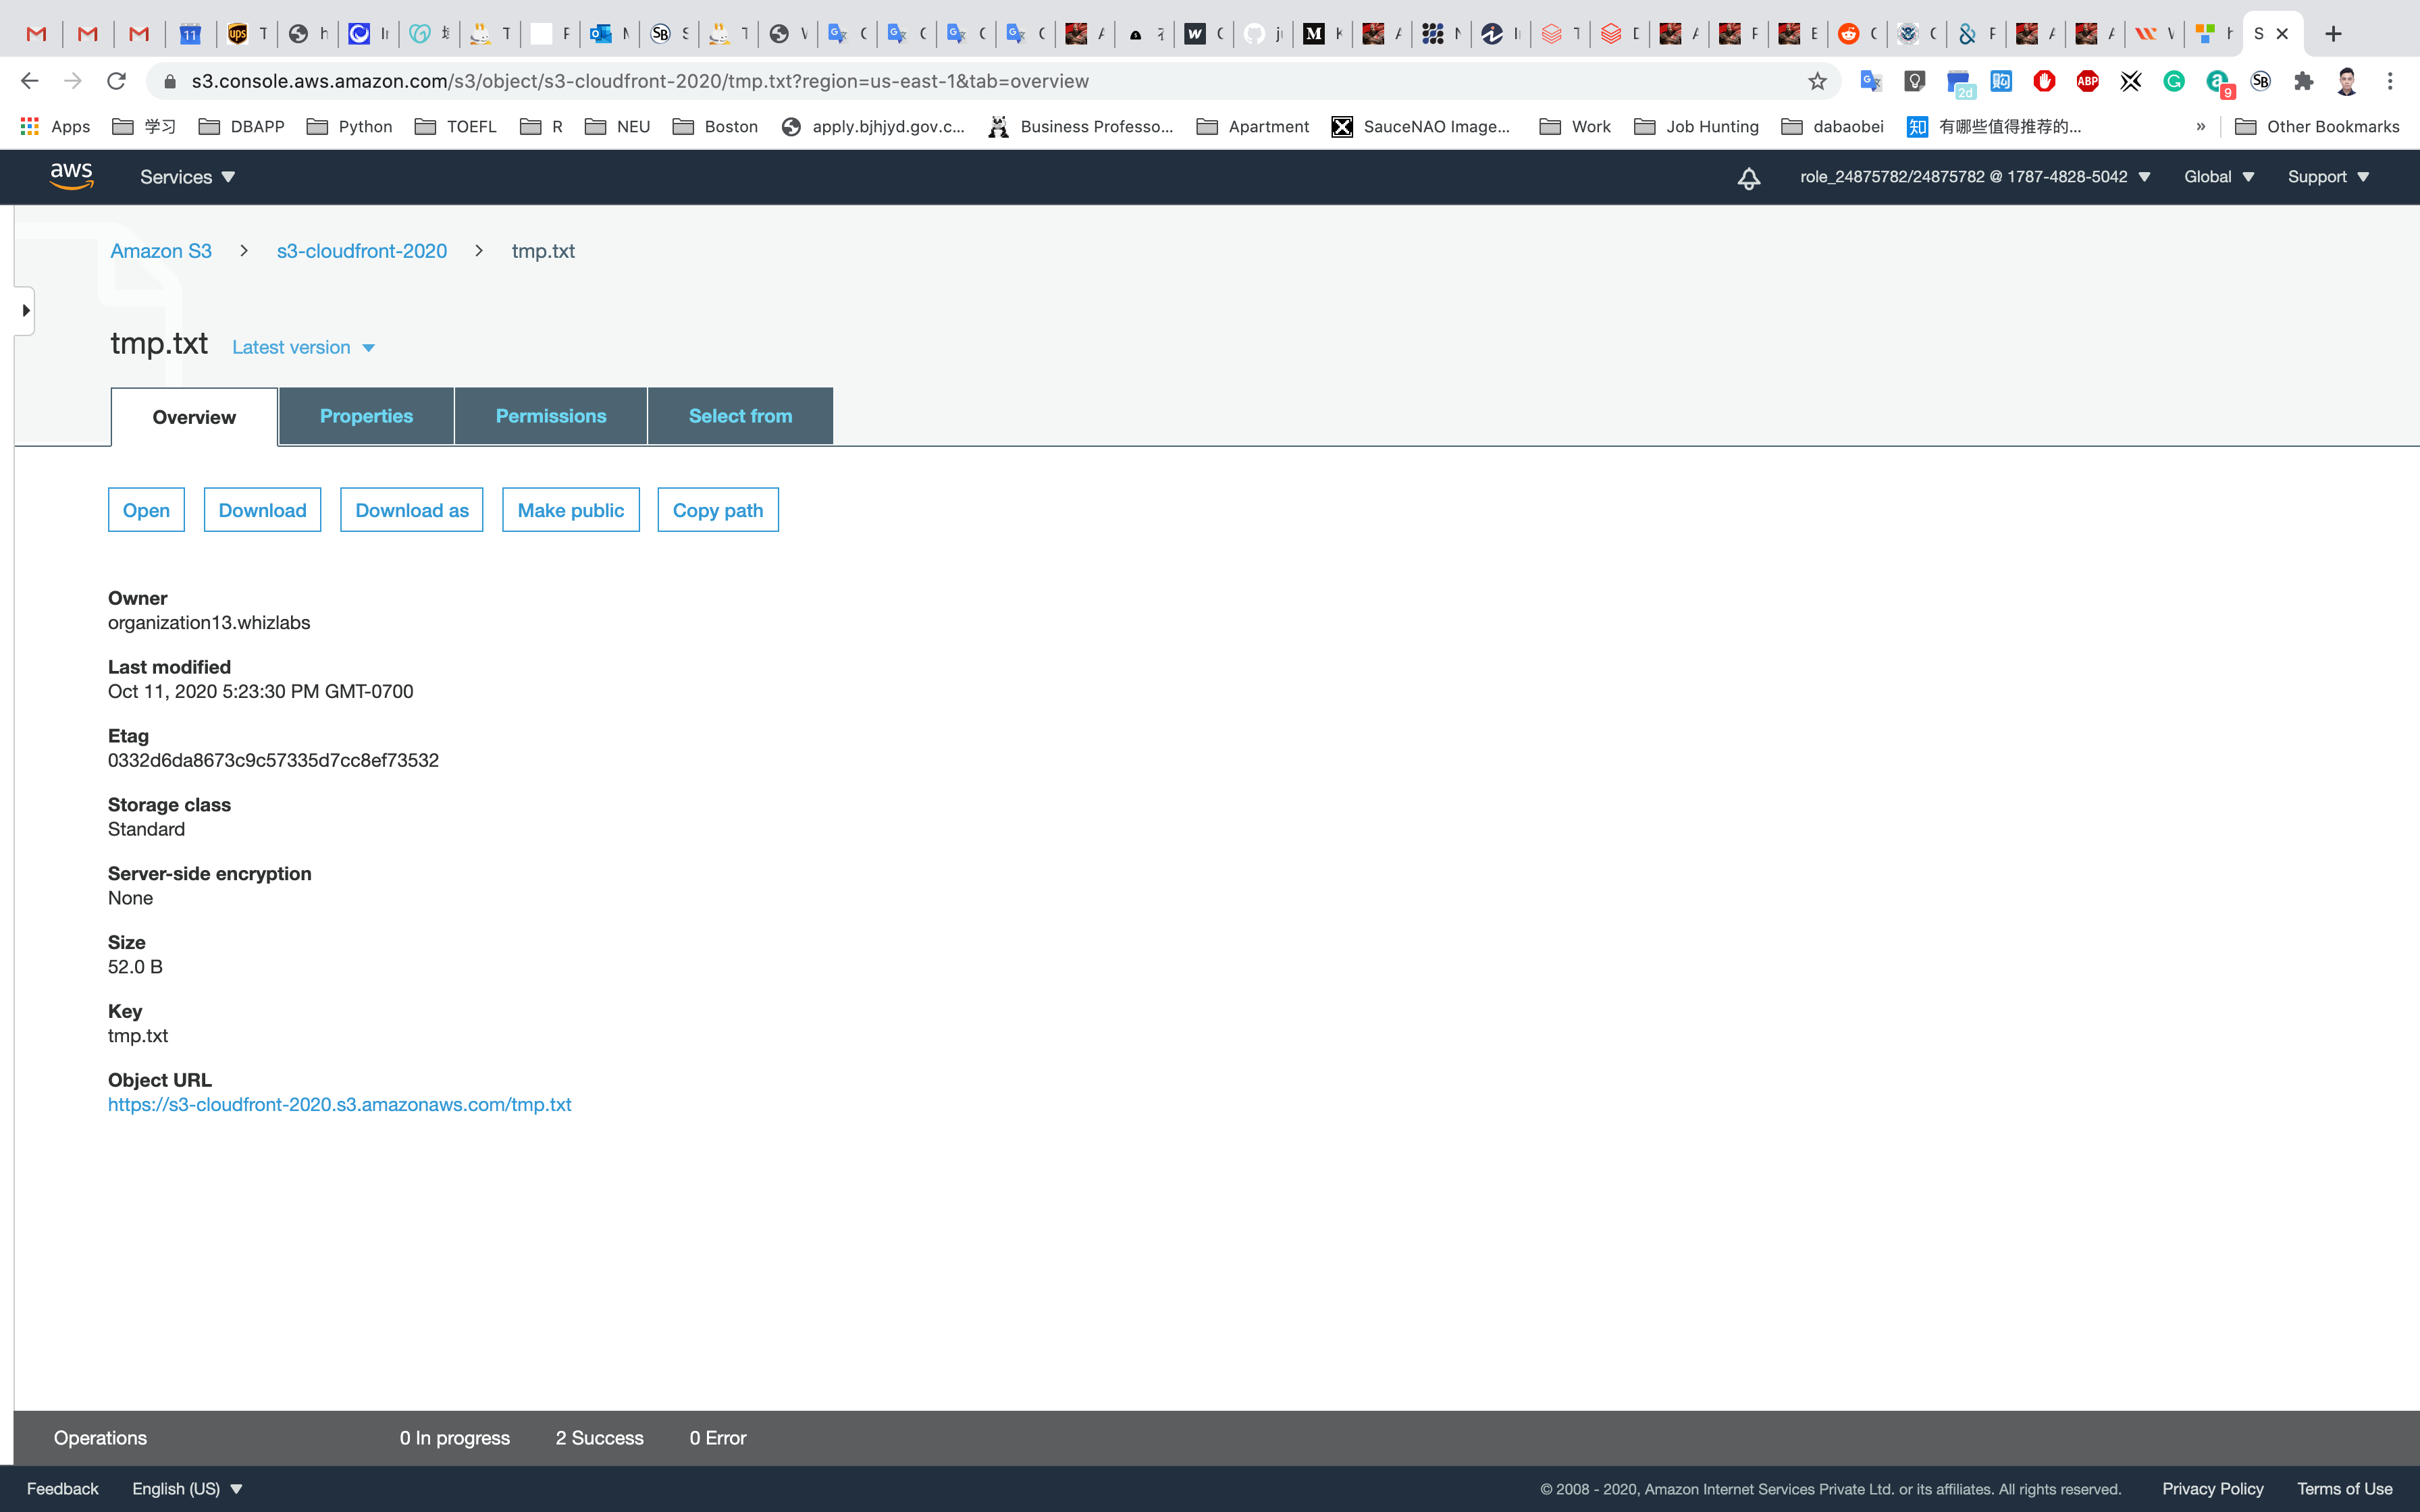
You will see the AccessDenied message, meaning the object is not publicly accessible.

Go back to the Bucket and click the Permissions tab.
Navigate to the Bucket Policy. Copy and paste the below policy and save the policy.
Note: Change the name of the bucket with your bucket name in the Resource marked in highlight.
1 | { |
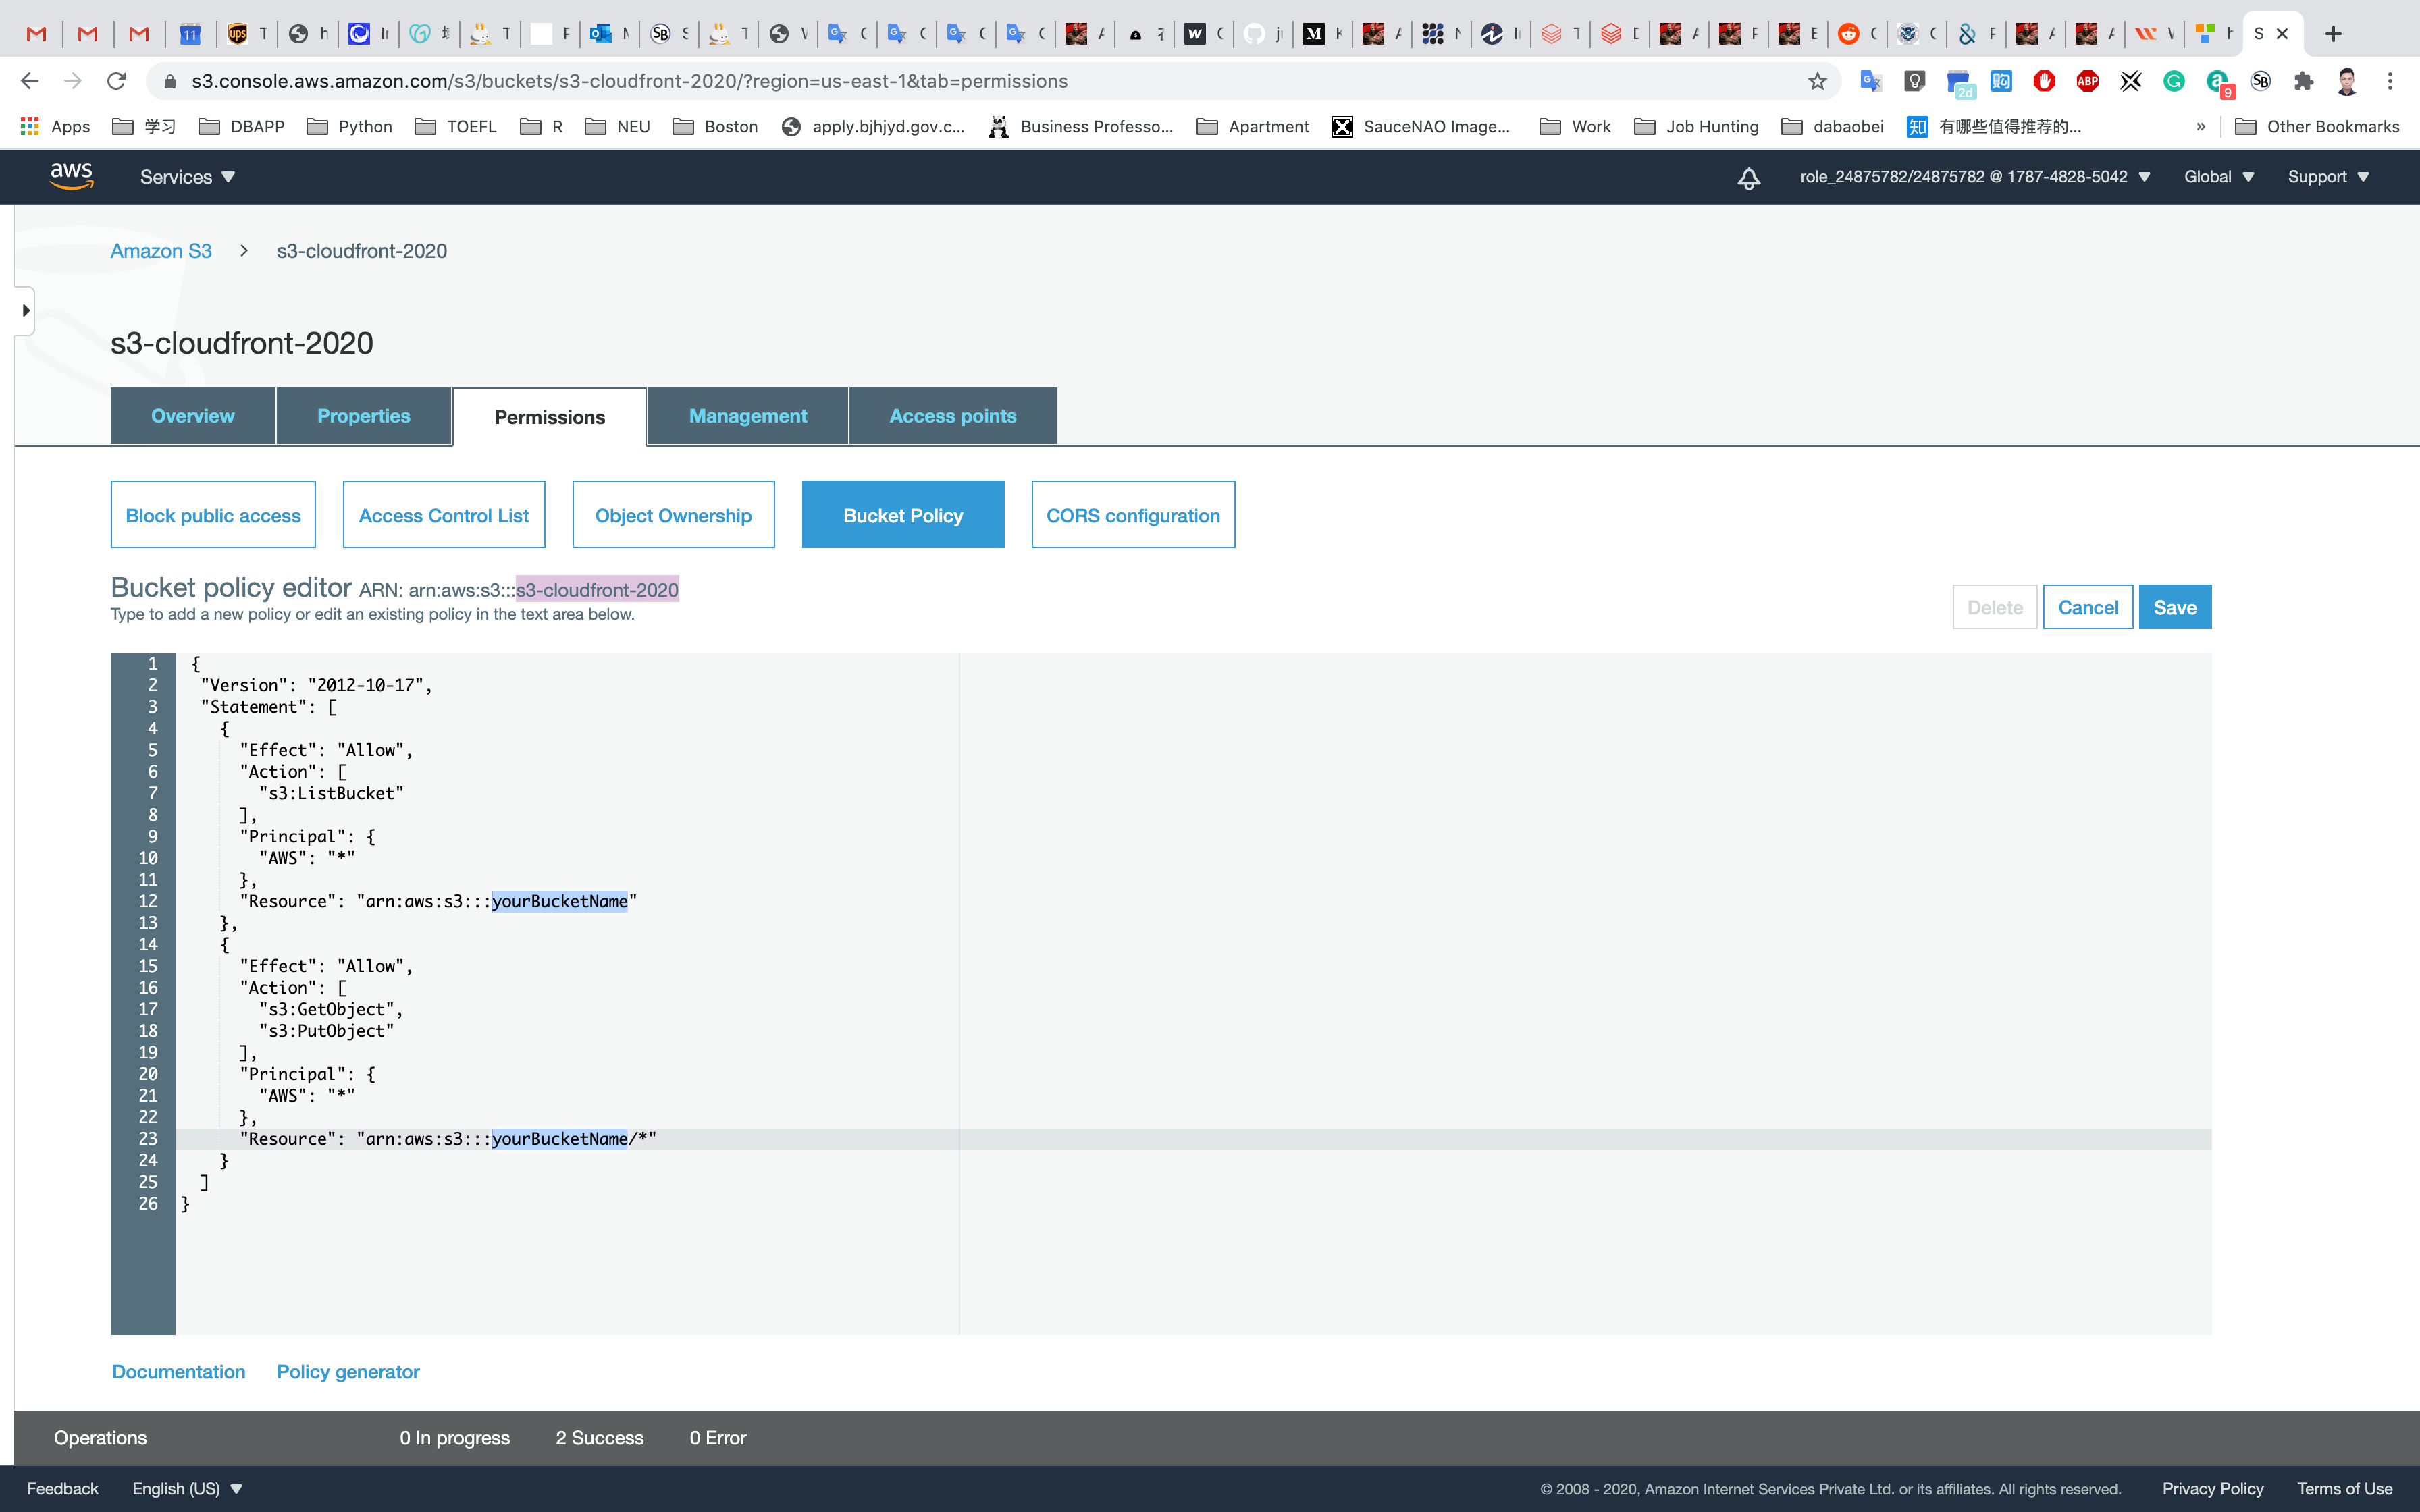
Click on Save
Open the file URL again or refresh the one already open.
If you can see your uploaded image in the browser, it means your image is publicly accessible. If not, check your bucket policy again.
CloudFront Configuration
Service -> CloudFront
Creating CloudFront Distribution
Click on Create Distribution.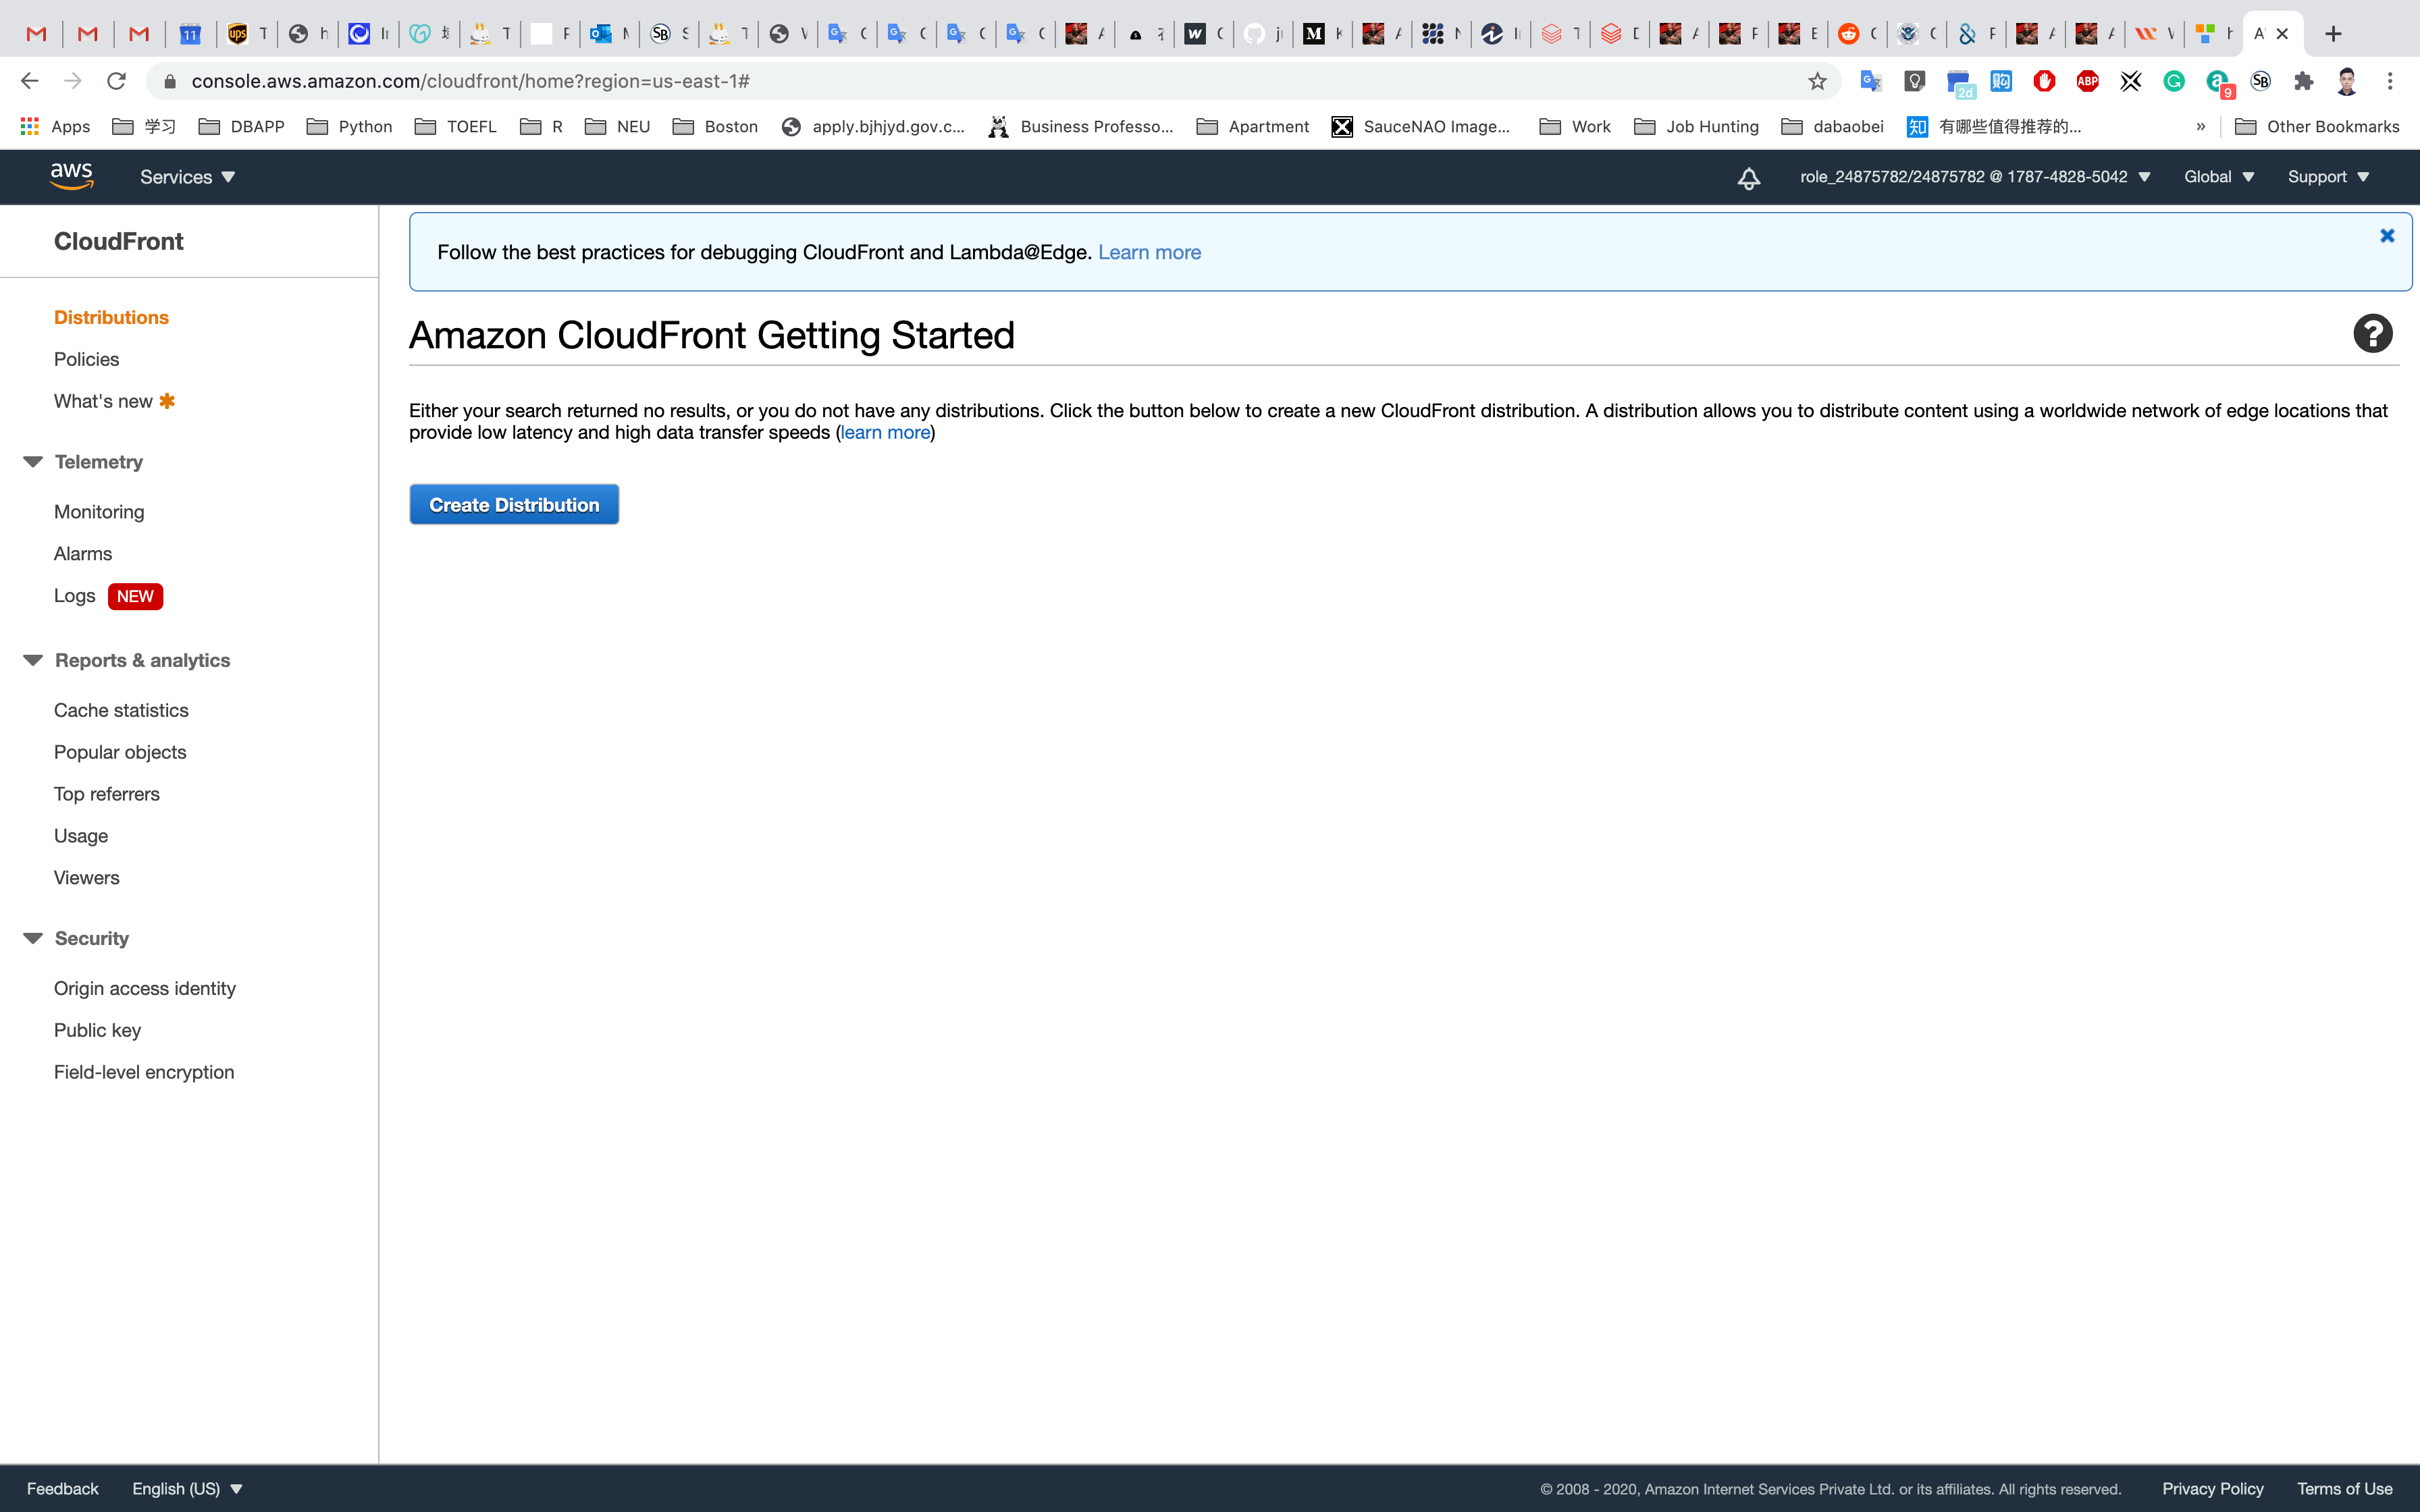
Select Get Started from the delivery method Web.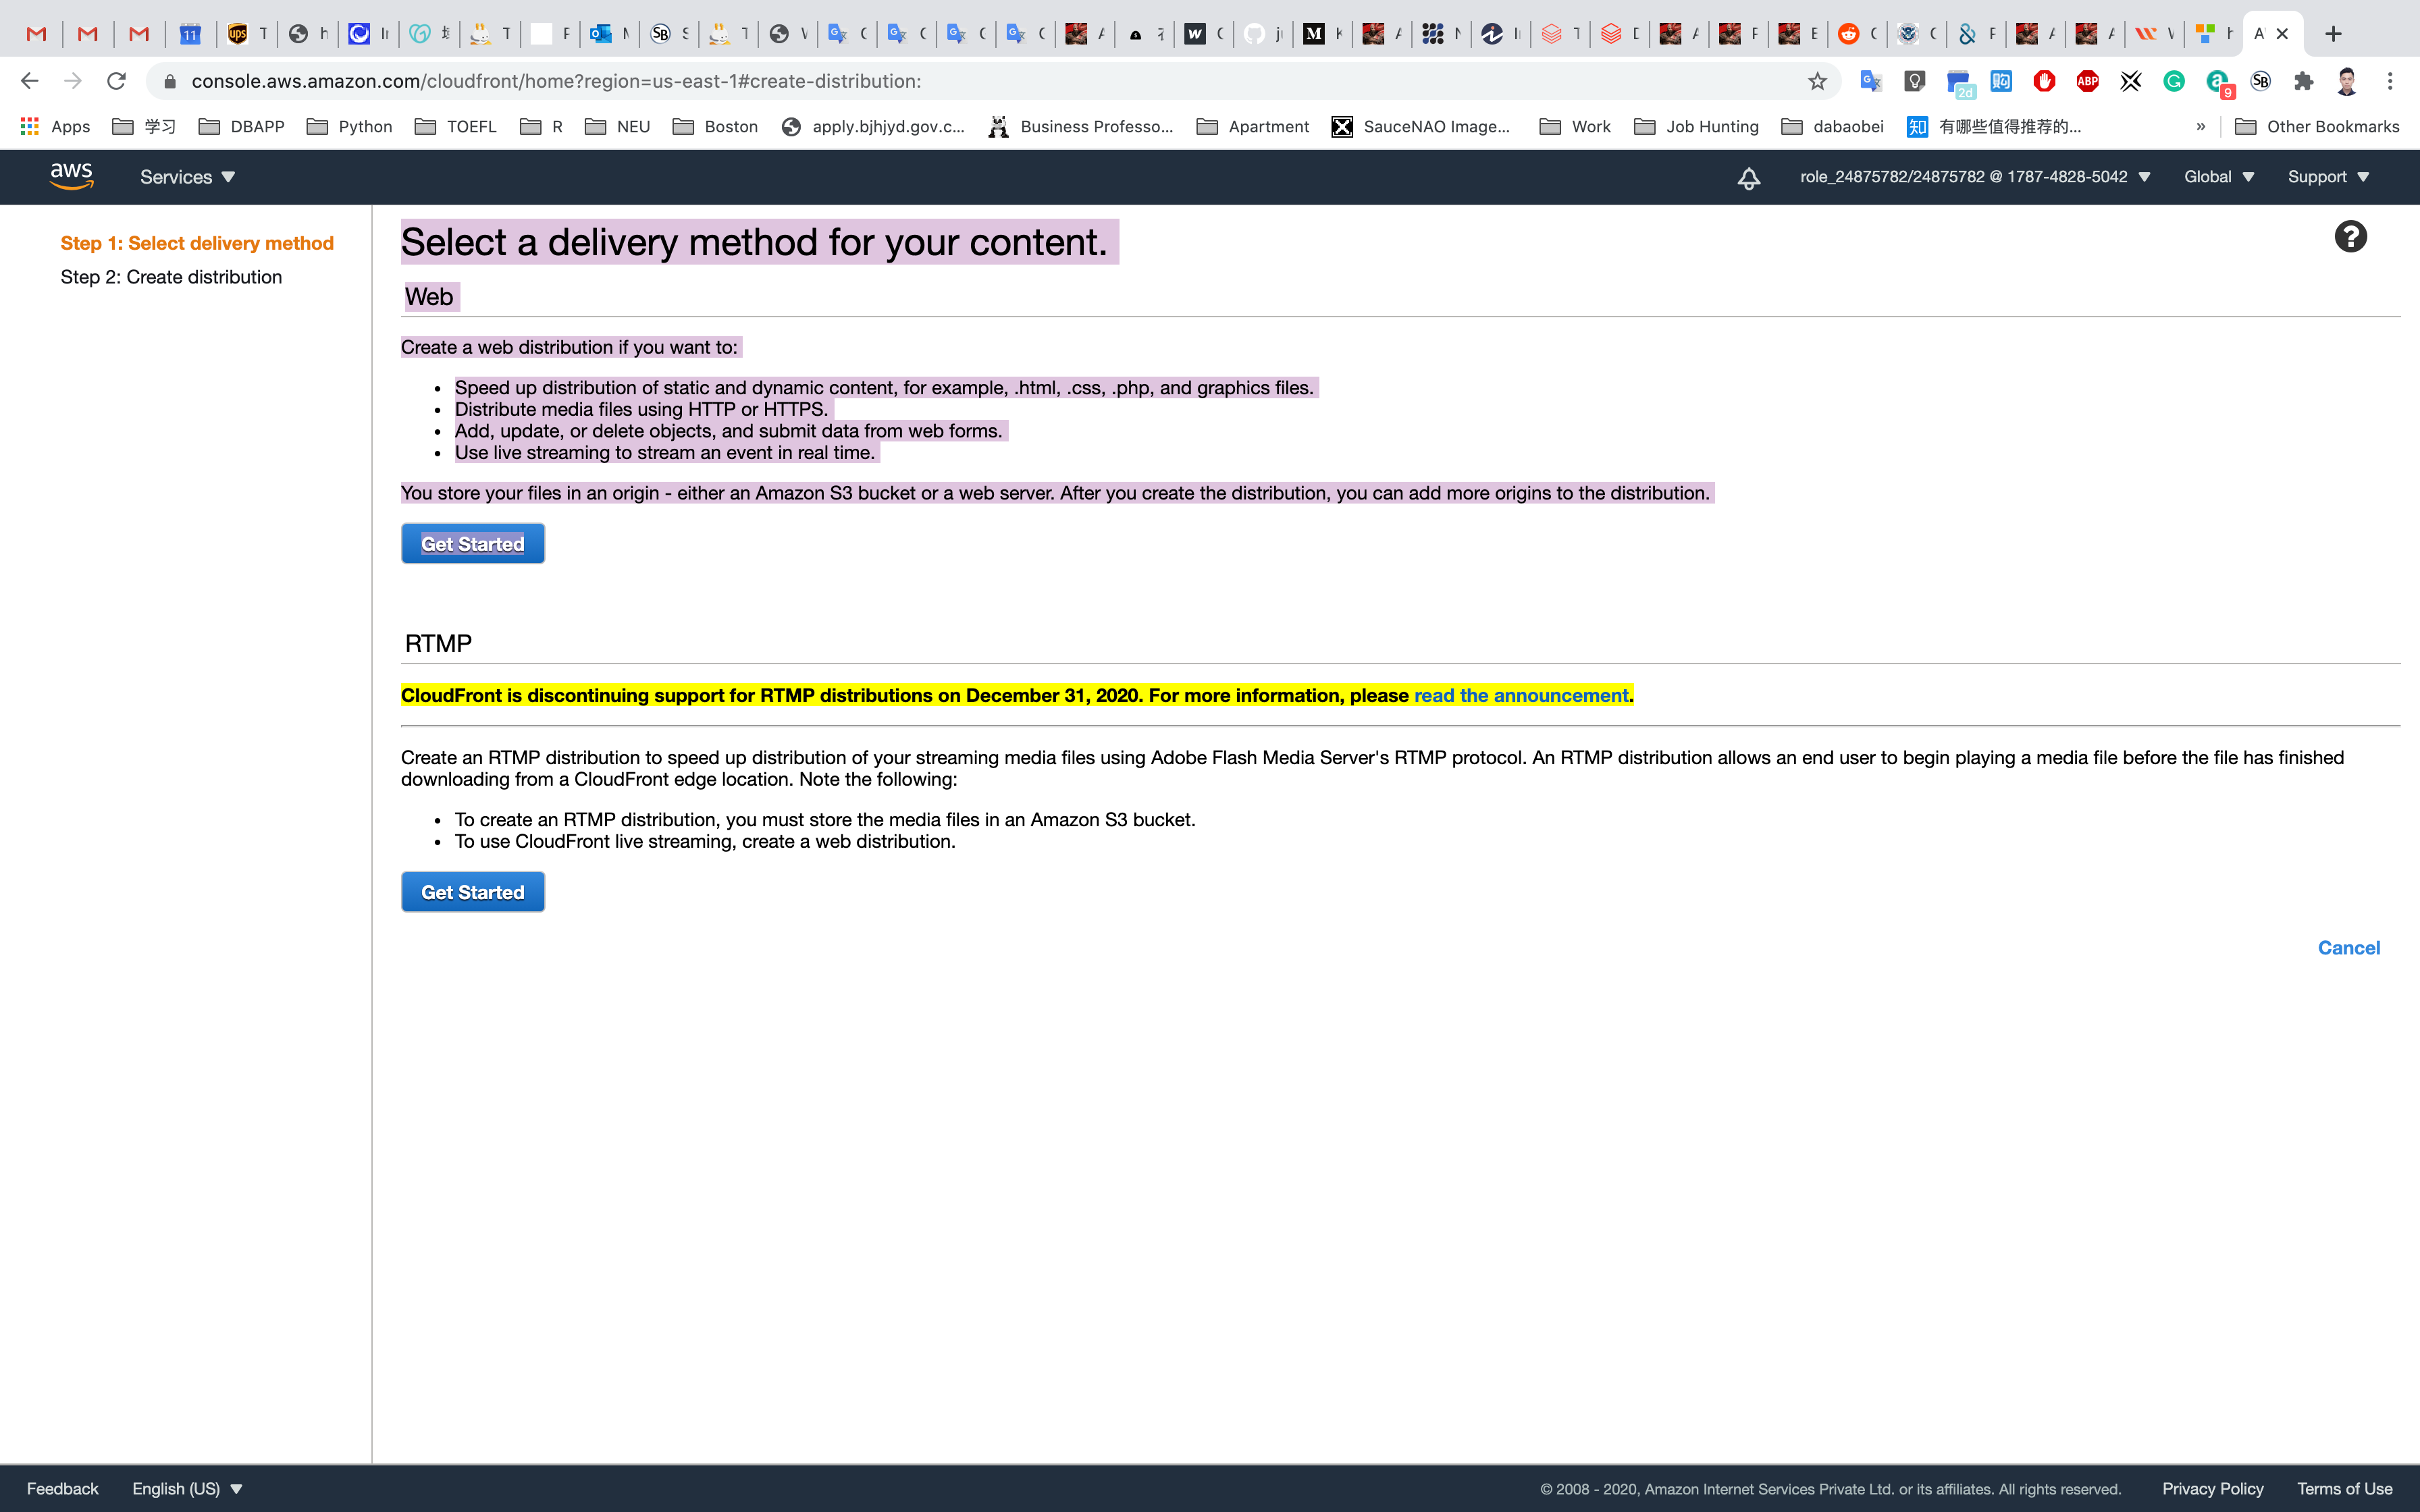
Now configure distribution as follows-:
- Origin Domain Name: Select your S3 bucket
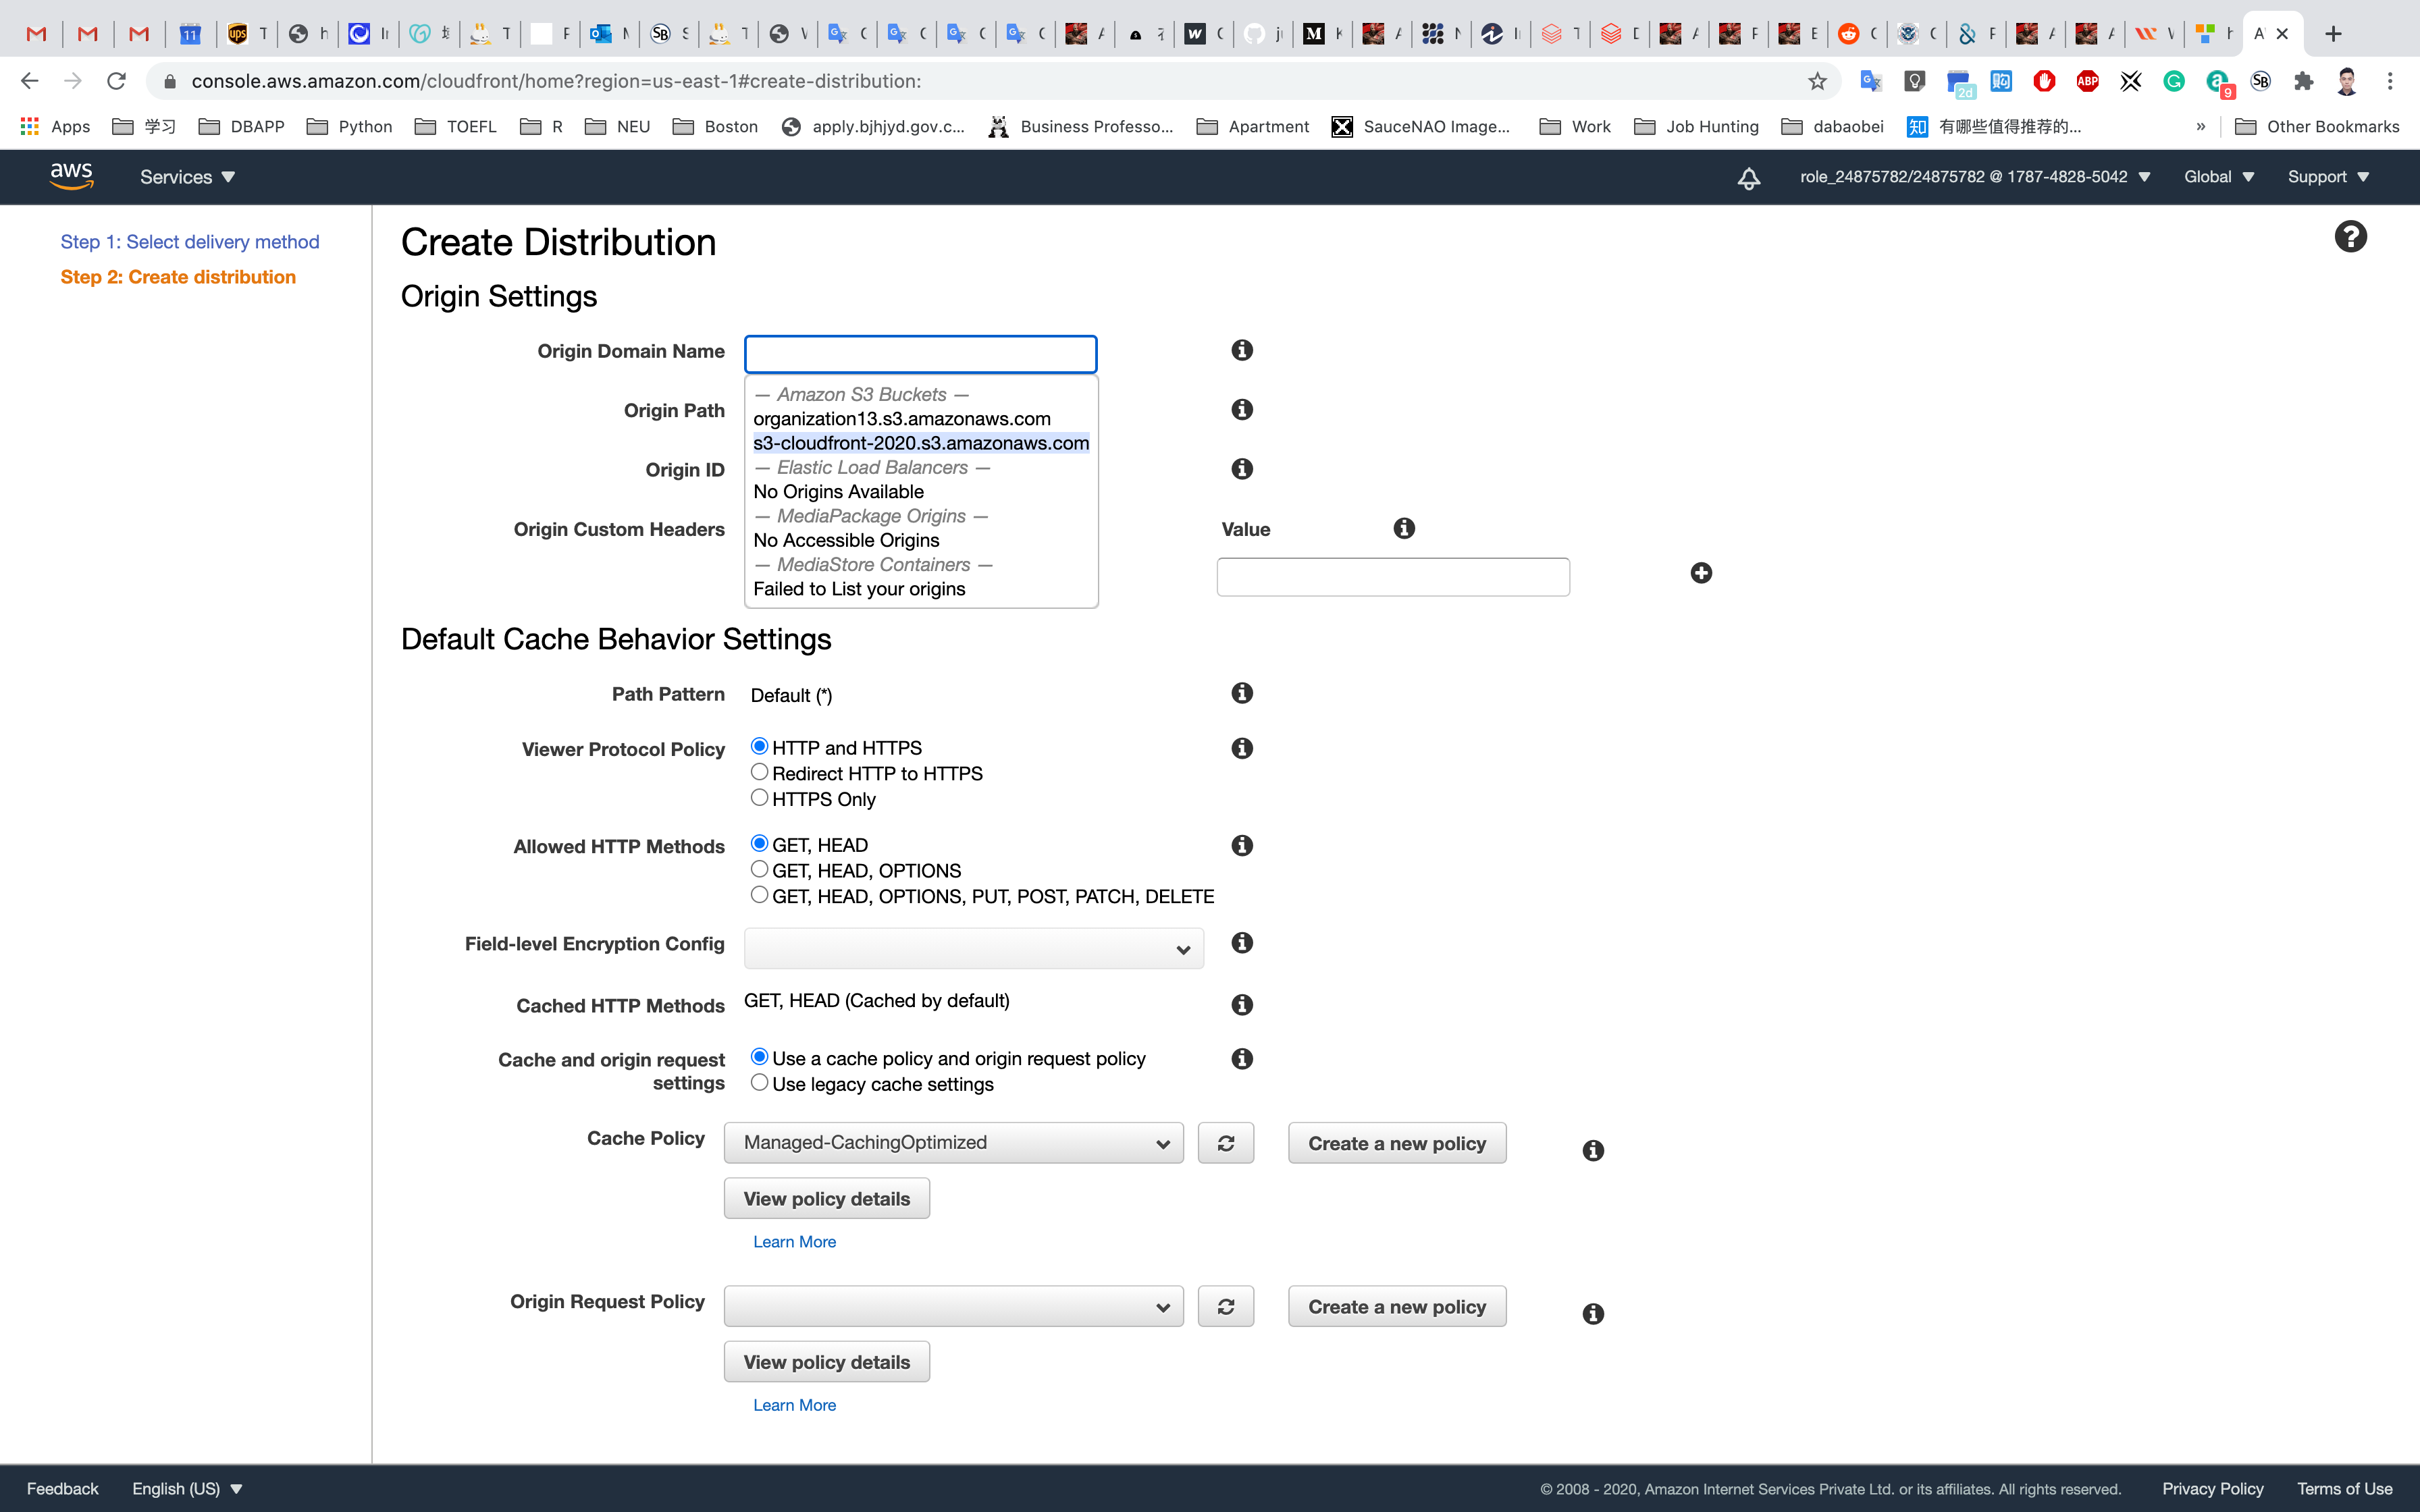
No need to change anything in configuration, scroll down and click on the Create Distribution.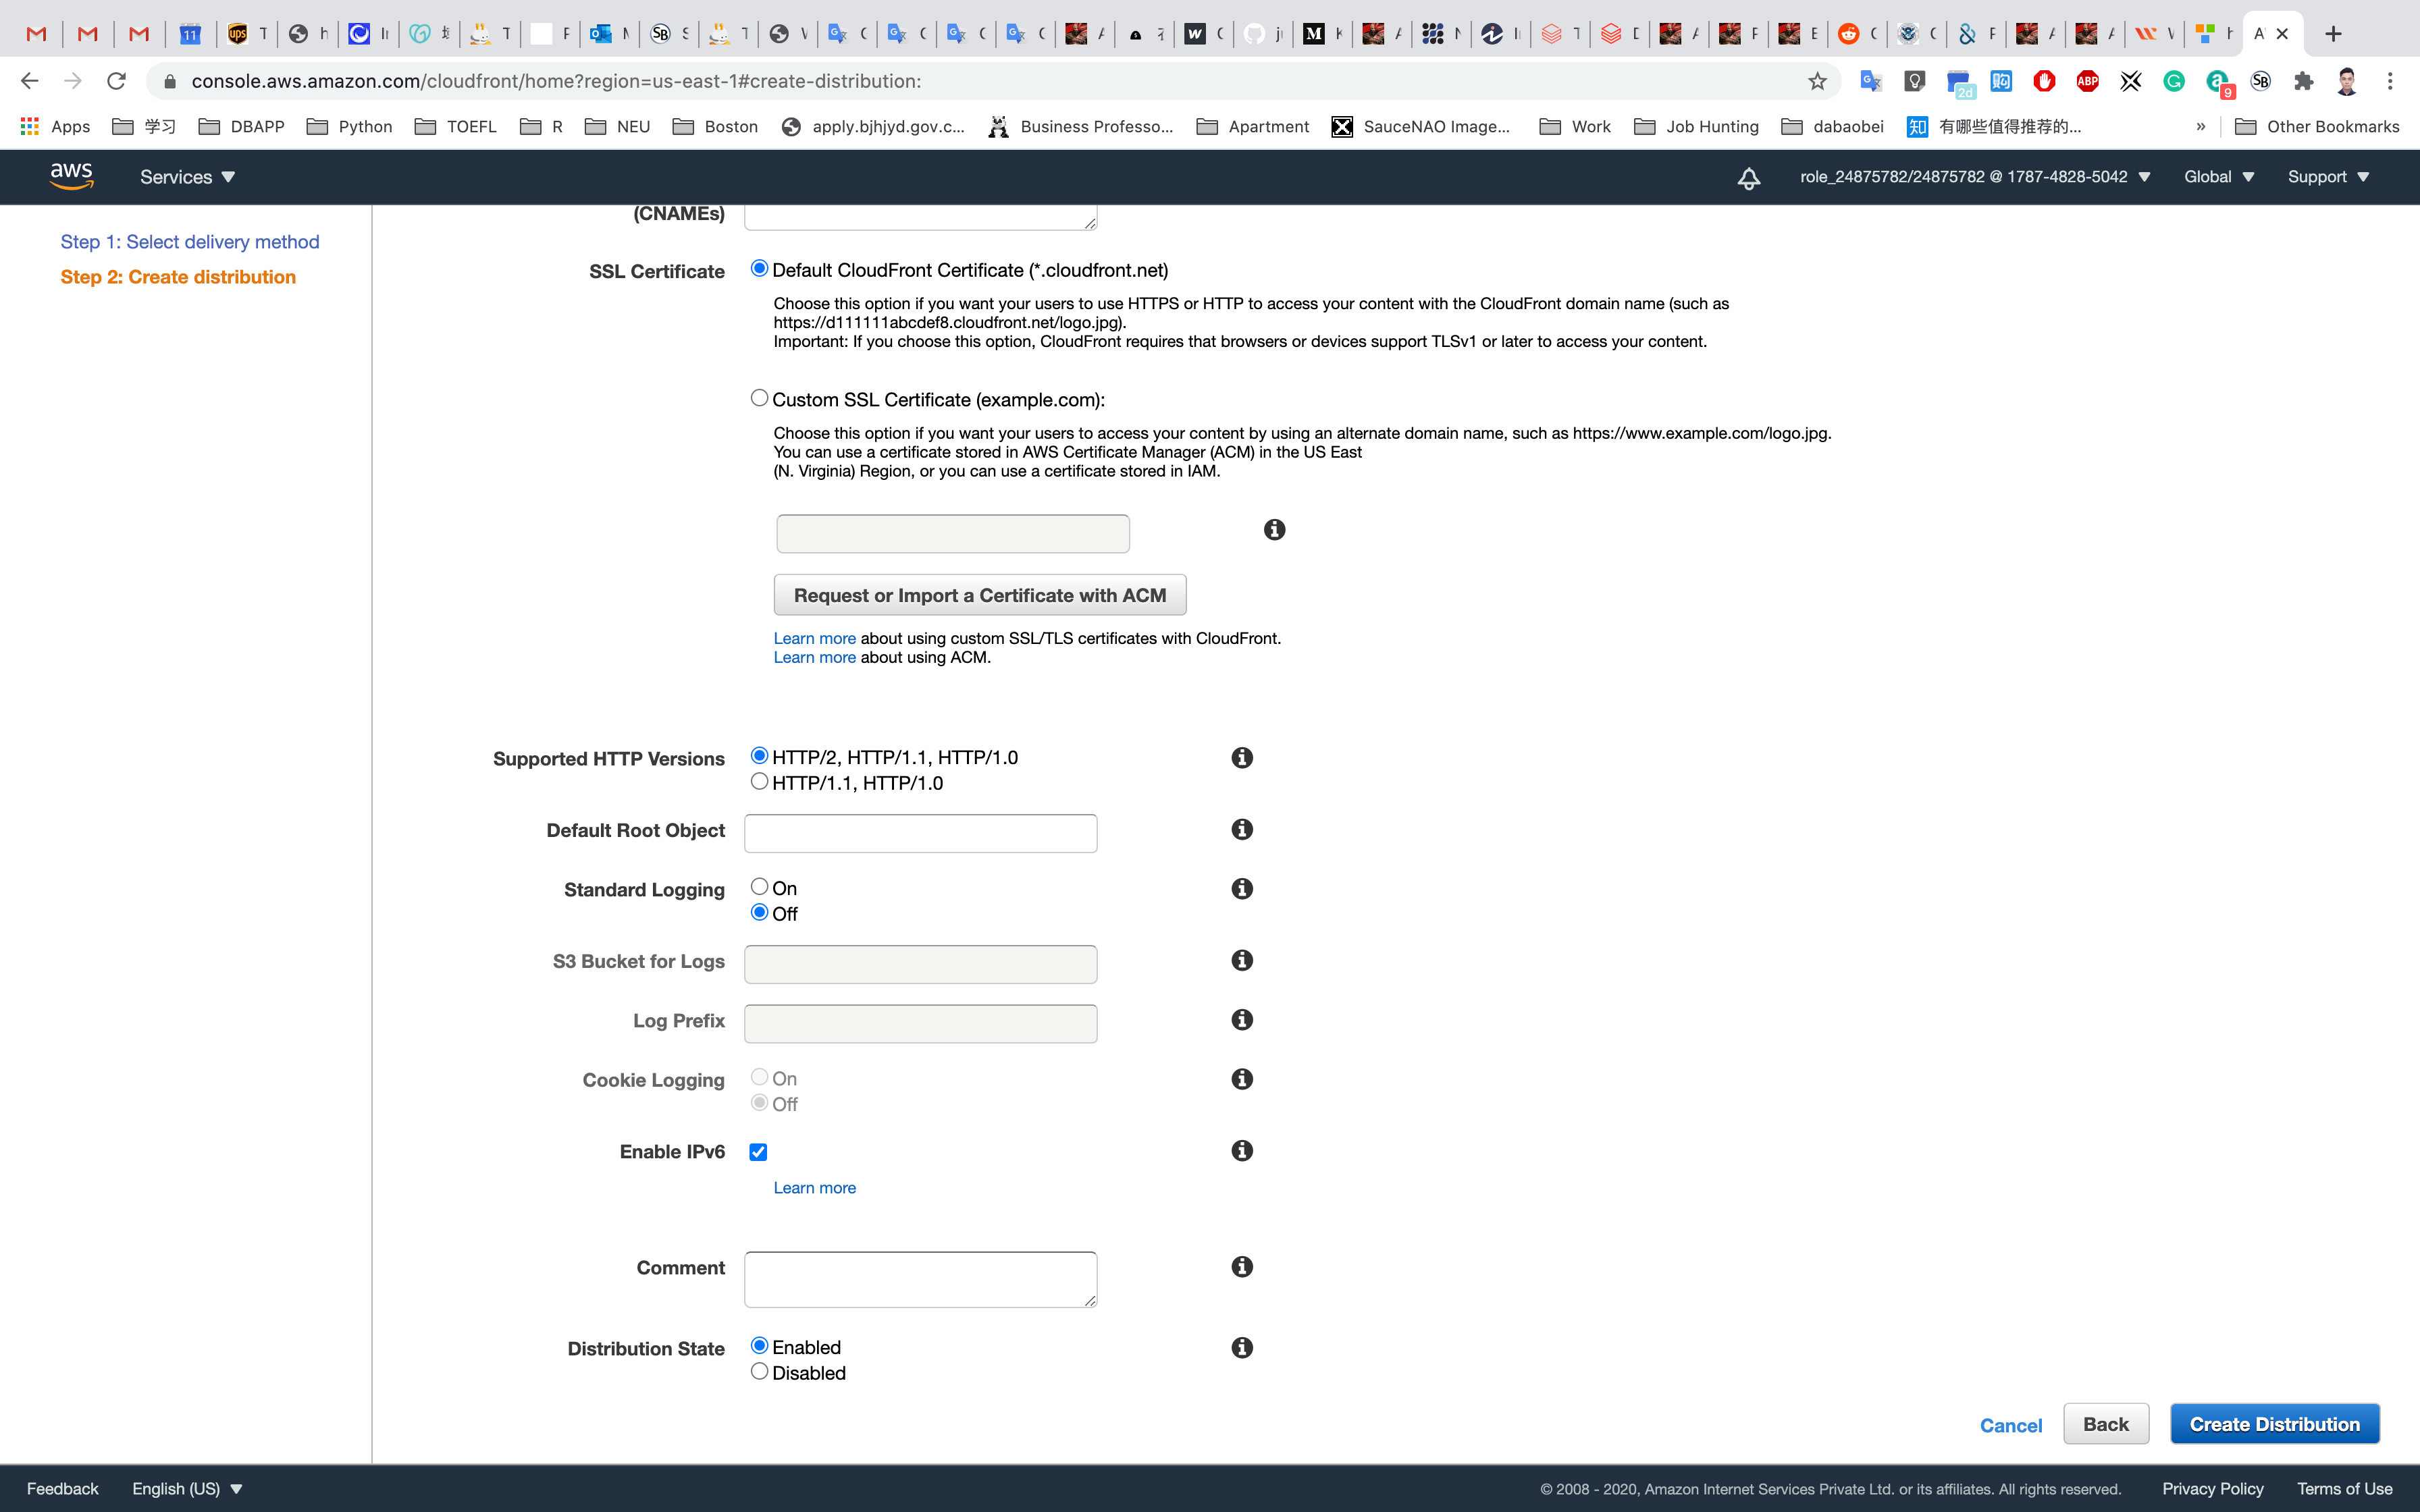
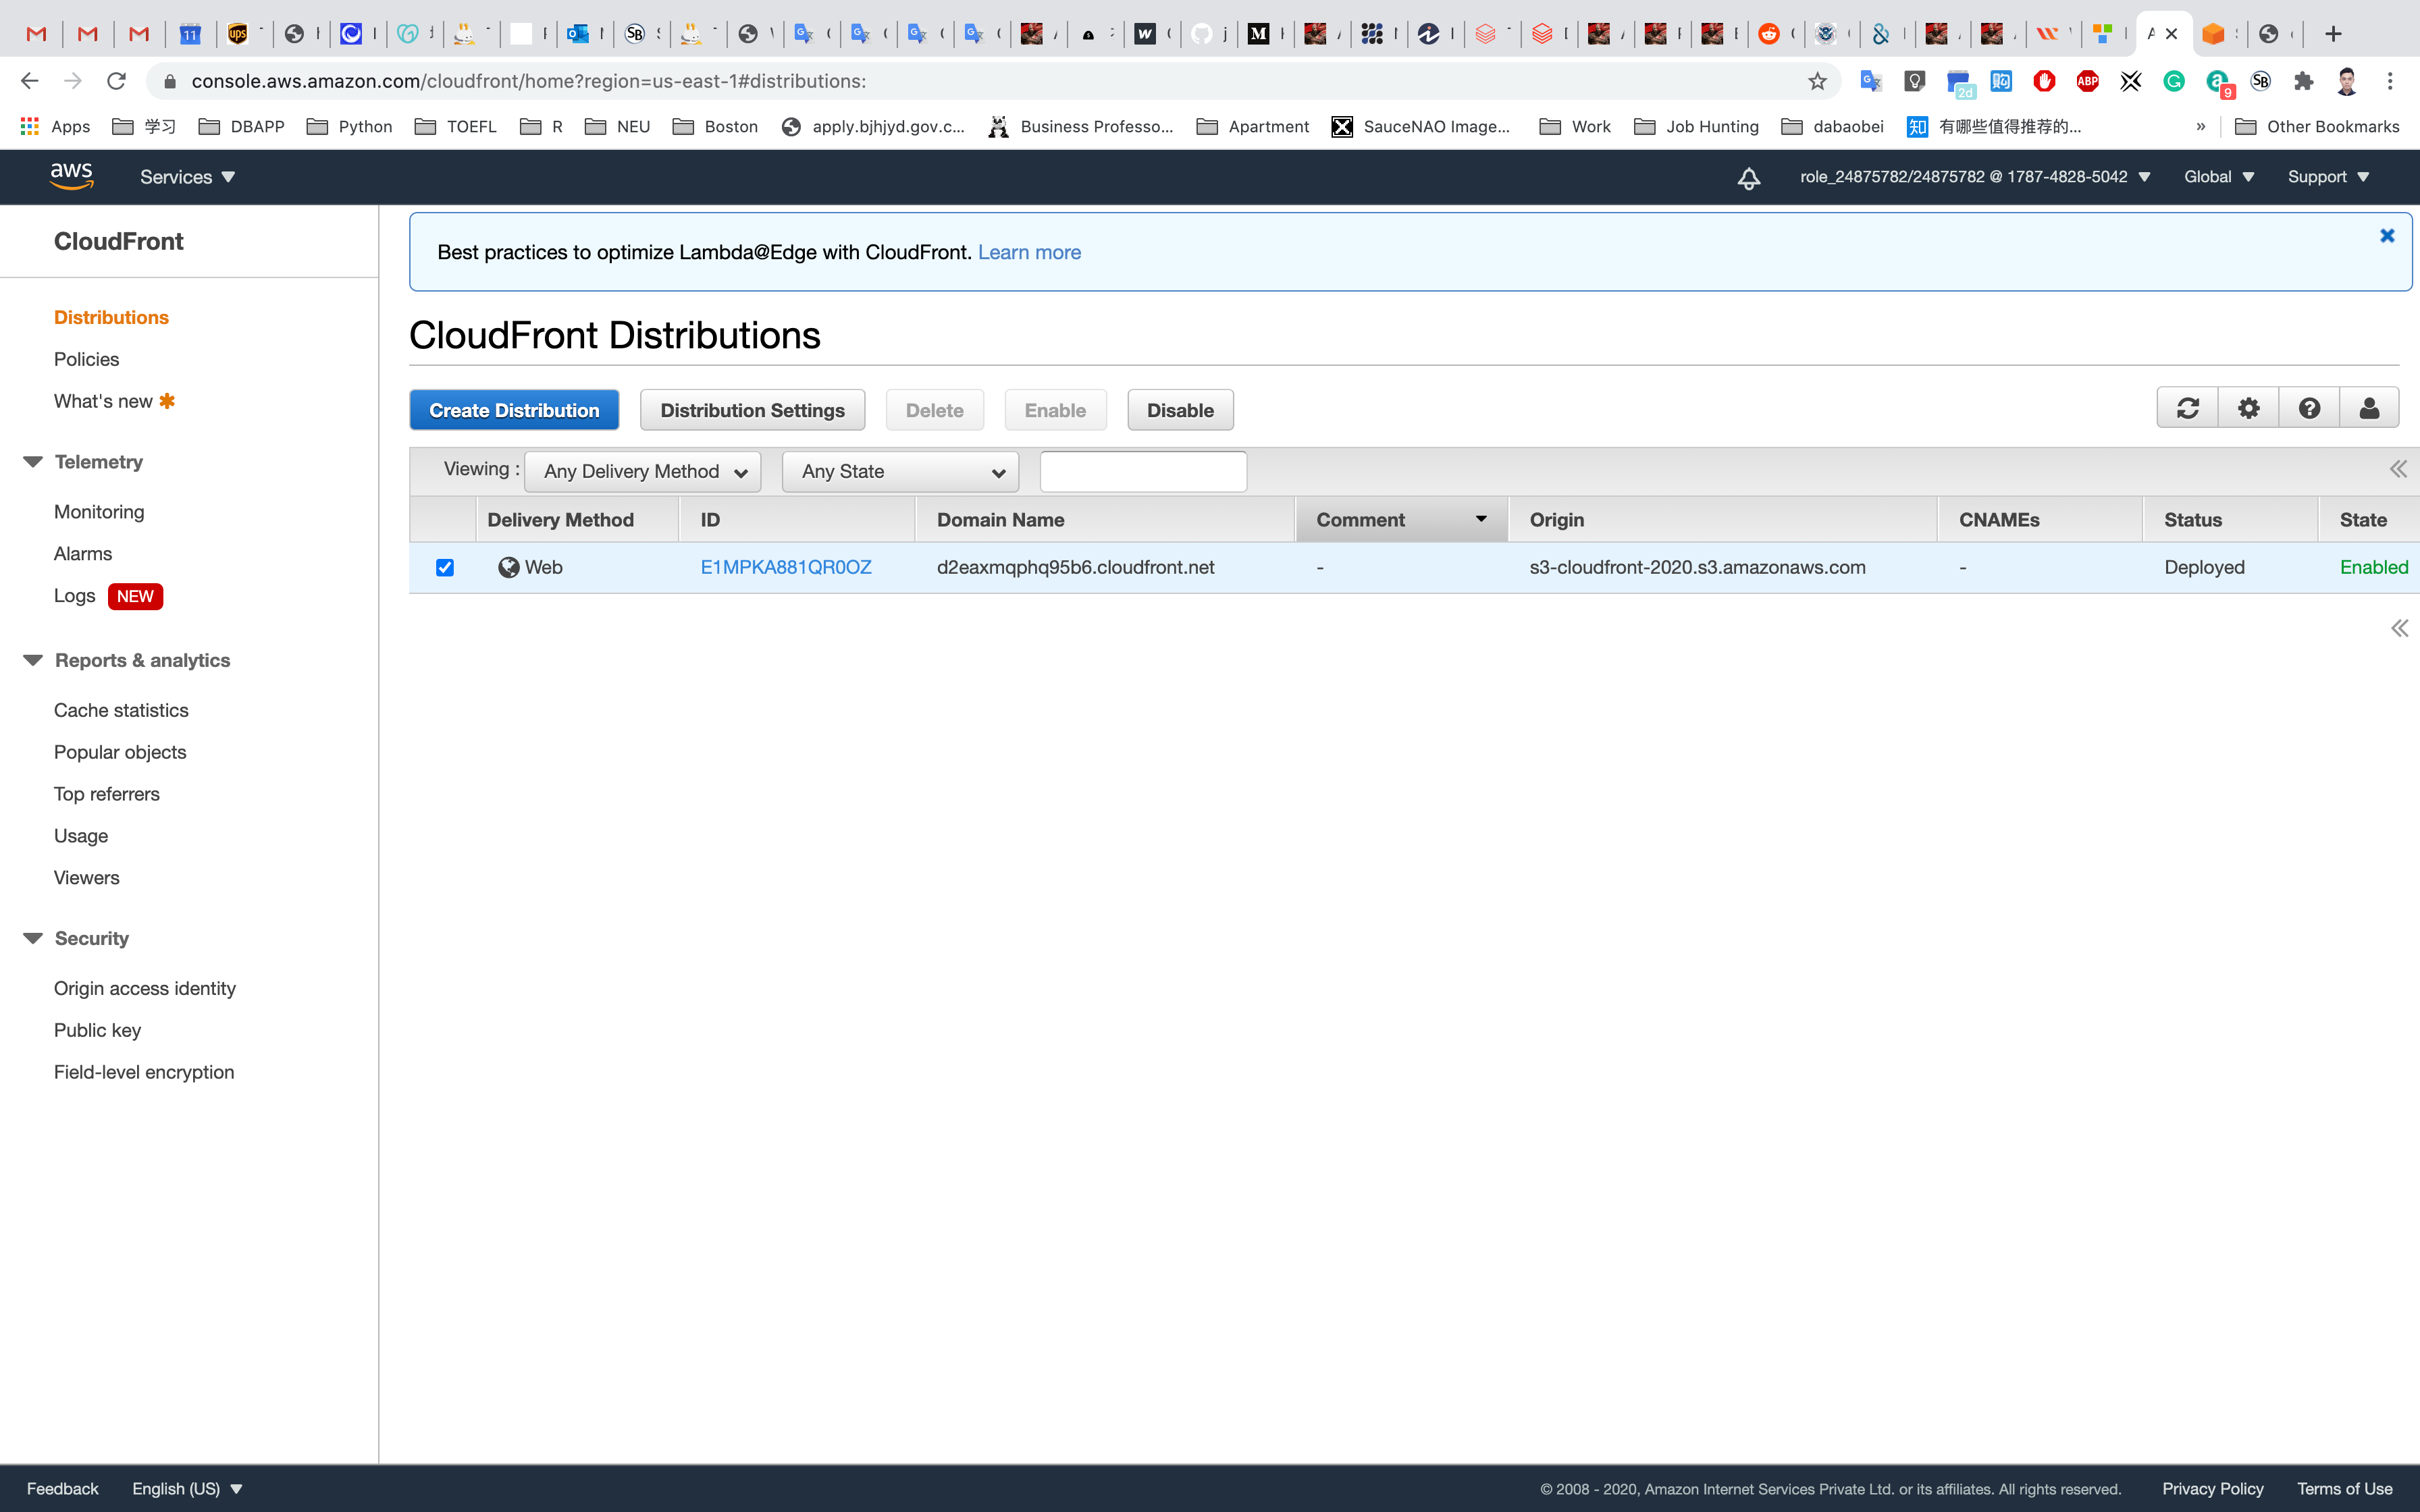
You can see the Status column shows In Progress for your distribution. After Amazon CloudFront has created your distribution, the Status for your distribution will change to Deployed. At this point, it will be ready to process requests.
- Note: This process will take around 15-20 minutes.

The domain name that Amazon CloudFront assigns to your distribution appears in the list of distributions. It will look similar to d1hmlwhed8zk6q.cloudfront.net
Click on your ID
Copy the Domain Name and paste to another tab on your browser, add /yourFilename to the end of URL.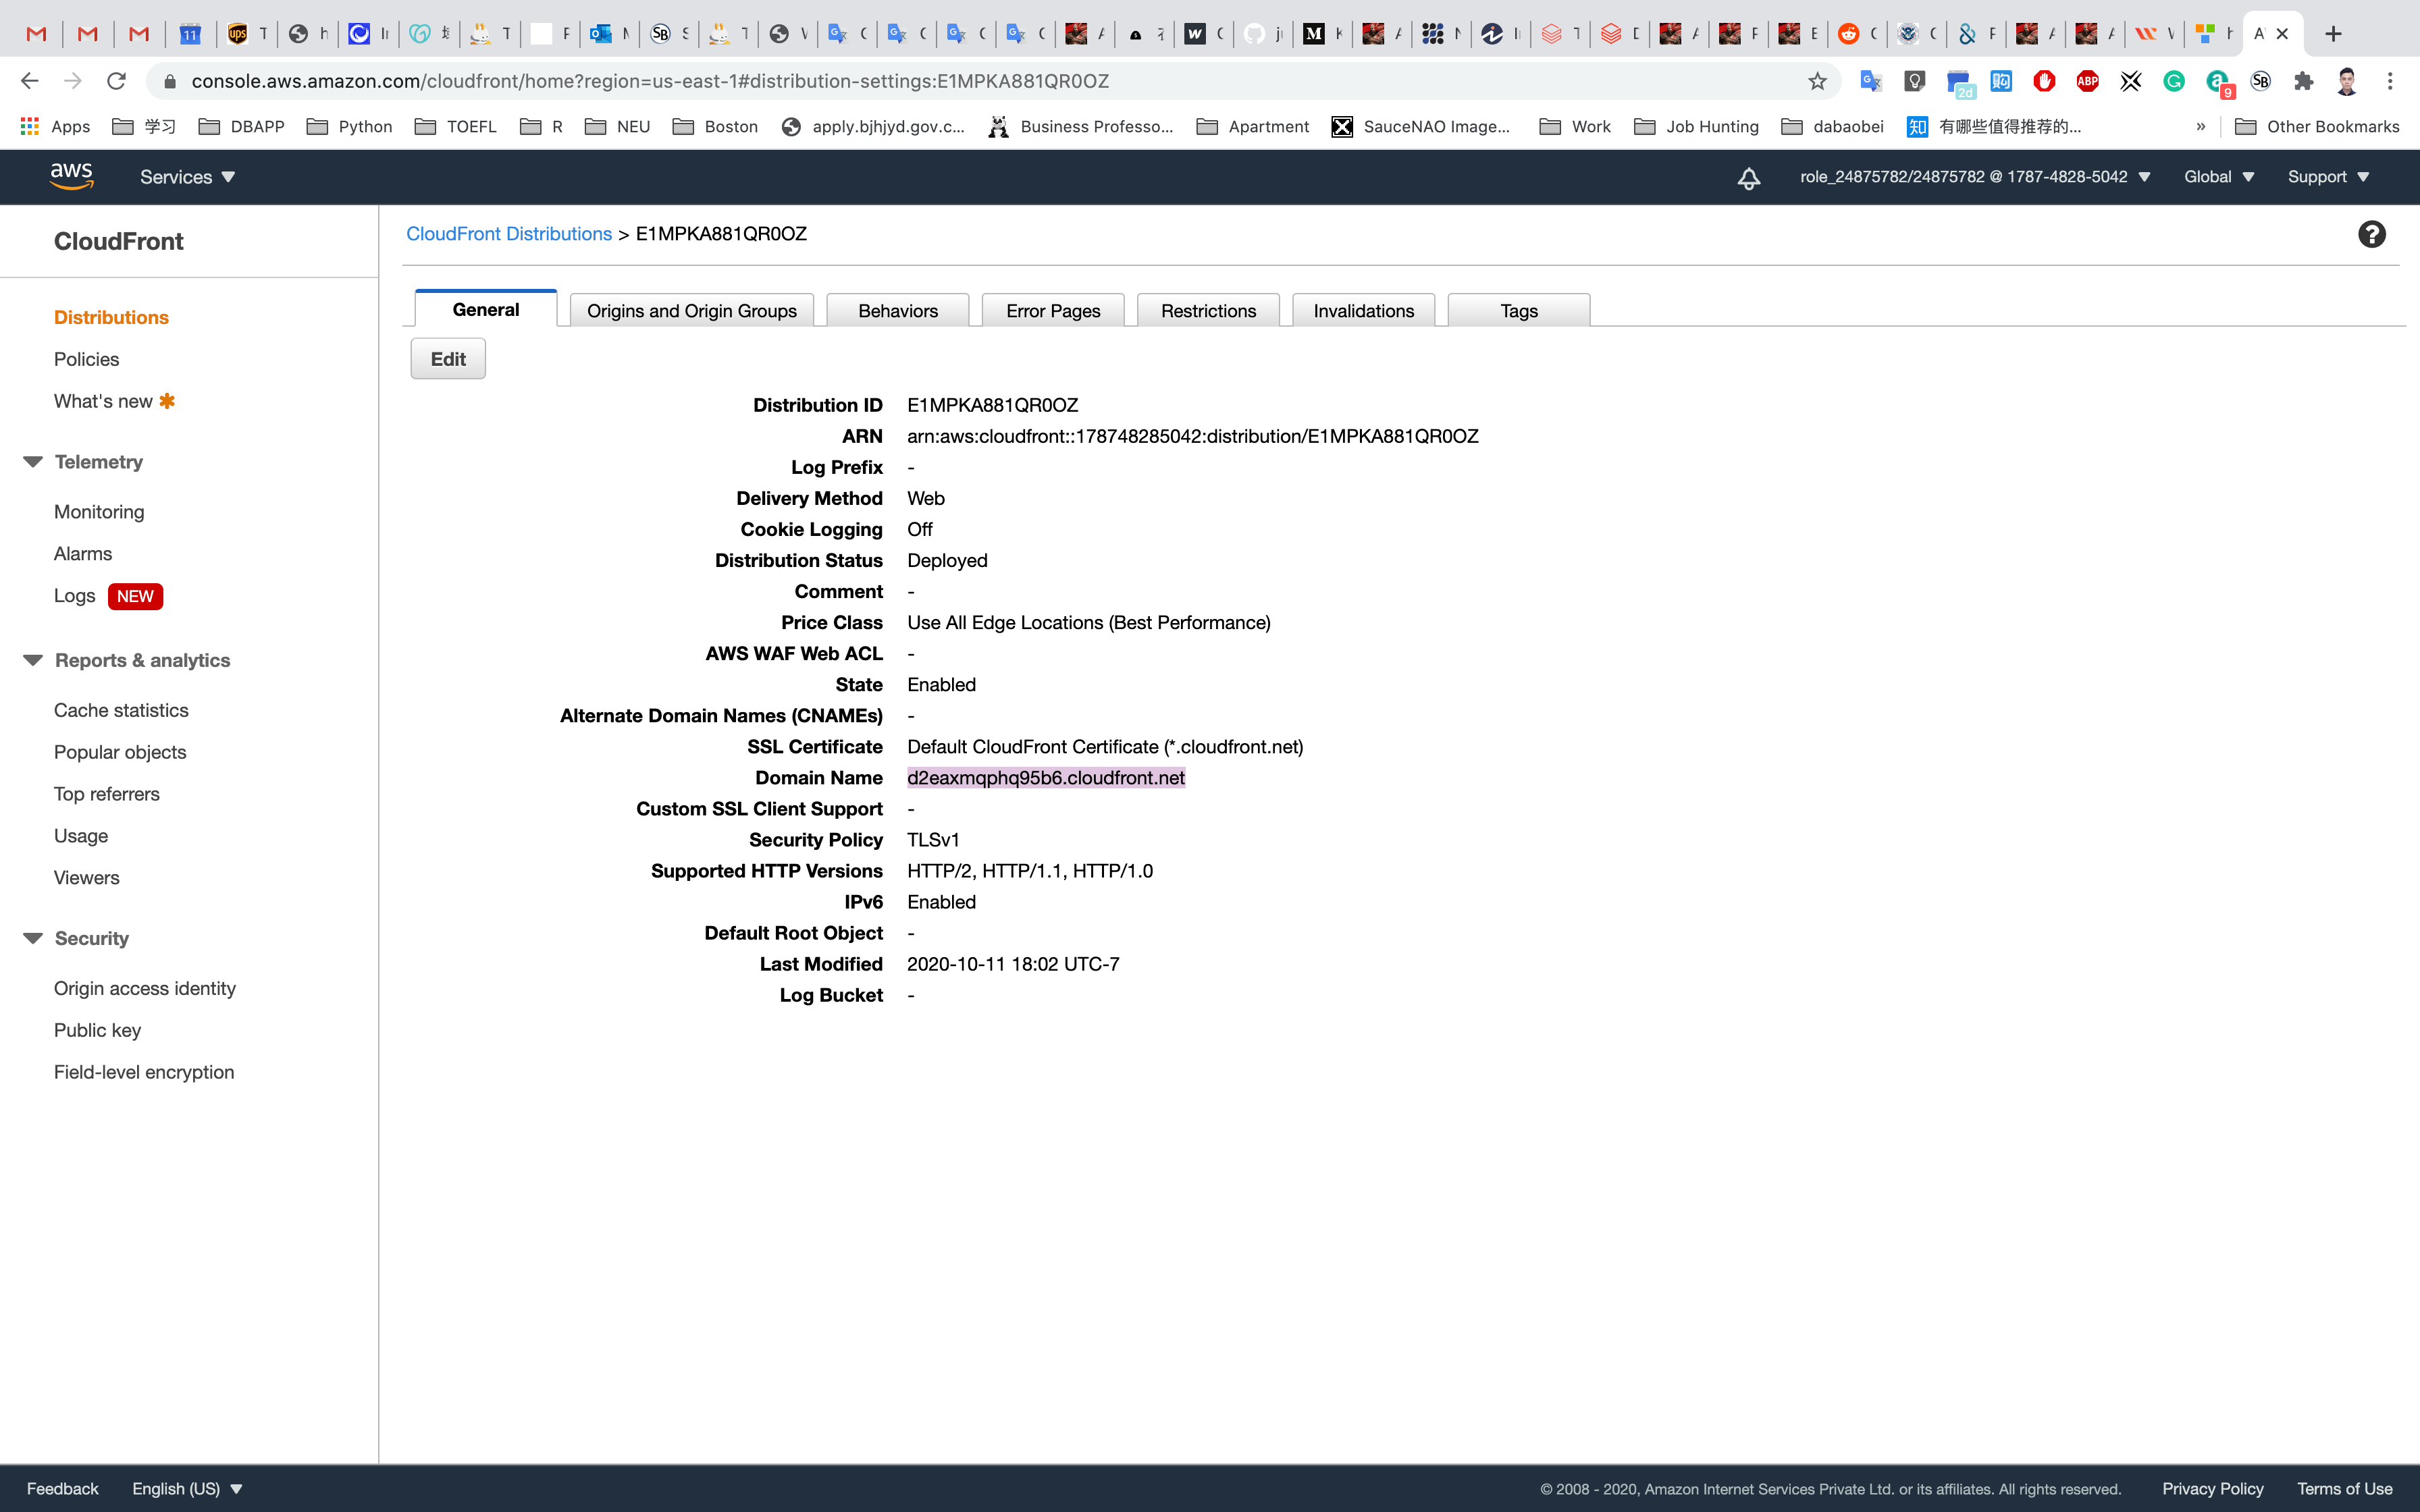
Our CloudFront distribution works well.
Go through the next steps.
Configuring Custom Error Page
Navigate back to CloudFront Dashboard and select the distribution created and click on Distribute Settings.
On the settings page, select Error Pages tab.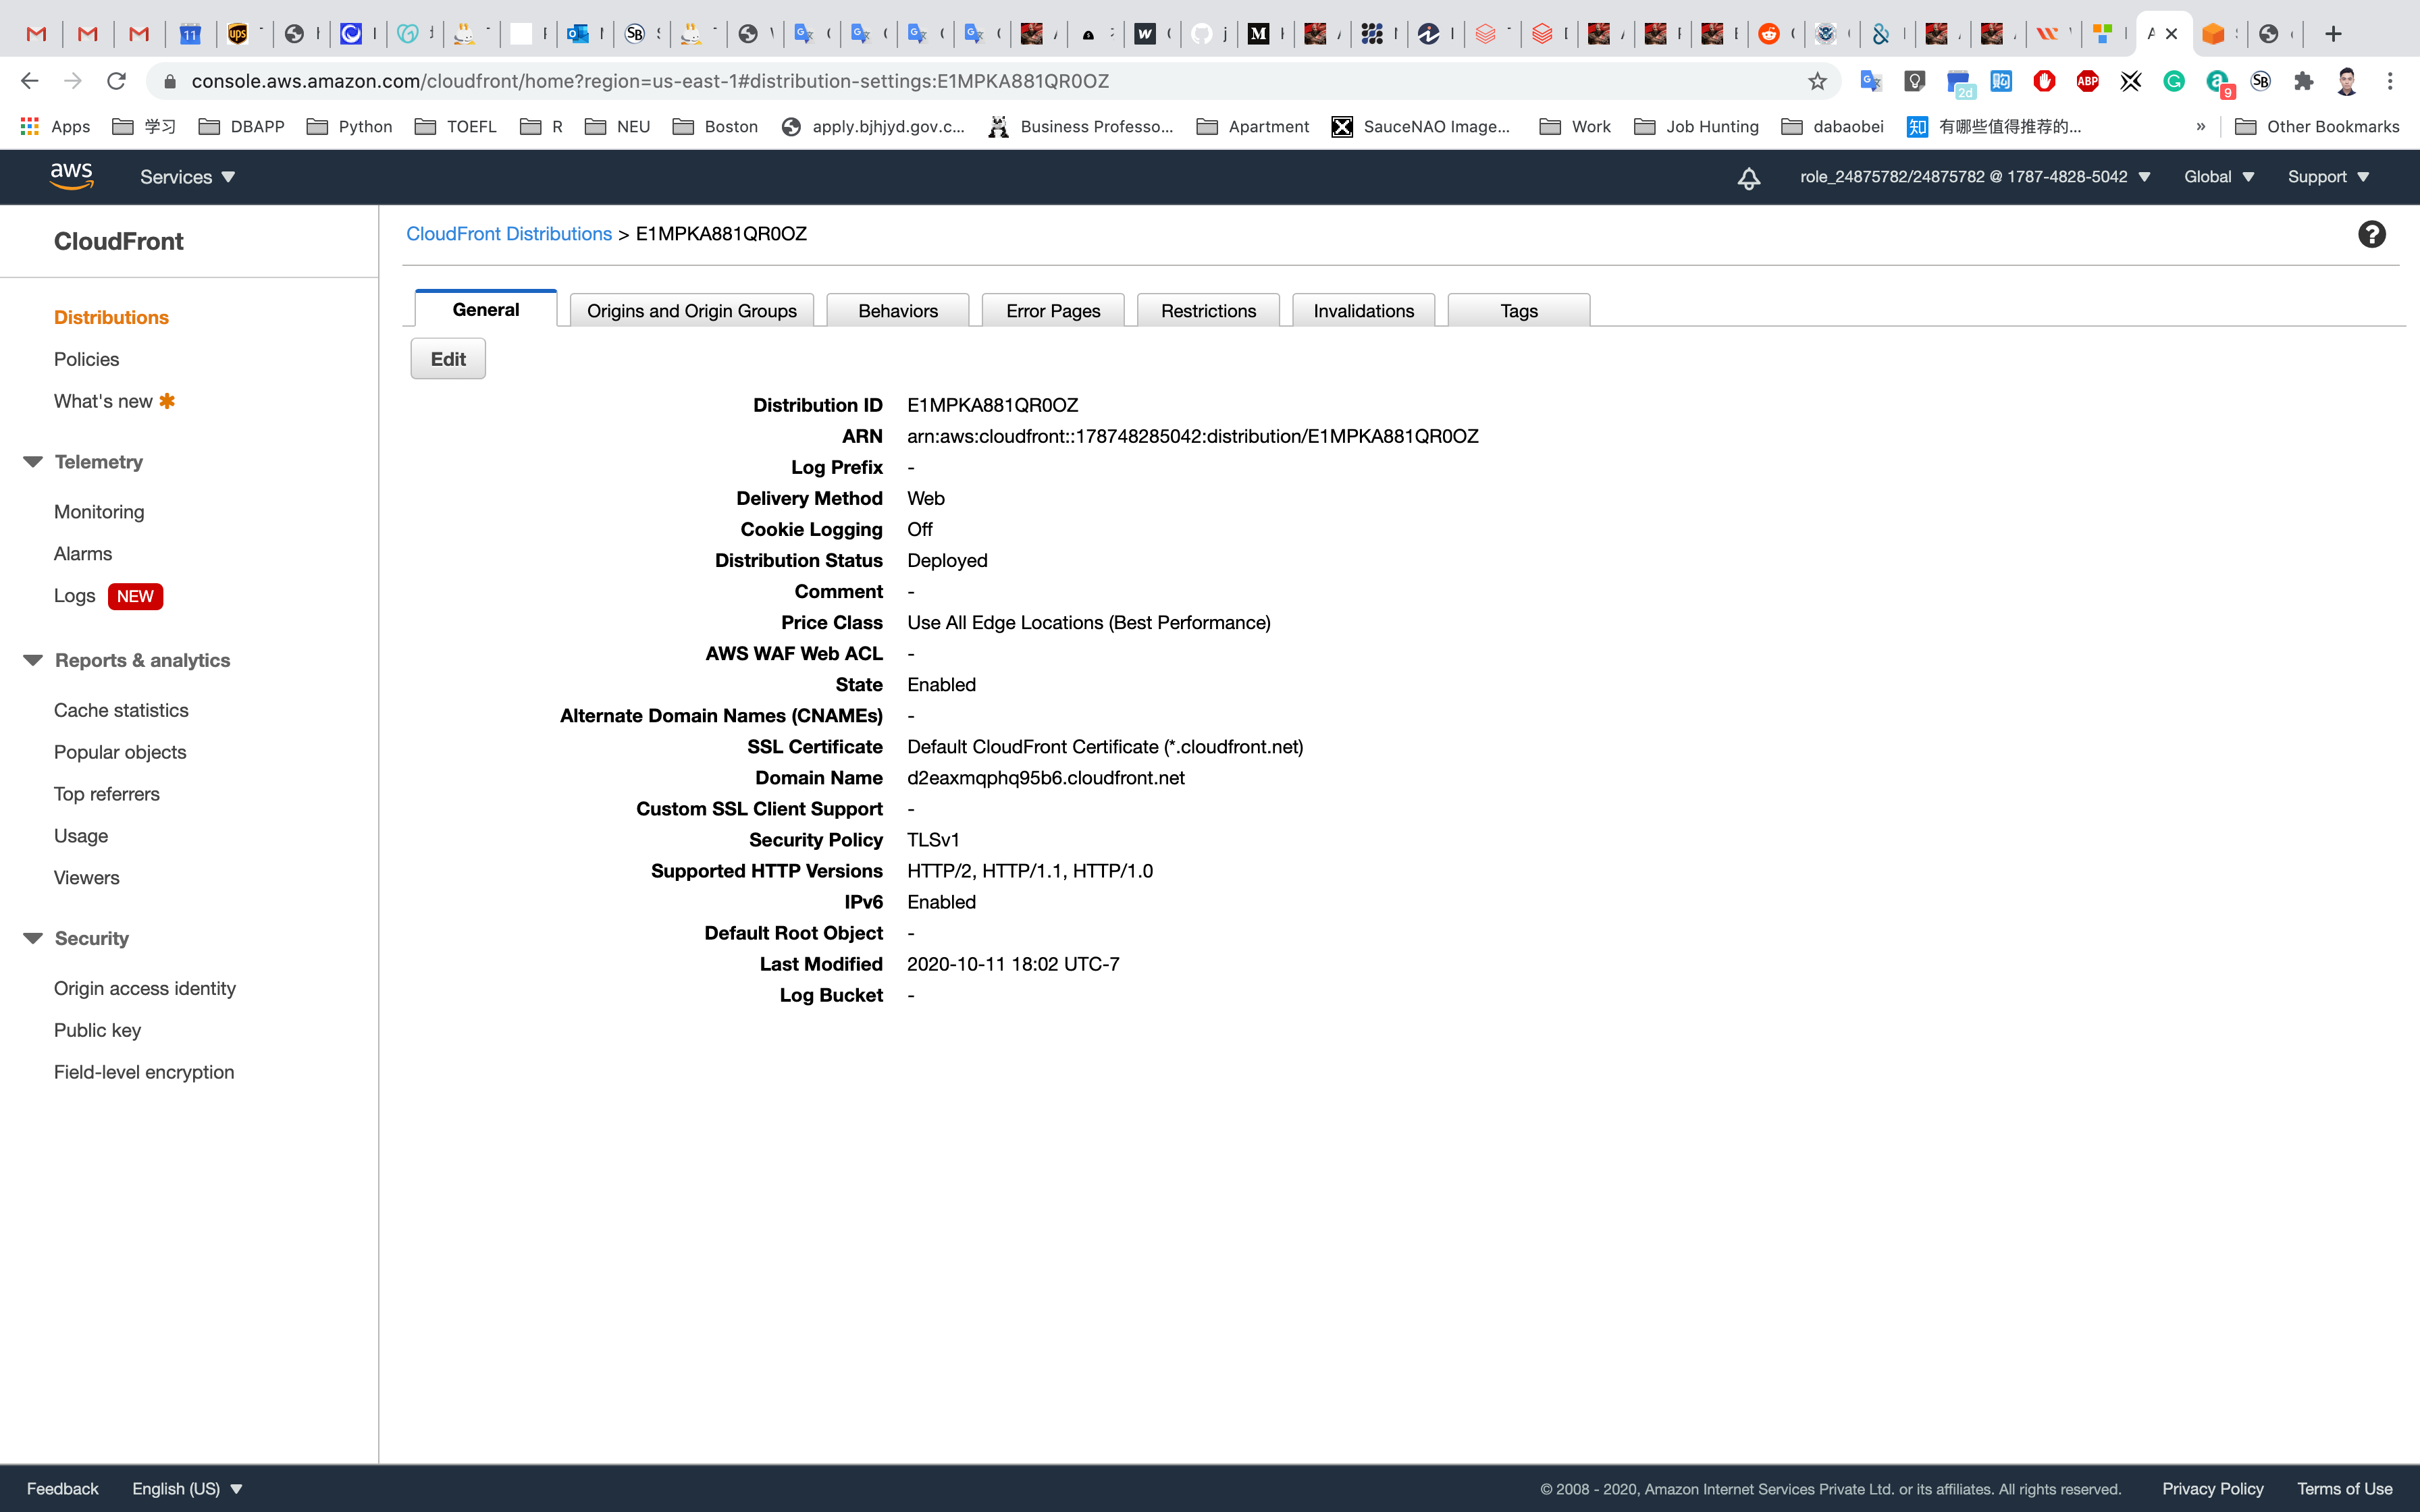
Click on the Create Custom Error Response.
Now we need to set up our custom error page:
- Http Error Code: Select
404: Not Found - Customize Error Response:
Yes - Response Page Path:
/CustomErrors/error.html - HTTP Response Code: Select
404: Not Found
Click on Create.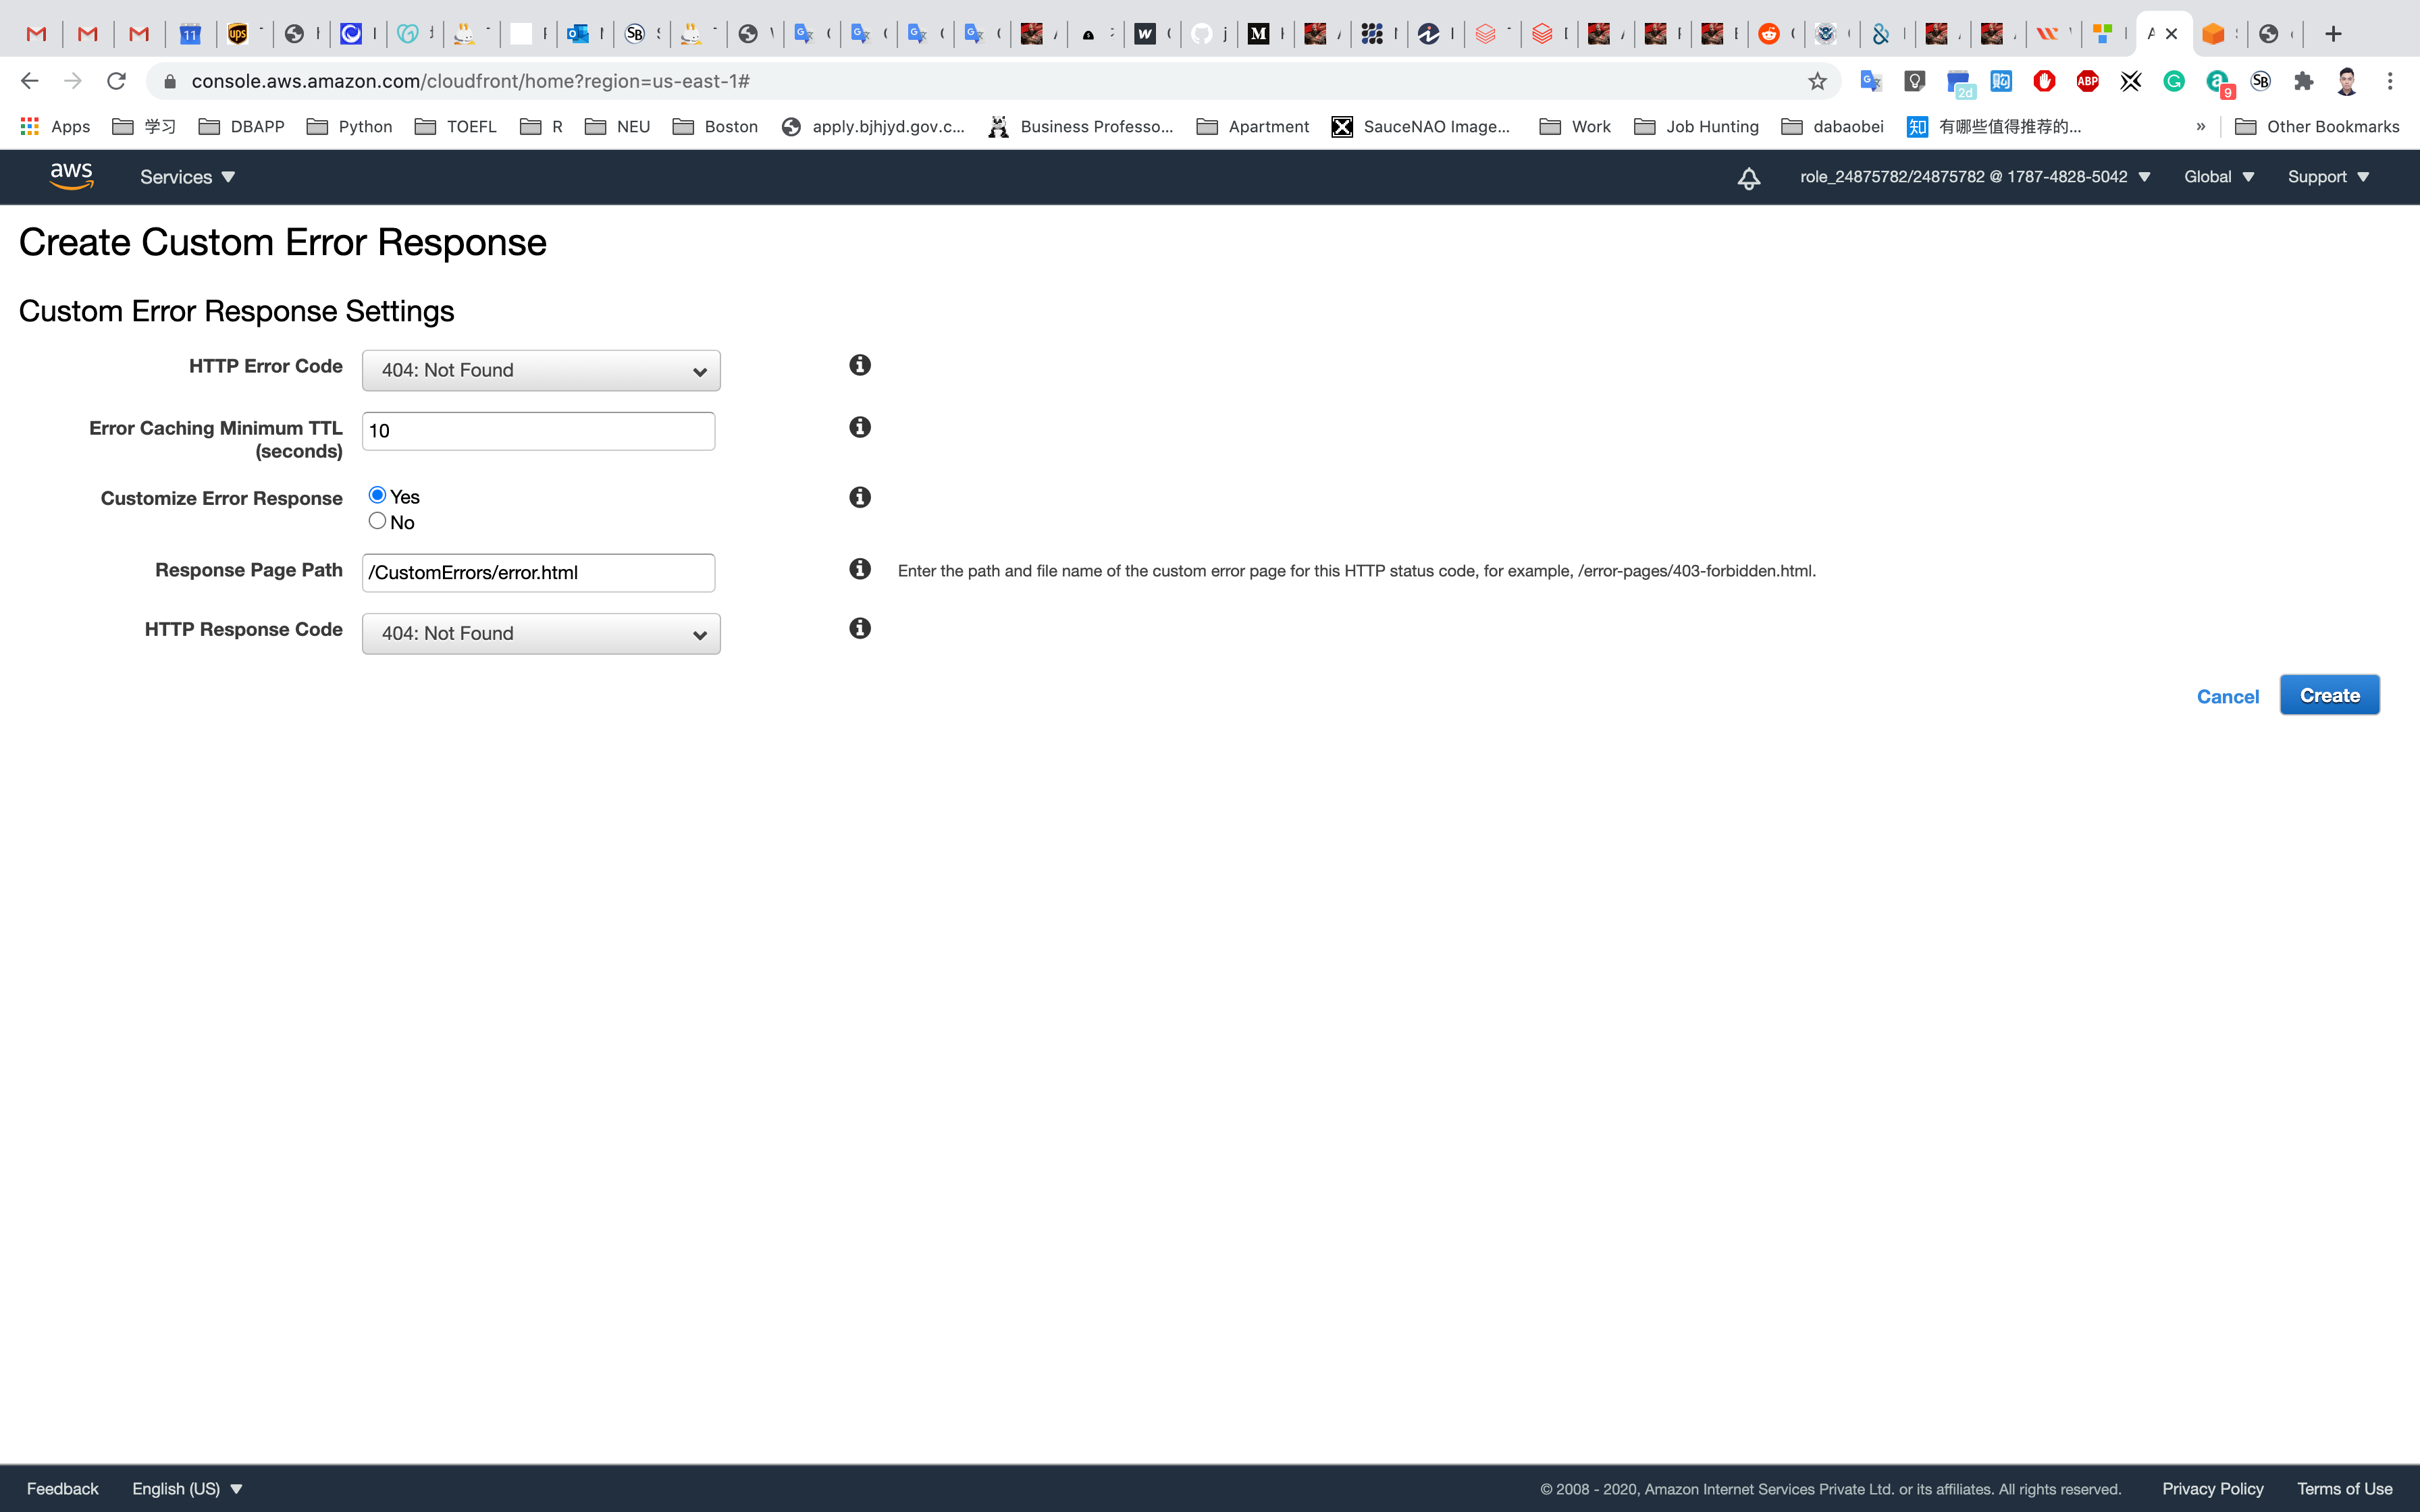
Navigate back to Distributions and wait for your distribution to complete state to change Deploy.
- Note: This process will take around 15 minutes.
- Once the state has been changed to Deployed, we will test the error page.
Enter the URL of an file which does not exist in your S3 bucket with CloudFront domain name
- e.g,
http://d2eaxmqphq95b6.cloudfront.net/tmp.txt
Before Deployed
After Deployed, refresh the page.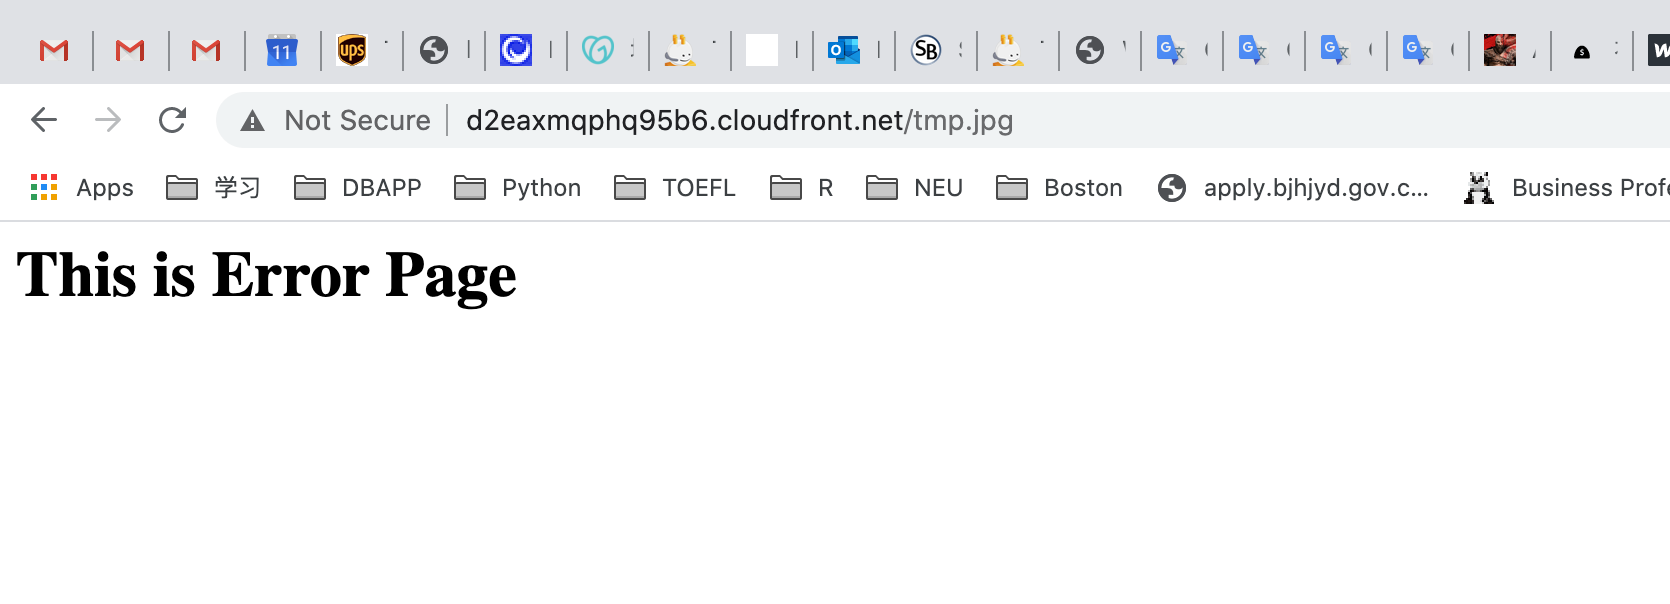
If you can see your HTML error page in the browser, it means you successfully set up your custom error page.
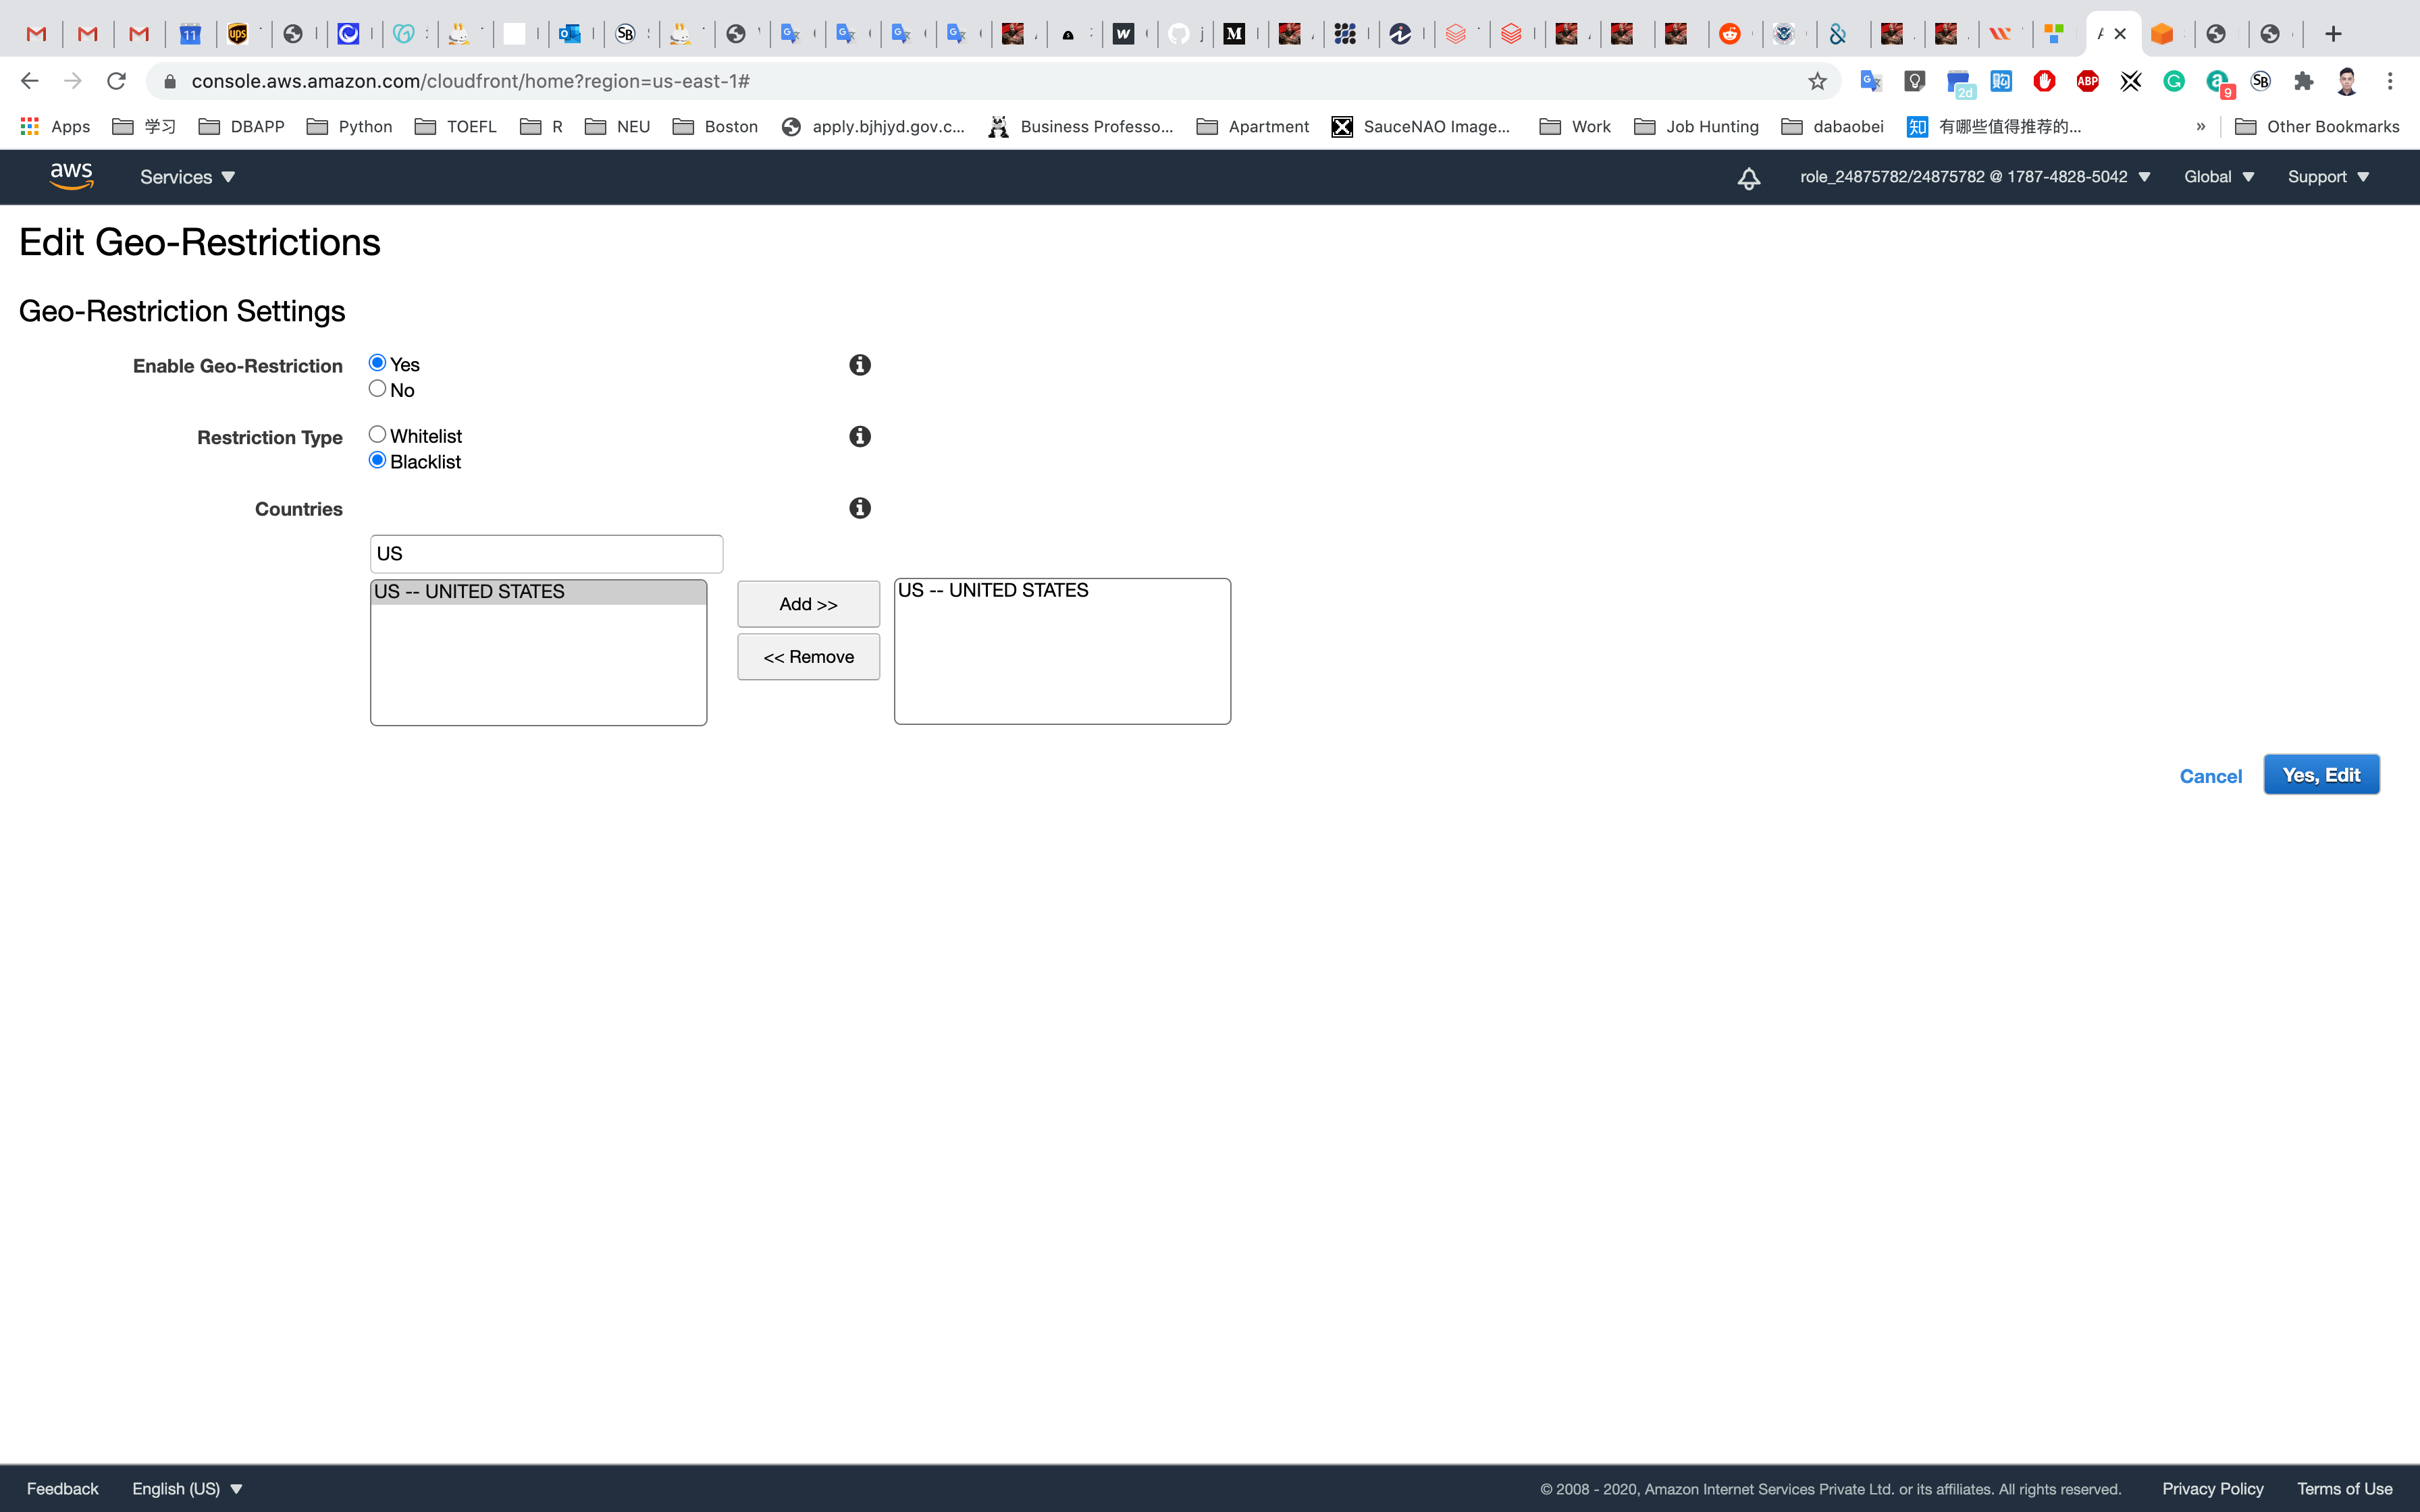
Restricting the Geographic Distribution of Your Content
If you need to prevent users in selected countries from accessing your content, you can specify either a whitelist (countries where they can access your content) or a blacklist (countries where they cannot) by using restrictions.
On the distribution settings page, select Restrictions and select Geo Restriction tab, then click on Edit.
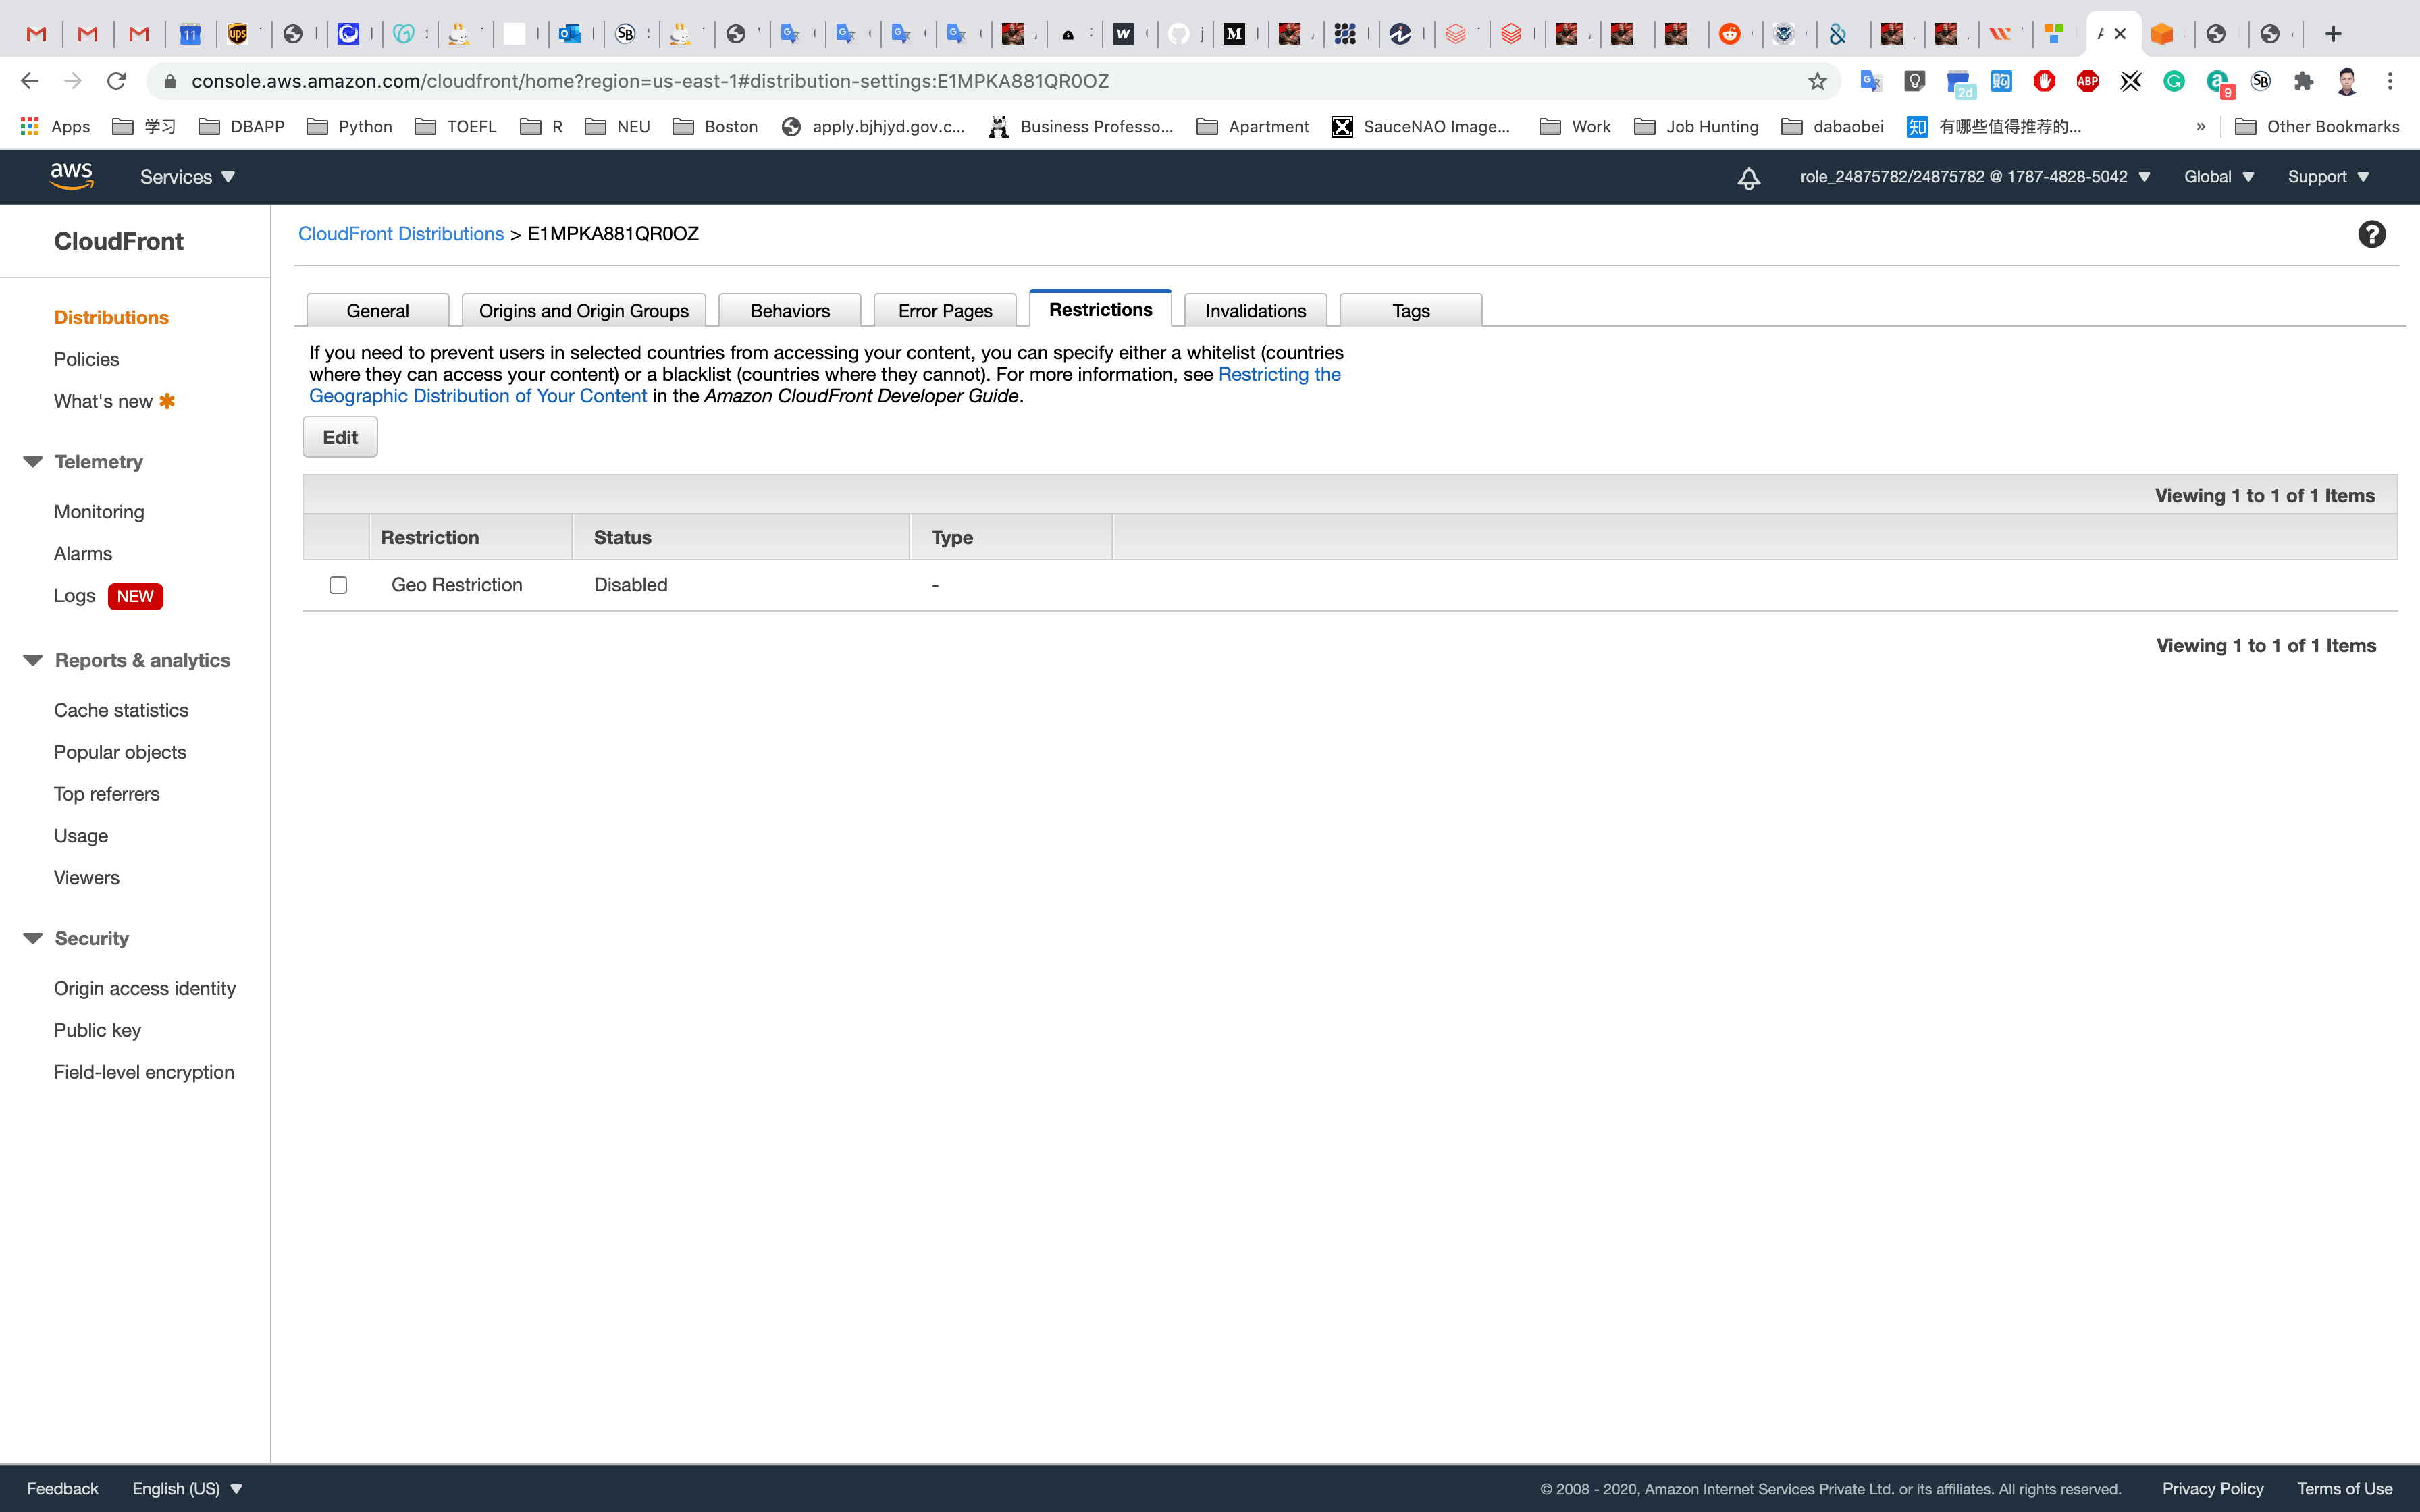
Enable Geo-Restriction : Select Yes
Restriction Type : Blacklist
Select the country where you are currently and click on Add to check this option.
On enabling this option, the request from the specified country which is “Blacklisted”, will not be displayed and a default error message is displayed.
Click on Yes, Edit.
Go to the distribution list and wait for your distribution to complete the state change to Deployed.
Once the state has been changed to Deployed, we will test the restriction through CloudFront in the browser.
- e,g,
http://d2eaxmqphq95b6.cloudfront.net/tmp.txt
Before Deployed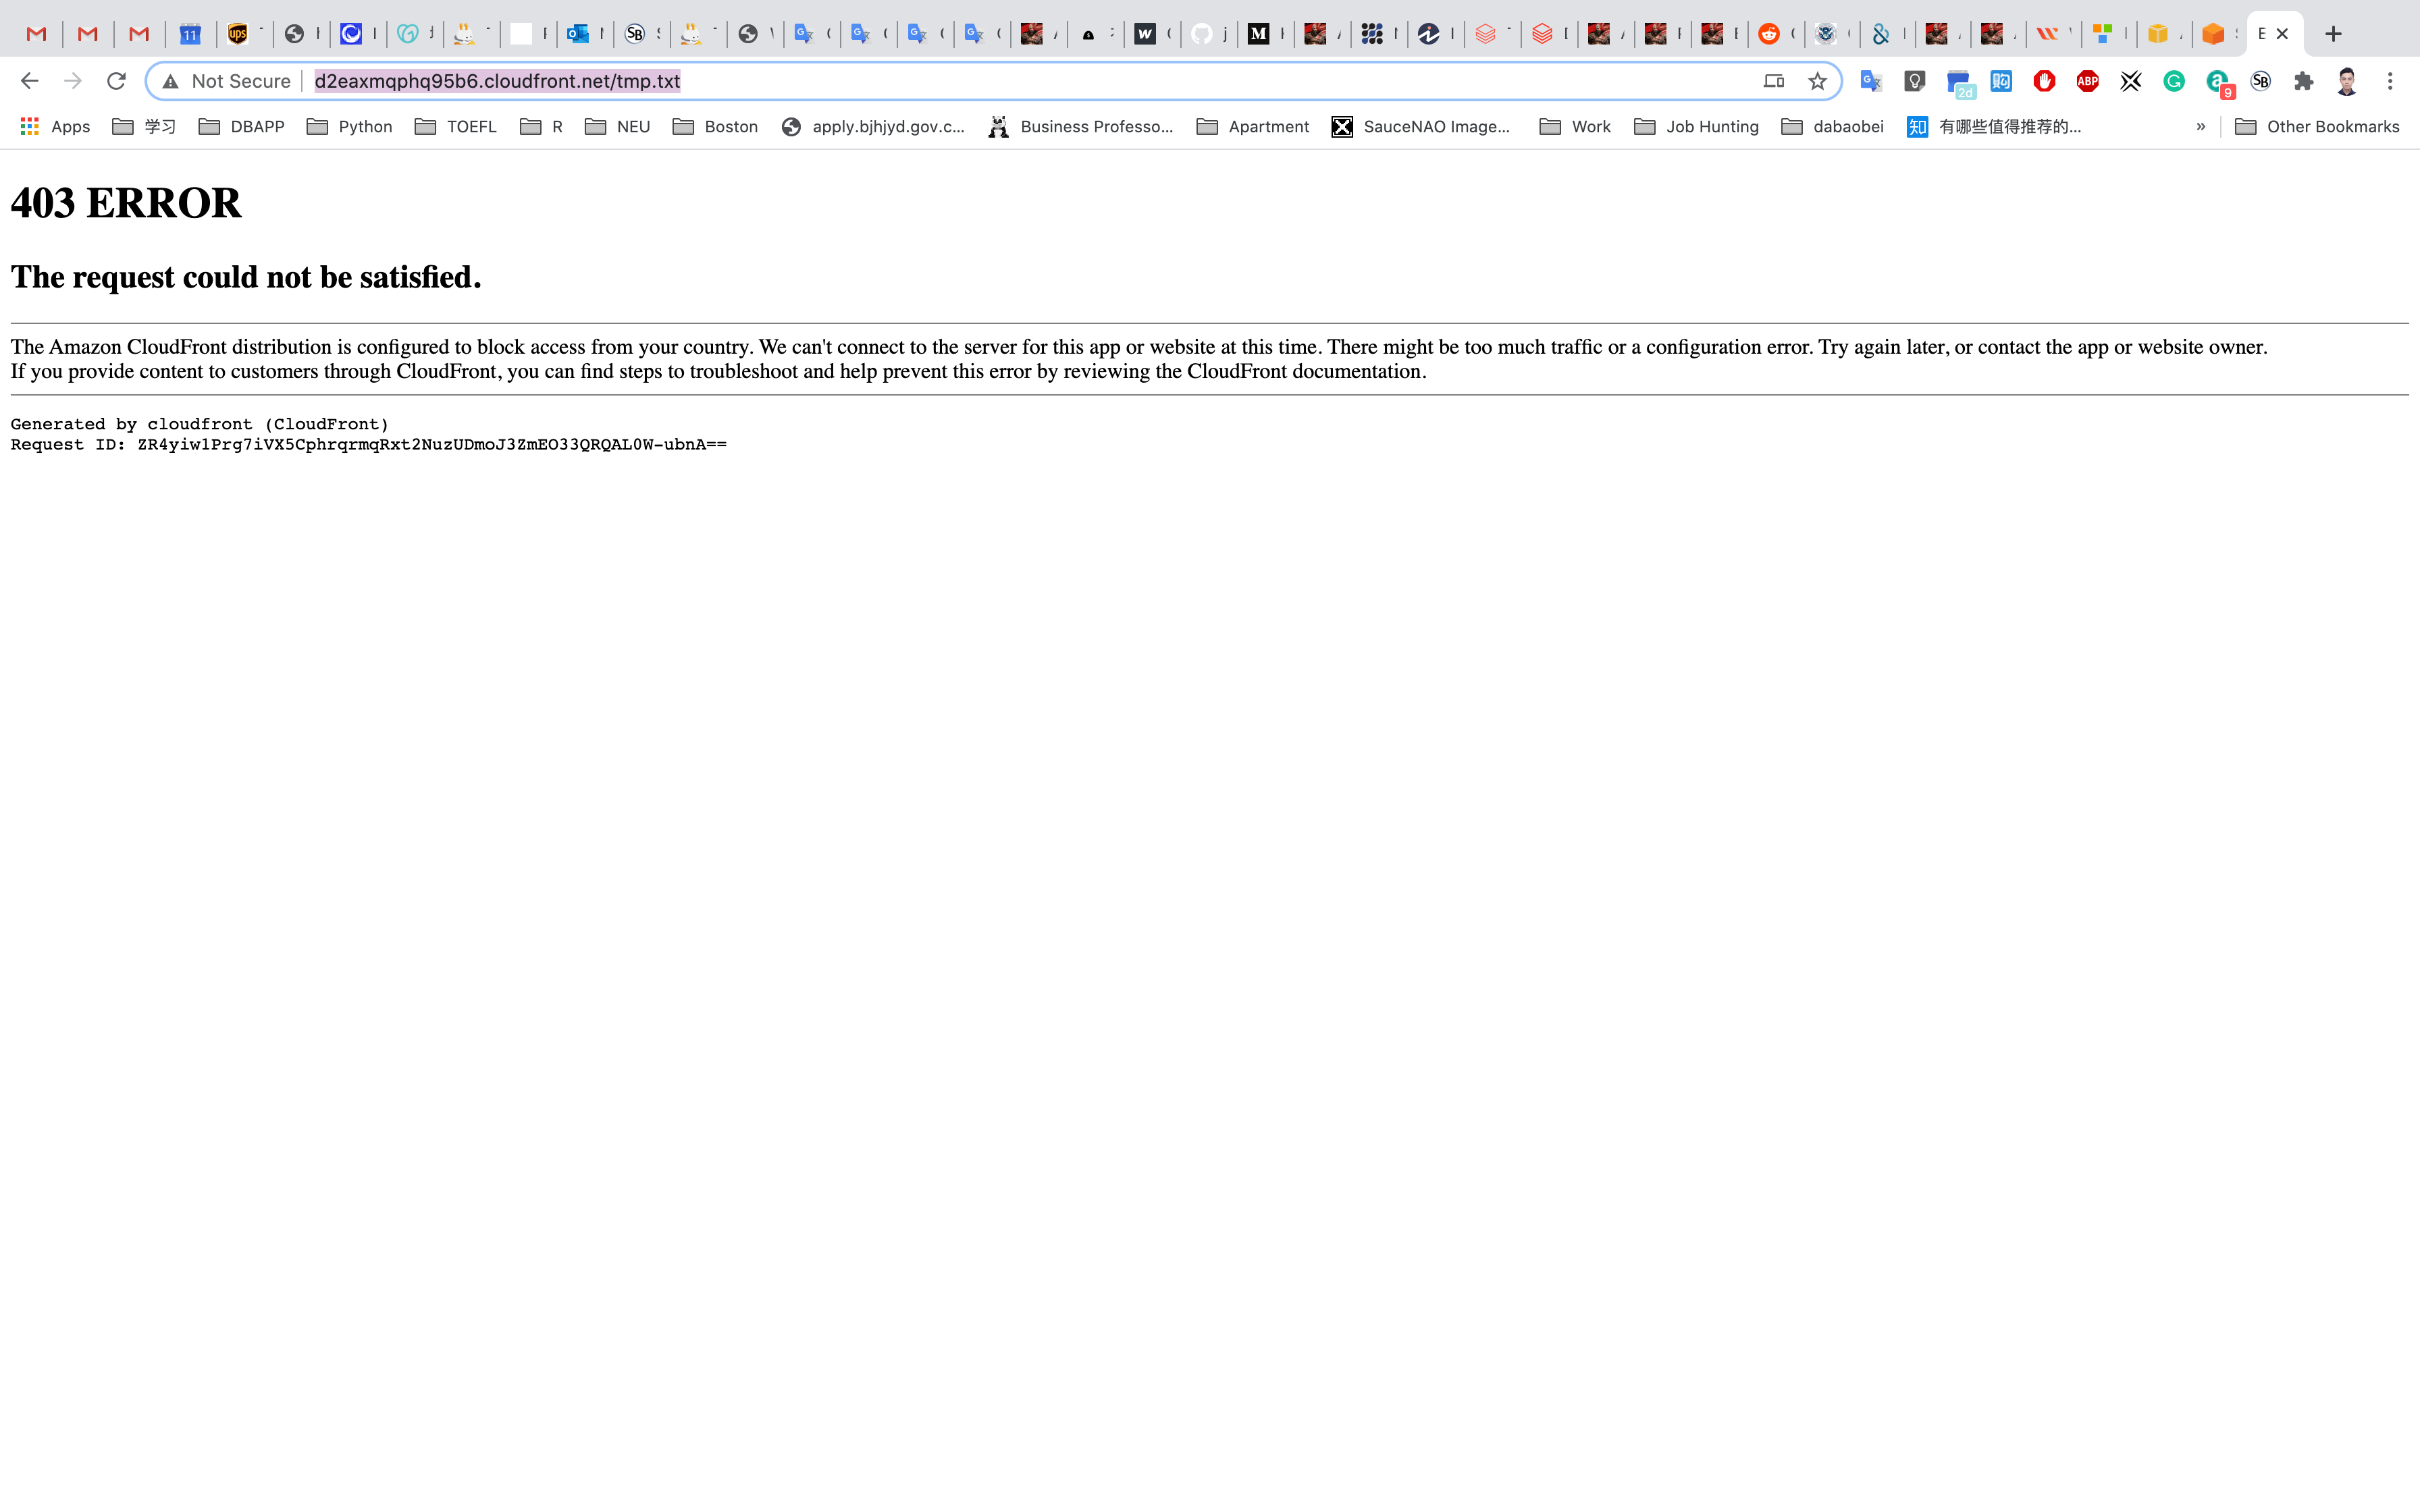
You can see the following error message:
- 403: Error The Amazon CloudFront distribution is configured to block access from your country.
Let us configure custom error page:
Navigate back to CloudFront Dashboard and select the distribution created and click on Distribution Settings.
On the settings page, select Error Pages tab.
Click on the Create Error Response.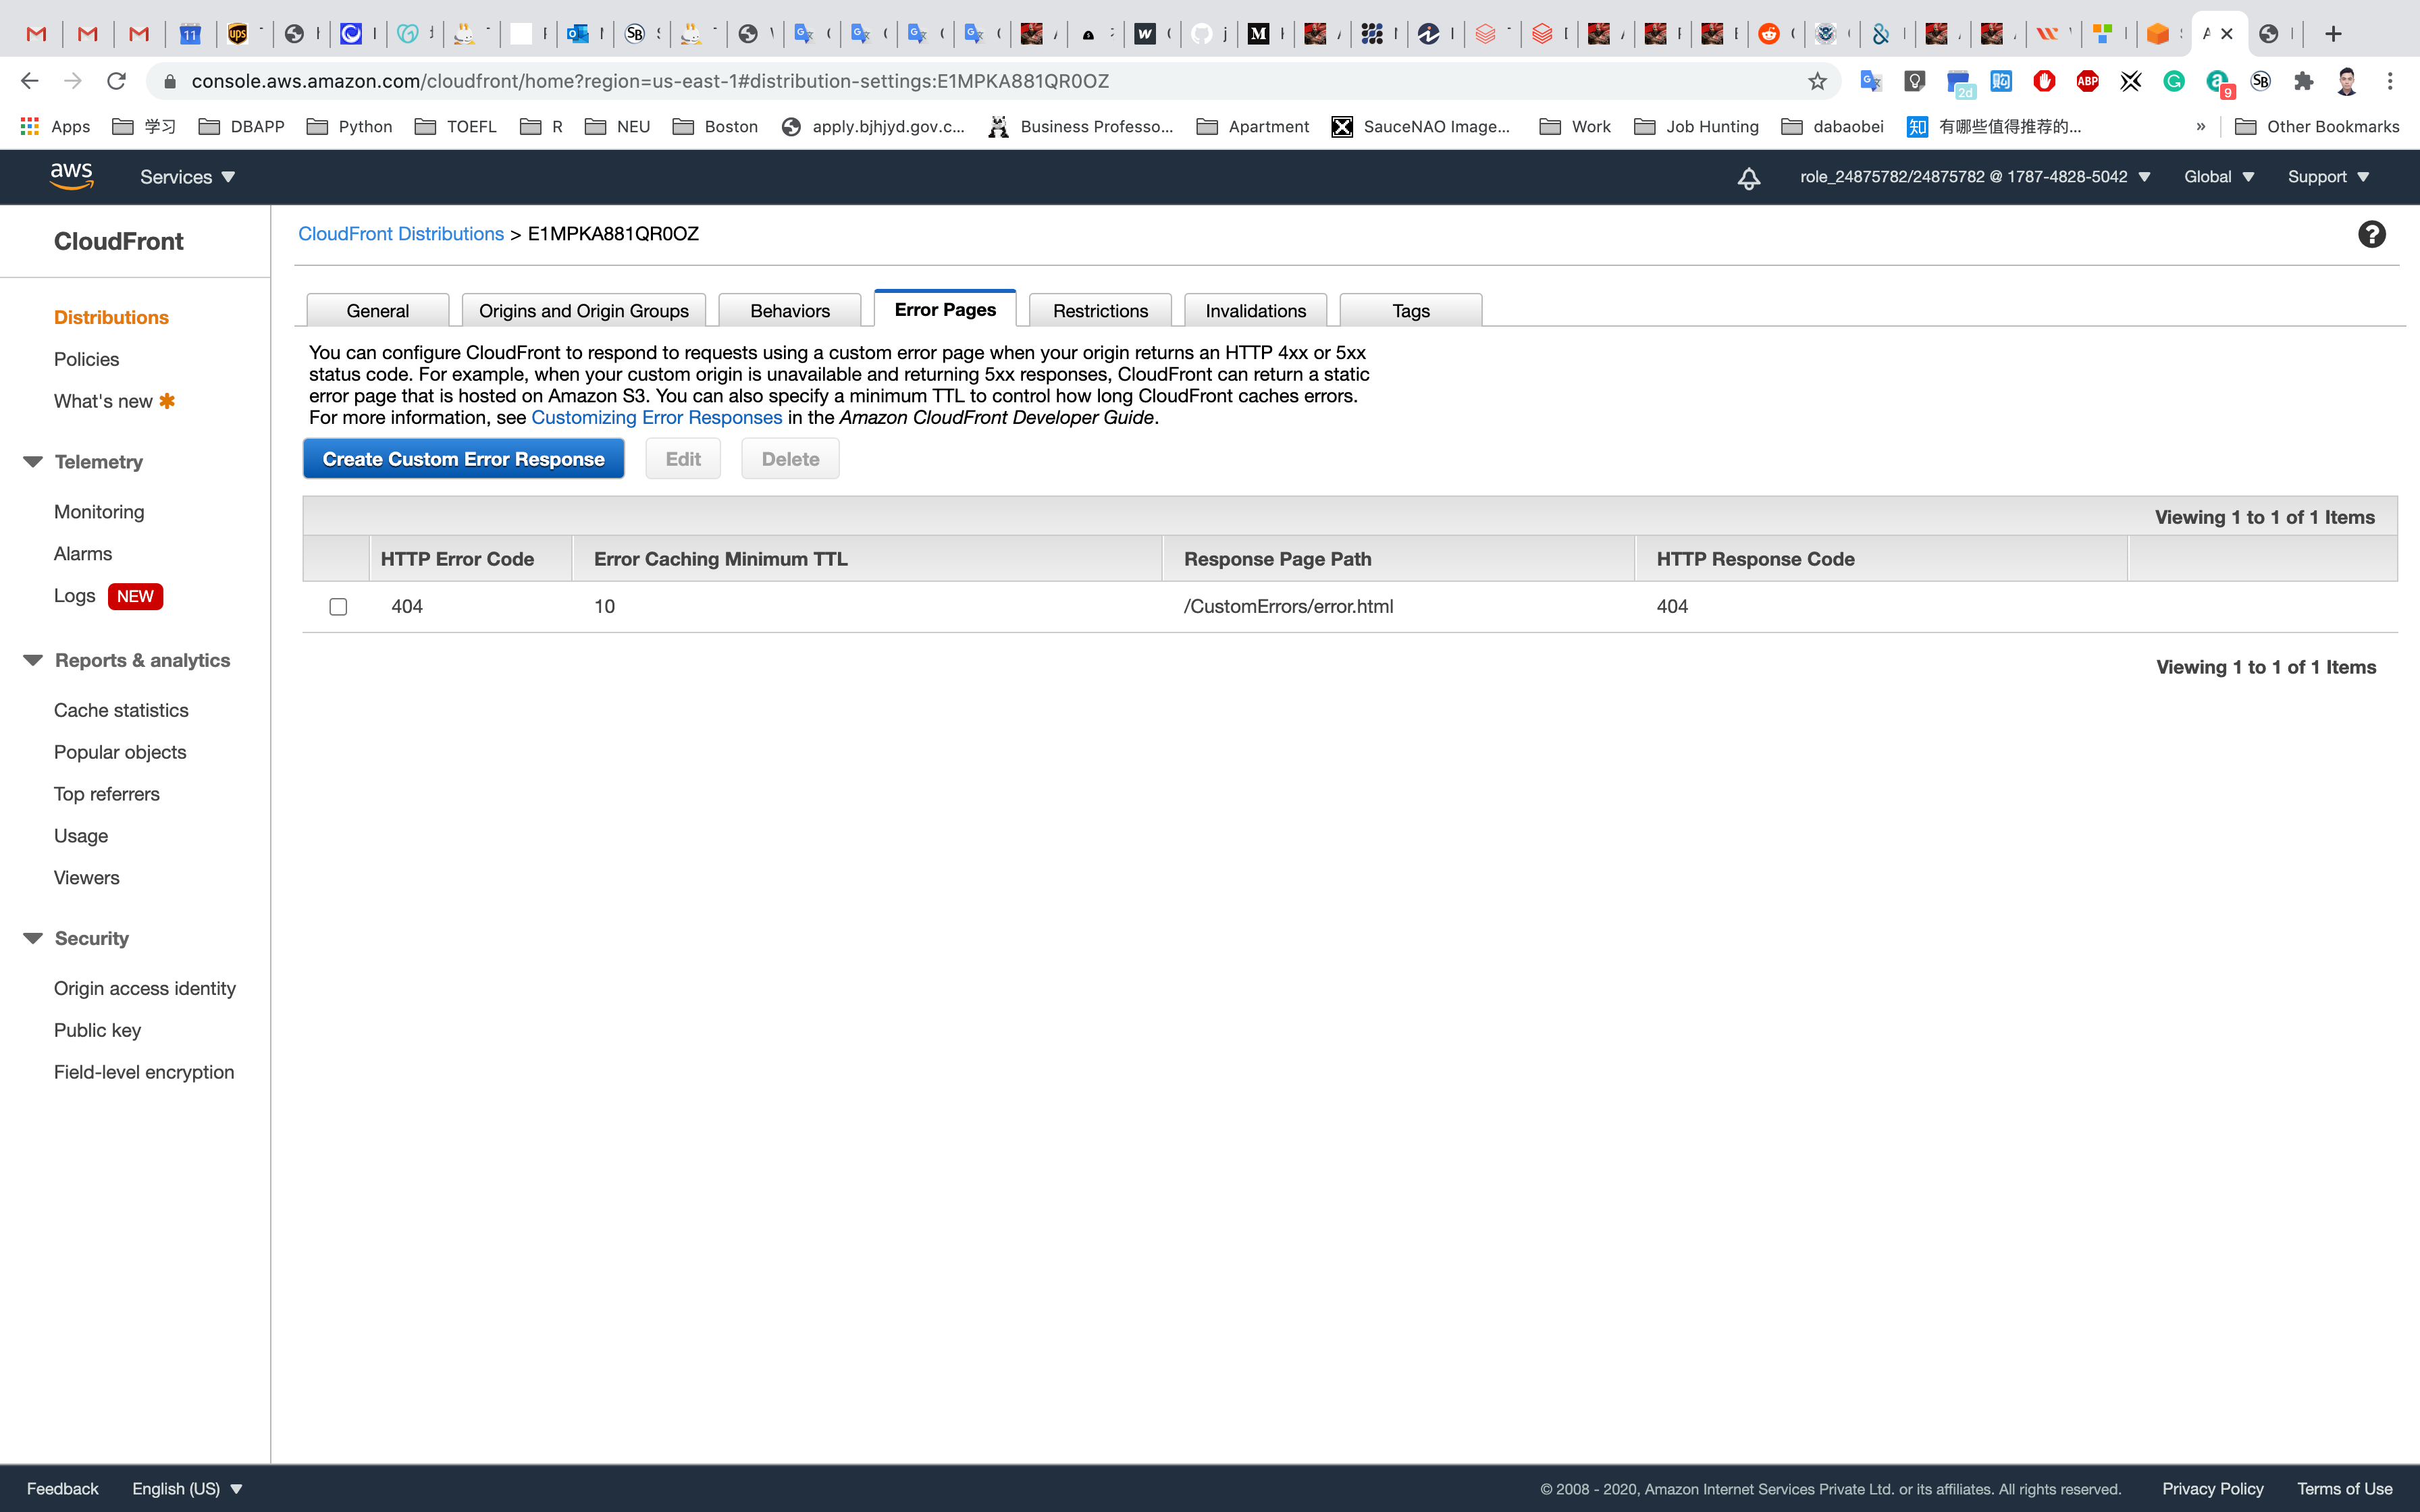
Now we need to set up our custom error page:
Http Error Code: Select 403: Forbidden
Customize Error Response : Yes
Response Page Path: /CustomErrors/block.html
HTTP Response Code: Select 403: Forbidden
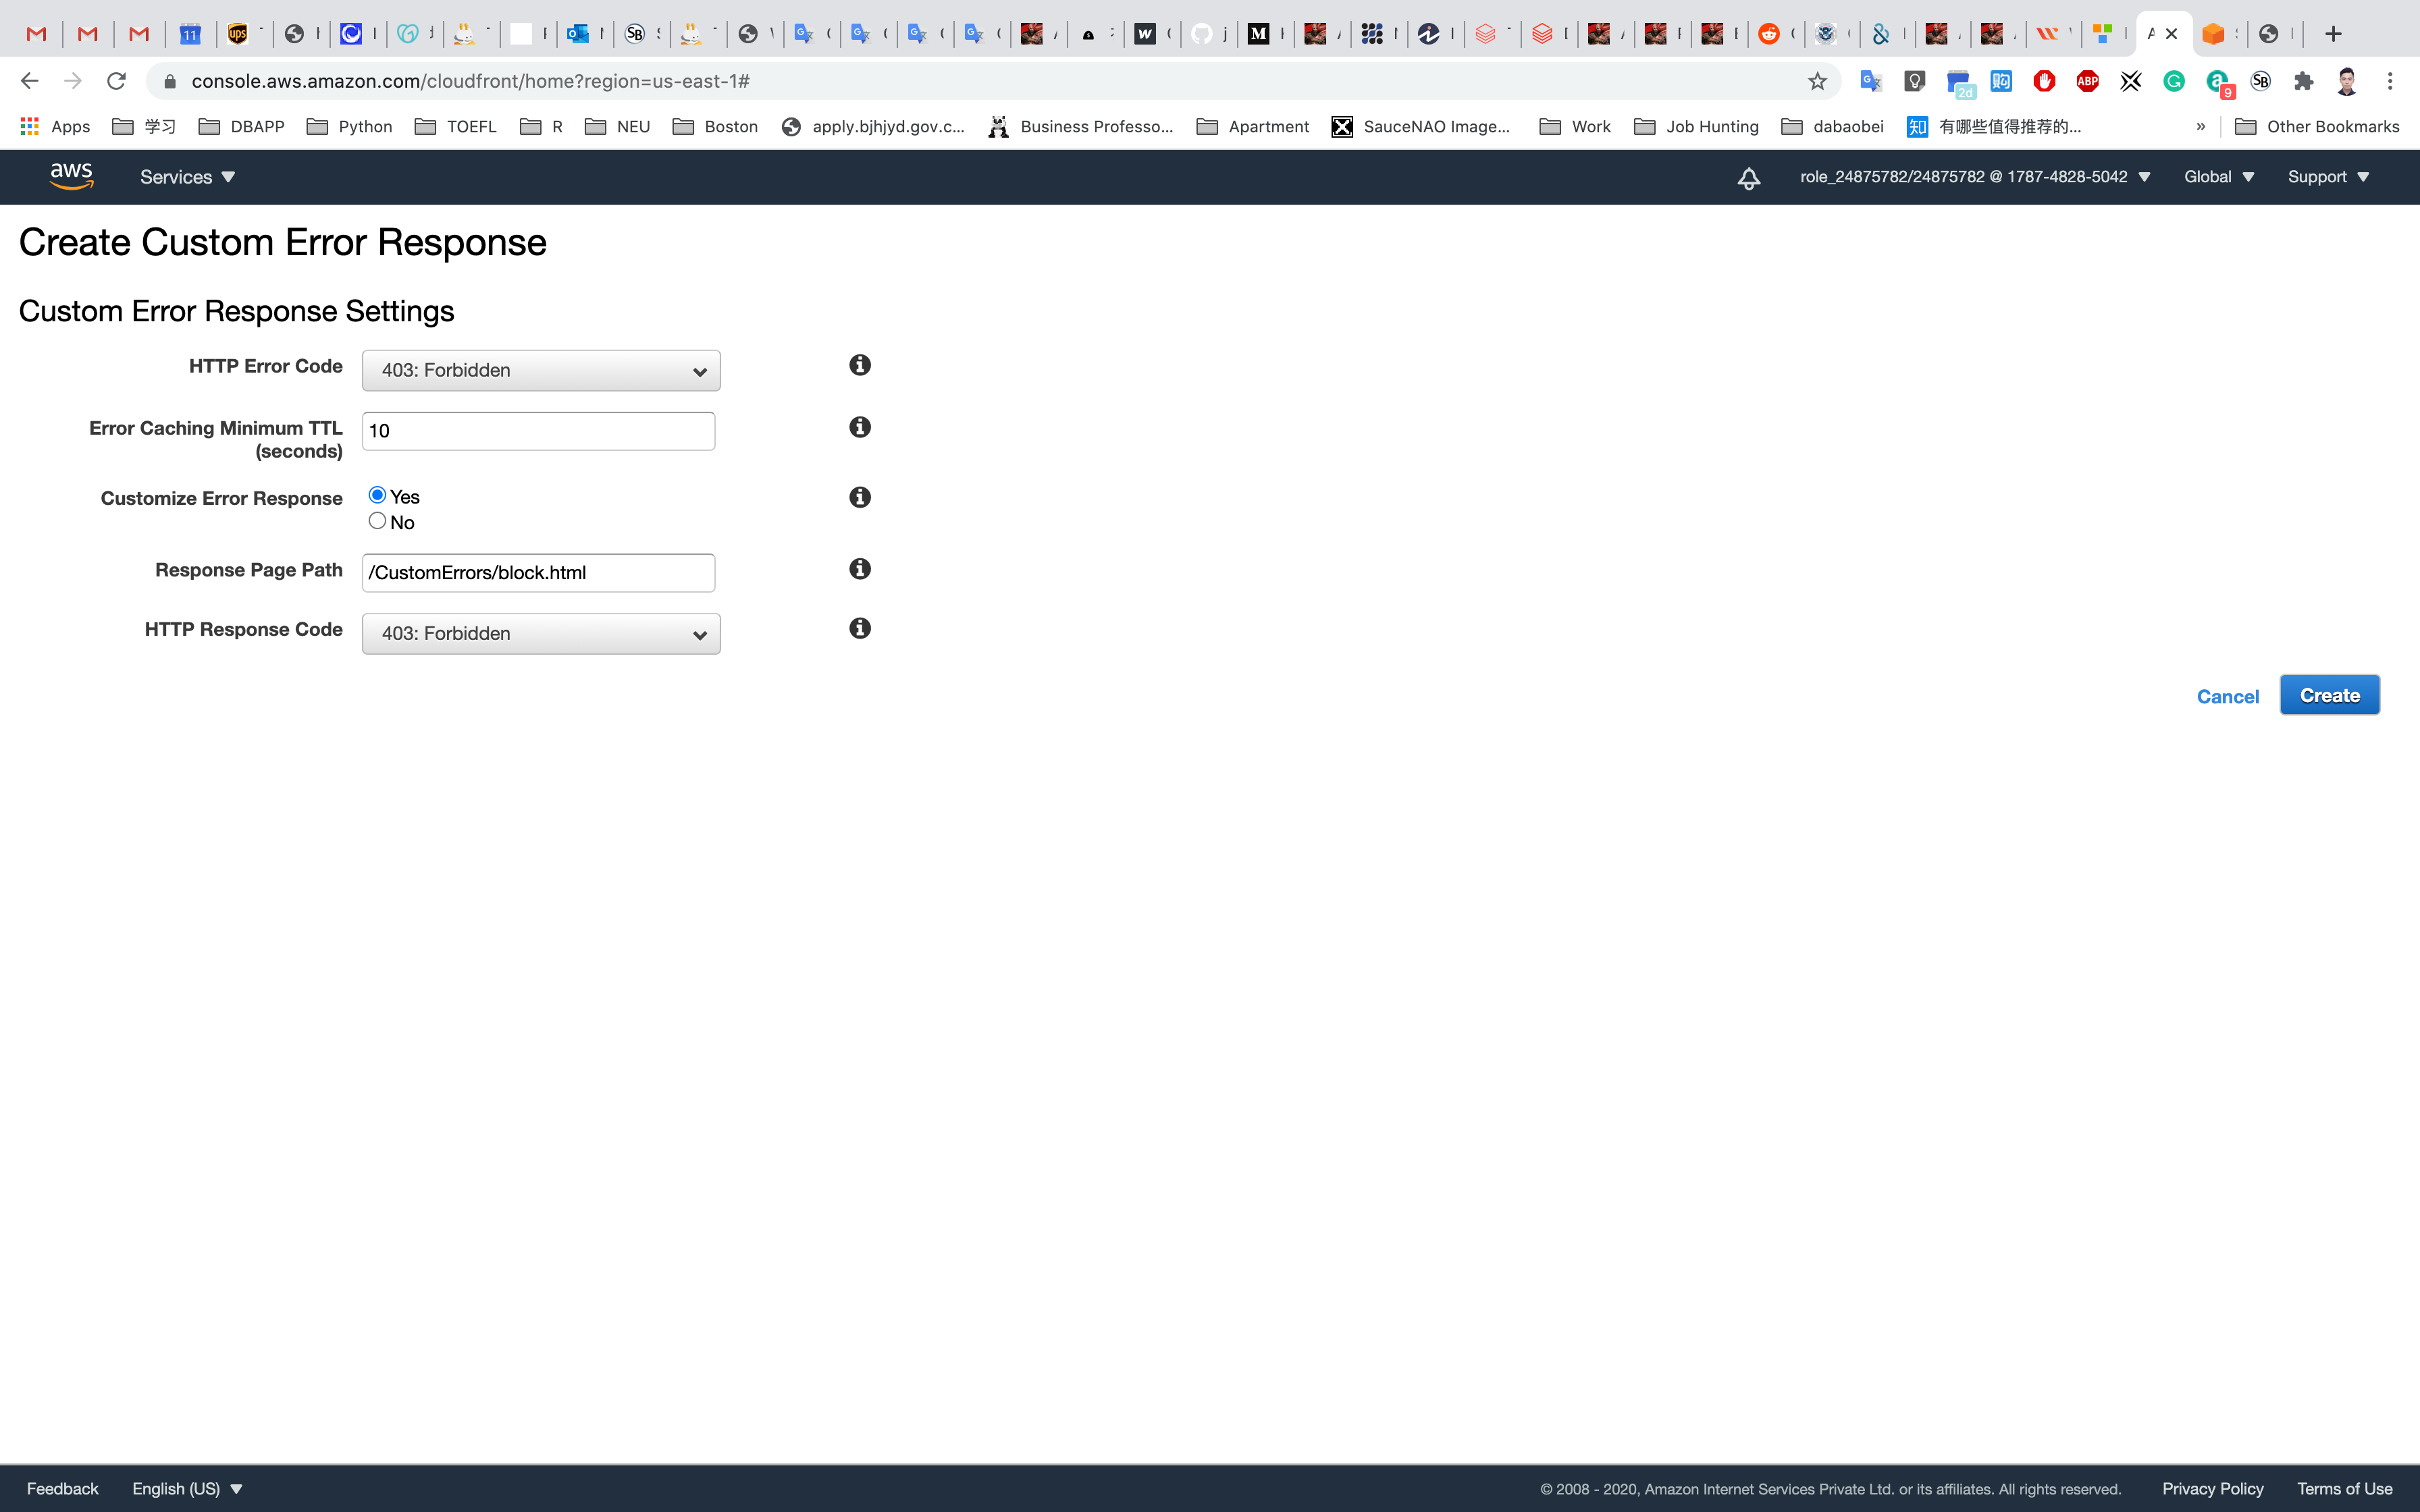
Click on Create.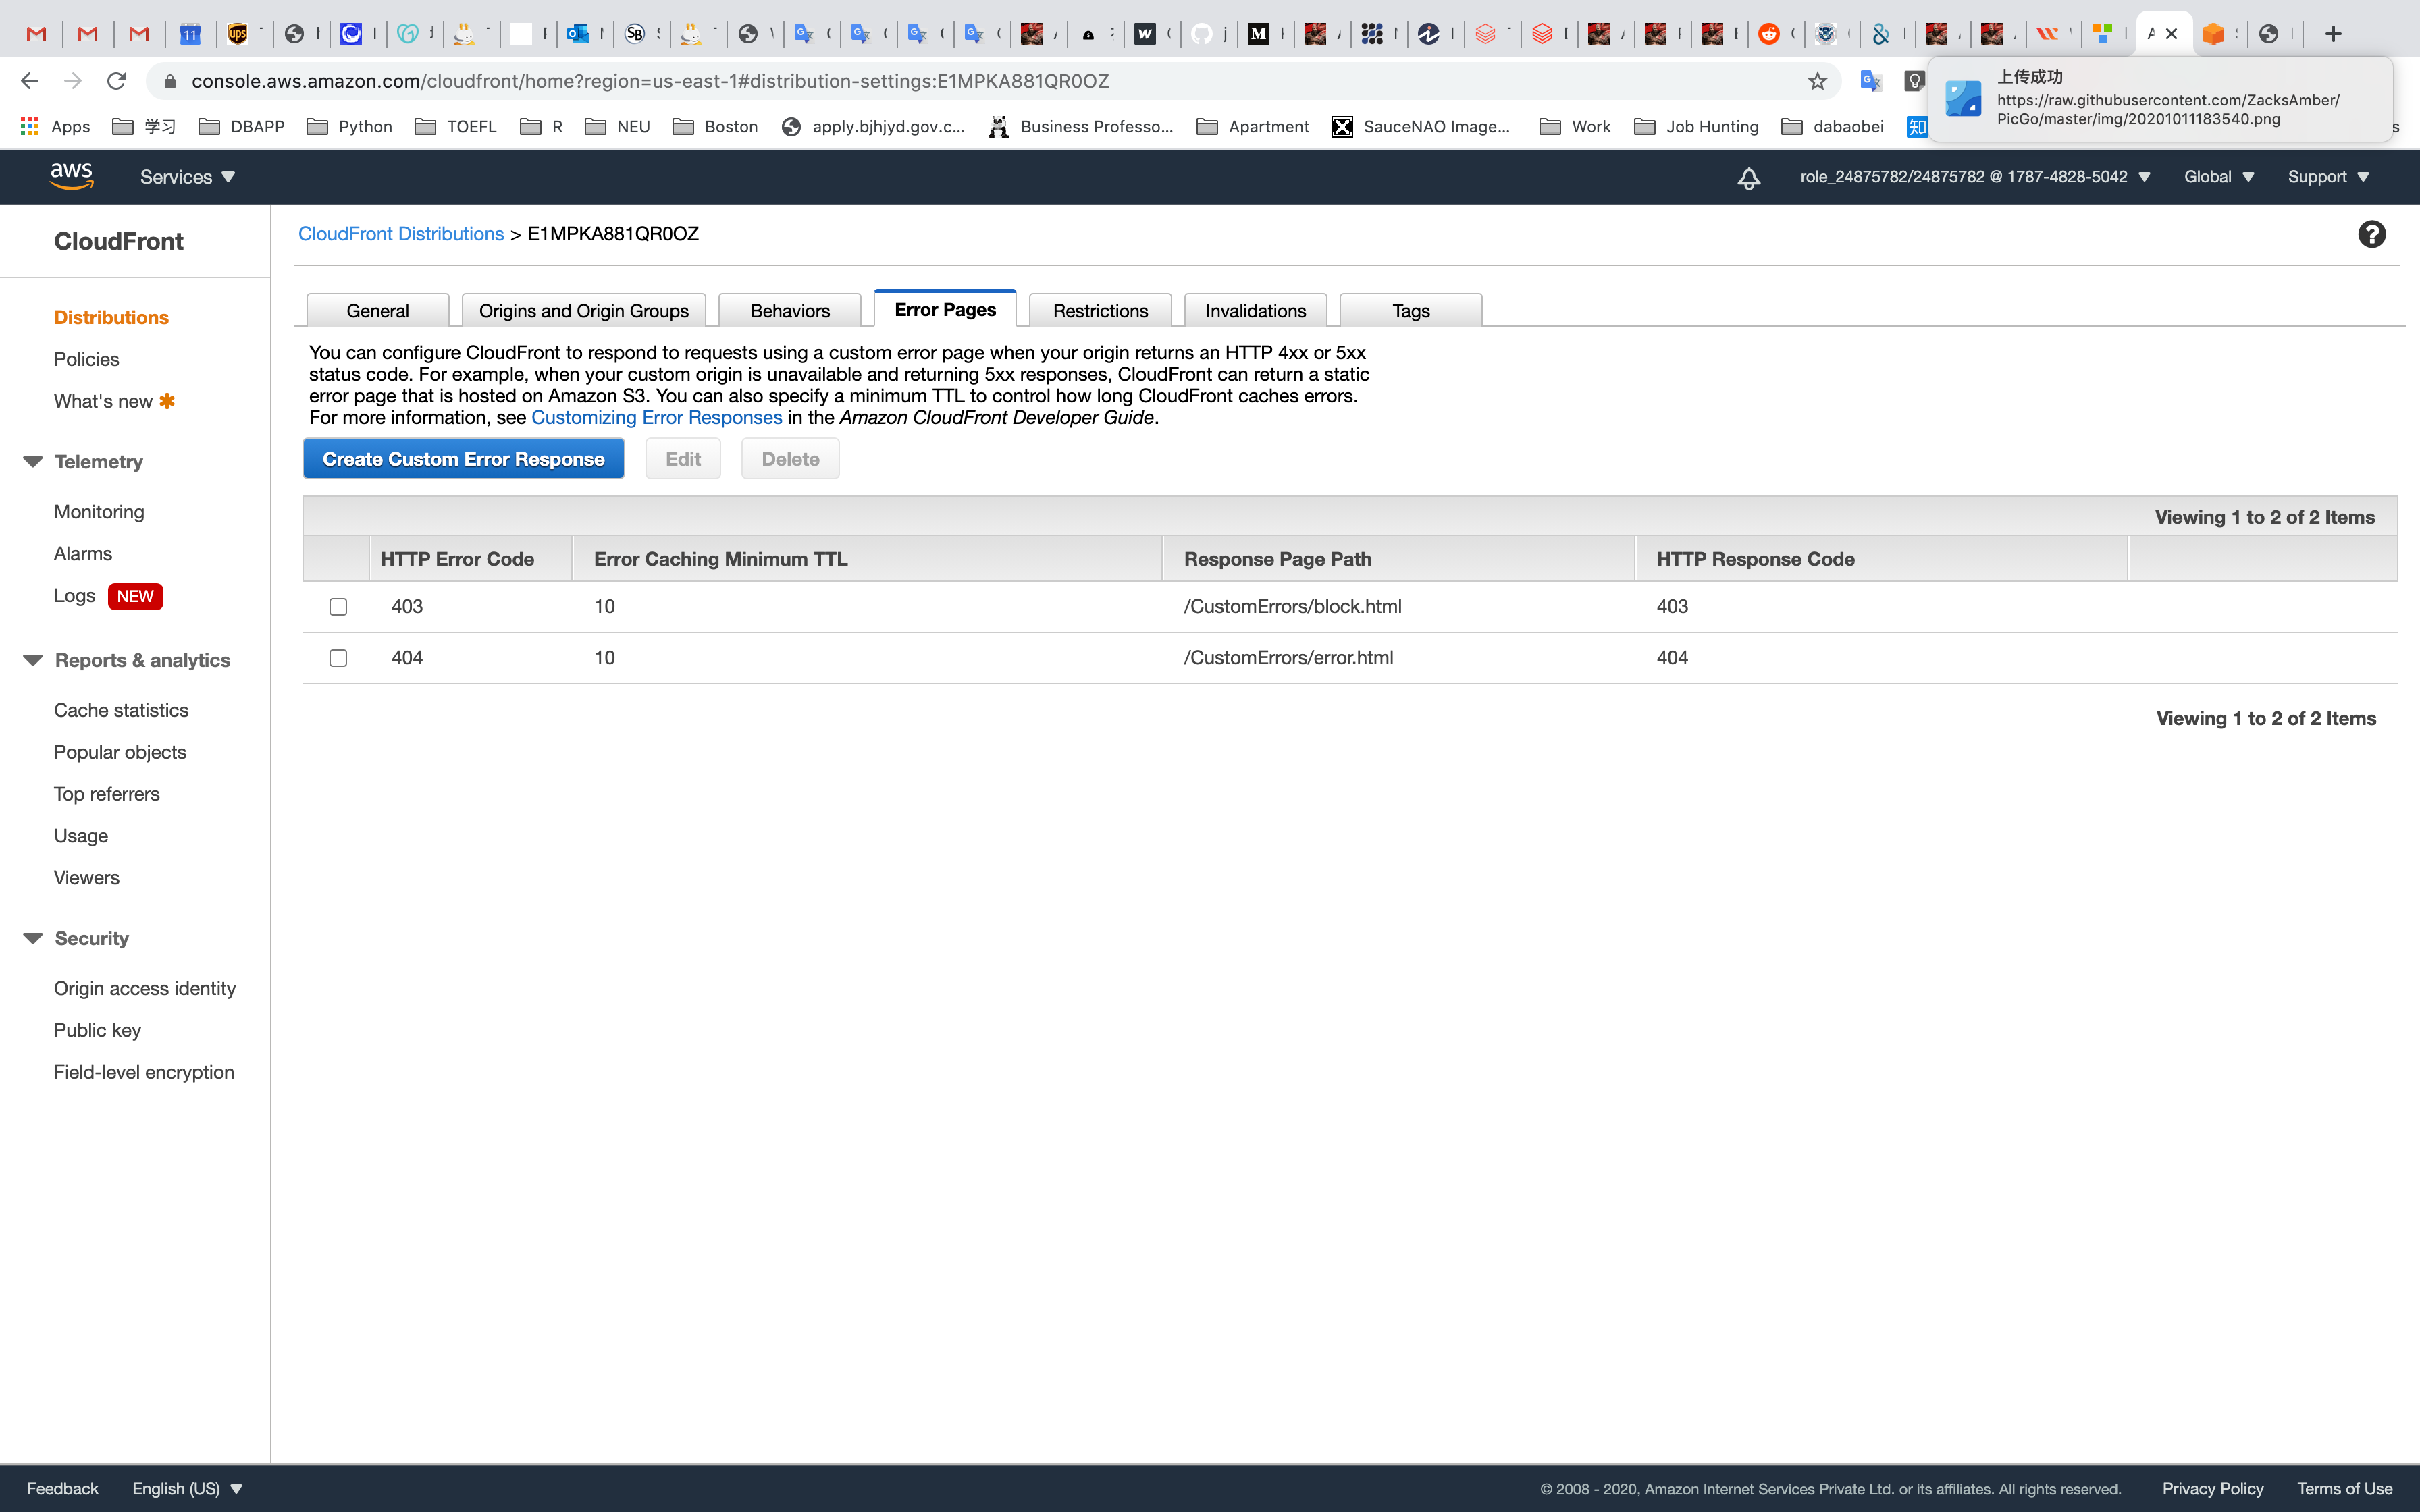
Navigate back to Distributions and wait for your distribution to complete state to change Deployed.
- Note: This process will take around 15 minutes.
Once the state has been changed to Deployed, we will test restriction through CloudFront in the browser.
- e,g,
http://d2eaxmqphq95b6.cloudfront.net/tmp.txt
- e,g,
If you see the error, this means you successfully configured custom error page and restricted file access from your country.
Before Deployed
After Deployed, refresh the page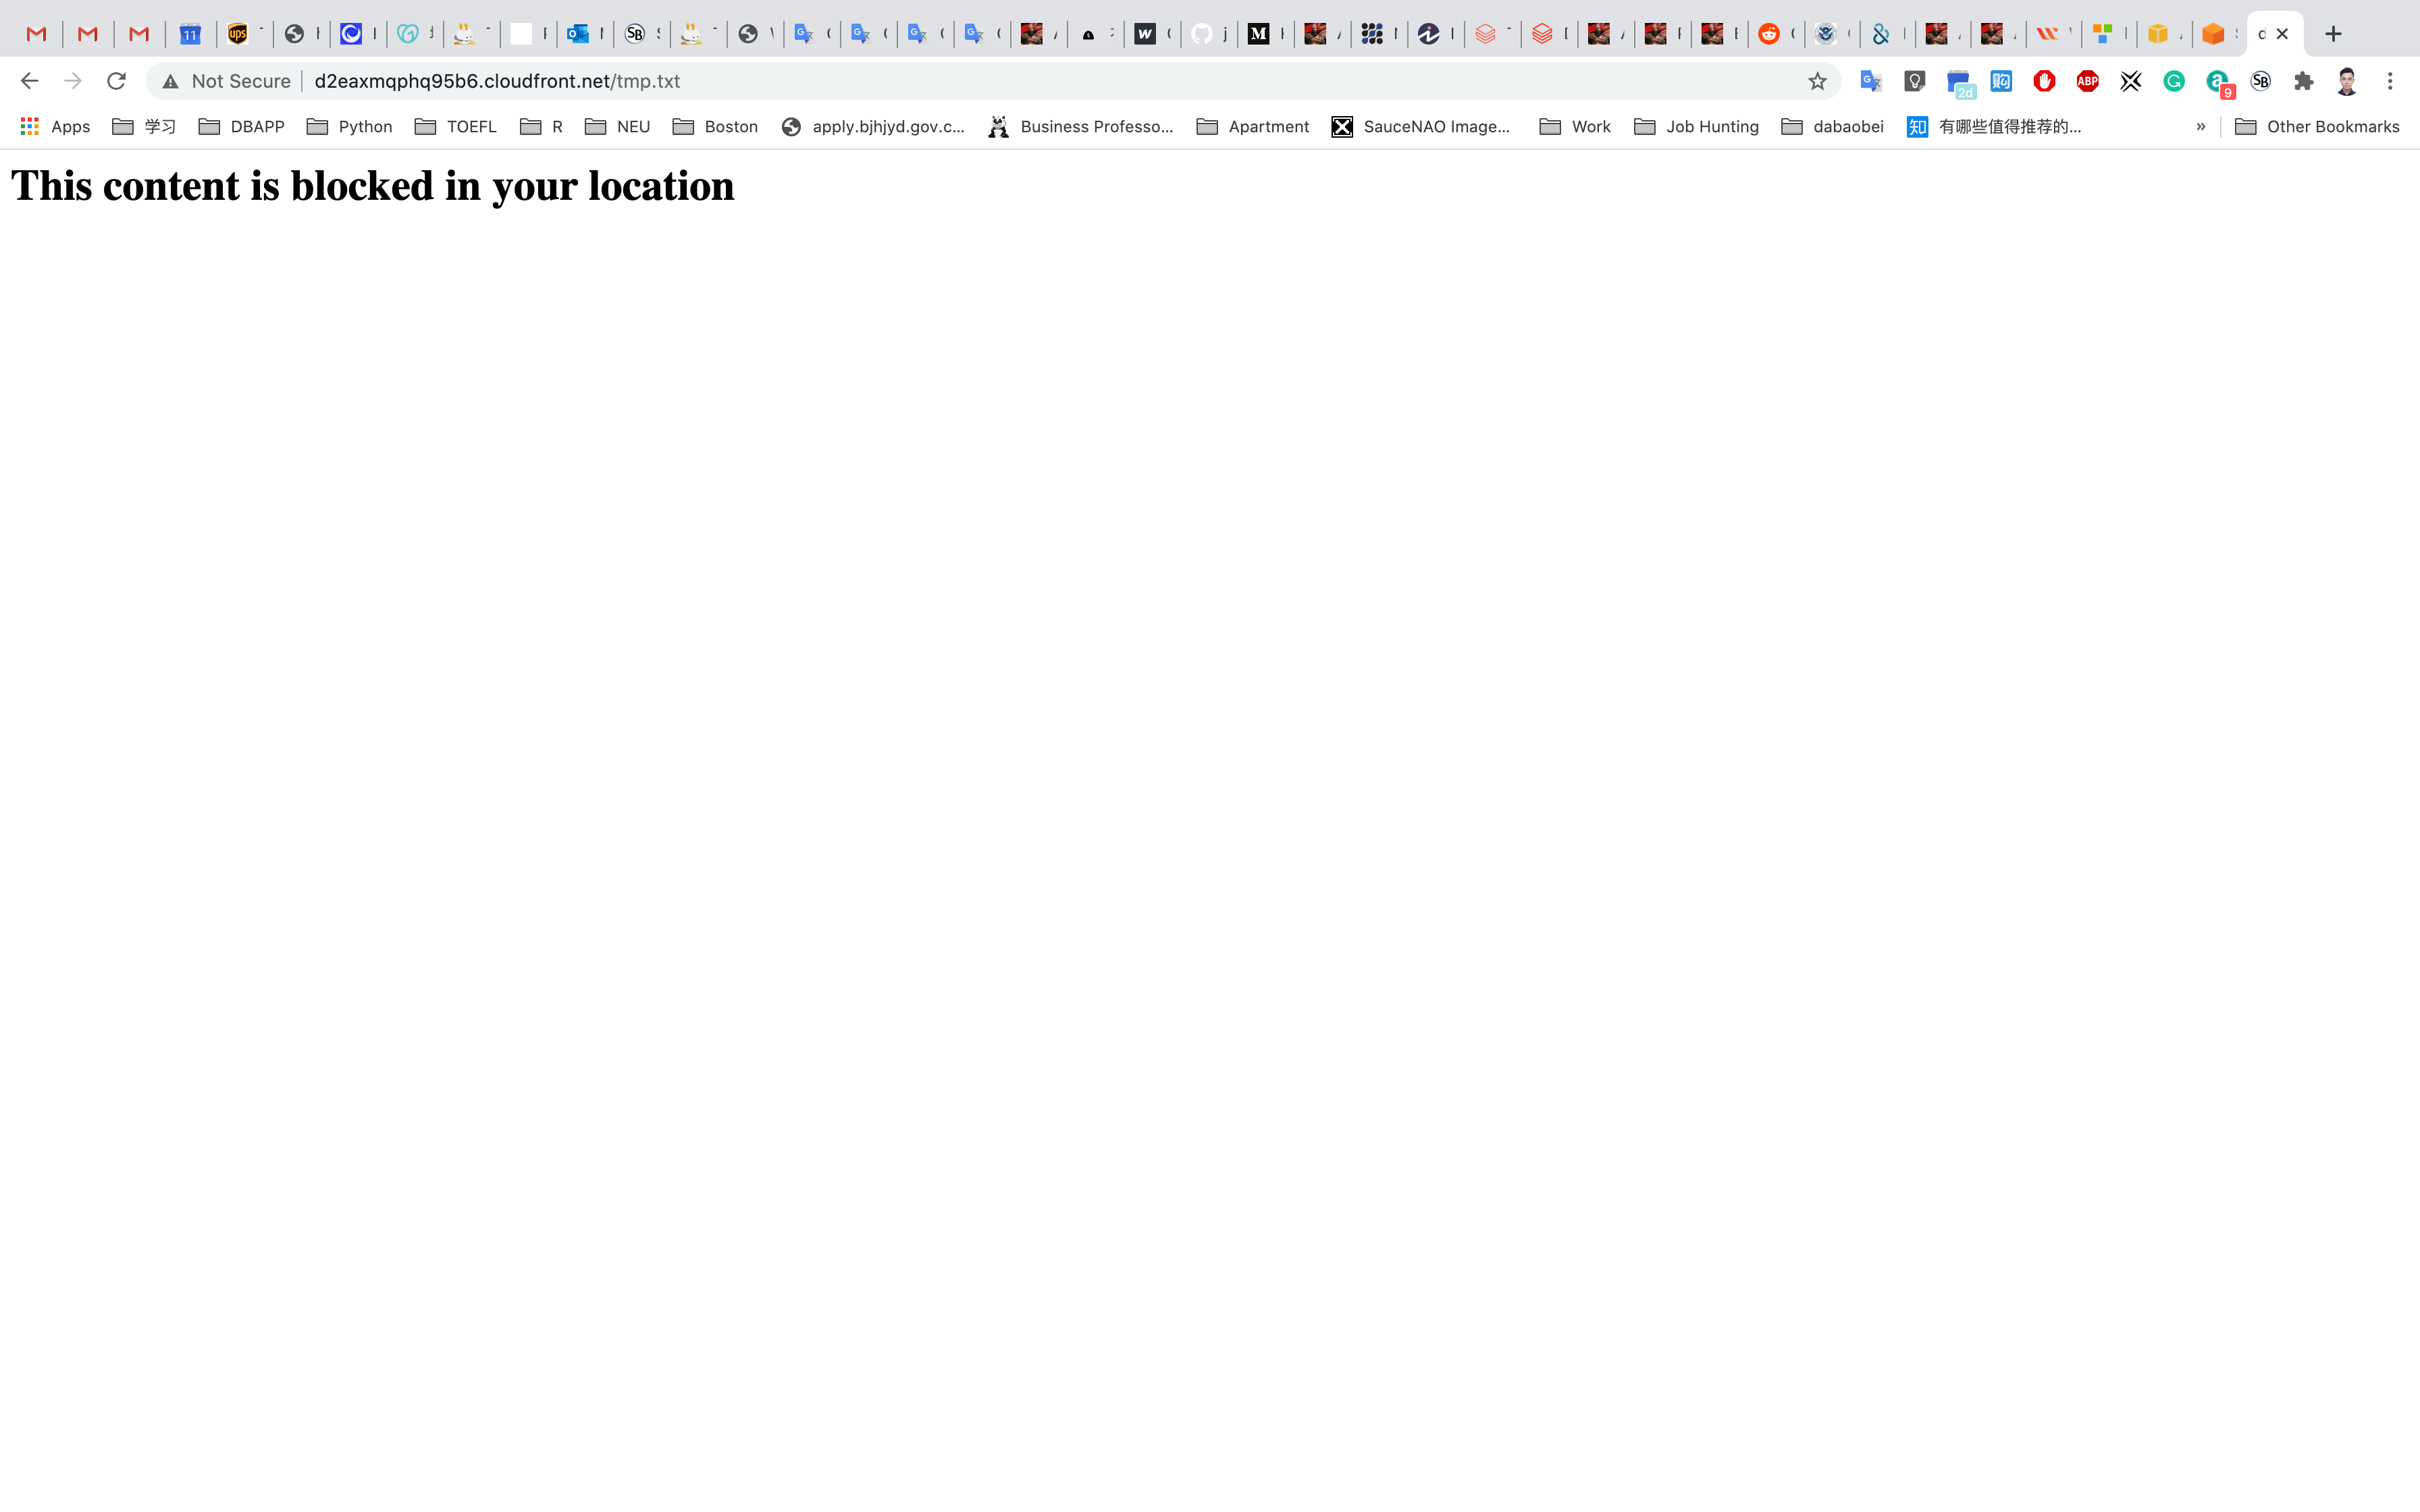
Completion and Conclusion
- You have successfully created an Amazon CloudFront distribution and published an image through CloudFront.
- You learned how to configure Custom Error Pages for CloudFront Distribution.
- You learned how to configure restrictions based on Geo-location.