AWS Cloud Architecting
ITC6480
Lab Resources
AWS Training & Certification Portal
Vocareum
VitalSource Bookshelf
Labs
ACA Module 3: Making Your Environment Highly Available
https://labs.vocareum.com/main/main.php?m=editor&nav=1&asnid=110819&stepid=110820
Version A5L5
Critical business systems should be deployed as Highly Available applications, meaning that they can remain operational even when some components fail. To achieve High Availability in AWS, it is recommended to run services across multiple Availability Zones.
Many AWS services are inherently highly available, such as Load Balancers, or can be configured for high availability, such as deploying Amazon EC2 instances in multiple Availability Zones.
In this lab, you will start with an application running on a single Amazon EC2 instance and will then convert it to be Highly Available.
Objectives
After completing this lab, you will be able to:
- Create an image of an existing Amazon EC2 instance and use it to launch new instances.
- Expand an Amazon VPC (Virtual Private Cloud) to additional Availability Zones.
- Create VPC Subnets and Route Tables.
- Create an AWS NAT Gateway.
- Create a Load Balancer.
- Create an Auto Scaling group.
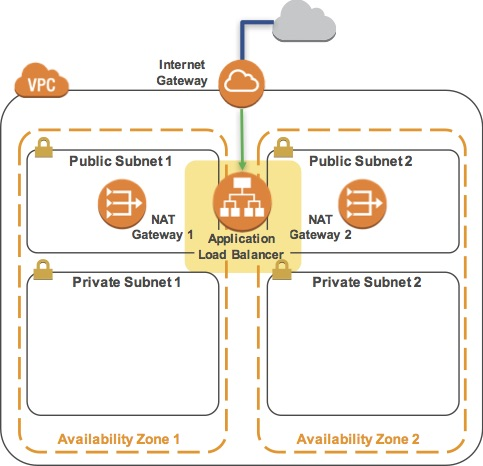
The final product of your lab will be this:
Accessing the AWS Management Console
- At the top of these instructions, click
Start Labto launch your lab.
A Start Lab panel opens displaying the lab status. - Wait until you see the message “Lab status: ready“, then click the
Xto close the Start Lab panel. - At the top of these instructions, click
AWS
This will to open the AWS Management Console in a new browser tab. The system will automatically log you in.
Tip: If a new browser tab does not open, there will typically be a banner or icon at the top of your browser indicating that your browser is preventing the site from opening pop-up windows. Click on the banner or icon and choose “Allow pop ups.”
4. Arrange the AWS Management Console tab so that it displays along side these instructions. Ideally, you will be able to see both browser tabs at the same time, to make it easier to follow the lab steps.
The IP address or any kind of ID may be different in any part of the lab because I did the lab three times. And each time AWS training will distribute a totally new environment.
Task 1: Inspect Your environment
This lab begins with an environment already deployed via AWS CloudFormation including:
- An Amazon VPC
- A public subnet and a private subnet in one Availability Zone
- An Internet Gateway associated with the public subnet
- A NAT Gateway in the public subnet
- An Amazon EC2 instance in the public subnet
Task 1.1: Inspect Your VPC
In this task, you will review the configuration of the VPC that has already been created.
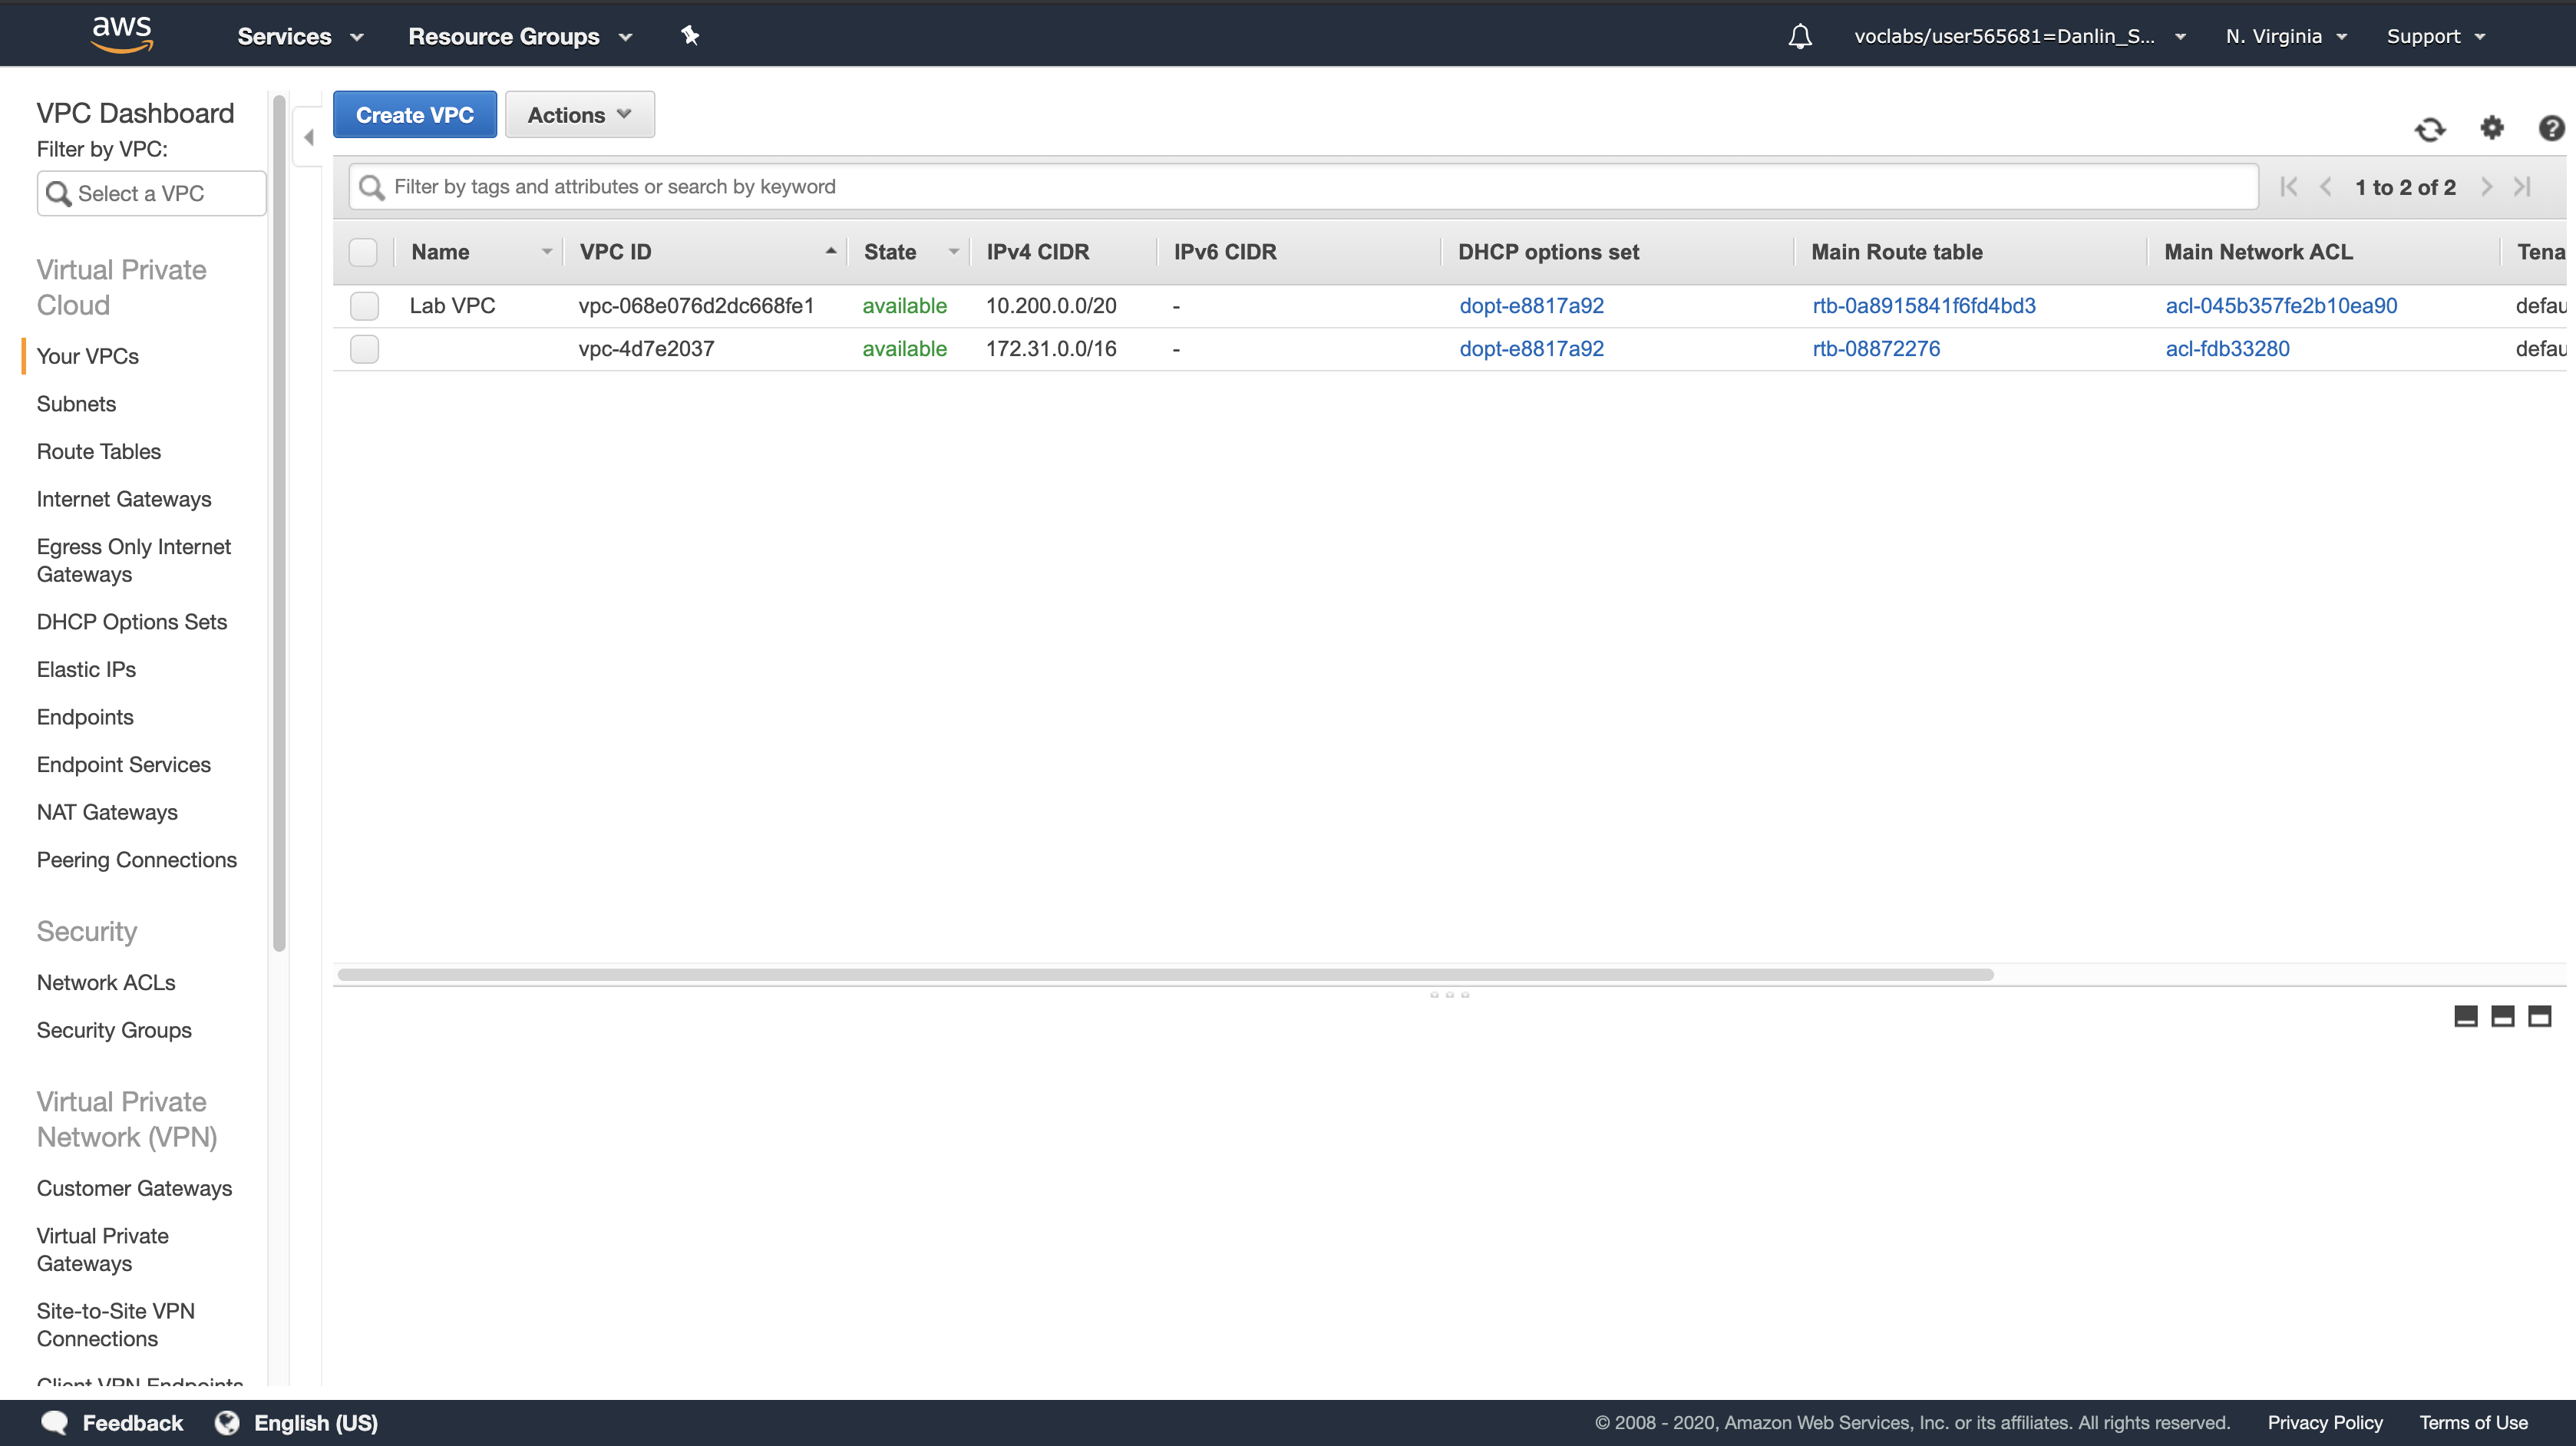
On the AWS Management Console: Click Services menu > VPC
Click Your VPCs
Here you can see the Lab VPC that has been created for you:
- In the IPv4 CIDR column, you can see a value of 10.200.0.0/20, which means this VPC includes 4,096 (2^16) IPs between 10.200.0.0 and 10.200.15.255 (with some reserved and unusable).
- 10.200.0.0/20 = 1010 0000, 1100 1000, 0000 / 0000, 0000 0000
- 10.200.0.1/20 Gateway
- 10.200.15.255/20 Broadcast
- 10.200.0.2/20 ~ 10.200.15.254/20 Valid Hosts
- It is also attached to a Route Table and a Network ACL.
- This VPC also has a Tenancy of default, instances launched into this VPC will by default use shared tenancy hardware.
Navigation Pane
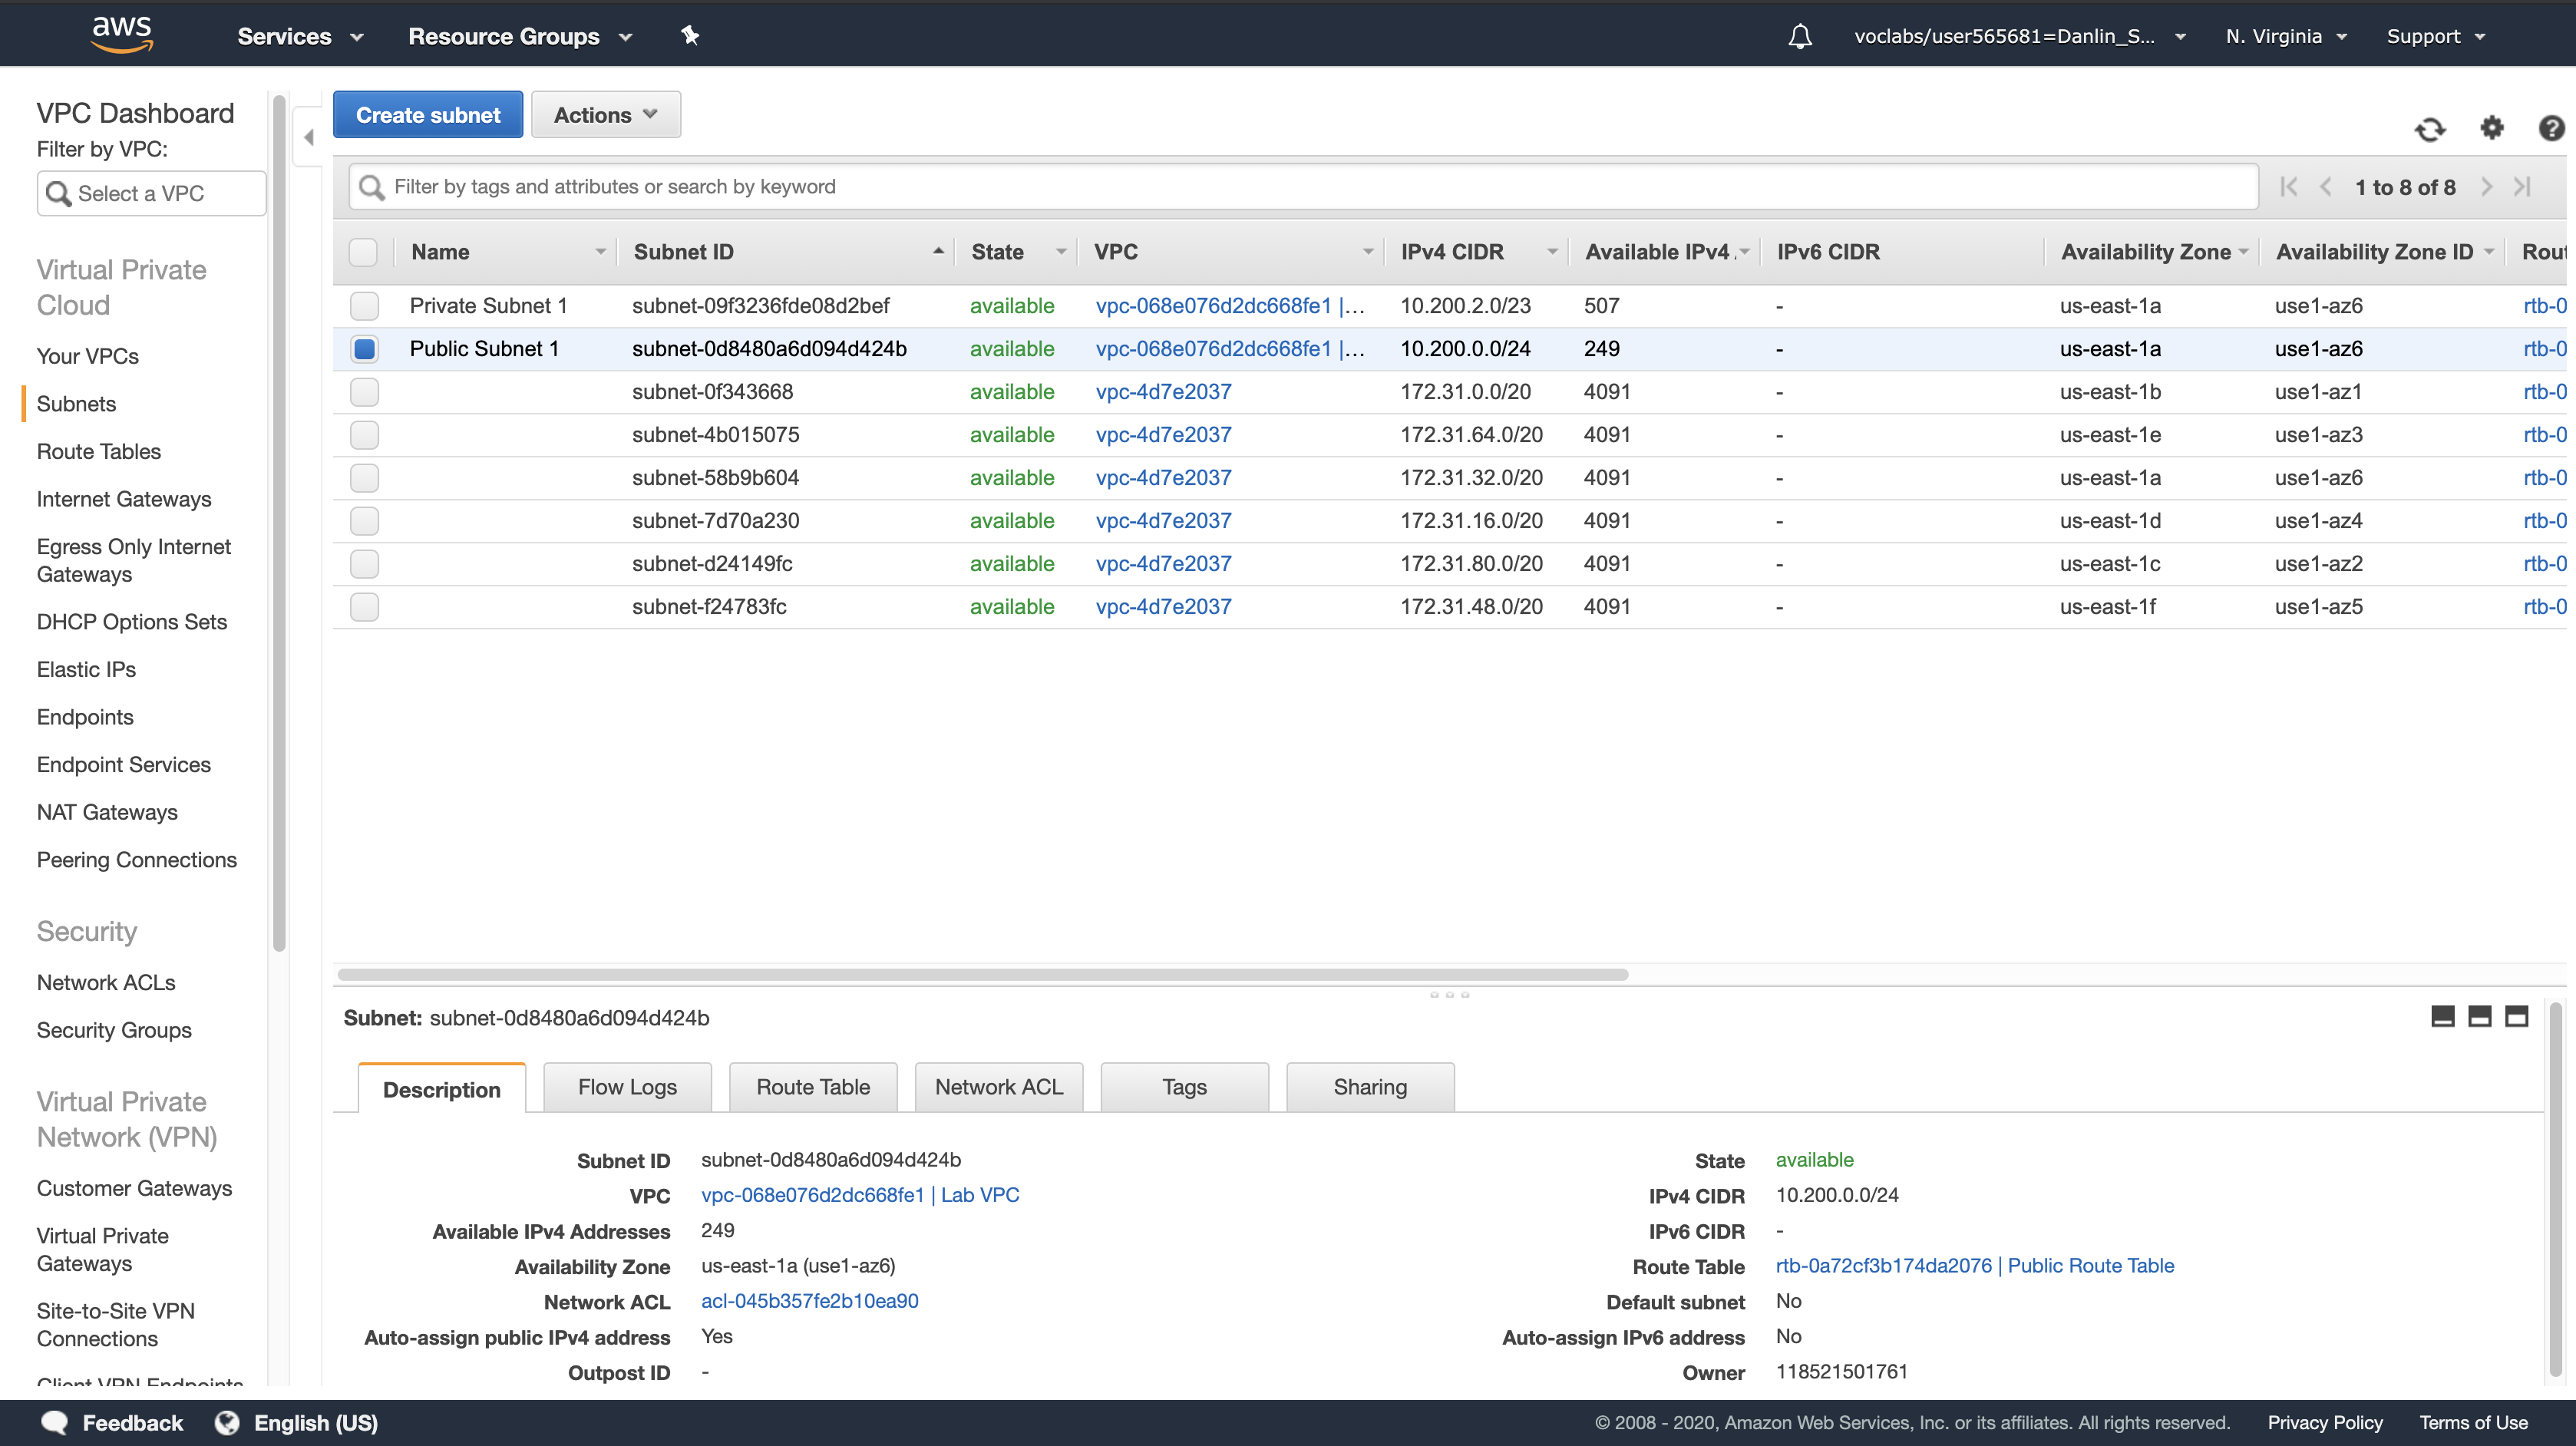
Click Subnets > Public Subnet 1
Here you can see the Public Subnet 1 subnet:
- In the VPC column, you can see that this subnet exists inside of Lab VPC.
- In the IPv4 CIDR column, you can see a value of 10.200.0.0/24, which means this subnet includes the 256 IPs (5 of which are reserved and unusable) between 10.200.0.0 and 10.200.0.255.
- 10.200.0.0/24 = 1010 0000, 1100 1000, 0000 0000, / 0000 0000
- 10.200.0.1/24 Gateway
- 10.200.0.255/24 Broadcast
- 10.200.0.2/24 ~ 10.200.0.254/24 Valid Hosts
- In the Availability Zone column, you can see the Availability Zone in which this subnet resides.
- Reveal more detail after click Public Subnet 1
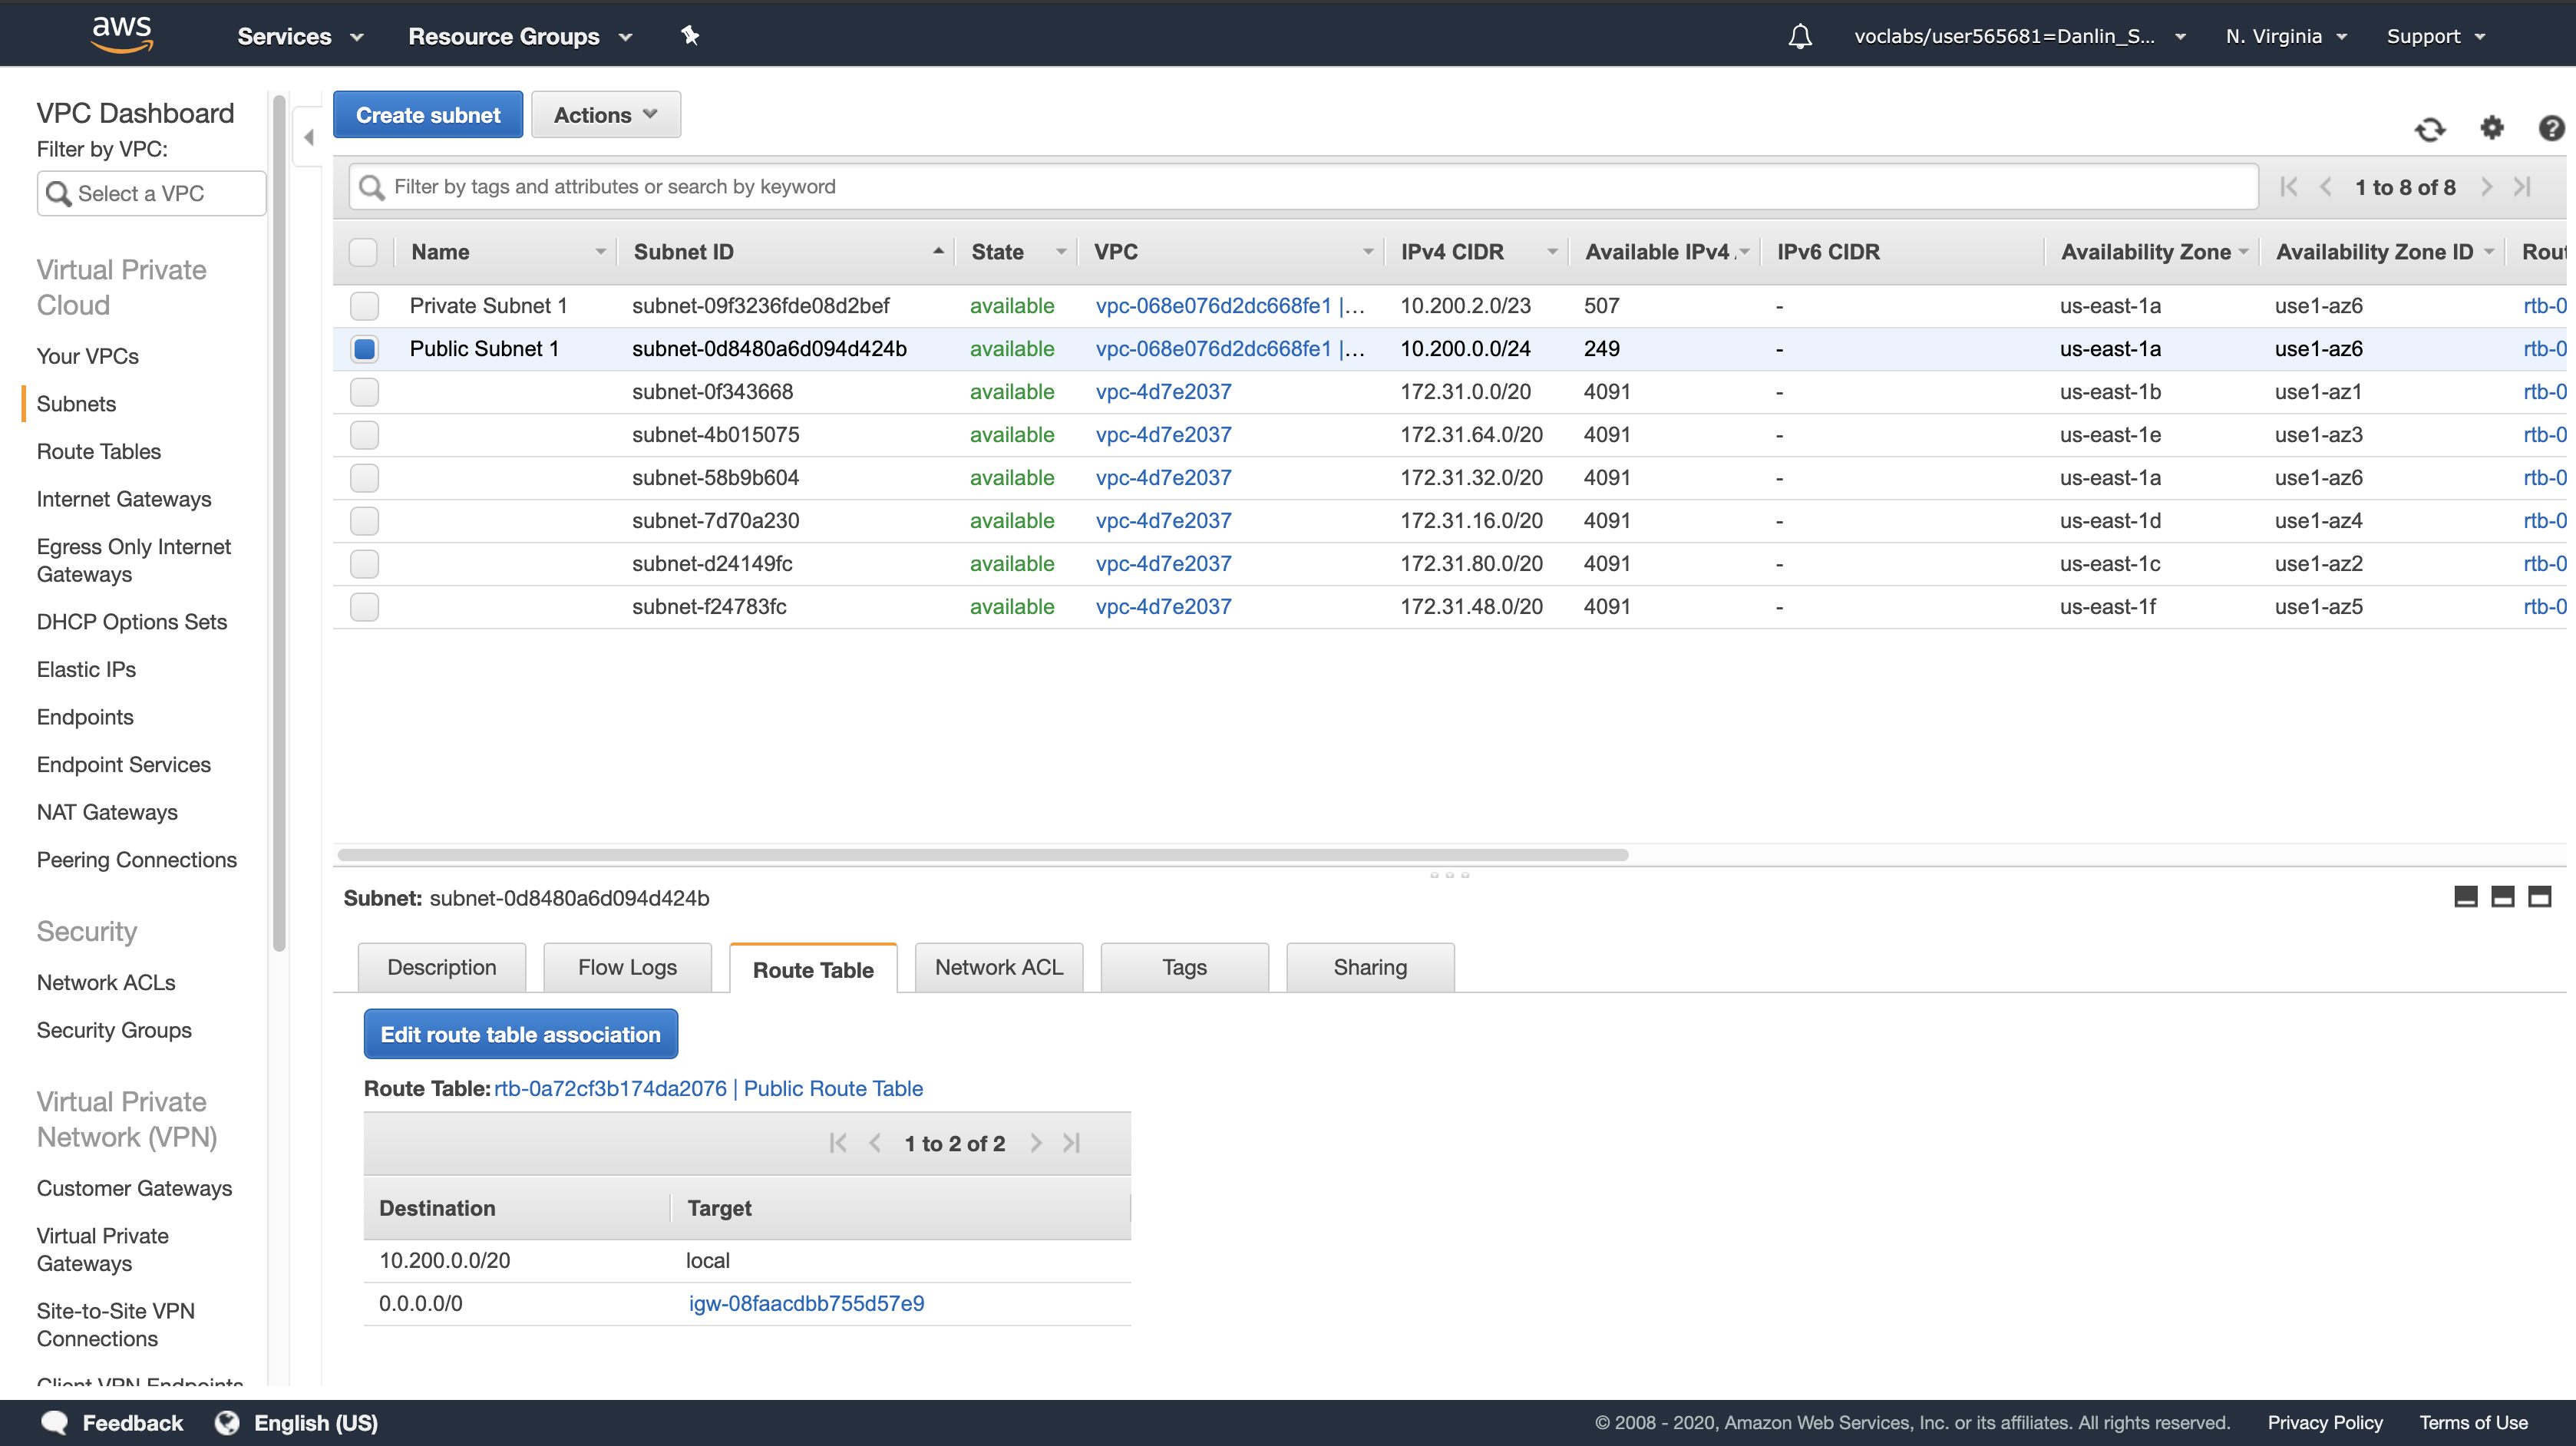
Click the Route Table tab
Here you can see details about the Routing for this subnet:
- The first entry specifies that traffic destined within the VPC’s CIDR range (10.200.0.0/20) will be routed within the VPC (local).
- The second entry specifies that any traffic destined for the Internet (0.0.0.0/0) is routed to the Internet Gateway (igw-08faacdbb755d57e9). This setting makes it a Public Subnet.
Click the Network ACL tab
Here you can see the Network Access Control List (ACL) associated with the subnet. The rules currently permit ALL Traffic to flow in and out of the subnet, but they can be further restricted by using Security Groups.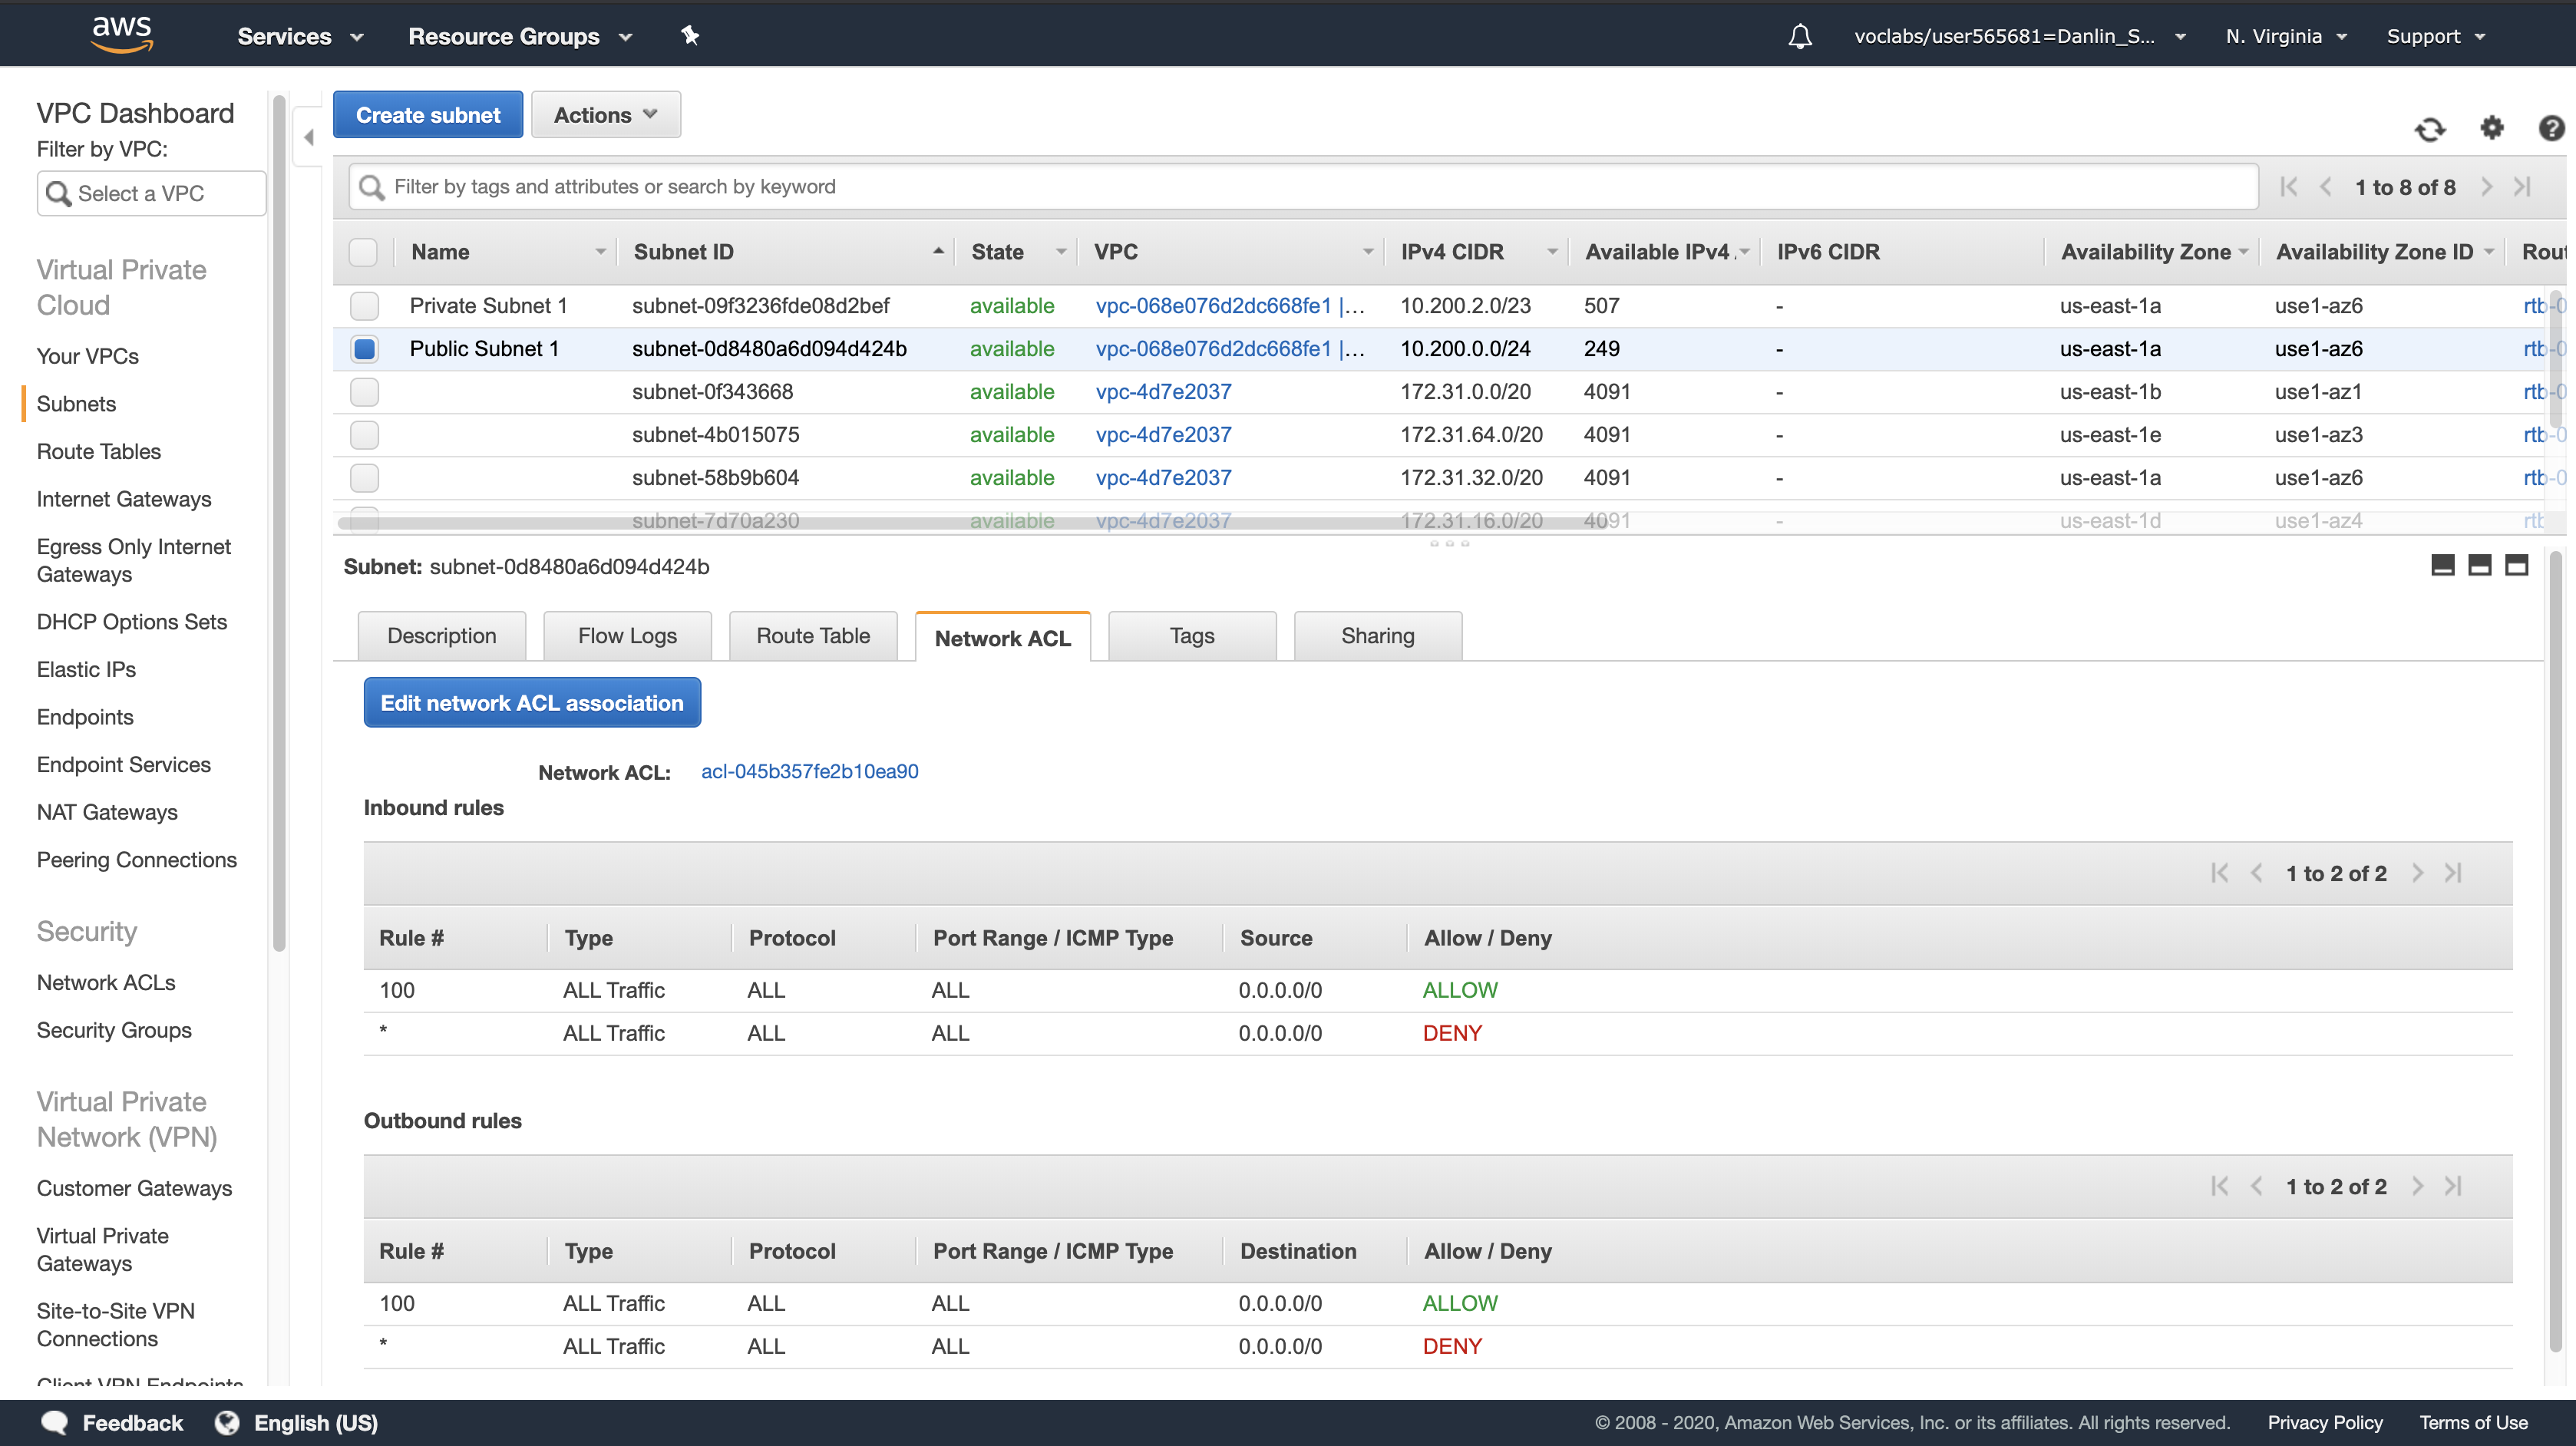
Navigation Pane
Click Internet Gateways
Notice that an Internet Gateway (igw-08faacdbb755d57e9) is already associated with Lab VPC.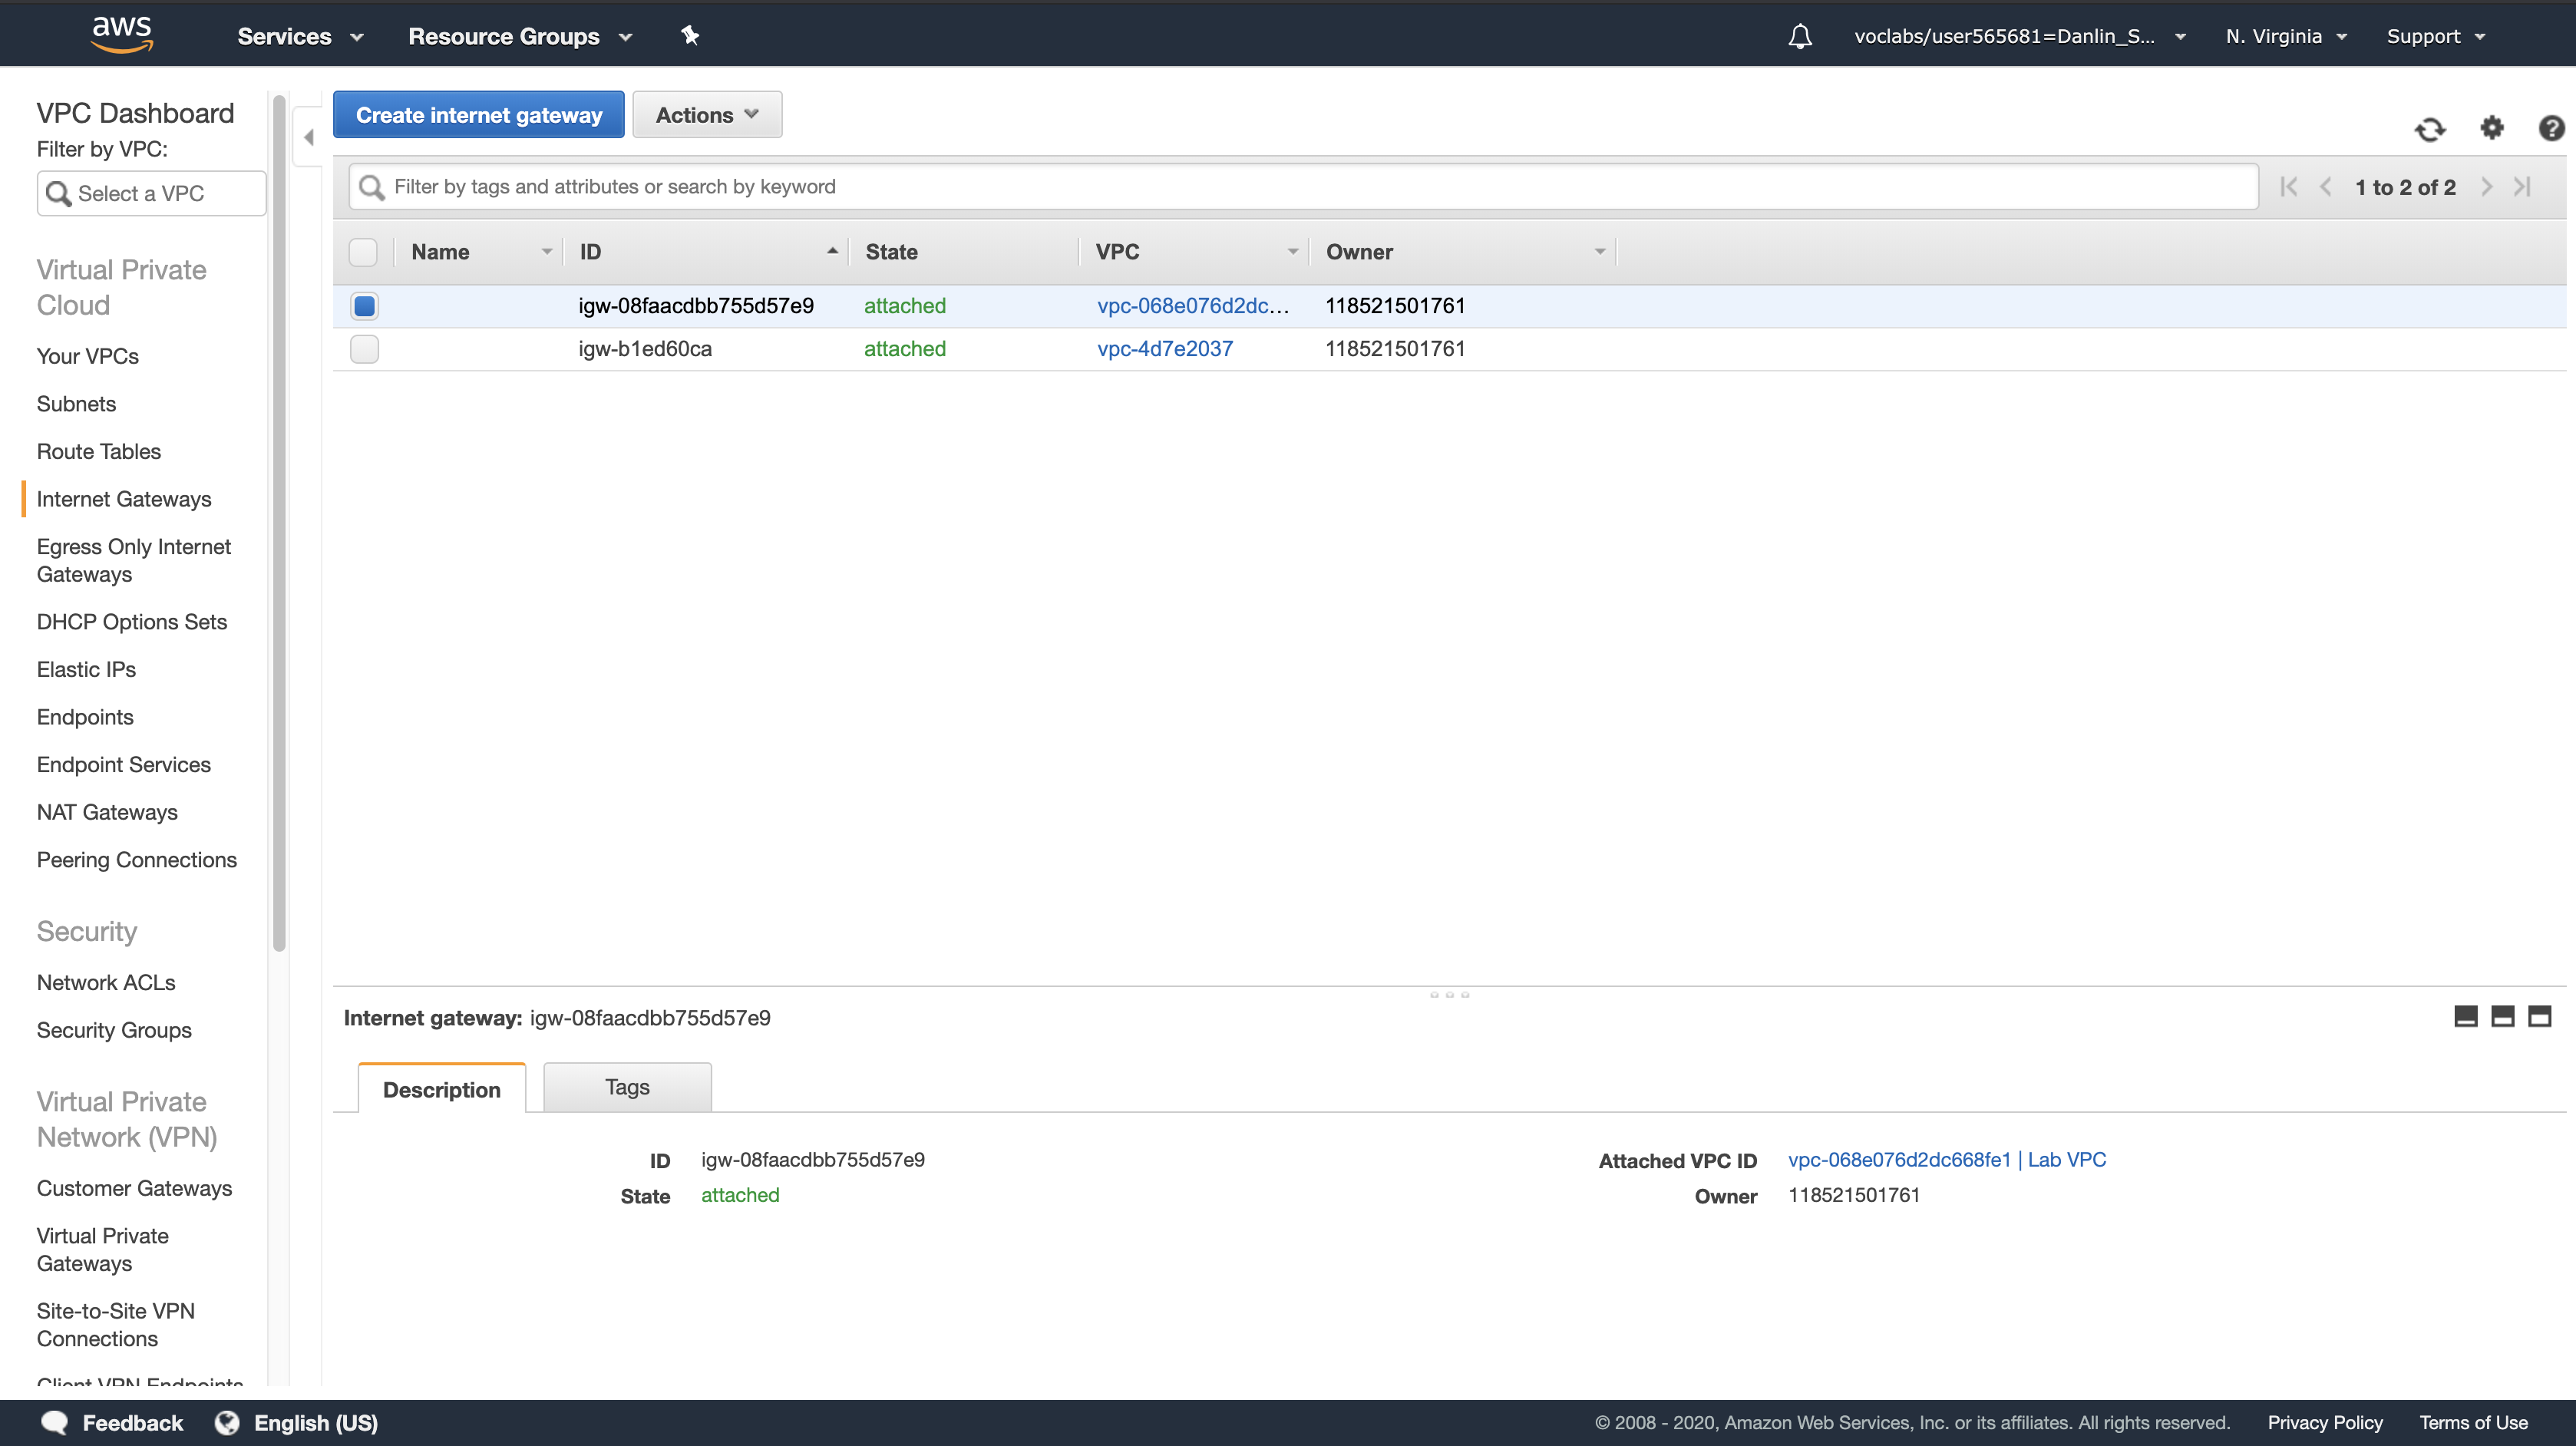
Navigation Pane
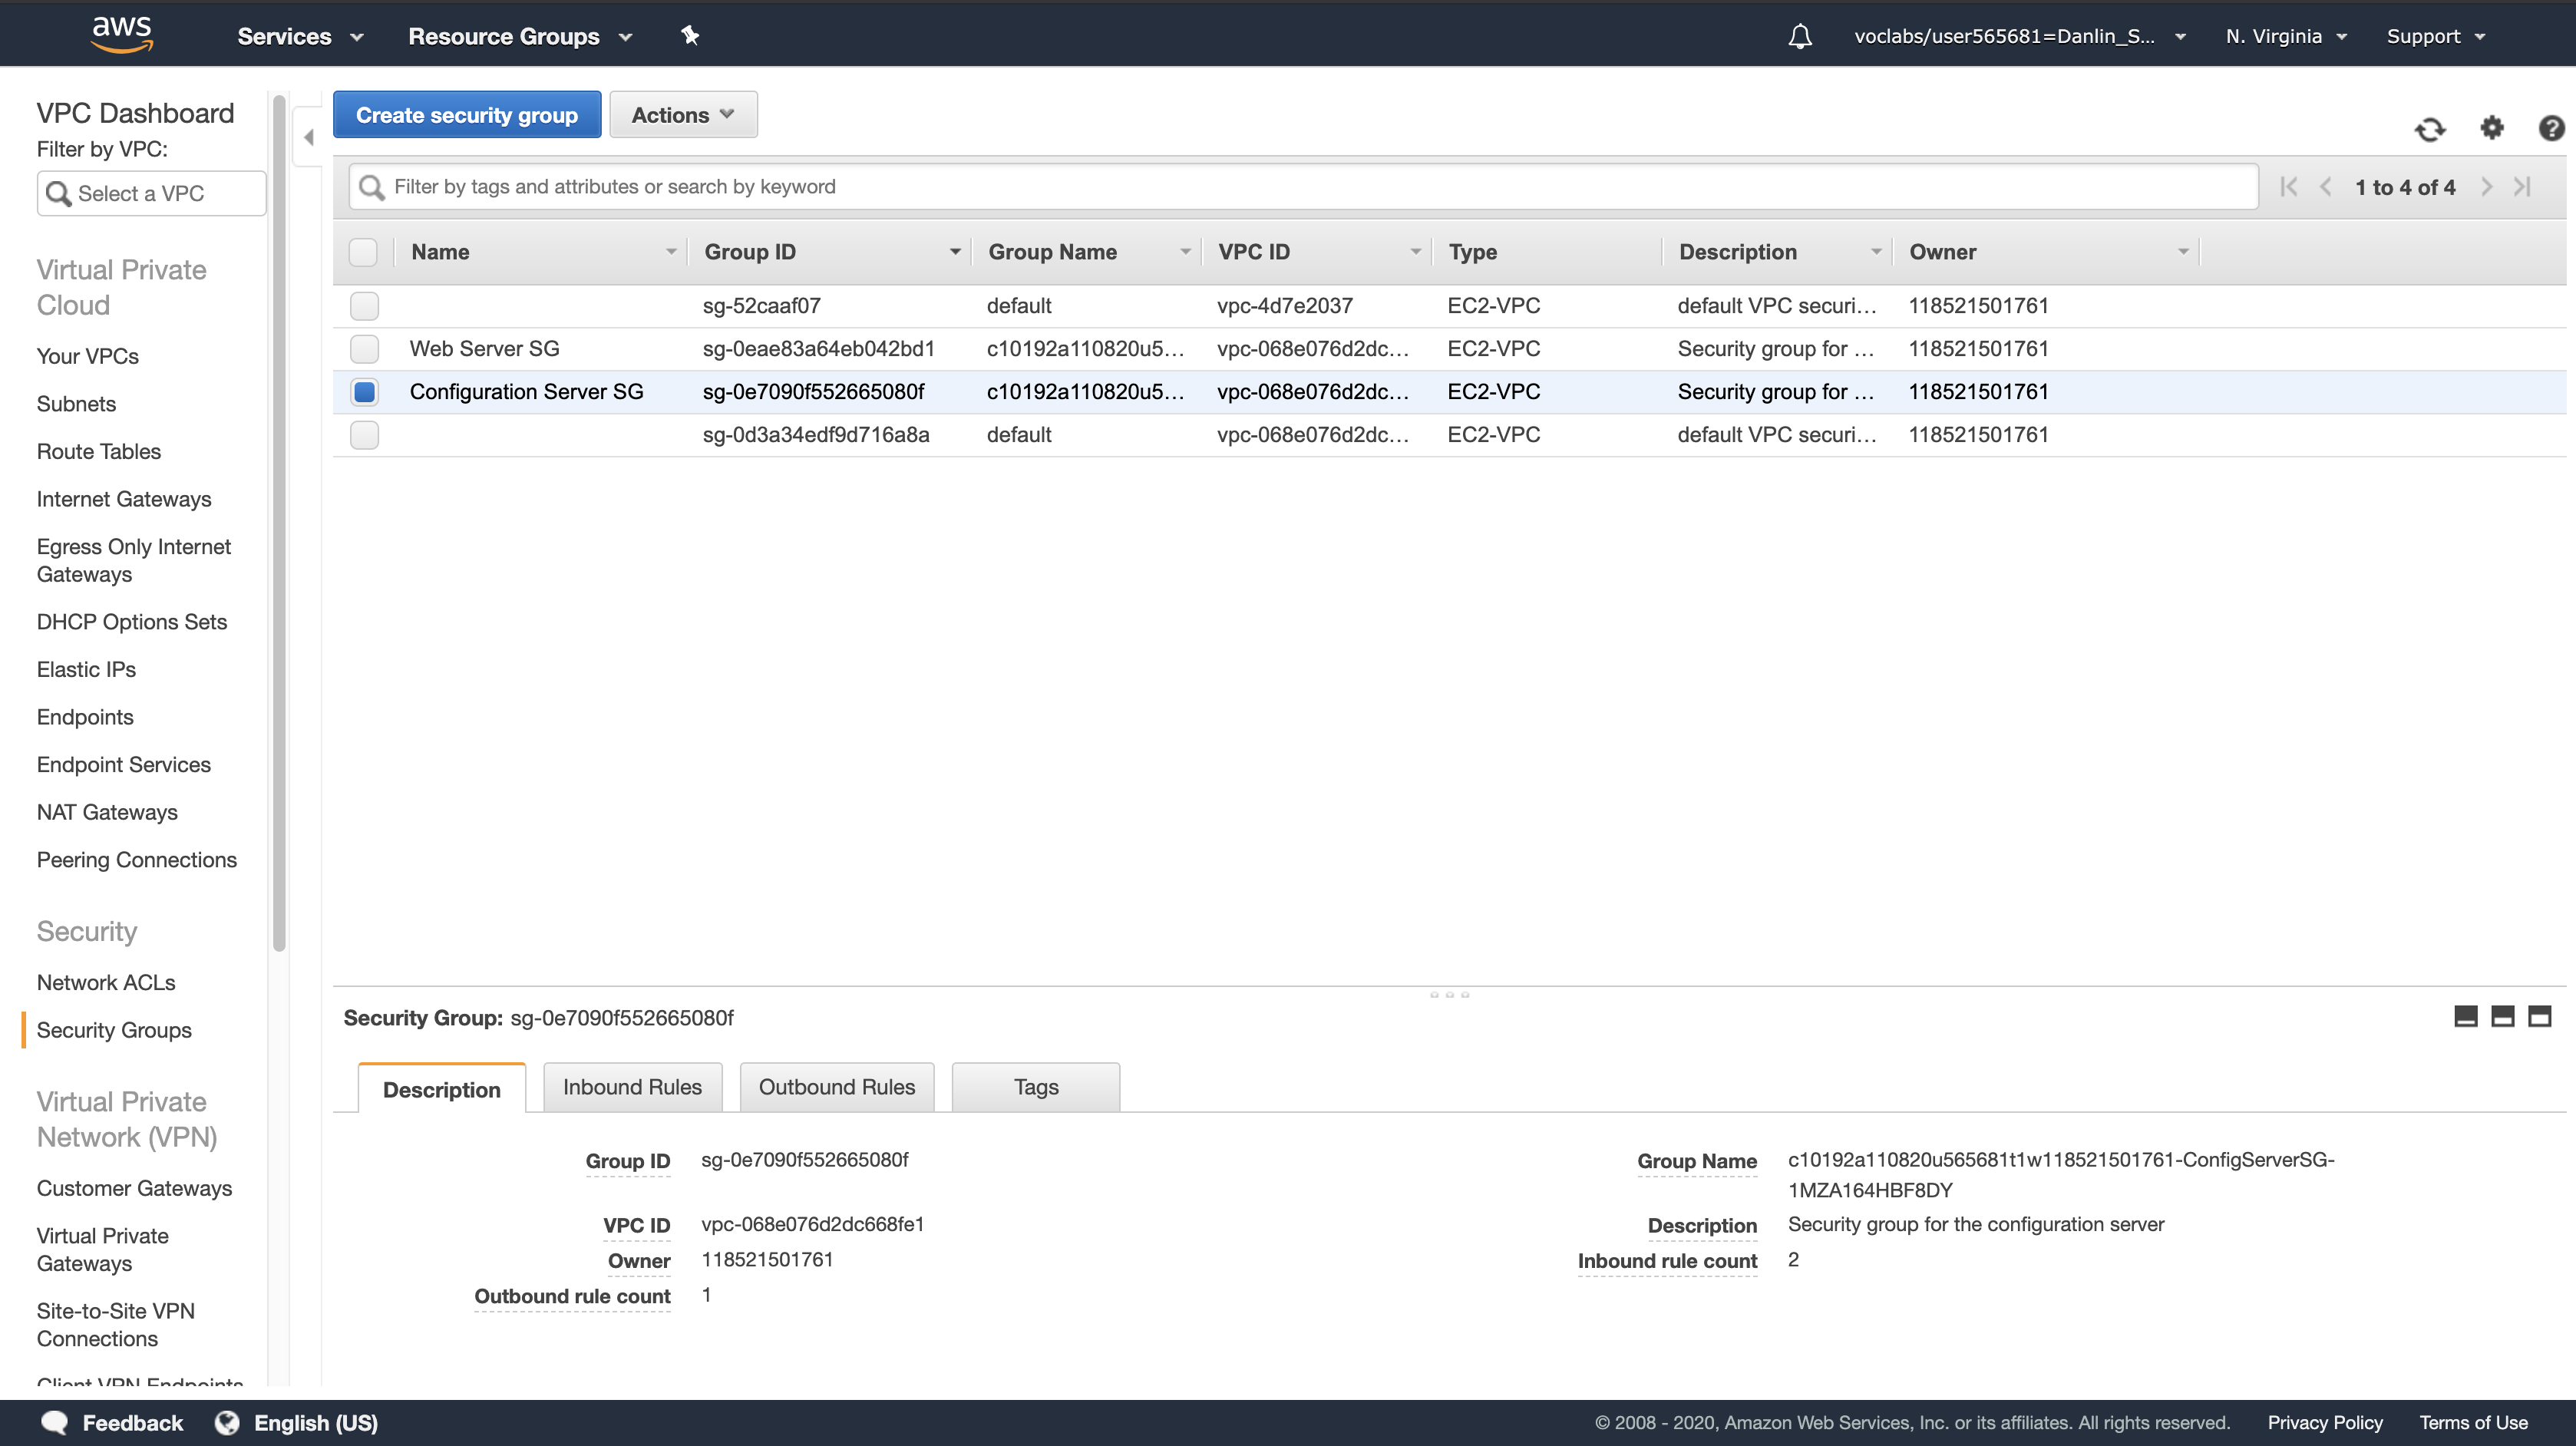
Click Security Groups > Configuration Server SG
- This is the security group used by the Configuration Server.
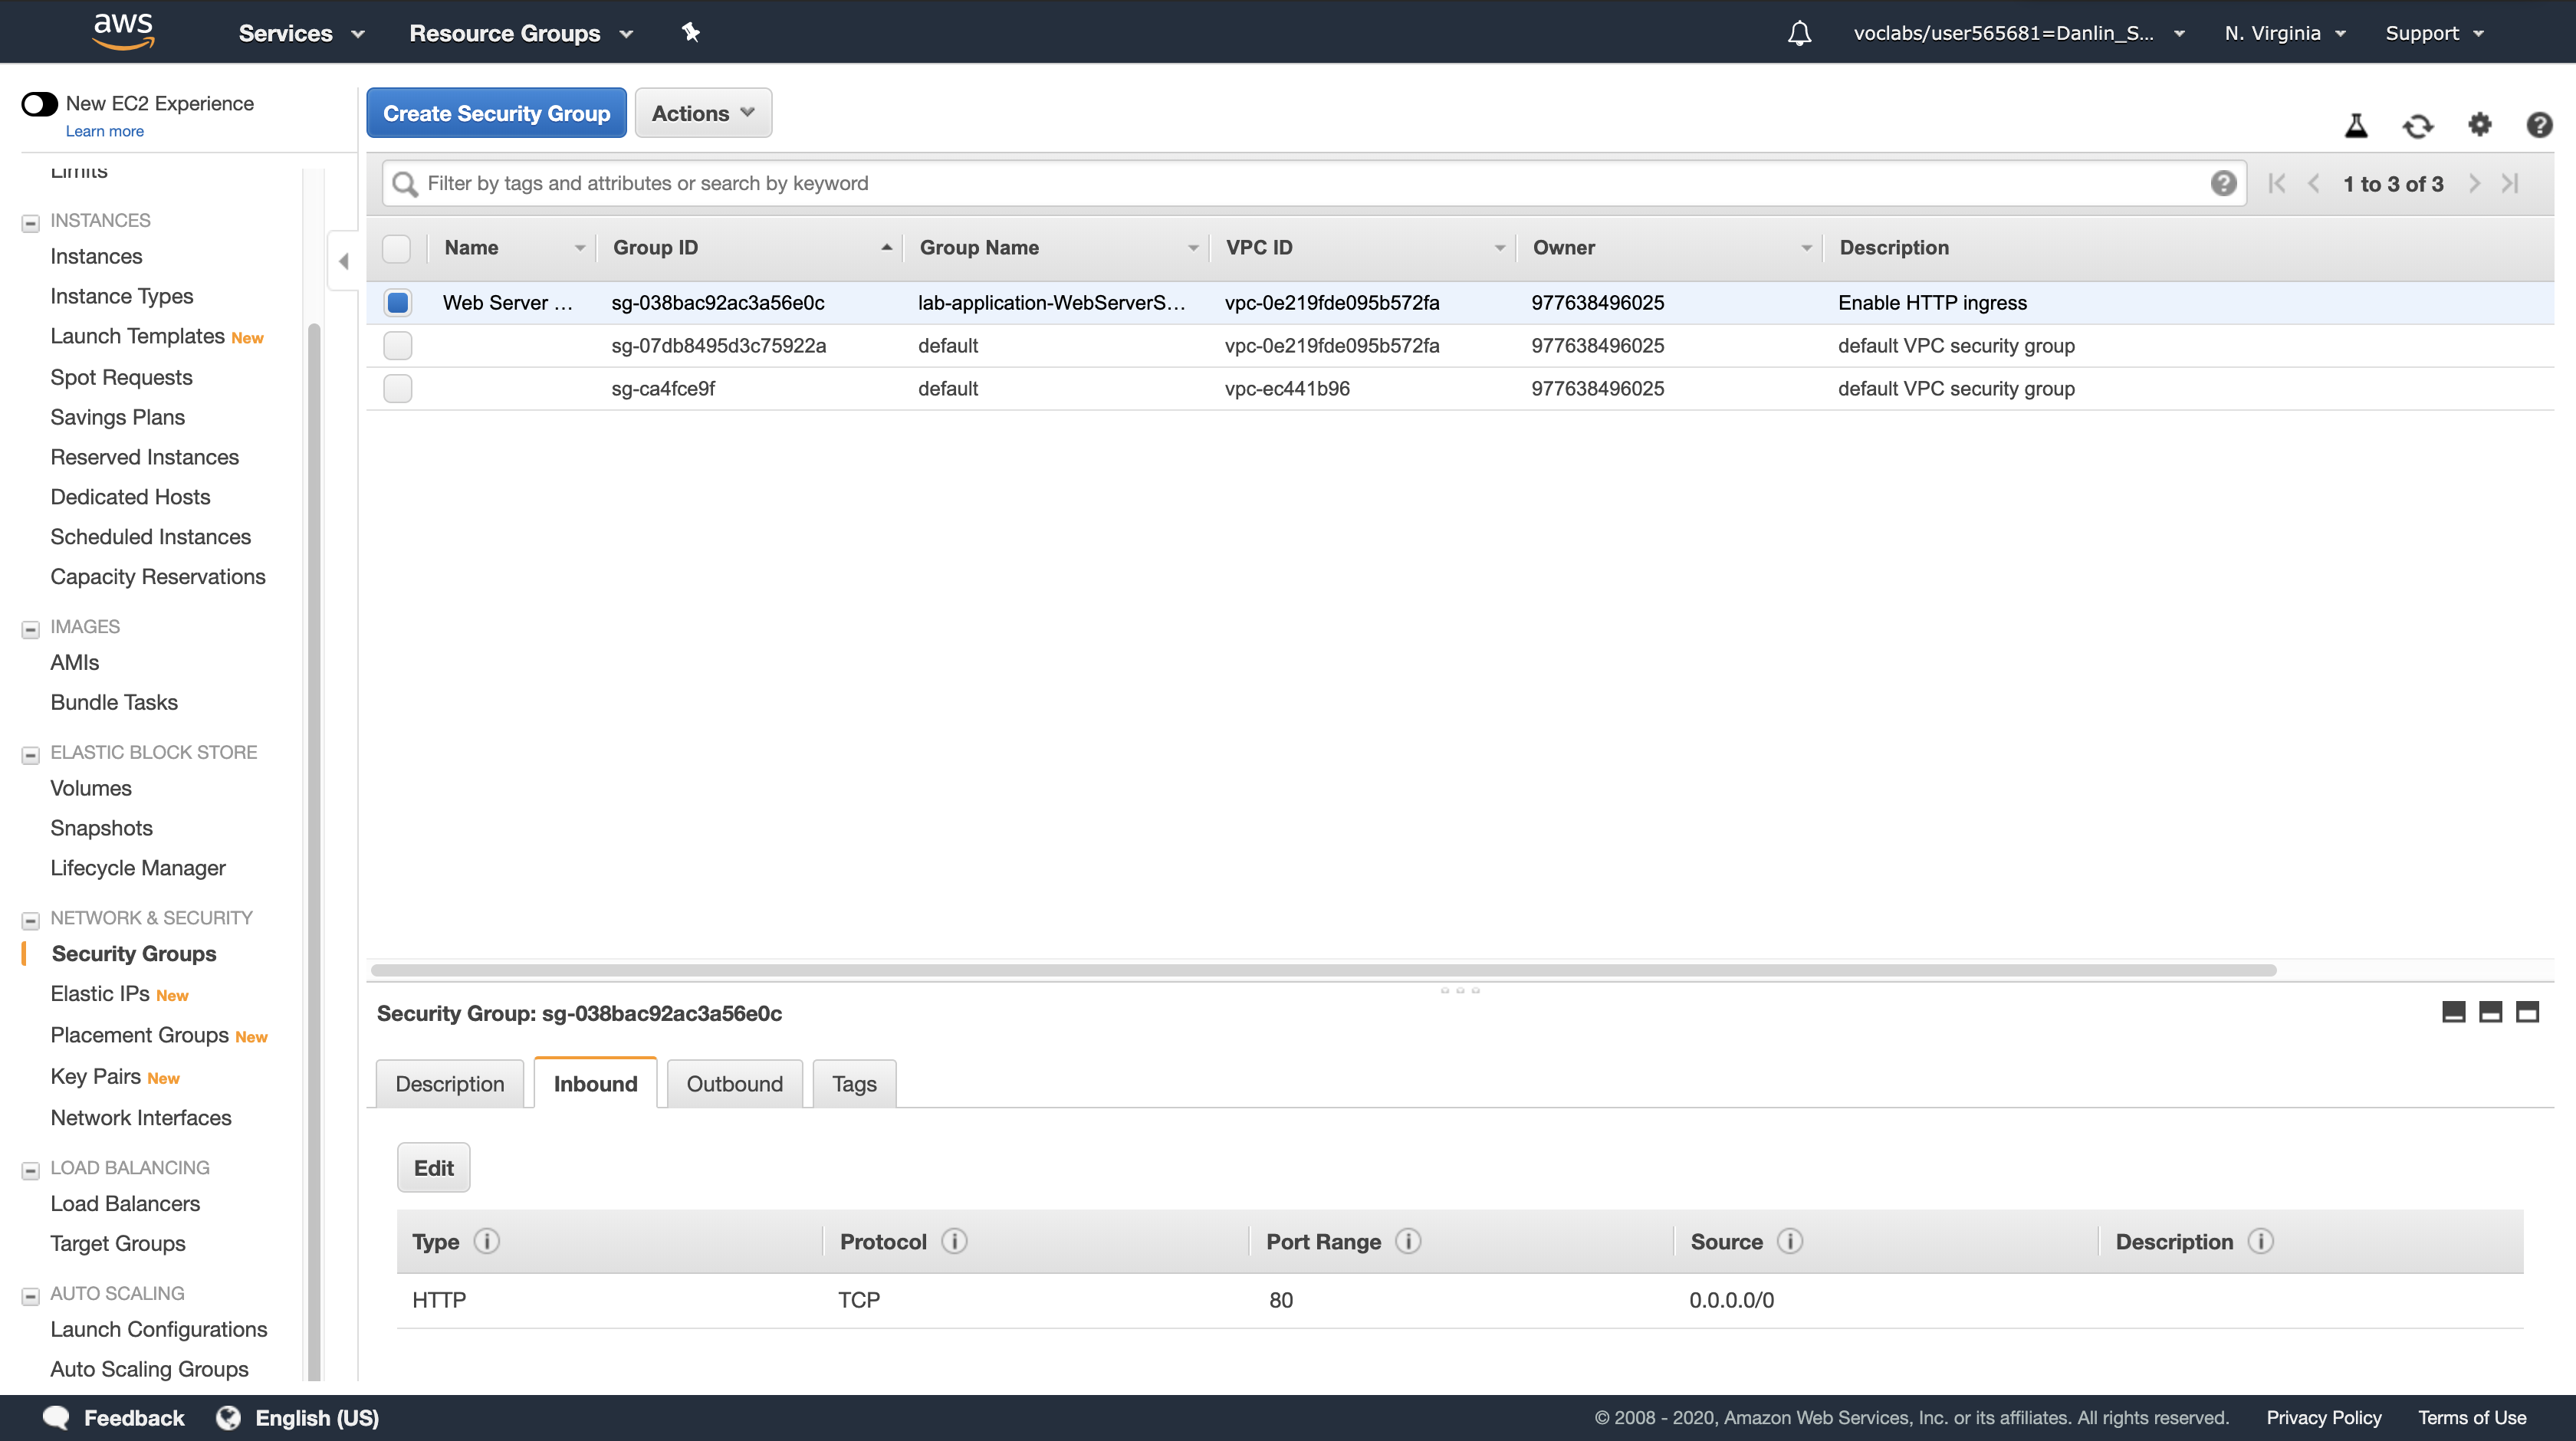
Click the Inbound Rules tab
Here you can see that this Security Group only allows traffic via SSH (TCP port 22) and HTTP (TCP port 80).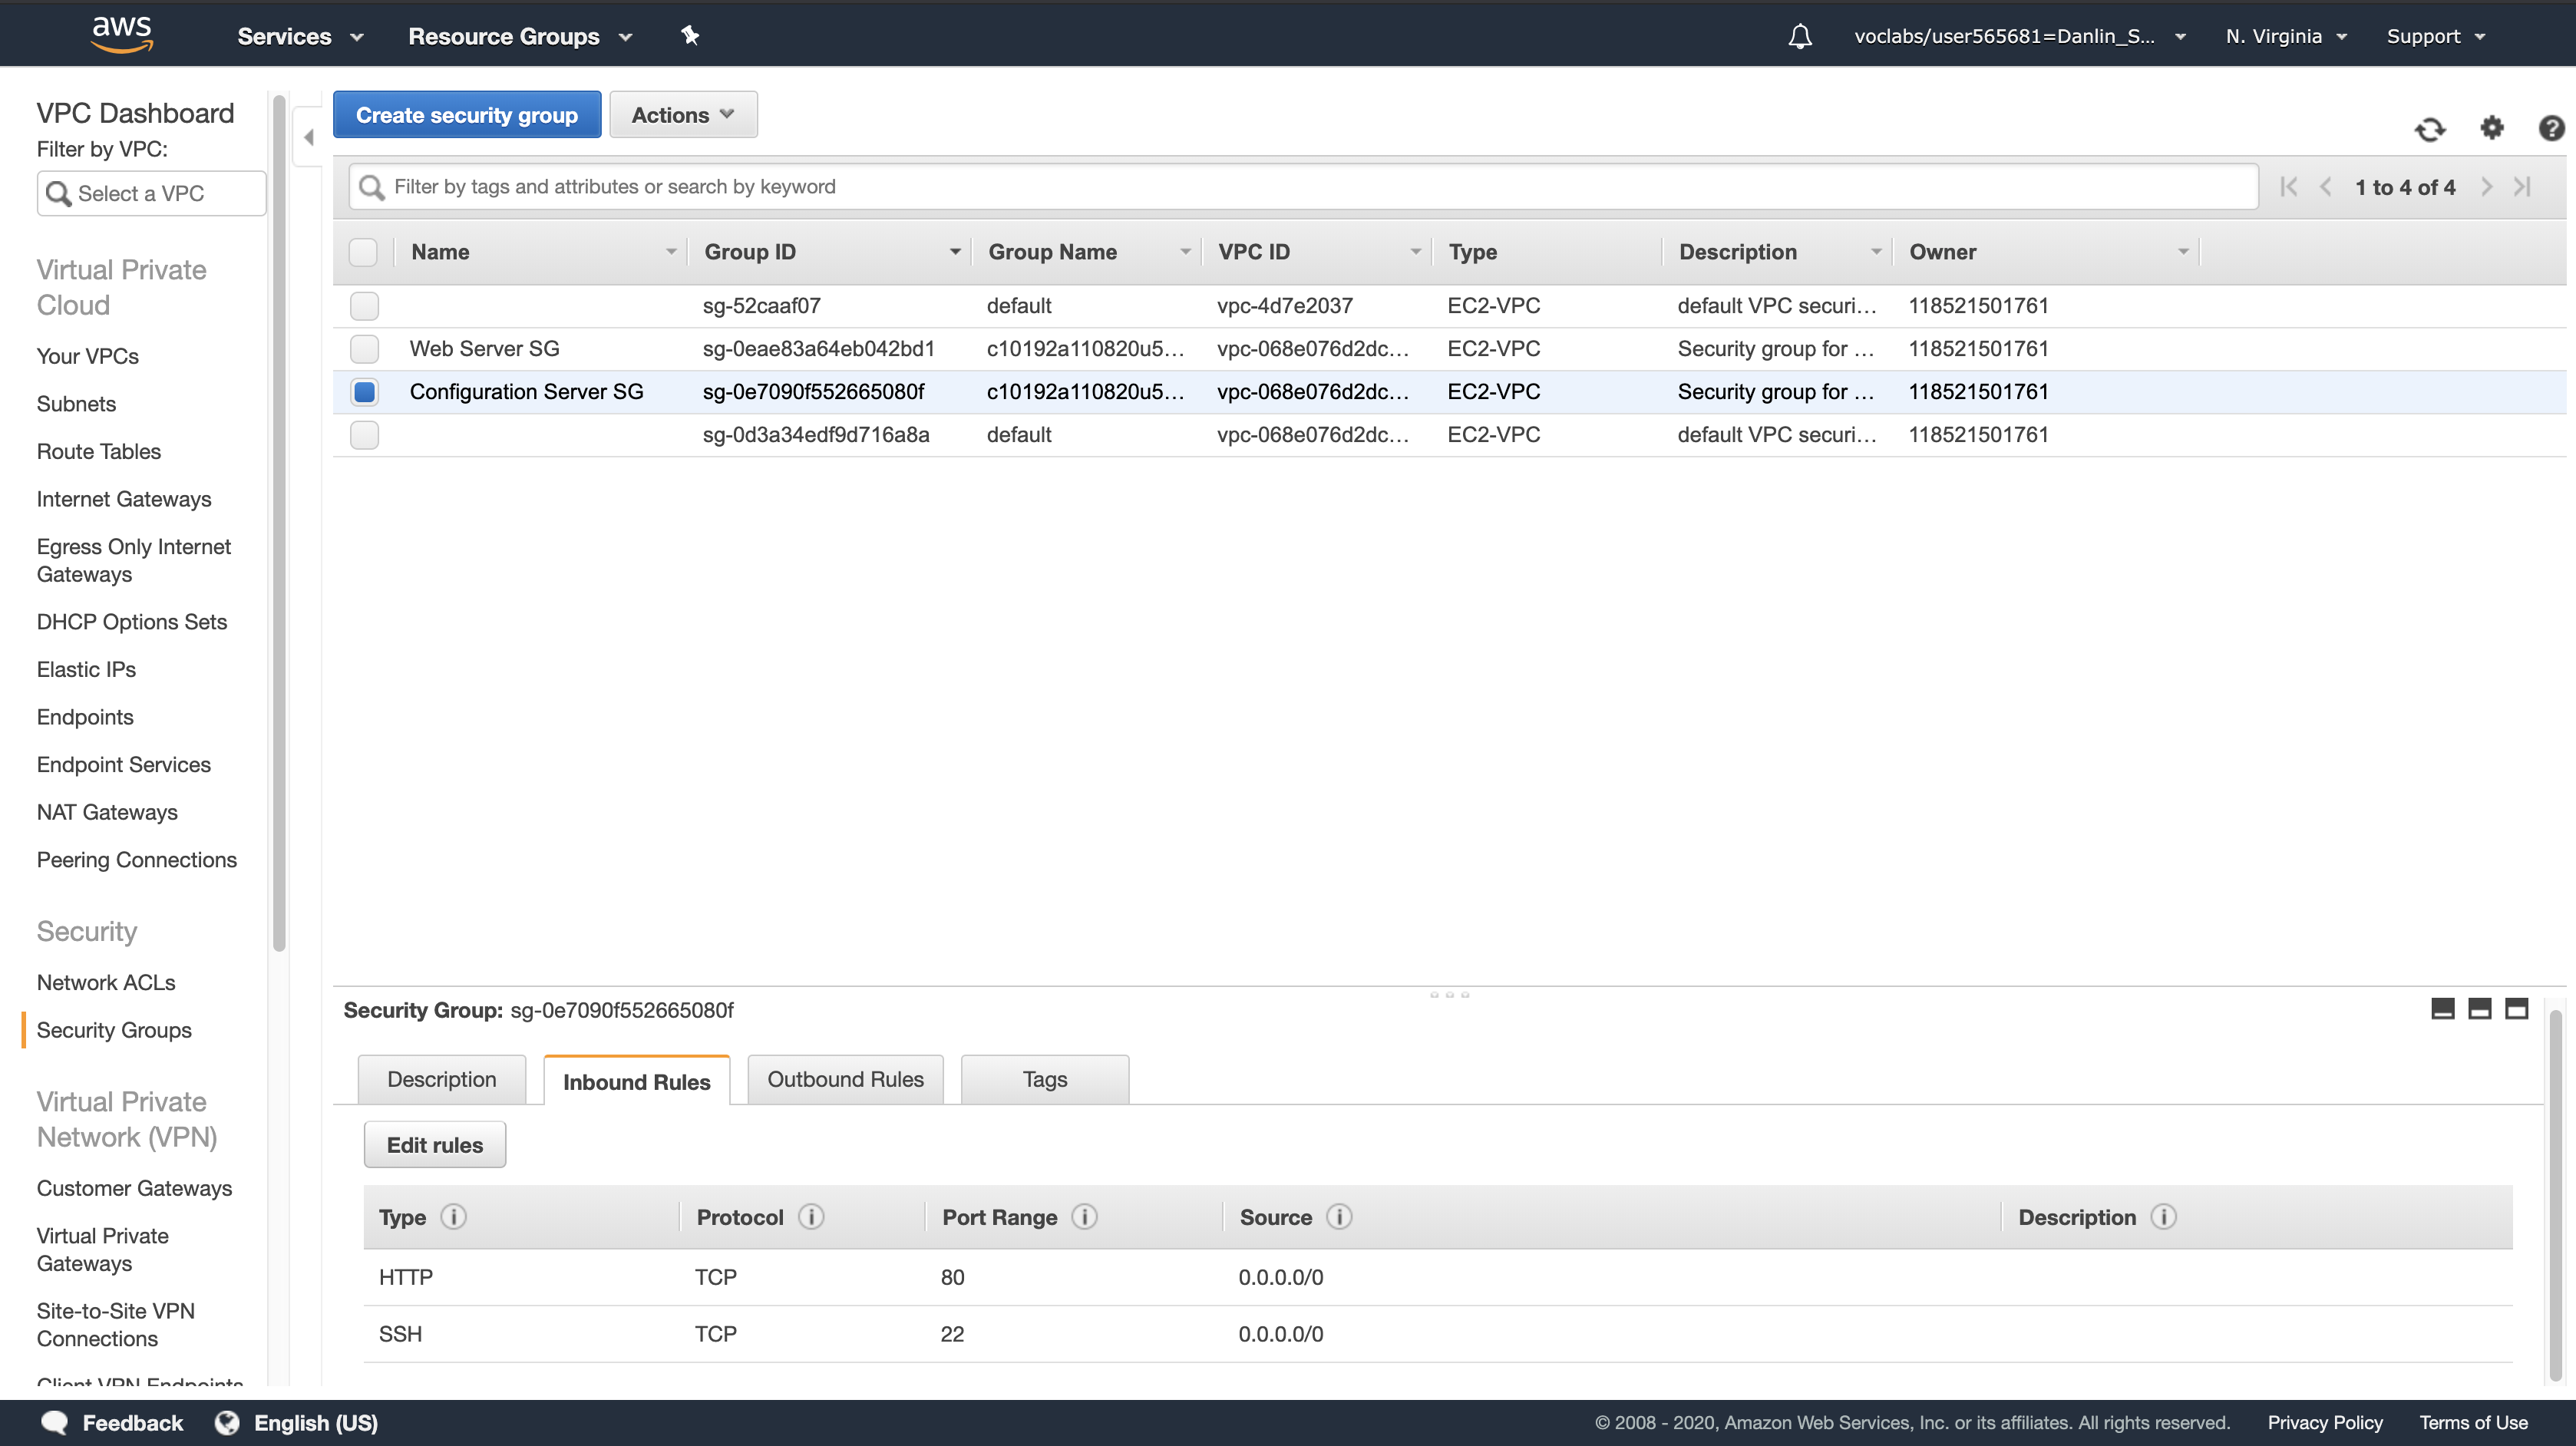
Click the Outbound Rules tab
Here you can see that this Security Group allows all outbound traffic.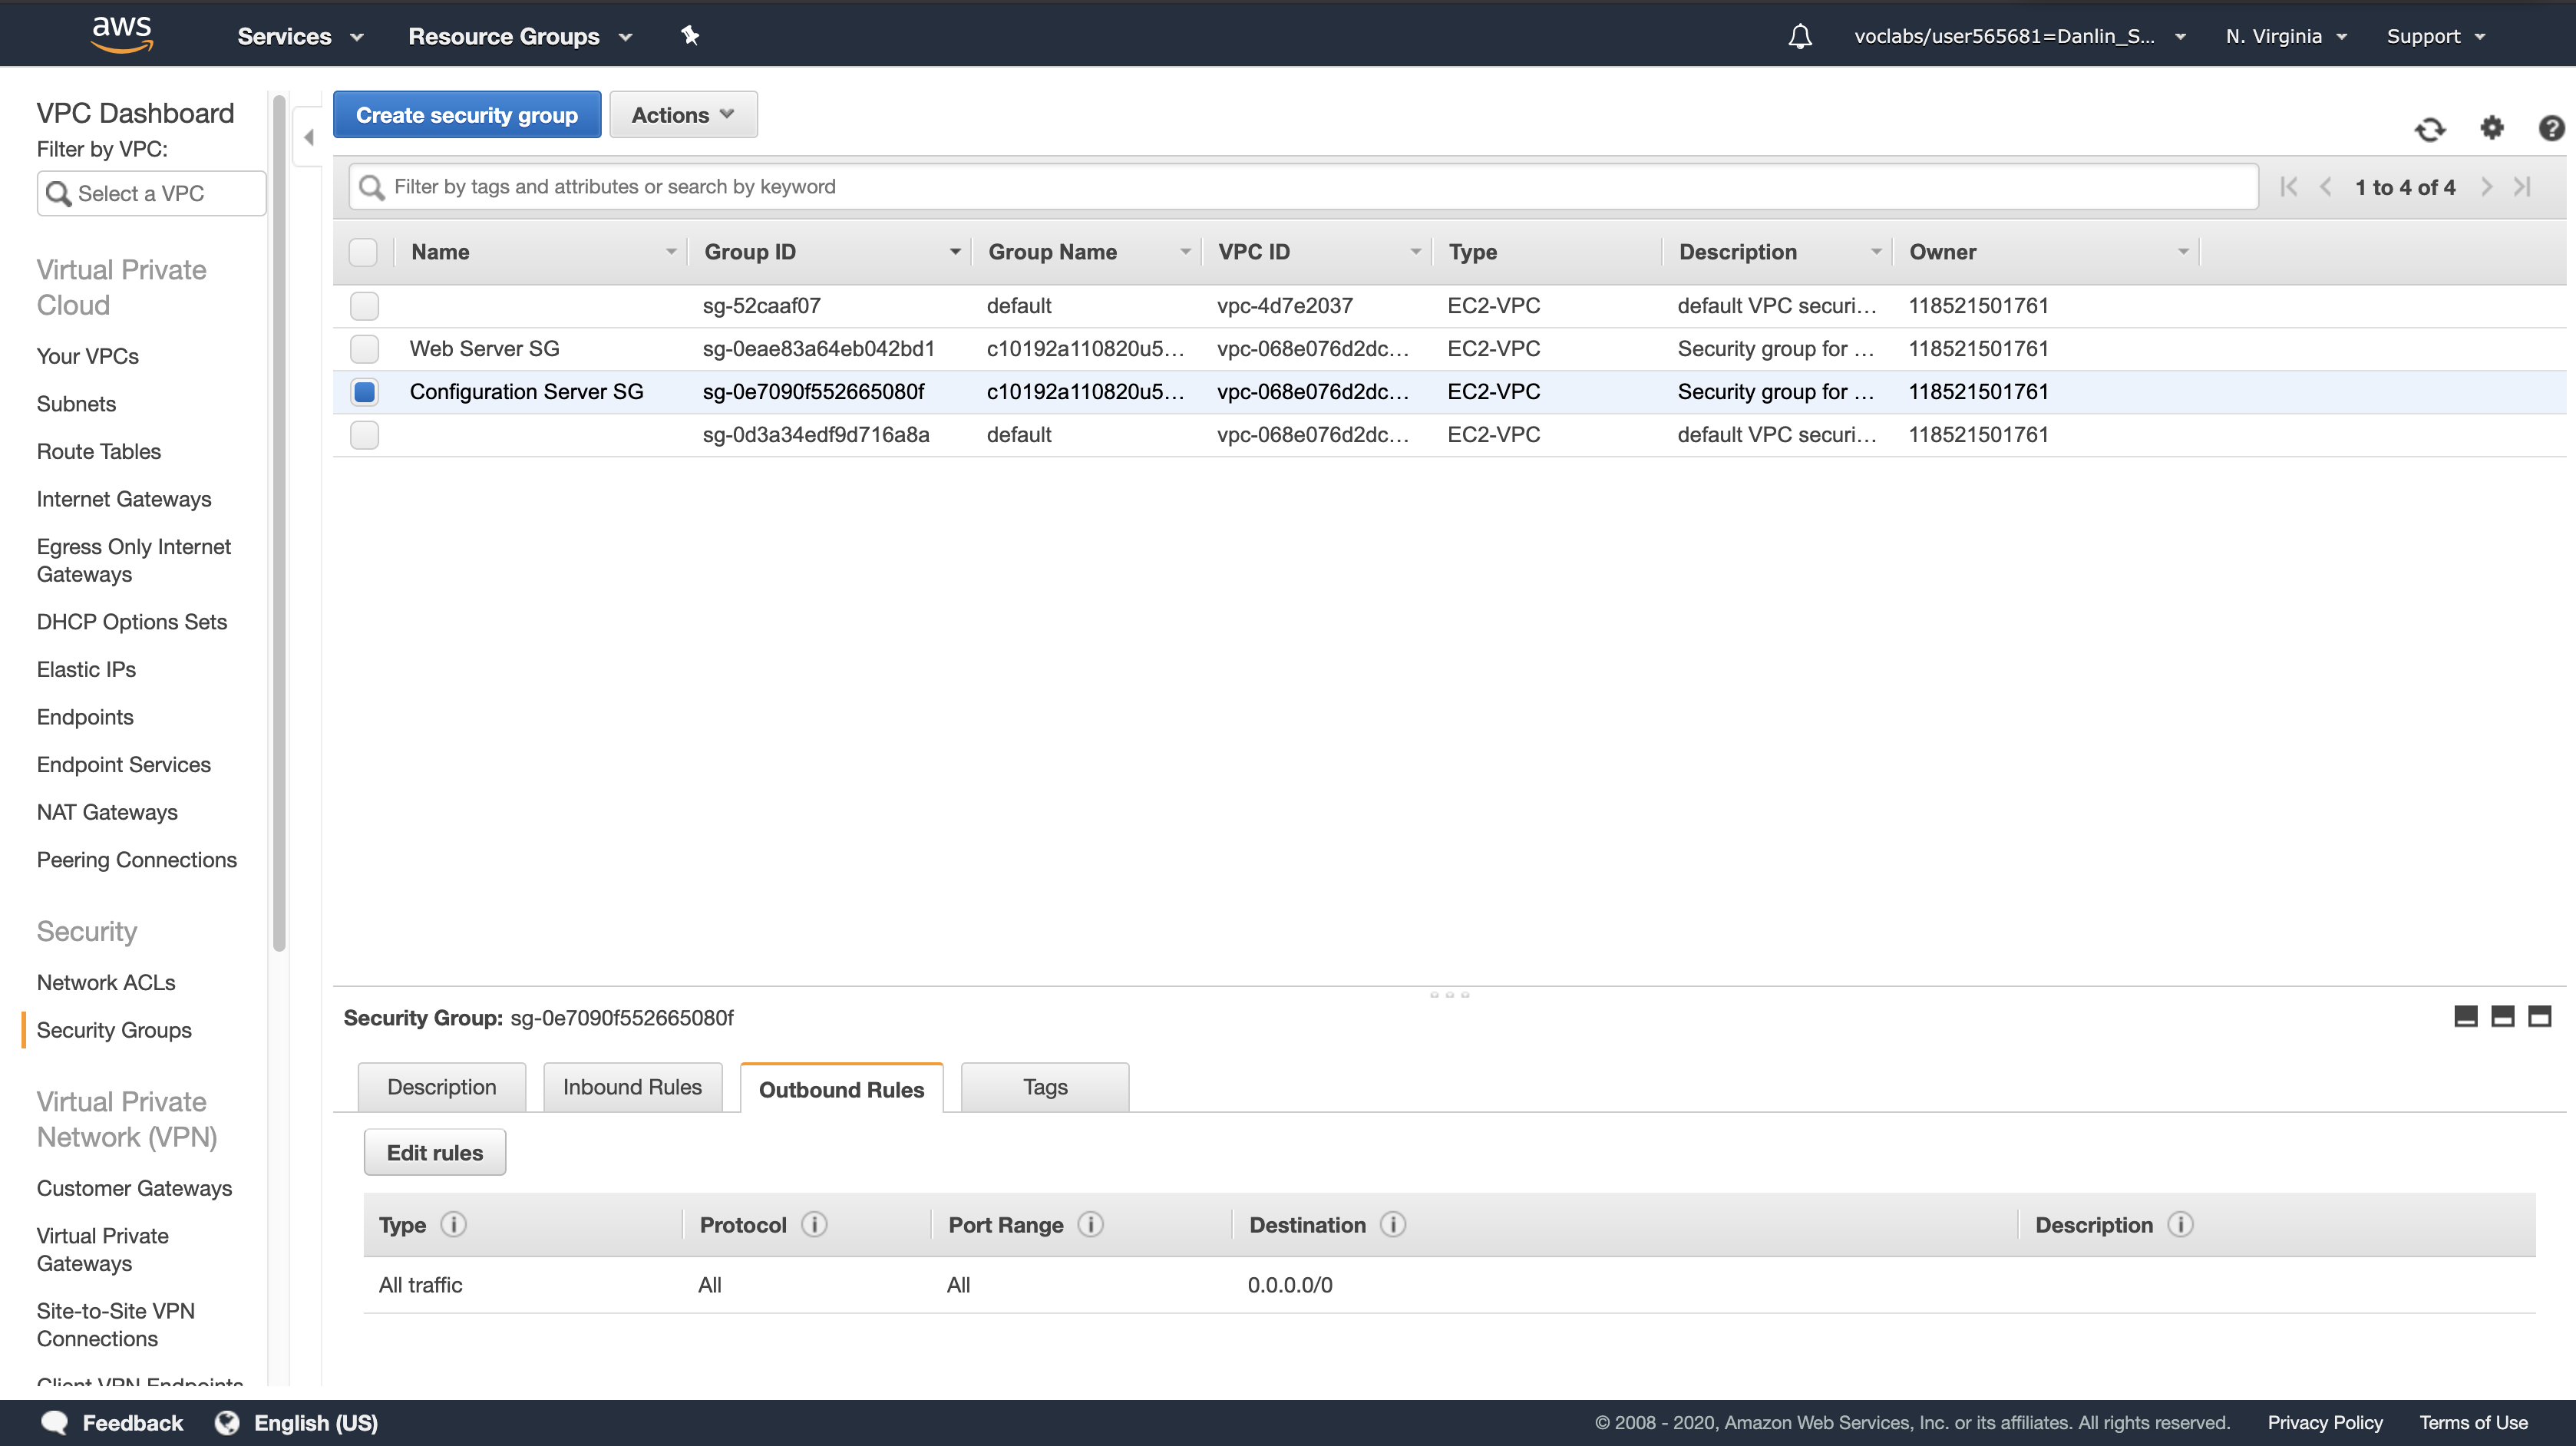
Task 1.2: Inspect Your Amazon EC2 Instance
In this task, you will review the configuration of the VPC that has already been created.
On the AWS Management Console: Click Services menu > EC2
Navigation Pane
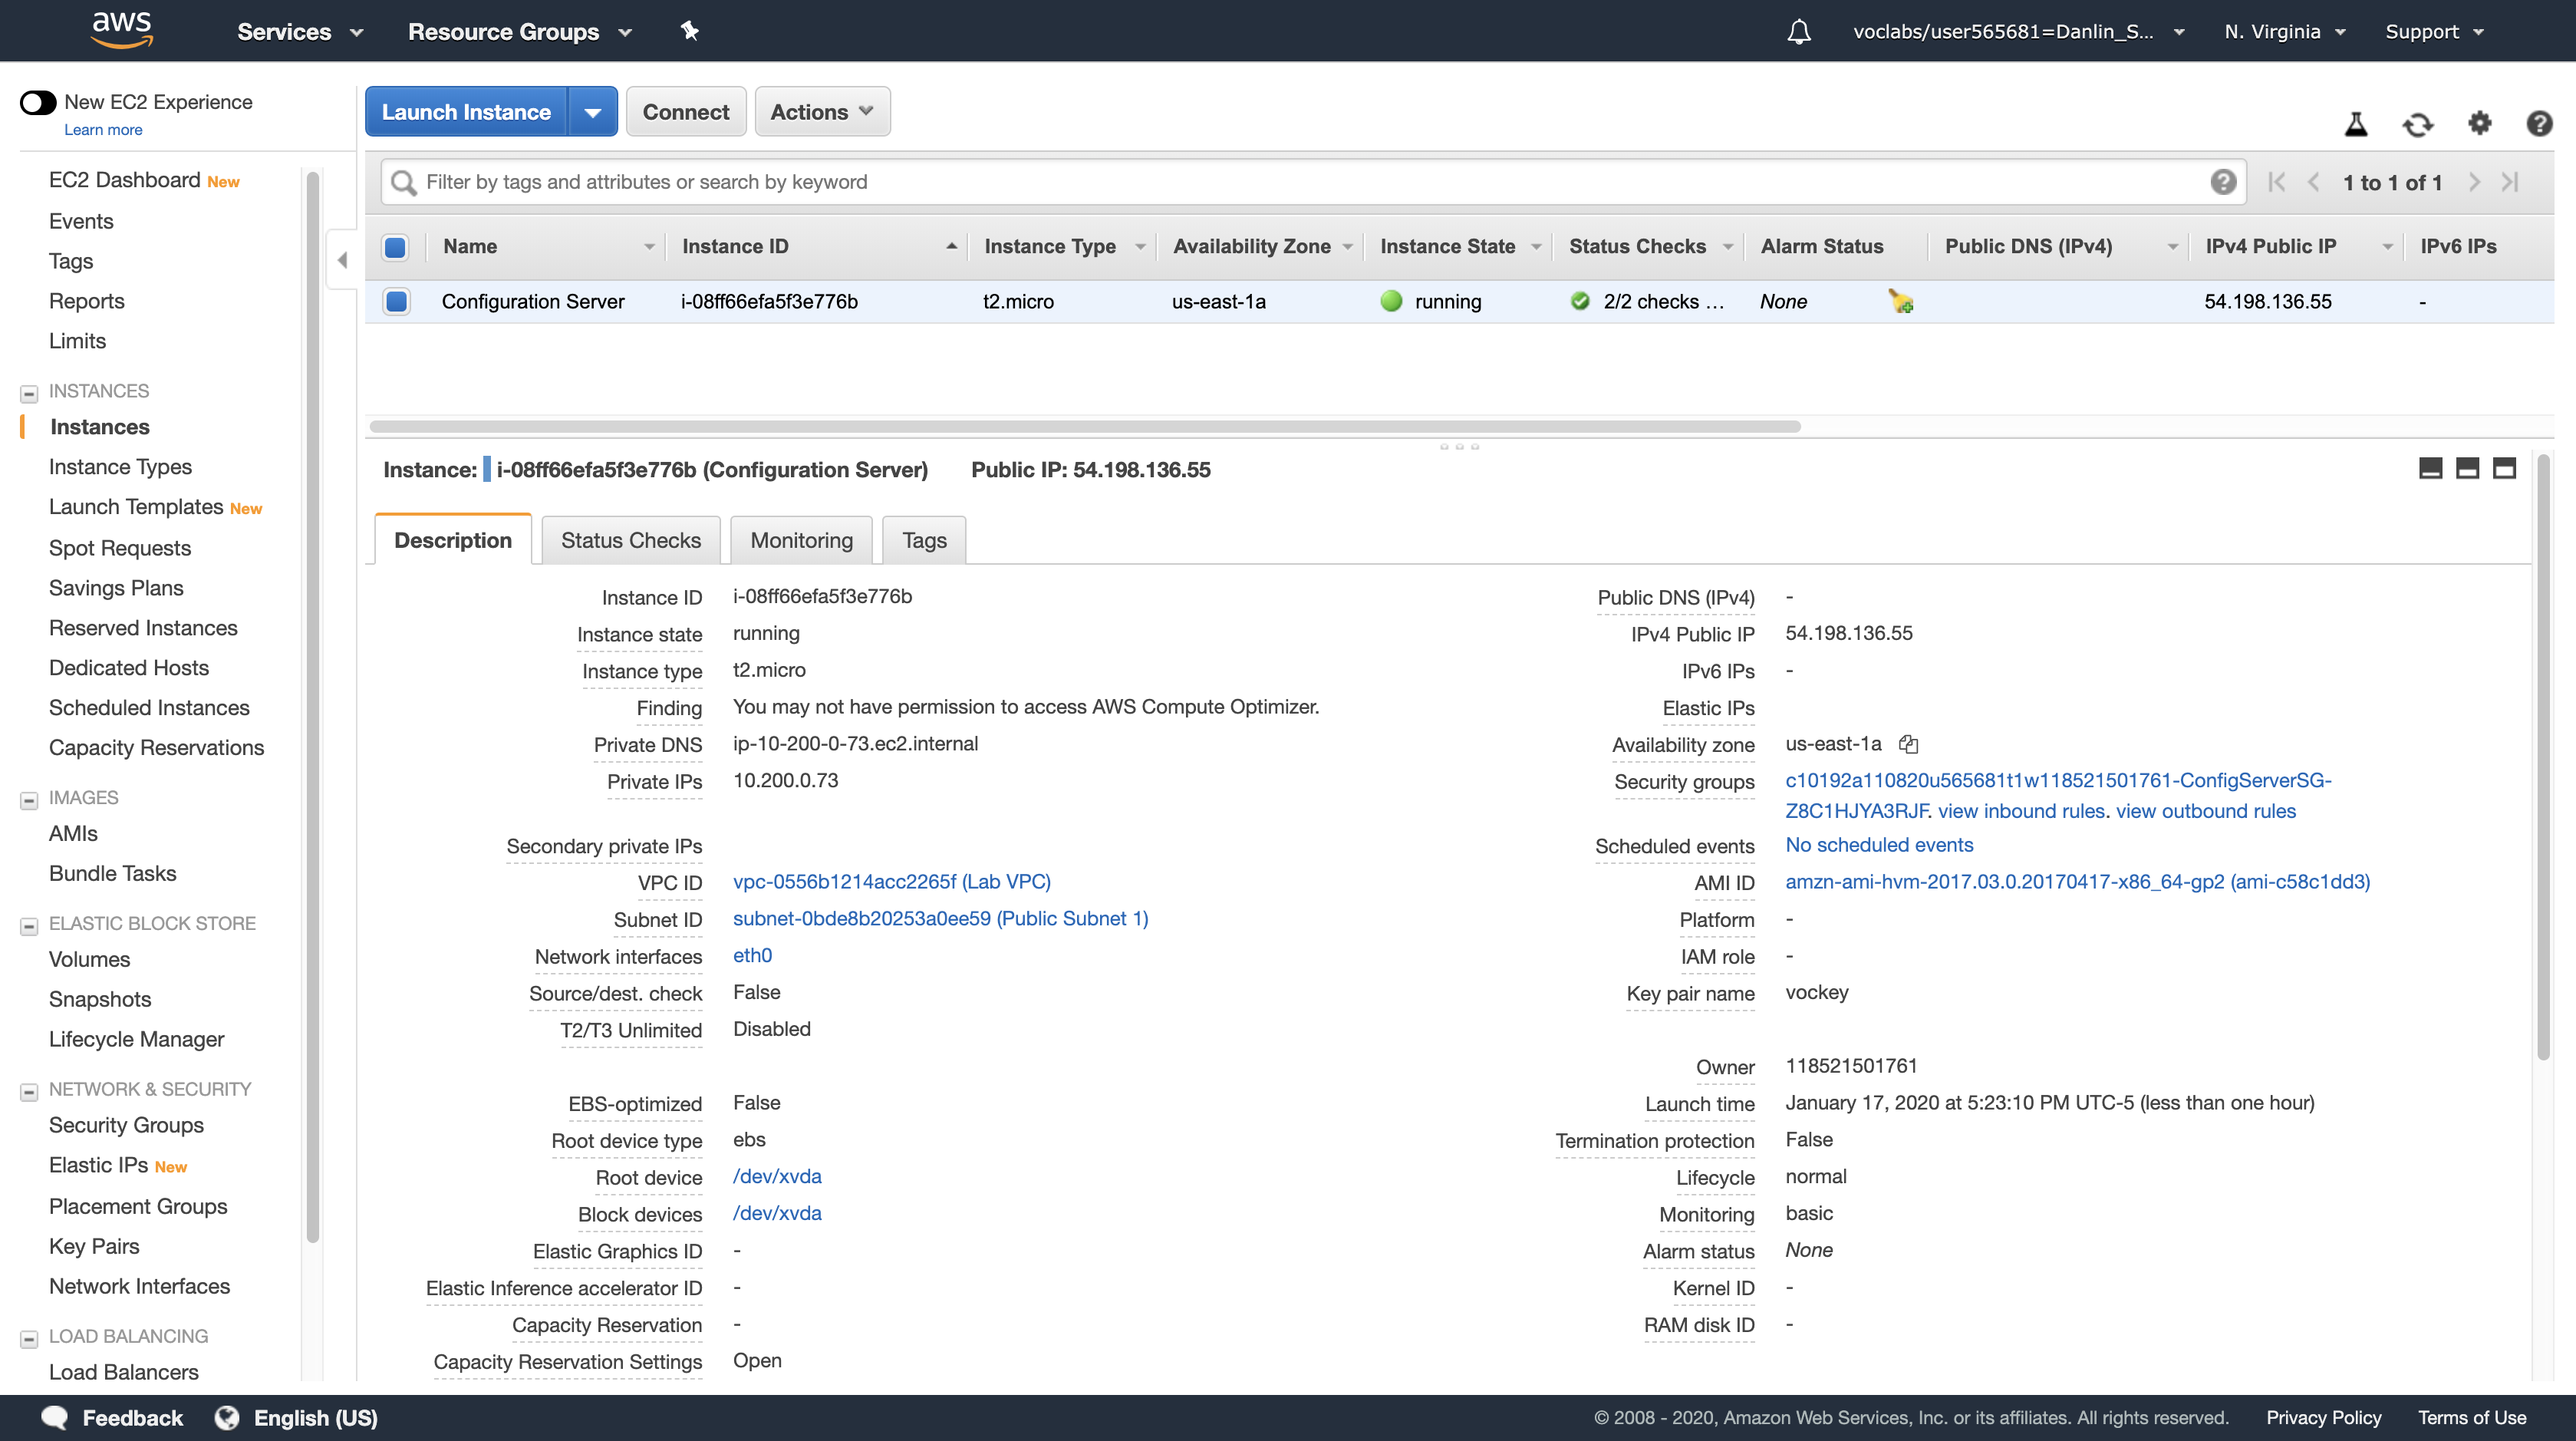
Click Instances
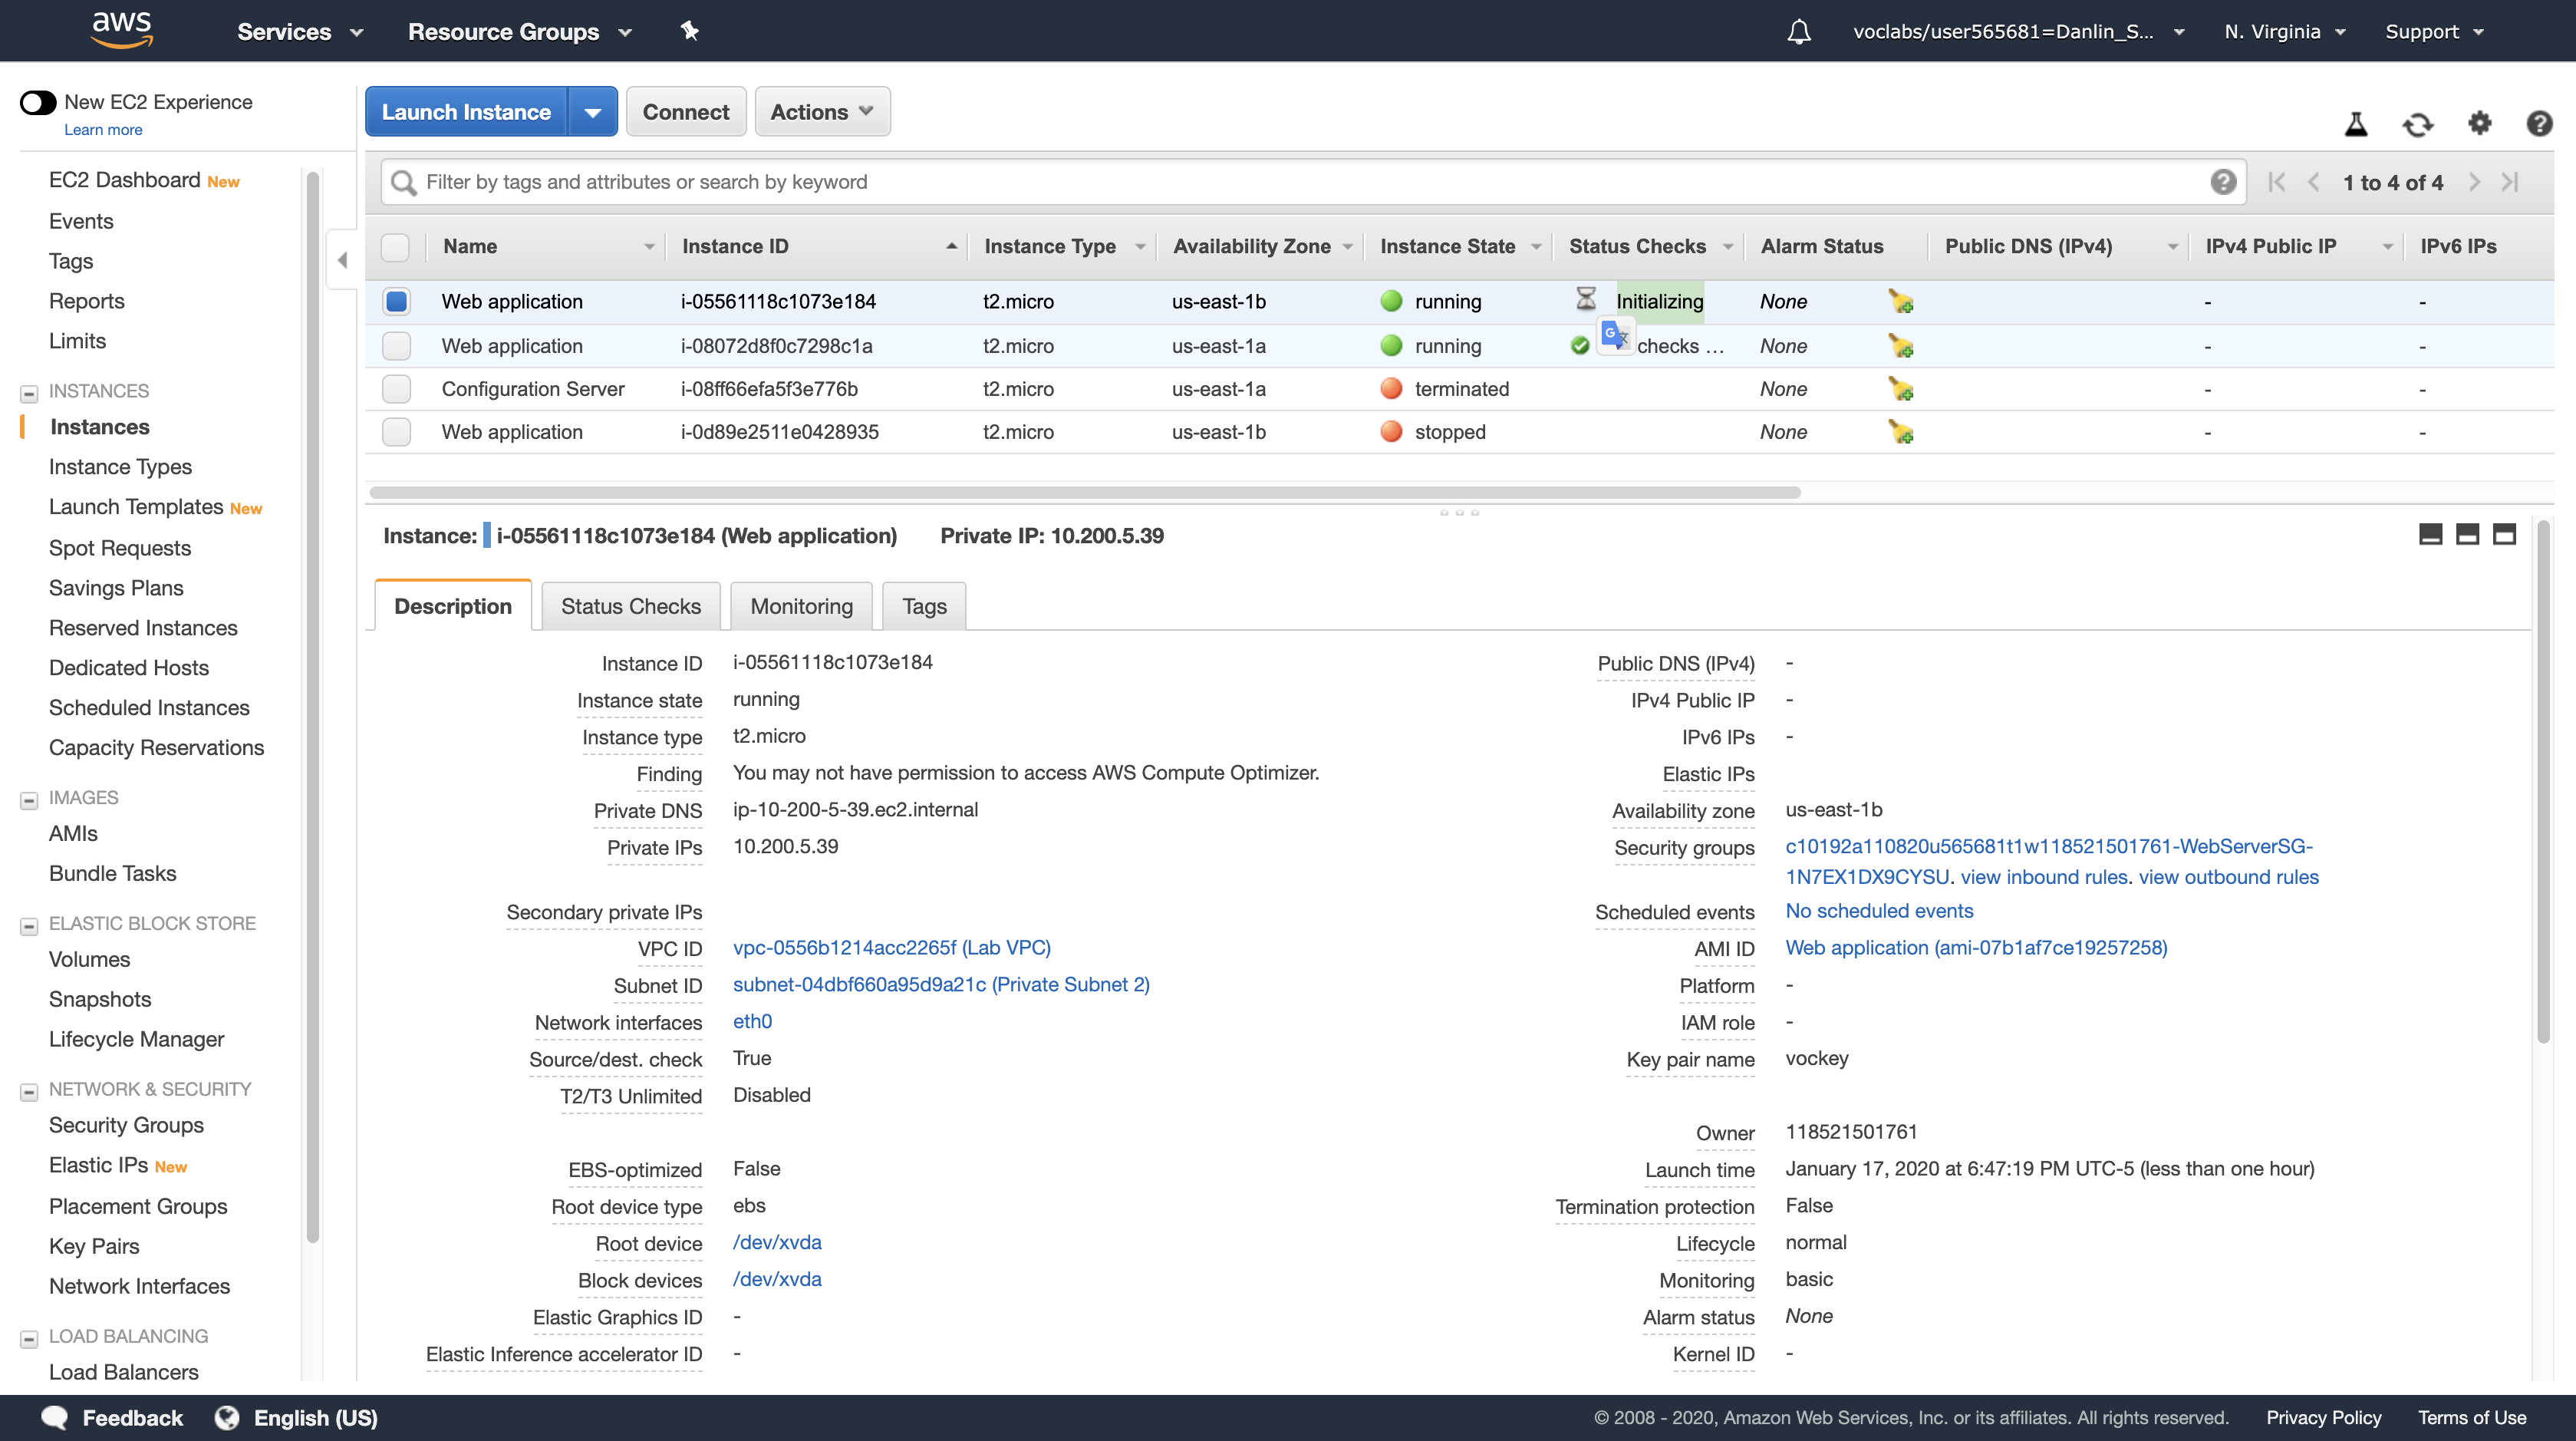
Here you can see that a Configuration Server is already running. In the Description tab in the lower half of the window, you can see the details of this instance, including its public and private IP addresses and the Availability zone, VPC, Subnet, and Security Groups.
- Public IP: 54.198.136.55
Actions menu
Click Instance Settings > View/Change User Data.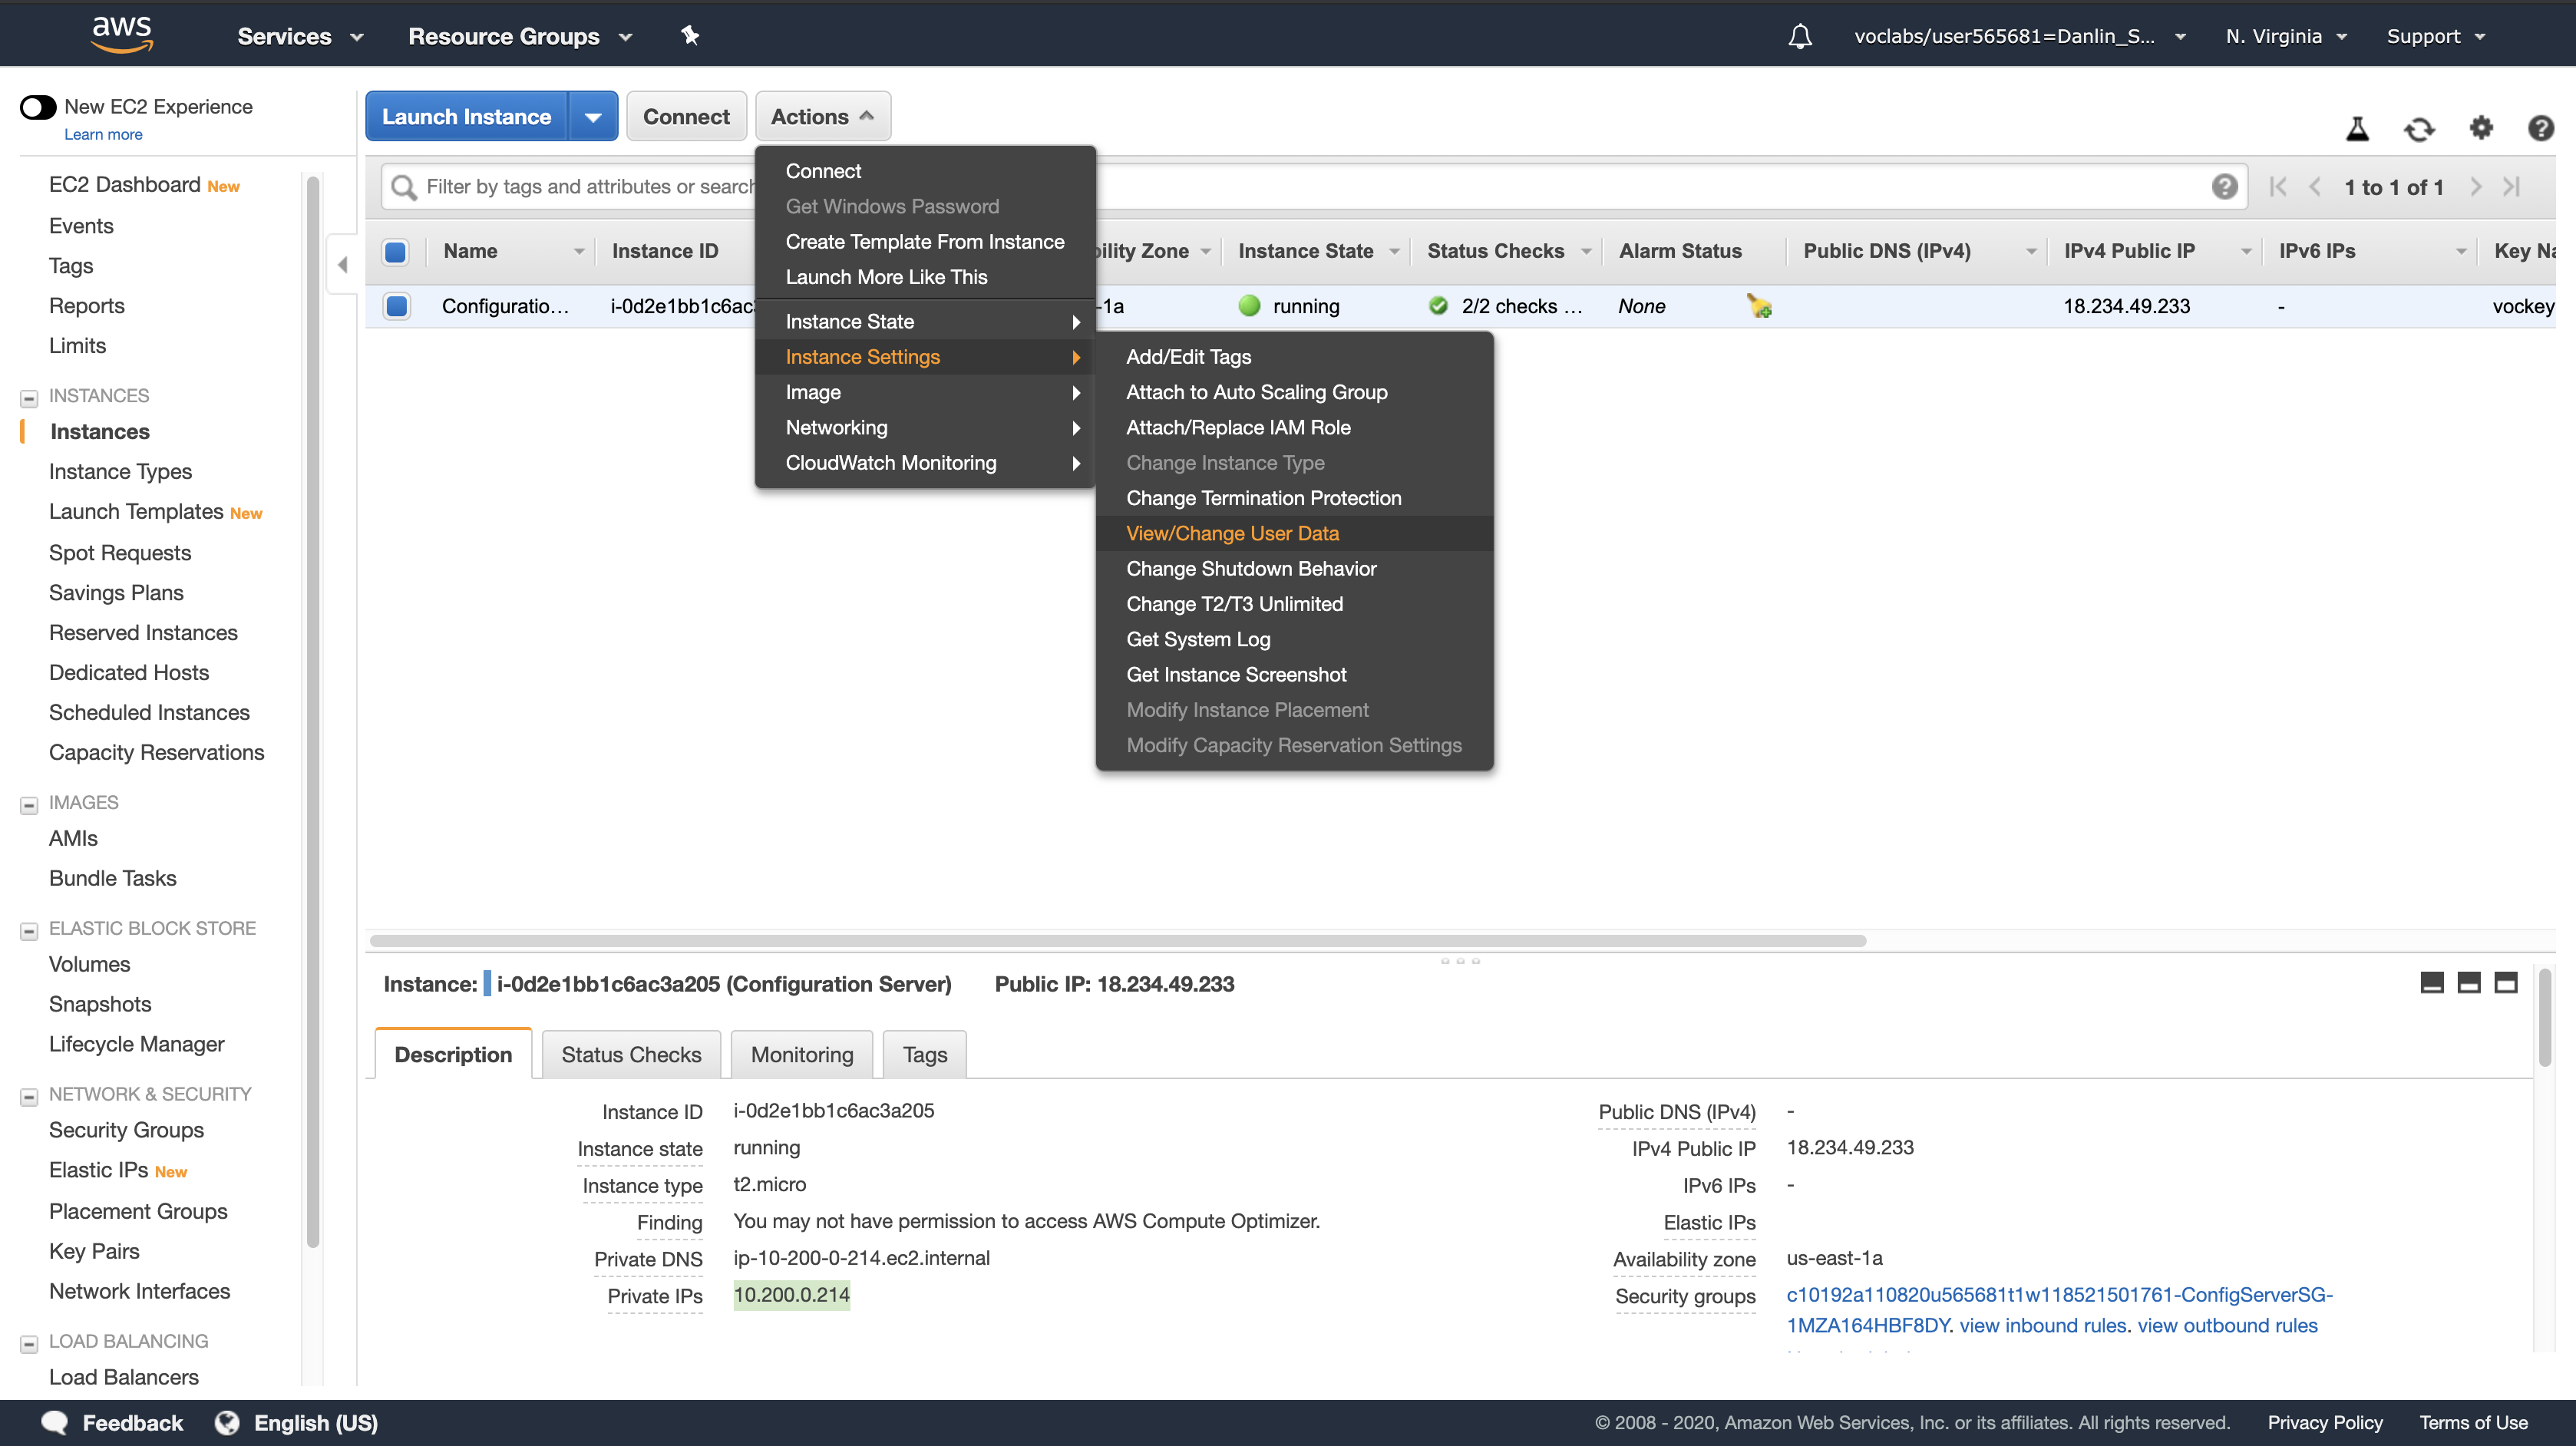
Note that no User Data appears! This means that the instance has not yet been configured to run your web application. When launching an Amazon EC2 instance, you can provide a User Data script that is executed when the instance first starts and is used to configure the instance. However, in this lab you will configure the instance yourself!
Click Cancel to close the User Data dialog box.
Even though an Amazon EC2 instance has already been launched for you, it is not yet running your web application. To install the web application, you will login to the instance via SSH and run commands that install and configure the application.
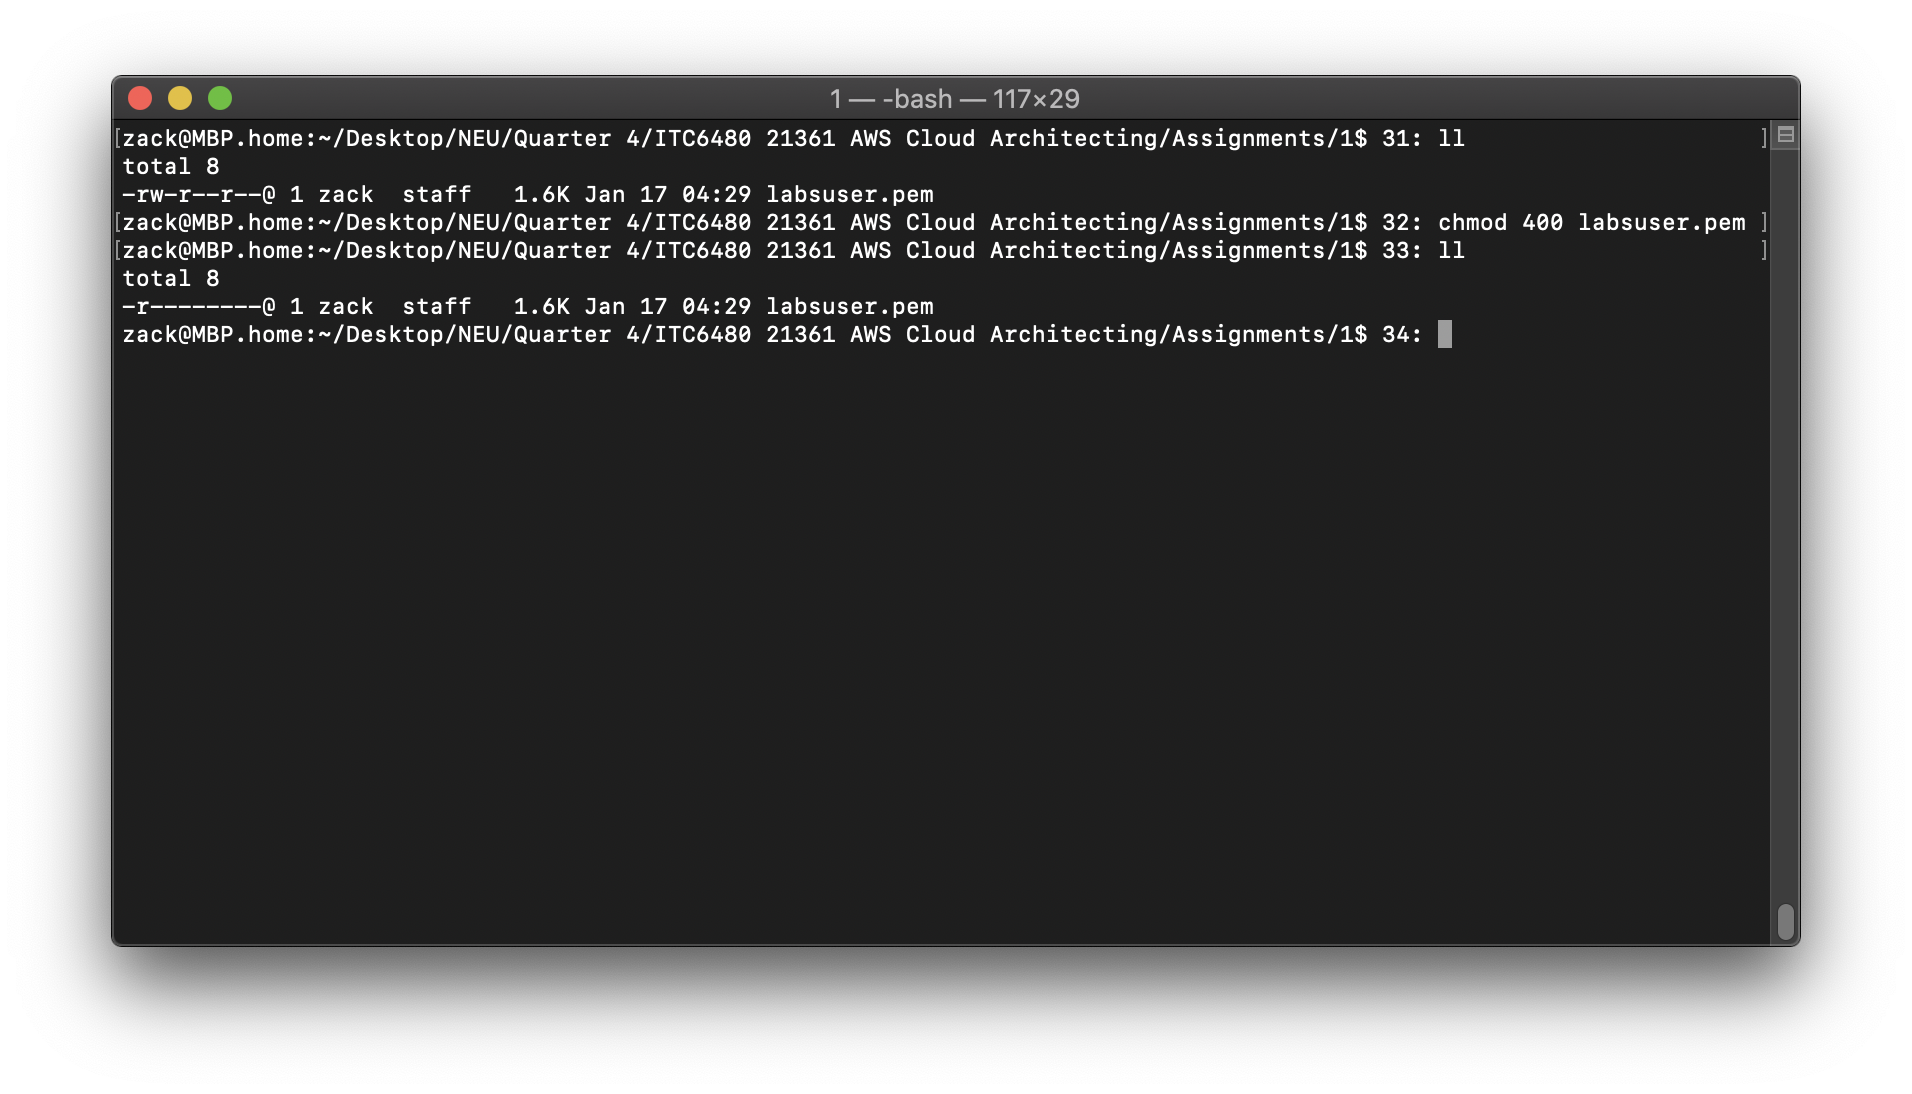
macOS and Linux Users
- Click on the
Detailsdrop down menu above these instructions you are currently reading, and then clickShow. A Credentials window will open. - Click on the Download button and save the labsuser.pem file.
- Then exit the Details panel by clicking on the
X.
Open a terminal window, and change directory cd to the directory where the labsuser.pem file was downloaded.
1 | cd ~/Downloads |
For example, run this command, if it was saved to your Downloads directory:
Change the permissions on the key to be read only, by running this command:
1 | chmod 400 labsuser.pem |
Copy the Configuration Server public IP at Task 1.2
Run this command (replace
1 | ssh -i labsuser.pem ec2-user@<public-ip> |
Type yes when prompted to allow a first connection to this remote SSH server.
Because you are using a key pair for authentication, you will not be prompted for a password.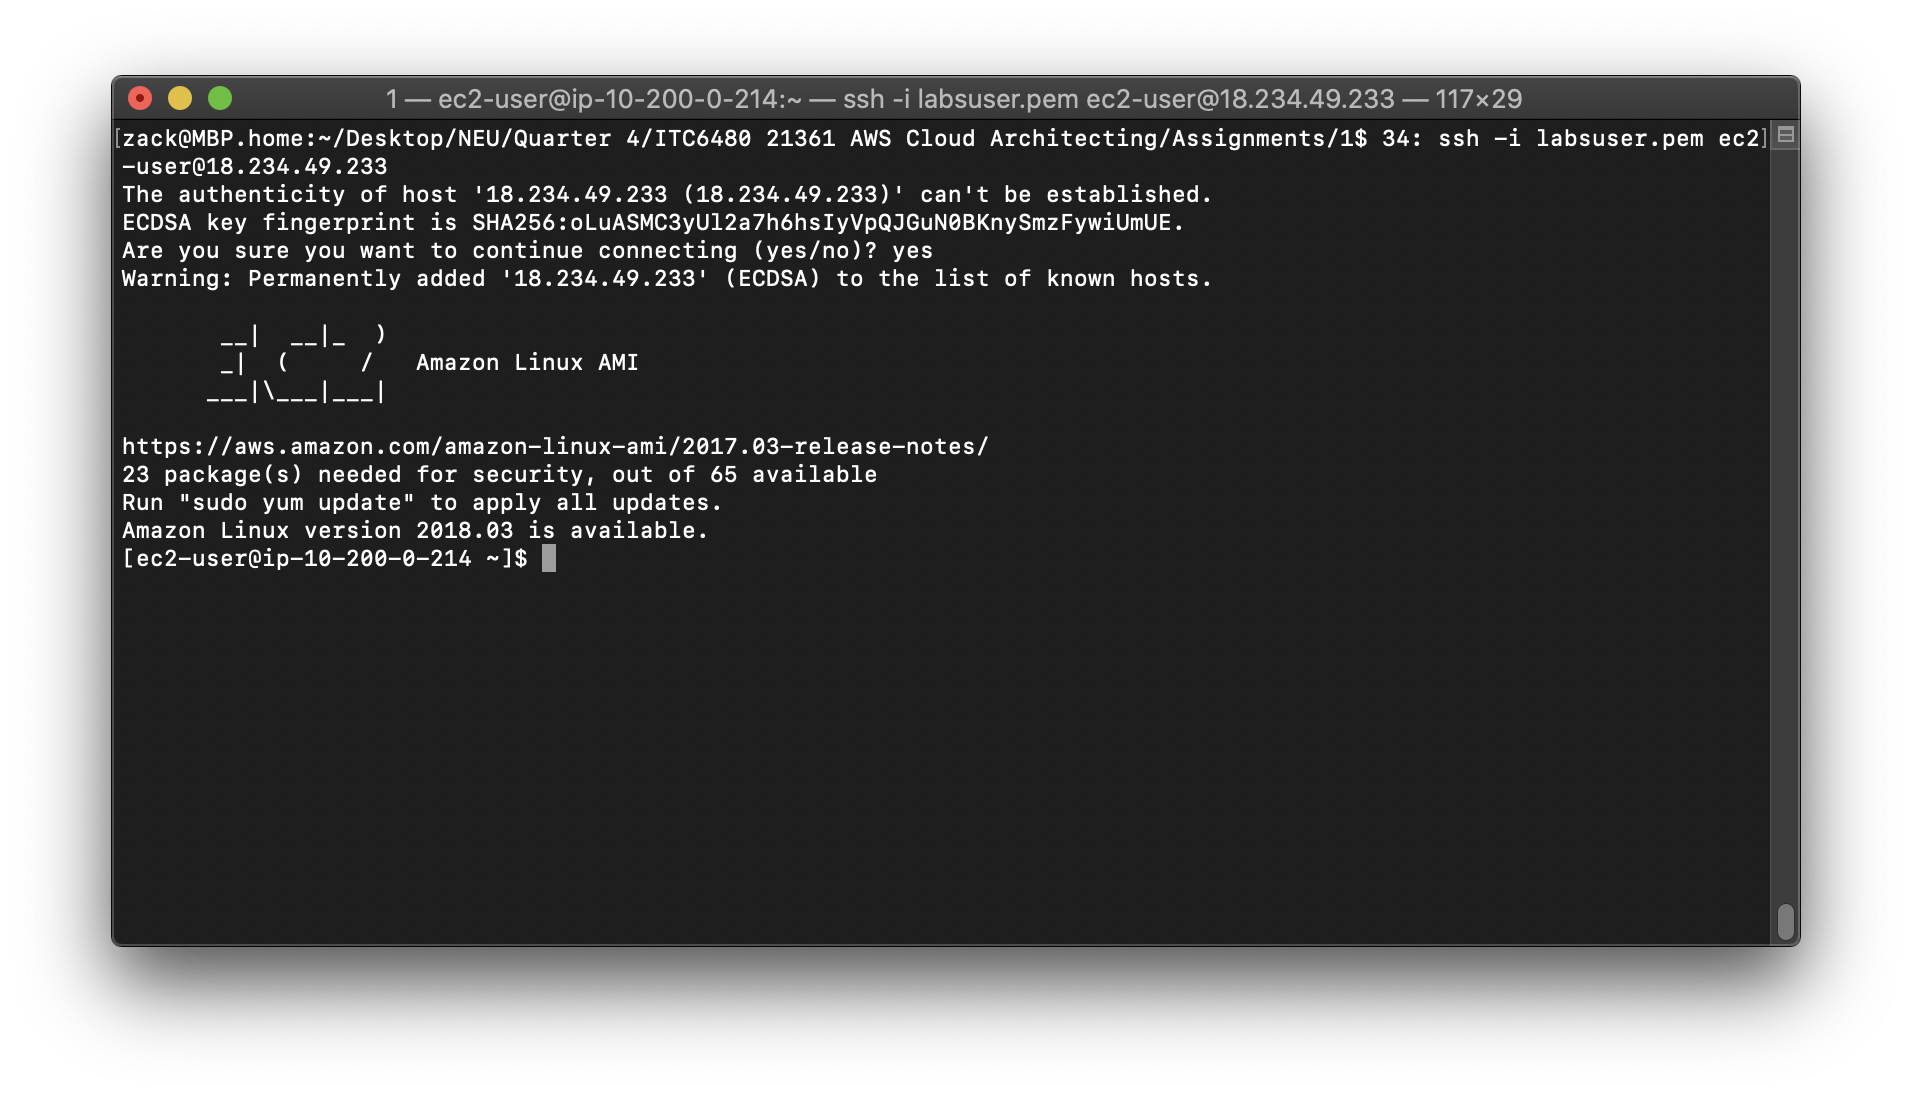
Task 3: Download, Install, and Launch Your Web Server’s PHP Application
In this task, you will be performing typical System Administrator activities to install and configure the web application. In a following task, you will create an image of this machine to automatically deploy the application on more instances to make it Highly Available.
The commands in this task will download, install, and launch your PHP web application. The instructions will step you through each command one at a time so you can understand exactly what you are doing to accomplish this task.
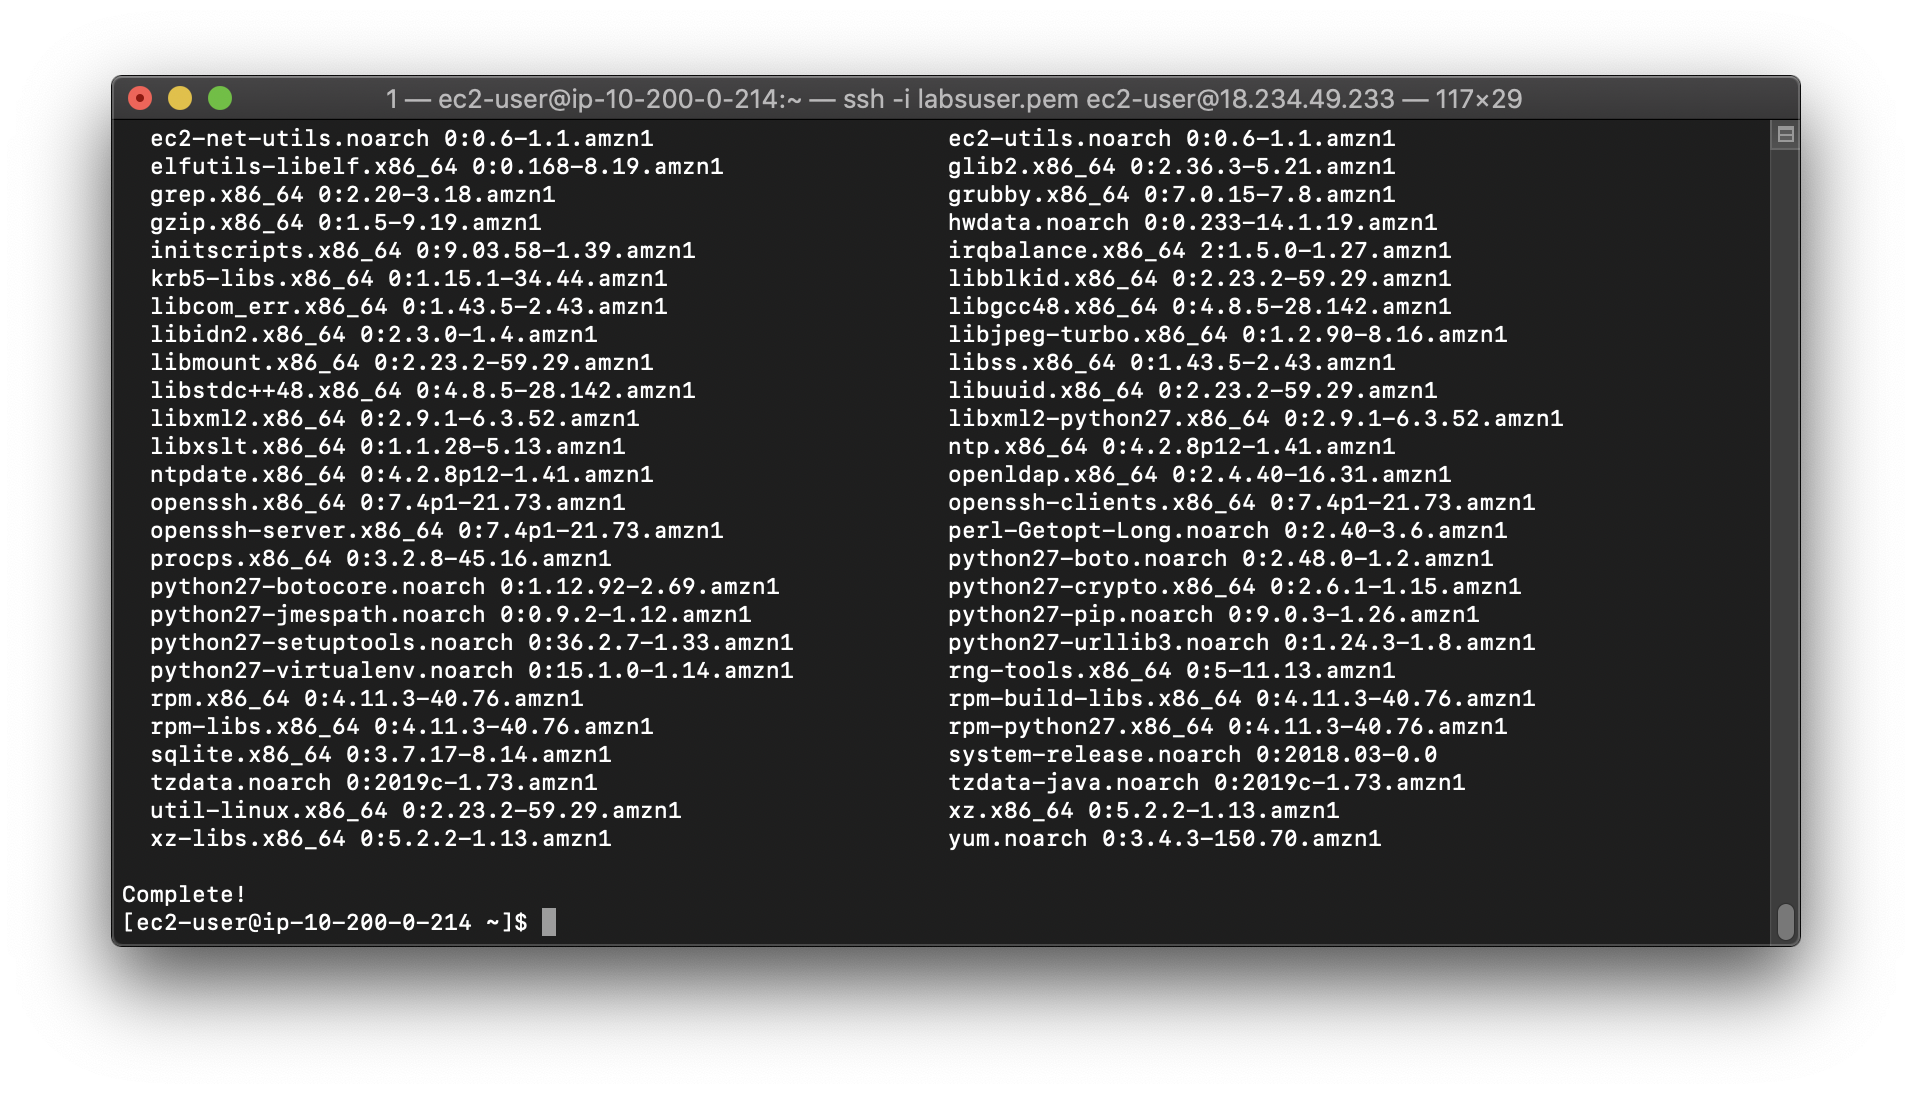
Update yum
To update the base software installed your instance, execute the following command:
1 | sudo yum -y update |
Install Apache web sever
To install a package that creates a web server, execute the following command.
- httpd is the Apache HyperText Transfer Protocol (HTTP) server program
1
sudo yum -y install httpd php
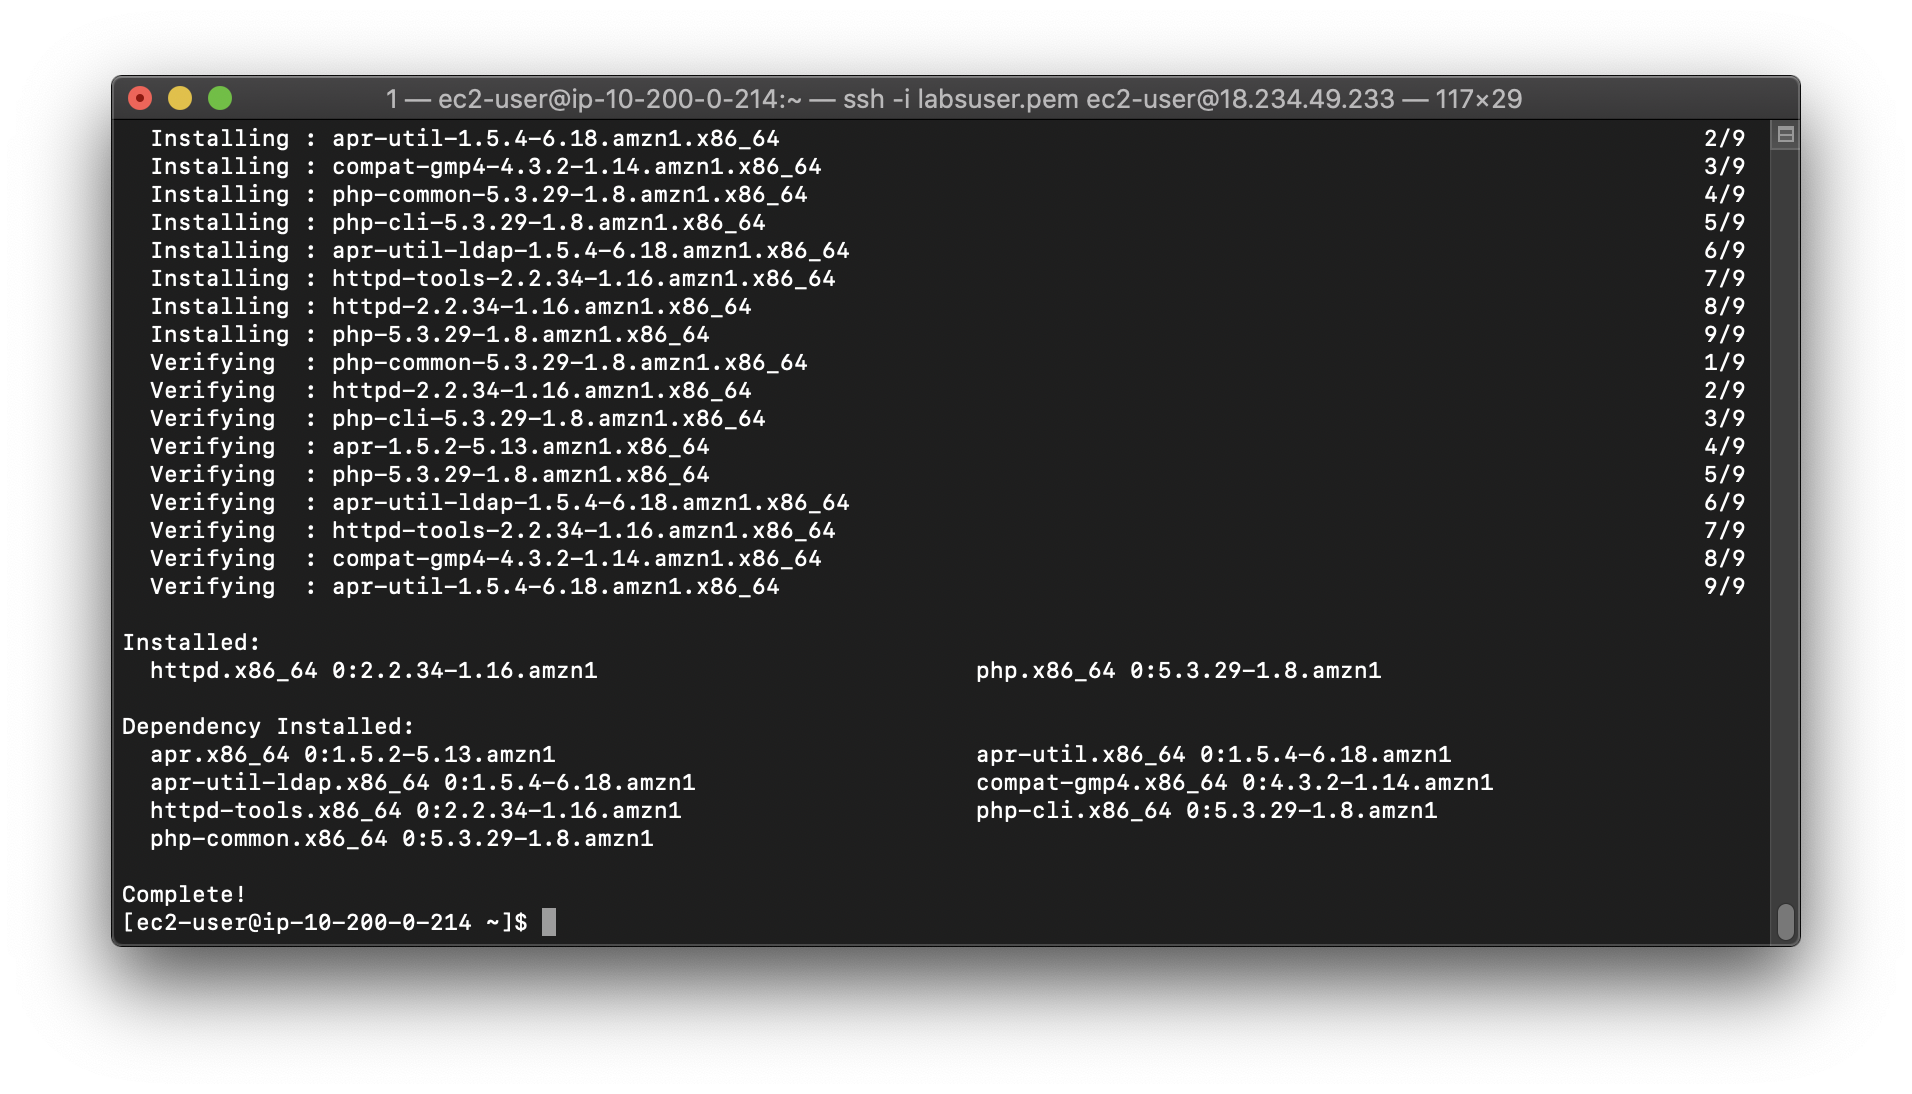
Enable Apache server when the EC2 instance startup
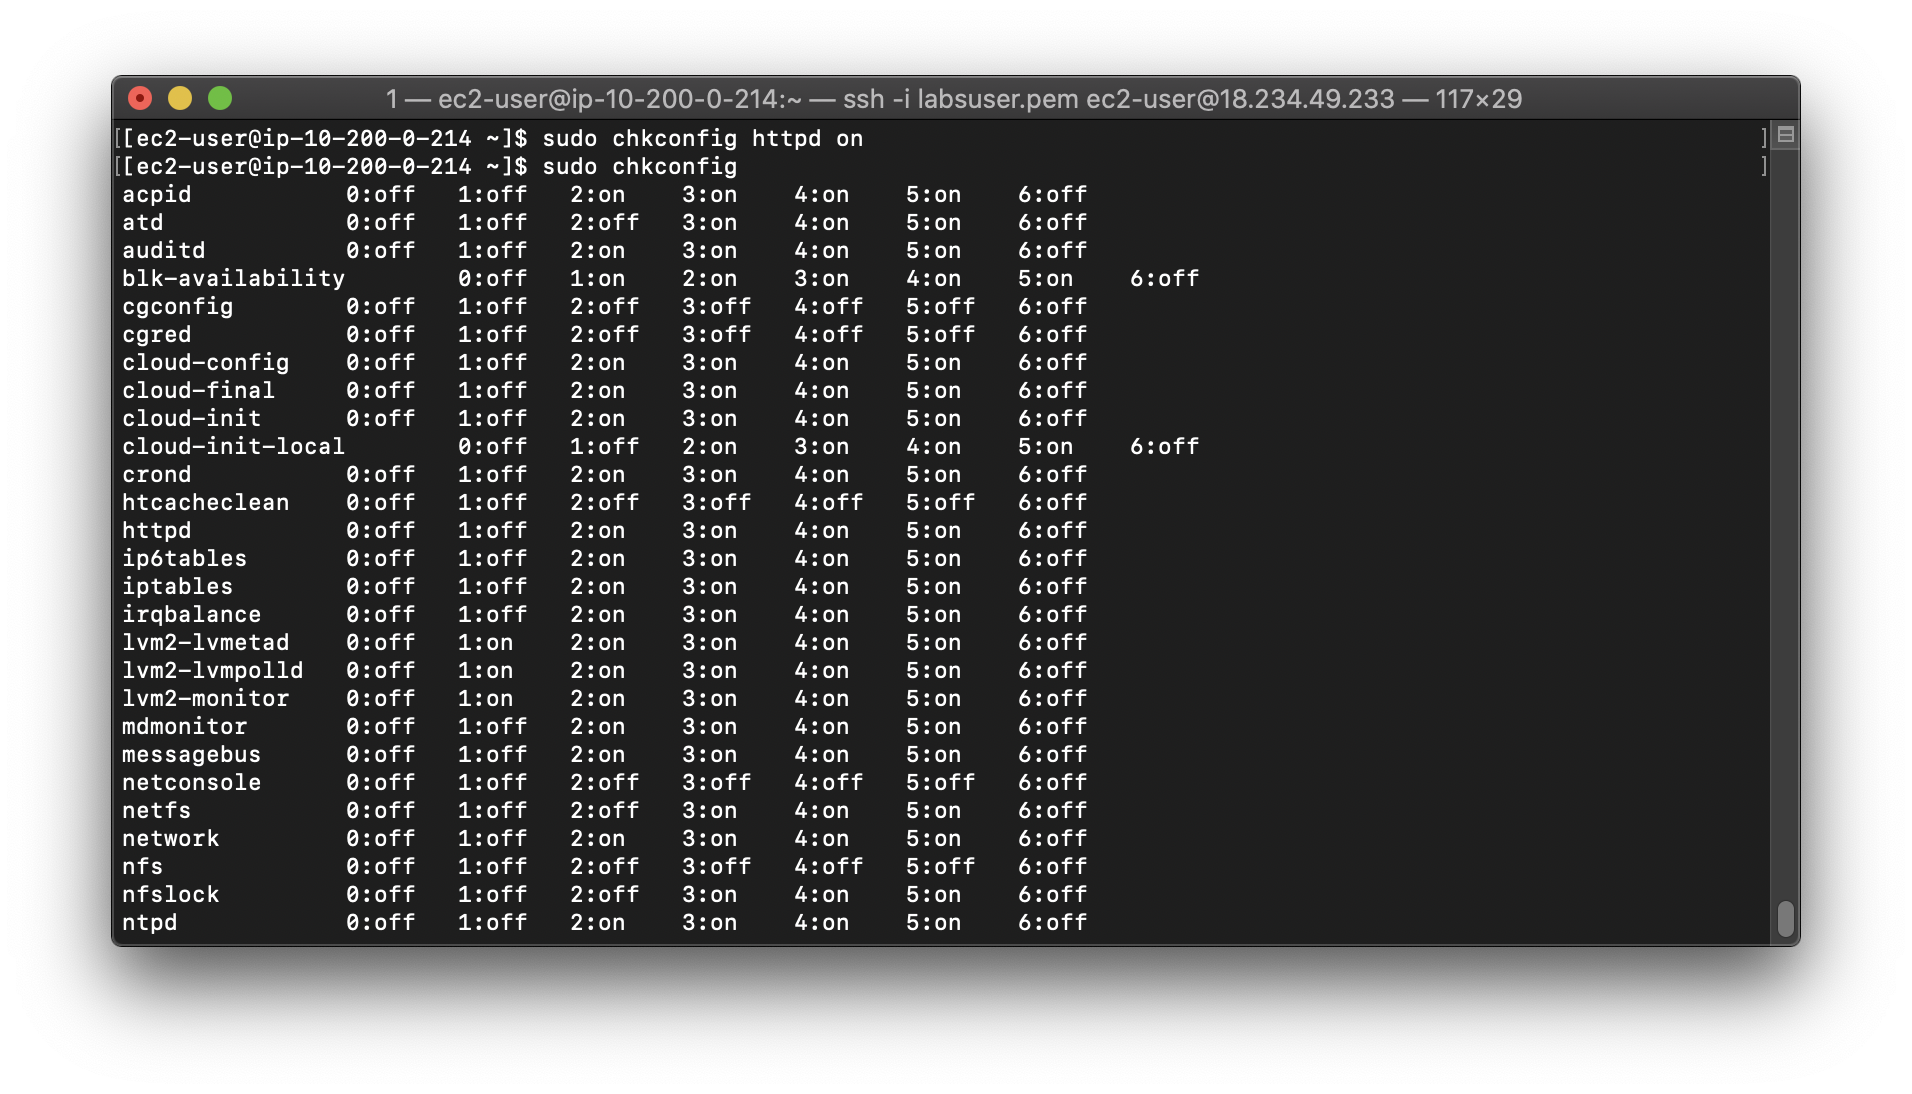
1 | sudo chkconfig httpd on |
Download PHP web application sample
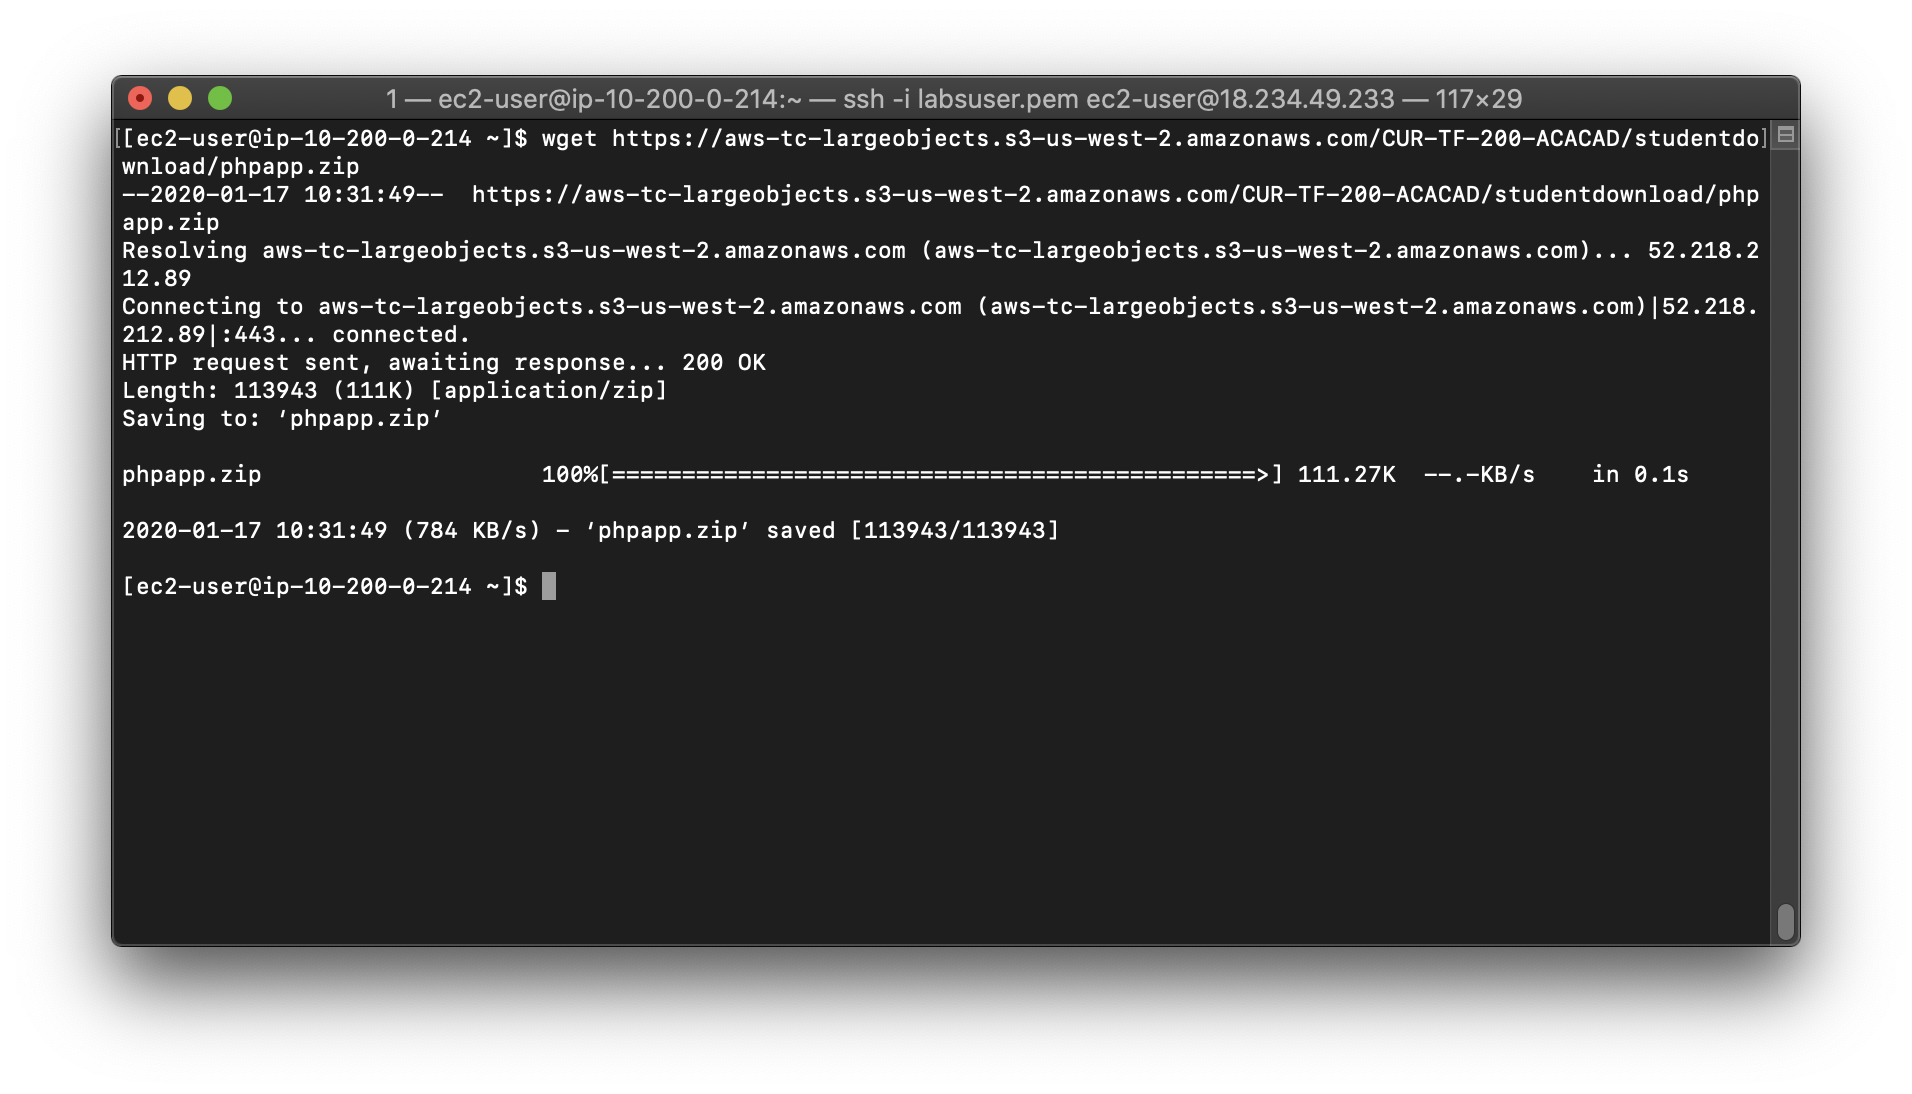
1 | wget https://aws-tc-largeobjects.s3-us-west-2.amazonaws.com/CUR-TF-200-ACACAD/studentdownload/phpapp.zip |
Extract the application to the work director /var/www/html/
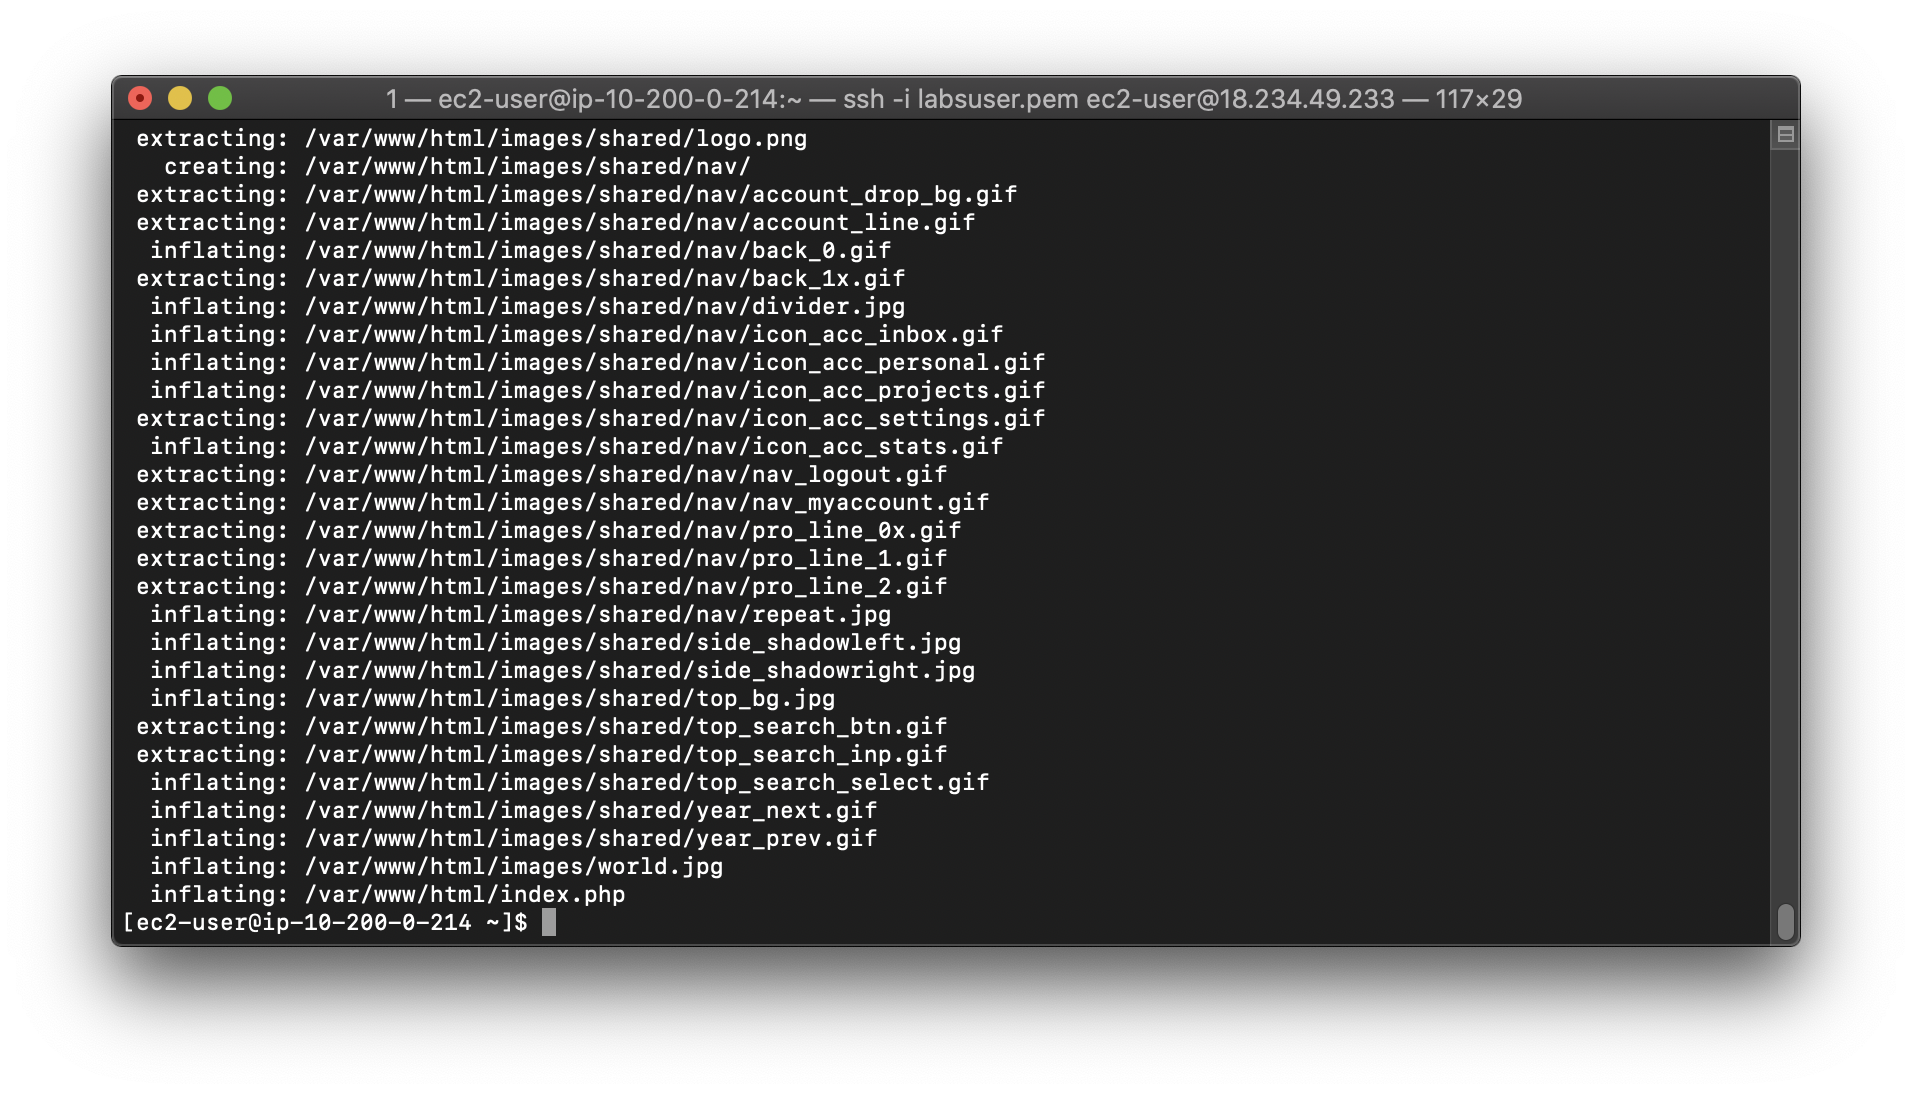
1 | sudo unzip phpapp.zip -d /var/www/html/ |
Activate Apache Web server
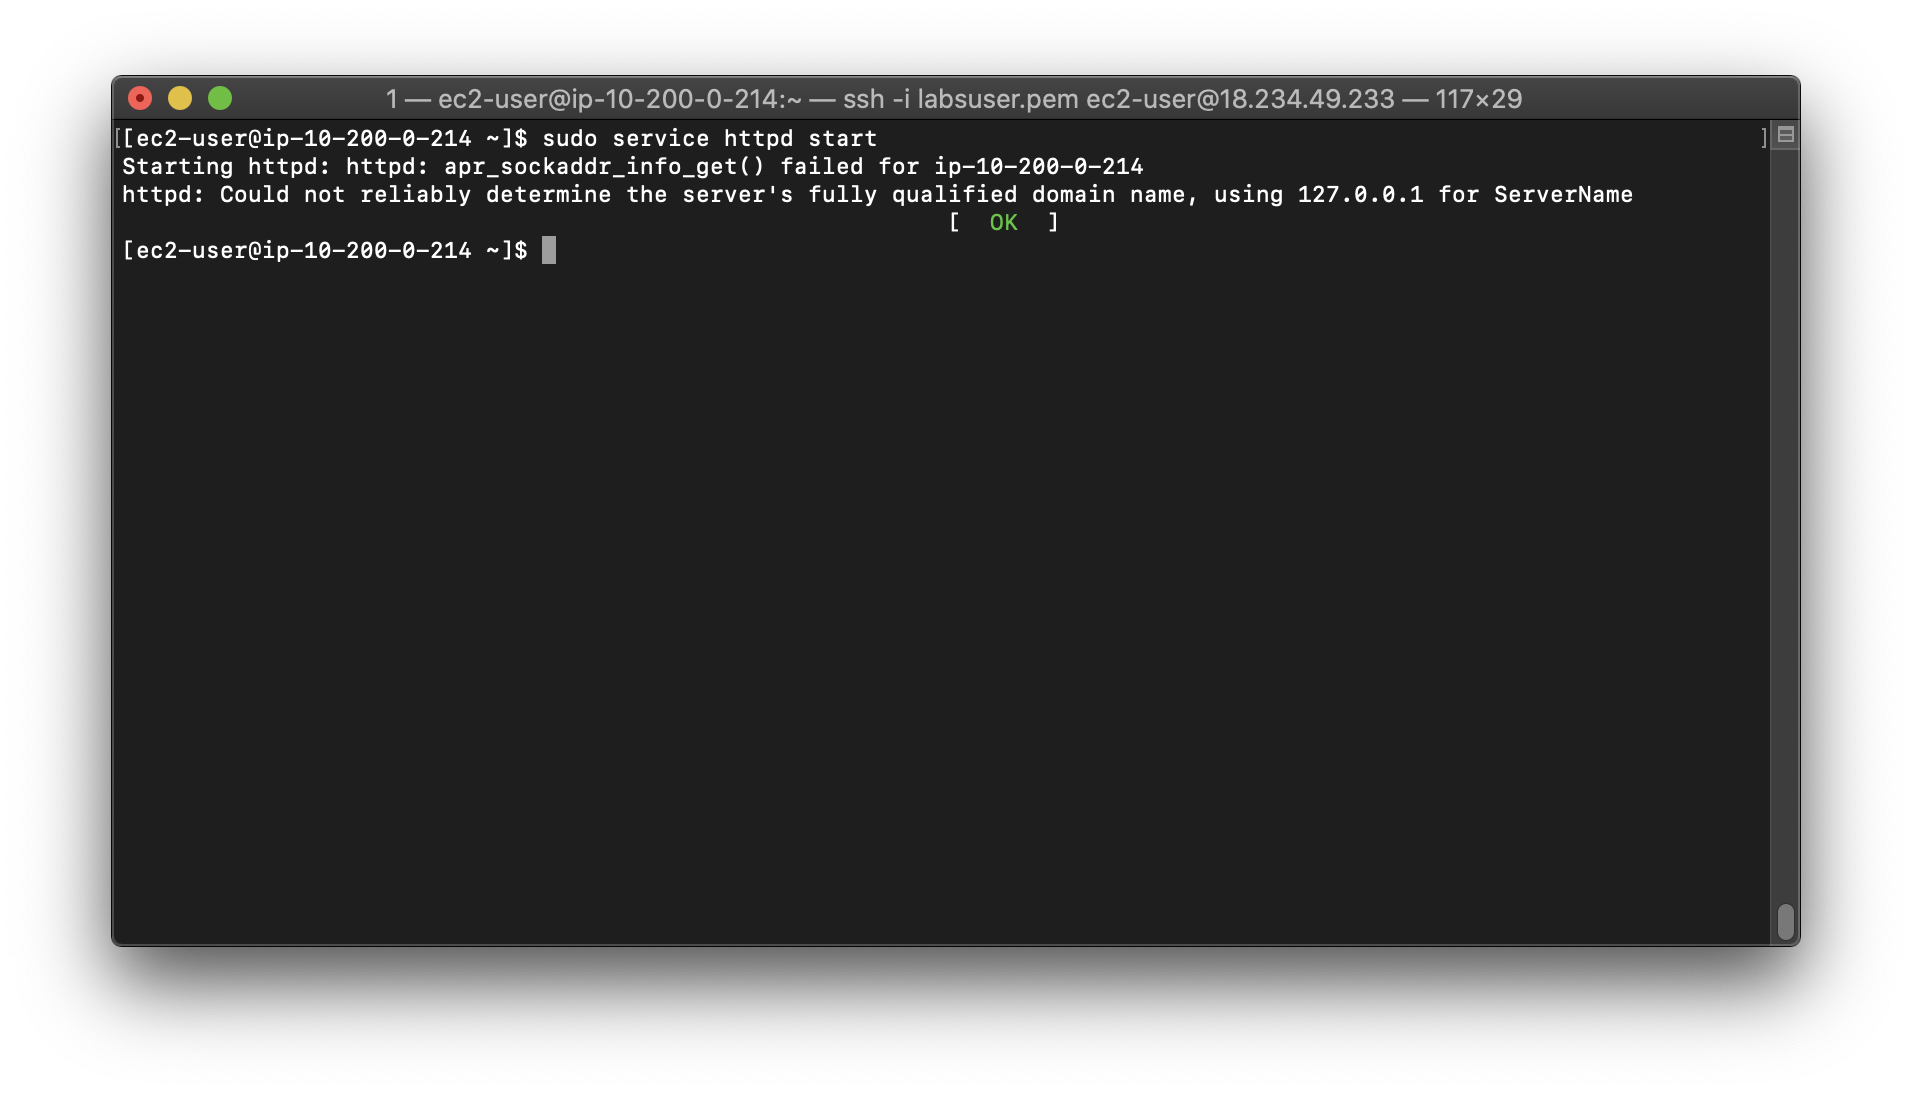
1 | sudo service httpd start |
Check
Open a new web browser tab, paste the Public IP address for your instance in the address bar and hit Enter. (That is the same IP address you copied into a Text Editor and used with ssh/PuTTy.)
The web application should appear and will display information about your location (actually, the location of your Amazon EC2 instance). This information is obtained from freegeoip.app.
Close the web application browser tab that you opened in the previous step.
Return to your SSH session, execute the following command. It will exit the connection between your computer and your EC2 instance.
1 | exit |
Task 4: Create an Amazon Machine Image (AMI)
Now that your web application is configured on your instance, you will create an Amazon Machine Image (AMI) of it. An AMI is a copy of the disk volumes attached to an Amazon EC2 instance. When a new instance is launched from an AMI, the disk volumes will contain exactly the same data as the original instance.
This is an excellent way to clone instances to run an application on multiple instances, even across multiple Availability Zones.
In this task, you will create an AMI from your Amazon EC2 instance. You will later use this image to launch additional, fully-configured instances to provide a Highly Available solution.
EC2 Management Console
Ensure that your Configuration Server is selected, and click Actions > Image > Create Image.
You will see that a Root Volume is currently associated with the instance. This volume will be copied into the AMI.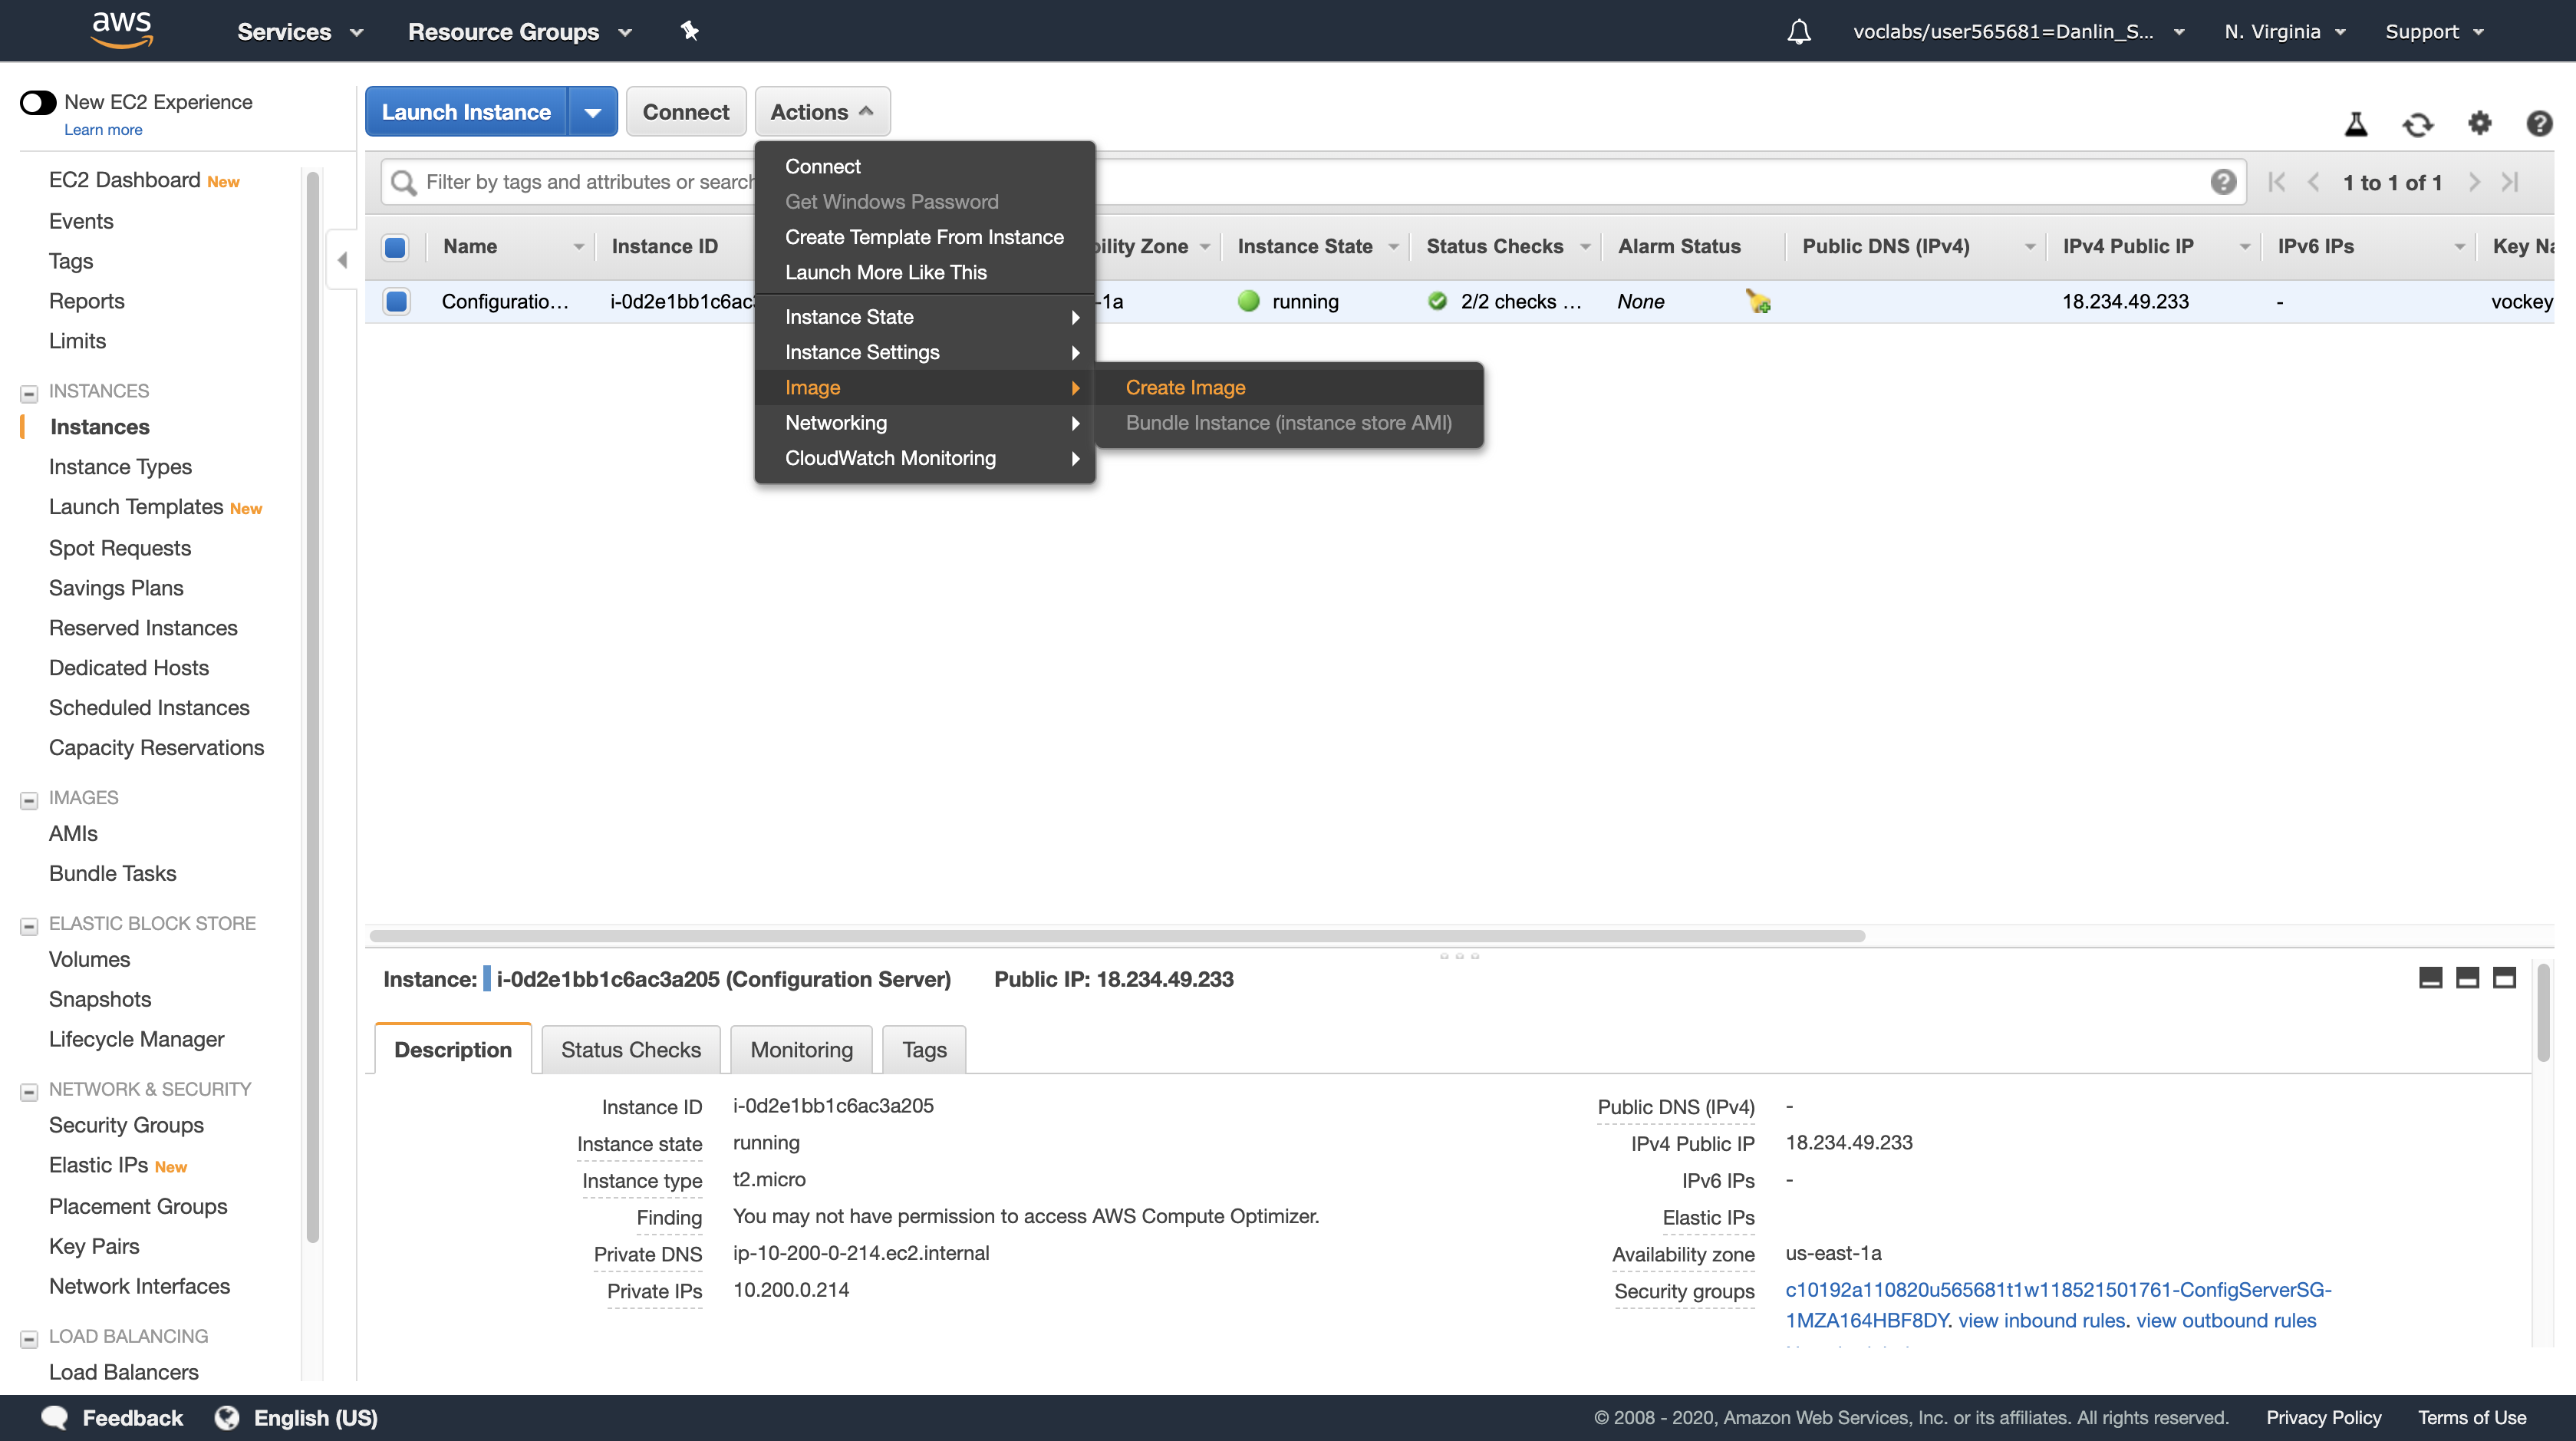
For Image name, type: Web application
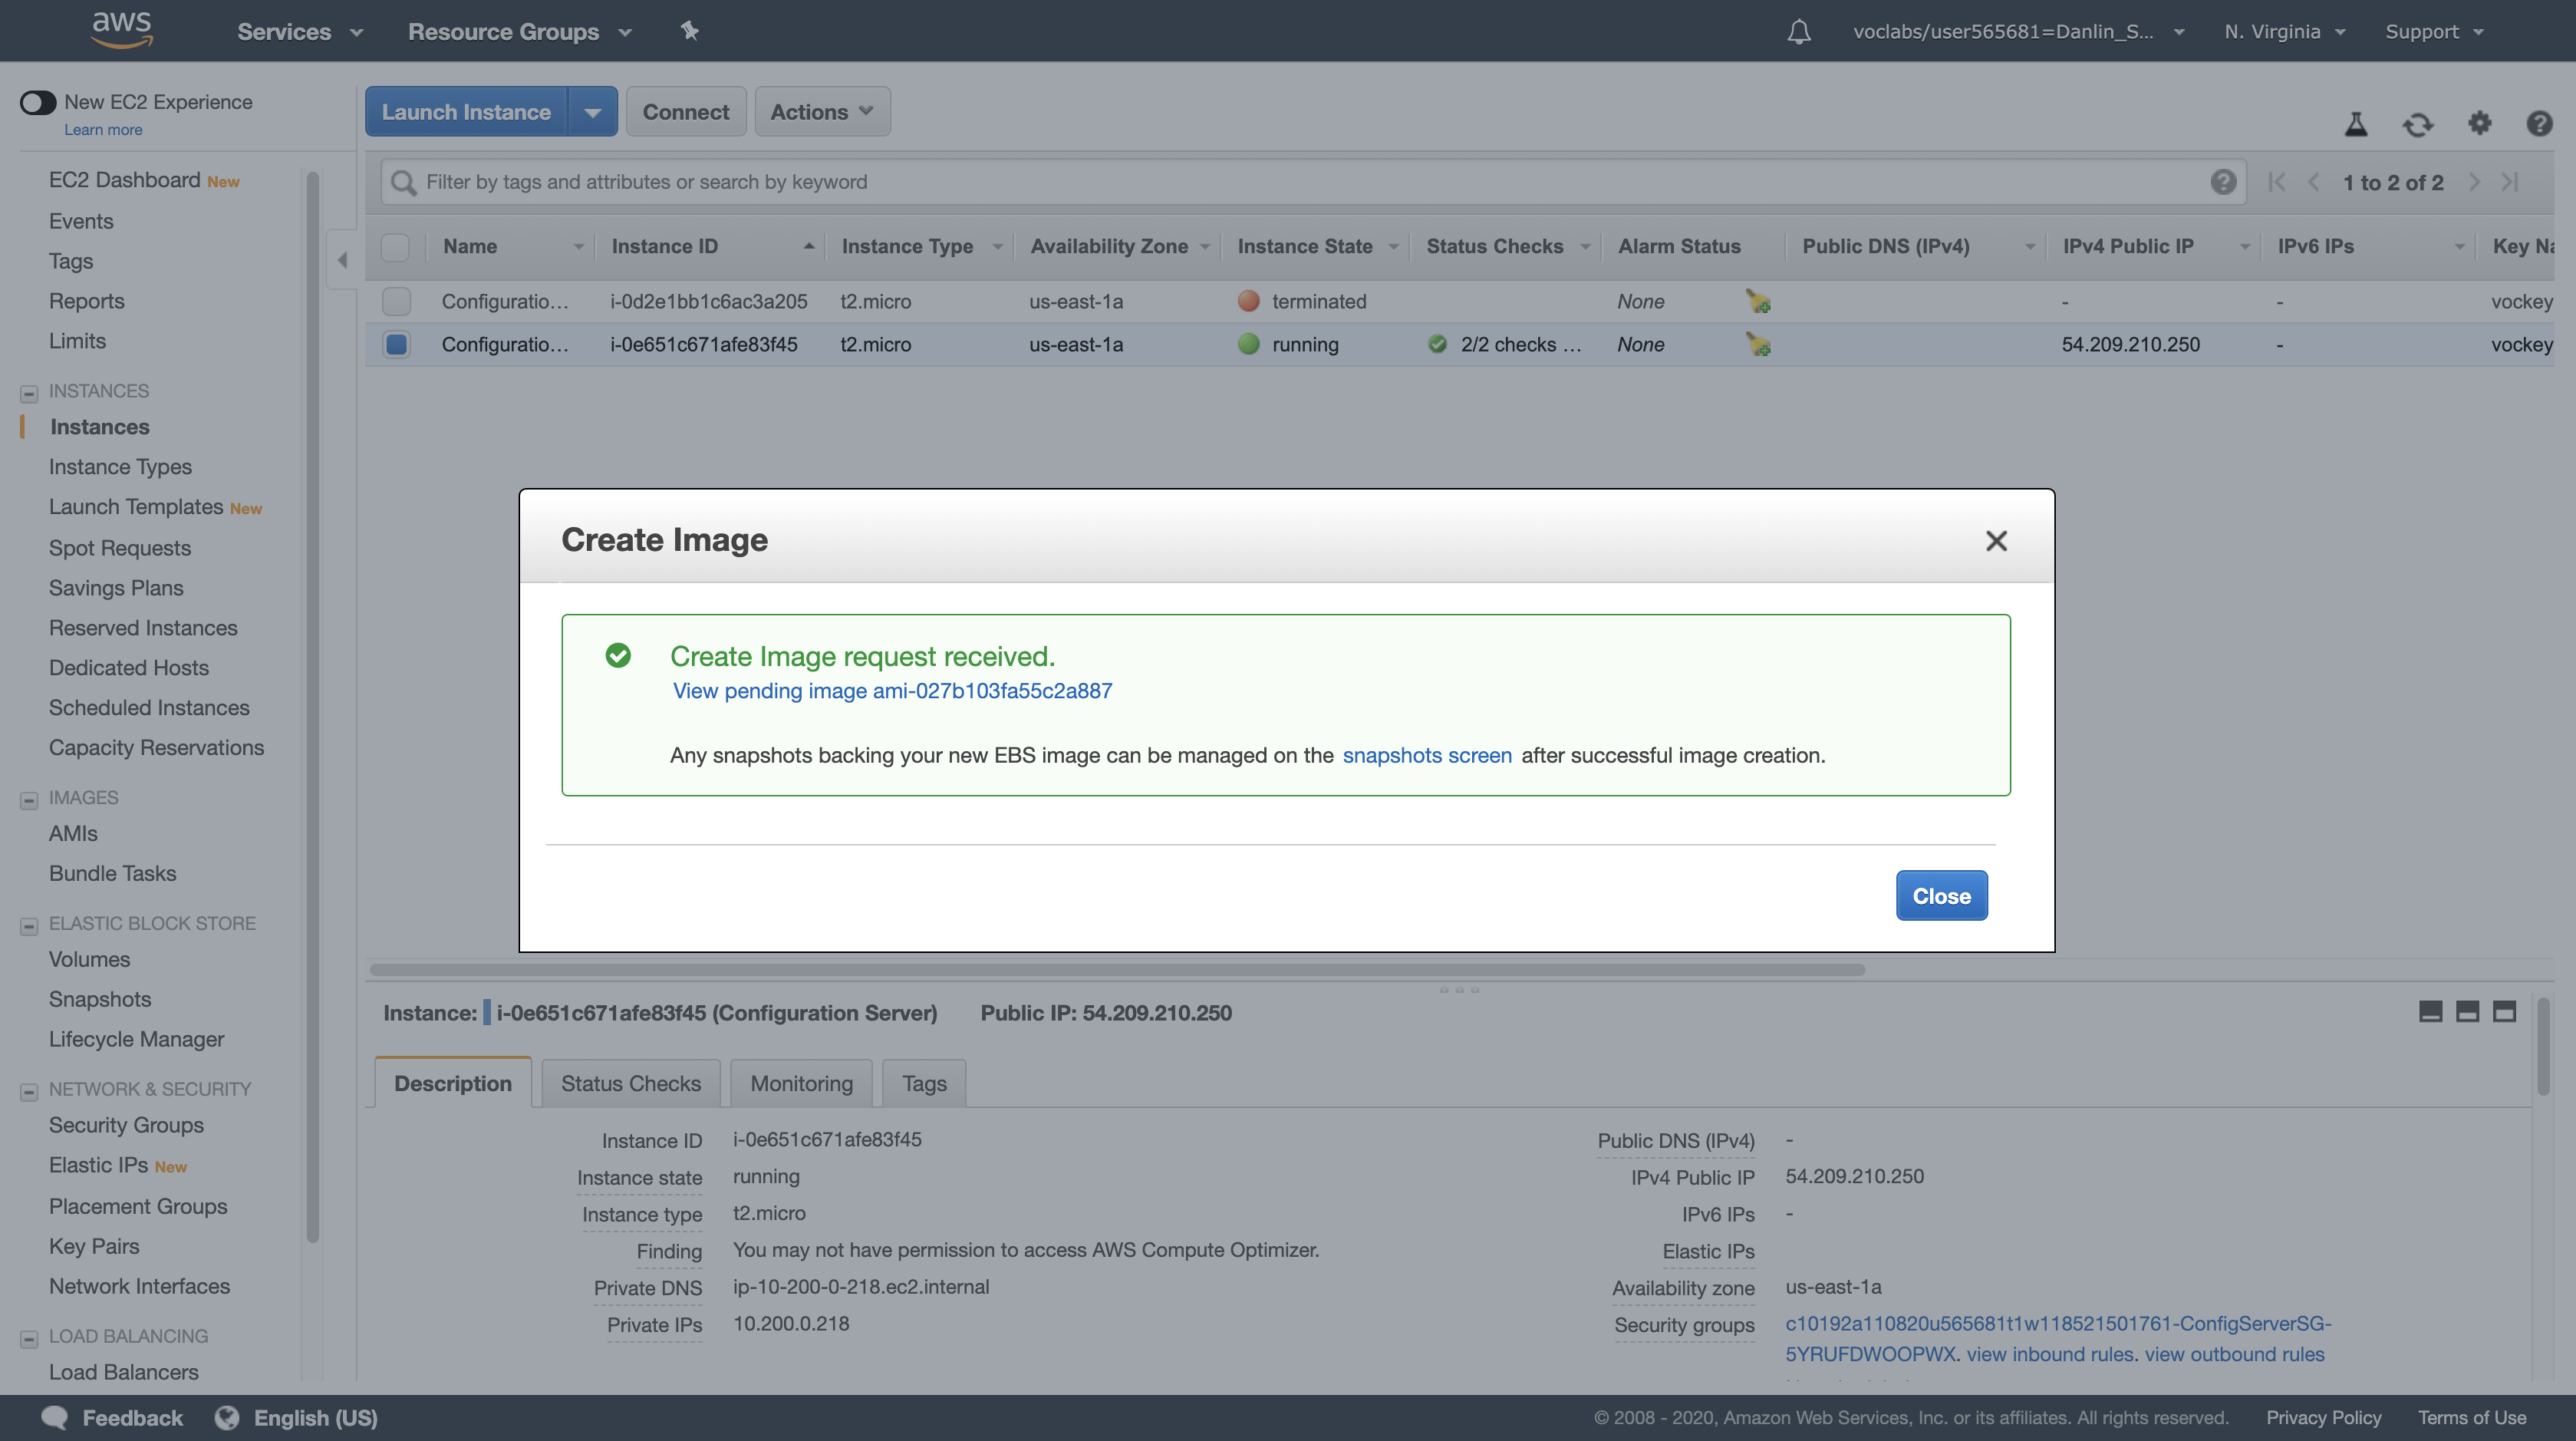
Leave other values at their default settings and click Create Image.
Click Close.
The AMI will be created in the background and you will use it in a later step. There is no need to wait while it is being created.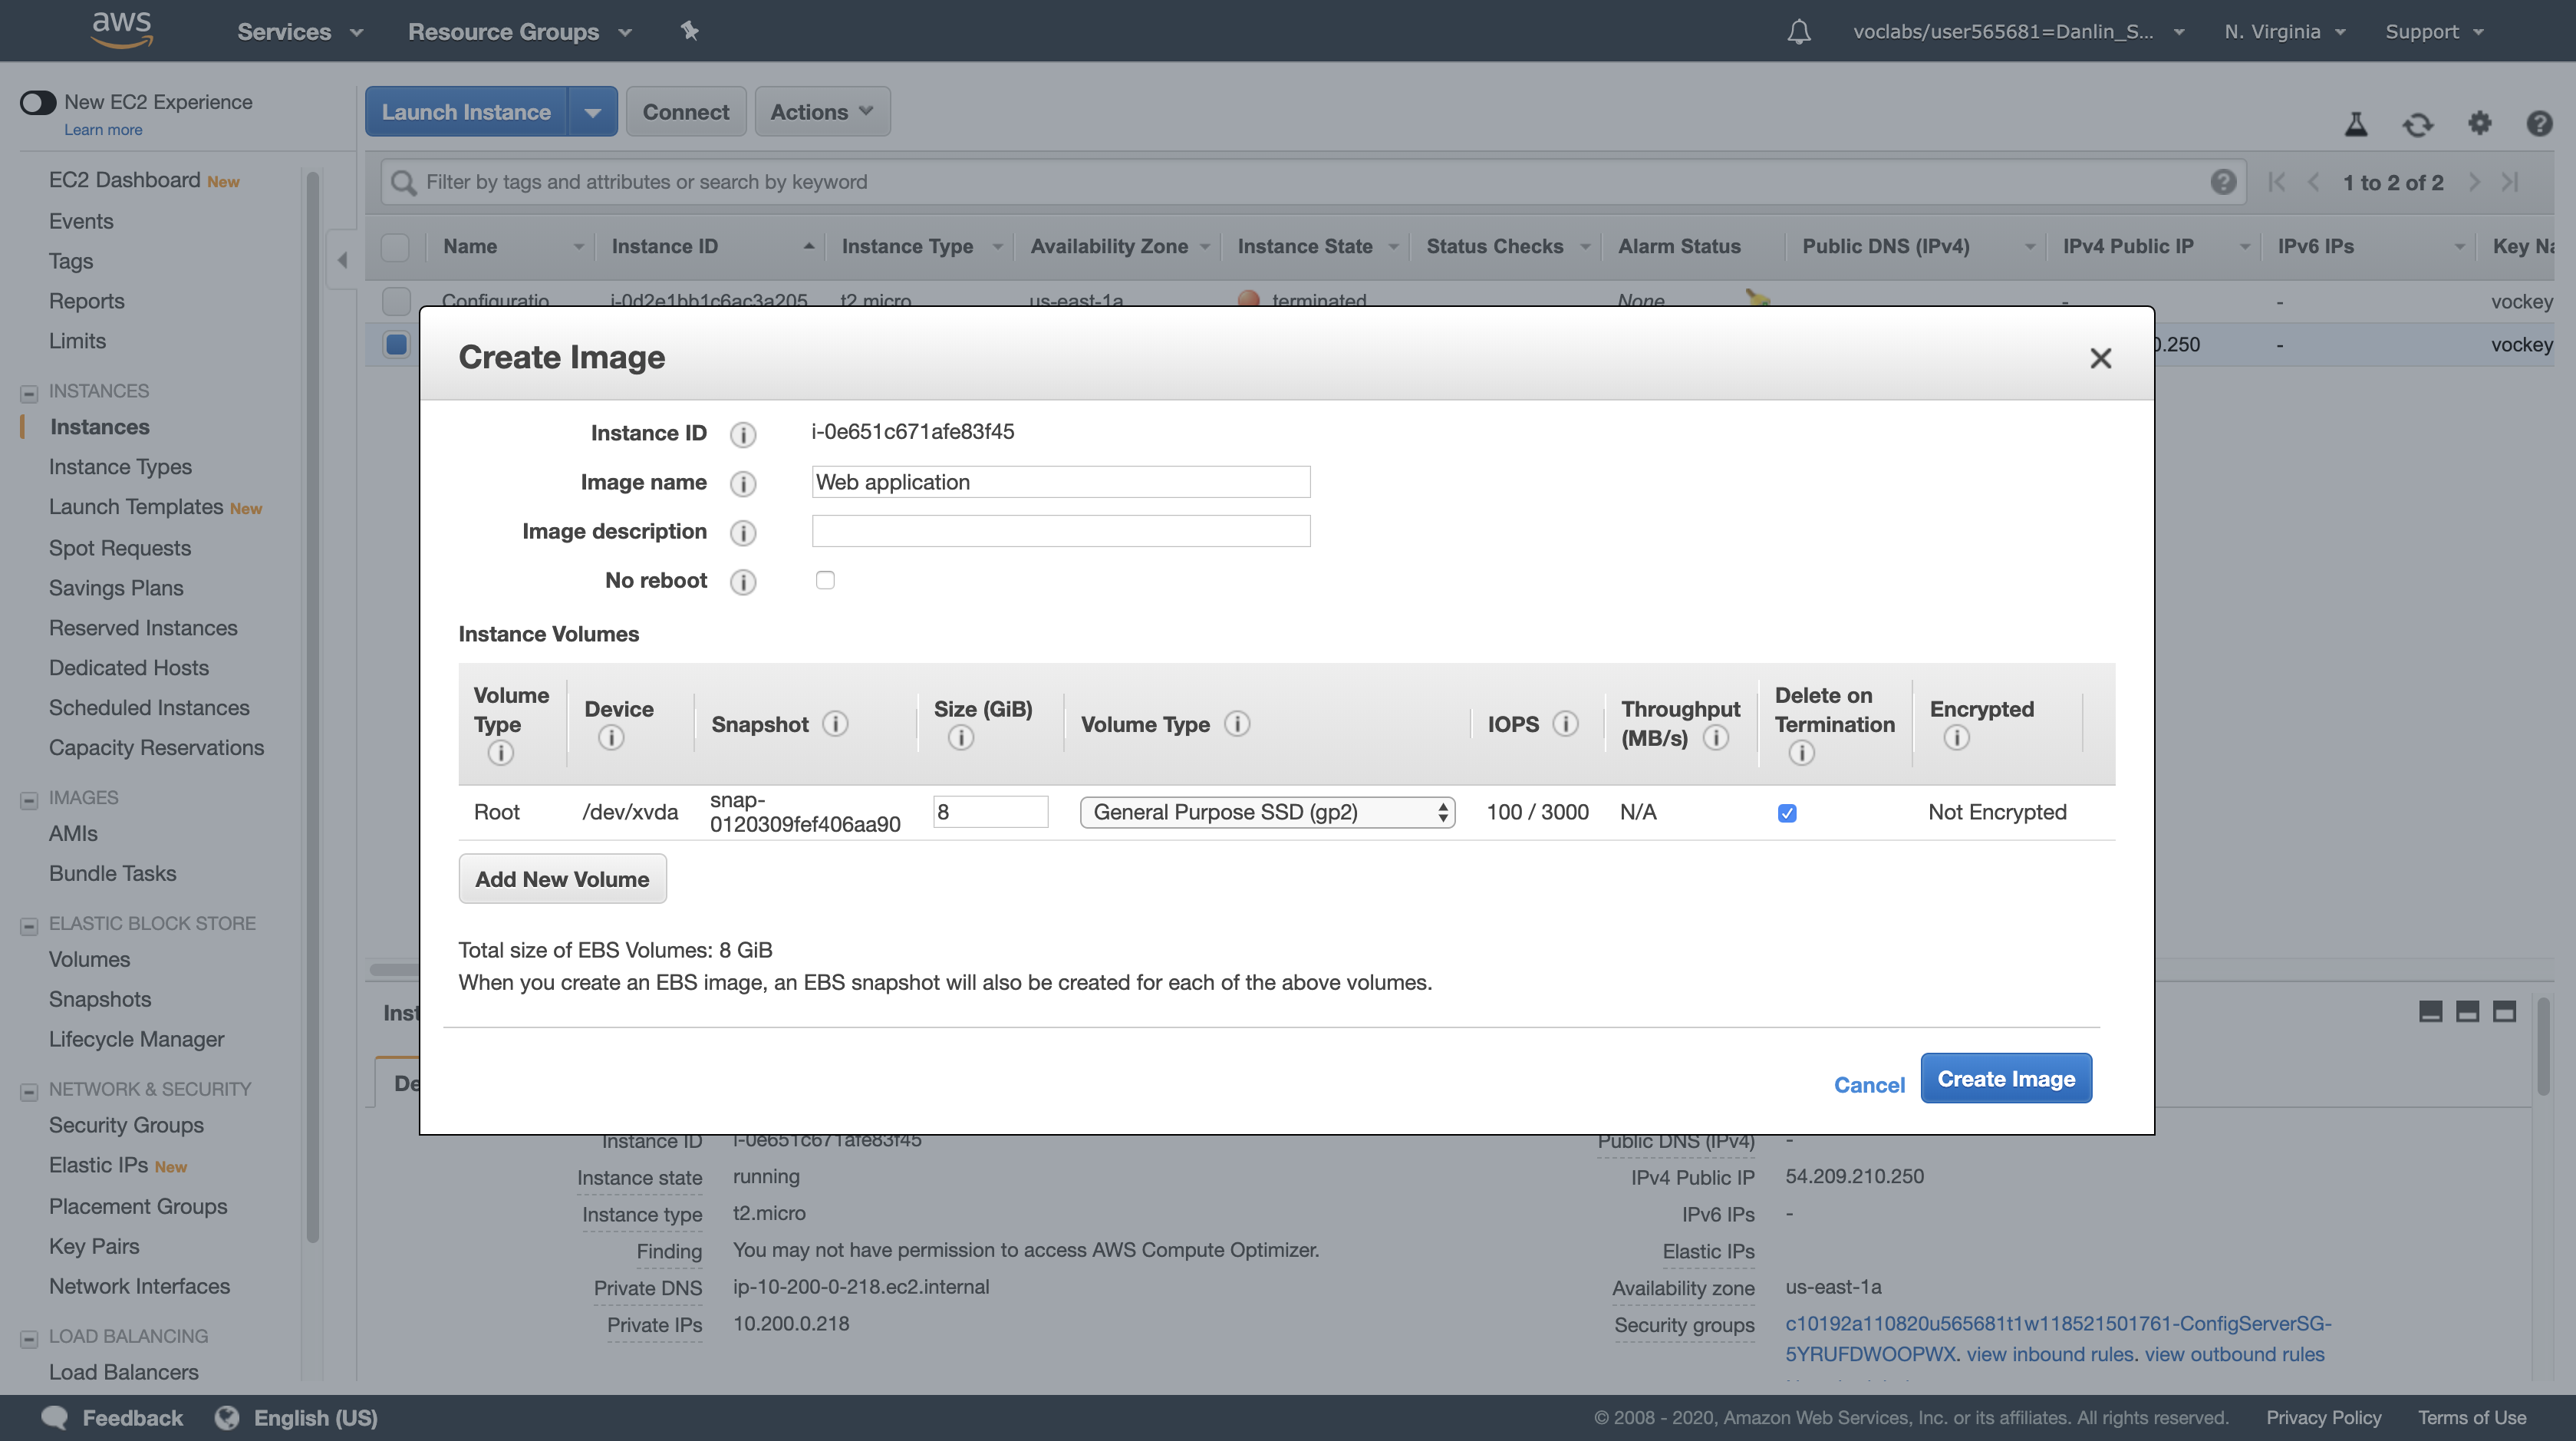
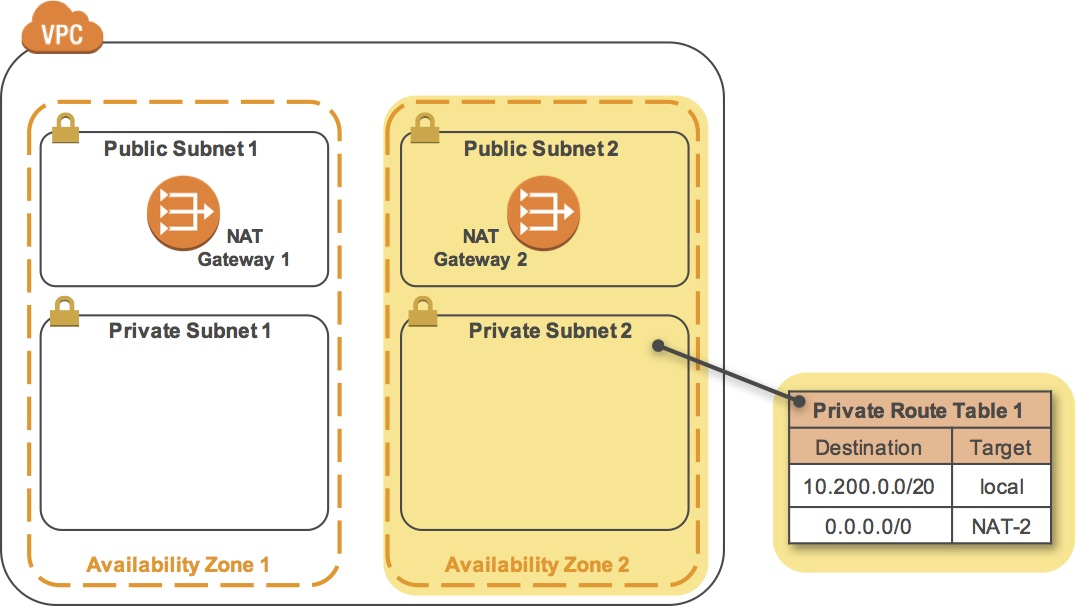
Task 5: Configure a Second Availability Zone
To build a highly available application, it is a best practice to launch resources in multiple Availability Zones. Availability Zones are physically separate data centers (or groups of data centers) within the same Region. Running your applications across multiple Availability Zones will provide greater availability in case of failure within a data center.
In this task, you will duplicate your network environment into a second Availability Zone. You will create:
- A second public subnet
- A second private subnet
- A second NAT Gateway
- A second private Route Table
Services menu
Click VPC
Navigation Pane
Click Subnets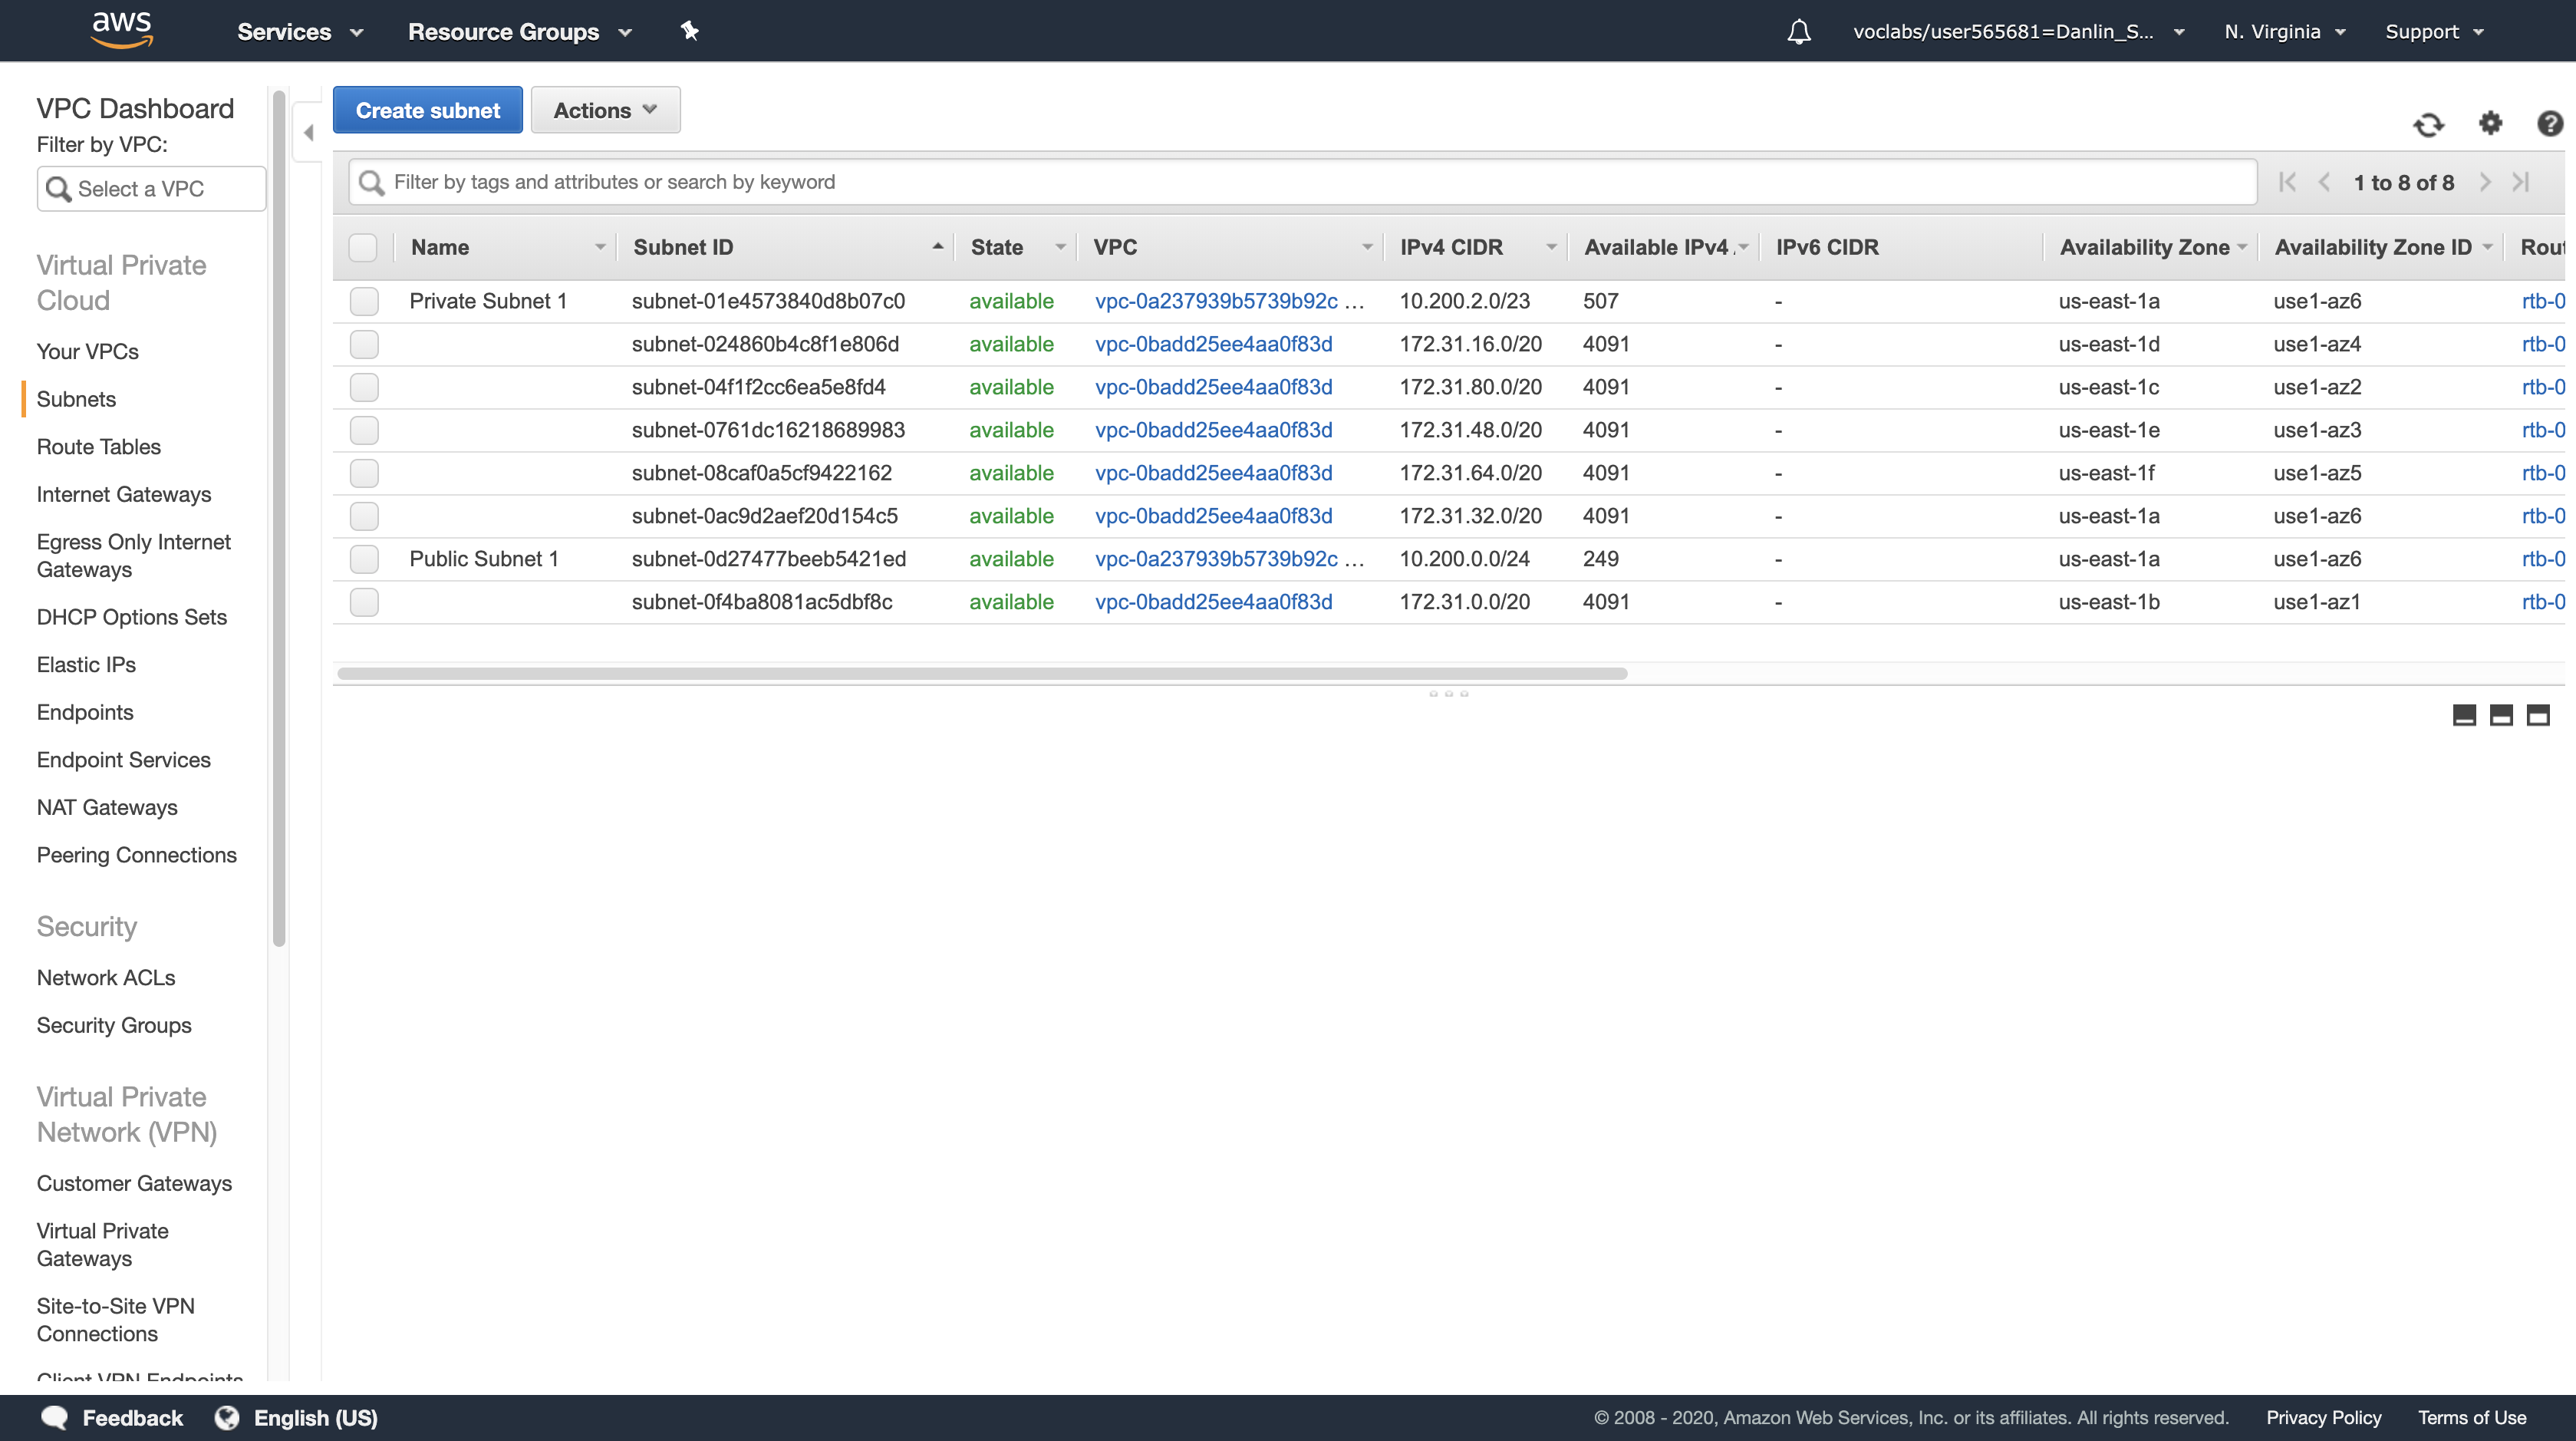
In the row for Public Subnet 1, take note of the value for Availability Zone. (You might need to scroll sideways to see it.)
- Availability Zone: us-east-1a (use1-az6)
Note: The name of an Availability Zone consists of the Region name (eg us-west-2) plus a zone identifier (eg a). Together, this Availability Zone has a name of us-west-2a.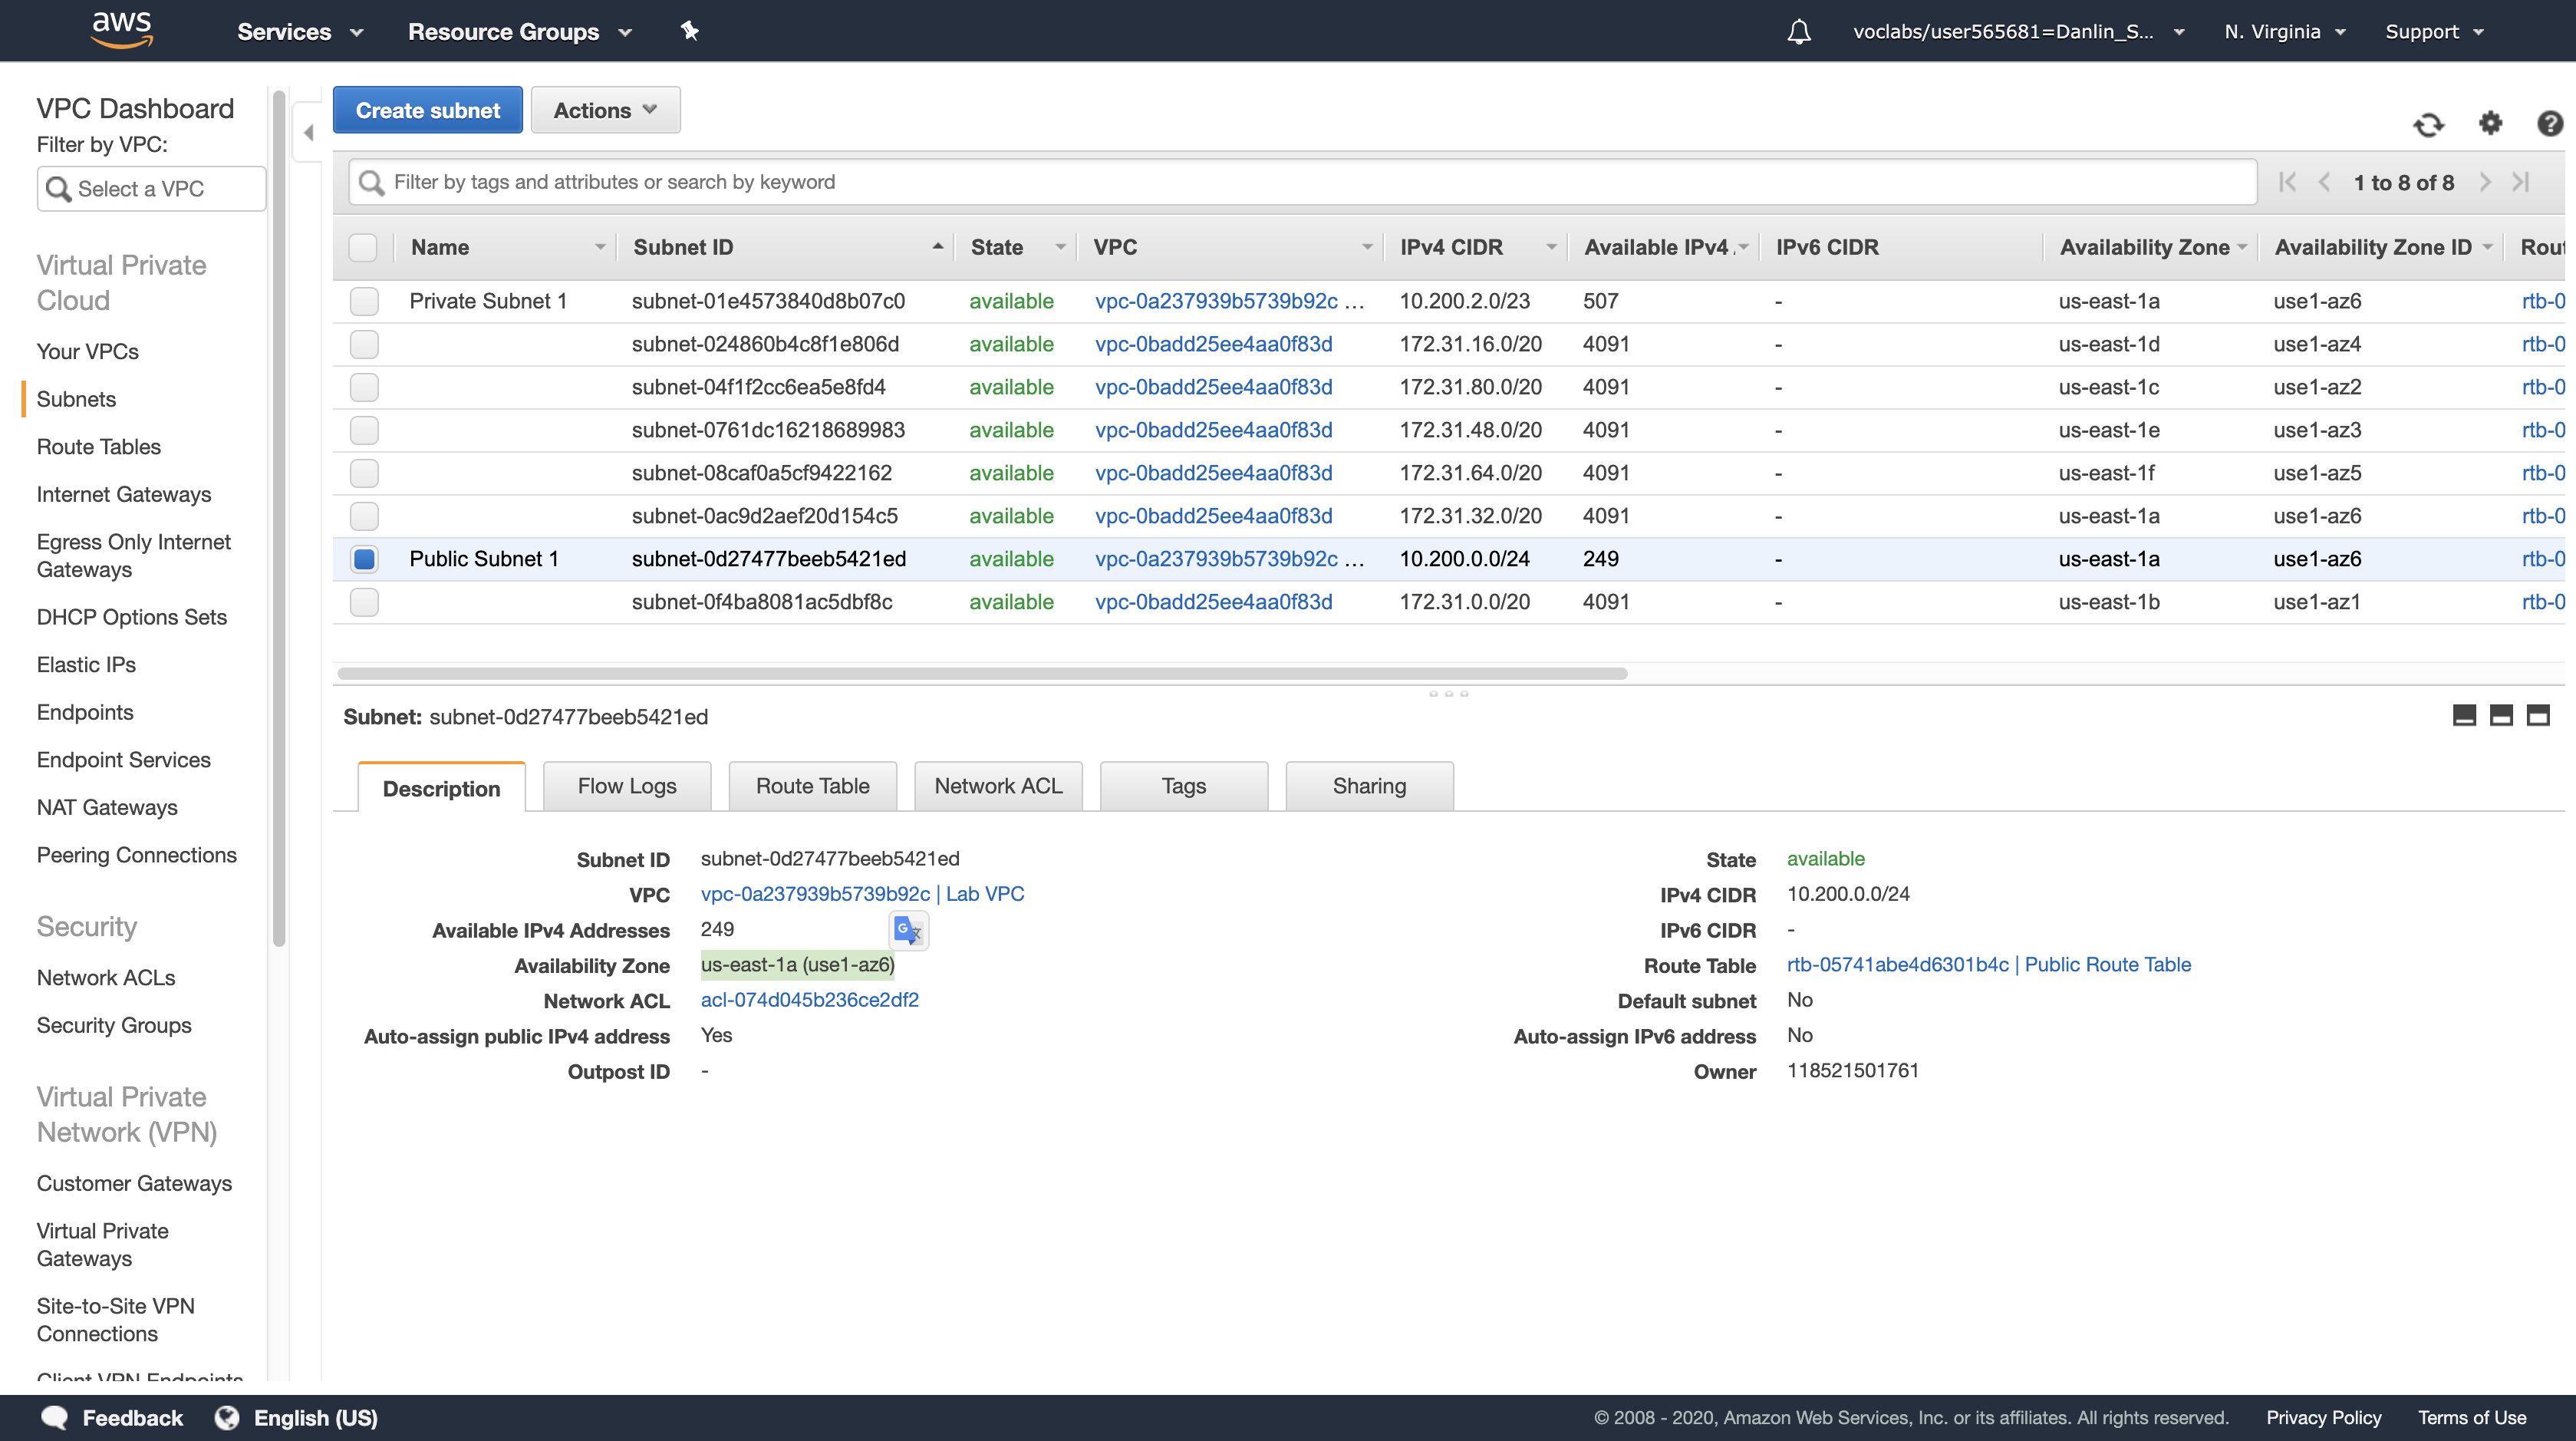
Click Create Subnet
In the Create Subnet dialog box, configure the following:
- Name tag:
Public Subnet 2 - VPC:
Lab VPC - Availability Zone:
us-east-1b- Choose a different Availability Zone from the existing Subnet (for example, if it was a, then choose b).
- IPv4 CIDR block:
10.200.1.0/24
This will create a second Subnet in a different Availability Zone, but still within Lab VPC. It will have an IP range between 10.200.1.0 and 10.200.1.255.
- 10.200.1.0/24 = 1010 0000, 1100 1000, 0000 0001, / 0000 0000
- 10.200.1.1/24 Gateway
- 10.200.1.255/24 Broadcast
- 10.200.1.2/24 ~ 10.200.1.254/24 Valid Hosts
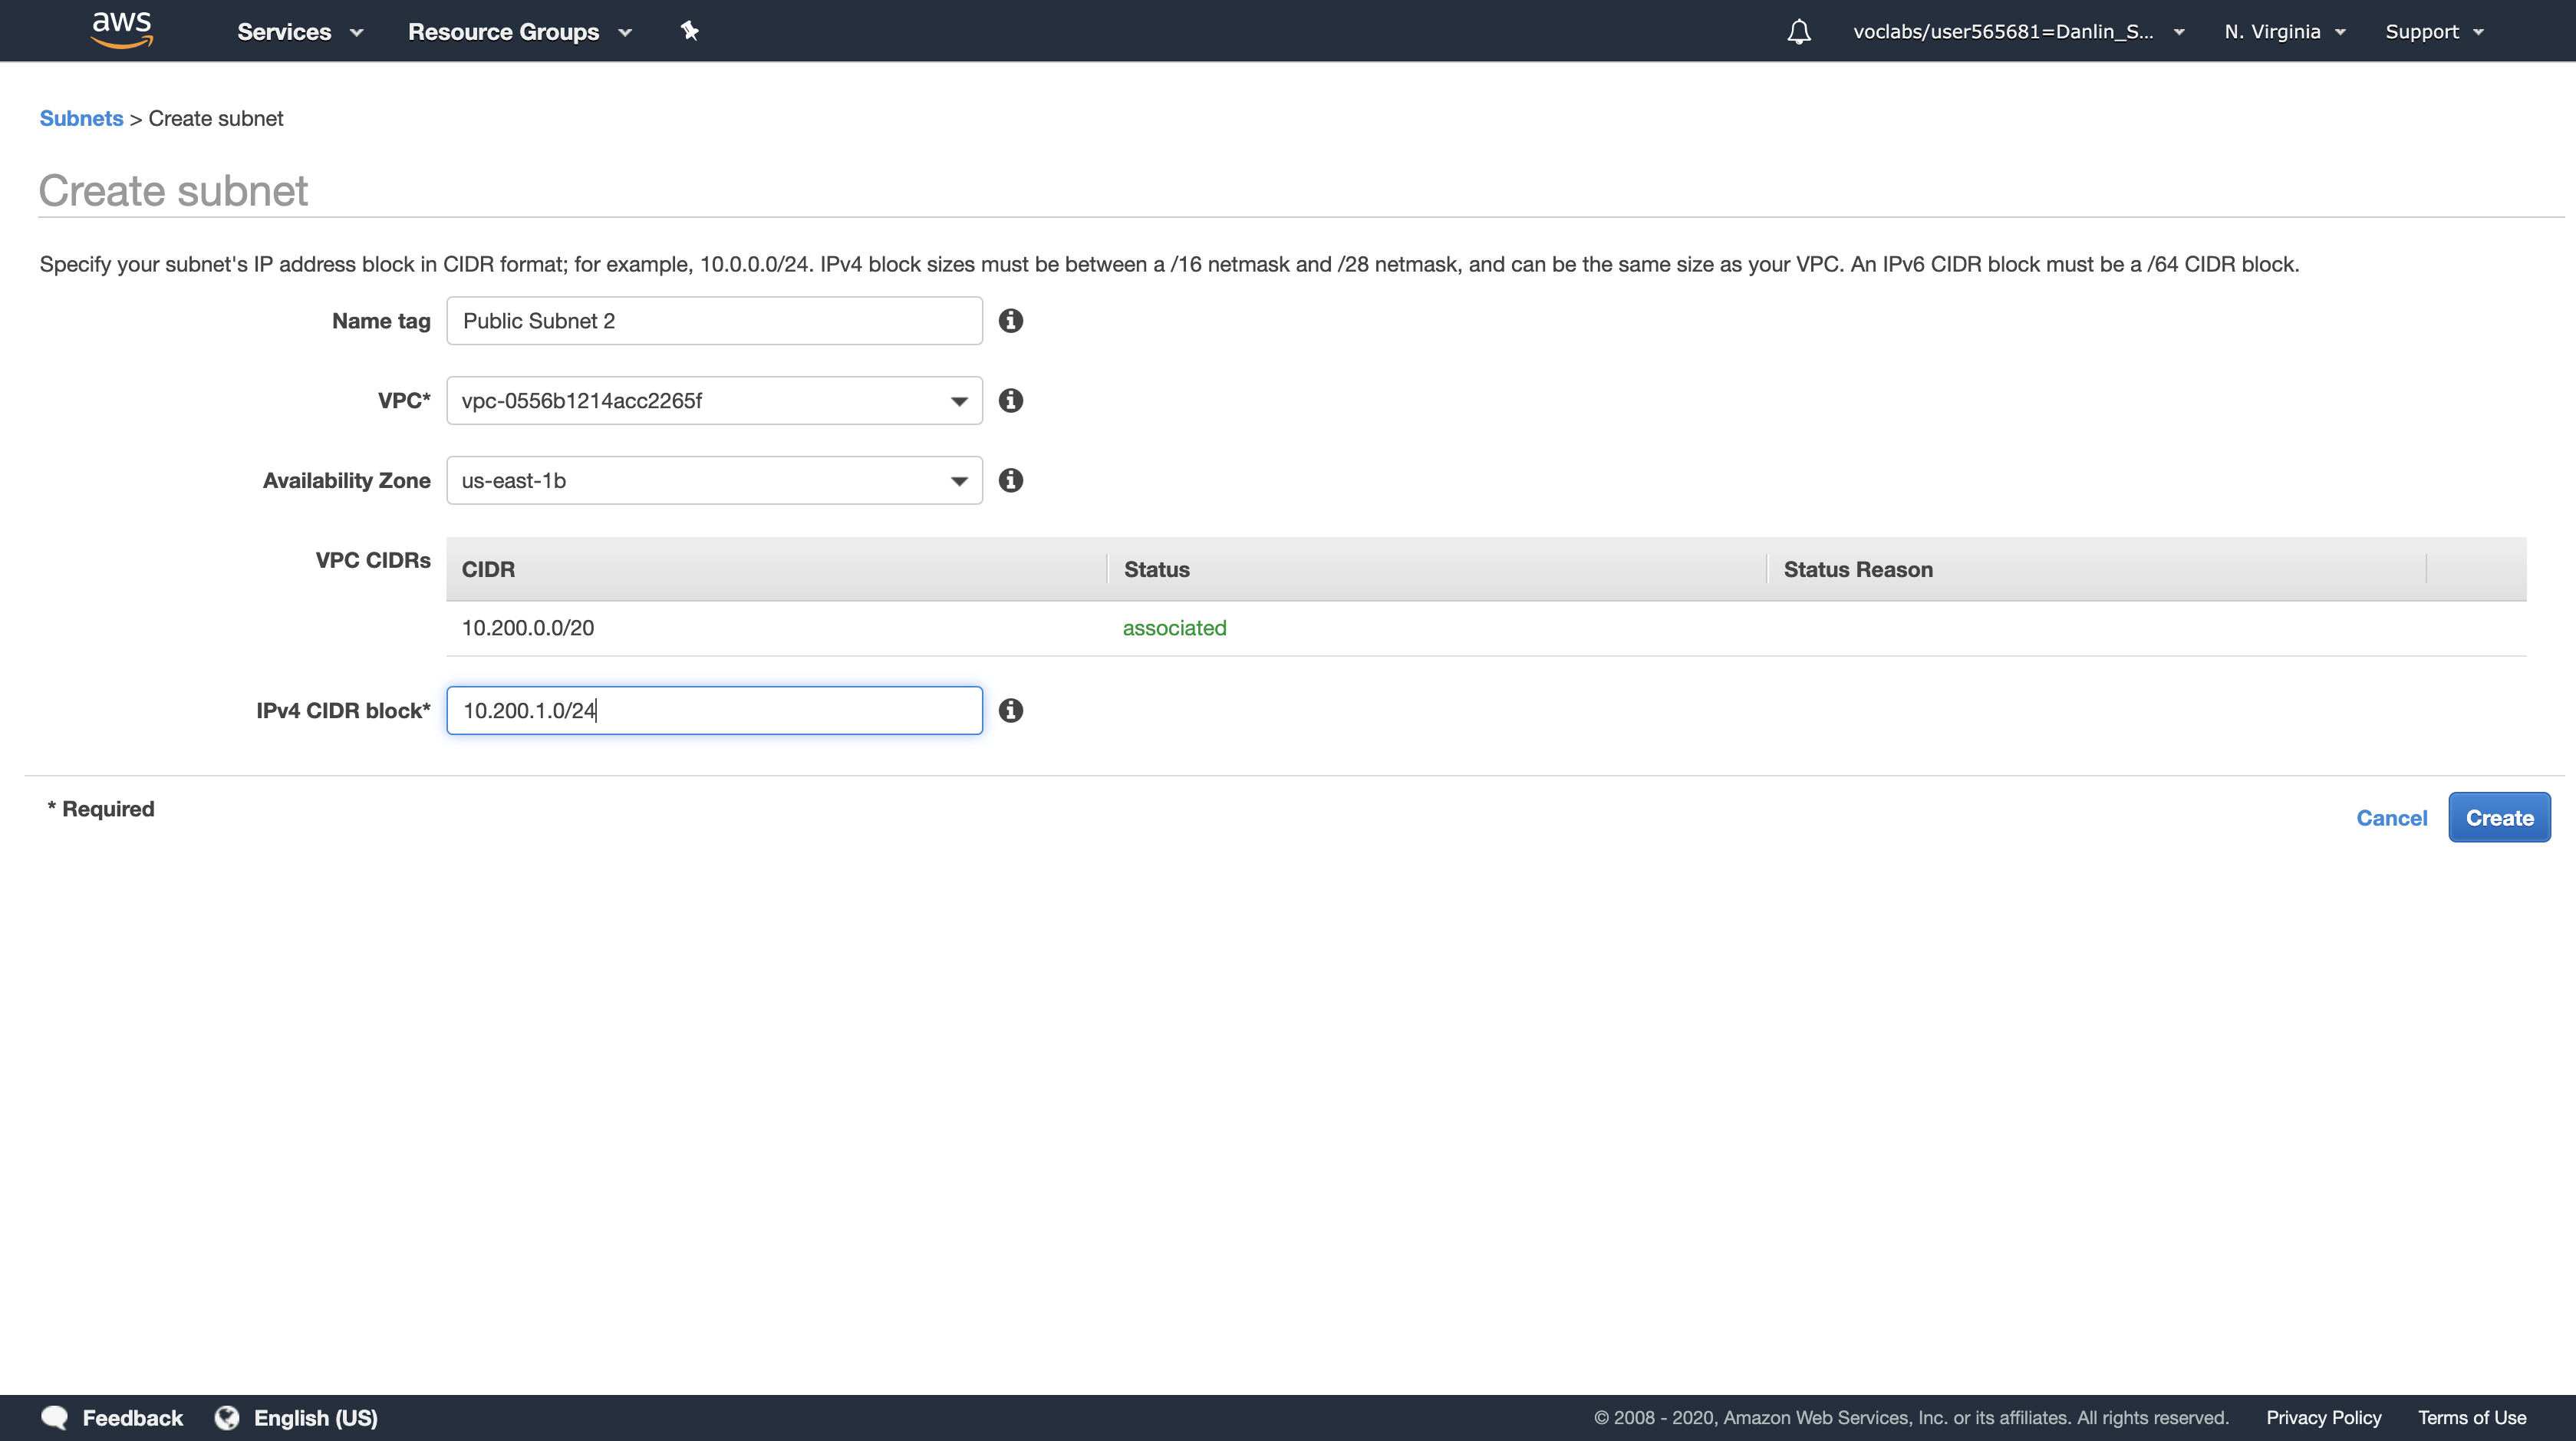
Click Create
Copy the Subnet ID to a text editor for later use, then click Close.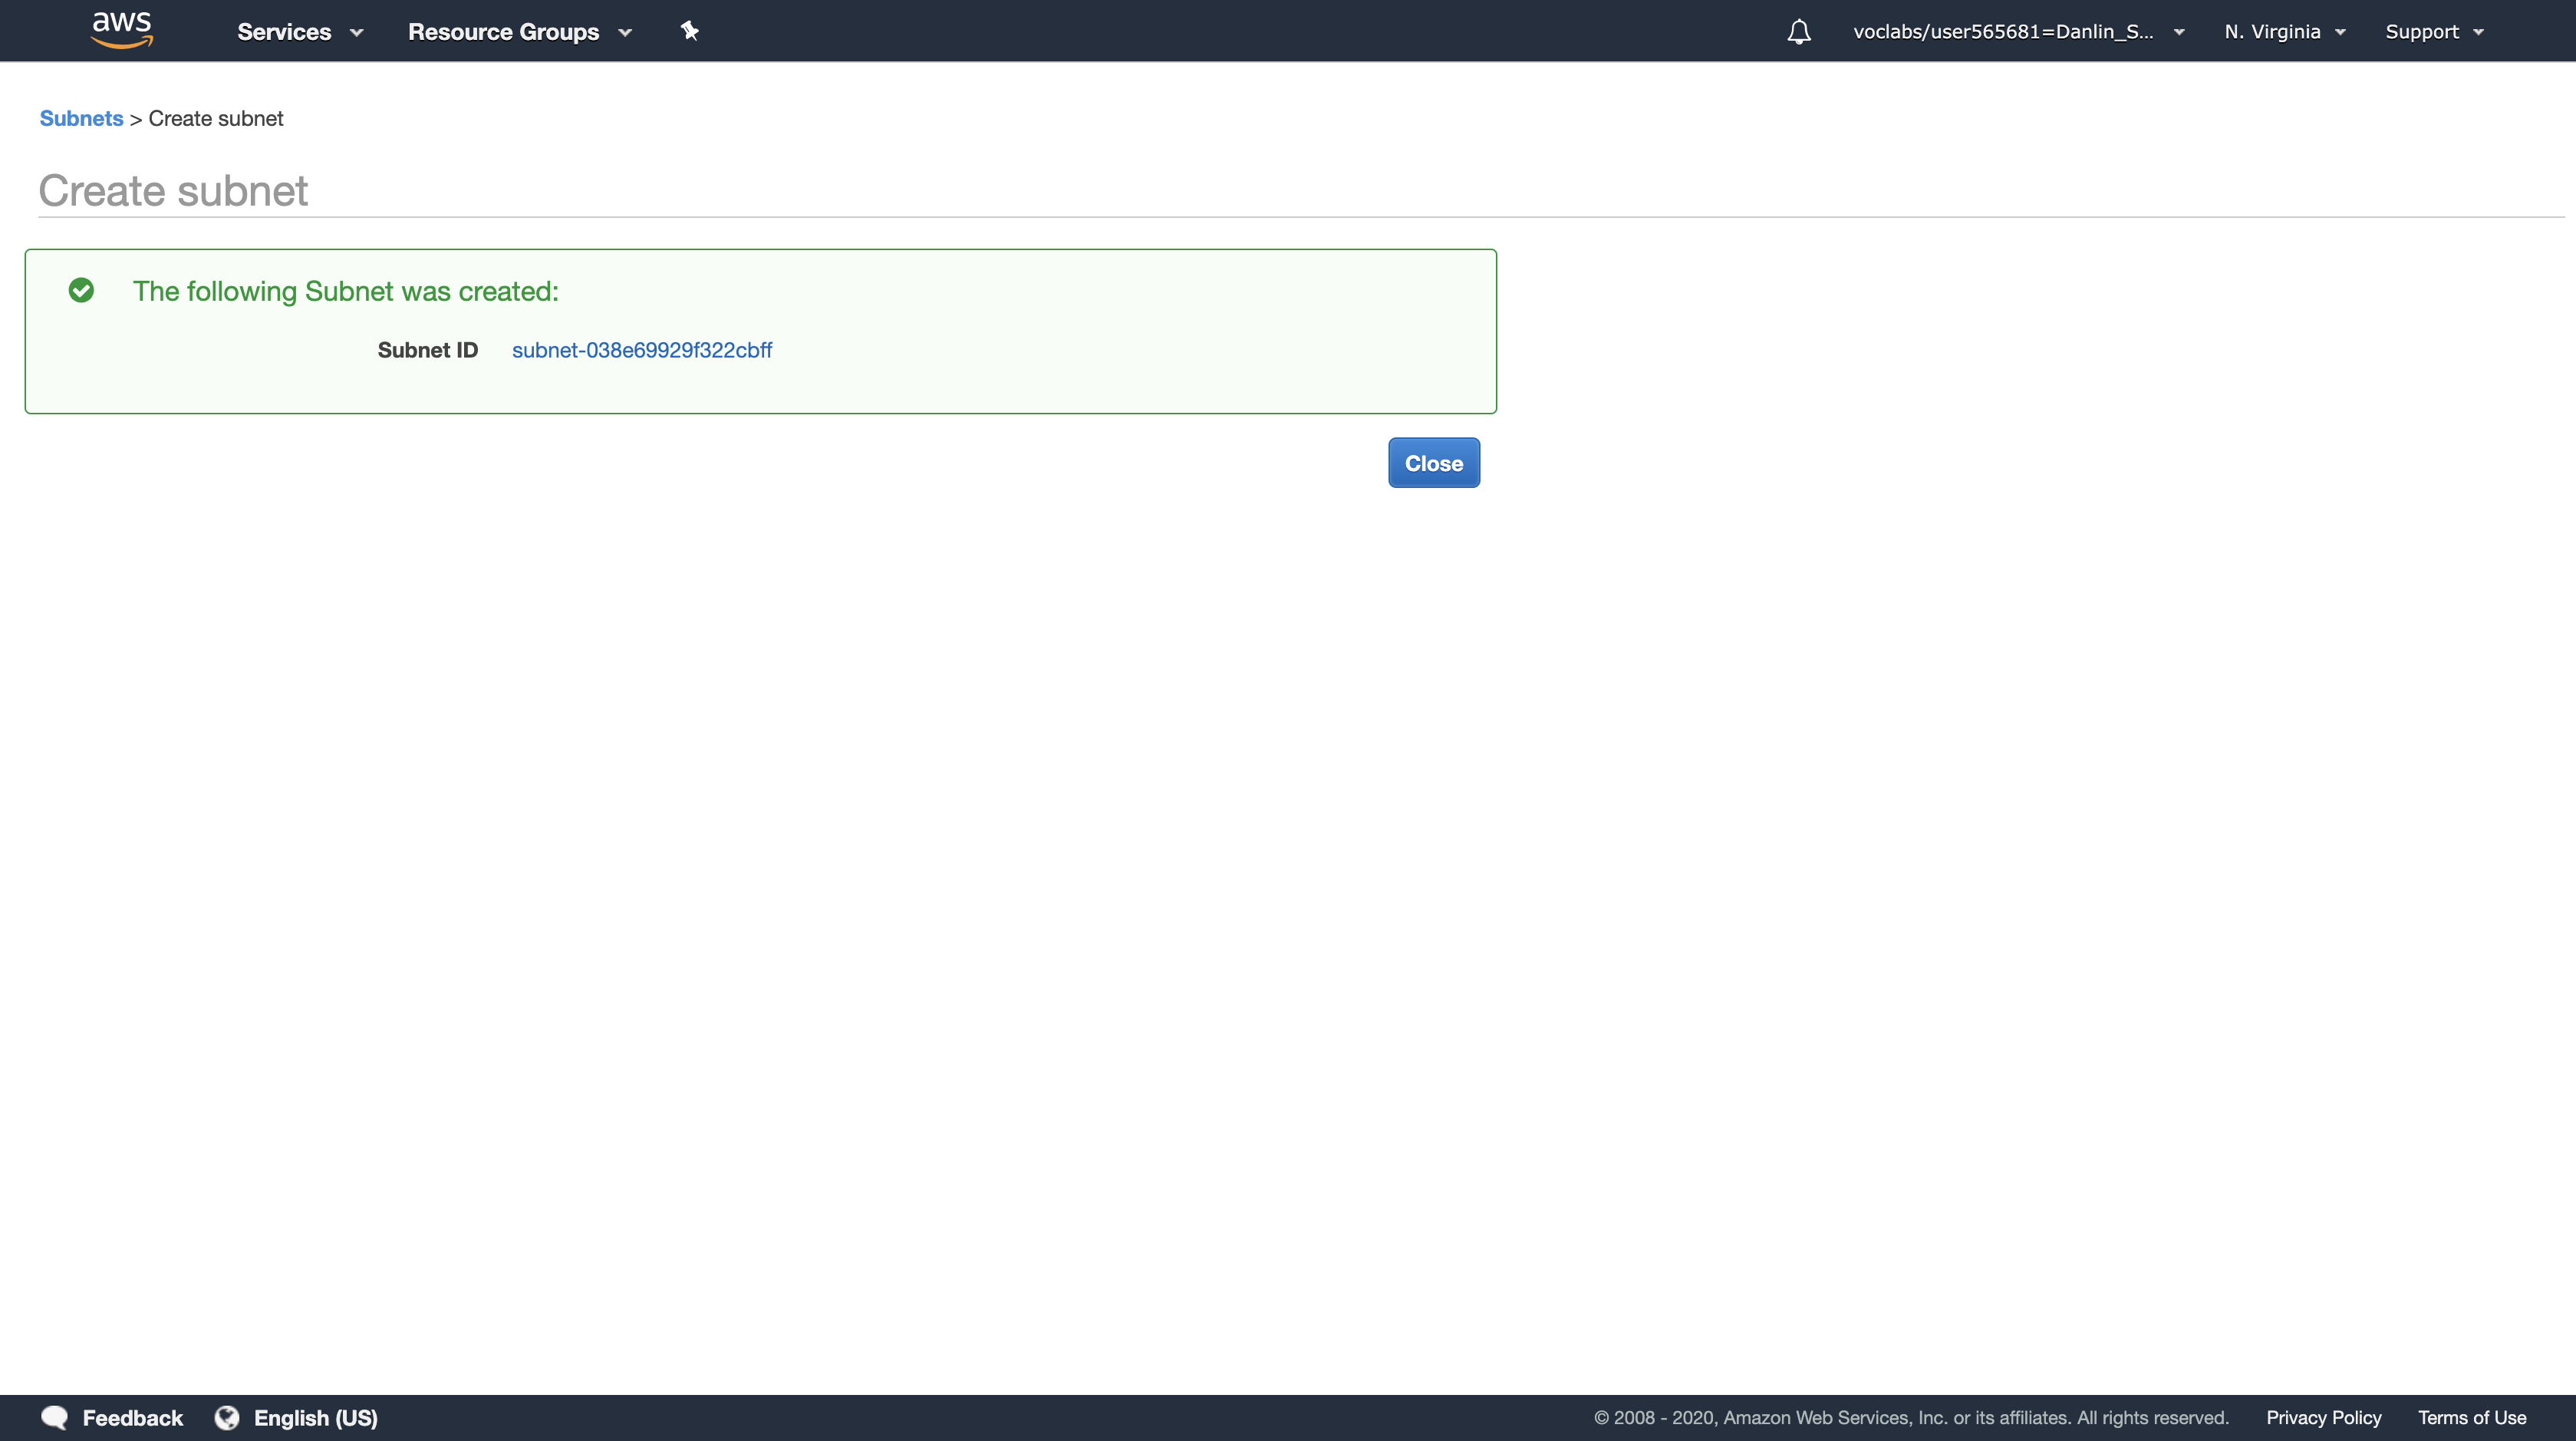
With Public Subnet 2 selected, click the Route Table tab in the lower half of the window. (Do not click the Route Tables link in the left navigation pane.)
Here you can see that your new Subnet has been provided with a default Route Table, but this Route Table does not have a connection to your Internet gateway. You will change it to use the Public Route Table.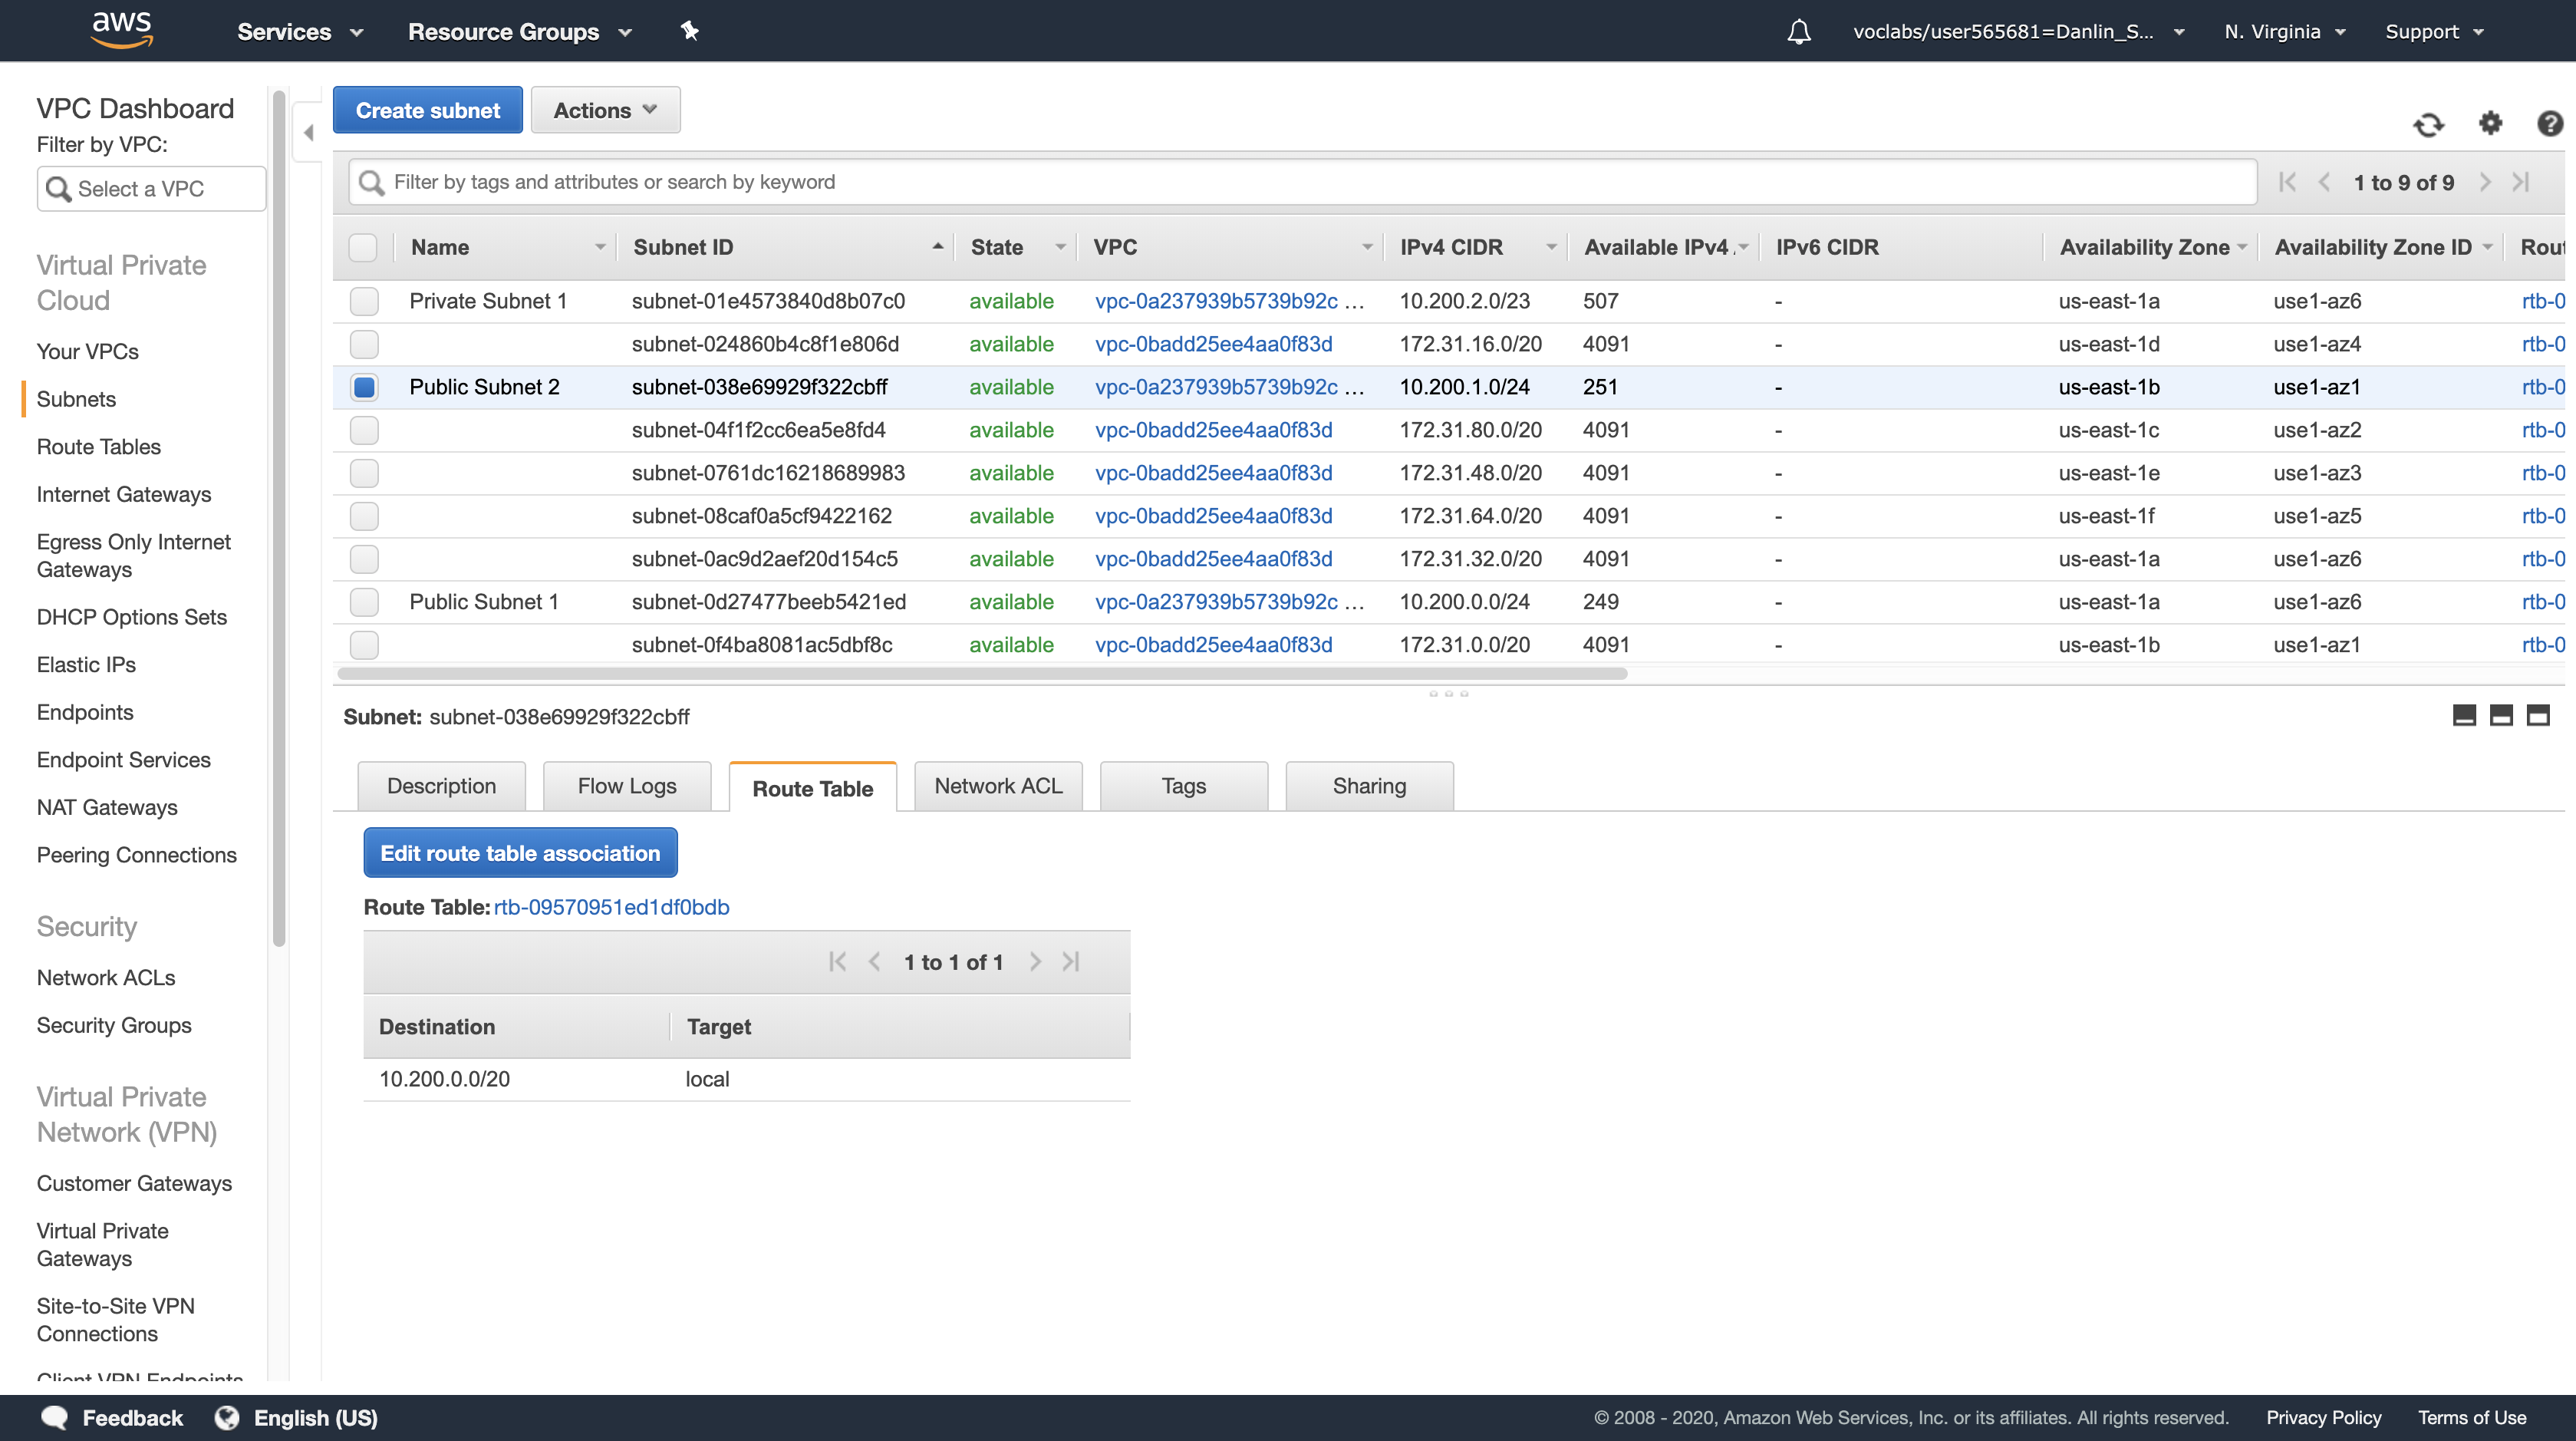
Click Edit route table association
Try each Route Table ID in the list, selecting the one that shows a Target containing igw.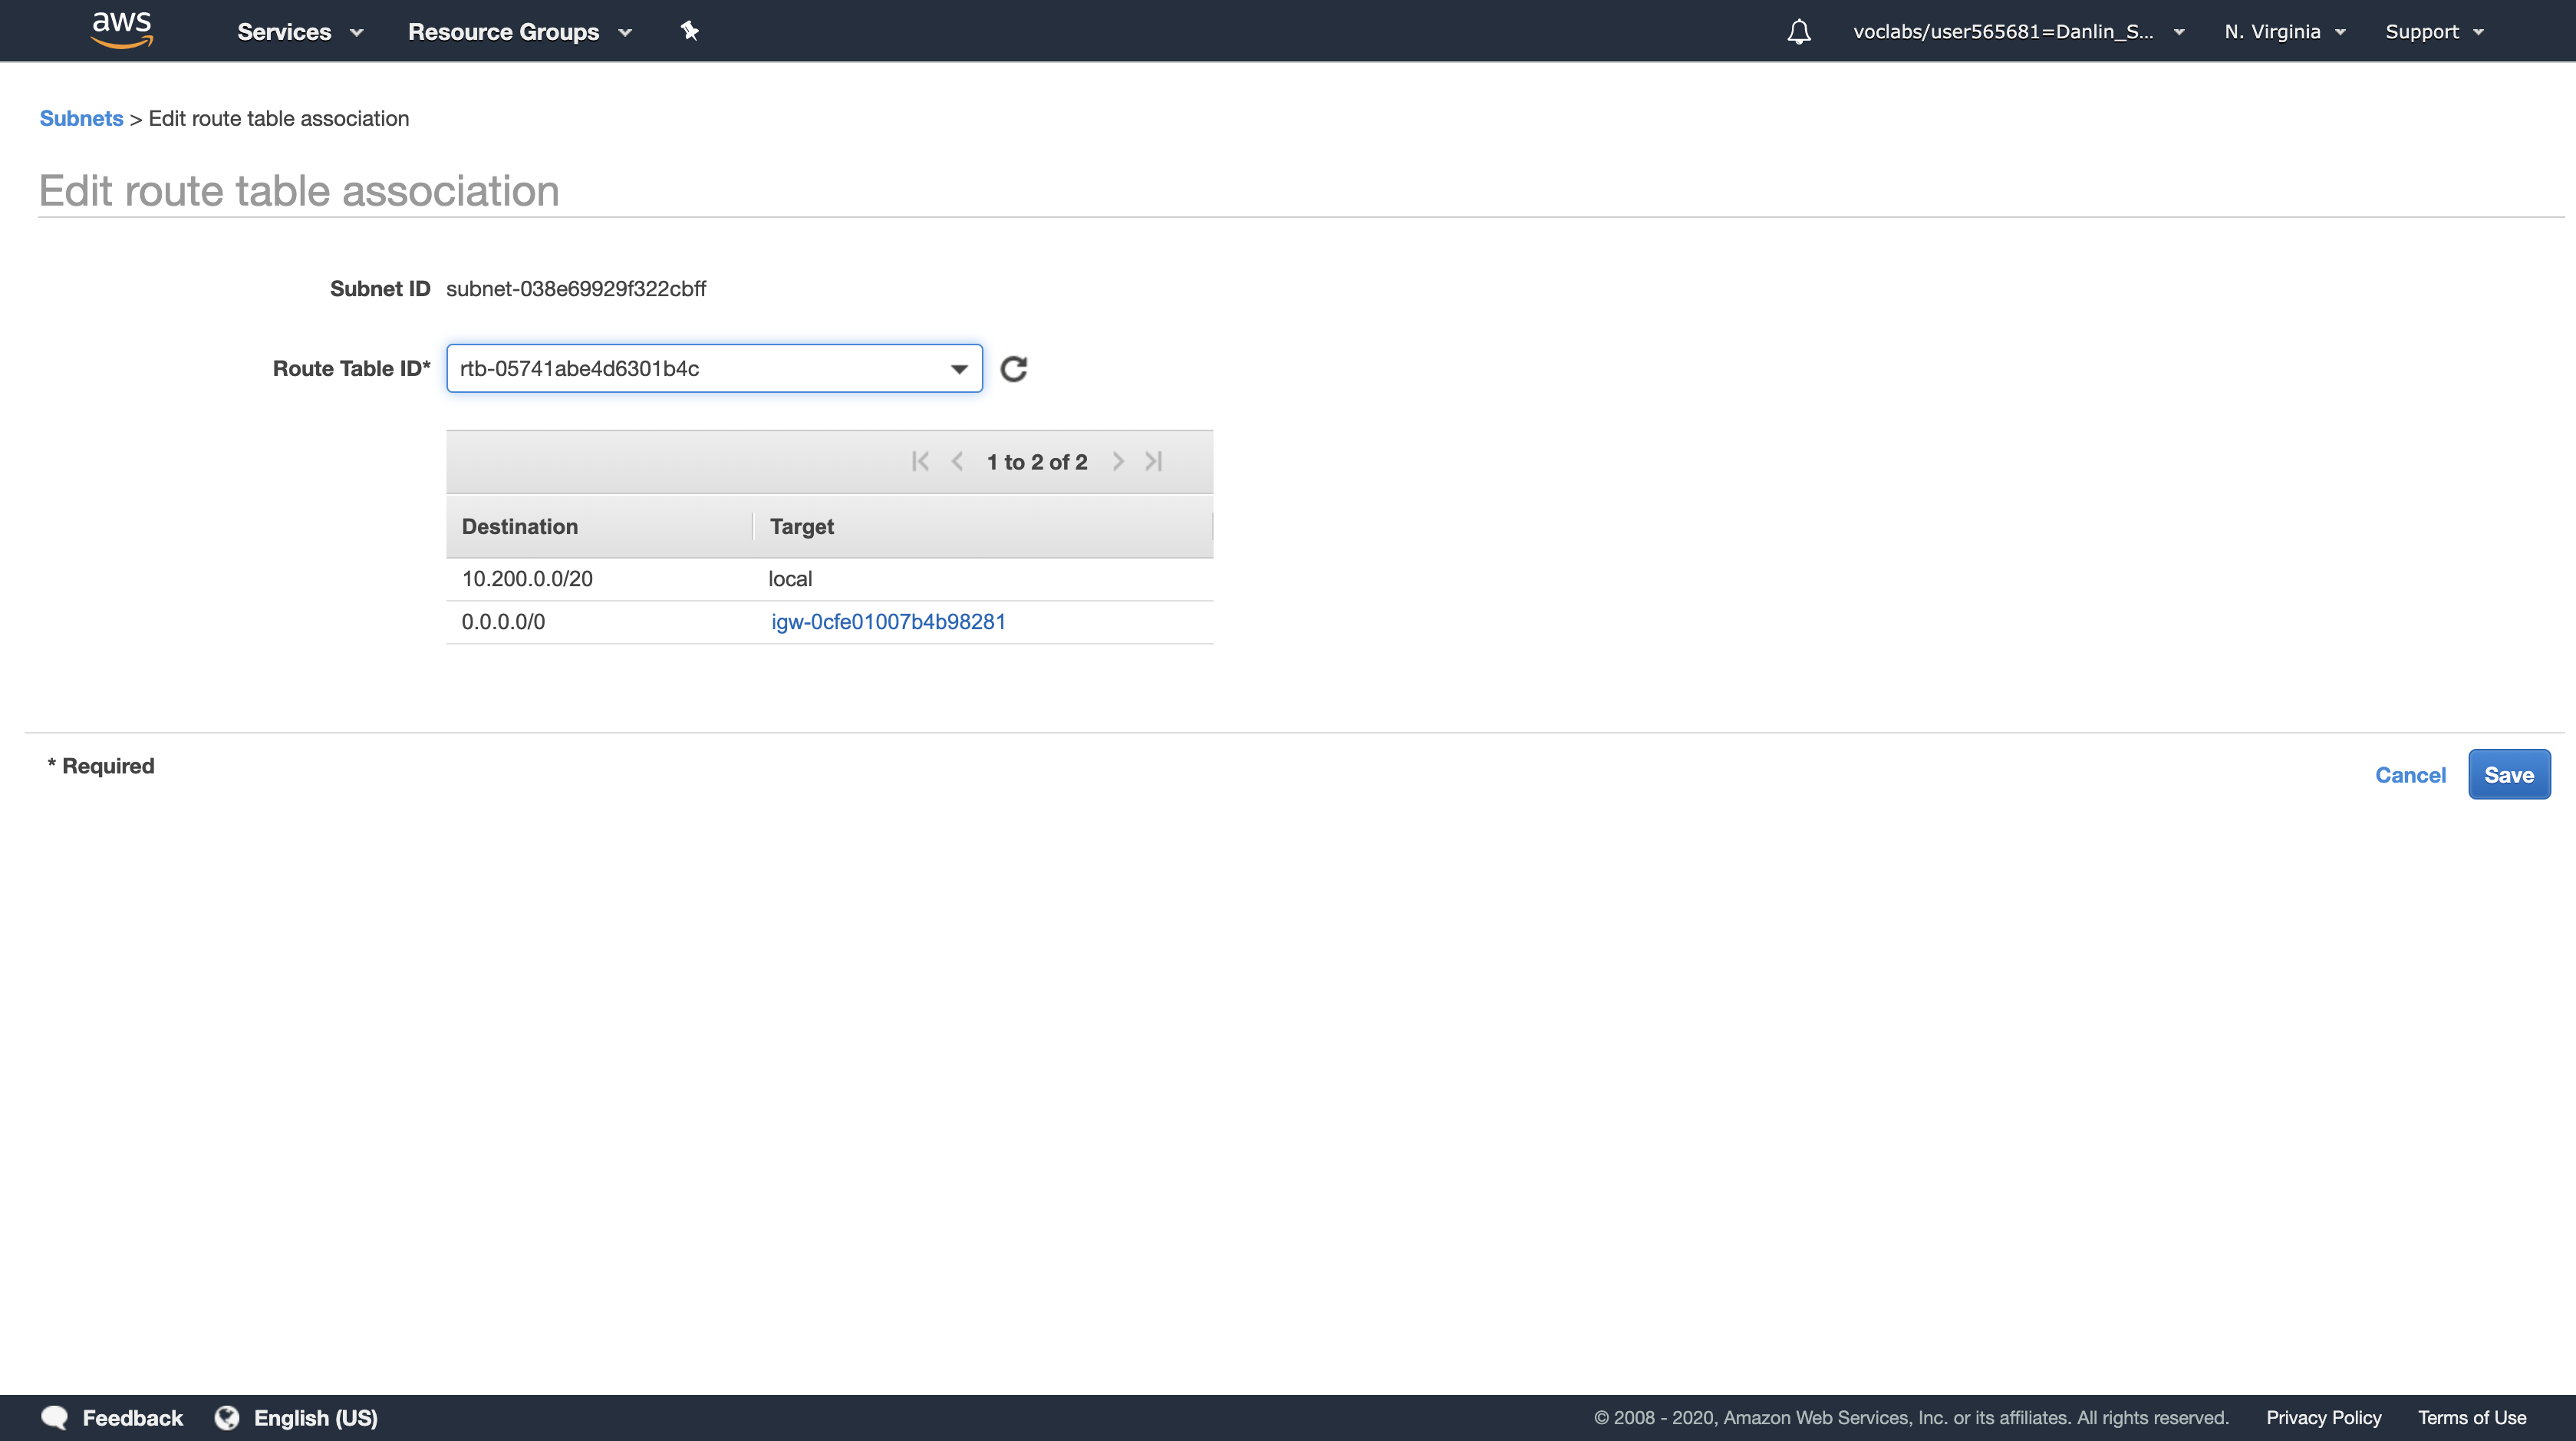
Click Save then click Close
Public Subnet 2 is now a Public Subnet that can communicate directly with the Internet.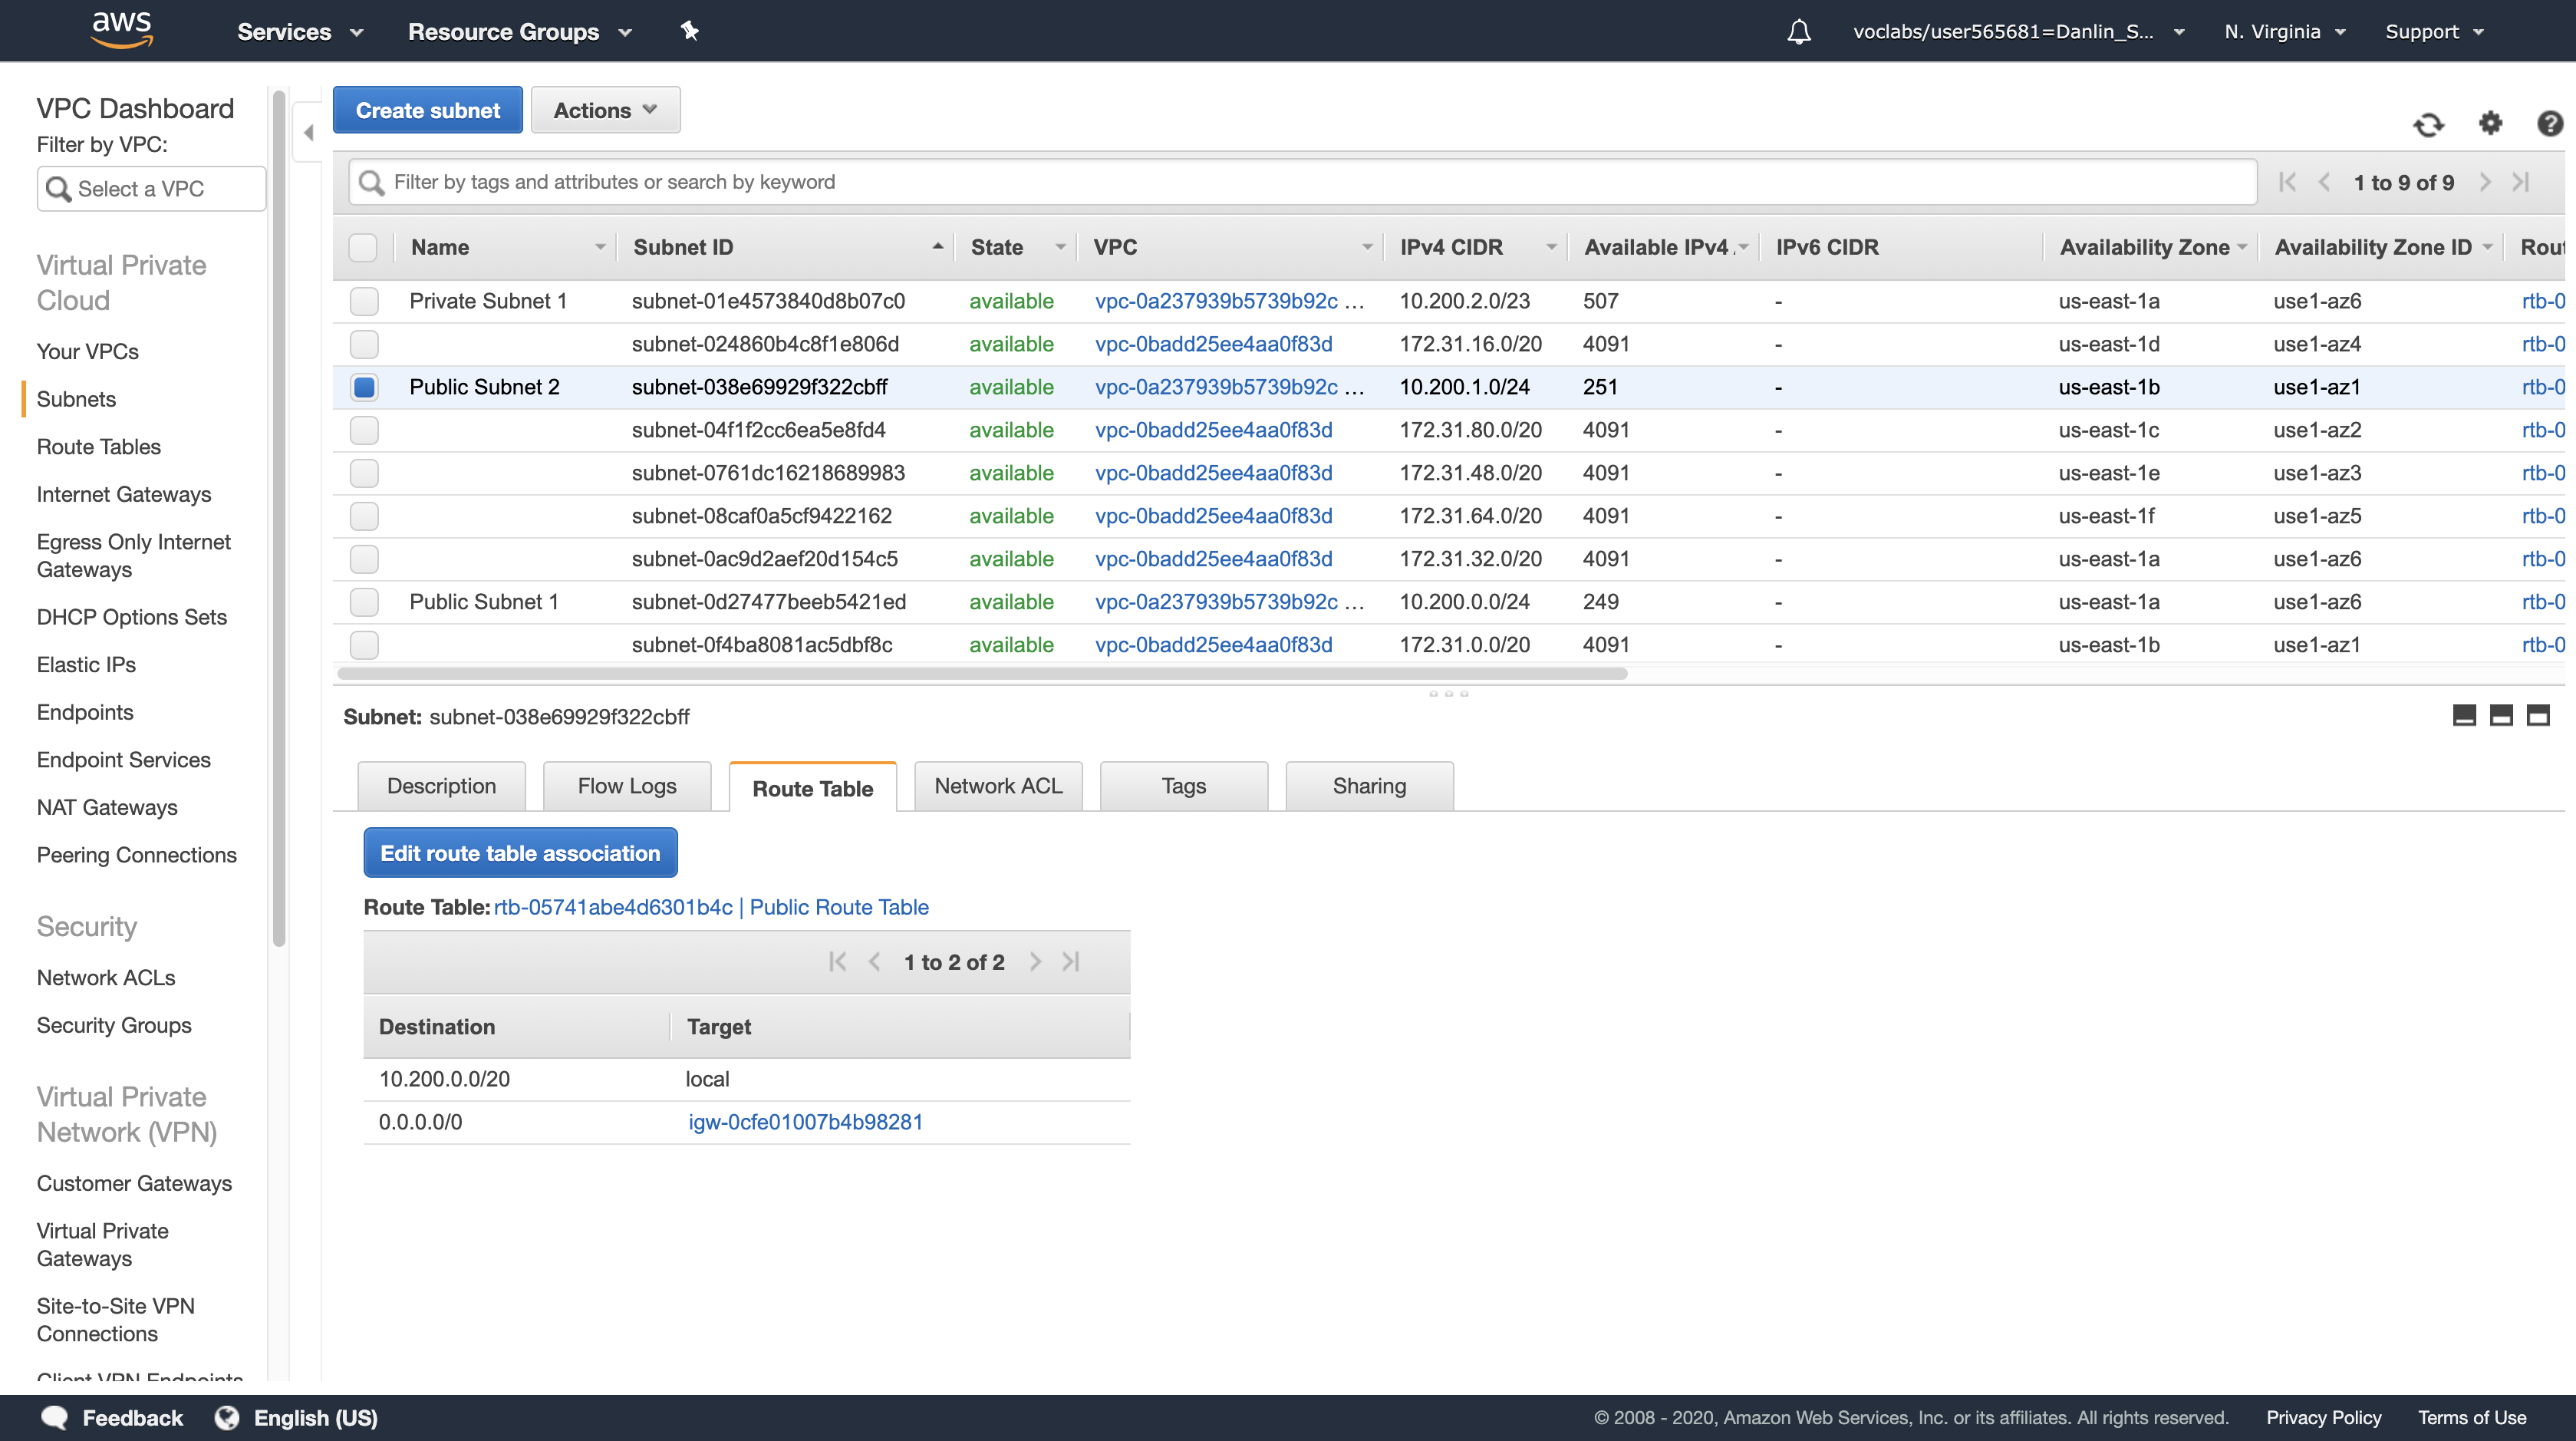
Task 5.2: Create a Second Private Subnet
Your application will be deployed in private subnets for improved security. This prevents direct access from the Internet to the instances (For security). To configure high availability, you will need a second private Subnet.
Click Create subnet
In the Create Subnet dialog box, configure the following:
- Name tag:
Private Subnet 2 - VPC:
Lab VPC - Availability Zone:
us-east-1b- Choose the same Availability Zone you just selected for Public Subnet 2.
- IPv4 CIDR block:
10.200.4.0/23
Click Create and then click Close
The Subnet will have an IP range between 10.200.4.0 and 10.200.5.255.
- 10.200.4.0/23 = 1010 0000, 1100 1000, 0000 100 / 0, 0000 0000
- 10.200.4.1/23 Gateway
- 10.200.5.255/23 Broadcast
- 10.200.4.2/23 ~ 10.200.5.254/23 Valid Hosts
Task 5.3: Create a Second NAT Gateway
A NAT Gateway (Network Address Translation) is provisioned into a public Subnet and provides outbound Internet connectivity for resources in a private Subnet. Your web application requires connectivity to the Internet to retrieve geographic information, so you will need to route Internet-bound traffic through a NAT Gateway.
To remain Highly Available, your web application must be configured such that any problems in the first Availability Zone should not impact resources in the second Availability Zone, and vice versa. Therefore, you will create a second NAT Gateway in the second Availability Zone.
Navigation pane
Click NAT Gateway
Click Create NAT Gateway
For Subnet, select the Subnet ID of Public Subnet 2
Click Create New EIP
An Elastic IP Address (EIP) is a static IP address that will be associated with this NAT Gateway. The Elastic IP address will remain unchanged over the life of the NAT Gateway.
Click Create a NAT Gateway, then click Close
You will now see two NAT Gateways.
Tip: If you only see one, click the refresh icon in the top-right until the second one appears.
The NAT Gateway that you just created will initially have a status of pending. Wait for several minutes. Once it becomes available, you will see that it will have a private IP Address starting with 10.200.1.x.
Copy the NAT Gateway ID show in the first column, starting with nat-. Paste it into a text document for use in the next task.
You must now configure your network to use the second NAT Gateway.
Task 5.4: Create a Second Private Route Table
A Route Table defines how traffic flows into and out of a Subnet. You will now create a Route Table for Private Subnet 2 that sends Internet-bound traffic through the NAT Gateway that you just created.
Navigation pane
Click Route Tables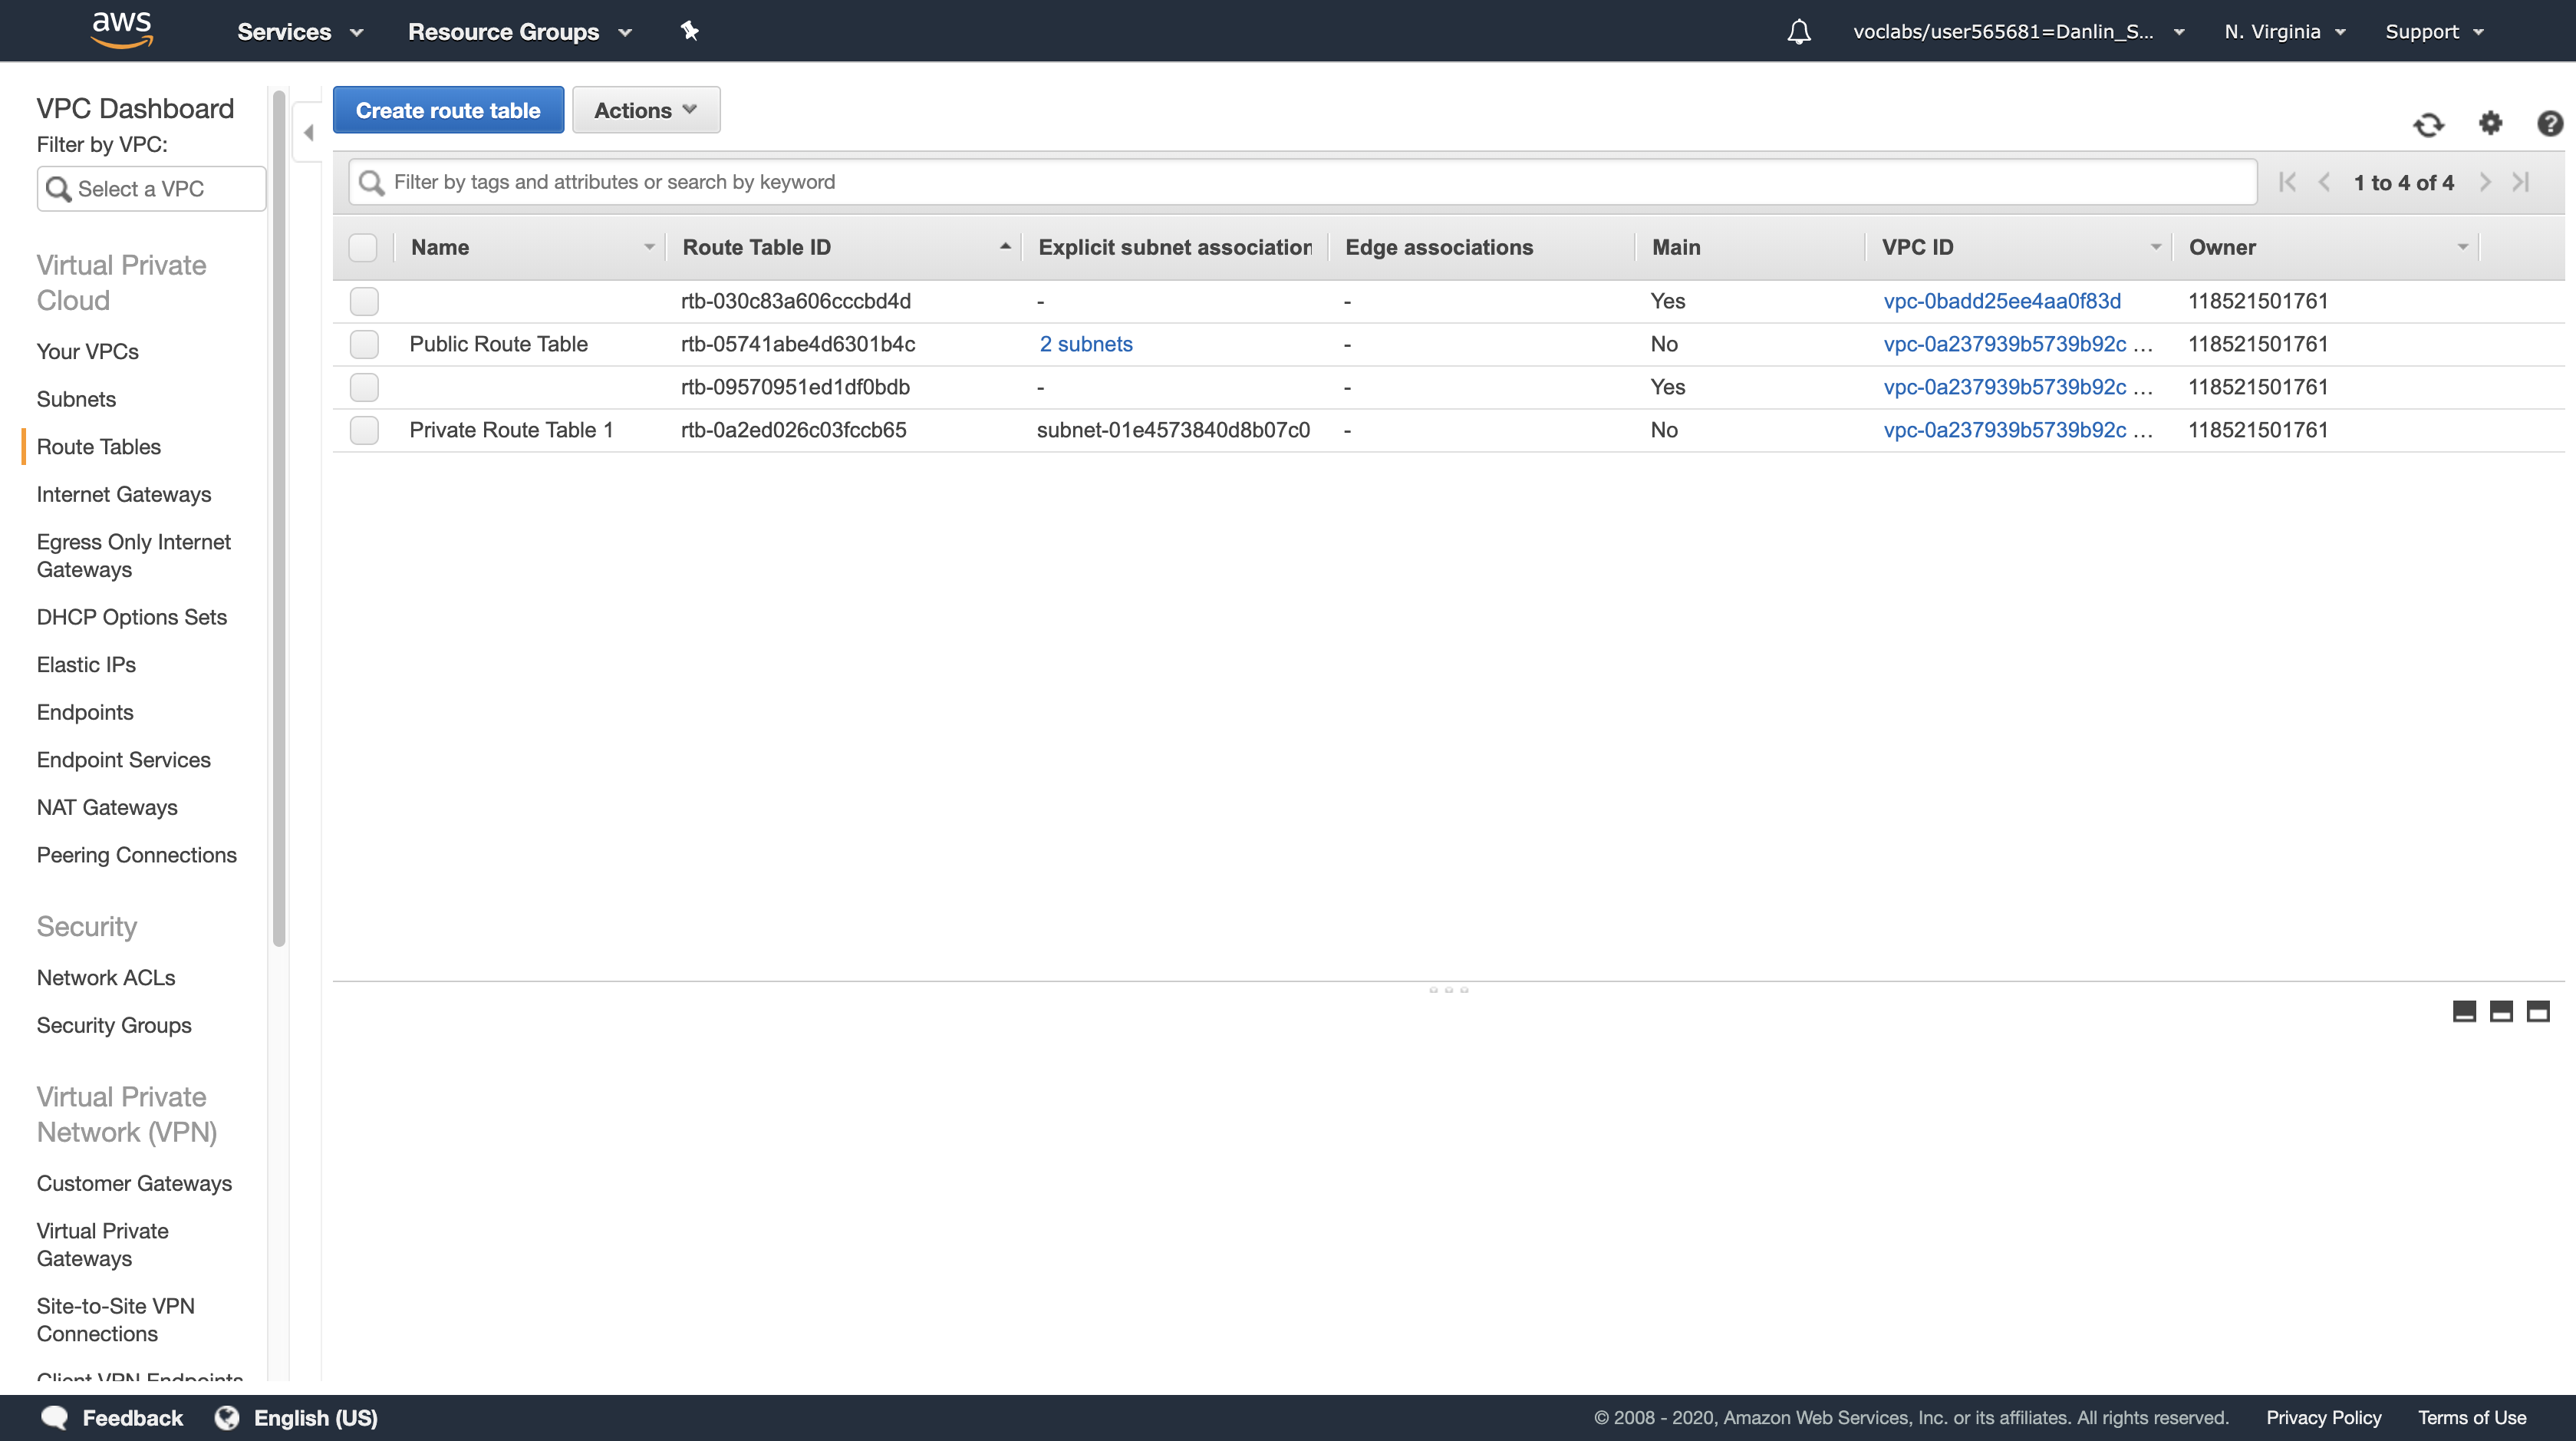
Click Create route table
In the Create route table dialog box, configure the following:
- Name tag:
Private Route Table 2 - VPC:
Lab VPC
Click Create, then click Close.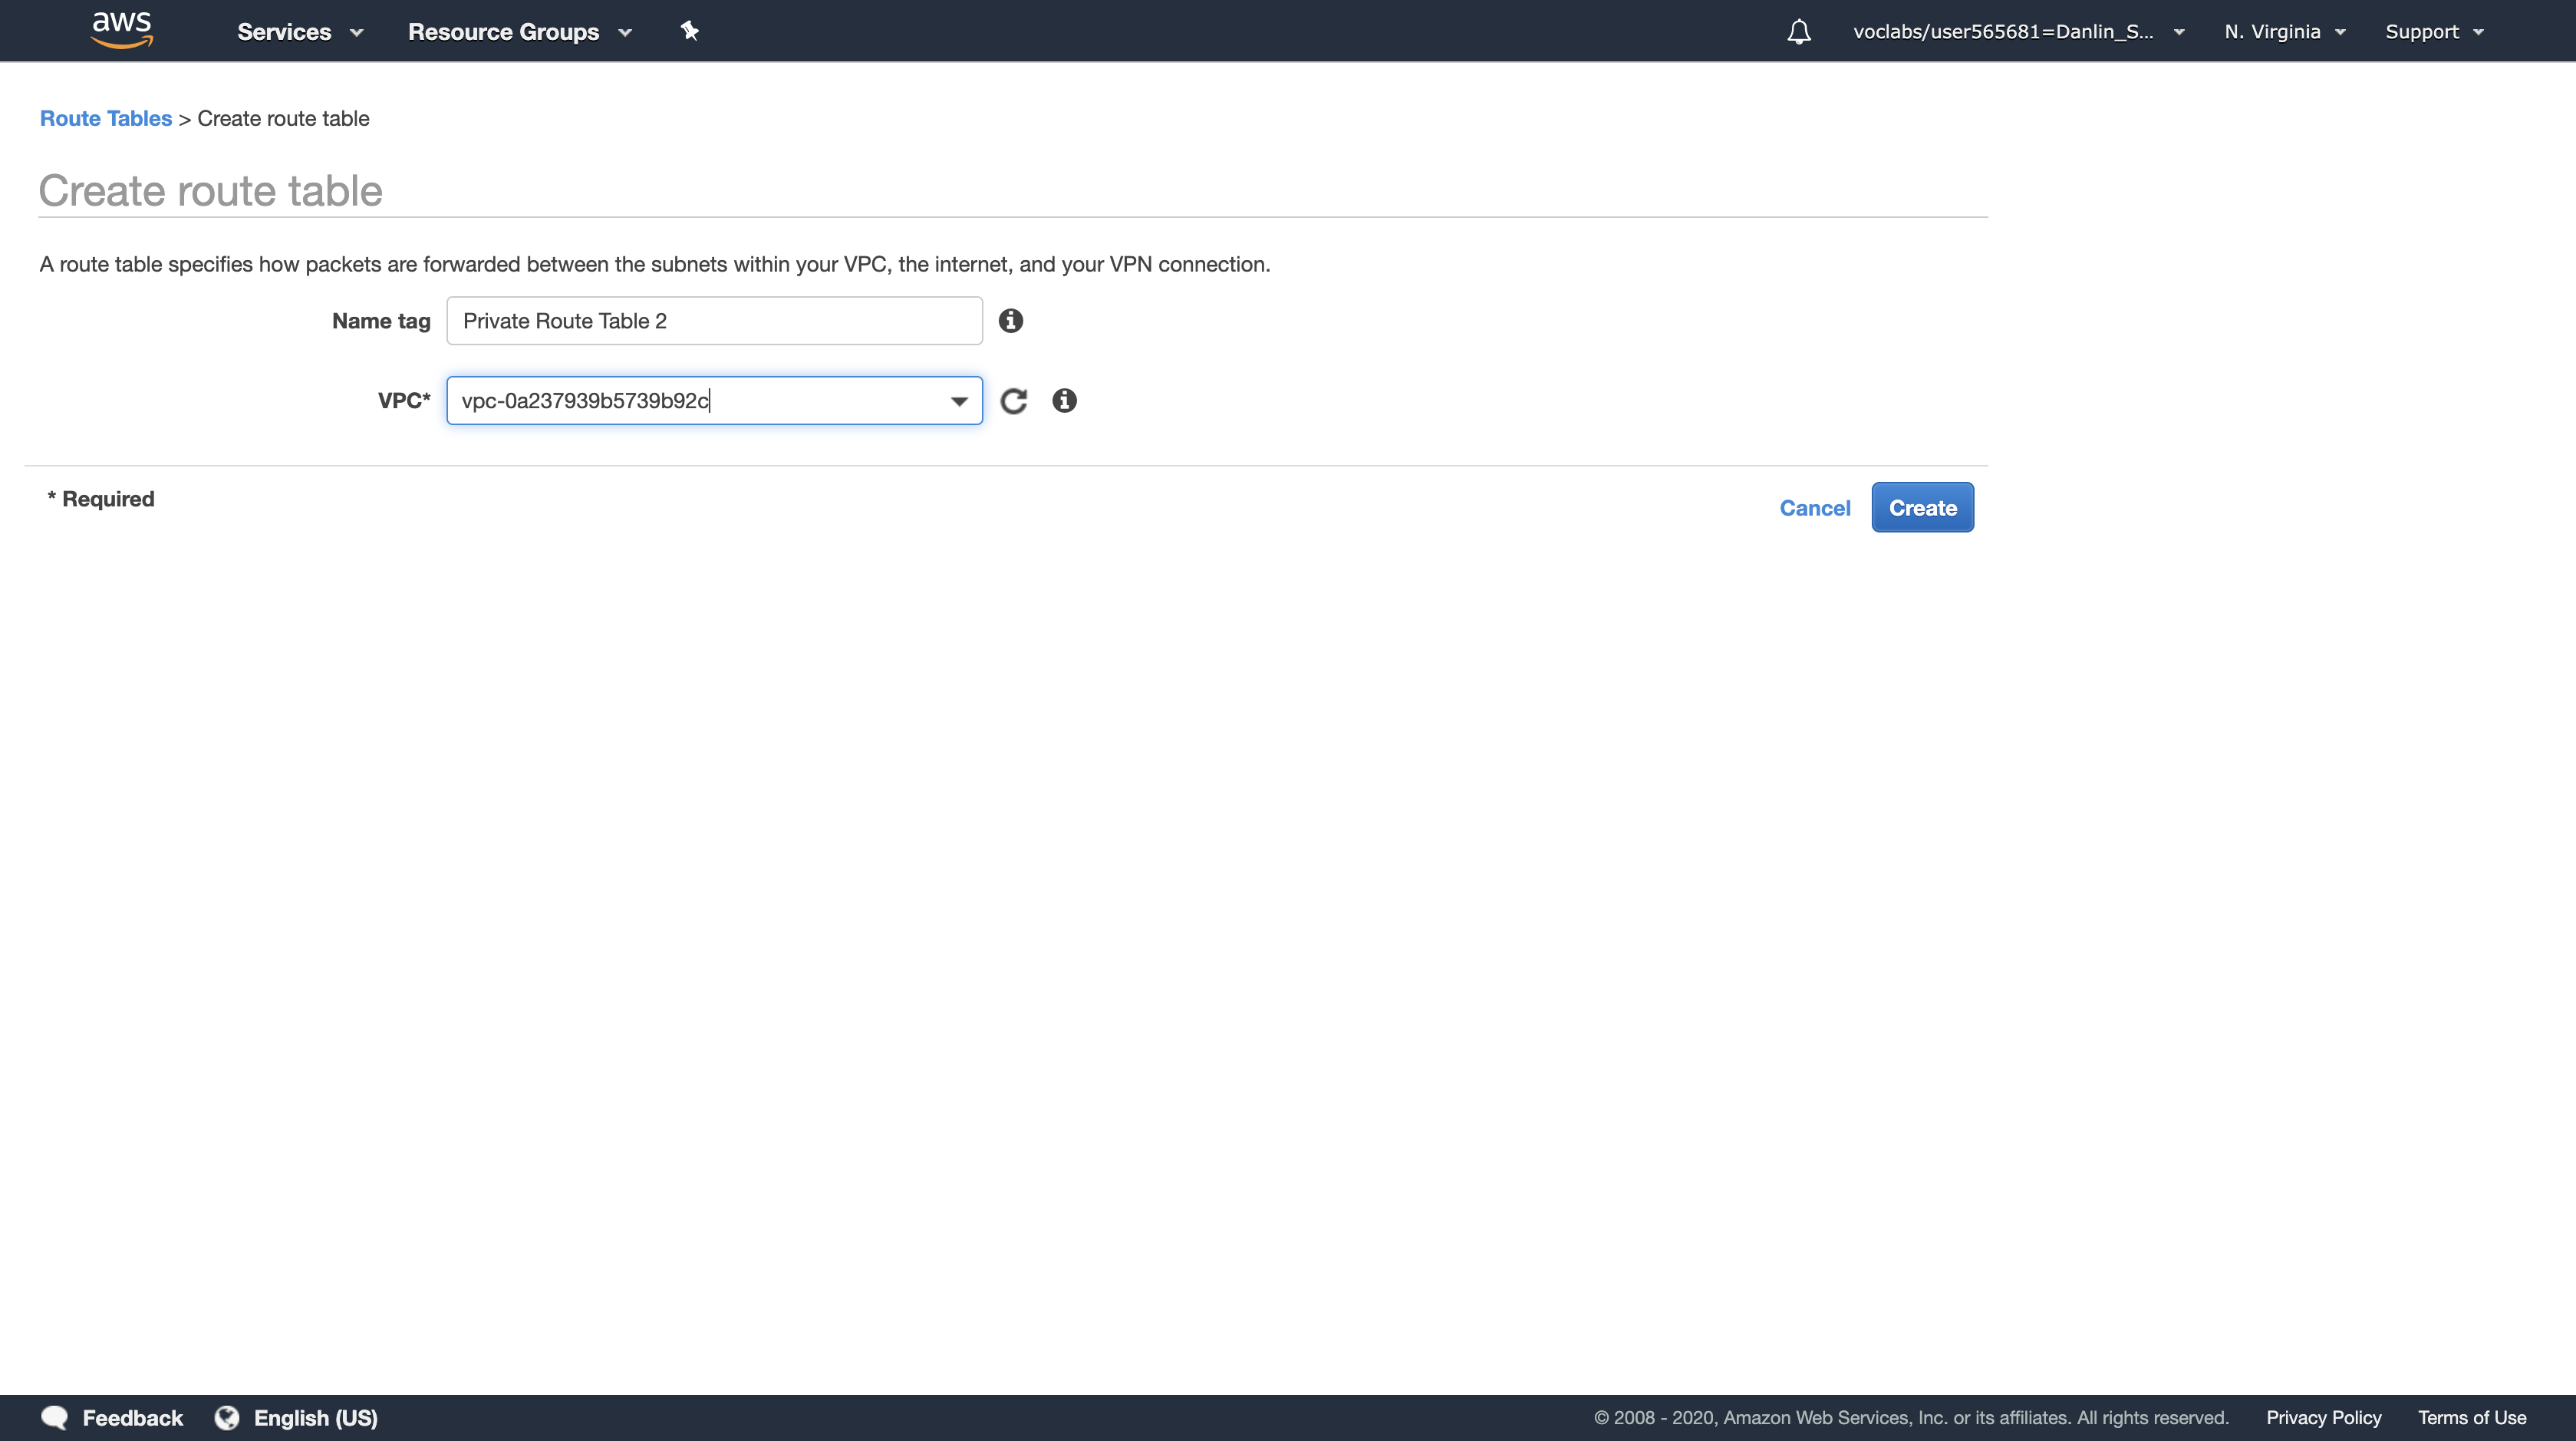
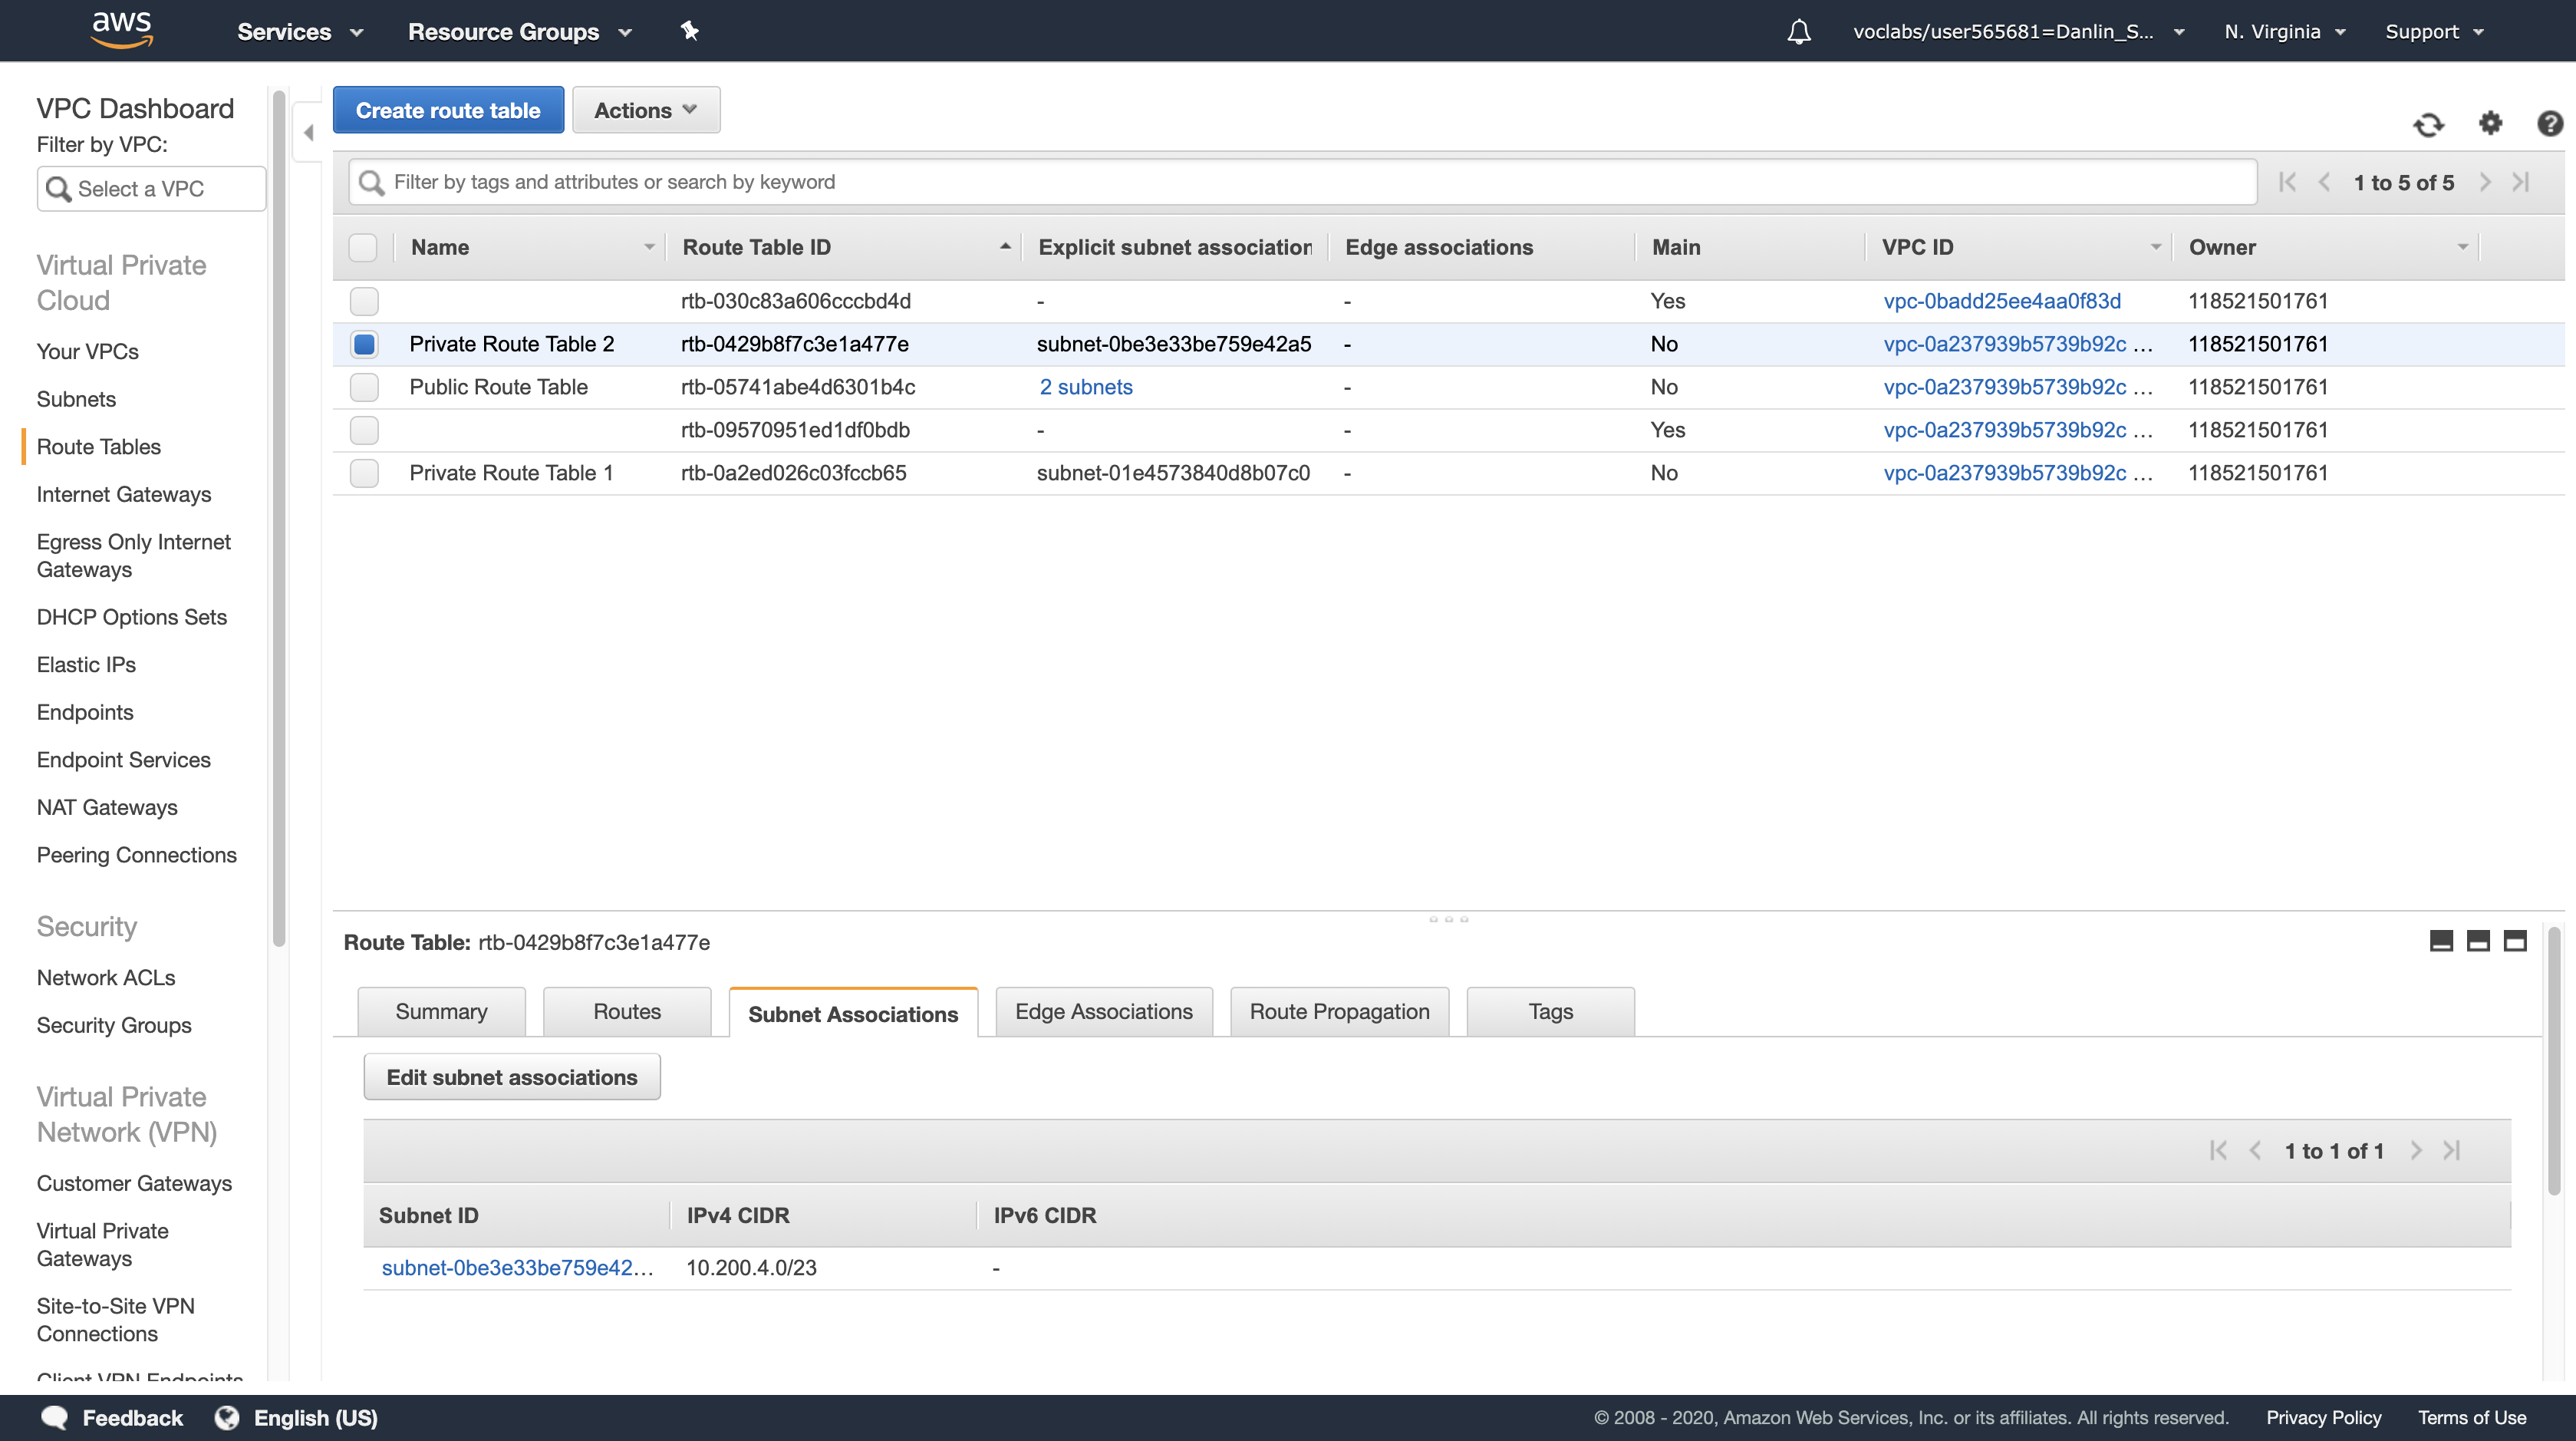
Compare Private Route Table 1 & 2
We can see that Private Route Table miss 0.0.0.0/0
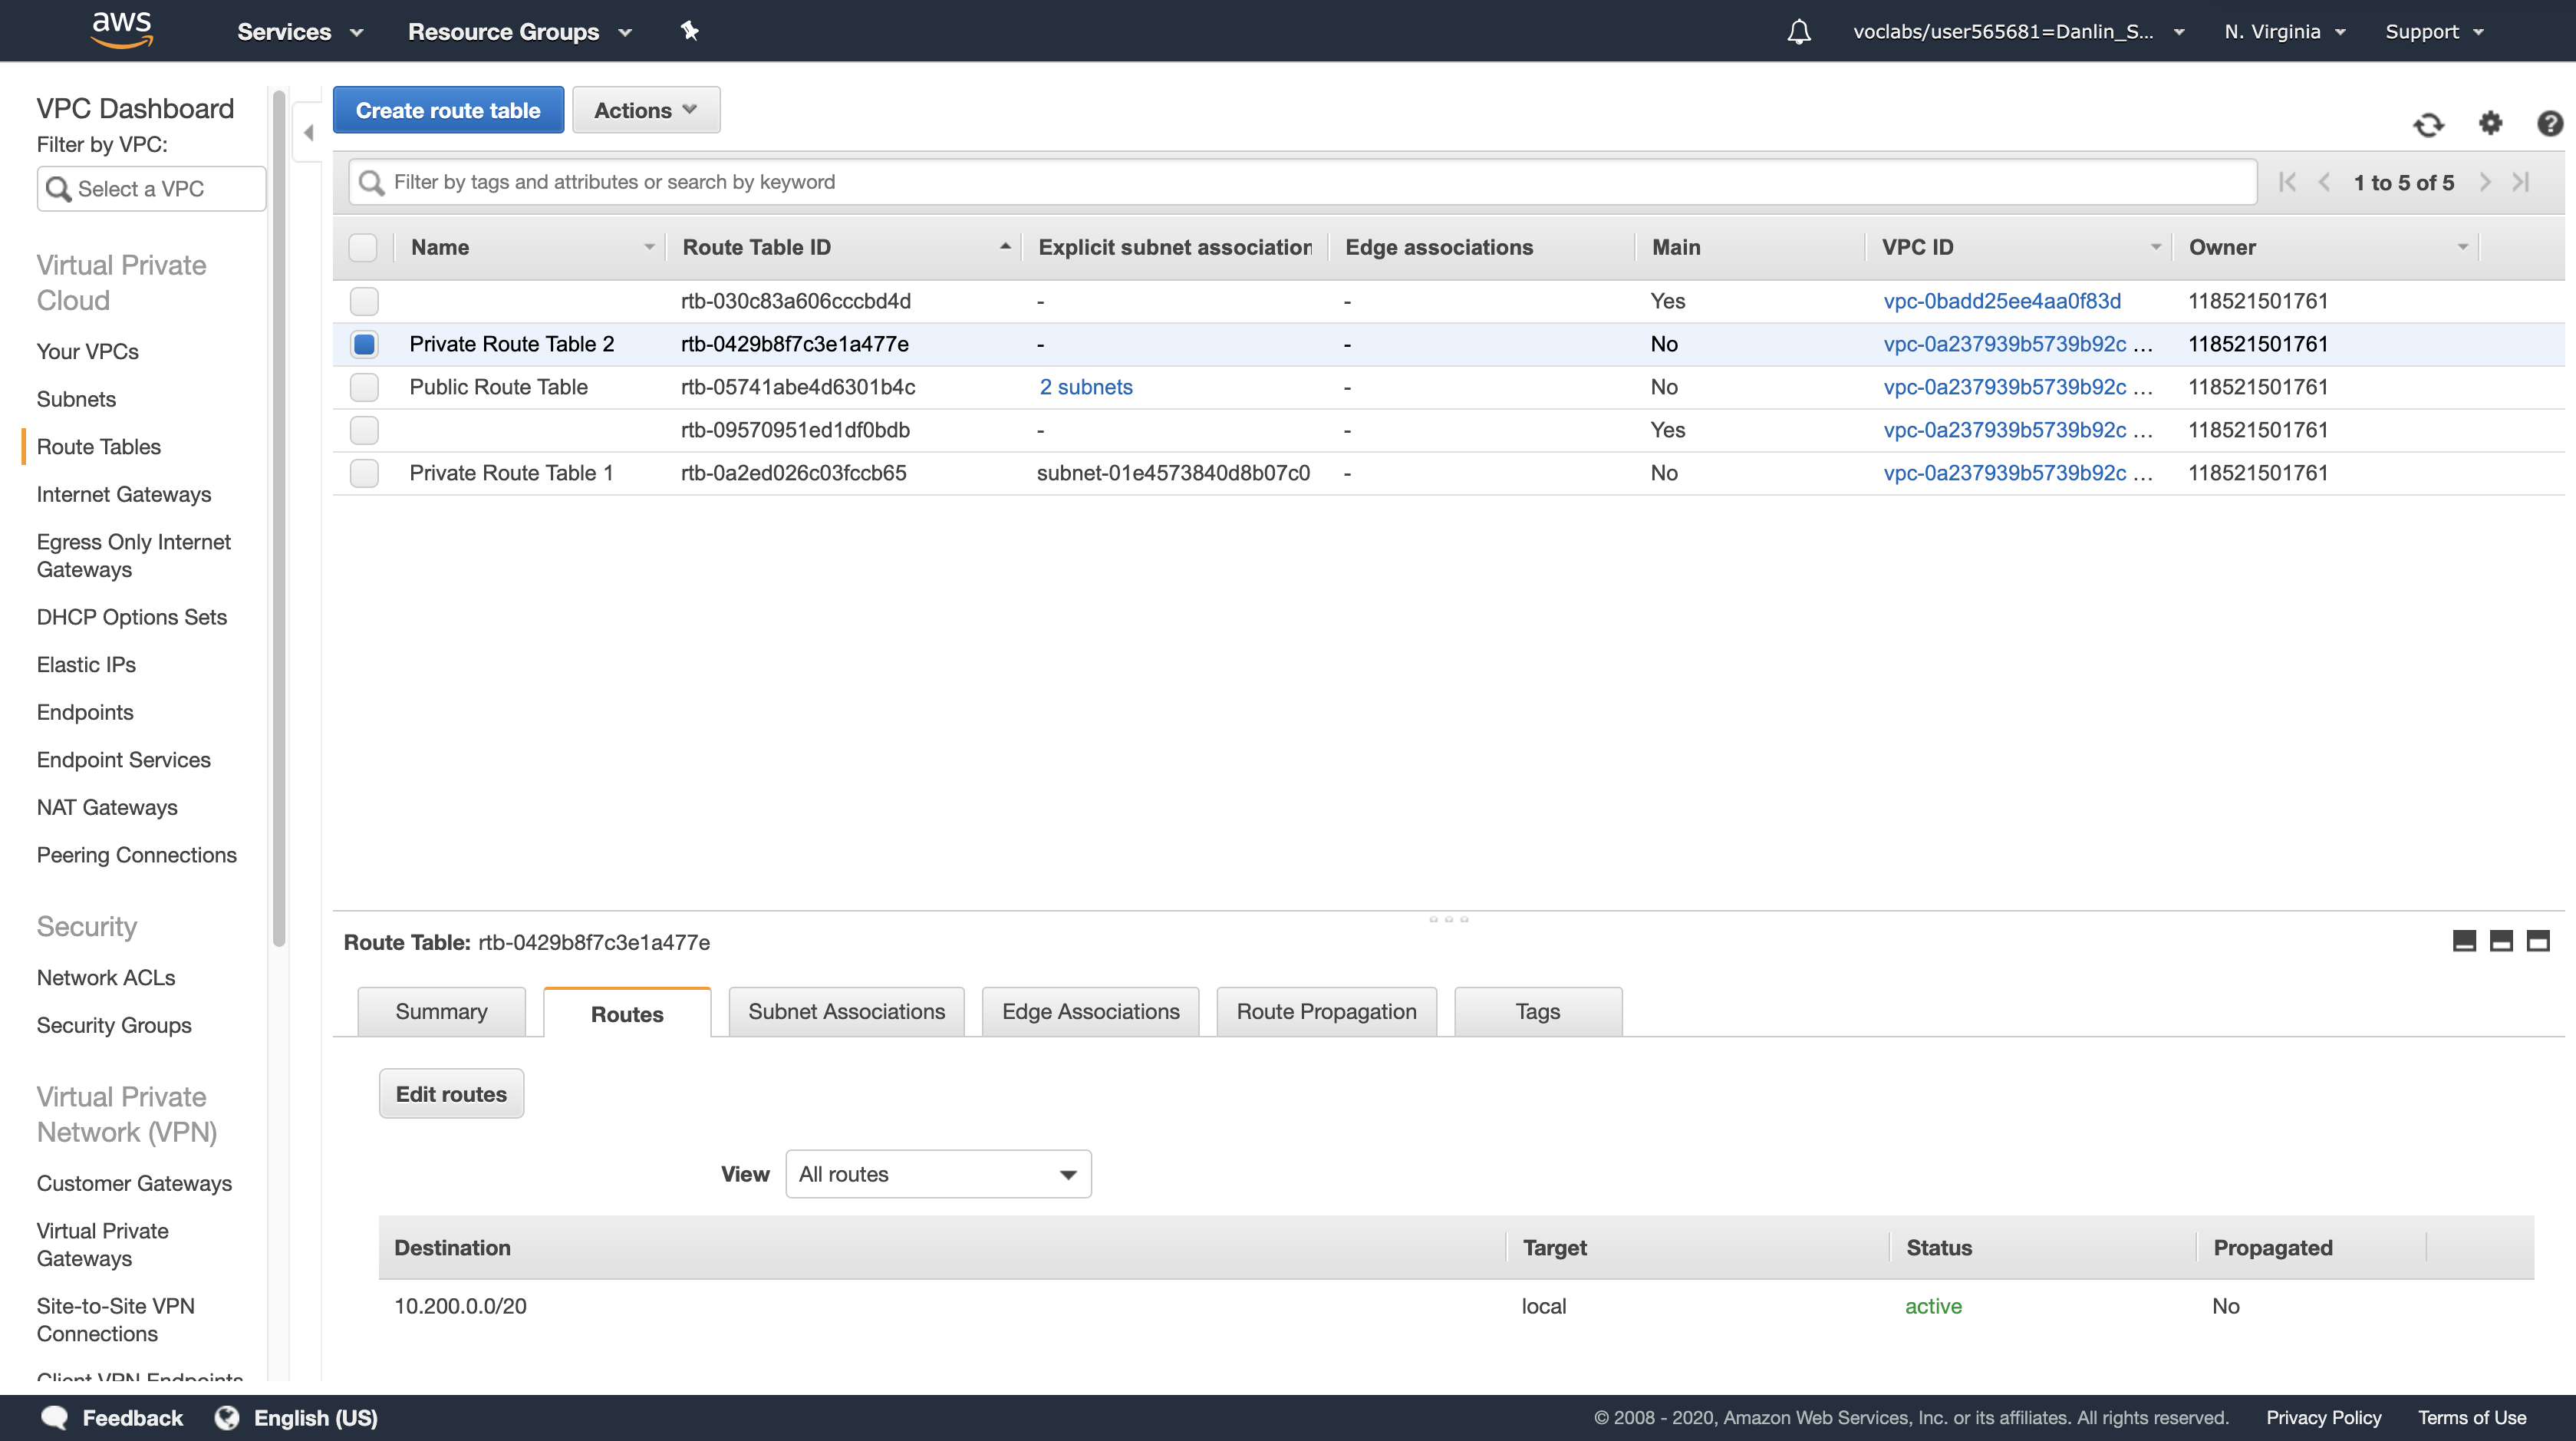
Select Private Route Table 2 > Routes tab > Edit routes > Add route
The Route Table currently only sends traffic within the VPC, as shown in the route table entry with the Target of local. You will now configure the Route Table to send Internet-bound traffic (identified with the wildcard 0.0.0.0/0) through the second NAT Gateway.
For Destination, type: 0.0.0.0/0
Click in the Target drop down list, and choose the NAT Gateway with the ID you copied earlier. (Check your text editor for the nat- ID you saved earlier.)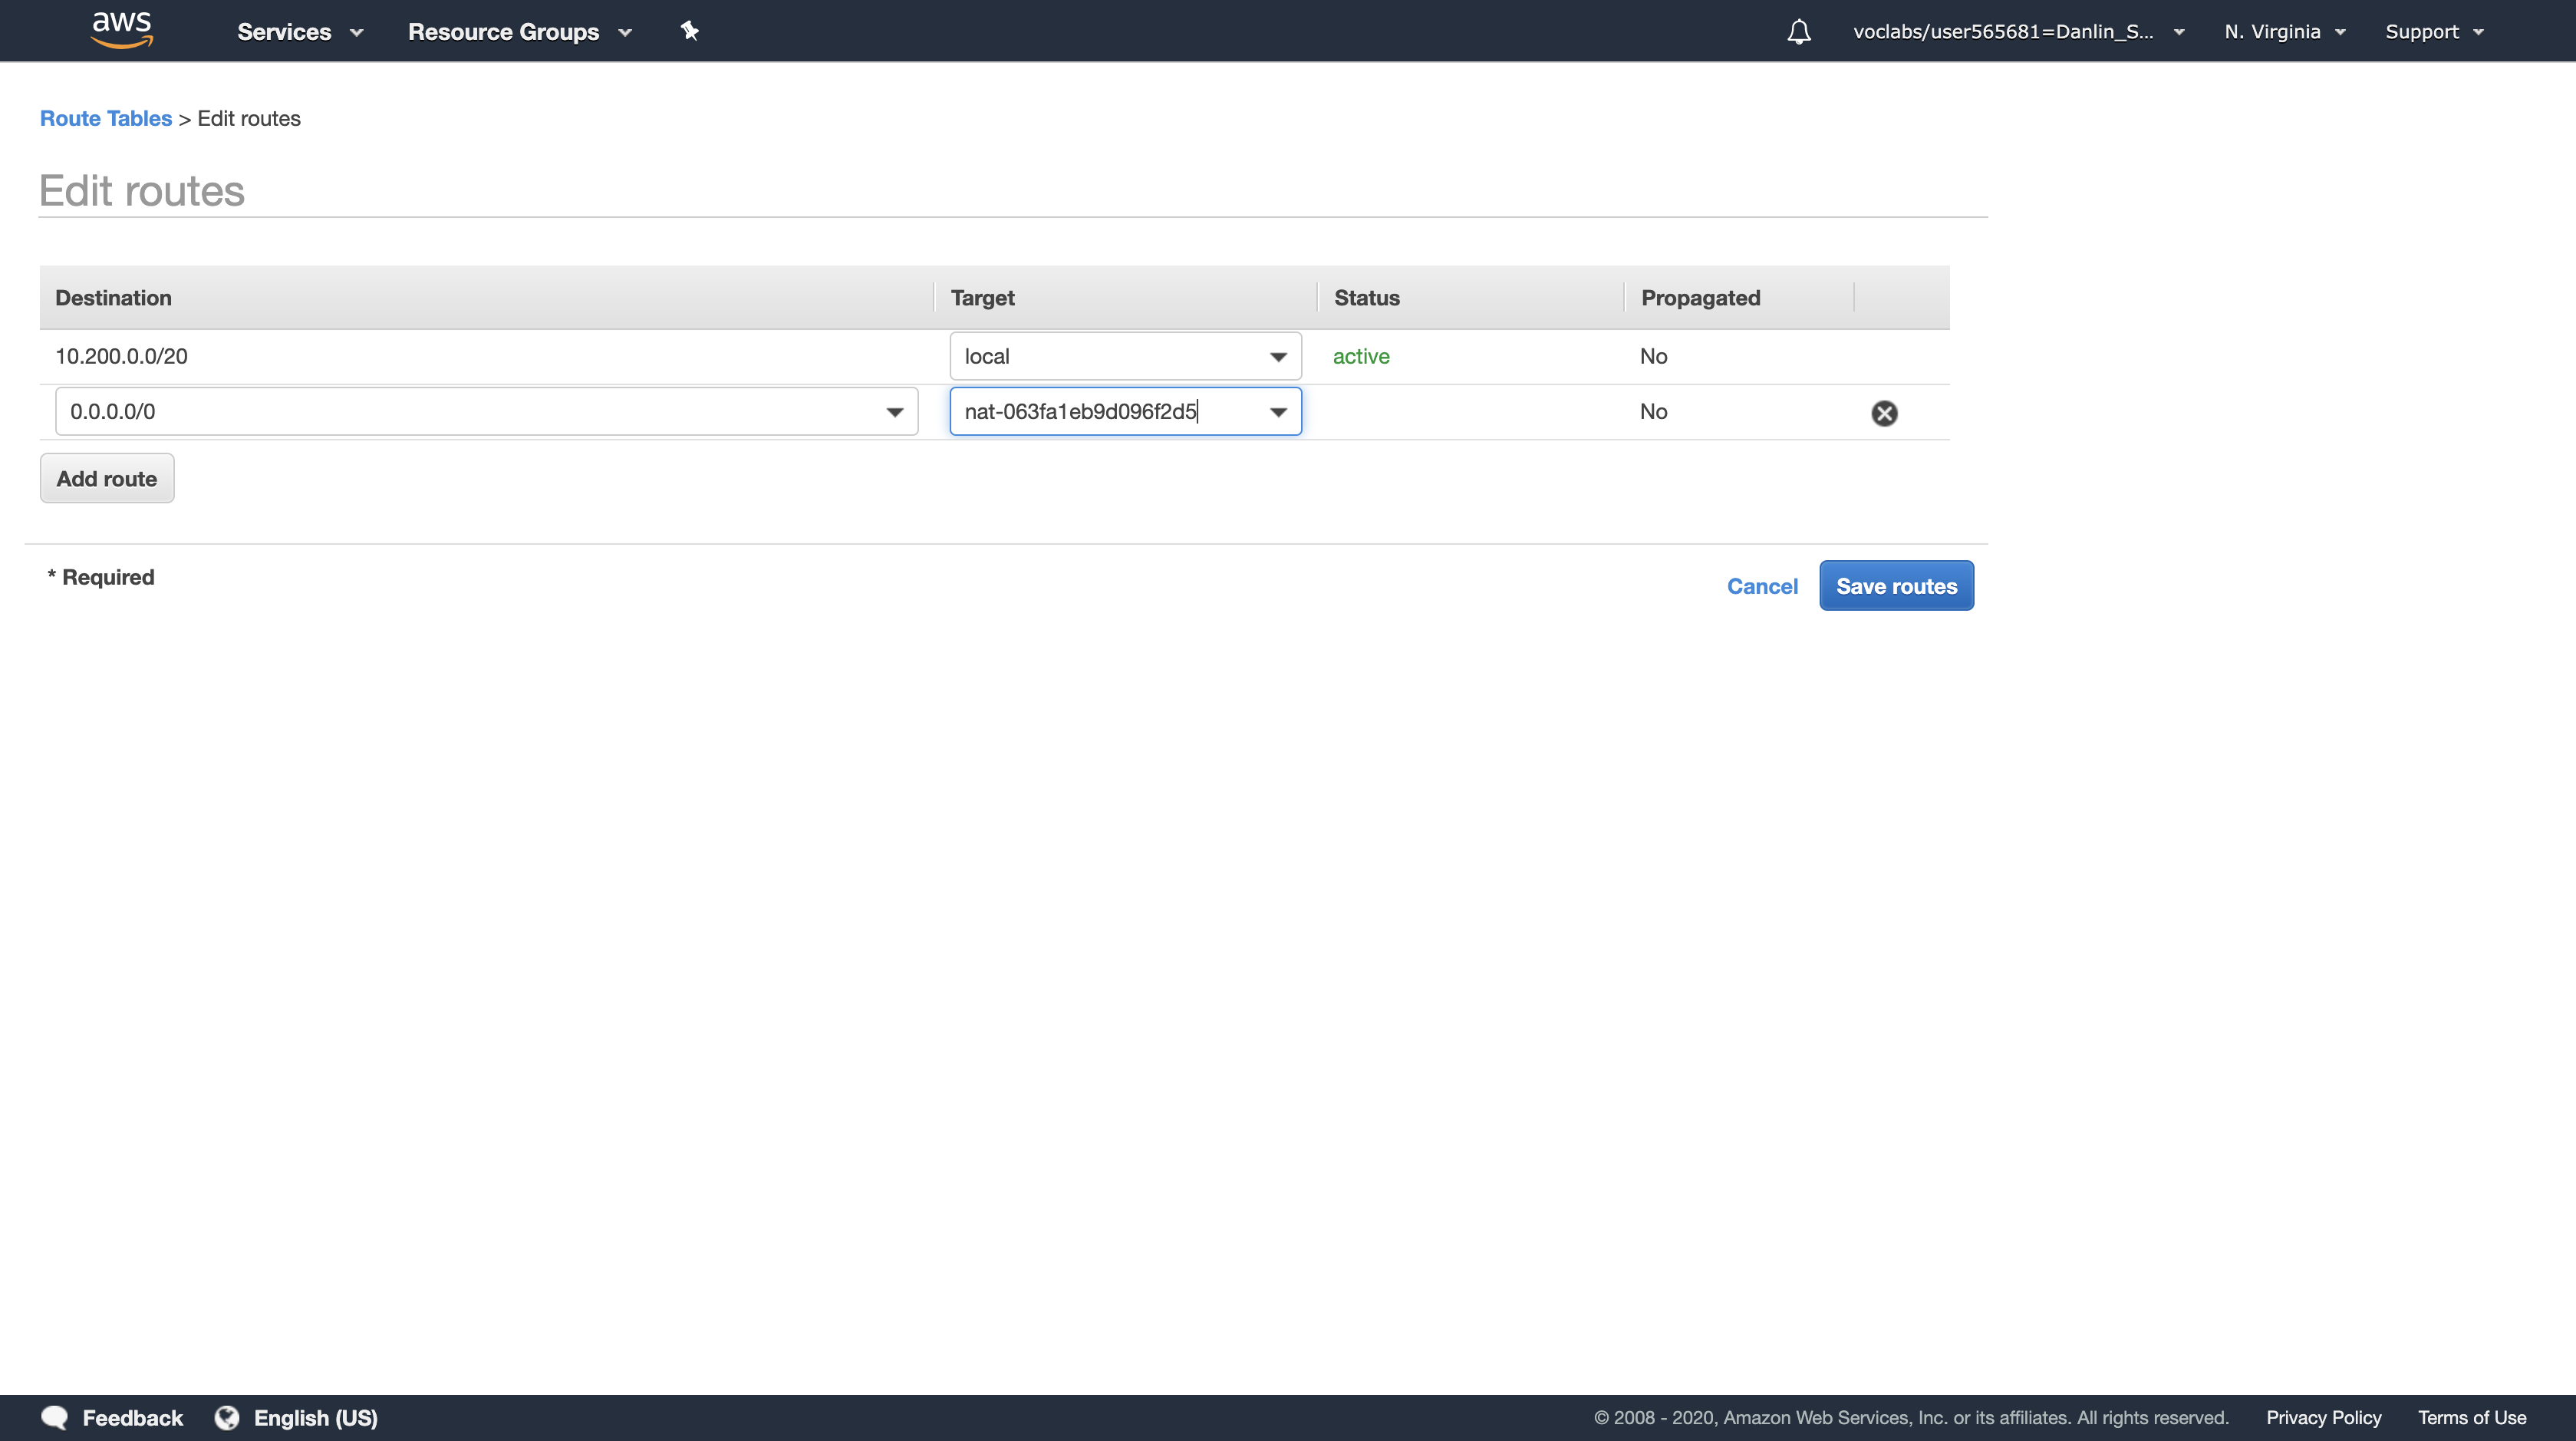
Click Save routes, then click Close
You can now associate this Route Table (Private Route Table 2) with the second Private Subnet 2 that you created earlier.
Private Route Table 2
Click the Subnet Associations tab > Click Edit subnet associations
Select (tick) the checkbox beside Private Subnet 2.
Click Save
Private Subnet 2 will now route Internet-bound traffic through the second NAT Gateway.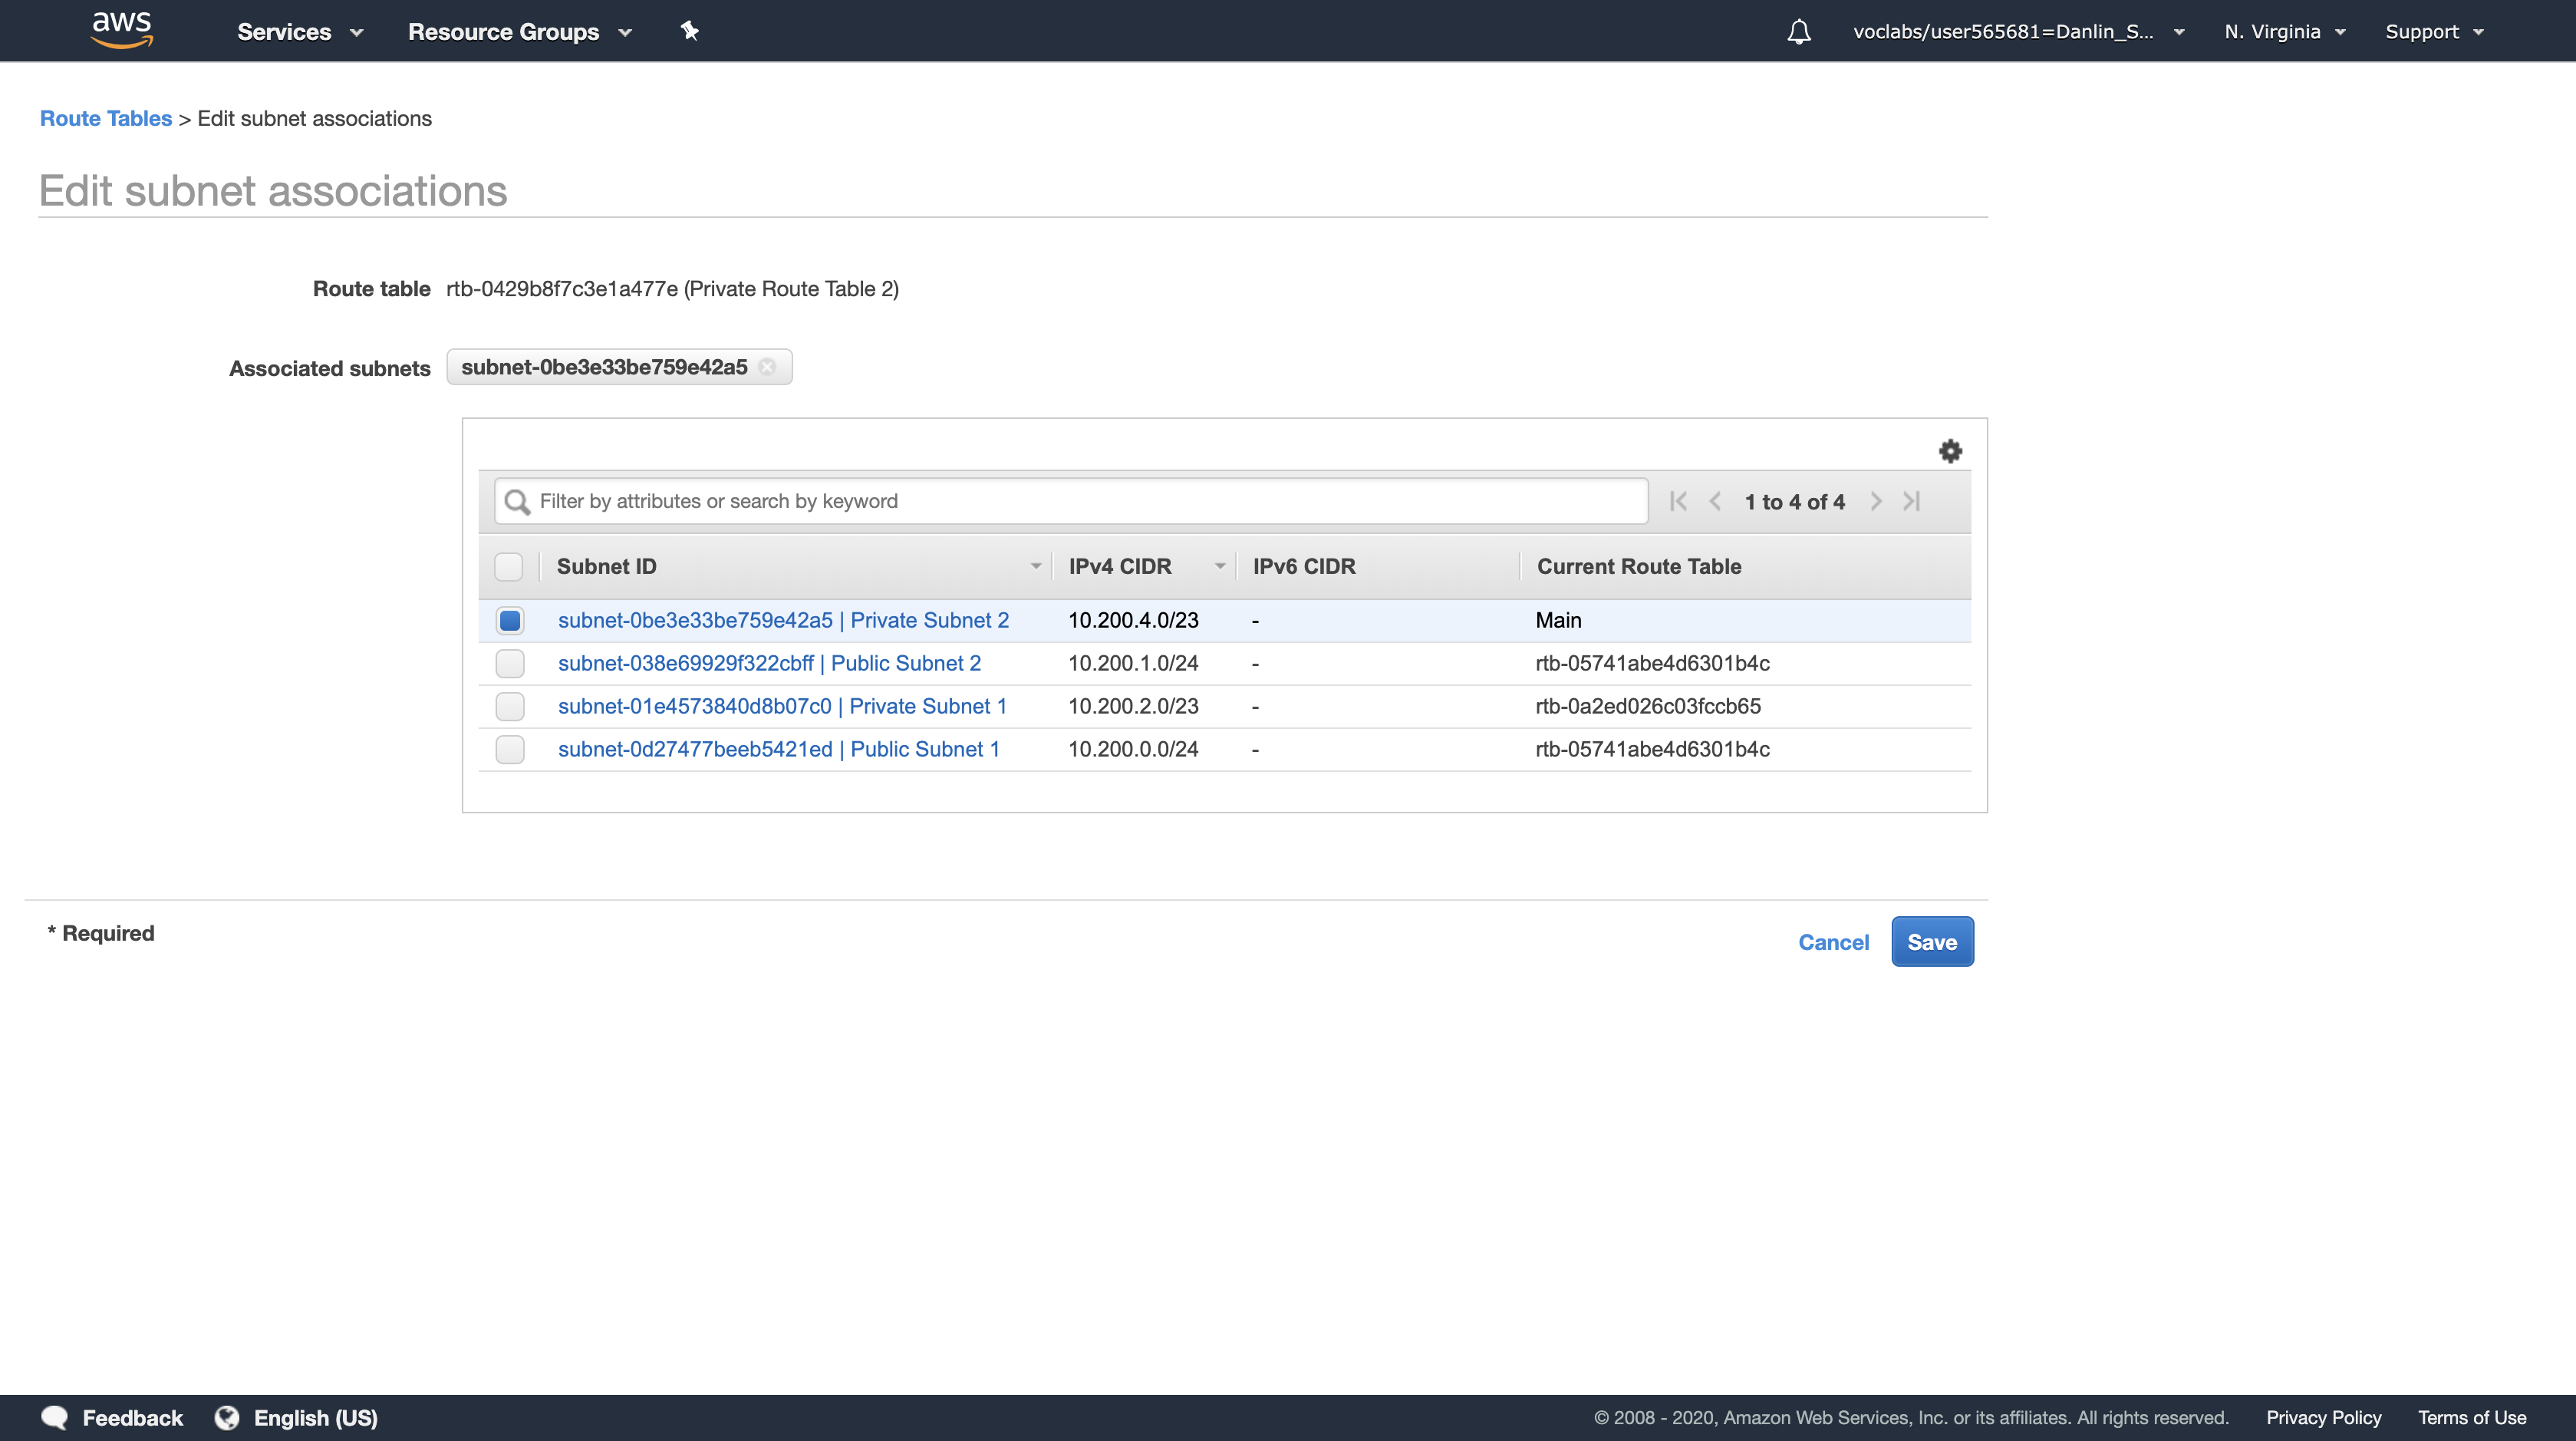
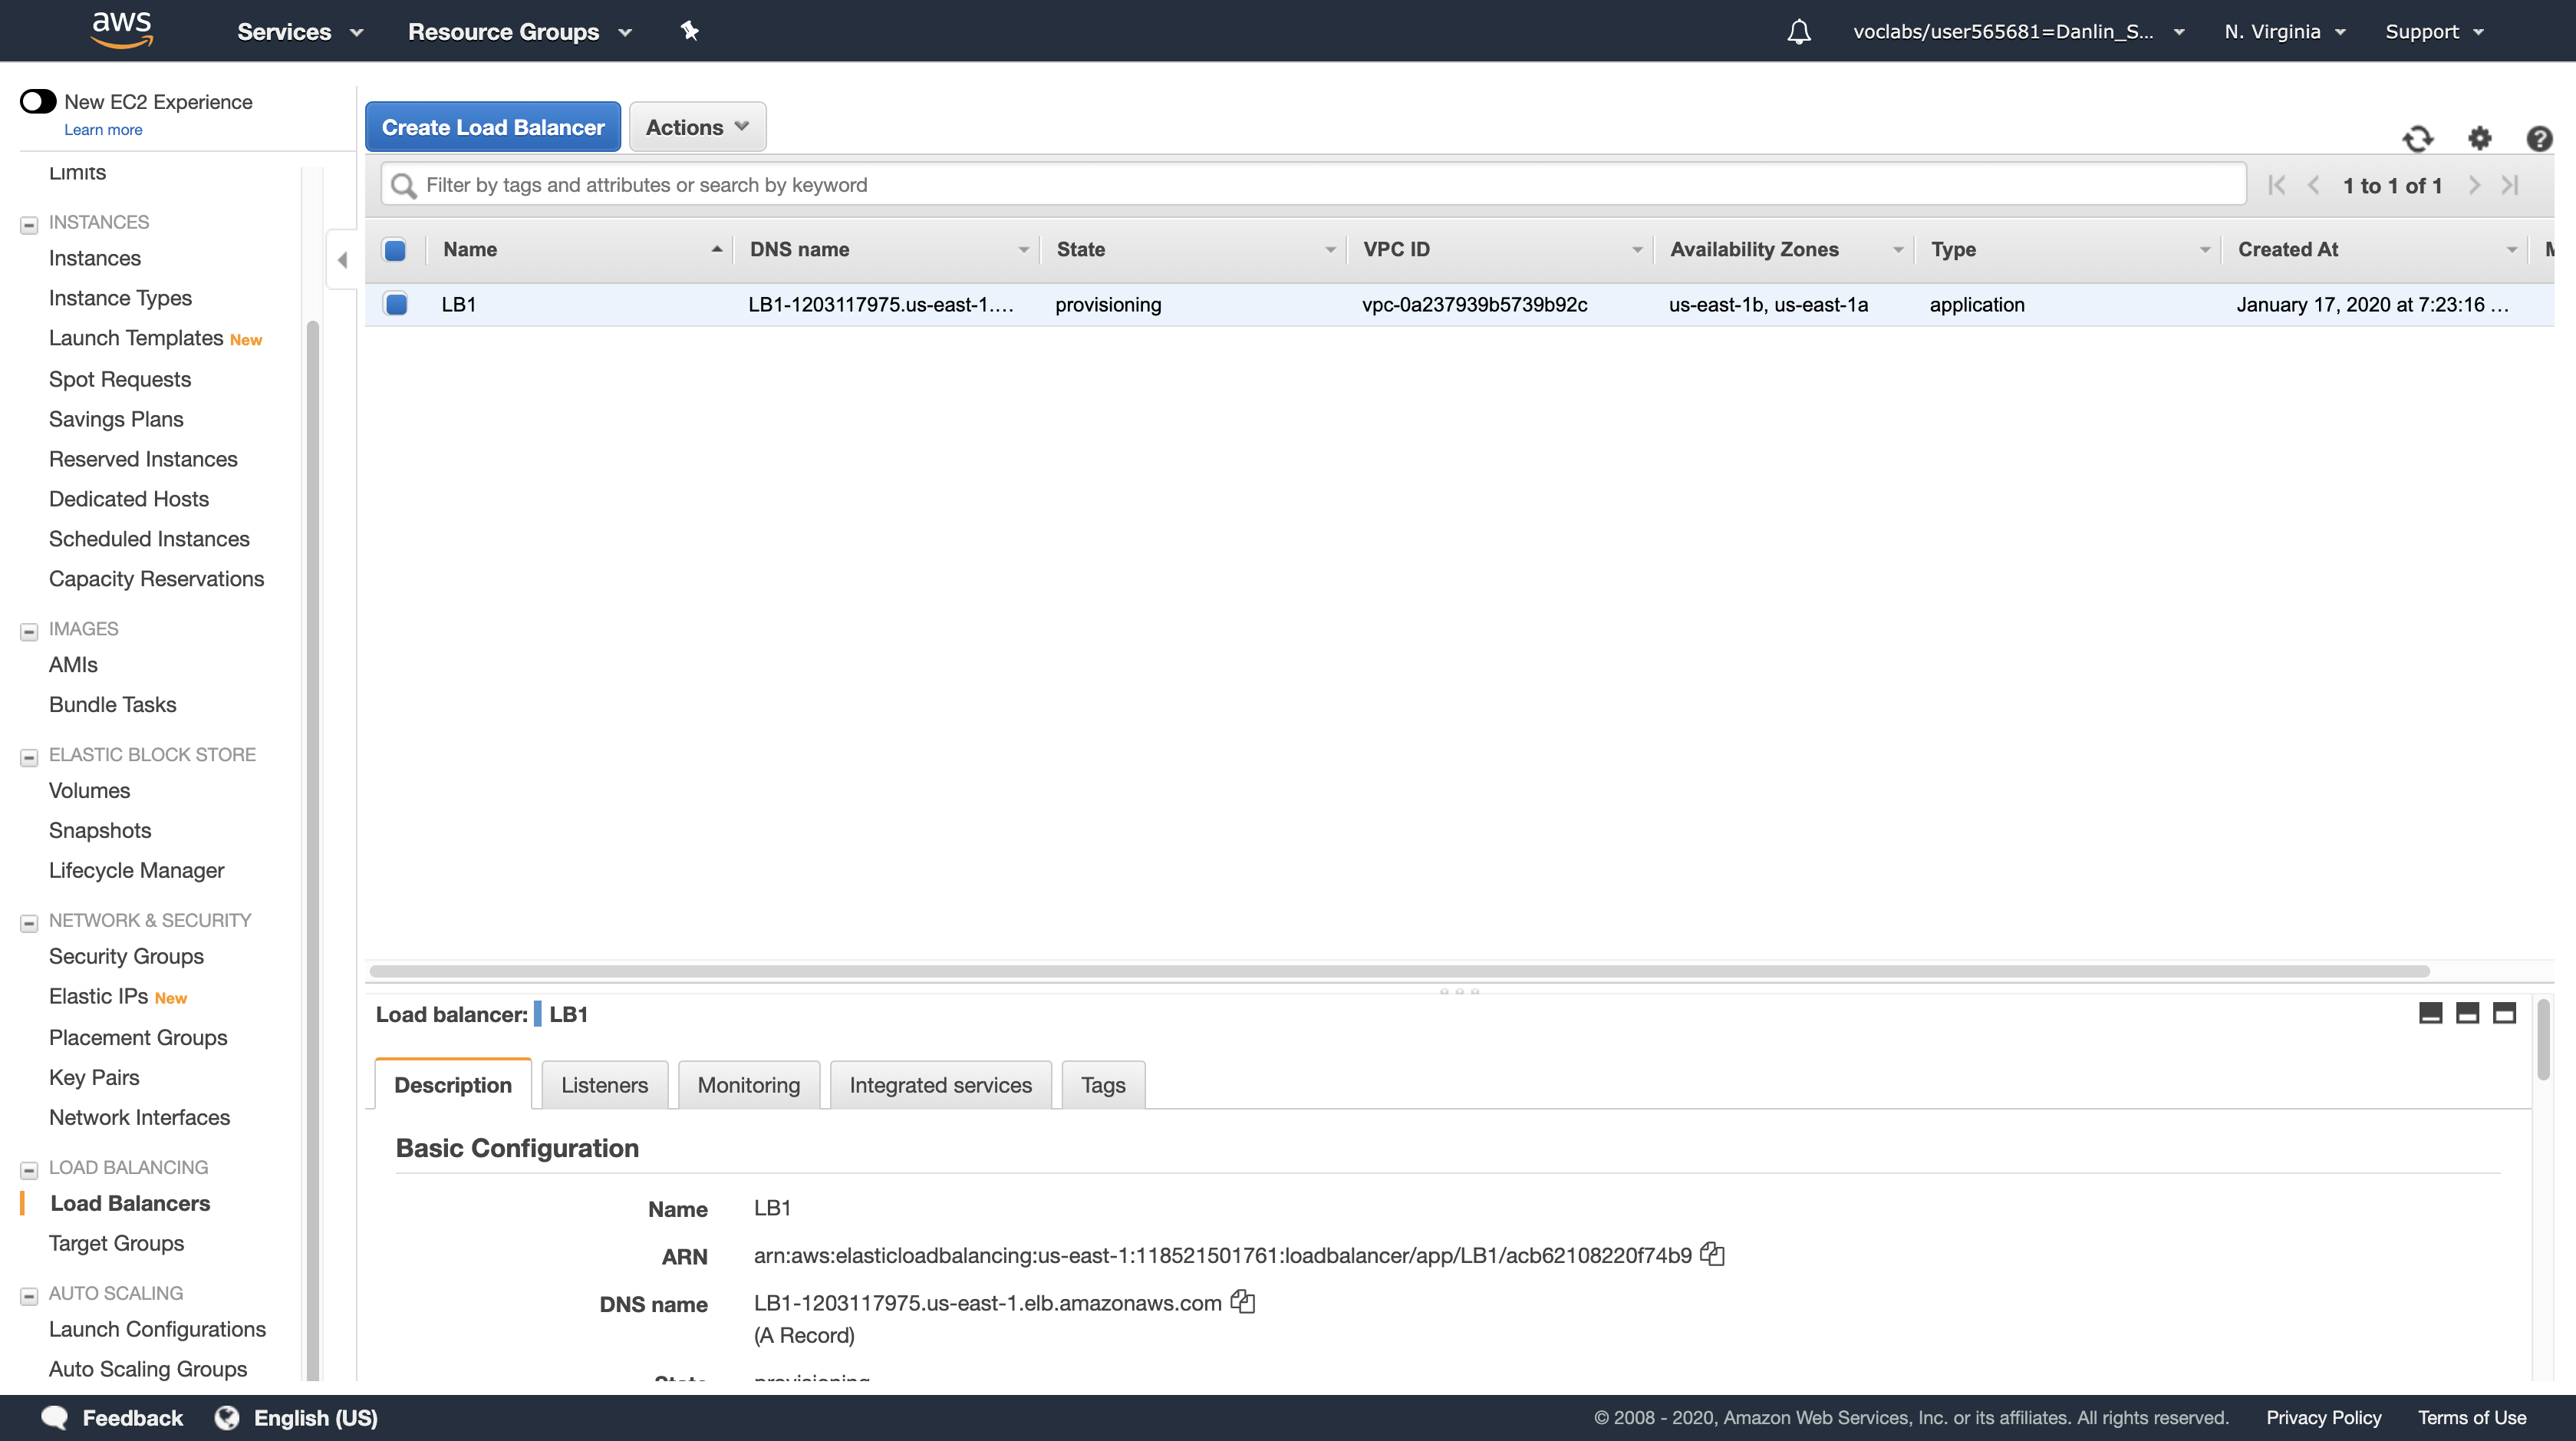
Task 6: Create an Application Load Balancer
In this task, you will create an Application Load Balancer that distributes requests across multiple Amazon EC2 instances. This is a critical component of a Highly Available architecture because the Load Balancer performs health checks on instances and only sends requests to healthy instances.
You do not have any instances yet – they will be created by the Auto Scaling group in the next task.
Services menu
Click EC2
Navigation pane
Click Load Balancers (you might need to scroll down to find it).
Click Create Load Balancer
Several types of Load Balancers are displayed. Read the descriptions of each type to understand their capabilities.
- Application Load Balancer: Choose an Application Load Balancer when you need a flexible feature set for your web applications with HTTP and HTTPS traffic. Operating at the request level, Application Load Balancers provide advanced routing and visibility features targeted at application architectures, including microservices and containers.
- Network Load Balancer: Choose a Network Load Balancer when you need ultra-high performance, TLS offloading at scale, centralized certificate deployment, support for UDP, and static IP addresses for your application. Operating at the connection level, Network Load Balancers are capable of handling millions of requests per second securely while maintaining ultra-low latencies.
- Classic Load Balancer: Choose a Classic Load Balancer when you have an existing application running in the EC2-Classic network.
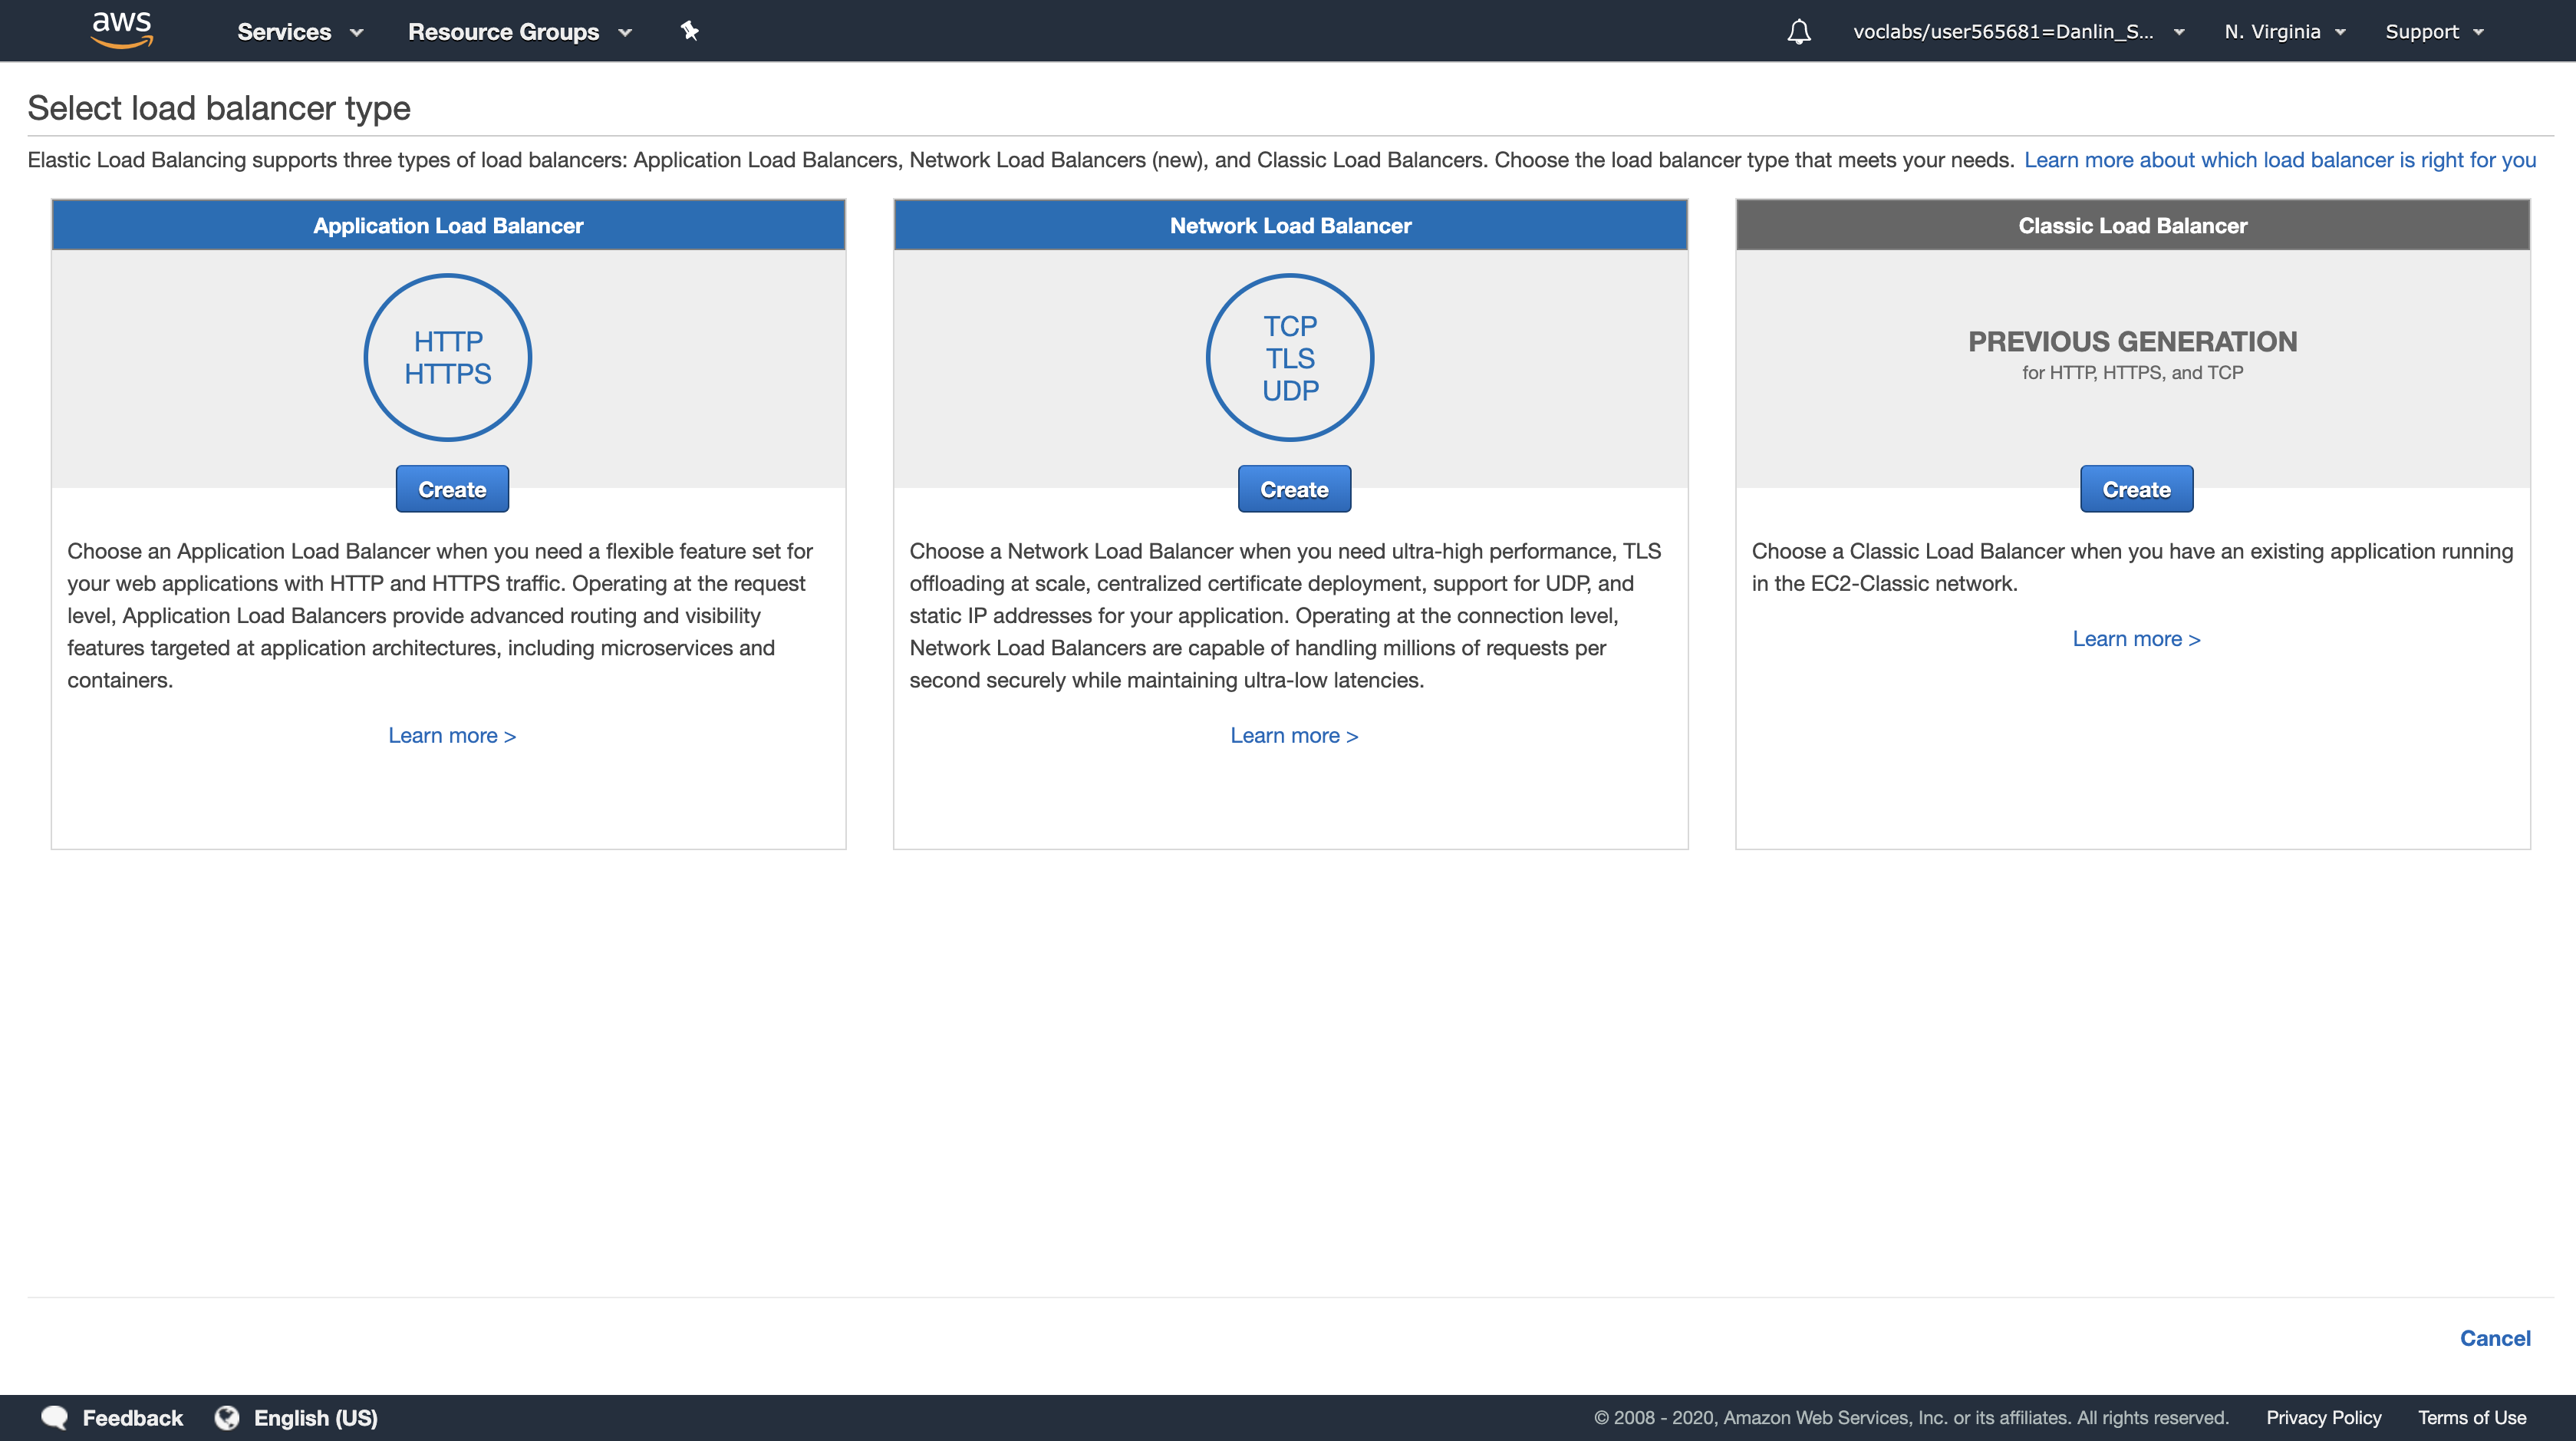
Under Application Load Balancer, click Create
- Name, type:
LB1 - VPC, select
Lab VPC
You will now specify which subnets the Load Balancer should use. It will be an Internet-facing load balancer, so you will select both Public Subnets.
- Click the first displayed Availability Zone, then click the Public Subnet displayed underneath.
- Click the second displayed Availability Zone, then click the Public Subnet displayed underneath.
You should now have two subnets selected: Public Subnet 1 and Public Subnet 2. (If not, go back and try the configuration again.)
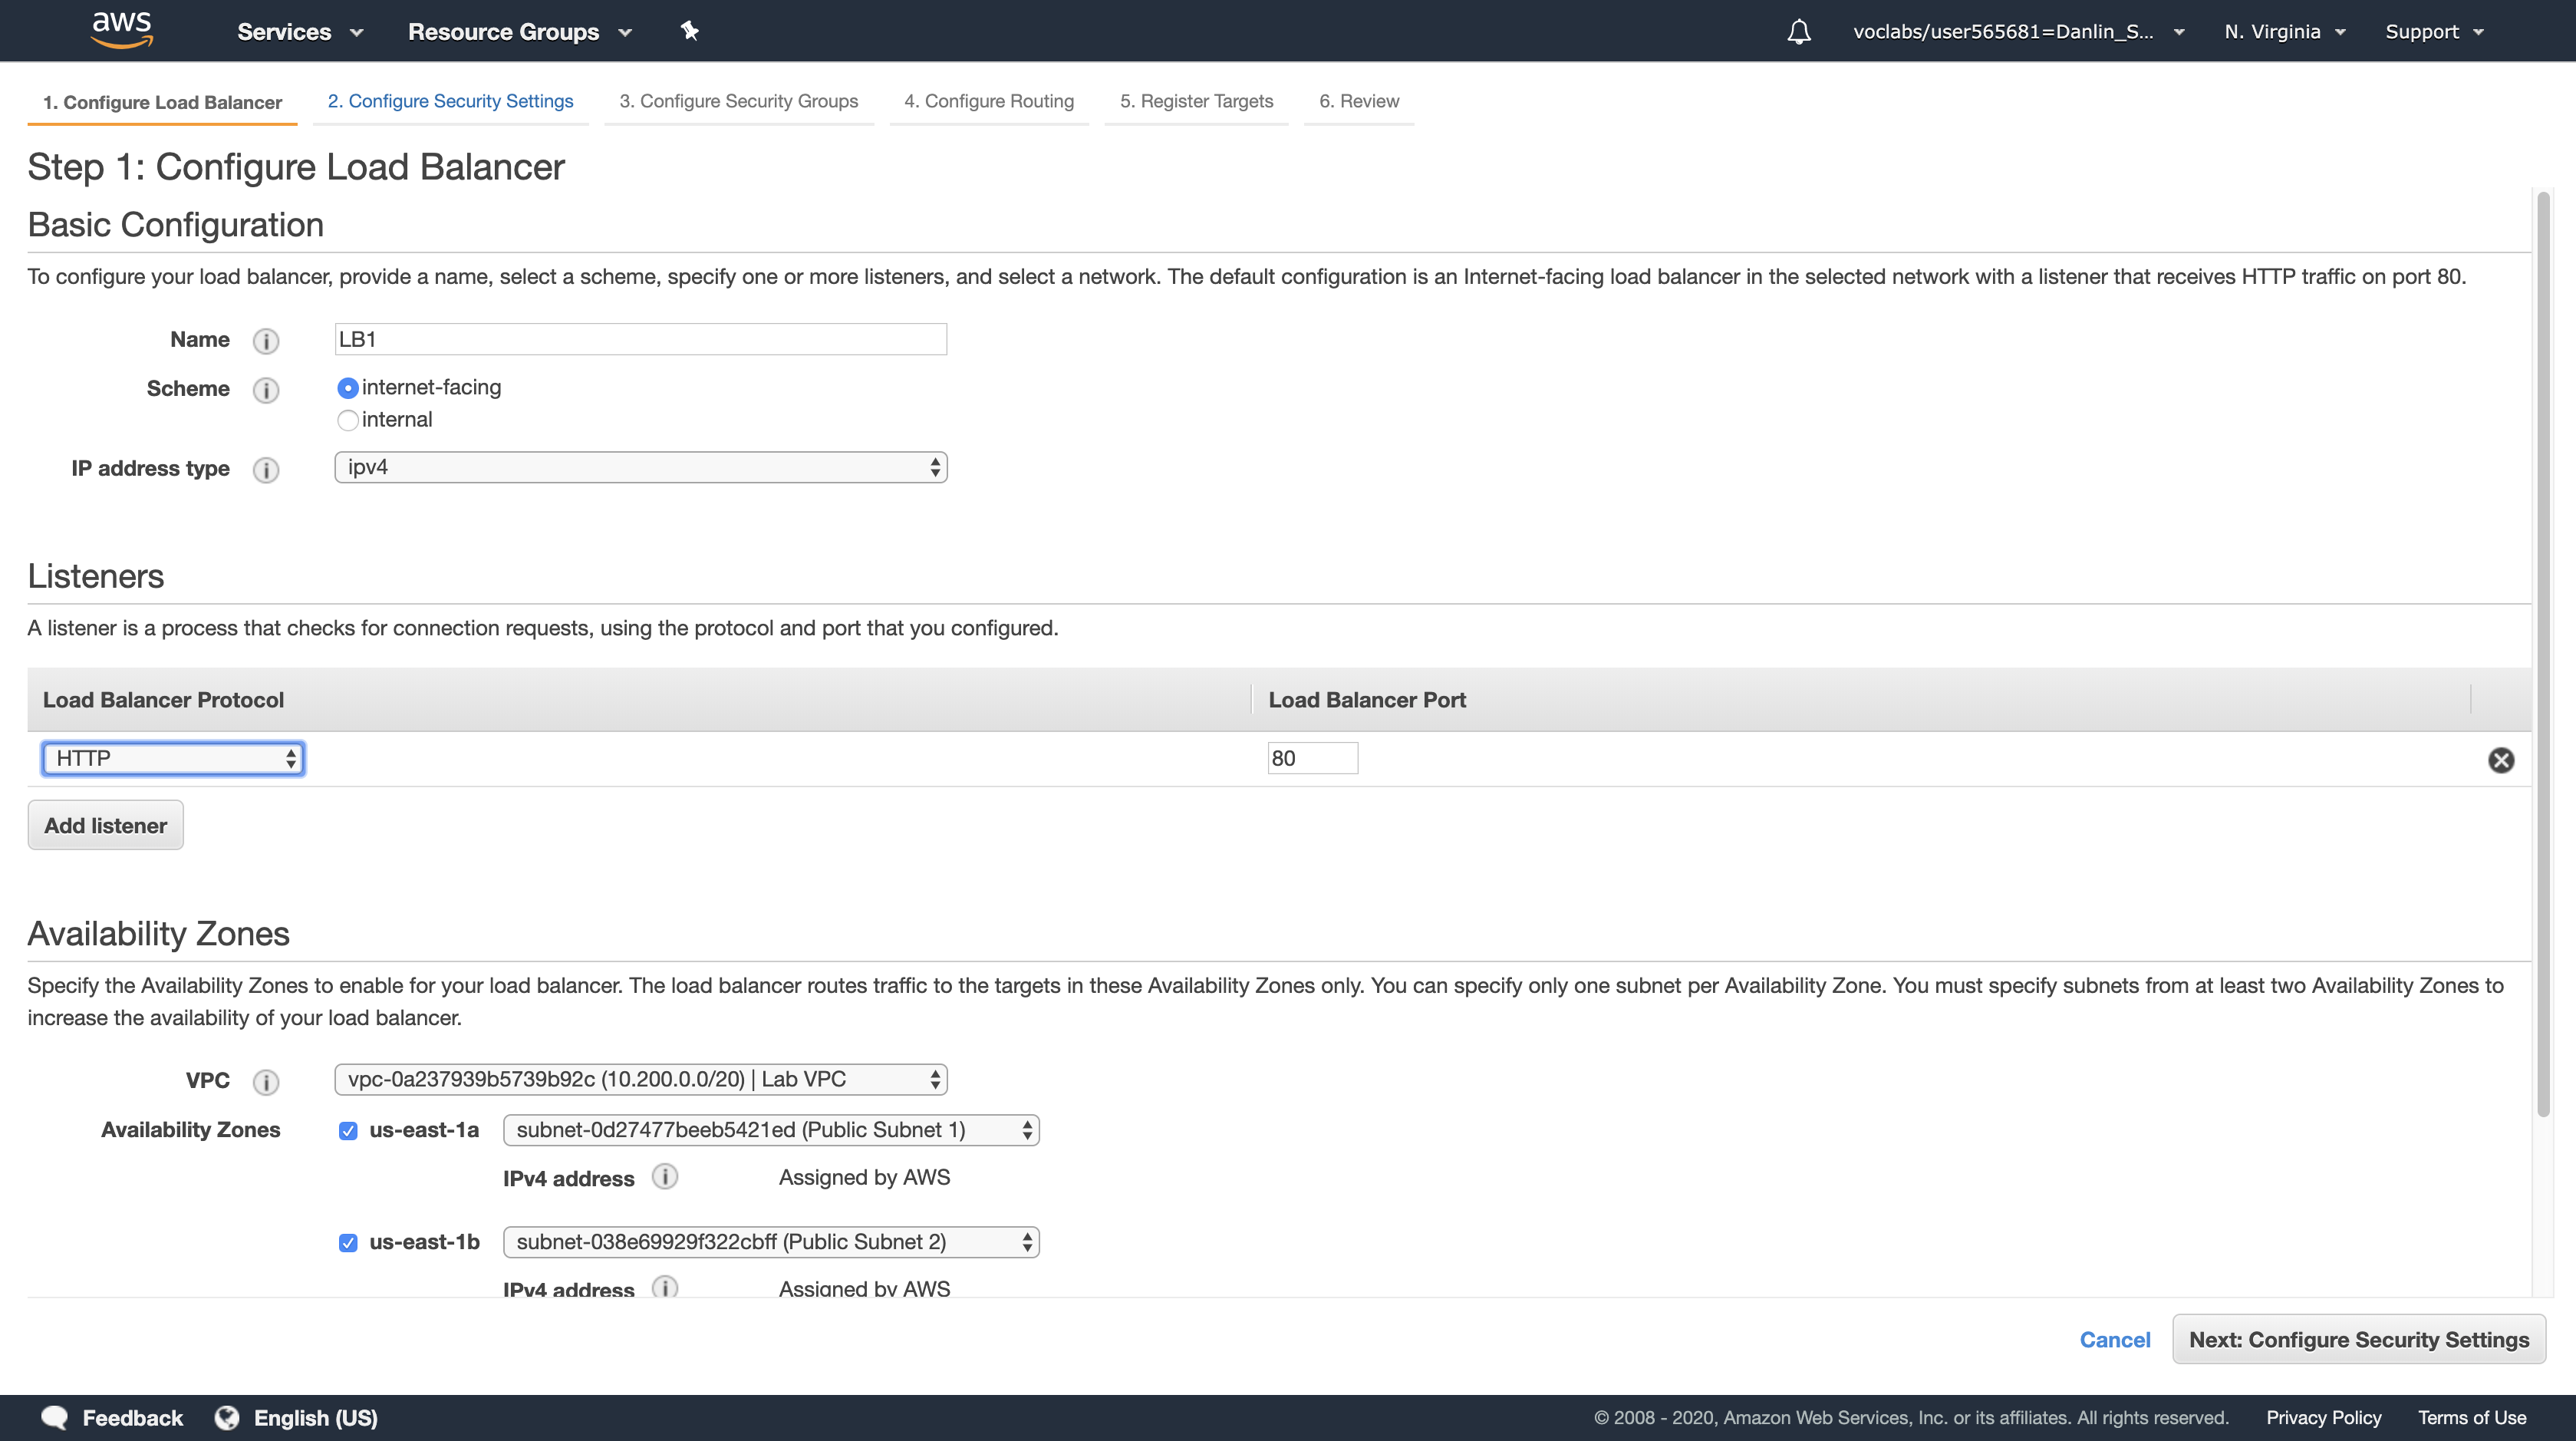
Click Next: Configure Security Settings
A warning is displayed, which recommends using HTTPS for improved security. This is good advice, but is not necessary for this lab.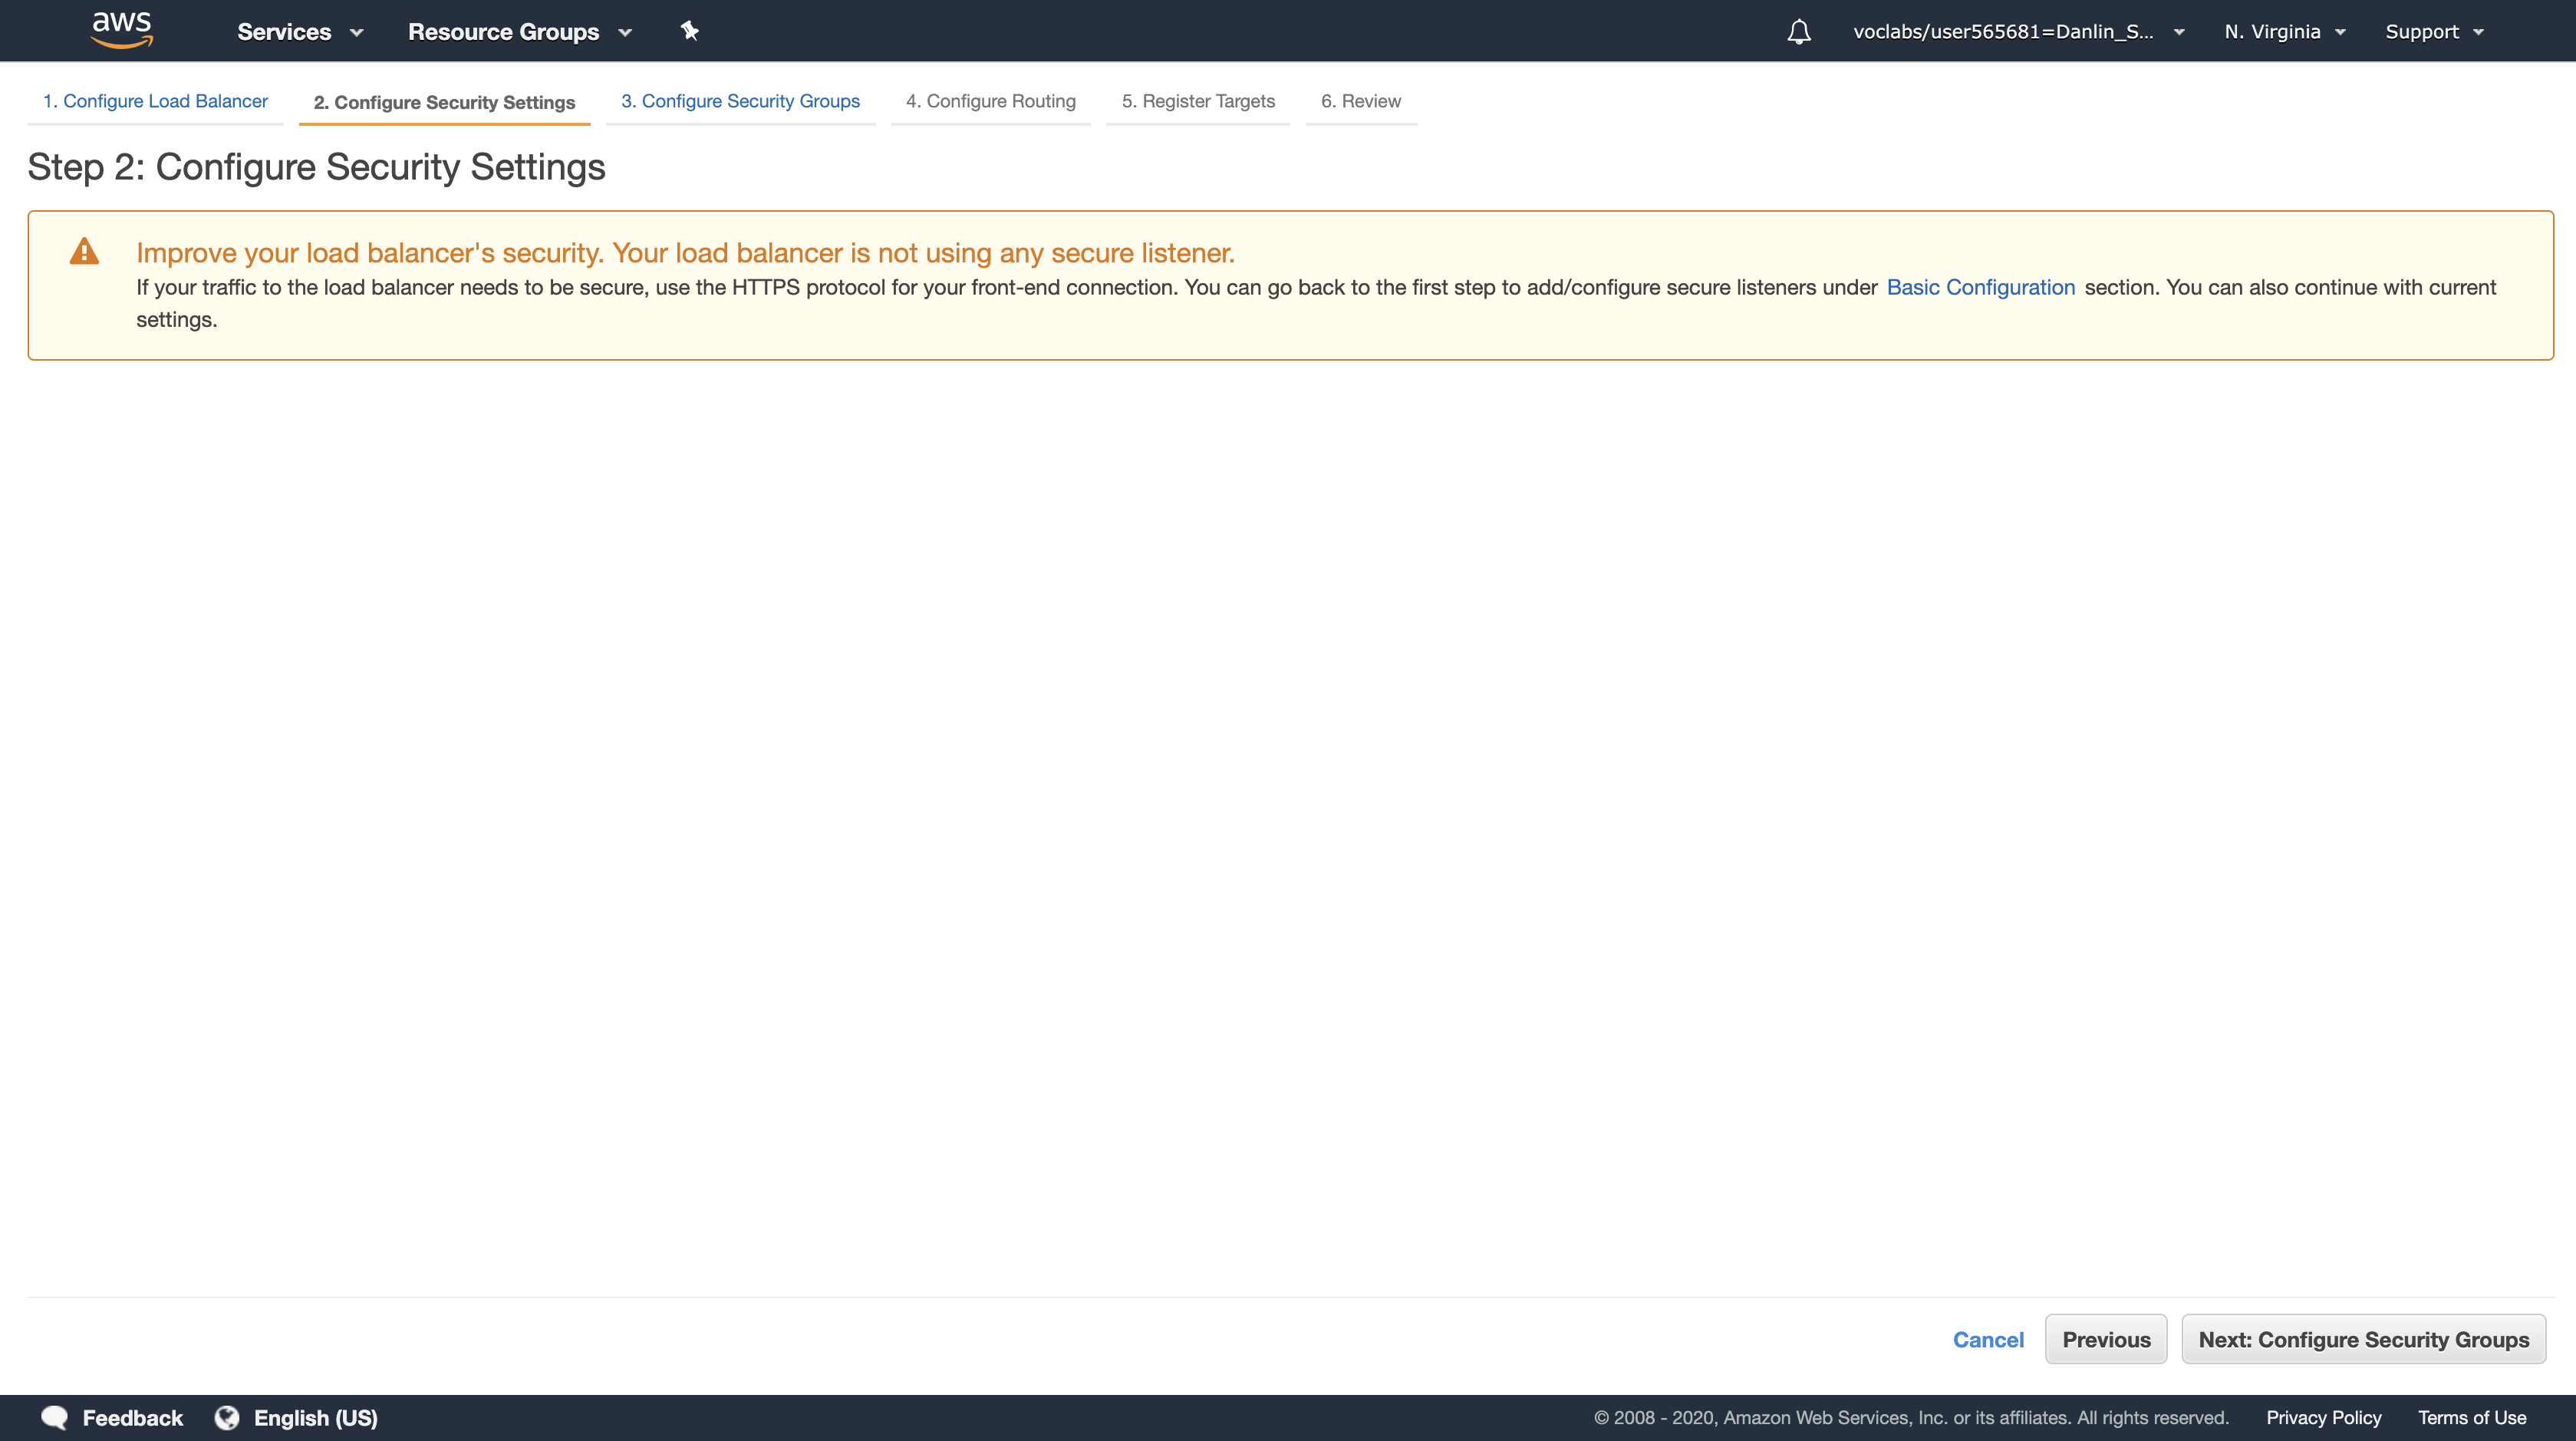
Click Next: Configure Security Groups
Select the Security Group with a Description of Security group for the web servers (and deselect any other security group).
Note: This Security Group permits only HTTP incoming traffic, so it can be used on both the Load Balancer and the web servers.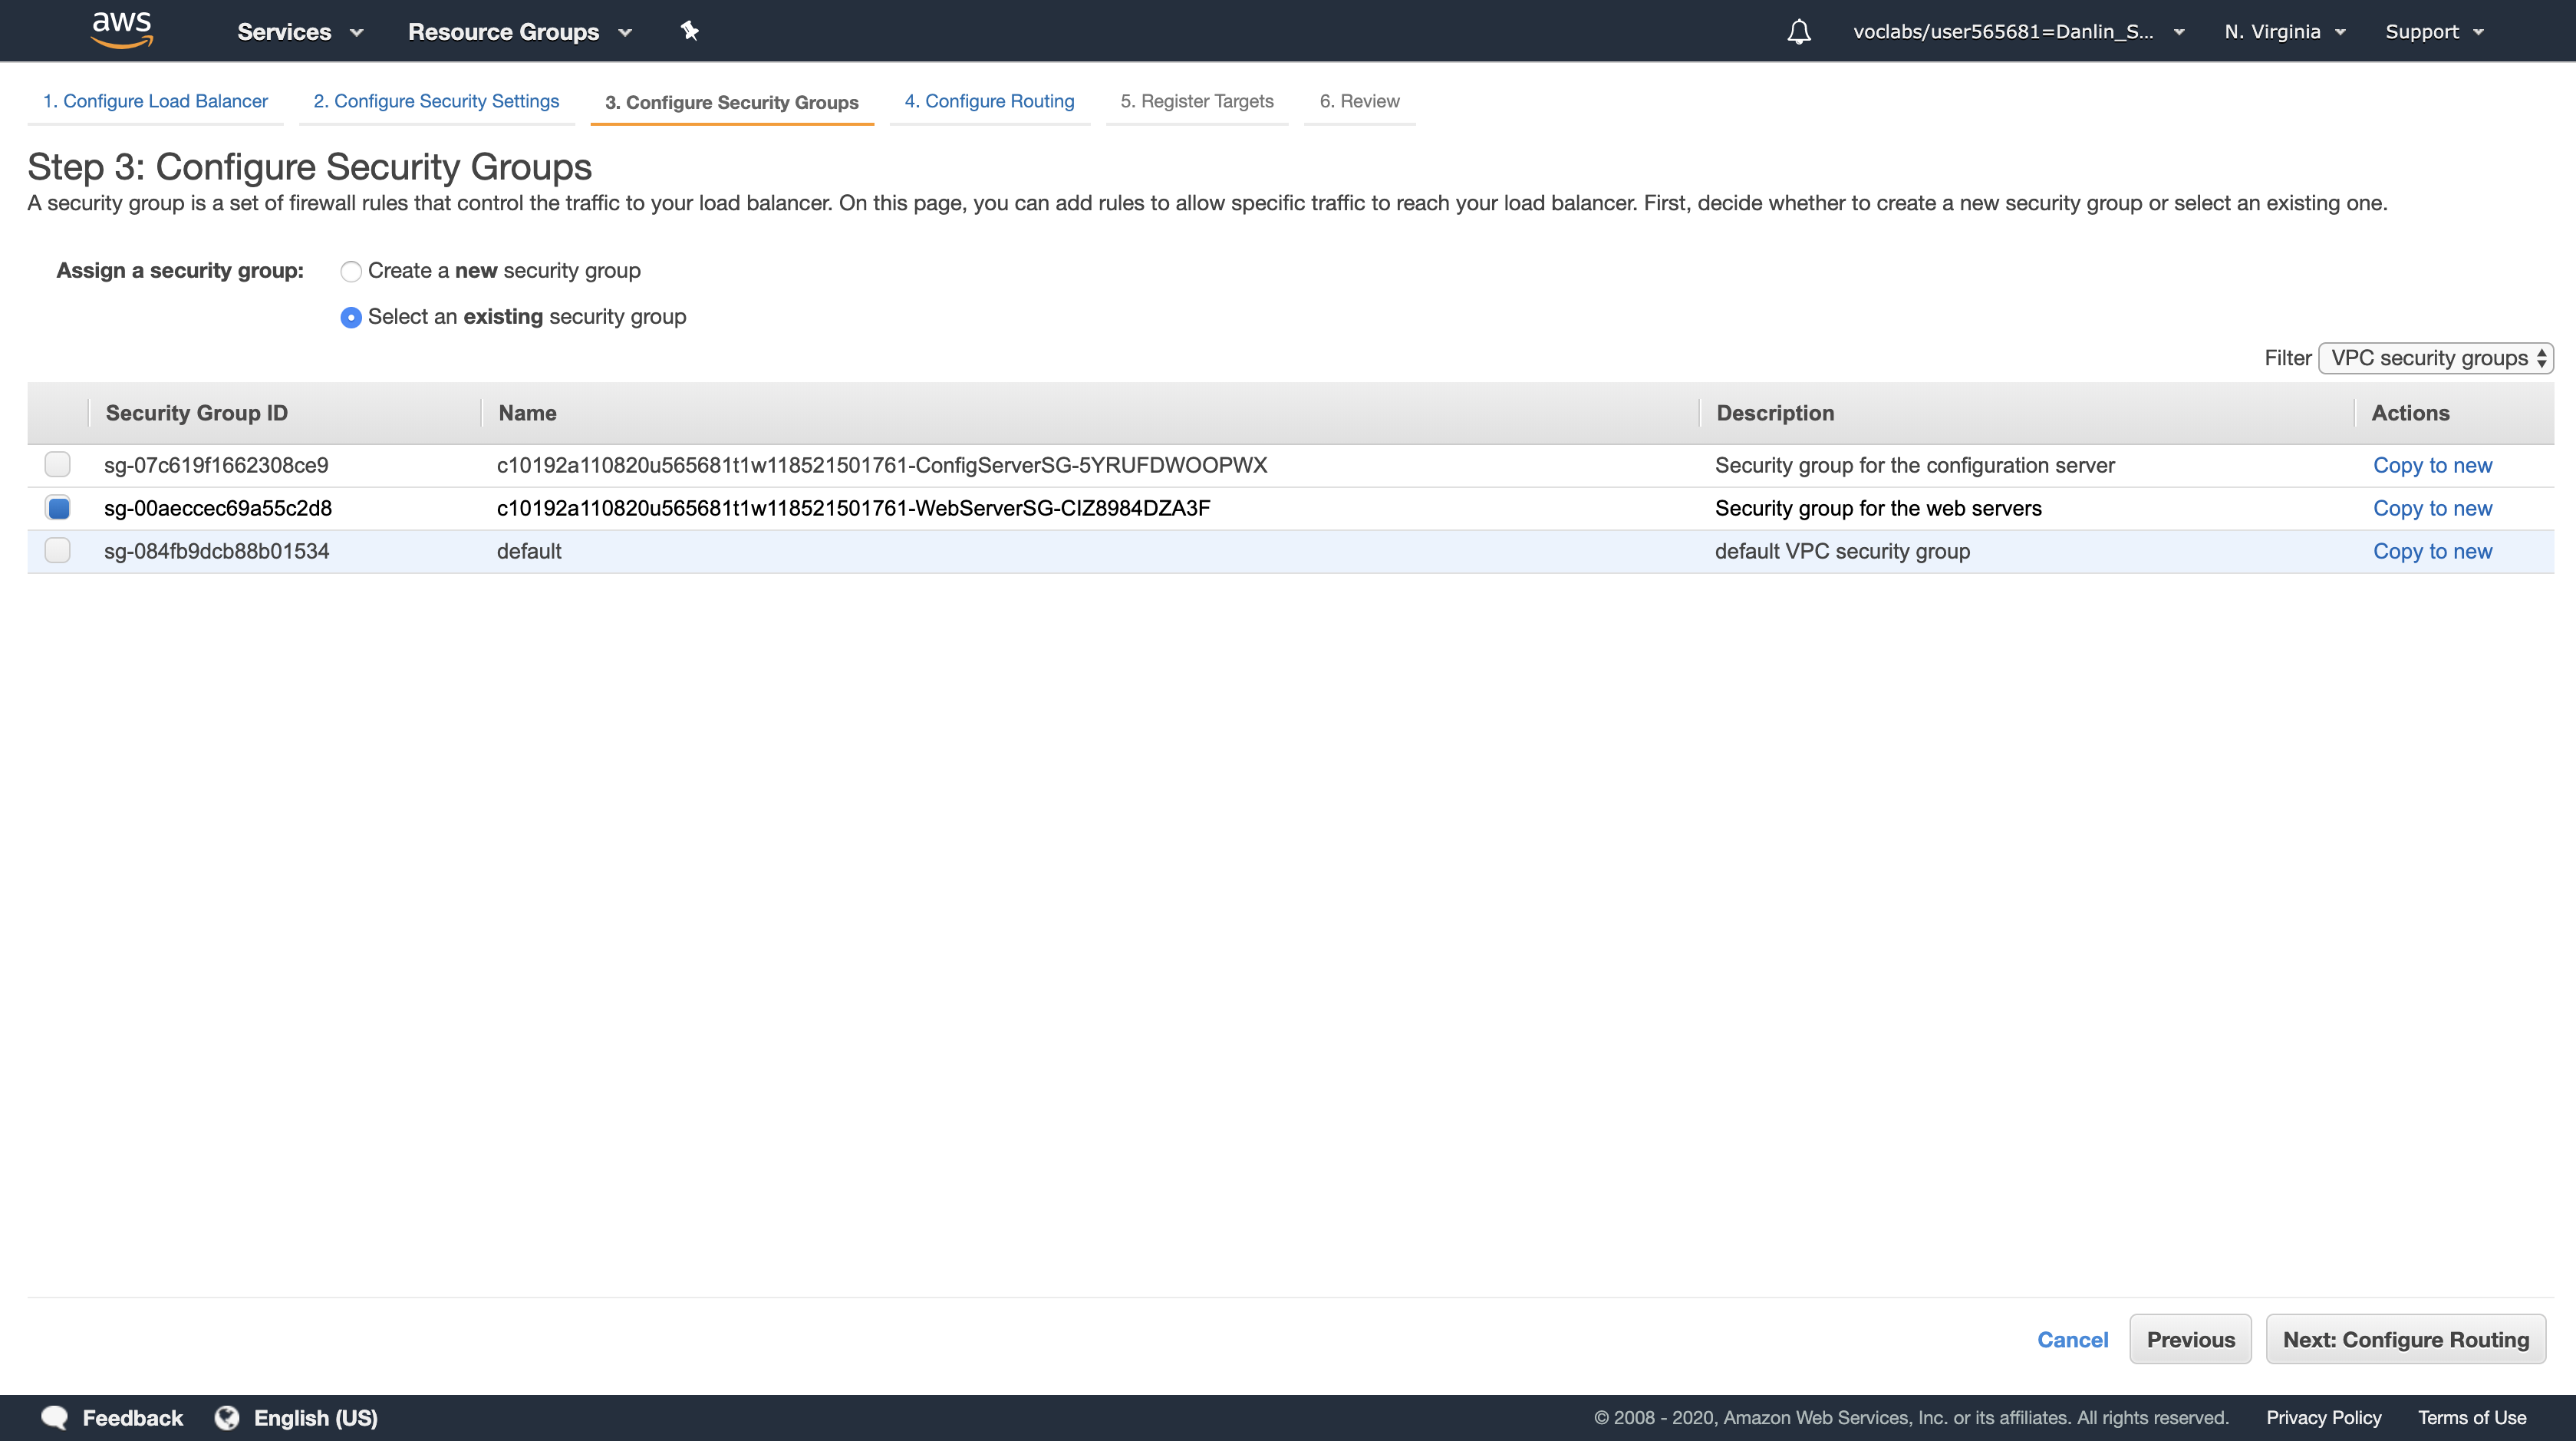
Click Next: Configure Routing
Target Groups define where to send traffic that comes into the Load Balancer. The Application Load Balancer can send traffic to multiple Target Groups based upon the URL of the incoming request. Your web application will use only one Target Group.
- Name, type:
Group1 - Healthy threshold, type:
2- The Application Load Balancer automatically performs Health Checks on all instances to ensure that they are healthy and are responding to requests. The default settings are recommended, but you will make them slightly faster for use in this lab.
- The number of consecutive health checks successes required before considering an unhealthy target healthy (2-10).
- Interval, type:
10- This means that the Health Check will be performed every 10 seconds and if the instance responds correctly twice in a row, it will be considered healthy.
- The approximate amount of time between health checks of an individual target (5-300 seconds).
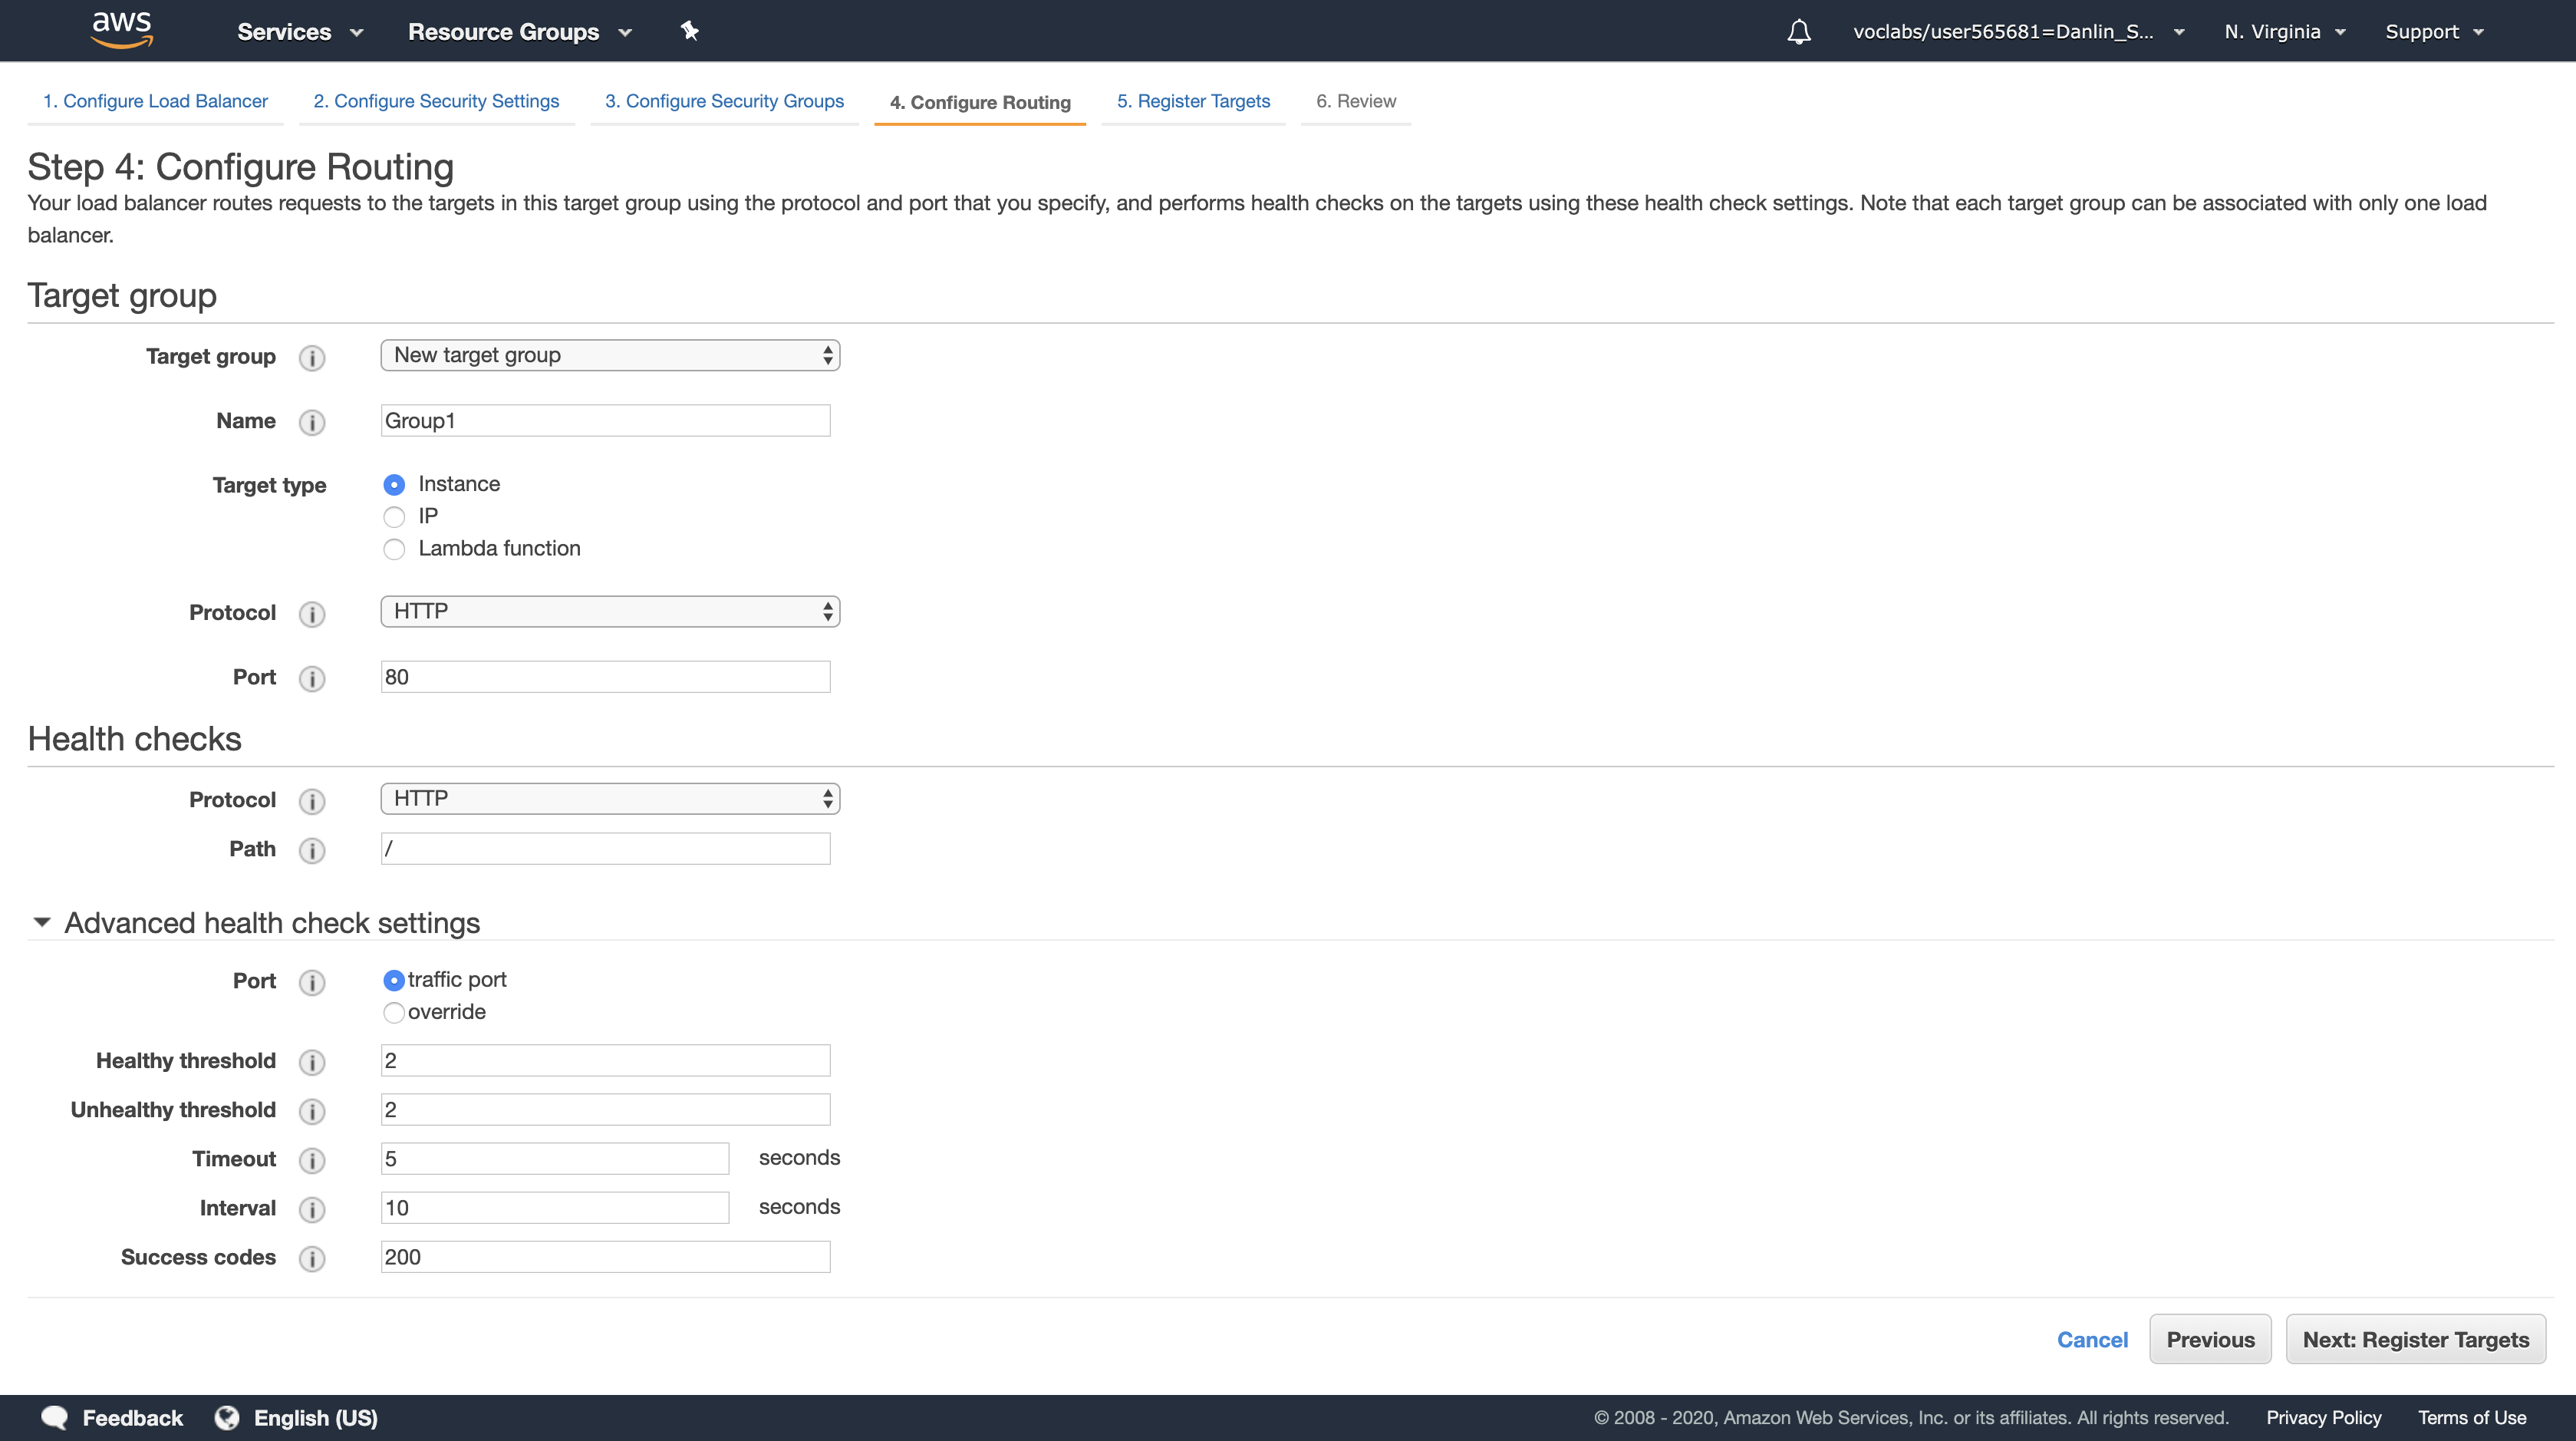
Click Next: Register Targets
Targets are instances that will respond to requests from the Load Balancer. You do not have any web application instances yet, so you can skip this step.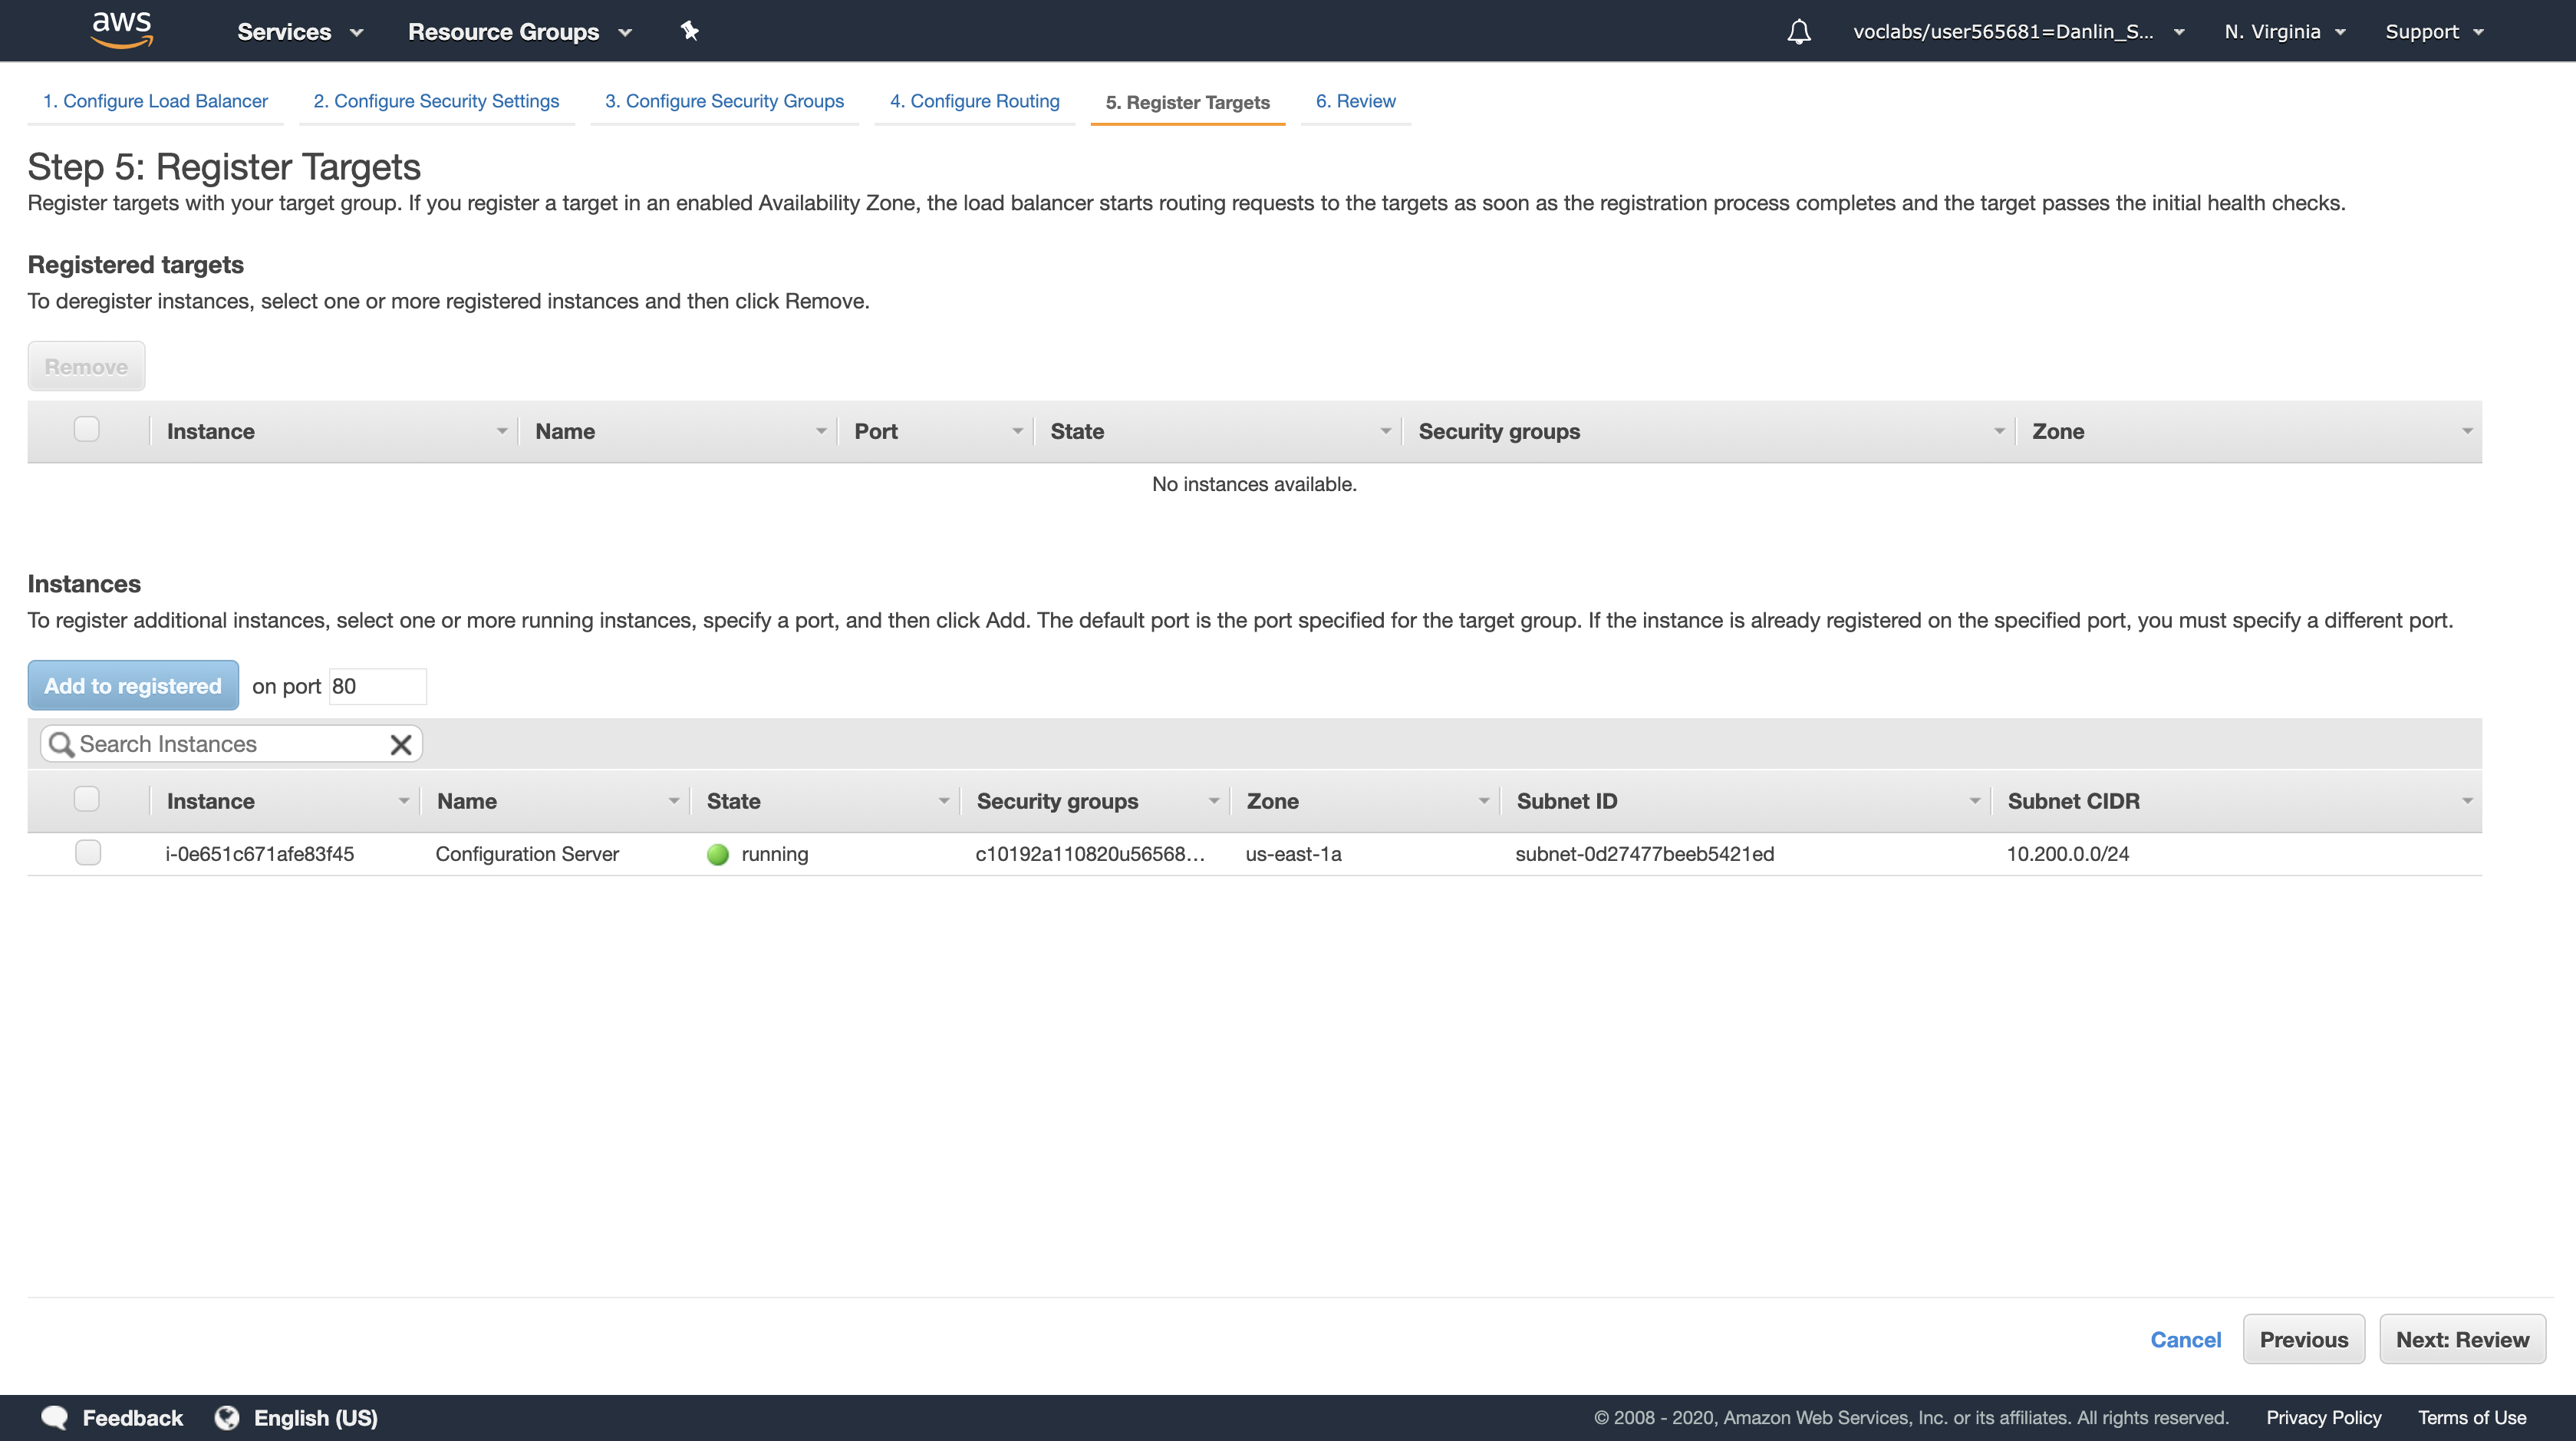
Click Next: Review
Review the settings and click Create.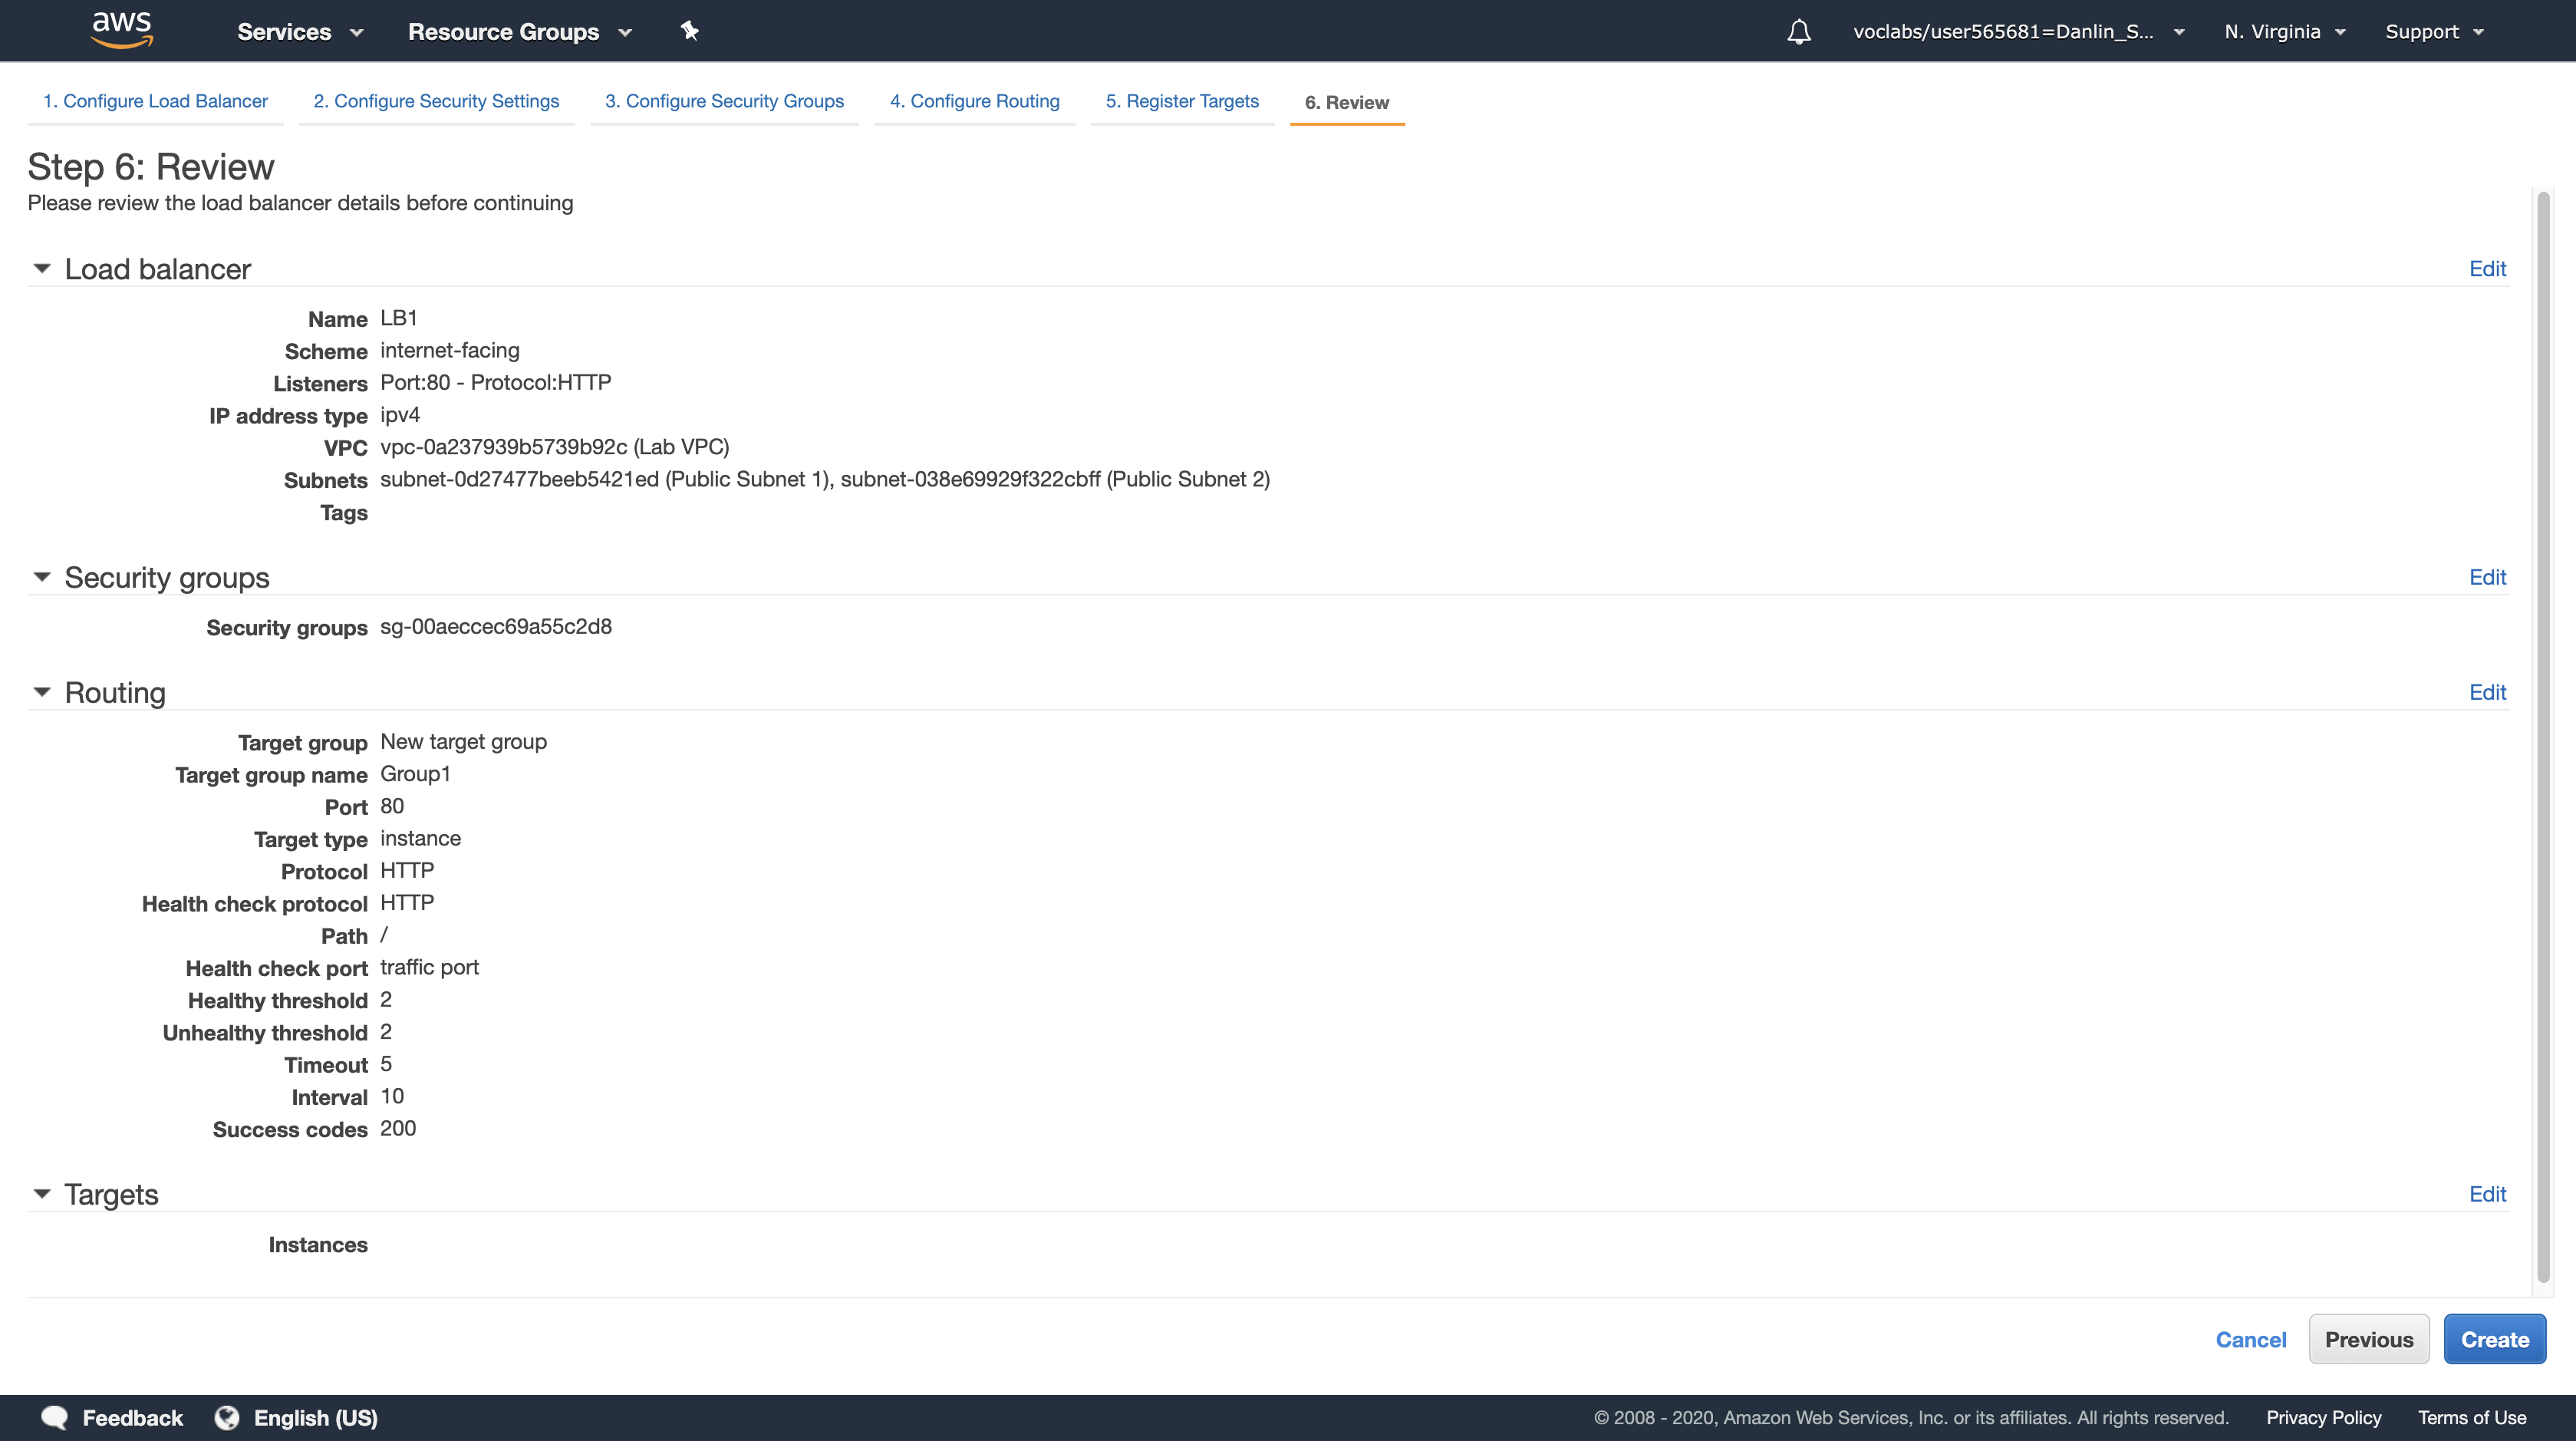
Click Close
You can now create an Auto Scaling group to launch your Amazon EC2 instances.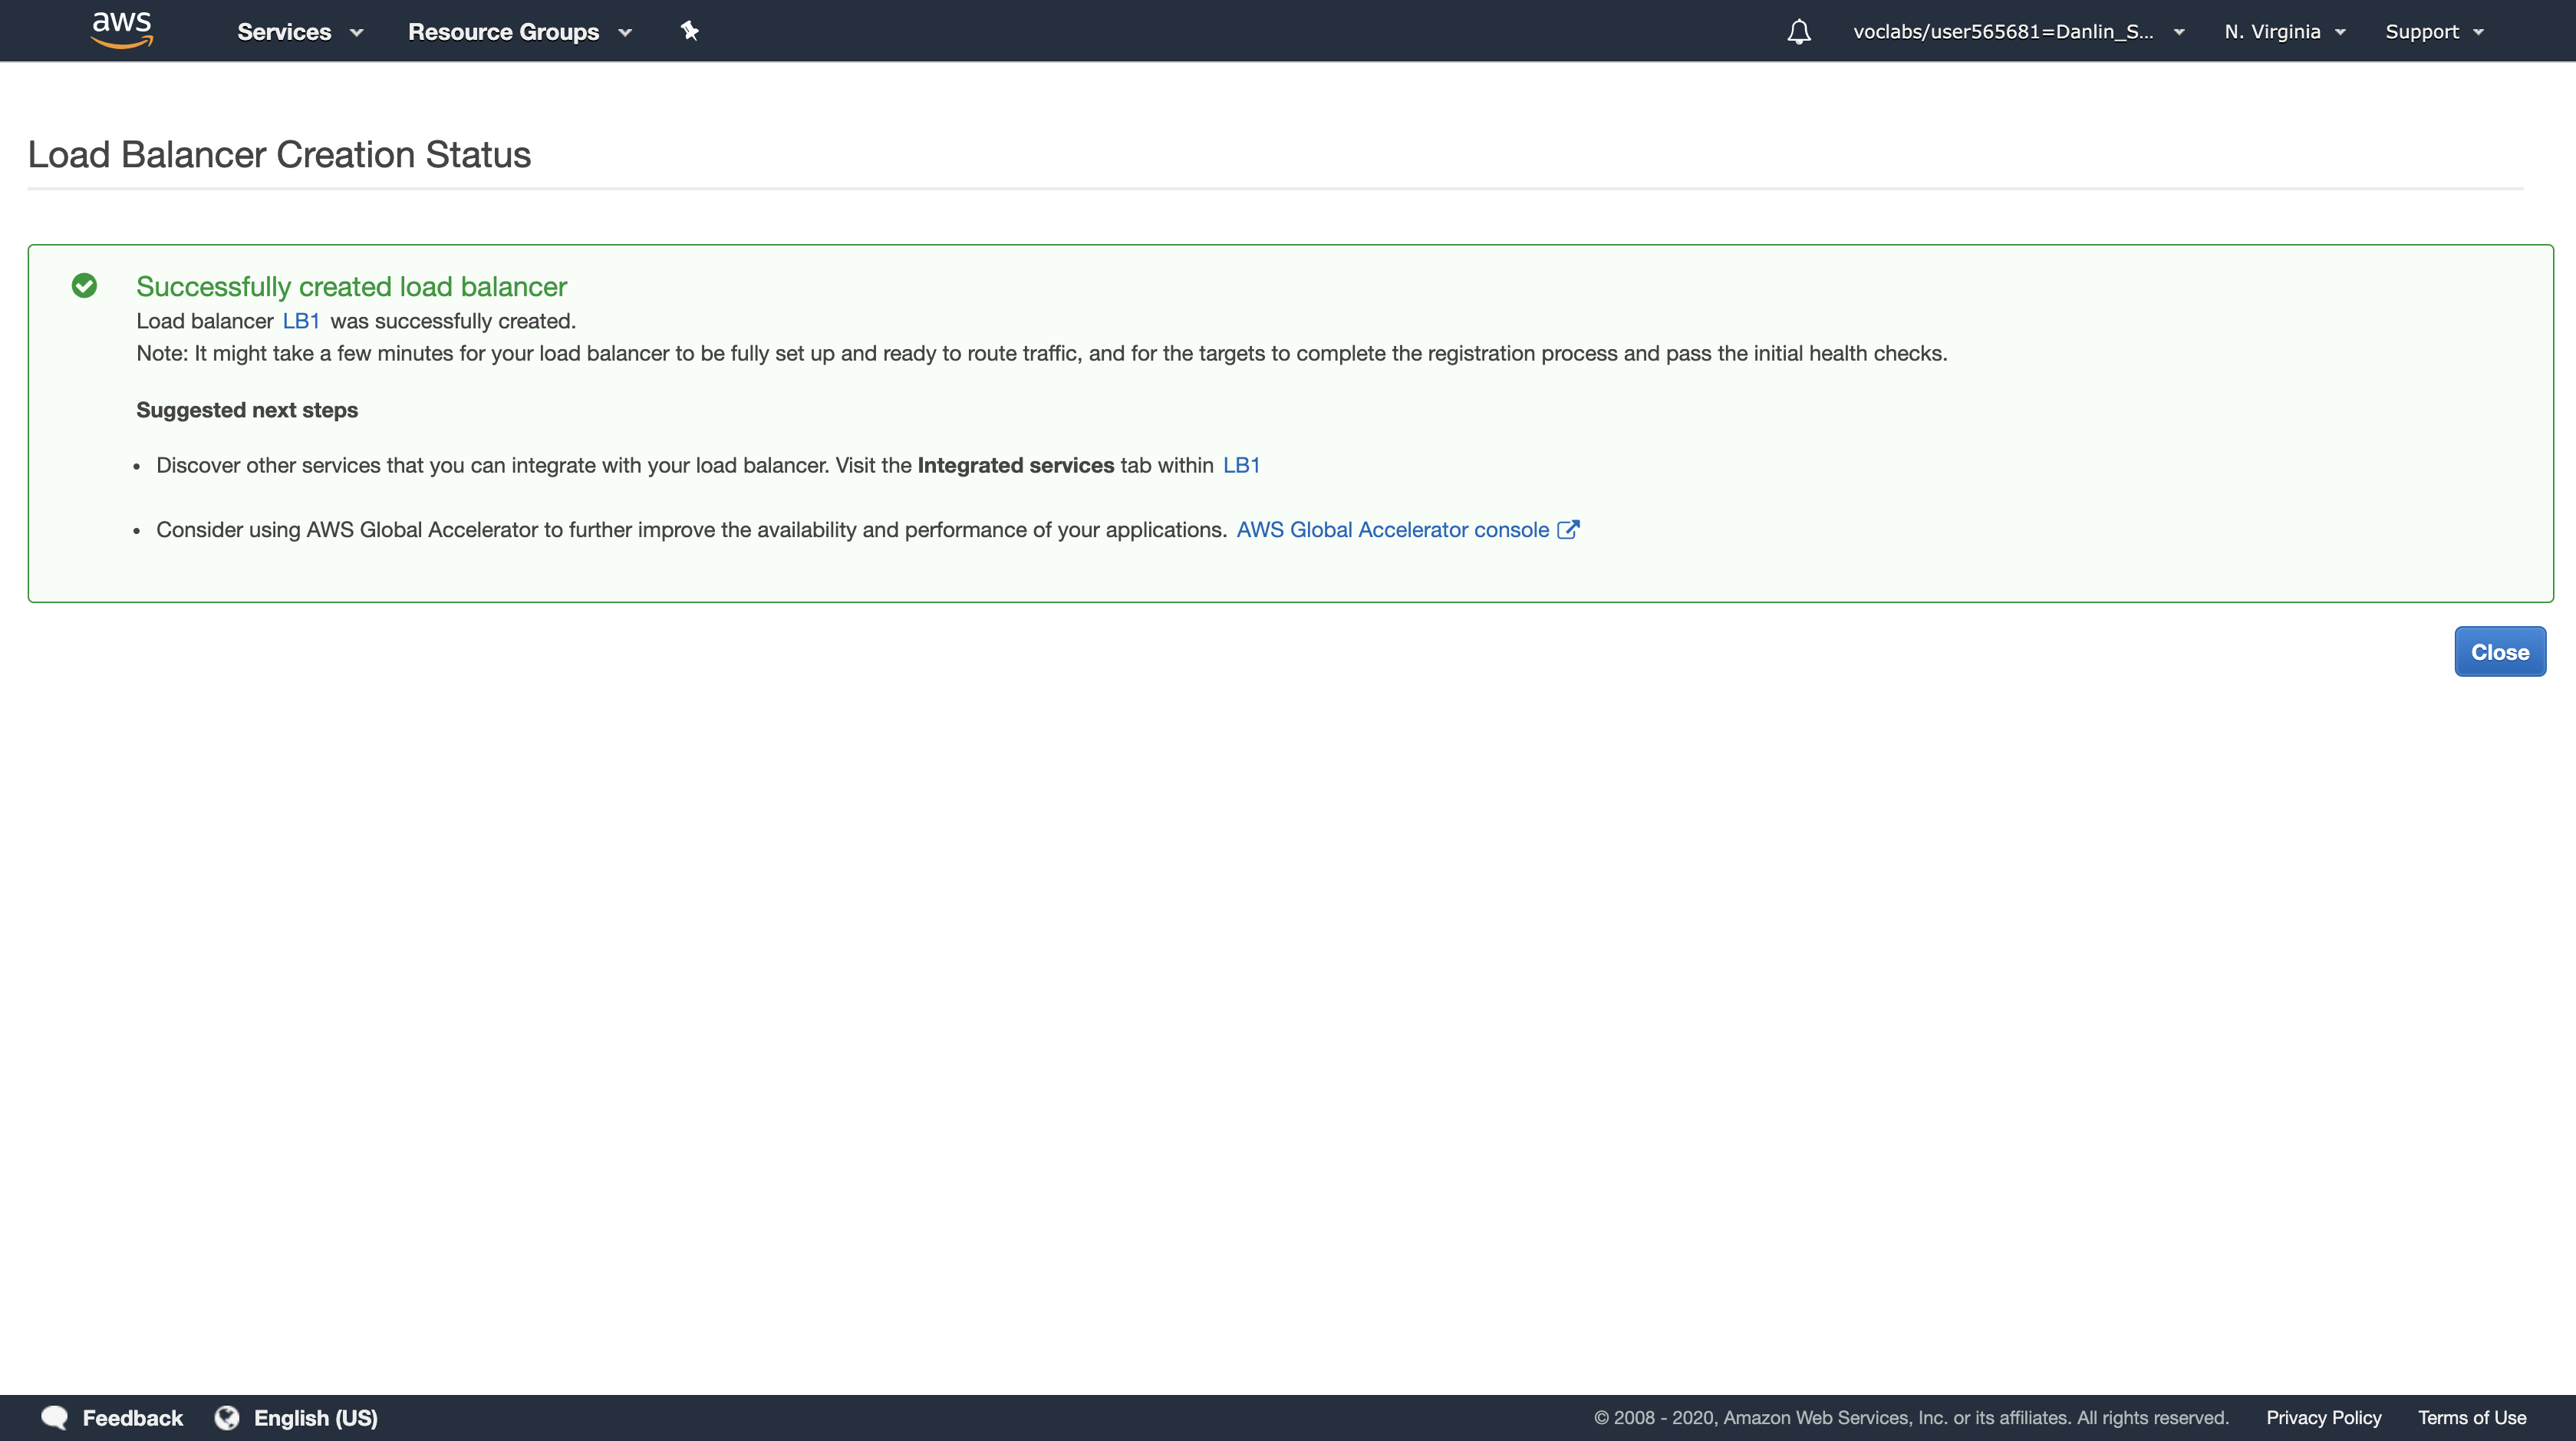
Task 7: Create an Auto Scaling Group
Auto Scaling is a service designed to launch or terminate Amazon EC2 instances automatically based on user-defined policies, schedules, and health checks. It also automatically distributes instances across multiple Availability Zones to make applications Highly Available.
In this task, you will create an Auto Scaling group that deploys Amazon EC2 instances across your Private Subnets. This is best practice security for deploying applications because instances in a private subnet cannot be accessed from the Internet. Instead, users will send requests to the Load Balancer, which will forward the requests to Amazon EC2 instances in the private subnets.

Navigation pane
Click Auto Scaling Groups (you might need to scroll down to find it)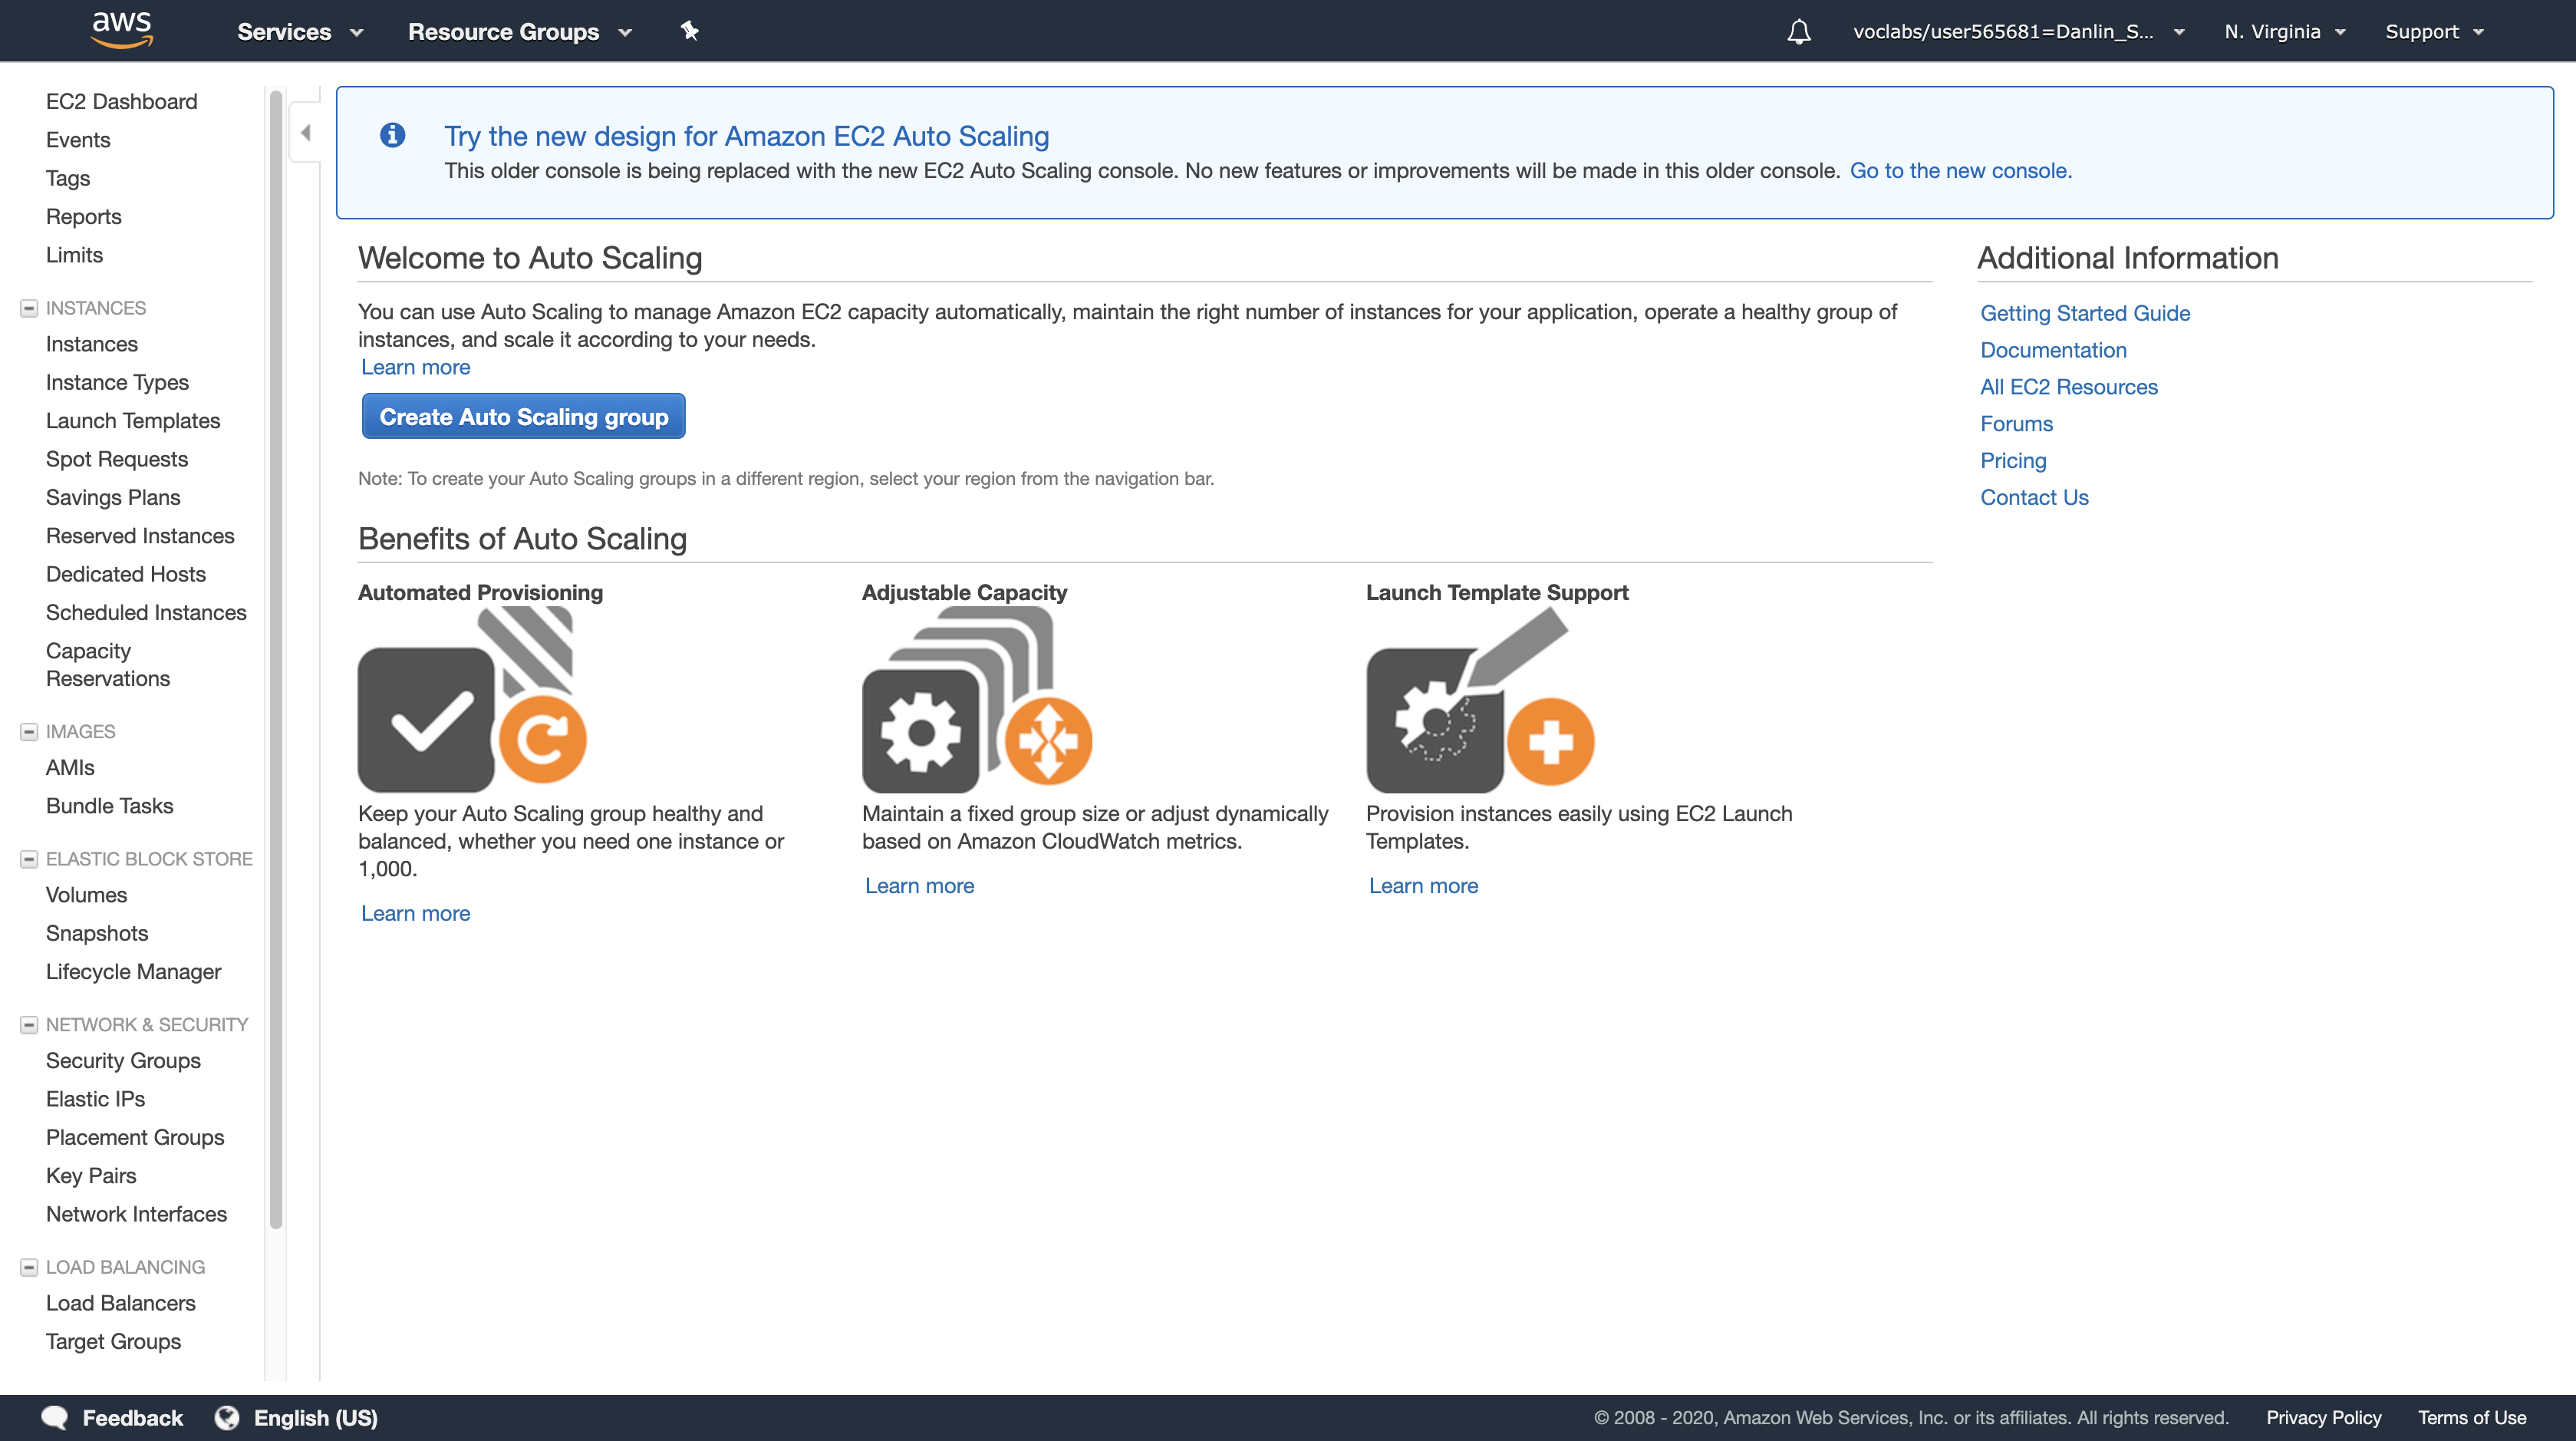
Click Create Auto Scaling group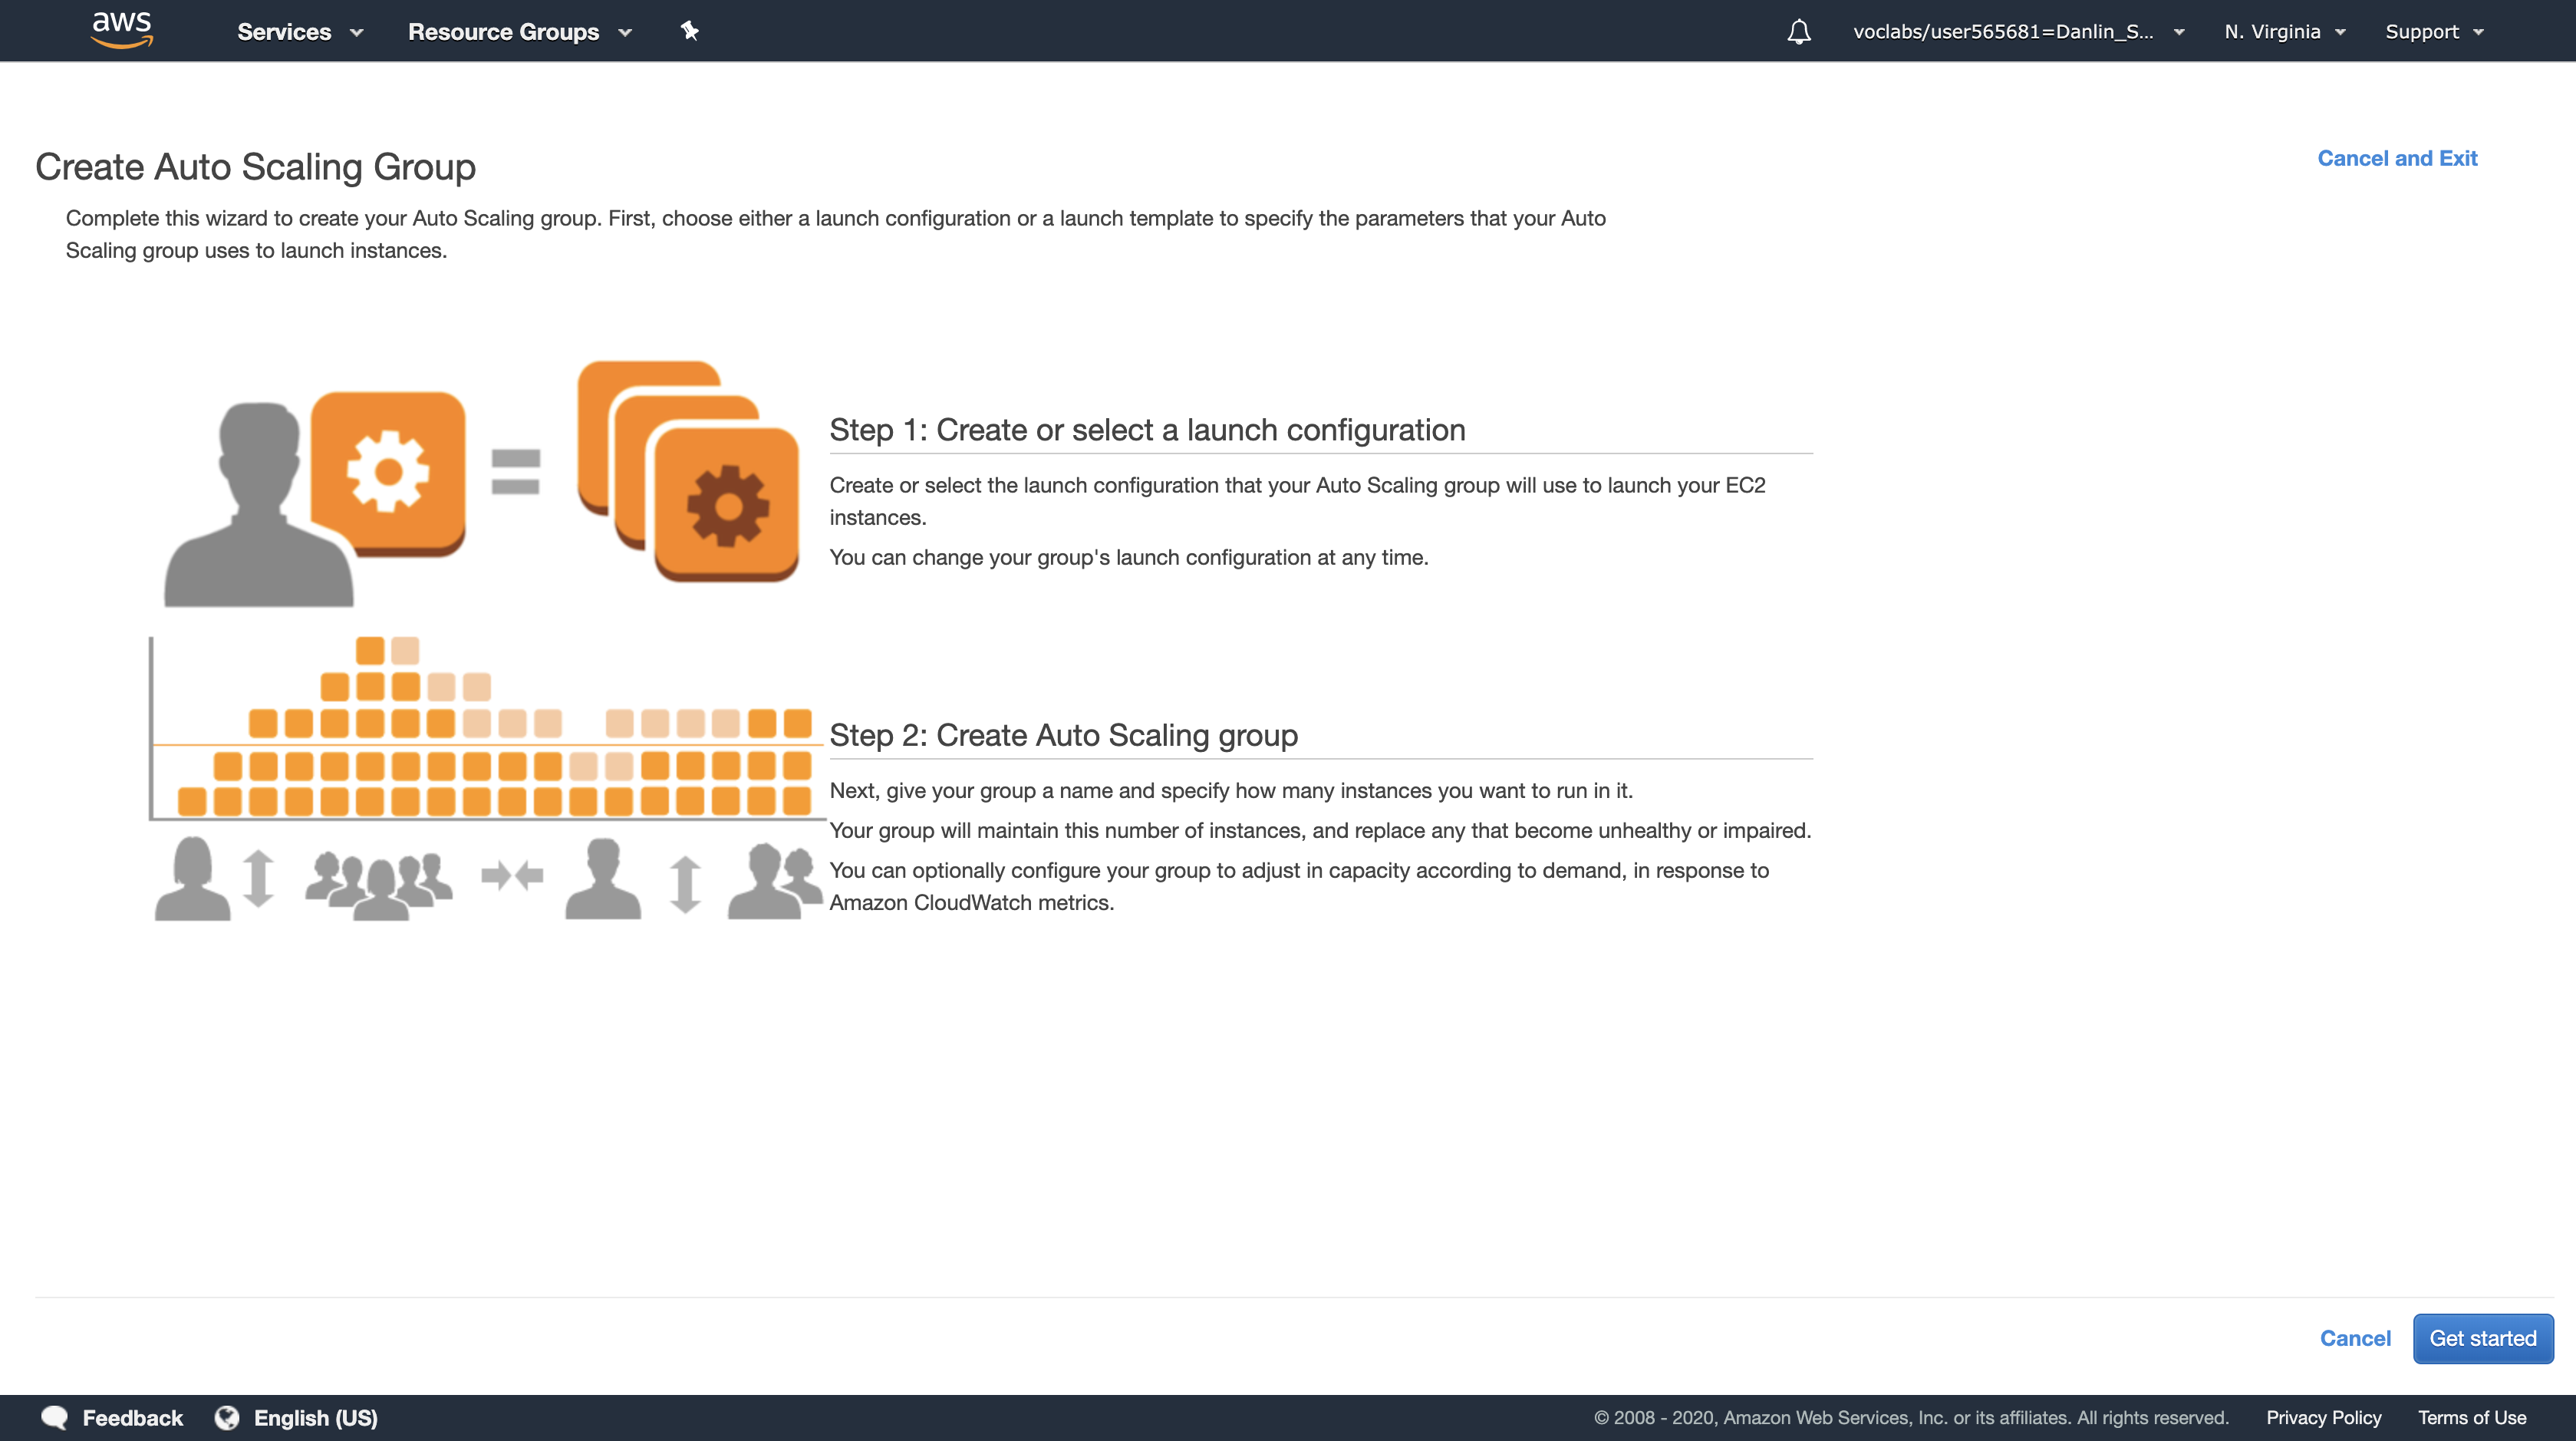
Click Get started
A Launch Configuration defines what type of instances should be launched by Auto Scaling. The interface looks similar to launching an Amazon EC2 instance, but rather than launching an instance it stores the configuration for later use.
You will configure the Launch Configuration to use the AMI that you created earlier. It contains a copy of the software that you installed on the Configuration Server.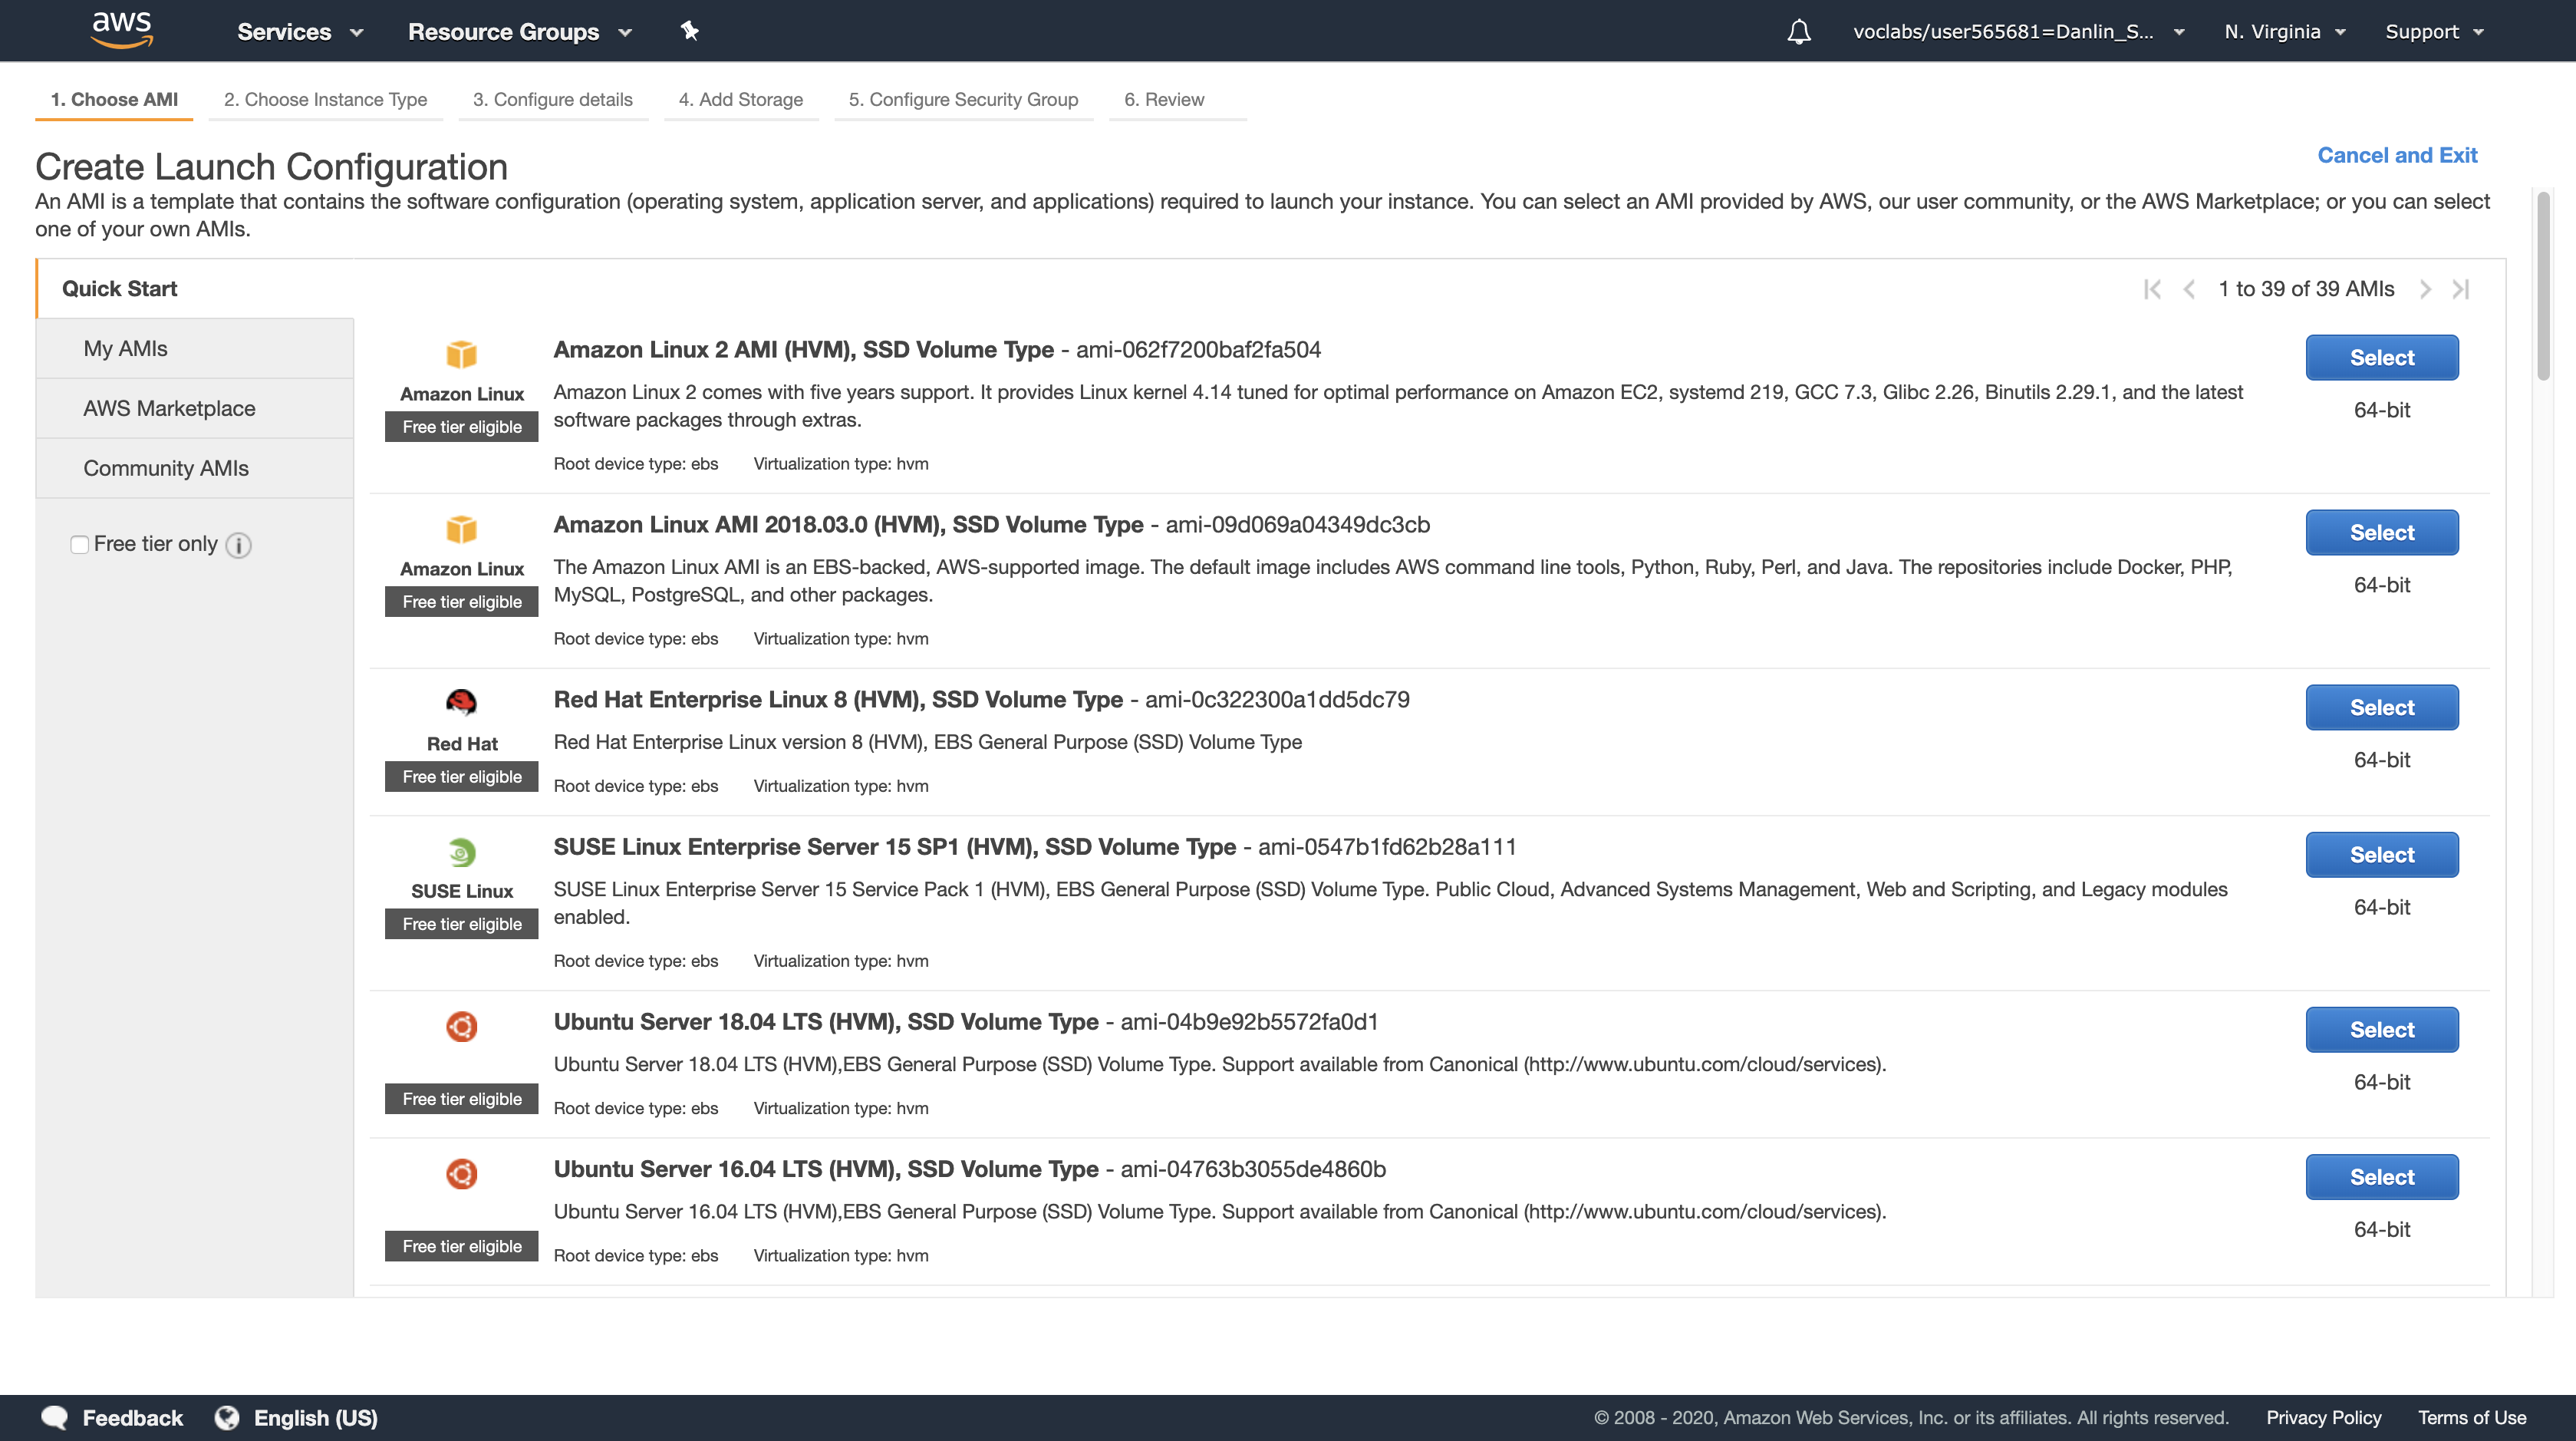
Navigation pane
Click My AMIs
Click Select
Accept the default (t2.micro) instance type and click Next: Configure details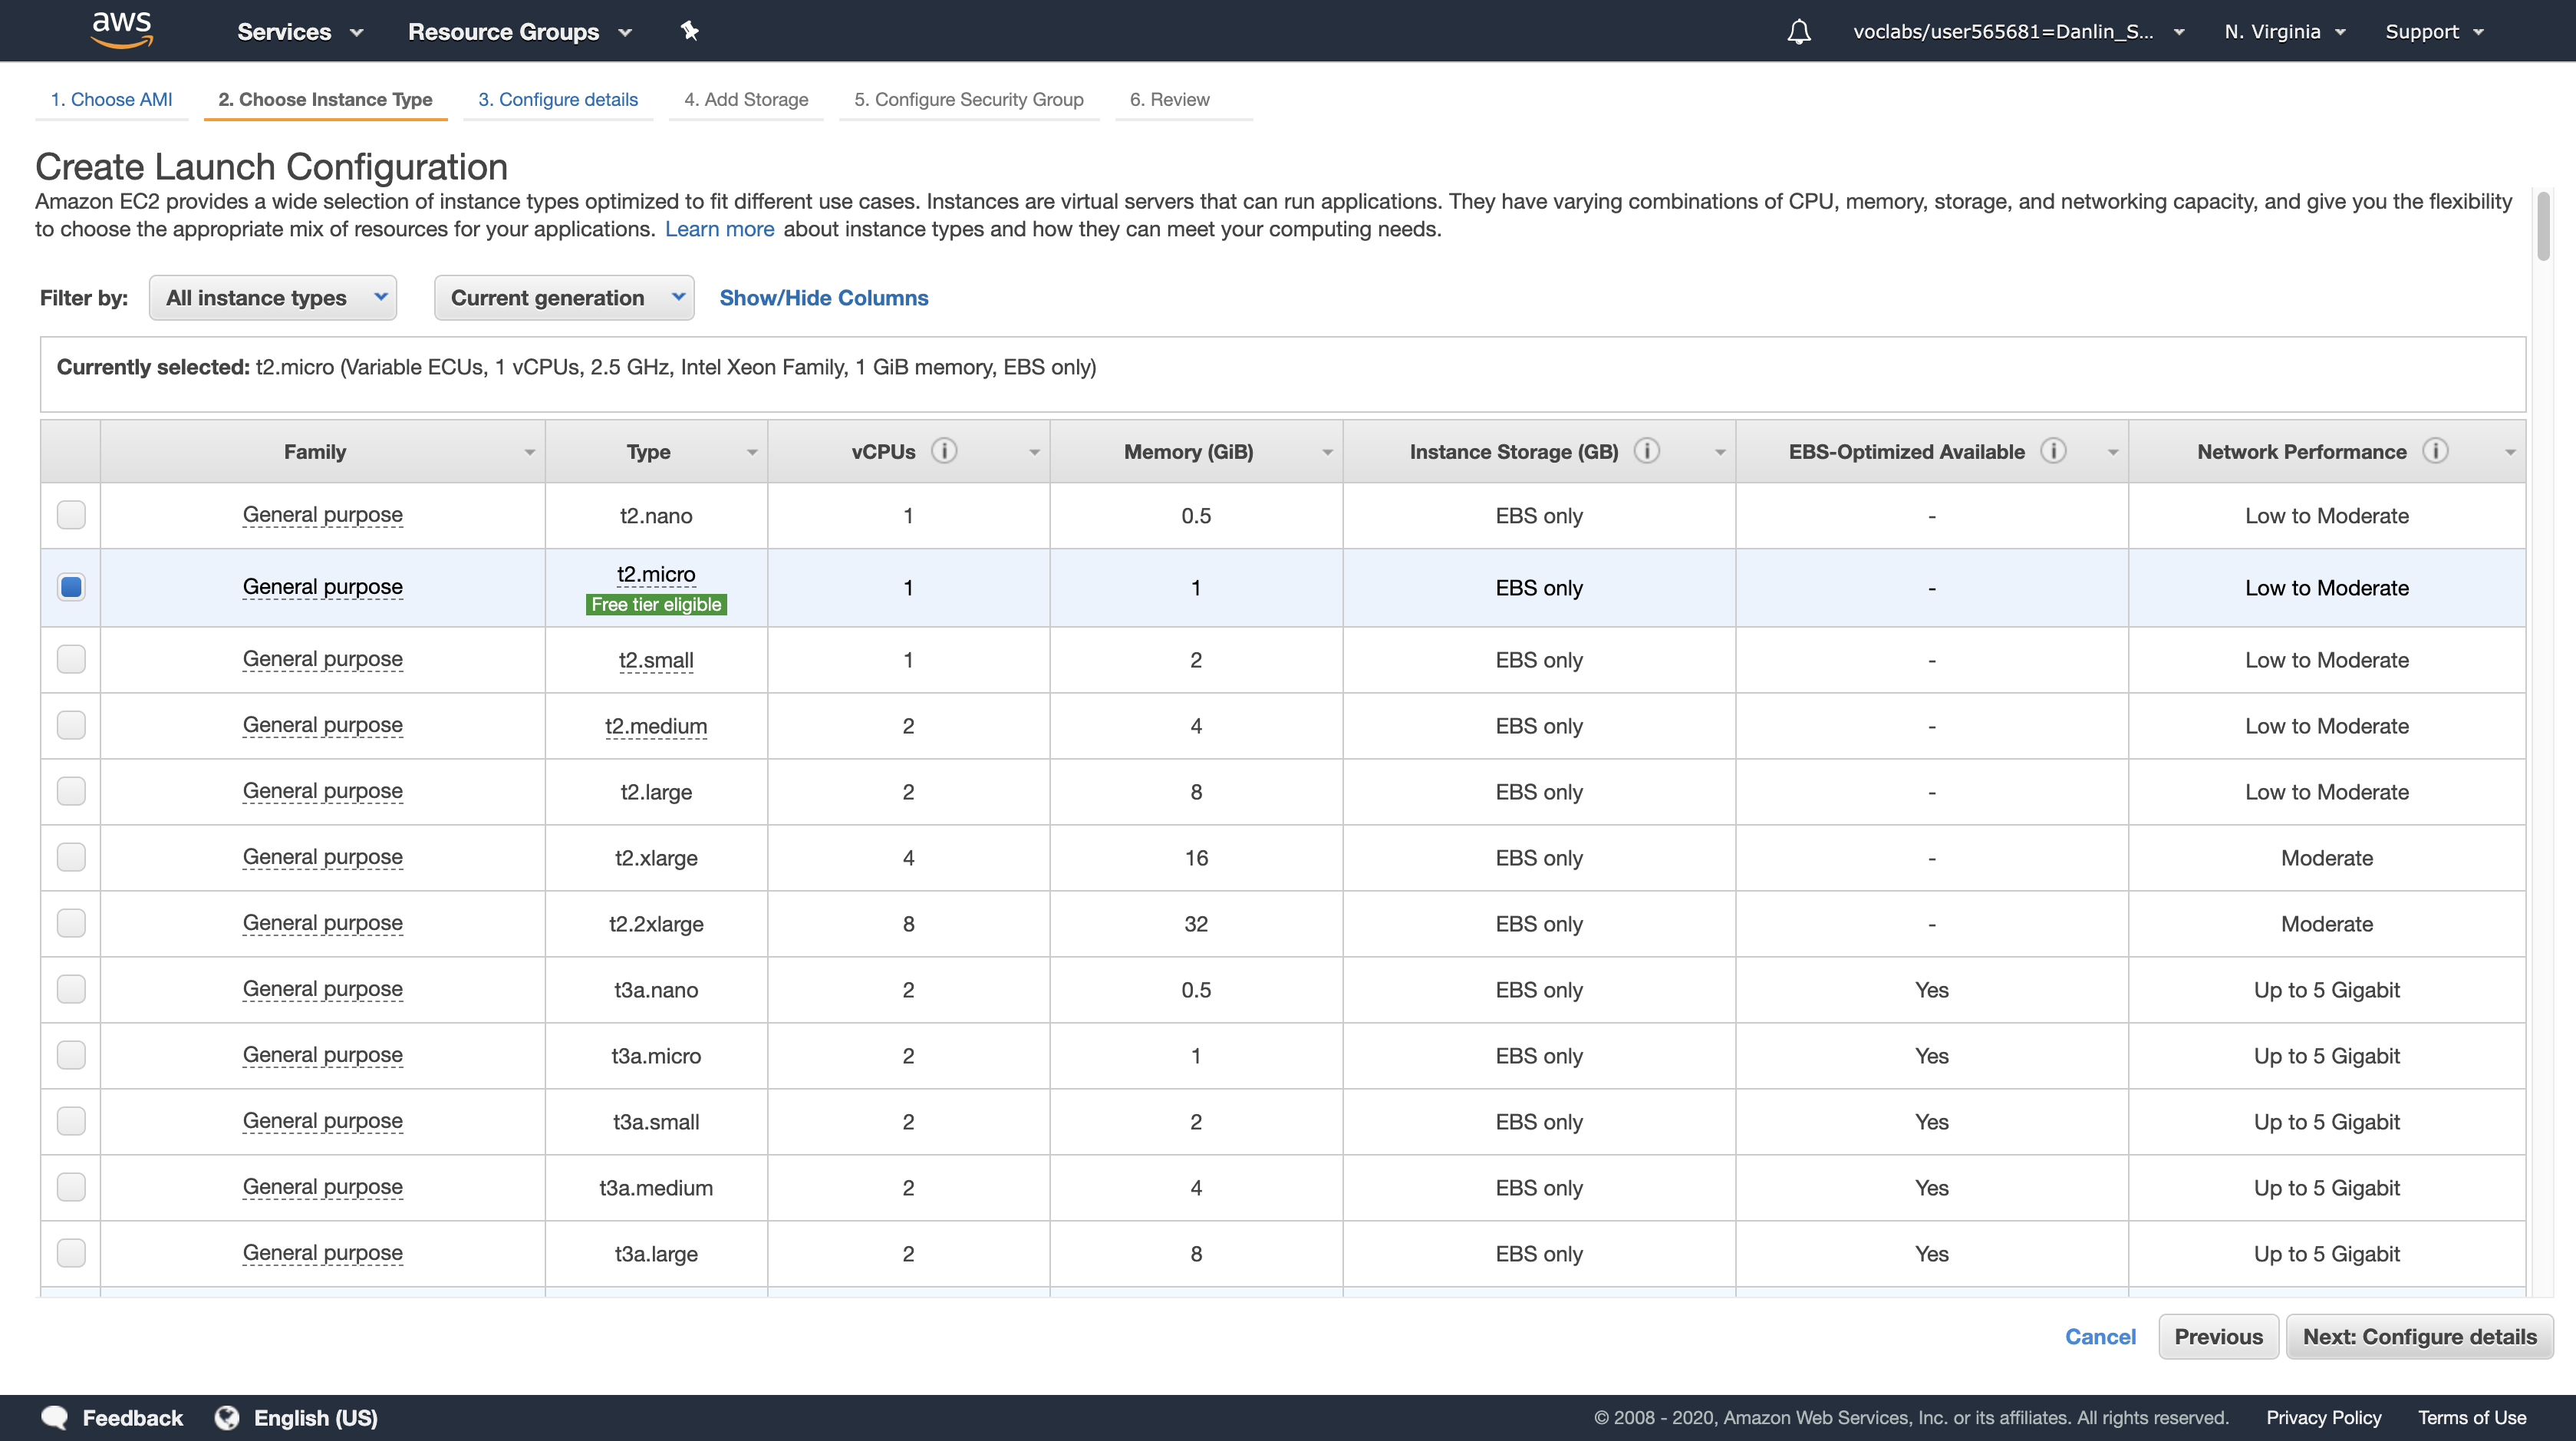
- Name, type:
Web-Configuration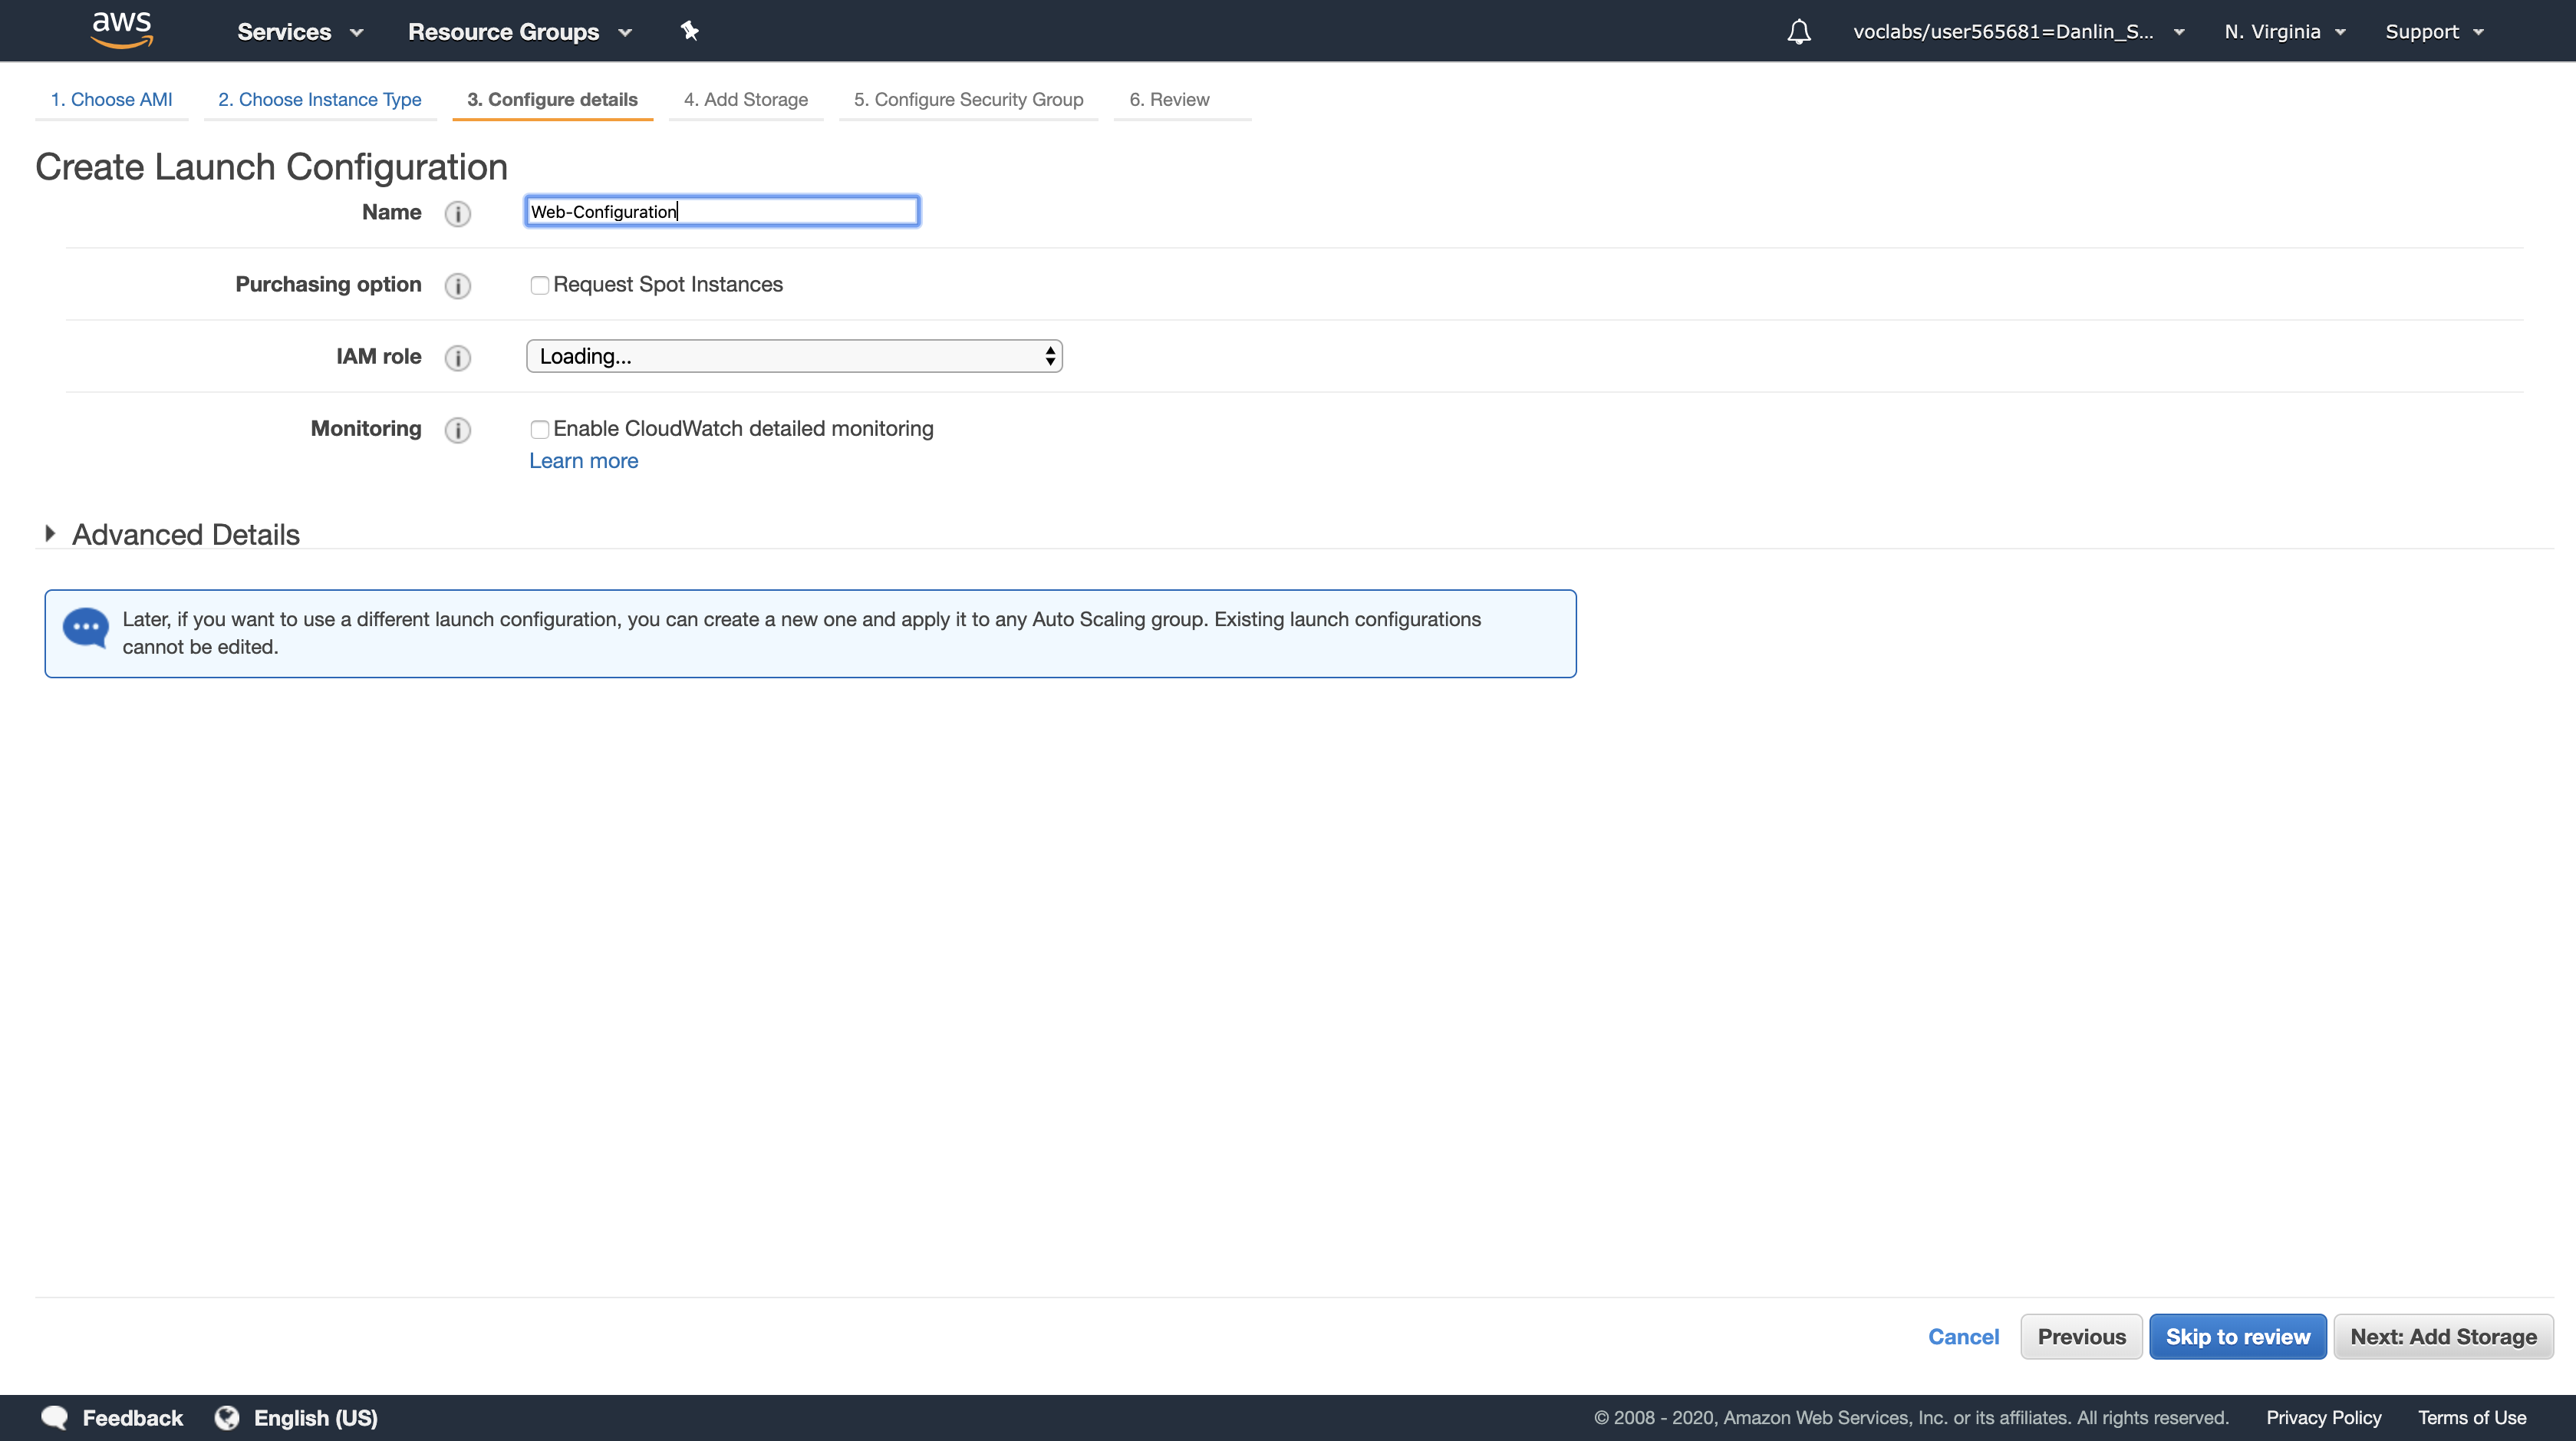
Click Next: Add Storage
You do not require additional storage on this instance, so keep the default settings.
Click Next: Configure Security Group
Click Select an existing security group
Select the Security Group with a Description of Security group for the web servers.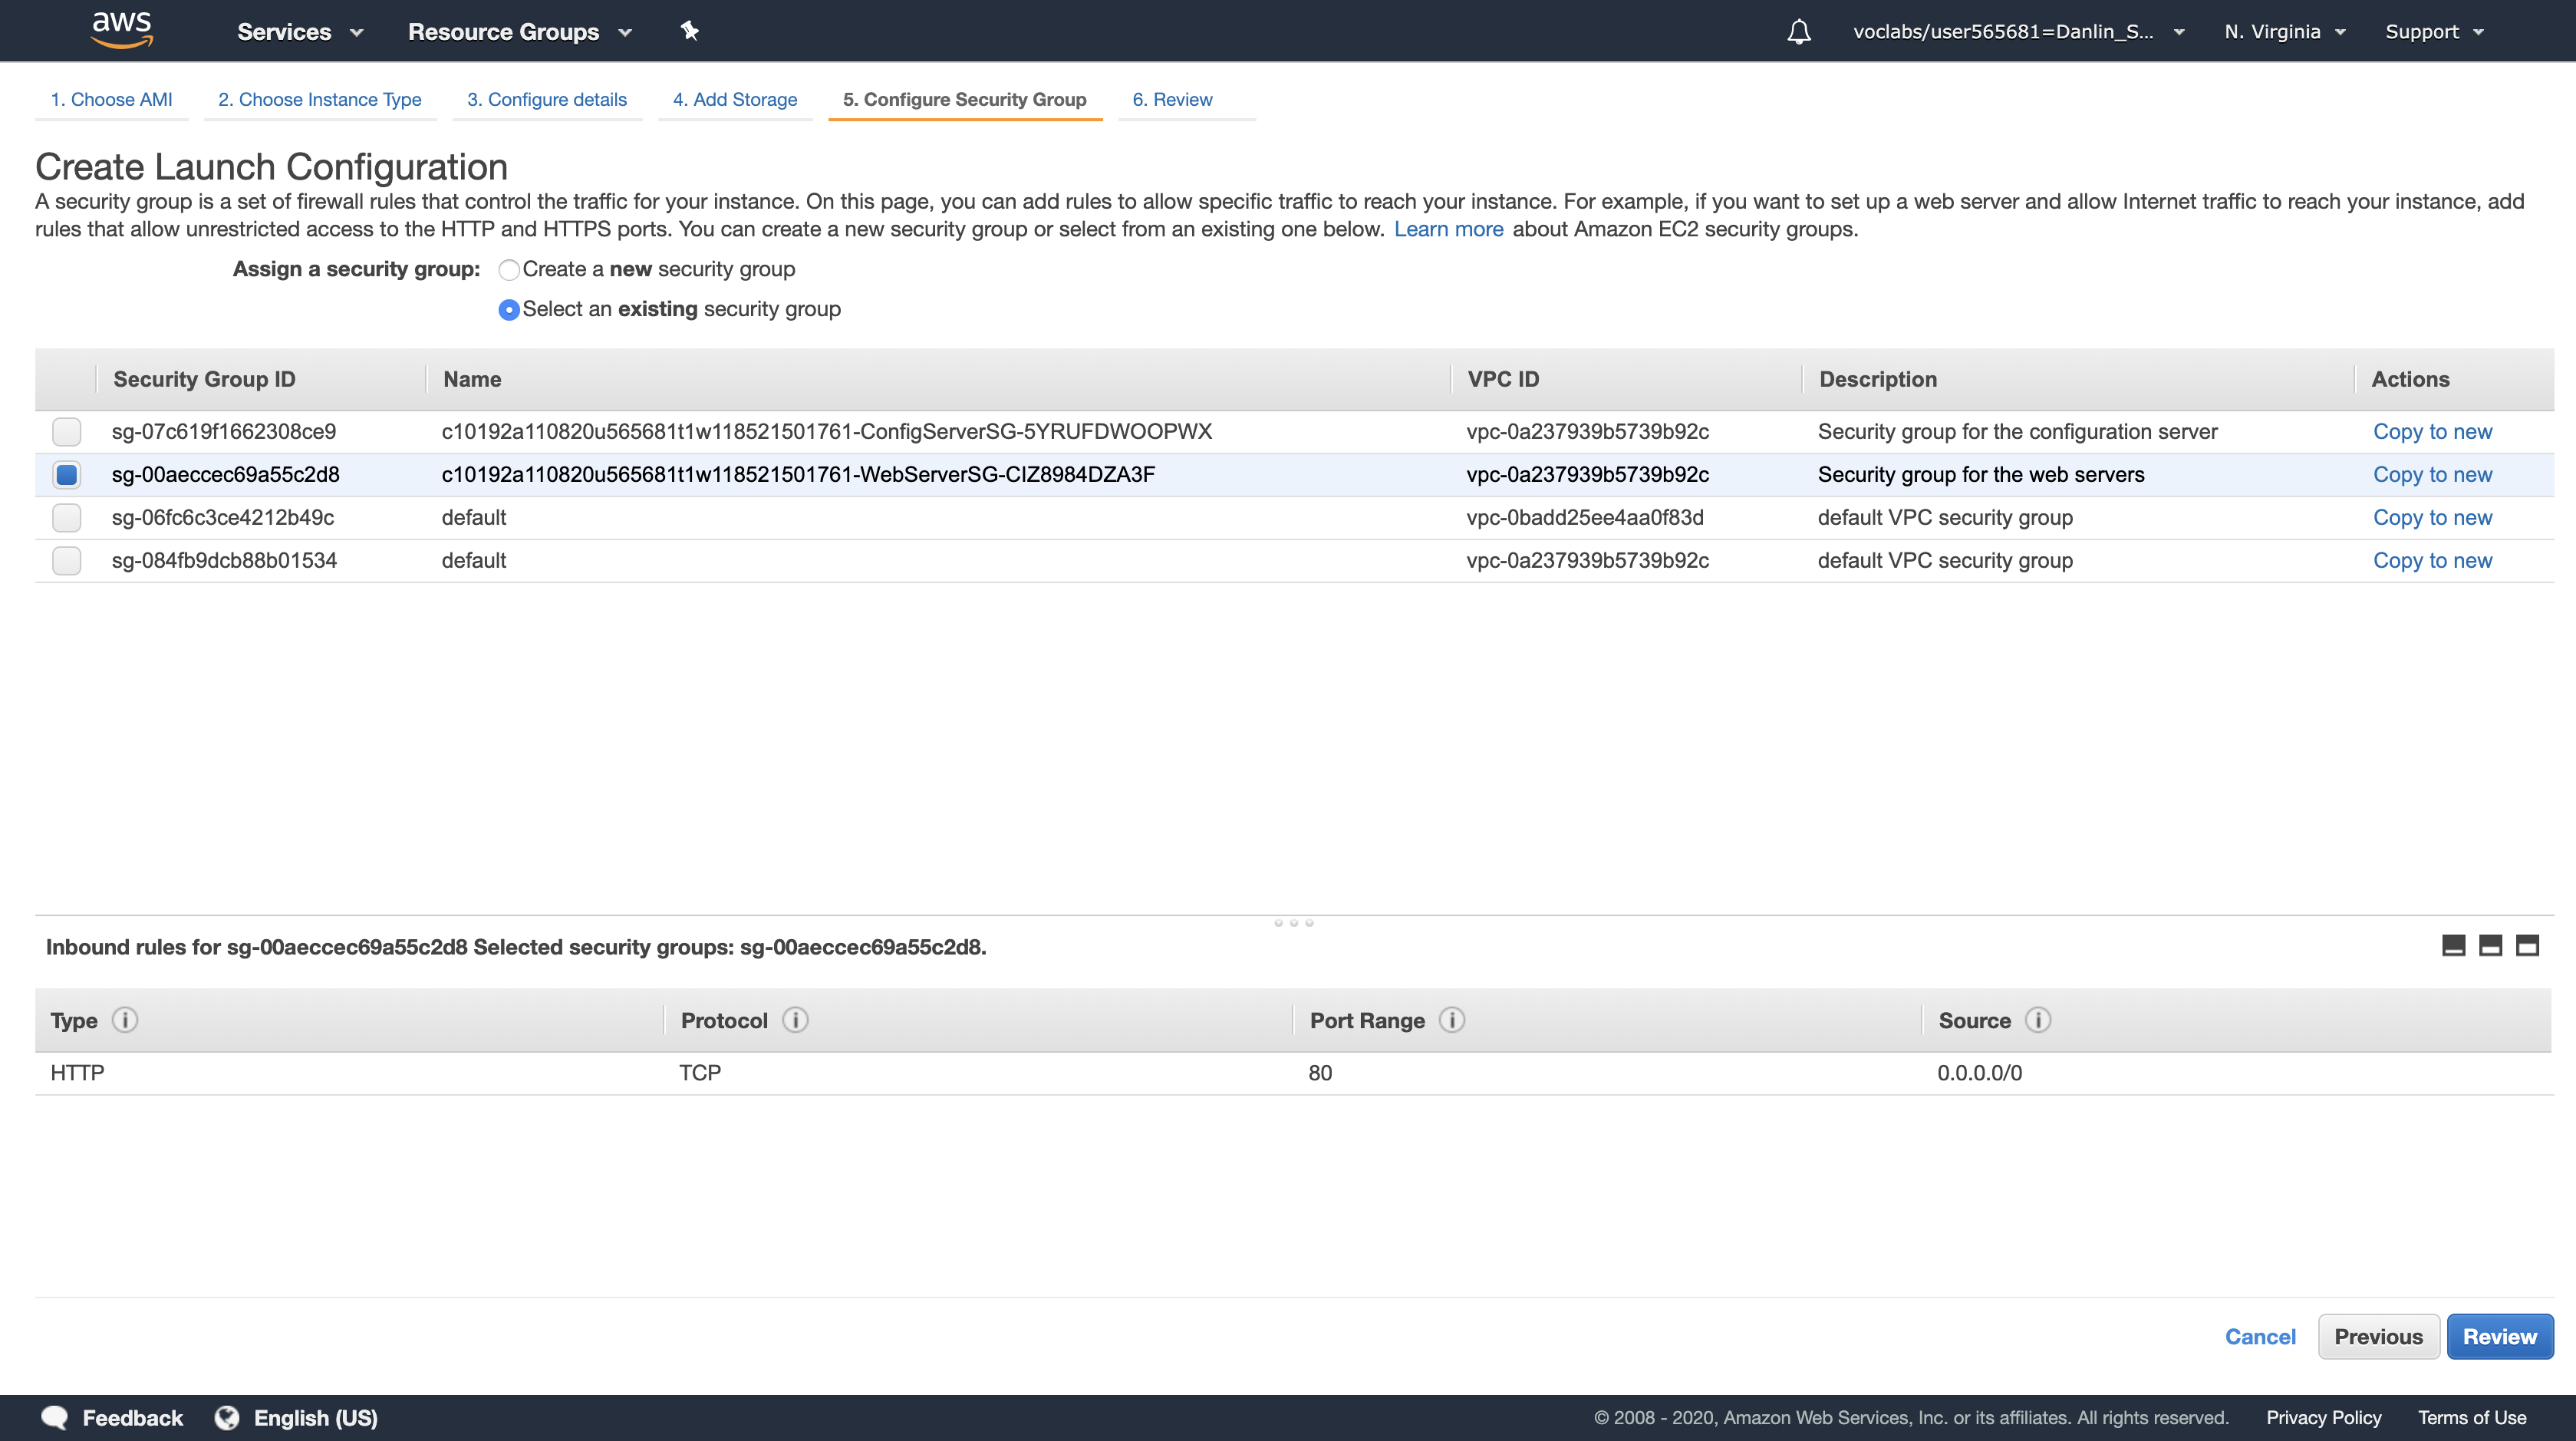
Click Review
You may receive a warning that you will not be able to connect to the instance via SSH. This is acceptable because the server configuration is already defined on the AMI and there is no need to login to the instance.
Click Continue to dismiss the warning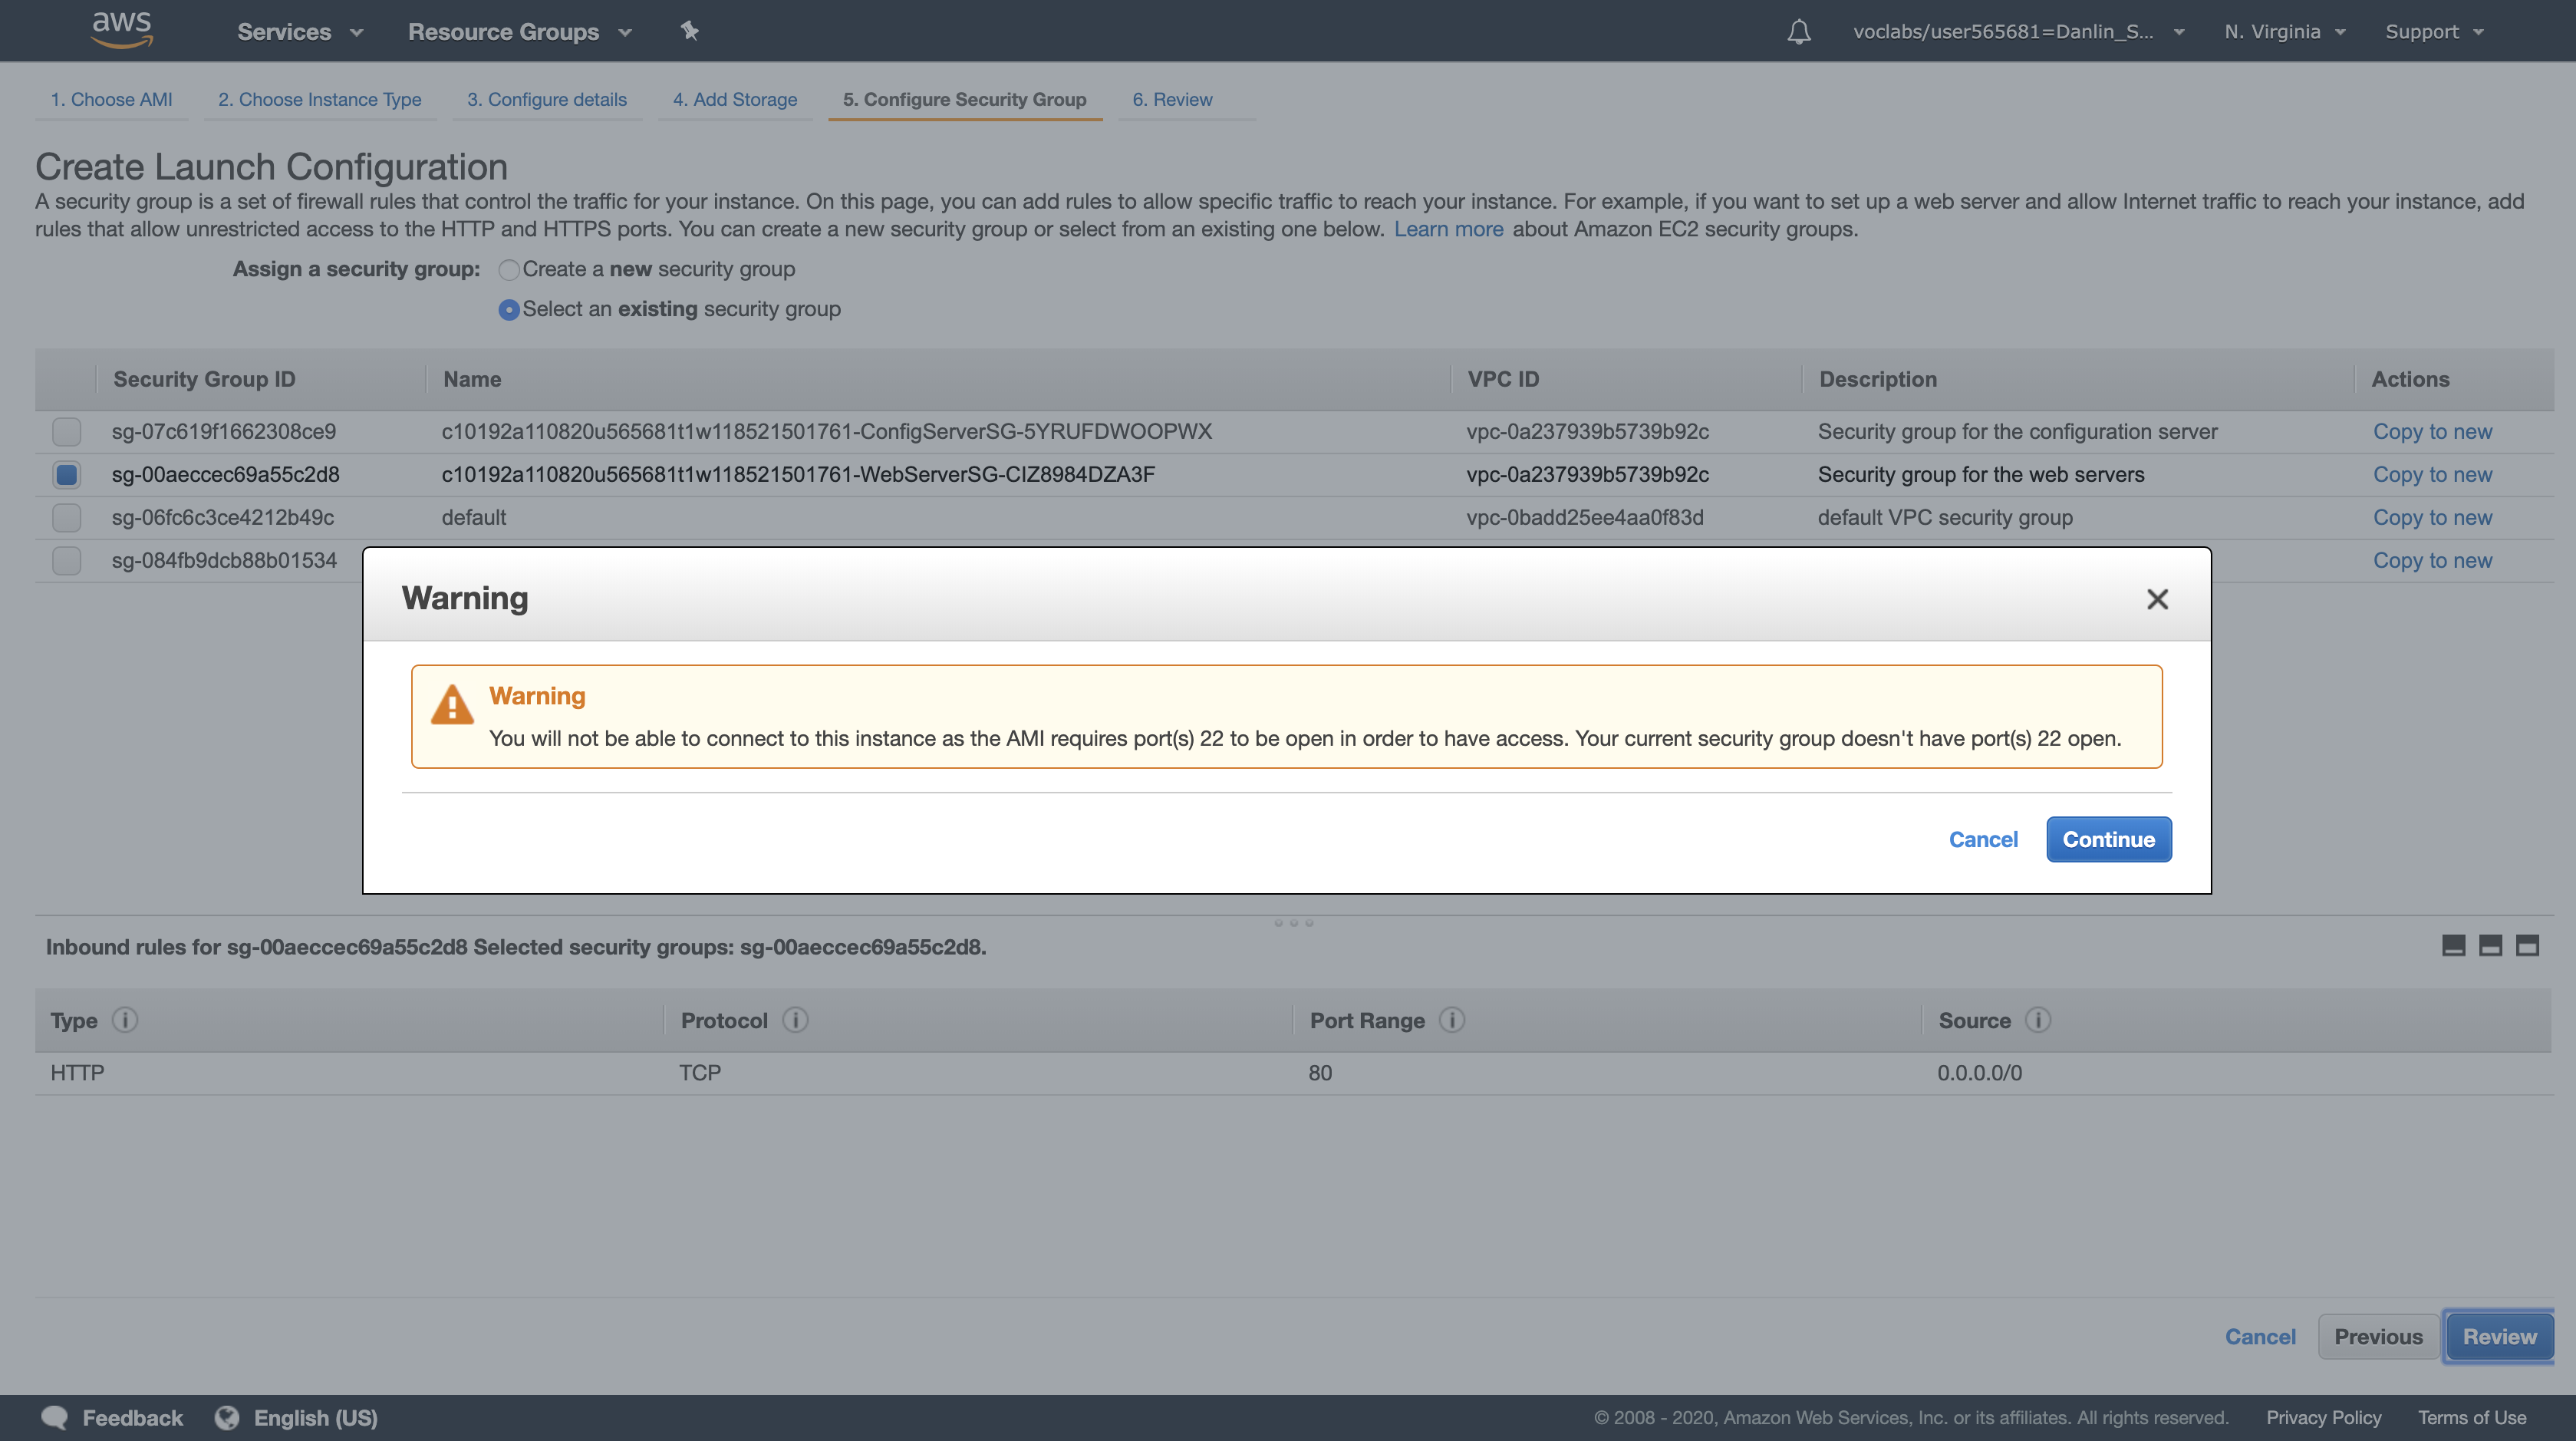
Review the settings, then click Create launch configuration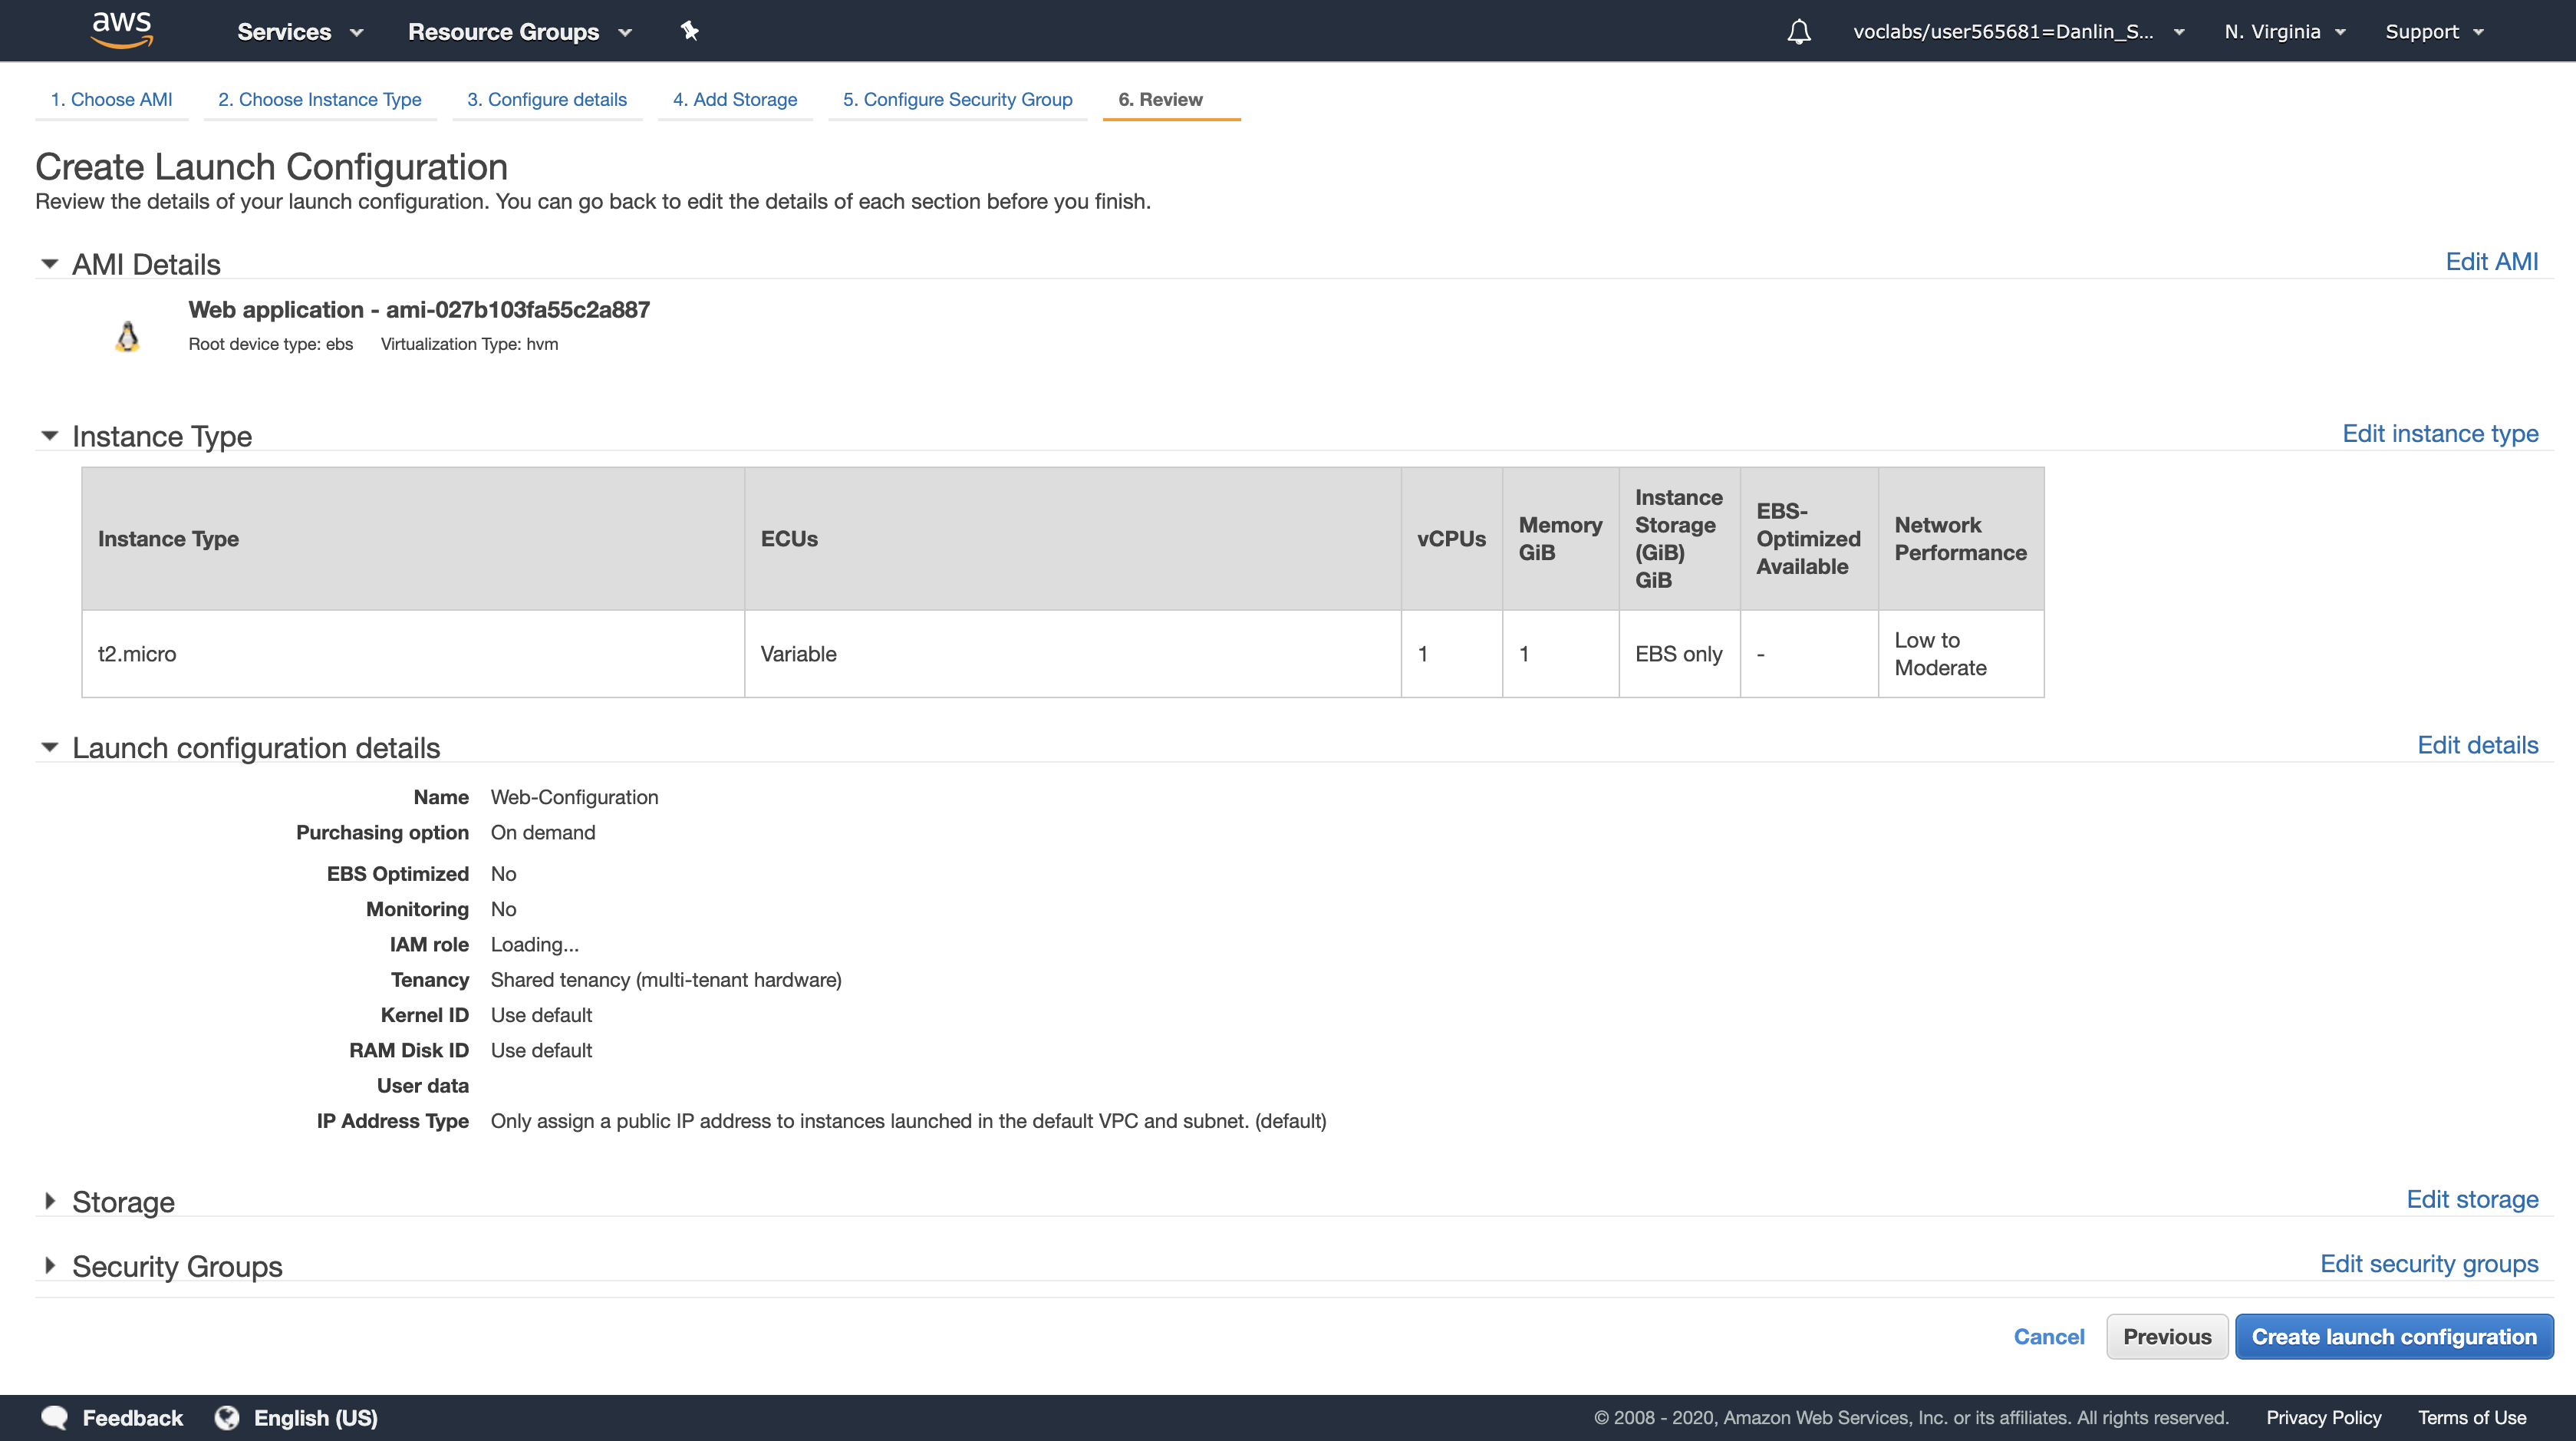
When prompted, accept the vockey keypair, select the acknowledgement check box, then click Create launch configuration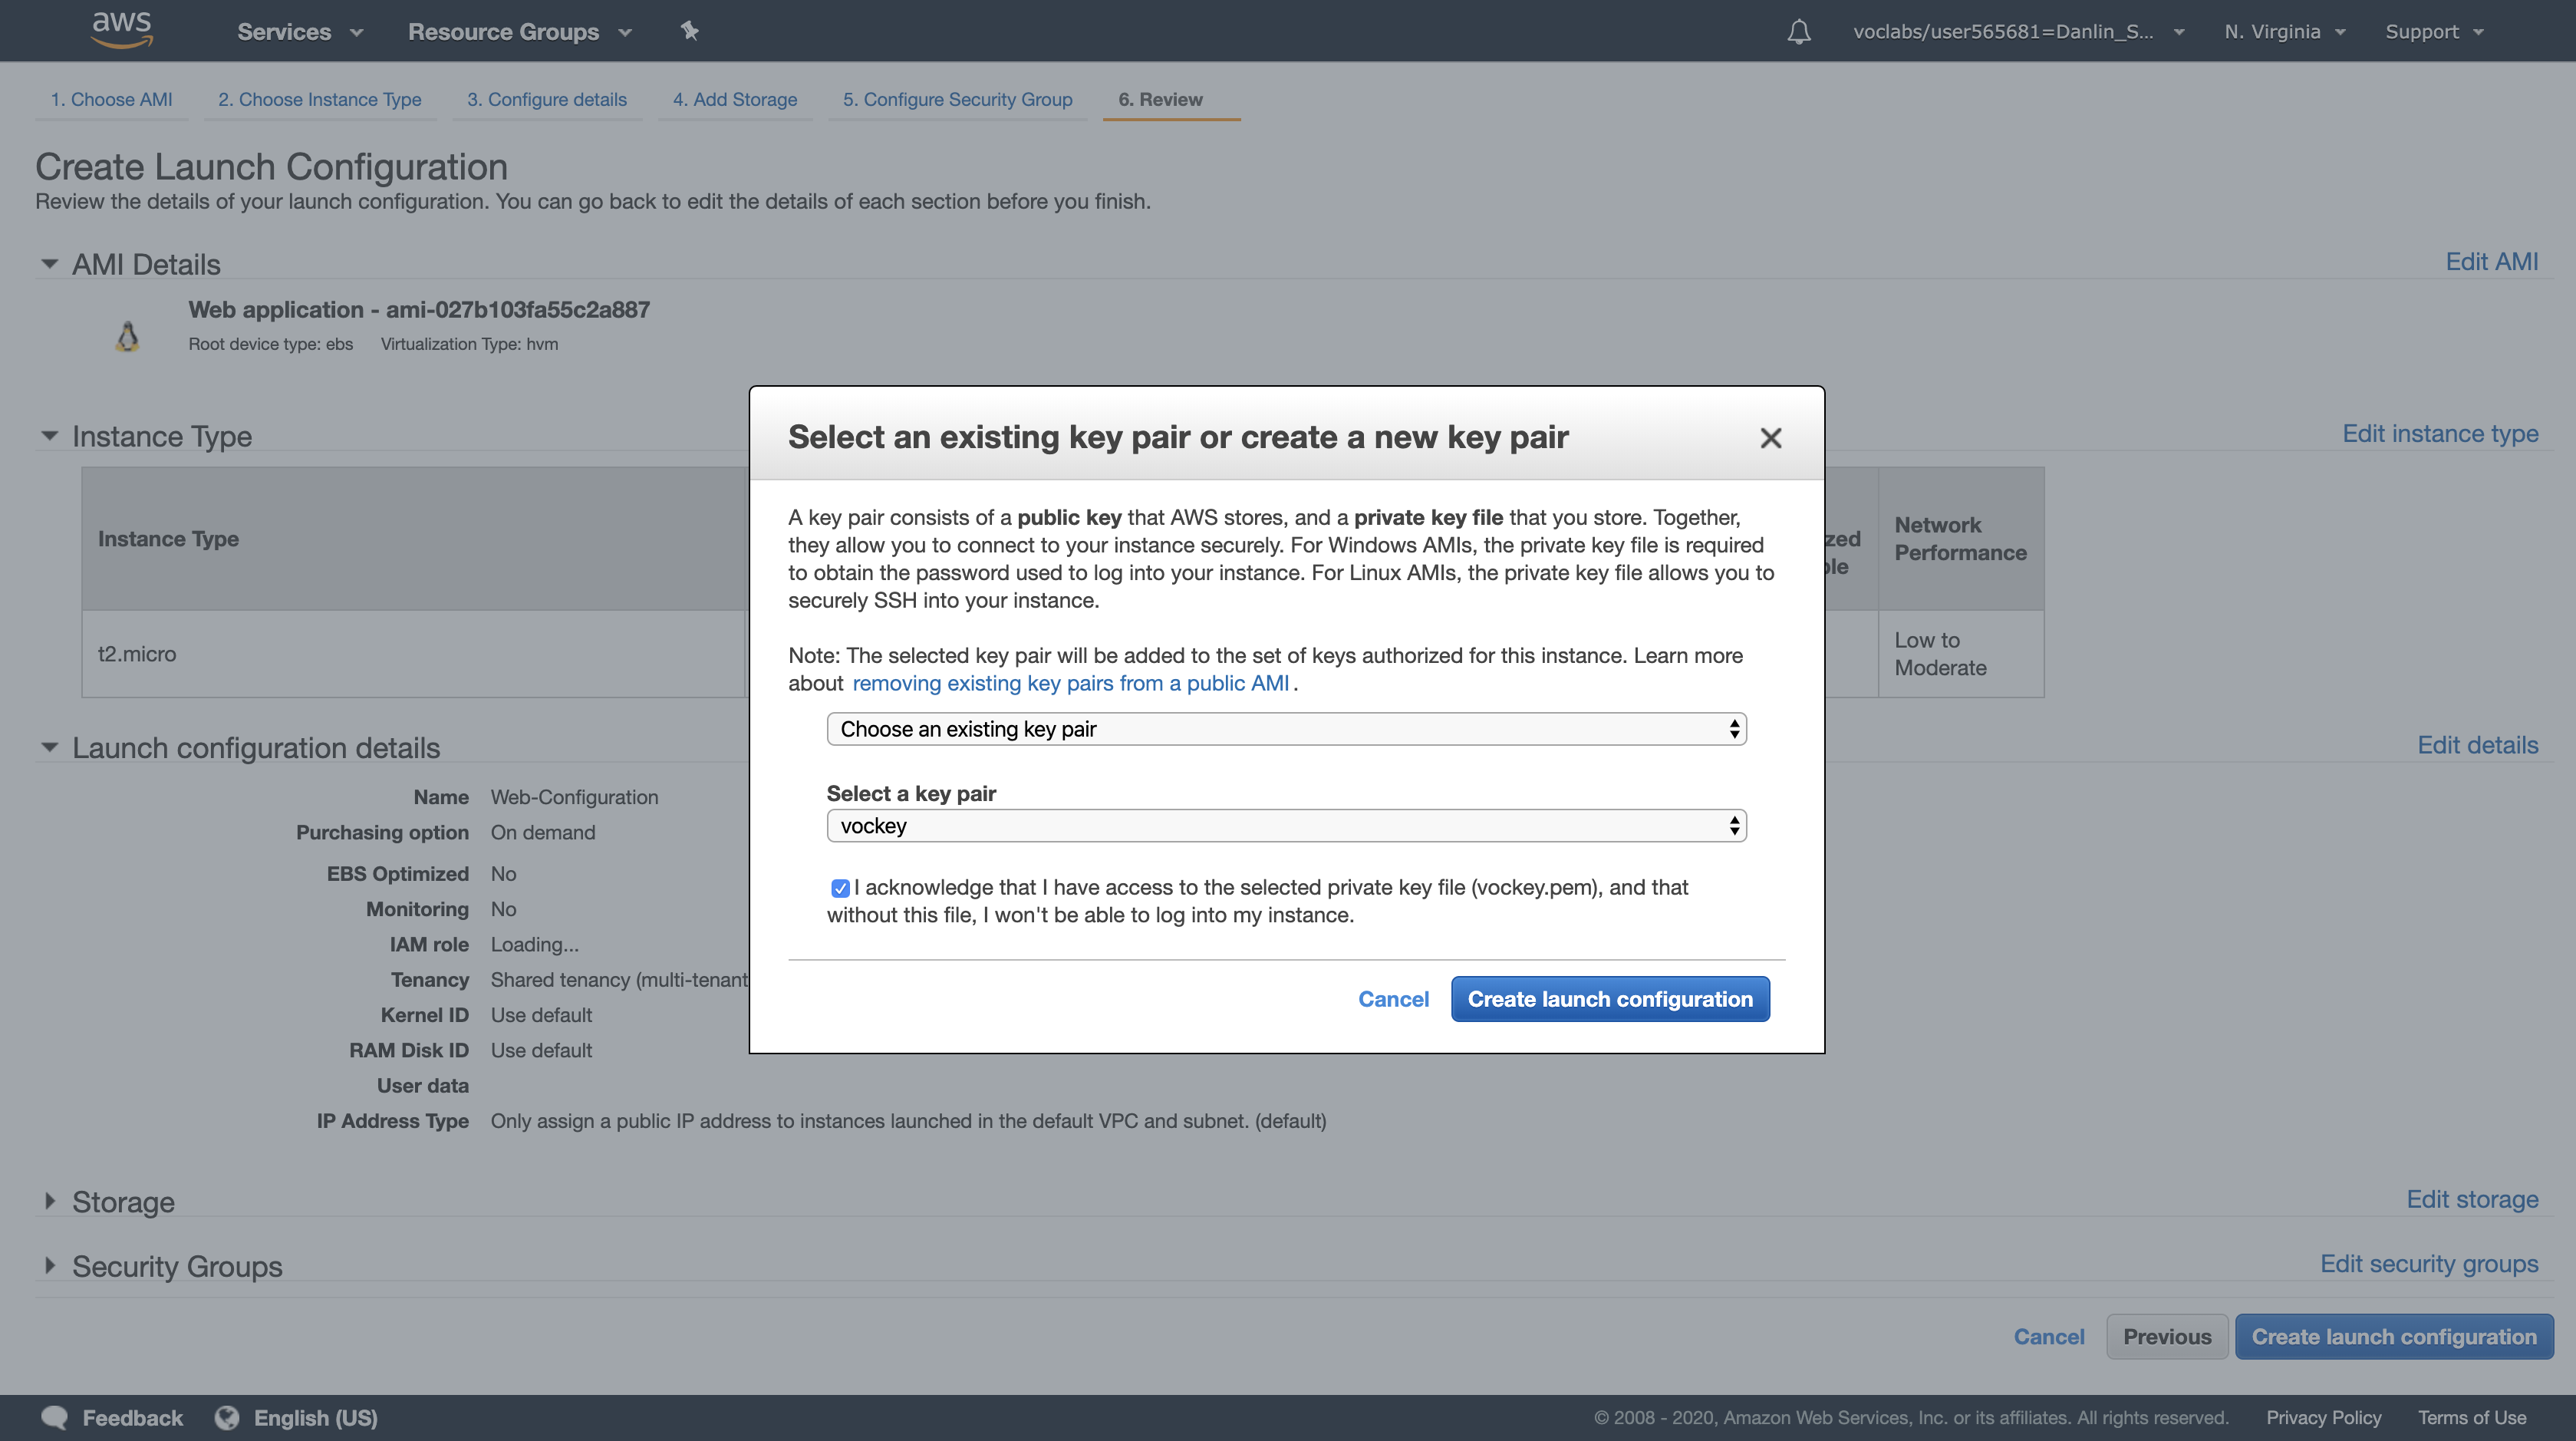
You will now be prompted to create the Auto Scaling group. This includes defining the number of instances and where they should be launched.
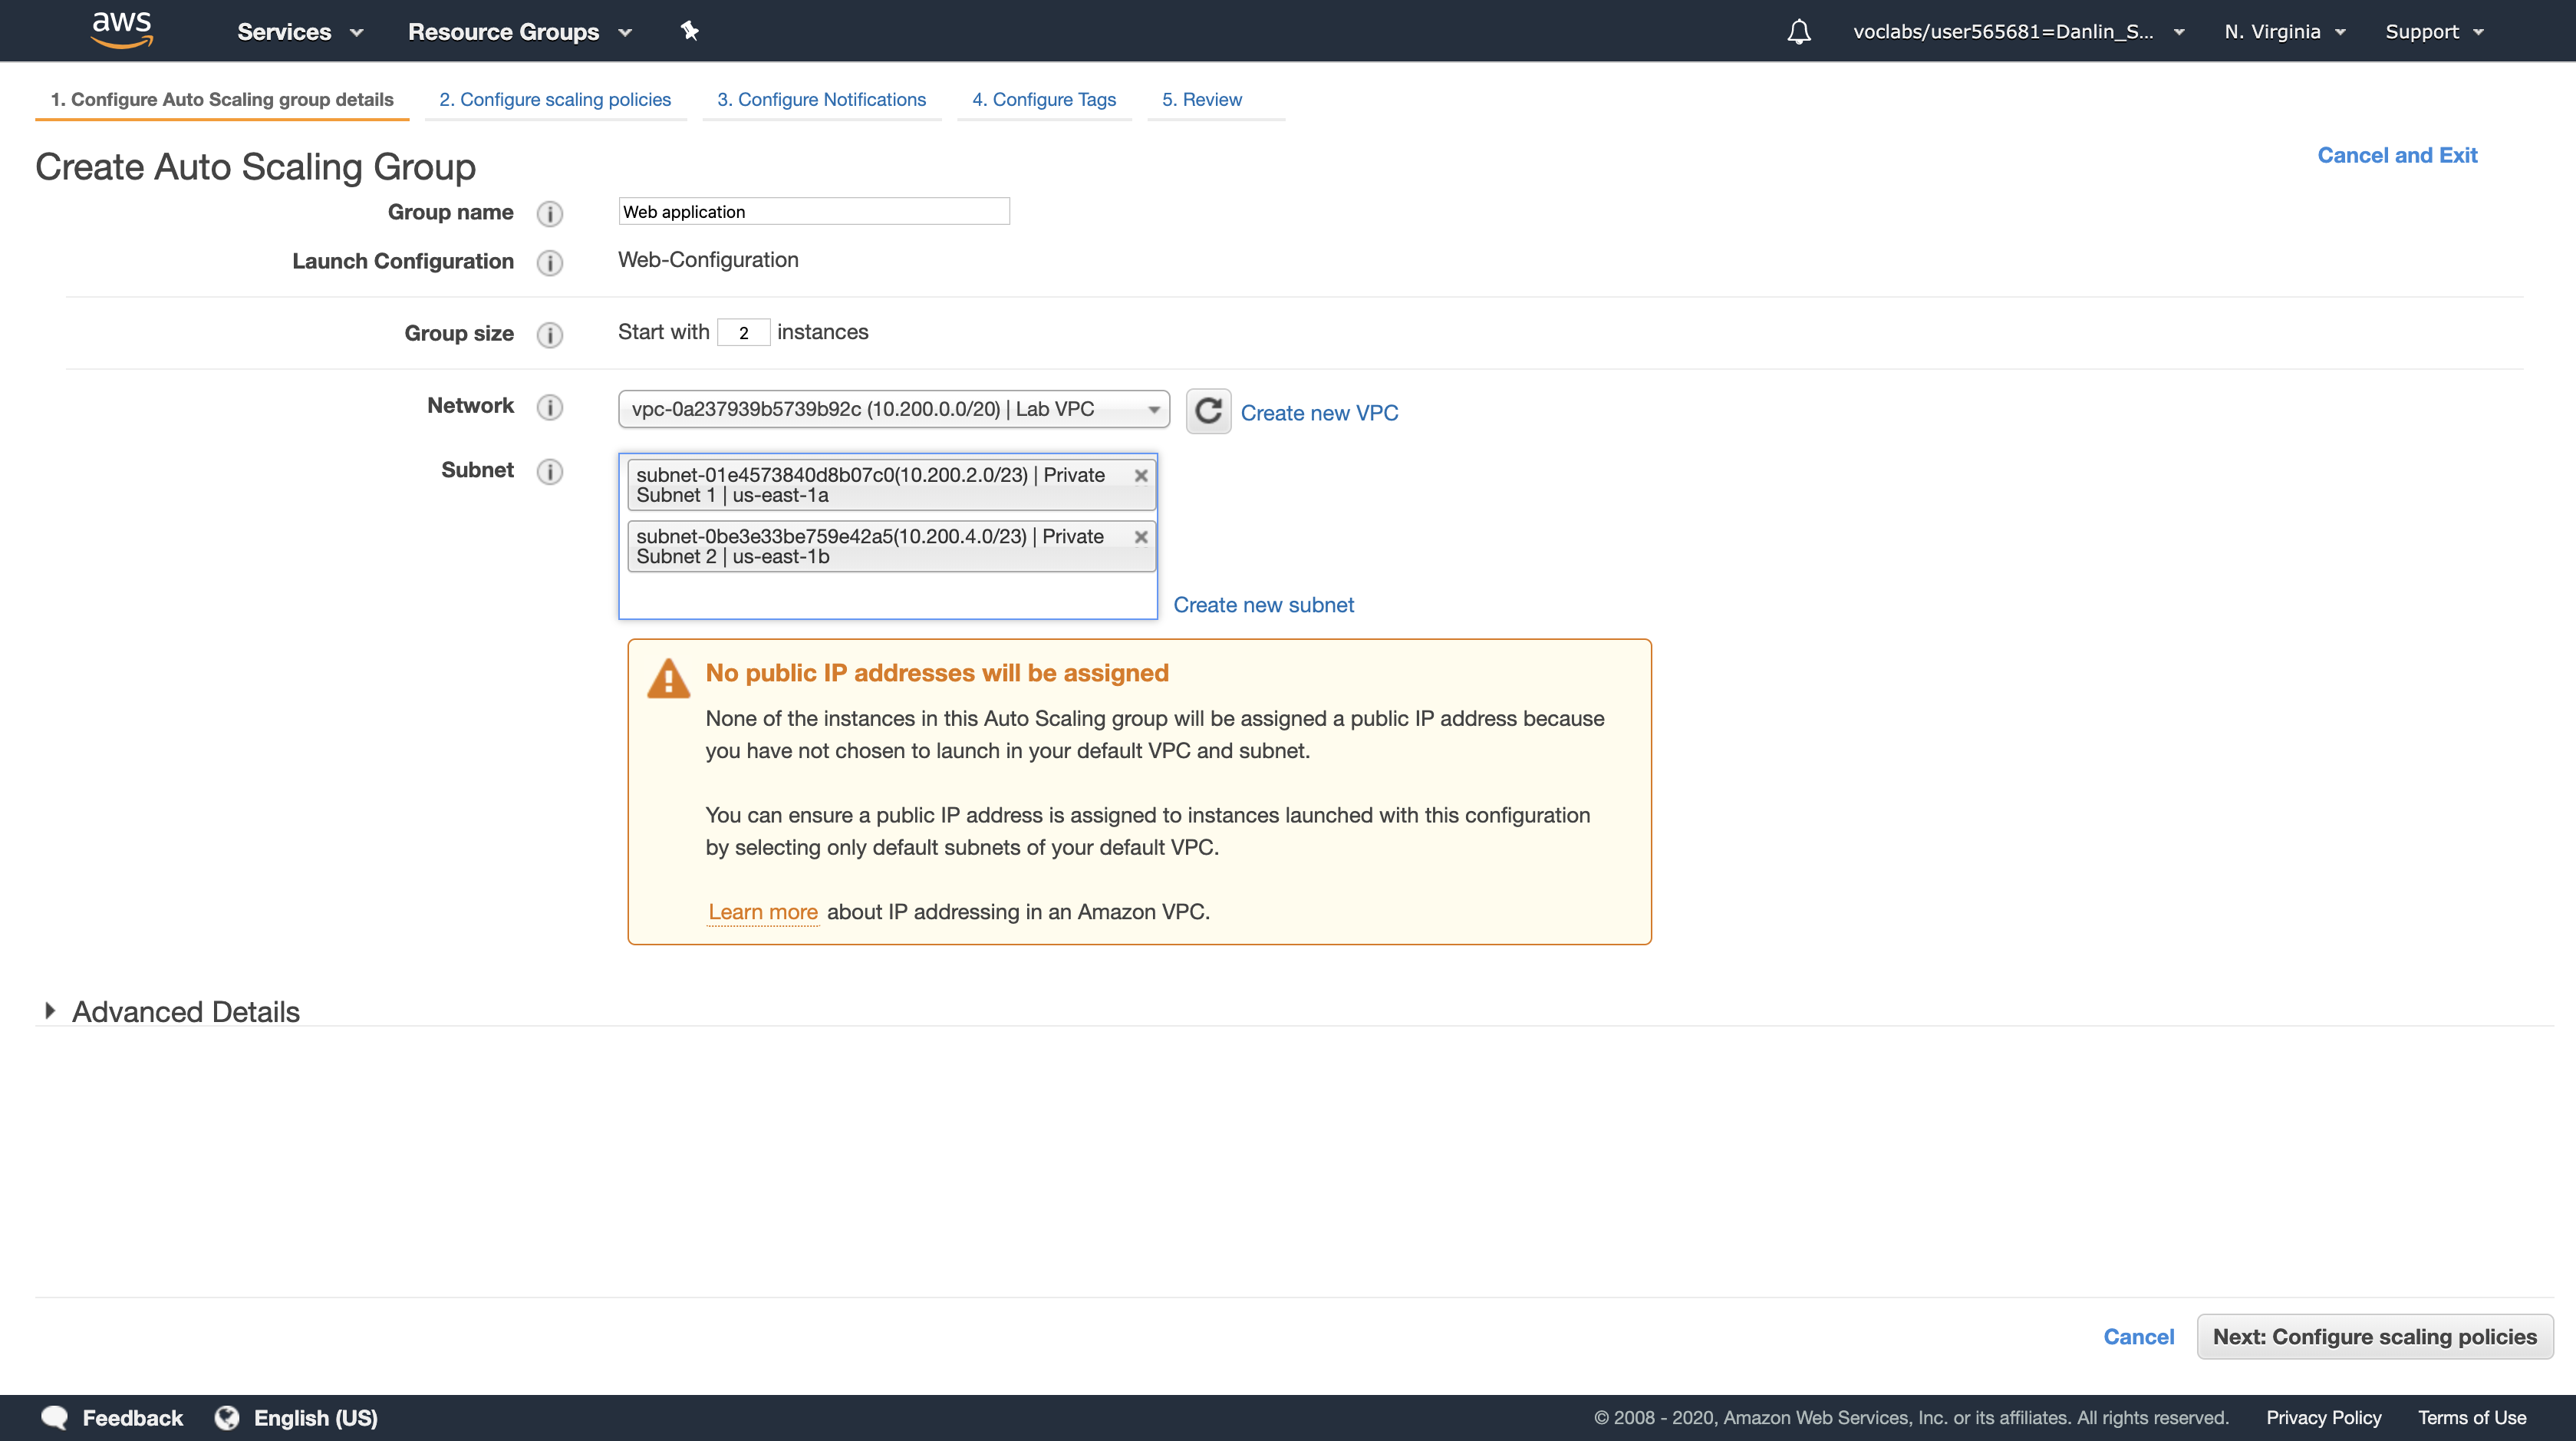
In the Create Auto Scaling Group page, configure the following settings:
- Group Name:
Web application - Group Size: Start with
2instances - Network:
Lab VPC - Subnet: Click in the box and select both Private Subnet 1 and Private Subnet 2
Auto Scaling will automatically distribute the instances amongst the selected Subnets, with each Subnet in a different Availability Zone. This is excellent for maintaining High Availability because the application will survive the failure of an Availability Zone.
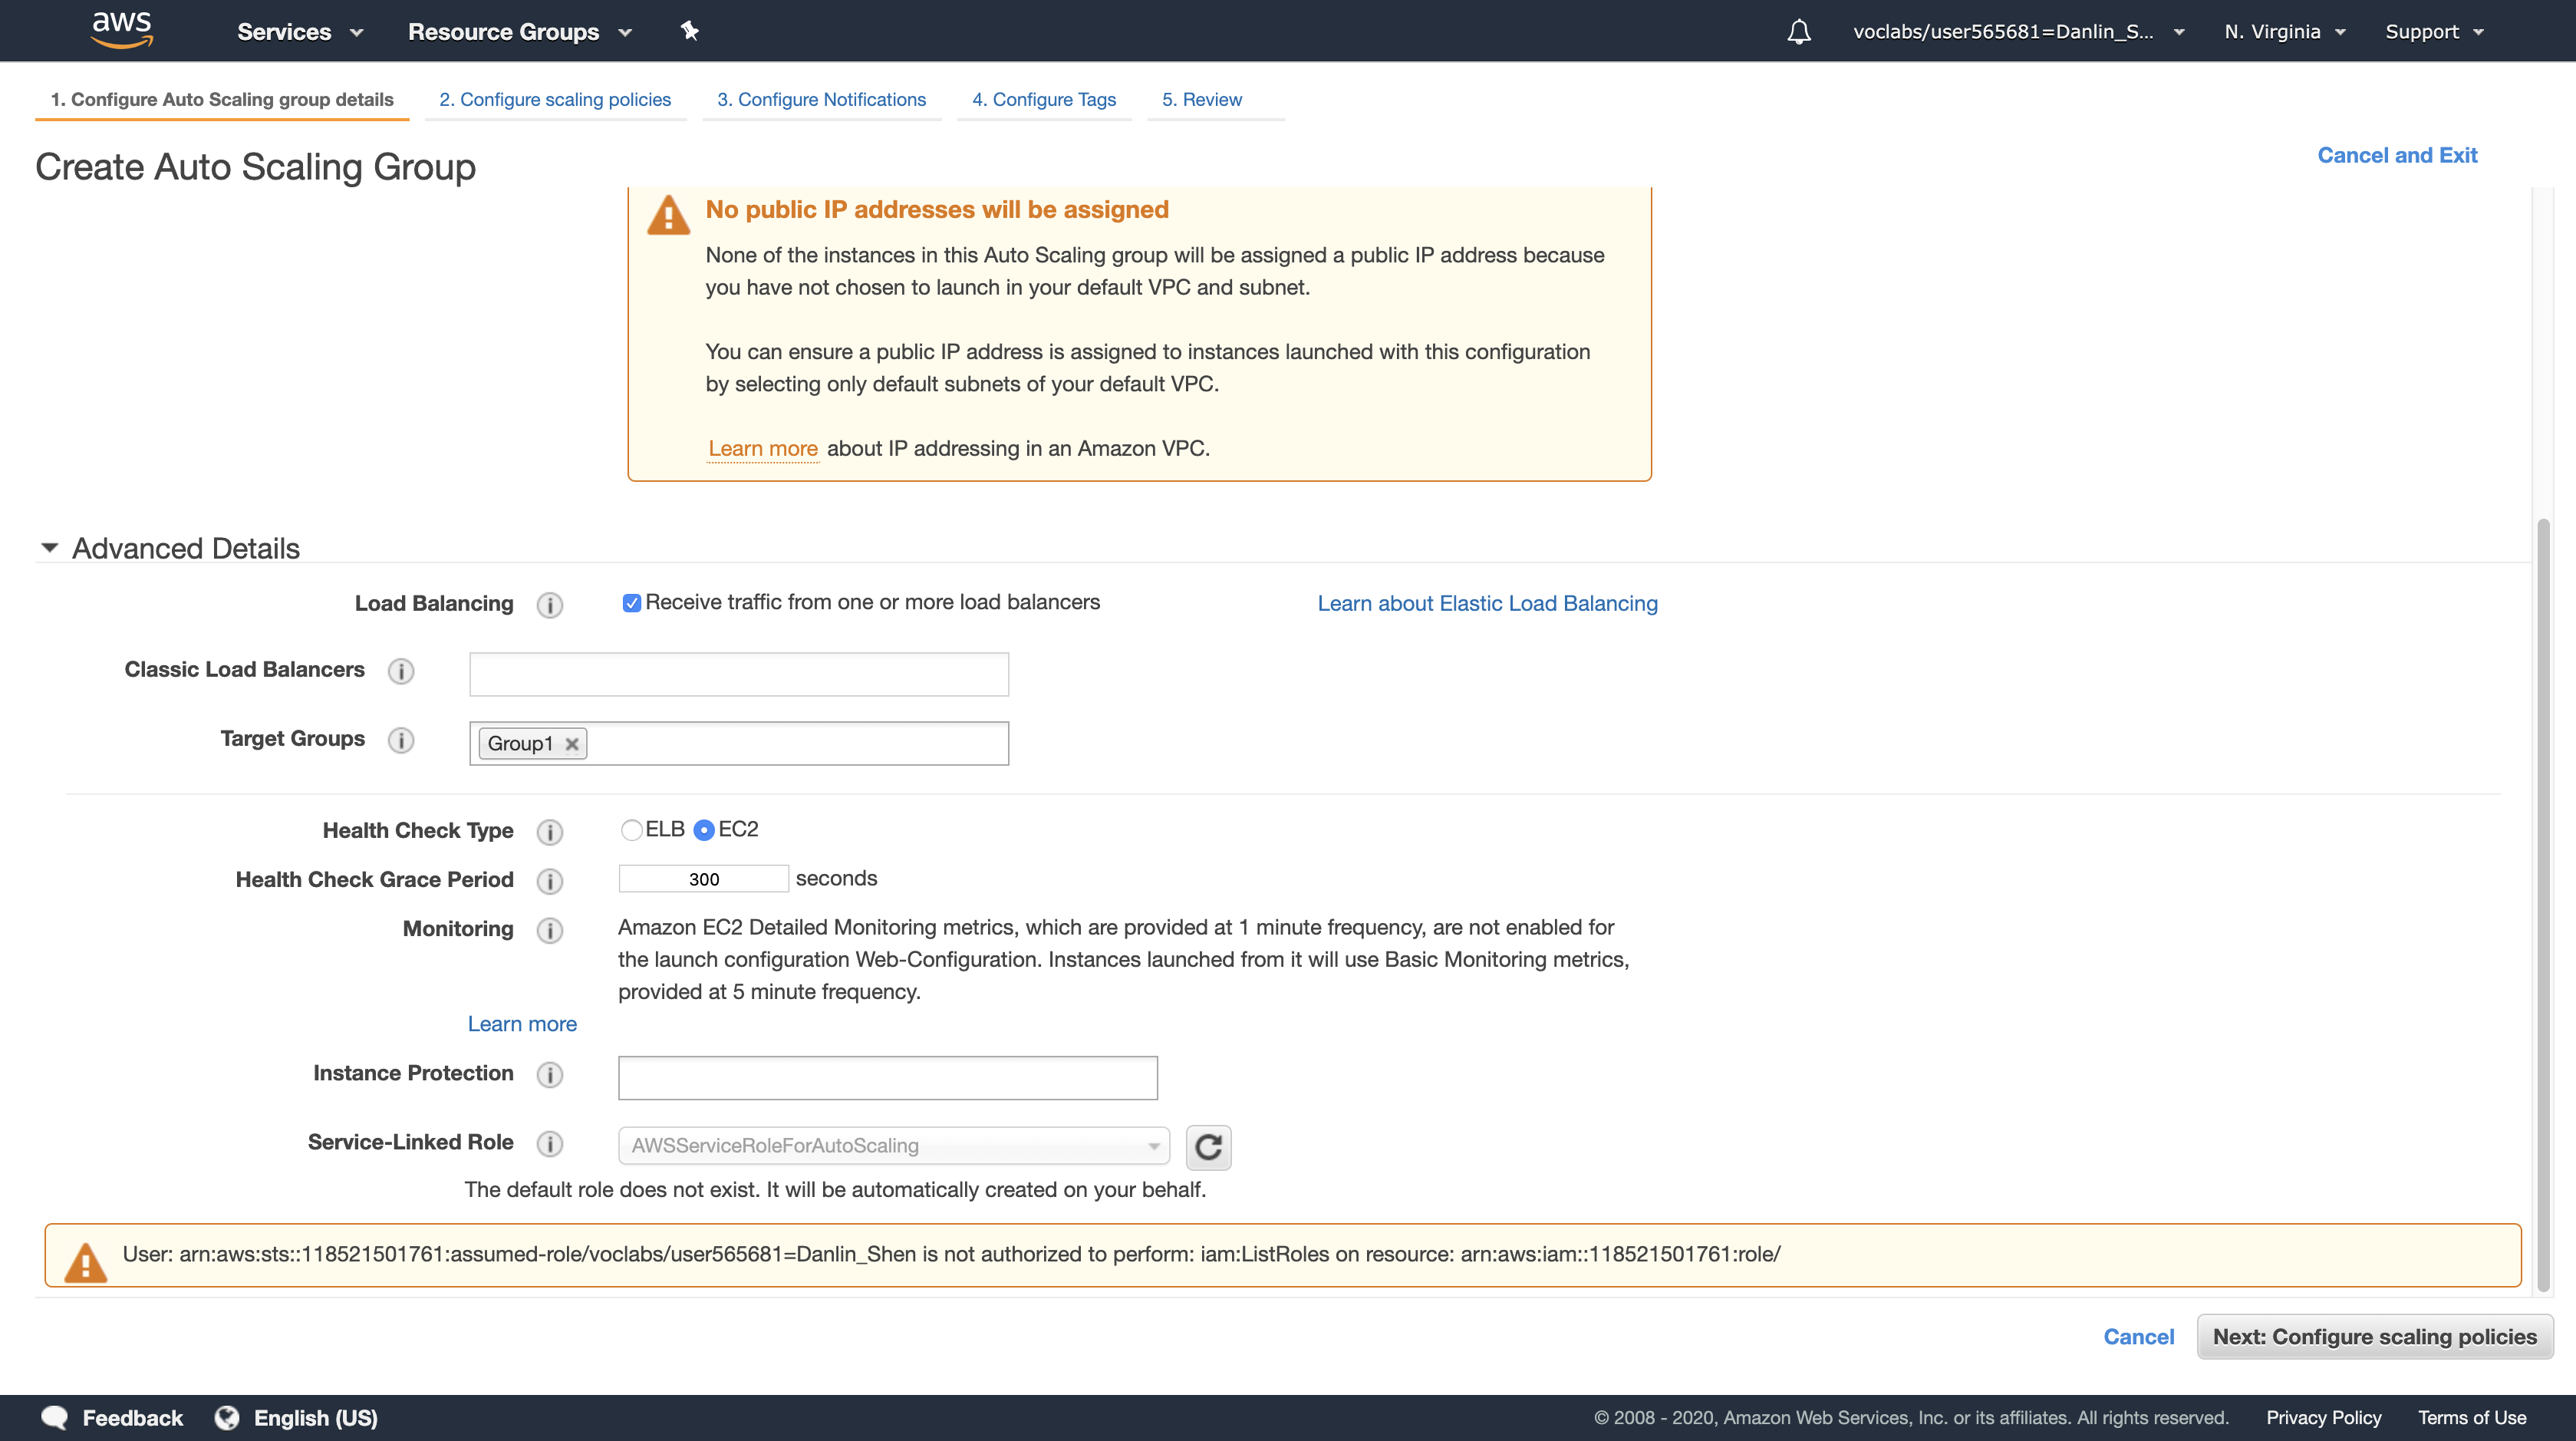
Click the Advanced Details heading to expand it
- Select (tick) the Load Balancing checkbox.
- Click in Target Groups, then select Group1.
Click Next: Configure scaling policies
Ensure Keep this group at its initial size is selected.
This configuration tells Auto Scaling to always maintain two instances in the Auto Scaling group. This is ideal for a Highly Available application because the application will continue to operate even if one instance fails. In such an event, Auto Scaling will automatically launch a replacement instance.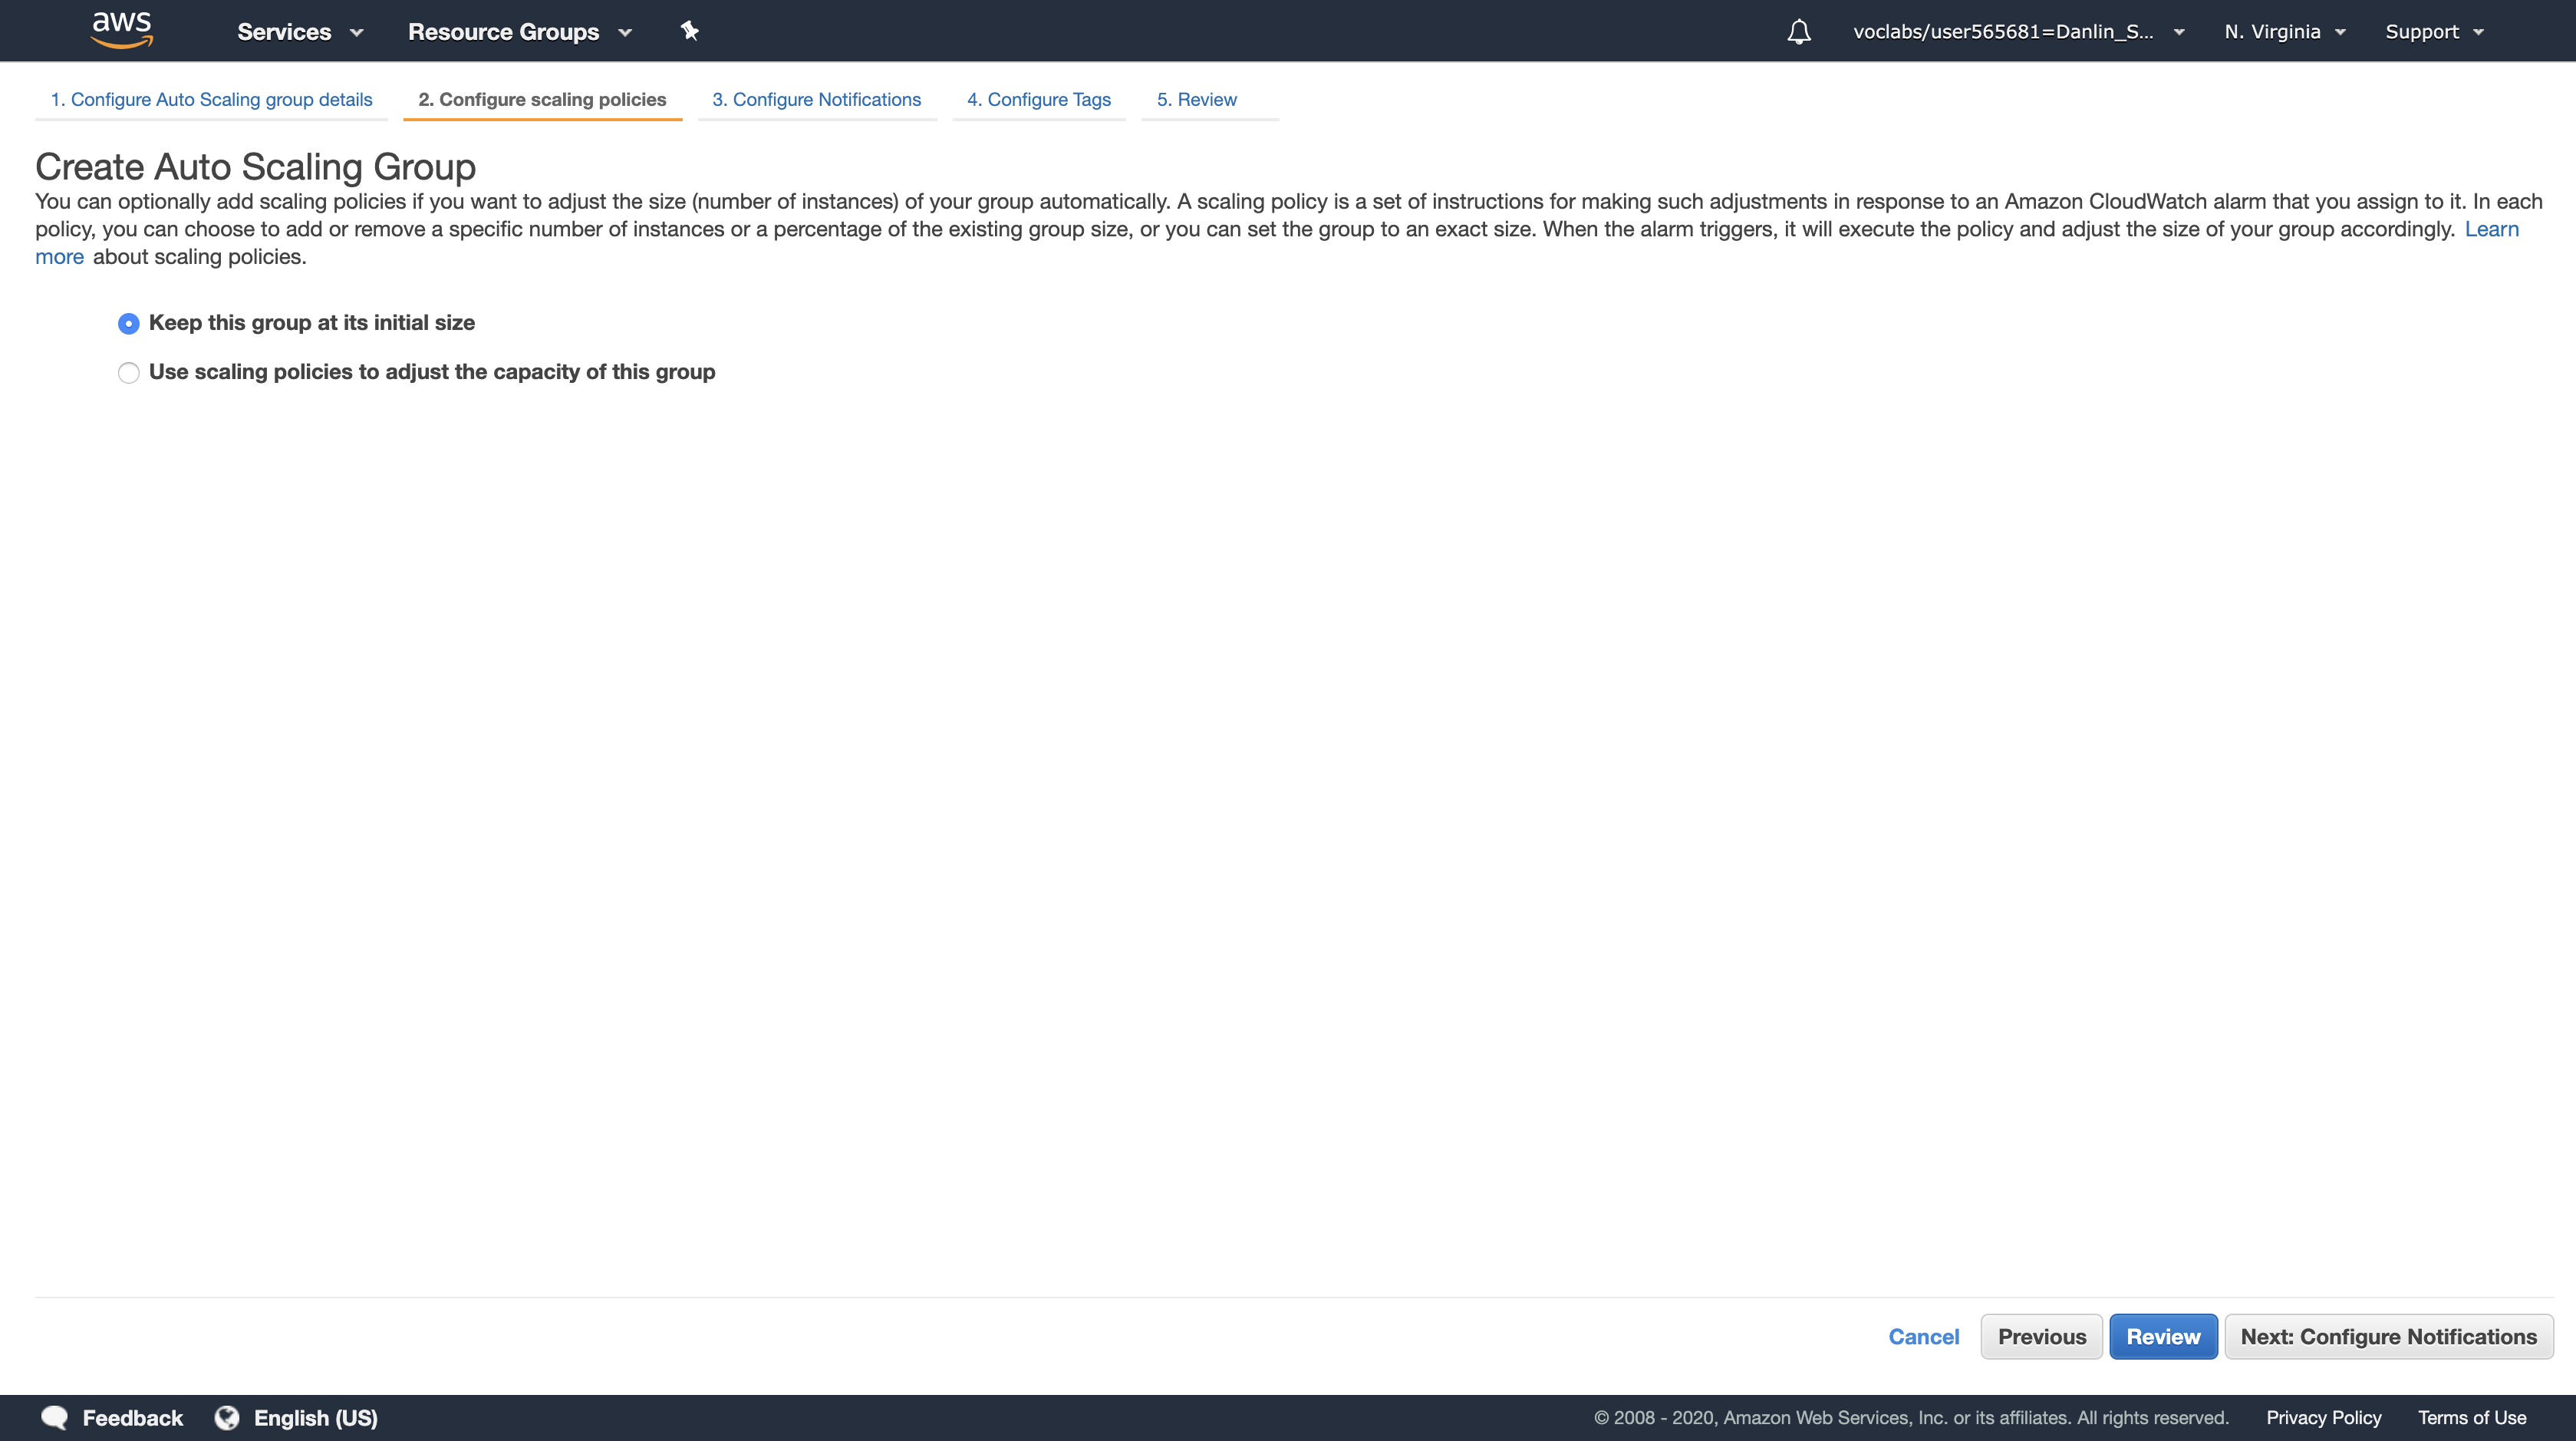
Click Next: Configure Notifications
You will not be configuring any notifications.
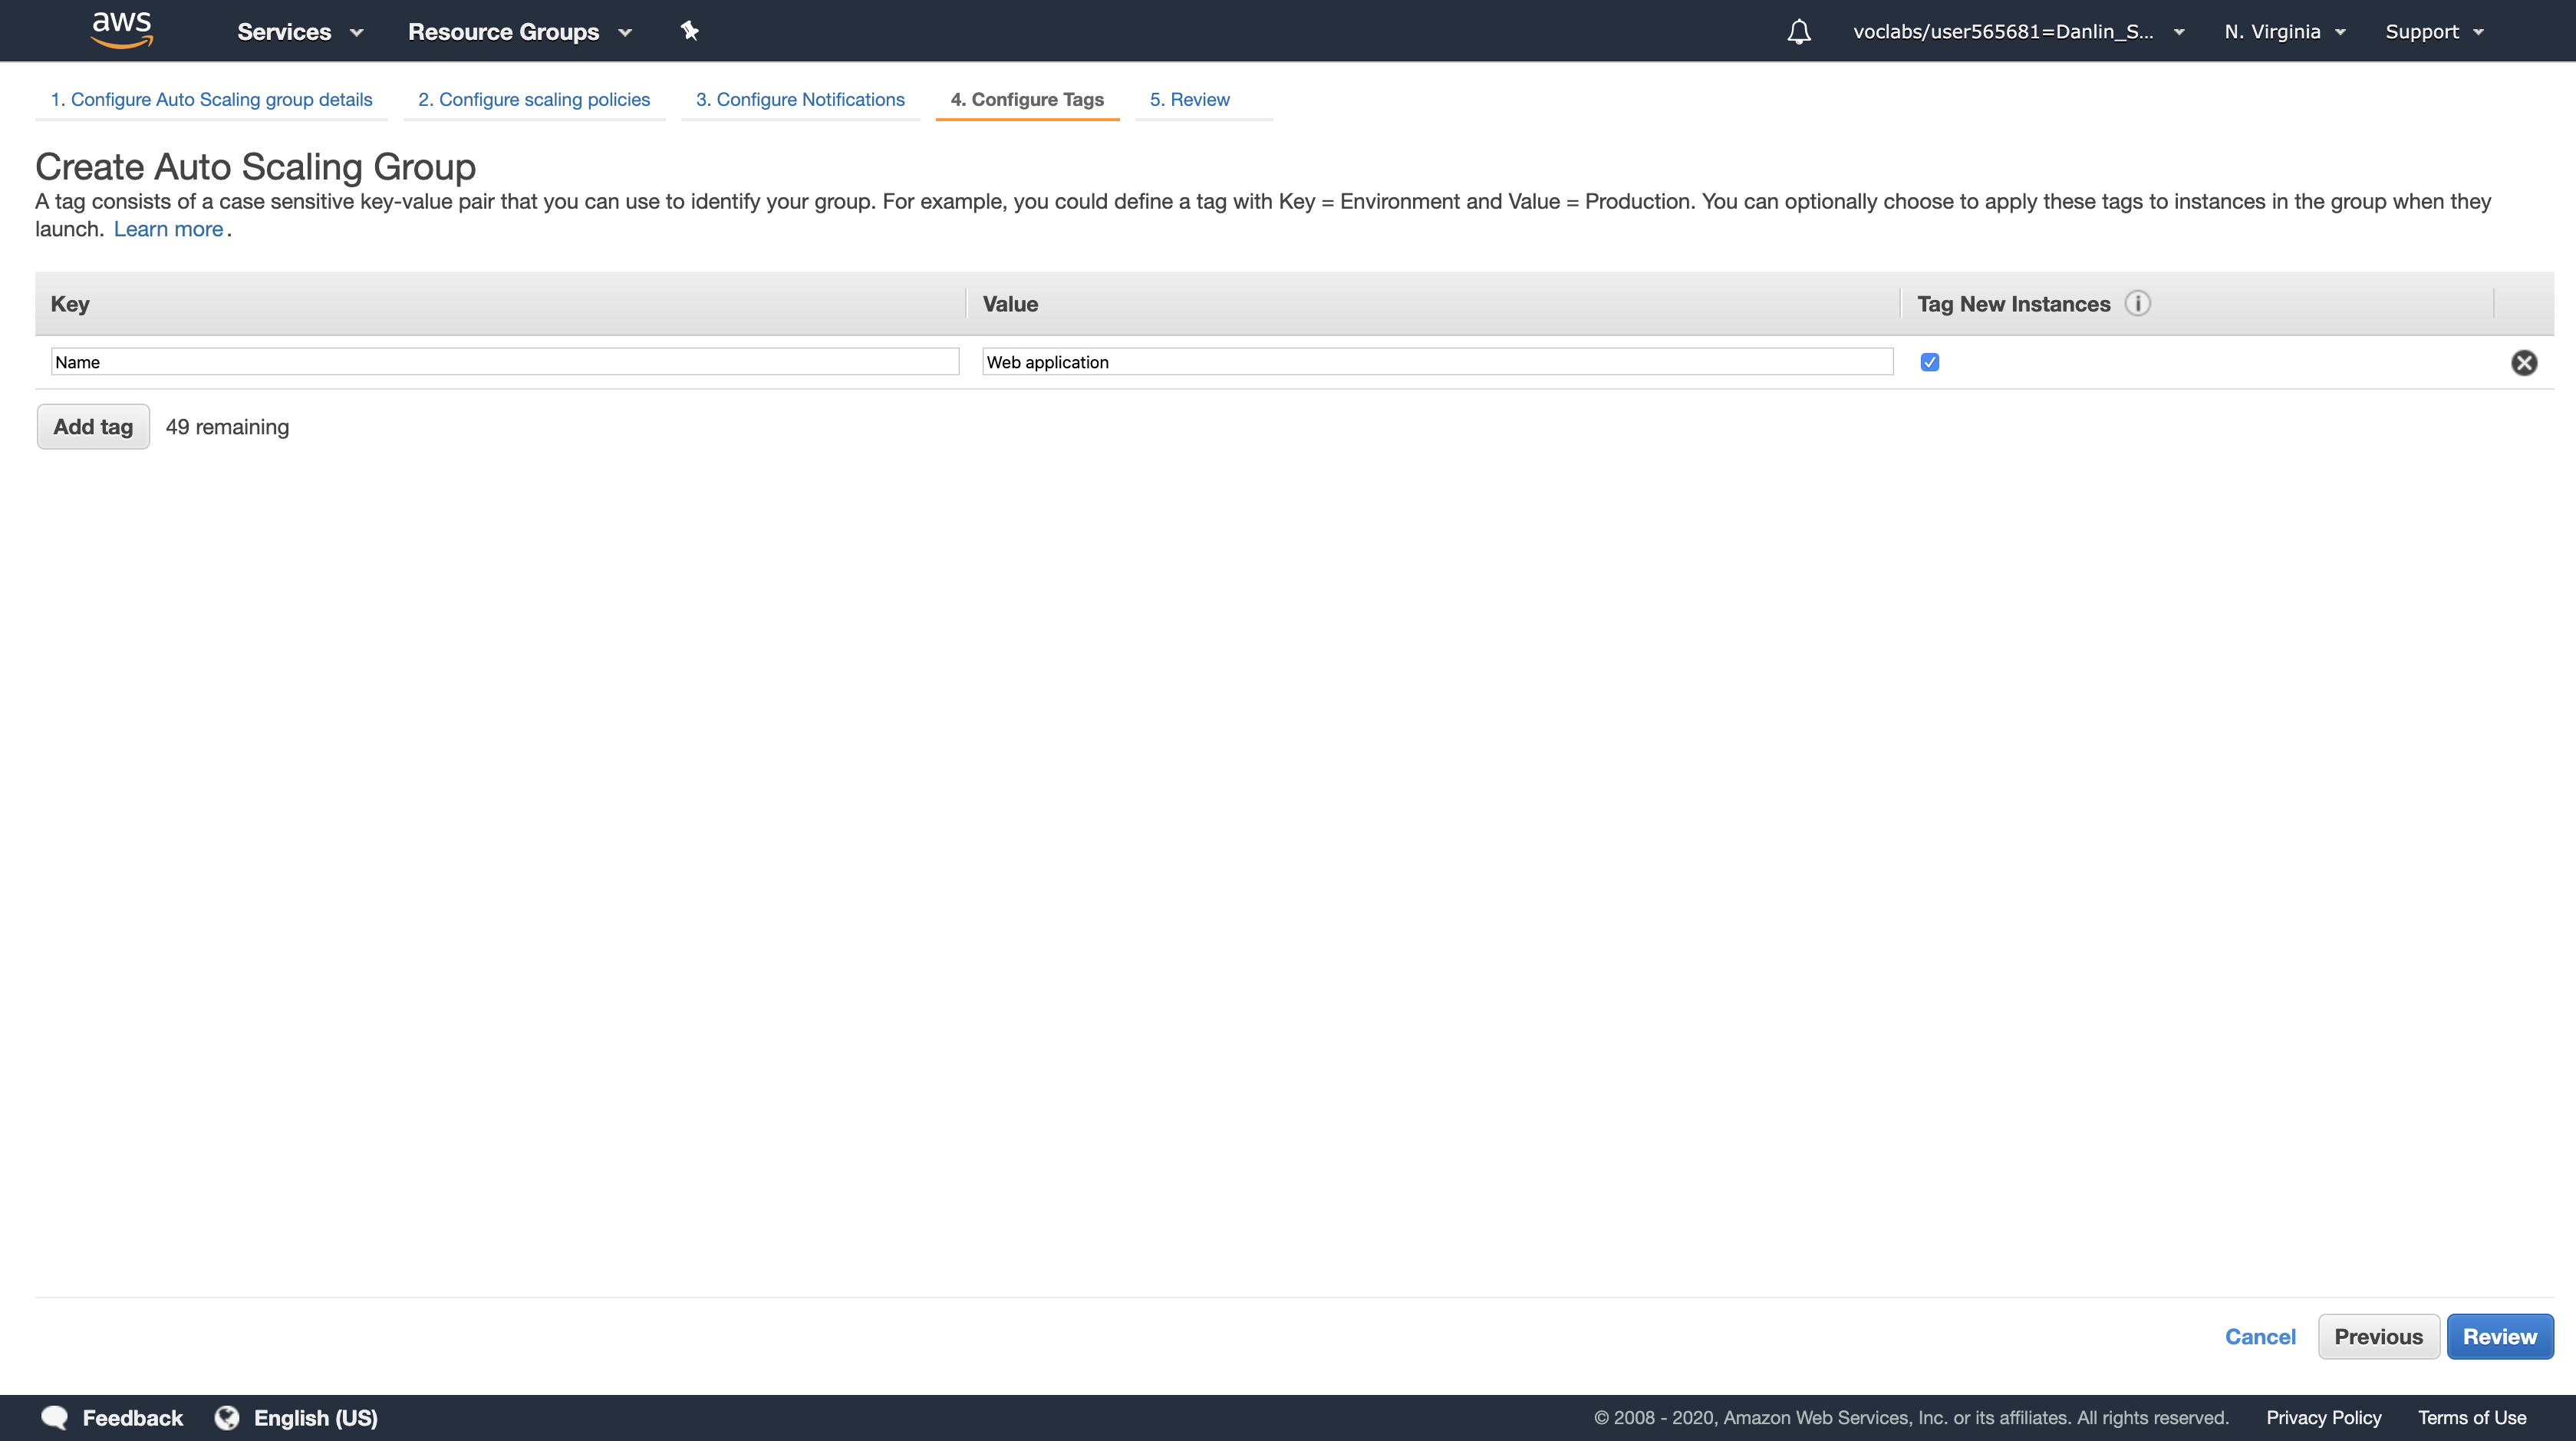
Click Next: Configure Tags
Tags placed on the Auto Scaling group can also automatically propagate to the instances launched by Auto Scaling.
- Key, type:
Name - Value, type:
Web application
Click Review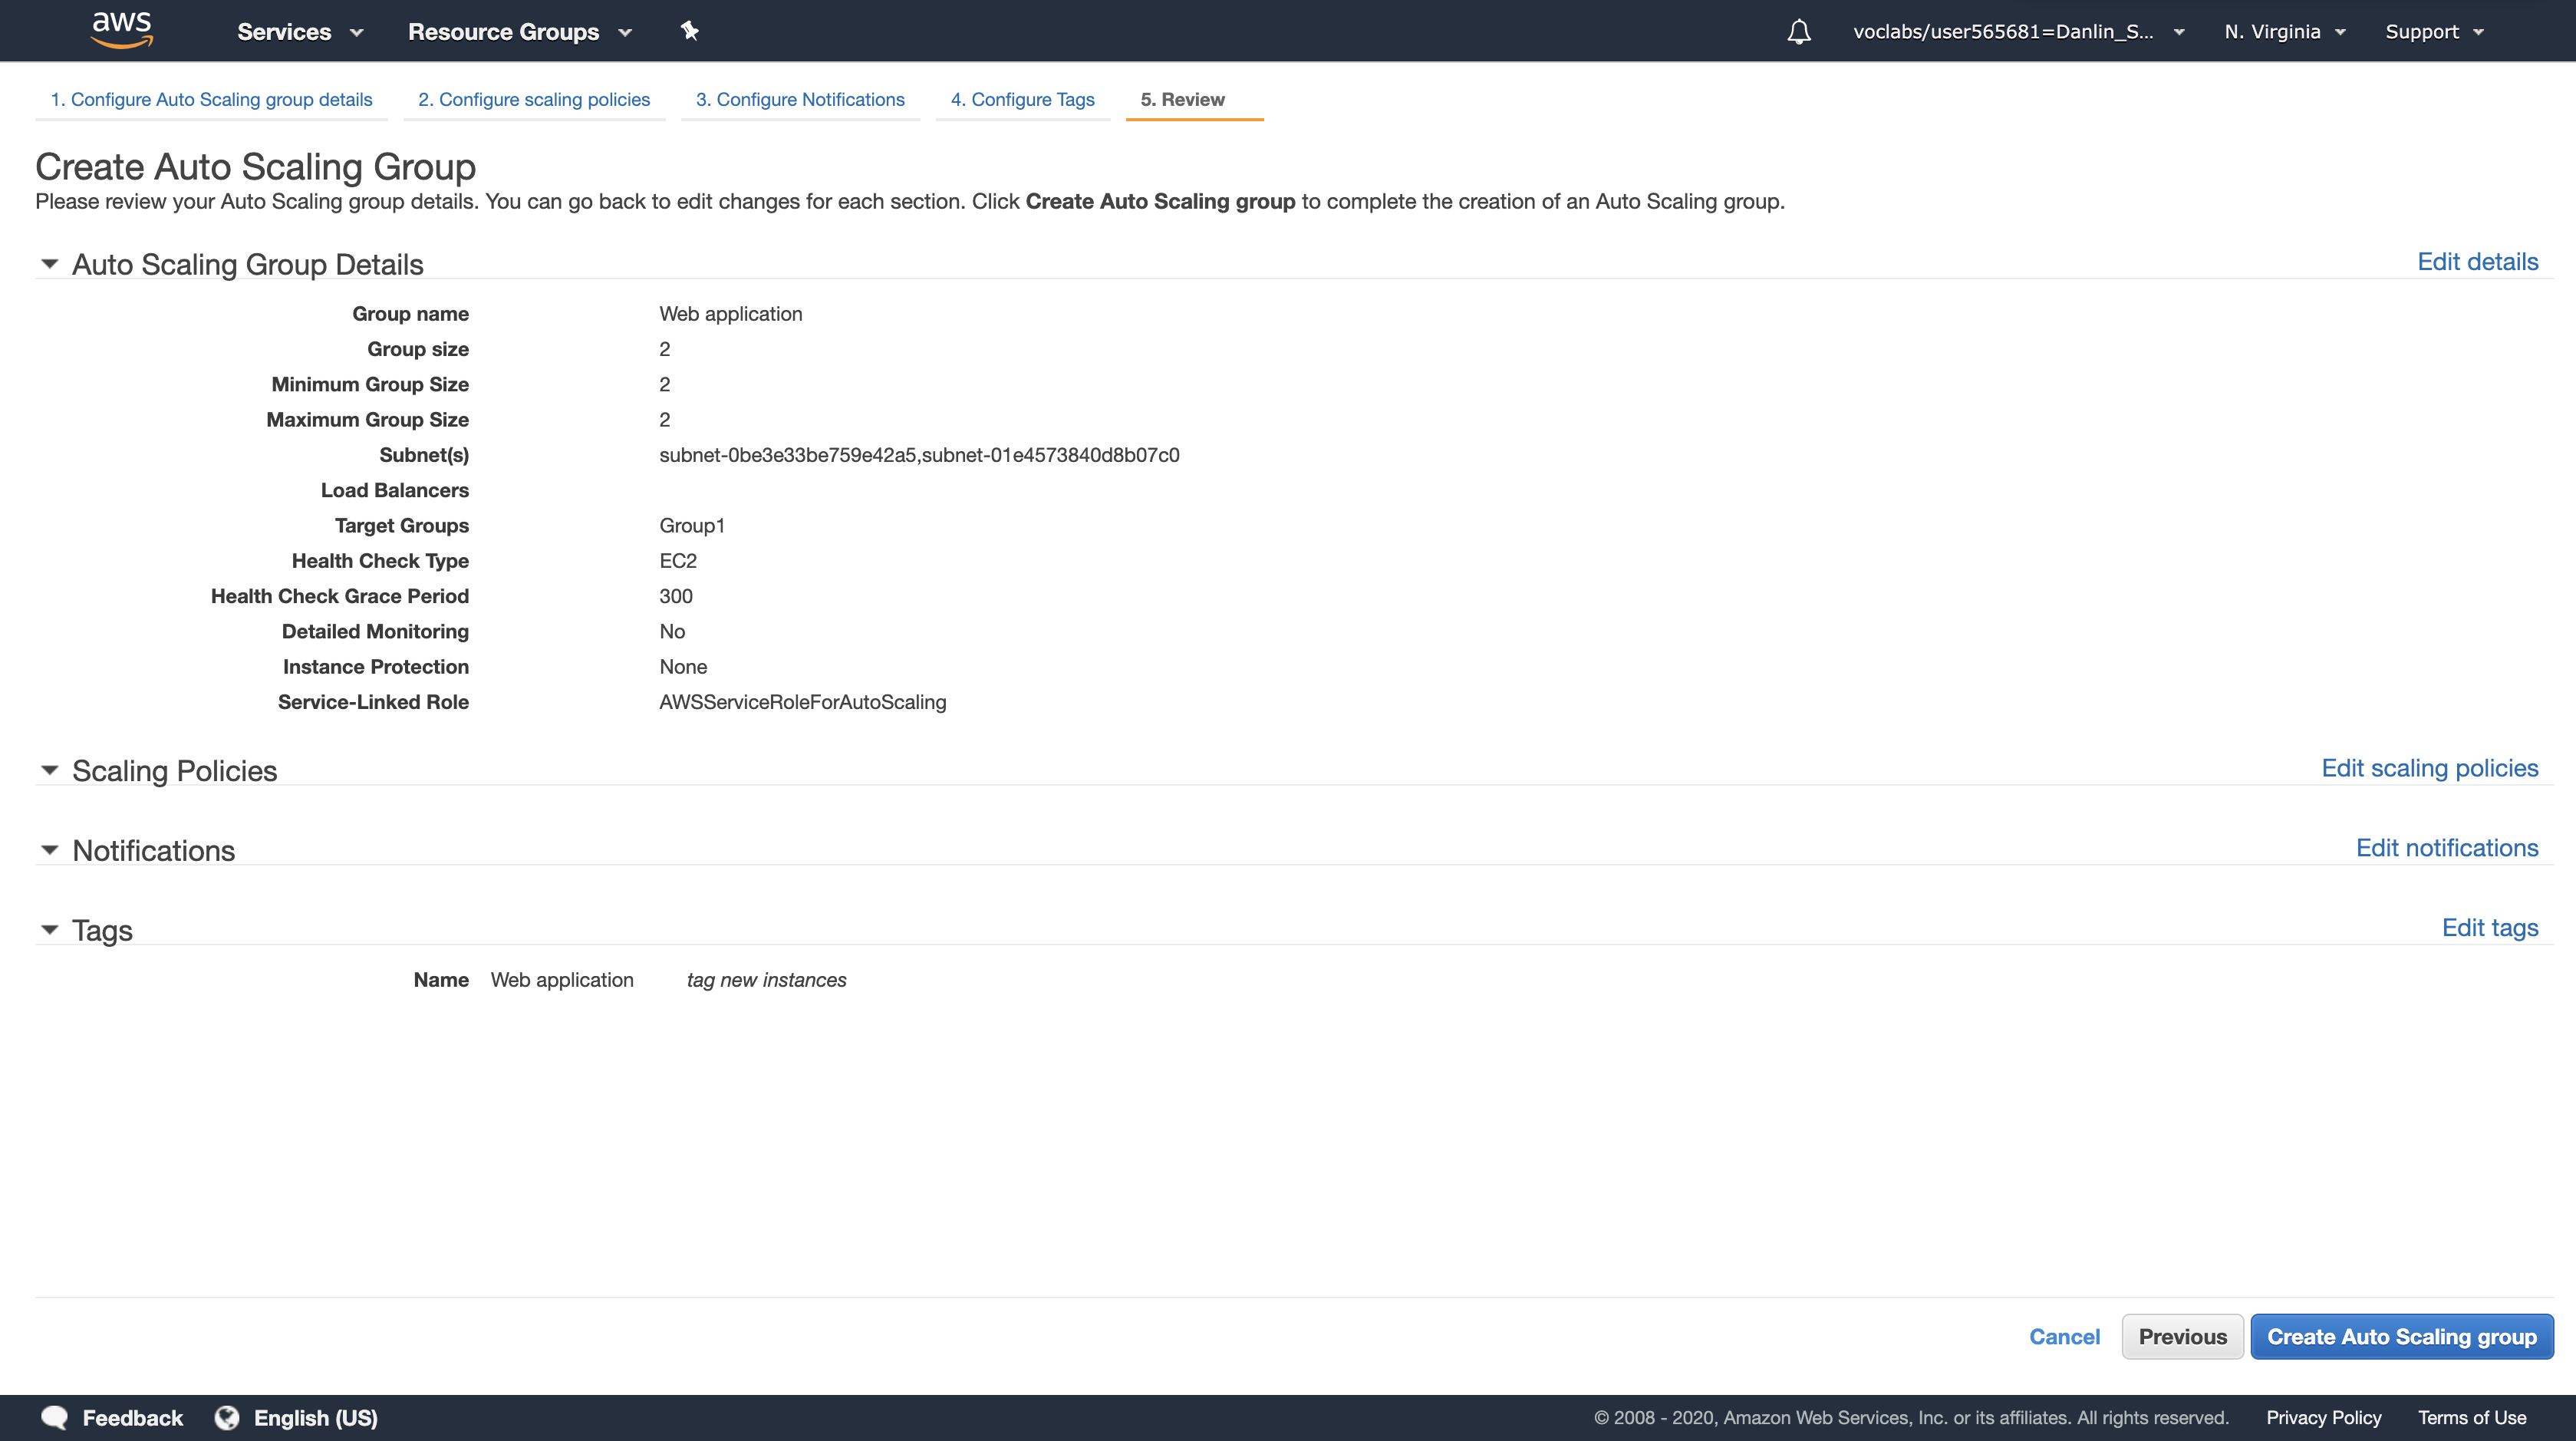
Review the settings, then click Create Auto Scaling group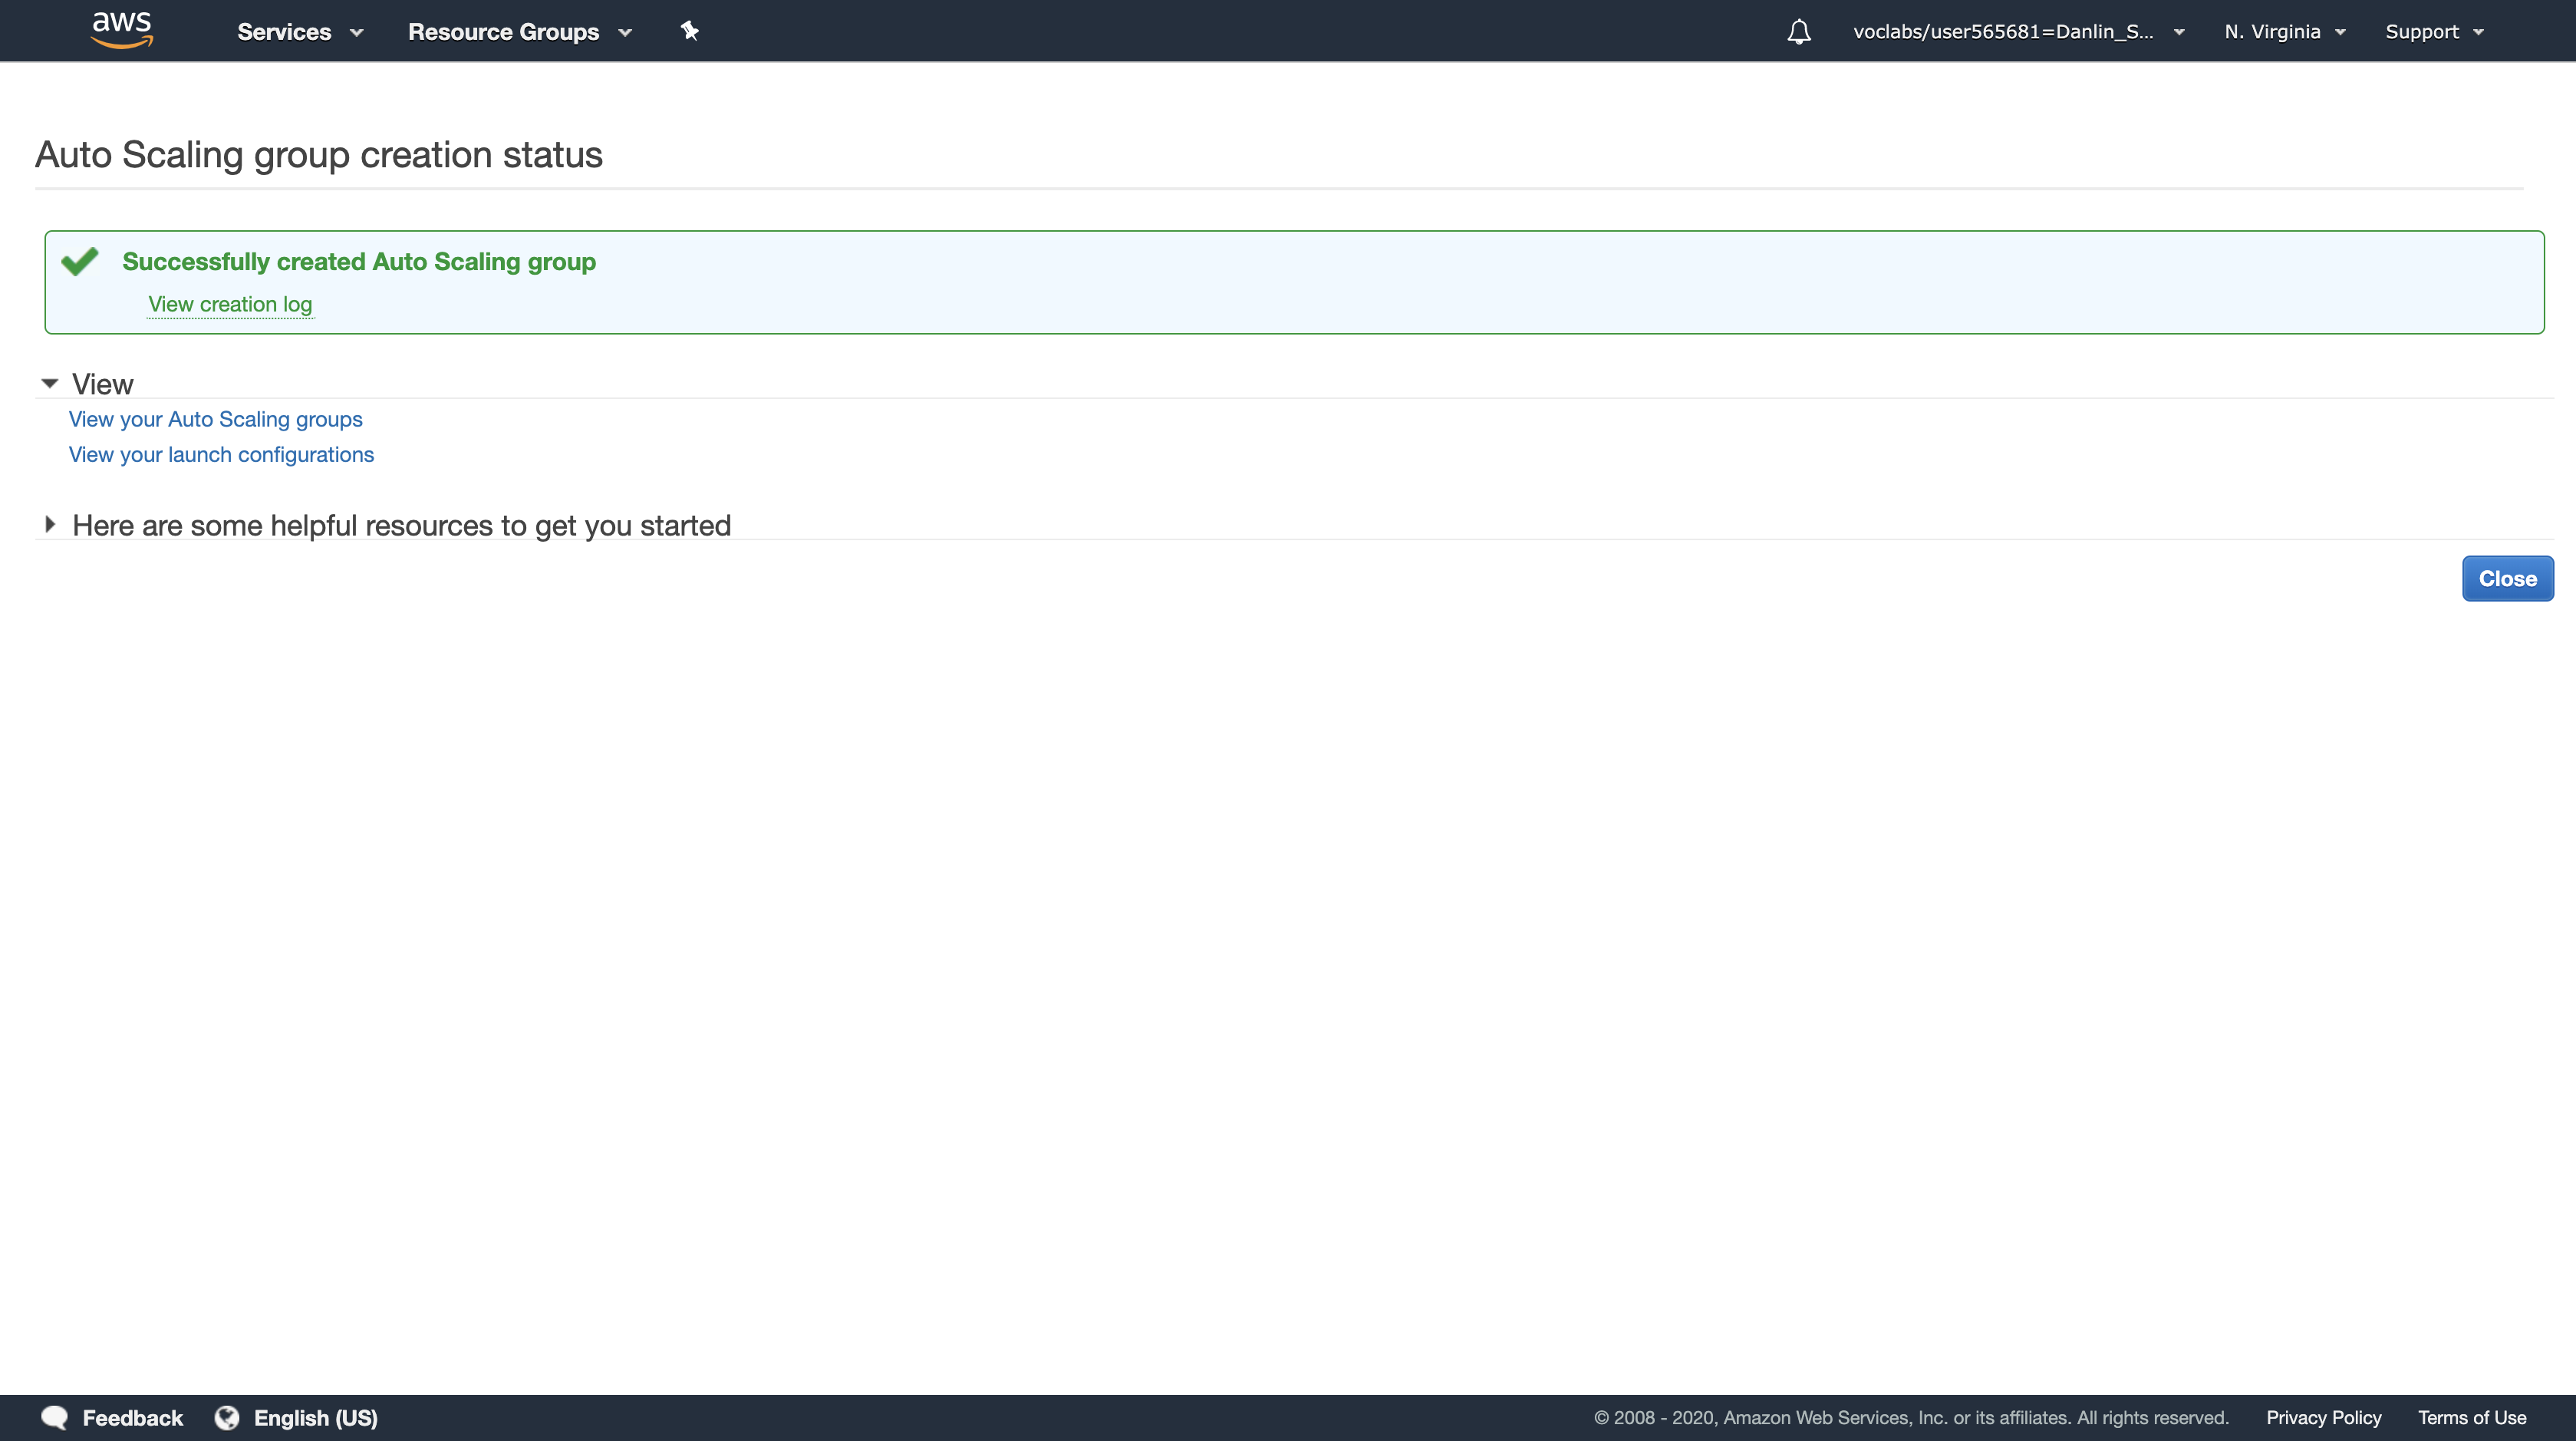
Click Close
Your Auto Scaling group will initially show zero instances. This should soon update to two instances. (Click the refresh icon in the top-right to update the display.)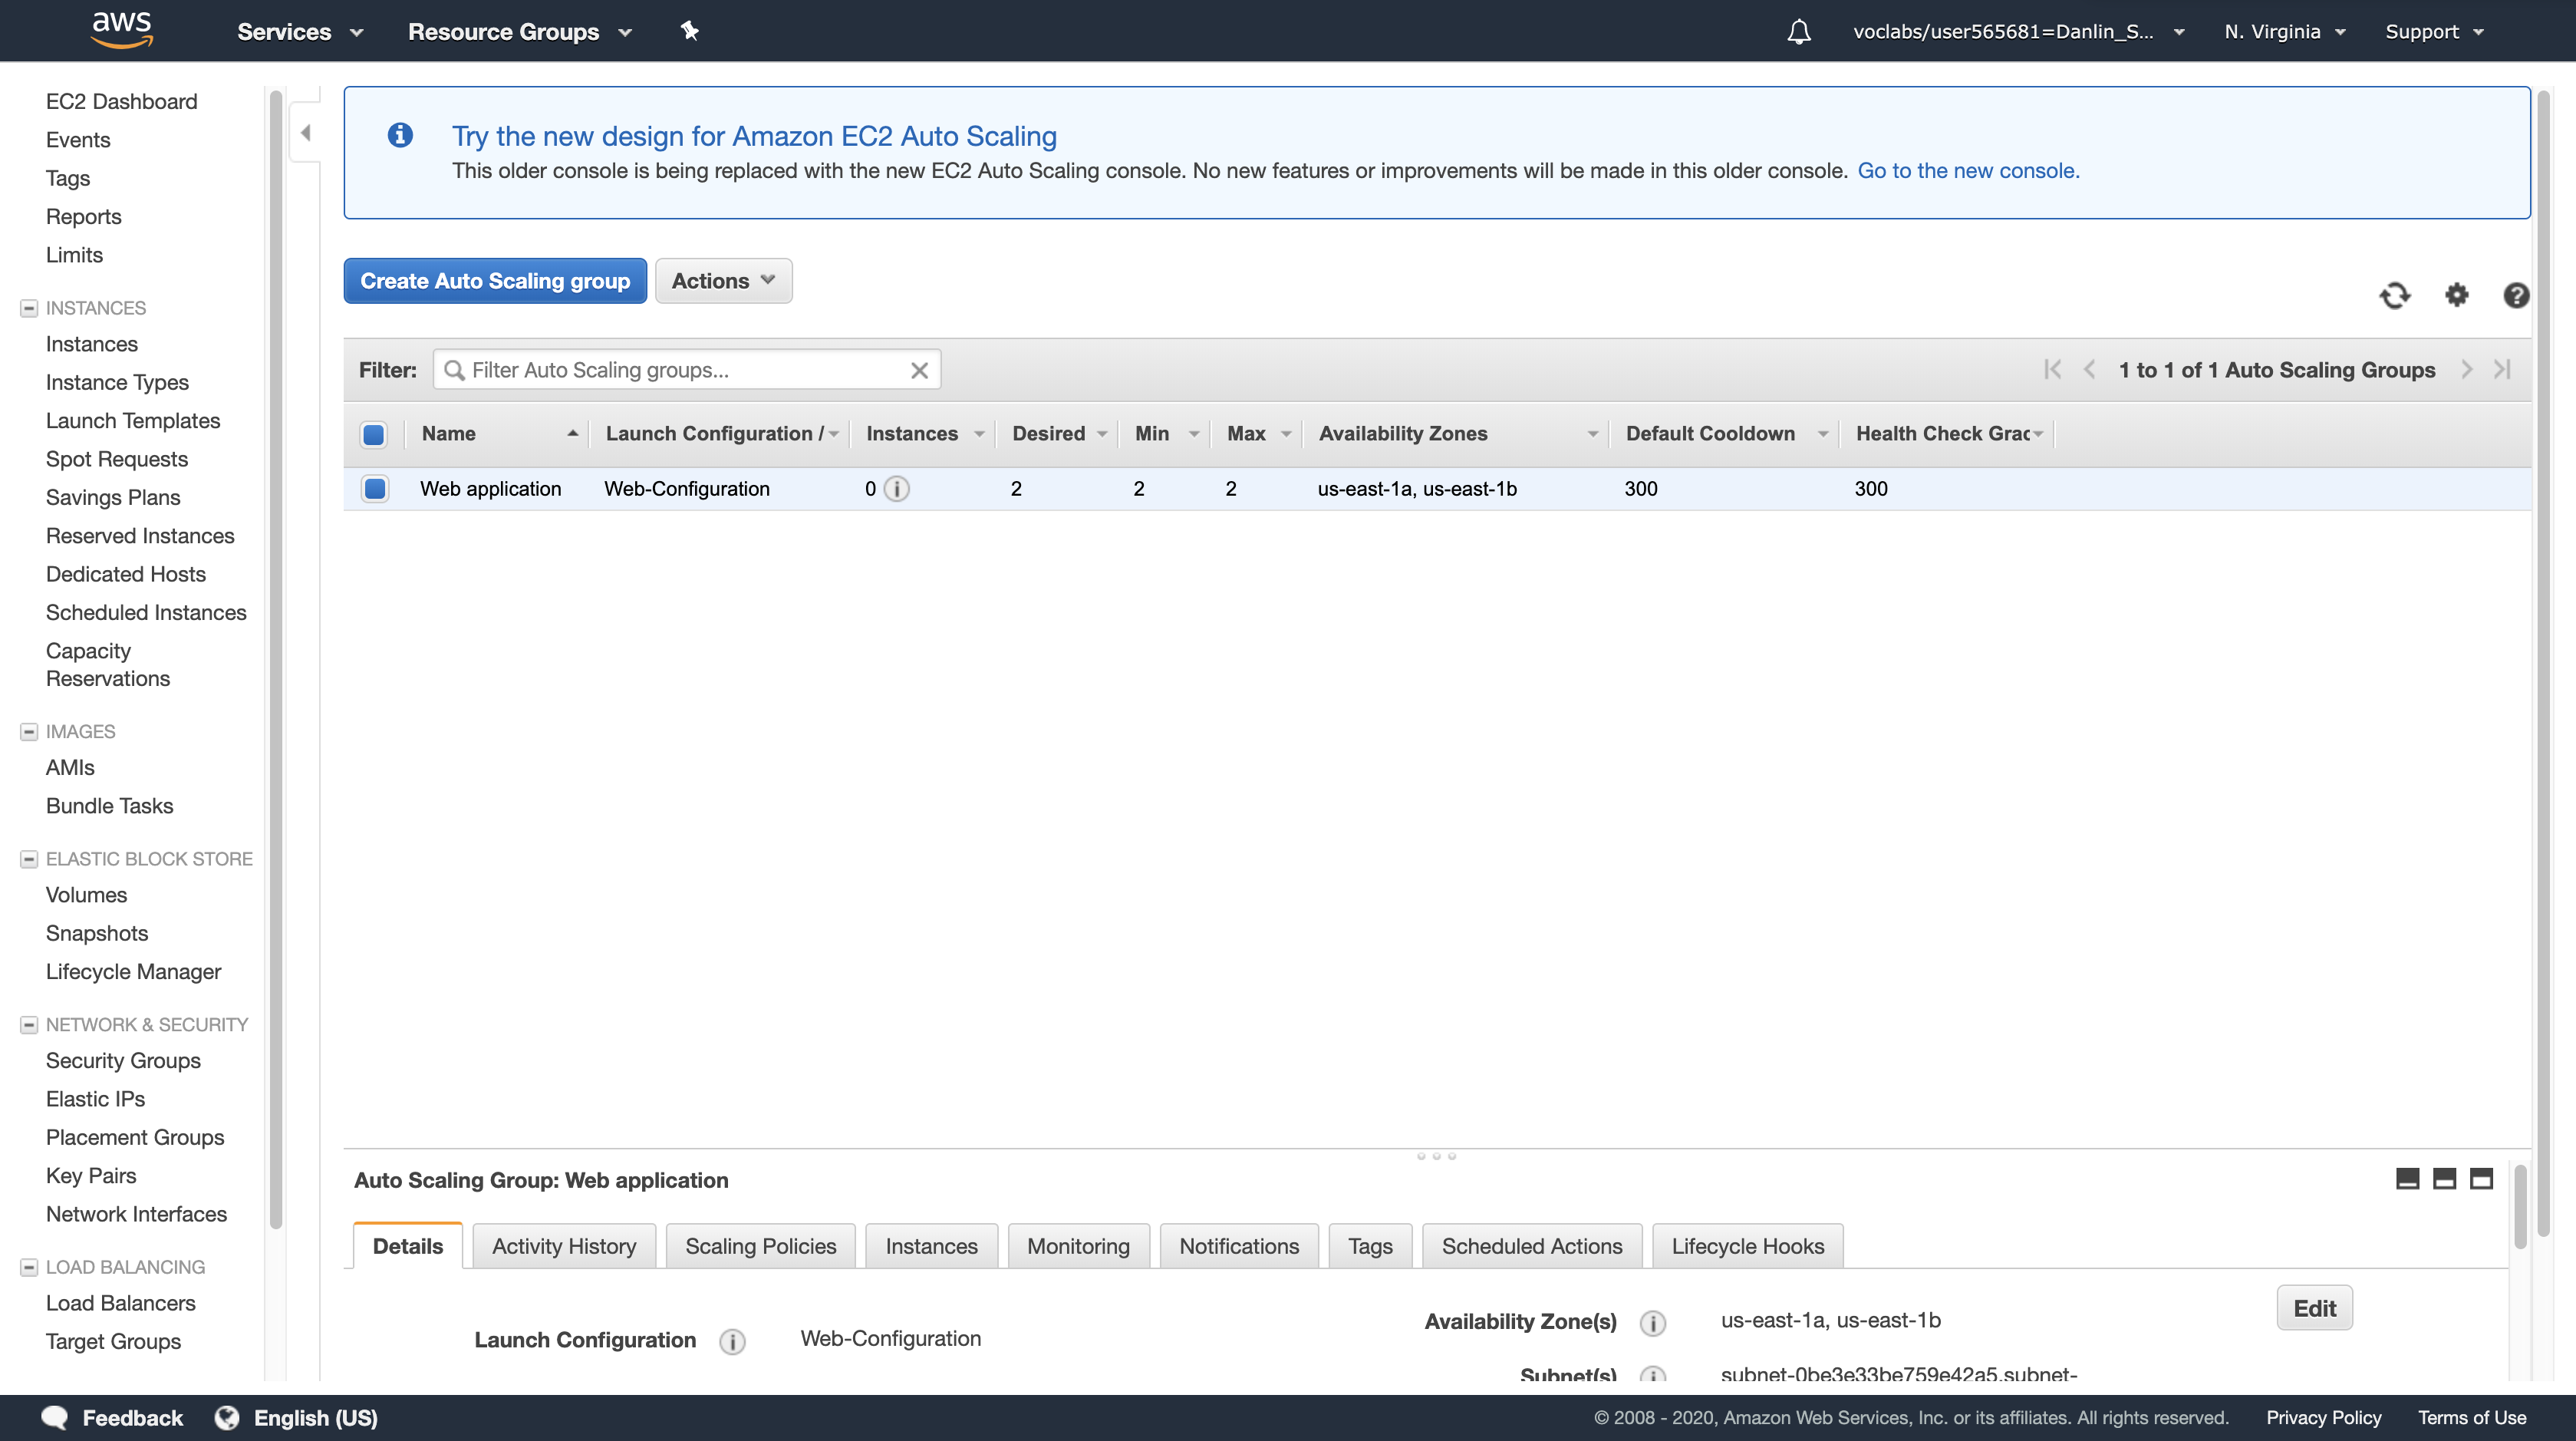
Your application will soon be running across two Availability Zones and Auto Scaling will maintain that configuration even if an instance or Availability Zone fails.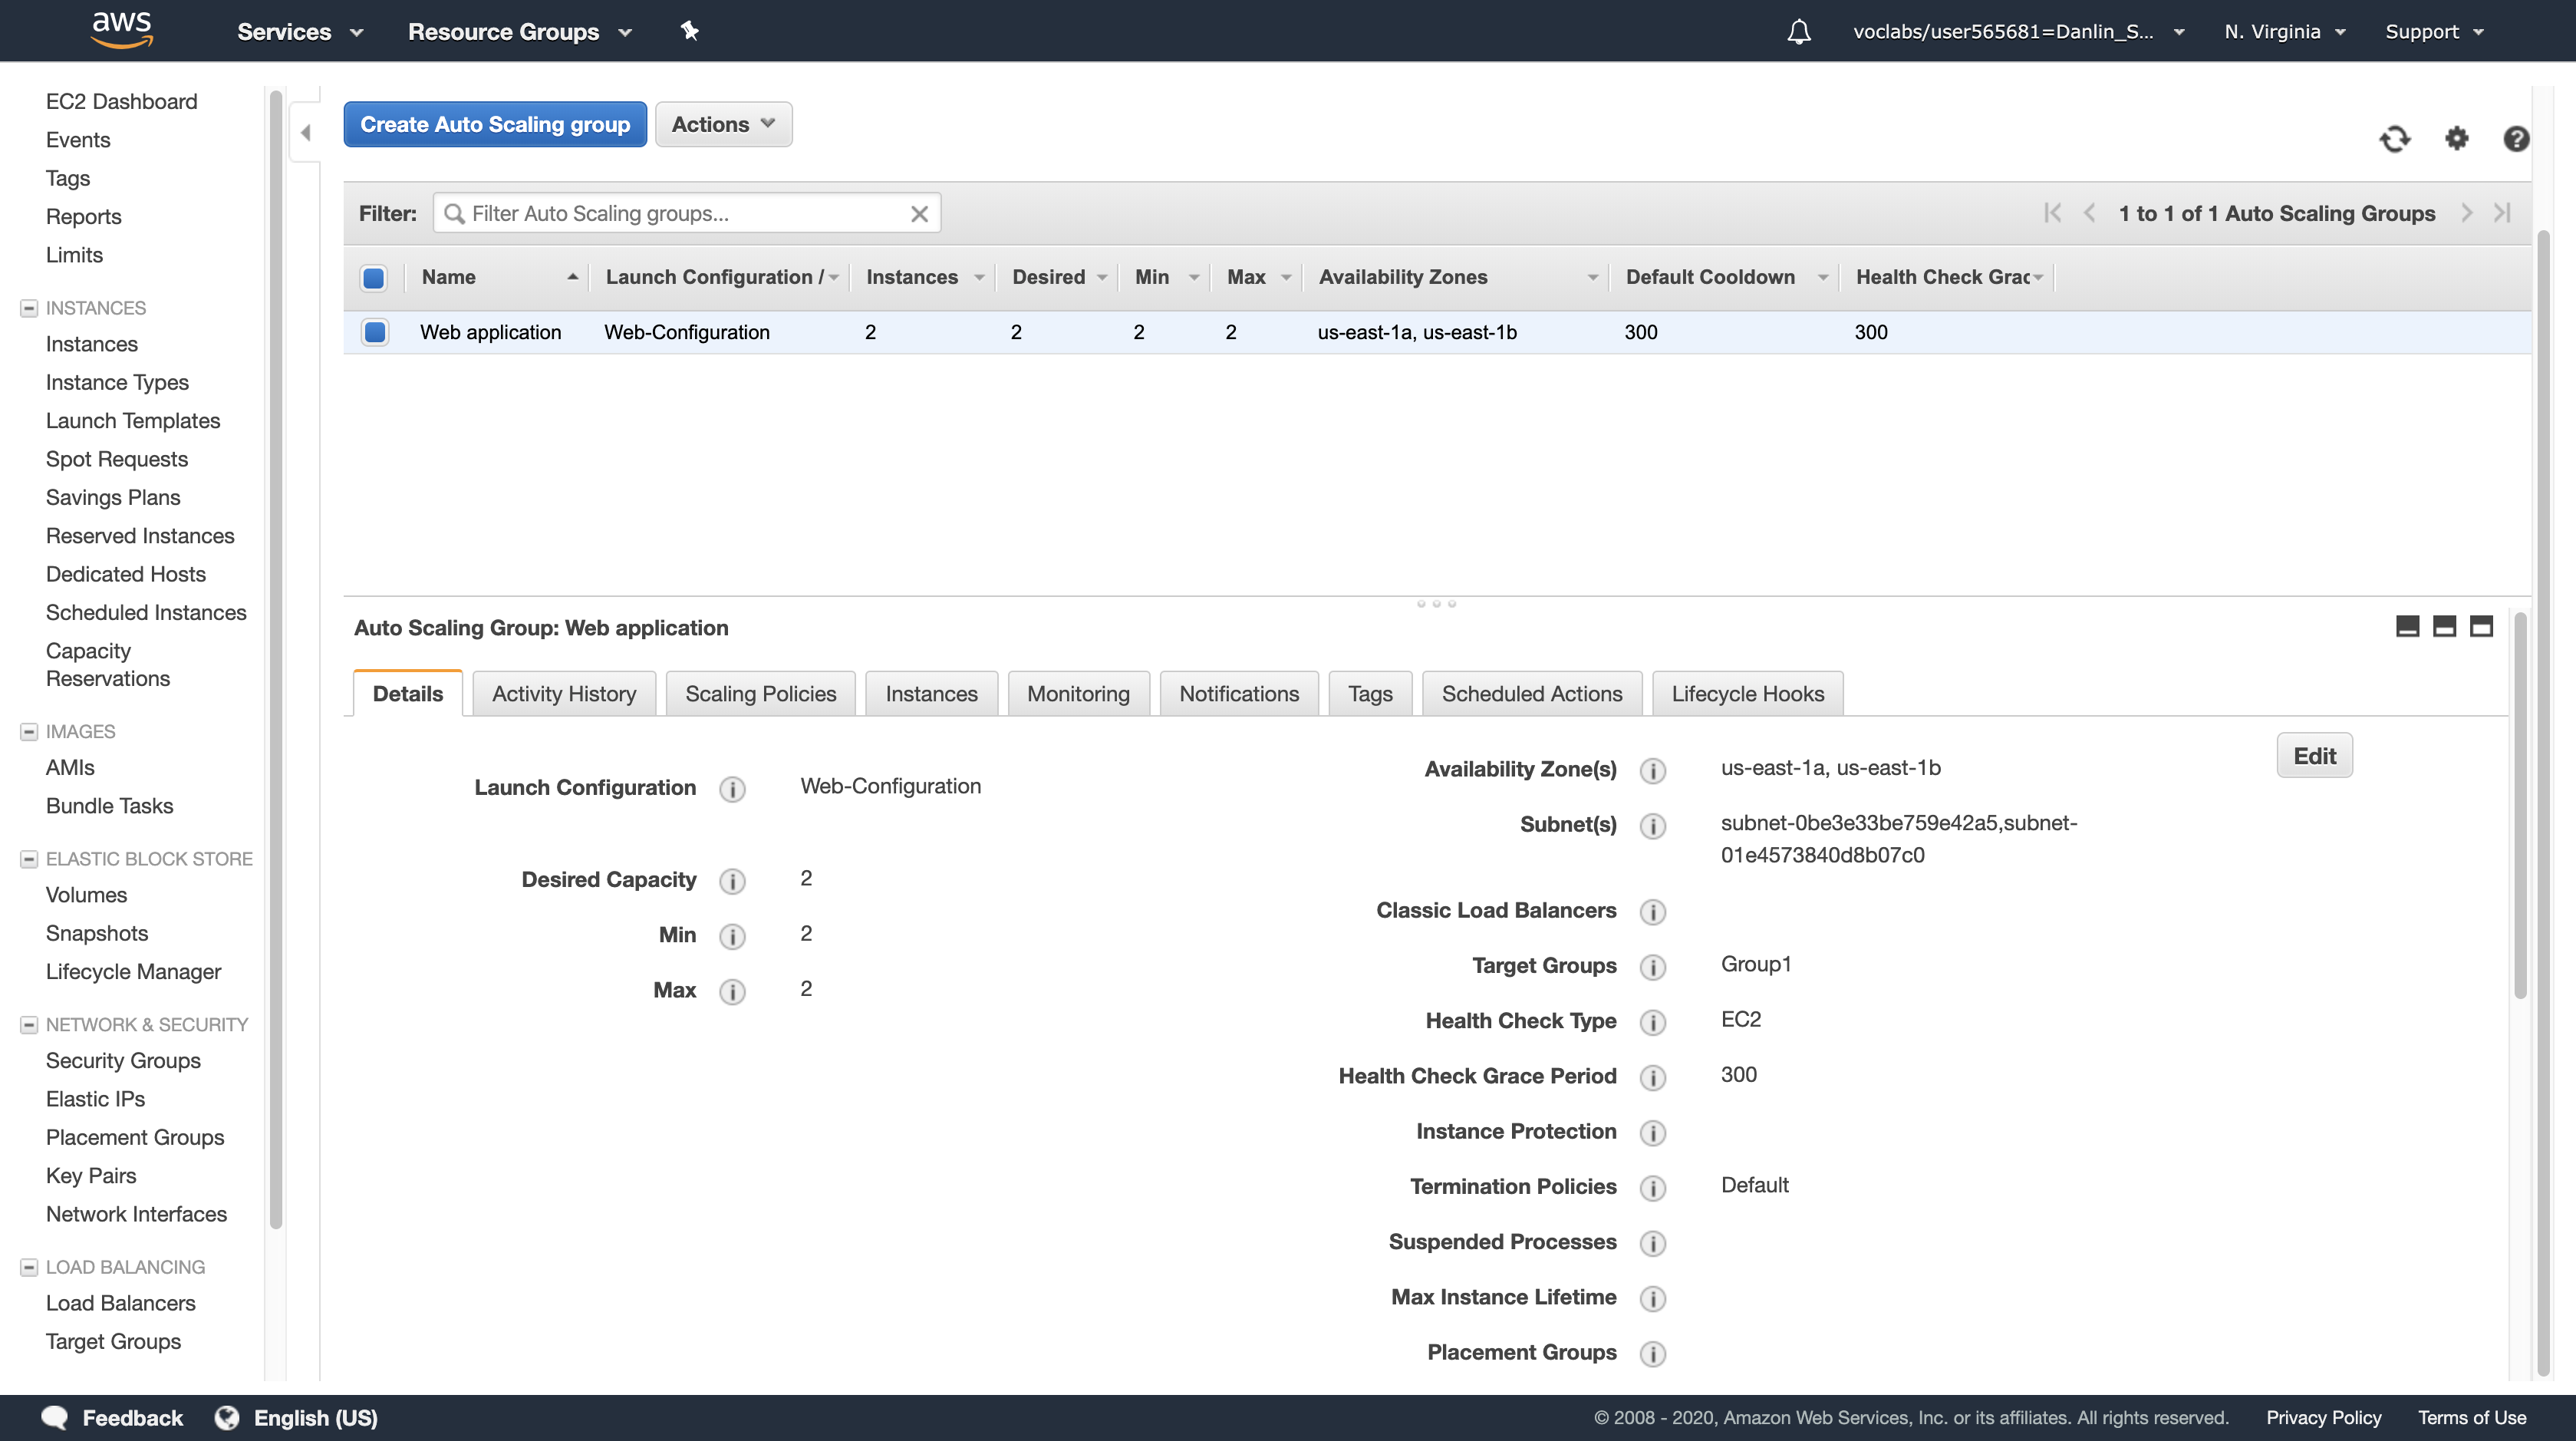
Task 8: Test the Application
In this task, you will confirm that your web application is running and you will test that it is highly available.
Navigation pane
Select Target Groups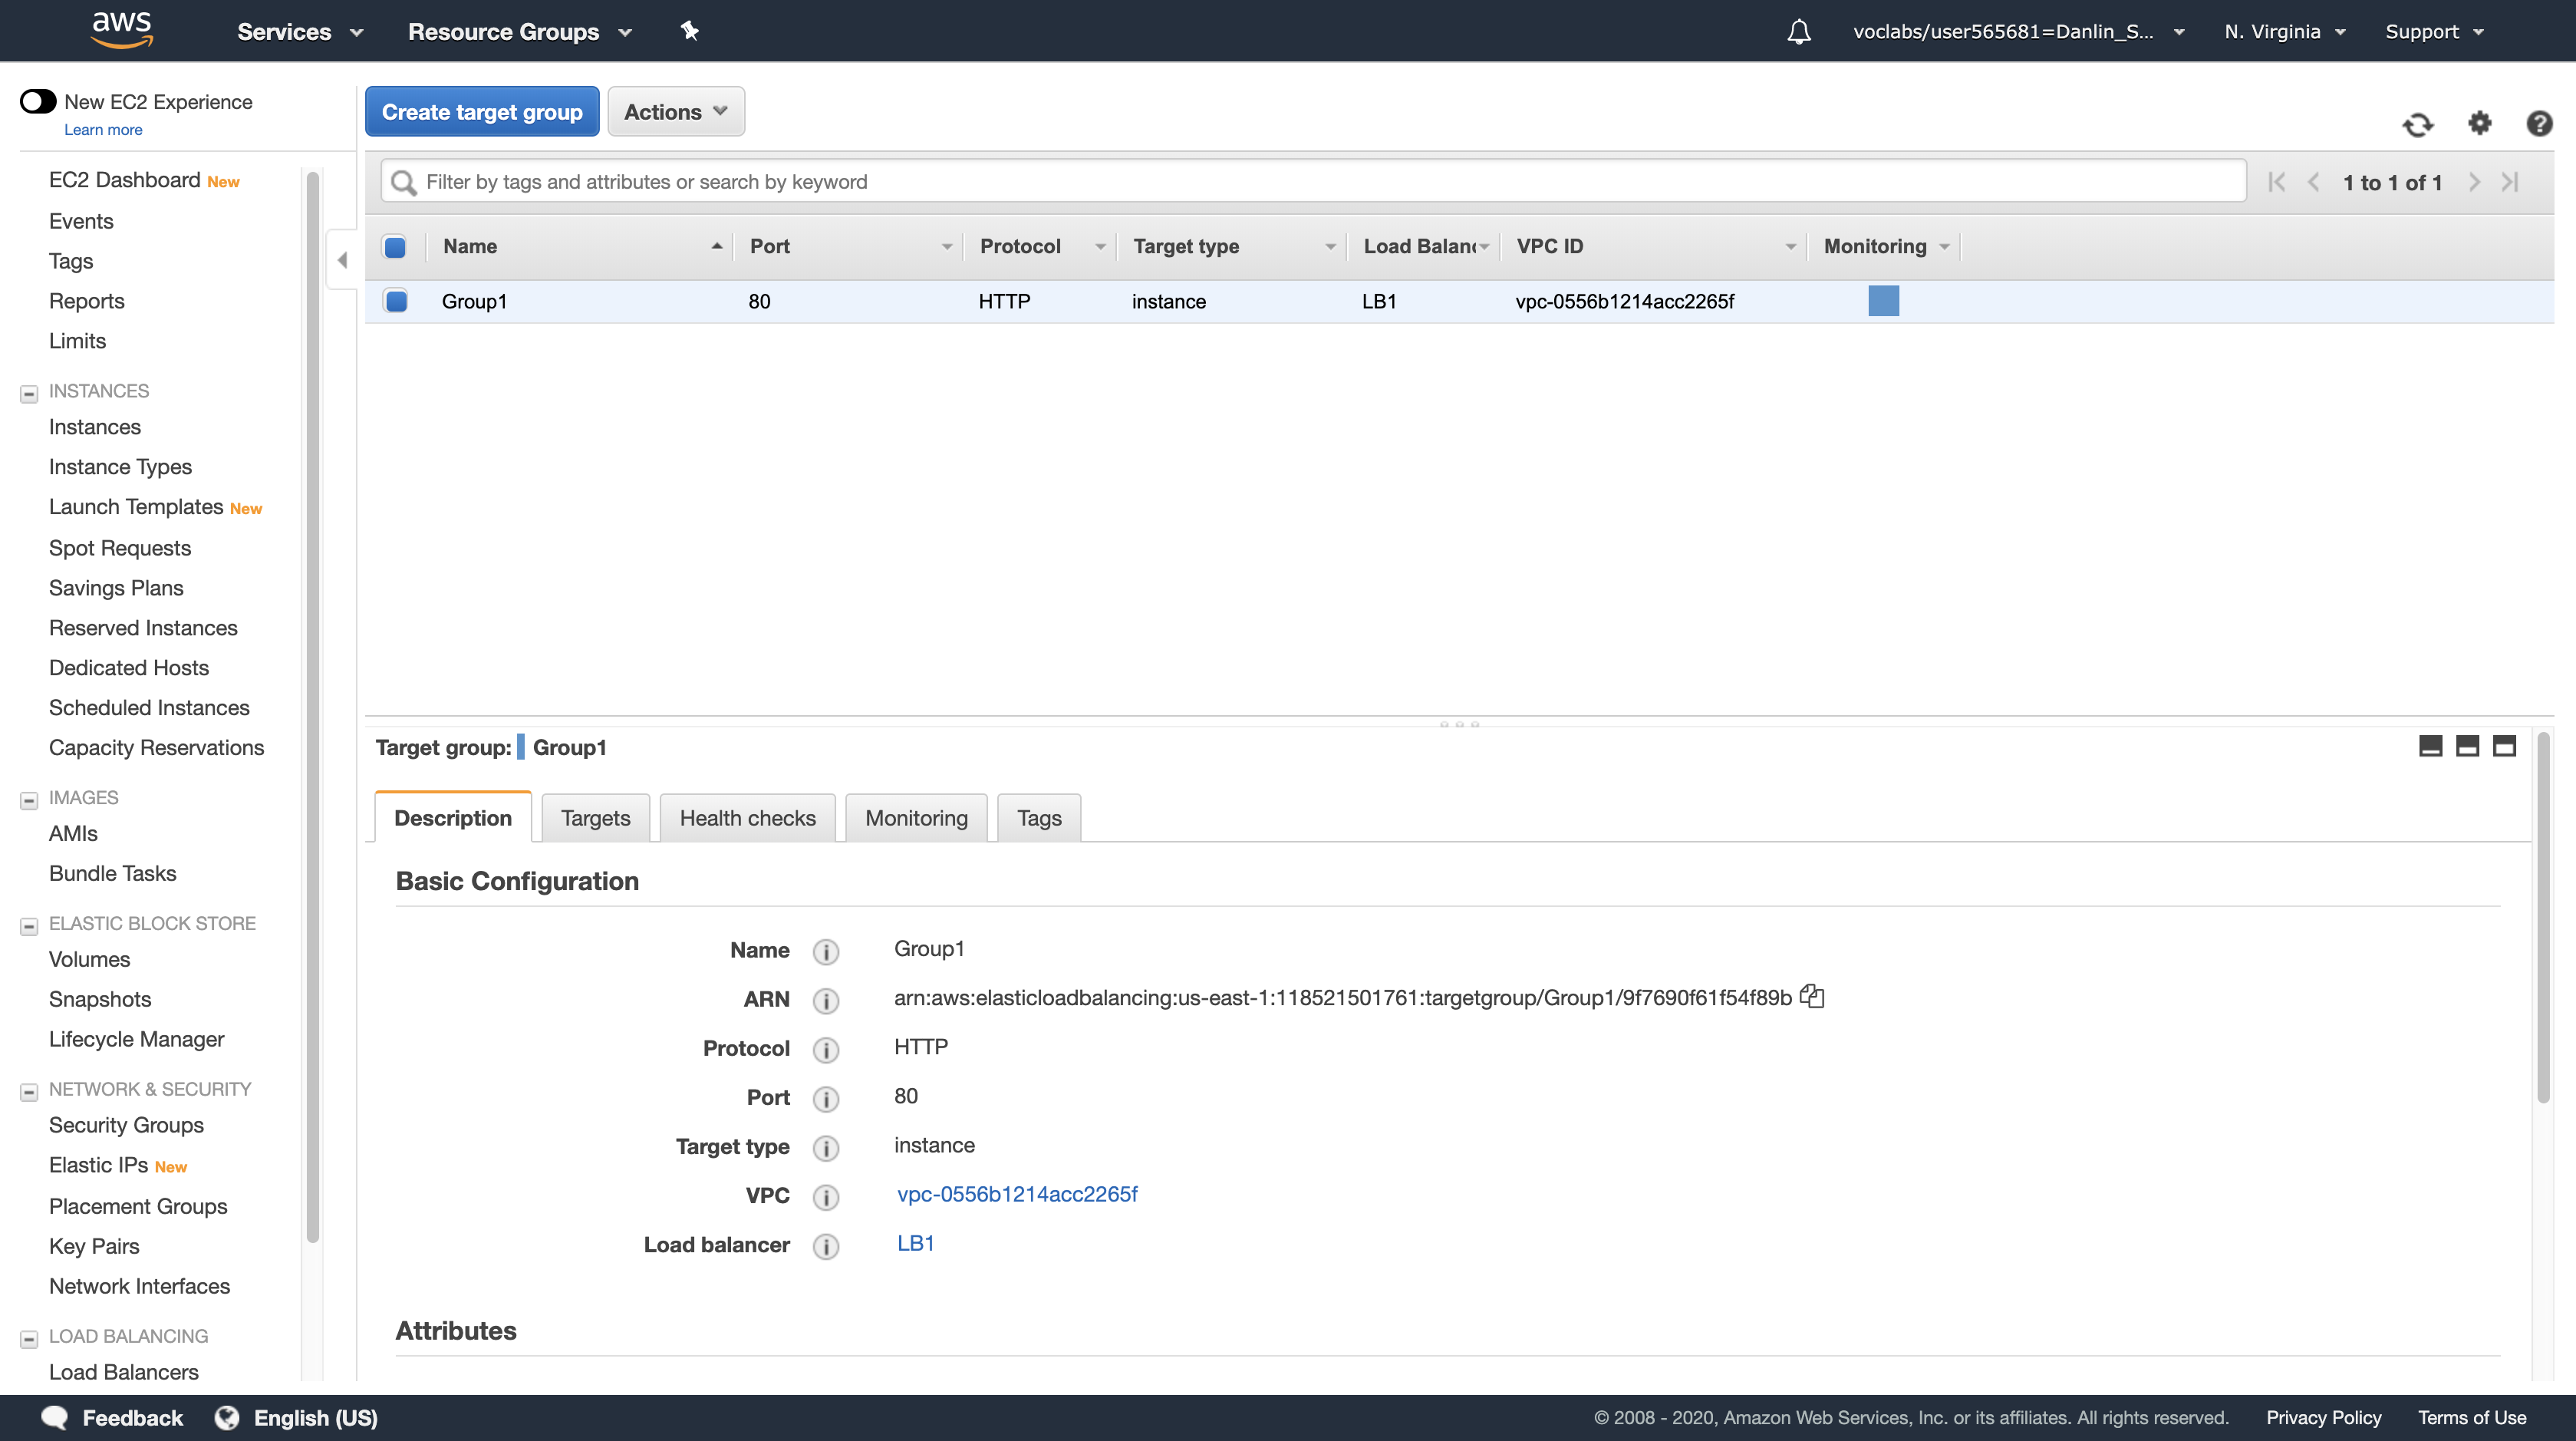
Click the Targets tab in the lower half of the window.
You should see two Registered instances. The Status column shows the results of the Load Balancer Health Check that is performed against the instances.
Occasionally click the refresh icon in the top-right until the Status for both instances appears as healthy.
- If the status does not eventually change to healthy, ask your instructor for assistance in diagnosing the configuration. Hovering over the
iicon in the Status column will provide more information about the status.7
You will be testing the application by connecting to the Load Balancer, which will then send your request to one of the Amazon EC2 instances. You will need to retrieve the DNS Name of the Load Balancer.
Navigation pane
Load Balancers
In the Description tab in the lower half of the window, copy the DNS Name to your clipboard, but do not copy “(A Record)”. It should be similar to: LB1-xxxx.elb.amazonaws.com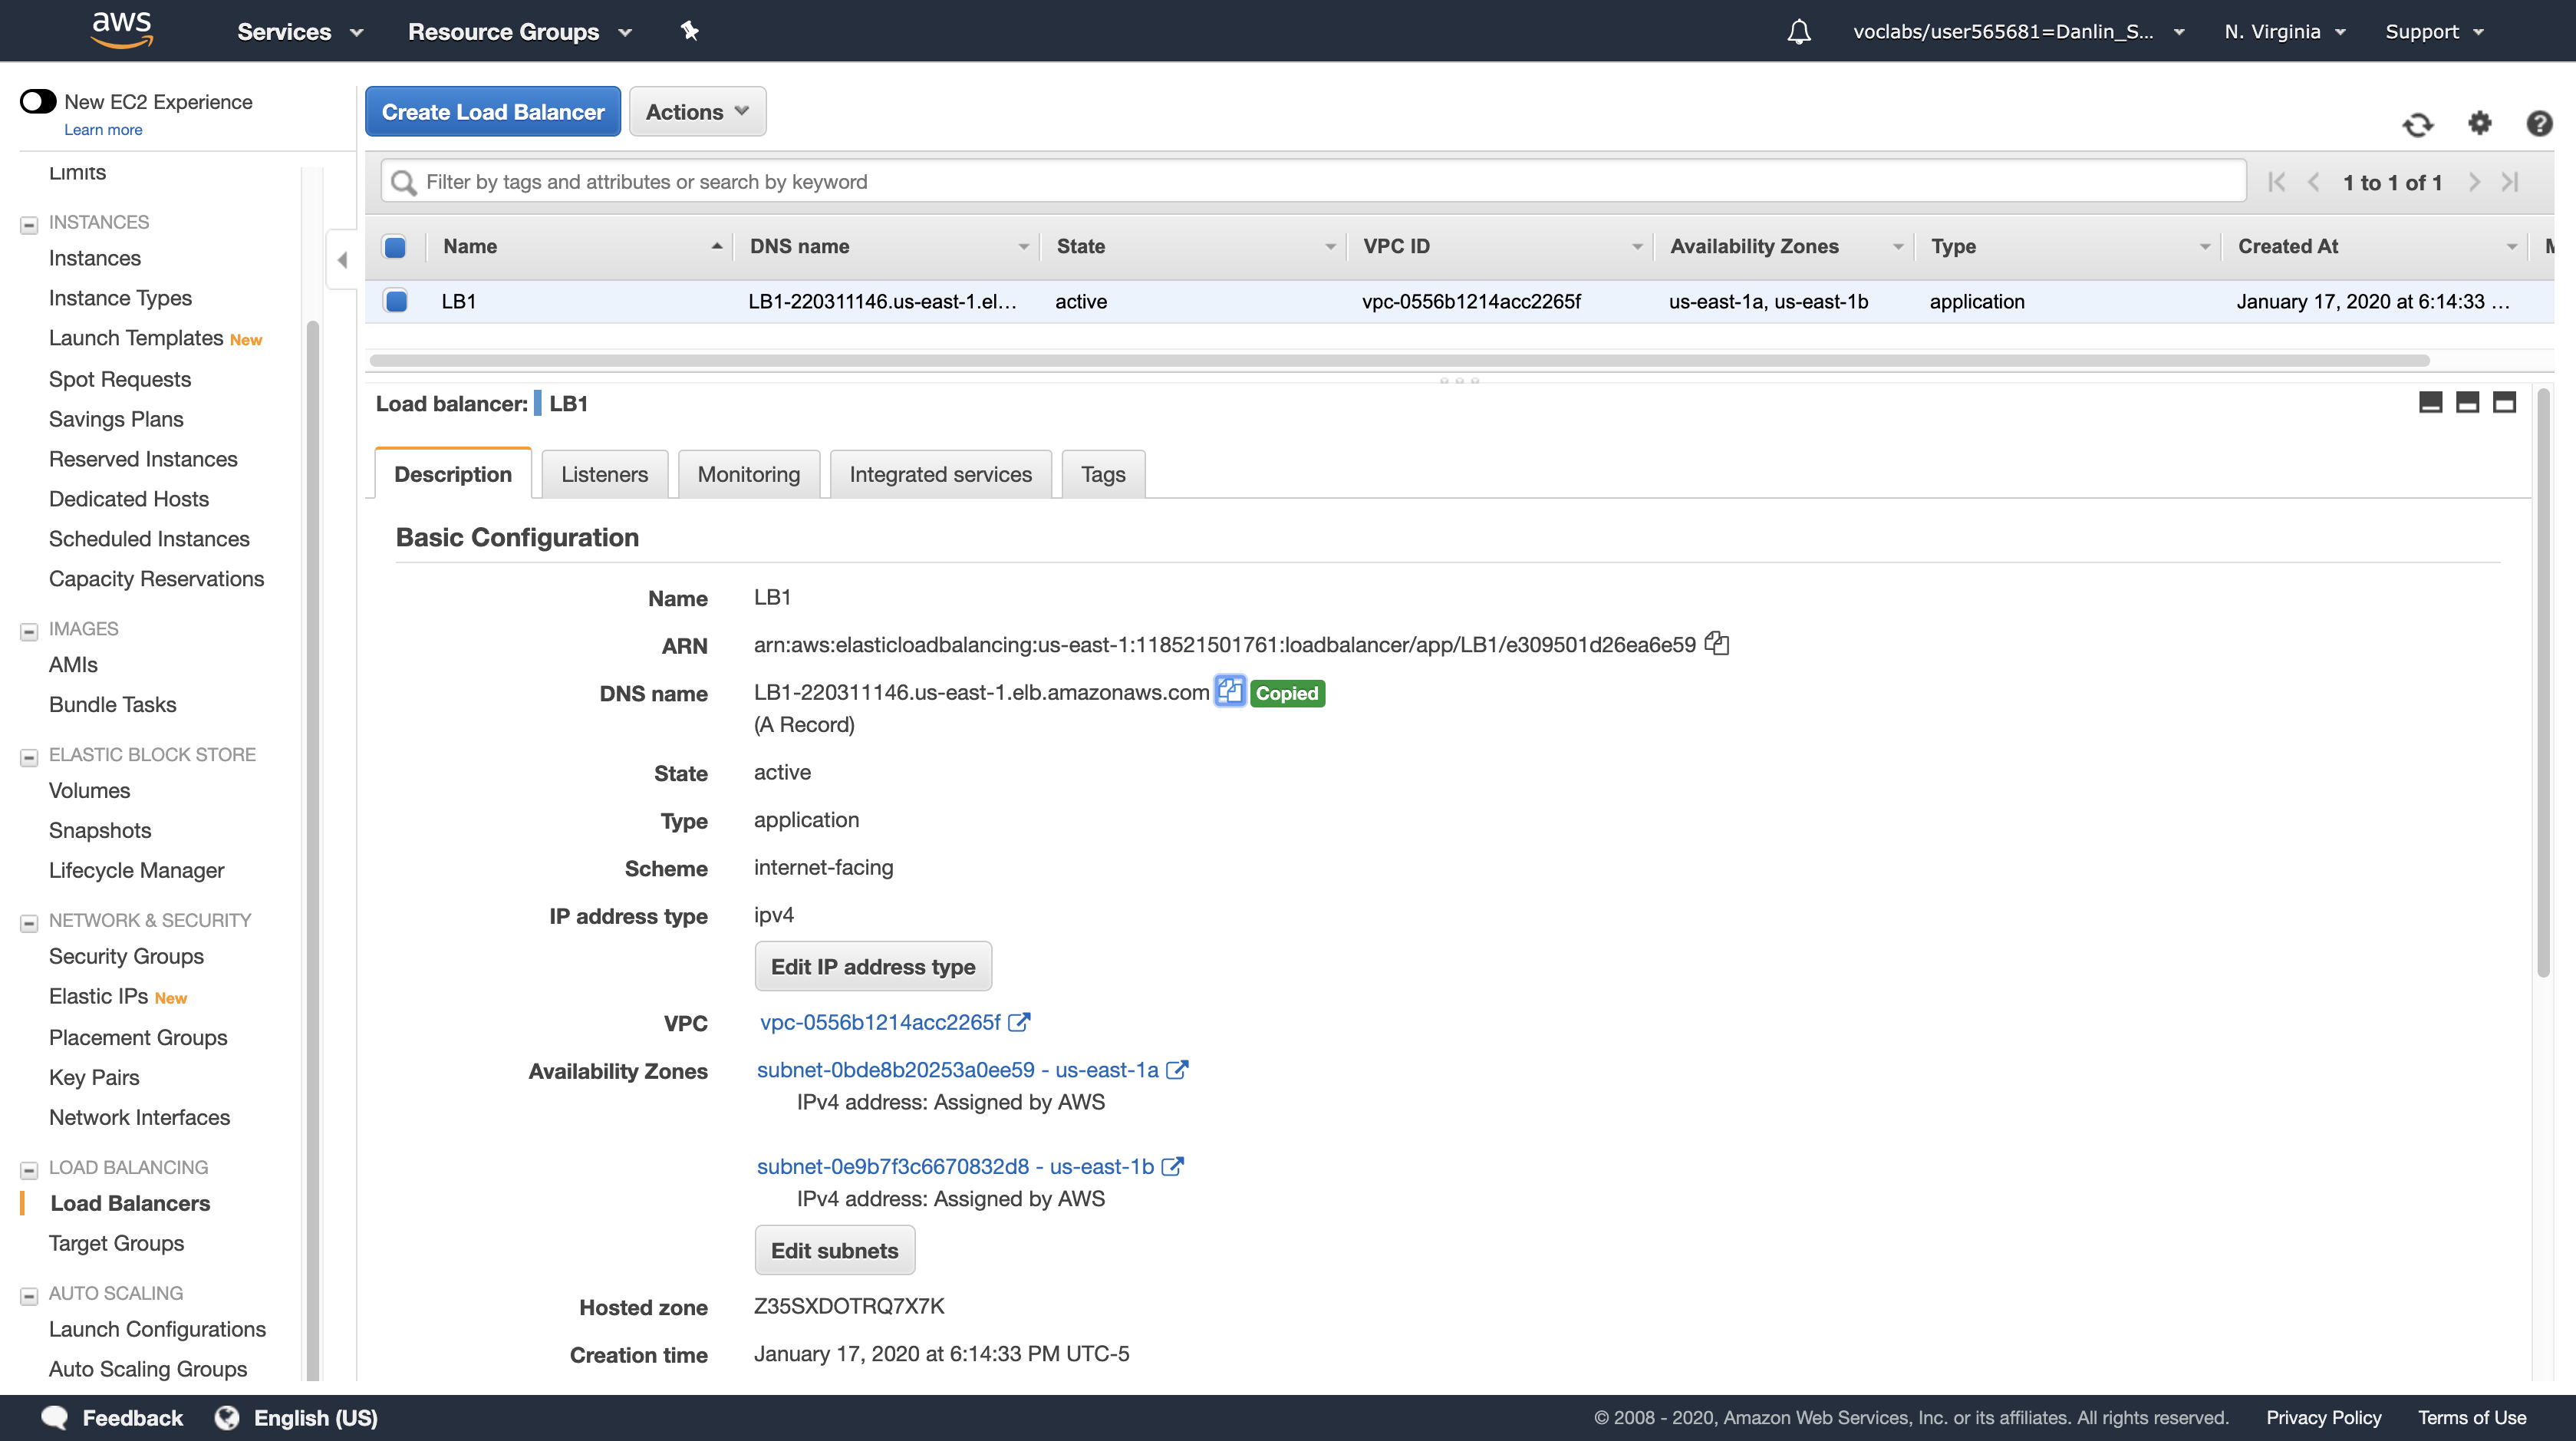
Open a new web browser tab, paste the DNS Name from your clipboard and hit Enter.
The Load Balancer forwarded your request to one of the Amazon EC2 instances. The Instance ID and Availability Zone are shown at the bottom of the web application.
Note: keep refresh the browser will cause the Public IP Address, Instance ID, and Availability Zone change between the two EC2 instances since we did a successful load balancer. The load balancer will random distribute your request to one of your EC2 instance based on some rule.
The flow of information when displaying this web application is: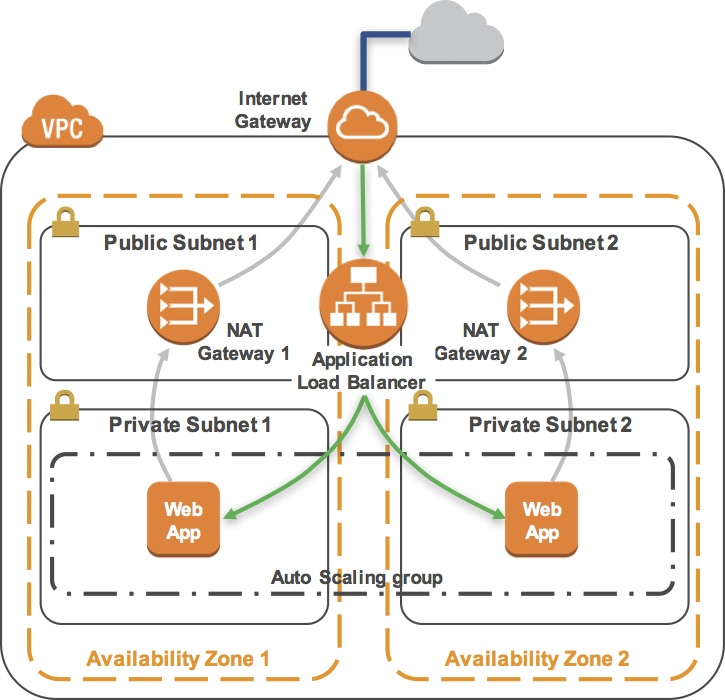
Principle of Load Balancer
- You sent the request to the Load Balancer, which resides in the public subnets that are connected to the Internet.
- The Load Balancer chose one of the Amazon EC2 instances that reside in the private subnets and forwarded the request to it.
- The Amazon EC2 instance requested geographic information from freegeoip.app. This request went out to the Internet through the NAT Gateway in the same Availability Zone as the instance.
- The Amazon EC2 instance then returned the web page to the Load Balancer, which returned it to your web browser.
Task 9: Test High Availability
Your application has been configured to be Highly Available. This can be proven by stopping one of the Amazon EC2 instances.
EC2 Management Console
(do not close the web application tab - you will return to it soon).
Navigation pane
Click Instances
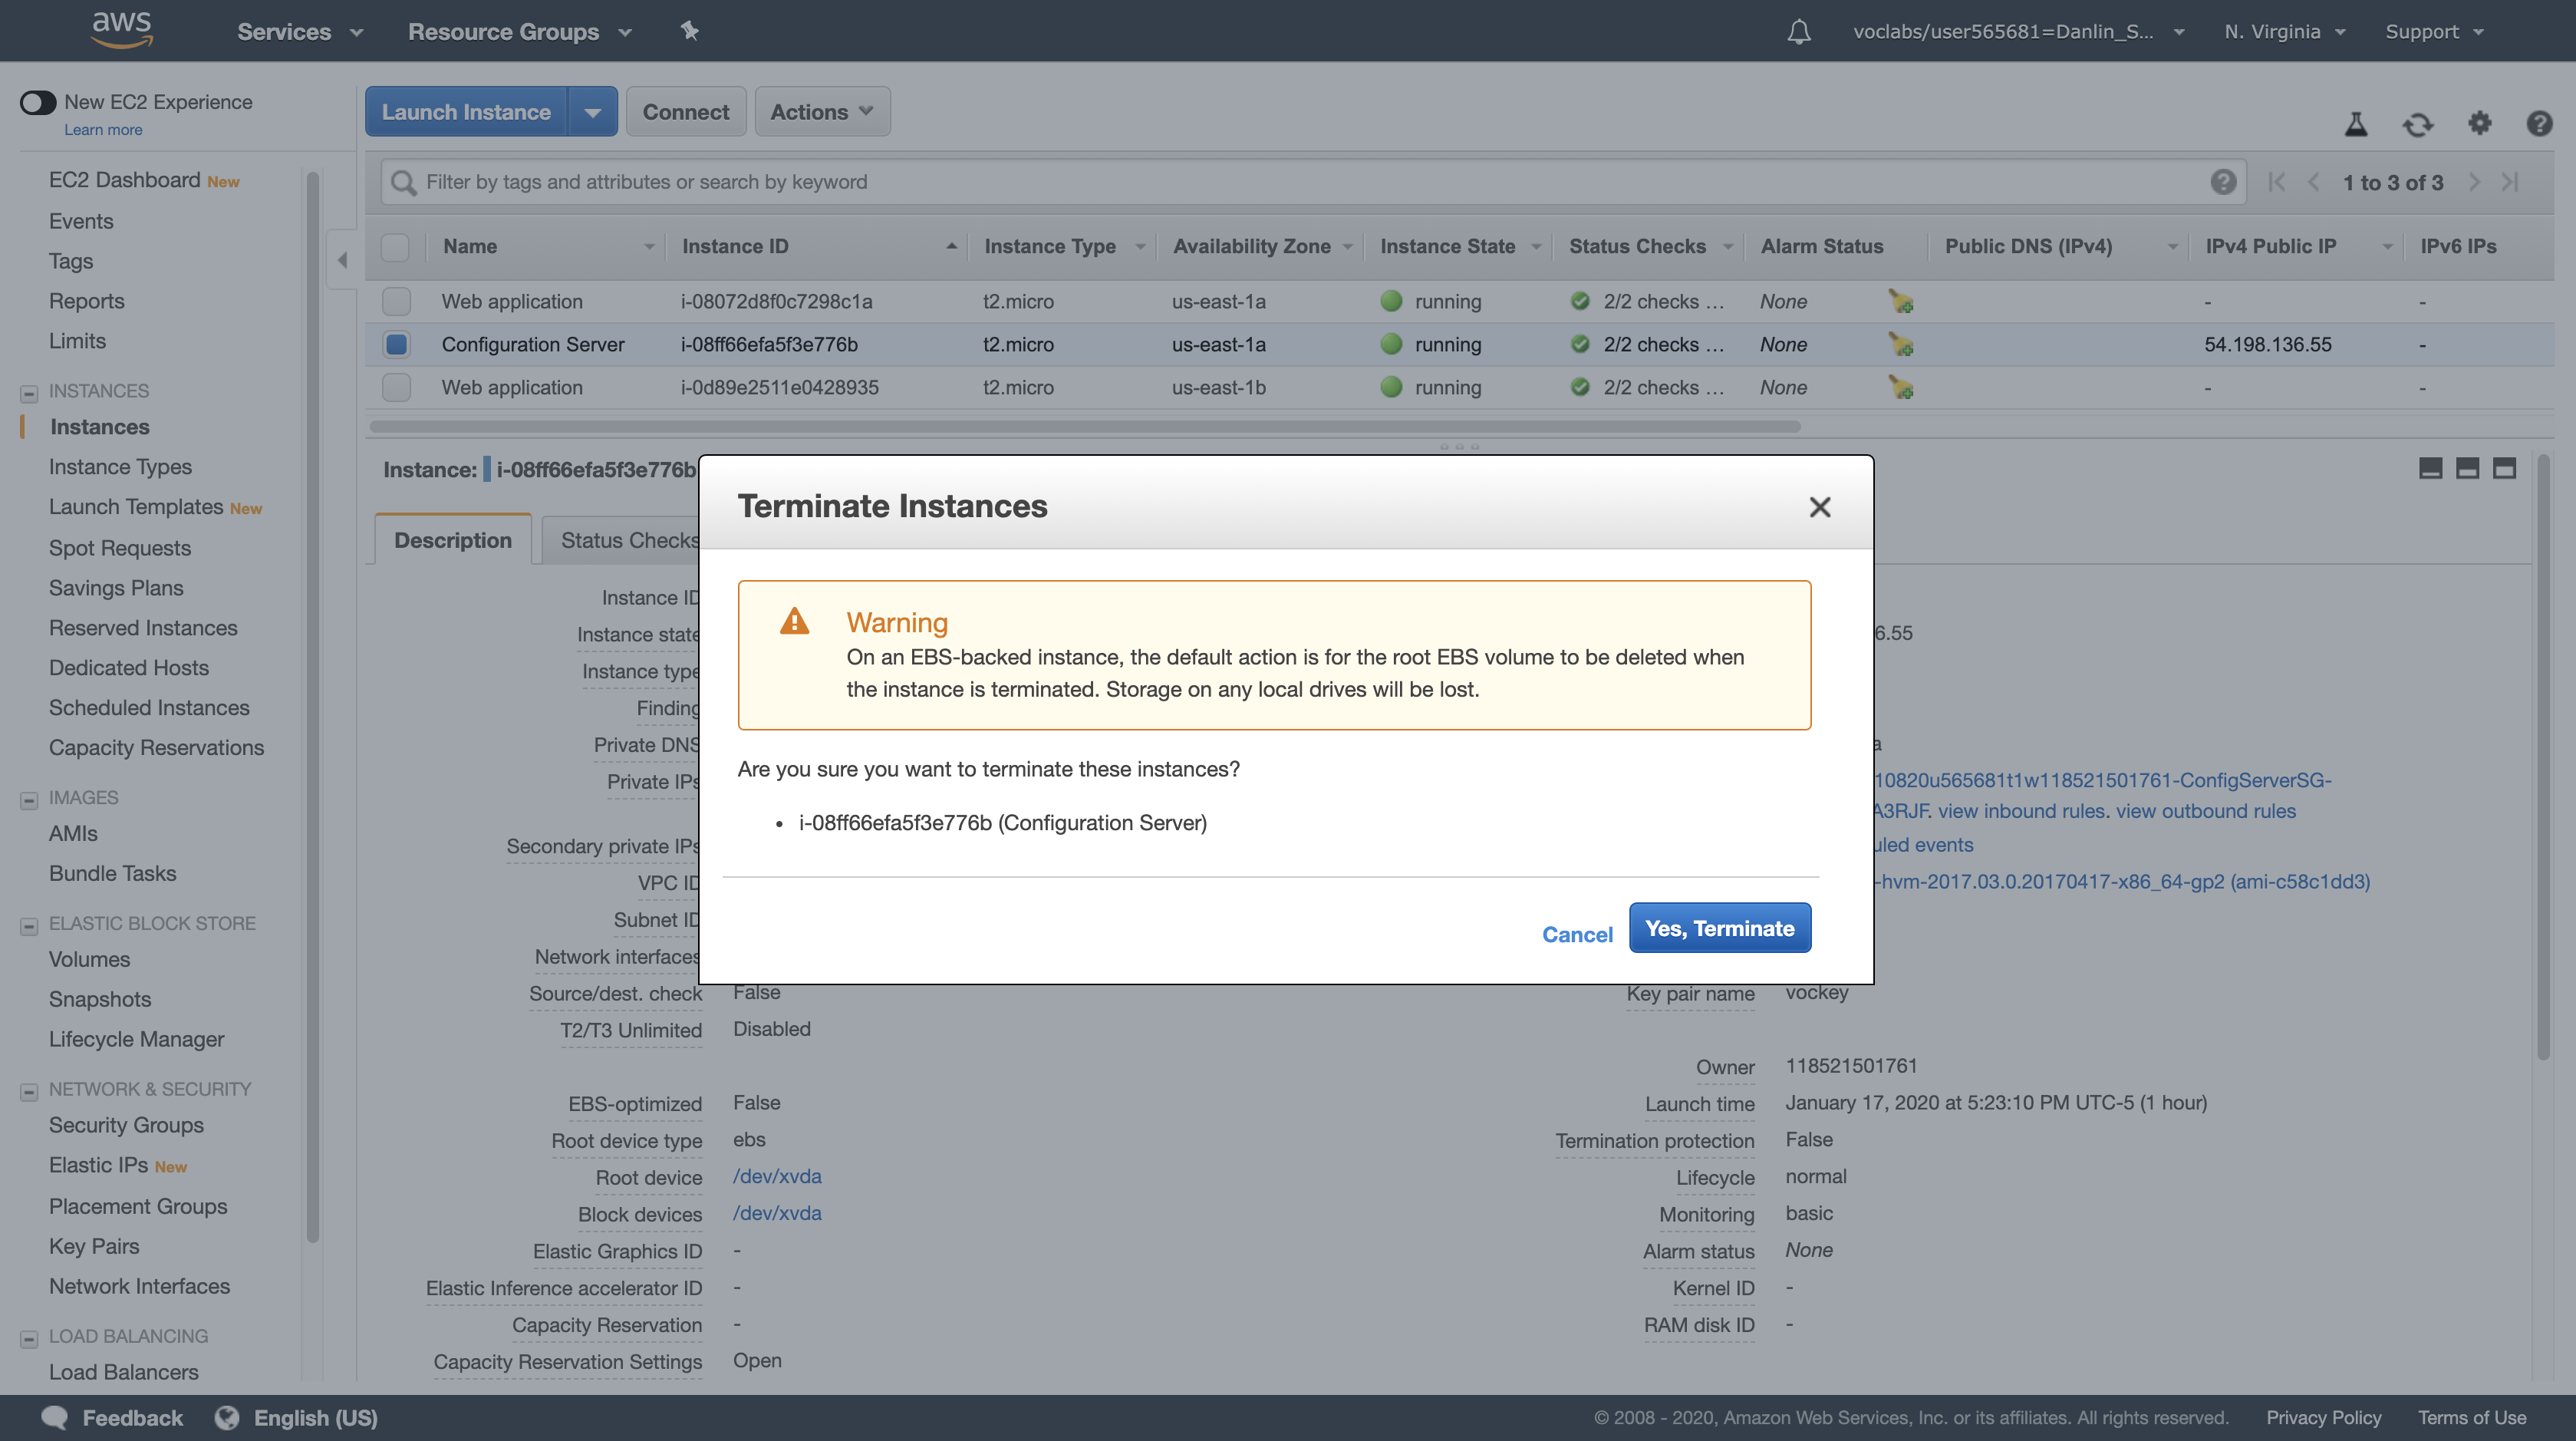
First, you do not require the Configuration Server any longer, so it can be terminated.
- Select the Configuration Server.
- Click Actions > Instance State > Terminate, then click Yes, Terminate.
Next, stop one of the Web application instances to simulate a failure.
- Select one of the instances named Web application (it does not matter which one you select).
- Click Actions > Instance State > Stop, then click Yes, Stop.
Notice we stopped the EC2 instance which in Availability zone us-east-1b.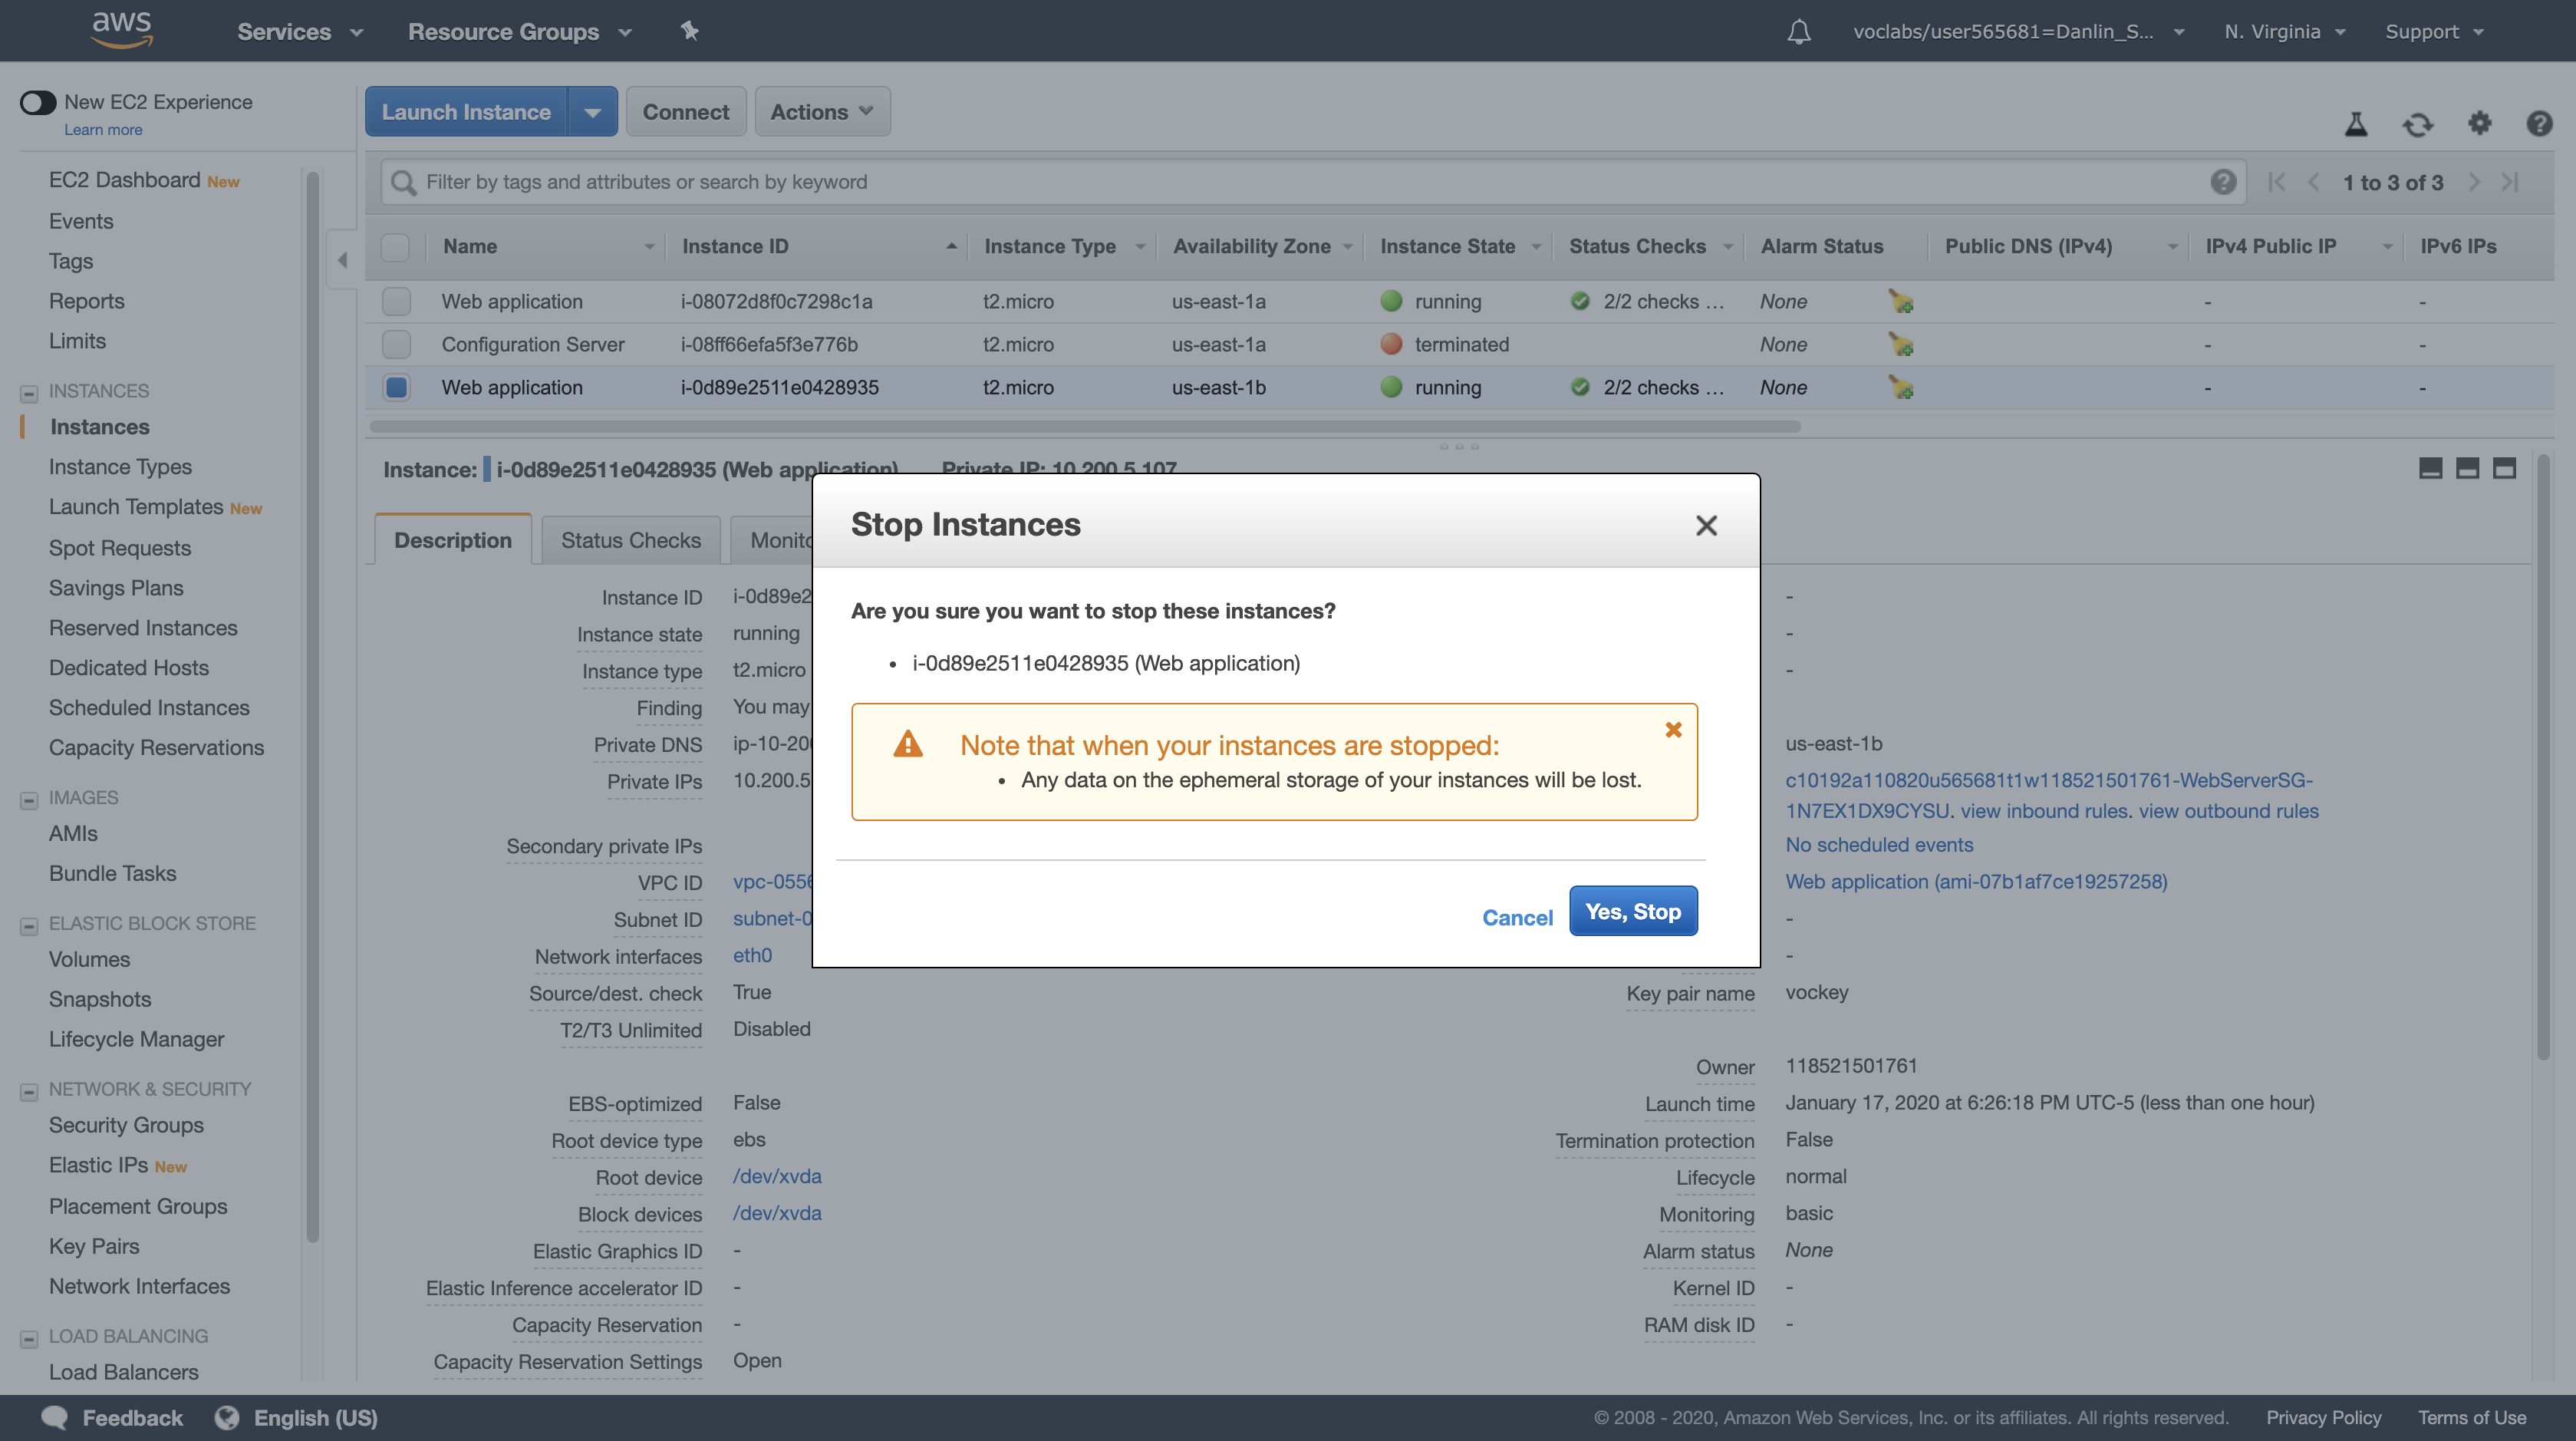
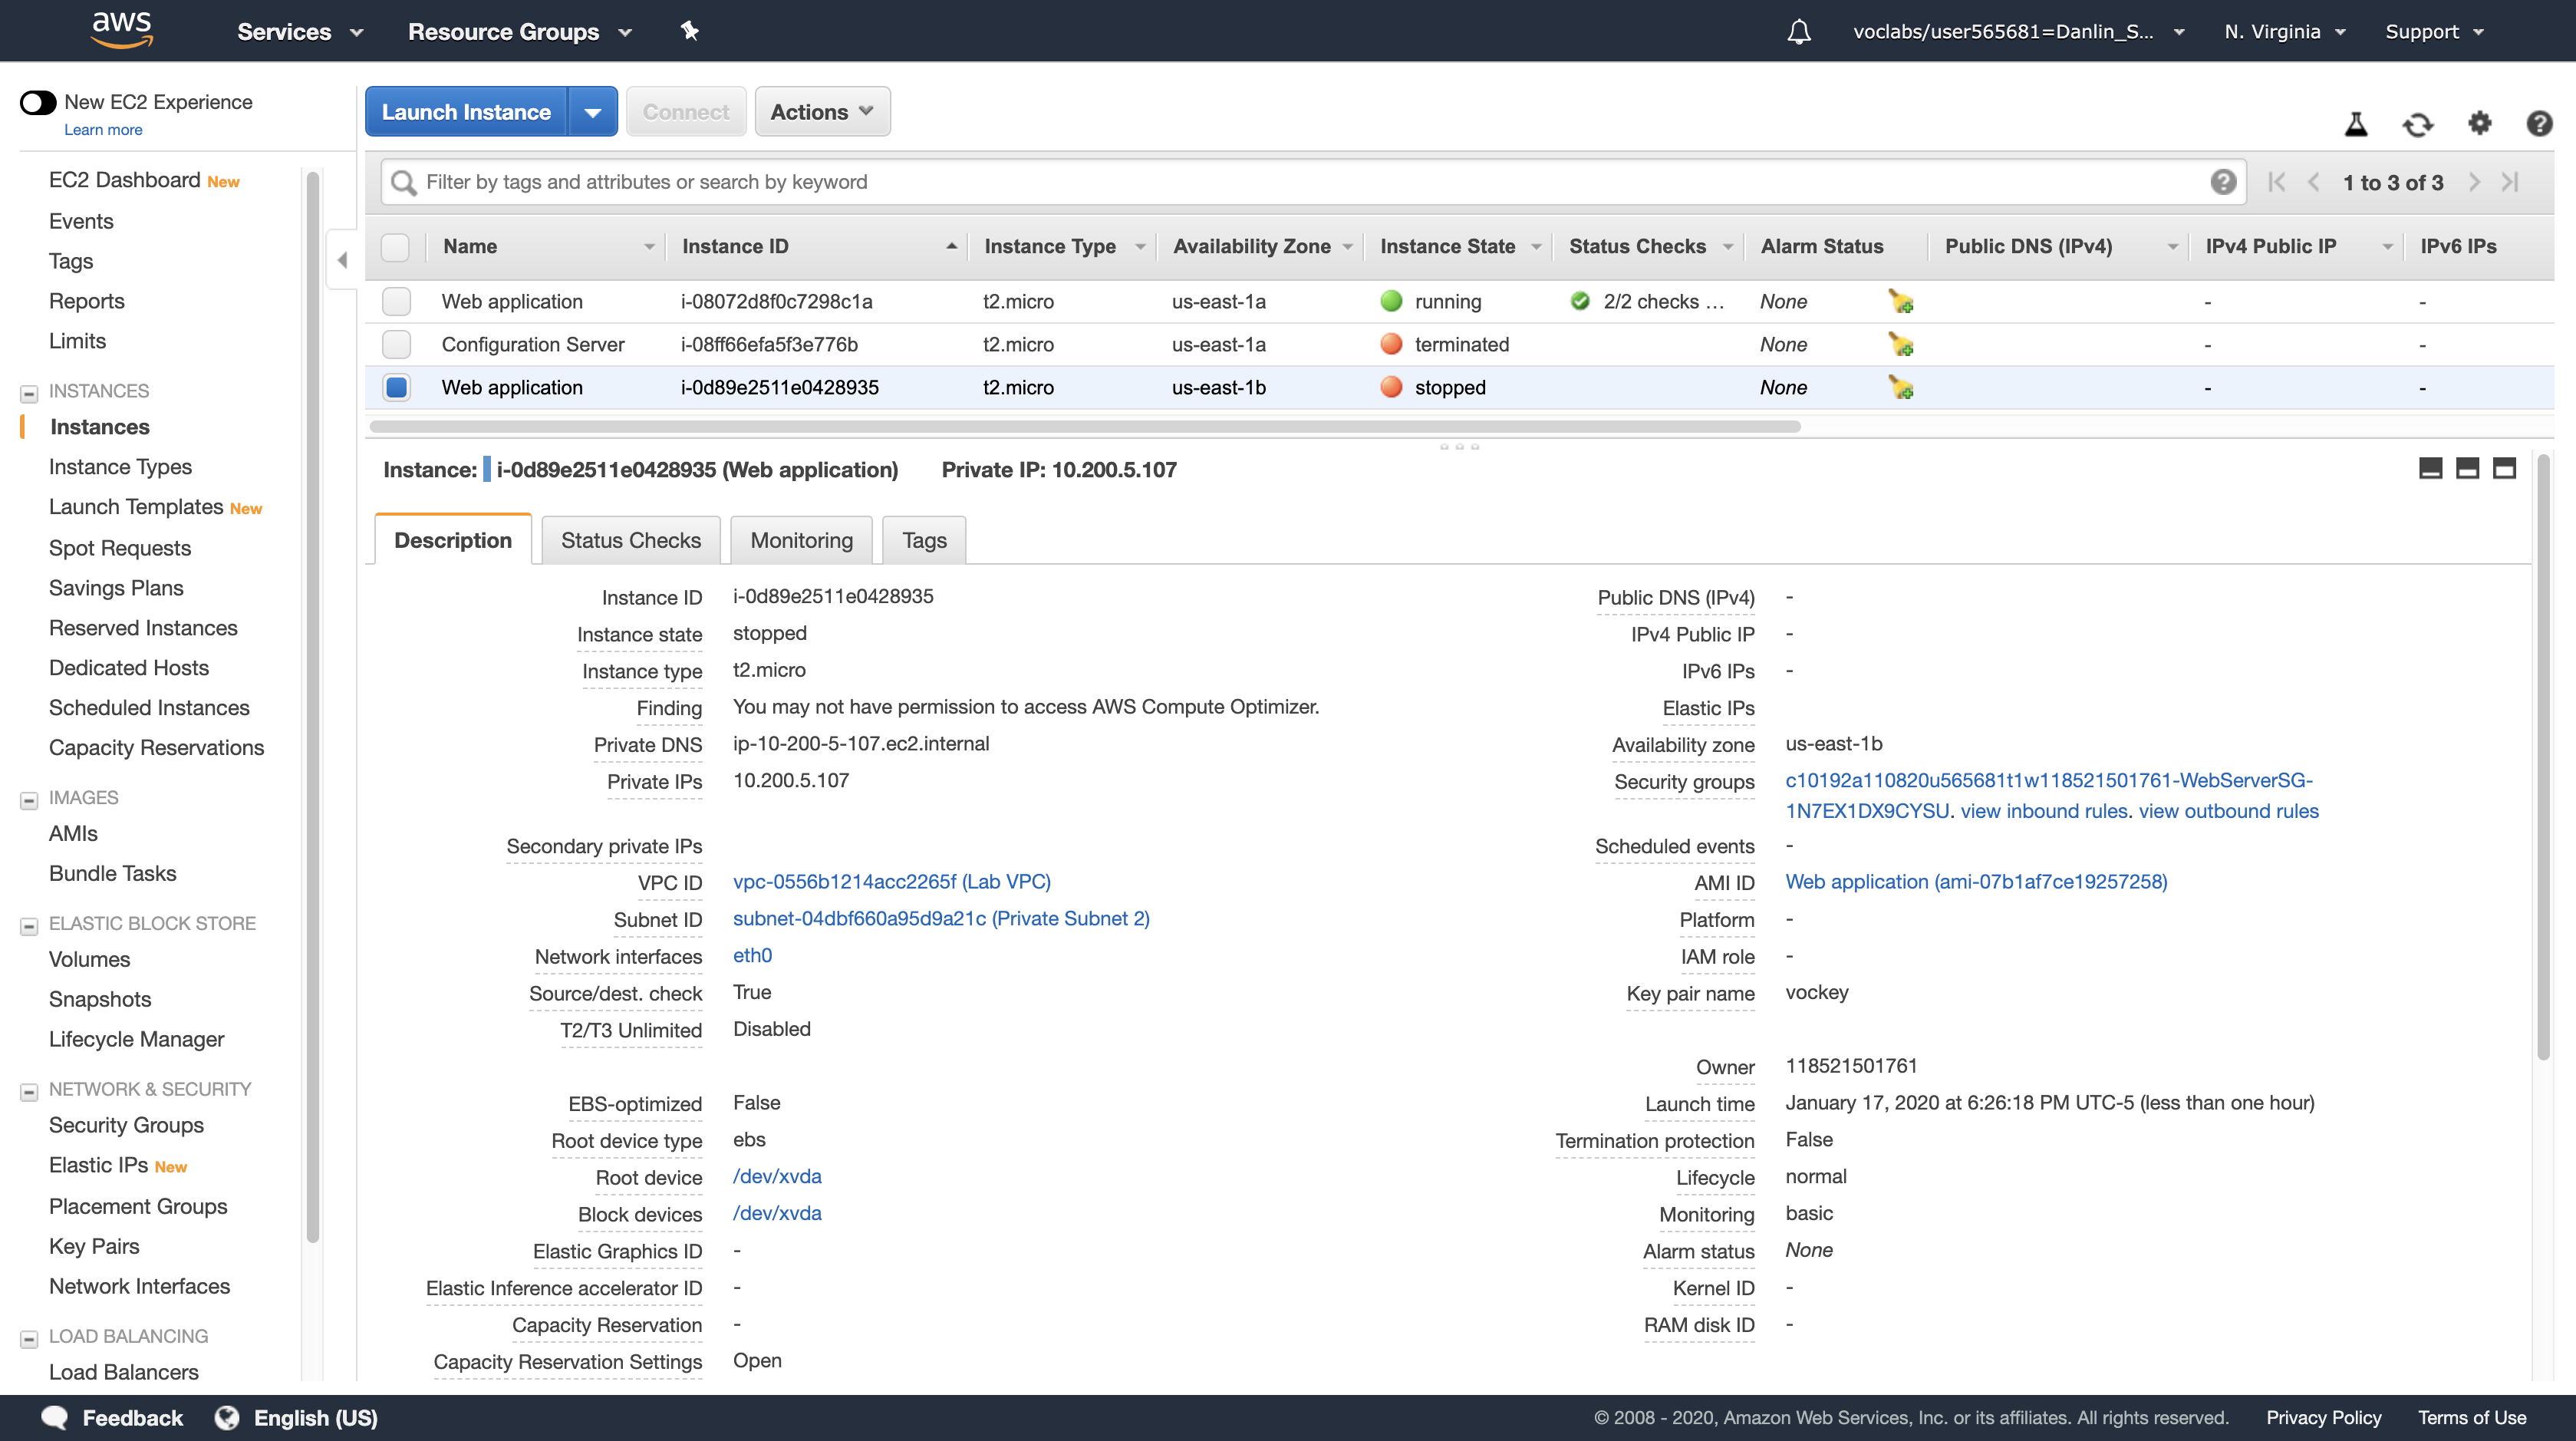
In a short time, the Load Balancer will notice that the instance is not responding and will automatically route all requests to the remaining instance.
Return to the Web application tab in your web browser and reload the page several times.
You should notice that the Availability Zone shown at the bottom of the page stays the same. Even though an instance has failed, your application remains available.

After a few minutes, Auto Scaling will also notice the instance failure. It has been configured to keep two instances running, so Auto Scaling will automatically launch a replacement instance.
EC2 Management Console
Navigation pane
Click Instances
Click the refresh icon in the top-right occasionally until a new Amazon EC2 instance appears.
After a few minutes, the Health Check for the new instance should become healthy and the Load Balancer will continue sending traffic between two Availability Zones. You can reload your Web application tab to see this happening.
This demonstrates that your application is now Highly Available.
Notice the Auto Scaling clones a same configuration and environment for the stopped EC2, and the new one still in the private subnet 2 (10.200.4.2/23 ~ 10.200.5.254/23 Valid Hosts).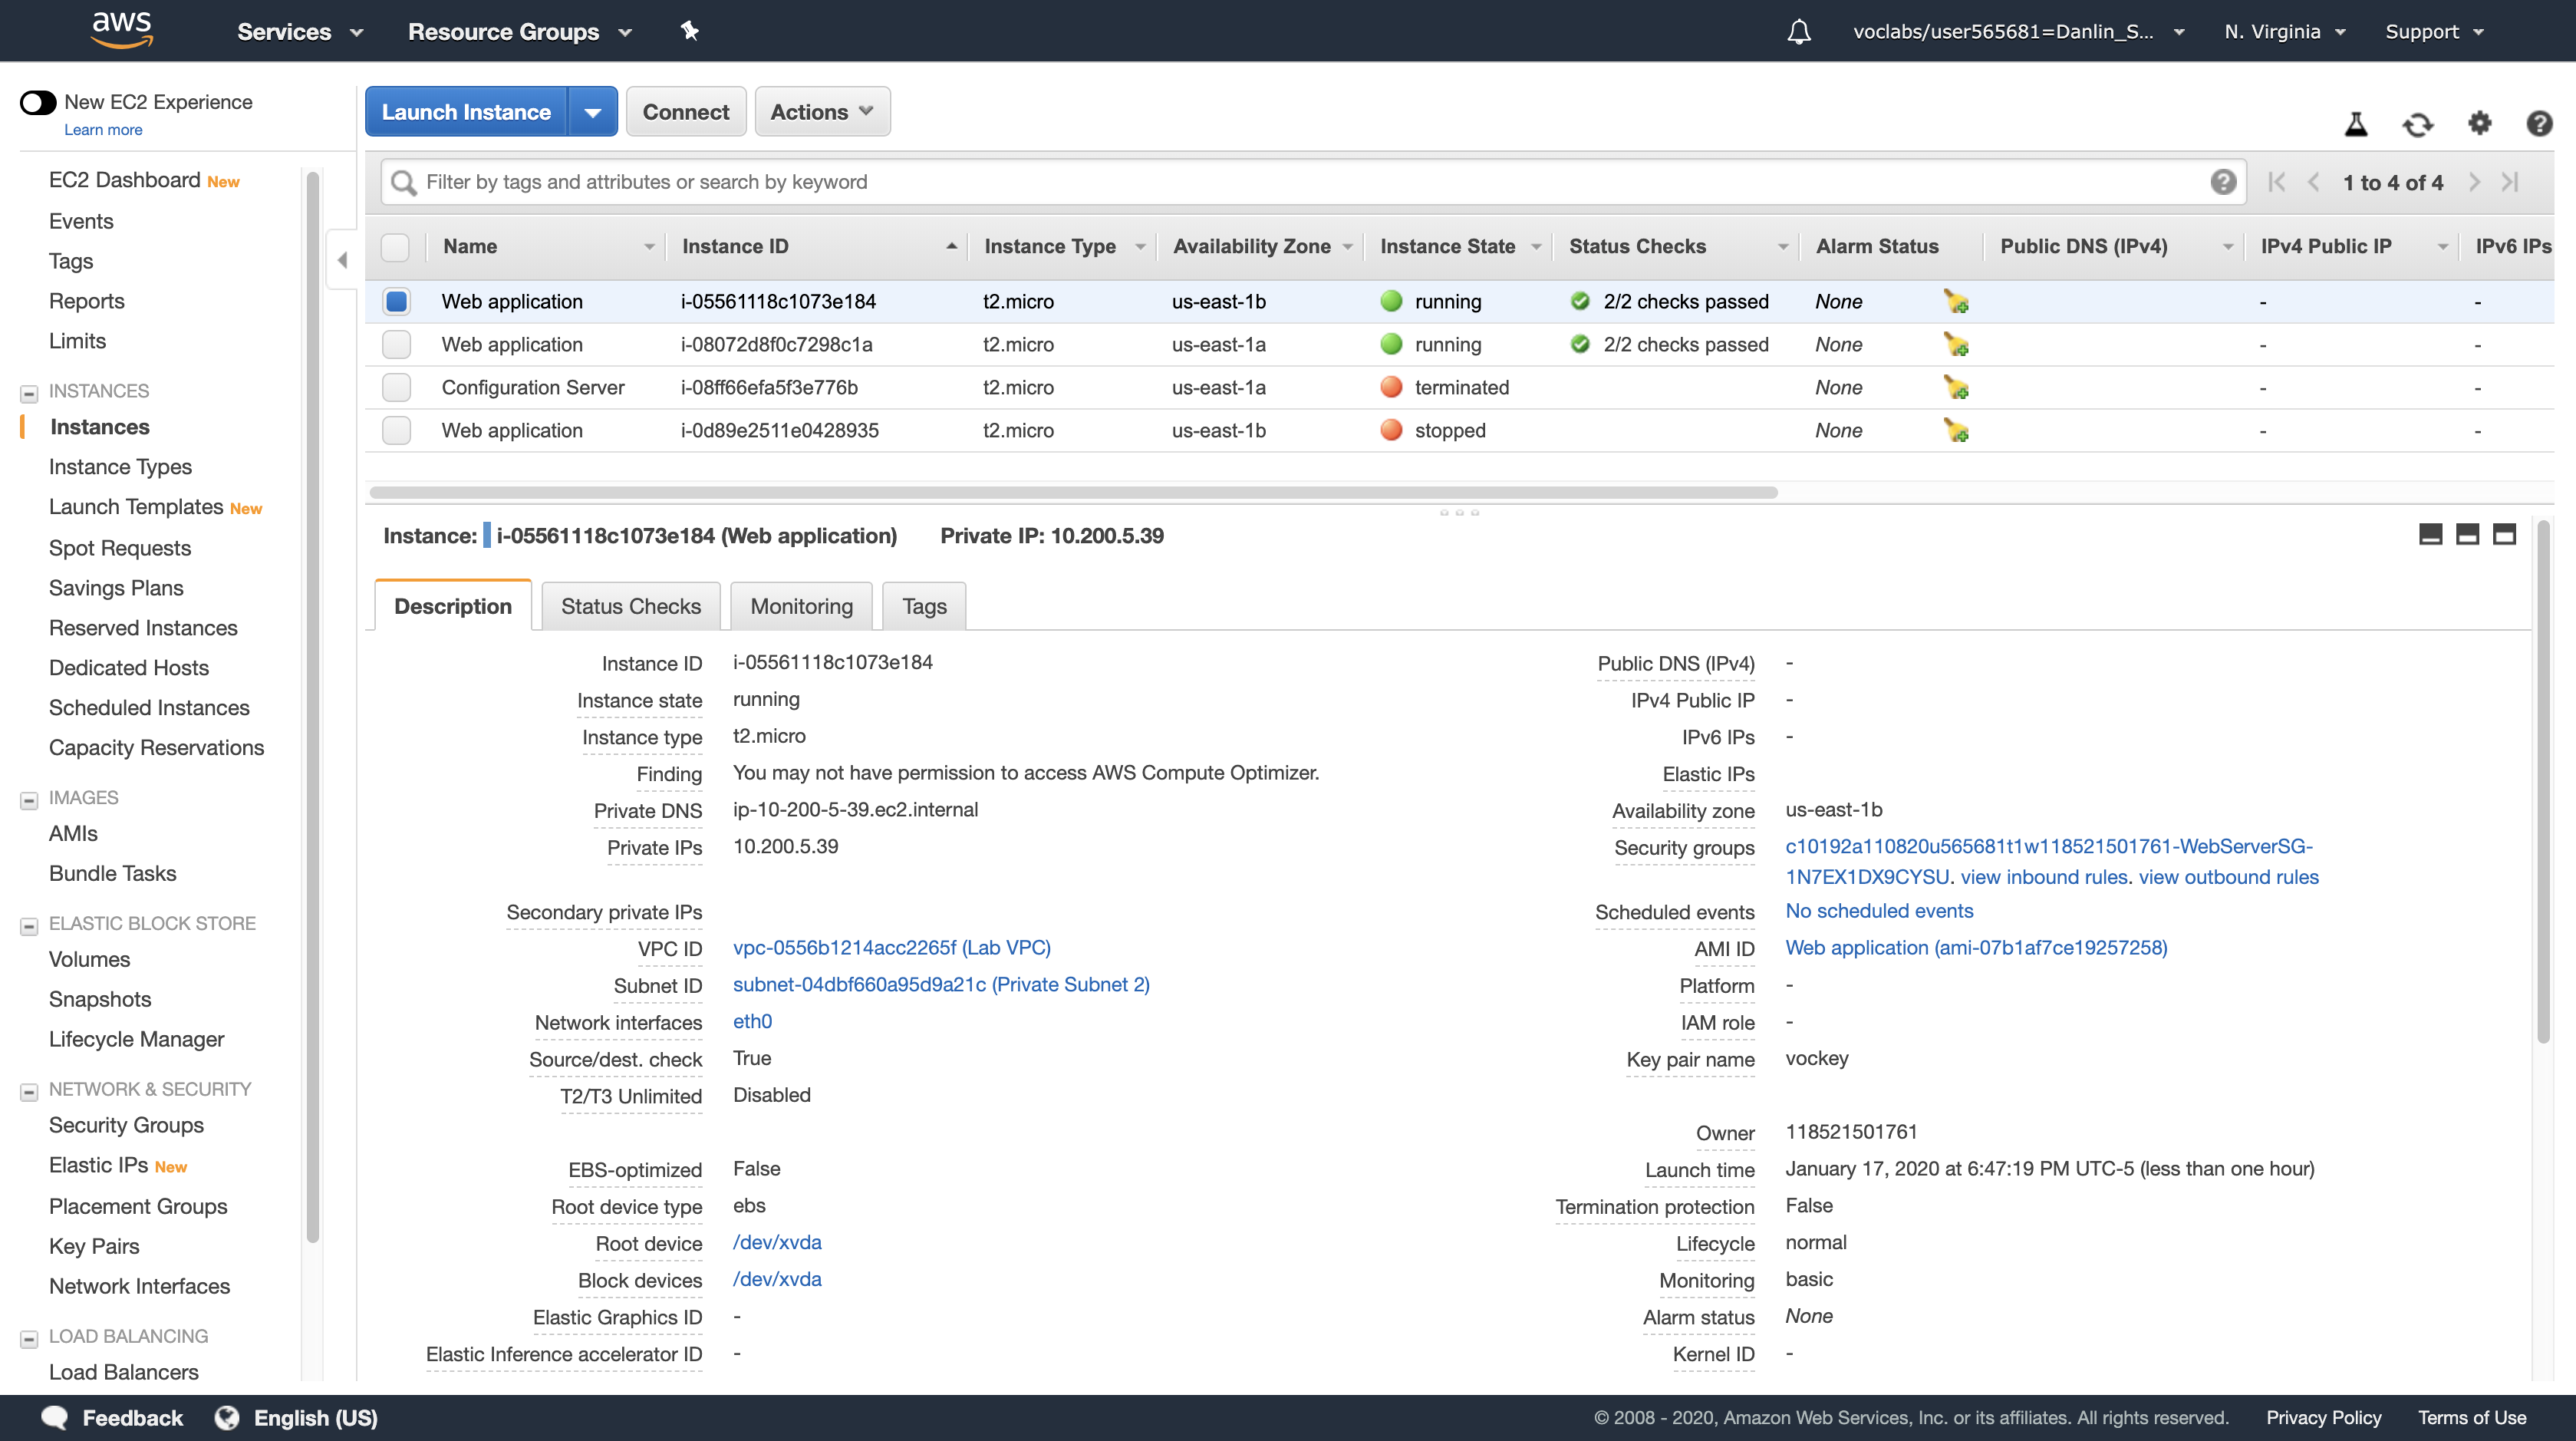
Navigation pane
Click Target Groups
Click Targets
We can see the new instance which created by the Auto Scaling works well.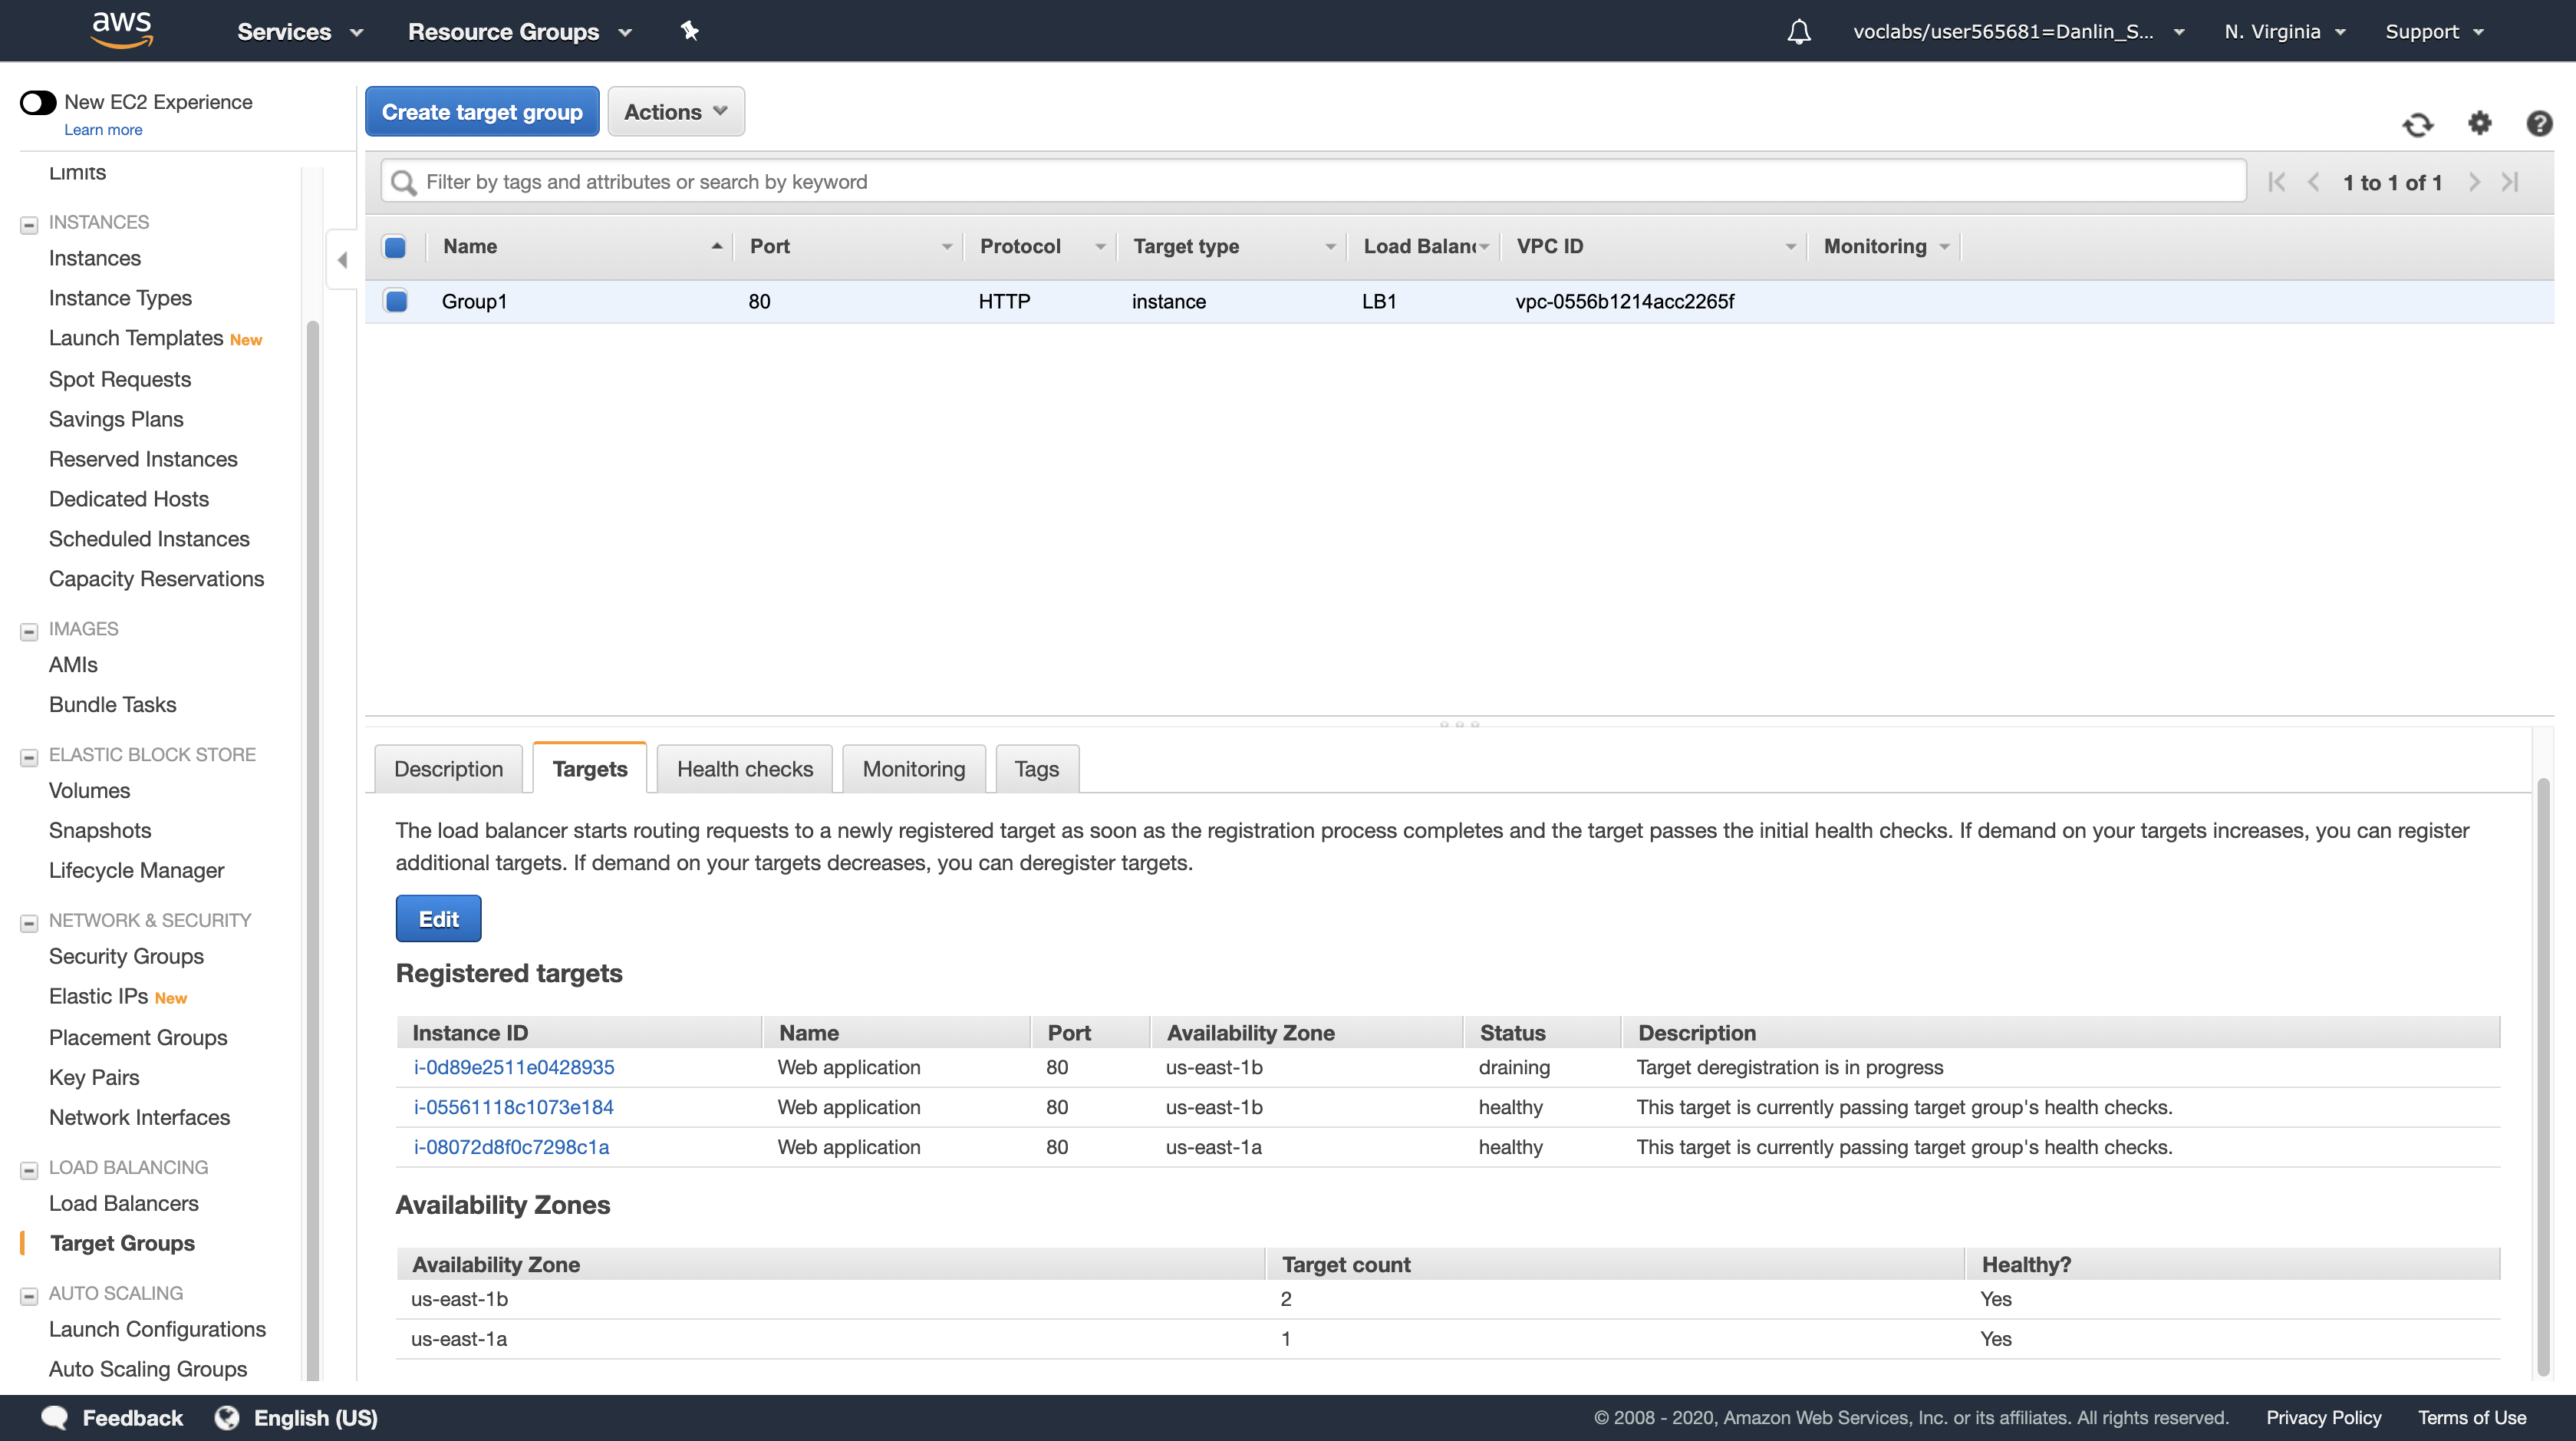
Also, the load balancer works well too.
Lab Complete
Click End Lab at the top of this page and then click Yes to confirm that you want to end the lab.
A panel will appear, indicating that “DELETE has been initiated… You may close this message box now.”
Click the X in the top right corner to close the panel.
For feedback, suggestions, or corrections, please email us at: aws-course-feedback@amazon.com
ACA Module 4 LAB: Using Notifications to Trigger AWS Lambda
https://labs.vocareum.com/main/main.php?m=editor&nav=1&asnid=110821&stepid=110822
Version A5L3
Many AWS services can automatically generate notifications when events occur. These notifications can be used to trigger automated actions without requiring human intervention.
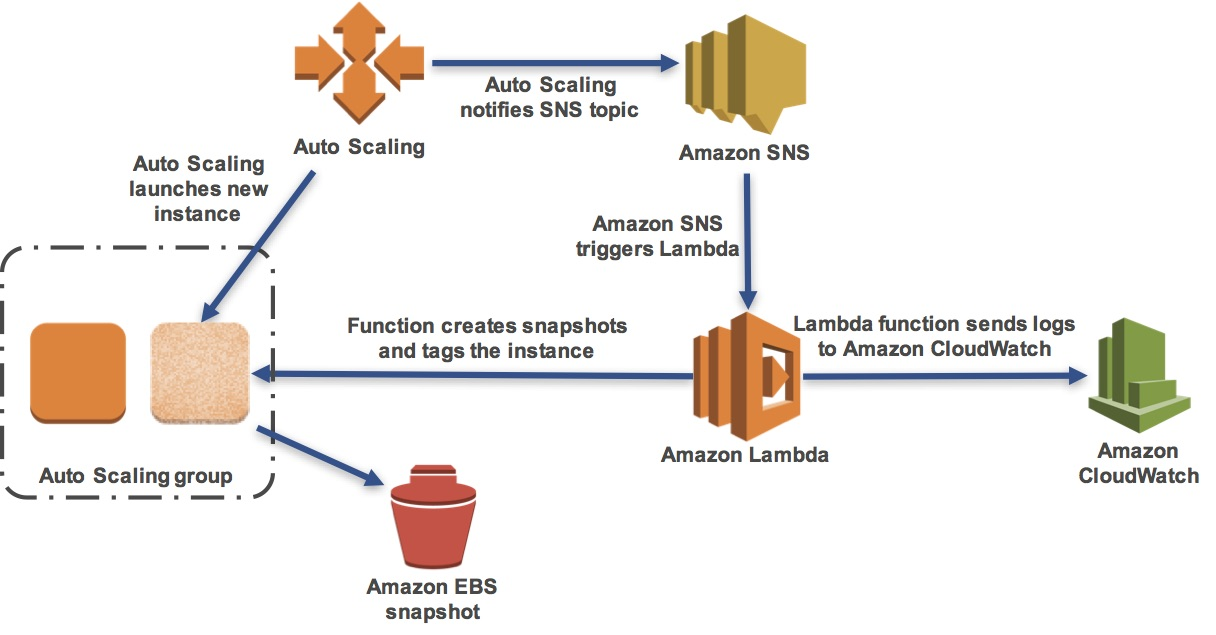
In this lab, you will create an AWS Lambda function that will automatically snapshot and tag new Amazon EC2 instances launched by Auto Scaling.
The lab scenario is:
- An Auto Scaling group has already been configured.
- You will trigger Auto Scaling to scale-out and launch a new Amazon EC2 instance.
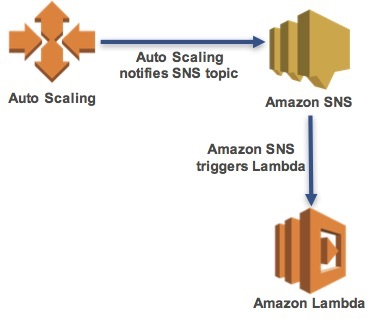
- This will send a notification to an Amazon Simple Notification Service (SNS) topic.
- The SNS topic will trigger an AWS Lambda function which will:
- Create a snapshot of the Amazon EBS volumes attached to the instance.
- Add a tag to the instance.
- Sent log information to Amazon CloudWatch Logs.
In this lab, you will:
- Create an Amazon Simple Notification Service (Amazon SNS) topic as a notification target for Auto Scaling events.
- Configure your Auto Scaling group to send notifications when new Amazon EC2 instances are launched.
- Create an AWS Lambda function that will be invoked when it receives a message from your Amazon SNS topic that an Auto Scaling event has occurred.
Objectives
After completing this lab, you will be able to:
- Configure Auto Scaling to send notifications.
- Create an AWS Lambda function to respond to notifications.
Accessing the AWS Management Console
- At the top of these instructions, click
Start Labto launch your lab.
A Start Lab panel opens displaying the lab status. - Wait until you see the message “Lab status: ready“, then click the
Xto close the Start Lab panel. - At the top of these instructions, click
AWS
This will to open the AWS Management Console in a new browser tab. The system will automatically log you in.
Tip: If a new browser tab does not open, there will typically be a banner or icon at the top of your browser indicating that your browser is preventing the site from opening pop-up windows. Click on the banner or icon and choose “Allow pop ups.”
4. Arrange the AWS Management Console tab so that it displays along side these instructions. Ideally, you will be able to see both browser tabs at the same time, to make it easier to follow the lab steps.
Task 1: Create an SNS Topic
In this task, you will create an Amazon Simple Notification Service (SNS) topic that the Auto Scaling group will use as a notification target.
AWS Management Console
Services menu > click Simple Notification Service.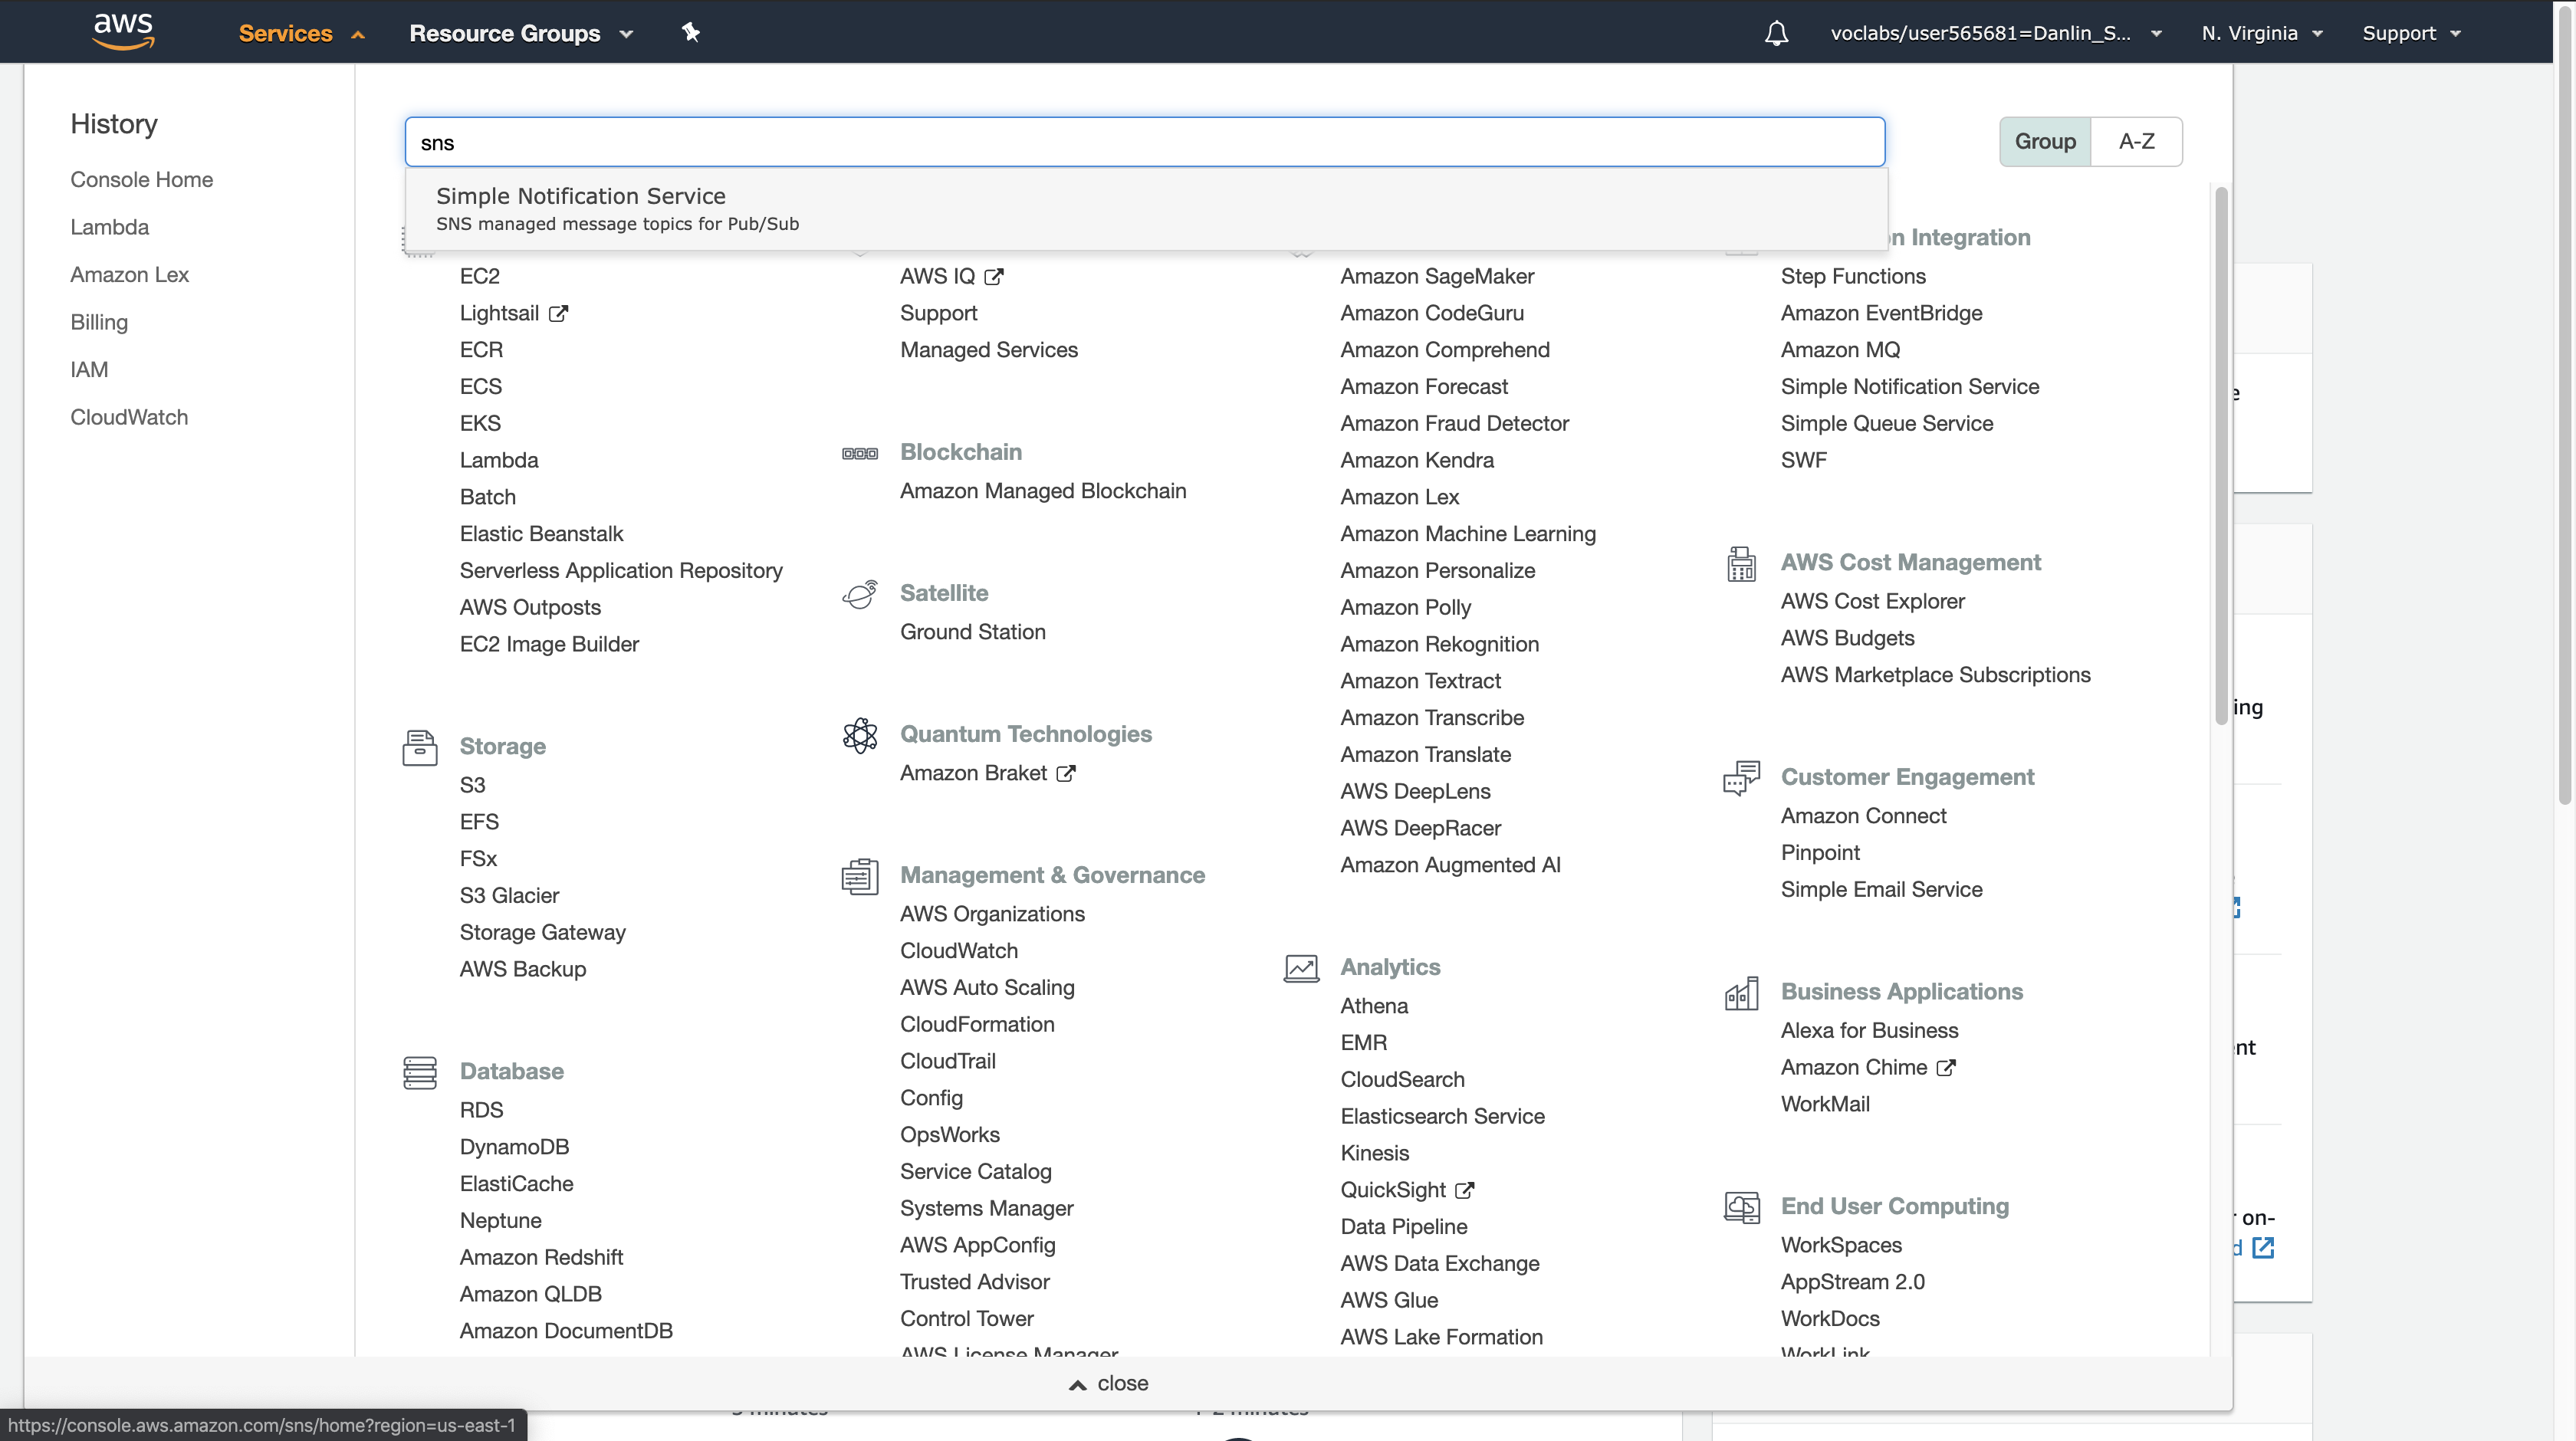
On the left side of the screen > click on 三 to reveal the Amazon SNS menu > click Topics.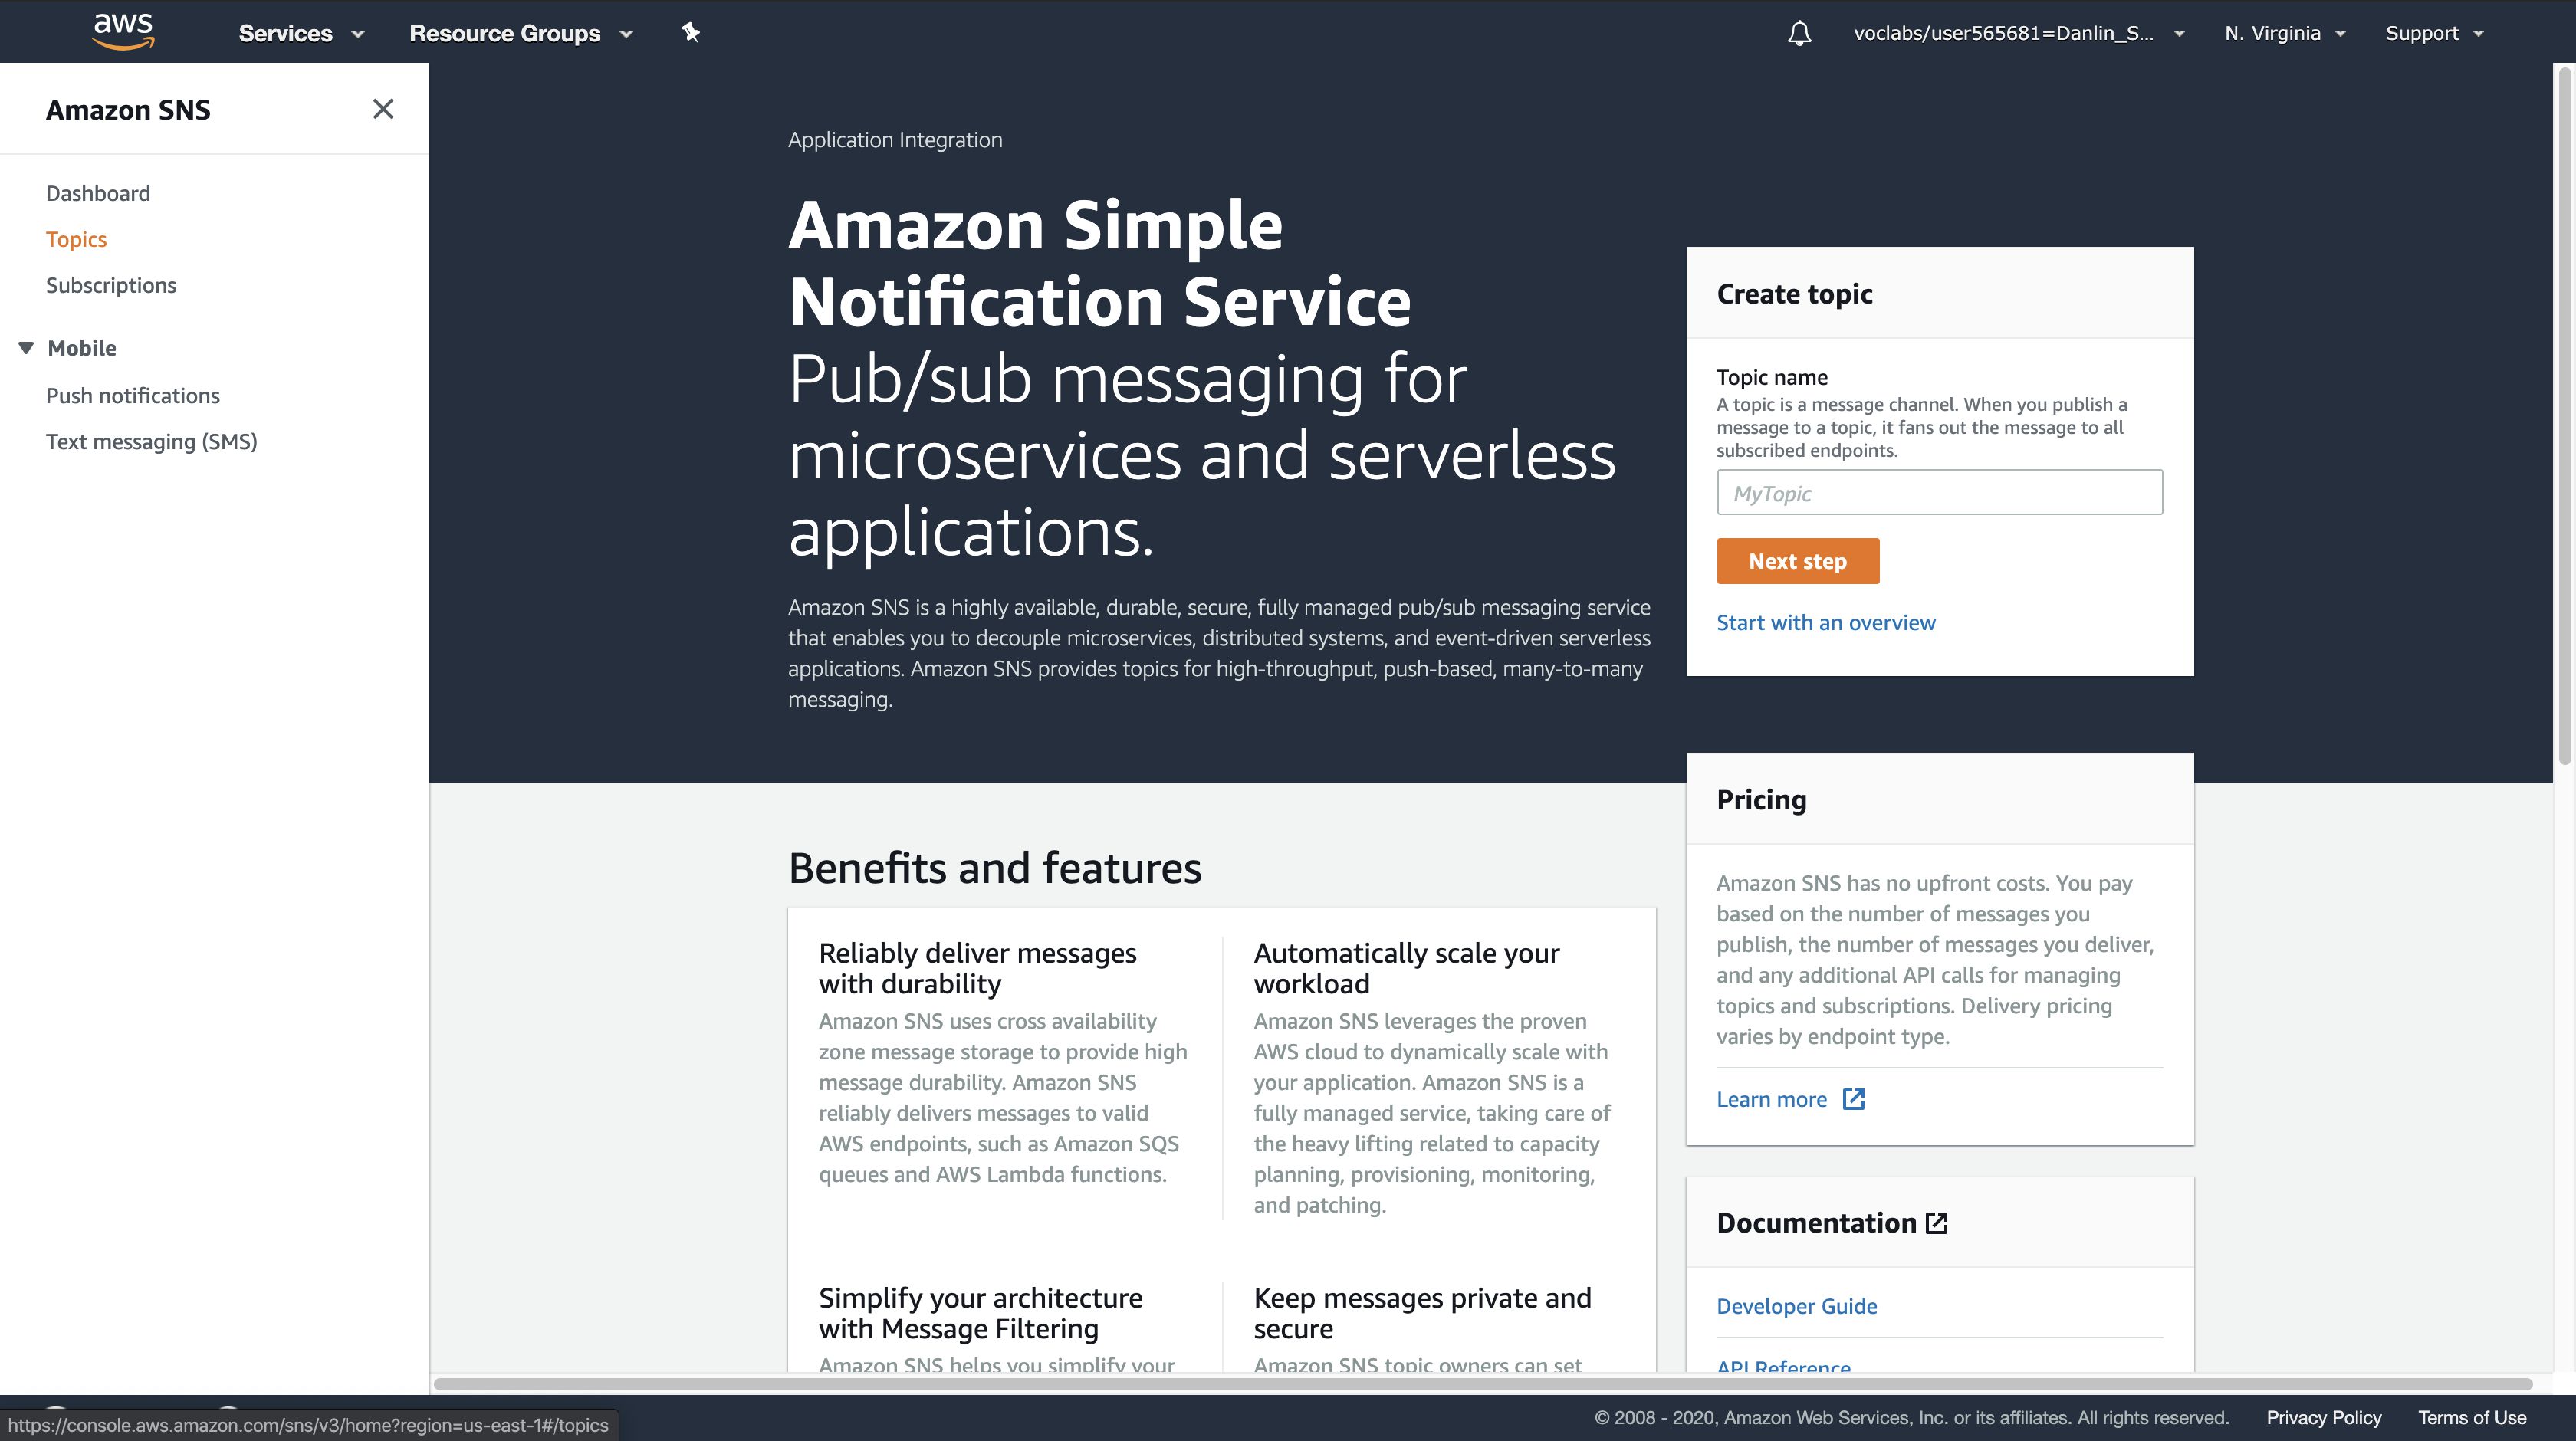
Click Create topic.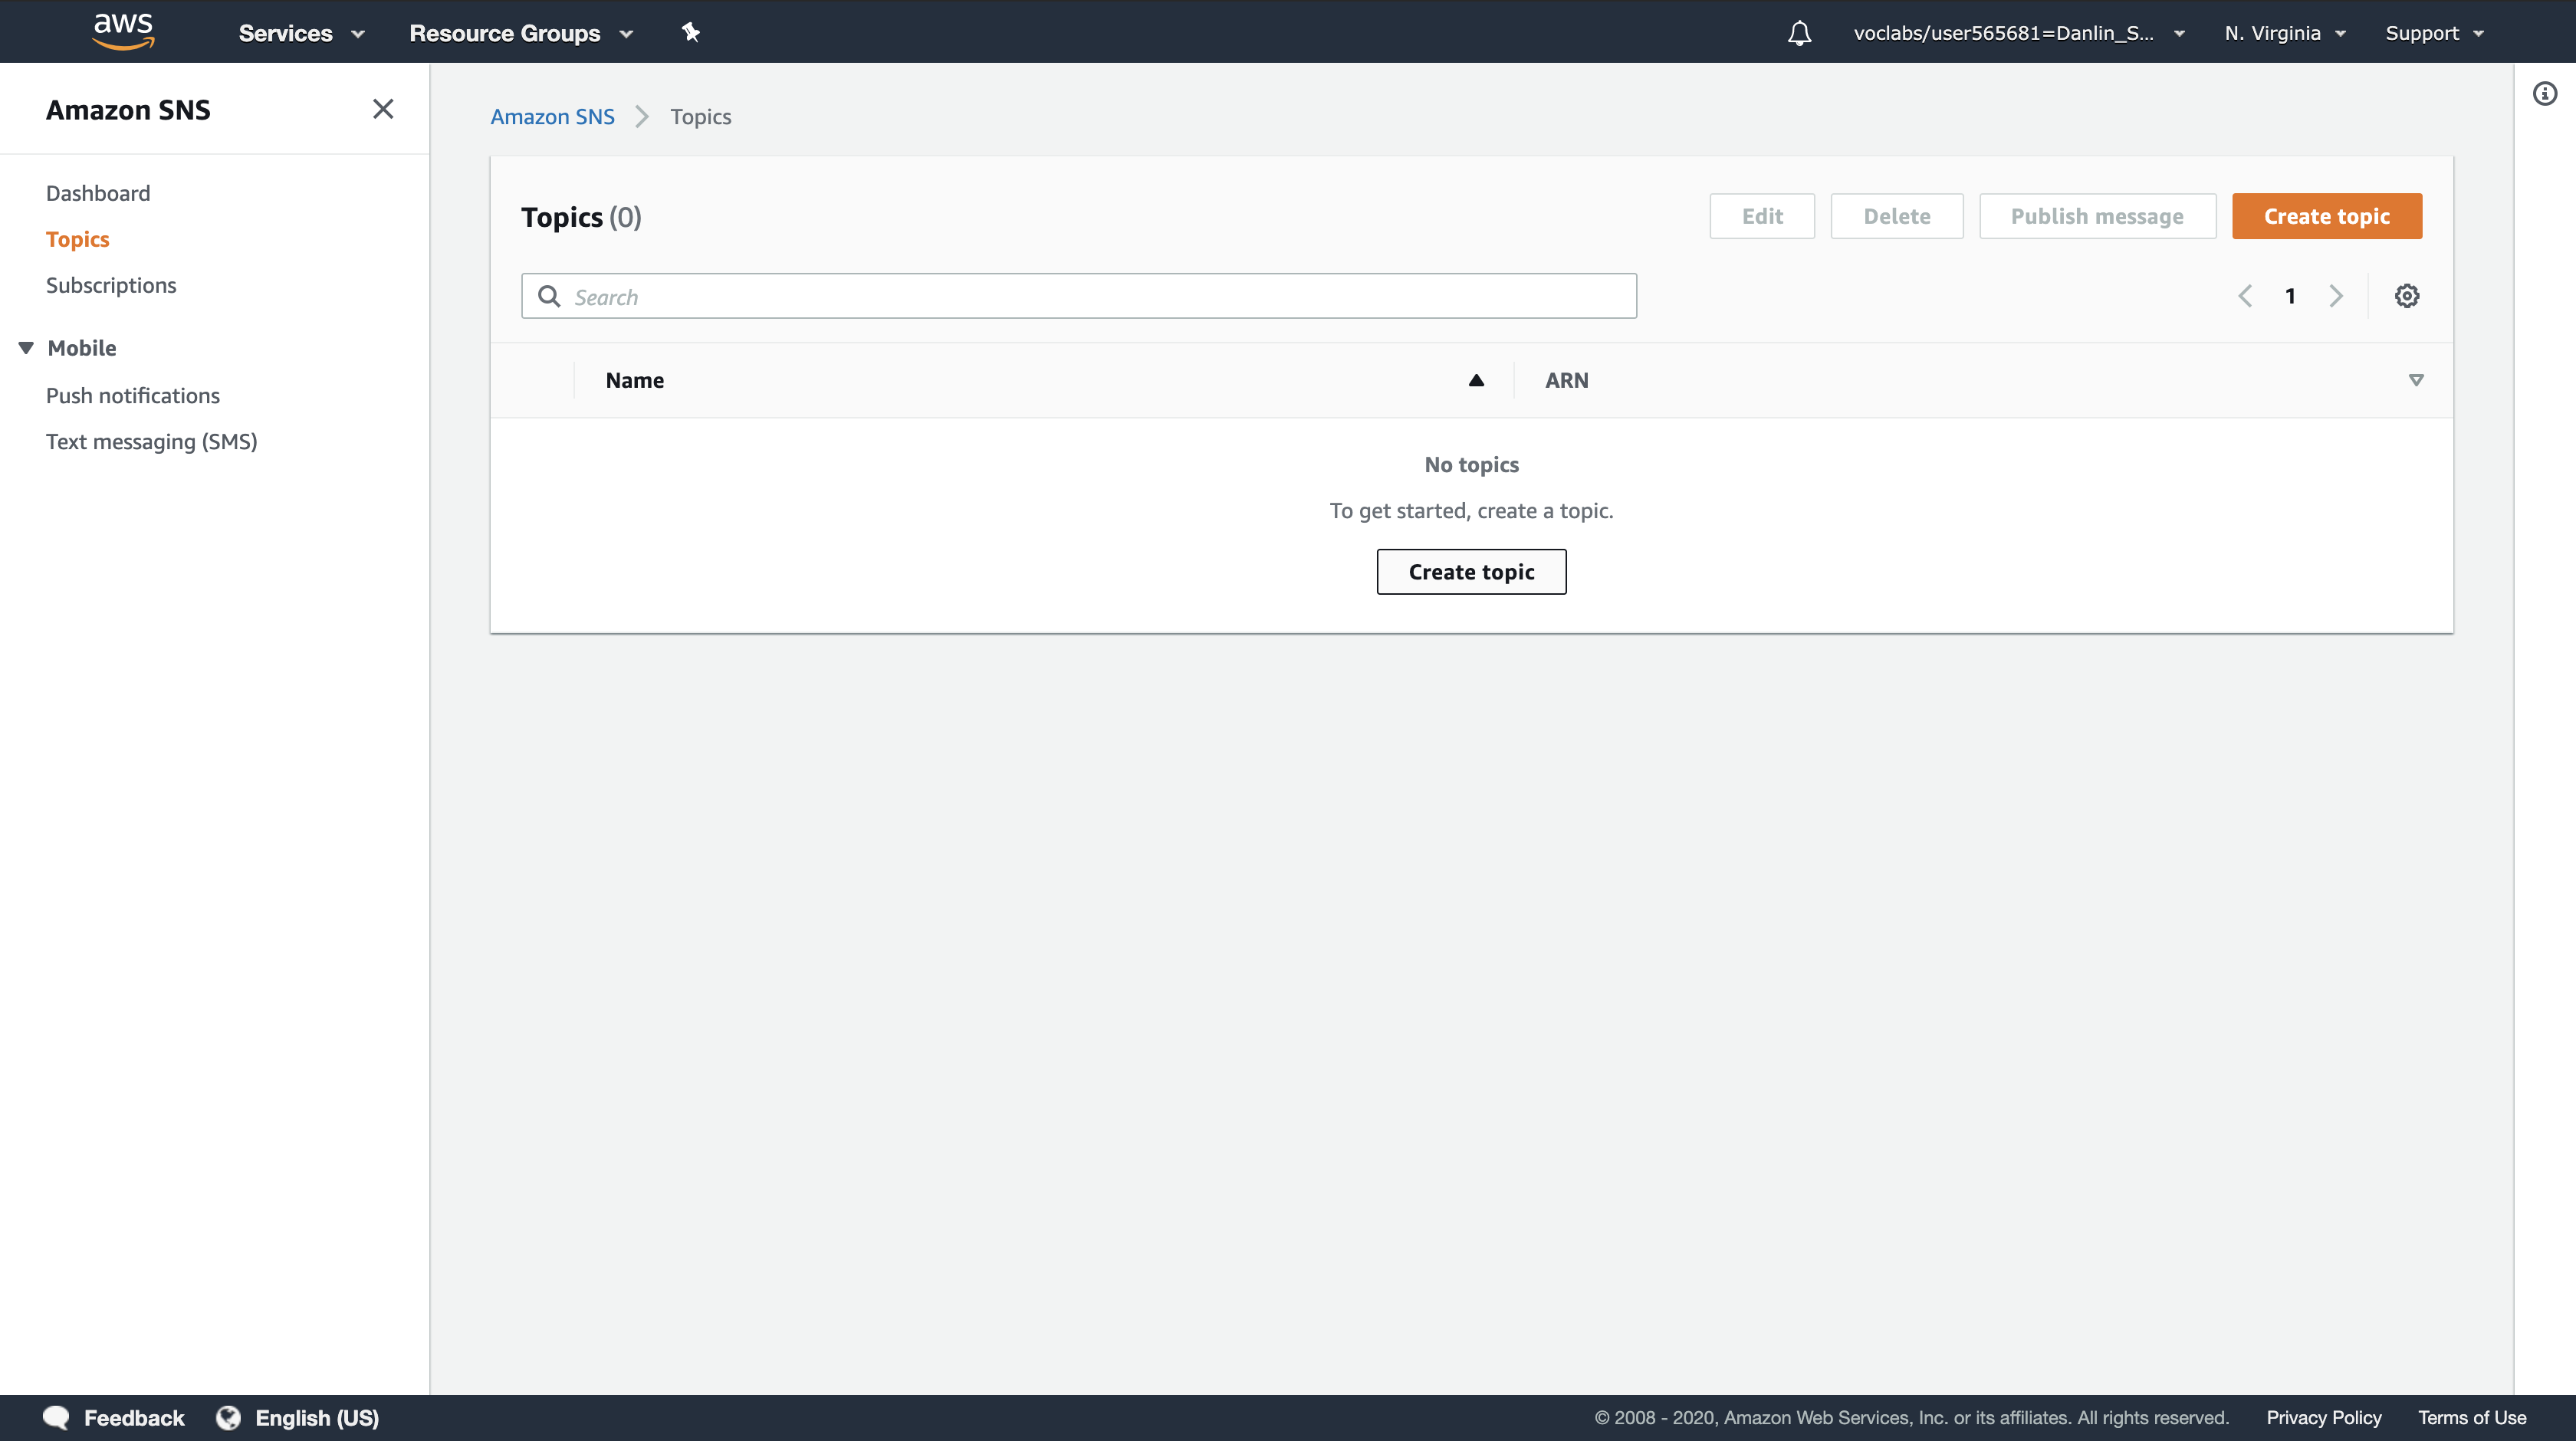
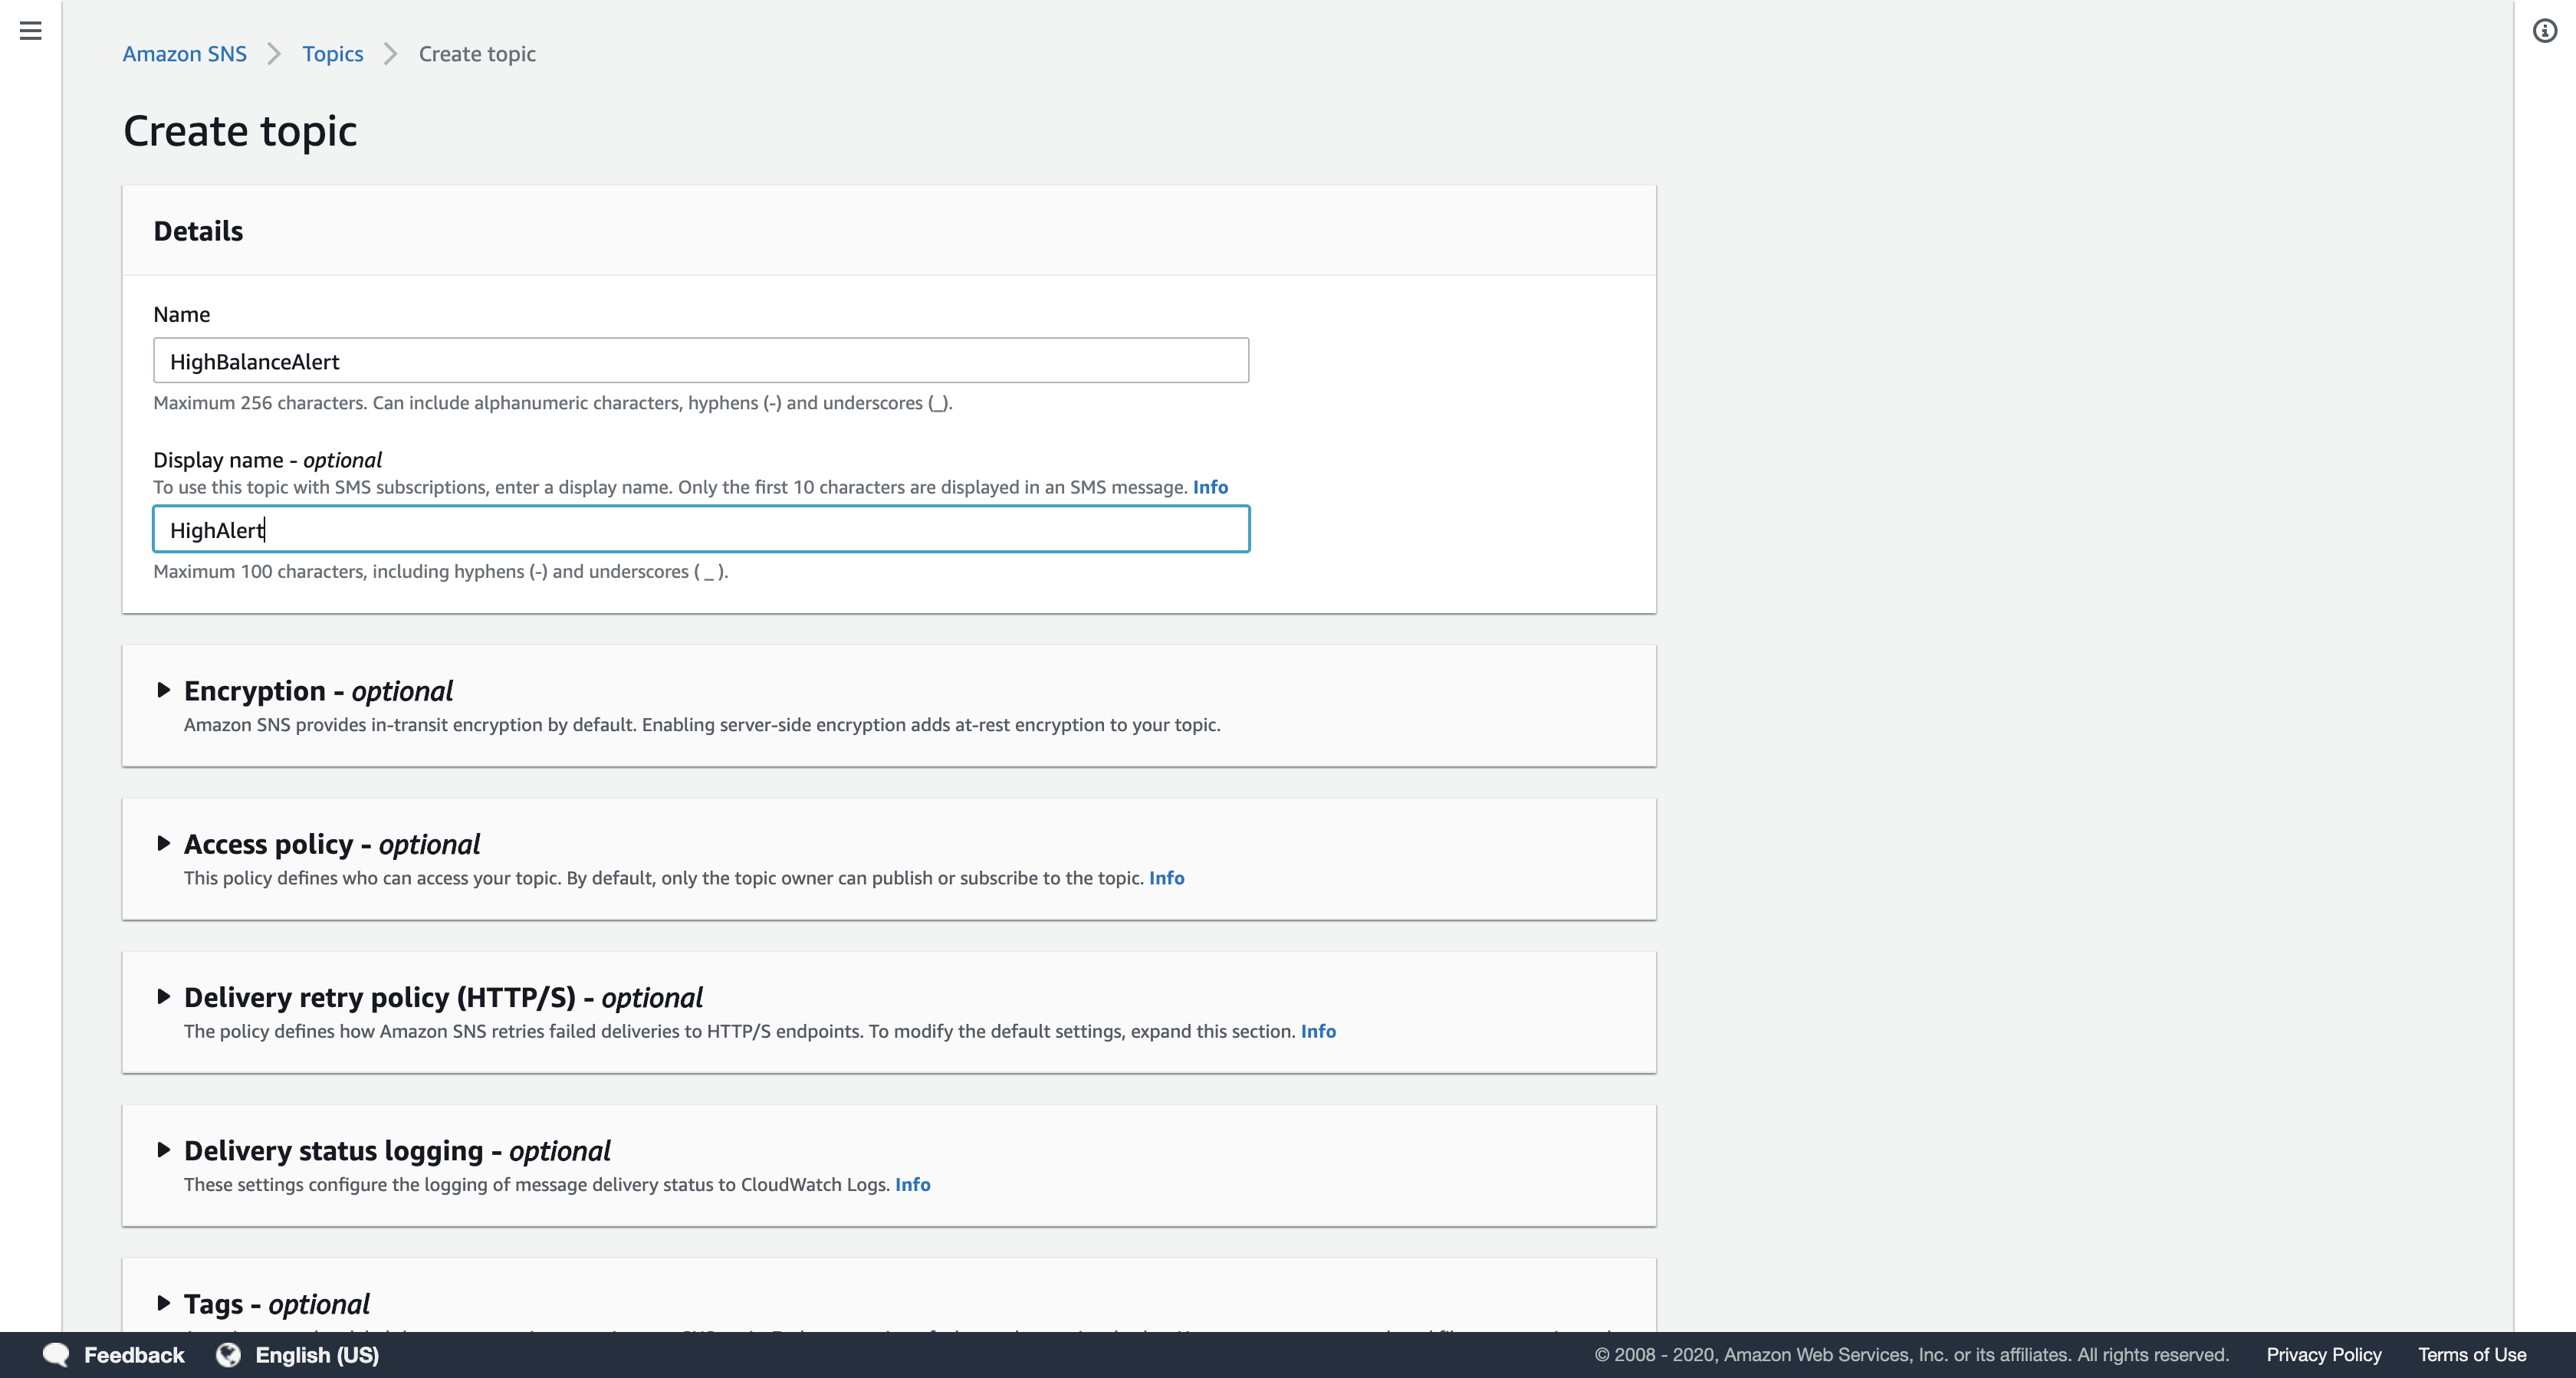
In the Create topic dialog box, configure the following settings:
- Name:
ScaleEvent - Display name:
ScaleEvent

Click Create topic.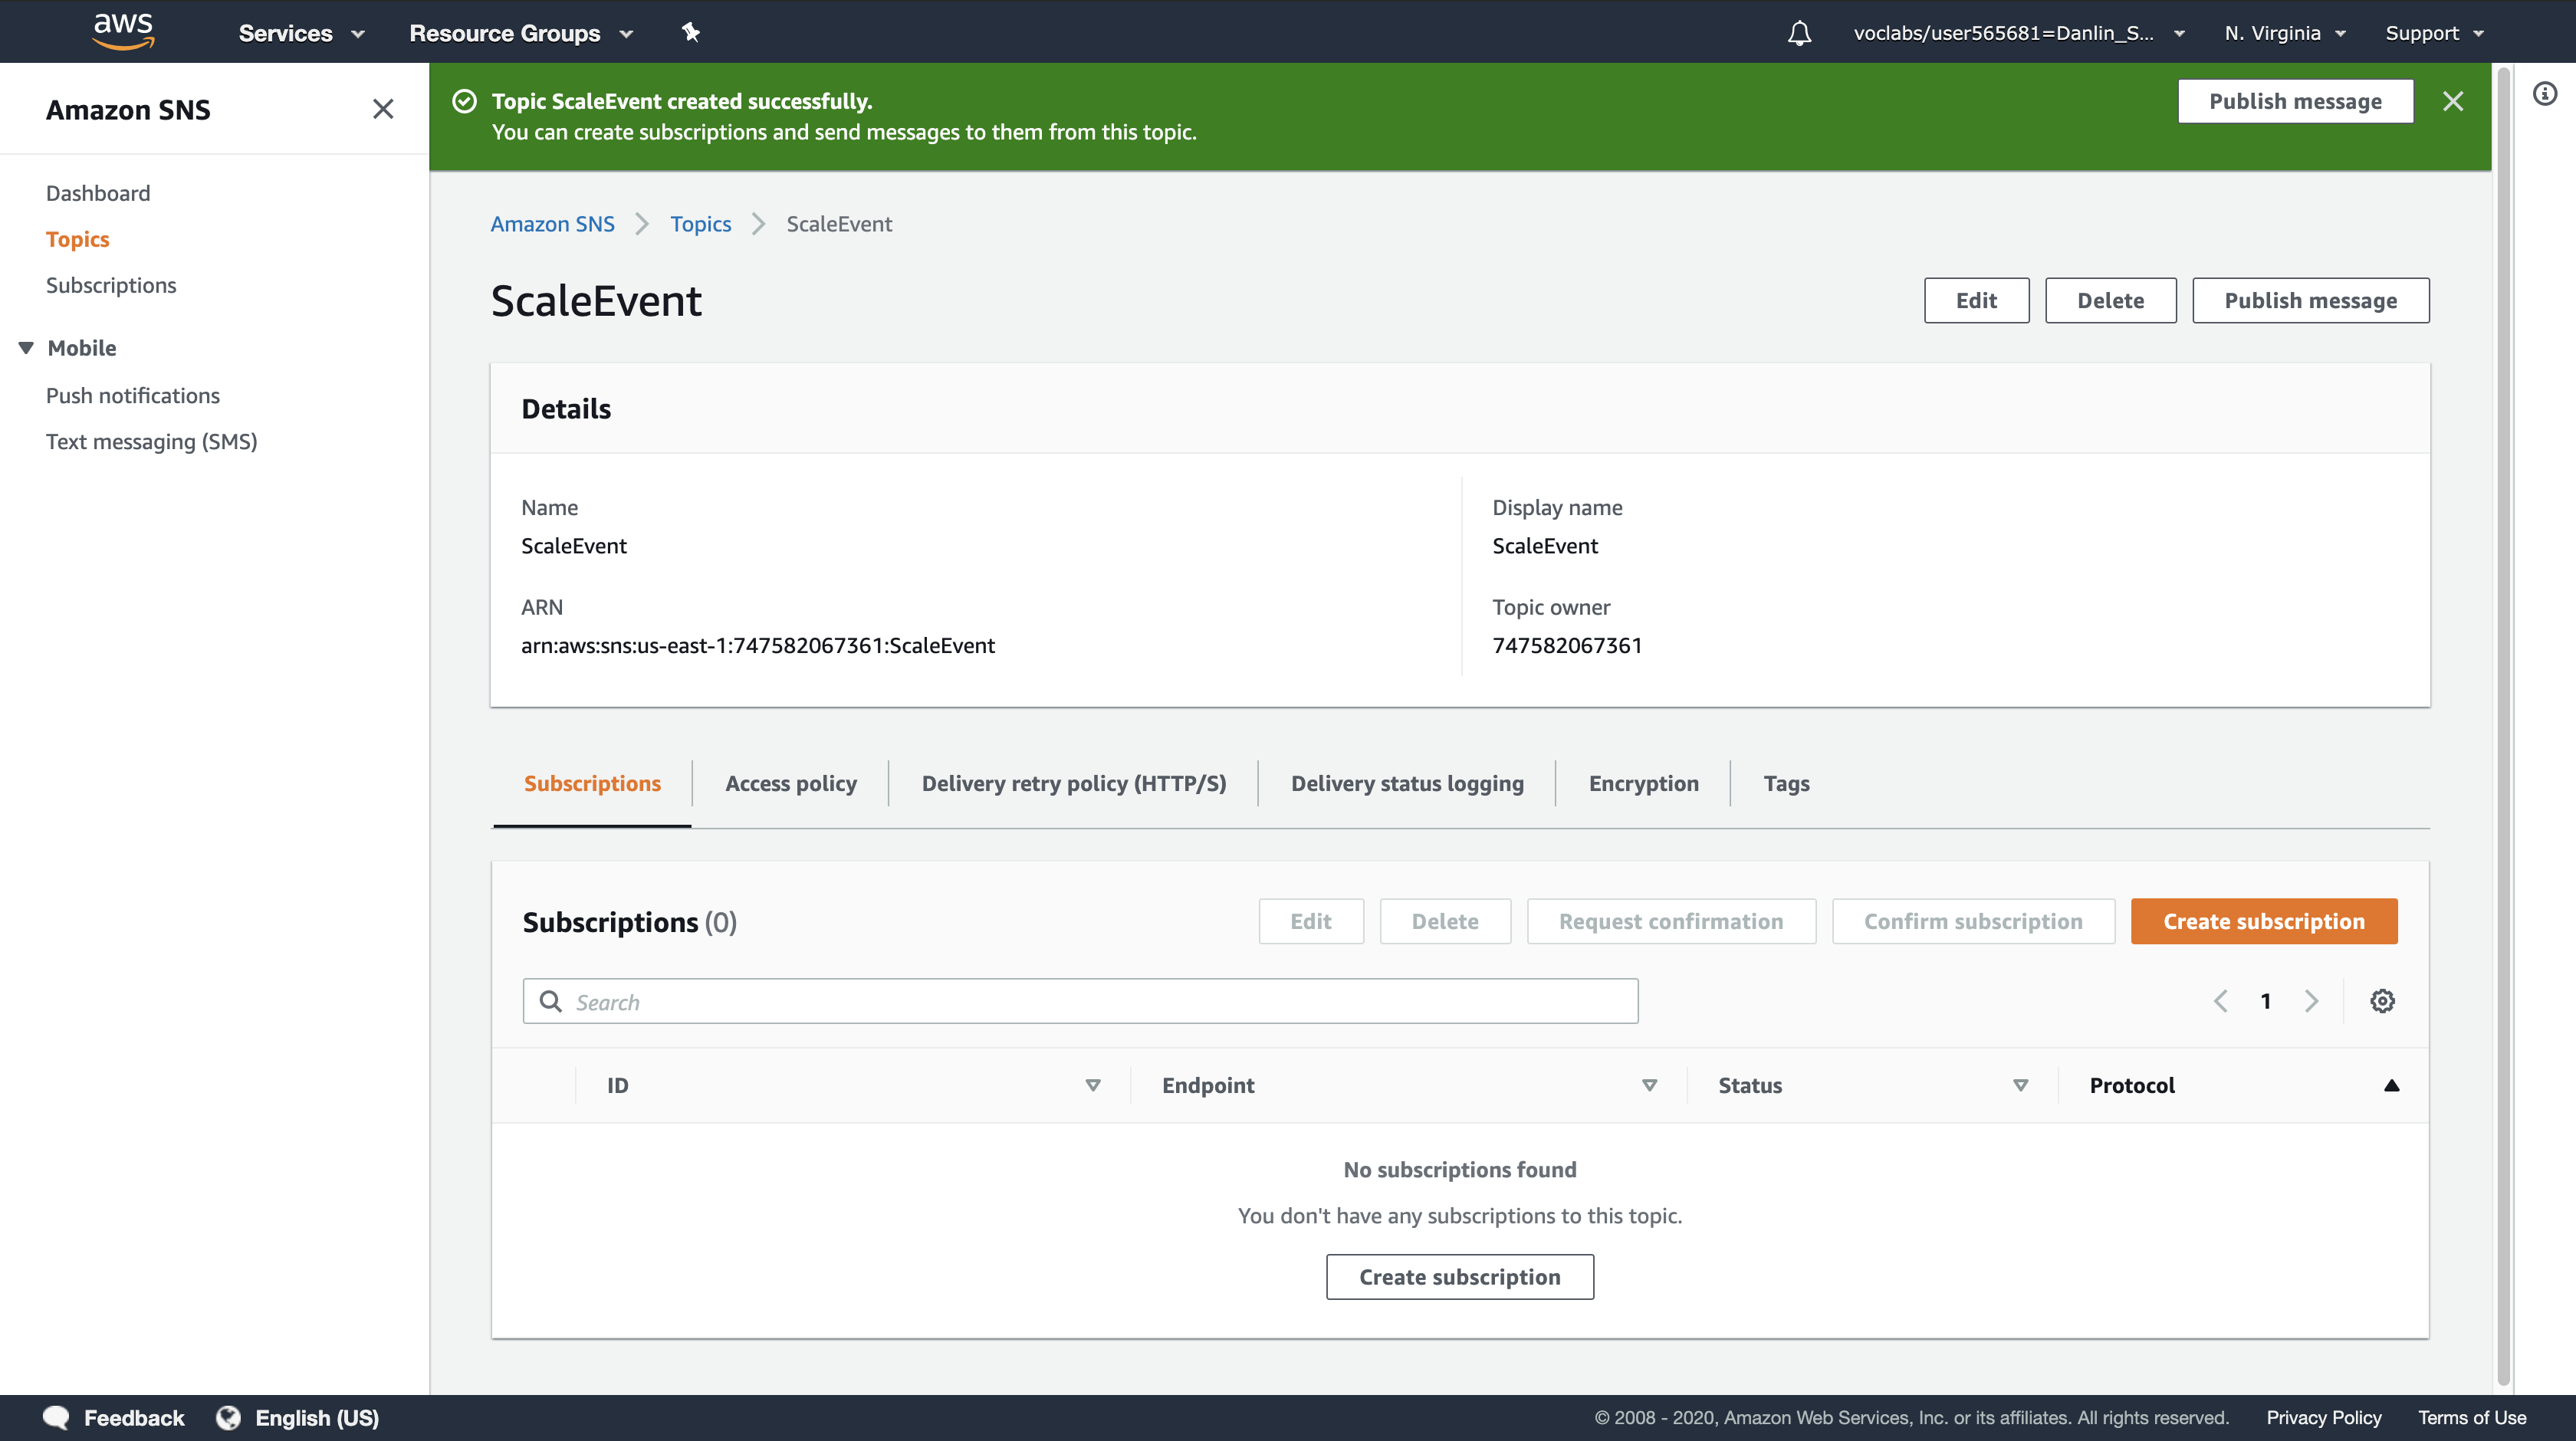
The topic is now ready to receive notifications.
Task 2: Configure Auto Scaling to Send Events
In this task, you will configure an Auto Scaling group to send notifications to the SNS topic when new Amazon EC2 instances are launched in the group.
AWS Management Console
Services menu > click EC2.
Navigation pane
click Auto Scaling Groups (you might need to scroll down to see it).
You will now see the Auto Scaling group that was created for you automatically for this lab.
Note: If you do not see a list of groups, click Auto Scaling Group: 1.
Click the Notifications tab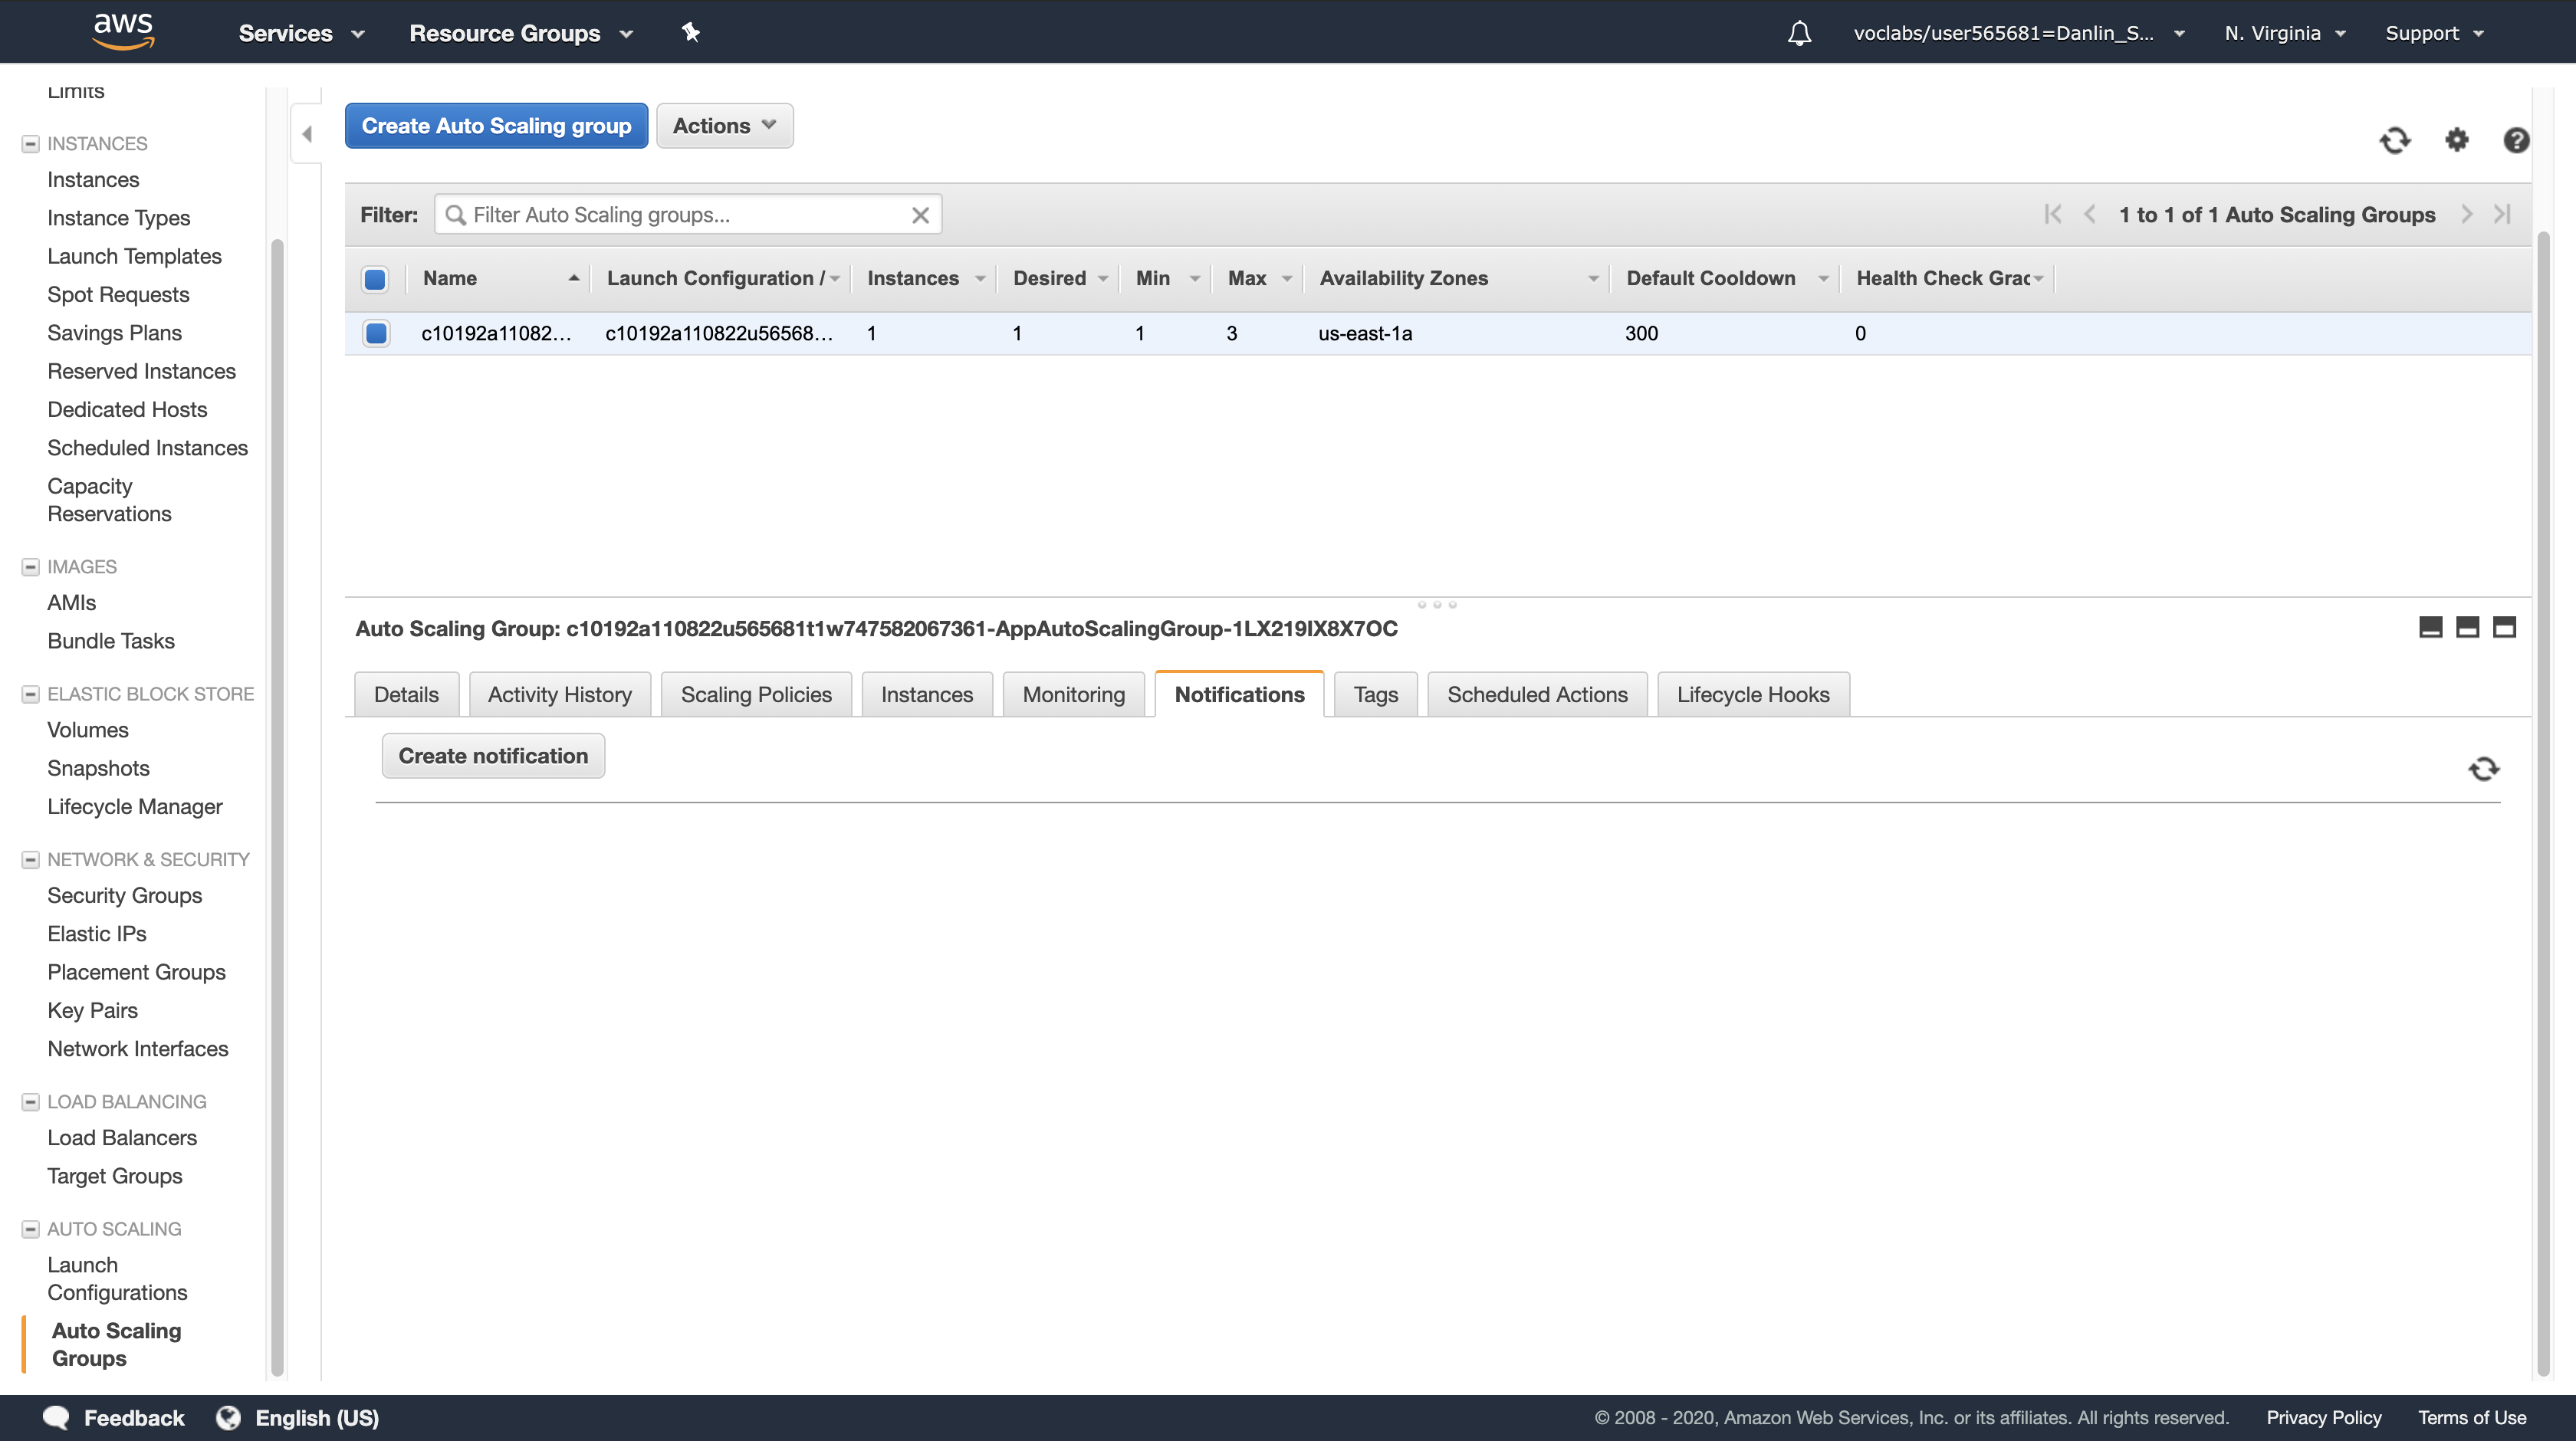
Click Create notification.
Note: You can drag the dividing line upwards to make the lower window pane bigger.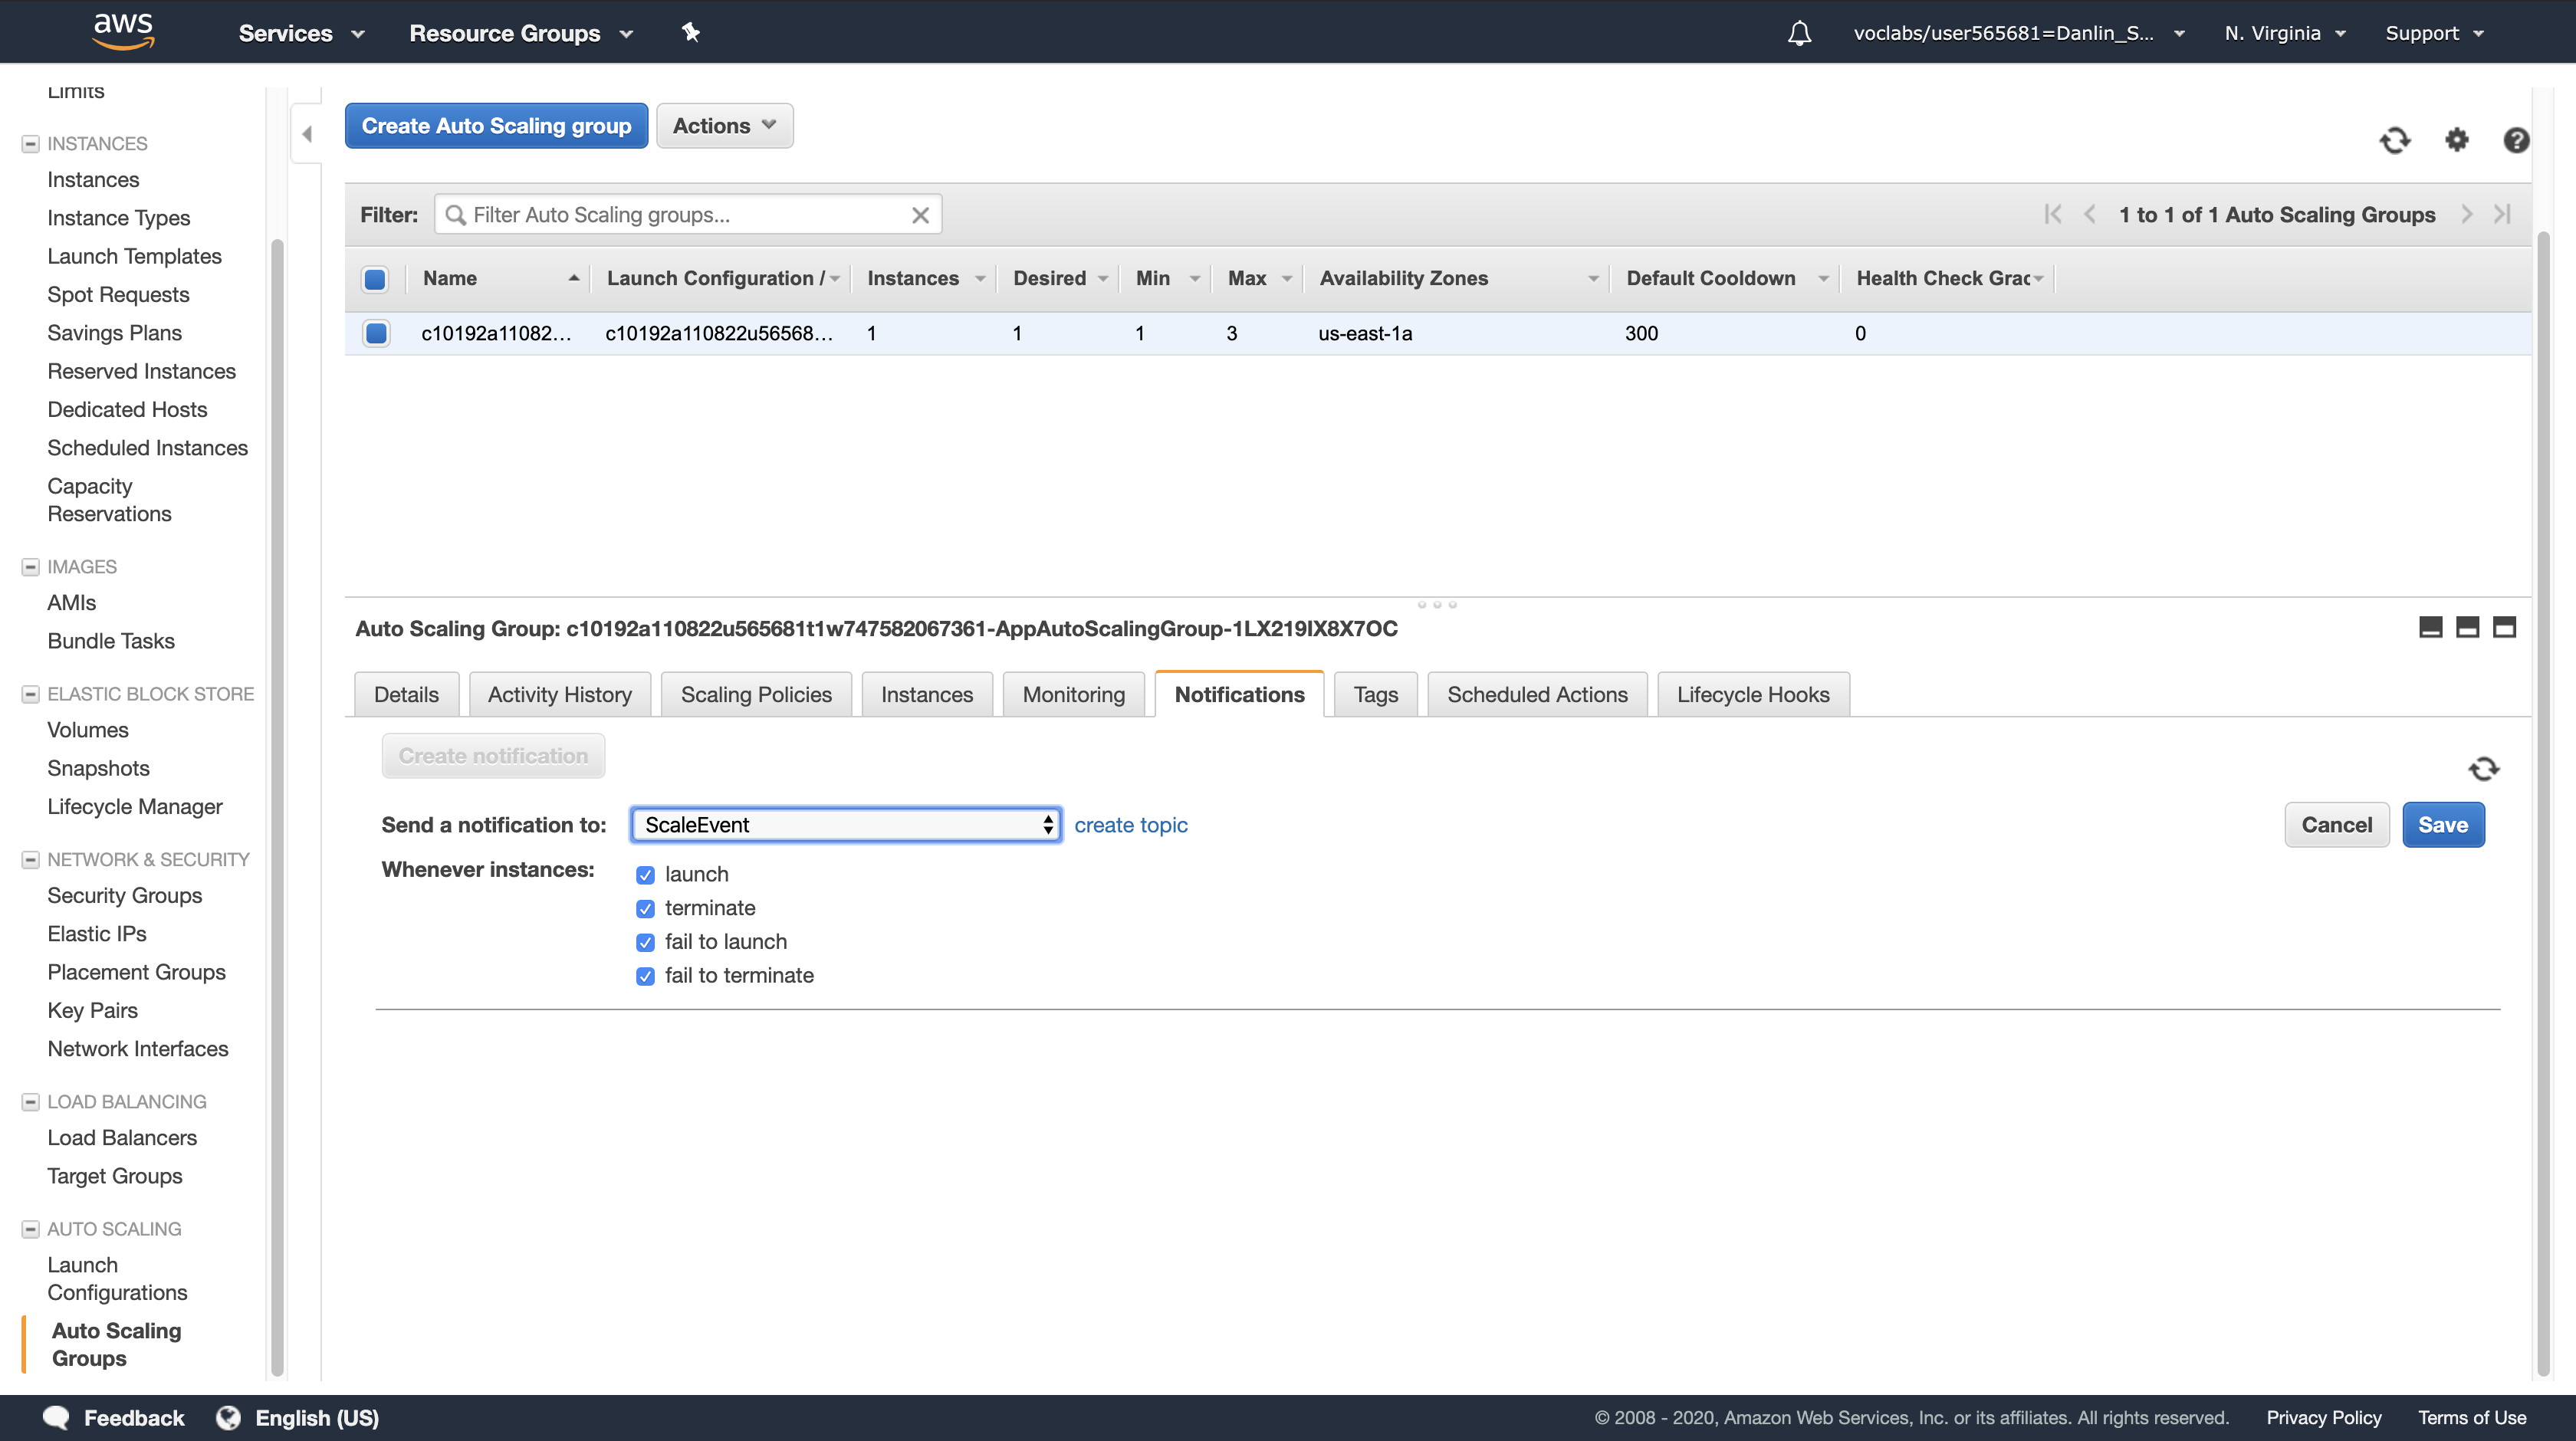
For Send a notification to, confirm that ScaleEvent is selected. (This is the notification topic you just created.)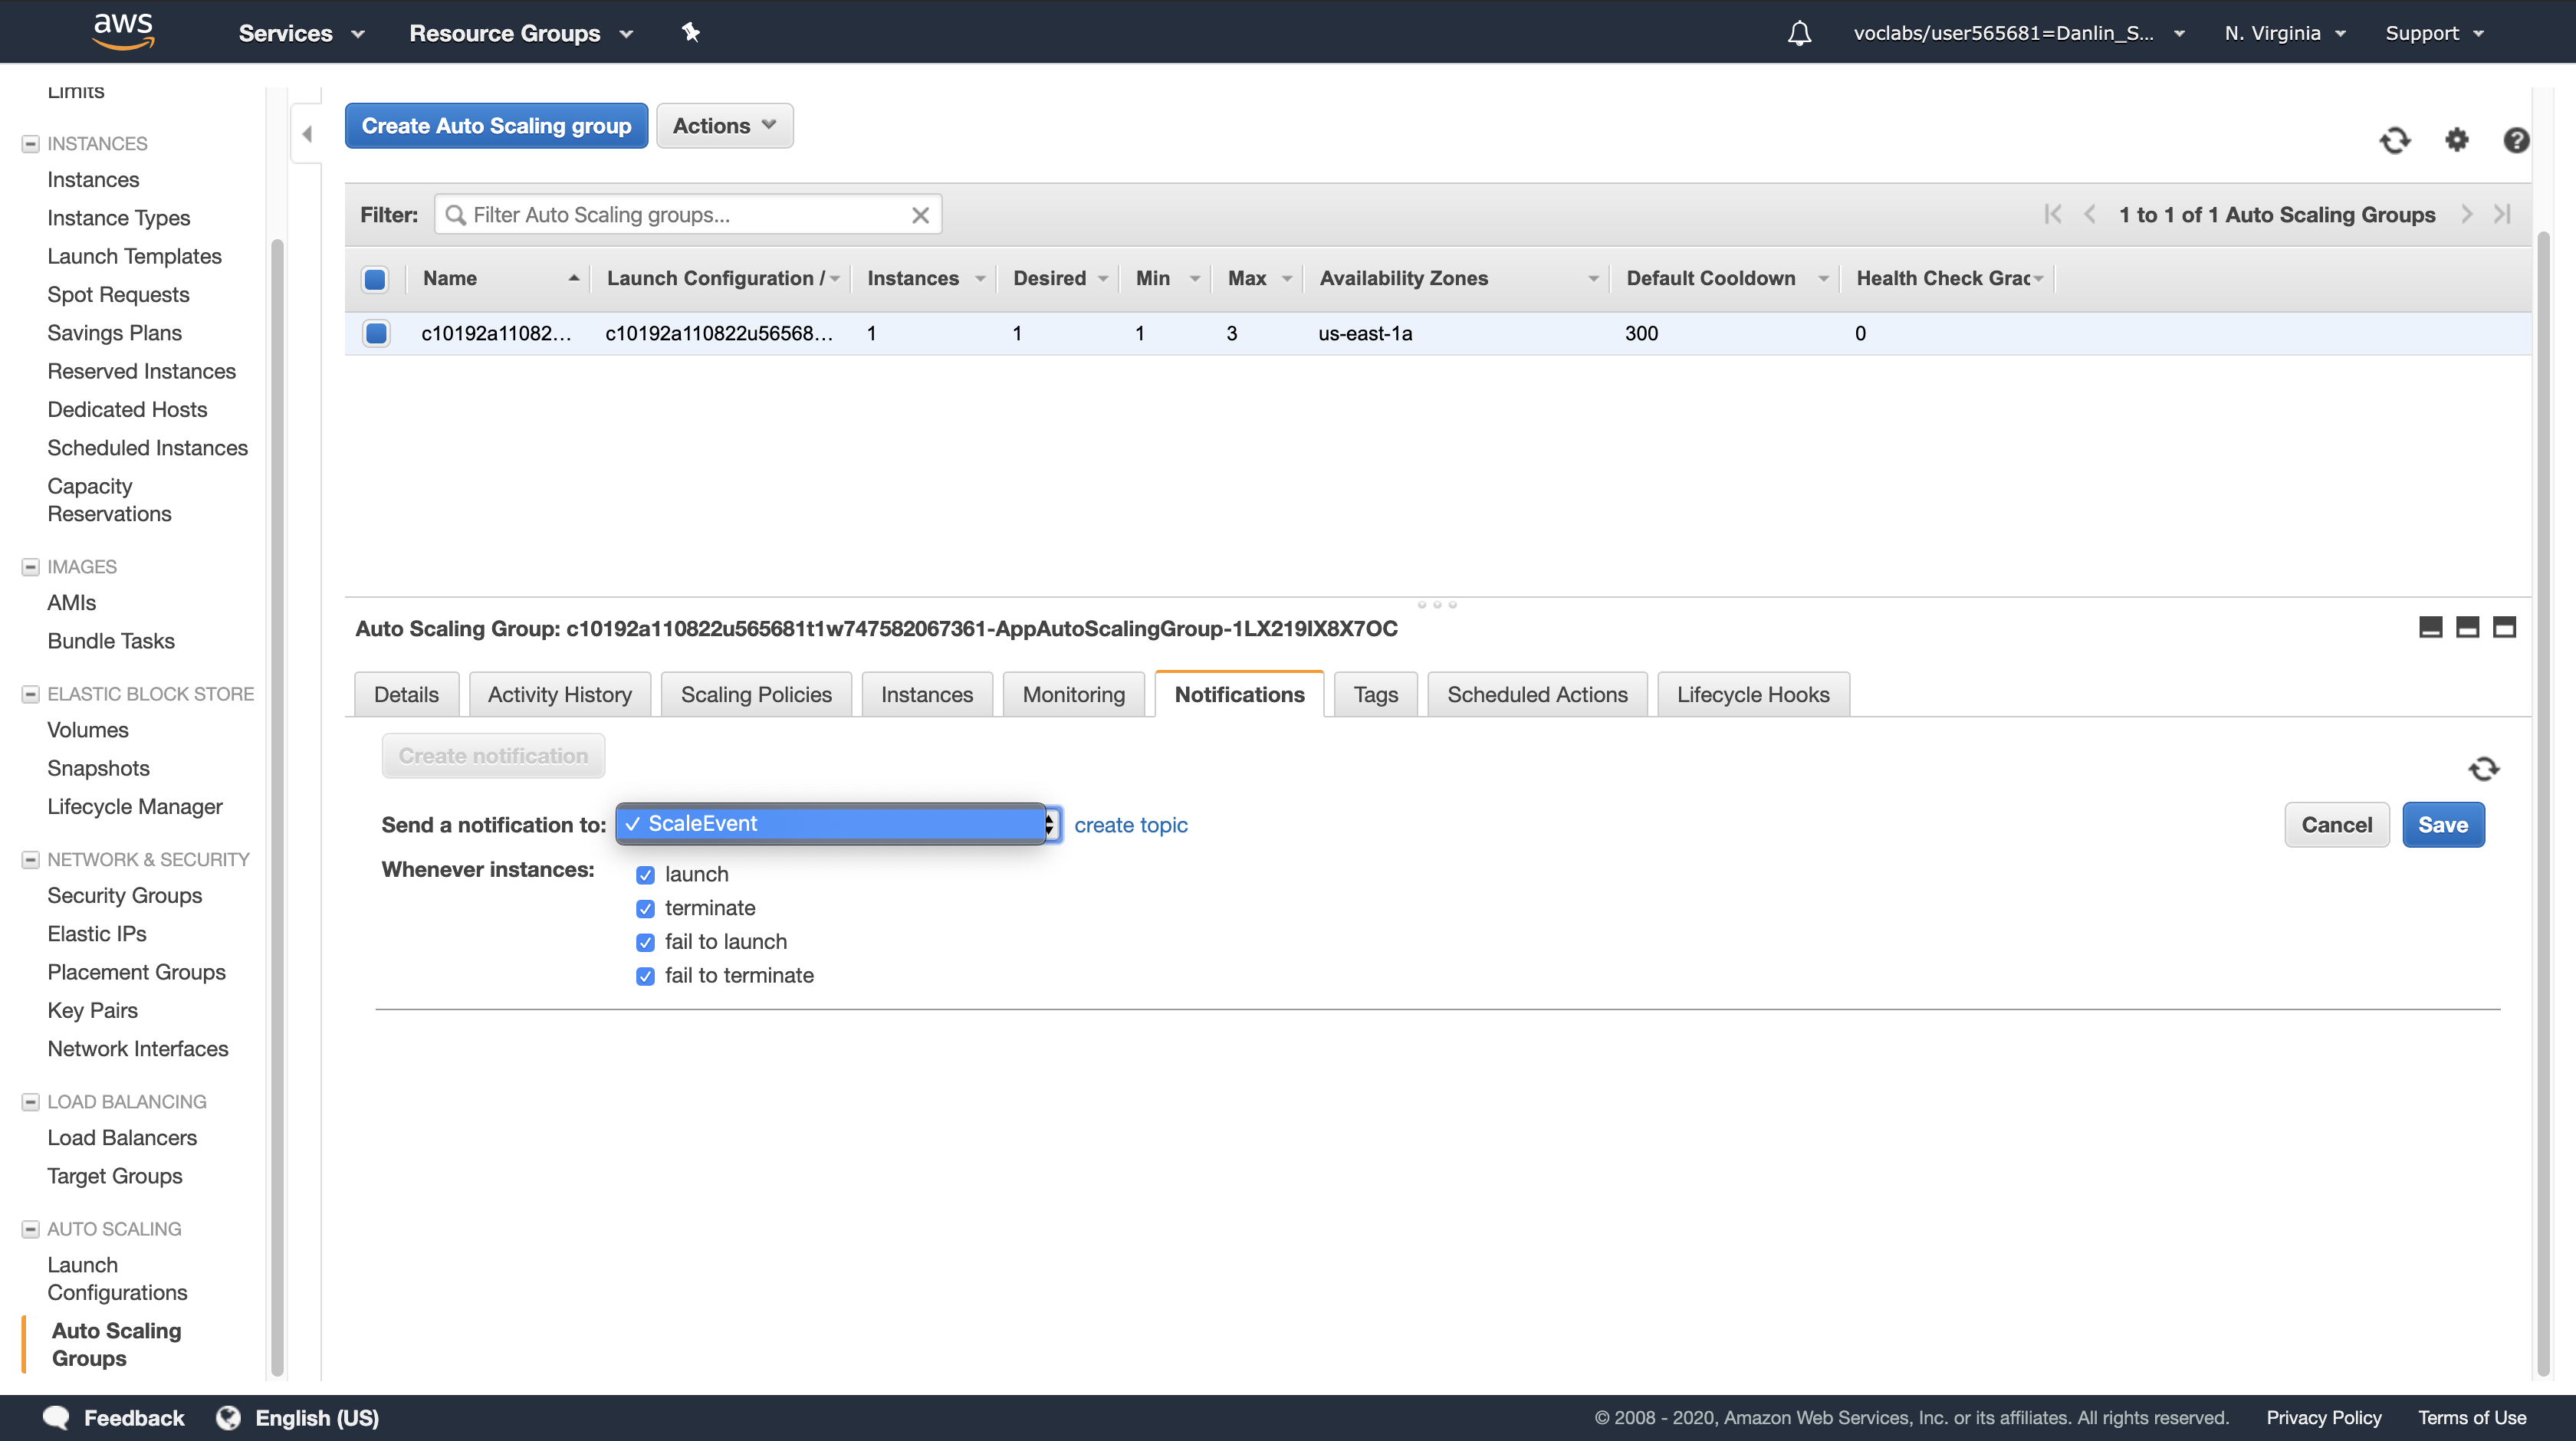
For Whenever instances, ensure that only launch is selected. All other options should be deselected.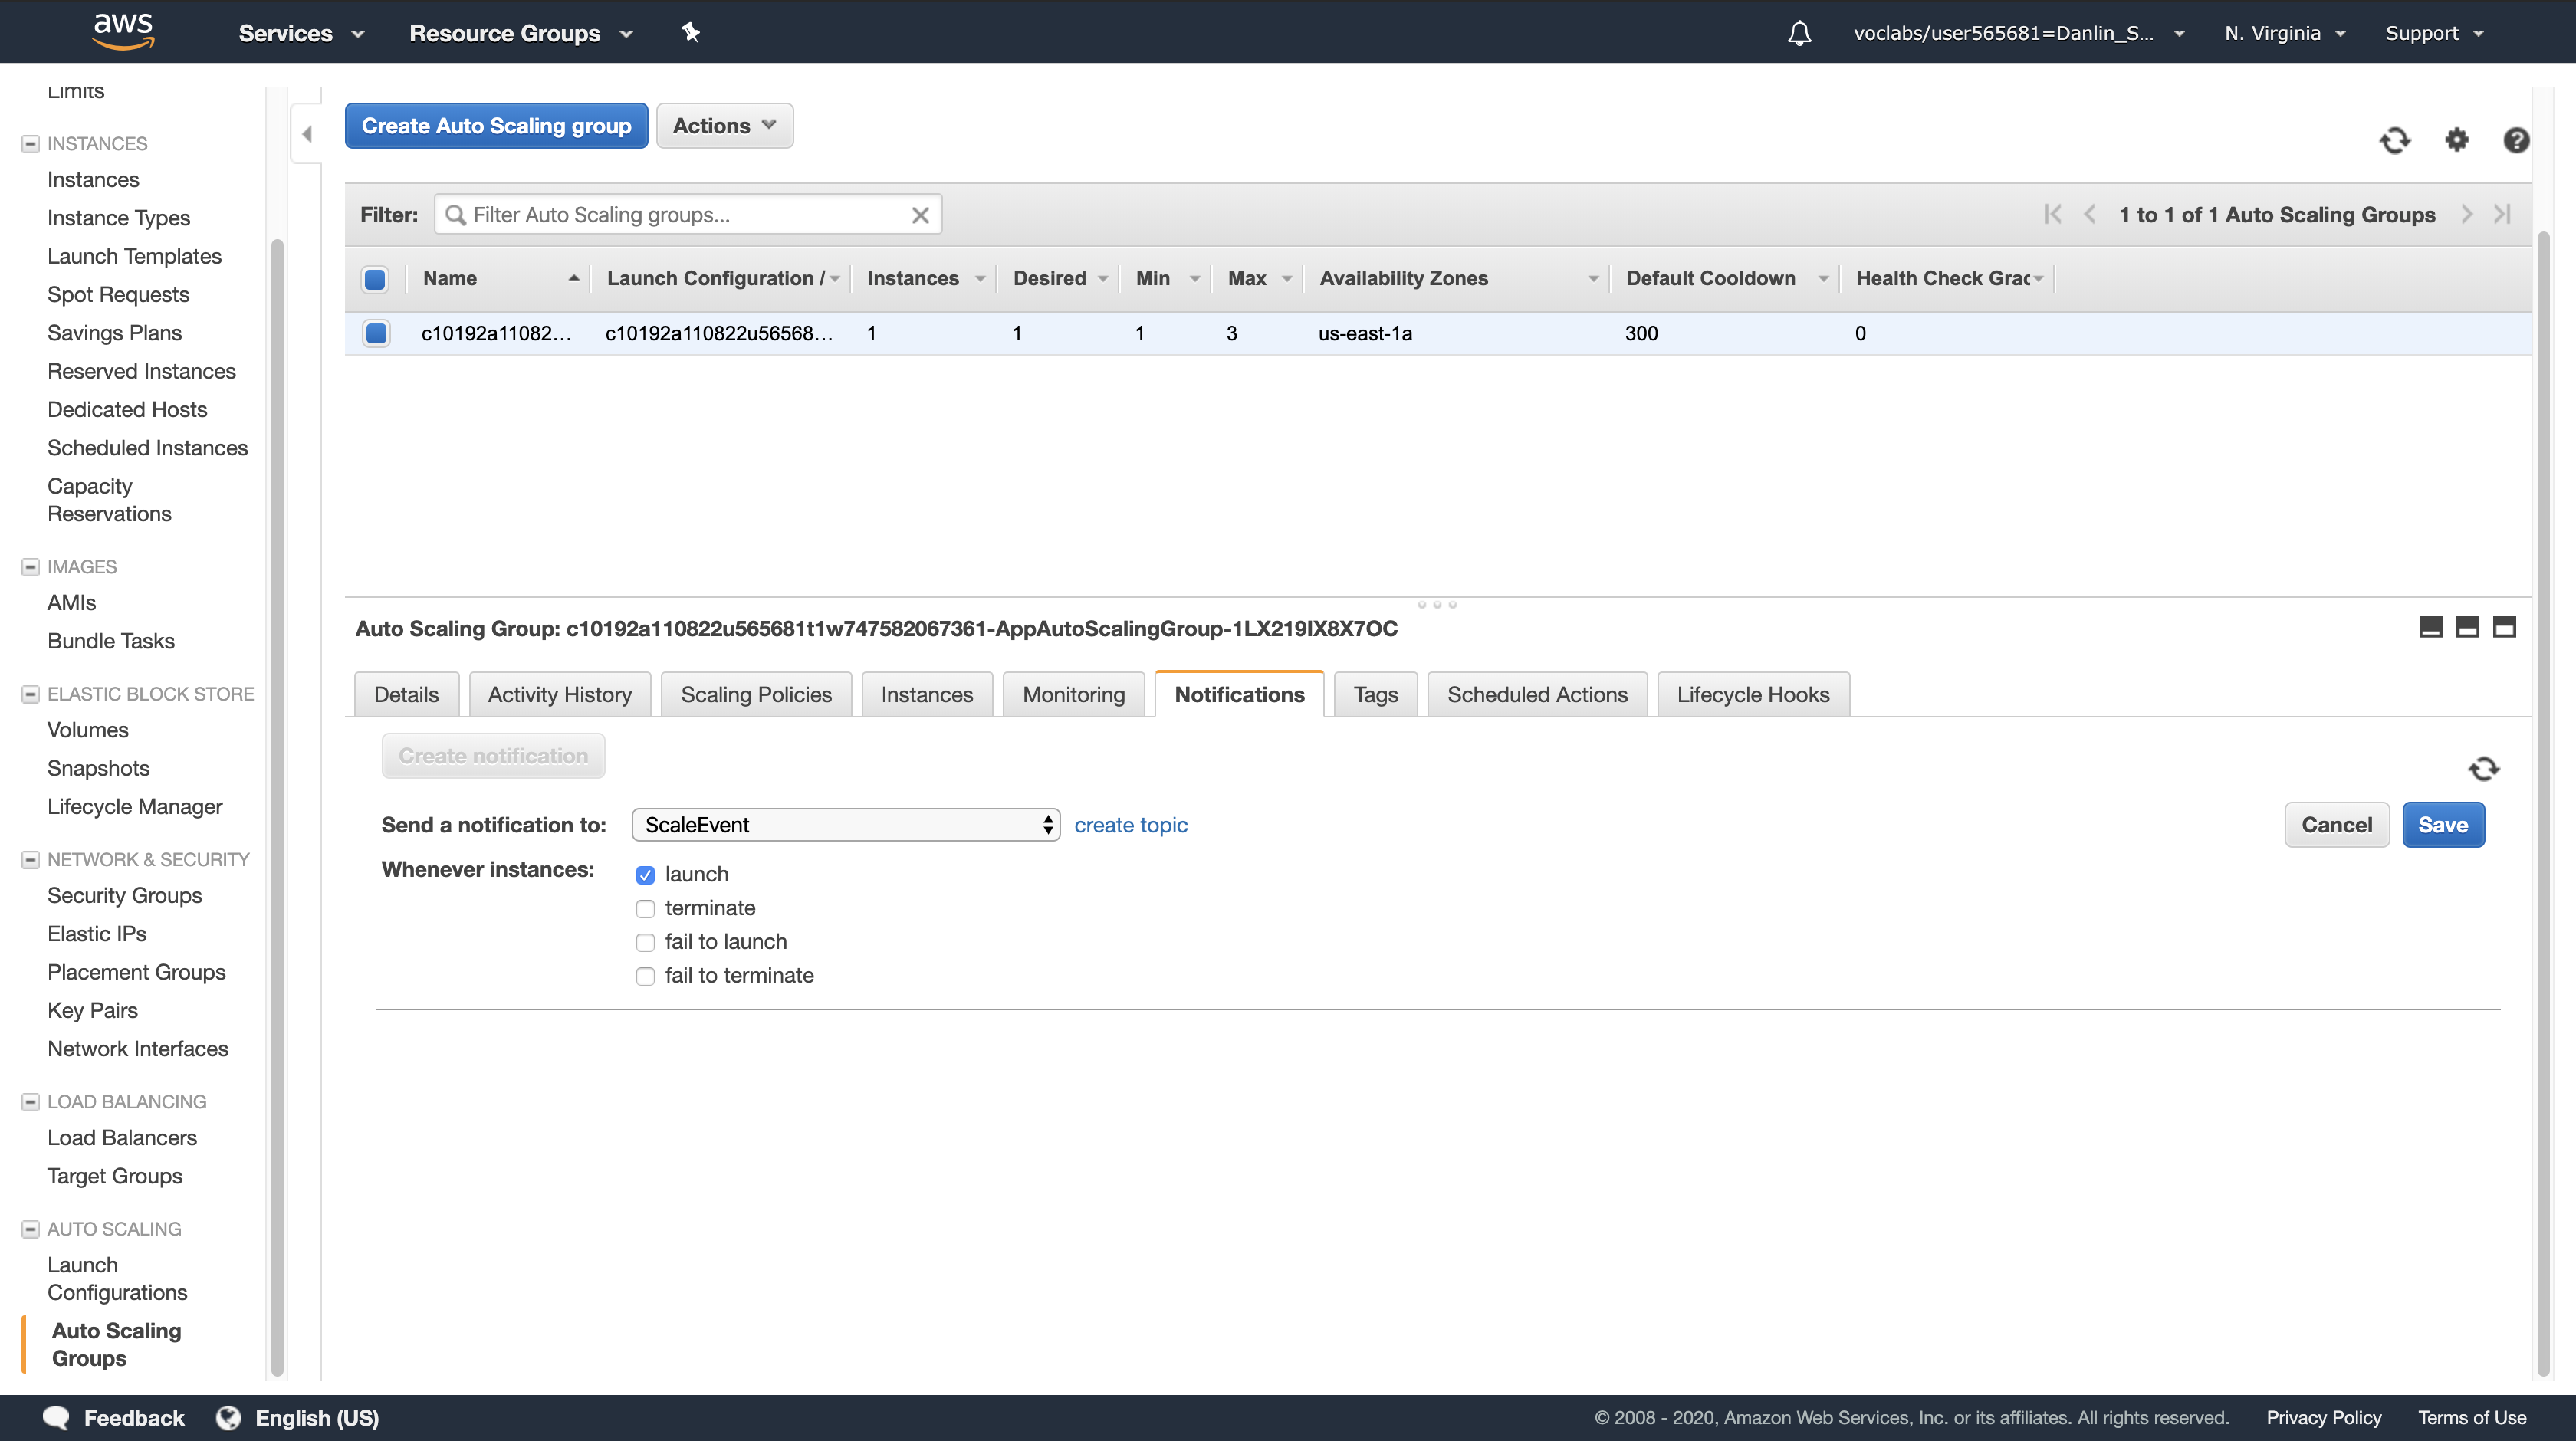
Click Save.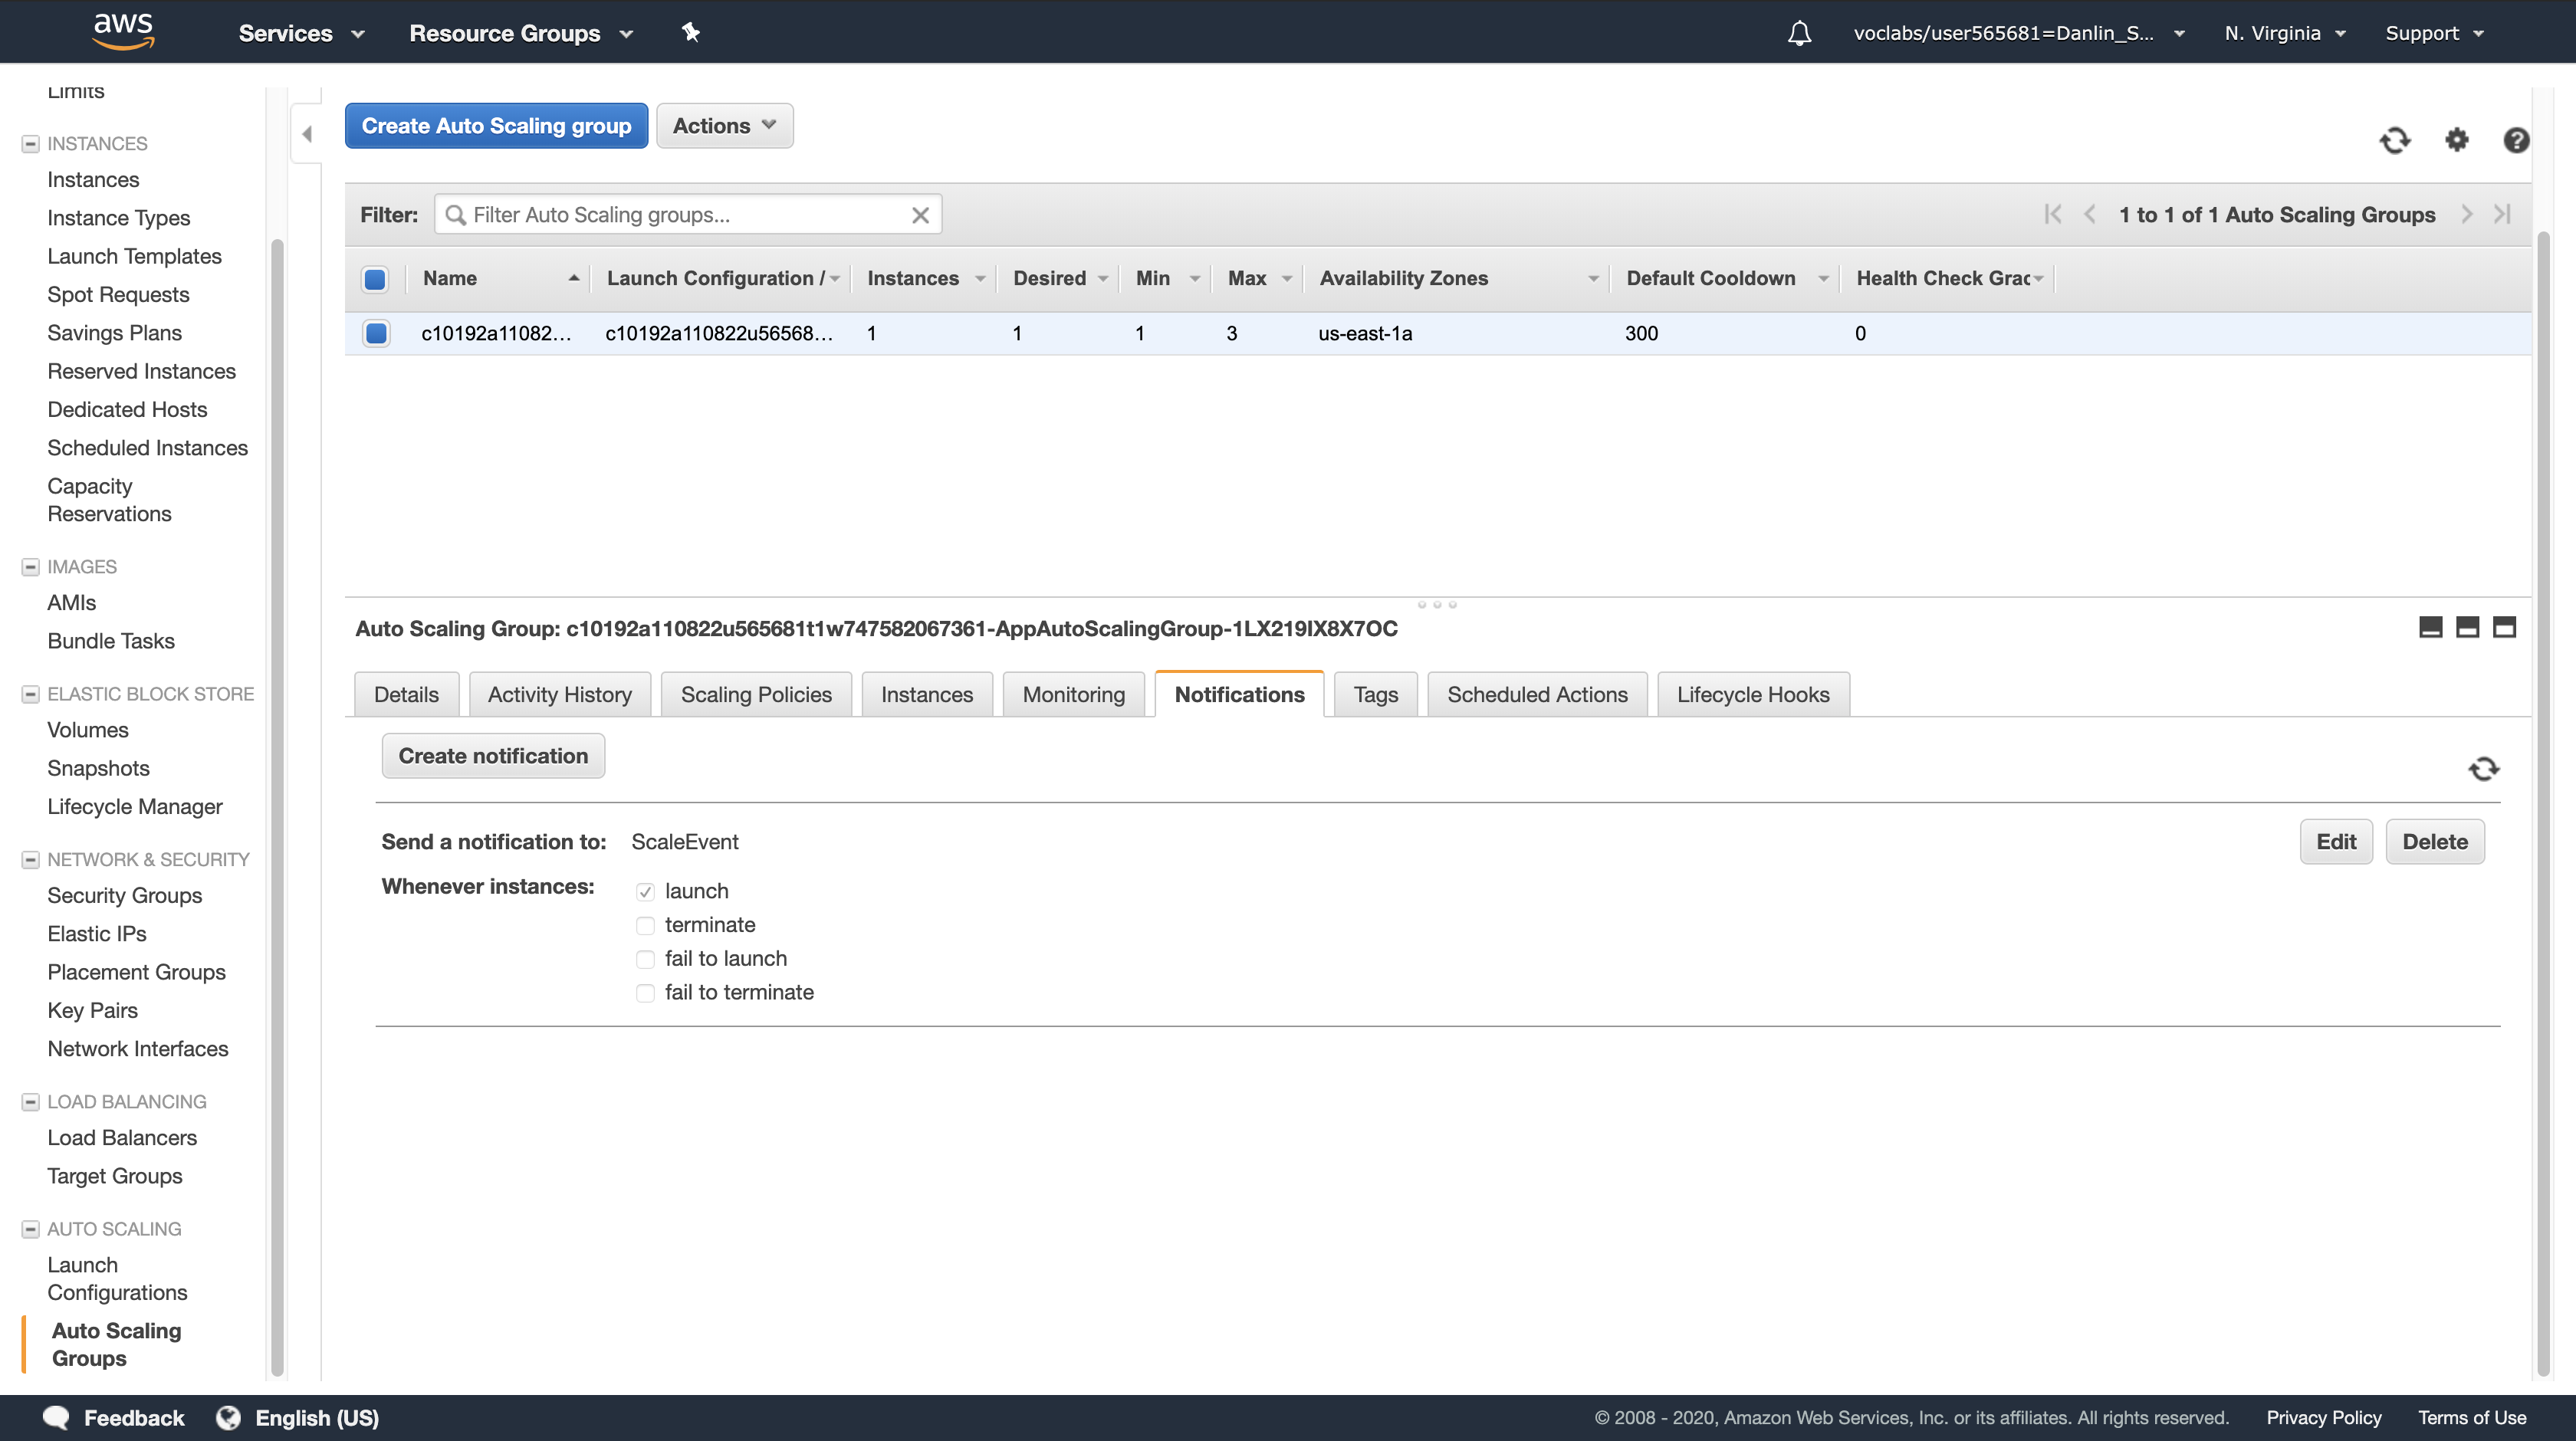
Auto Scaling will now send a message to your SNS topic whenever a new instance is launched in the Auto Scaling group.
An IAM Role for the Lambda function
An IAM role named SnapAndTagRole that has permission to perform operations on EC2 instances and to log messages in Amazon CloudWatch Logs has been pre-created for you. You will later associate this role with your Lambda function.
In this task, you will create an AWS Lambda function that will be invoked by Amazon SNS when Auto Scaling launches a new EC2 instance. The Lambda function will create a snapshot of the Amazon EBS volumes attached to the instance and then add a tag to the instance.
AWS Management Console
Services menu > click Lambda.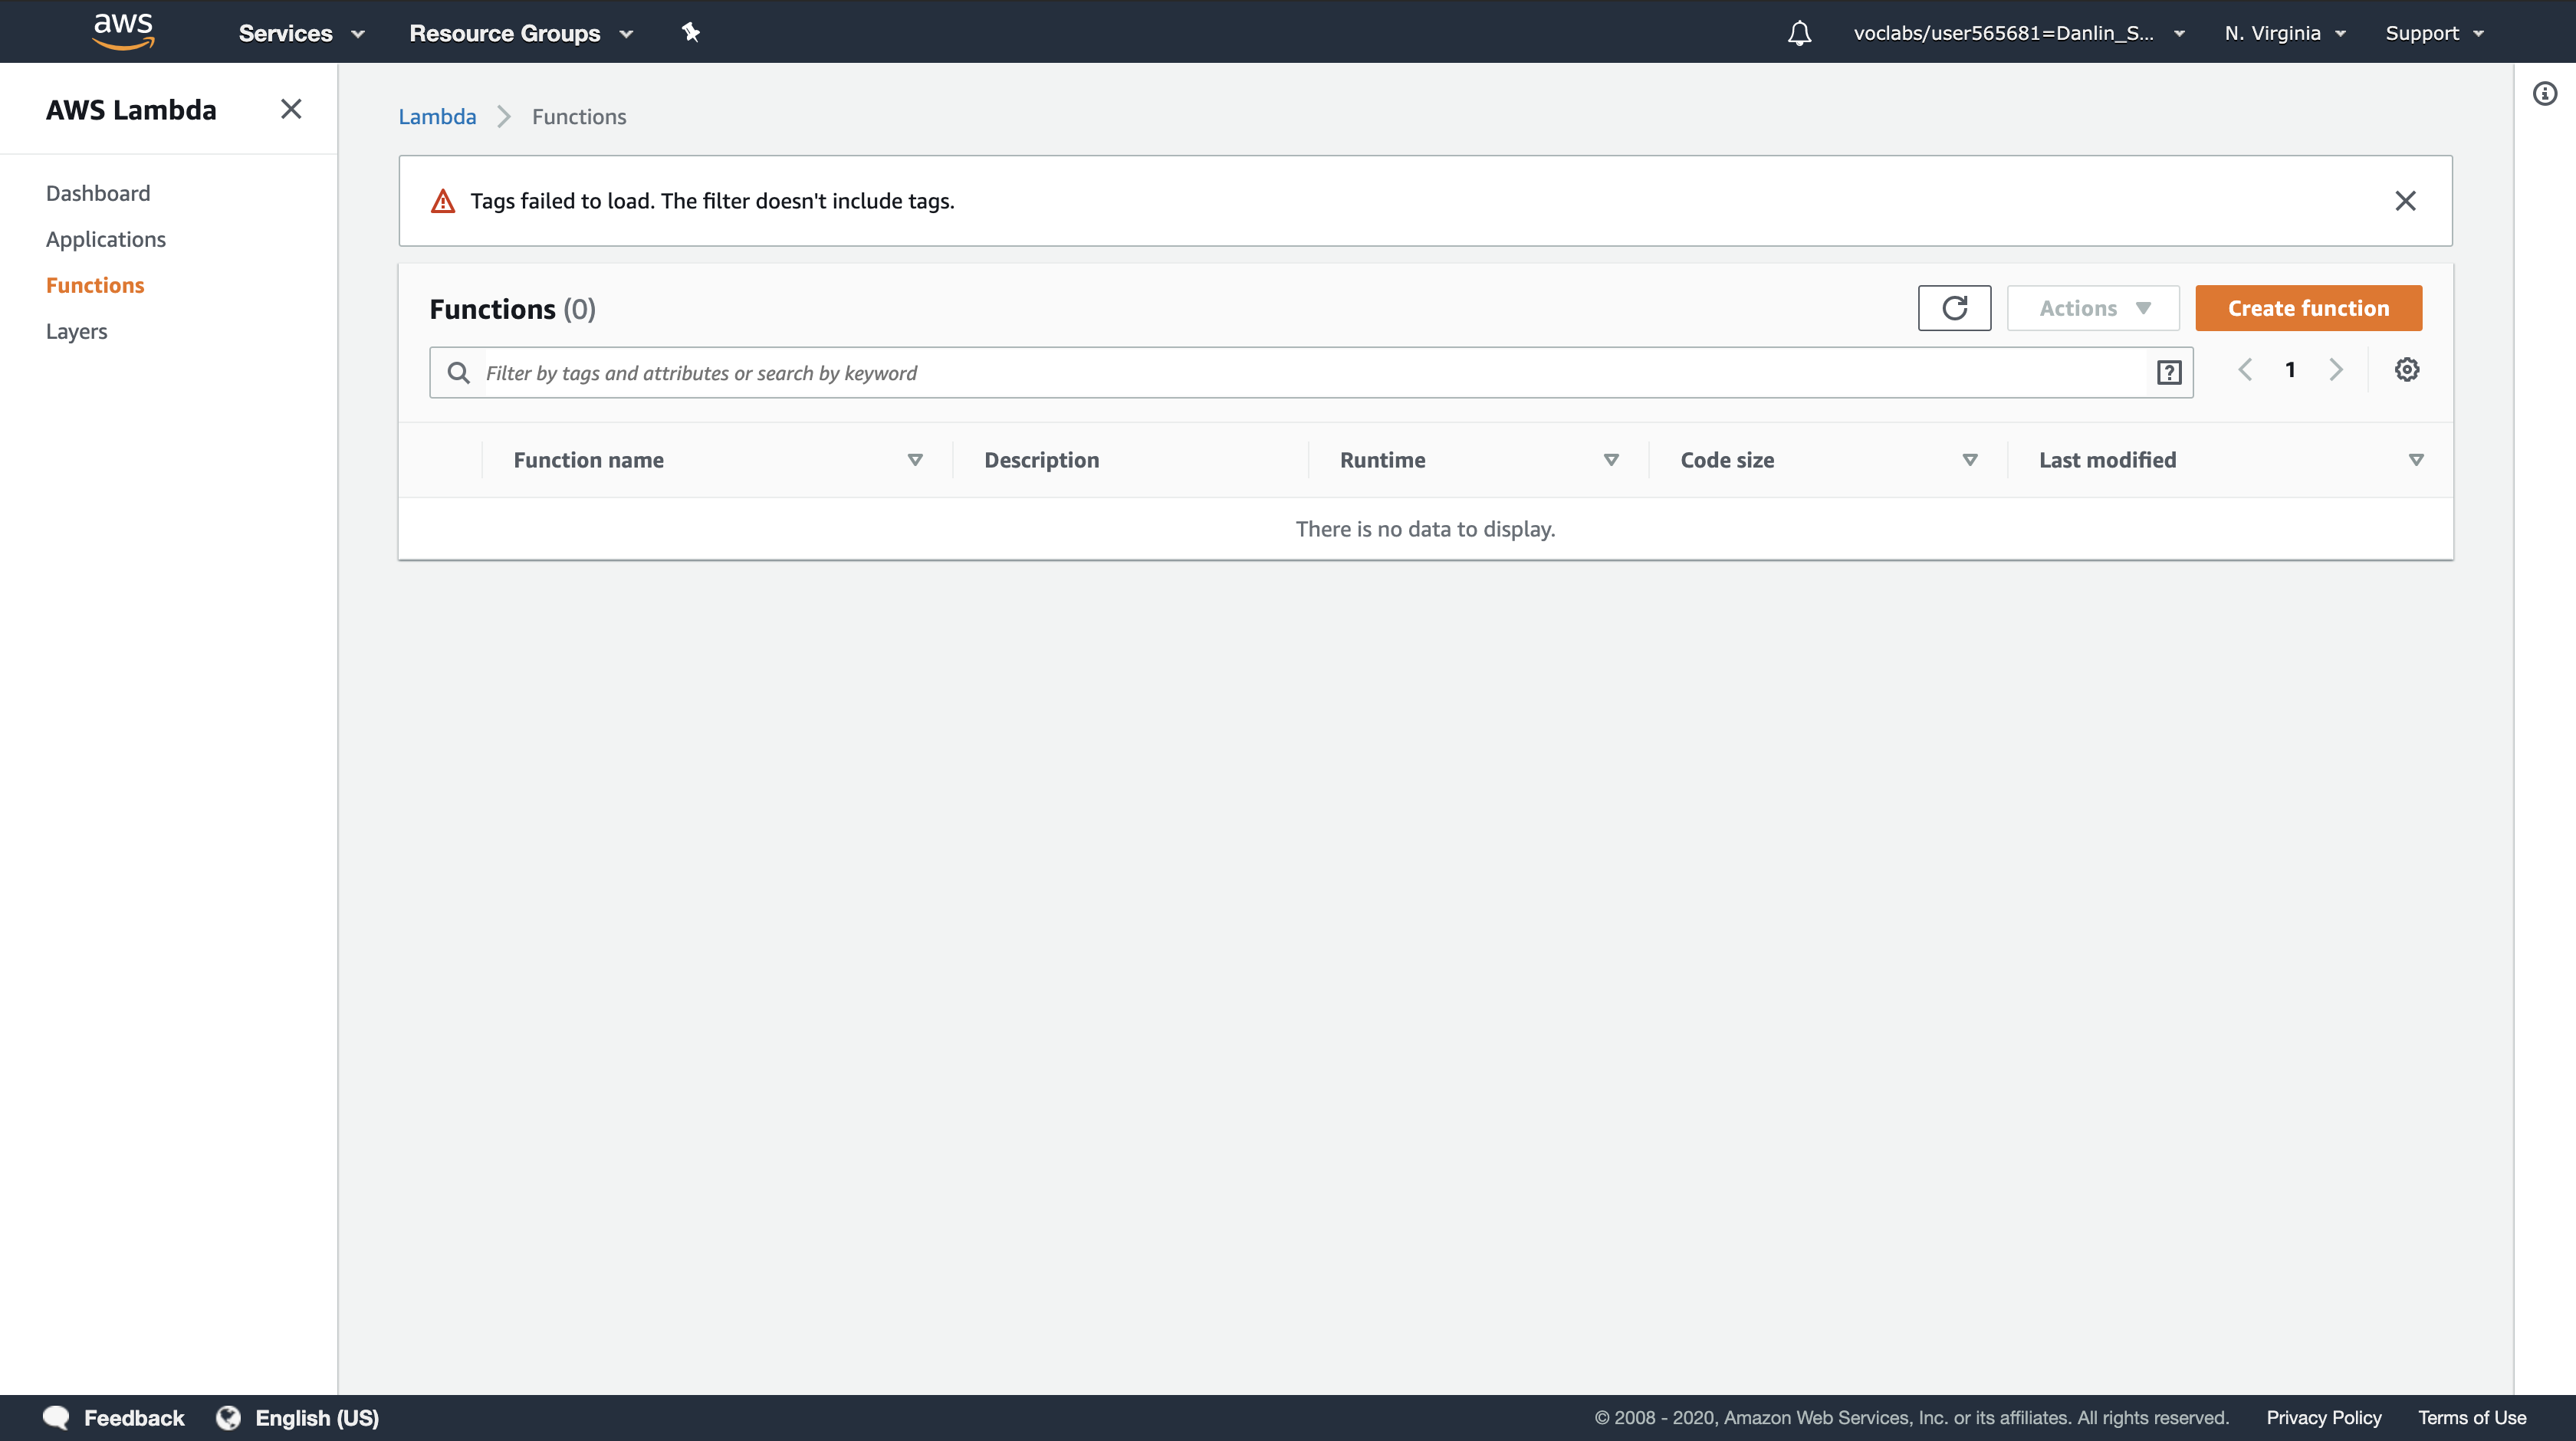
Click Create a function.
Note: Blueprints are code templates for writing Lambda functions. Blueprints are provided for standard Lambda triggers such as creating Alexa skills and processing Amazon Kinesis Firehose streams. This lab provides you with a pre-written Lambda function, so you will Author from scratch.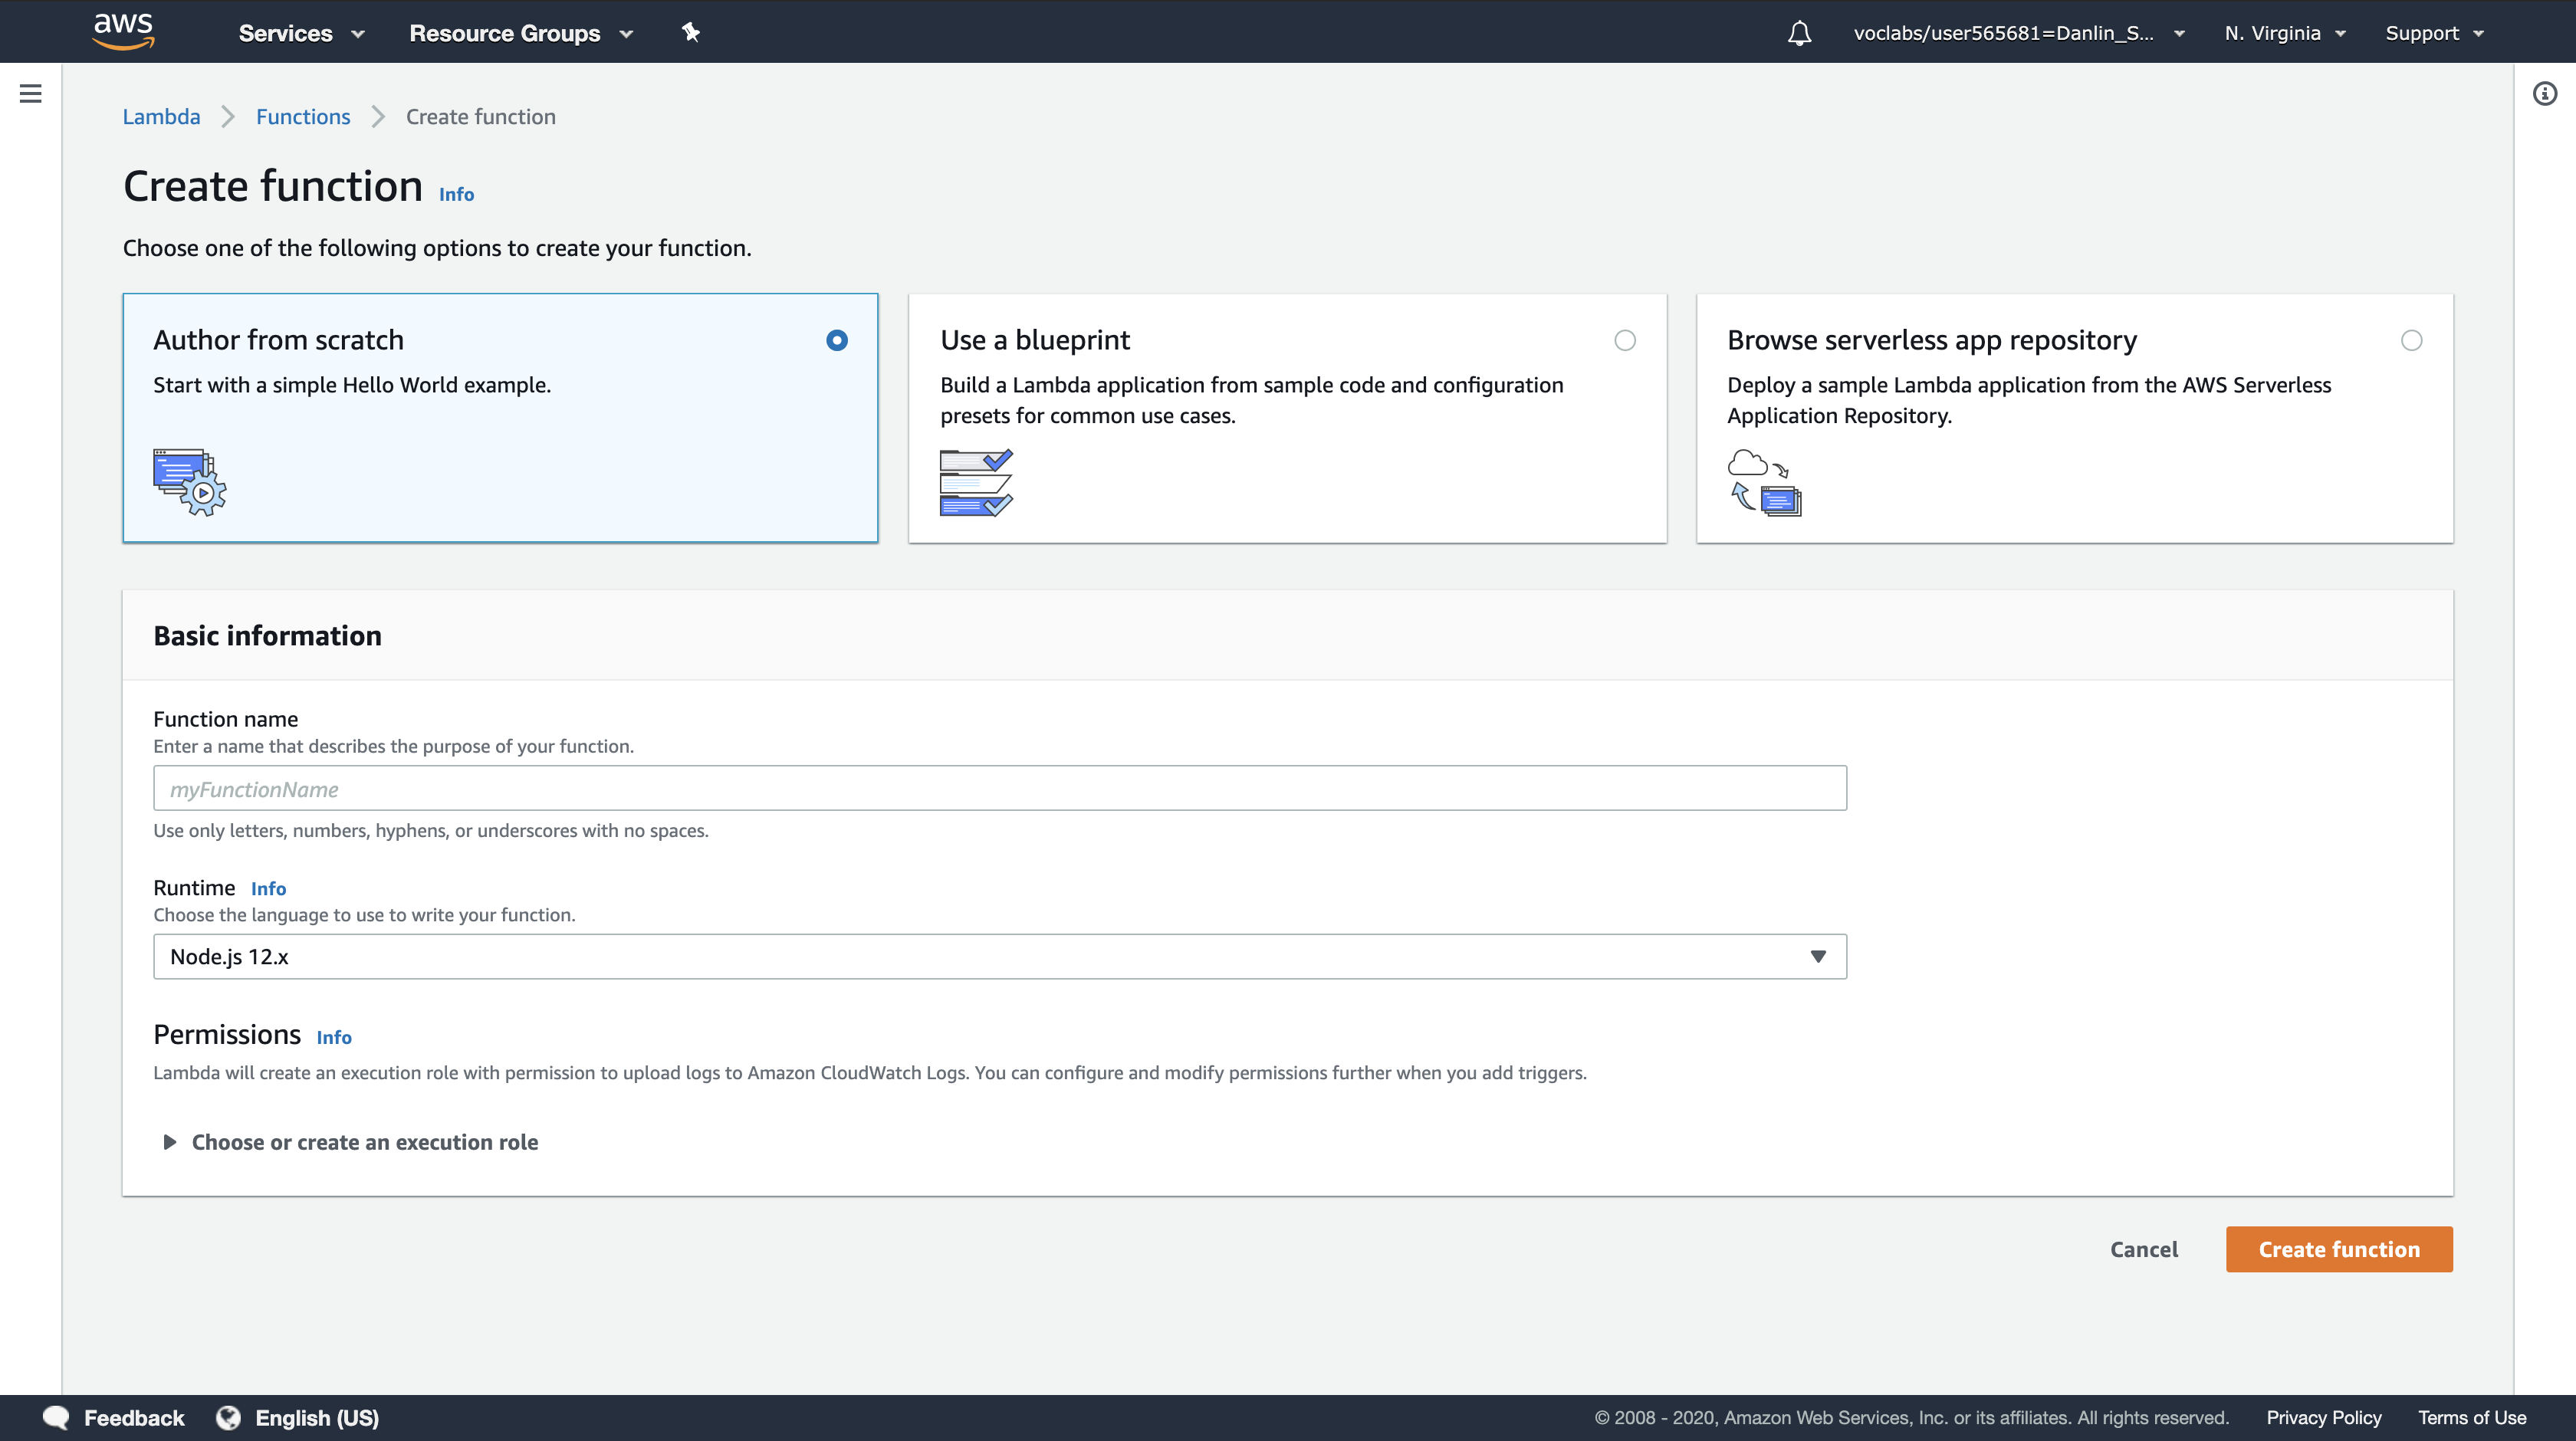
This role grants permission to the Lambda function to create an EBS Snapshot and to tag the EC2 instance.
Configure the following:
- Function Name:
Snap_and_Tag - Runtime:
Python 2.7 - Role:
Use an existing role - Existing role:
SnapAndTagRole
This role grants permission to the Lambda function to create an EBS Snapshot and to tag the EC2 instance.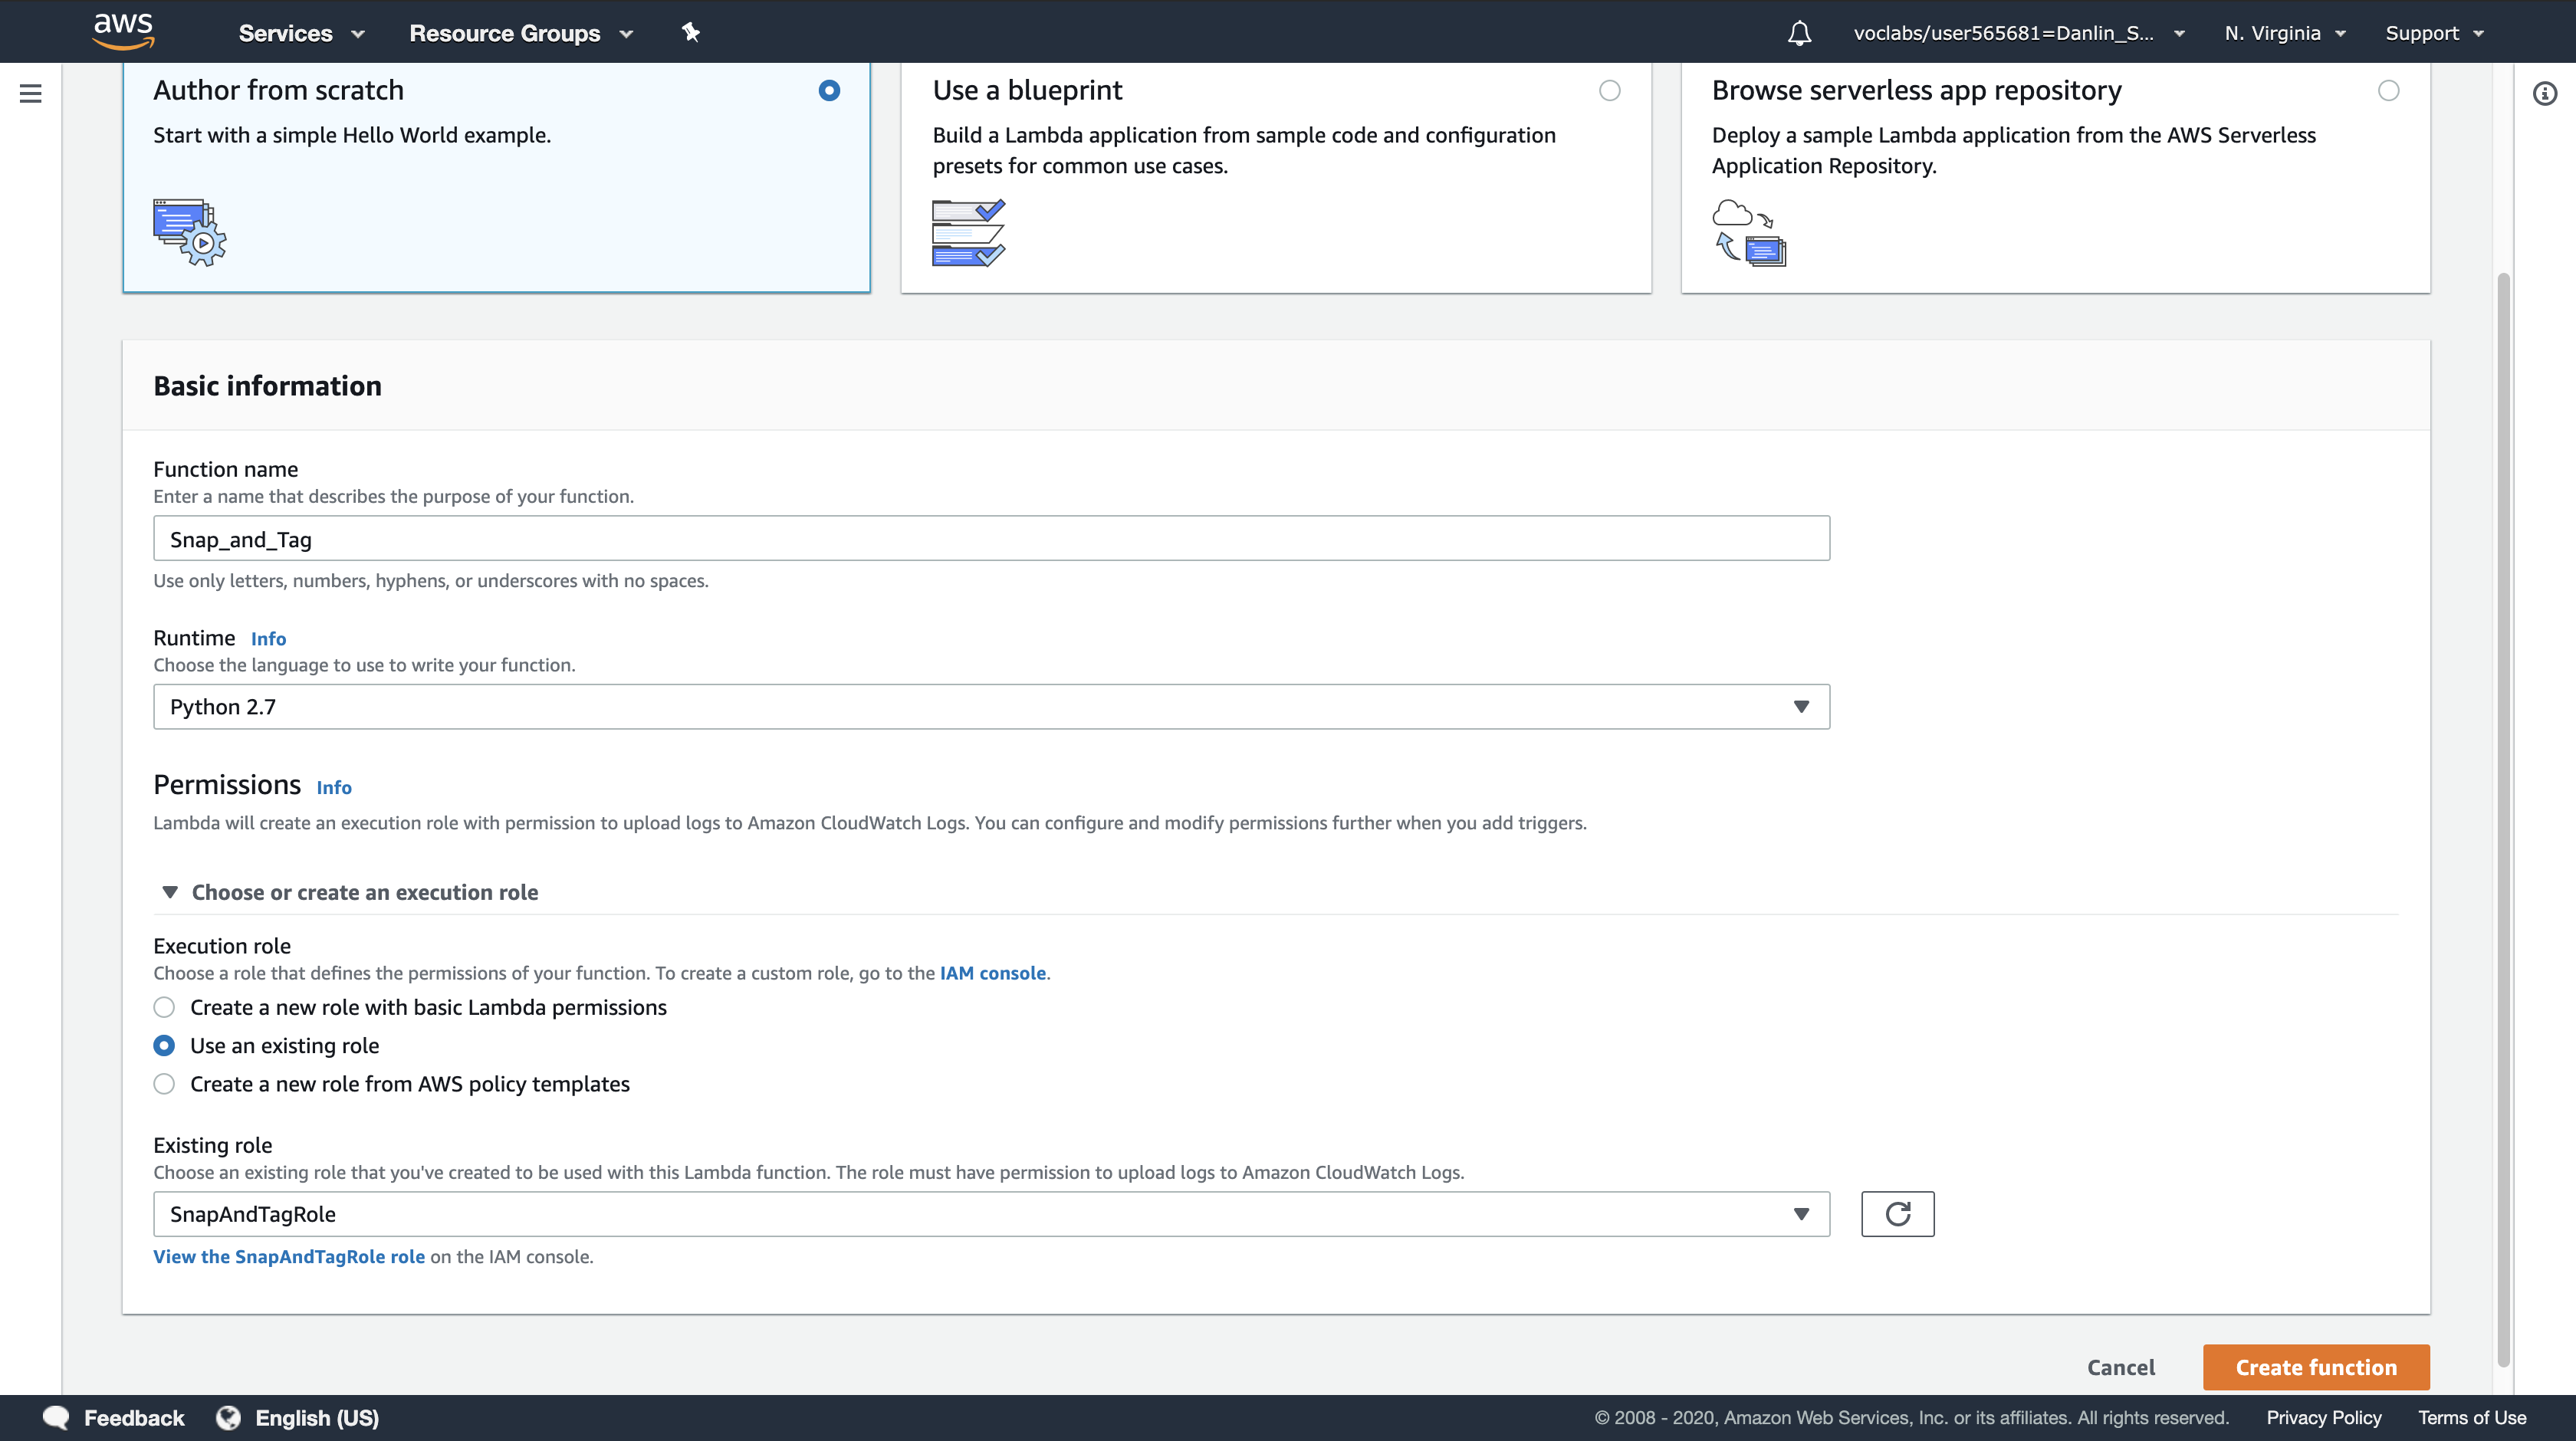
Click Create function.
A page will be displayed with your function configuration.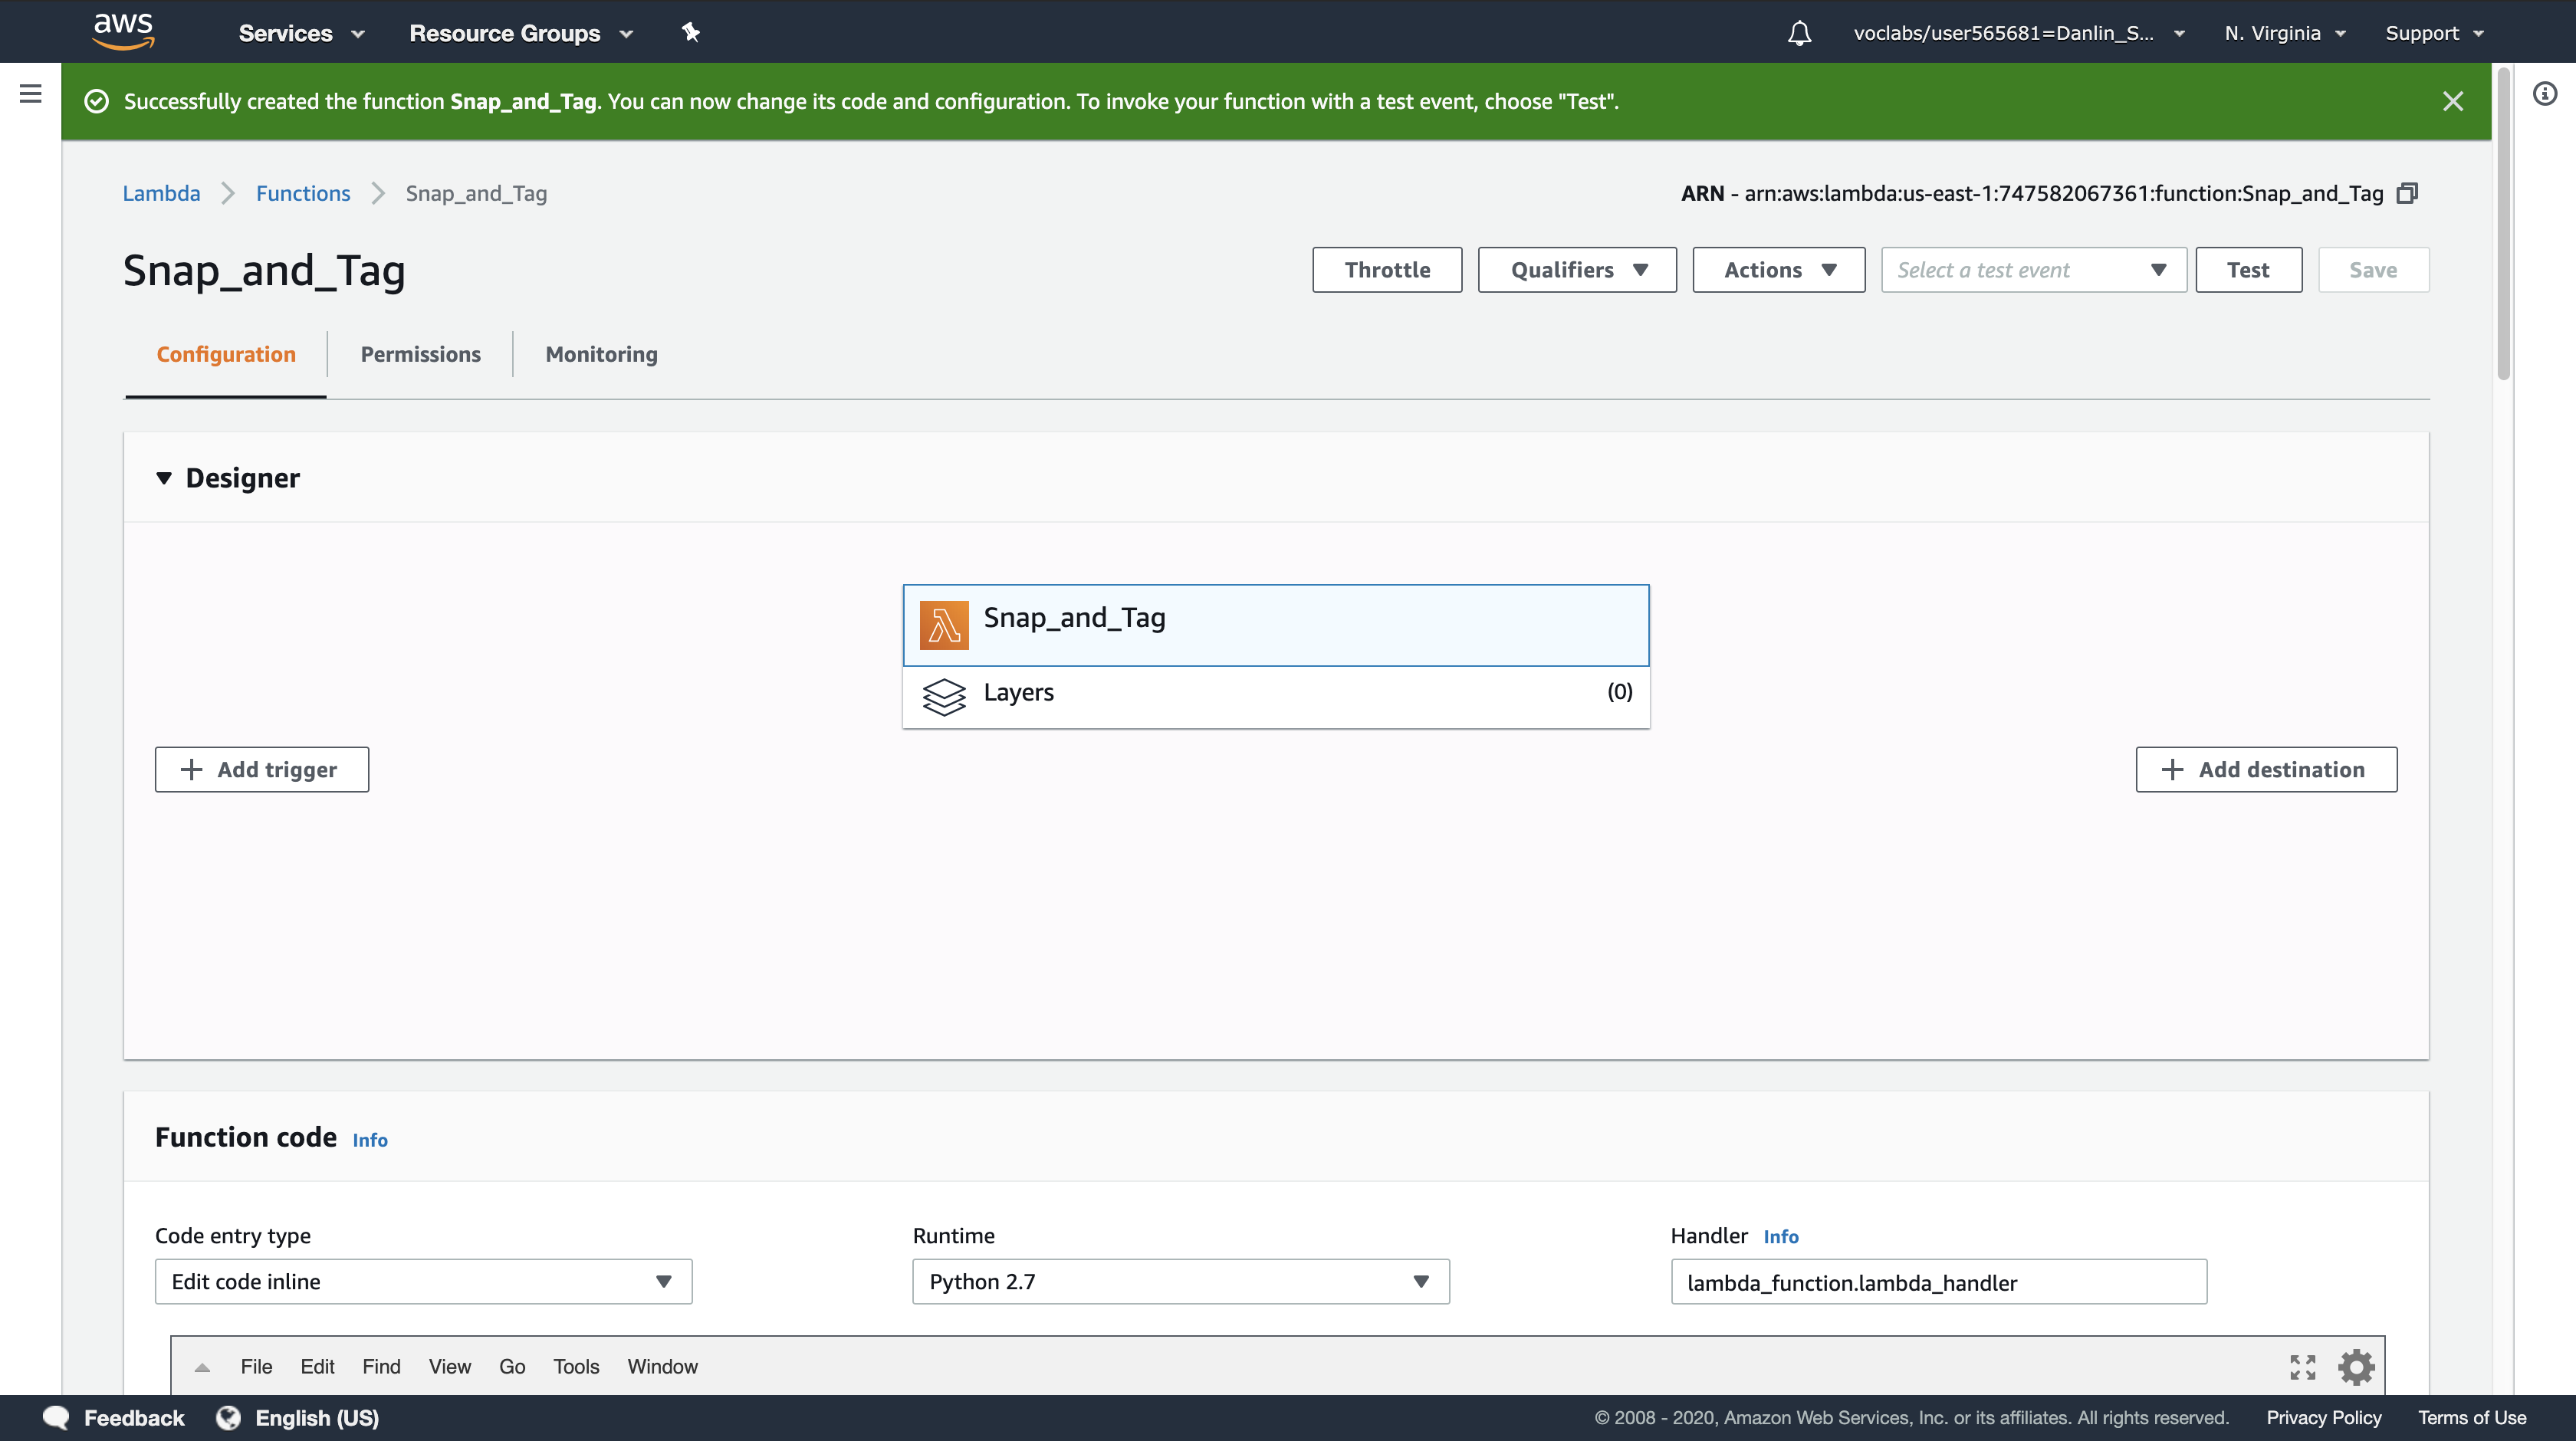
Scroll down to the Function code section, then delete all of the code that appears in the code editor.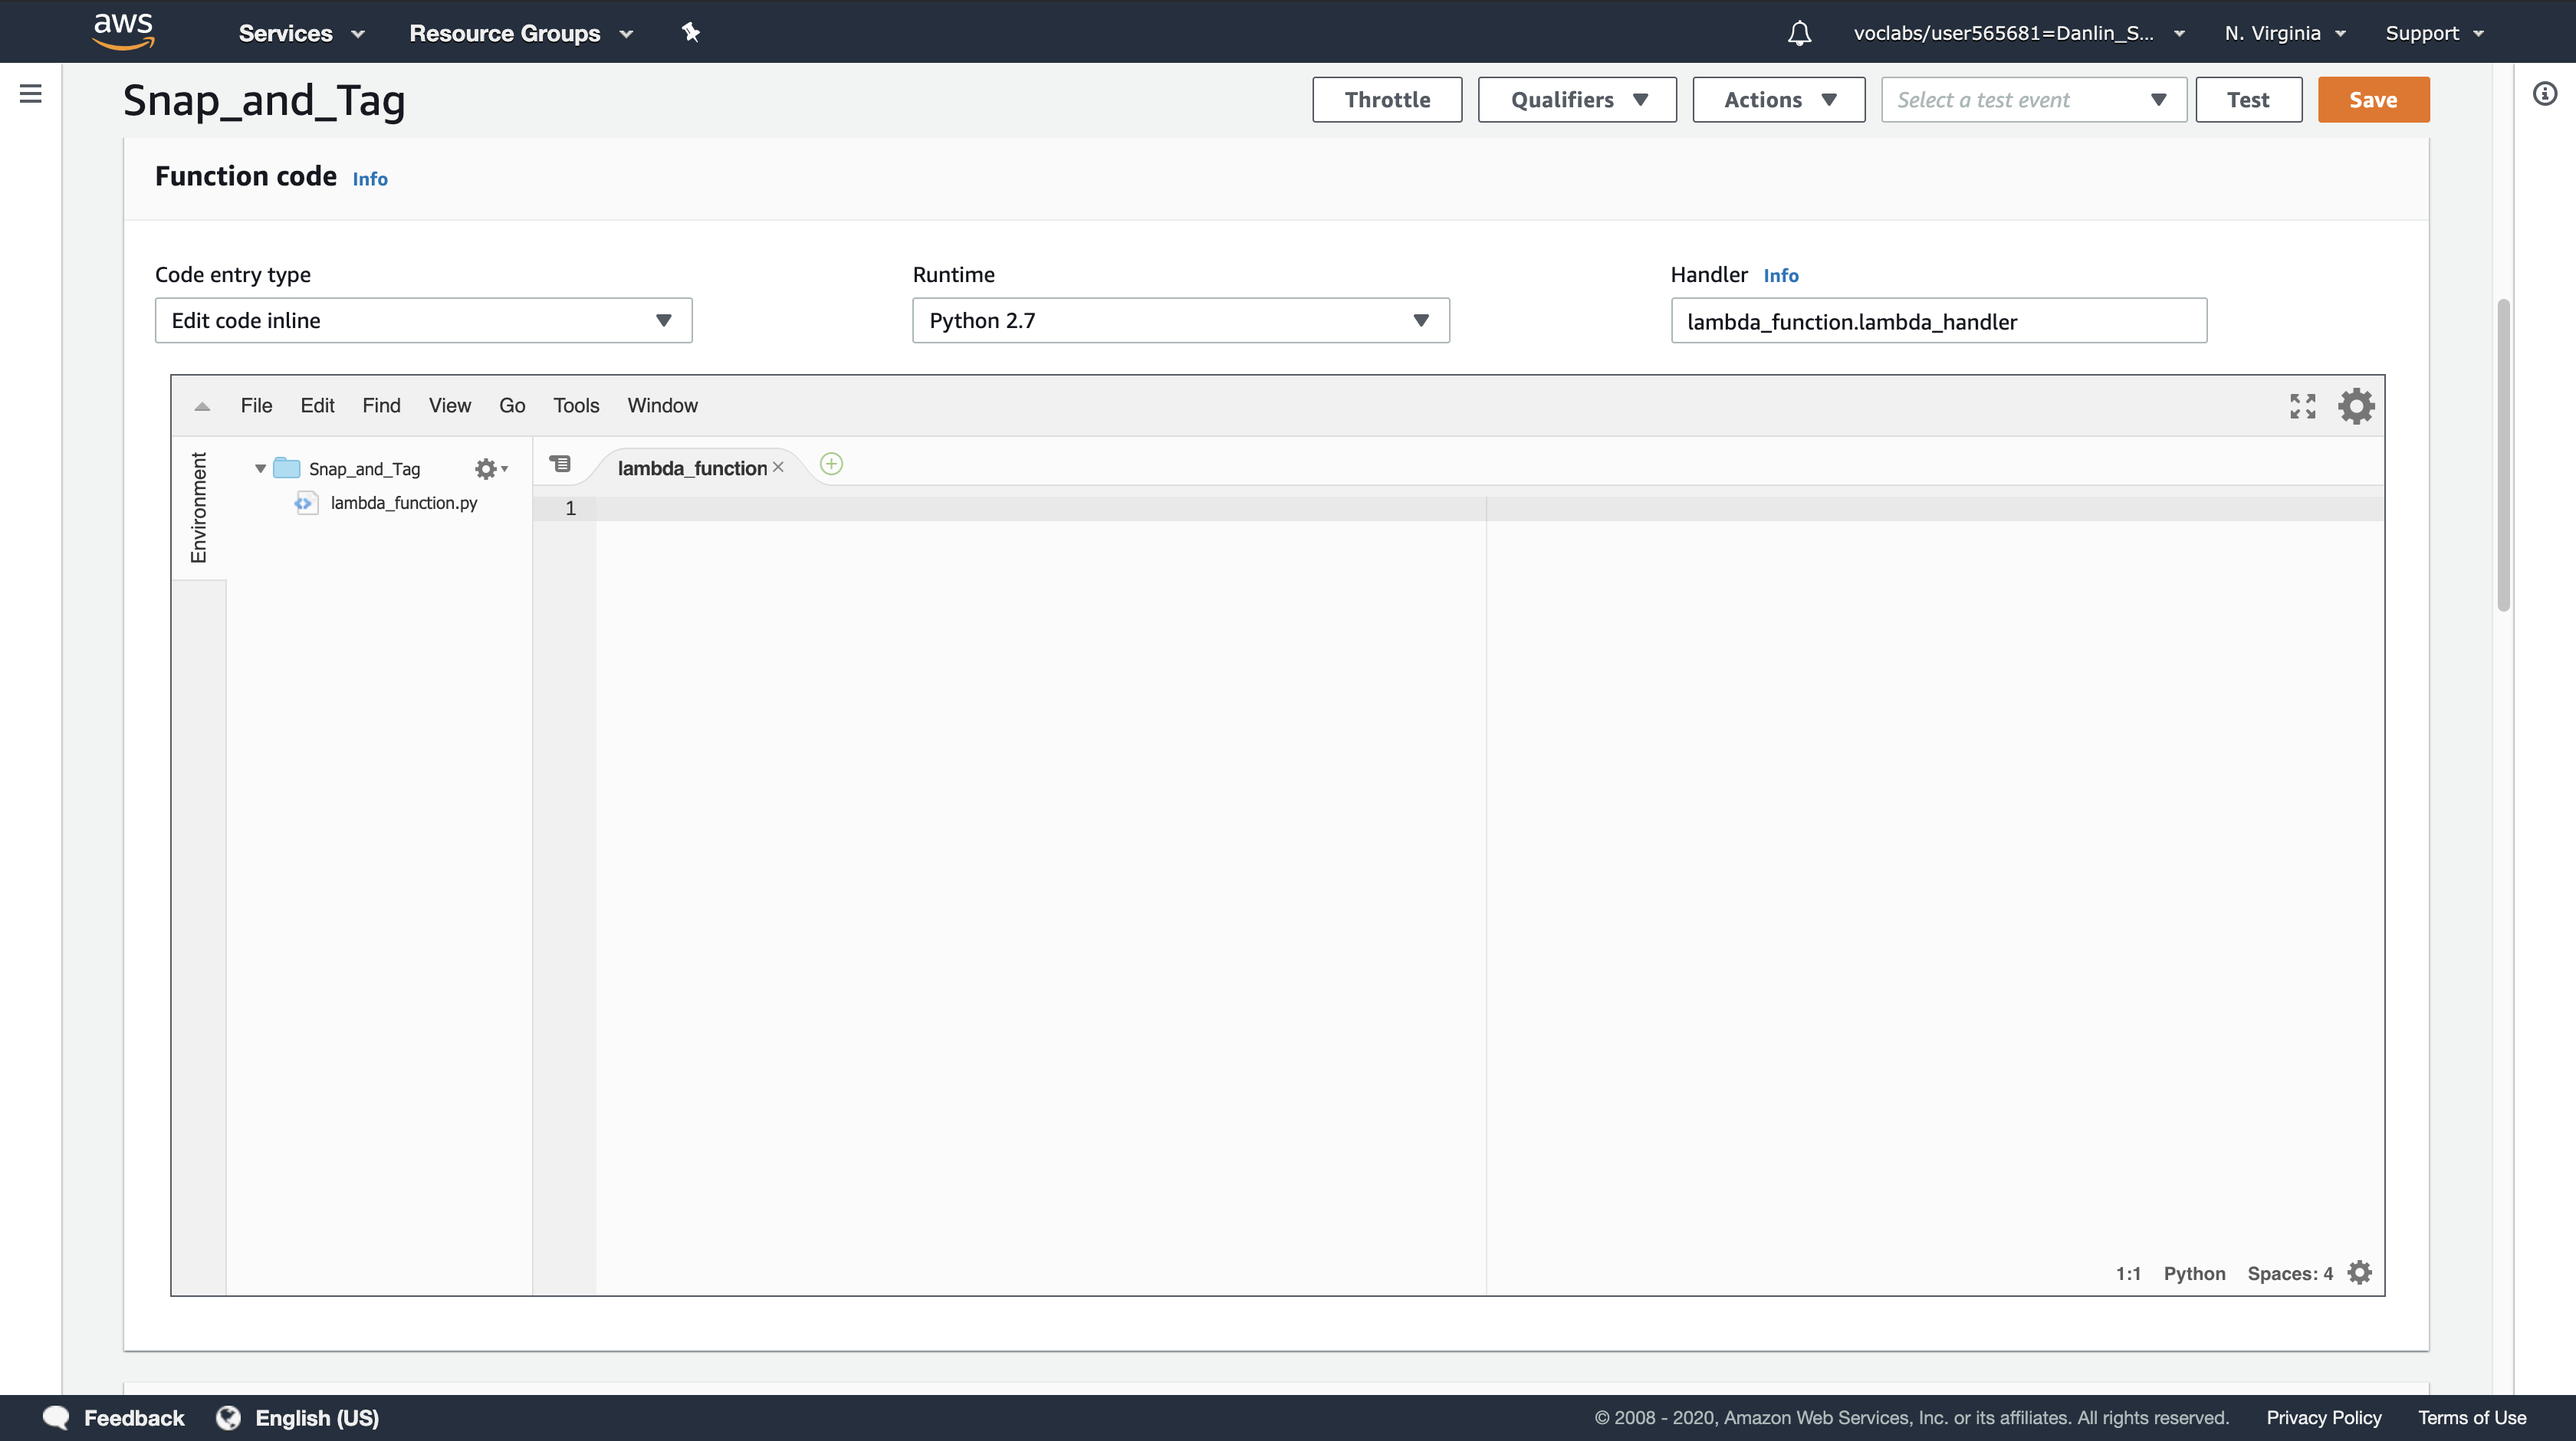
Copy the code below, and paste it into the code editor:
Note: When pasting code into the code editor, use keyboard shortcuts (Ctrl+v / ⌘+v) rather than right-clicking and pasting.
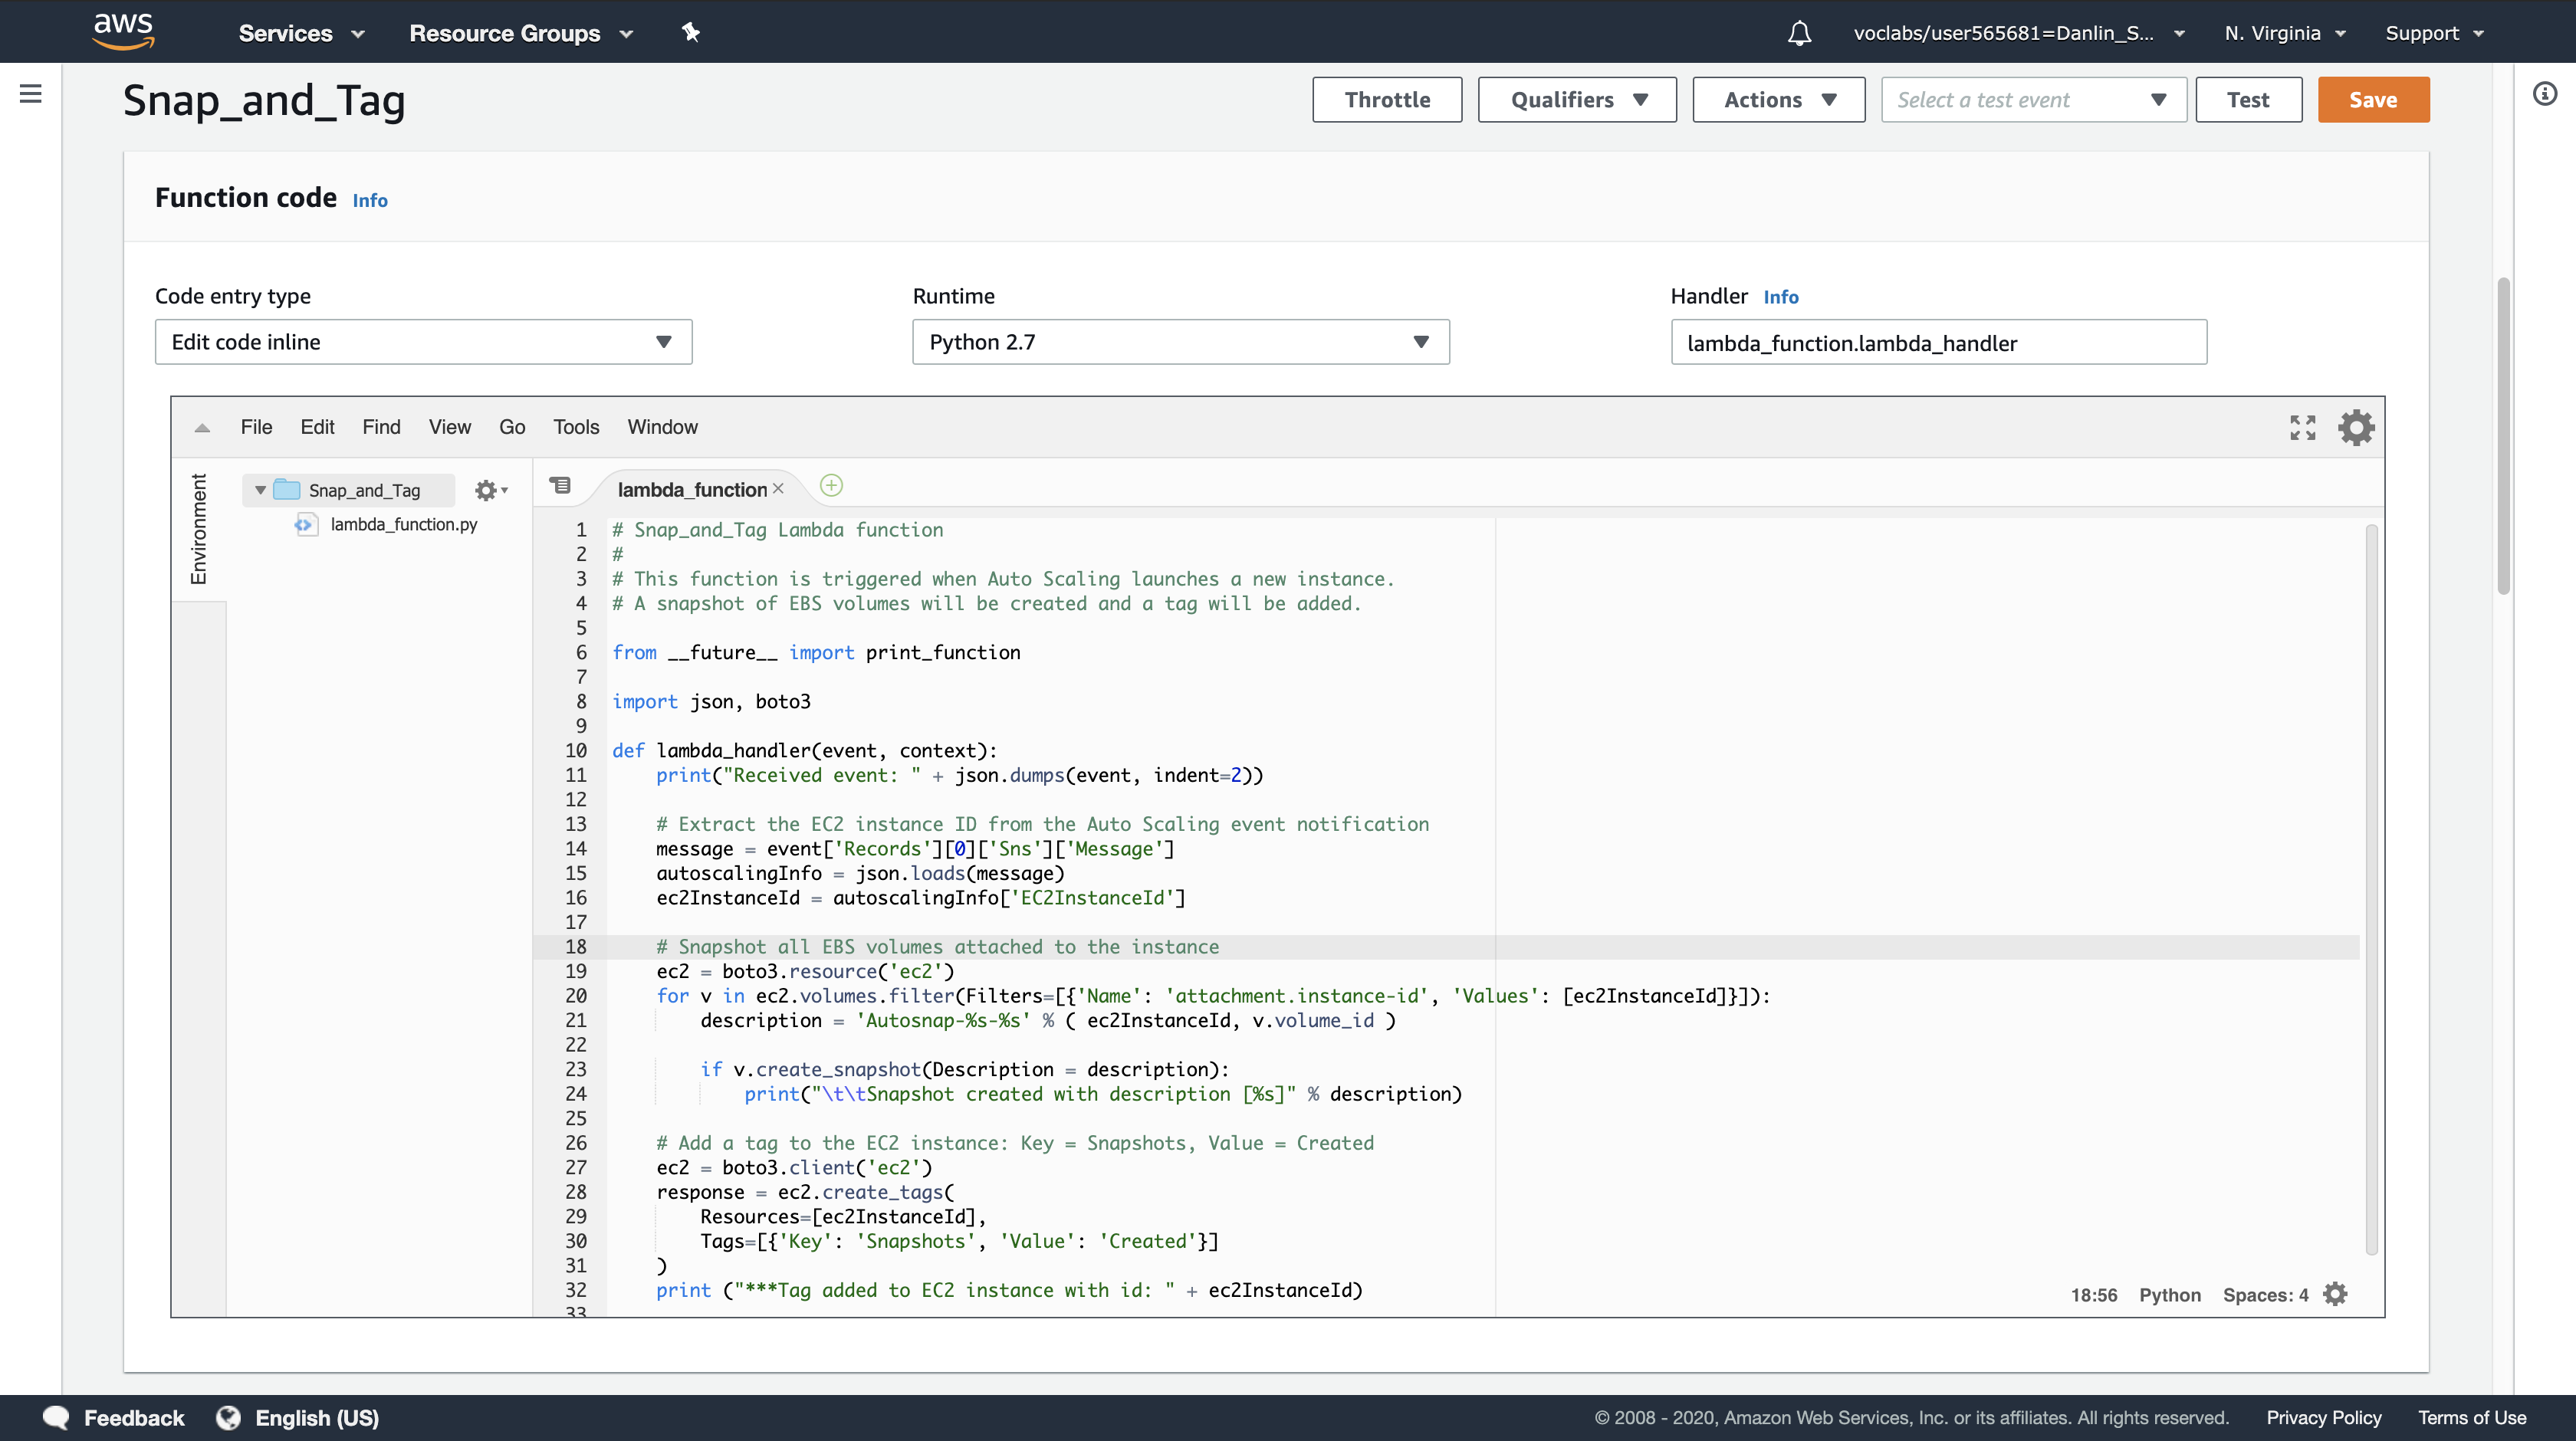
1 | # Snap_and_Tag Lambda function |
Examine the code. It is performing the following steps:
- Extract the EC2 instance ID from the notification message
- Create a snapshot of all EBS volumes attached to the instance
- Add a tag to the instance to indicate that snapshots were created
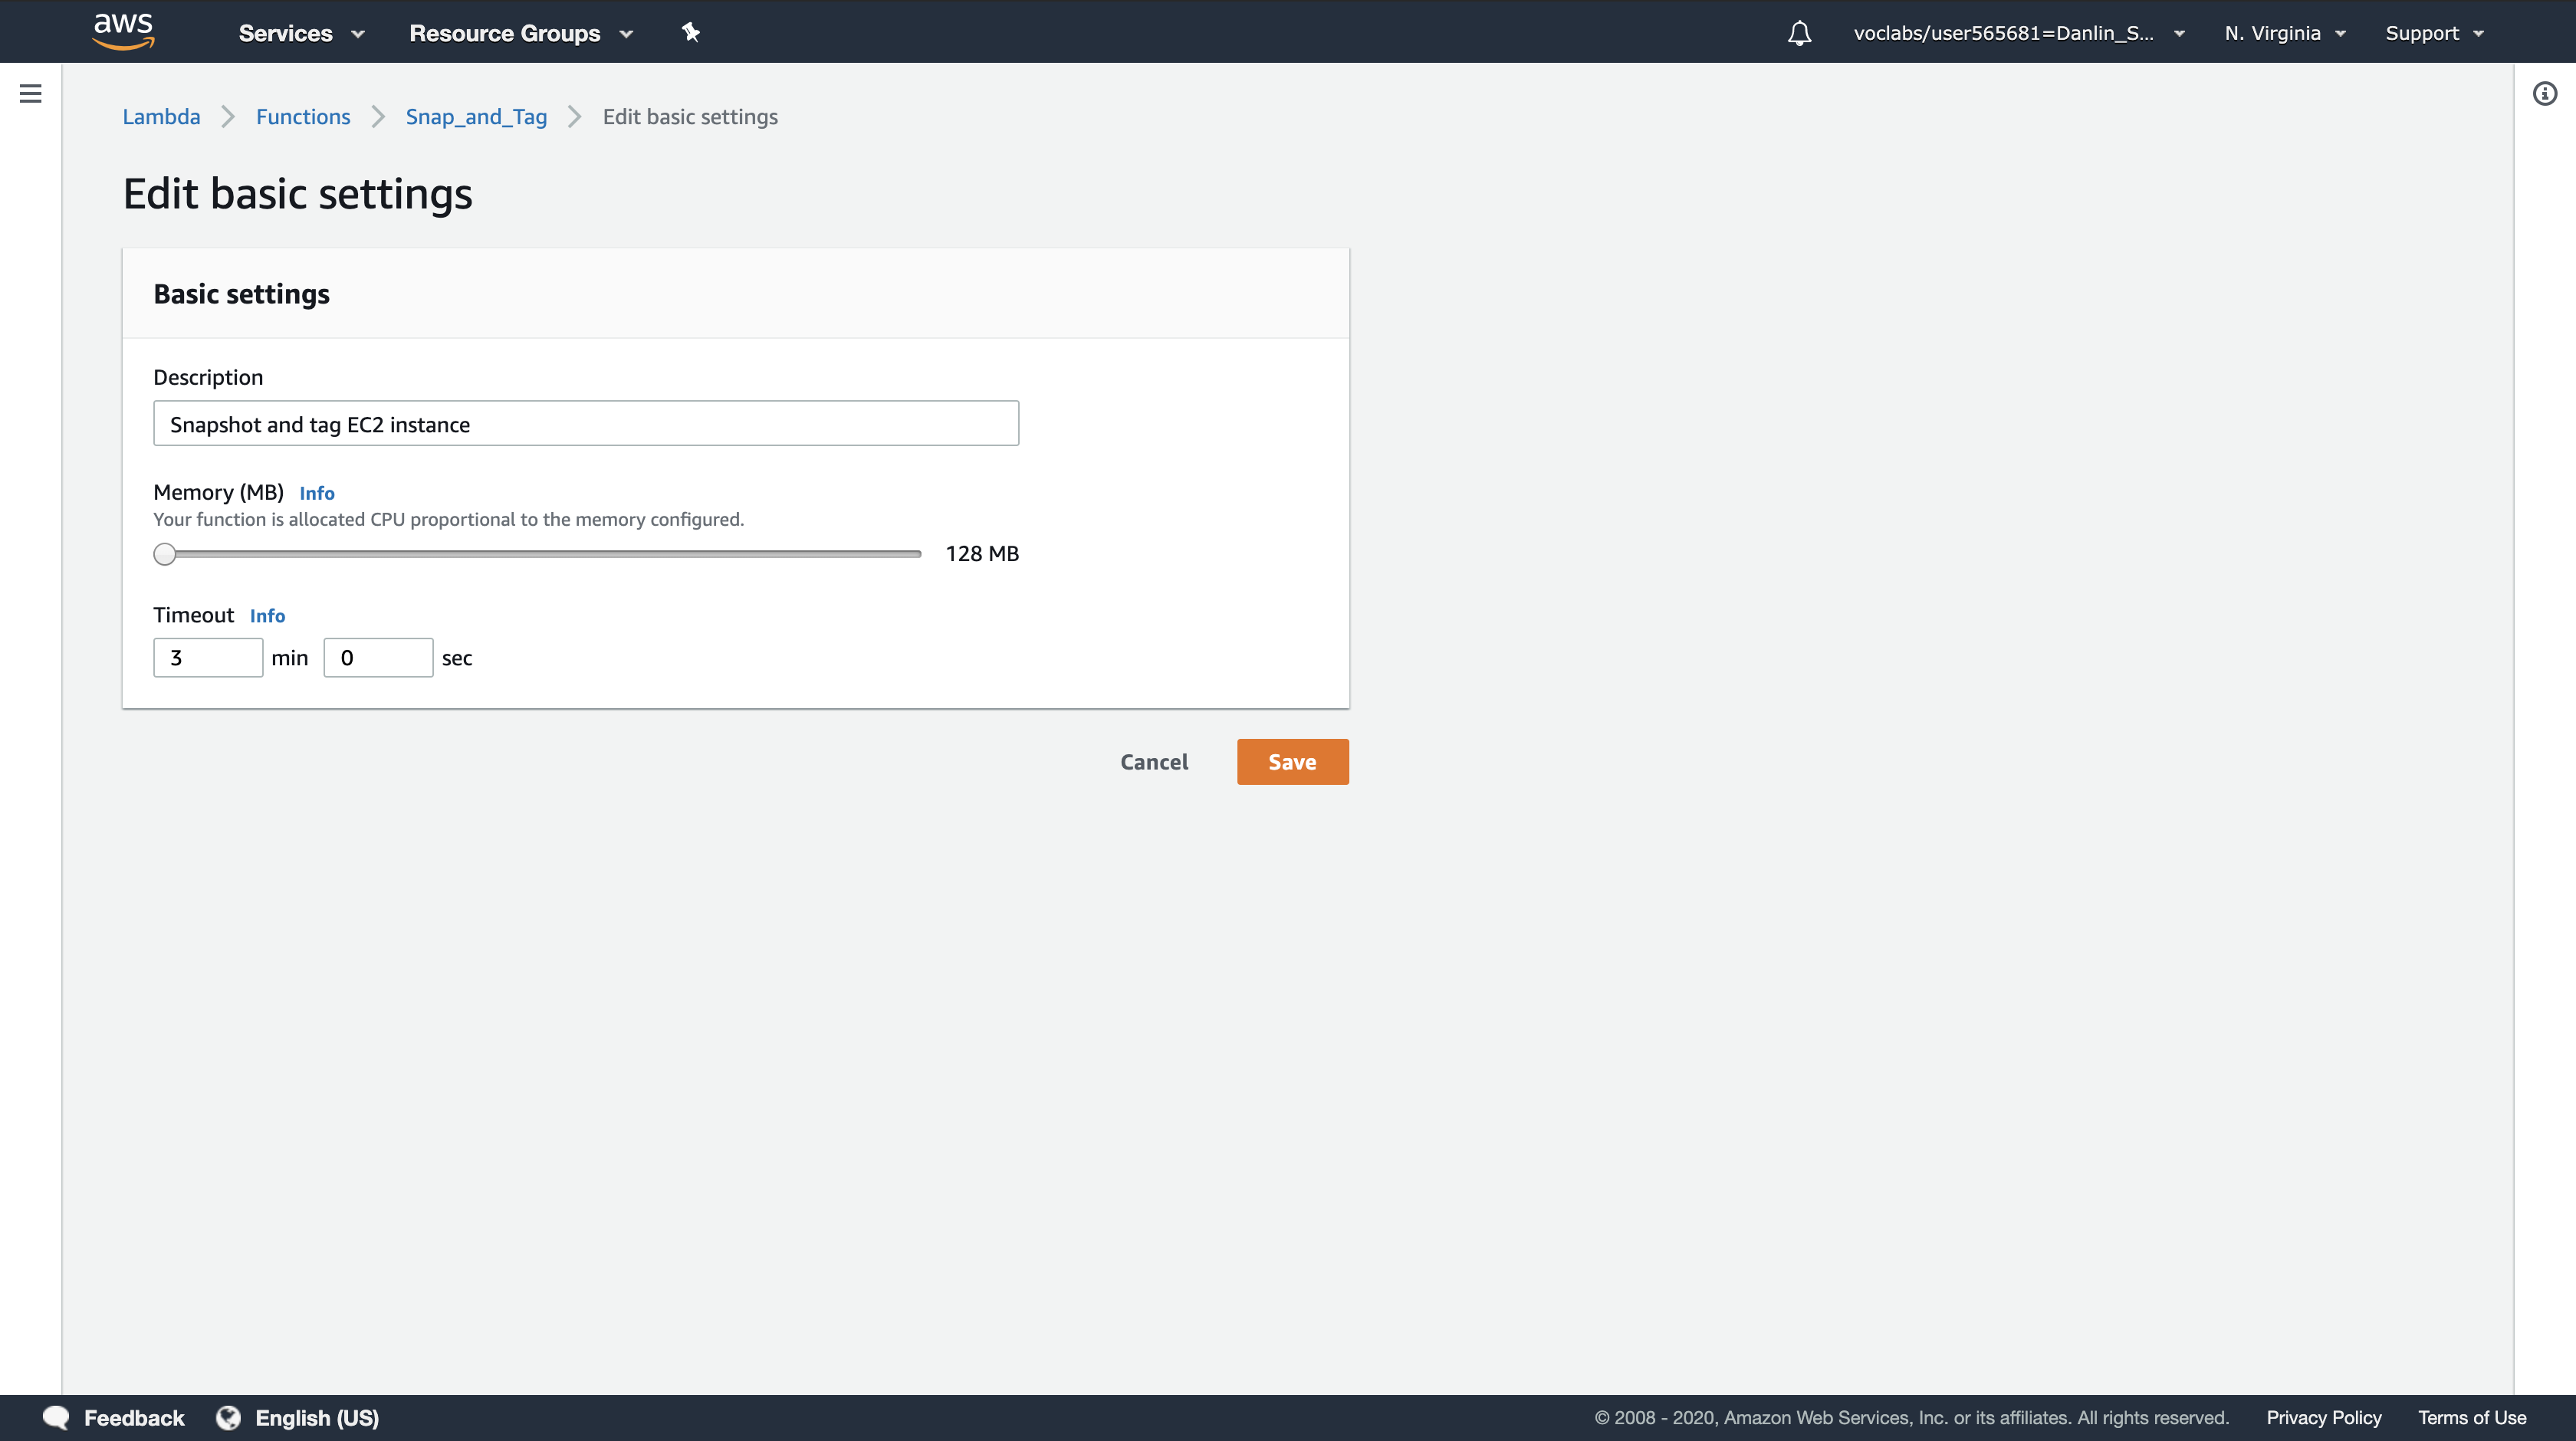
In the Basic settings section at the bottom of the page, configure the following:
- Description:
Snapshot and tag EC2 instance - Timeout:
3 min 0 sec
You will now configure the trigger that will activate the Lambda function.
Scroll up to Add triggers at the top of the page.
Under Add triggers, click SNS.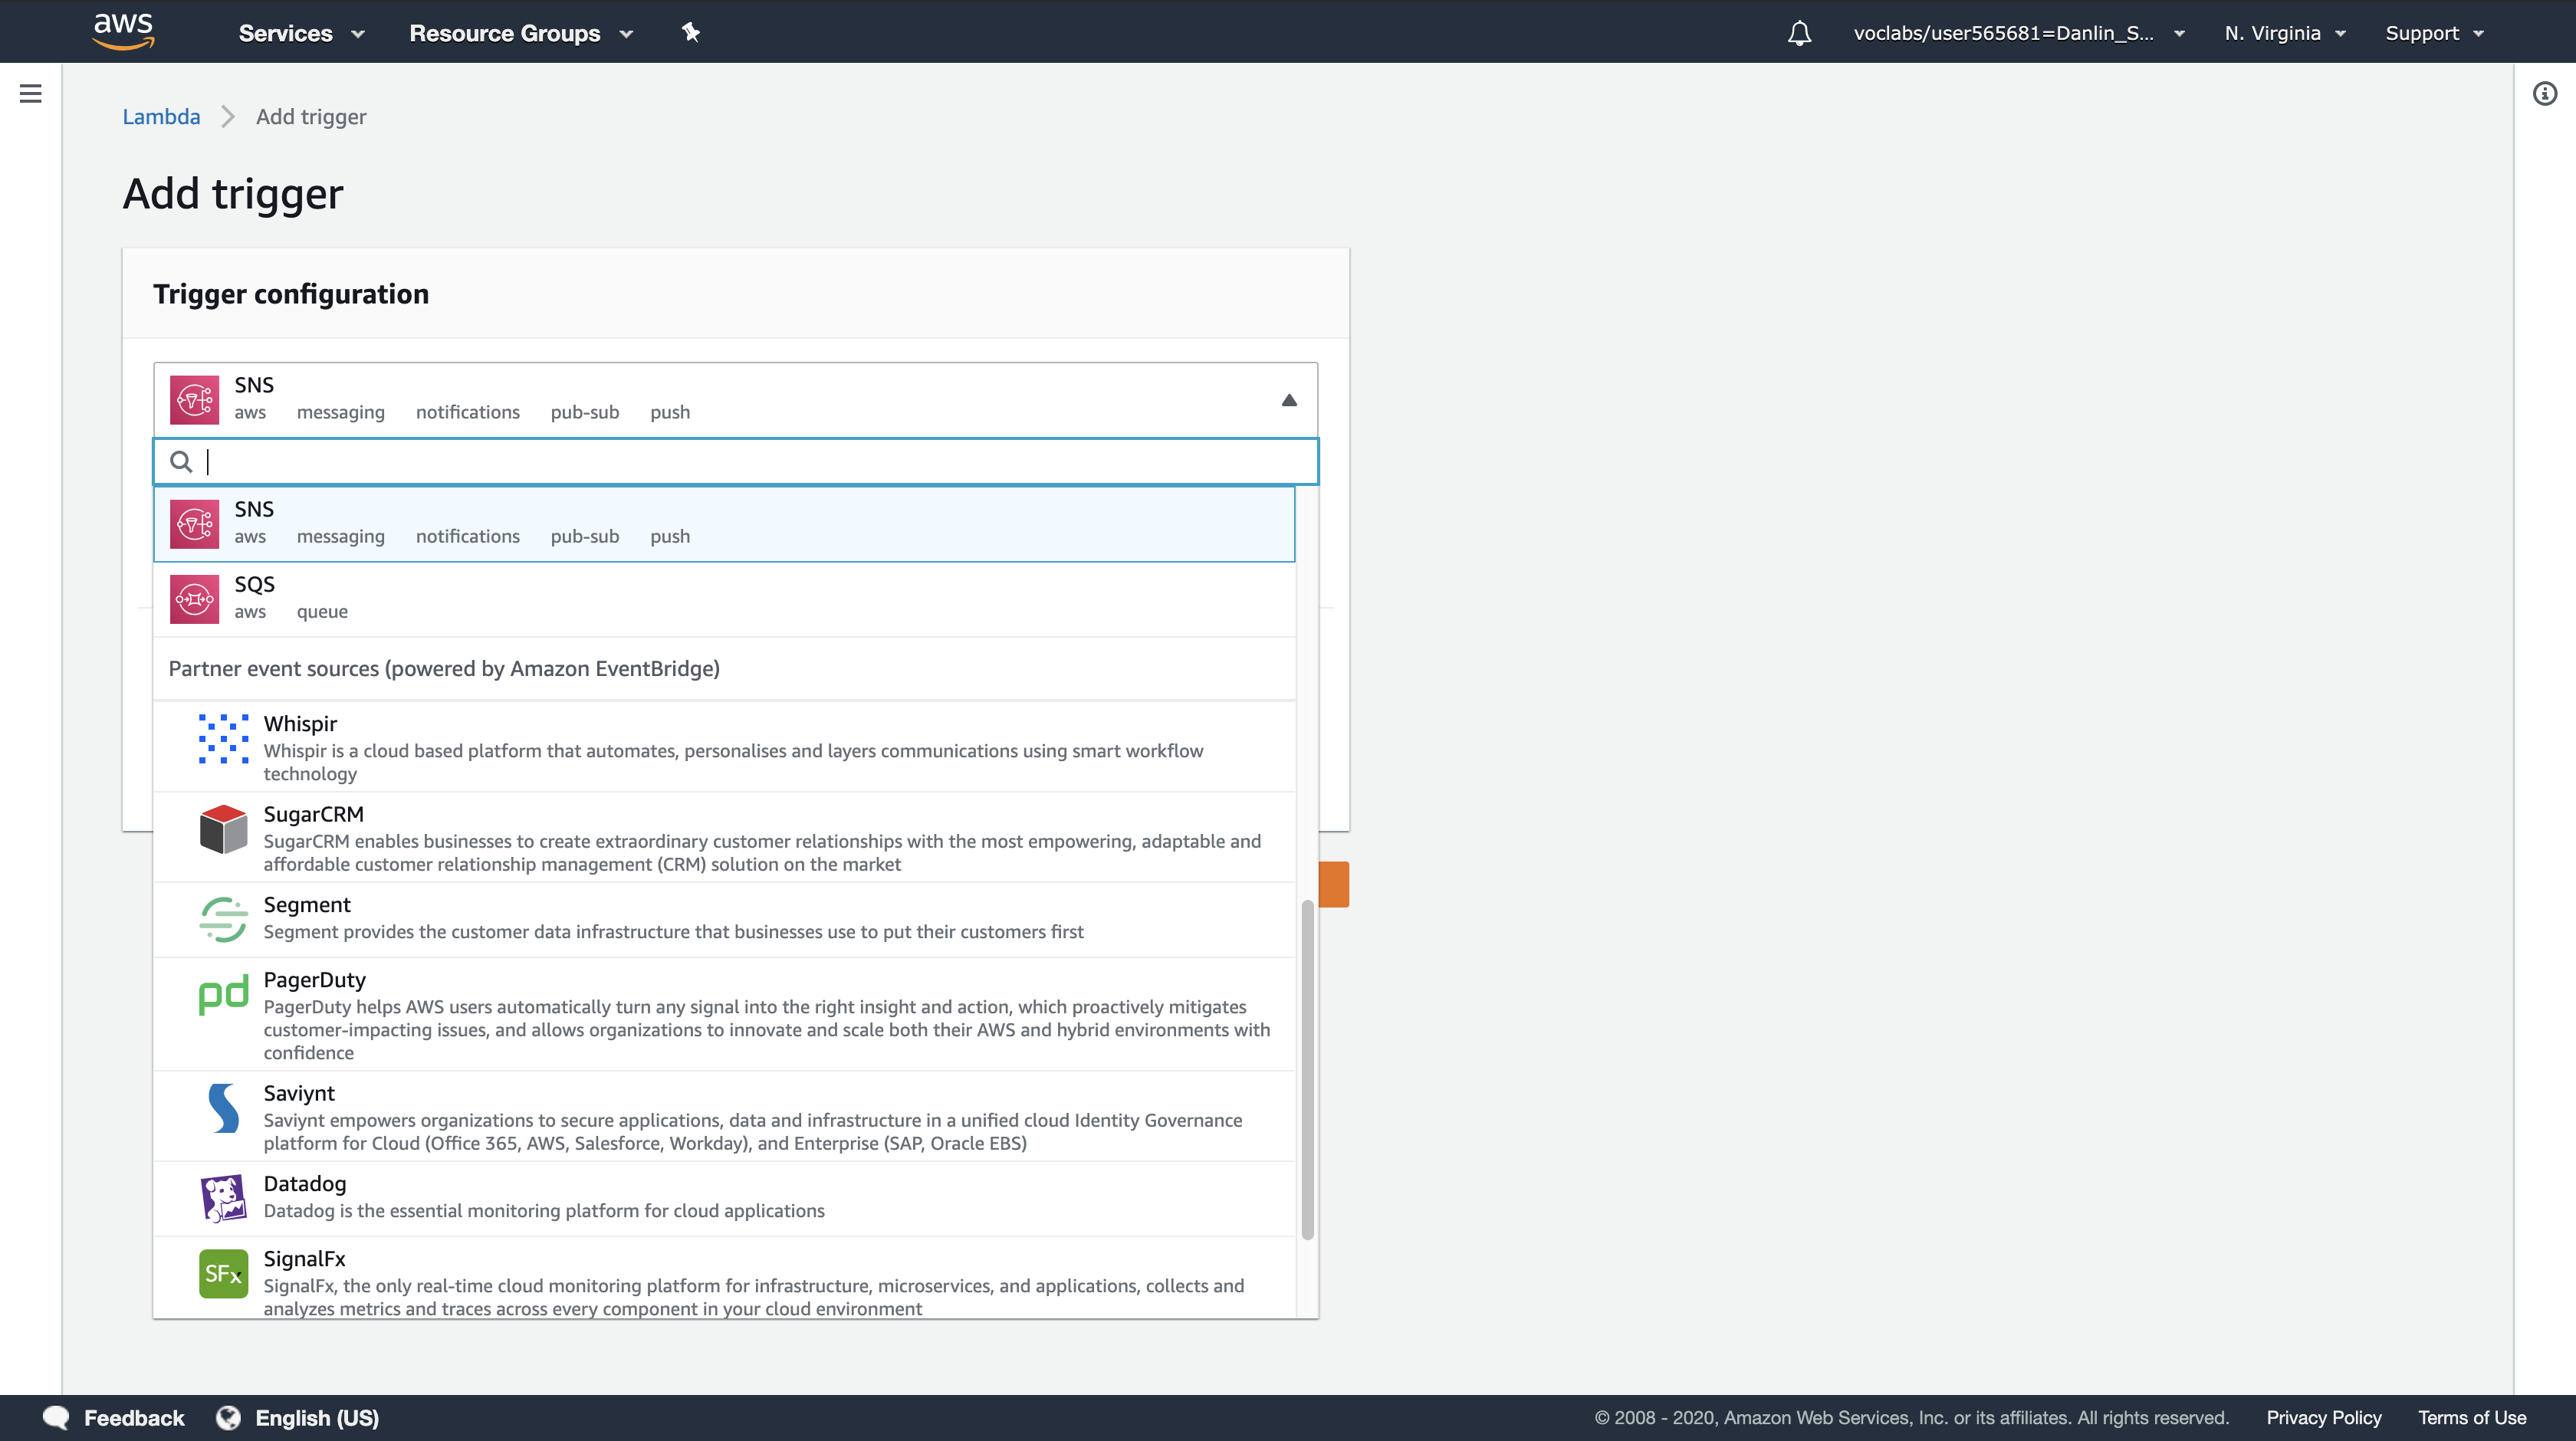
Scroll down to Configure triggers and use these settings:
- SNS topic:
ScaleEvent
Note: the topic may already be pre-populated in the text box.
Amazon SNS will invoke this Lambda function when the ScaleEvent topic receives a notification from Auto Scaling.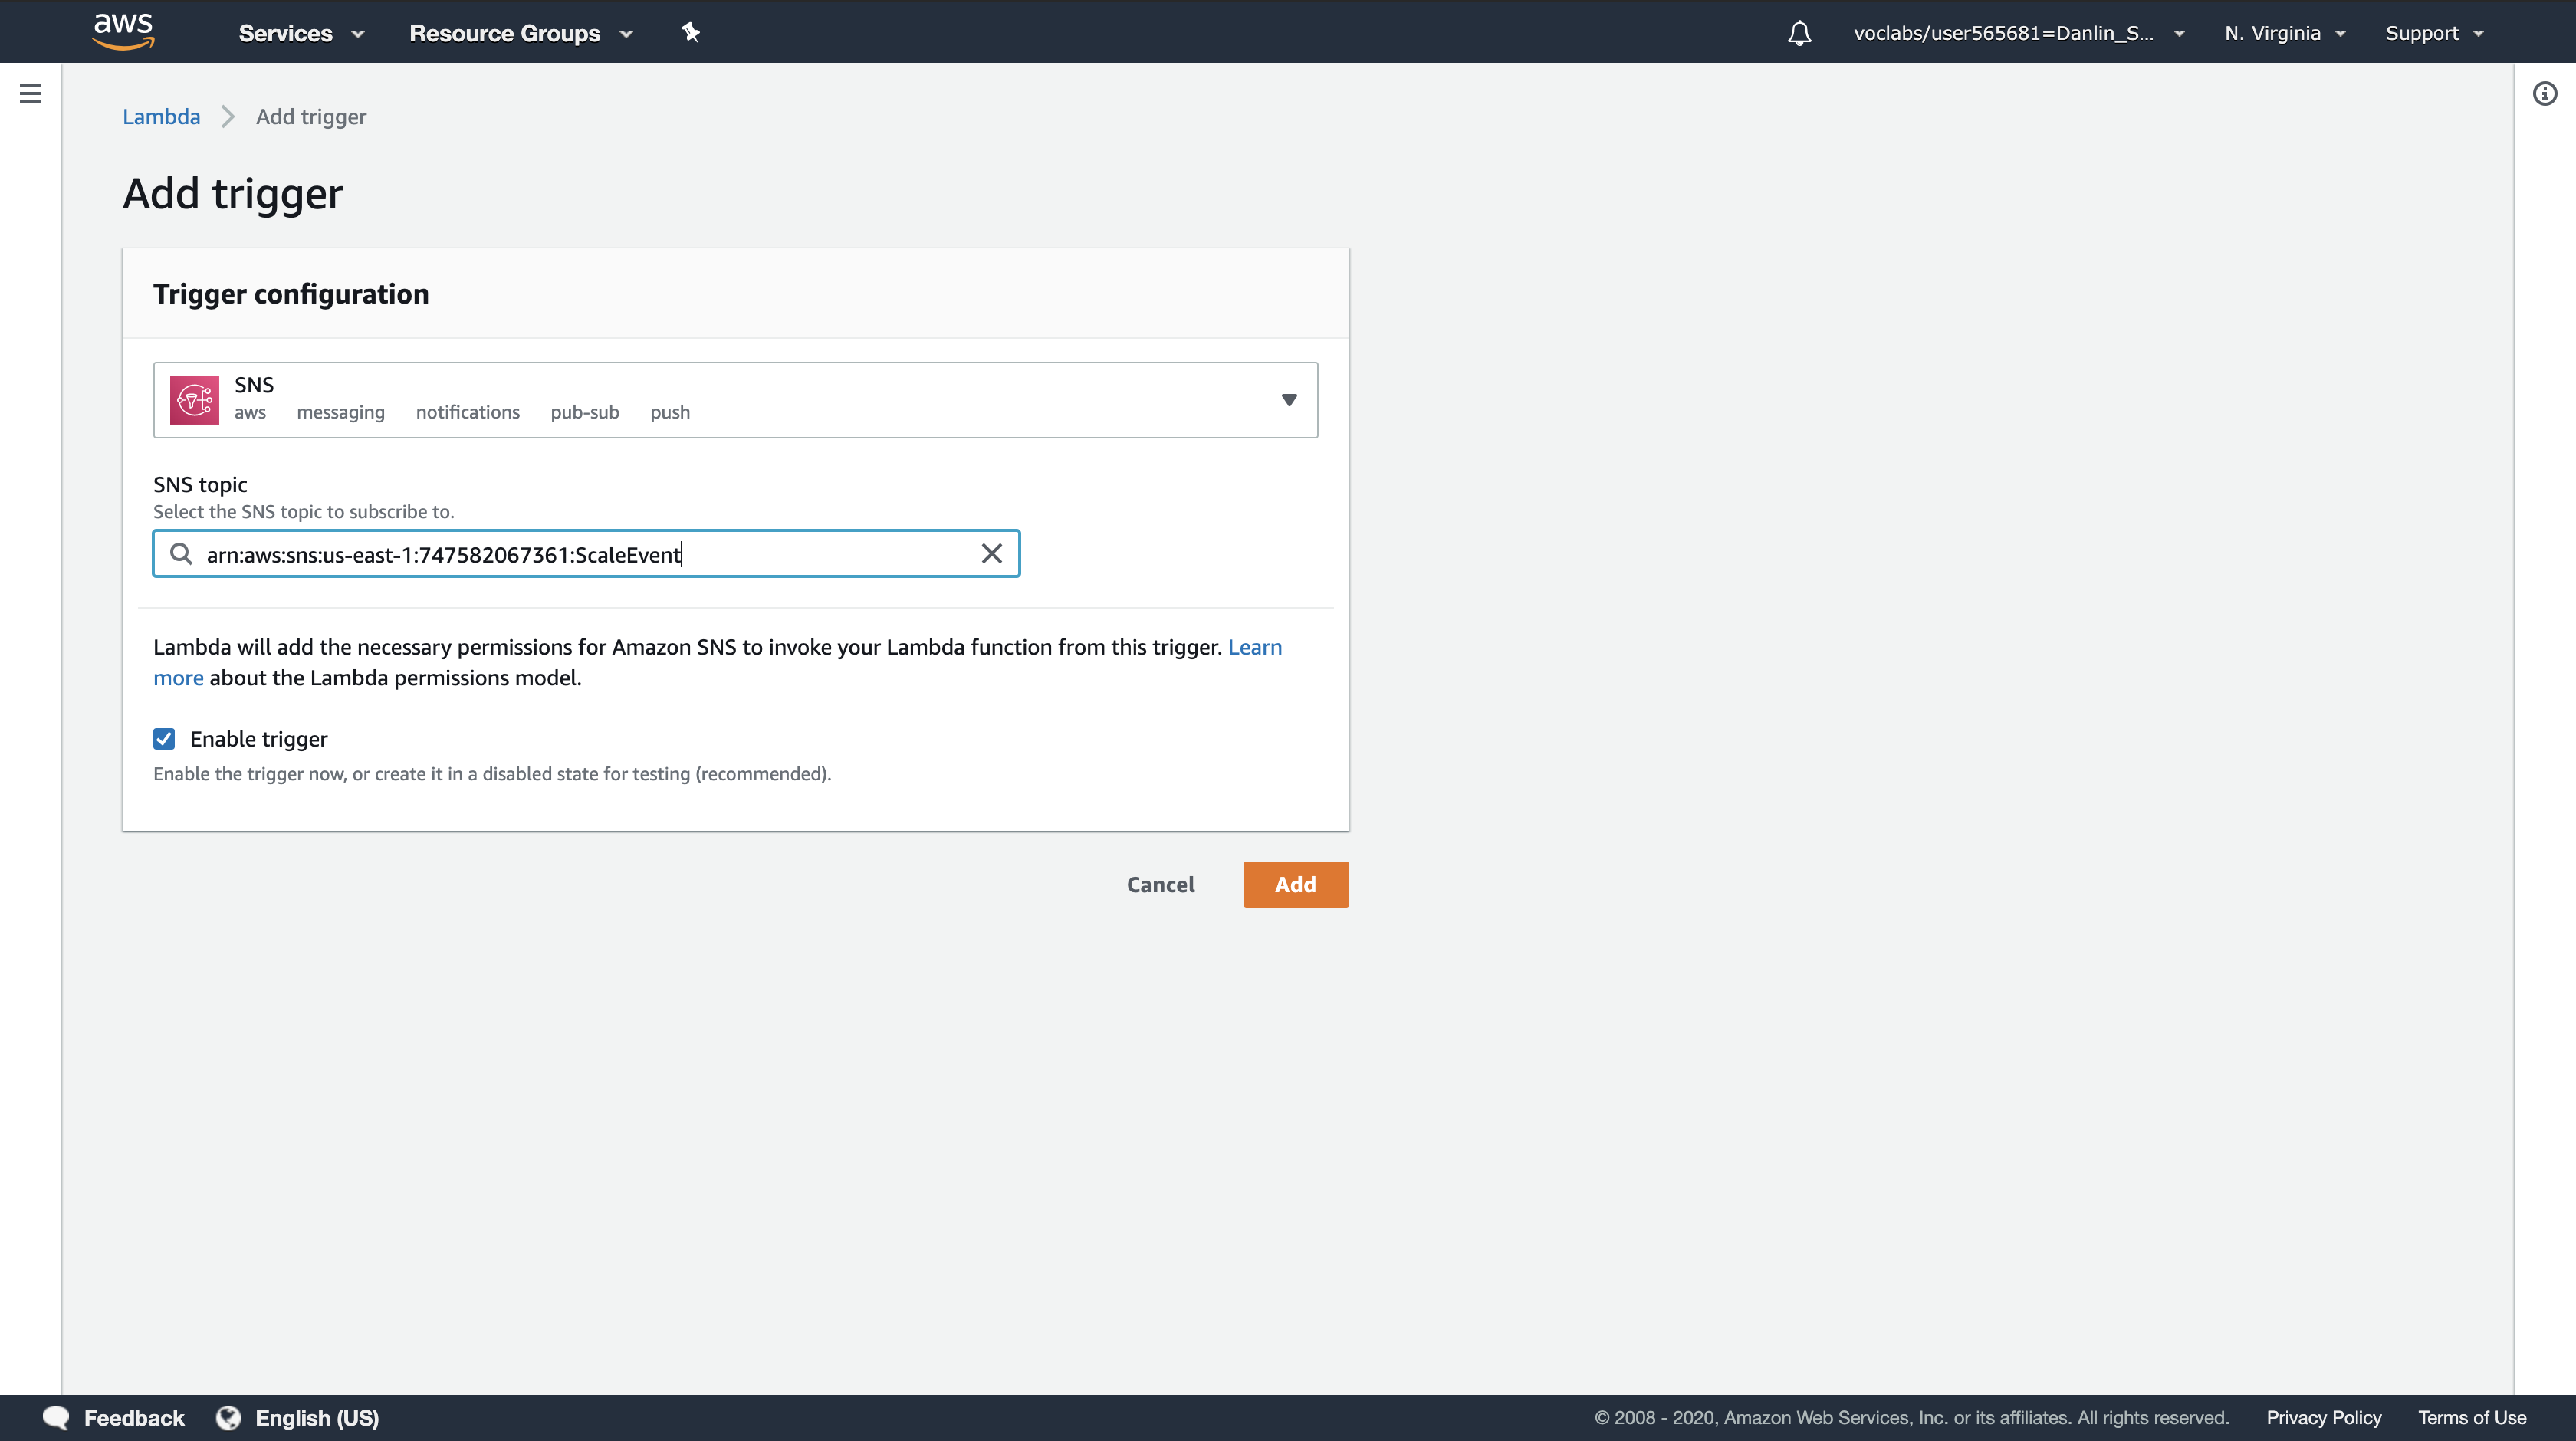
Click Add.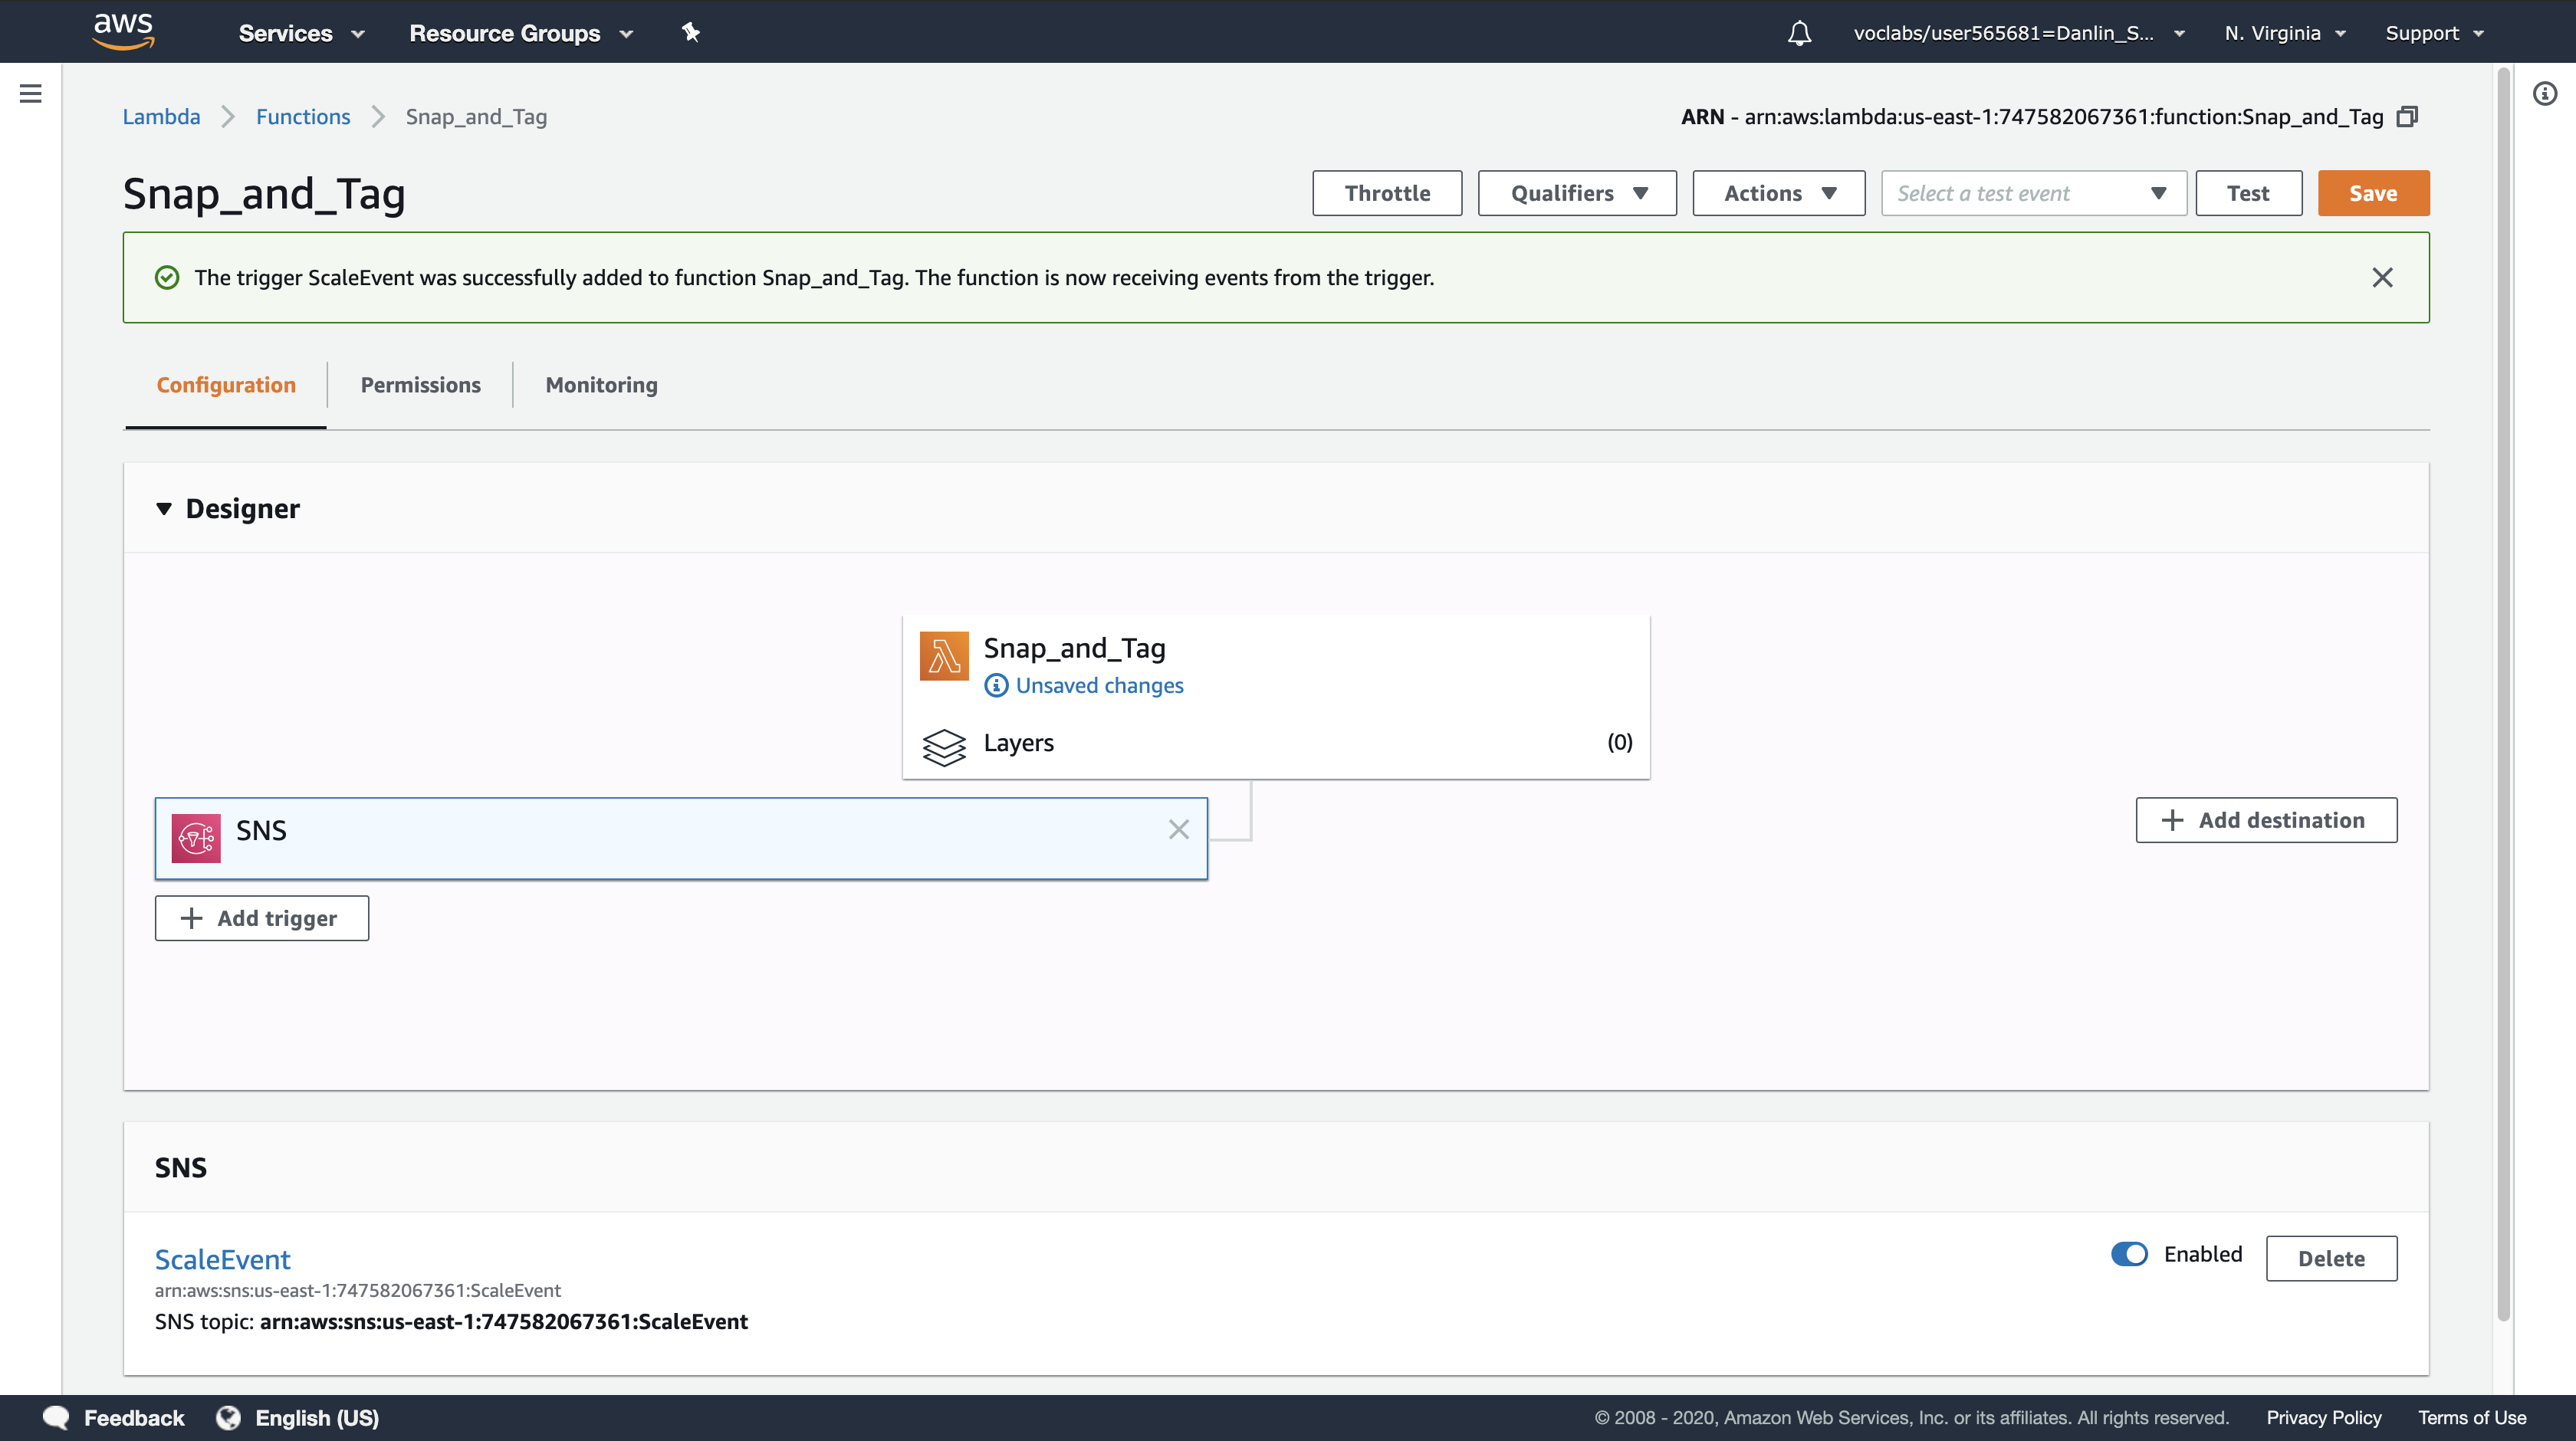
Click Save at the top of the page.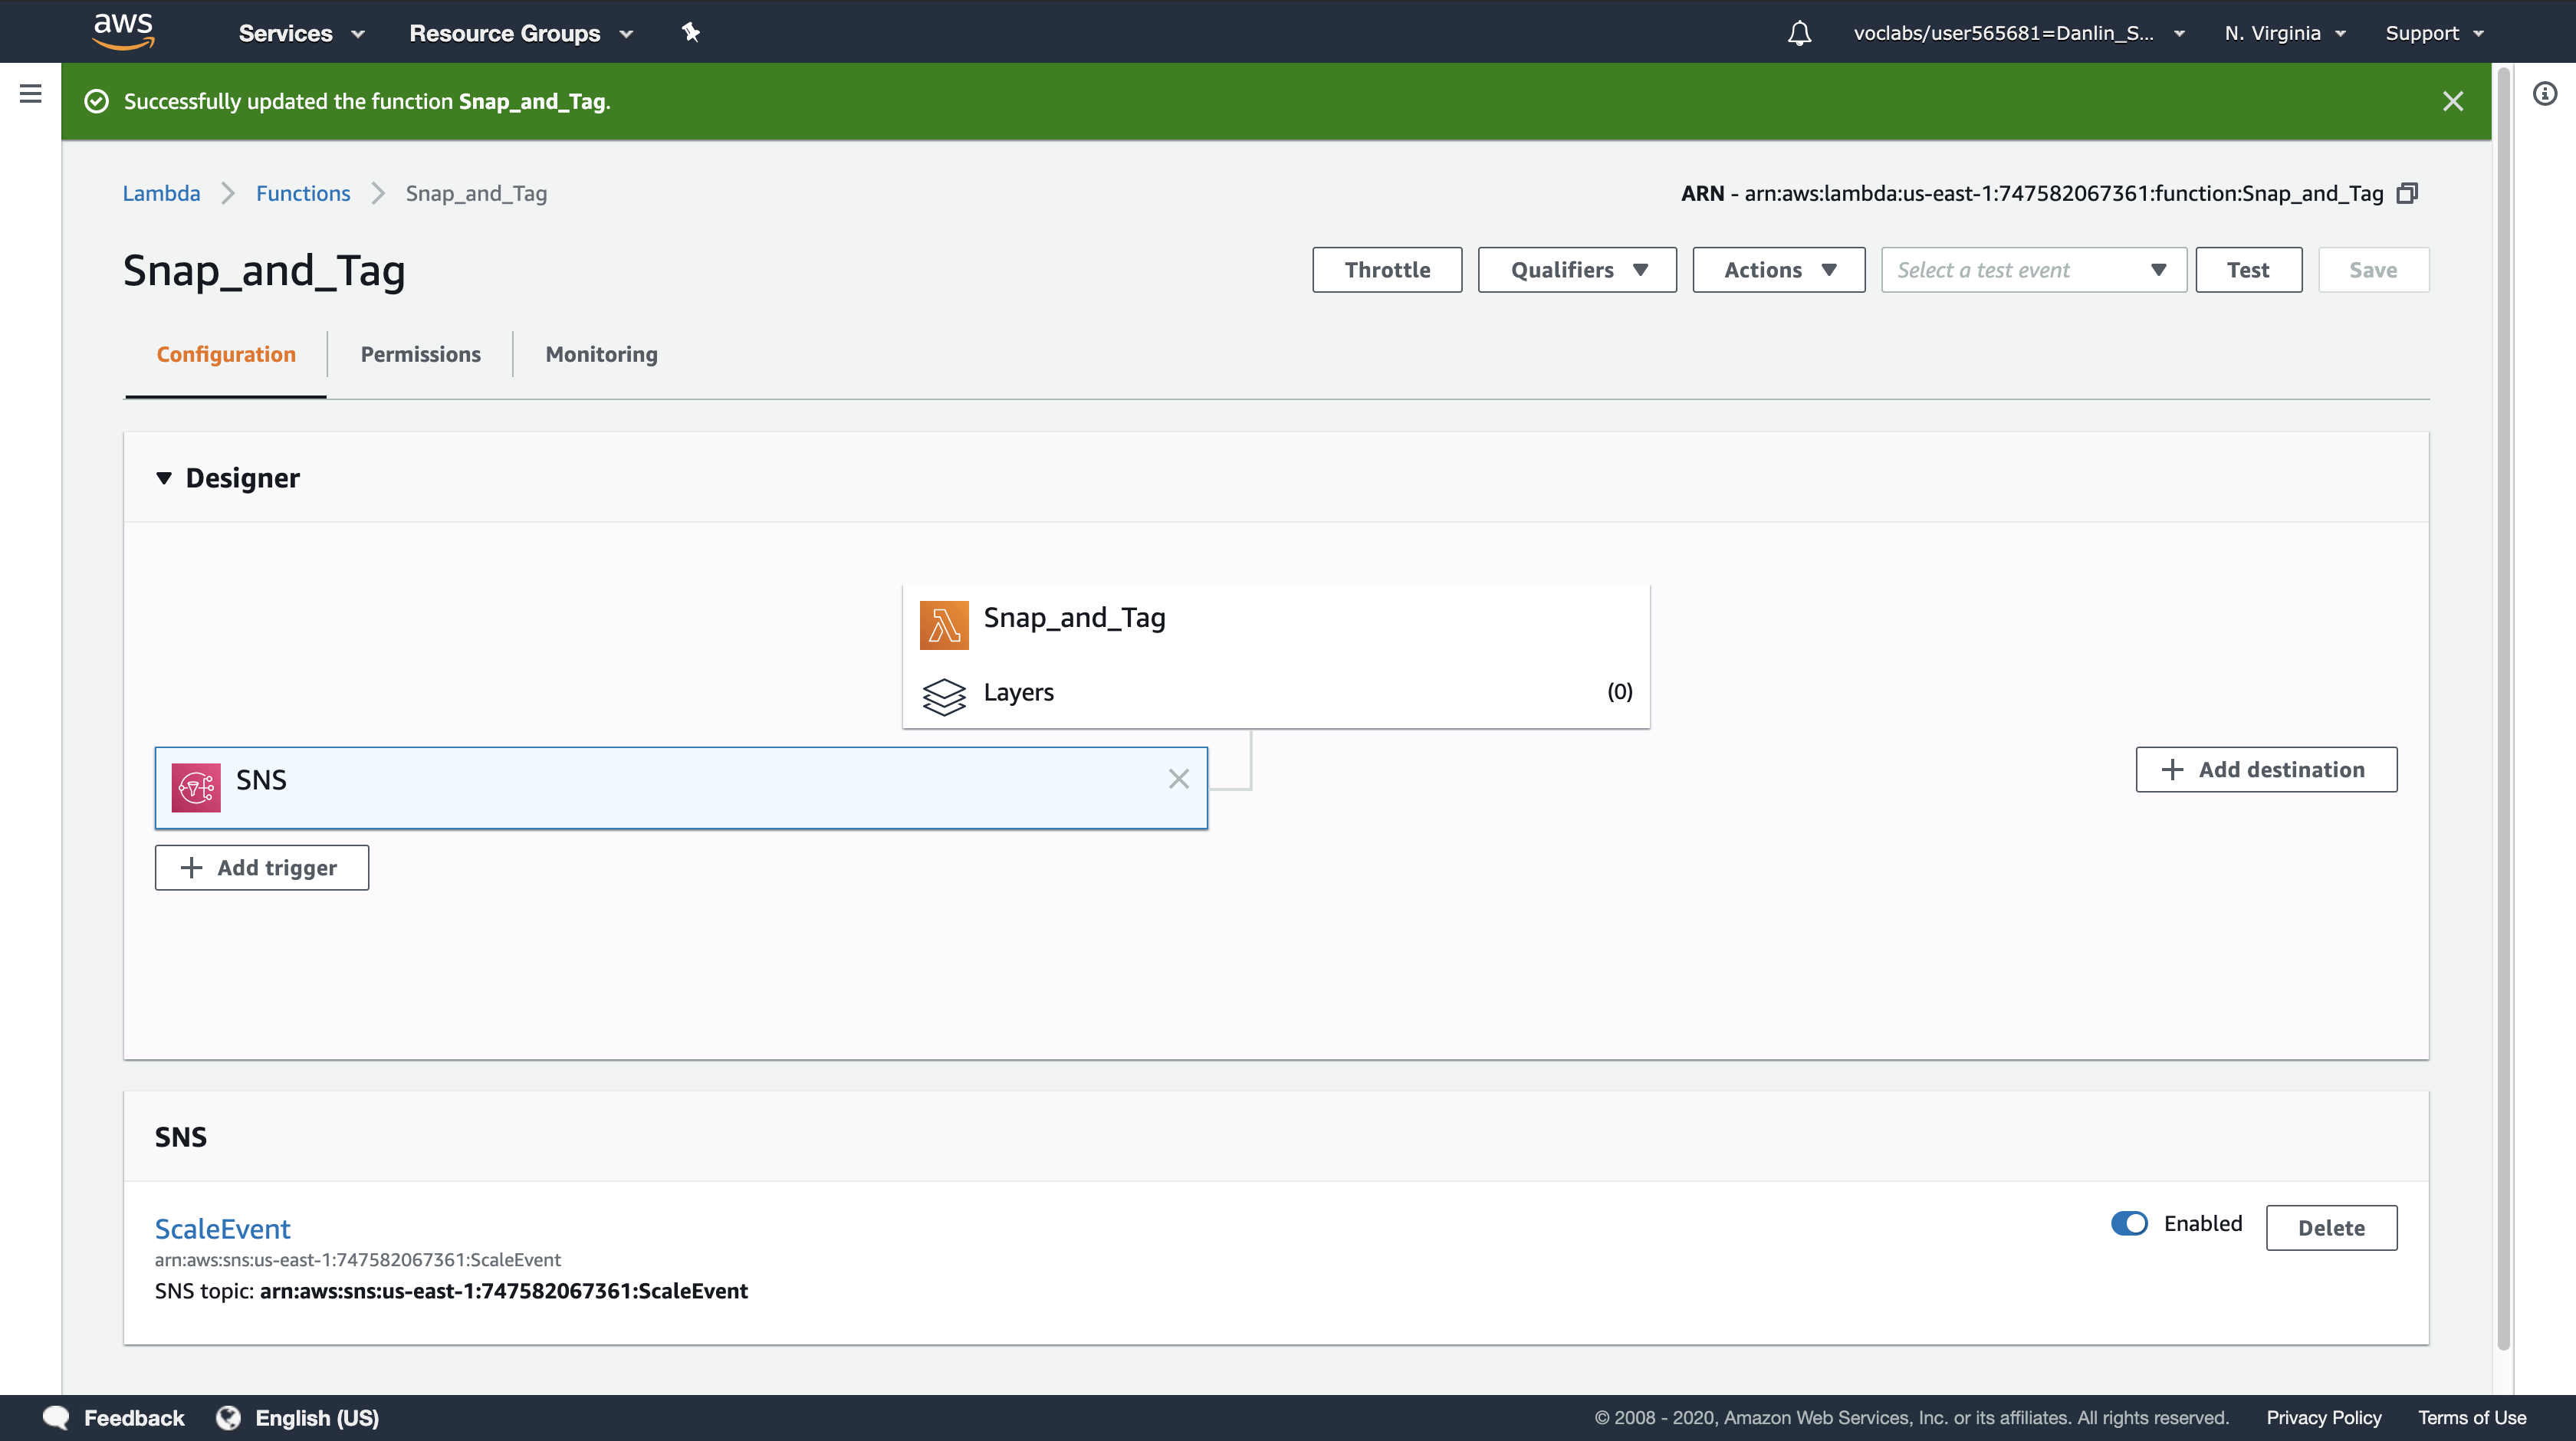
Your Lambda function will now automatically execute whenever Auto Scaling launches a new instance.
Task 5: Scale-Out the Auto Scaling Group to Trigger the Lambda function
In this task, you will increase the desired capacity of the Auto Scaling group. This will cause the Auto Scaling group to launch a new Amazon EC2 instance to meet the increased capacity requirement. Auto Scaling will then send a notification to the ScaleEvent SNS topic. Amazon SNS will then invoke the Snap_and_Tag Lambda function.
AWS Management Console
Services menu > click EC2.
Left navigation pane
click Auto Scaling Groups (you might need to scroll down to see it).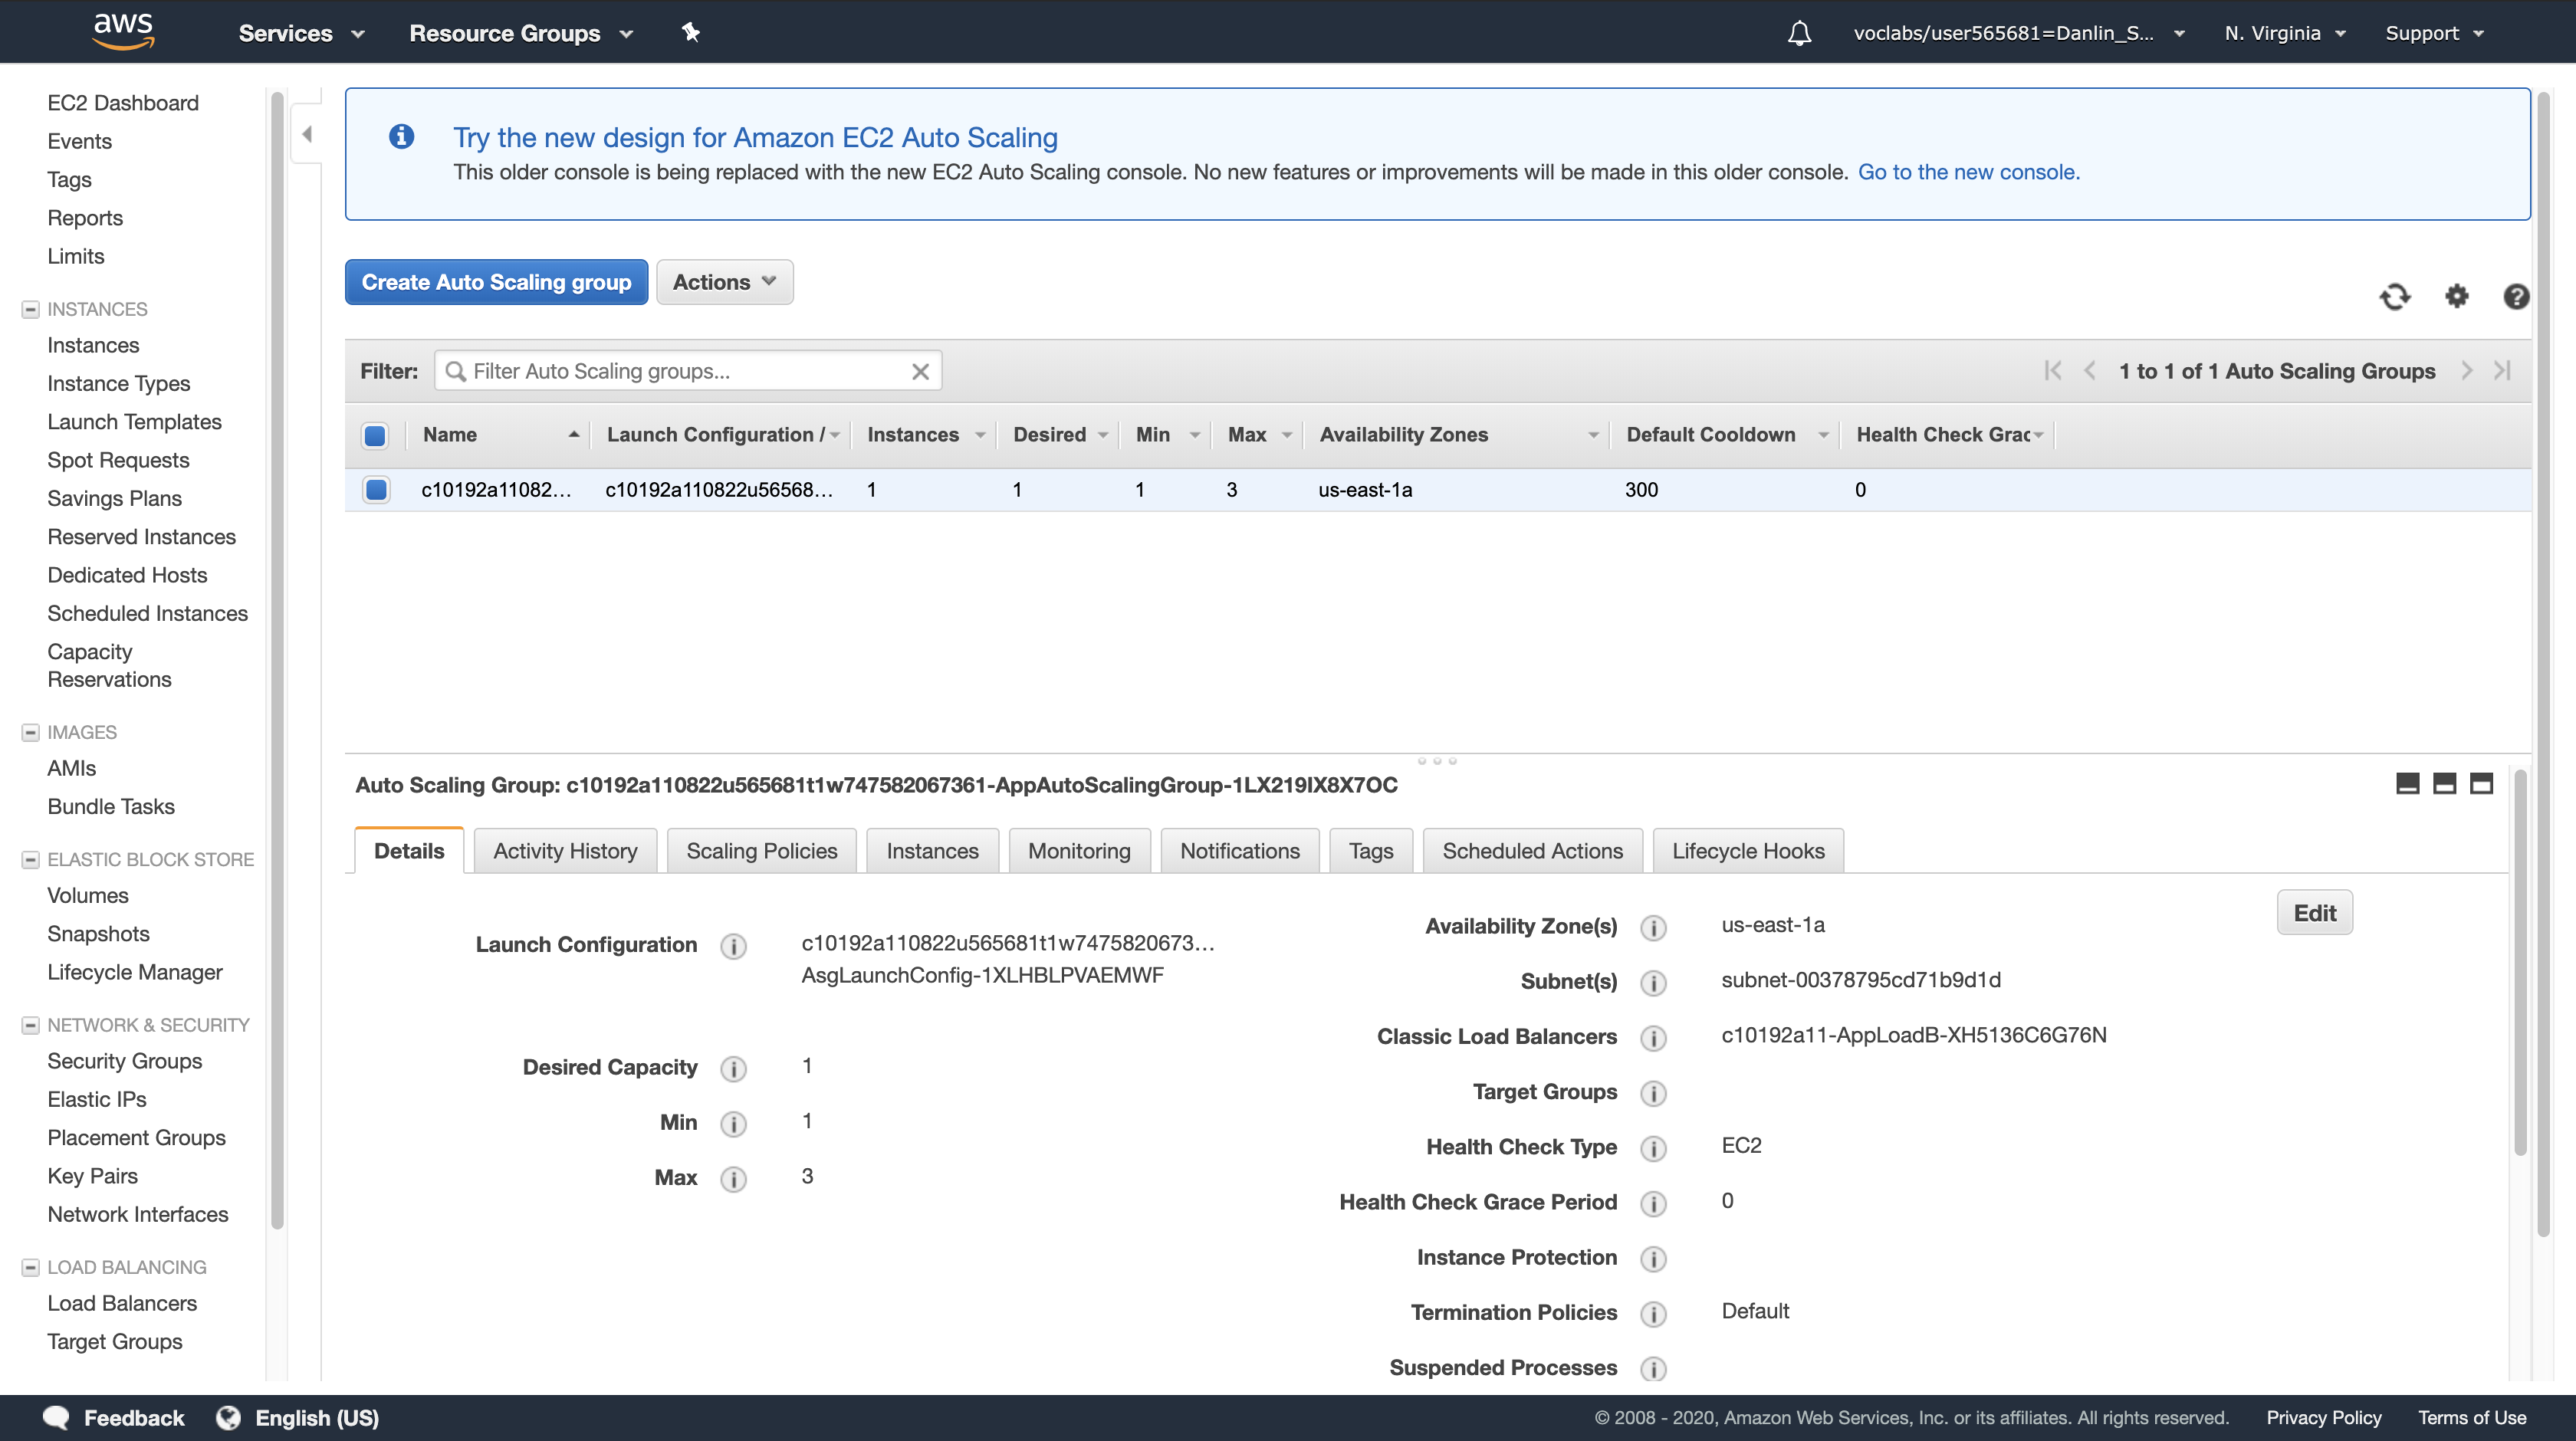
On the Details tab at the bottom of the screen, click Edit (you may need to scroll to the right to see the button).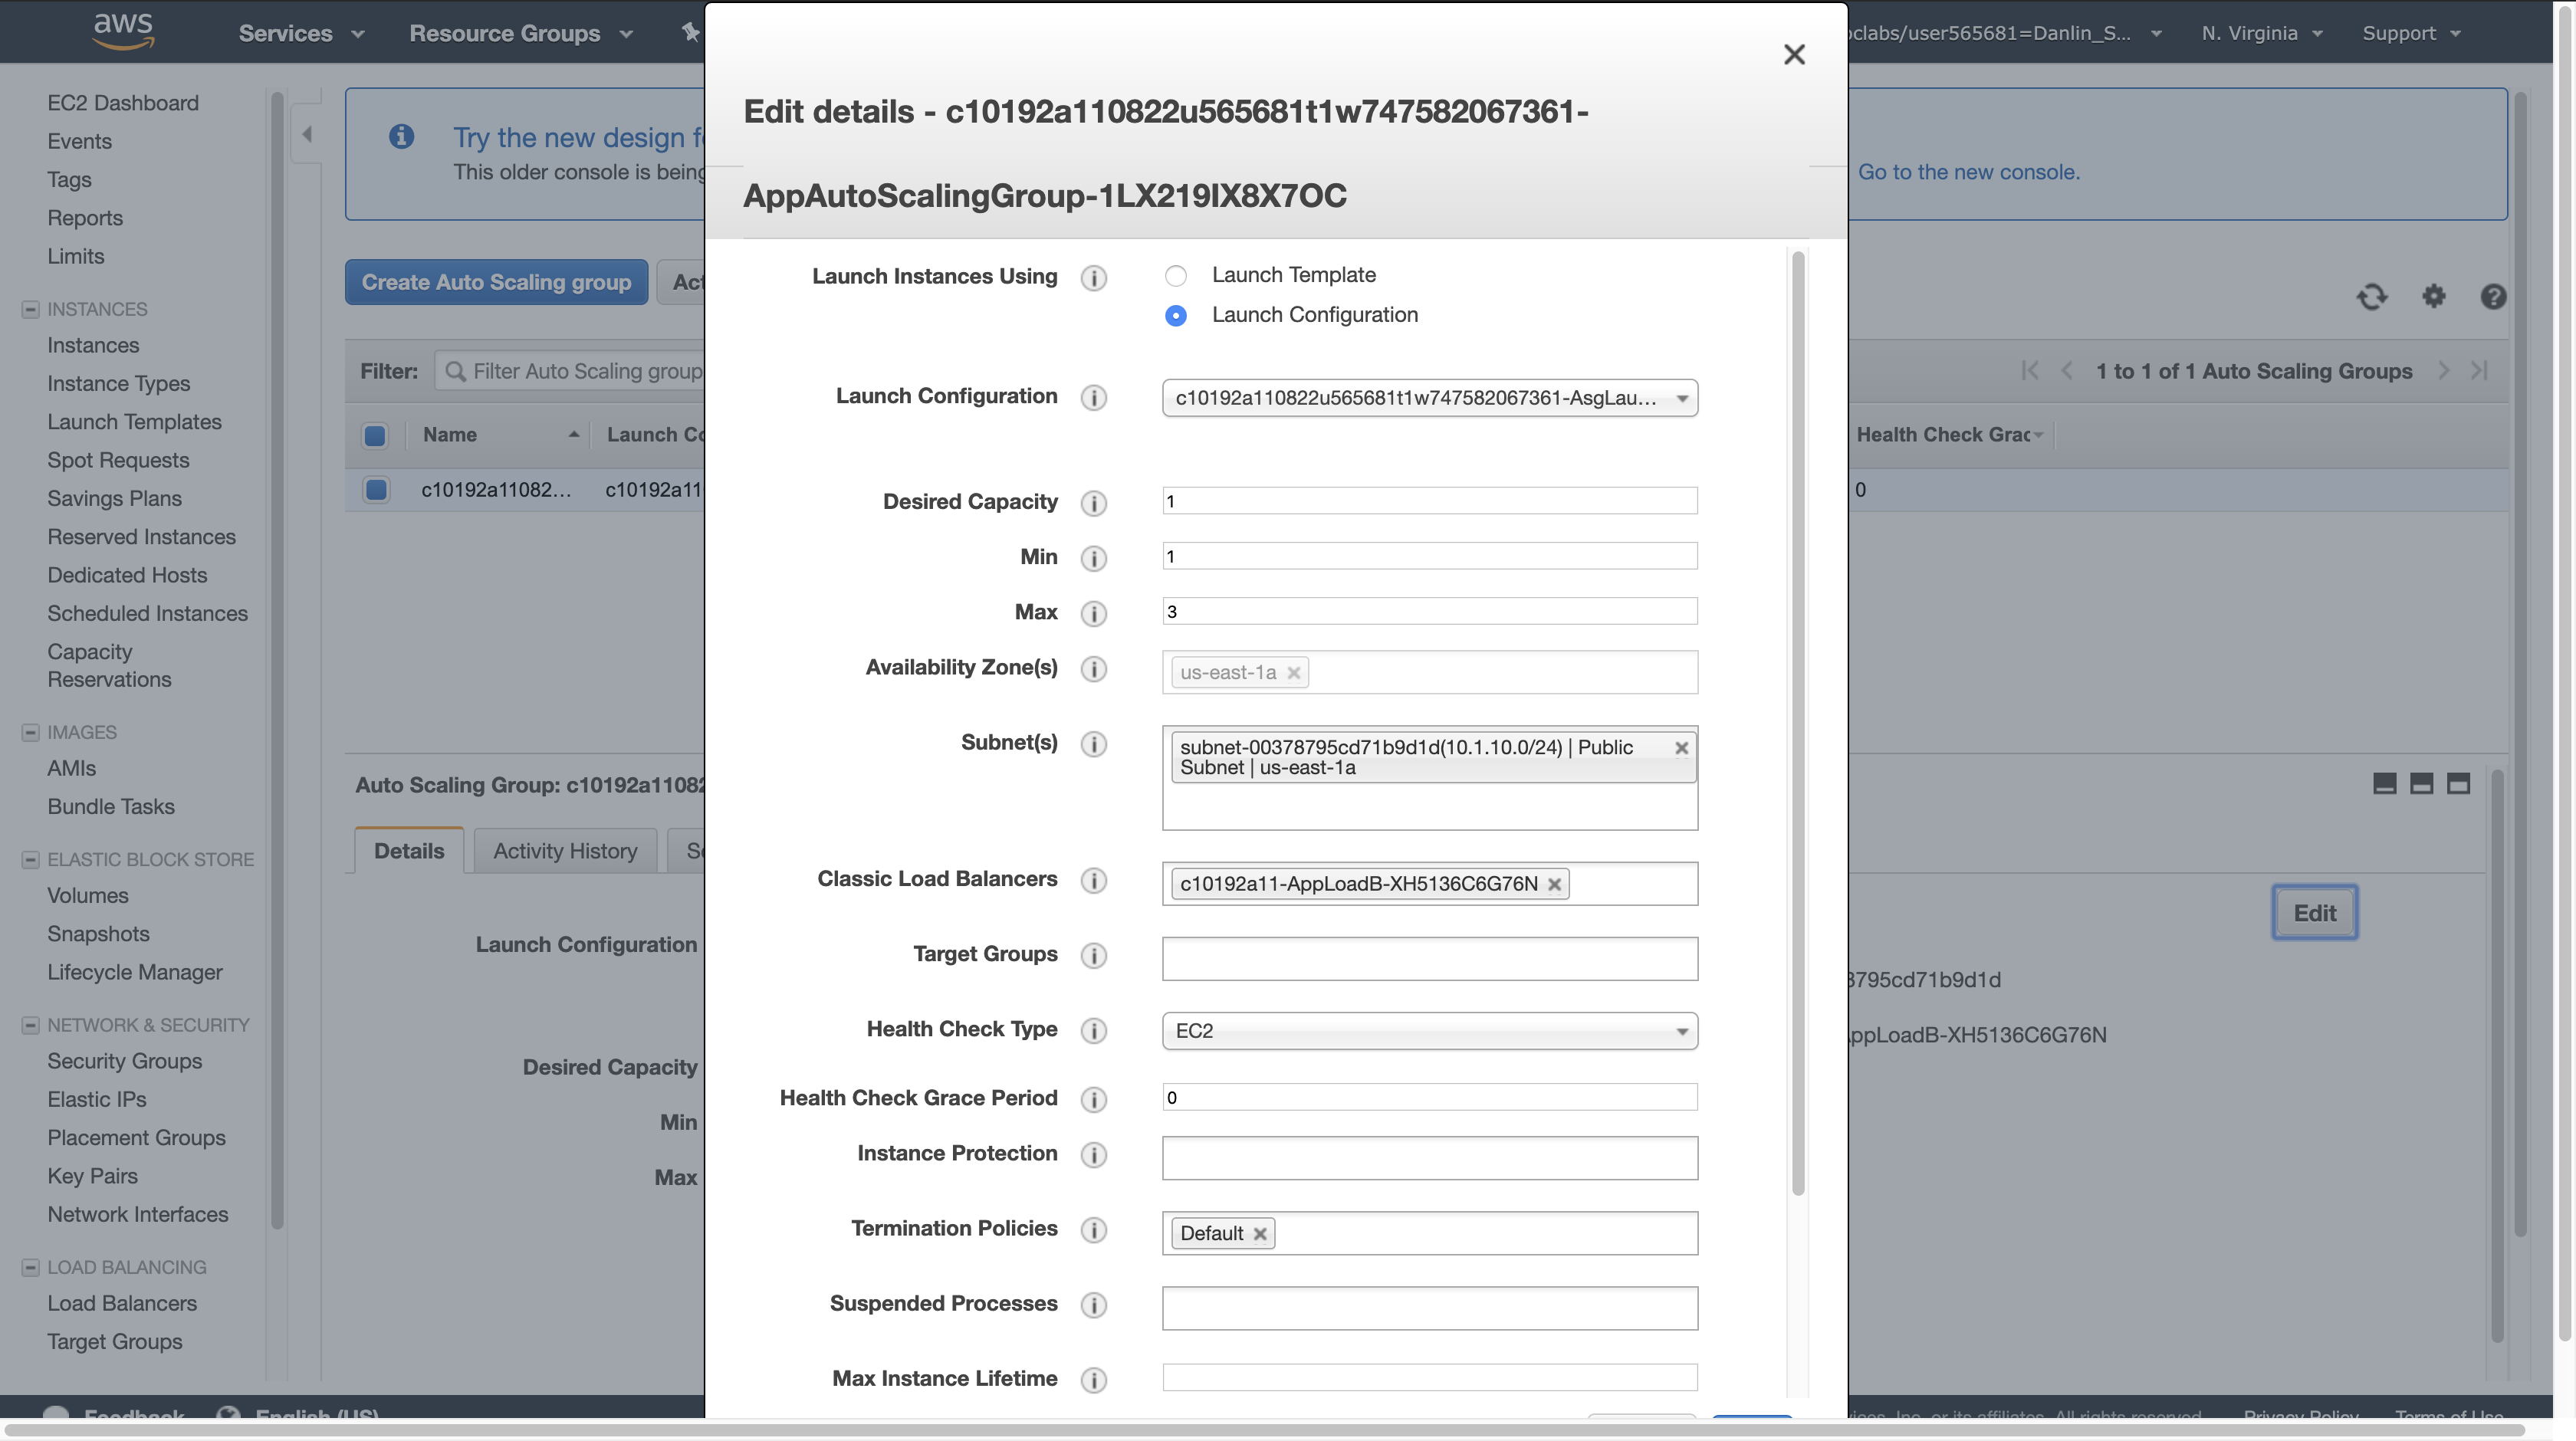
For Desired Capacity, enter: 2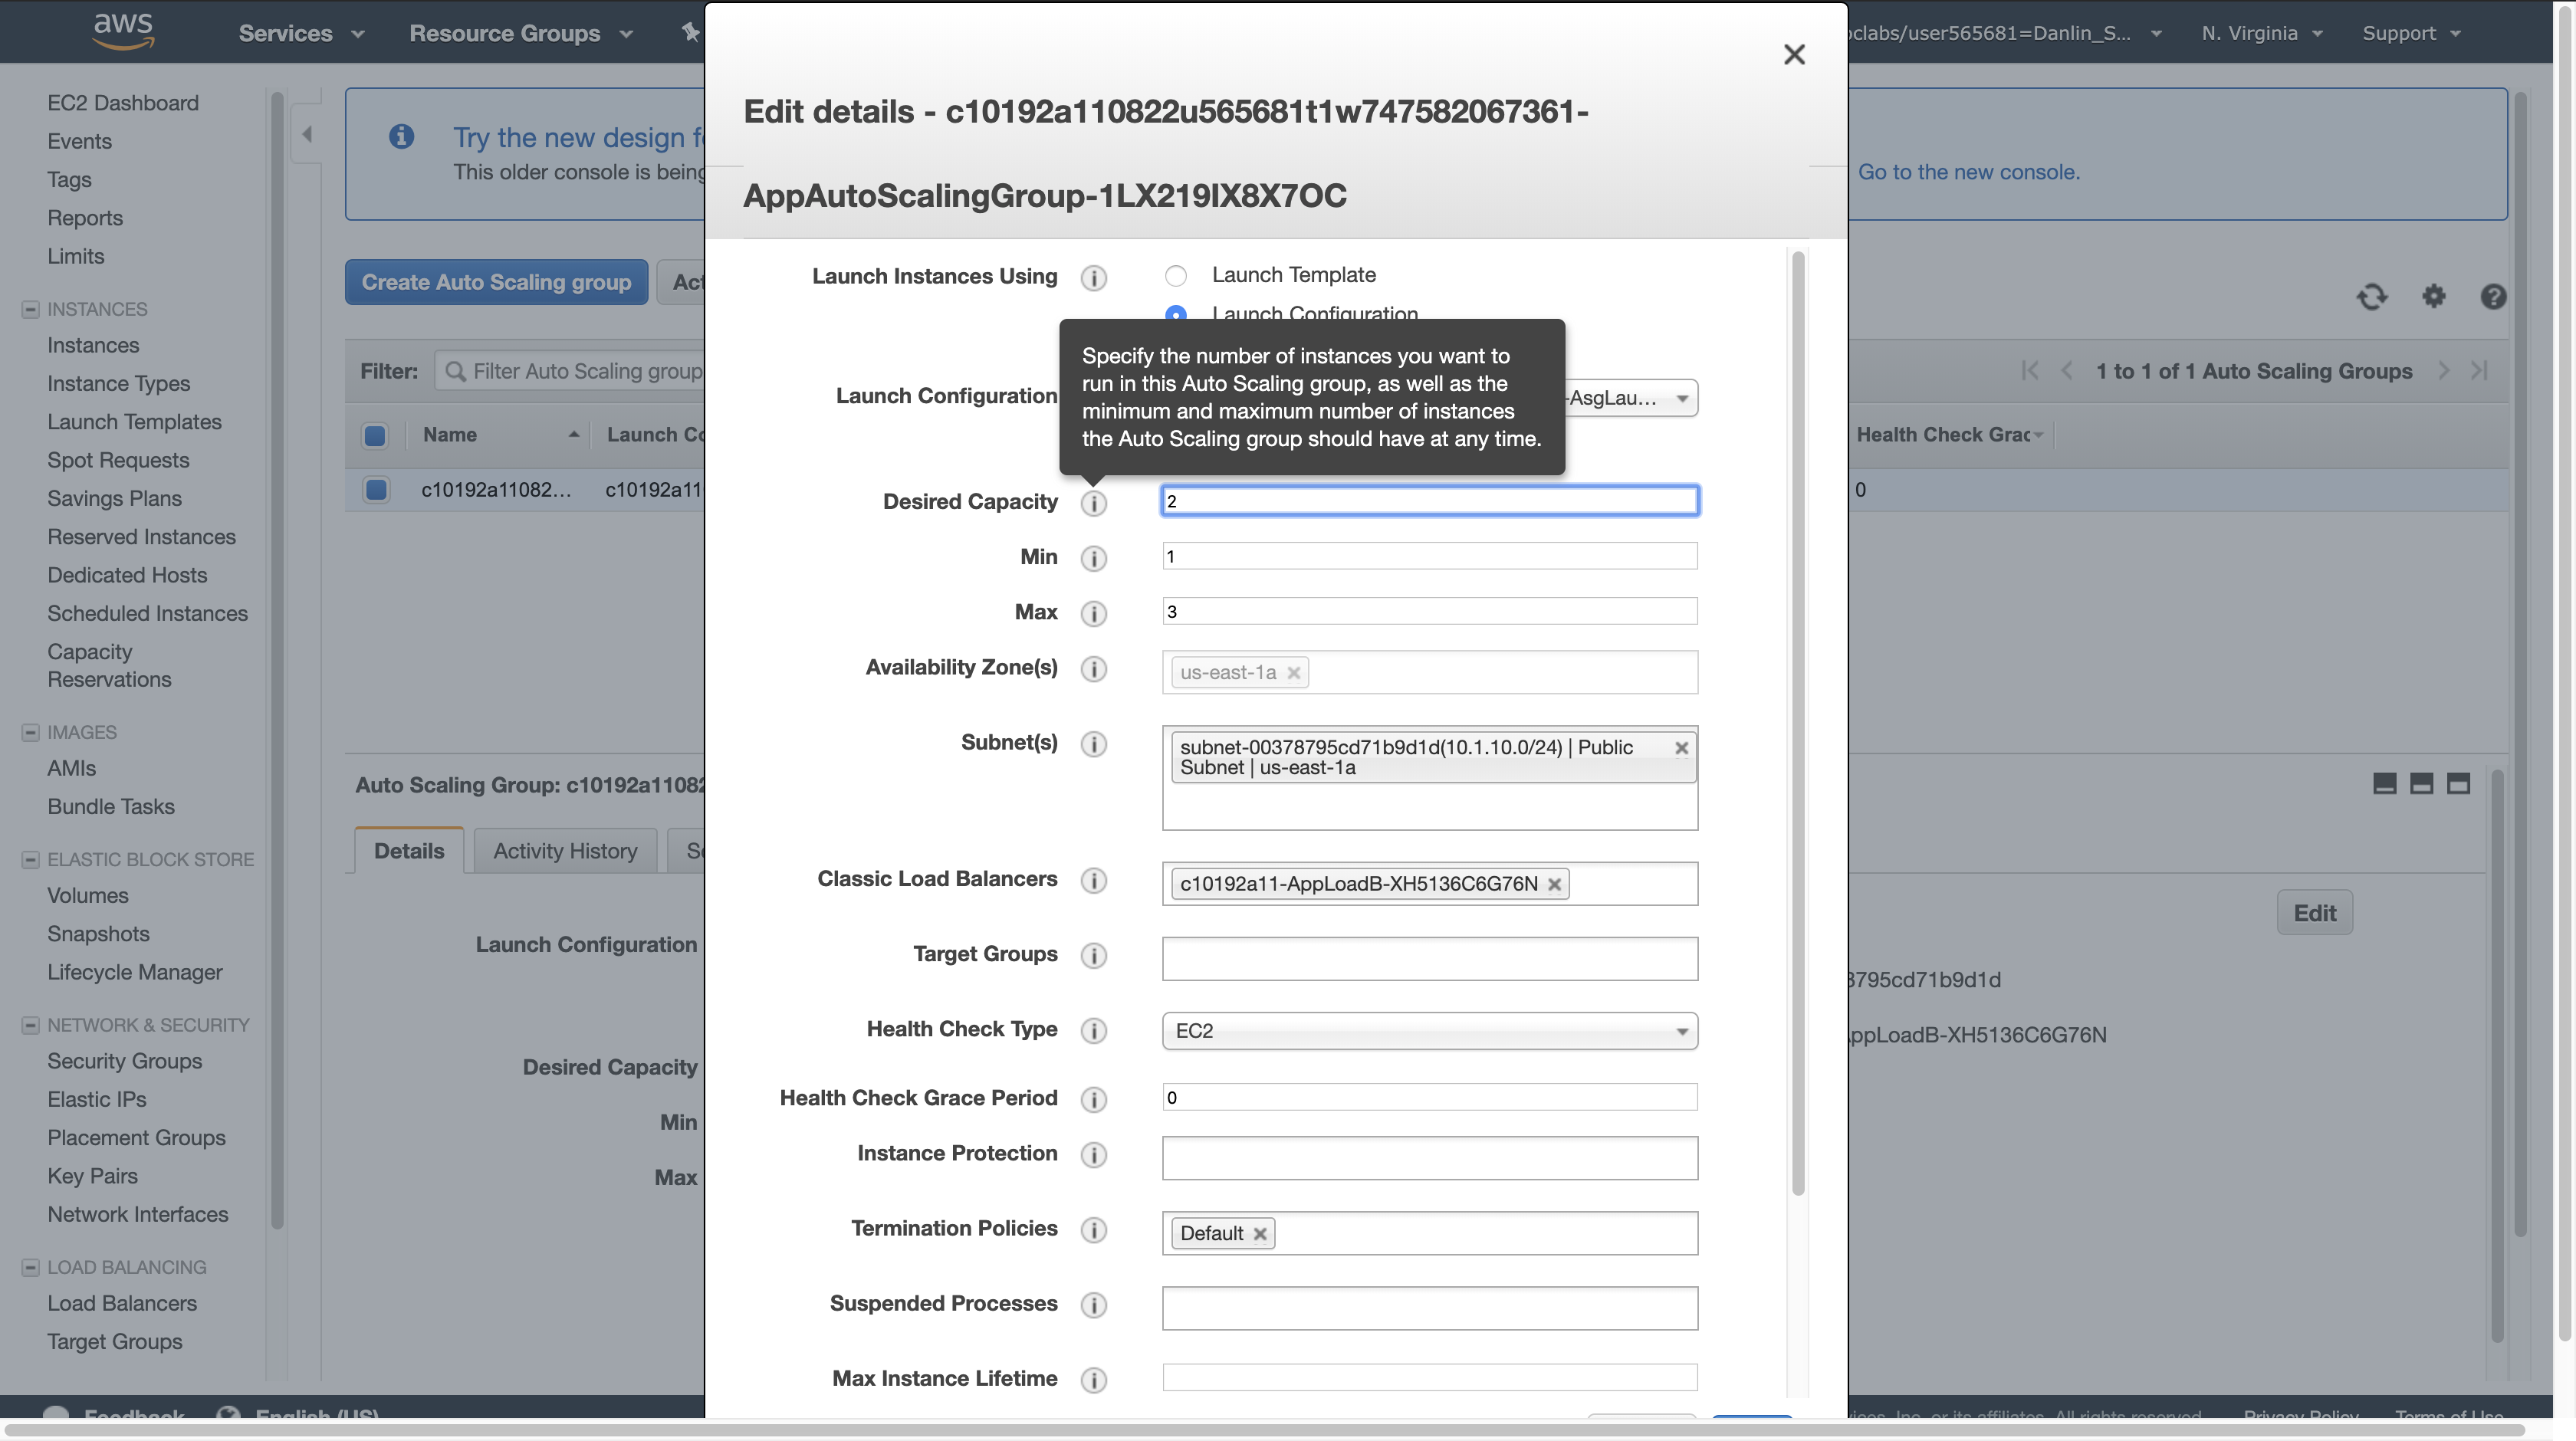
Click Save.
This will cause Auto Scaling to launch an additional Amazon EC2 instance.
Click the Activity History tab and monitor the progress of the new EC2 instance that is being launched.
Note: Wait for the status to change to show 2 rows with a Status of Successful. You can occasionally click refresh button to update the status.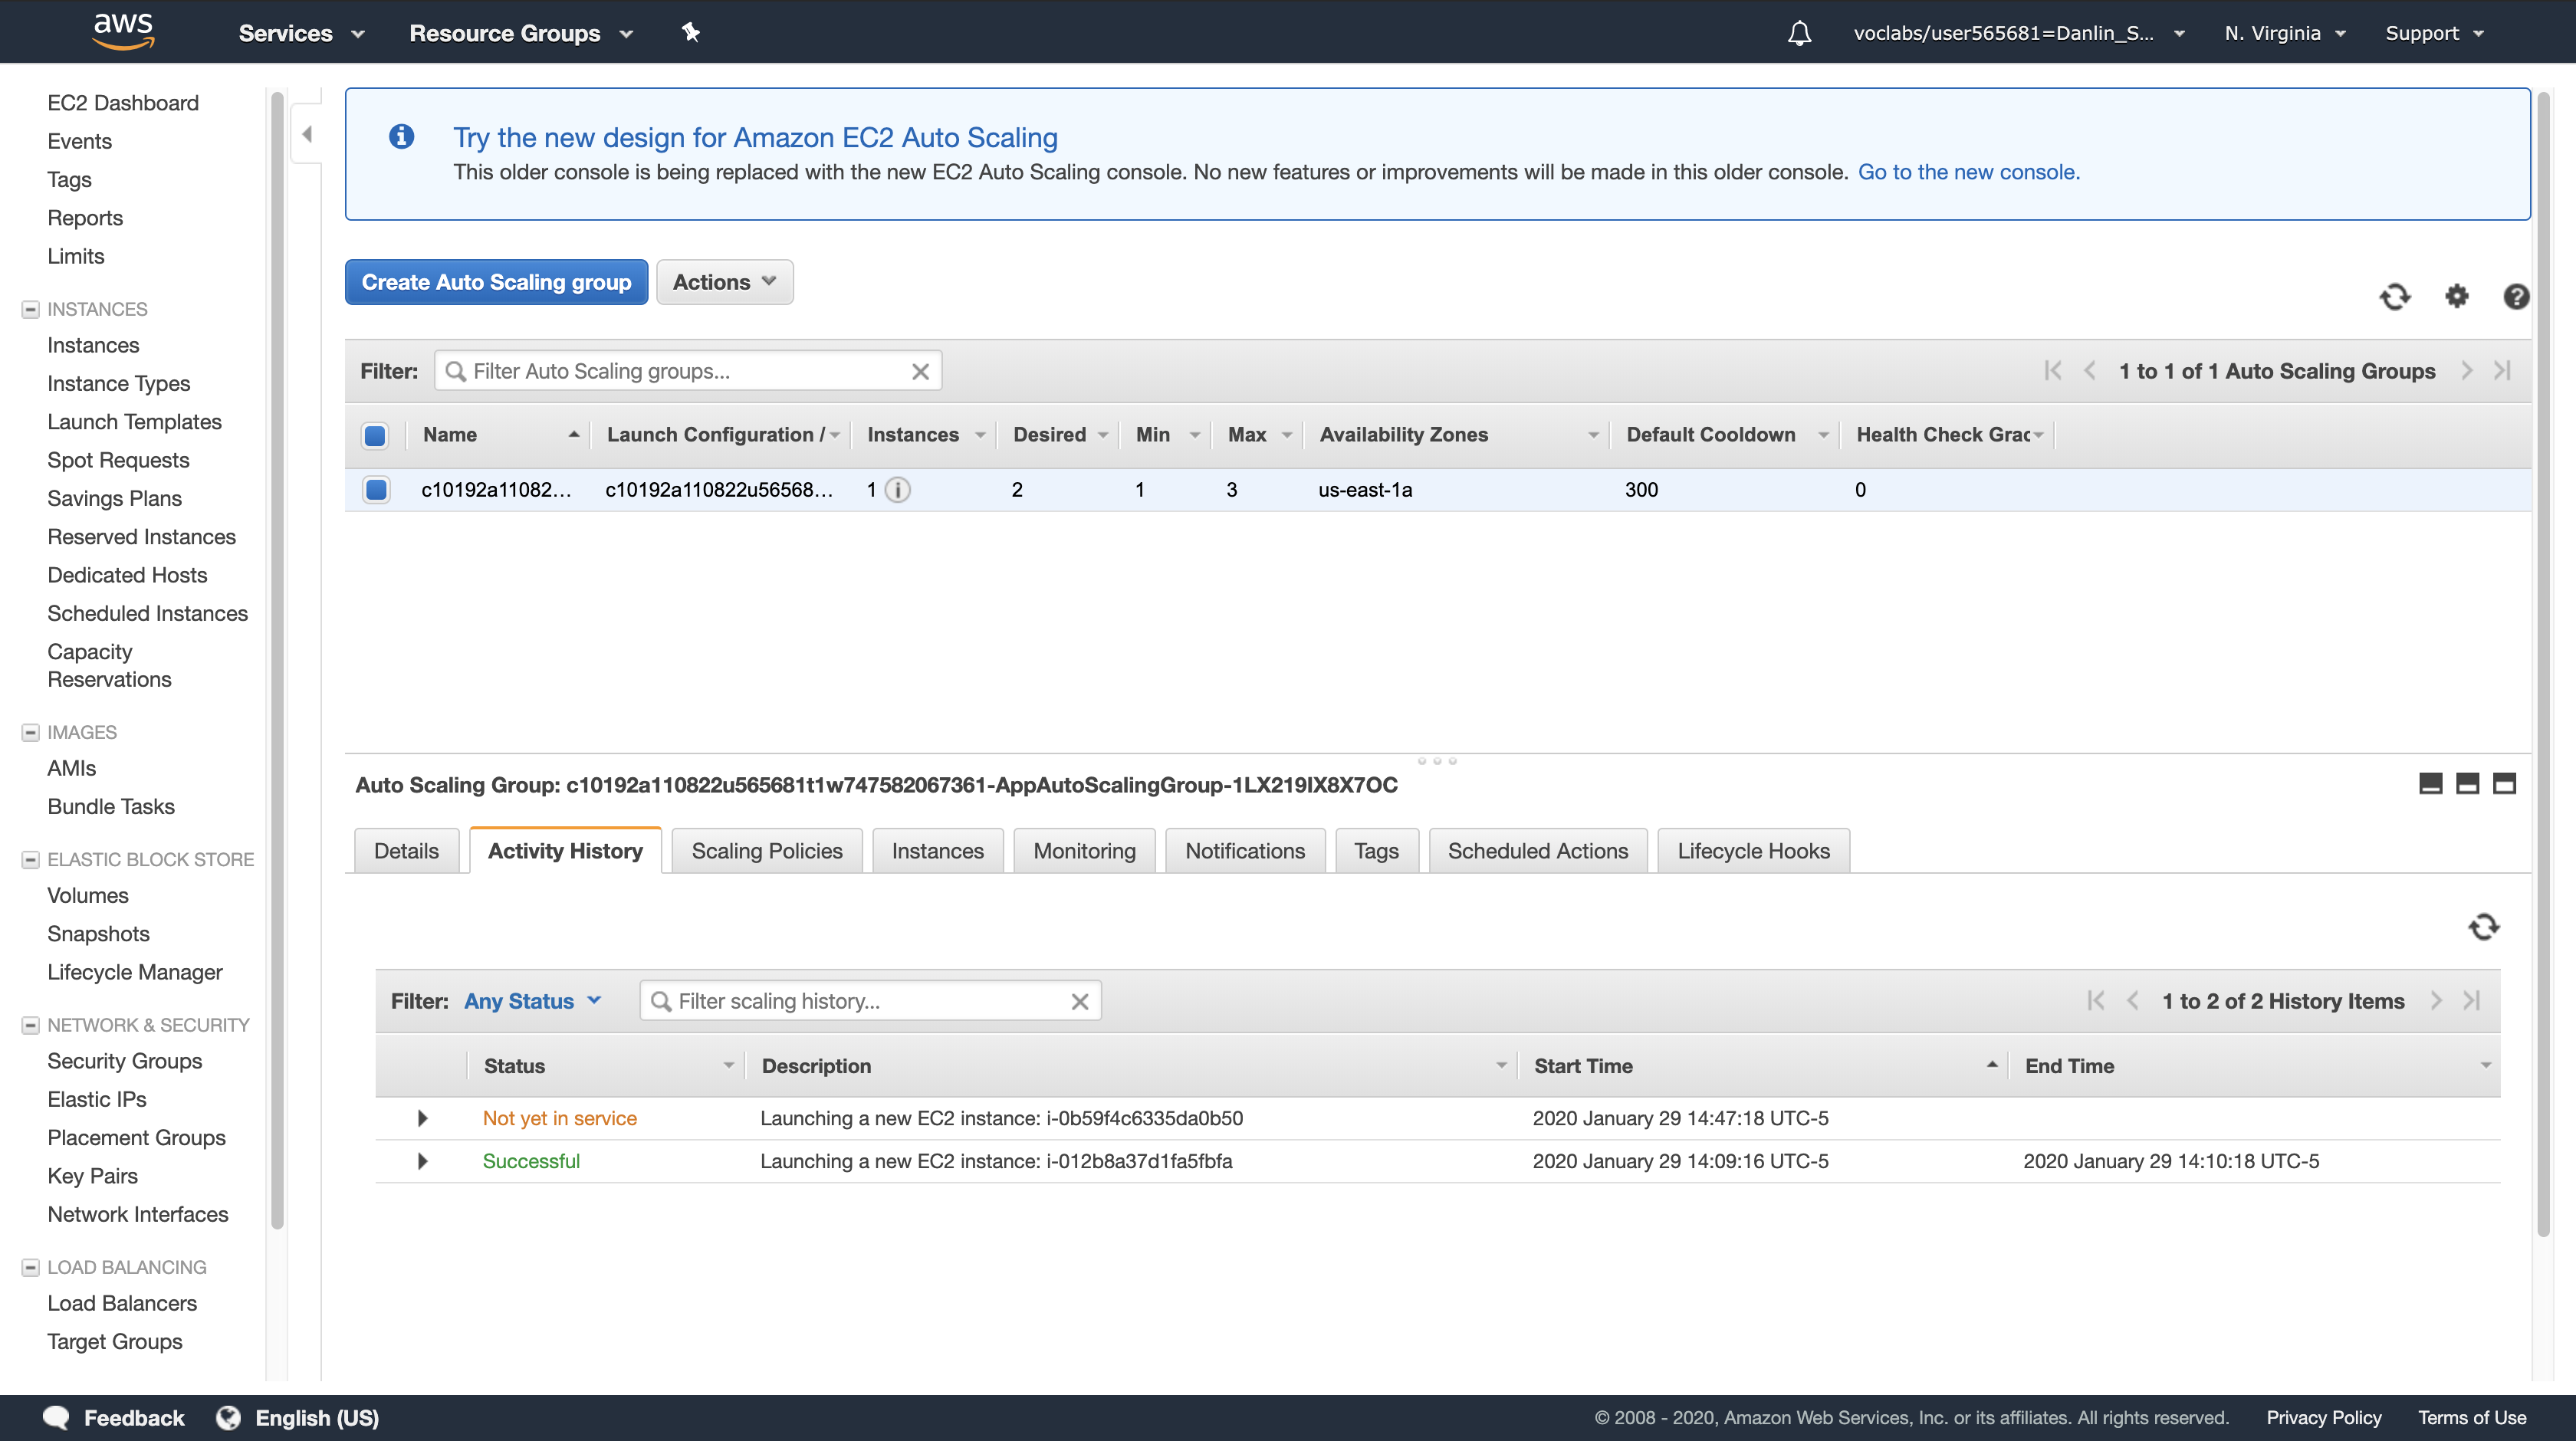
It will take several minutes. Once the status has updated, you can confirm that the Lambda function executed correctly.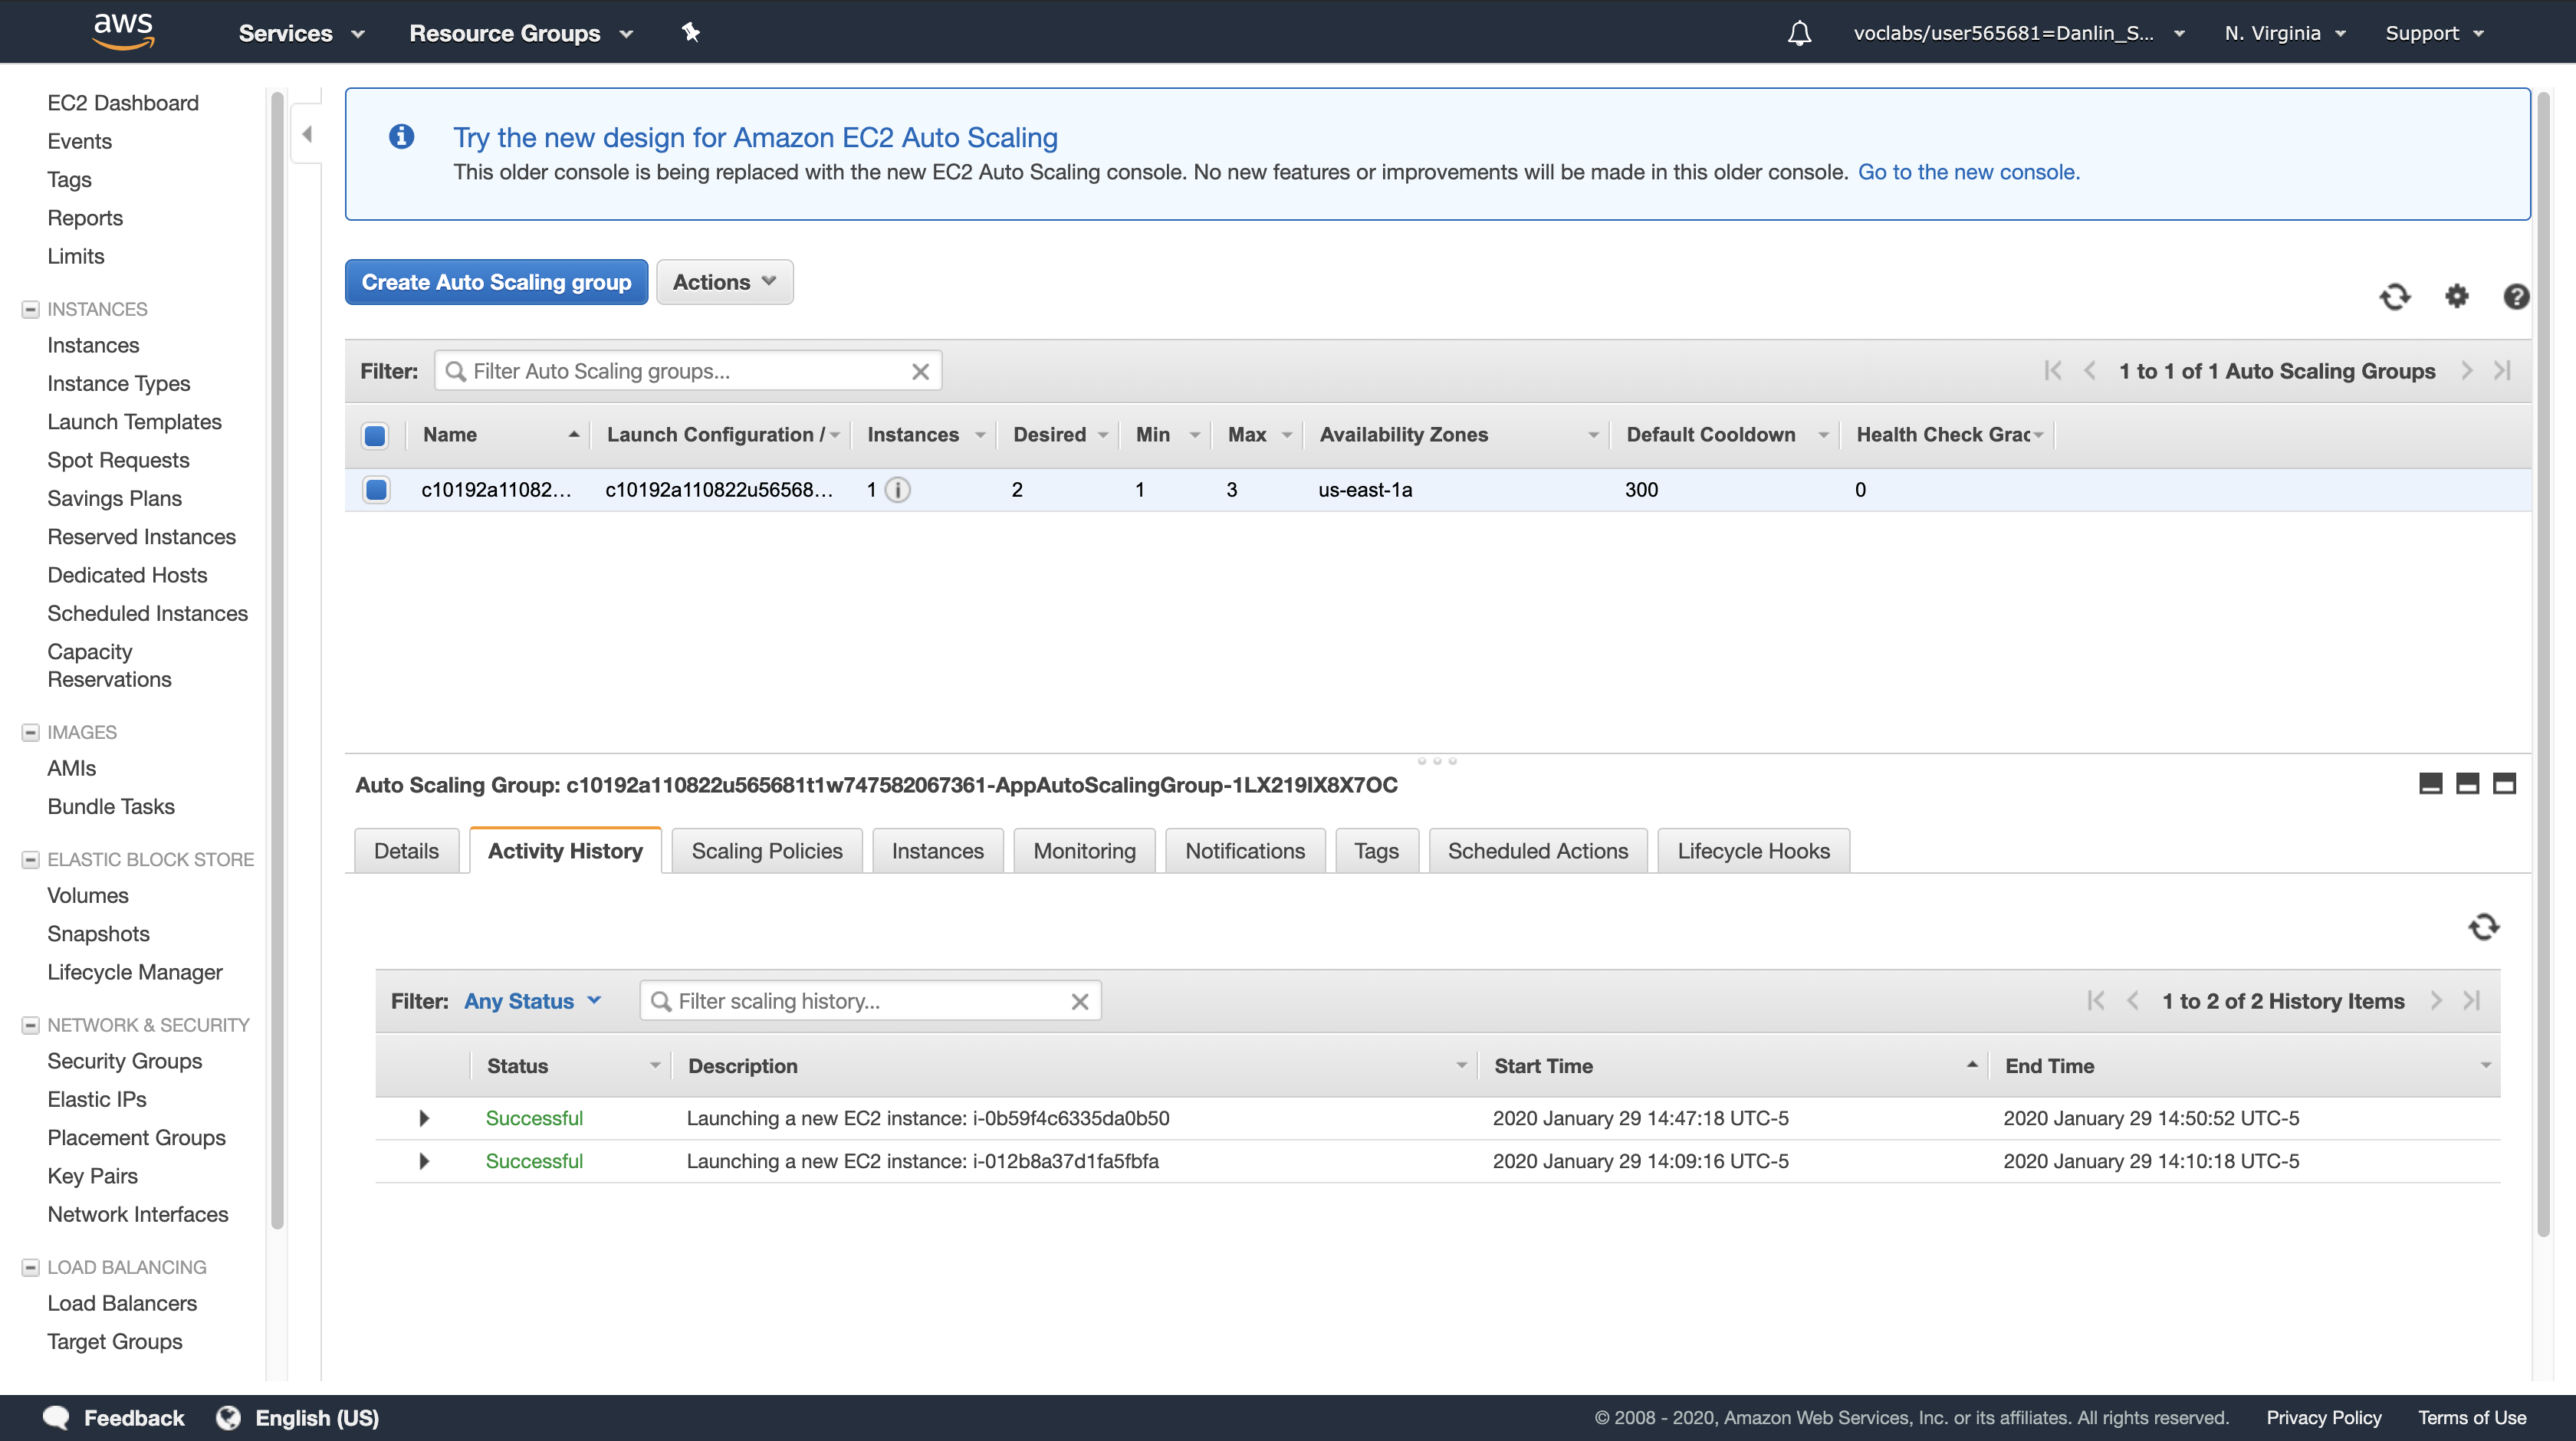
Left navigation pane
click Instances.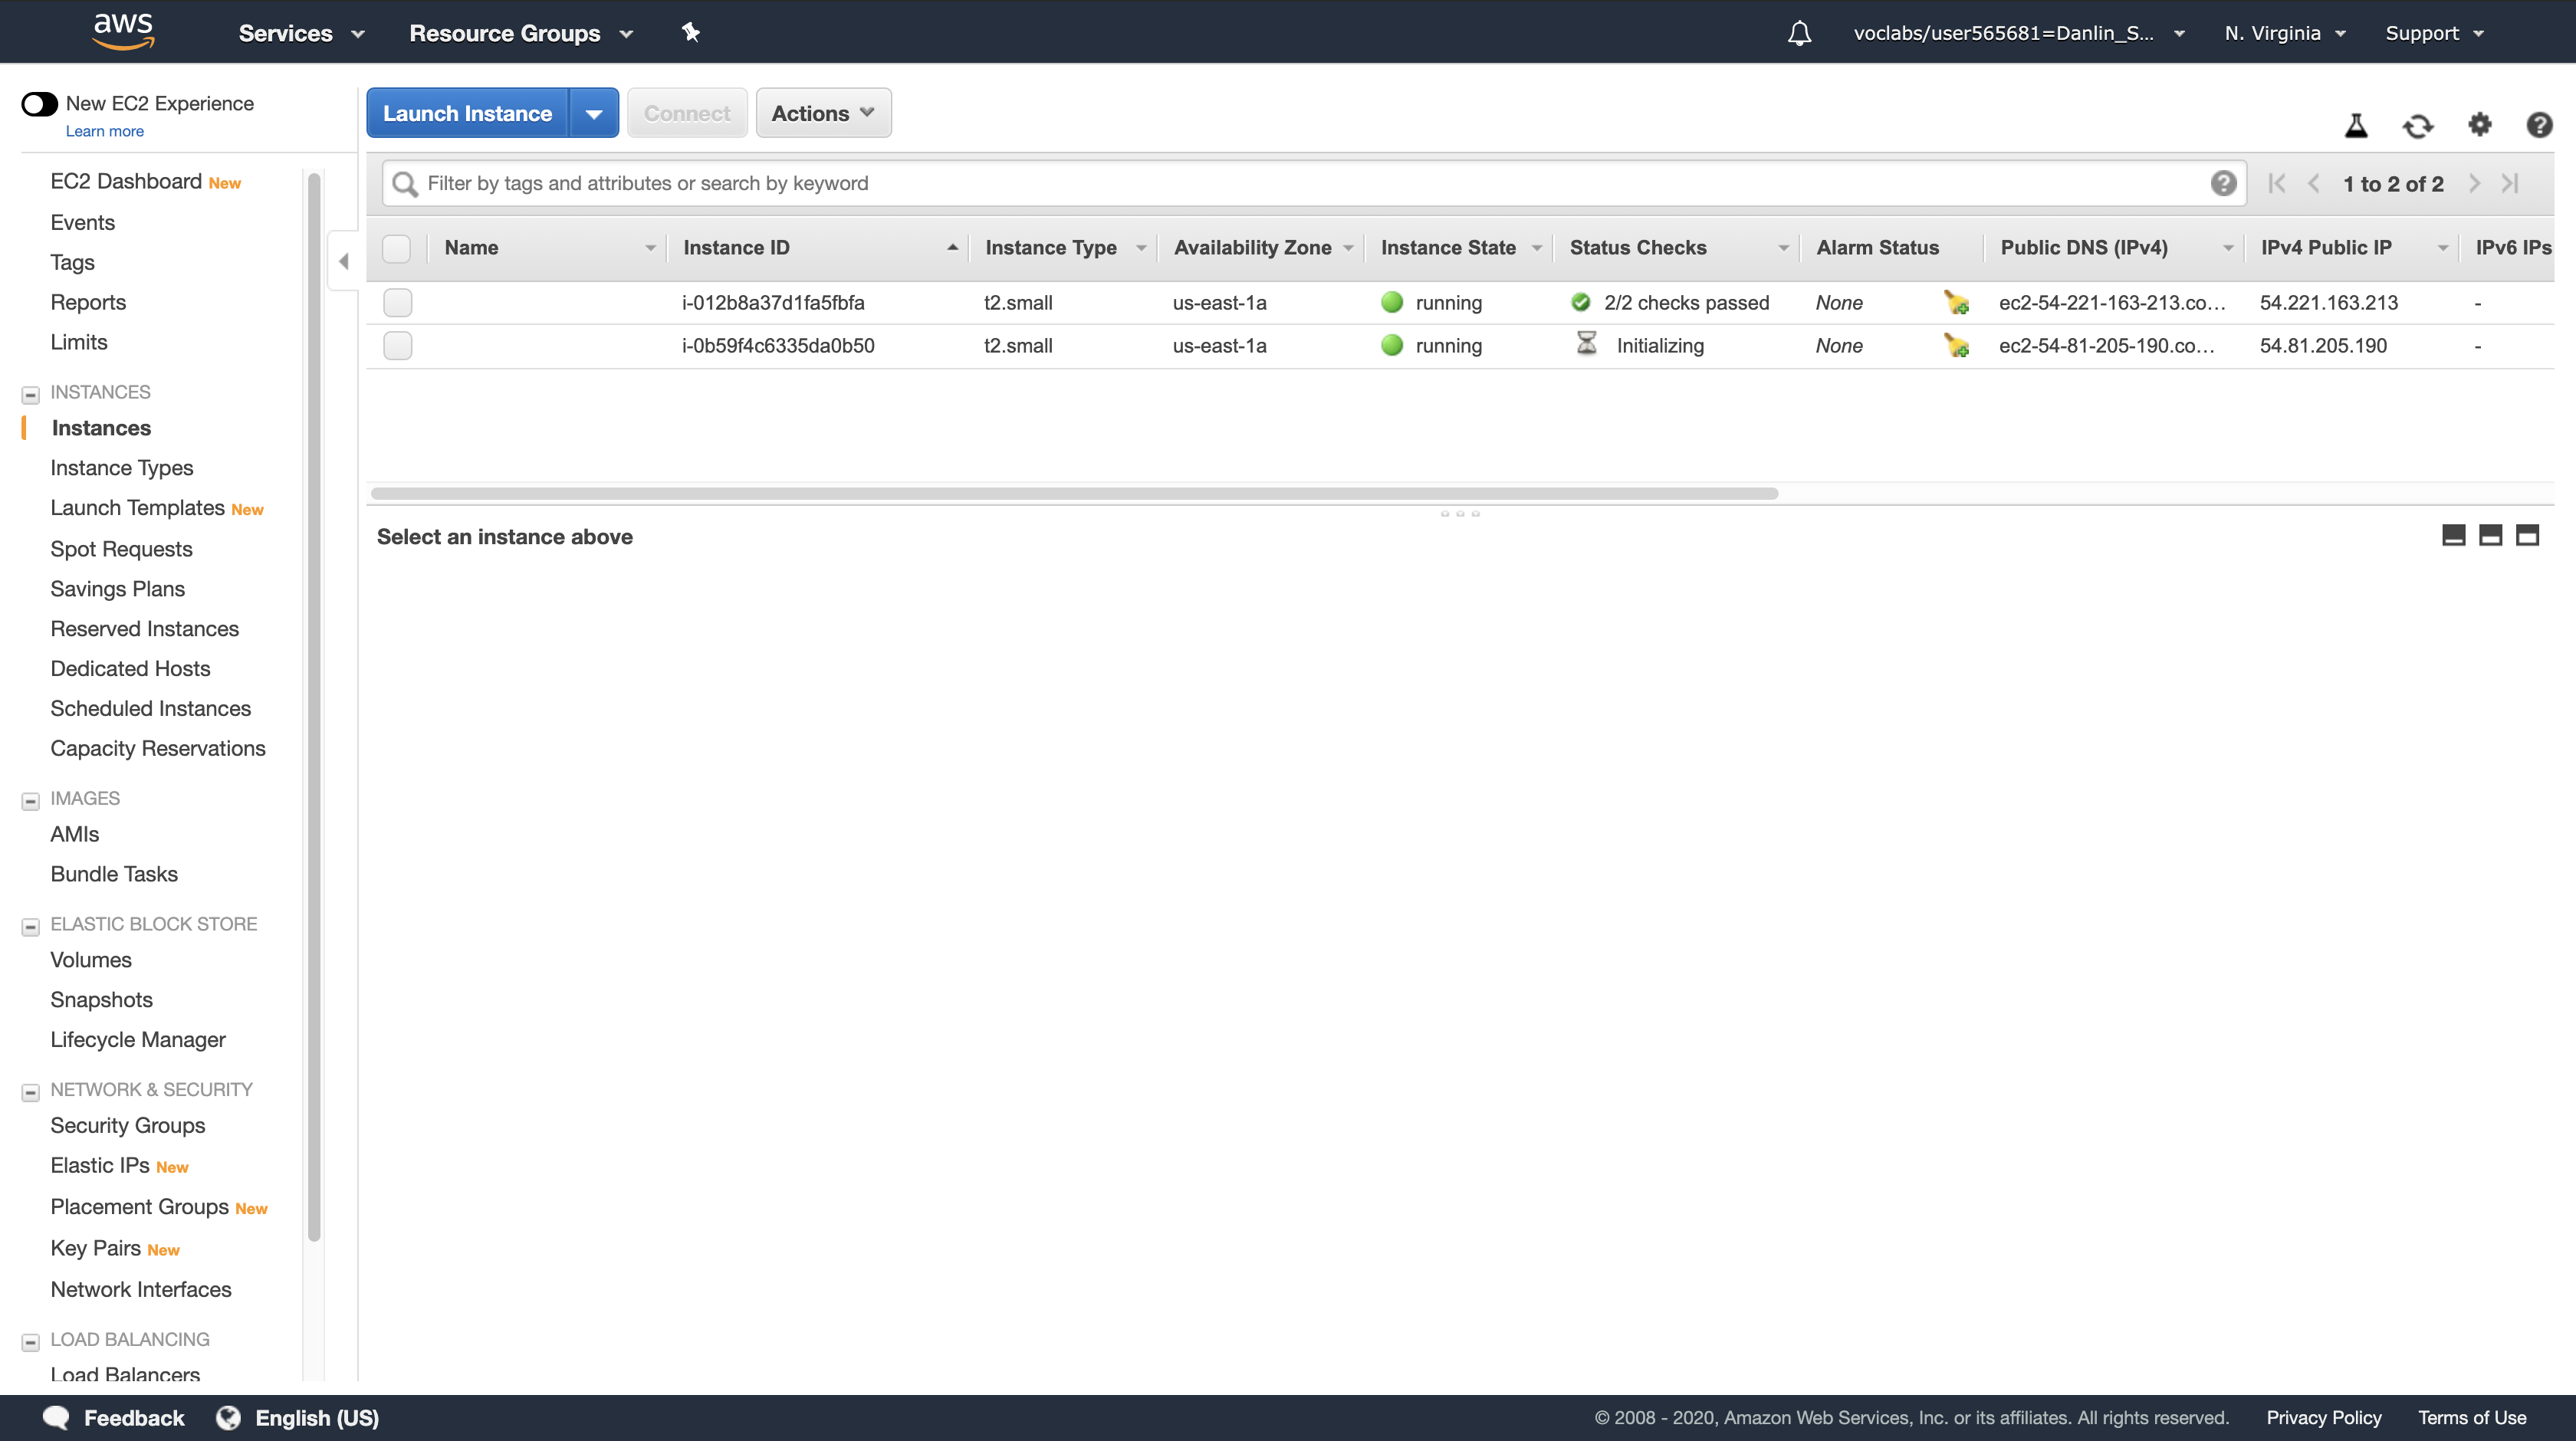
Click the row for the instance that has the most recent launch time. You might have to scroll to the right to view the Launch Time column for your instance.
Click the Tags tab at the bottom of the screen.
You should see a tag with Snapshots as the key, and Created as the value. This tag was added to the EC2 instance by your Lambda function.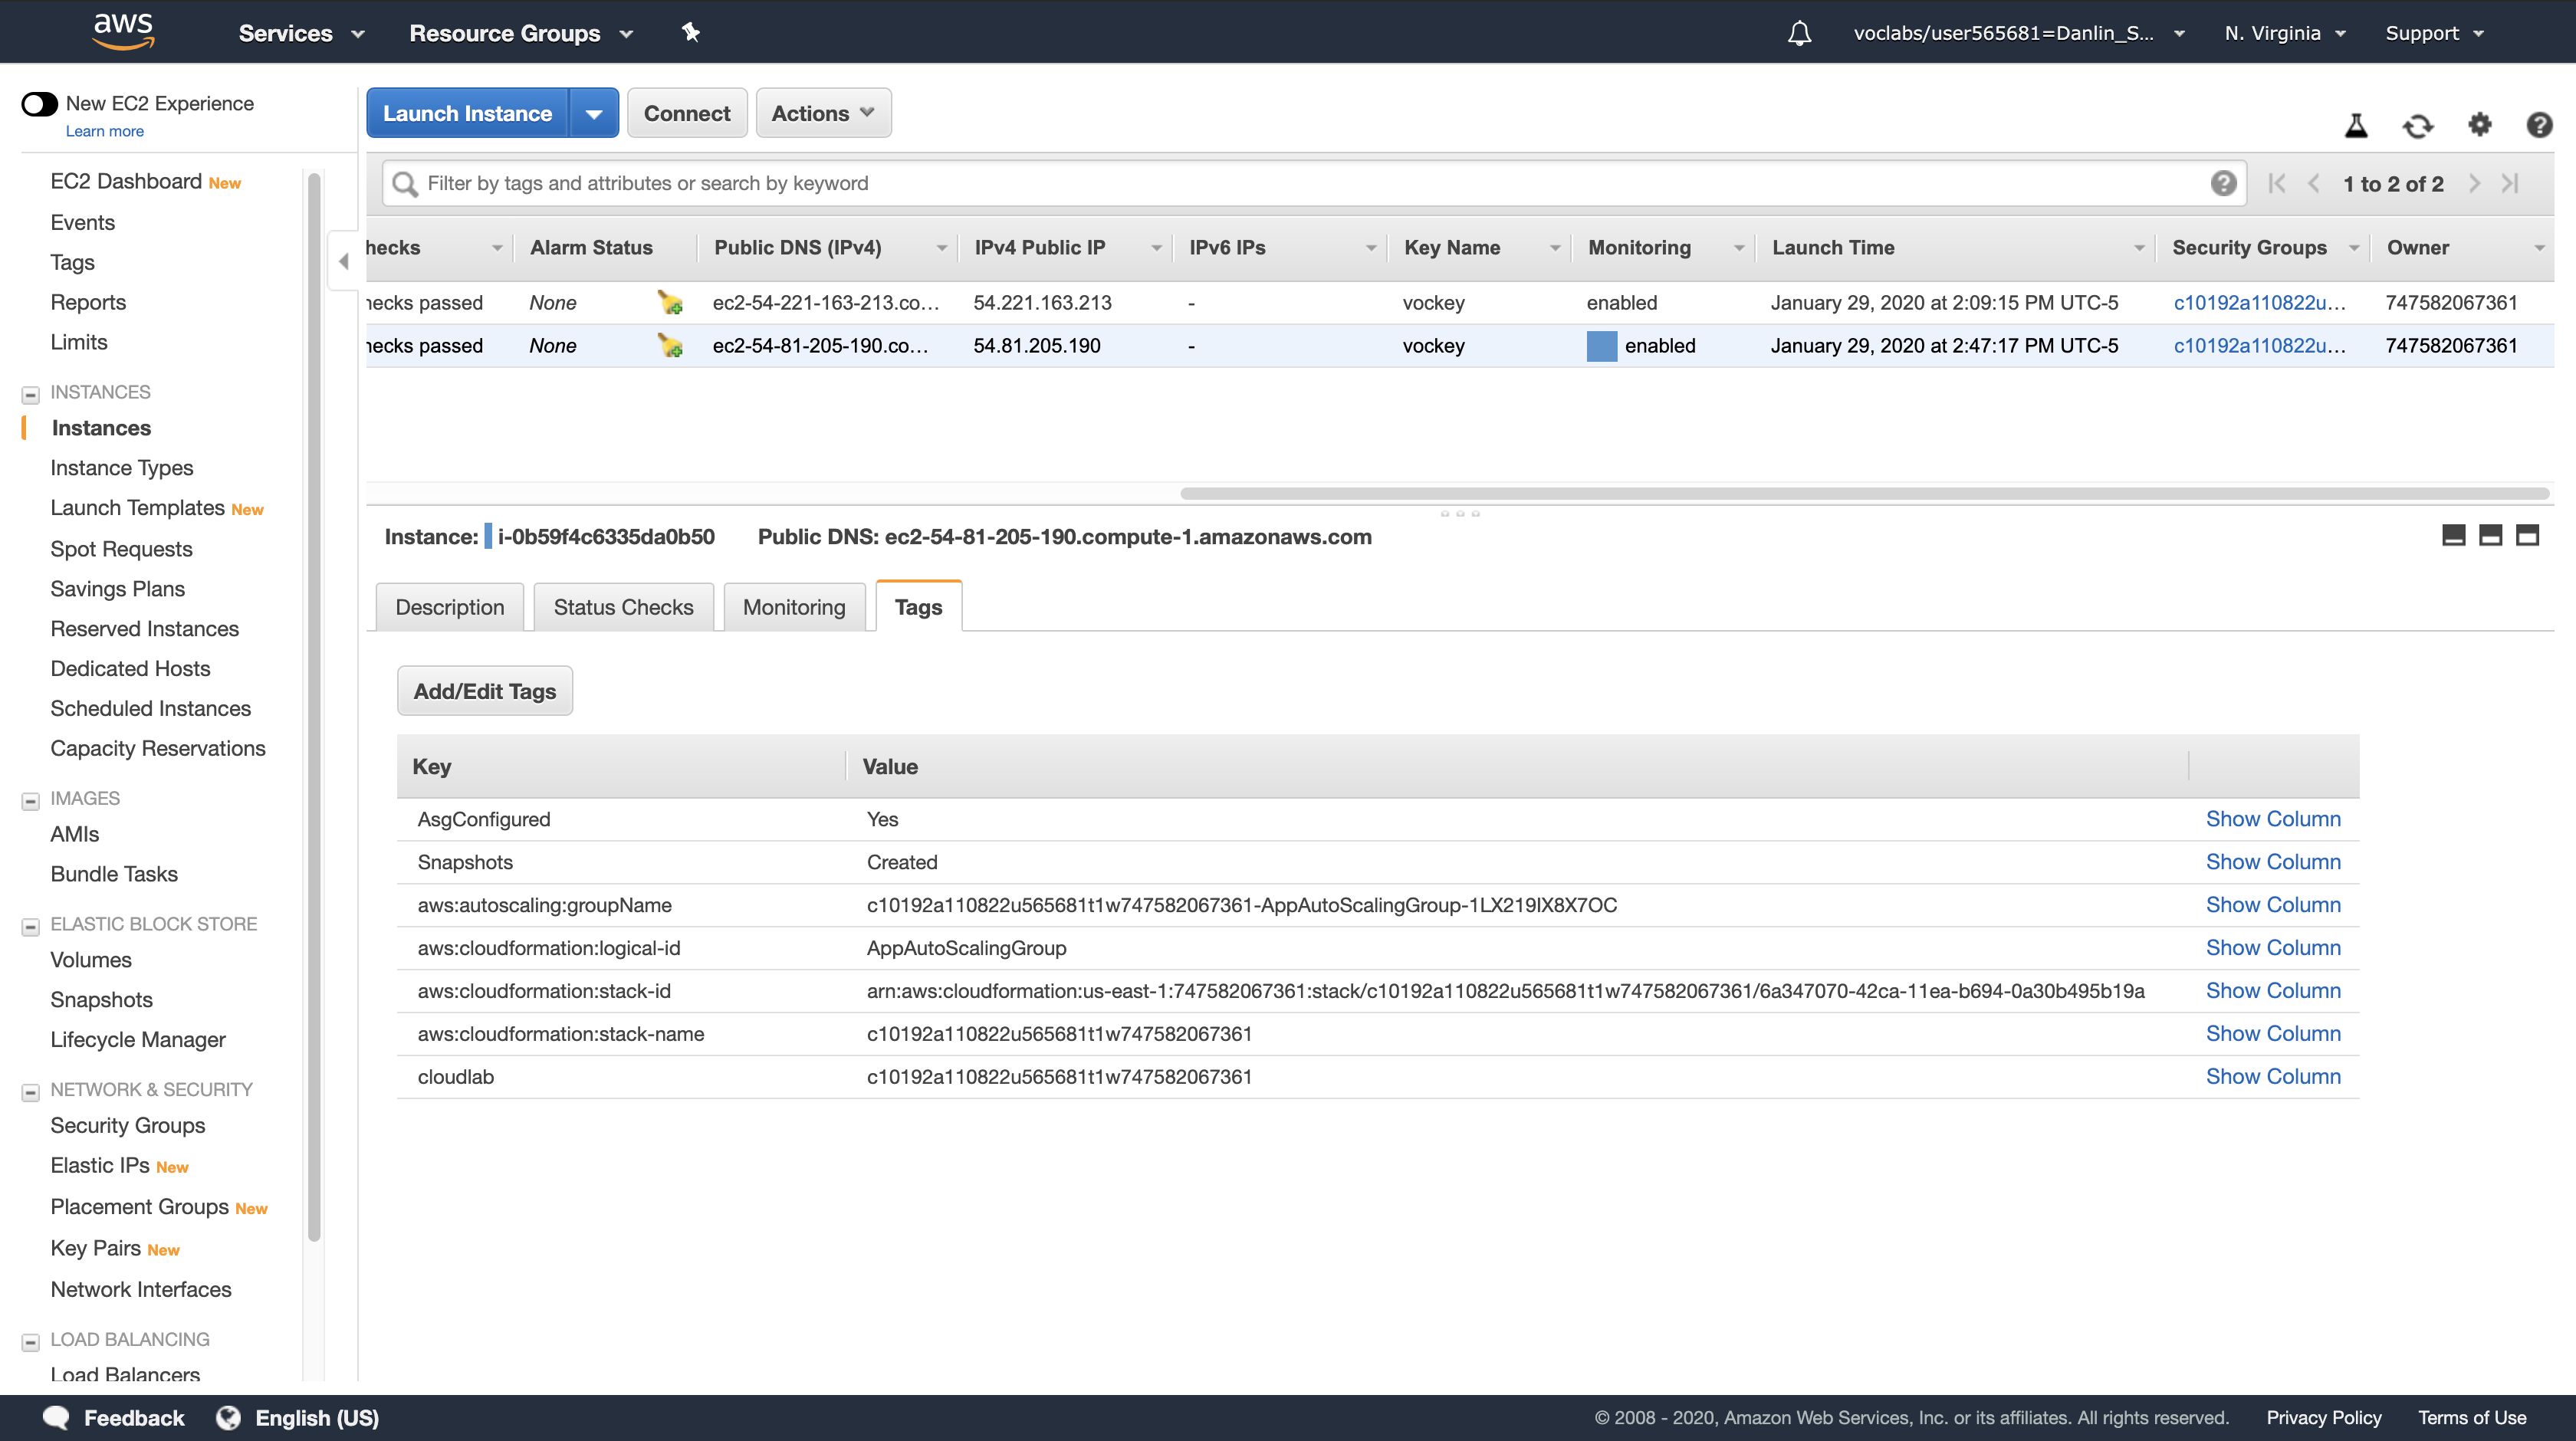
Navigation pane
click Snapshots.
In the snapshot window, you should see two snapshots that were created by the Lambda function.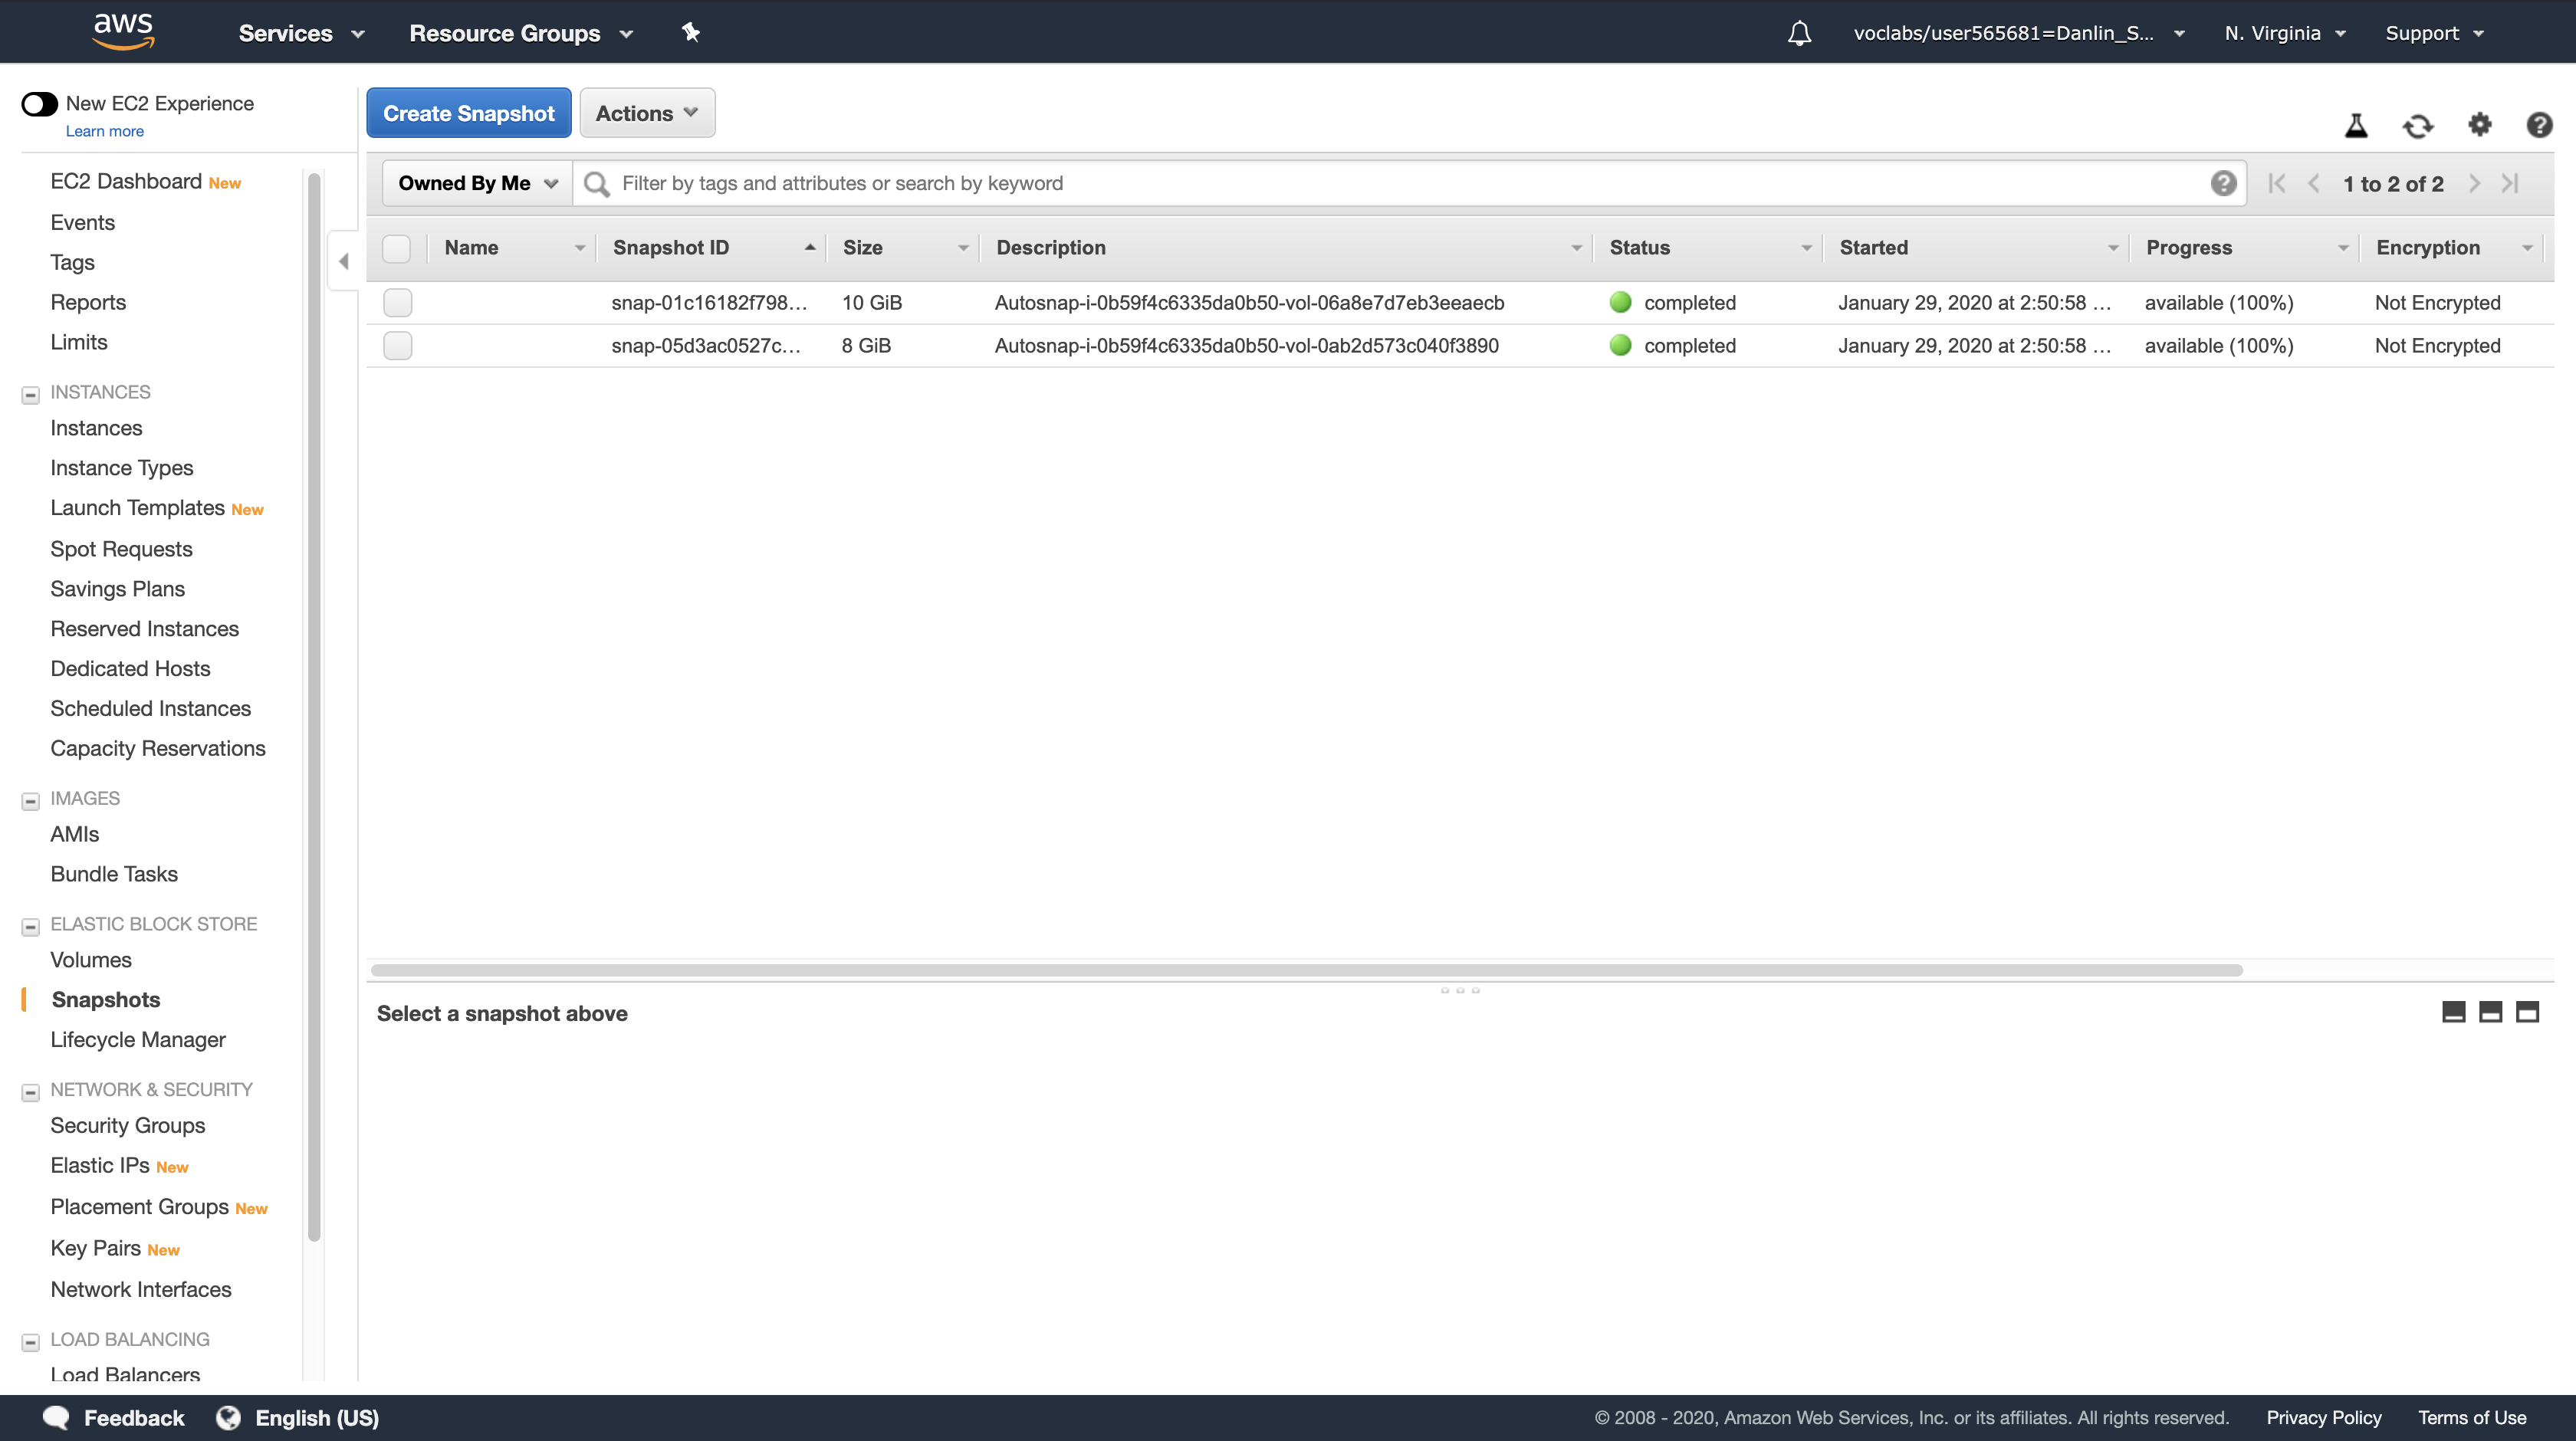
Note: If the tag or snapshots were not created, then your Lambda function either had a failure or was not triggered. Ask your instructor for assistance in diagnosing the configuration.
Your Auto Scaling group successfully triggered the Lambda function, which created the tag and snapshots. This provides an example serverless solution on AWS.
Lab Complete
Click End Lab at the top of this page and then click Yes to confirm that you want to end the lab.
A panel will appear, indicating that “DELETE has been initiated… You may close this message box now.”
Click the X in the top right corner to close the panel.
For feedback, suggestions, or corrections, please email us at: aws-course-feedback@amazon.com
ACA Module 5 LAB: Automating Infrastructure Deployment with AWS CloudFormation
https://labs.vocareum.com/main/main.php?m=editor&nav=1&asnid=110823&stepid=110824
Version A6L5
Deploying infrastructure in a consistent, reliable manner is difficult — it requires people to follow documented procedures without taking any undocumented shortcuts. Plus, it can be difficult to deploy infrastructure out-of-hours when less staff are available. AWS CloudFormation changes this by defining infrastructure in a template that can be automatically deployed — even on an automated schedule.
This lab shows how to deploy multiple layers of infrastructure with CloudFormation, update a stack and delete a stack (while retaining some resources). It also demonstrates how Service Catalog can be used to provide pre-packed ‘products’ based on CloudFormation templates.
In this lab you will:
- Use AWS CloudFormation to deploy a VPC networking layer
- Use AWS CloudFormation to deploy an application layer that references the networking layer
- Explore templates with AWS CloudFormation Designer
Delete a stack that has a Deletion Policy
Accessing the AWS Management Console
- At the top of these instructions, click
Start Labto launch your lab.
A Start Lab panel opens displaying the lab status. - Wait until you see the message “Lab status: ready“, then click the
Xto close the Start Lab panel. - At the top of these instructions, click
AWS
This will to open the AWS Management Console in a new browser tab. The system will automatically log you in.
Tip: If a new browser tab does not open, there will typically be a banner or icon at the top of your browser indicating that your browser is preventing the site from opening pop-up windows. Click on the banner or icon and choose “Allow pop ups.”
4. Arrange the AWS Management Console tab so that it displays along side these instructions. Ideally, you will be able to see both browser tabs at the same time, to make it easier to follow the lab steps.
Task 1: Deploy a Networking Layer
It is a best-practice recommendation to deploy infrastructure in layers. Common layers are:
- Network (Amazon VPC)
- Database
- Application
This way, templates can be re-used between systems, such as deploying a common network topology between Dev/Test/Production or deploying a standard database for multiple application.
In this task, you will deploy an AWS CloudFormation template that creates a Networking layer using Amazon VPC.
Right-click the link below and choose the option (e.g. ‘Save Link As…’) to download the lab-network.yaml template to your computer.
- Download lab-network.yaml
- If you wish, you can open the template in a text editor to see how resources are defined.
- Templates can be written in JSON or YAML. YAML is a markup language similar to JSON, but is easier to read and edit.
1 | AWSTemplateFormatVersion: 2010-09-09 |
AWS Management Console
Services menu > click CloudFormation.
If you see this message, click Try it out now and provide us feedback:
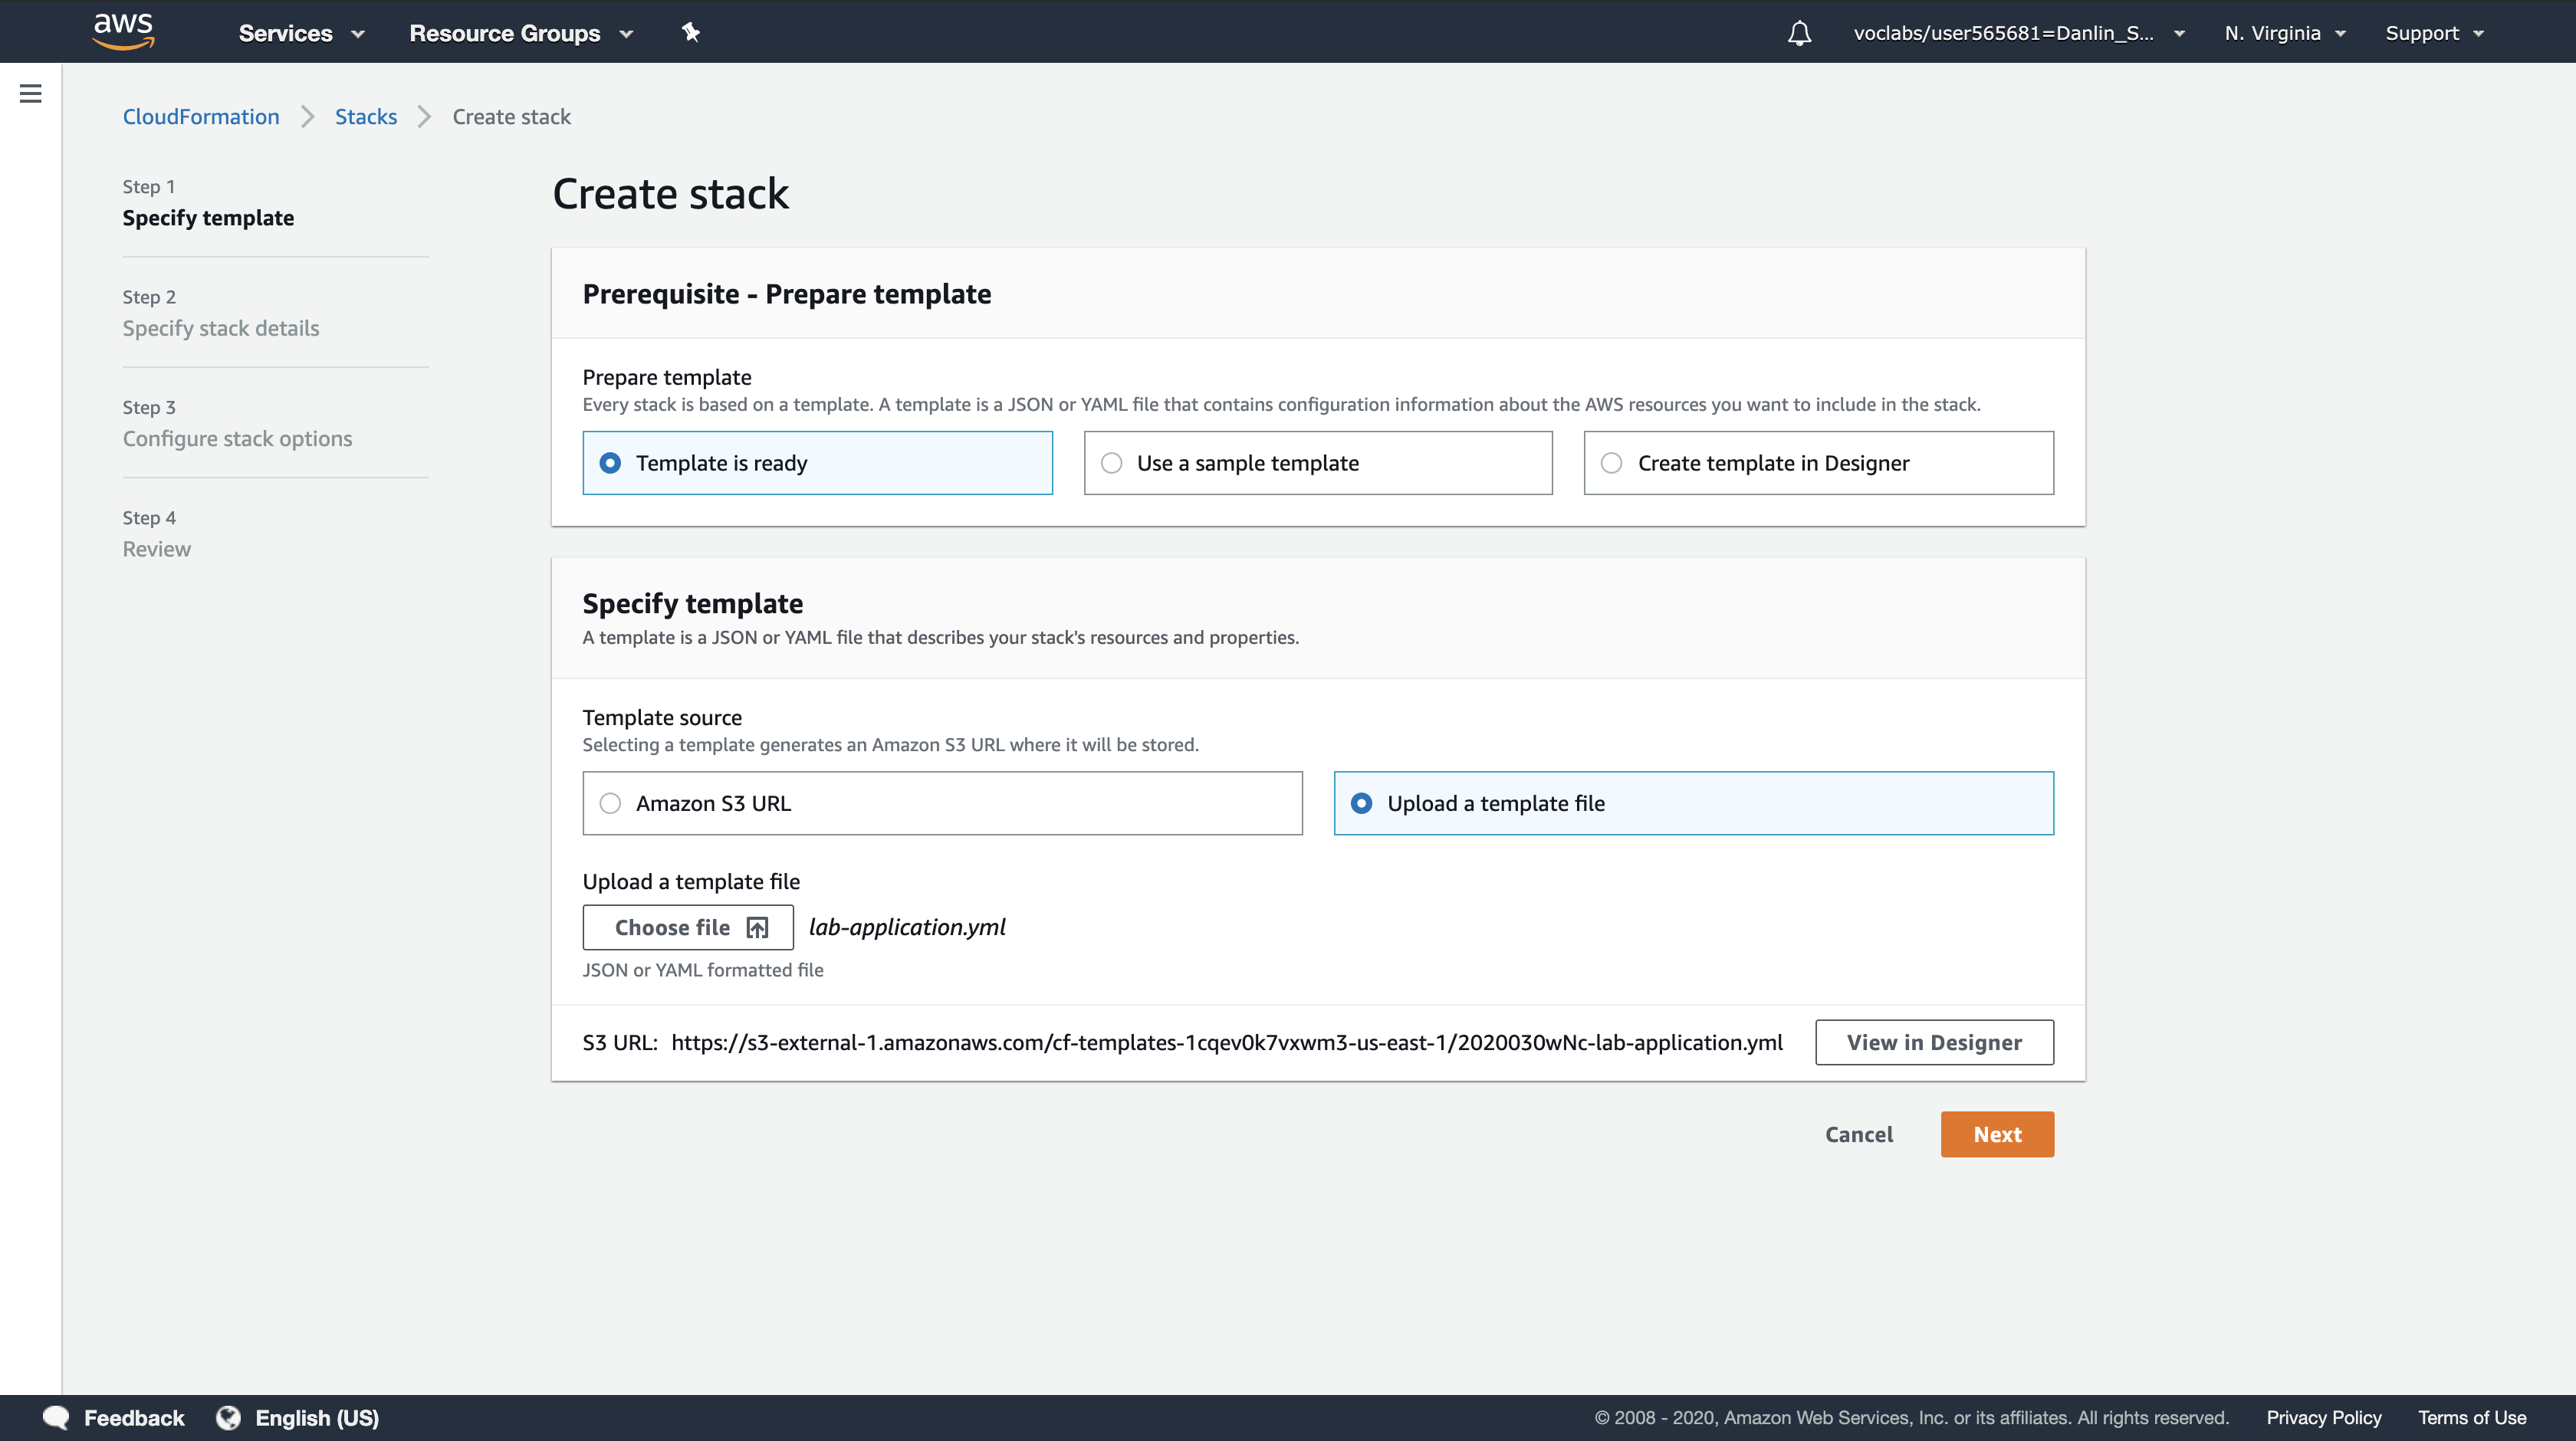
Click Create stack and configure:
Step 1: Specify template
- Template source:
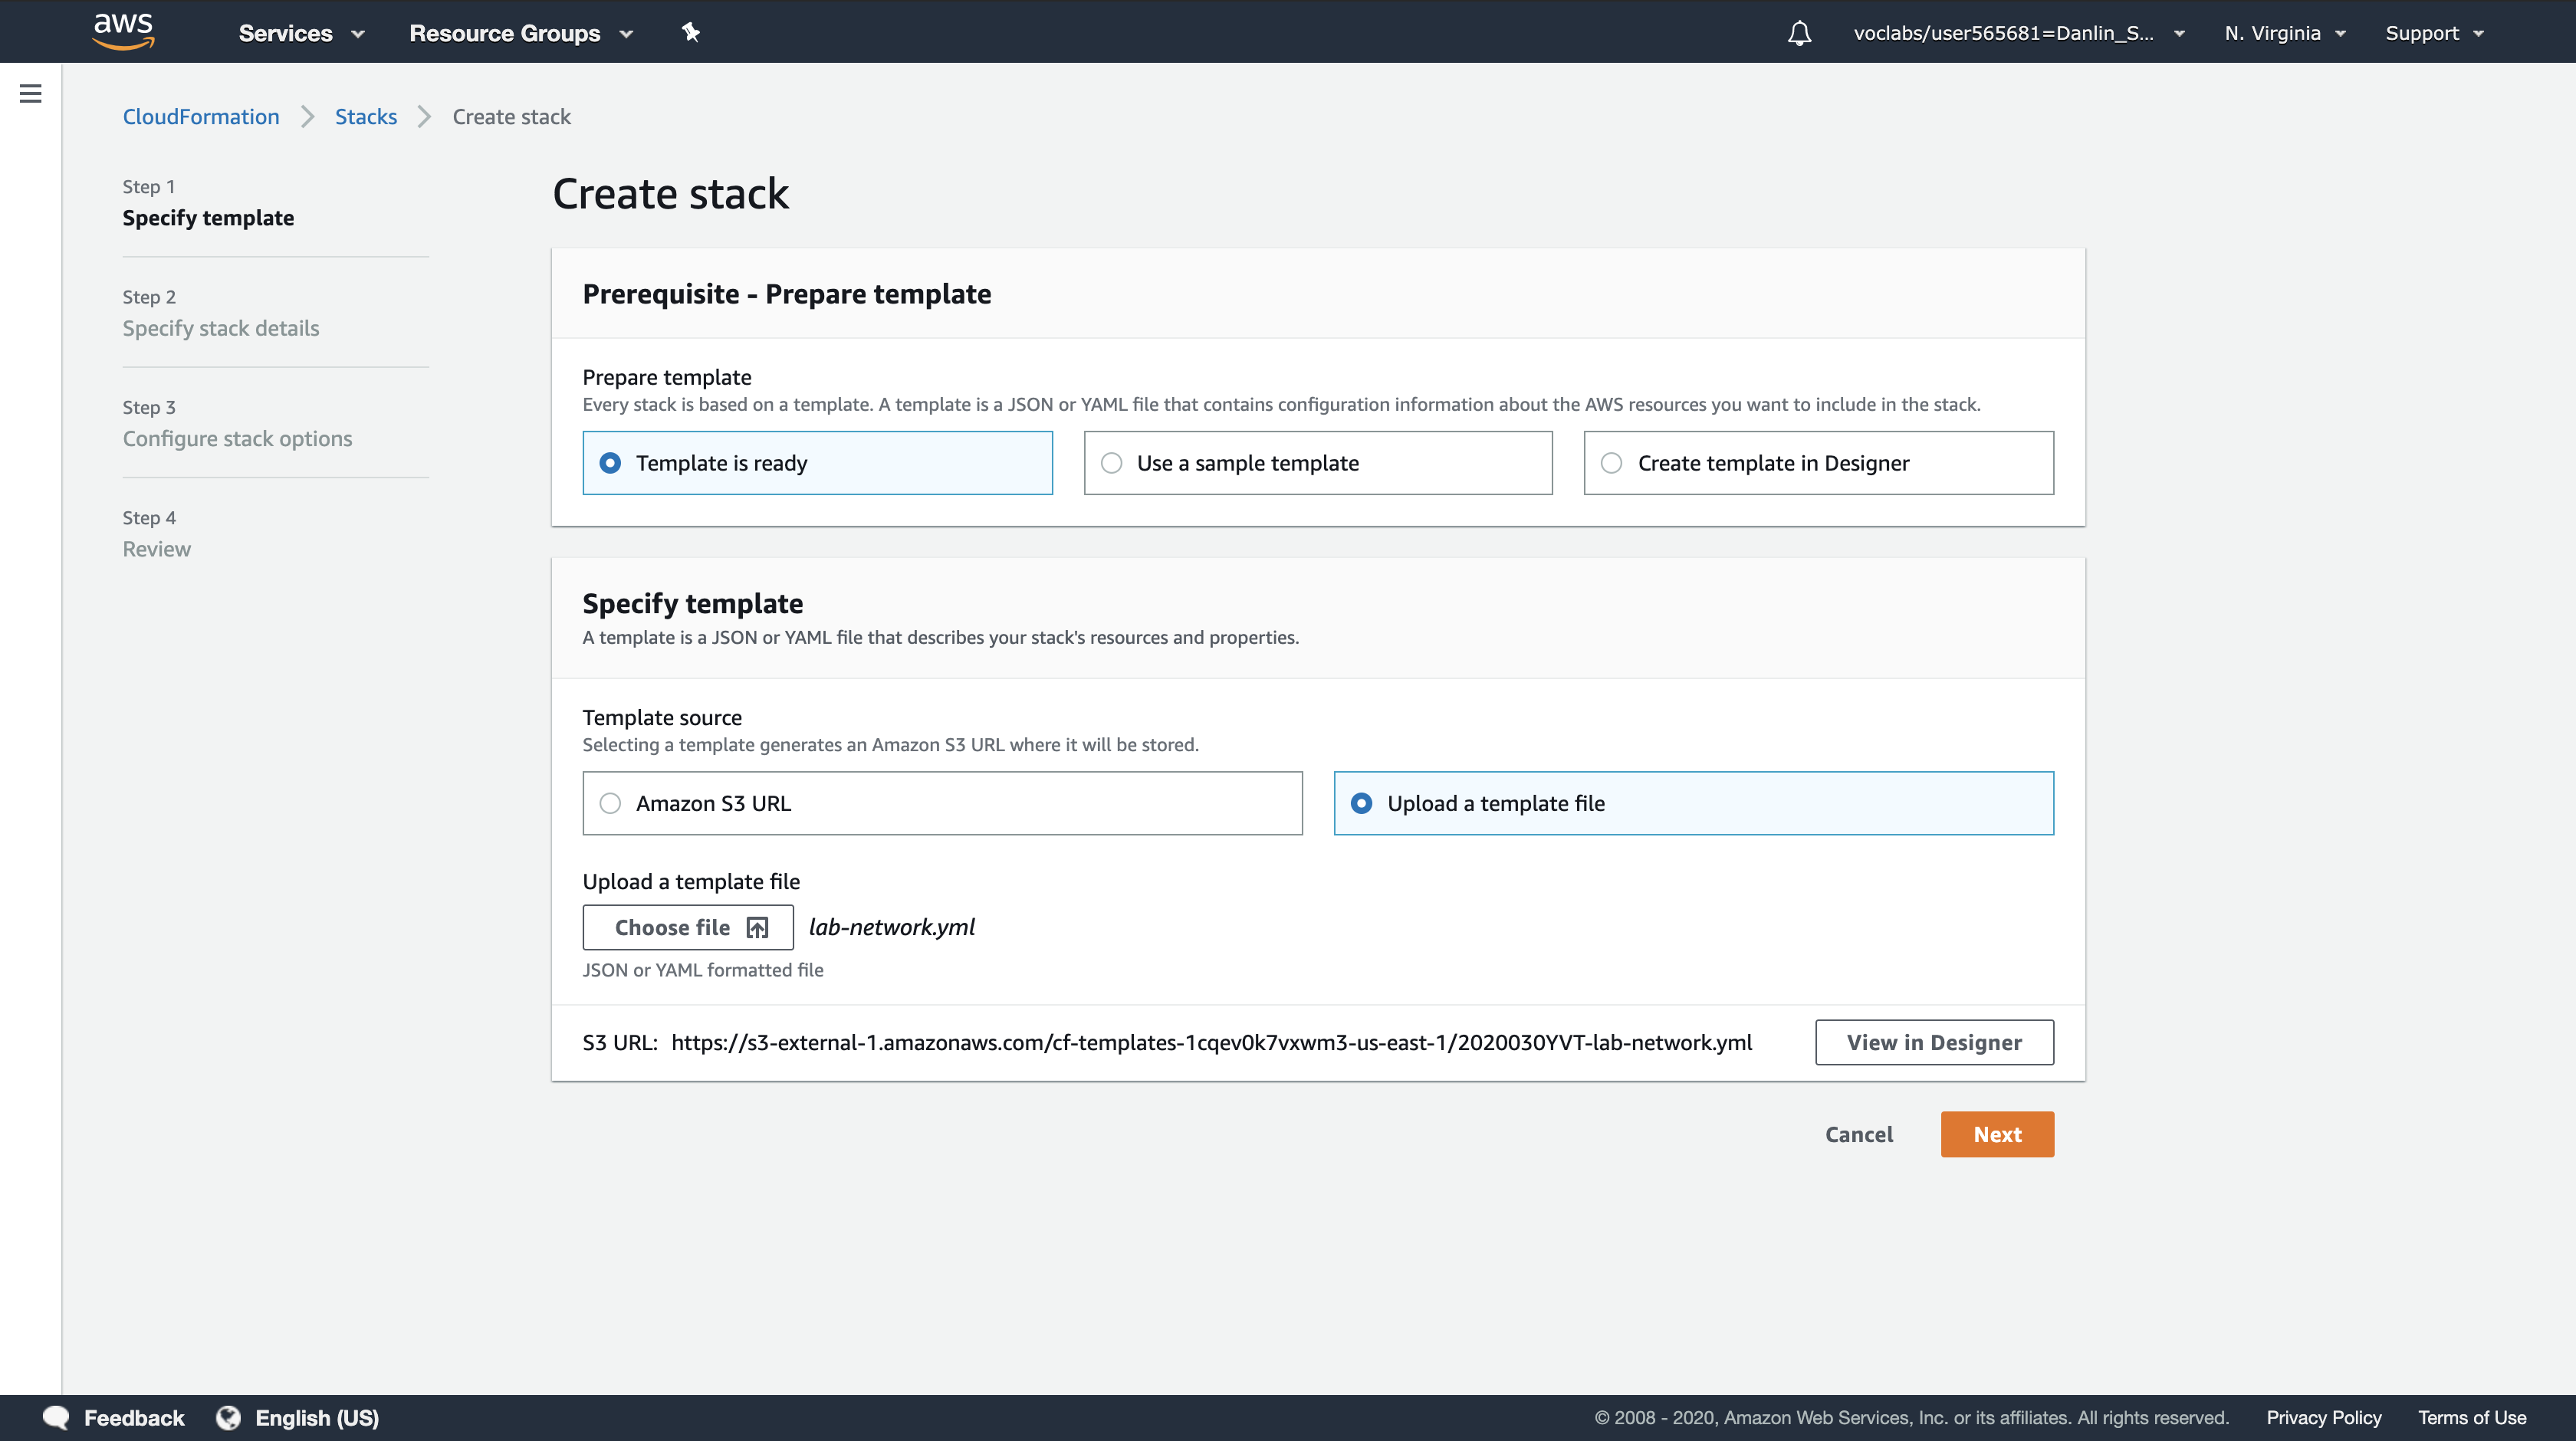
Upload a template file - Upload a template file: Click
Choose filethen select the lab-network.yaml file you downloaded. - Click
Next

Step 2: Create Stack
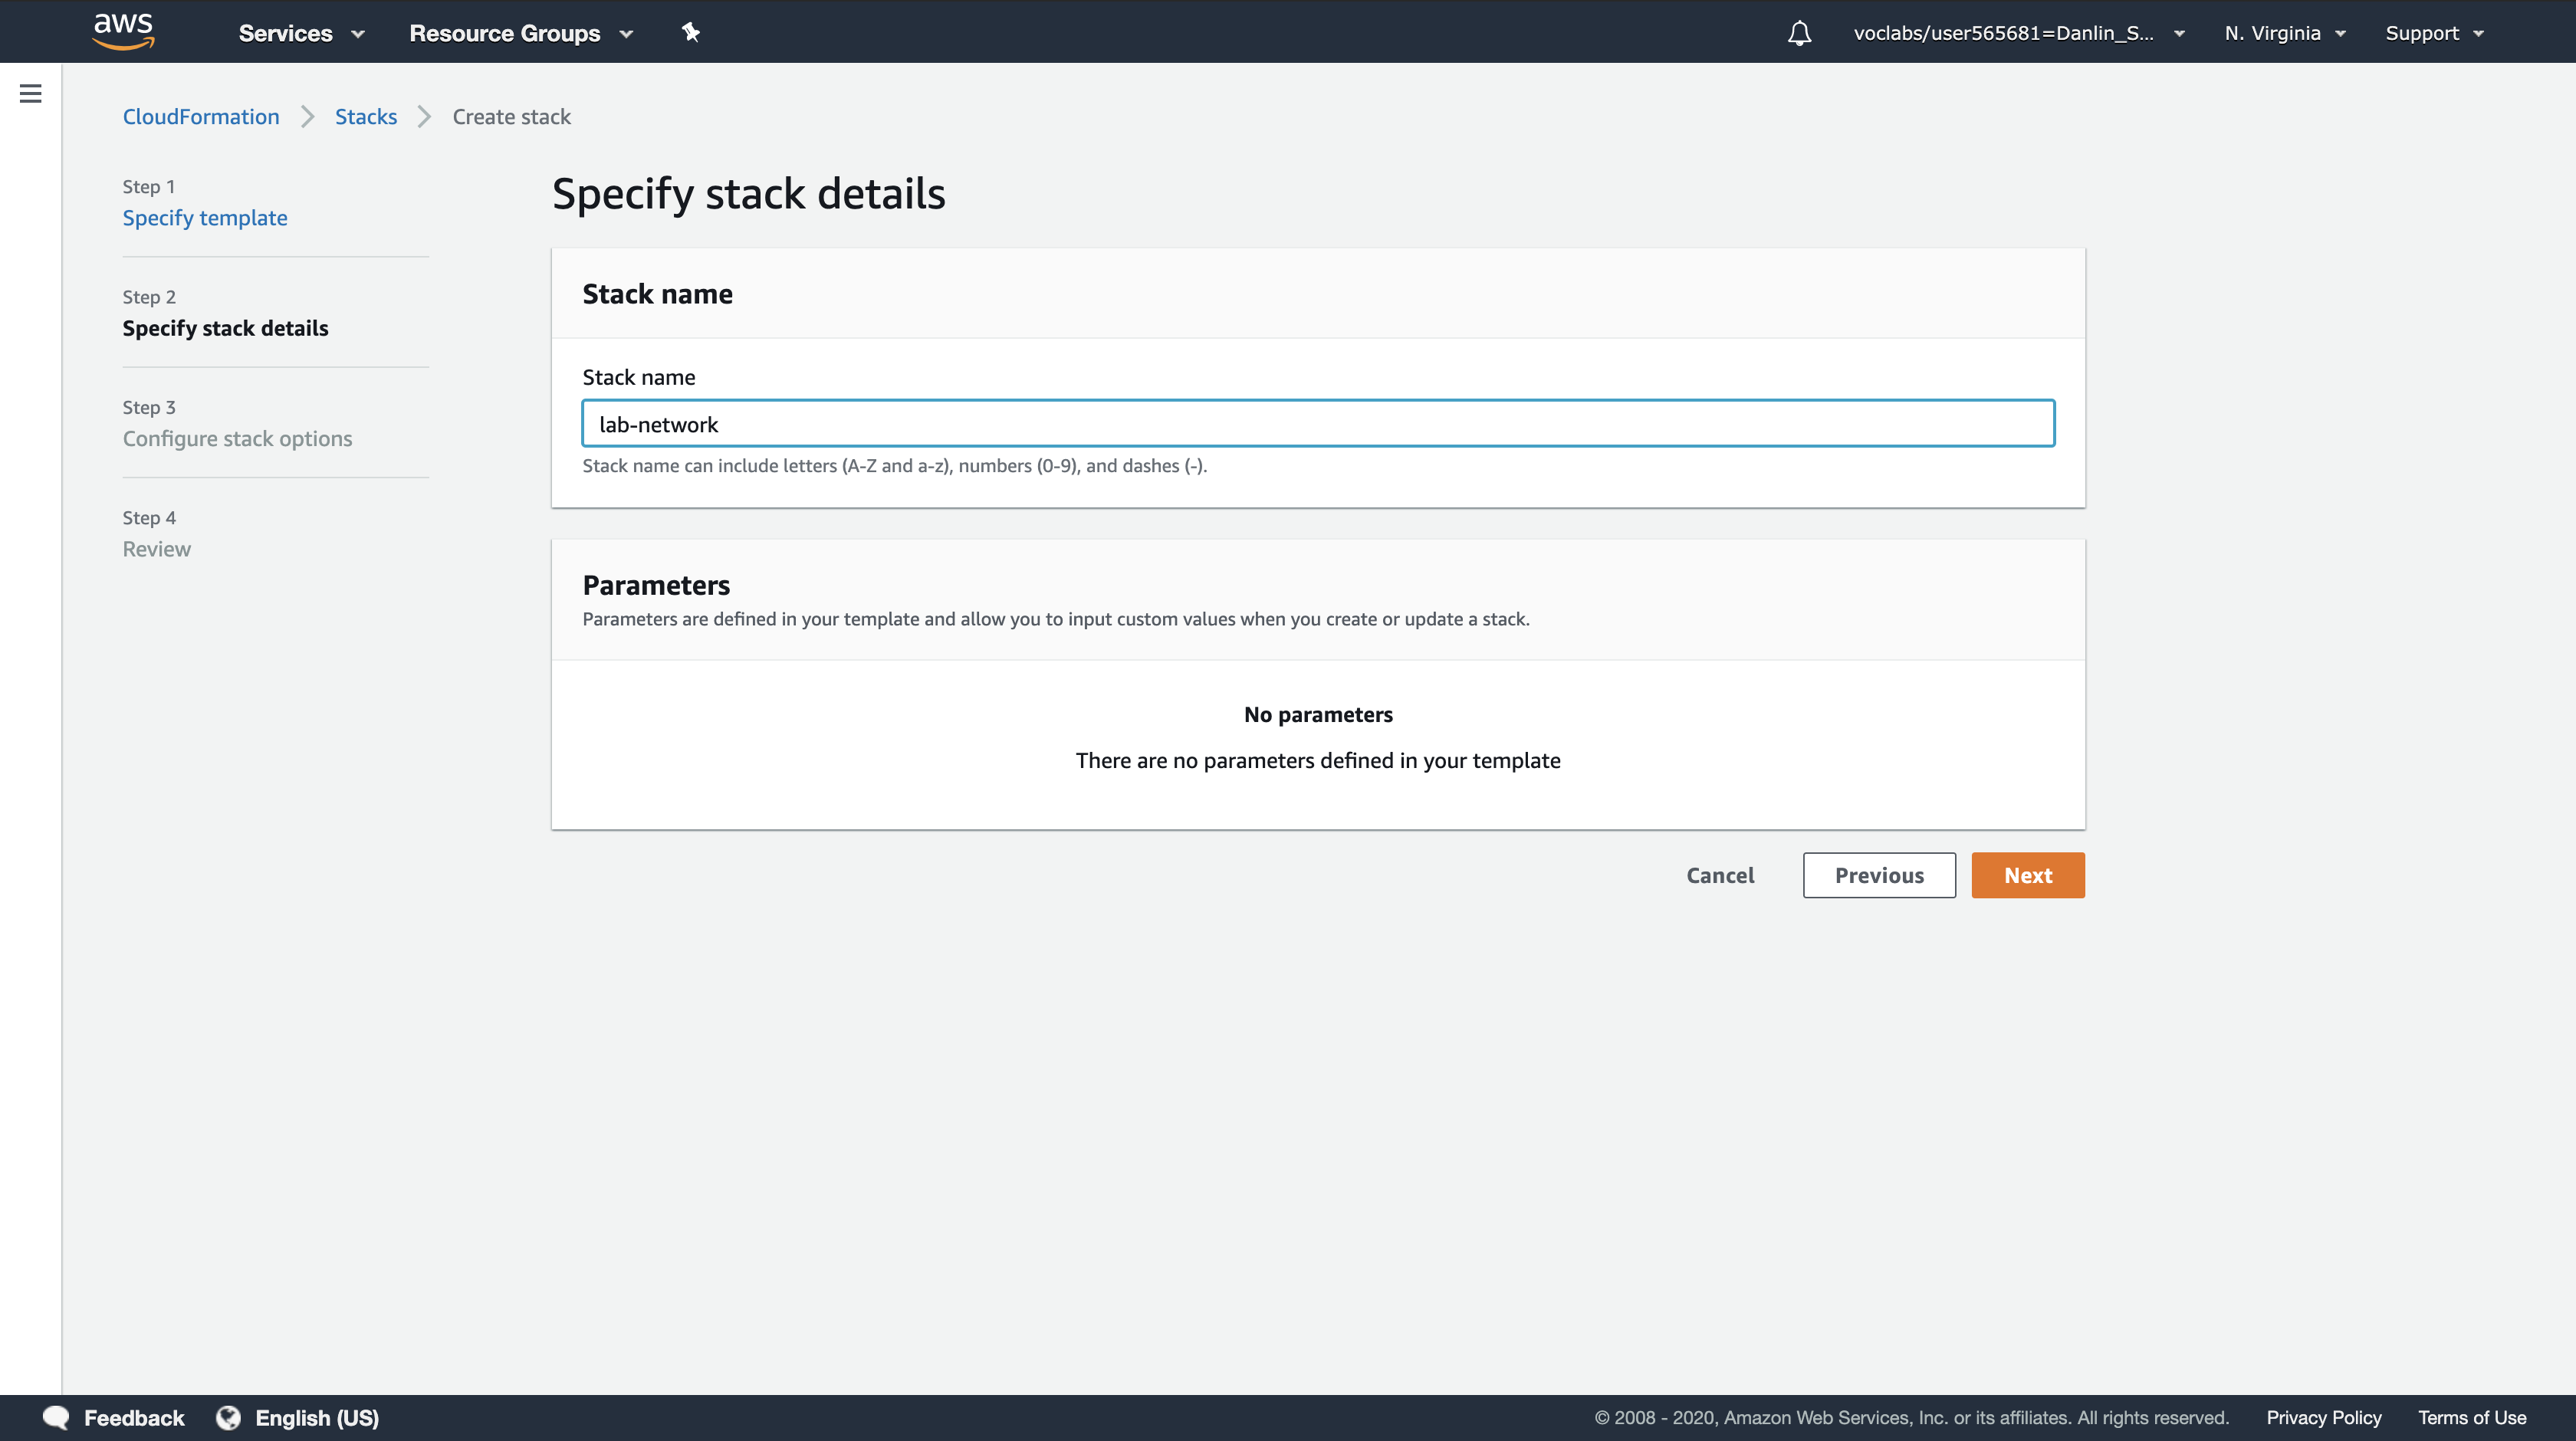
- Stack name:
lab-network - Click
Next
Step 3: Configure stack options
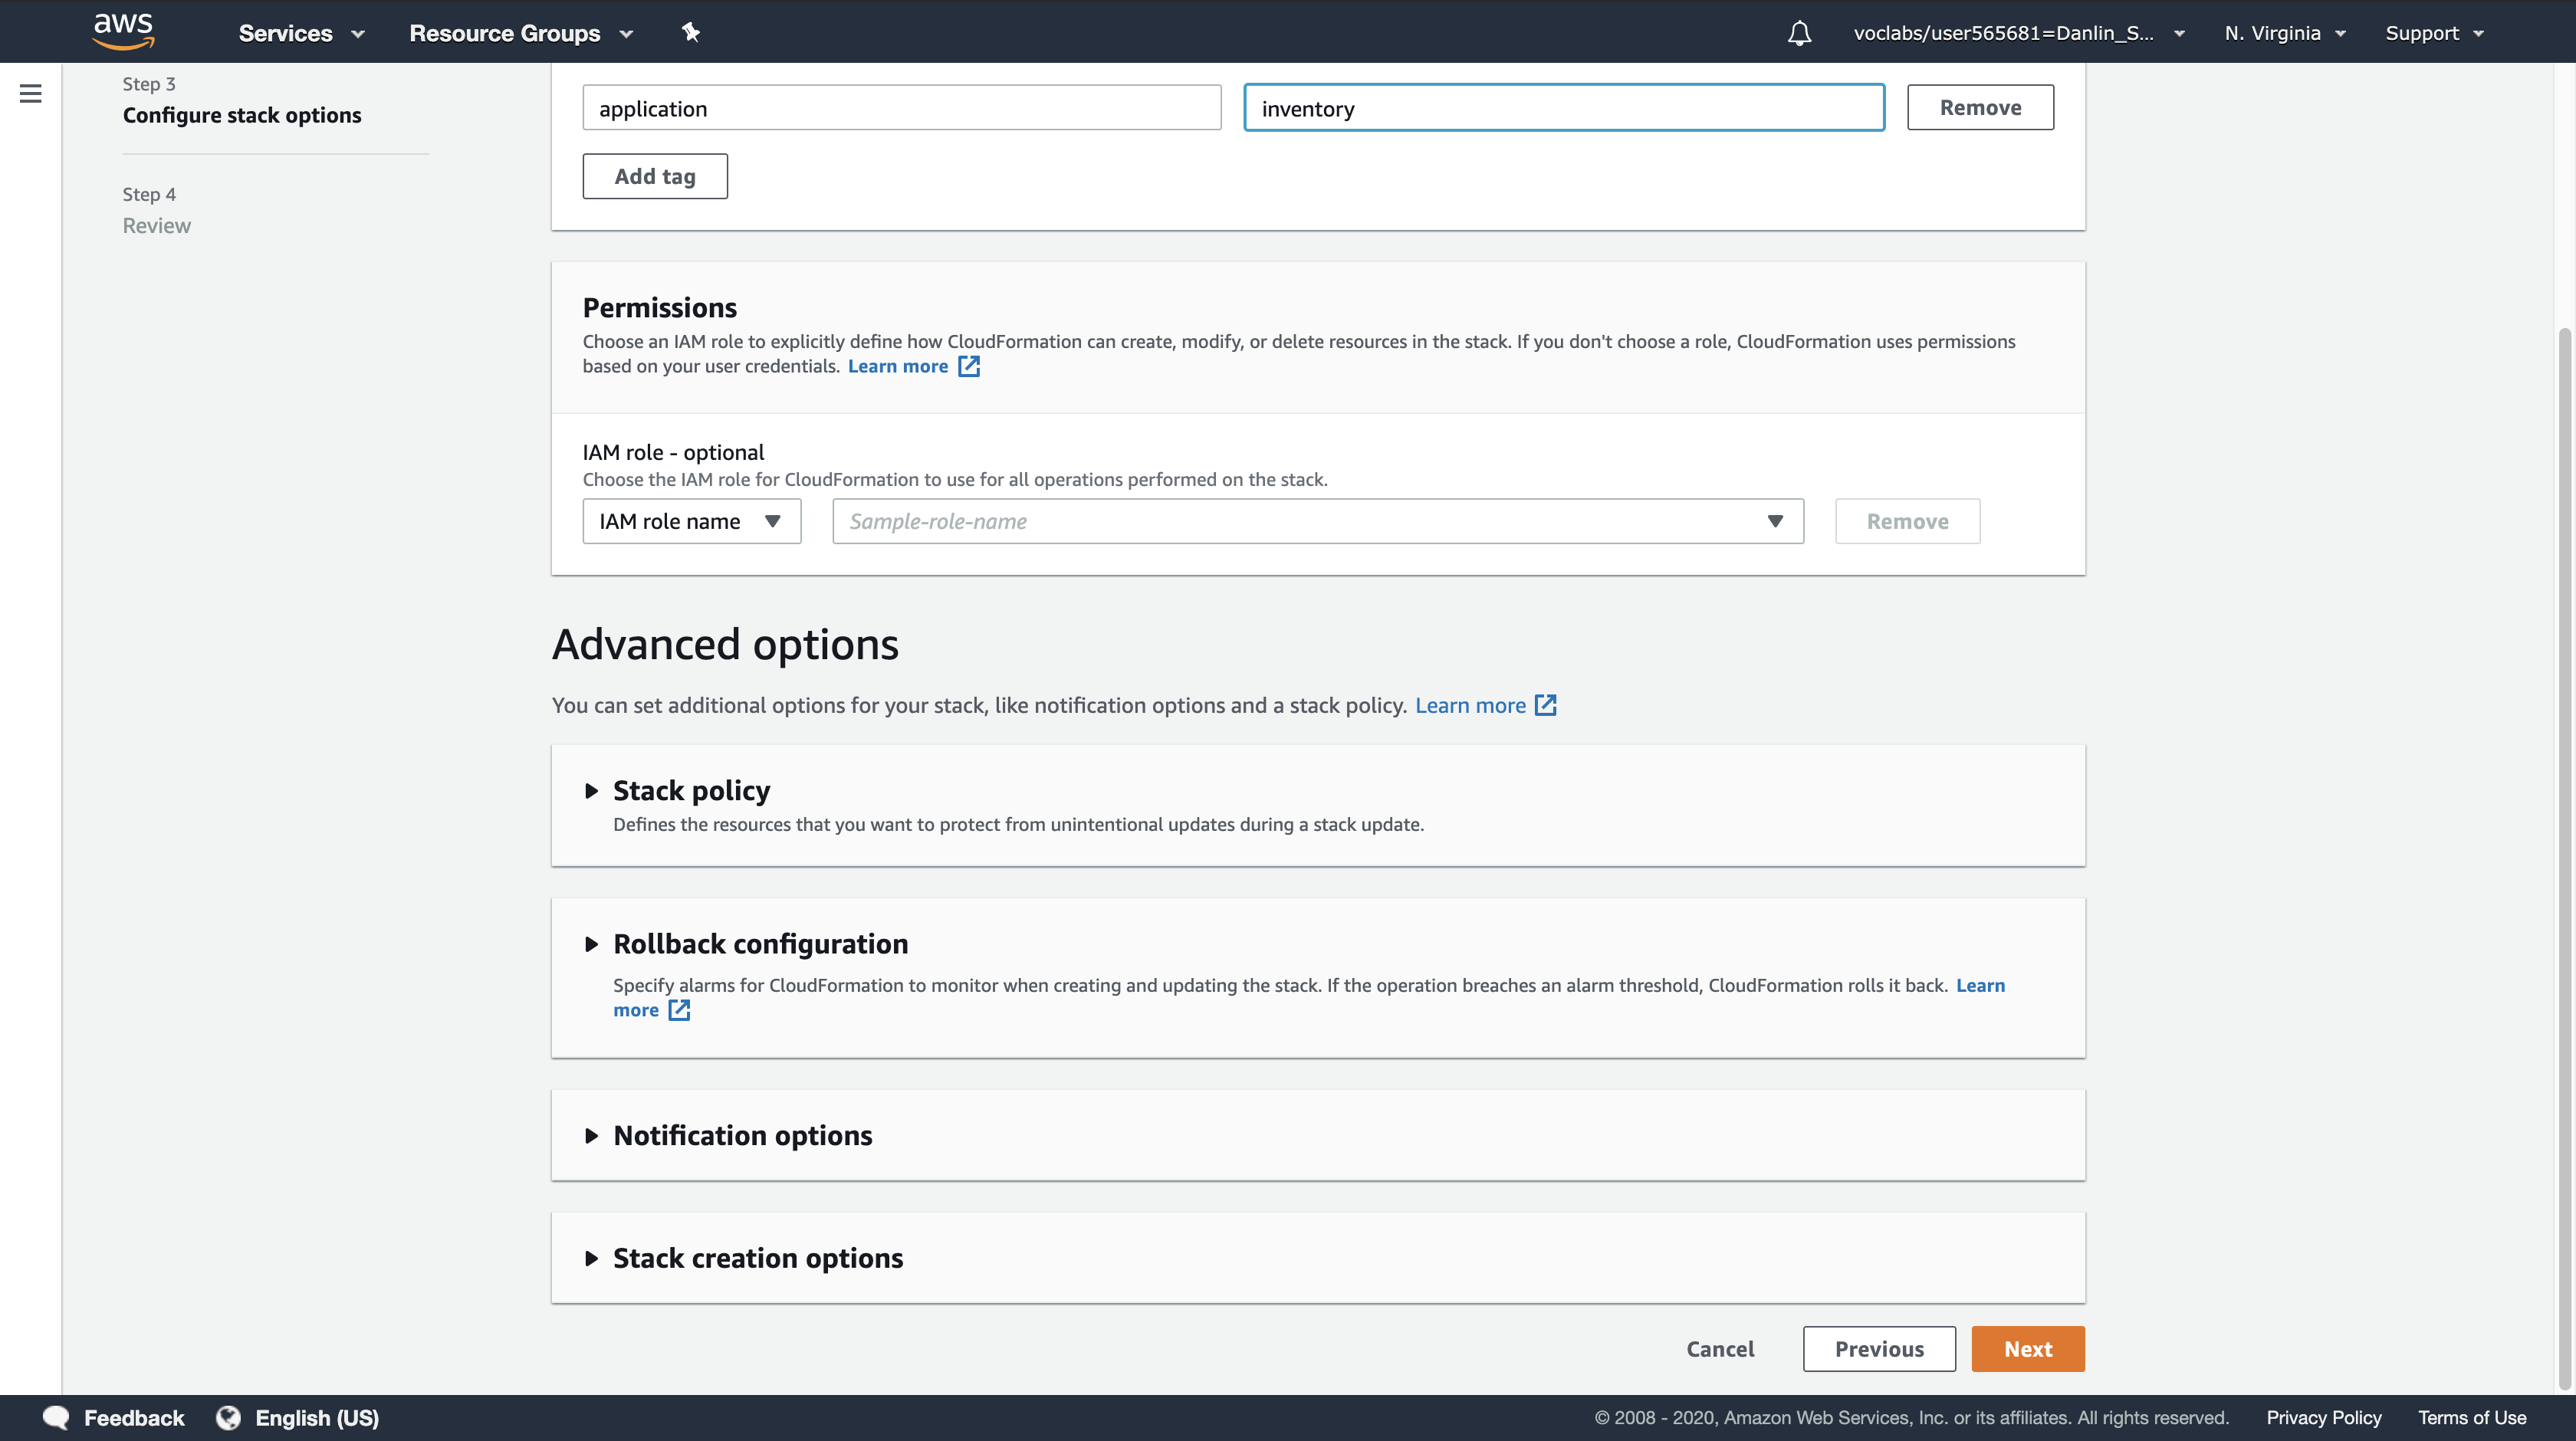
- Tags:
- Key:
application - Value:
inventory
- Key:
- Click
Next
Step 4: Review lab-network
- Click
Create stack
The template will now be used by CloudFormation to generate a stack of resources.
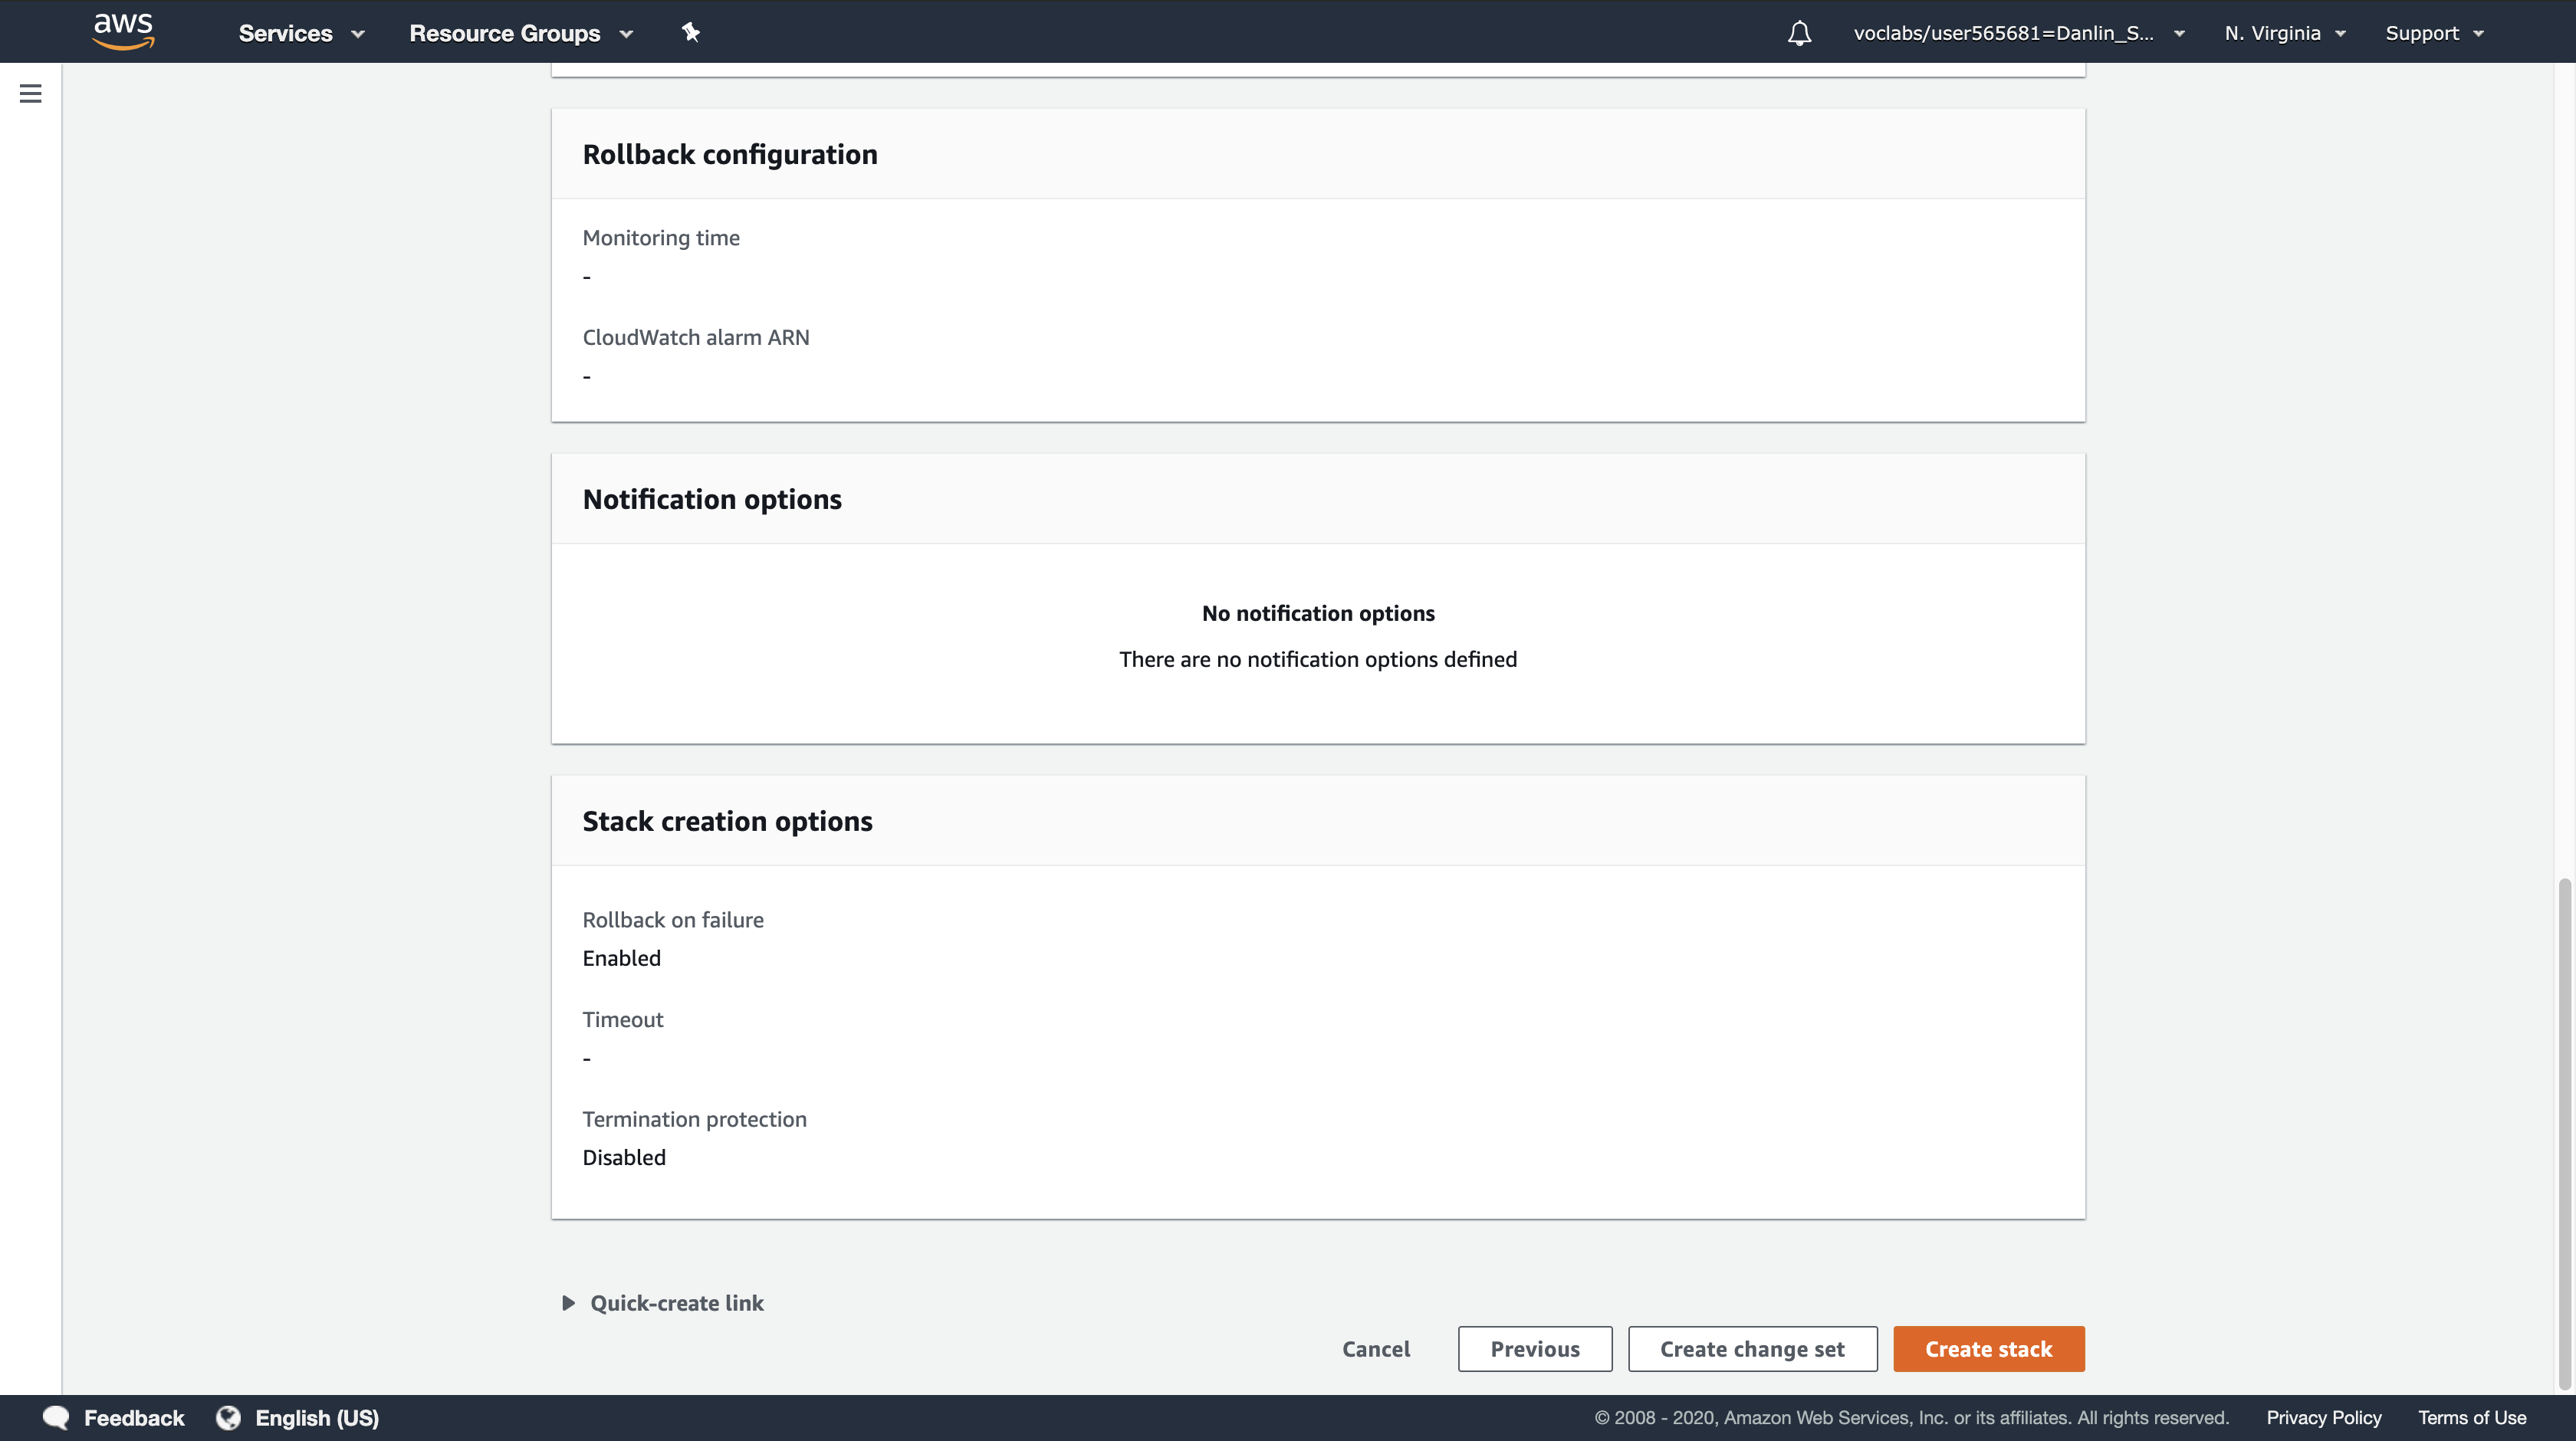
The specified tags will be automatically propagated to the resources that are created, making it easier to identify resources used by particular applications.
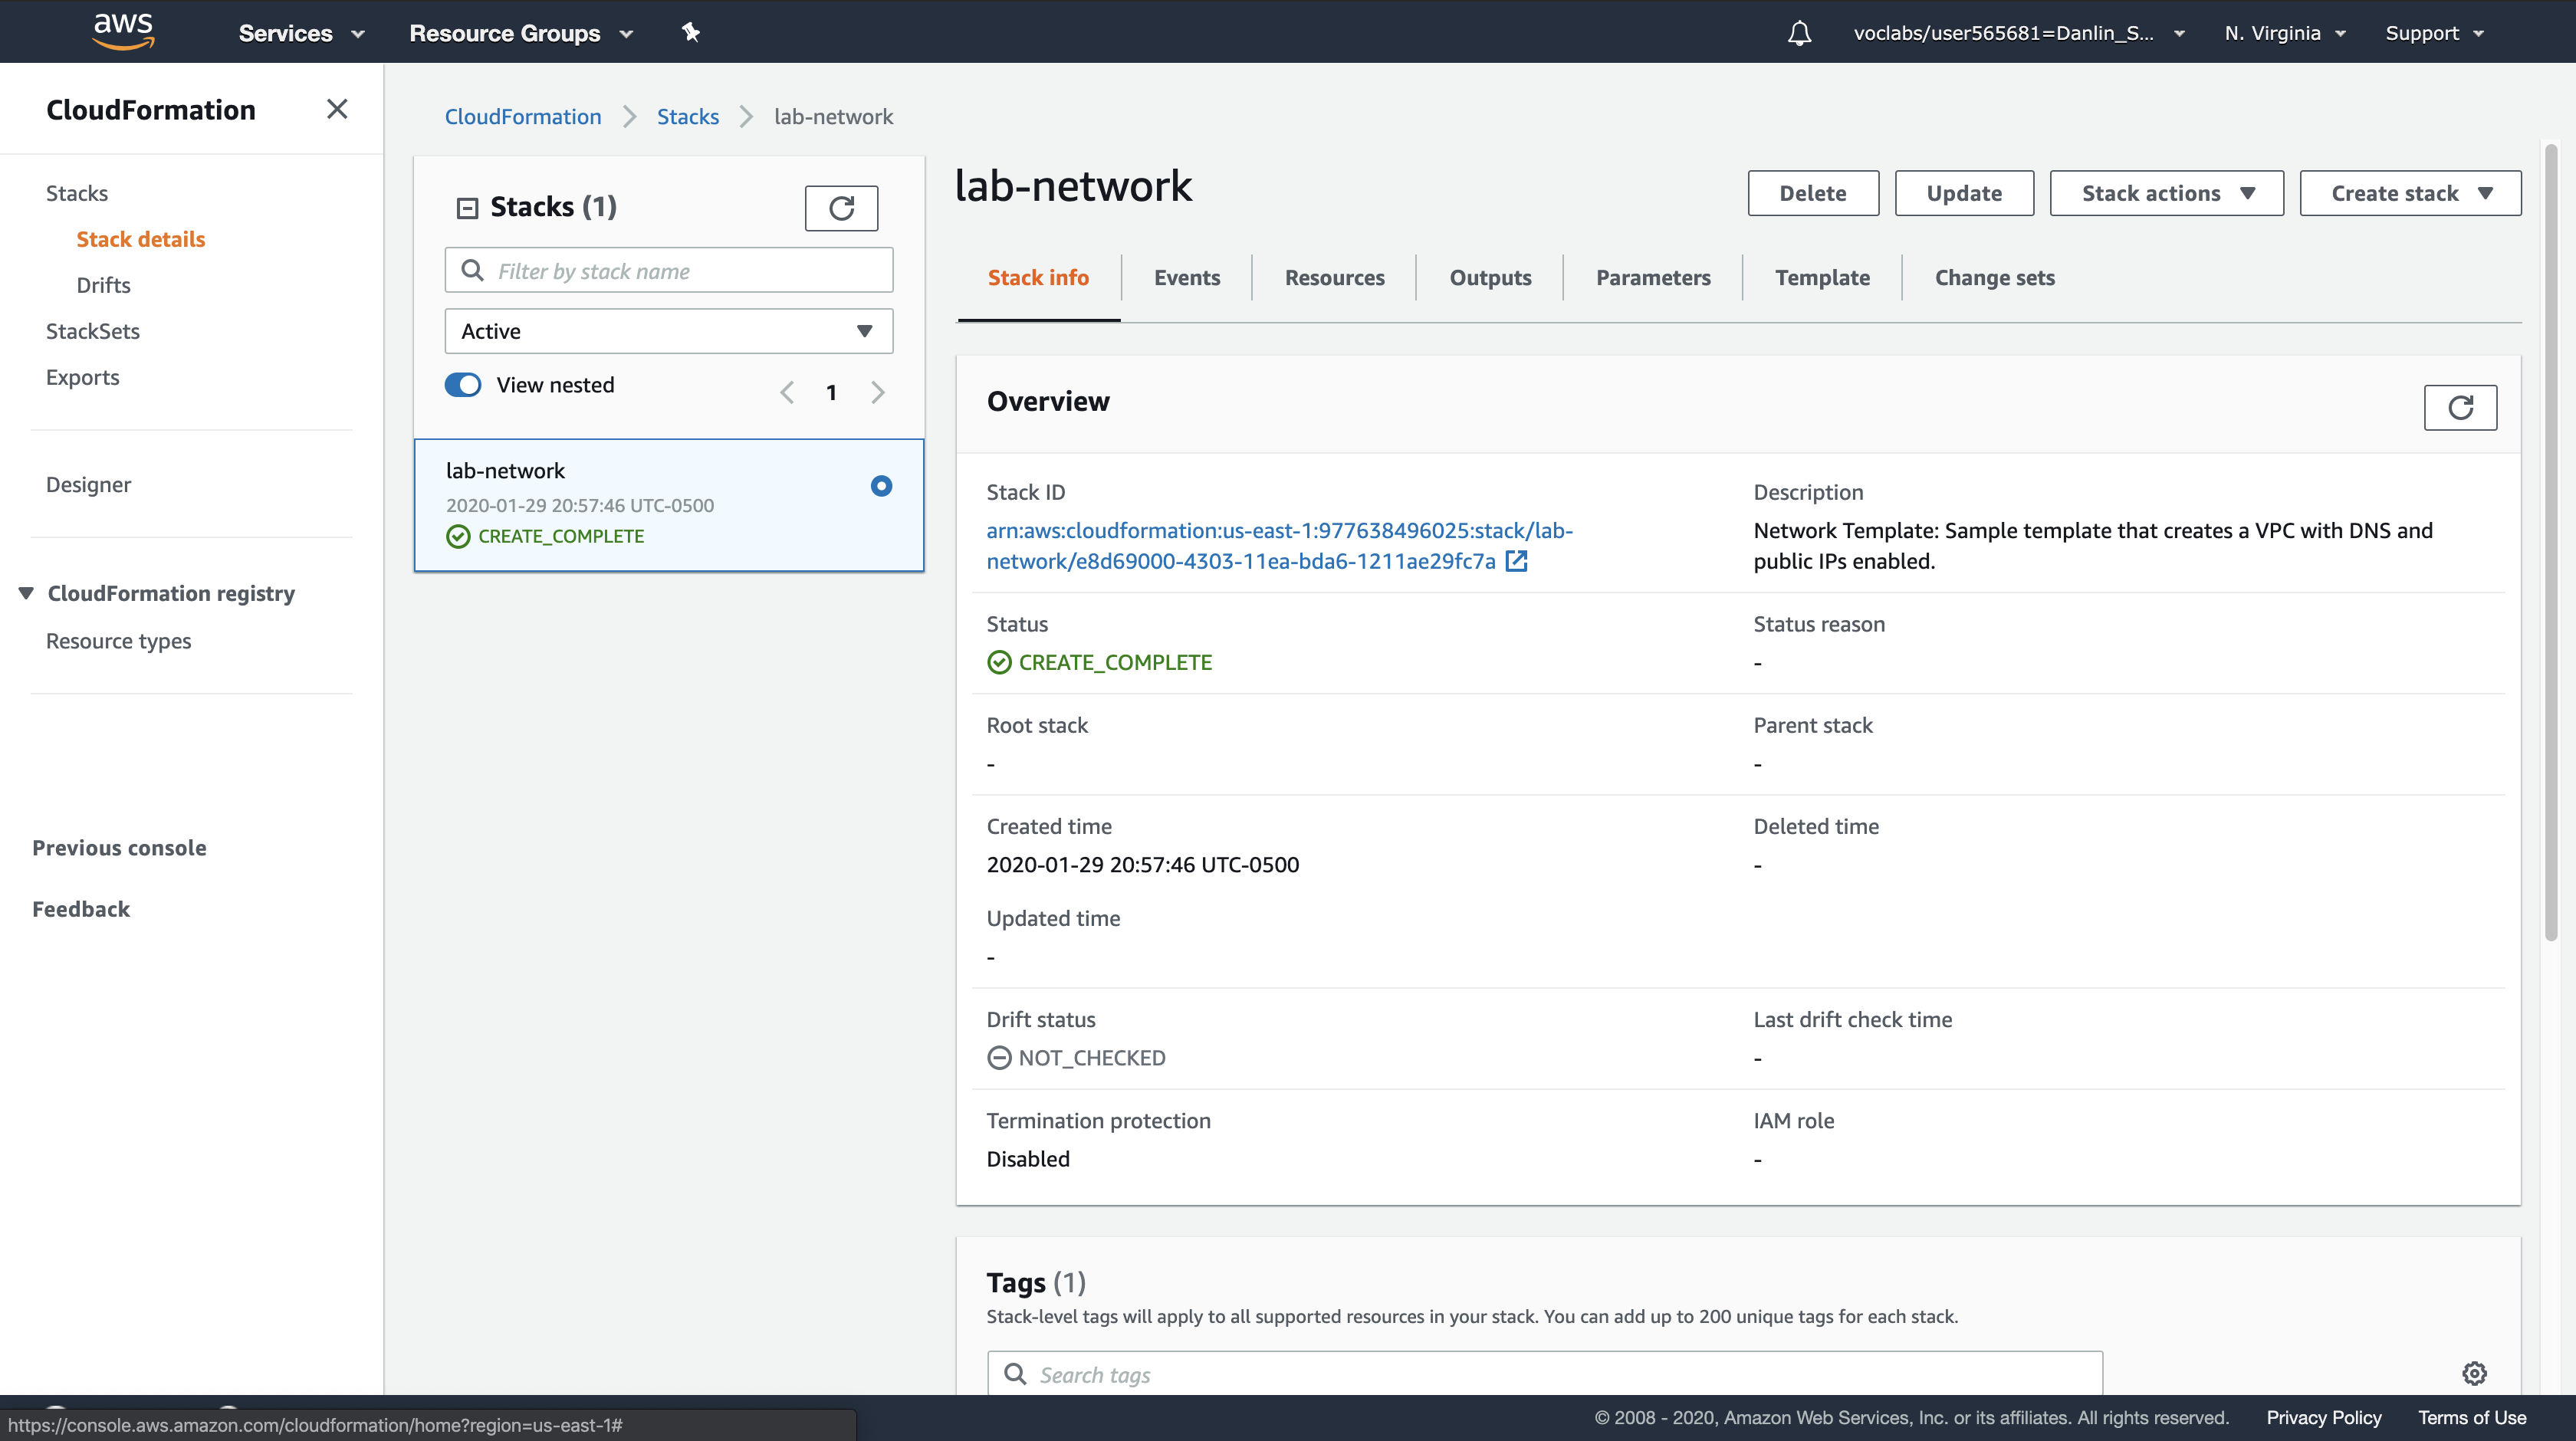
Click the Stack info tab.
Wait for the Stack status to change to CREATE_COMPLETE.
- Click Refresh every 15 seconds to update the display if necessary.
- You can now examine the resources that were created.
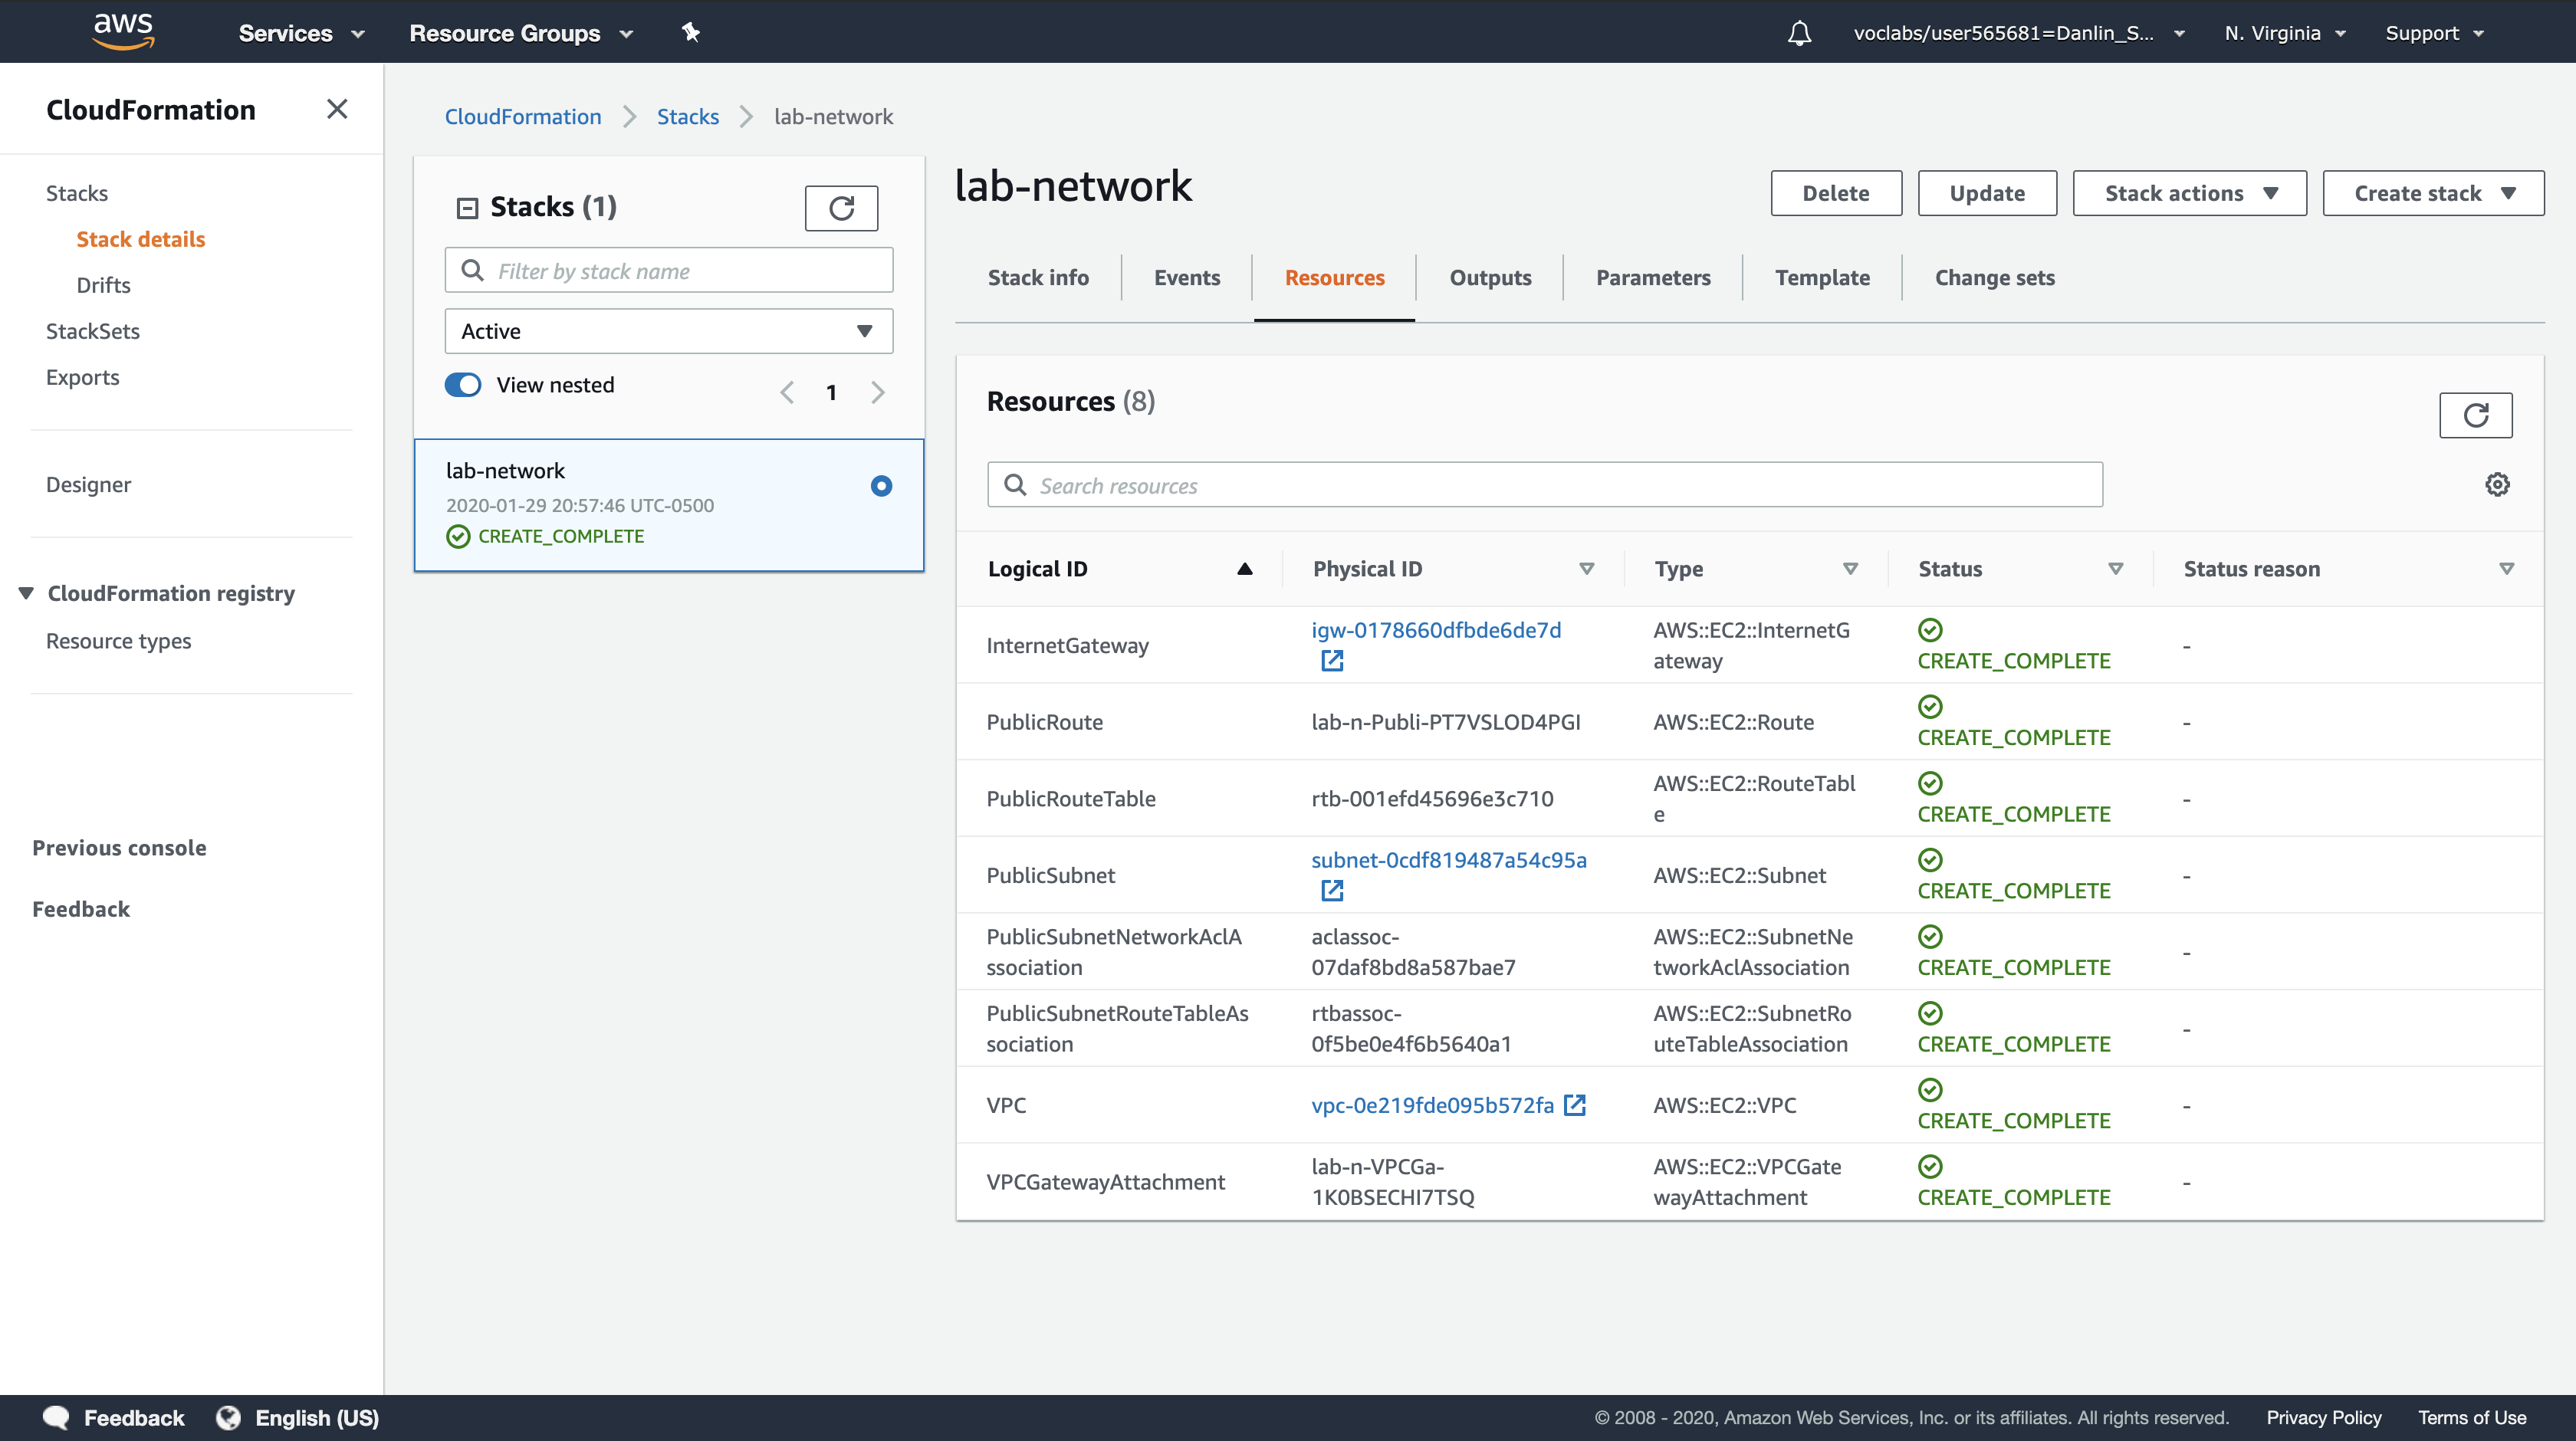
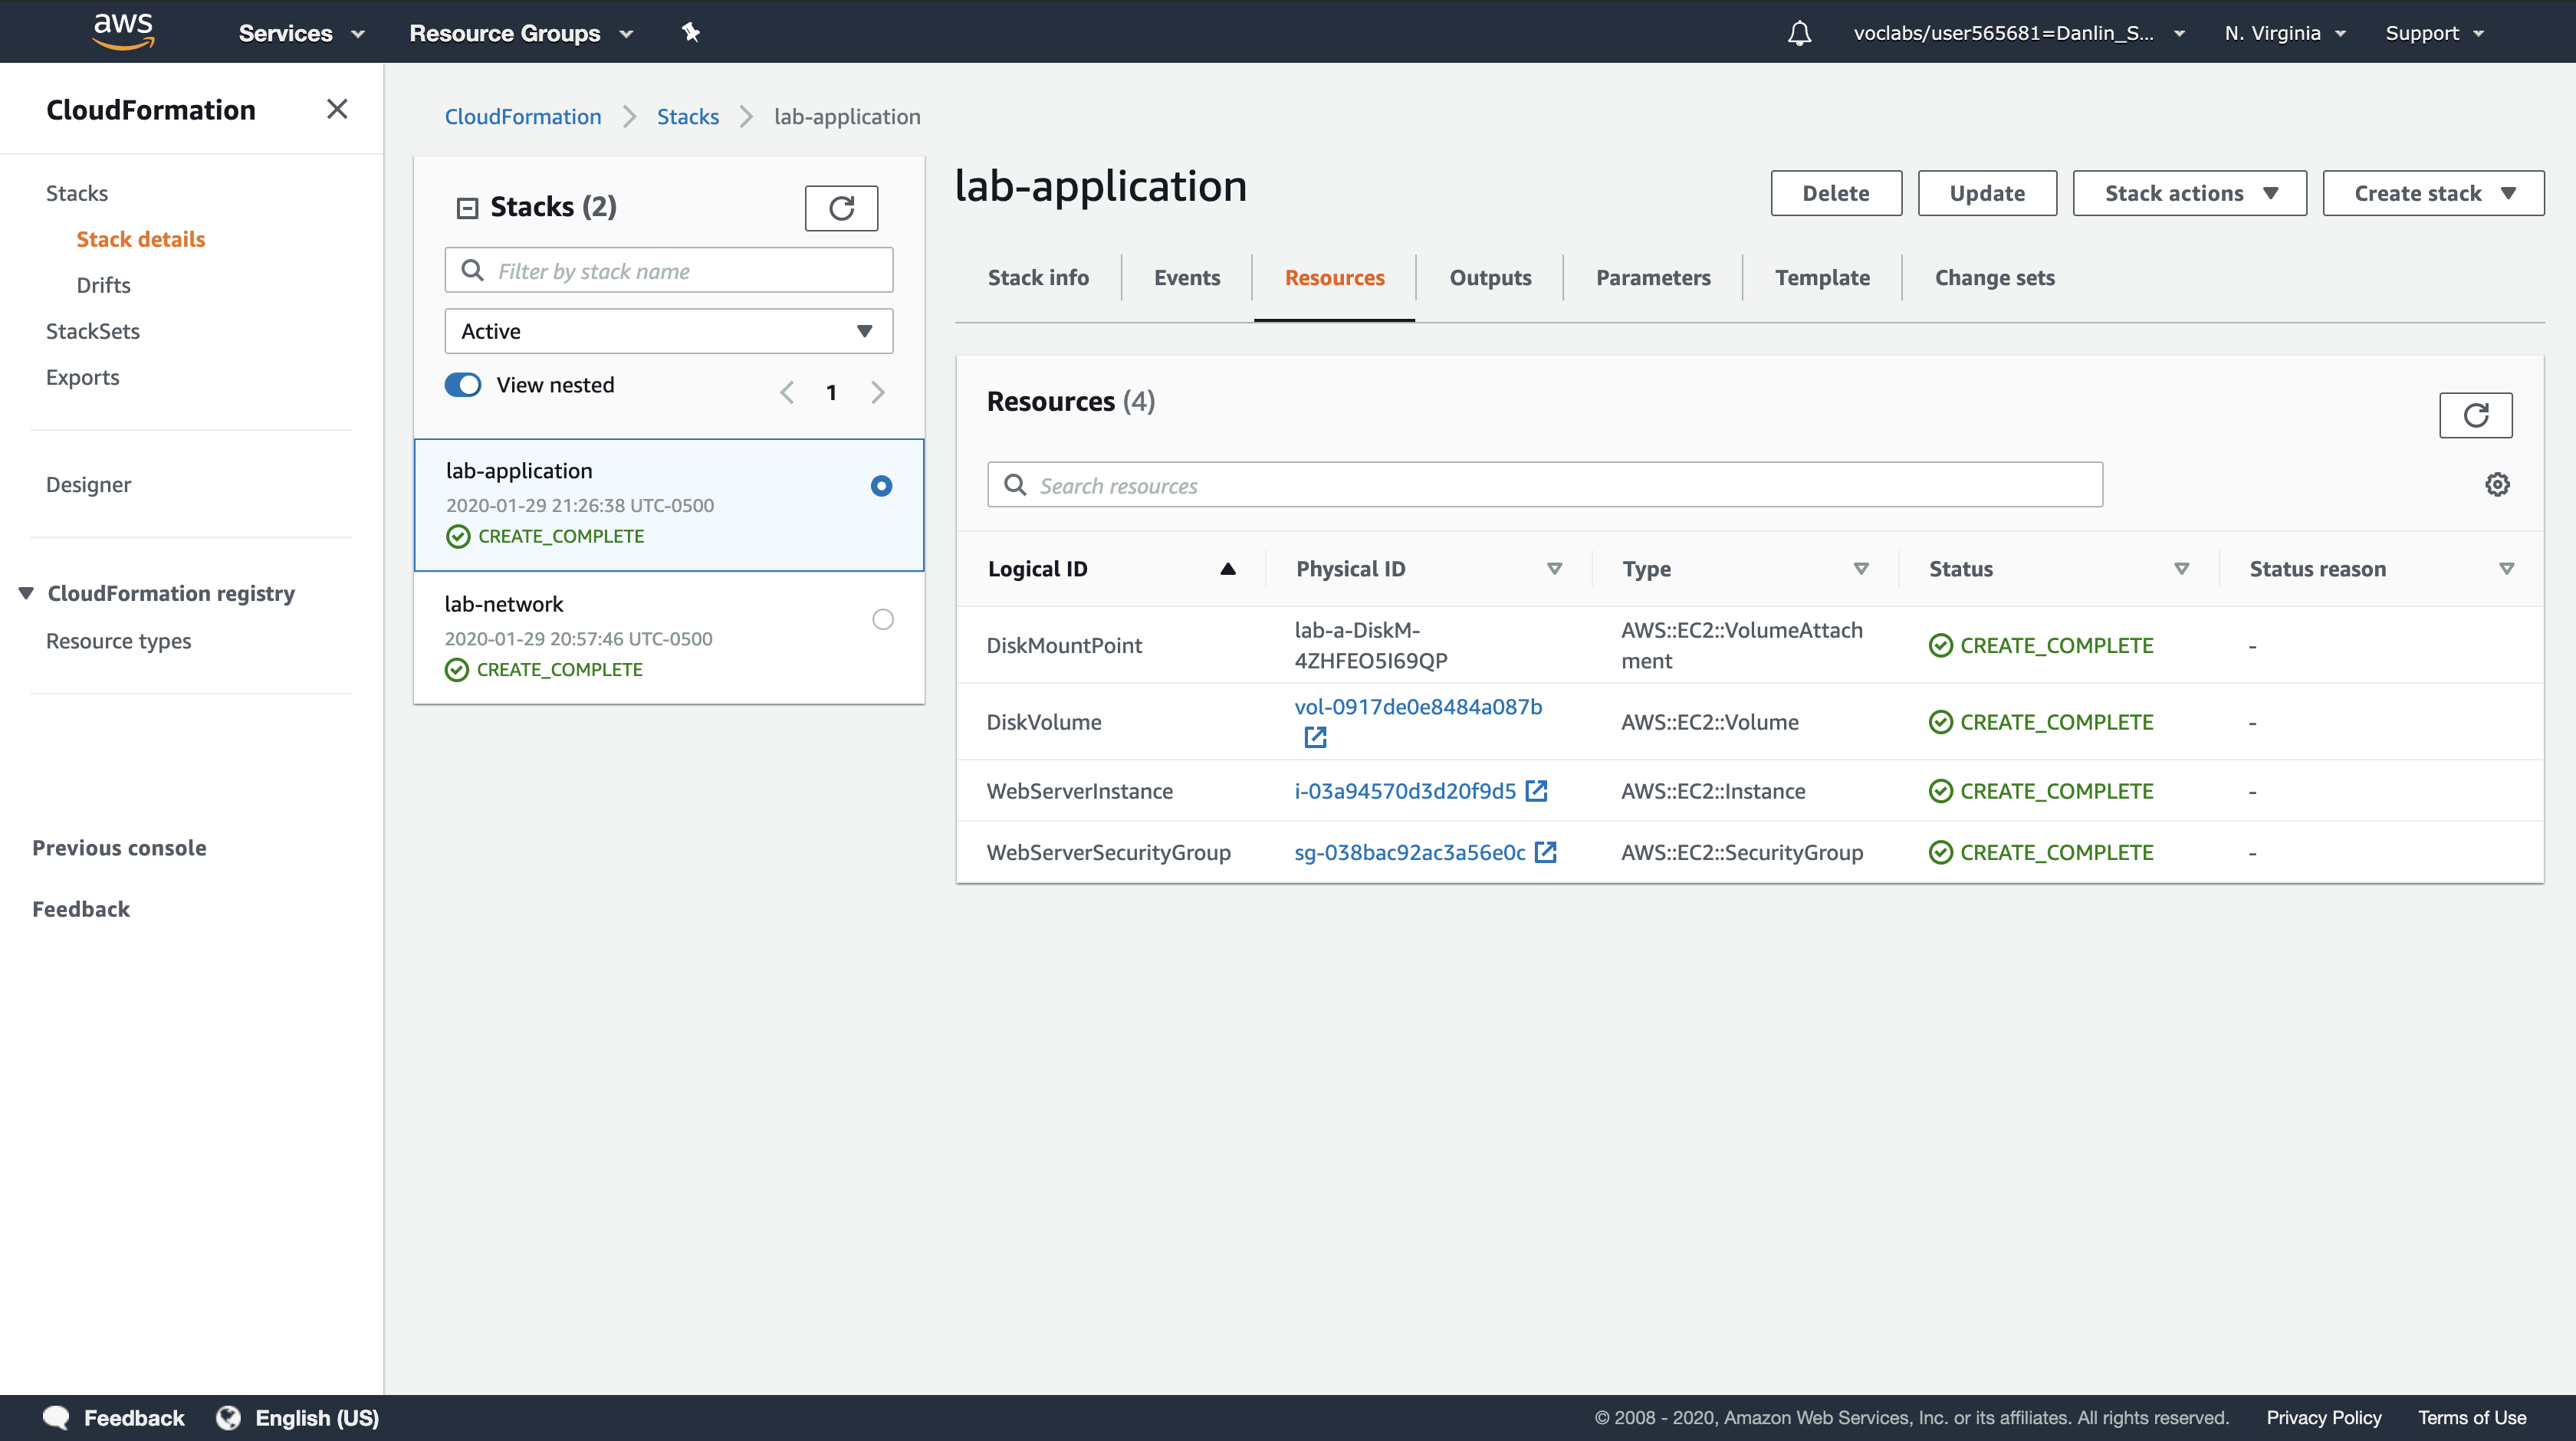
Click the Resources tab.
- You will see a list of the resources created by the template.
- If the list is empty, click Refresh to update the list.
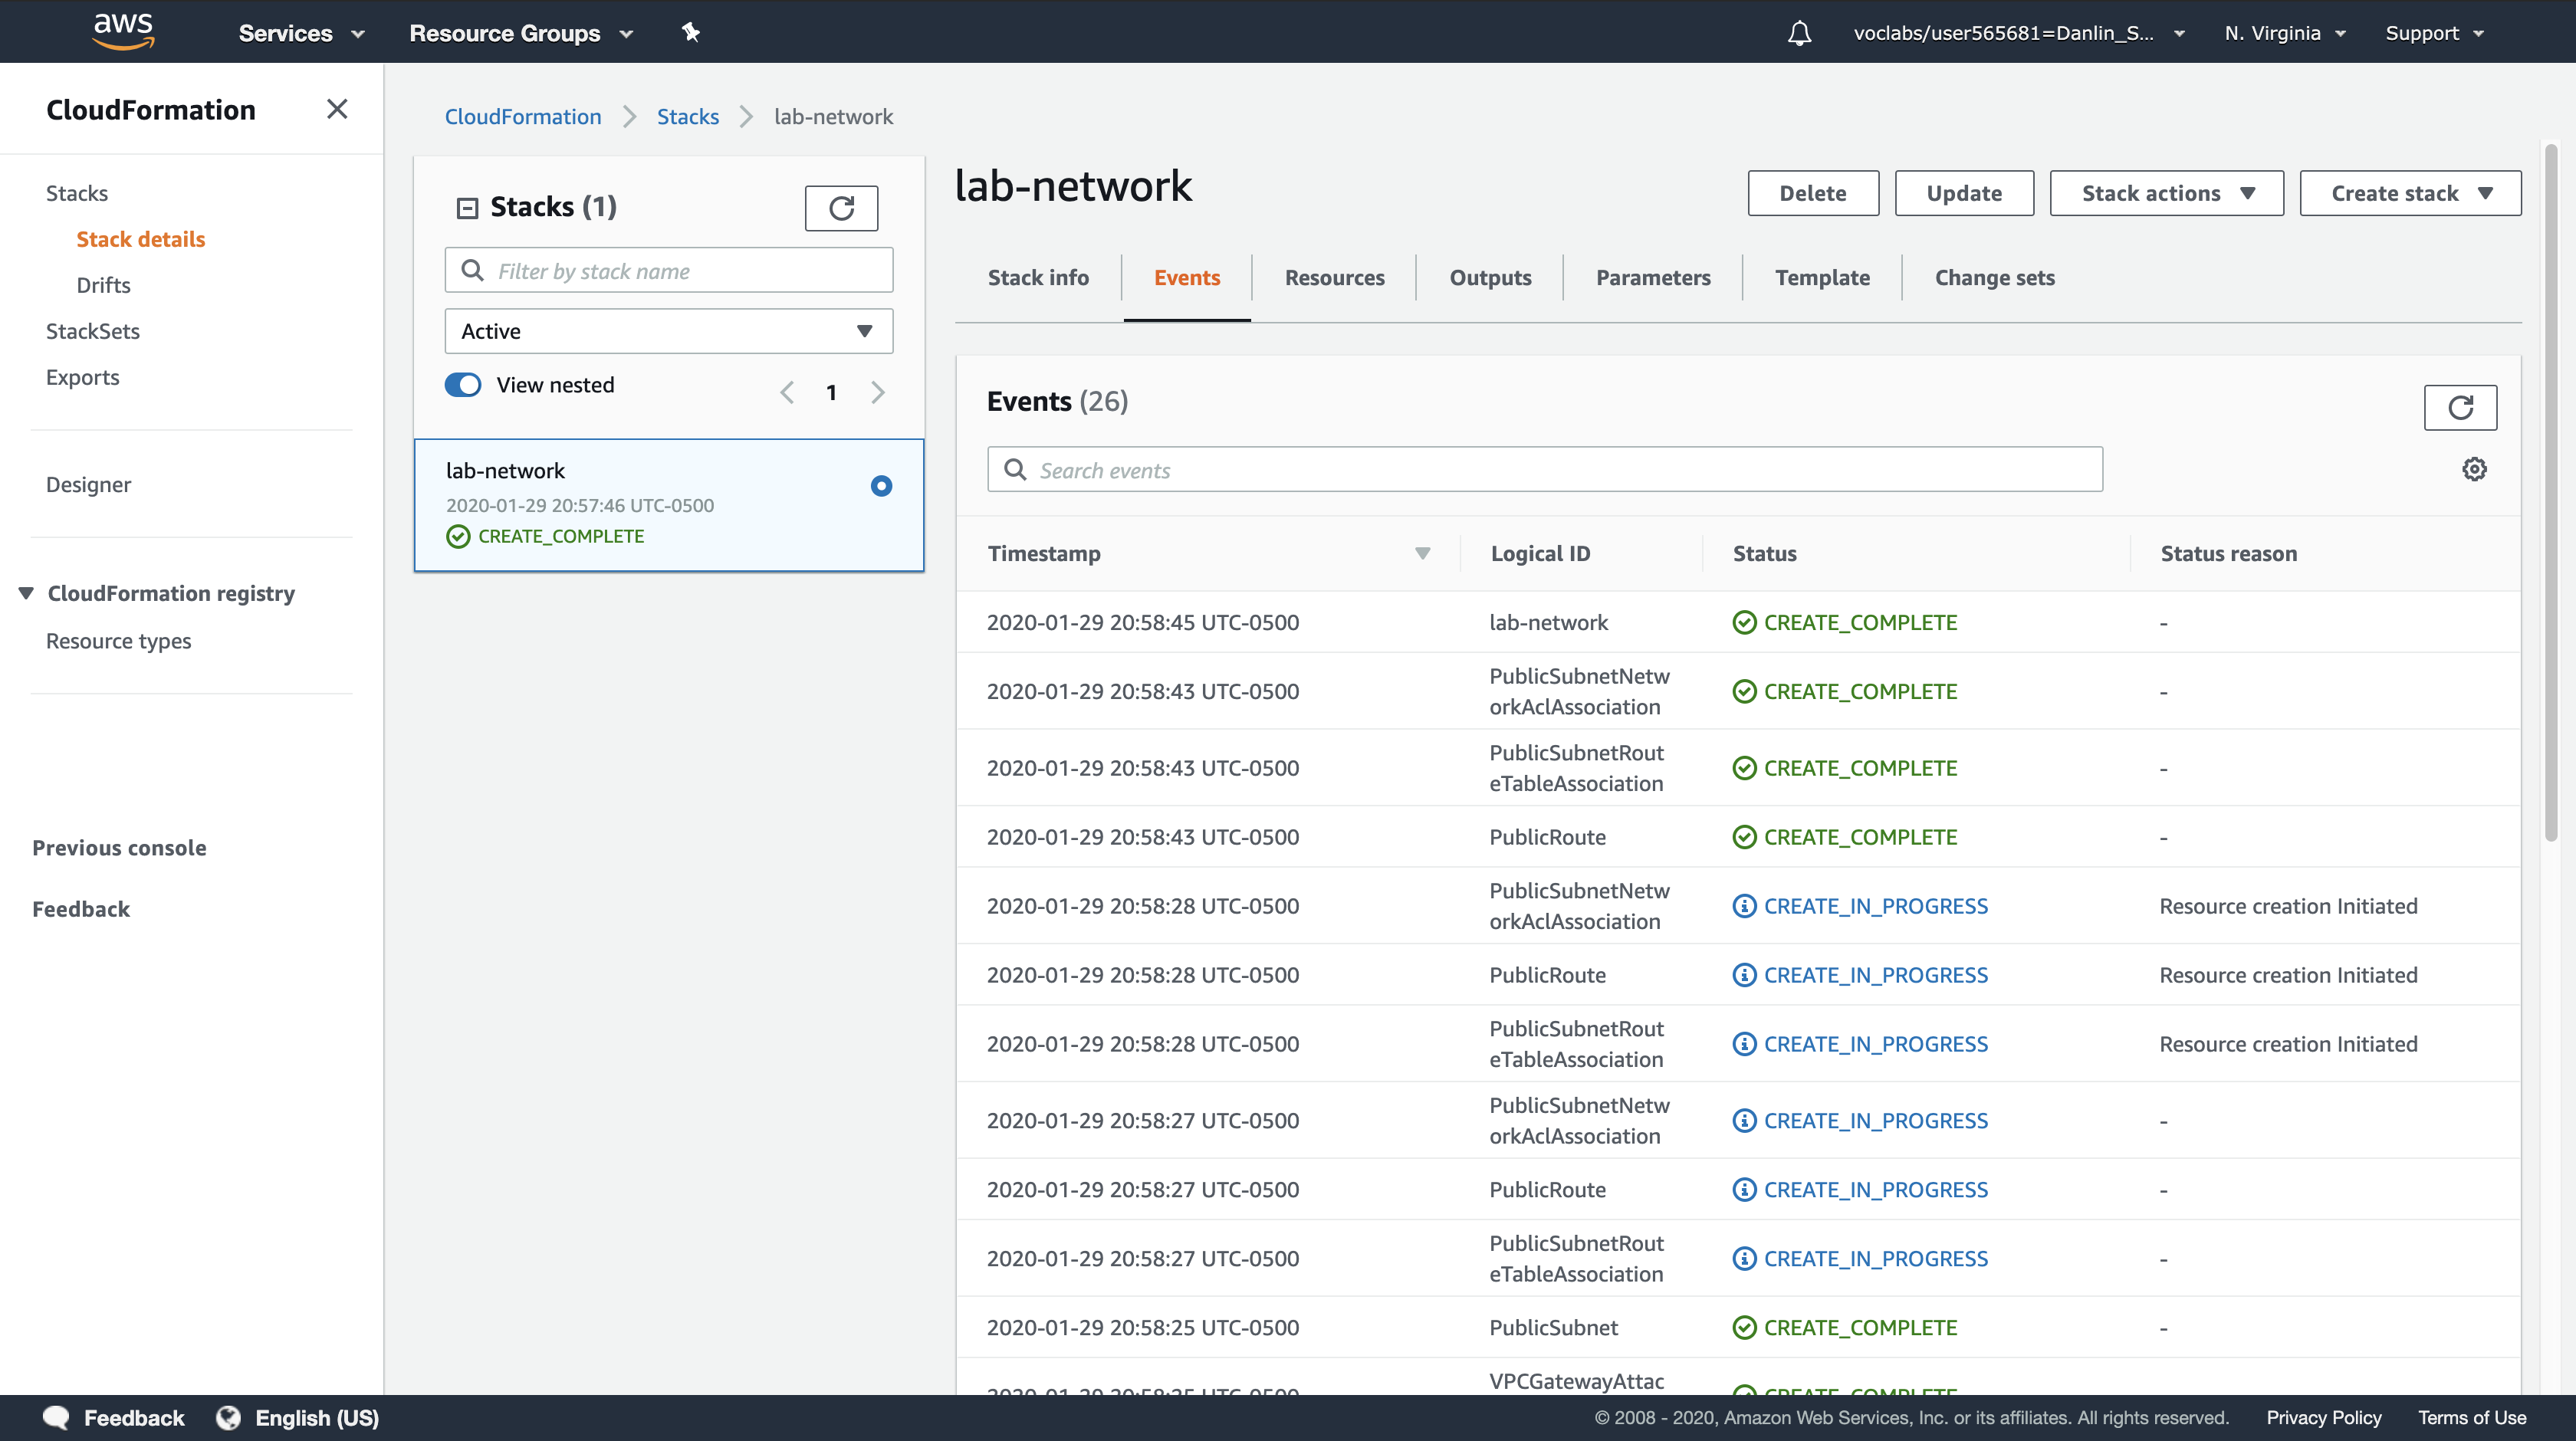
Click the Events tab and scroll through the list of events.
- The list shows (in reverse order) the activities performed by CloudFormation, such as starting to create a resource and then completing the resource creation. Any errors encountered during the creation of the stack will be listed in this tab.
Click the Outputs tab.
A CloudFormation stack can provide output information, such as the ID of specific resources and links to resources.
You will see two outputs:
- PublicSubnet: The ID of the Public Subnet that was created (eg subnet-08aafd57f745035f1)
- VPC: The ID of the VPC that was created (eg vpc-08e2b7d1272ee9fb4)
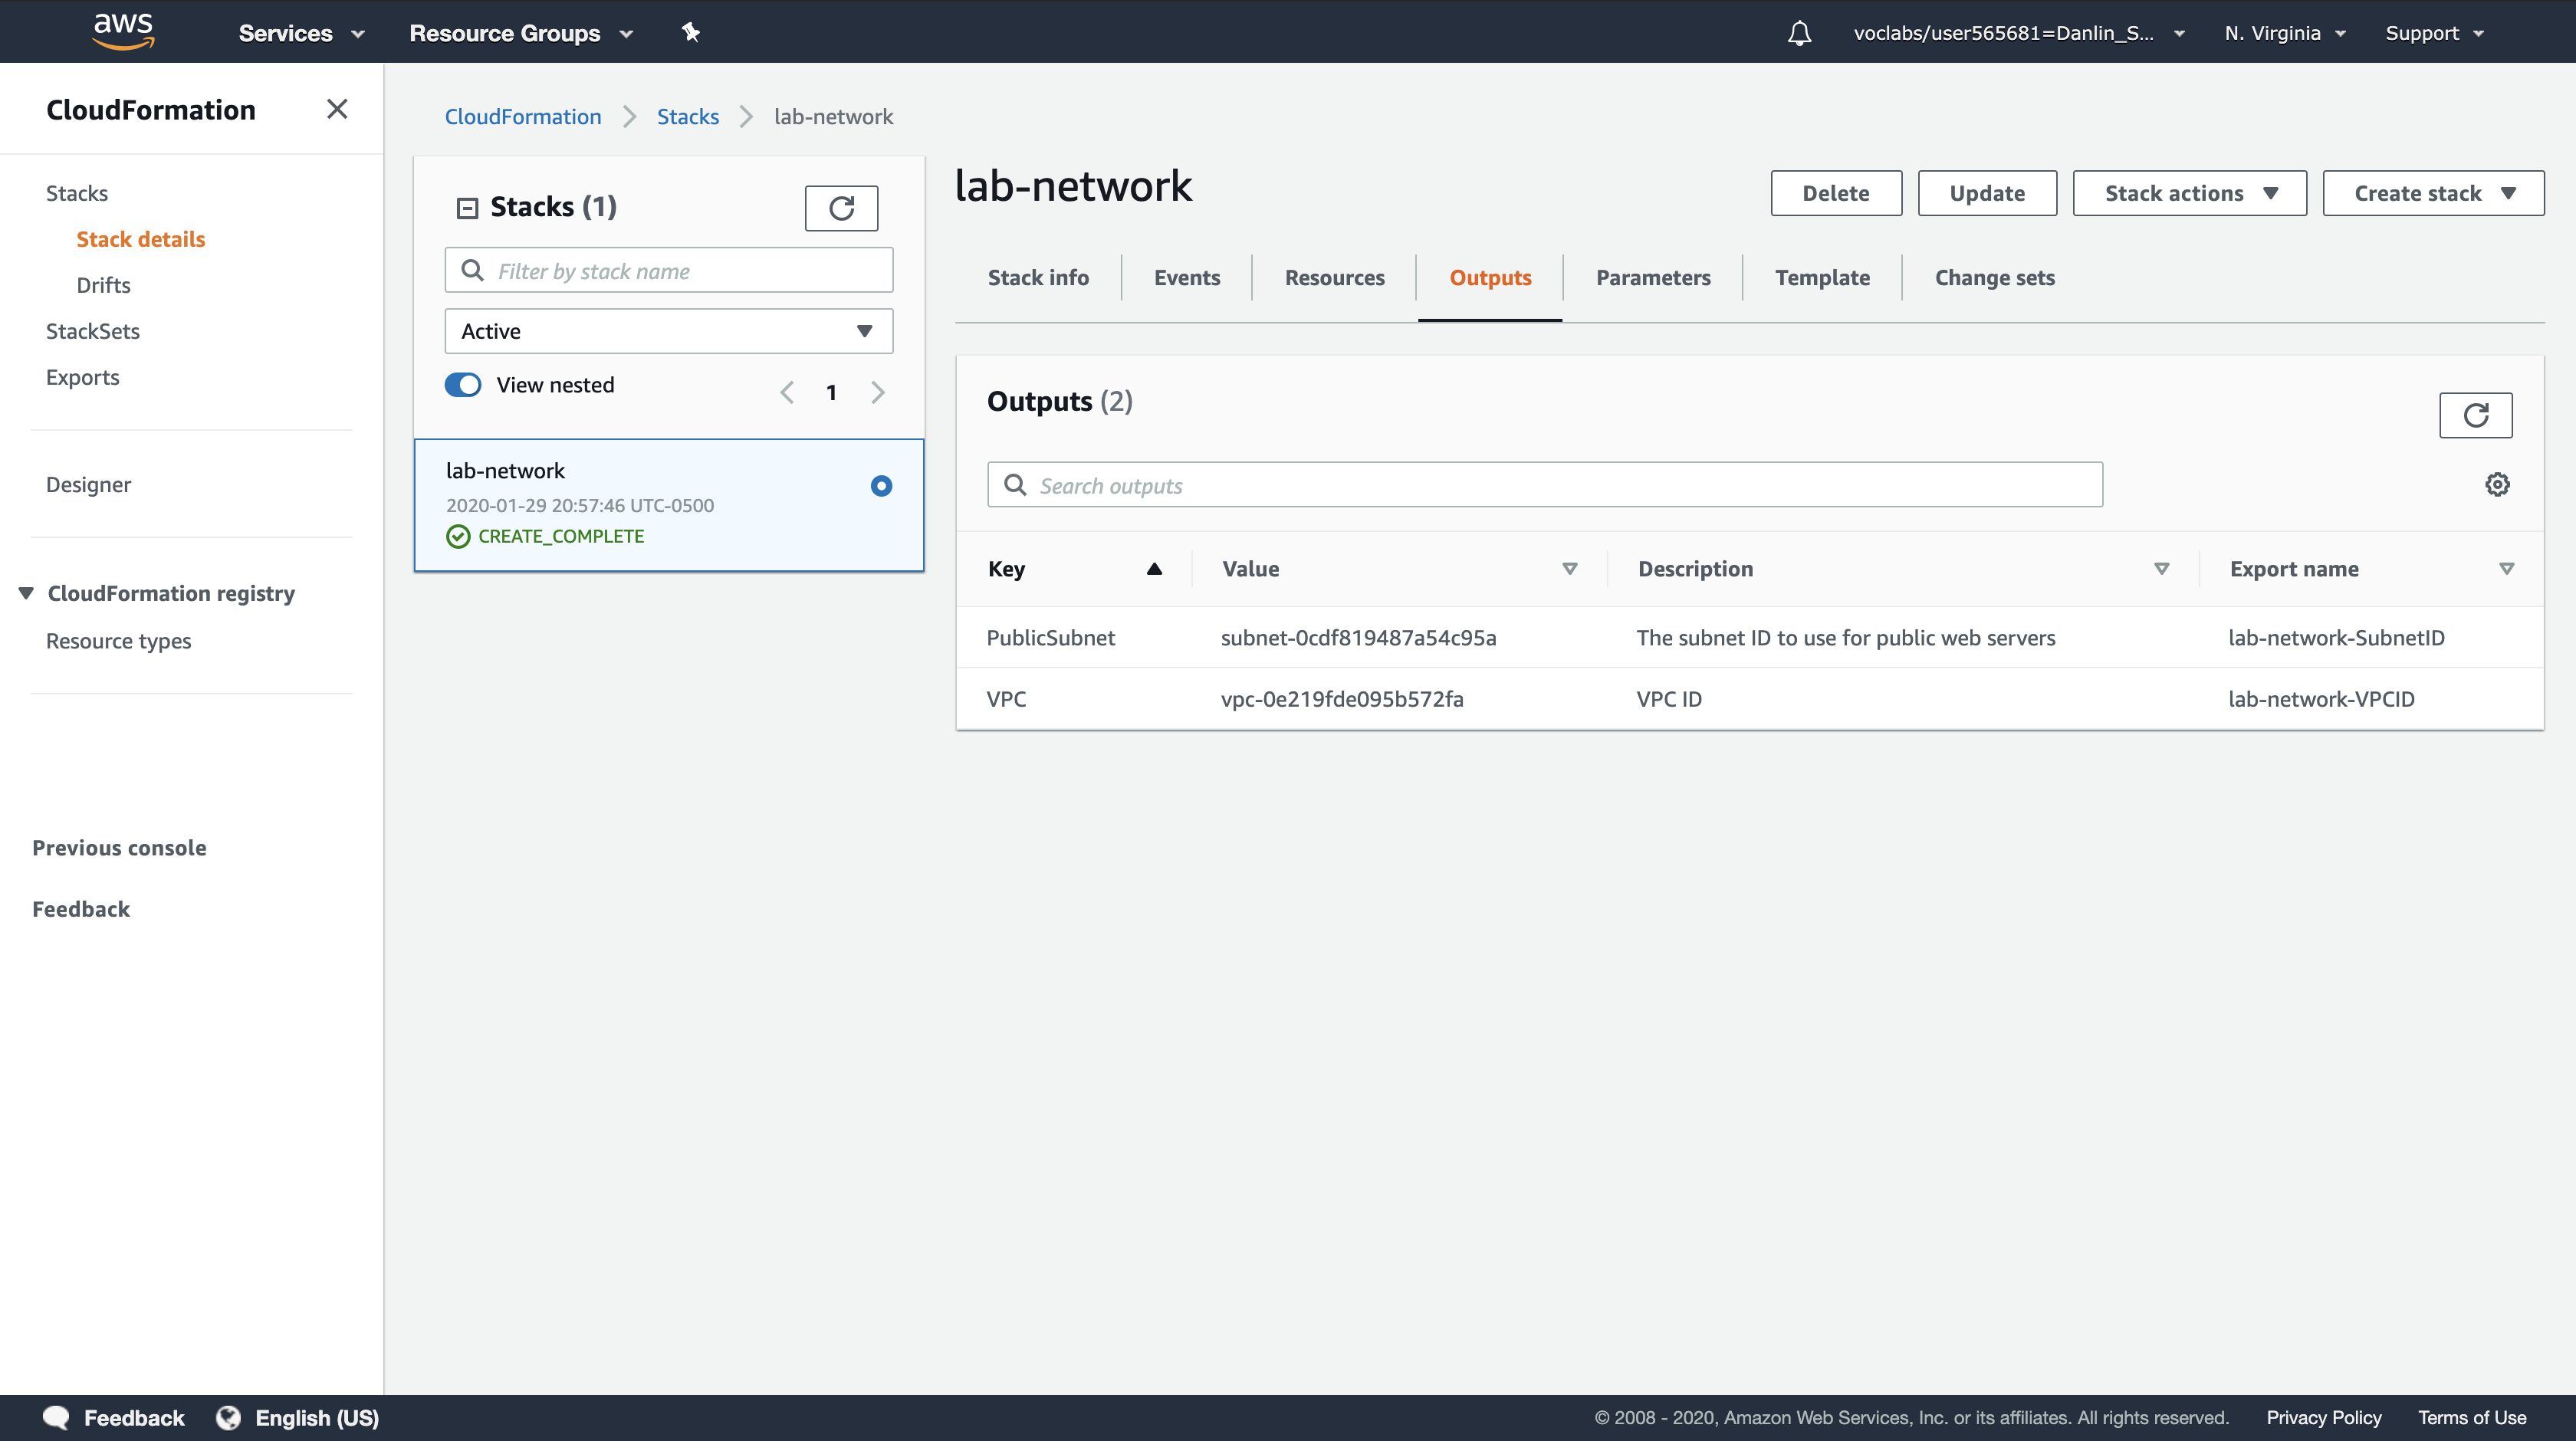
Outputs can also provide values that will be used by other stacks. This is shown in the Export name column. In this case, the VPC and Subnet IDs are given an export name so that other stacks can retrieve the values and build resources inside the VPC and Subnet. You will be using these values in the next task.
Click the Template tab.
This tab shows the template that was used to create the stack. It shows the template that you uploaded while creating the stack. Feel free to examine the template and see the resources that were created, and the Outputs section at the end that defined which values to export.
Task 2: Deploy an Application Layer
Now that the network layer has been deployed, you will deploy an application layer that contains an Amazon EC2 instance and a Security Group.
The CloudFormation template will import the VPC and Subnet IDs from the Outputs of the existing CloudFormation stack. It will then use this information to create the Security Group in the VPC and the EC2 instance in the Subnet.
Right-click the link below and choose the option (e.g. ‘Save Link As…’) to download the lab-application.yaml file to your local machine.
- Download lab-application.yaml
- If you wish, you can open the template in a text editor to see how resources are defined.
1 | AWSTemplateFormatVersion: 2010-09-09 |
Left navigation pane
Click Stacks.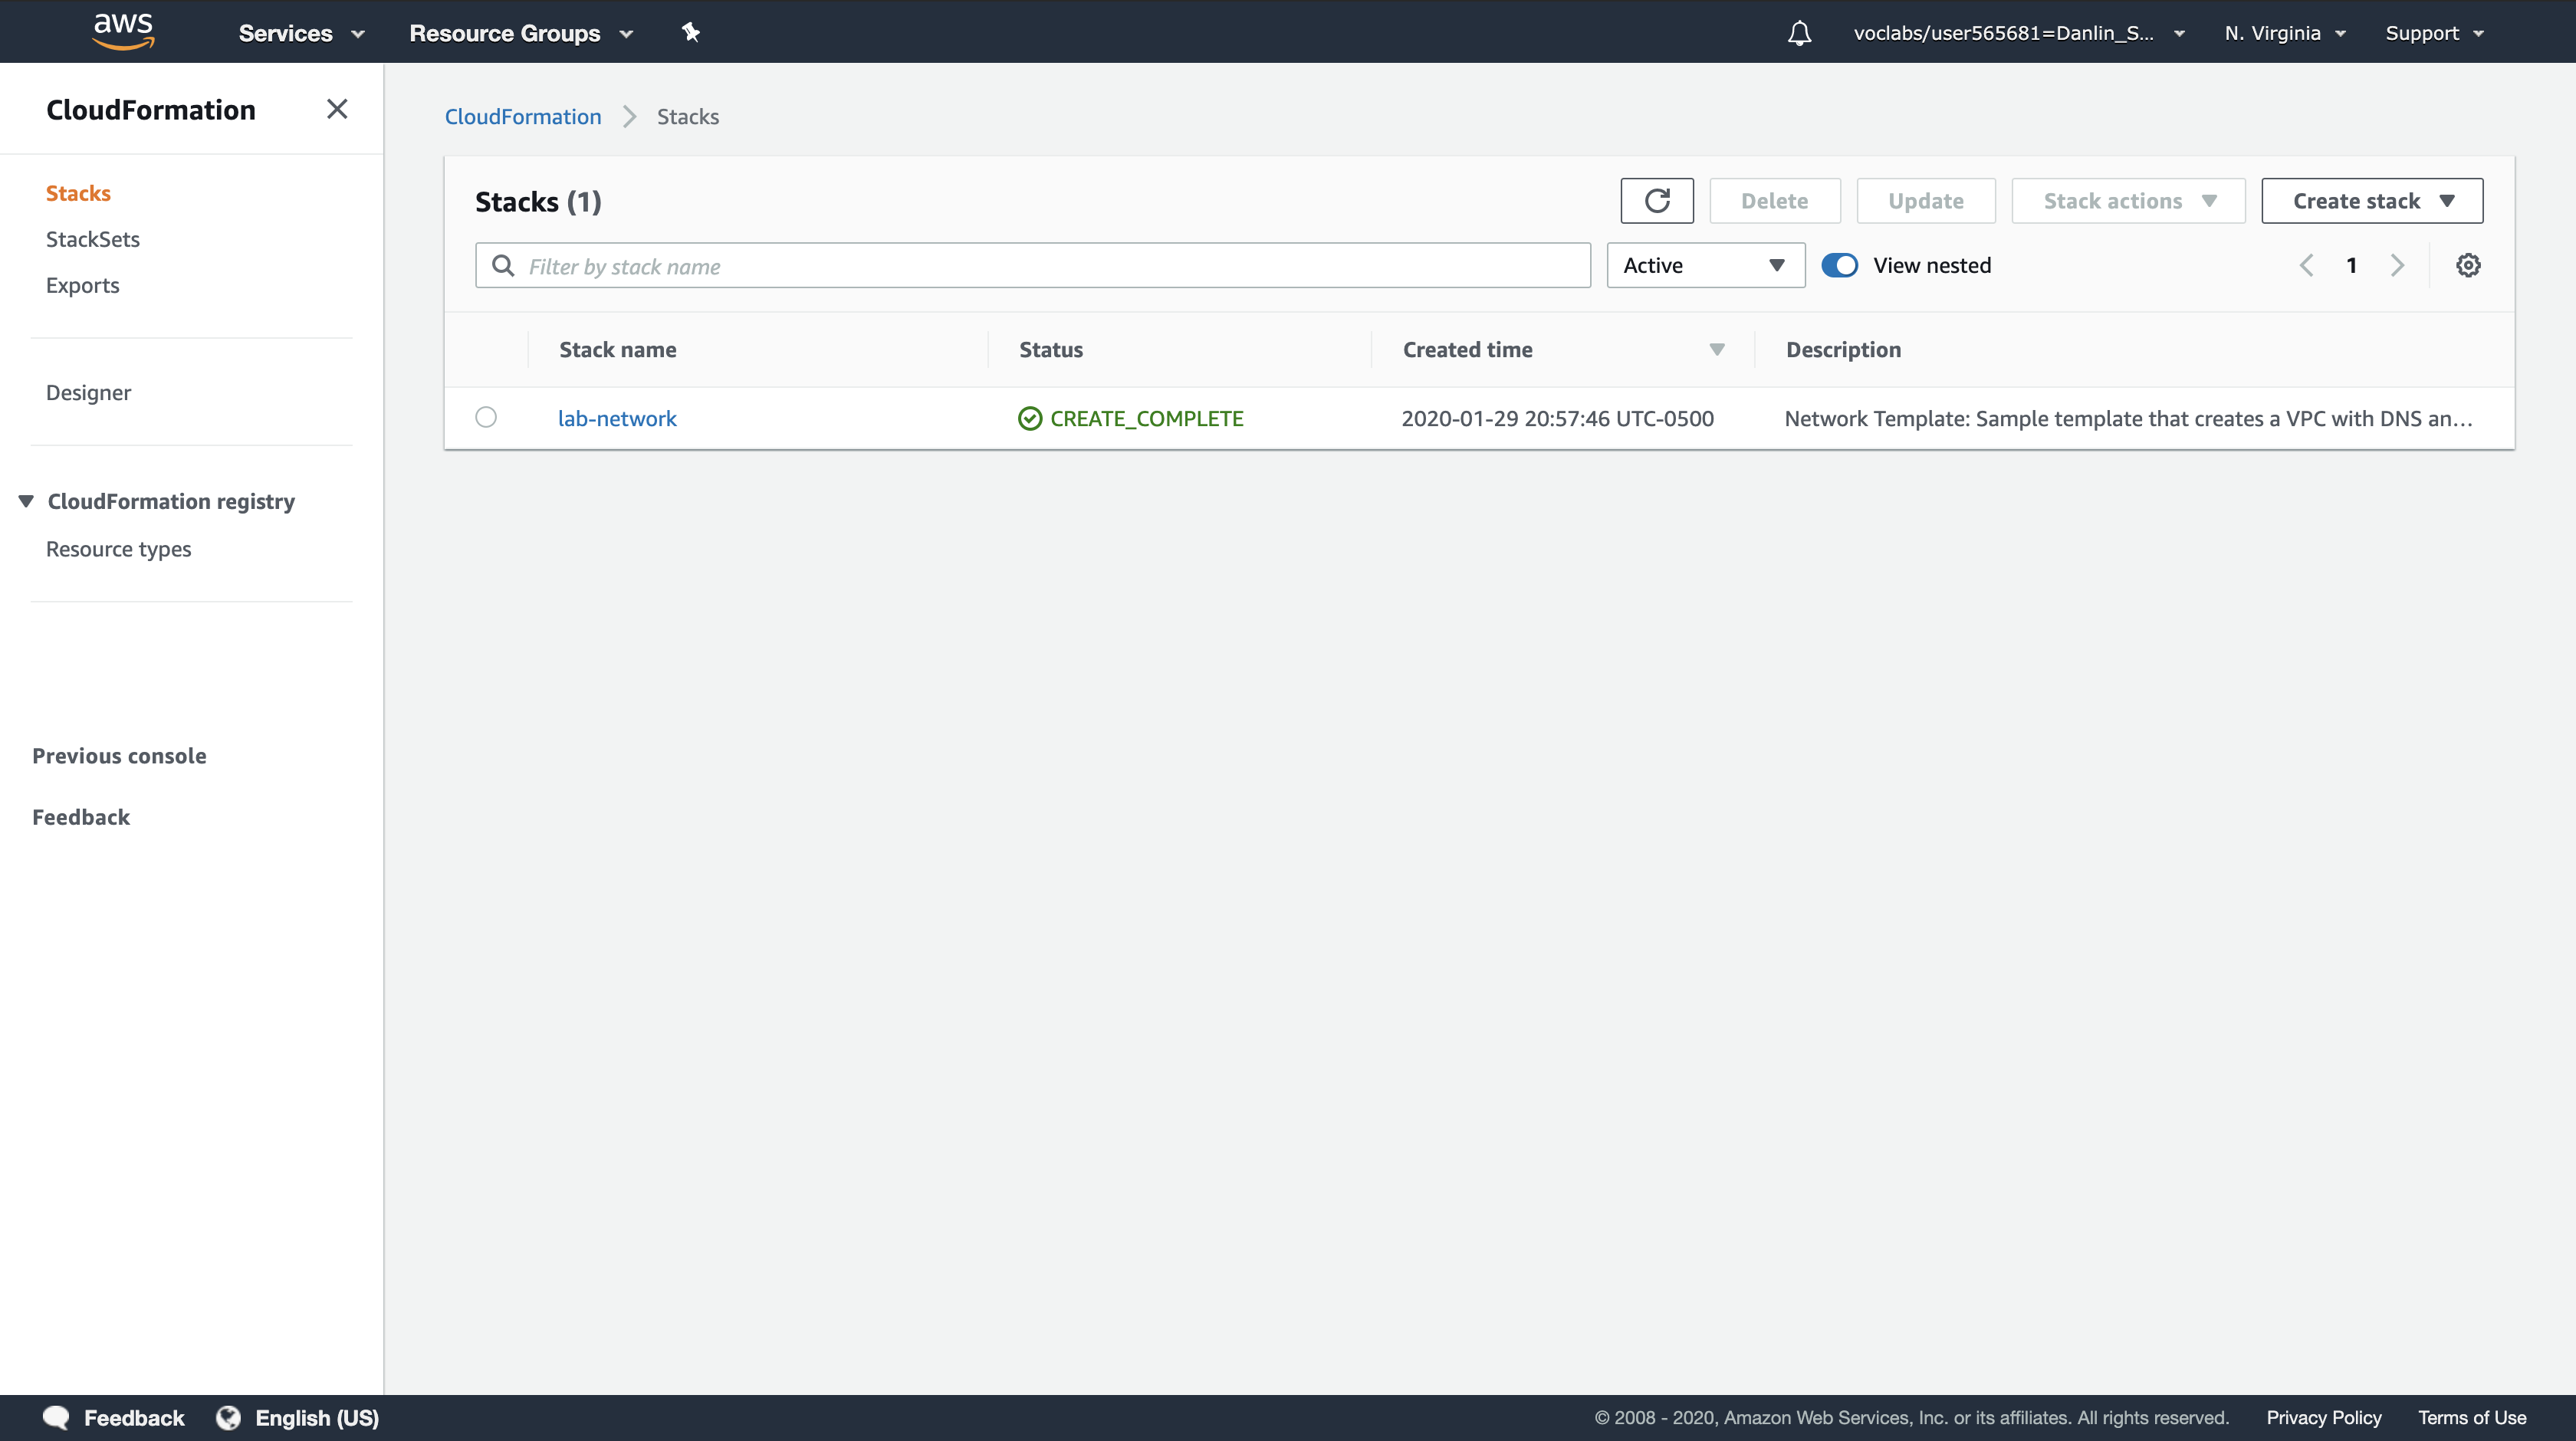
Click Create stack and configure:
Step 1: Specify template
- Template source:
Upload a template file - Upload a template file: Click
Choose filethen select the lab-application.yaml file you downloaded. - Click Next

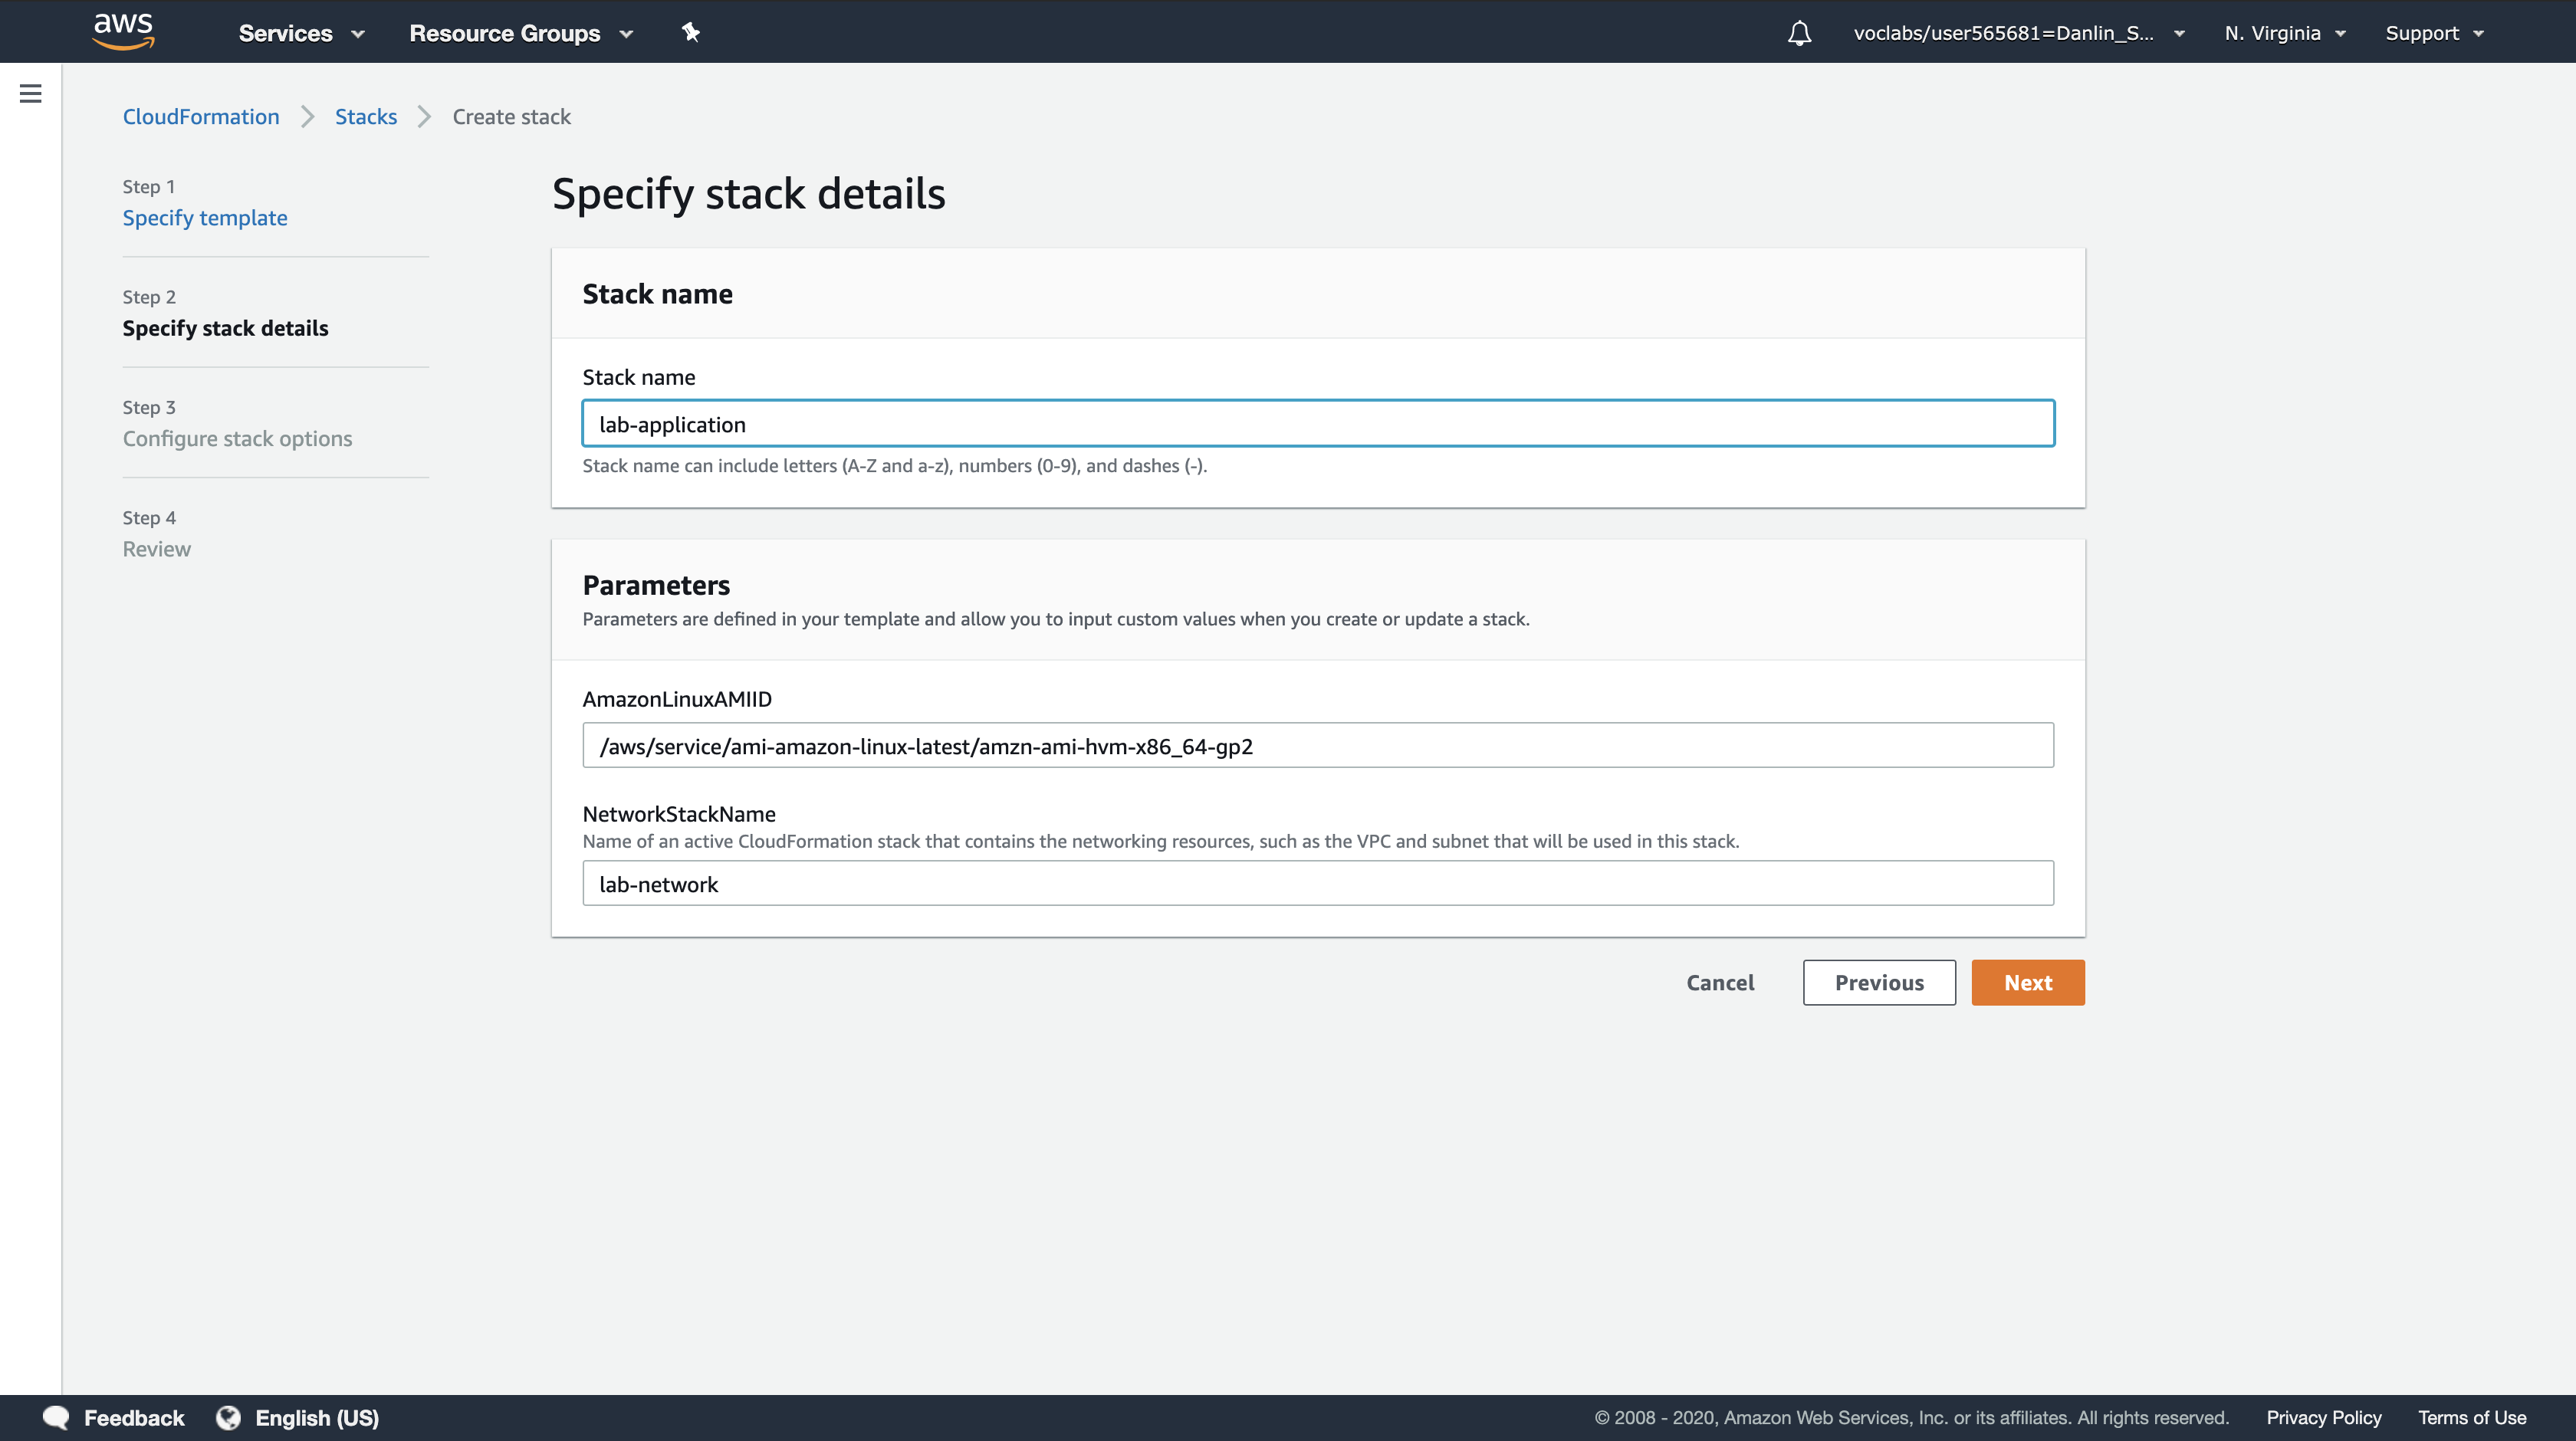
Step 2: Specify stack details
- Stack name:
lab-application - NetworkStackName:
lab-network - Click
Next
Note: The Network Stack Name parameter tells the template the name of the first stack you created (lab-network) so that it can retrieve values from the Outputs.
Step 3: Configure stack options
- Tags:
- Key:
application - Value:
inventory
- Key:
- Click
Next

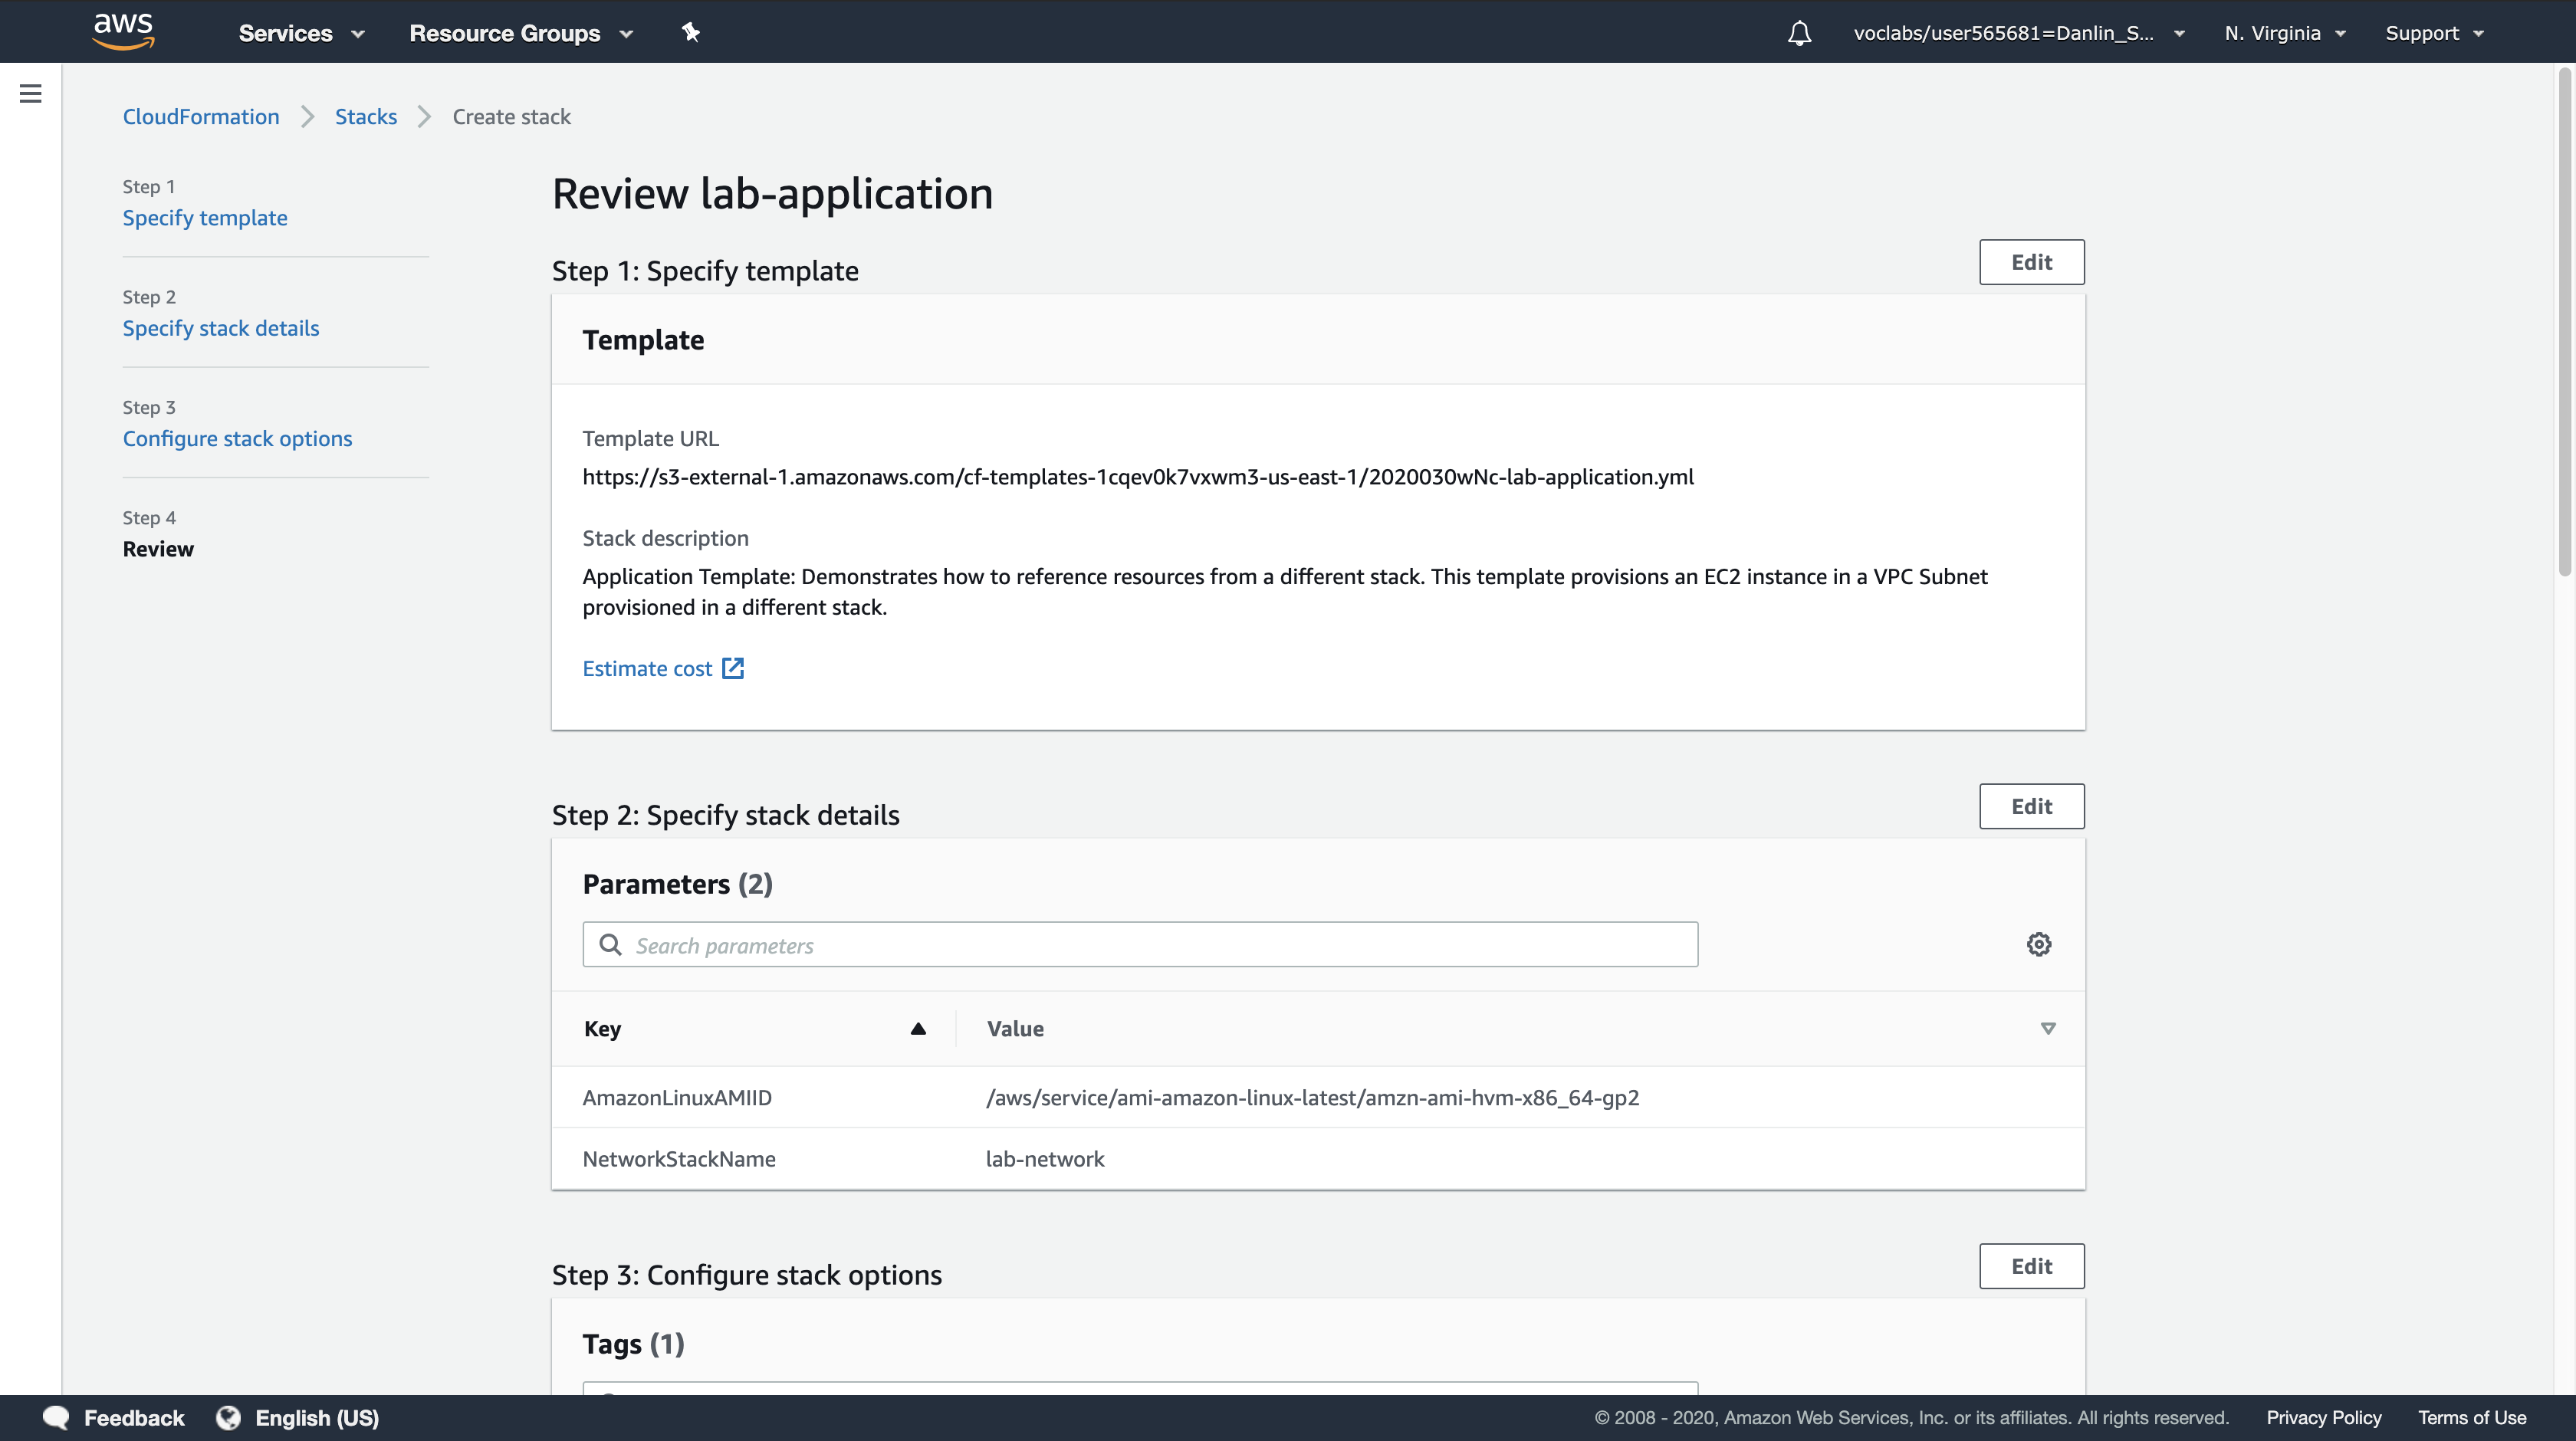
Step 4: Review lab-network
- Click
Create stack
While the stack is being created, examine the Events tab and the Resources tab to view the resources that are being created.
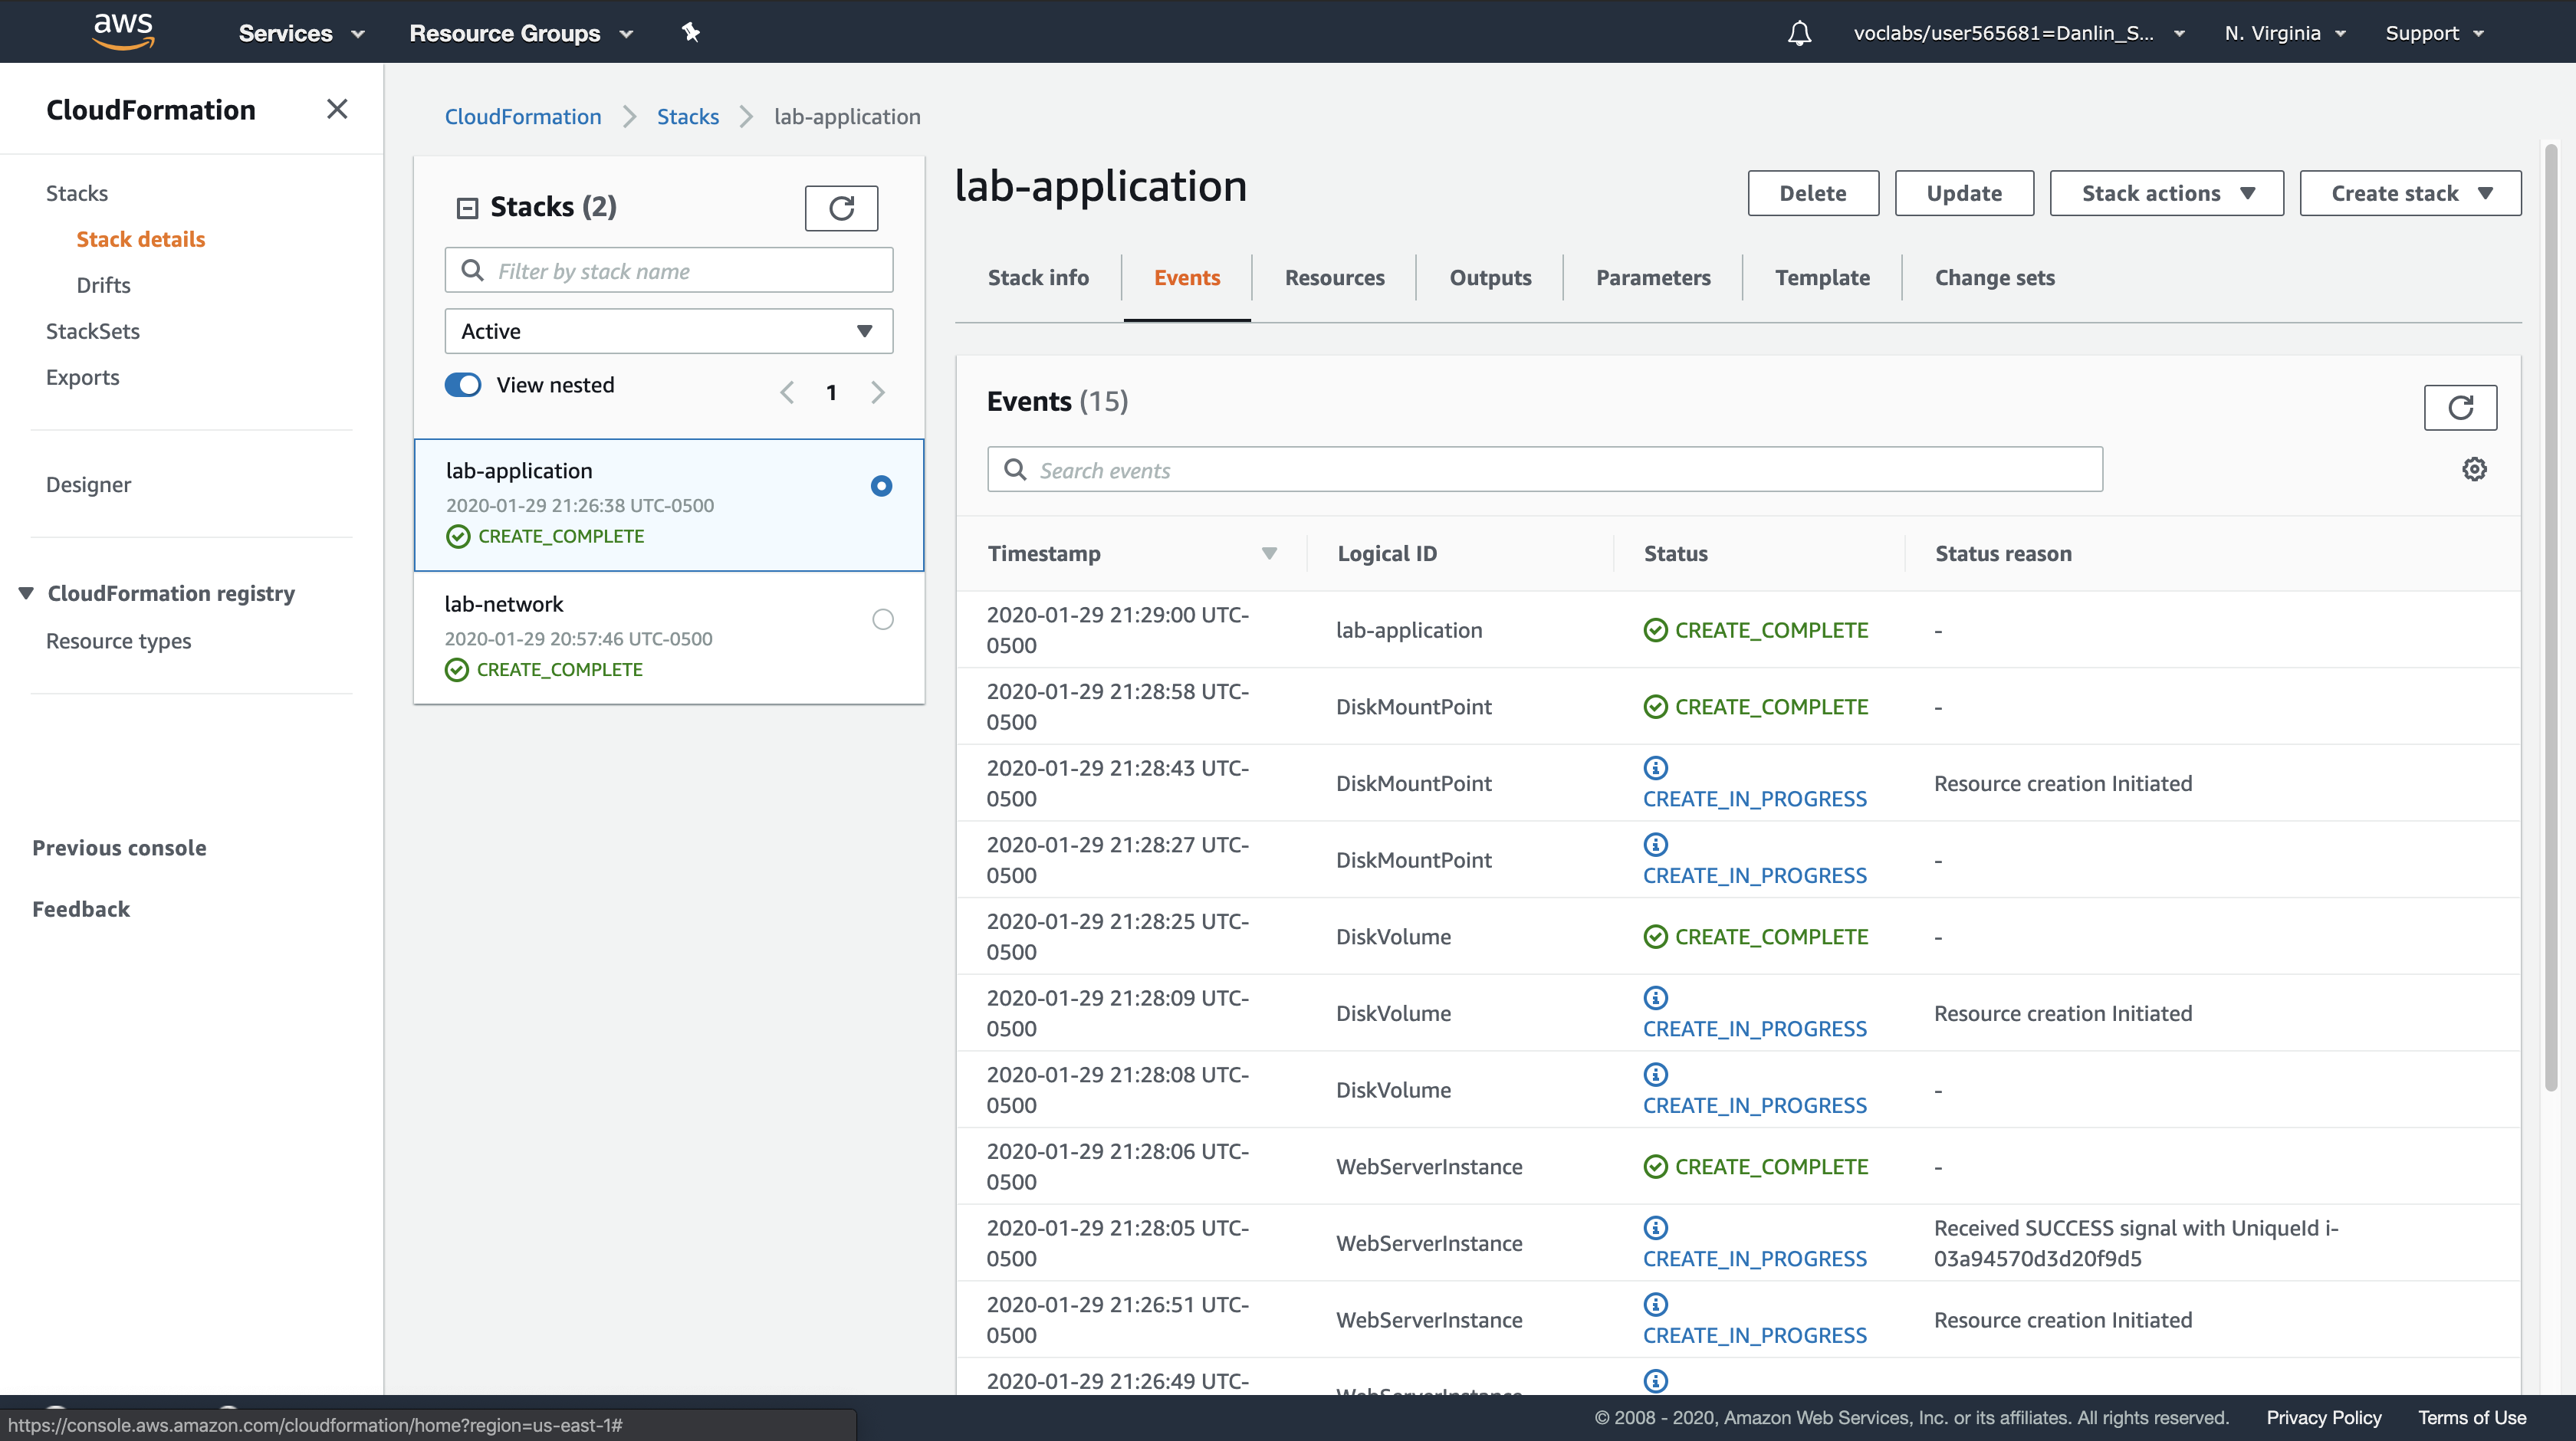
Wait for the Stack status (in the Stack info tab) to change to CREATE_COMPLETE.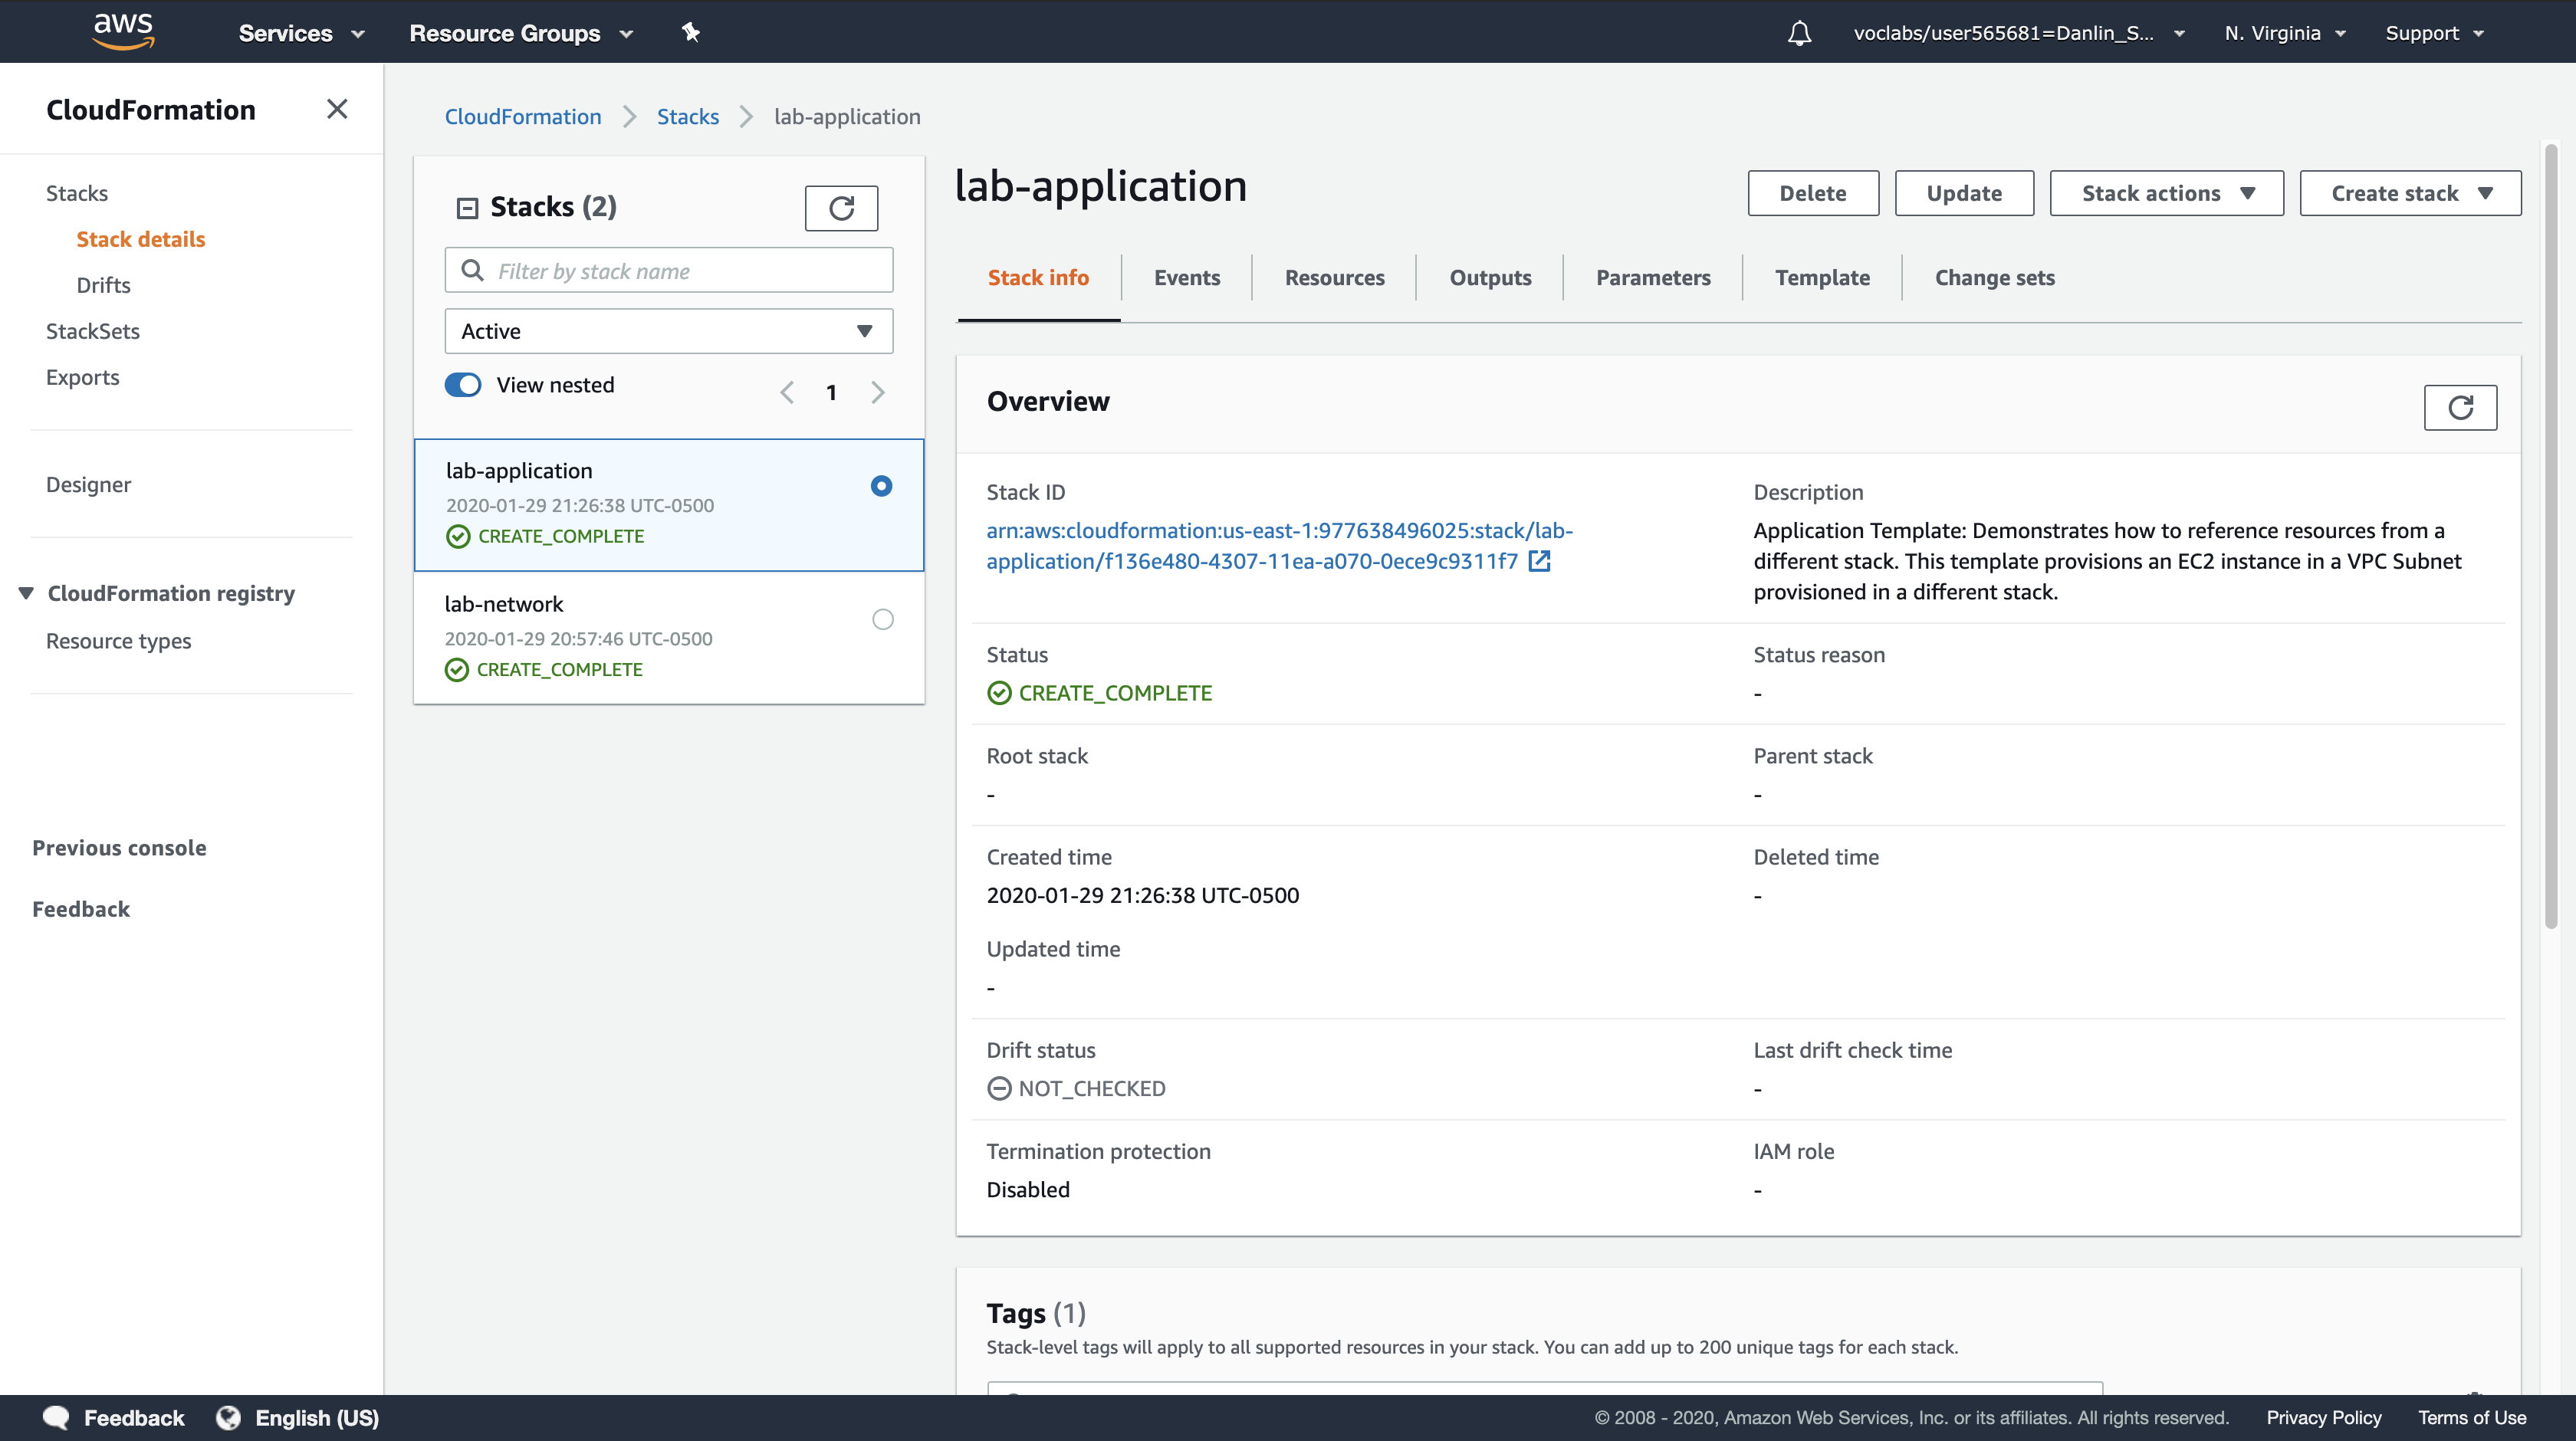
Your application is now ready!
Click the Outputs tab.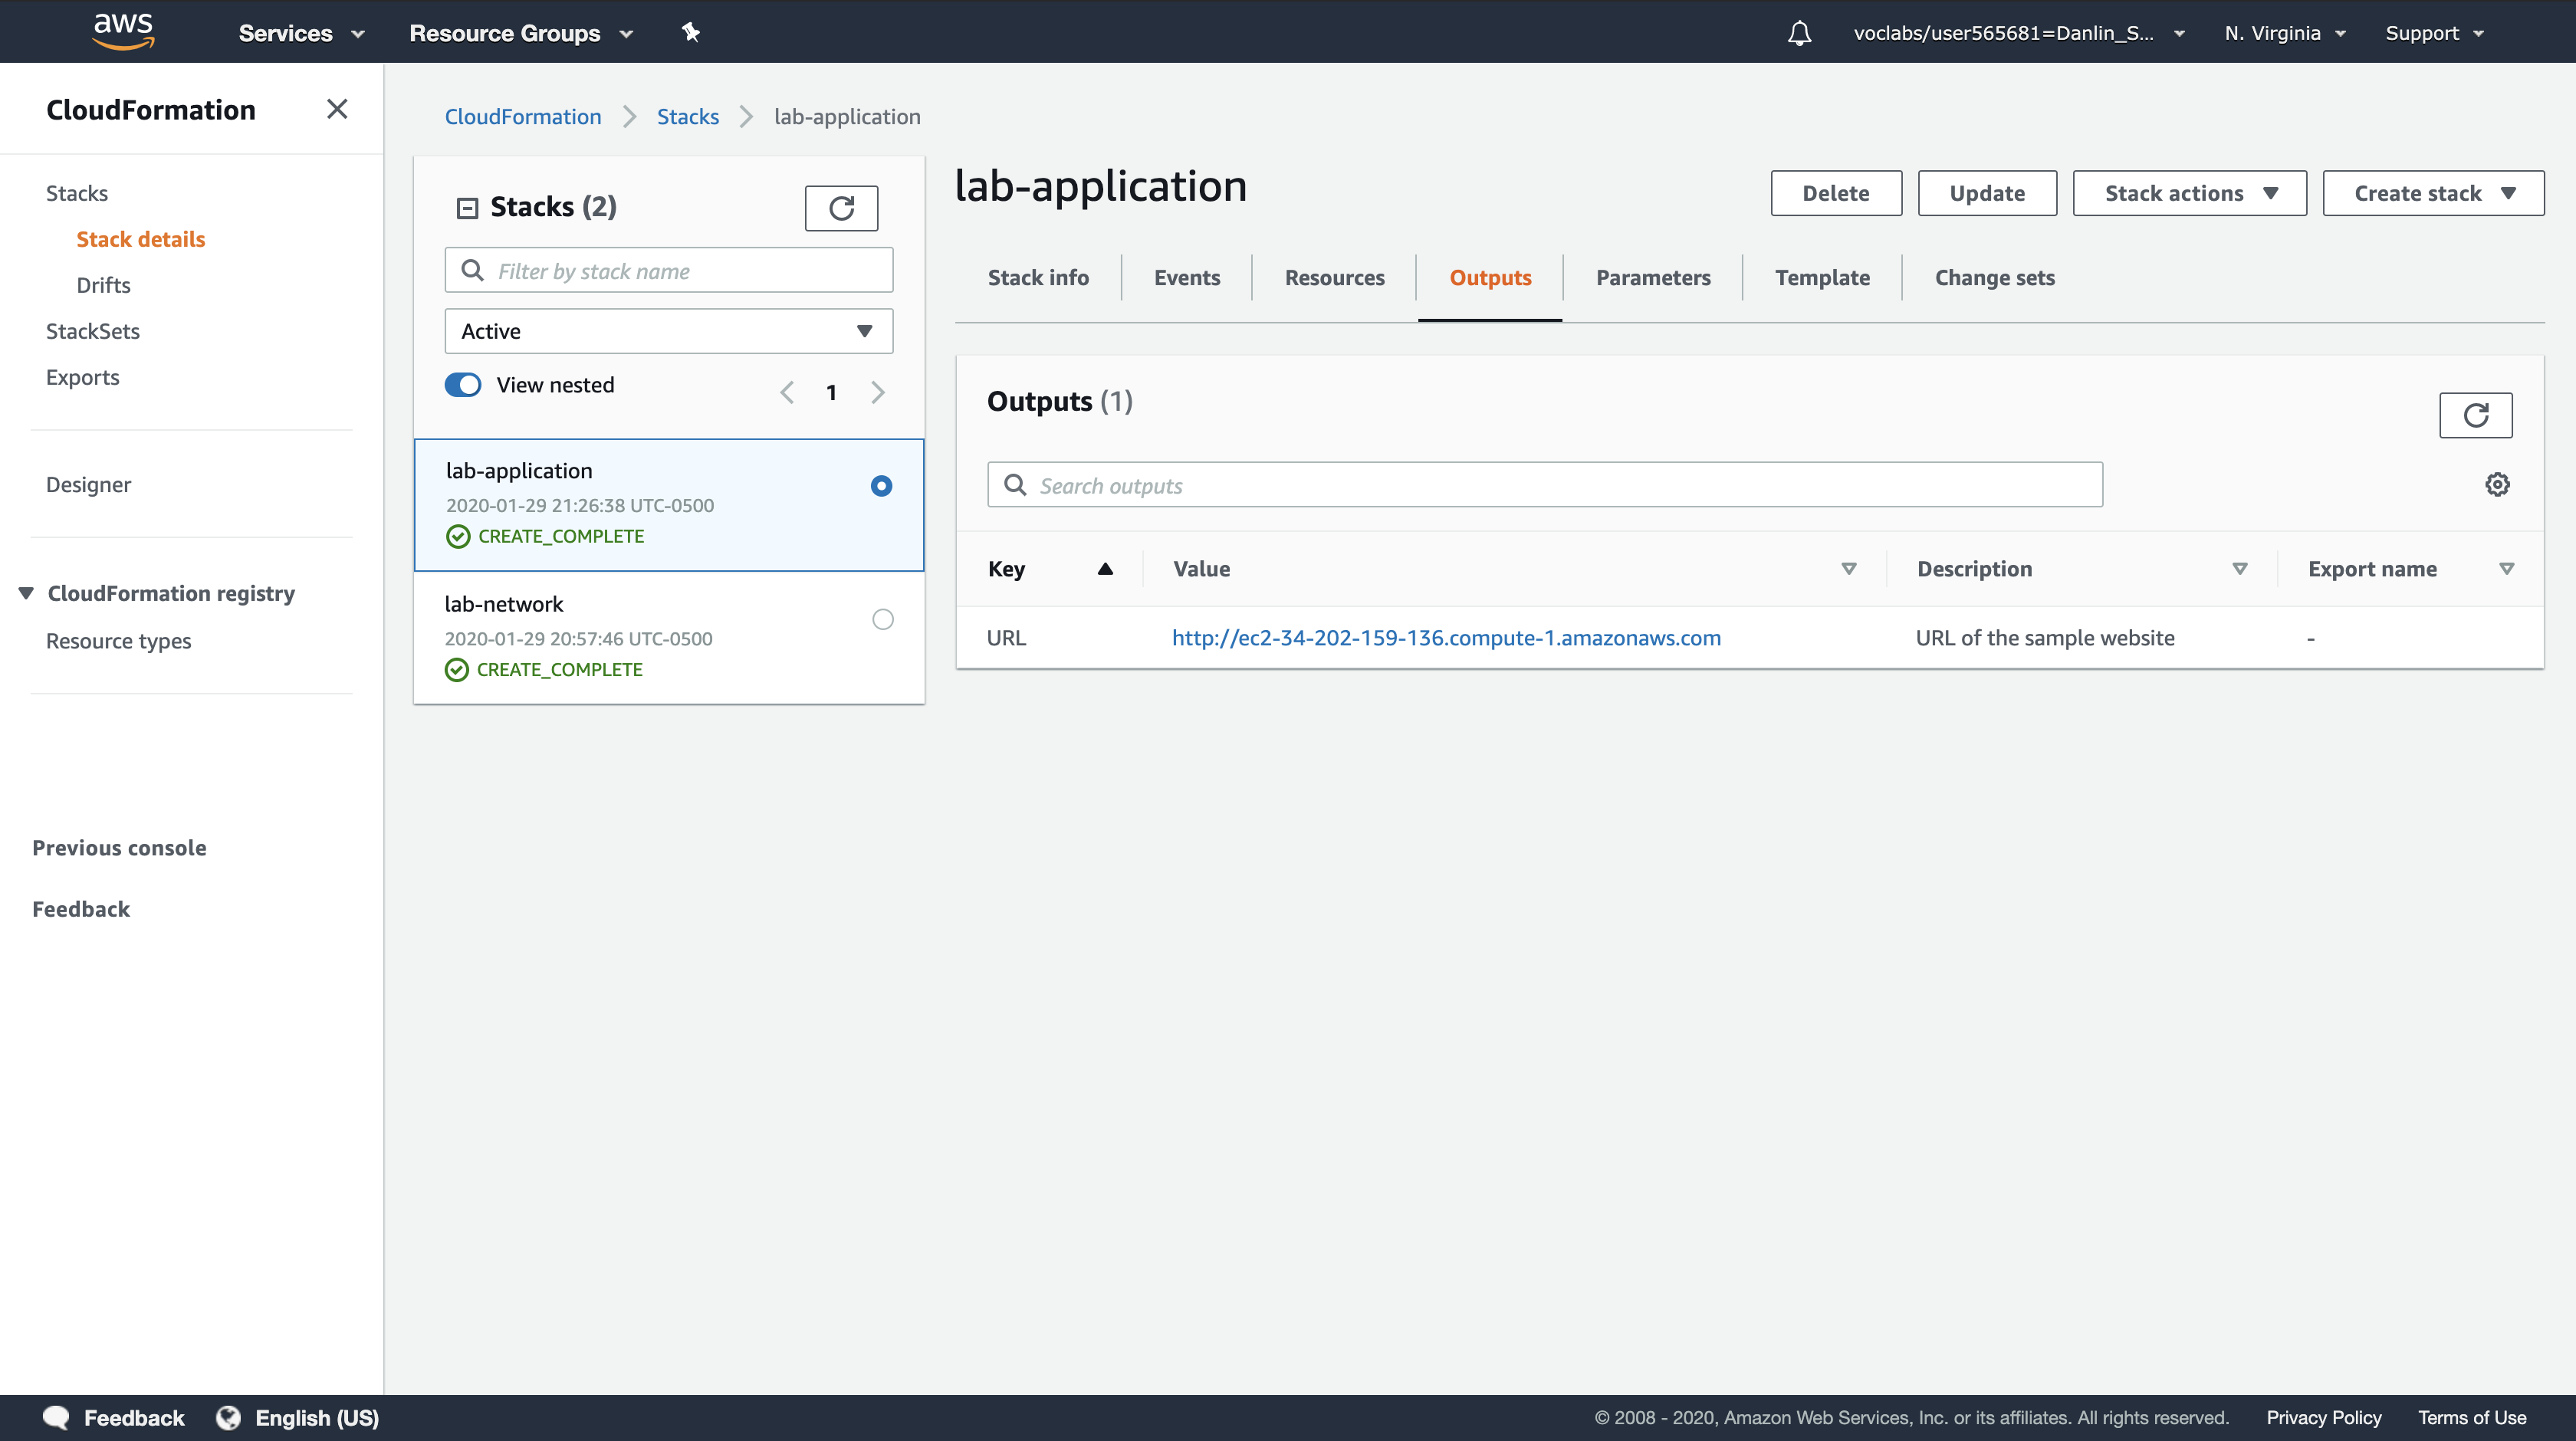
Copy the URL that is displayed, then open a new web browser tab, paste the URL and press Enter.
A new browser tab will open, taking you to the application running on the web server.
A CloudFormation stack can also reference values from another CloudFormation stack. For example, here is a portion of the lab-application template that references the lab-network template:
1 | WebServerSecurityGroup: |
The last line uses to the Network Stack Name that you provided (“lab-network”) when the stack was created. It then imports the value of lab-network-VPCID from the Outputs of the first stack and inserts the value into the VPC ID field of the security group definition. The result is that the security group is created in the VPC created by the first stack.
In another example, here is the code that places the Amazon EC2 instance into the correct subnet:
1 | SubnetId: |
It takes the Subnet ID from the lab-network stack and uses it in the lab-application stack to launch the instance into the public subnet that created by the first stack.
This demonstrates how multiple CloudFormation stacks can be used to deploy infrastructure in multiple layers.
Task 3: Update a Stack
CloudFormation can also update a stack that has been deployed. When updating a stack, CloudFormation will only modify or replace the resources that are being changed. Any resources that are not being changed will be left as-is.
In this task, you will update the lab-application stack to modify a setting in the Security Group. CloudFormation will leave all other resources as-is, without being modified by the update.
First, you will examine the current settings on the Security Group.
AWS Management Console
Services menu > click EC2.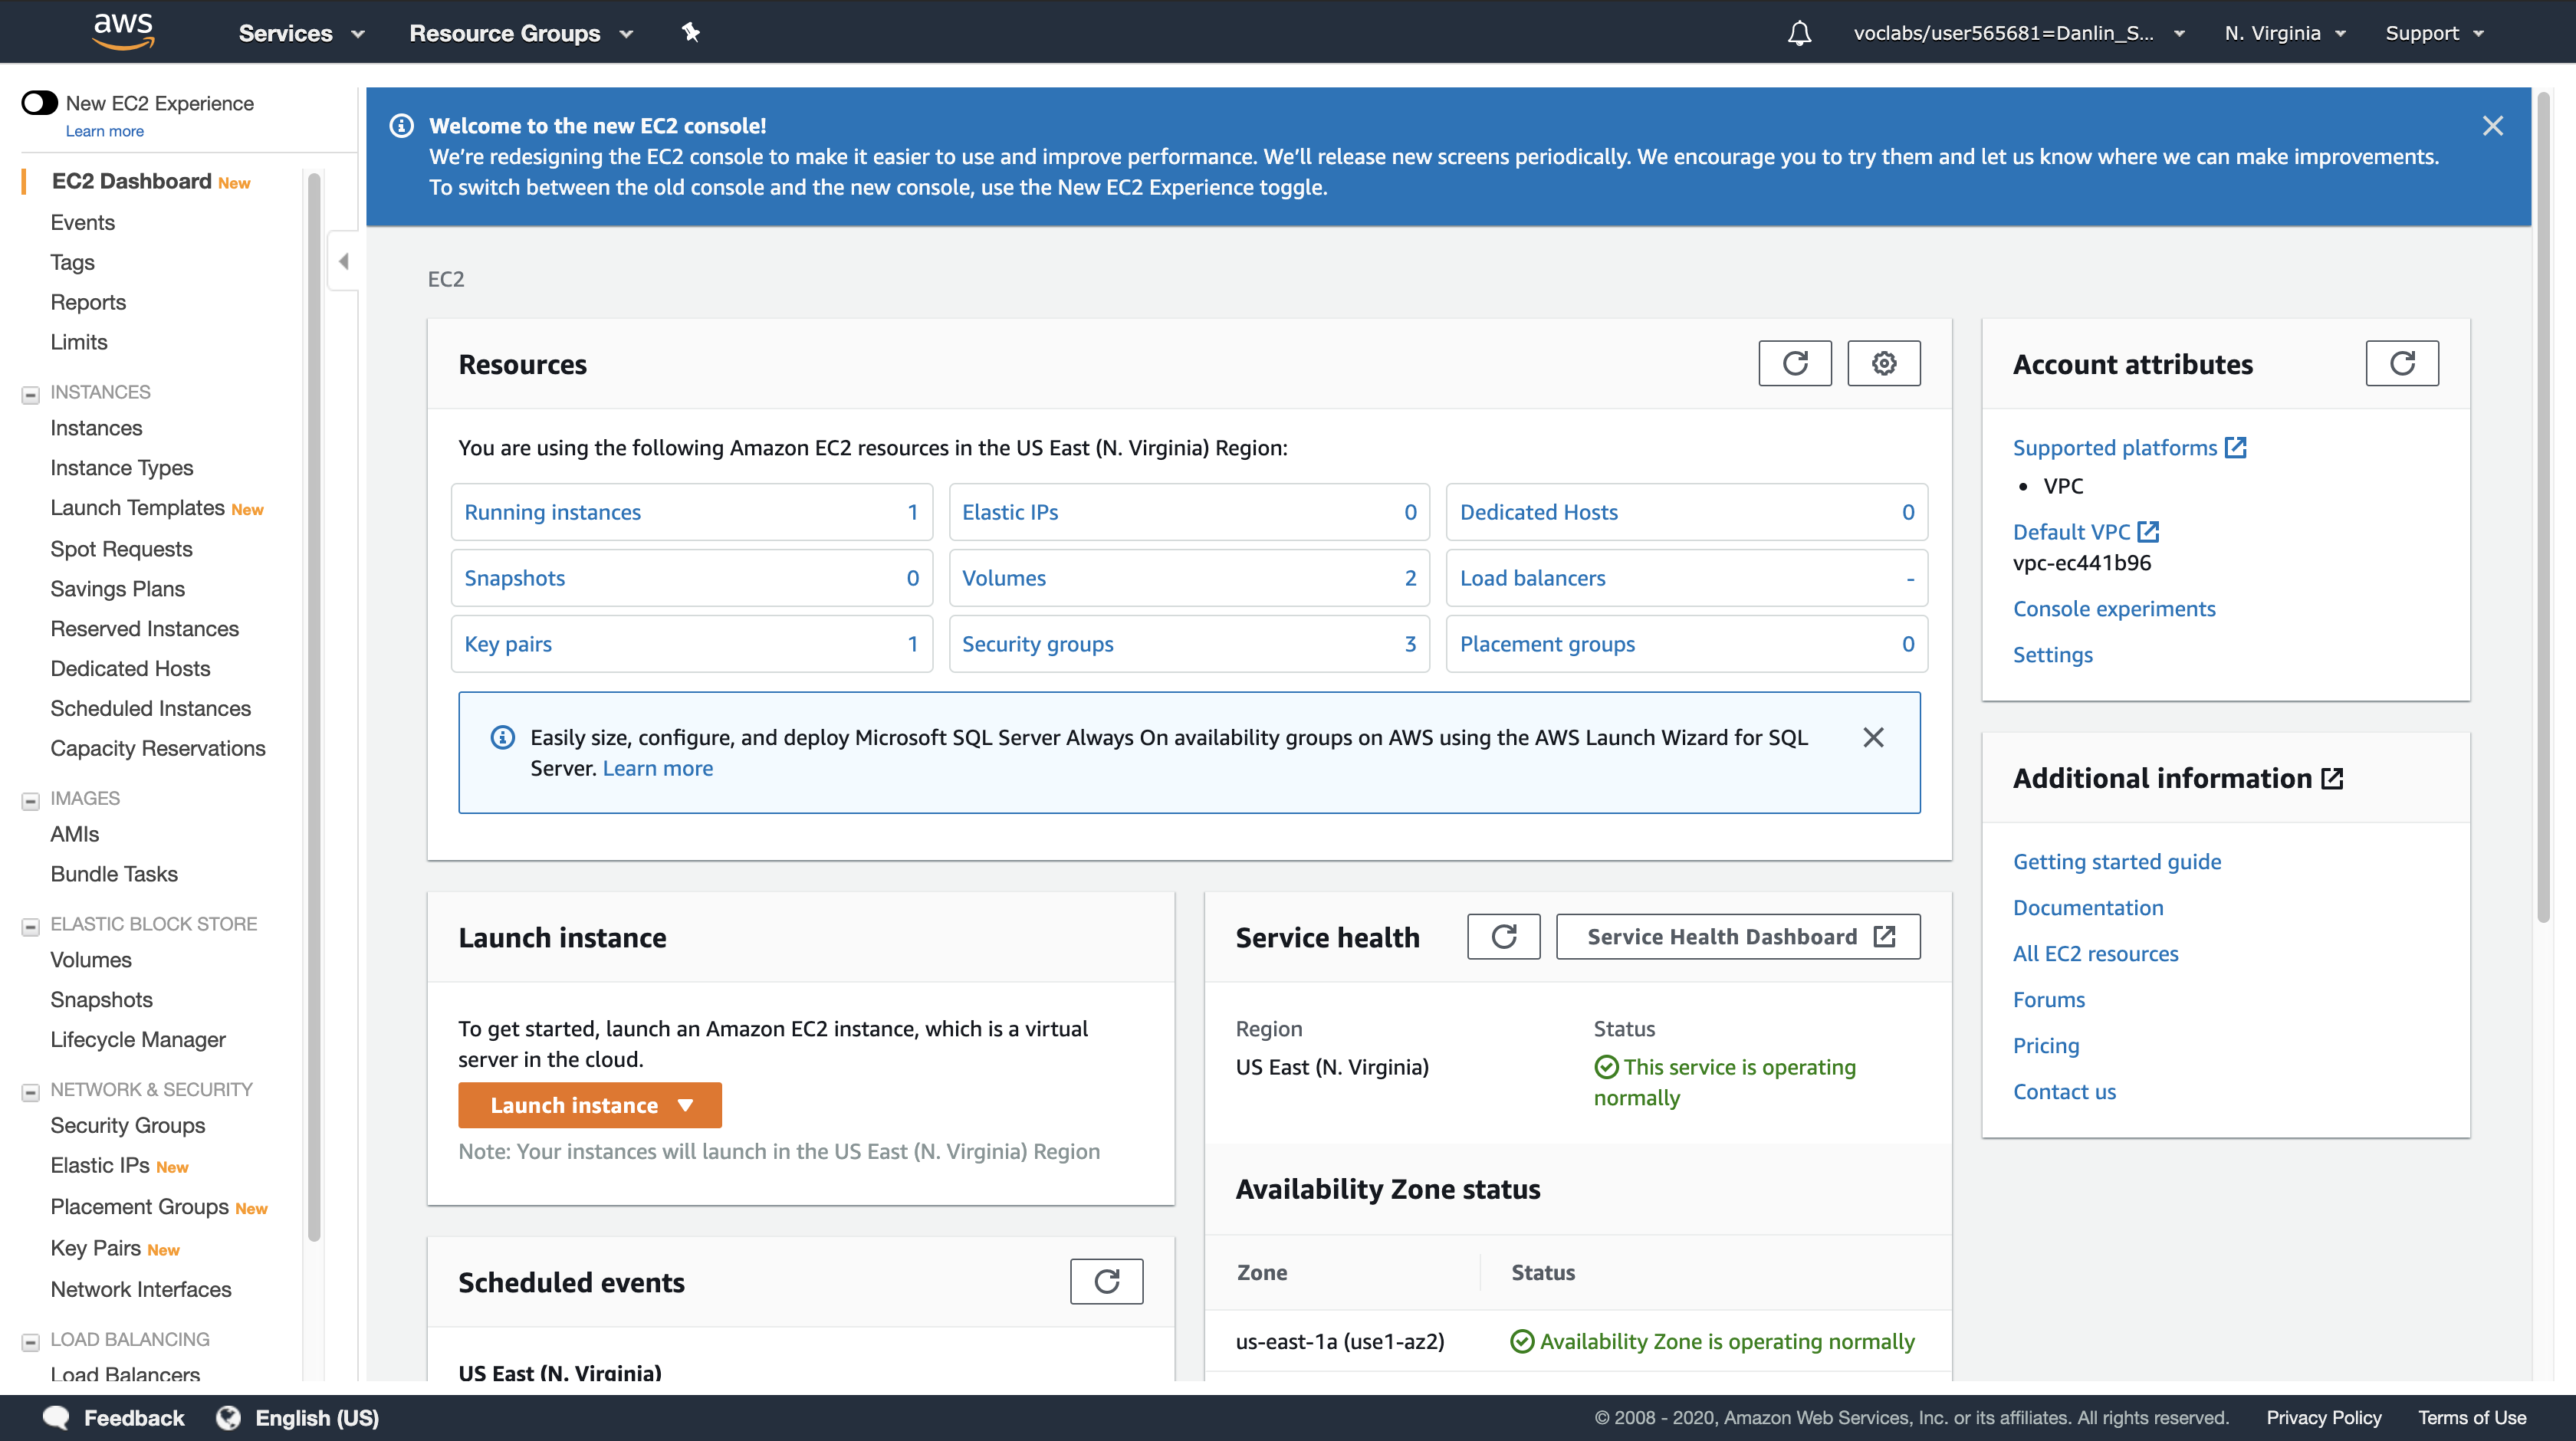
Left navigation pane > click Security Groups.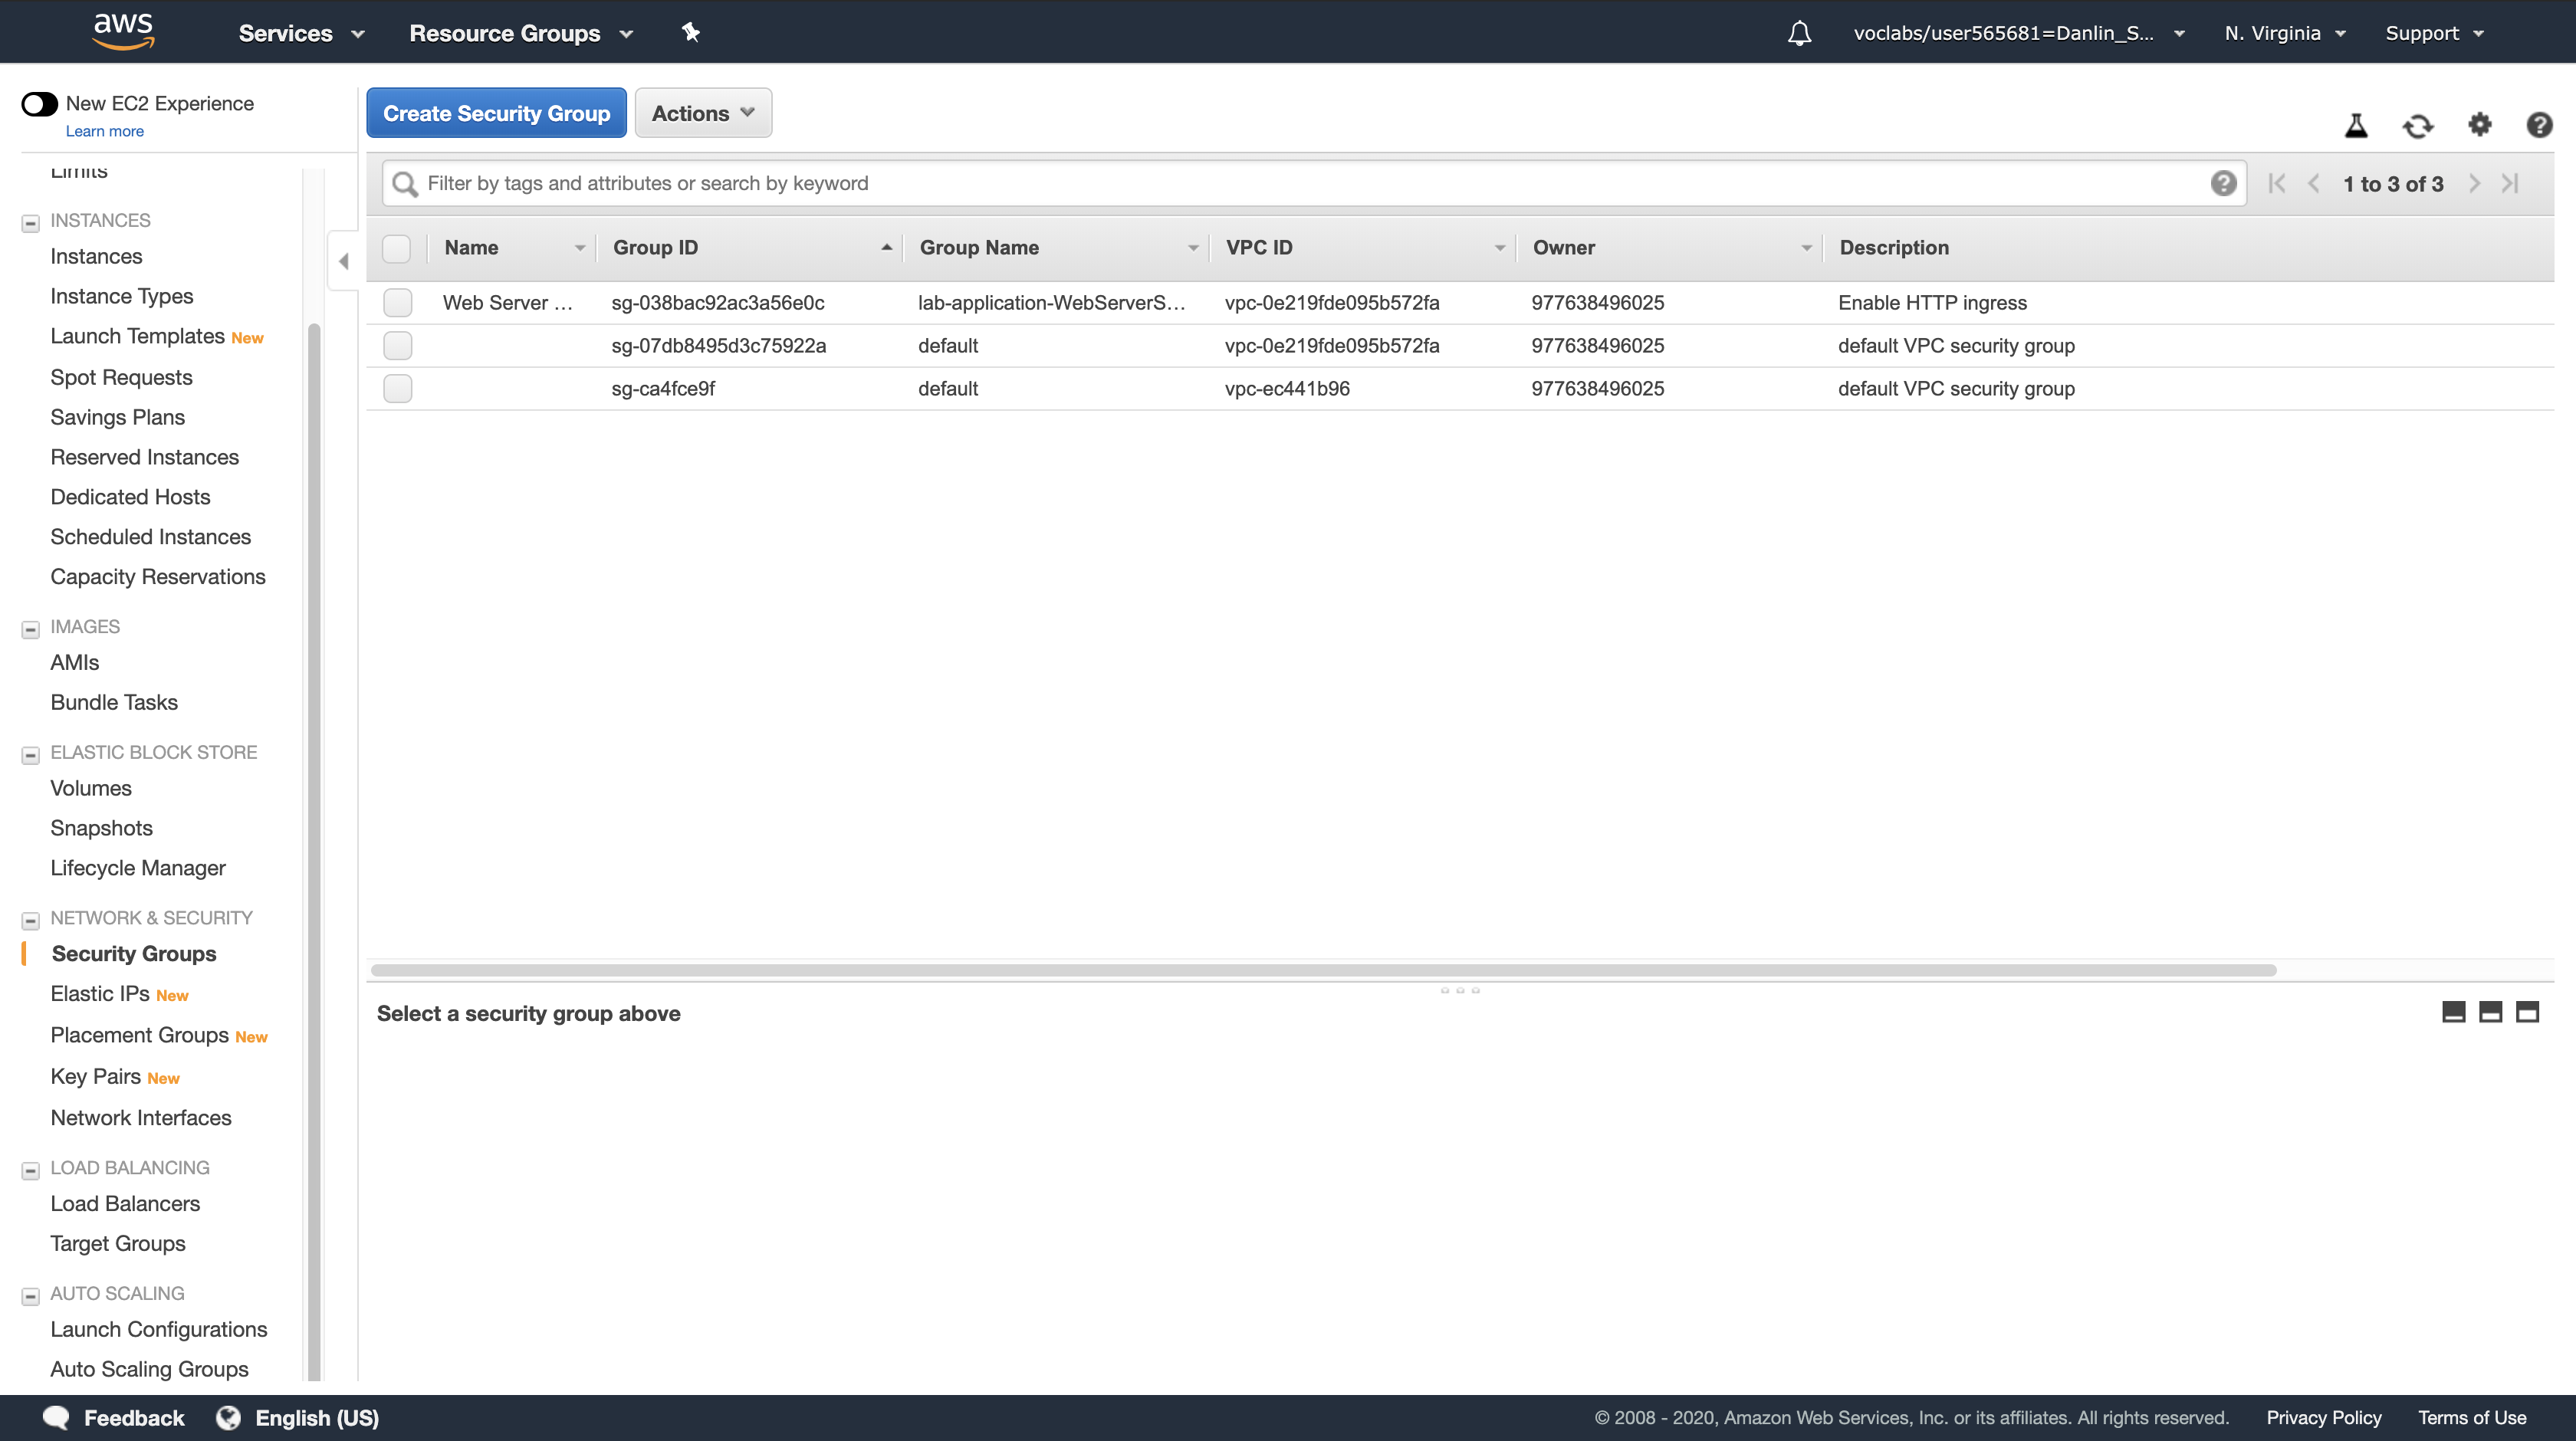
Select Web Server Security Group.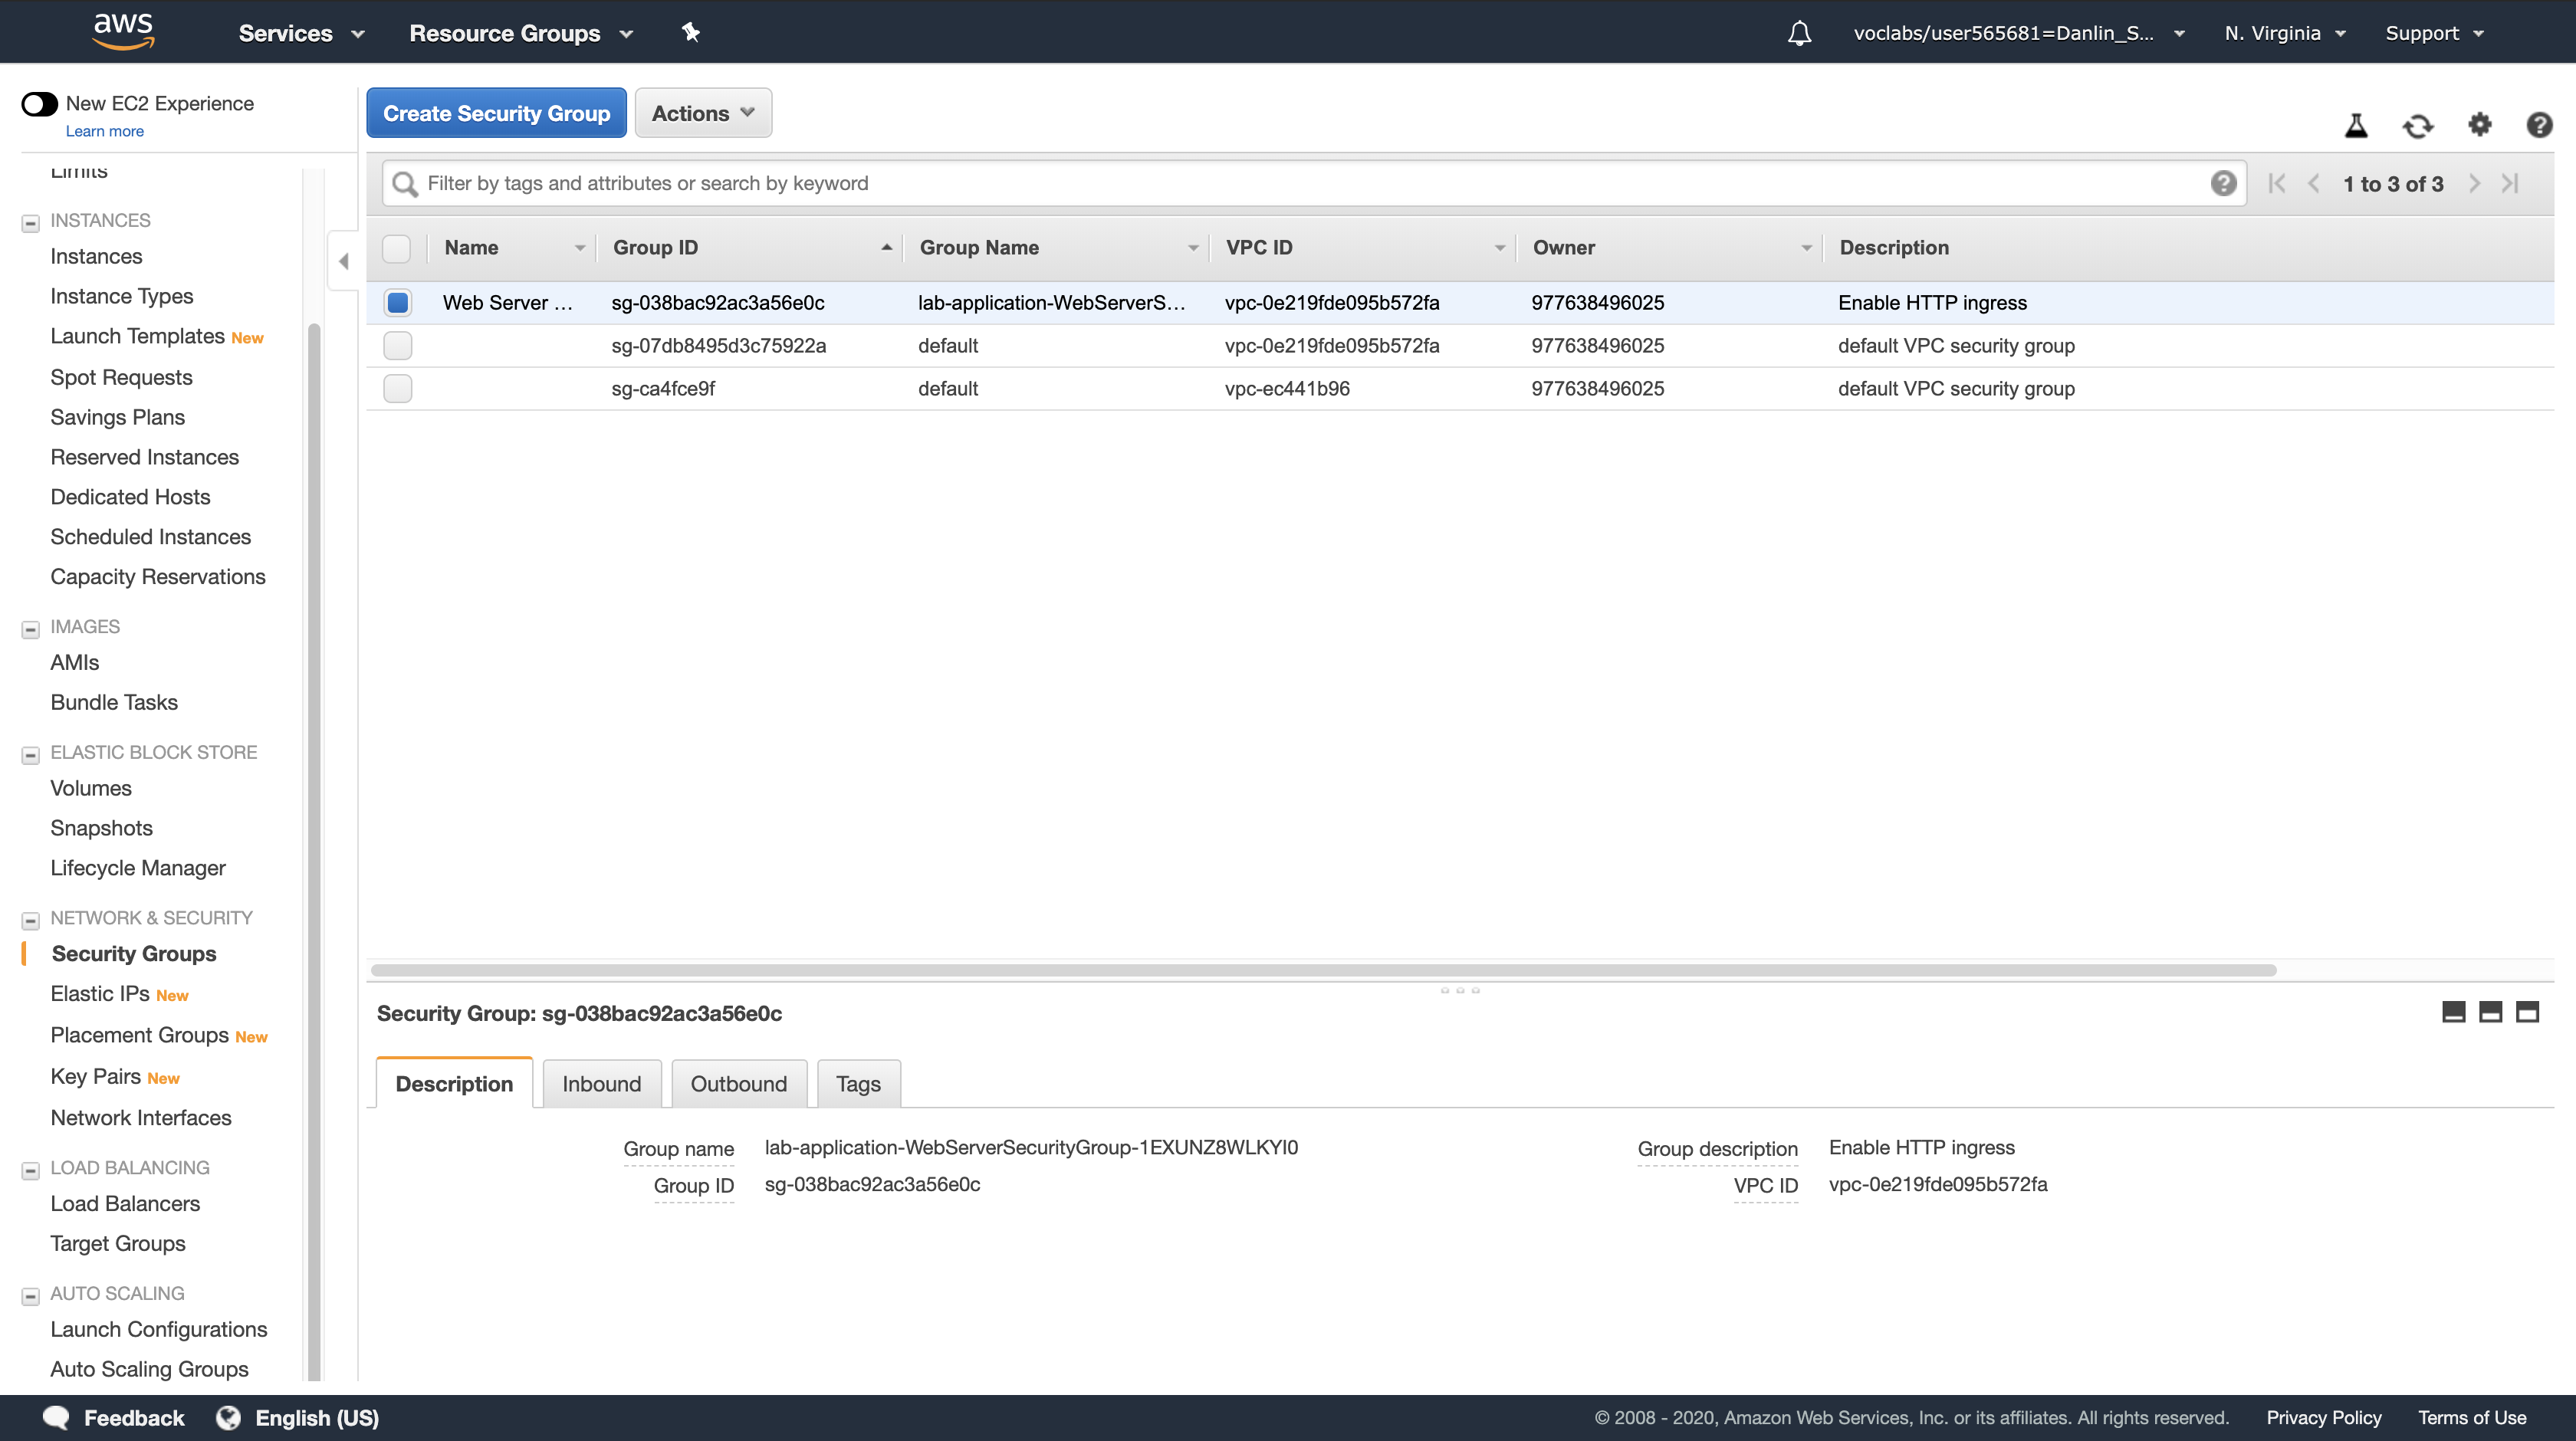
Click the Inbound tab.
- You will see that there is currently only one rule in the Security Group, which permits HTTP traffic.
- You will now return to CloudFormation to update the stack.
AWS Management Console
Services menu > click CloudFormation.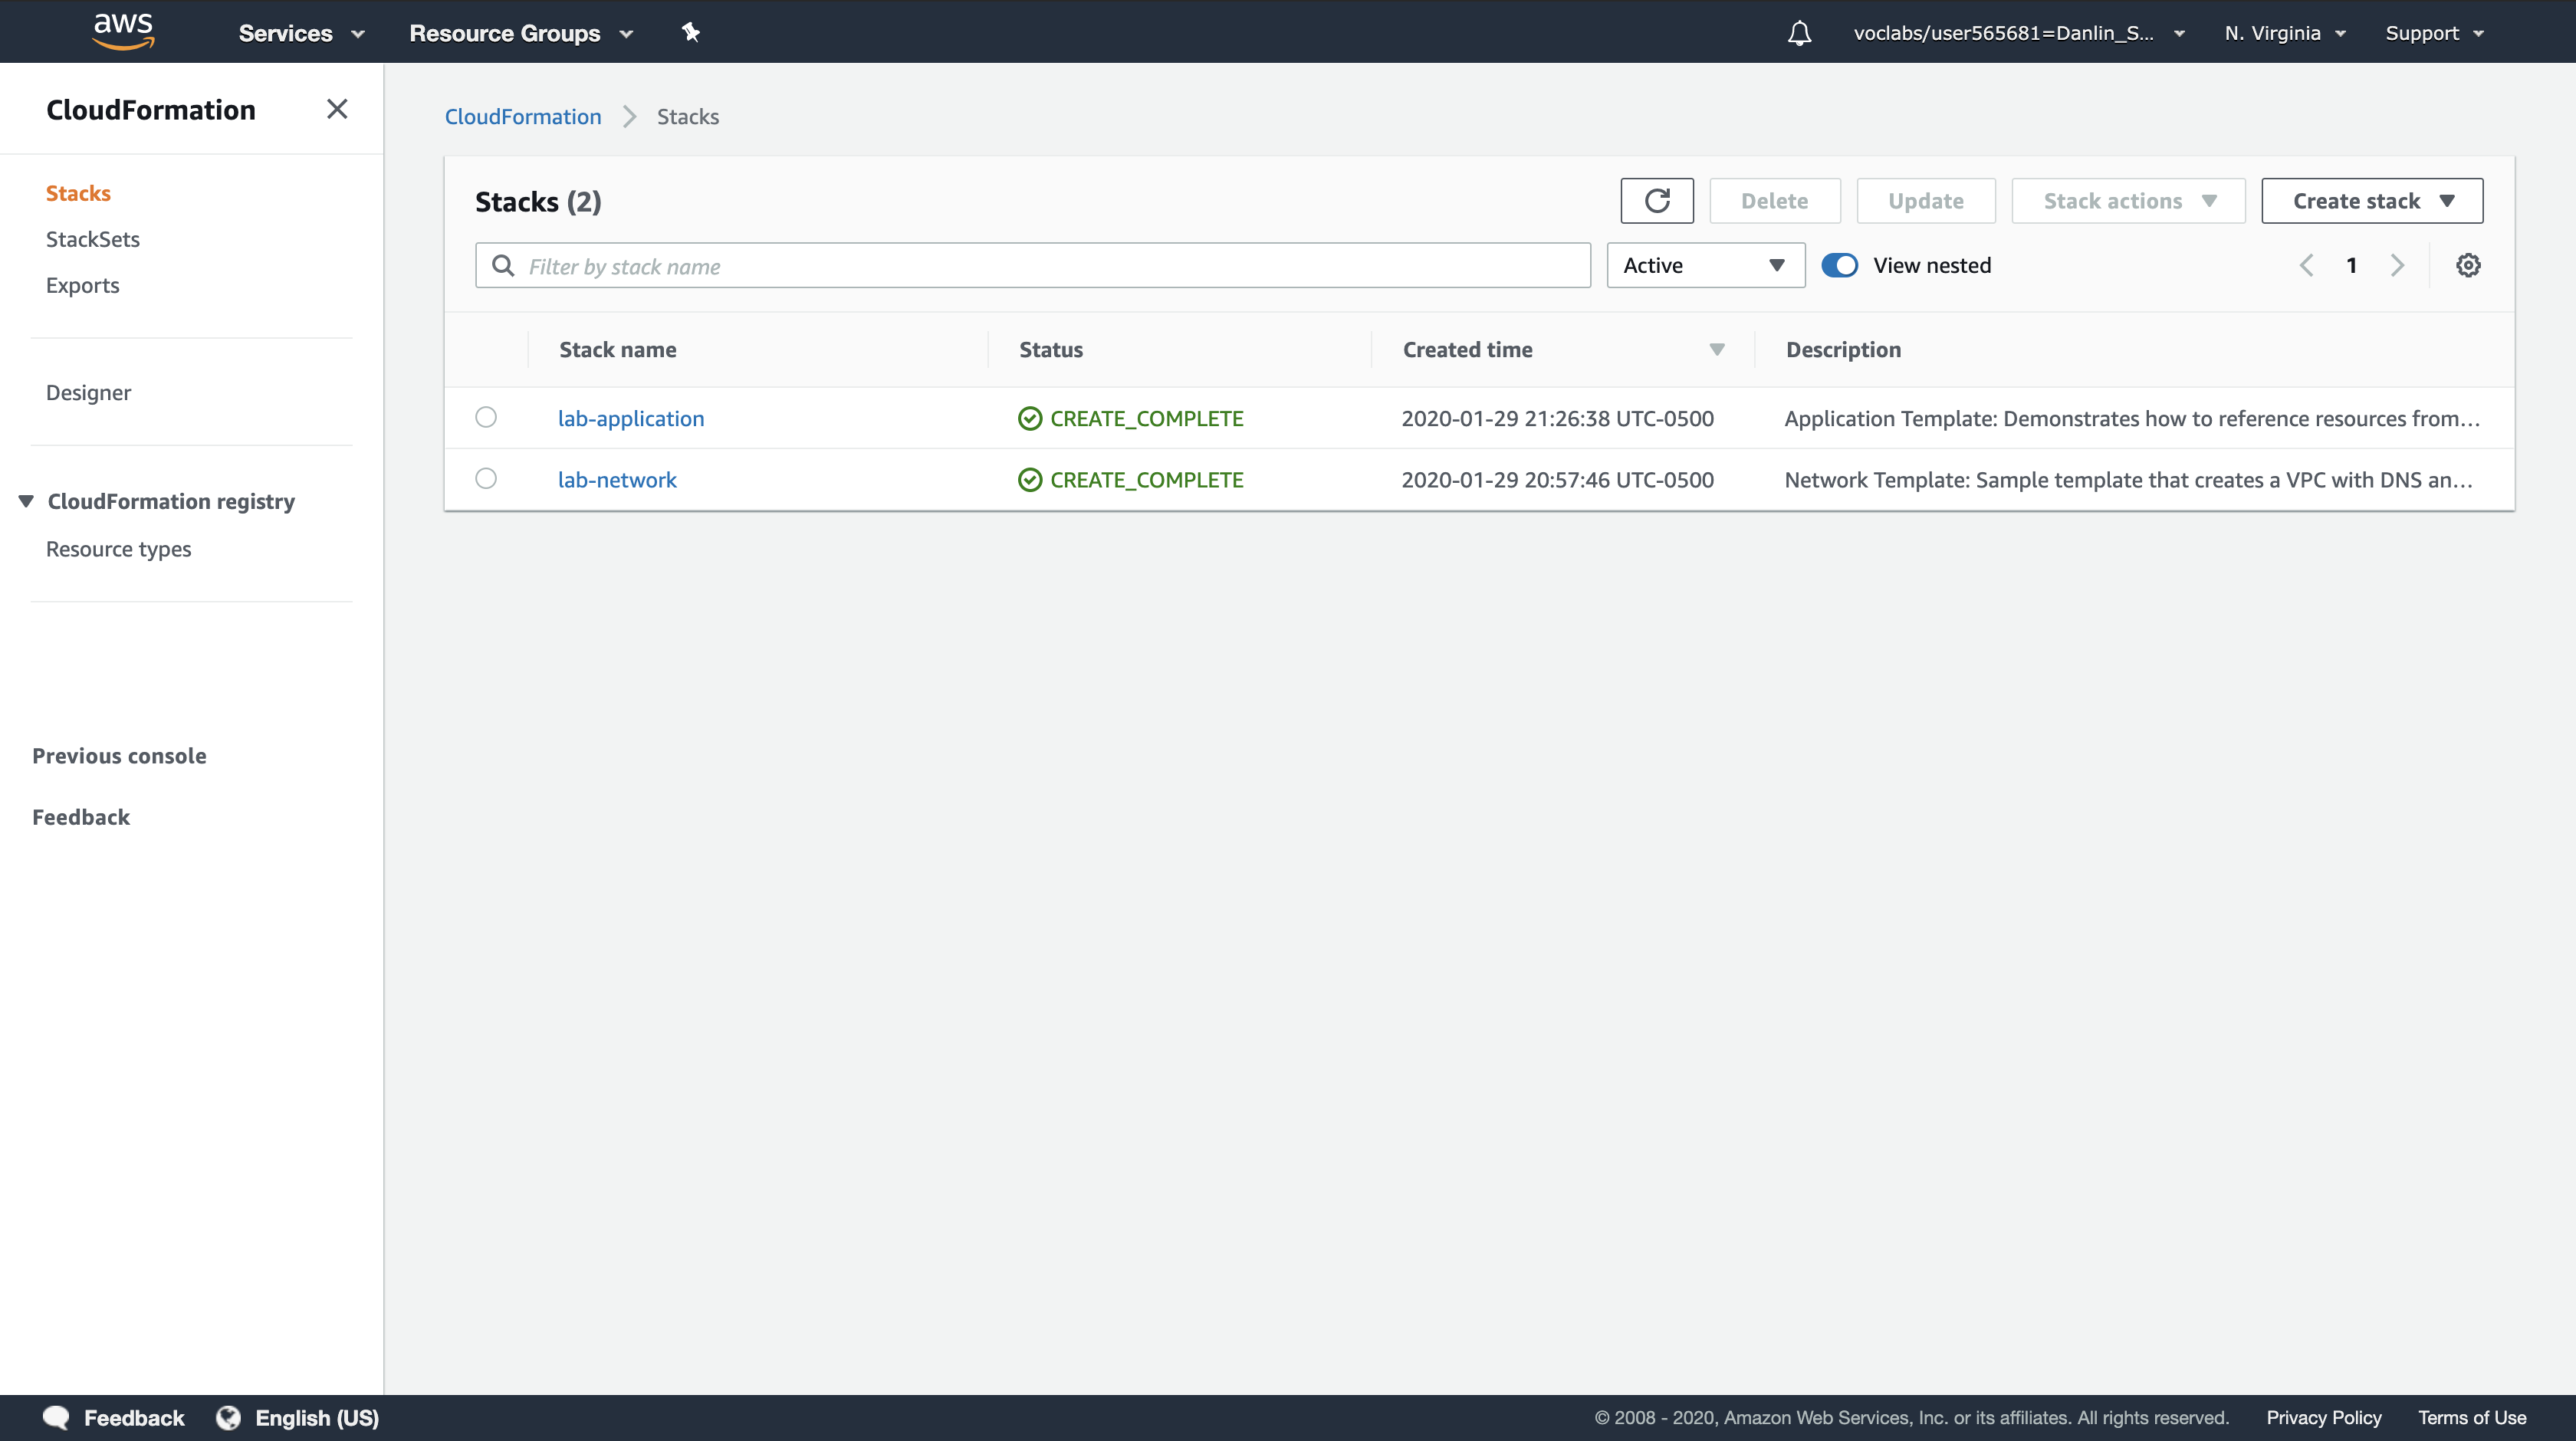
Right-click the link below and choose the option (e.g. ‘Save Link As…’) to download the lab-application2.yaml file to your local machine.
Download lab-application2.yaml
This template has an additional configuration to permit inbound SSH traffic on port 22:
1 | - IpProtocol: tcp |
1 | AWSTemplateFormatVersion: 2010-09-09 |
Click lab-application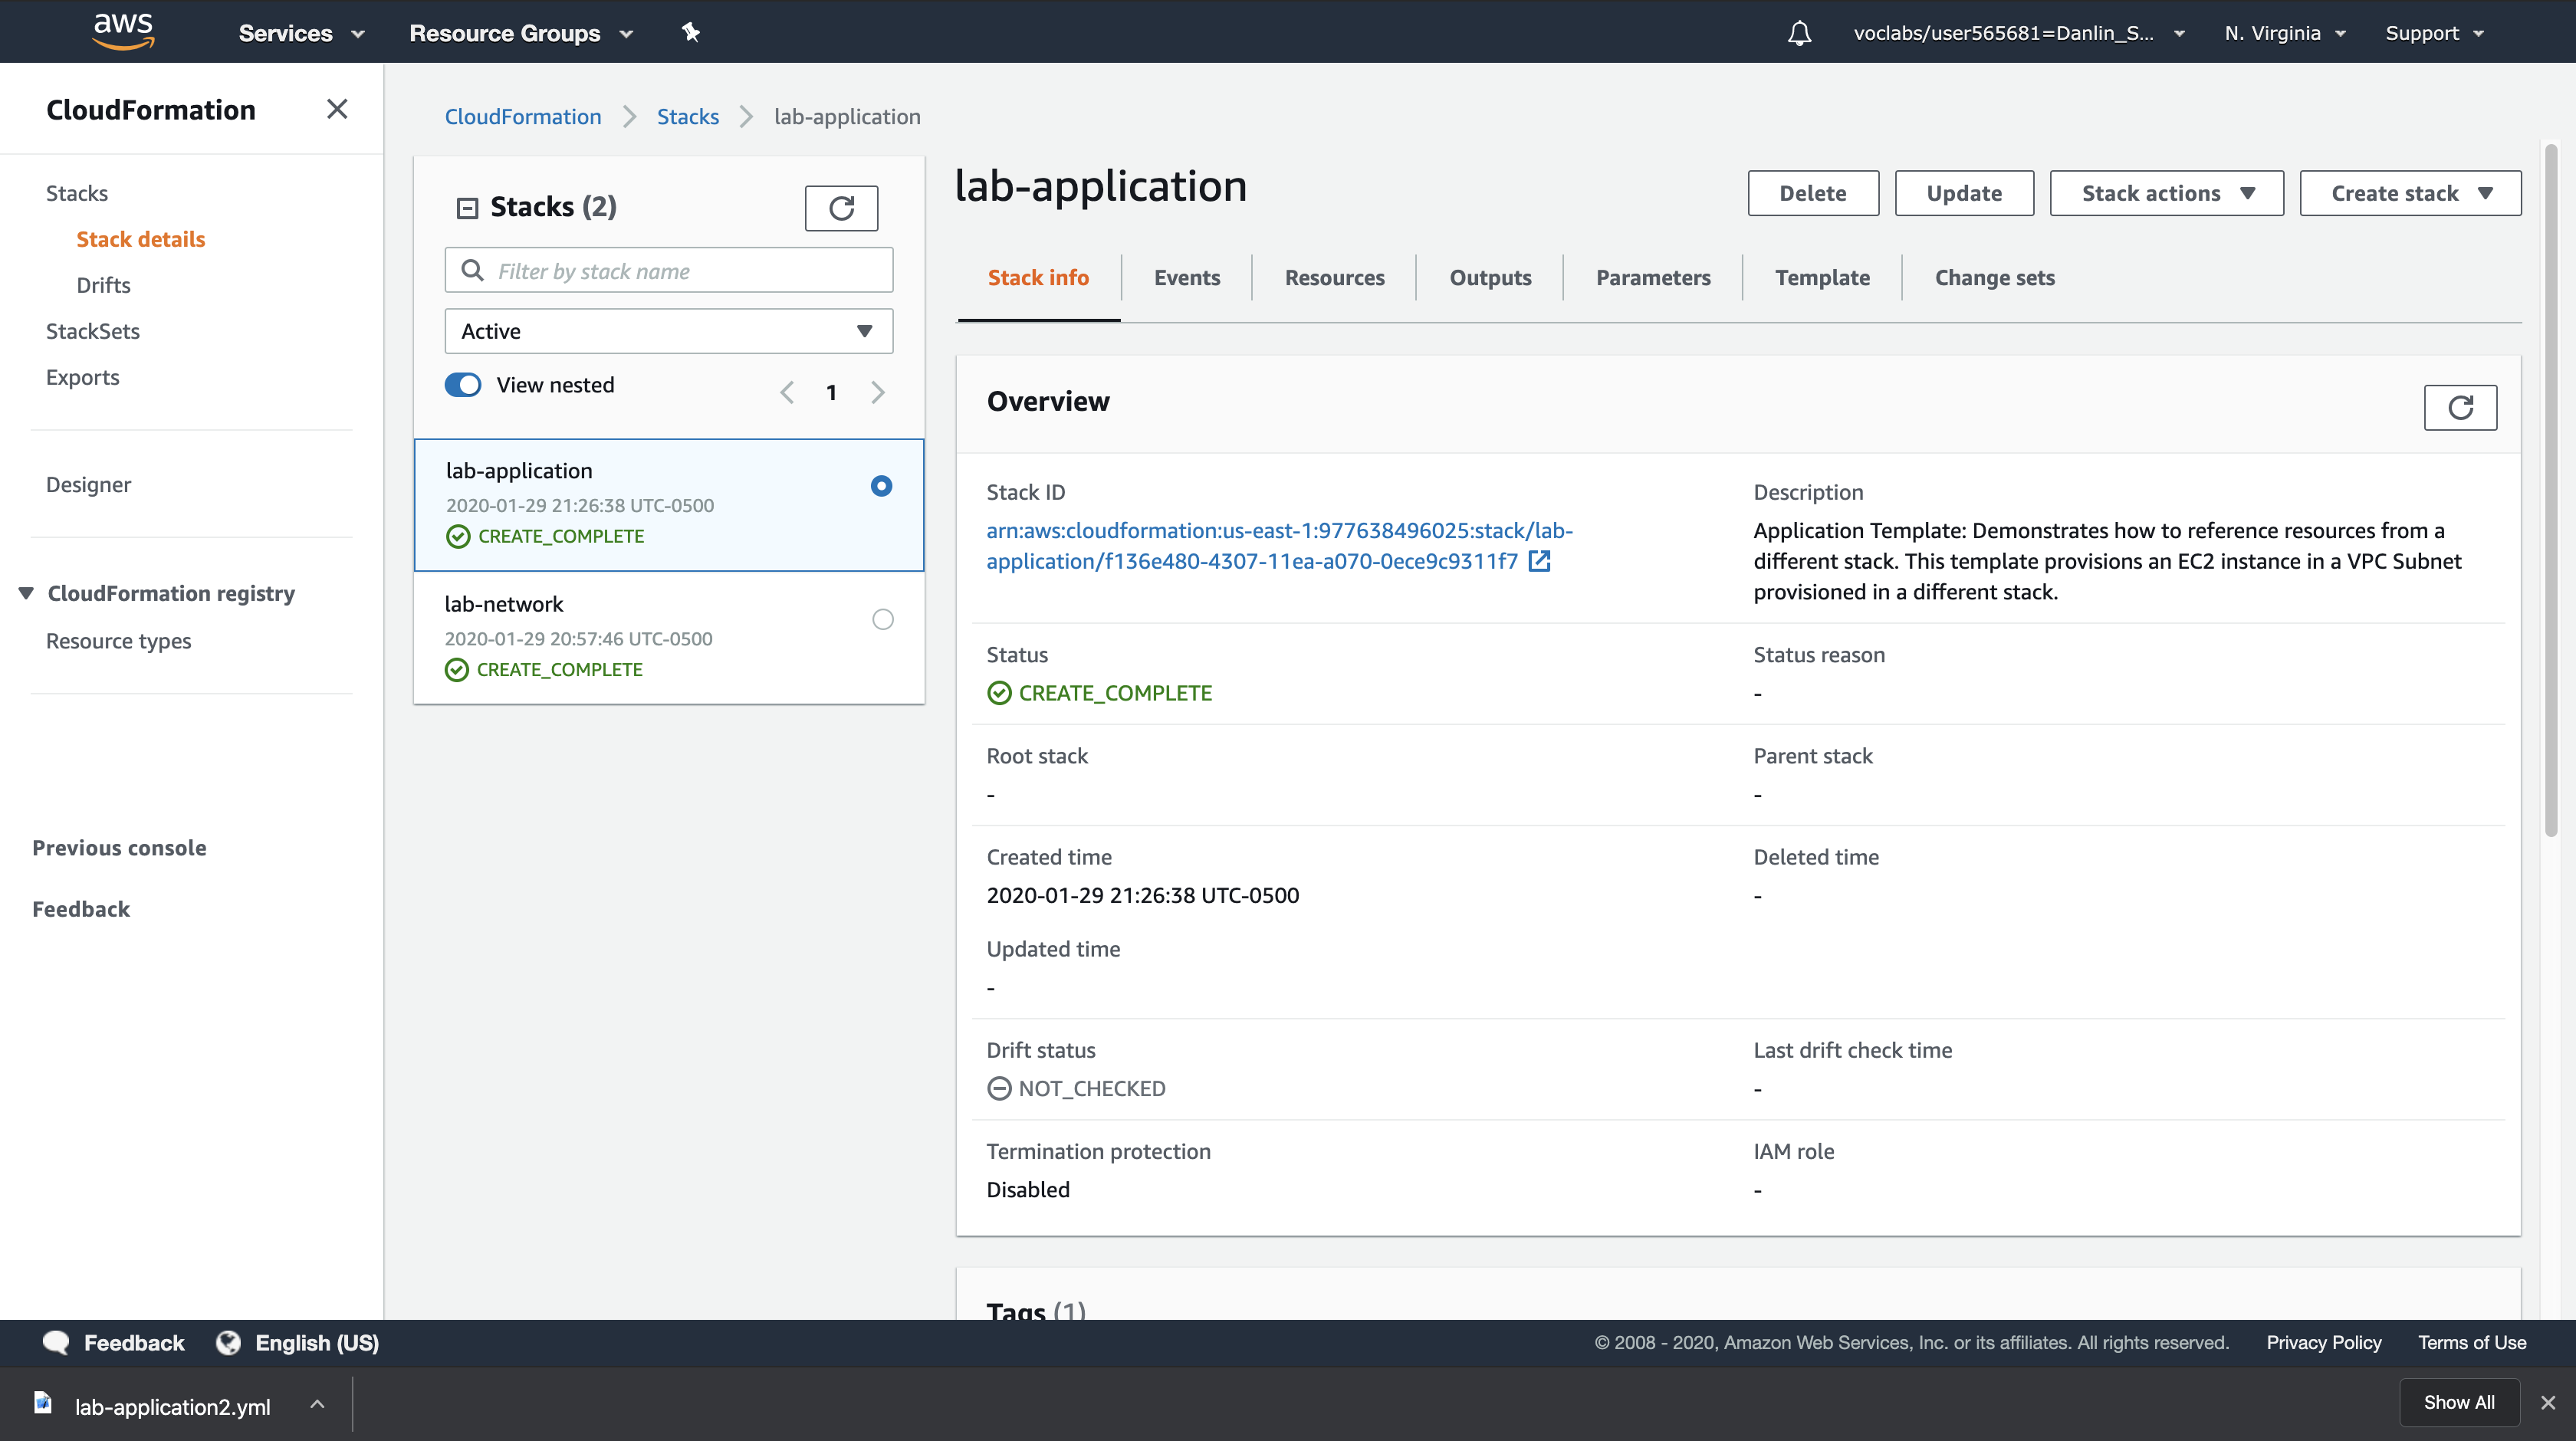
Click the Update button and configure:
- Click
Replace current template - Template source:
Upload a template file - Upload a template file: Click
Choose filethen select the lab-application2.yaml file you downloaded.
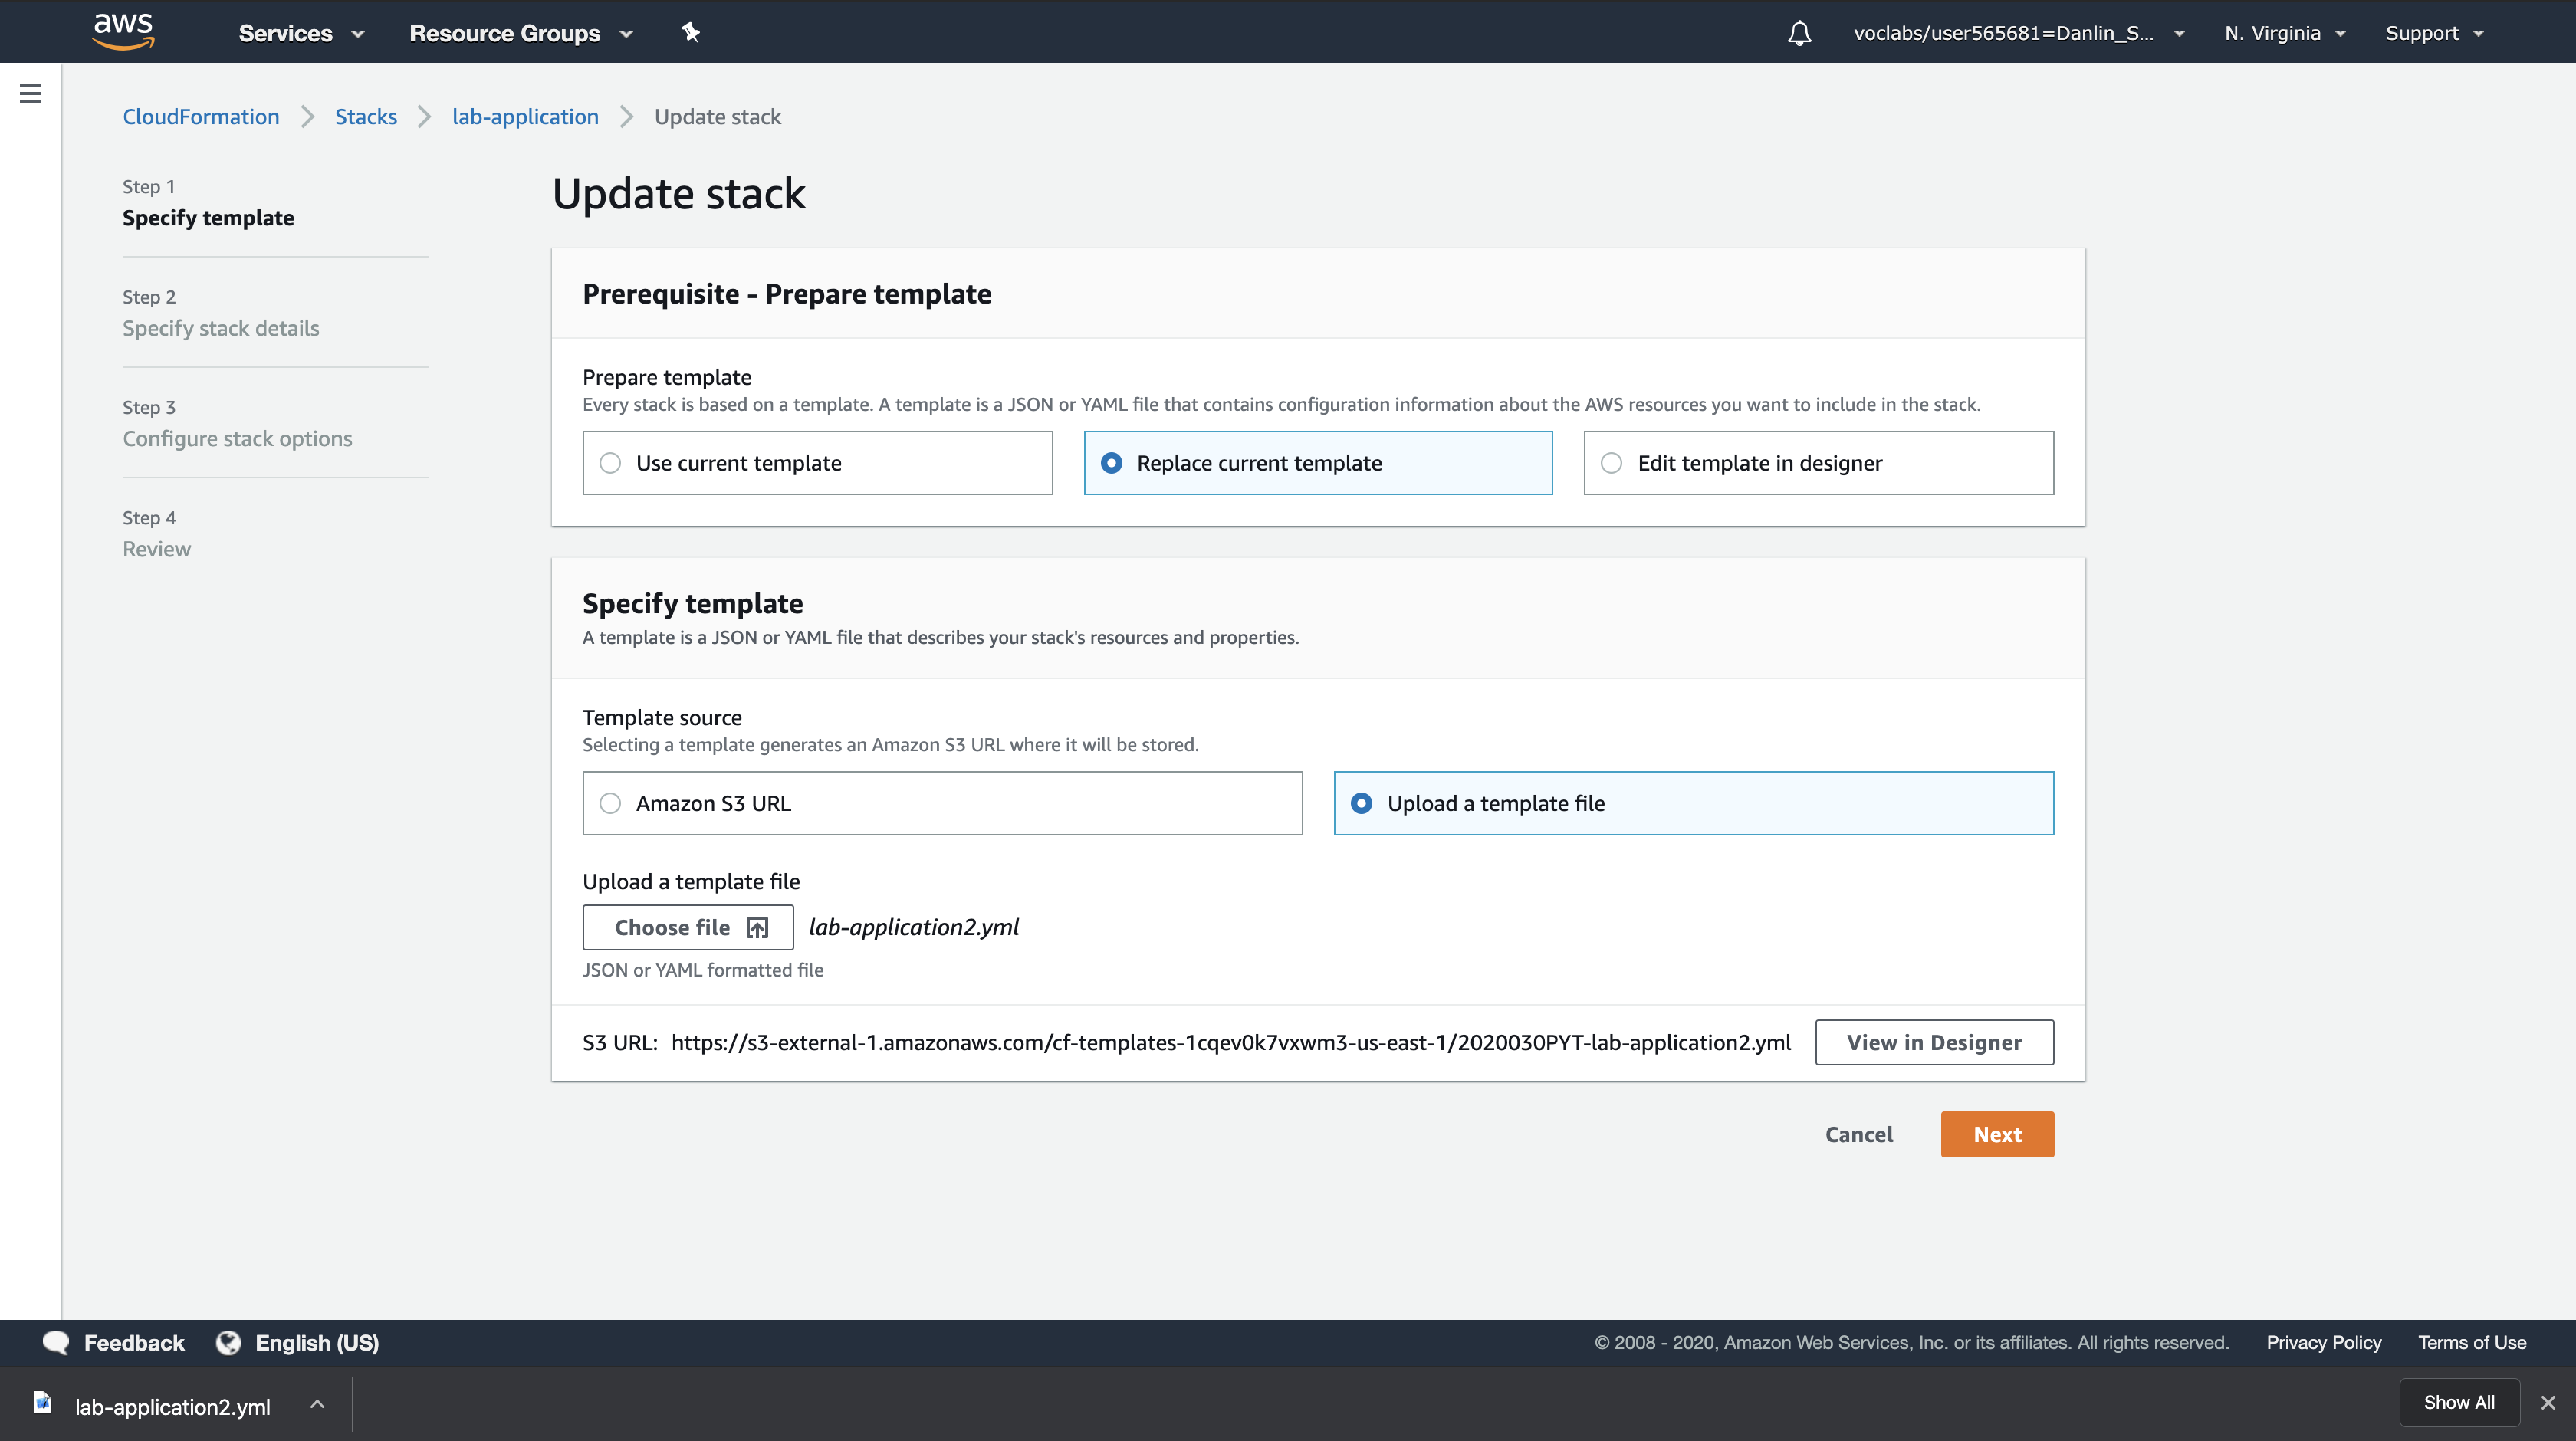
Click Next three times to advance to the Review page.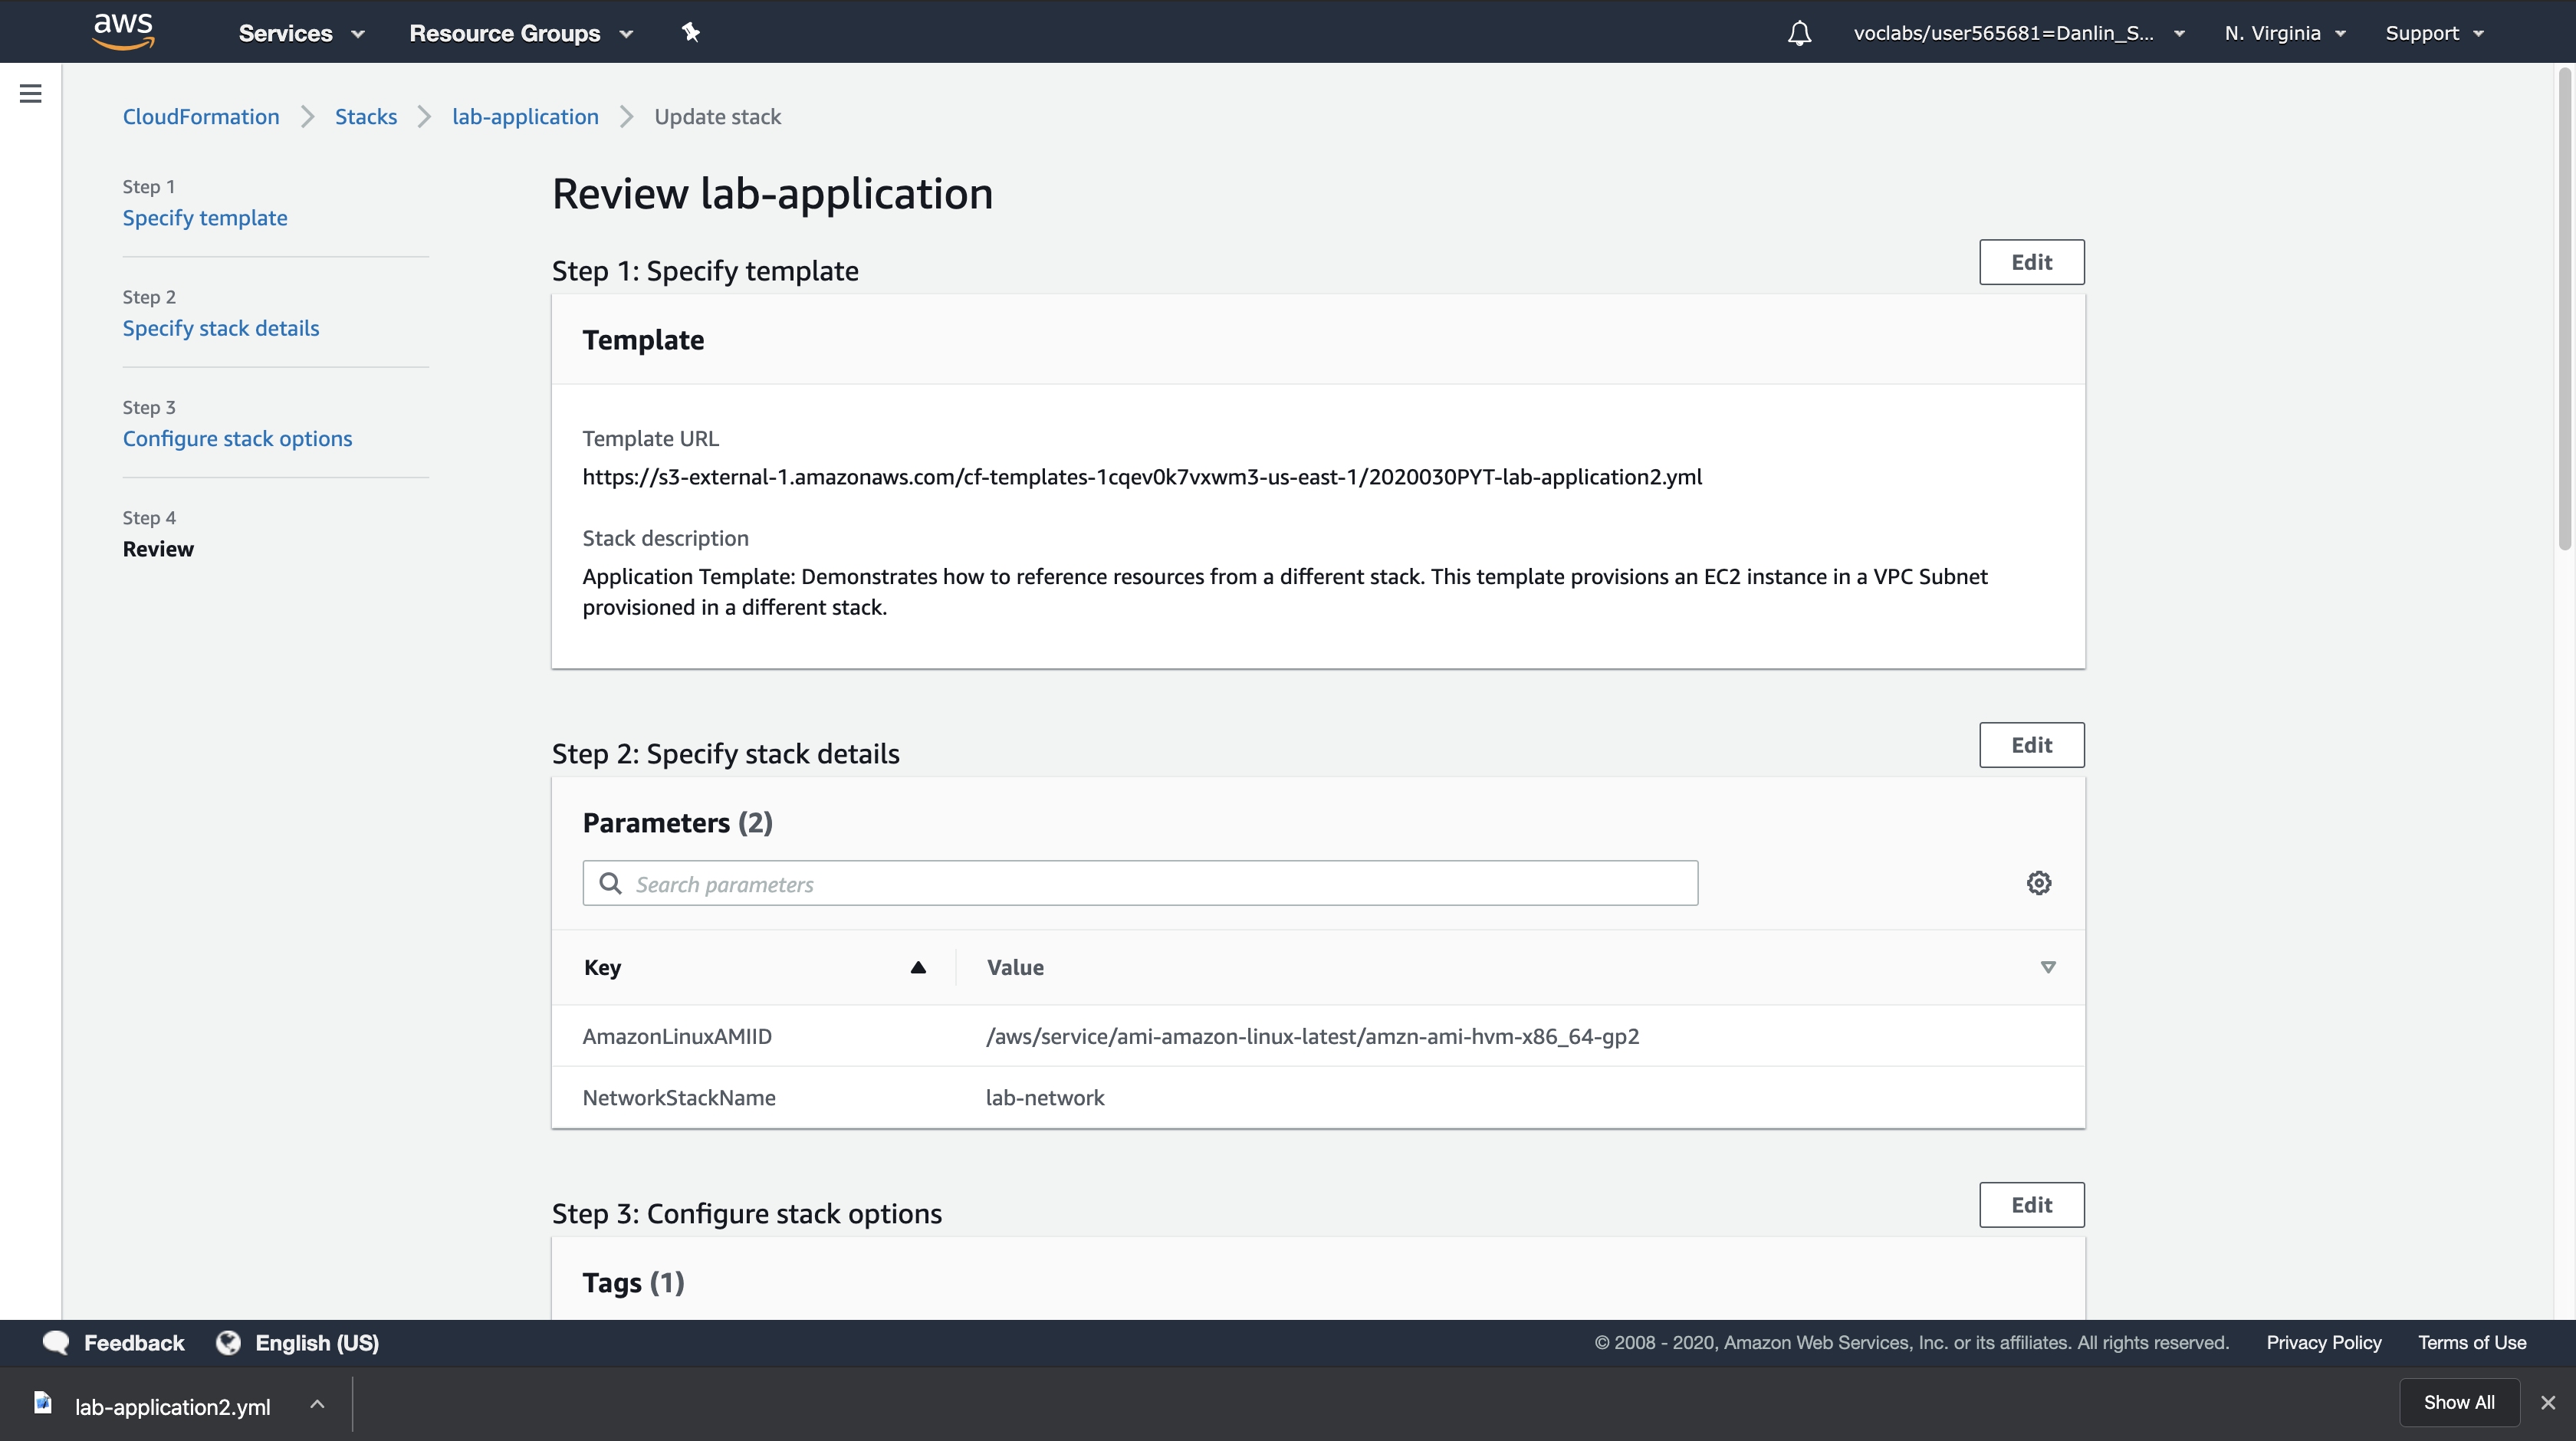
In the Change set preview section at the bottom of the page, CloudFormation will display what resources need to be updated: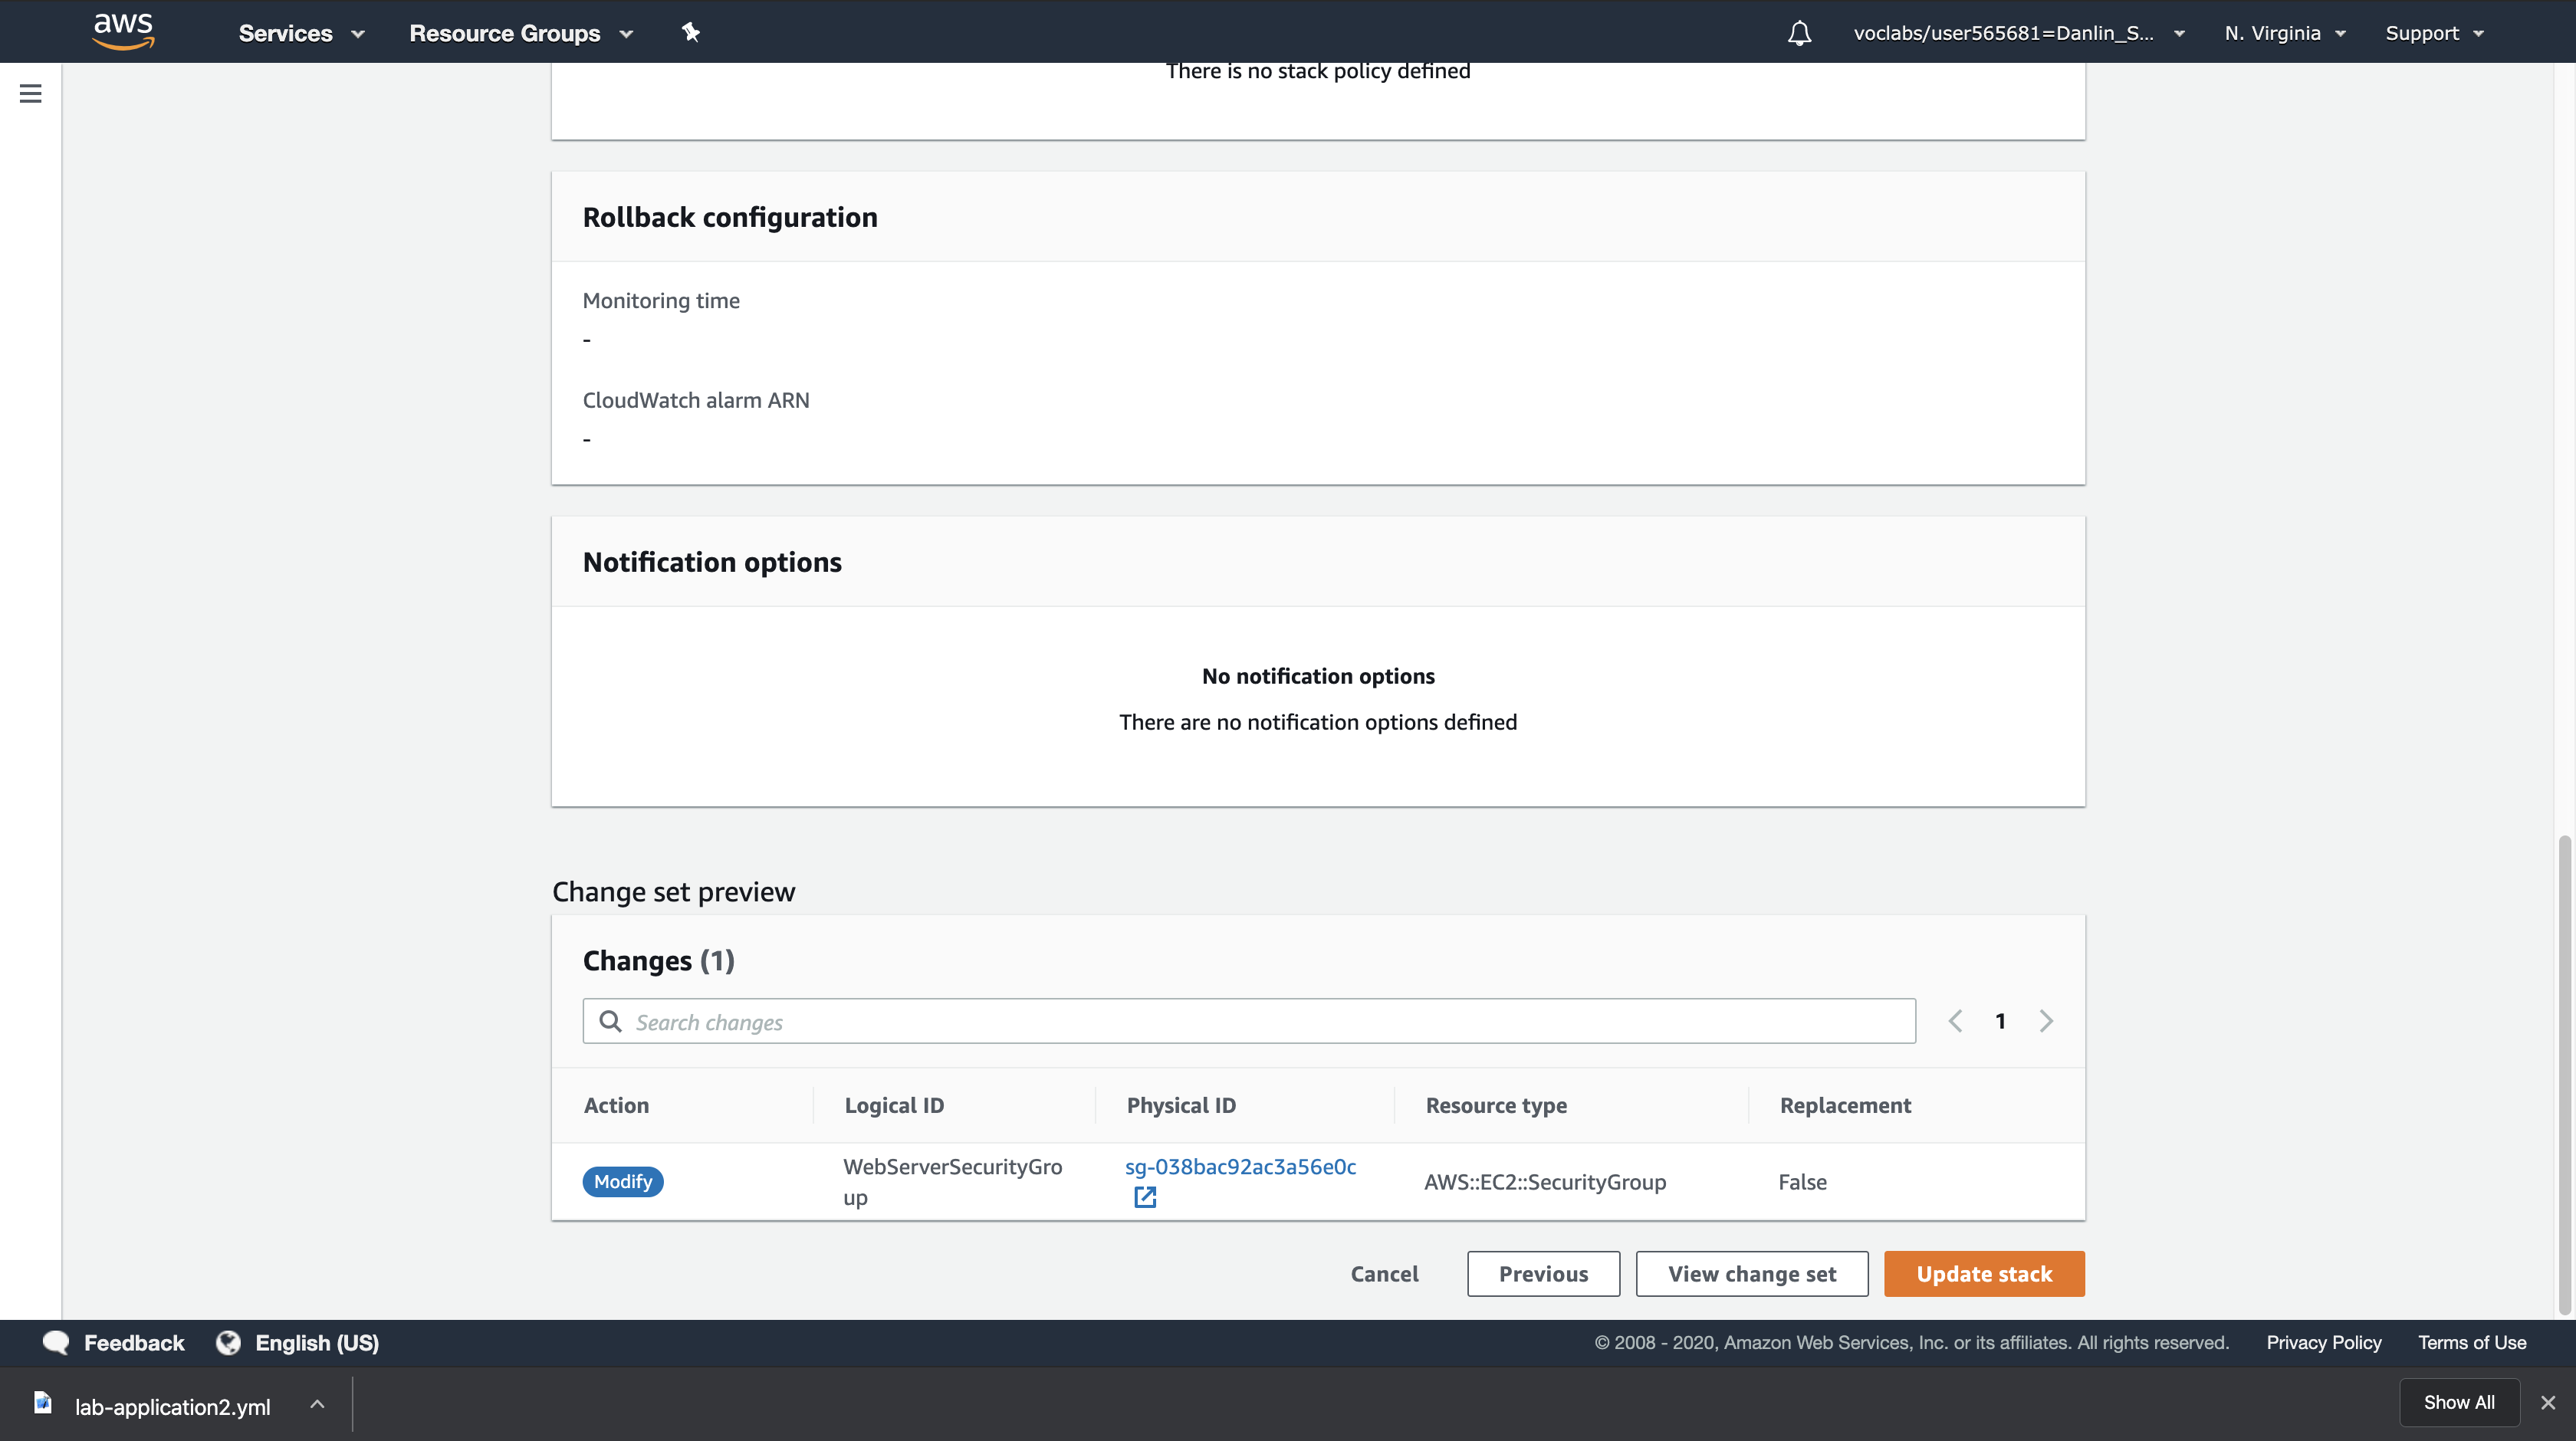
This is indicating that CloudFormation will Modify the Web Server security group without needing to replace it (Replacement = False). This means there will be a minor change to the Security Group and no references to the security group will need to change.
Click Update stack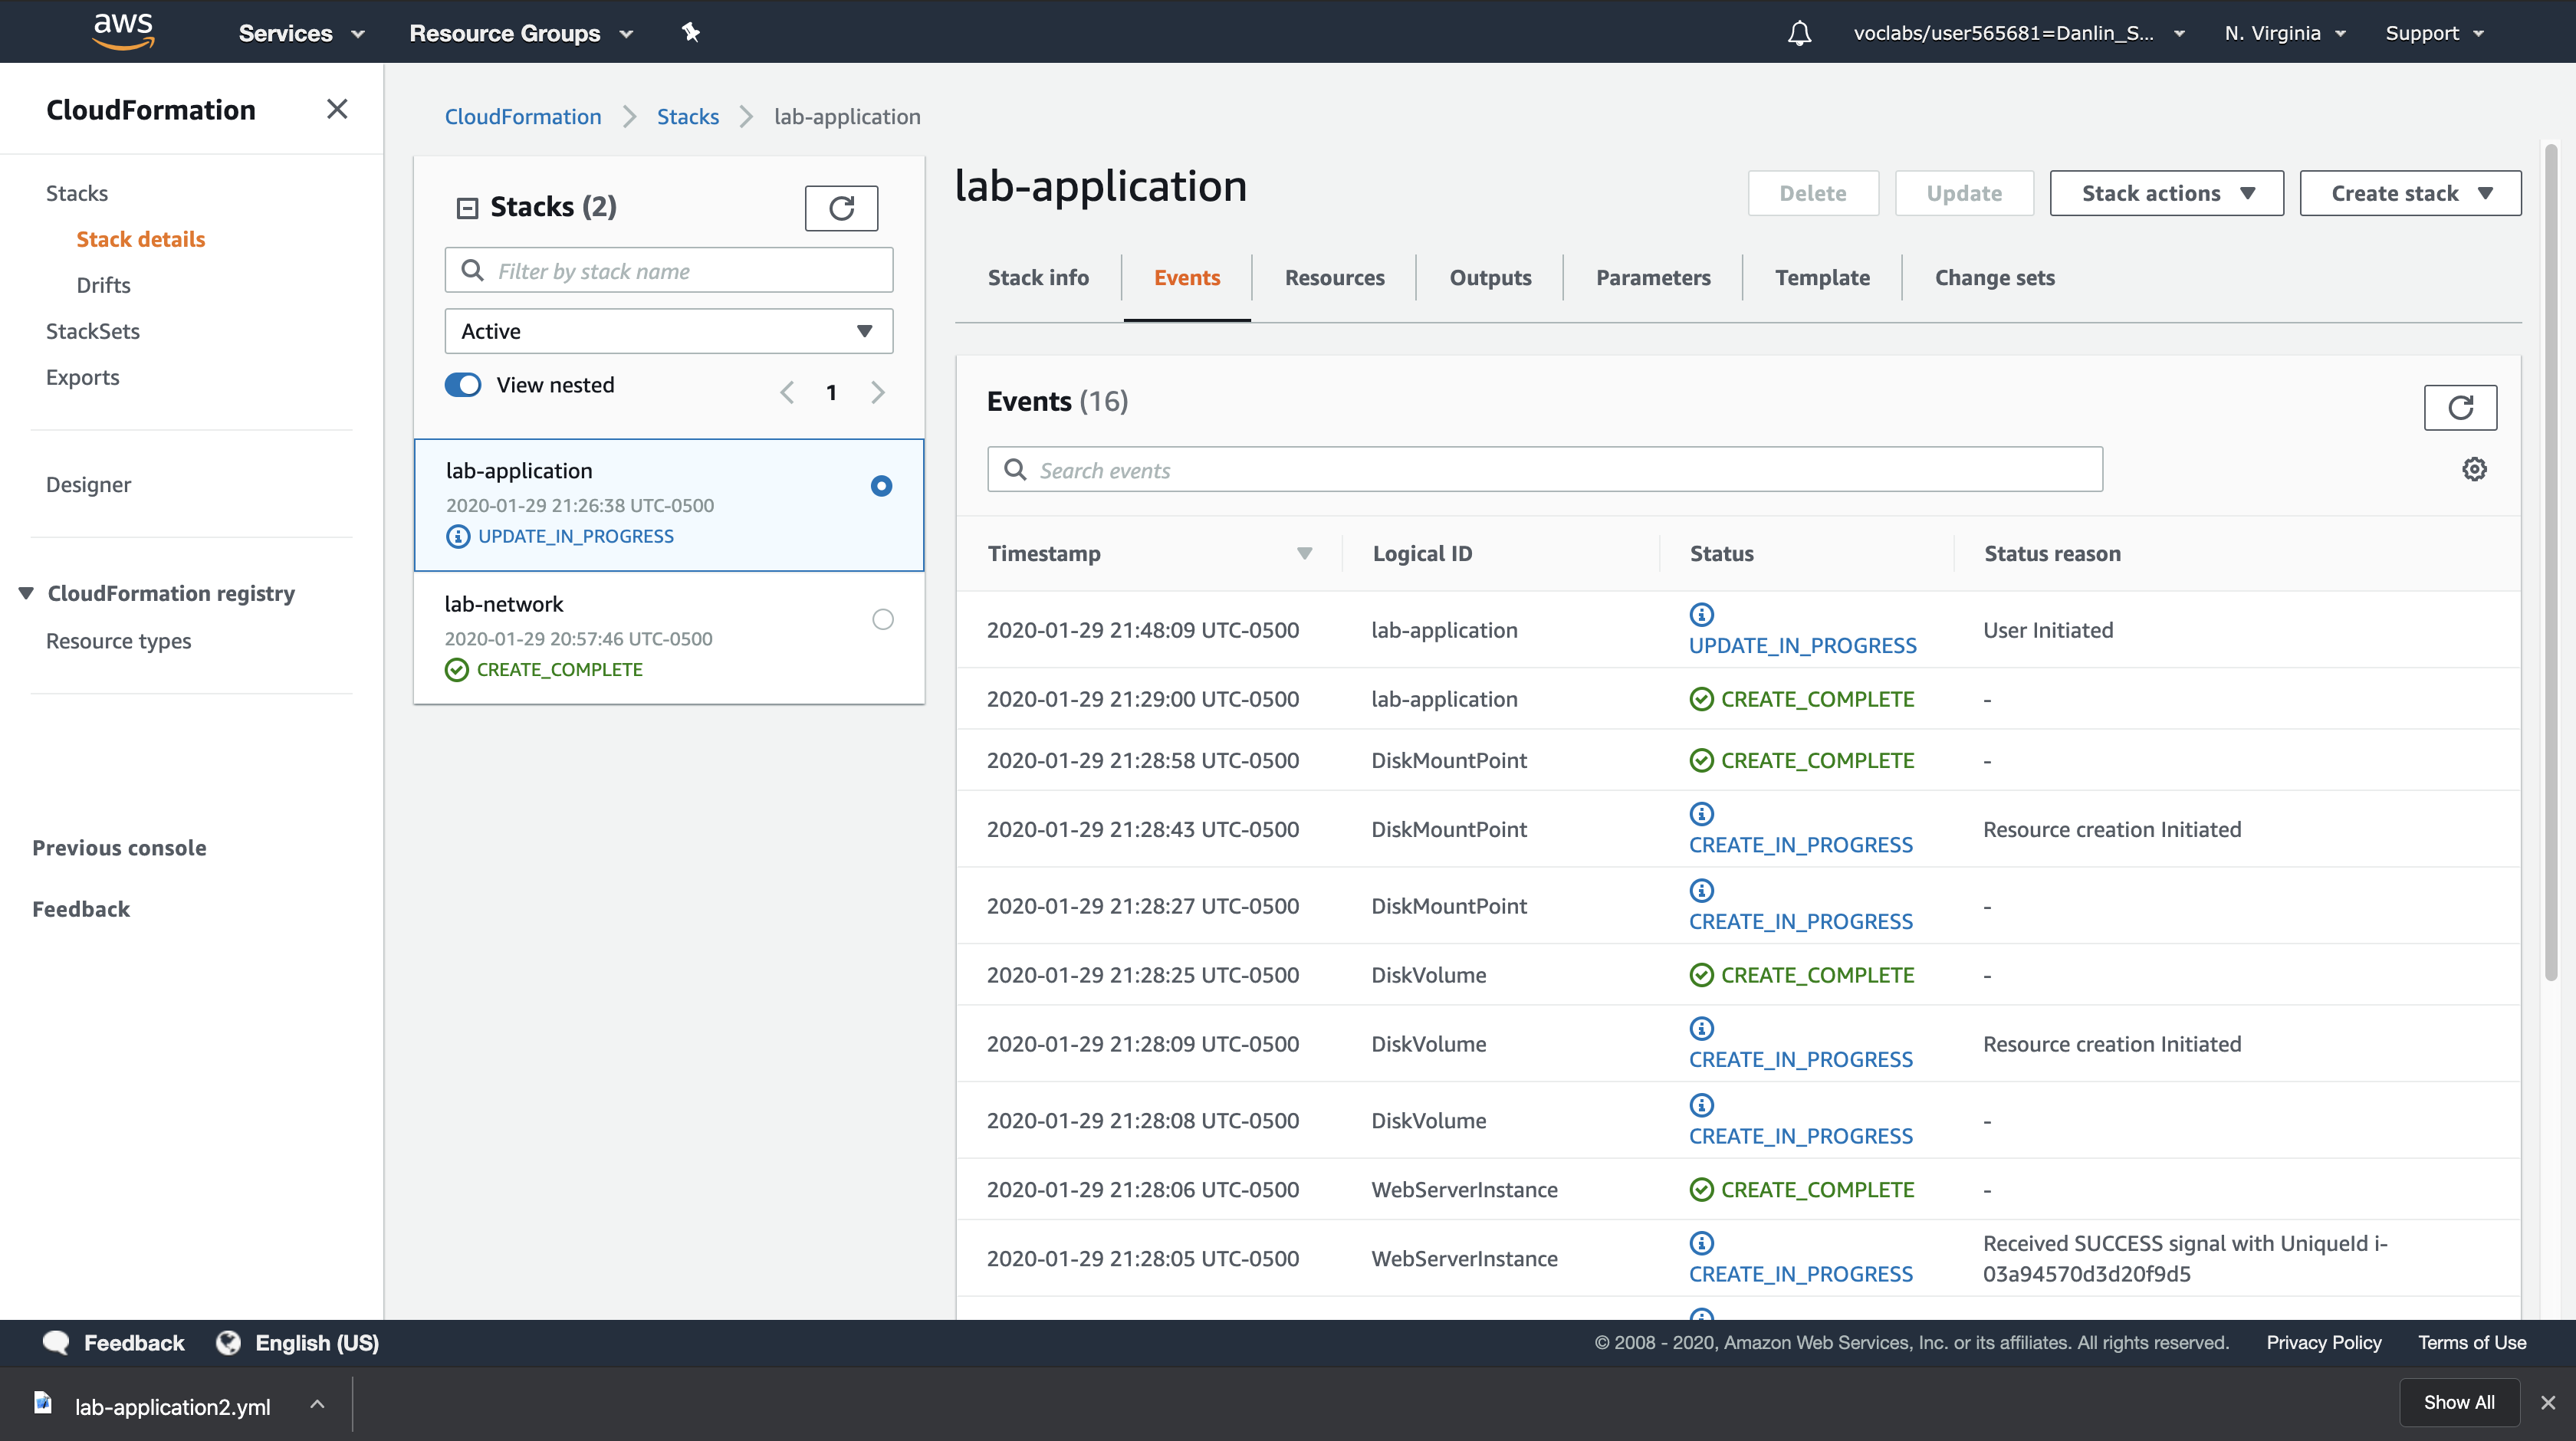
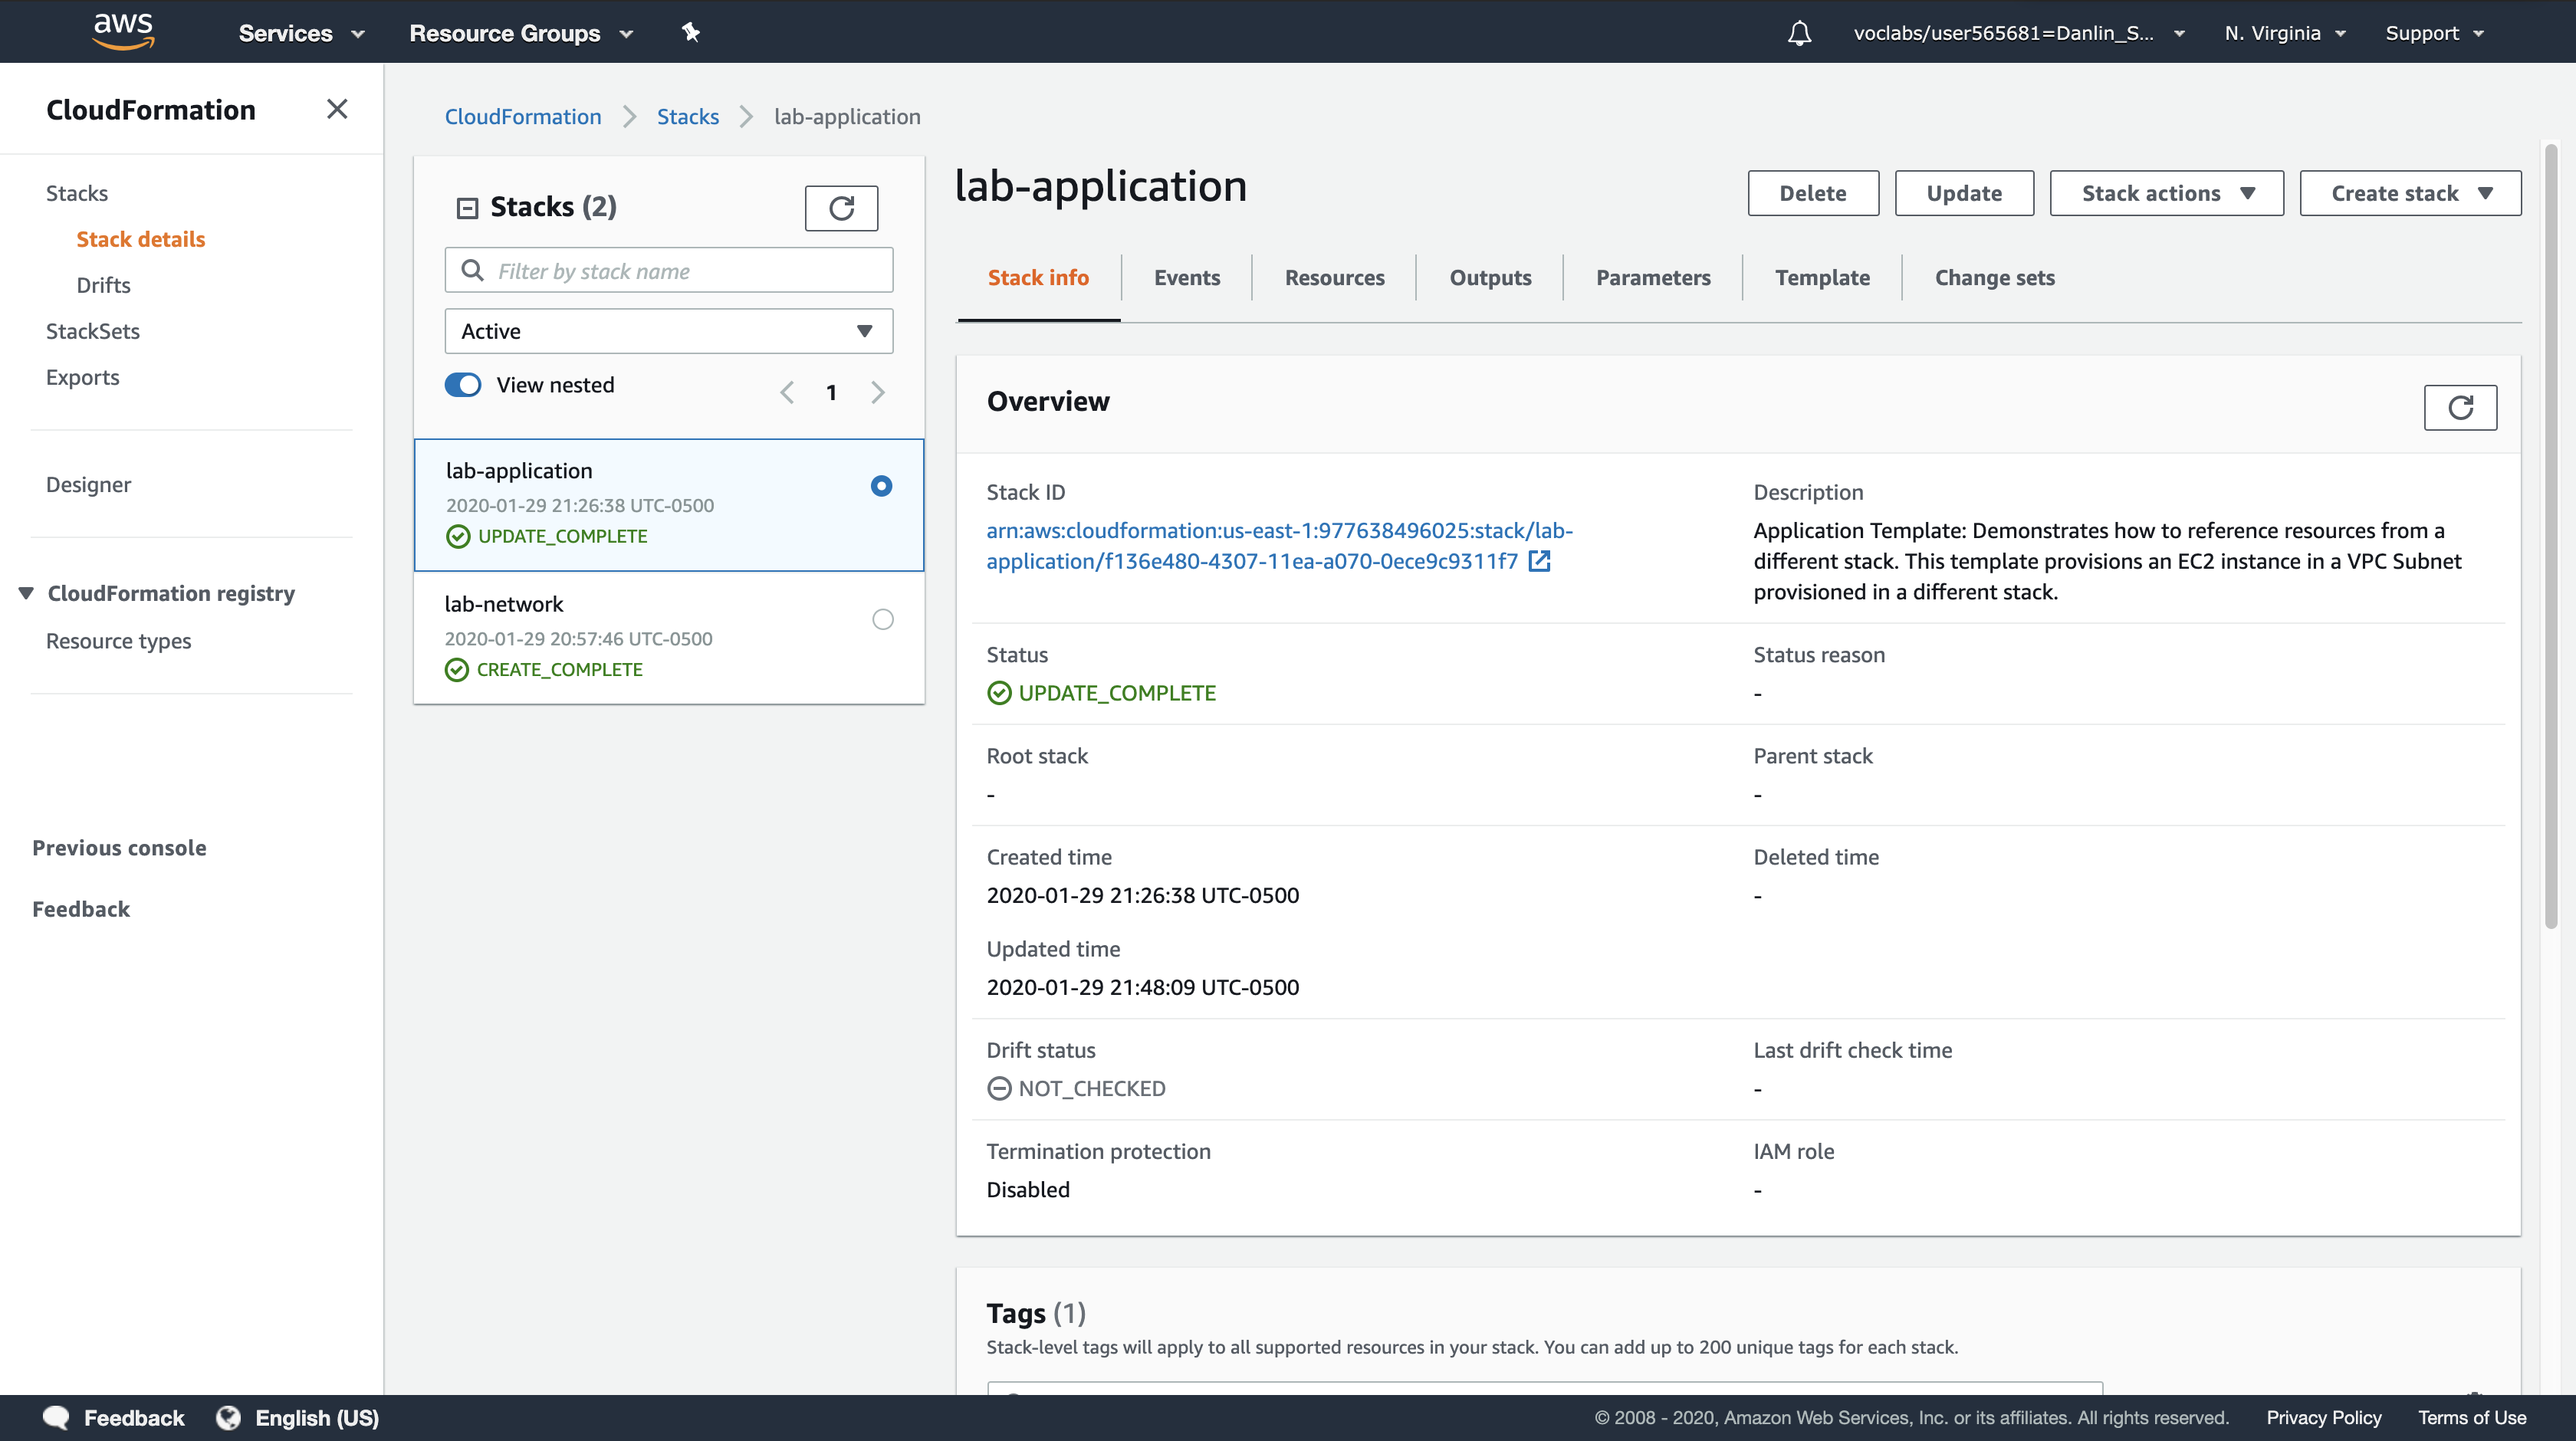
Wait for the Stack status (in the Stack info tab) to change to CREATE_COMPLETE.
- Click Refresh every 15 seconds to update the status if necessary.
- You can now verify the change.
Return to the EC2 console and select the Web Server security group.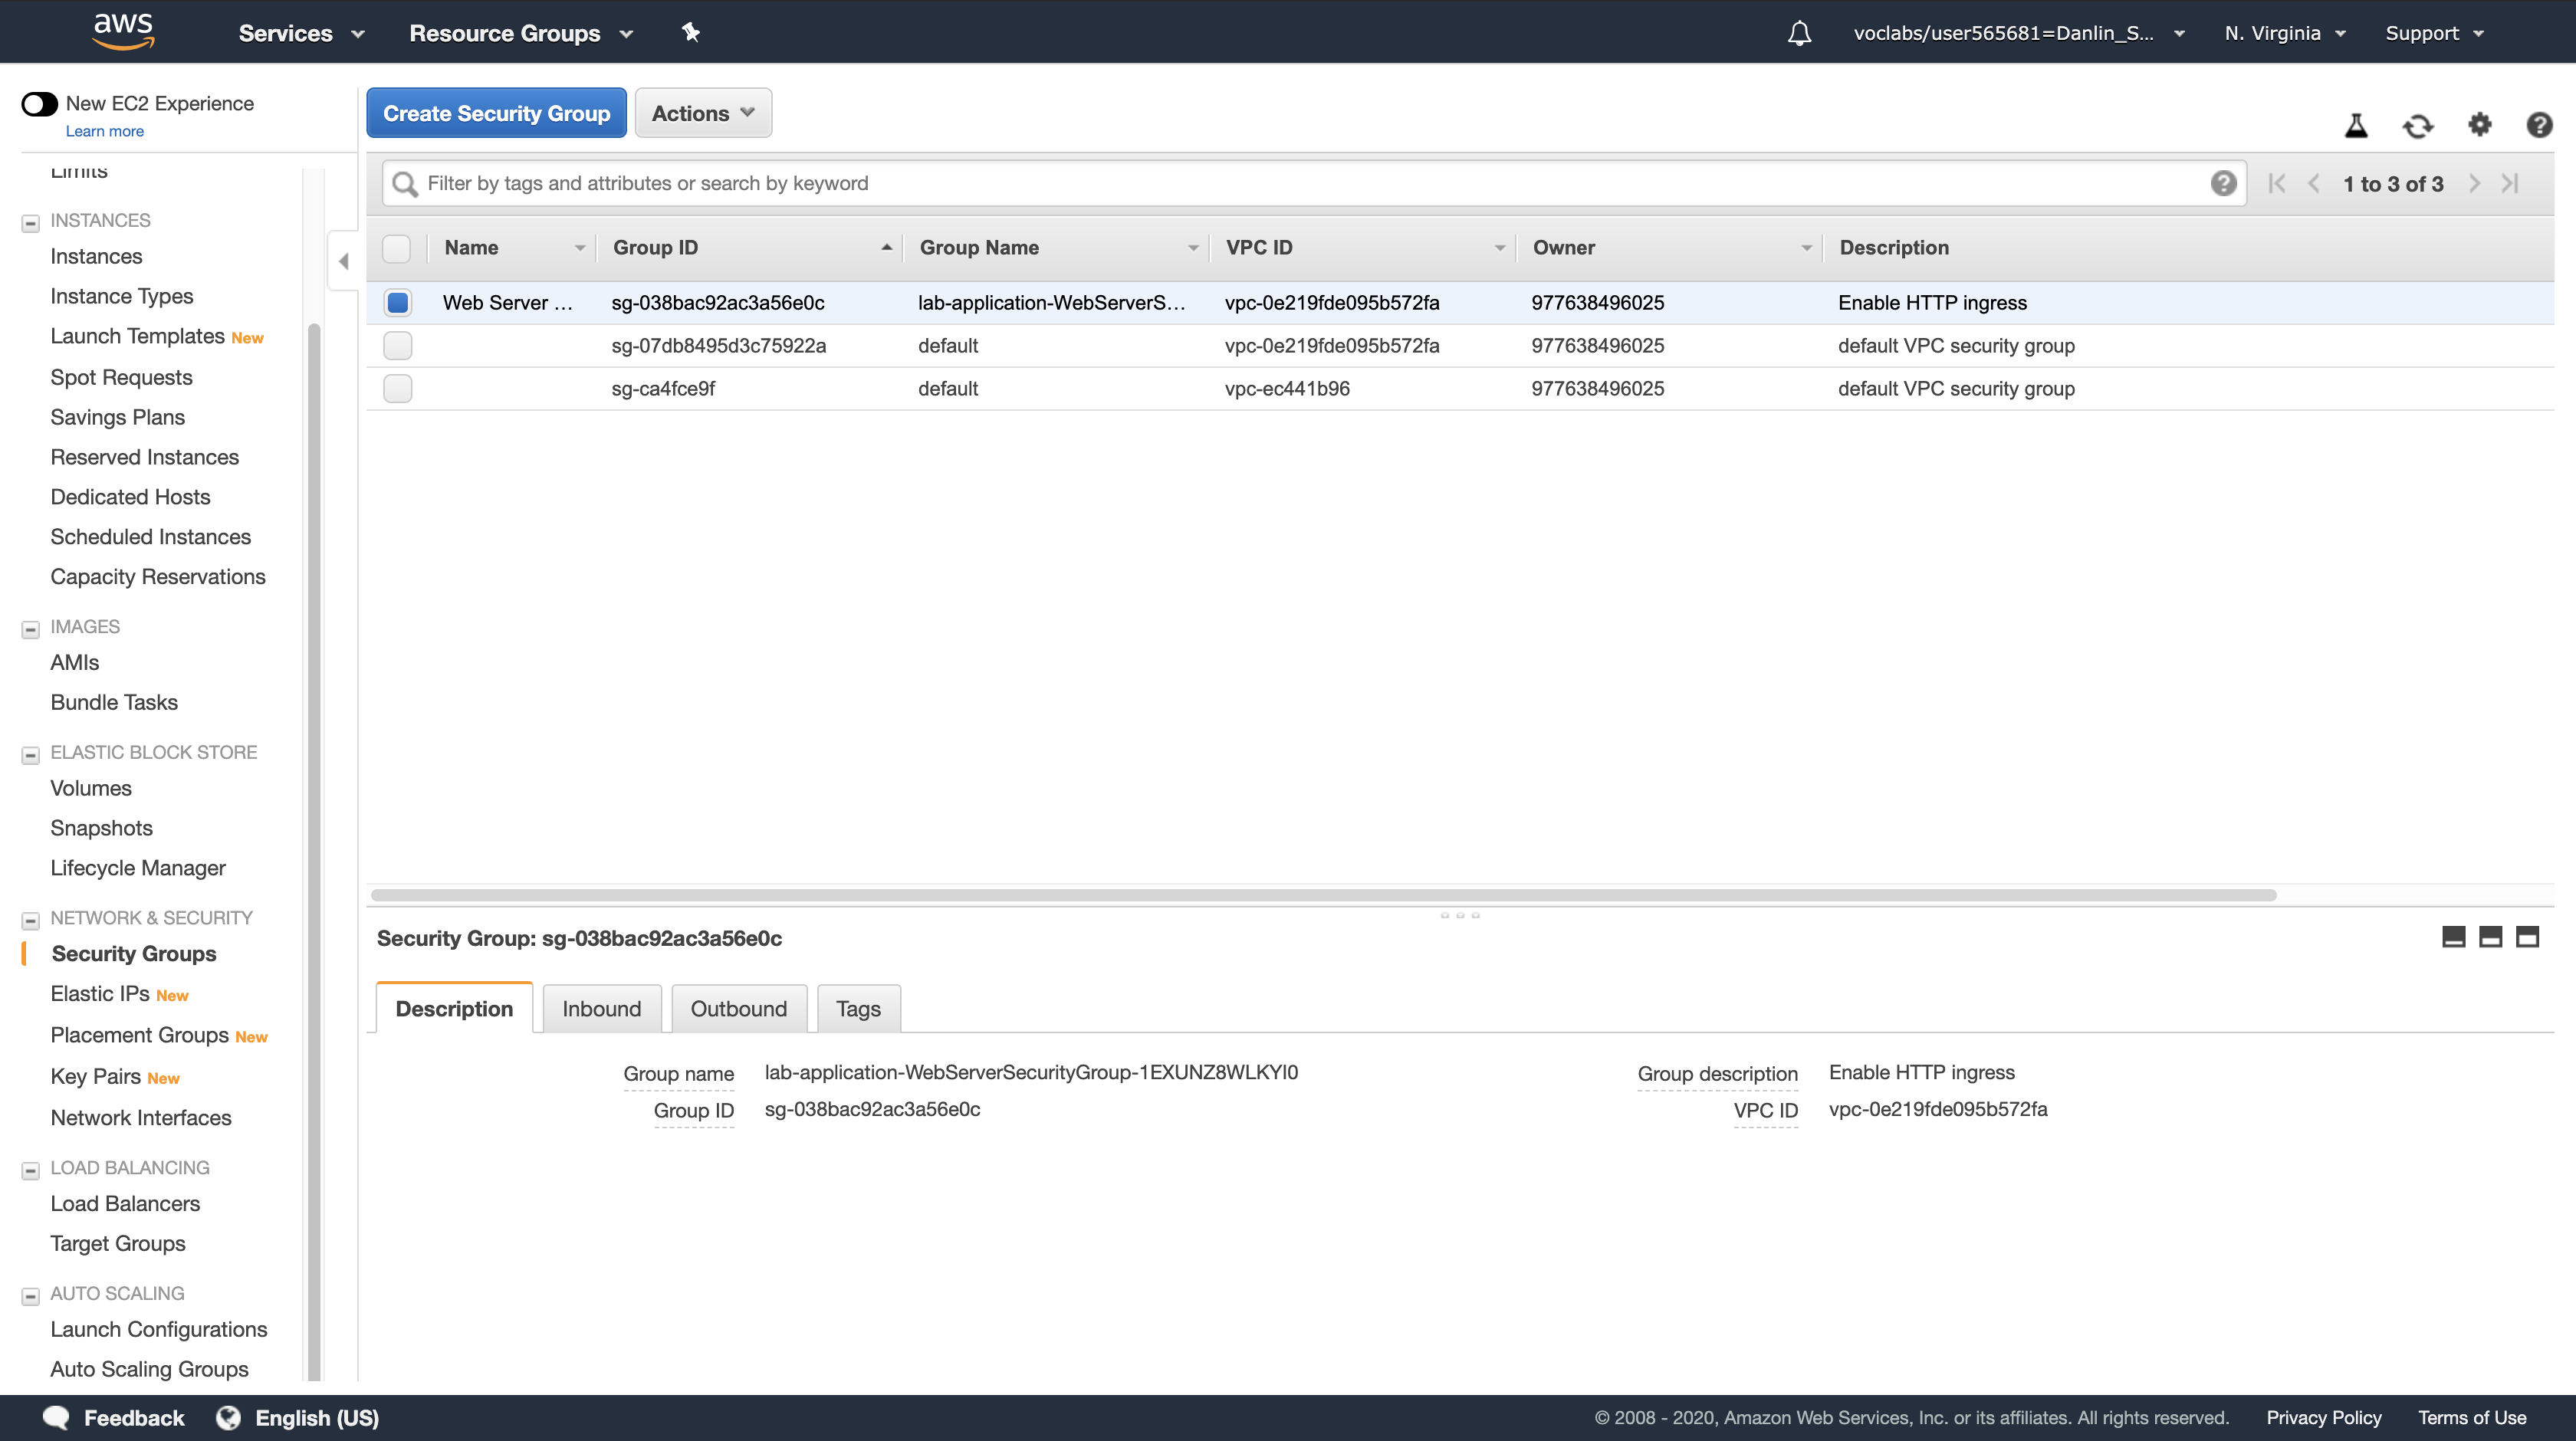
The Inbound tab should display an additional rule for SSH traffic.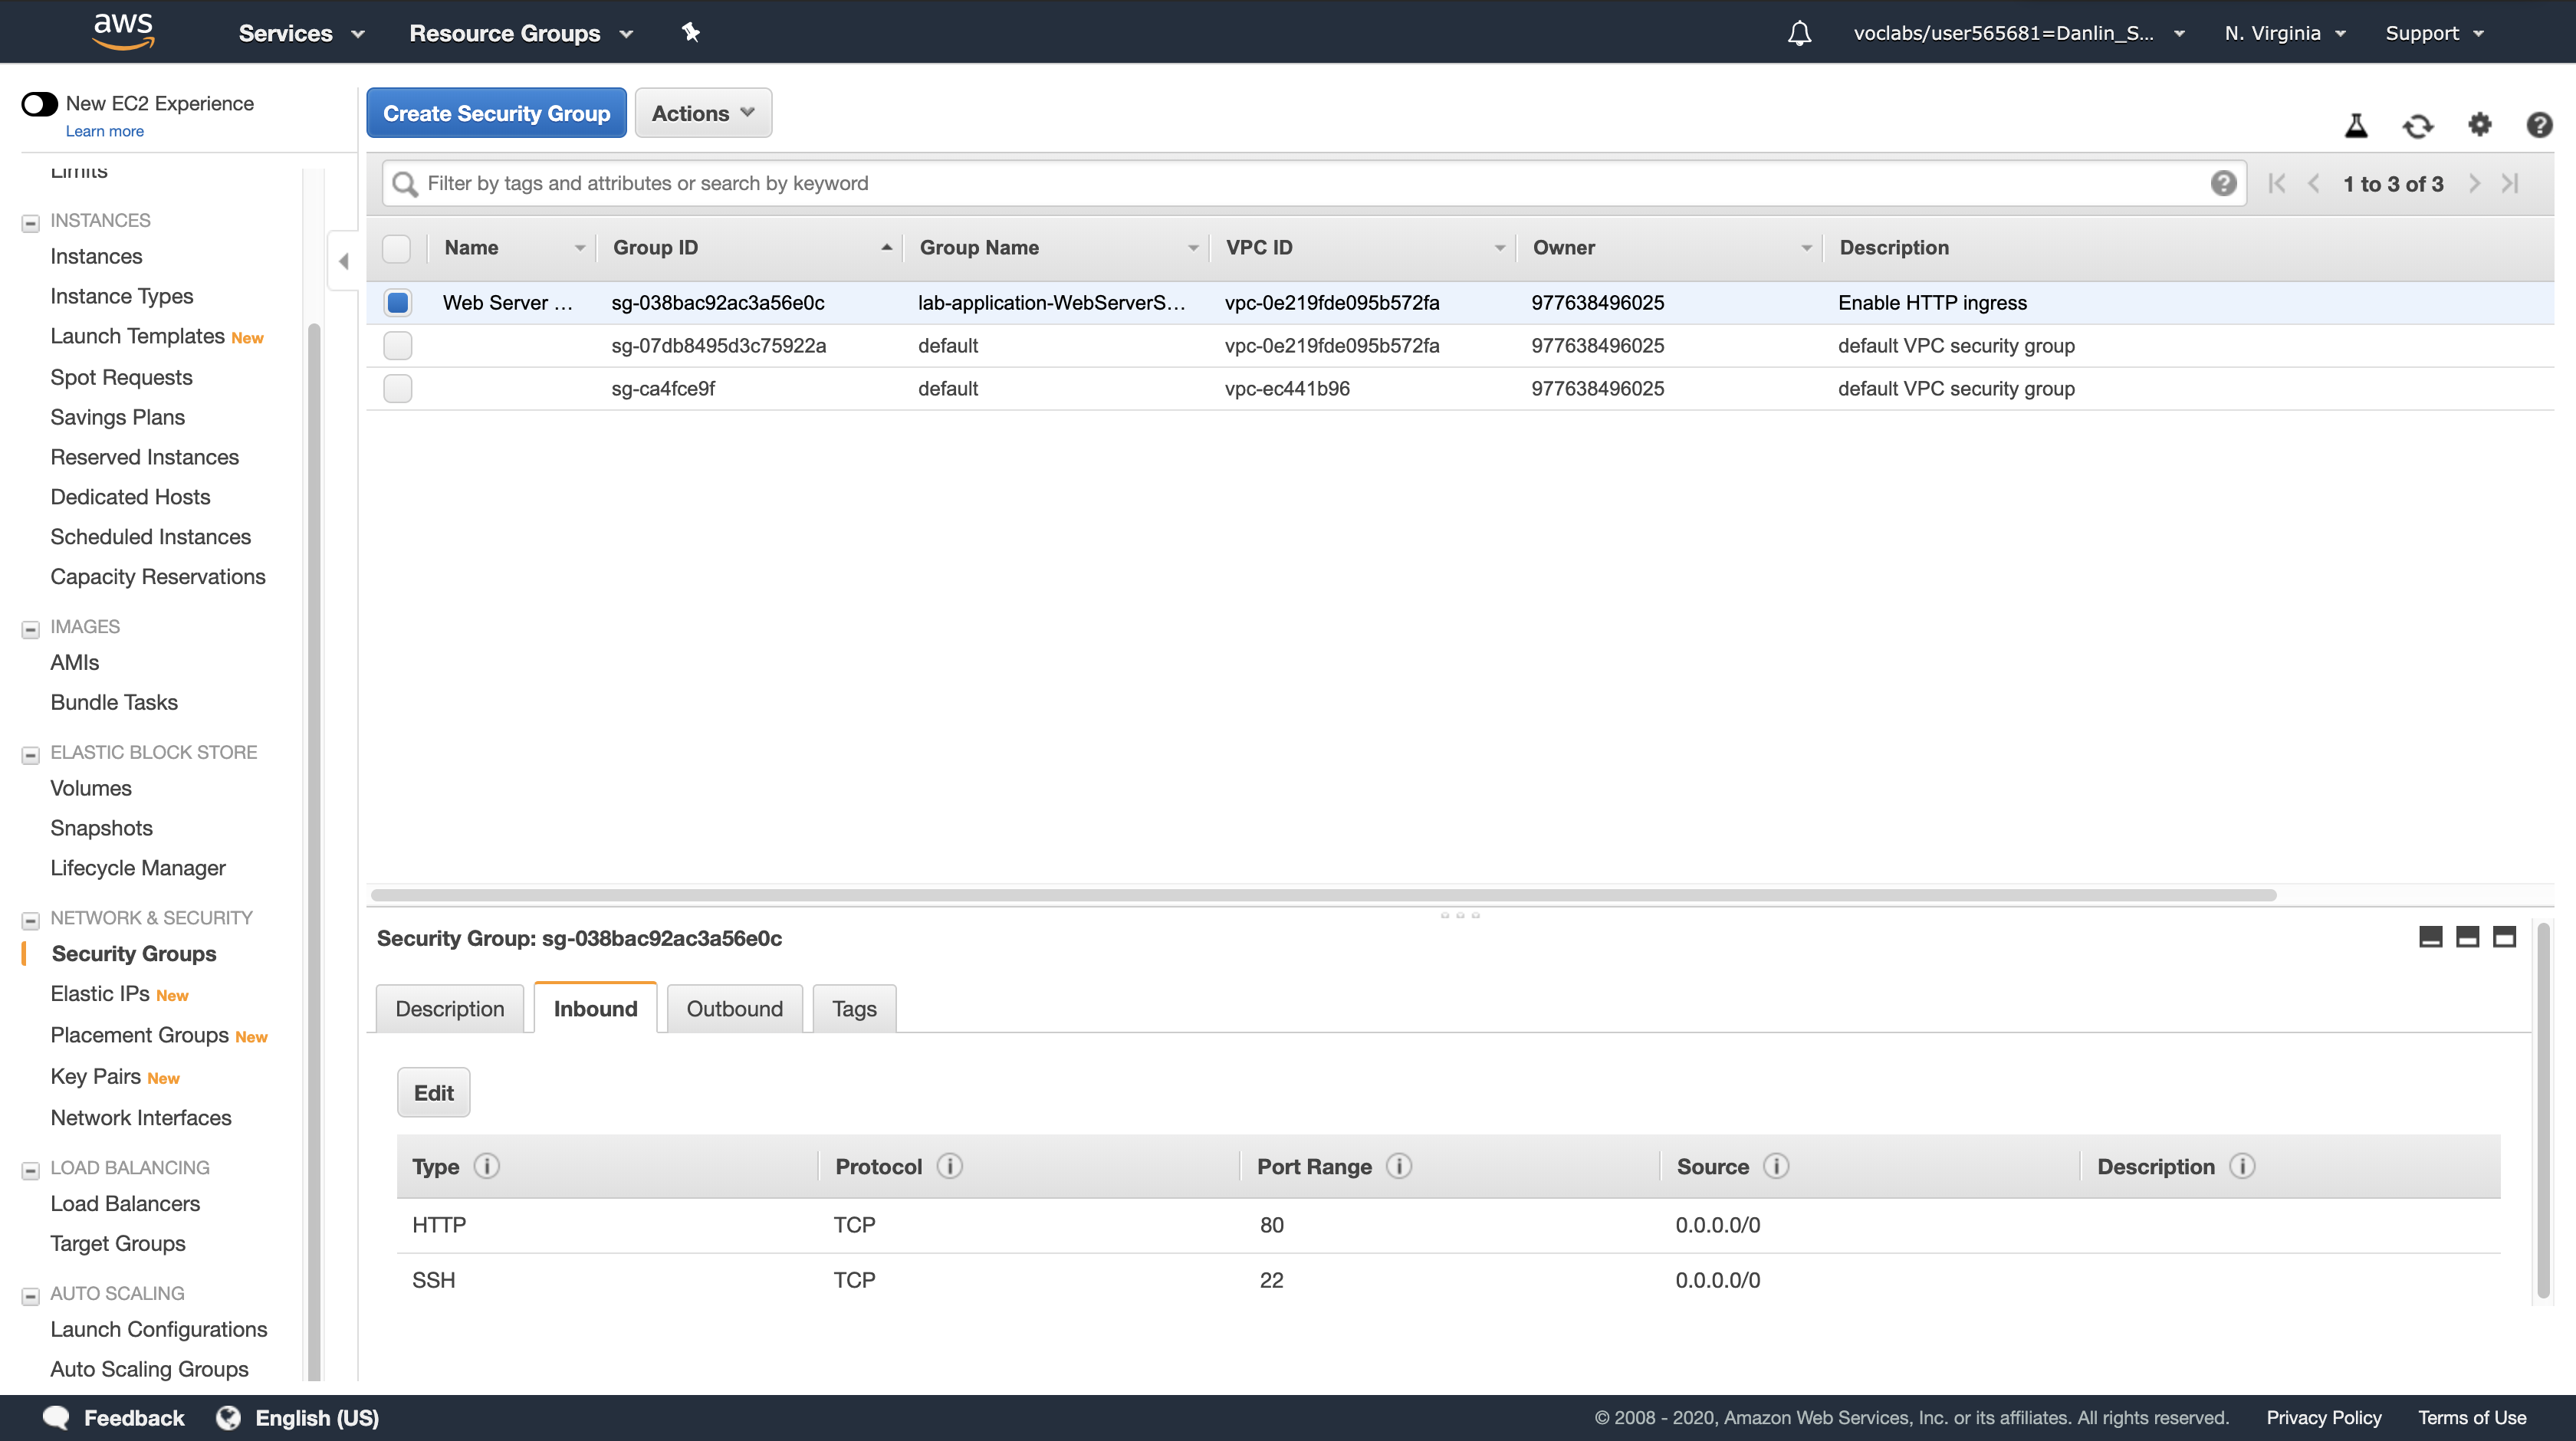
This demonstrates how changes can be deployed in a repeatable, documented process. The CloudFormation template can be stored in a Source Code Repository (e.g., AWS CodeCommit) to maintain a history of the template and the infrastructure that has been deployed.
Task 4: Explore Templates with AWS CloudFormation Designer
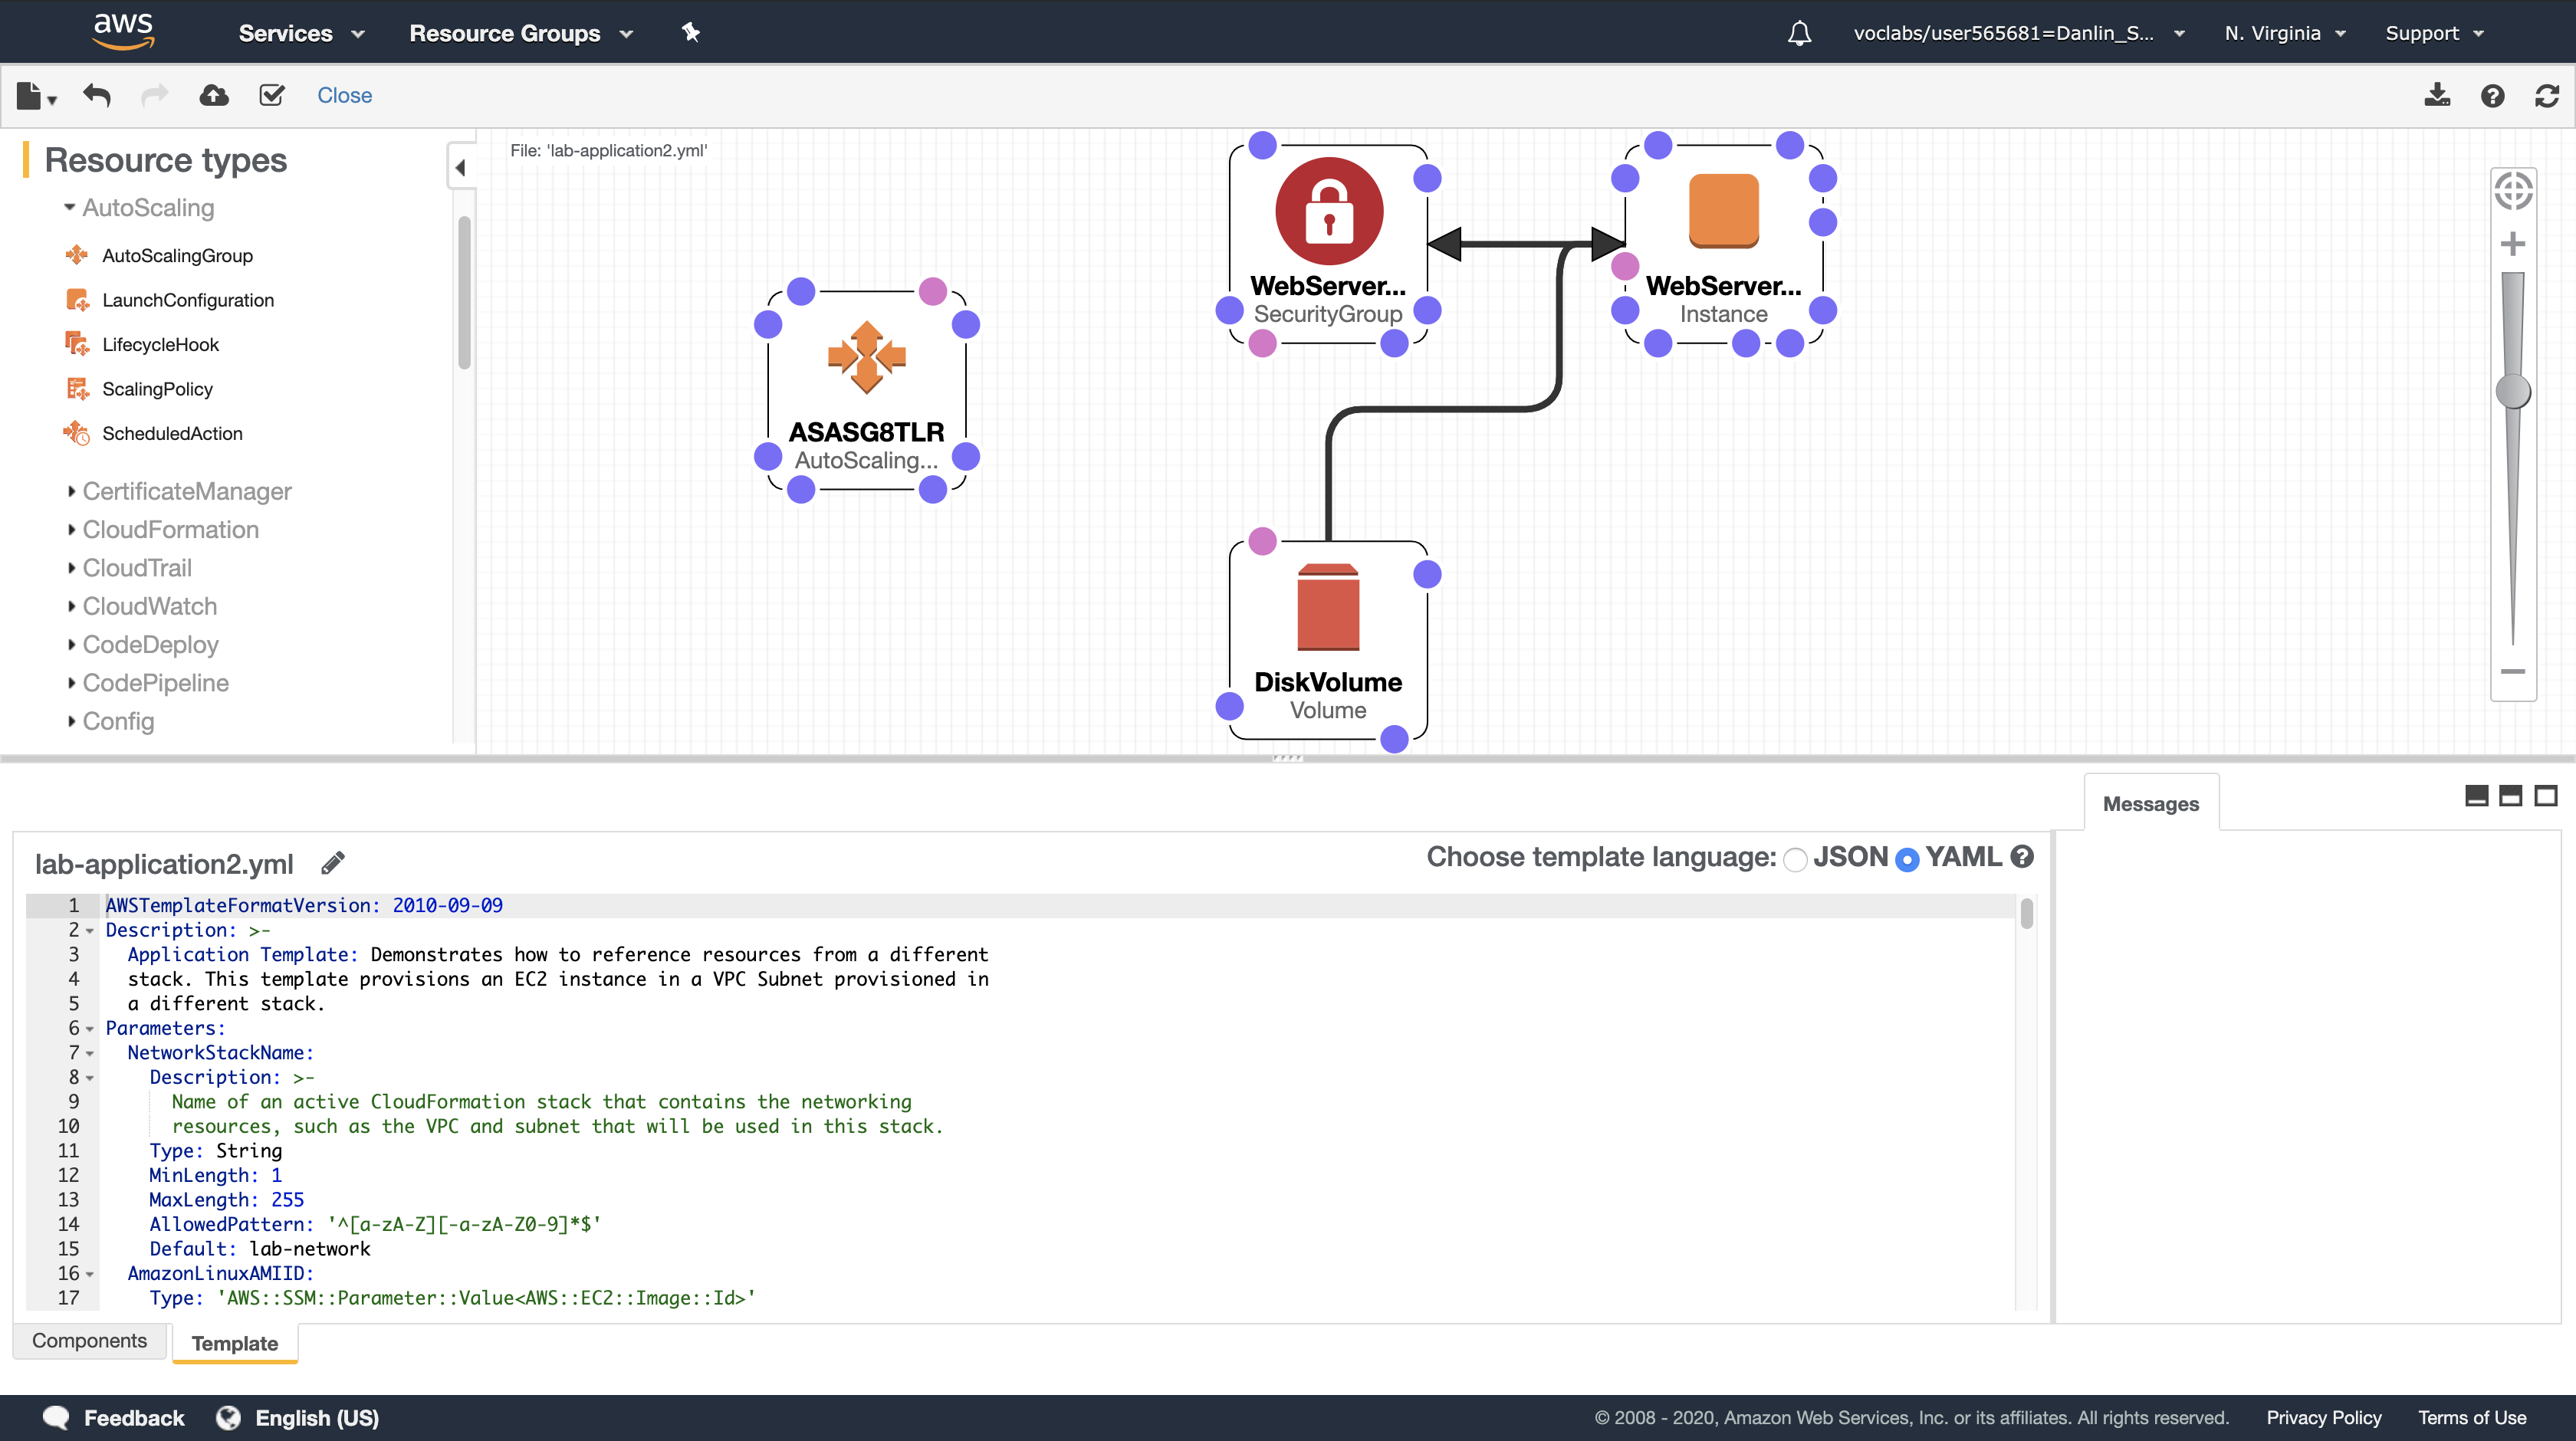
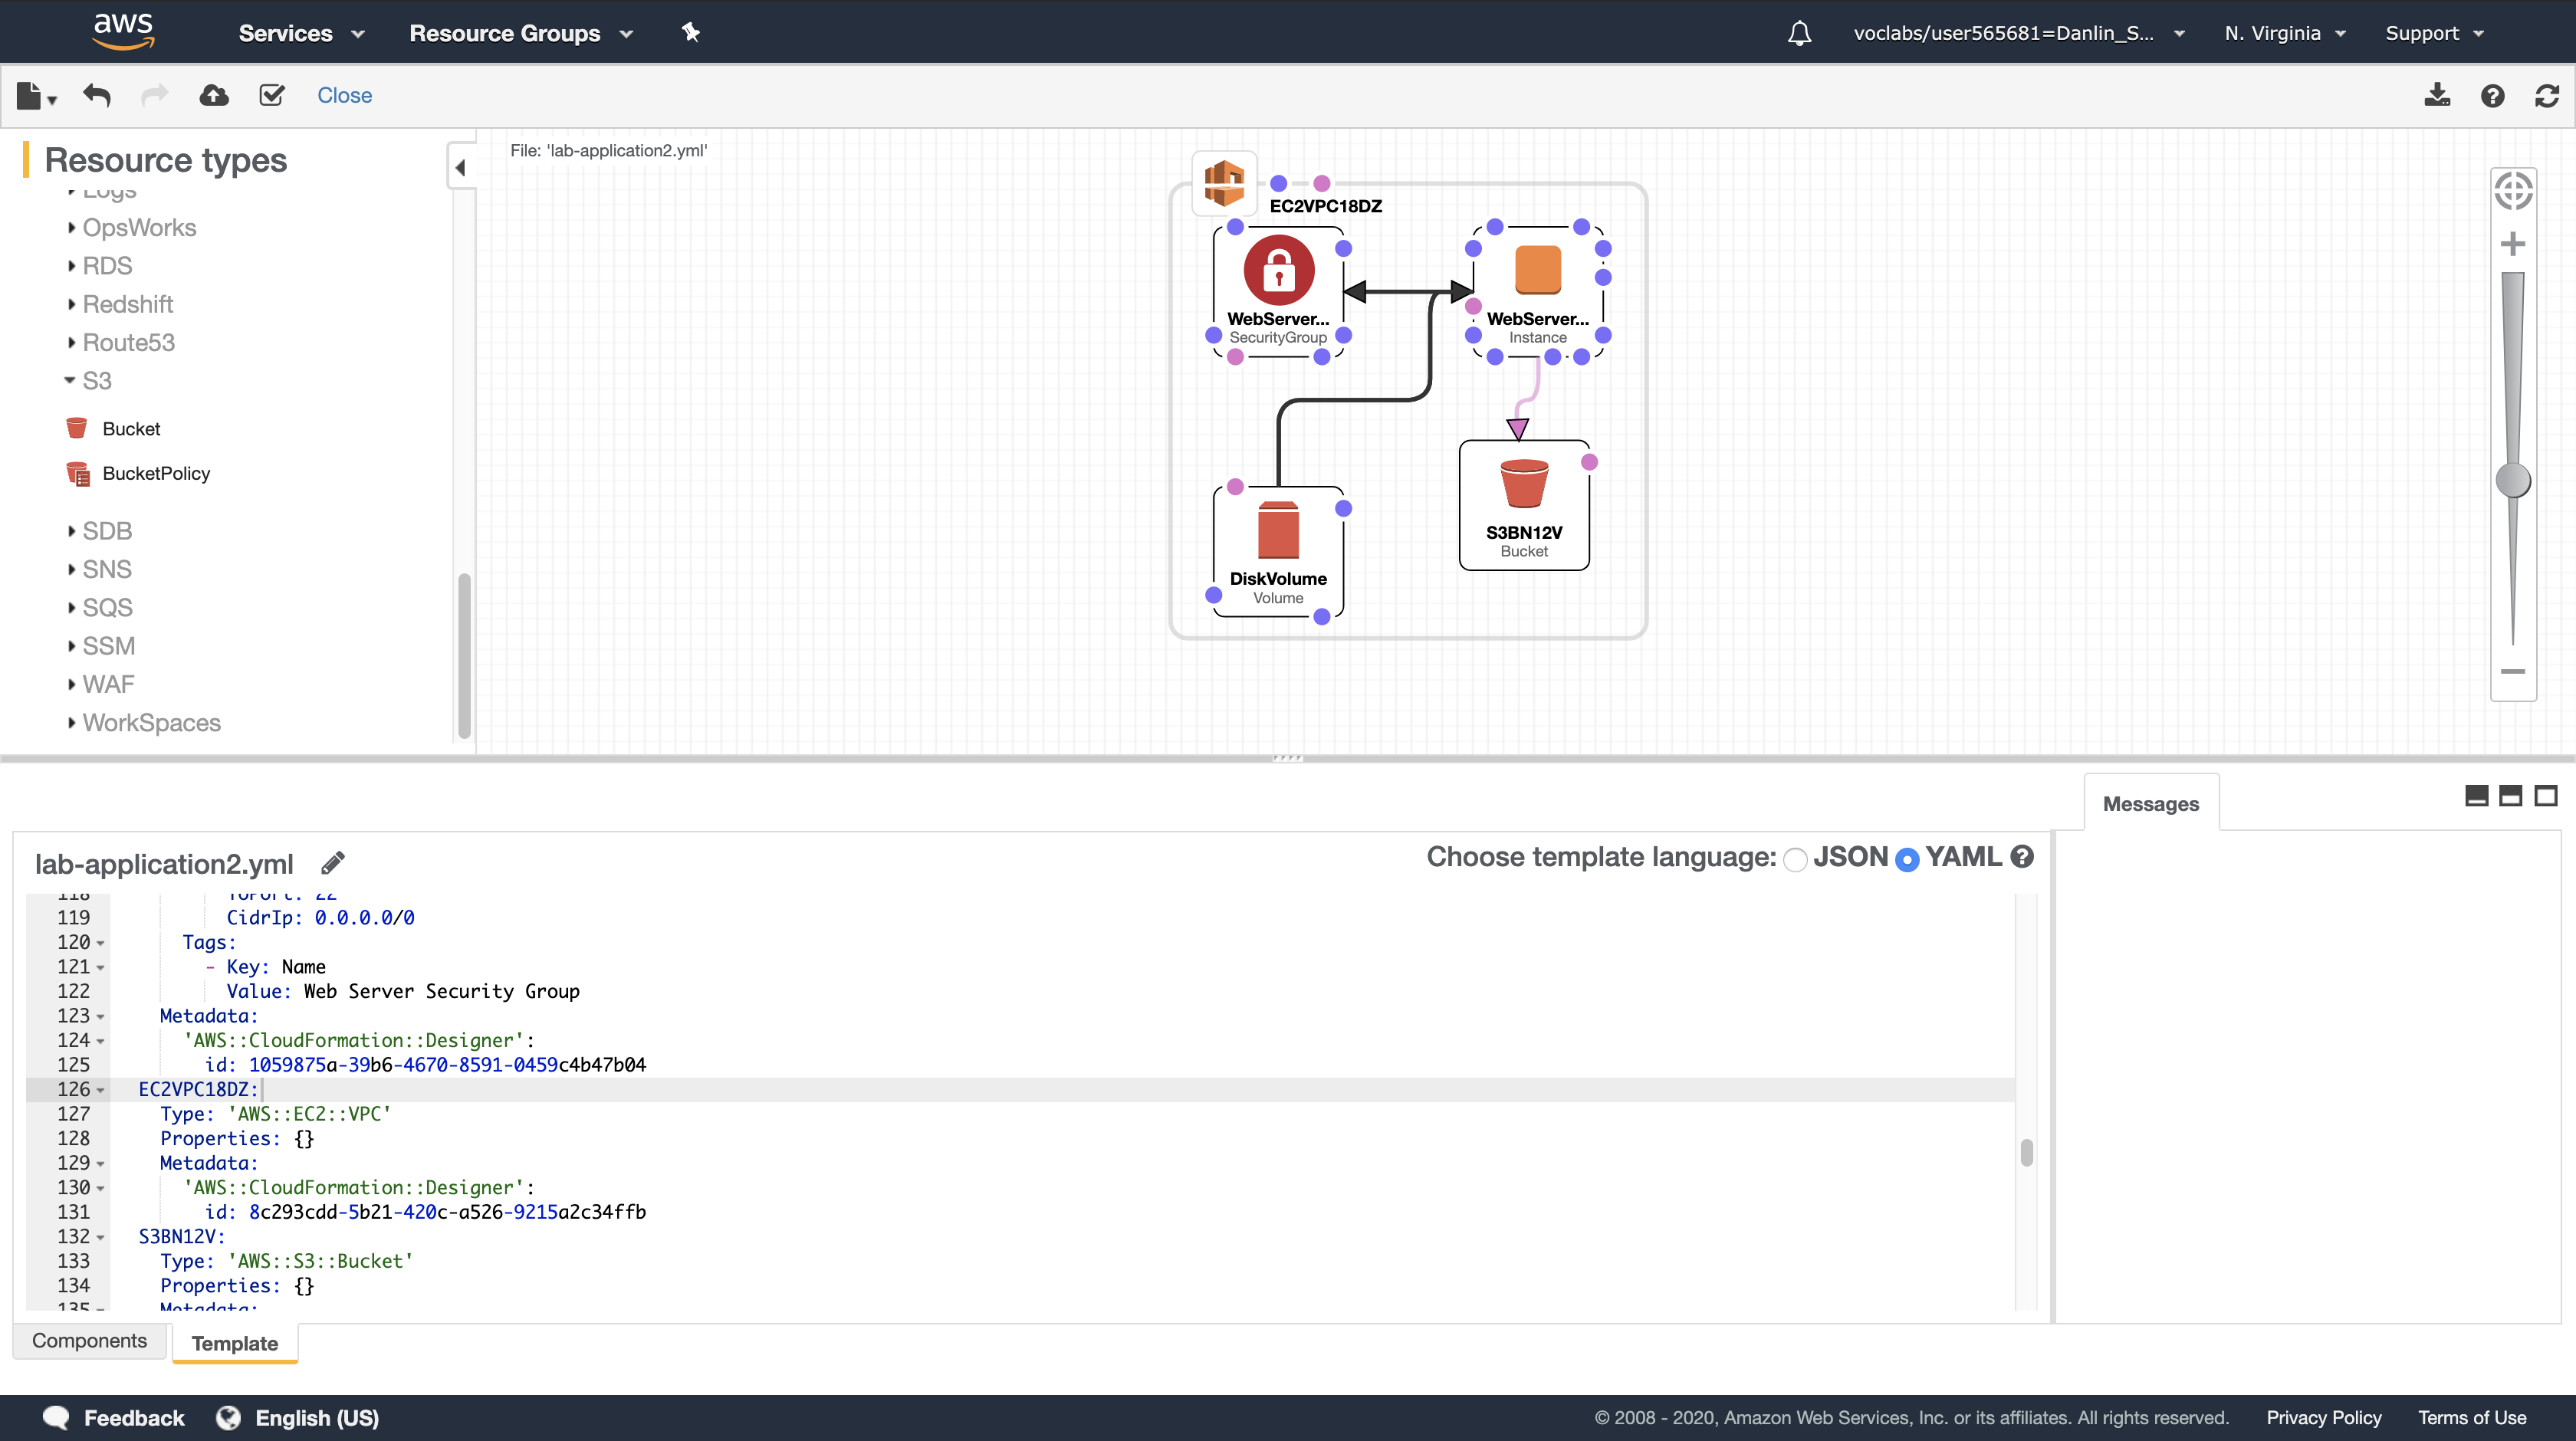
AWS CloudFormation Designer is a graphic tool for creating, viewing, and modifying AWS CloudFormation templates. With Designer, you can diagram your template resources using a drag-and-drop interface, and then edit their details using the integrated JSON and YAML editor. Whether you are a new or an experienced AWS CloudFormation user, AWS CloudFormation Designer can help you quickly see the interrelationship between a template’s resources and easily modify templates.
In this task, you will gain some hands-on experience with the Designer.
Amazon Management Console
Services menu > Click CloudFormation.
Left navigation pane > Click Designer.
Use the File menu to open a Local file and select the lab-application2.yaml template you downloaded previously.
Designer will display a graphical representation of the template: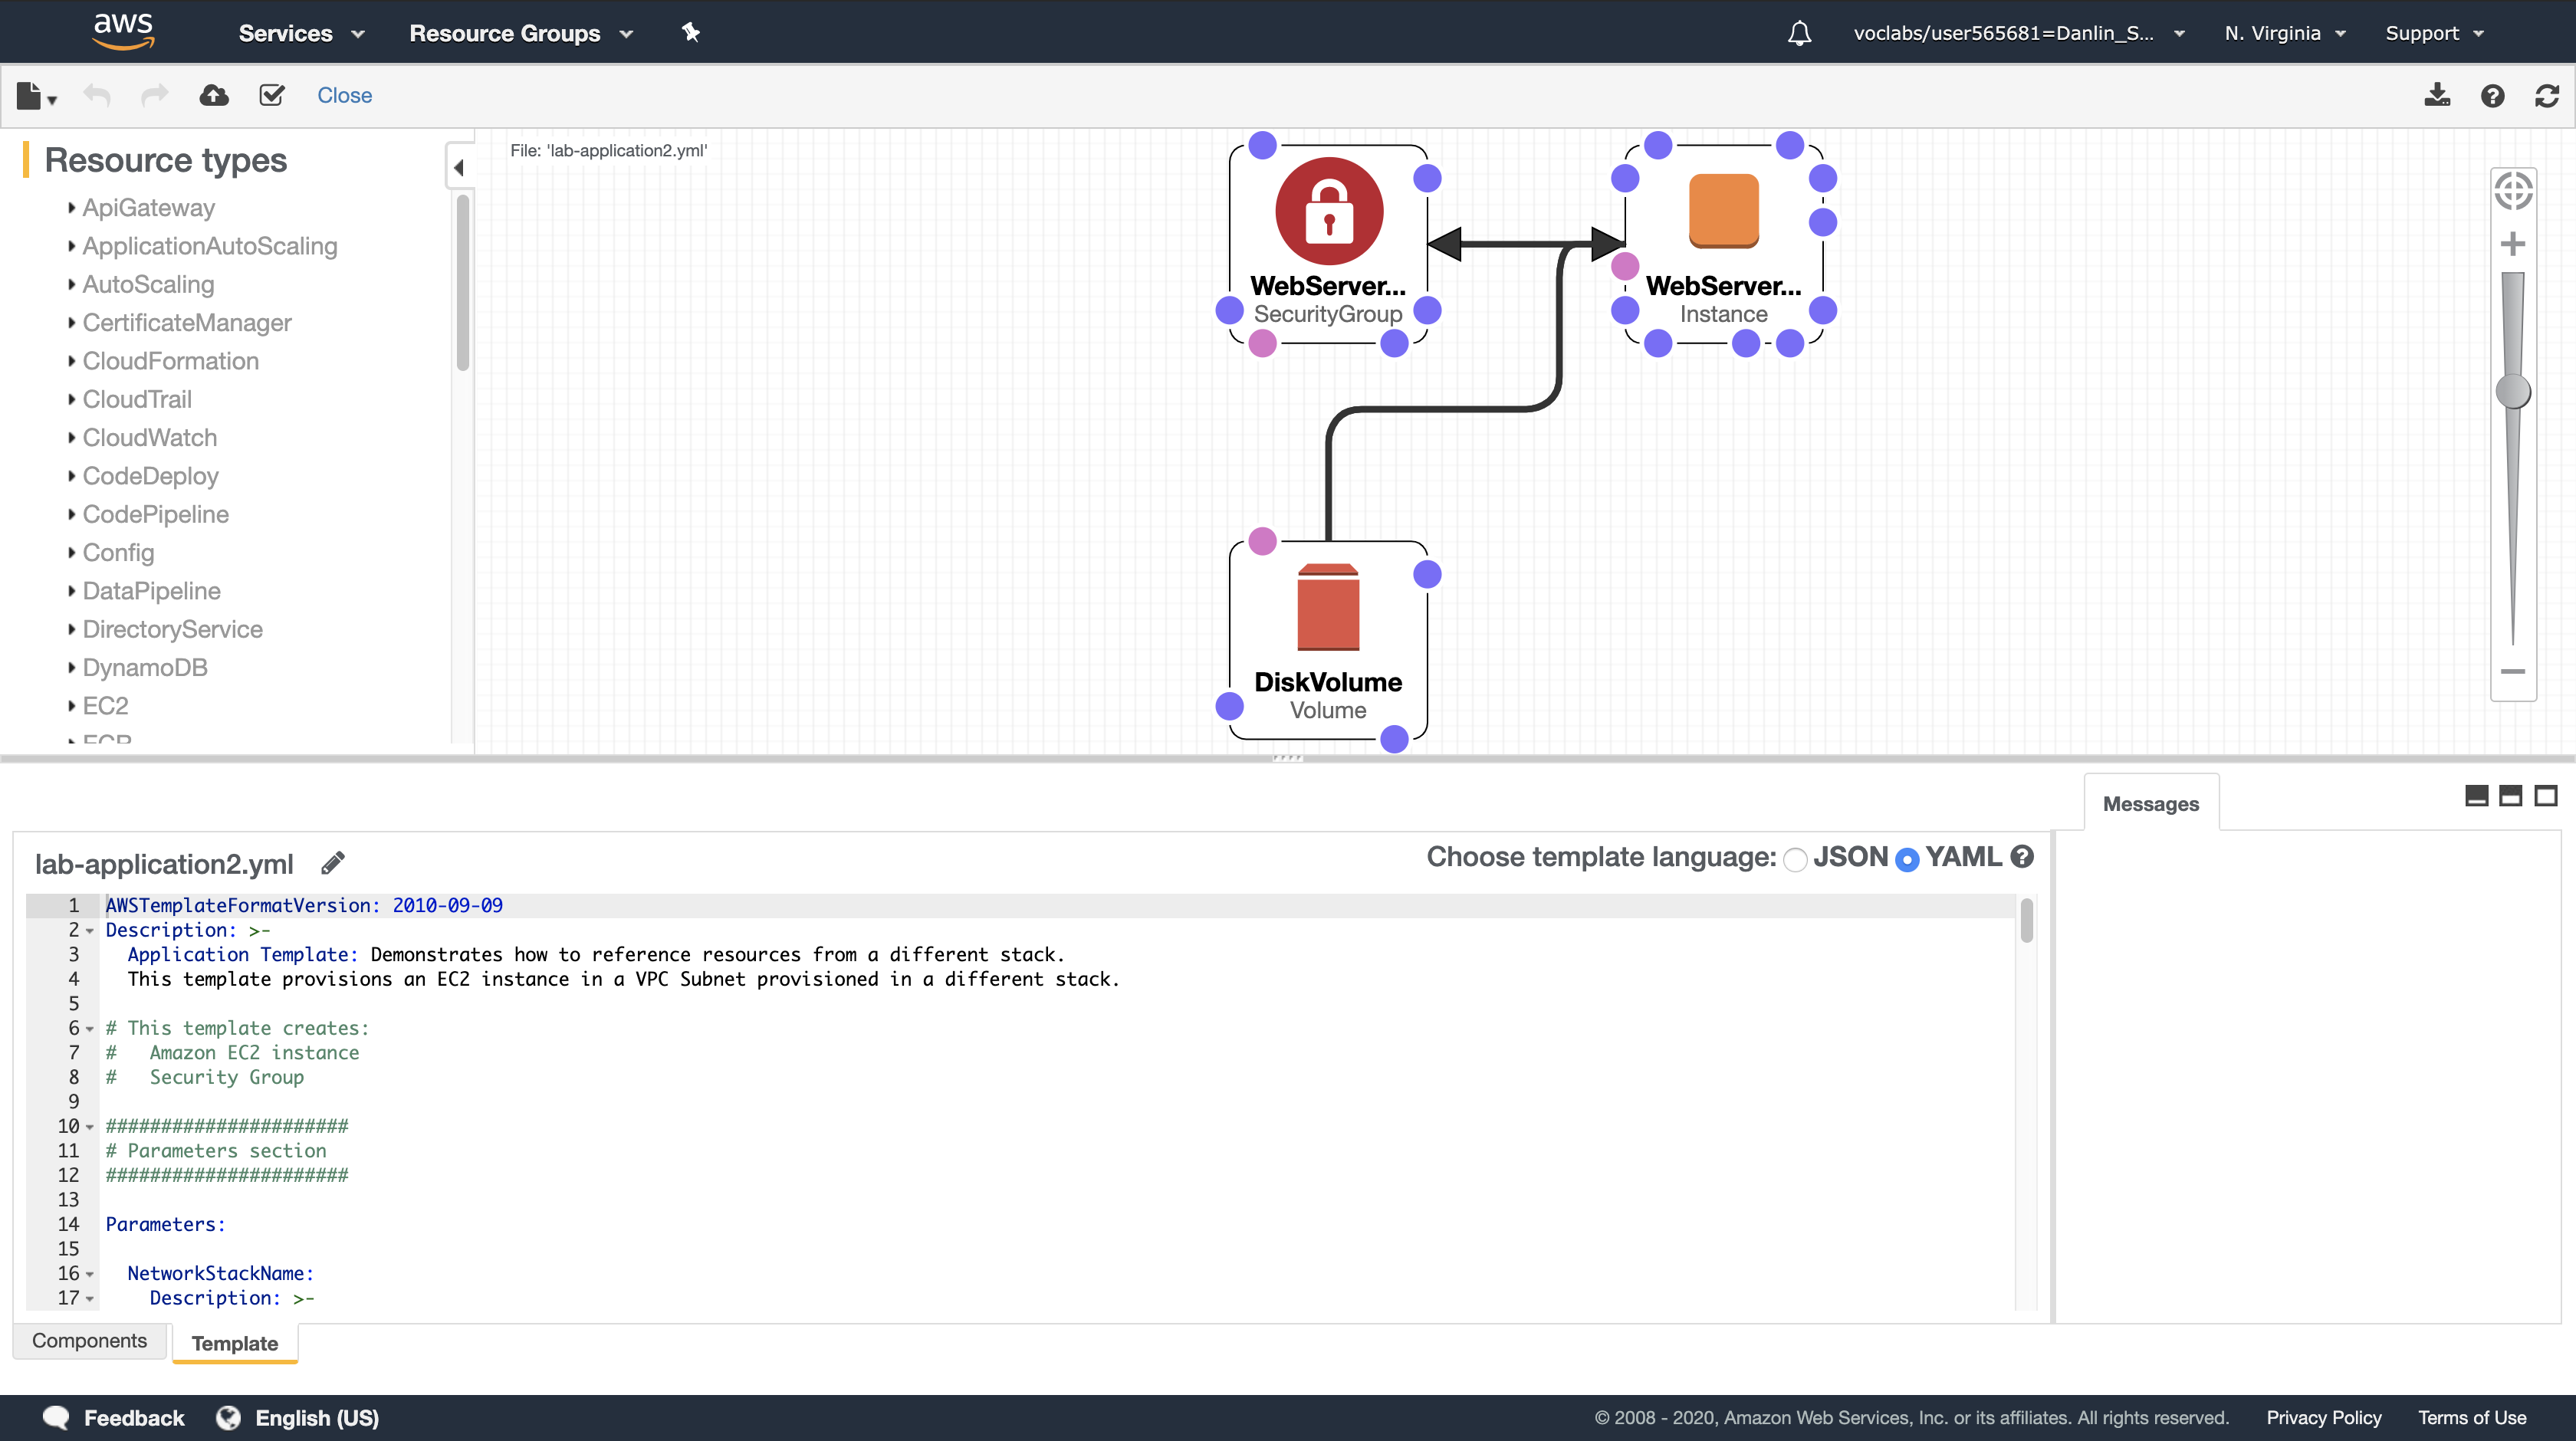
Rather than drawing a typical architecture diagram, Designer is a visual editor for CloudFormation templates so it draws the resources defined in a template and their relationships to each other.
Experiment with the features of the Designer. Some things to try are:
- Click on the displayed resources. The lower pane will then display the portion of the template that defines the resources.
- Try dragging a new resource from the Resource Types pane on the left into the design area. The definition of the resource will be automatically inserted into the template.
- Try dragging the resource connector circles to create relationships between resources
- Open the lab-network.yaml template you downloaded earlier in the lab and explore its resources too
Task 5: Delete the Stack
When resources are no longer required, CloudFormation can delete the resources built for the stack.
A Deletion Policy can also be specified against resources, which can preserve or (in some cases) backup a resource when its stack is deleted. This is useful for retaining databases, disk volumes or any resource that might be required after stack deletion.
The lab-application stack has been configured to take a snapshot of an Amazon EBS disk volume before it is deleted:
1 | DiskVolume: |
The DeletionPolicy in the final line is directing CloudFormation to create a snapshot of the disk volume before it is deleted.
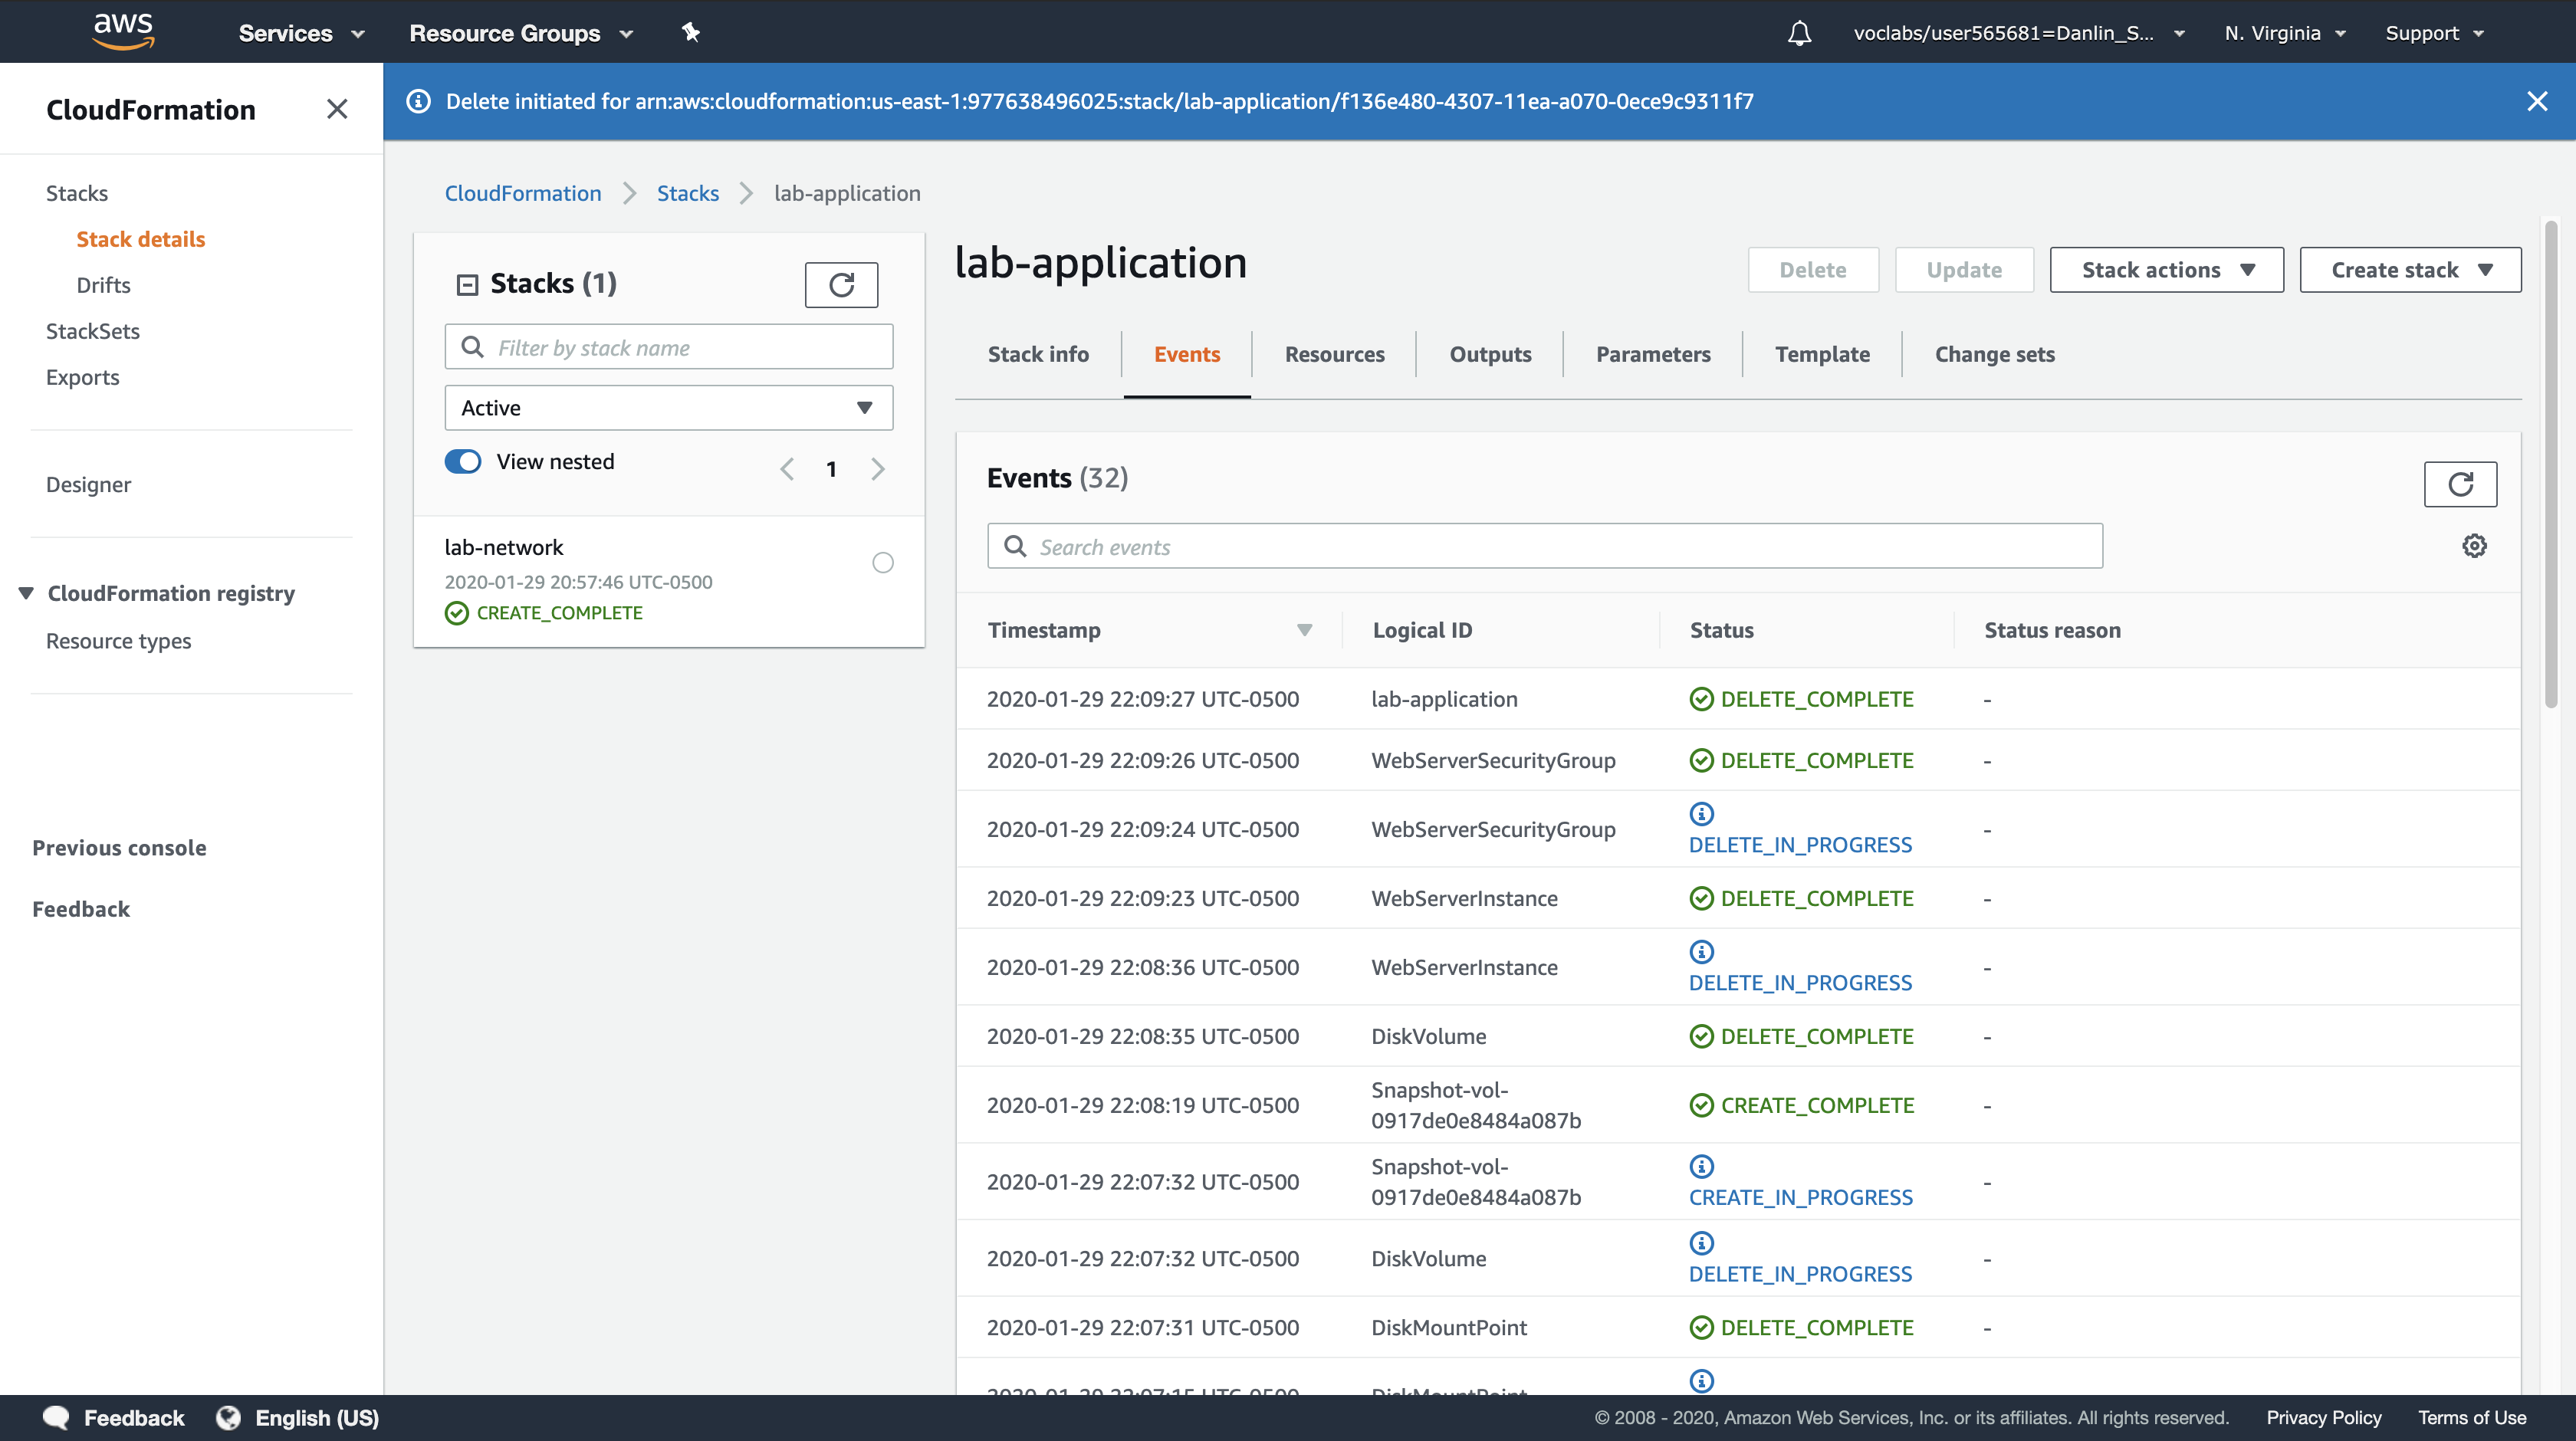
You will now delete the lab-application stack and see the results of this Deletion Policy.
Amazon Management Console
Service Menu > Click CloudFormation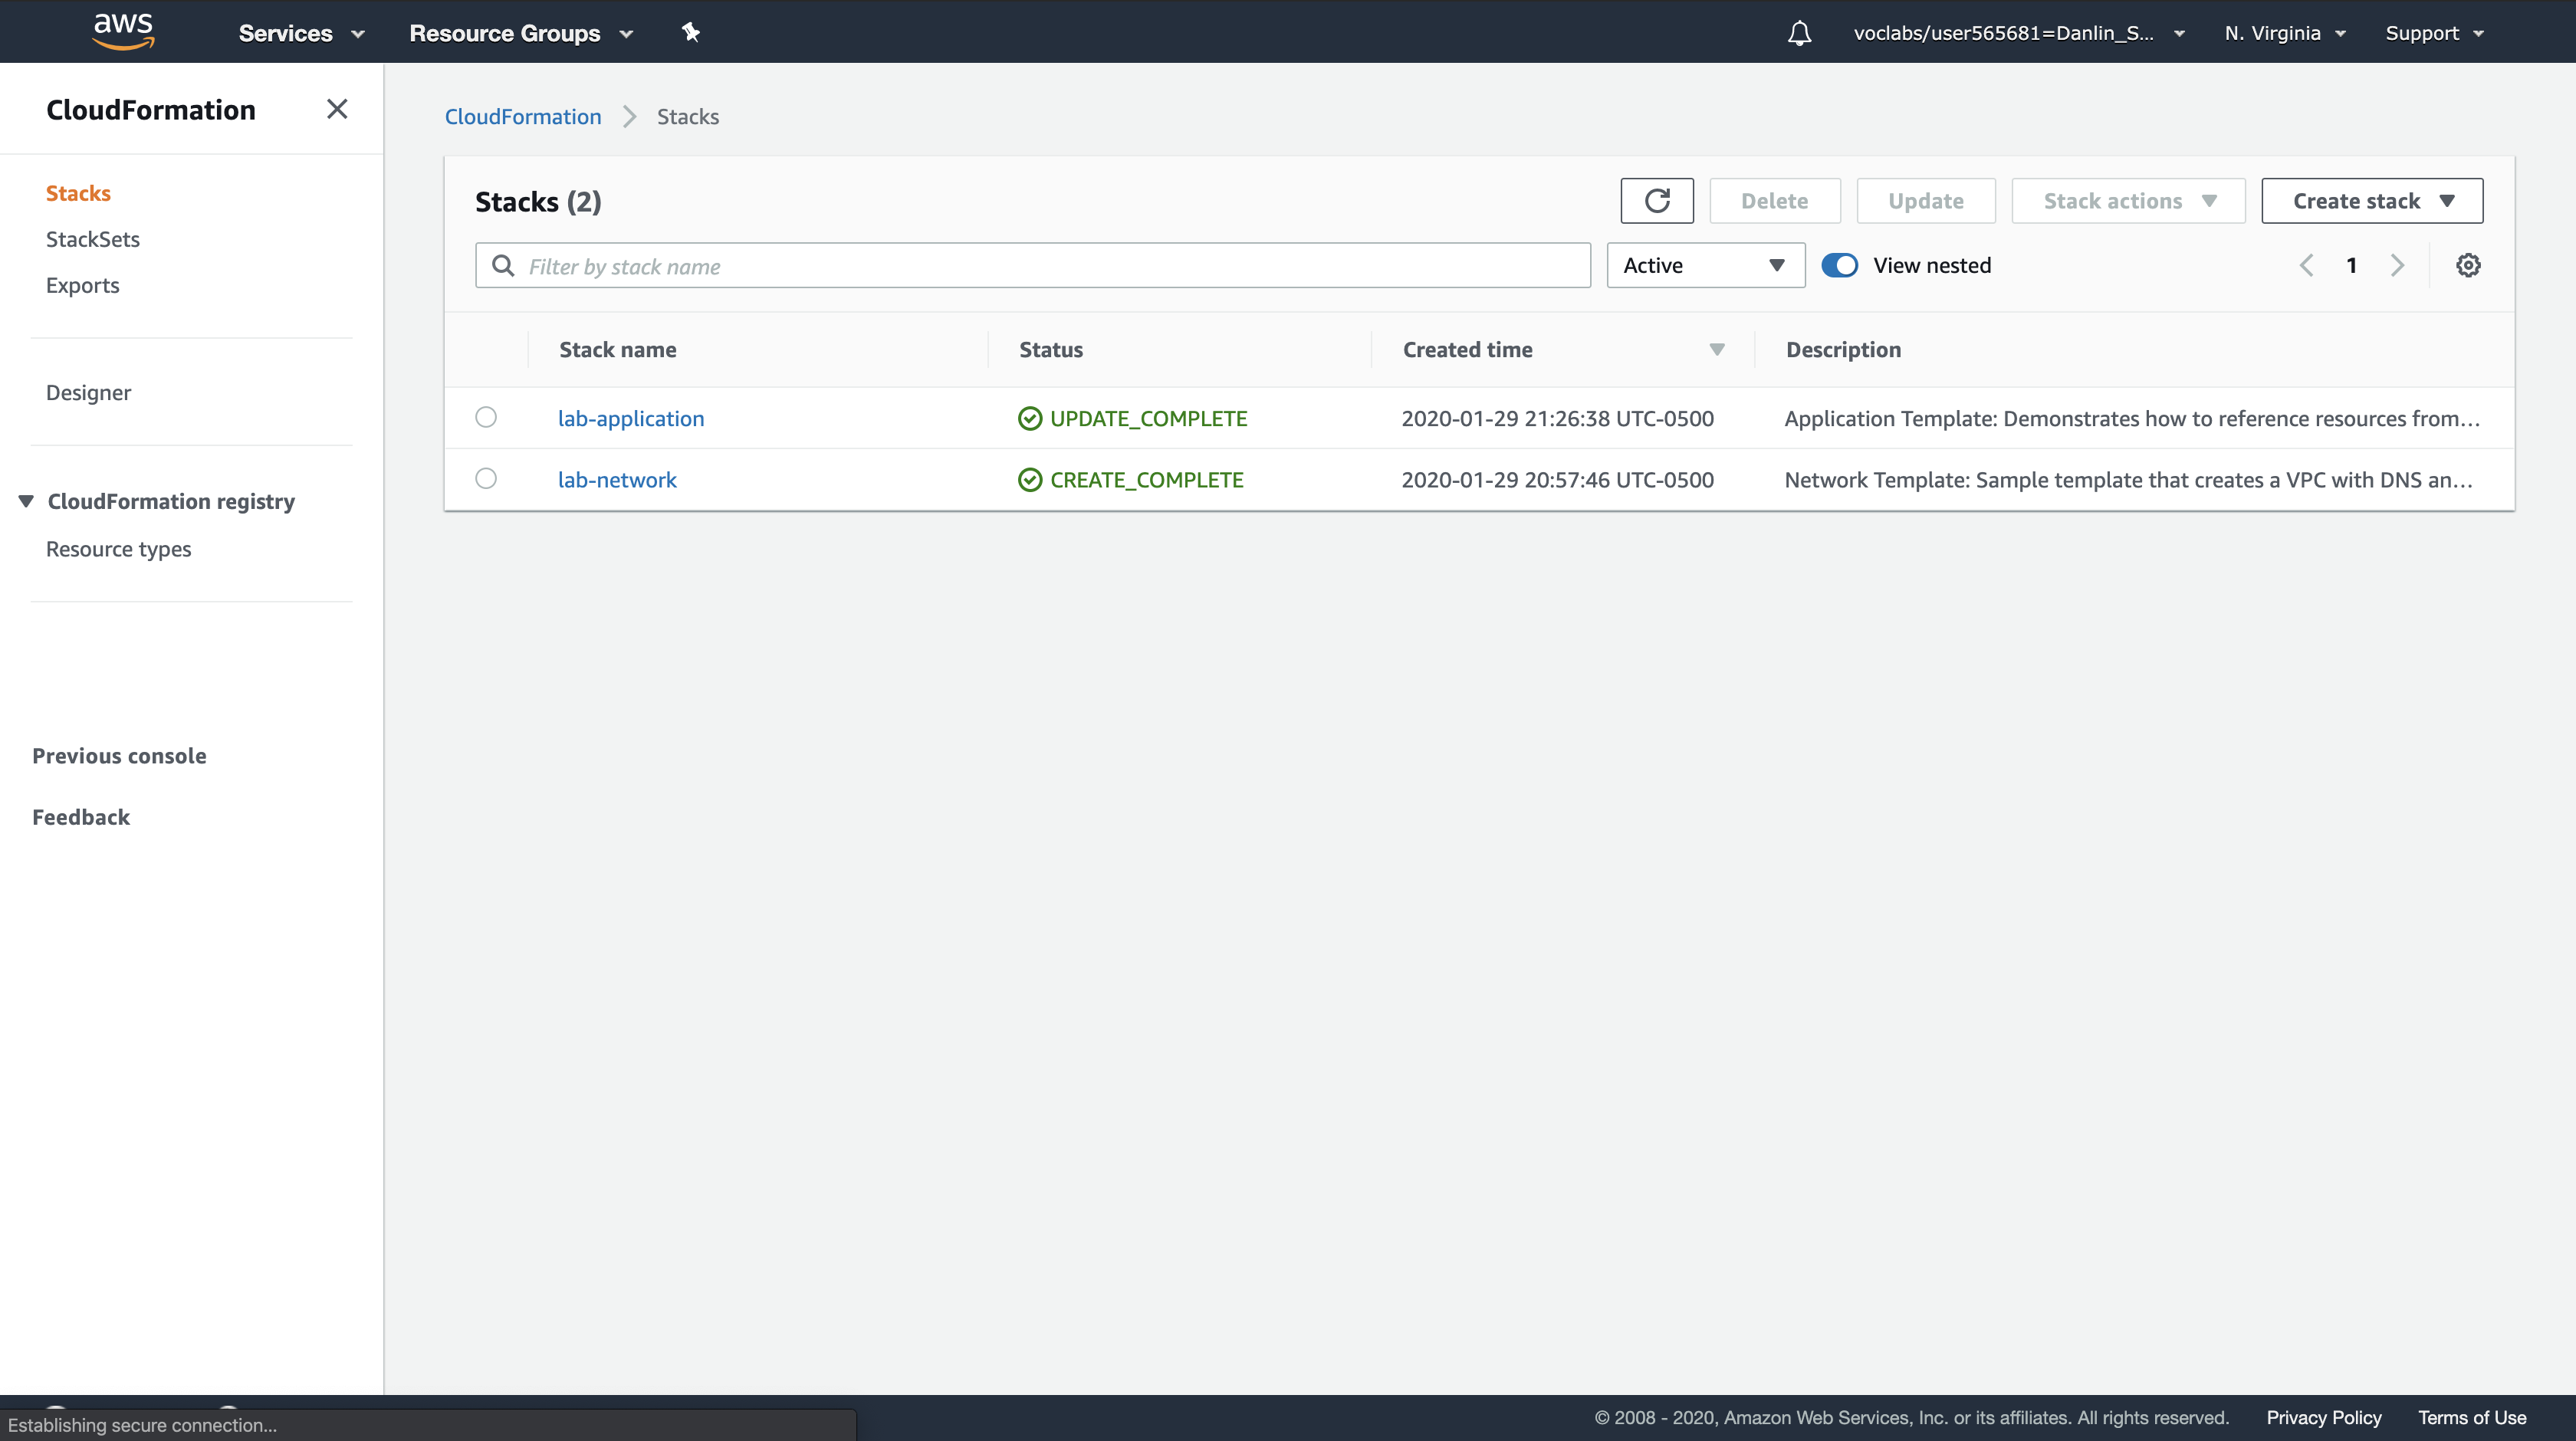
Click lab-application.
Click Delete.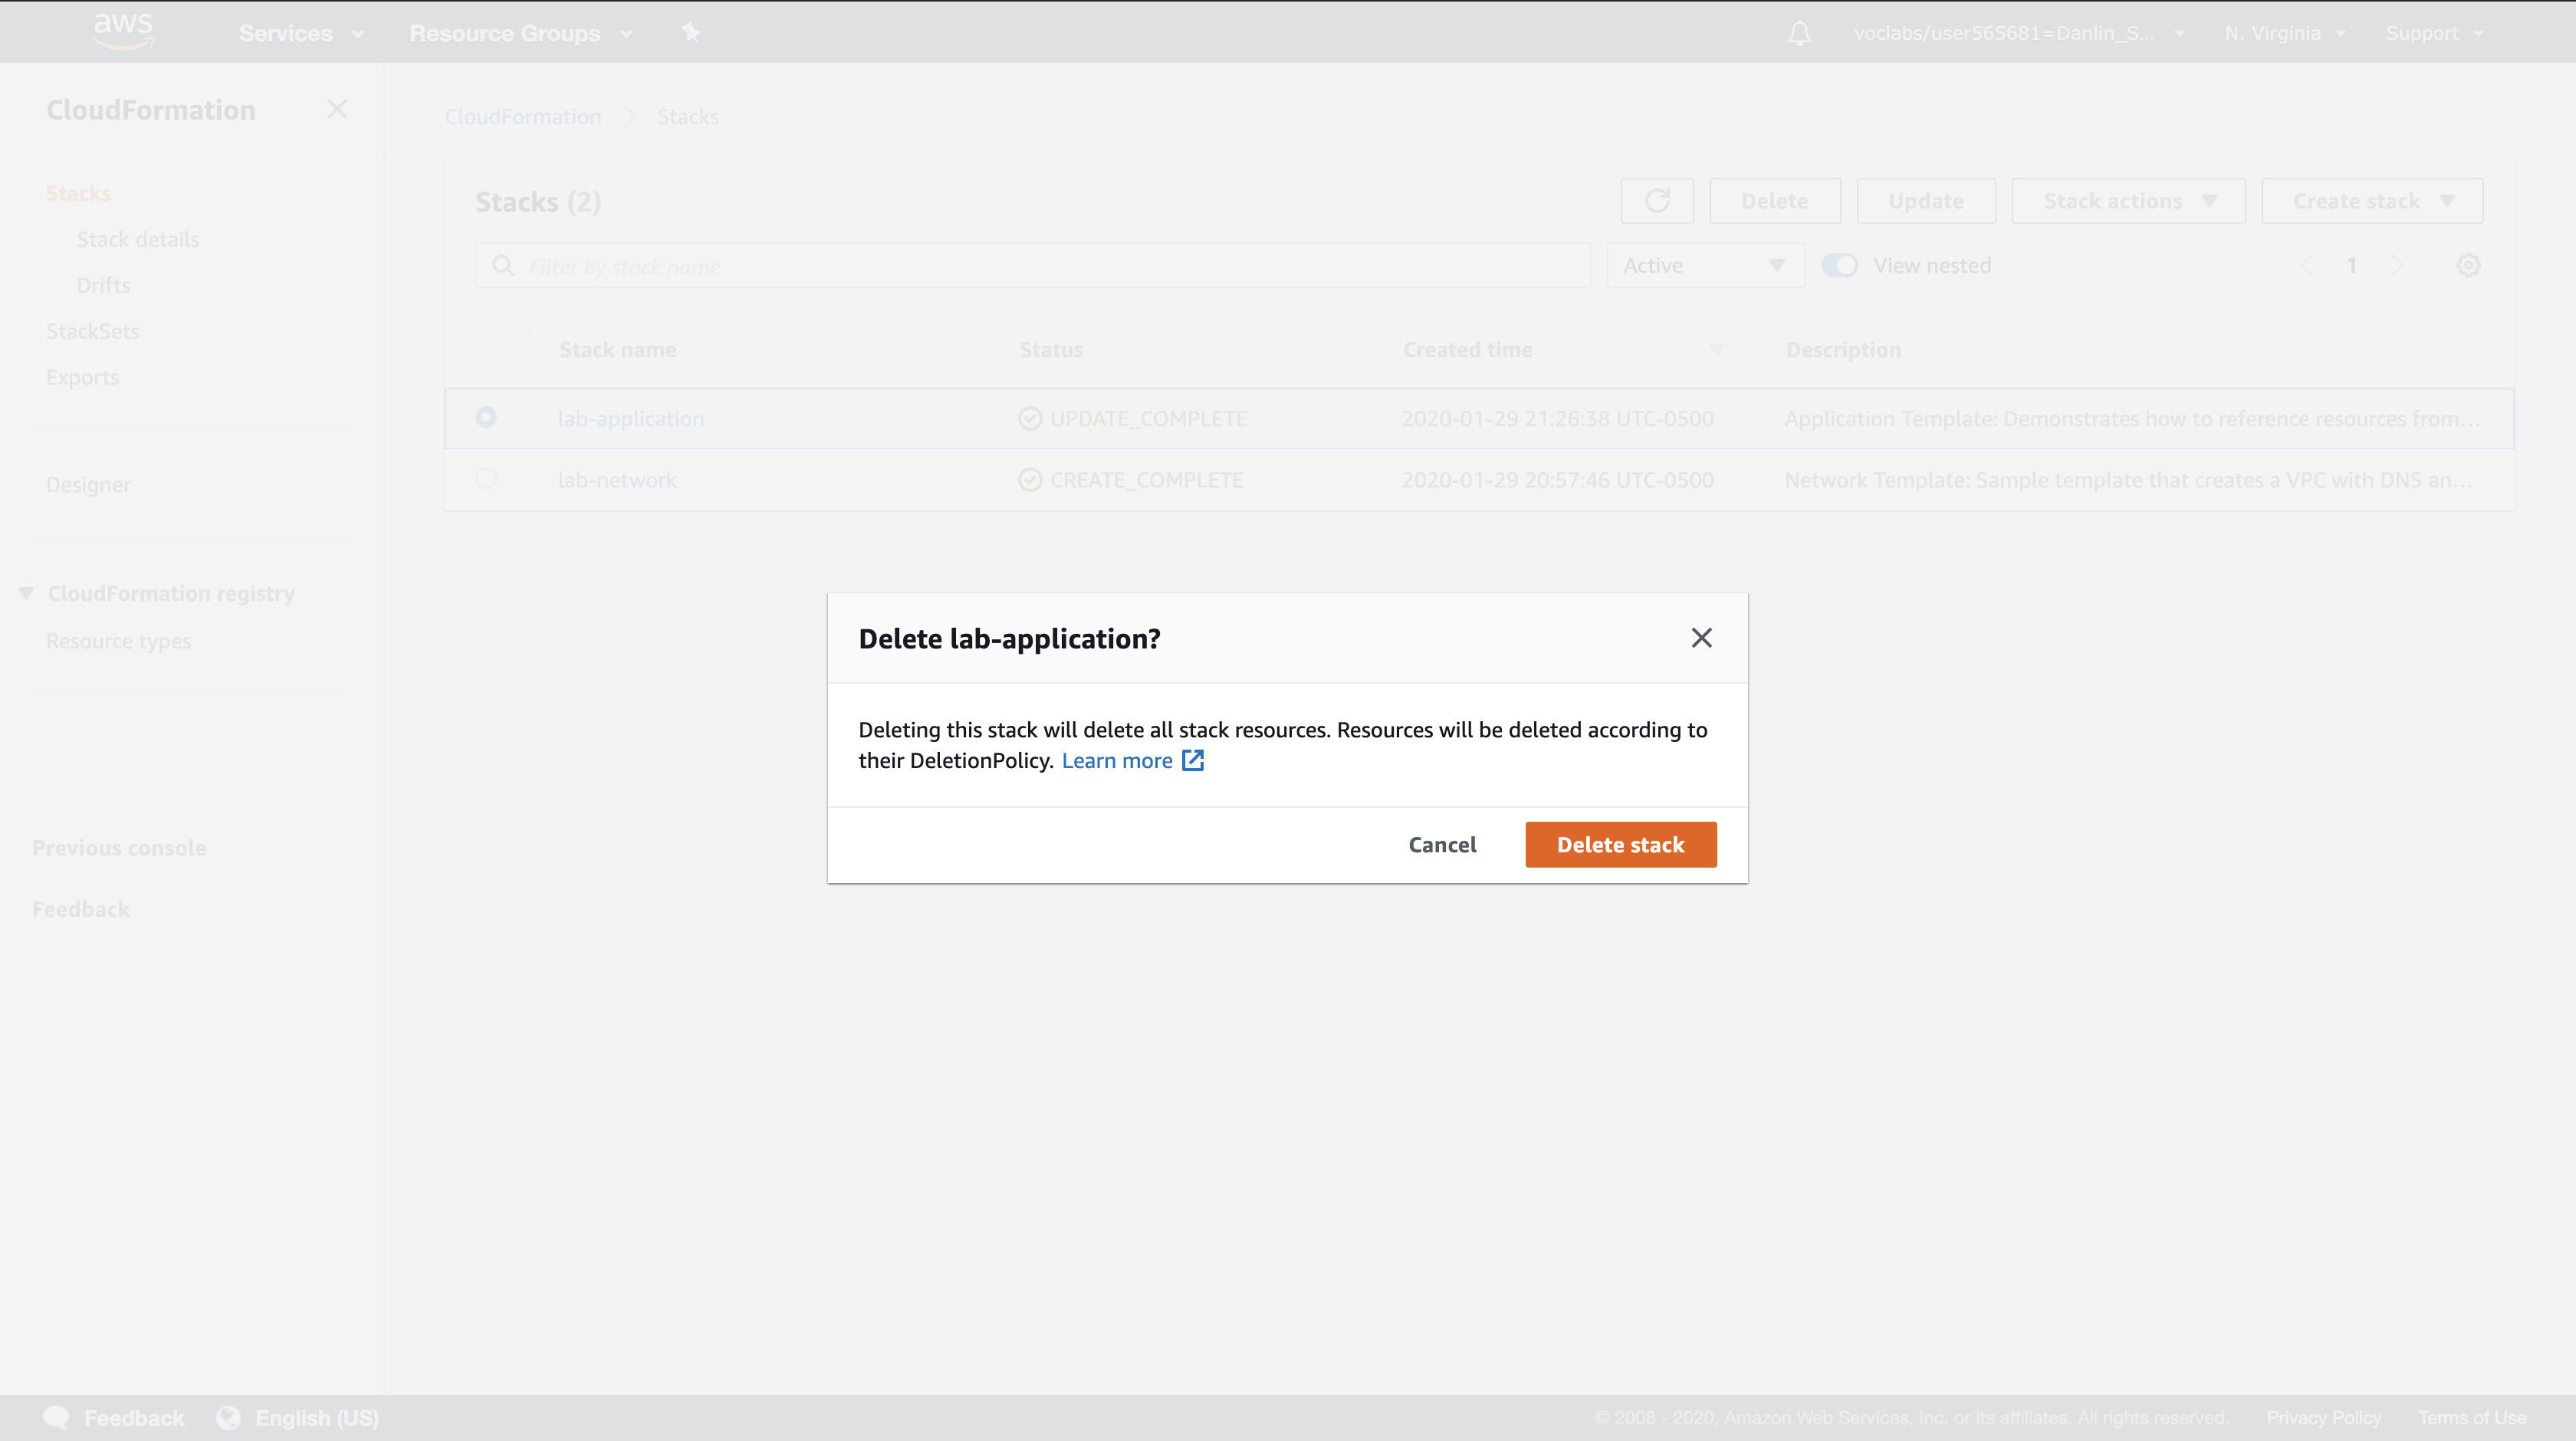
Click Delete stack.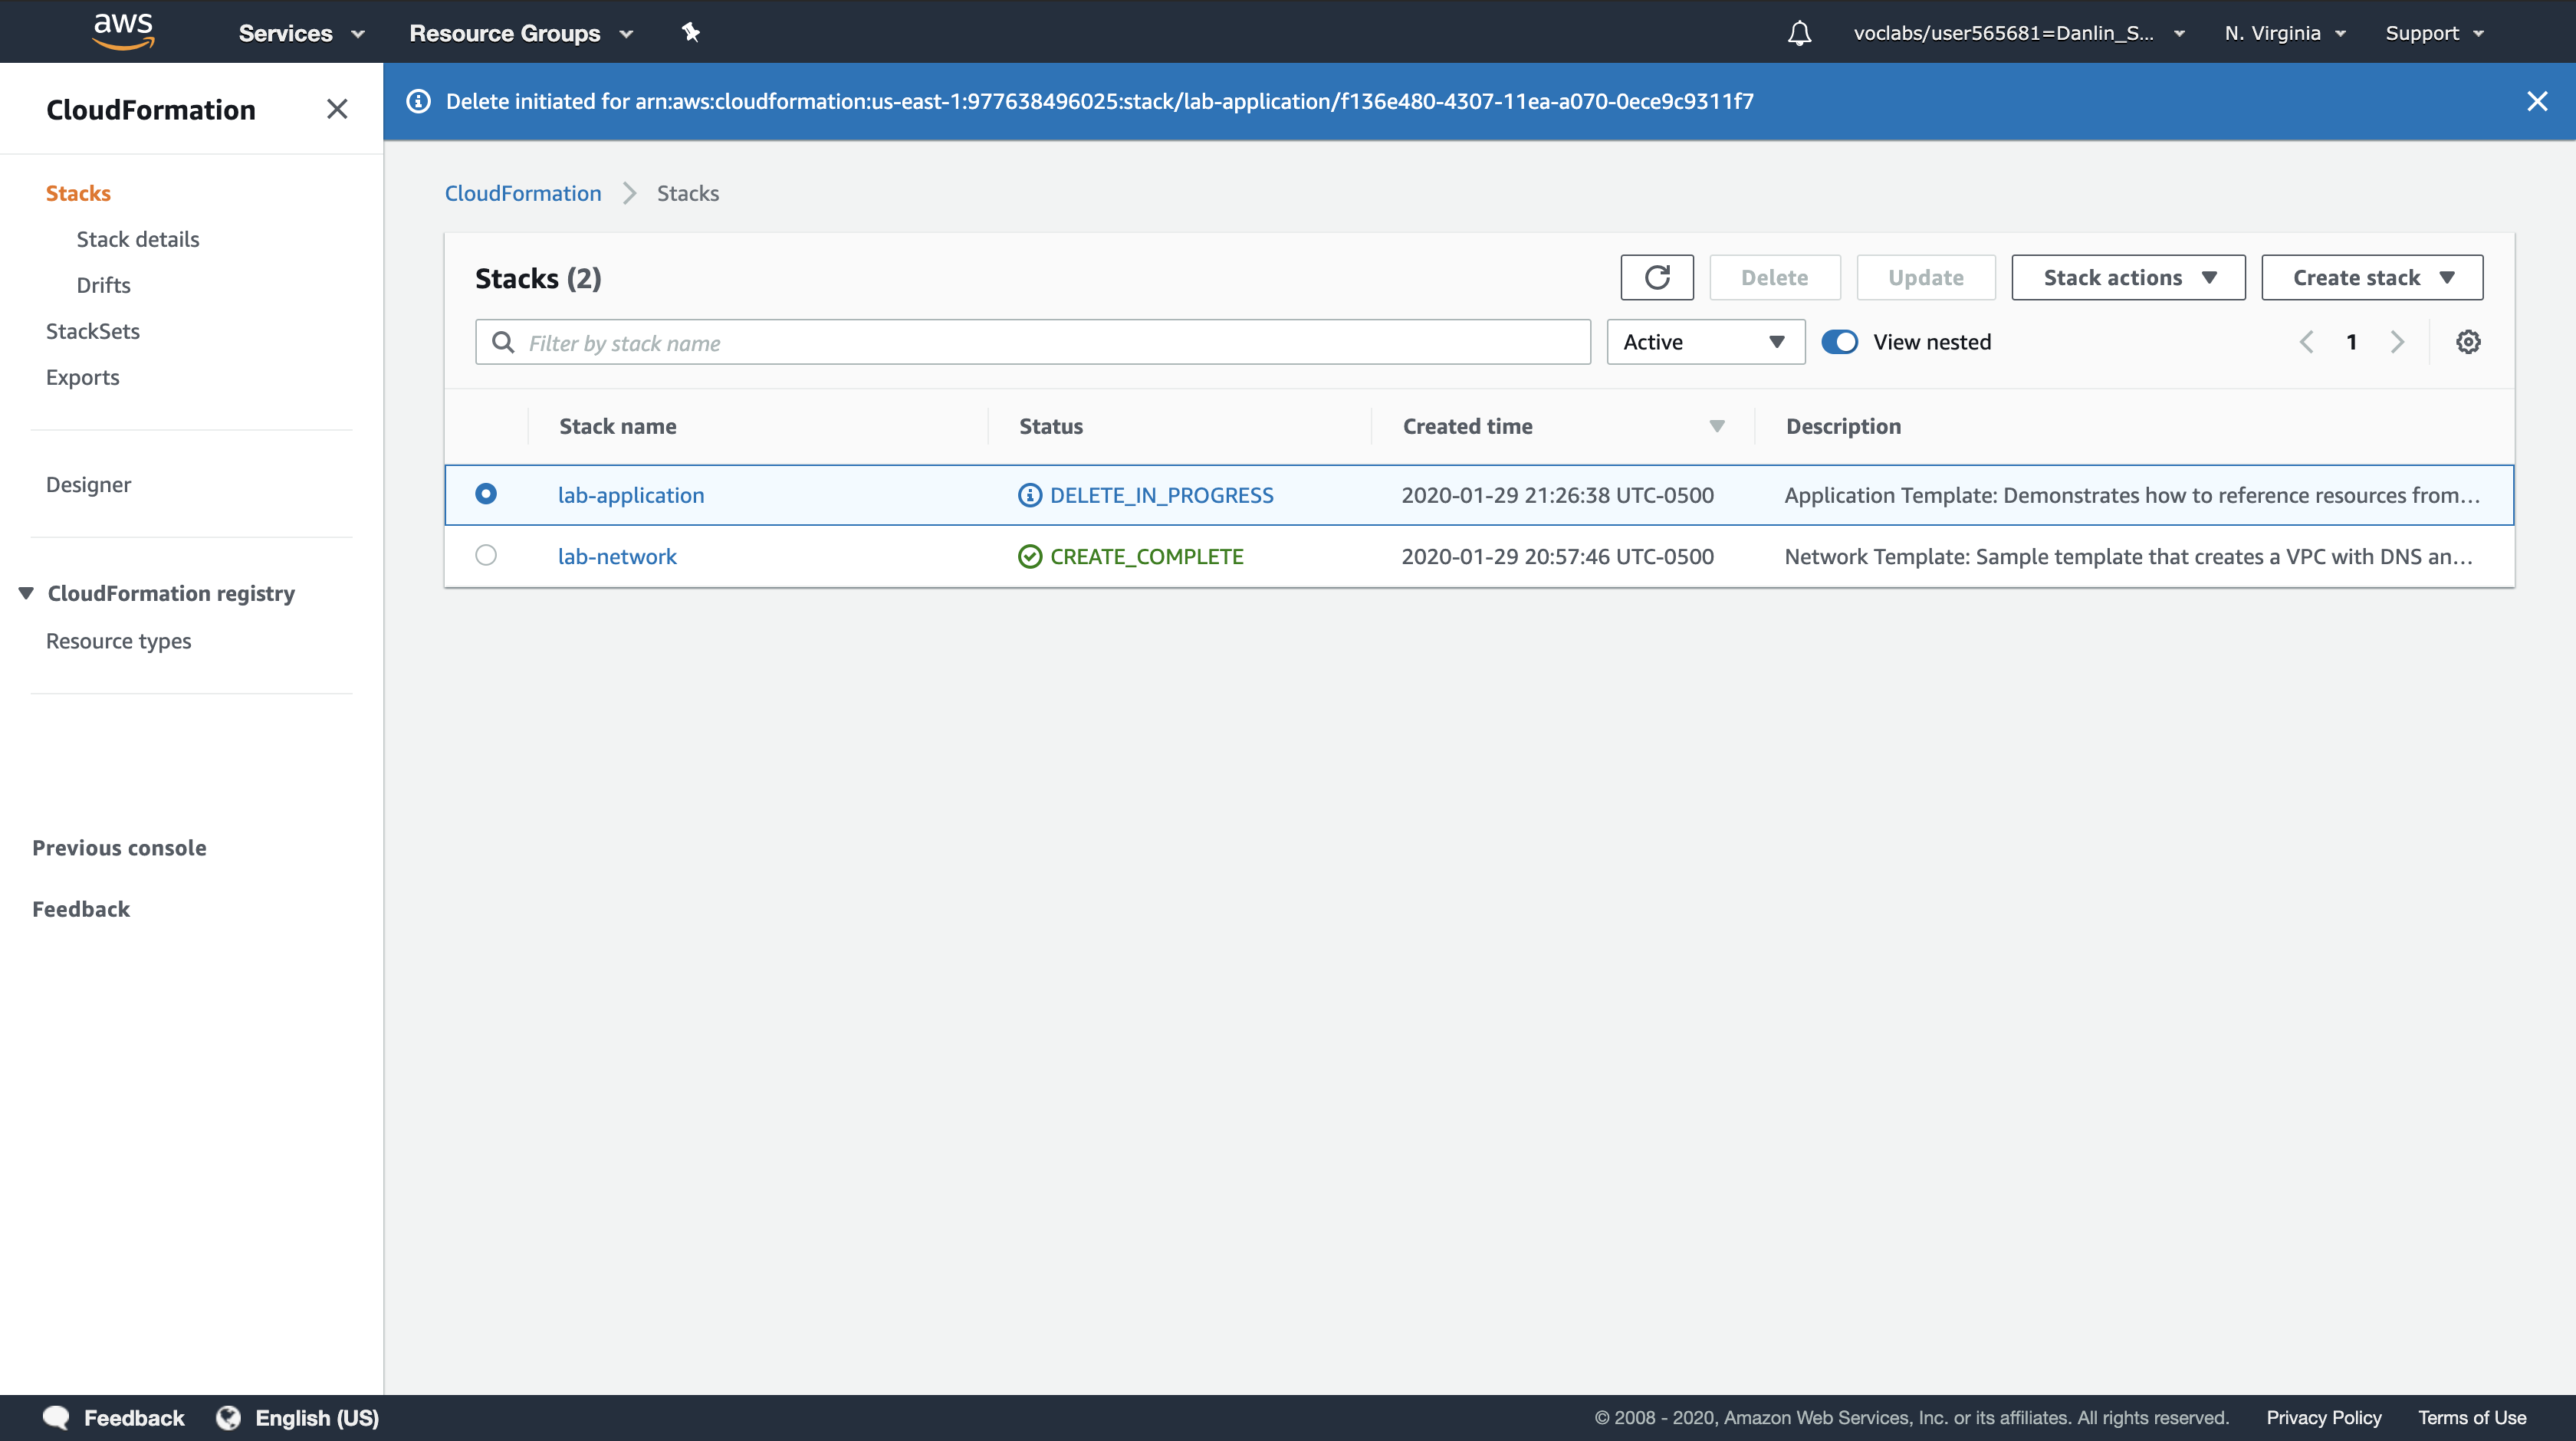
You can monitor the deletion process in the Events tab and update the screen by clicking Refresh occasionally. You might also see a reference to the EBS snapshot being created.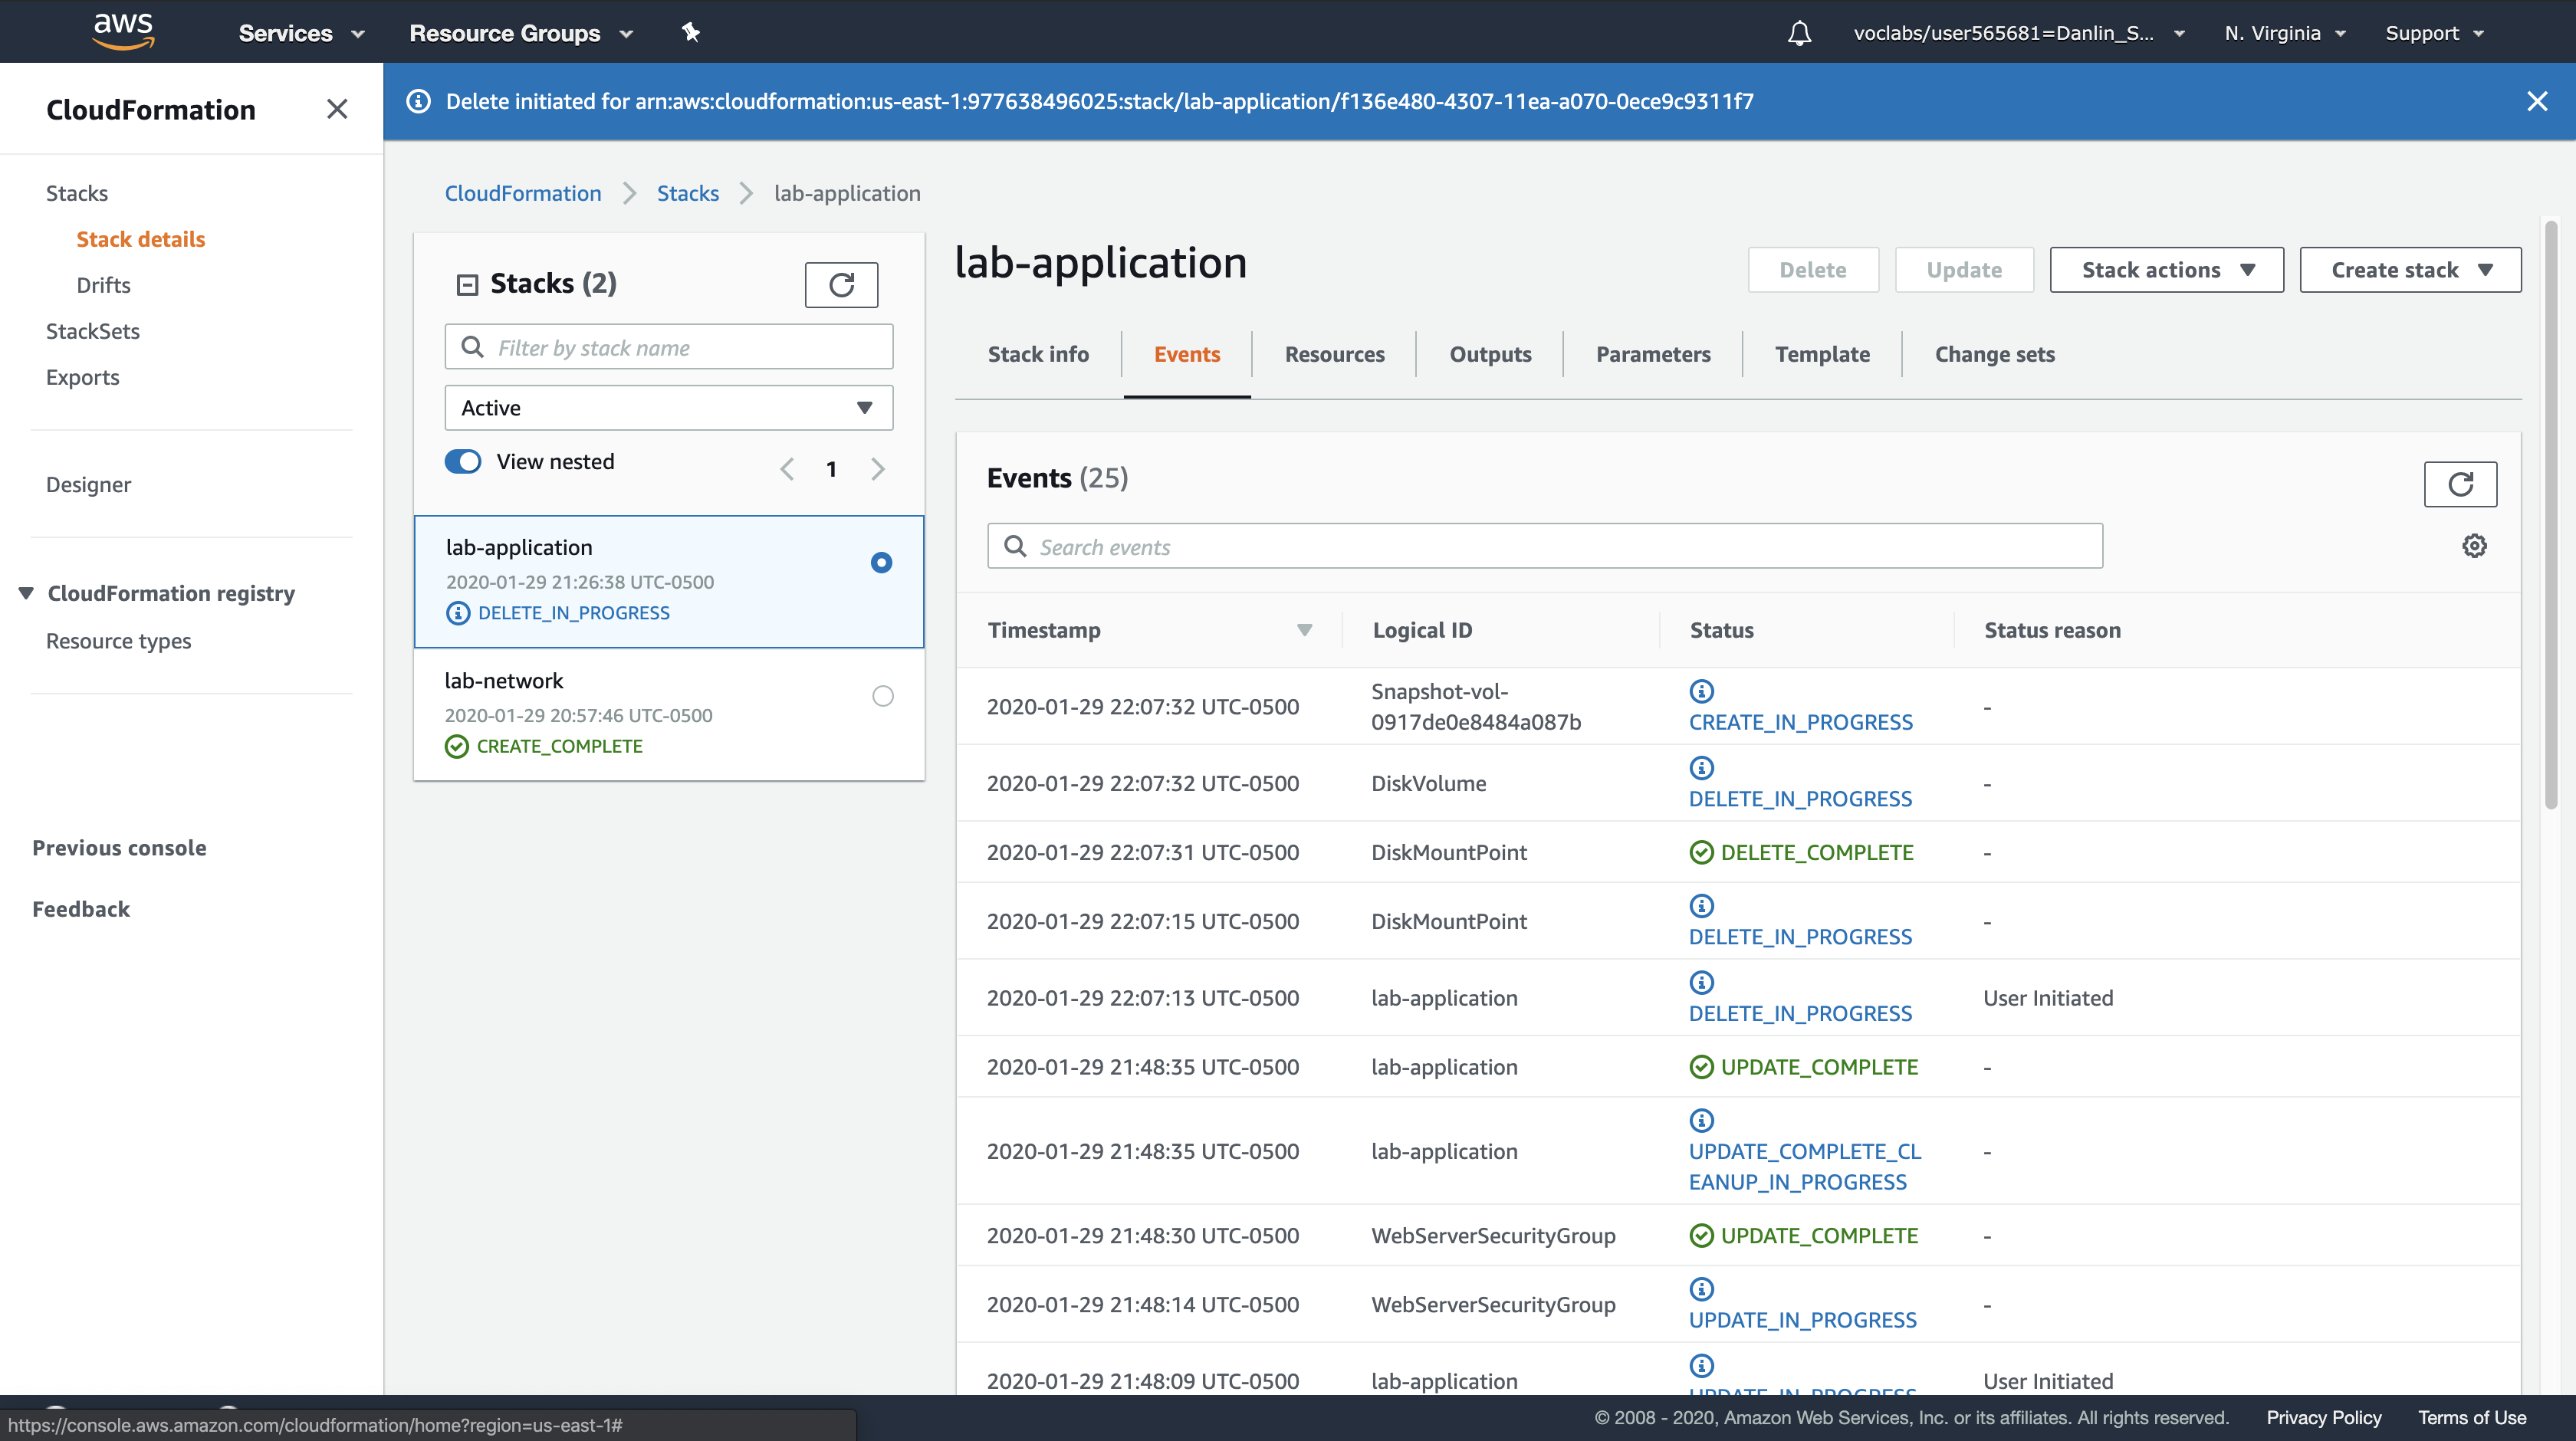
Wait for the stack to be deleted. It will disappear from the list.
- The application stack has been removed, but the network stack has remained untouched. This reinforces the idea that different teams (eg network team, application team) can manage their own stacks.
- You will now check that a snapshot was created of the EBS volume before it was deleted.
Service Menu > Click EC2
Left navigation pane > Click Snapshots.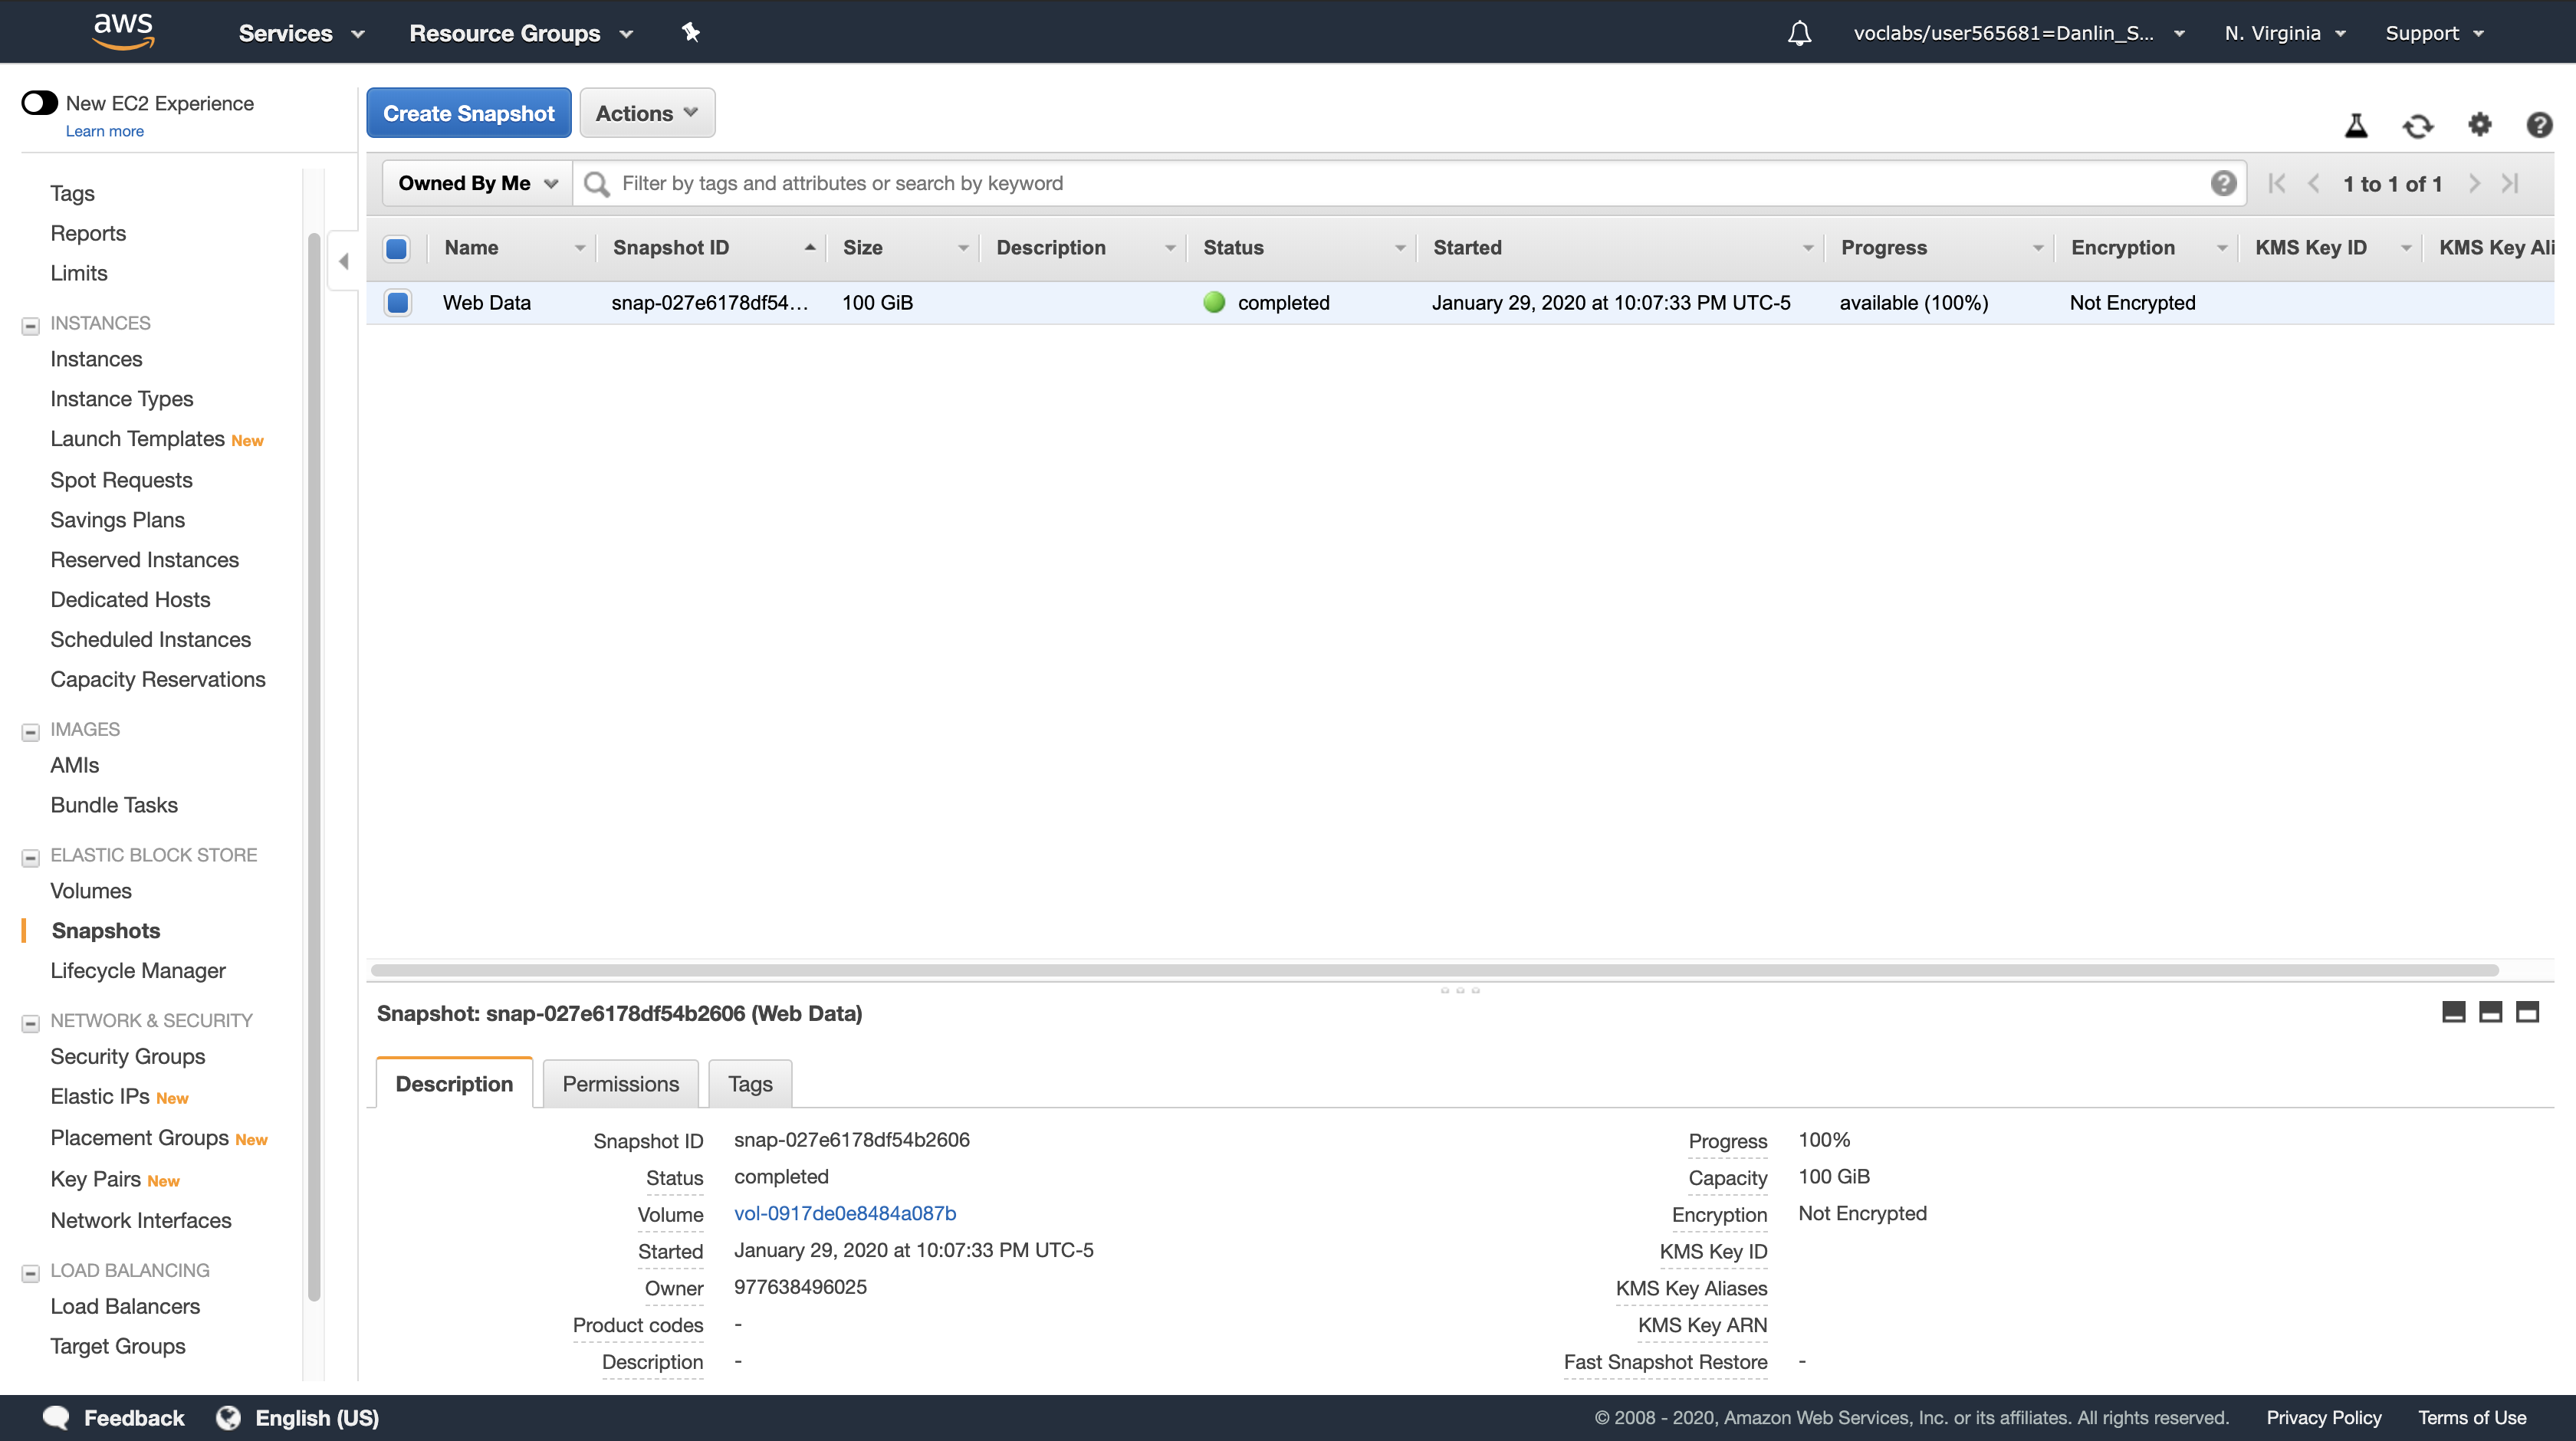
You should see a snapshot with a Started time in the last few minutes.
Lab Complete
Click End Lab at the top of this page and then click Yes to confirm that you want to end the lab.
A panel will appear, indicating that “DELETE has been initiated… You may close this message box now.”
Click the X in the top right corner to close the panel.
For feedback, suggestions, or corrections, please email us at: aws-course-feedback@amazon.com
ACA Module 7 LAB: Implementing a Serverless Architecture with AWS Managed Services
https://labs.vocareum.com/main/main.php?m=editor&nav=1&asnid=110825&stepid=110826
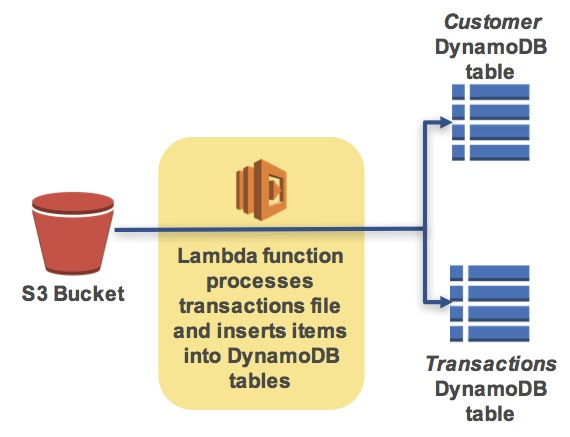
In this lab, you will use AWS managed services to implement a serverless architecture. Your system will receive a transactions file, automatically load its contents into a database and send notifications. This will be done without using any Amazon EC2 servers.
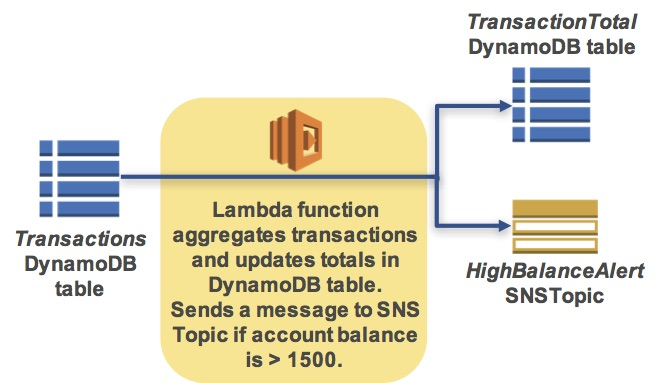
Scenario
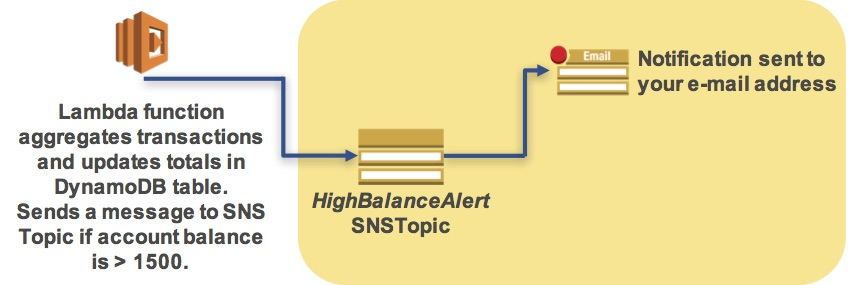
The following diagram shows the lab scenario: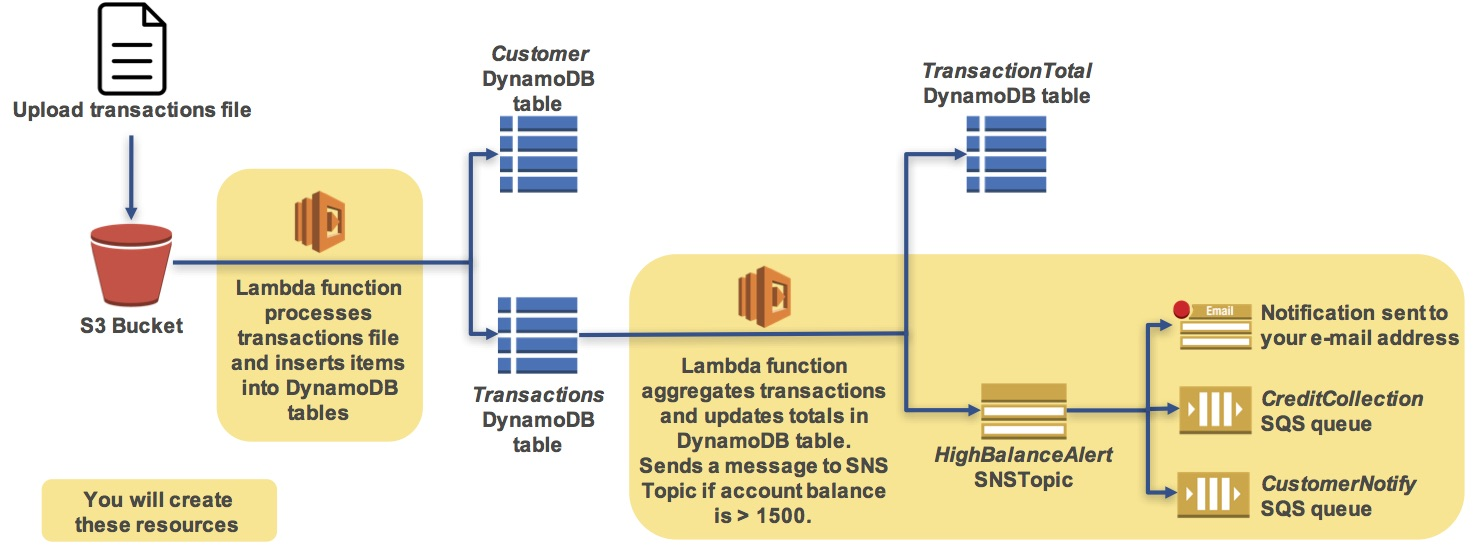
The scenario workflow is:
- You will upload a transactions file to an Amazon S3 bucket
- This will trigger an AWS Lambda function that will read the file and insert records into two Amazon DynamoDB tables
- This will trigger another AWS Lambda function that will calculate customer totals and will send a message to an Amazon Simple Notification Service (SNS) Topic if the account balance is over $1500
- Amazon SNS will then send an email notification to you and will store a message in Amazon Simple Queue Service (SQS) queues to notify the customer and your credit collection department.
Objectives
After completing this lab, you will be able to:
- Use AWS managed services to implement a serverless architecture
- Trigger AWS Lambda functions from Amazon S3 and Amazon DynamoDB
Accessing the AWS Management Console
- At the top of these instructions, click
Start Labto launch your lab.
A Start Lab panel opens displaying the lab status. - Wait until you see the message “Lab status: ready“, then click the
Xto close the Start Lab panel. - At the top of these instructions, click
AWS
This will to open the AWS Management Console in a new browser tab. The system will automatically log you in.
Tip: If a new browser tab does not open, there will typically be a banner or icon at the top of your browser indicating that your browser is preventing the site from opening pop-up windows. Click on the banner or icon and choose “Allow pop ups.”
4. Arrange the AWS Management Console tab so that it displays along side these instructions. Ideally, you will be able to see both browser tabs at the same time, to make it easier to follow the lab steps.
Task 1: Create a Lambda Function to Process a Transactions File
In this task, you will create an AWS Lambda function to process a transactions file. The Lambda function will read the file and insert information into the Customer and Transactions DynamoDB tables.
AWS Management Console
Service Menue > click Lambda
Click Create function
Blueprints are code templates for writing Lambda functions. Blueprints are provided for standard Lambda triggers such as creating Alexa skills and processing Amazon Kinesis Firehose streams. This lab provides you with a pre-written Lambda function, so you will Author from scratch.
Configure the following:
- Function Name:
TransactionProcessor - Runtime:
Python 2.7 - Execution Role:
Choose Use an existing role - Existing role:
TransactionProcessorRole
Note: This role gives execution permissions to your Lambda function so it can access Amazon S3 and Amazon DynamoDB.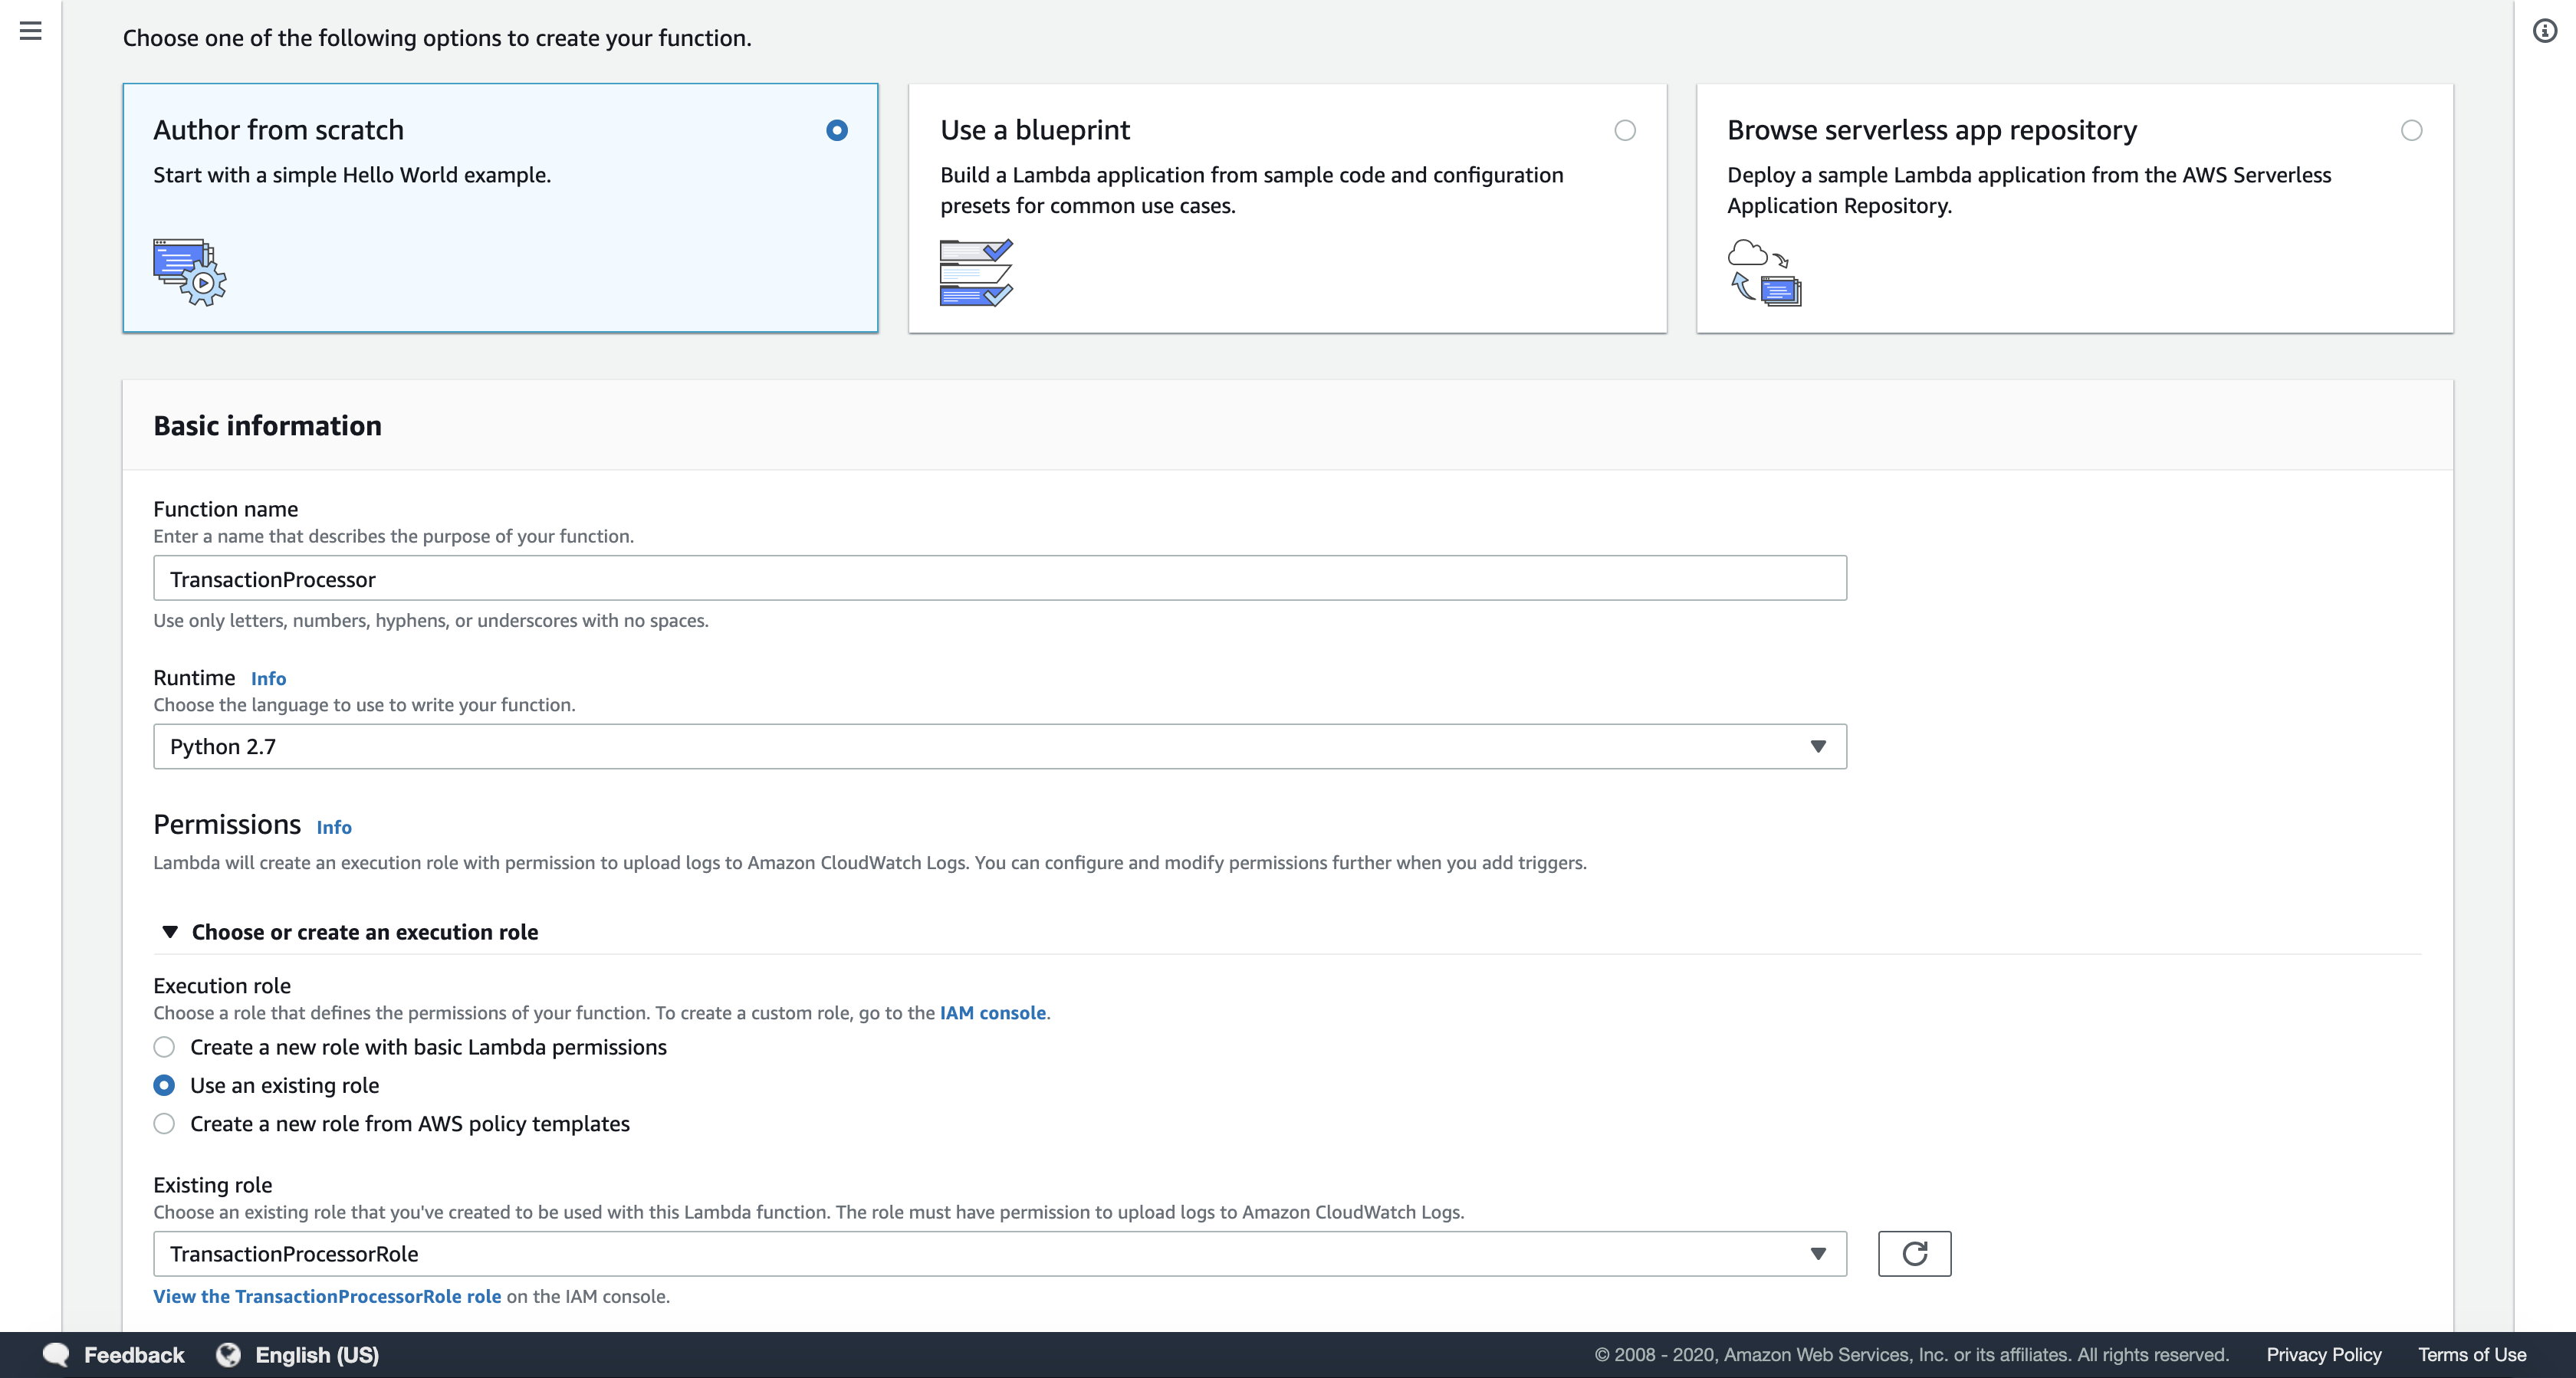
Click Create function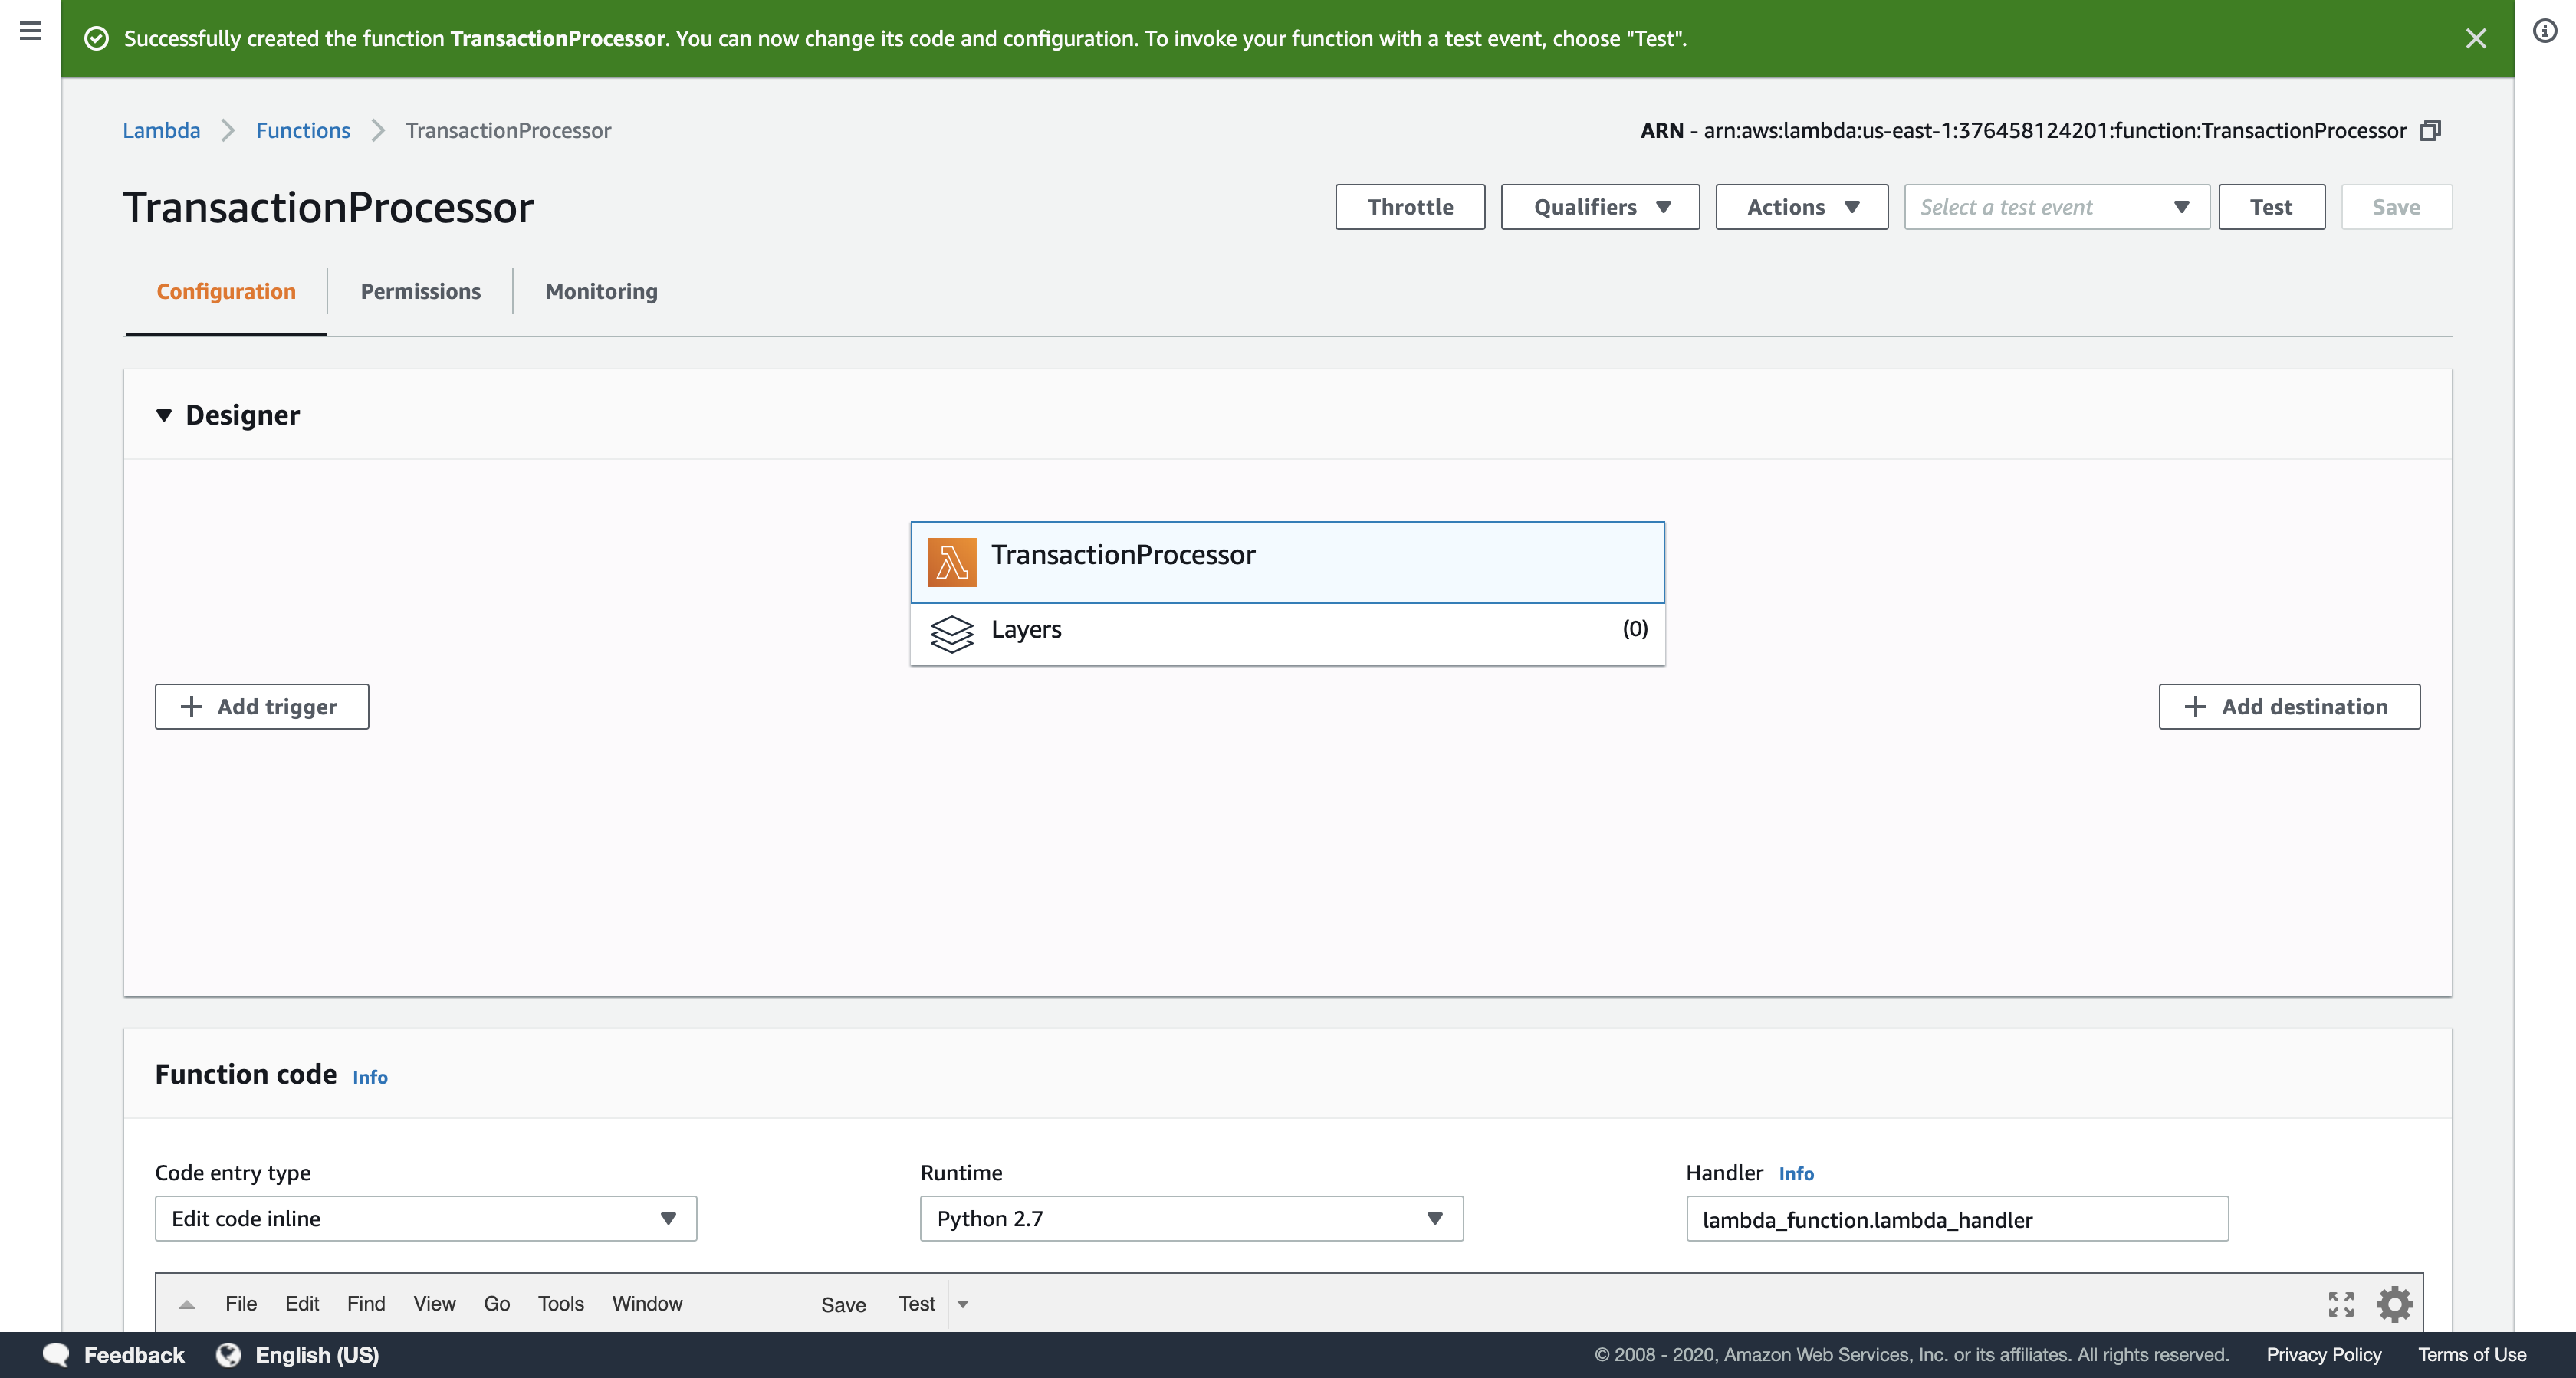
In the Function code section, delete all of the code that appears in the code editor.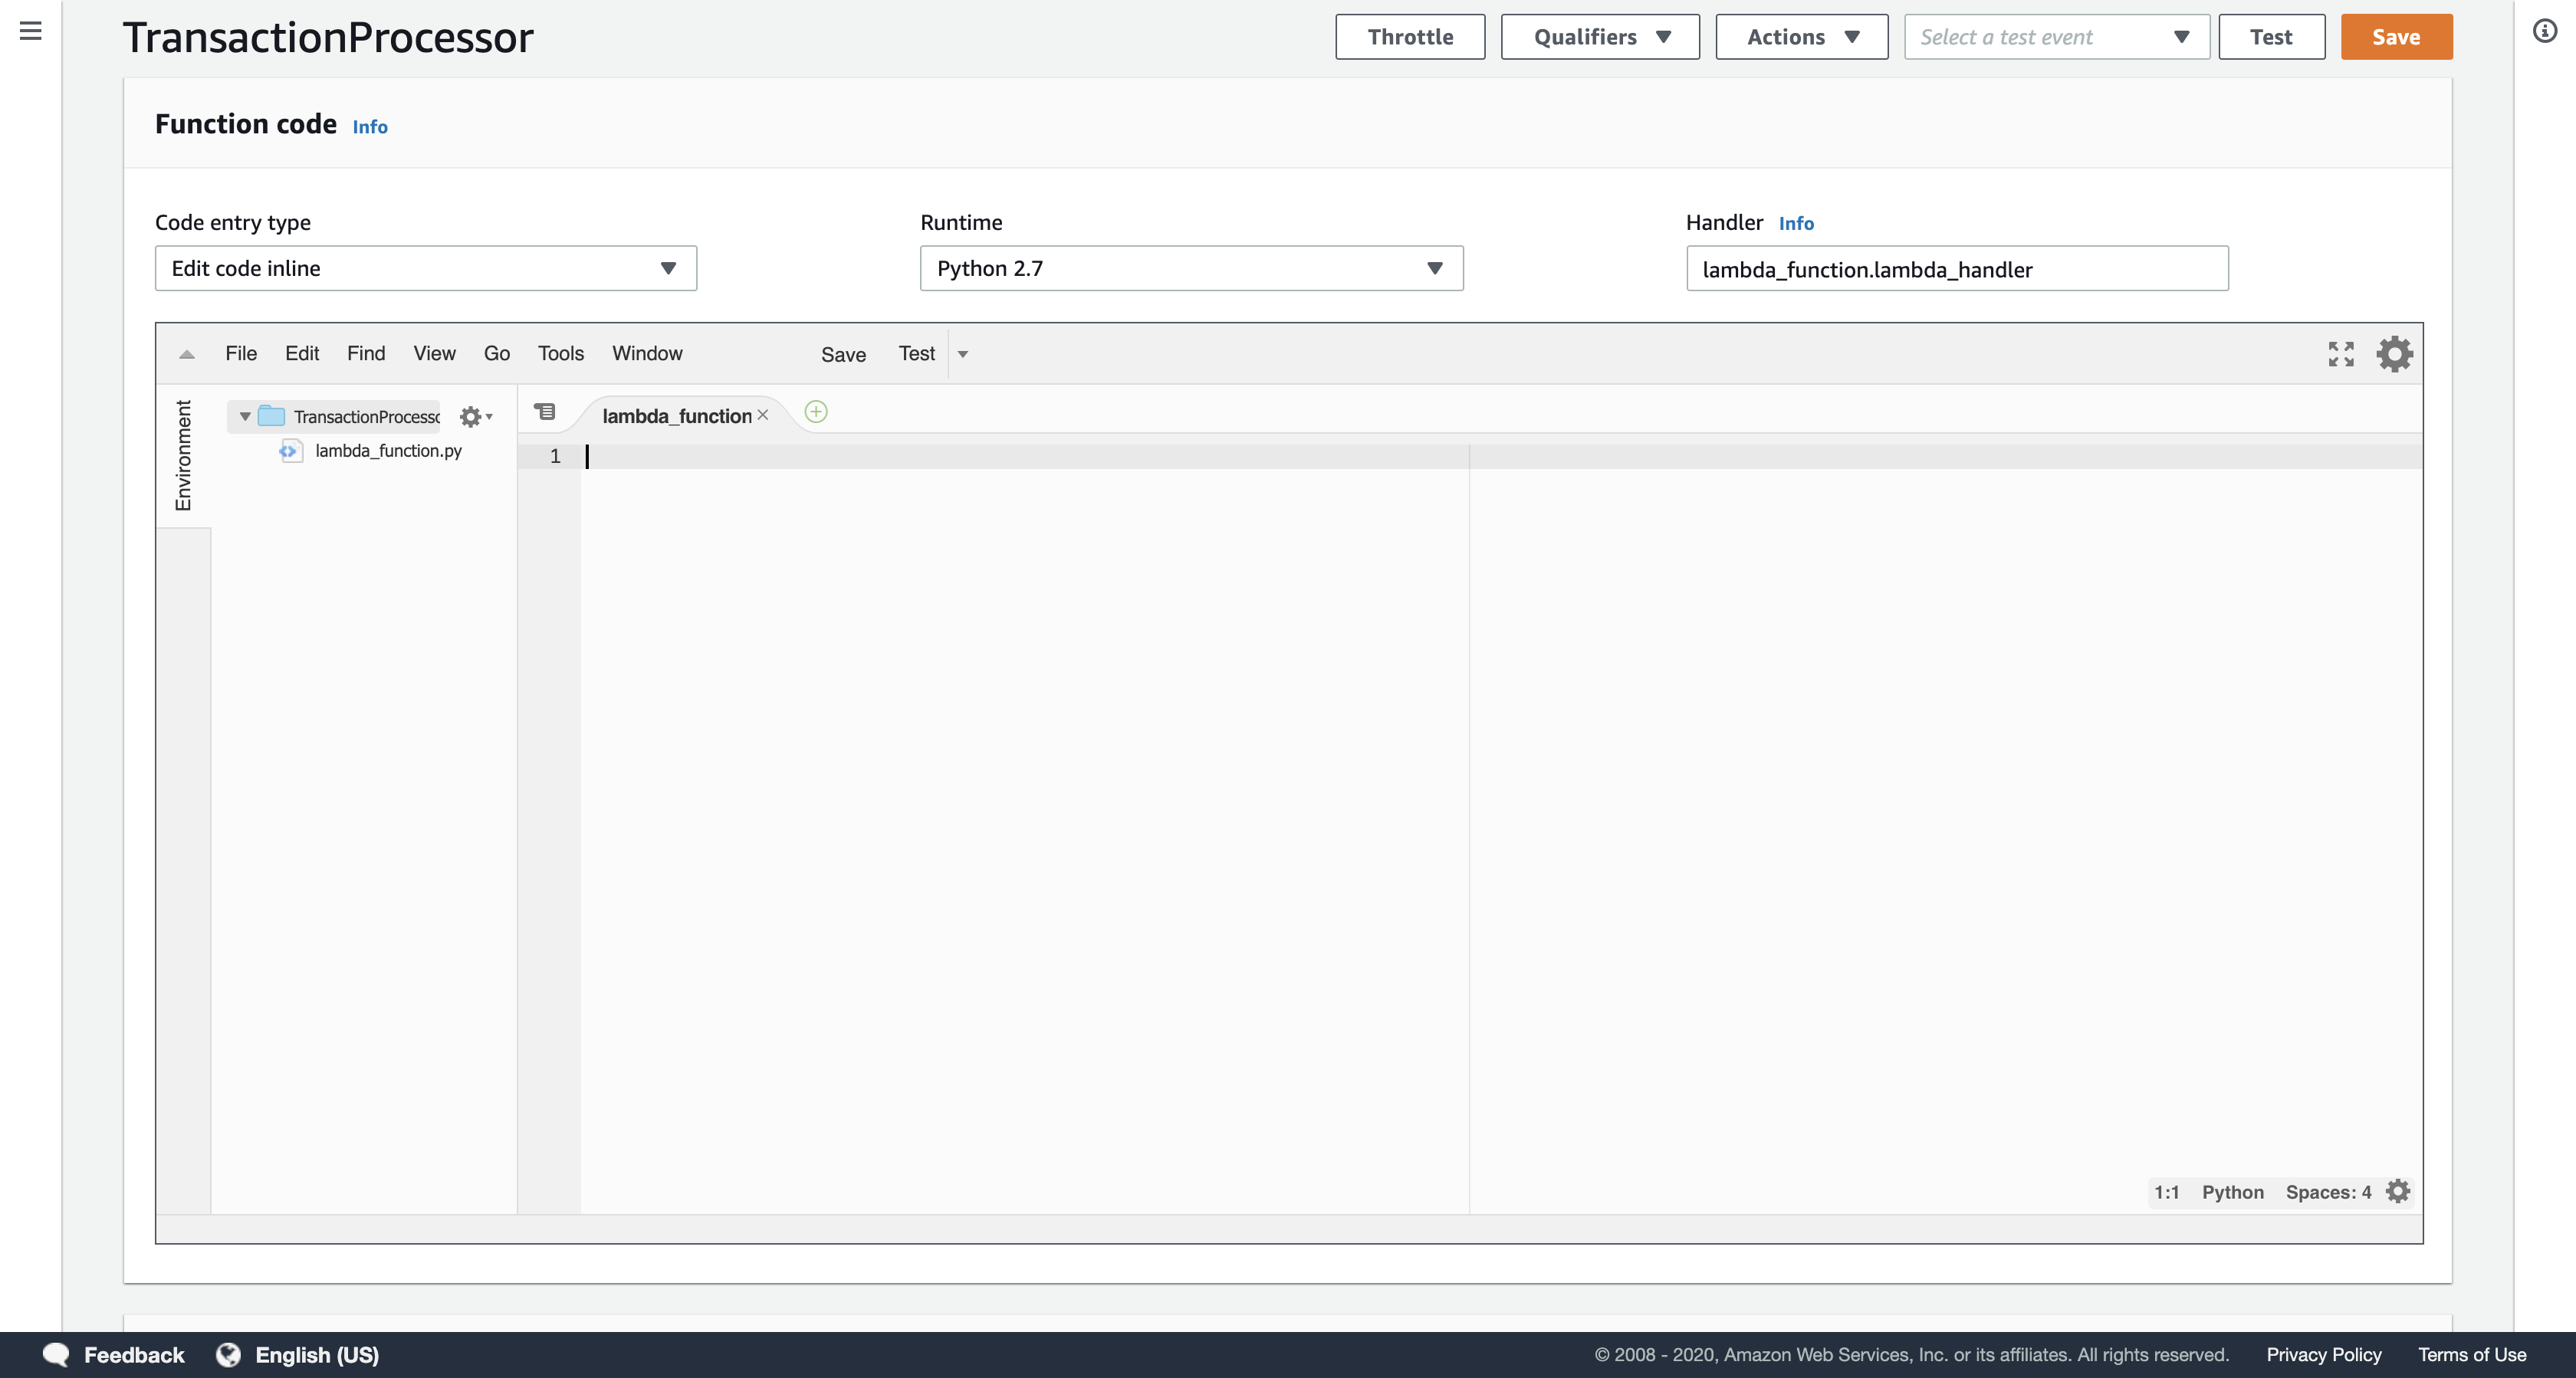
Copy the code block below and paste it into the code editor.
1 | # TransactionProcessor Lambda function |
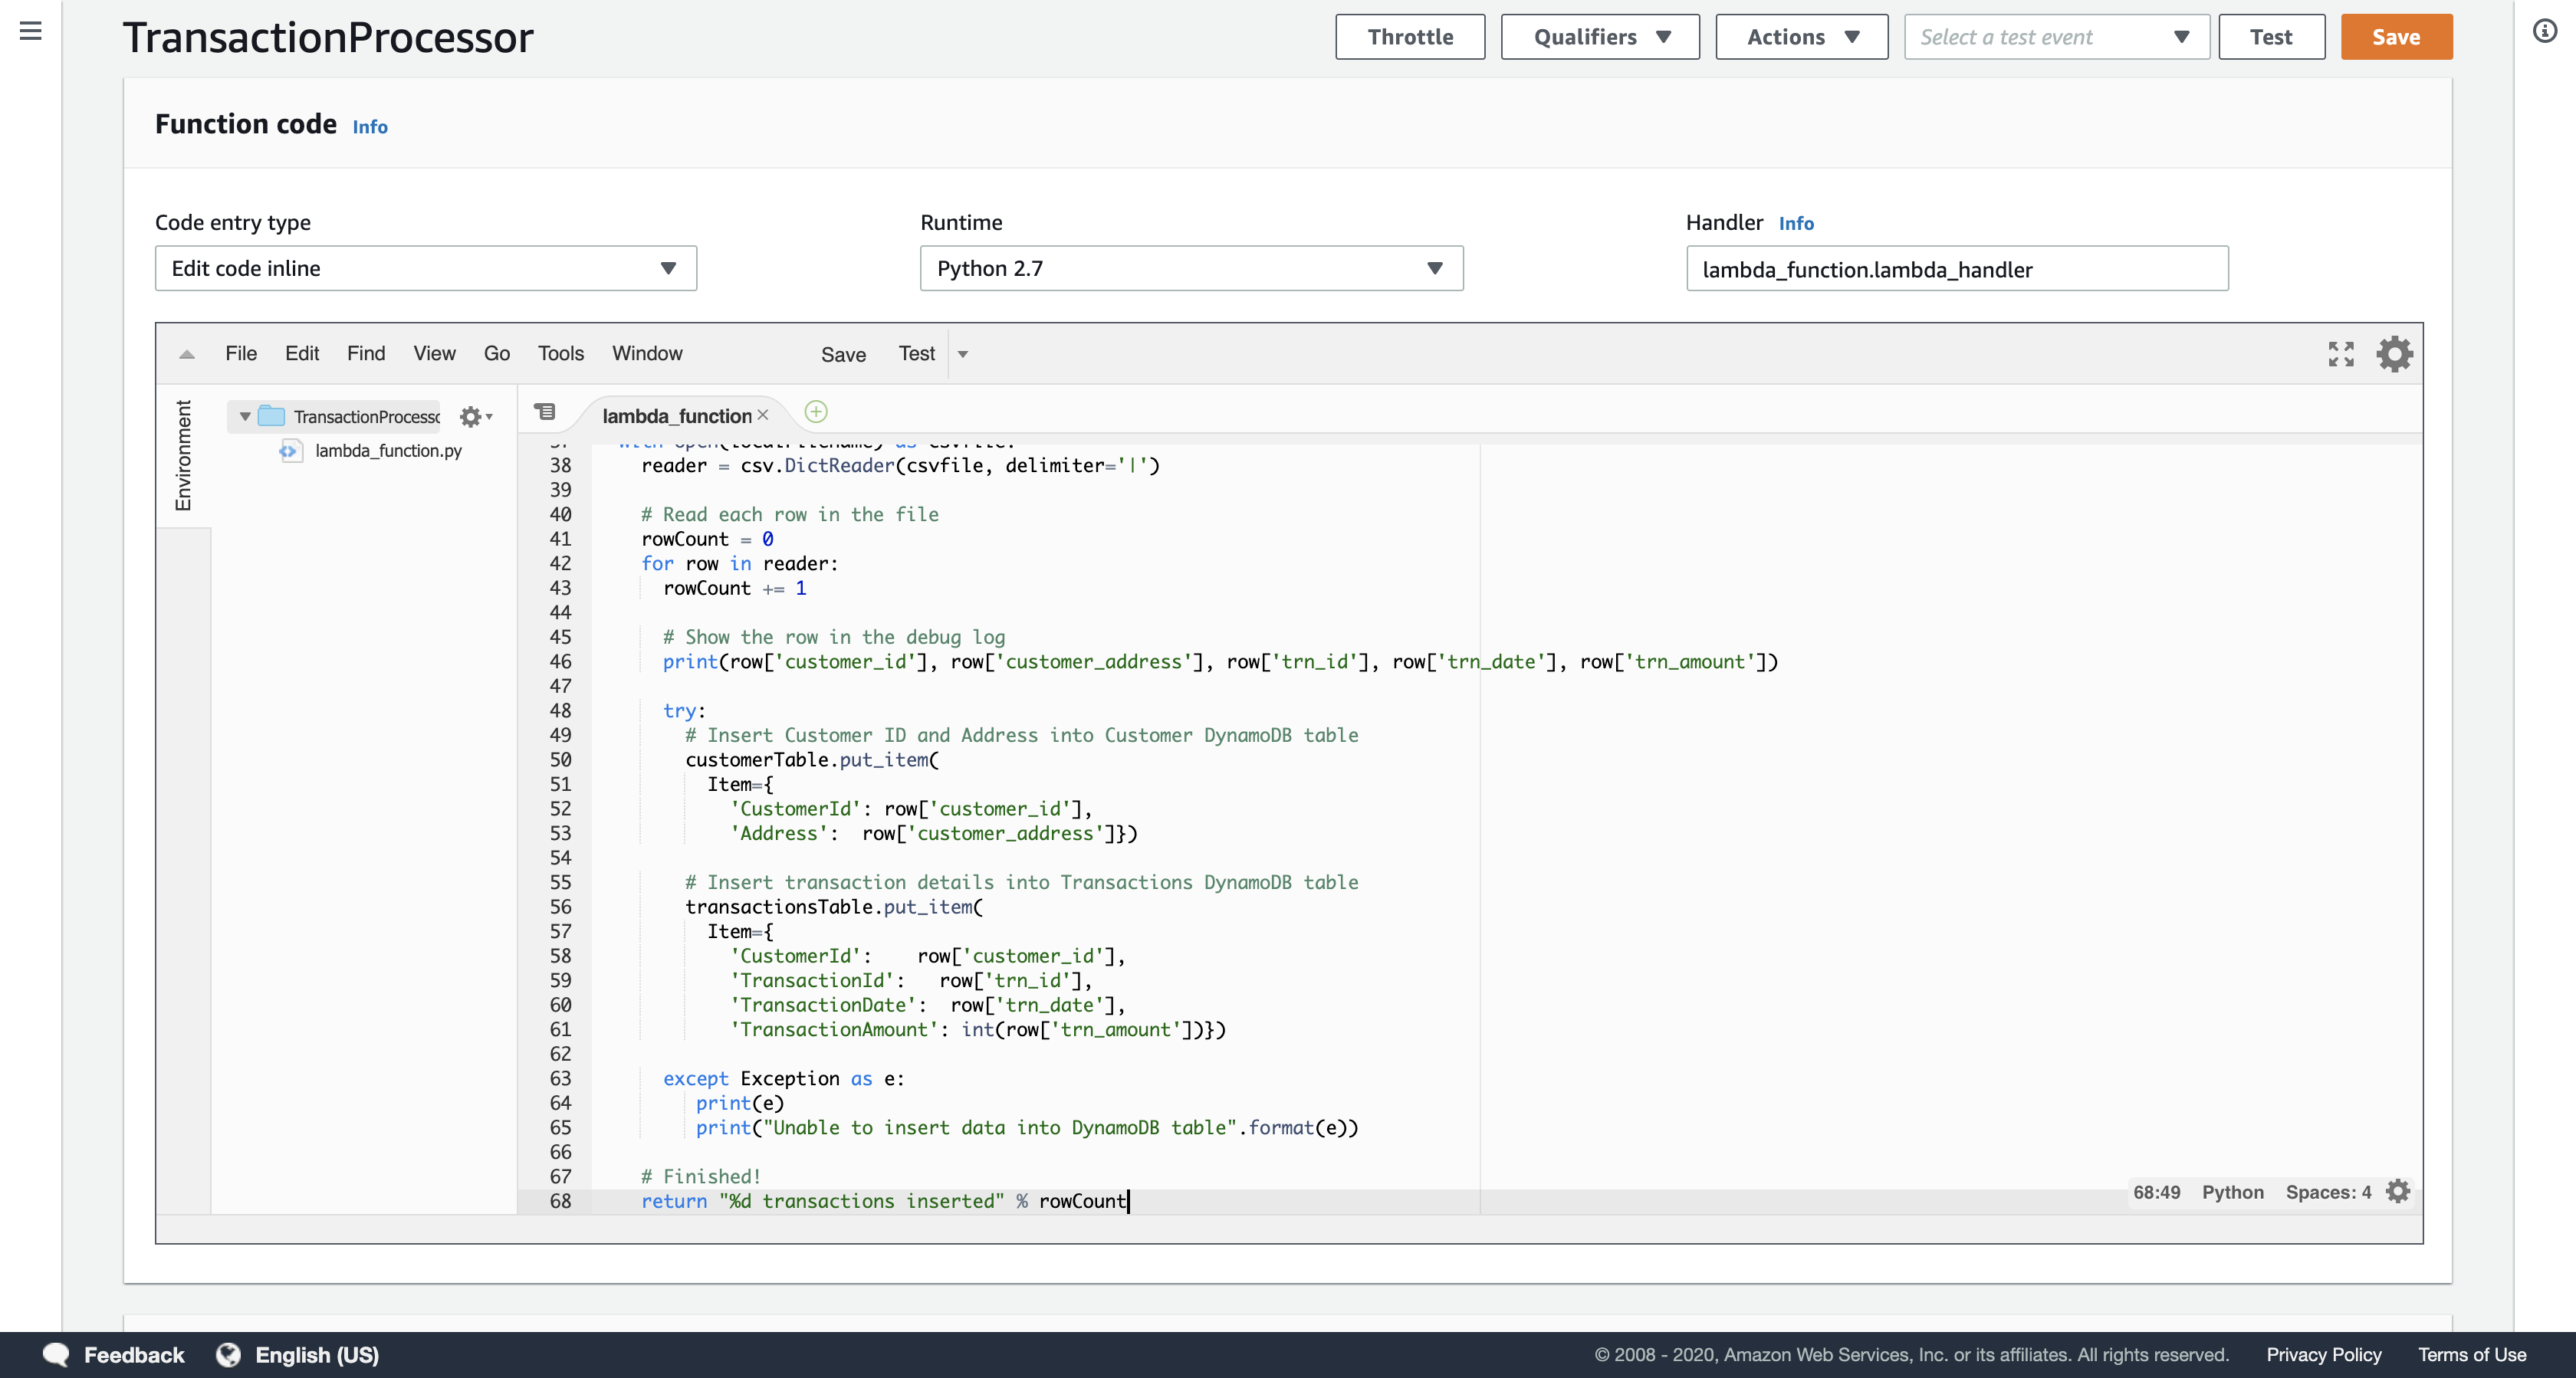
Examine the code. It performs the following steps:
- Downloads the file from Amazon S3 that triggered the event
- Loops through each line in the file
- Inserts the data into the Customer and Transactions DynamoDB tables
In the Basic settings section lower on the page, configure as shown:
- Description:
Process data and send to DynamoDB tables - Timeout:
20 sec
You will now define a trigger that will activate the Lambda function.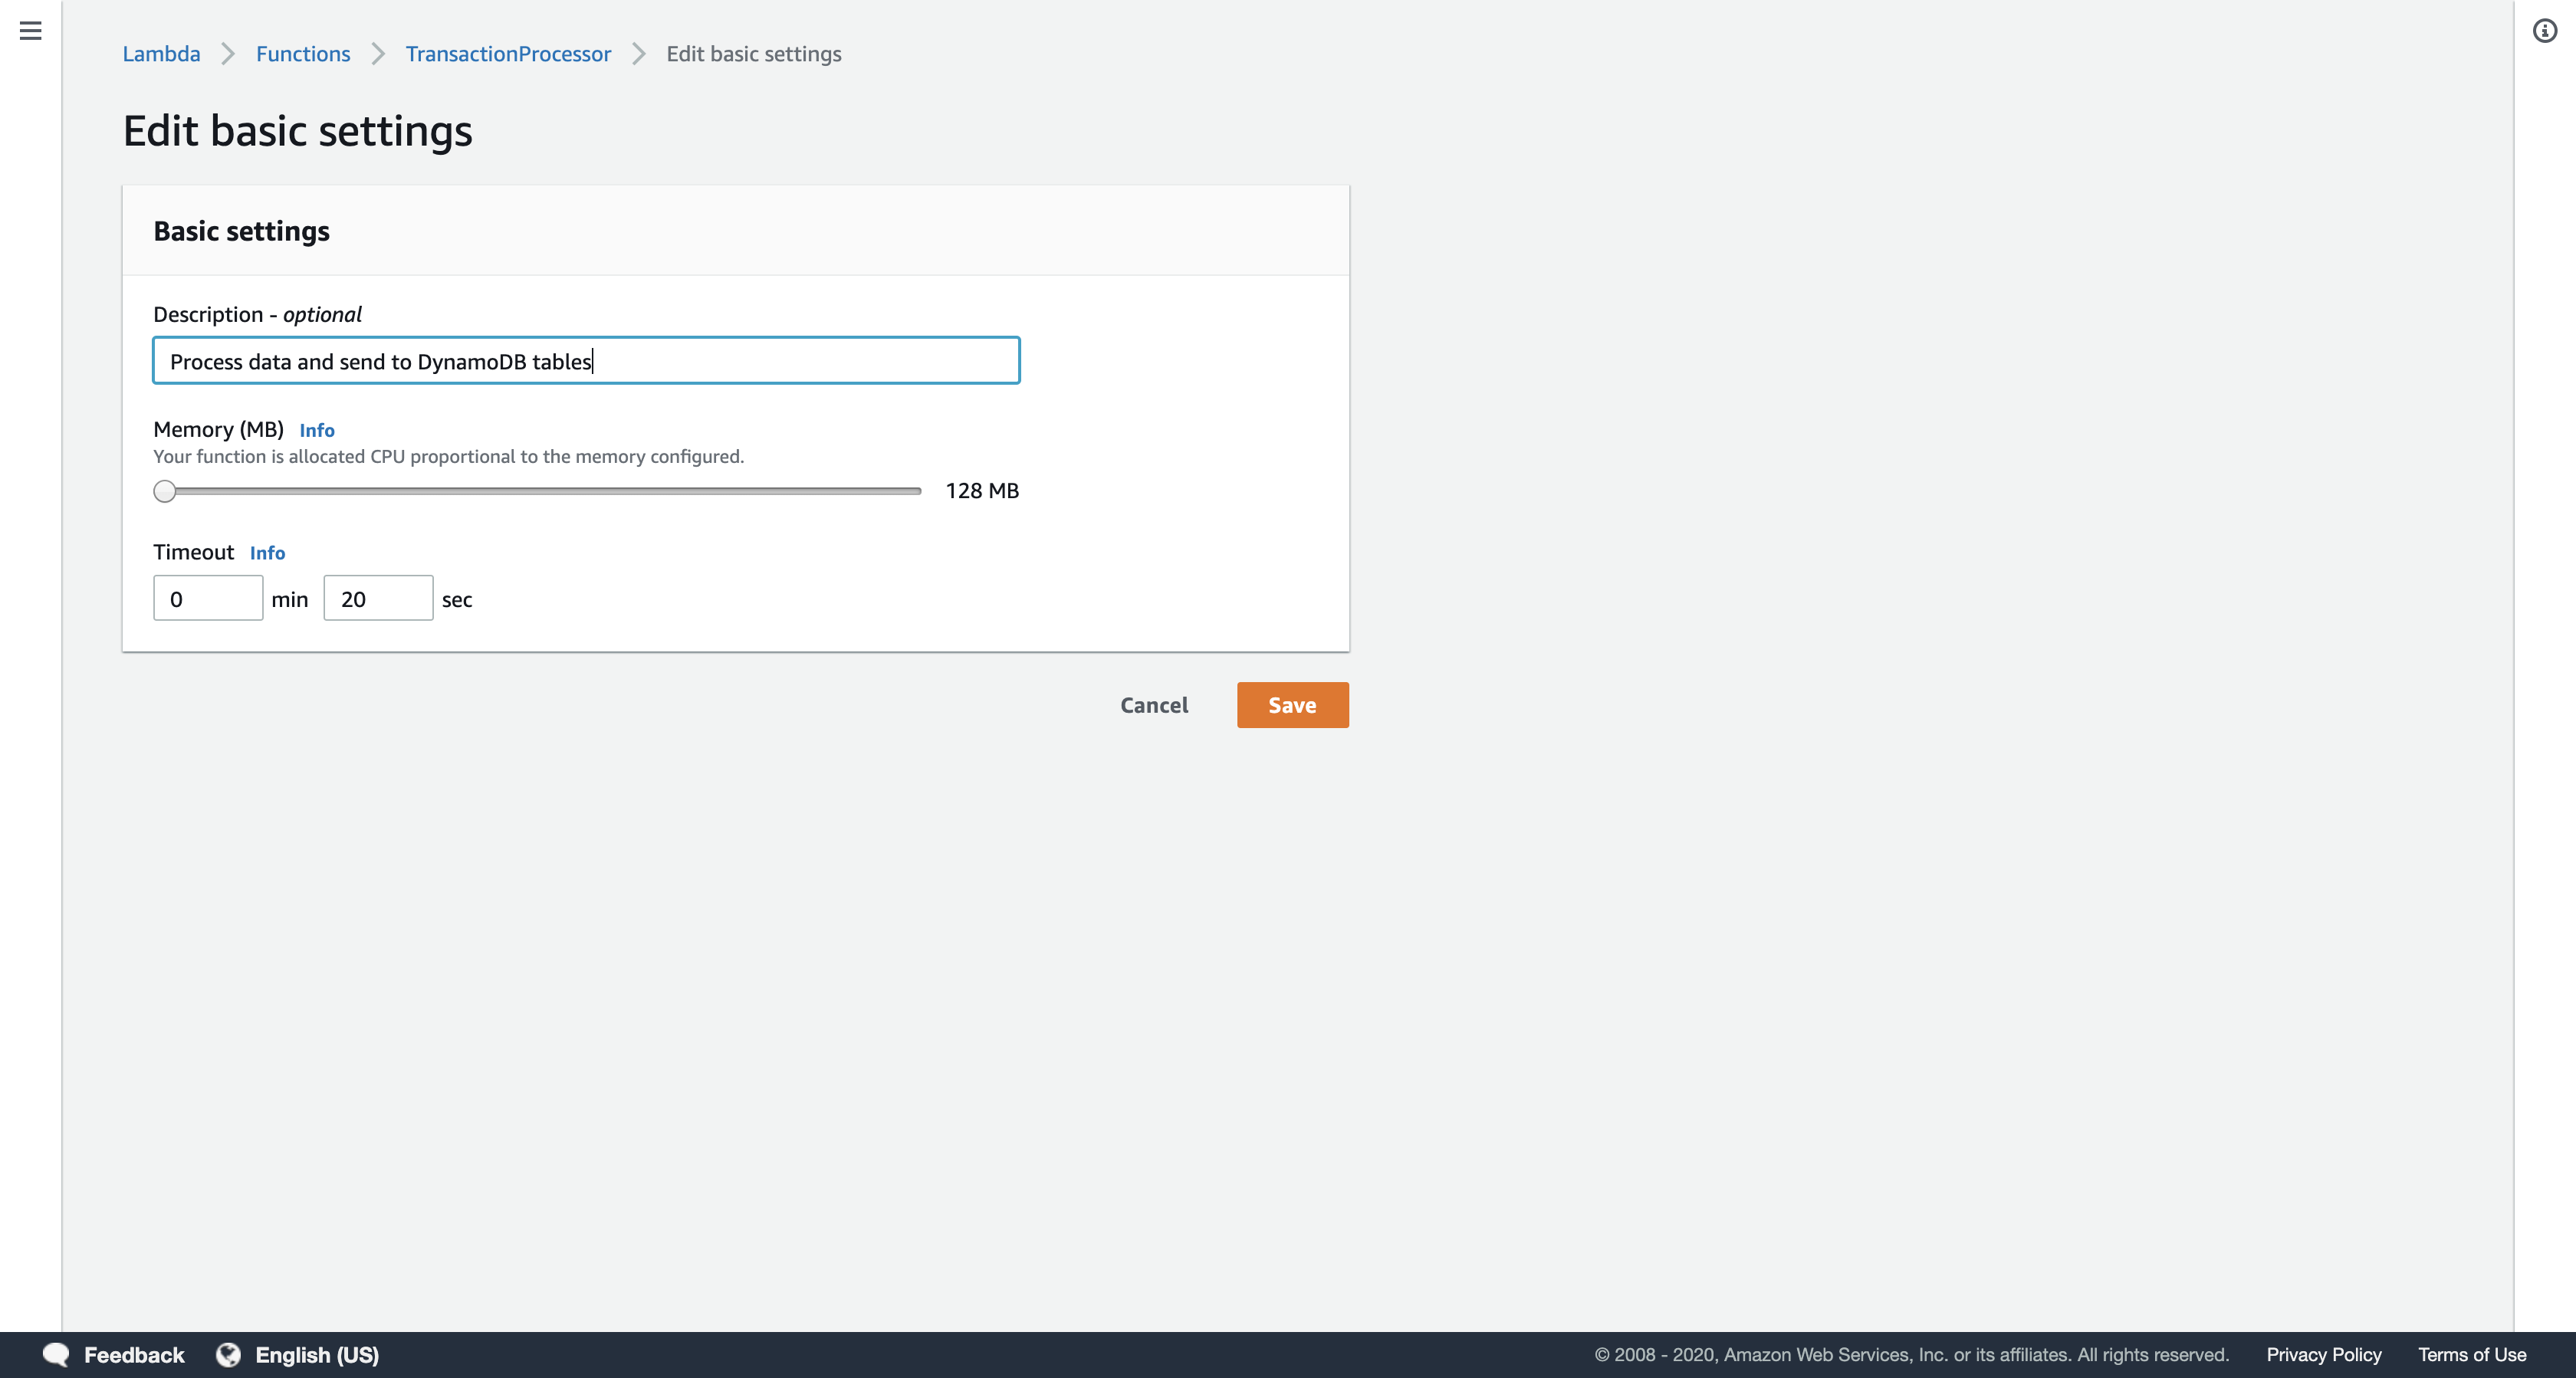
Click Save
Scroll up to the Add triggers section at the top of the page.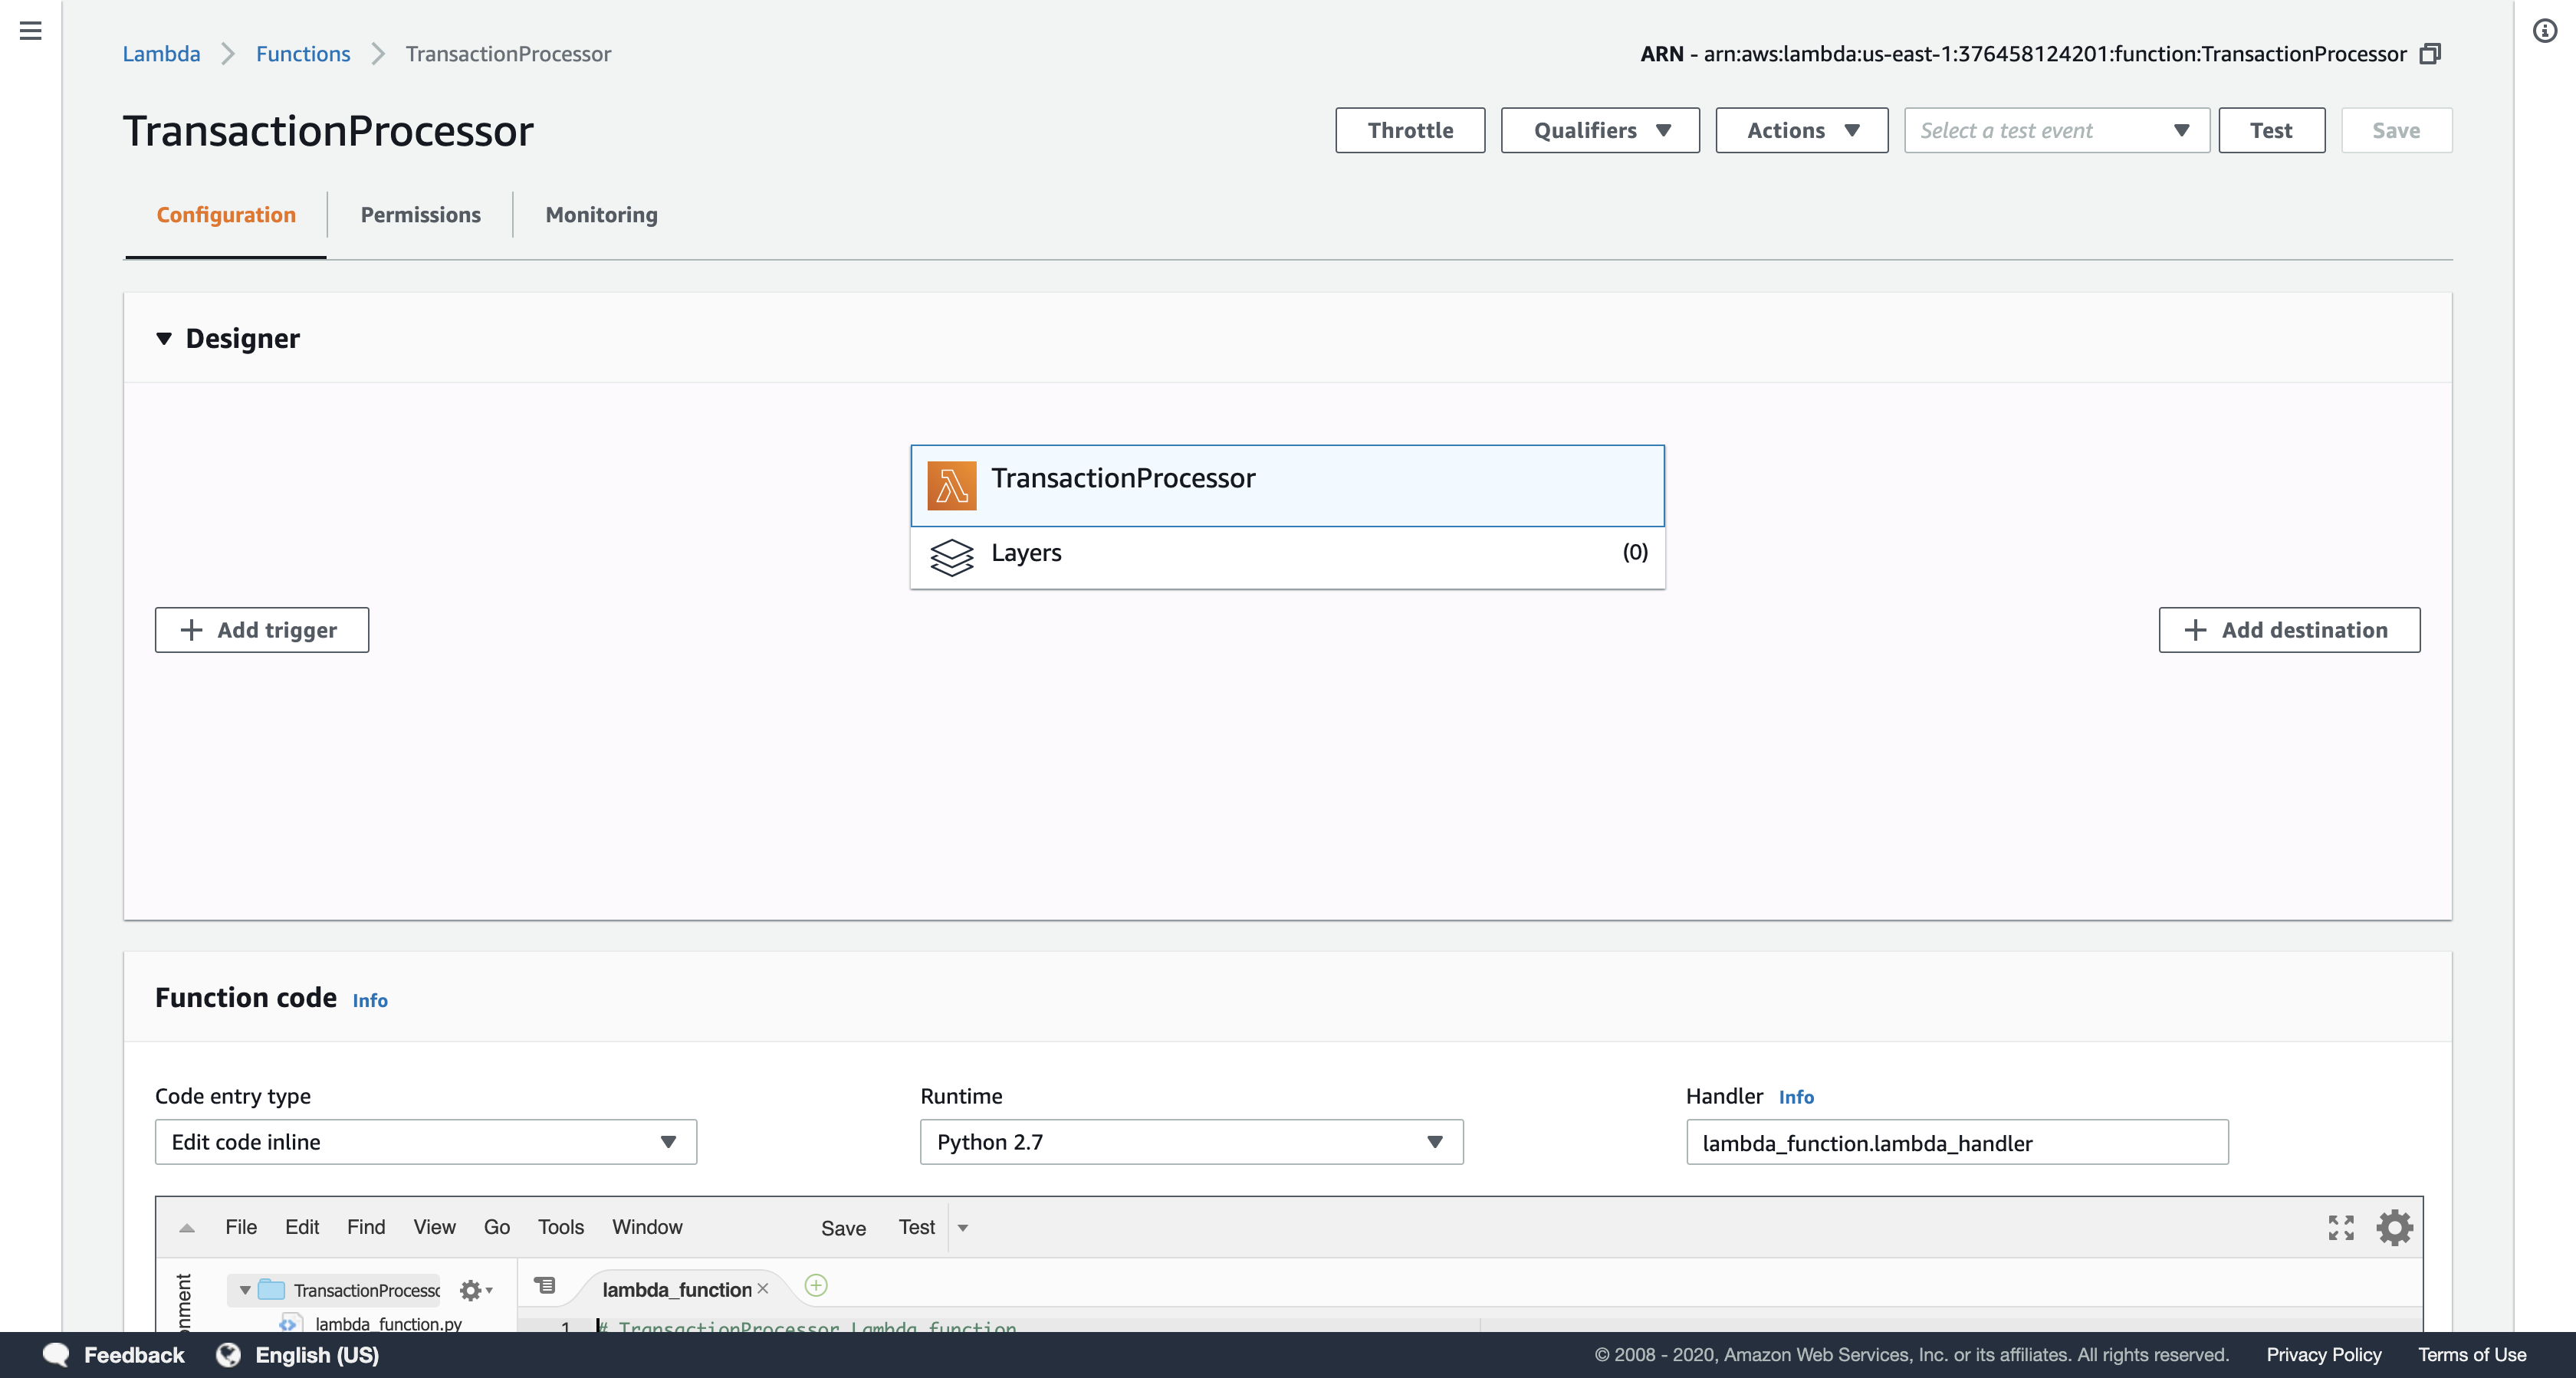
Under Add triggers, click S3.
Scroll down to the Configure triggers panel and configure these settings:
- Bucket:
Select the Bucket that includes the words inputs3bucketfortransact.
It will look similar to …-inputs3bucket-… - Event type:
All object create events
Do not select Object Removed.
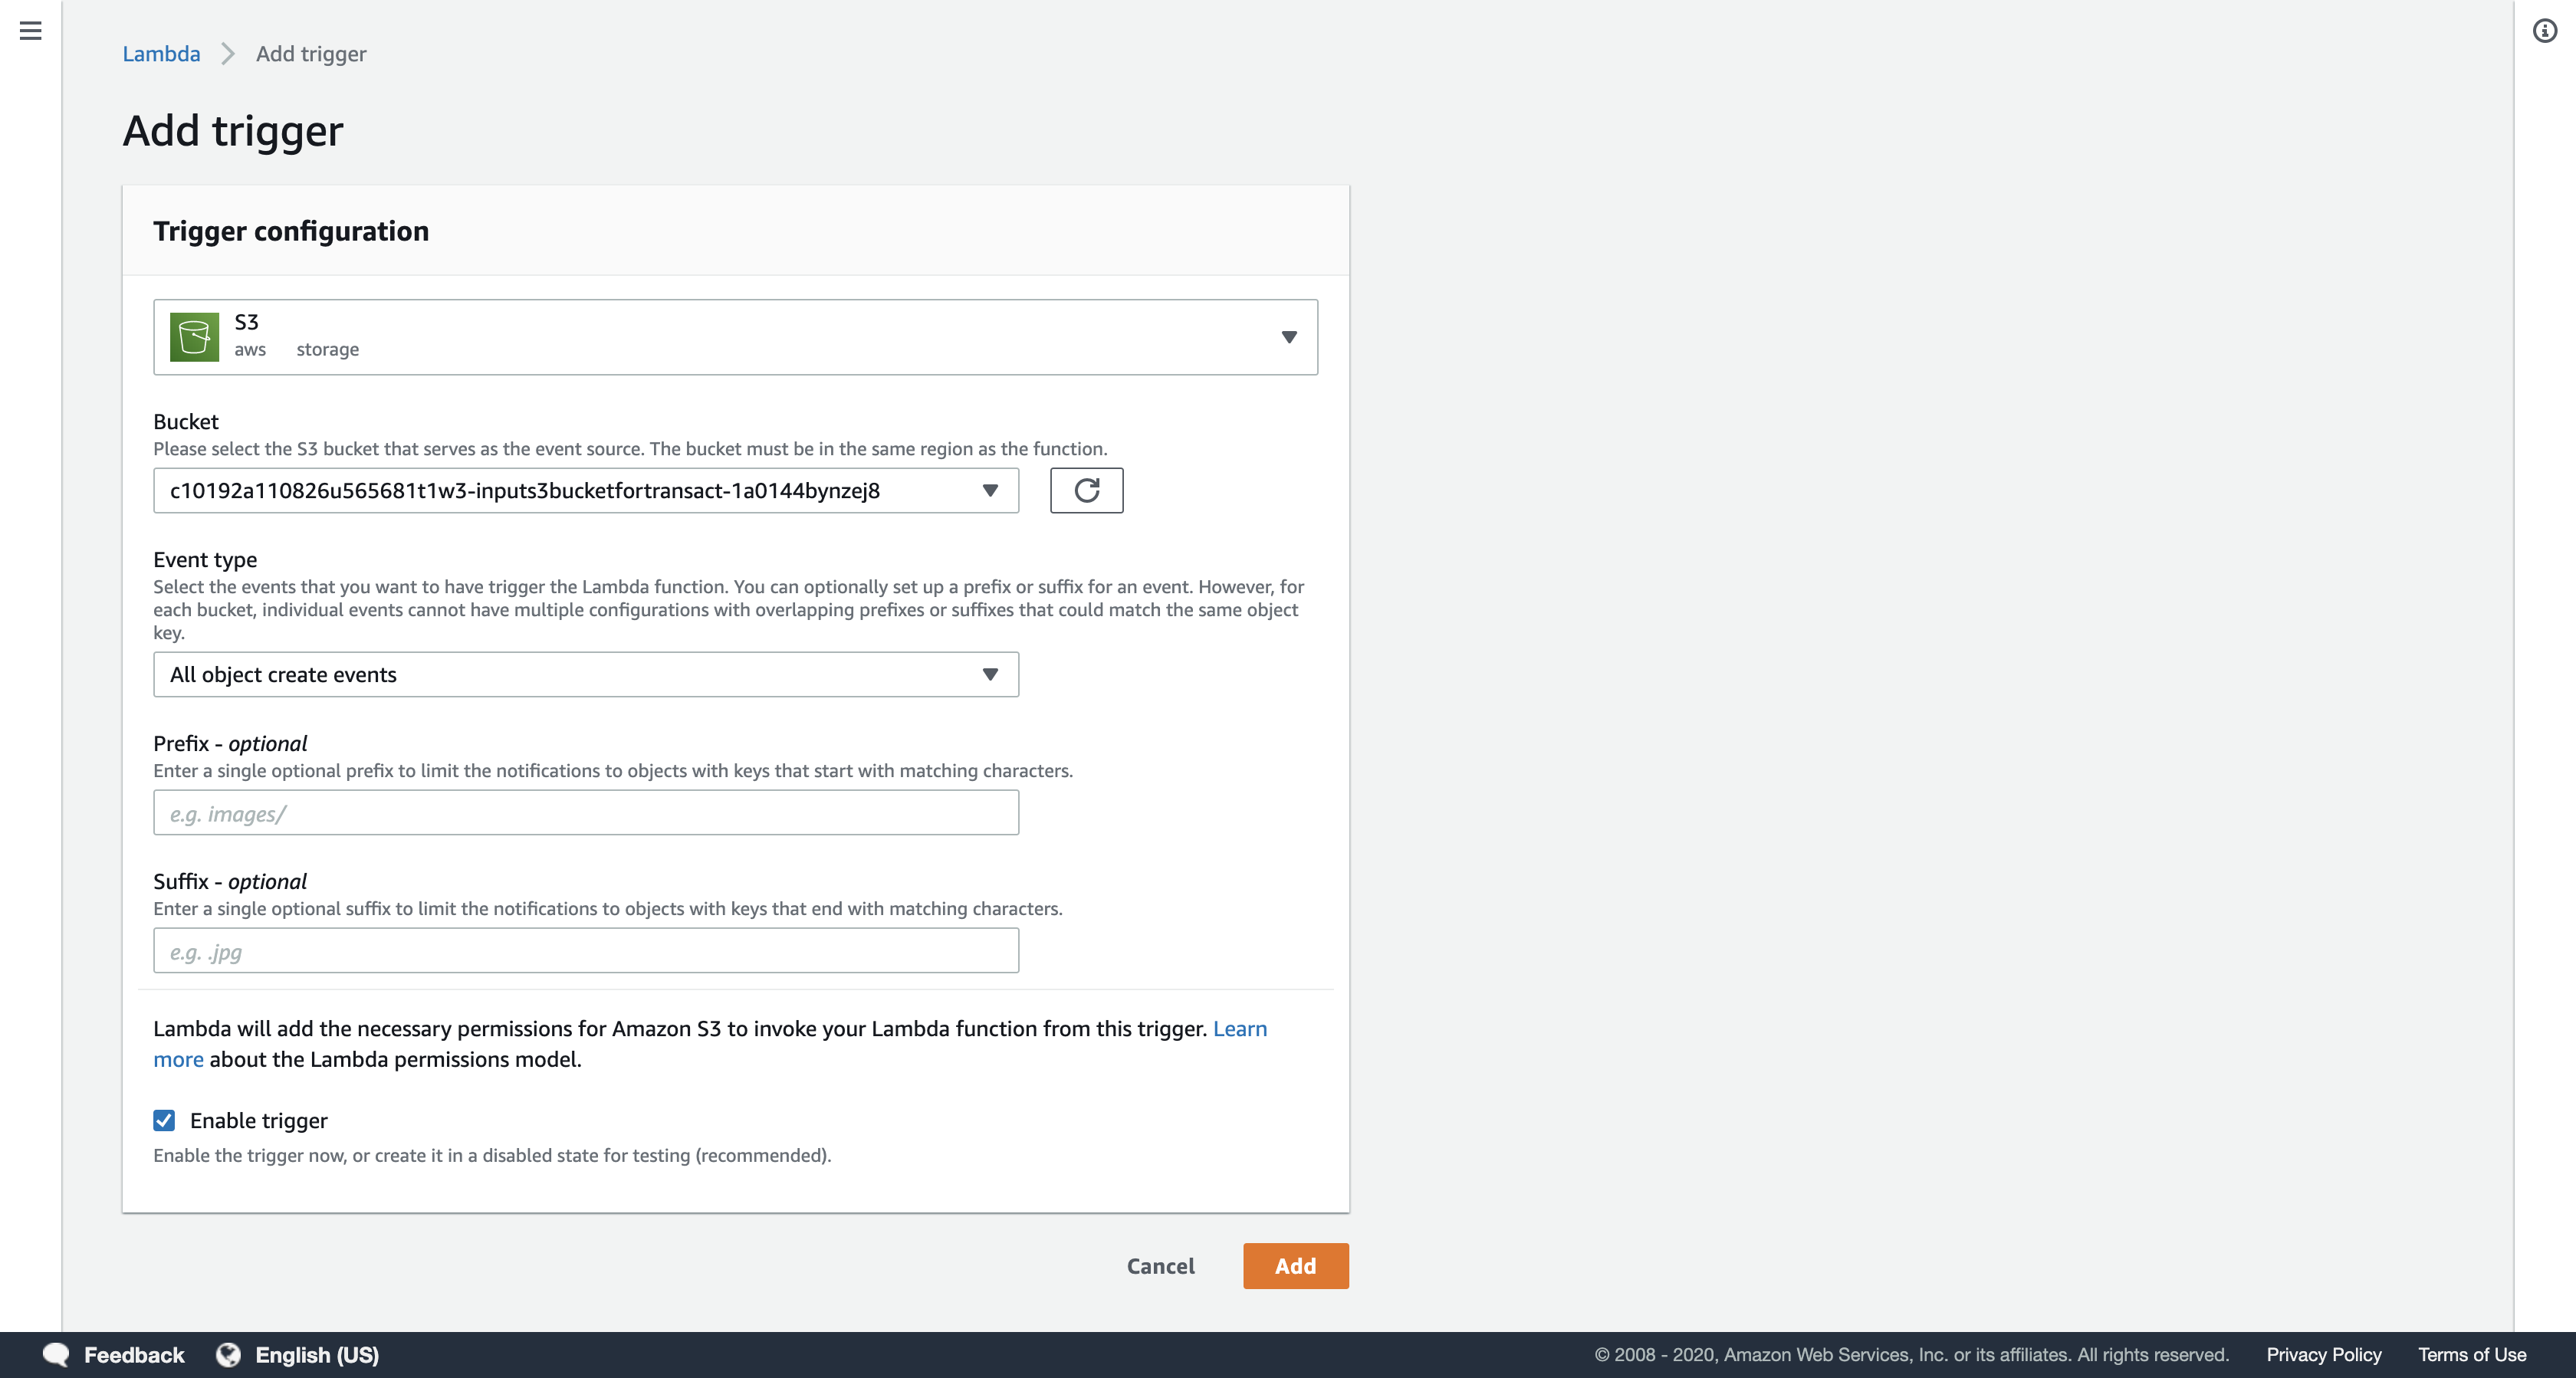
The Lambda function will run whenever an object is created in your Amazon S3 bucket.
Click Add at the bottom of the page.
Click Save at the top of the page.
Now whenever a file is uploaded to the selected Amazon S3 bucket, this Lambda function will execute. It will read the data from the uploaded file and will store the data it finds into the Customer and Transactions tables in DynamoDB.
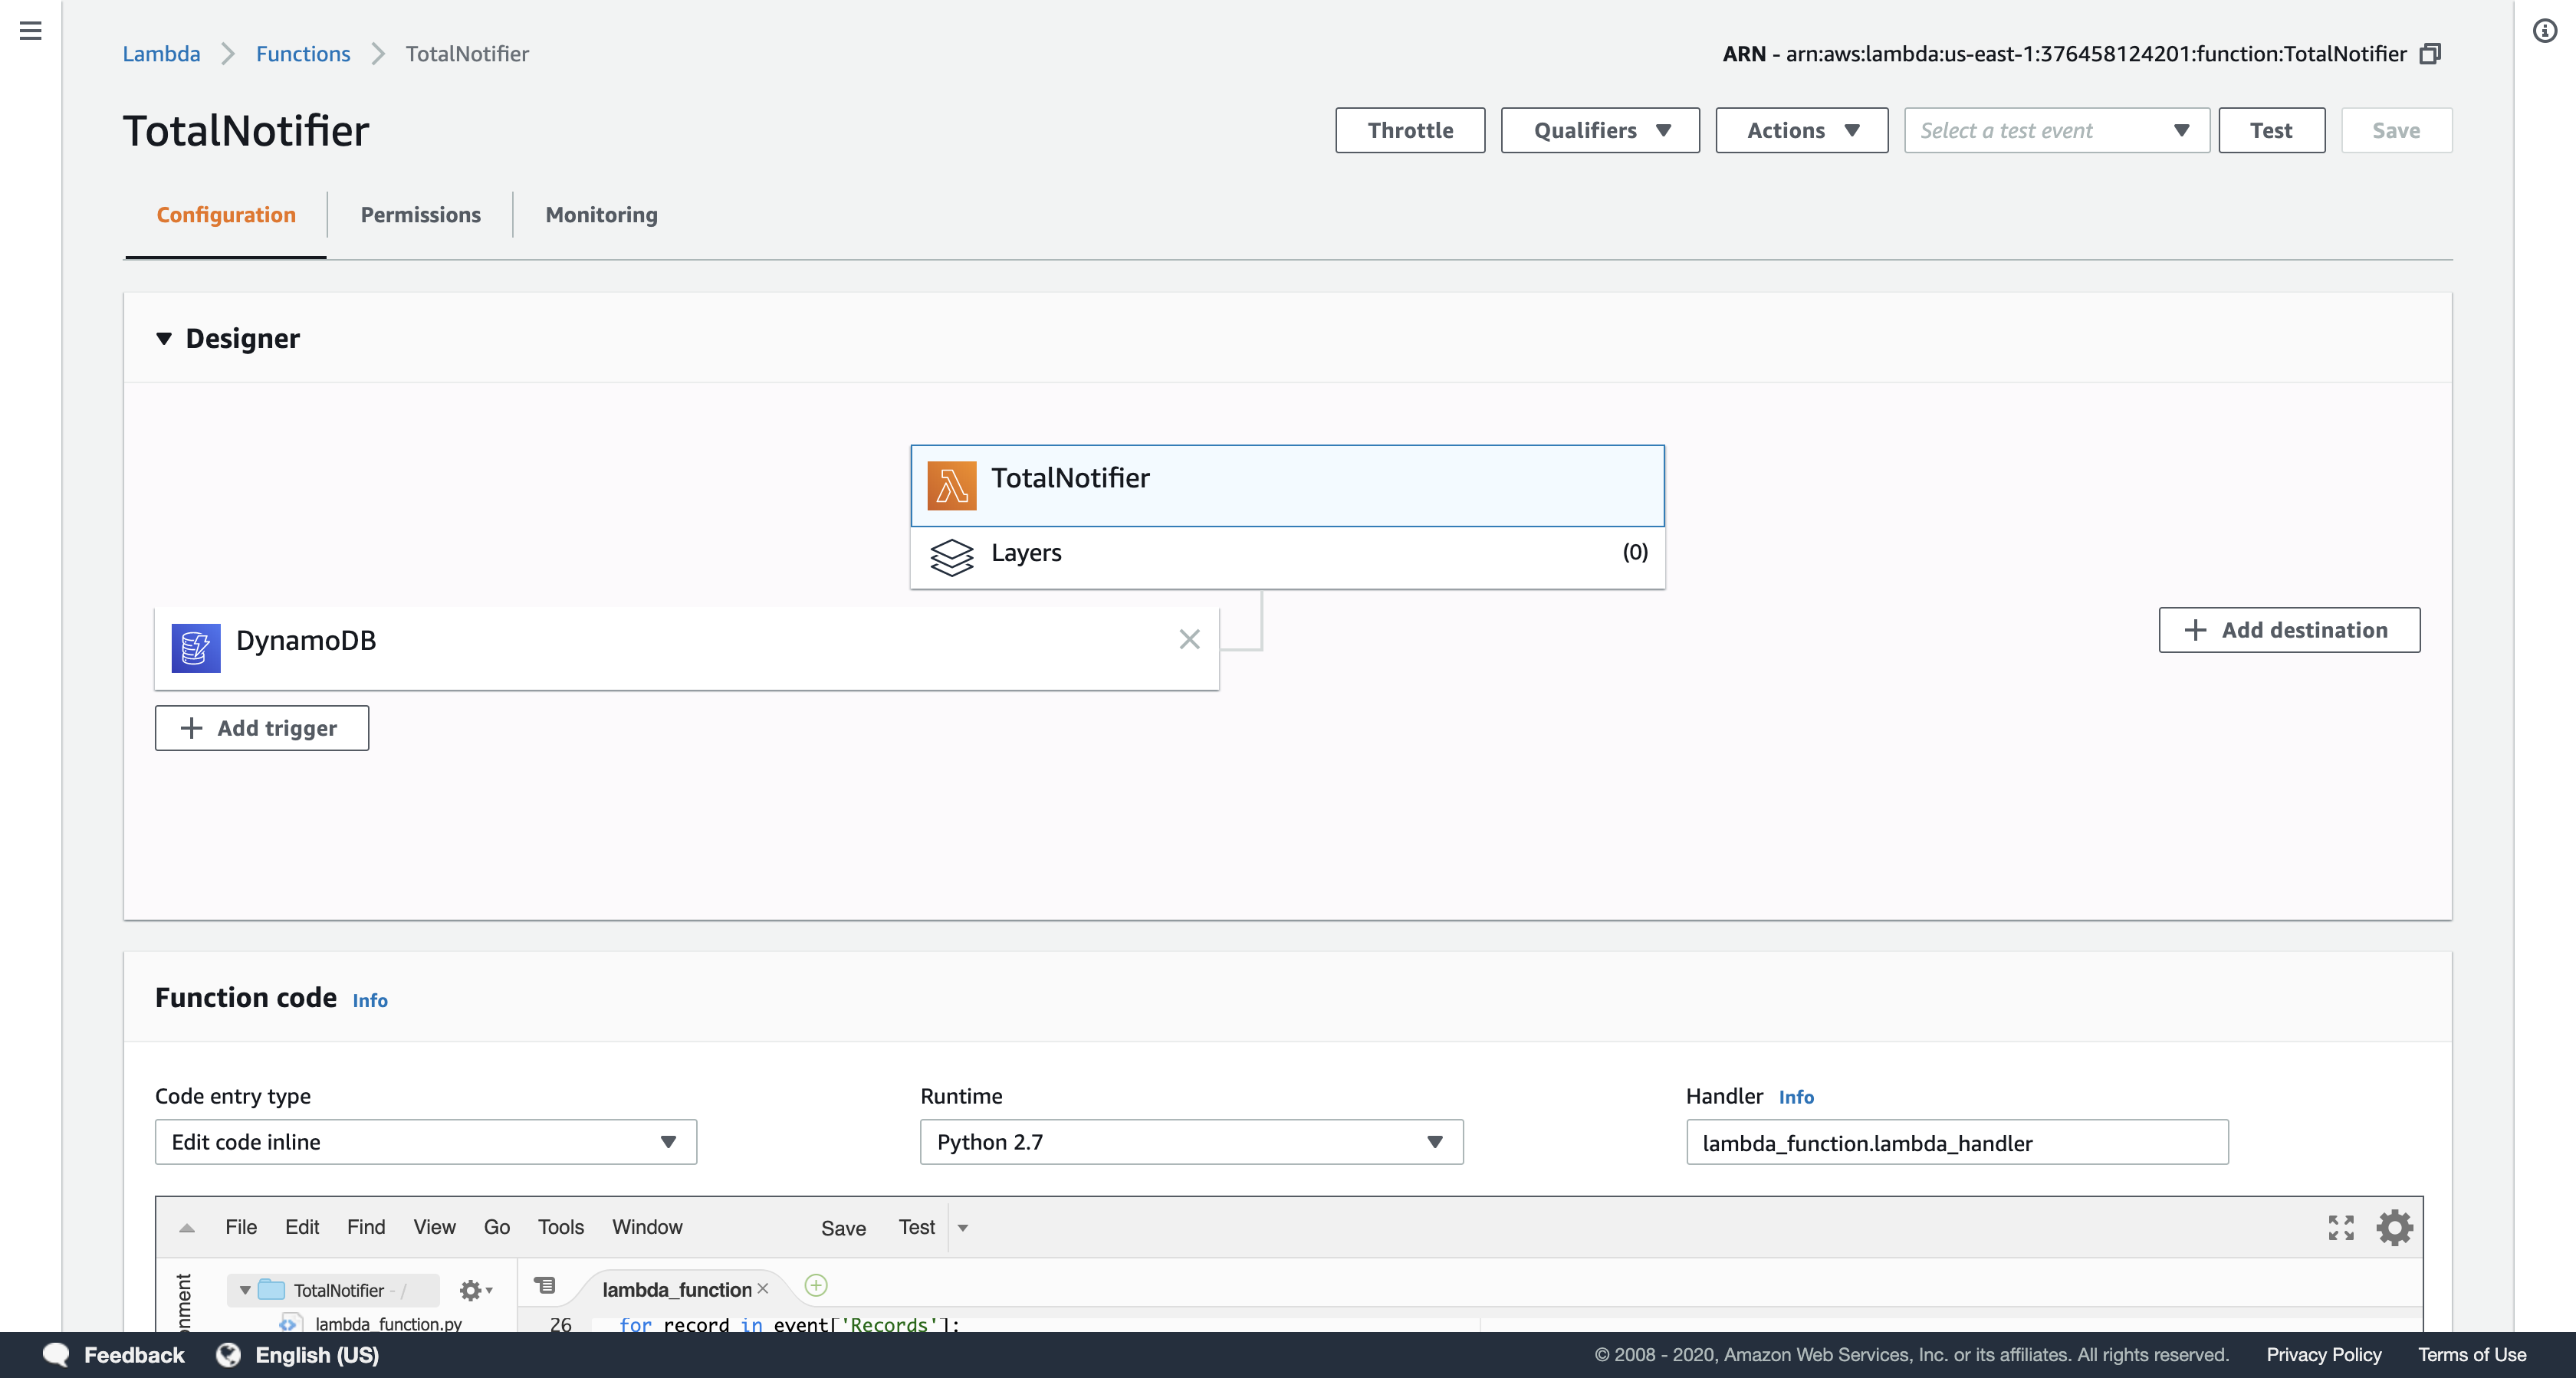
Task 2: Create a Lambda Function to Calculate Transaction Totals and Notify About High Account Balances
In this task, you will create an AWS Lambda function to calculate transaction totals and send a Simple Notification Service notification if an account balance exceeds $1500.
In the top-left of the page, click Functions.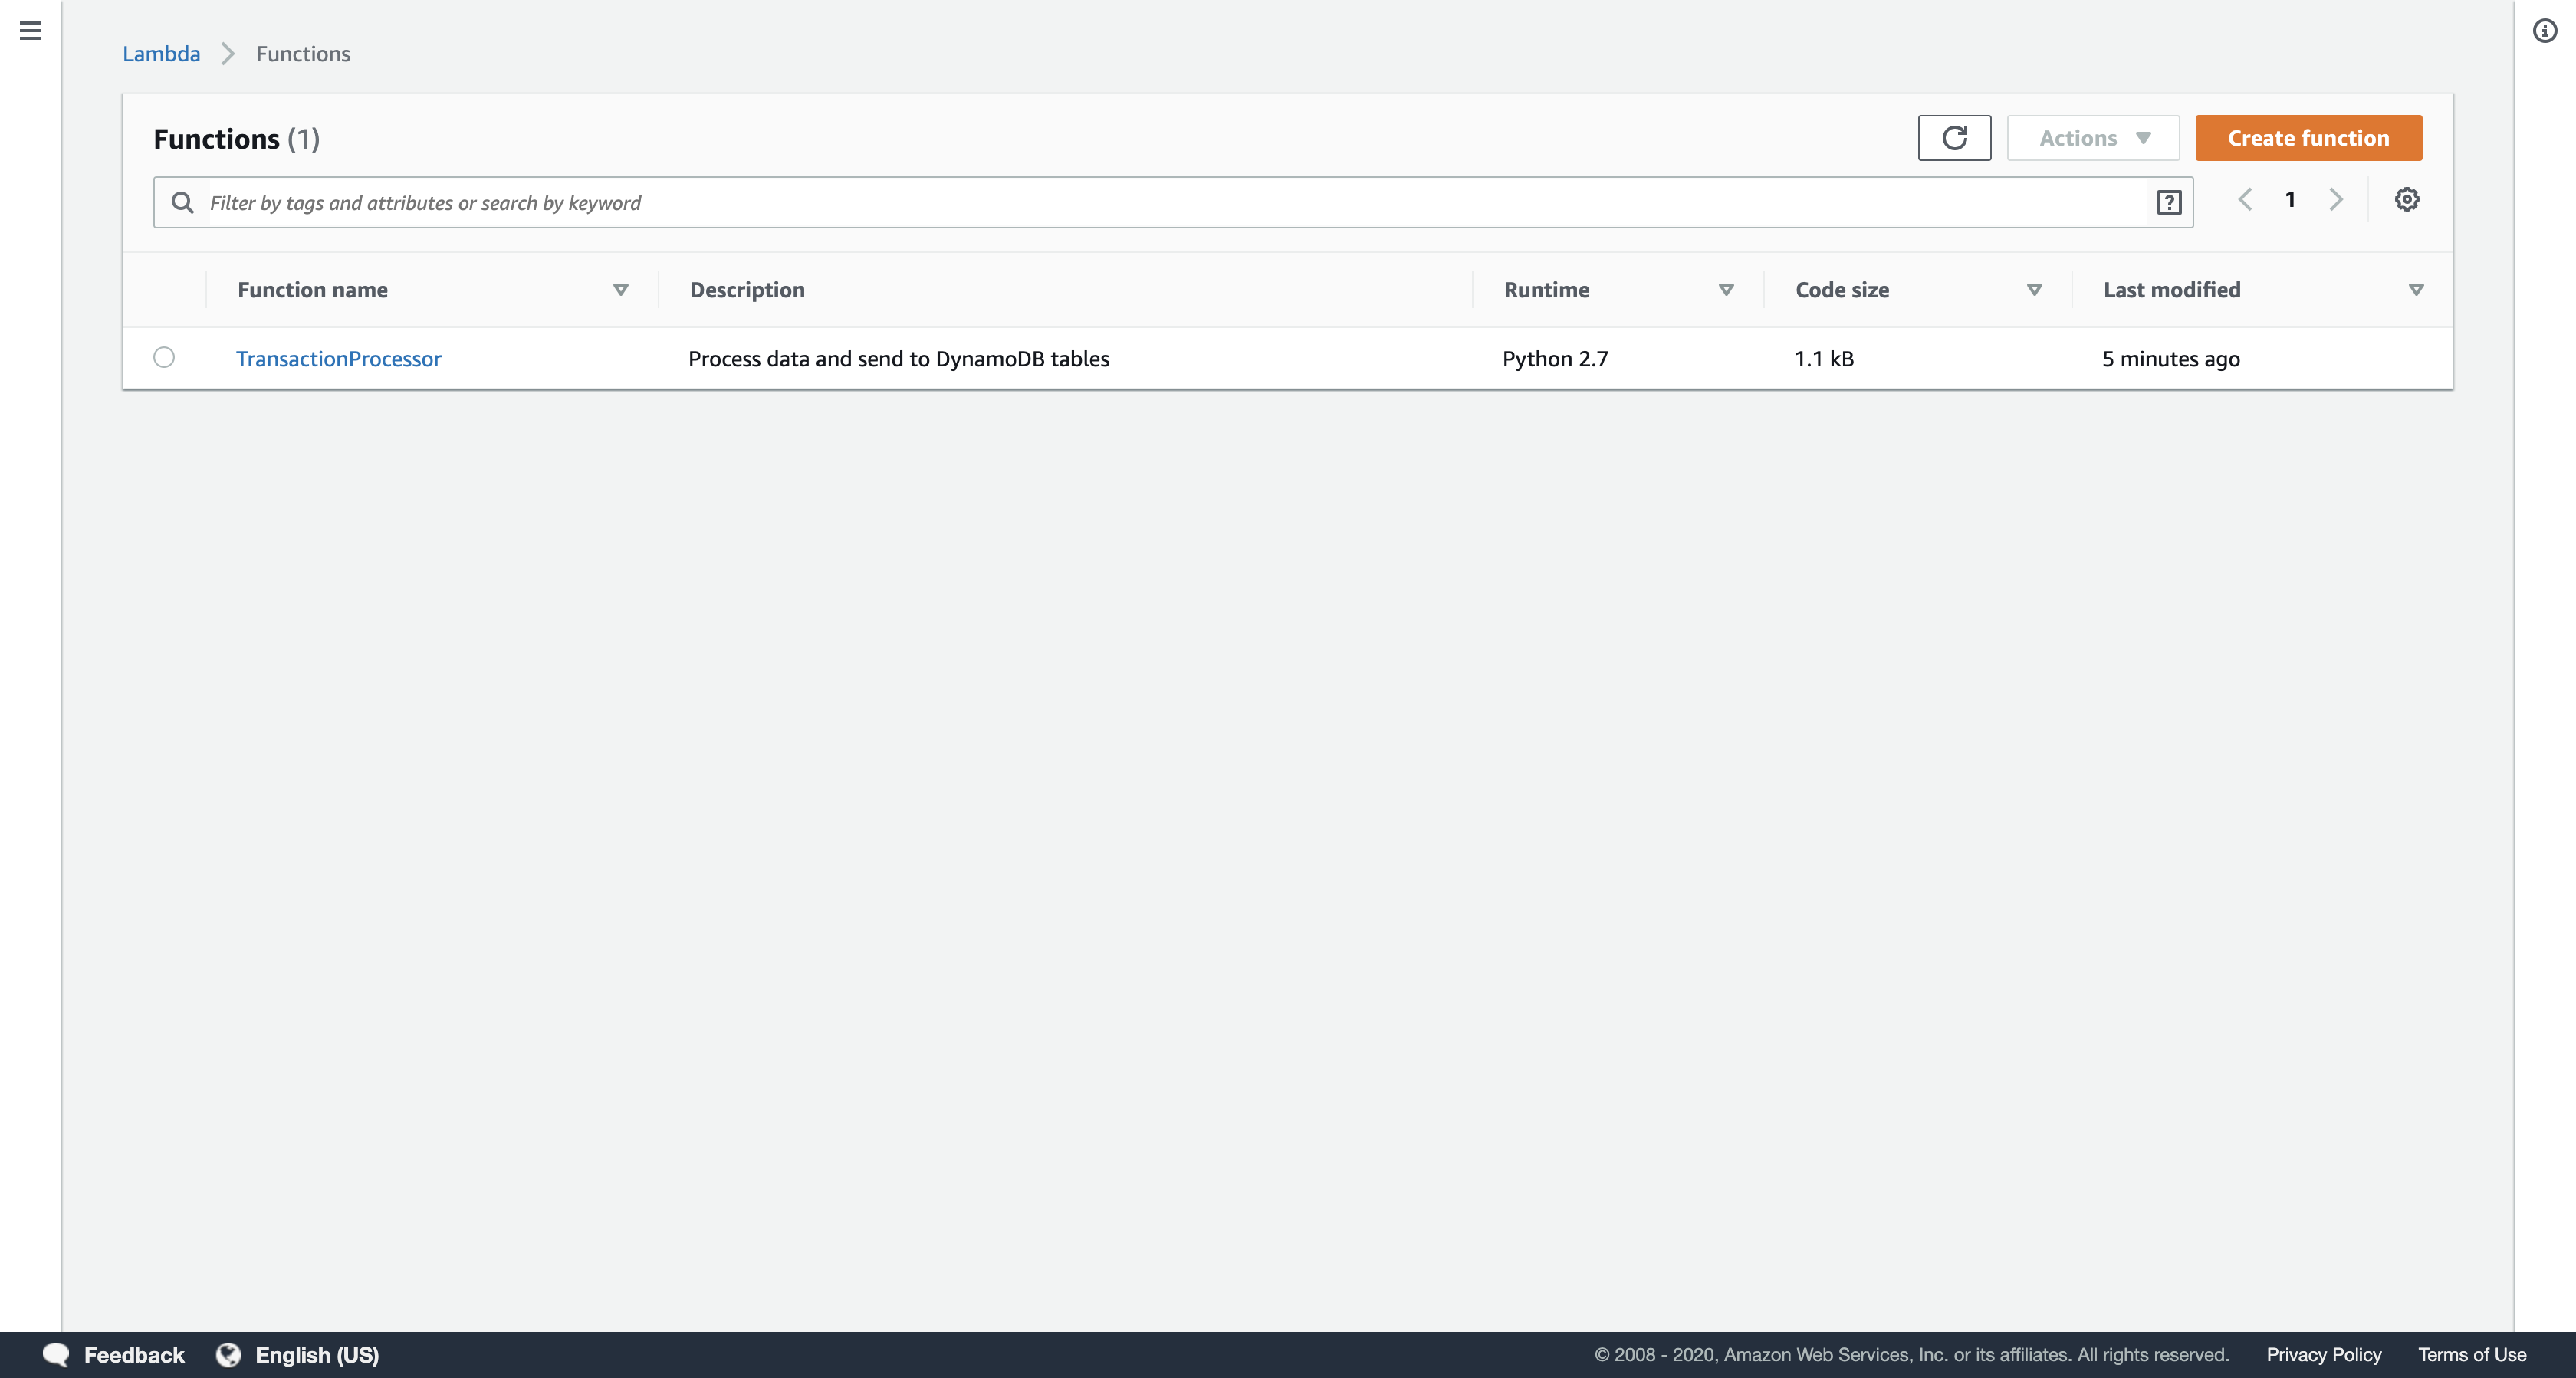
Click Create function.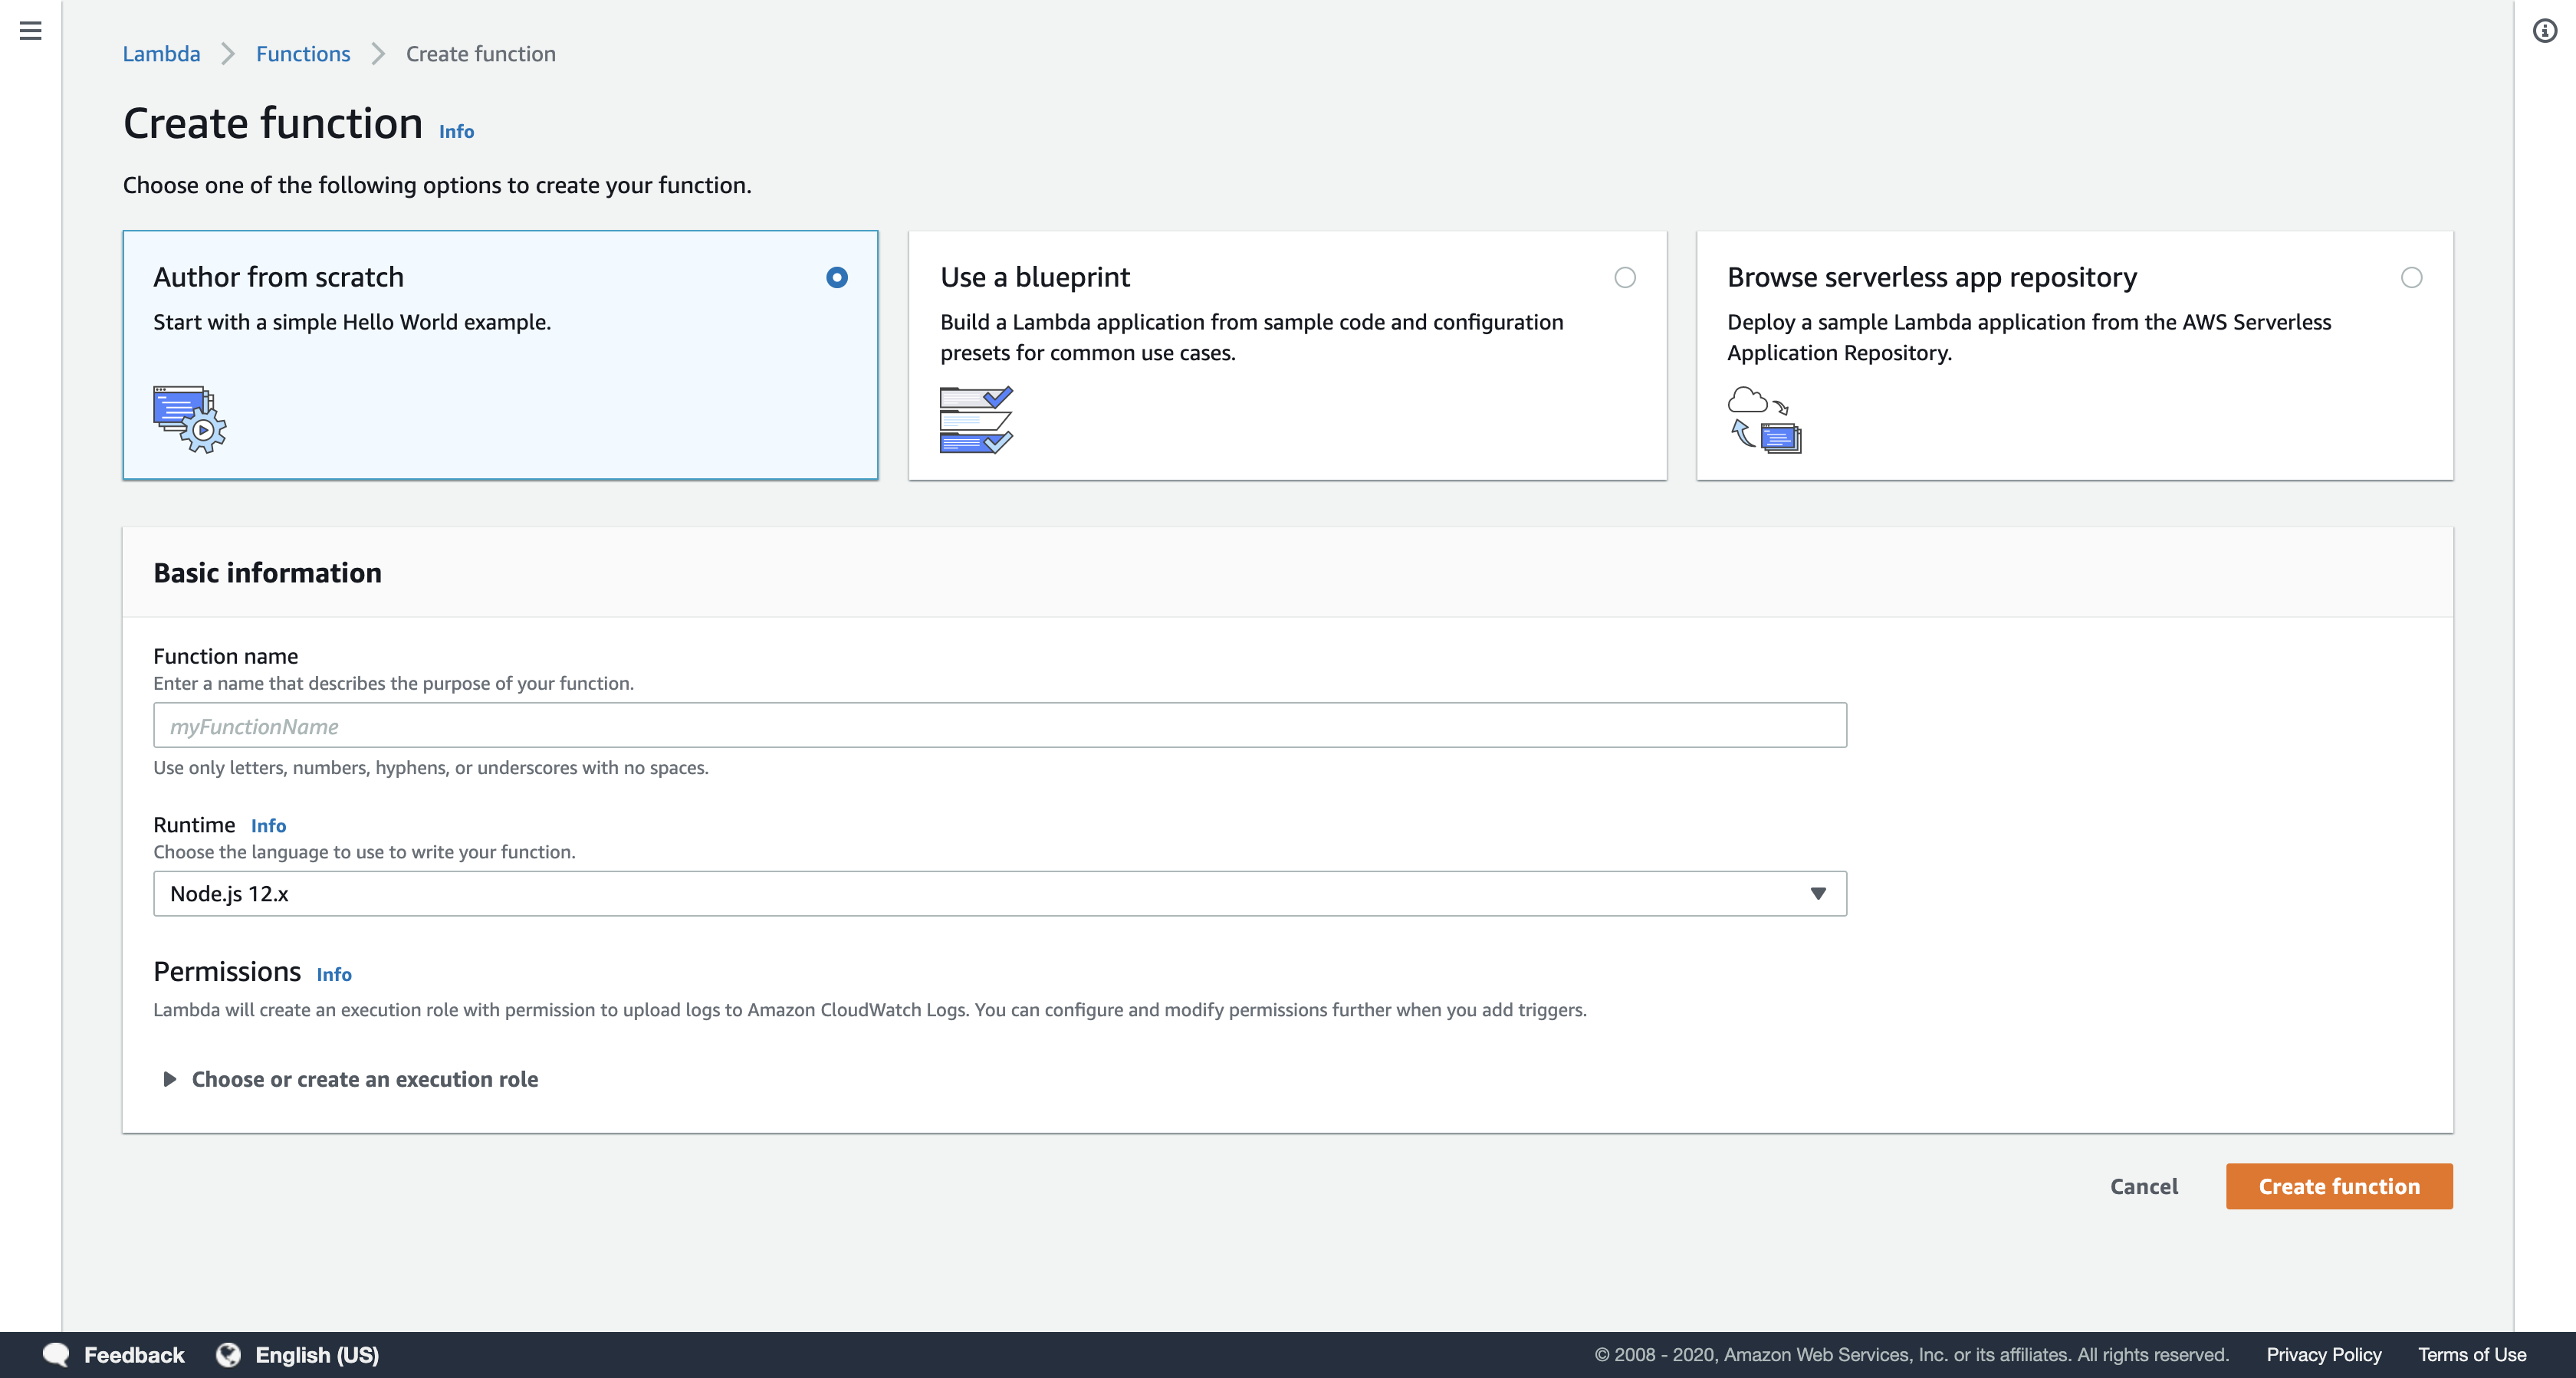
Configure the following settings:
- Function name:
TotalNotifier - Runtime:
Python 2.7 - Execution role:
Use an existing role - Existing role:
TotalNotifierRole
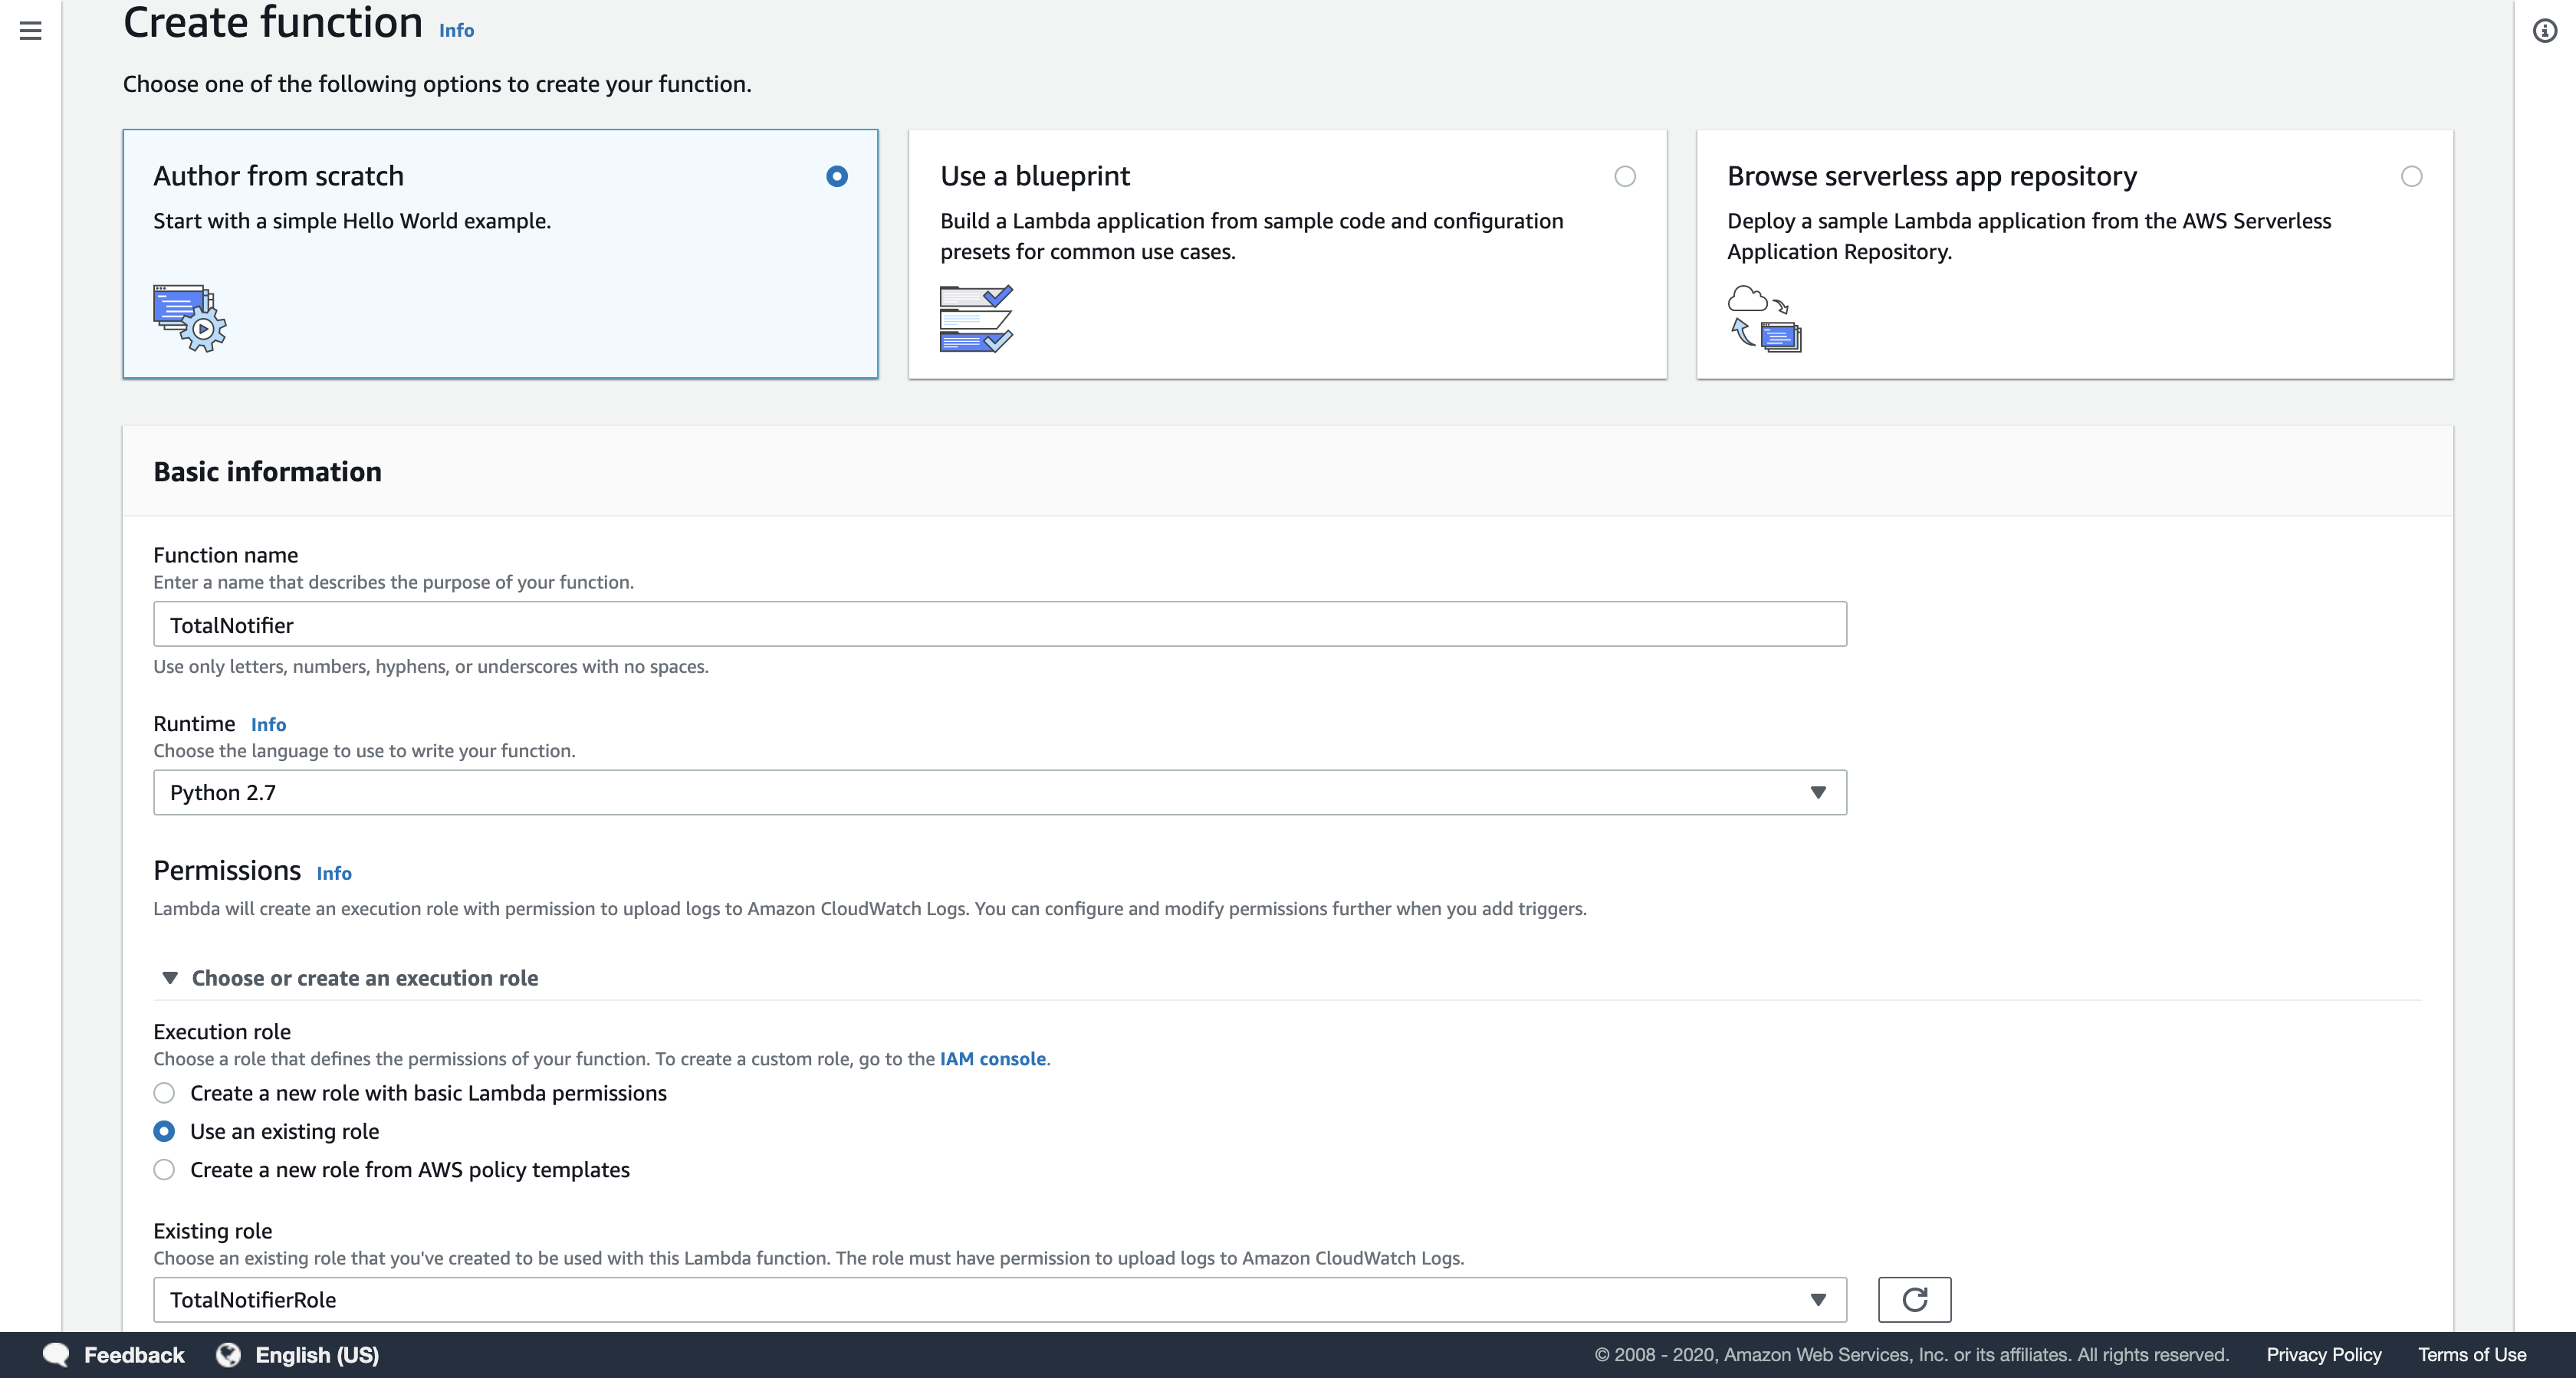
Note: This role gives AWS Lambda the execution permissions required to access Amazon DynamoDB and Amazon Simple Notification Service (SNS).
Click Create function.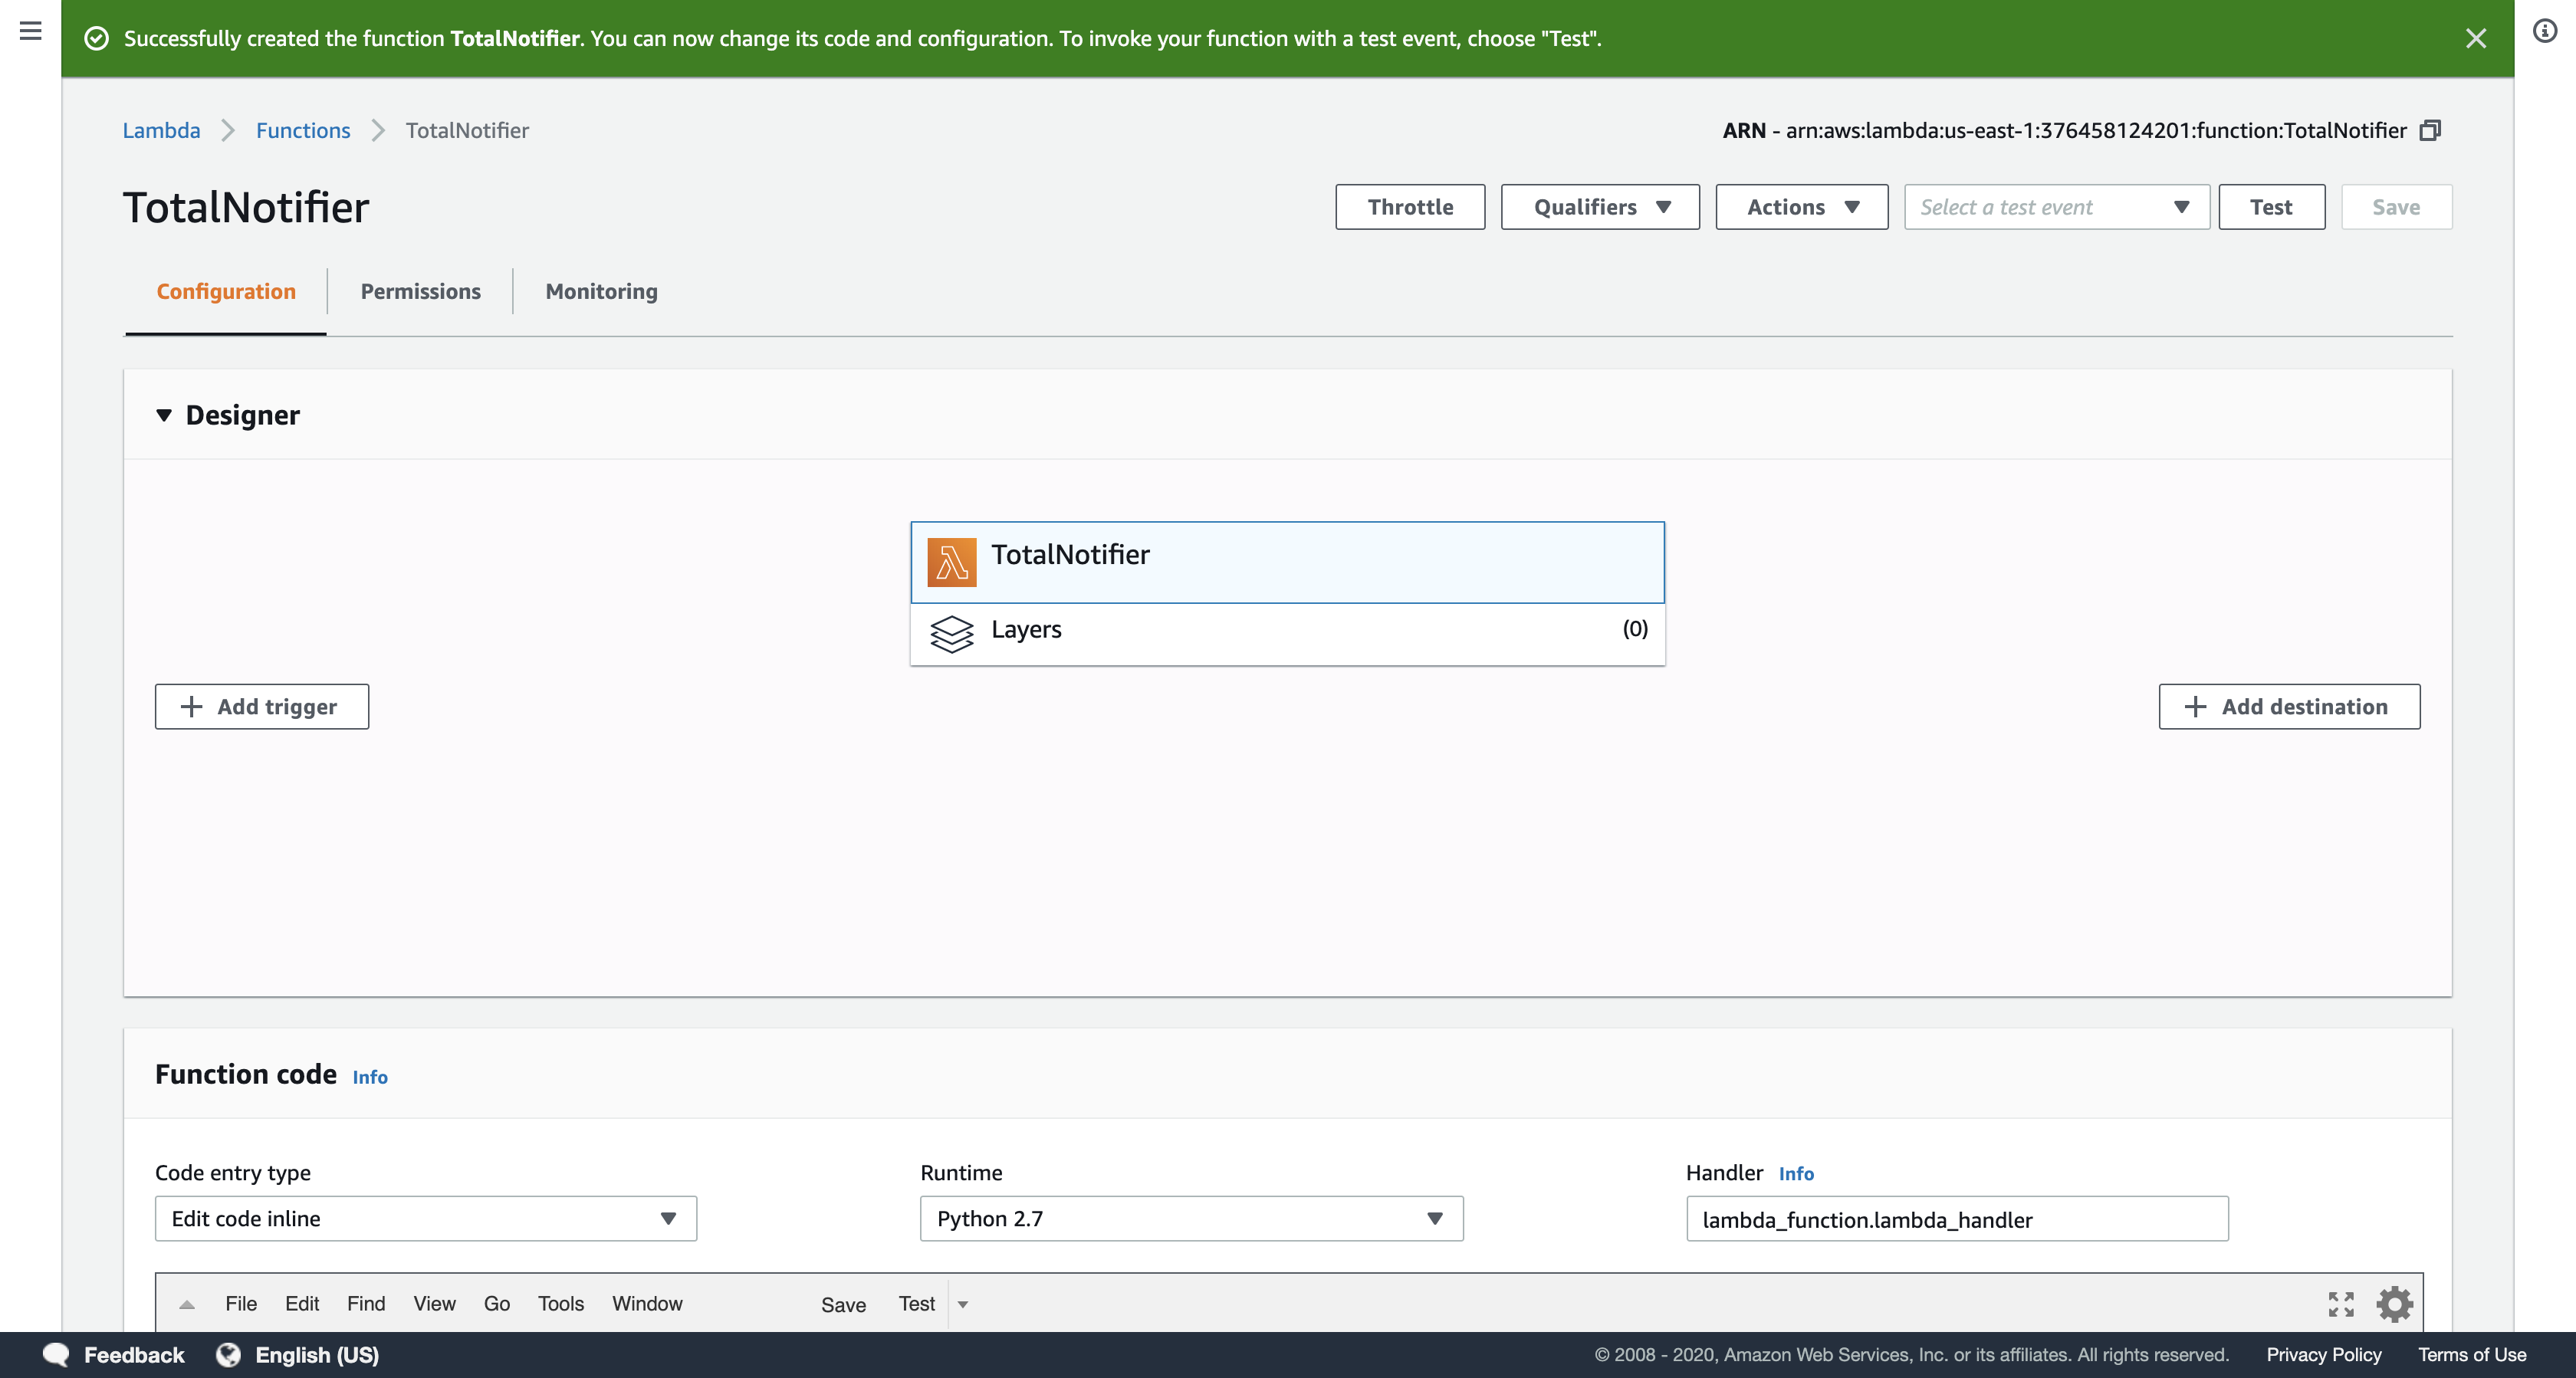
In the Function code section, delete all of the code that appears in the code editor.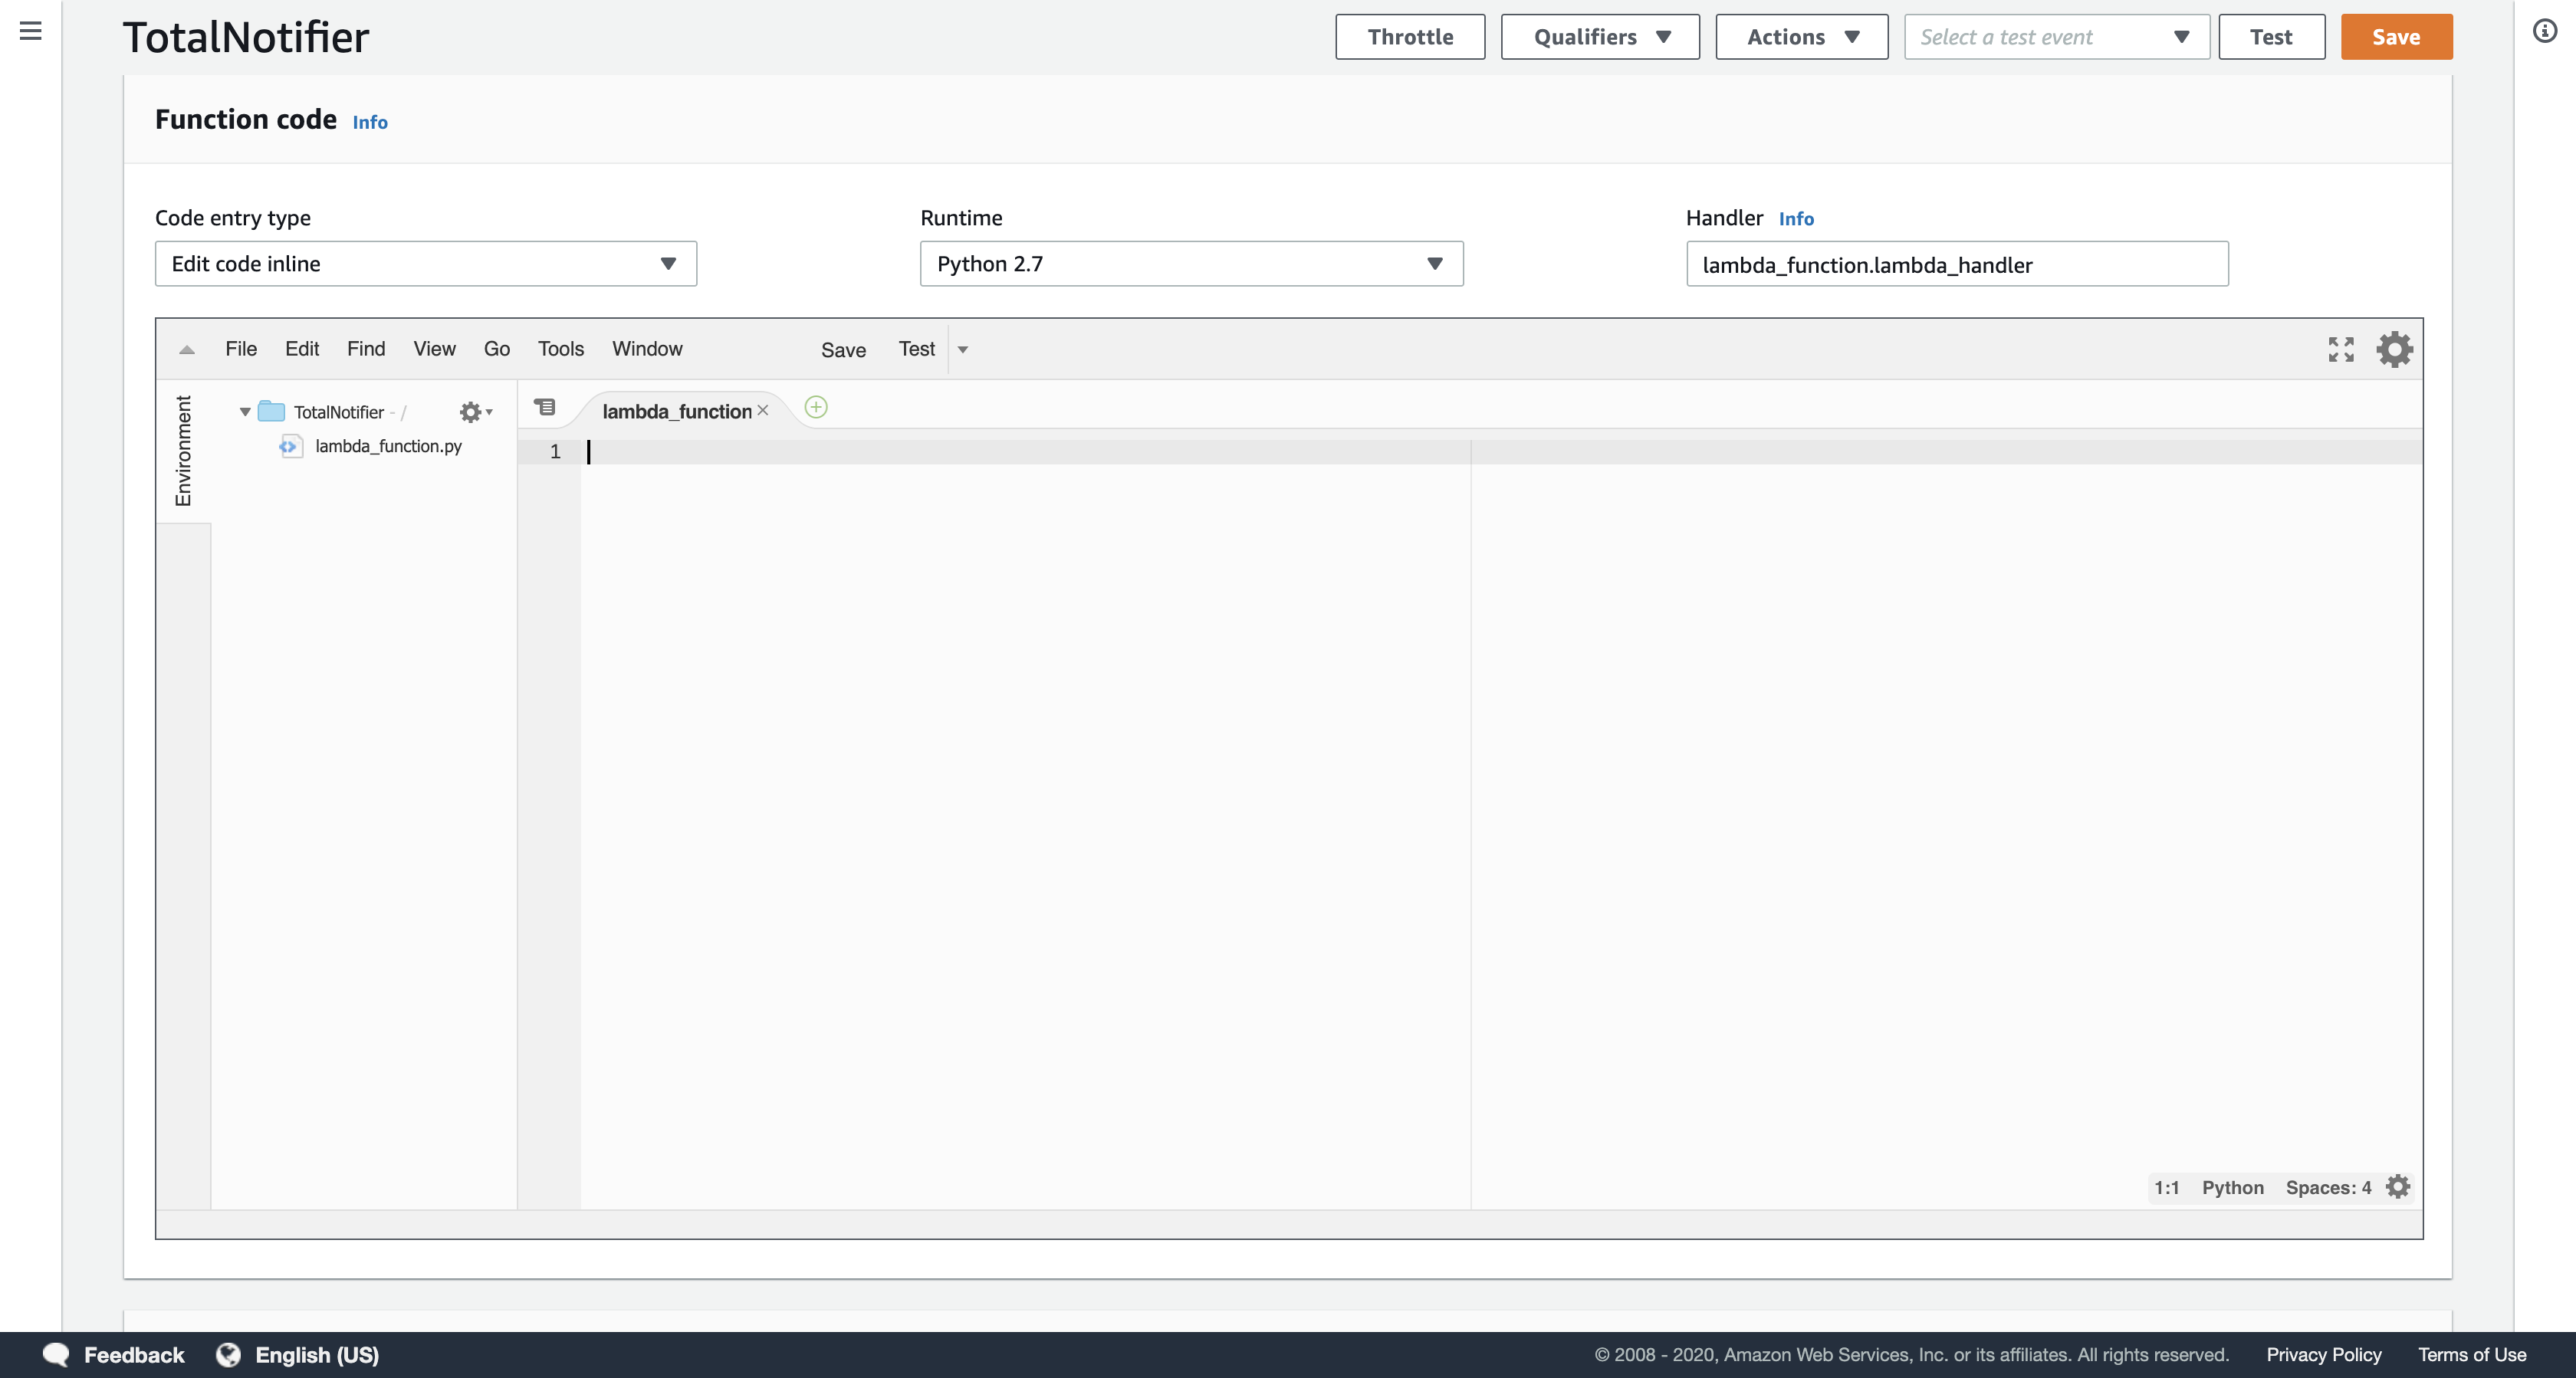
Copy the code block below, and paste it into the code editor:
1 | # TotalNotifier Lambda function |
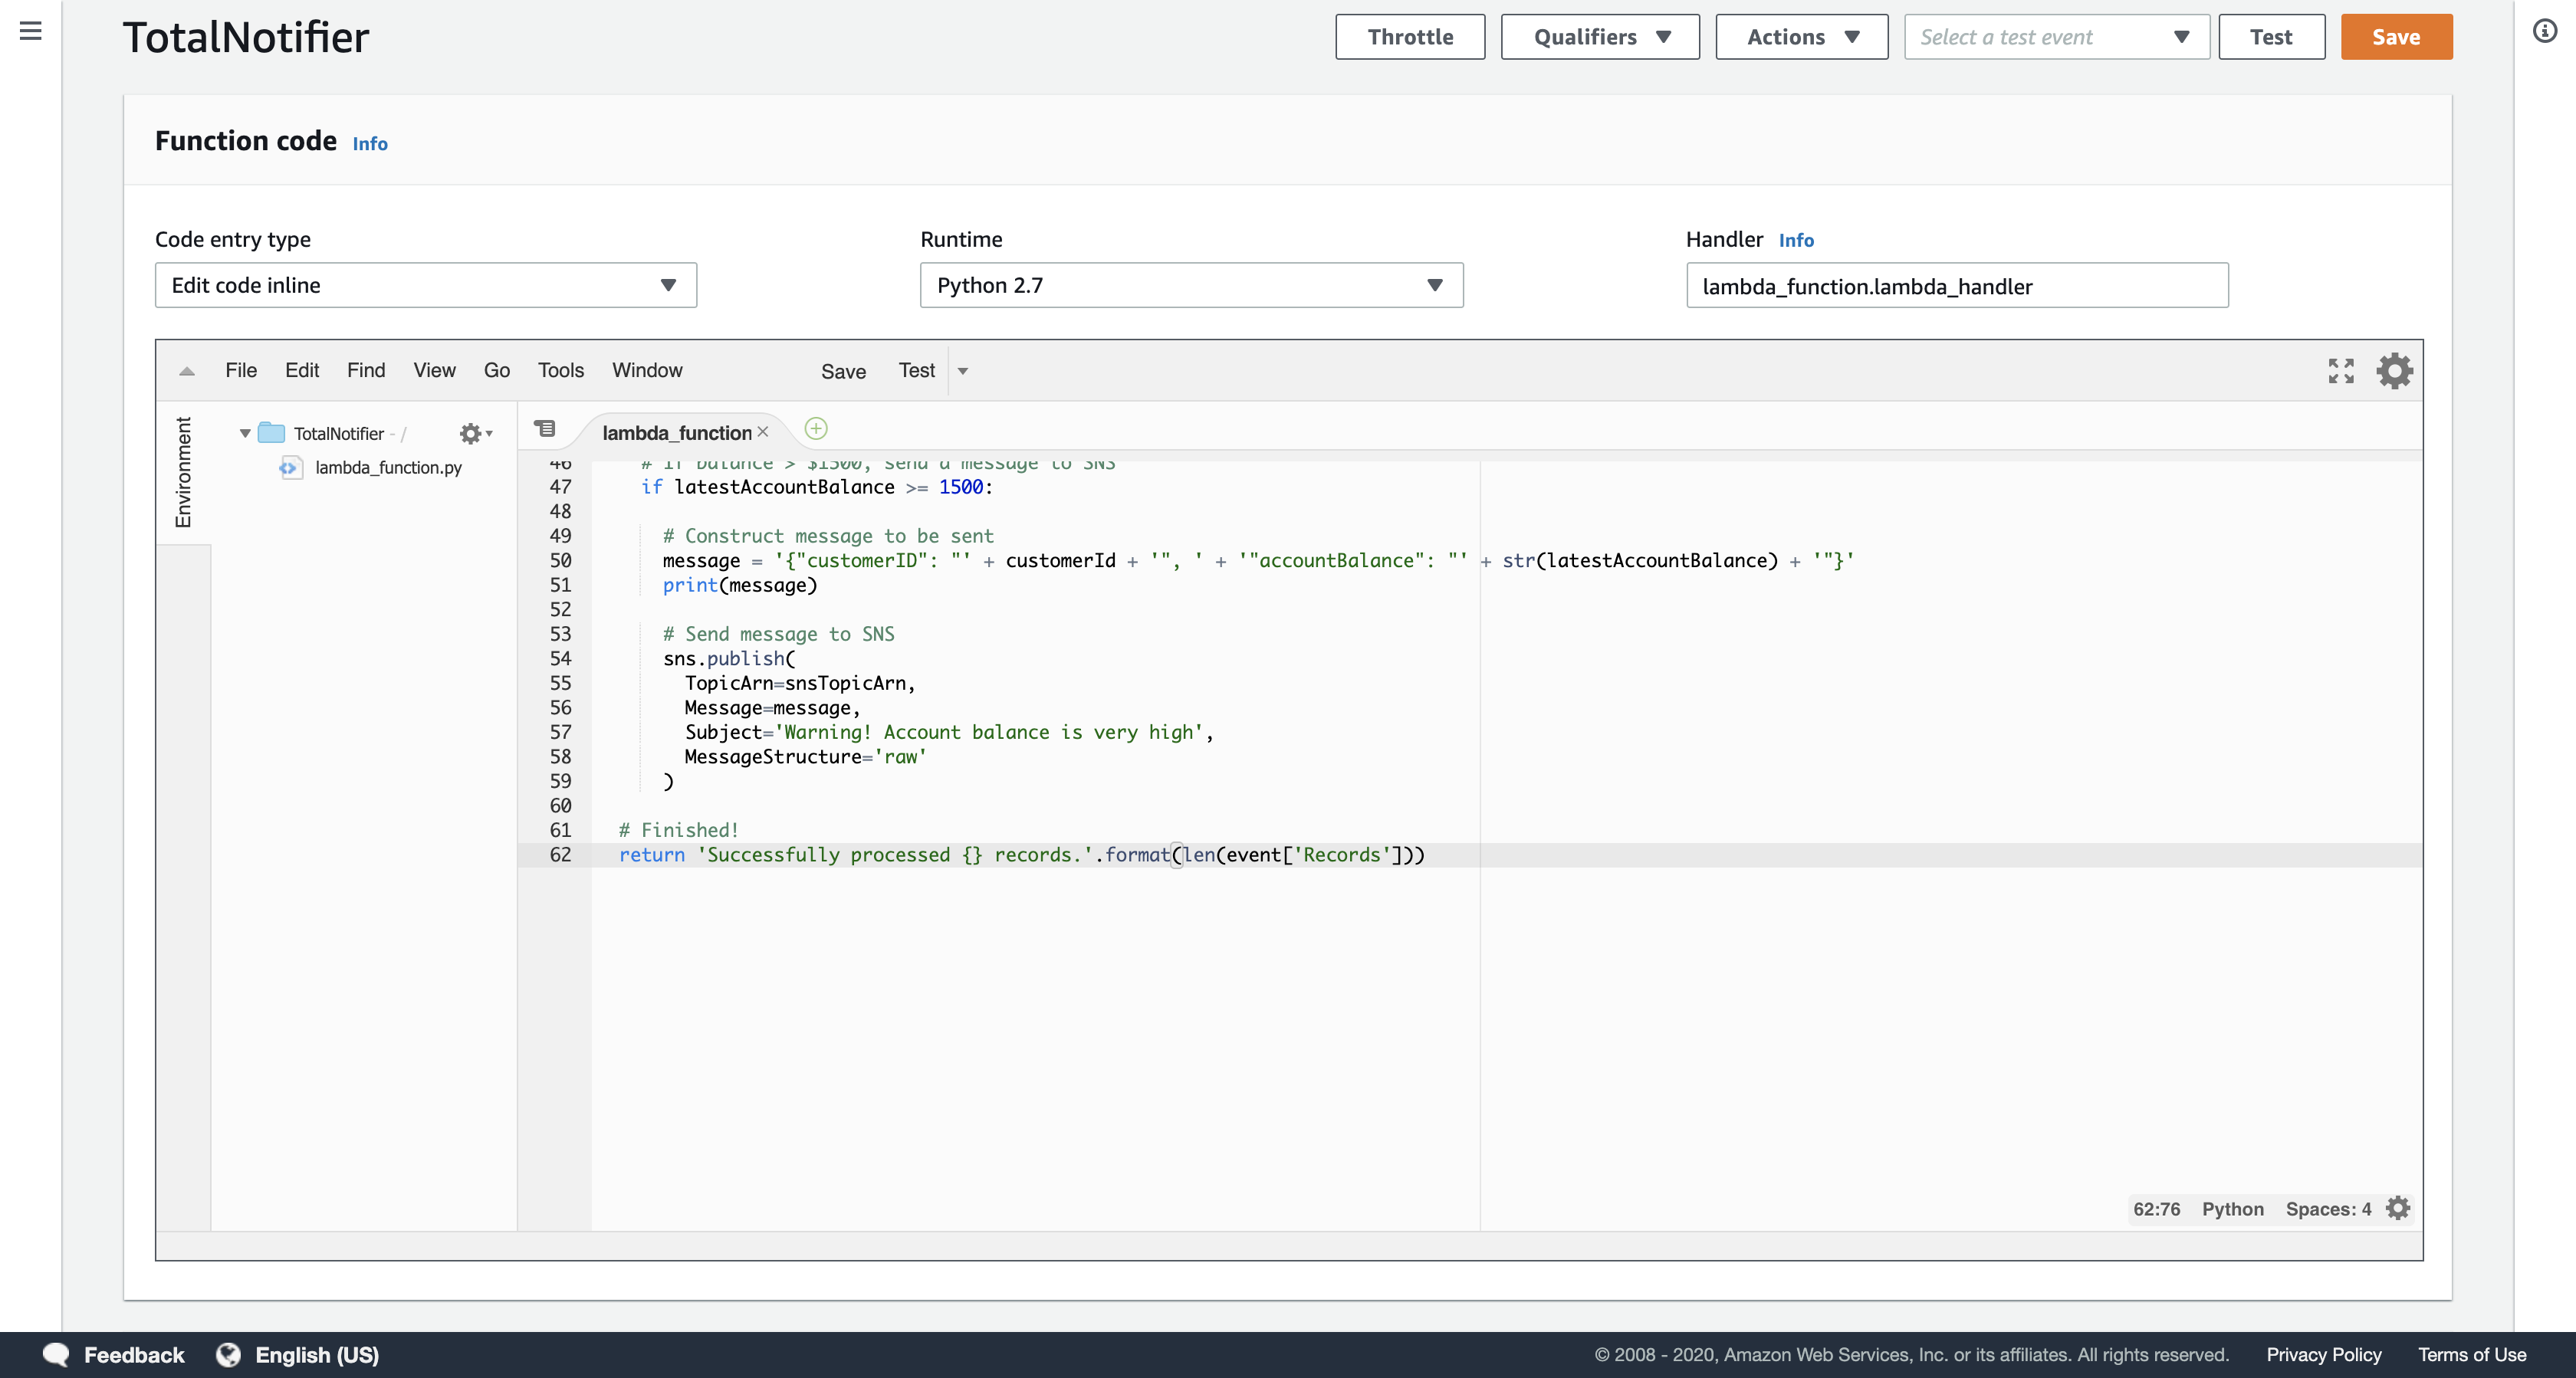
Examine the code. It performs the following steps:
- Connects to Amazon SNS and Amazon DynamoDB
- Calculates transaction totals and store them in the TransactionTotal DynamoDB table
- Sends a notification to Amazon SNS if the transaction total is over $1500
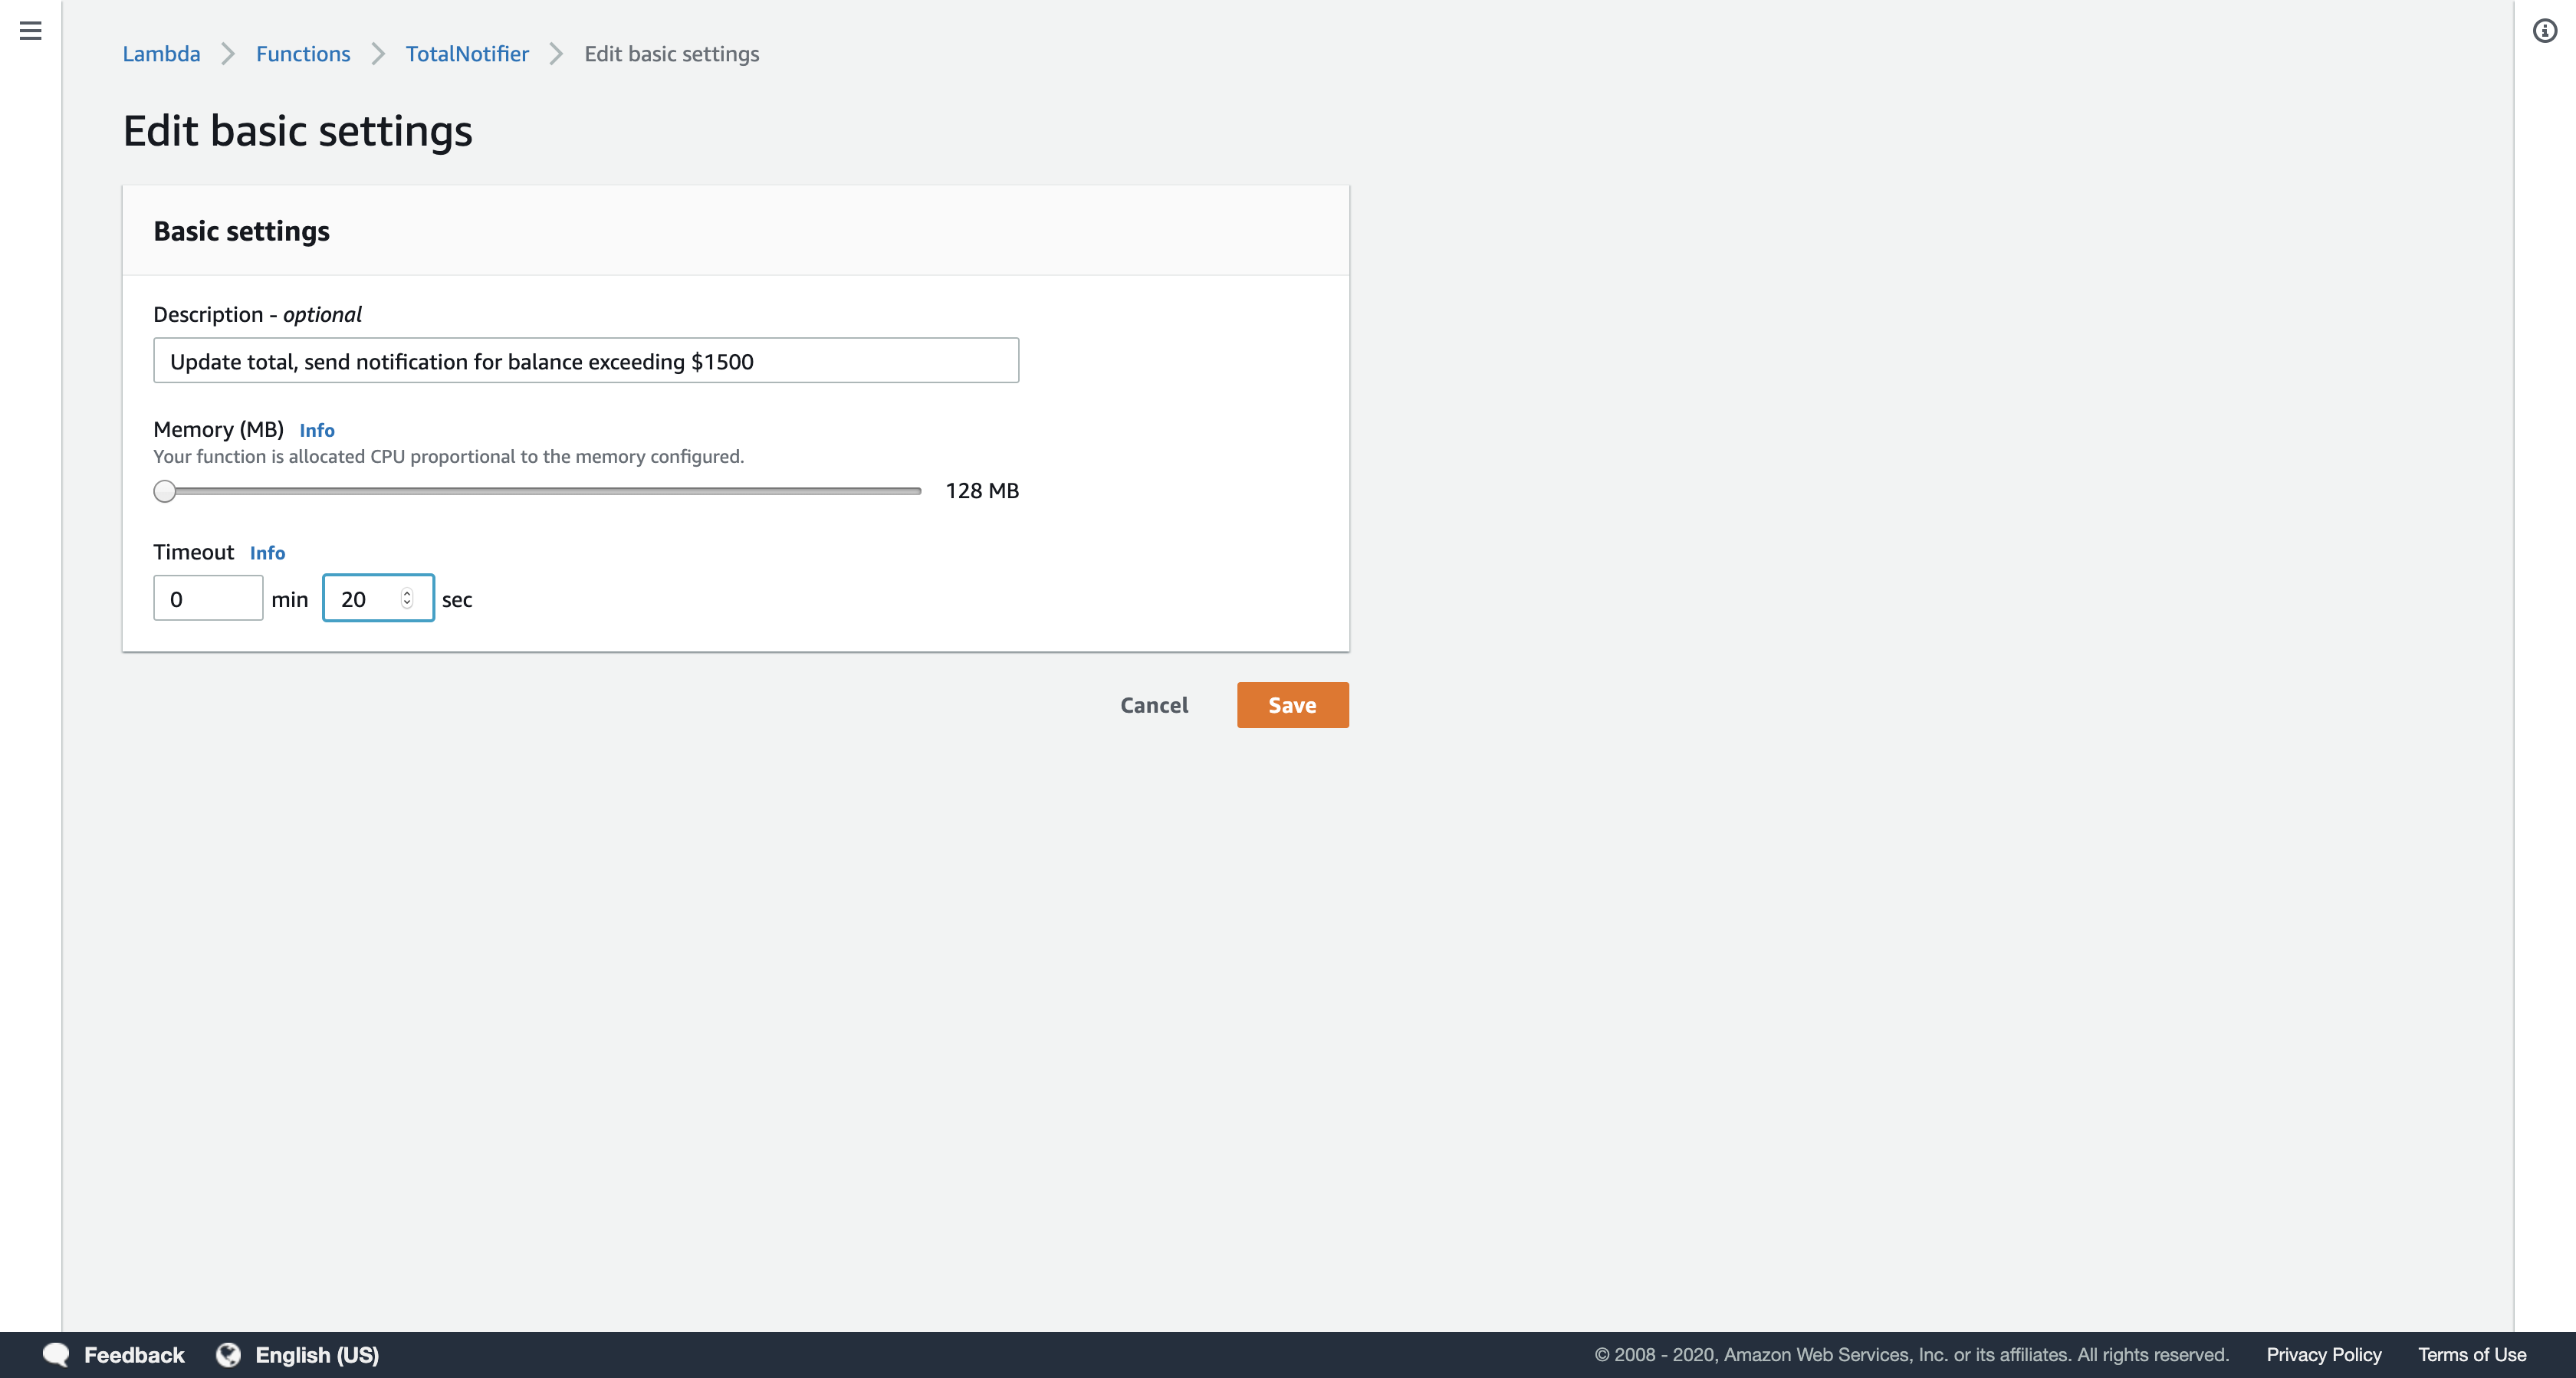
In the Basic settings section lower on the page:
Description: Update total, send notification for balance exceeding $1500
Timeout: 20 sec
Click Save
Scroll up to the Add triggers section at the top of the page.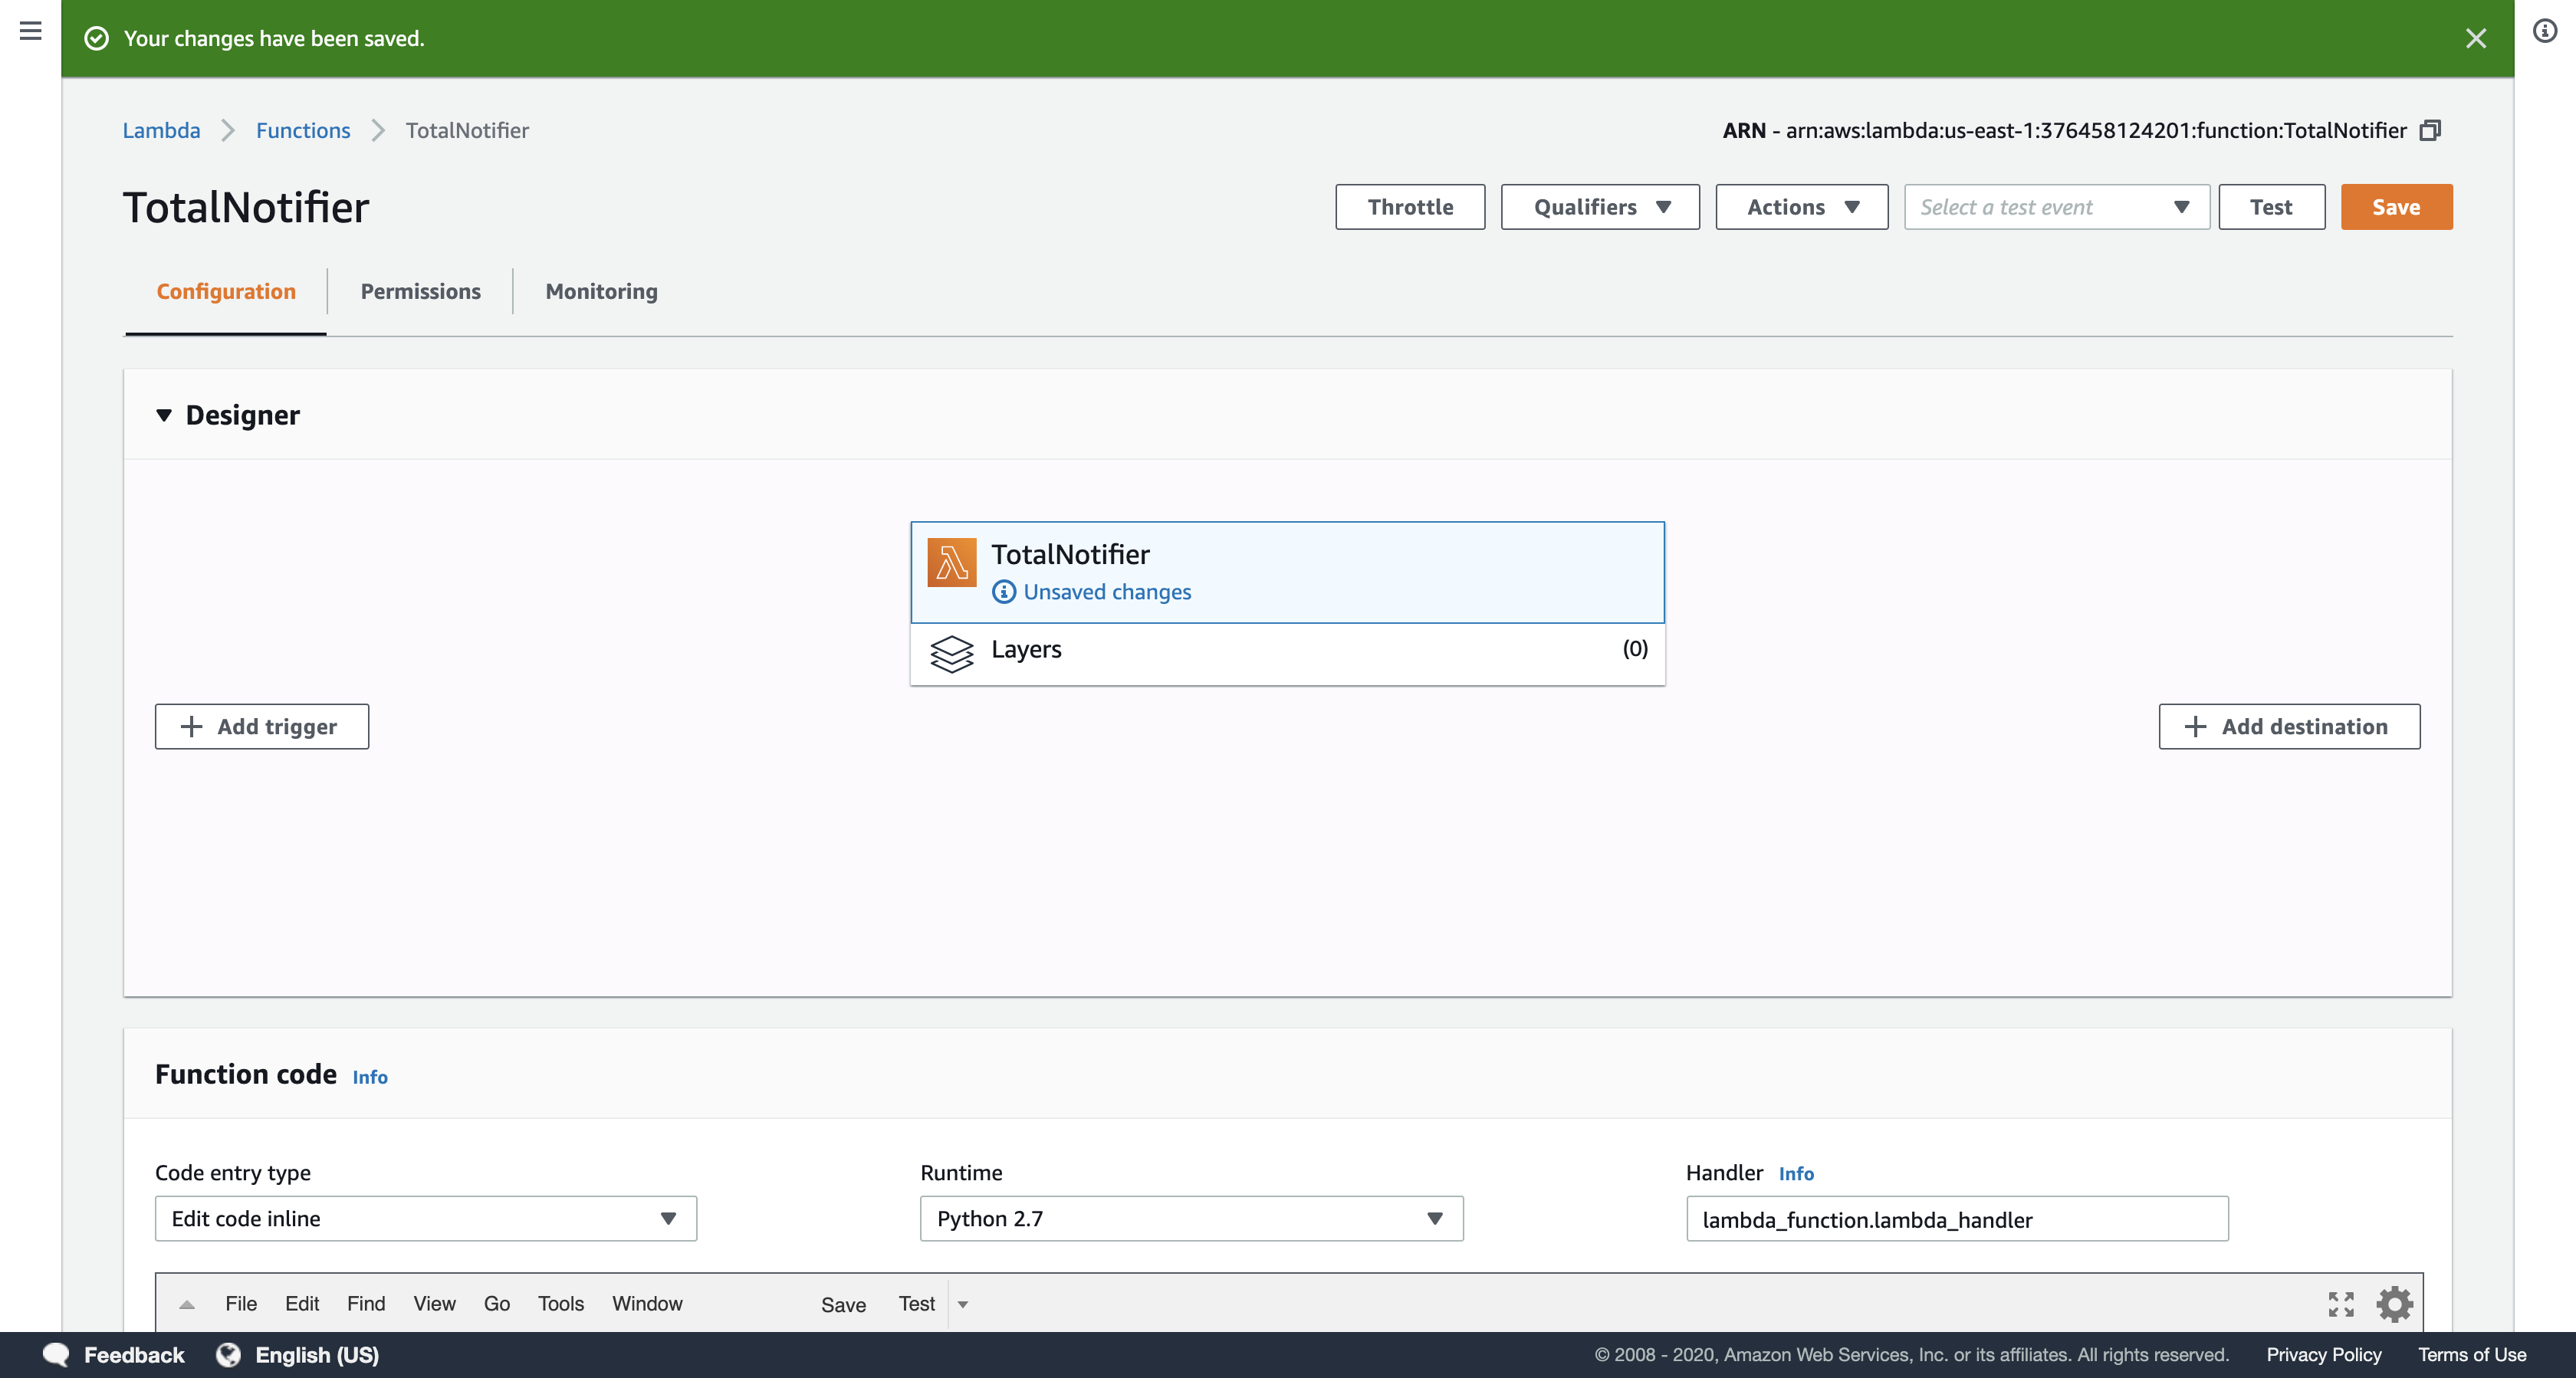
Under Add triggers, click DynamoDB.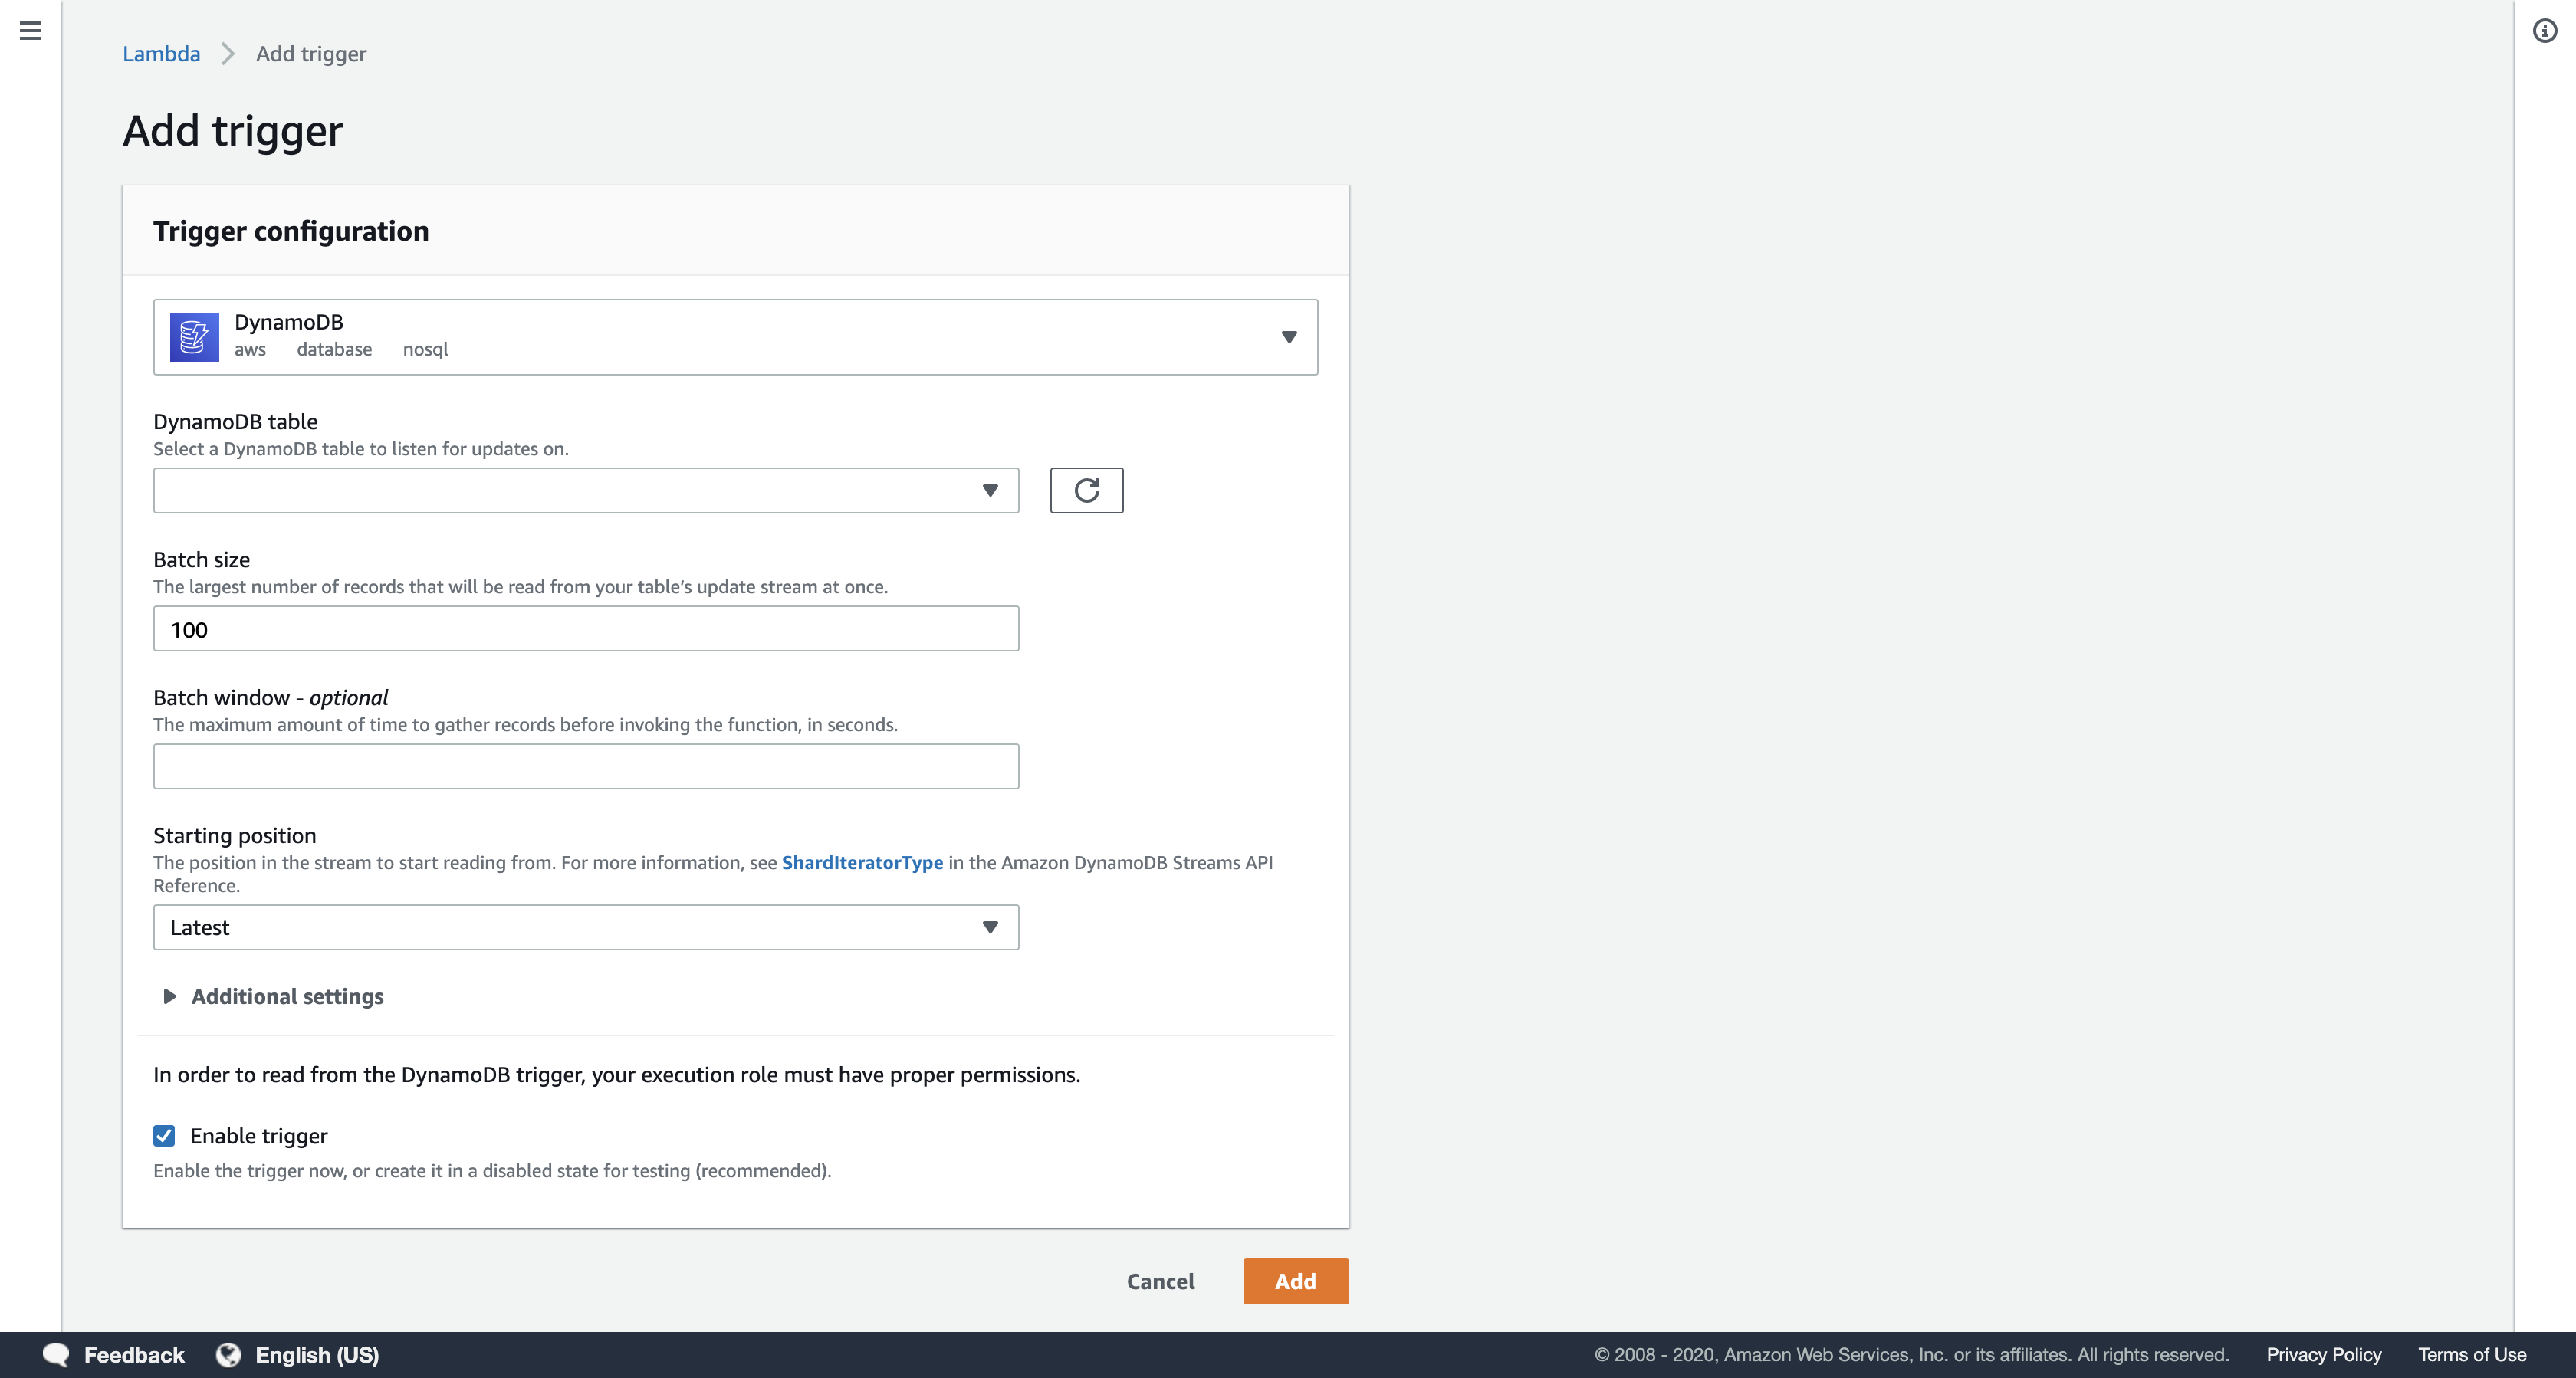
Scroll down to the Configure triggers panel and configure these settings:
- DynamoDB table:
Transactions - Starting position:
Latest

The Starting Position tells Lambda whether to process the most recent information that was added to DynamoDB or whether to go back to the earliest data available (known as the Trim Horizon). This function will use the Latest information.
Click Add.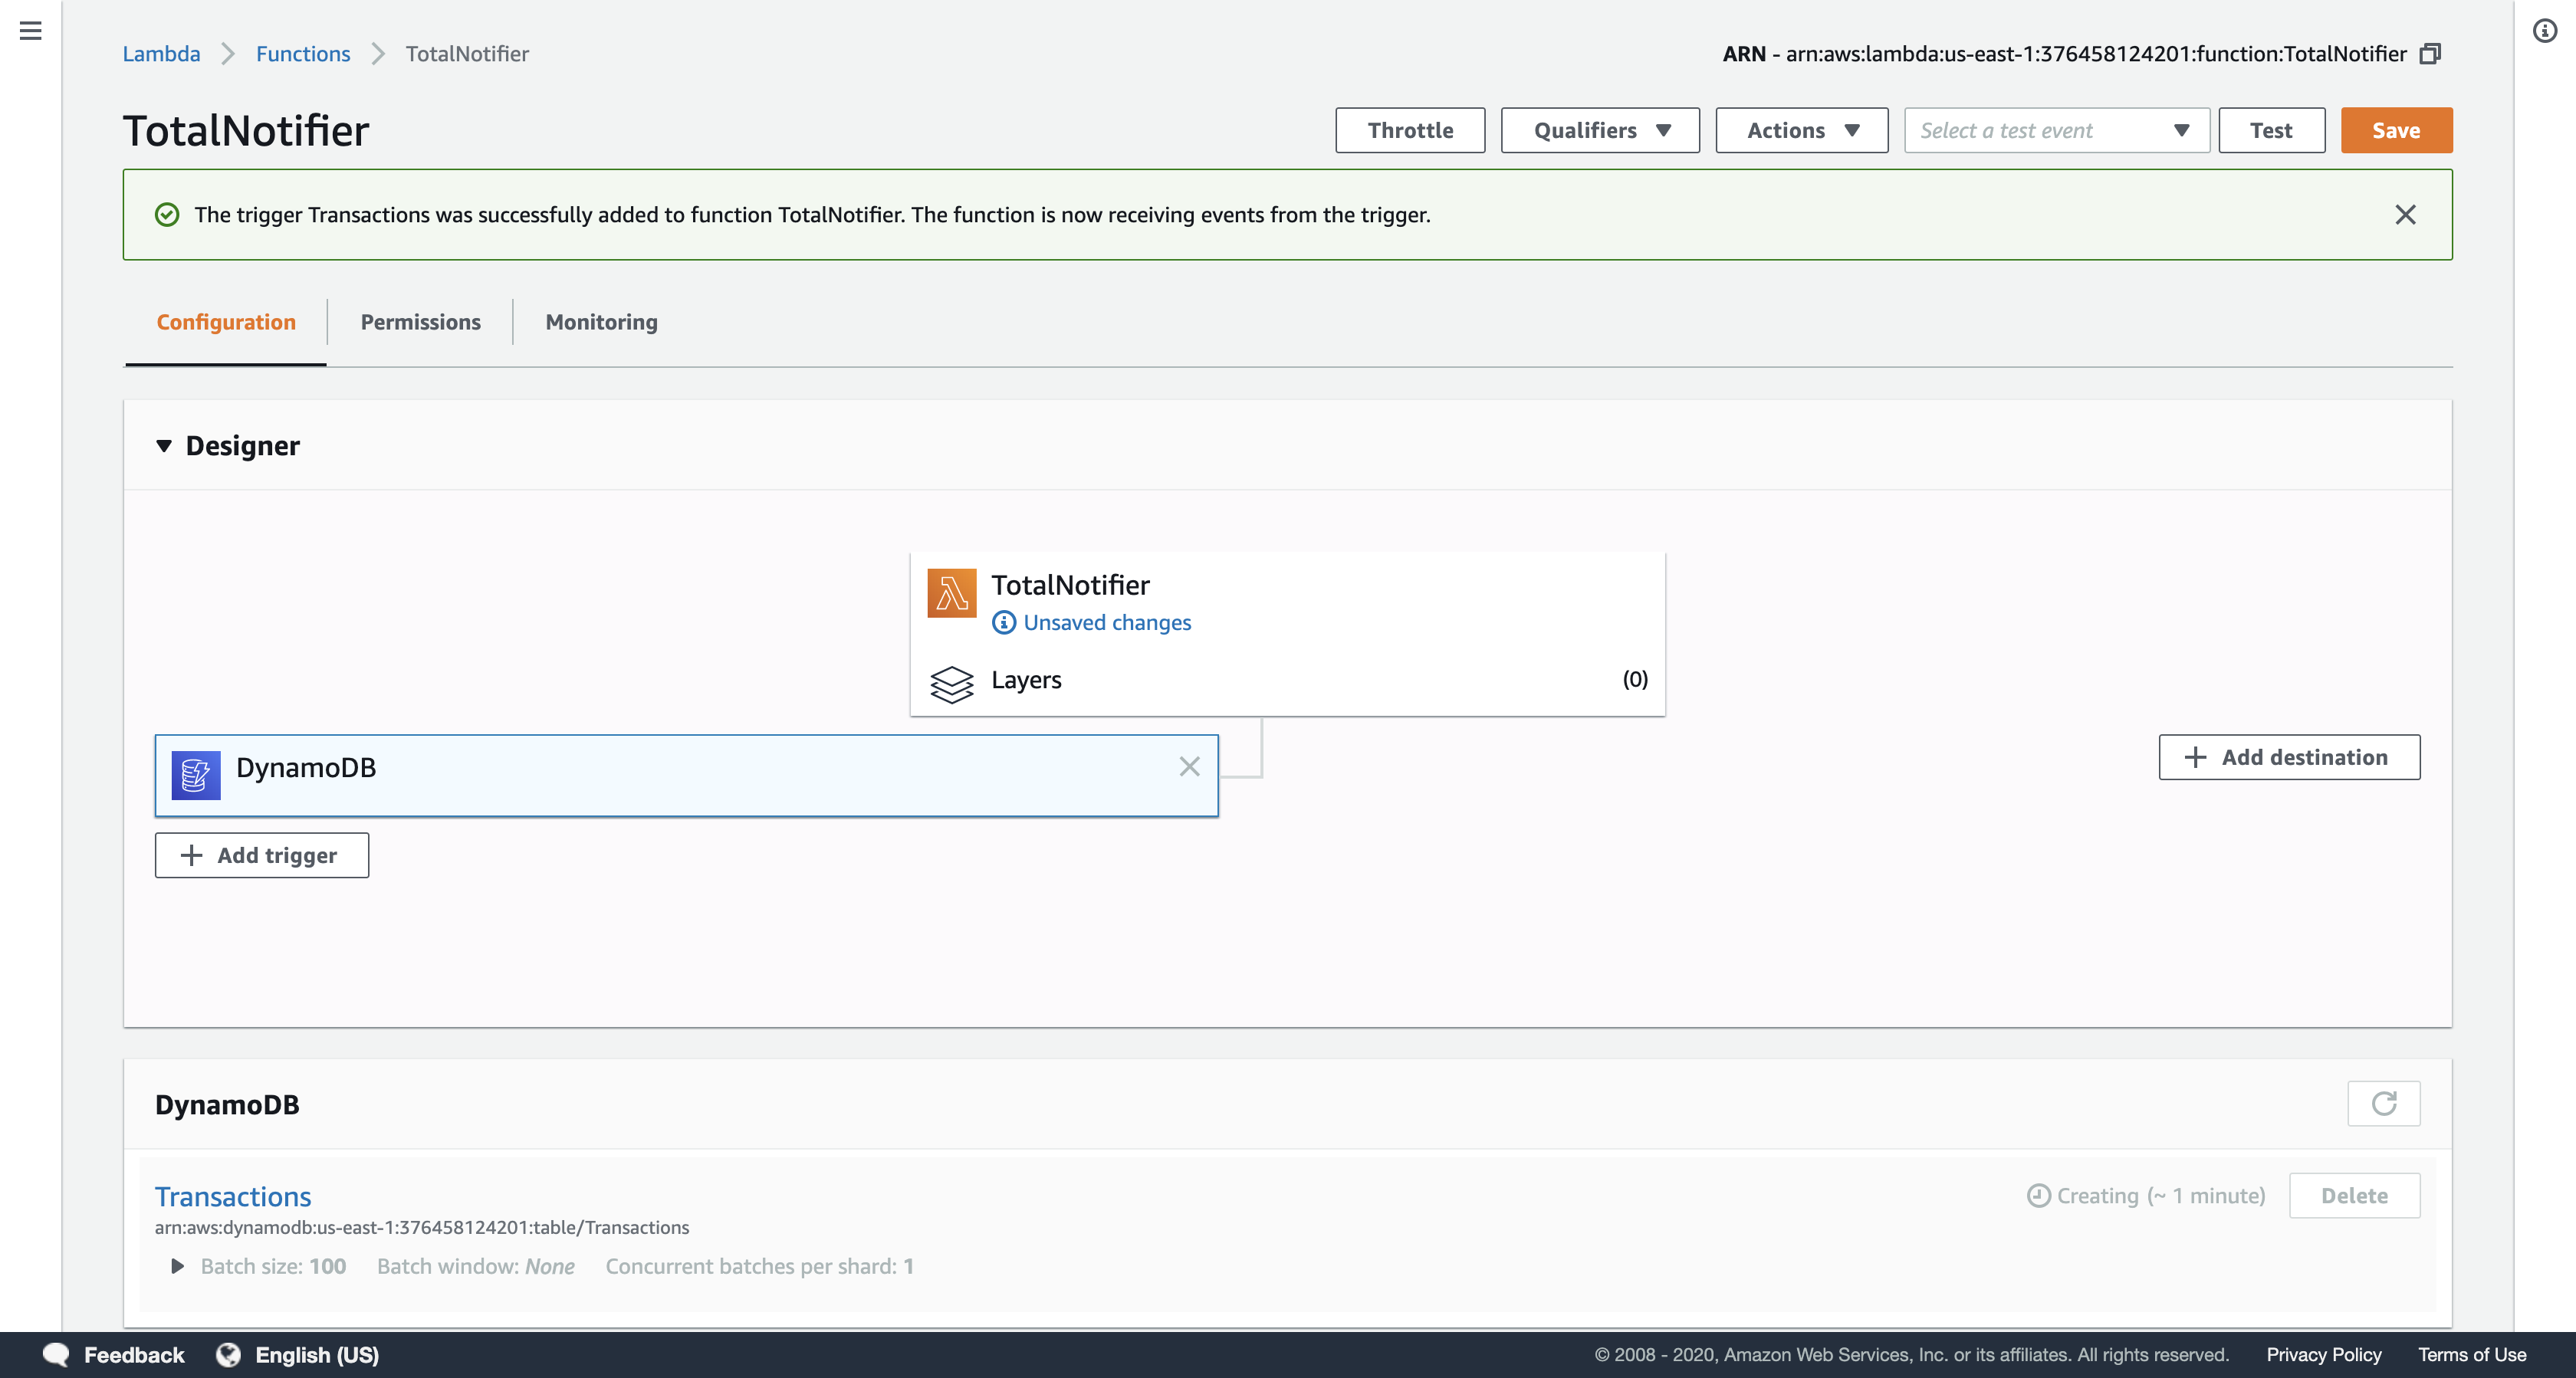
Click Save at the top of the page.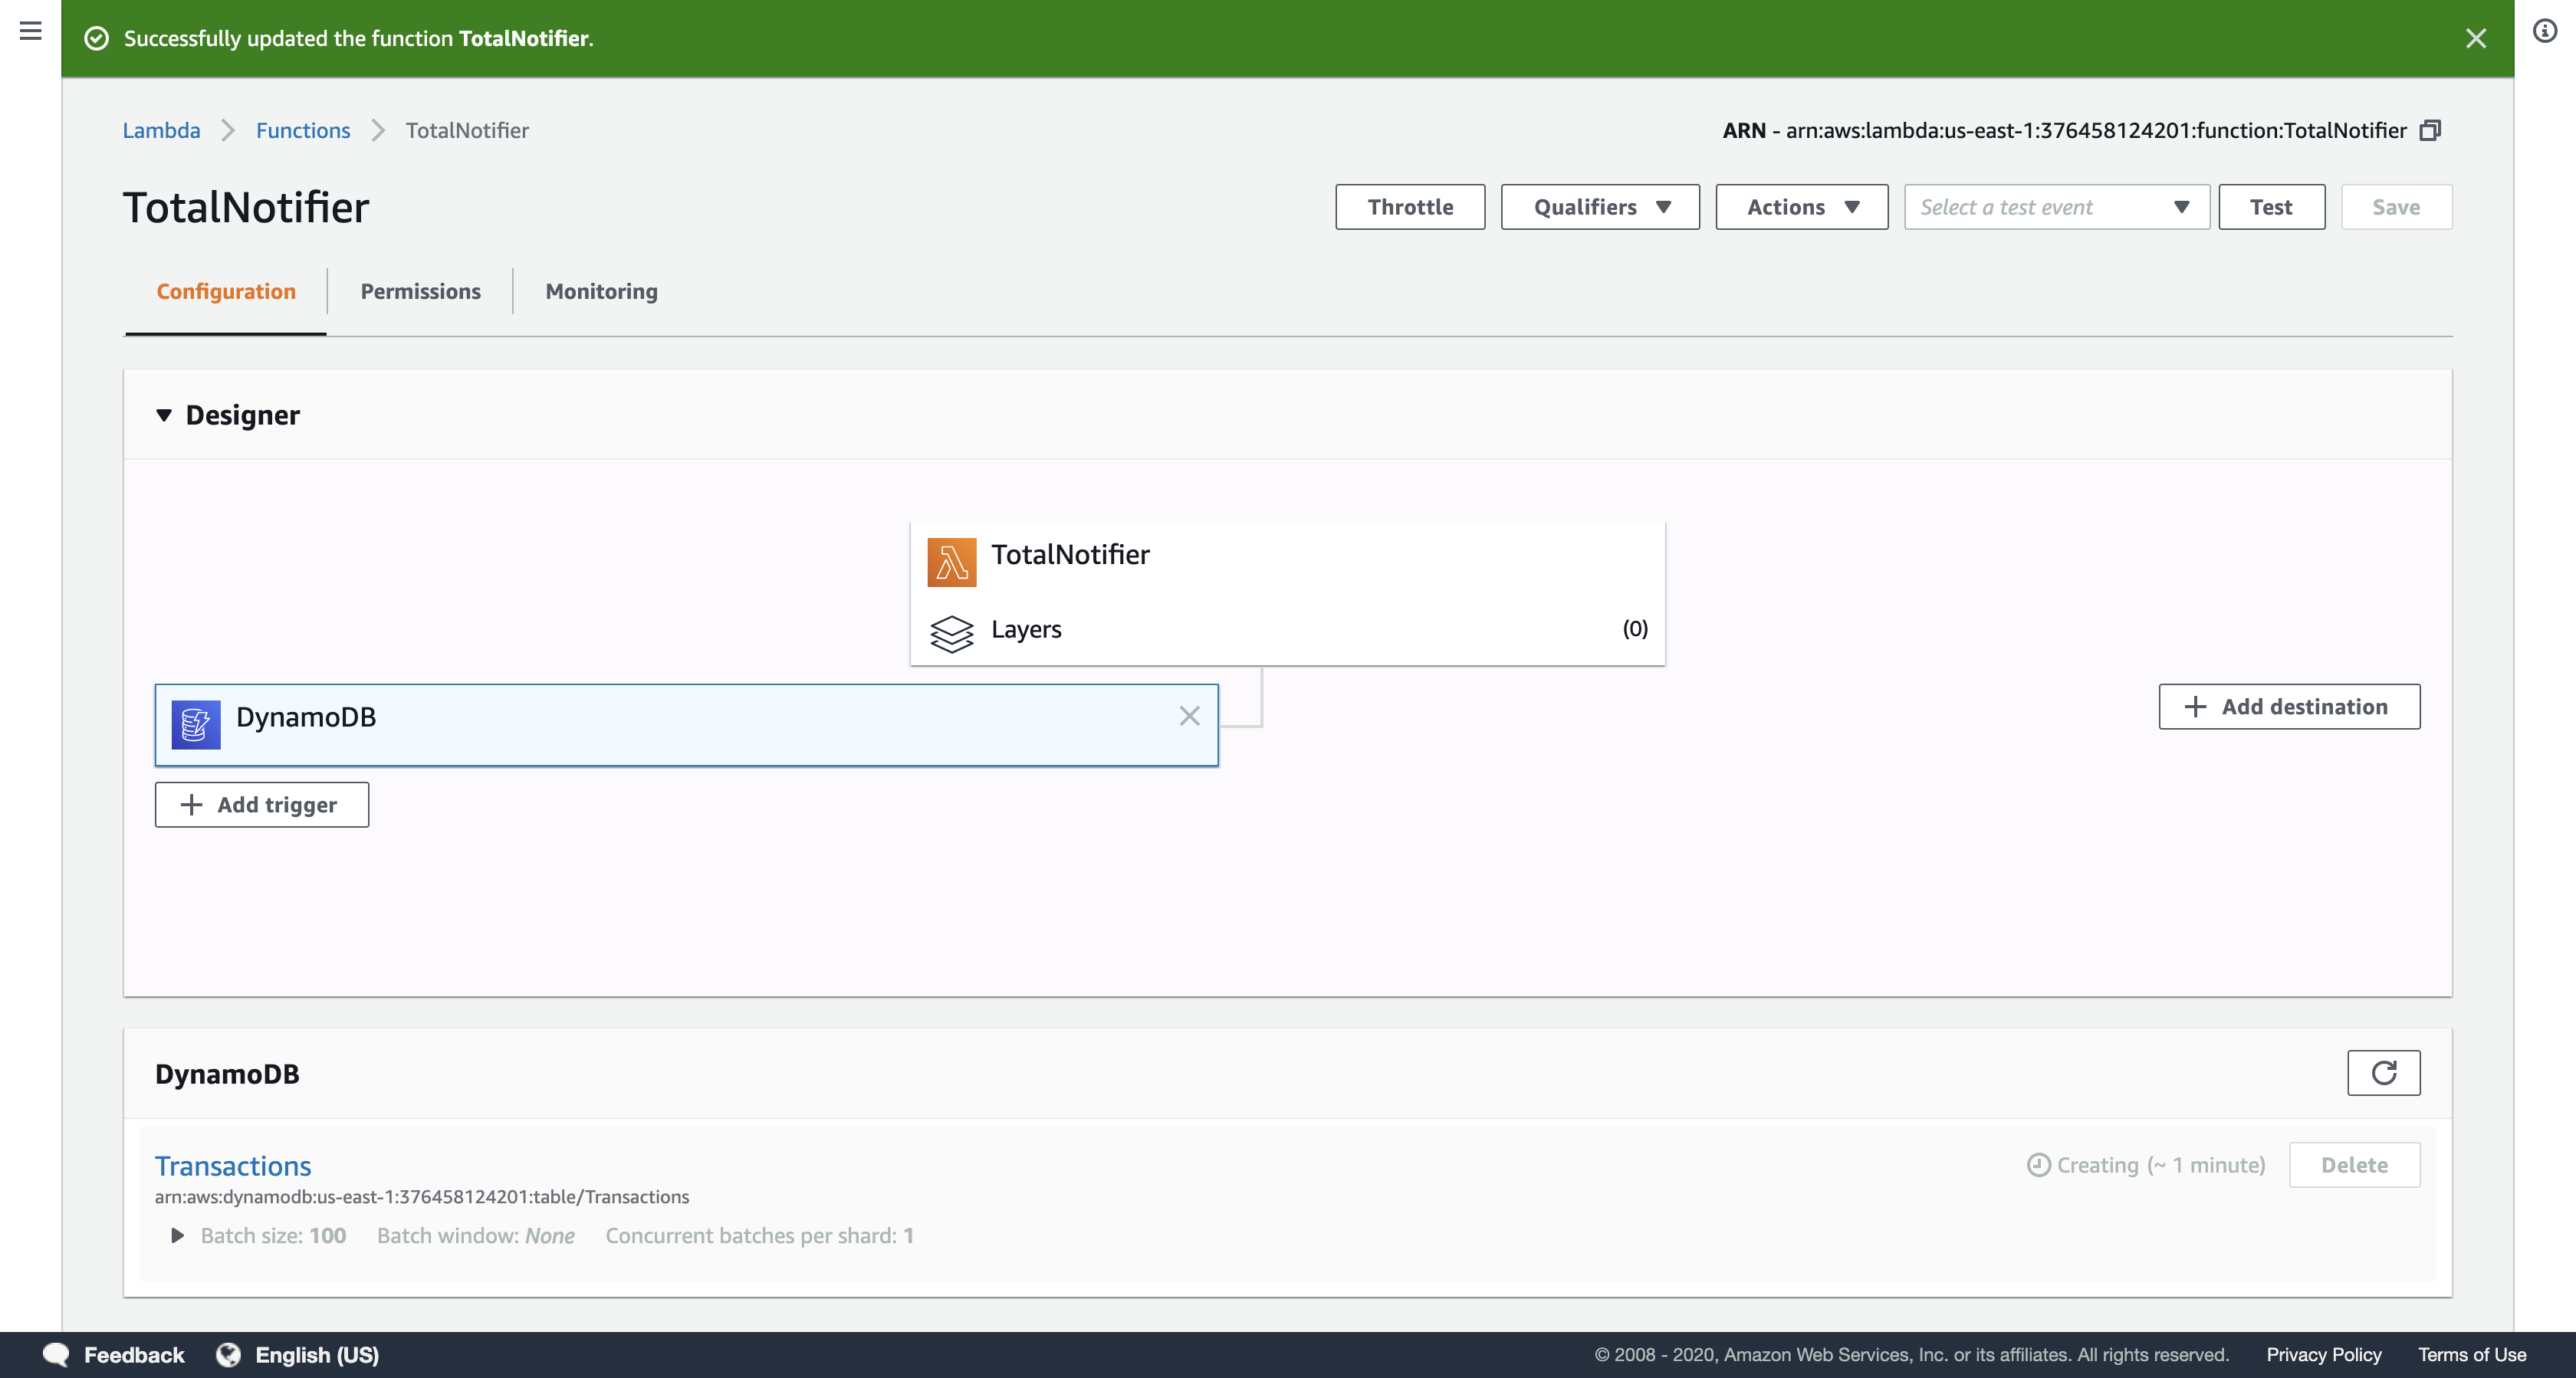
Now whenever the Transactions DynamoDB table is updated, this function will calculate each customer’s transaction total and store it in the TransactionTotal DynamoDB table. It the total exceeds $1500, it will send a message to a Simple Notification Service topic to notify the customer and your credit collection department.
Task 3: Create a Simple Notification Service (SNS) Topic
In this task, you will create a Simple Notification Service (SNS) topic that will receive a notification from your Lambda function when an account balance exceeds $1500. You will also subscribe to the topic with an email address and, optionally, via SMS.
Services menu
click Simple Notification Service.

On the left side of the screen, click on 三 to reveal the Amazon SNS menu, and then click Topics.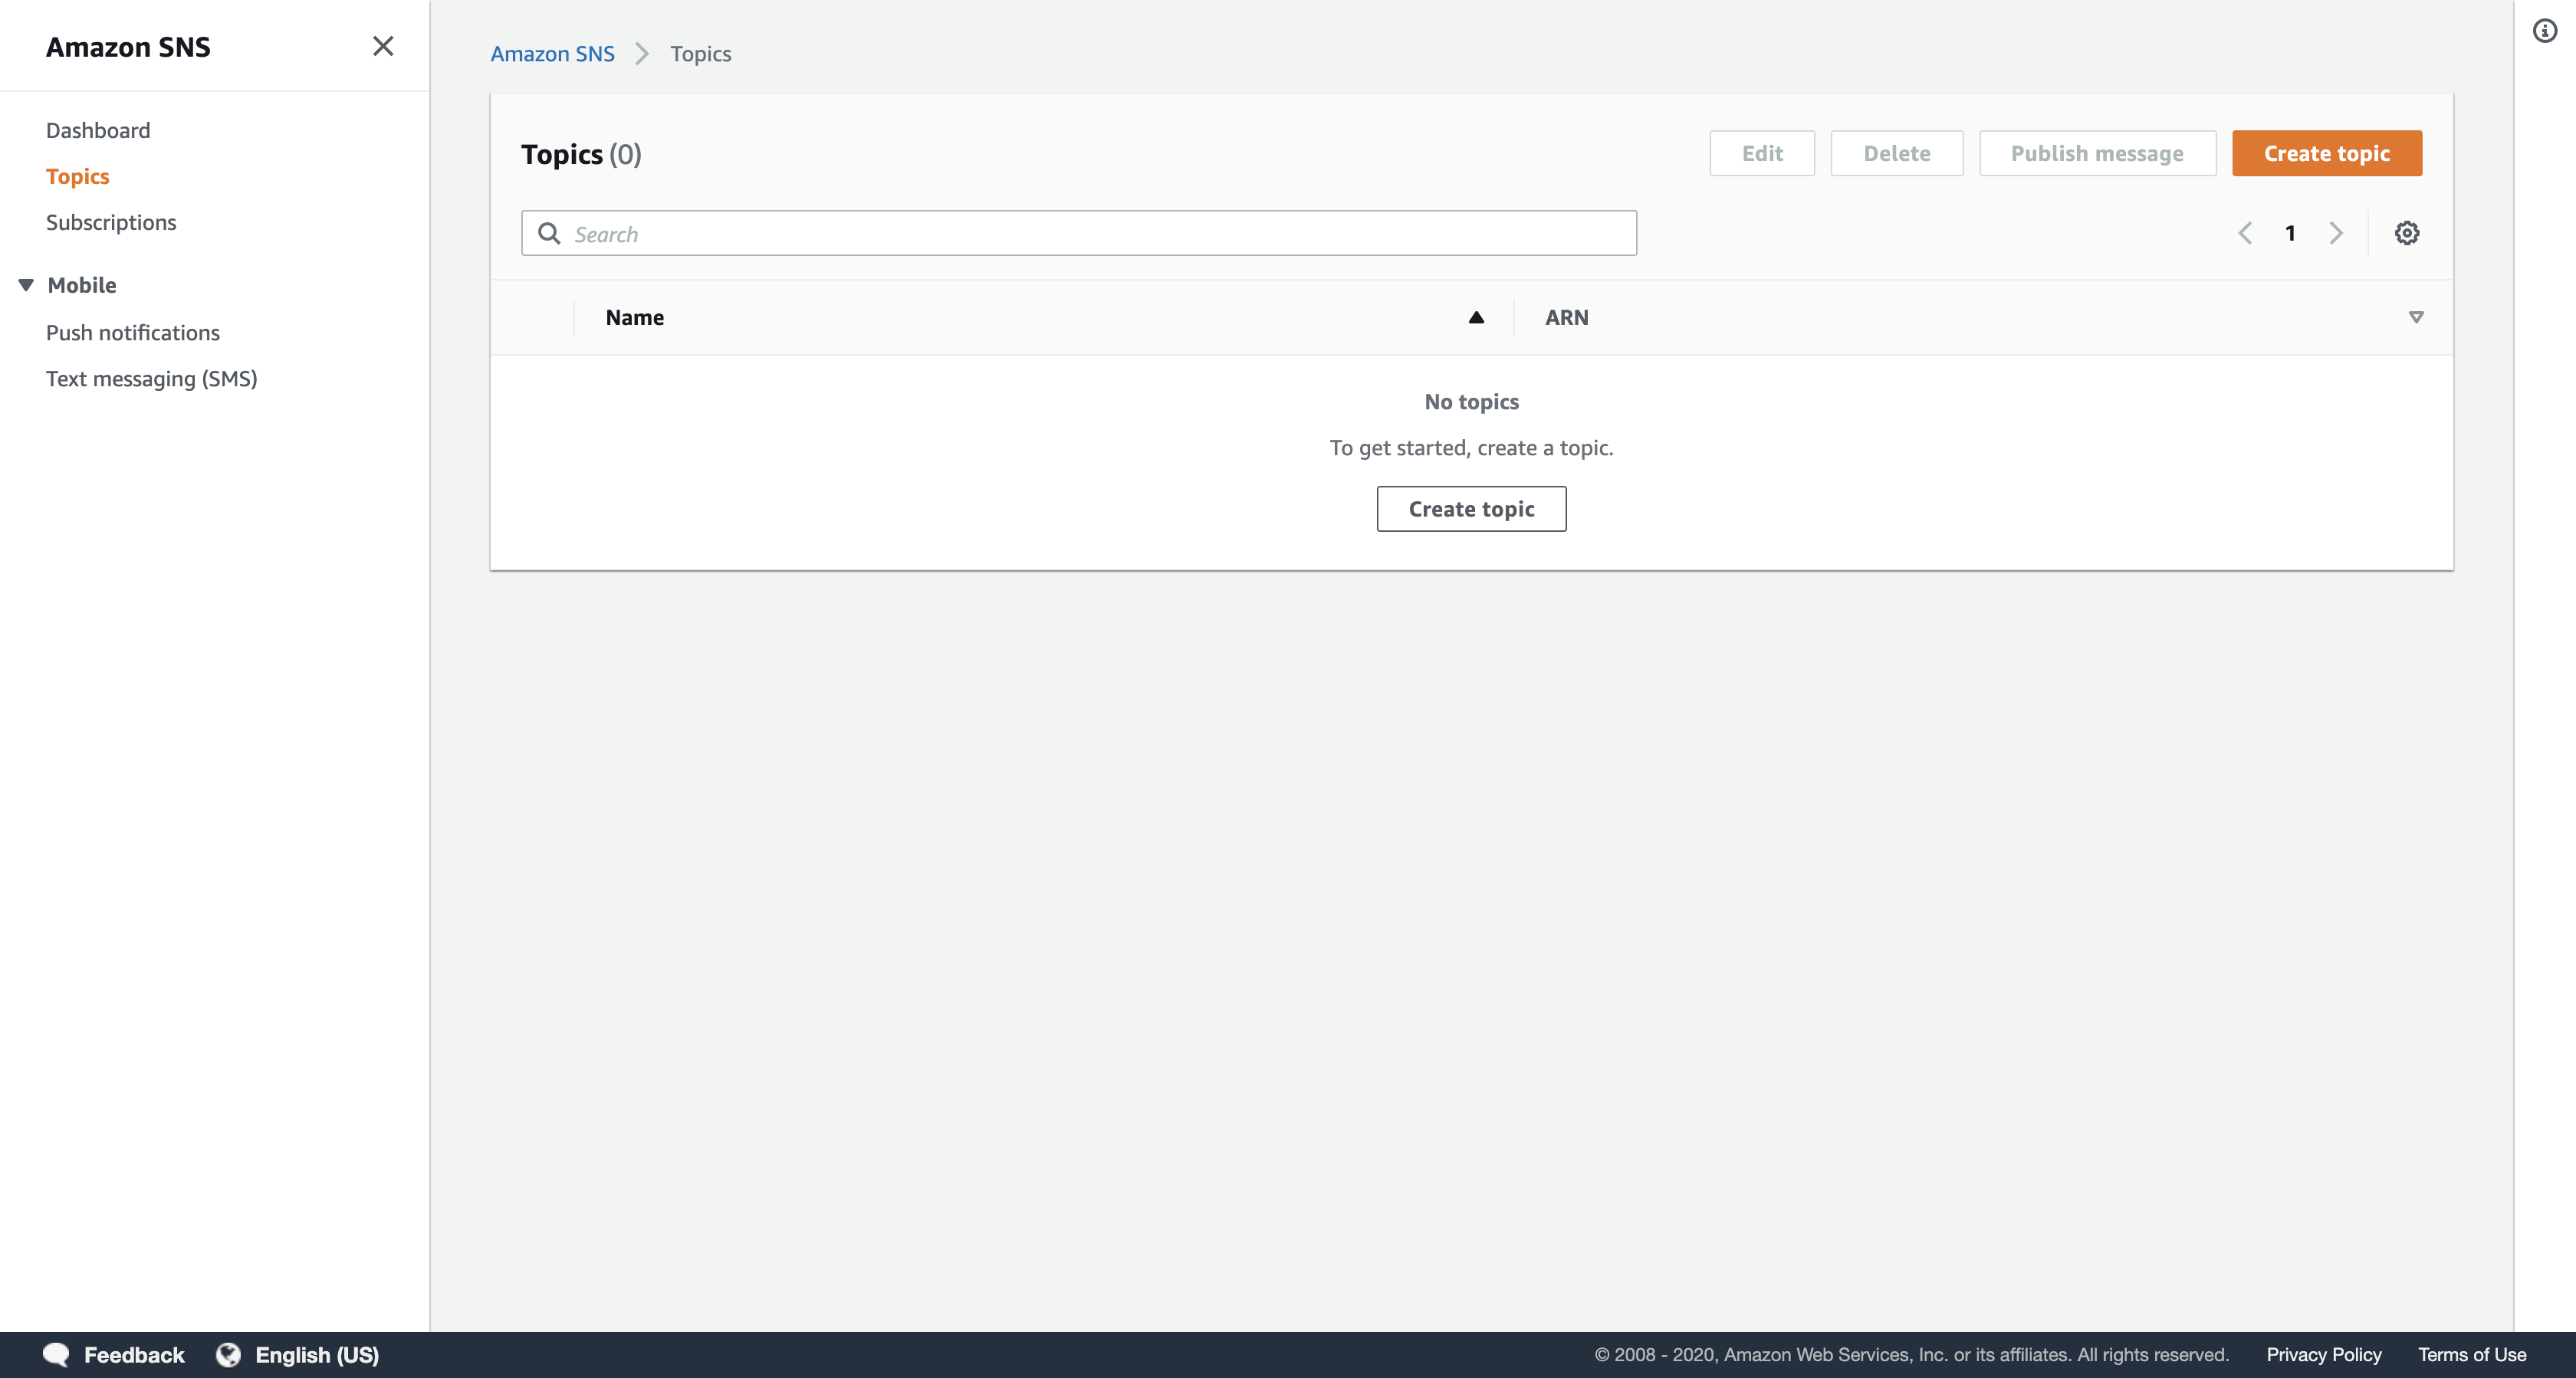
Click Create topic.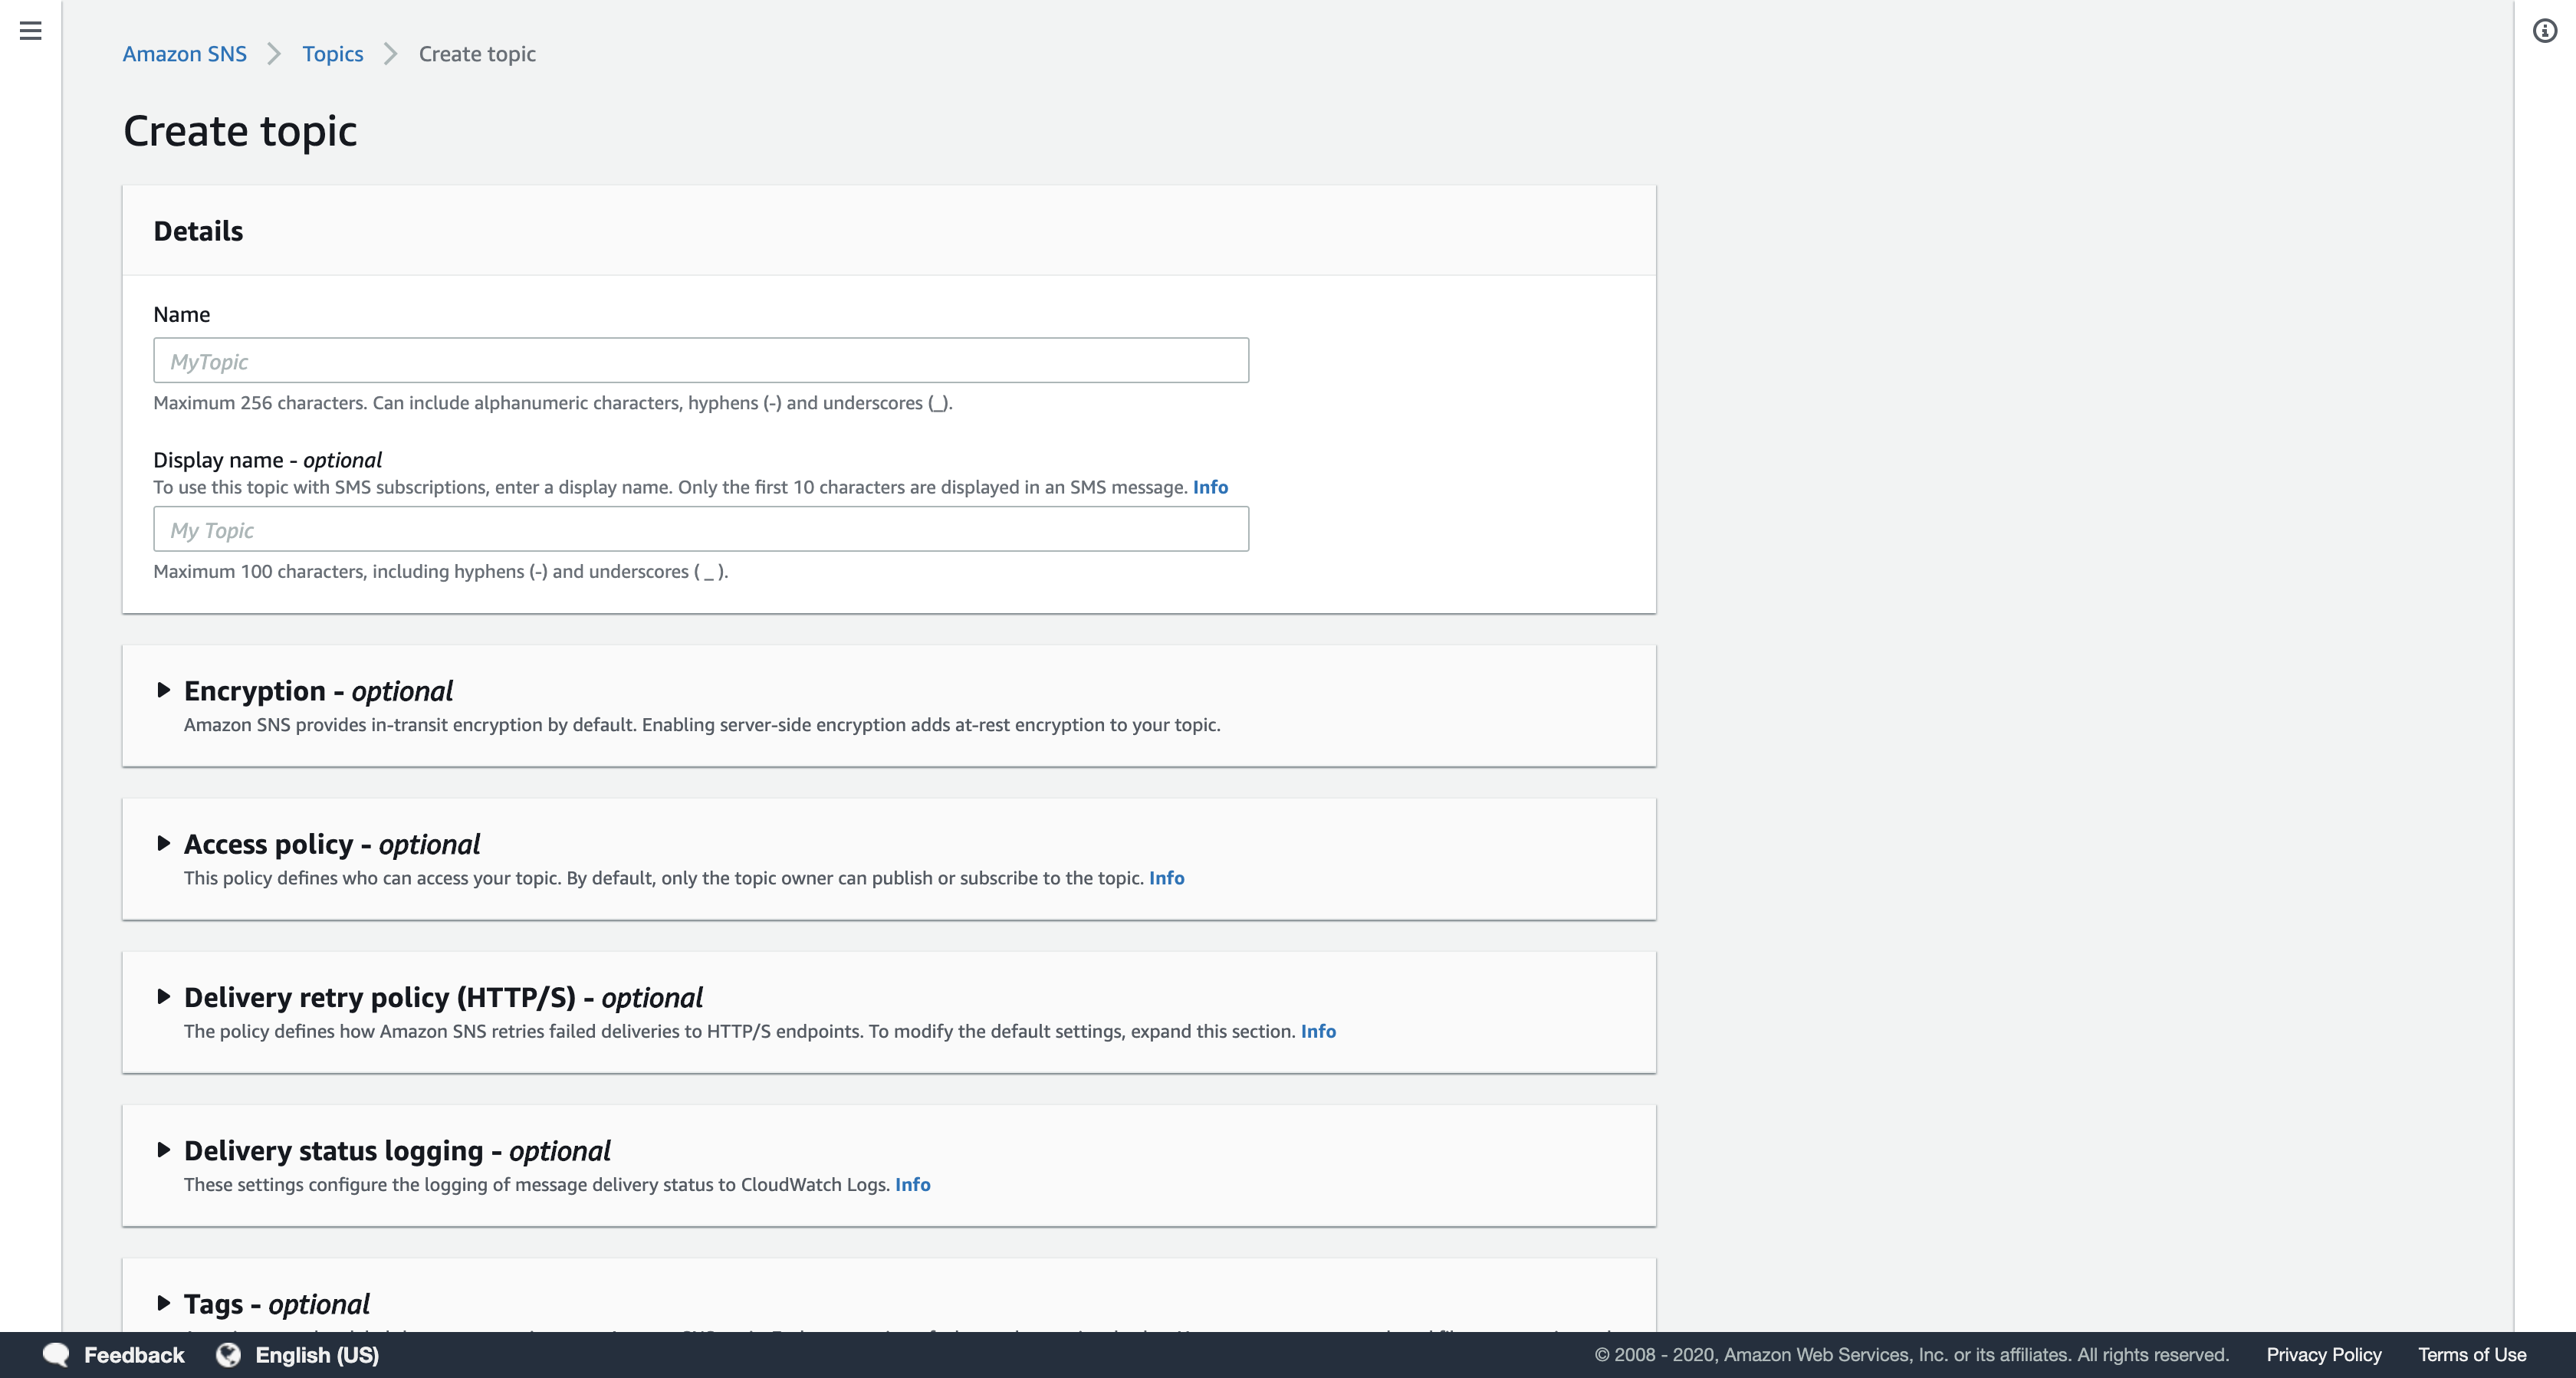
In the Create topic dialog box, configure the following settings:
- Name:
HighBalanceAlert
Please use this exact name so the Lambda function can trigger the notification. - Display name:
HighAlert
Click Create topic.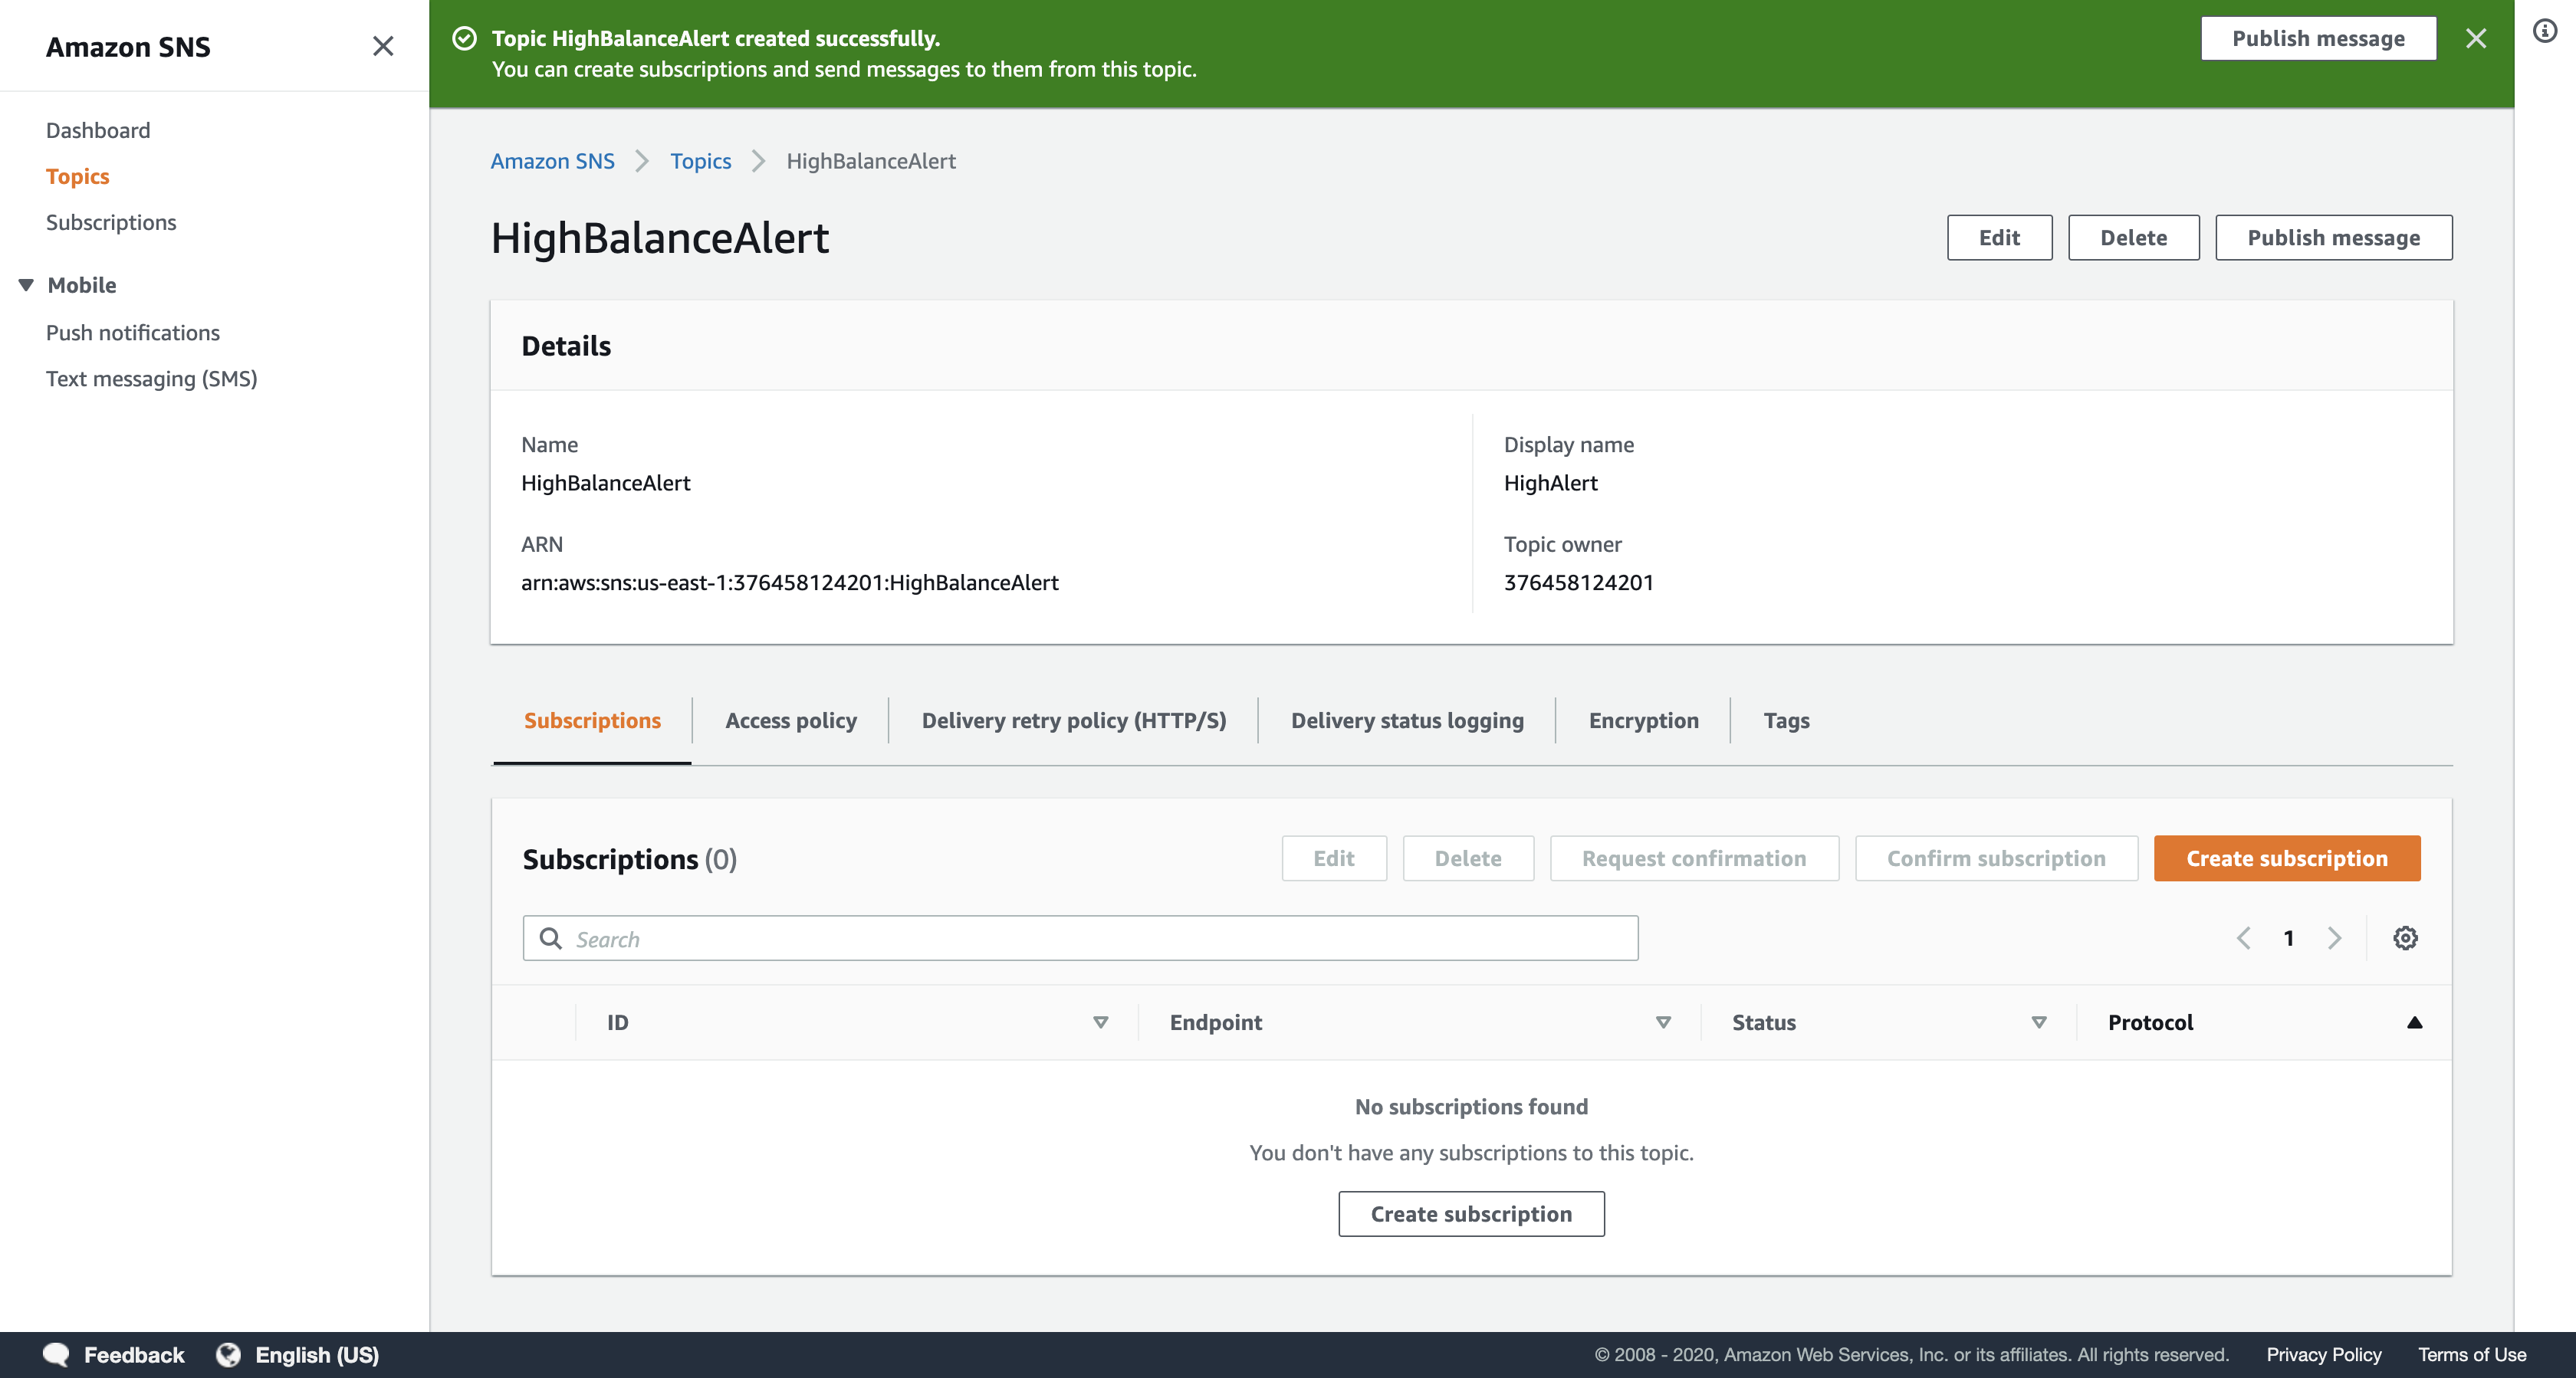
Click Create subscription.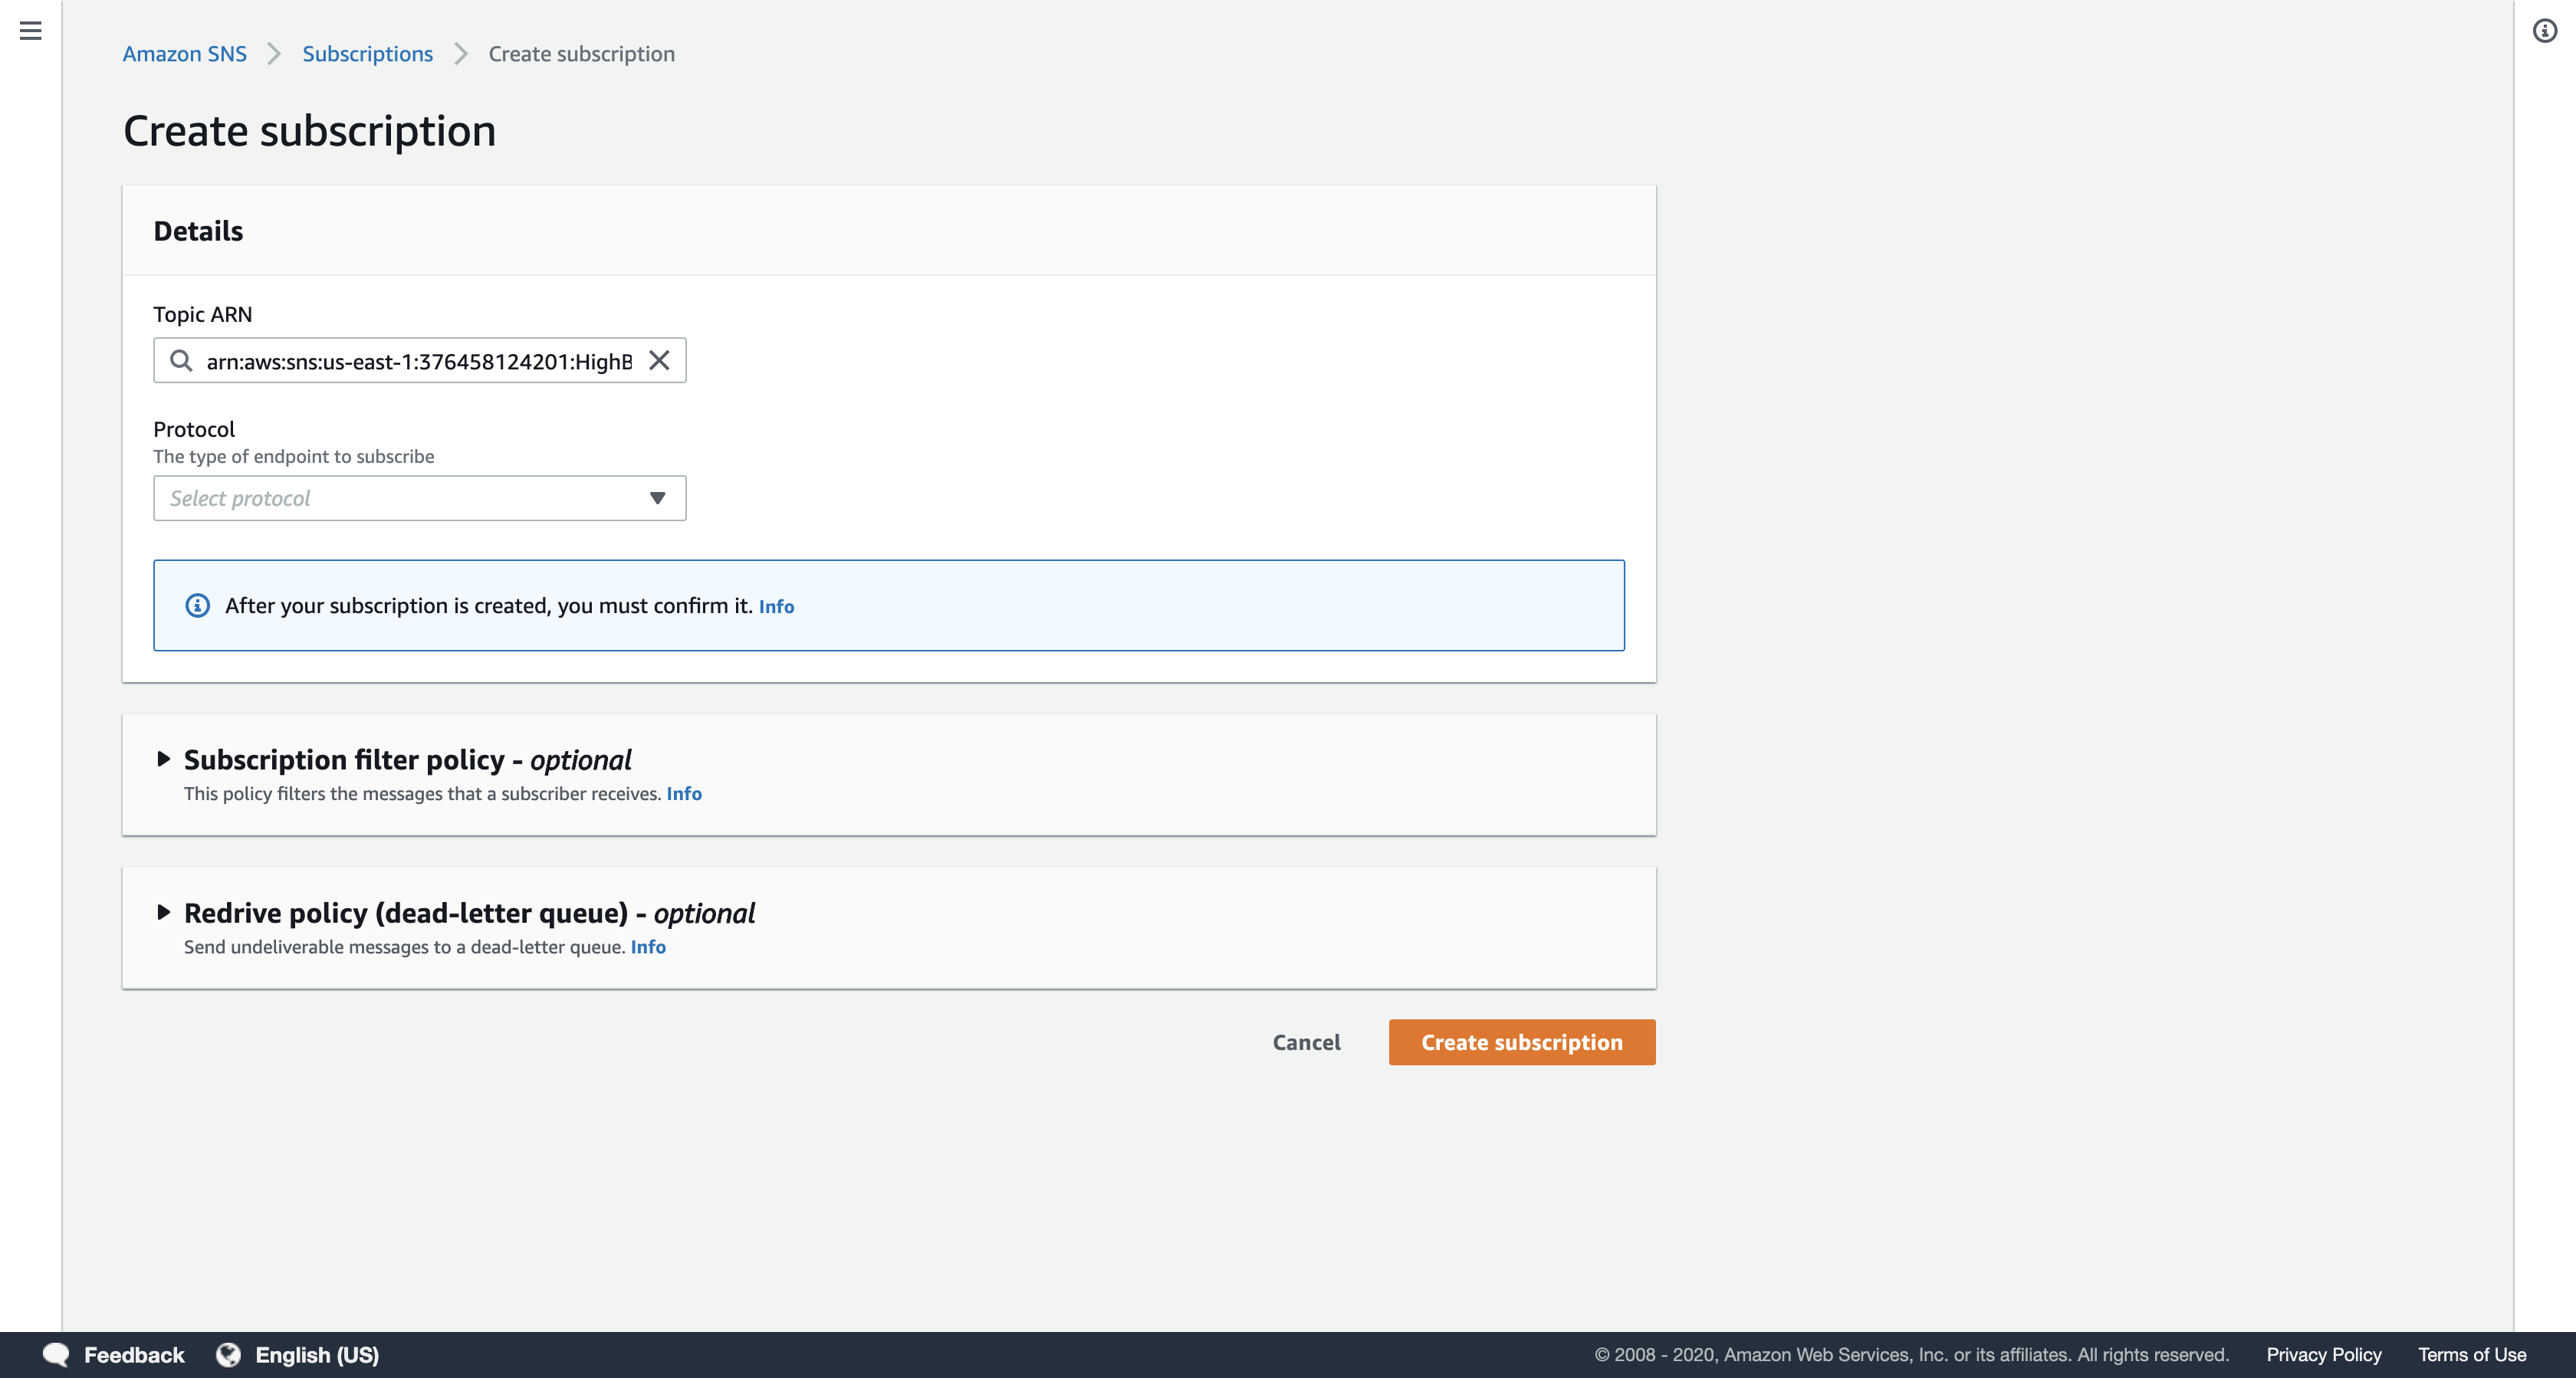
In the Create subscription dialog box, configure the following settings:
- Protocol:
Email - Endpoint: Enter an email address that you can easily access. This can be either a work or personal email address. This email will receive notifications from the Simple Notification Service topic you have created.
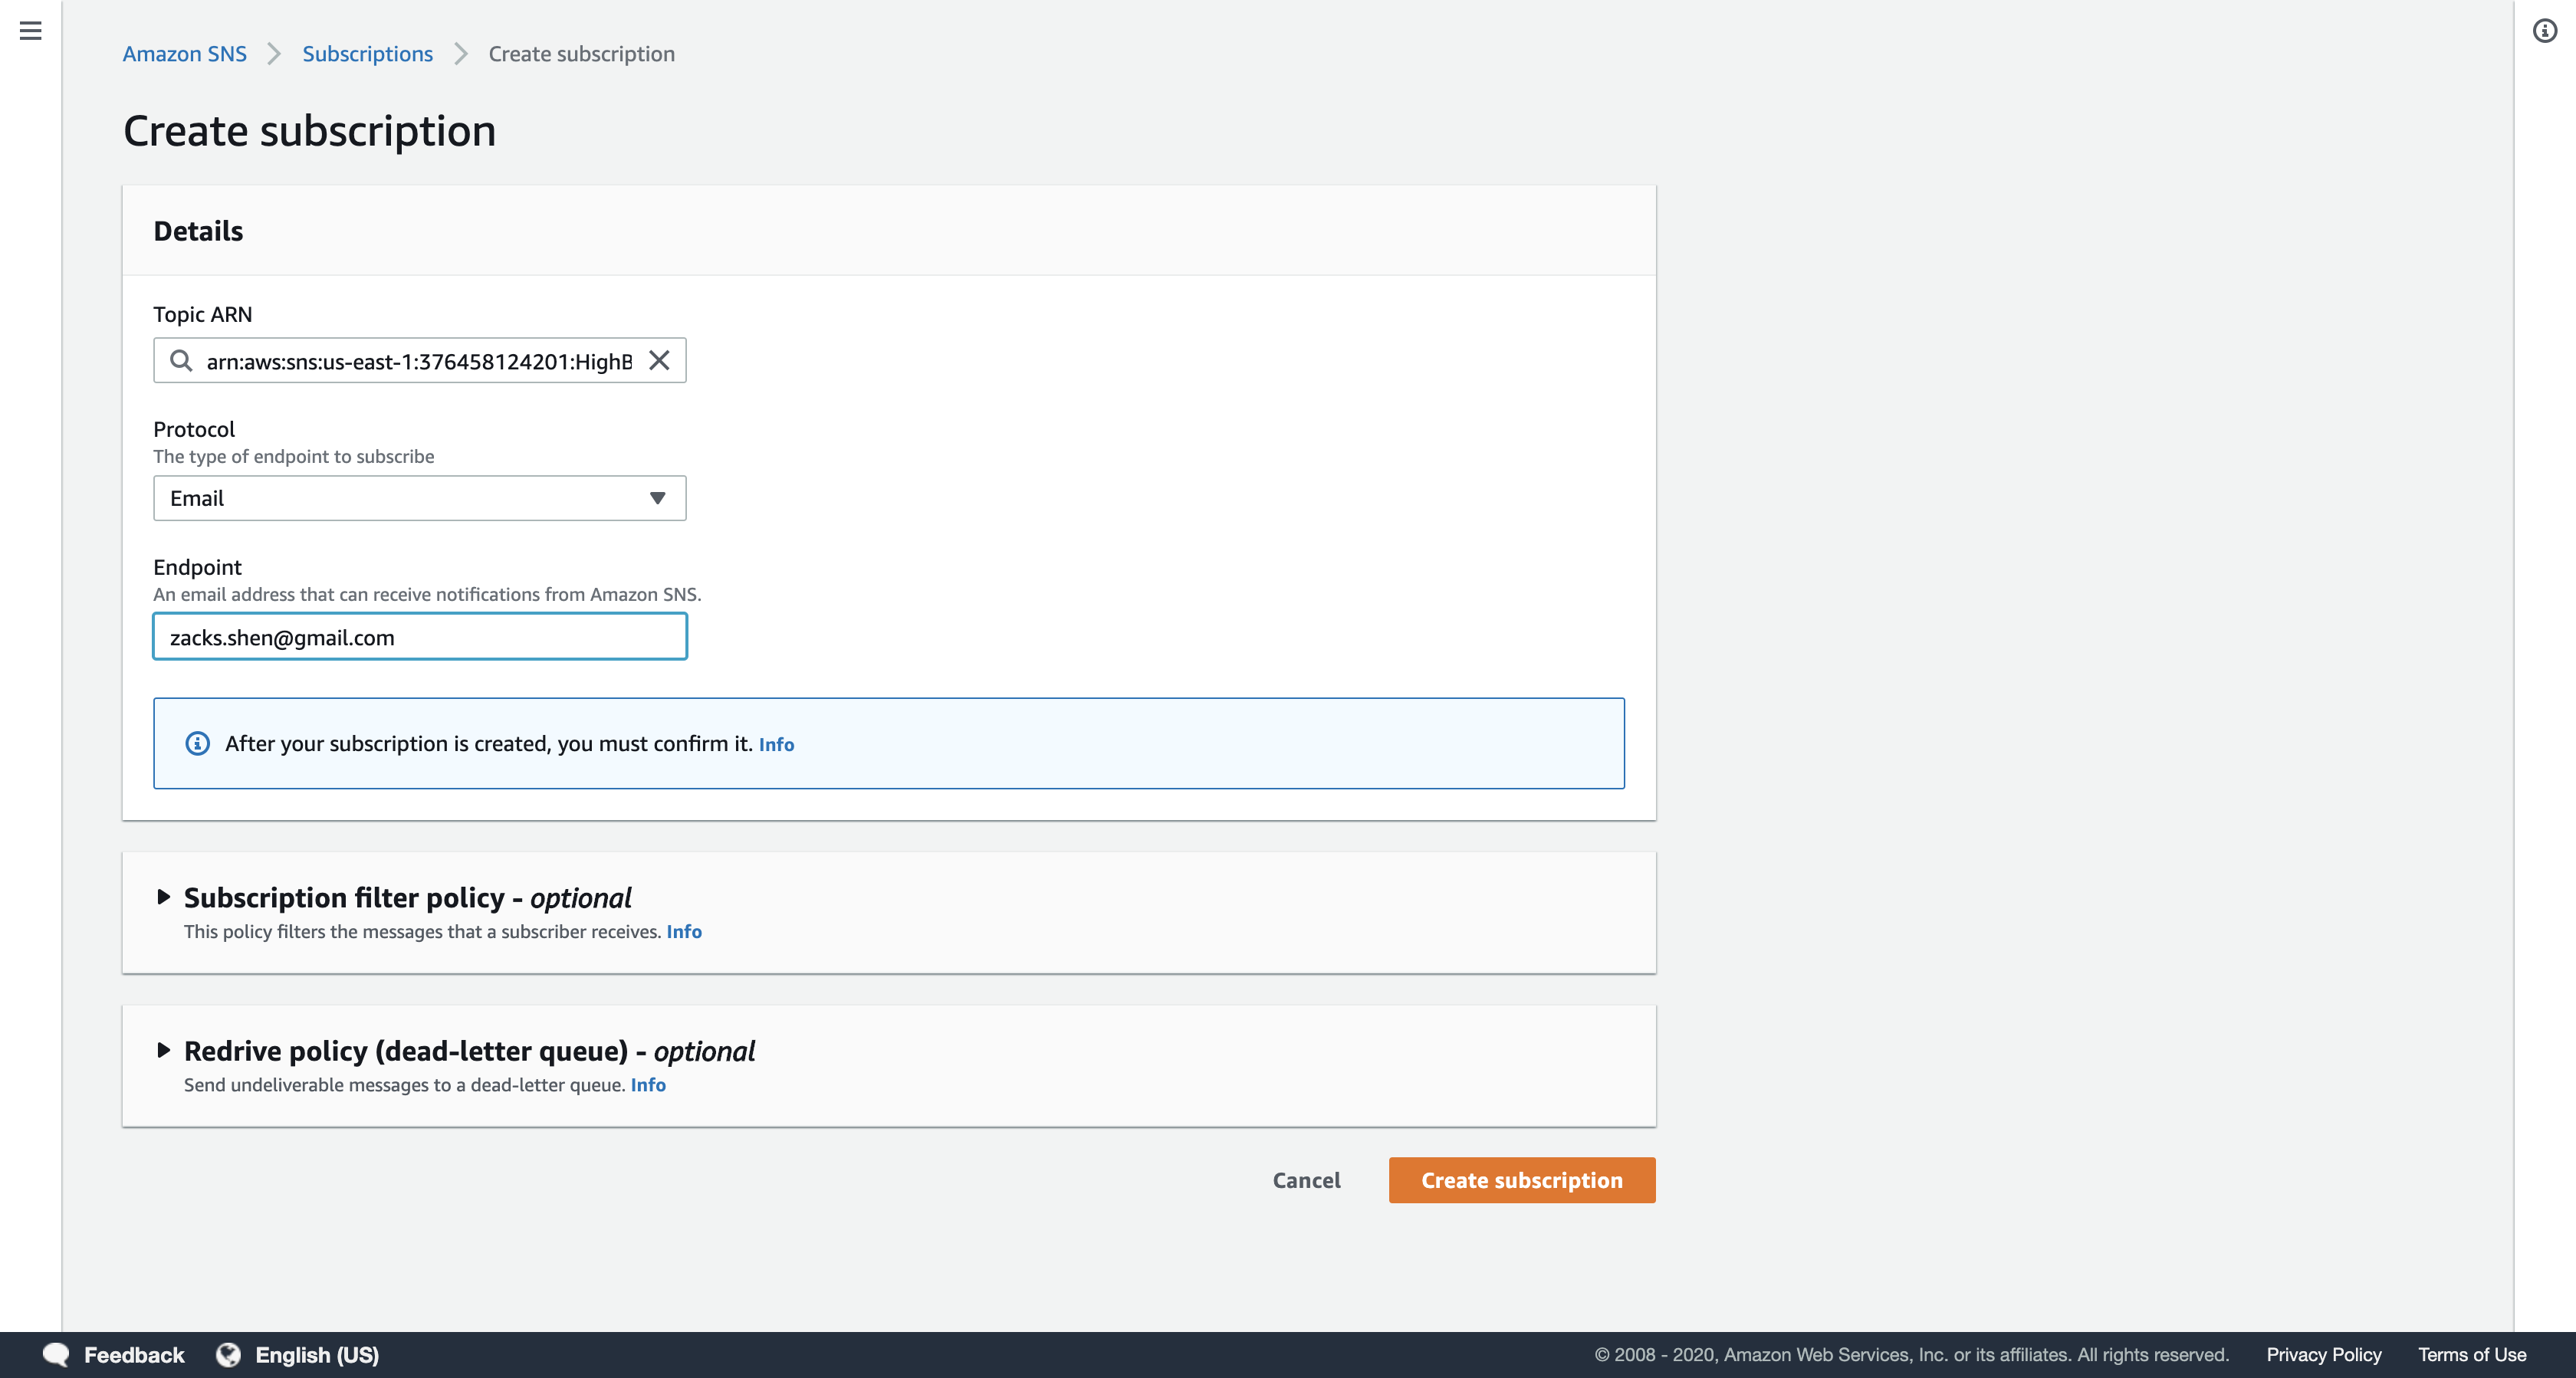
Click Create subscription.
A confirmation request will be sent to your email address. You will need to confirm the subscription to receive notifications.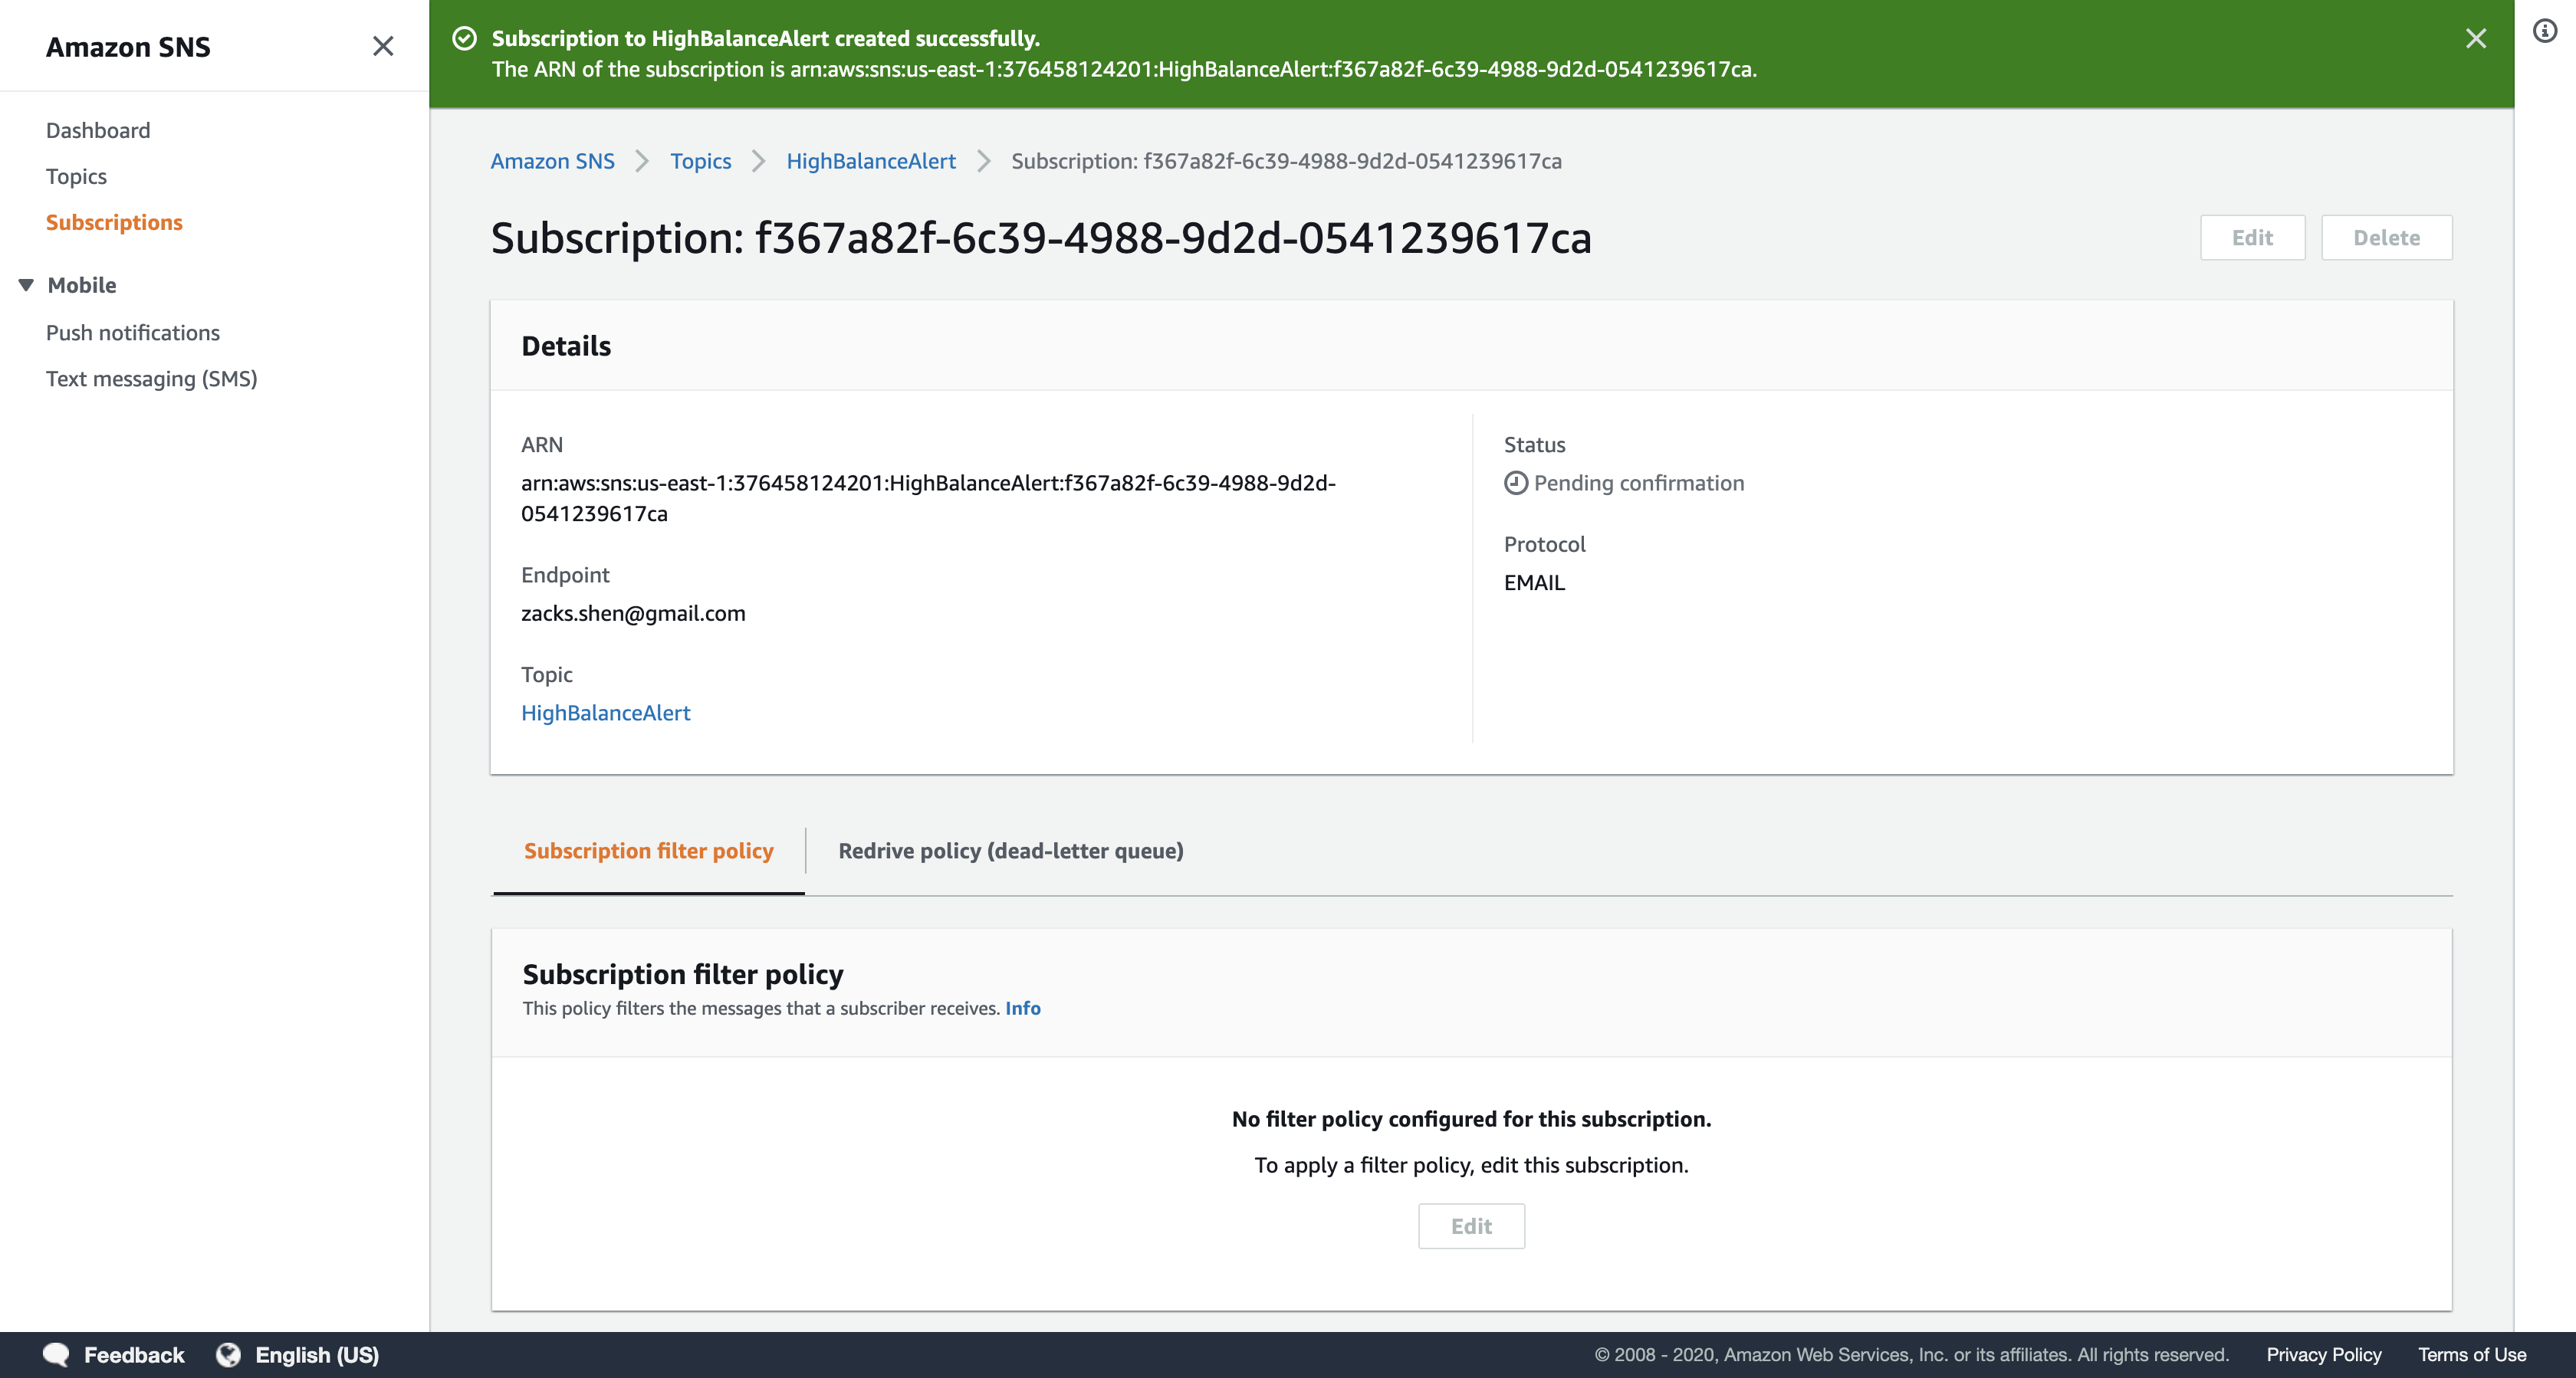
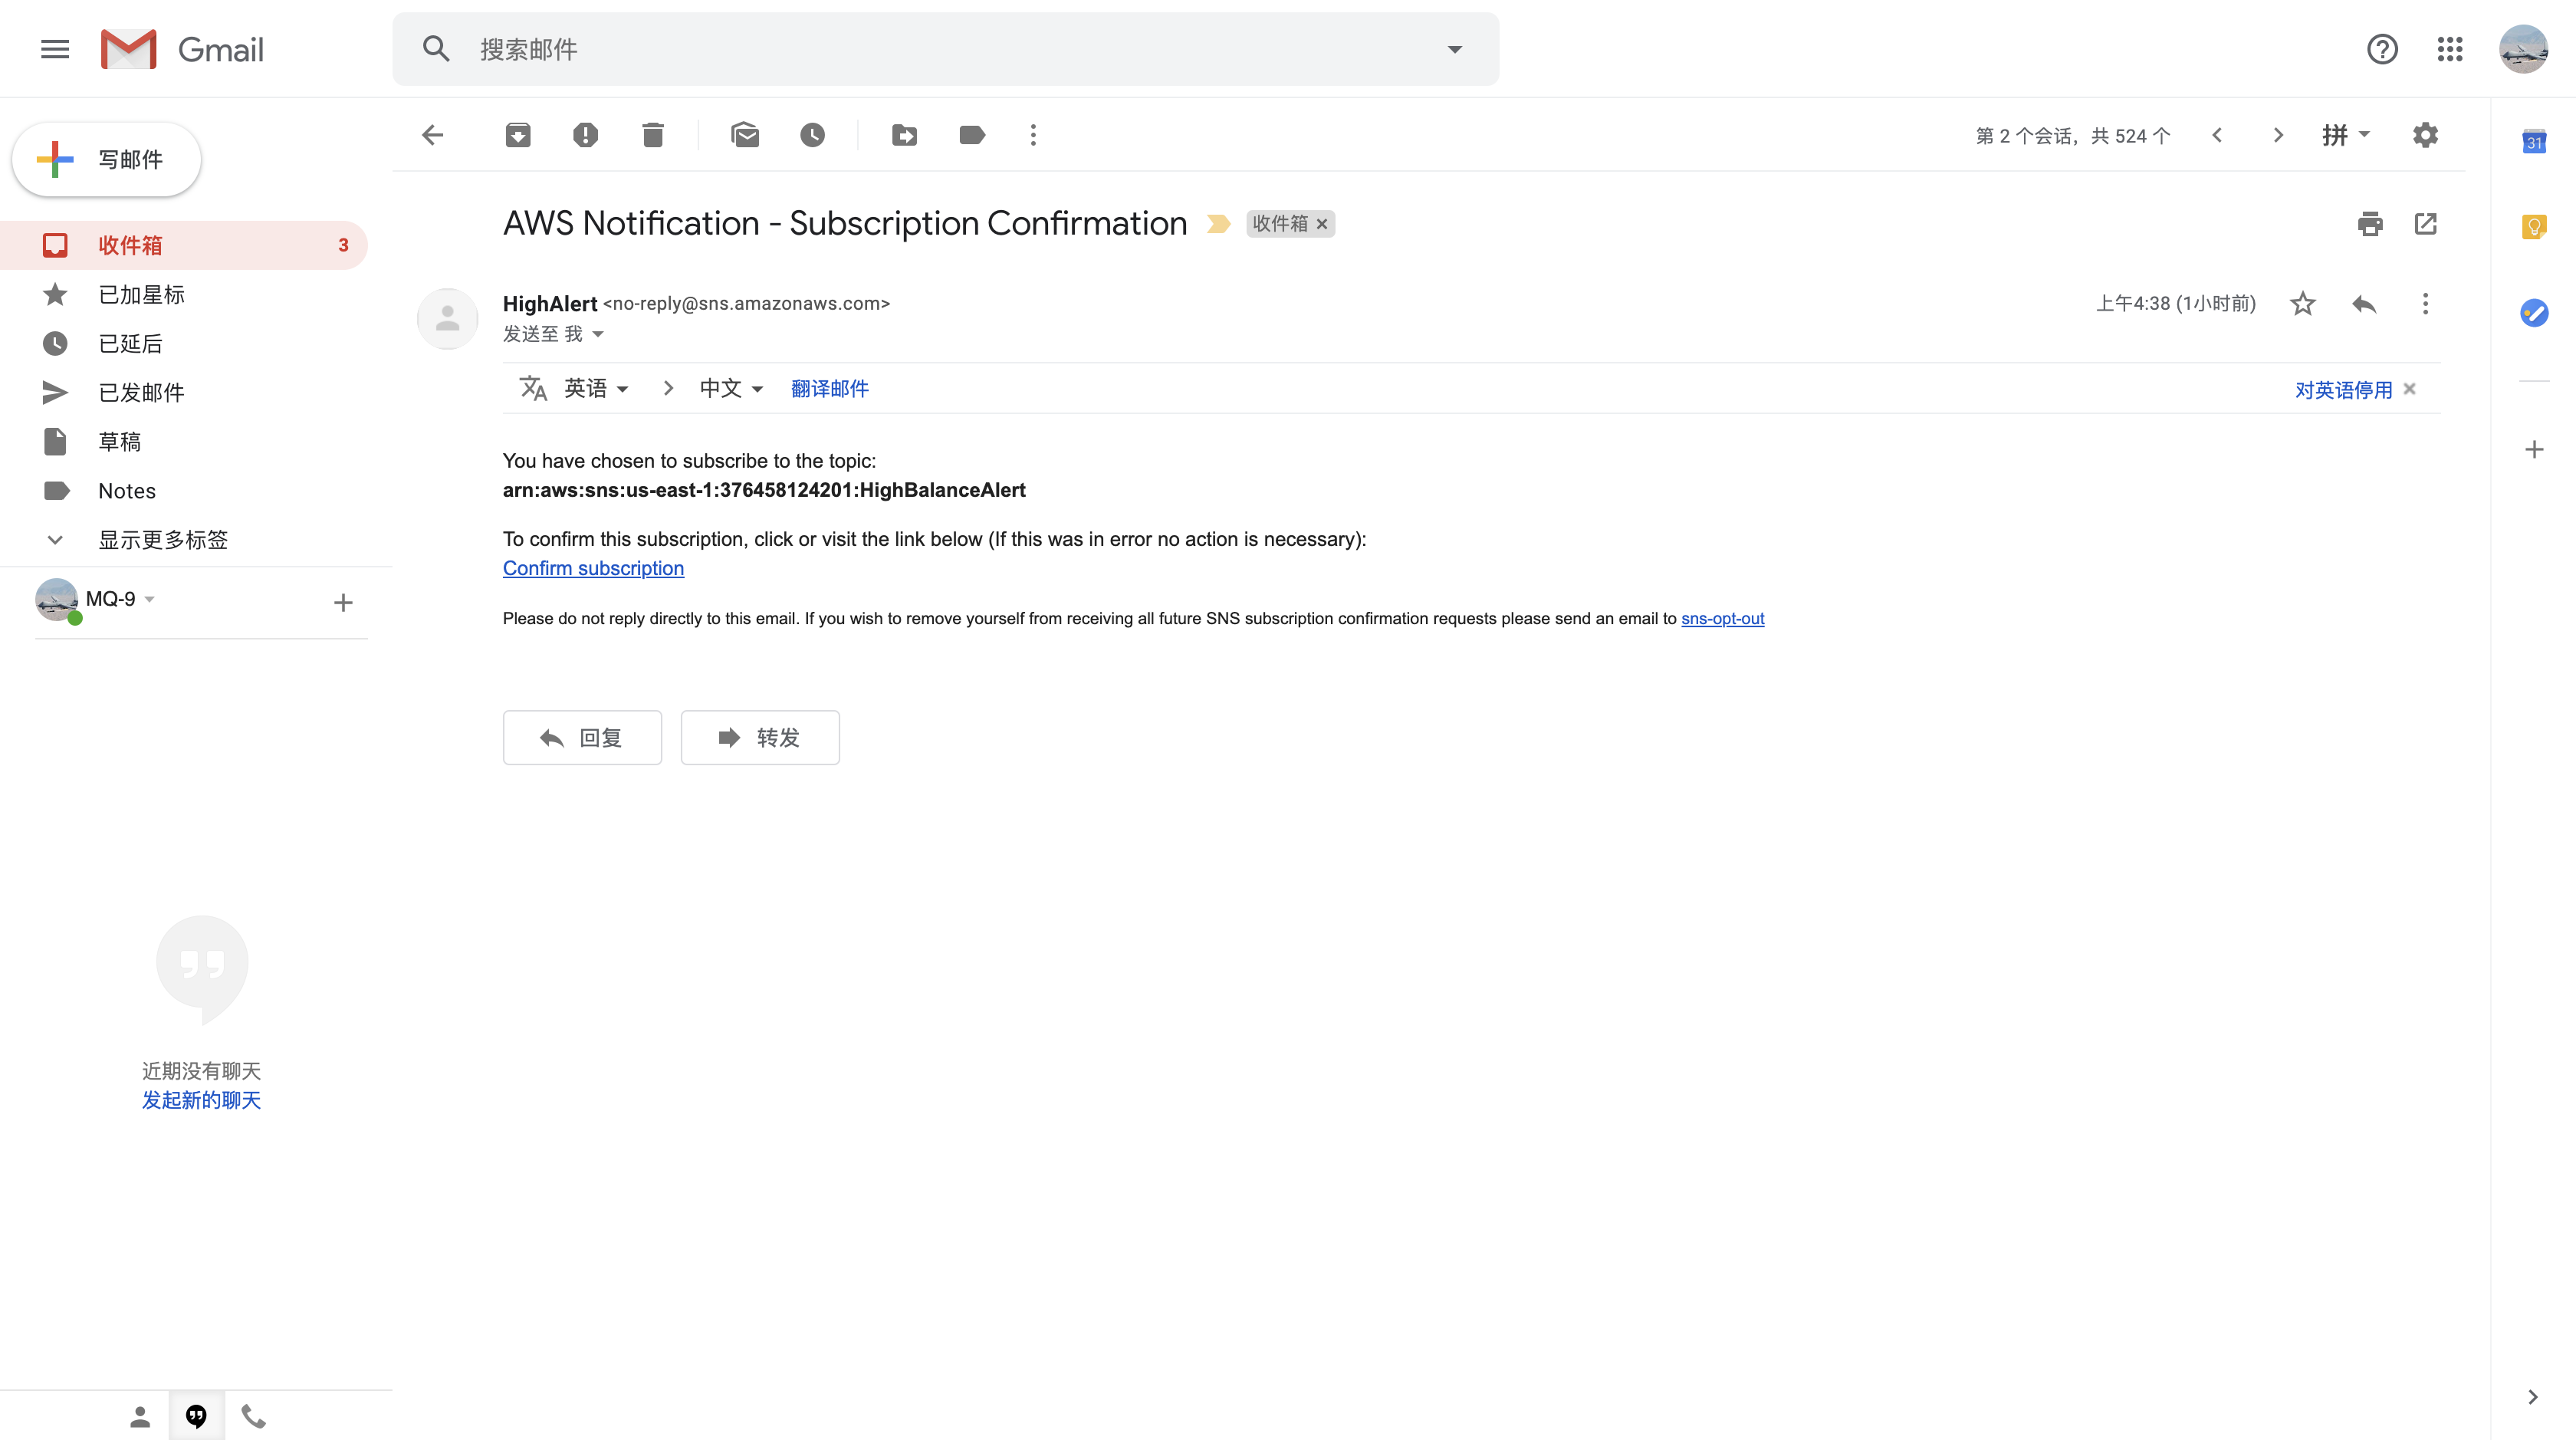
Check the email account you just provided for a new email from HighAlert. It may take a minute to be delivered.
When you receive the email, click the Confirm subscription link contained within the email message.

The Simple Notification Service topic will now send you an email whenever it receives a message.
Optional: You can also subscribe to receive a message on your phone via SMS. If you wish to do this, then:
- Click
Create subscription - For Protocol, select
SMS - For Endpoint, enter your phone number in international format (eg +14155557000 or +917513200000)
Click Create subscription
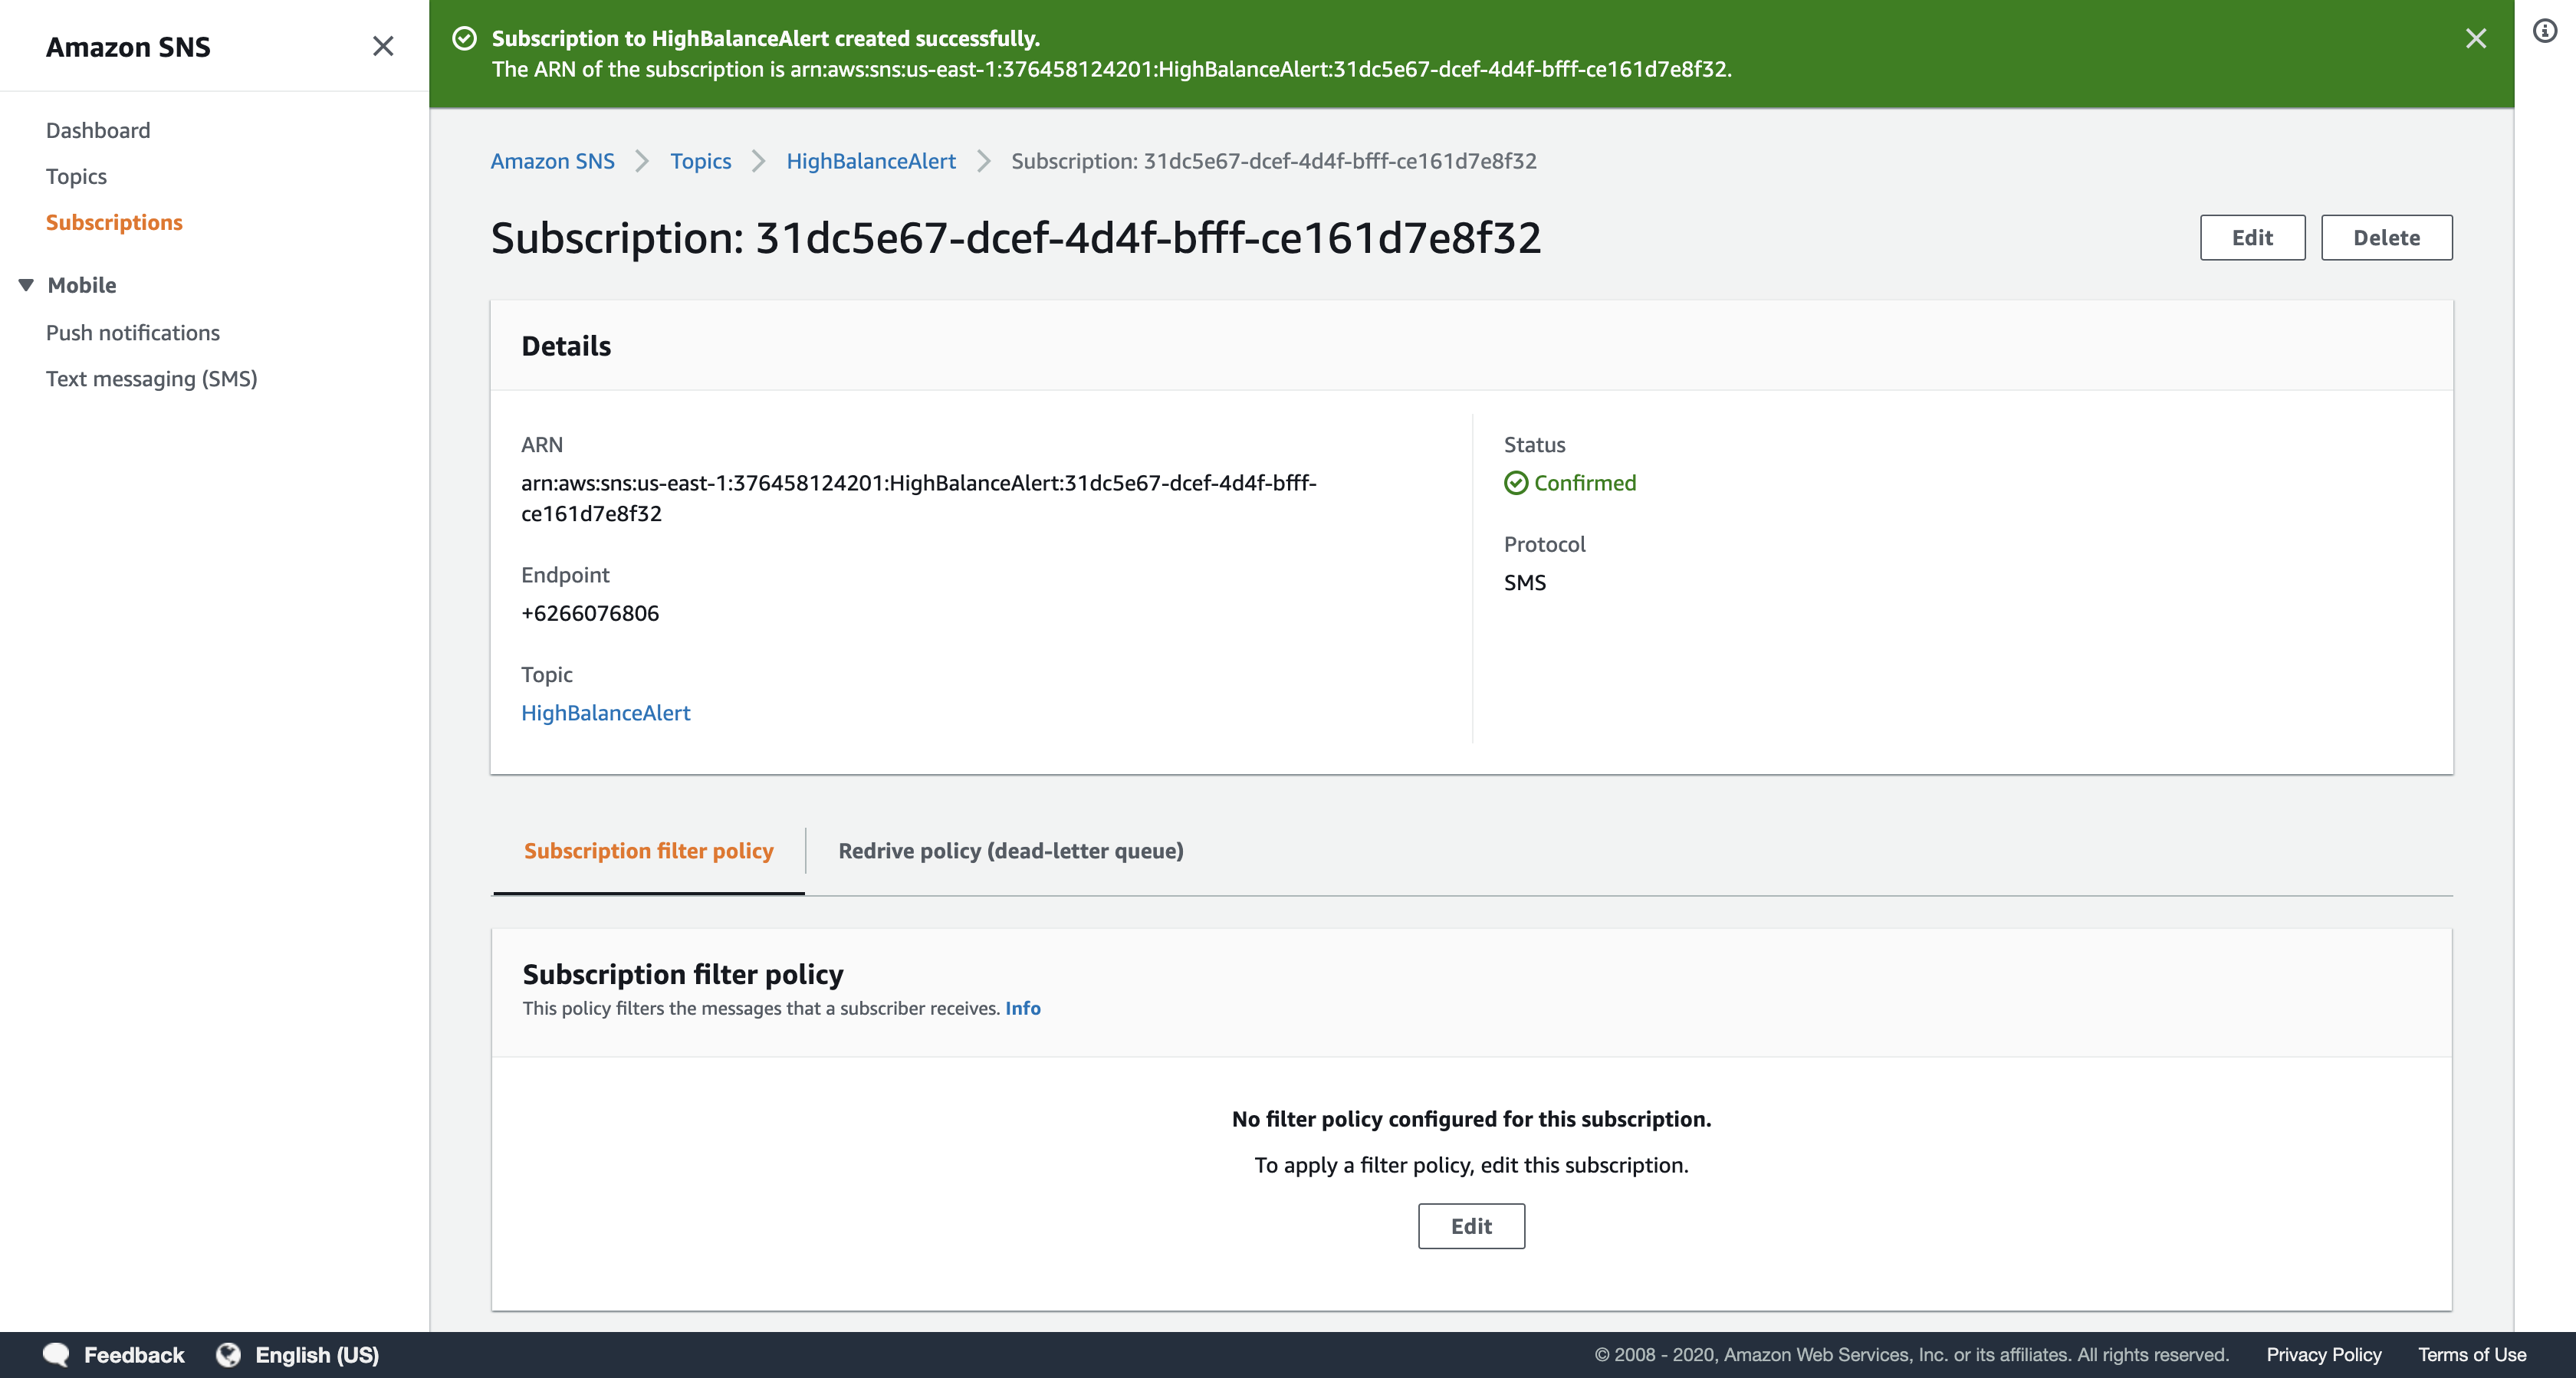
Note: This is a WRONG phone number since it missed an International area code.
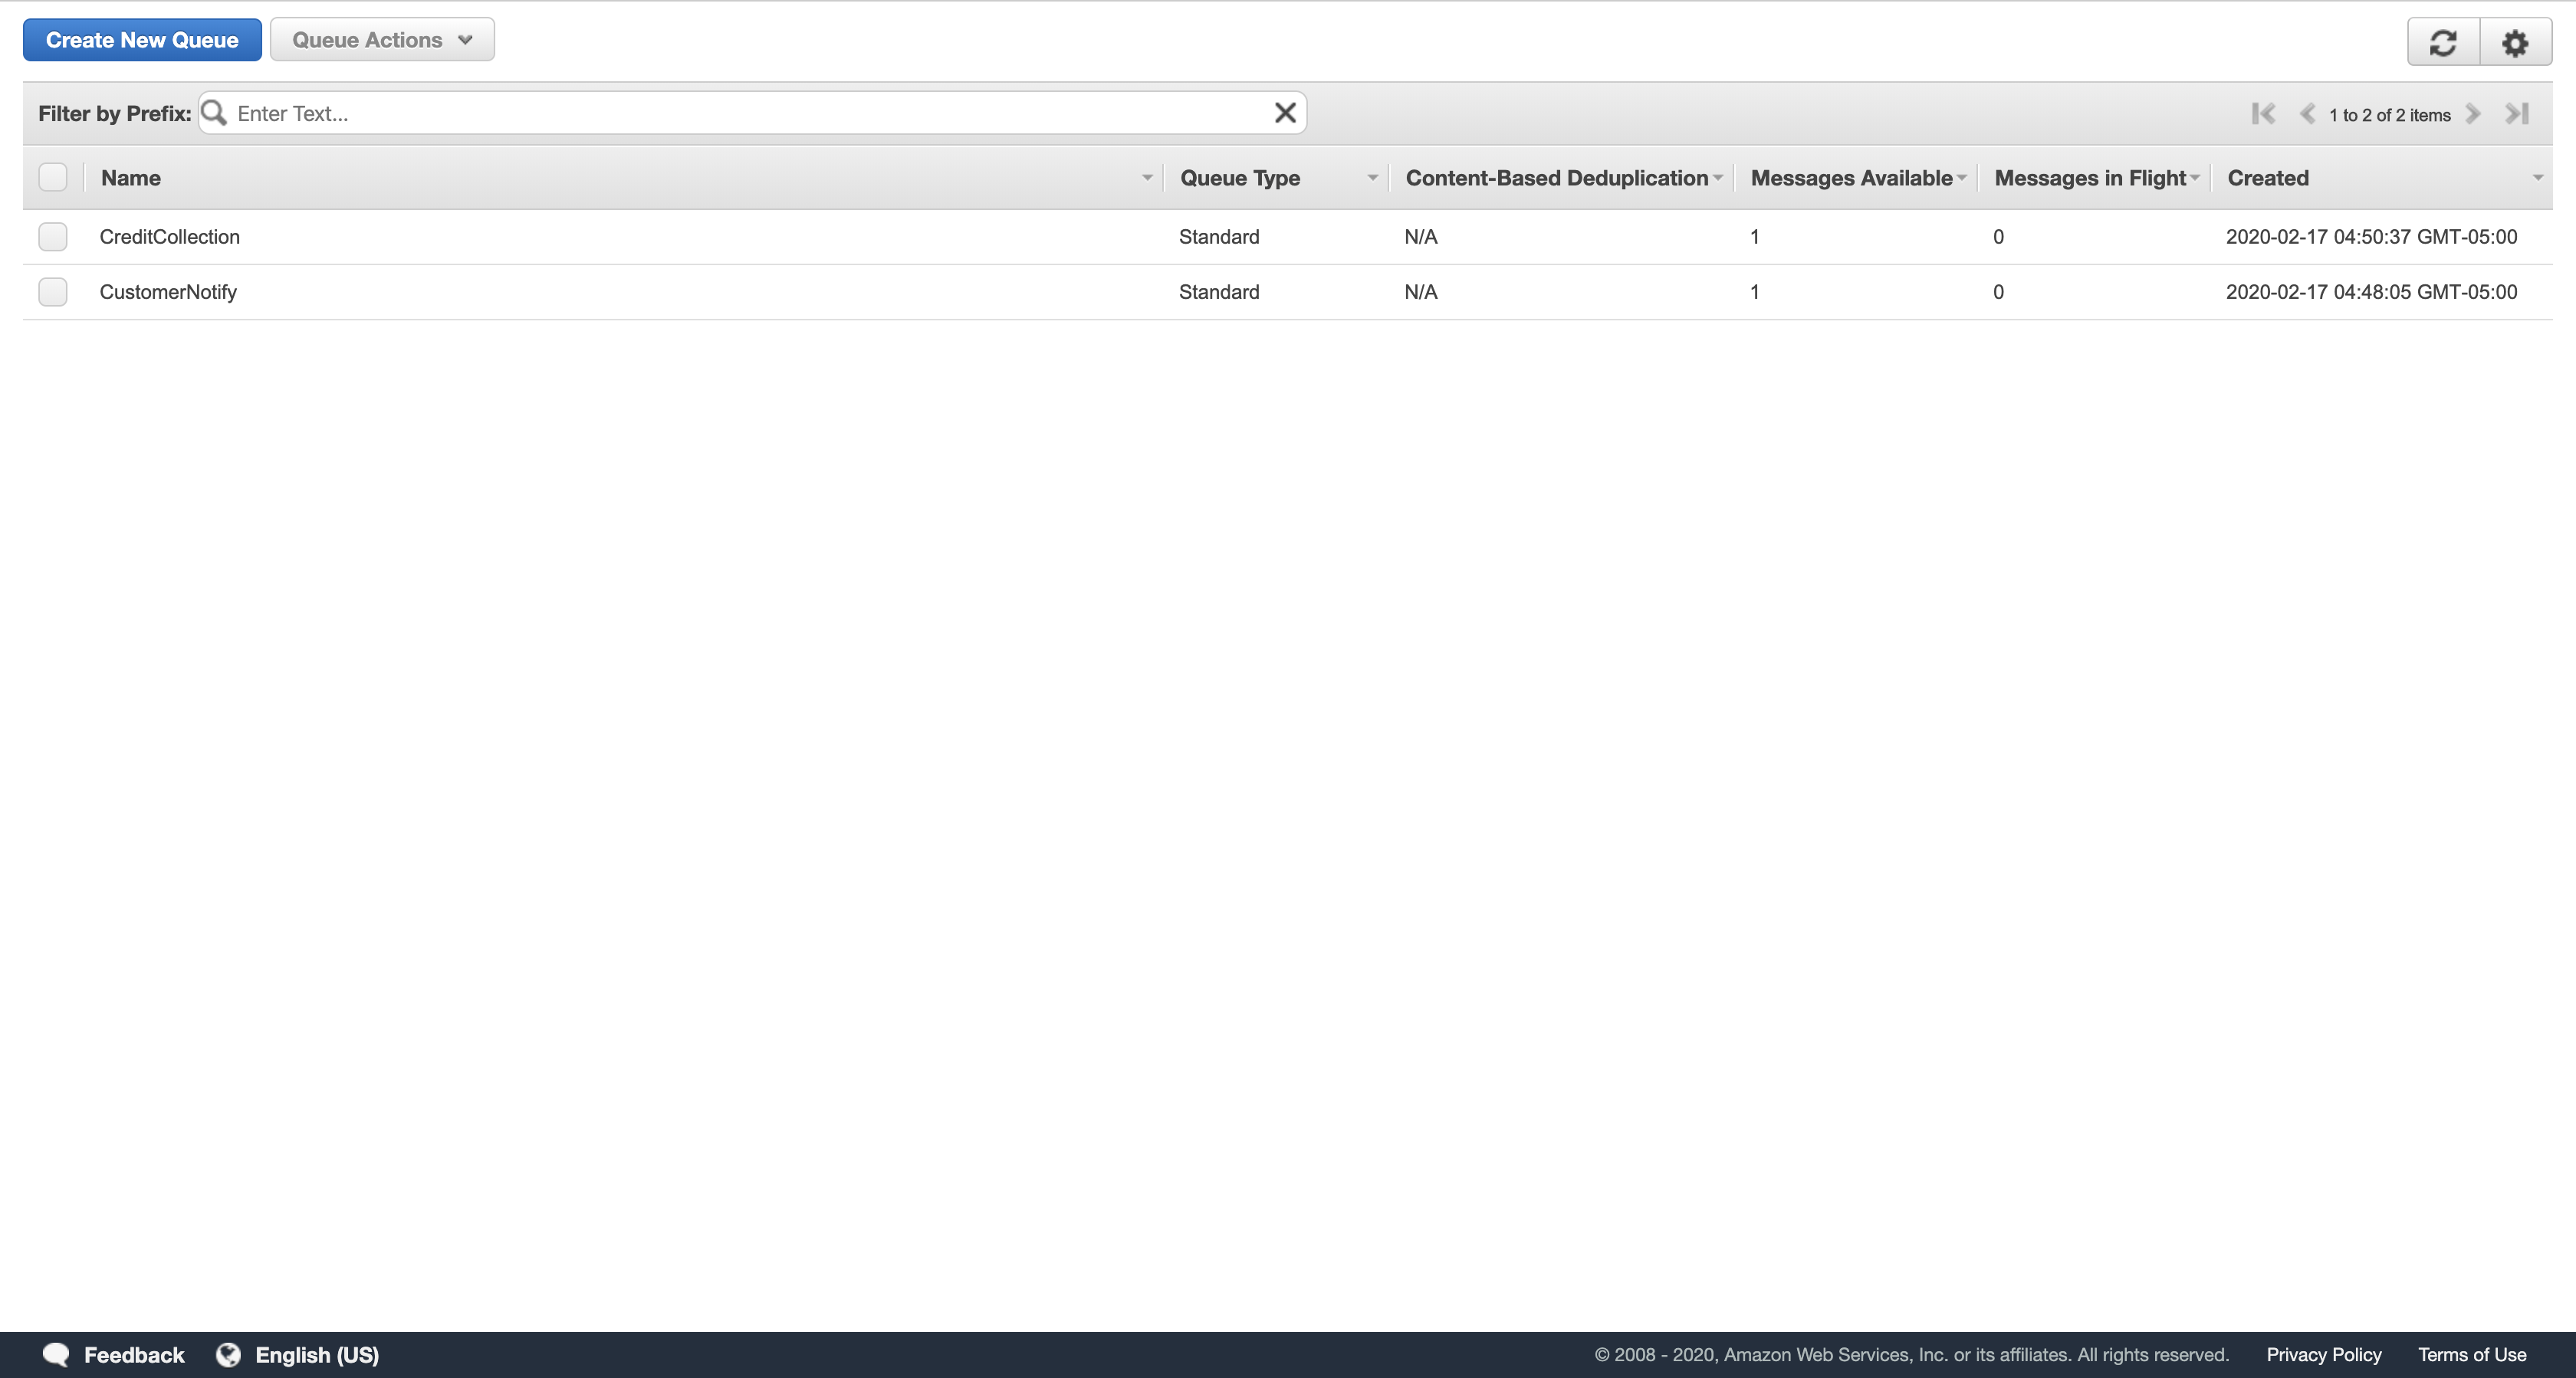
Task 4: Create Two Simple Queue Service Queues
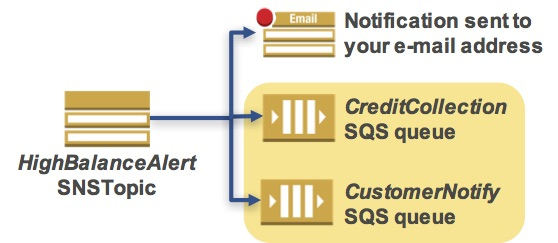
In this task, you will create two Simple Queue Service (SQS) queues. You will subscribe these queues to the Simple Notification Service (SNS) topic you just created. This setup is known as a fan-out scenario because each SNS notification is sent to multiple subscribers and those subscribers can independently consume messages from their own queue.
First, create a queue to notify the customer.
Services menu
click Simple Queue Service.
Click Get Started Now.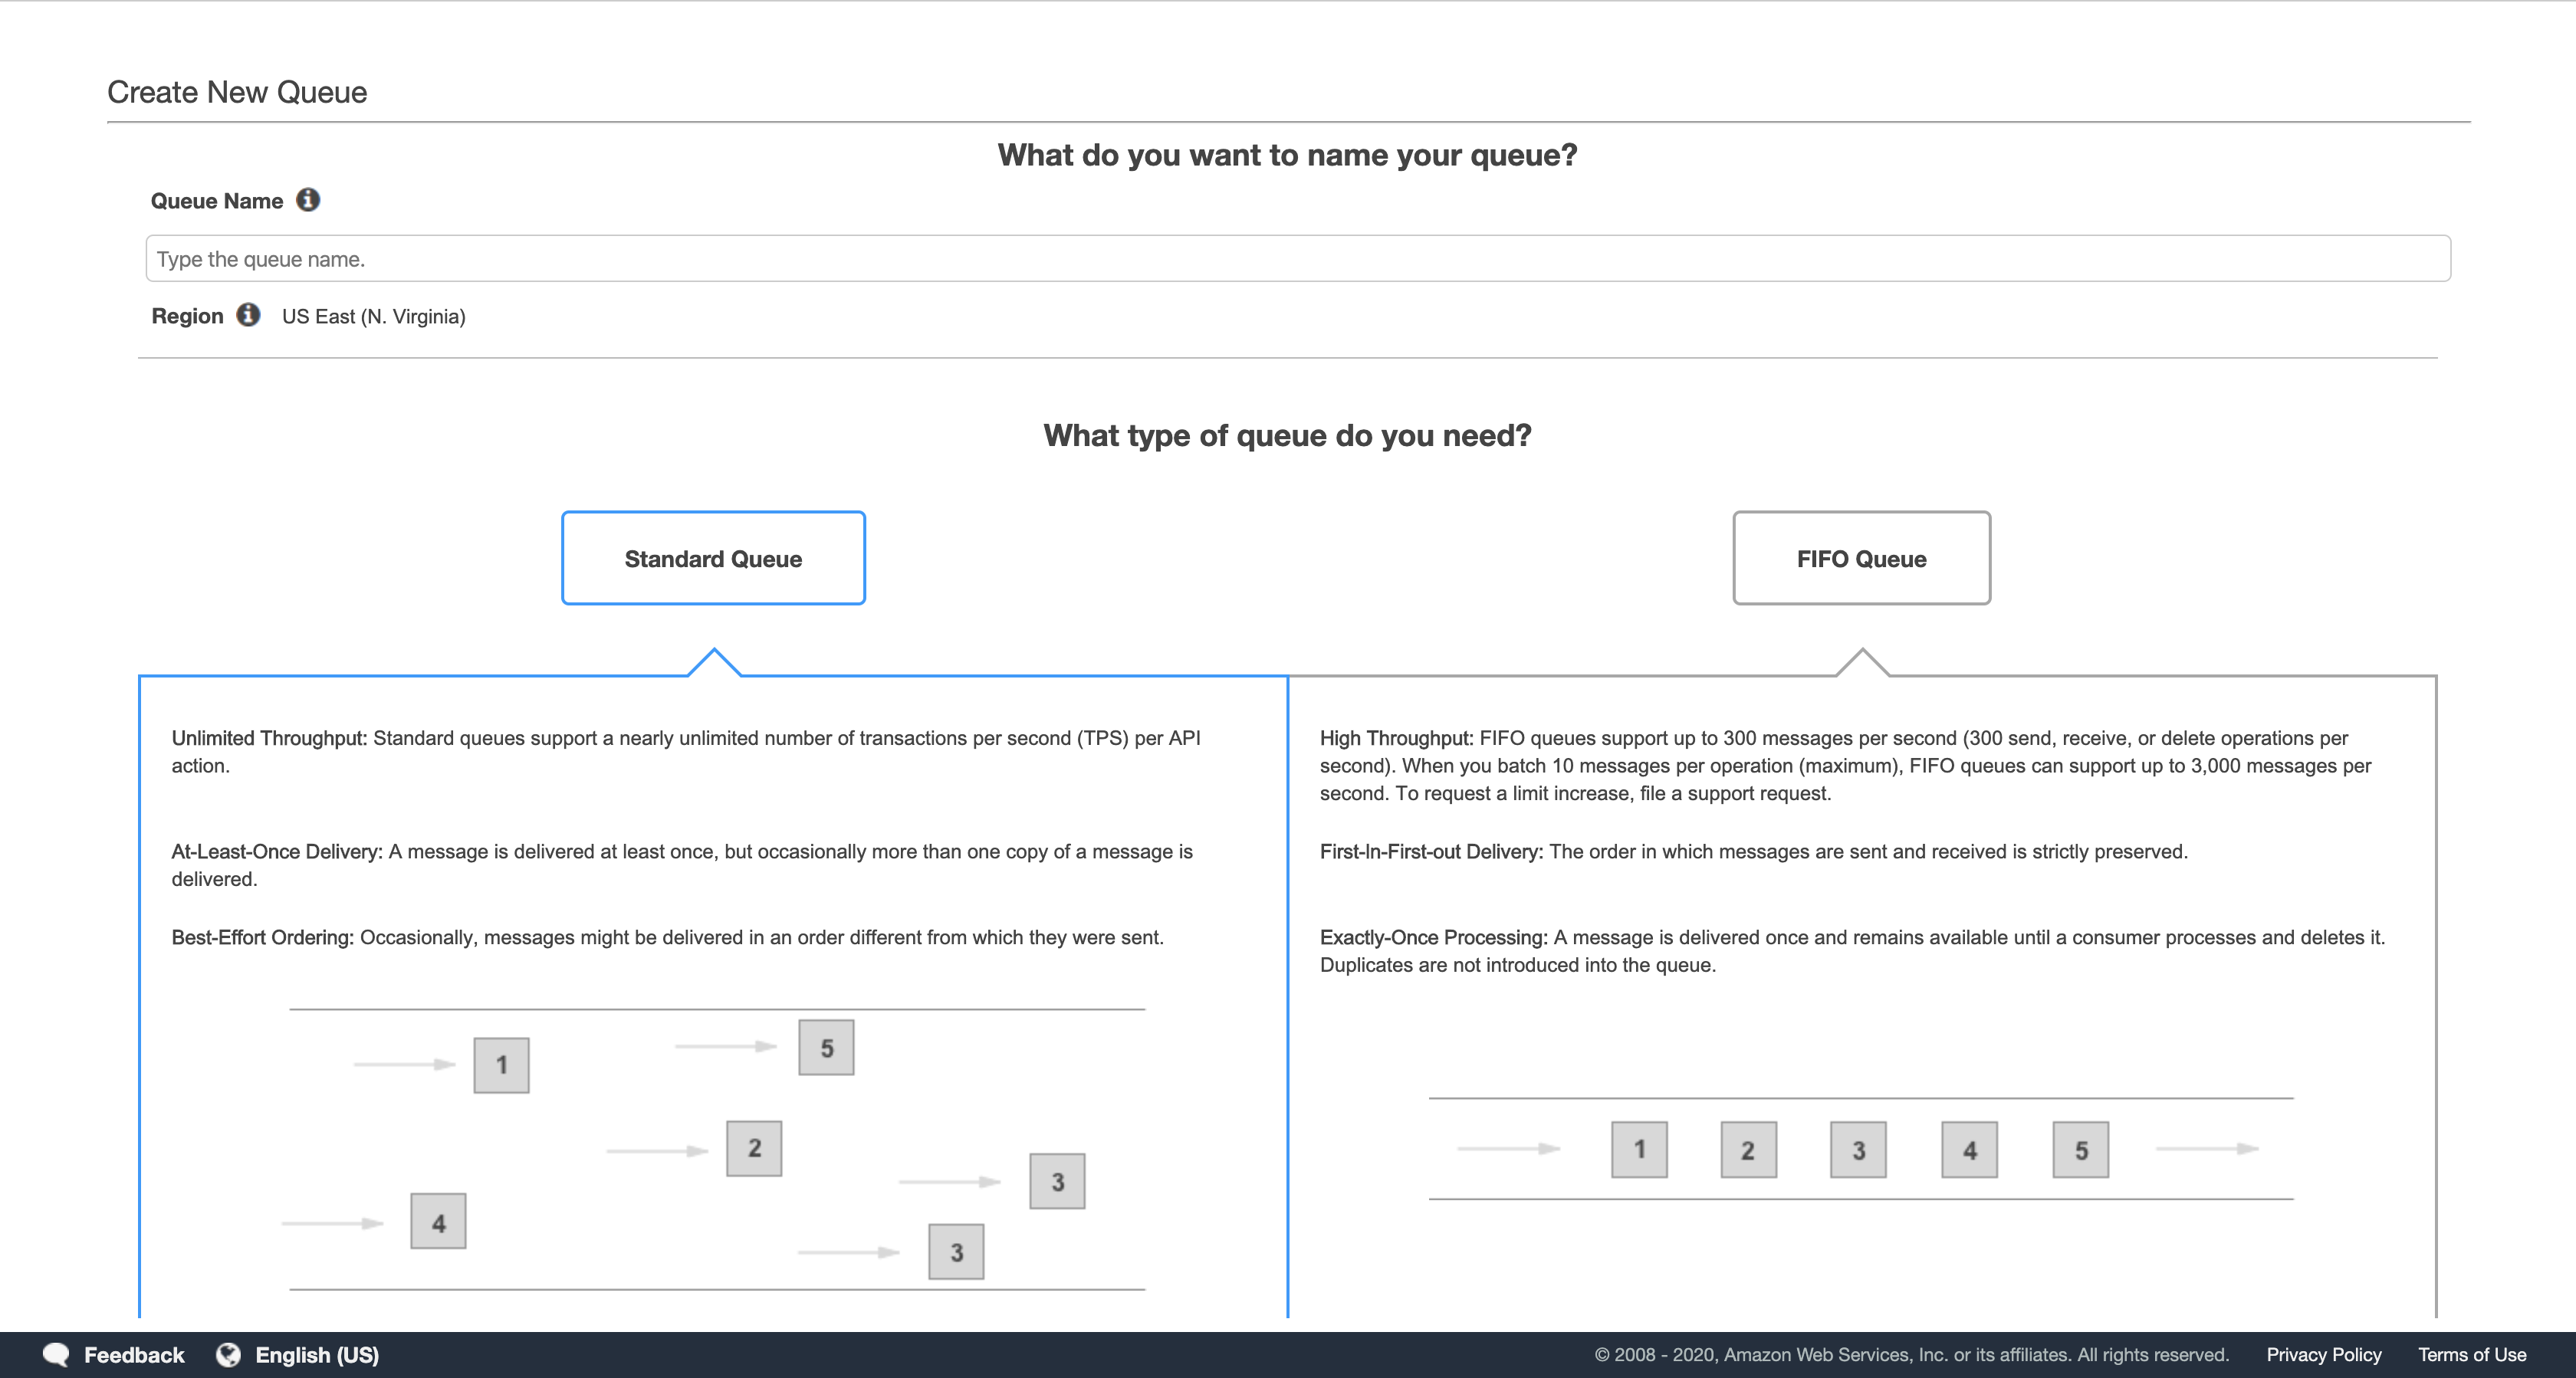
In the Create New Queue dialog box, for Queue Name, type: CustomerNotify
- The interface will vary depending upon whether your region supports First-In-First-Out (FIFO) queues.

If you see “What type of queue do you need?”, leave the default Standard Queue selected, then scroll down to the bottom.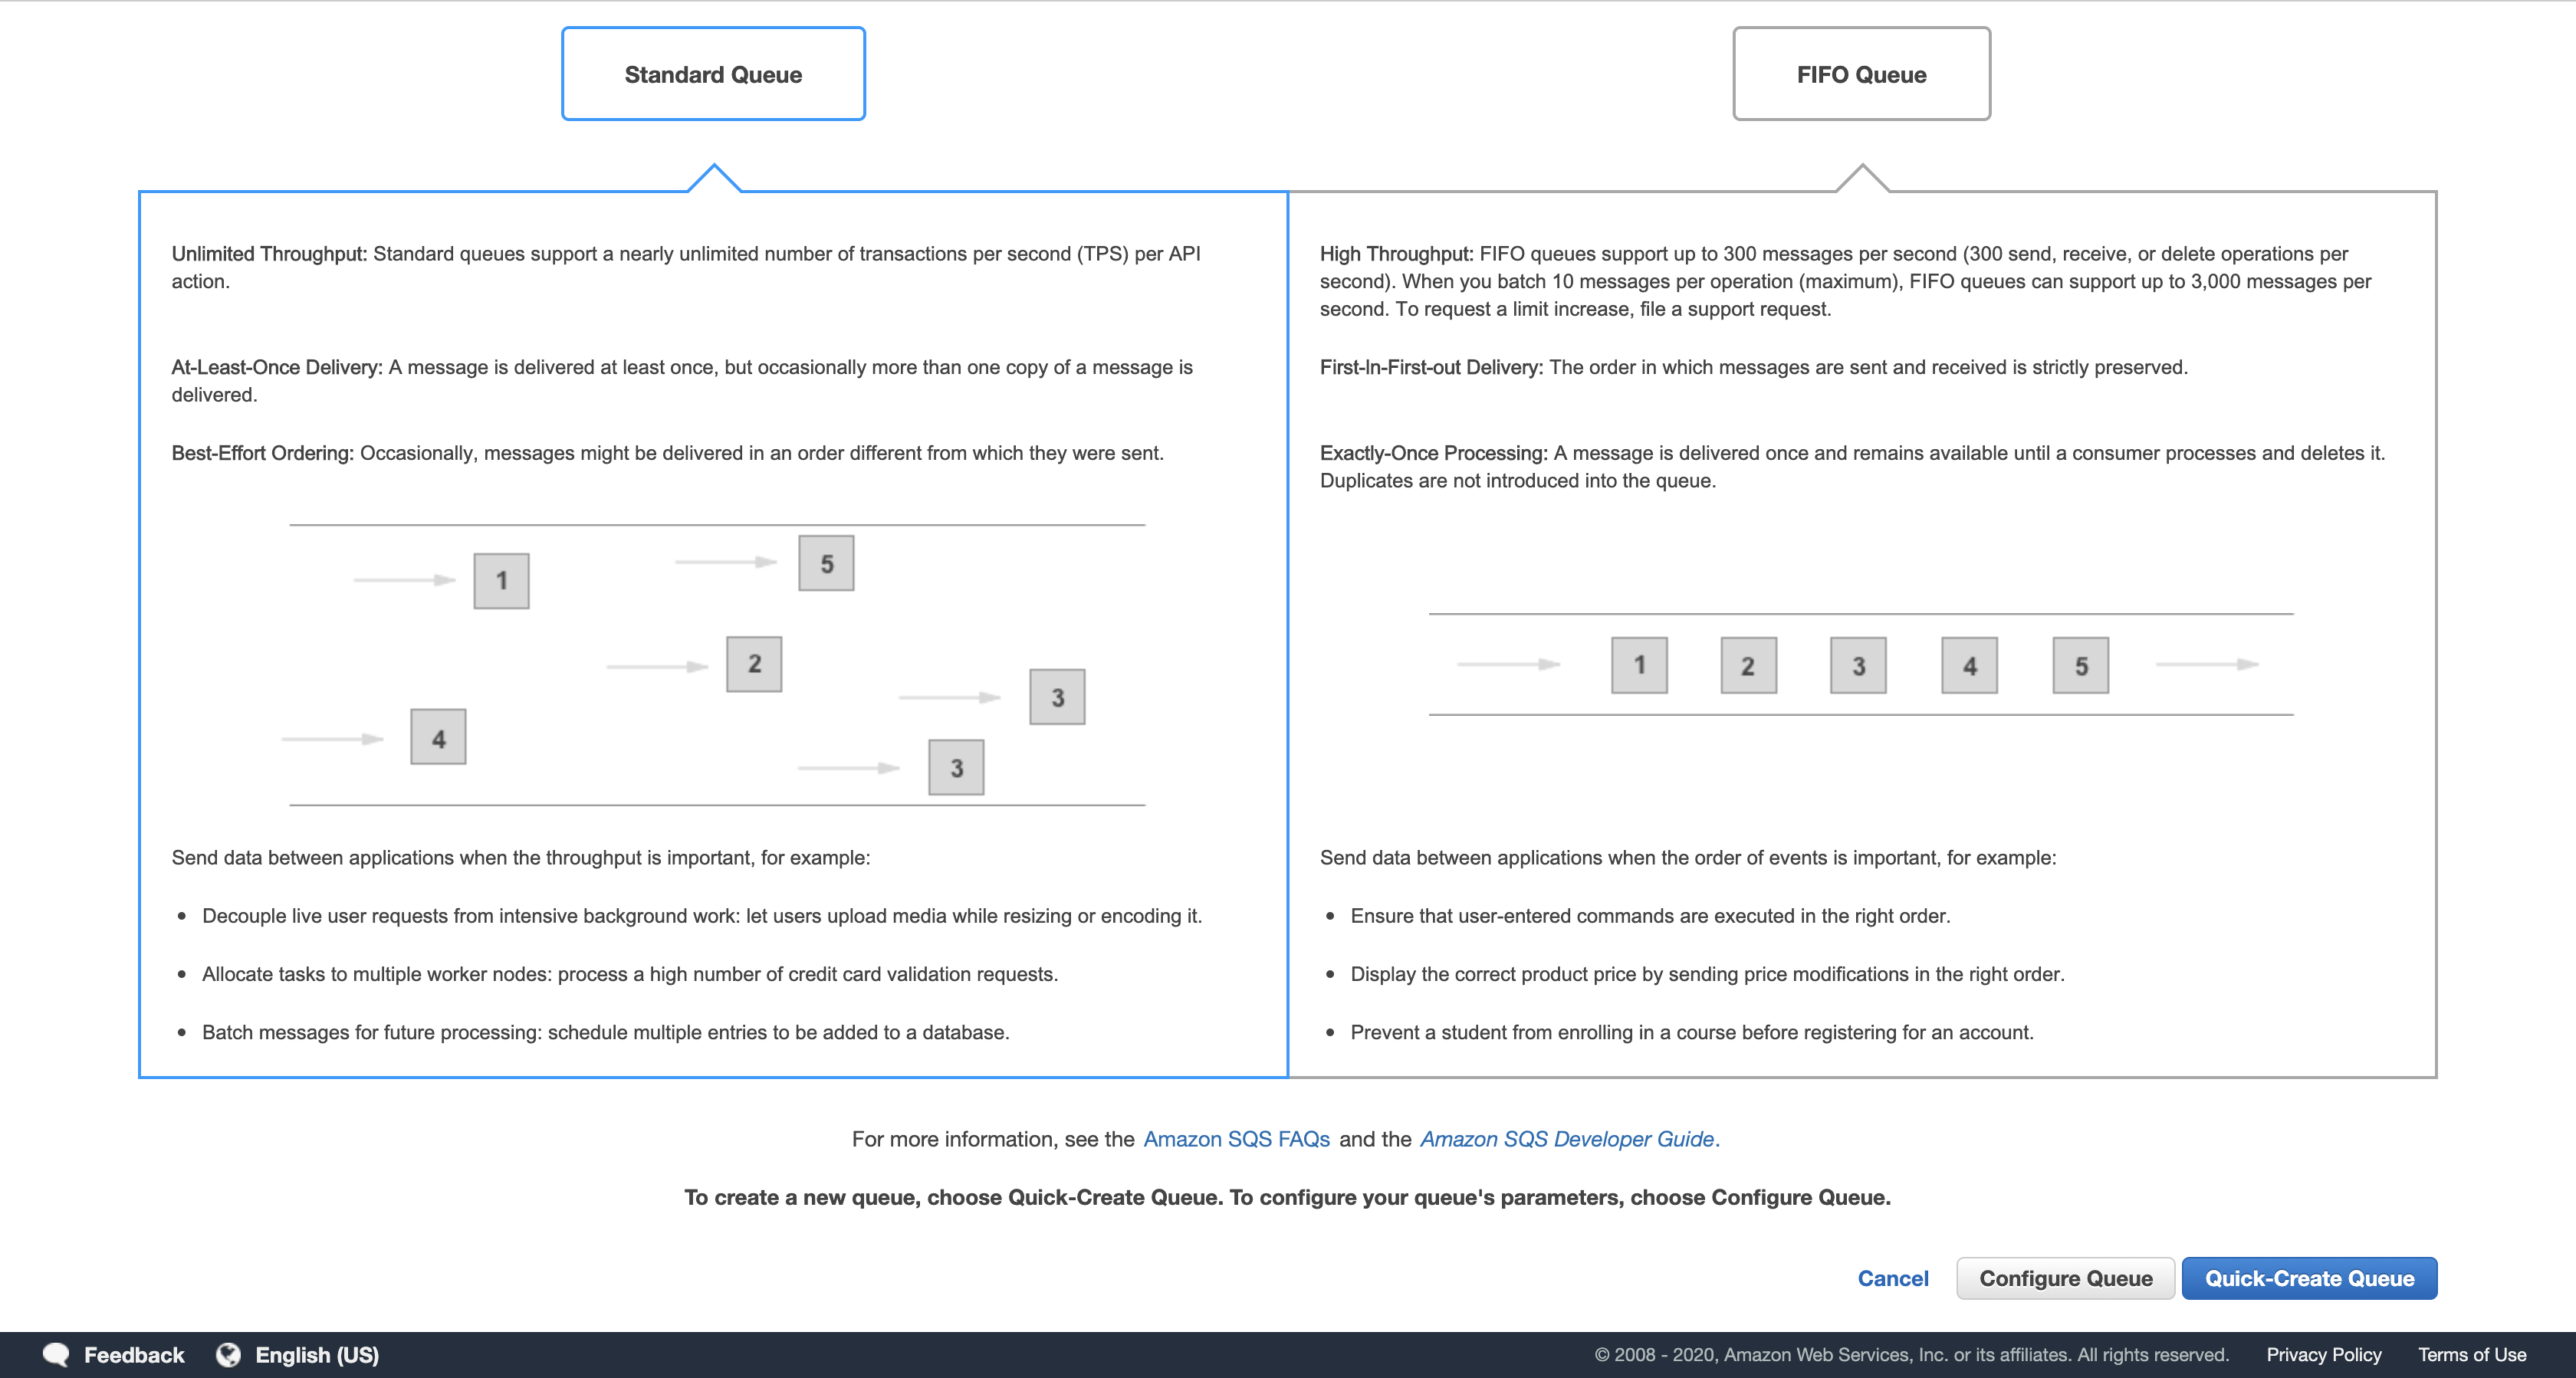
Leave the remaining settings as their default and click either Create Queue or Quick-Create Queue.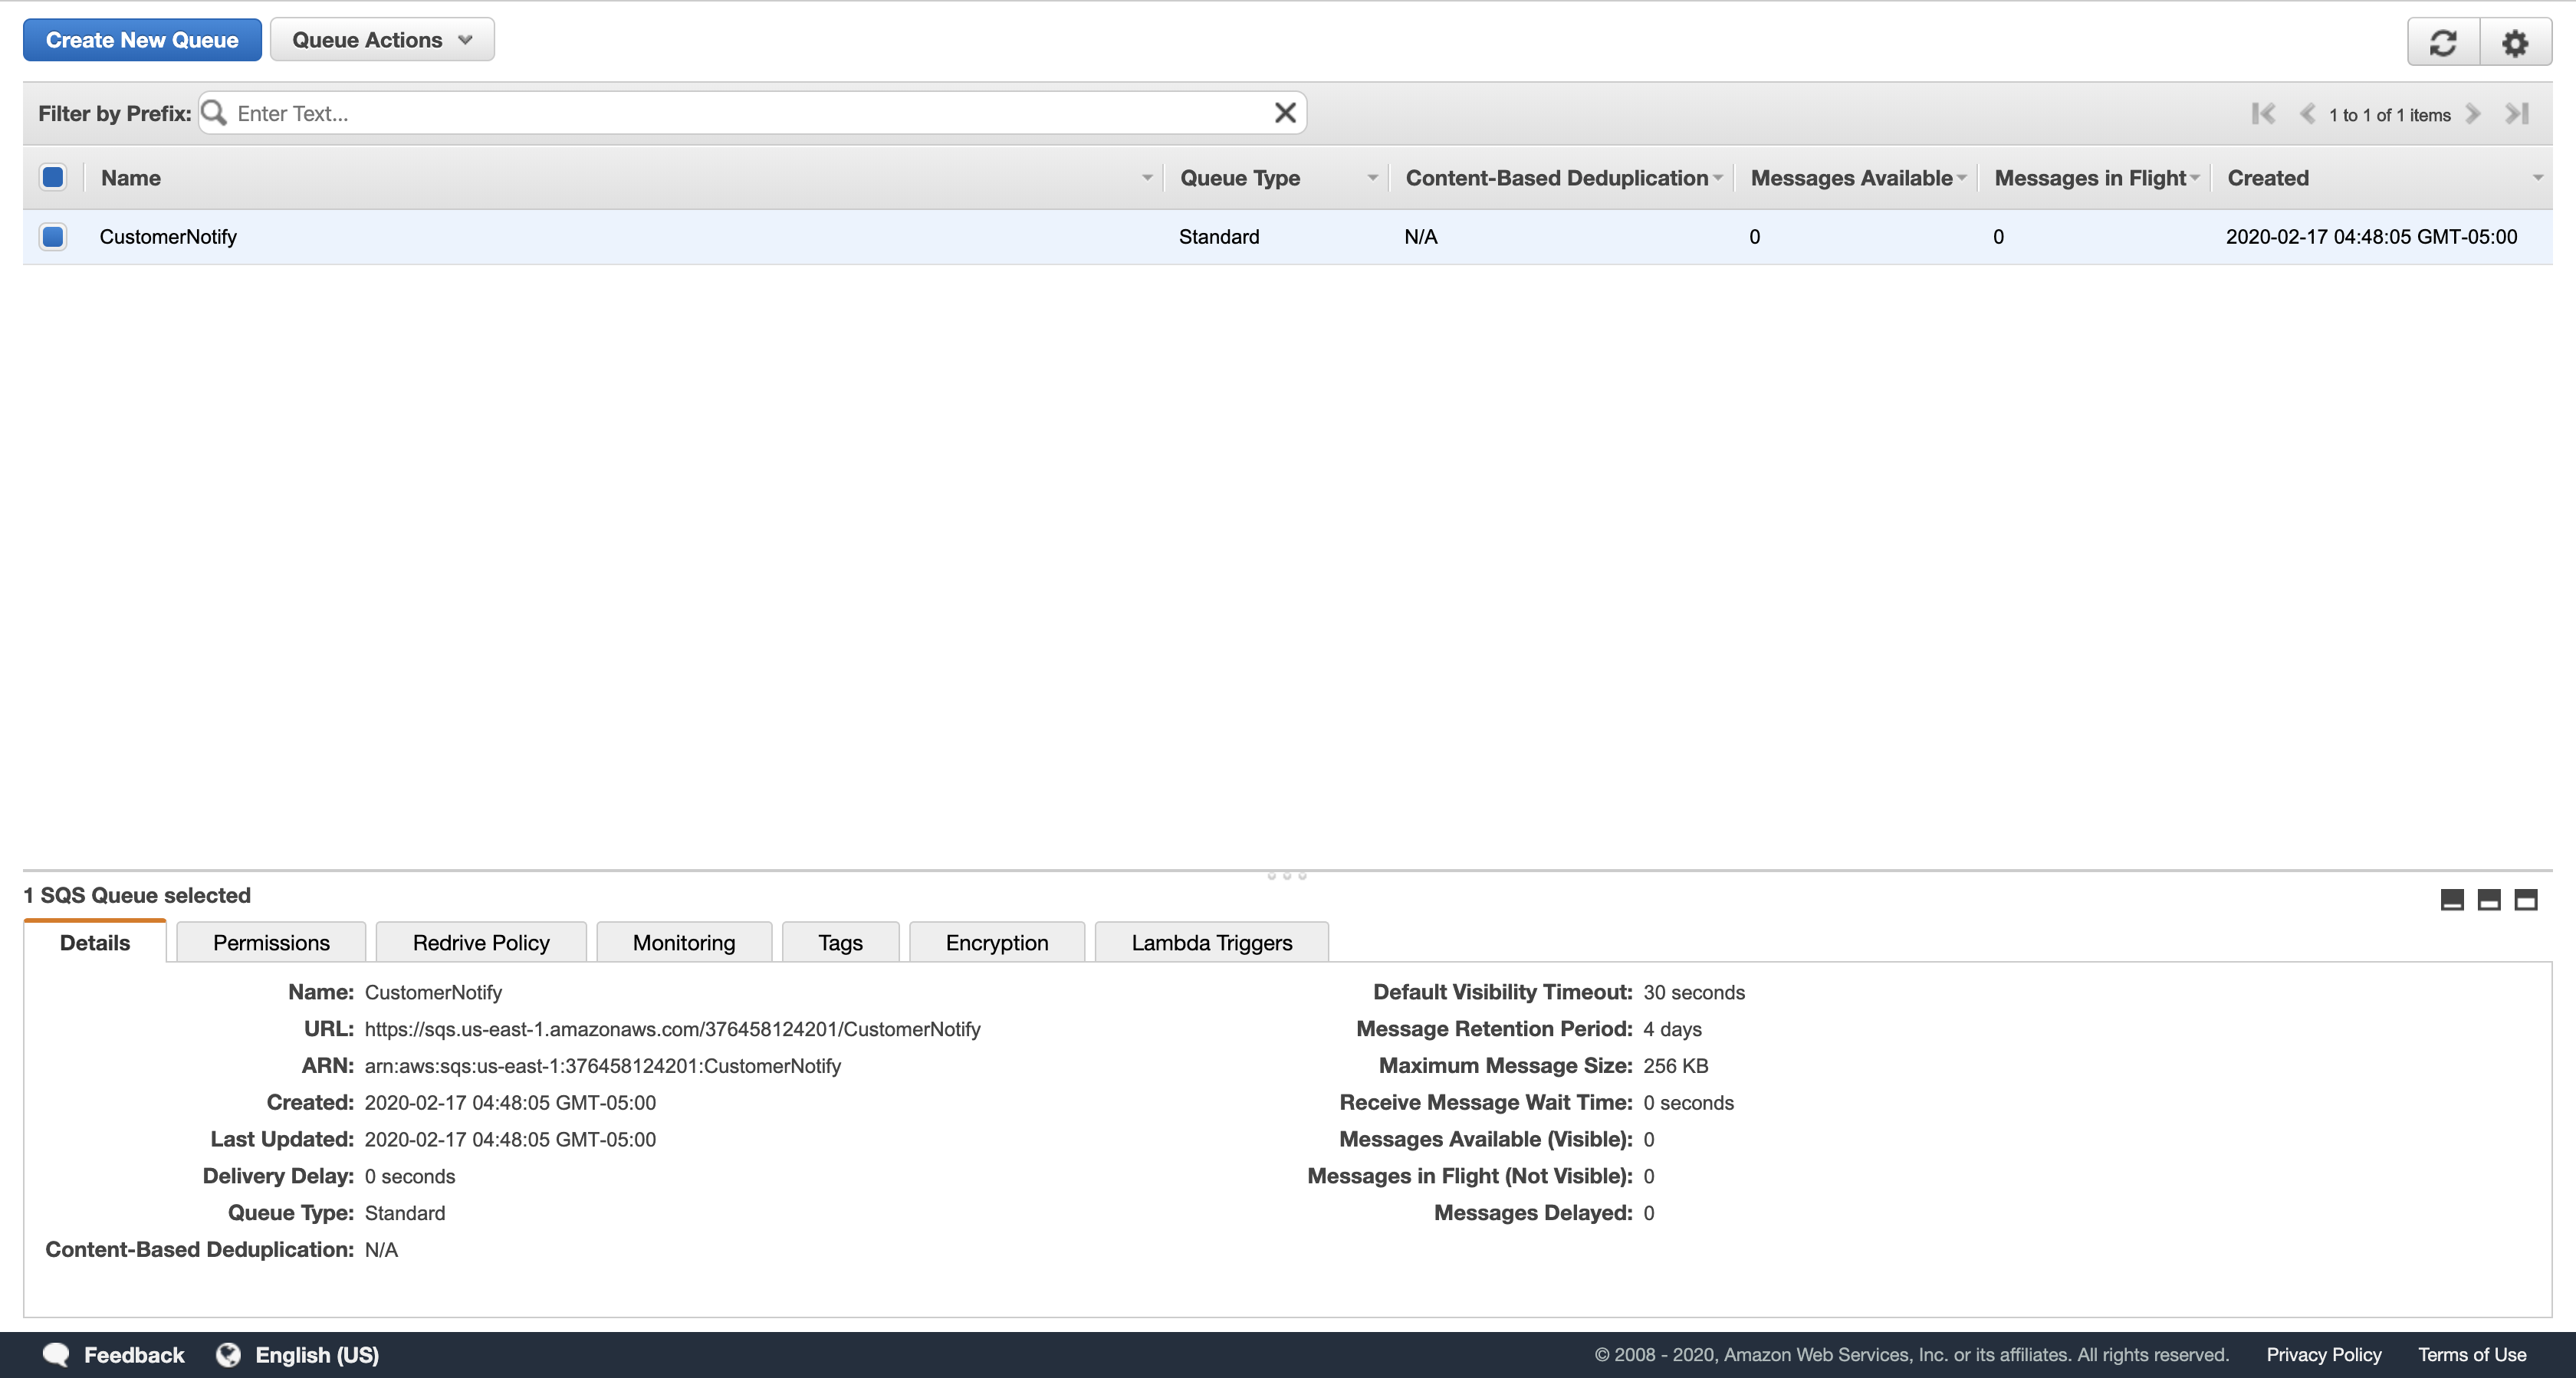
In a complete application environment, you would use a Lambda function or other application to read the messages in this queue and notify customers of the high balance.
Next, create a queue to notify the credit collection department.
Click Create New Queue.
In the Create New Queue dialog box, for Queue Name, type: CreditCollection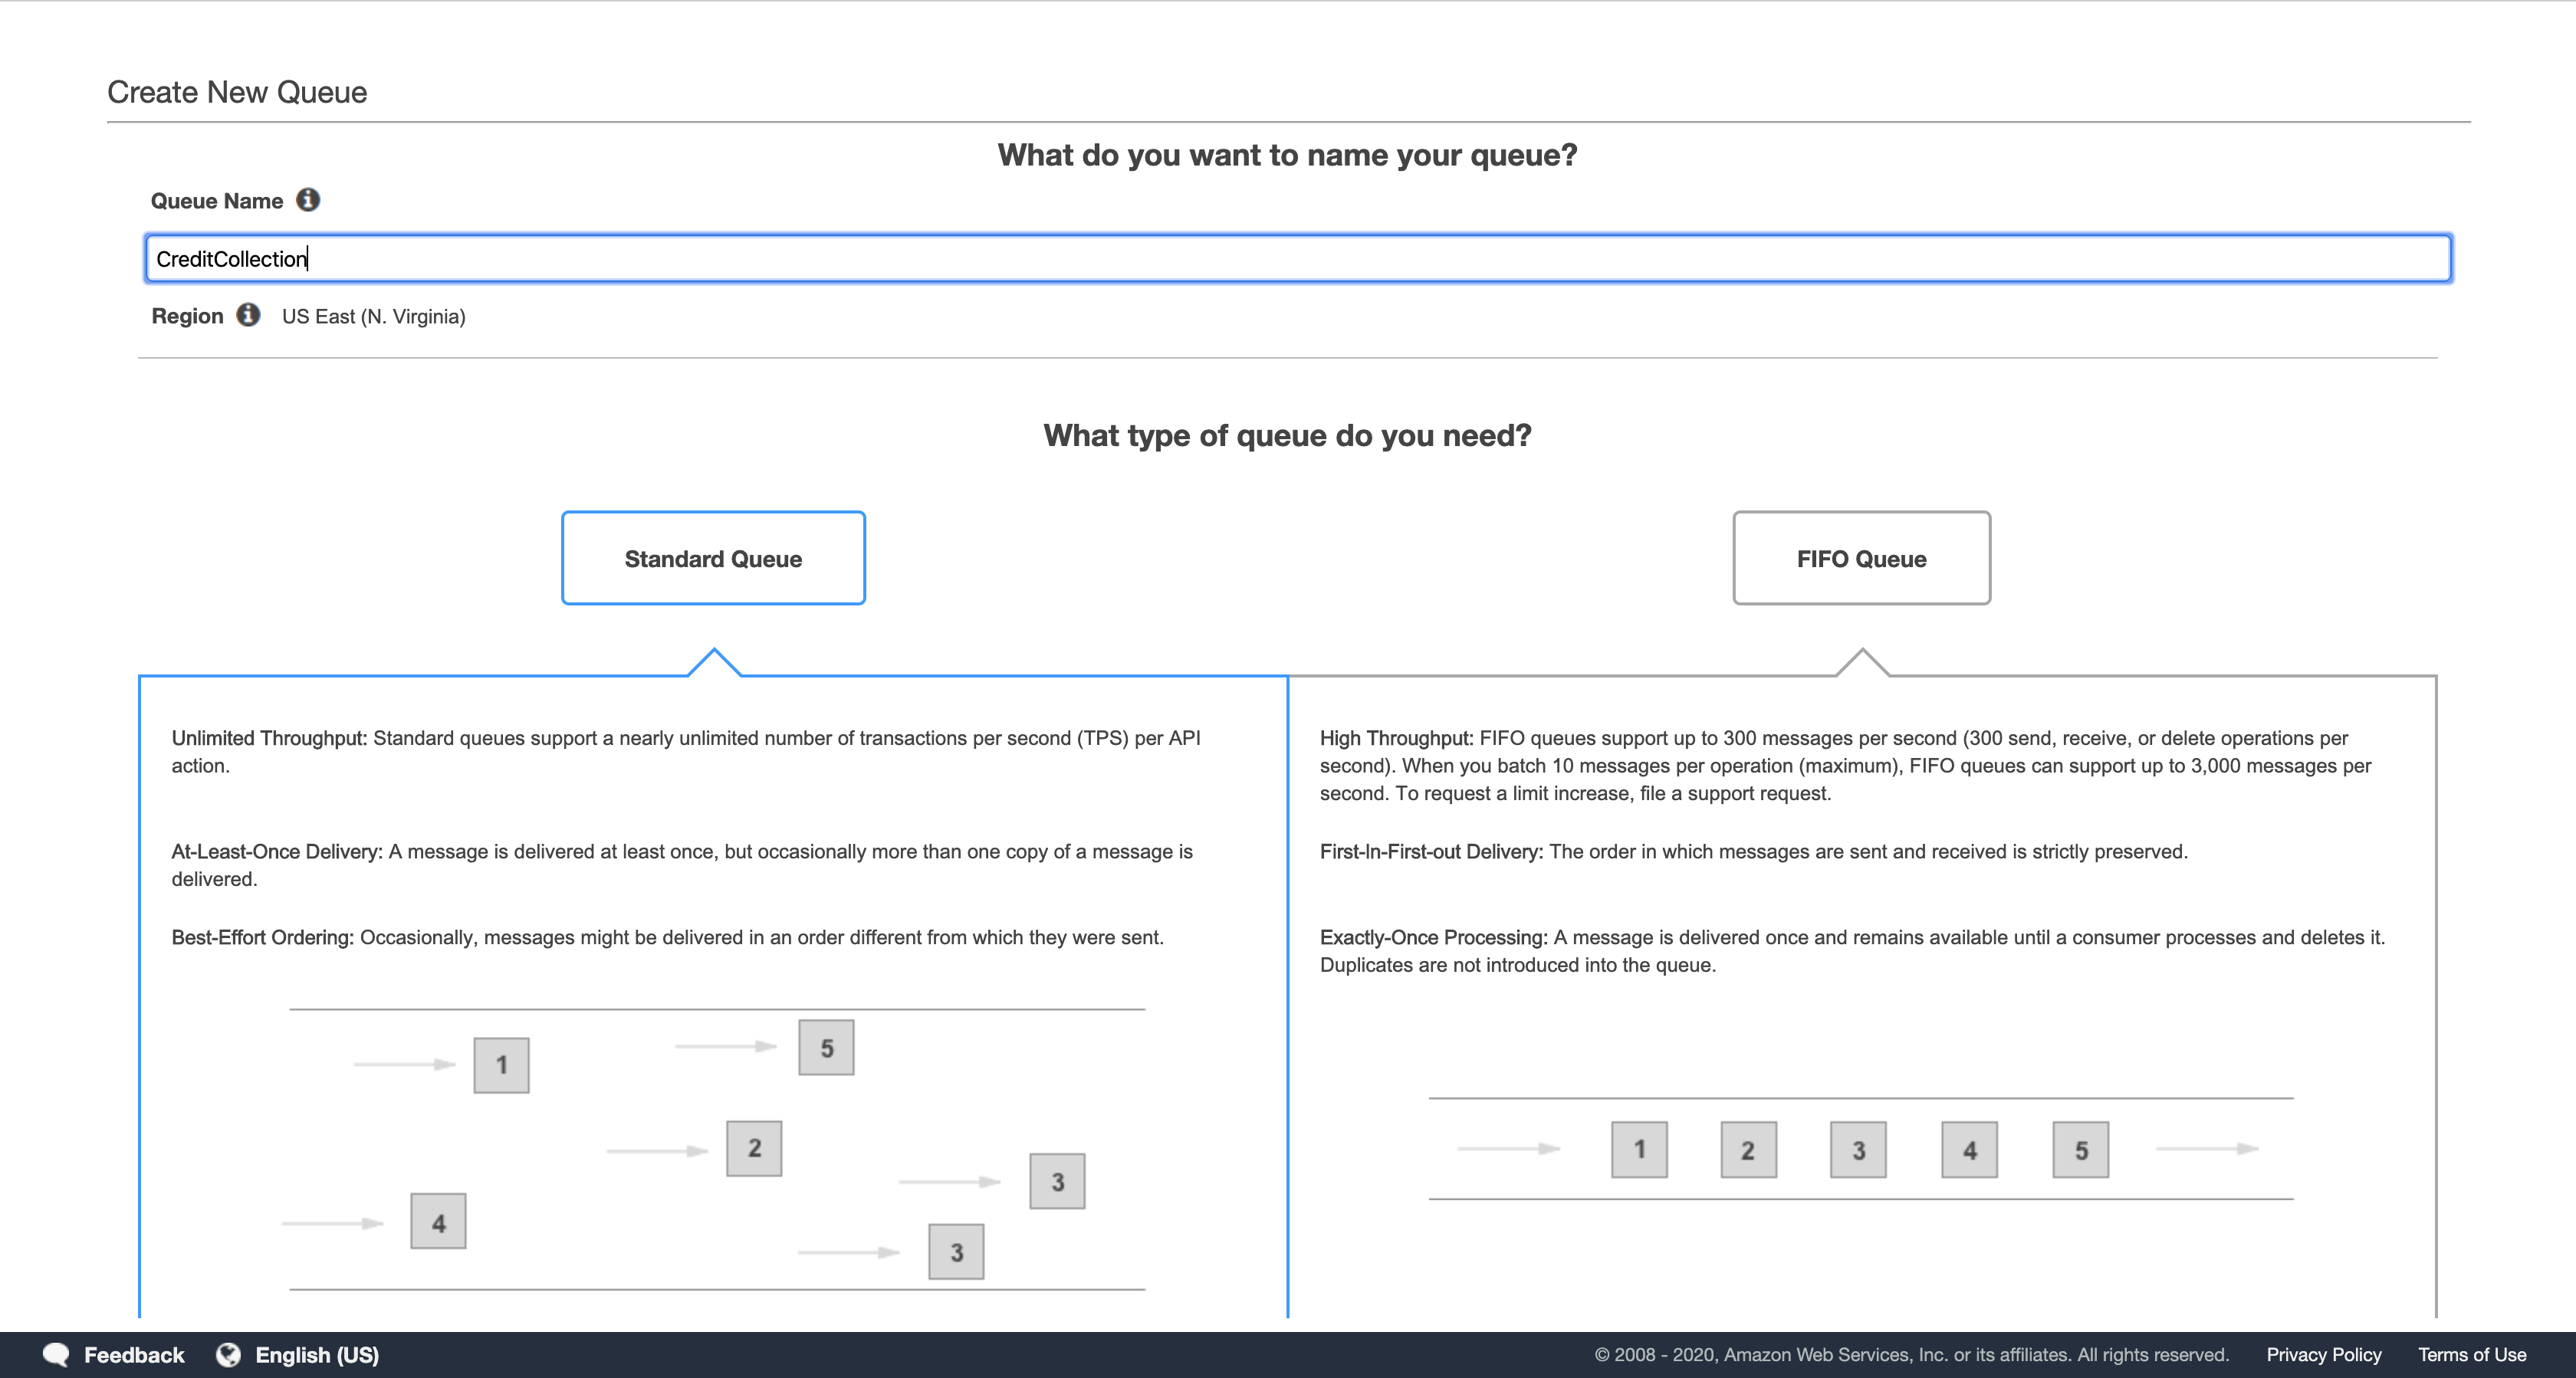
Leave the remaining settings as their default and click Create Queue or Quick-Create Queue.
In a complete application environment, you would use a Lambda function or other application to read the messages in this queue and notify your credit collection department to monitor this account.
Select the check boxes for both queues.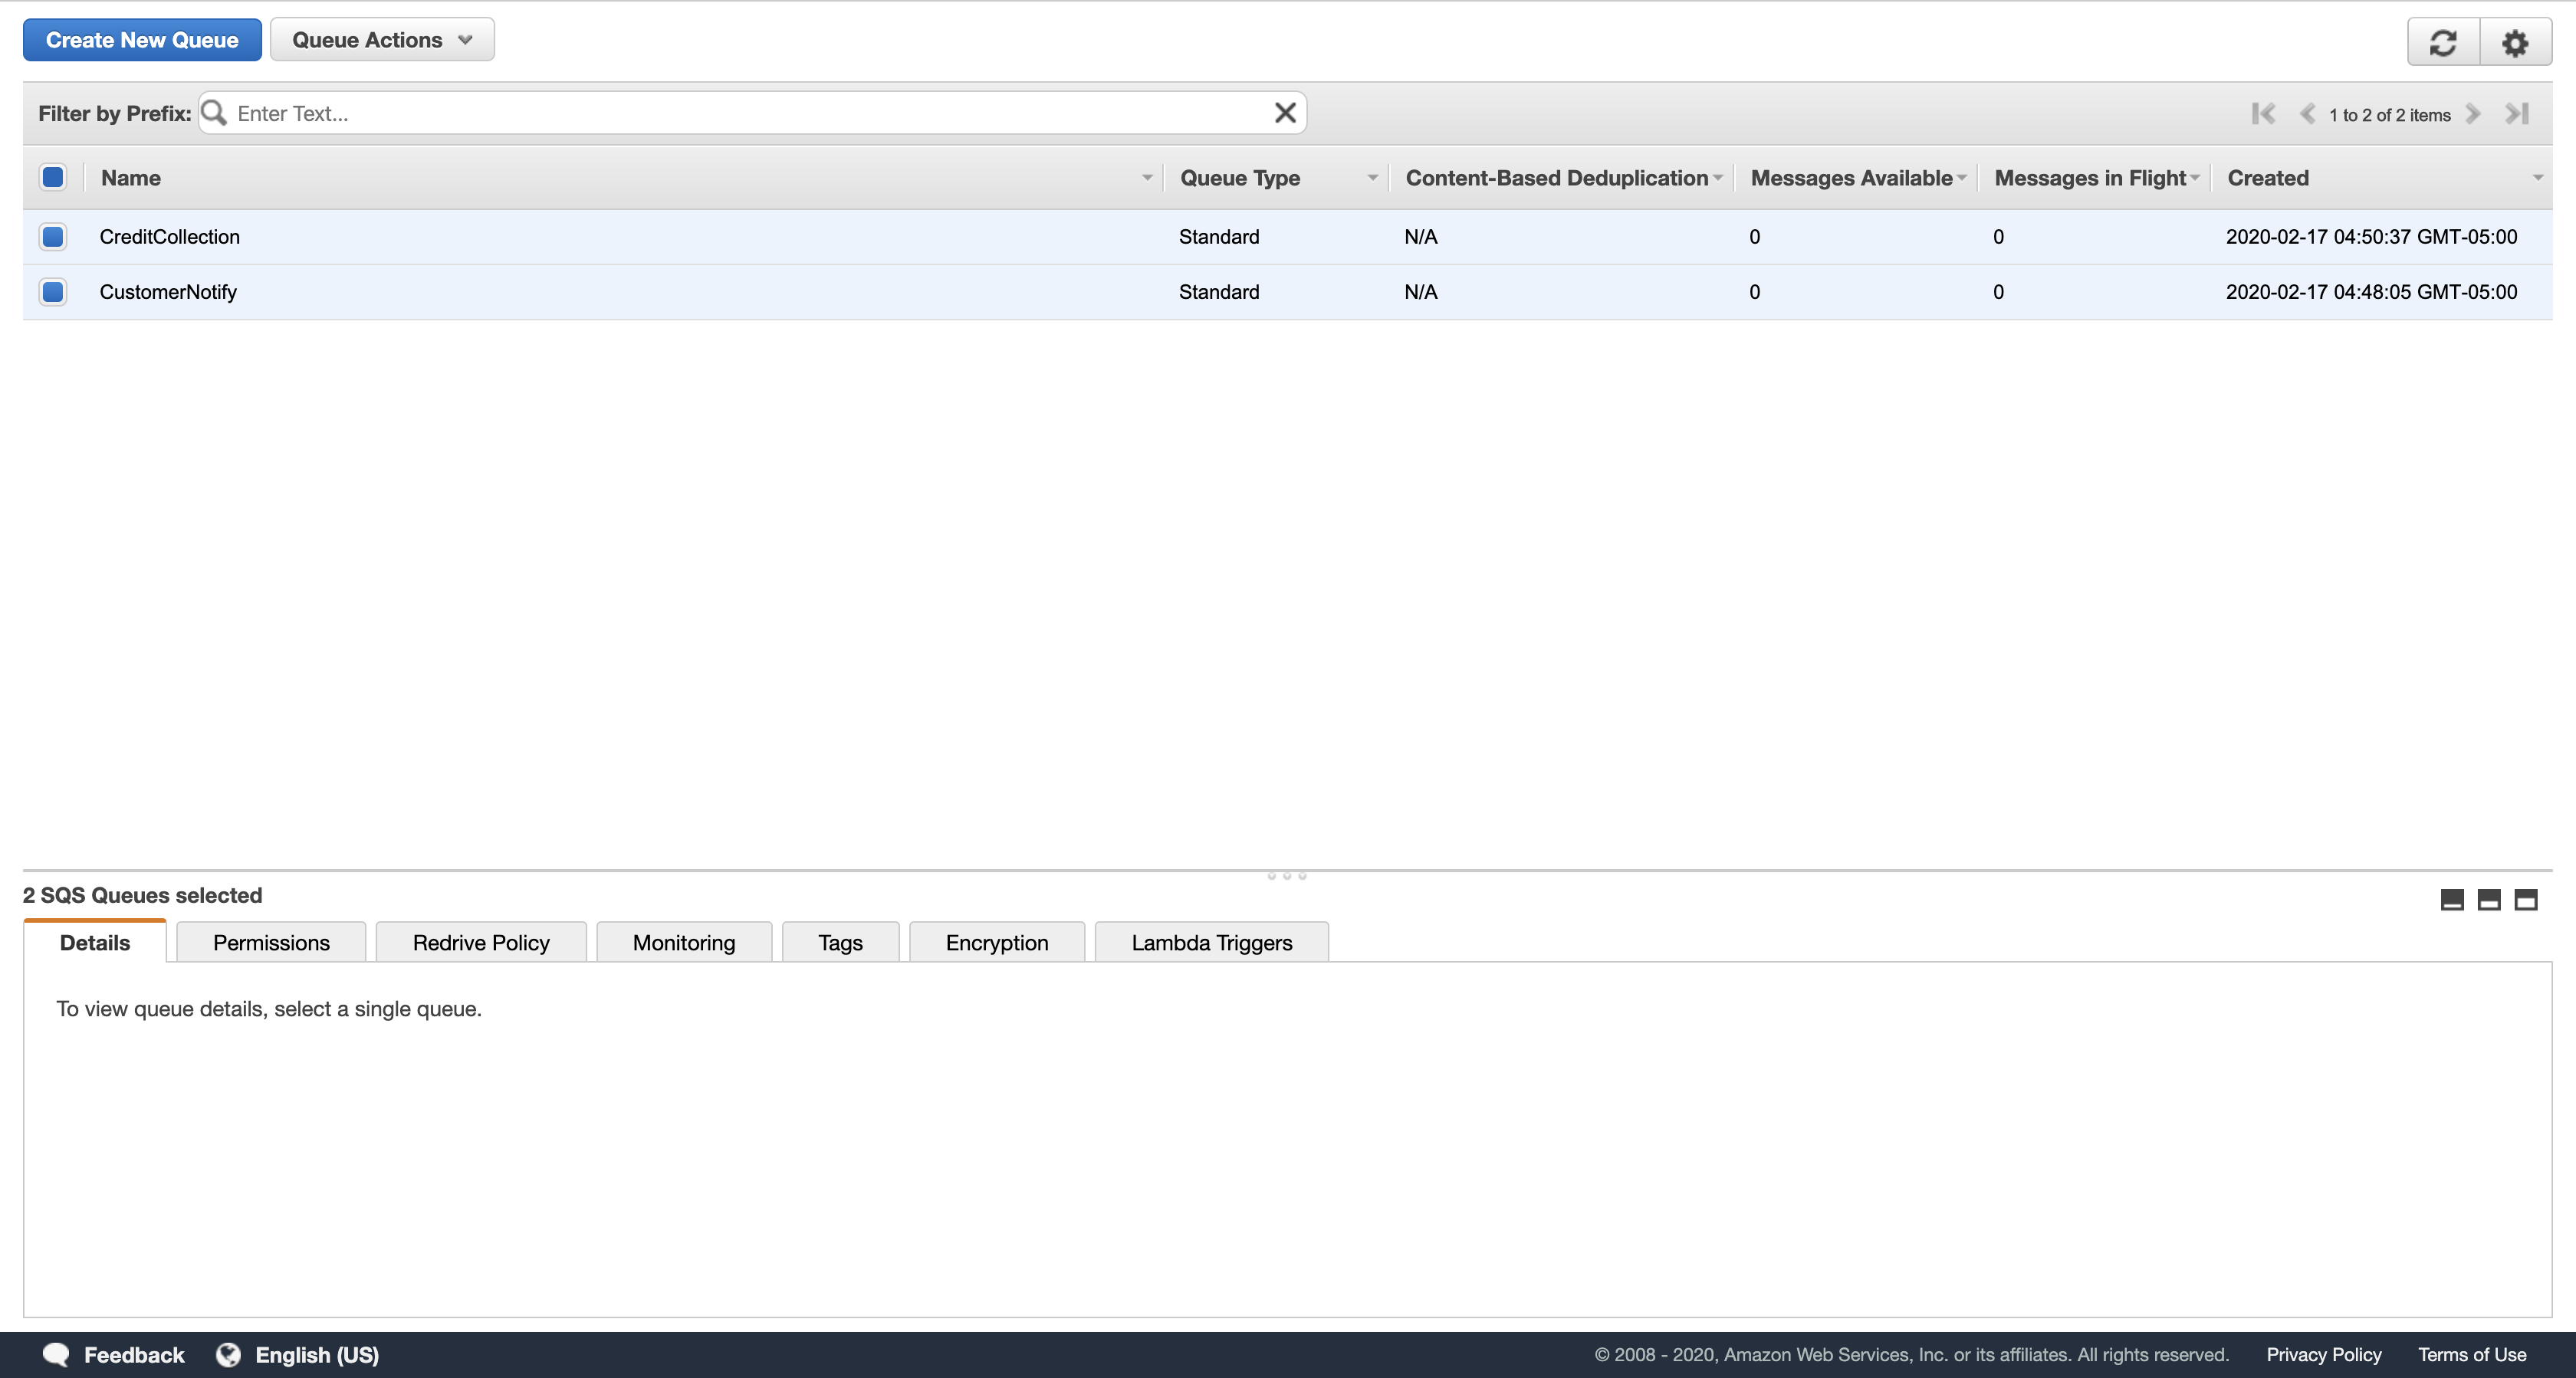
Click Queue Actions, then Subscribe Queues to SNS Topic.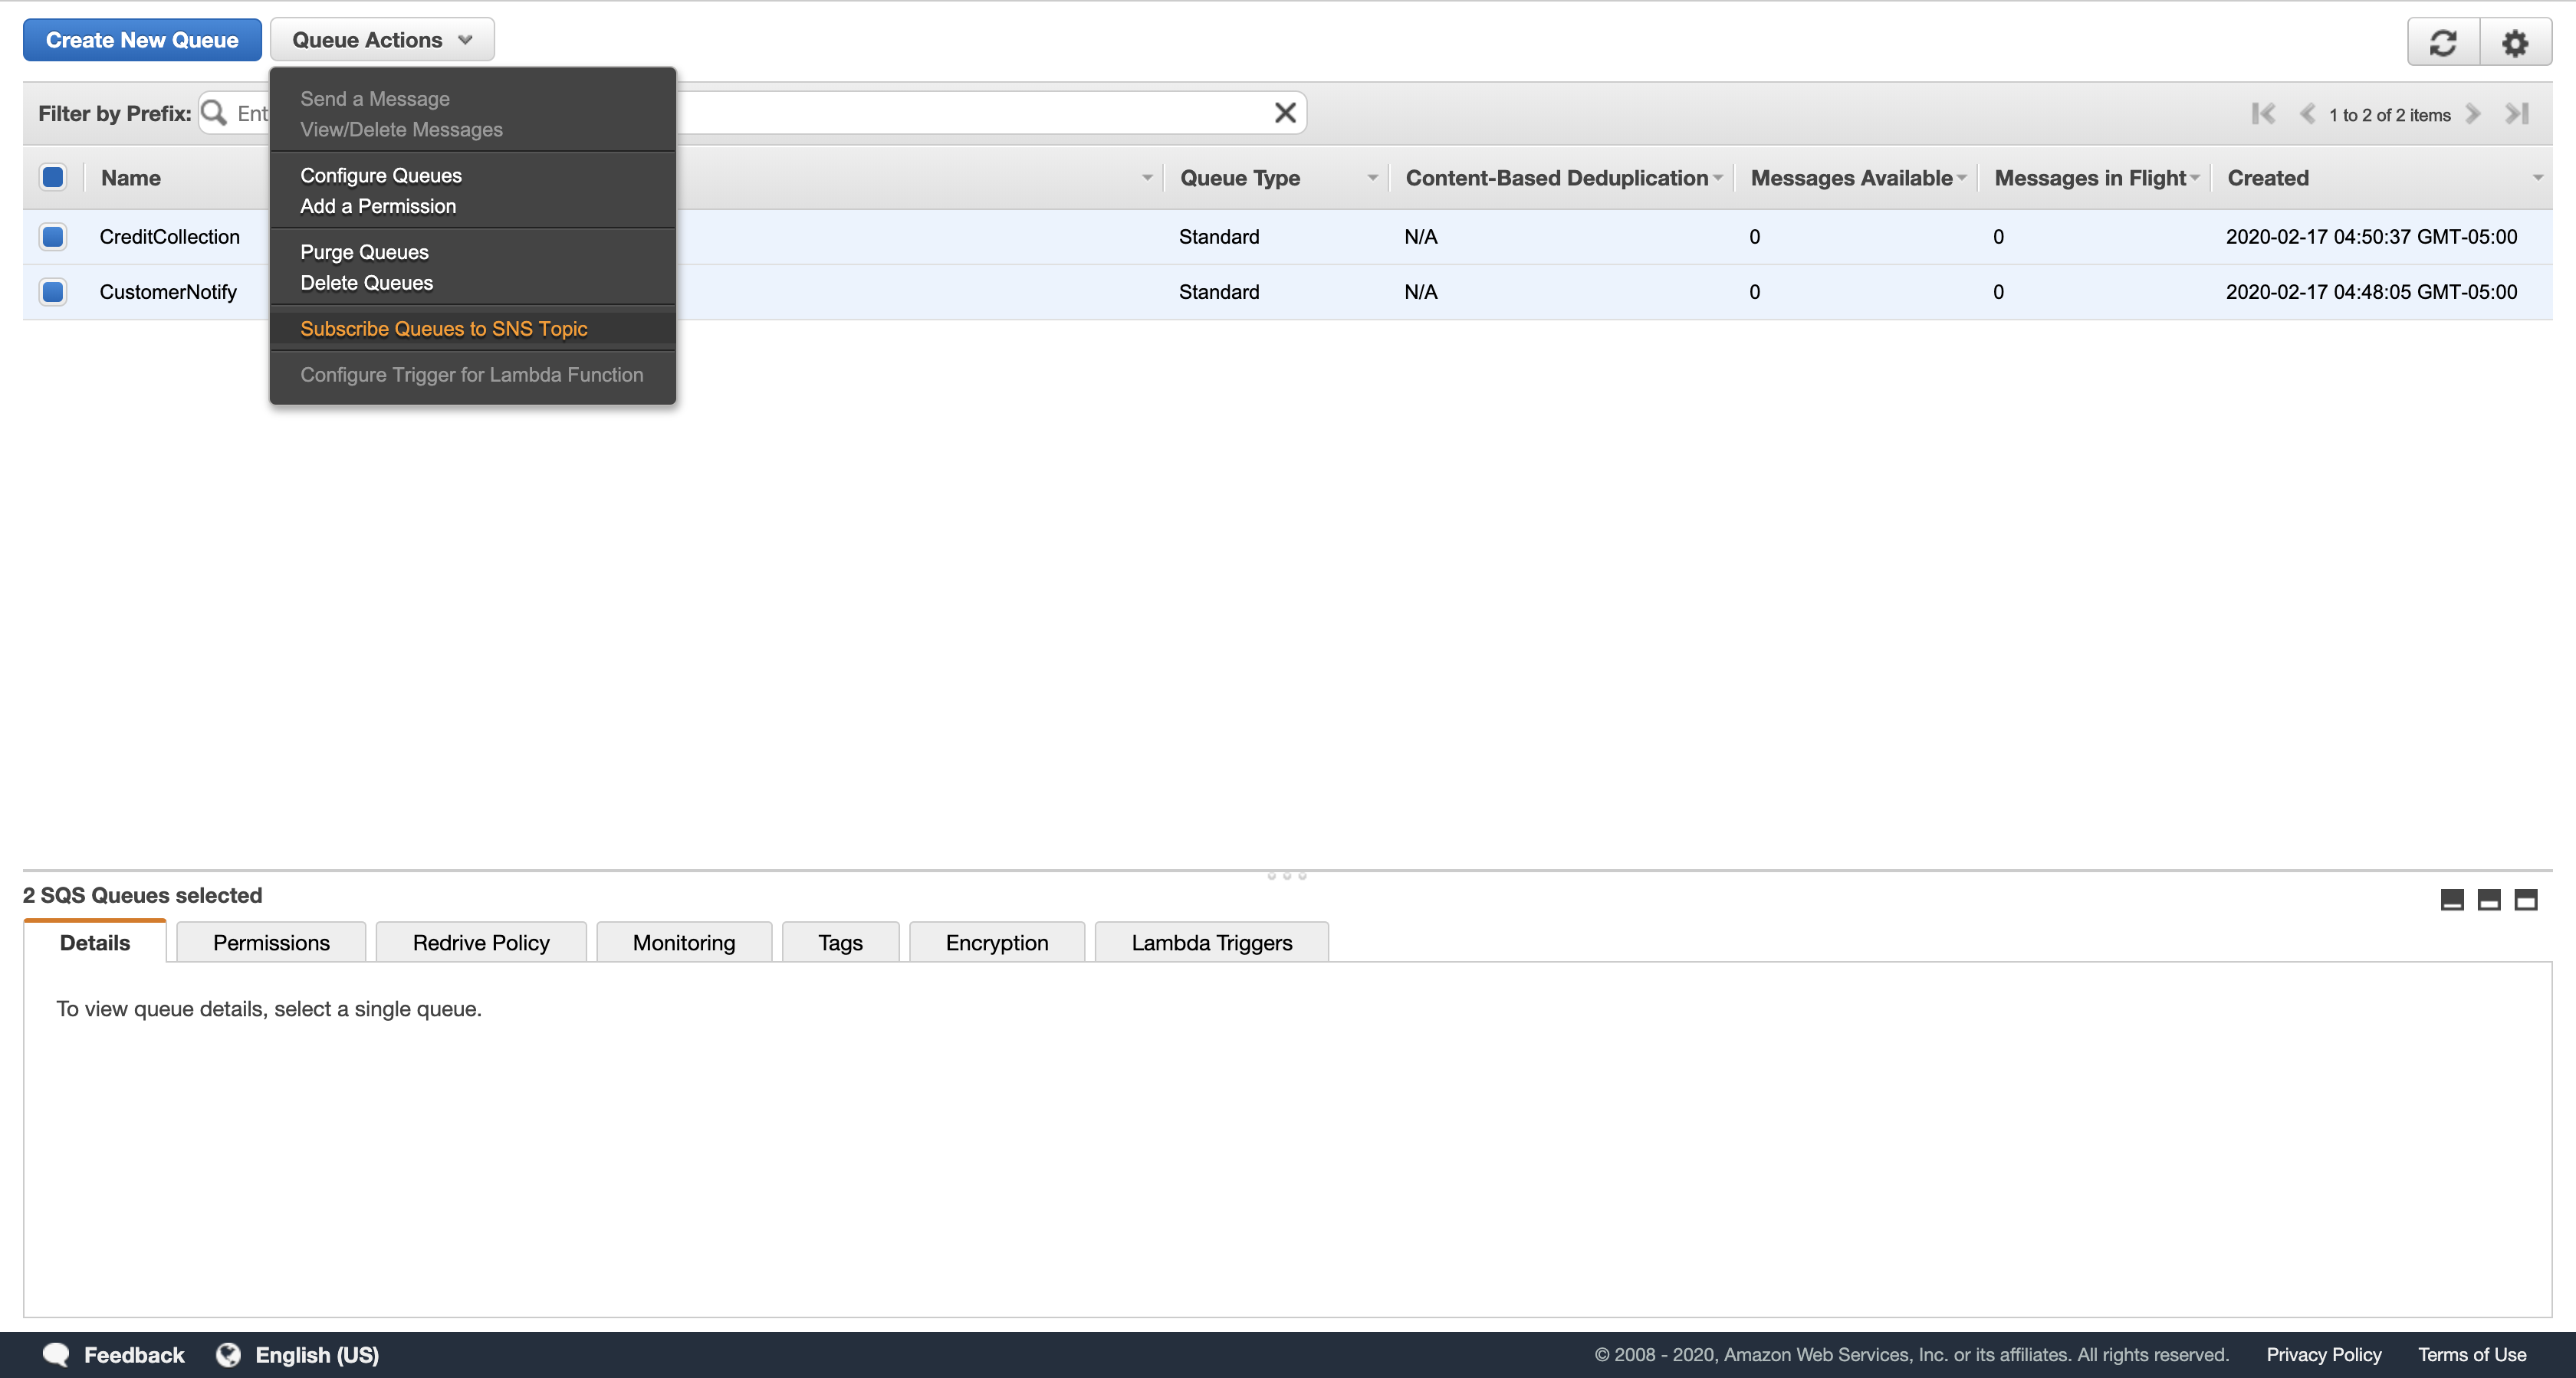
In the Subscribe to a Topic dialog box, for Choose a Topic, click HighBalanceAlert, then click Subscribe.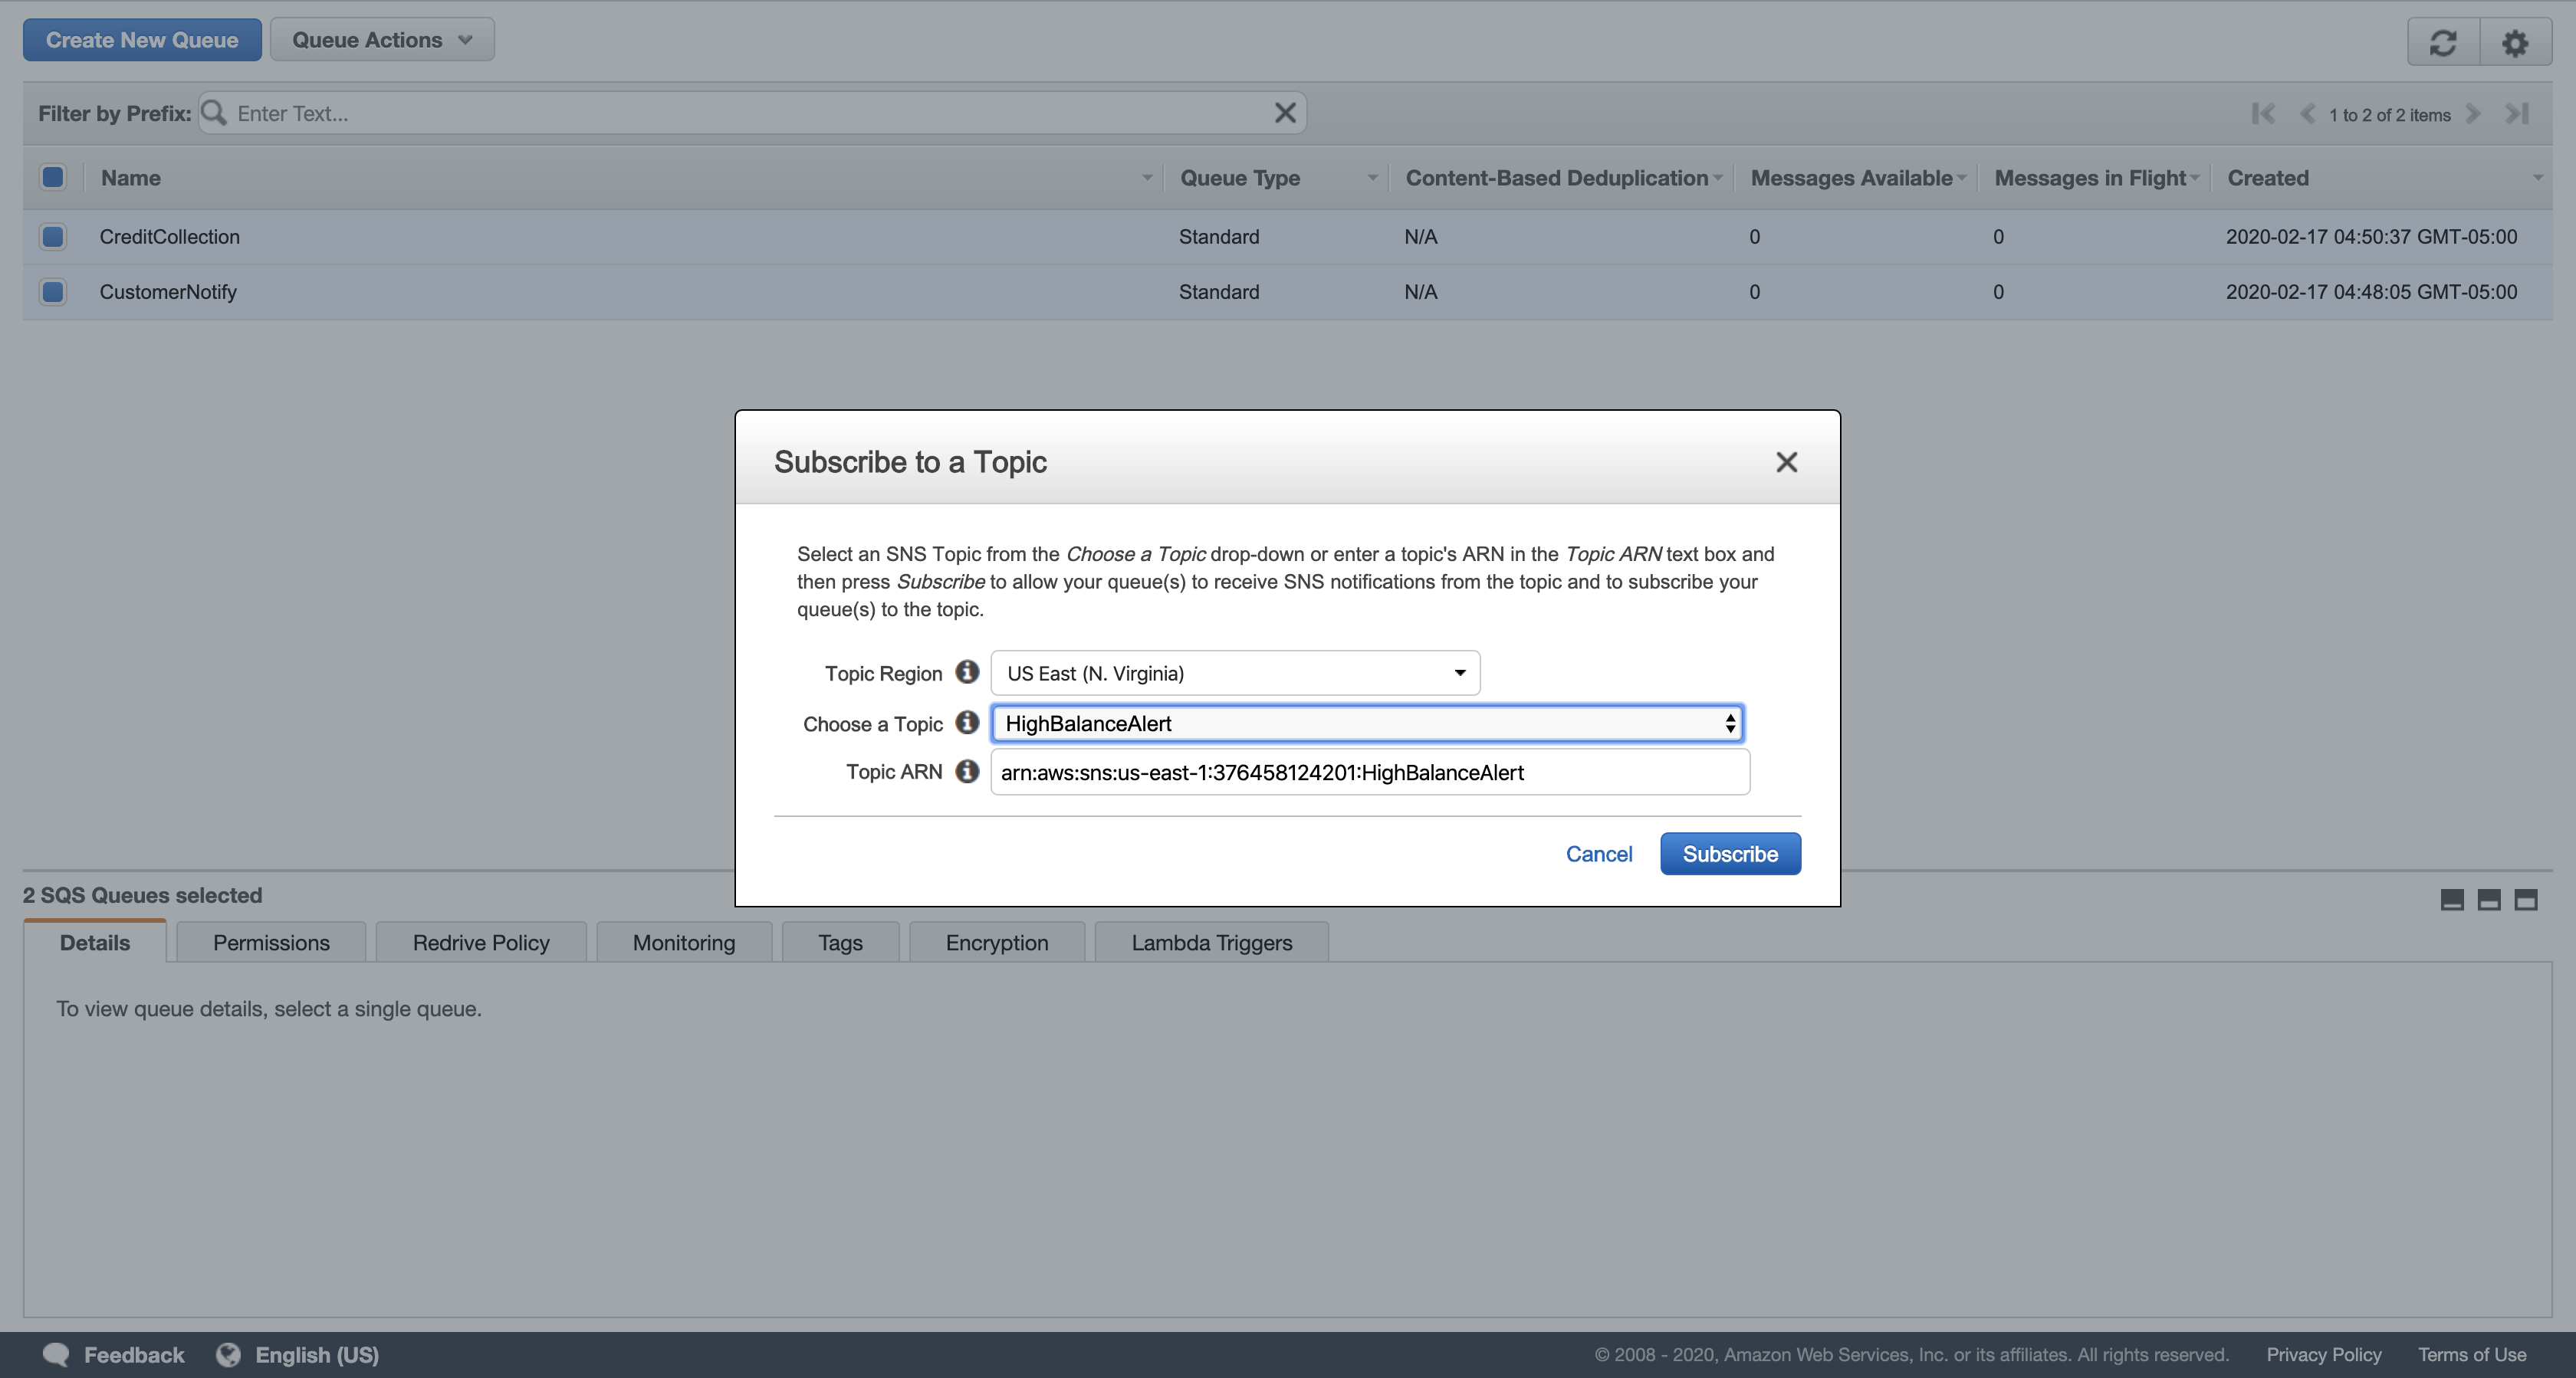
In the Topic Subscription Result dialog box, click OK.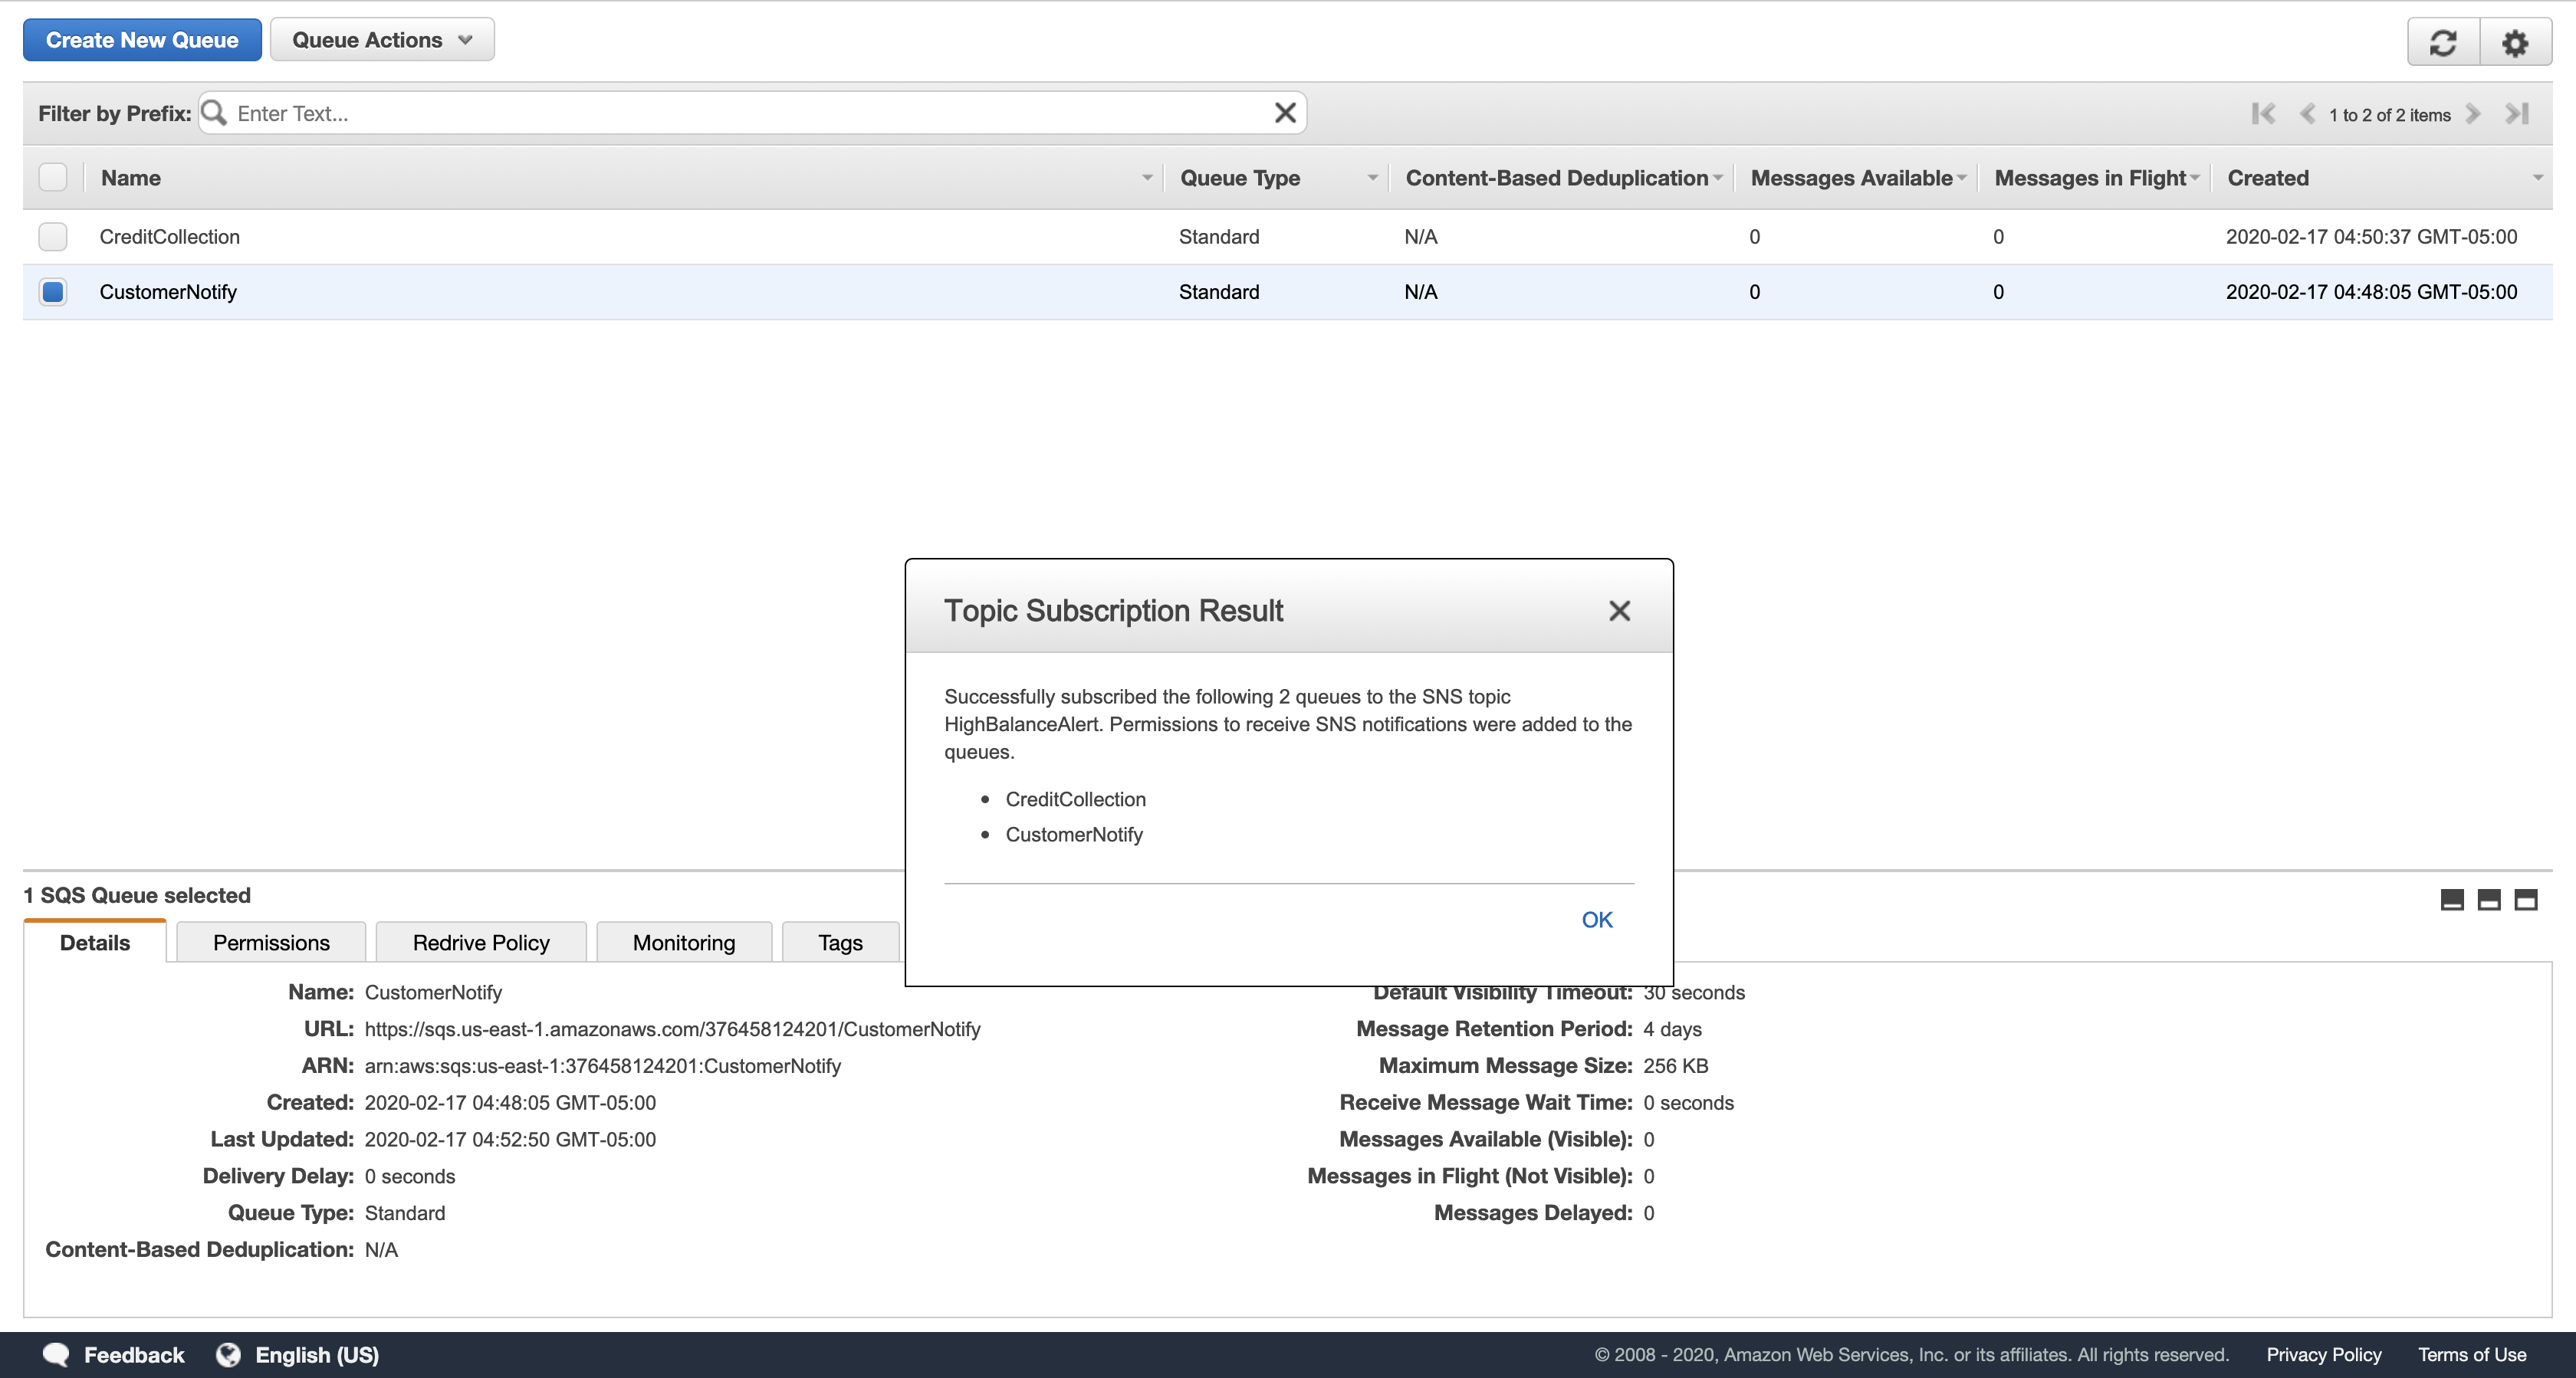
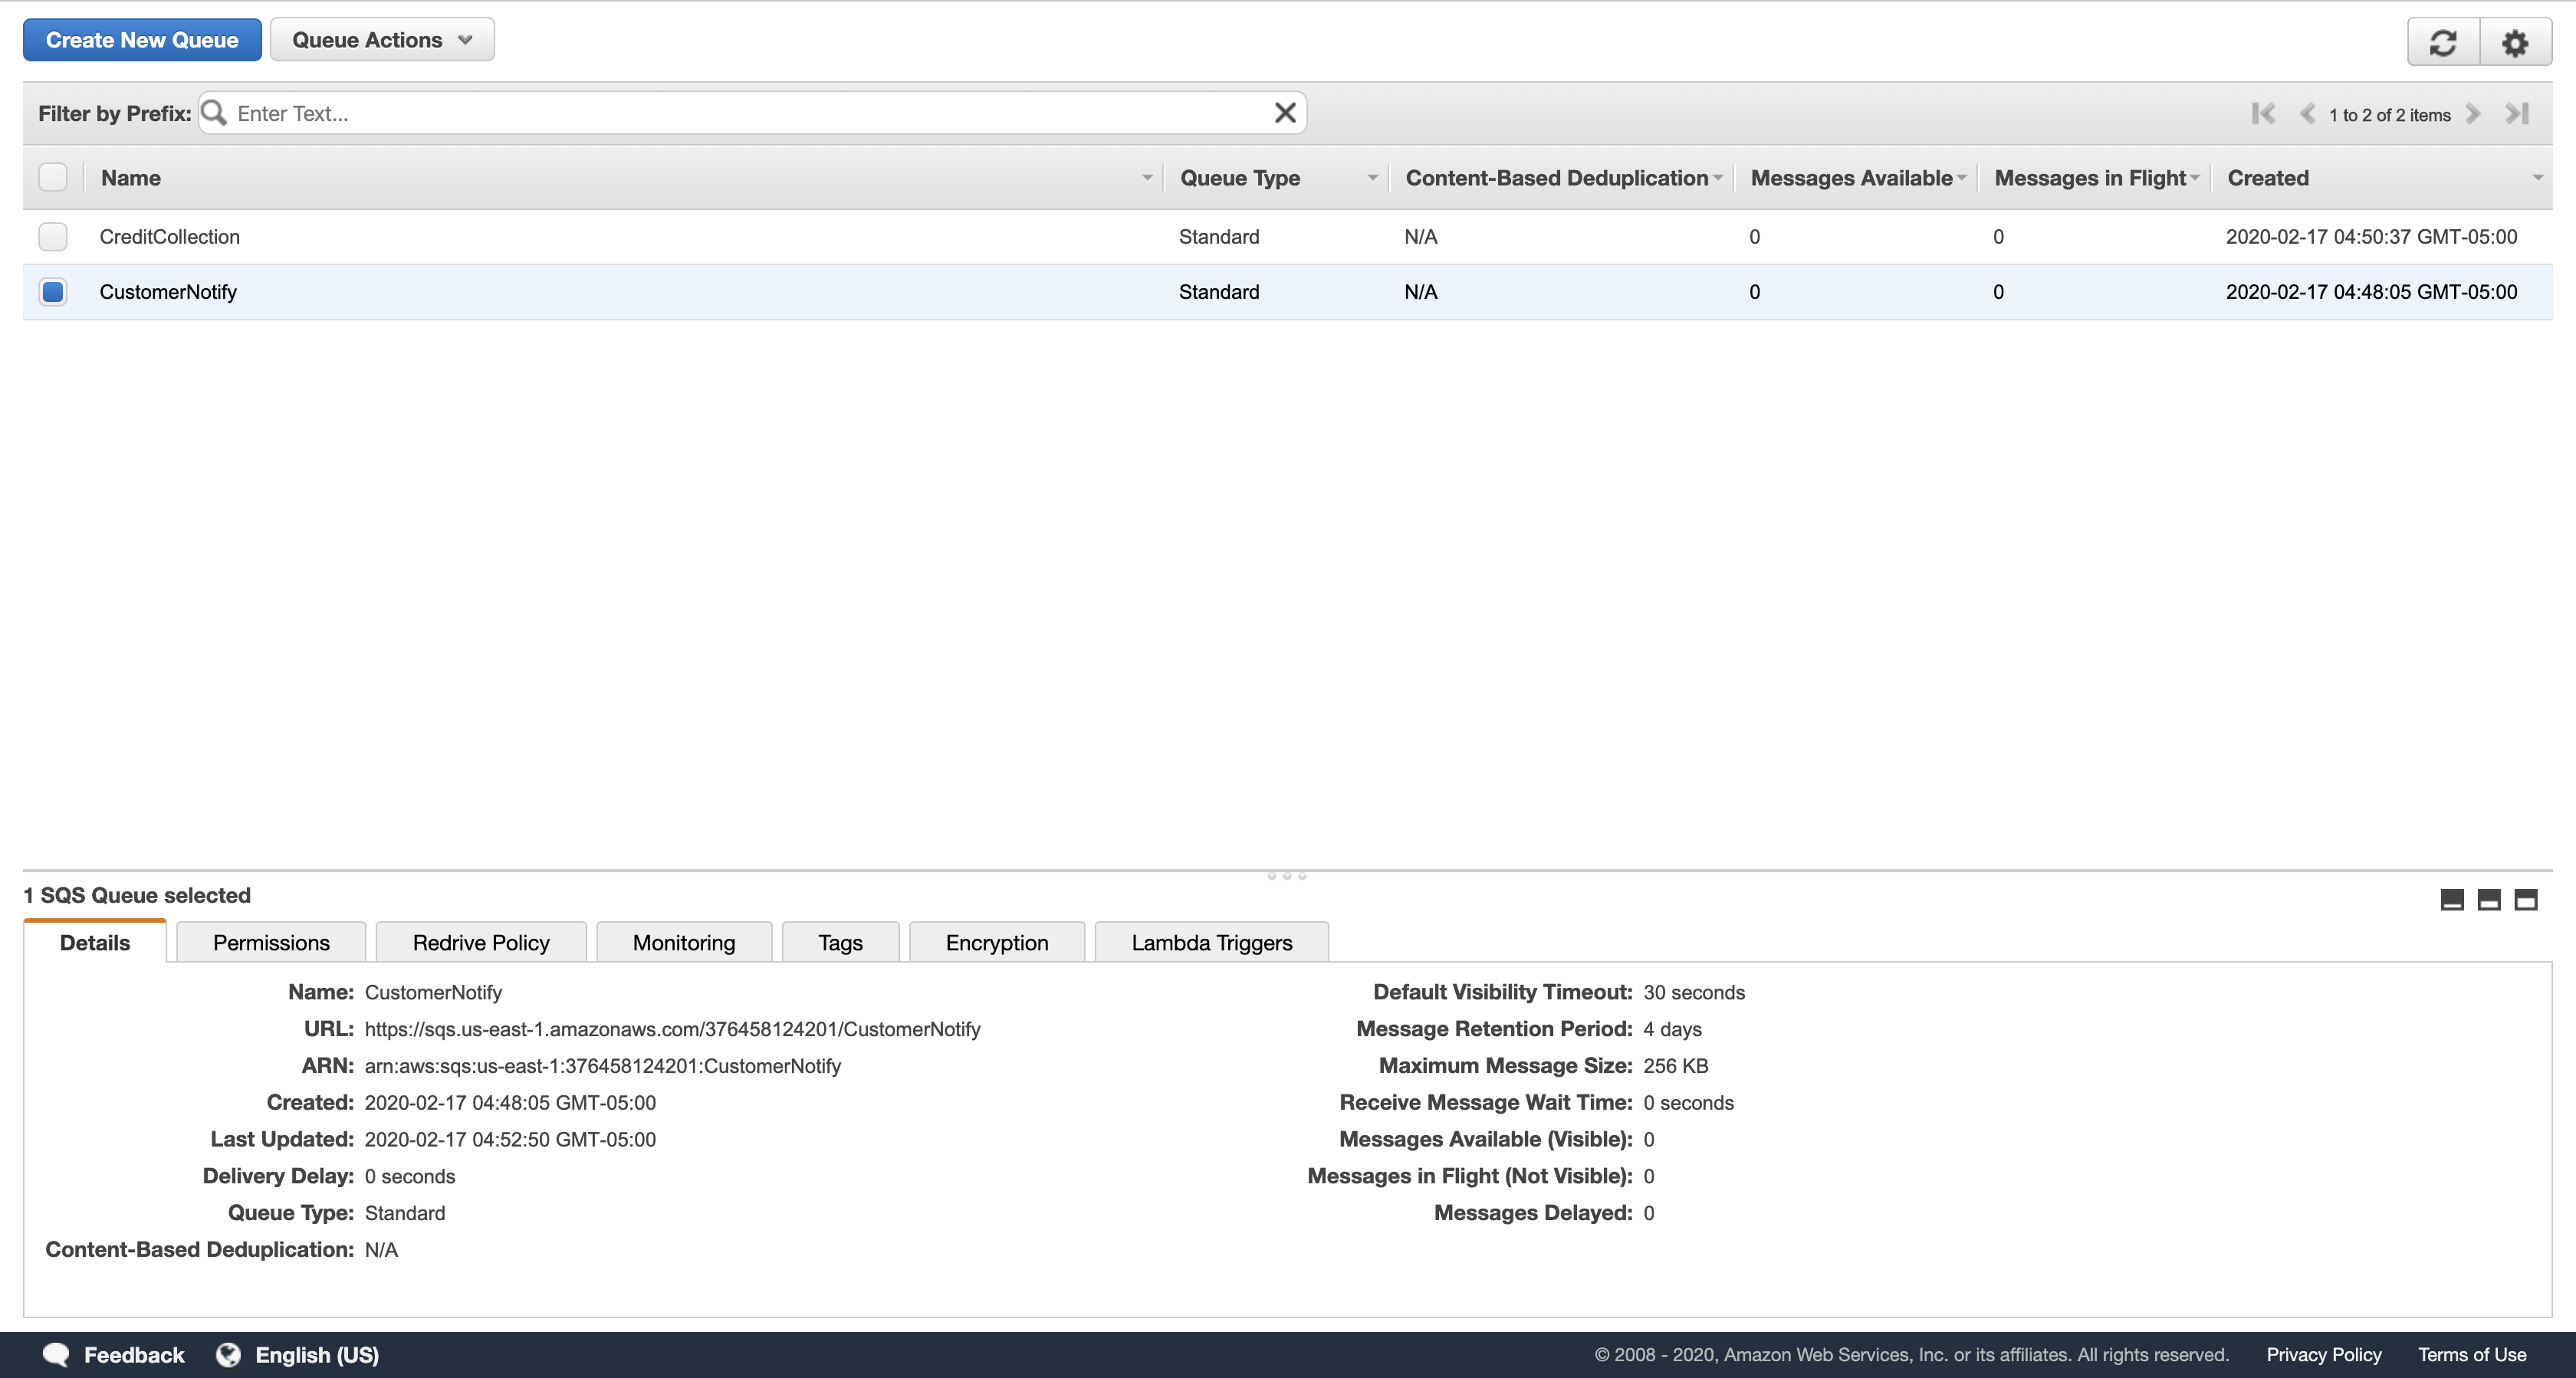
Your two queues are now subscribed to your Simple Notification Service topic. They will automatically receive any messages sent to that topic.
Task 5: Testing the Serverless Architecture by Uploading a Transactions File
In this task, you will retrieve a transactions file and upload it to your S3 bucket. You will then test your serverless architecture.
Right-click the link below and choose the option (e.g. ‘Save Link As…’) to download the transactions.txt file to your local machine.

Services menu
click S3.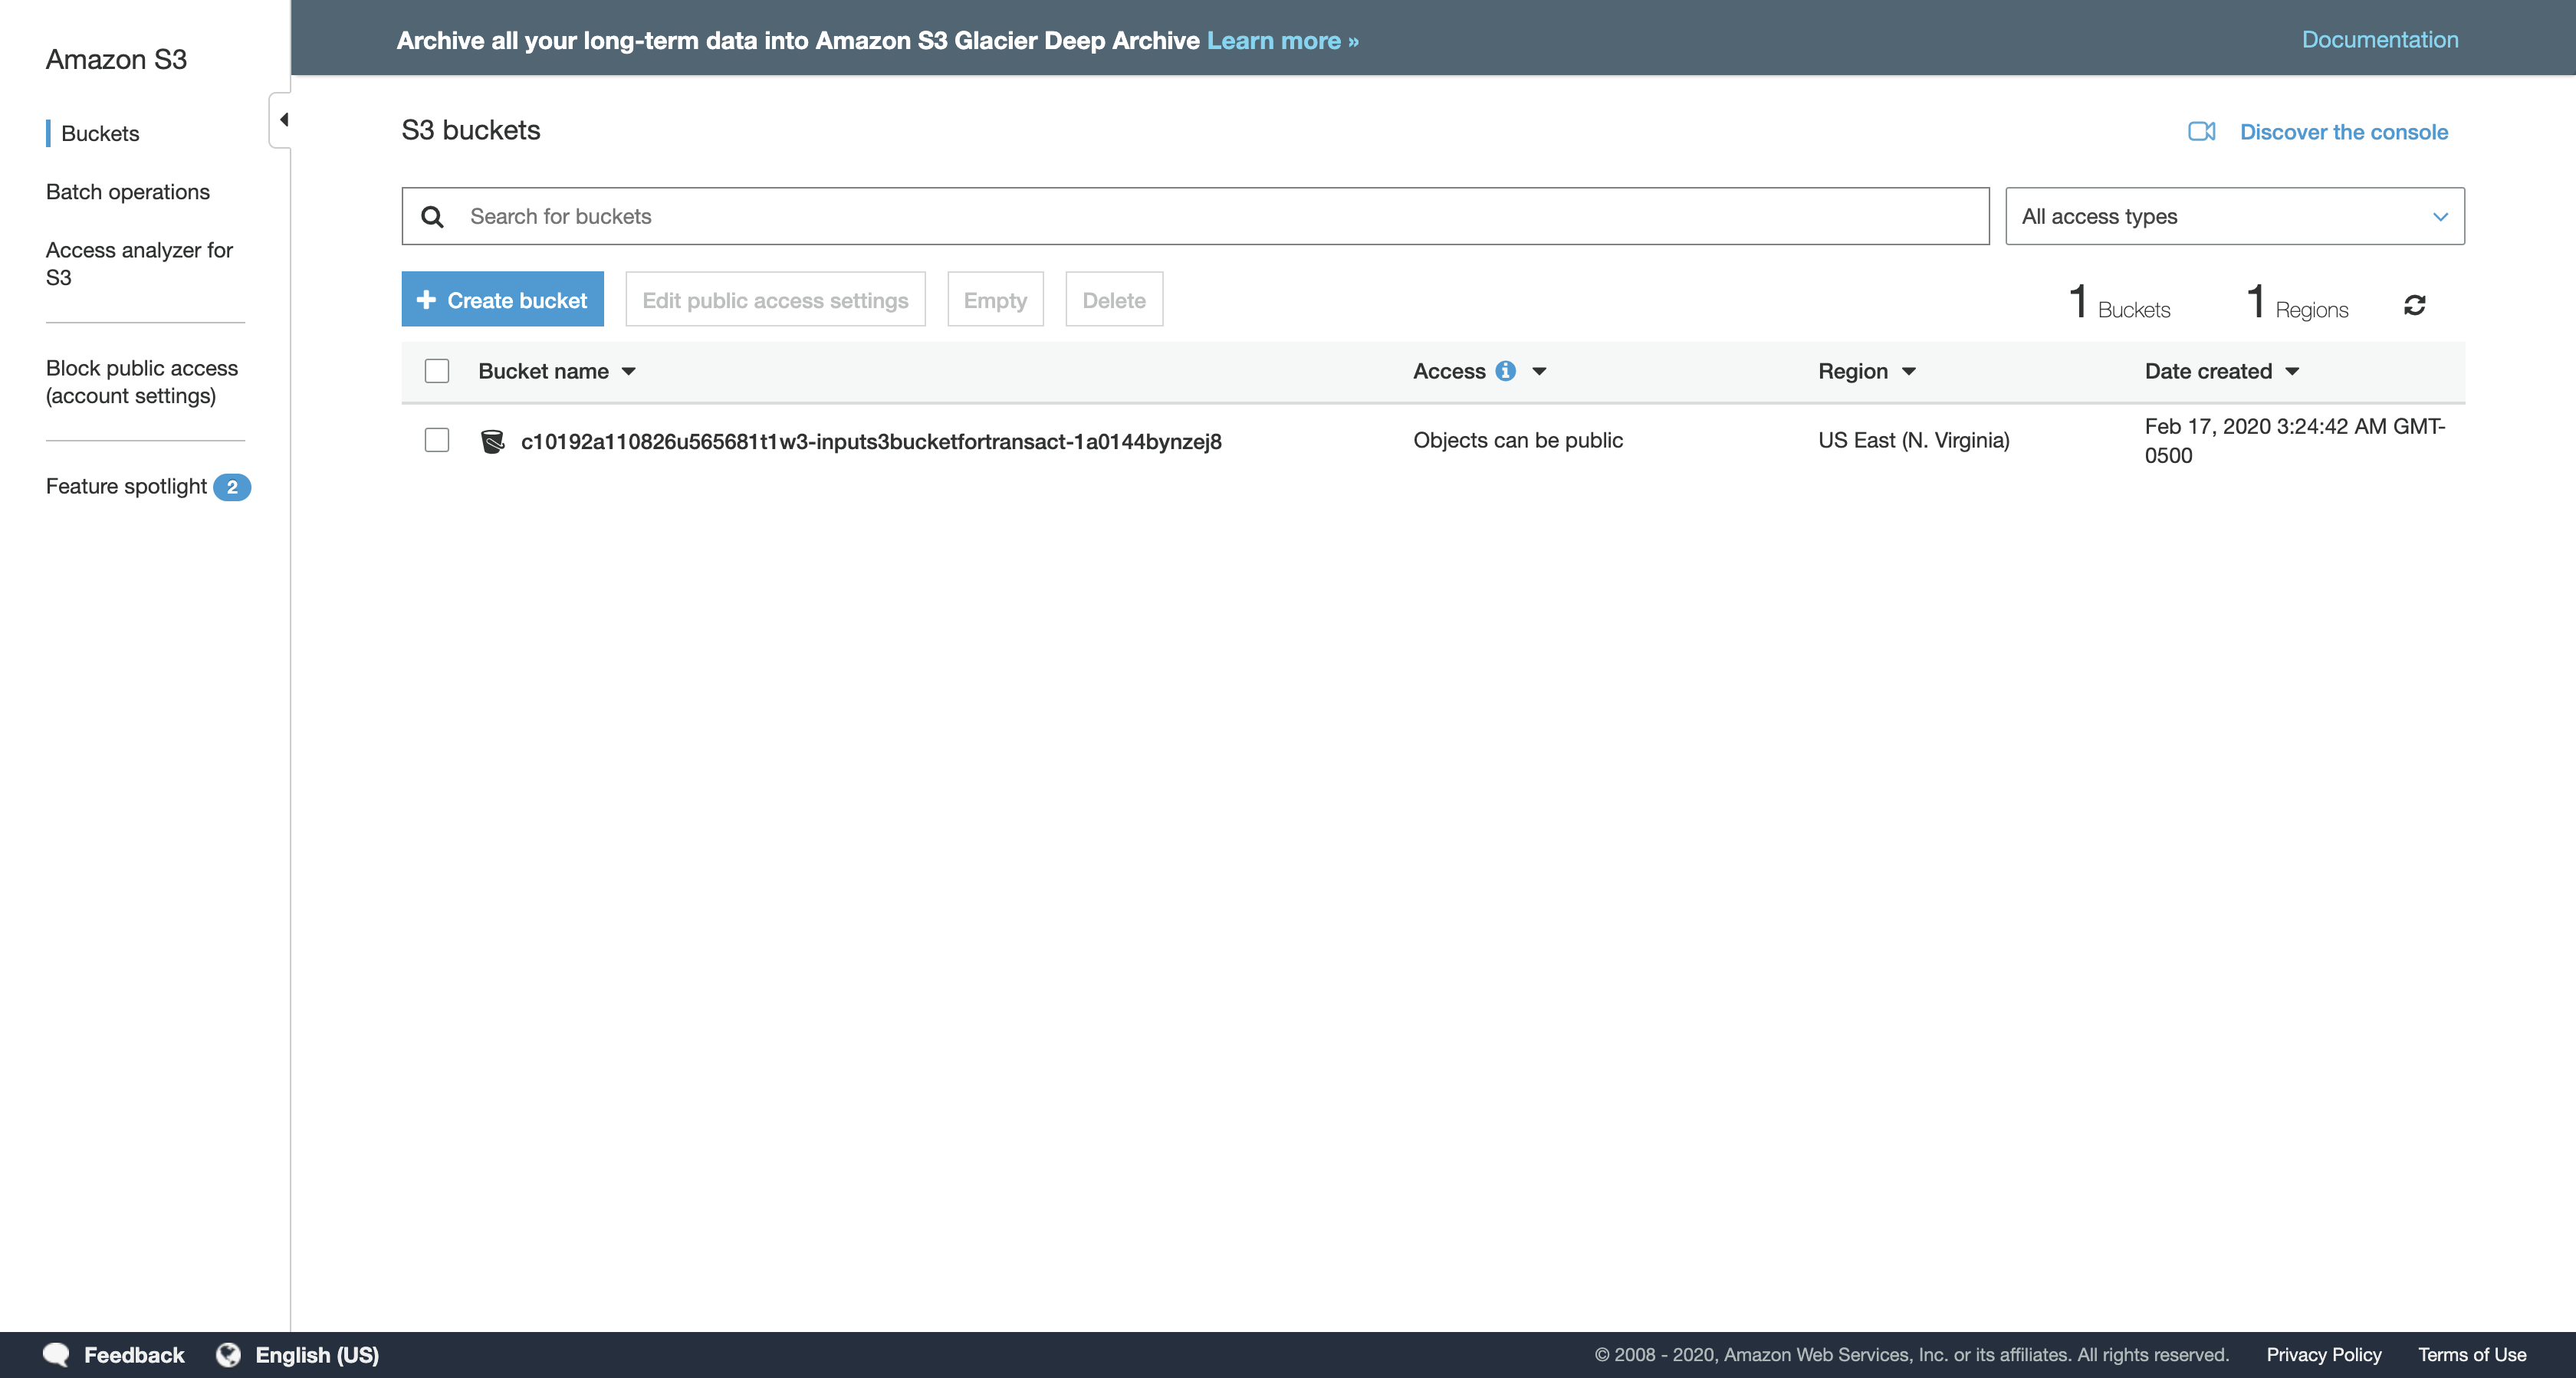
Click on the bucket name with a name similar to …-inputs3bucketfortransact-…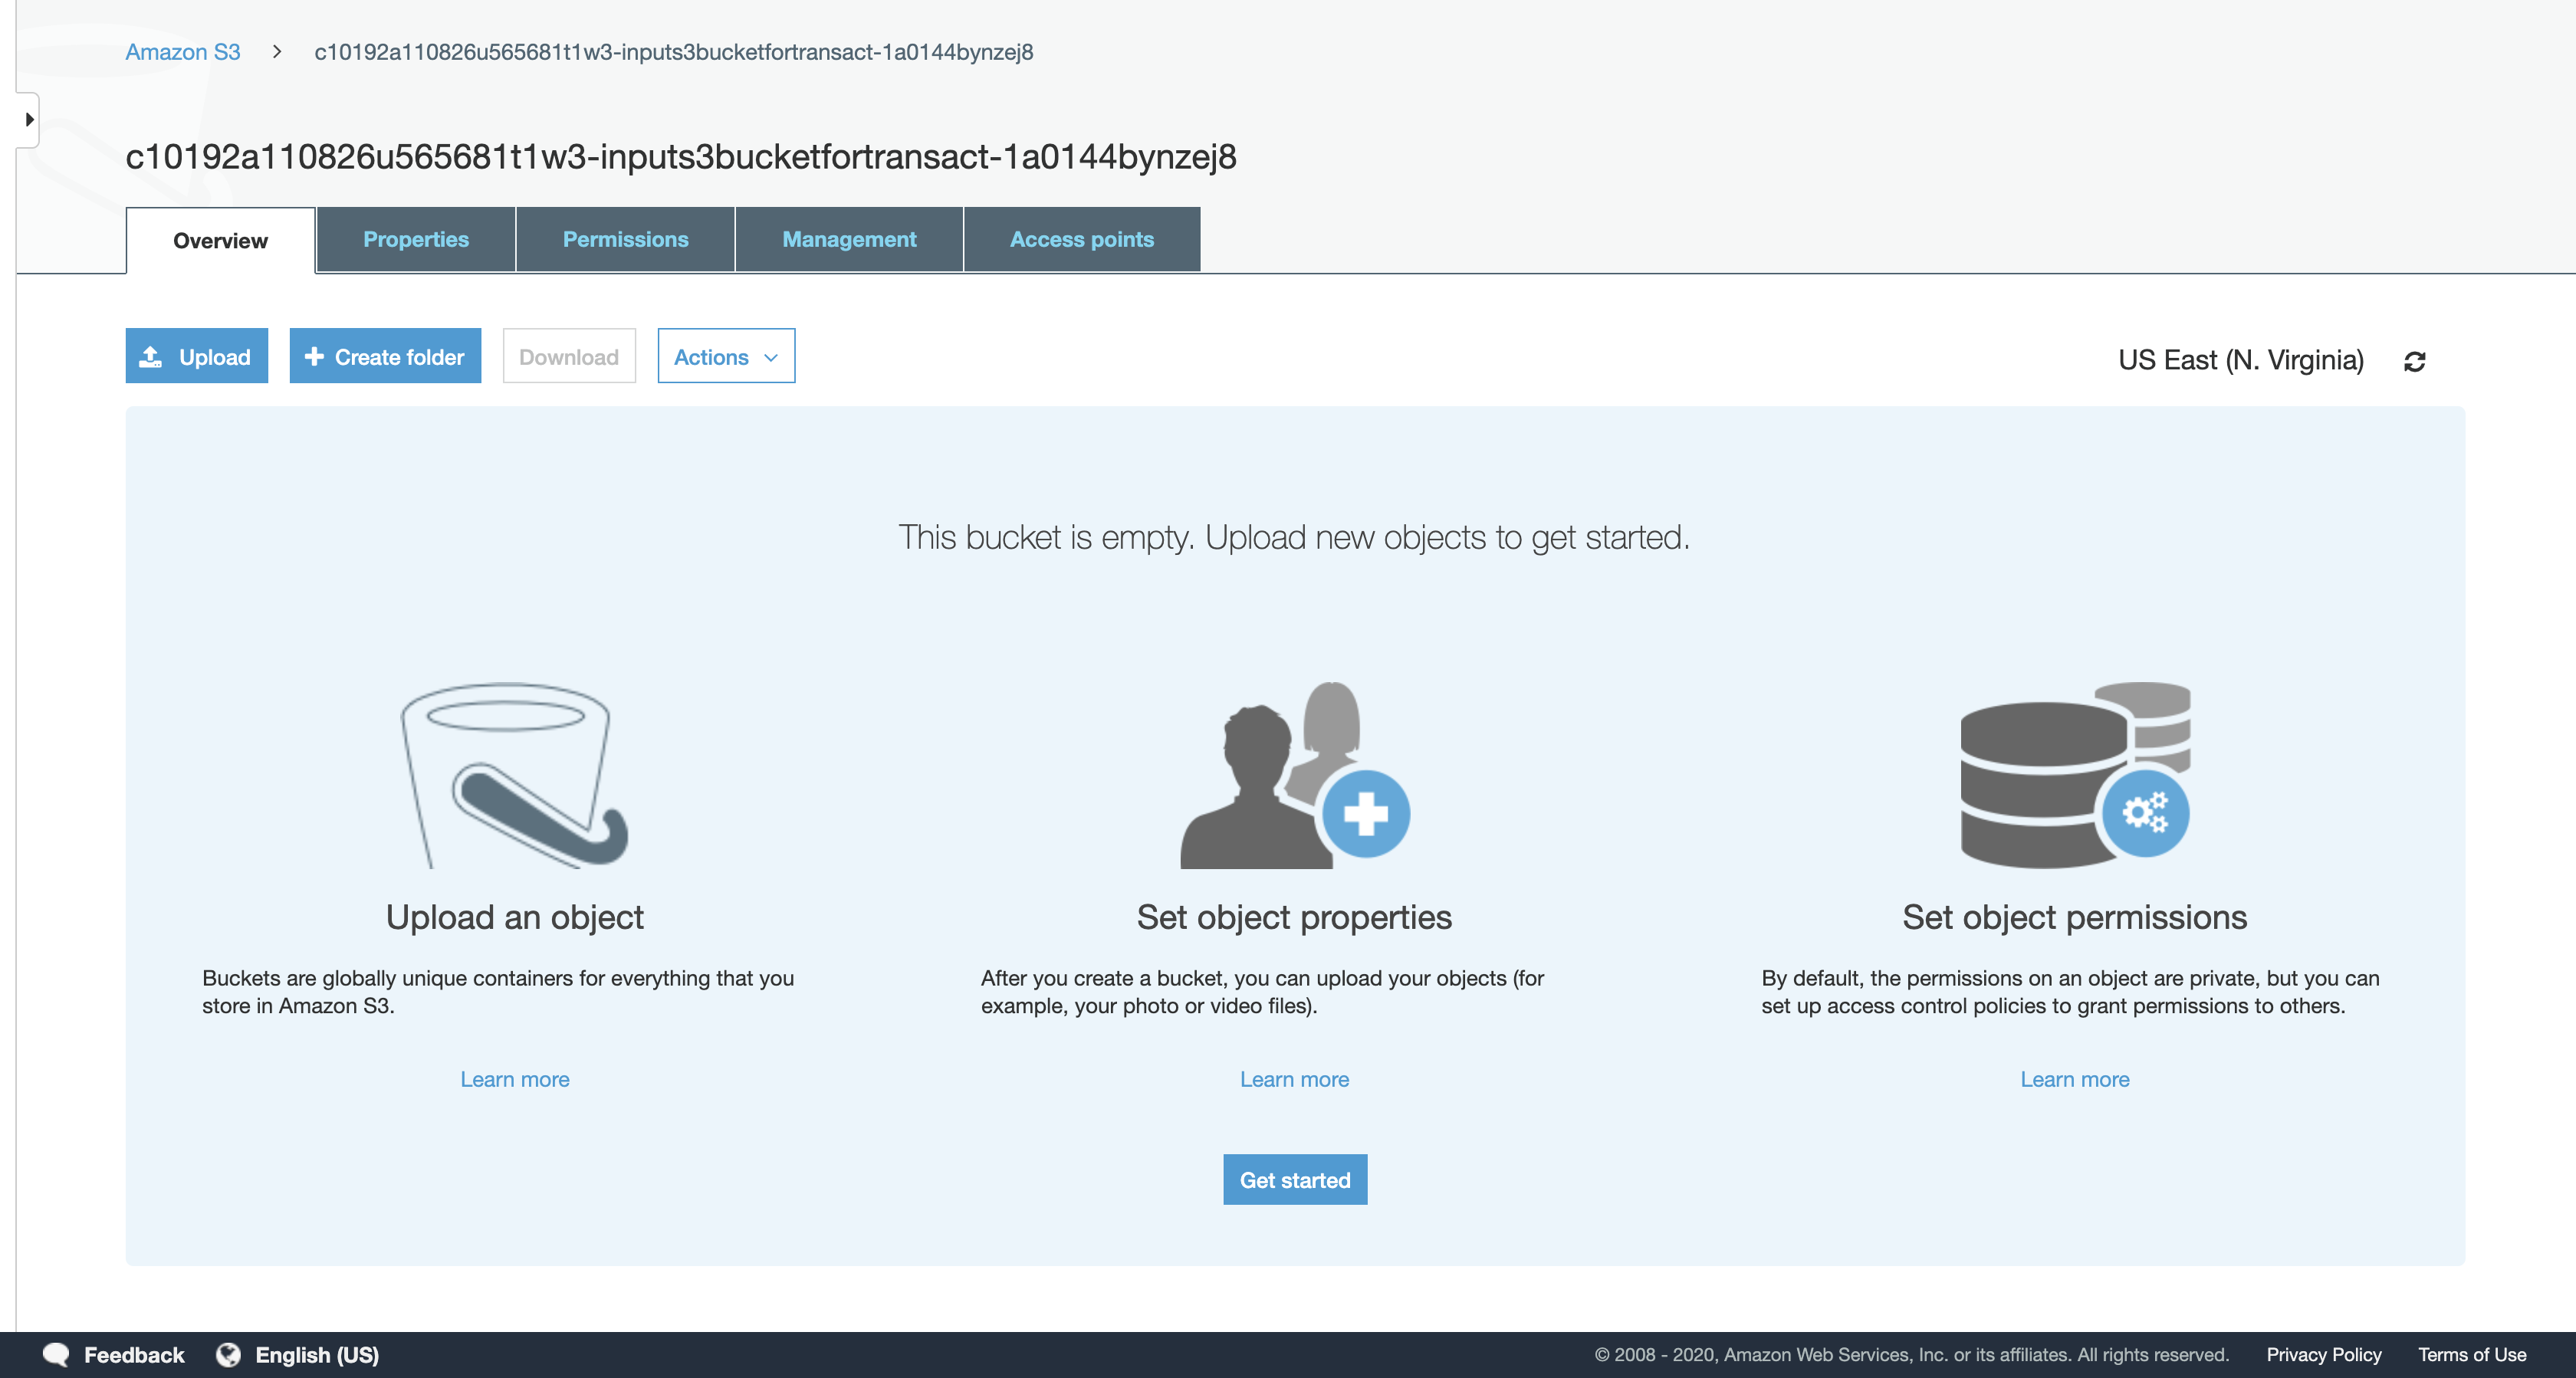
Click Upload.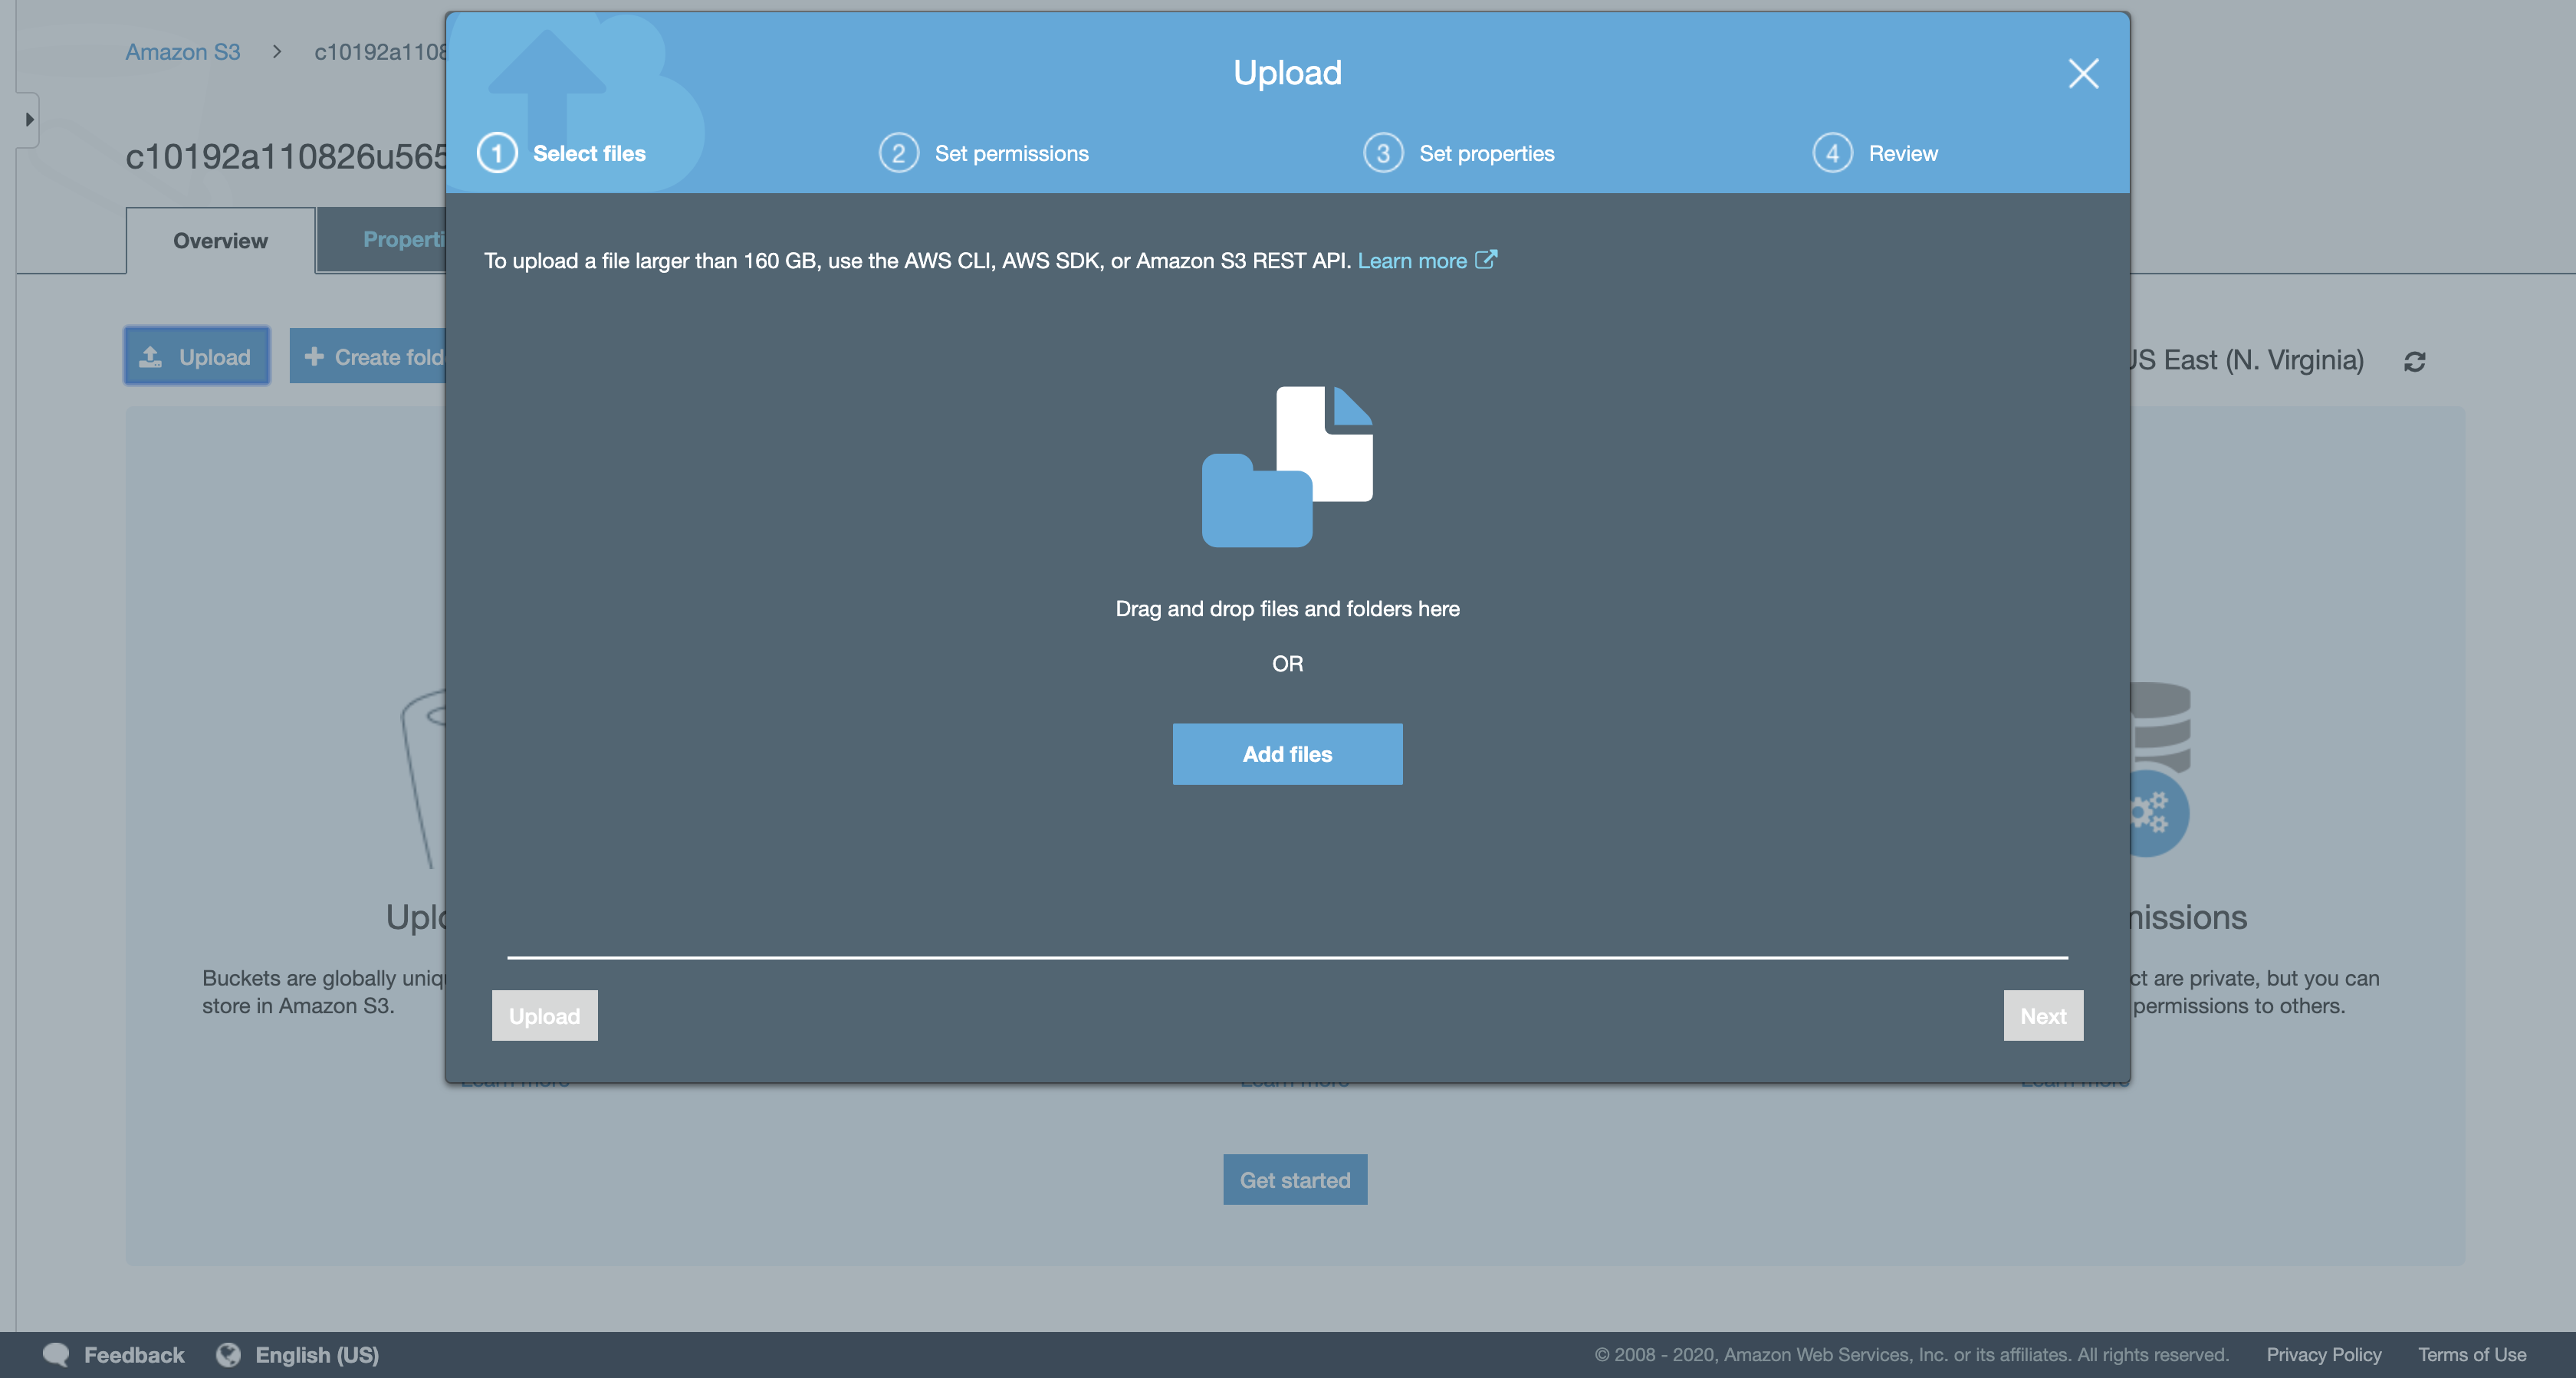
Click Add files, and then select the transactions.txt file that you downloaded.
- Tip: the file may be inside a ‘ql’ sub-directory in the direc
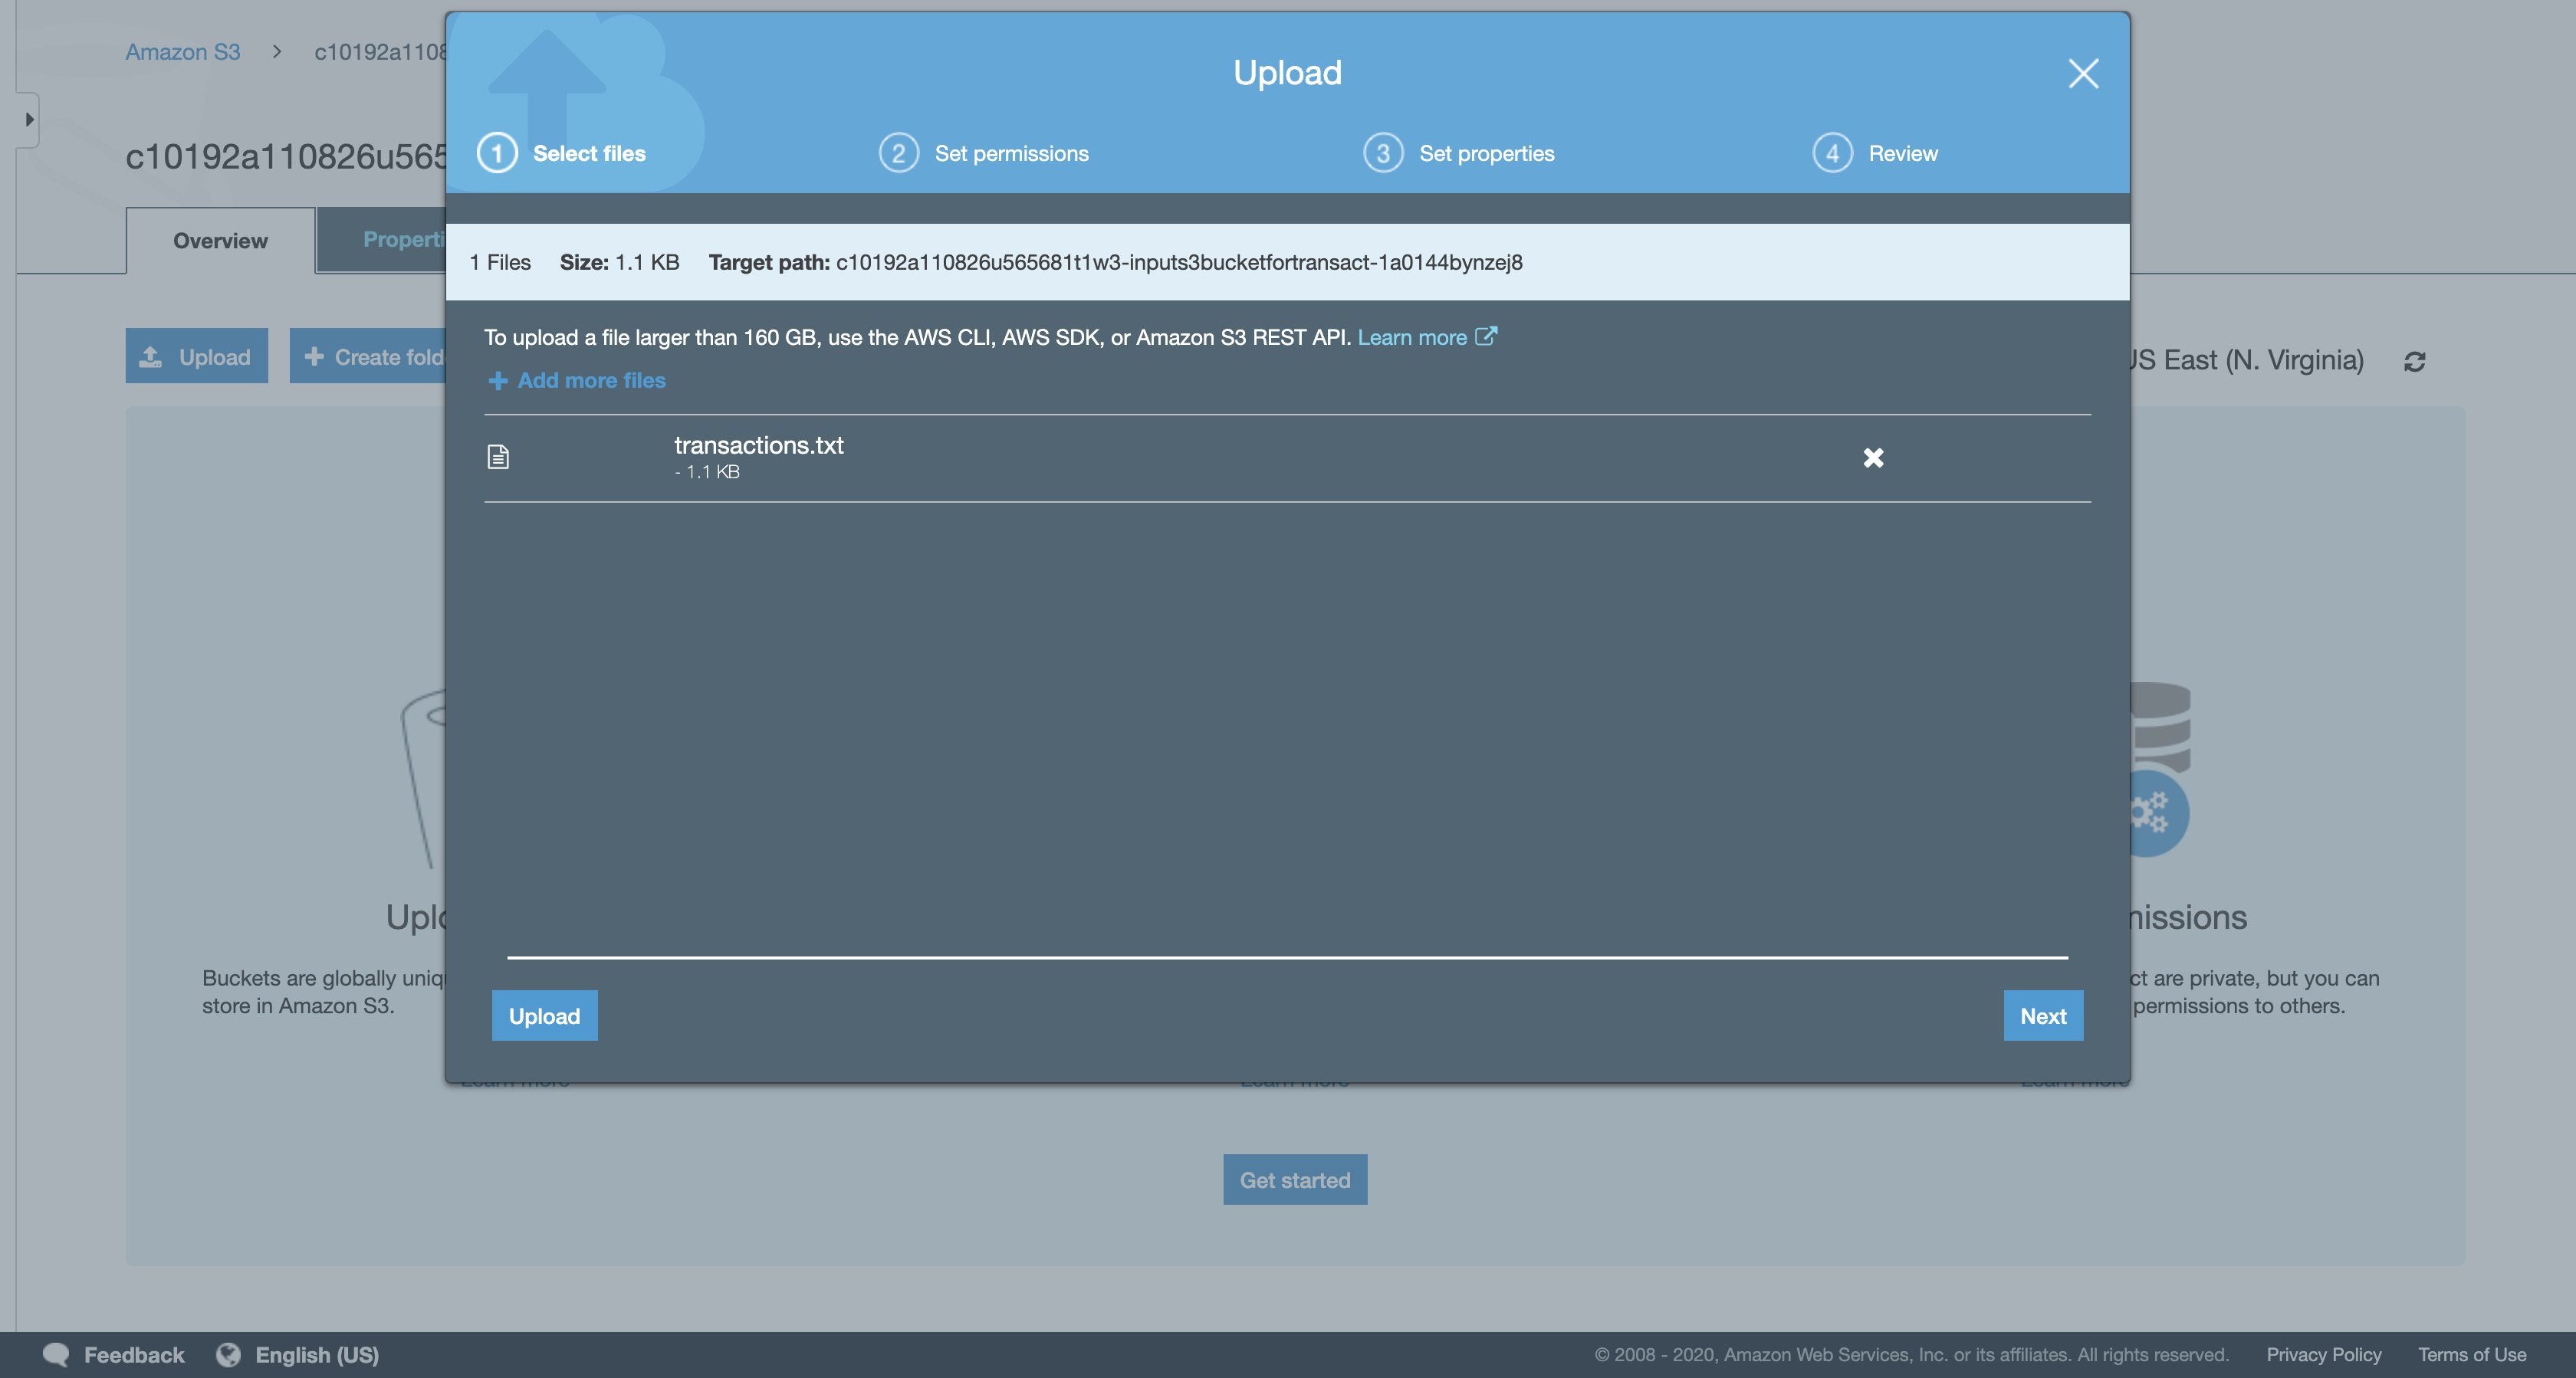
Click Upload.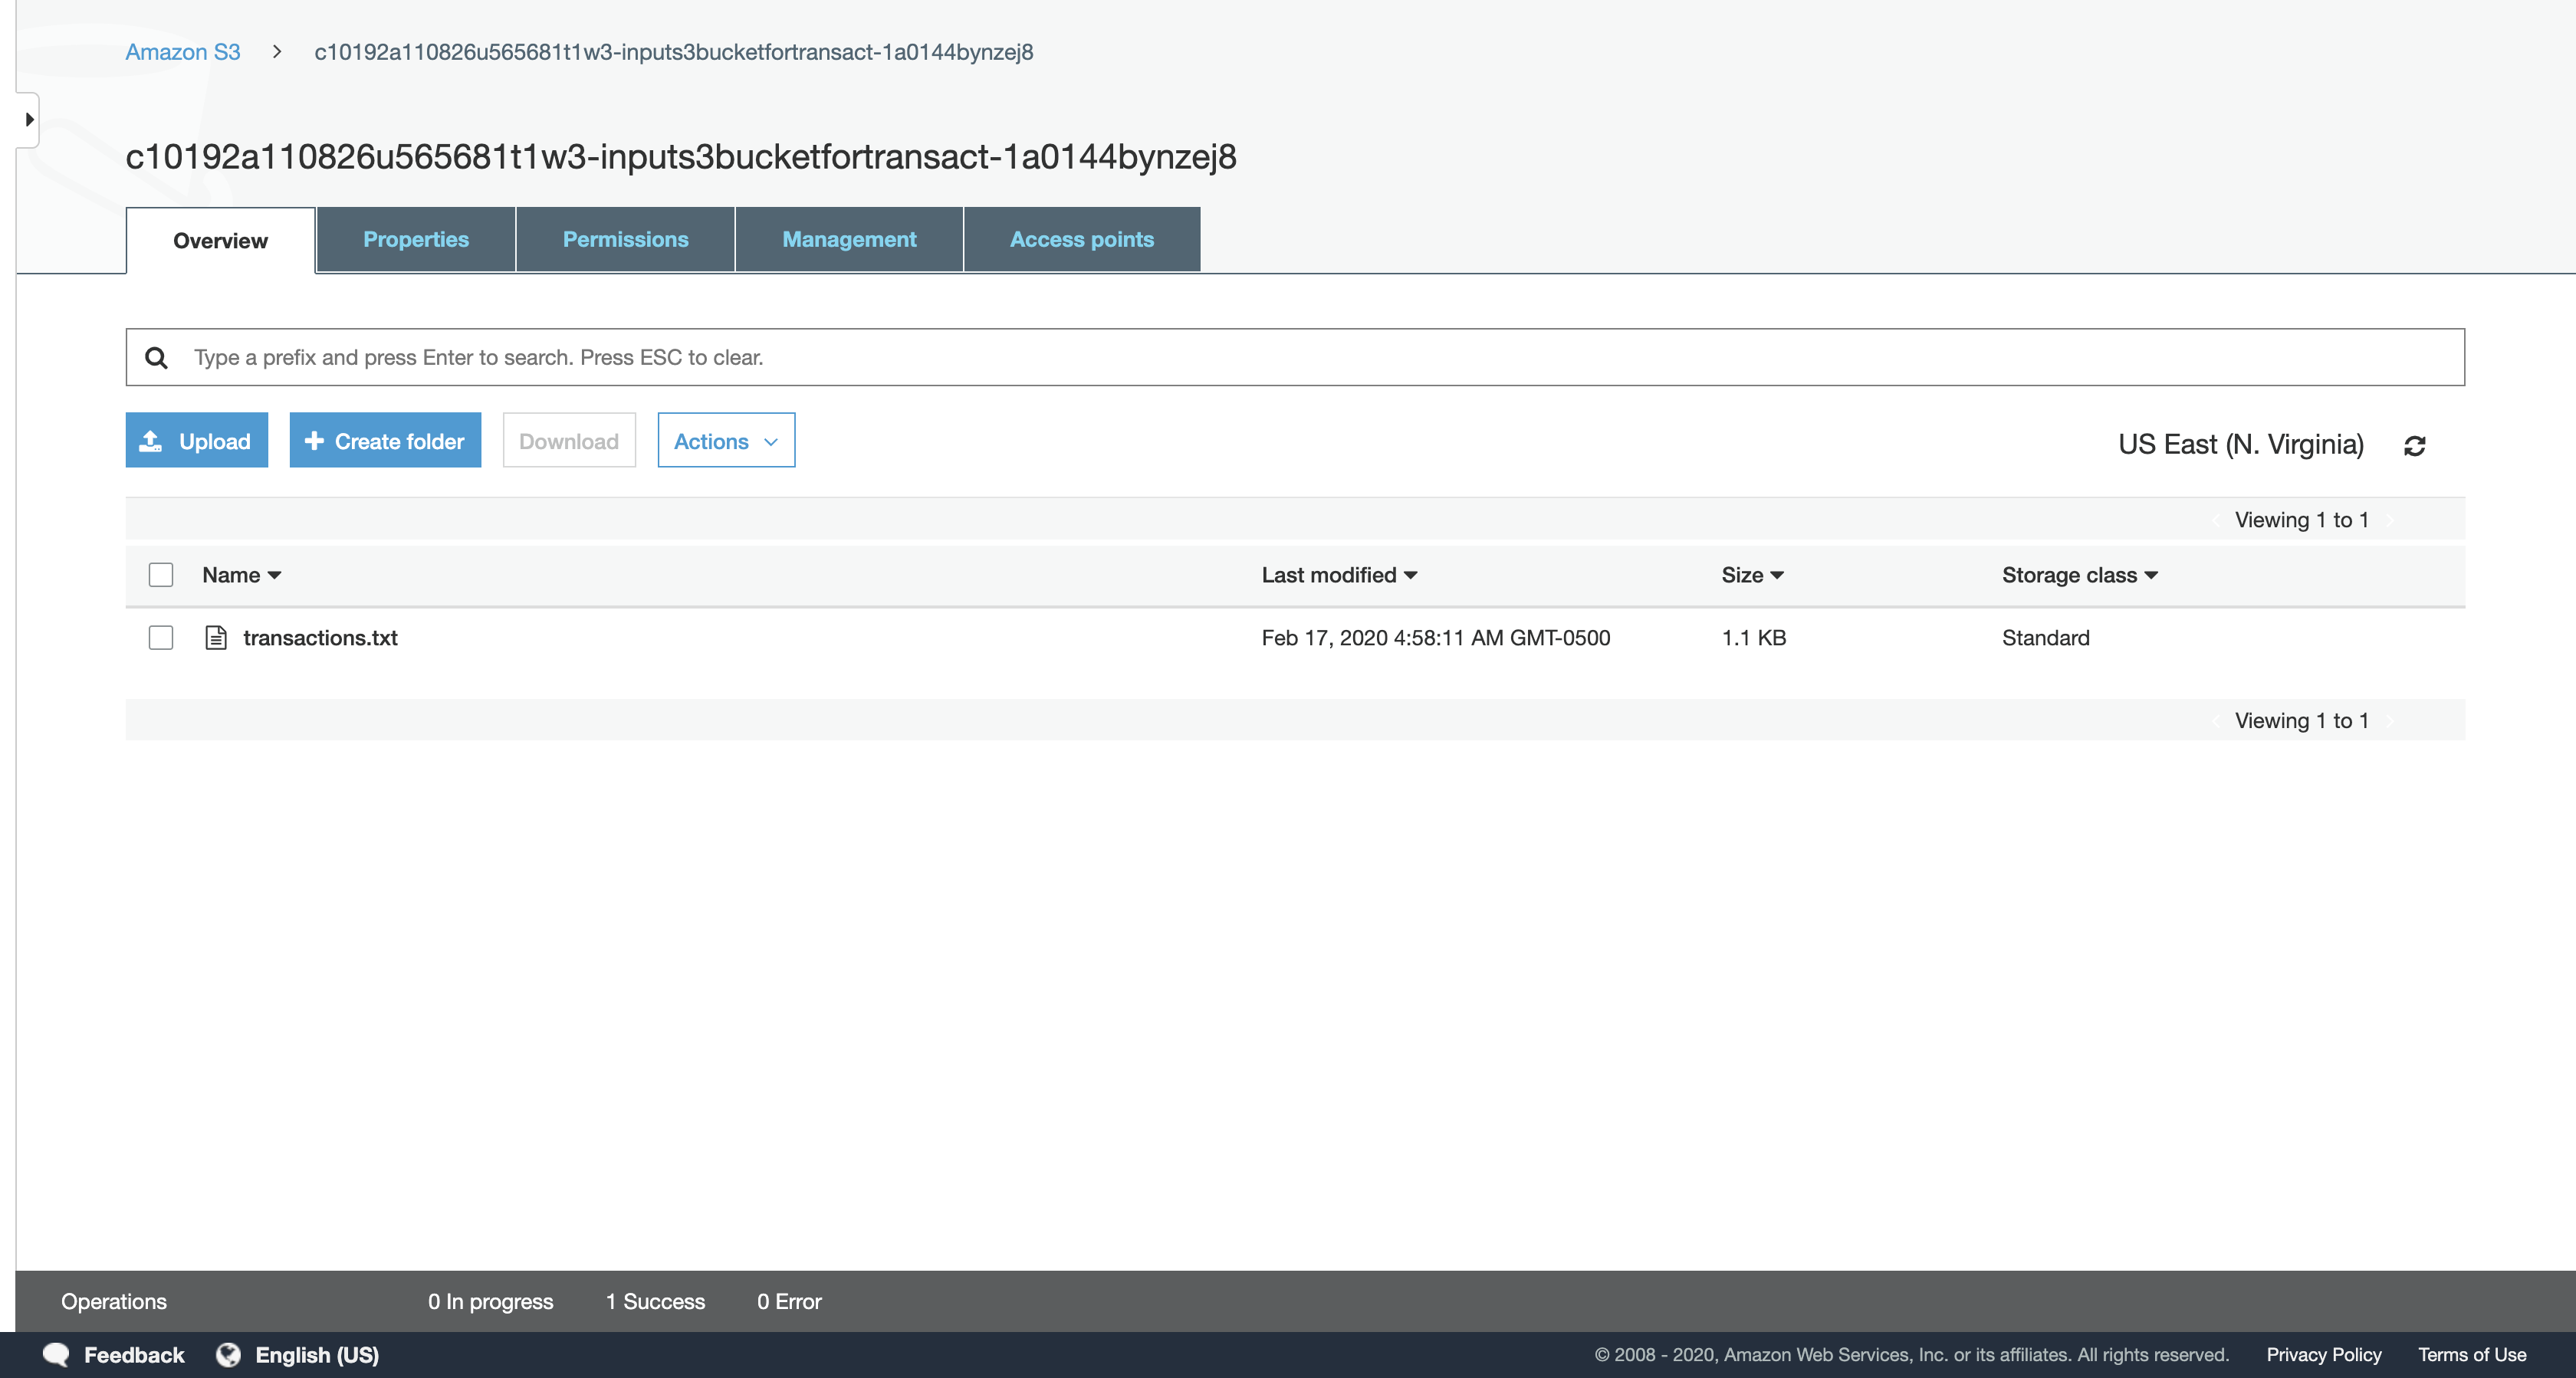
Uploading this file to Amazon S3 will immediately trigger the first Lambda function you created, which will immediately read the text file and store data in the Customer and Transactions DynamoDB tables.
Task 5.2: Check the DynamoDB tables
You can now verify that the transactions file was processed correctly by confirming that data has been loaded into the DynamoDB tables.
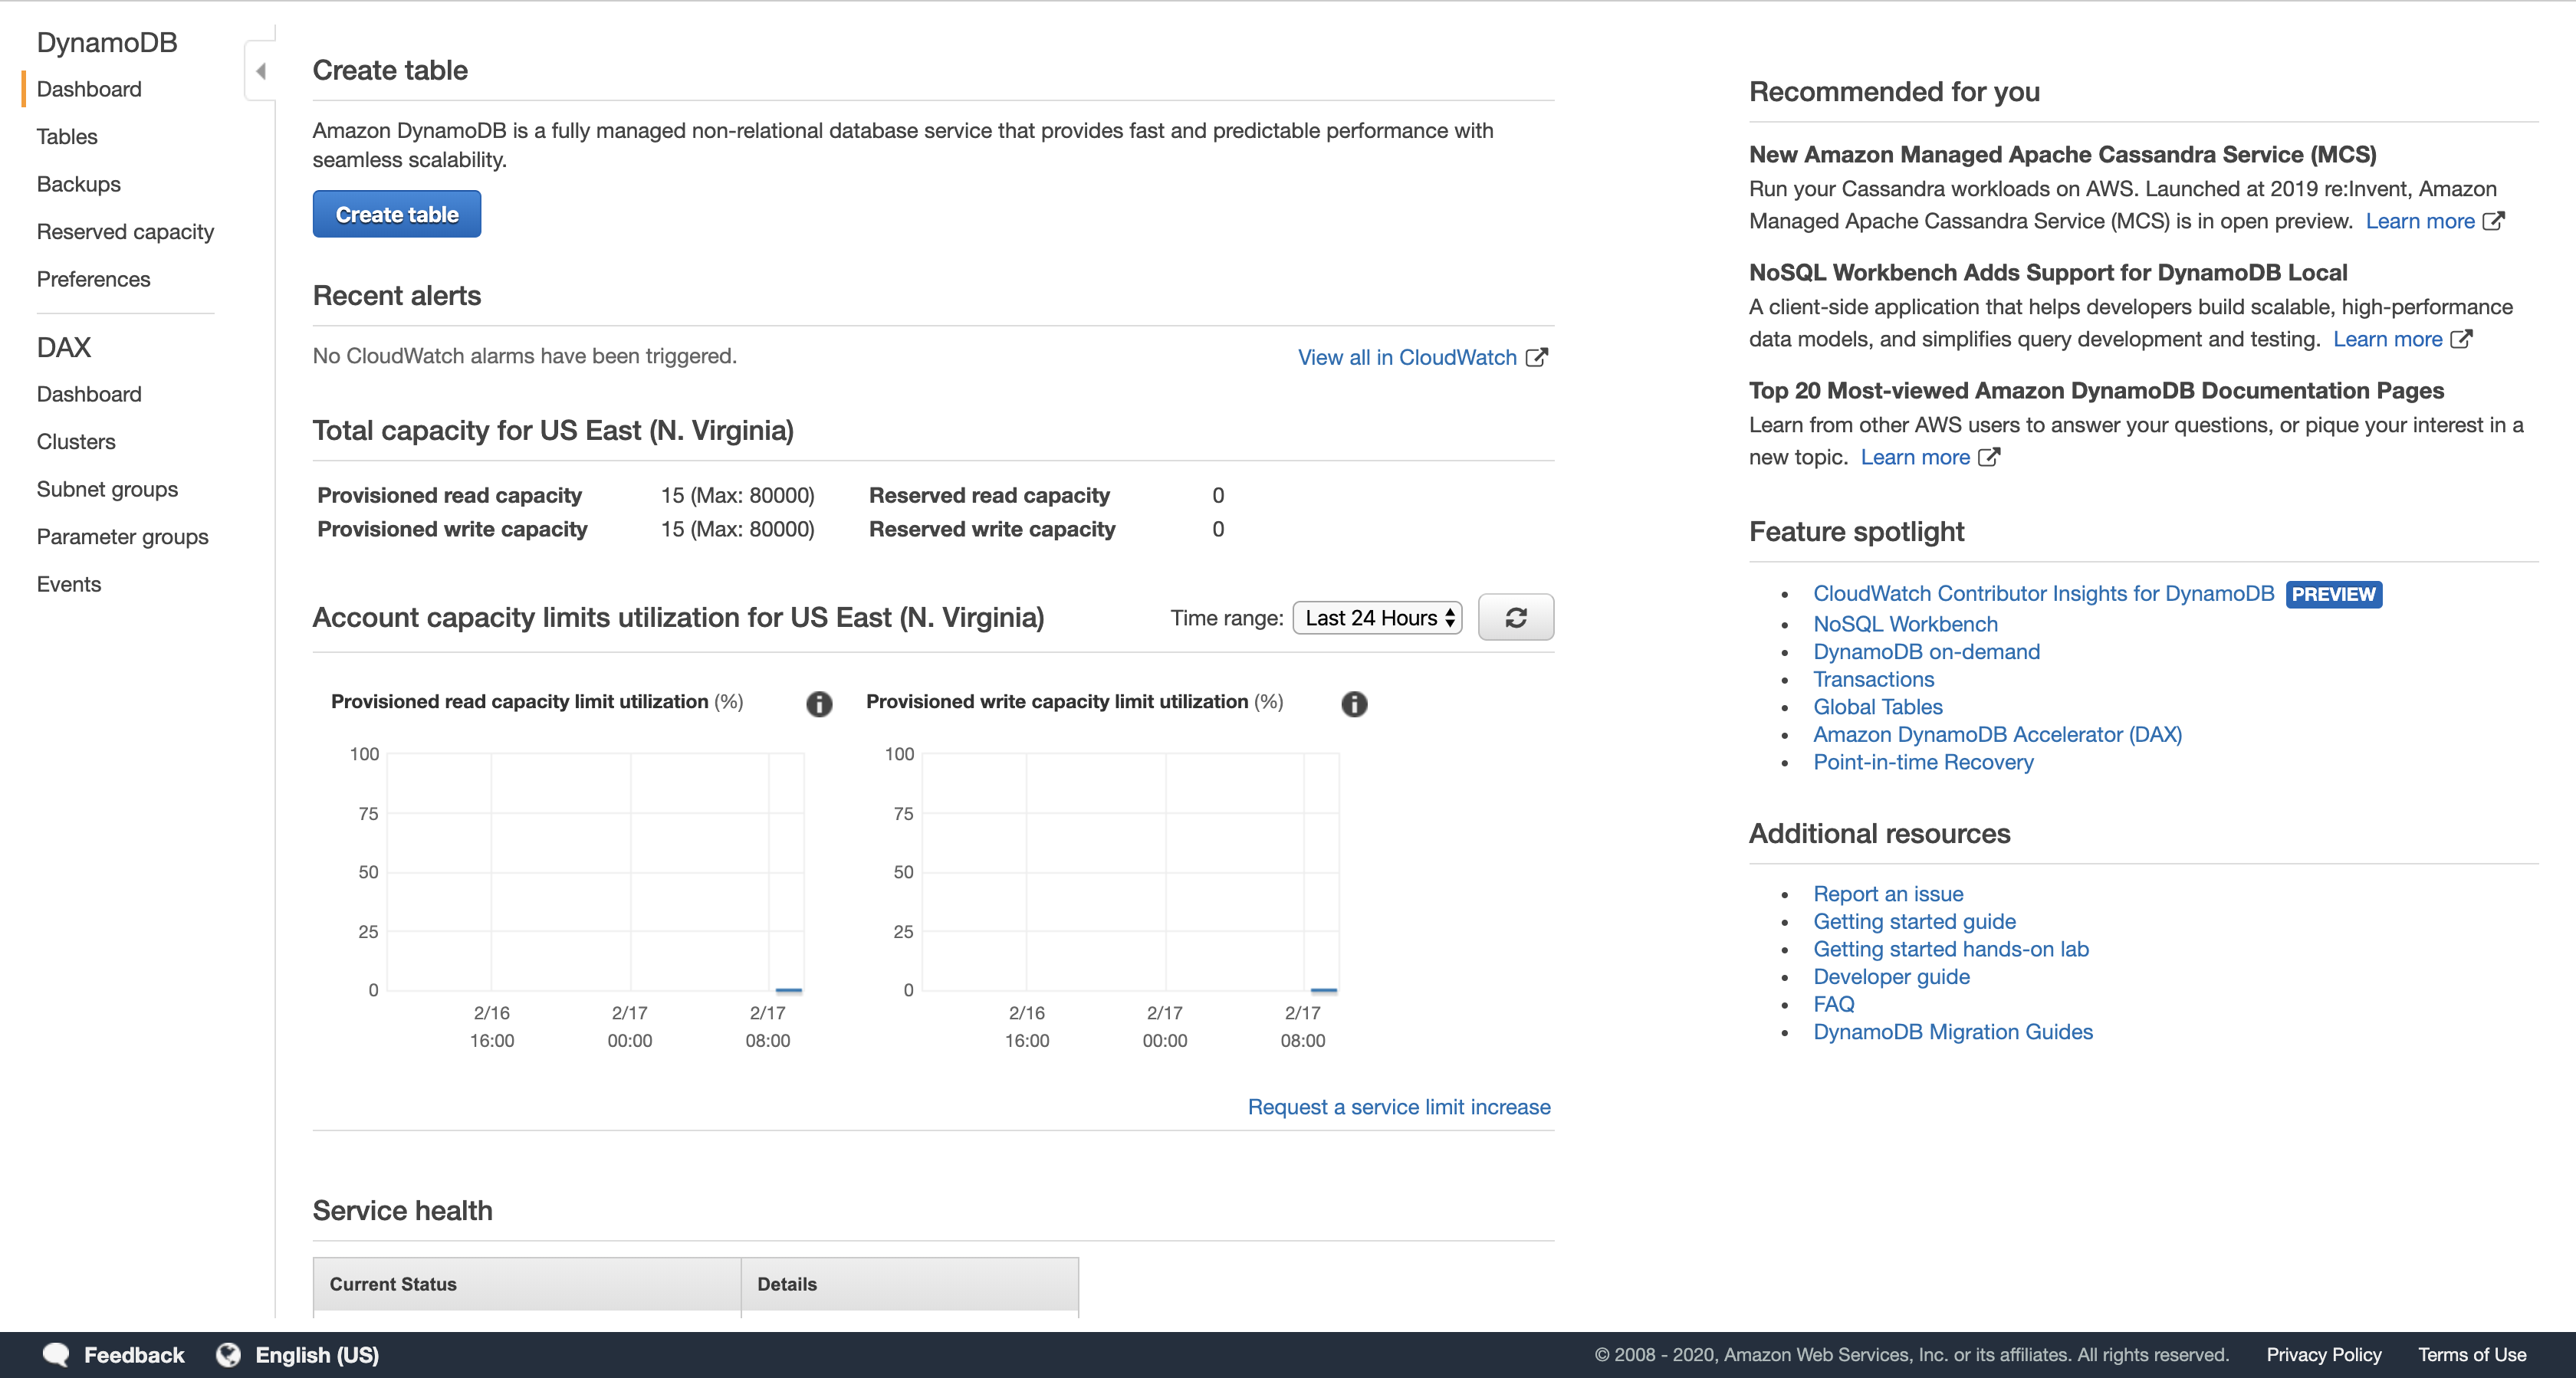
Services menu
click DynamoDB.
Navigation pane
click Tables.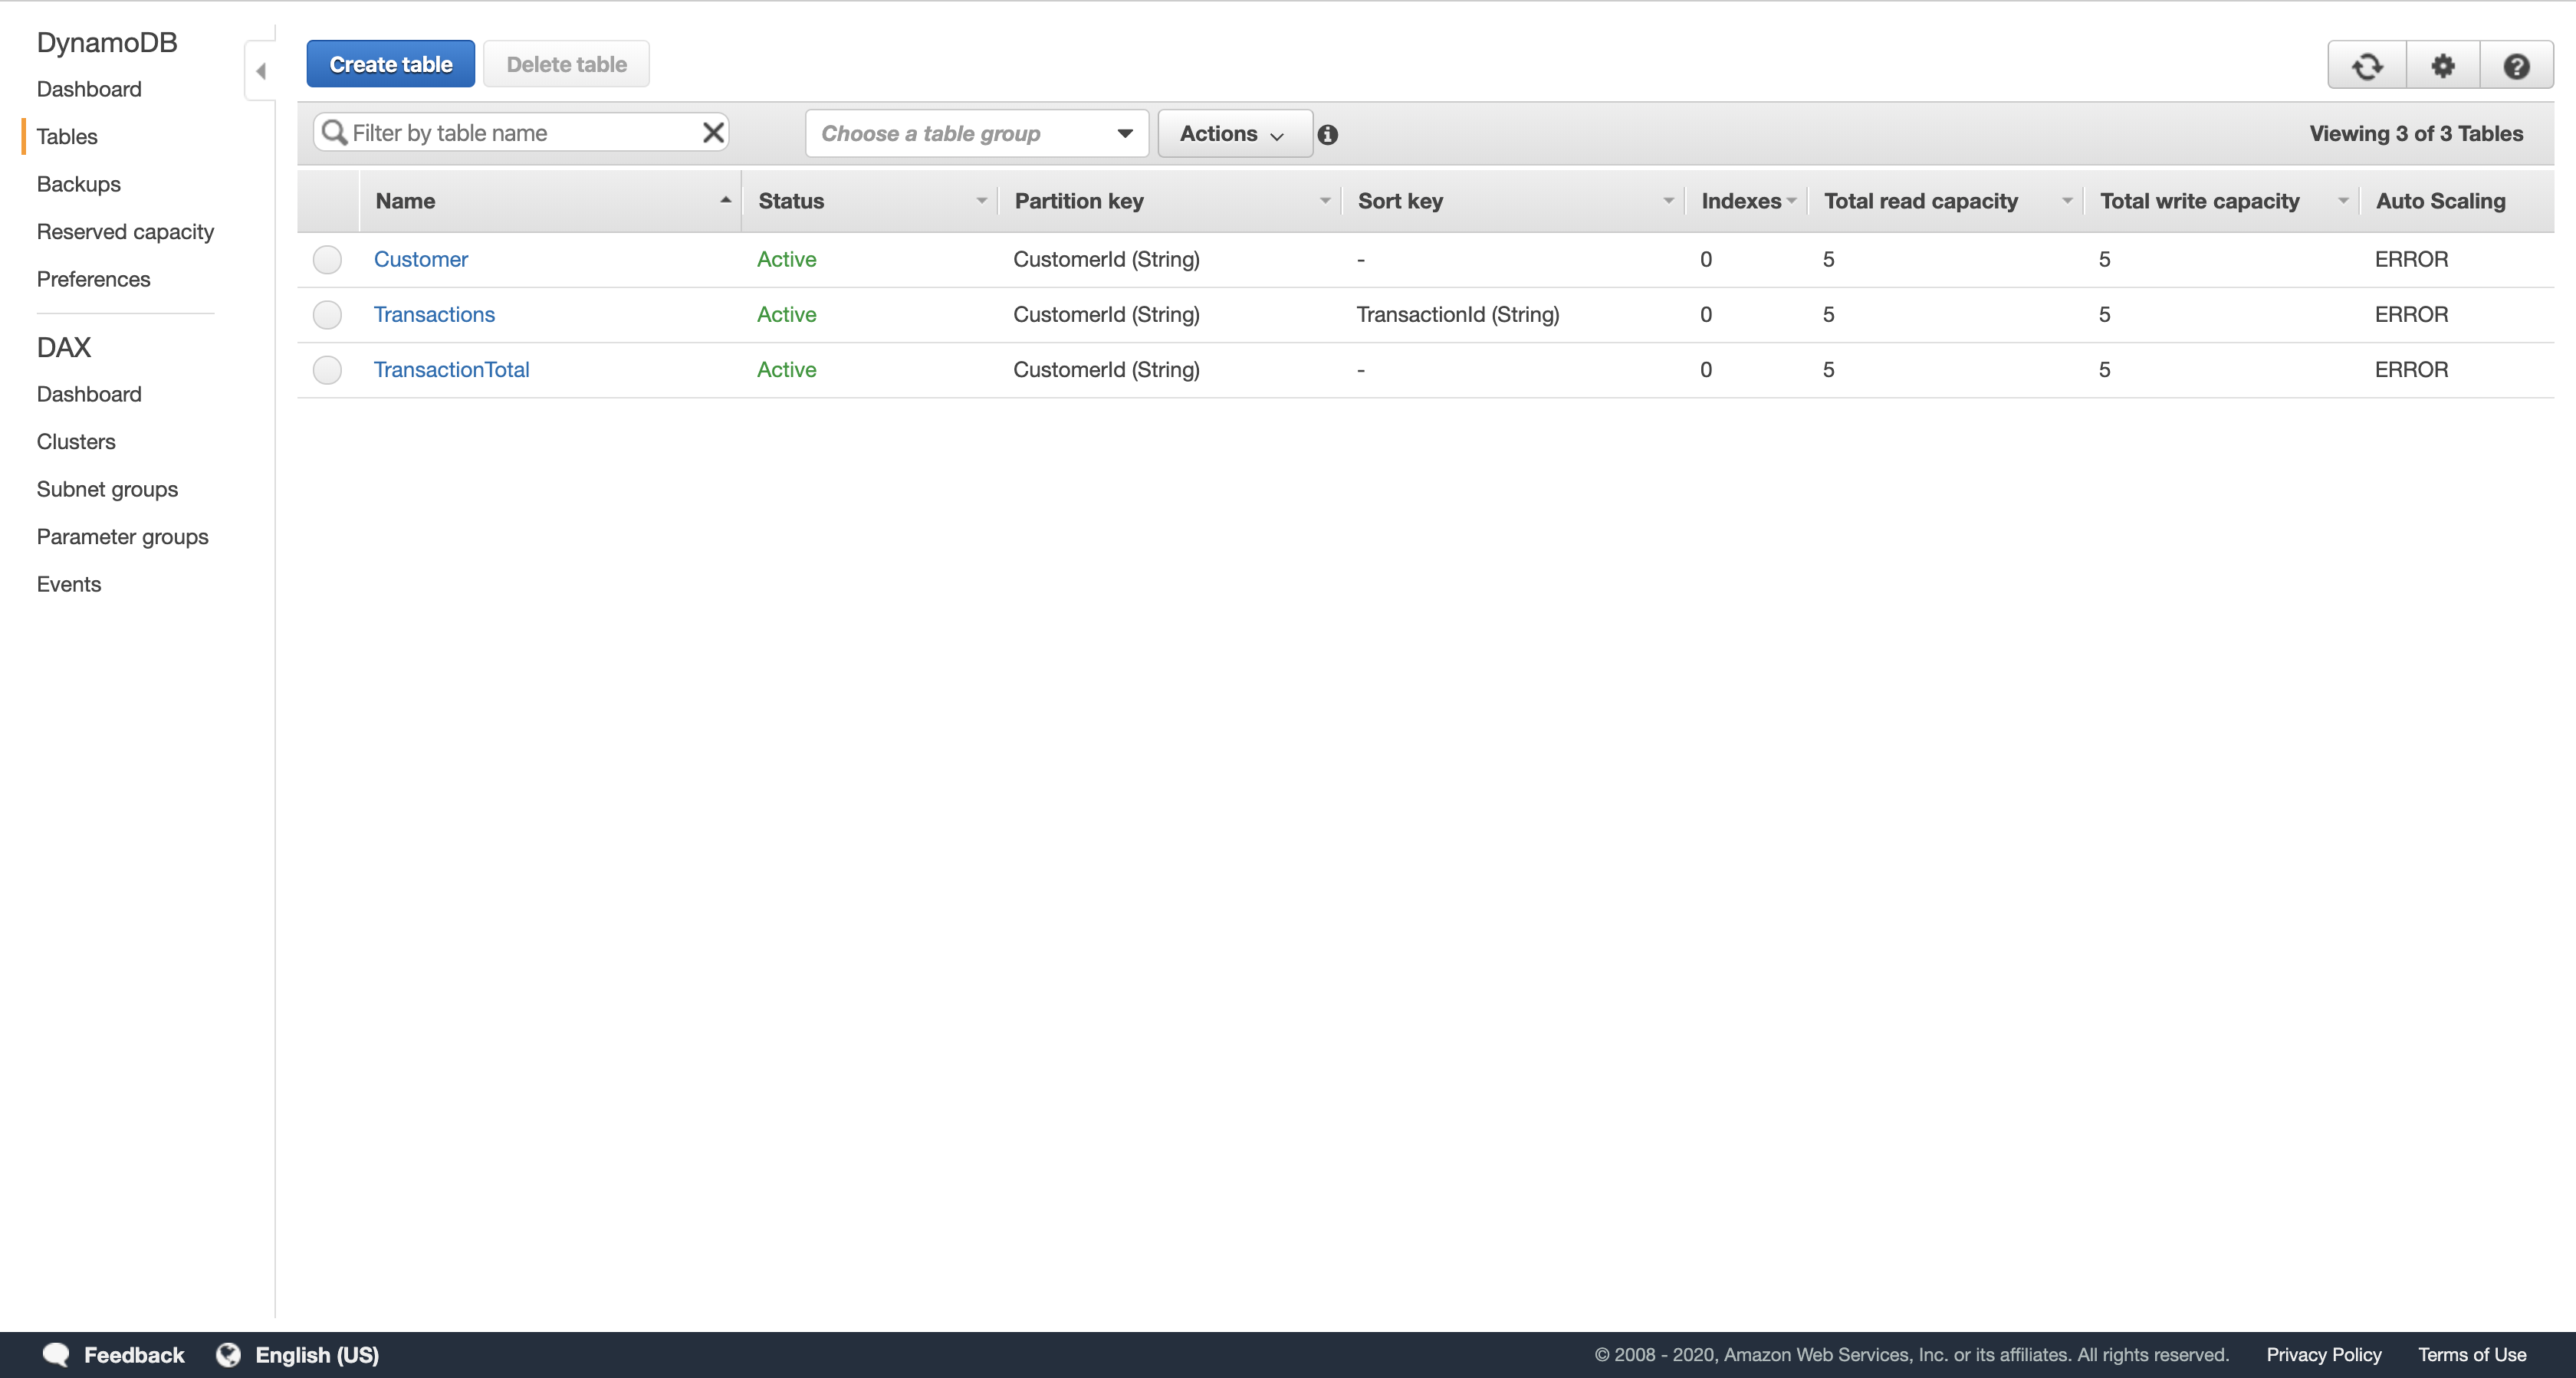
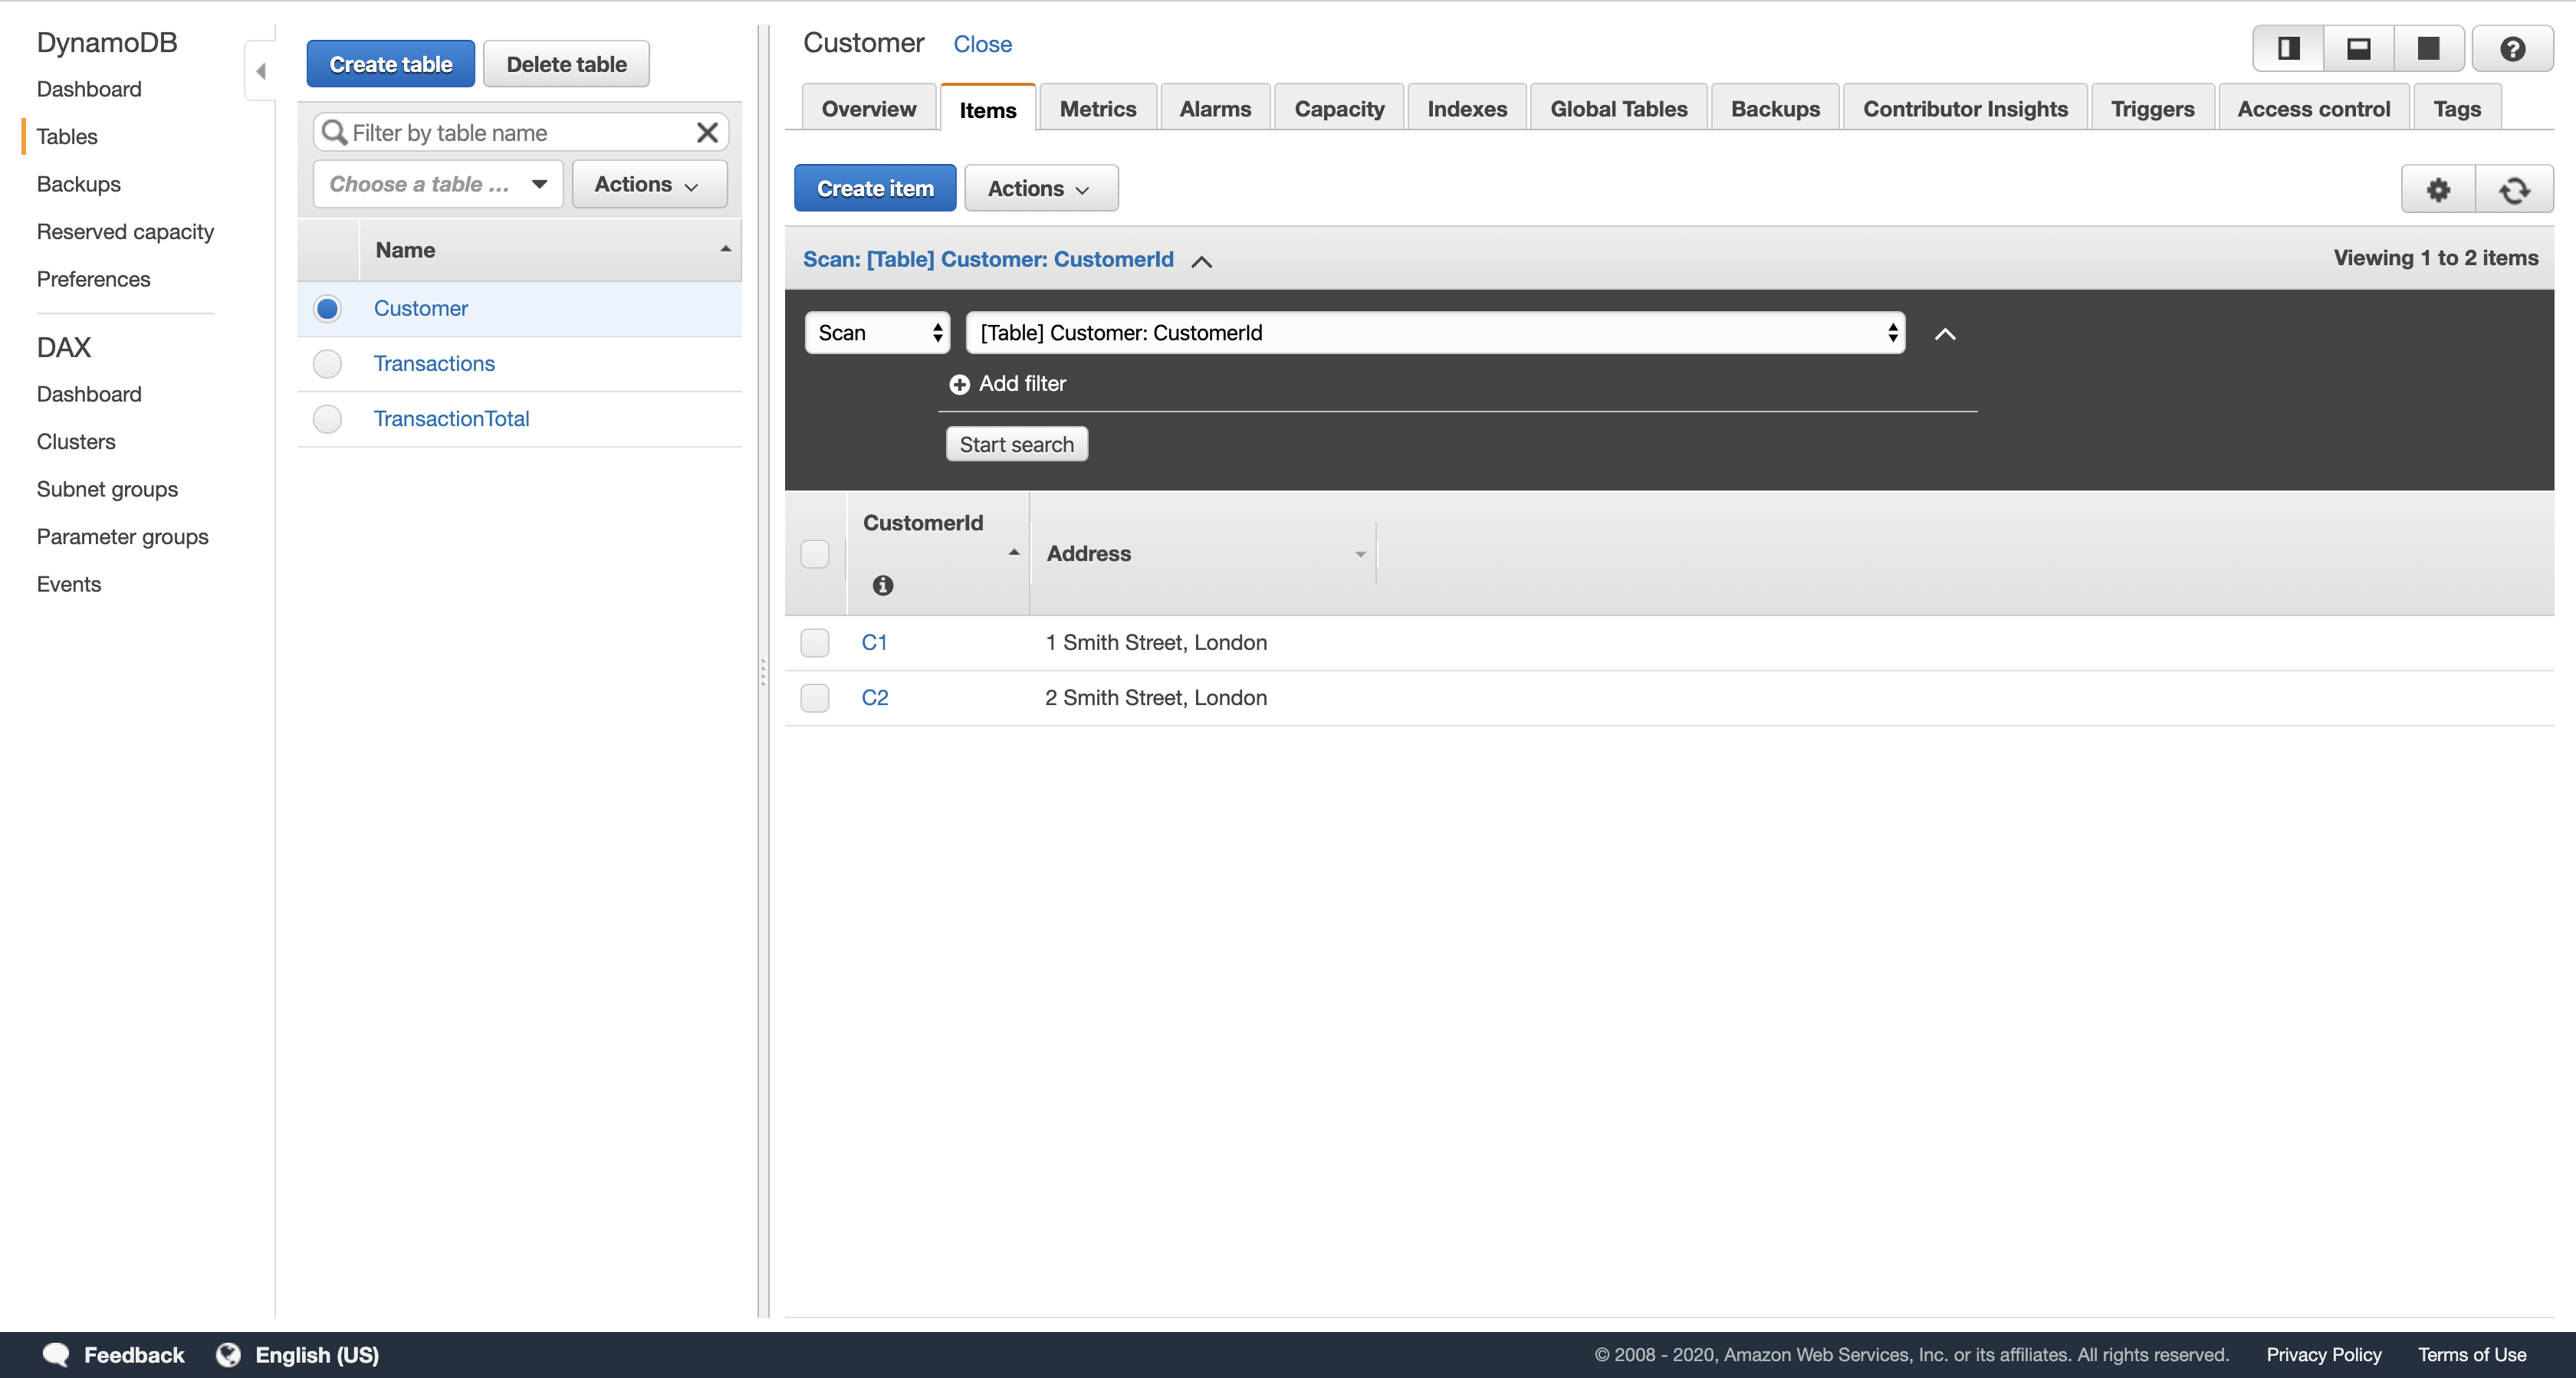
Click Customer.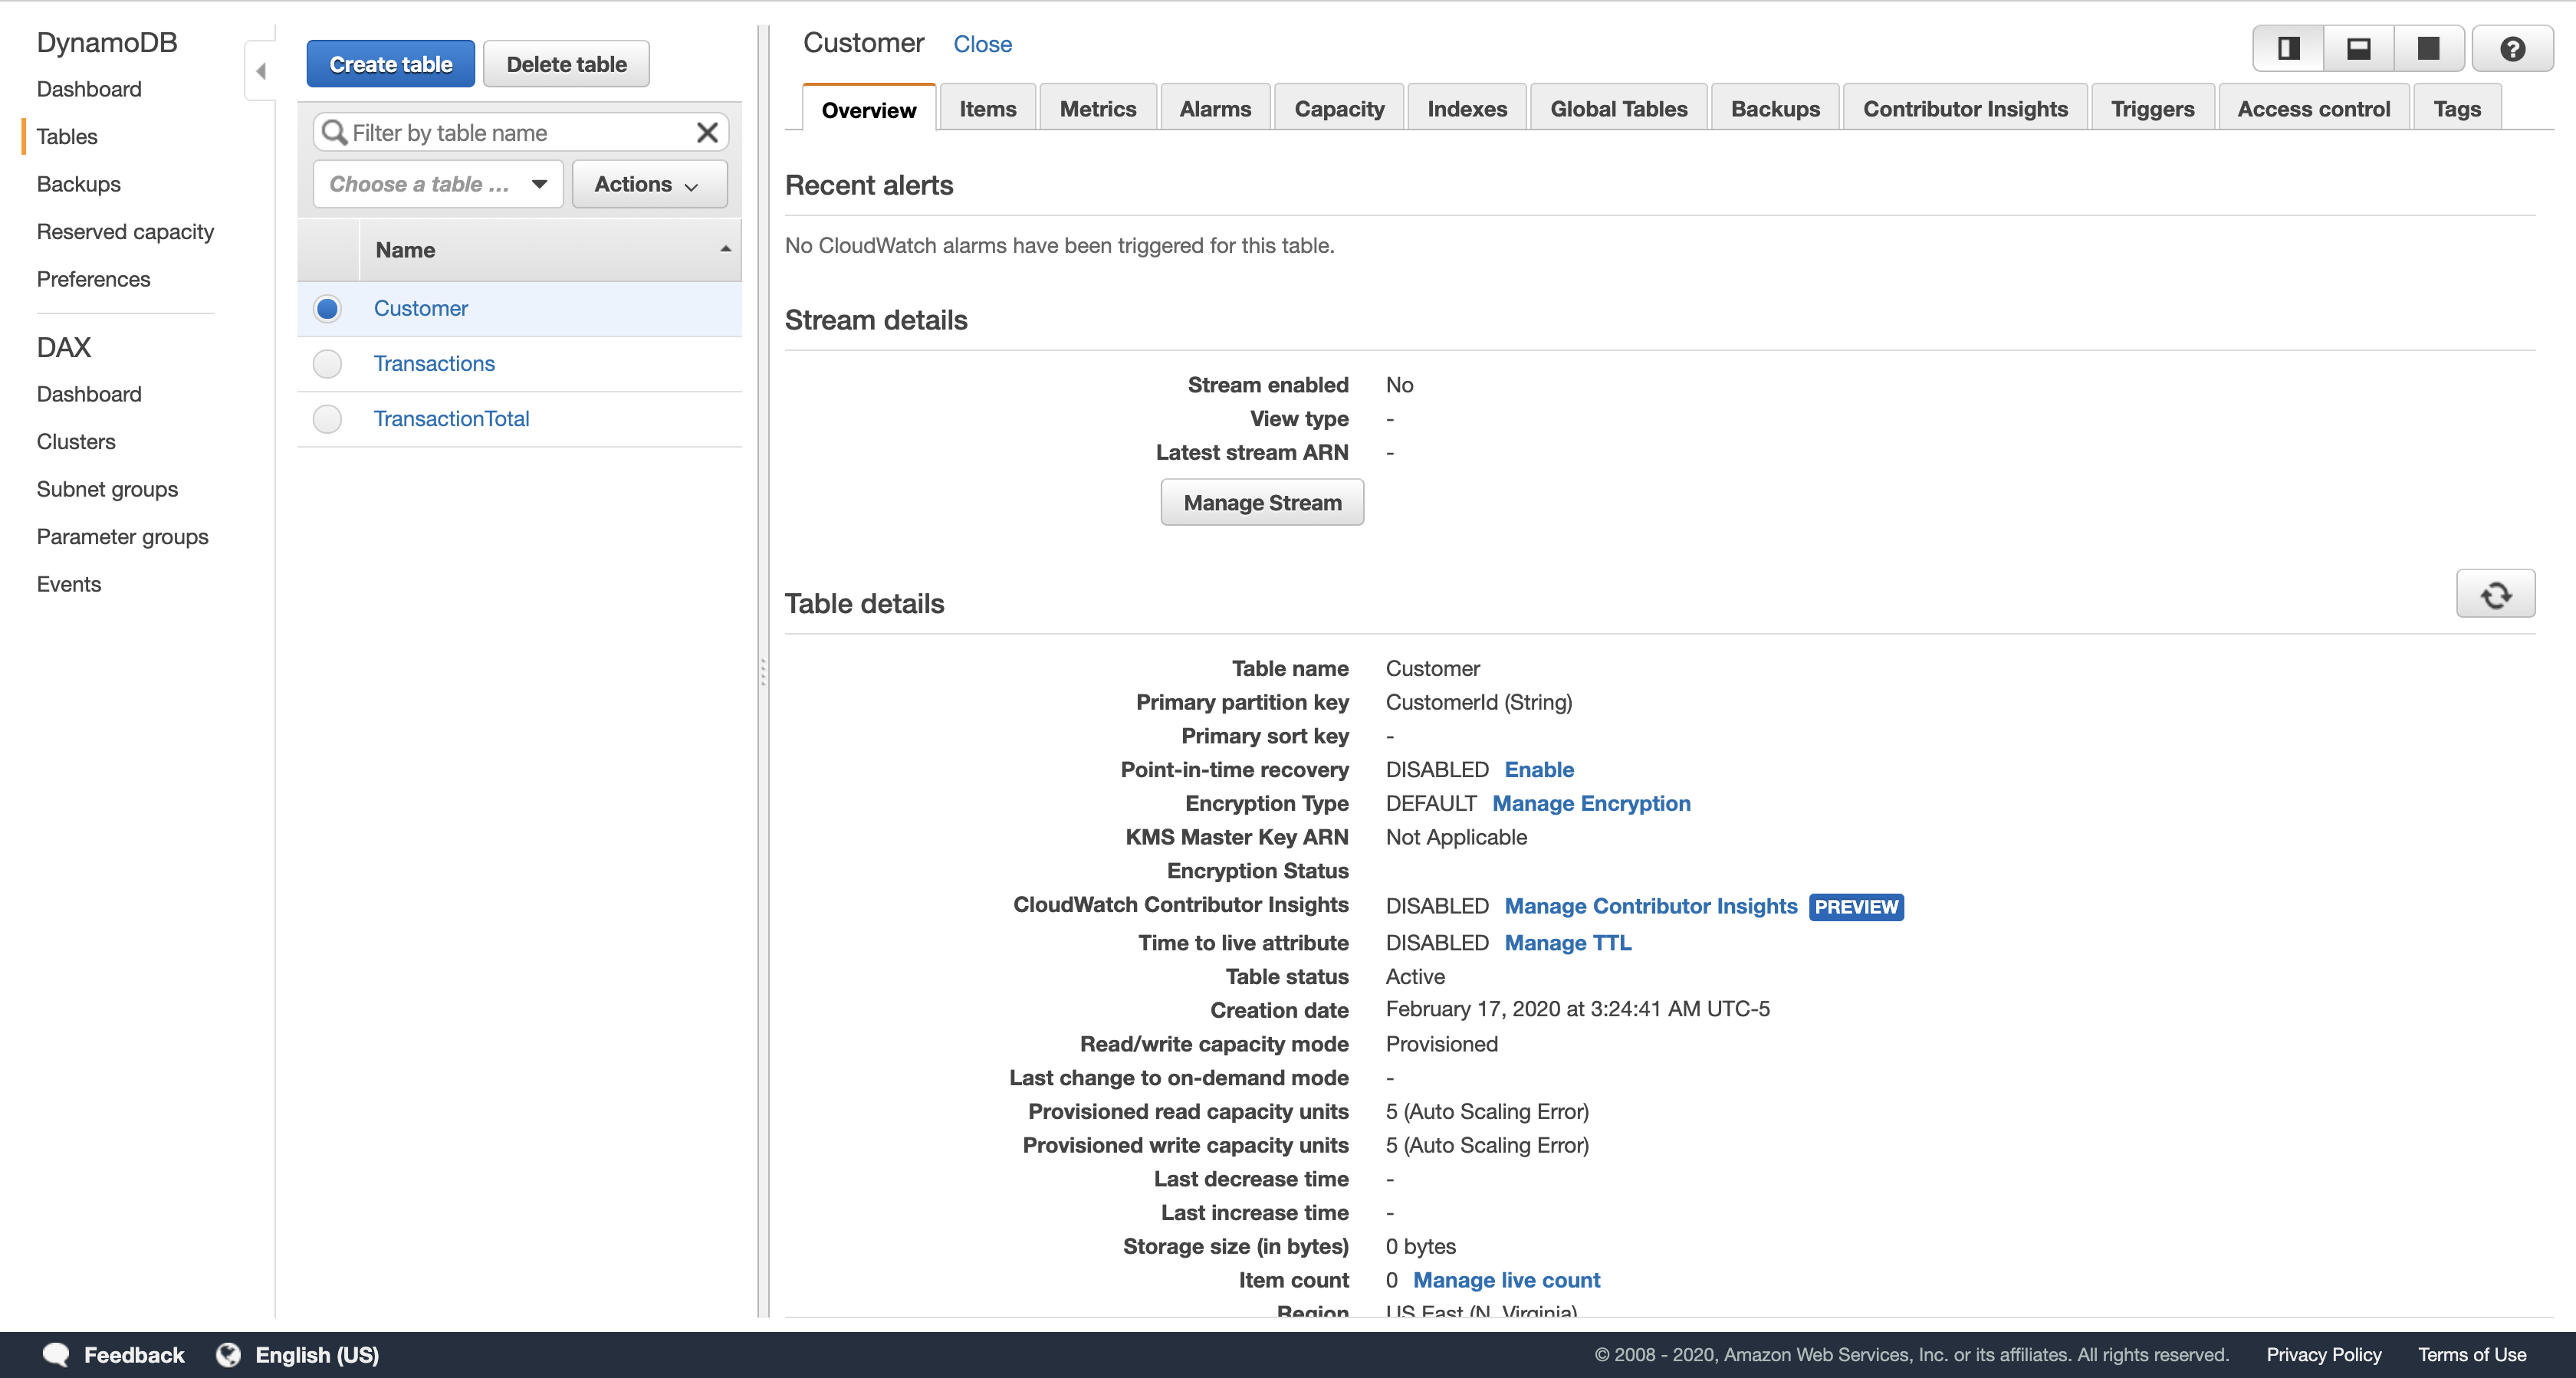
In the Items tab, verify that there are items with the customer id and address for two customers.
- If no data is visible, then your Lambda function either had a failure or was not triggered. Ask your instructor for assistance in diagnosing the configuration.
Navigation pane
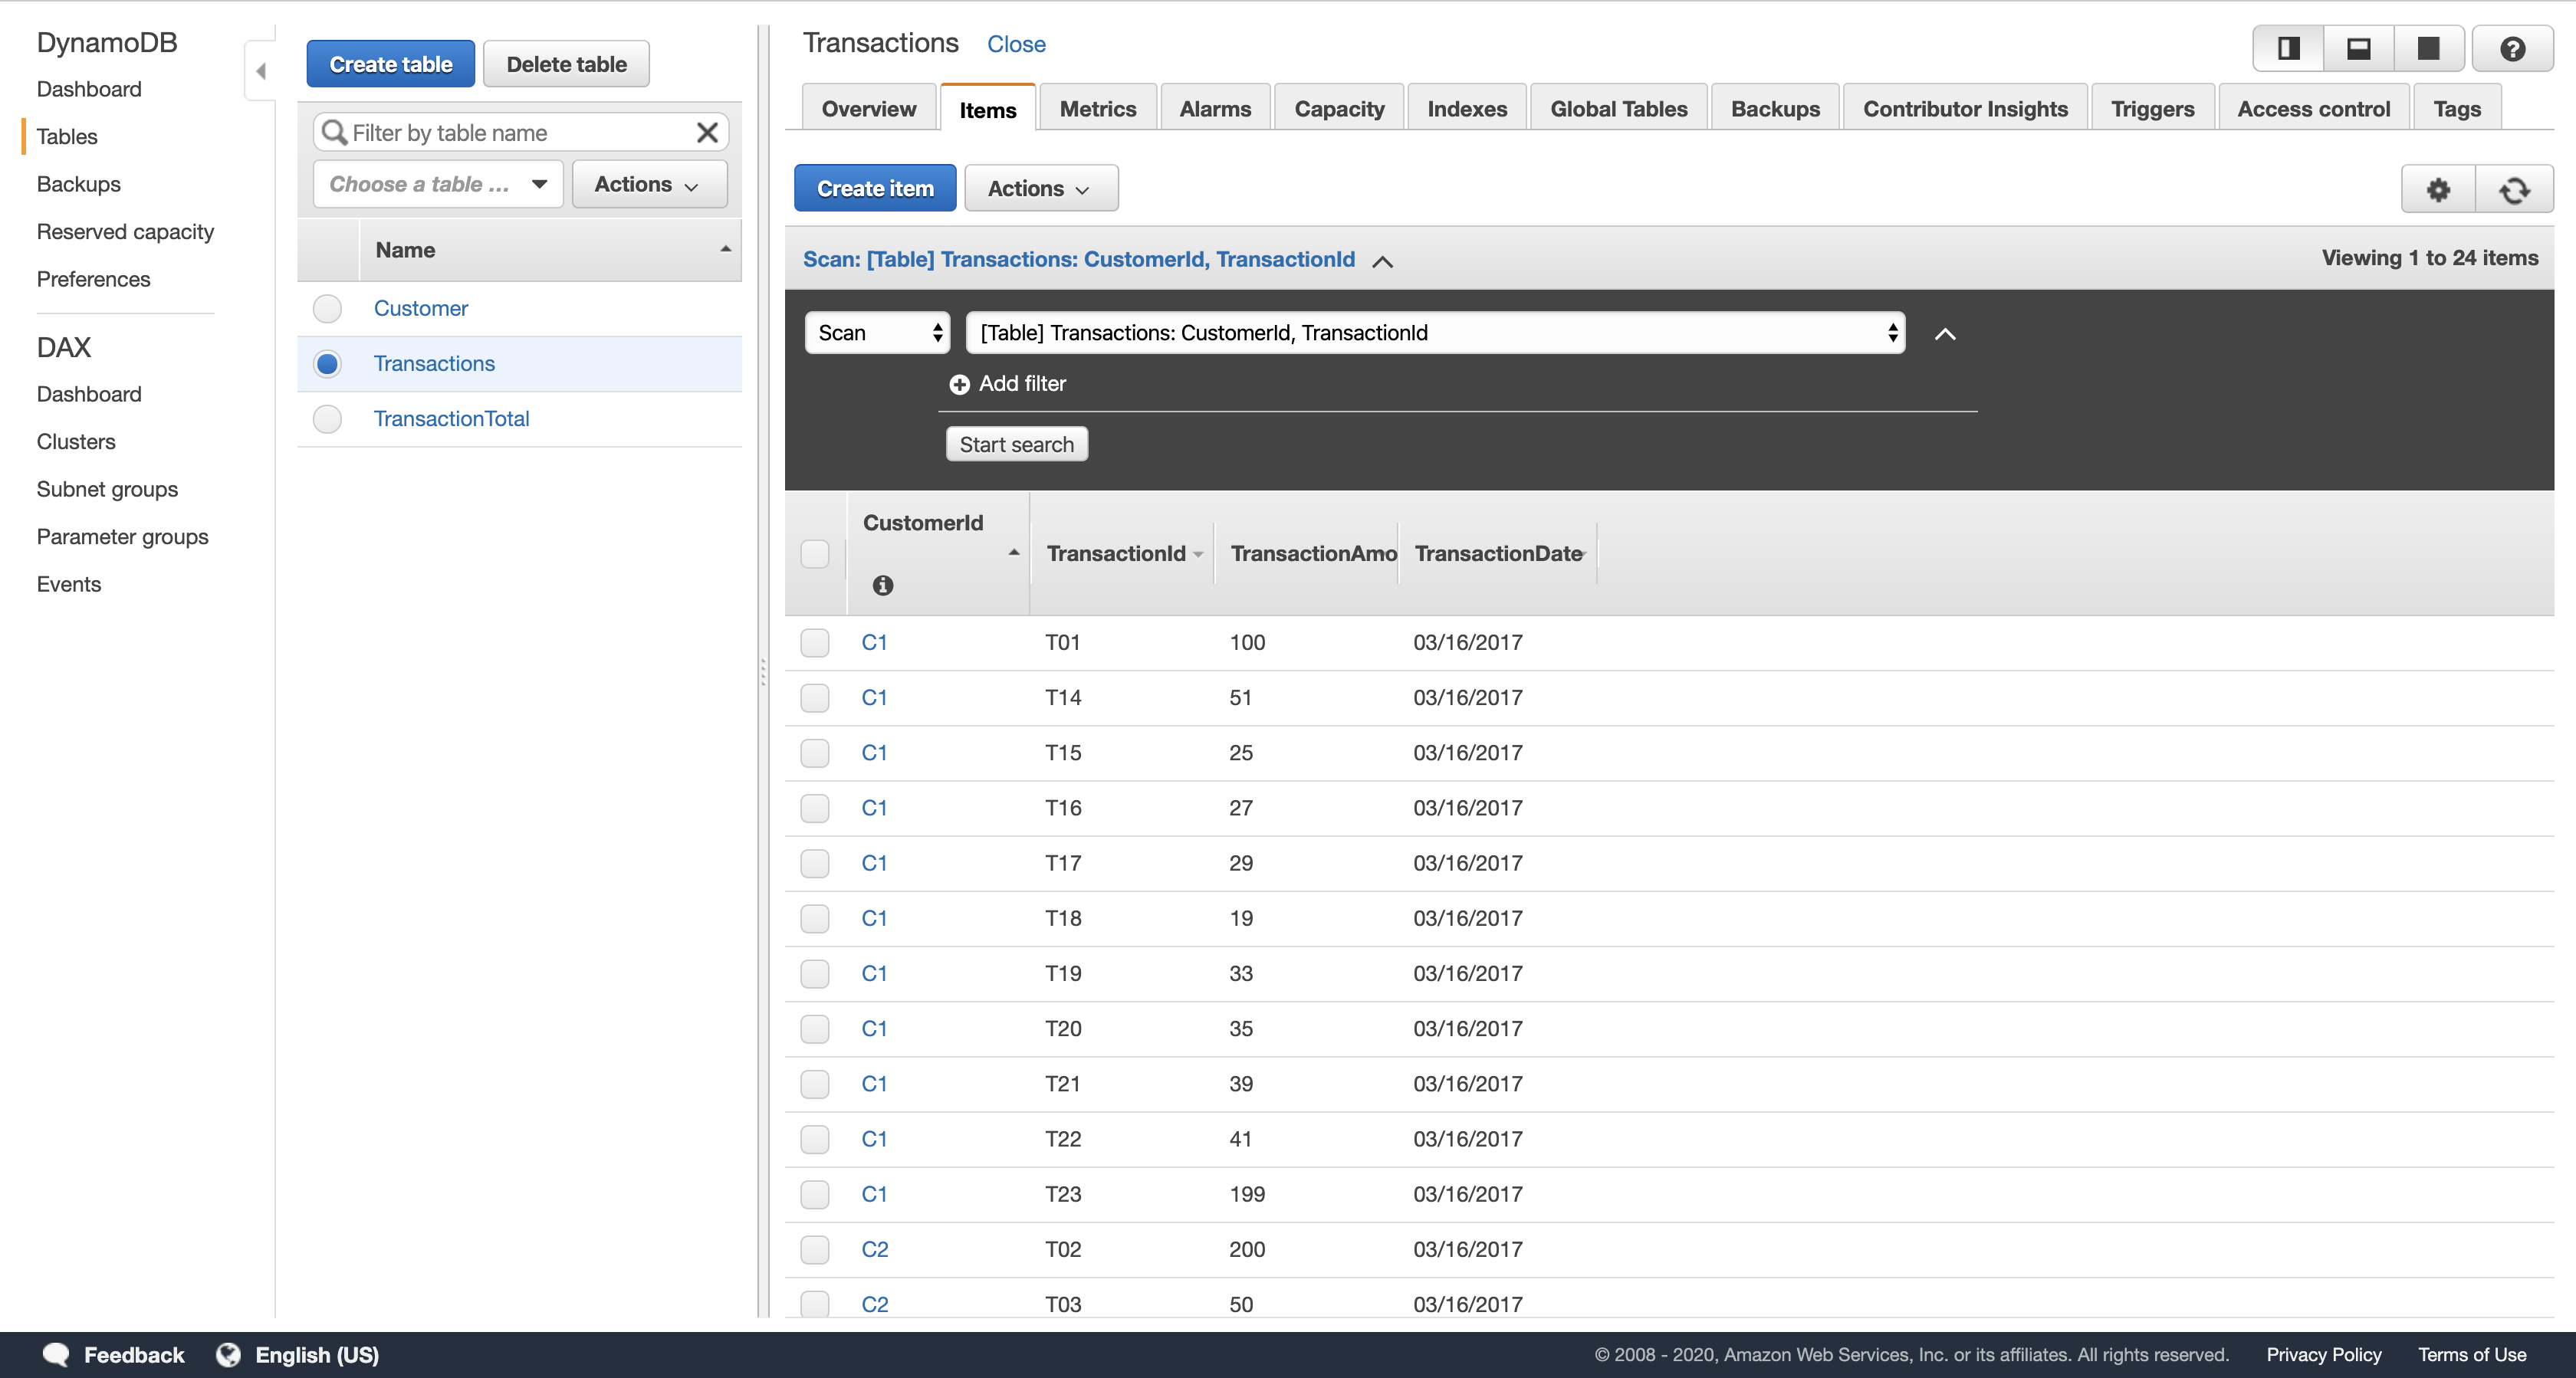
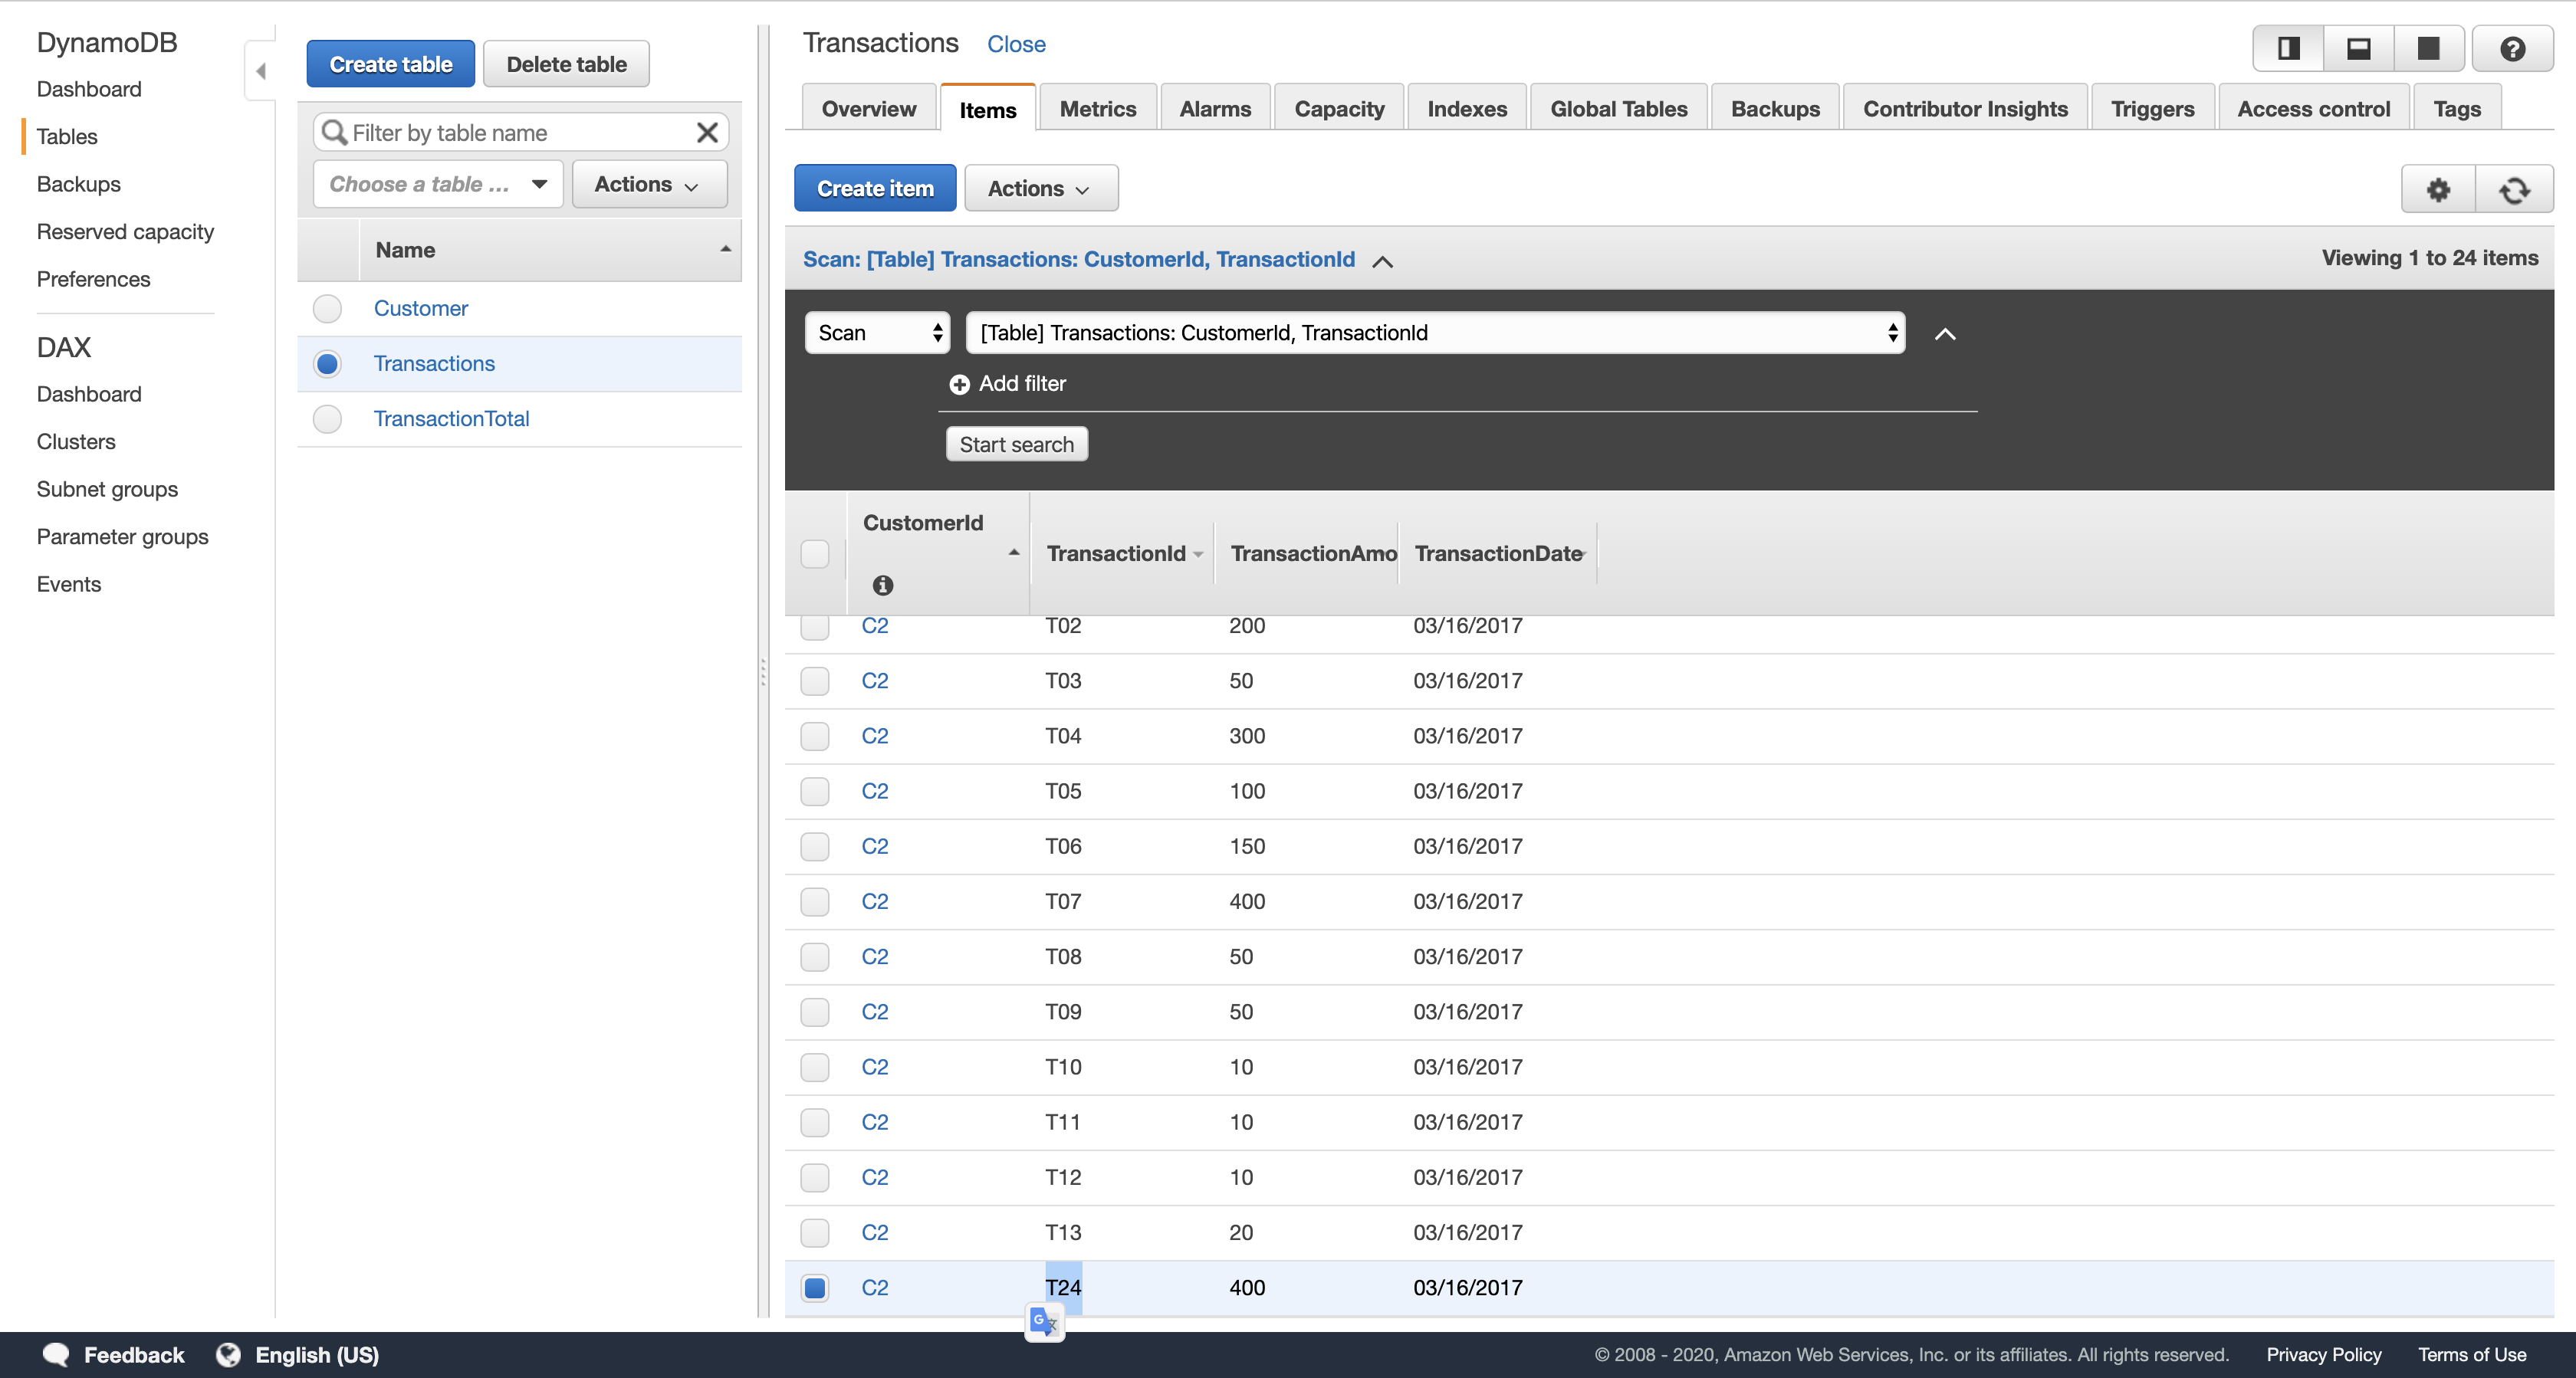
click Transactions.
- In the Items tab, verify that several transactions exist. You should see 24 items total in the list.
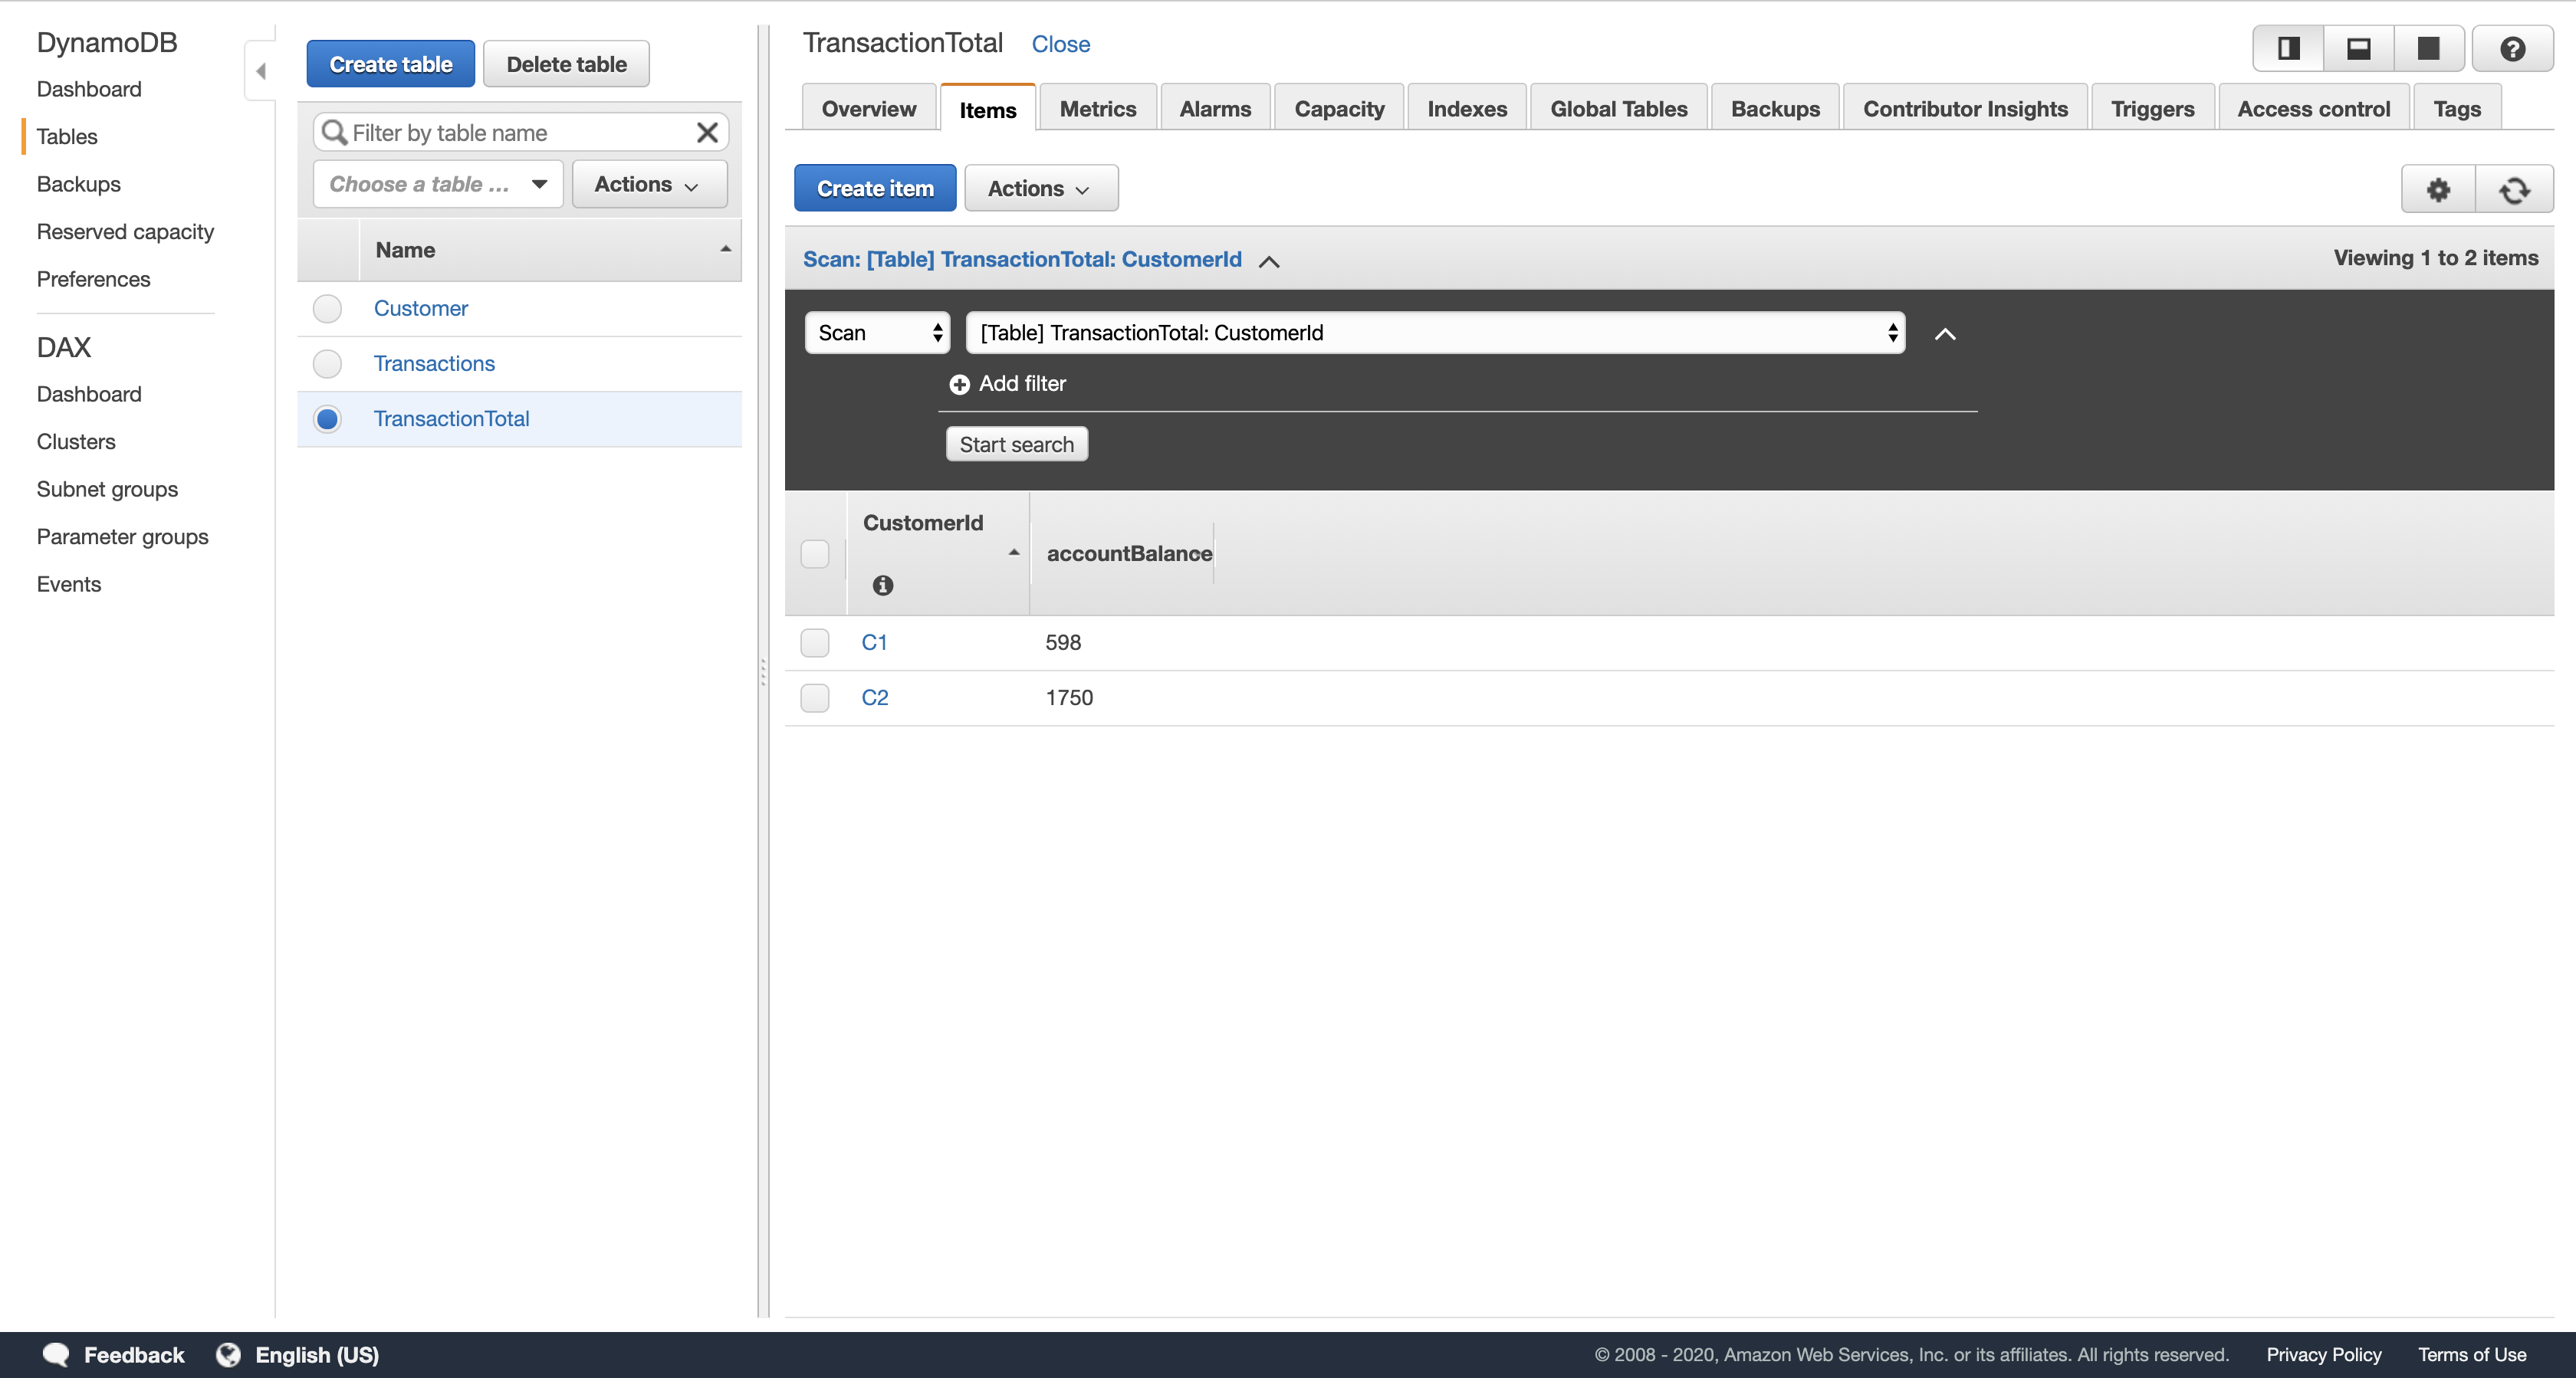
When information was added to the Transactions table, your second DynamoDB function would have been automatically triggered. This function calculates transaction totals for each account and stores the total in the TransactionTotal table. You can now check whether this process operated correctly.
Navigation pane
click TransactionTotal.
- In the Items tab, verify that there are items with the customer id and account balance for two customers. Note that the account balance for customer C2 is above $1500.
- If no data is visible, then your second Lambda function either had a failure or was not triggered. Ask your instructor for assistance in diagnosing the configuration.
Task 5.3: Check your SQS Queues
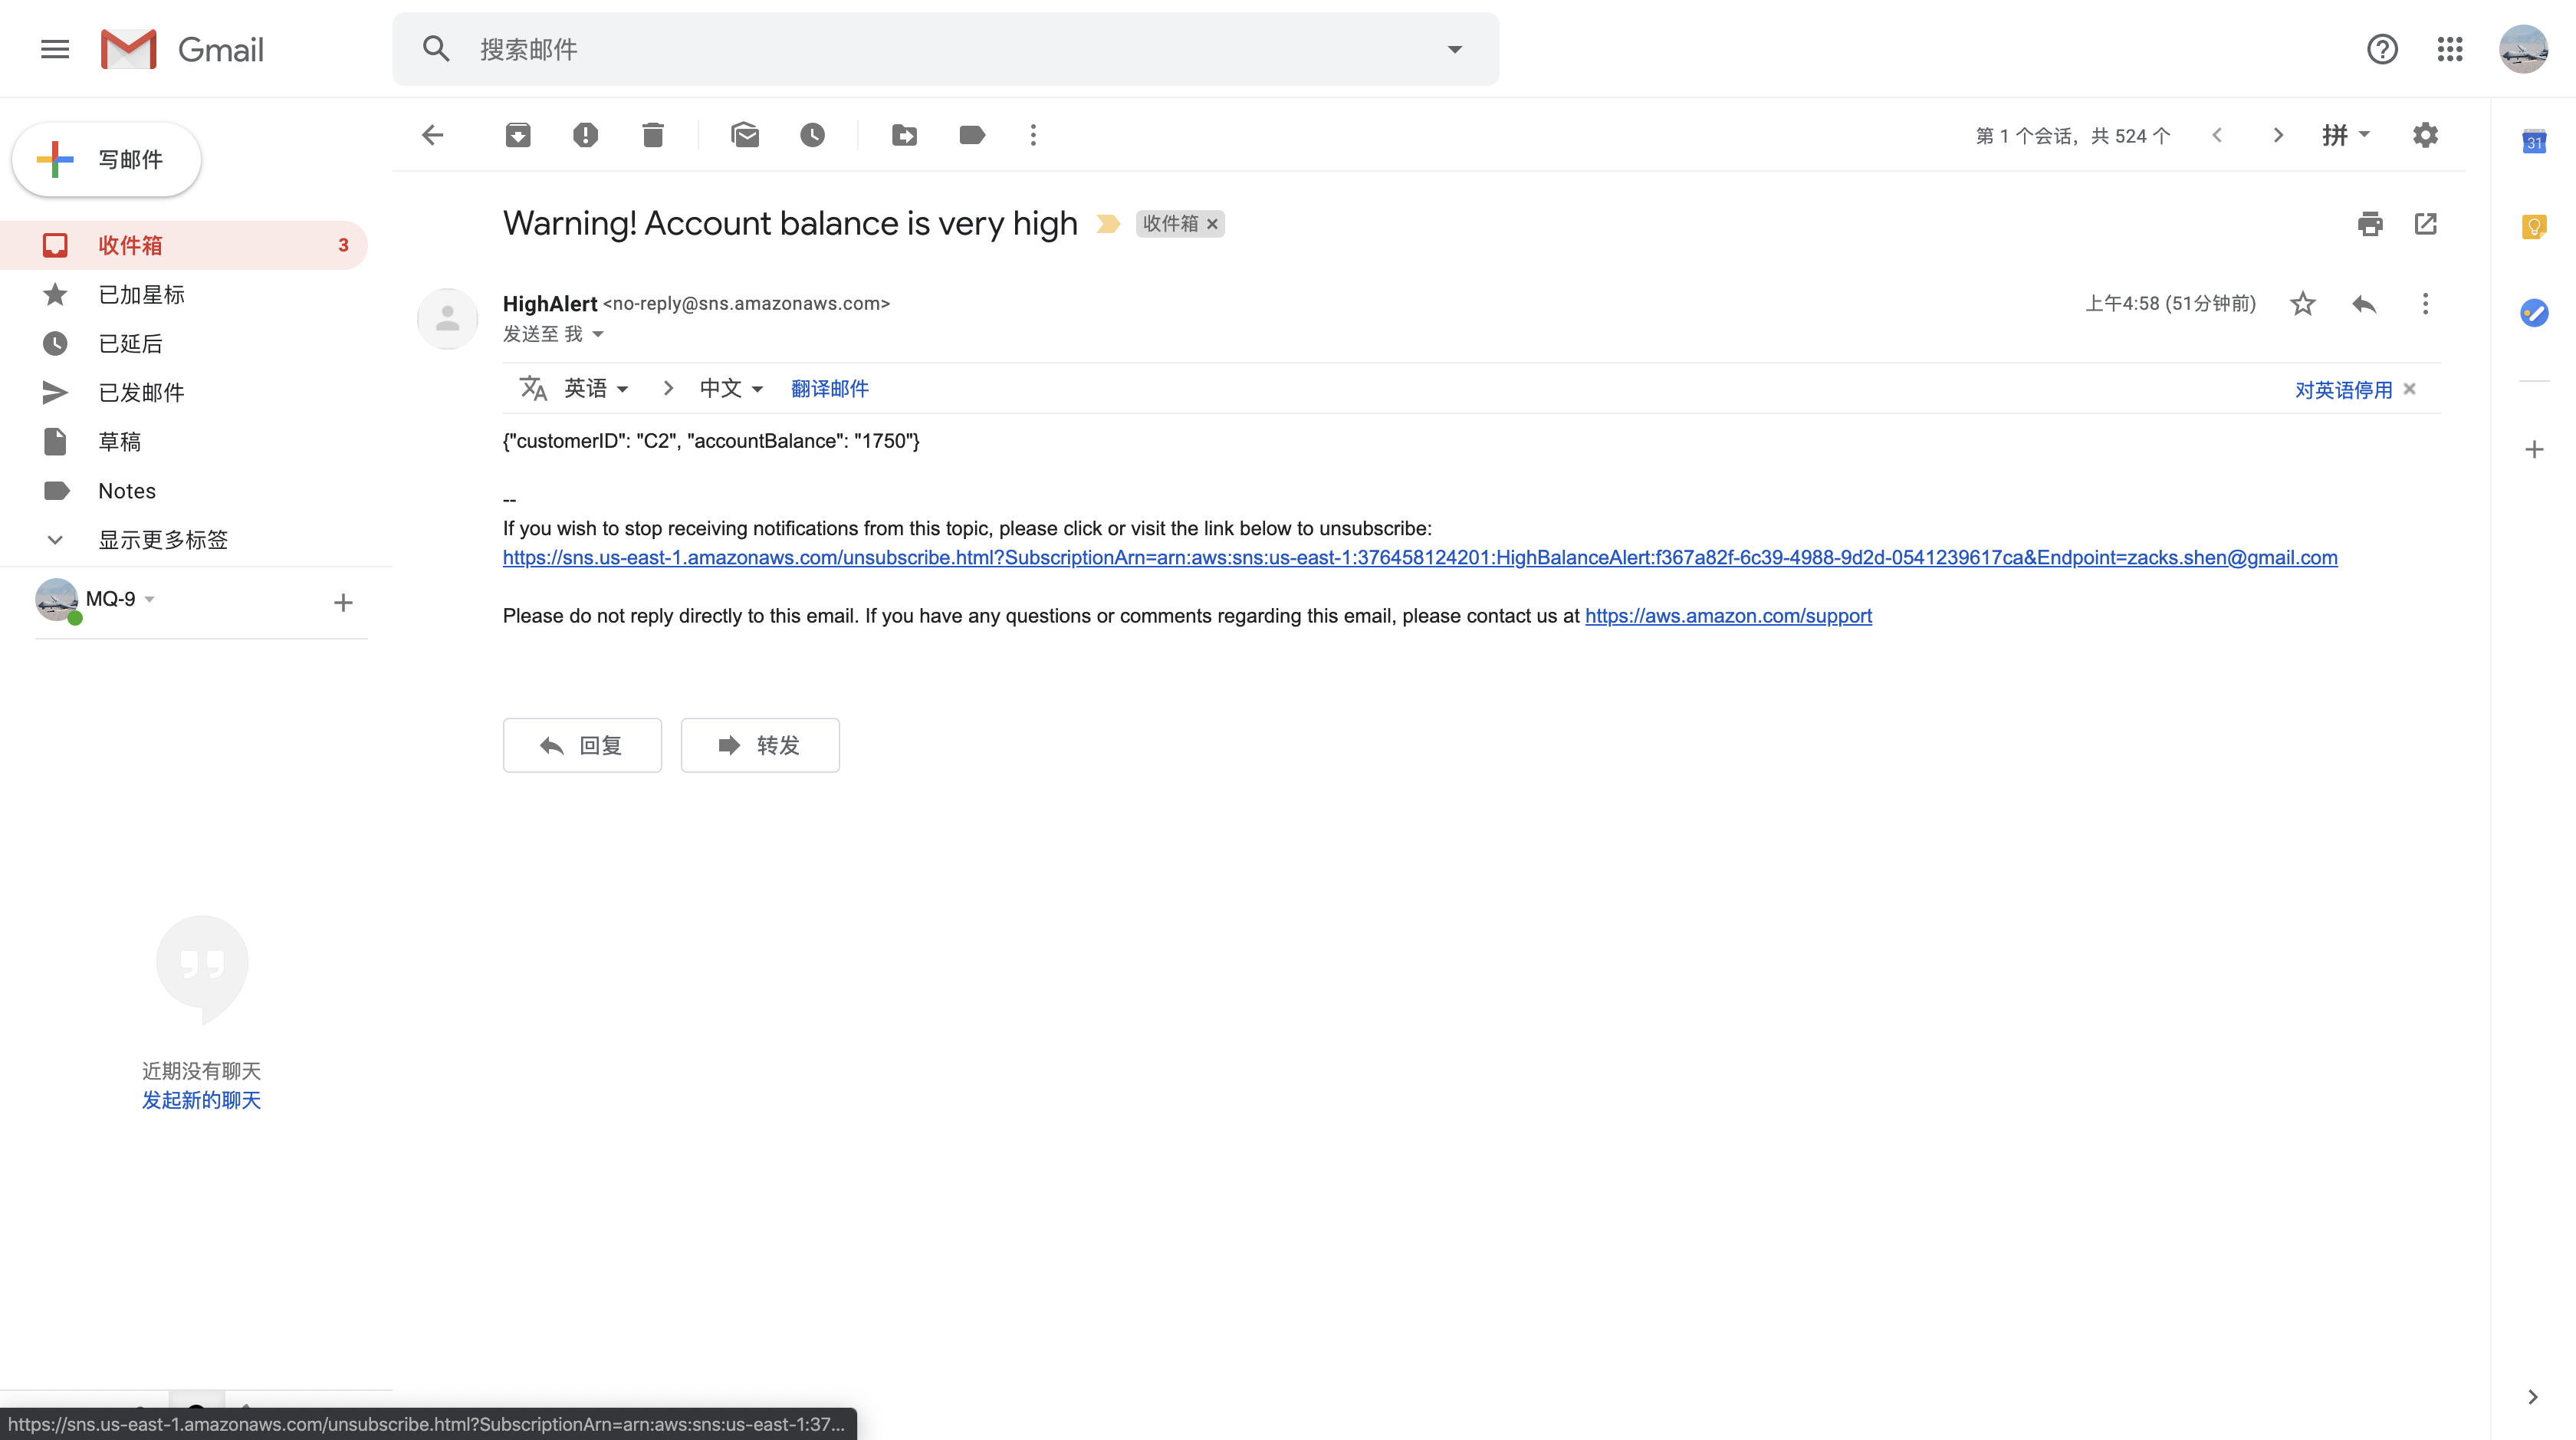
By now you should have received a new email from HighAlert that includes an alert about customer C2’s high account balance. That same message was also sent to your two Simple Queue Service queues, ready to be picked up by another process.
Note: It may take several minutes.
If you provided a phone number, you should have also received an SMS notification. These are examples of the many ways that Amazon Simple Notification Service can send notifications to people and systems.
Services menu
click Simple Queue Service.
- If the Lambda function worked correctly, both queues should show one message in the Messages Available column. If no messages are available, ask your instructor for assistance in diagnosing the configuration.
Select CreditCollection.
Click Queue Actions, and then click View/Delete Messages.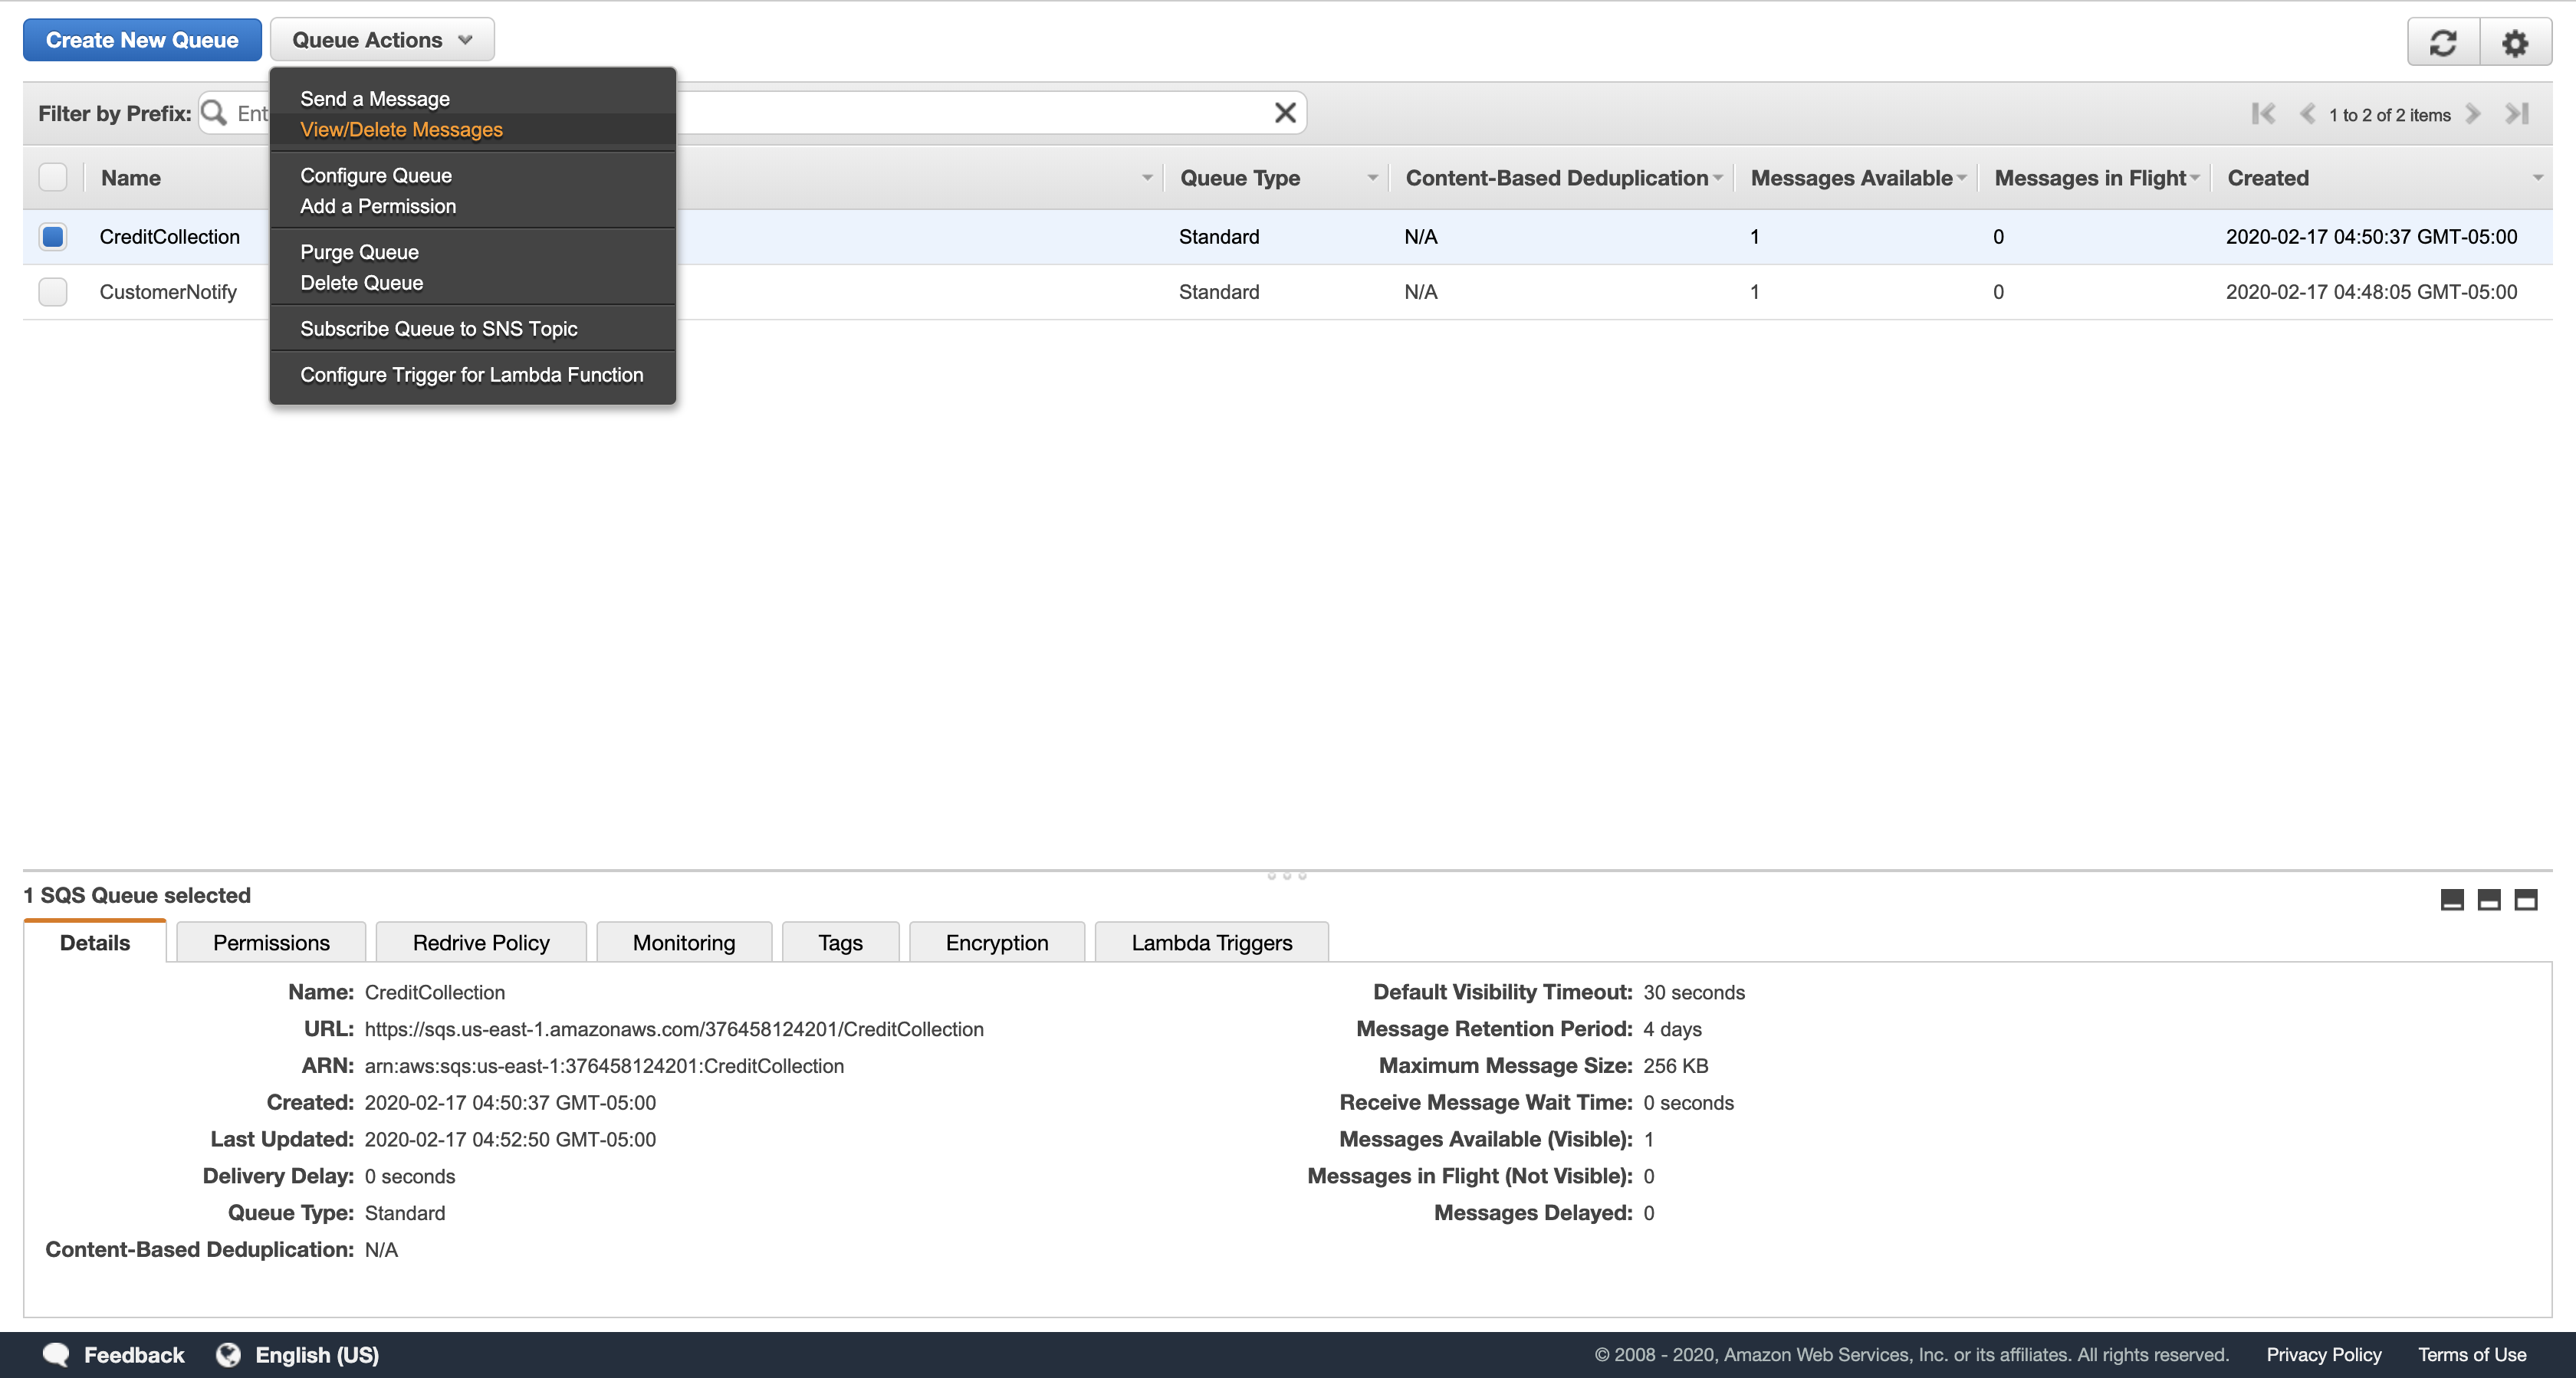
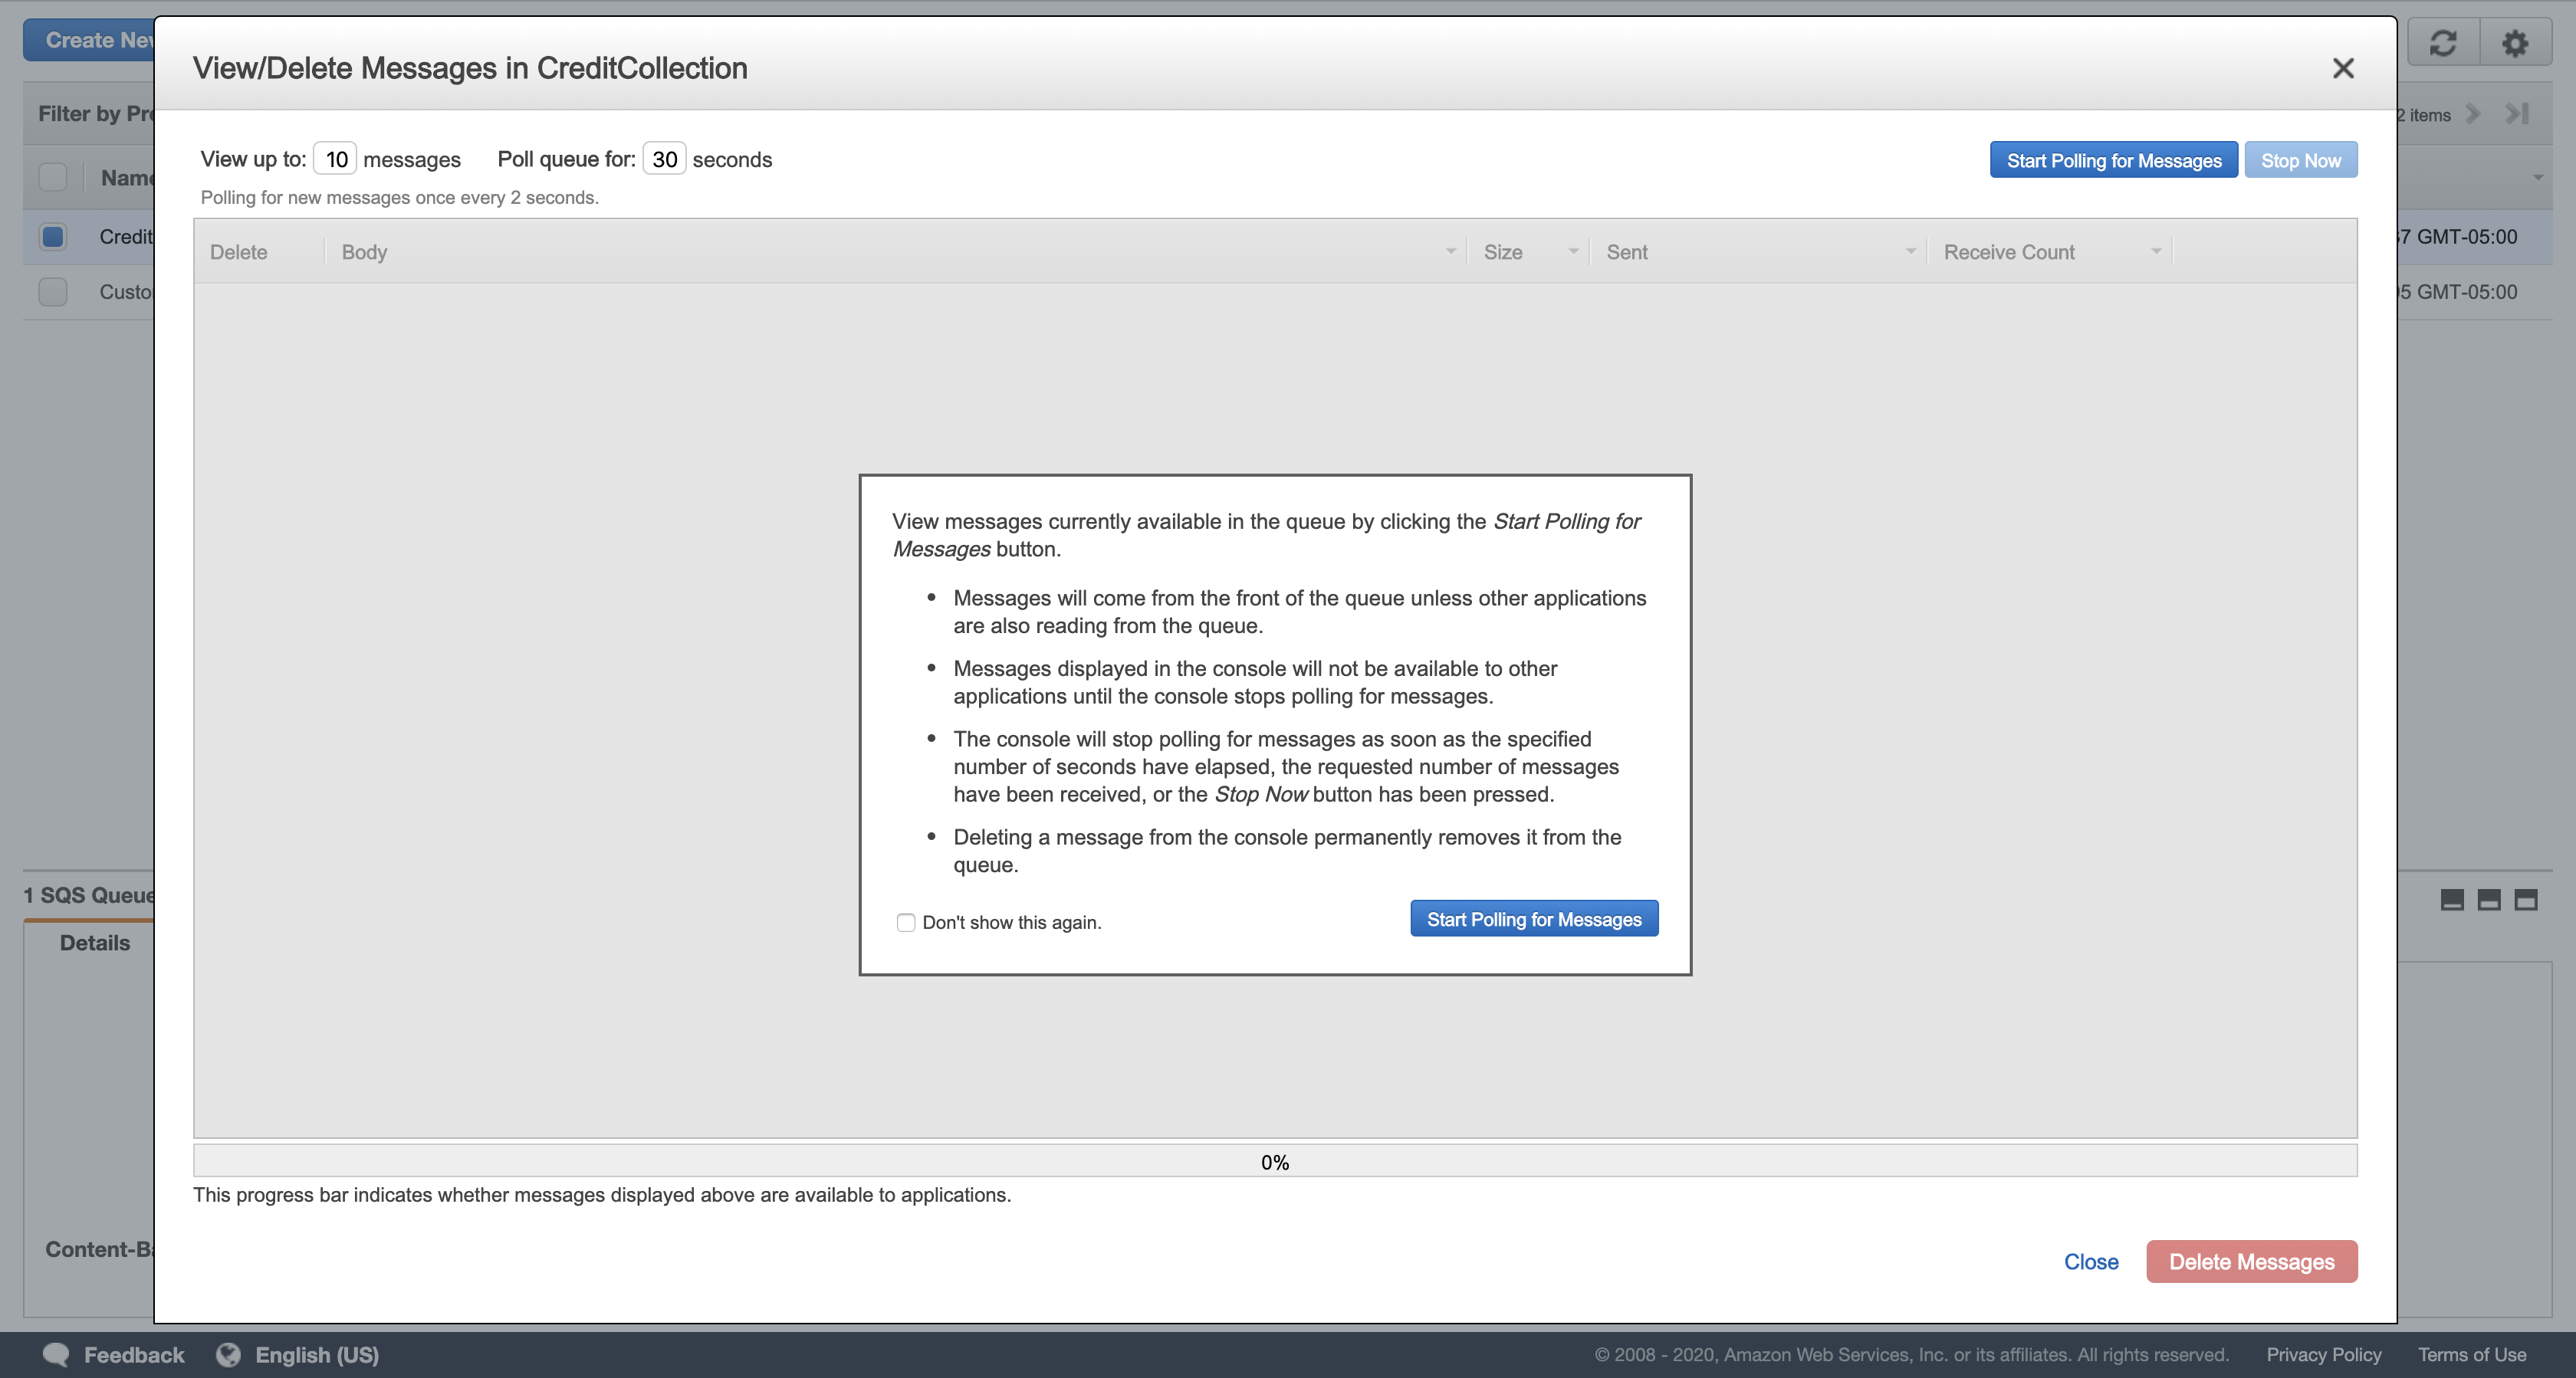
Click Start Polling for Messages.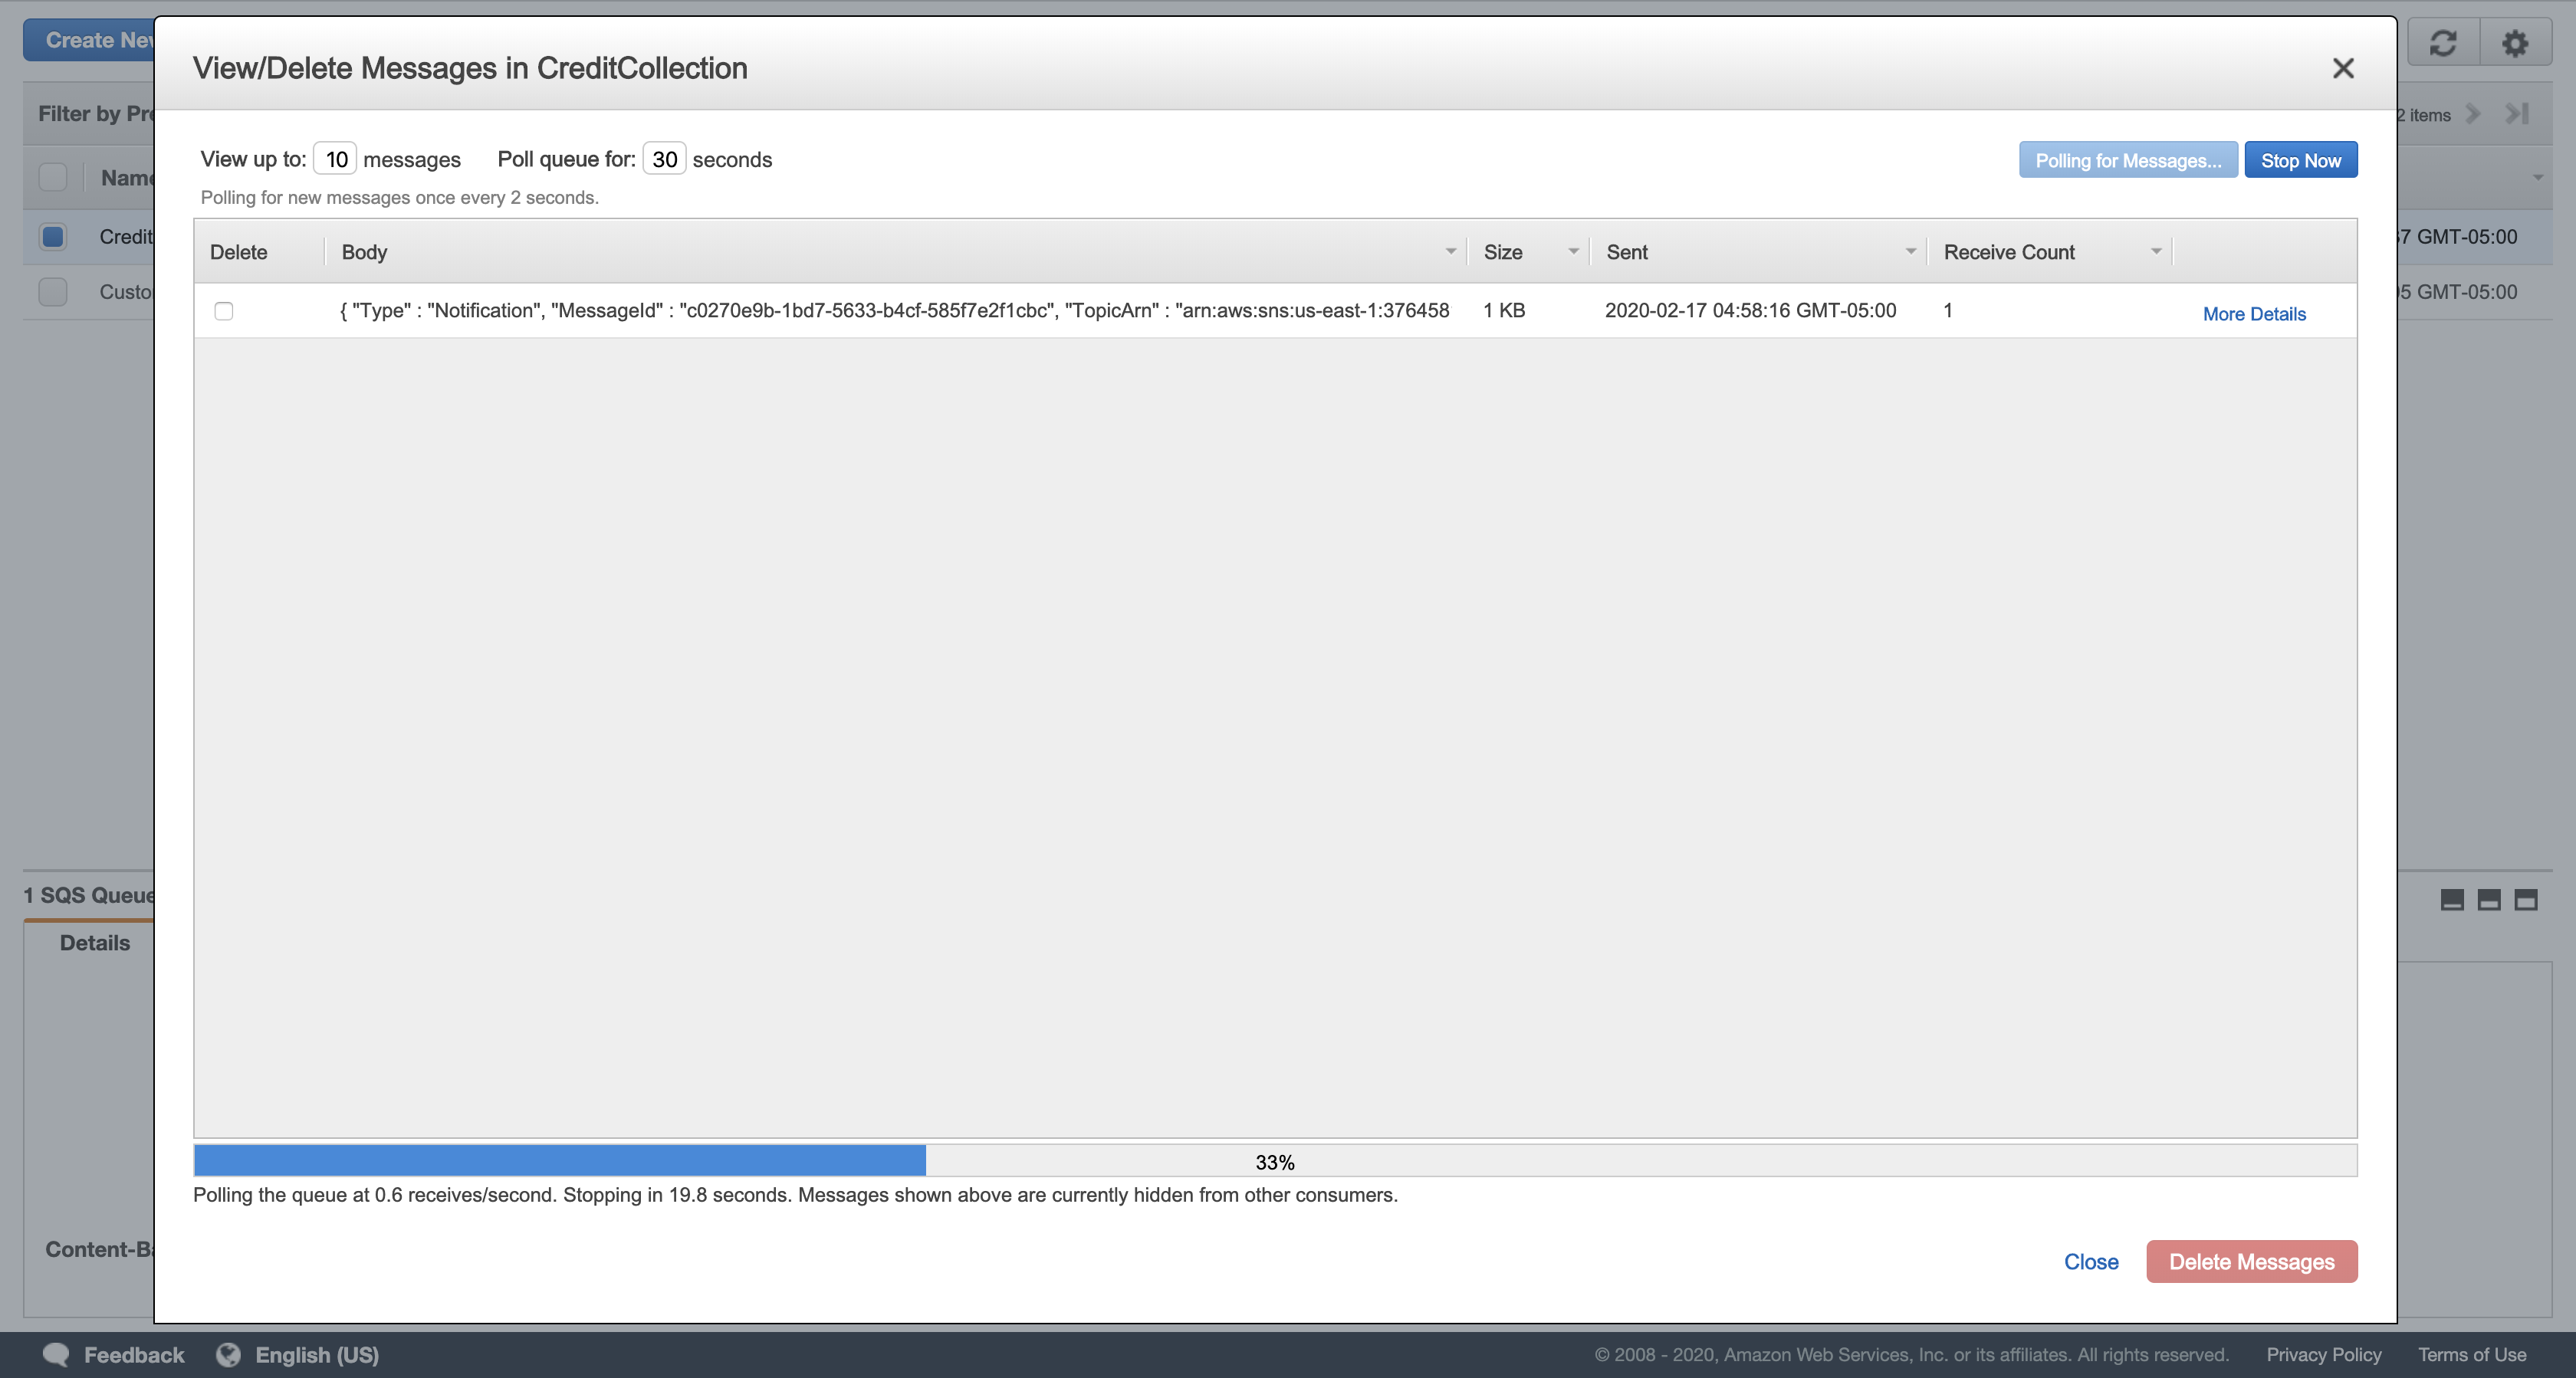
Click More Details in the message displayed.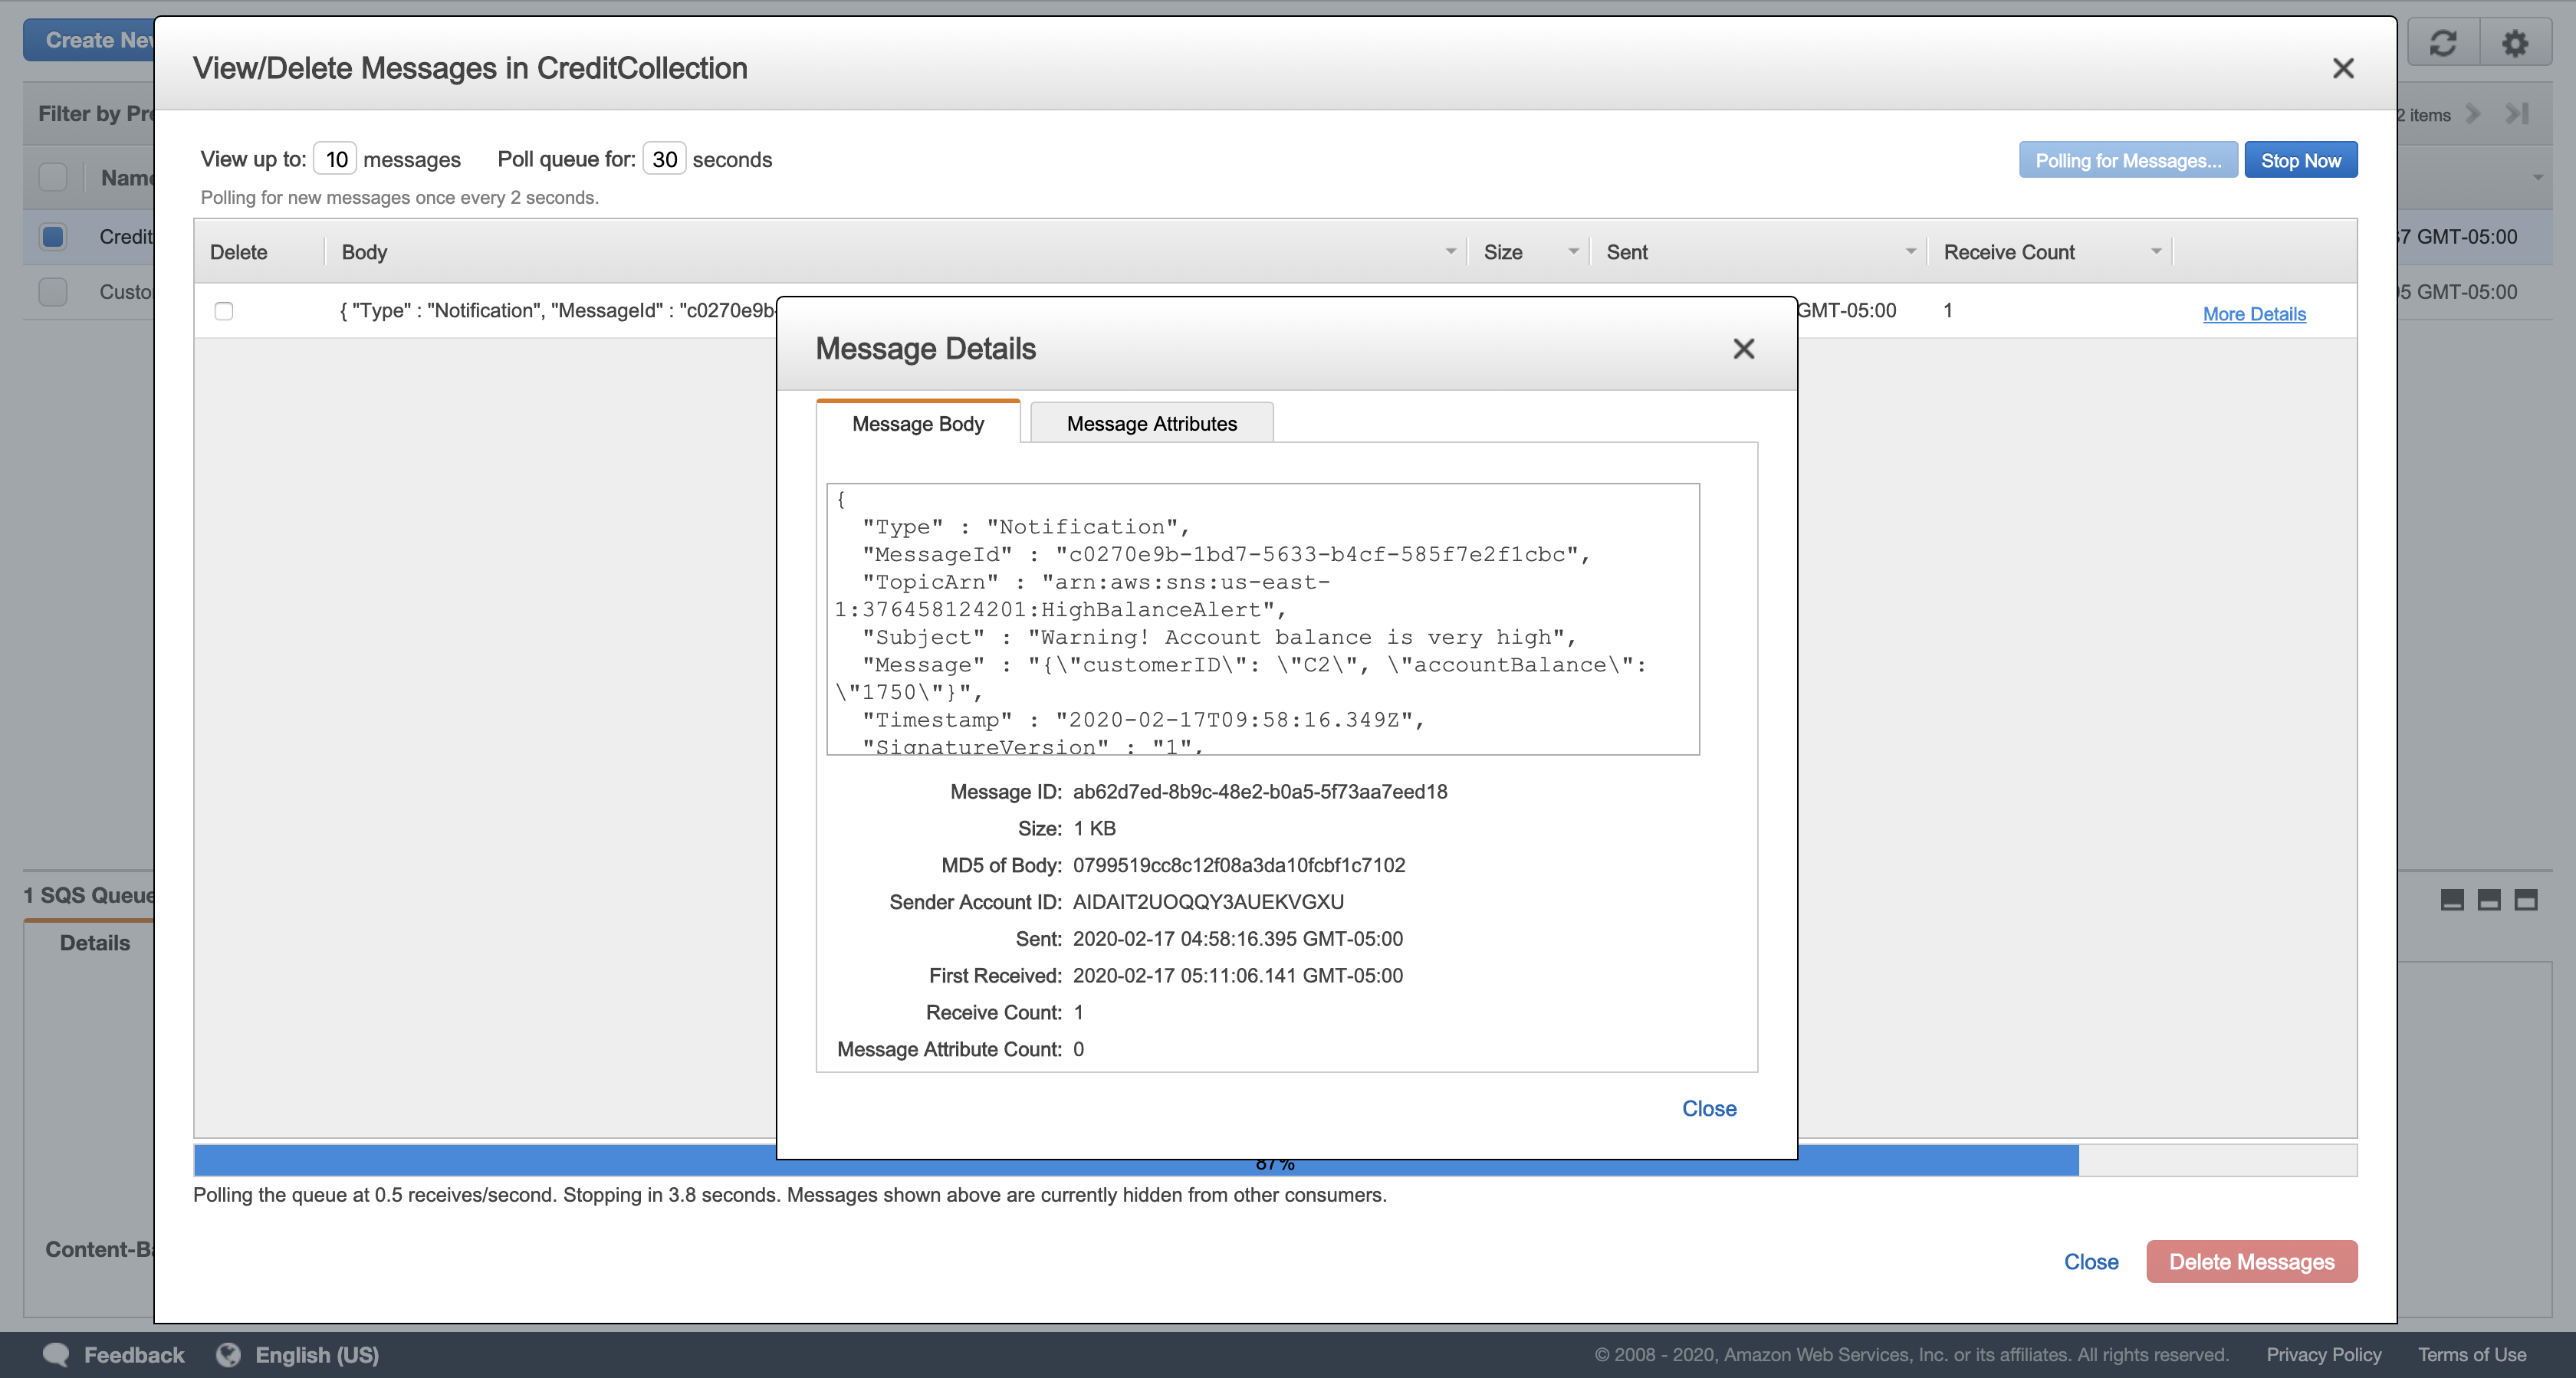
Verify that the Message Body displays a warning for customer C2. Your message should look similar to this:
1 | { |
Click Close.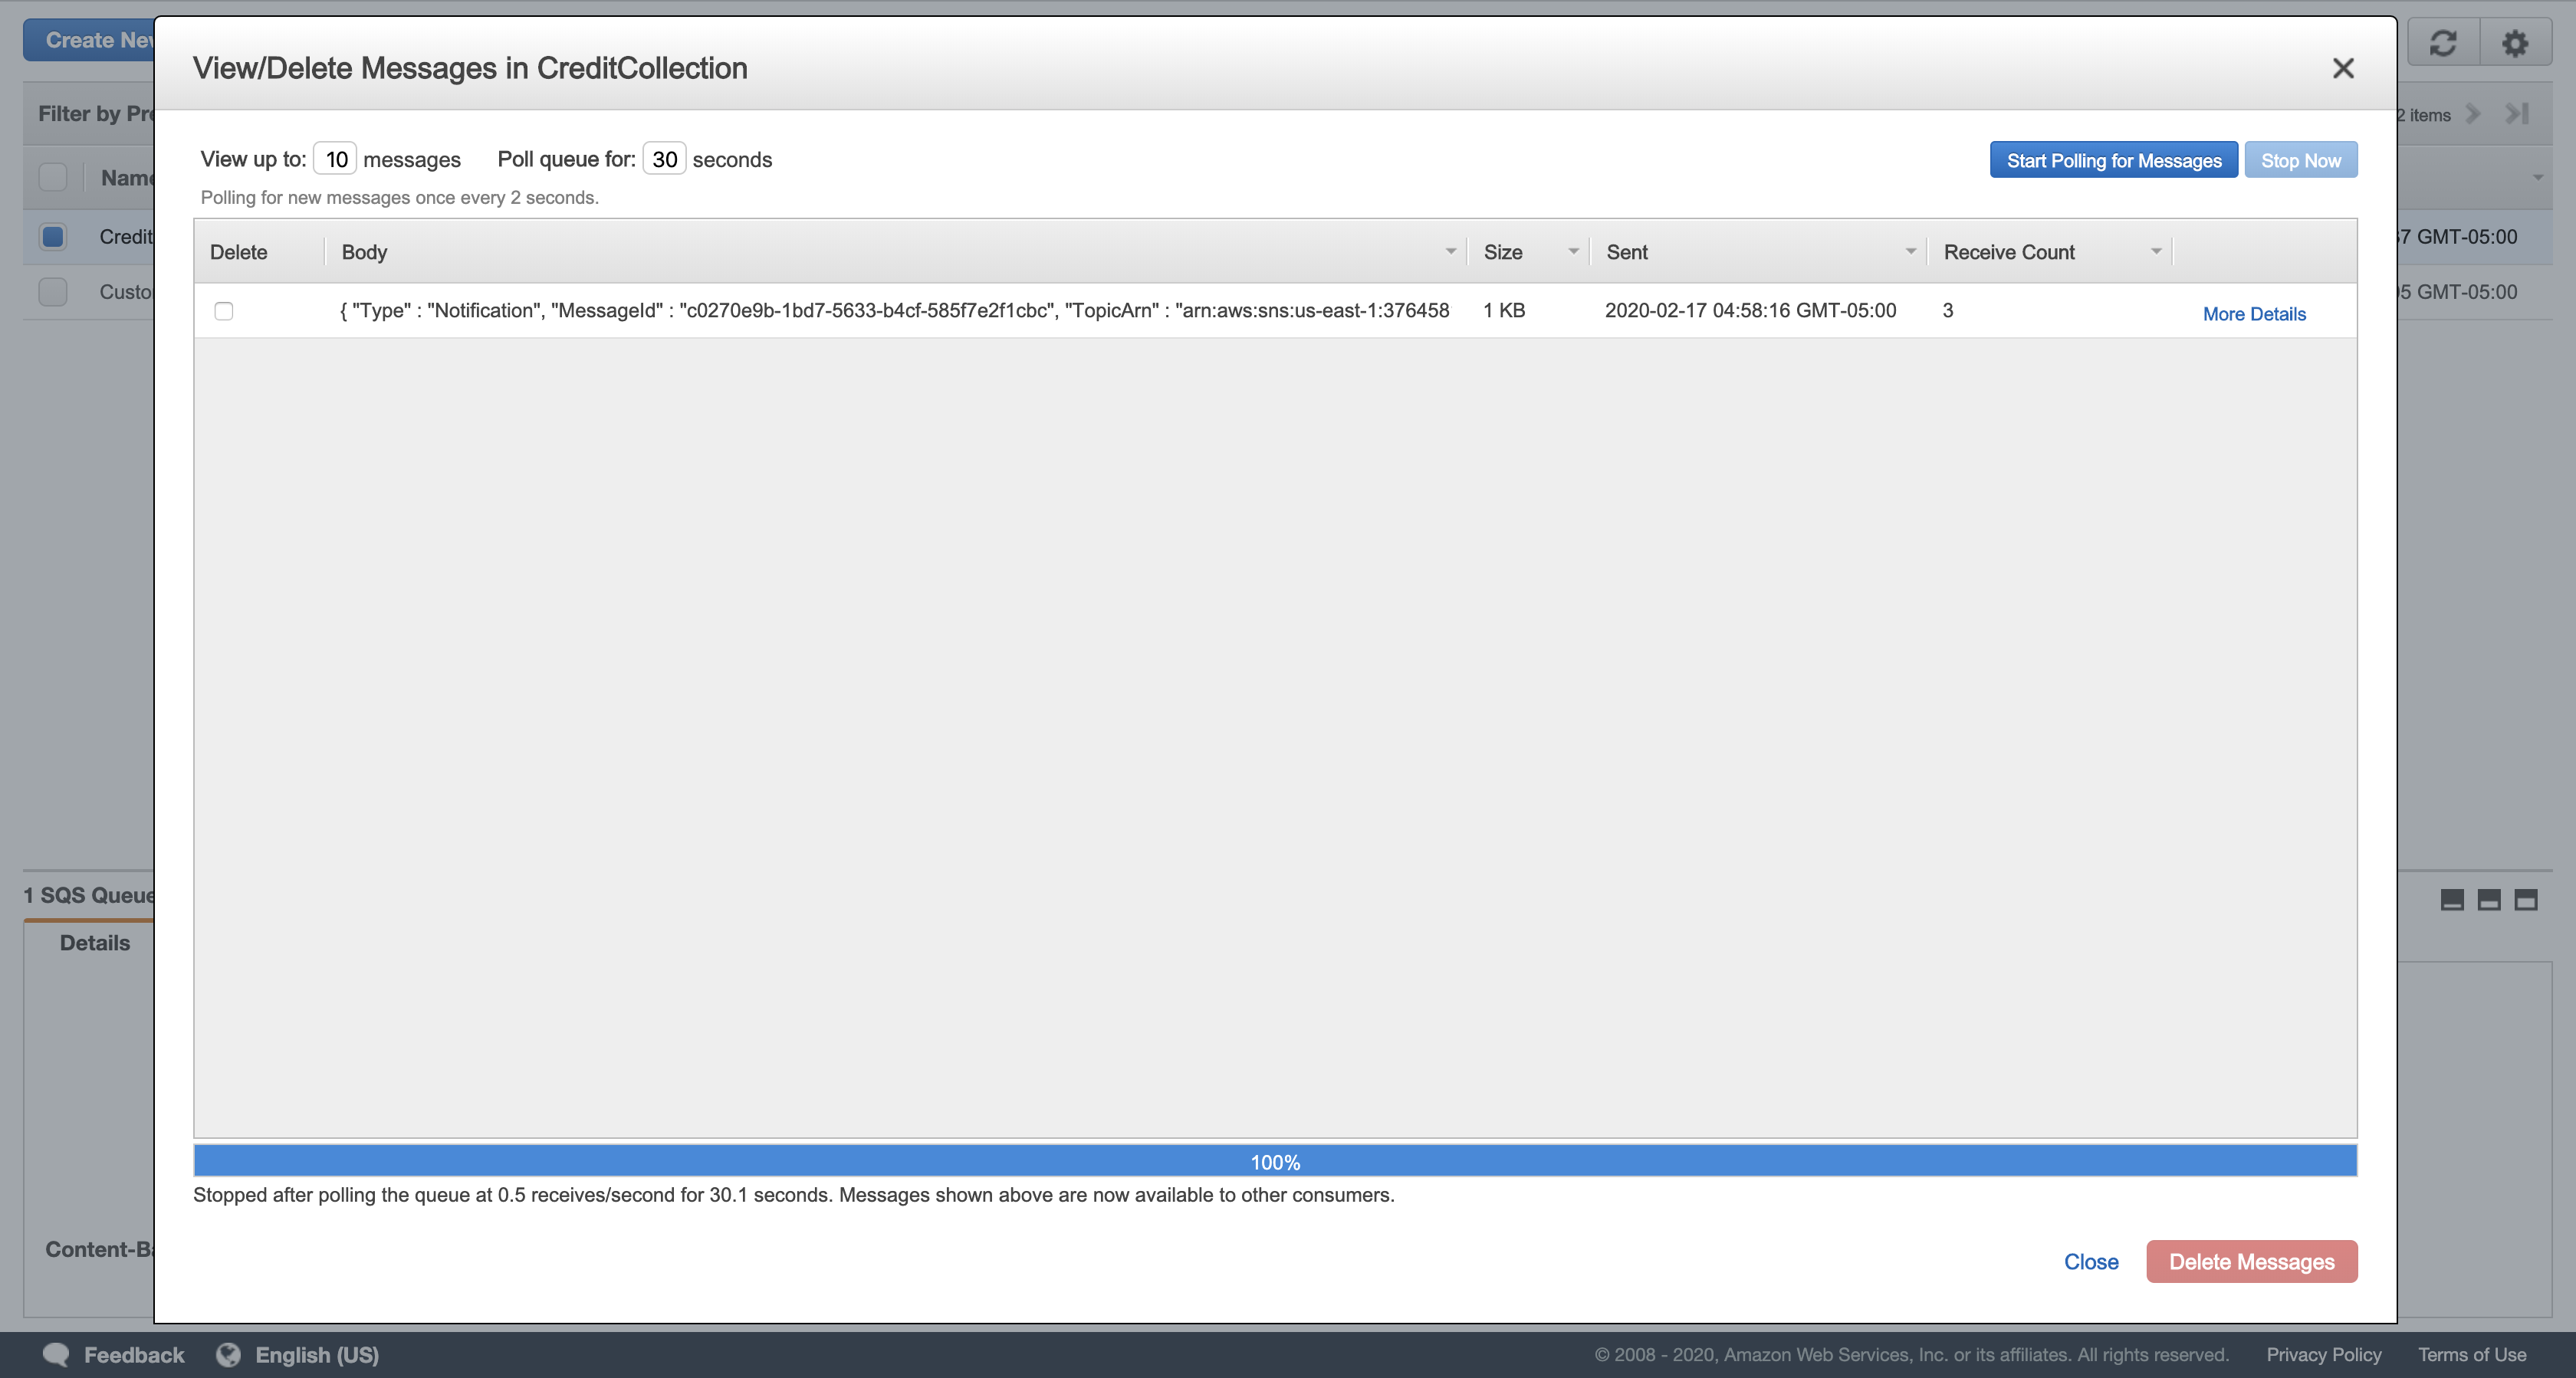
Click Close again to return to your list of queues.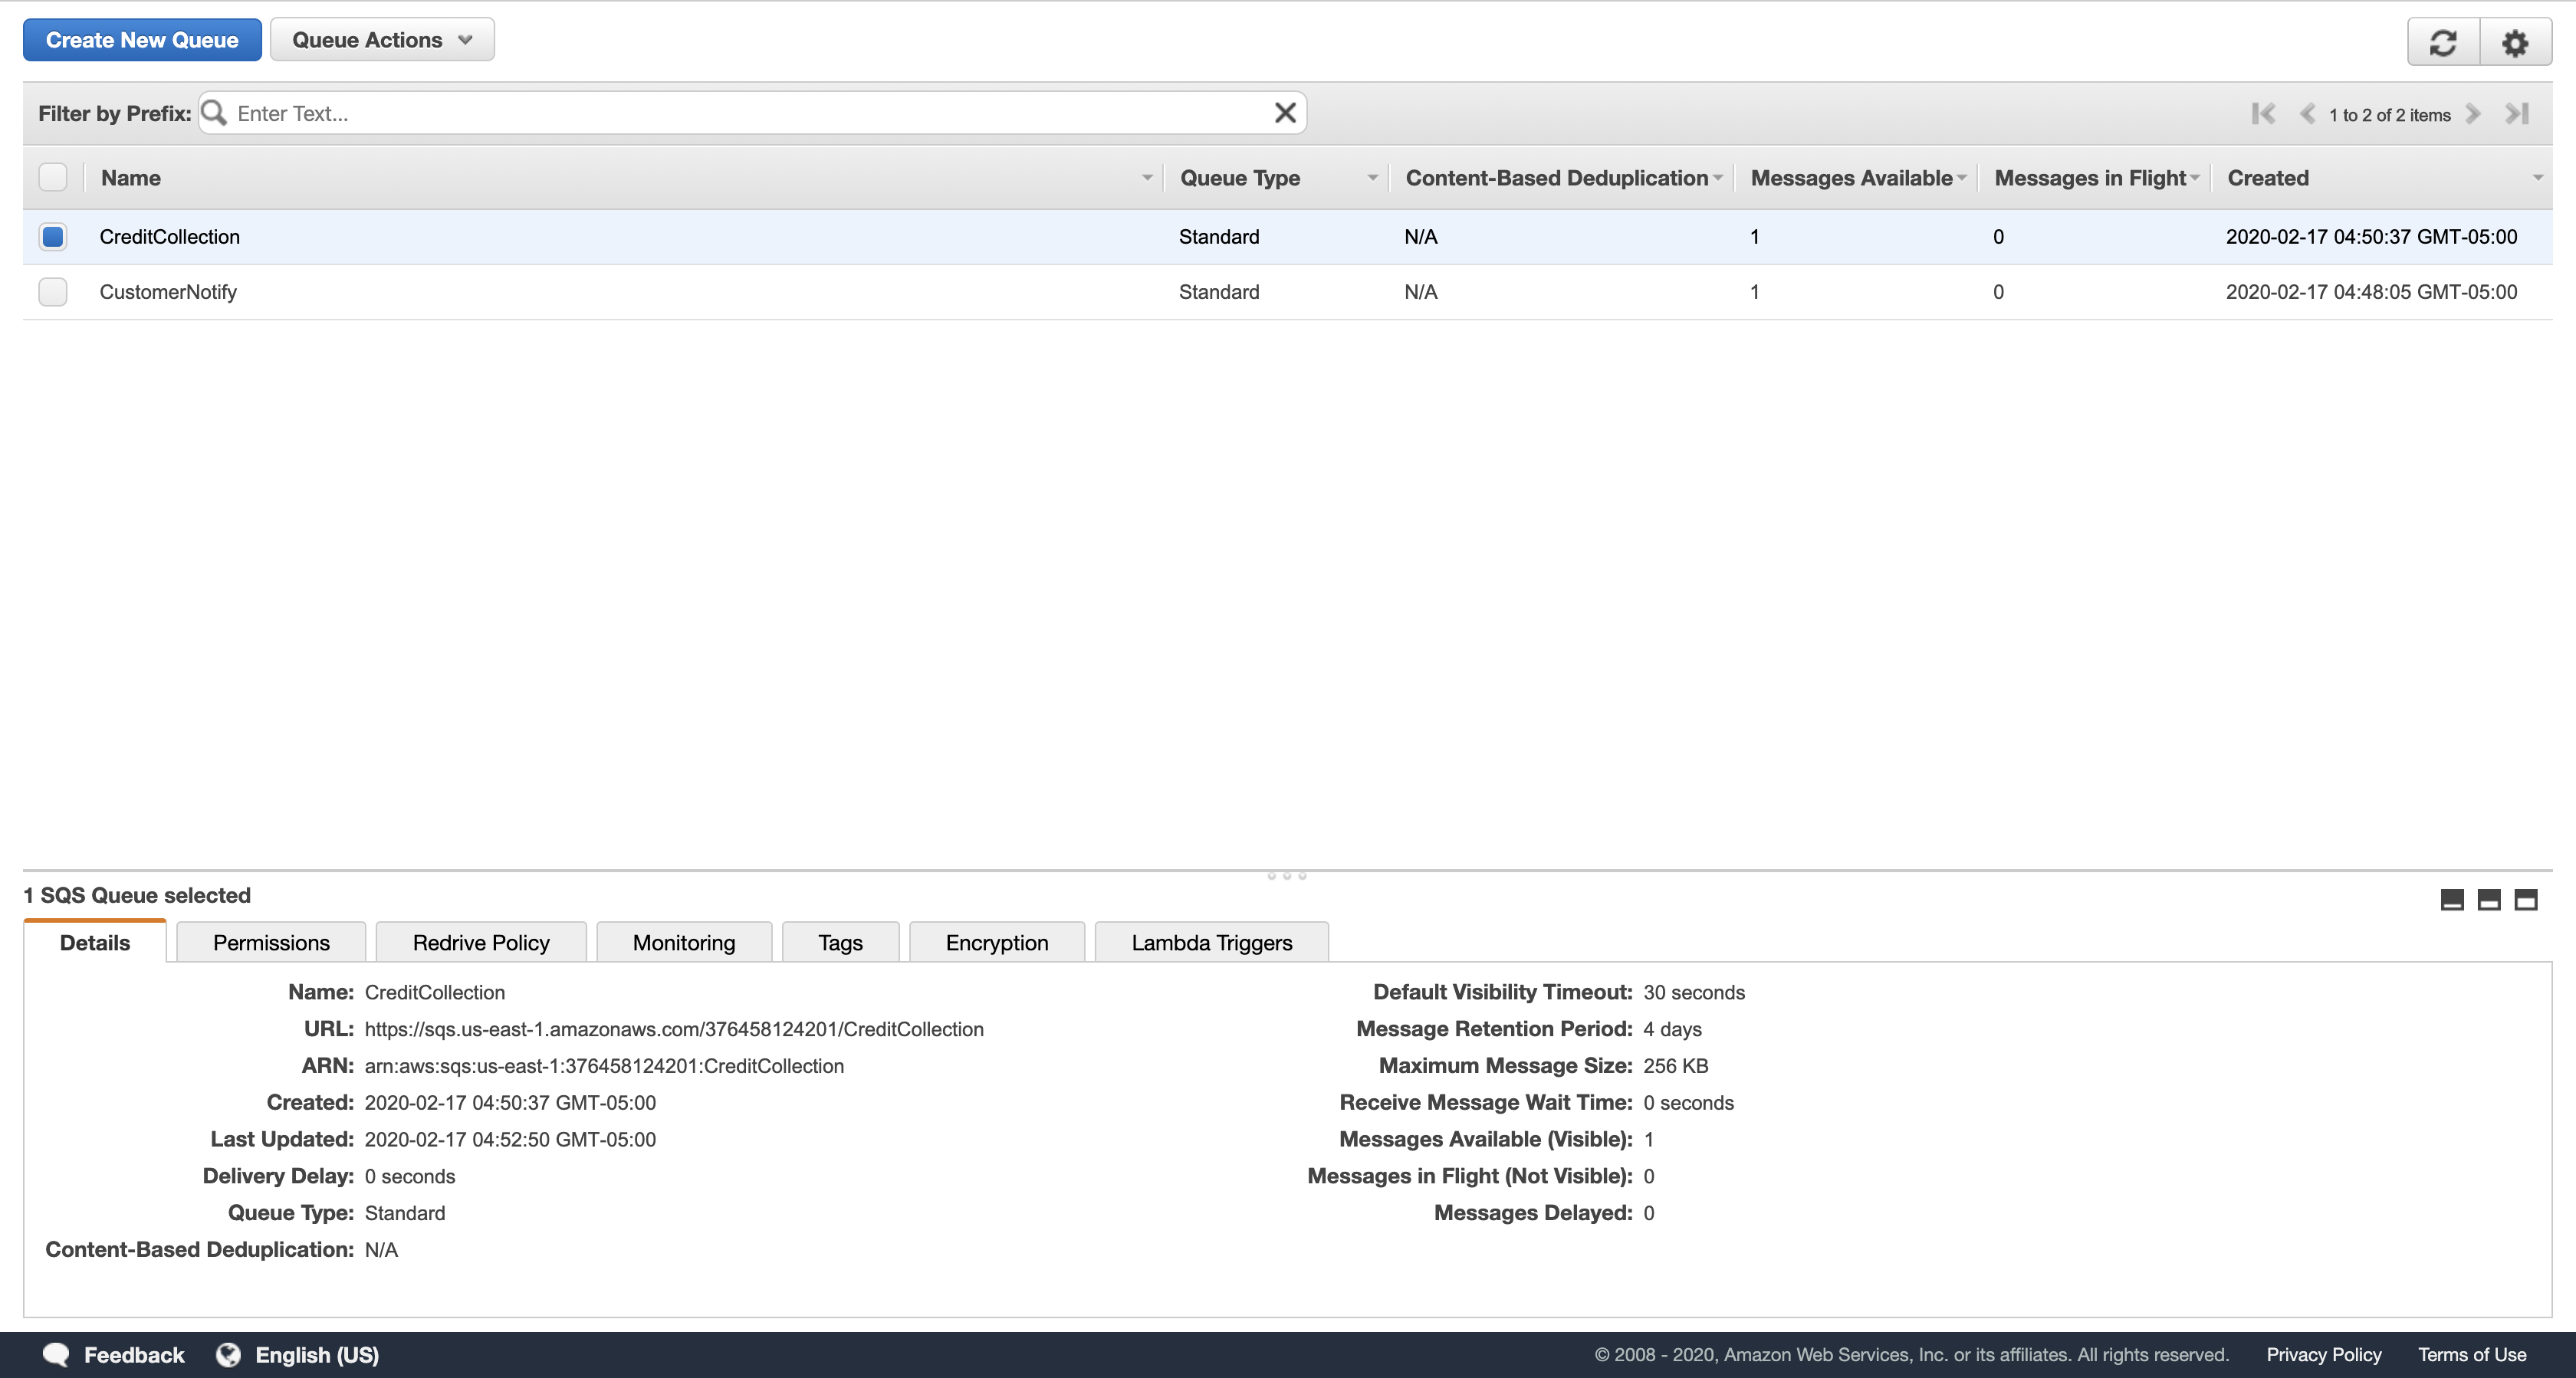
Optional: View the message in the CustomerNotify queue too. It should contain a message identical to the one in the CreditCollection queue.
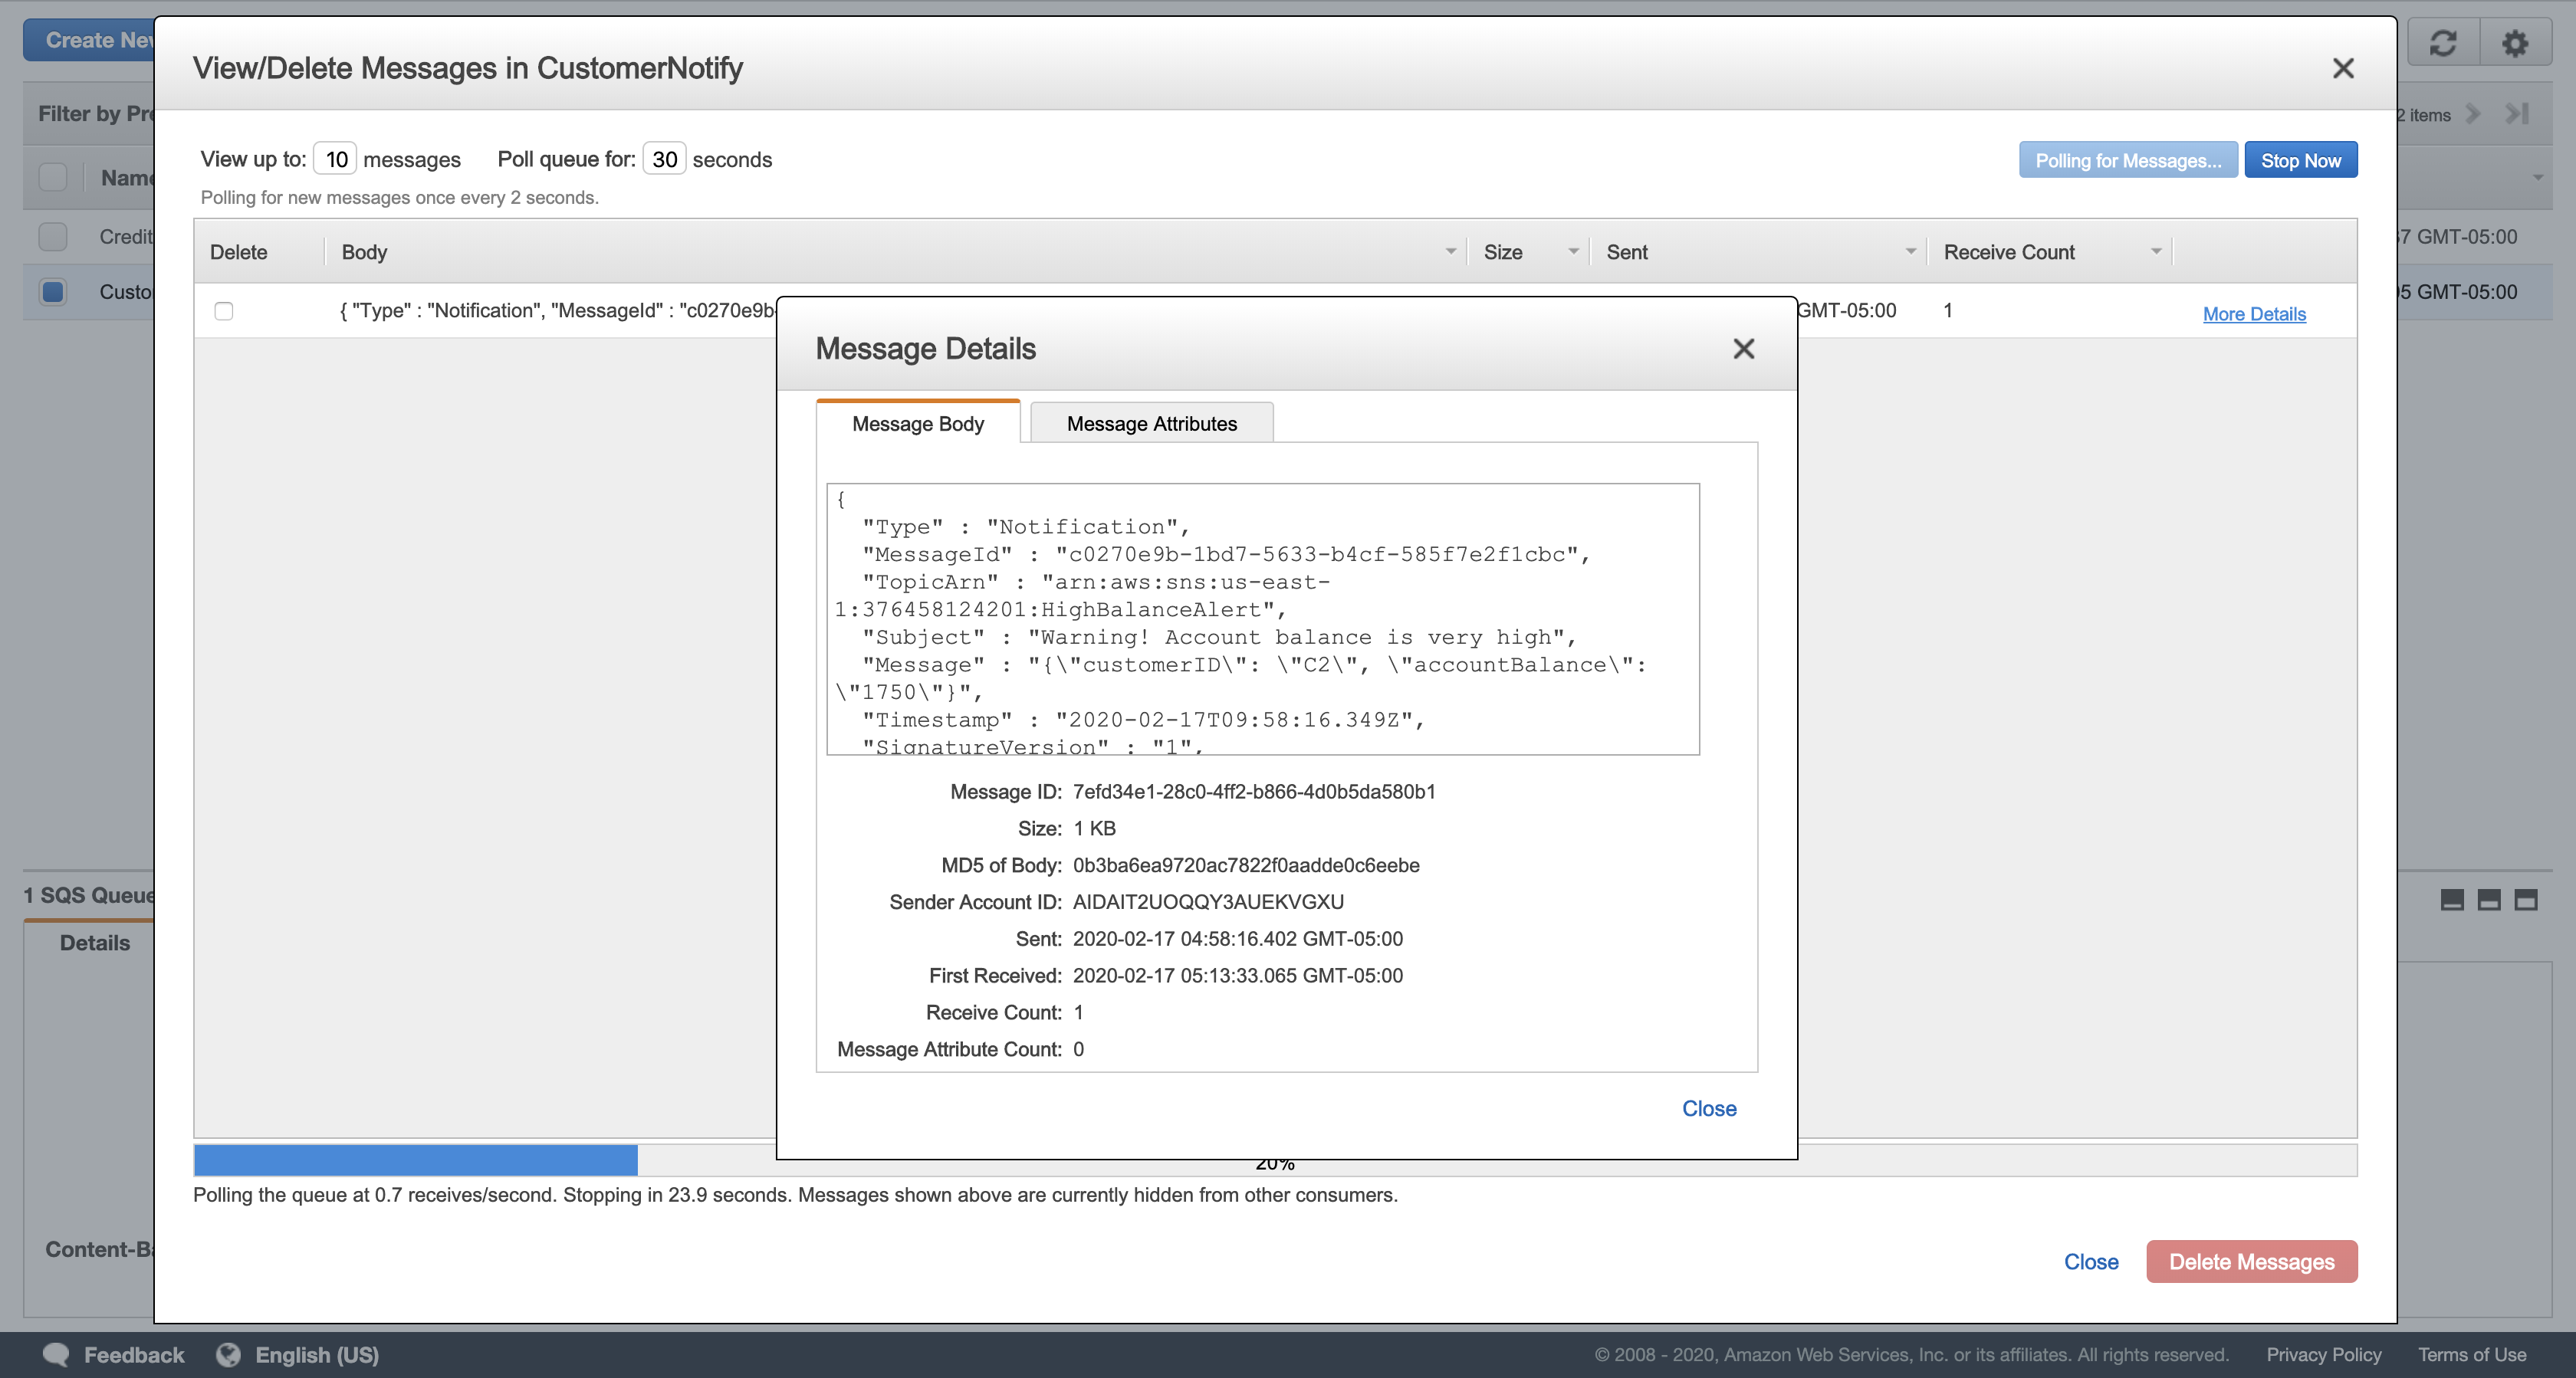
1 | { |
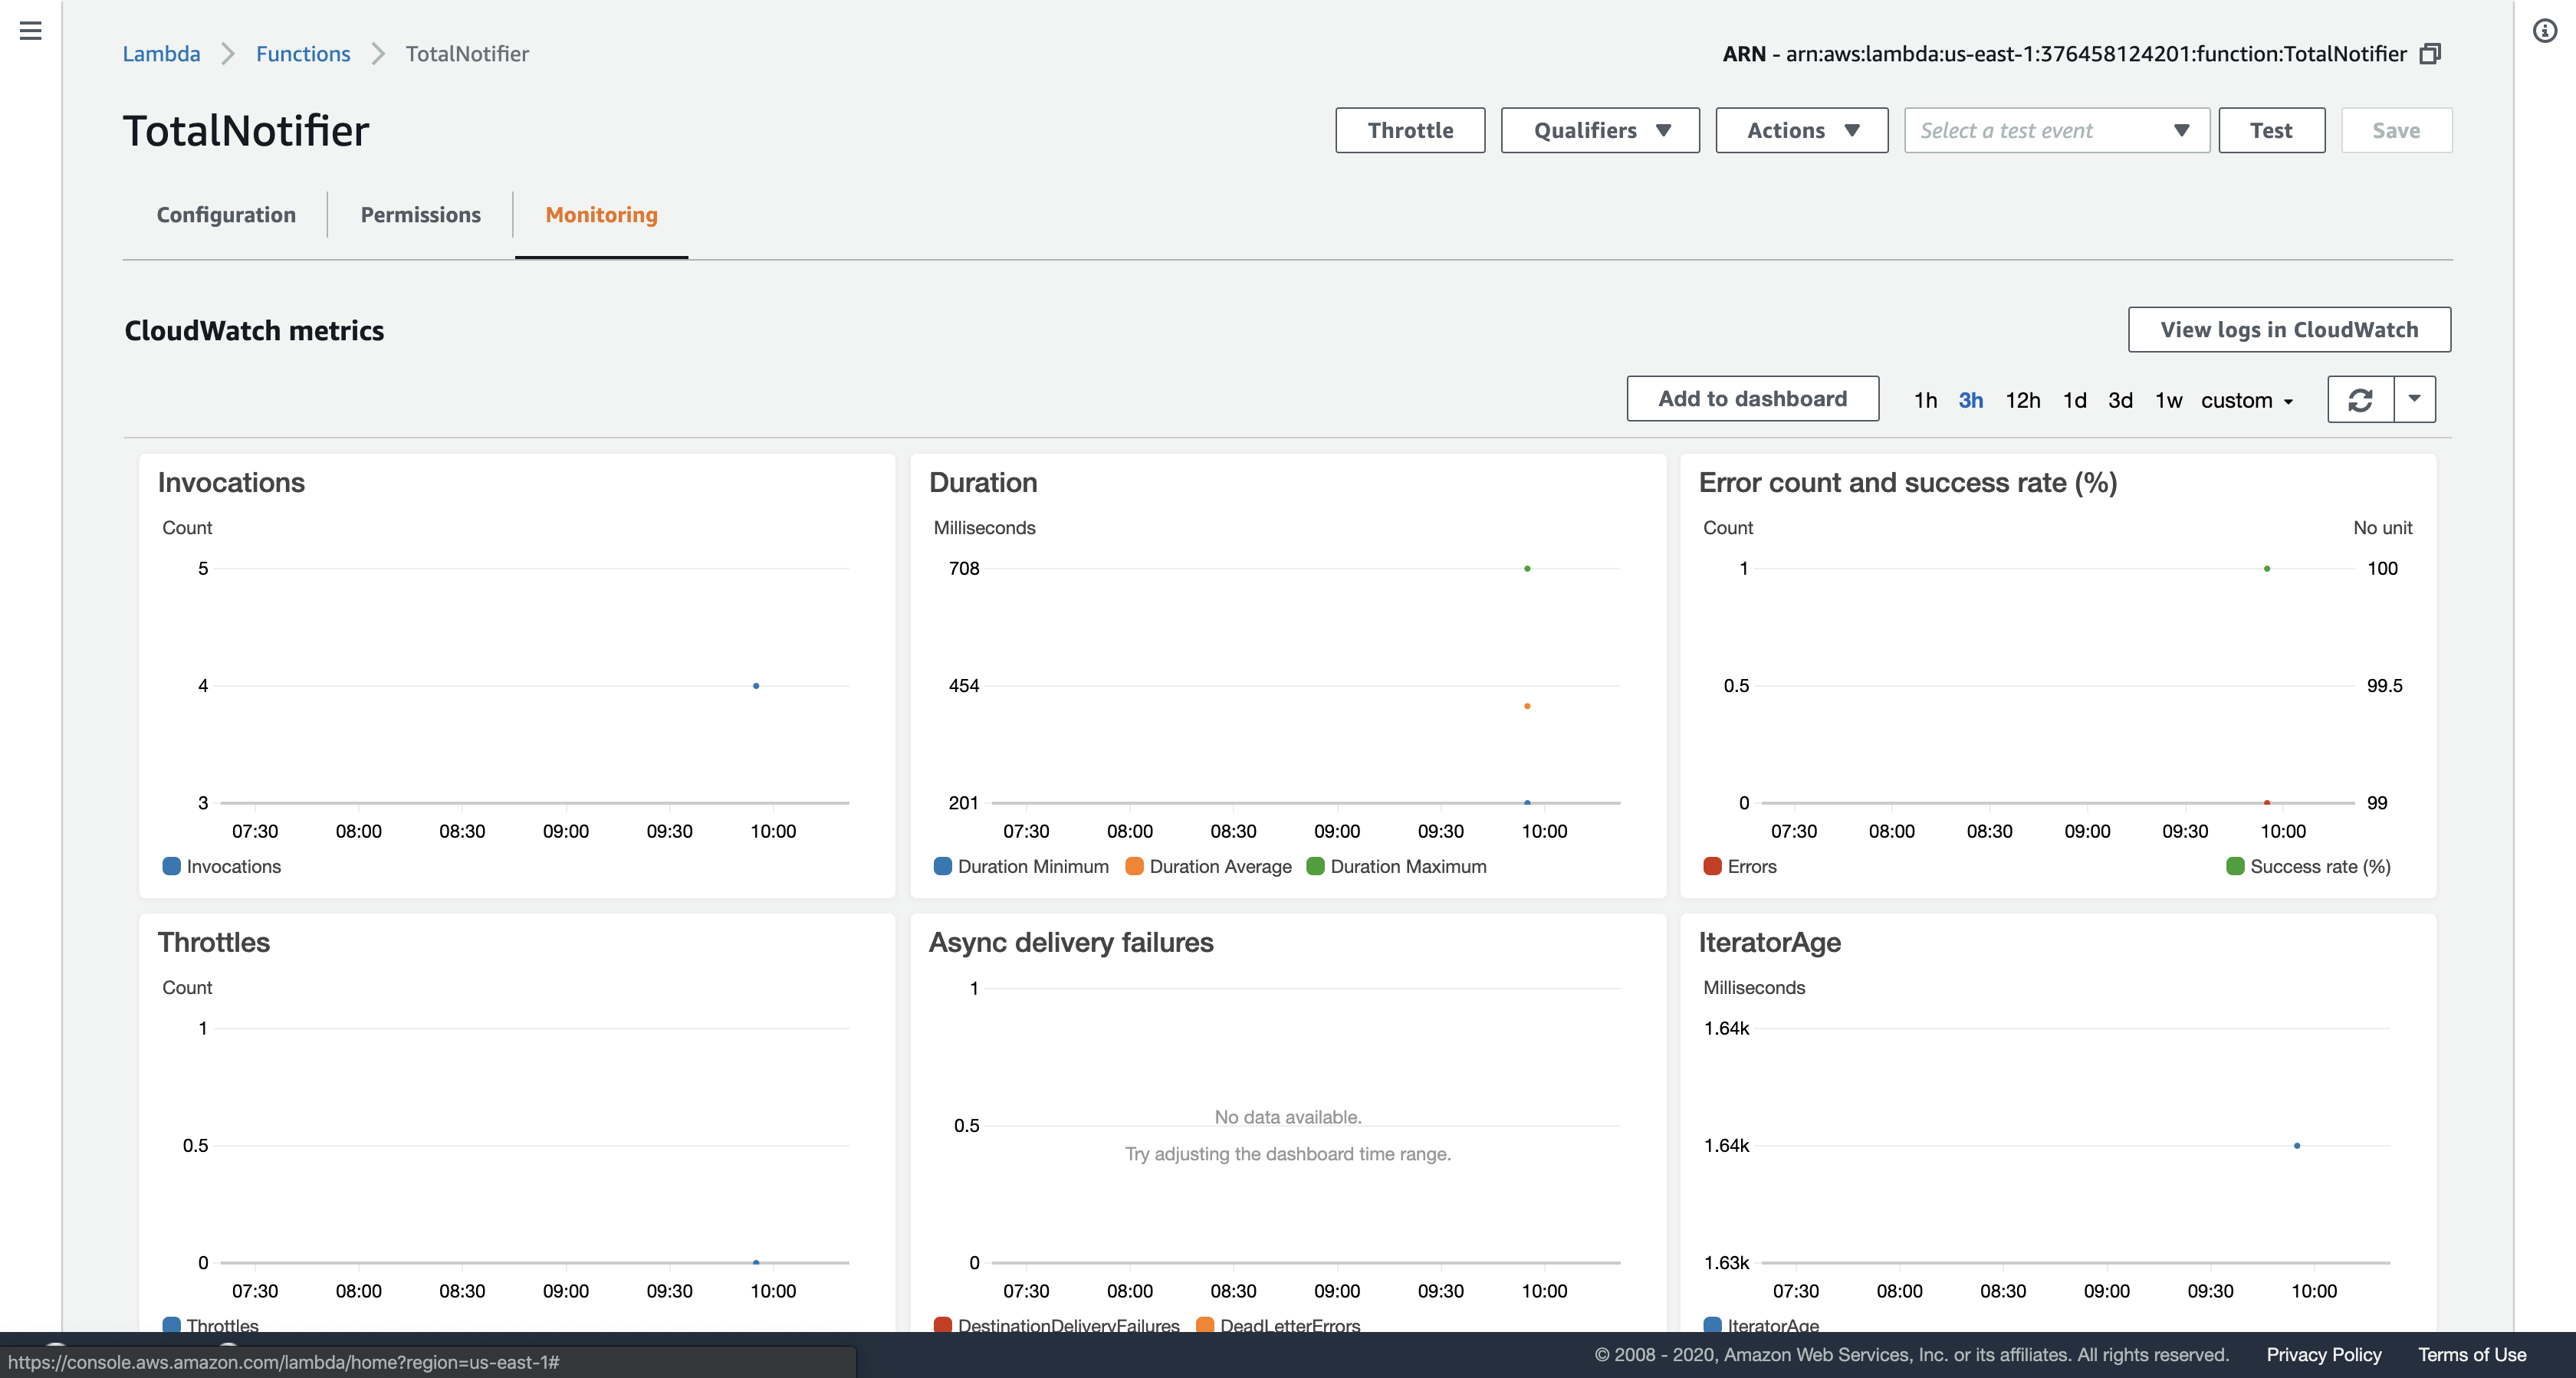
Task 5.4: Check your Lambda Functions
Your Lambda functions automatically record logs and metrics. You can view this information to confirm that your functions executed correctly.
Services menu
click Lambda.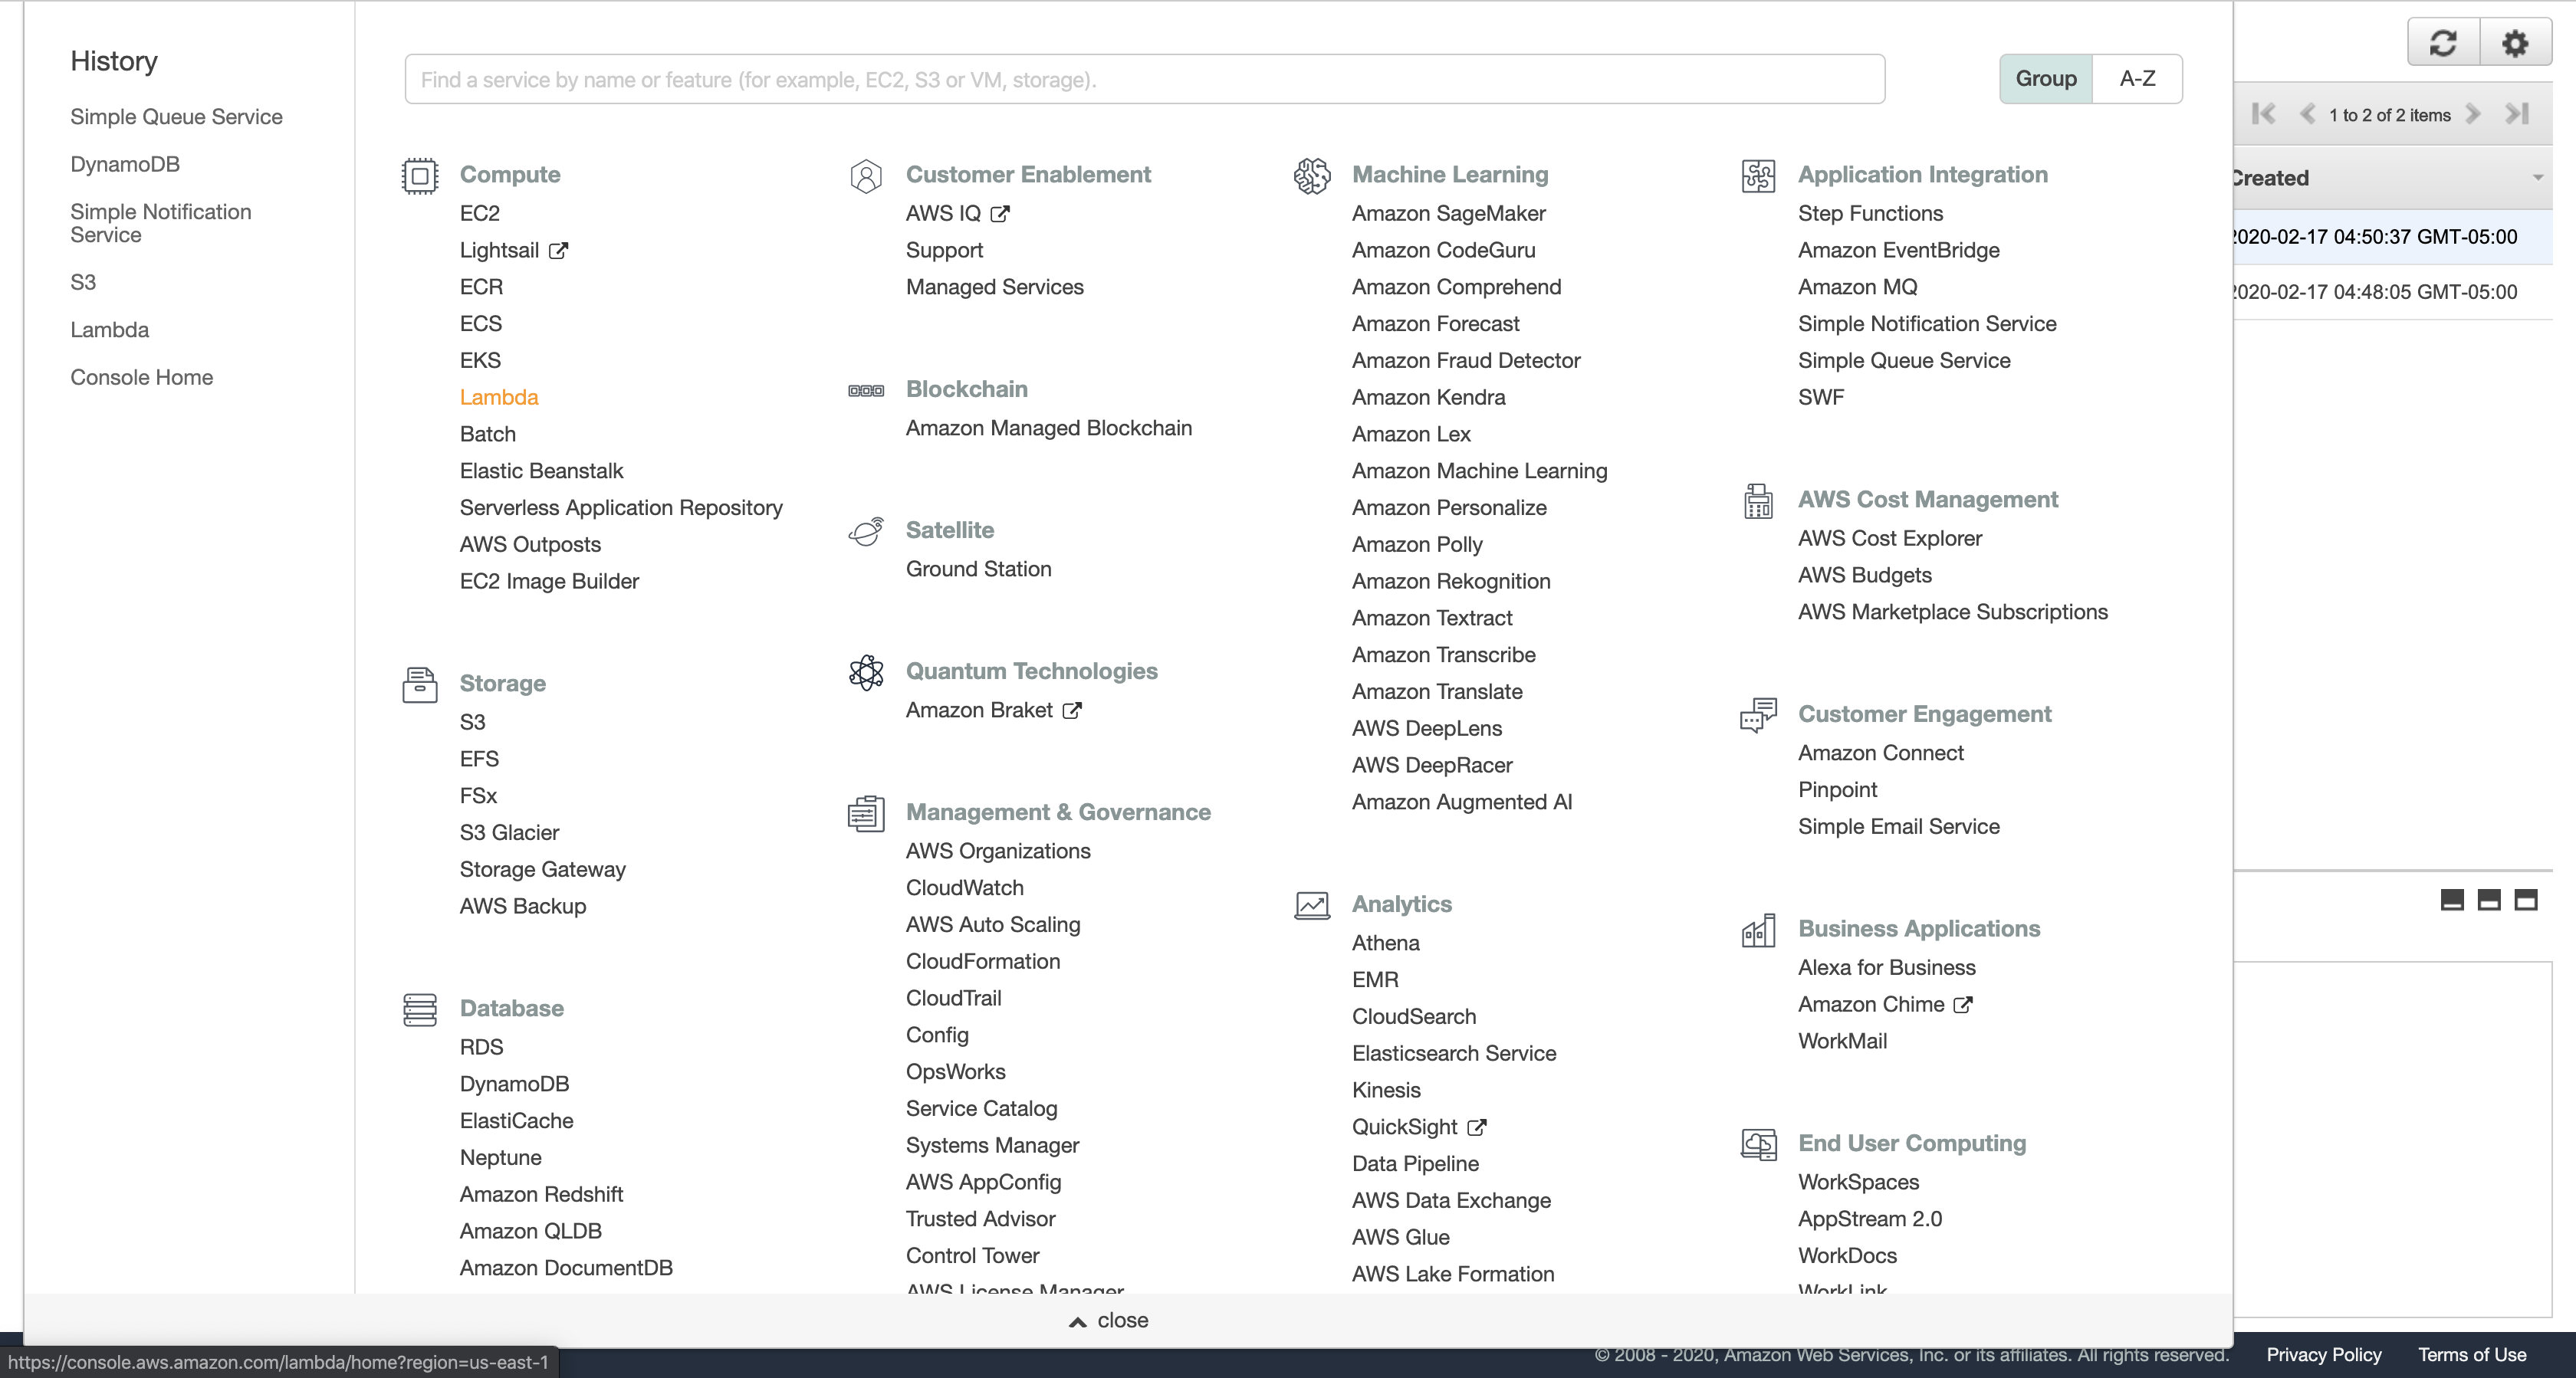
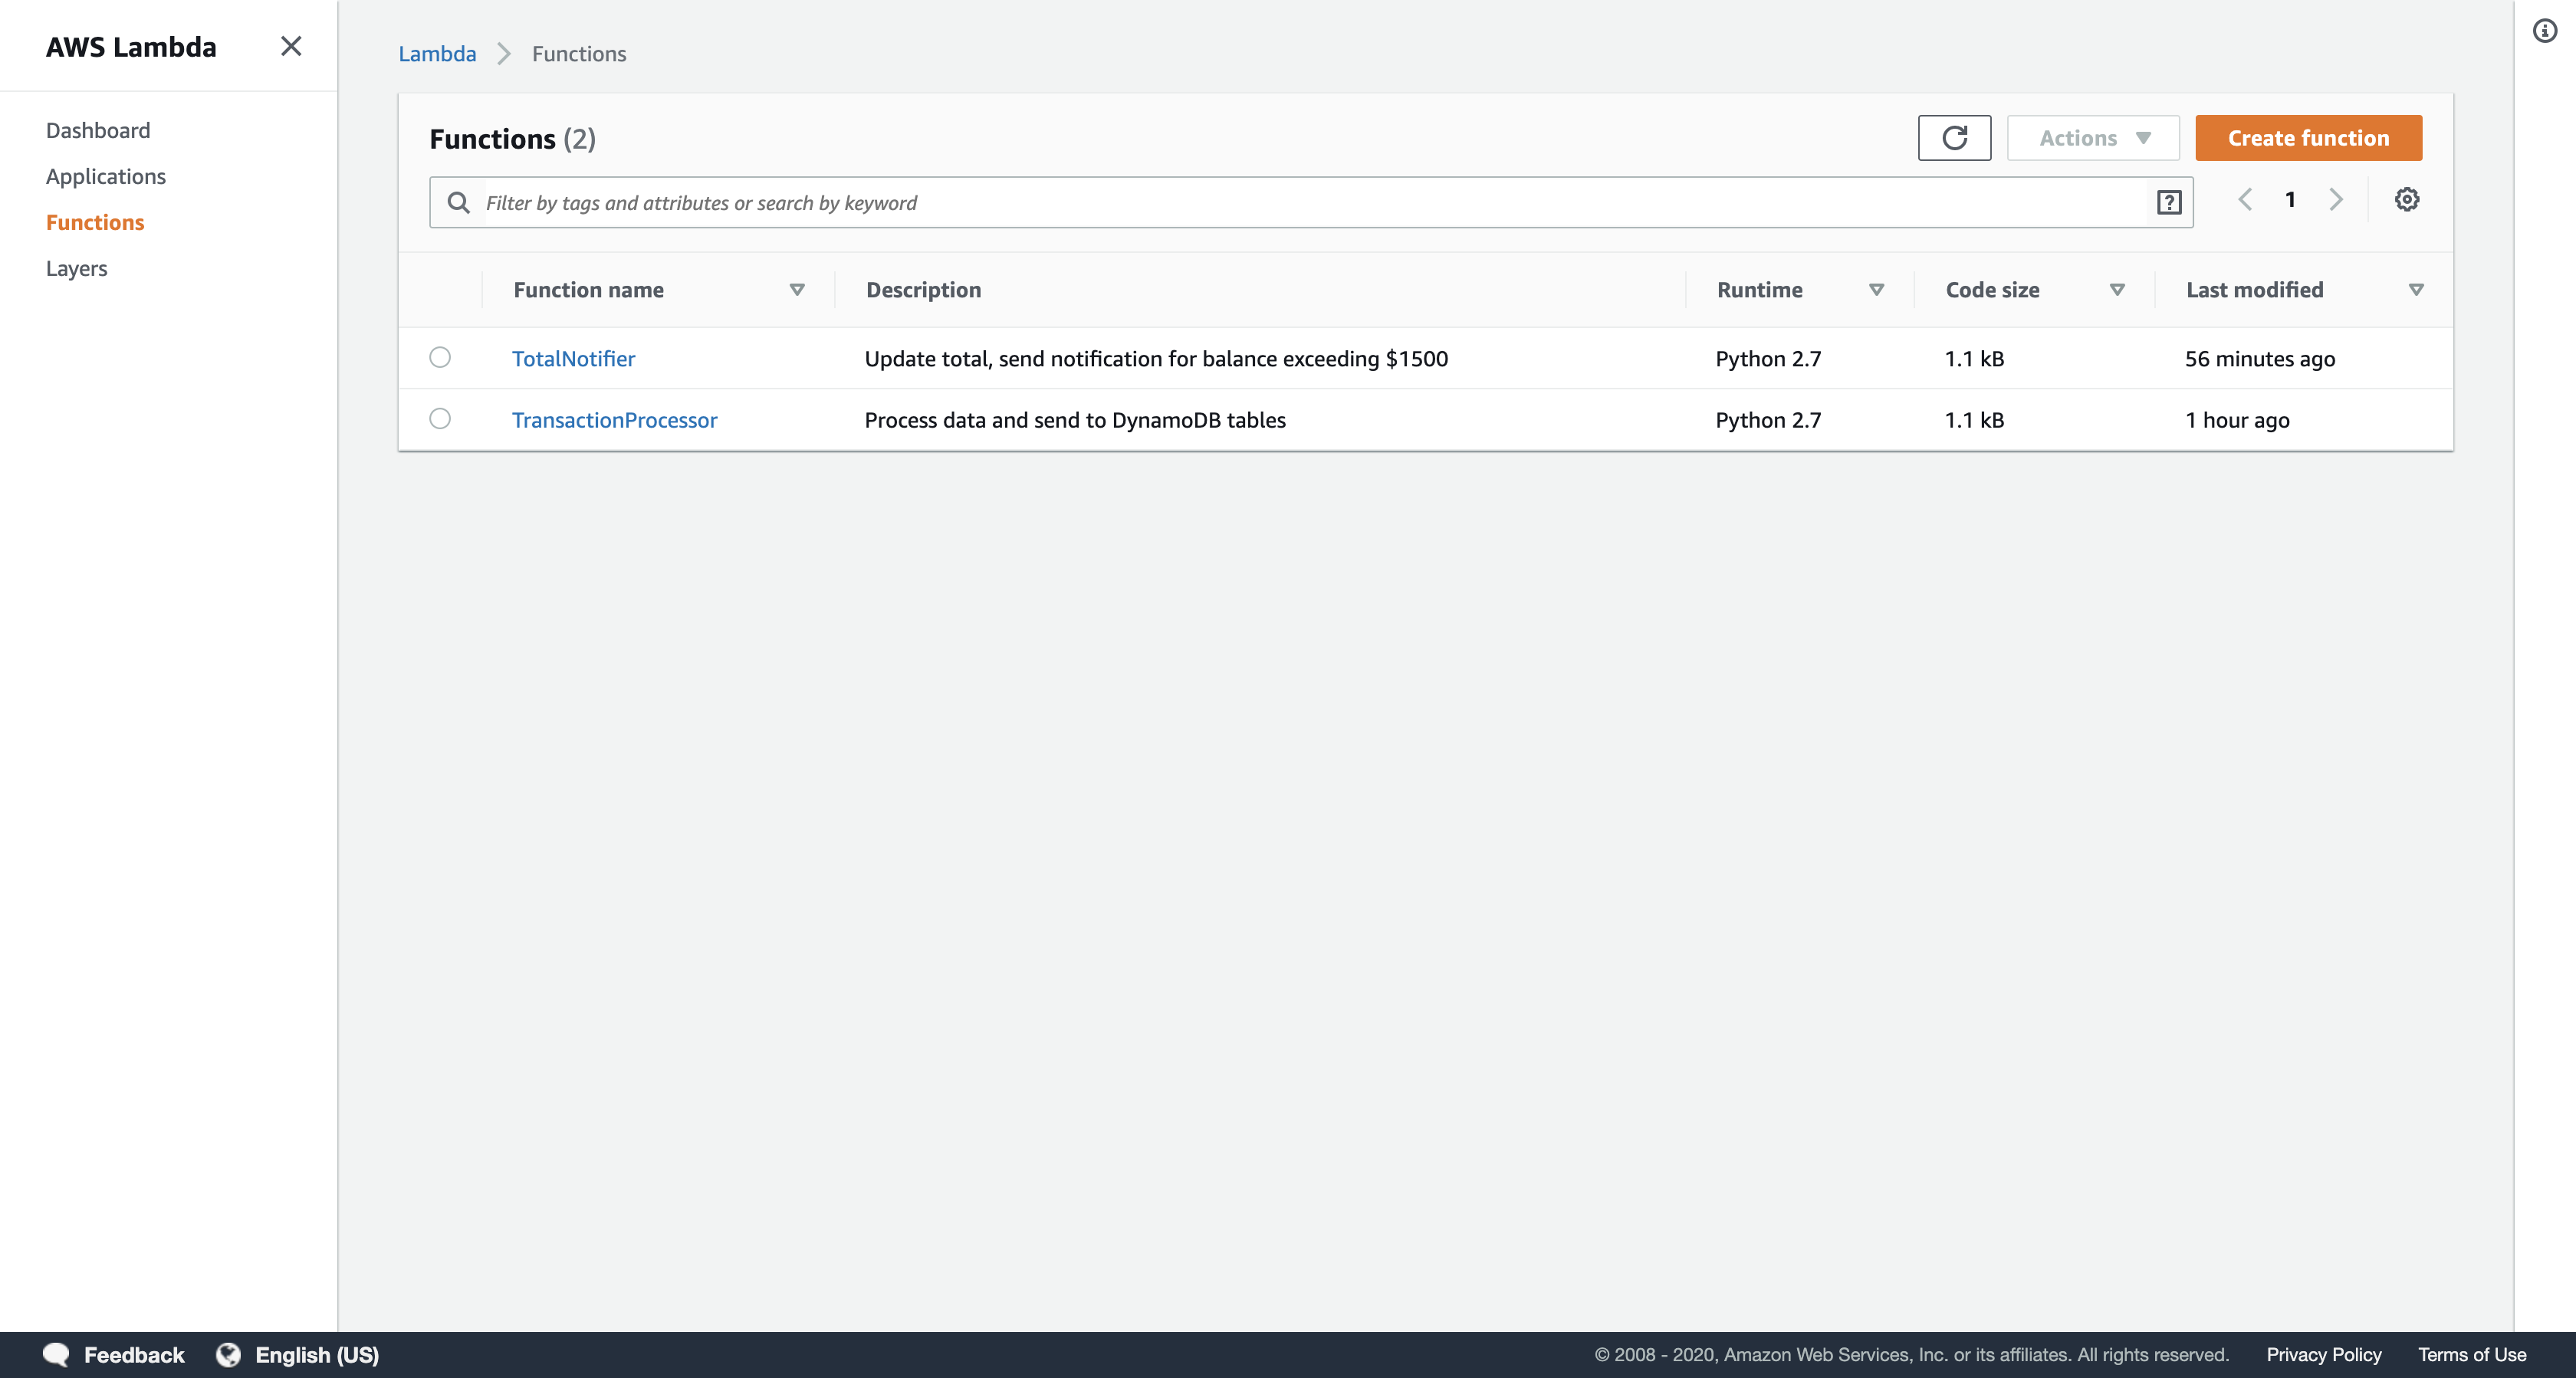
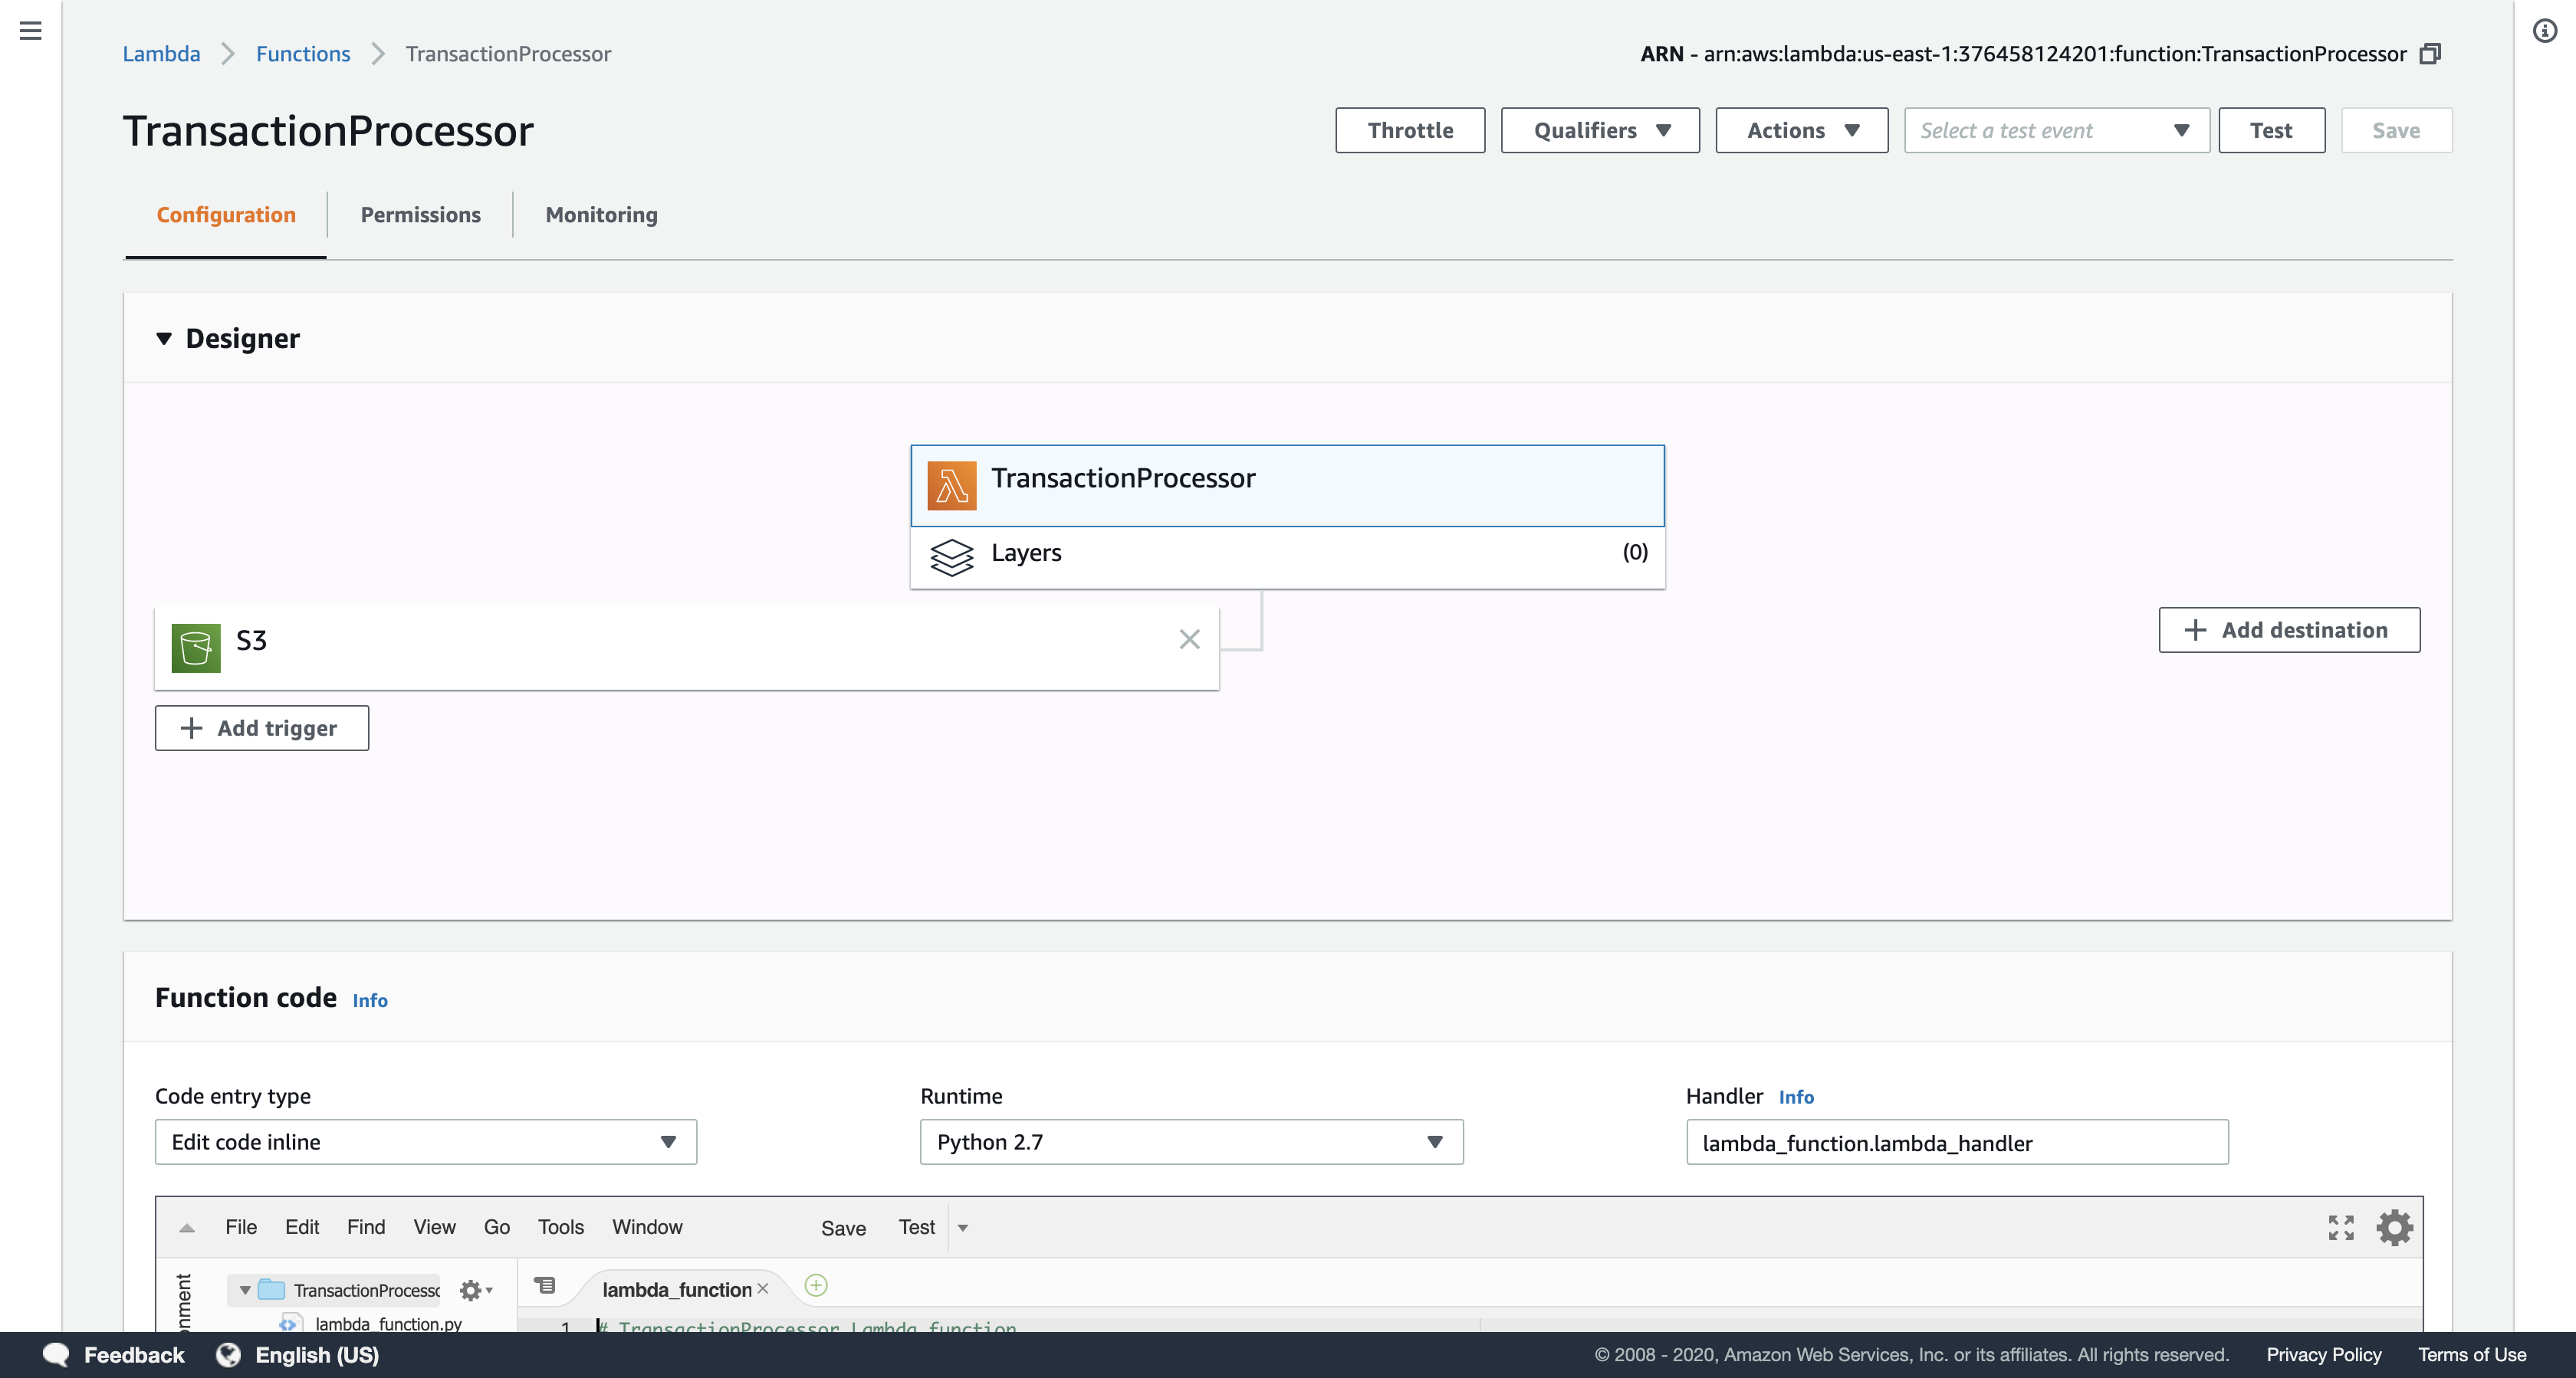
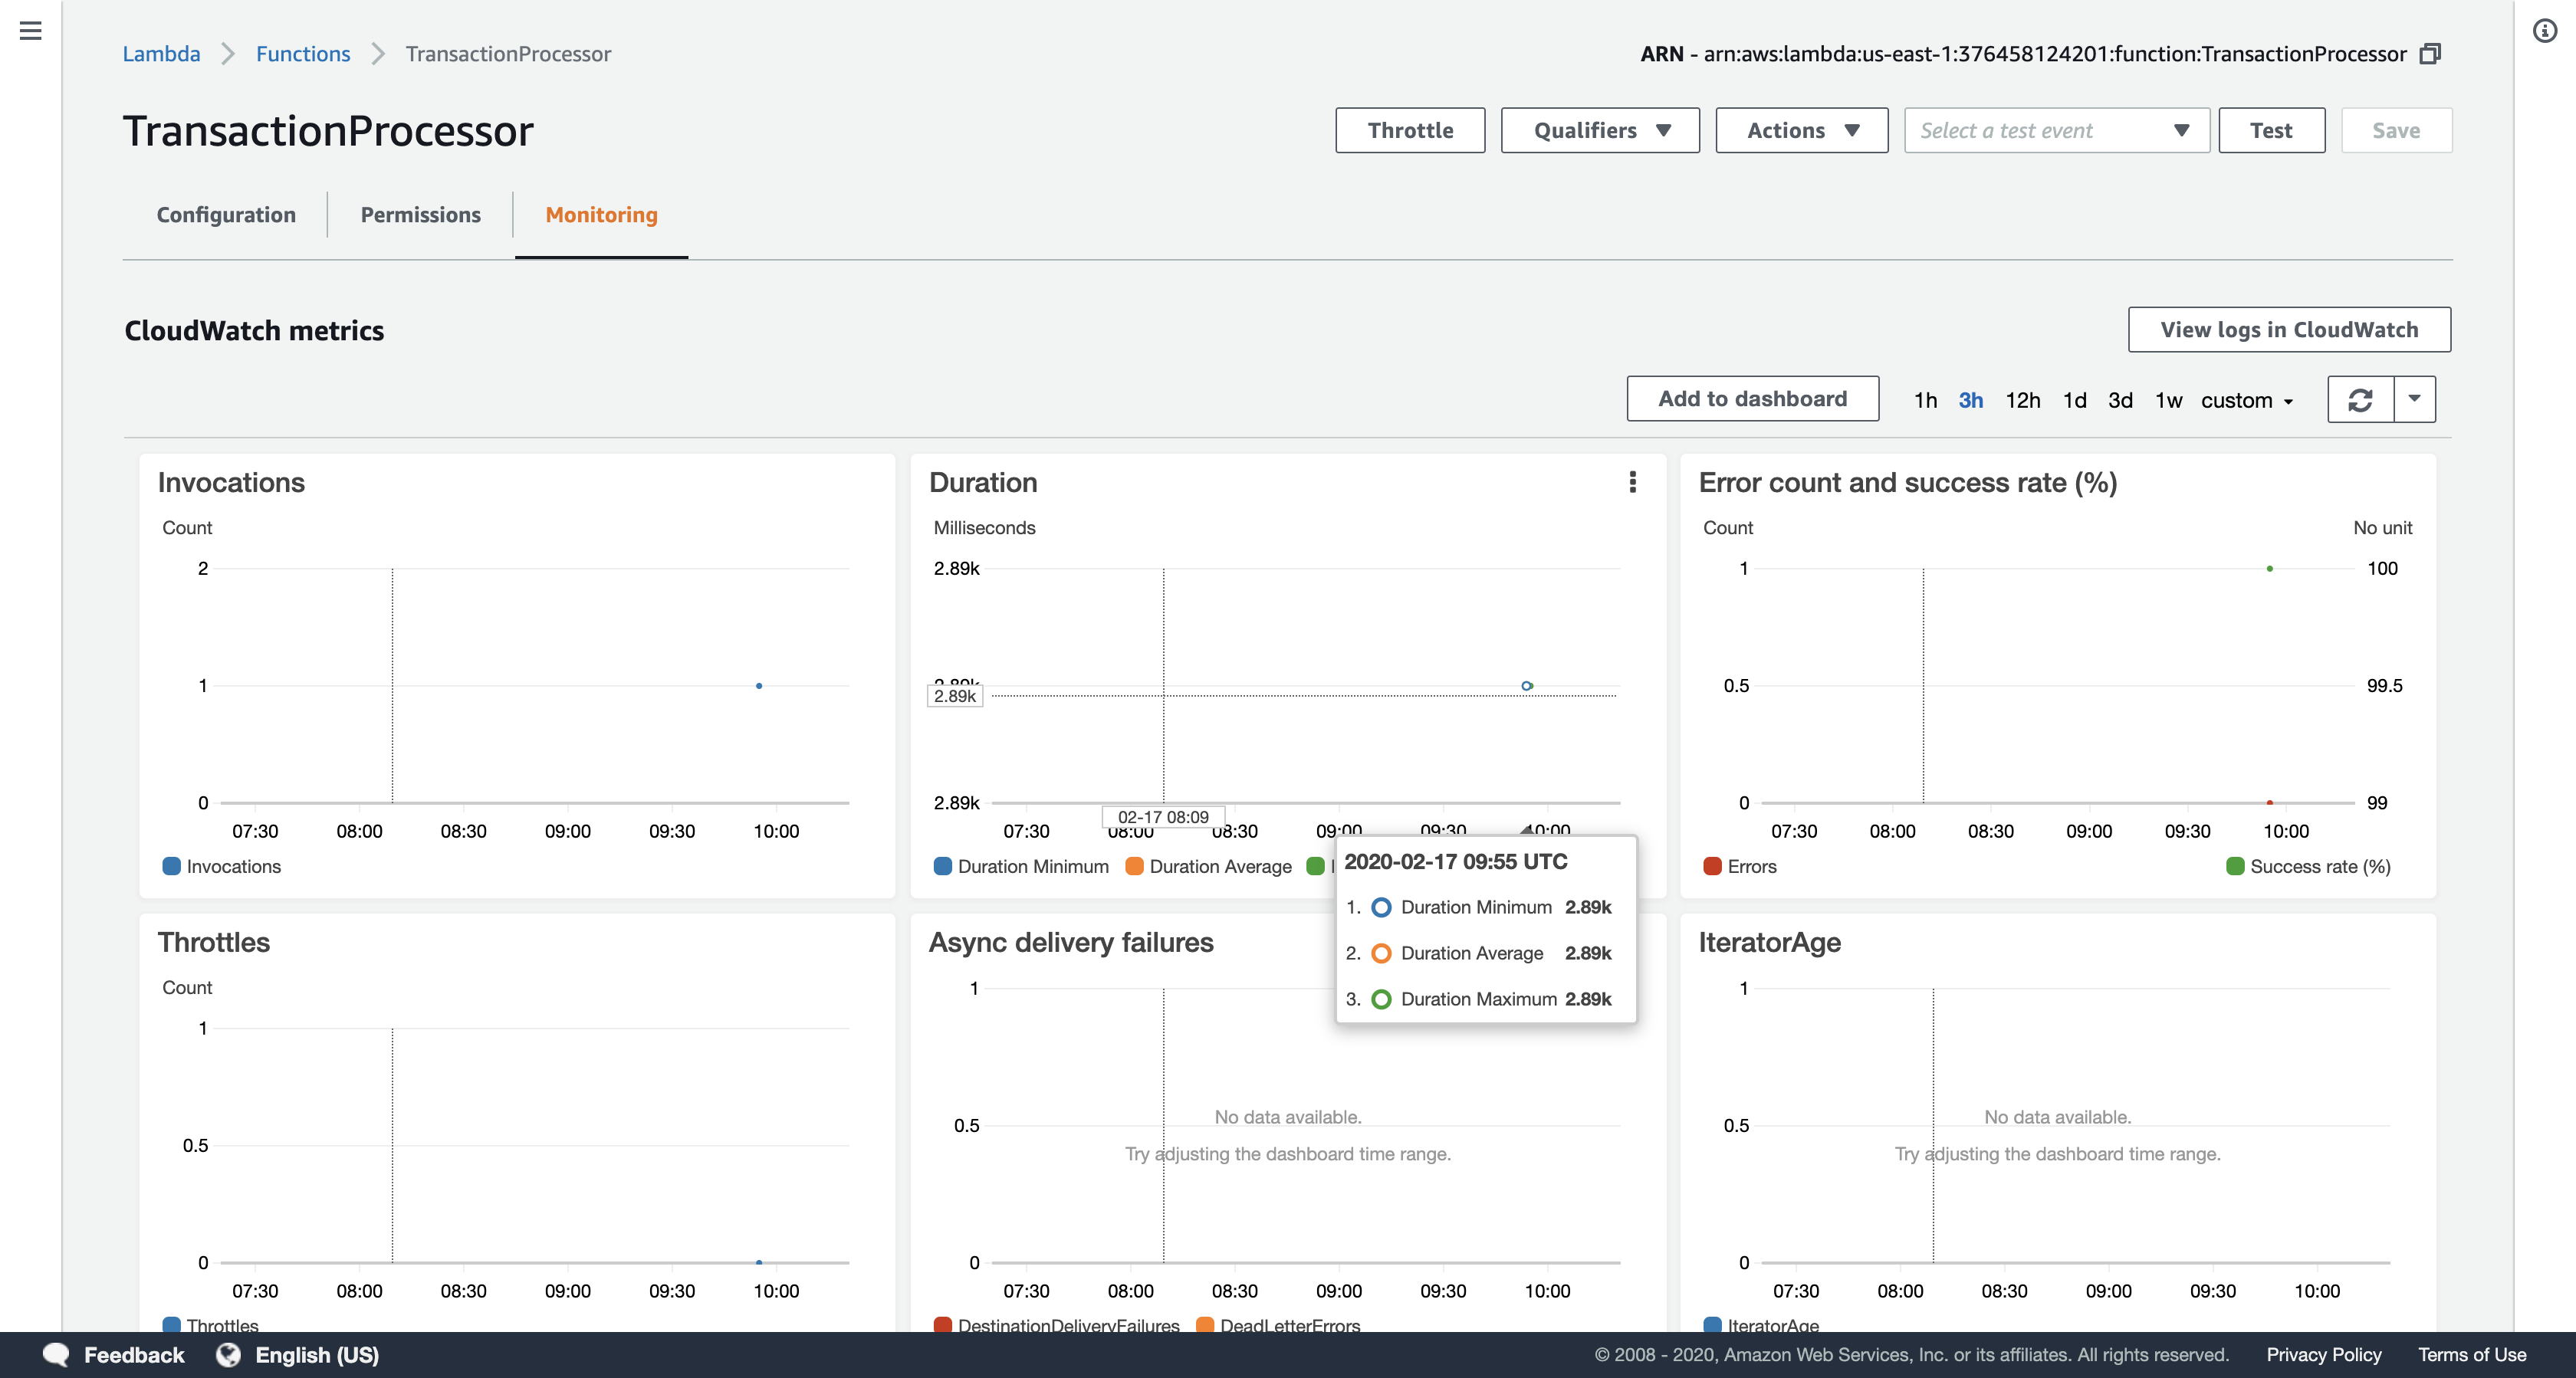
Click TransactionProcessor (click on the name itself), and then click the Monitoring tab to view CloudWatch metrics for the Lambda function.
- The metrics should indicate that the Lambda function was invoked and that no errors occurred.
In the top-left of the page, click Functions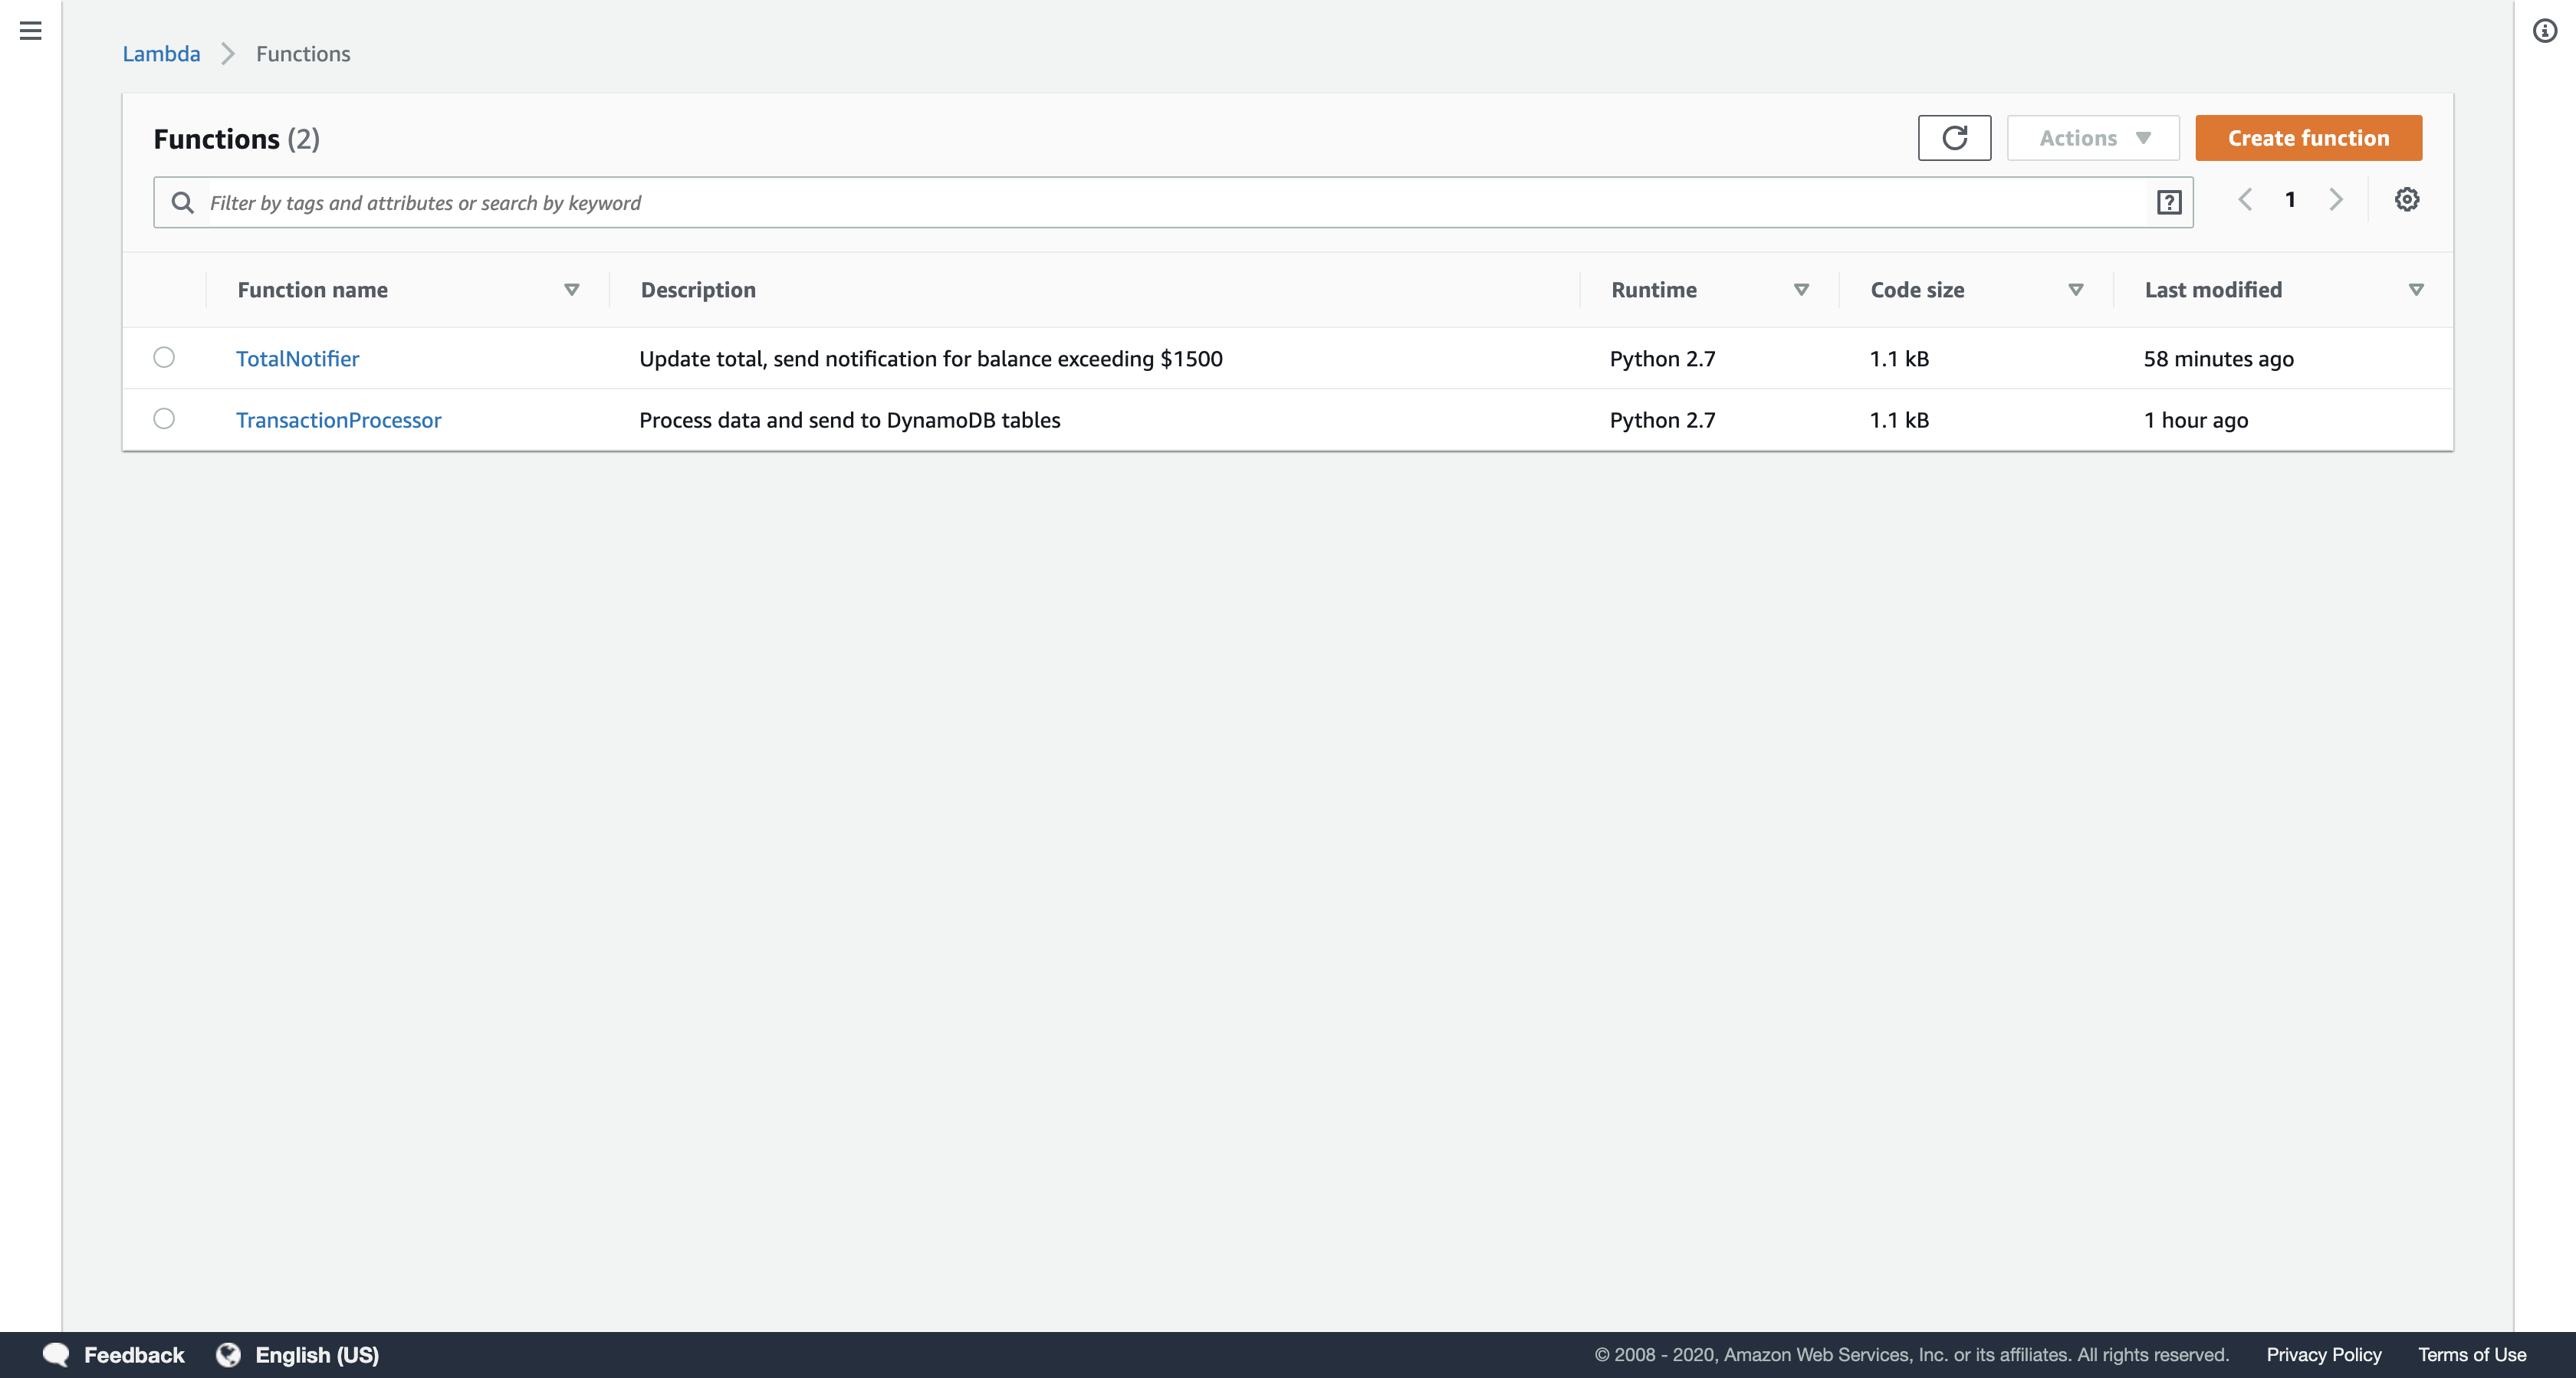
Click TotalNotifier (click on the name), and then click the Monitoring tab to view CloudWatch metrics for the Lambda function.
- Log files are useful for debugging Lambda functions. They are stored in Amazon CloudWatch Logs.
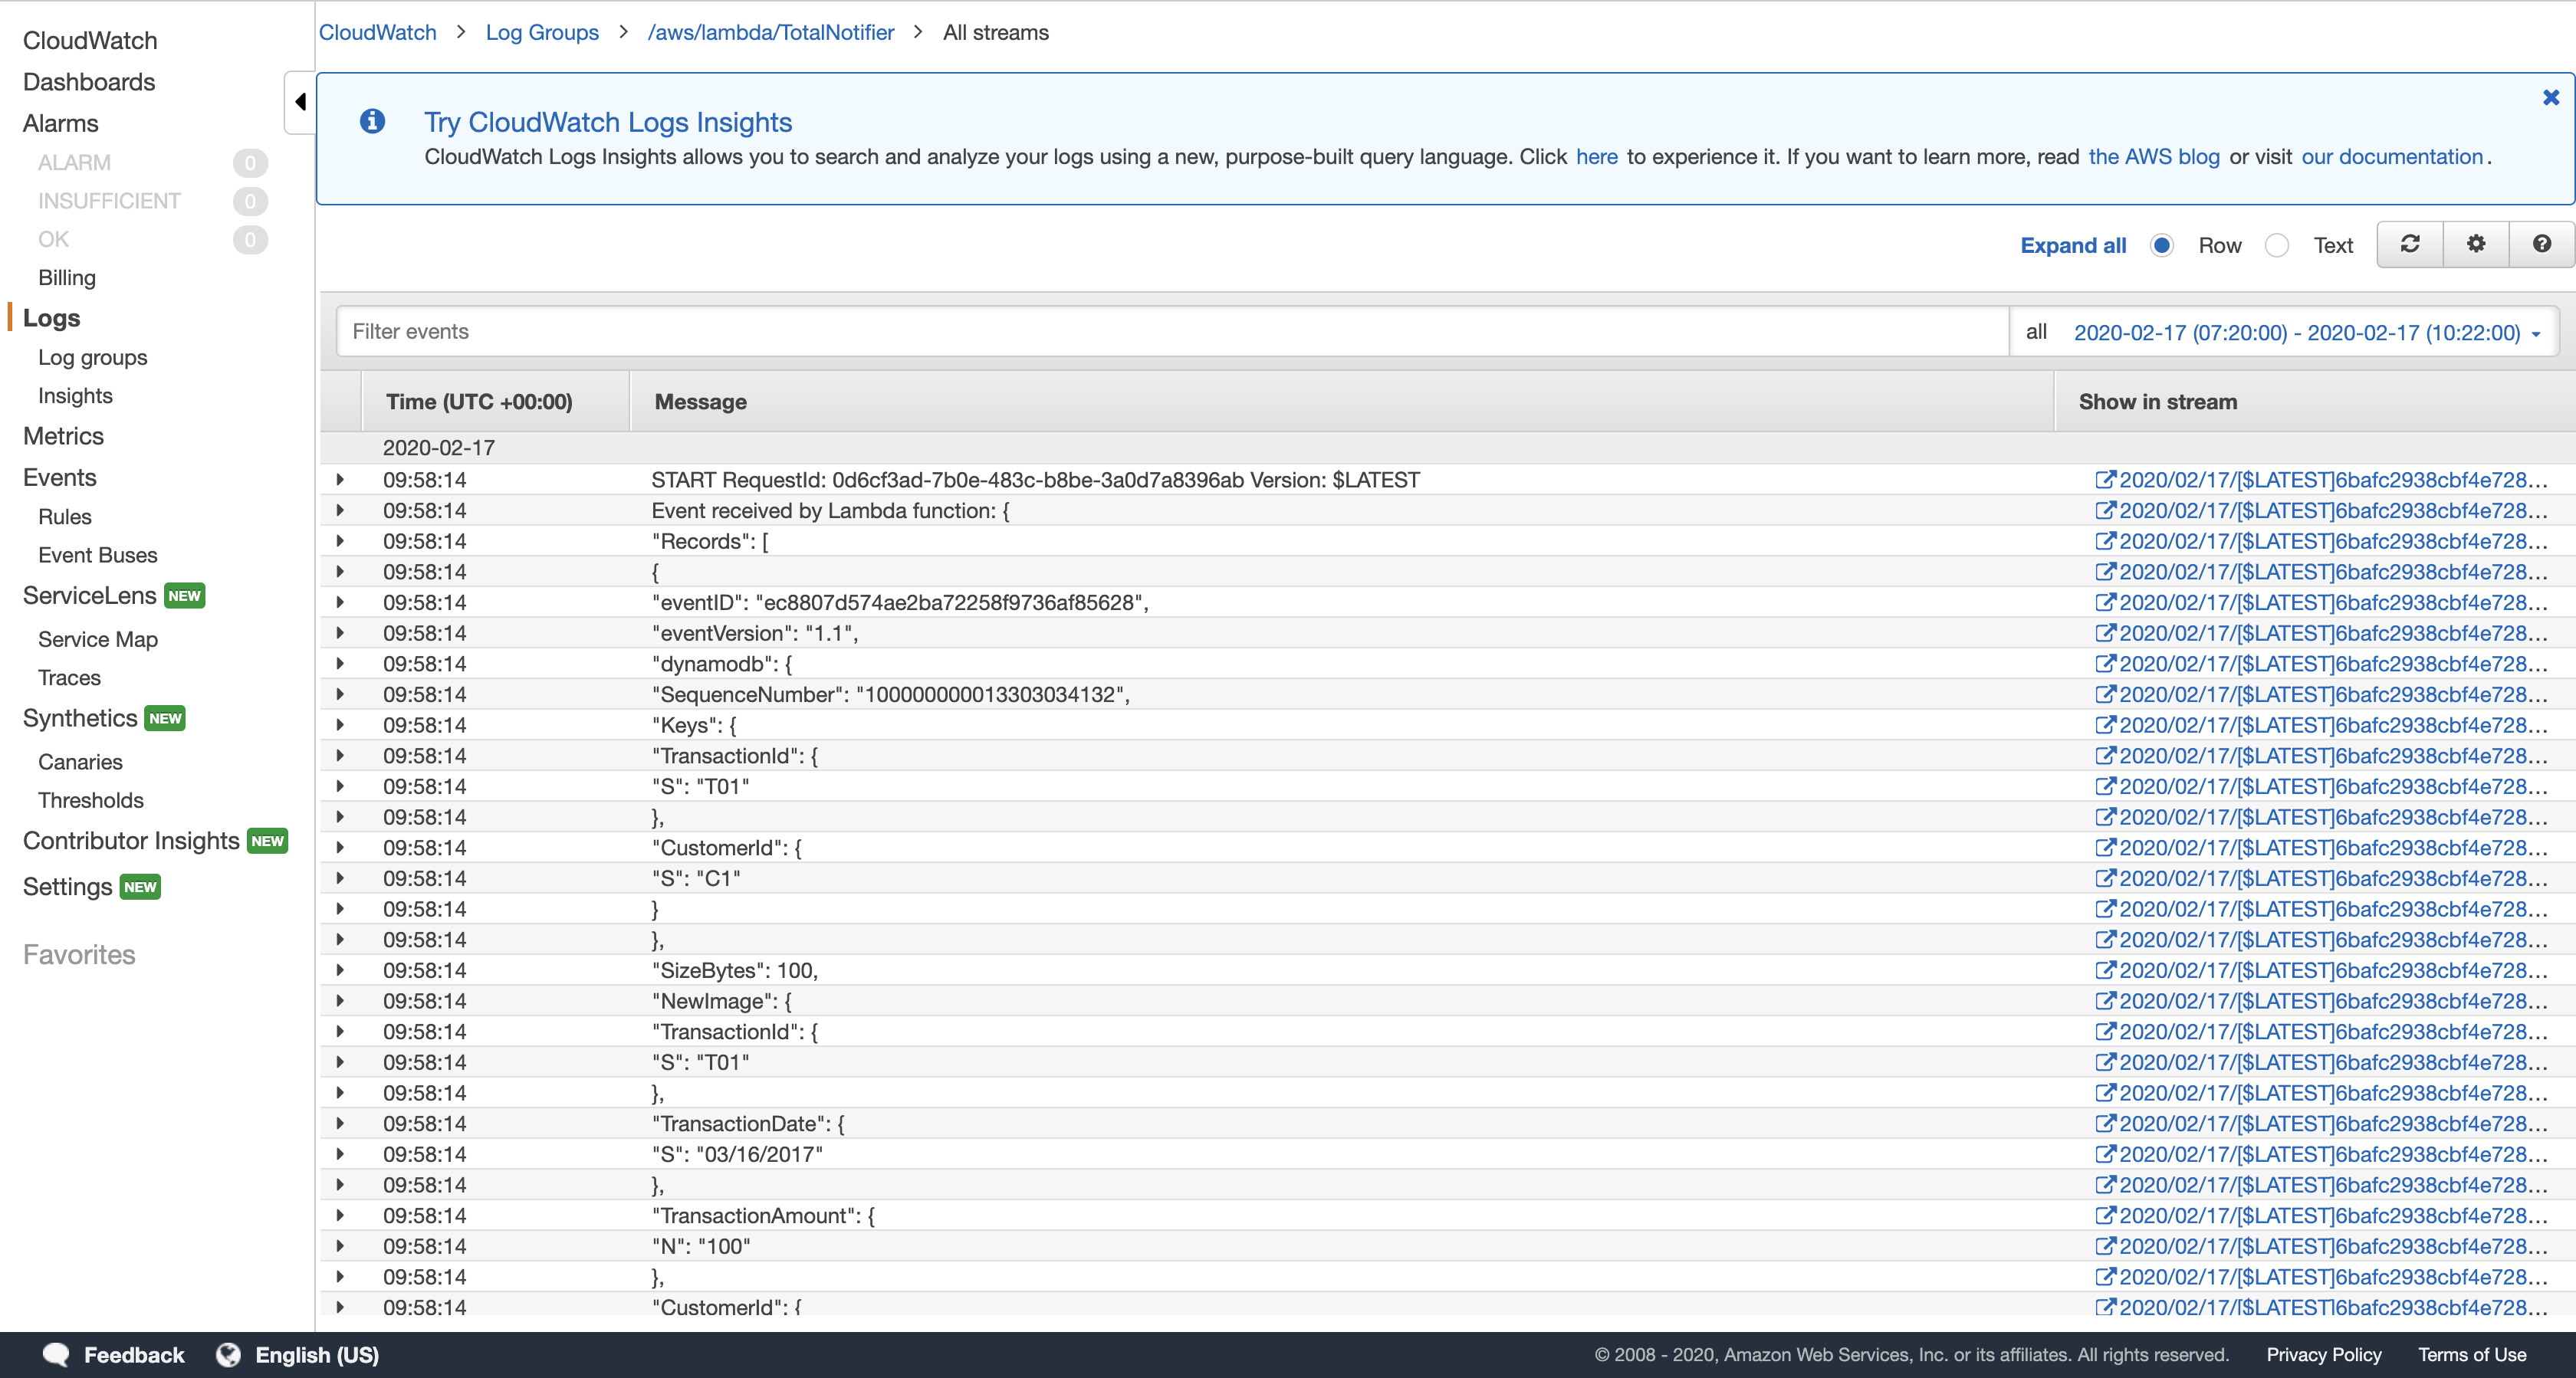
In the Invocations chart, click View logs in CloudWatch to see the logs for your function. Click the link displayed and look through the logs.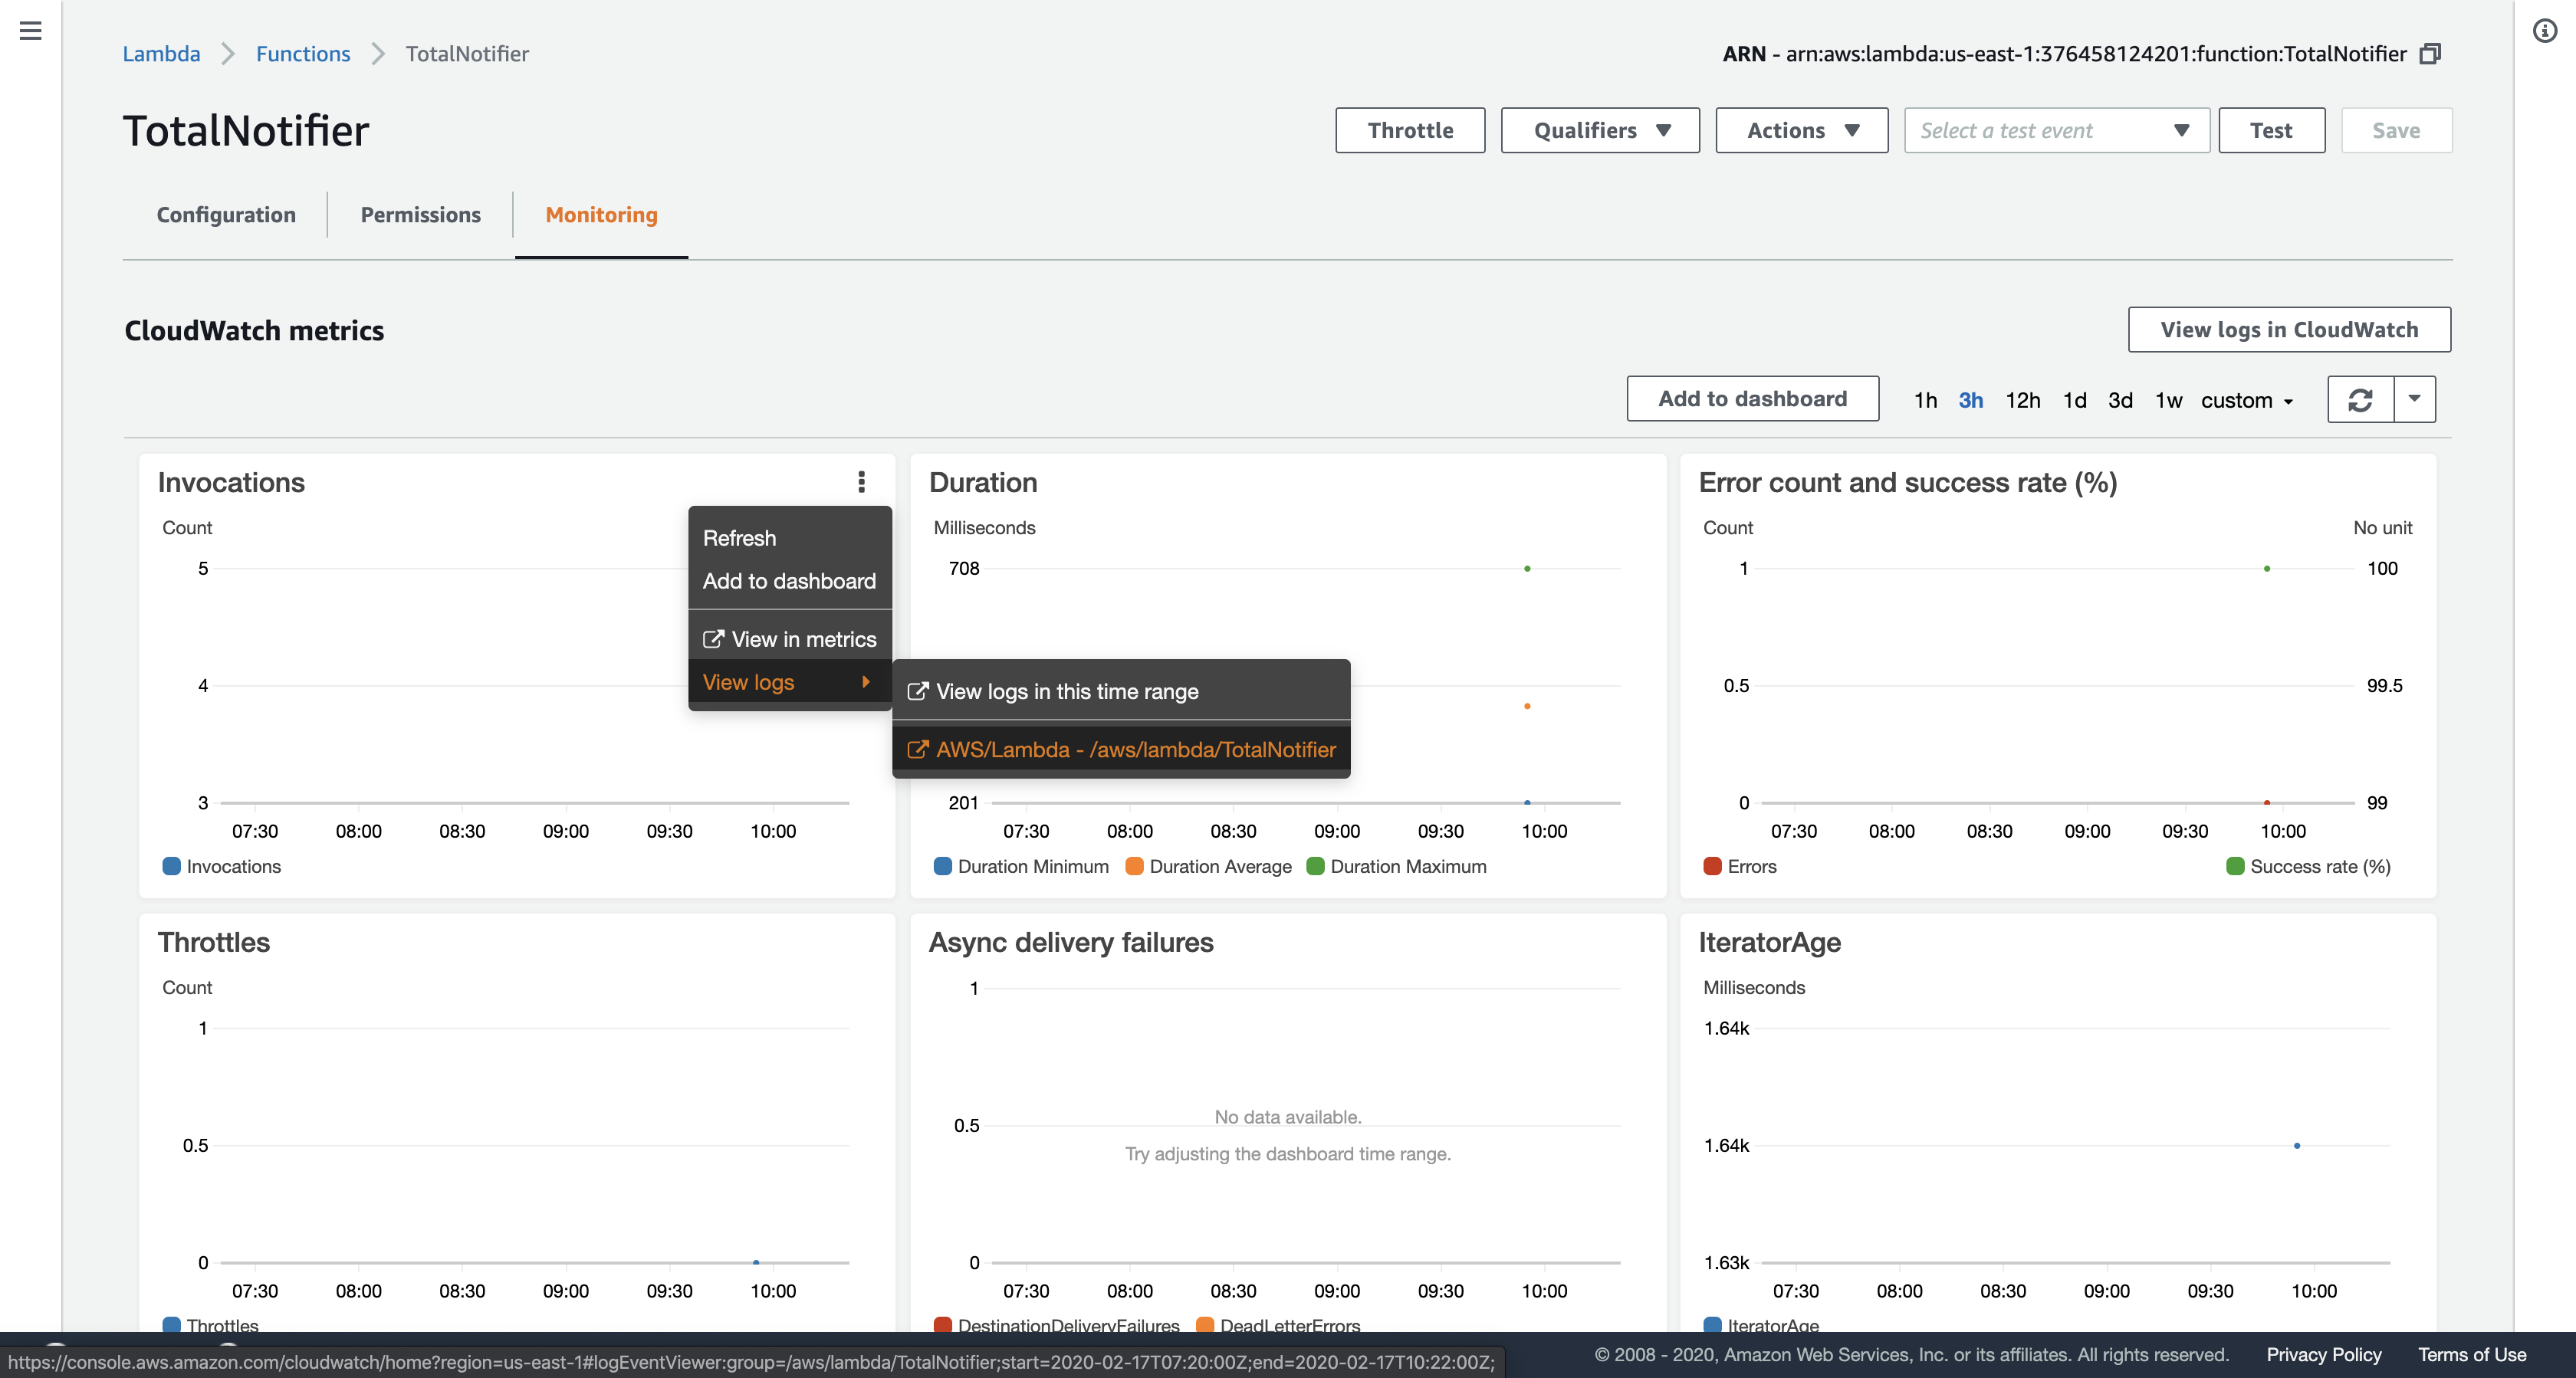
Lab Complete
Click End Lab at the top of this page and then click Yes to confirm that you want to end the lab.
A panel will appear, indicating that “DELETE has been initiated… You may close this message box now.”
Click the X in the top right corner to close the panel.
For feedback, suggestions, or corrections, please email us at: aws-course-feedback@amazon.com
ACA Module 10 LAB: Introducing Amazon CloudFront
In this lab you will create an Amazon CloudFront distribution that will use a CloudFront domain name in the url to distribute a publicly accessible image file stored in an Amazon S3 bucket.
Overview
This guide introduces you to Amazon CloudFront. In this lab you will create an Amazon CloudFront distribution that will use a CloudFront domain name in the url to distribute a publicly accessible image file stored in an Amazon S3 bucket.
Topics covered
By the end of this lab, you will be able to:
- Create a new Amazon CloudFront distribution
- Use your Amazon CloudFront distribution to serve an image file
- Delete your Amazon CloudFront distribution when it is no longer required
Amazon CloudFront
Amazon CloudFront is a content delivery web service. It integrates with other Amazon Web Services products to give developers and businesses an easy way to distribute content to end users with low latency, high data transfer speeds, and no minimum usage commitments.
Accessing the AWS Management Console
- At the top of these instructions, click
Start Labto launch your lab.
A Start Lab panel opens displaying the lab status. - Wait until you see the message “Lab status: ready“, then click the
Xto close the Start Lab panel. - At the top of these instructions, click
AWS
This will to open the AWS Management Console in a new browser tab. The system will automatically log you in.
Tip: If a new browser tab does not open, there will typically be a banner or icon at the top of your browser indicating that your browser is preventing the site from opening pop-up windows. Click on the banner or icon and choose “Allow pop ups.”
4. Arrange the AWS Management Console tab so that it displays along side these instructions. Ideally, you will be able to see both browser tabs at the same time, to make it easier to follow the lab steps.
Task 1: Store a Publicly Accessible Image File in an Amazon S3 Bucket
https://labs.vocareum.com/main/main.php?m=editor&nav=1&asnid=110827&stepid=110828
In this task, you will store the file that you wish to distribute using Amazon CloudFront in a publicly accessible location. You will store the image file in a publically accessible Amazon S3 bucket.
AWS Management Console
Services menu > click S3
Amazon S3 console > click Create bucket then configure:
- Bucket name:
cloudfront-bucket-0 - Replace
0with a random number - Leave others blank or default value
- Click
Create

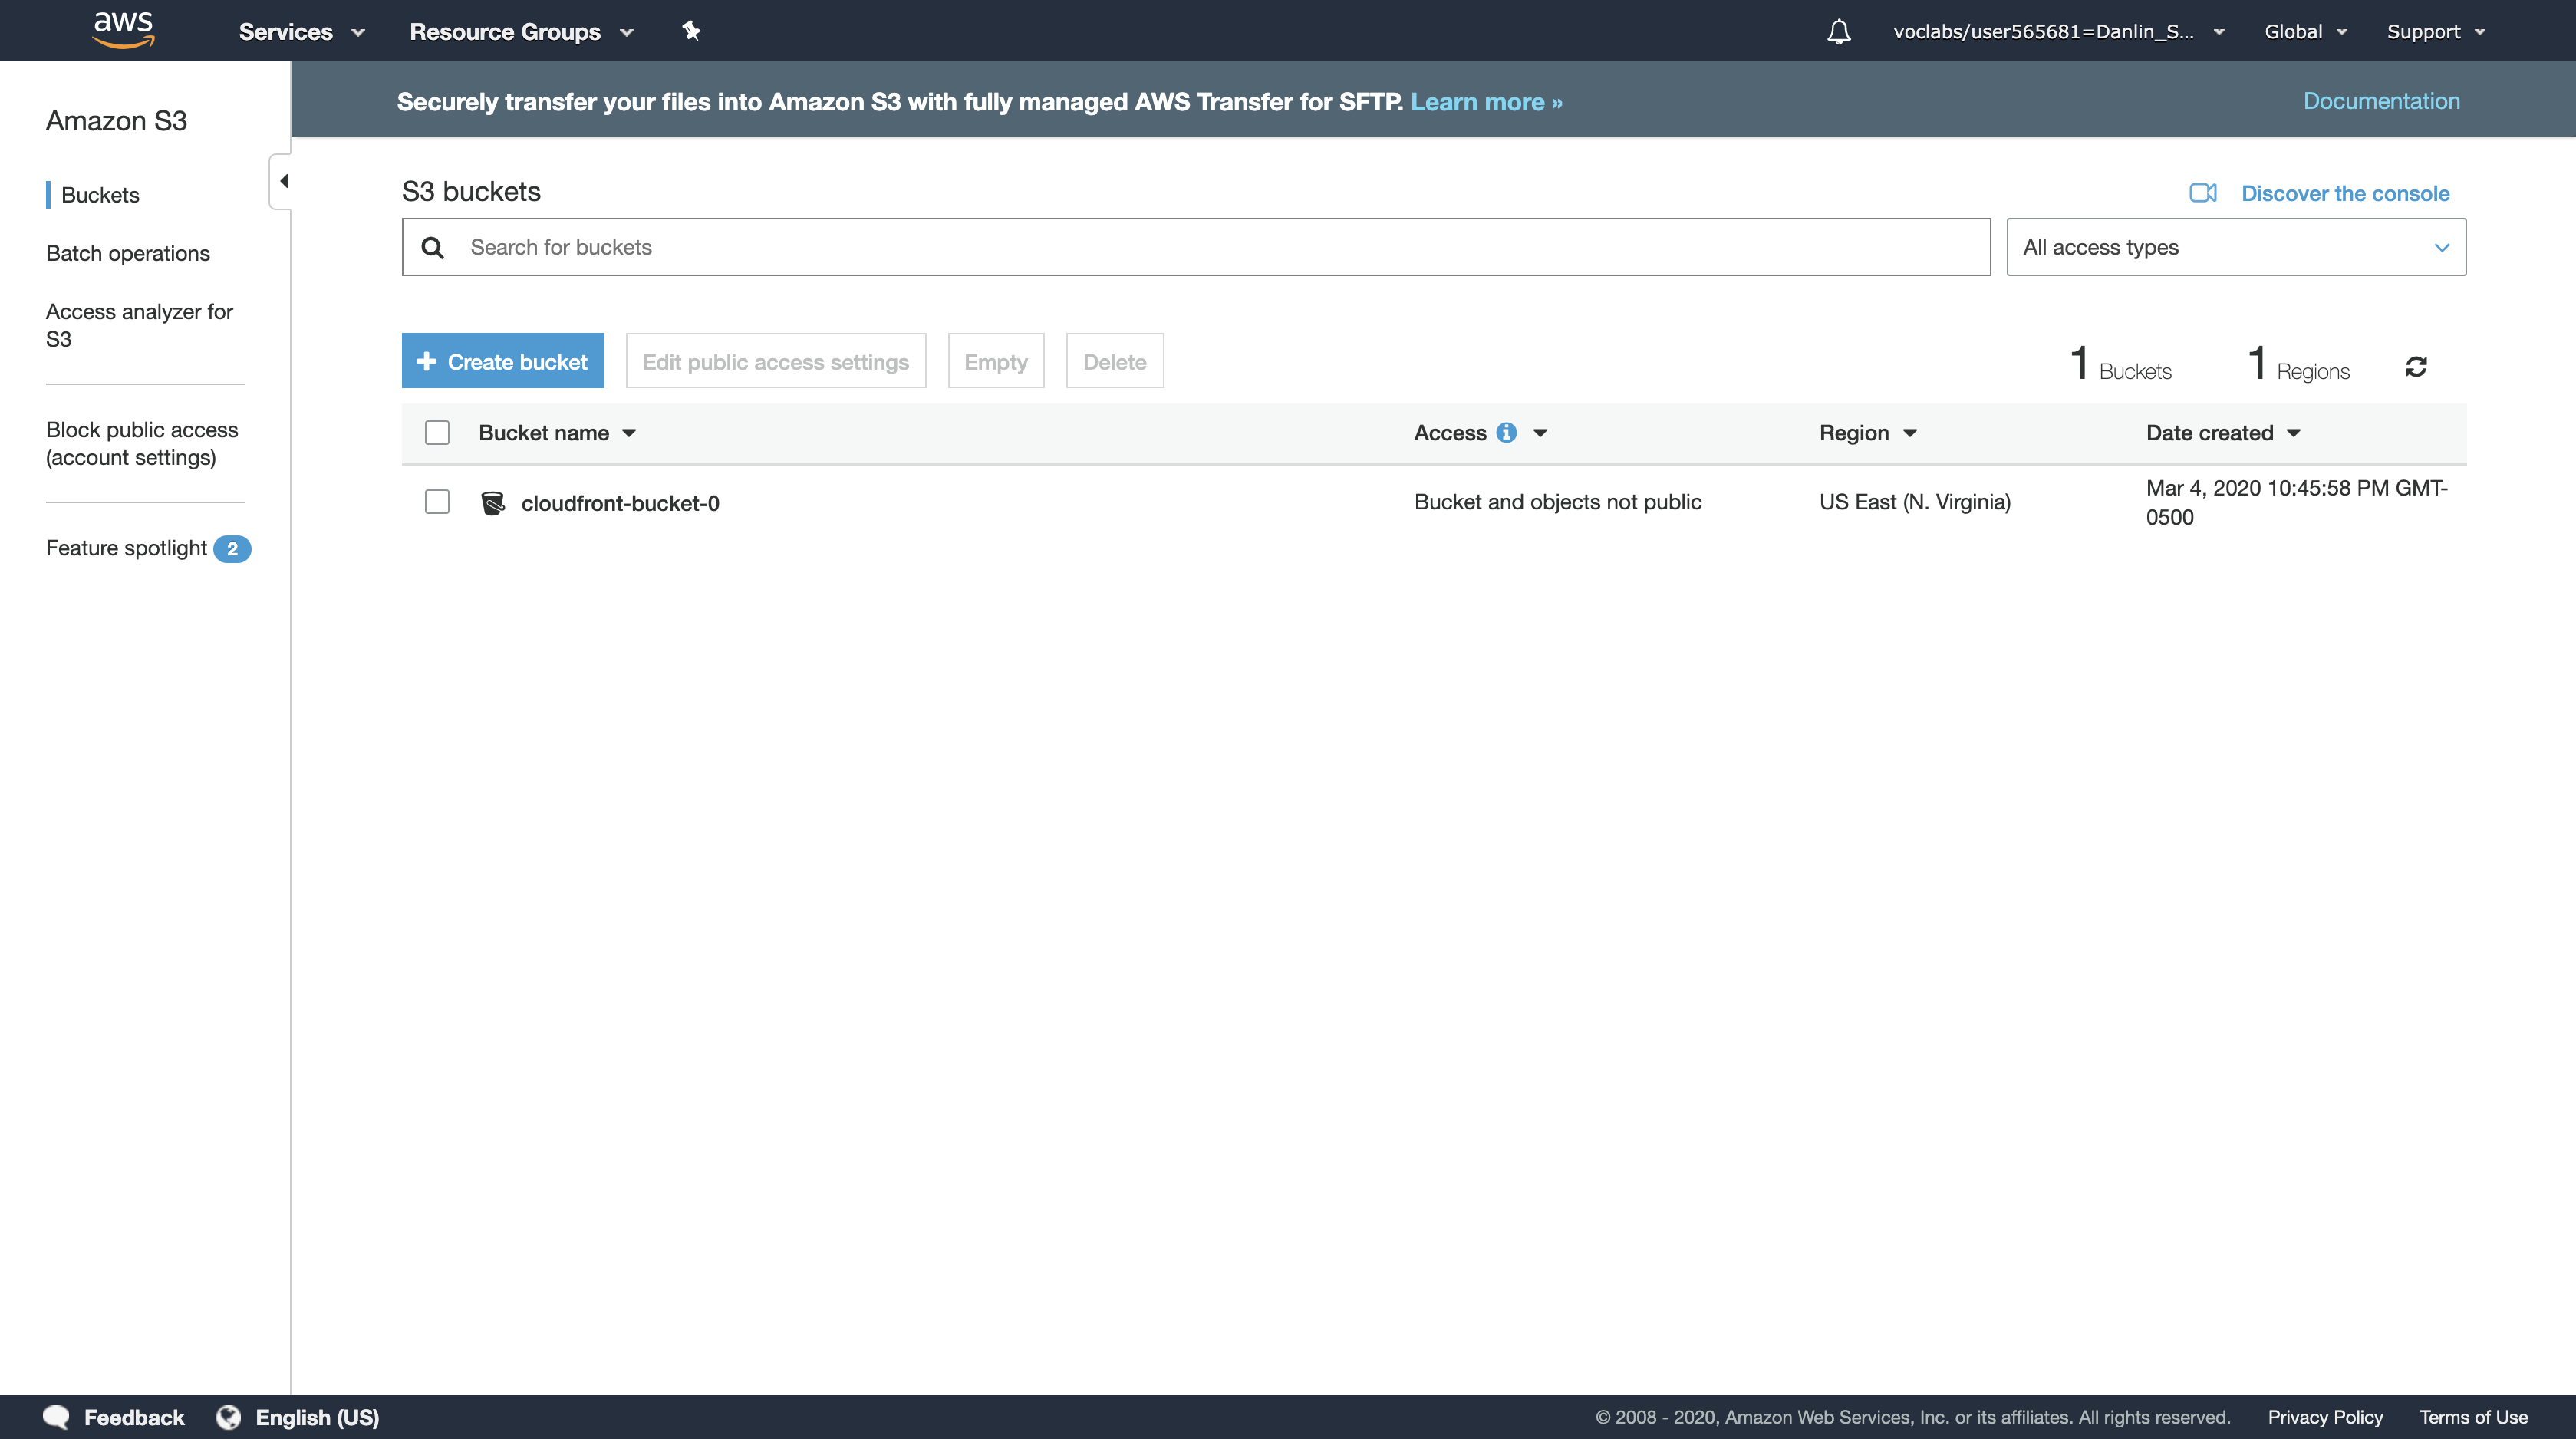
Note: If you receive an error saying that your bucket name is not available, try a different bucket name. For your bucket to work with CloudFront, the name must conform to DNS naming requirements. For more information, go to Bucket Restrictions and Limitations in the Amazon Simple Storage Service Developer Guide.
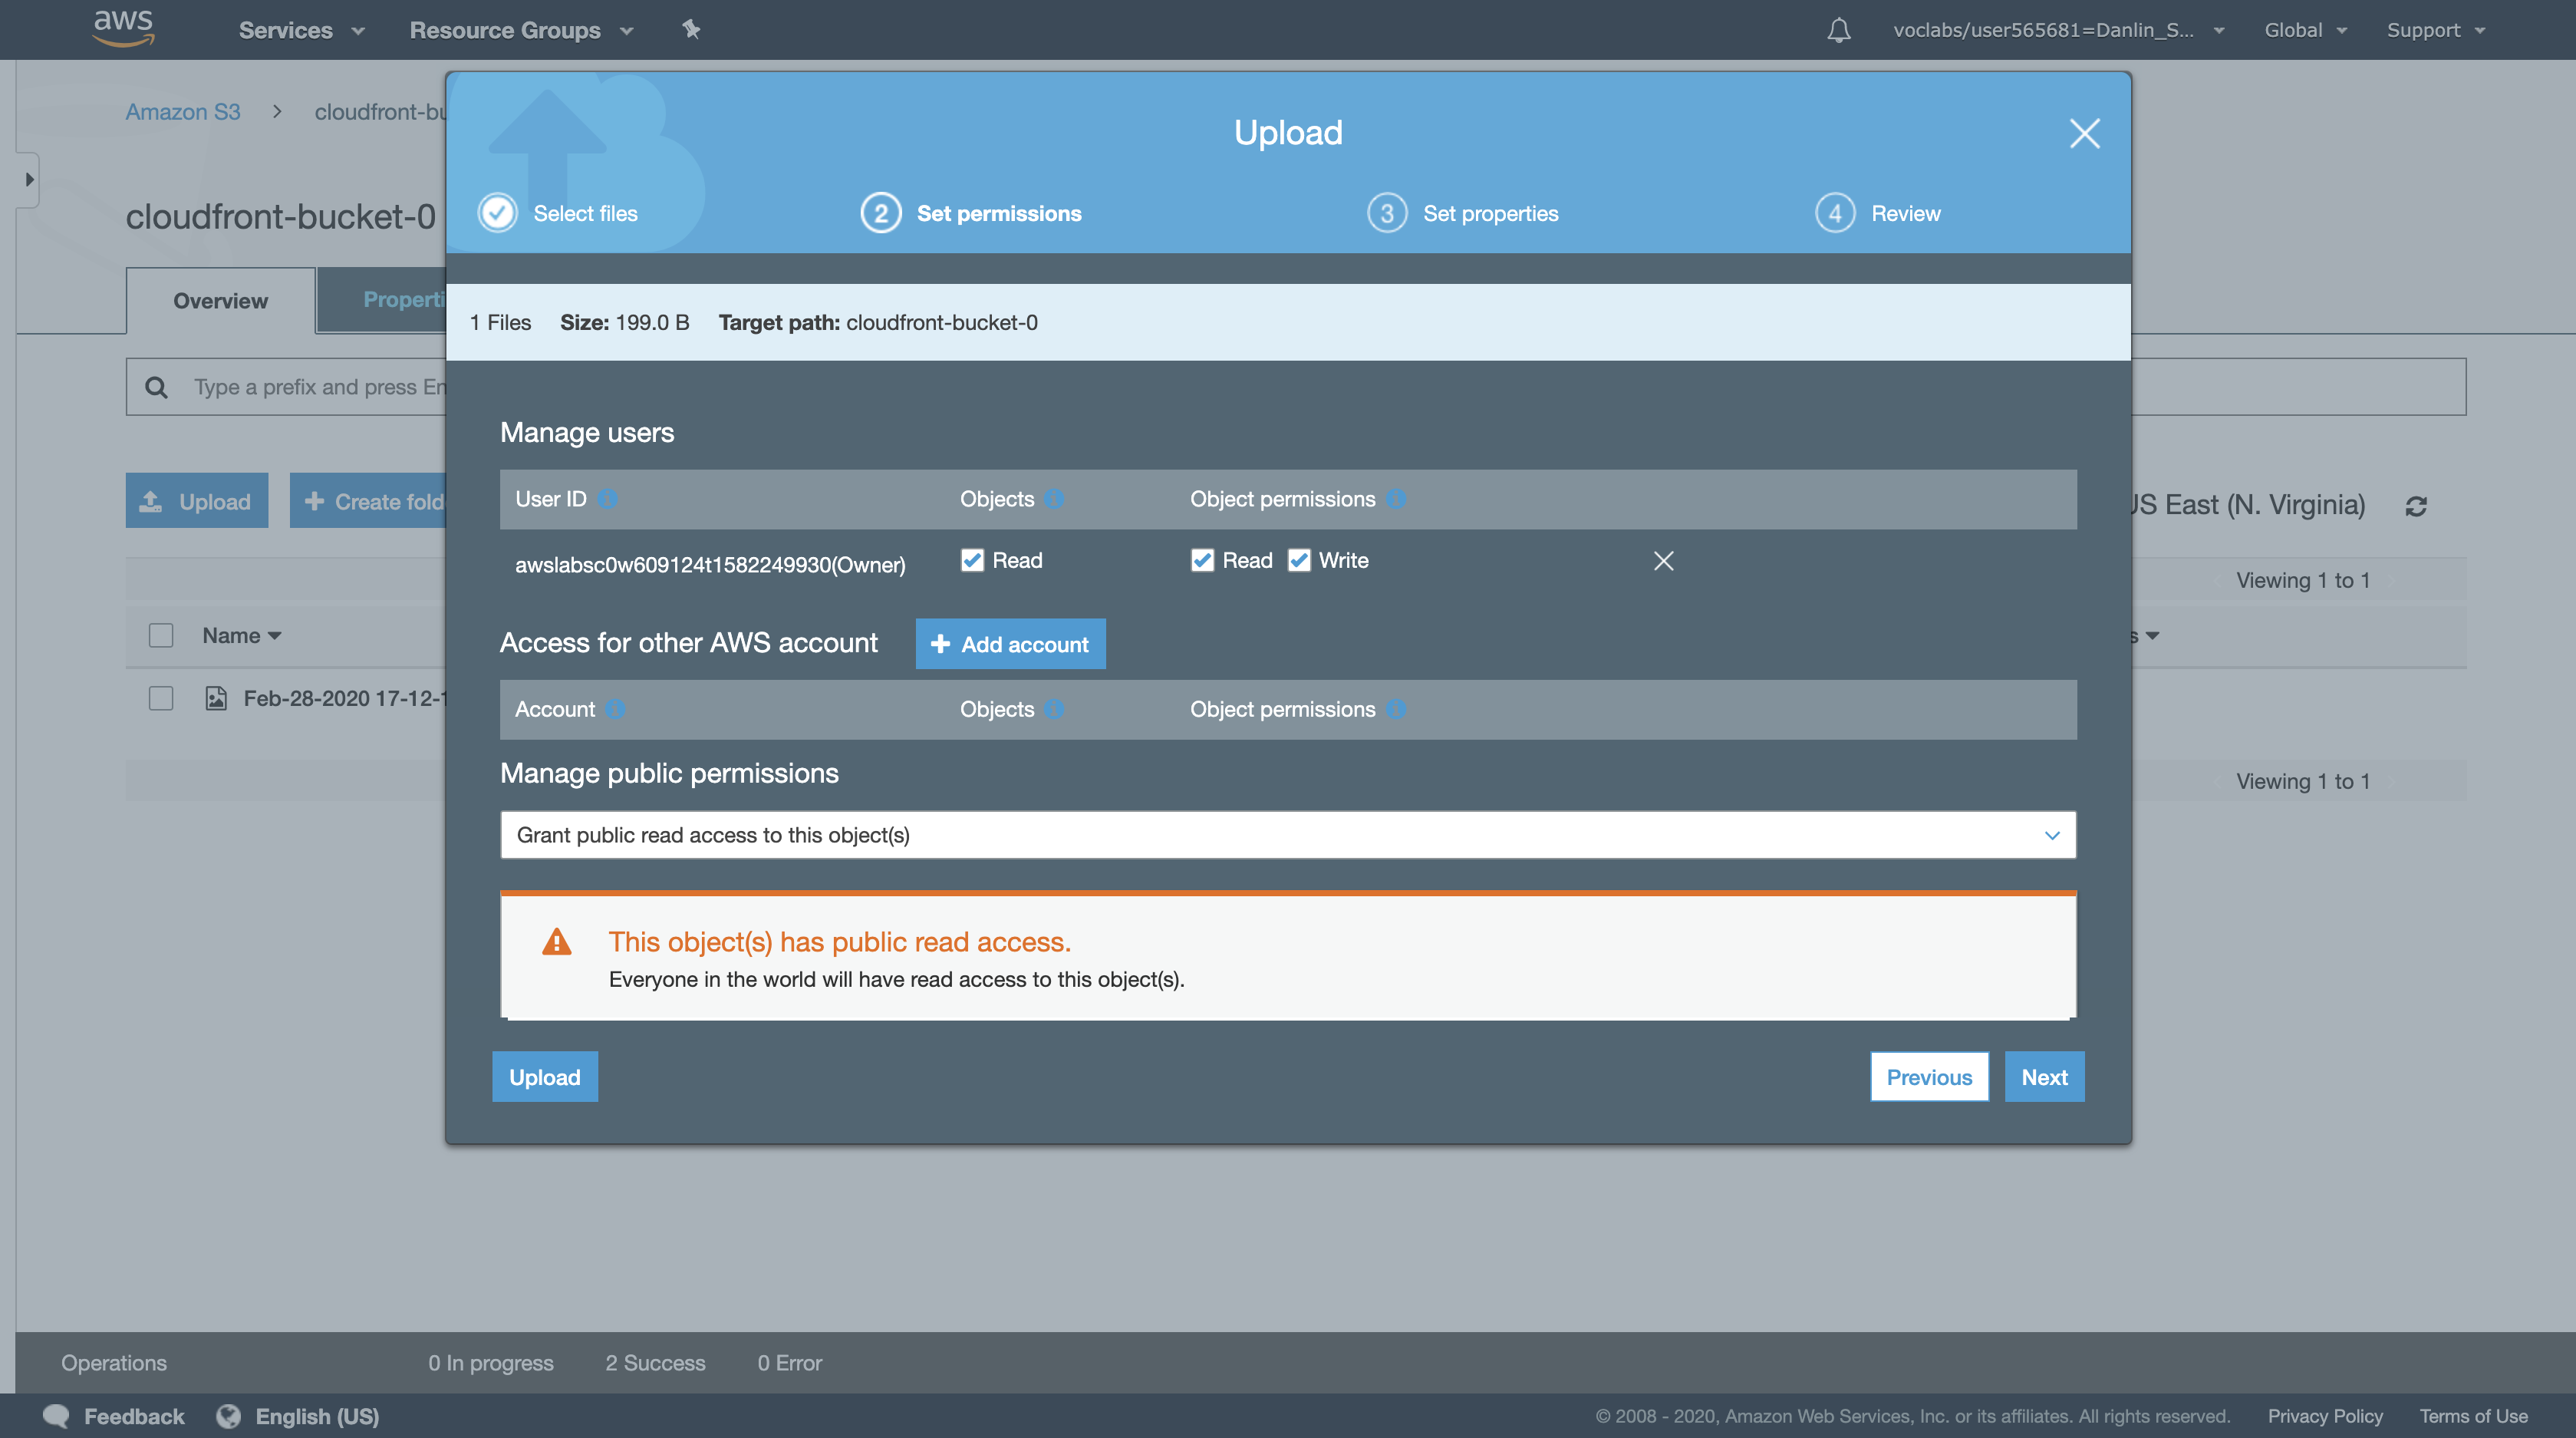
Click on the S3 bucket you created and then click the Permissions tab.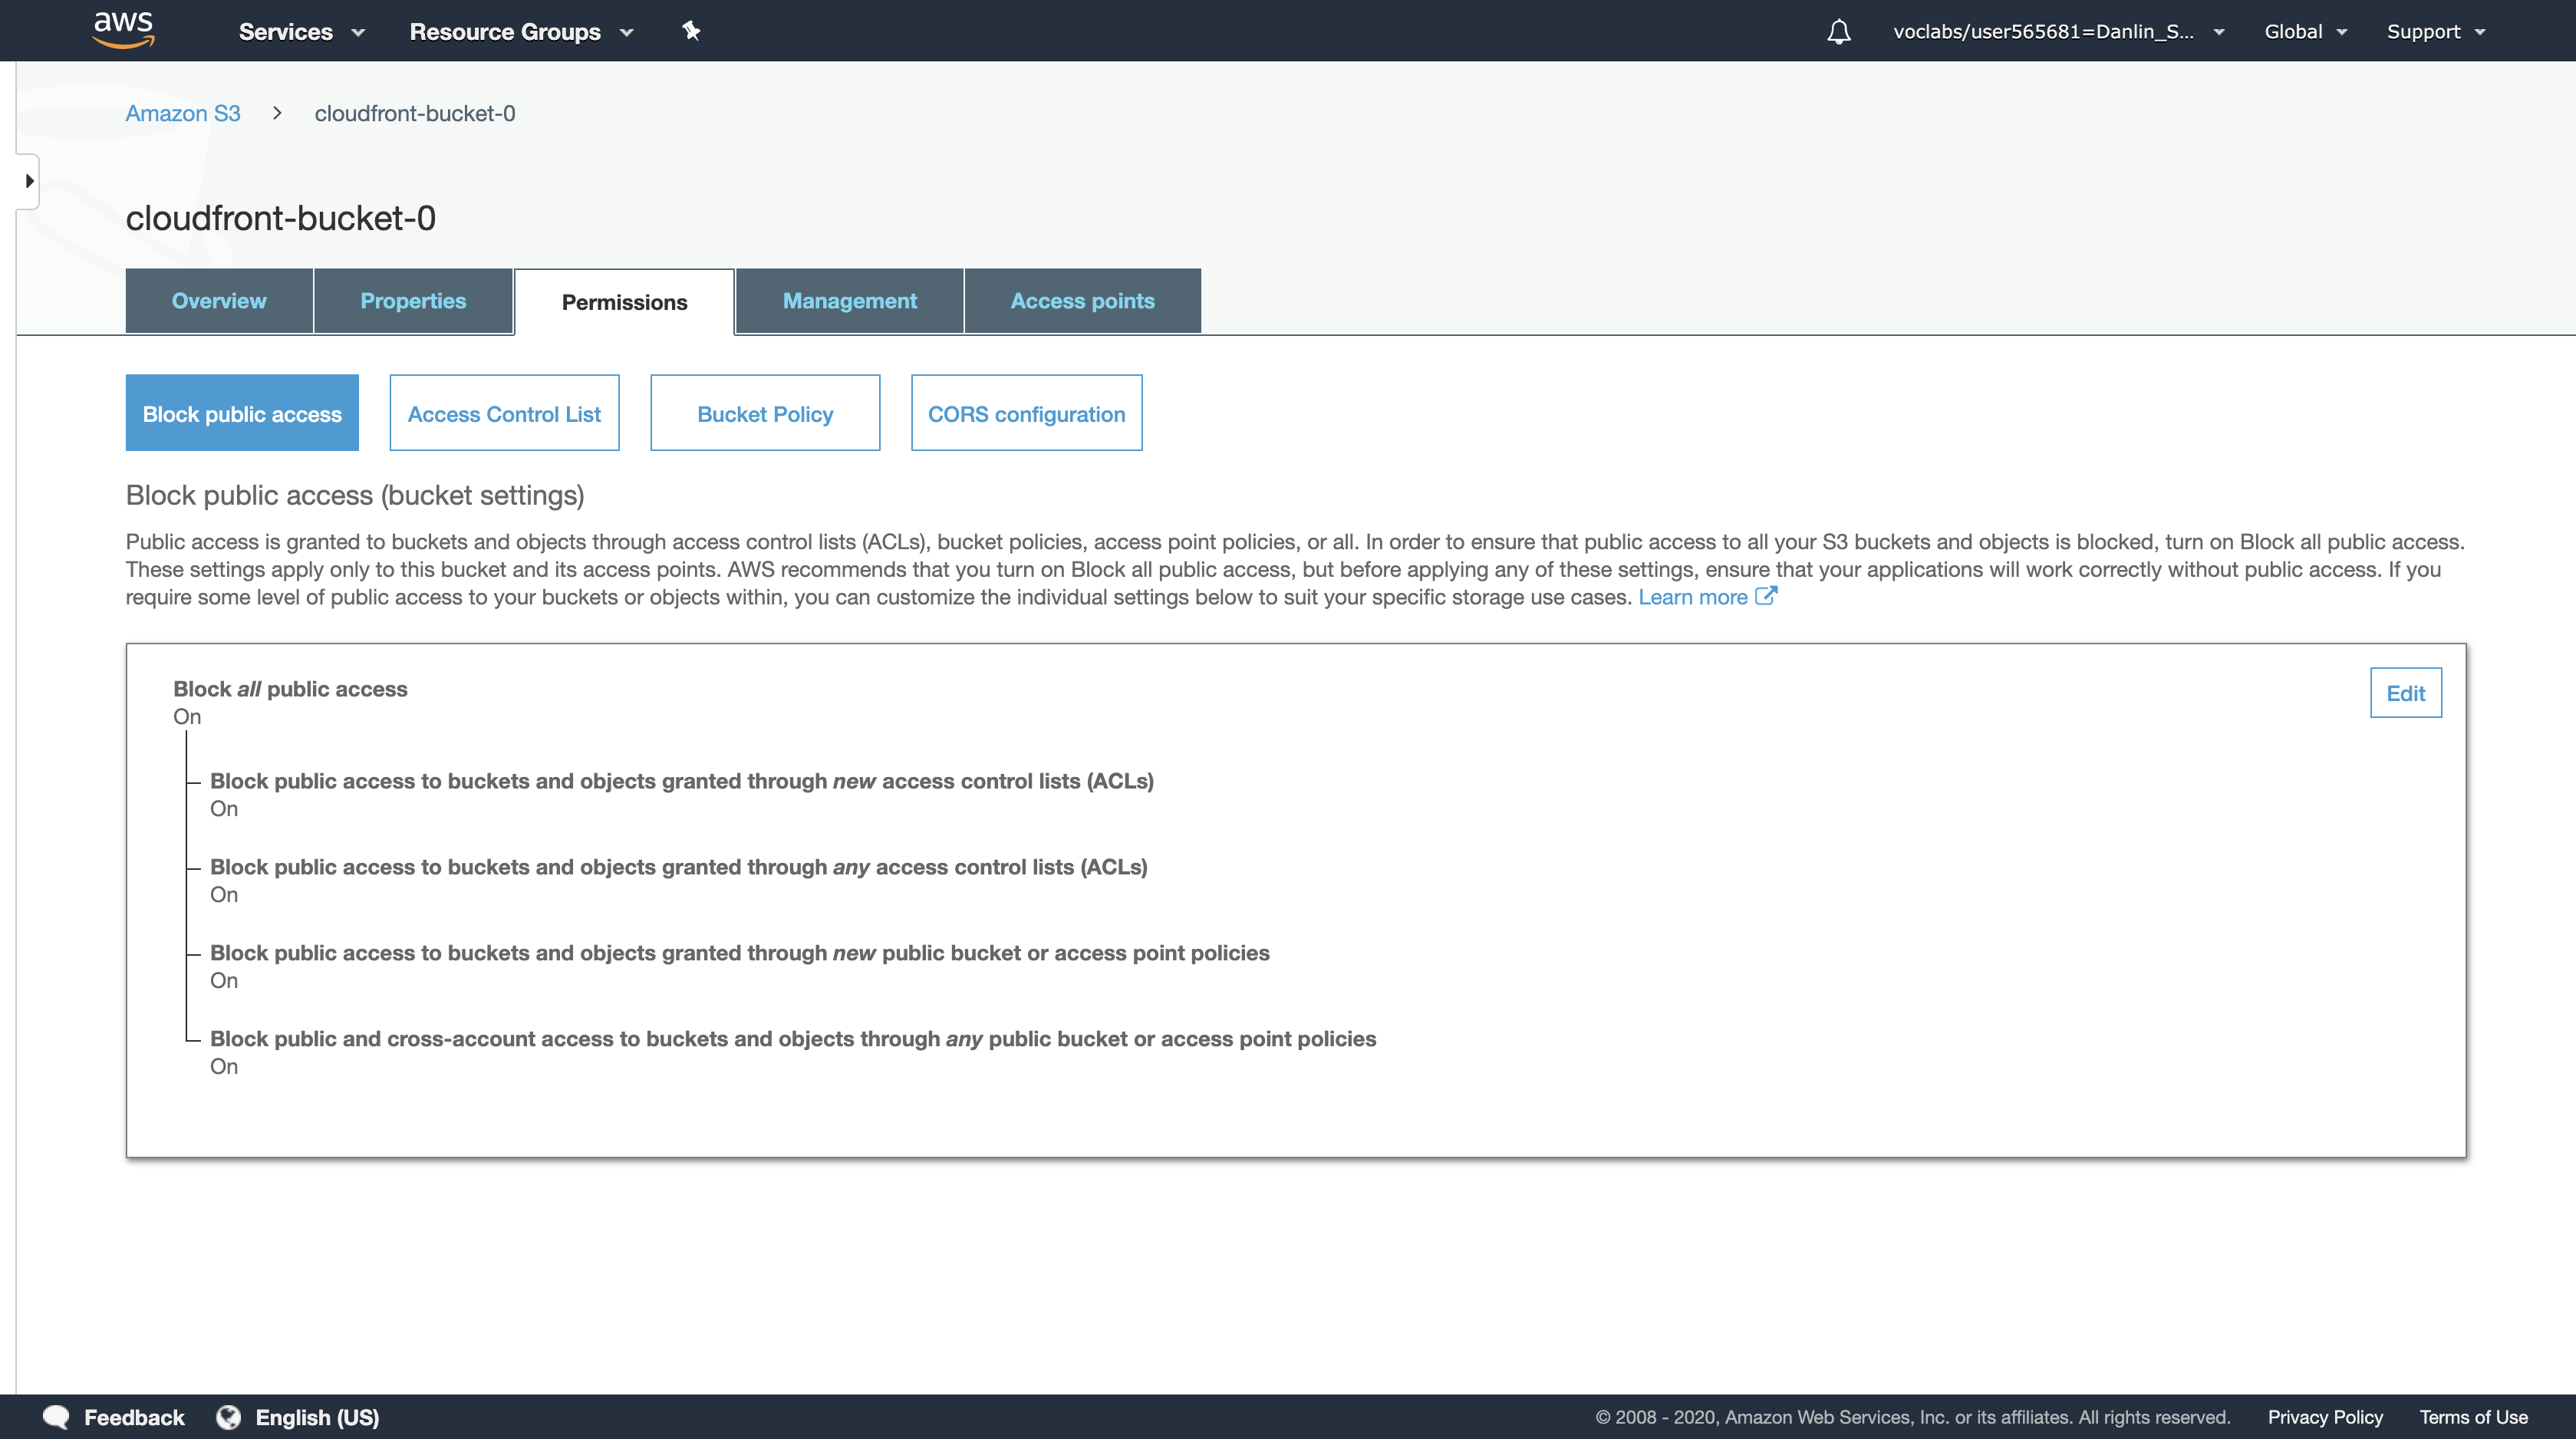
With Block public access selected, click Edit.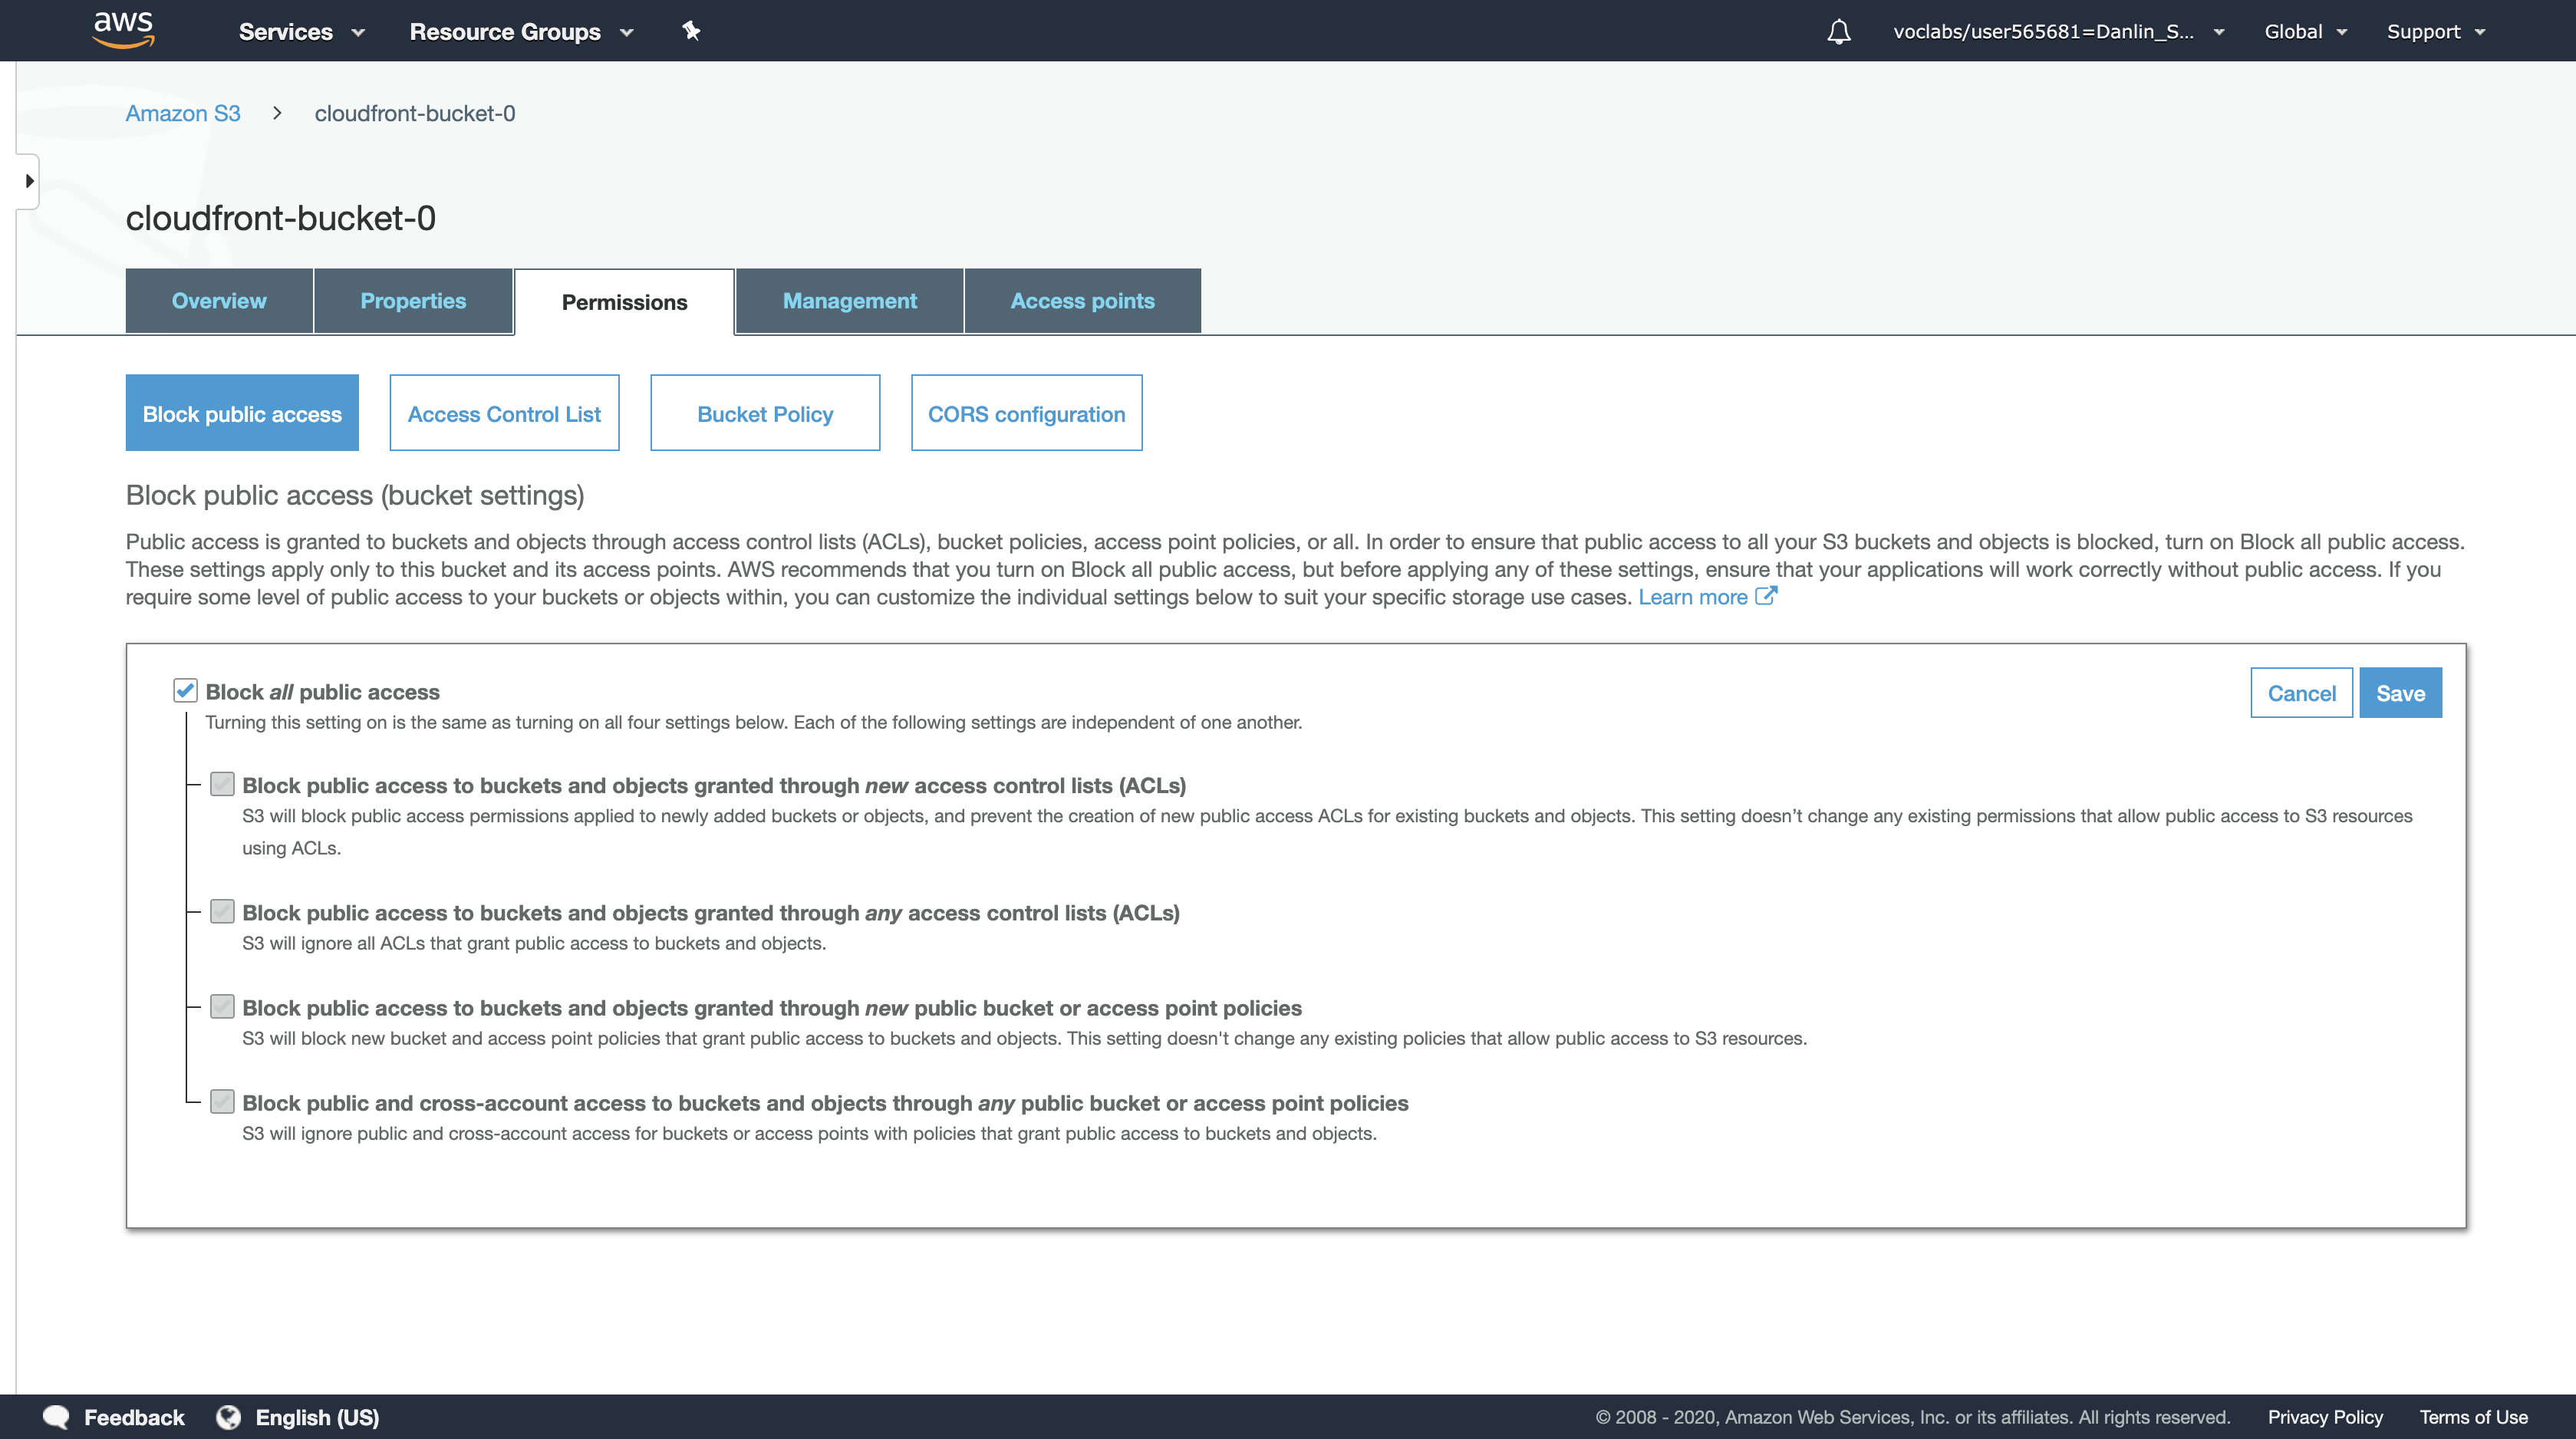
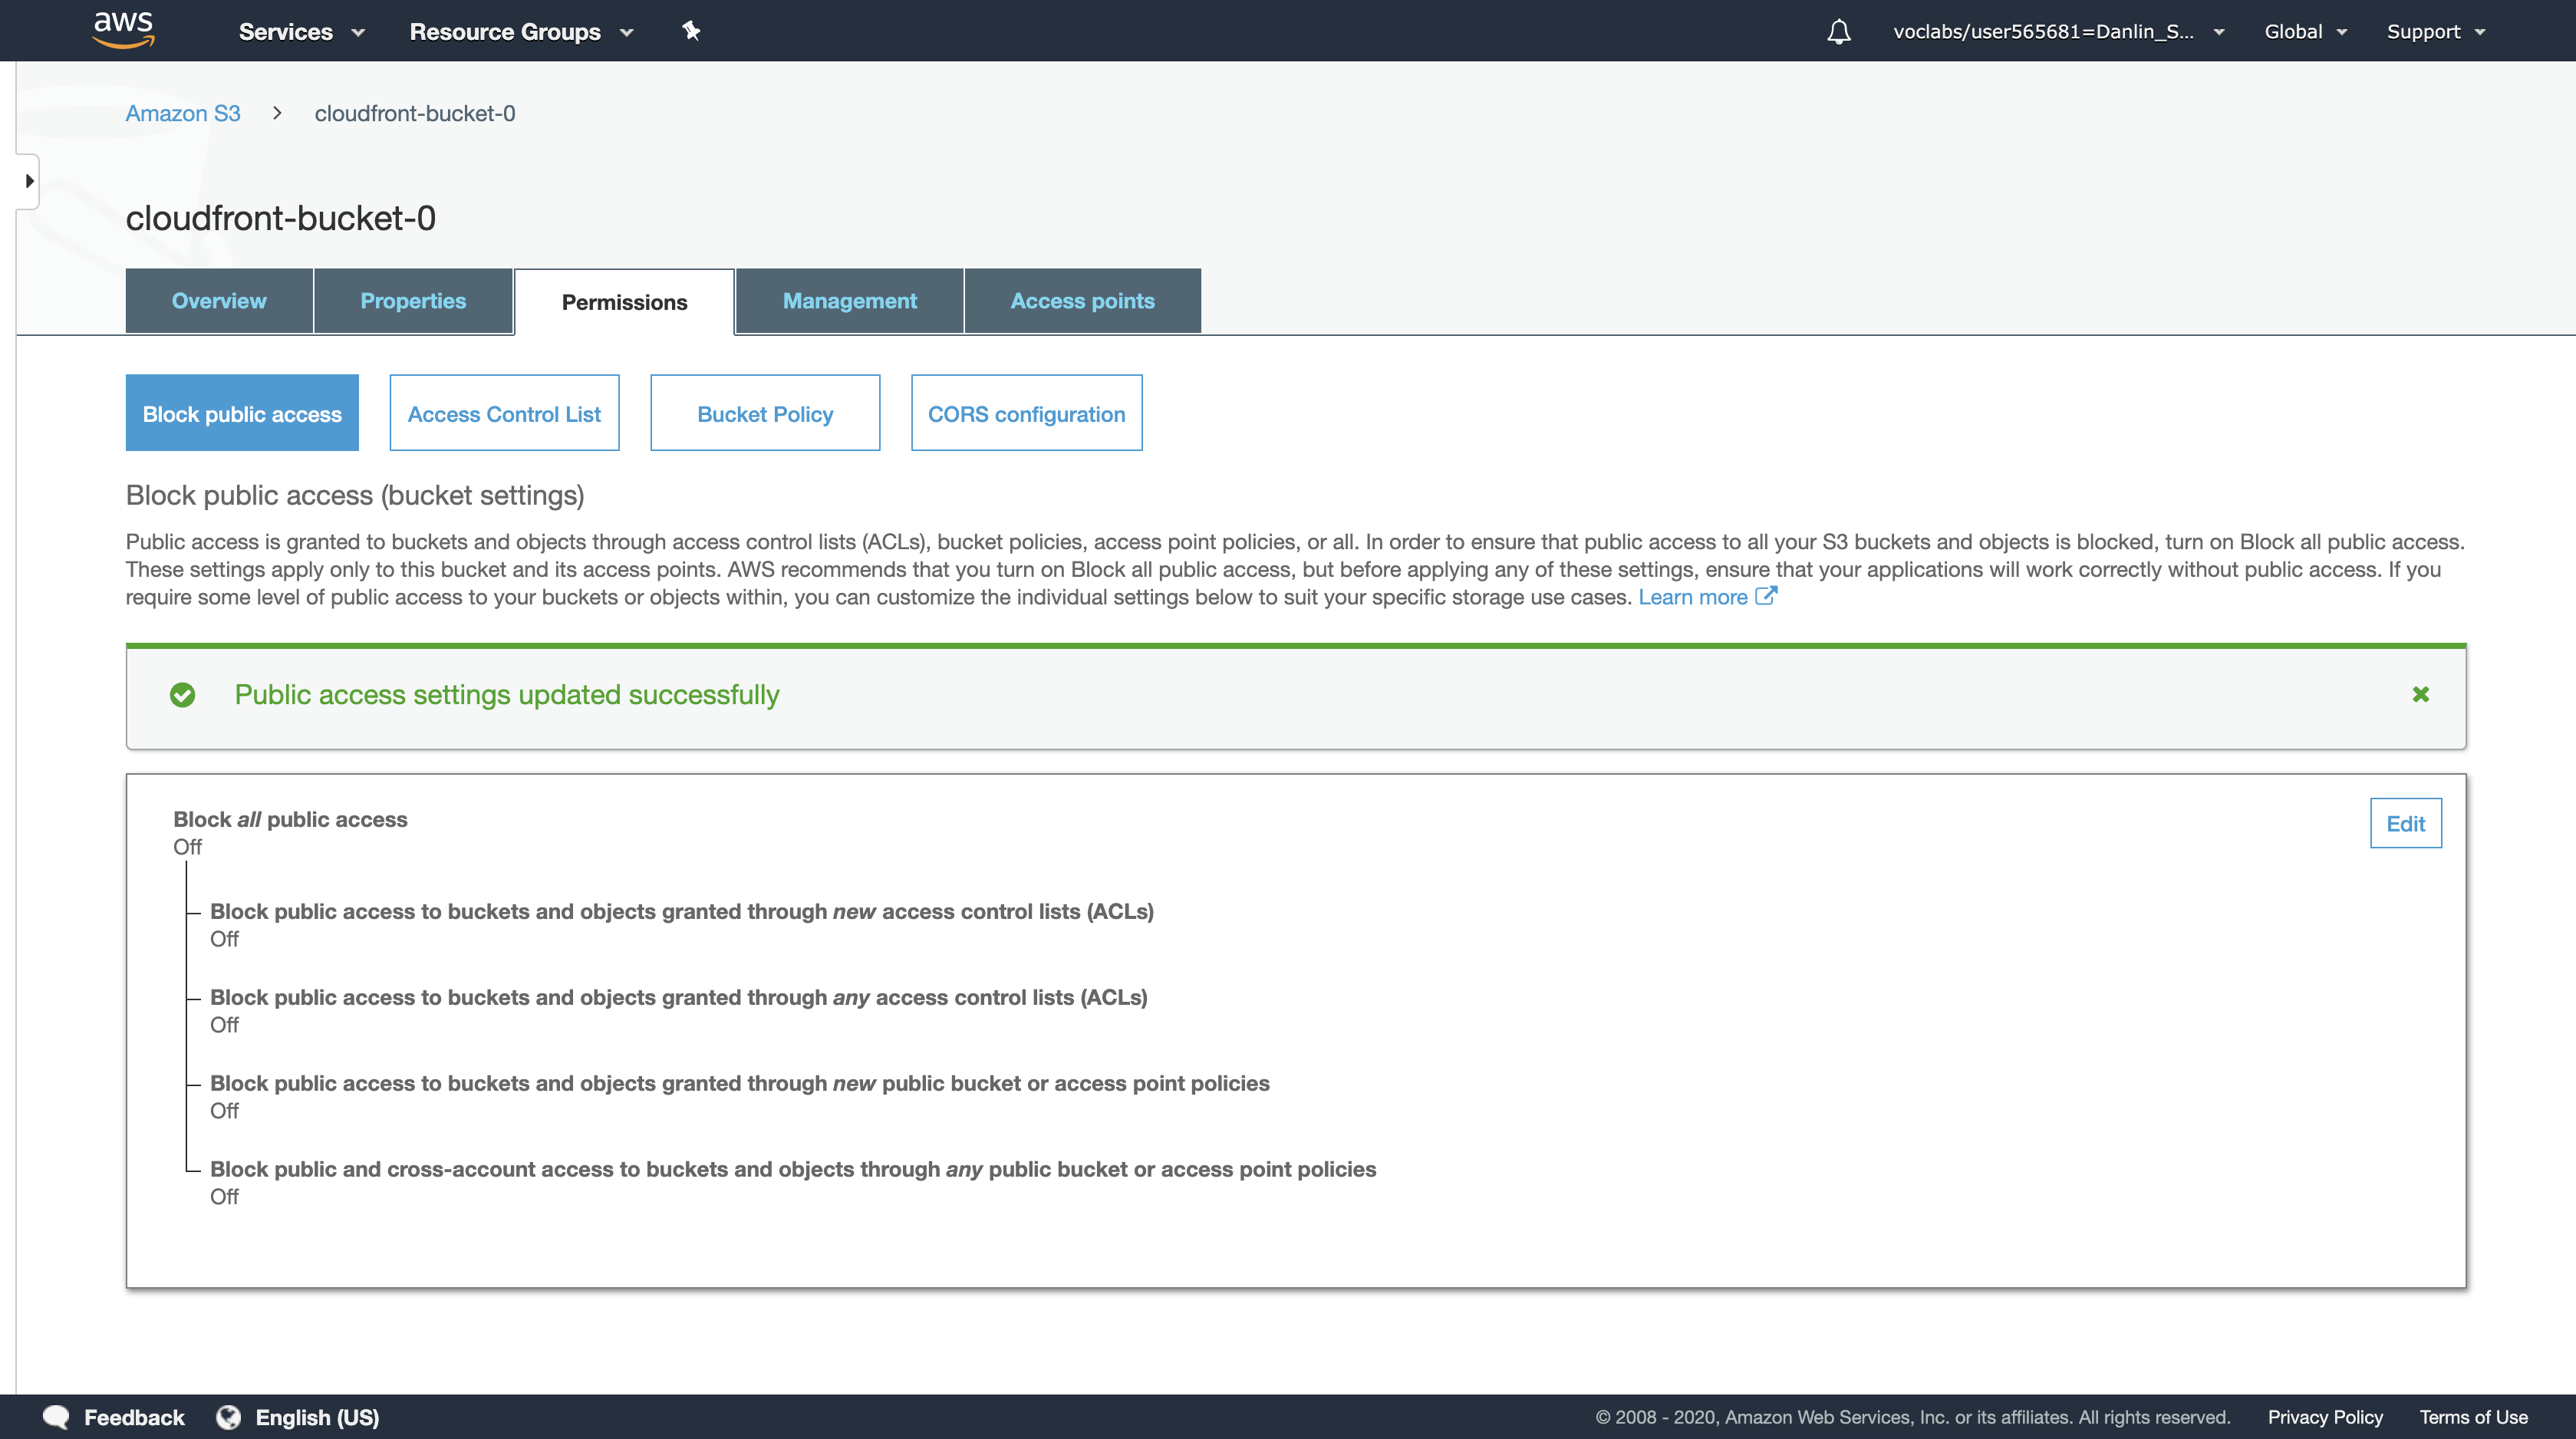
Uncheck the Block all public access. All five boxes should now be unchecked. Click Save.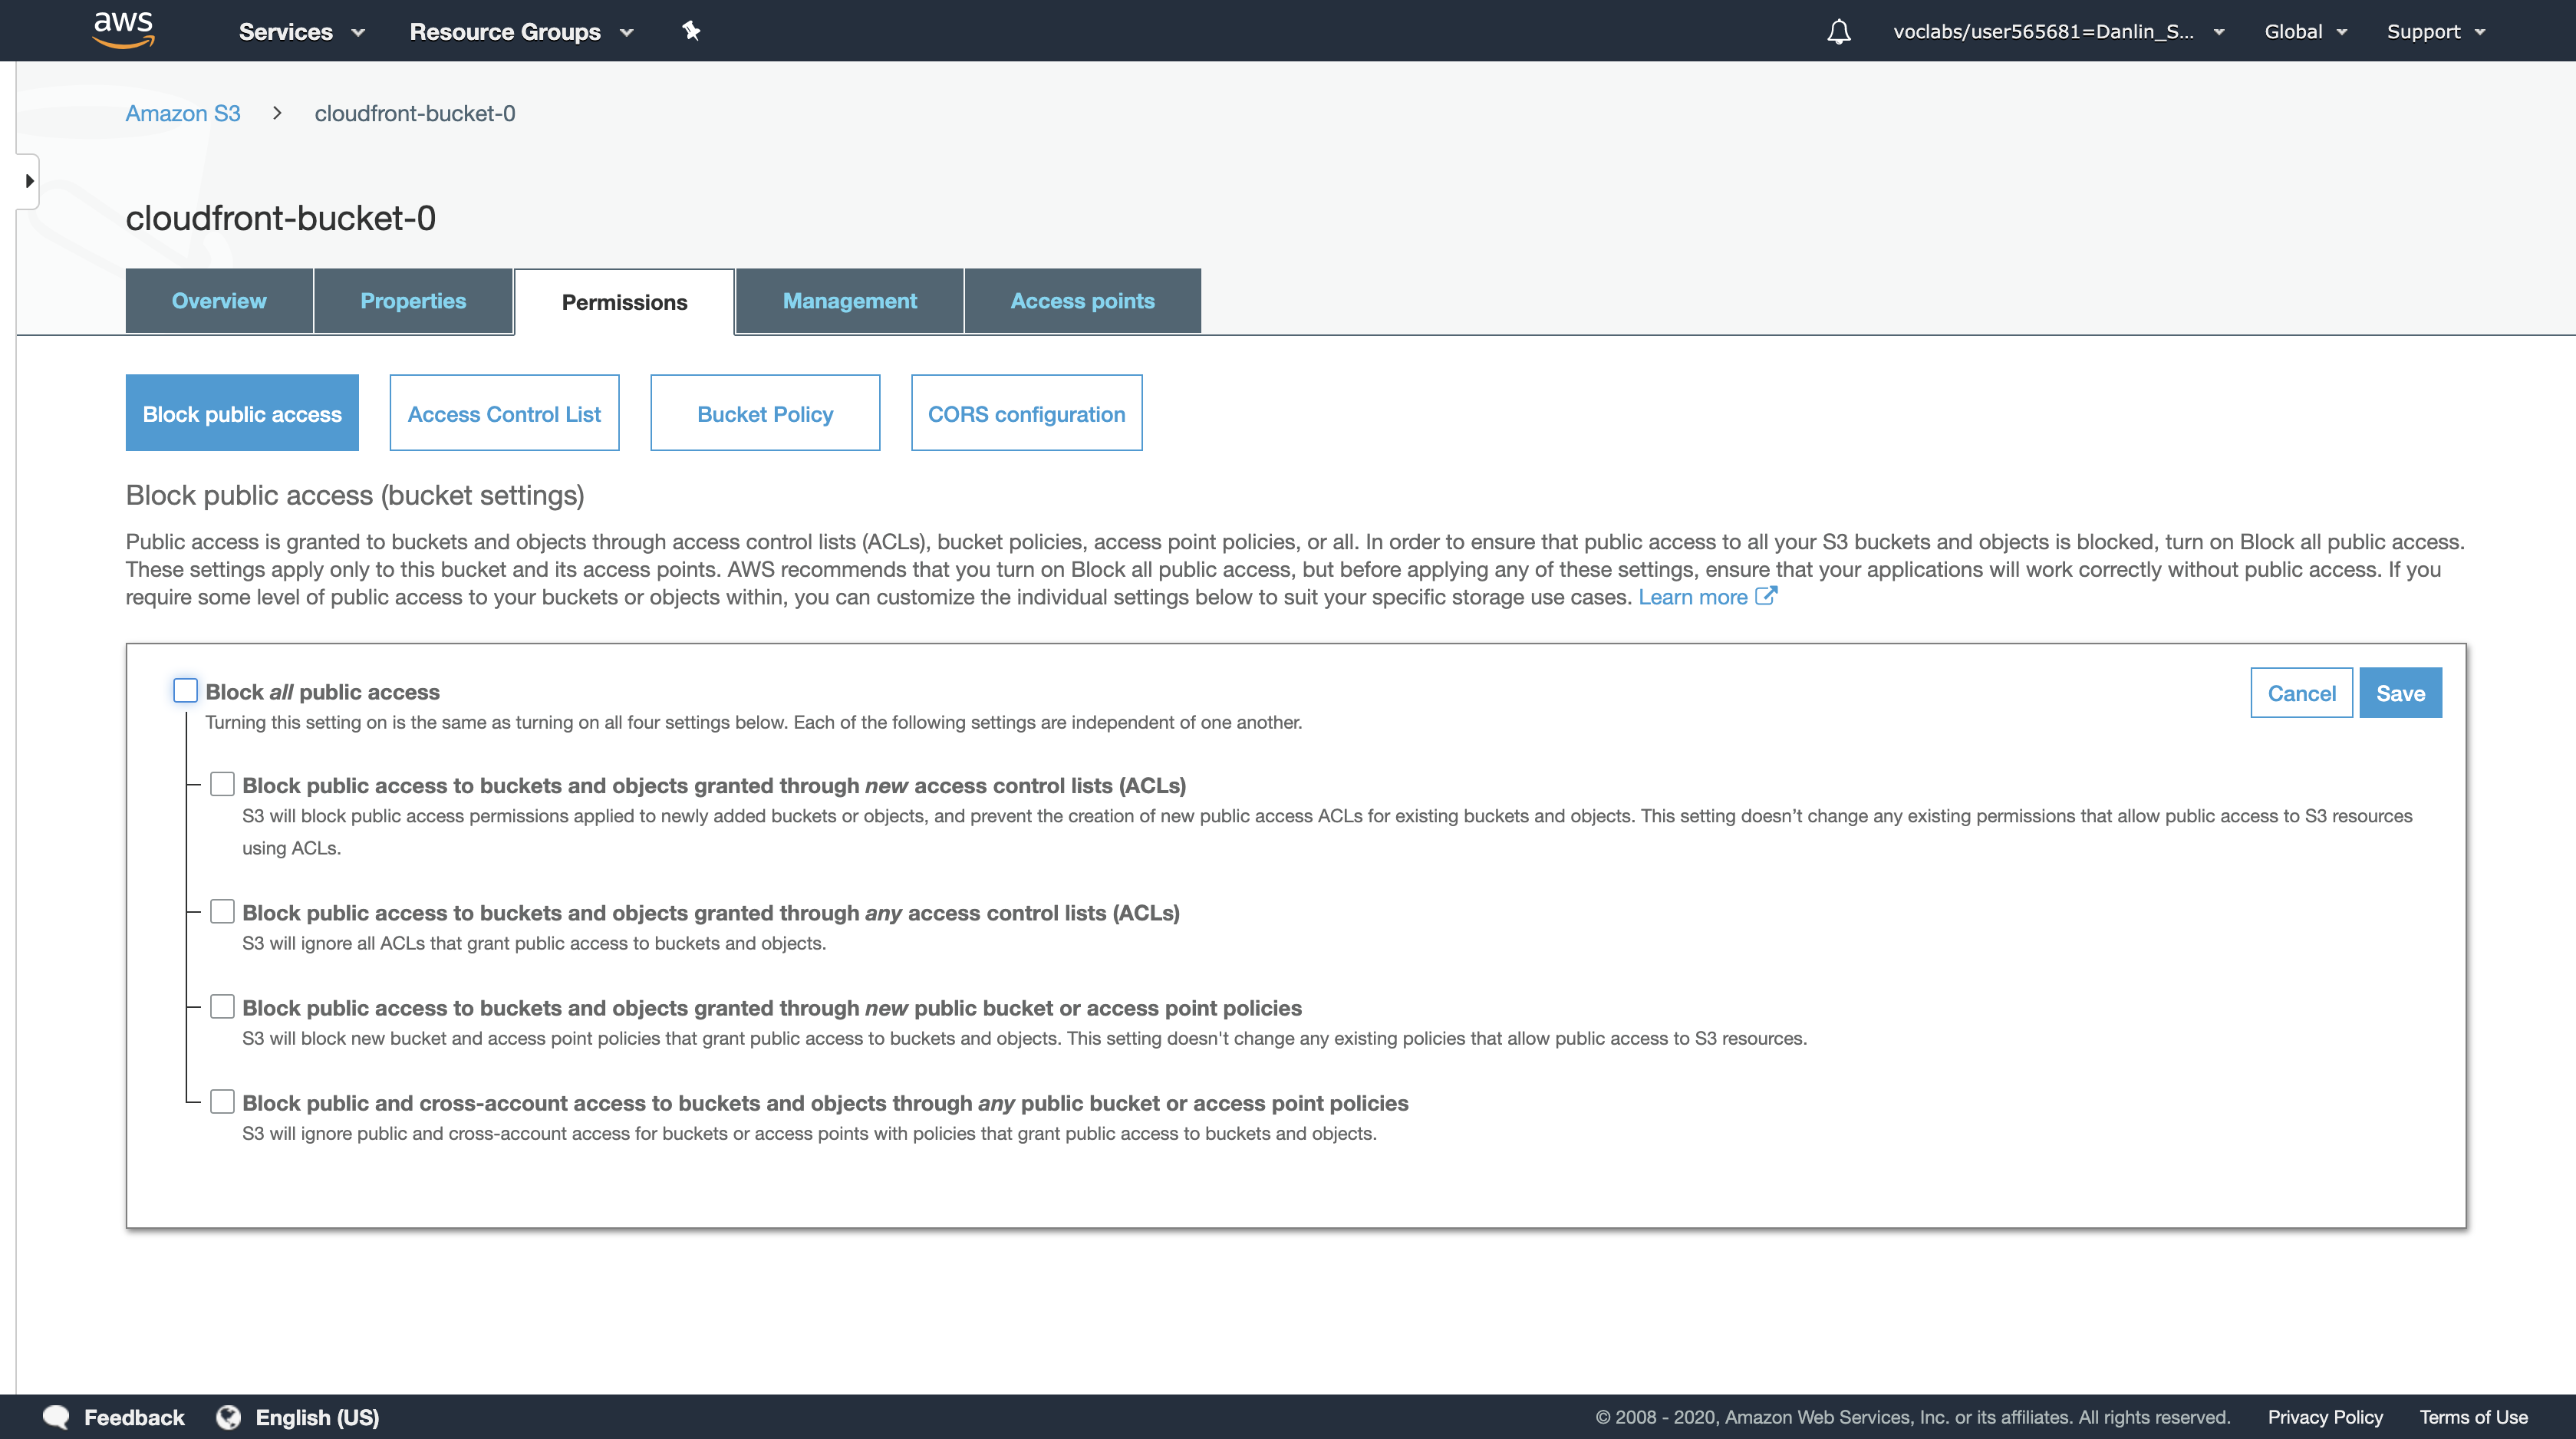
In the Edit public access settings for this bucket dialog box, type confirm and click Confirm to update the settings.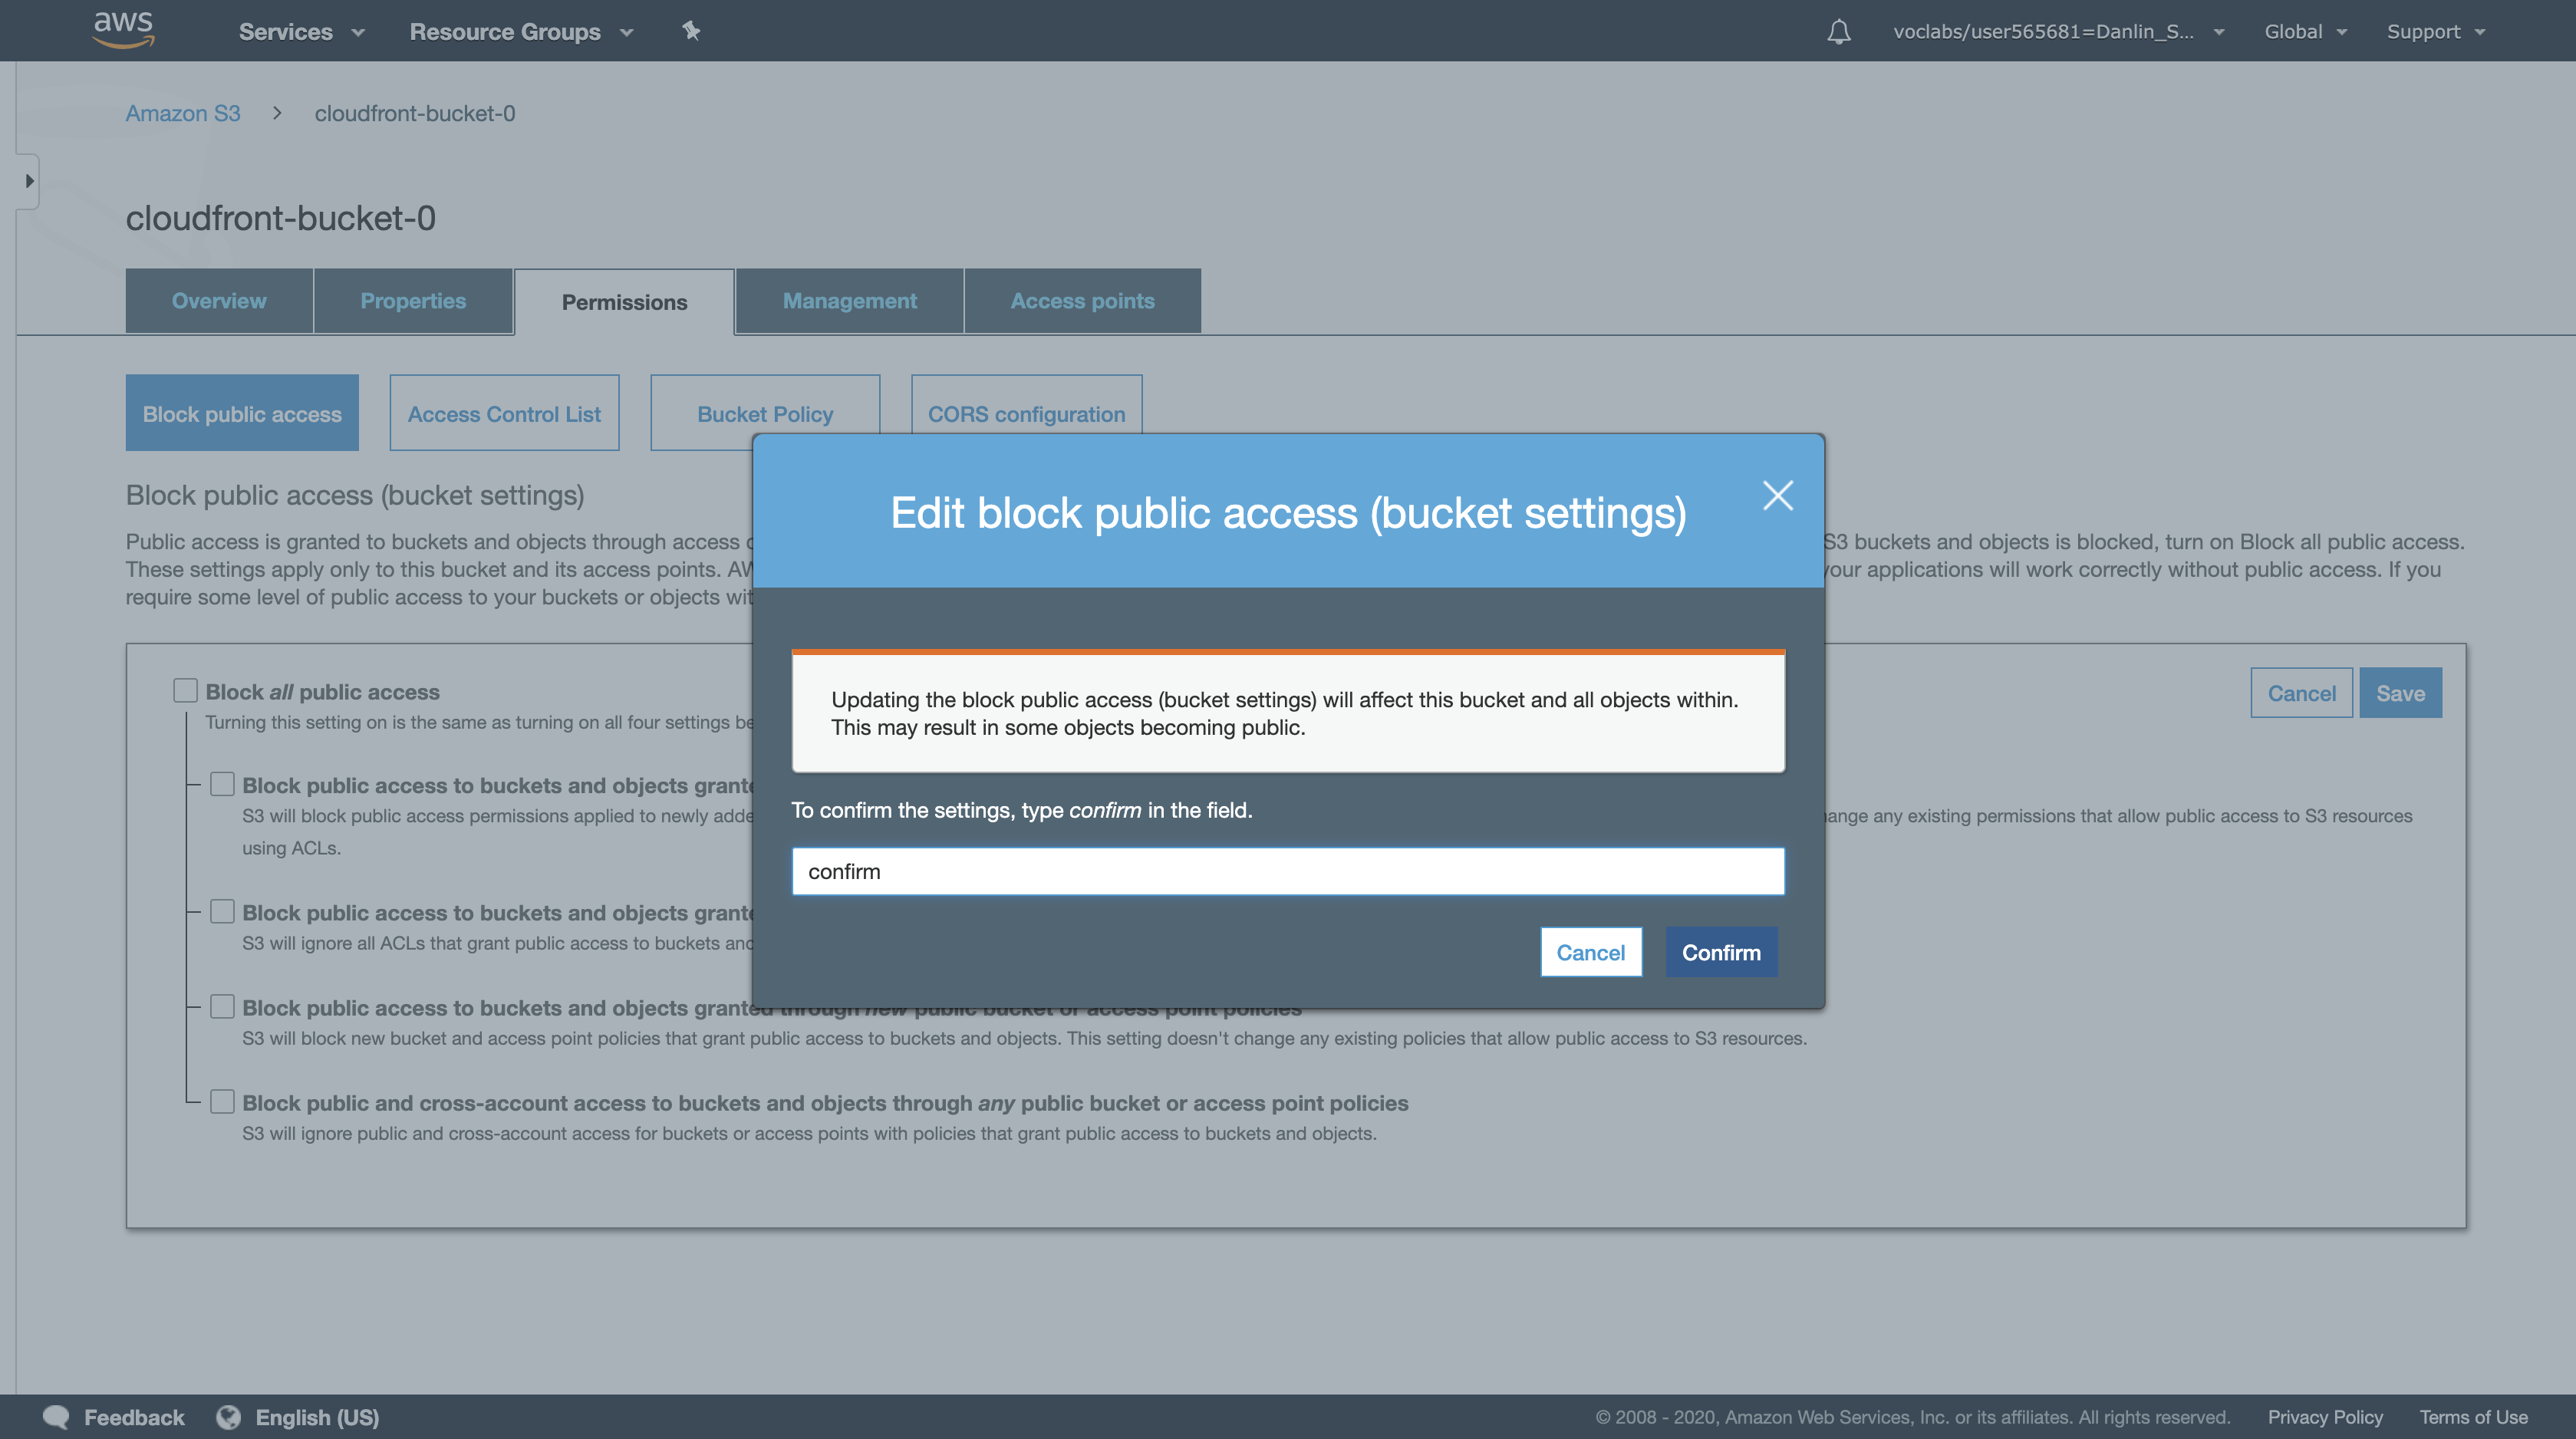
Click Overview tab.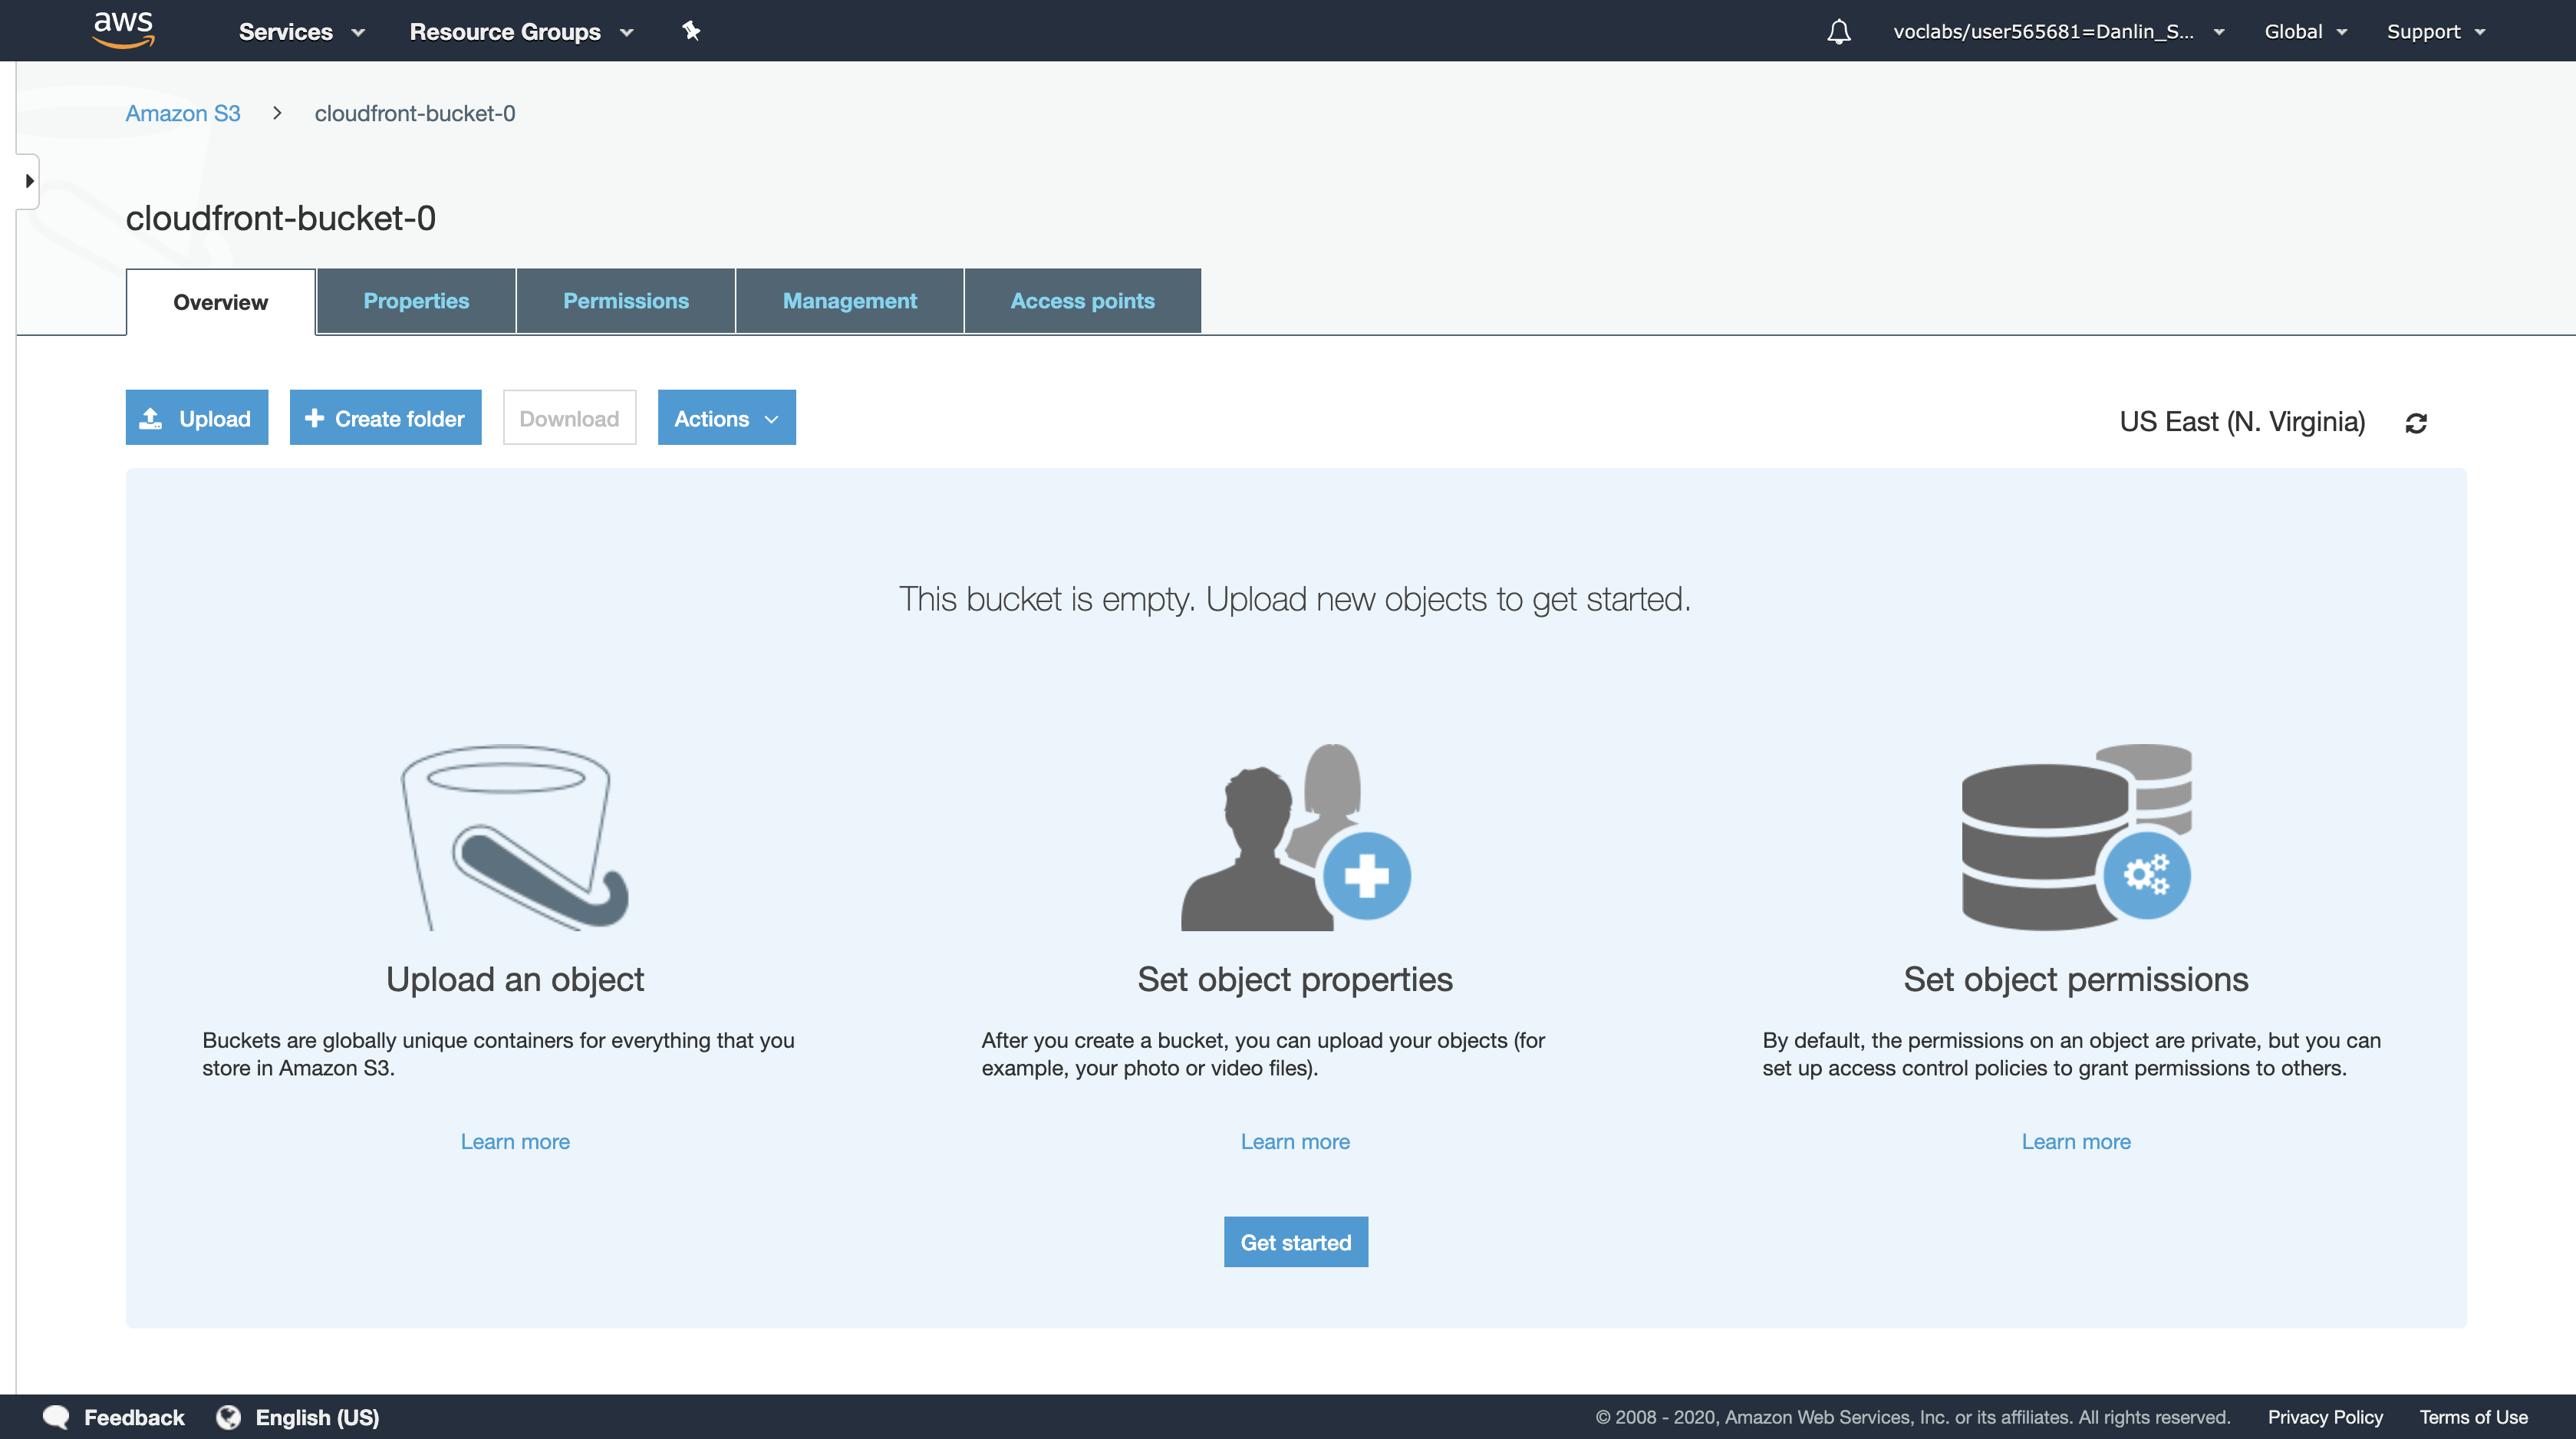
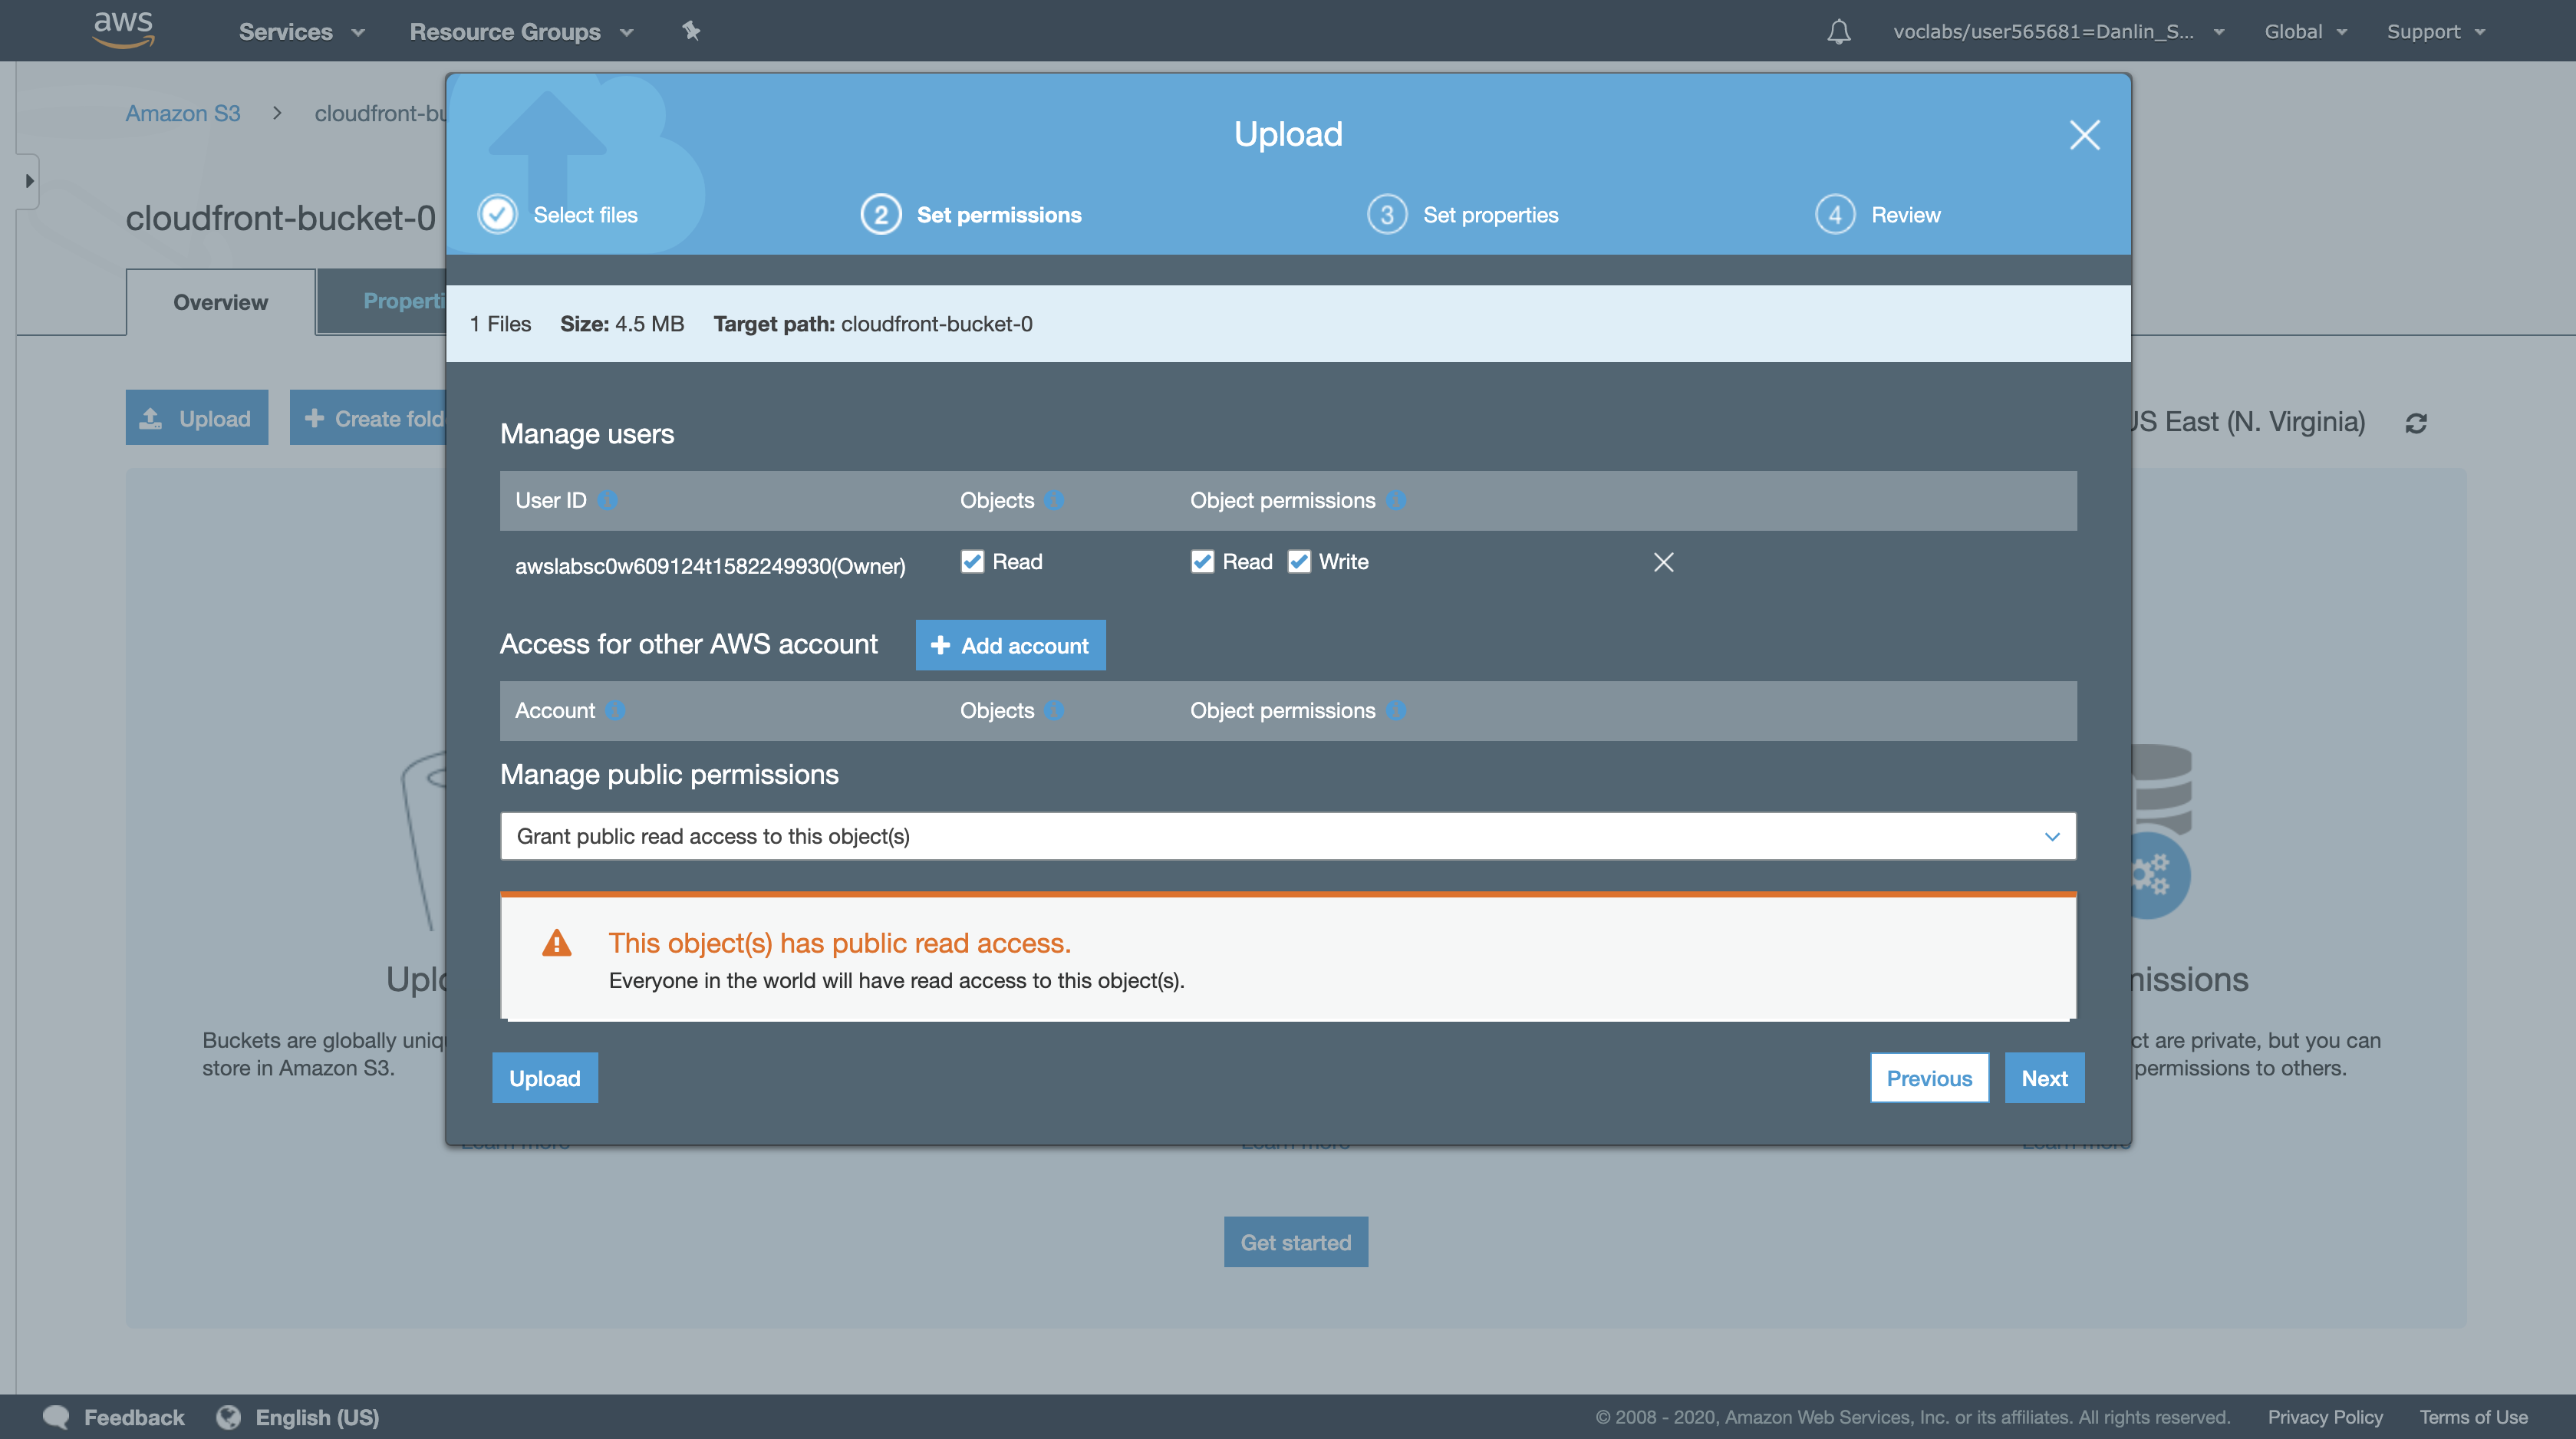
Click Upload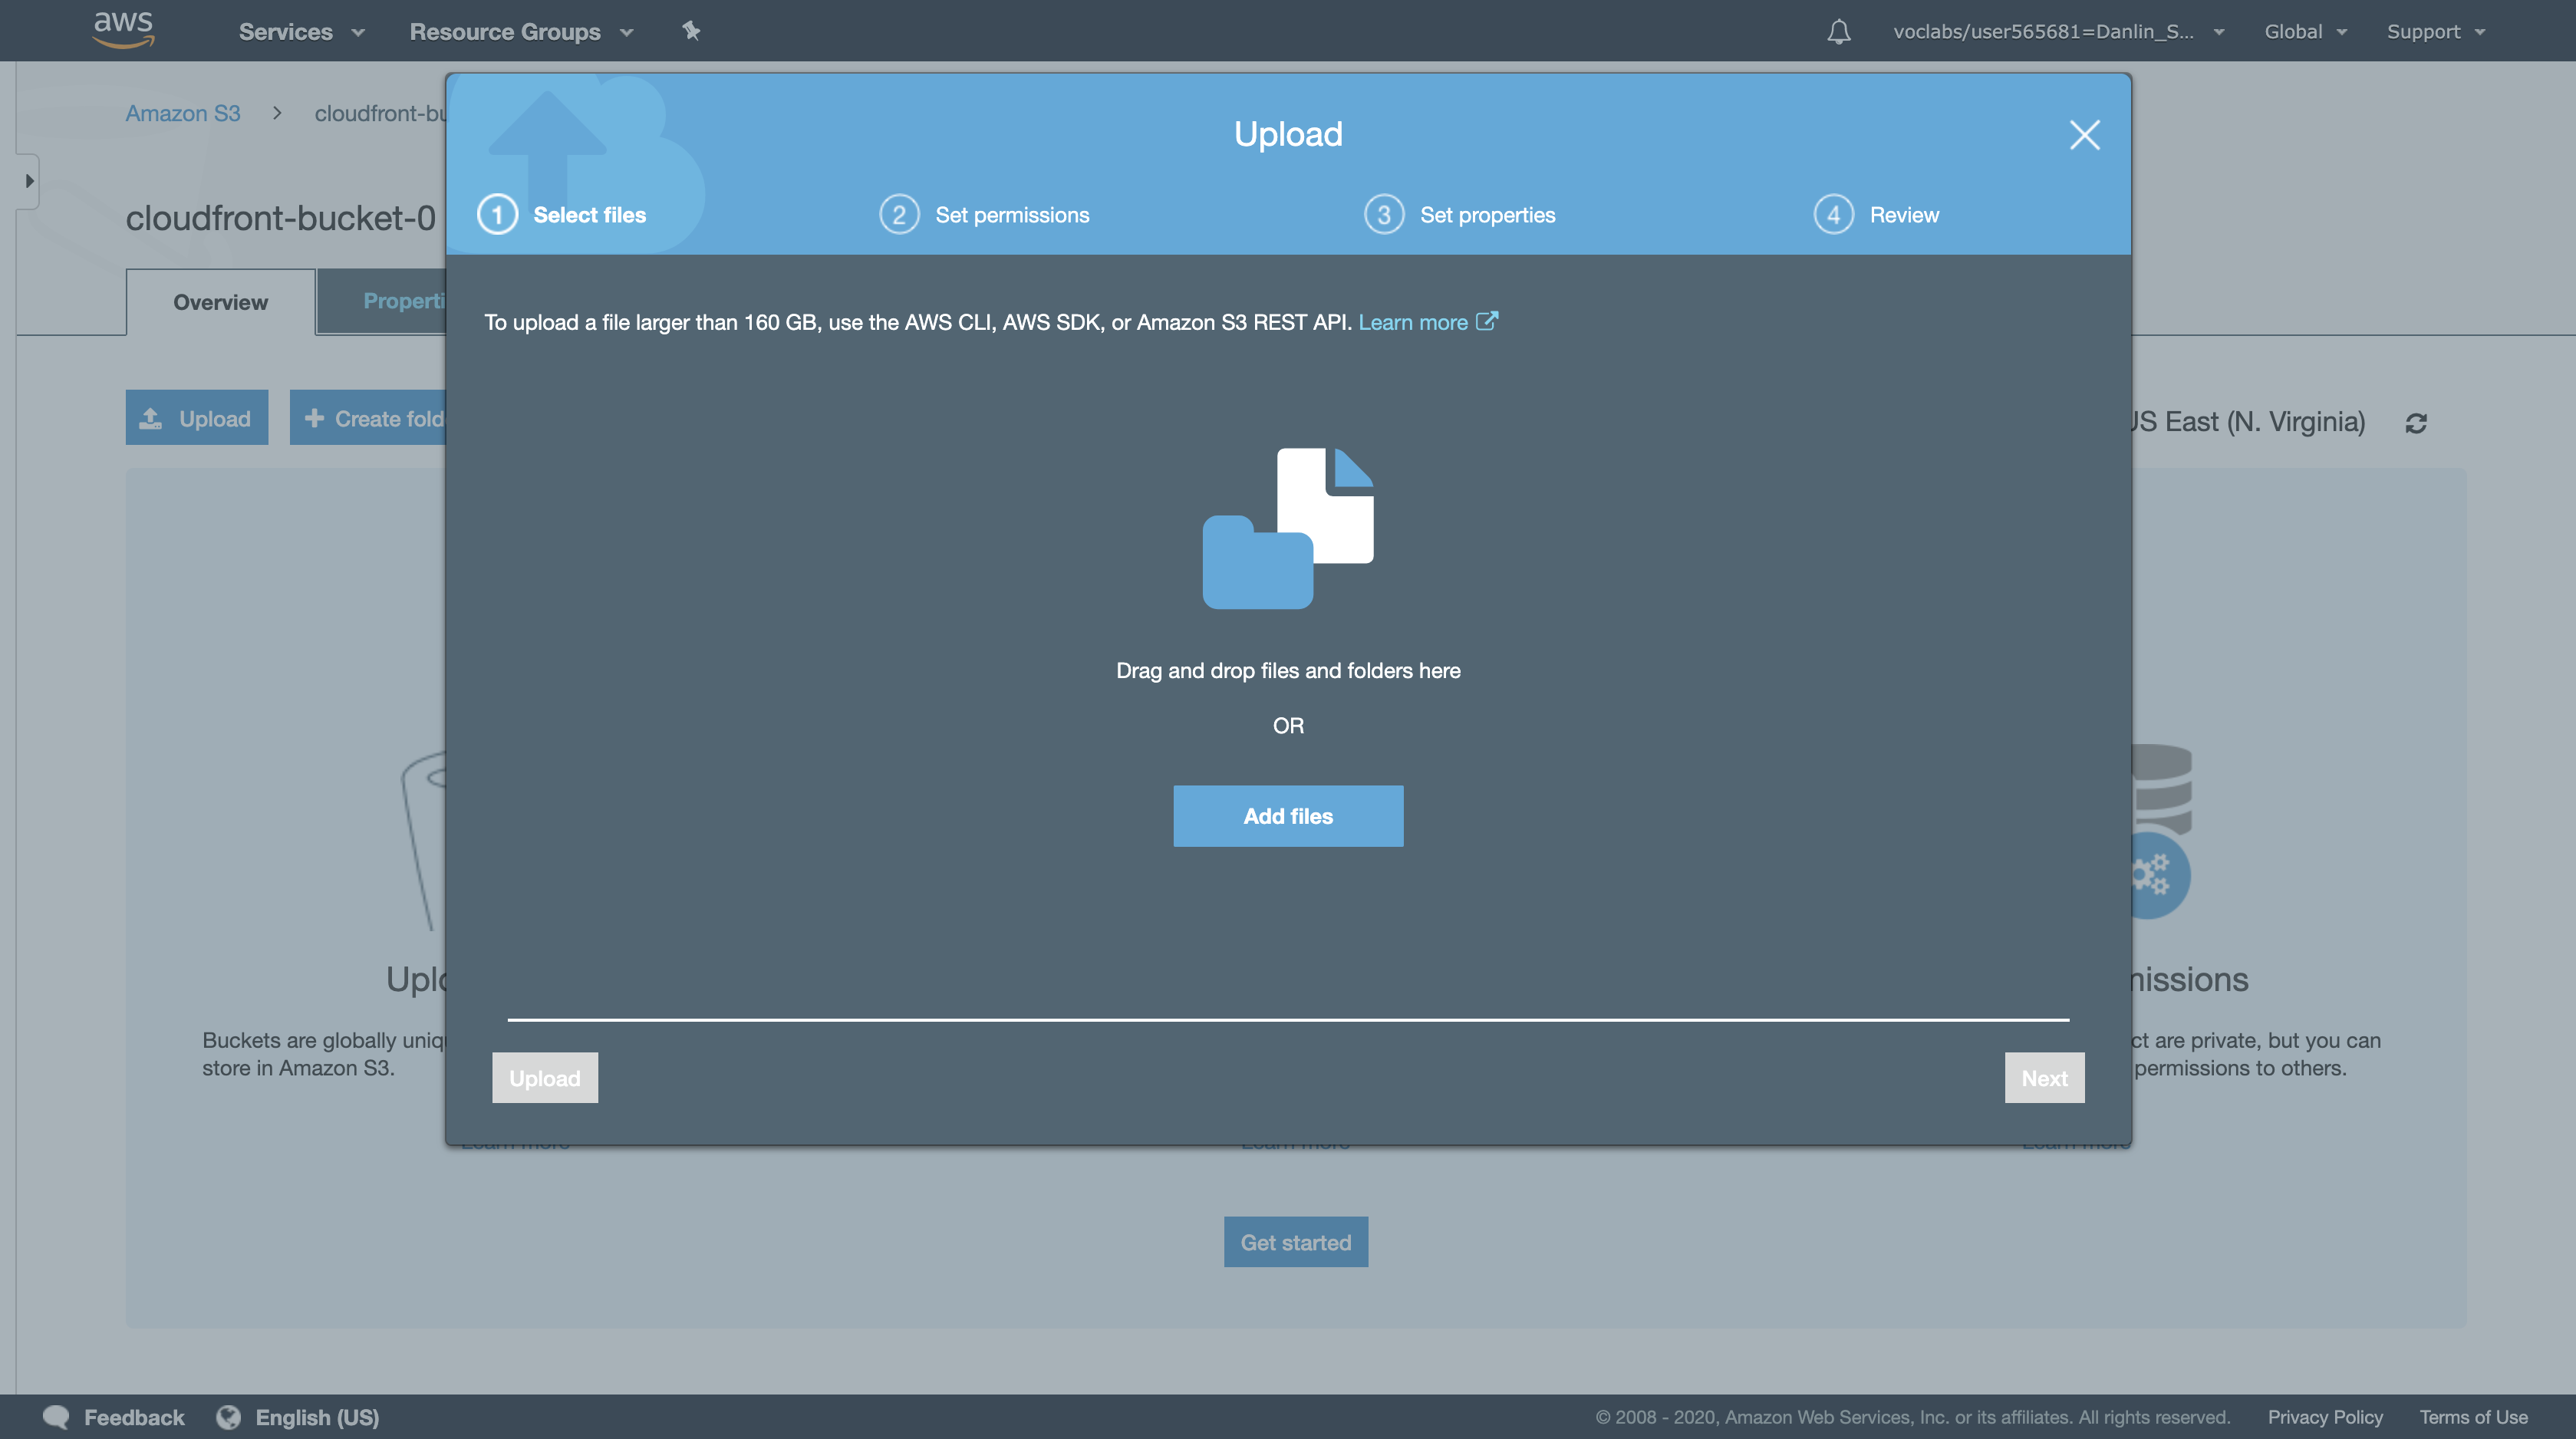
Click Add files
Select a file that you would like to upload.
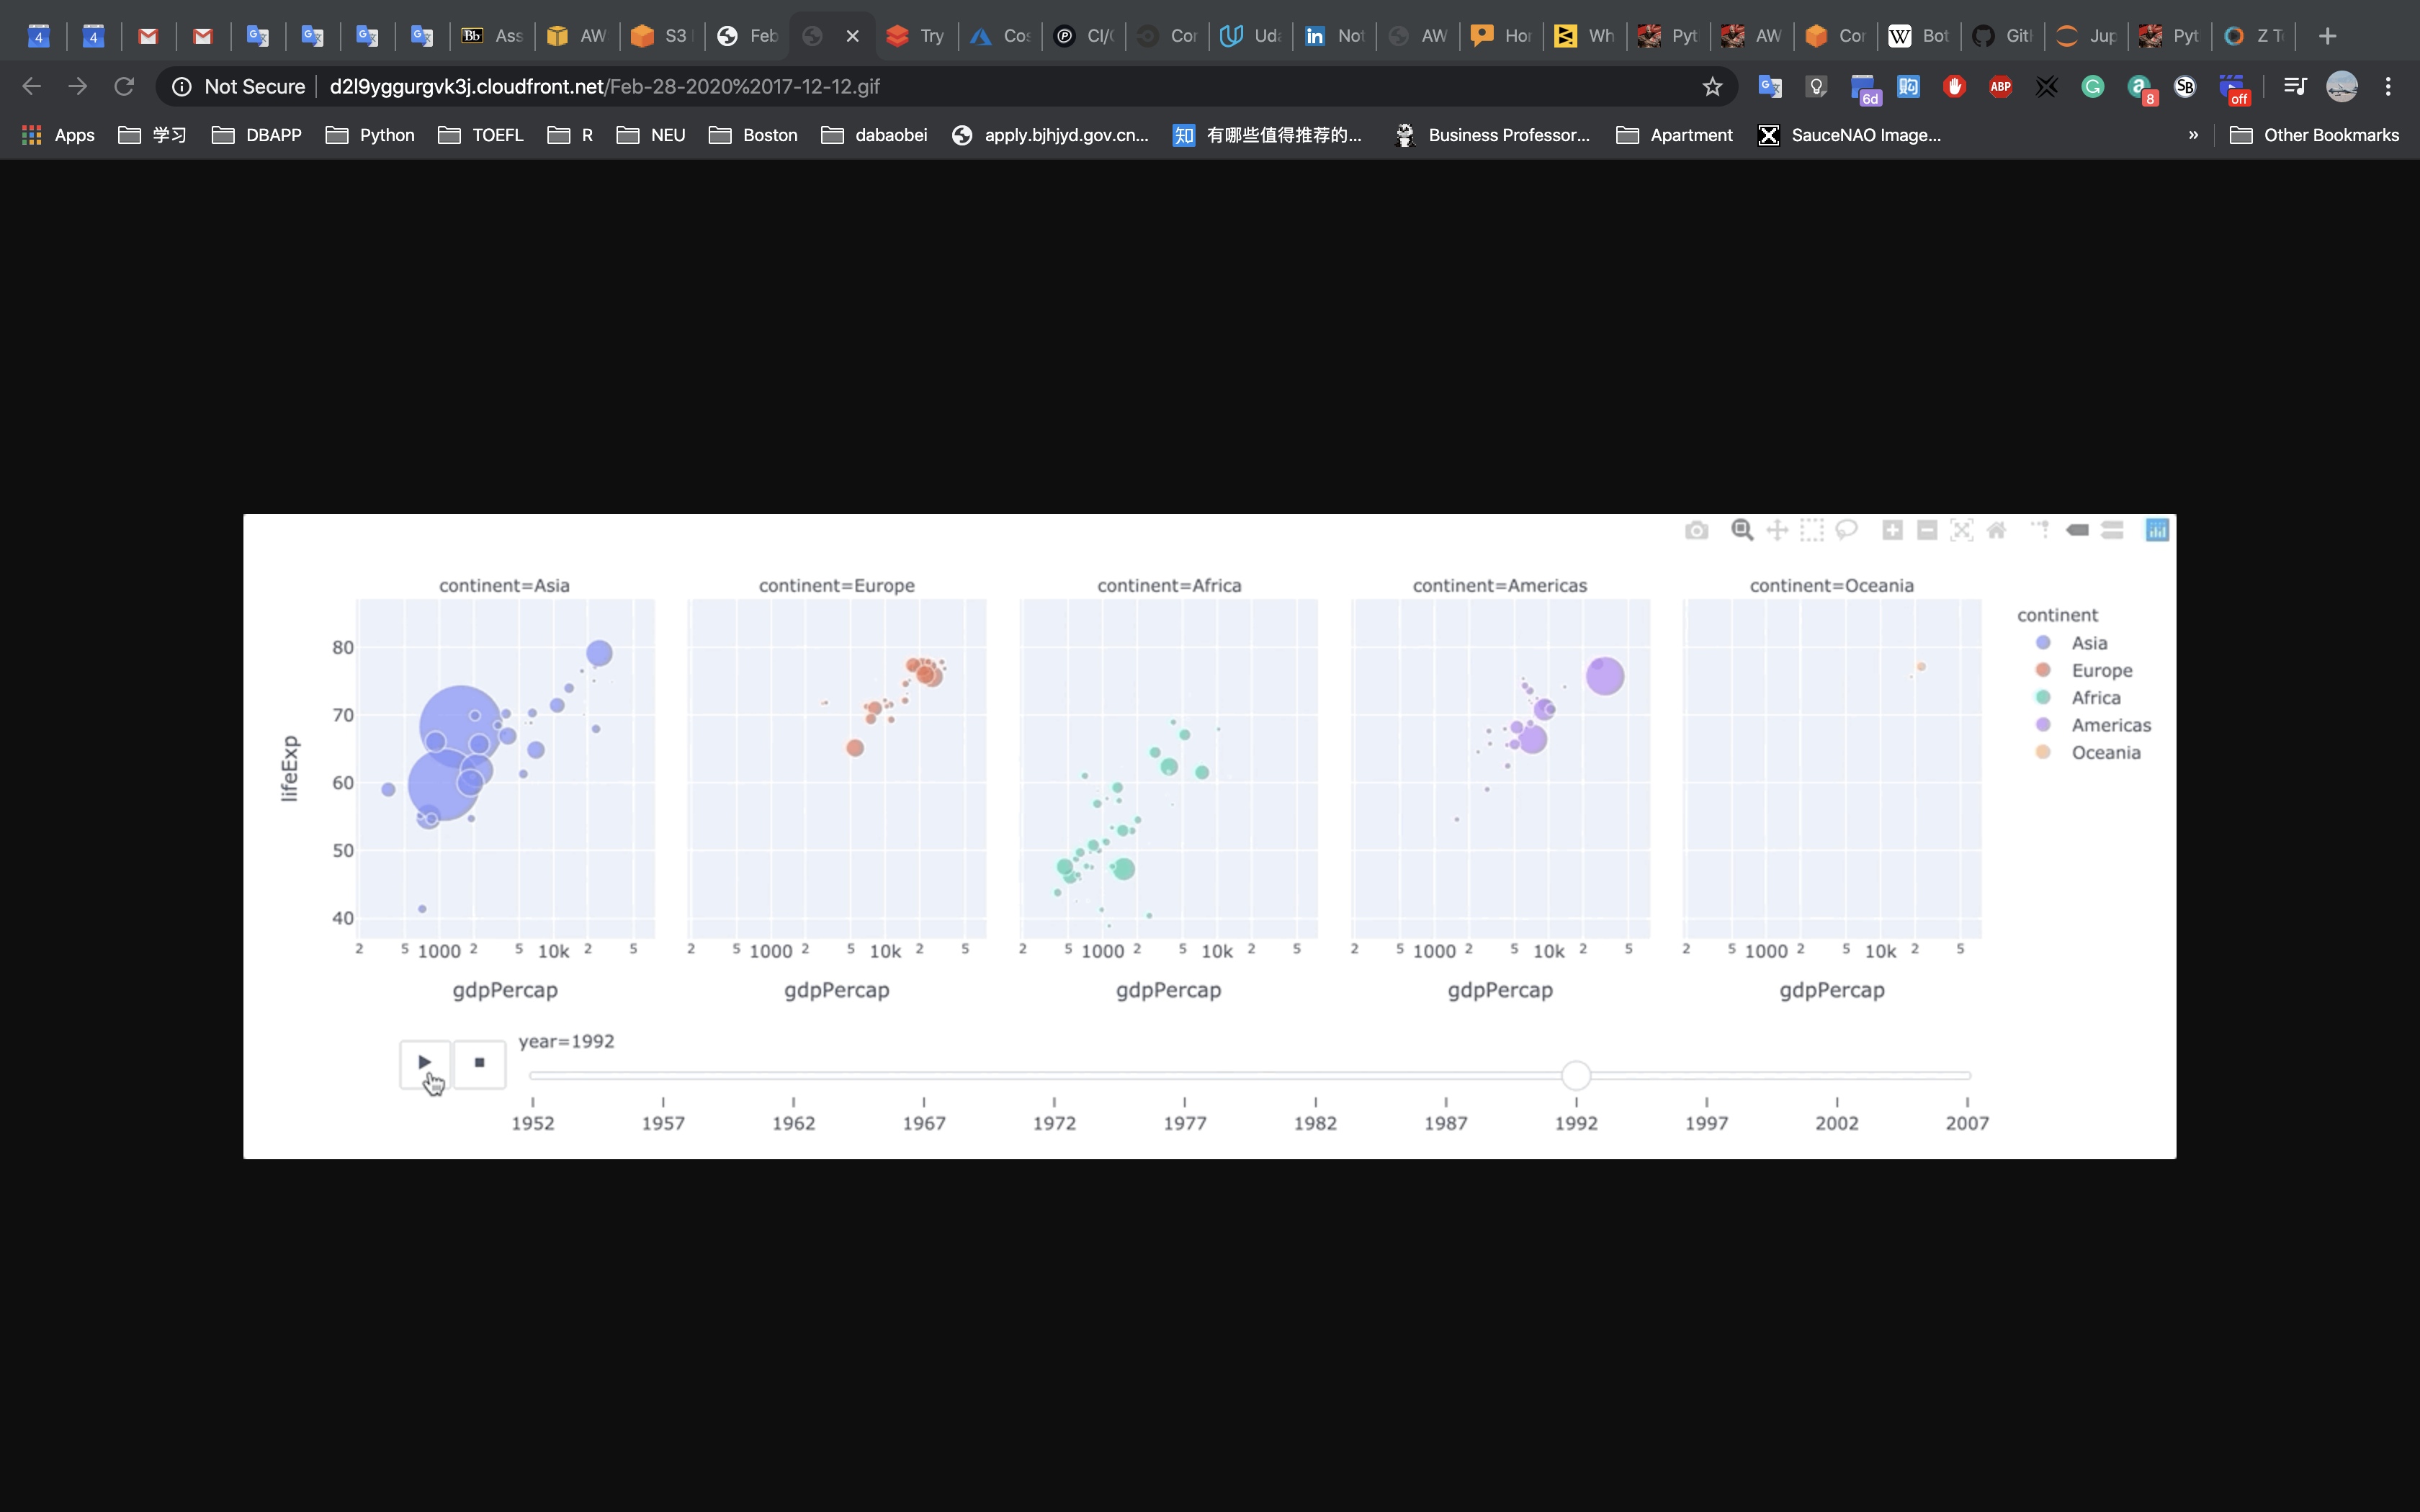
- If you don’t have a file prepared, visit a favorite website in your browser and download an image from the website to your desktop. Then choose that file for this step.
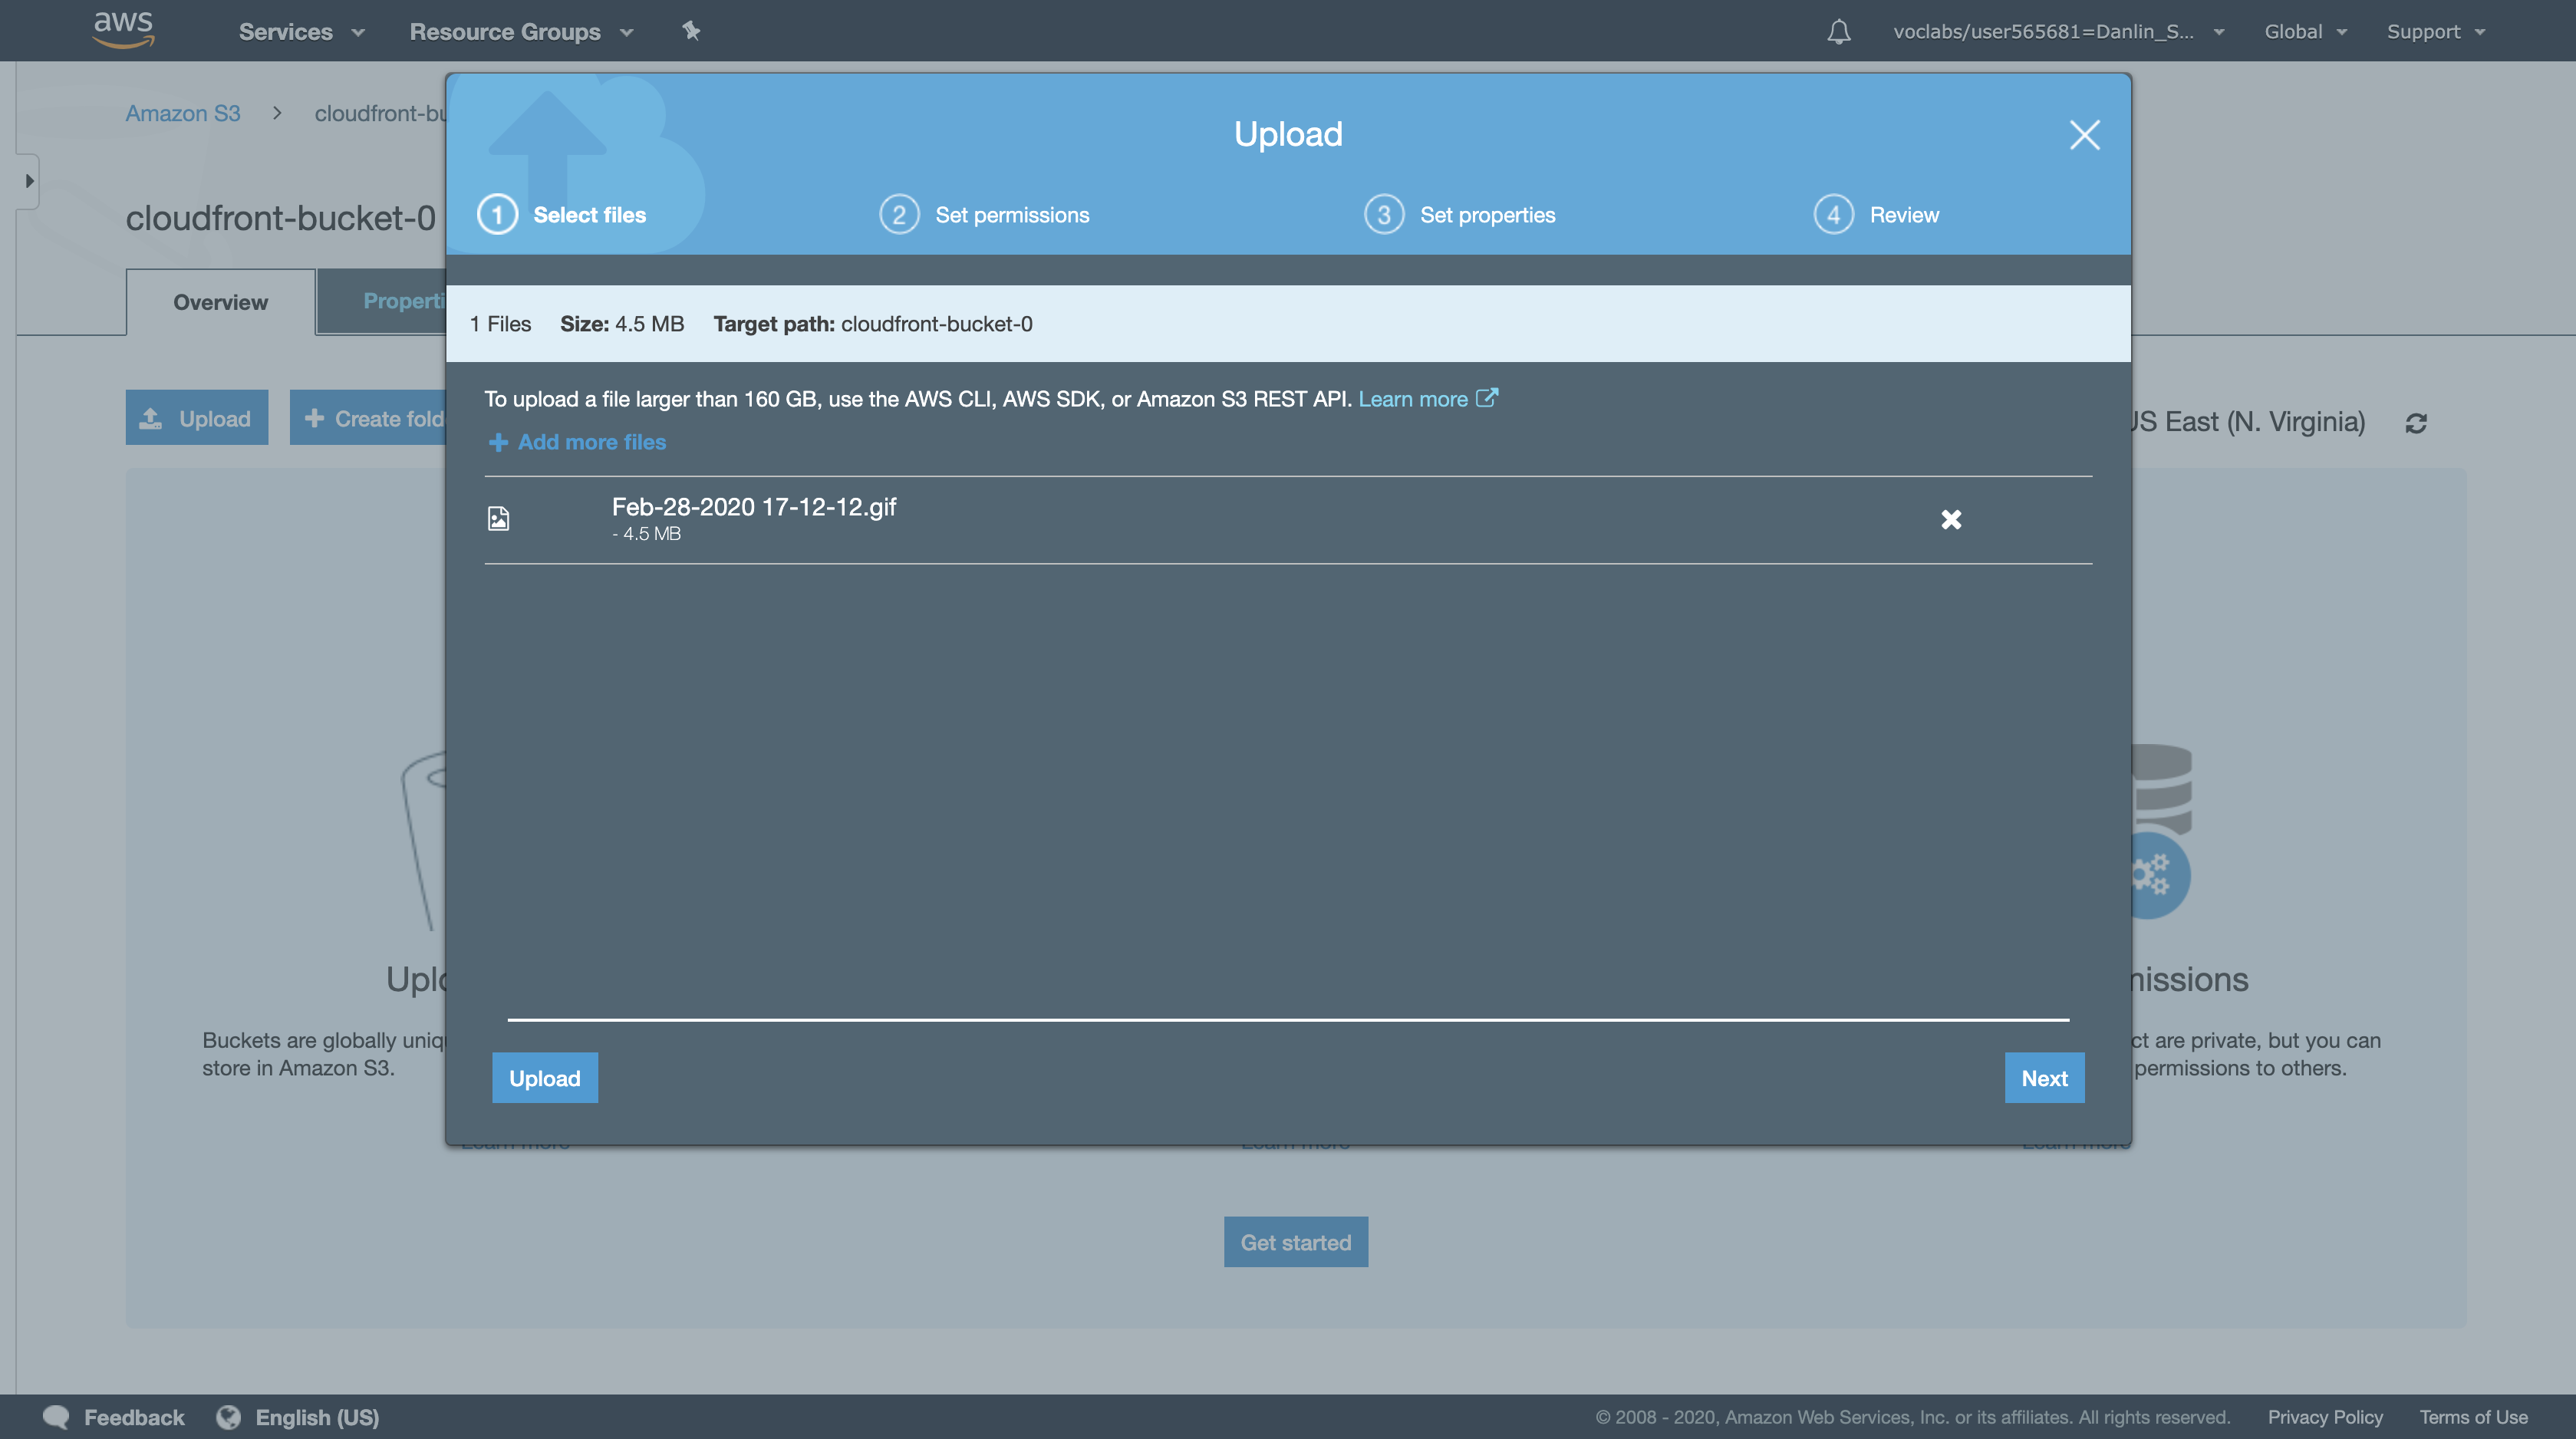
Click Next then configure:
- Under Manage public permissions, select Grant public read access to this object(s)
- Click
Upload

Copy the name of your file to your text editor for later use.
- e.g. The name of your file could be myimage.png
Click the file that you uploaded.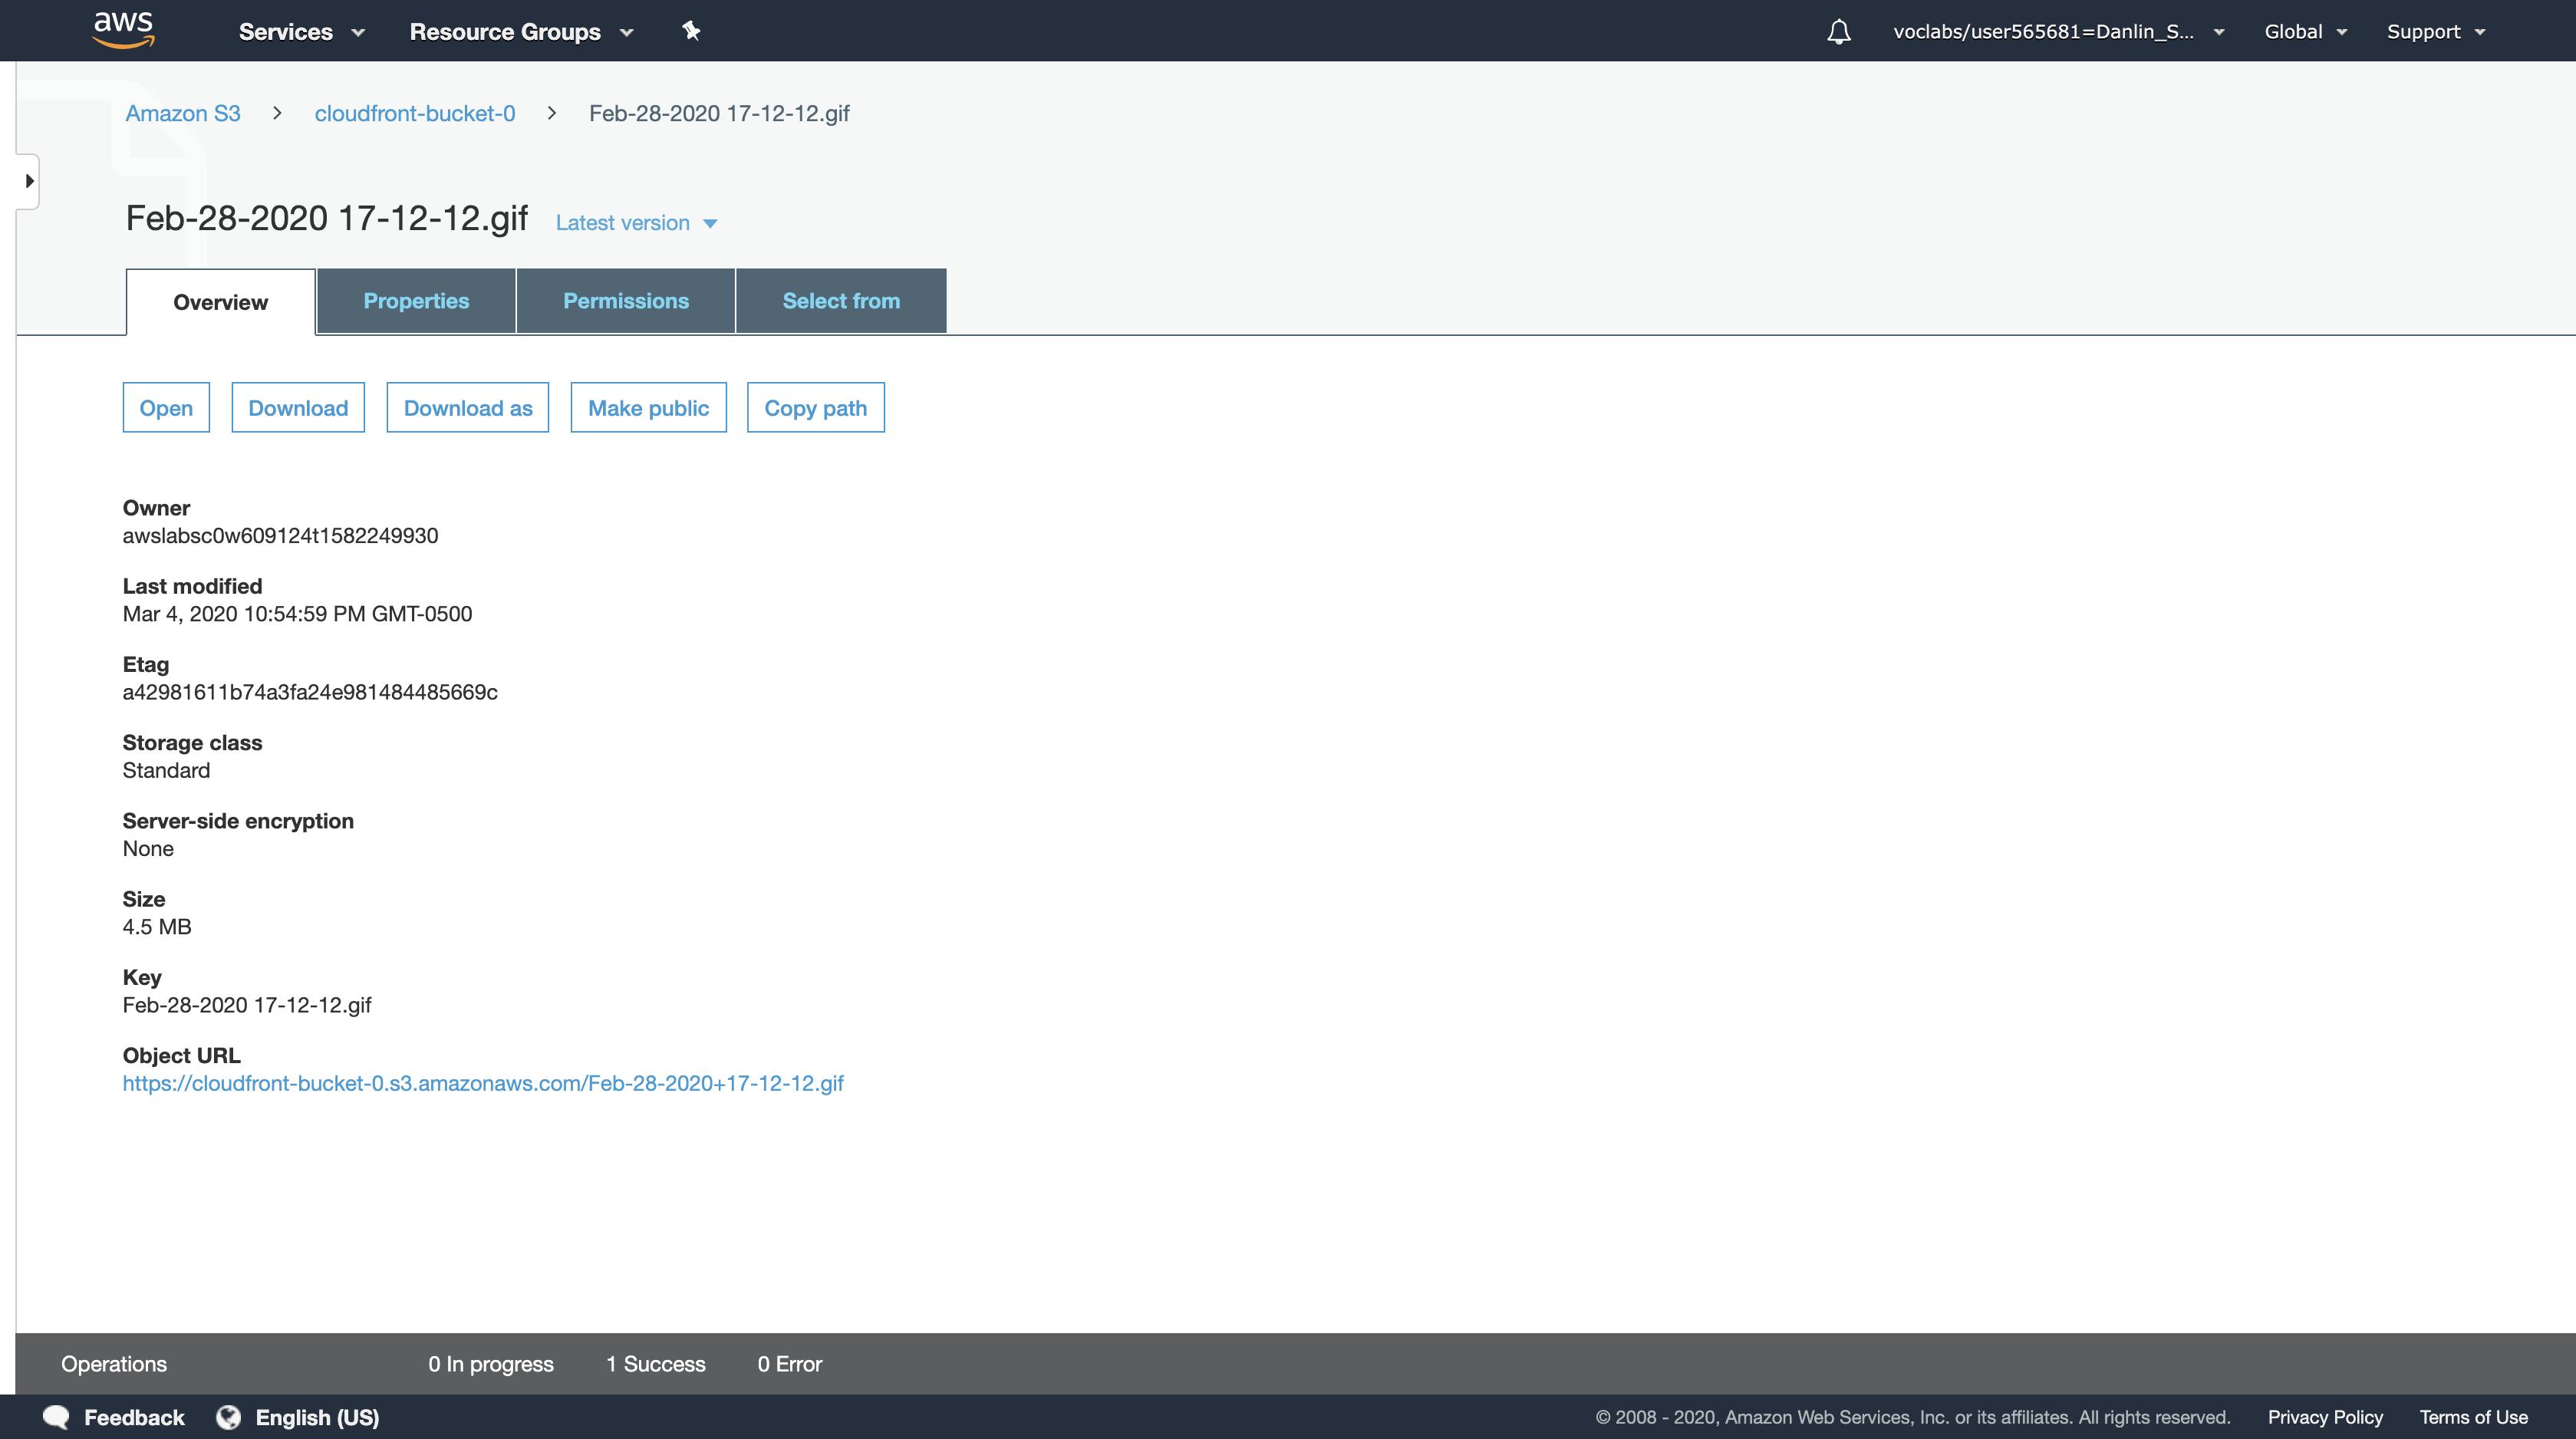
Under S3 Object URL, copy the link to your clipboard.
Paste the link in a new browser tab, then press Enter.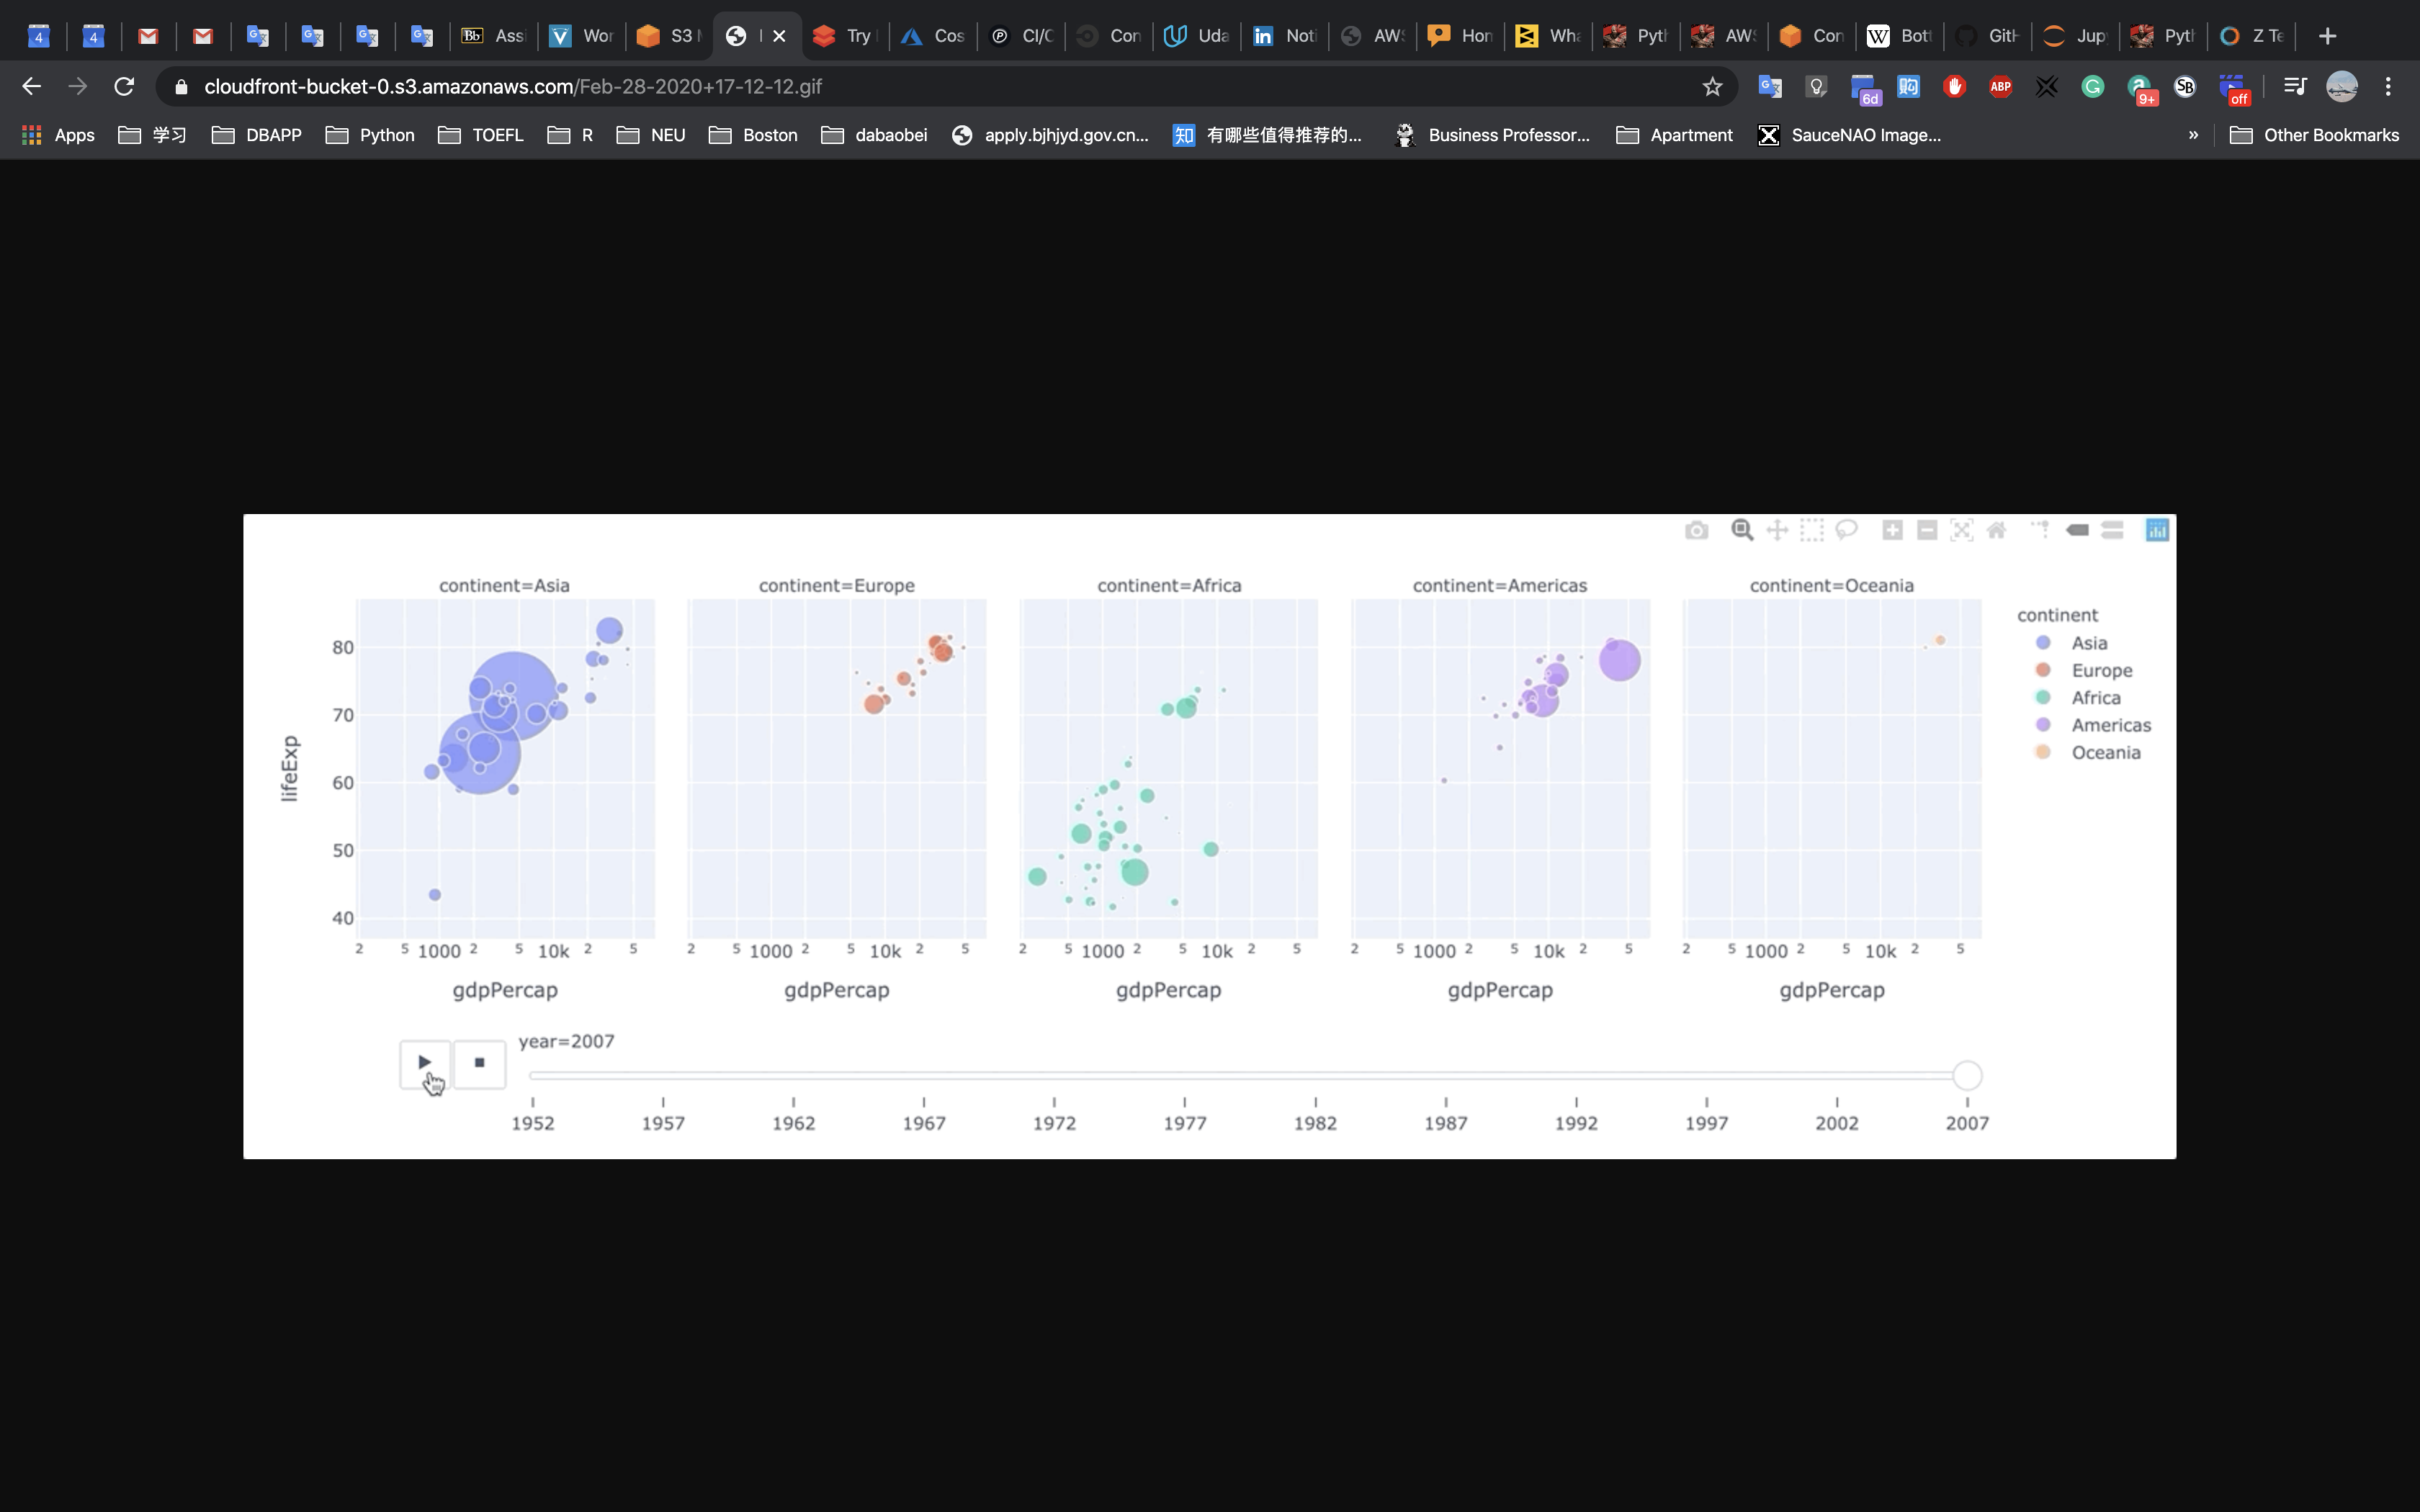
This will display your image. It also proves that your content is publicly accessible. However, this is not the URL you will use when you are ready to distribute your content.
Task 2: Create an Amazon CloudFront Web Distribution
In this task, you will create an Amazon CloudFront web distribution that distributes the file stored in the publicly accessible Amazon S3 bucket.
AWS Management Console
Services menu > click CloudFront.
Click Create Distribution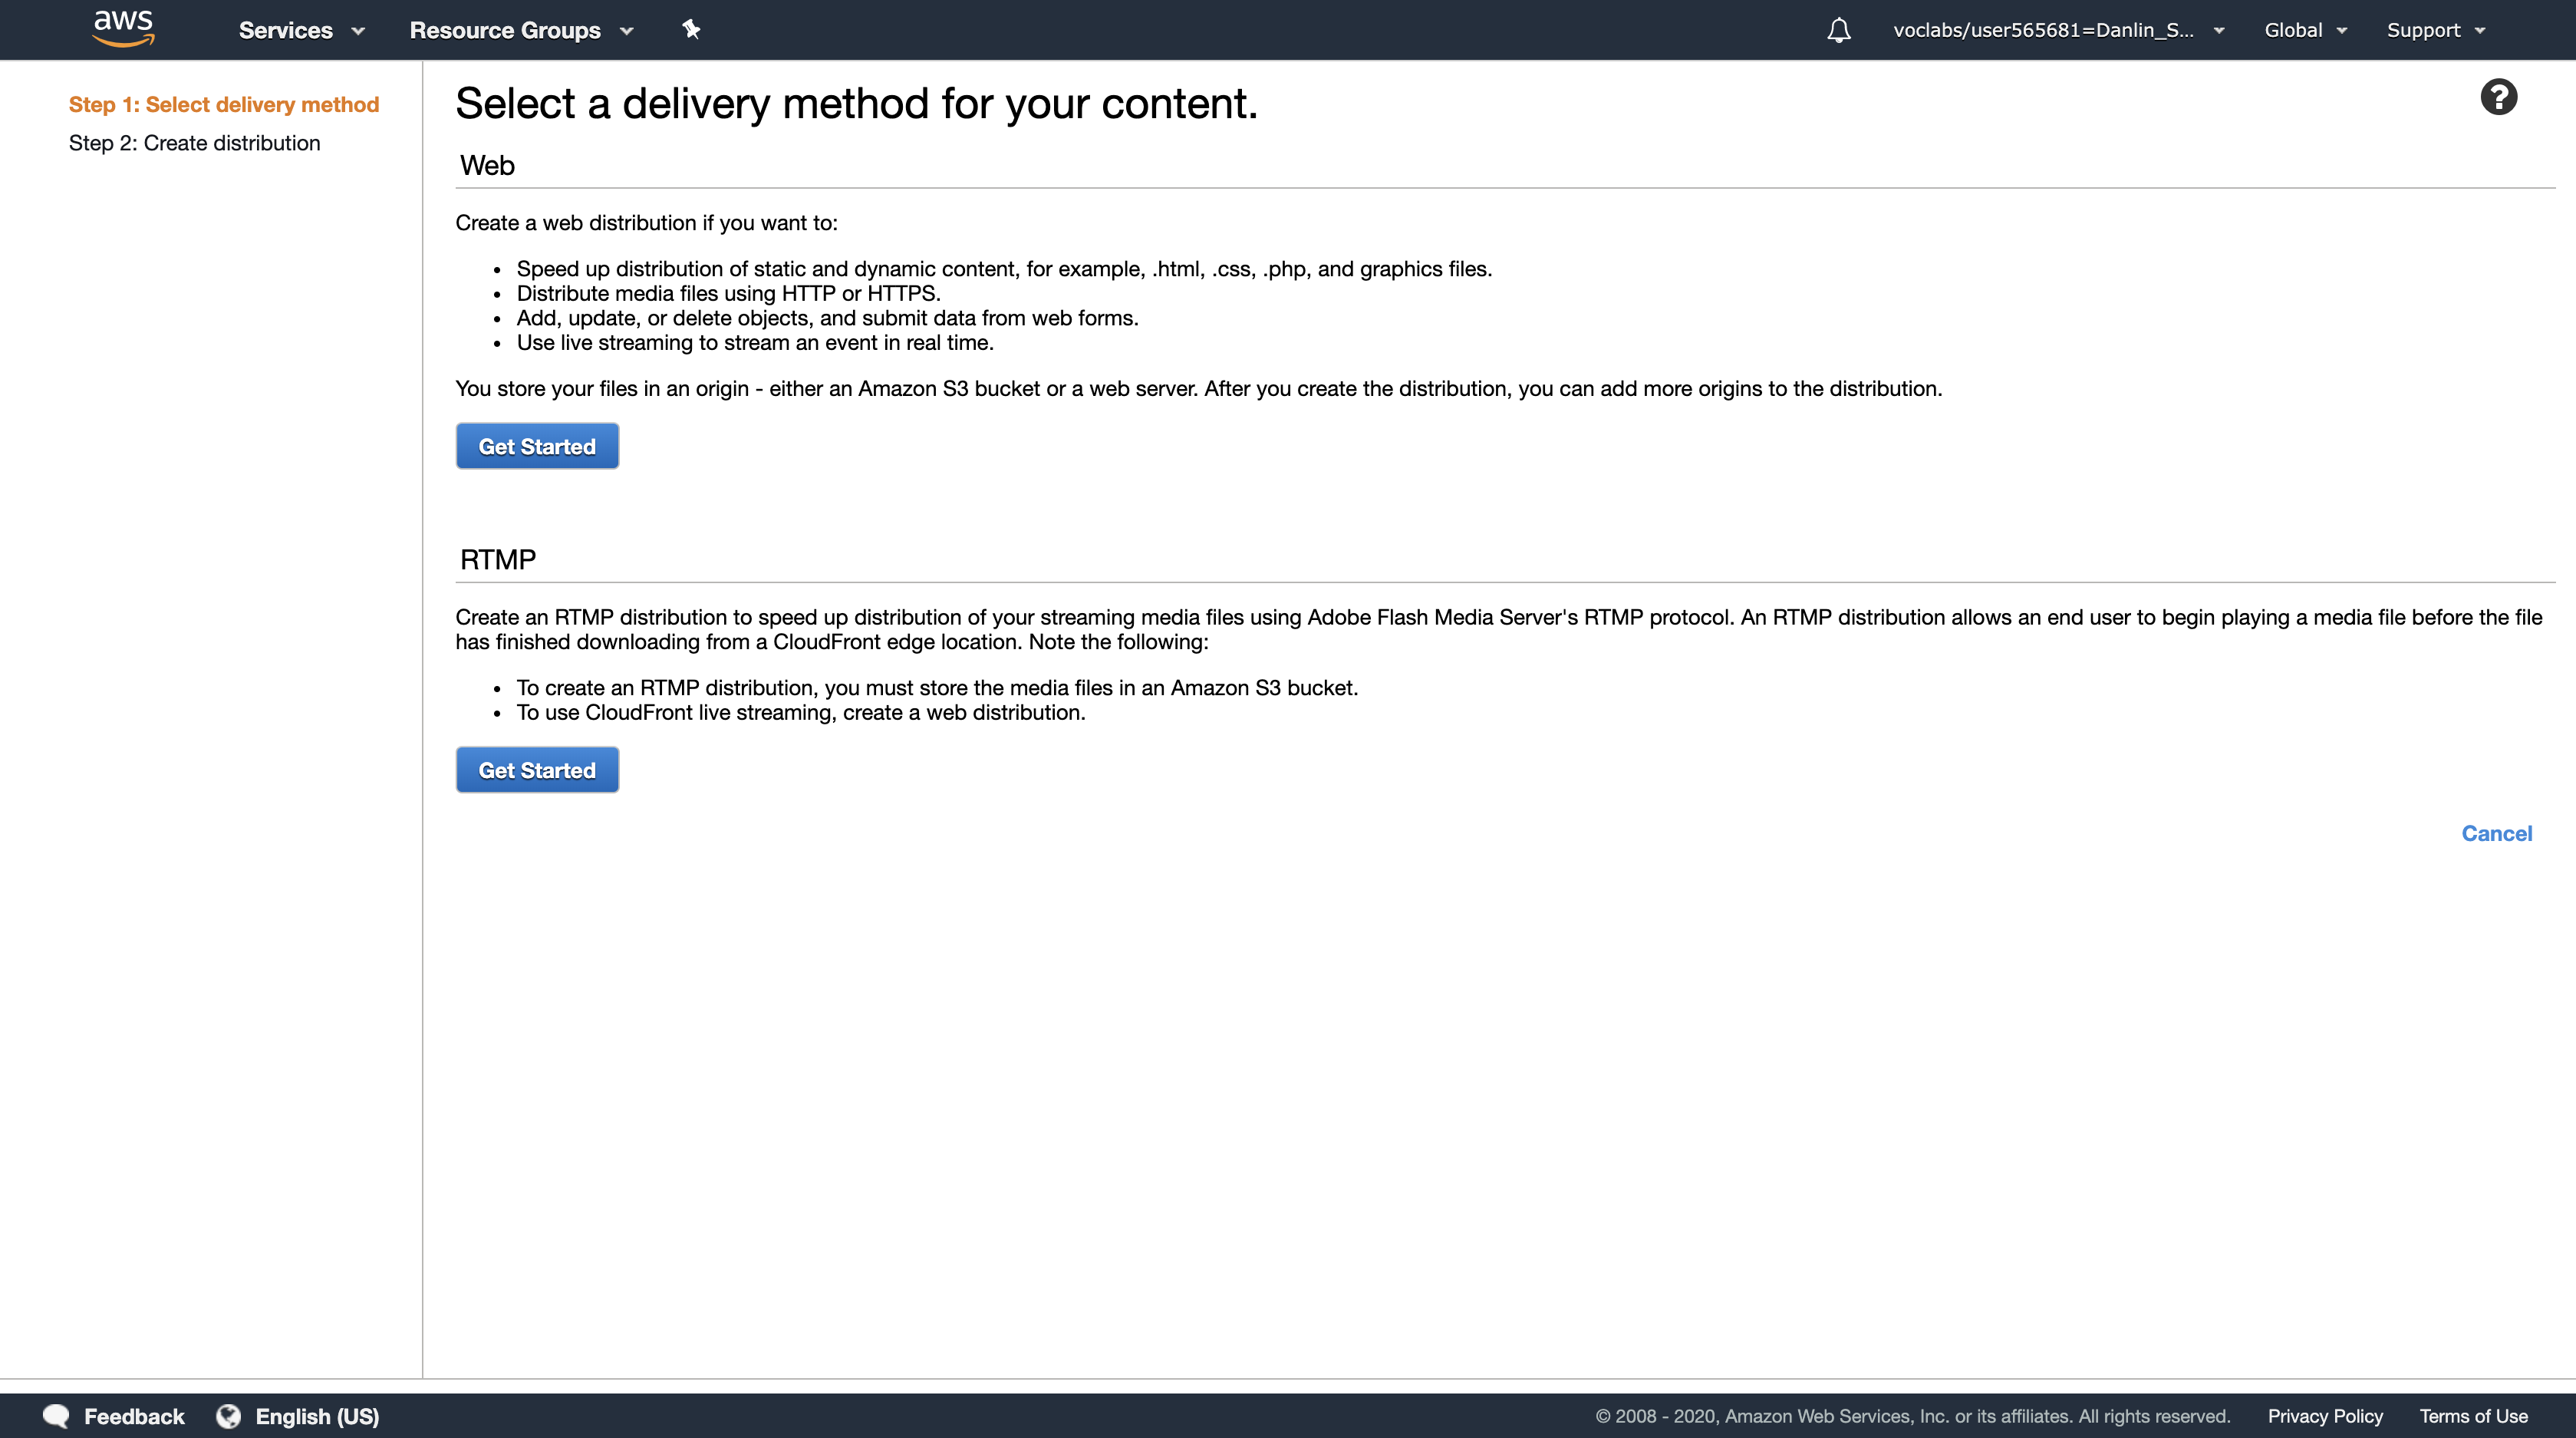
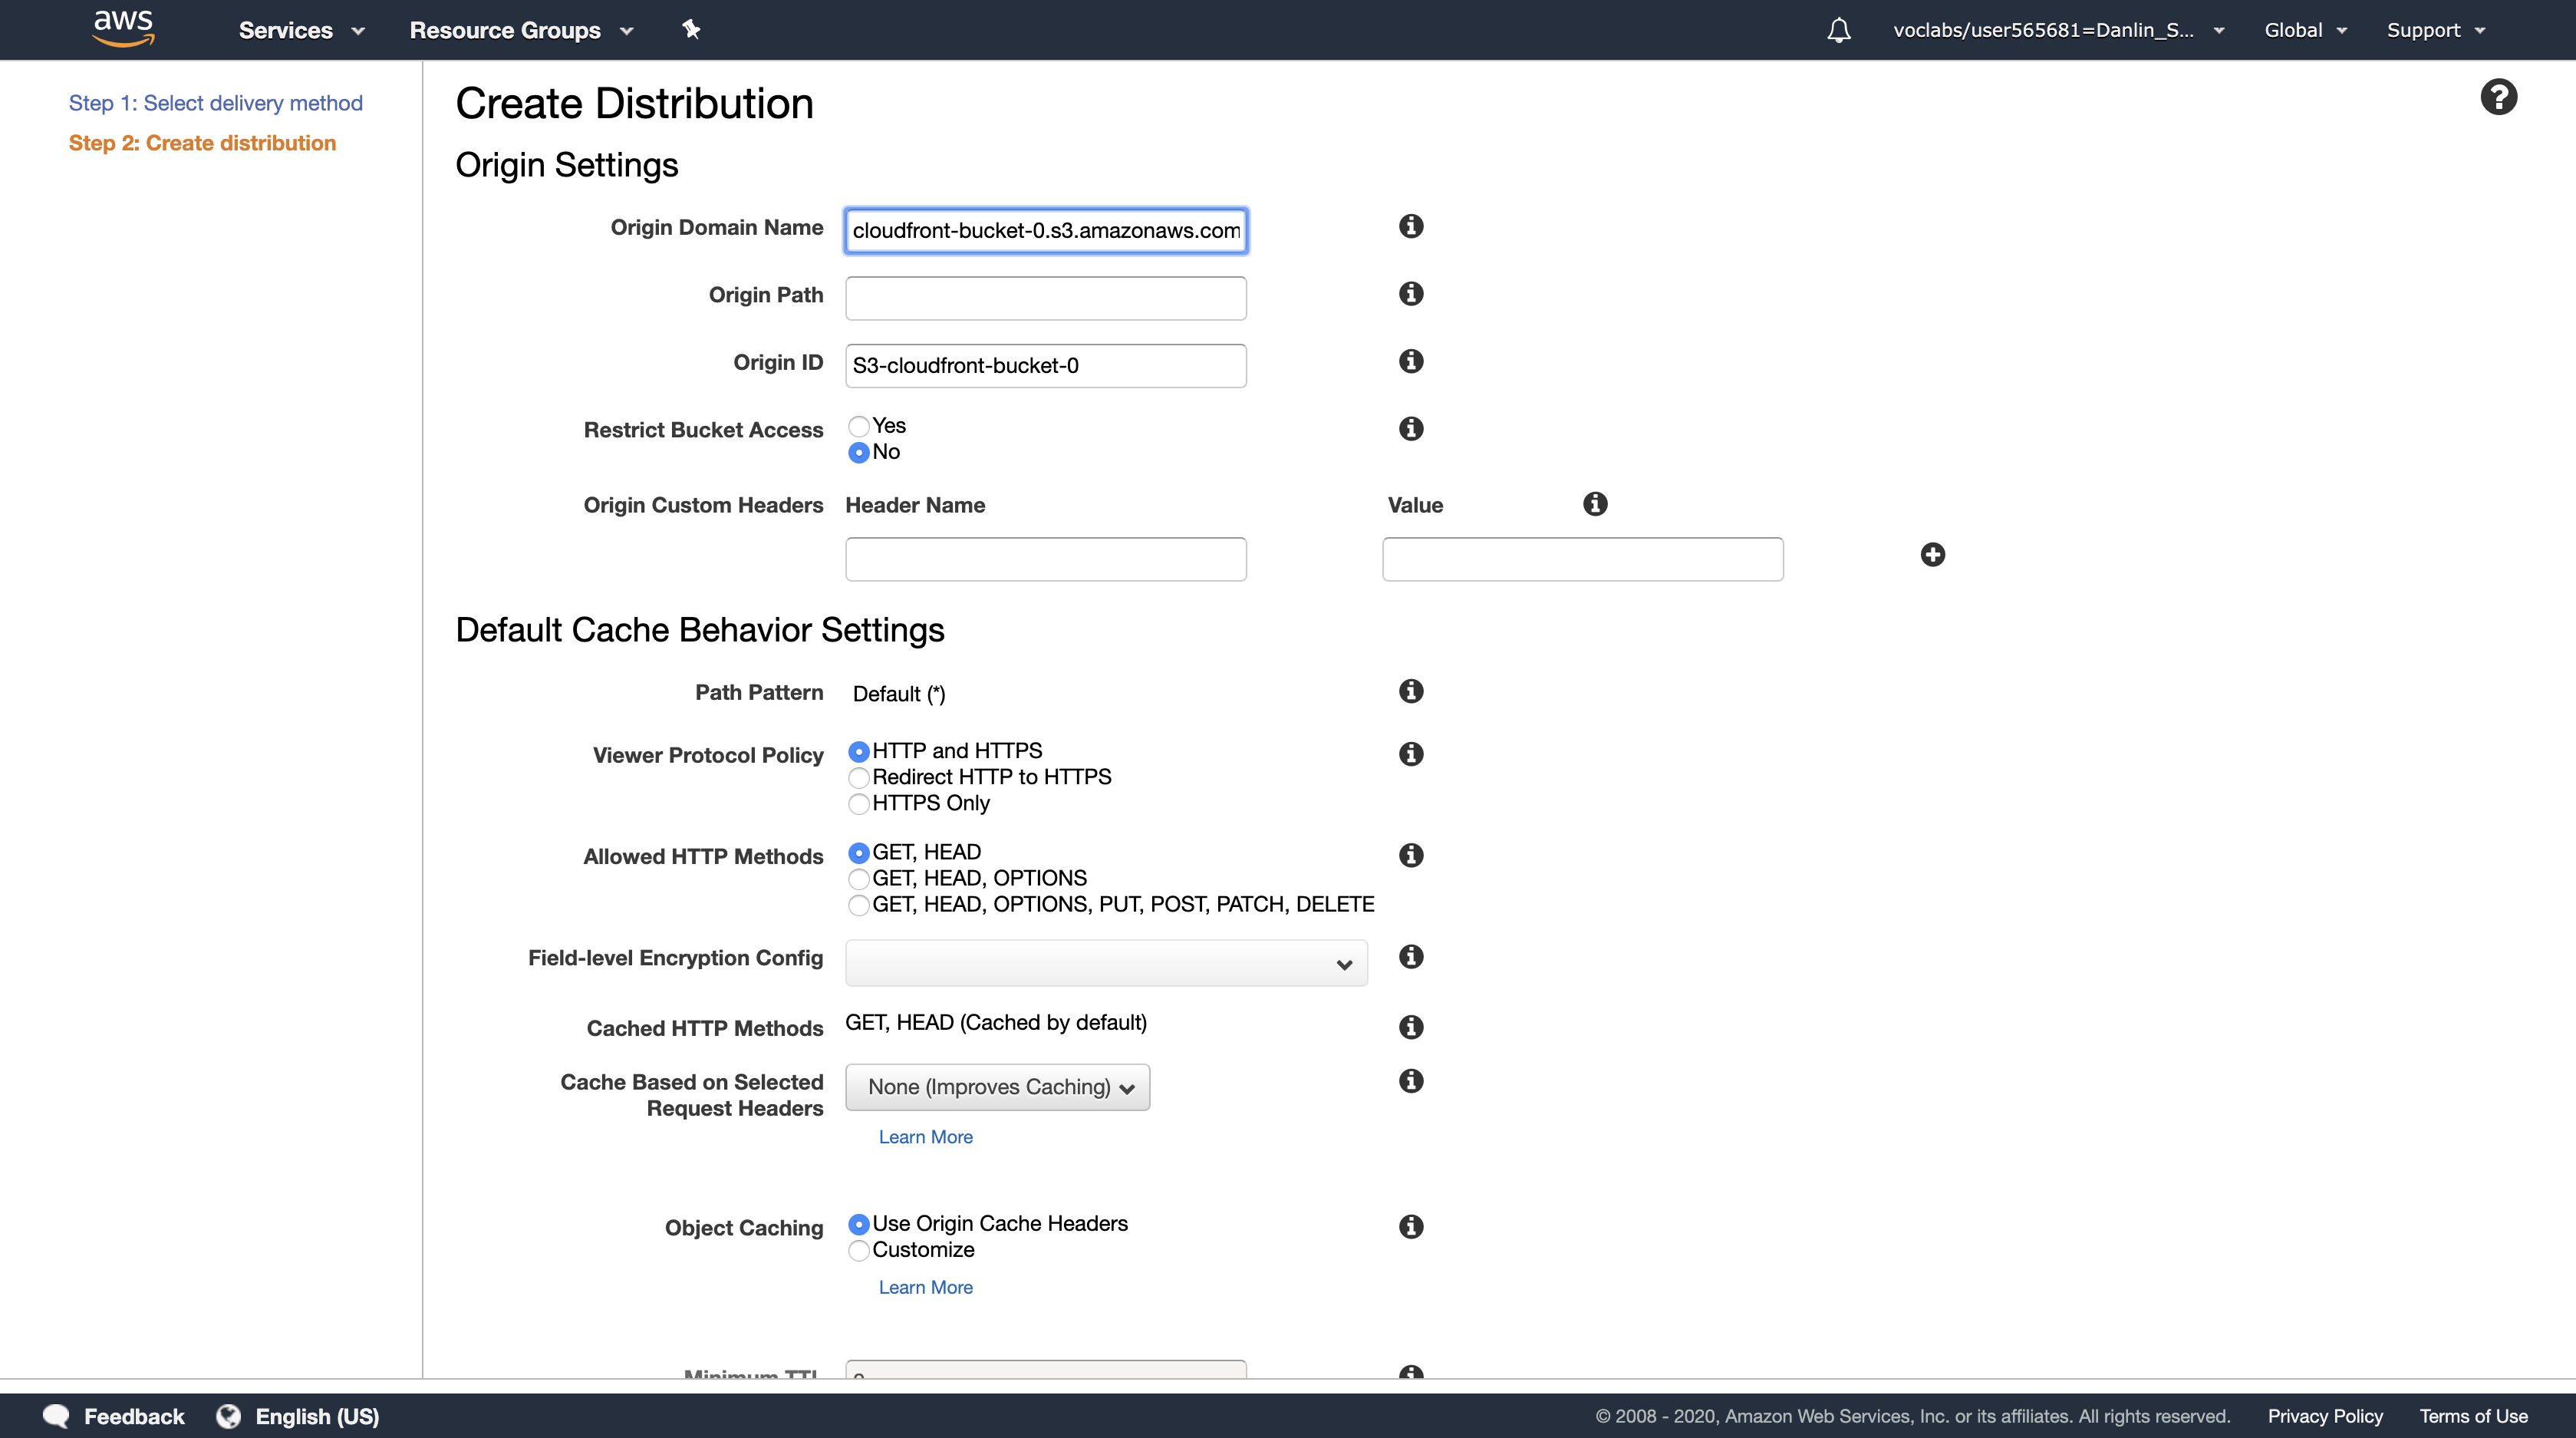
On the Select a delivery method for your content page, in the Web section, click Get Started then configure:
- Origin Domain Name: Select the S3 bucket you created
- Scroll to the bottom of the page, then click
Create Distribution

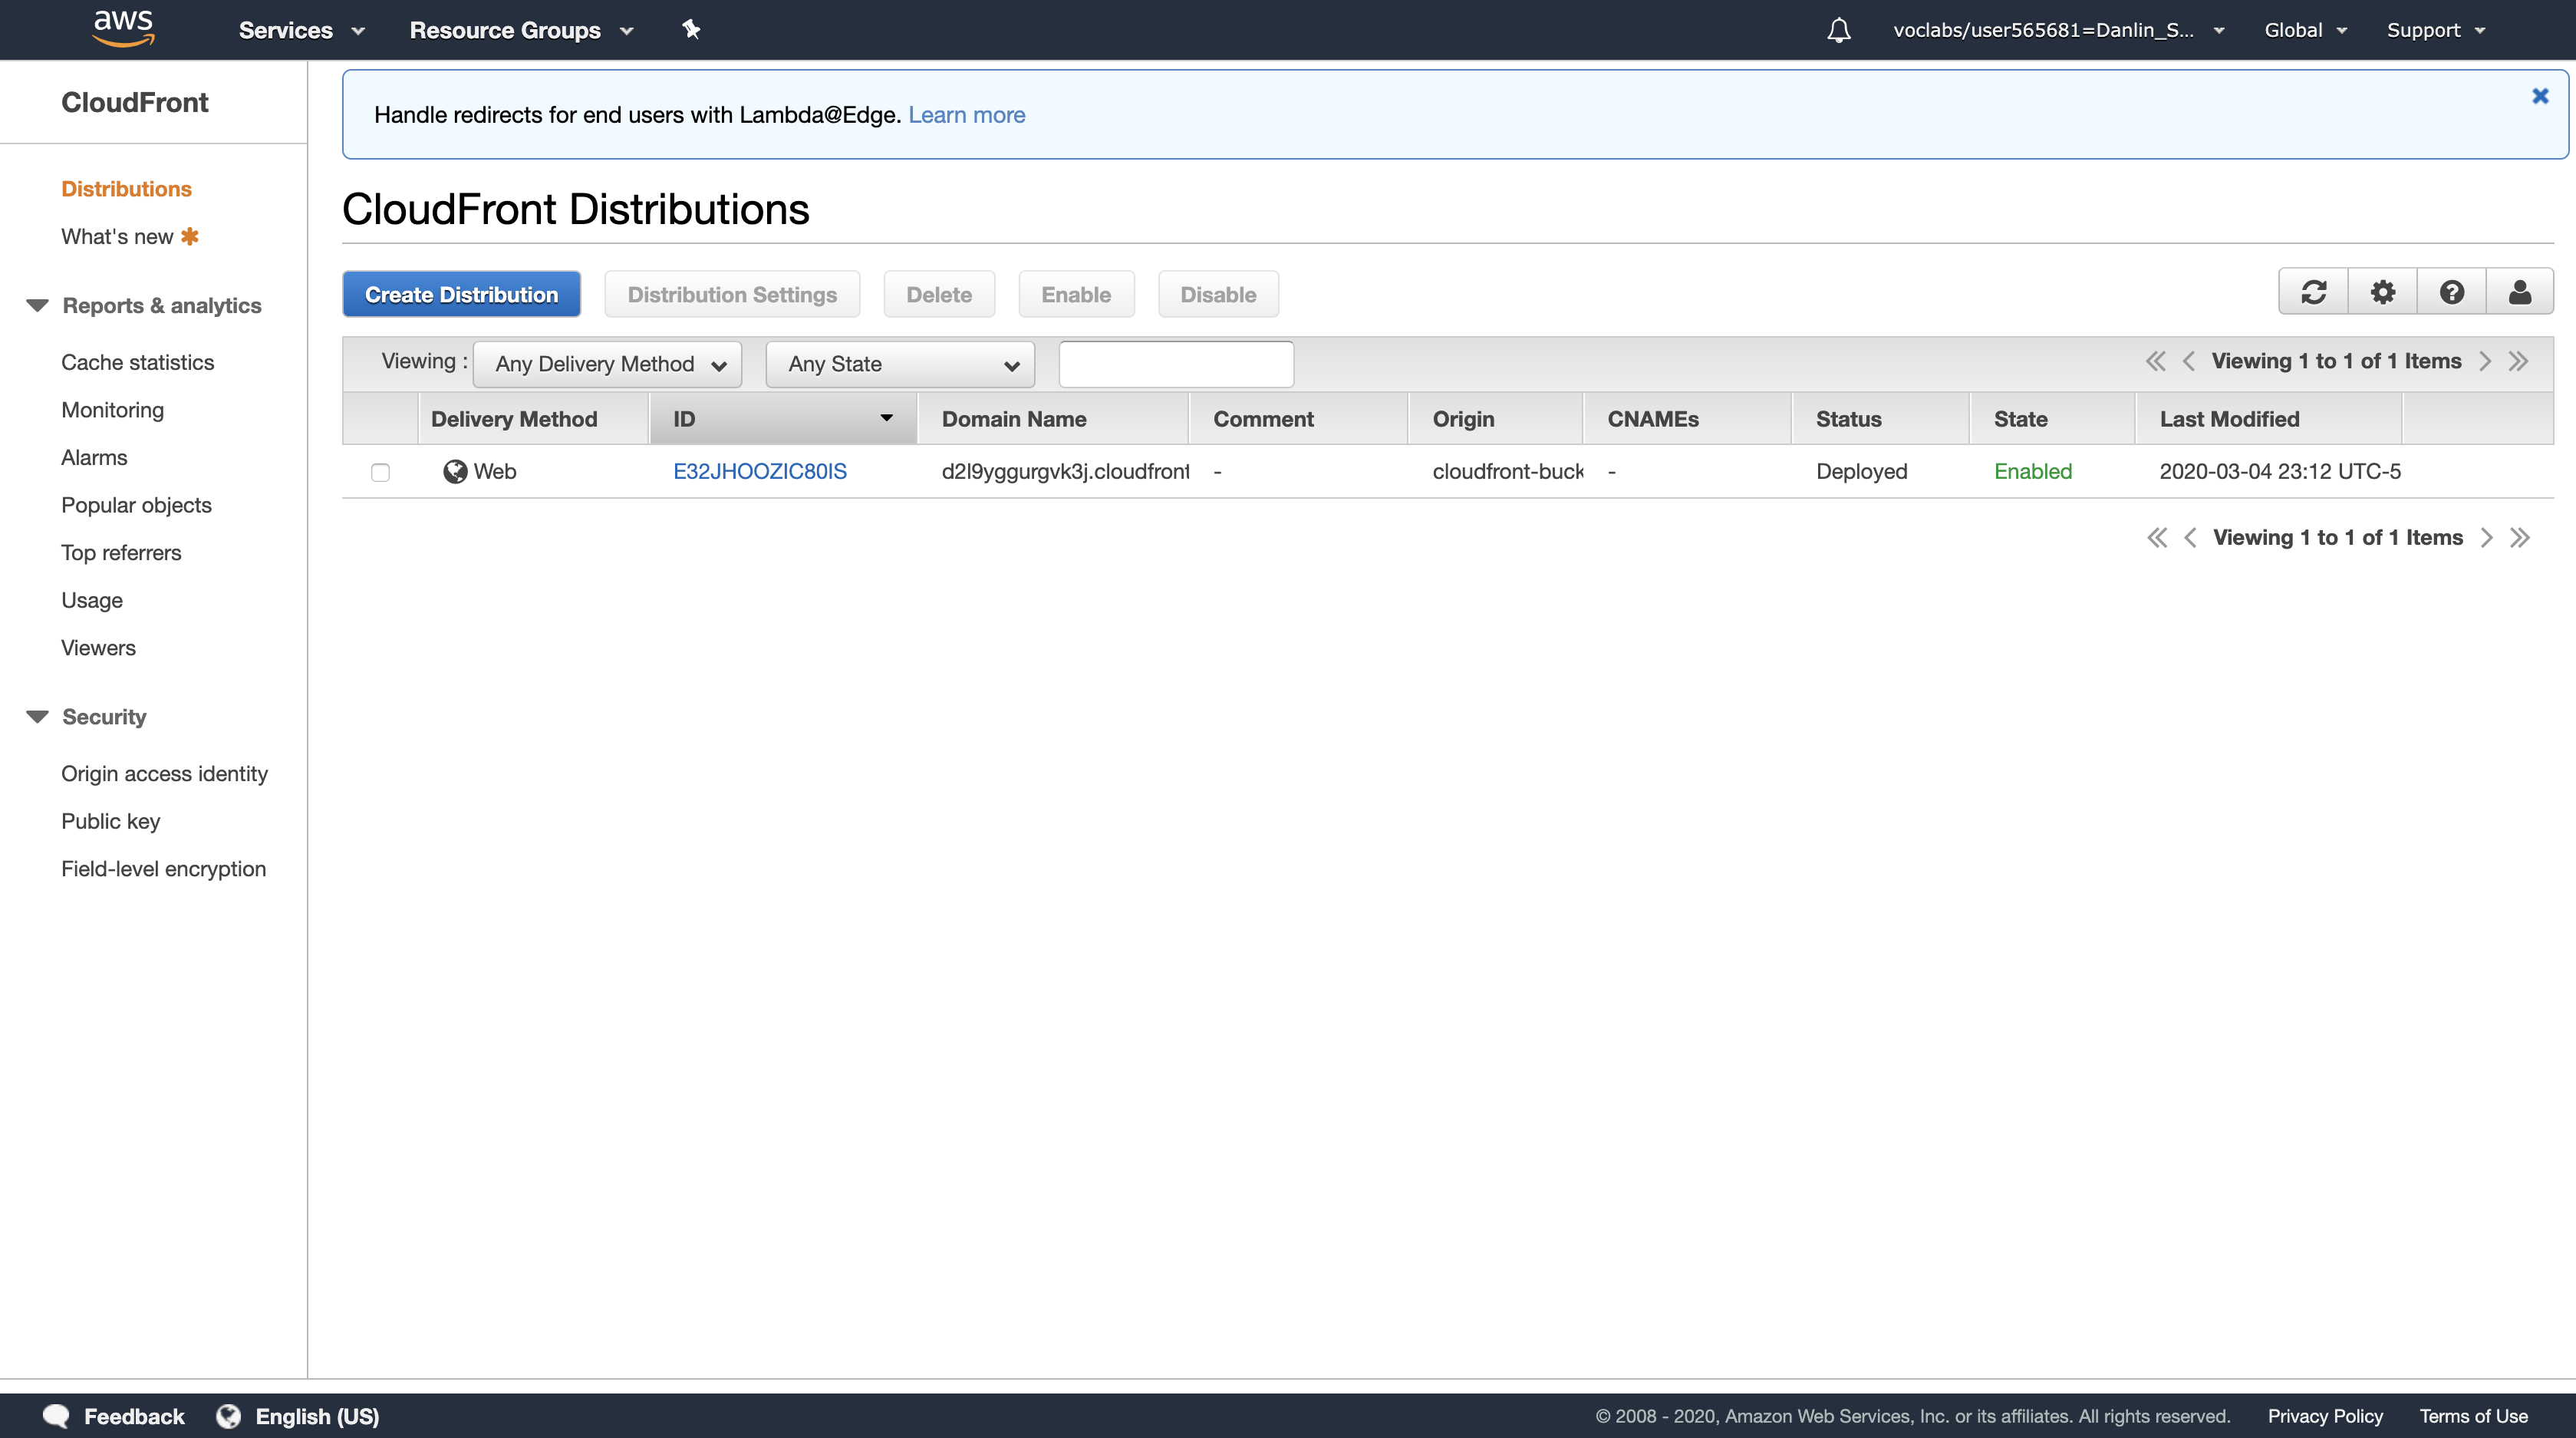
The Status column shows In Progress for your distribution. After Amazon CloudFront has created your distribution, the value of the Status column for your distribution will change to Deployed. At this point, it will be ready to process requests. This should take around 15-20 minutes. The domain name that Amazon CloudFront assigns to your distribution appears in the list of distributions. It will look similar to dm2afjy05tegj.cloudfront.net
Amazon CloudFront now knows where your Amazon S3 origin server is, and you know the domain name associated with the distribution. You can create a link to your Amazon S3 bucket content with that domain name, and have Amazon CloudFront serve it.
Copy the following HTML into a new text file:
1 | <html> |
In your text file:
- Replace
DOMAINwith your Amazon CloudFront Domain Name for your distribution. You should see this on the CloudFront Distributions page. - Replace
OBJECTwith the name of the file that you uploaded to your Amazon S3 bucket
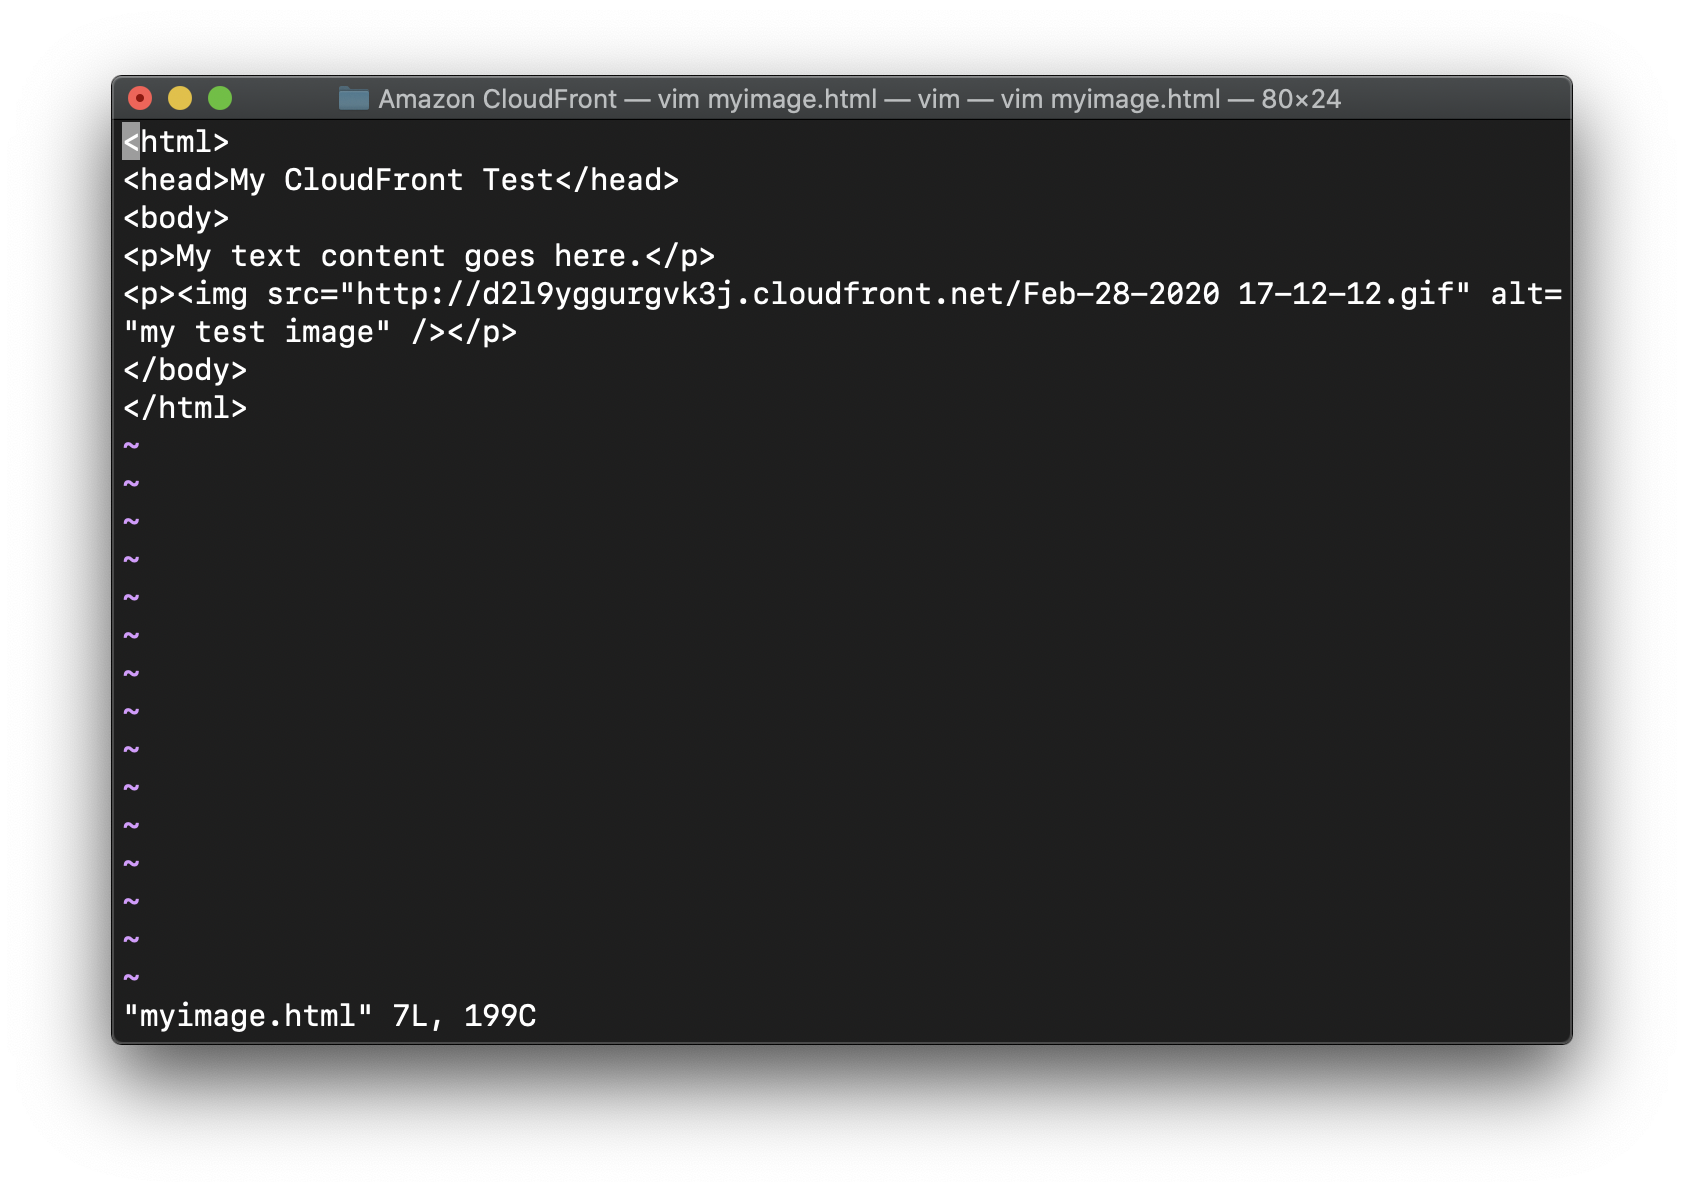
Save the text file to your computer as myimage.html
Open the web page you just created in a browser to ensure that you can see your content.
- The browser returns your page with the embedded image file, served from the edge location that Amazon CloudFront determined was appropriate to serve the object.
Upload the file myimage.html to S3 bucket.
- Under Manage public permissions, select Grant public read access to this object(s)
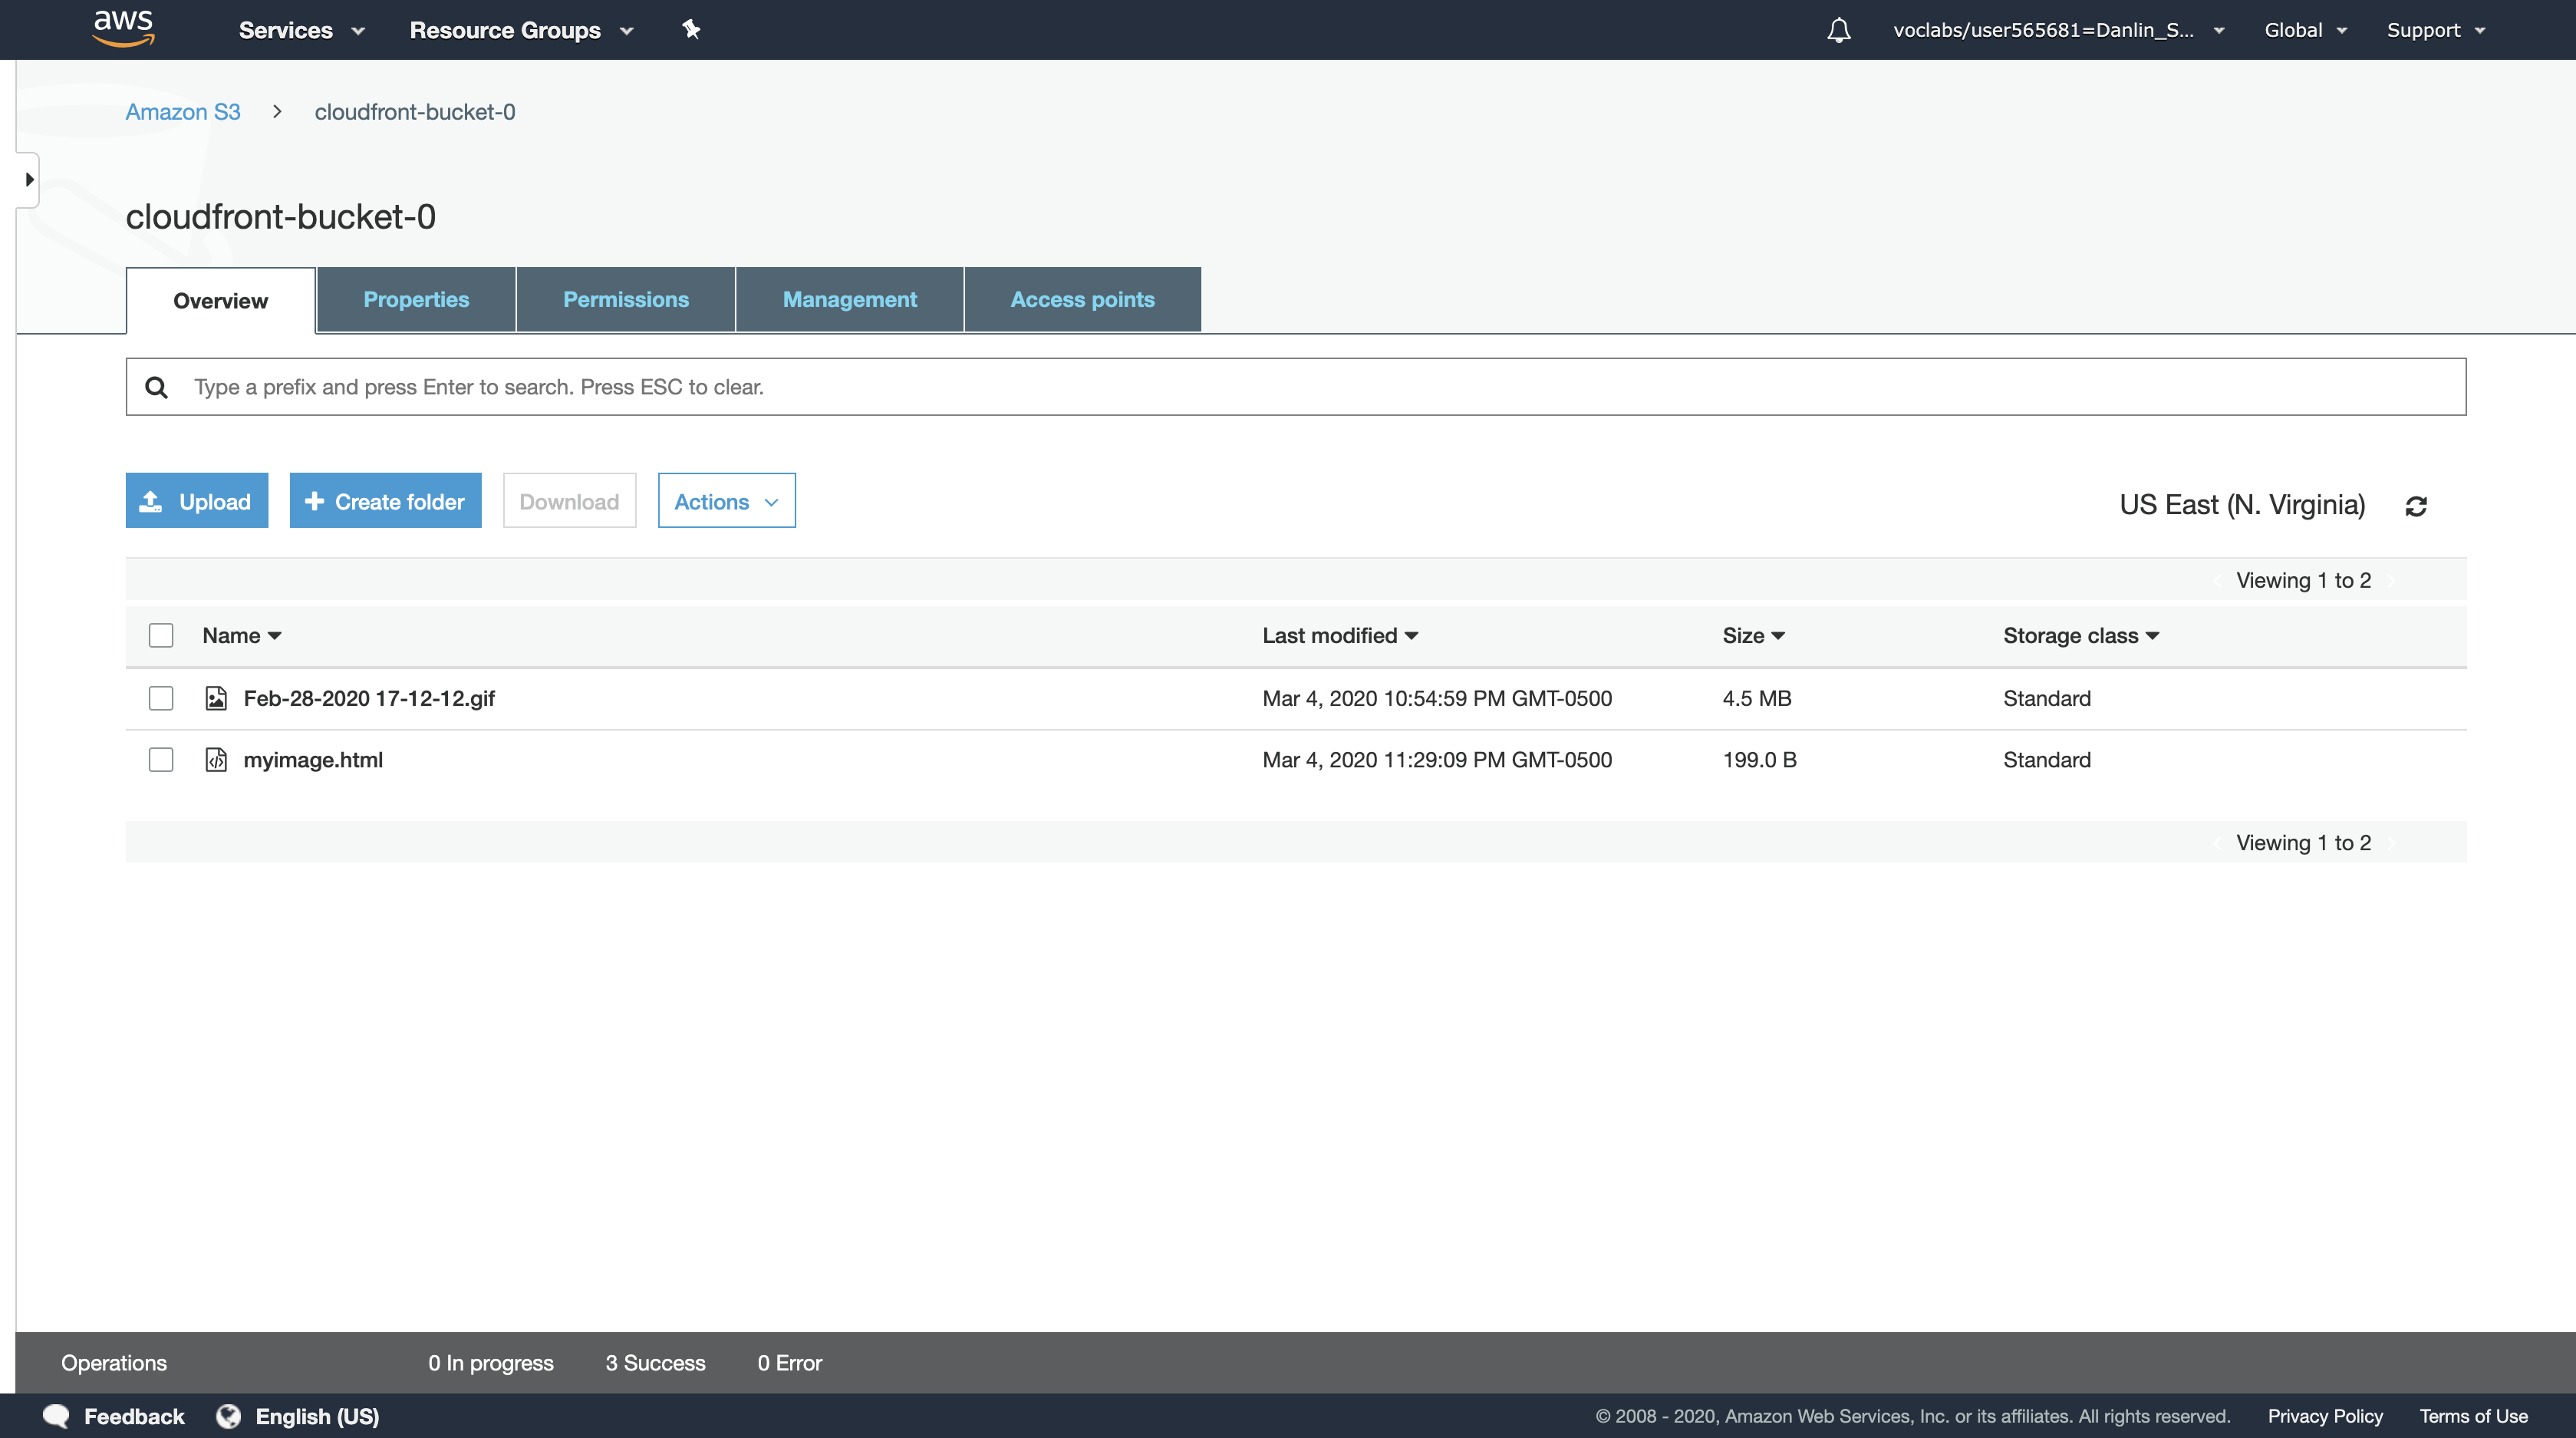
Click myimage.html.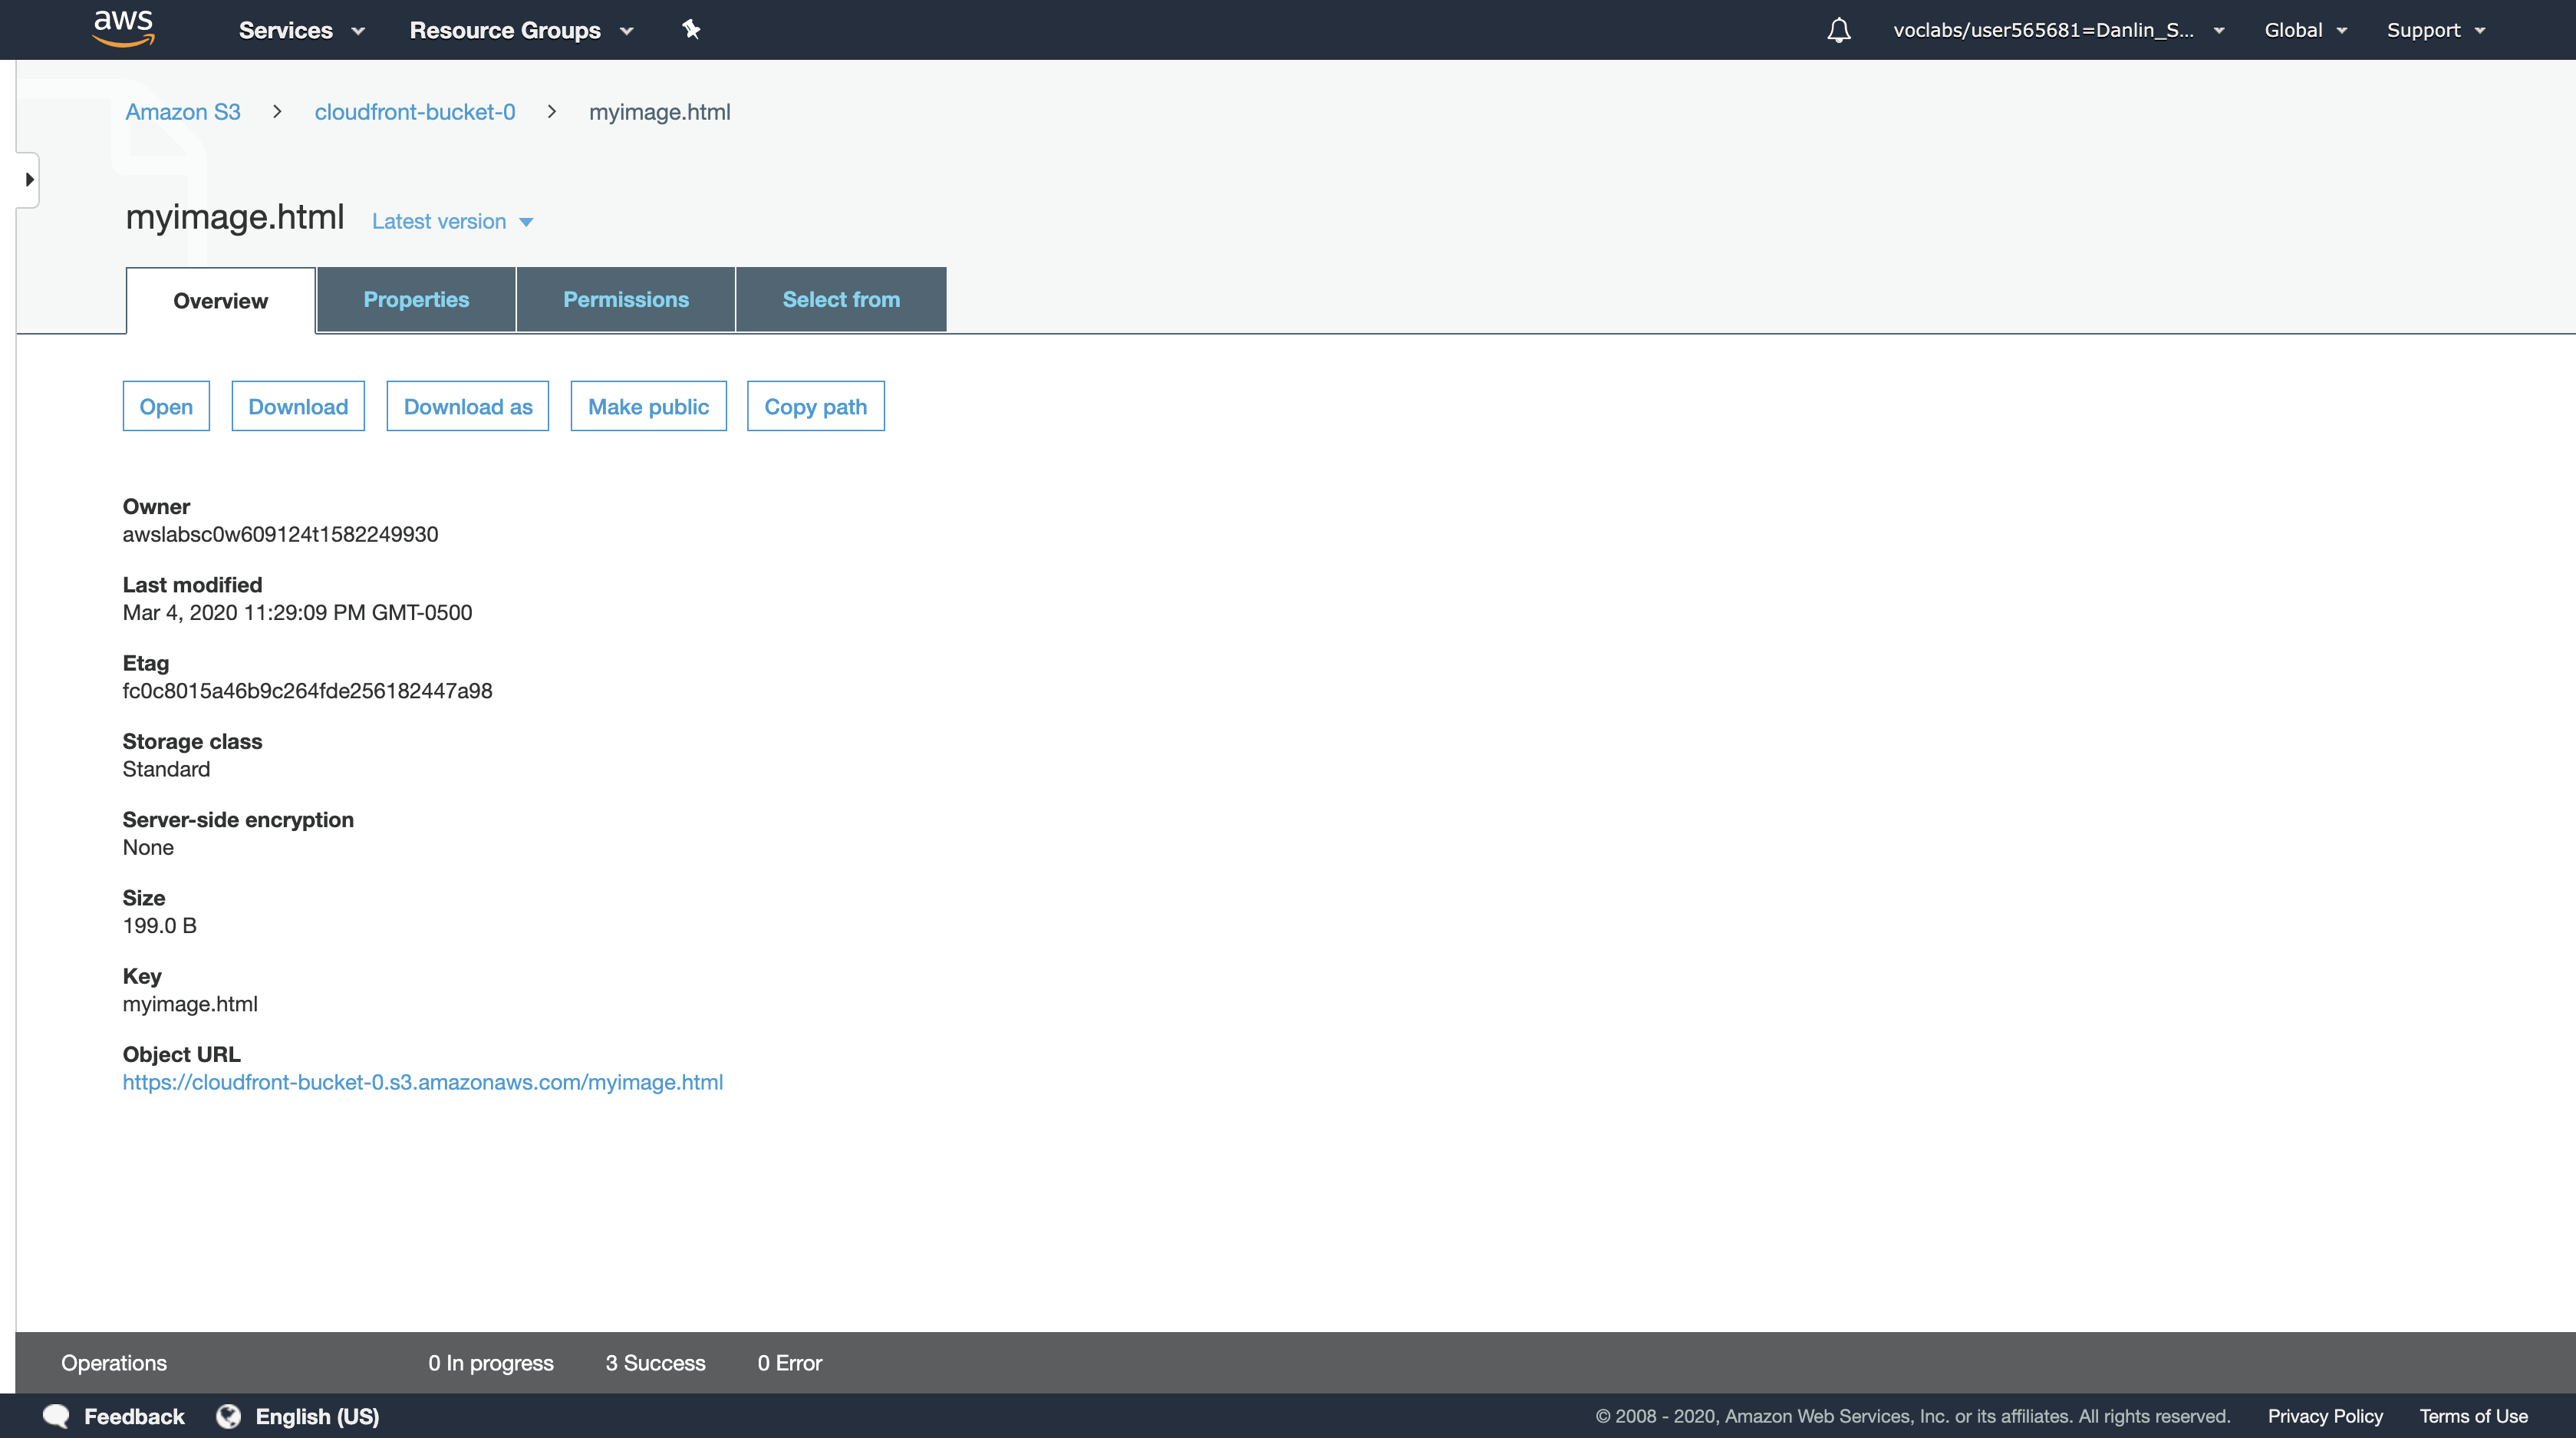
Paste the Object URL on new tab.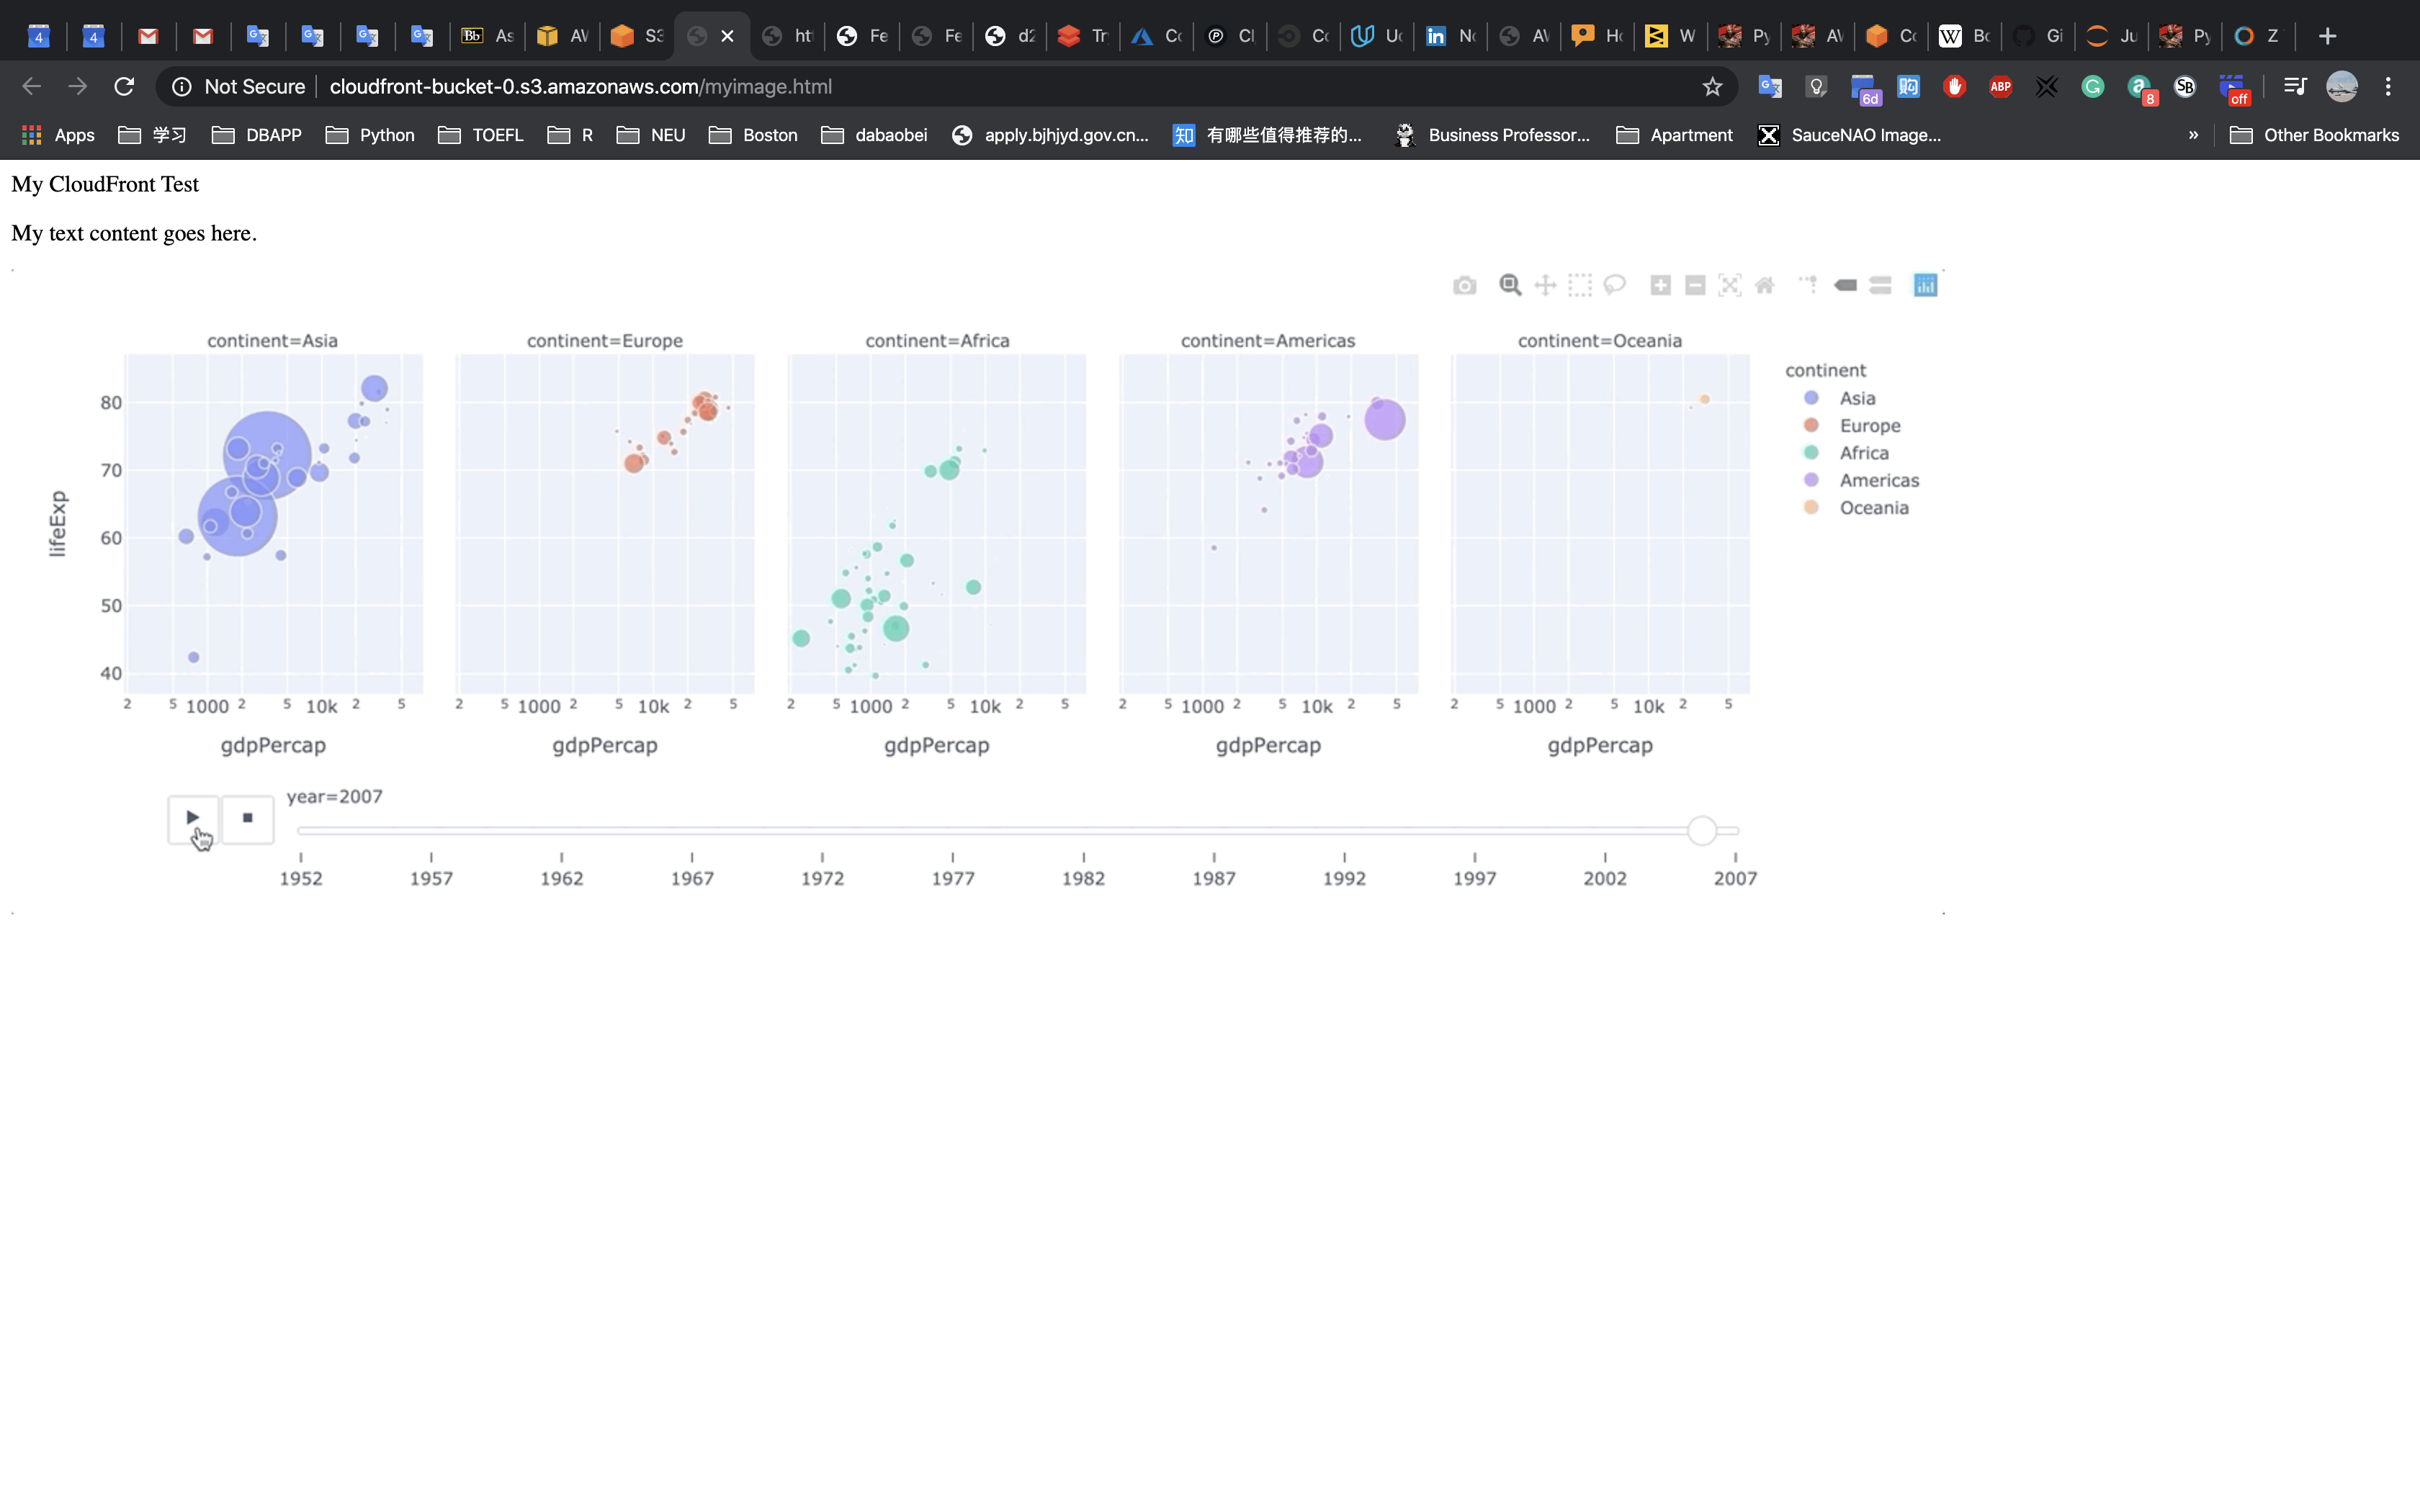
Visit http://DOMAIN/OBJECT
- Replace the
DOMAINto your CloudFrontdomain name - Replace the
OBJECTtomyimage.html

Notice the difference of the URL in two pages.
Task 4: Delete Your Amazon CloudFront Distribution
You can clean up your resources by deleting the Amazon CloudFront distribution and the Amazon S3 bucket.
AWS Management Console
Select the check box for your CloudFront distribution.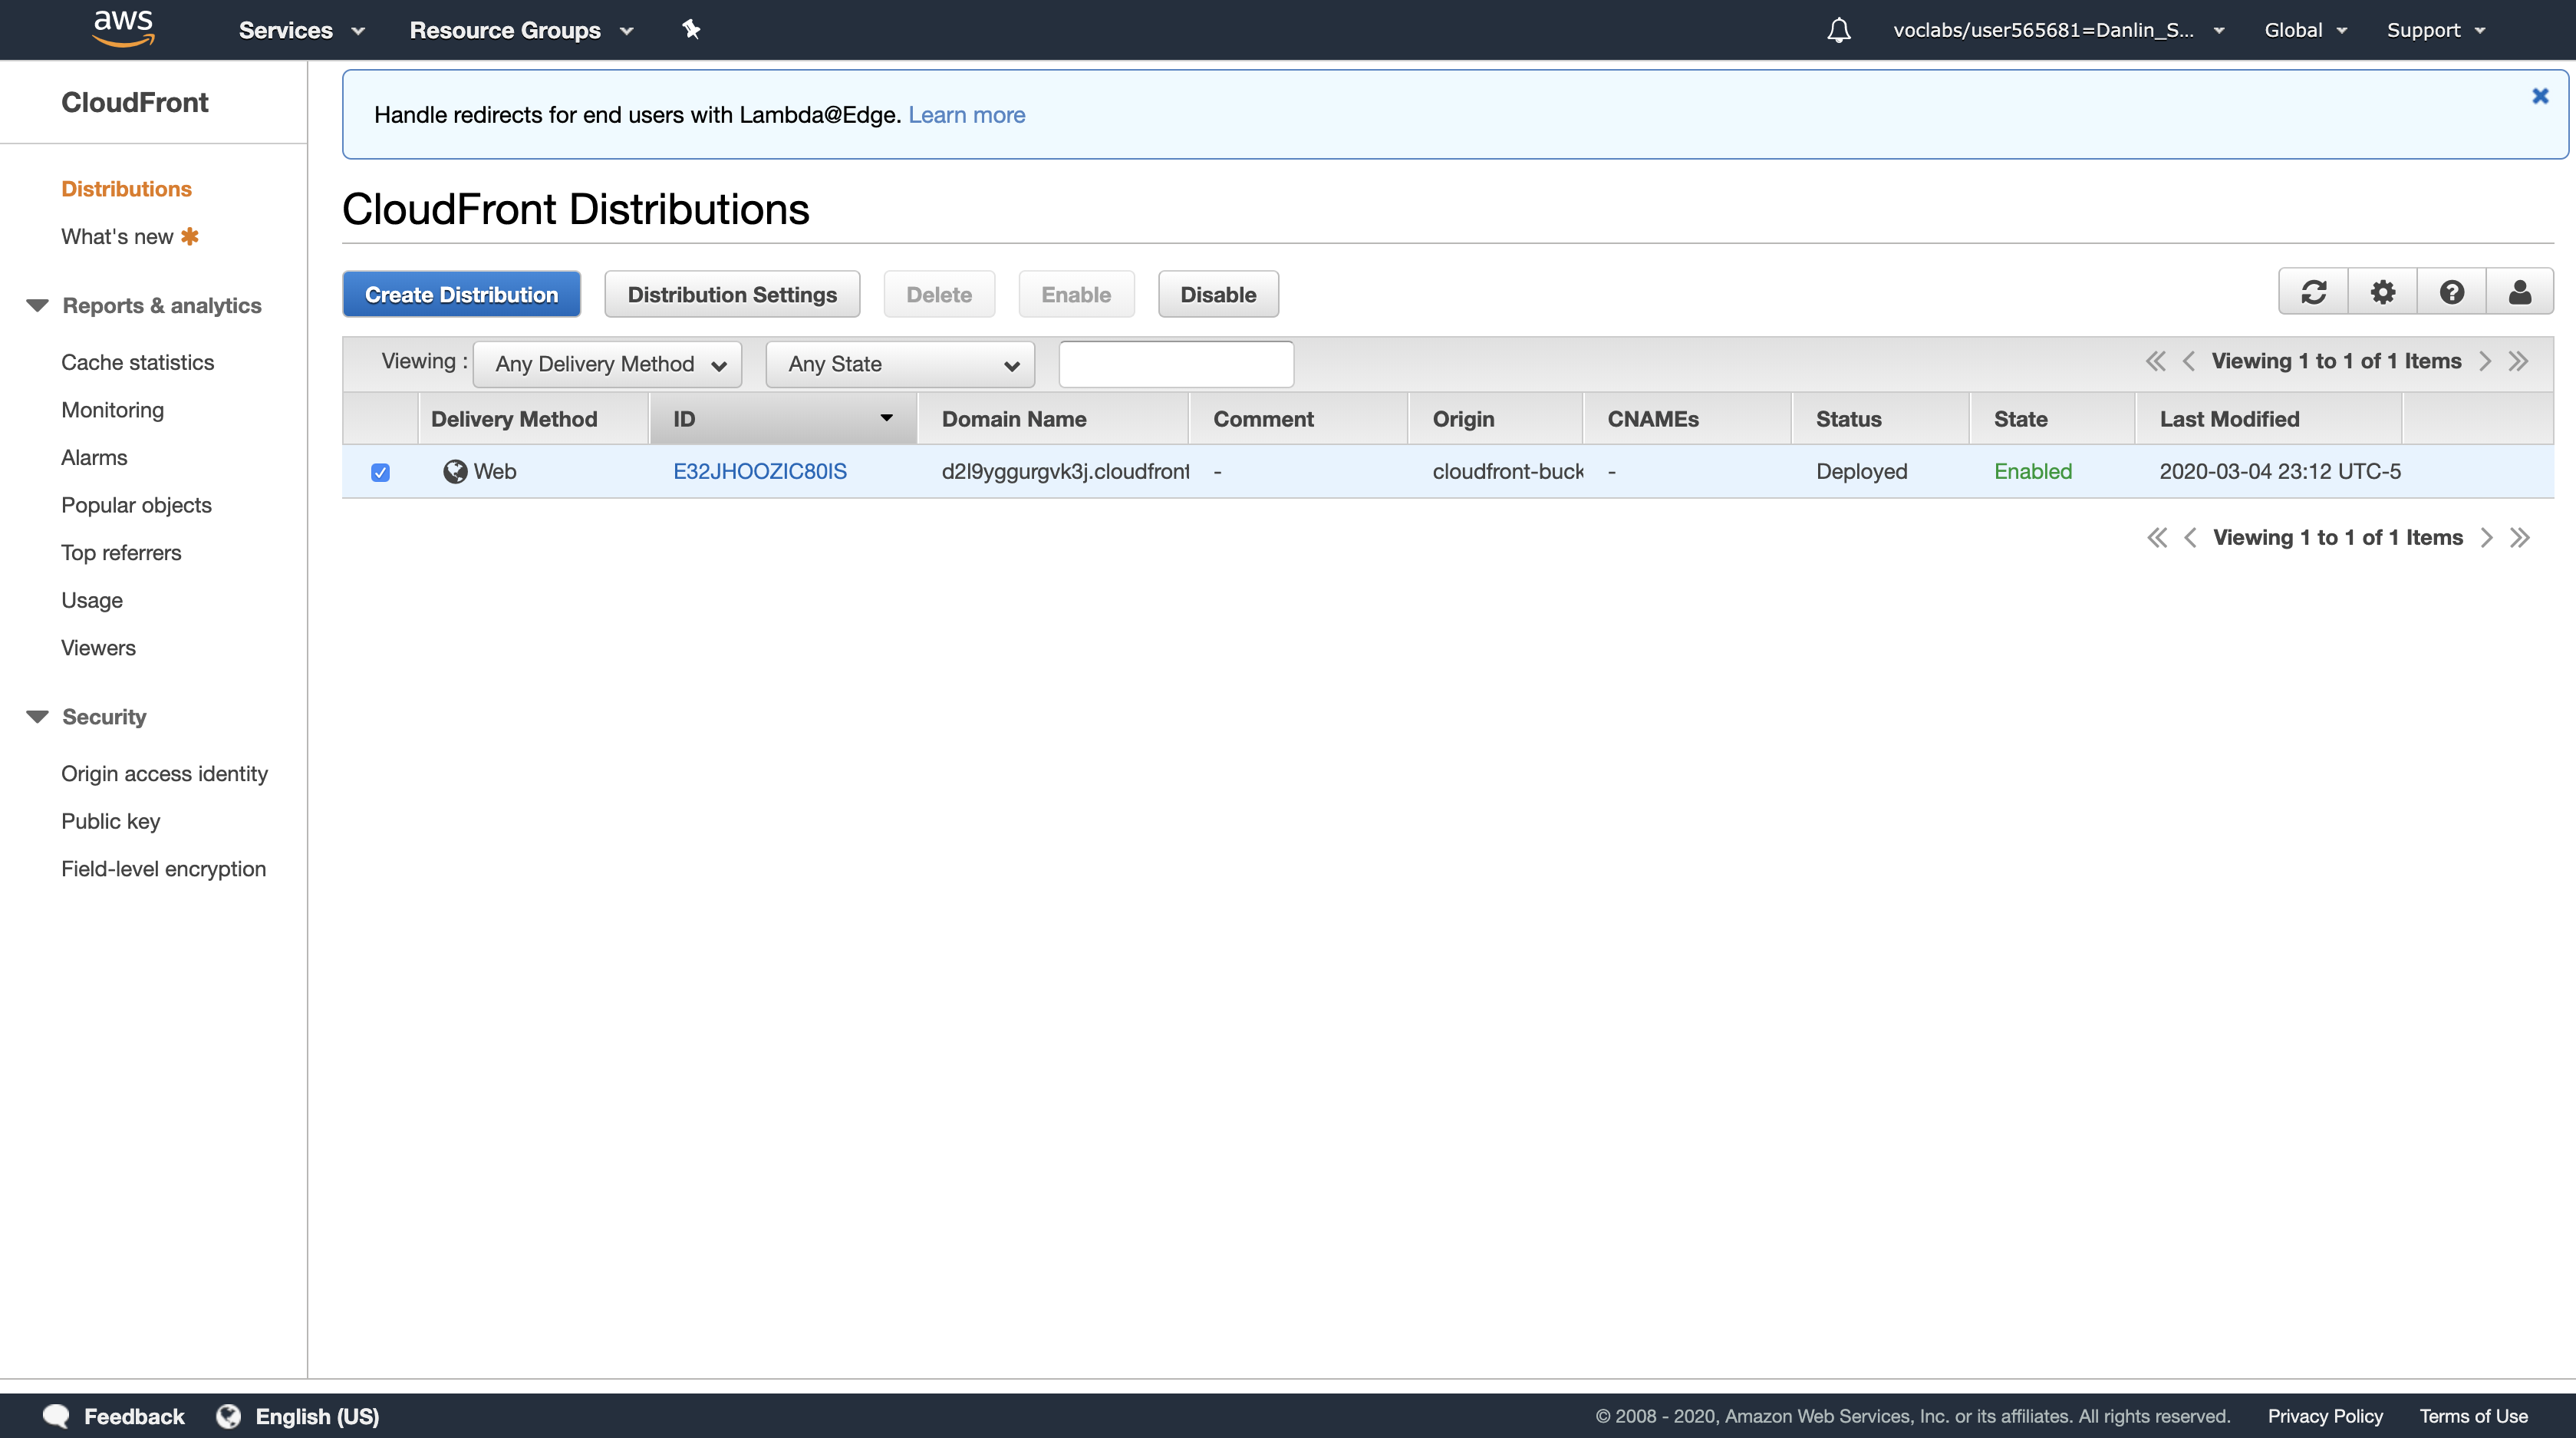
At the top of the screen, click Disable
Click Yes, Disable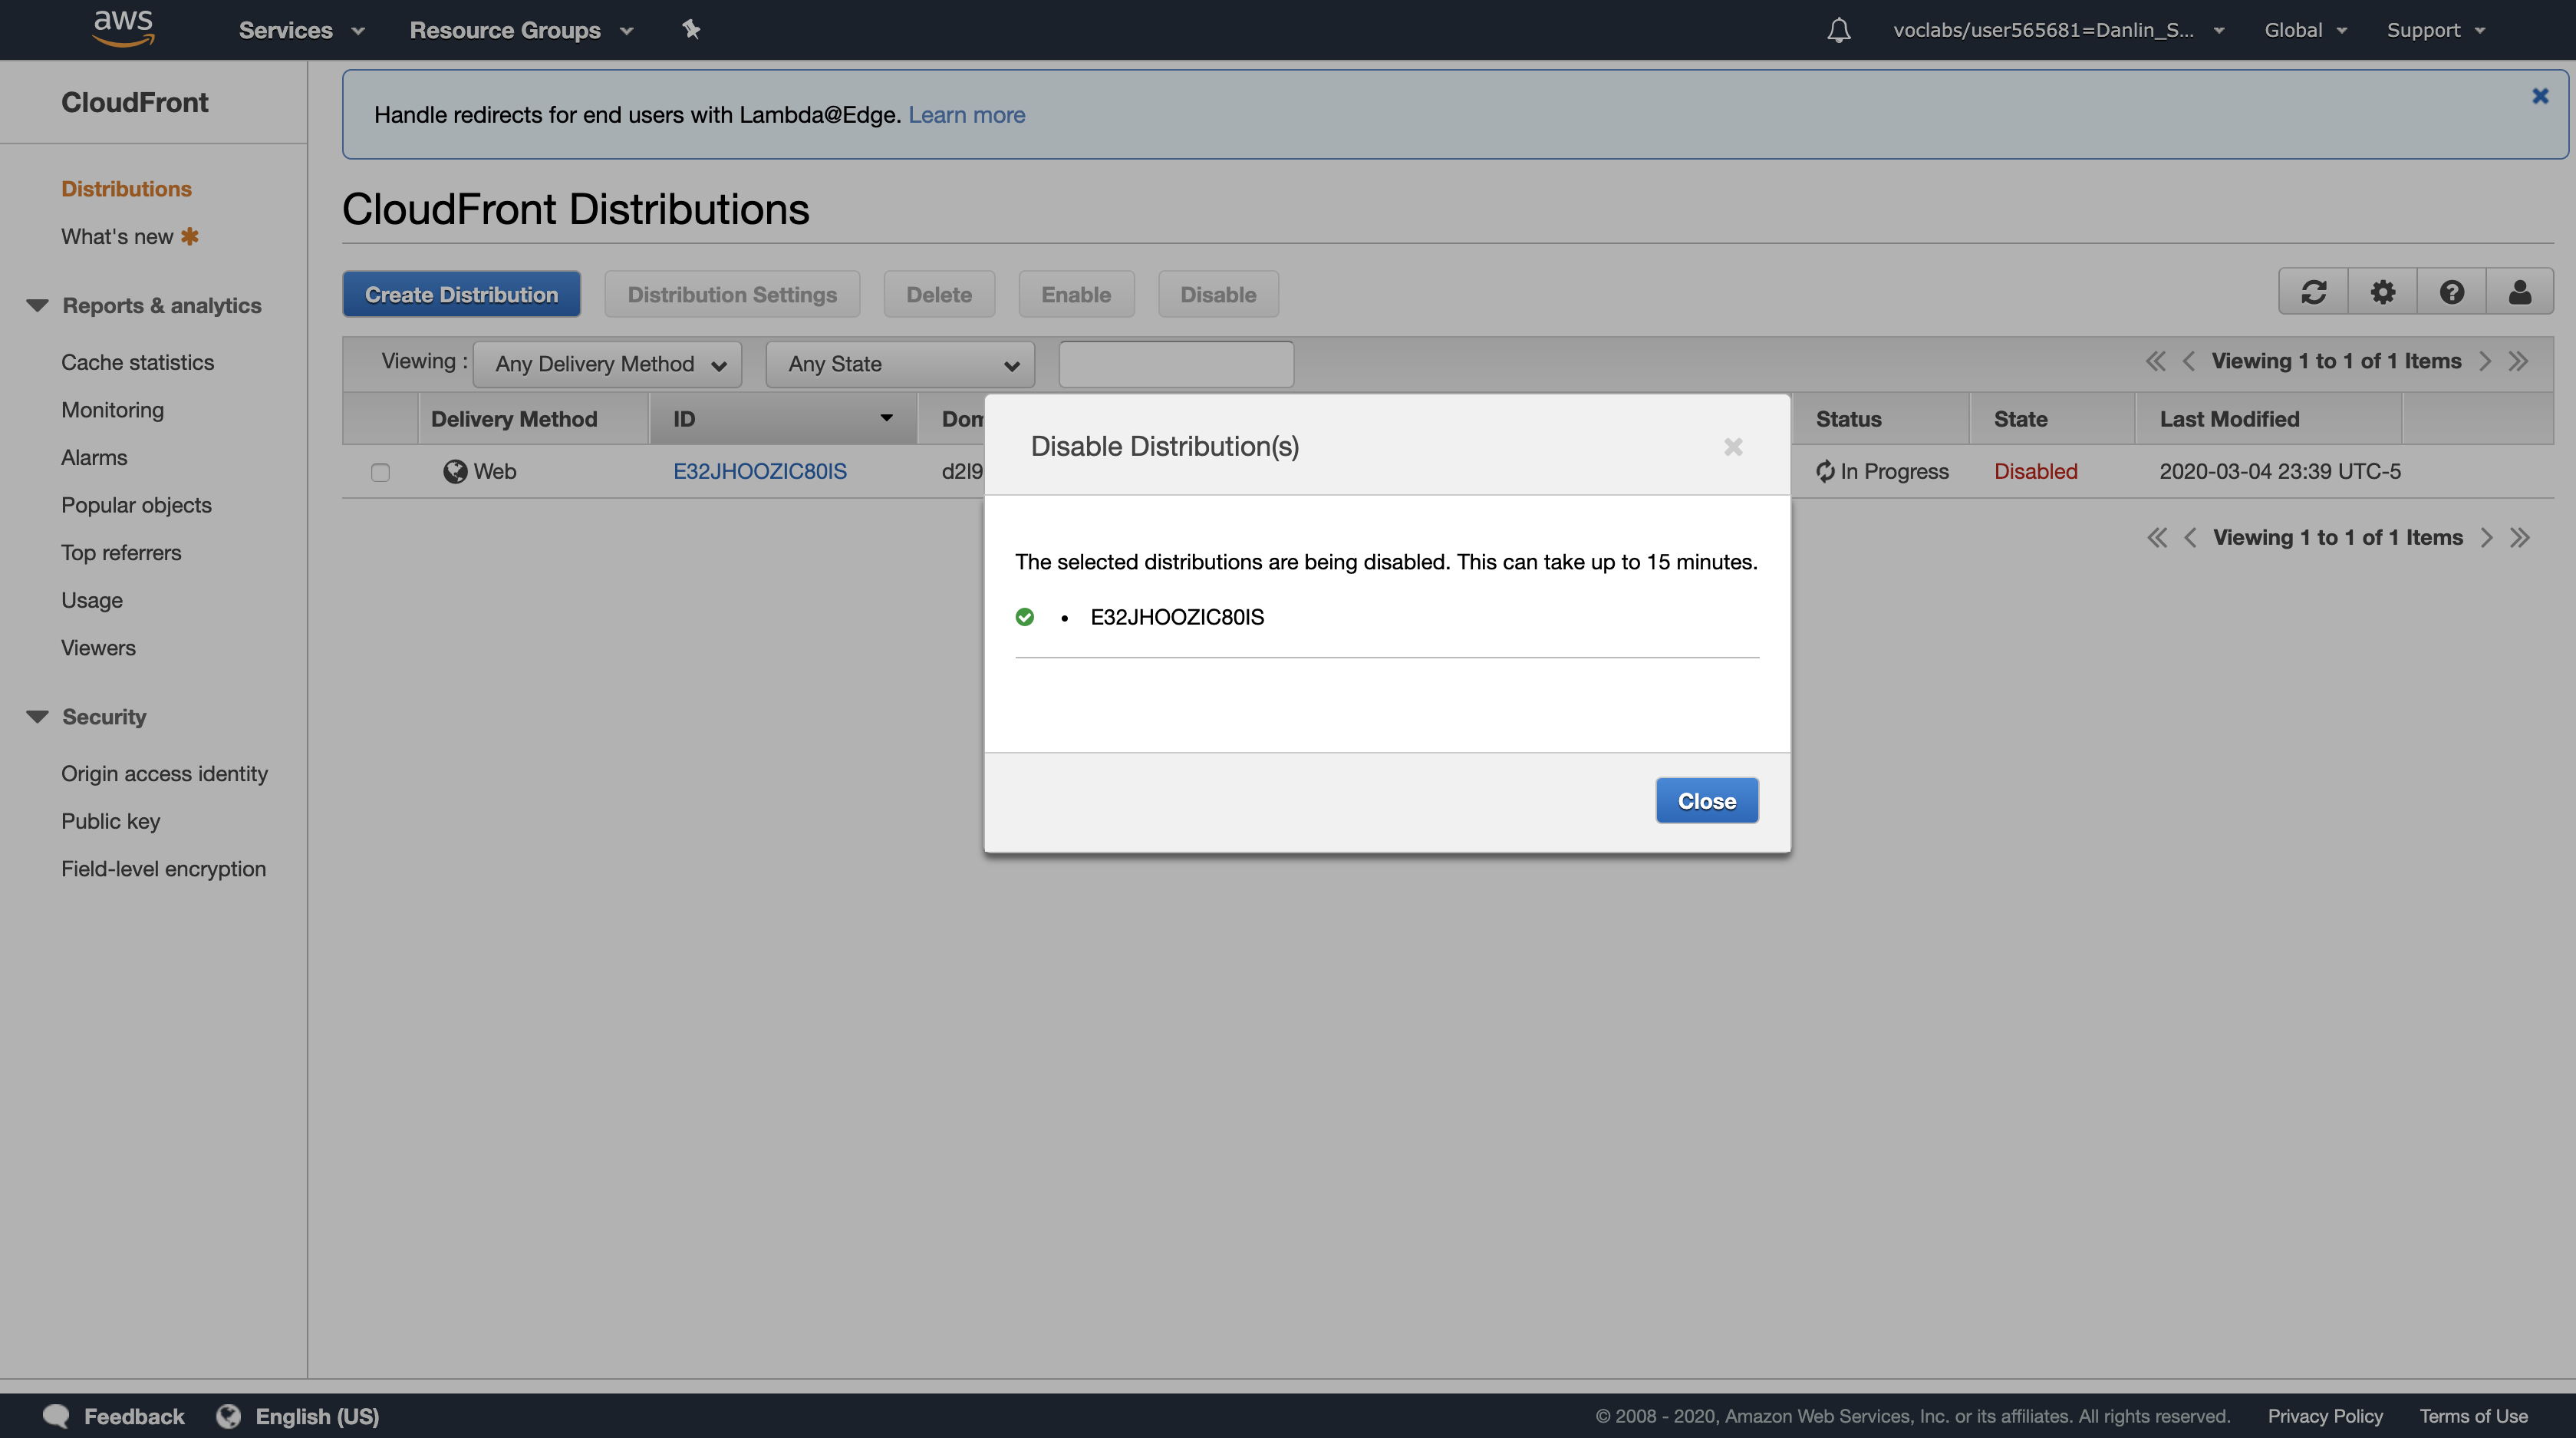
Click Close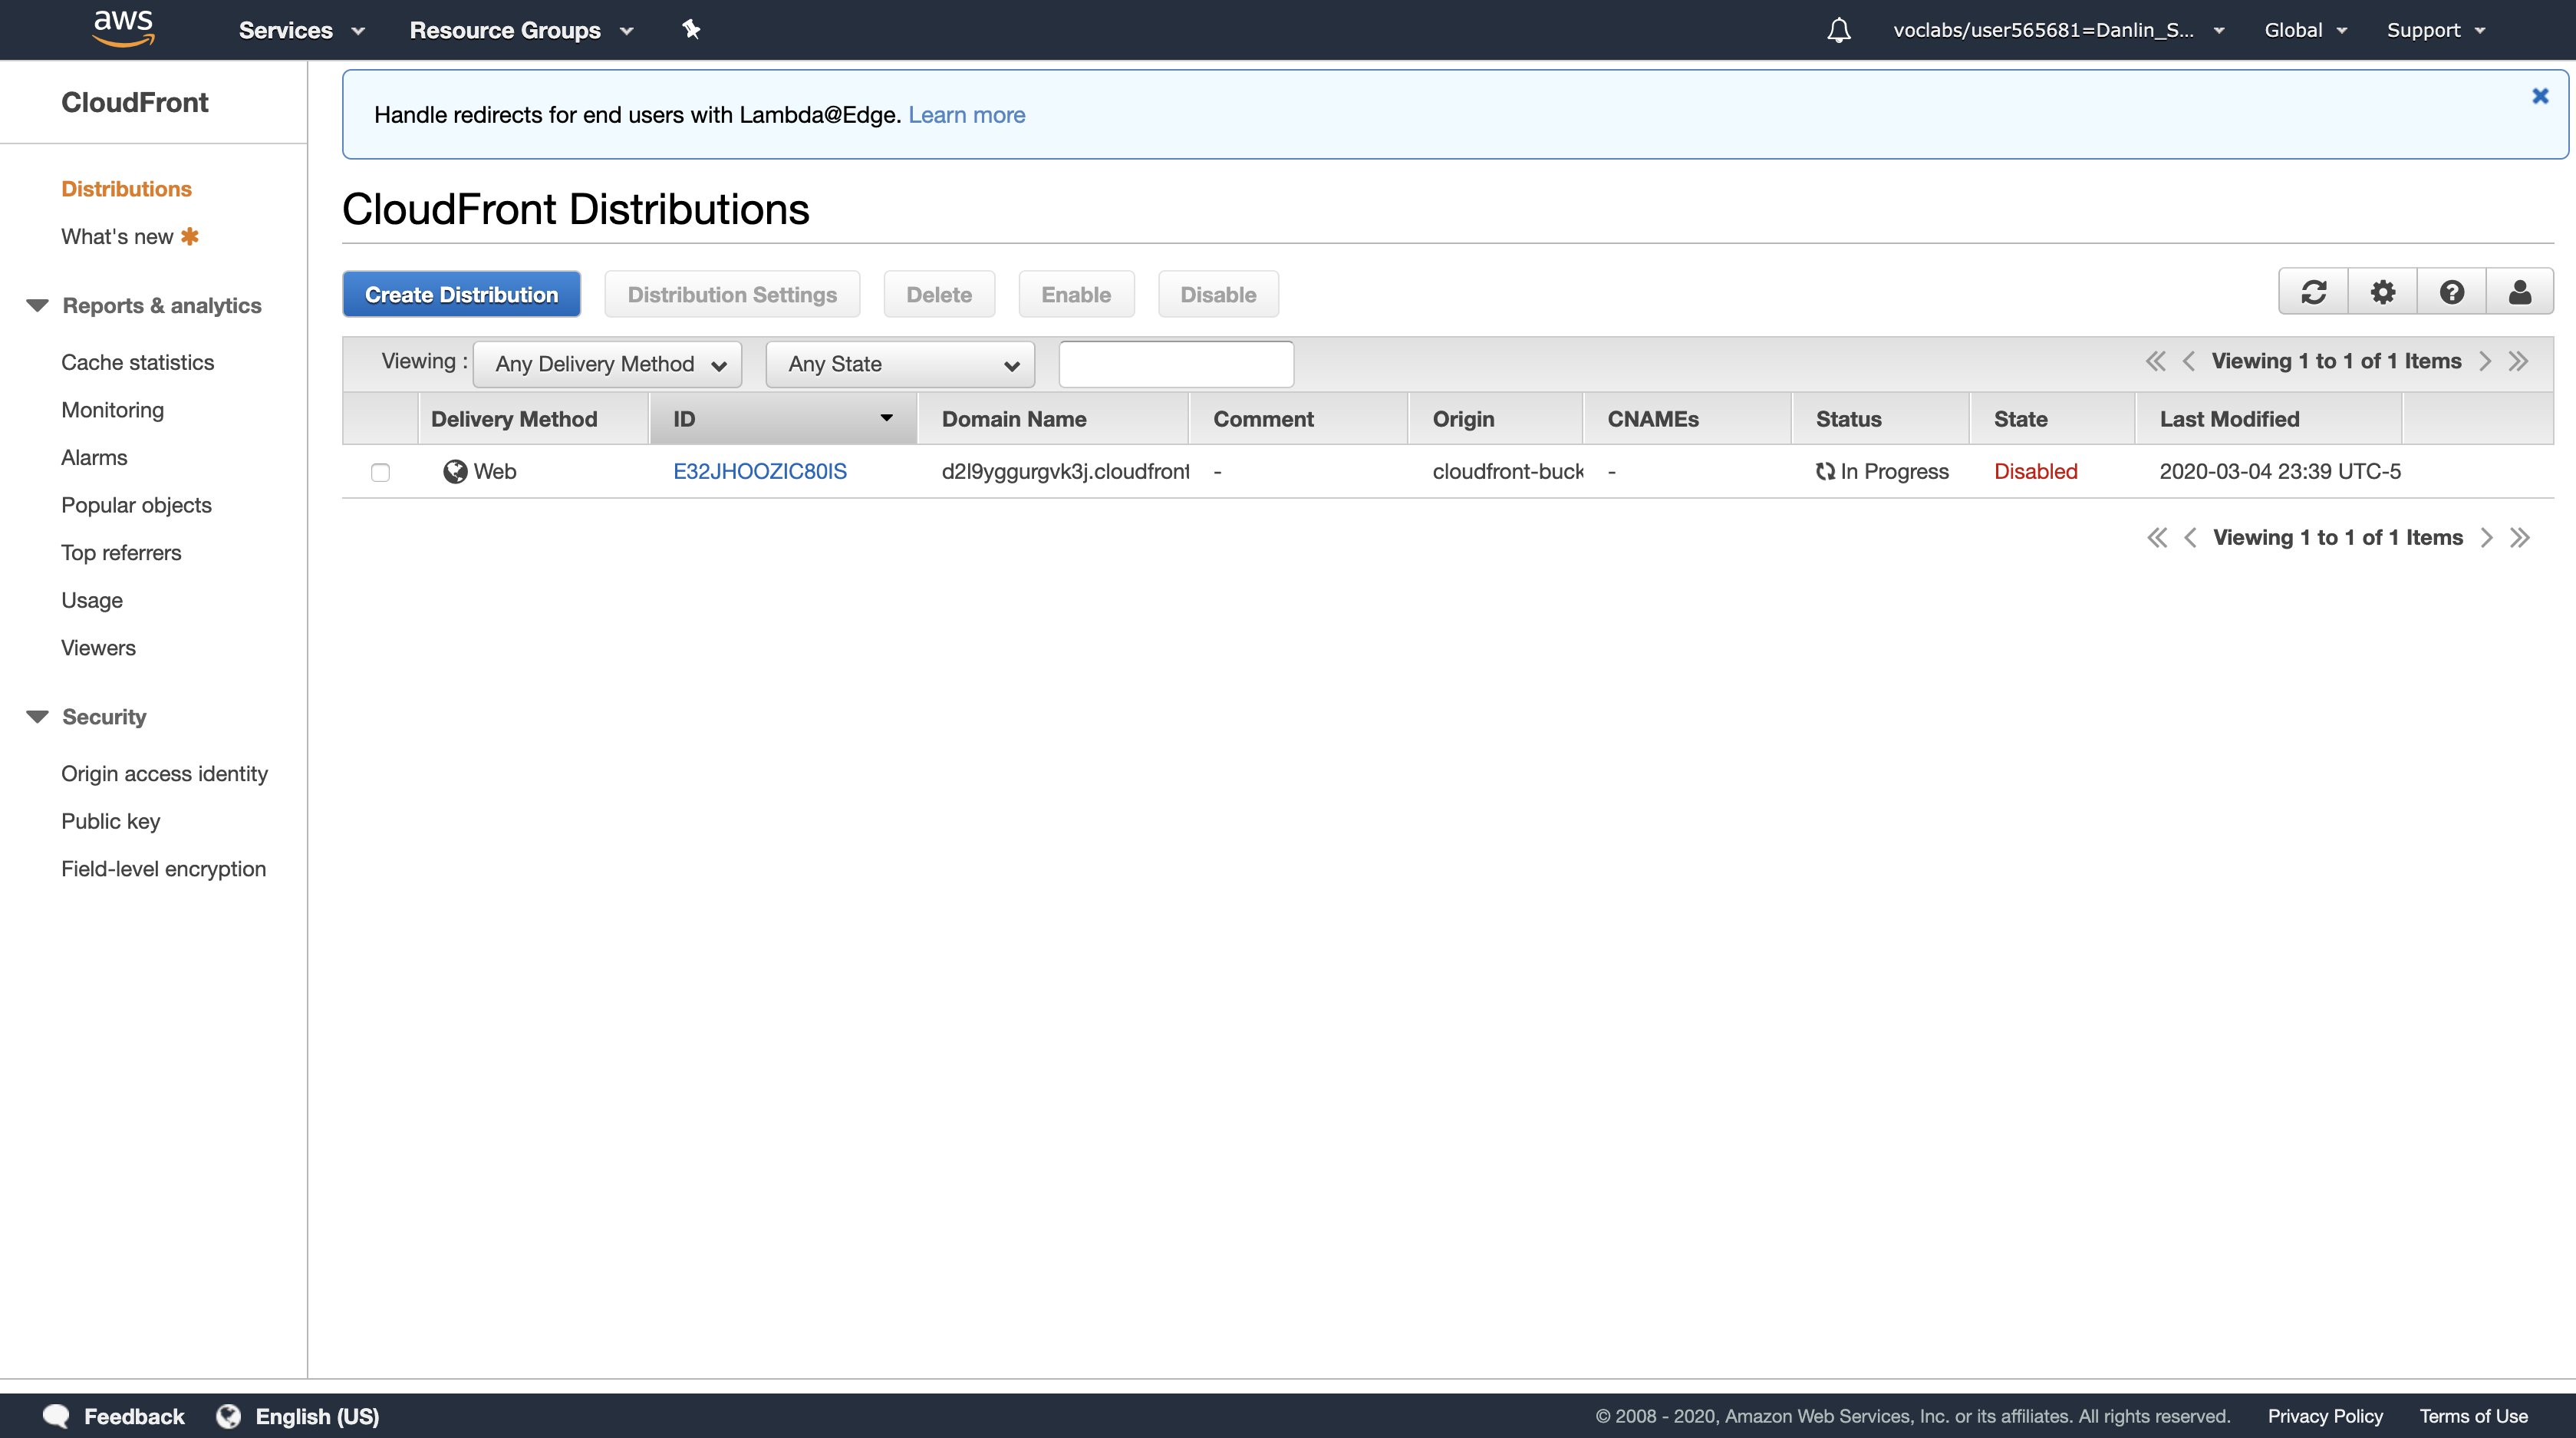
The value of the State column immediately changes to Disabled.
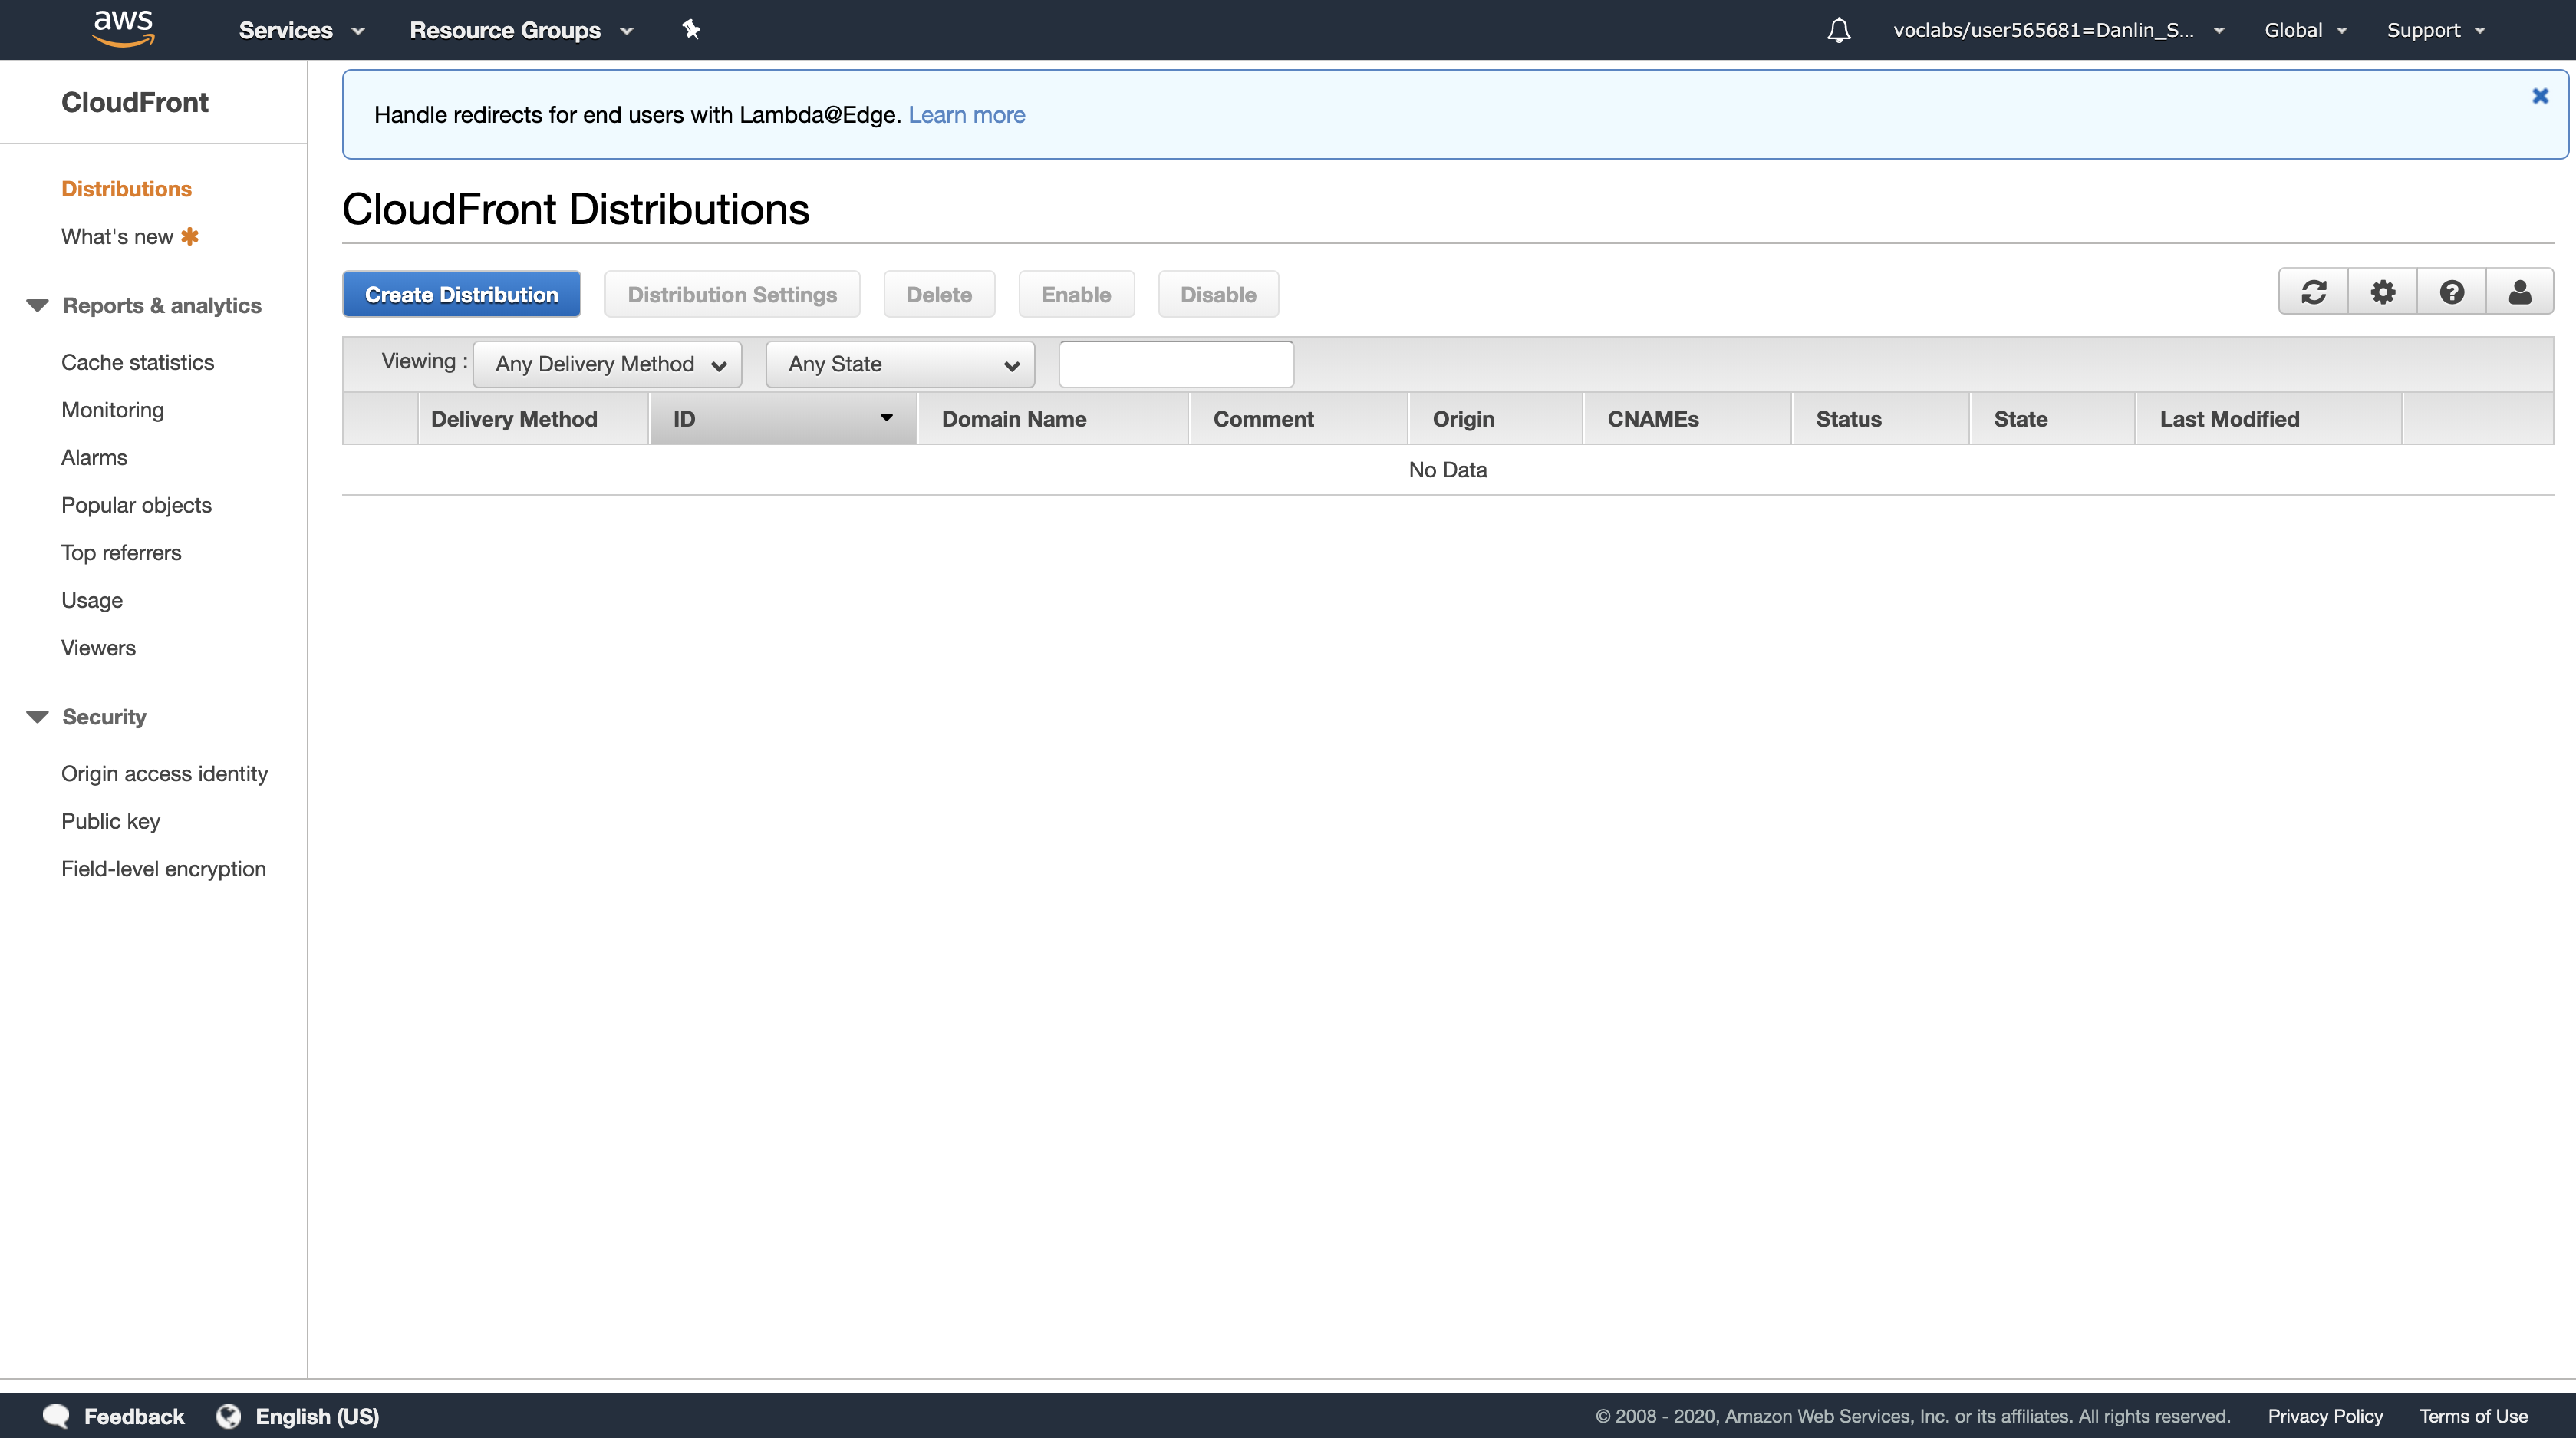
Wait until the value of the Status column changes to Deployed.

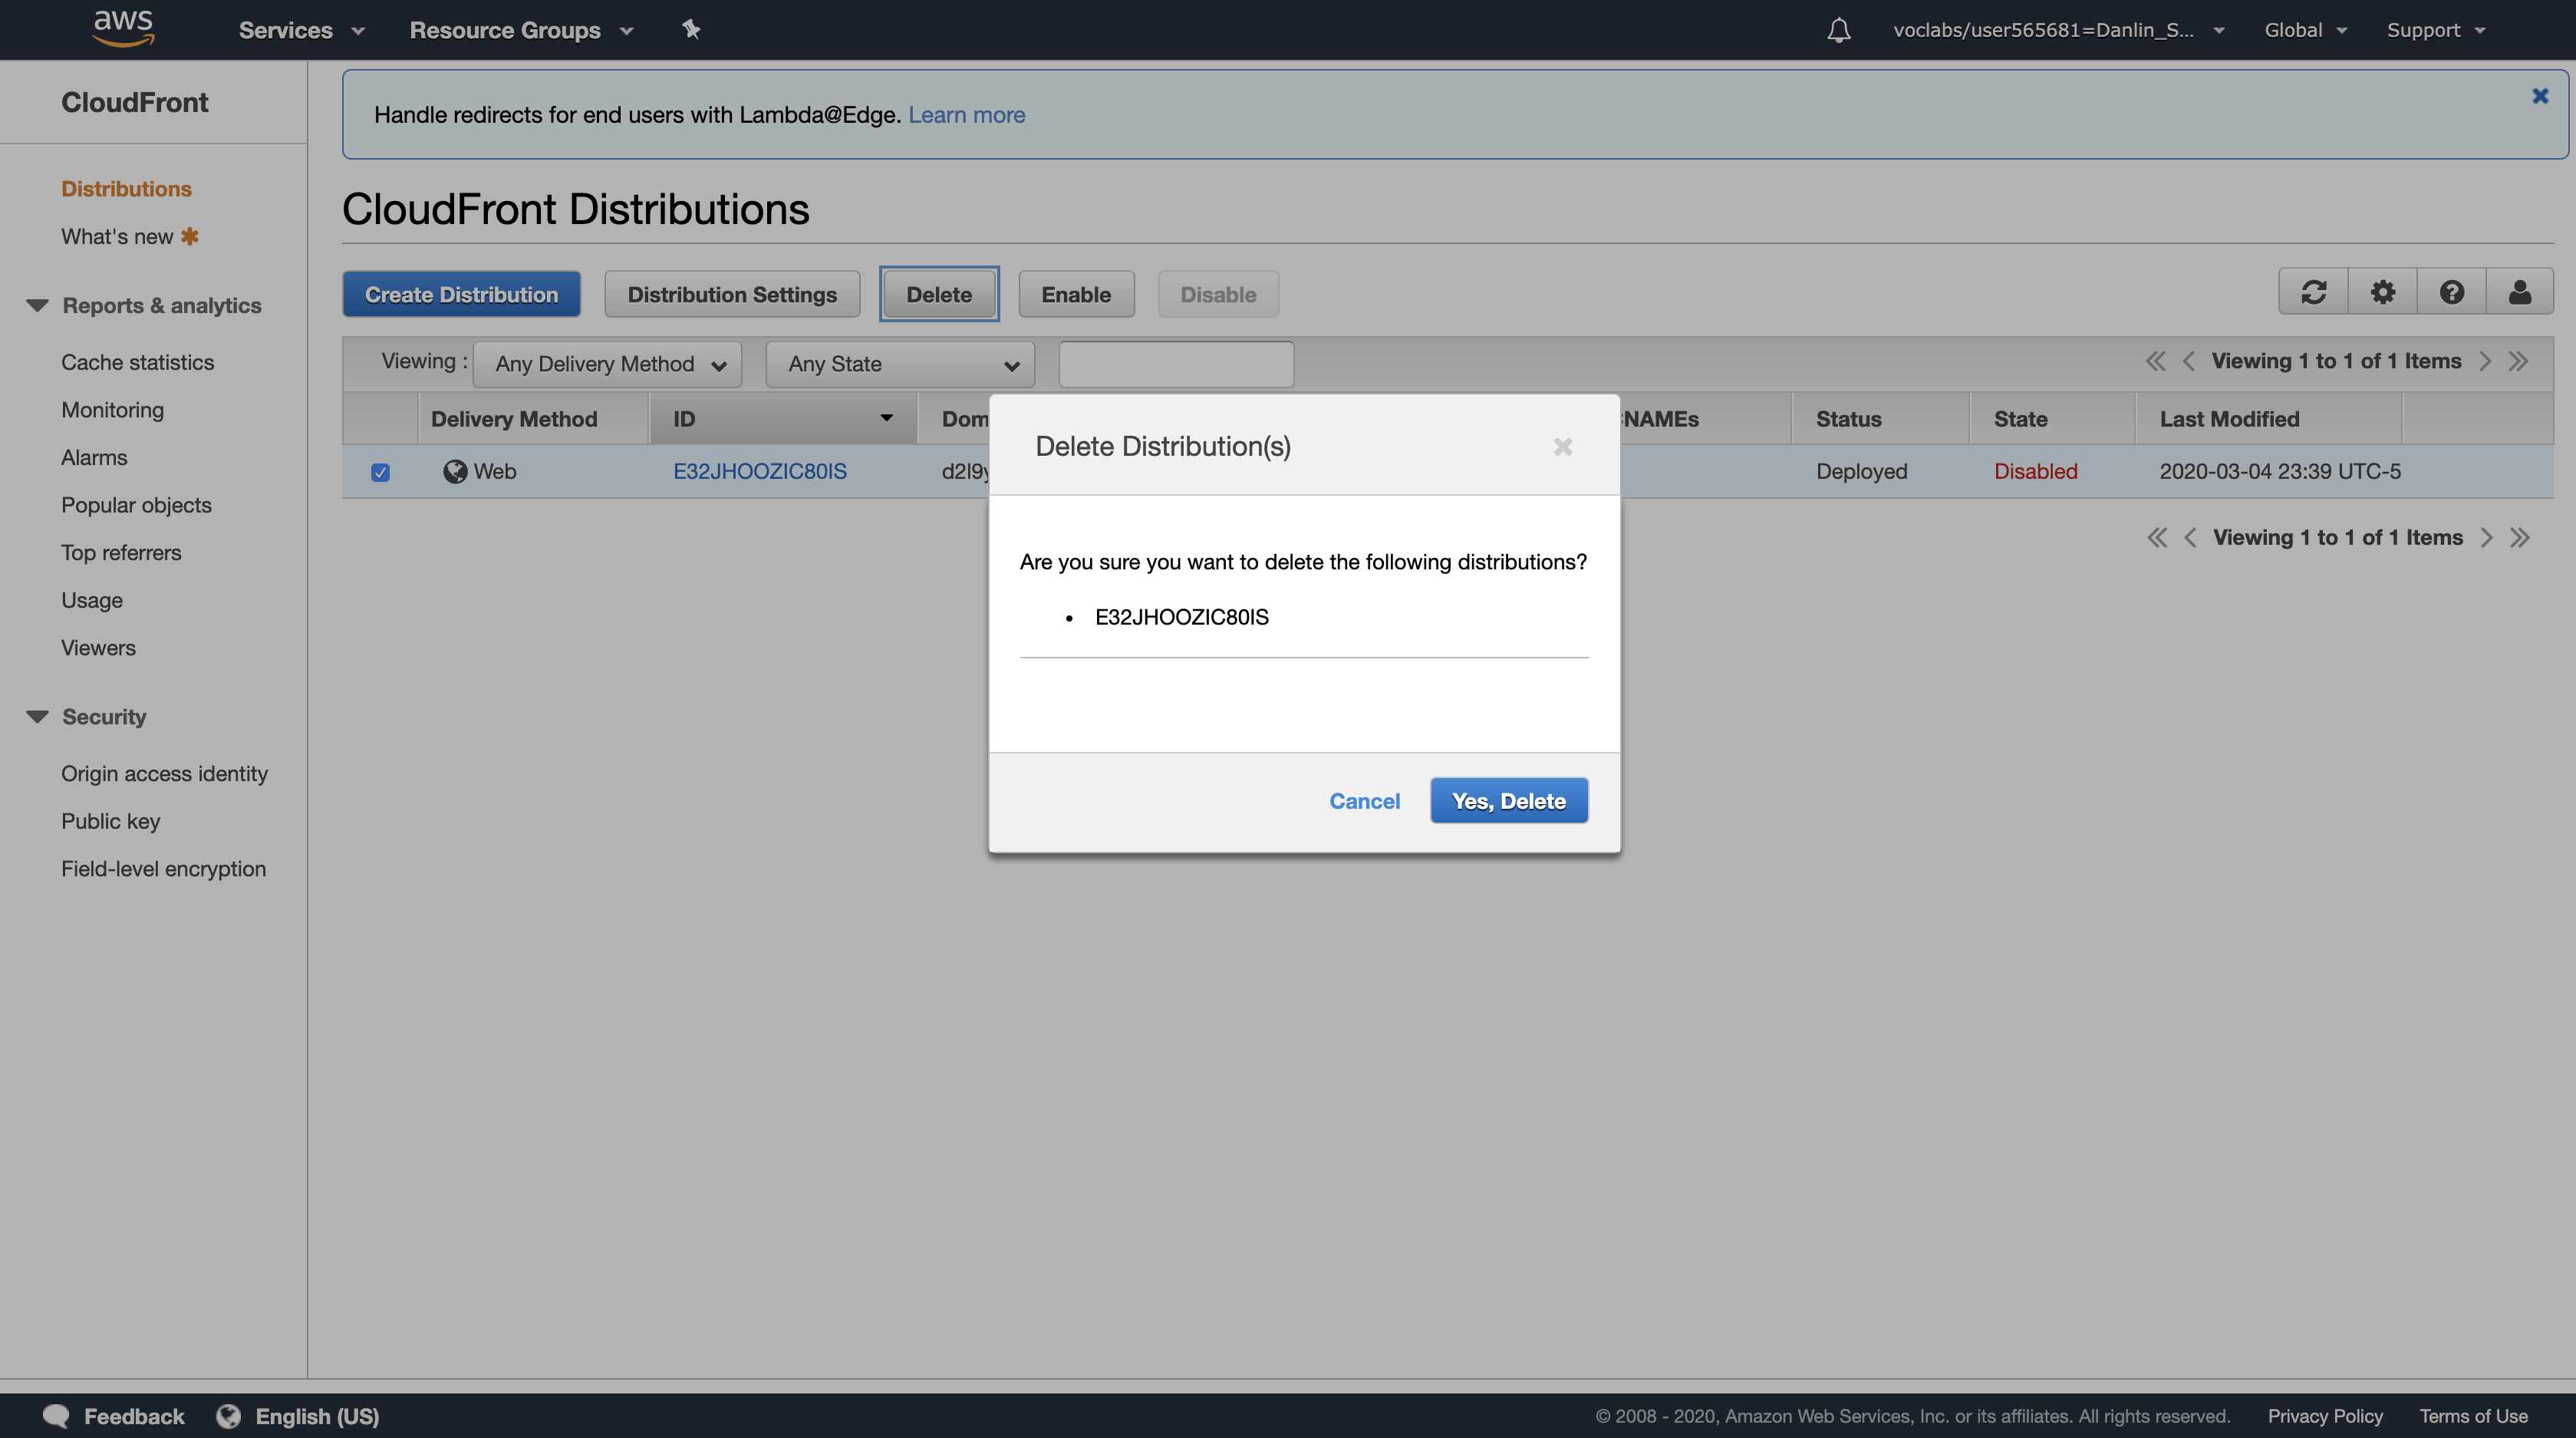
Select the check box for your CloudFront distribution, then configure:
Click Delete then:
- Click
Yes, Delete - Click
Close
Services menu > click S3.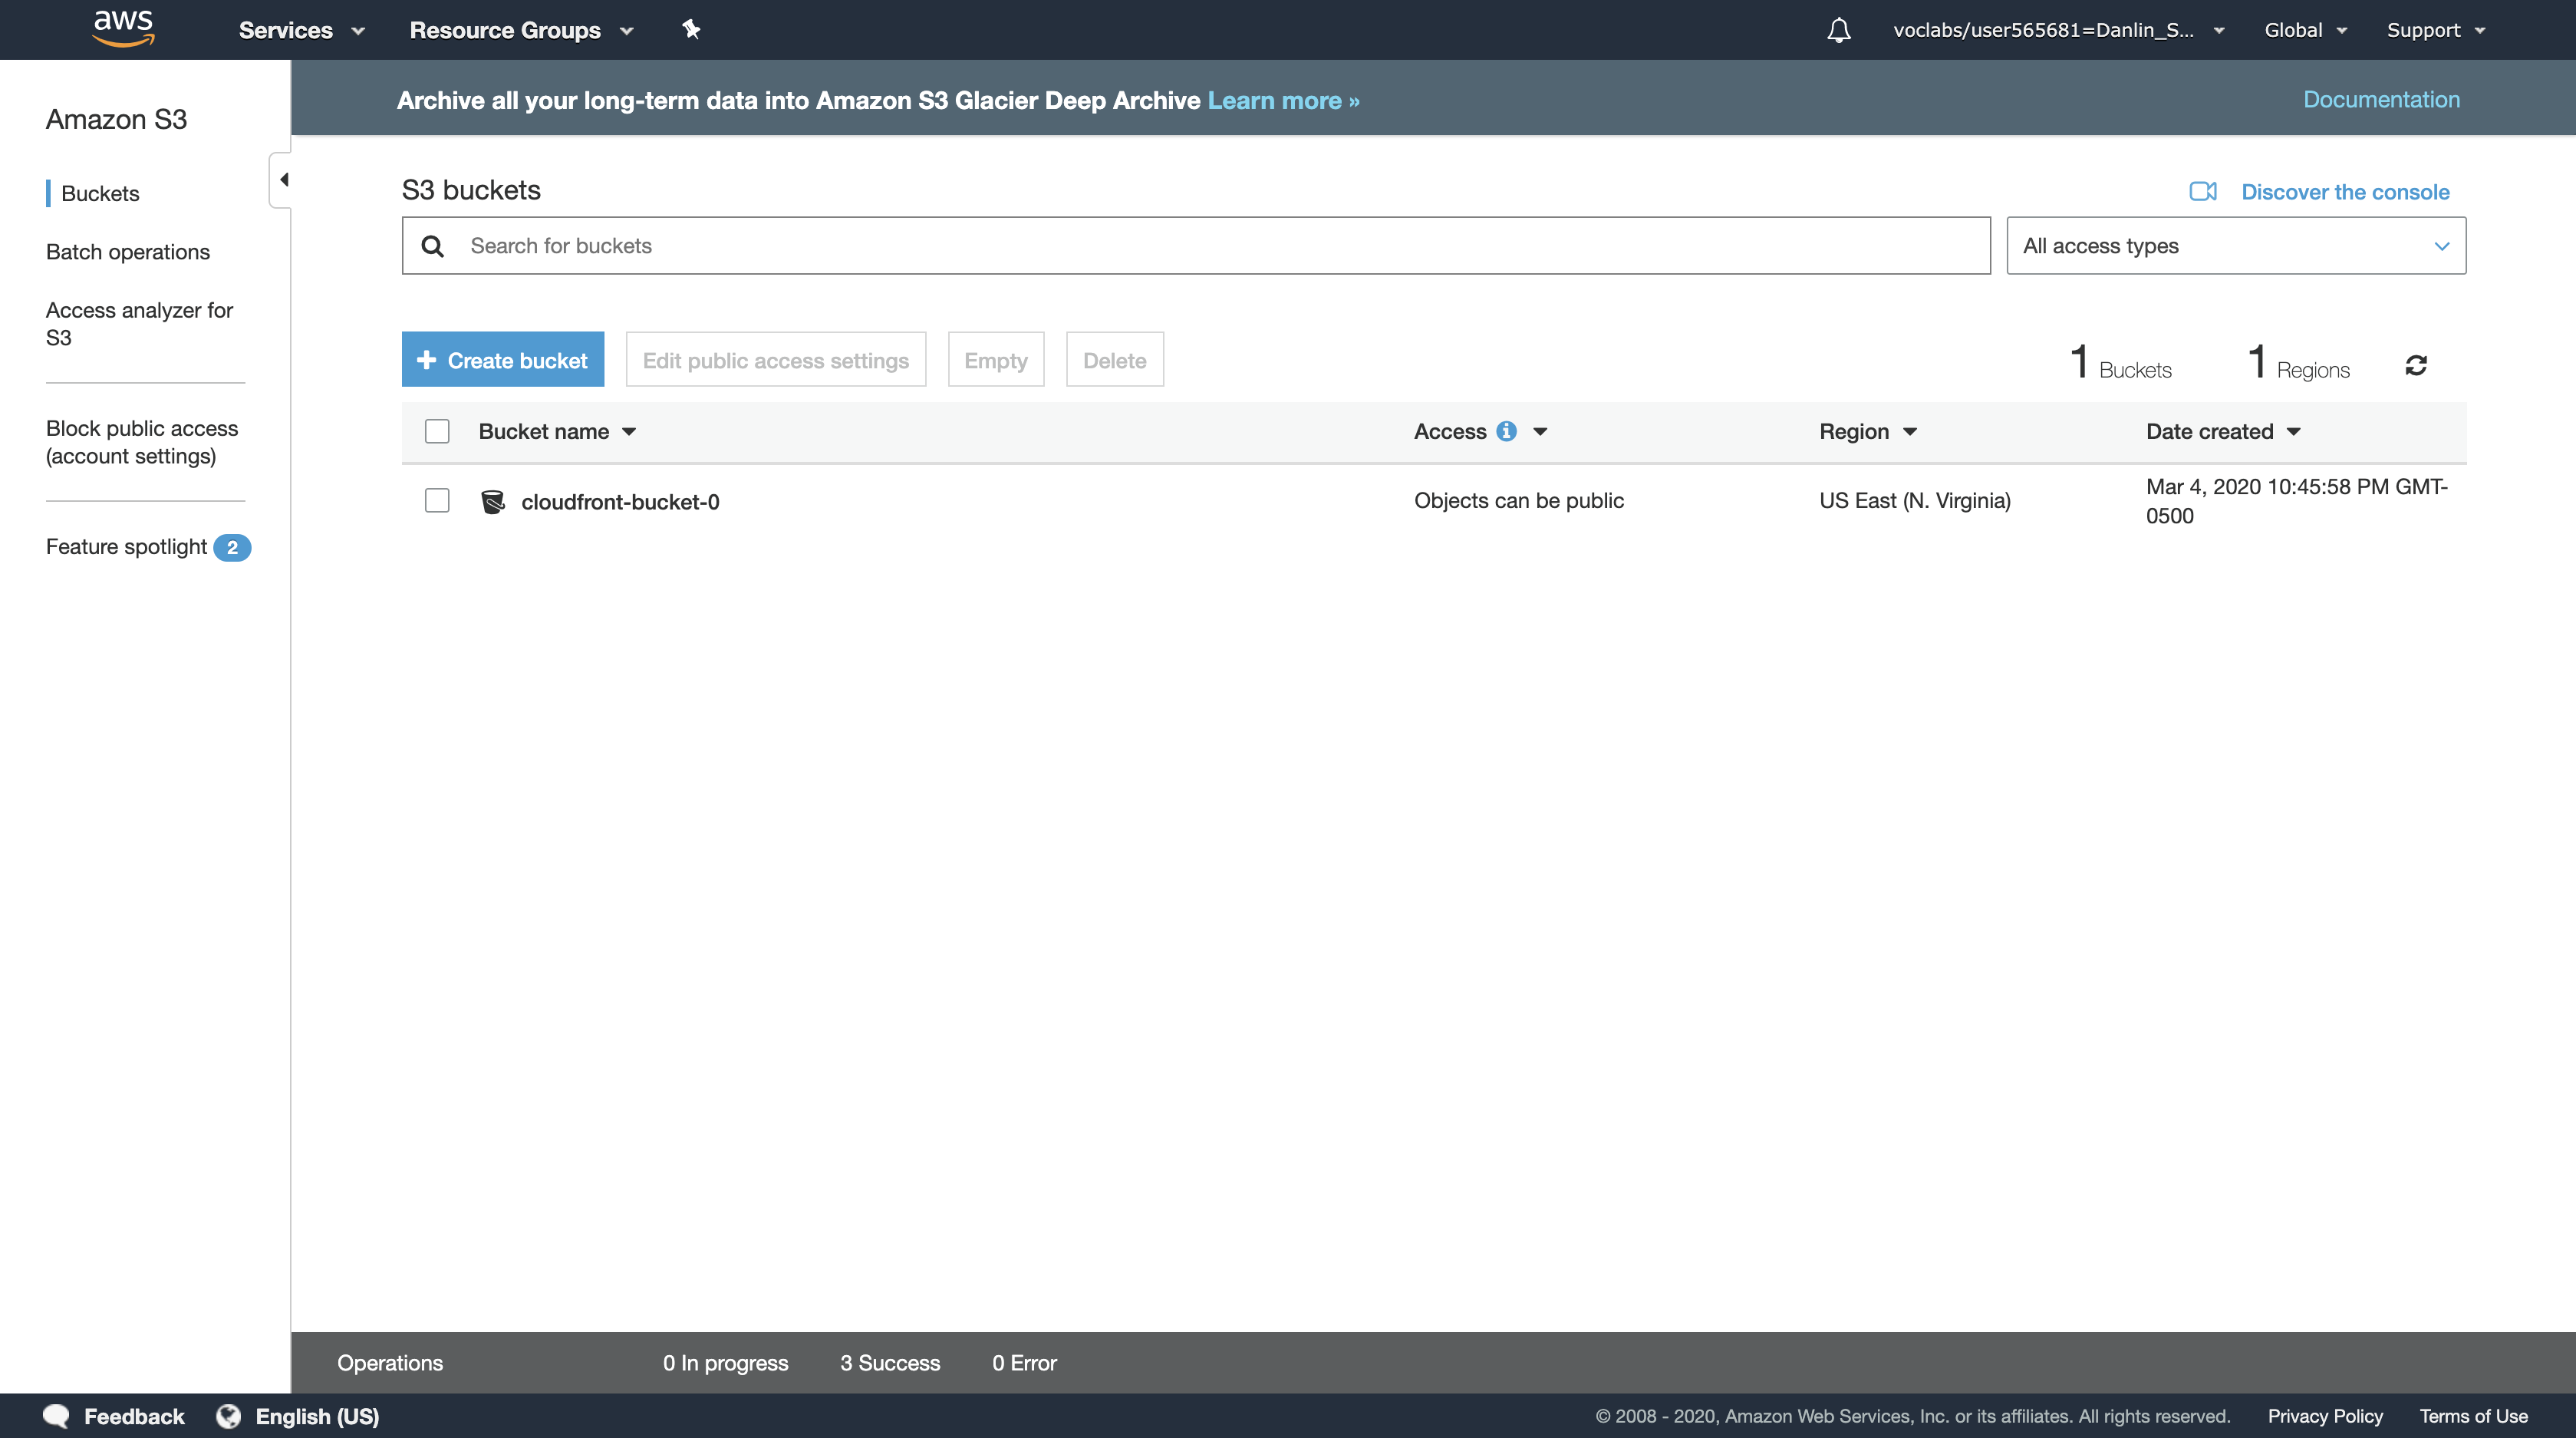
Click the area to the right of your bucket so that you highlight your bucket.
- Do not click the name of your bucket. You only need to highlight your bucket.

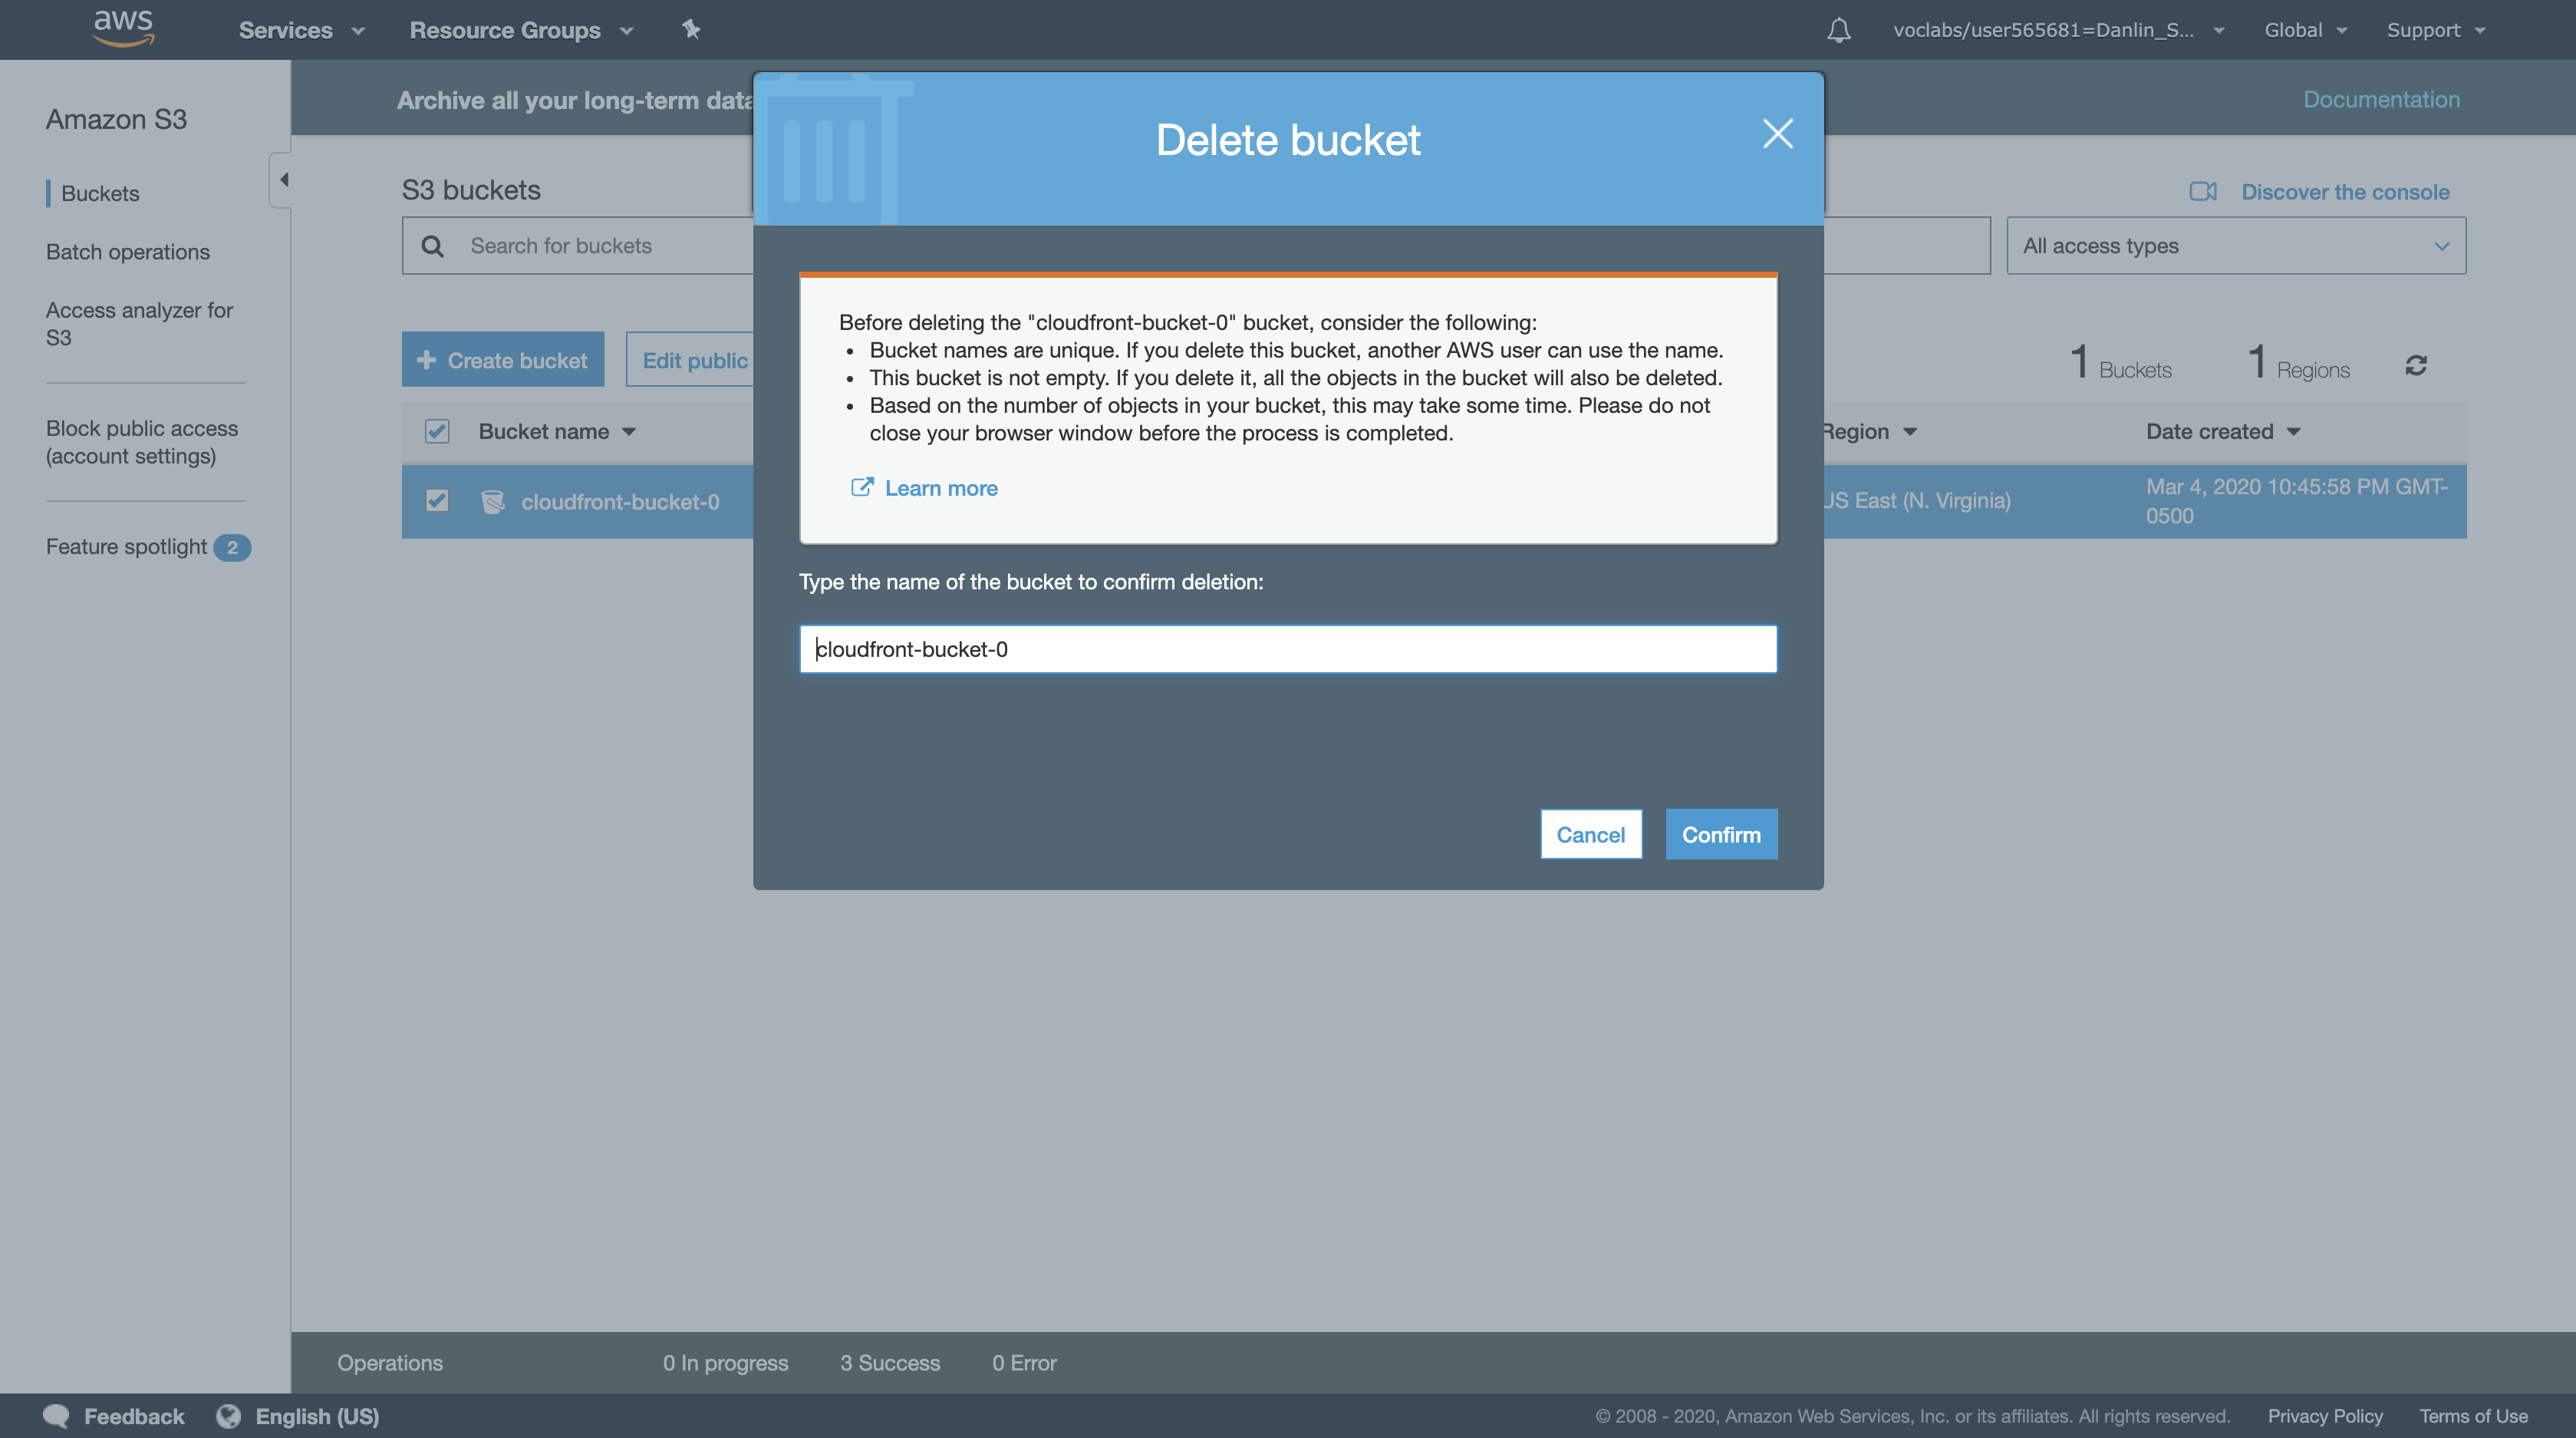
Click Delete then:
- Enter the name of your bucket
- Click
Confirm
You have now released the resources used by your CloudFront distribution and Amazon S3 bucket.
Lab Complete
Click End Lab at the top of this page and then click Yes to confirm that you want to end the lab.
- A panel will appear, indicating that “DELETE has been initiated… You may close this message box now.”
Click the X in the top right corner to close the panel.
Additional resources
ACA Module 11 LAB: Multi-region failover with Amazon Route 53
https://labs.vocareum.com/main/main.php?m=editor&nav=1&asnid=110829&stepid=110830
In this lab, you will configure and test a cross-region disaster recovery scenario.
Version A5L5
Region-wide events such as natural disasters can disrupt the availability of a region for an extended length of time, making cross-region availability a critical component to ensure that an application is highly available. Amazon Route 53 can help keep your web application available with a minimal amount of downtime.
Scenario
In this lab, you will configure and test a cross-region disaster recovery scenario.
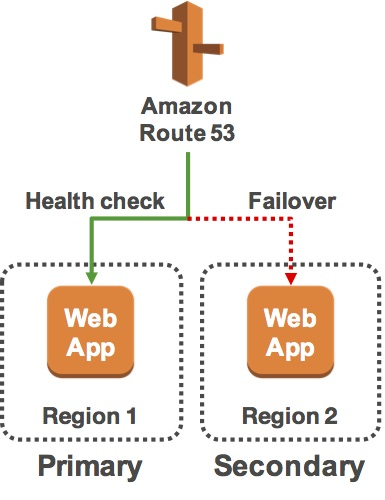
A web application has already been deployed in two different regions. You will:
- Configure a domain in Amazon Route 53 to send traffic to the primary region.
- Configure a Health Check on the primary region. If the health check fails, traffic will be sent to the secondary region.
- Test the failover by stopping the instance in the primary region.
Objectives
After completing this lab, you will be able to:
- Use Route 53 to configure cross-region failover of a web application.
- Use Route 53 health checks to determine the health of a resource.
Accessing the AWS Management Console
- At the top of these instructions, click
Start Labto launch your lab.
A Start Lab panel opens displaying the lab status. - Wait until you see the message “Lab status: ready“, then click the
Xto close the Start Lab panel. - At the top of these instructions, click
AWS
This will to open the AWS Management Console in a new browser tab. The system will automatically log you in.
Tip: If a new browser tab does not open, there will typically be a banner or icon at the top of your browser indicating that your browser is preventing the site from opening pop-up windows. Click on the banner or icon and choose “Allow pop ups.”
4. Arrange the AWS Management Console tab so that it displays along side these instructions. Ideally, you will be able to see both browser tabs at the same time, to make it easier to follow the lab steps.
Task 1: Inspect Your Environment
Resources have already been deployed for you in two regions. You will start by inspecting the resources in your Primary region.
AWS Management Console
Services menu > click EC2.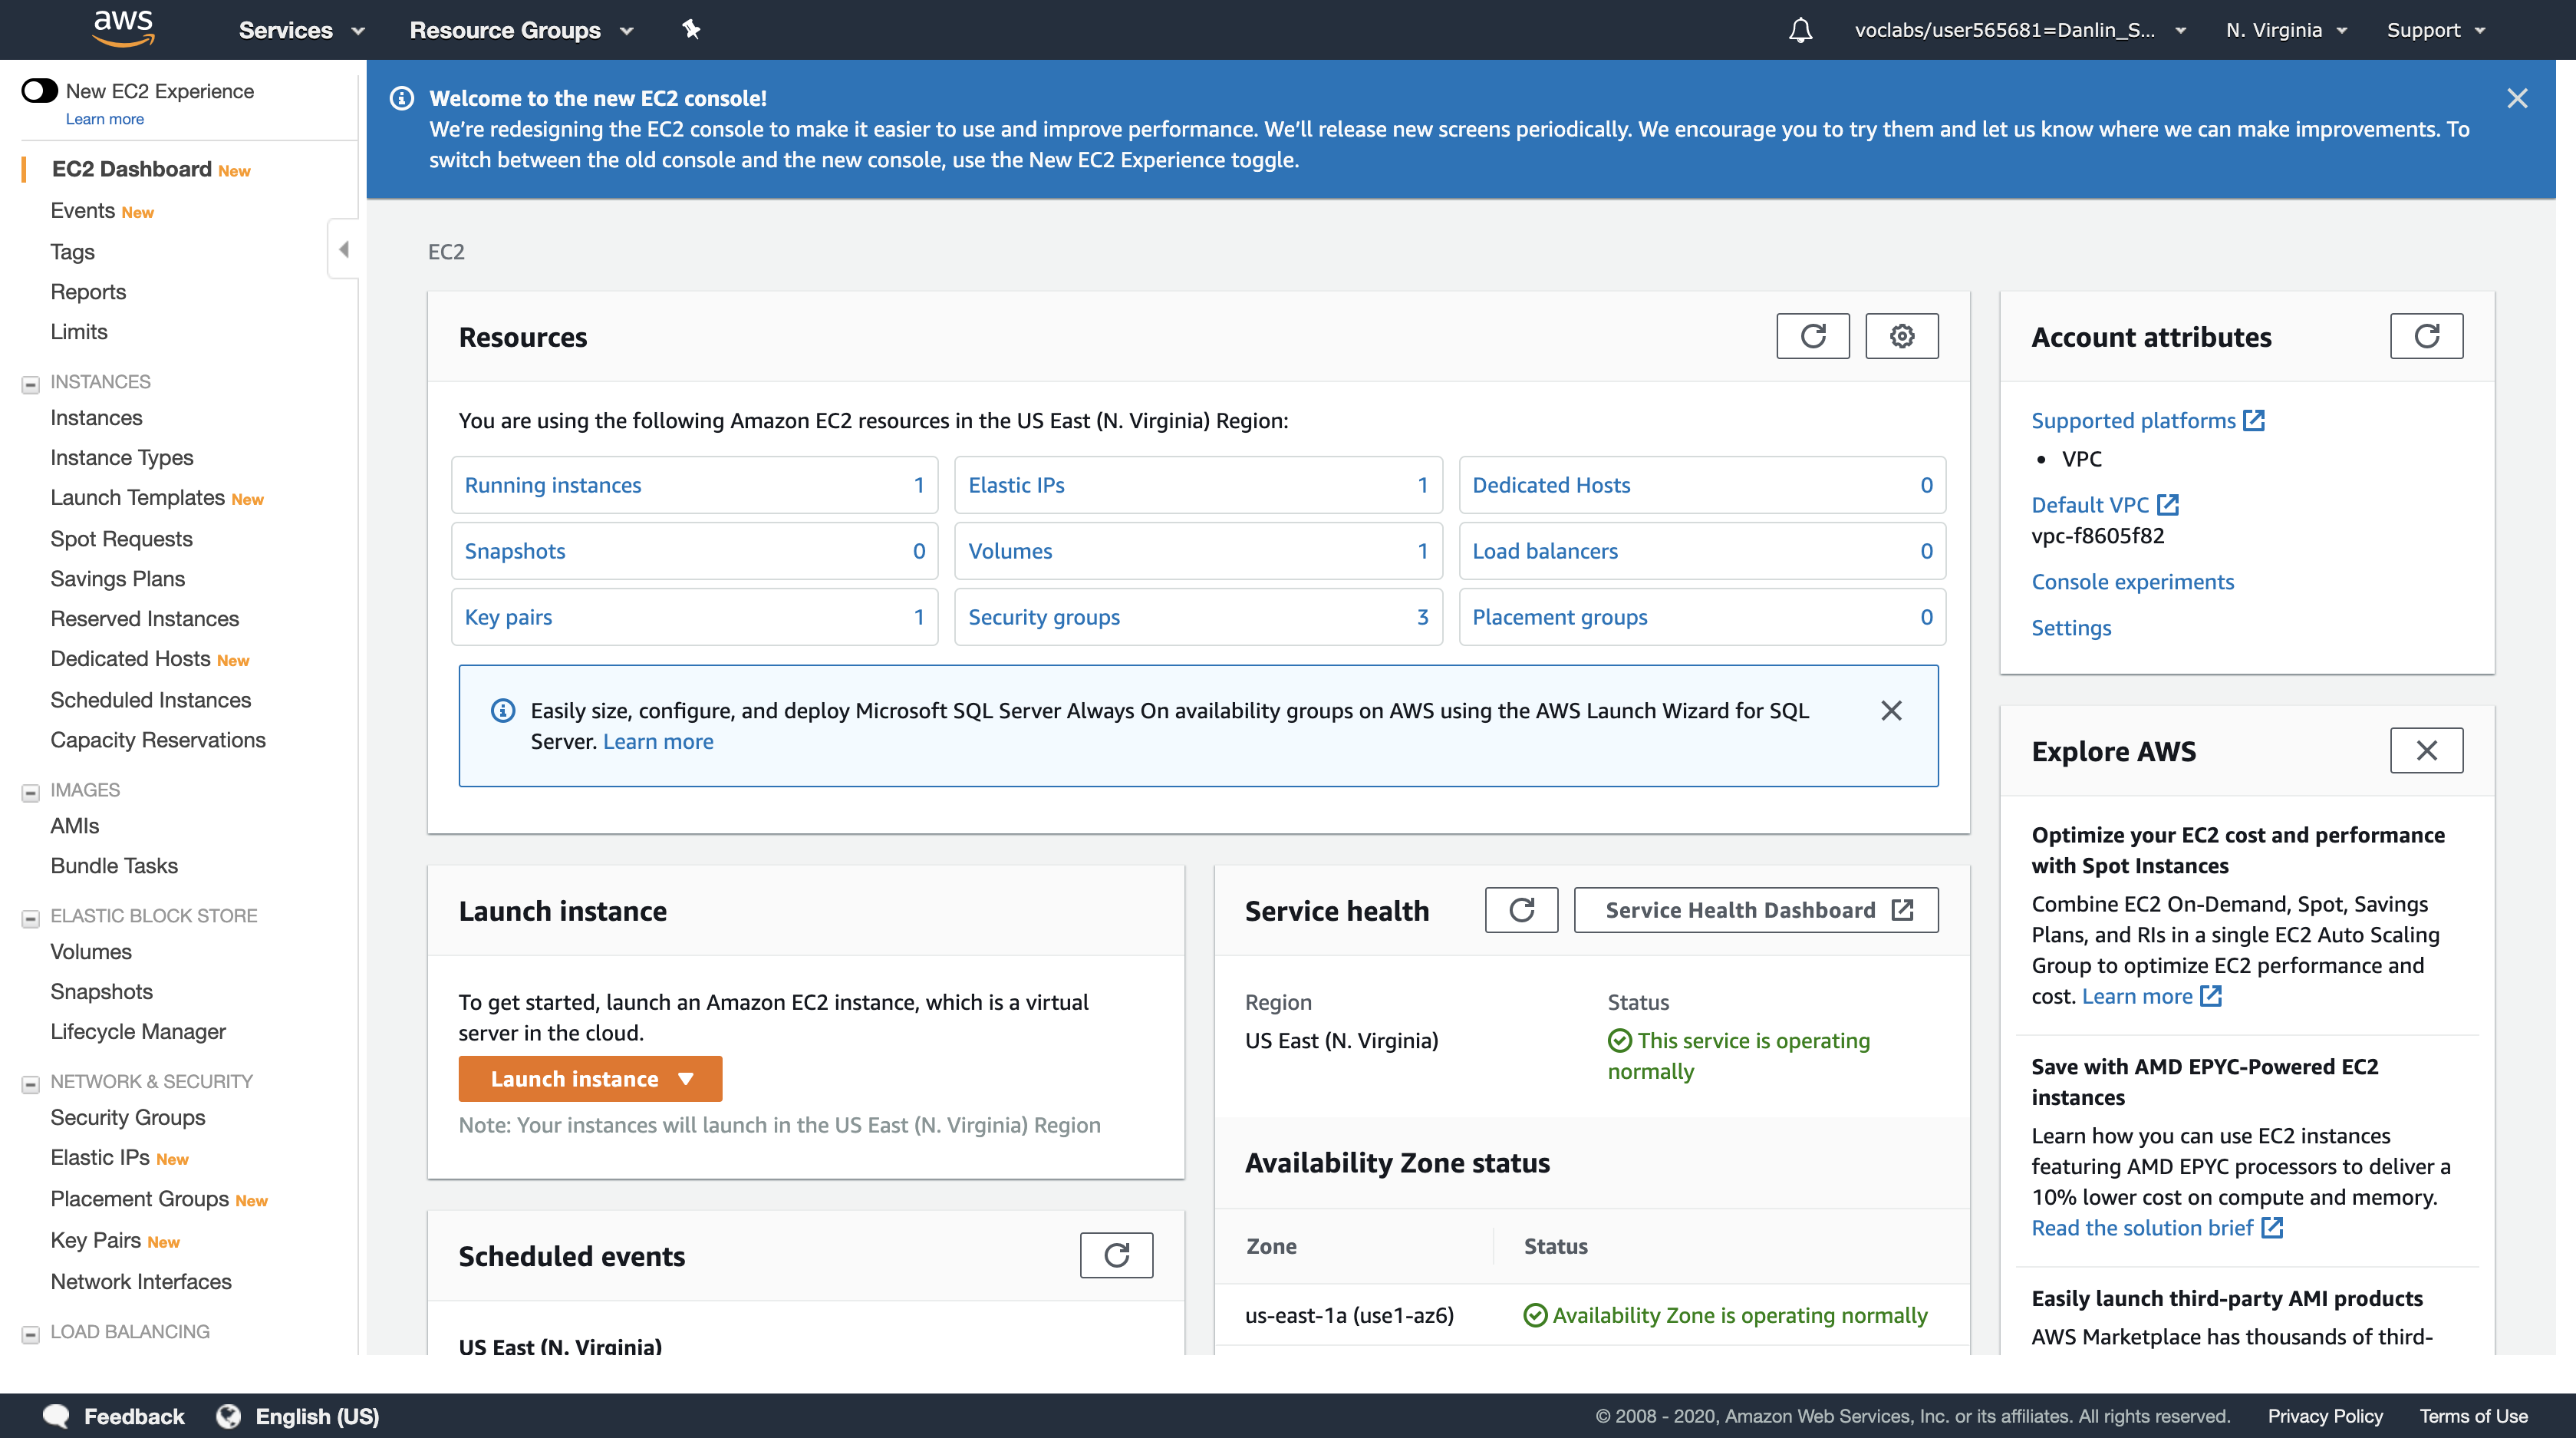
Navigation pane > click Instances.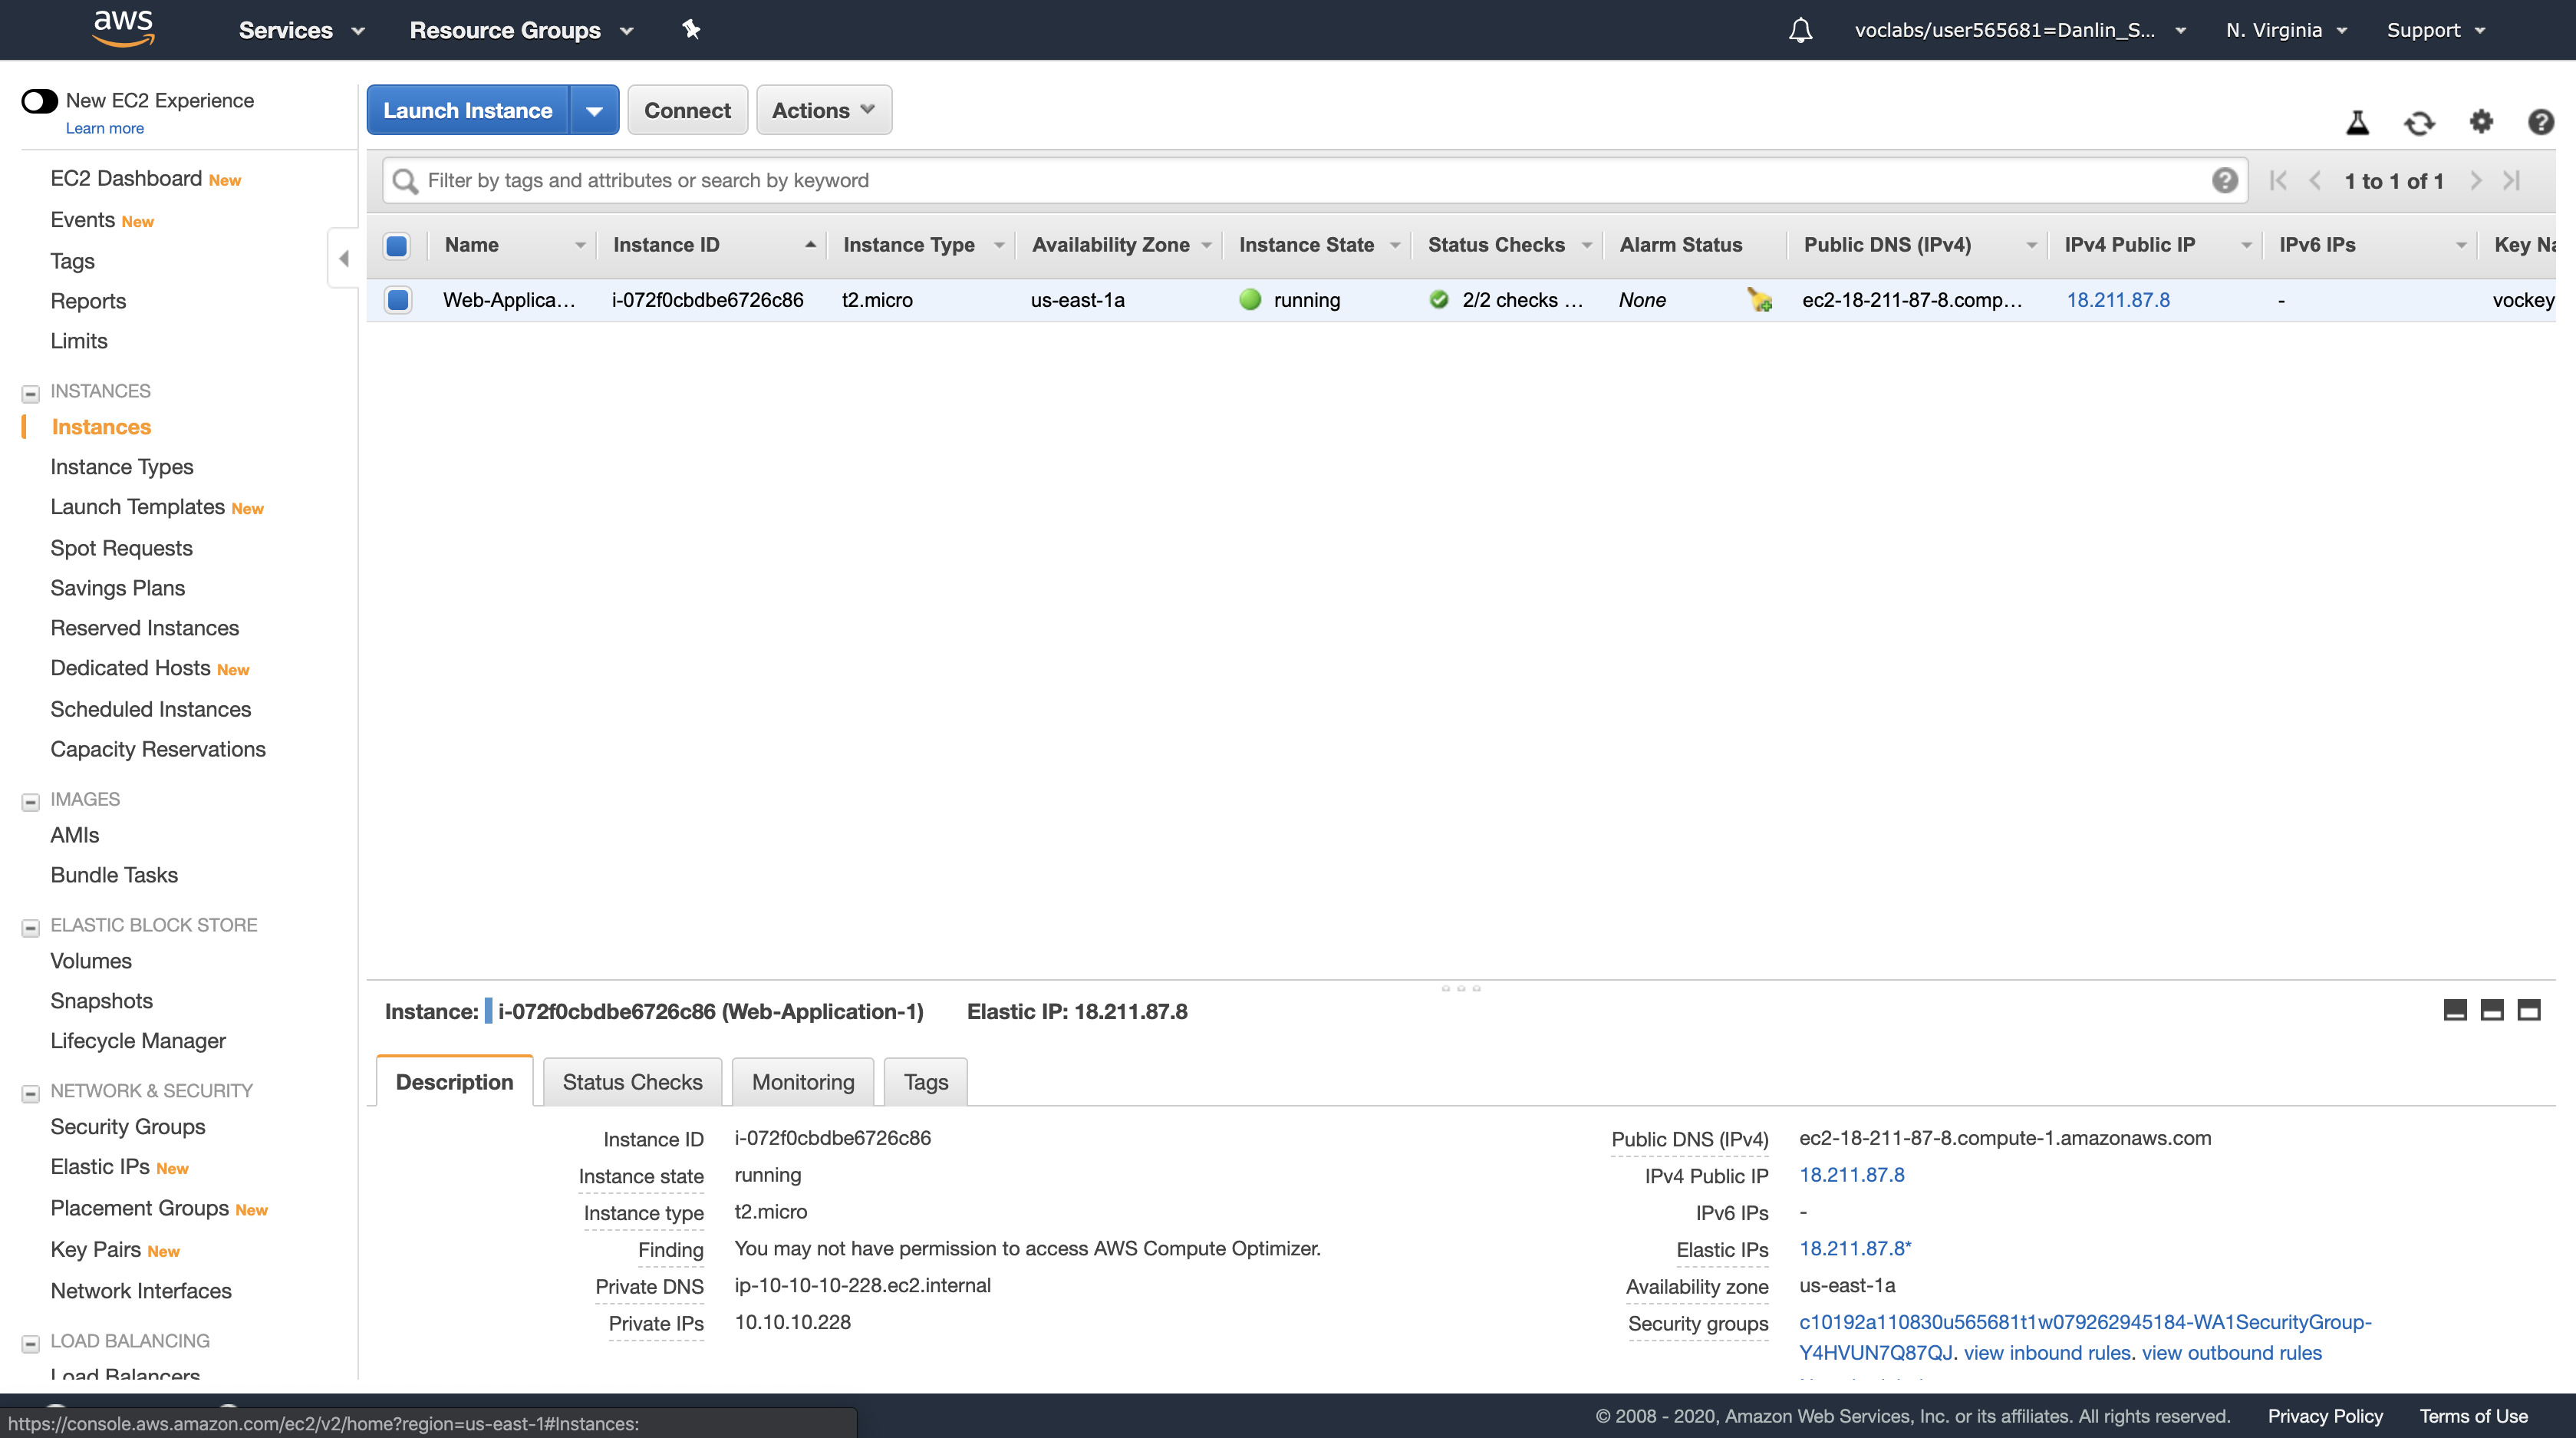
Click on the instance named Web-Application-1.
Copy the IPv4 Public IP (shown in the bottom-right) and paste it into a text document for future reference.
- This is the IP address of your Primary web server. You will configuring your domain to point to this instance by default.
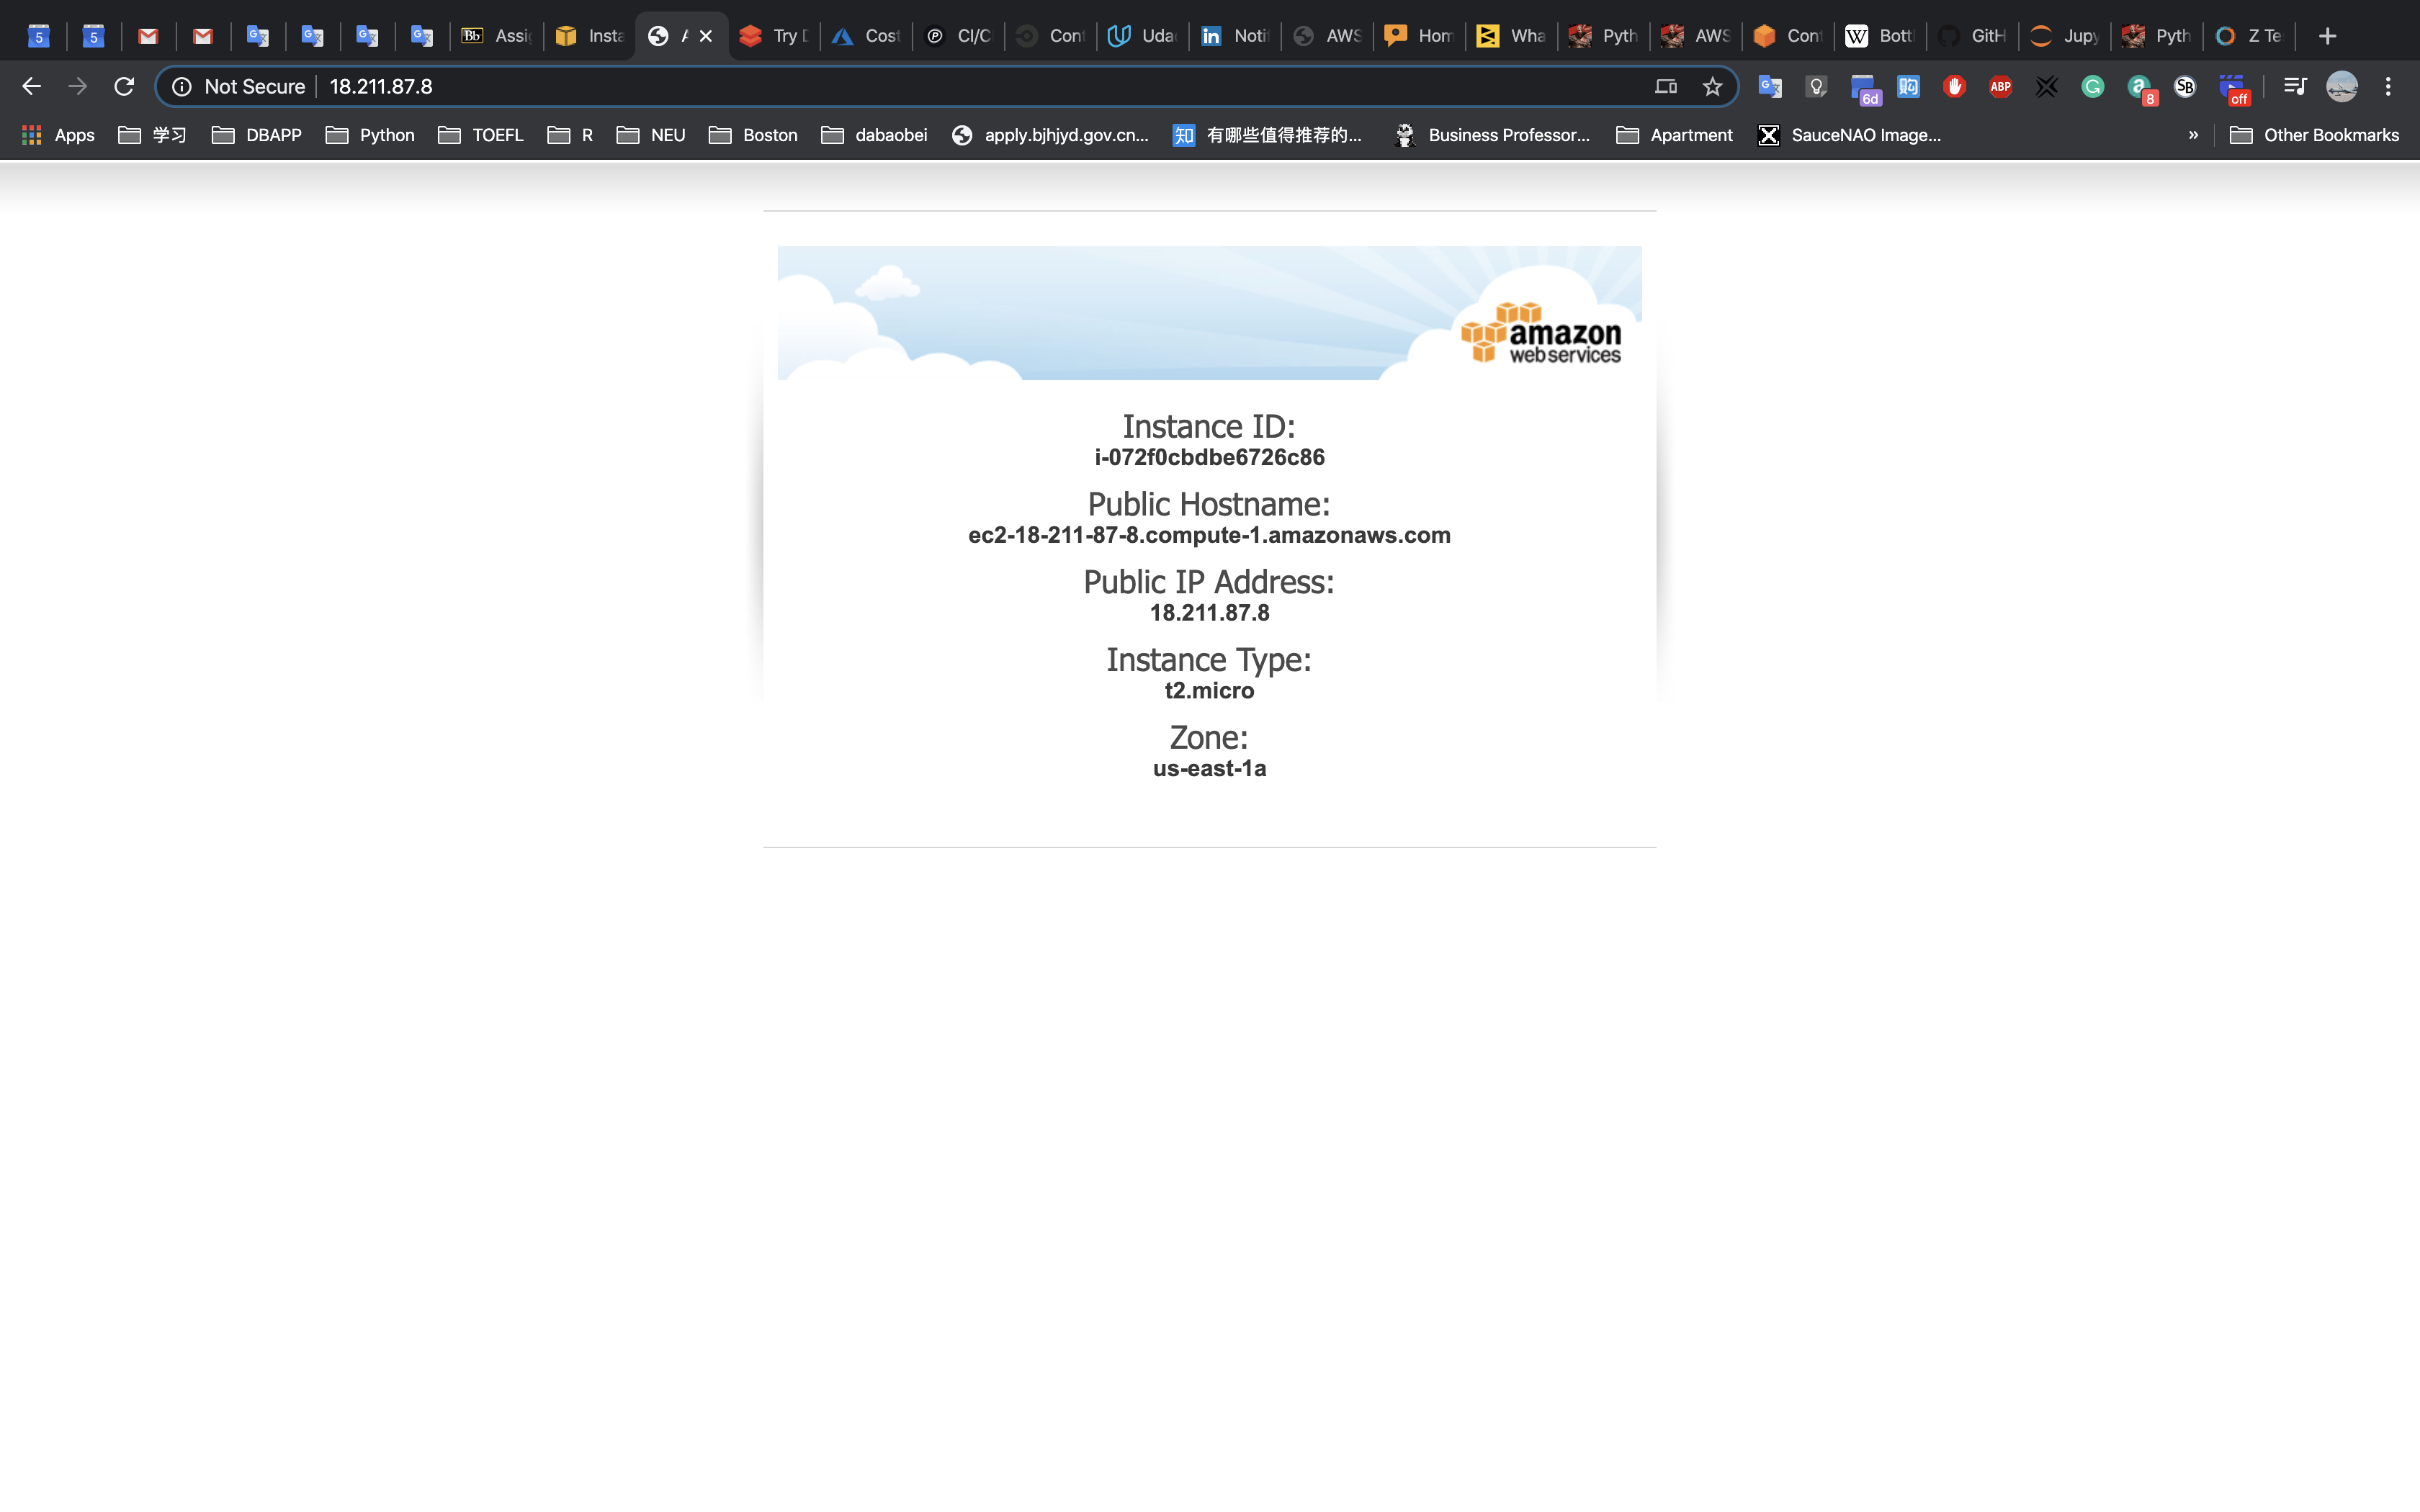
Make a note of your Region, displayed in the top-right corner of the screen. This is the Region of your Primary web server.
Next, you will look at your resources in your Secondary region. You can determine your Secondary Region from this table:
Make a note of your Secondary Region.
Select your Secondary Region from the Region pull-down menu in the top-right of the screen.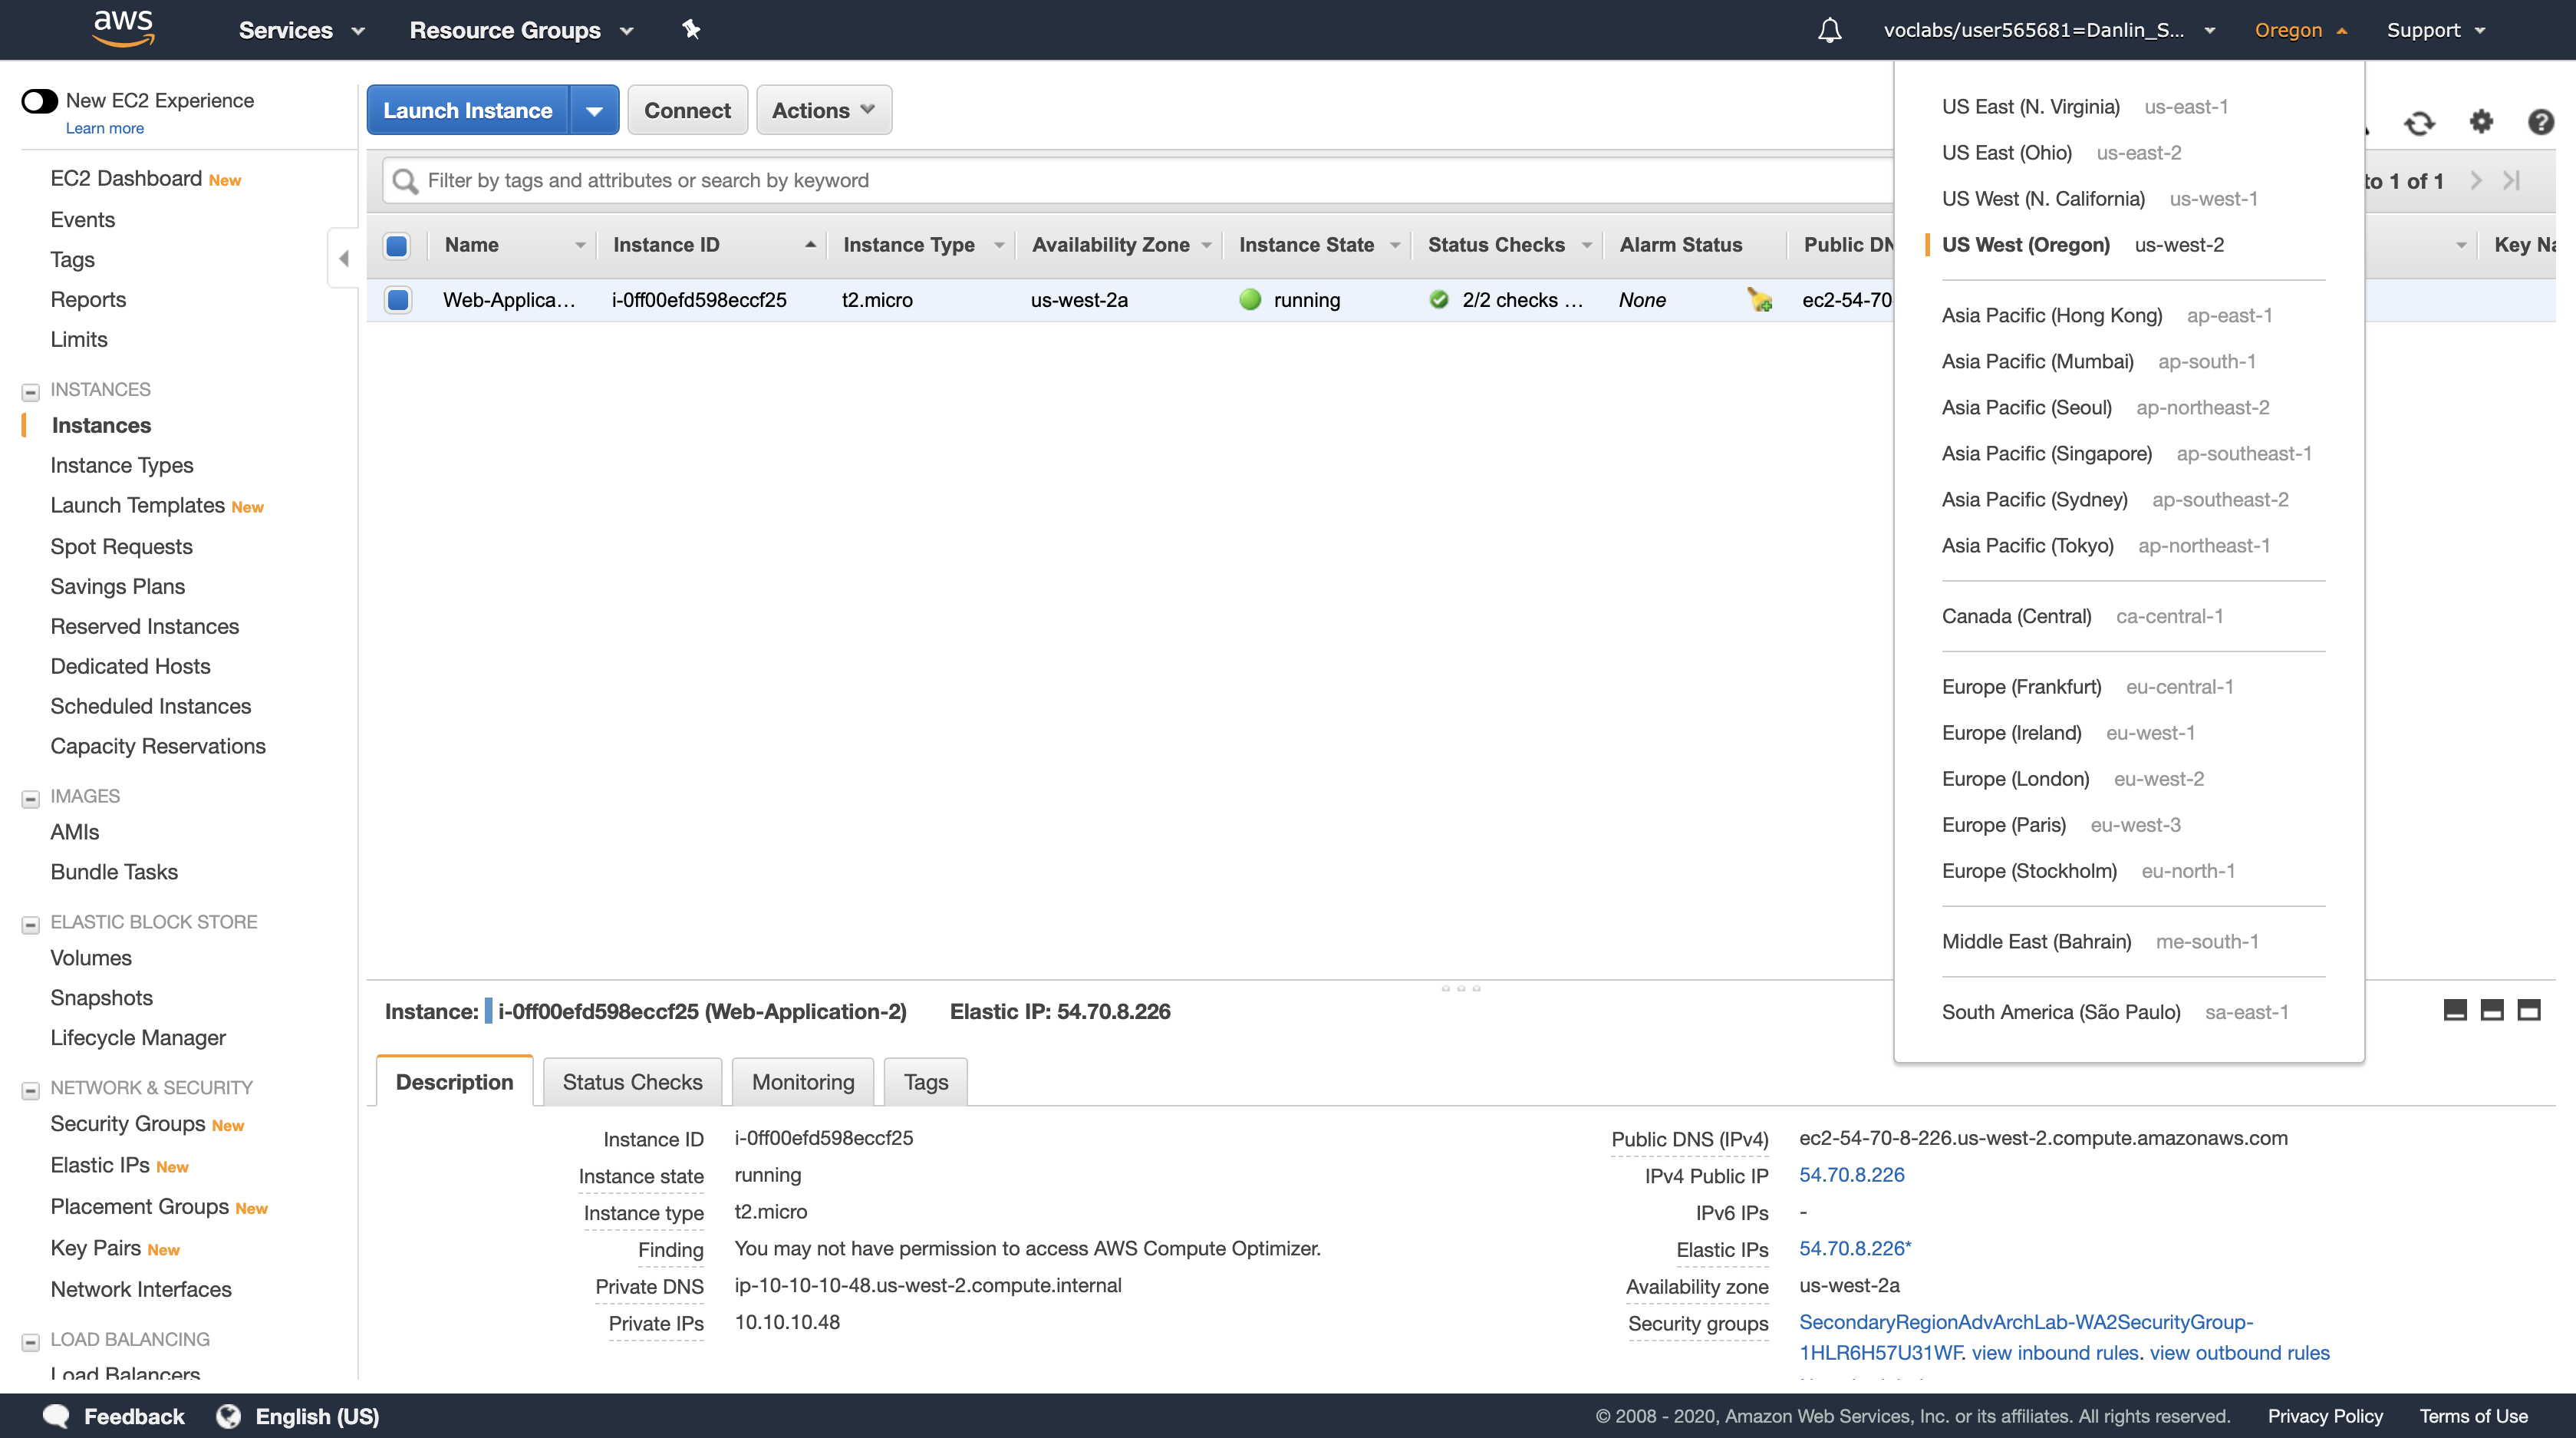
Click on the instance named Web-Application-2.
- If you do not see any instances listed, please refer to the above table to find the correct Secondary Region.
Copy the IPv4 Public IP (shown in the bottom-right) and paste it into a text document for future reference.
This is the IP address of your Secondary web server. You will configuring your domain to point to this instance if the Primary web server fails.
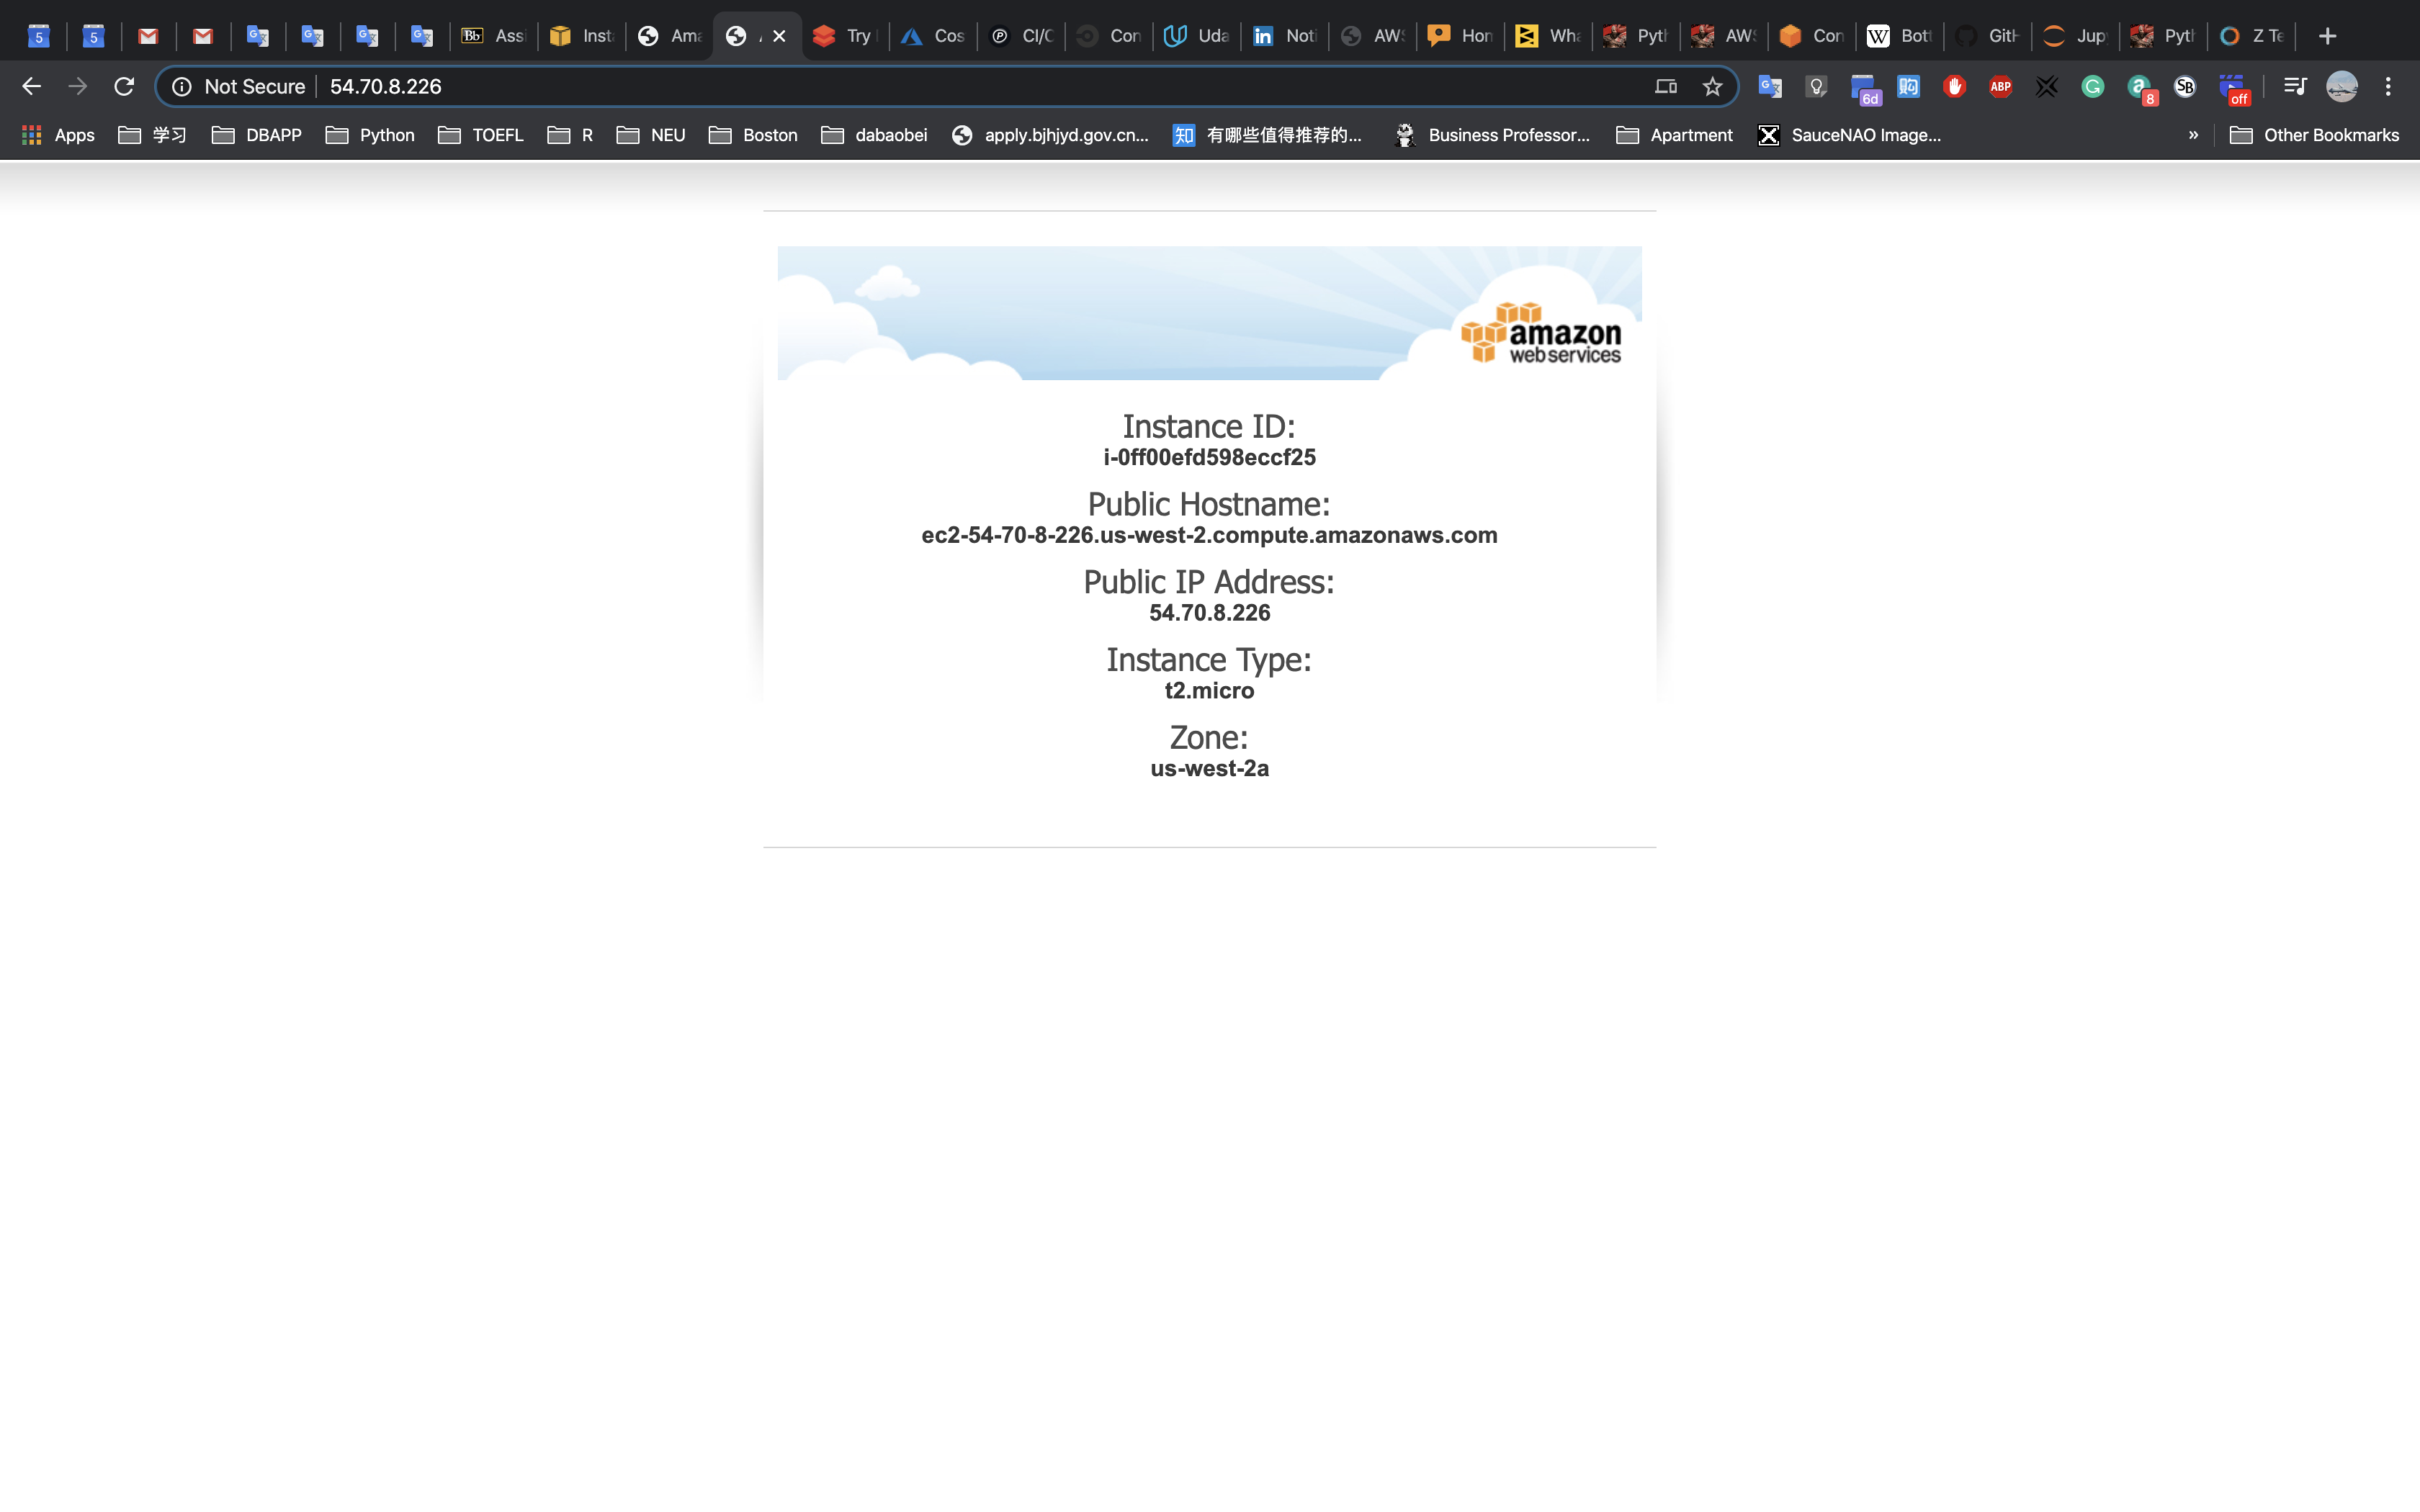
Task 2: Configure a Health Check
In this task, you will create a Health Check that will test the health of your Primary web server. AWS has health checkers located in multiple locations around the world that can test whether your website is accessible.
Services menu > click Route 53.
- If you see any error messages, you can safely ignore them. They will not impact your lab.
Navigation pane > click Health checks.
Click Create health check.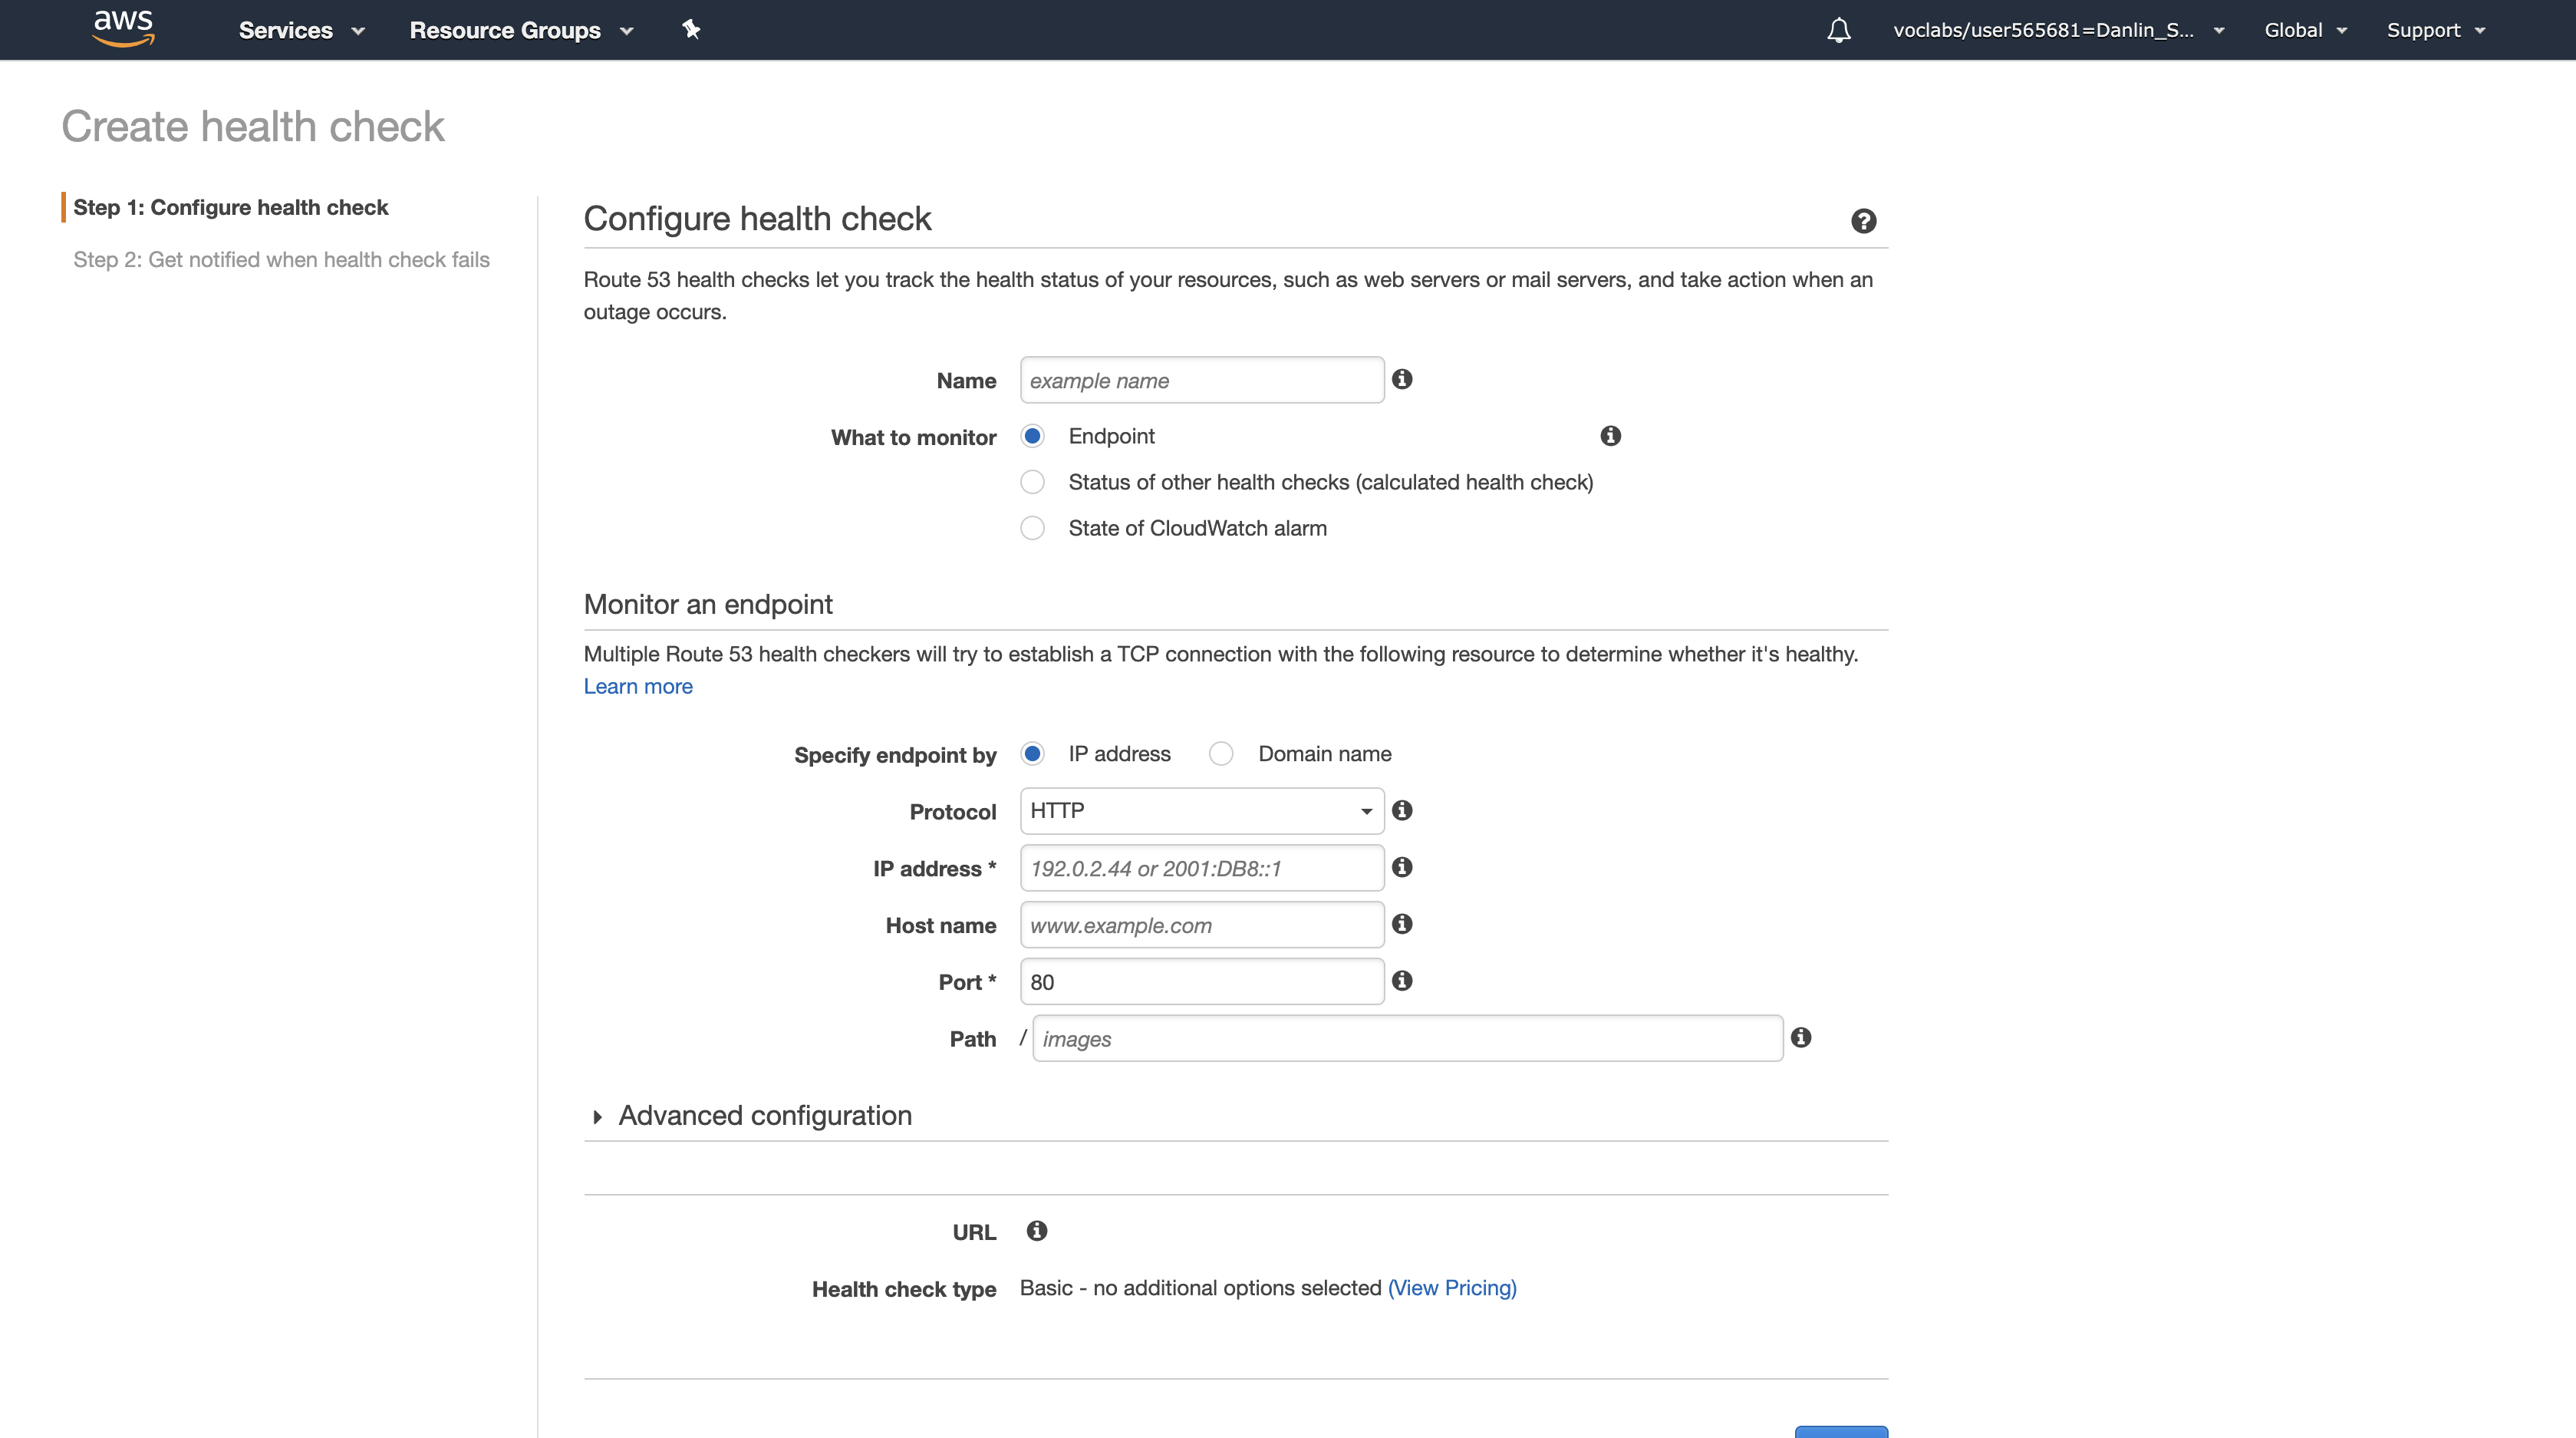
In the Configure health check page, configure the following settings (and ignore any settings that aren’t listed):
- Name: check-1
- IP address: Enter the IP address of your primary web server that you copied earlier.
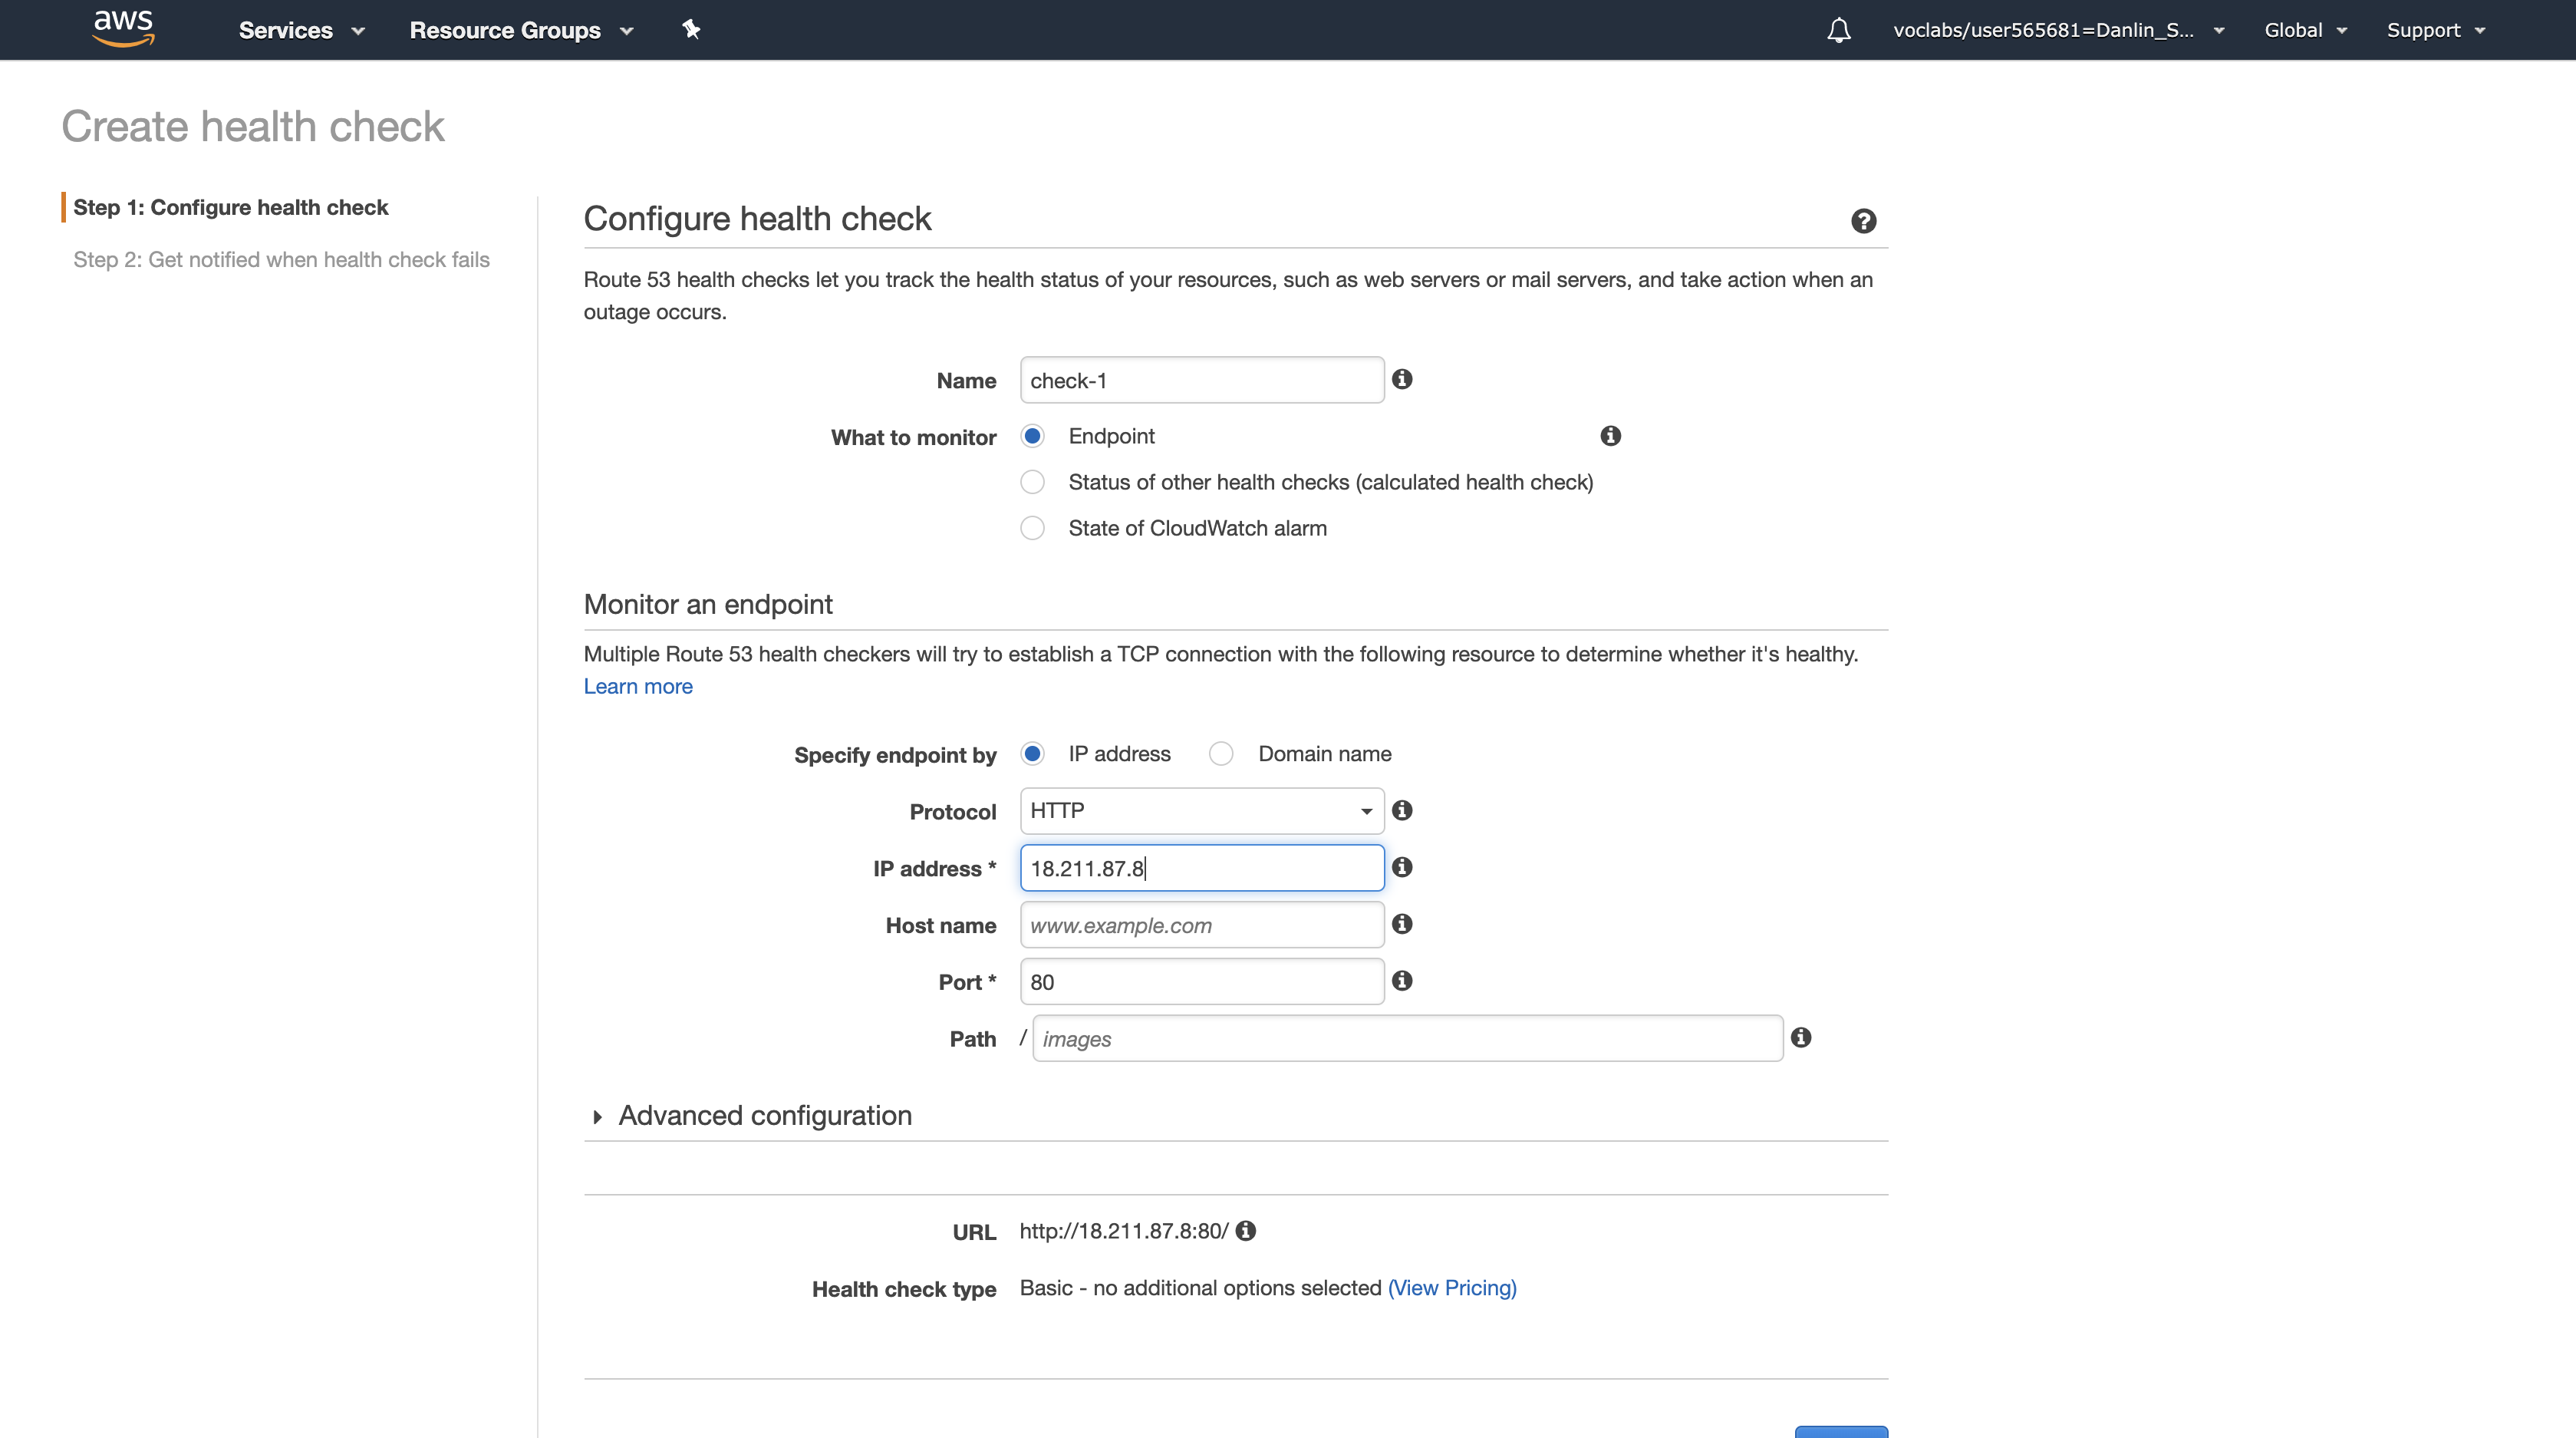
Expand Advanced configuration and then configure the following settings (and ignore any settings that aren’t listed):
- Request interval: Fast (10 seconds)
- Failure threshold:
2
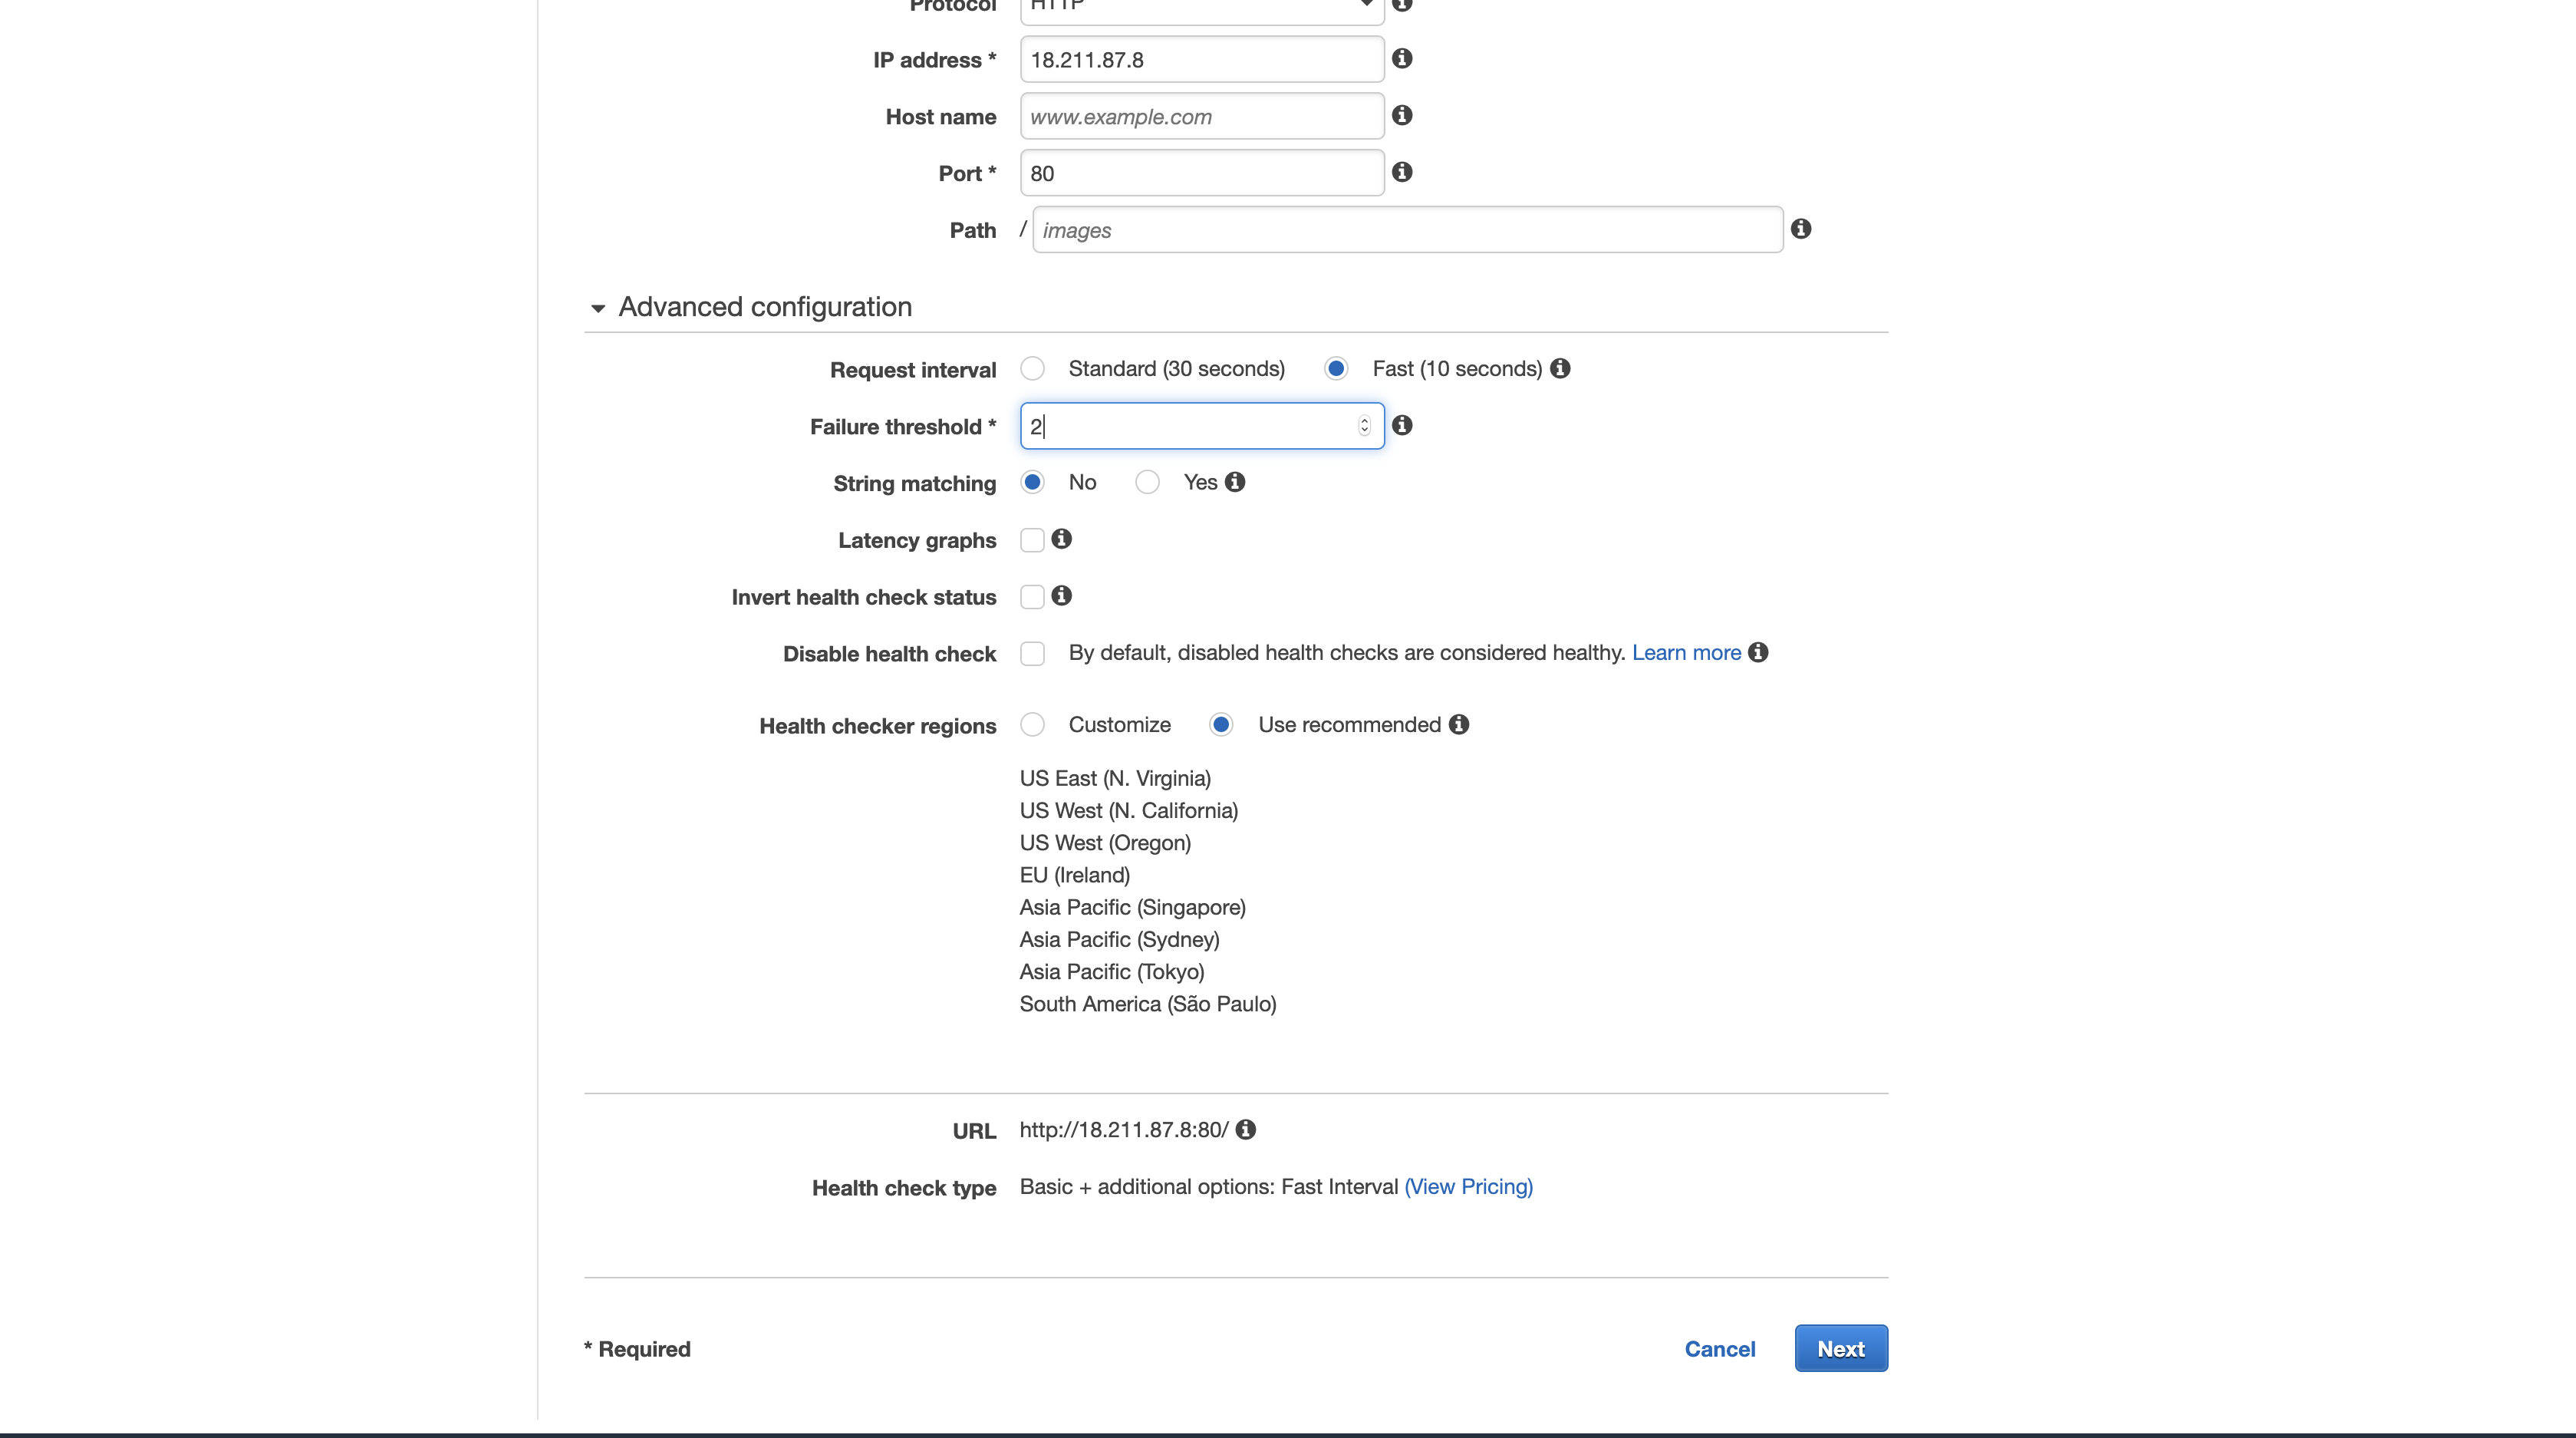
Click Next.
Click Create health check, and refresh the web page.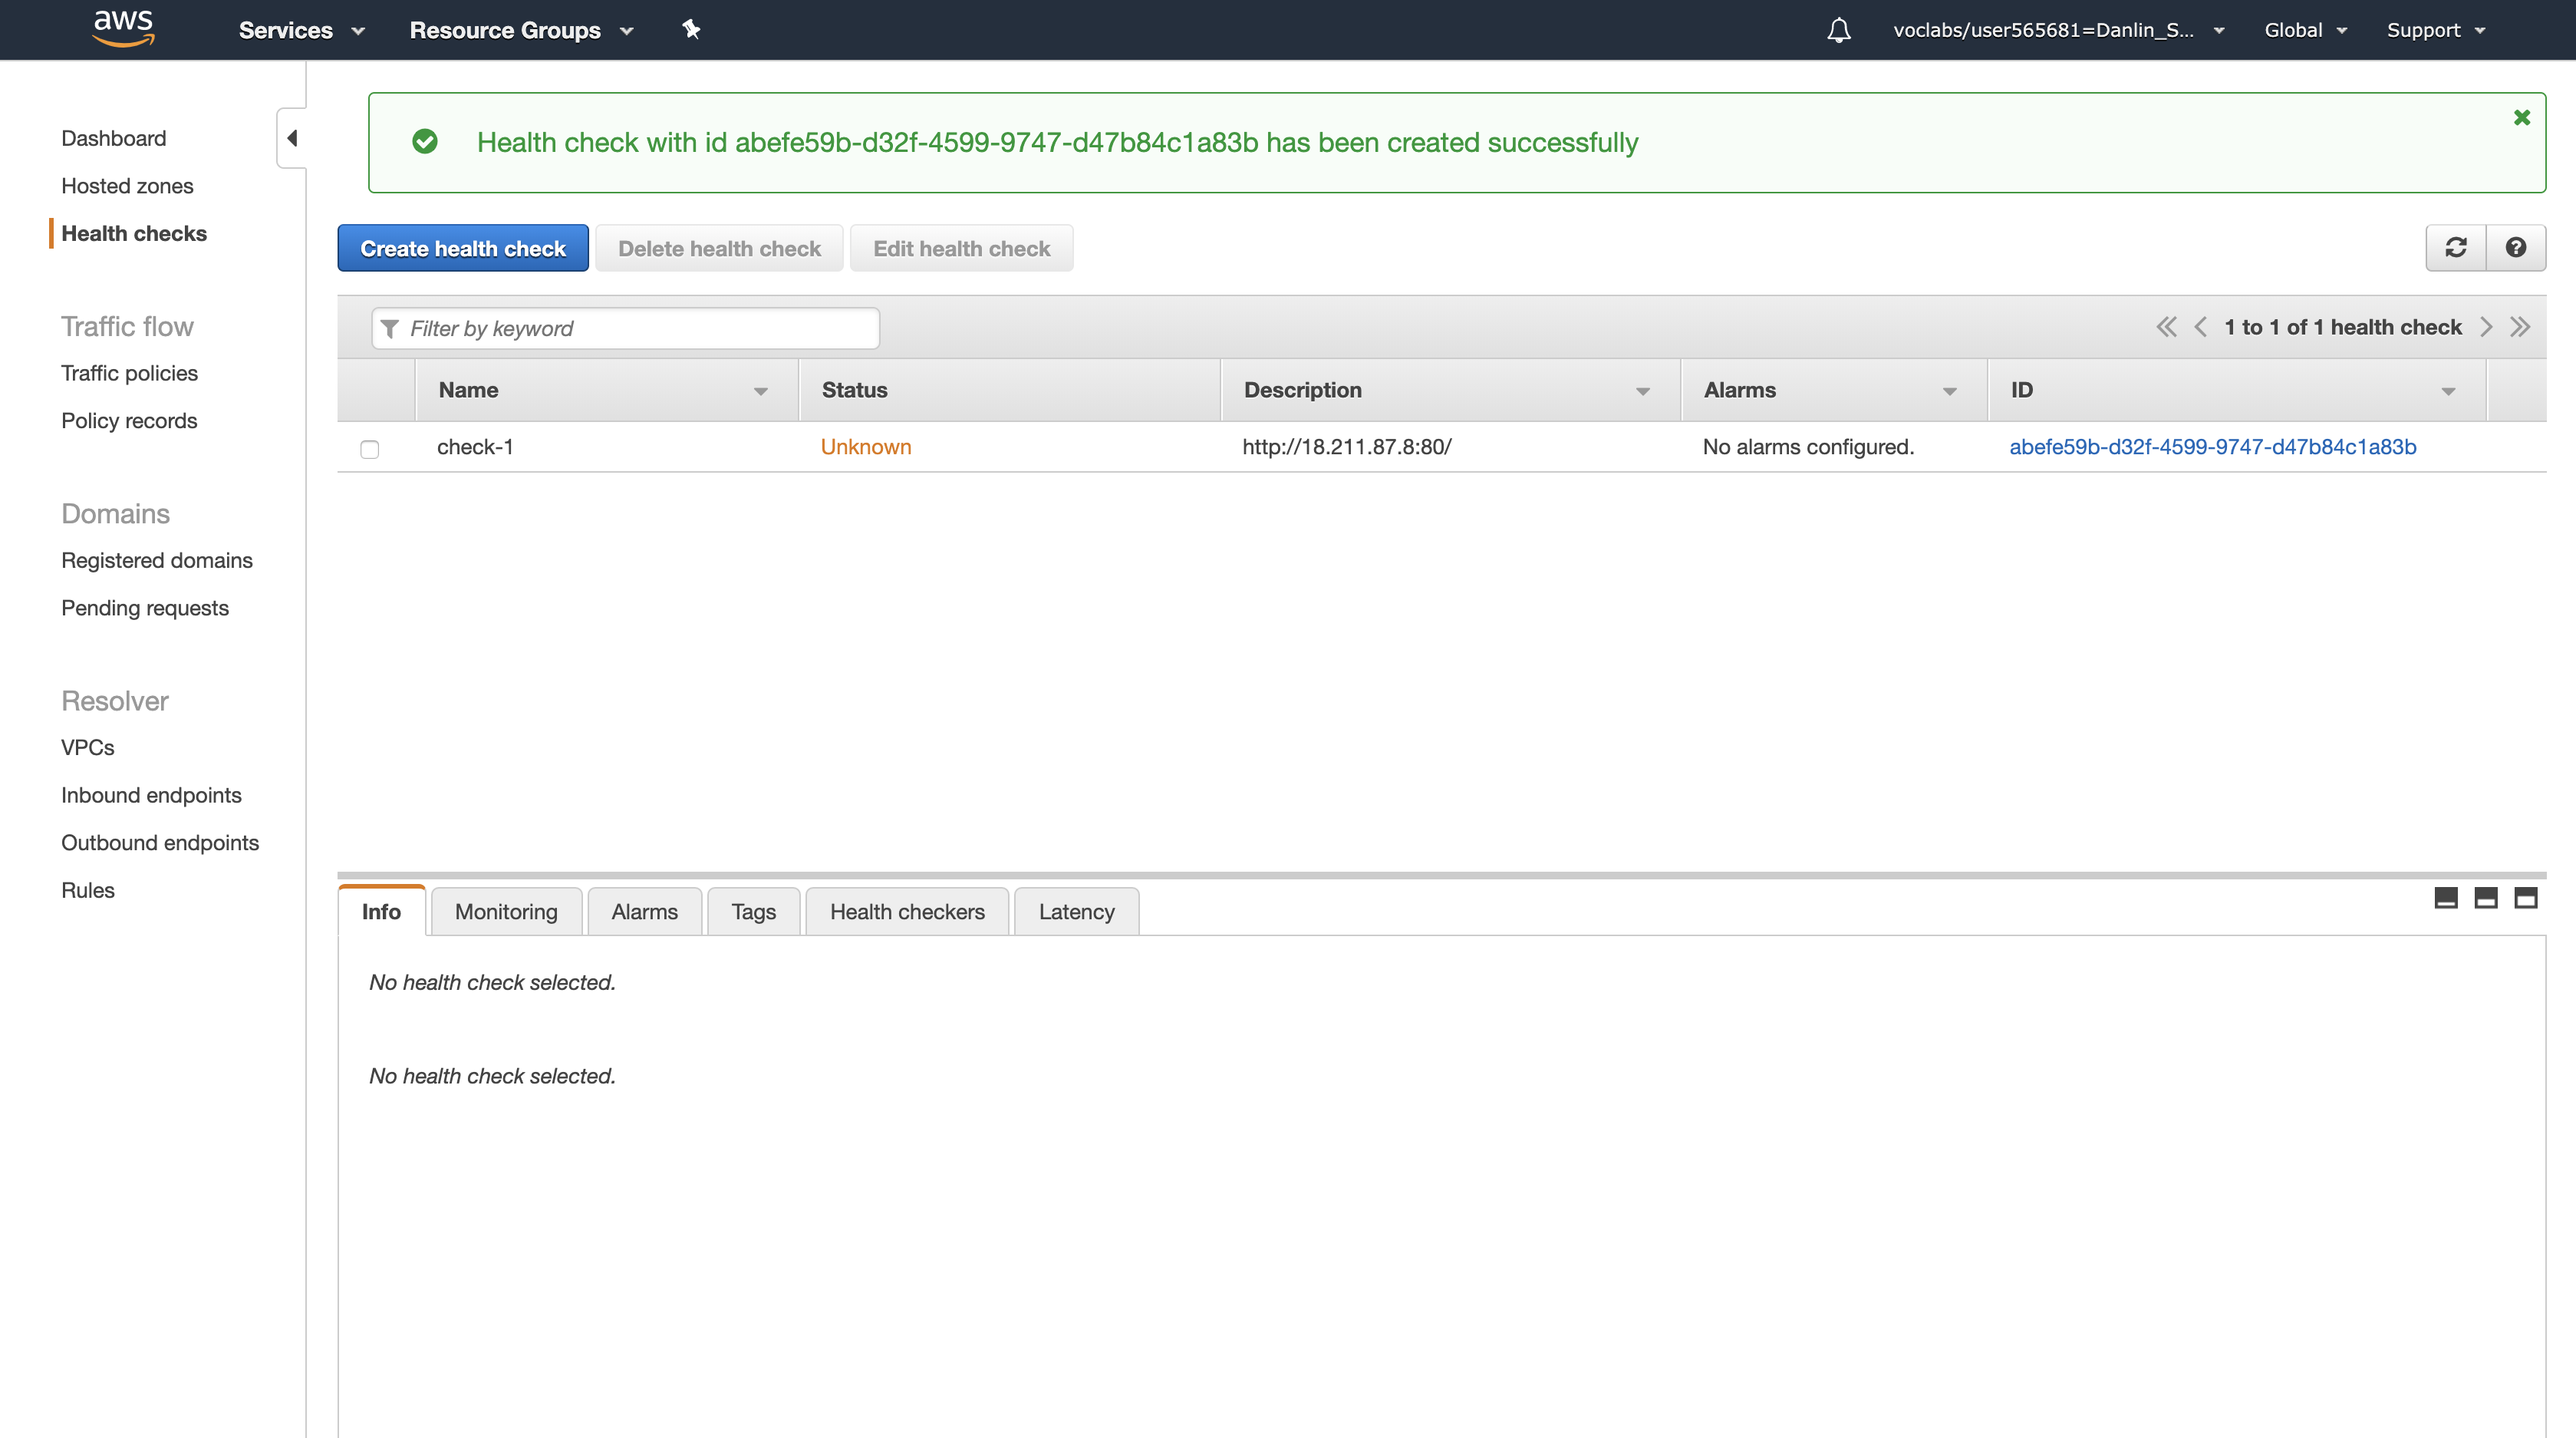

The health check will now start monitoring your primary web server.
Task 3: Configure your Domain in Route 53
In this task, you will configure your domain to point to your primary and secondary web servers.
Navigation pane > click Hosted zones.
- A random domain name has been created for you. It has a name similar to:
XXXXXX_XXXXXXXXXX.training

Click the name of your domain.
Click Create Record Set.
- You will now create a DNS A-record to point to your Primary web server. An A-record resolves a domain name by returning an IP address. You will also associate this Record Set with the Health Check you created earlier so that traffic will only be sent to your Primary web server if the Health Check indicates that the server is healthy.
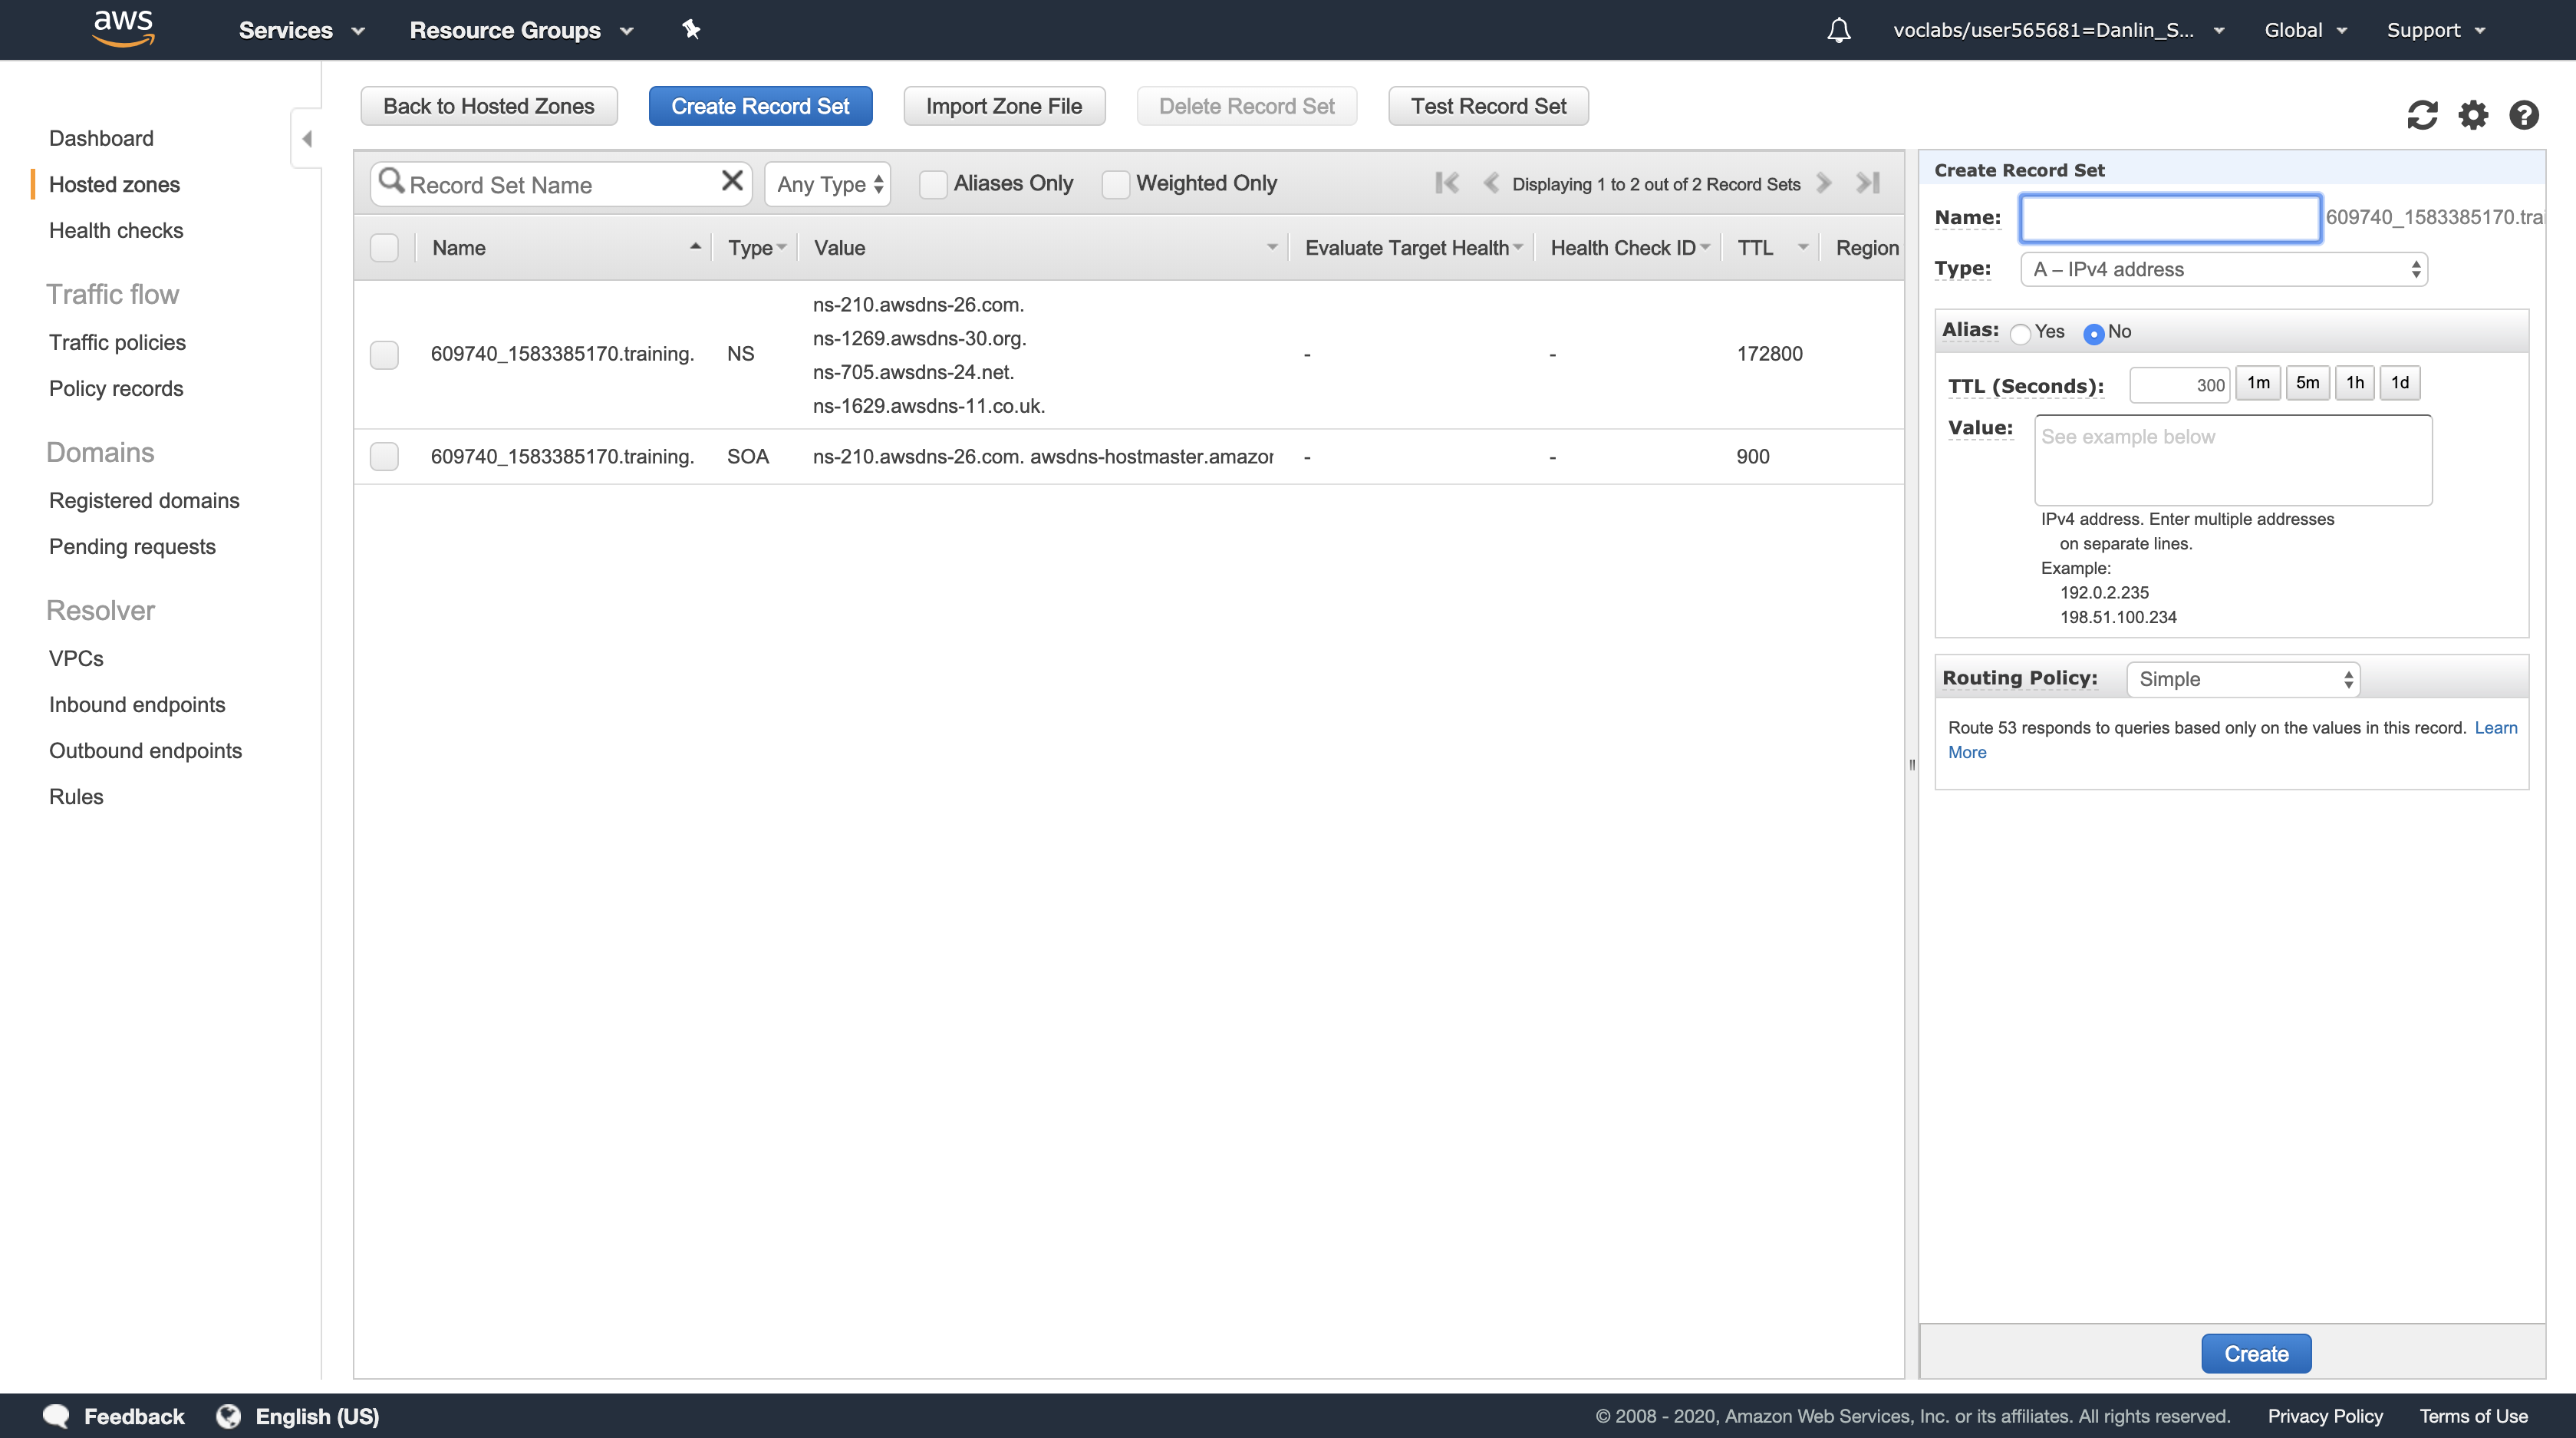
In Create Record Set, configure the following settings (and ignore any settings that aren’t listed):
- Name:
wwww - Type: A - IPv4 address
- TTL (Seconds):
60 - Value: Enter the IP address of your primary web server that you copied earlier.
- Routing Policy: Failover
- Failover Record Type: Primary
- Associate with Health Check: Yes
- Health Check to Associate: check-1
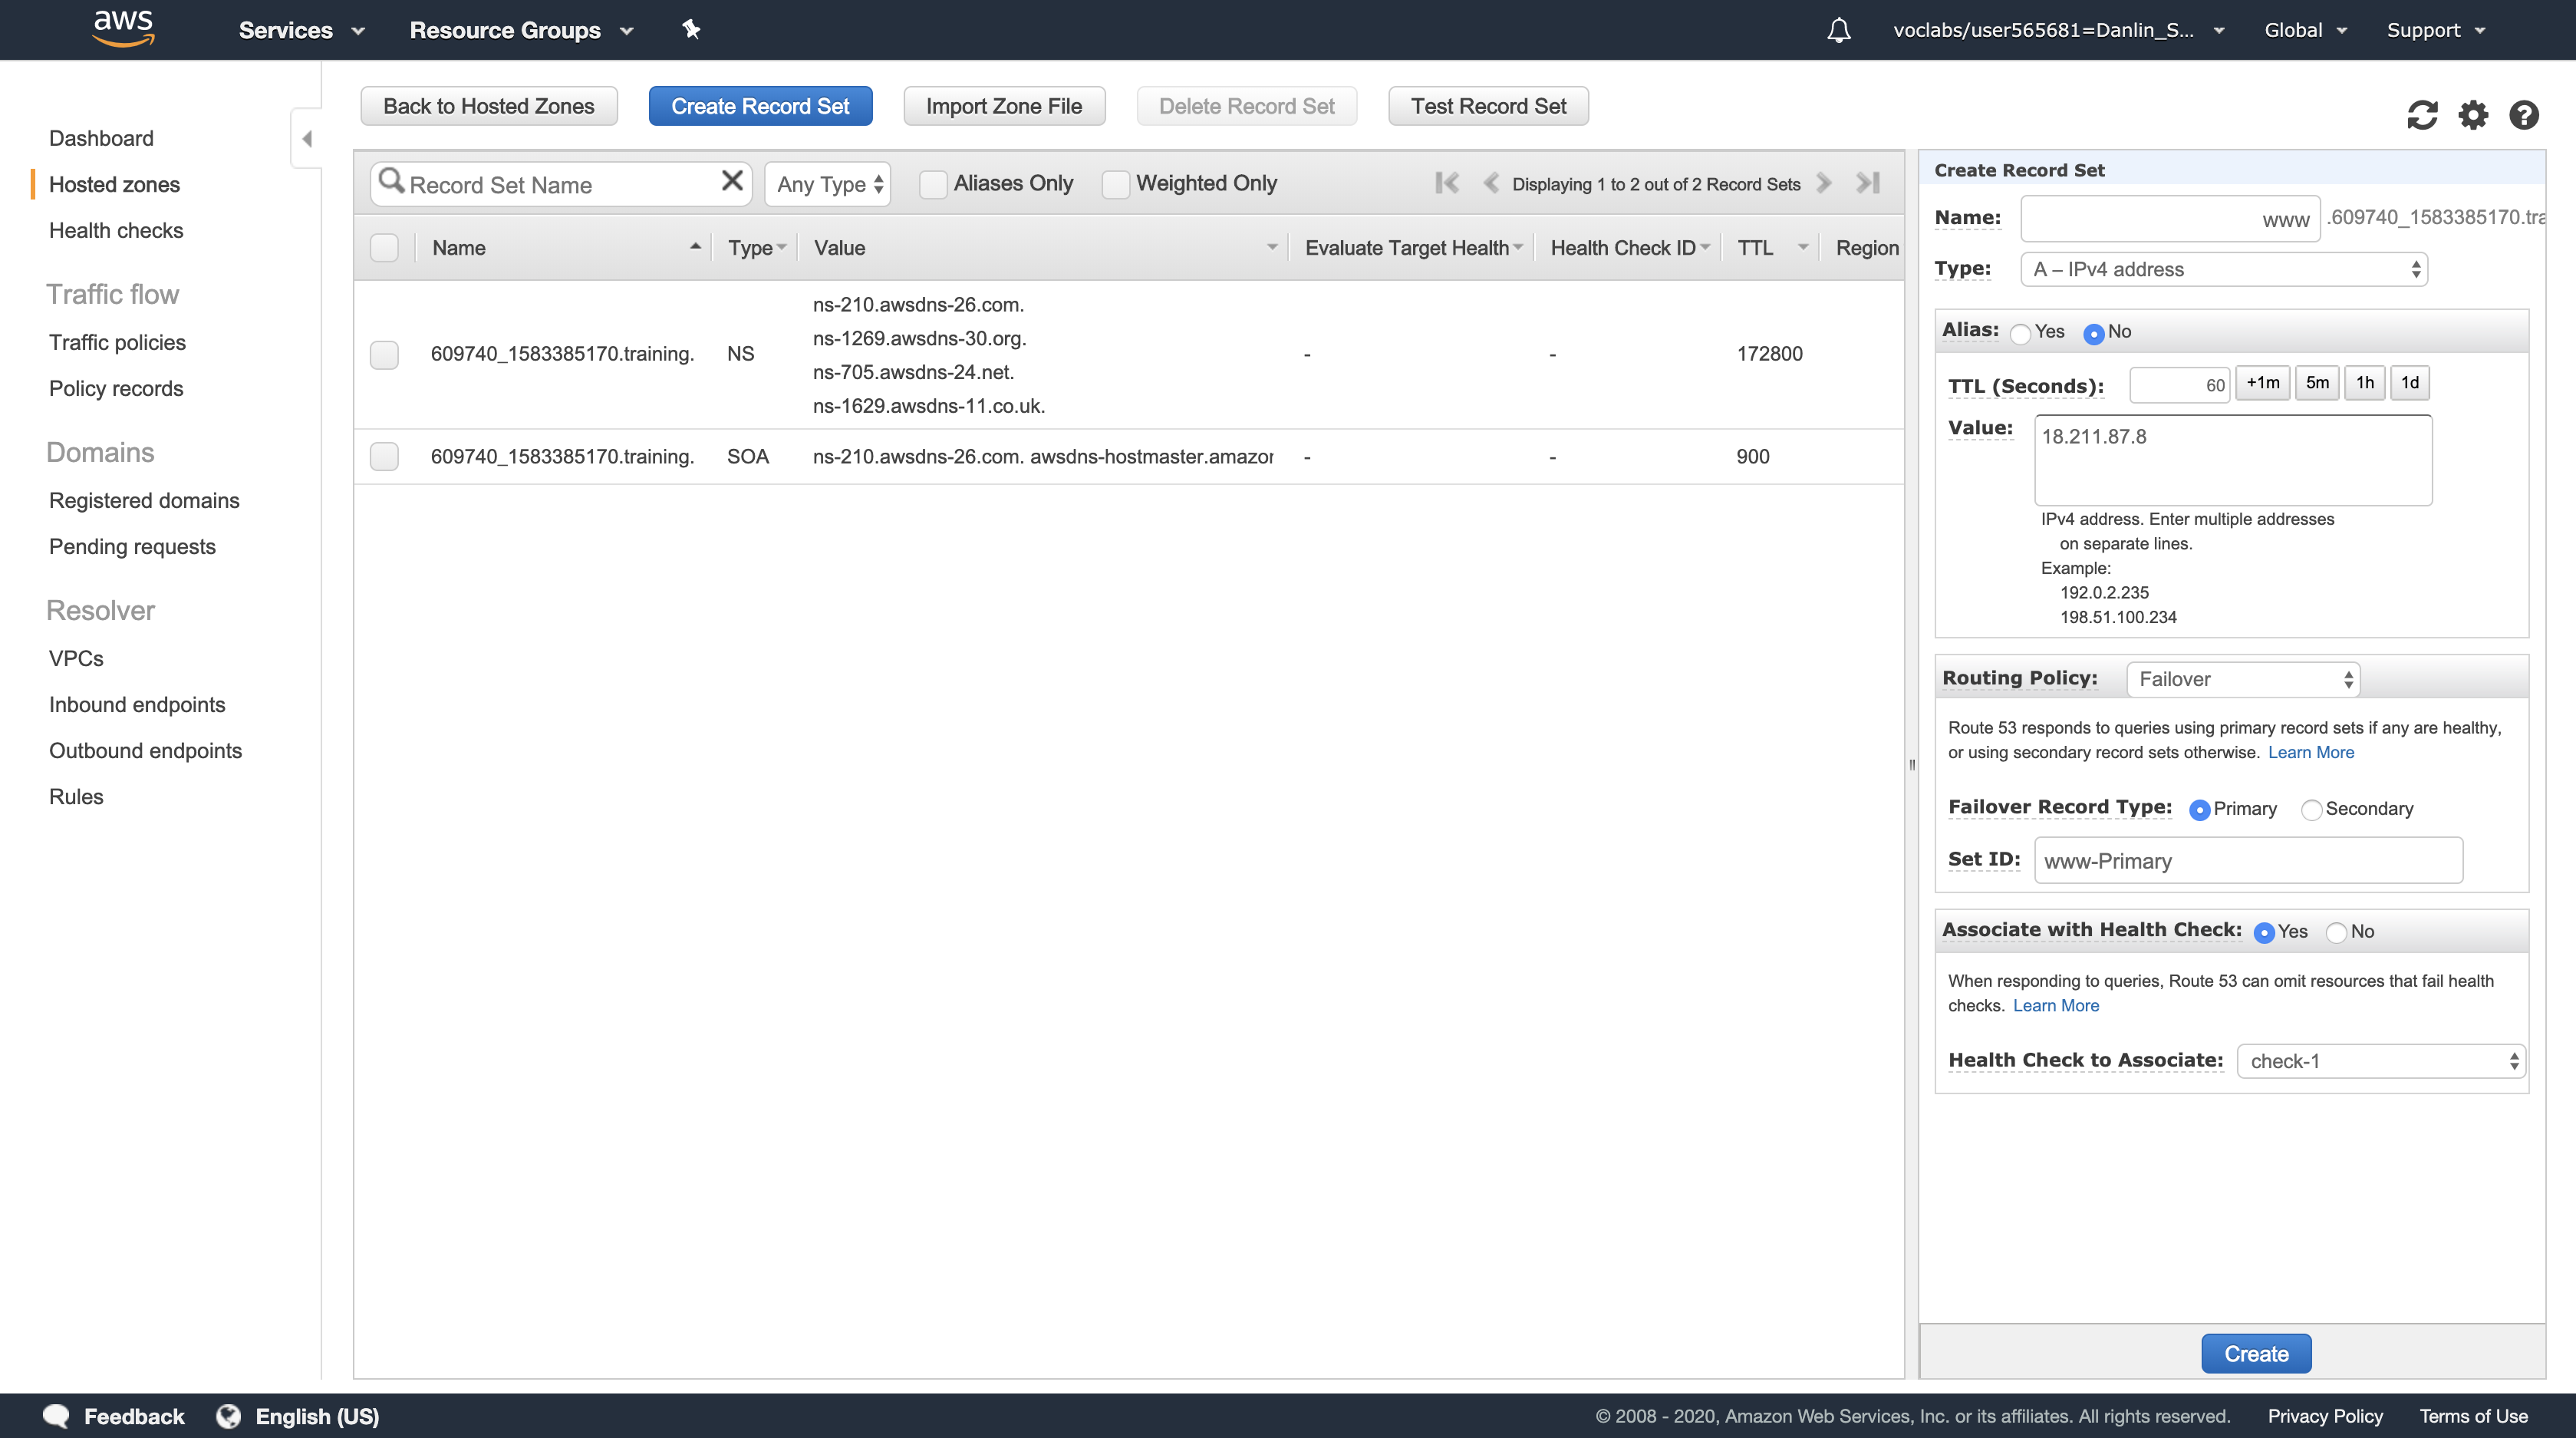
Click Create.
- An A-record should be listed. If the newly created record does not immediately appear in the table, periodically click the refresh icon to update the table until it appears.

You will now create another A-record to point to the Secondary web server. It will be used as the failover server if the Primary web server fails its Health Check.
Click Create Record Set again.
In Create Record Set, configure the following settings (and ignore any settings that aren’t listed):
- Name:
wwww - Type: A - IPv4 address
- TTL (Seconds):
60 - Value: Enter the IP address of your Secondary web server that you copied earlier.
- Routing Policy: Failover
- Failover Record Type: Secondary
- Associate with Health Check: No
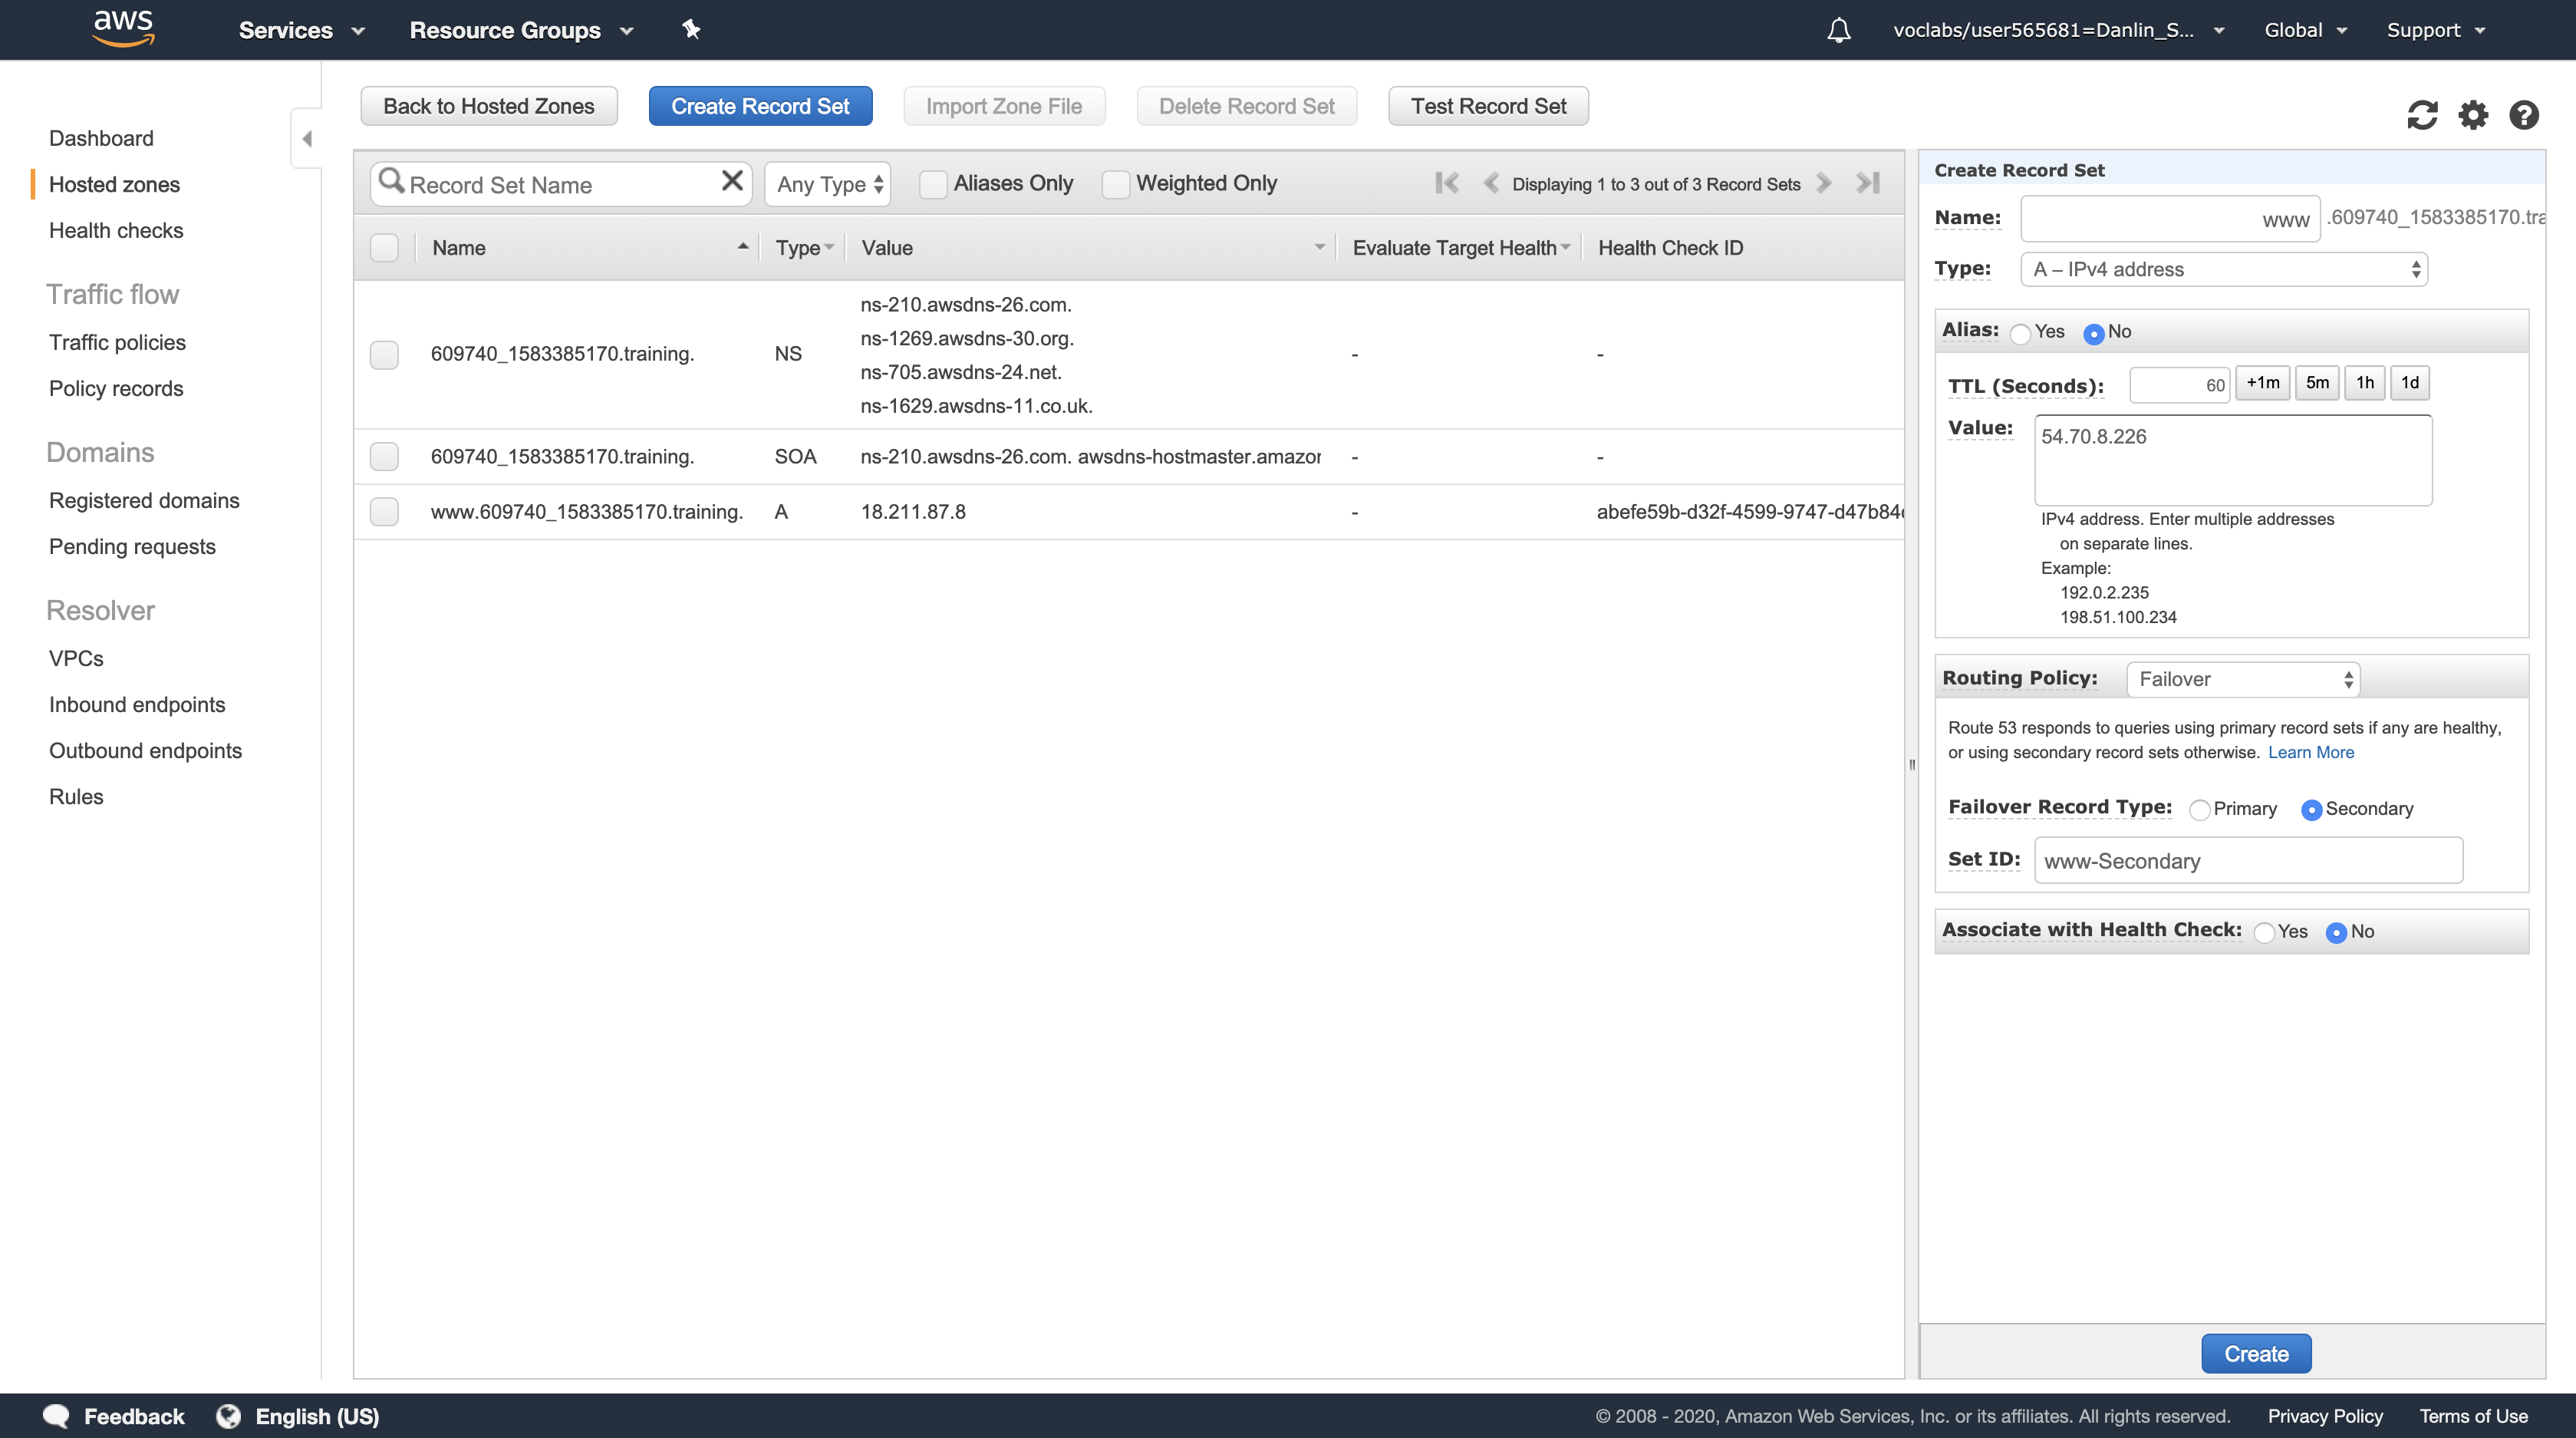
Click Create.
- You are not associating this record with a Health Check because there is no third site available.
- You can now check the status of your Health Check.
Navigation pane > click Health checks.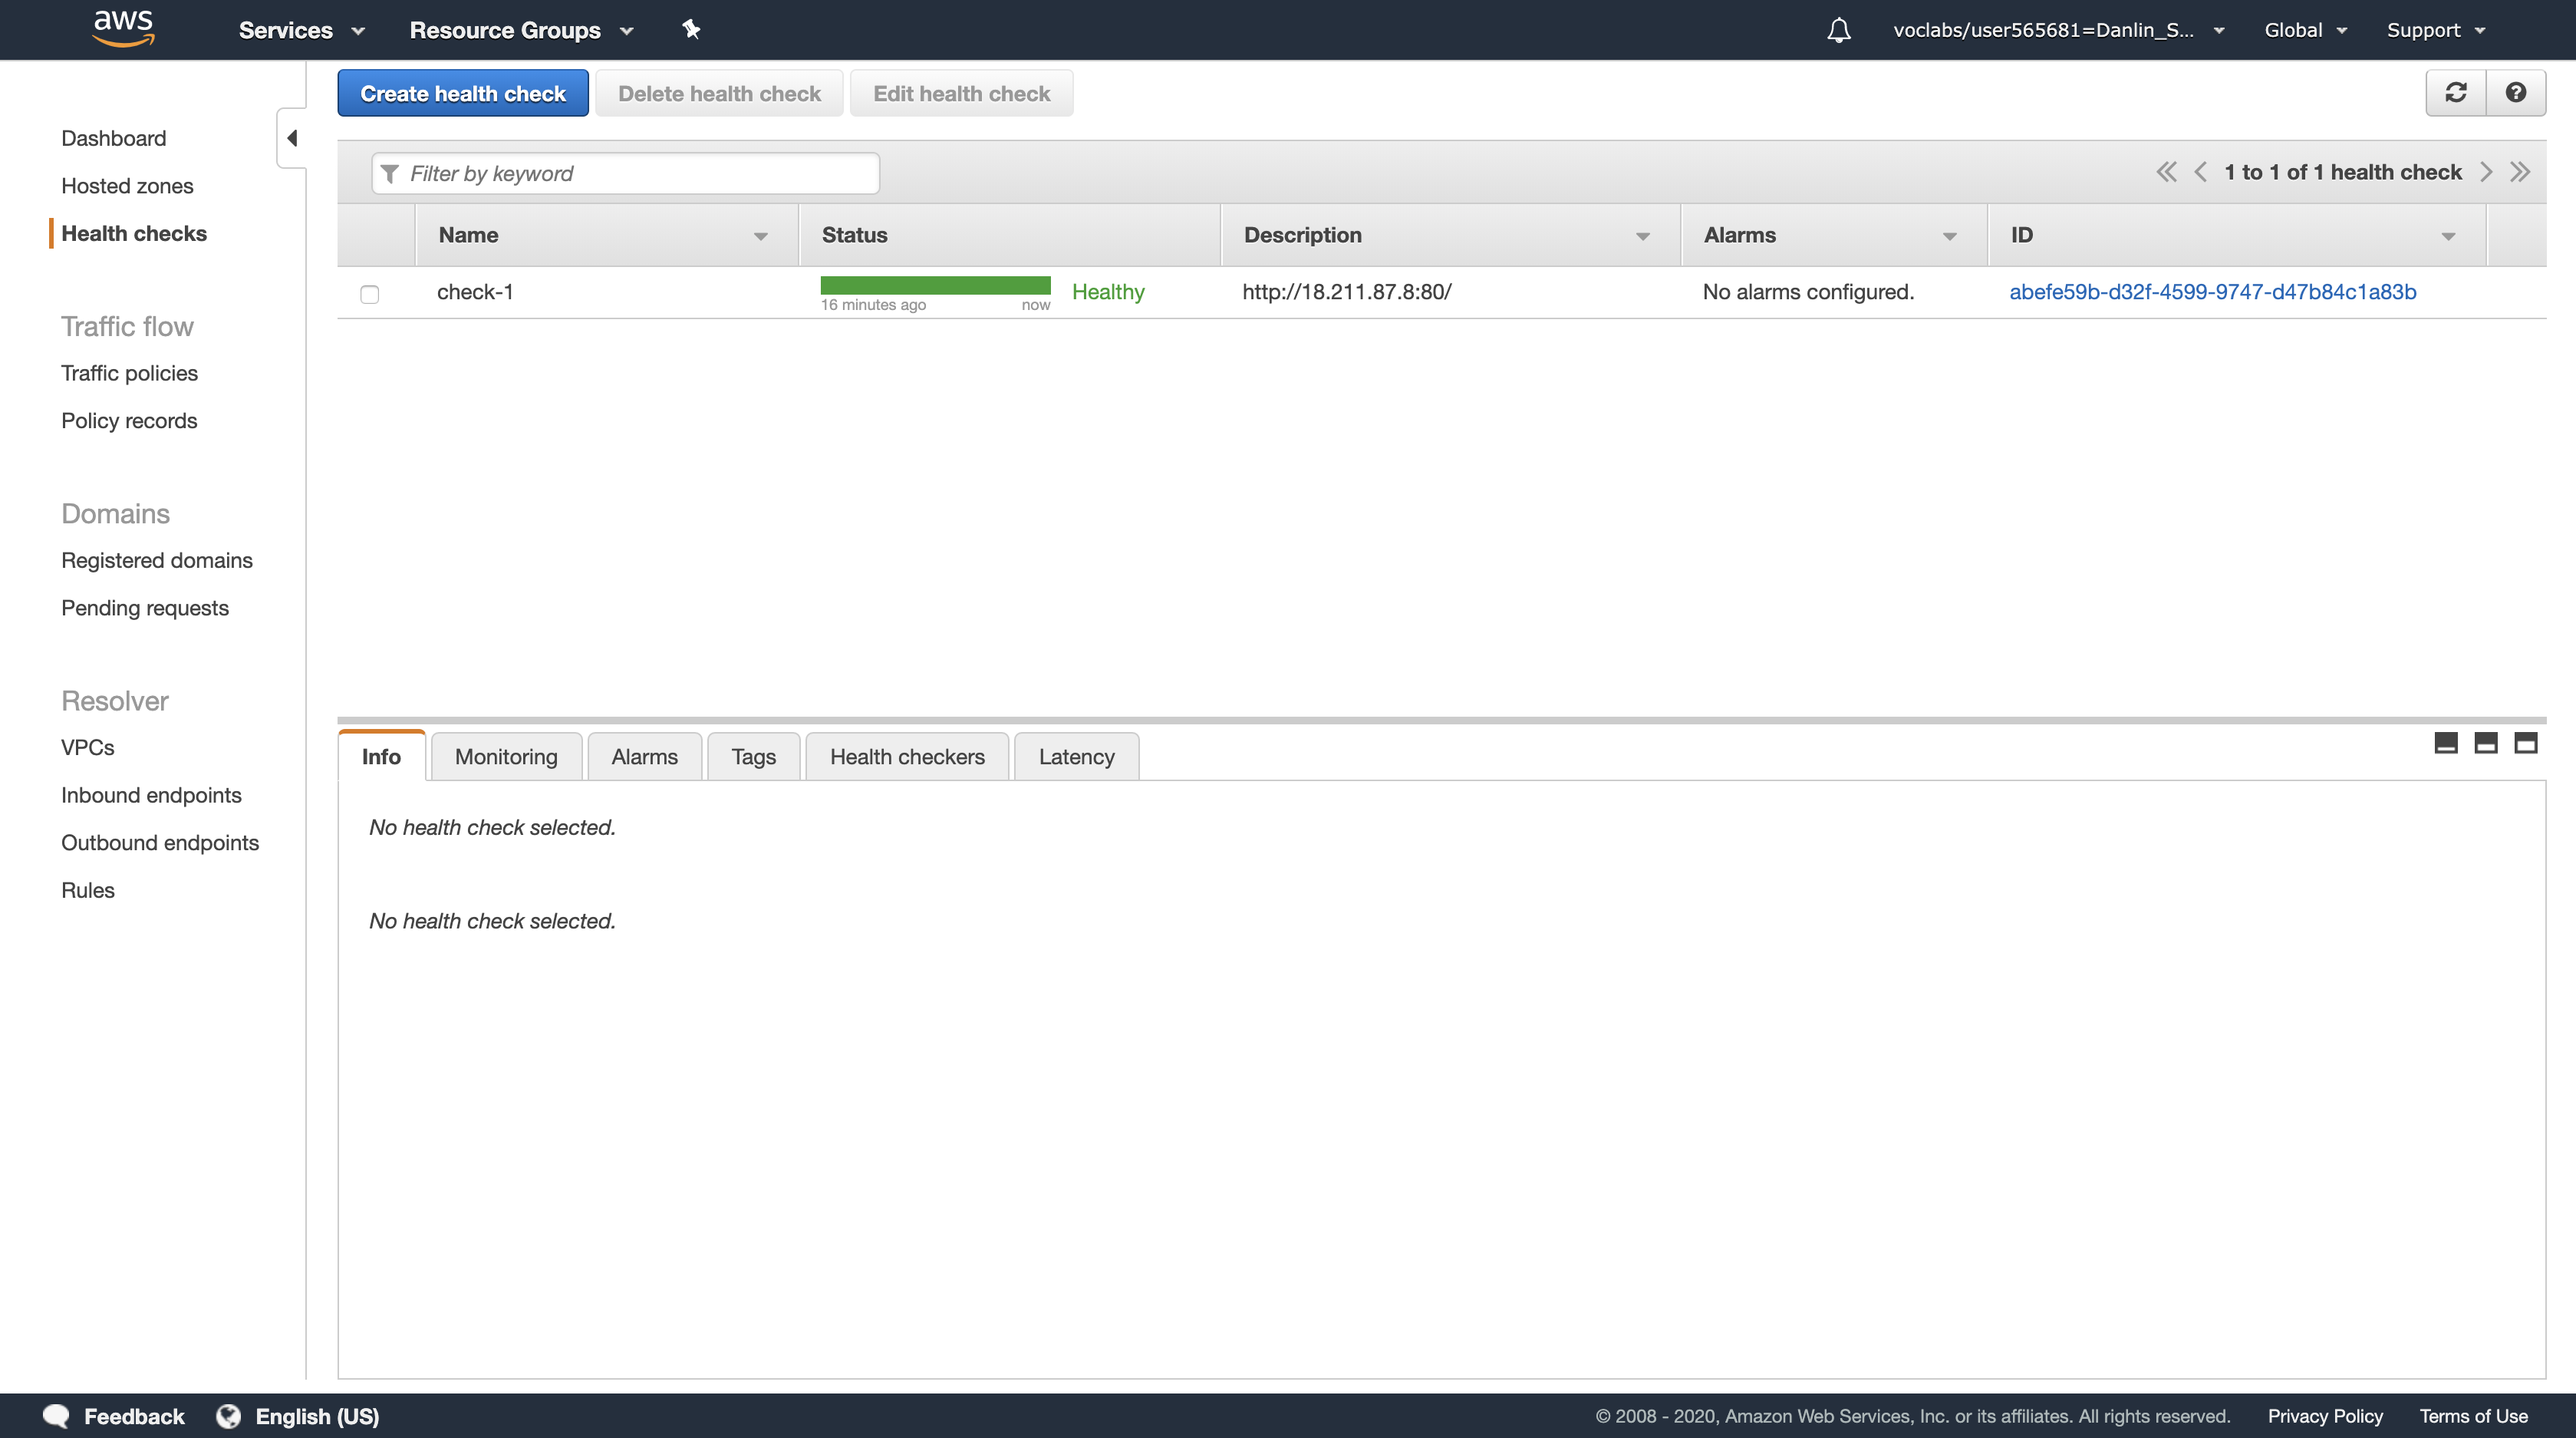
Select check-1.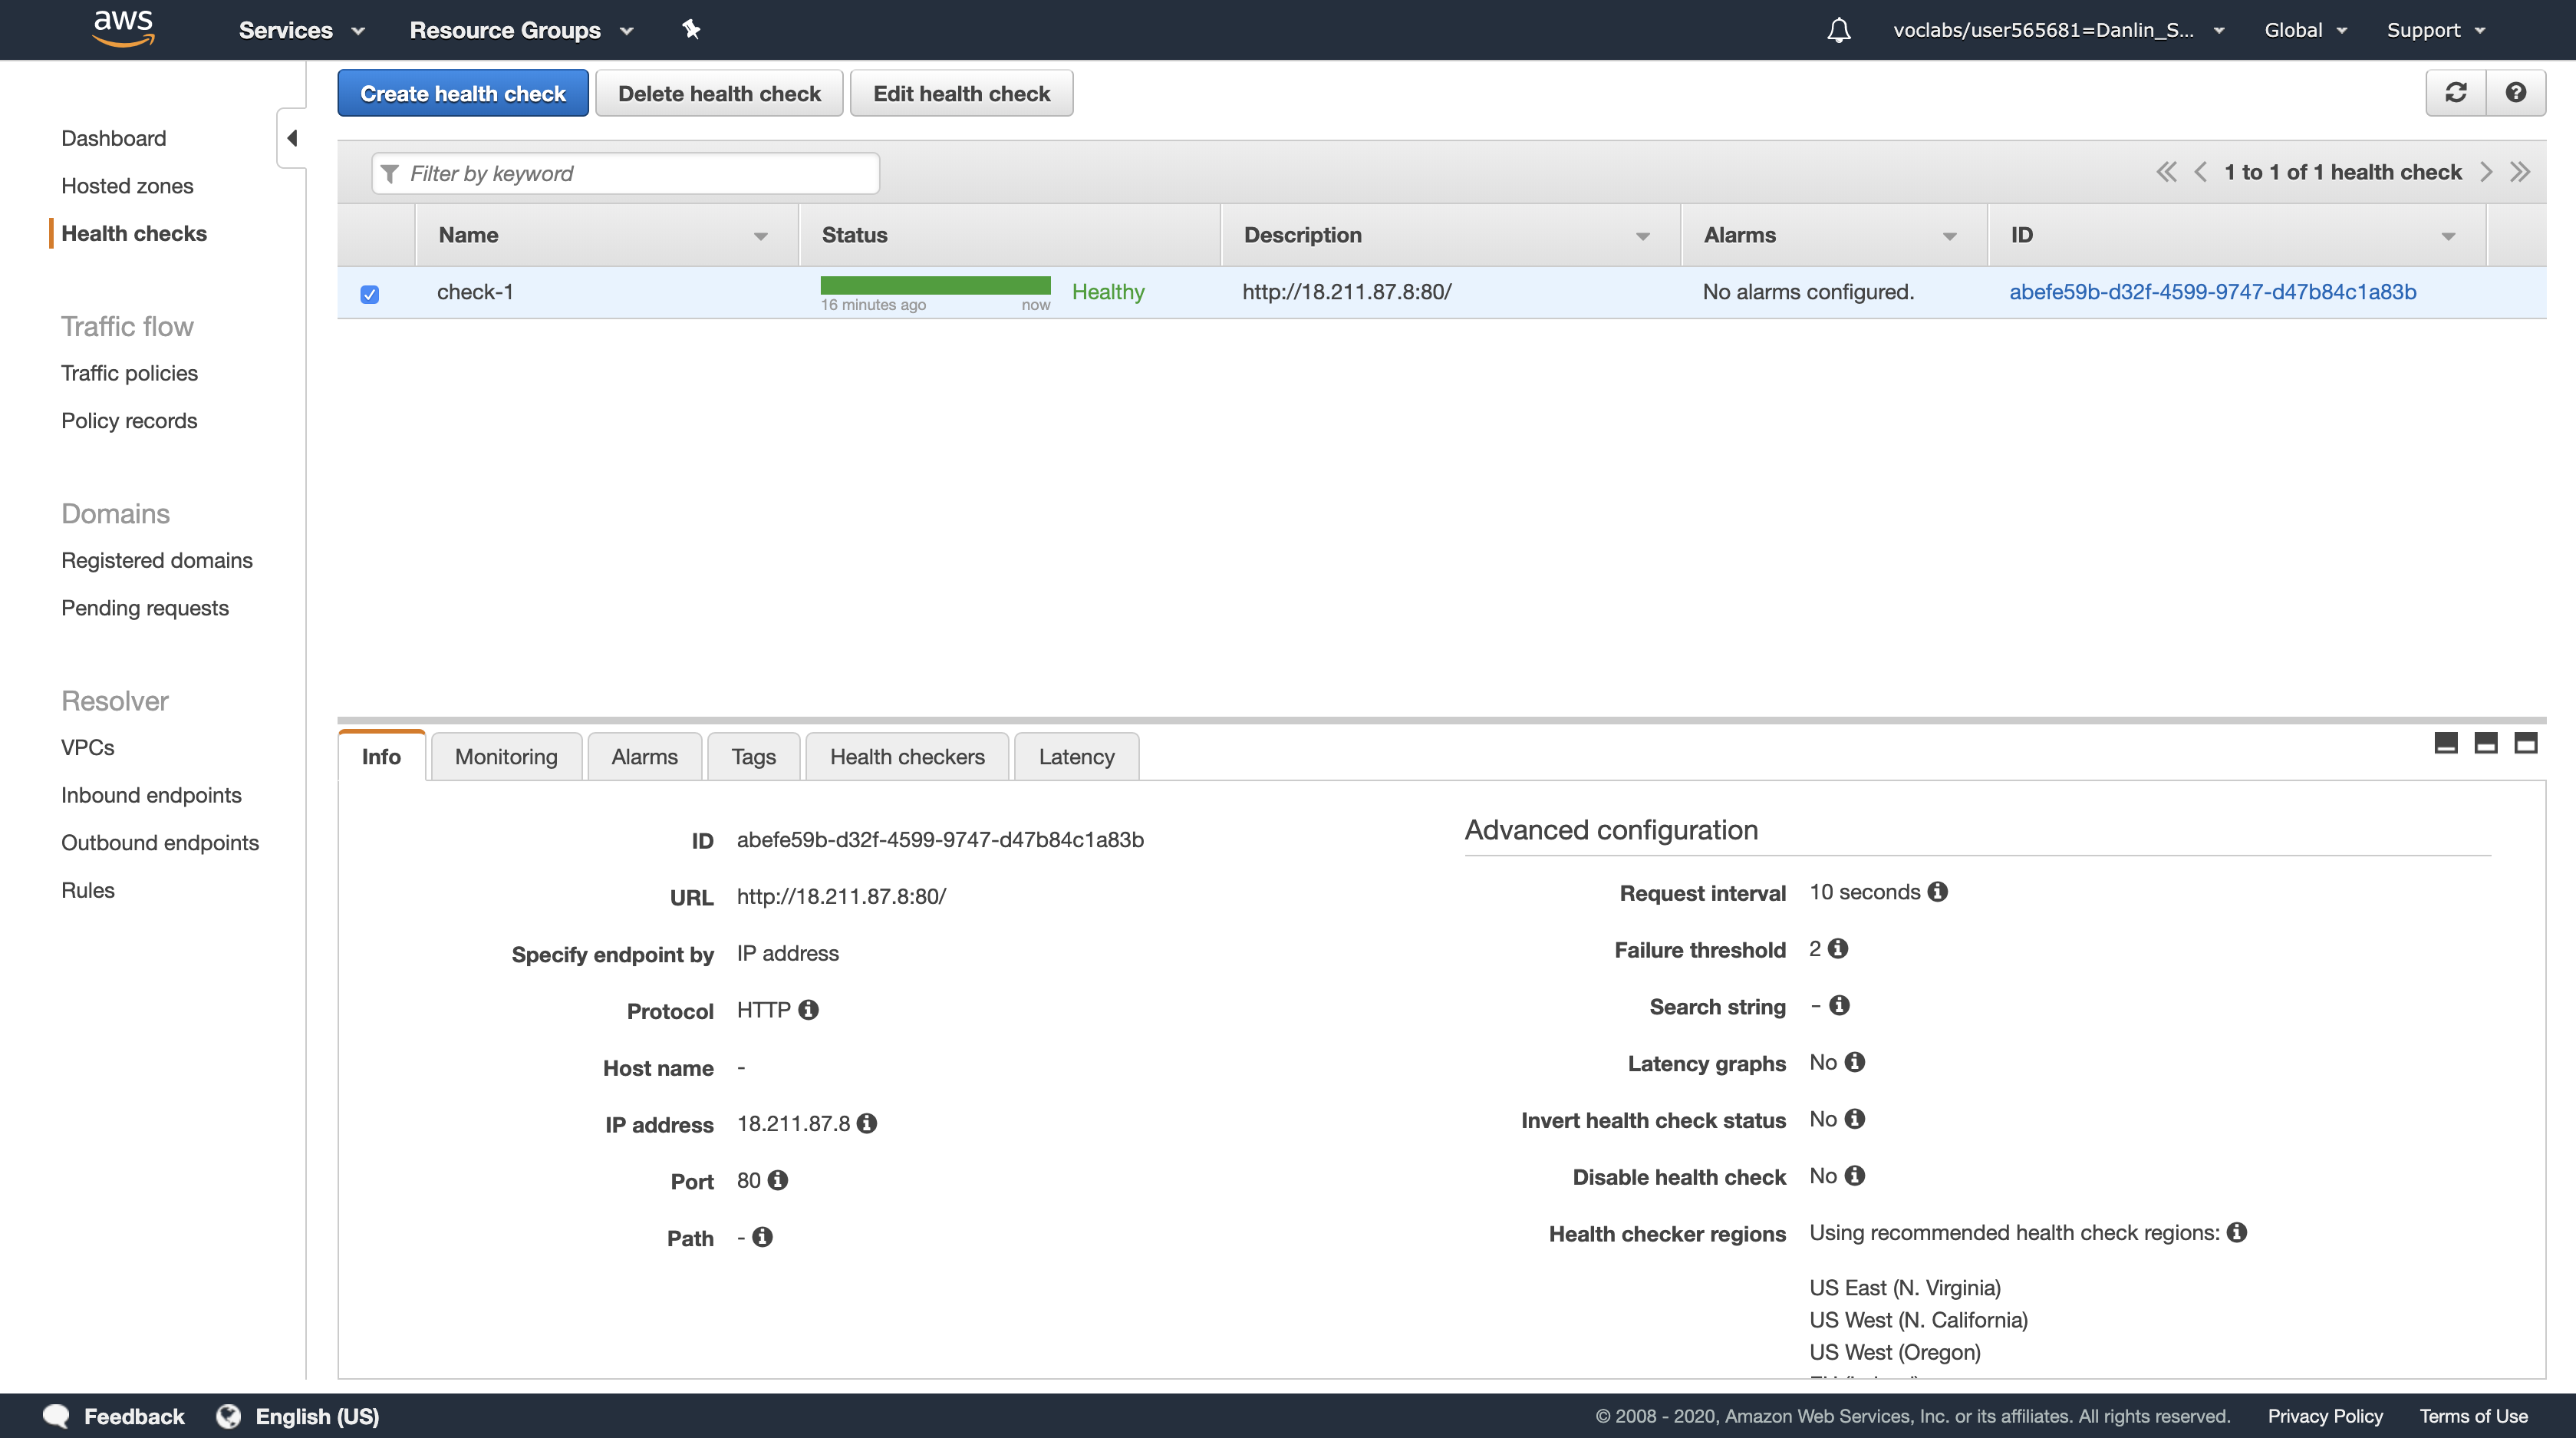
Click the Health checkers tab at the bottom of the page.
- The health check is performed independently from multiple locations around the world, with each location requesting the page every 10 seconds.
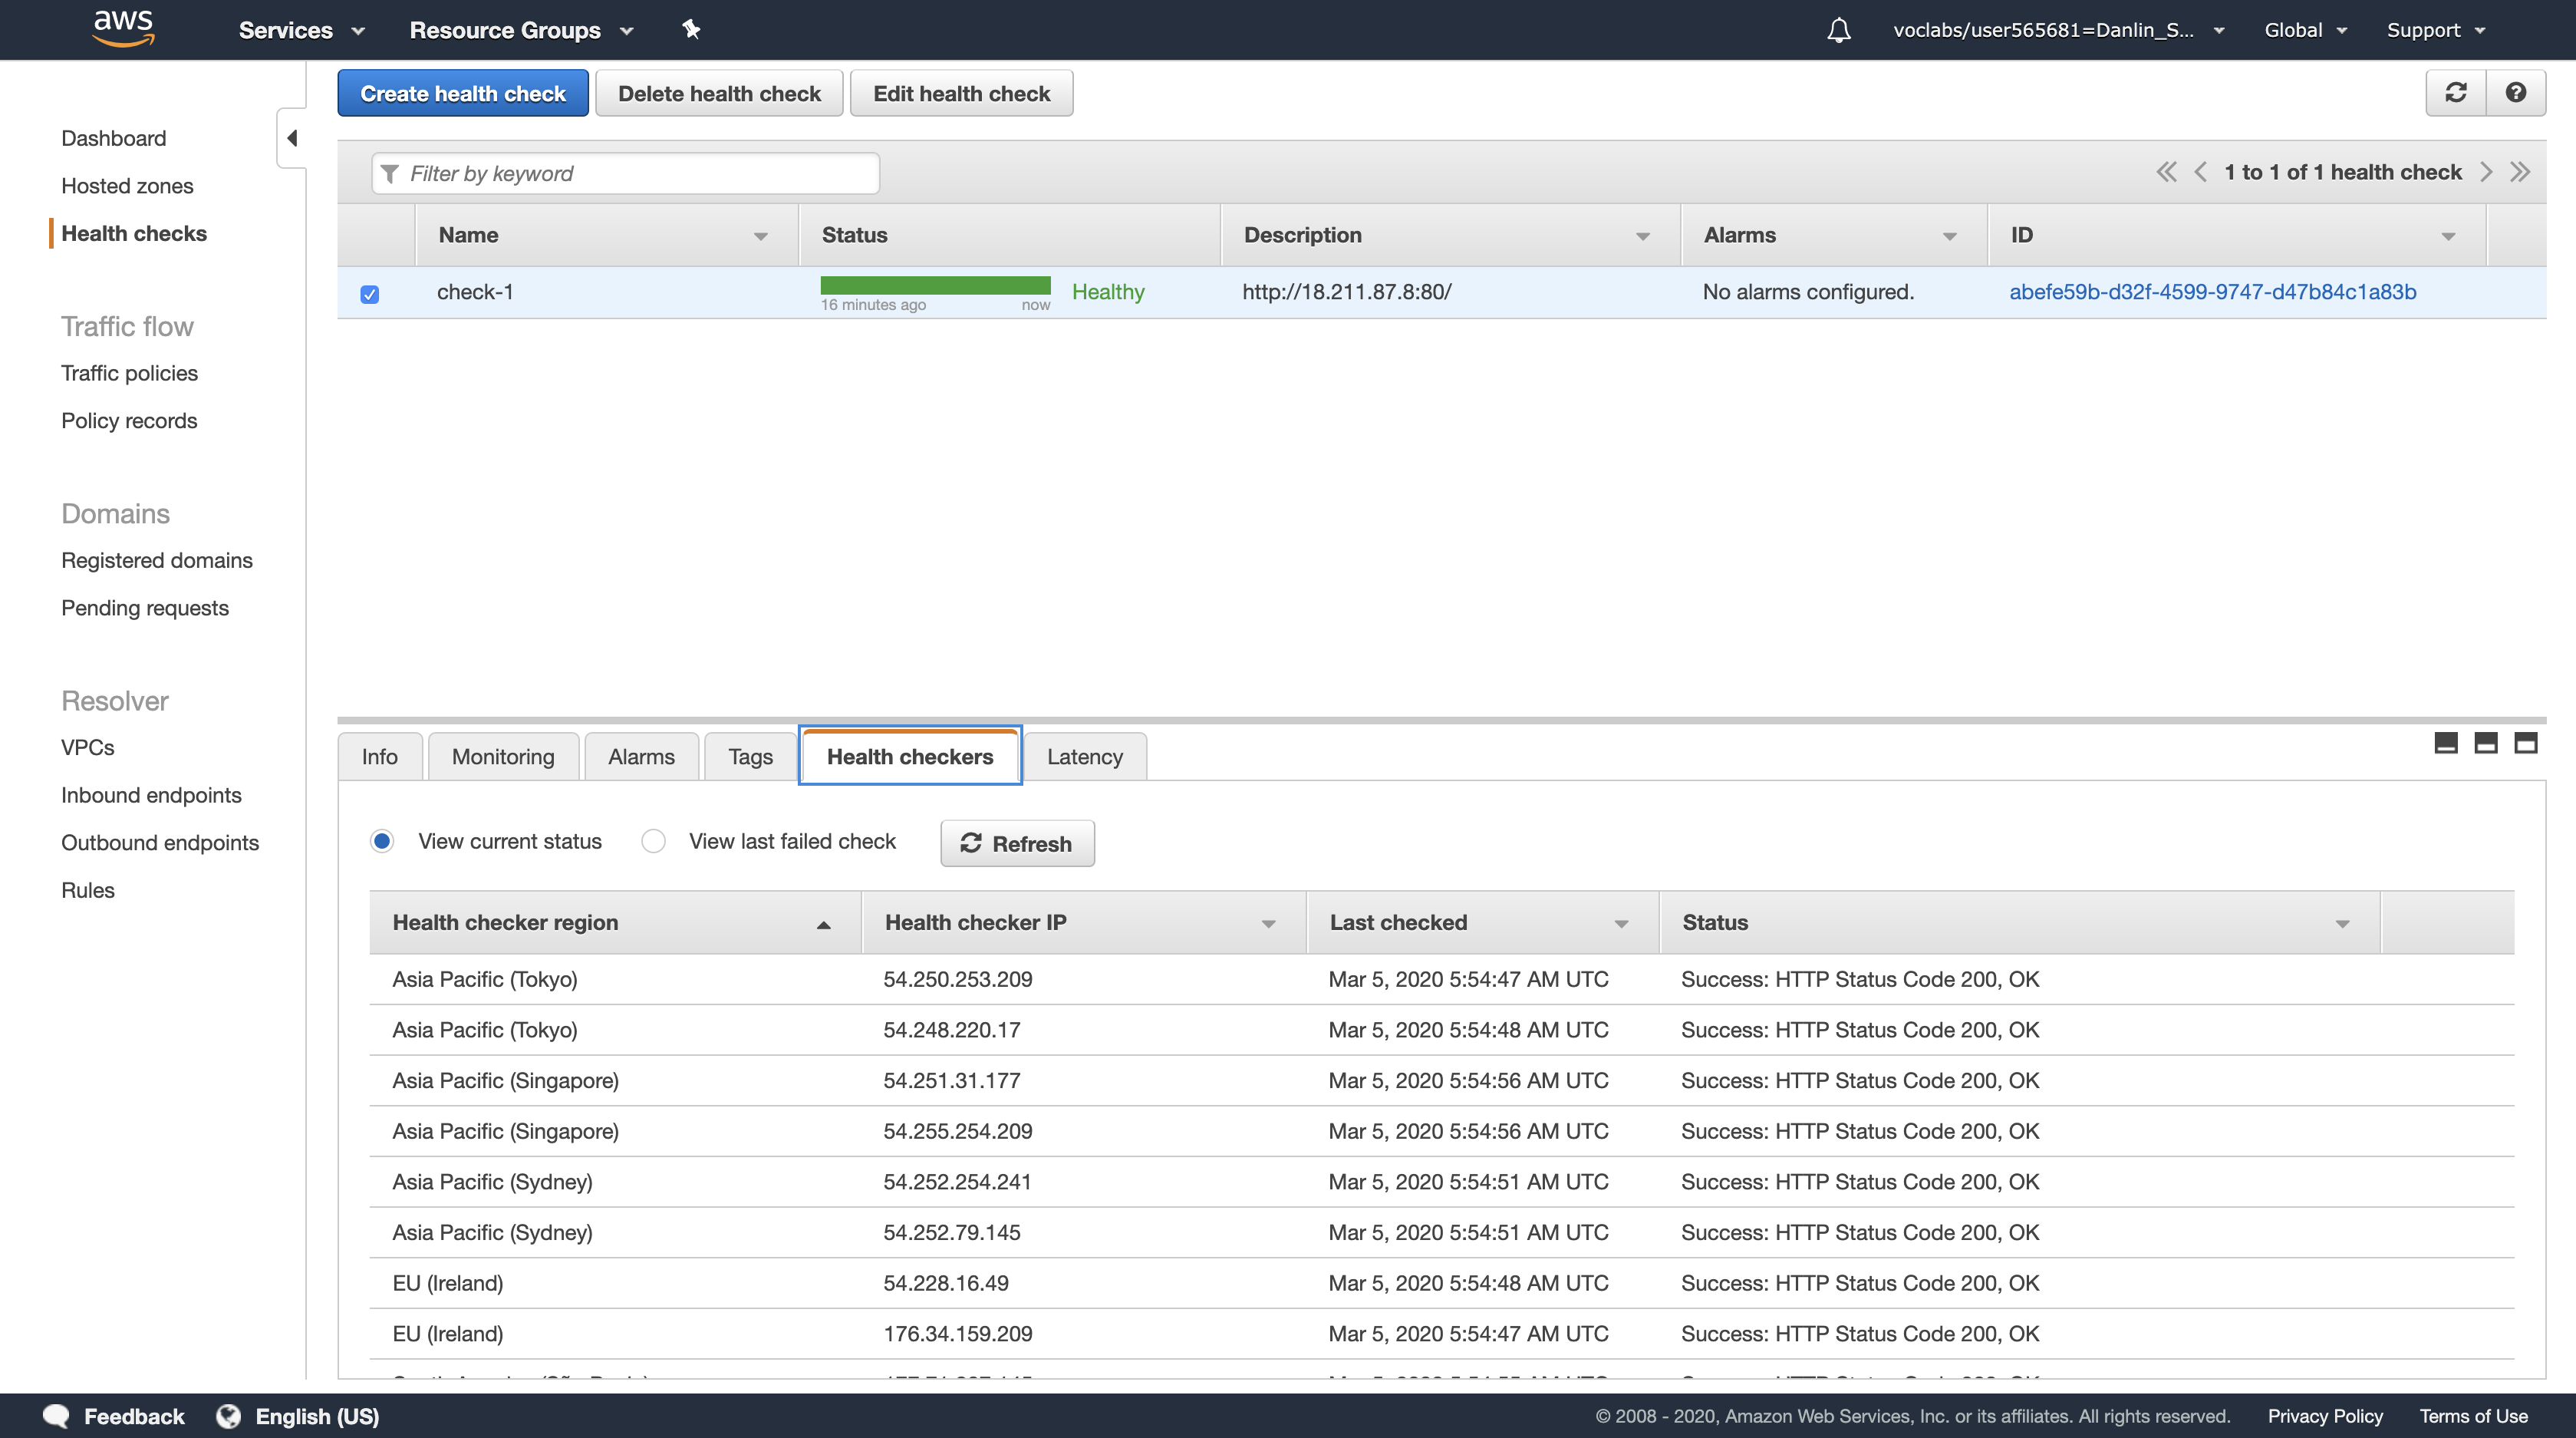
Confirm that check-1 has a status of Healthy. If it is not showing as Healthy after a few minutes, ask your instructor for assistance in debugging the configuration.
You have now configured your web application to failover across two regions.
Task 4: Check the DNS Resolution
In this task, you will query DNS (Domain Name Service) to verify that Amazon Route 53 is correctly sending traffic to your Primary web server.
Navigation pane > click Hosted zones.
Click the name of your domain (starting with vocareum).
Click Test Record Set.
- If the Test Record Set button is not visible, try making your window wider so that it appears.
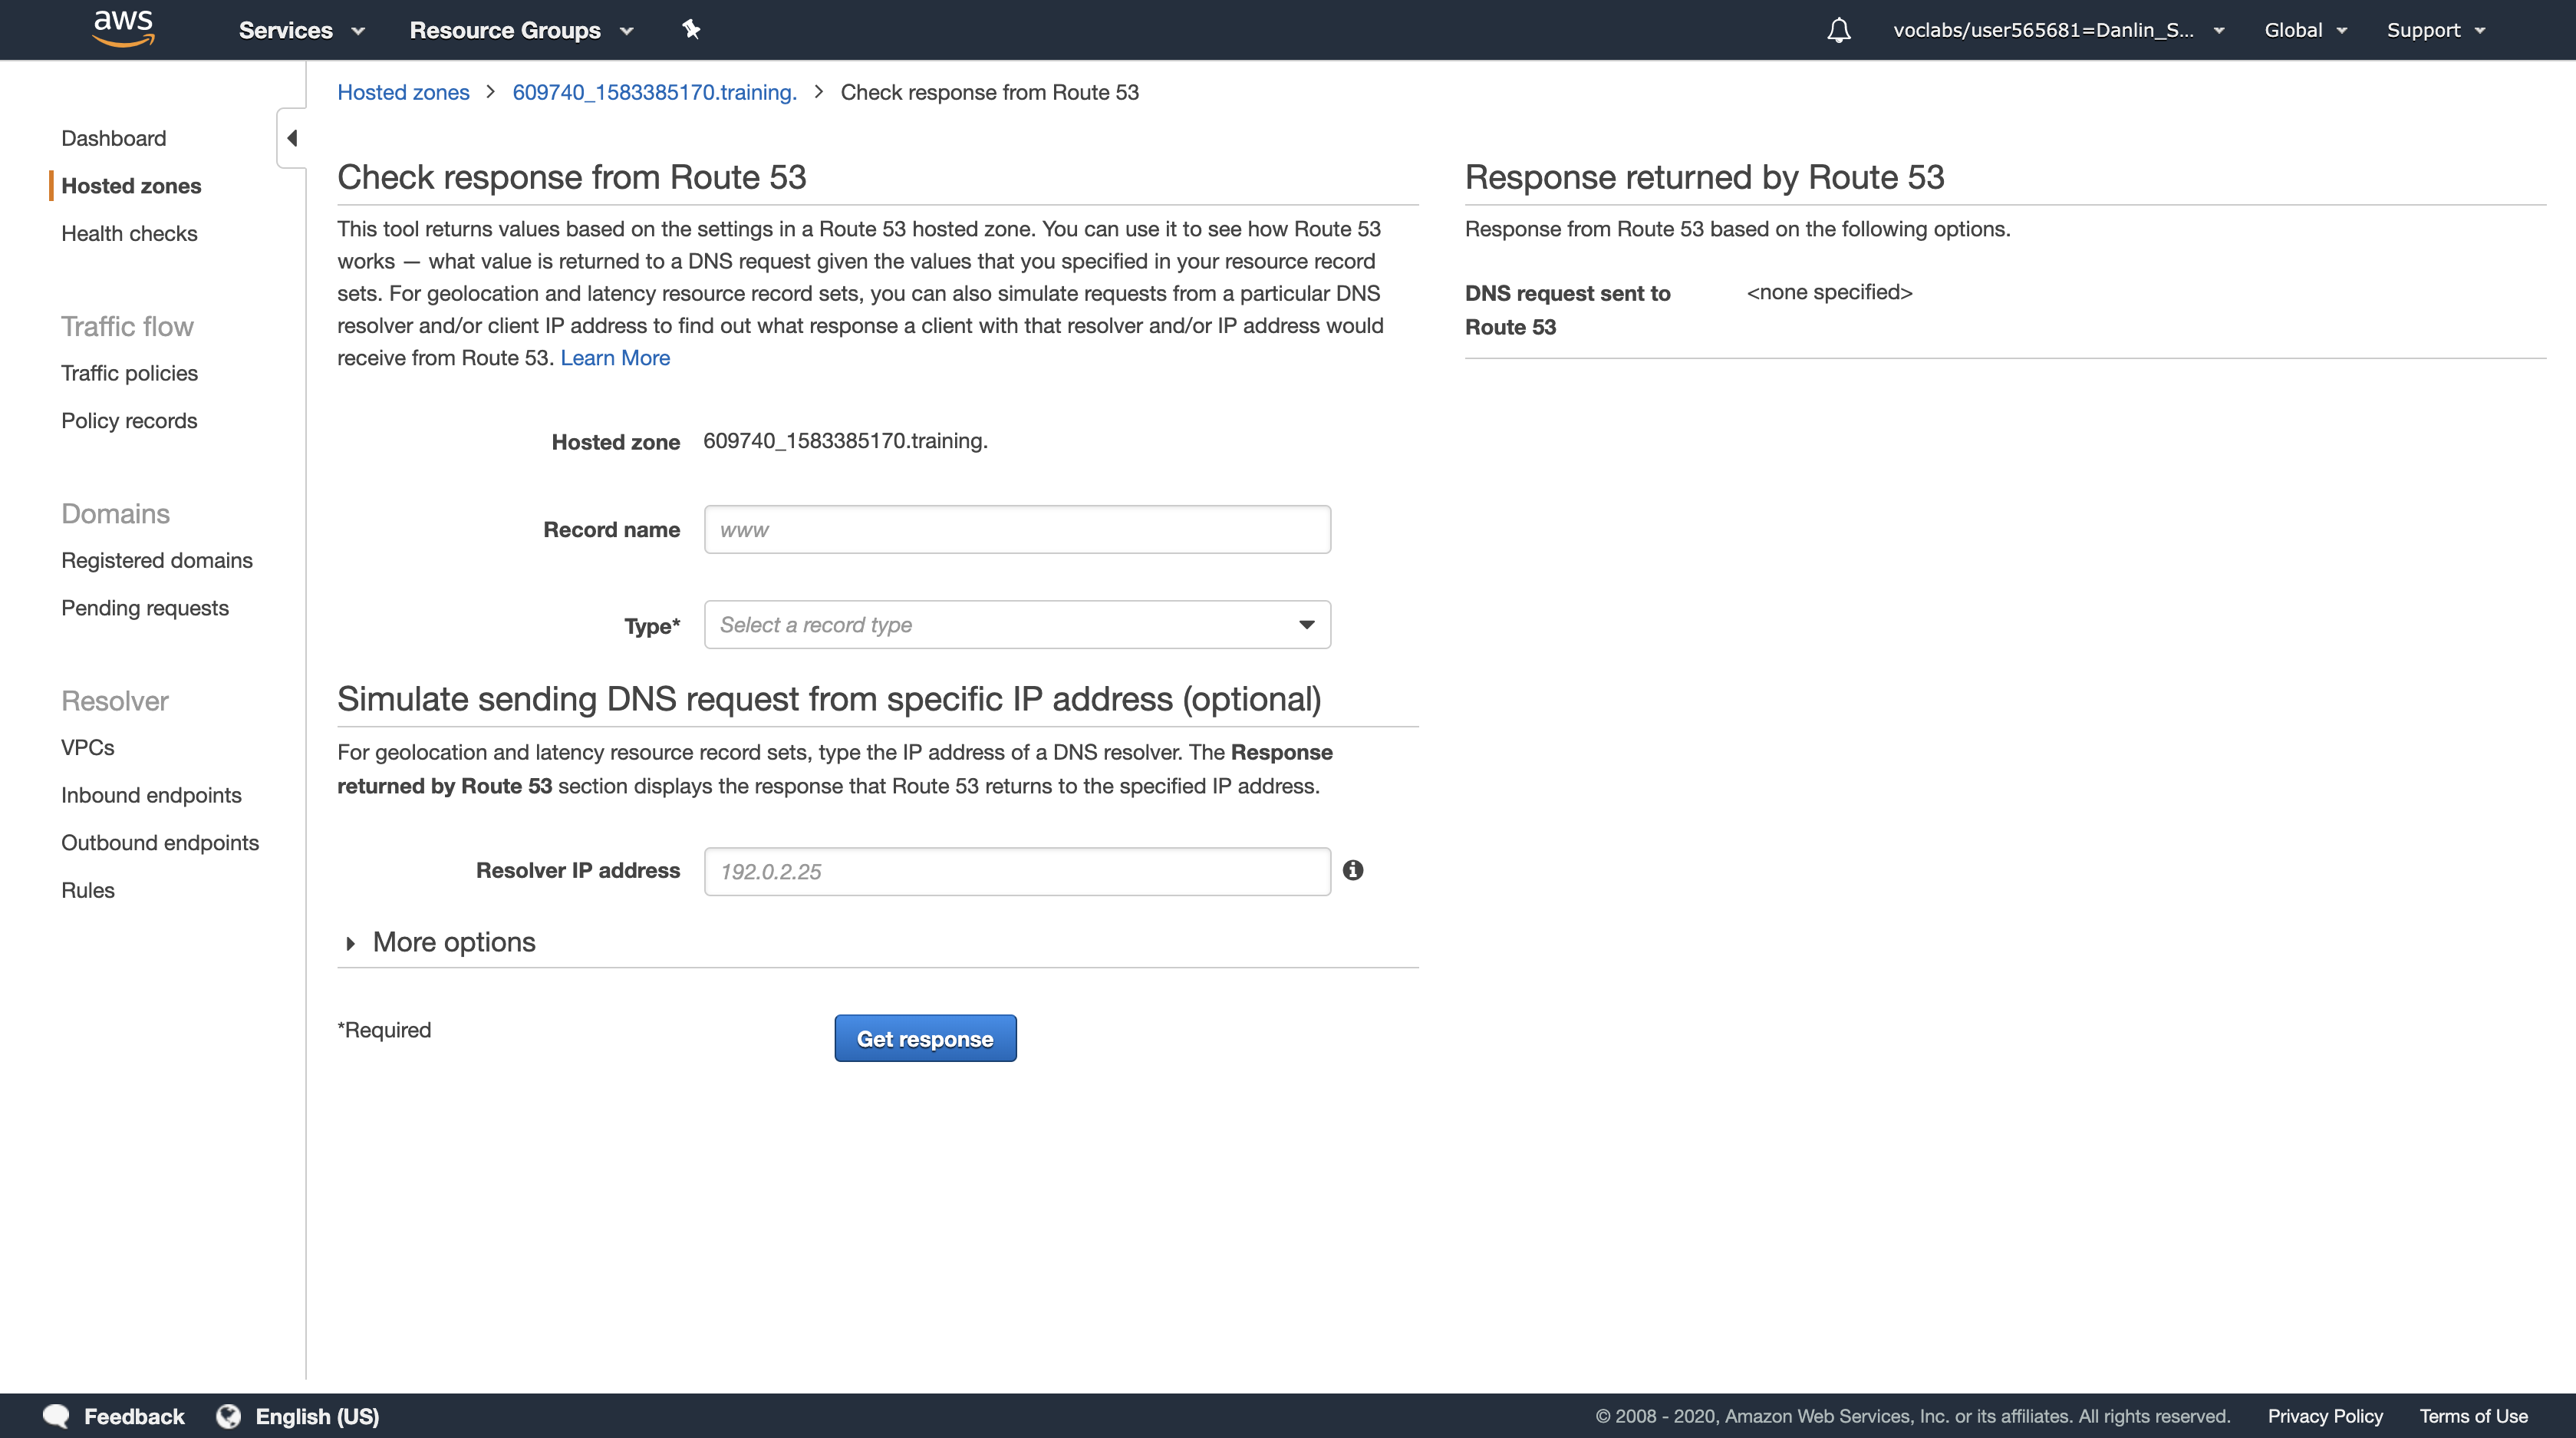
In Check response from Route 53, configure the following settings (and ignore any settings that aren’t listed):
- Record name:
www - Type: A

Click Get response.
- The DNS response will be tested, with the results appearing on the right side of the window.
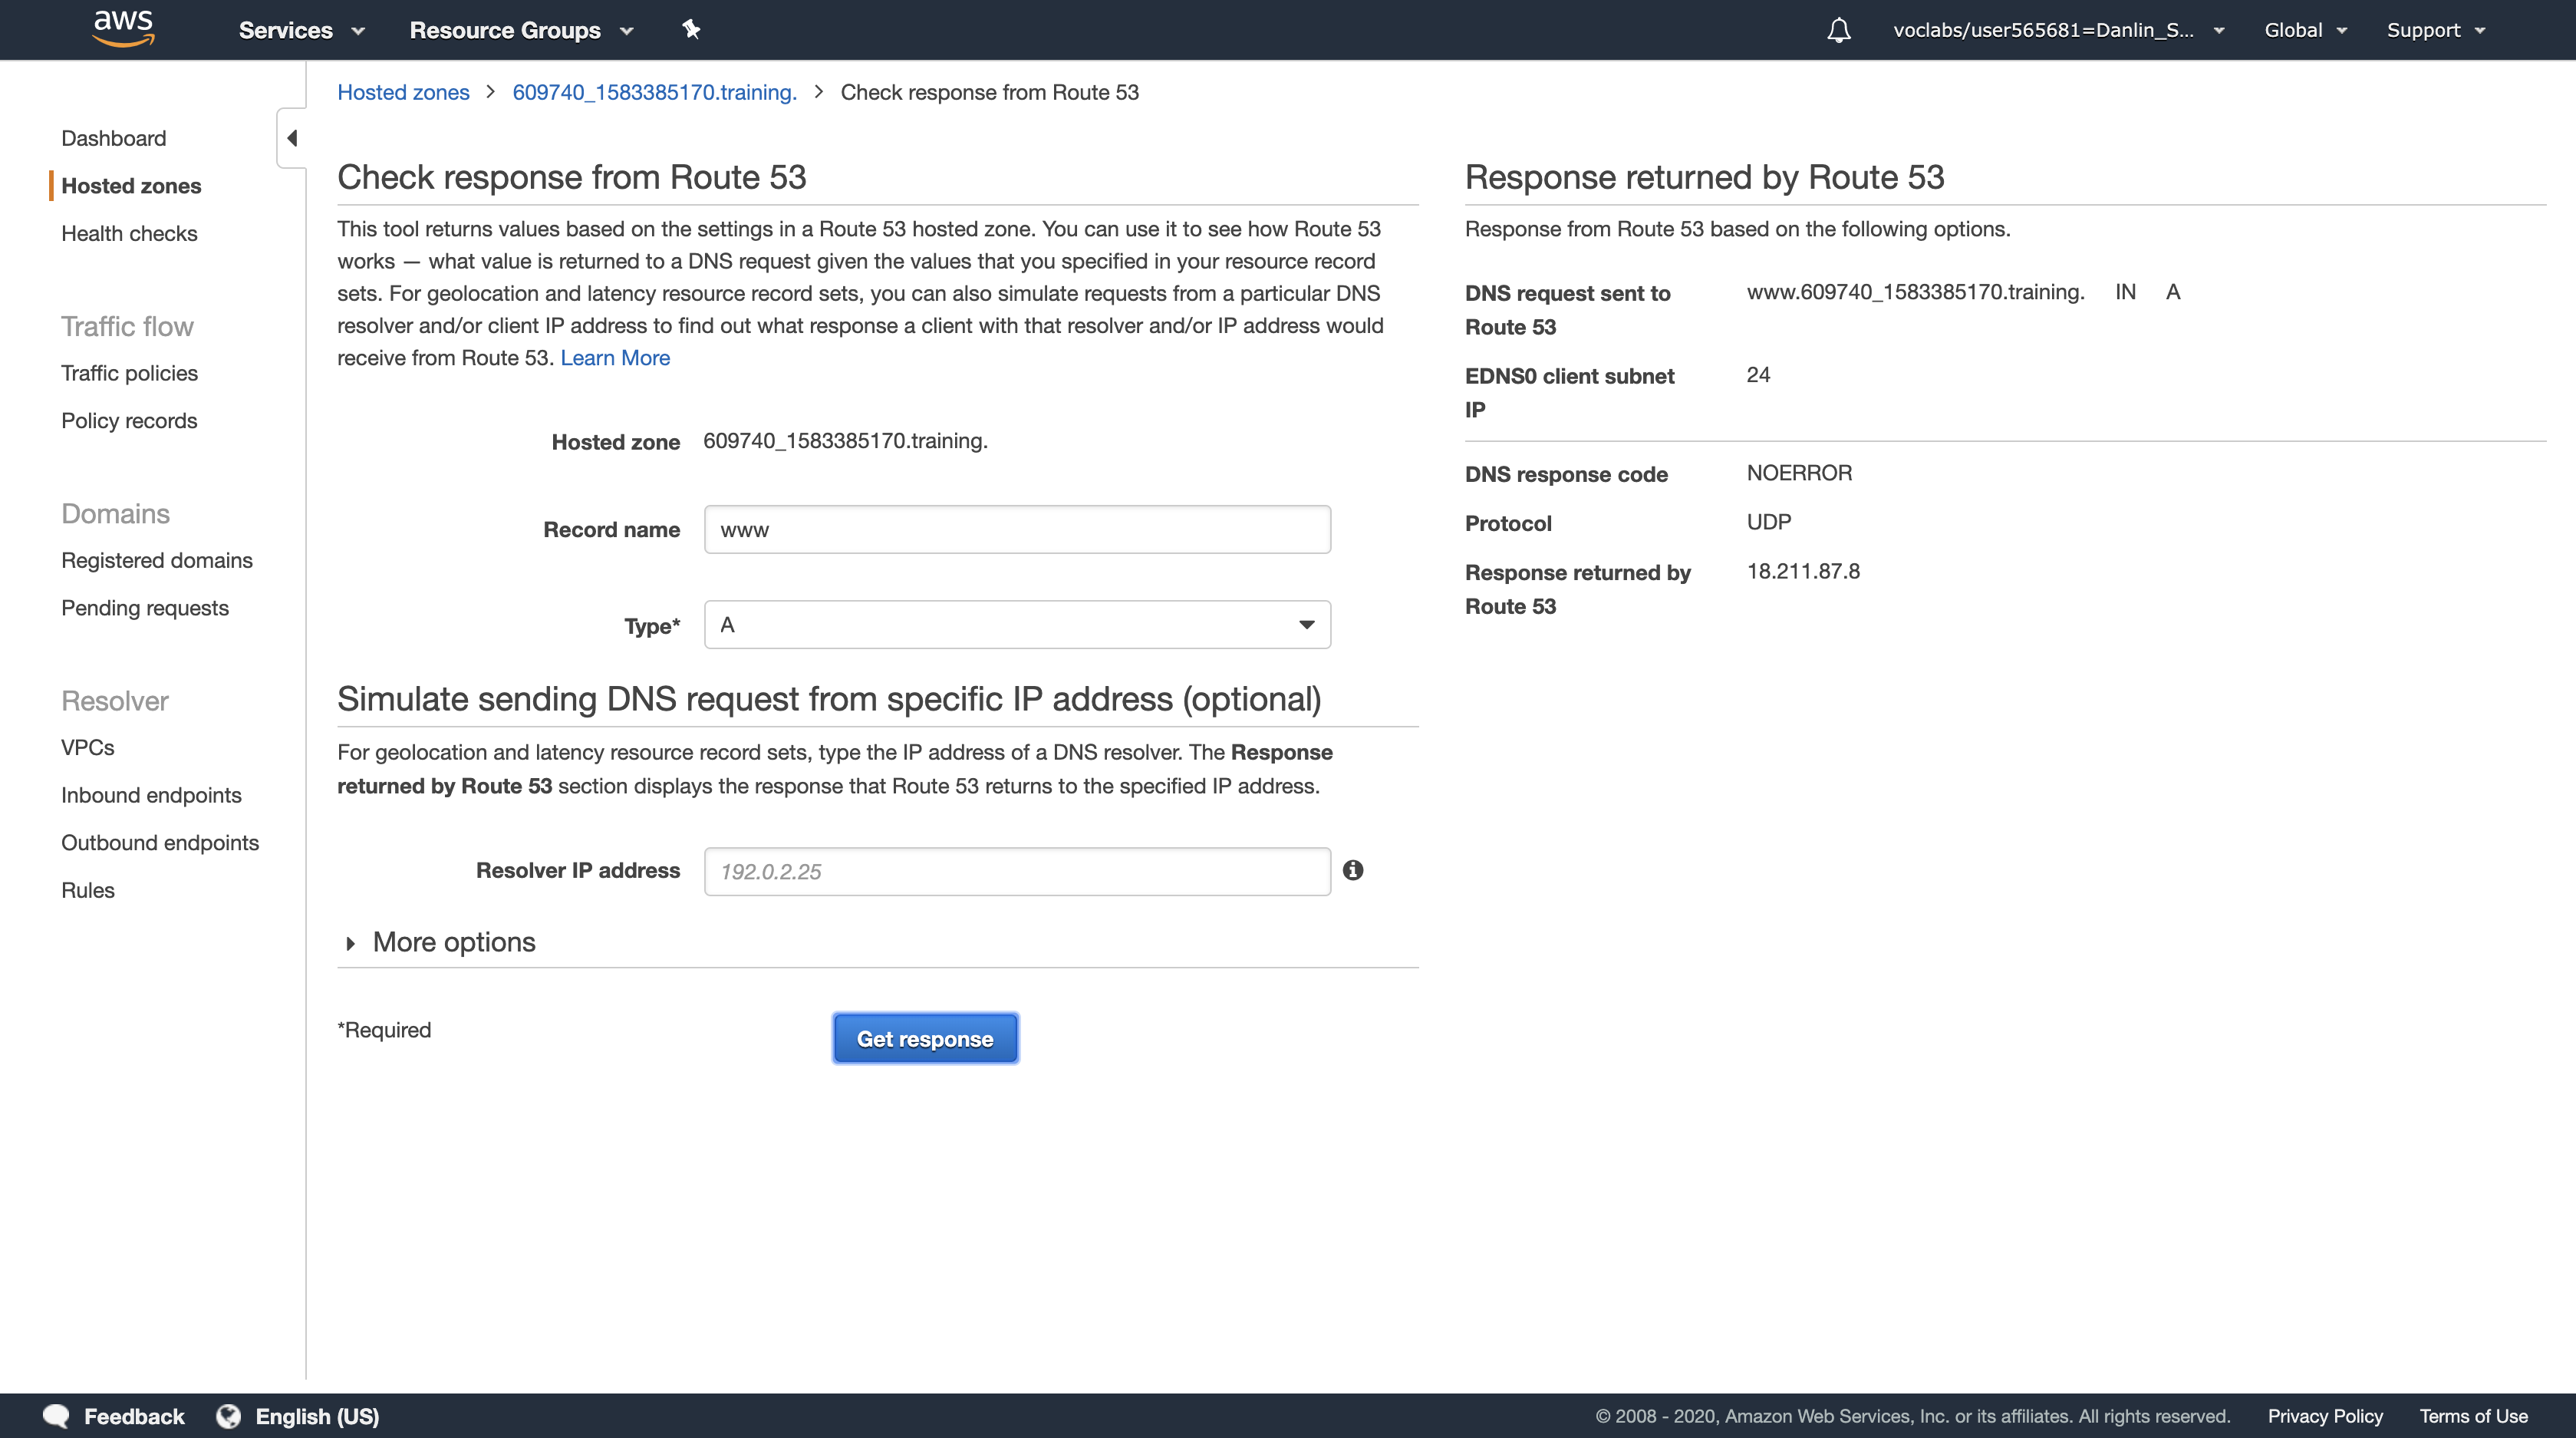
Look at the Response returned by Route 53 value. Confirm that it is the same IP address as your Primary web server.
- If correct IP address is not displayed, ask your instructor for assistance in debugging the configuration.
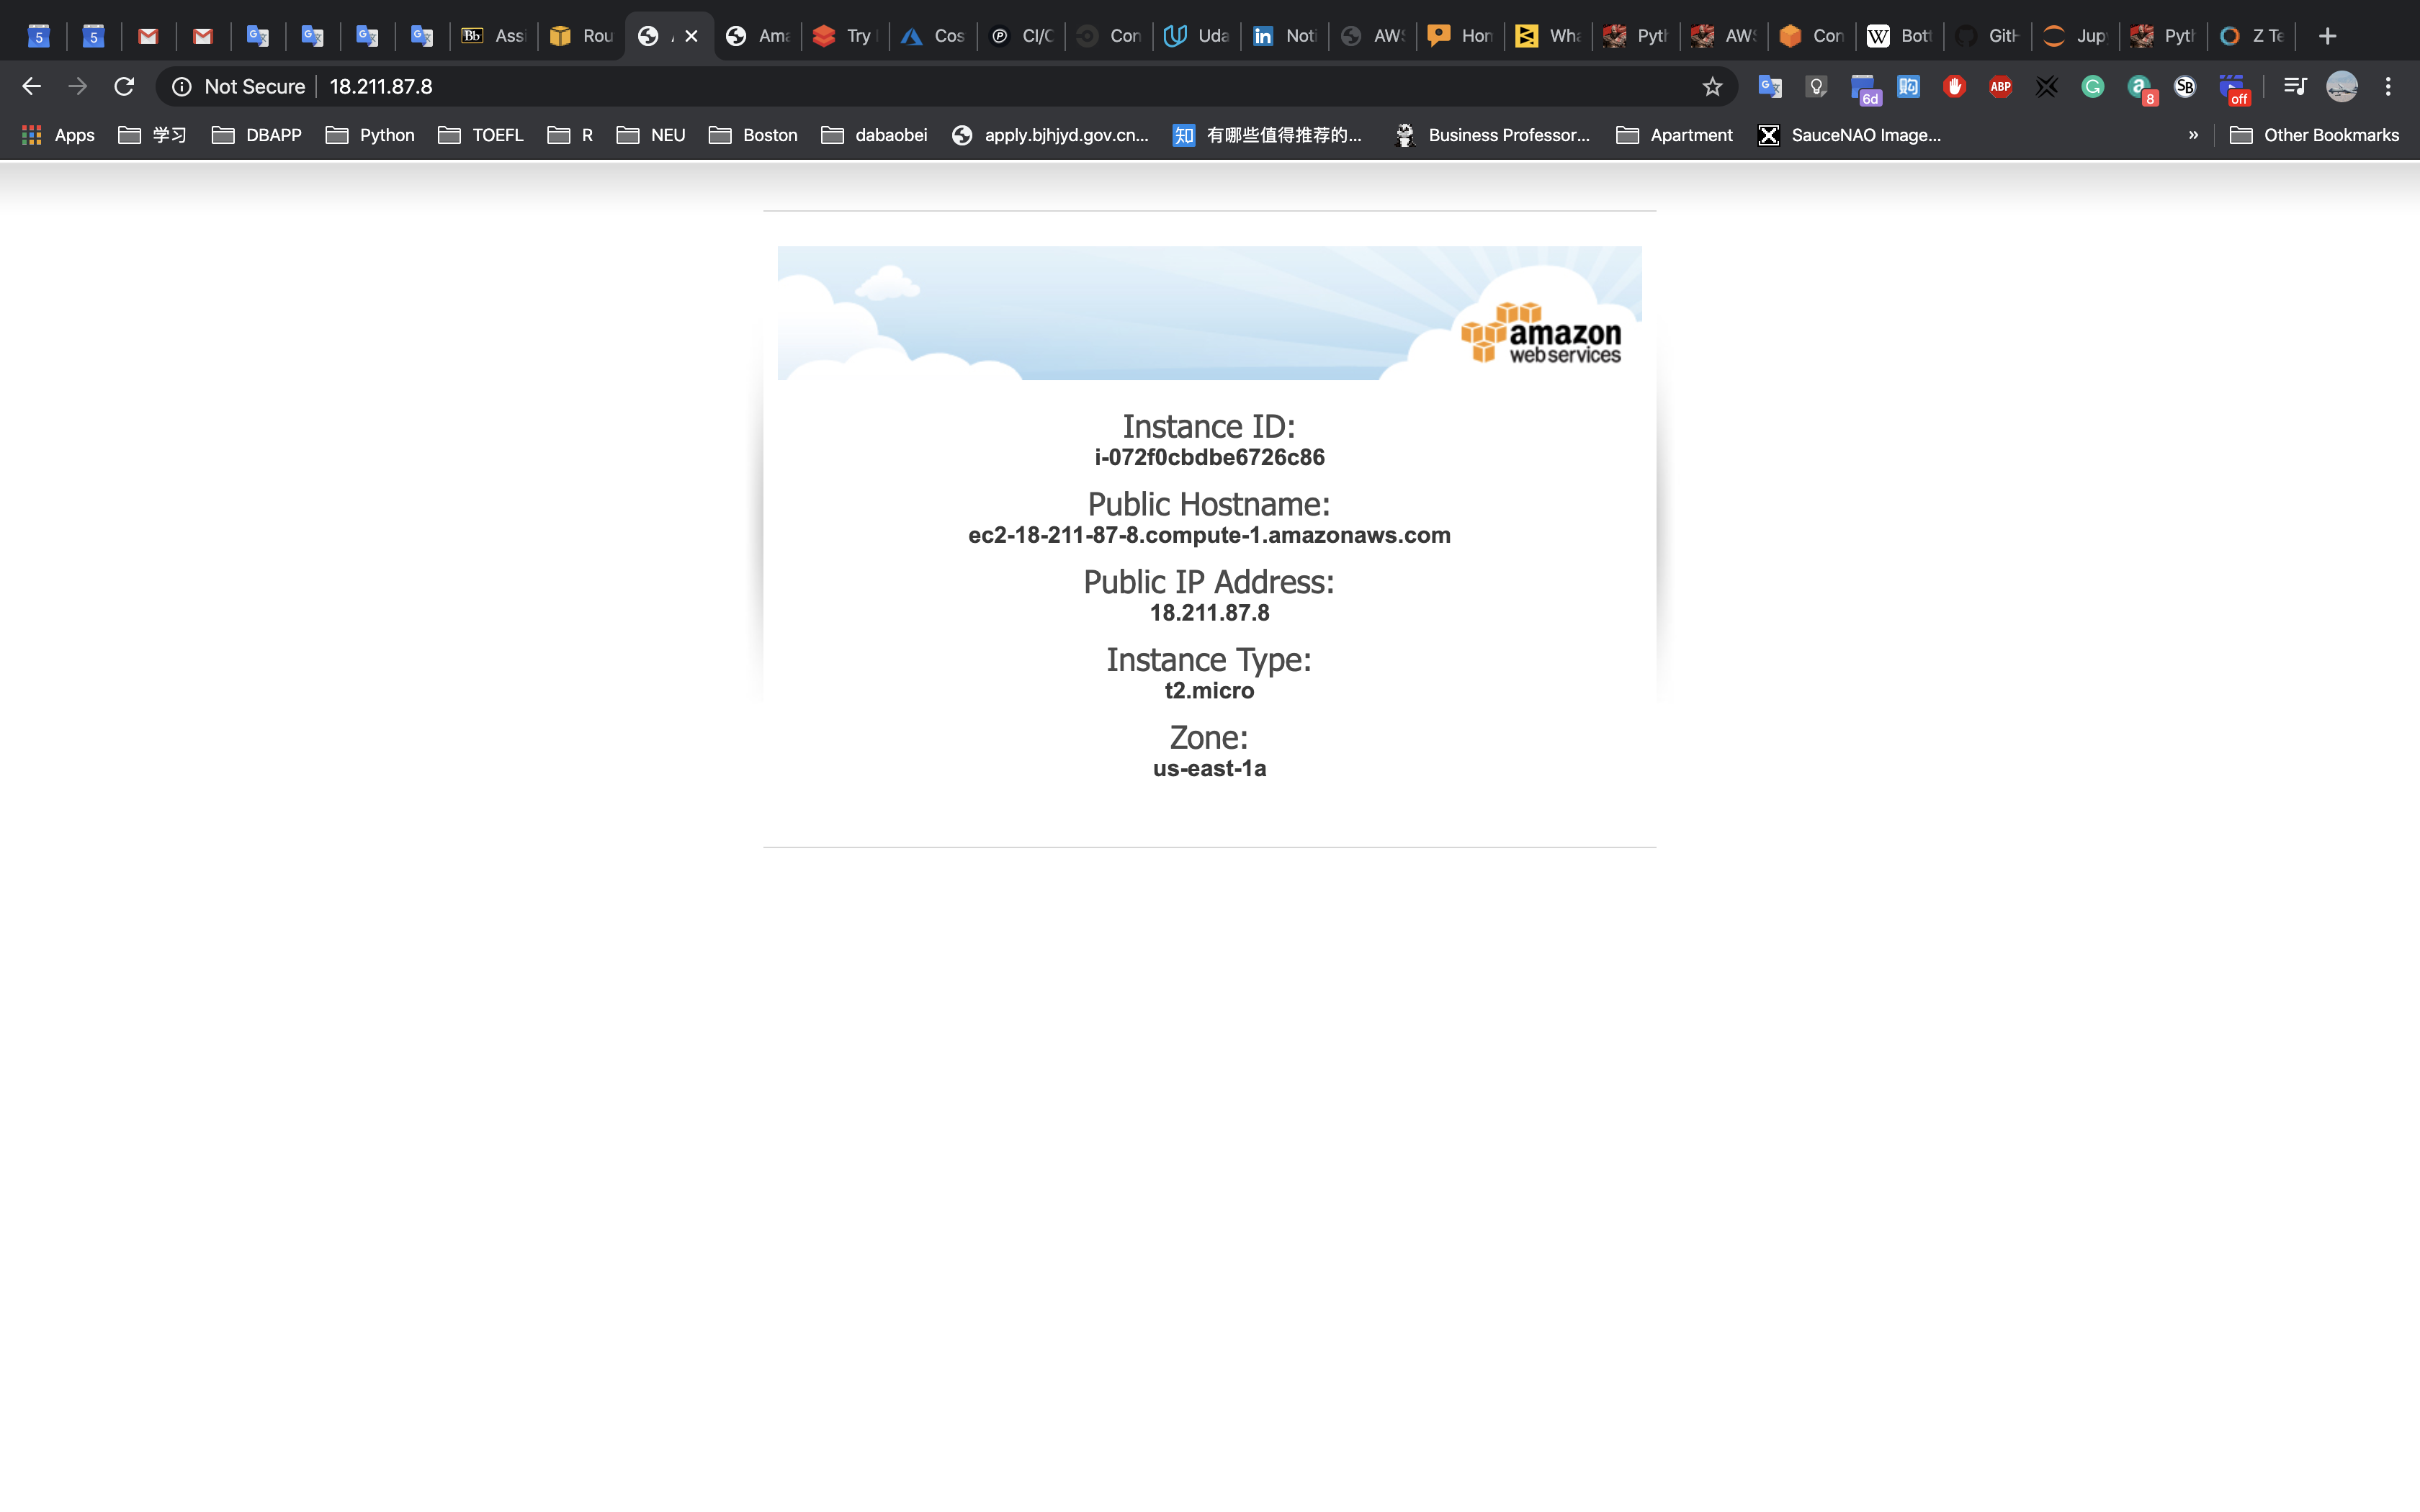
The fact that your Domain resolved to the IP address of your Primary web server means that requests to your domain will be routed by default to that web server.
Task 5 - Test Your Failover
In this task, you will verify that Amazon Route 53 correctly fails over to your Secondary web server if your Primary web server fails. You will simulate a failure by manually stopping the instance in your primary region.
Services menu > click EC2.
Select your primary region from the region drop-down list in the top-right. (That is the region where you started the lab.)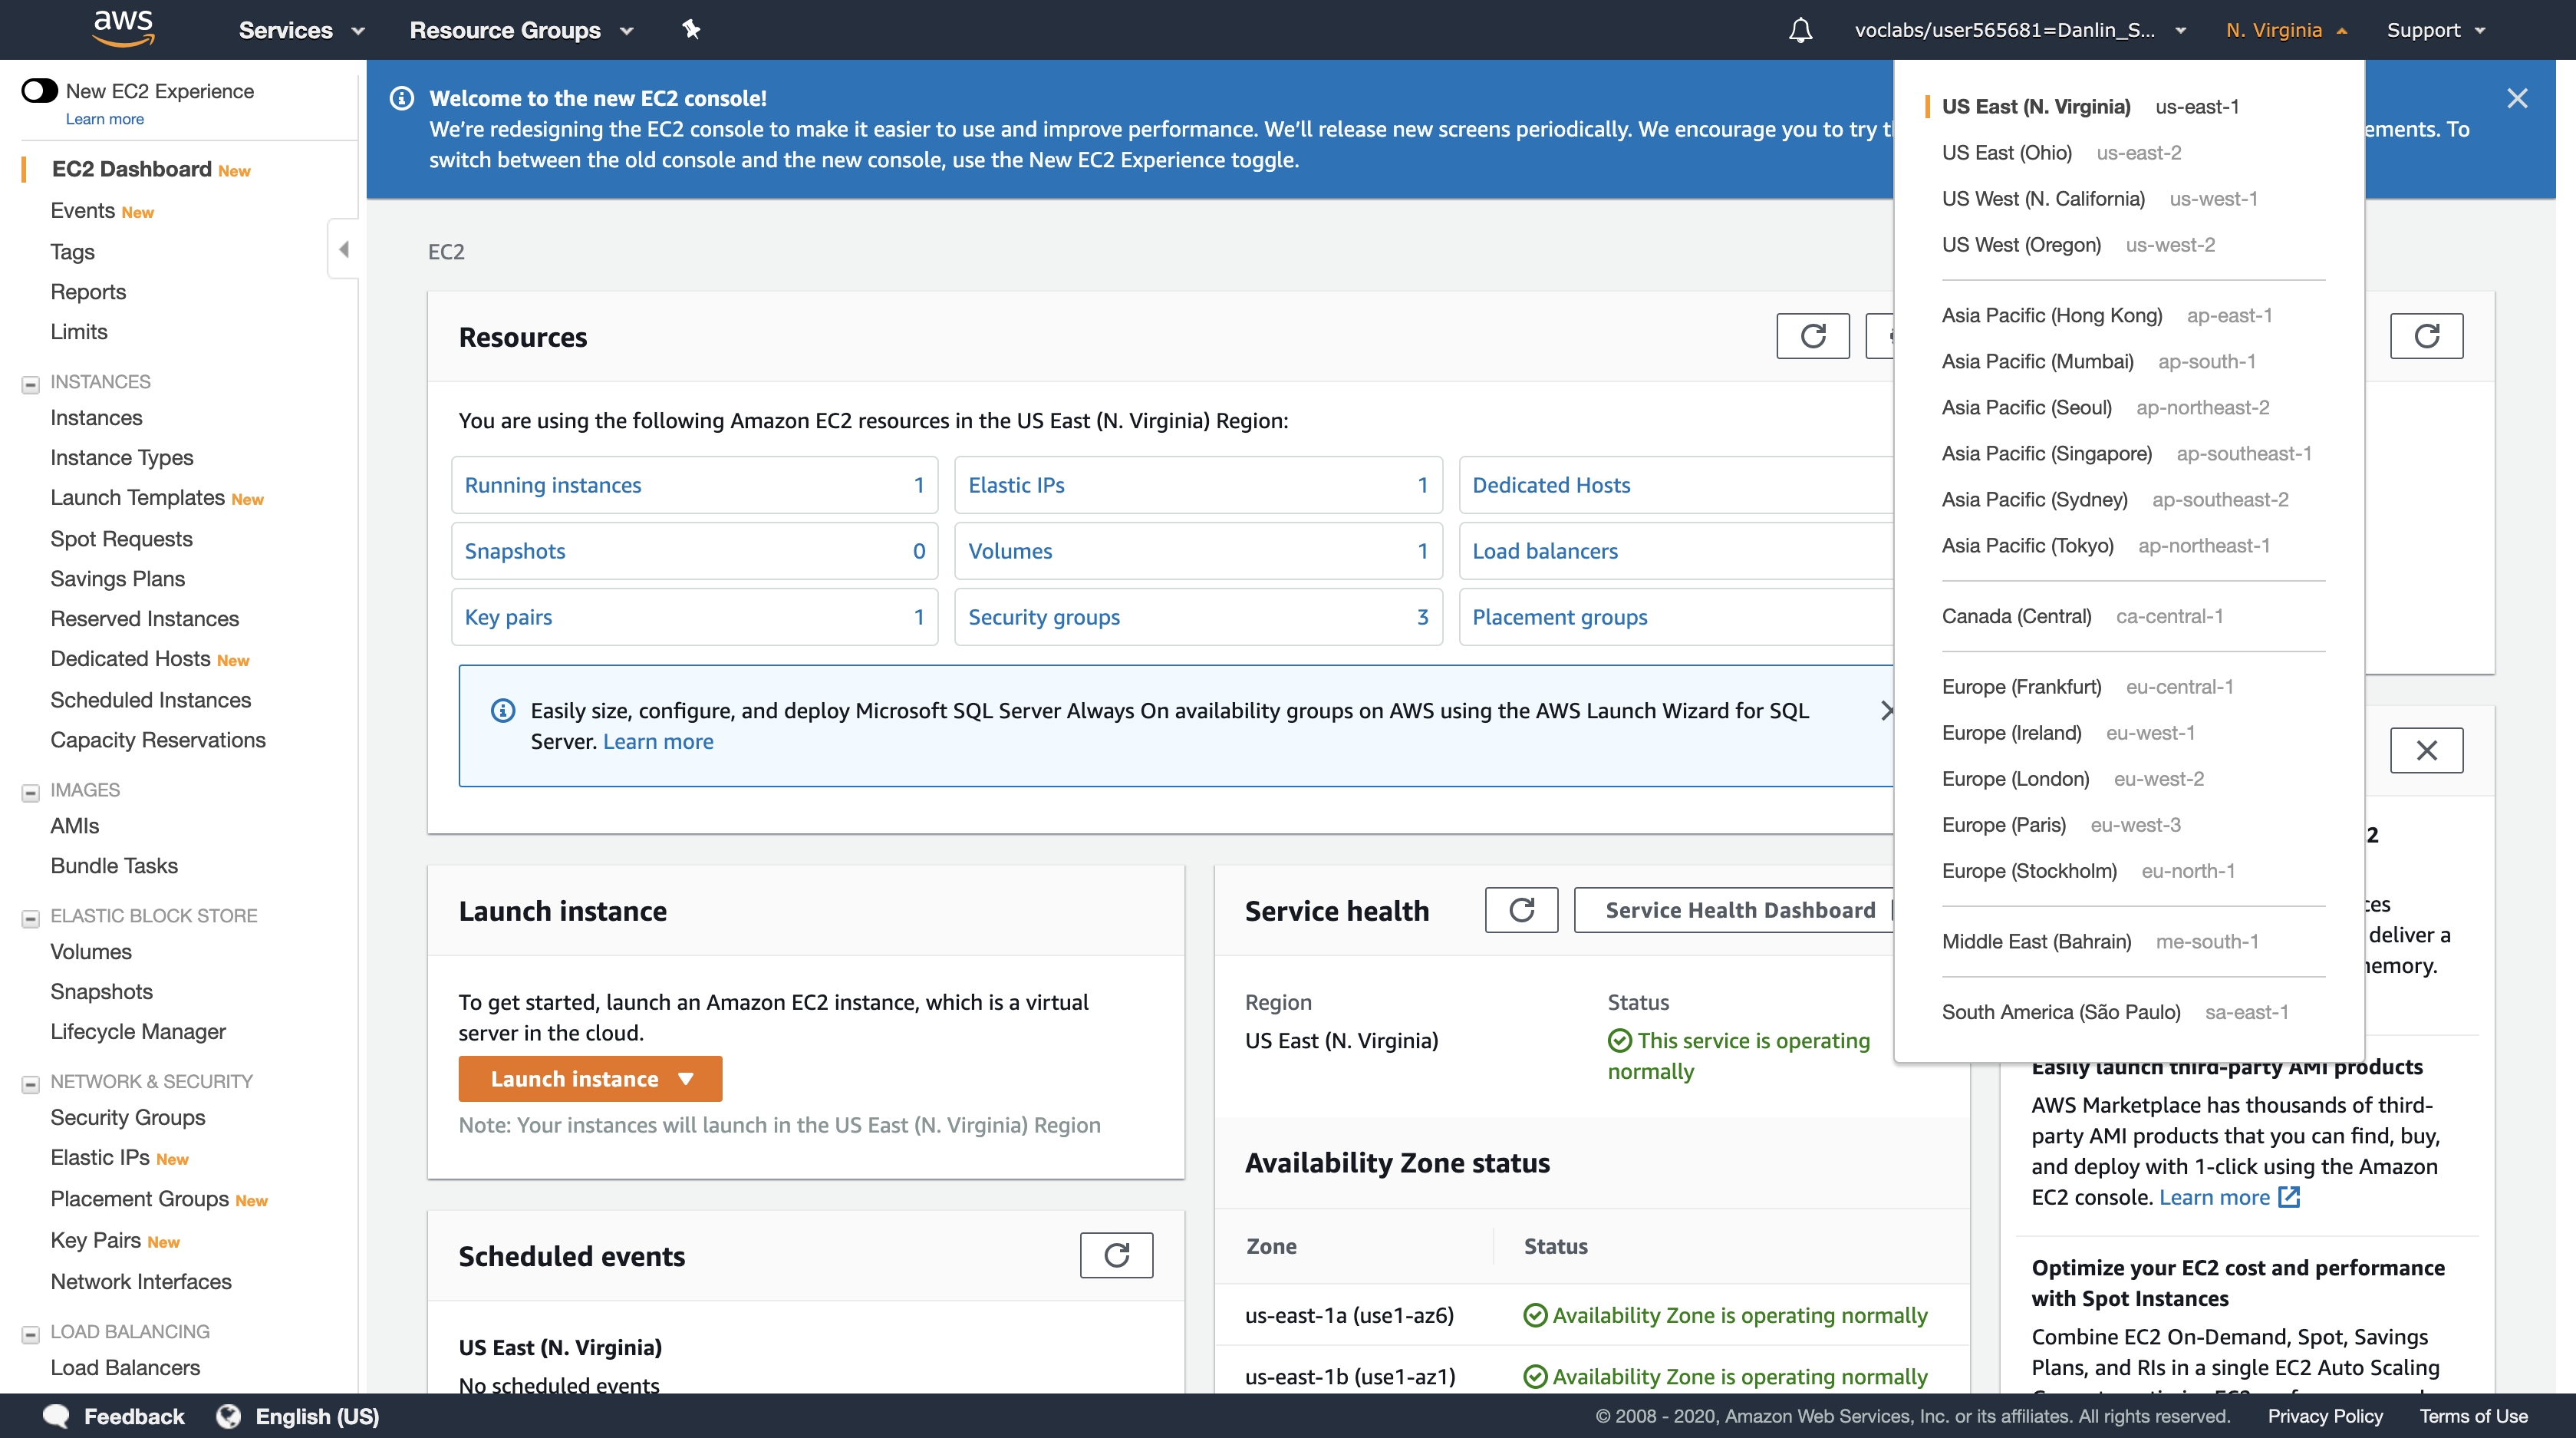
In the navigation pane > click Instances.
Right-click Web-Application-1, click Instance State, and click Stop.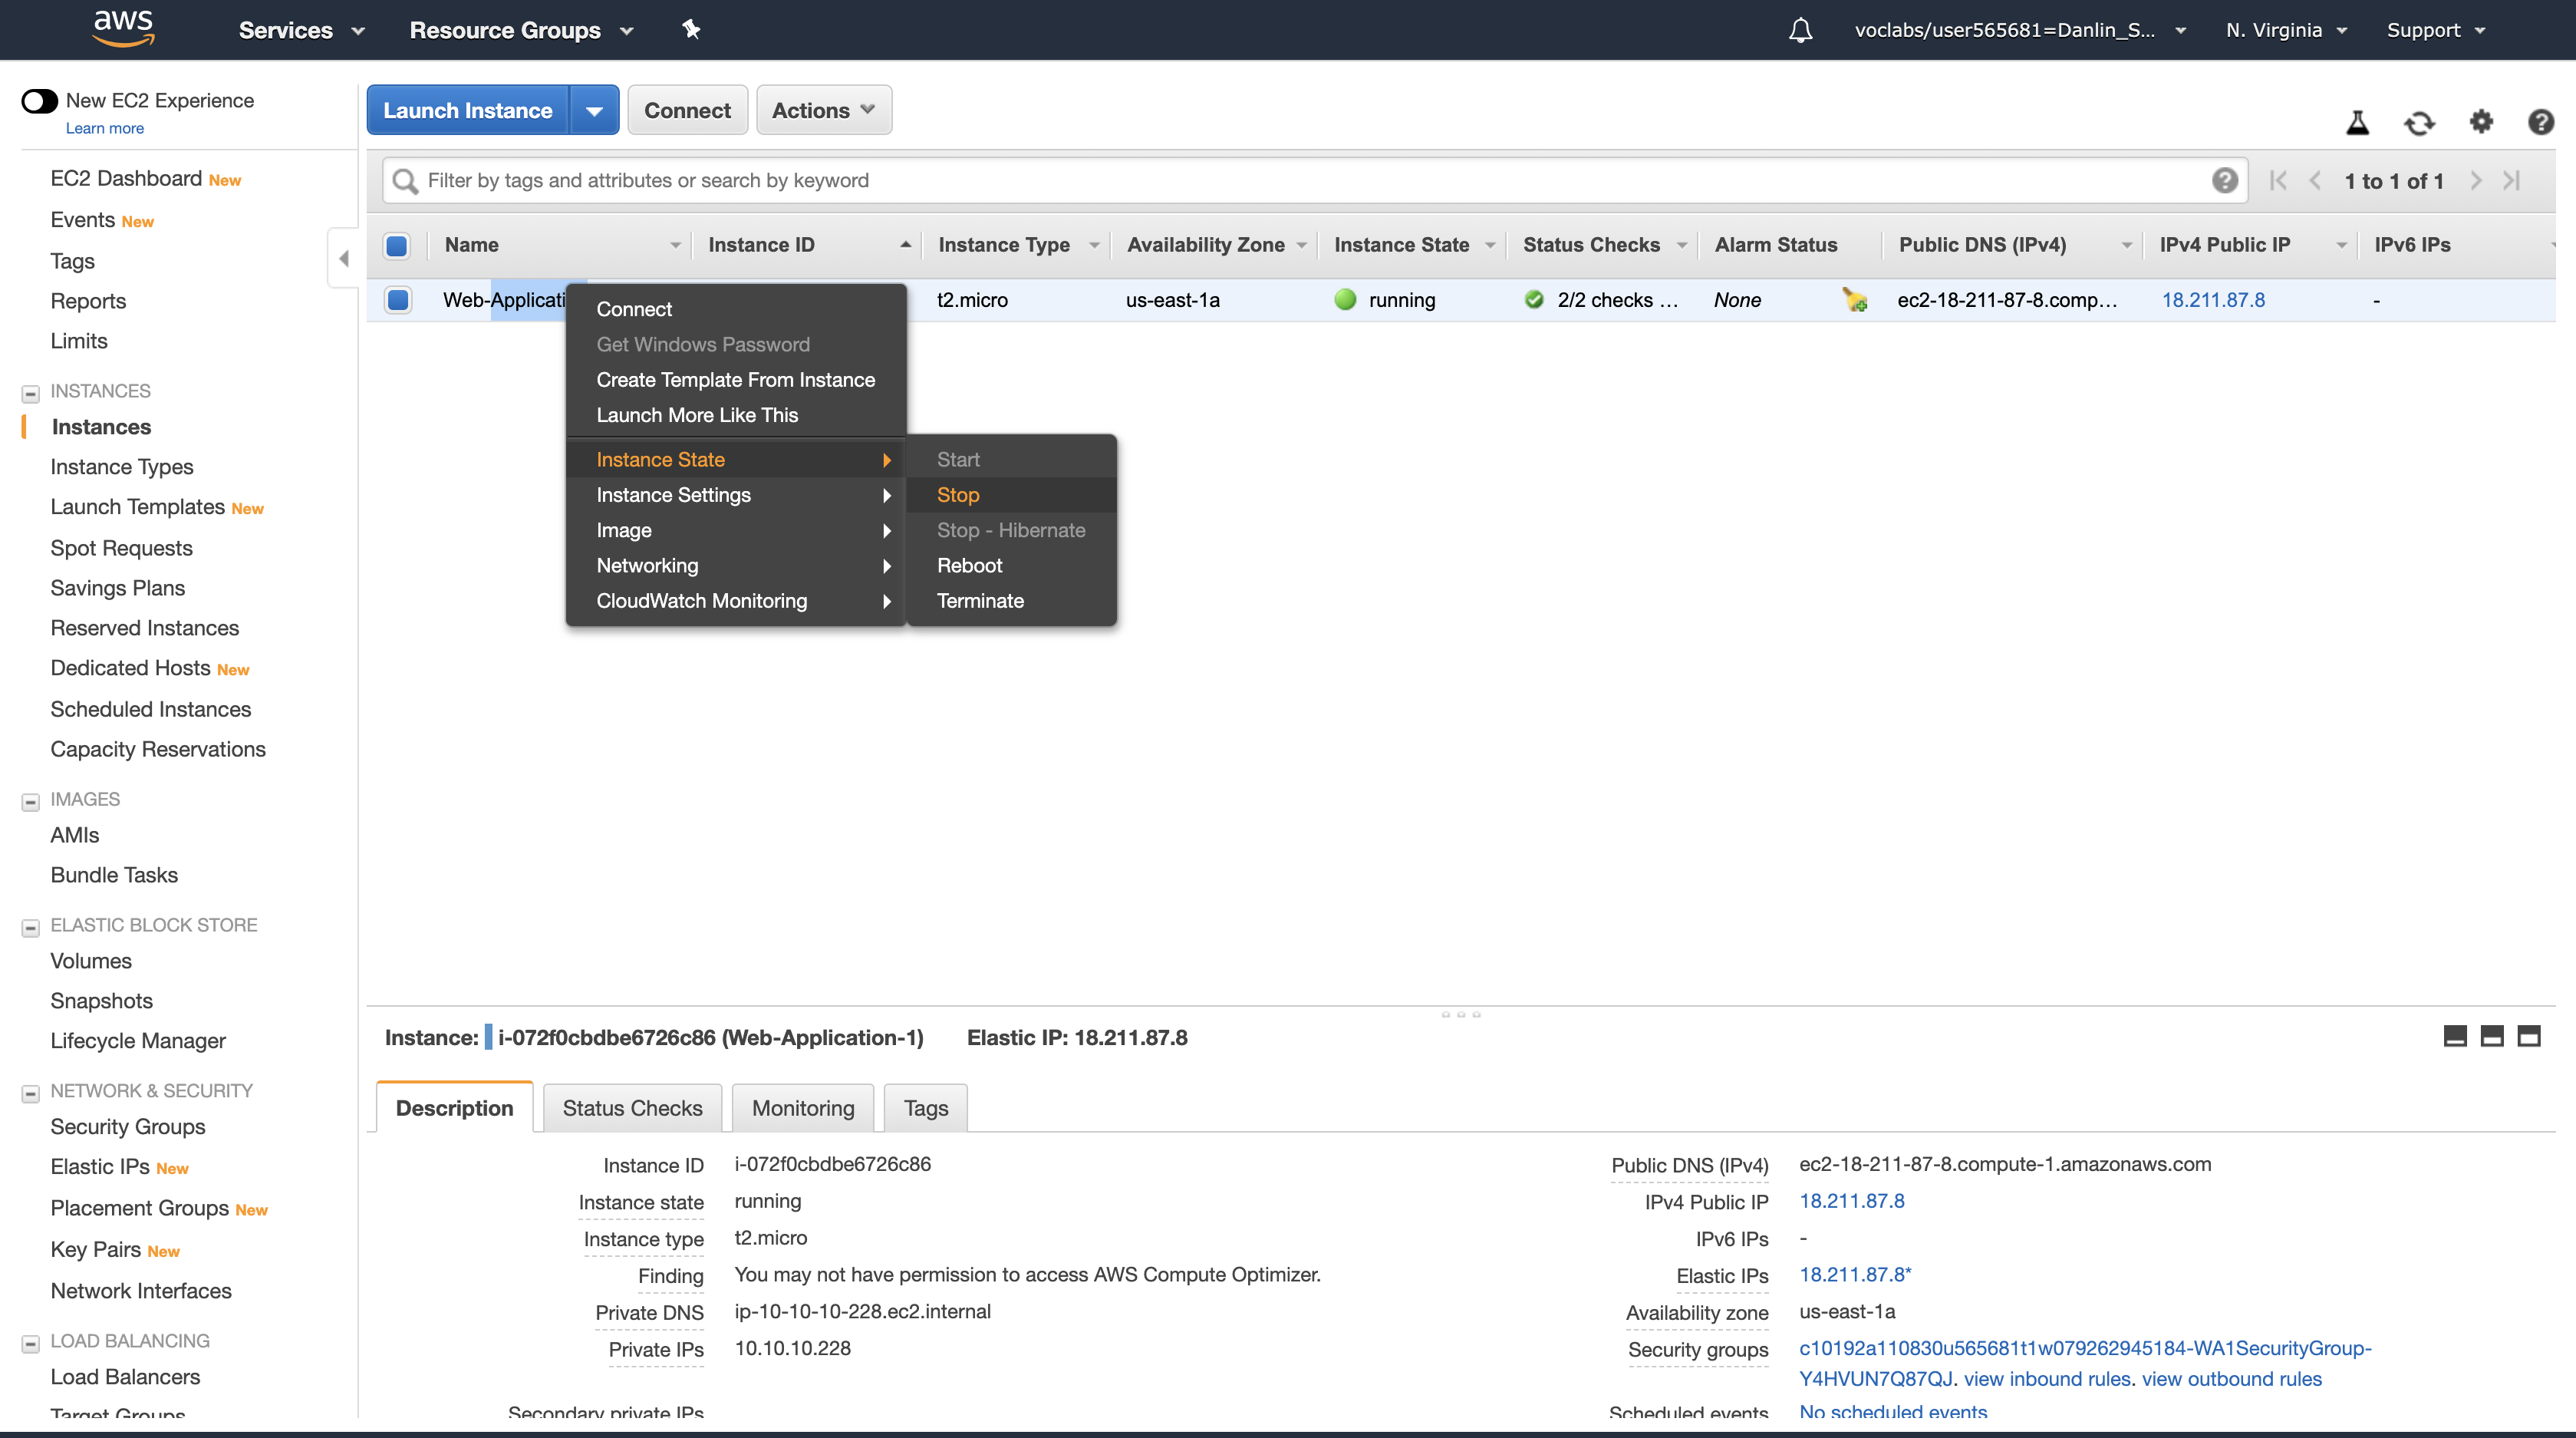
In the Stop Instances dialog box, click Yes, Stop.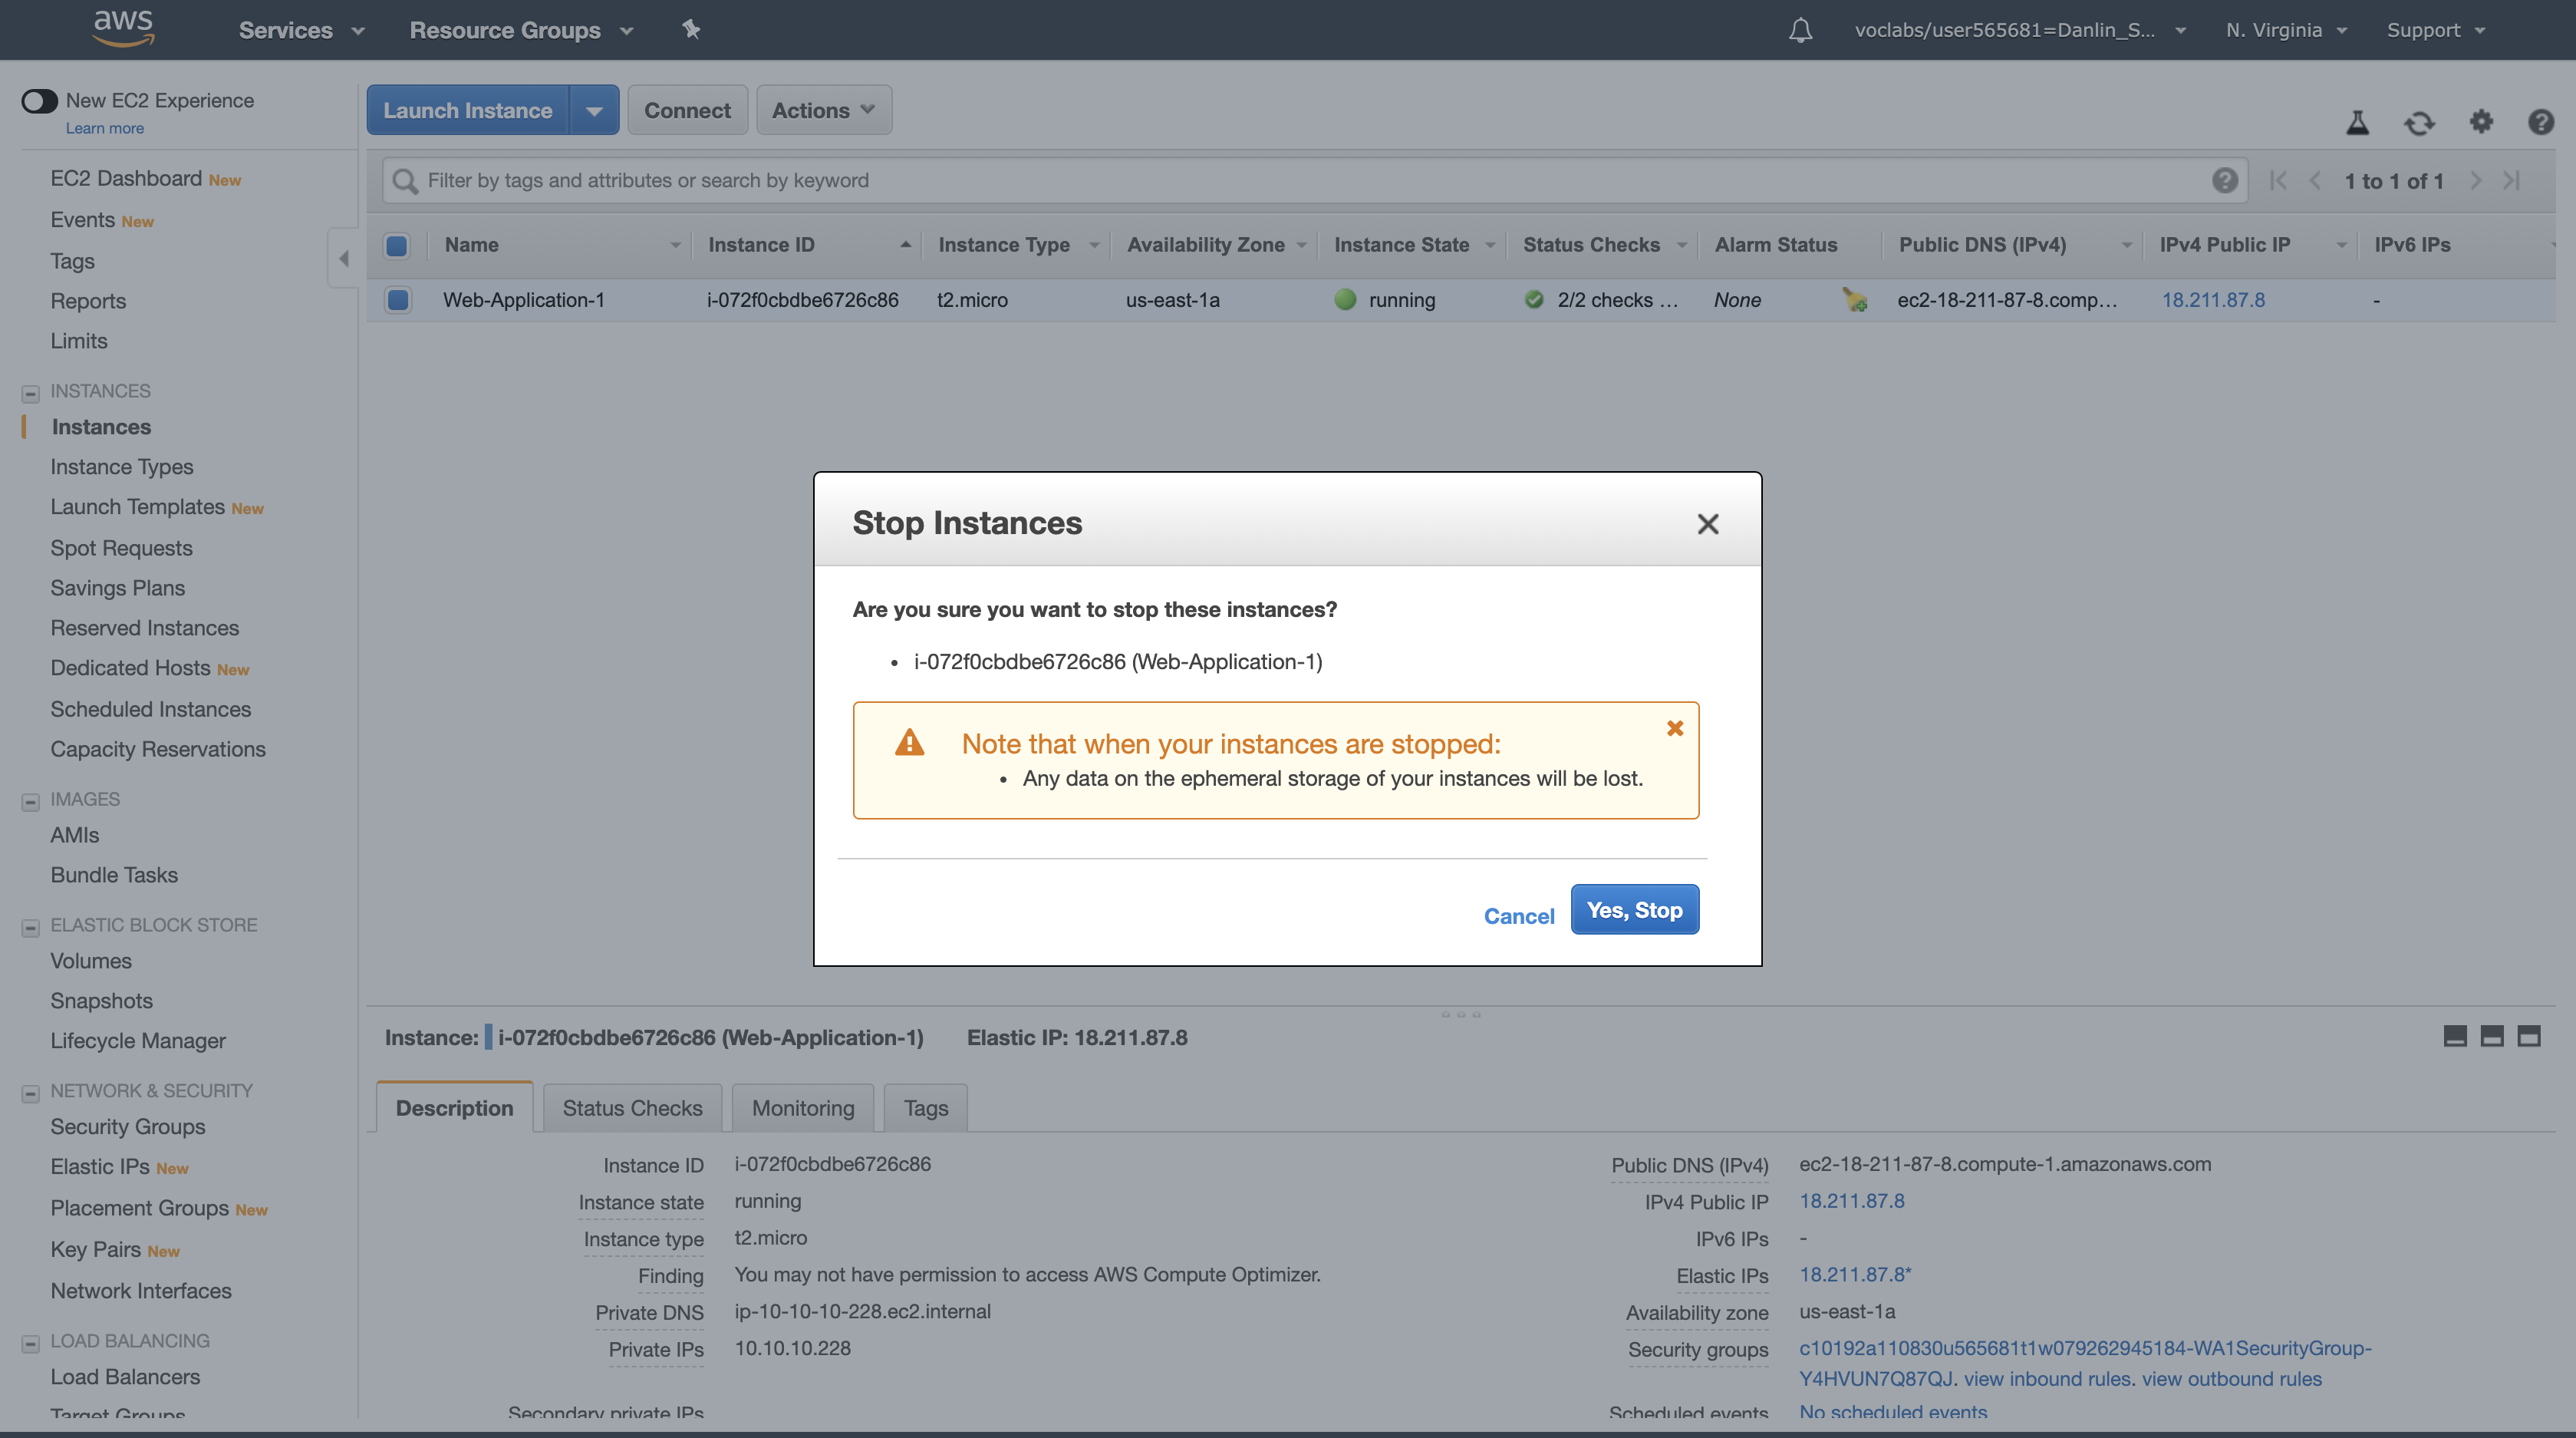
Wait until the instance state changes to stopped. (You may need to refresh the web page)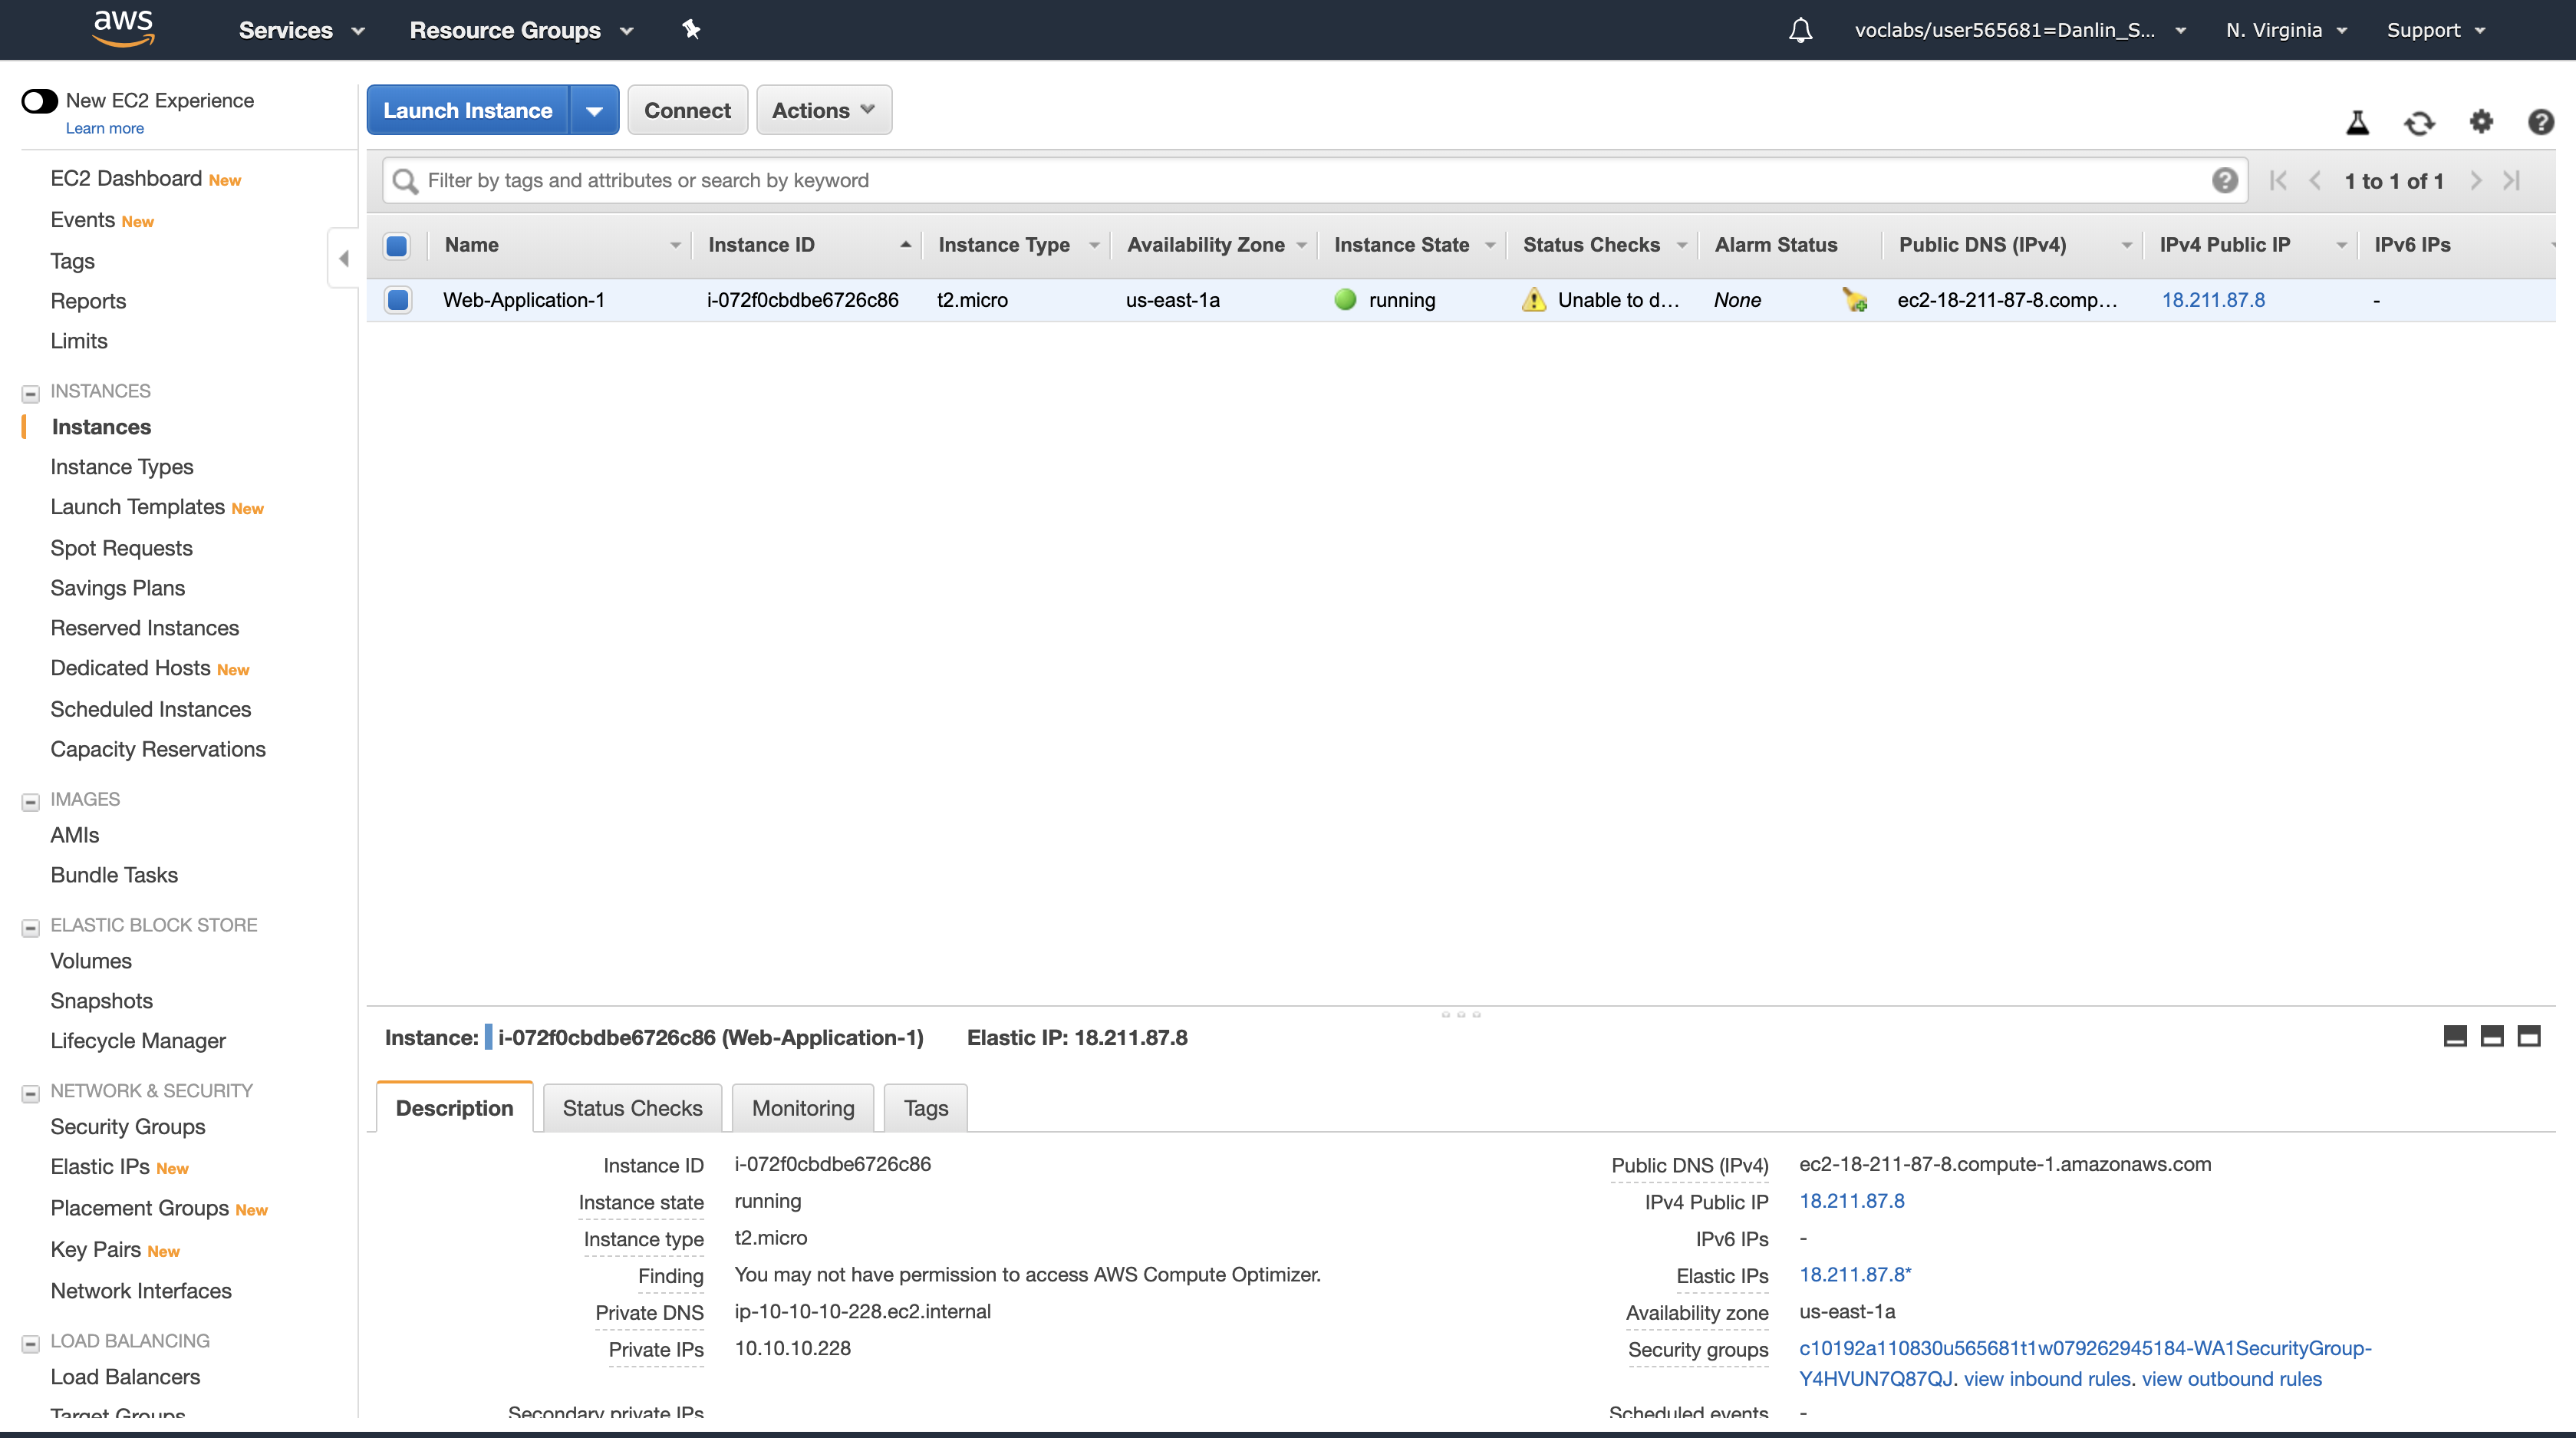
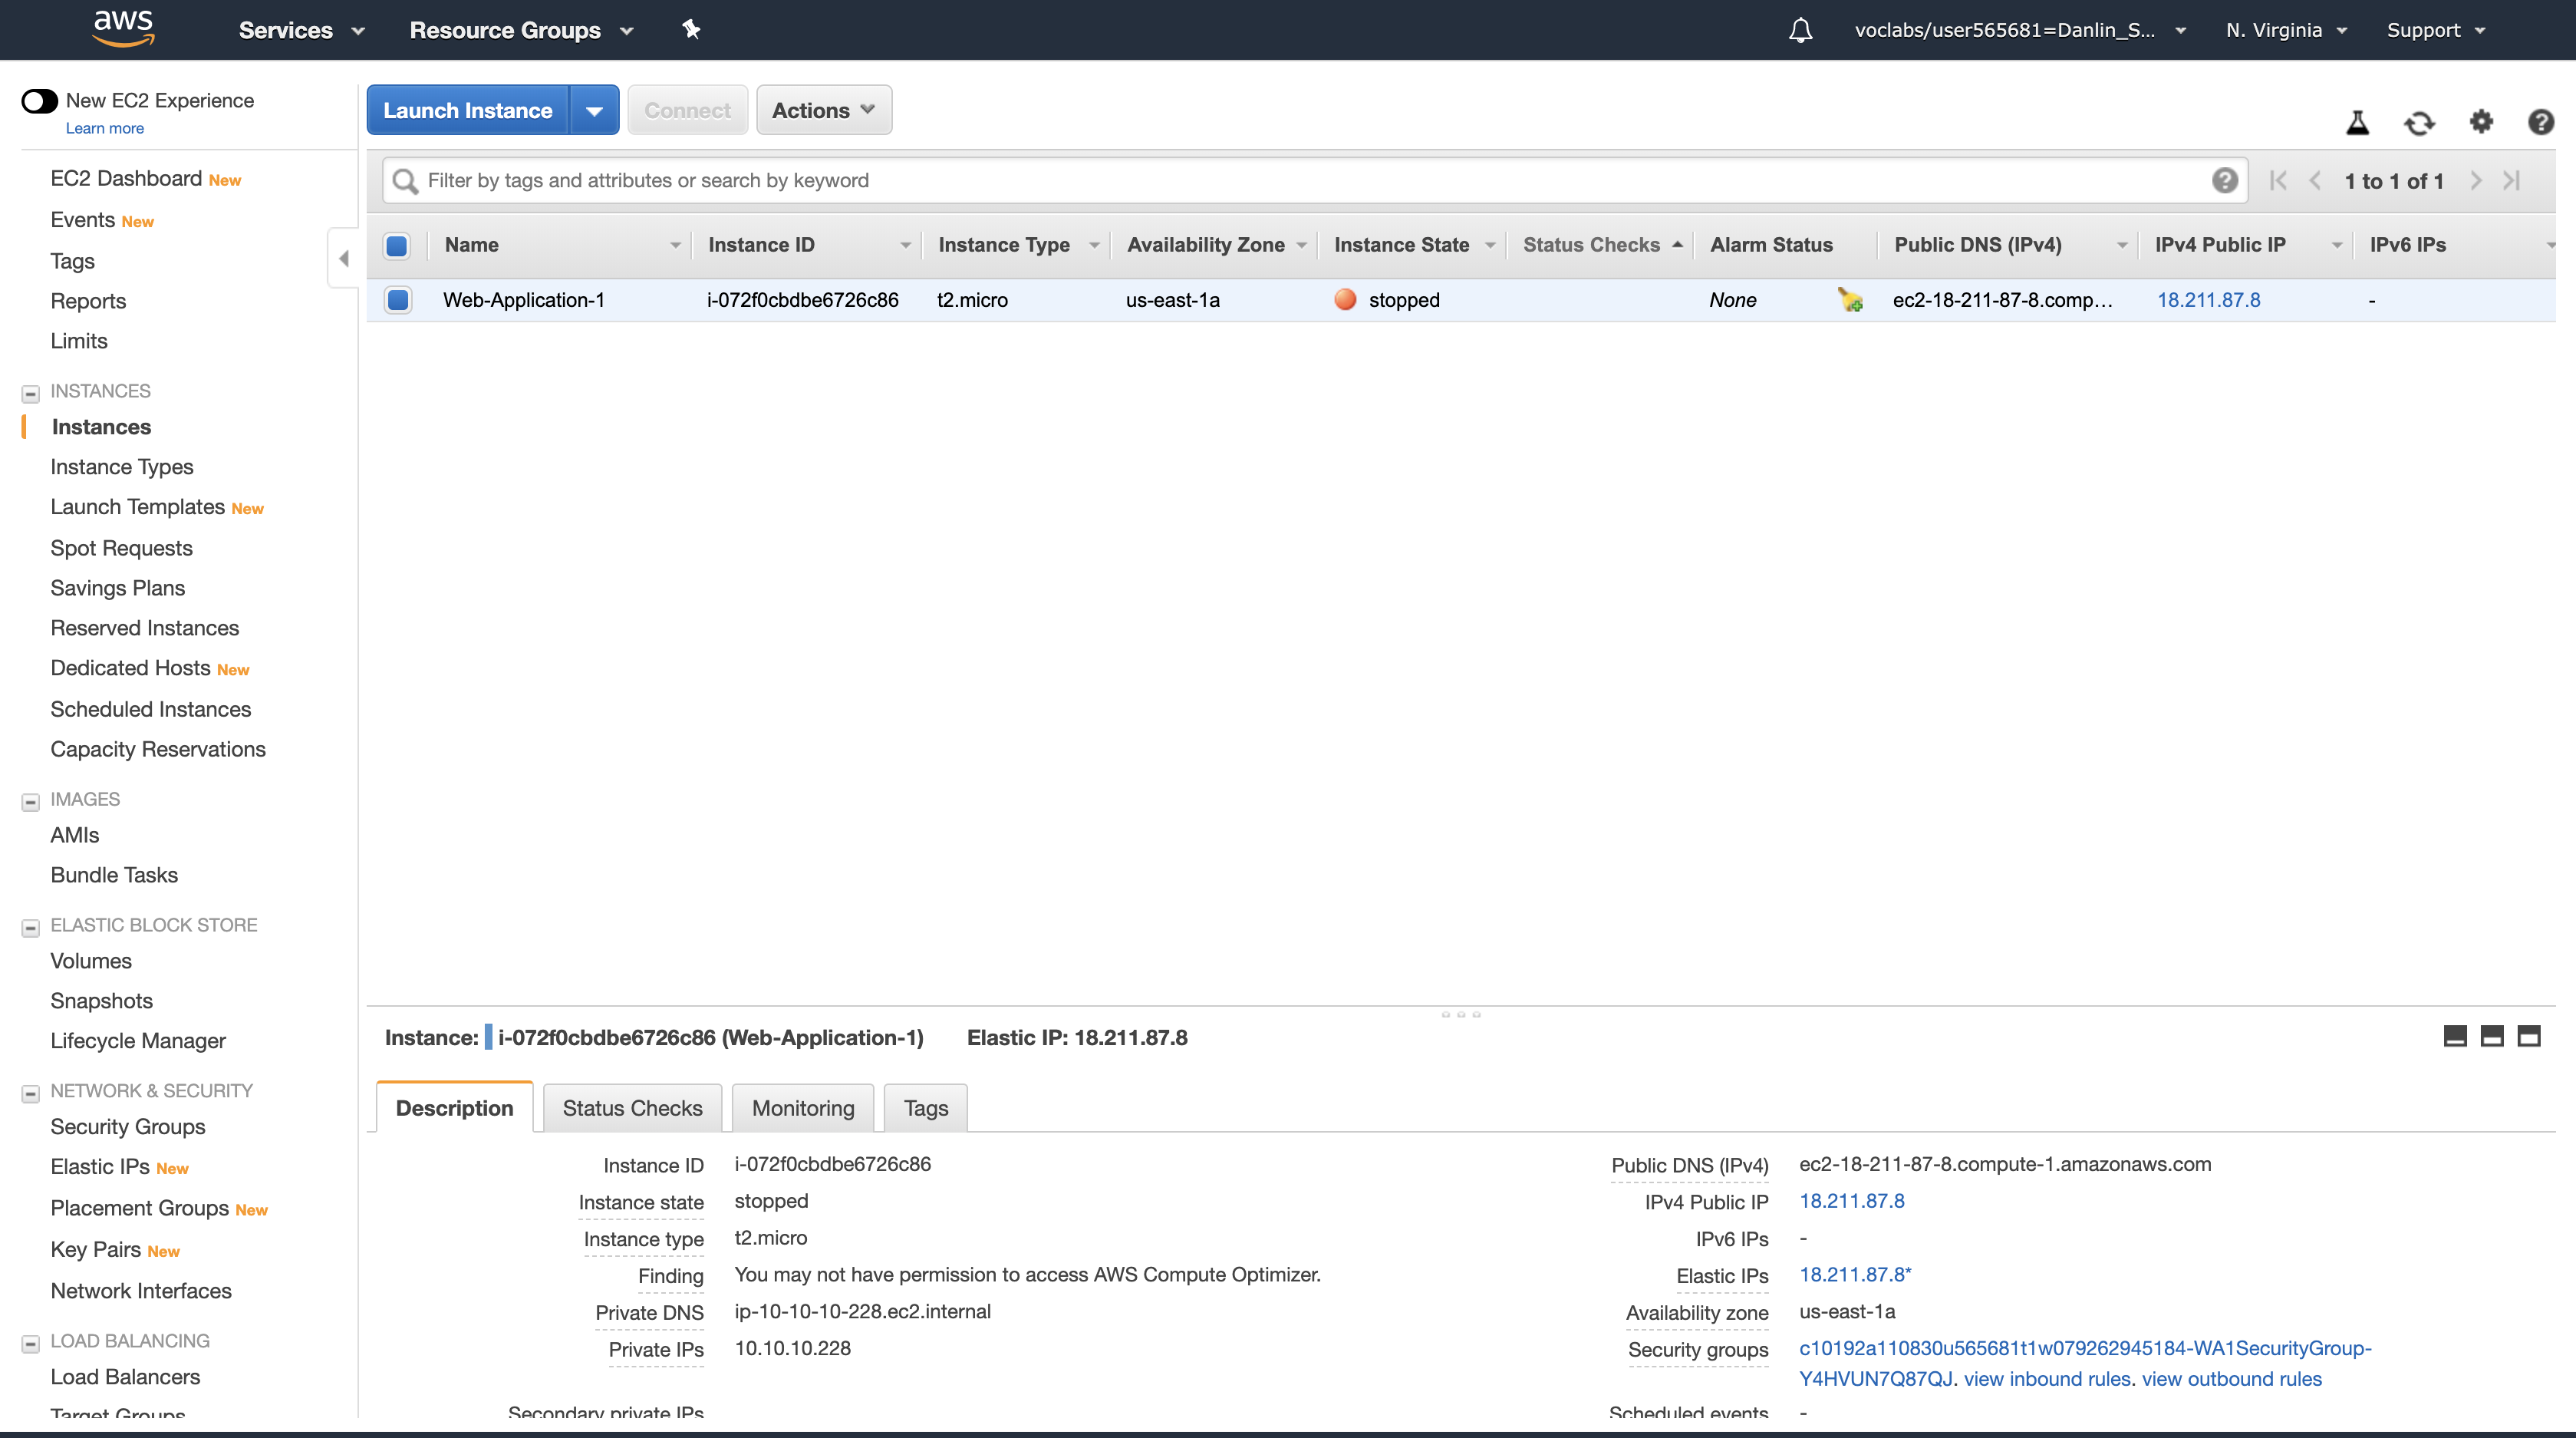
Services menu > click Route 53.
In the navigation pane, click Health checks.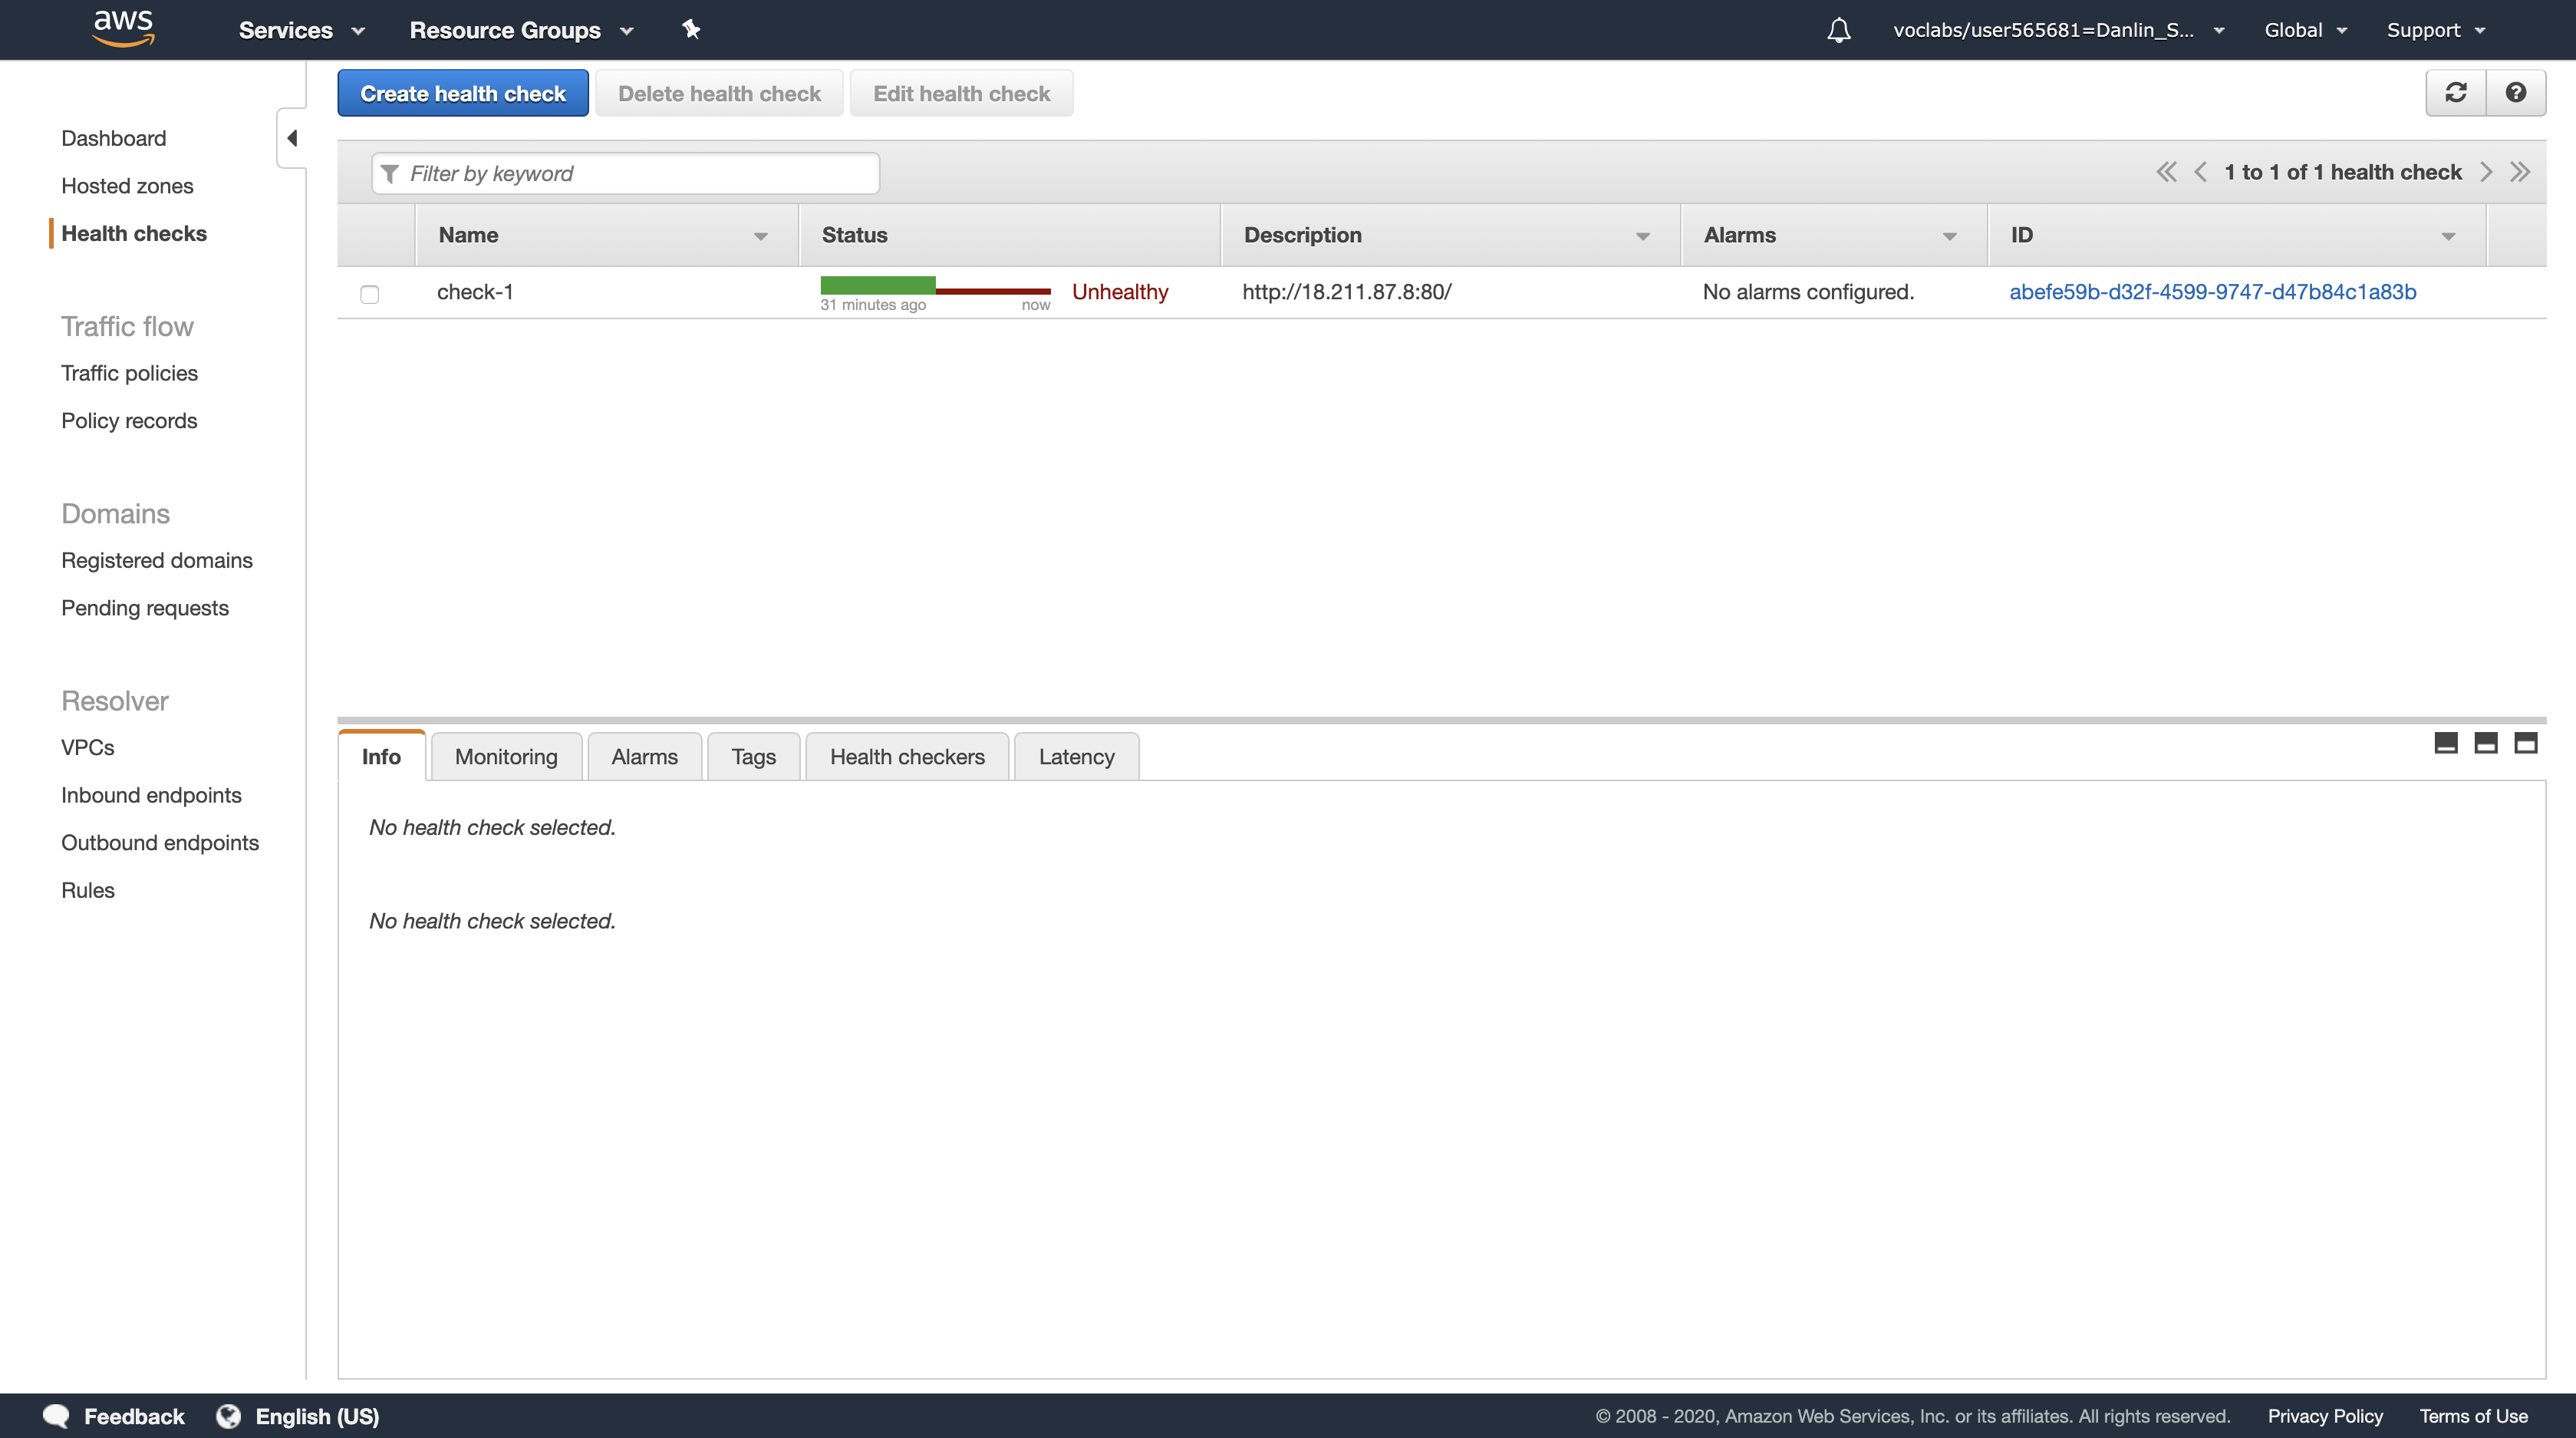
Select check-1 and click the Health checkers tab in the lower pane.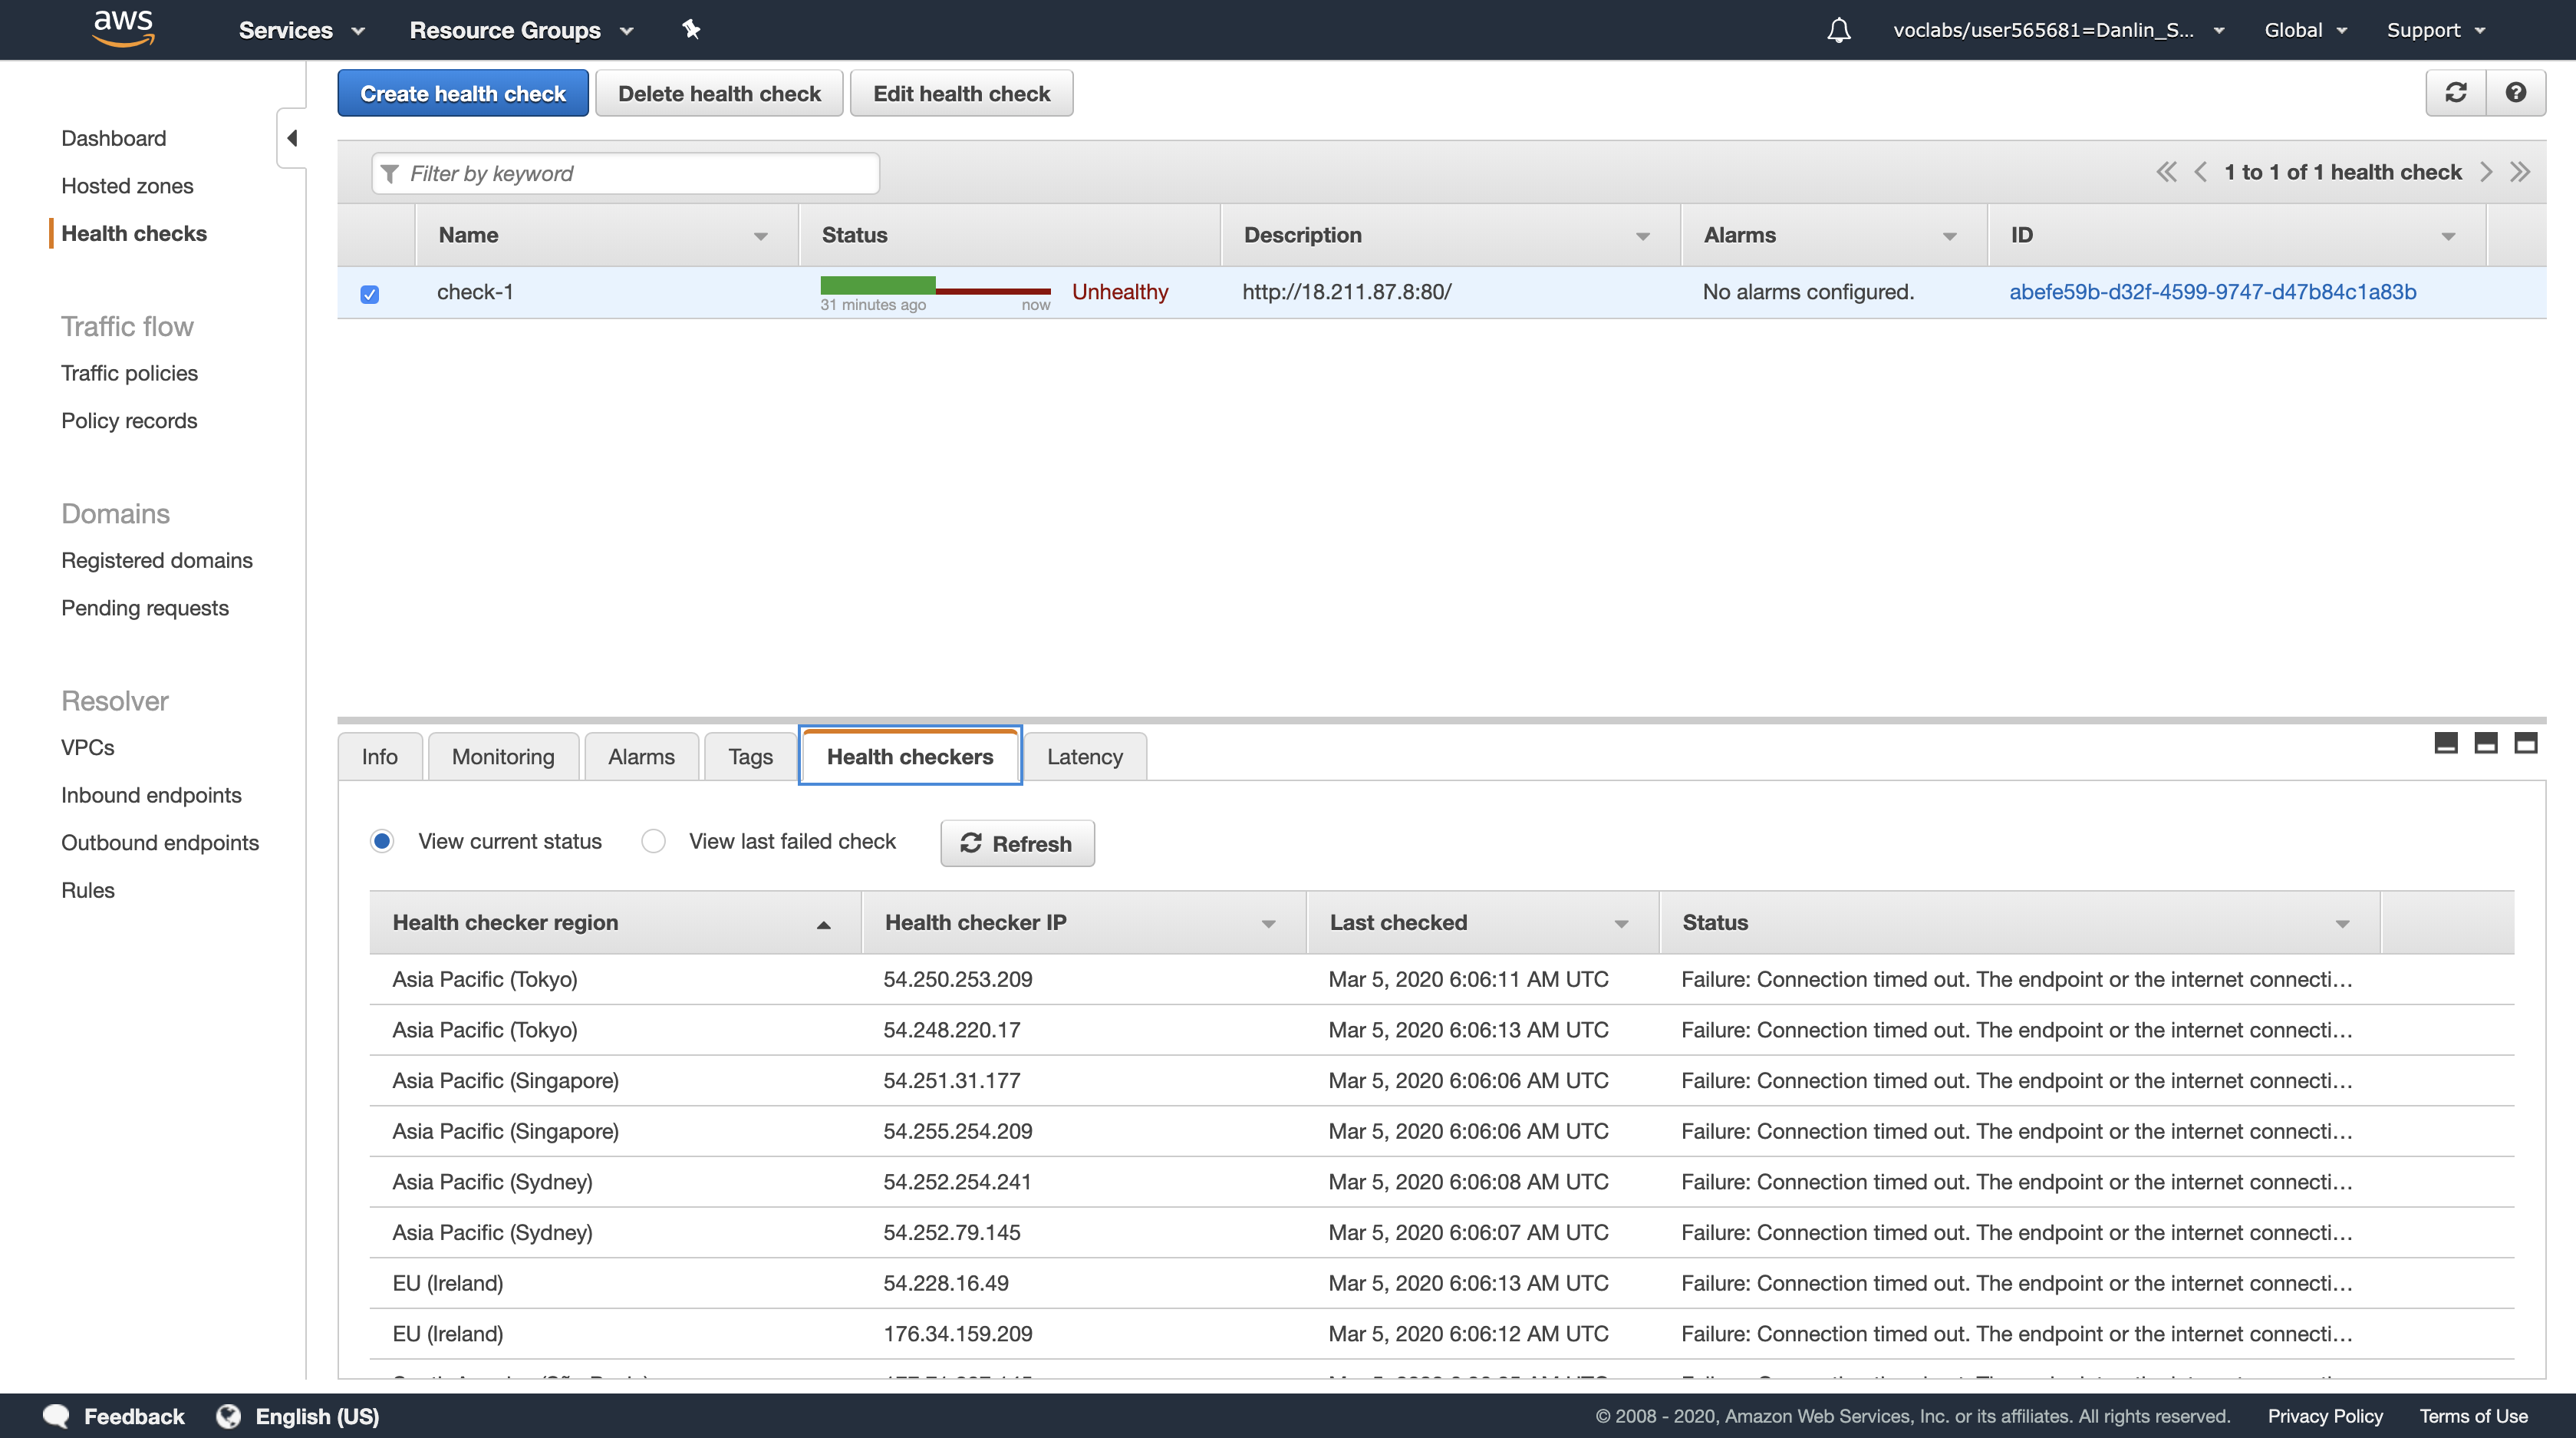
Wait until the status of check-1 is Unhealthy. If necessary, periodically click the refresh icon in the top-right corner.
- The Health Check has now detected that your Primary web server has stopped responding. It should now be directing DNS requests to the Secondary web server.
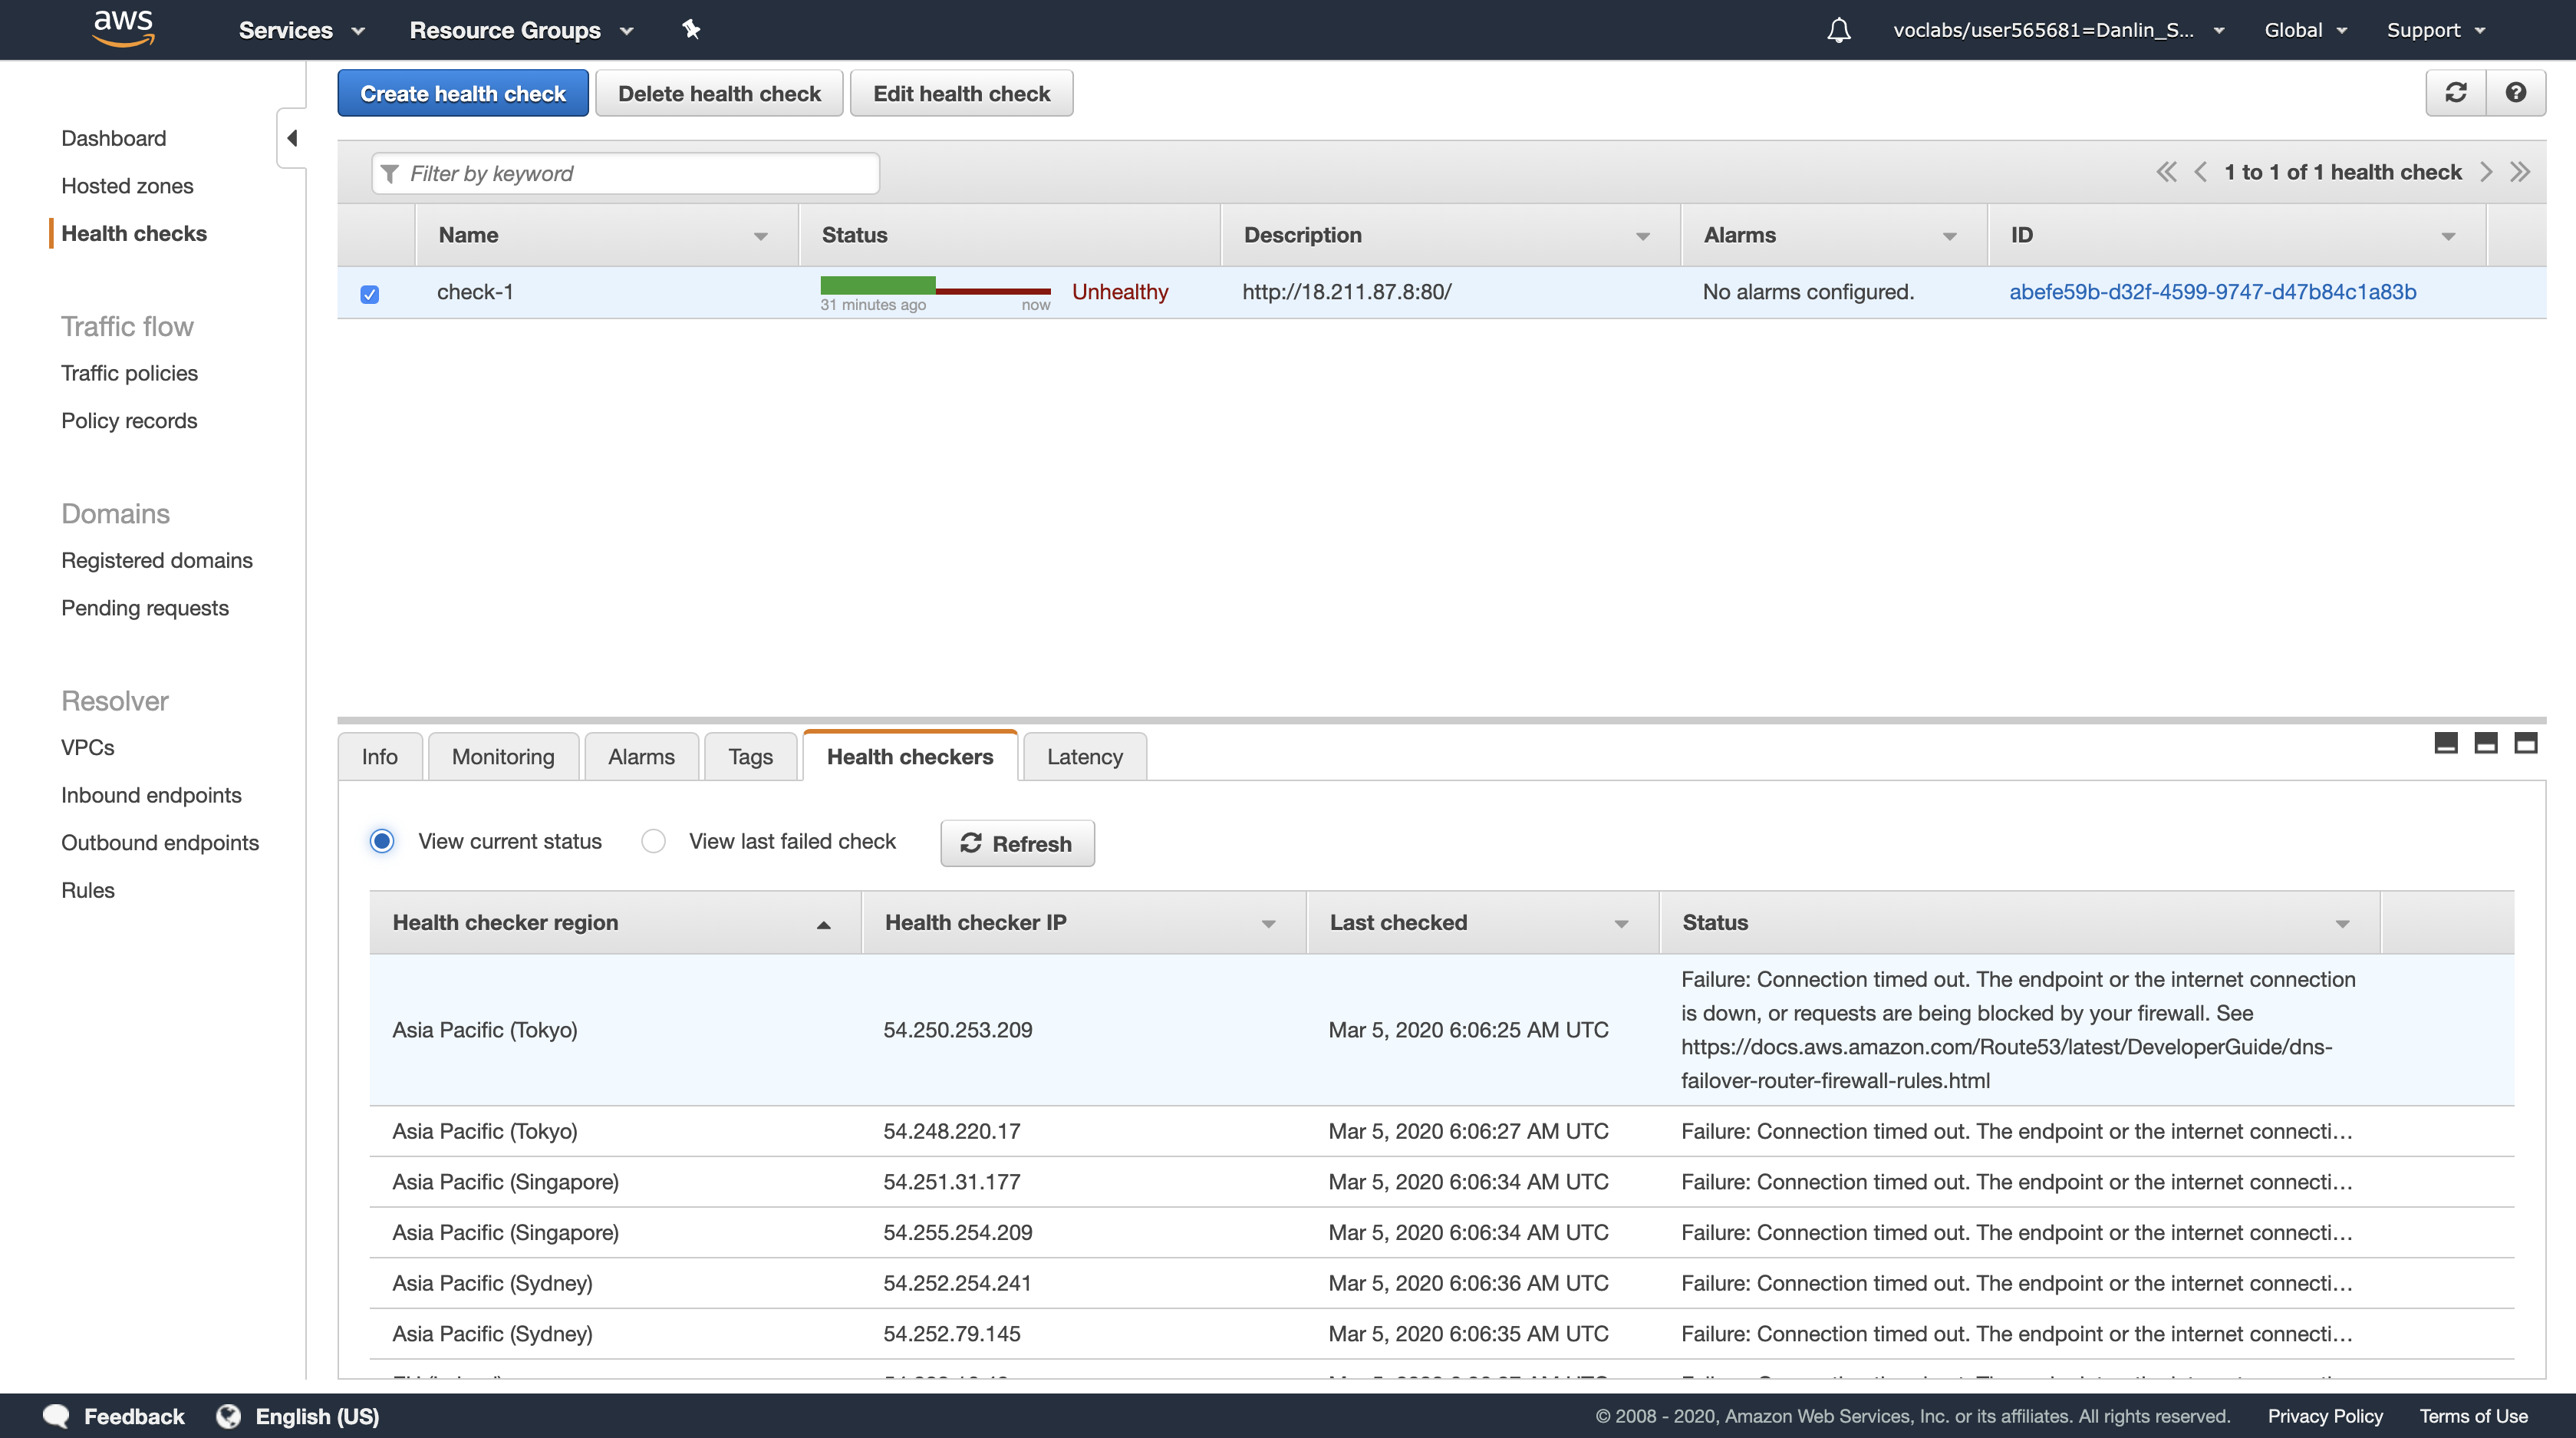
In the navigation pane, click Hosted zones.
Click your domain name.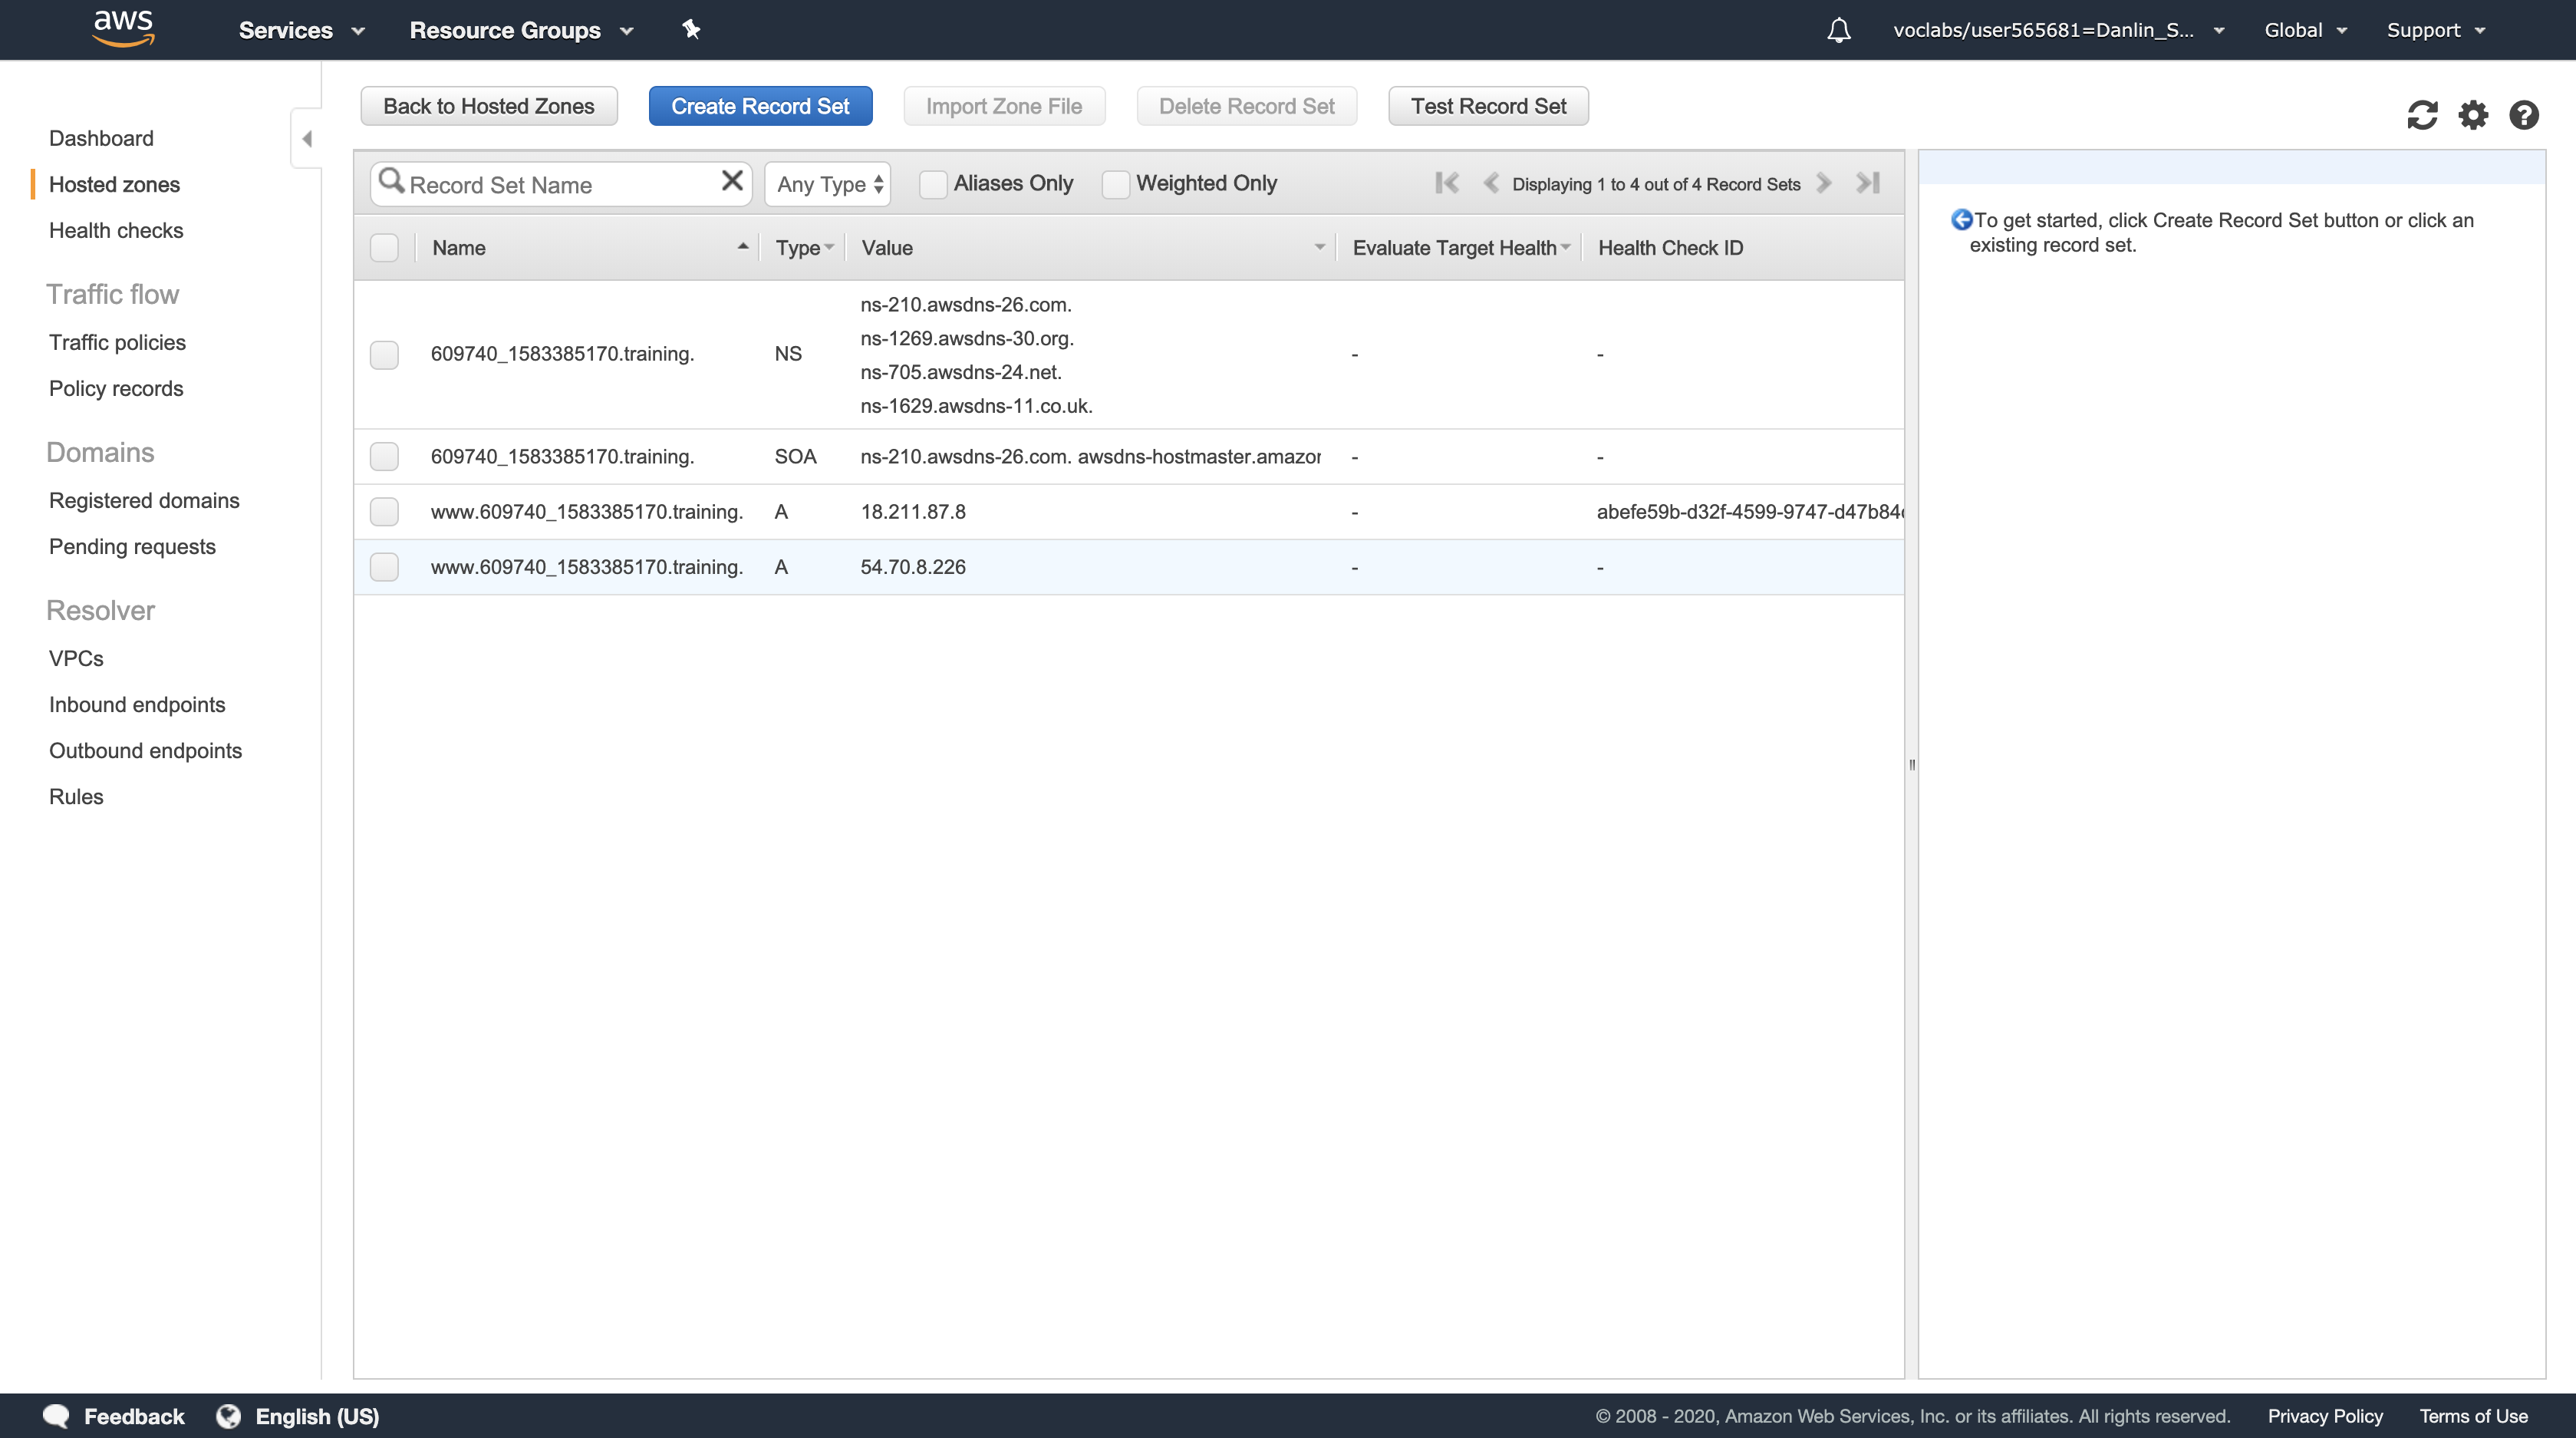
Click Test Record Set.
In Check response from Route 53, configure the following settings (and ignore any settings that aren’t listed):
- Record name:
www - Type: A
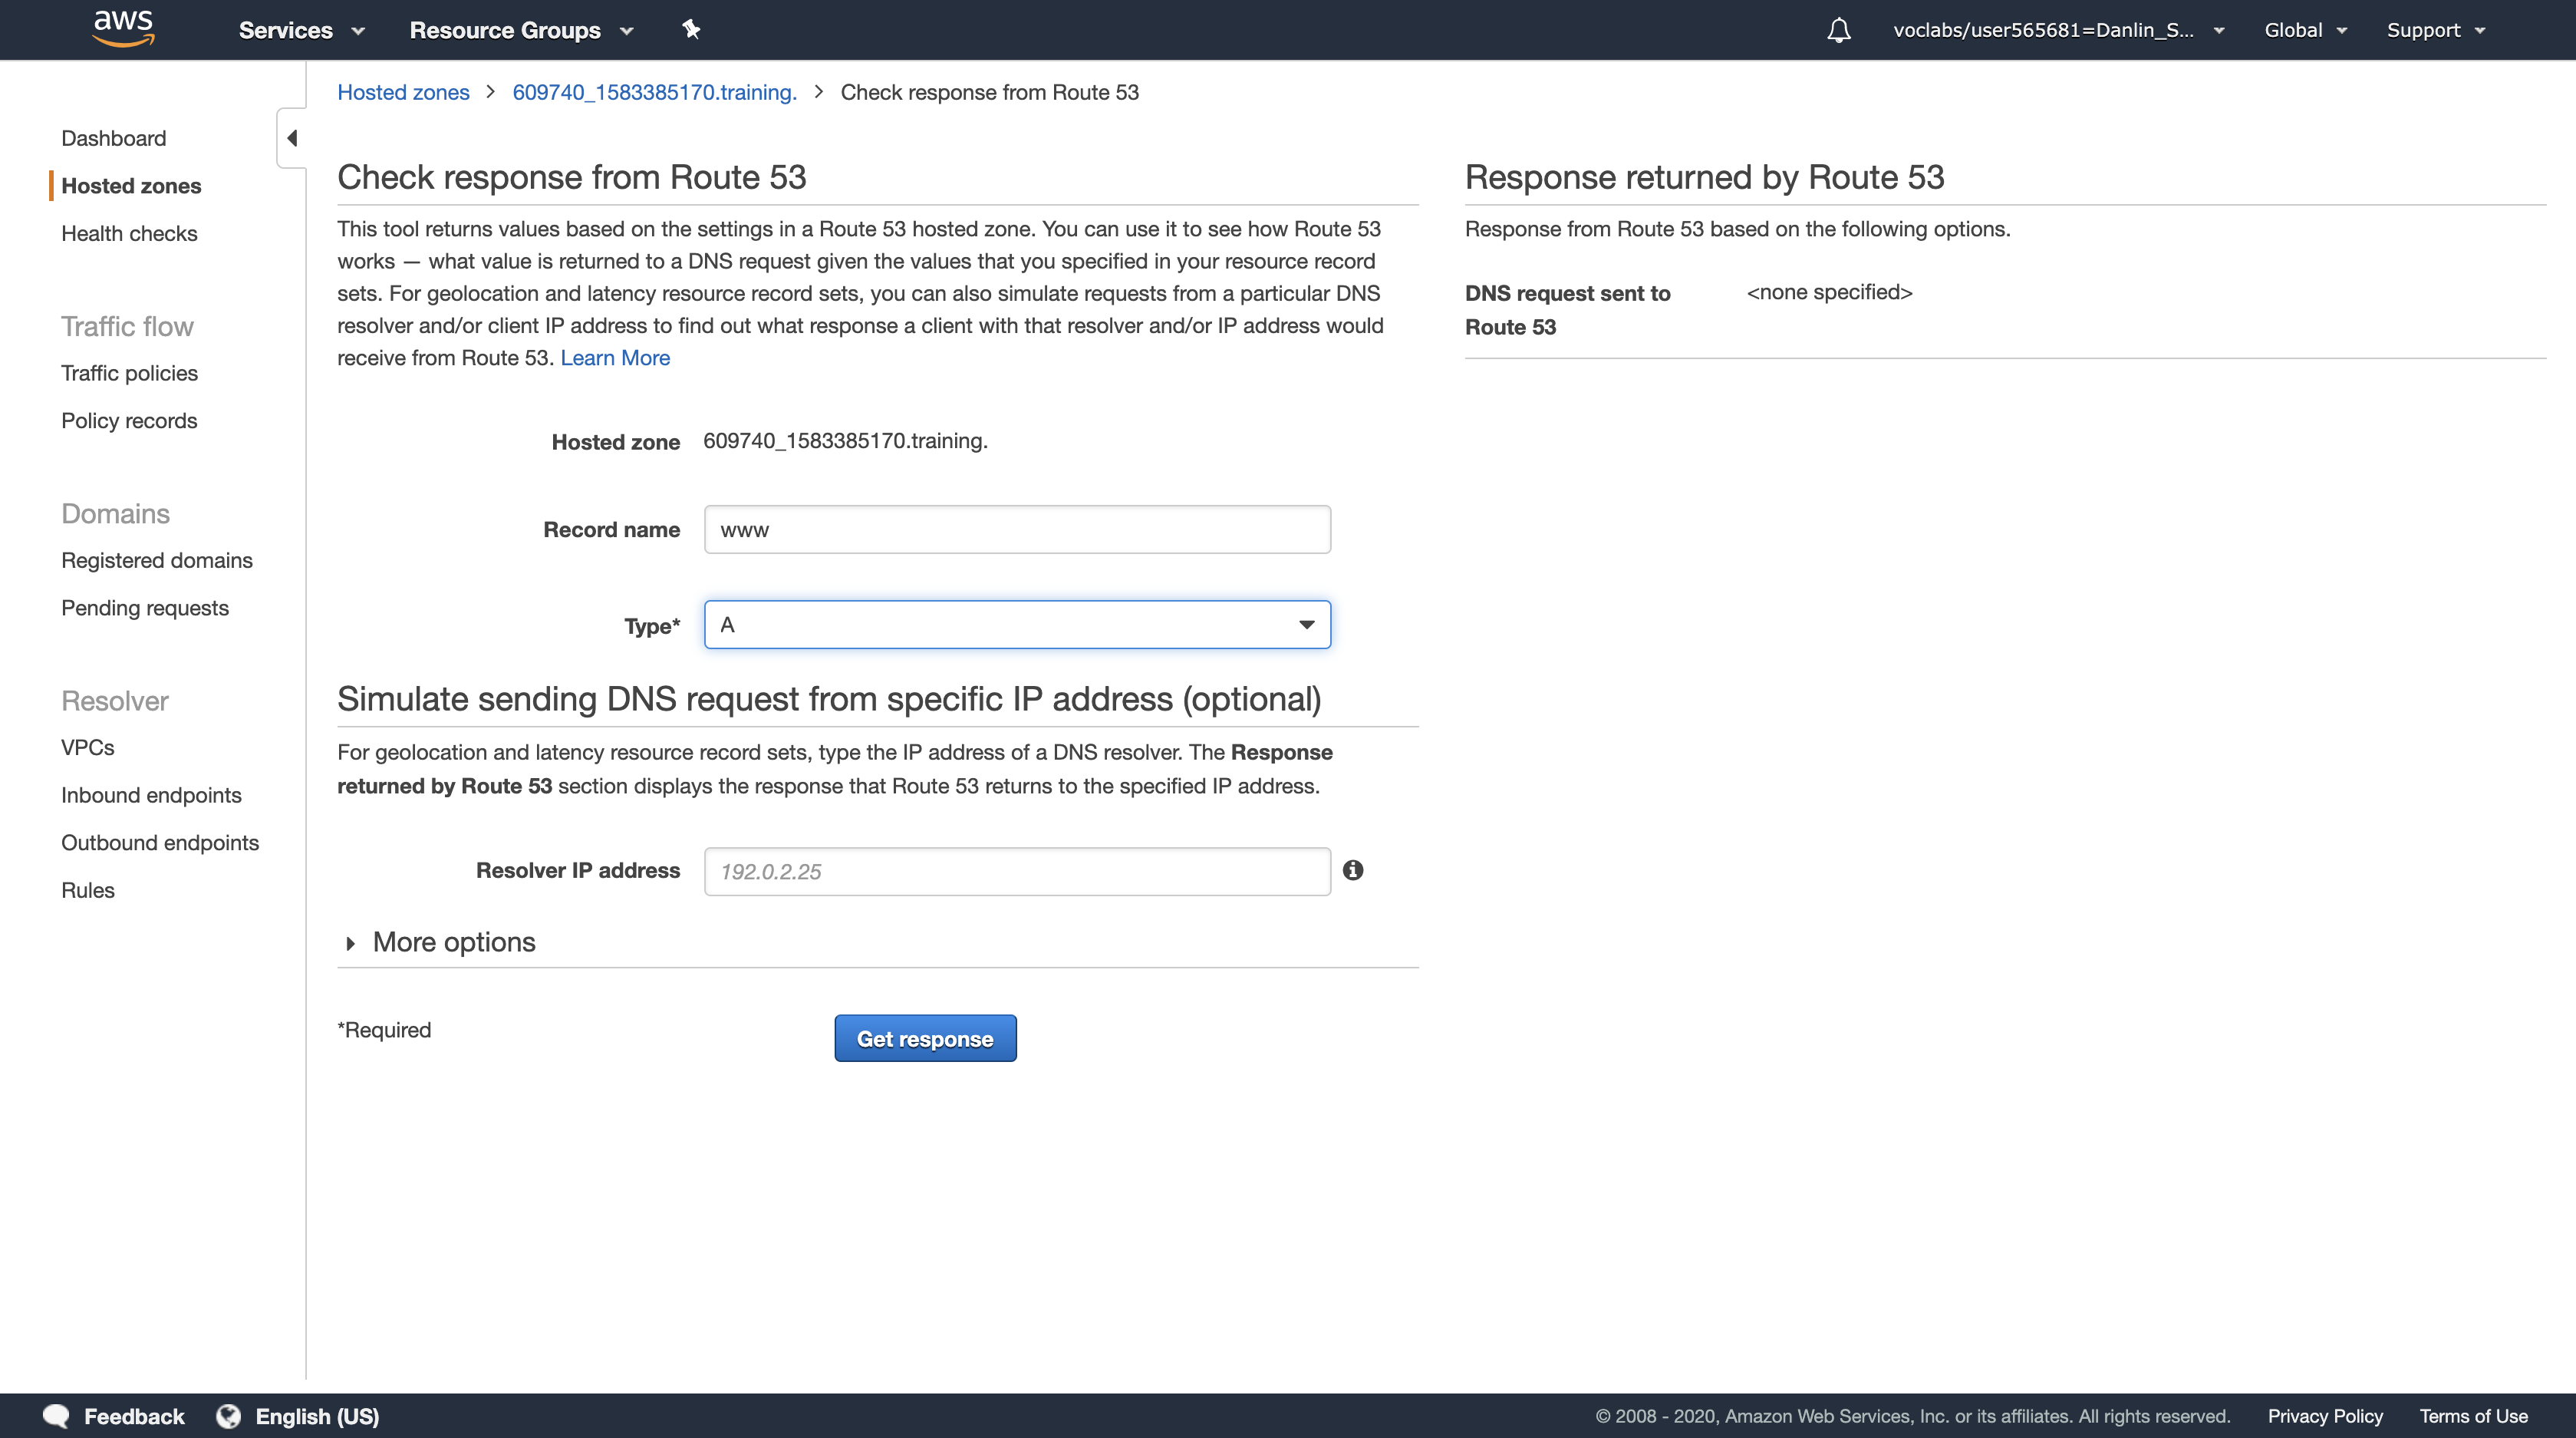
Click Get response.
- Look at the Response returned by Route 53 value. Confirm that it is the same IP address as your Secondary web server.
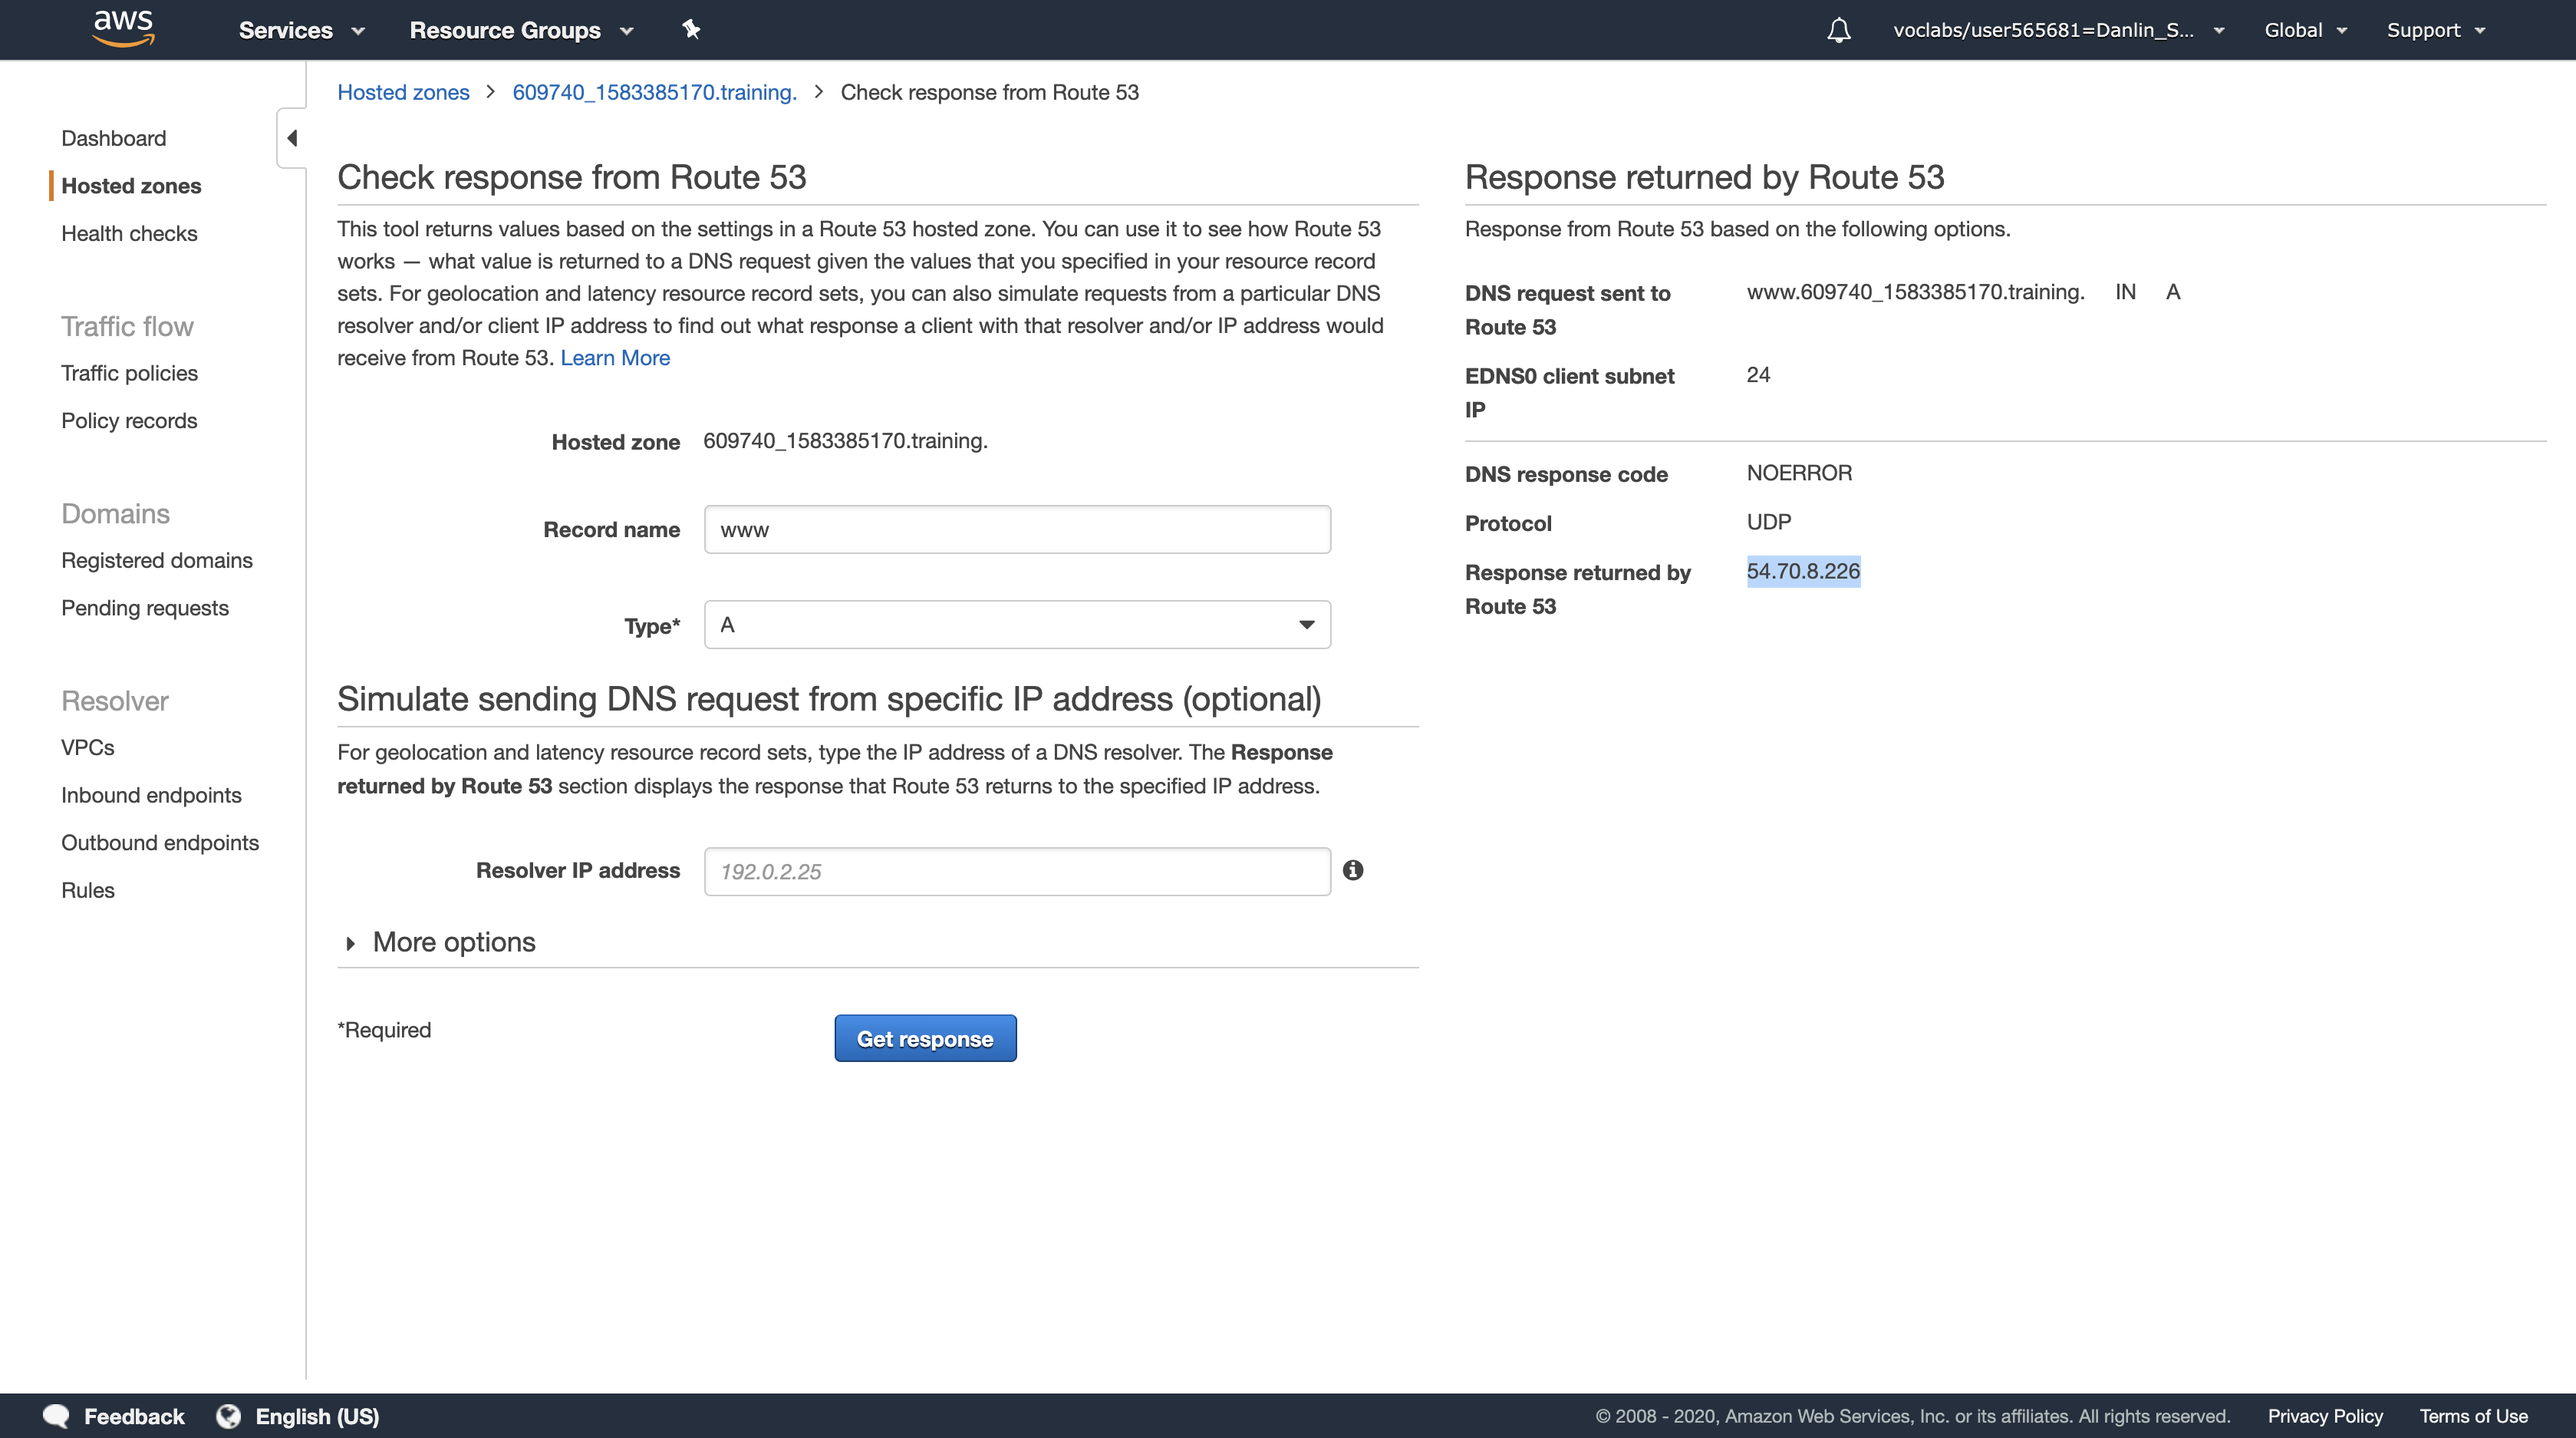
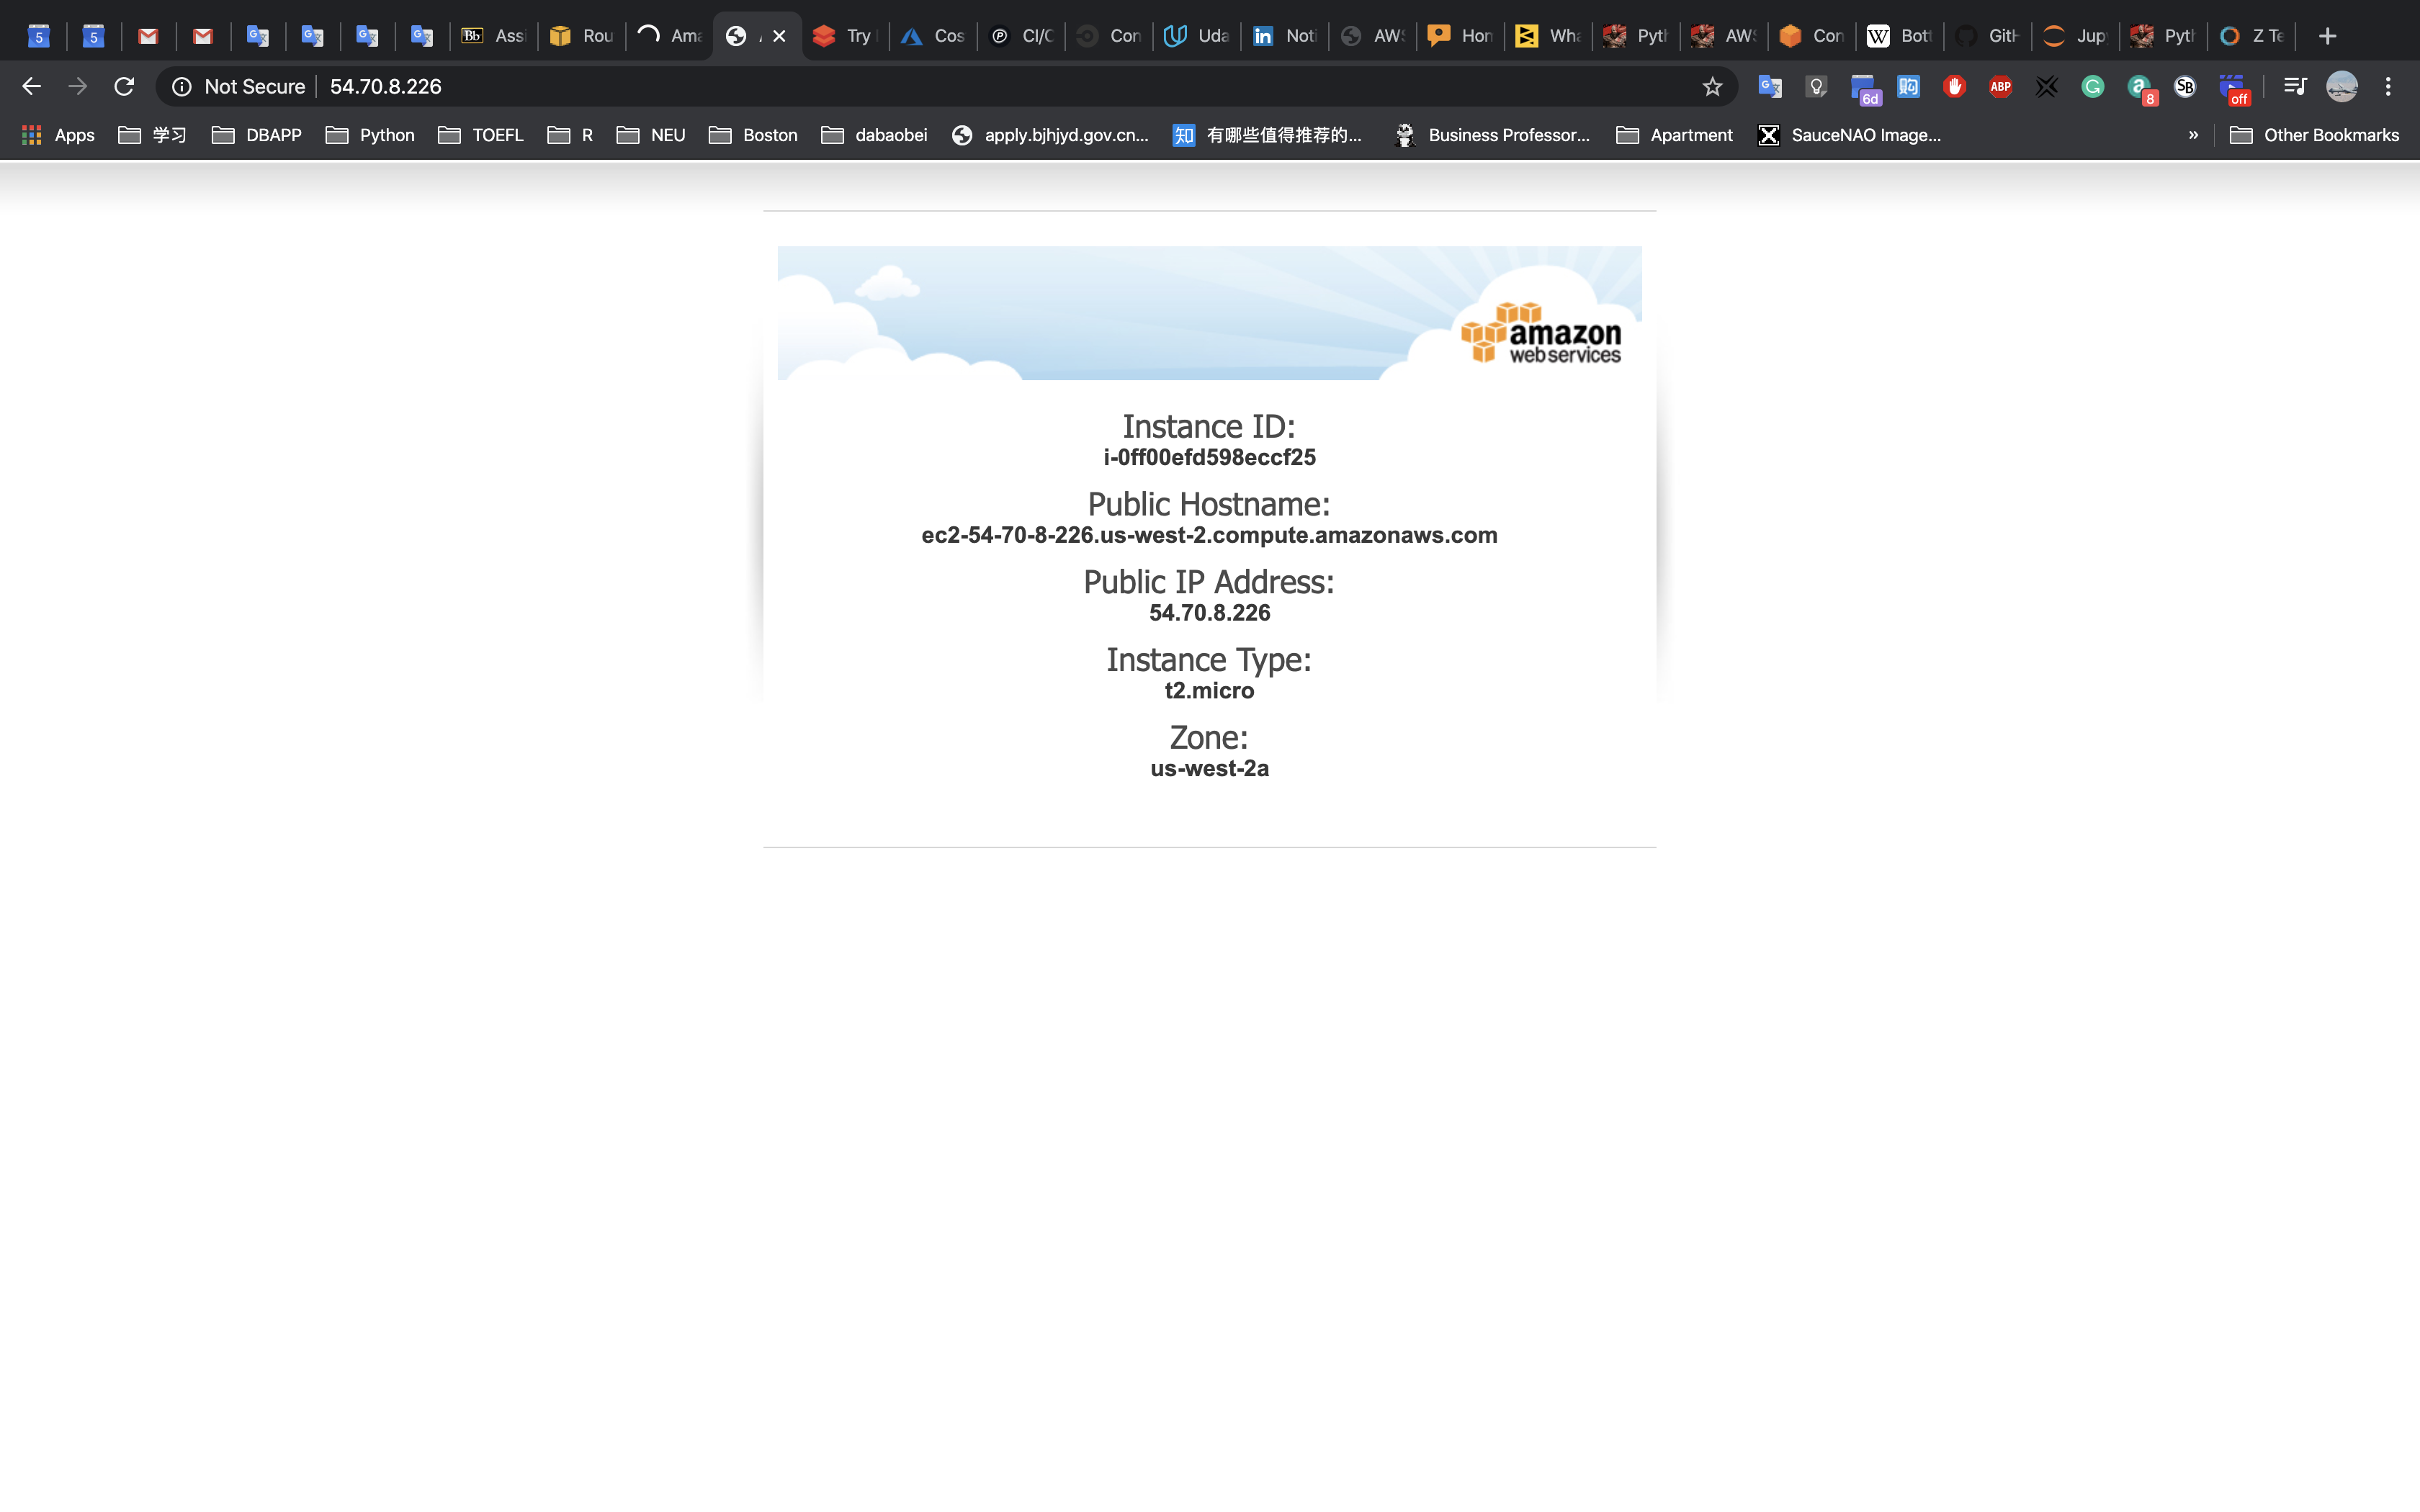
You have now successfully confirmed that your application environment can fail over from a primary region to a secondary region if the server in the primary region fails.
Optional: Start your Primary web server again, wait for the Health Check to become Healthy and confirm that the DNS resolution now points back to your Primary web server. This demonstrates the ability to failover to a Secondary web server and then to failback to Primary web server when it becomes healthy again.
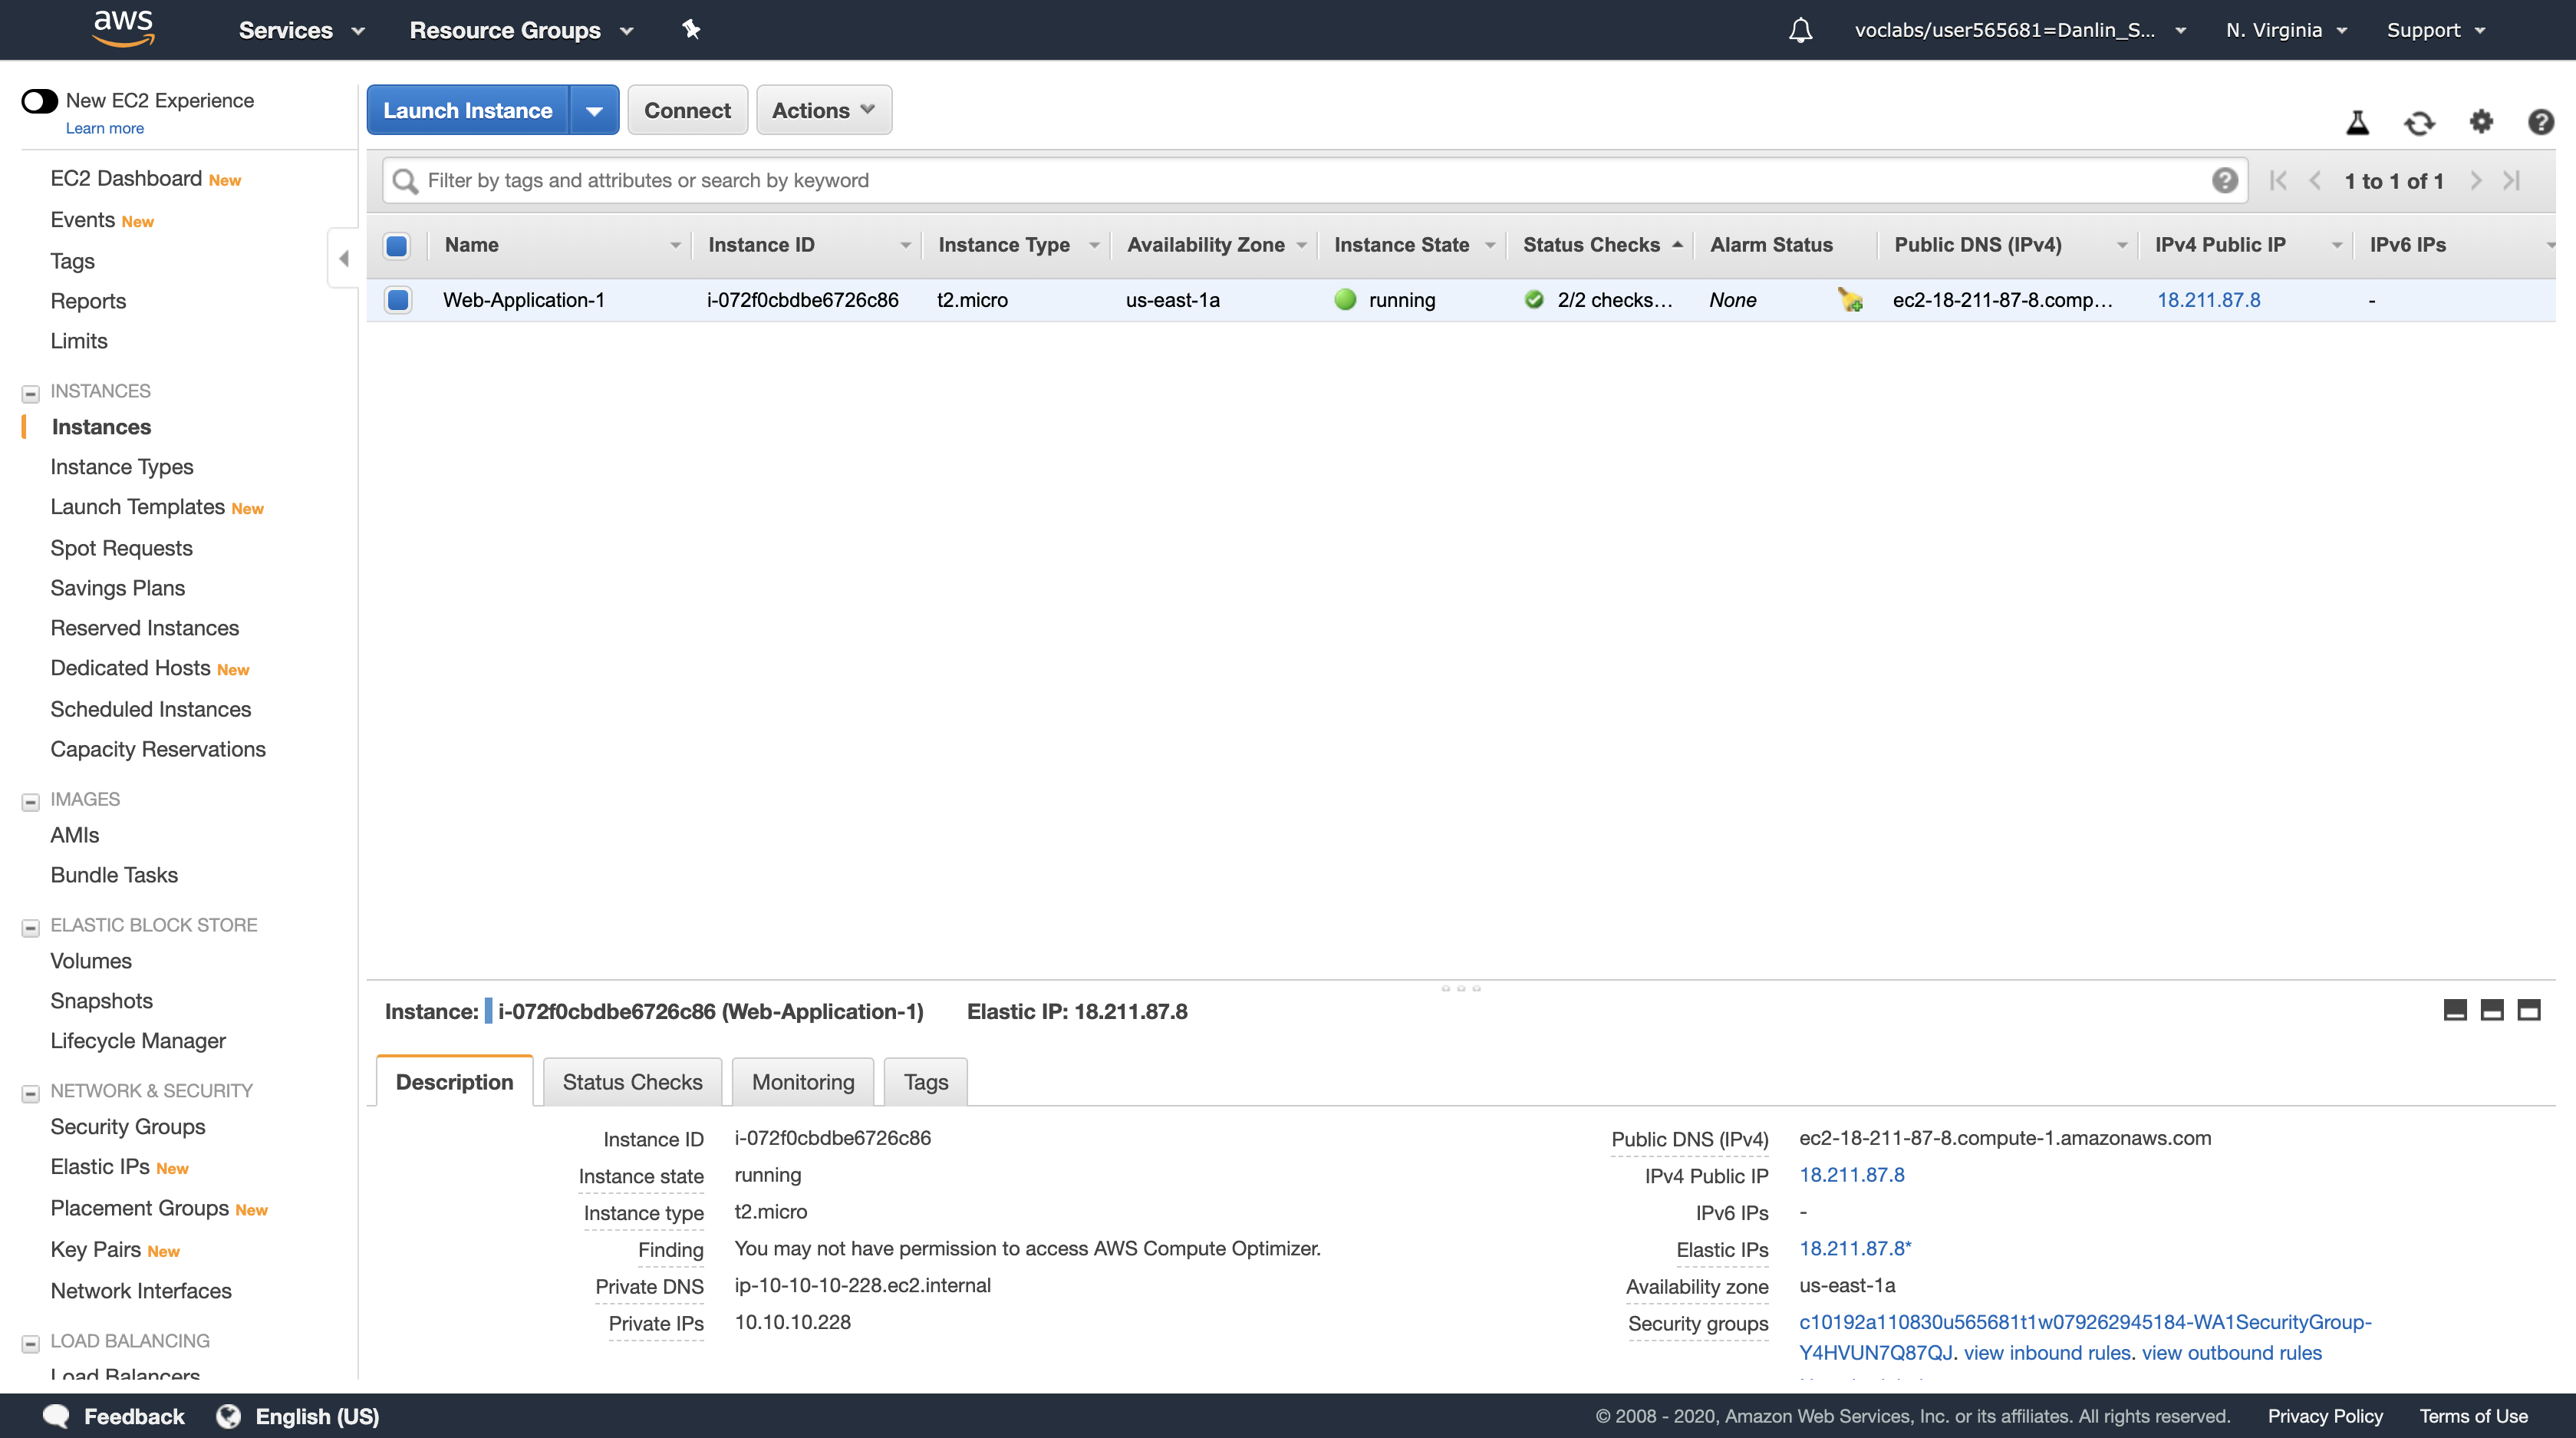
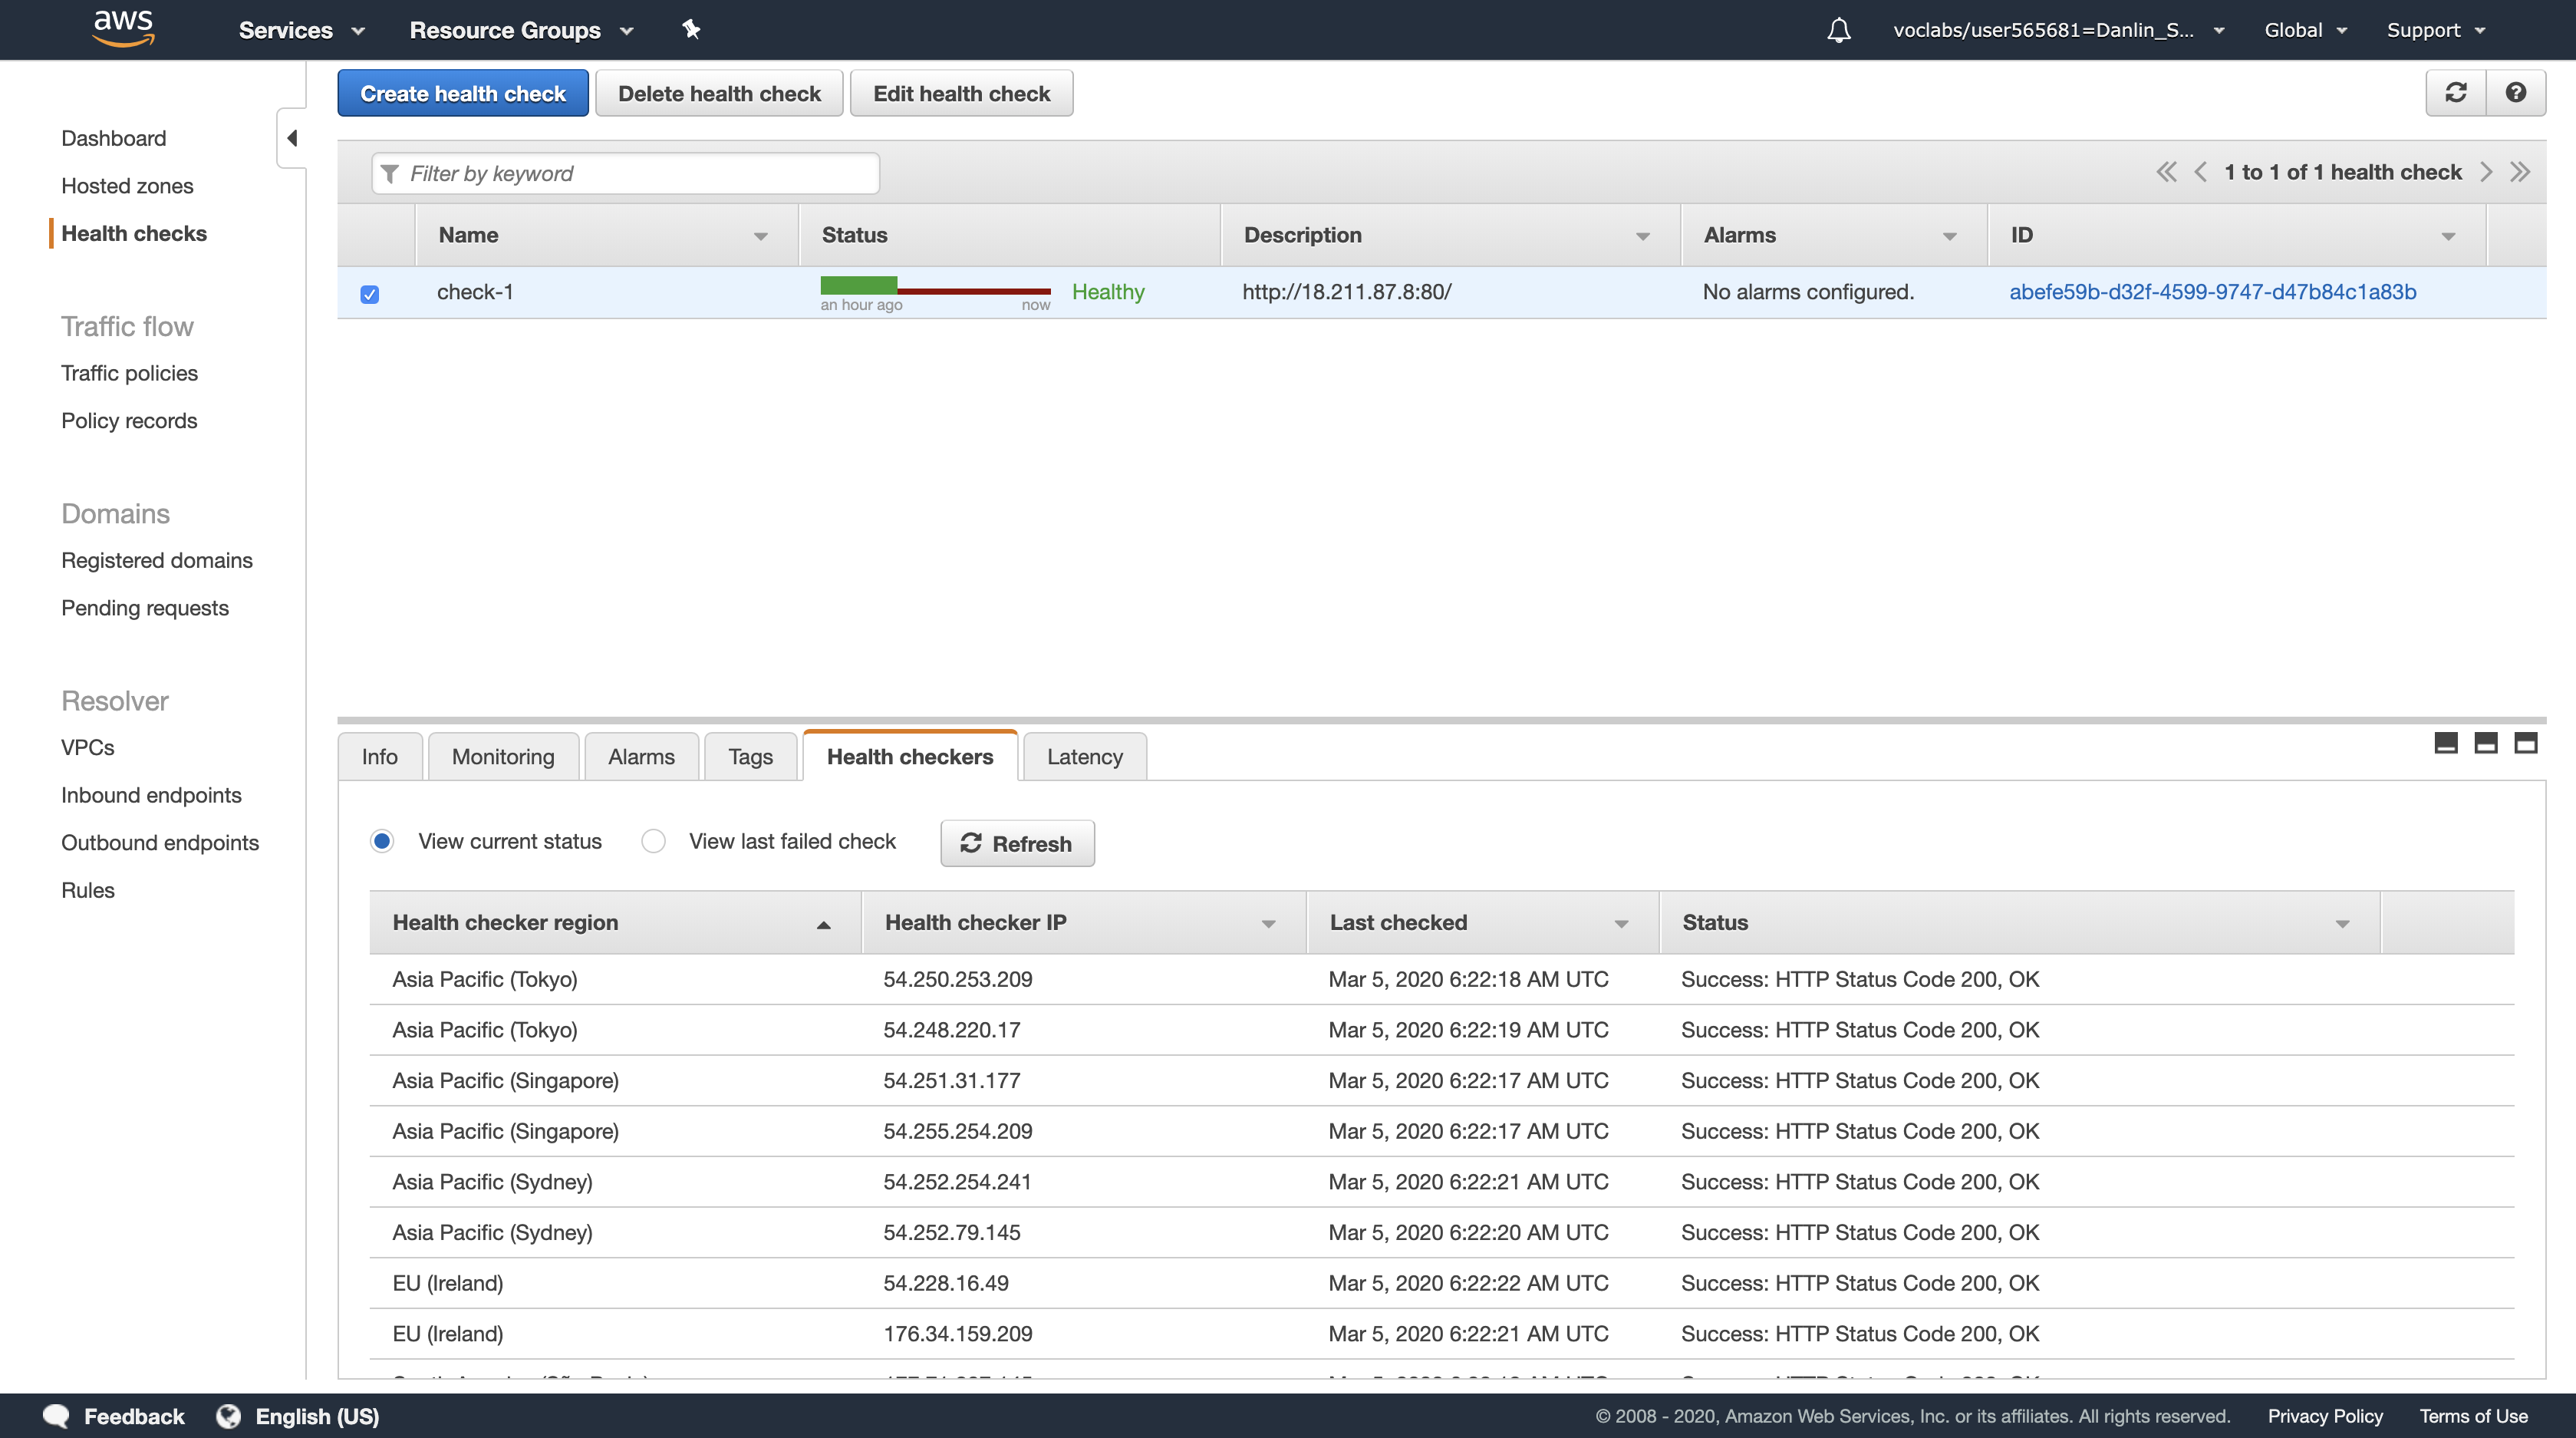


Lab Complete
Click End Lab at the top of this page and then click Yes to confirm that you want to end the lab.
- A panel will appear, indicating that “DELETE has been initiated… You may close this message box now.”
Click the X in the top right corner to close the panel.
AWS Well-Architected Resource
Introduction
The Well-Architected framework has been developed to help cloud architects build the most secure, high-performing, resilient, and efficient infrastructure possible for their applications. This framework provides a consistent approach for customers and partners to evaluate architectures, and provides guidance to help implement designs that will scale with your application needs over time.
This repository contains documentation and code in the format of hands-on labs to help you learn, measure, and build using architectural best practices. The labs are categorized into levels, where 100 is introductory, 200/300 is intermediate and 400 is advanced.
Prerequisites:
An AWS account that you are able to use for testing, that is not used for production or other purposes. NOTE: You will be billed for any applicable AWS resources used if you complete this lab that are not covered in the AWS Free Tier.
Labs:
The labs are structured around the five pillars of the Well-Architected Framework:
- Operational Excellence
- Security
- Reliability
- Performance Efficiency
- Cost Optimization
- Well-Architected Tool
AWS Well-Architected Cost Optimization Resource
Introduction
Cost optimization is a continual process of refinement and improvement of a system over its entire lifecycle. By using these labs, you gain practical experience on how to implement the Cost Optimization best practices and ensure your workloads are Well-Architected.
For more information about cost optimization best practices in the cloud, visit the Well-Architected tool in the AWS console, and read the AWS Well-Architected cost optimization whitepaper.
Cost Optimization Fundamentals
The first step in your Cost Optimization journey is to setup your account correctly, and get to know the tools and data available for Cost Optimization. These are a collection of labs that are accessible to anyone that will be working with the cloud, including non-technical roles.
Fundamentals covers the following:
- Account setup
- AWS billing console
- AWS Budgets
- AWS Cost Explorer
- Reserved Instances (RIs)
- Cost and Usage Report (CUR)
- cost and usage analysis
- cost and usage visualization.
Step 1 - Account Setup
Level 100: AWS Account Setup
This is a 100 level lab which requires root access. It must be completed for each AWS account in your organization.
This first step will help you to you build a basic account structure, and make sure your account is configured correctly. This will ensure you are collecting data for cost optimization, and this data is accessible to the right people within your organization.
Level 100: AWS Account Setup
Introduction
This hands-on lab will guide you through the steps to create and setup an initial account structure, and enable access to billing reports. This will ensure that you can complete the Well-Architected Cost workshops, and enable you to optimize your workloads inline with the Well-Architected Framework.
Goals
- Implement an account structure
- Configure billing services
Prerequisites
- Multiple AWS accounts (at least two)
- Root user access to the master account
Permissions required
- Root user access to the master account
- ./Code/master_policy IAM policy required for Master account user
- ./Code/member_policy IAM policy required for Member account user
- ./Code/IAM_policy IAM policy required to create the cost optimization team
- NOTE: There may be permission error messages during the lab, as the console may require additional privileges. These errors will not impact the lab, and we follow security best practices by implementing the minimum set of privileges required.
Costs
- https://aws.amazon.com/aws-cost-management/pricing/
- Variable costs will be incurred
- Cost Explorer: $0.01 per 1,000 usage records
- S3: Storage of CUR file, refer to S3 pricing https://aws.amazon.com/s3/pricing/
Time to complete
- The lab should take approximately 15 minutes to complete
Best Practice Checklist
- Create a basic account structure, with a master (payer) account and at least 1 member (linked) account
- Configure account parameters
- Configure IAM access to billing information
- Configure a Cost and Usage Report (CUR)
- Enable AWS Cost Explorer
- Enable AWS-Generated Cost Allocation Tags
- Create a cost optimization team, to manage cost optimization across your organization
Step 2 - Cost and Usage Governance - Notifications
Level 100: Cost and Usage Governance
100 Level Lab: This lab will show you how to implement AWS Budgets to provide notifications on usage and spend.
Configuring notifications allows you to receive an email when usage or cost is above a defined amount.
Level 100: Cost and Usage Governance
Introduction
This hands-on lab will guide you through the steps to implement cost and usage governance. The skills you learn will help you control your cost and usage in alignment with your business requirements.
Goals
- Implement AWS Budgets to notify on usage and spend
- Create an AWS Budget report to notify users every week on budget status
Prerequisites
- An AWS Account
- AWS Account Setup has been completed
Permissions required
- Access to the Cost Optimization team created in AWS Account Setup
Costs
- https://aws.amazon.com/aws-cost-management/pricing/
- Less than $1 per month if the tear down is not performed
AWS Well-Architected Labs
Level 100: AWS Account Setup
https://dx1572sre29wk.cloudfront.net/Cost/Cost_Fundamentals/100_1_AWS_Account_Setup/Lab_Guide.html
Authors
- Nathan Besh, Cost Lead Well-Architected
- Spencer Marley, Commercial Architect
Table of Contents
- Configure IAM access
- Create an account structure
- Configure account settings
- Configure Cost and Usage reports
- Enable AWS Cost Explorer
- Enable AWS-Generated Cost Allocation Tags
- Create a cost optimization team
- Tear down
- Rate this Lab
1. Configure IAM access to your billing
NOTE: You will need to sign into the account with root account credentials to perform this action. You need to enter in the account email and password for root access.
You need to enable IAM access to your billing so the correct IAM users can access the information. This allows other users (non-root) to access billing information in the master account. It is also required if you wish for member accounts to see their usage and billing information. This step will not provide access to the information, that is configured through IAM policies.
Log in to your Master account as the root user, Click on the account name in the top right, and click on
My Accountfrom the menu:
Scroll down to IAM User and Role Access to Billing Information, and click Edit:
Select
Activate IAM Accessand click onUpdate:
Confirm that IAM user/role access to billing information is activated:
You will now be able to provide access to non-root users to billing information via IAM policies.
NOTE: Logout as the root user before continuing.
2. Create an account structure
NOTE: Do NOT do this step if you already have an organization and consolidated billing setup.
You will create an AWS Organization, and join one or more accounts to the master account. An organization will allow you to centrally manage multiple AWS accounts efficiently and consistently. It is recommended to have a master account that is primarily used for billing and does not contain any resources, all resources and workloads will reside in the member accounts. You will need organizations:CreateOrganization access, and 2 or more AWS accounts. When you create a new master account, it will contain all billing information for member accounts, member accounts will no longer have any billing information, including historical billing information. Ensure you backup or export any reports or data.
2.1 Create an AWS Organization
You will create an AWS Organization with the master account.
- Login to the AWS console as an IAM user with the required permissions, start typing AWS Organizations into the Find Services box and click on AWS
Organizations:
The request failed because your credentials do not have permission to create the service-linked role required by AWS Organizations.
Click on
Create organization:
To create a fully featured organization, Click on Create organization
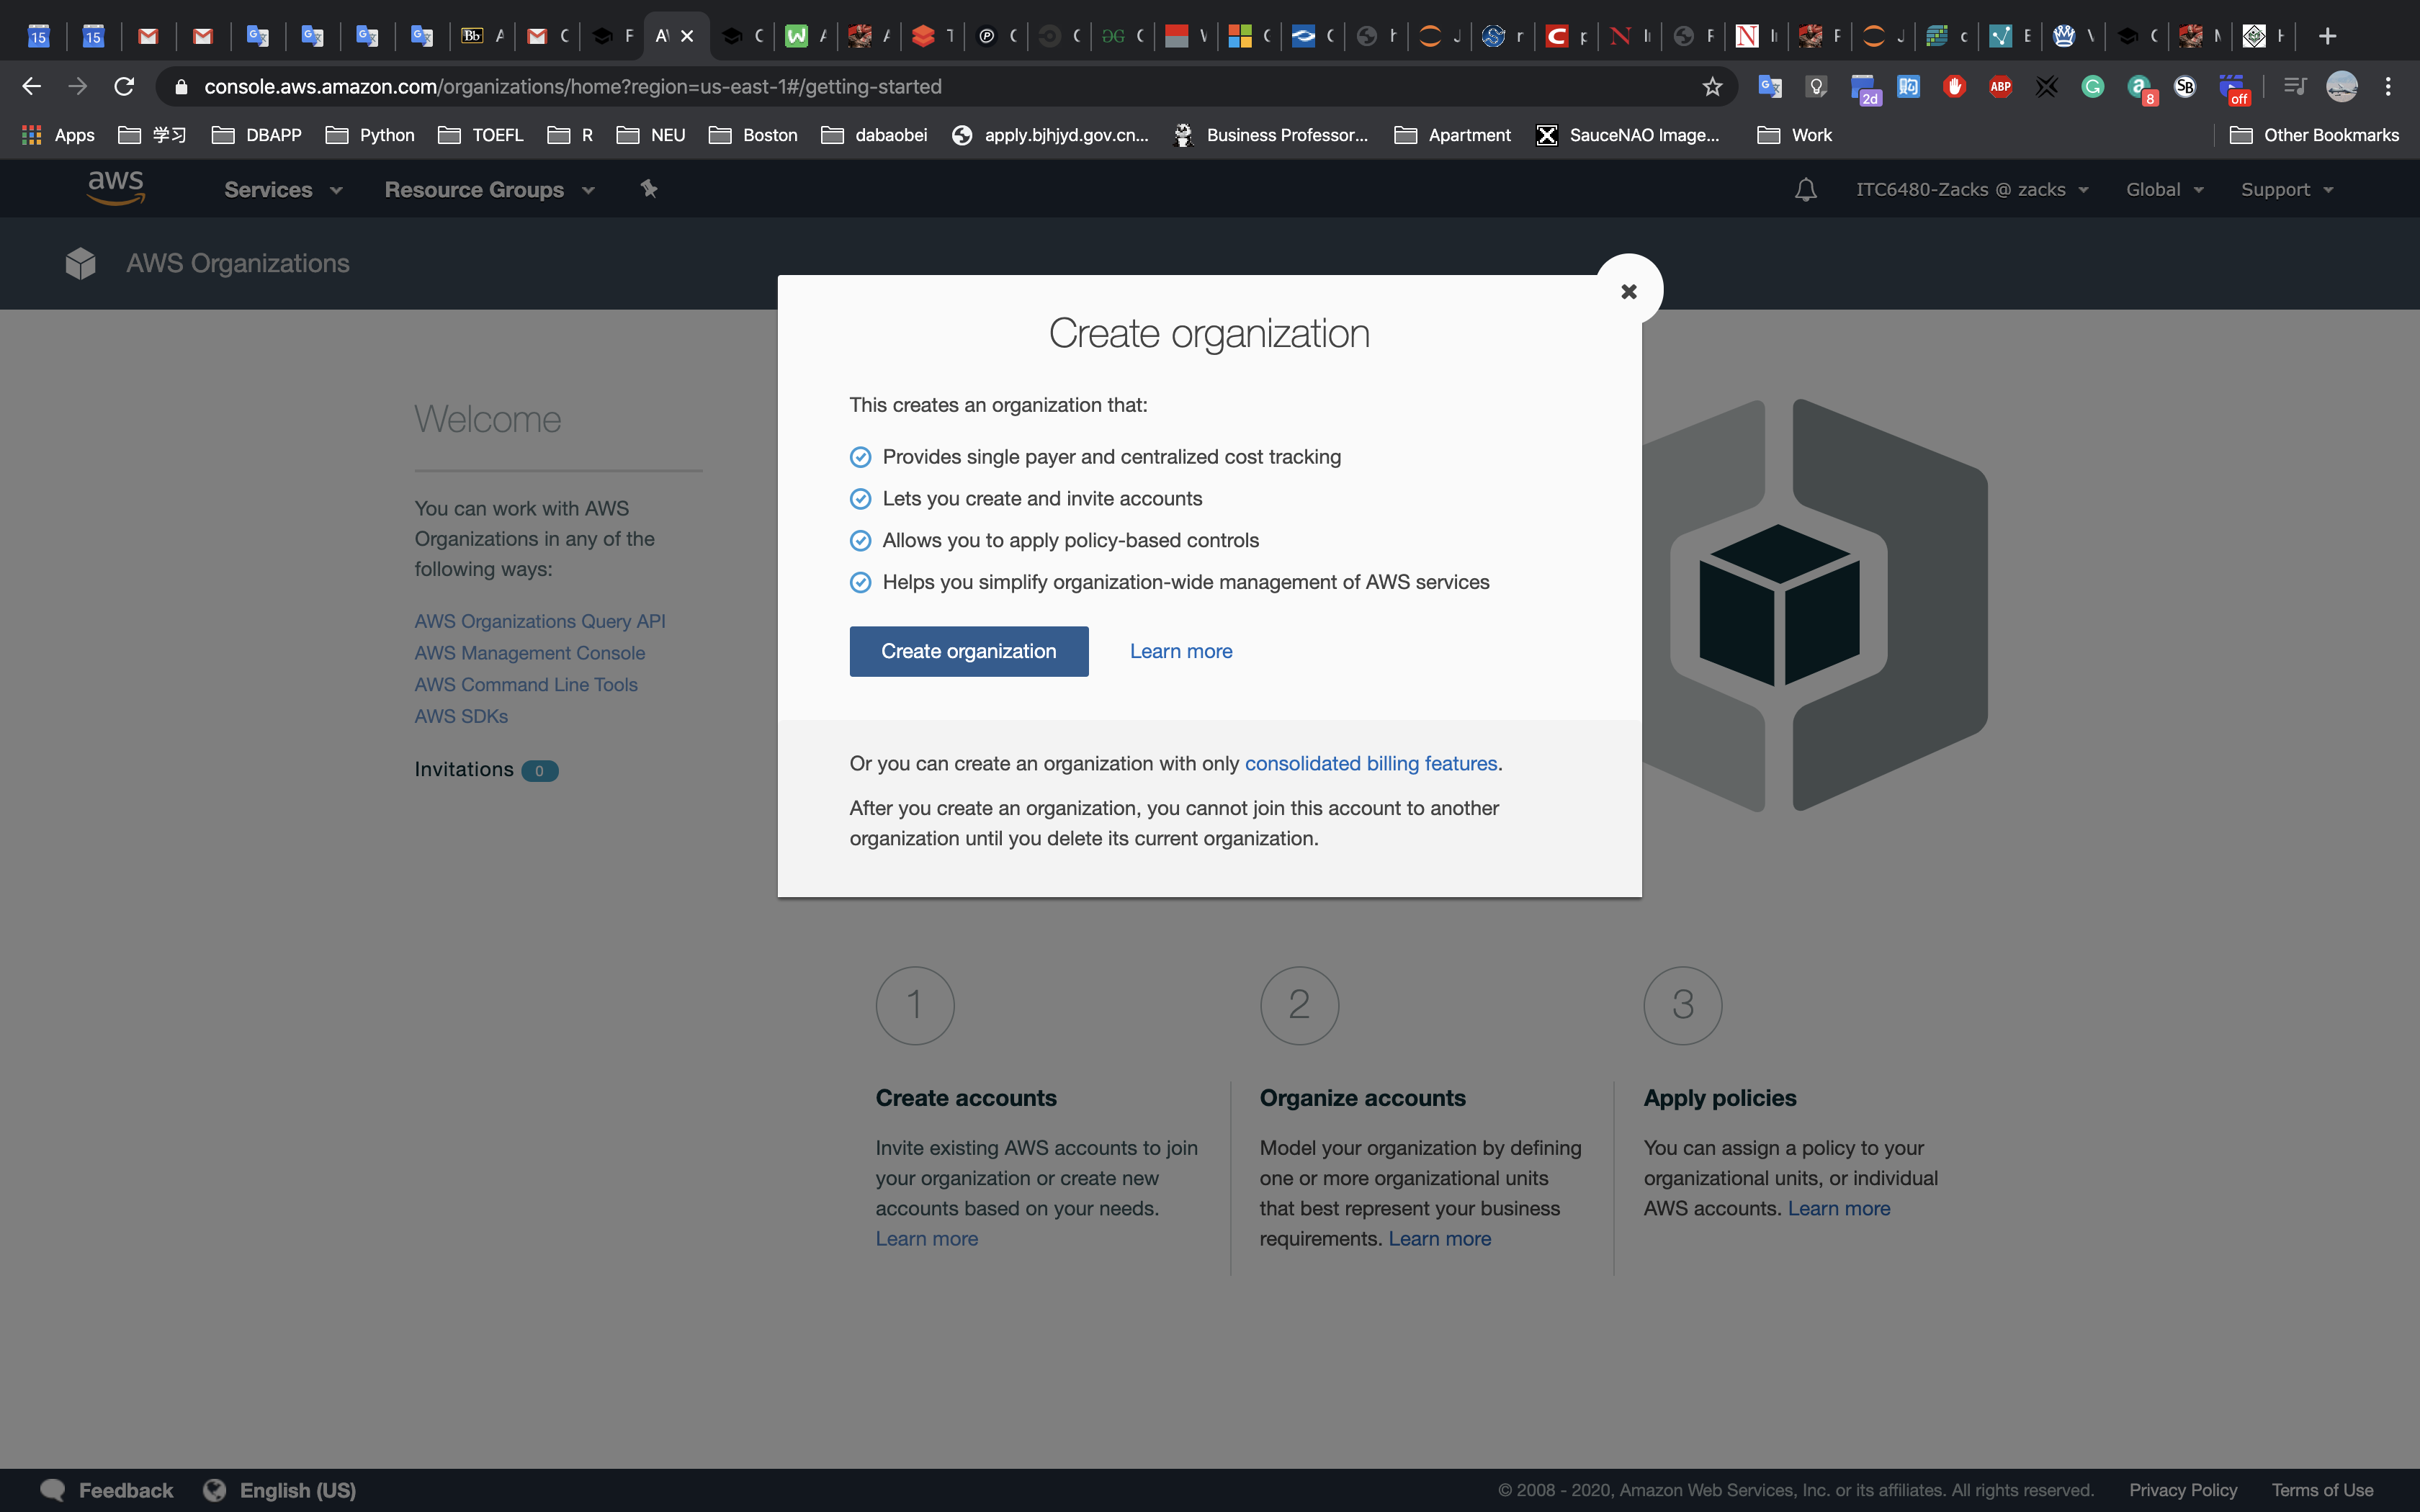
You will receive a verification email, click on
Verify your email addressto verify your account:
You will then see a verification message in the console for your organization:

You now have an organization that you can join other accounts to.
2.2 Join member accounts
You will now join other accounts to your organization.
From the AWS Organizations console click on
Add account:
Click on
Invite account:
Enter in the Email or account ID, enter in any relevant Notes and click
Invite: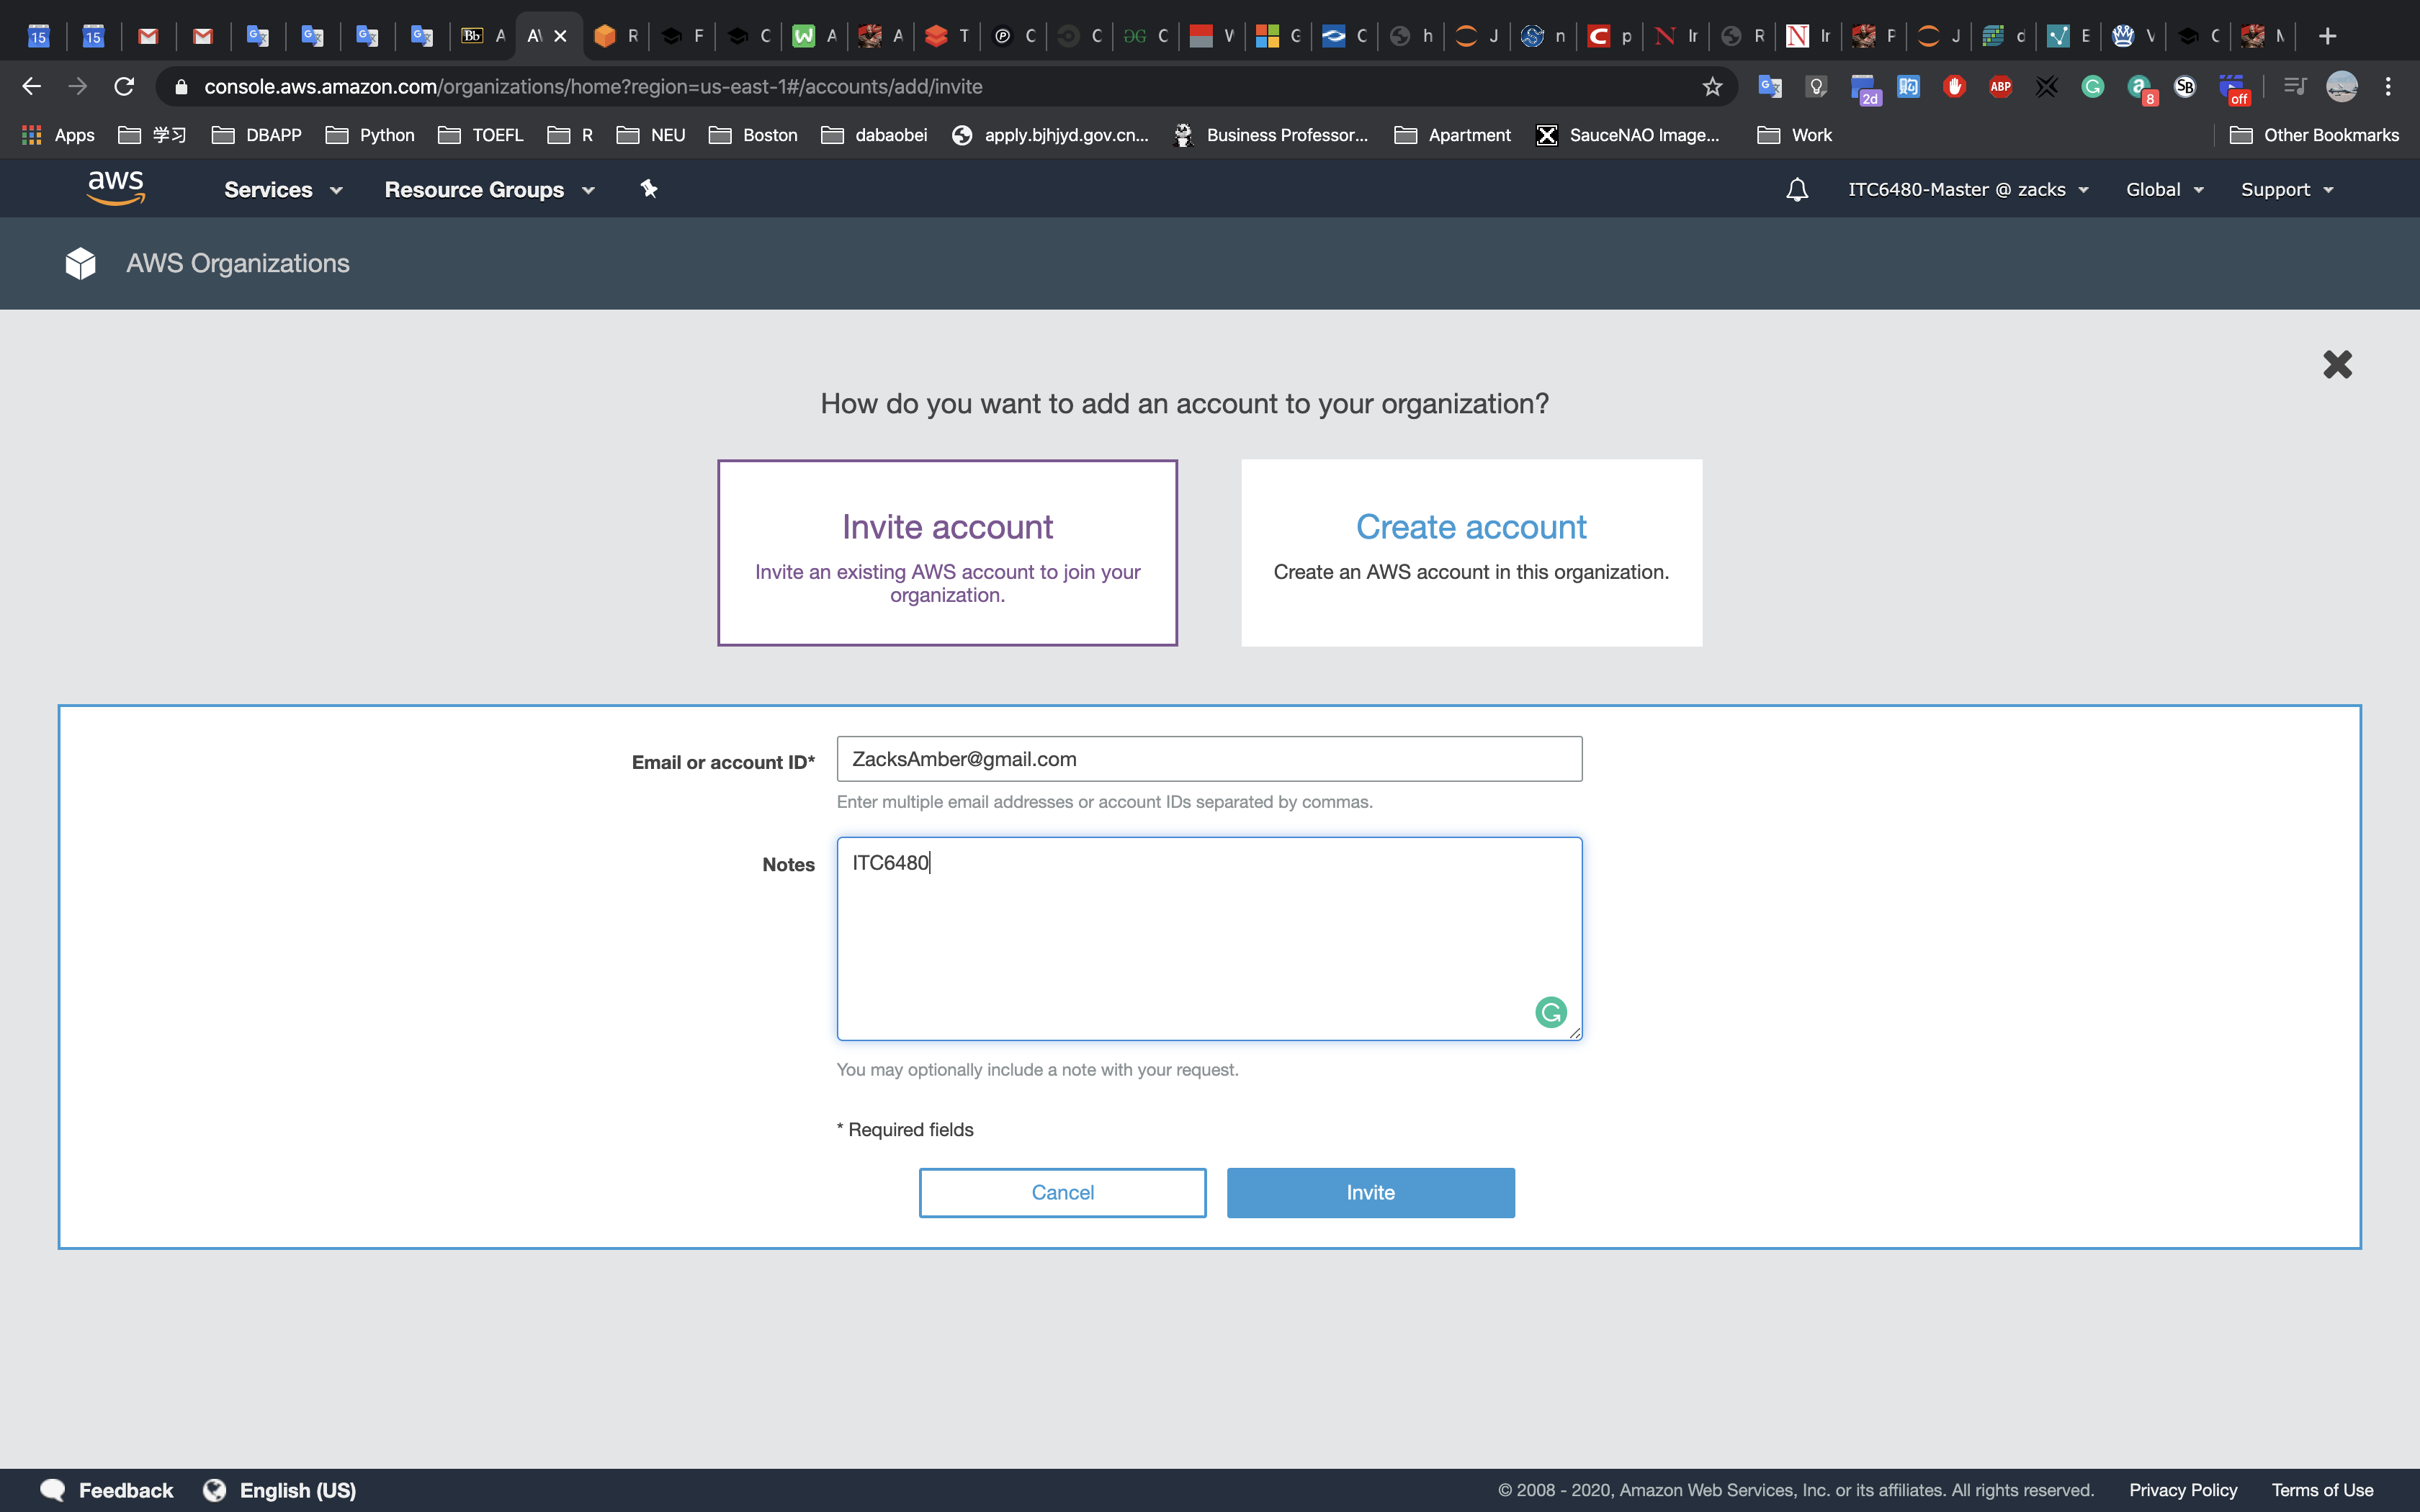
You will then have an open request:
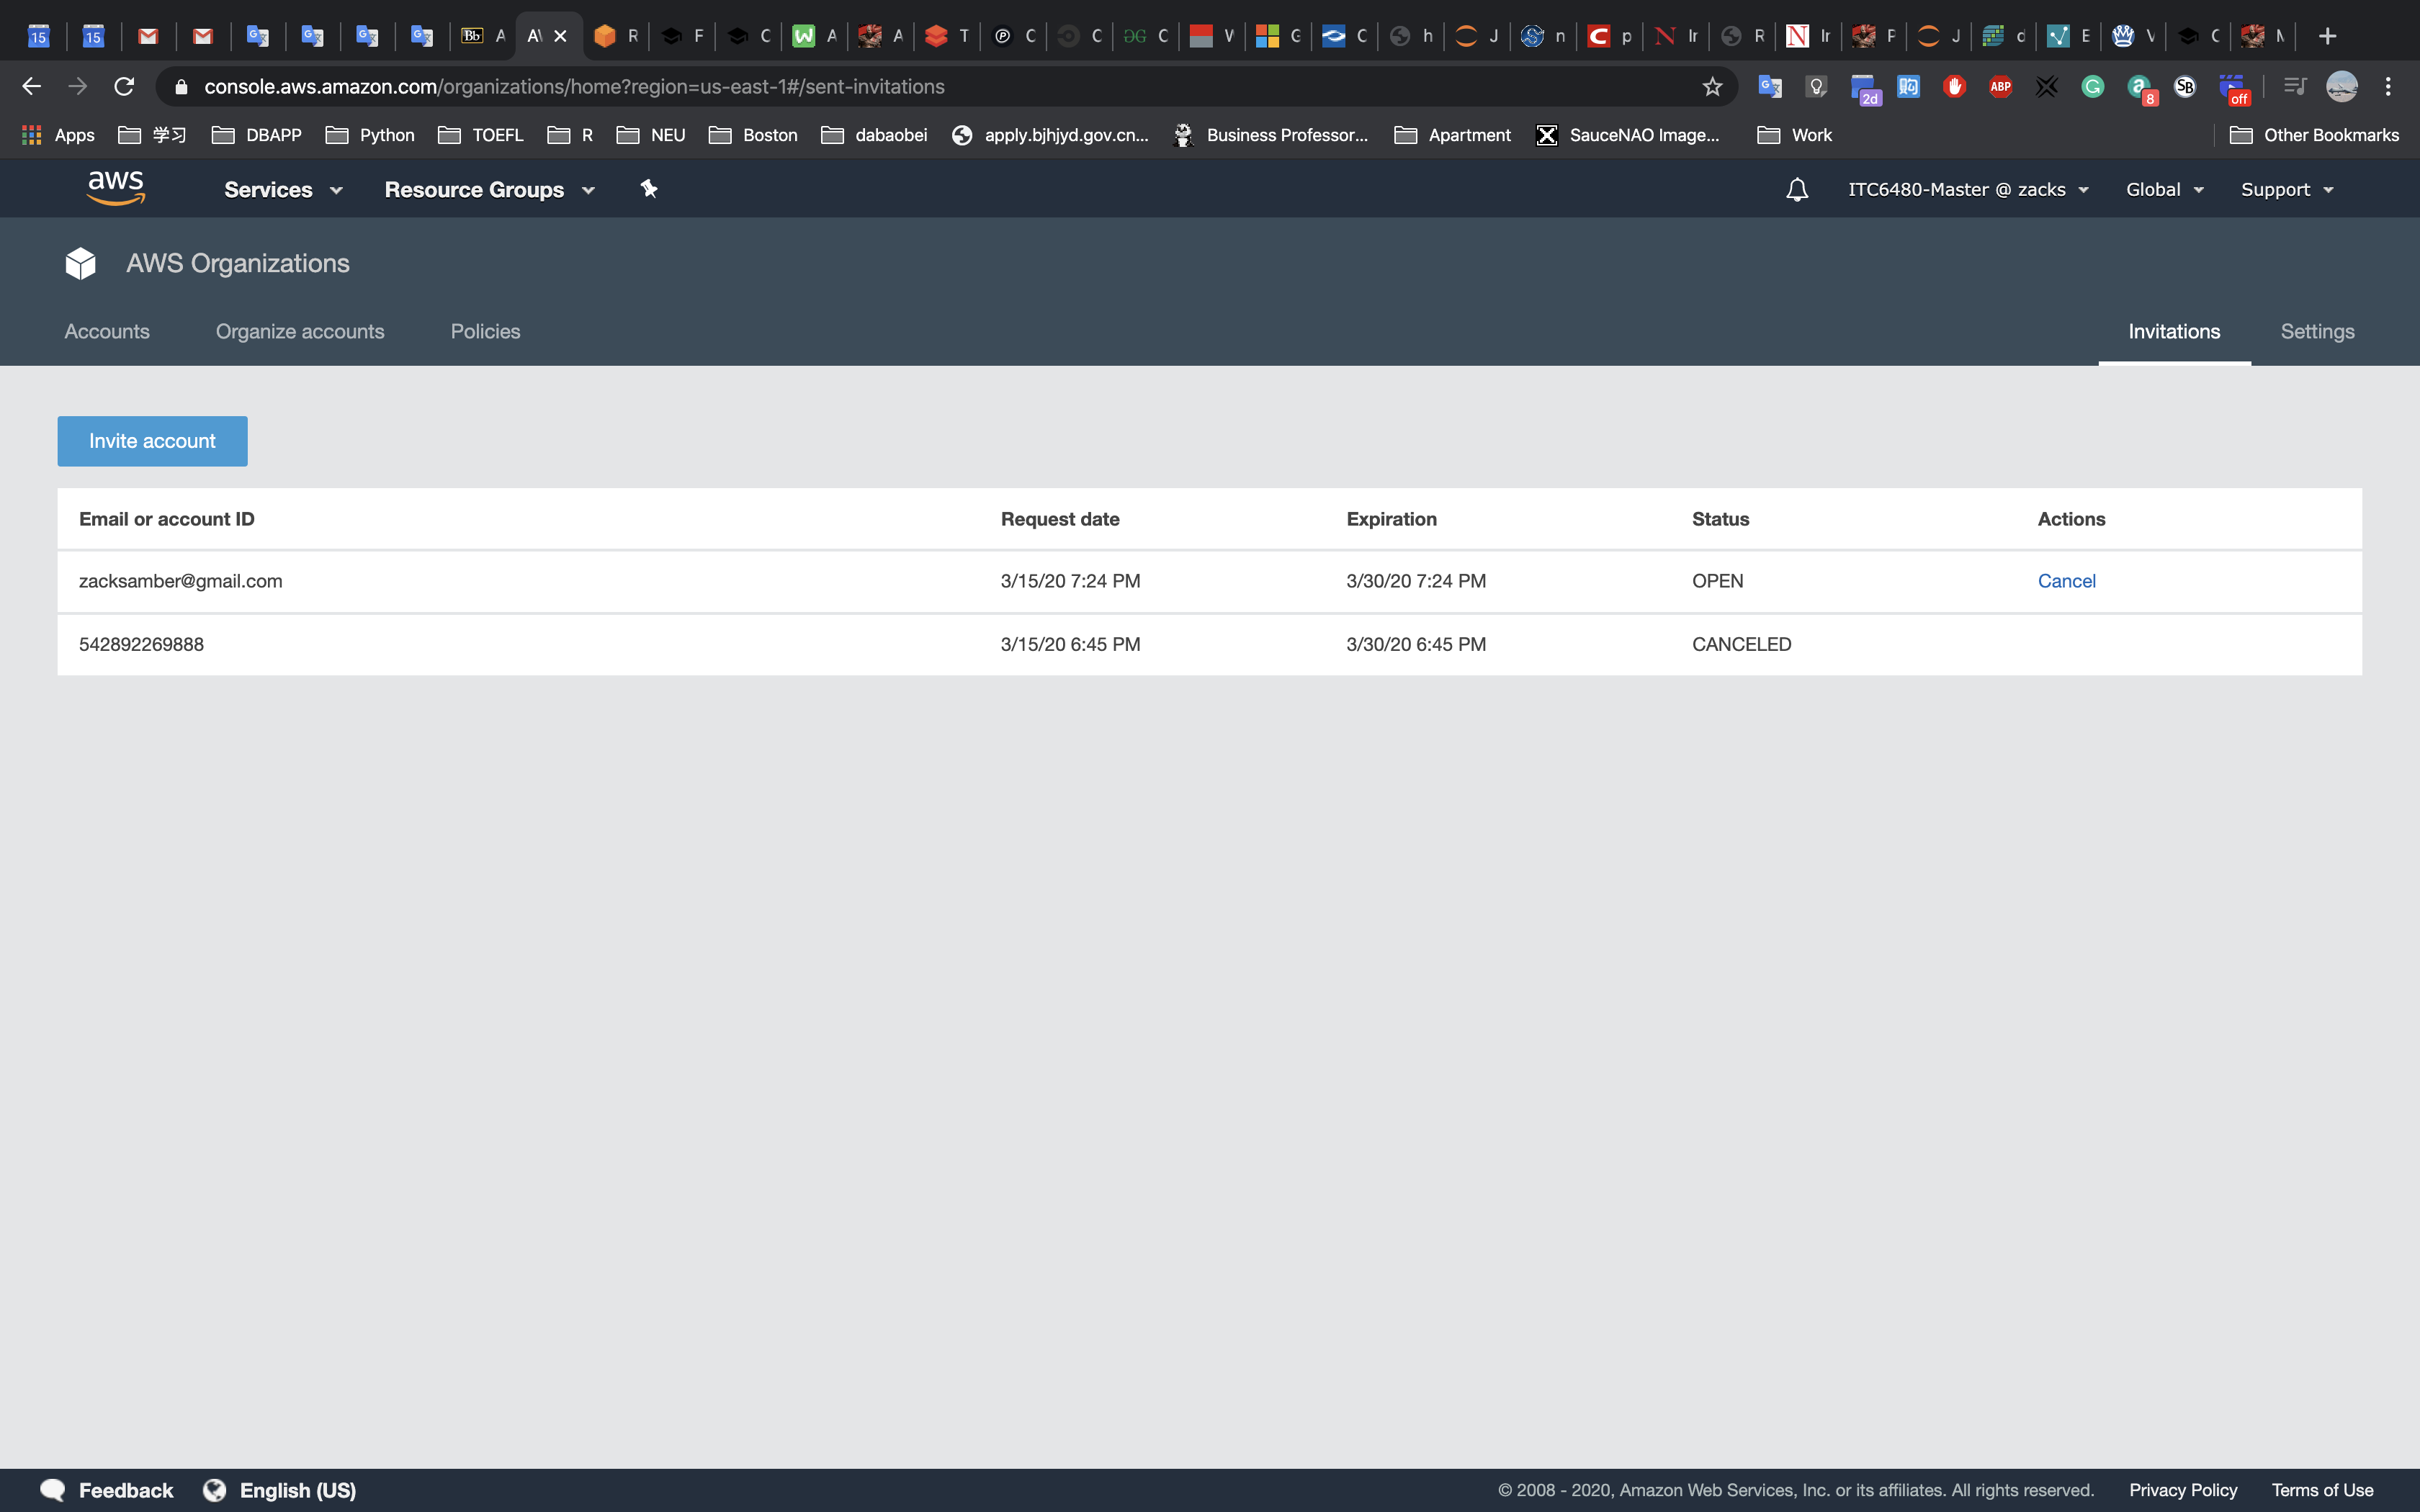
Log in to your member account, and go to AWS Organizations:
You will see an invitation in the menu, click on
Invitations:
Verify the details in the request, and click on Accept:
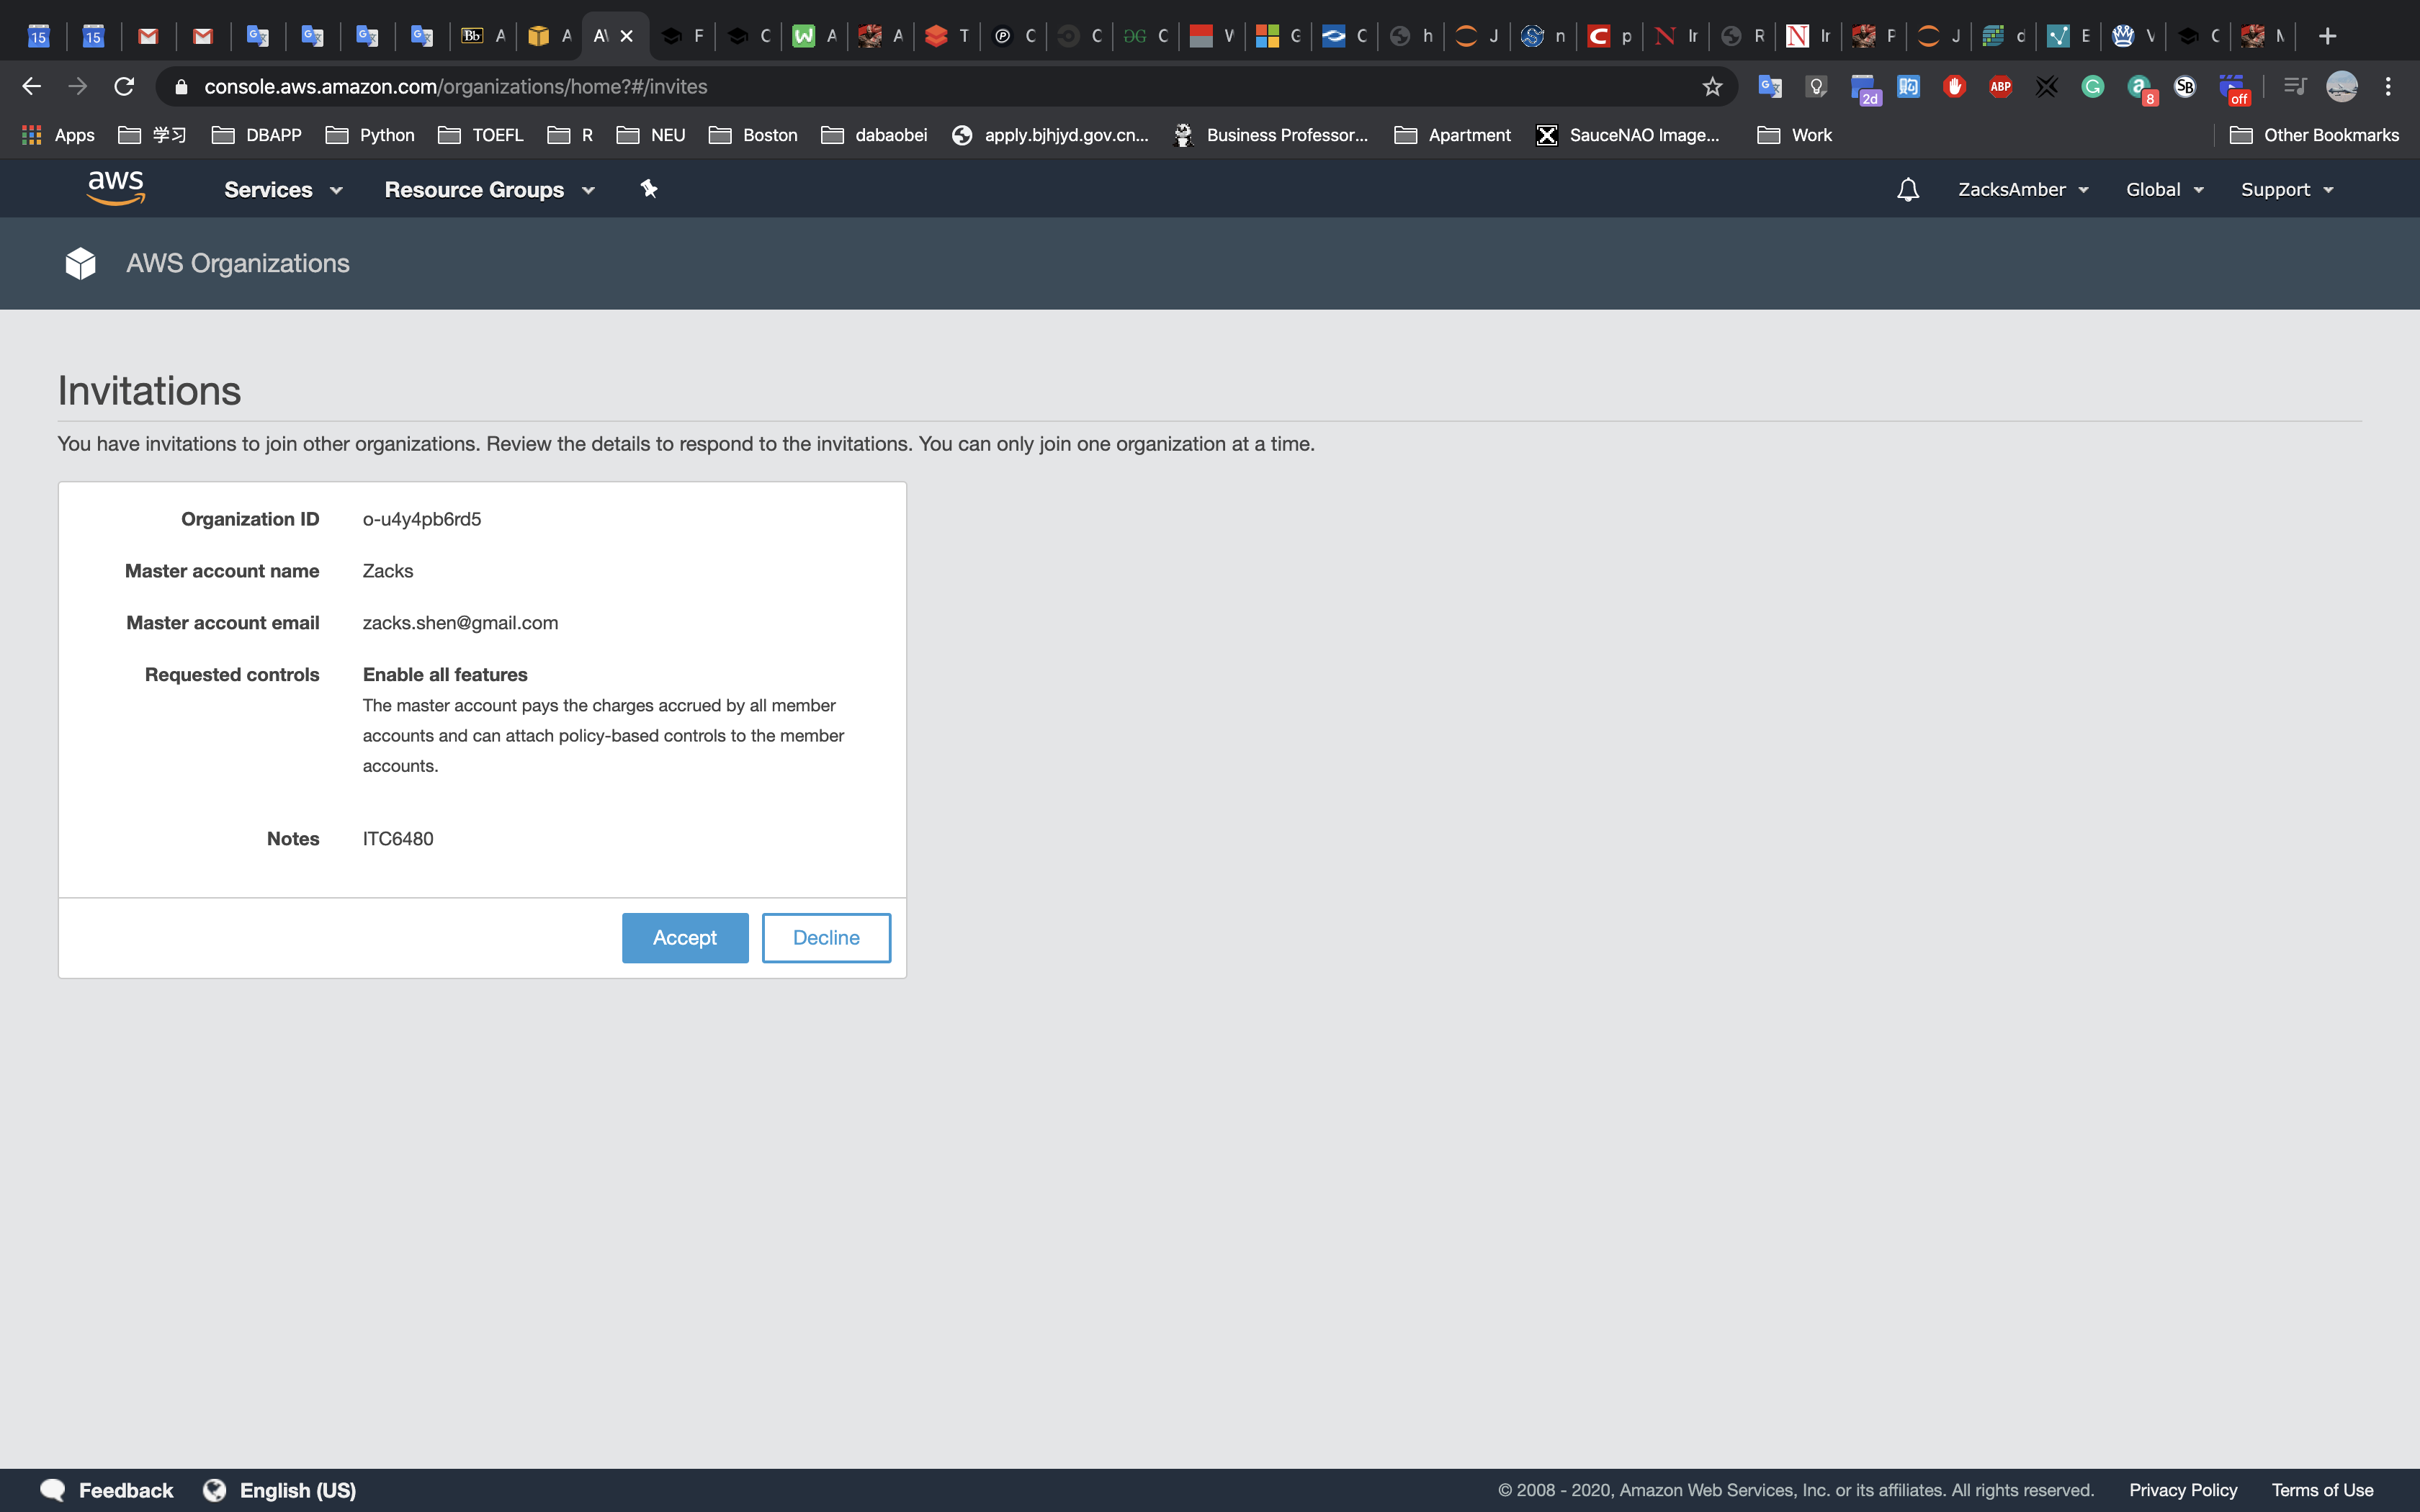
Verify the Organization ID (blacked out here), and click
Confirm: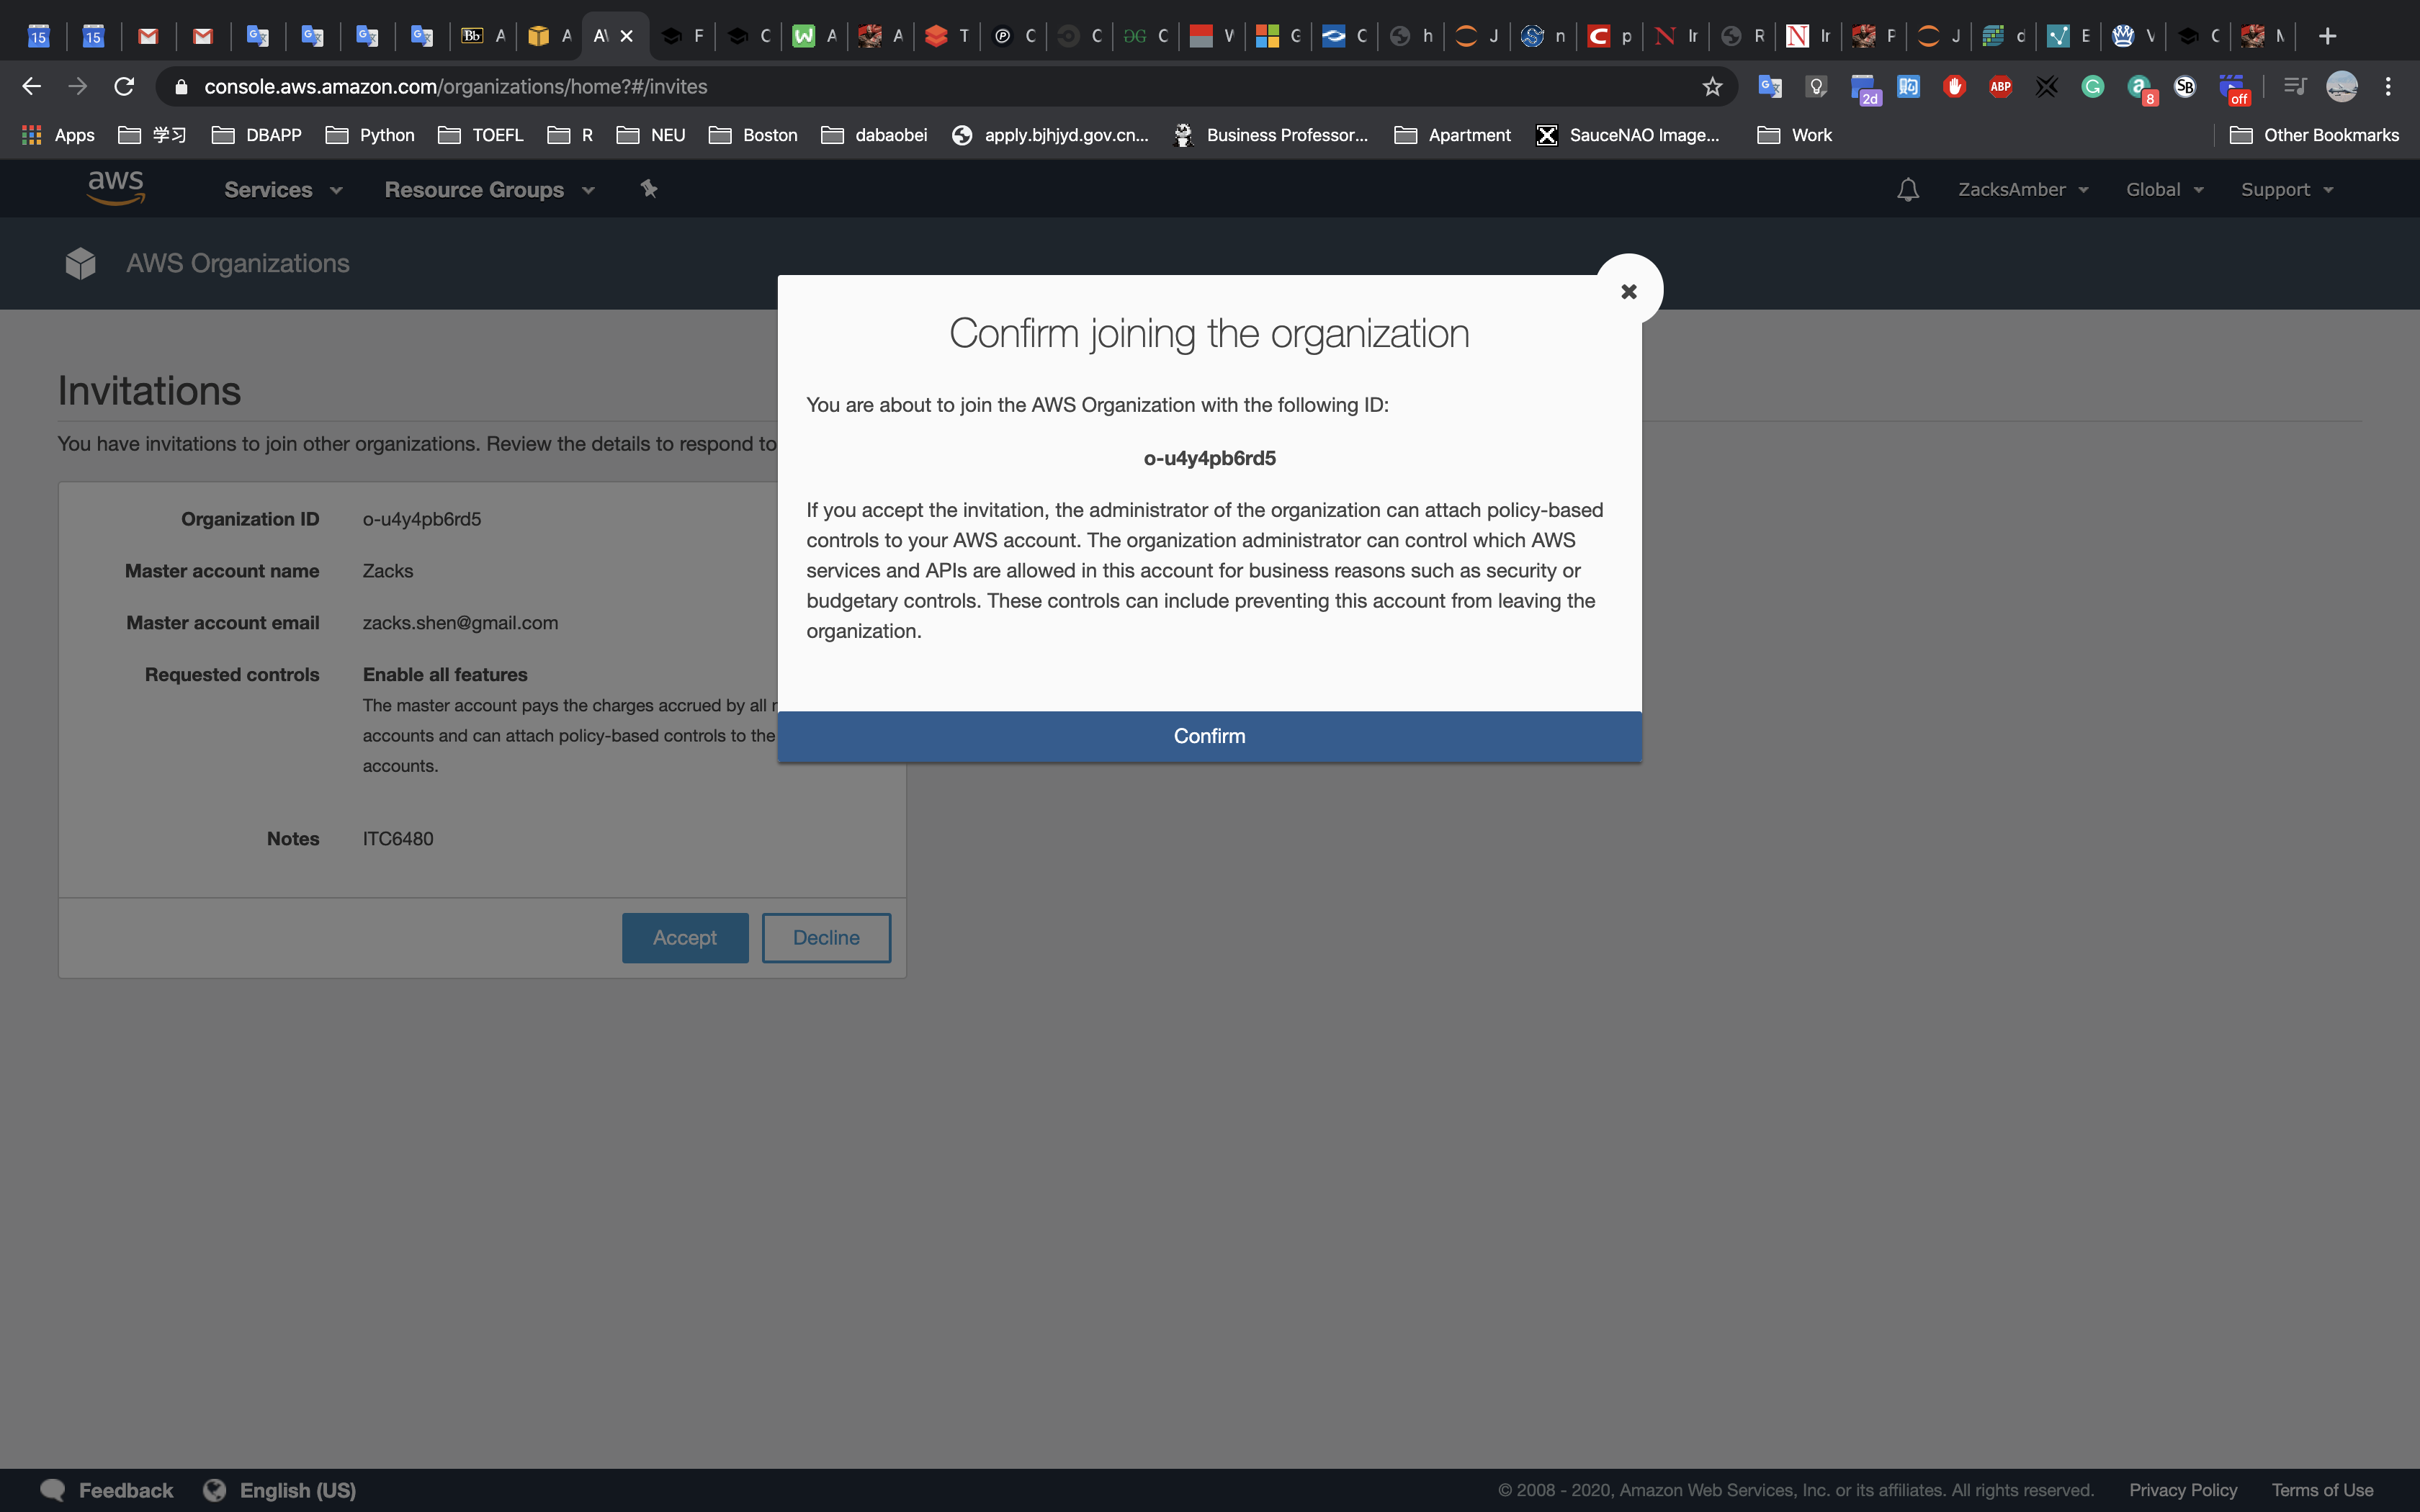
You are shown that the account is now part of your organization:
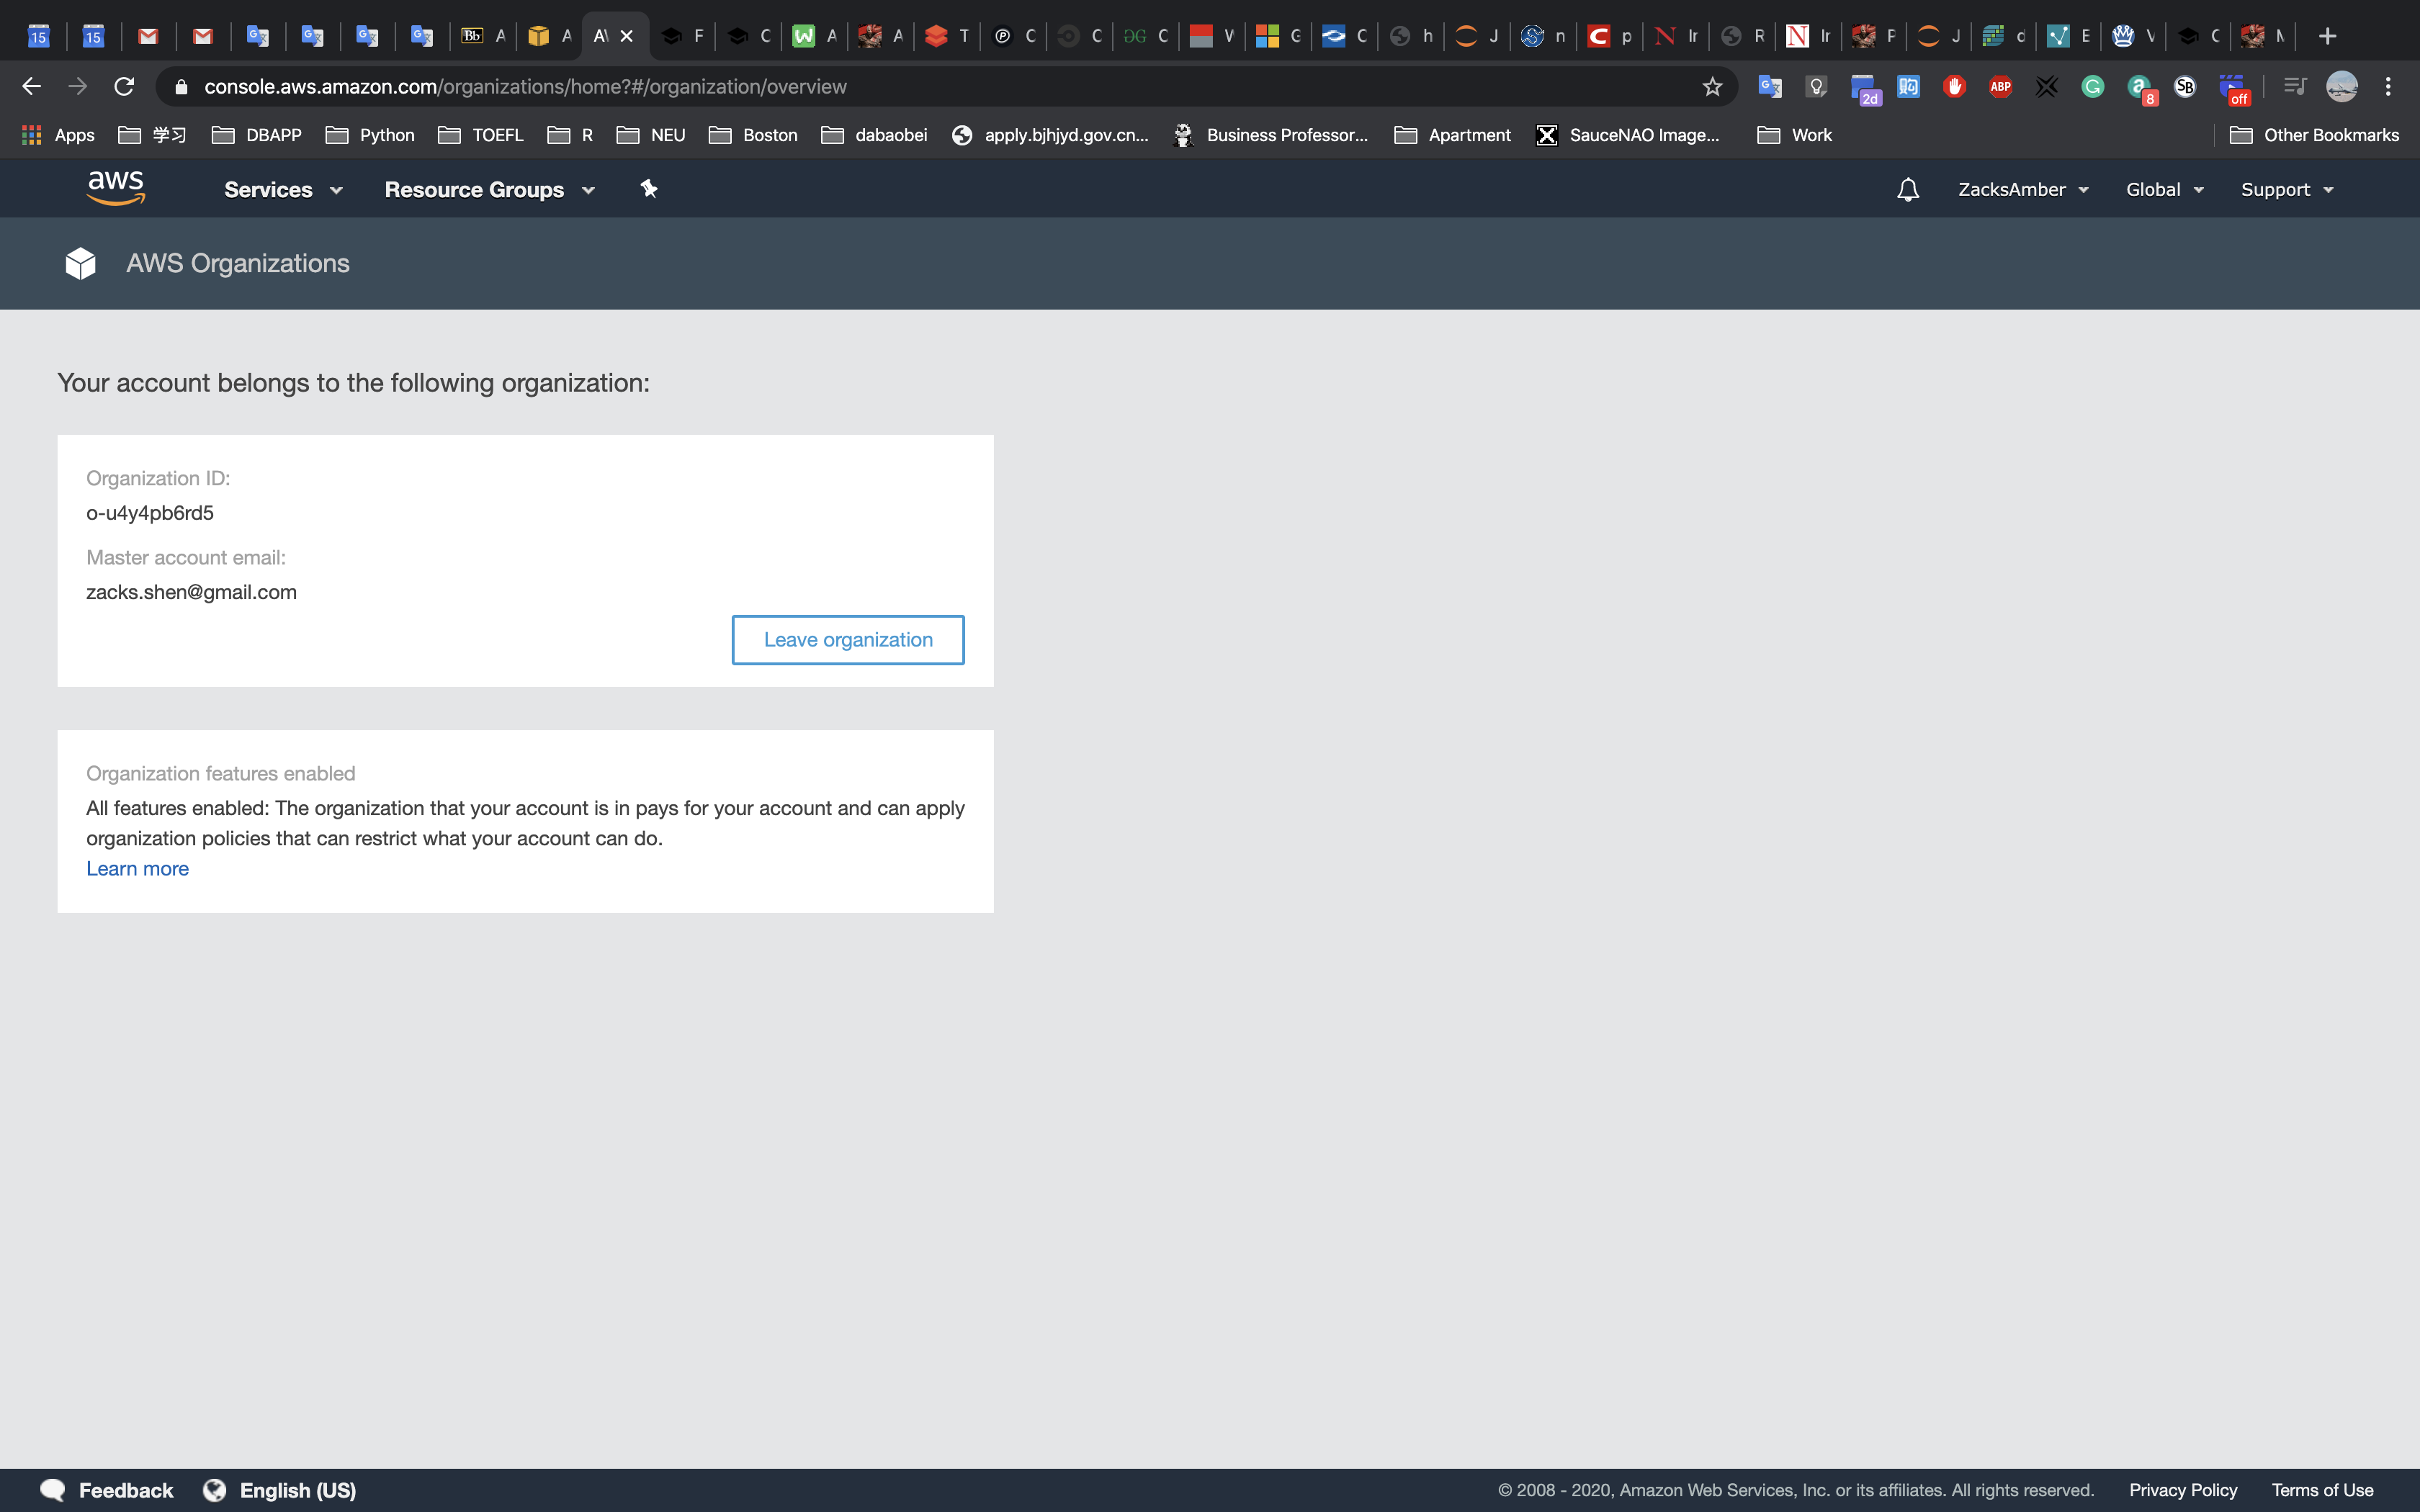
The member account will receive an email showing success:
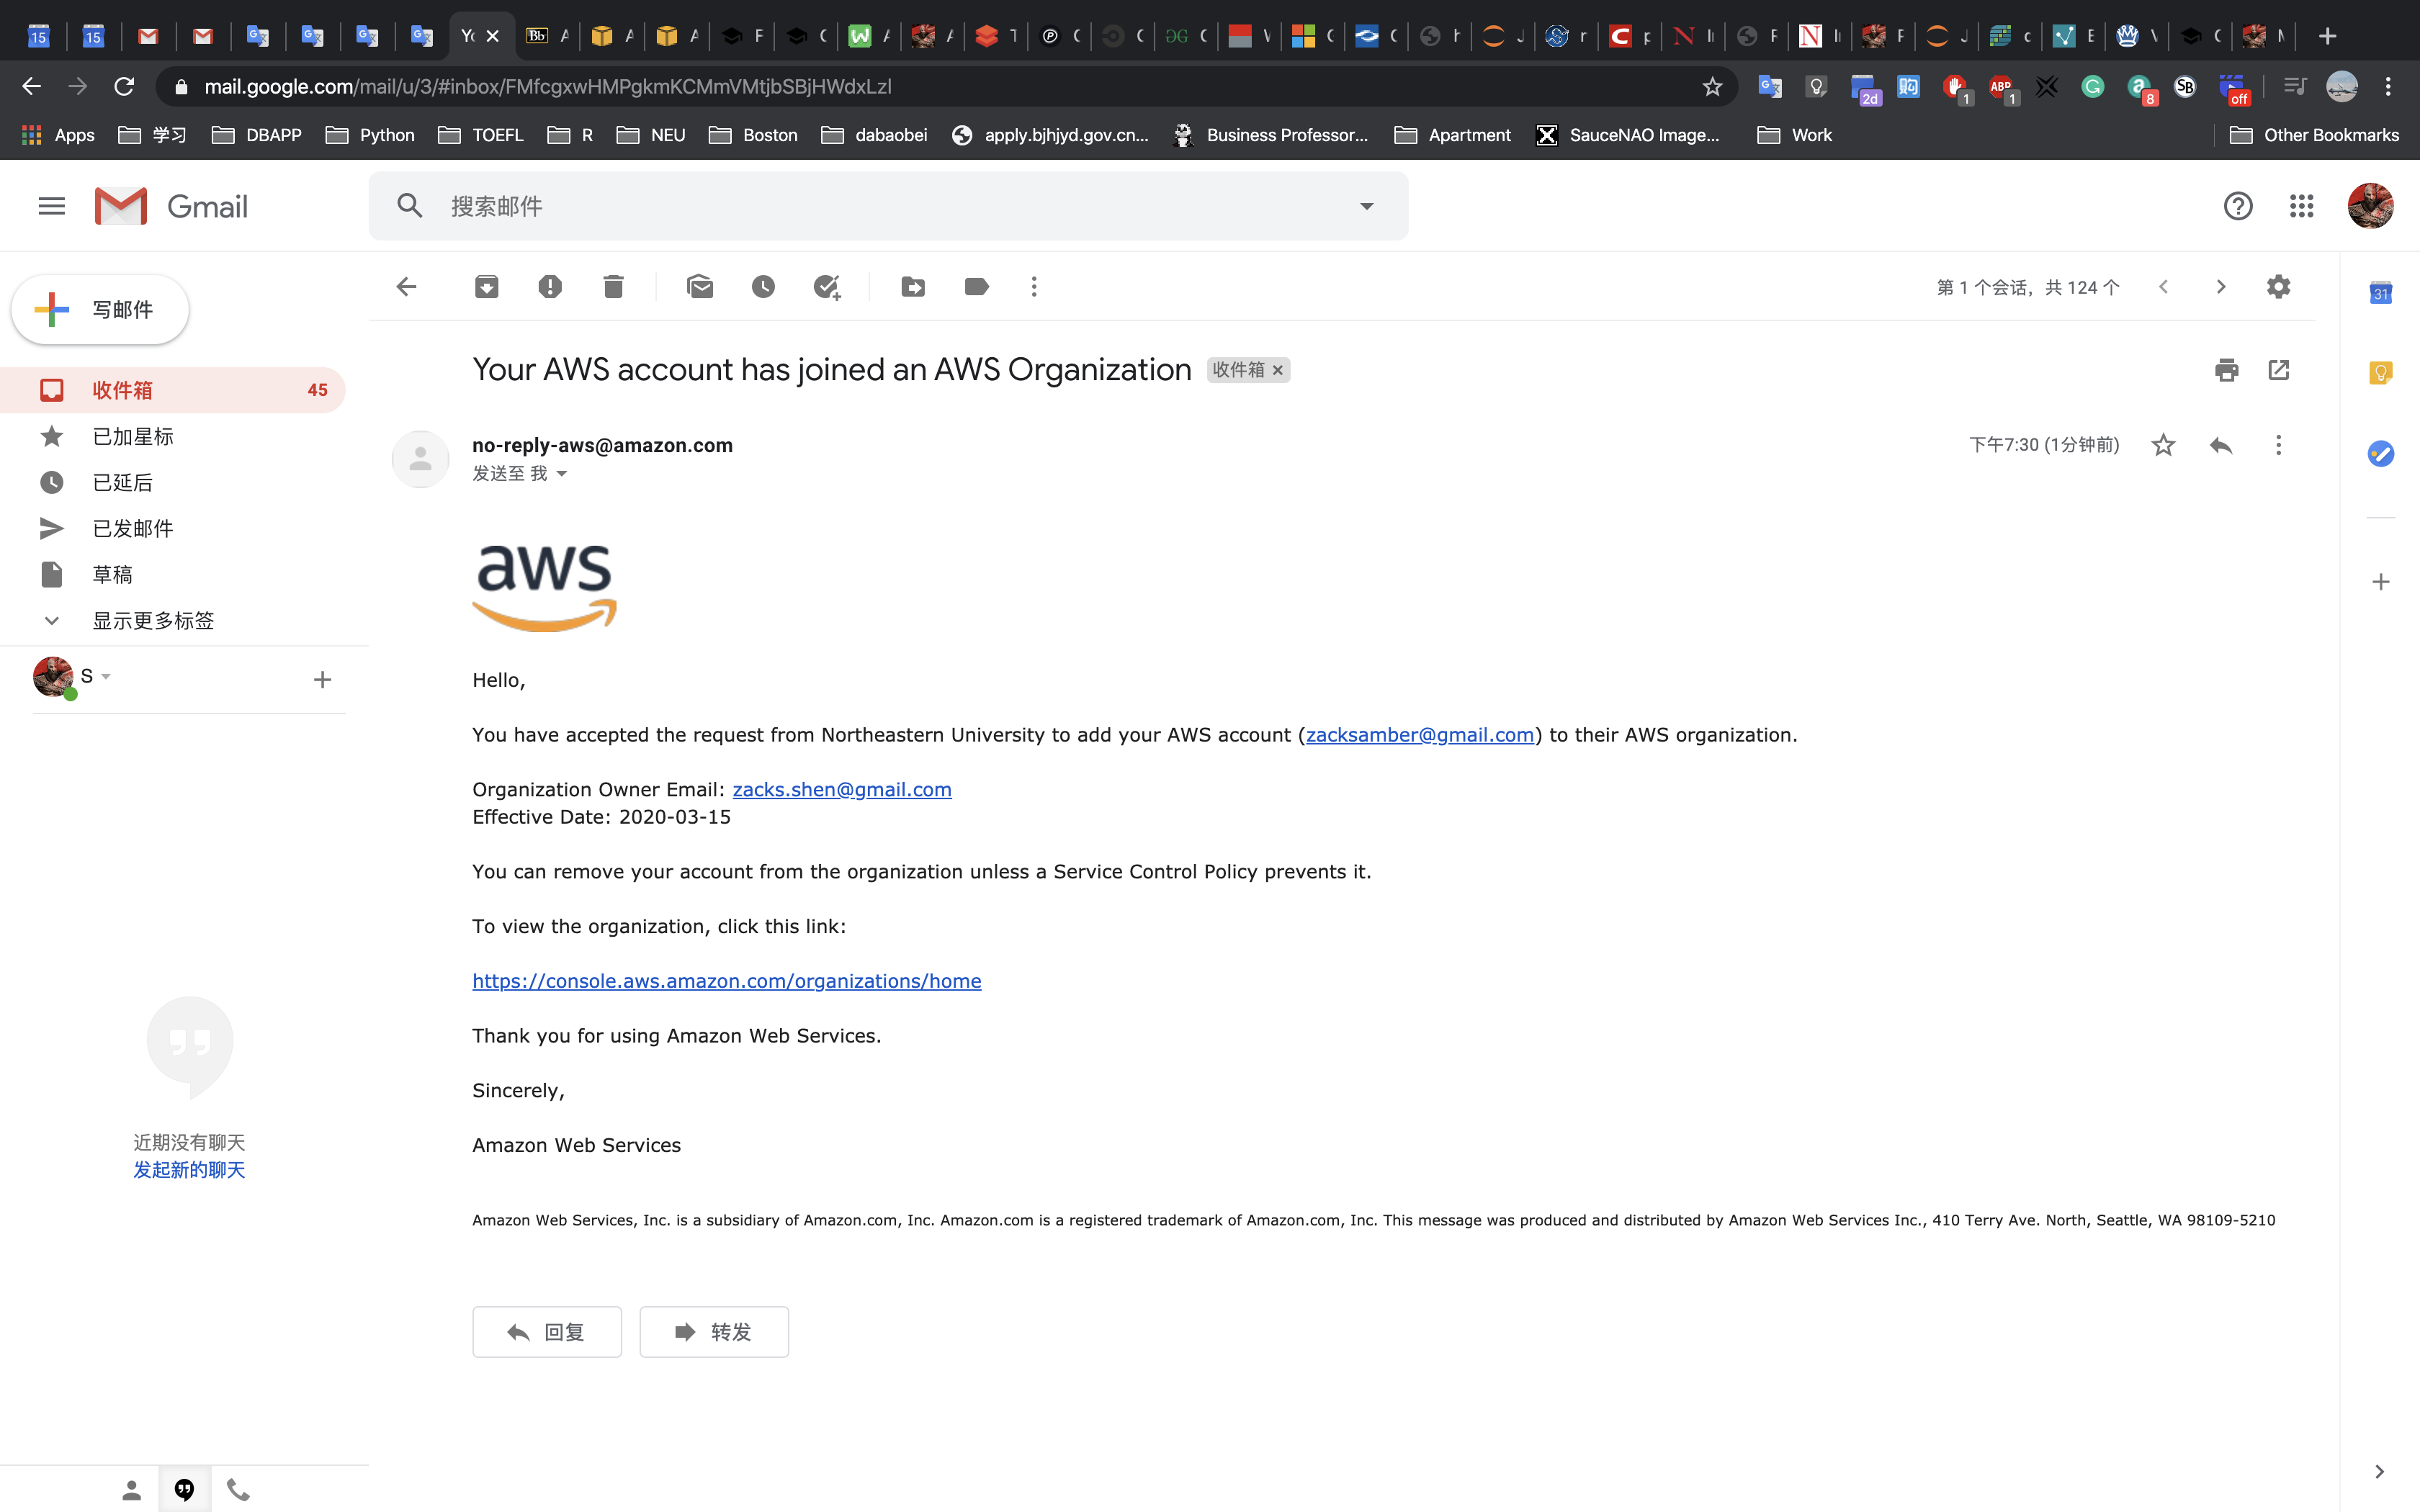
Repeat the steps above (exercise 1.2) for each additional account in your organization.
3. Configure billing account settings
It is important to ensure your account contacts are up to date and correct. This allows AWS to be able to contact the correct people in your organization if required. It is recommended to use a mailing list or shared email that is accessible by multiple team members for redundancy. Ensure the email accounts are actively monitored.
Log in to your Master account as an IAM user with the required permissions, Click on the account name in the top right, and click on
My Accountfrom the menu:
Scroll down to Alternate Contacts and click on
Edit:
Enter information into each of the fields for Billing, Operations and Security, and click
Update:
4. Configure Cost and Usage Reports
Cost and Usage Reports provide the most detailed information on your usage and bills. They can be configured to deliver 1 line per resource, for every hour of the day. They must be configured to enable you to access and analyze your usage and billing information. This will allow you to make modifications to your usage, and make your applications more efficient.
4.1 Configure a Cost and Usage Report
If you configure multiple Cost and Usage Reports (CURs), then it is recommended to have 1 CUR per bucket. If you must have multiple CURs in a single bucket, ensure you use a different report path prefix so it is clear they are different reports.
Log in to your Master account as an IAM user with the required permissions, and go to the Billing console:
Select Cost & Usage Reports from the left menu:
Click on
Create report:
Enter a
Report name(it can be any name), ensure you have selectedInclude resource IDsandData refresh settings, then click onNext:
Click on
Configure:
Enter a unique bucket name, and ensure the region is correct, click Next:

Read and verify the policy, this will allow AWS to deliver billing reports to the bucket. Click on
I have confirmed that this policy is correct, then clickSave:
Ensure your bucket is a Valid Bucket (if not, verify the bucket policy). Enter a Report path prefix (it can be any word) without any ‘/‘ characters, ensure the Time Granularity is
Hourly, Report Versioning is set toOverwrite existing report, under Enable report data integration for selectAmazon Athena,and clickNext: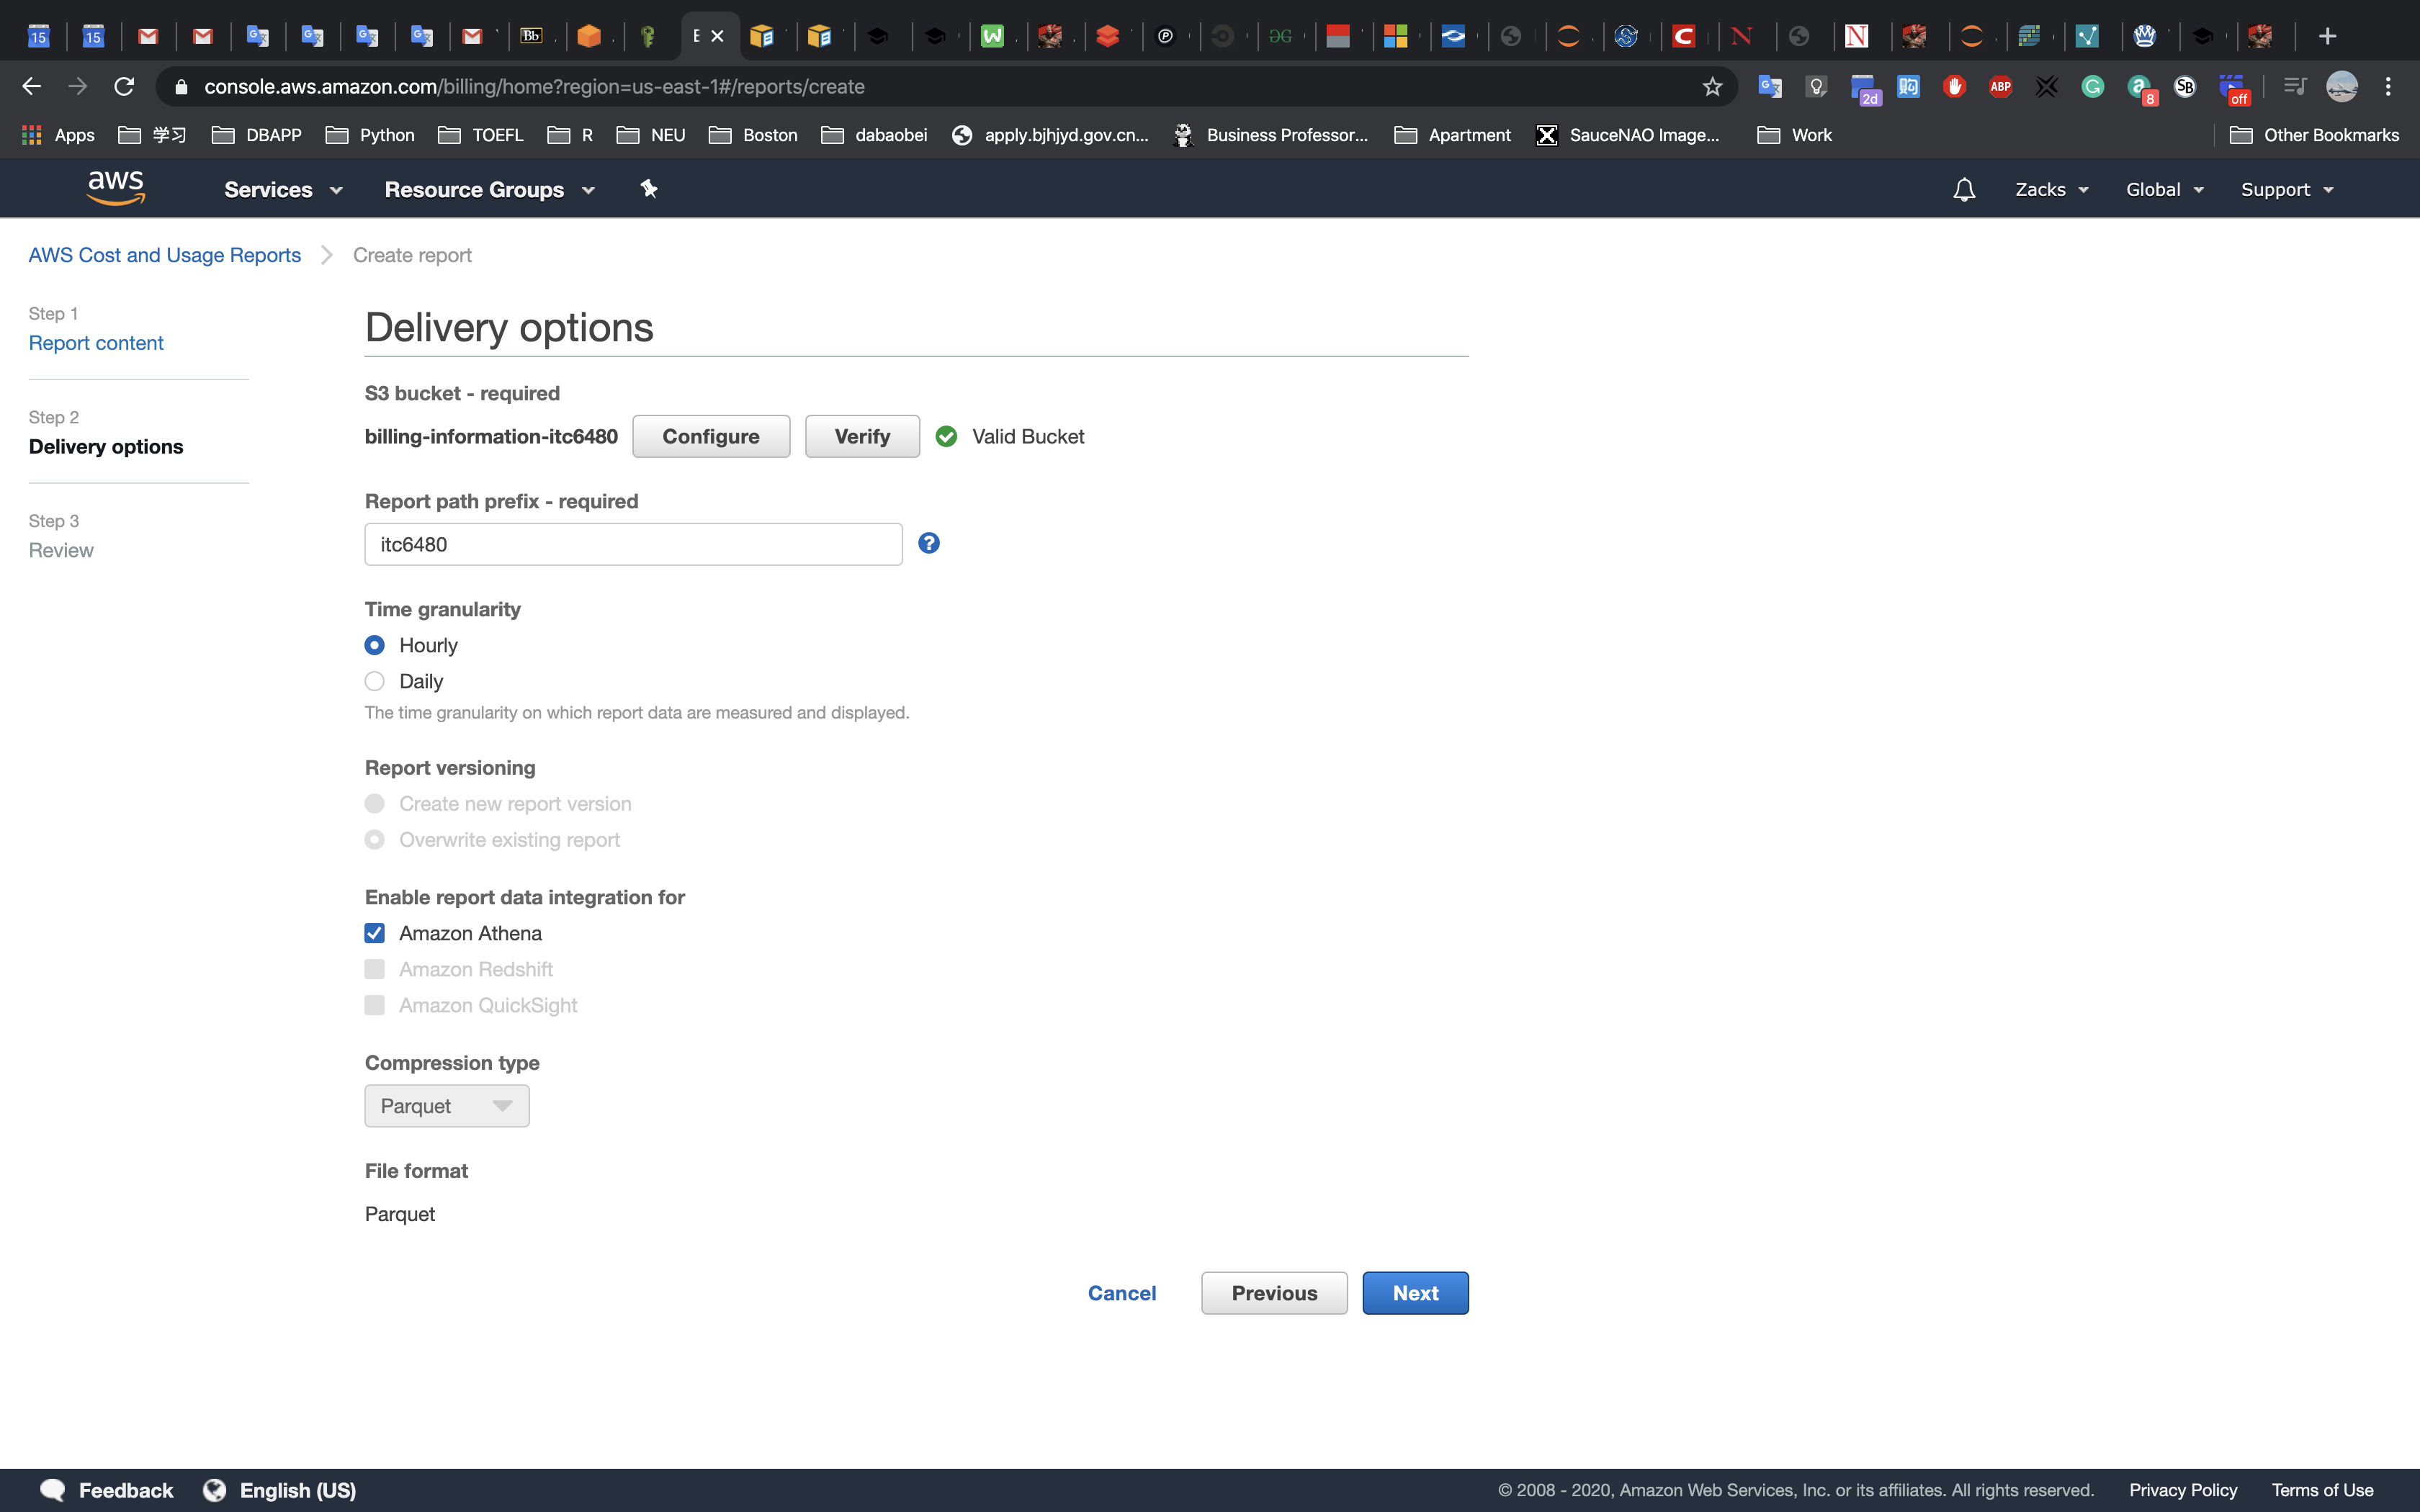
Review the configuration, scroll to the bottom and click on
Review and Complete: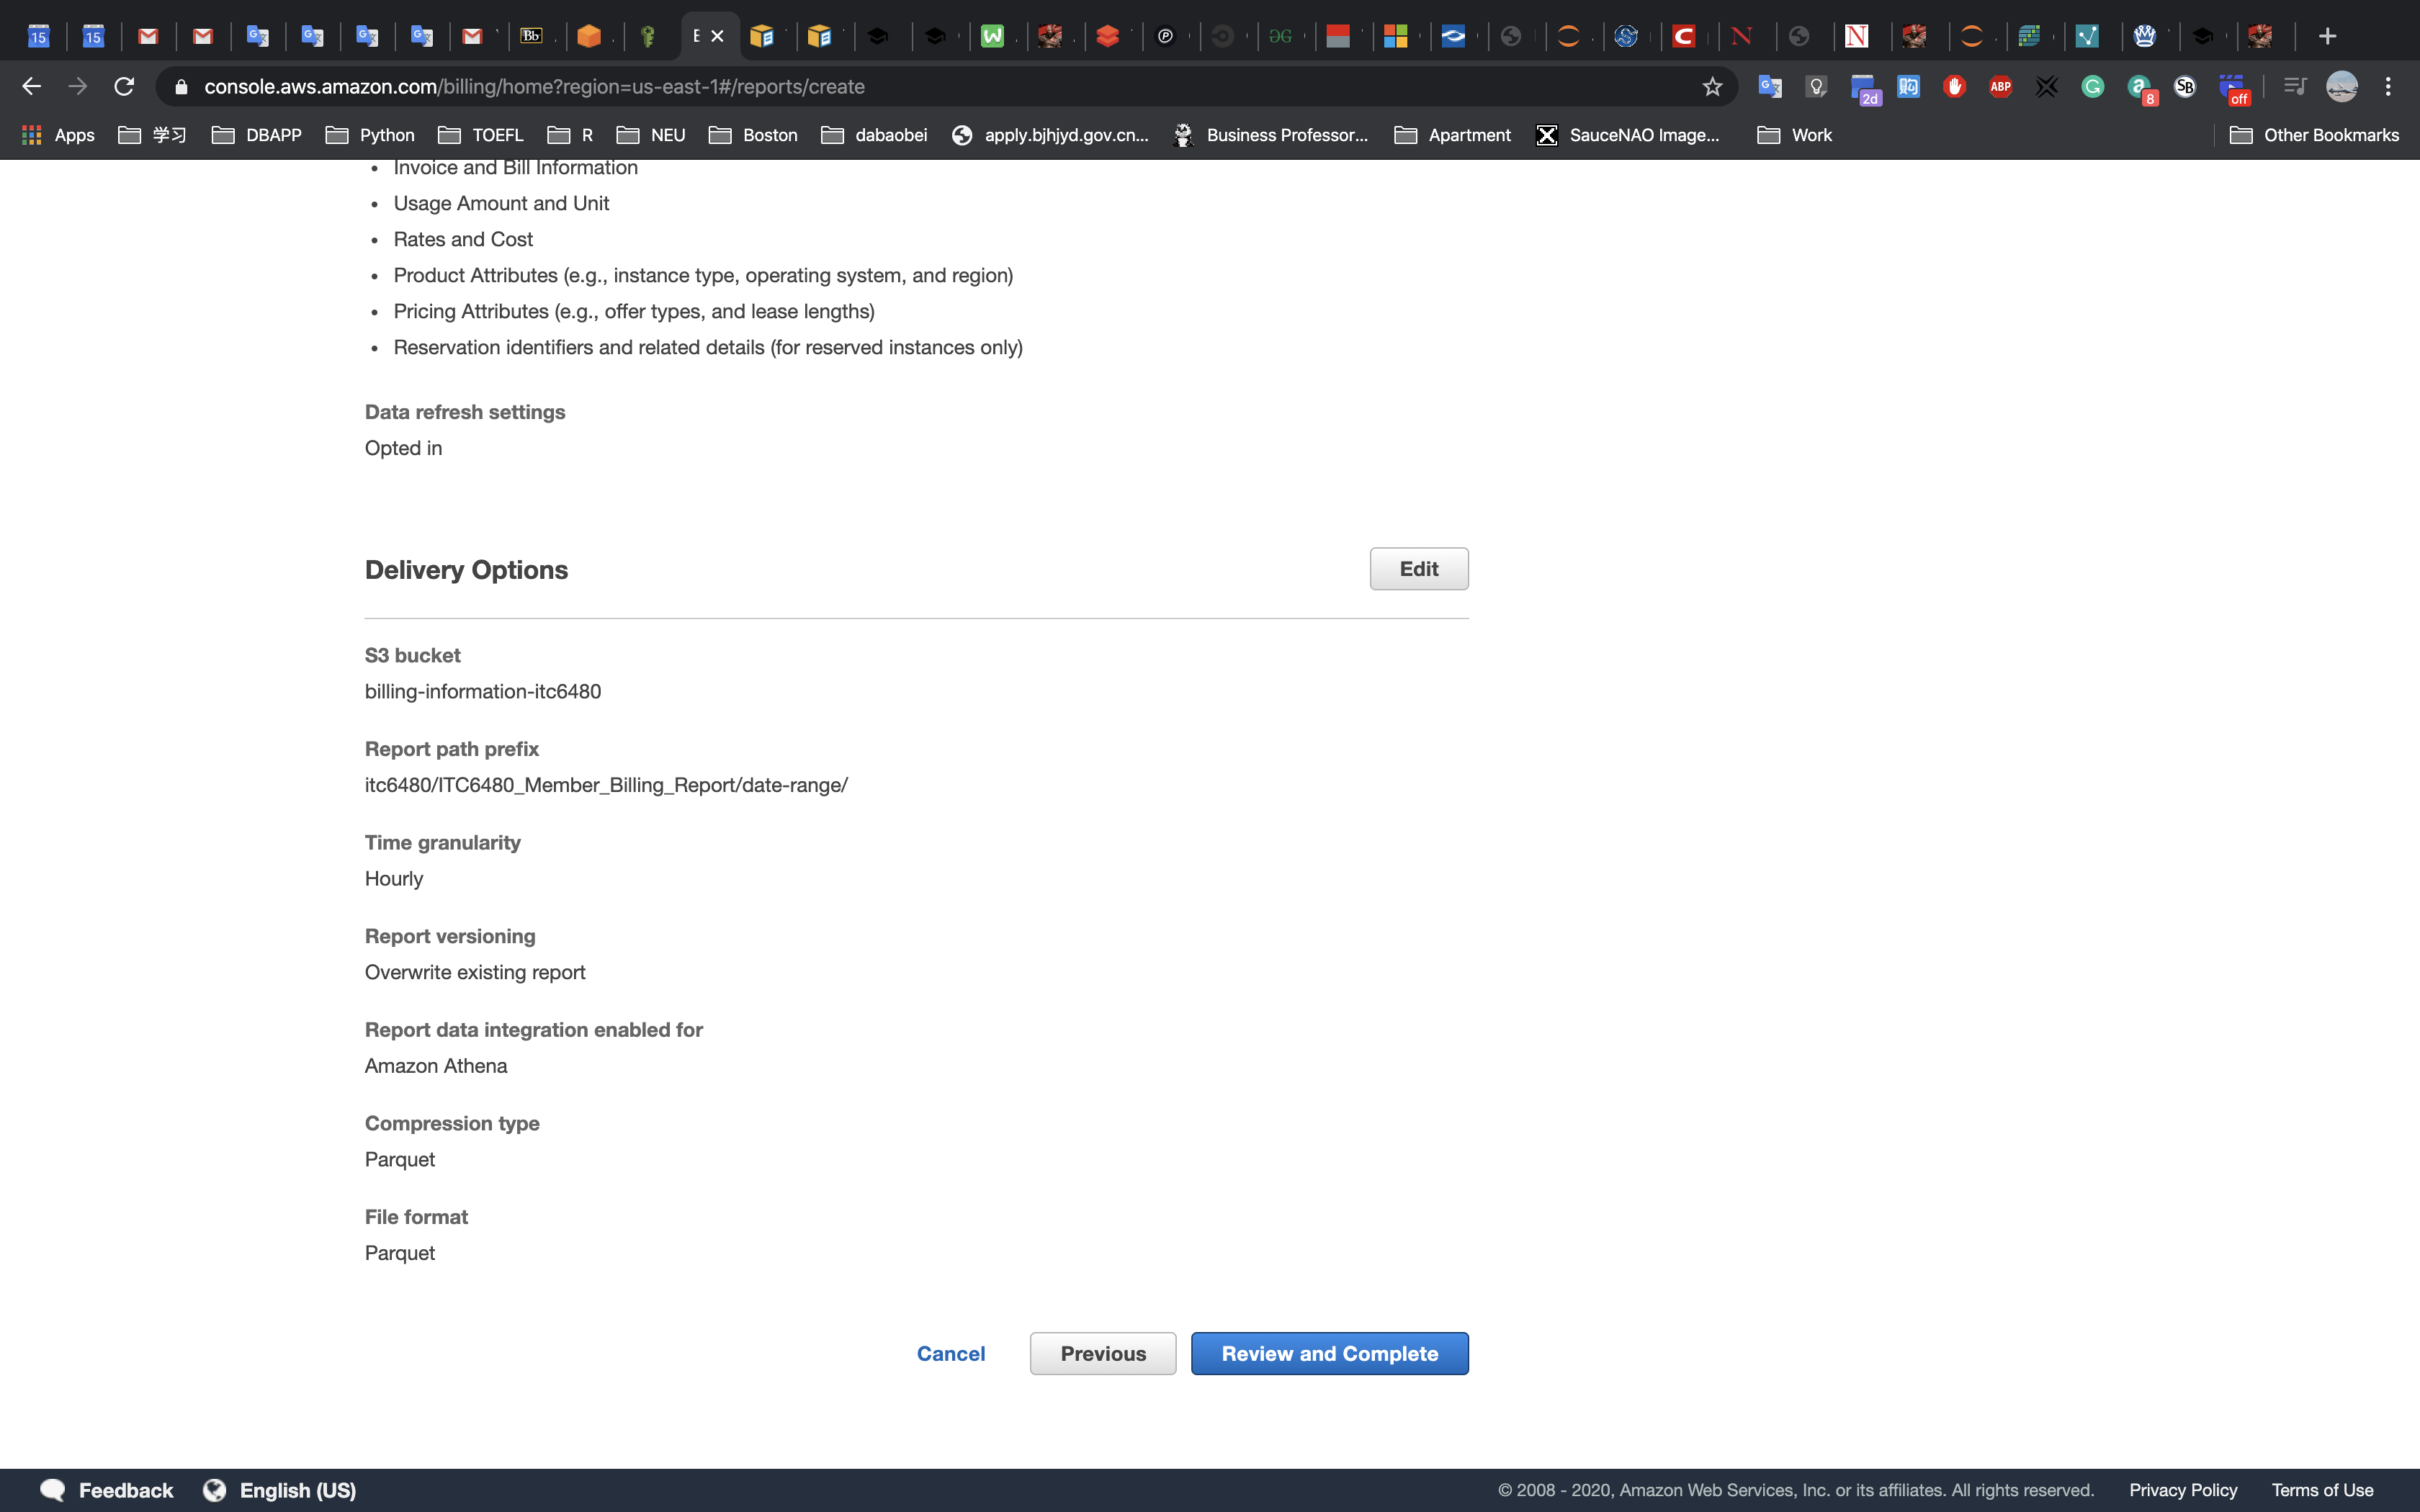
You have successfully configured a Cost and Usage Report to be delivered. It may take up to 24hrs for the first report to be delivered.
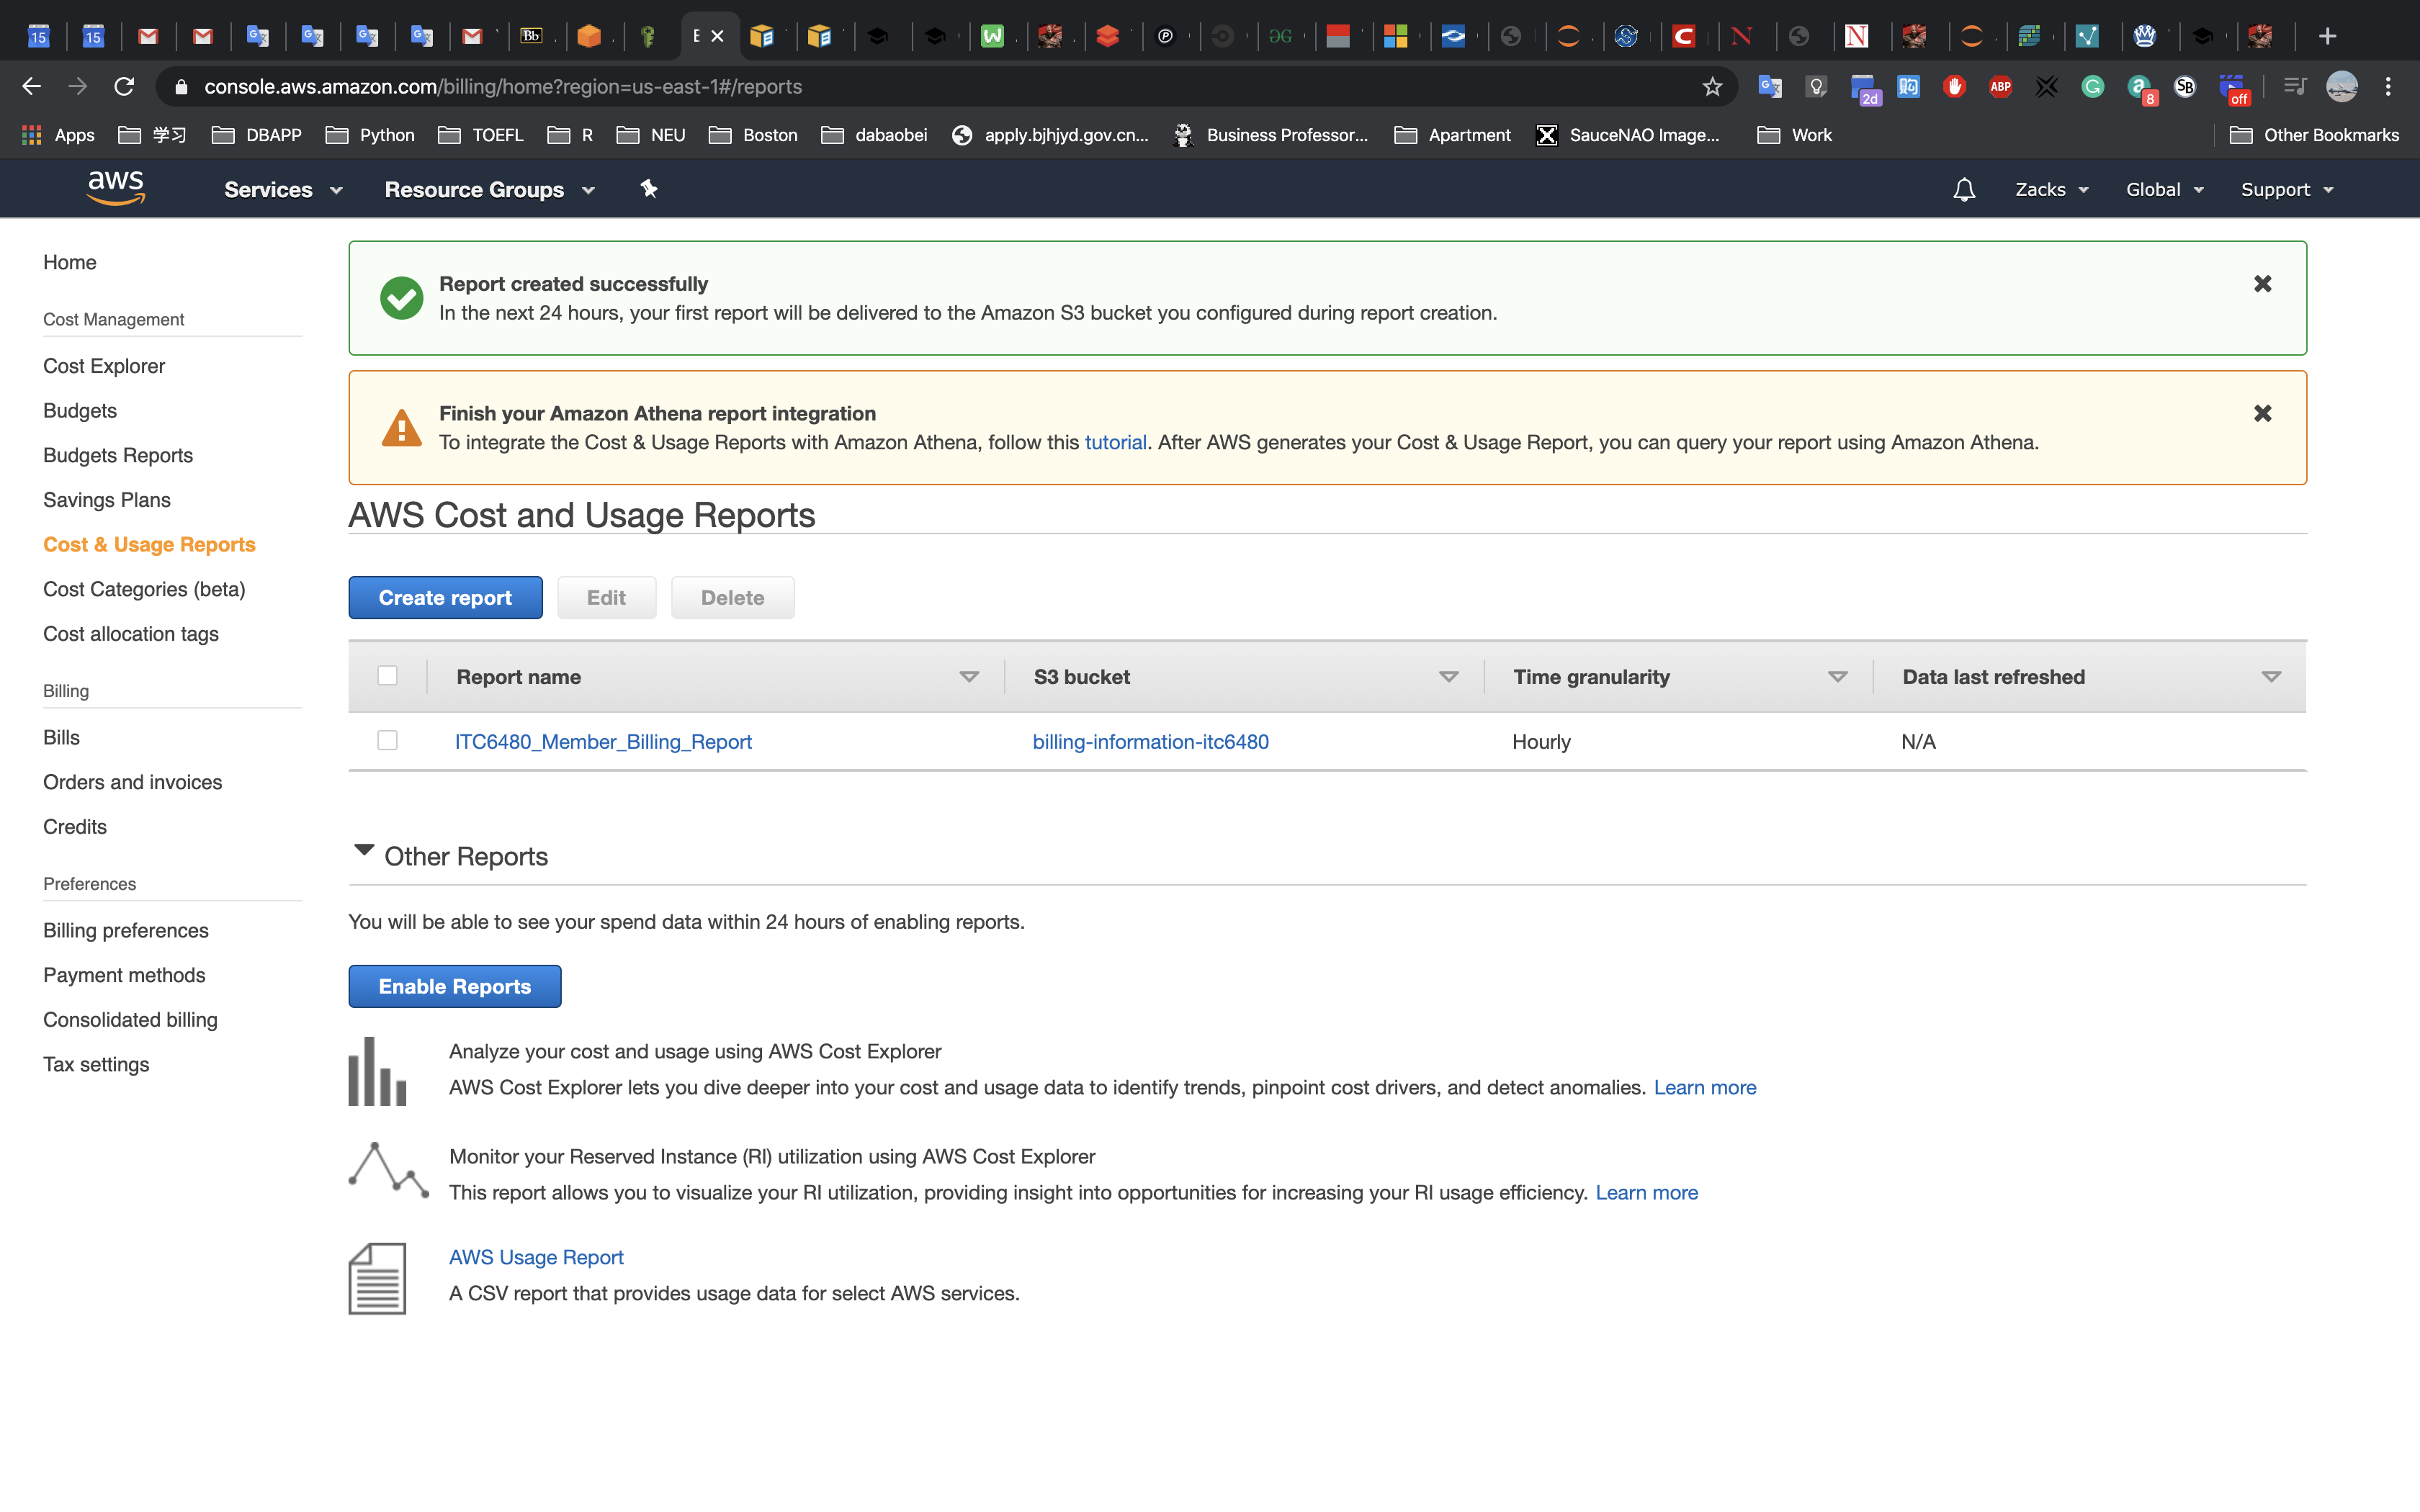
4.2 Enable monthly billing report
The monthly billing report contains estimated AWS charges for the month. It contains line items for each unique combination of AWS product, usage type, and operation that the account uses. NOTE: Billing files will only be delivered from the current month onwards. It will not generate previous months billing files.
Go to the
billingconsole:Click on Billing preferences from the left menu:

Scroll down, and click on Receive Billing Reports, then click on
Configure: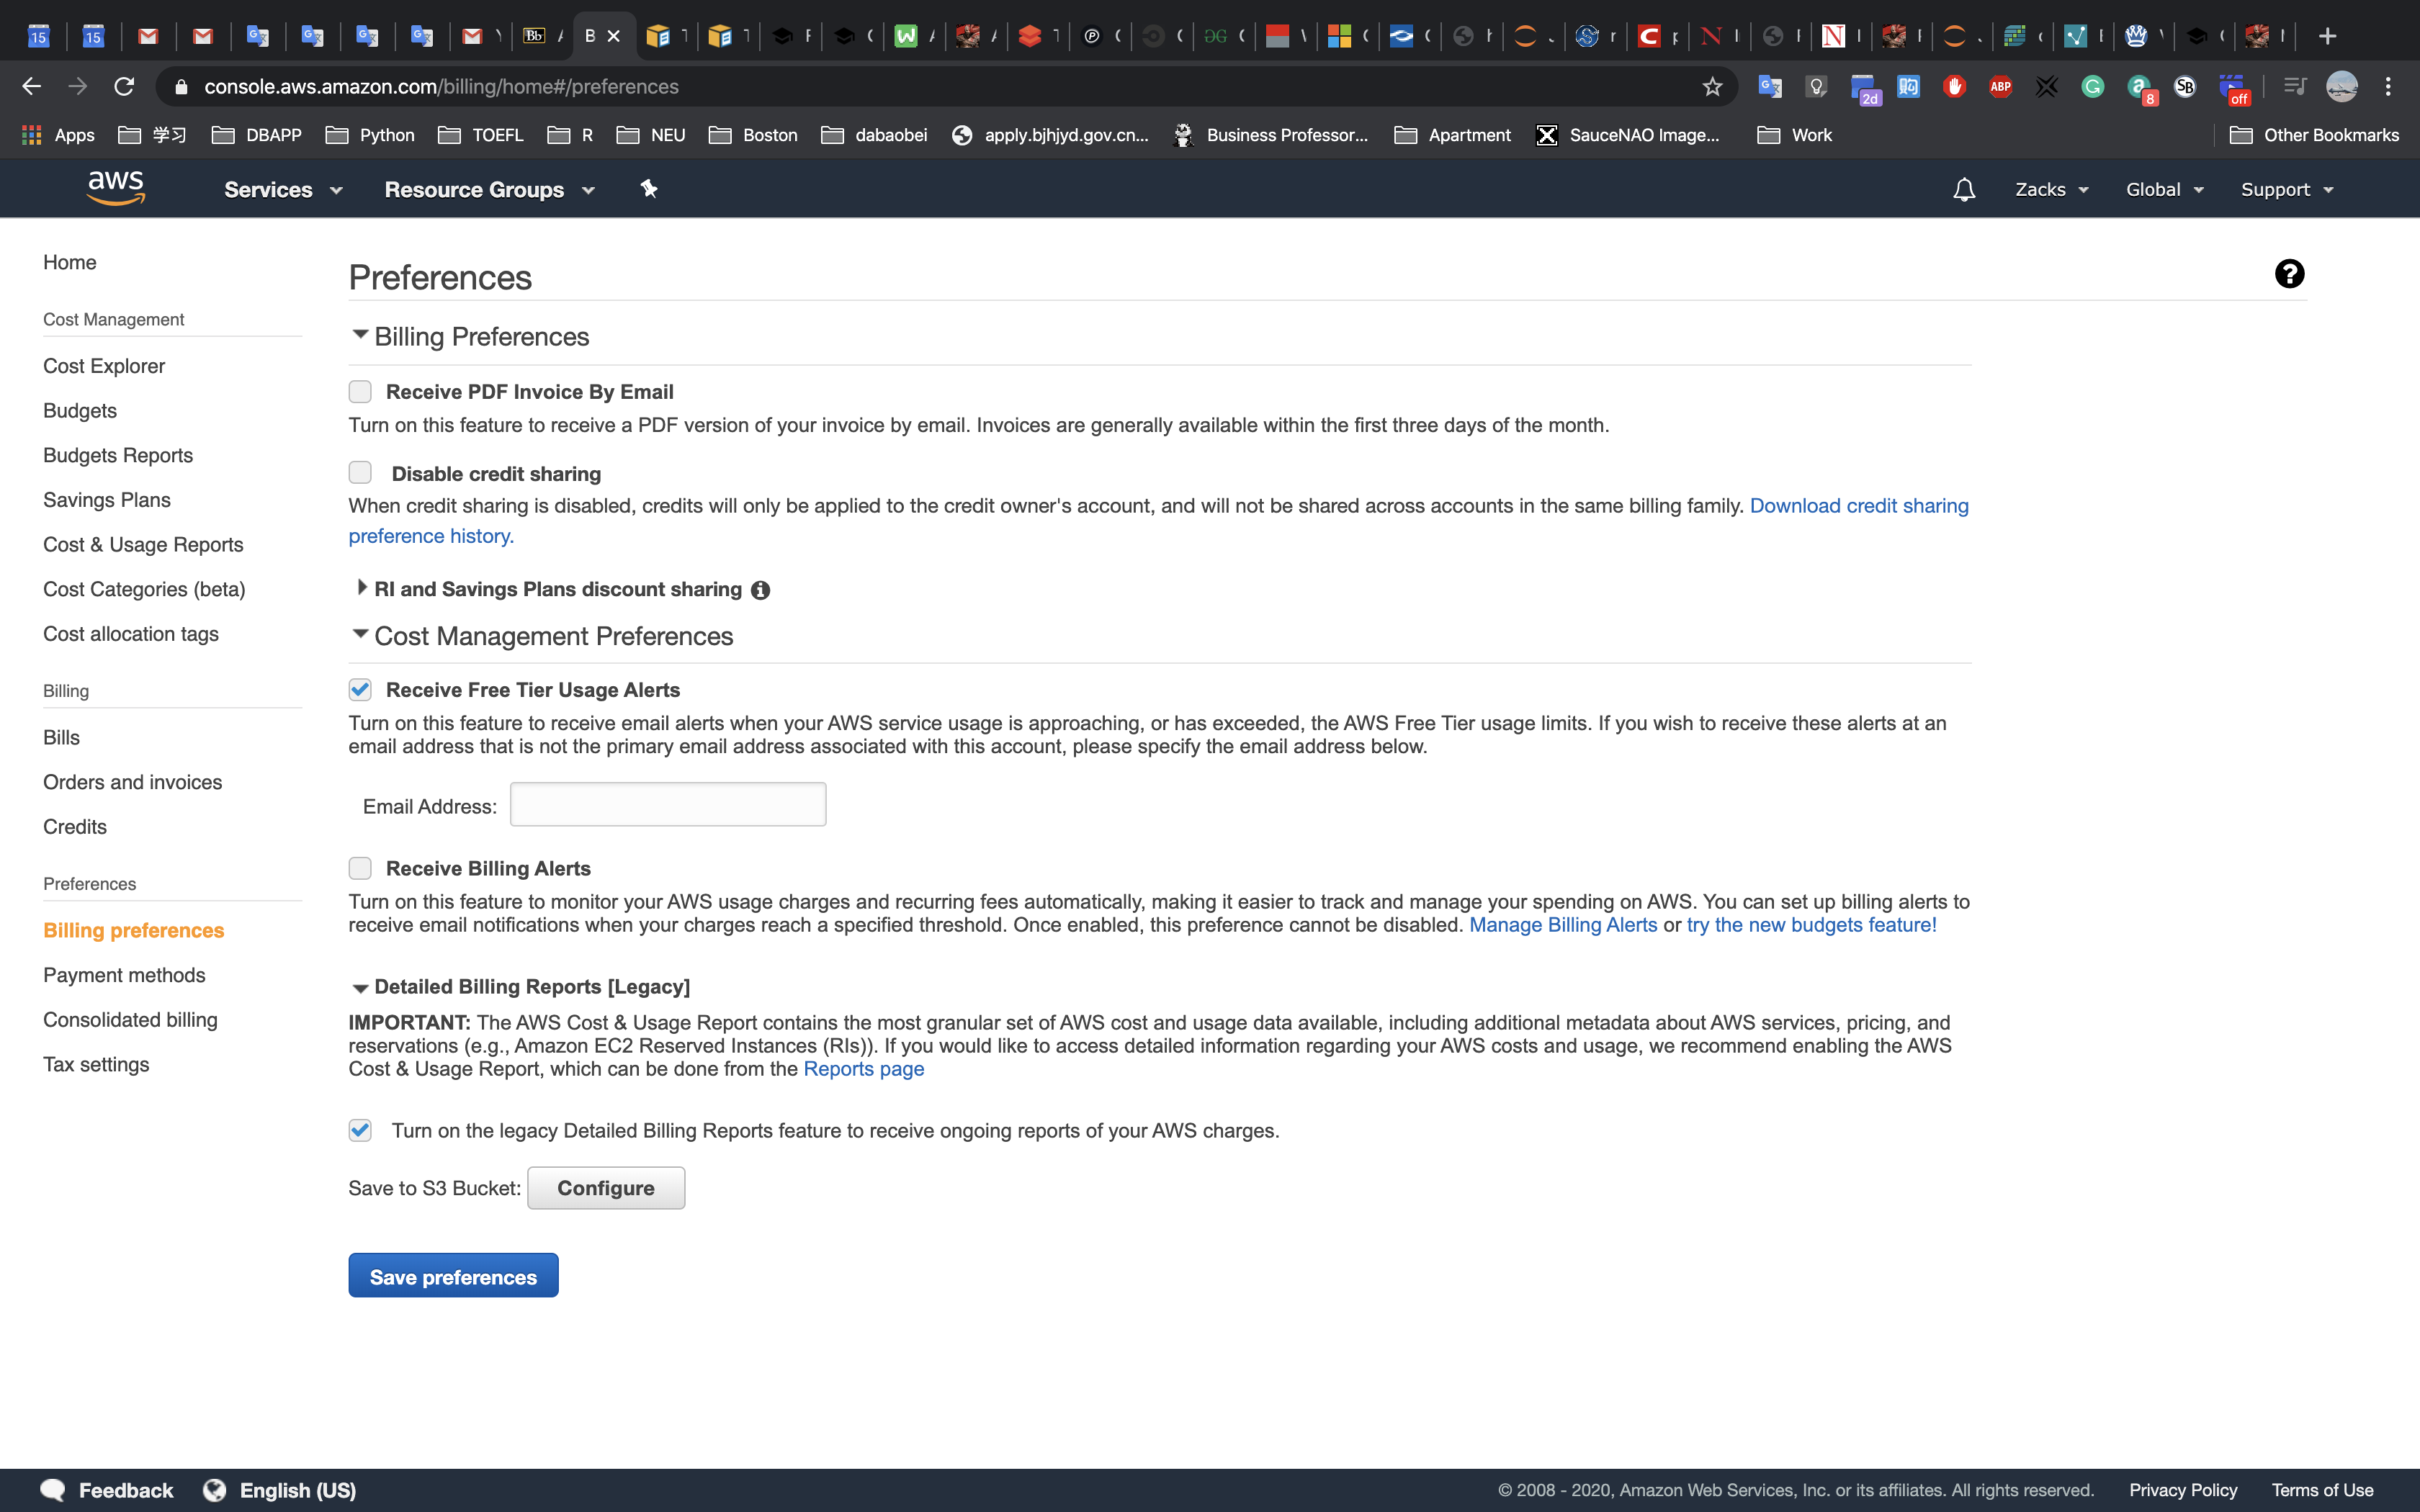
From the left dropdown, select your S3 billing bucket configured above:
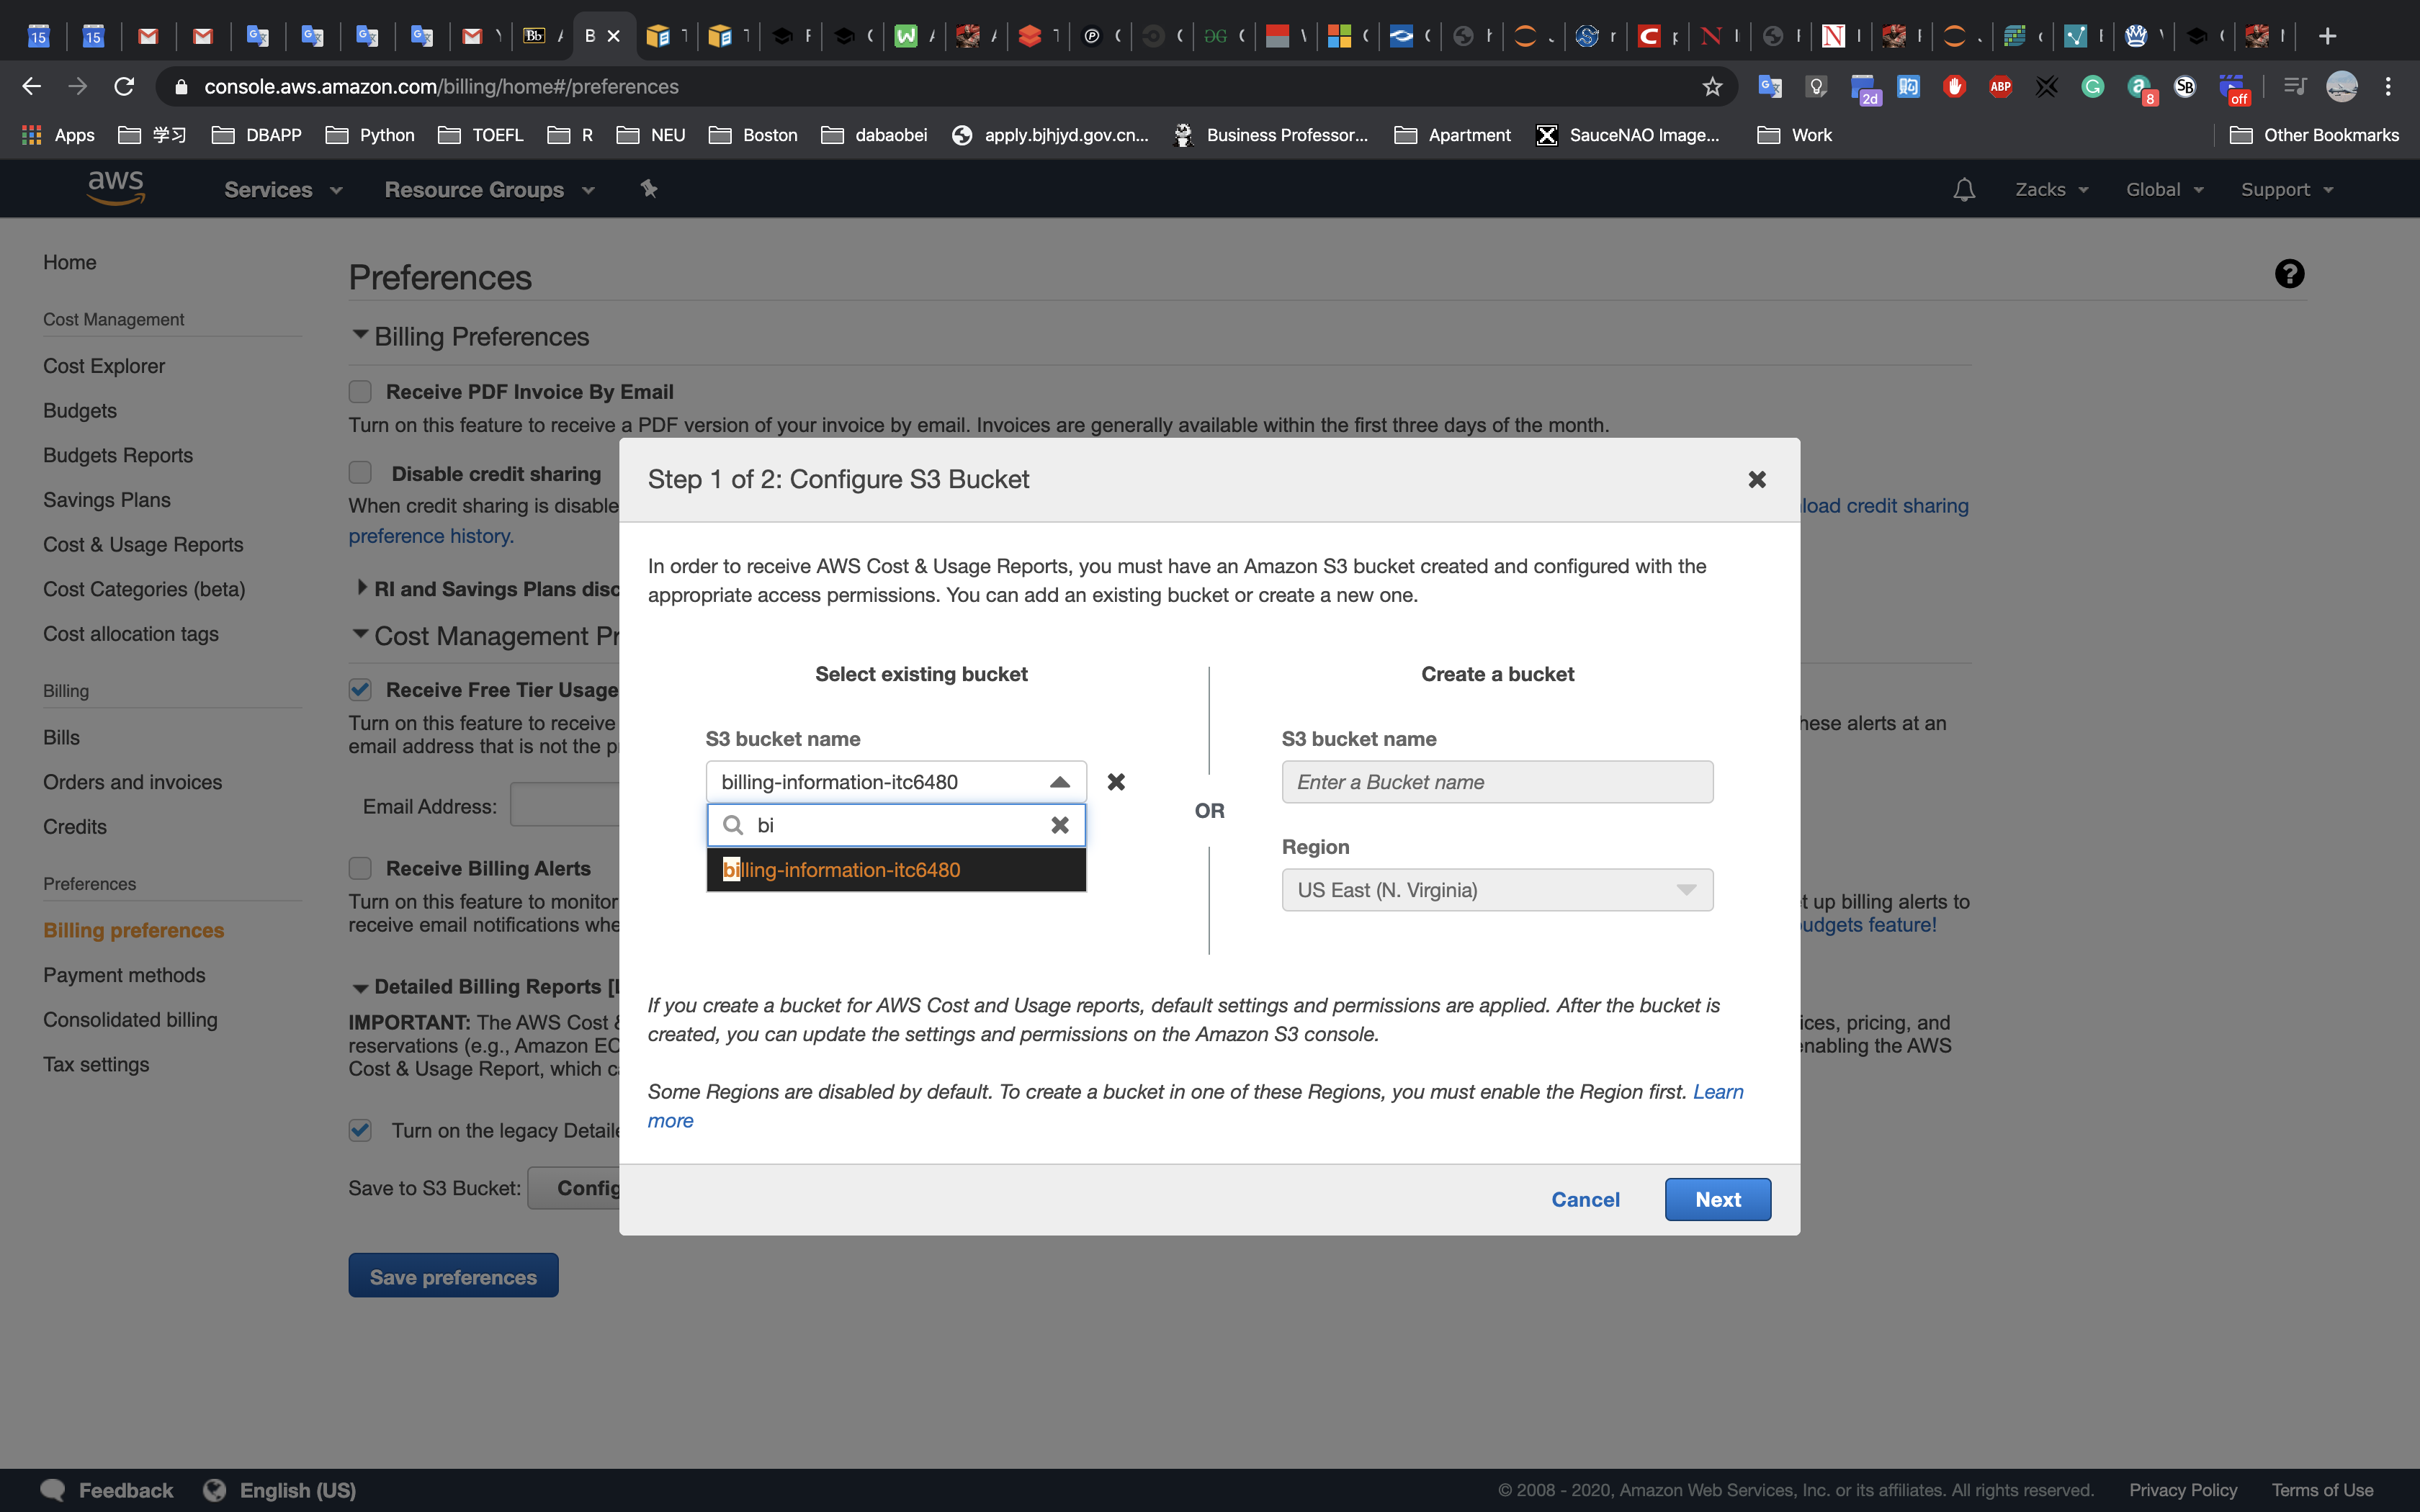
Click on Next:
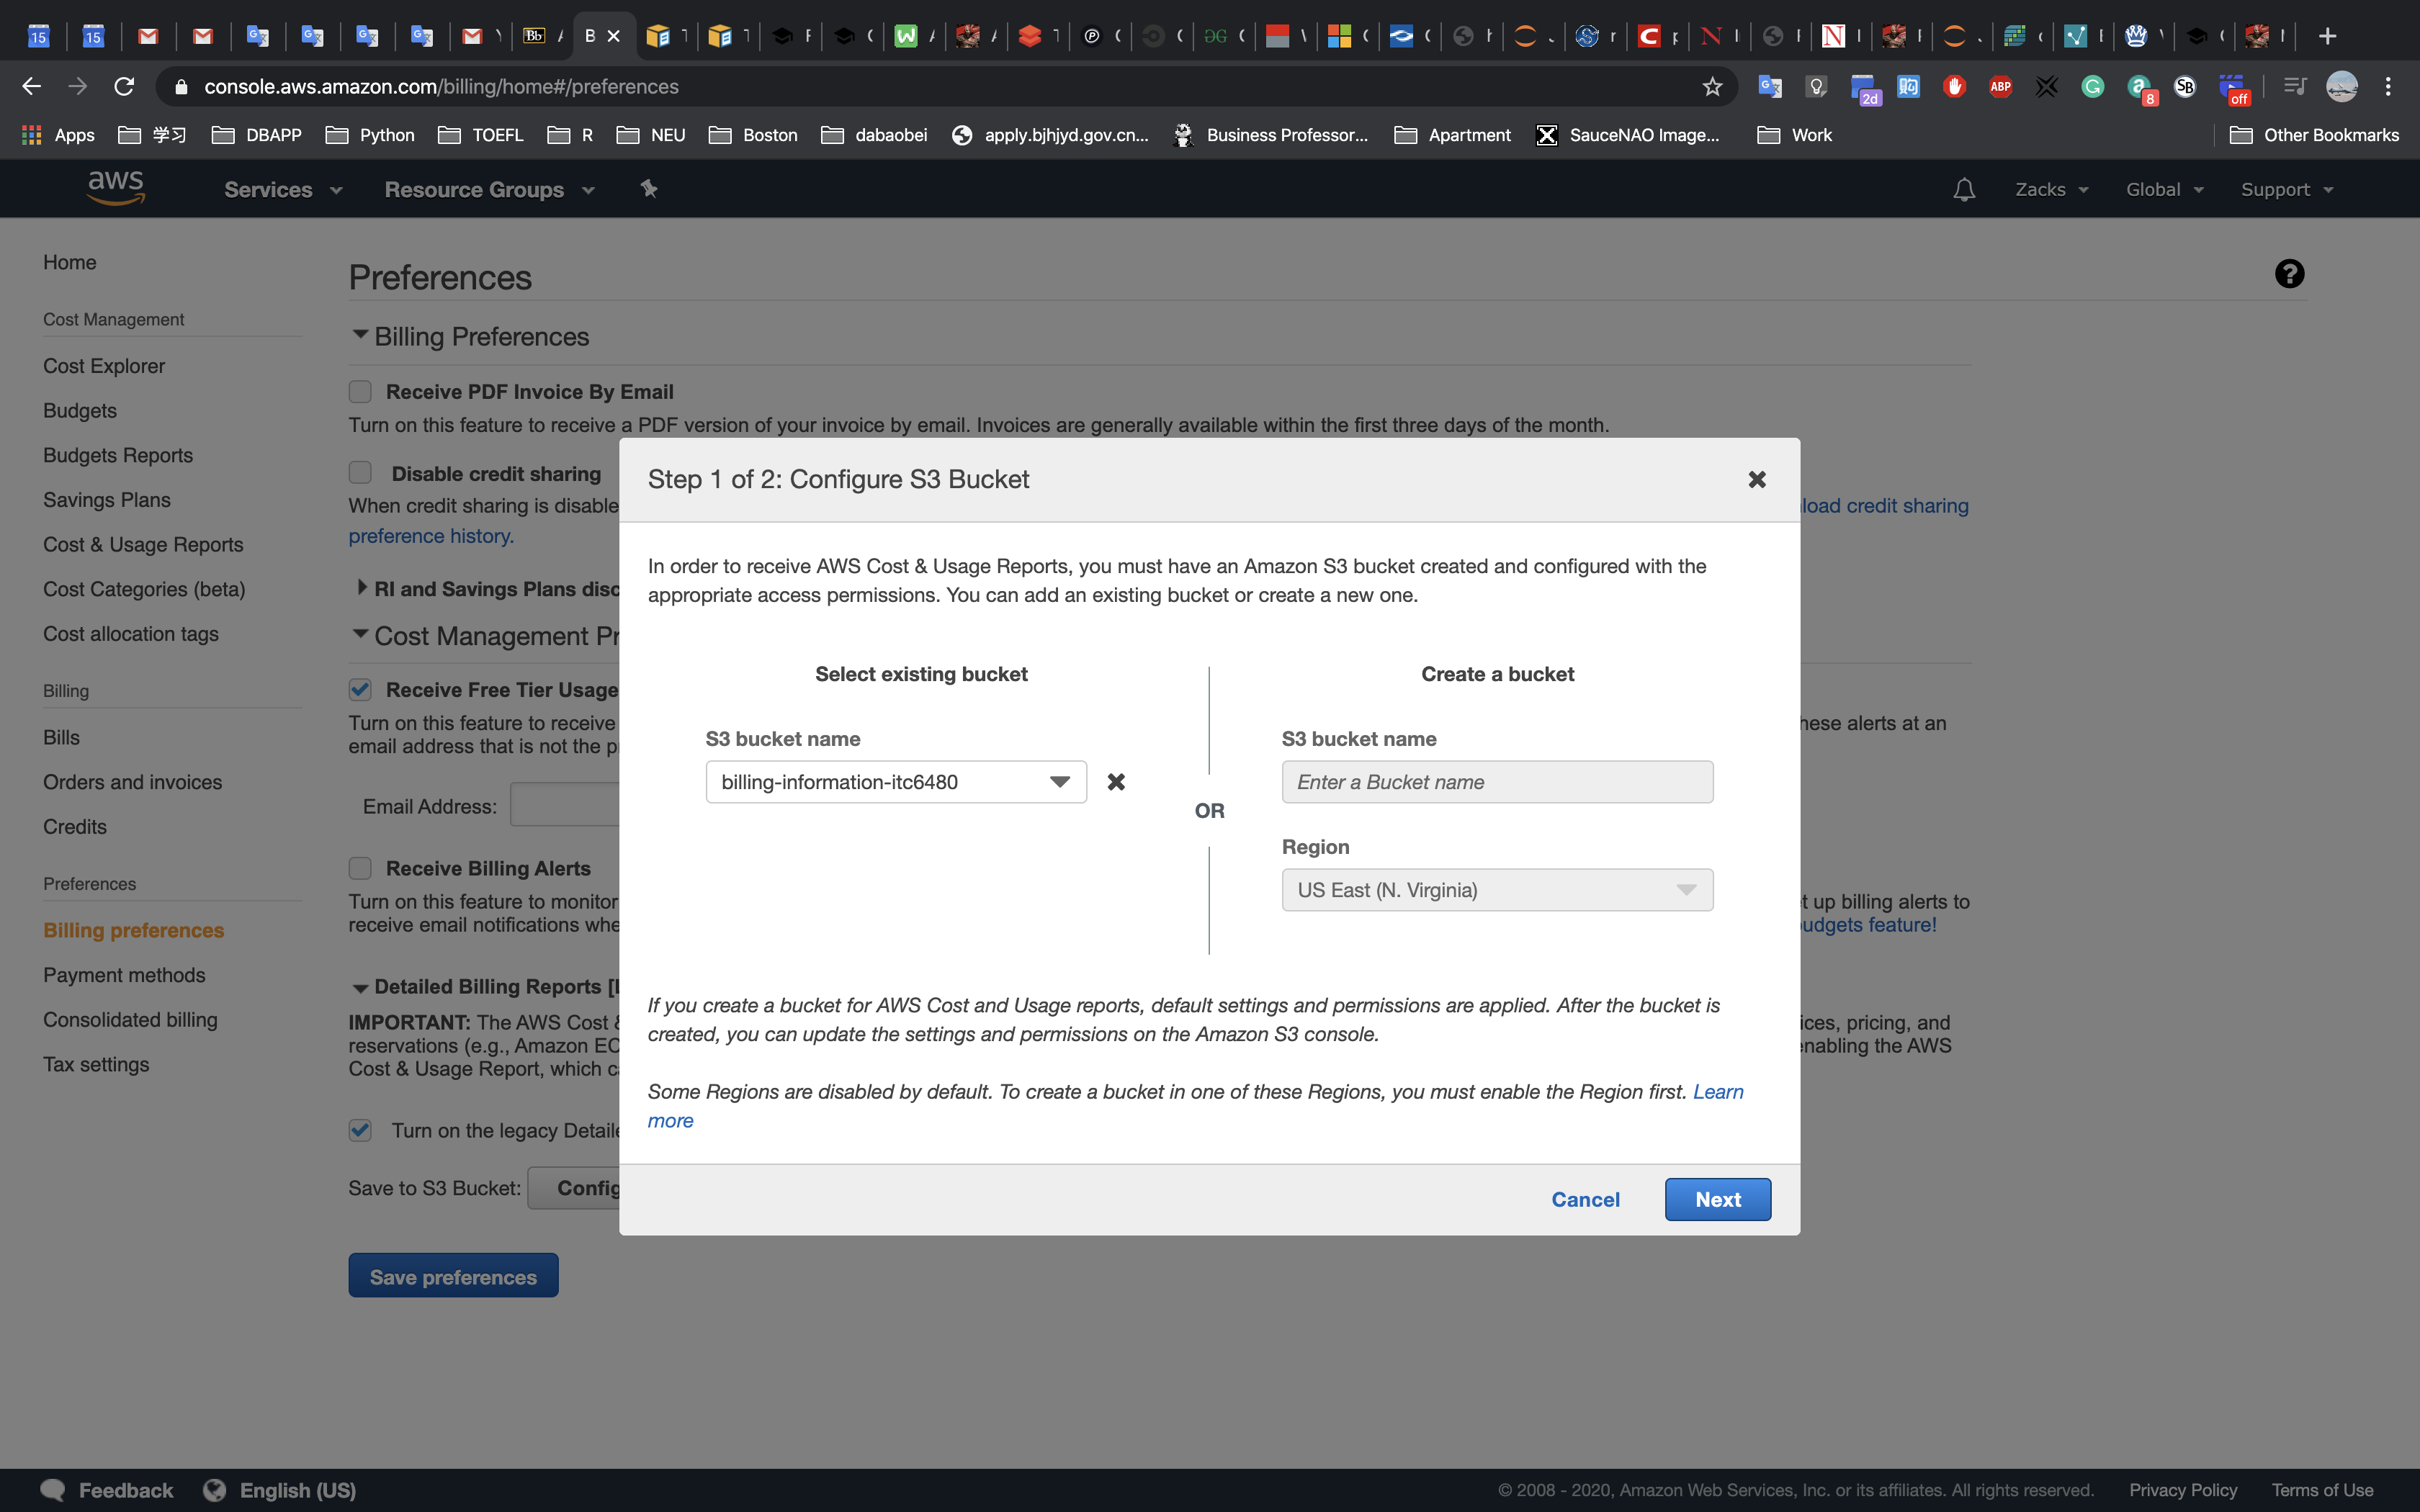
Read and verify the policy, this will allow AWS to deliver billing reports to the bucket. Click on
I have confirmed that this policy is correct, then clickSave: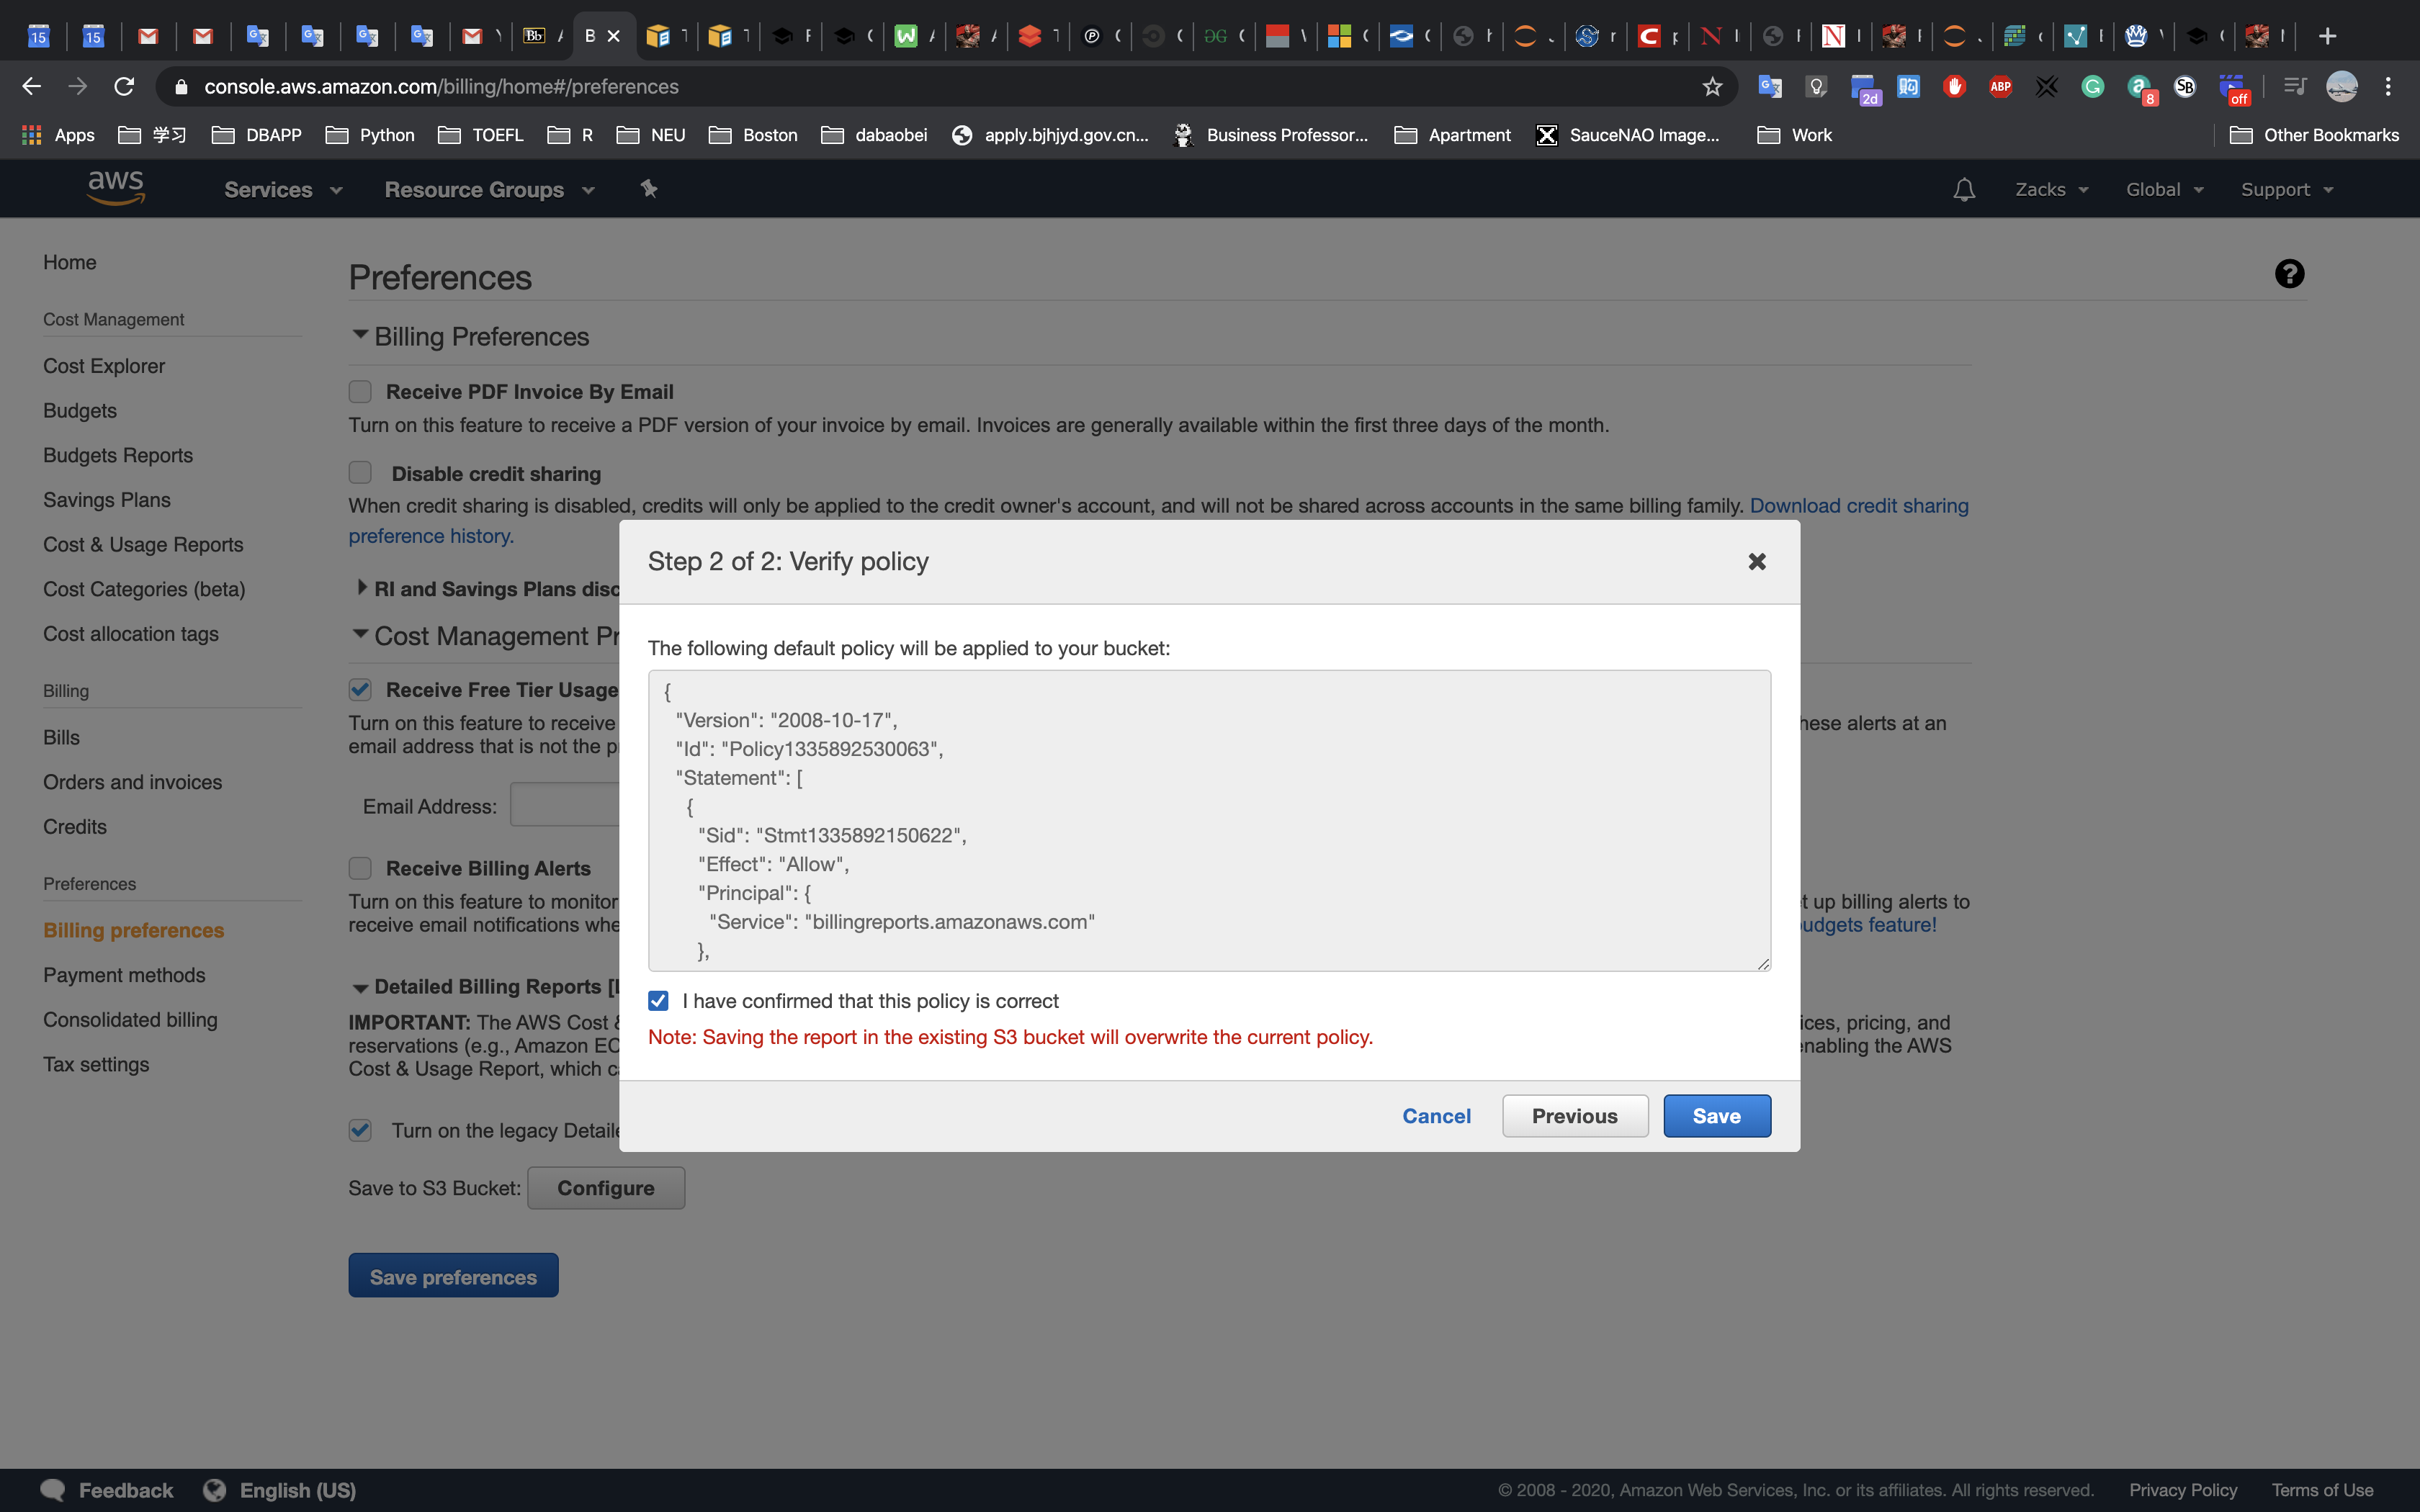
Ensure only
Monthly reportis selected, and uncheck all other boxes. Click onSave preferences:
5. Enable AWS Cost Explorer
AWS Cost Explorer has an easy-to-use interface that lets you visualize, understand, and manage your AWS costs and usage over time. You must enable it before you can use it within your accounts.
Log in to your Master account as an IAM user with the required permissions, and go to the
Billingconsole:Select
Cost Explorerfrom the left menu: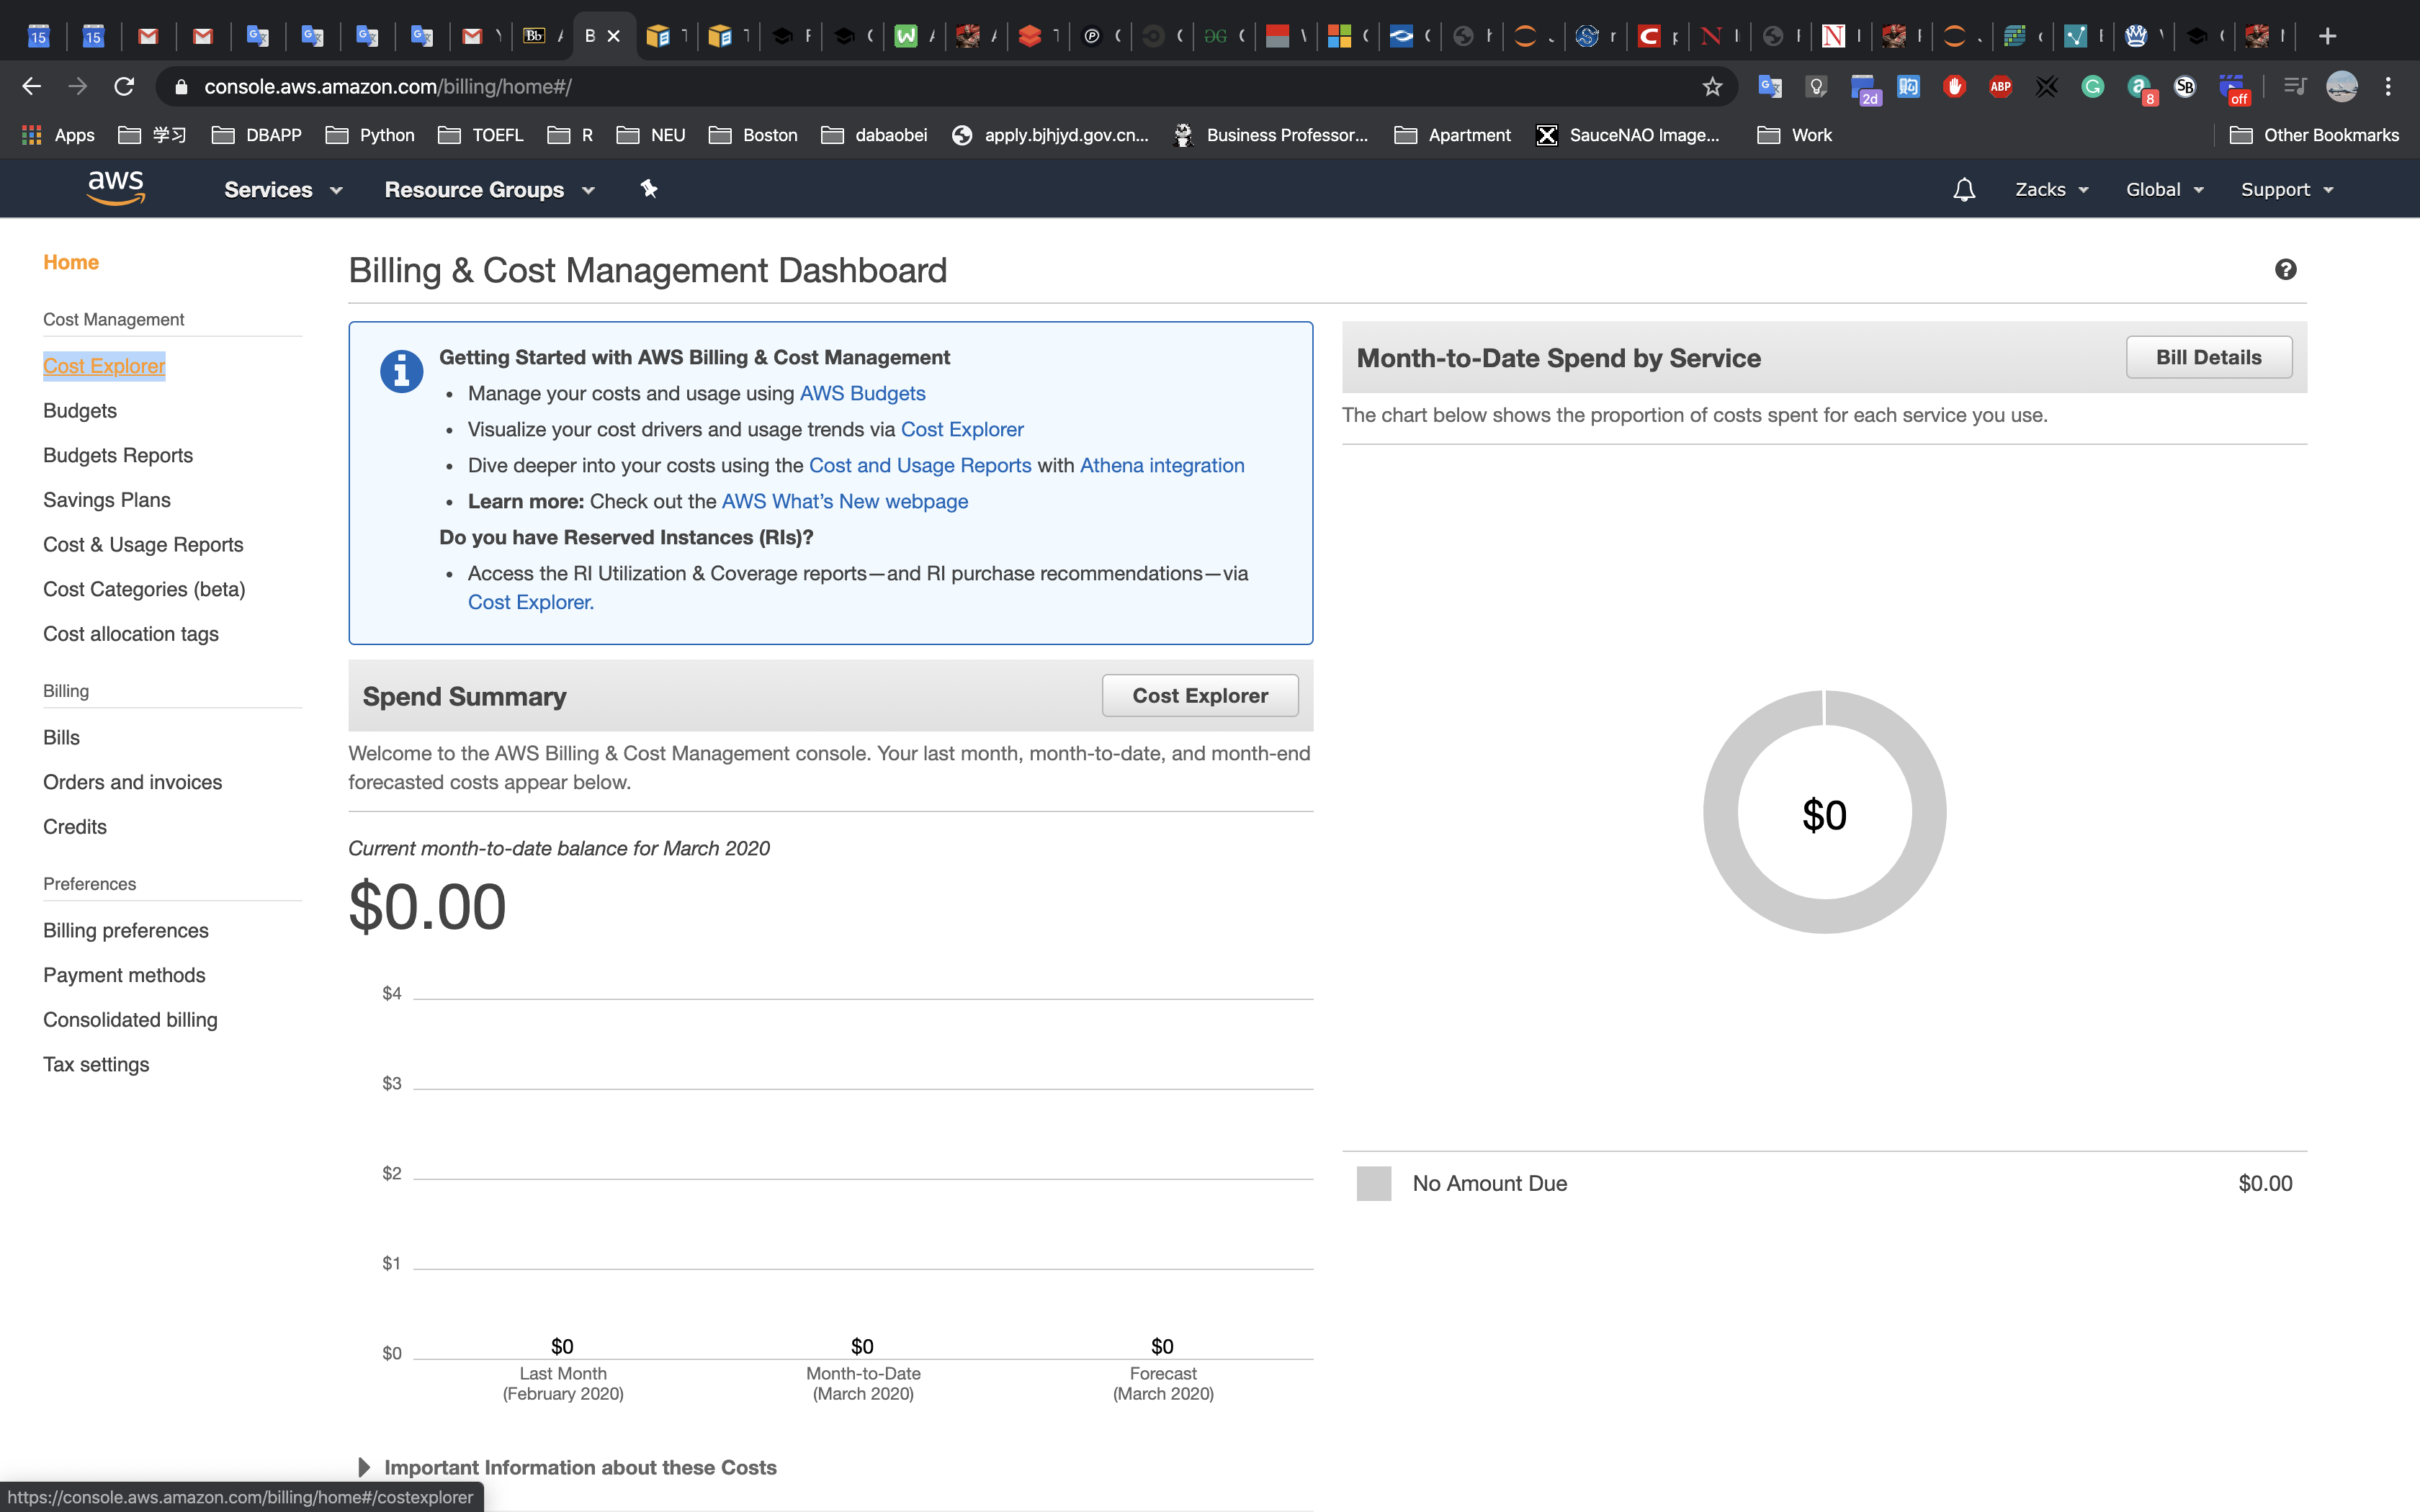
Click on
Enable Cost Explorer:
You will receive notification that Cost Explorer has been enabled, and data will be populated:
Go into
Cost Explorer:
Click
Settingsin the top right:
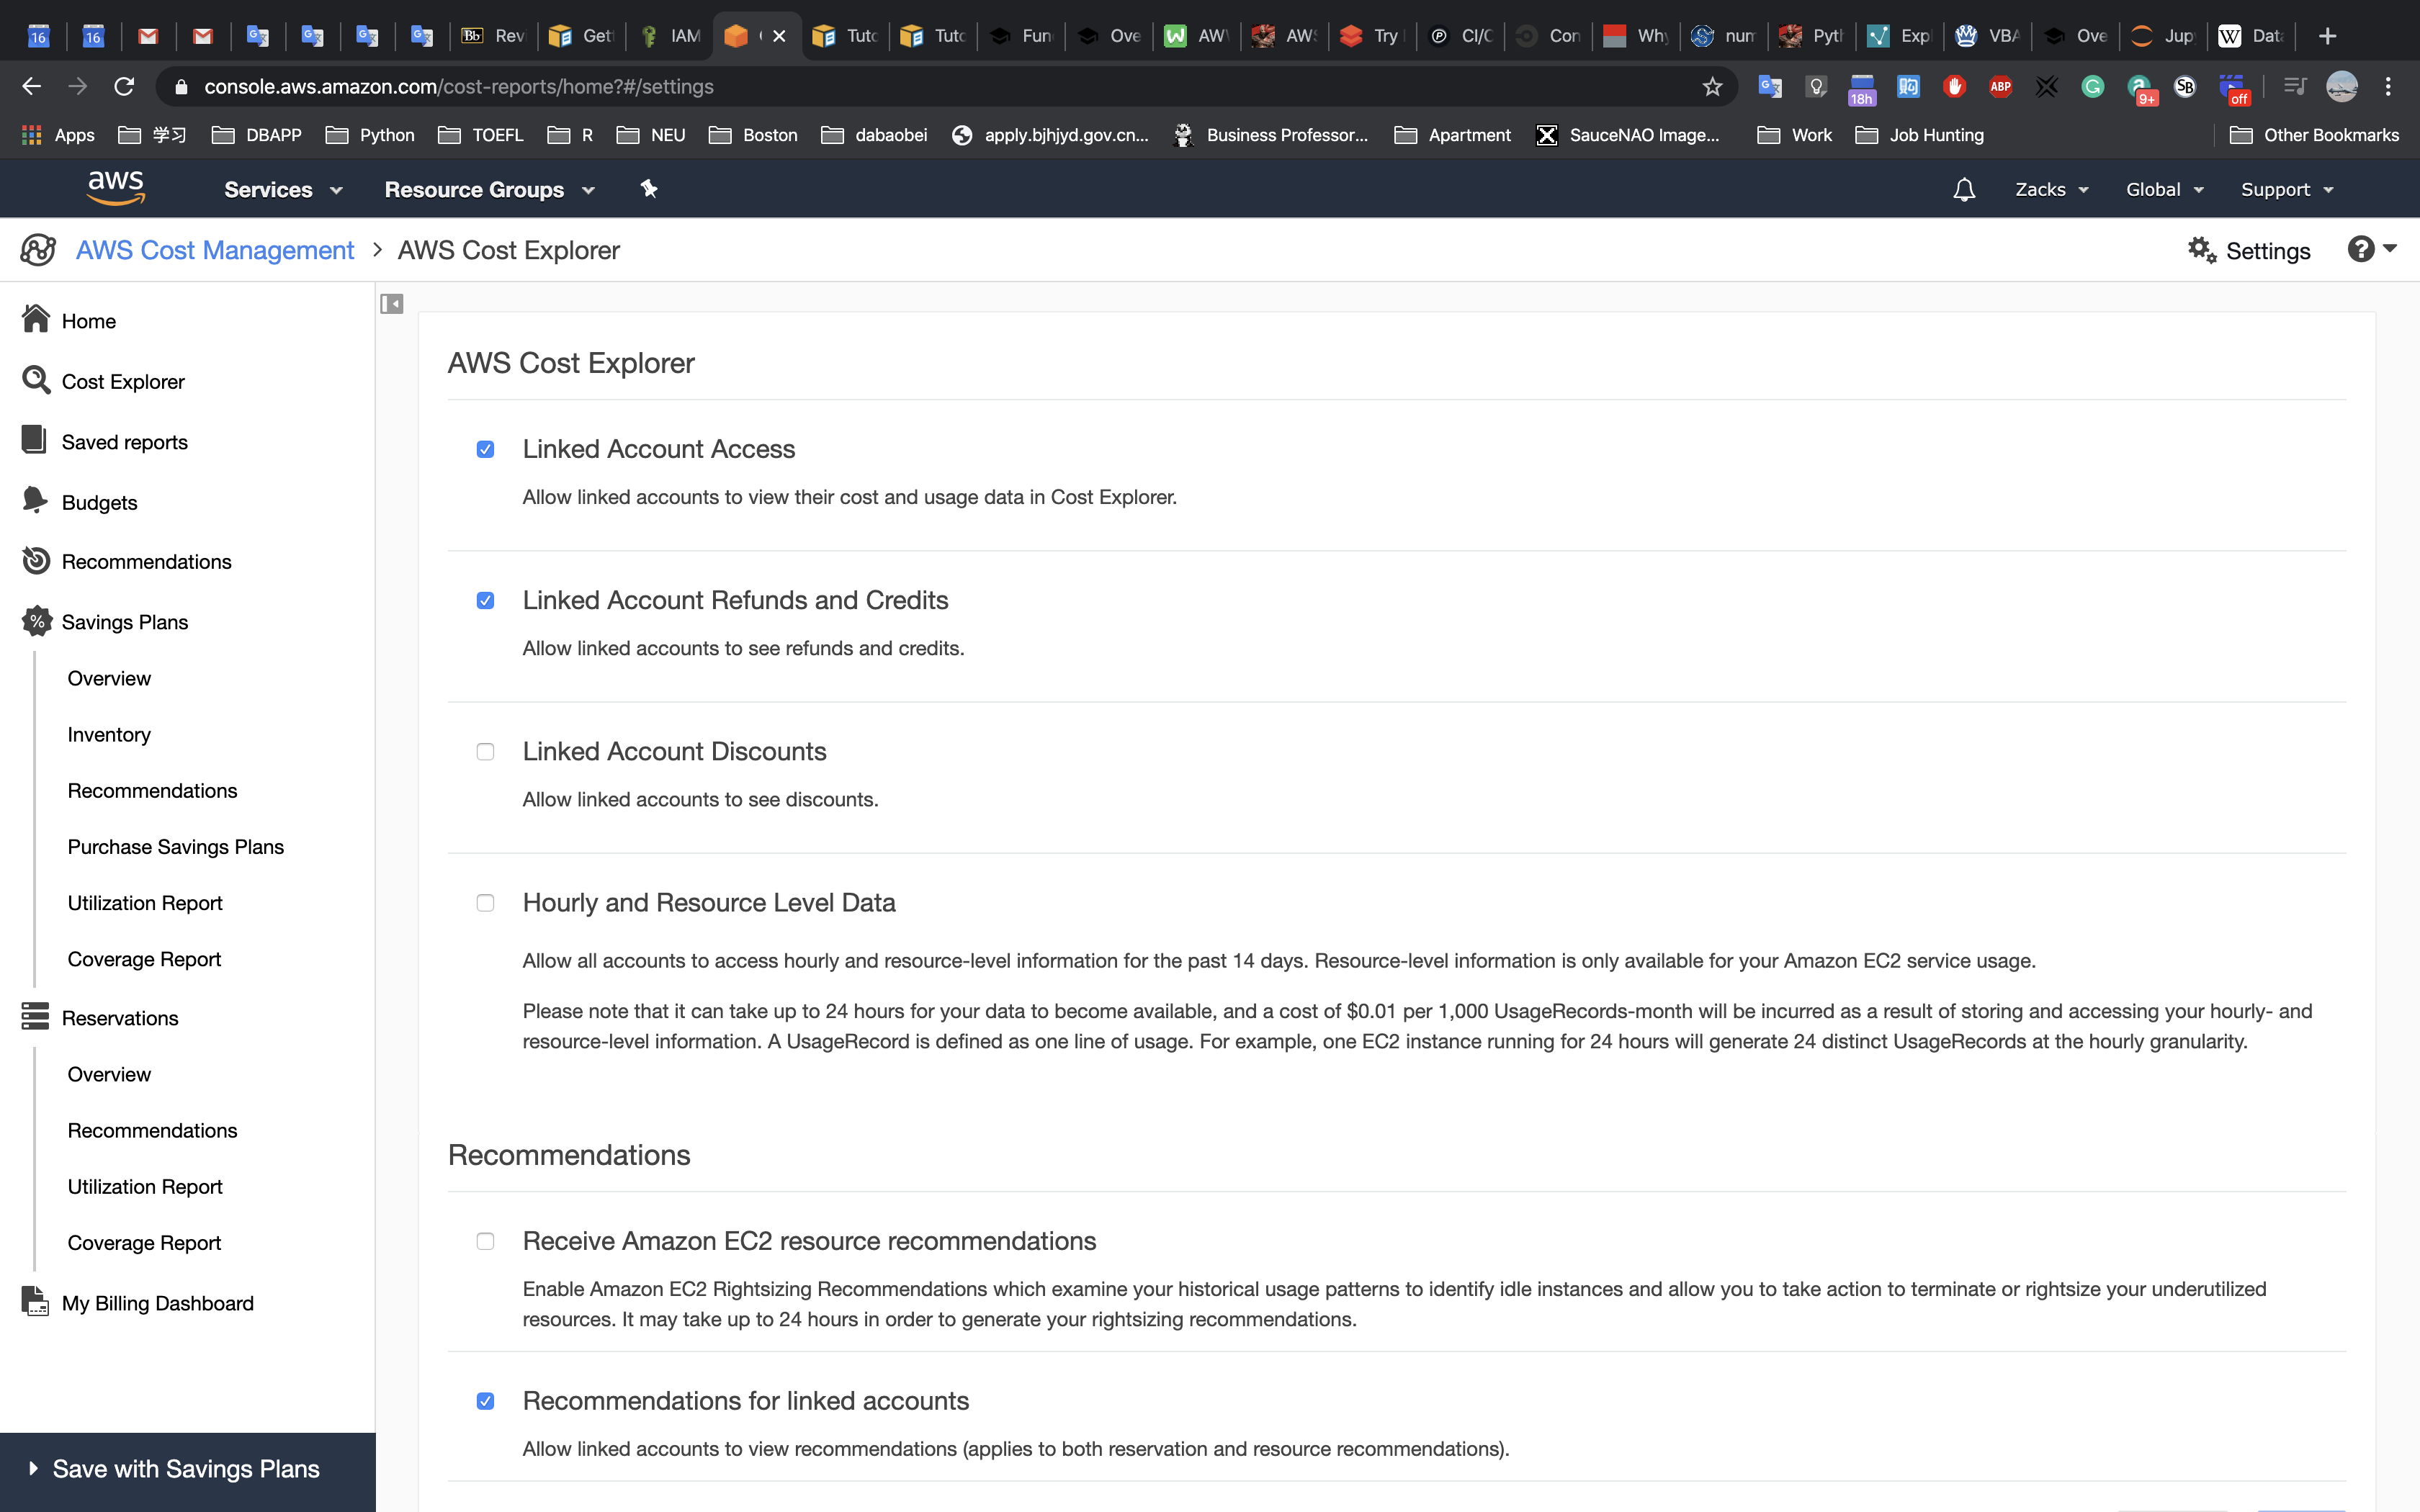
Select
Hourly and Resource Level Data, and clickSave:
NOTE: This will incur costs depending on the number of EC2 resources you are running.
6. Enable AWS-Generated Cost Allocation Tags
Enabling AWS-Generated Cost Allocation Tags, generates a cost allocation tag containing resource creator information that is automatically applied to resources that are created within your account. This allows you to view and allocate costs based on who created a resource.
Log in to your Master account as an IAM user with the required permissions, and go to the
Billingconsole:Select
Cost Allocation Tagsfrom the left menu:
Click on
Activateto enable the tags:
You will see that it is activated:
7. Create a cost optimization team
We are going to create a cost optimization team within your master/payer account - which is where the billing information is. Within your organization there needs to be a team of people that are focused around costs and usage. This exercise will create the users and the group, then assign all the access they need. This team will then be able to manage the organizations cost and usage, and start to implement optimization mechanisms.
NOTE: Review the IAM policy below with your security team, the permissions below are required for completion of the Fundamentals series of labs. Verify if they need to be changed for your organization.
Log into the console as an IAM user with the required permissions, as per: - ./Code/IAM_policy IAM policy required for this lab
7.1 Create an IAM policy for the team
This provides access to allow the cost optimization team to perform their work, namely the Labs in the 100 level fundamental series. This is the minimum access the team requires.
Log in and go to the
IAMService page:
Select Policies from the left menu:
Select
Create Policy:
Select the JSON tab:
Edit the policy below, replacing the billing bucket with what you previously configured. Then Copy & paste the following policy into the field: NOTE: Ensure you copy the entire policy, everything including the first ‘{‘ and last ‘}’
JSON 1
2
3
4
5
6
7
8
9
10
11
12
13
14
15
16
17
18
19
20
21
22
23
24
25
26
27
28
29
30
31
32
33
34
35
36
37
38
39
40
41
42
43
44
45
46
47
48
49
50
51
52
53
54
55
56
57
58
59
60
61
62
63
64
65
66
67{
"Version": "2012-10-17",
"Statement": [
{
"Sid": "VisualEditor0",
"Effect": "Allow",
"Action": [
"s3:GetObject",
"s3:ListBucket"
],
"Resource": [
"arn:aws:s3:::-billing bucket-",
"arn:aws:s3:::-billing bucket-/*"
]
},
{
"Sid": "VisualEditor1",
"Effect": "Allow",
"Action": [
"iam:GetPolicyVersion",
"quicksight:CreateAdmin",
"iam:DeletePolicy",
"iam:CreateRole",
"iam:AttachRolePolicy",
"aws-portal:ViewUsage",
"iam:GetGroup",
"aws-portal:ModifyBilling",
"iam:DetachRolePolicy",
"iam:ListAttachedRolePolicies",
"ds:UnauthorizeApplication",
"aws-portal:ViewBilling",
"iam:DetachGroupPolicy",
"iam:ListAttachedGroupPolicies",
"iam:CreatePolicyVersion",
"ds:CheckAlias",
"quicksight:Subscribe",
"ds:DeleteDirectory",
"iam:ListPolicies",
"iam:GetRole",
"ds:CreateIdentityPoolDirectory",
"ds:DescribeTrusts",
"iam:GetPolicy",
"iam:ListGroupPolicies",
"aws-portal:ViewAccount",
"iam:ListEntitiesForPolicy",
"iam:AttachUserPolicy",
"iam:ListRoles",
"iam:DeleteRole",
"budgets:*",
"iam:CreatePolicy",
"quicksight:CreateUser",
"s3:ListAllMyBuckets",
"iam:ListPolicyVersions",
"iam:AttachGroupPolicy",
"quicksight:Unsubscribe",
"iam:ListAccountAliases",
"ds:DescribeDirectories",
"iam:ListGroups",
"iam:GetGroupPolicy",
"ds:CreateAlias",
"ds:AuthorizeApplication",
"iam:DeletePolicyVersion"
],
"Resource": "*"
}
]
}Click
Review policy:
Enter a
NameandDescriptionfor the policy and clickCreate policy: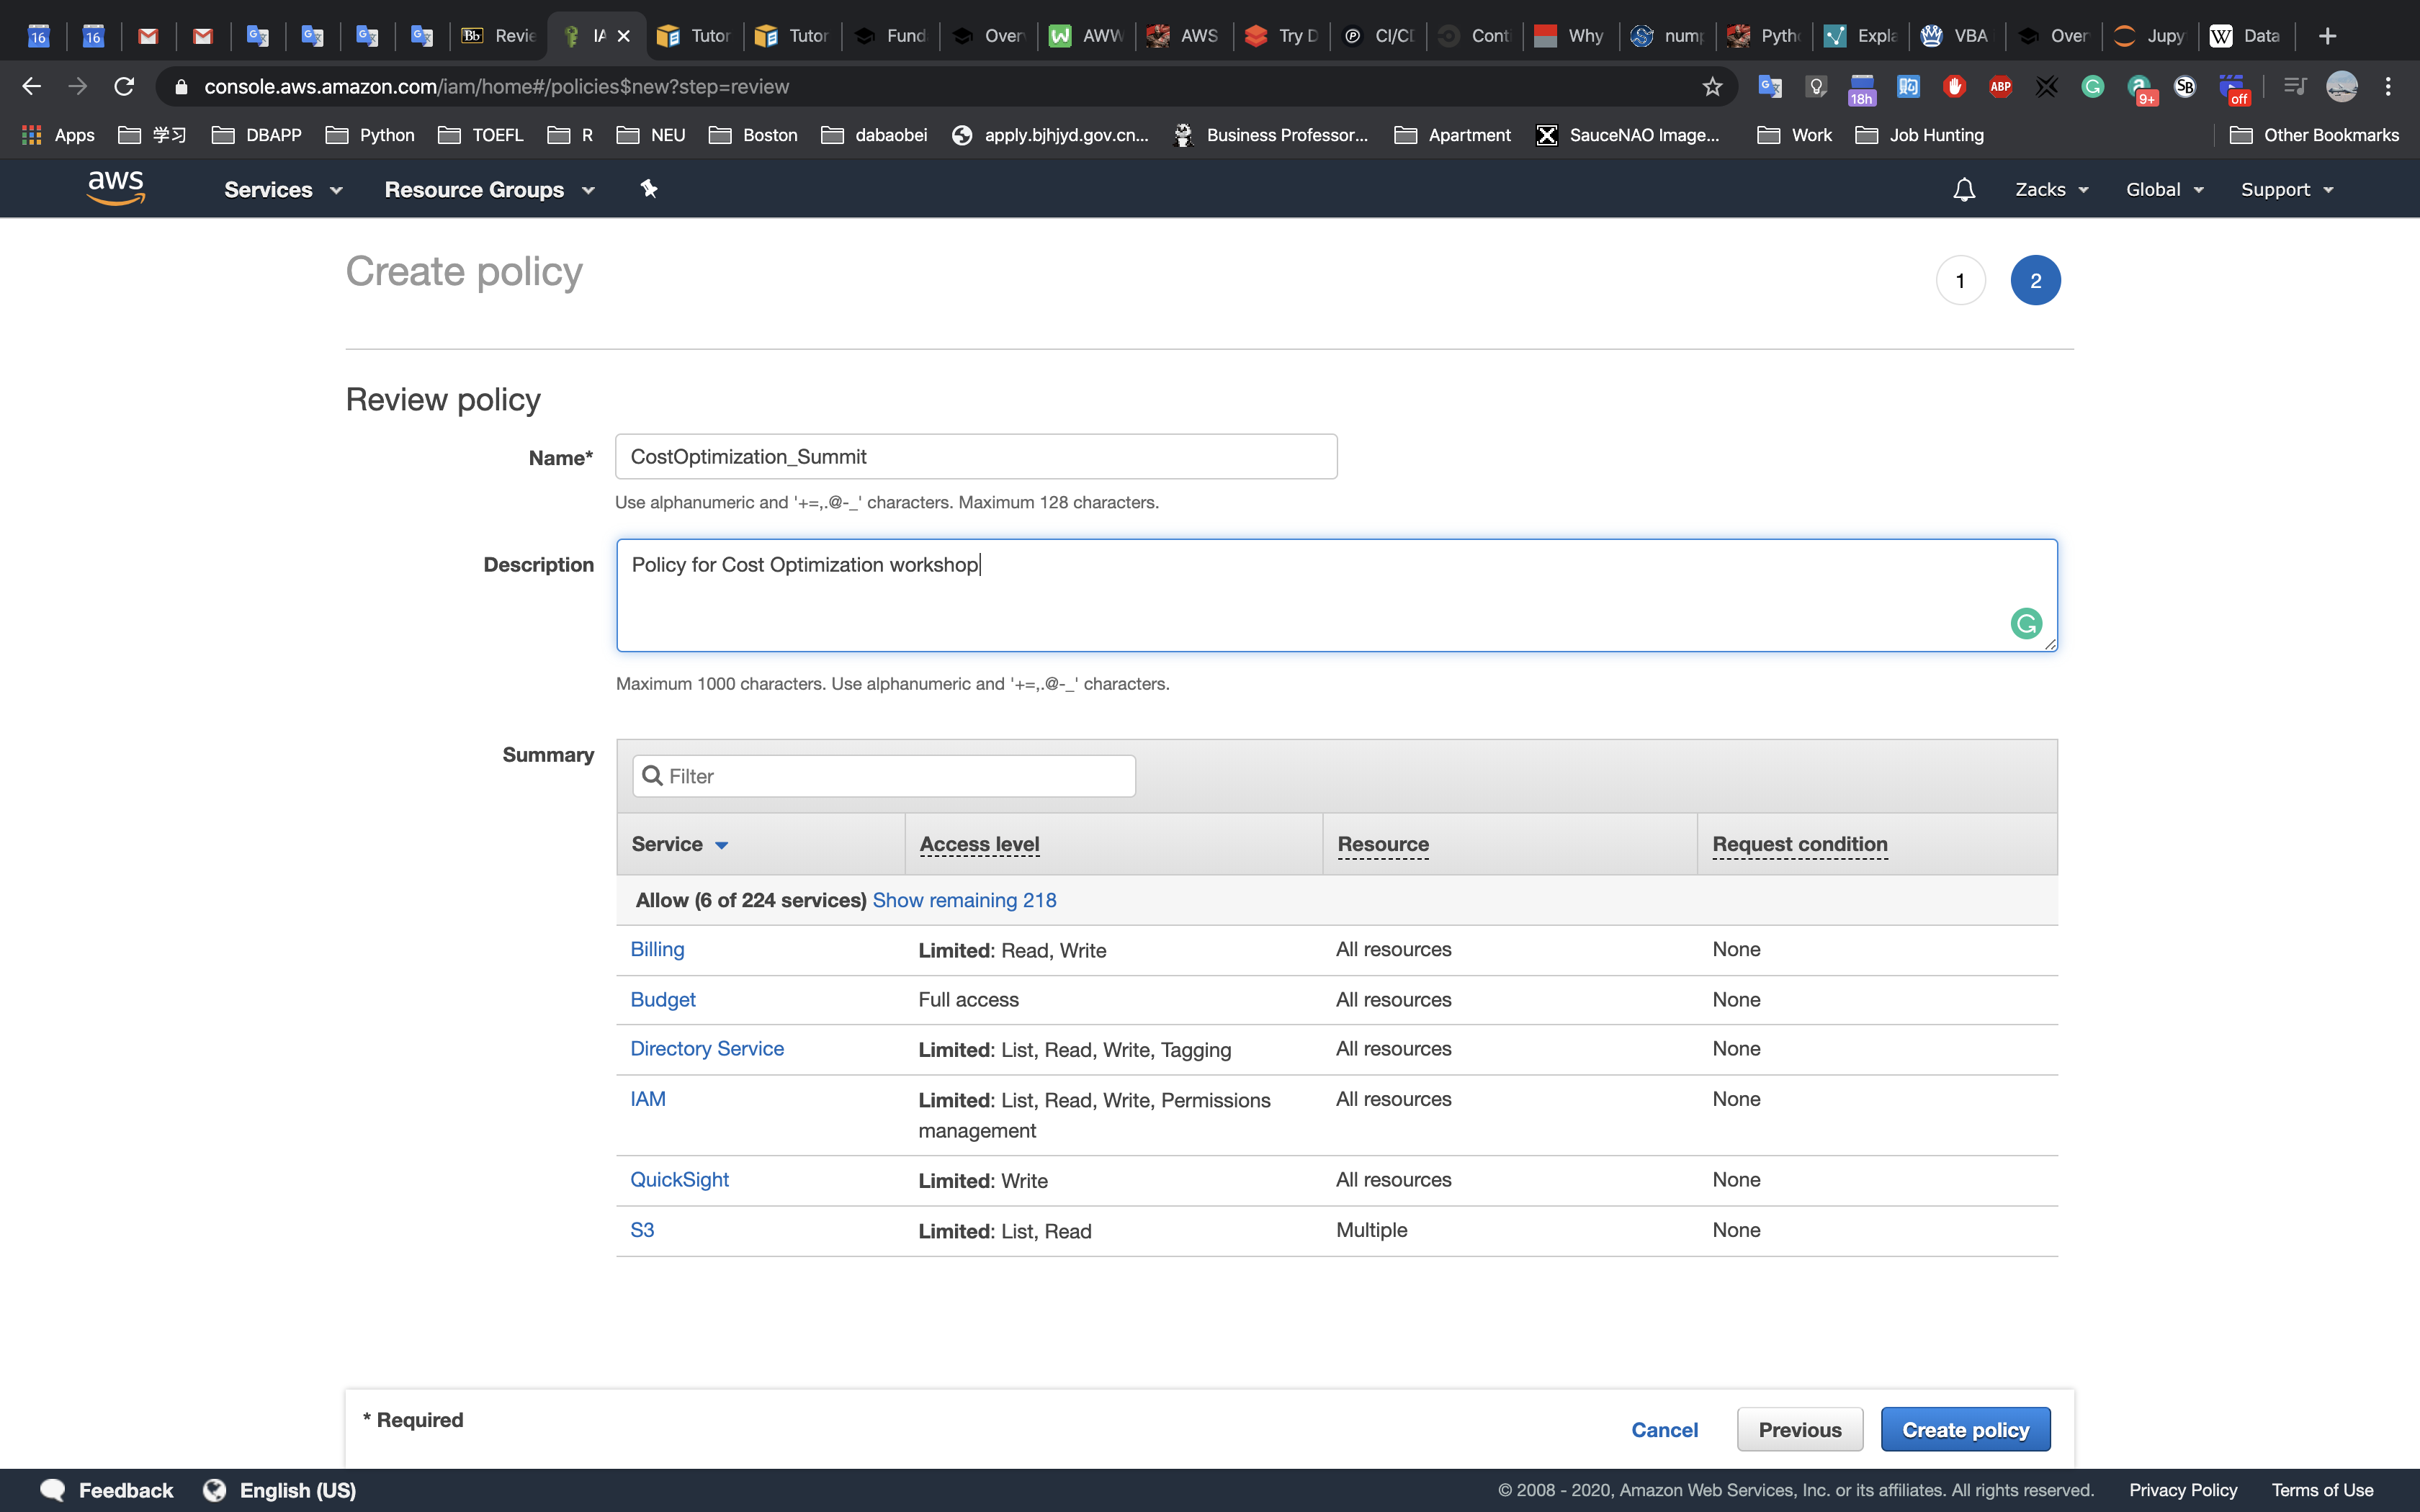
You have successfully created the cost optimization teams policy.
7.2 Create an IAM Group
This group will bring together IAM users and apply the required policies.
While in the IAM console, select Groups from the left menu:
Click on
Create New Group:
Enter a
Group Nameand clickNext Step:
Click
Policy Typeand selectCustomer Managed: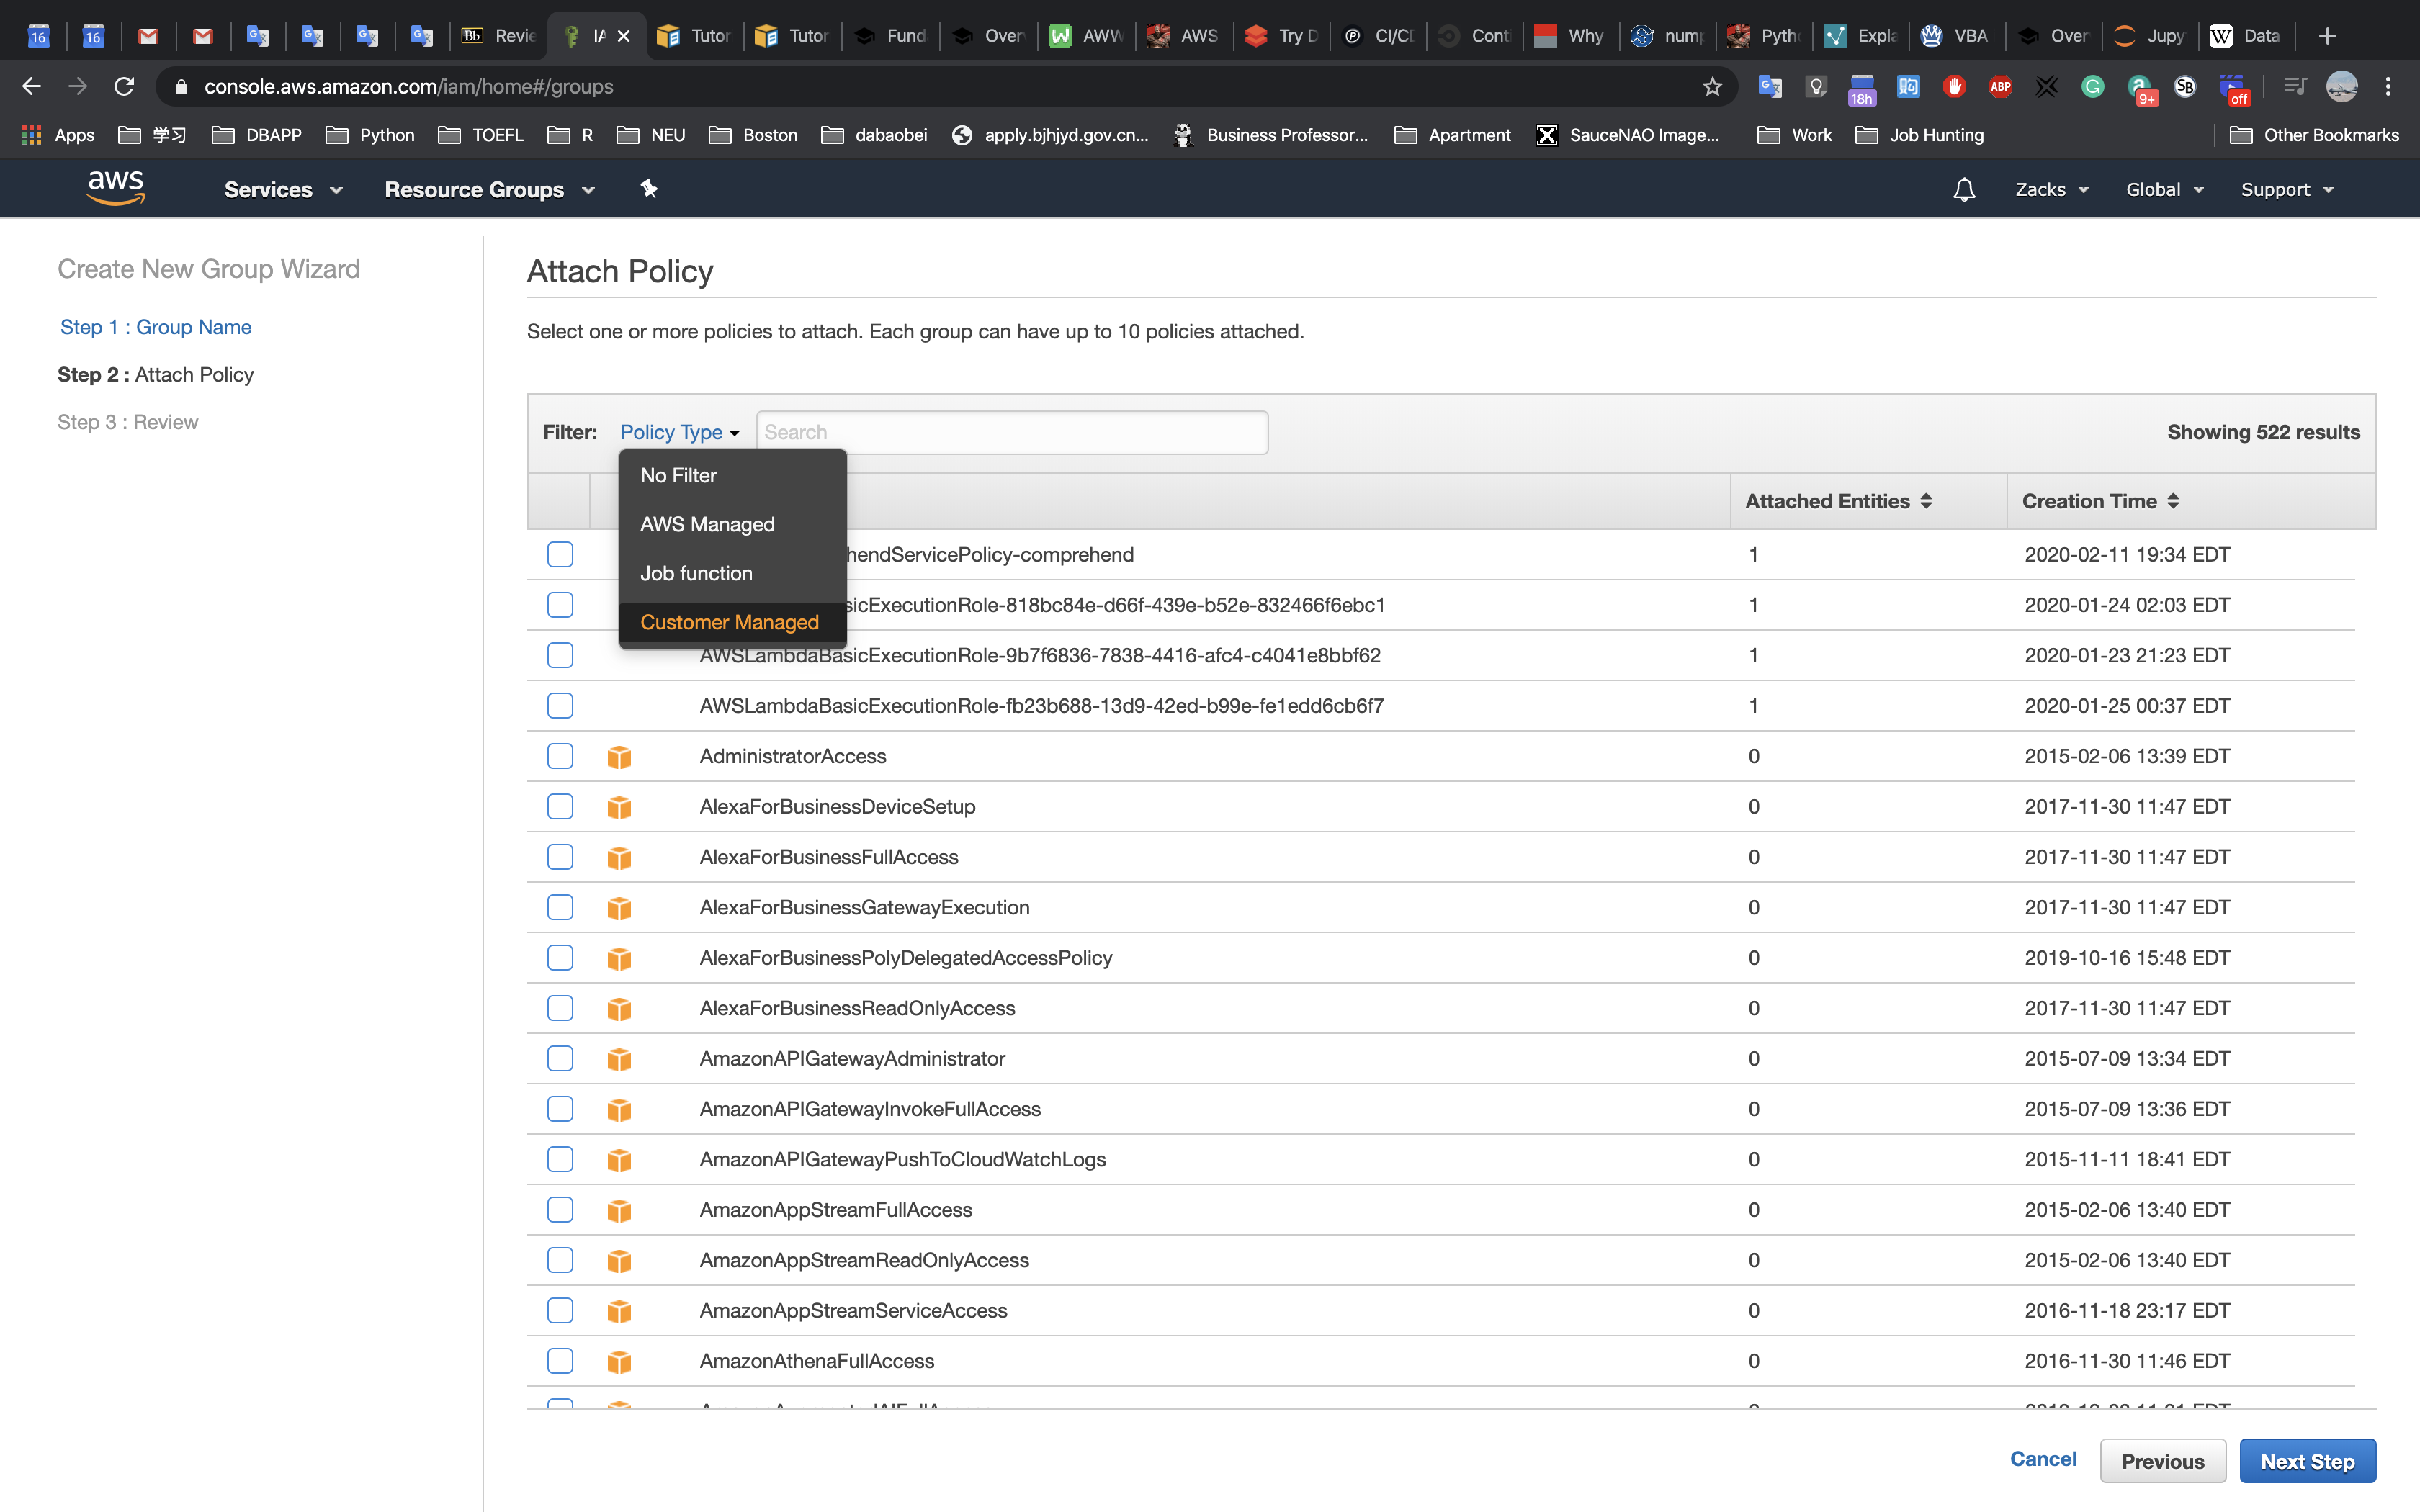
Select the
CostOptimization_Summitpolicy (created previously) and clickNext Step: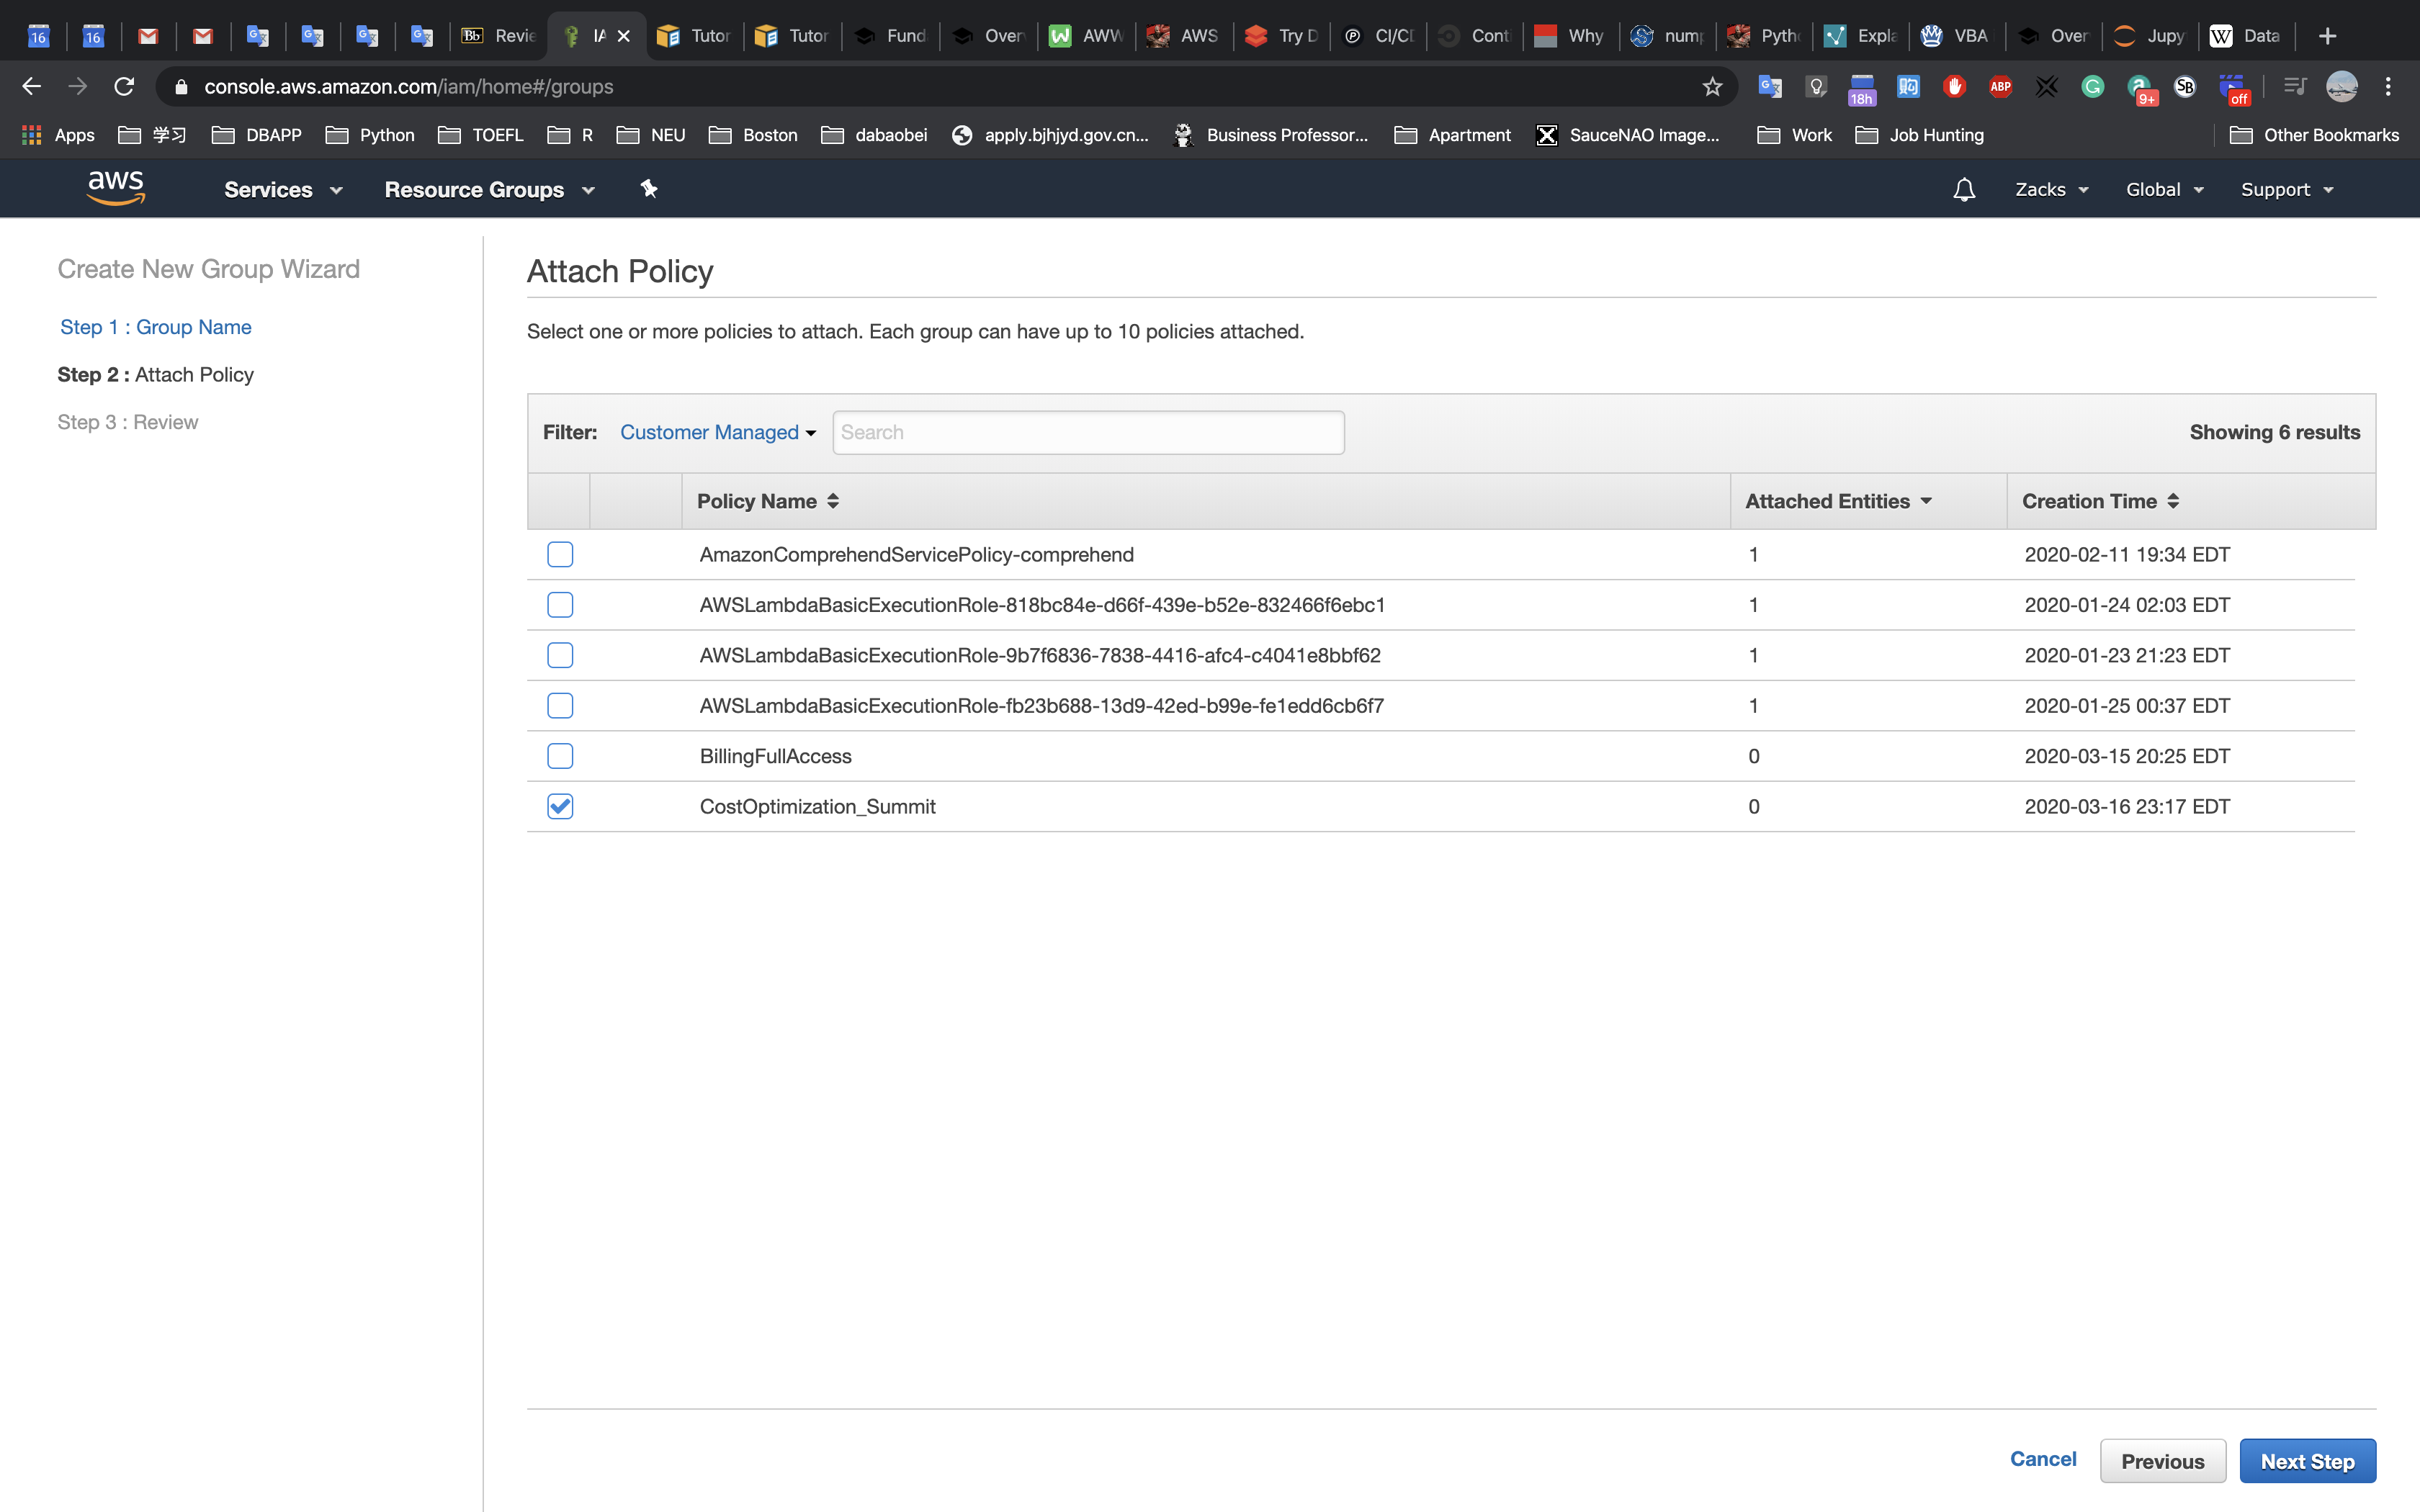
Click
Create Group: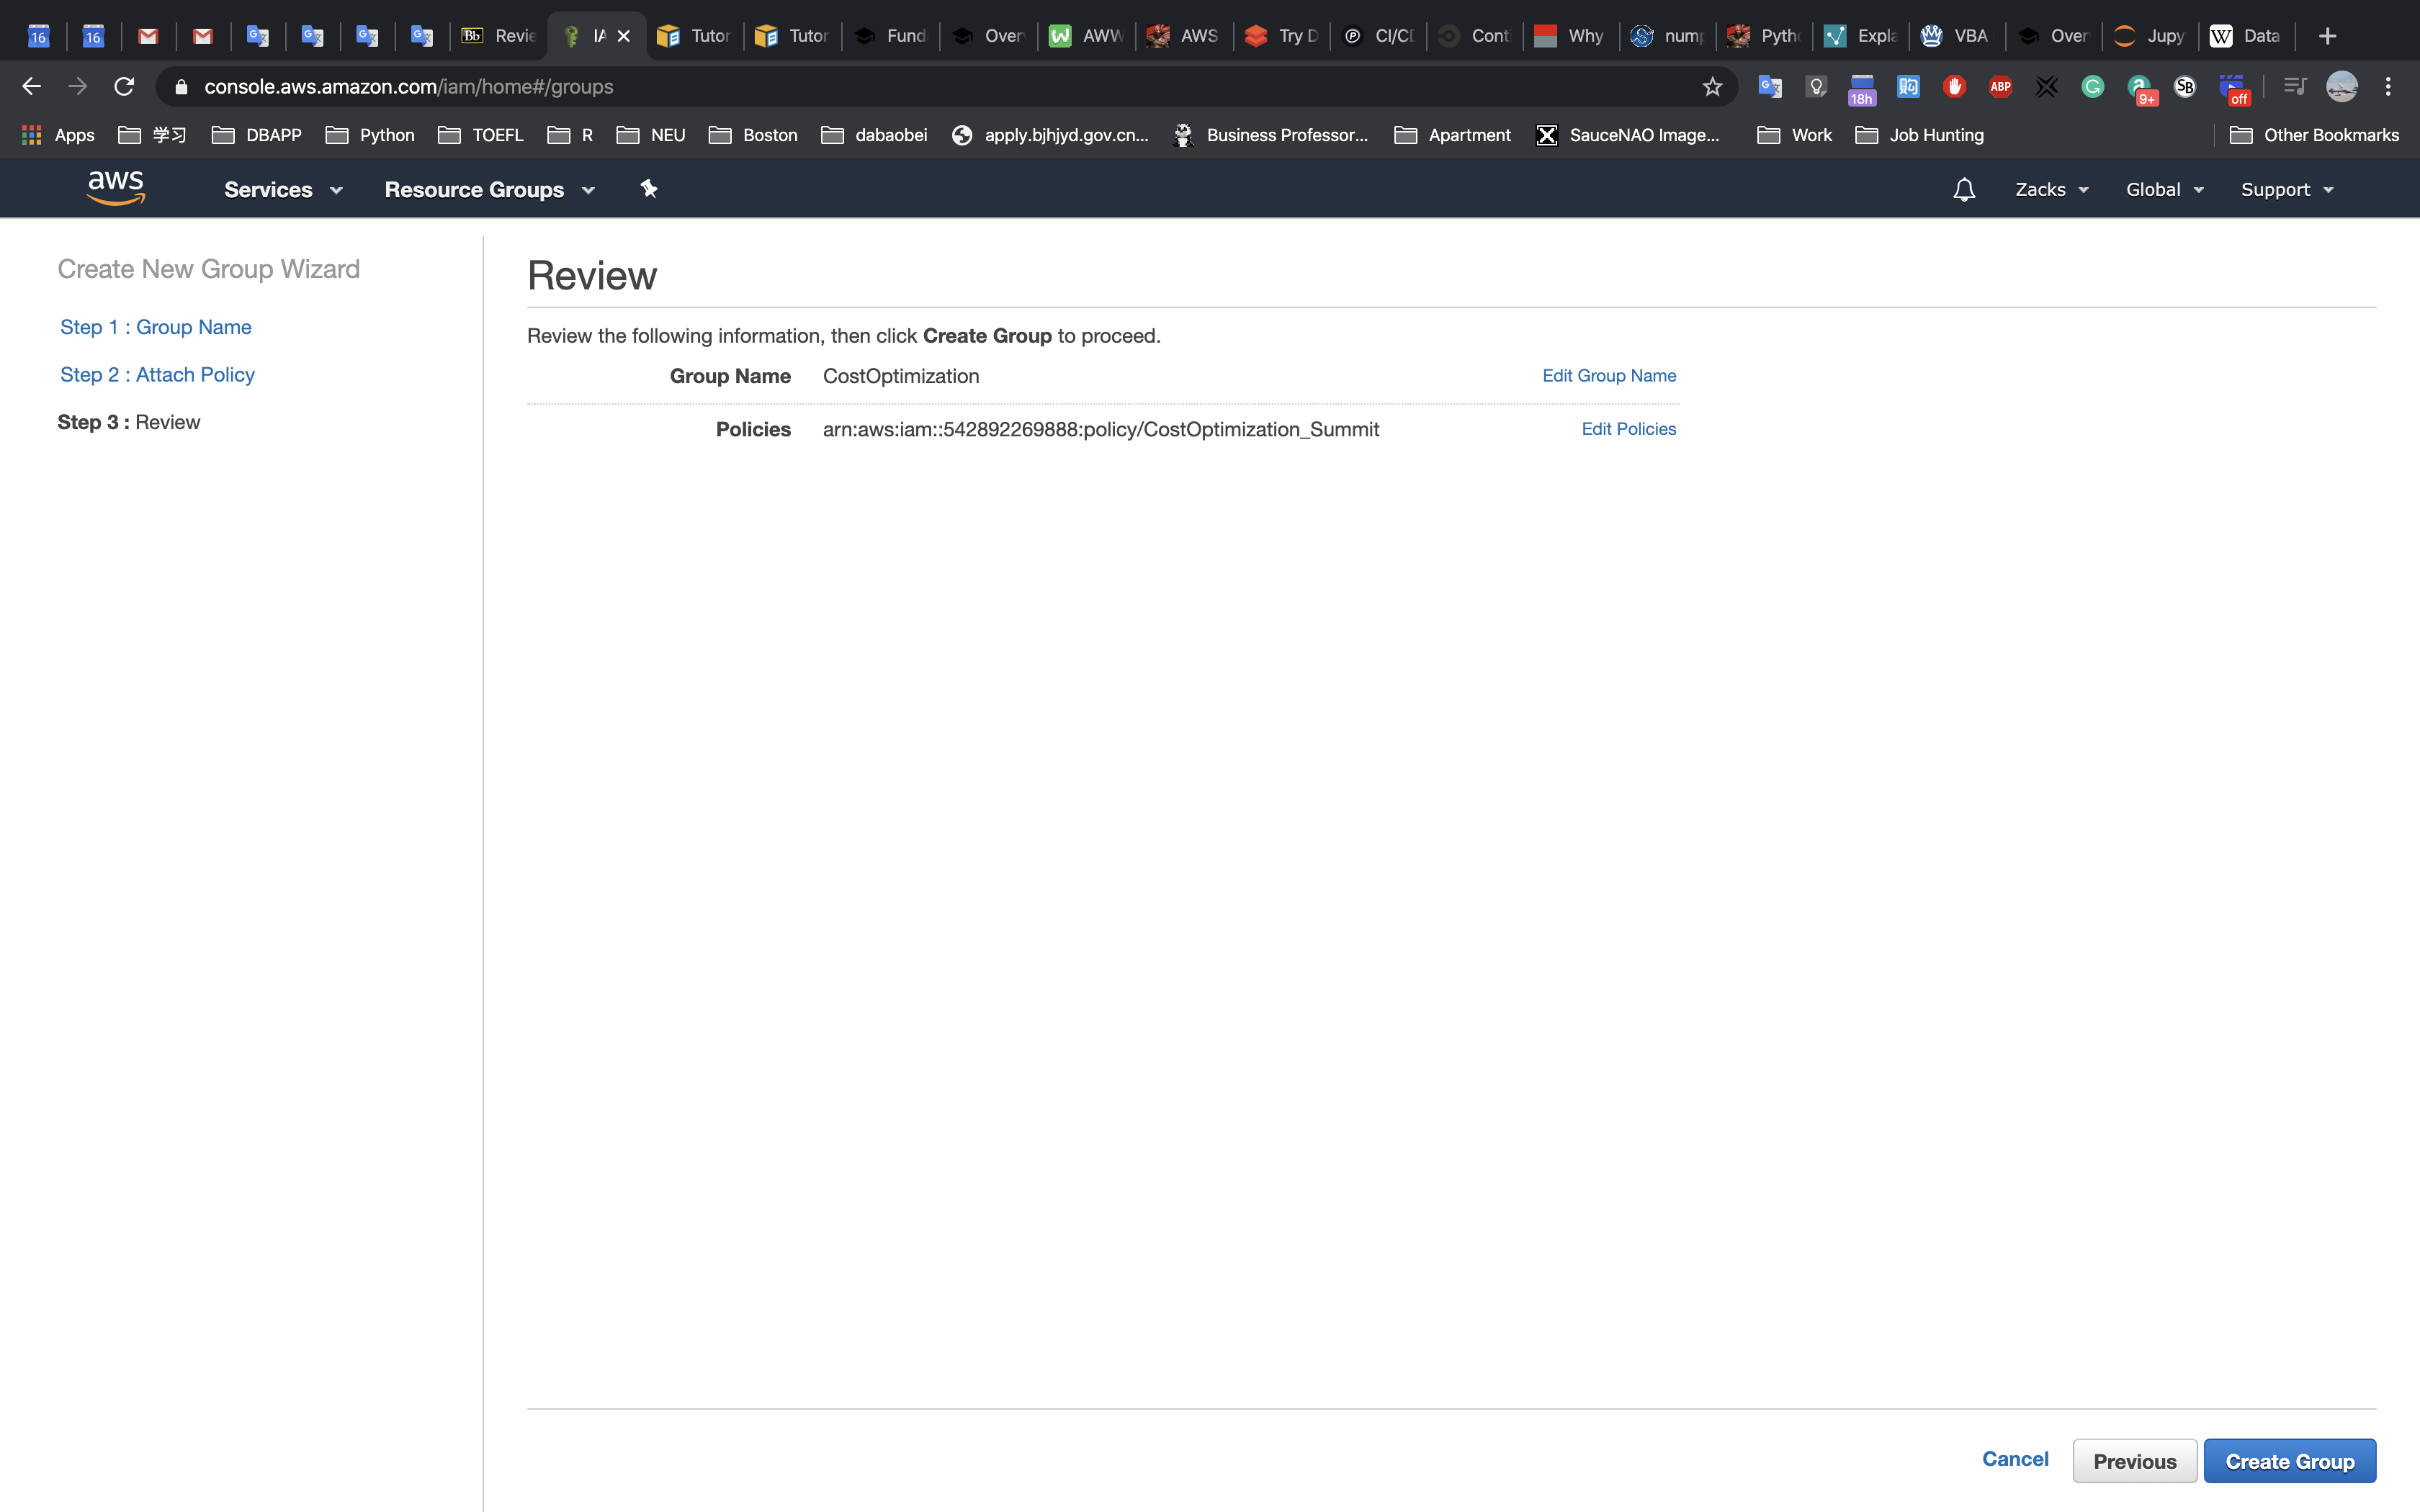
You have now successfully created the cost optimization group, and attached the required policies.
7.3 Create an IAM User
For this lab we will create a user and join them to the group above.
In the IAM console, select
Usersfrom the left menu: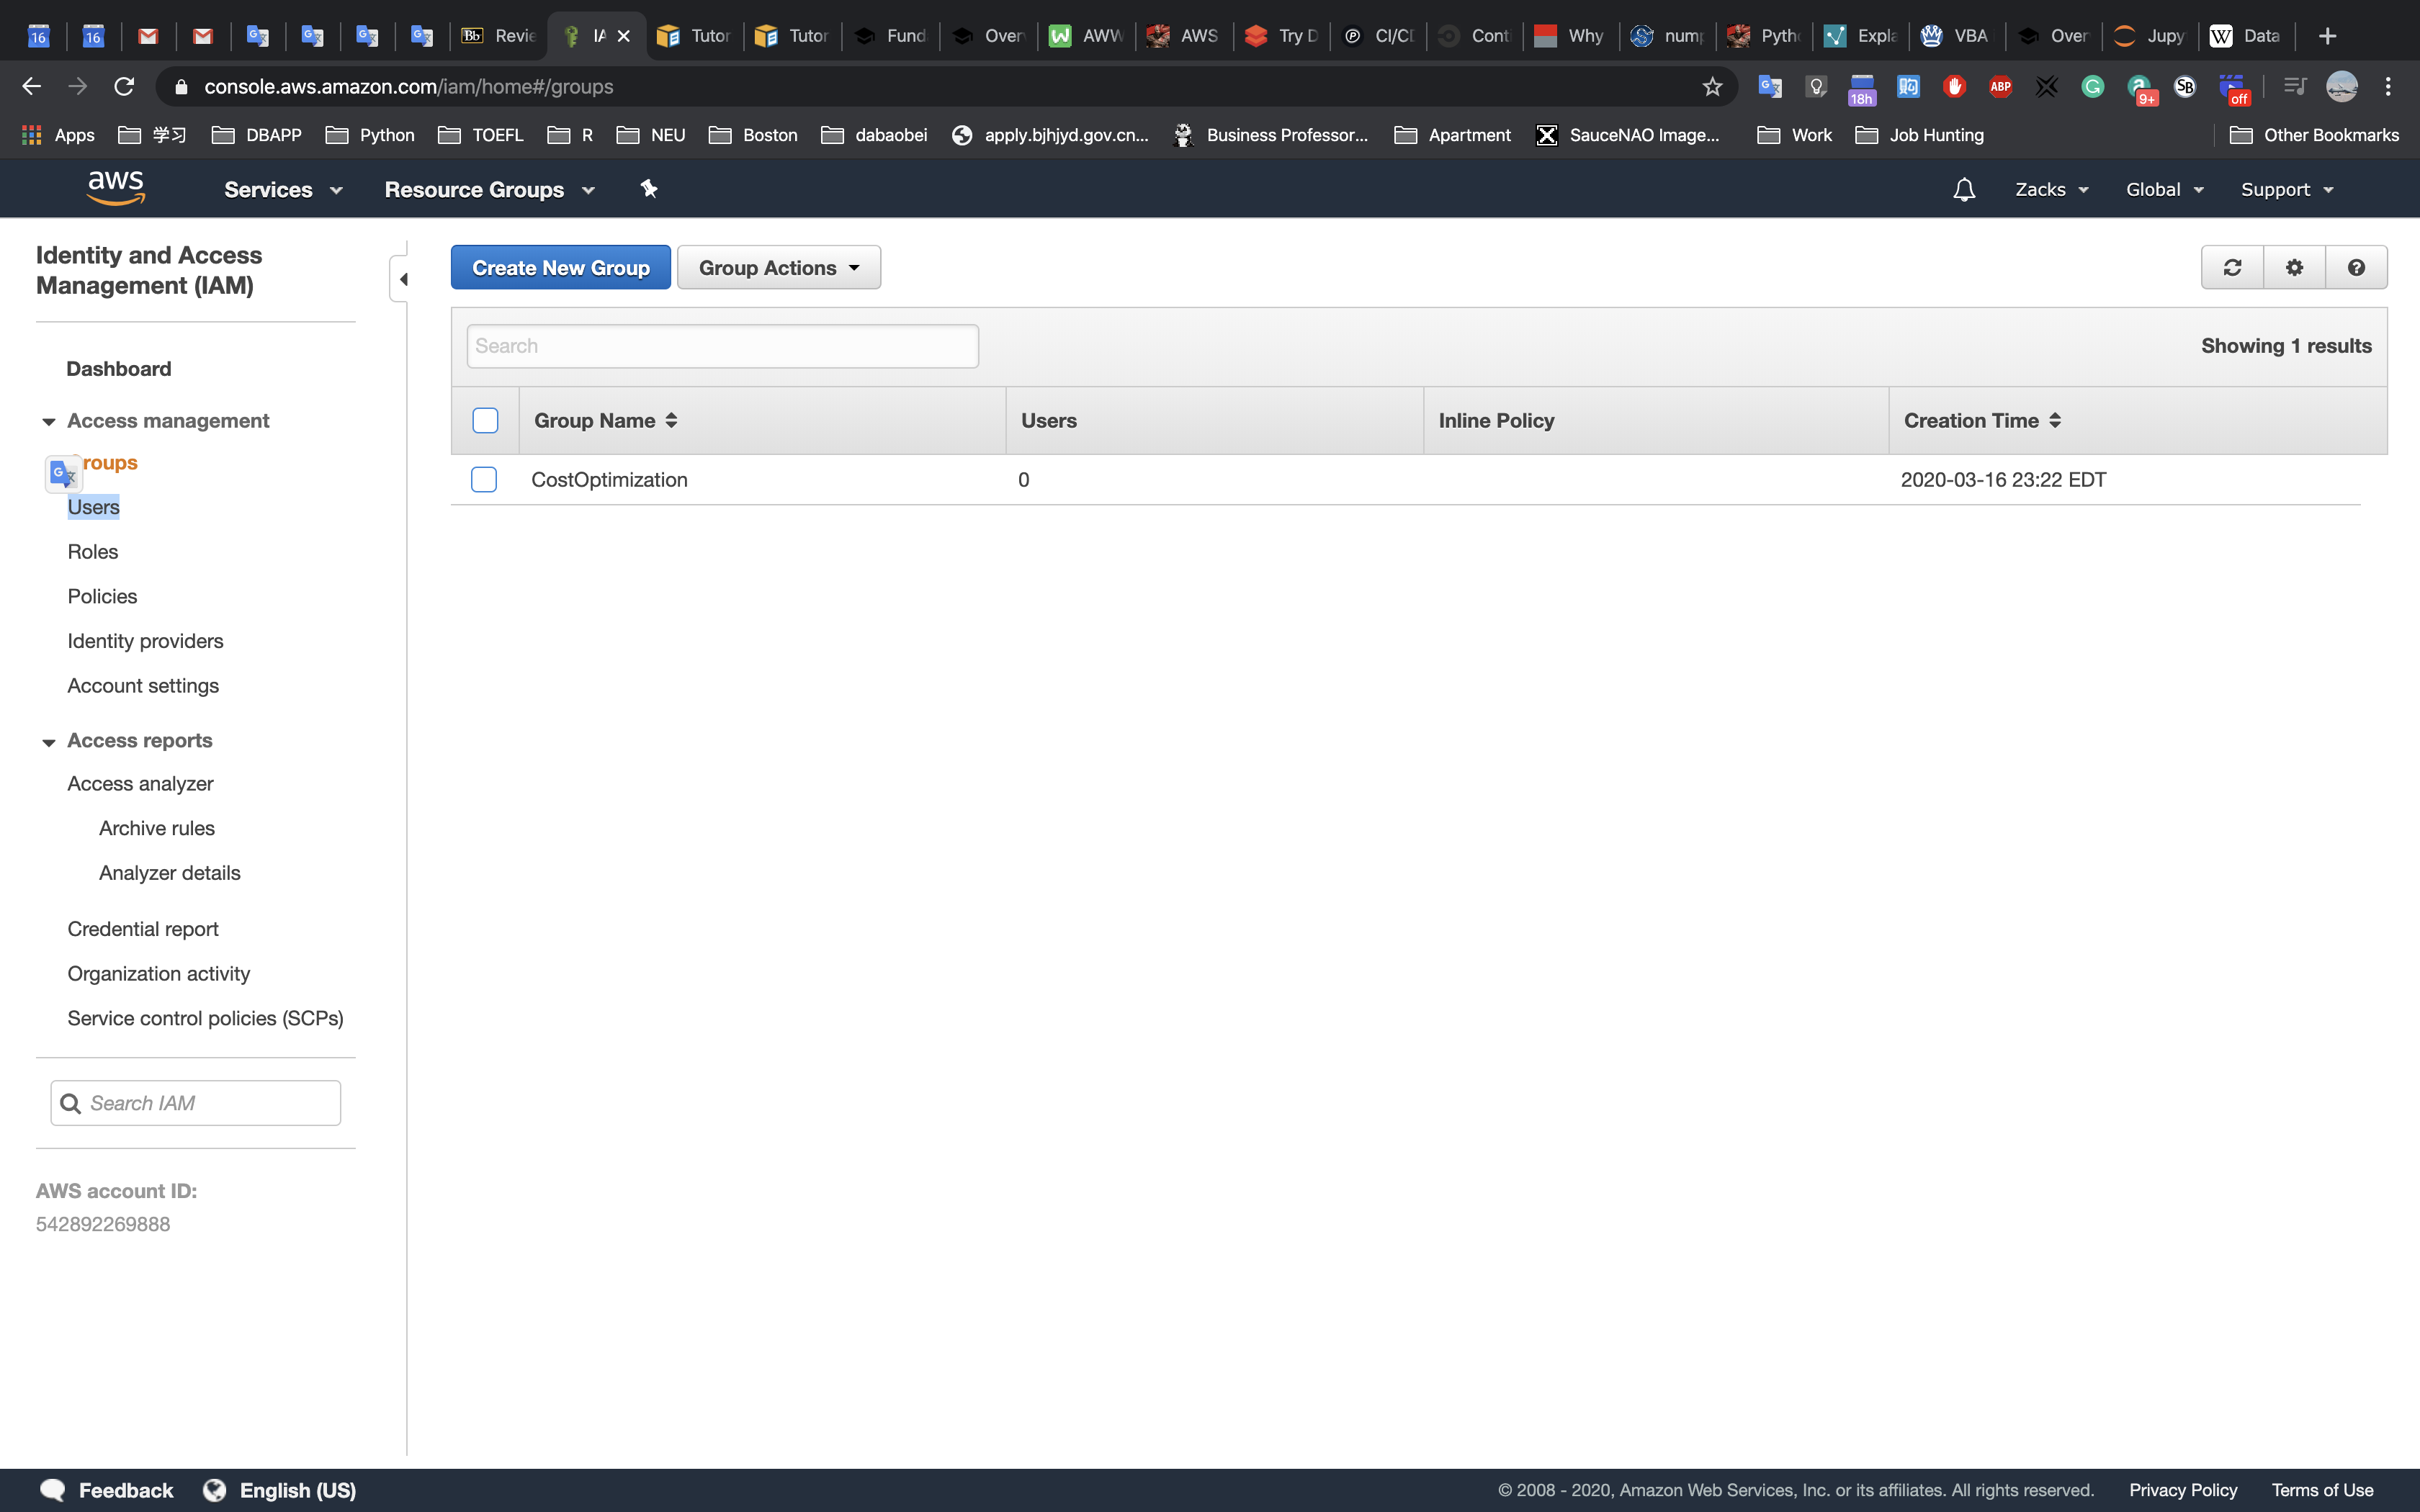
Click
Add user:
Enter a
User name, selectAWS Management Console access, chooseCustom Password, type a suitable password, deselect Require password reset, and clickNext: Permissions:
Select the
CostOptimizationgroup (created previously), and clickNext: Tags:
Click
Next Review:
Click
Create user:
Copy the link provided, and logout by clicking on your username in the top right, and selecting Sign Out:
Log back in as the username you just created, with the link you copied for the remainder of the Lab.
You have successfully created a user, placed them in the cost optimization group and have applied policies. You can continue to expand this group by adding additional users from your organization.
Tear down
This exercise covered fundamental steps that are recommended for all AWS accounts to enable Cost Optimization. There is no tear down for exercises in this lab. Ensure you remove the IAM policies from the users/groups if they were used.
Level 100: Cost and Usage Governance
Authors
- Nathan Besh, Cost Lead Well-Architected
Table of Contents
- Create an AWS Budget - monthly forecast
- Create an AWS Budget - EC2 actual
- Create an AWS Budget - SP Coverage
- Create an AWS Budget Report
- Tear down
1. Create and implement an AWS Budget for monthly forecasted cost
Budgets allow you to manage cost and usage by providing notifications when cost or usage are outside of configured amounts. They cannot be used to restrict actions, only notify on usage after it has occurred.
Budgets and notifications are updated when your billing data is updated, which is at least once per day.
NOTE: You may not receive an alarm for a forecasted budget if your account is new. Forecasting requires existing usage within the account.
Create a monthly cost budget for your account
We will create a monthly cost budget which will notify if the forecasted amount exceeds the budget.
Log into the console as an IAM user with the required permissions, go to the
Billingconsole:
Select Budgets from the left menu:
Click on
Create a budget:
Ensure
Cost Budgetis selected, and clickSet your budget >:
Create a cost budget, enter the following details:
- Name:
CostBudget1 - Period:
Monthly - Budget effective dates:
Recurring Budget - Start Month: (select current month)
- Budget amount:
Fixed - Budgeted amount:
$1(enter an amount a lot LESS than last months cost), - Other fields: leave as defaults
- Name:
Scroll down and click
Configure alerts >:
Select:
- Send alert based on: Forecasted Costs
- Alert threshold: 100% of budgeted amount
- Email contacts: (your email address)
- Click on
Confirm budget >: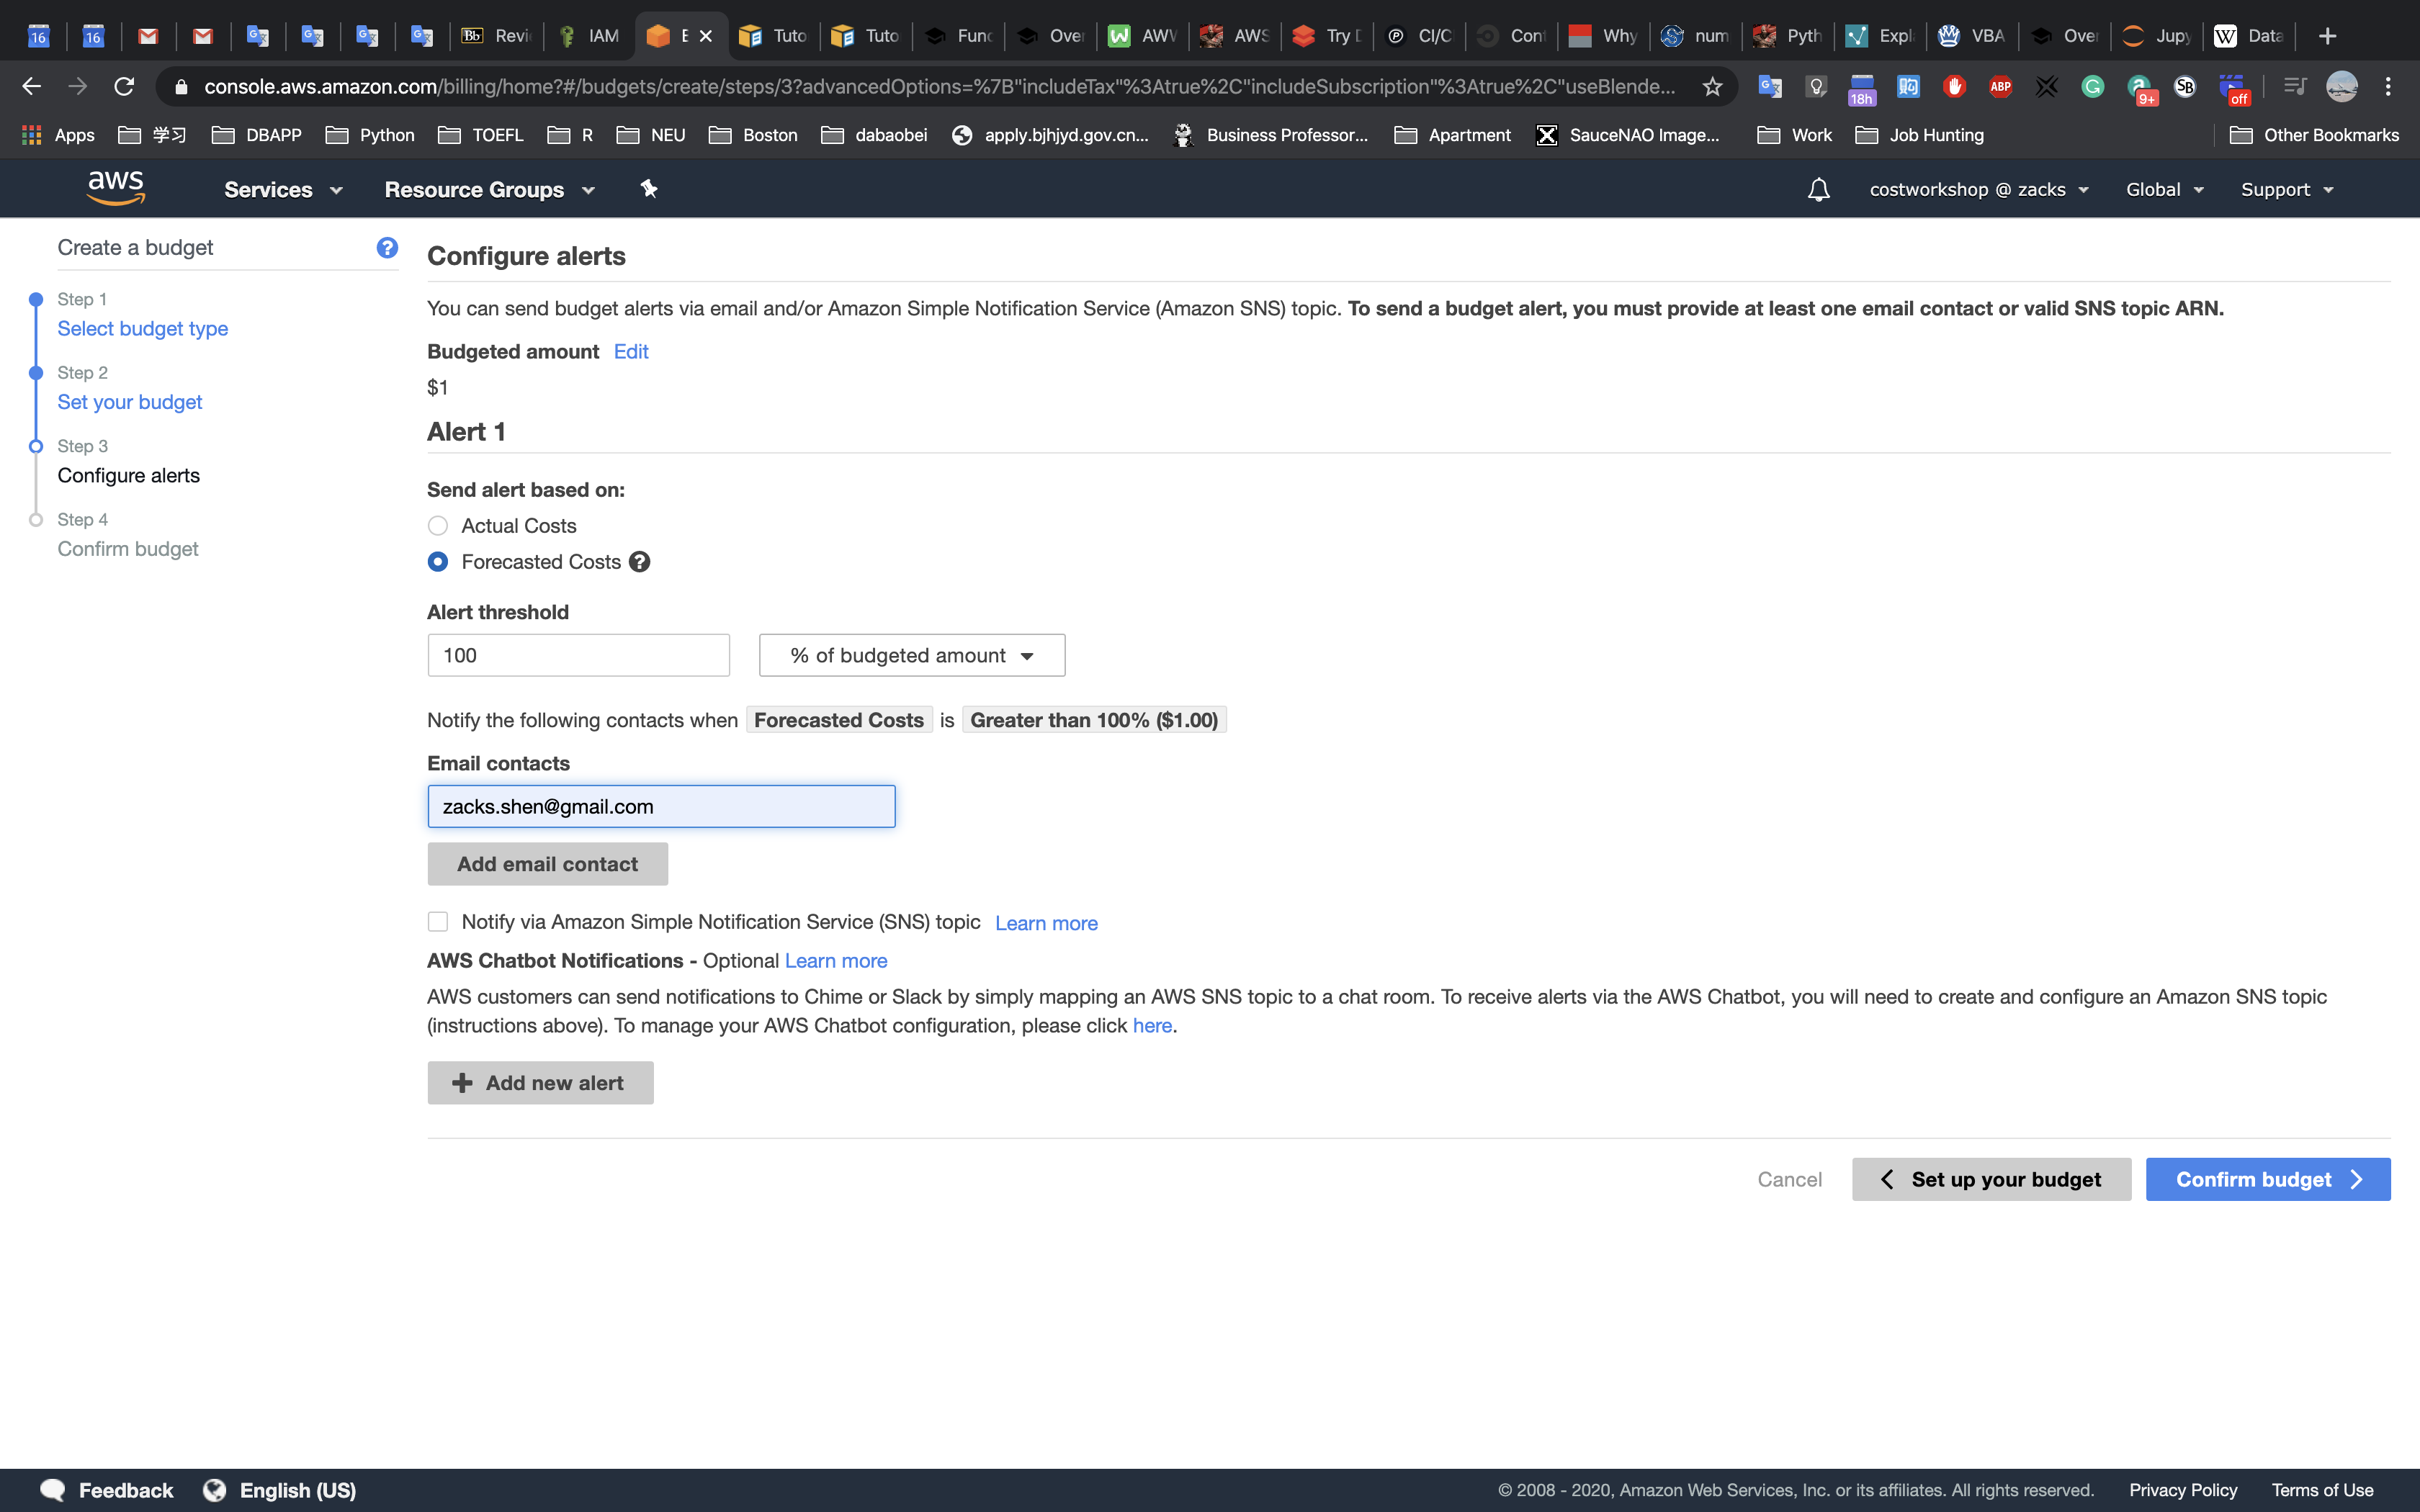
Review the configuration, and click
Create: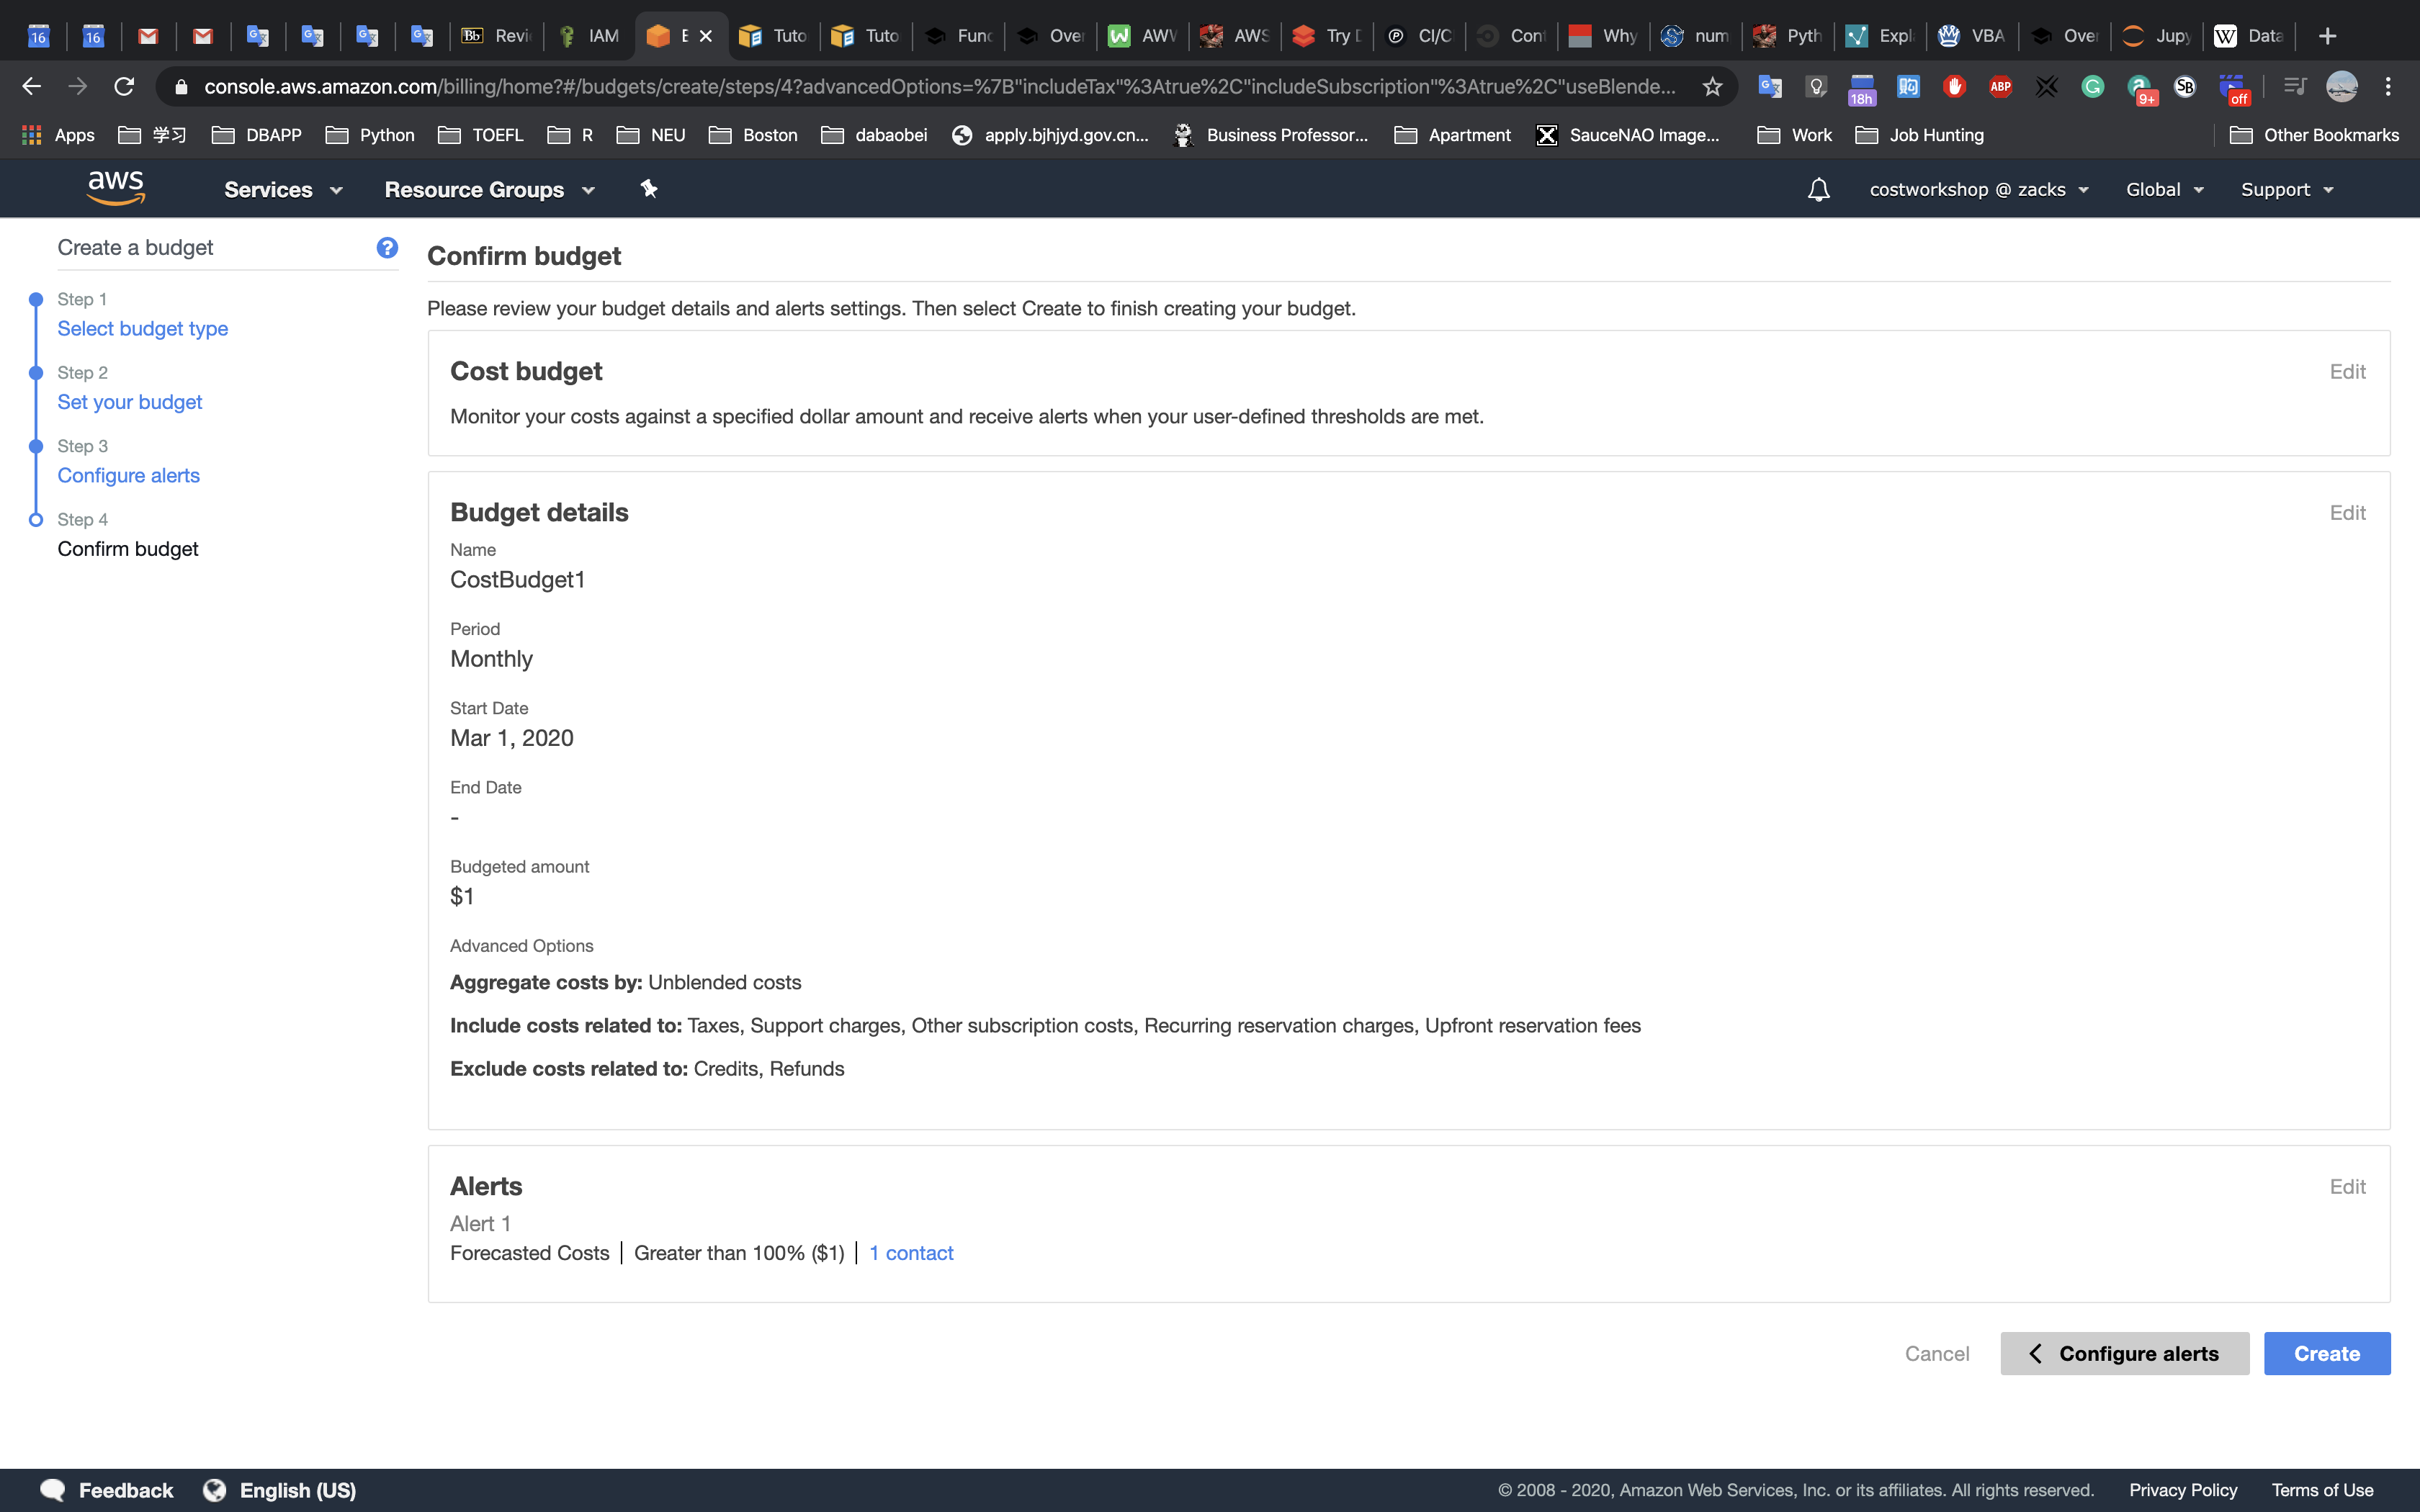
You should see the current forecast will exceed the budget (it should be red, you may need to refresh your browser):

You will receive an email similar to this within a few minutes:
You have created a forecasted budget, when your forecasted costs for the entire account are predicted to exceed the forecast, you will receive a notification. You can also create an actual budget, for when your current costs actually exceed a defined amount.
2. Create and implement an AWS Budget for EC2 actual cost
We will create a monthly EC2 actual cost budget, which will notify if the actual costs of EC2 instances exceeds the specified amount.
Click
Create budget: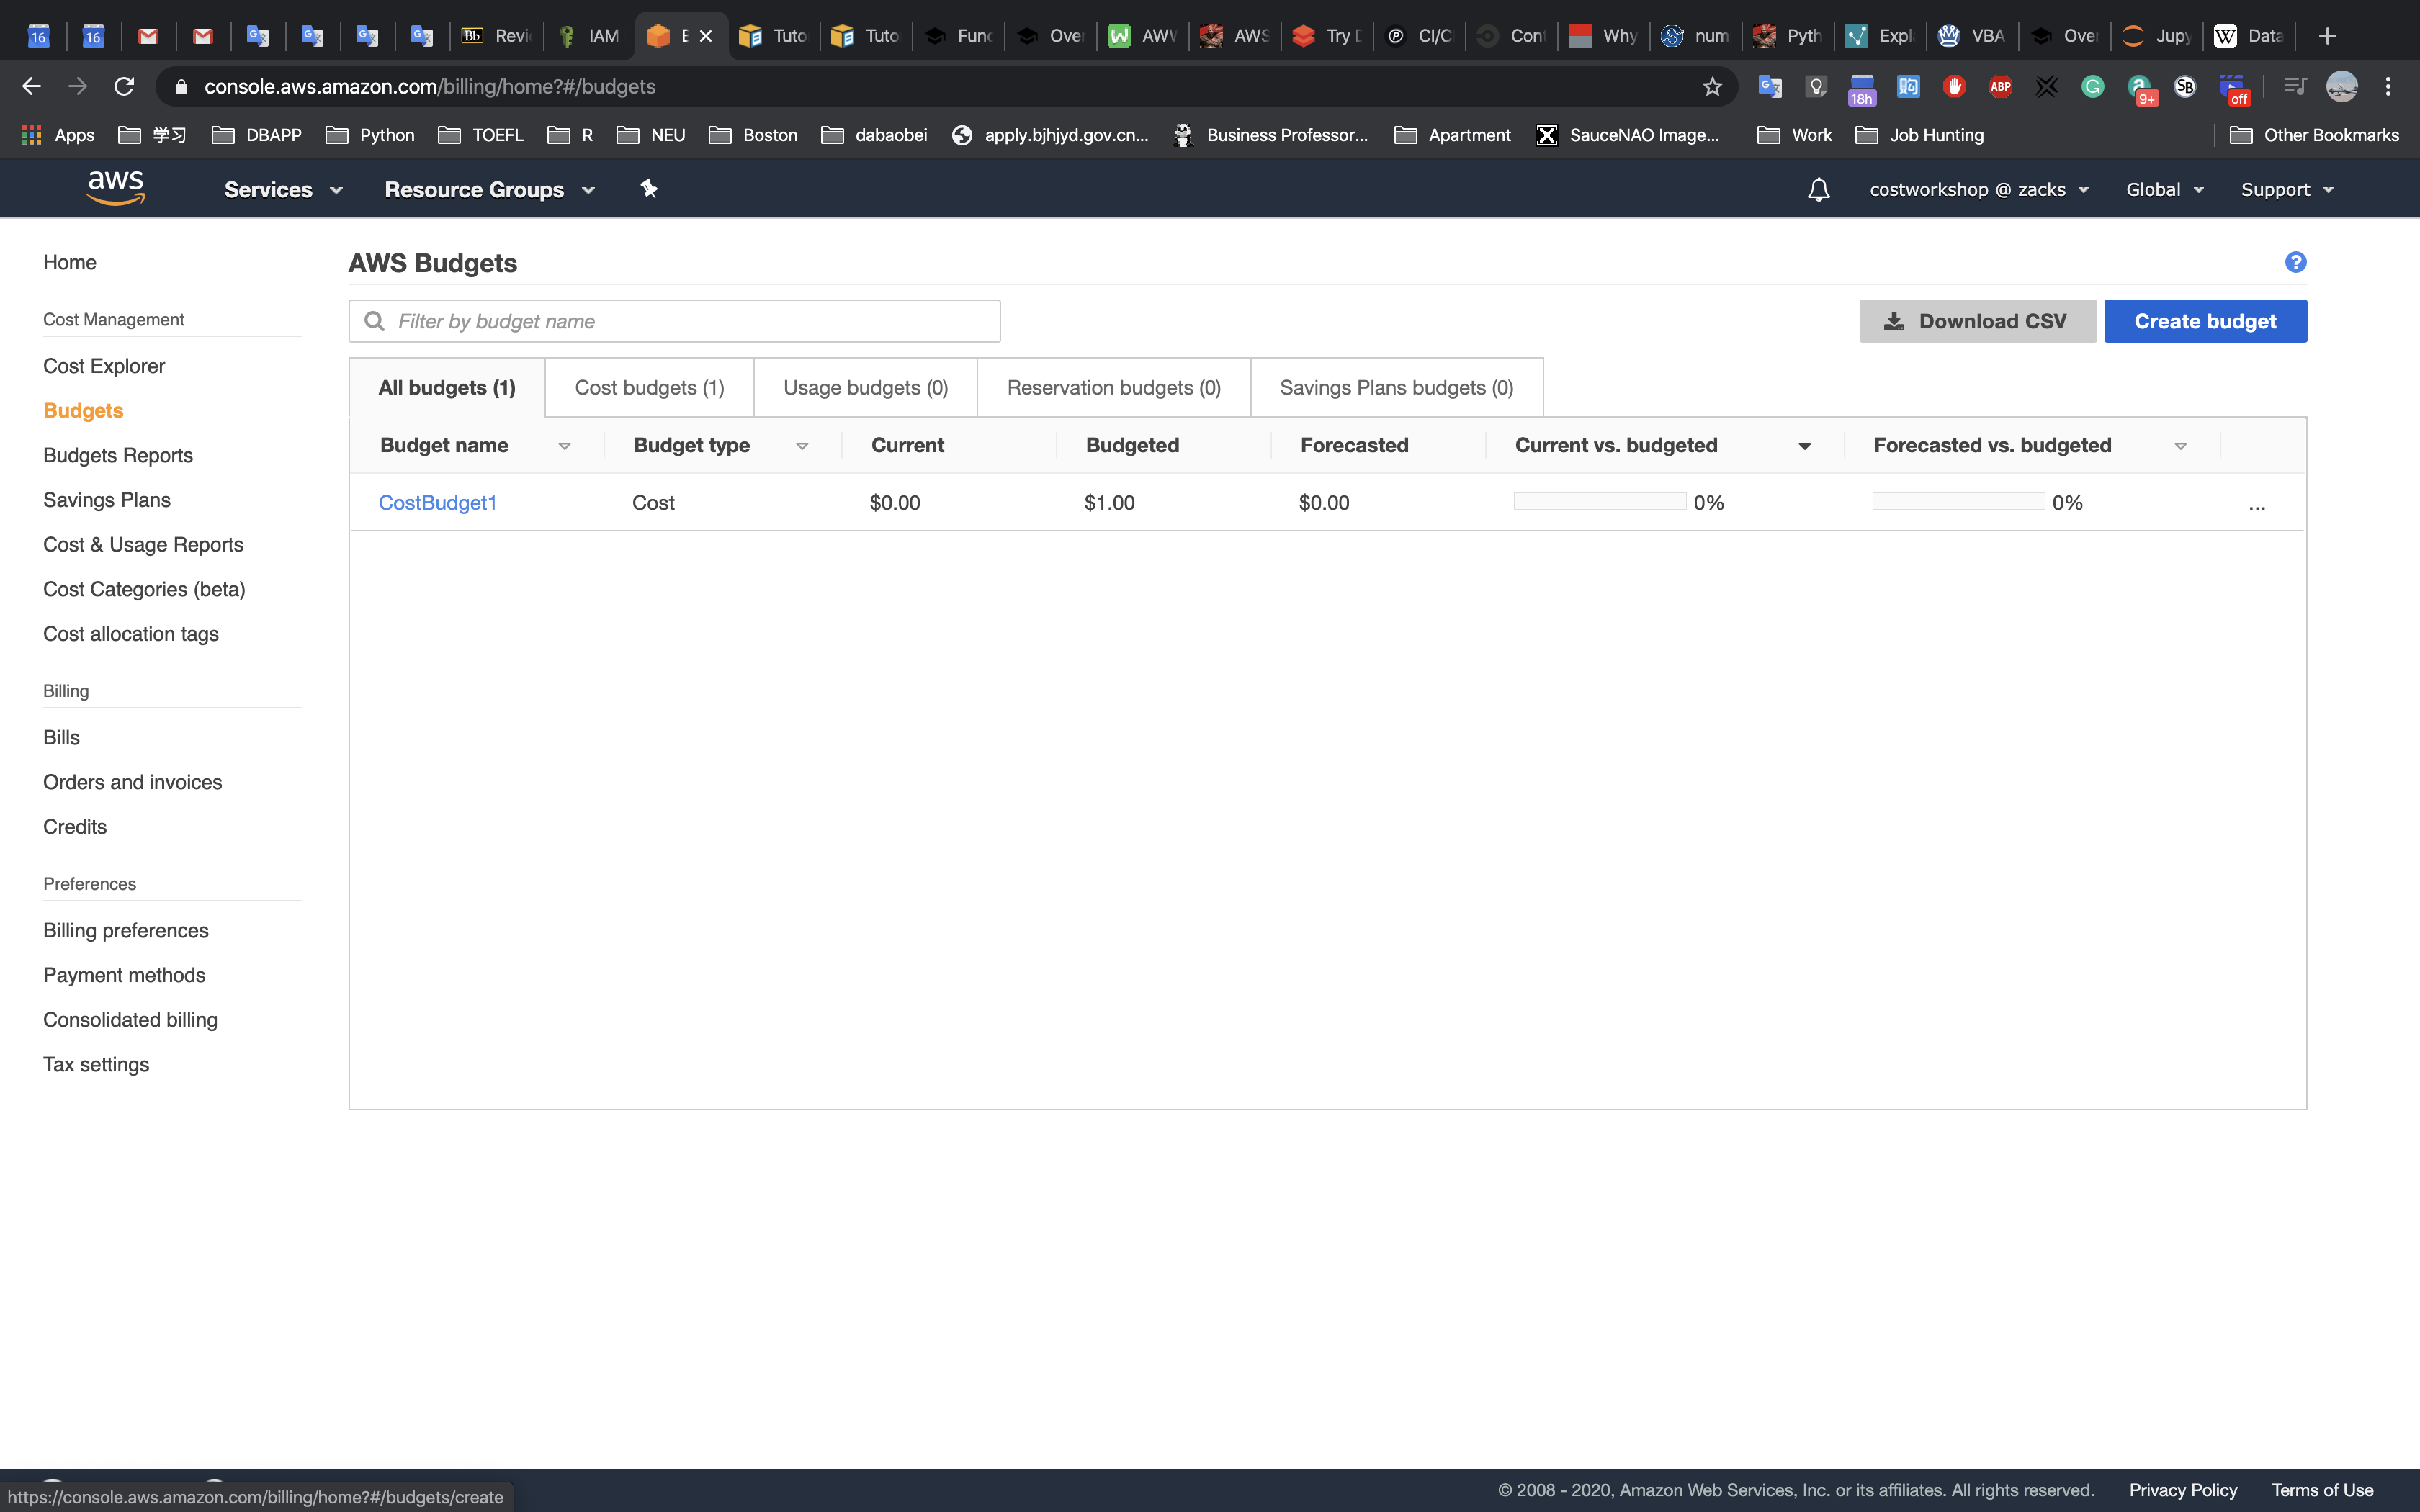
Select
Cost budget, and clickSet your budget >:Create a cost budget, enter the following details:
- Name:
EC2_actual - Period:
Monthly - Budget effective dates:
Recurring Budget - Start Month: (select current month)
- Budget amount:
Fixed - Budgeted amount:
$1(enter an amount a lot LESS than last months cost), - Other fields: leave as defaults
- Under FILTERING click on Service:
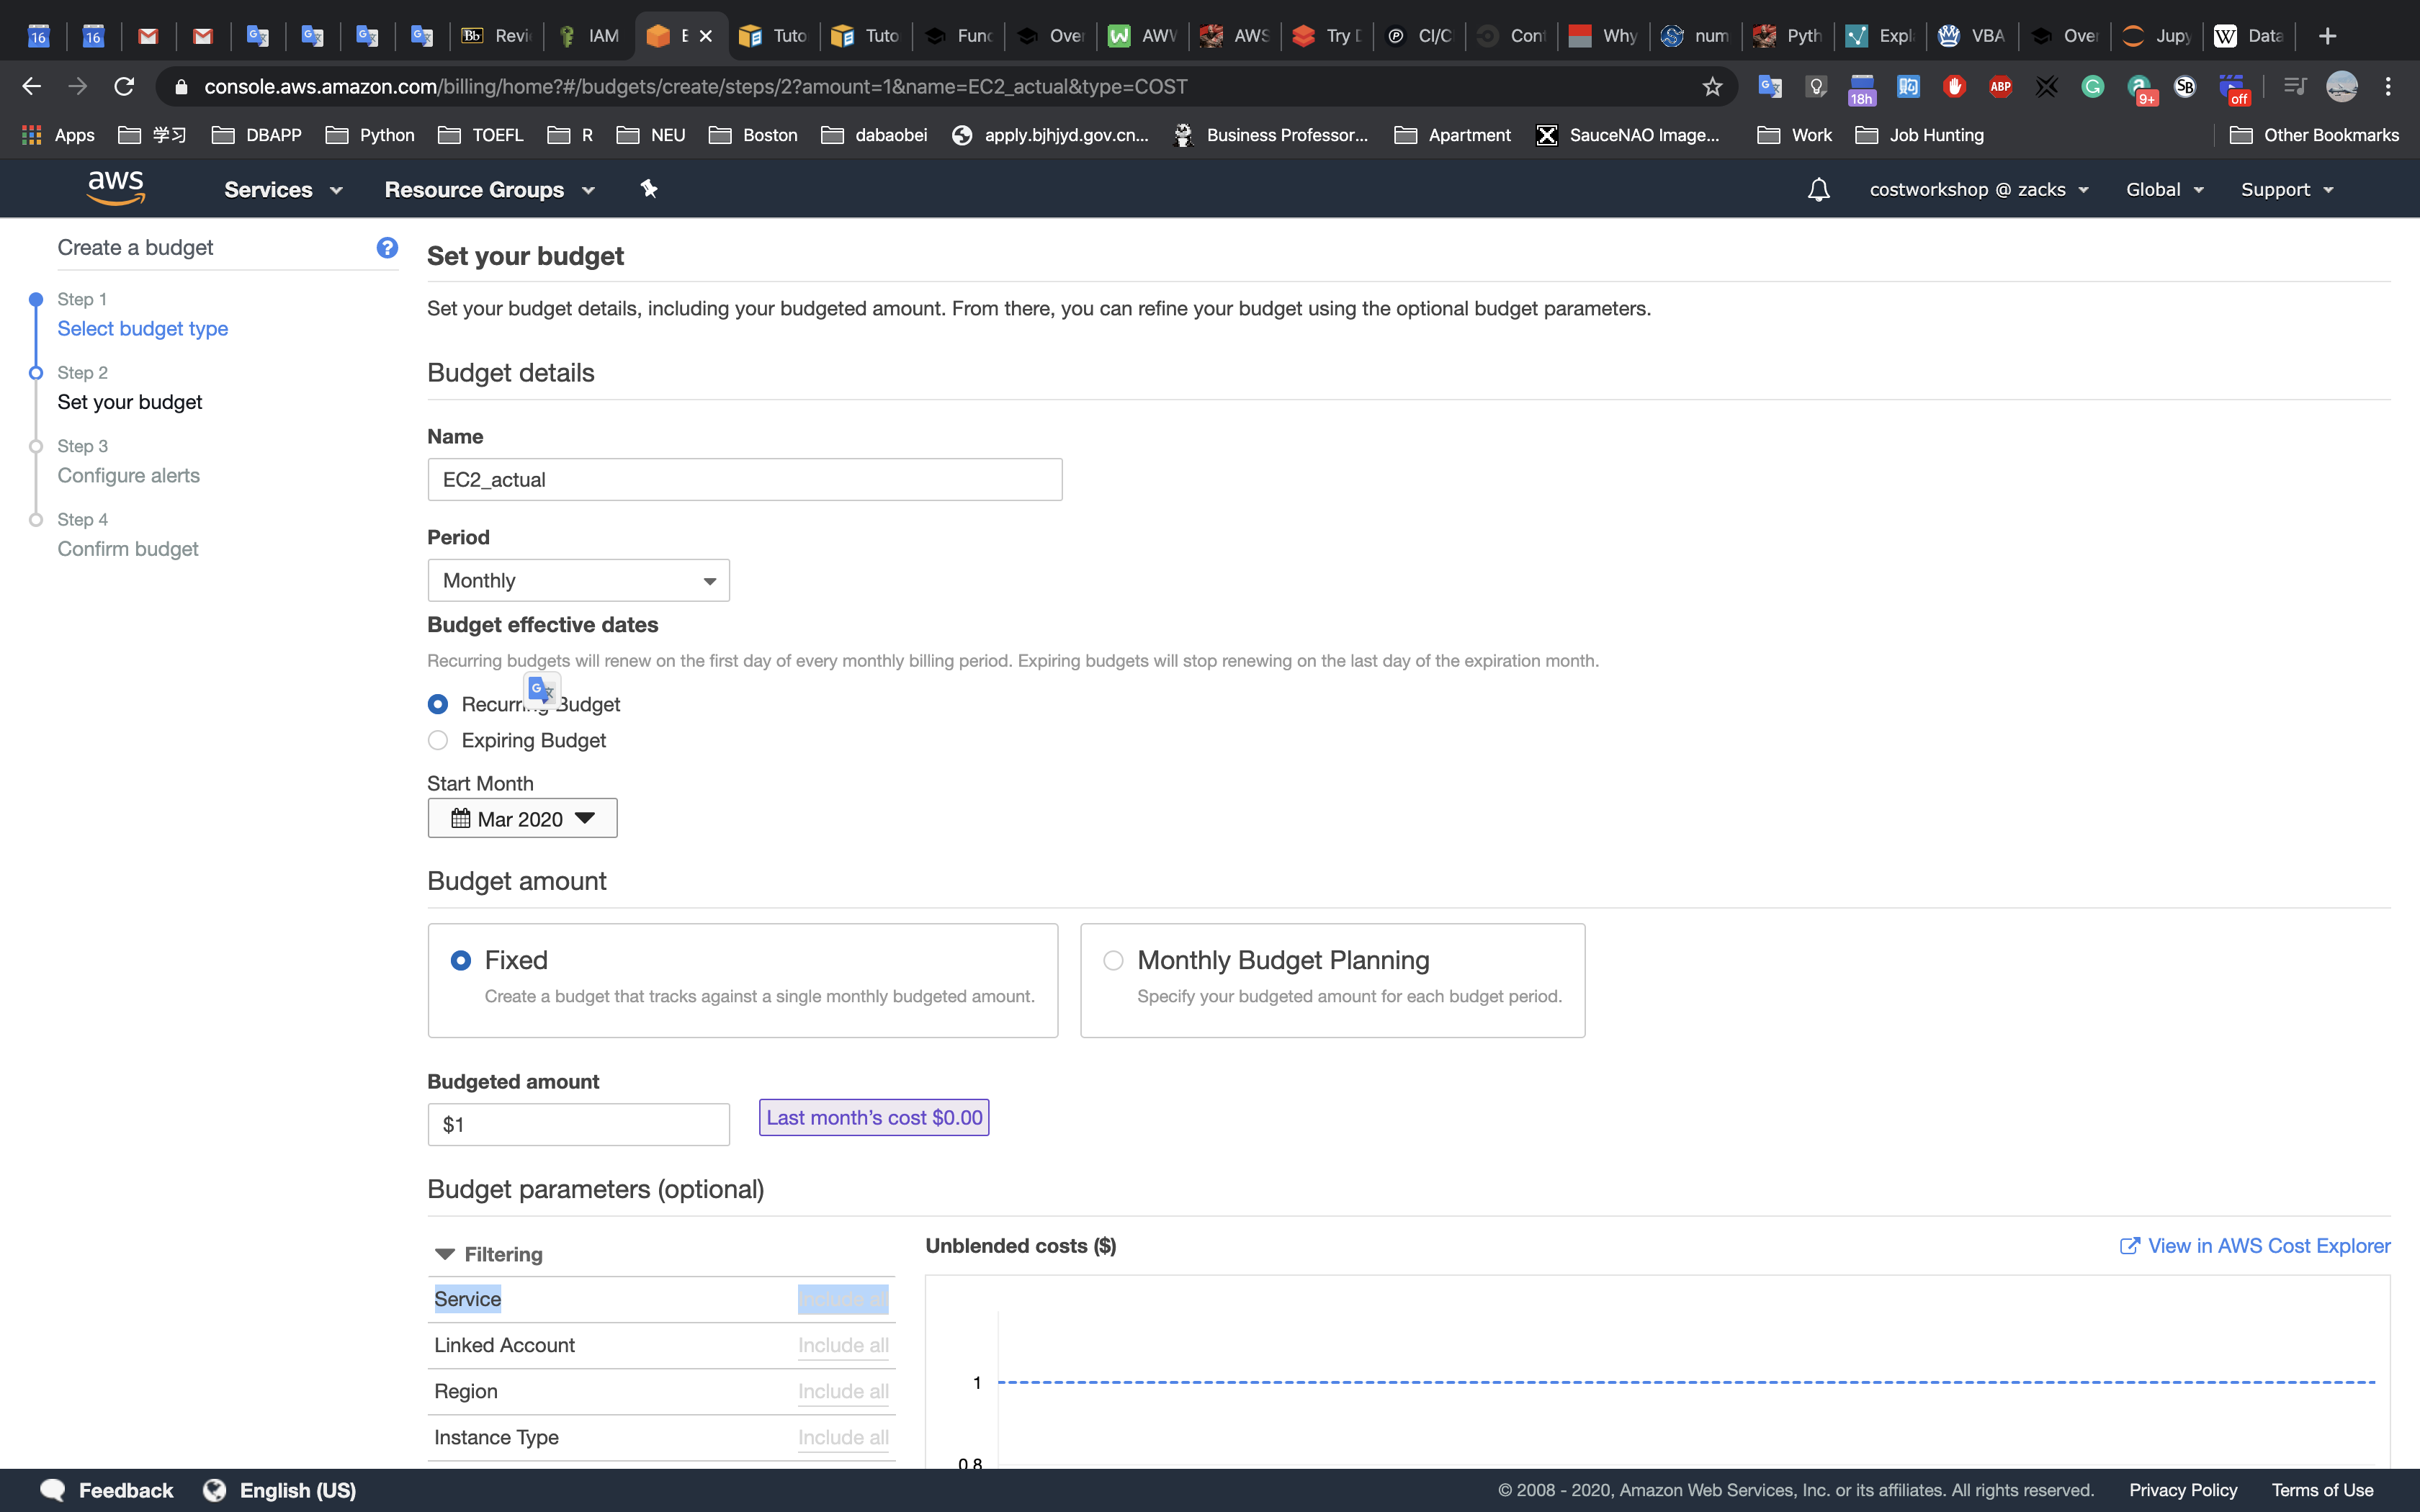
- Name:
Type
Elasticin the search field, then select the checkbox next toEC2-Instances(Elastic Compute Cloud - Compute)and ClickApply filters:
Not available for free account.De-select
Upfront reservation fees, and clickConfigure alerts >: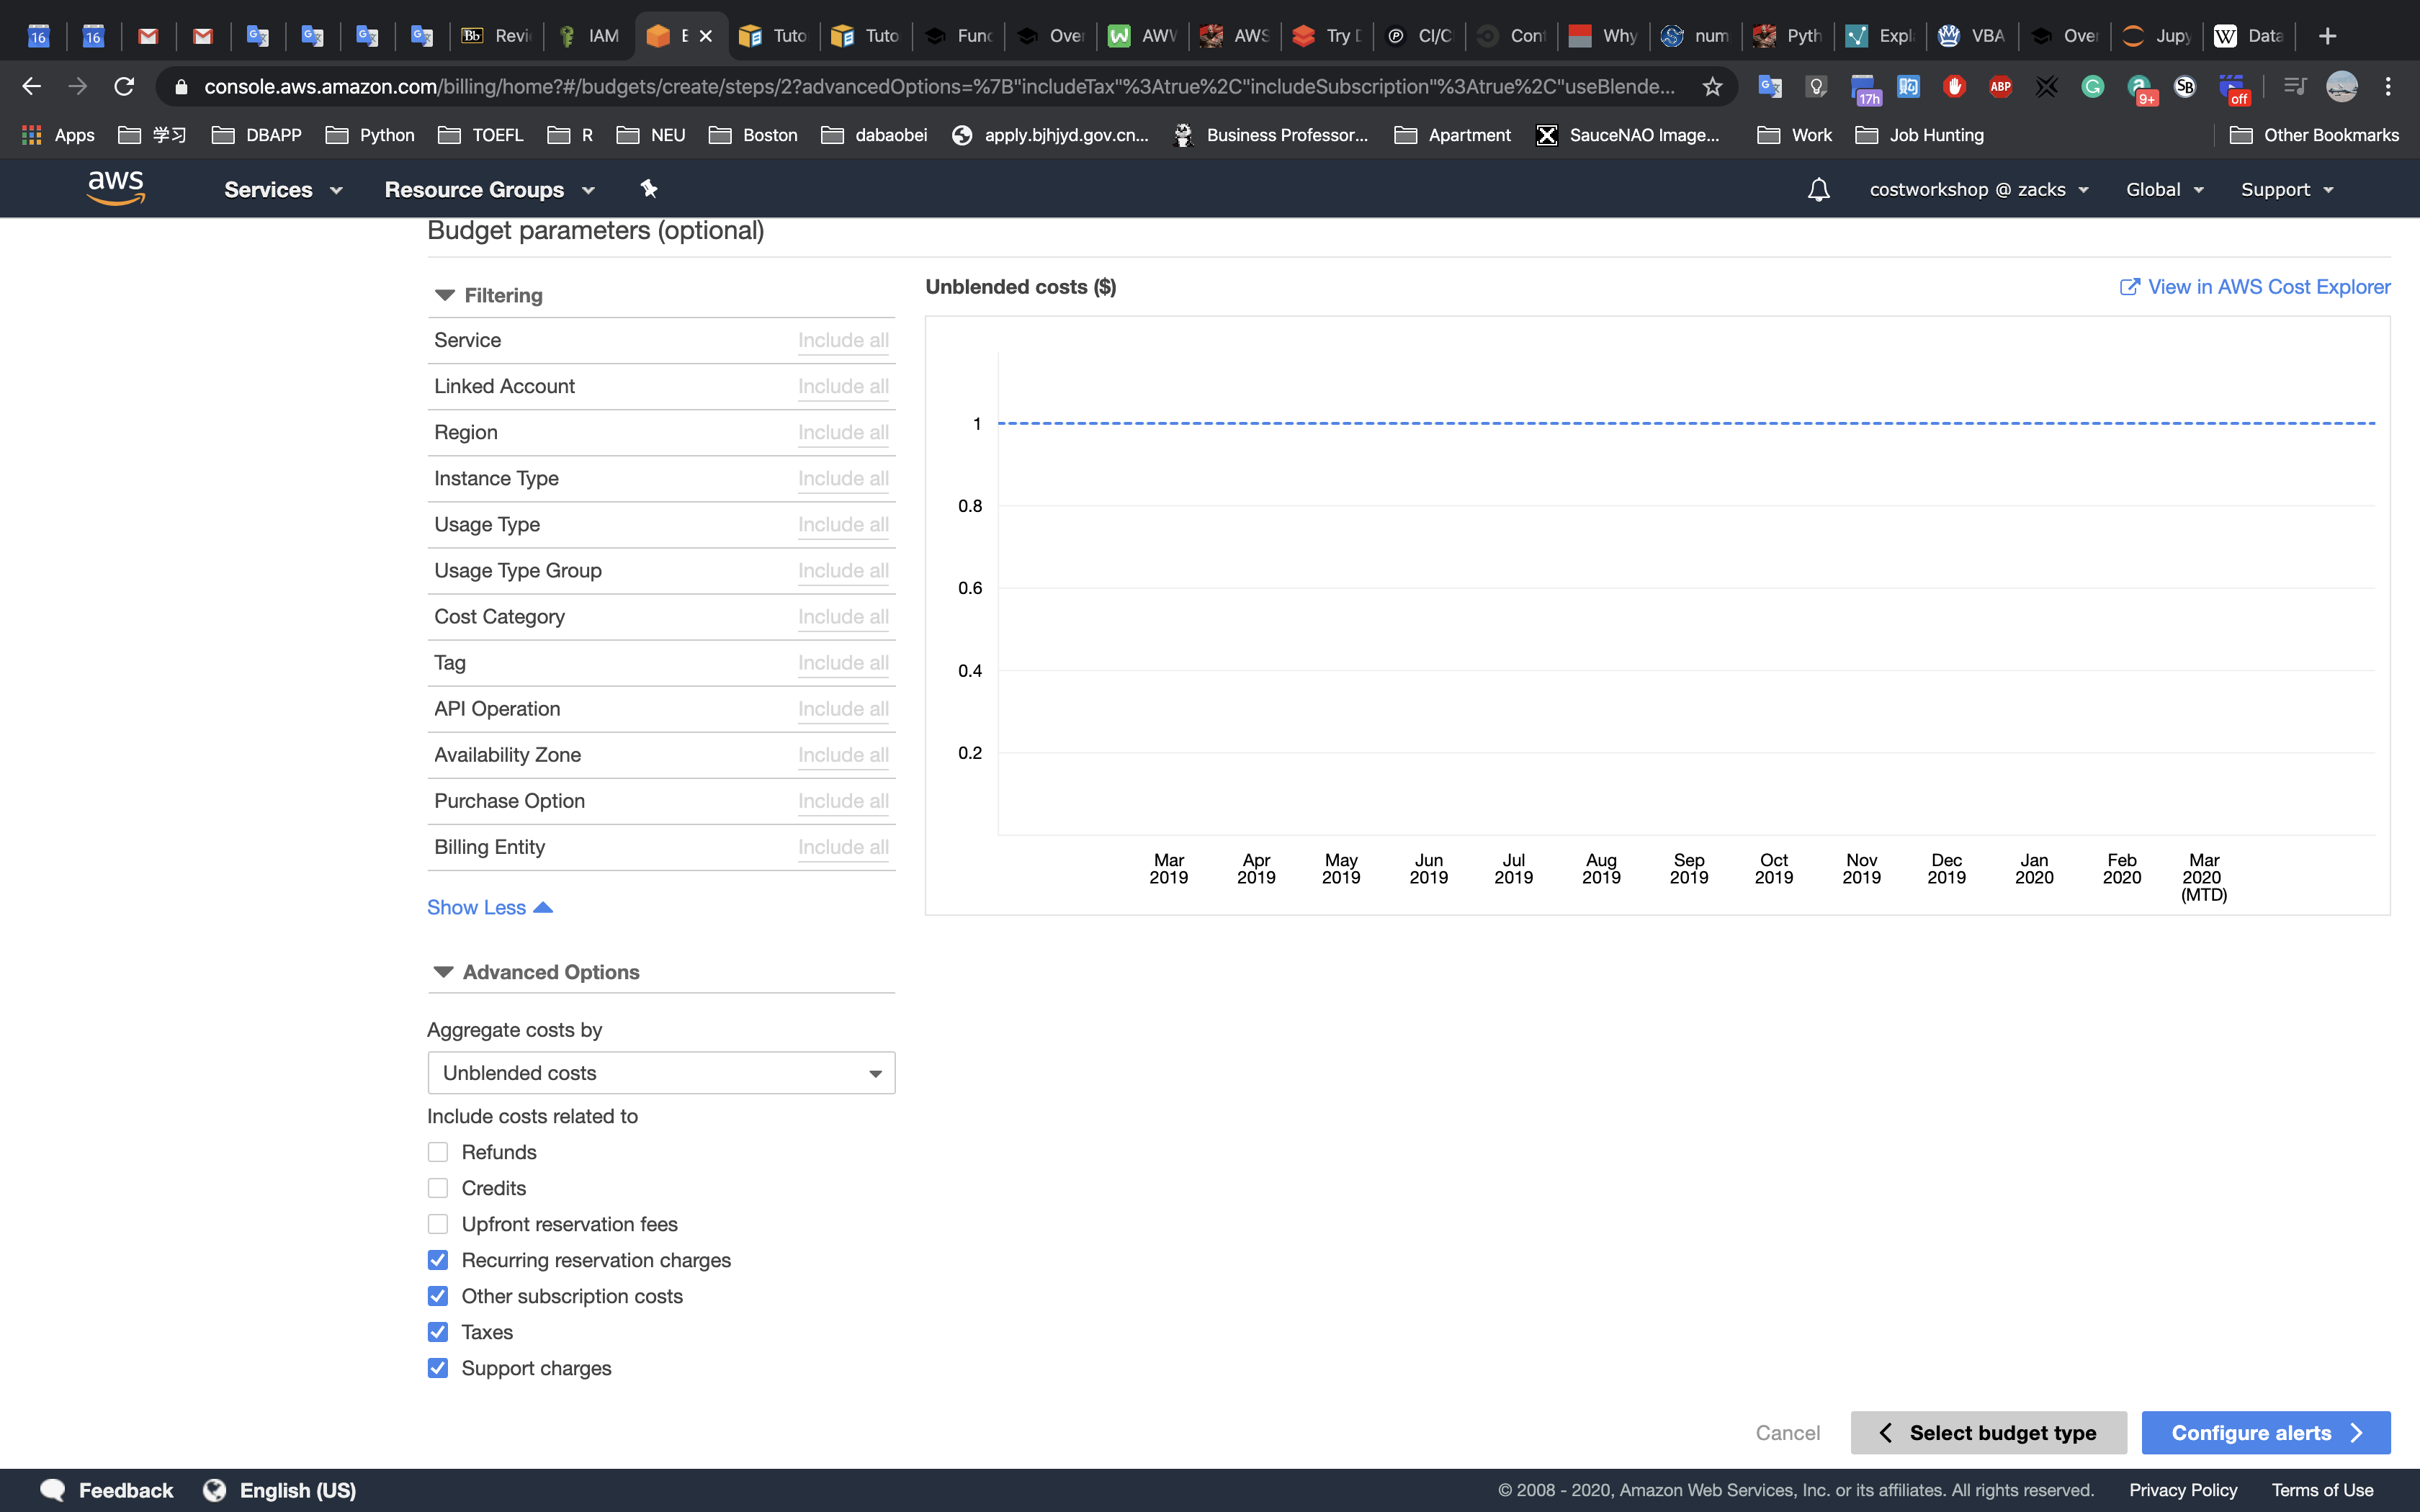
Select:
- Send alert based on: Actual Costs
- Alert threshold: 100% of budgeted amount
- Email contacts: (your email address)
- Click on
Confirm budget >: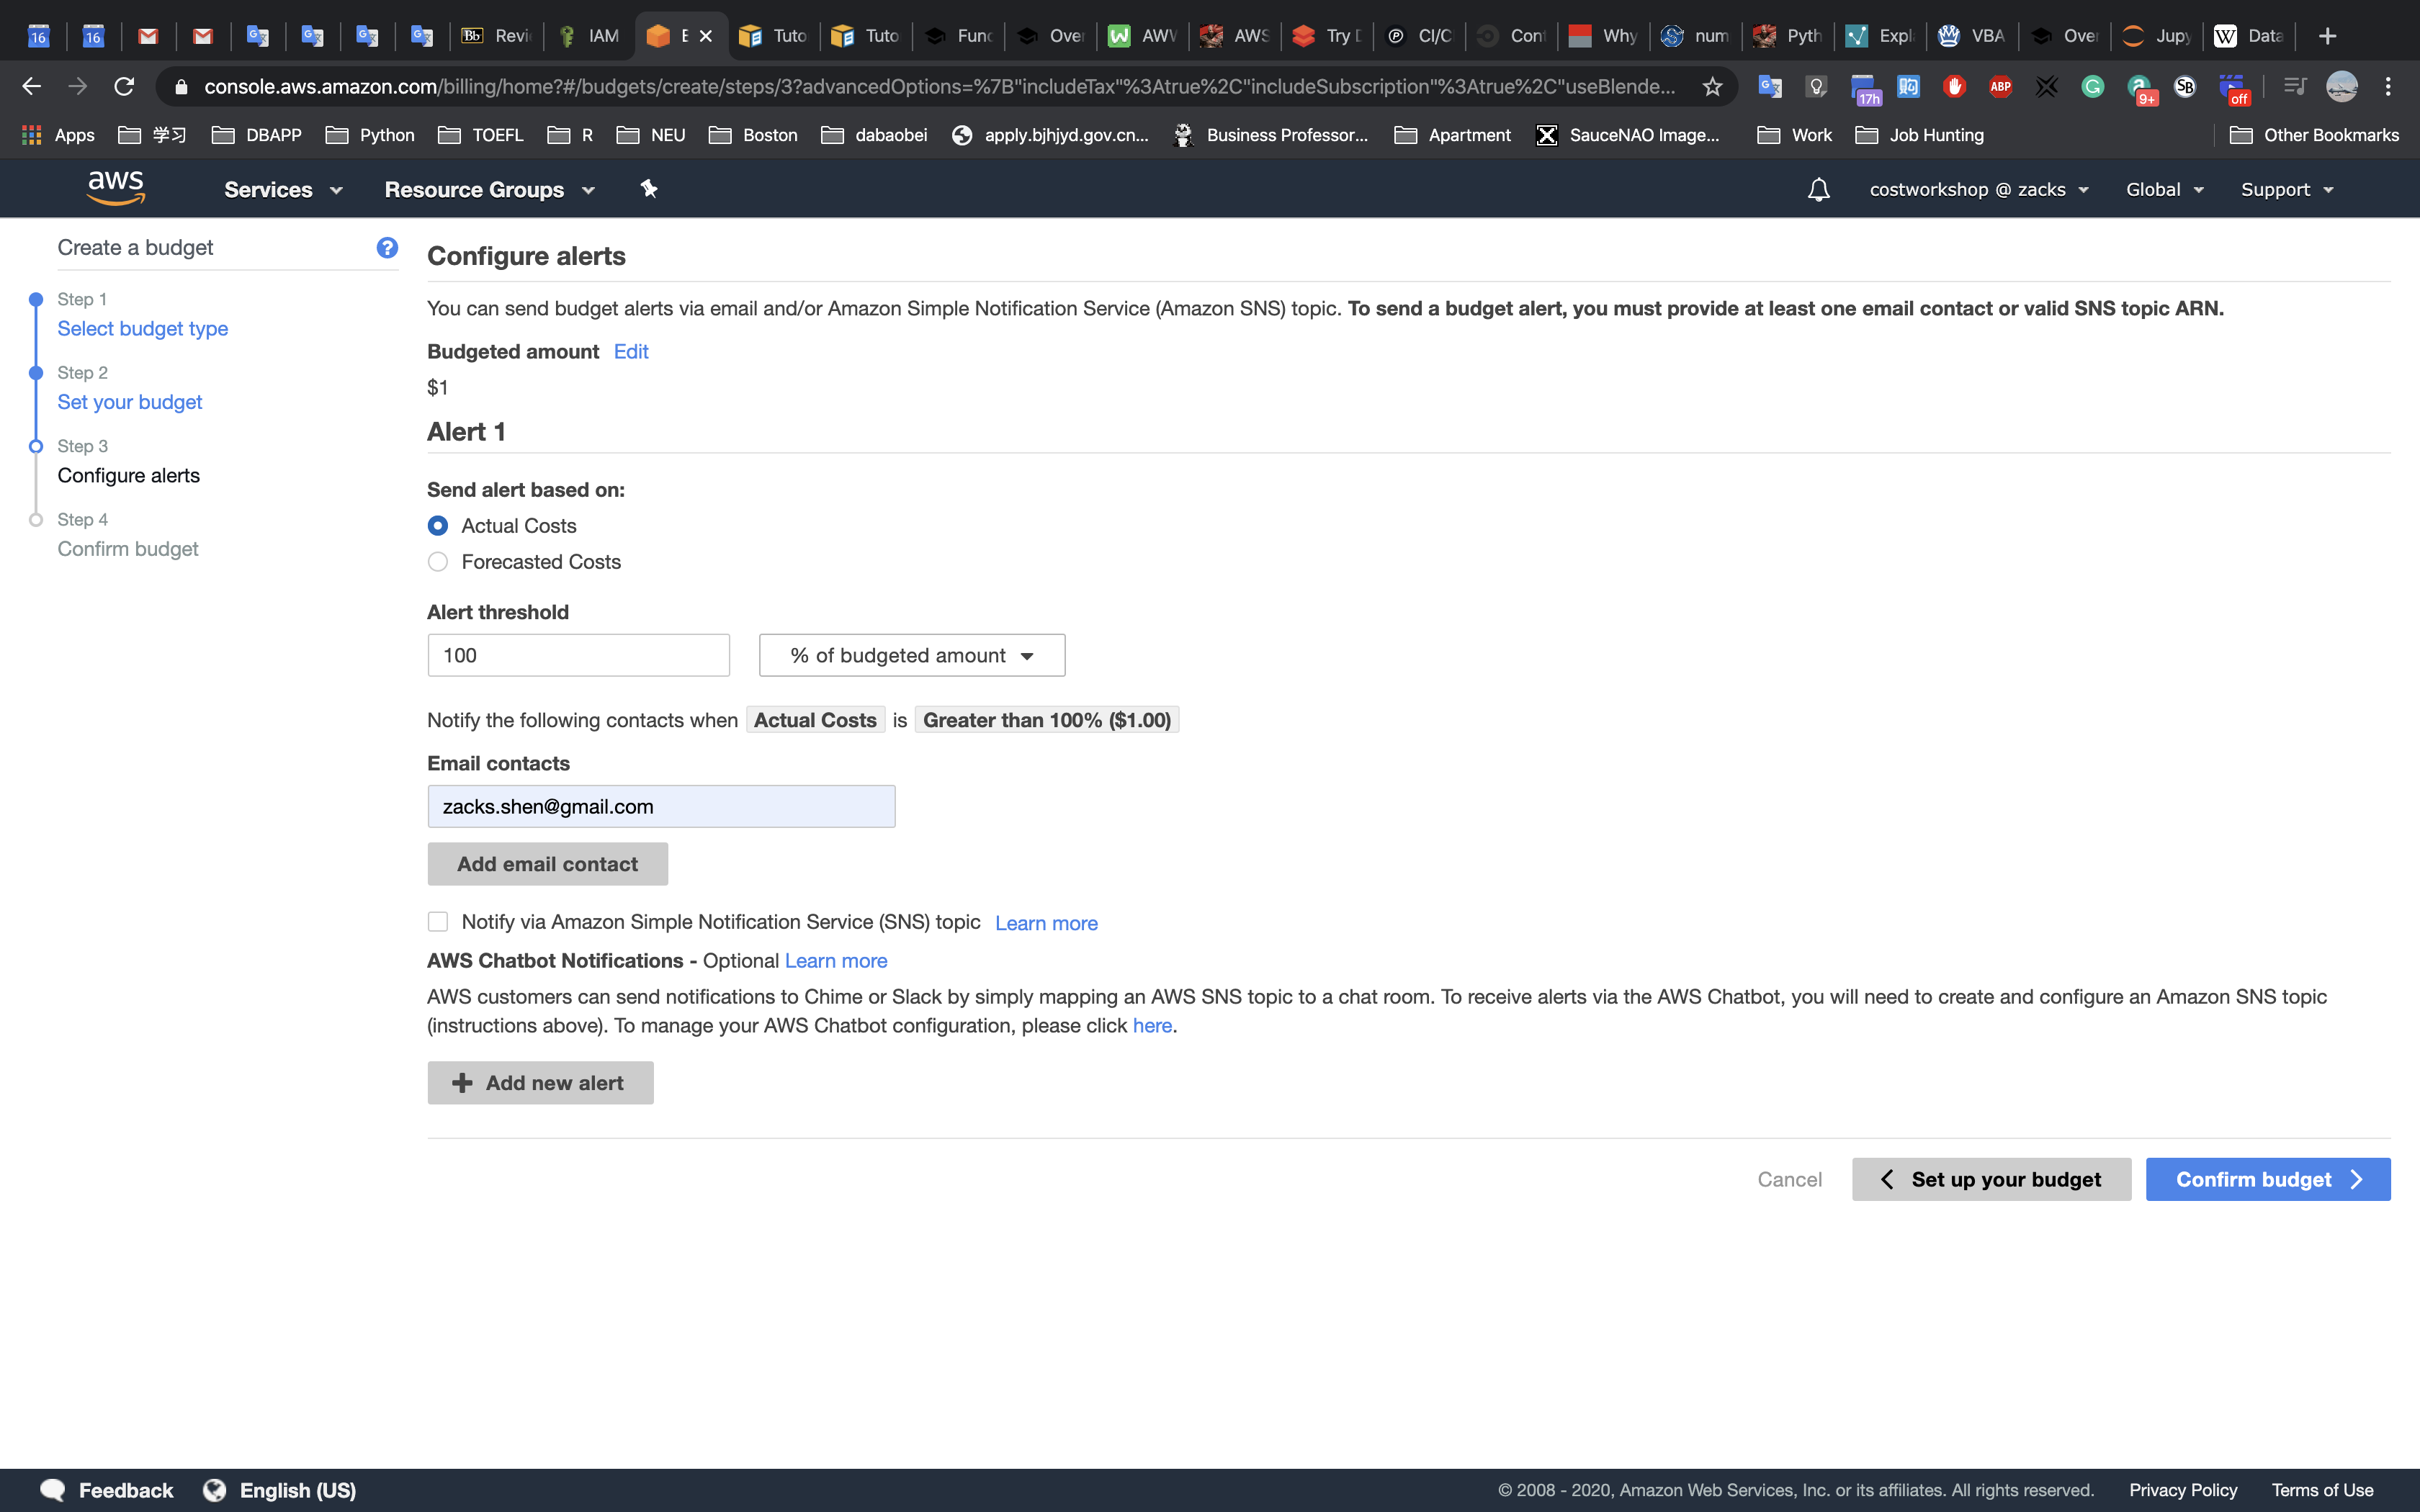
Review the configuration, and click
Create: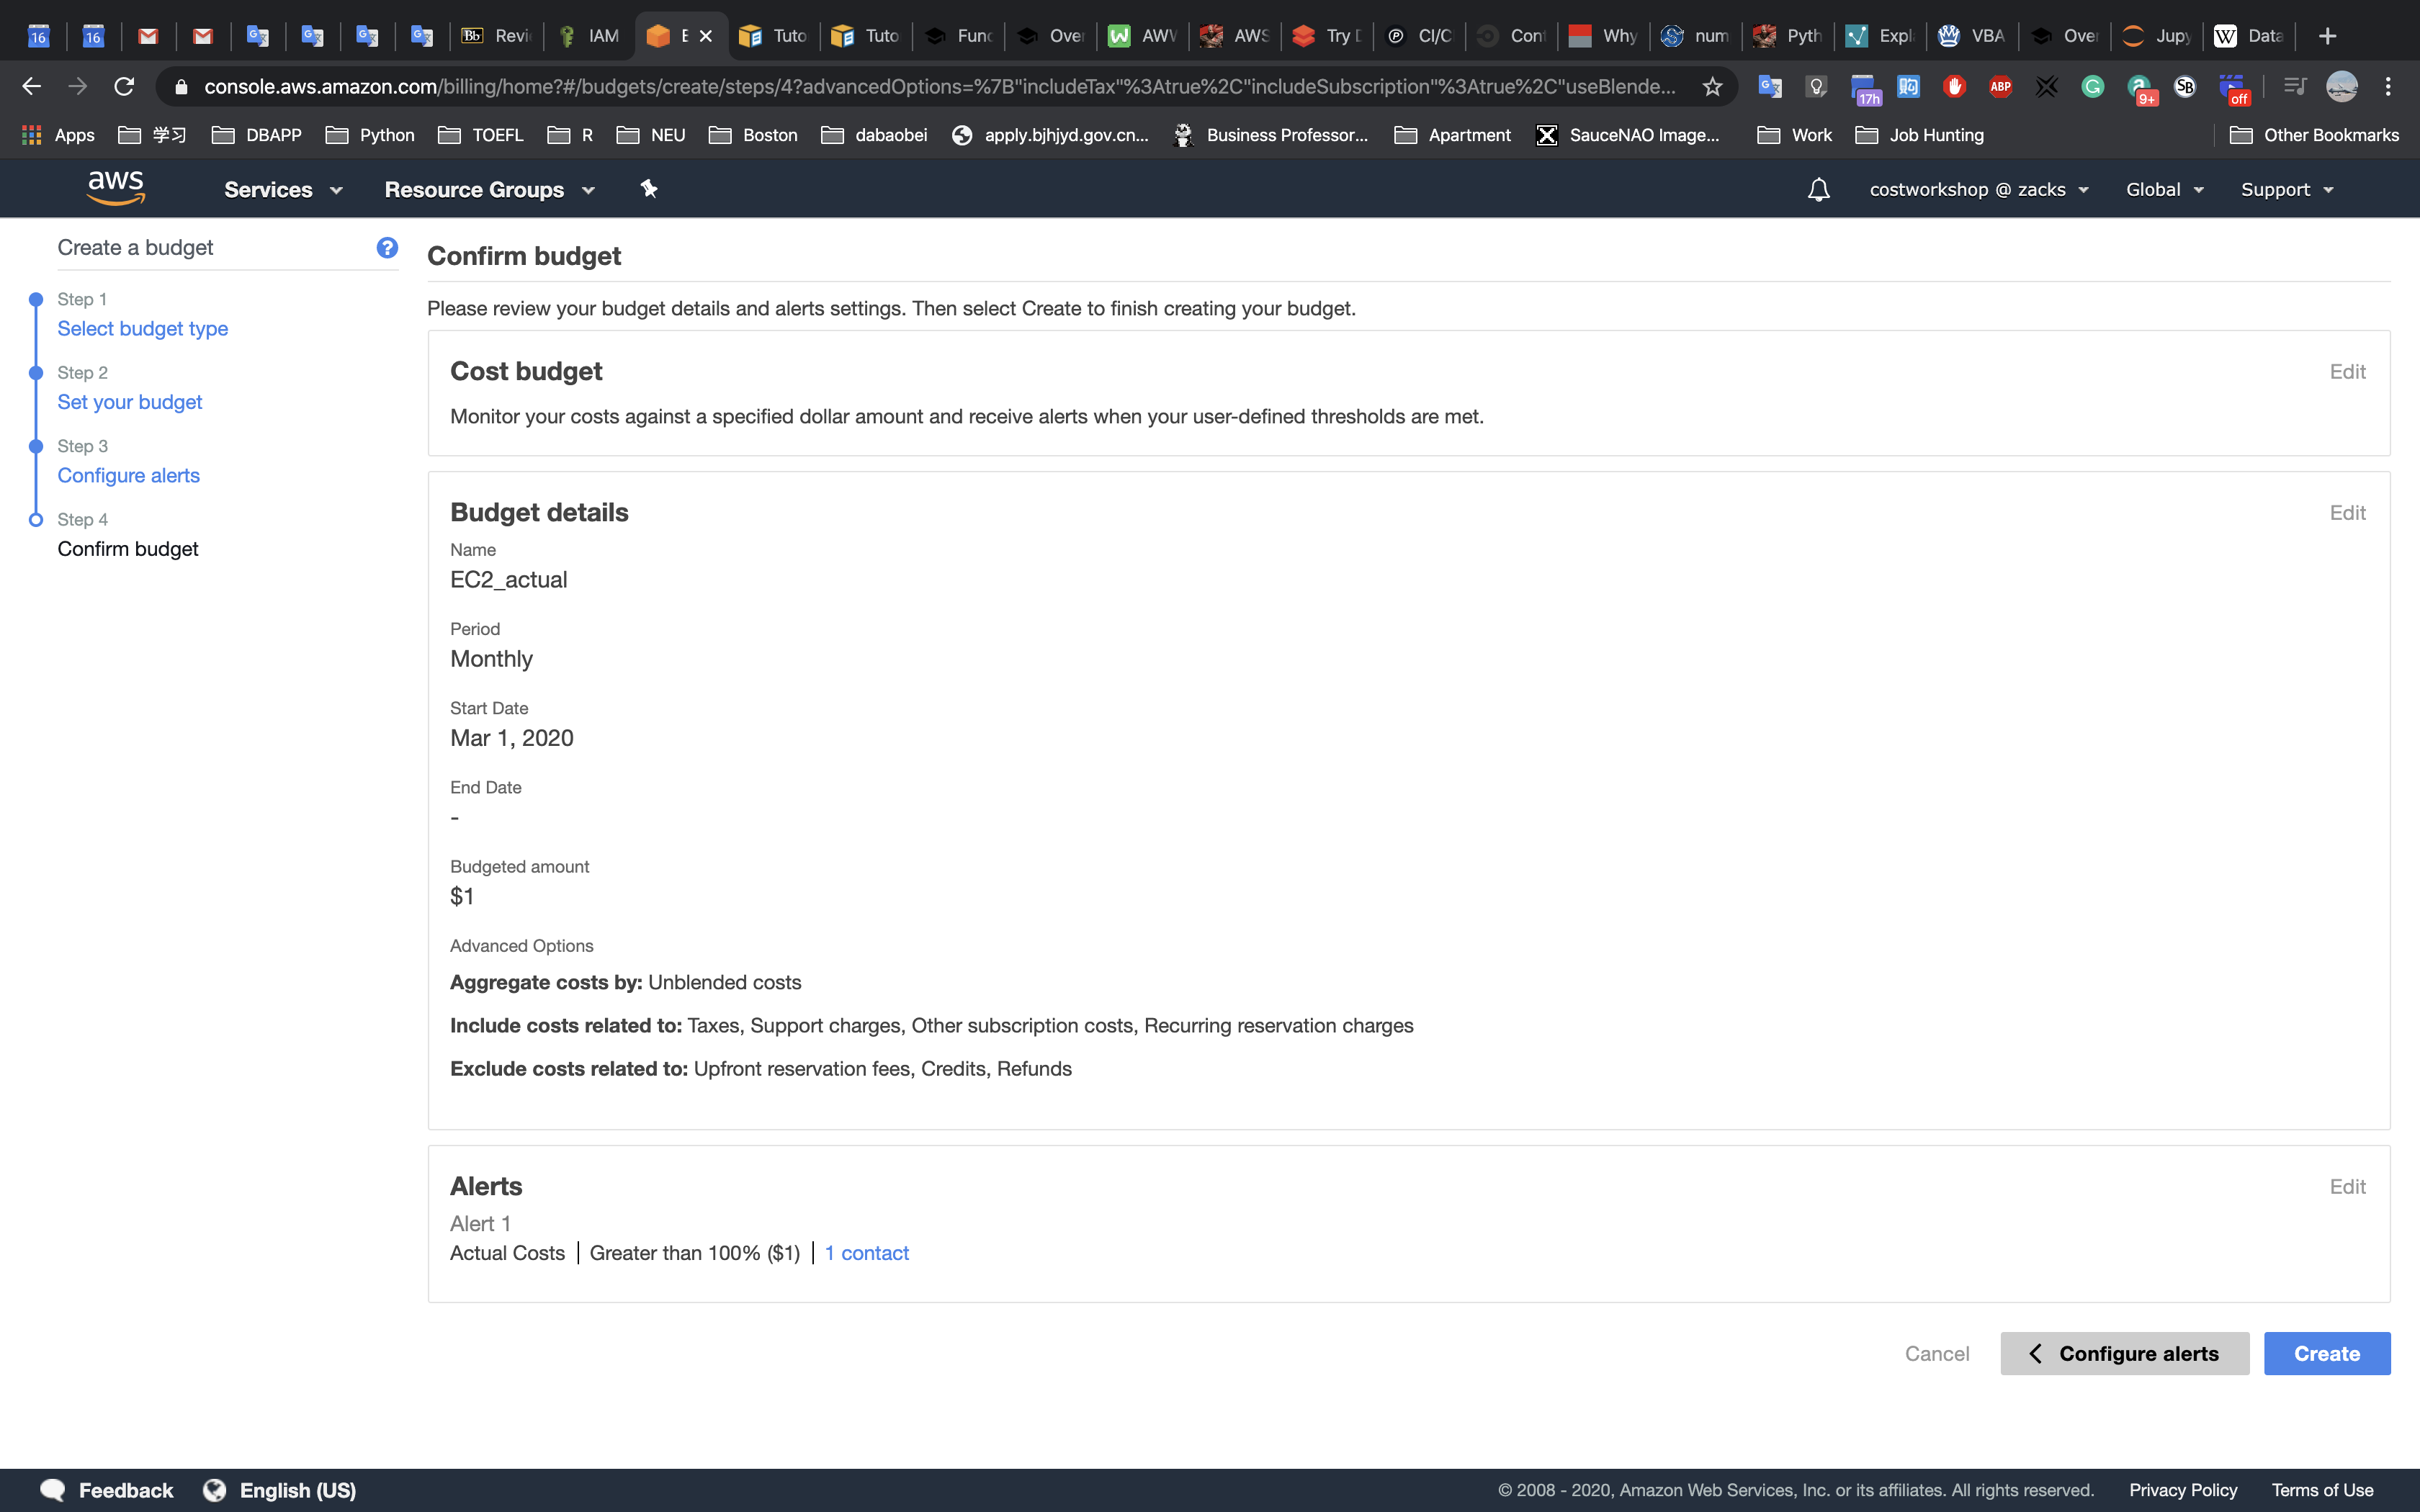
You can see the current amount exceeds the budget (it is red, you may need to refresh your browser):

You will receive an email similar to the previous budget within a few minutes.
You have created an actual cost budget for EC2 usage. You can extend this budget by adding specific filters such as linked accounts, tags or instance types. You can also create budgets for services other than EC2.
3. Create and implement an AWS Budget for EC2 Savings Plan coverage
We will create a monthly savings plan coverage budget which will notify if the coverage of Savings Plan for EC2 is below the specified amount.
From the AWS Budgets dashboard in the console, click Create budget:
Select
Savings Plans budget, and clickSet your budget >: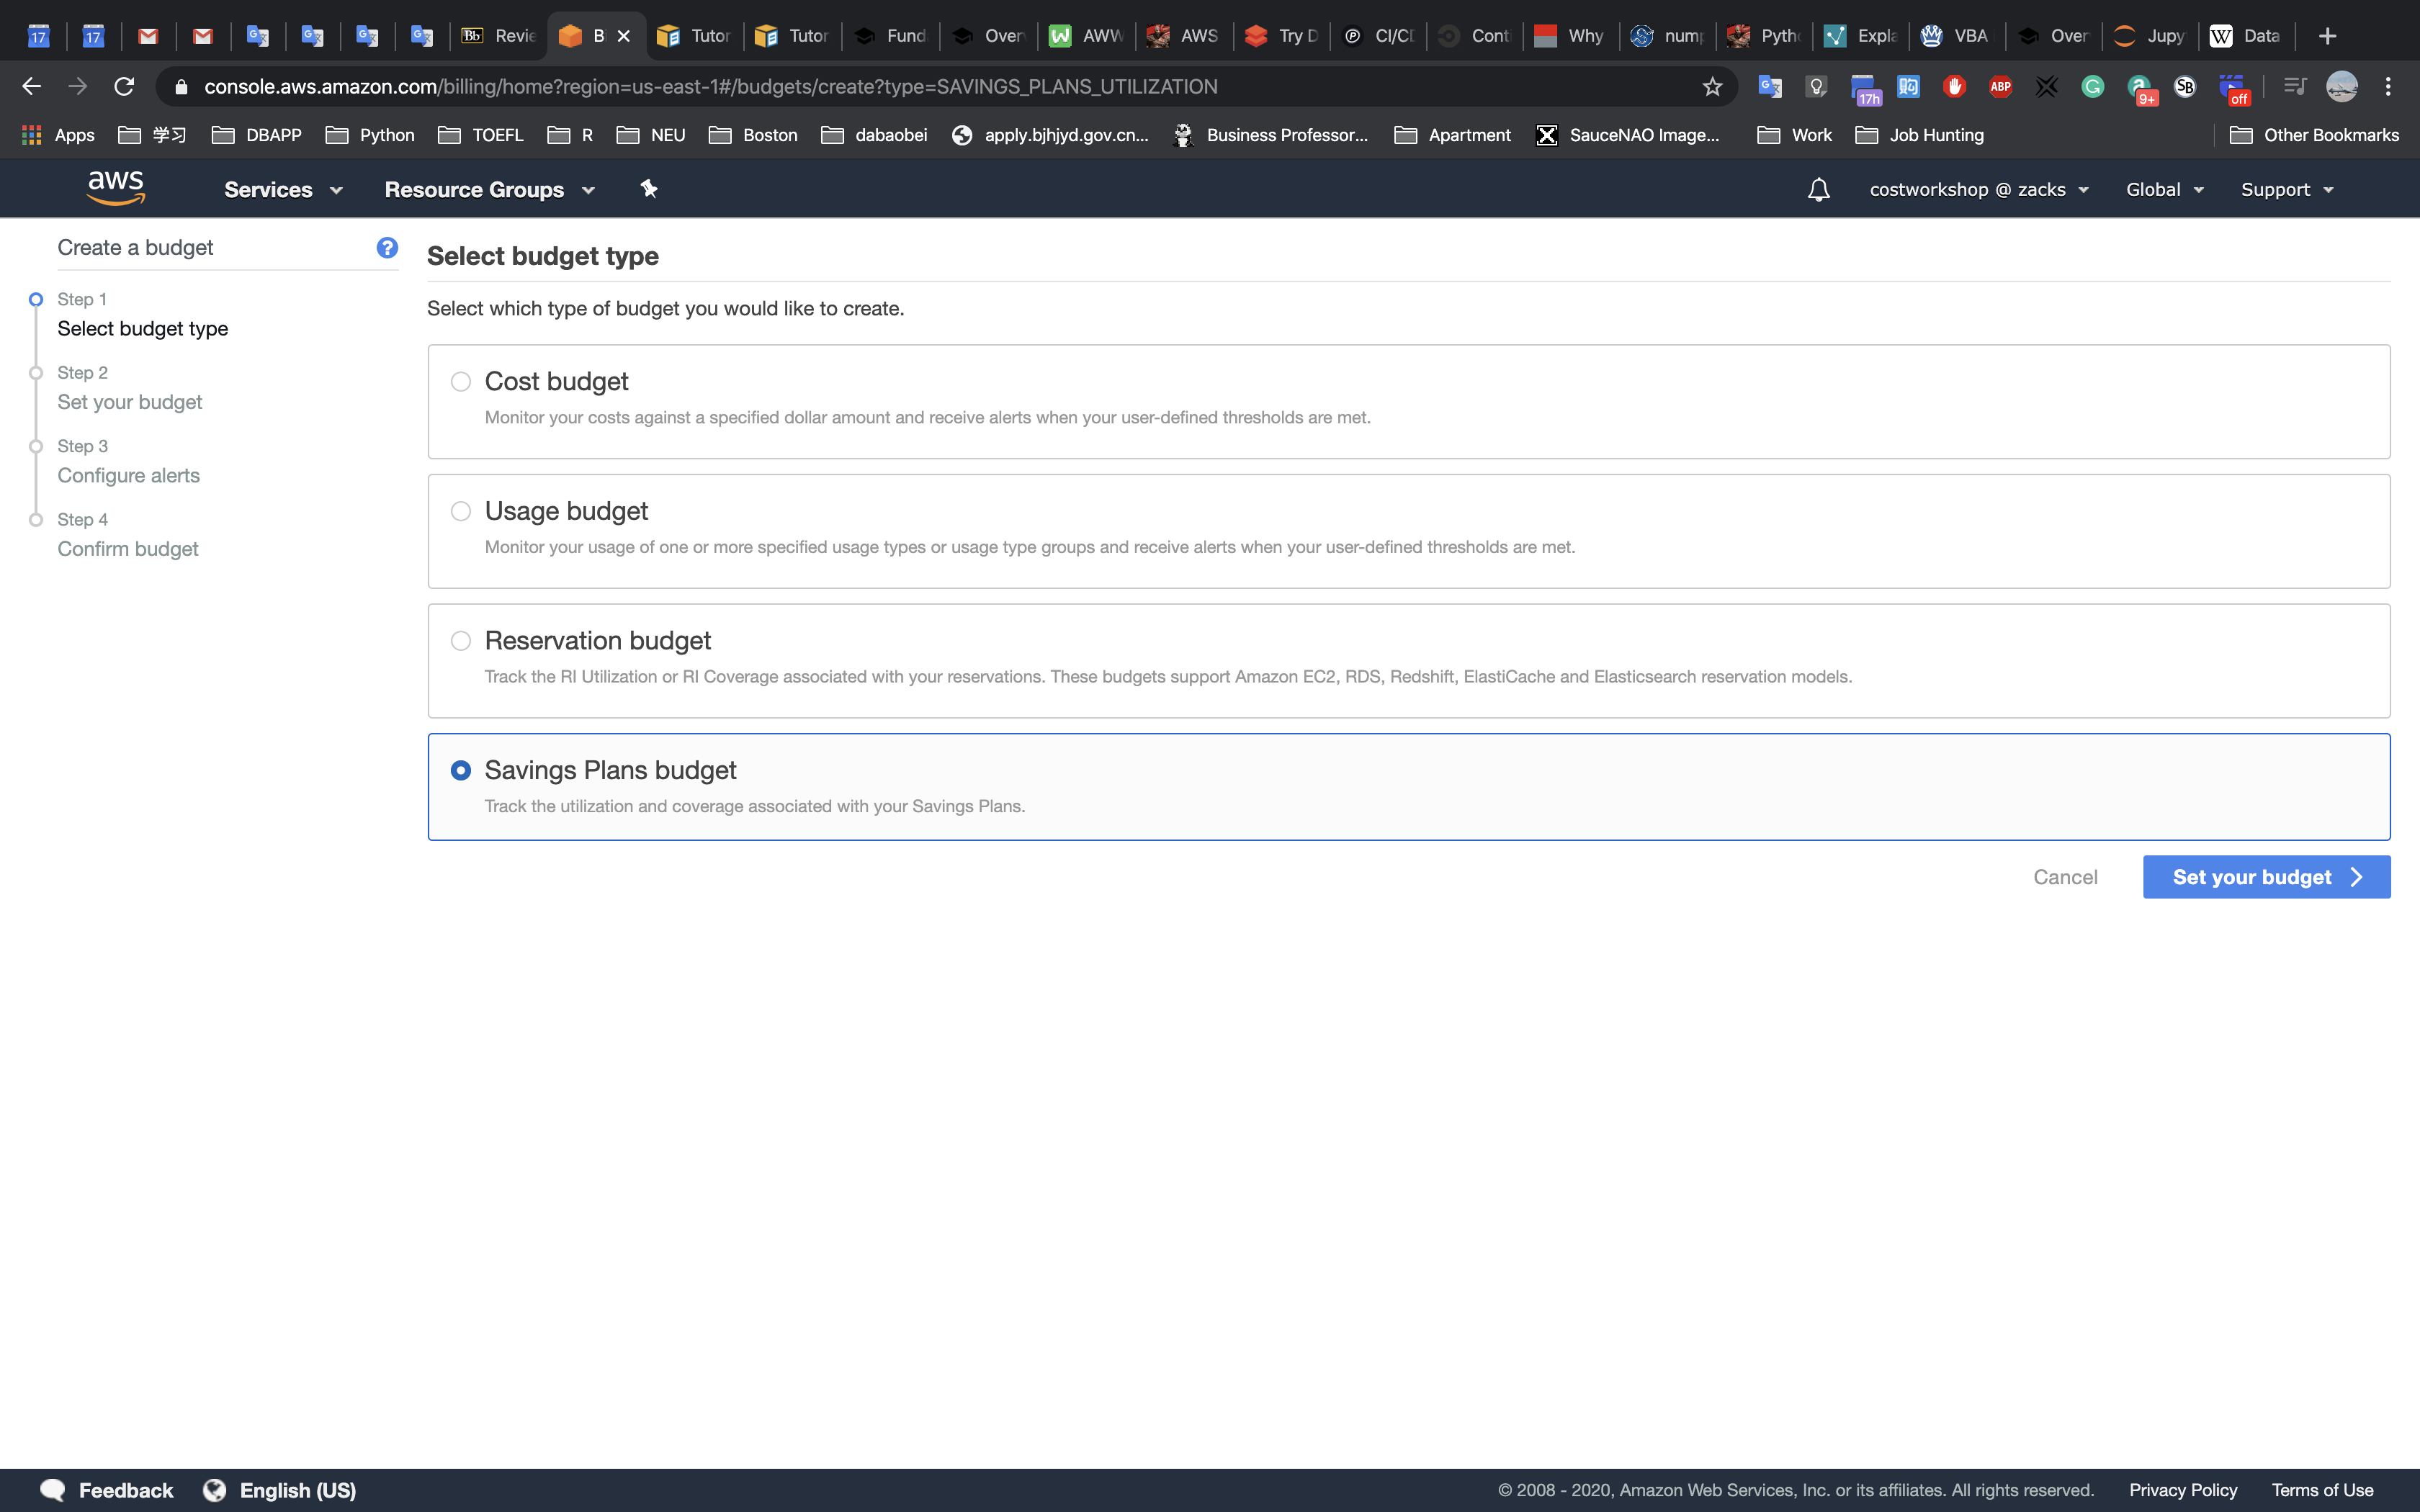
Create a cost budget, enter the following details:
- Name:
SP_Coverage - Period:
Monthly - Savings Plans budget type:
Savings Plans Coverage - Coverage threshold:
90% - Leave all other fields as defaults
- NOTE: NEVER create a utilization budget, unless you are doing it for a single and specific discount rate by using filters. For example you want to track the utilization of m5.large Linux discount. A utilization budget across different discounts will most likely lead to confusion and unnecessary work.
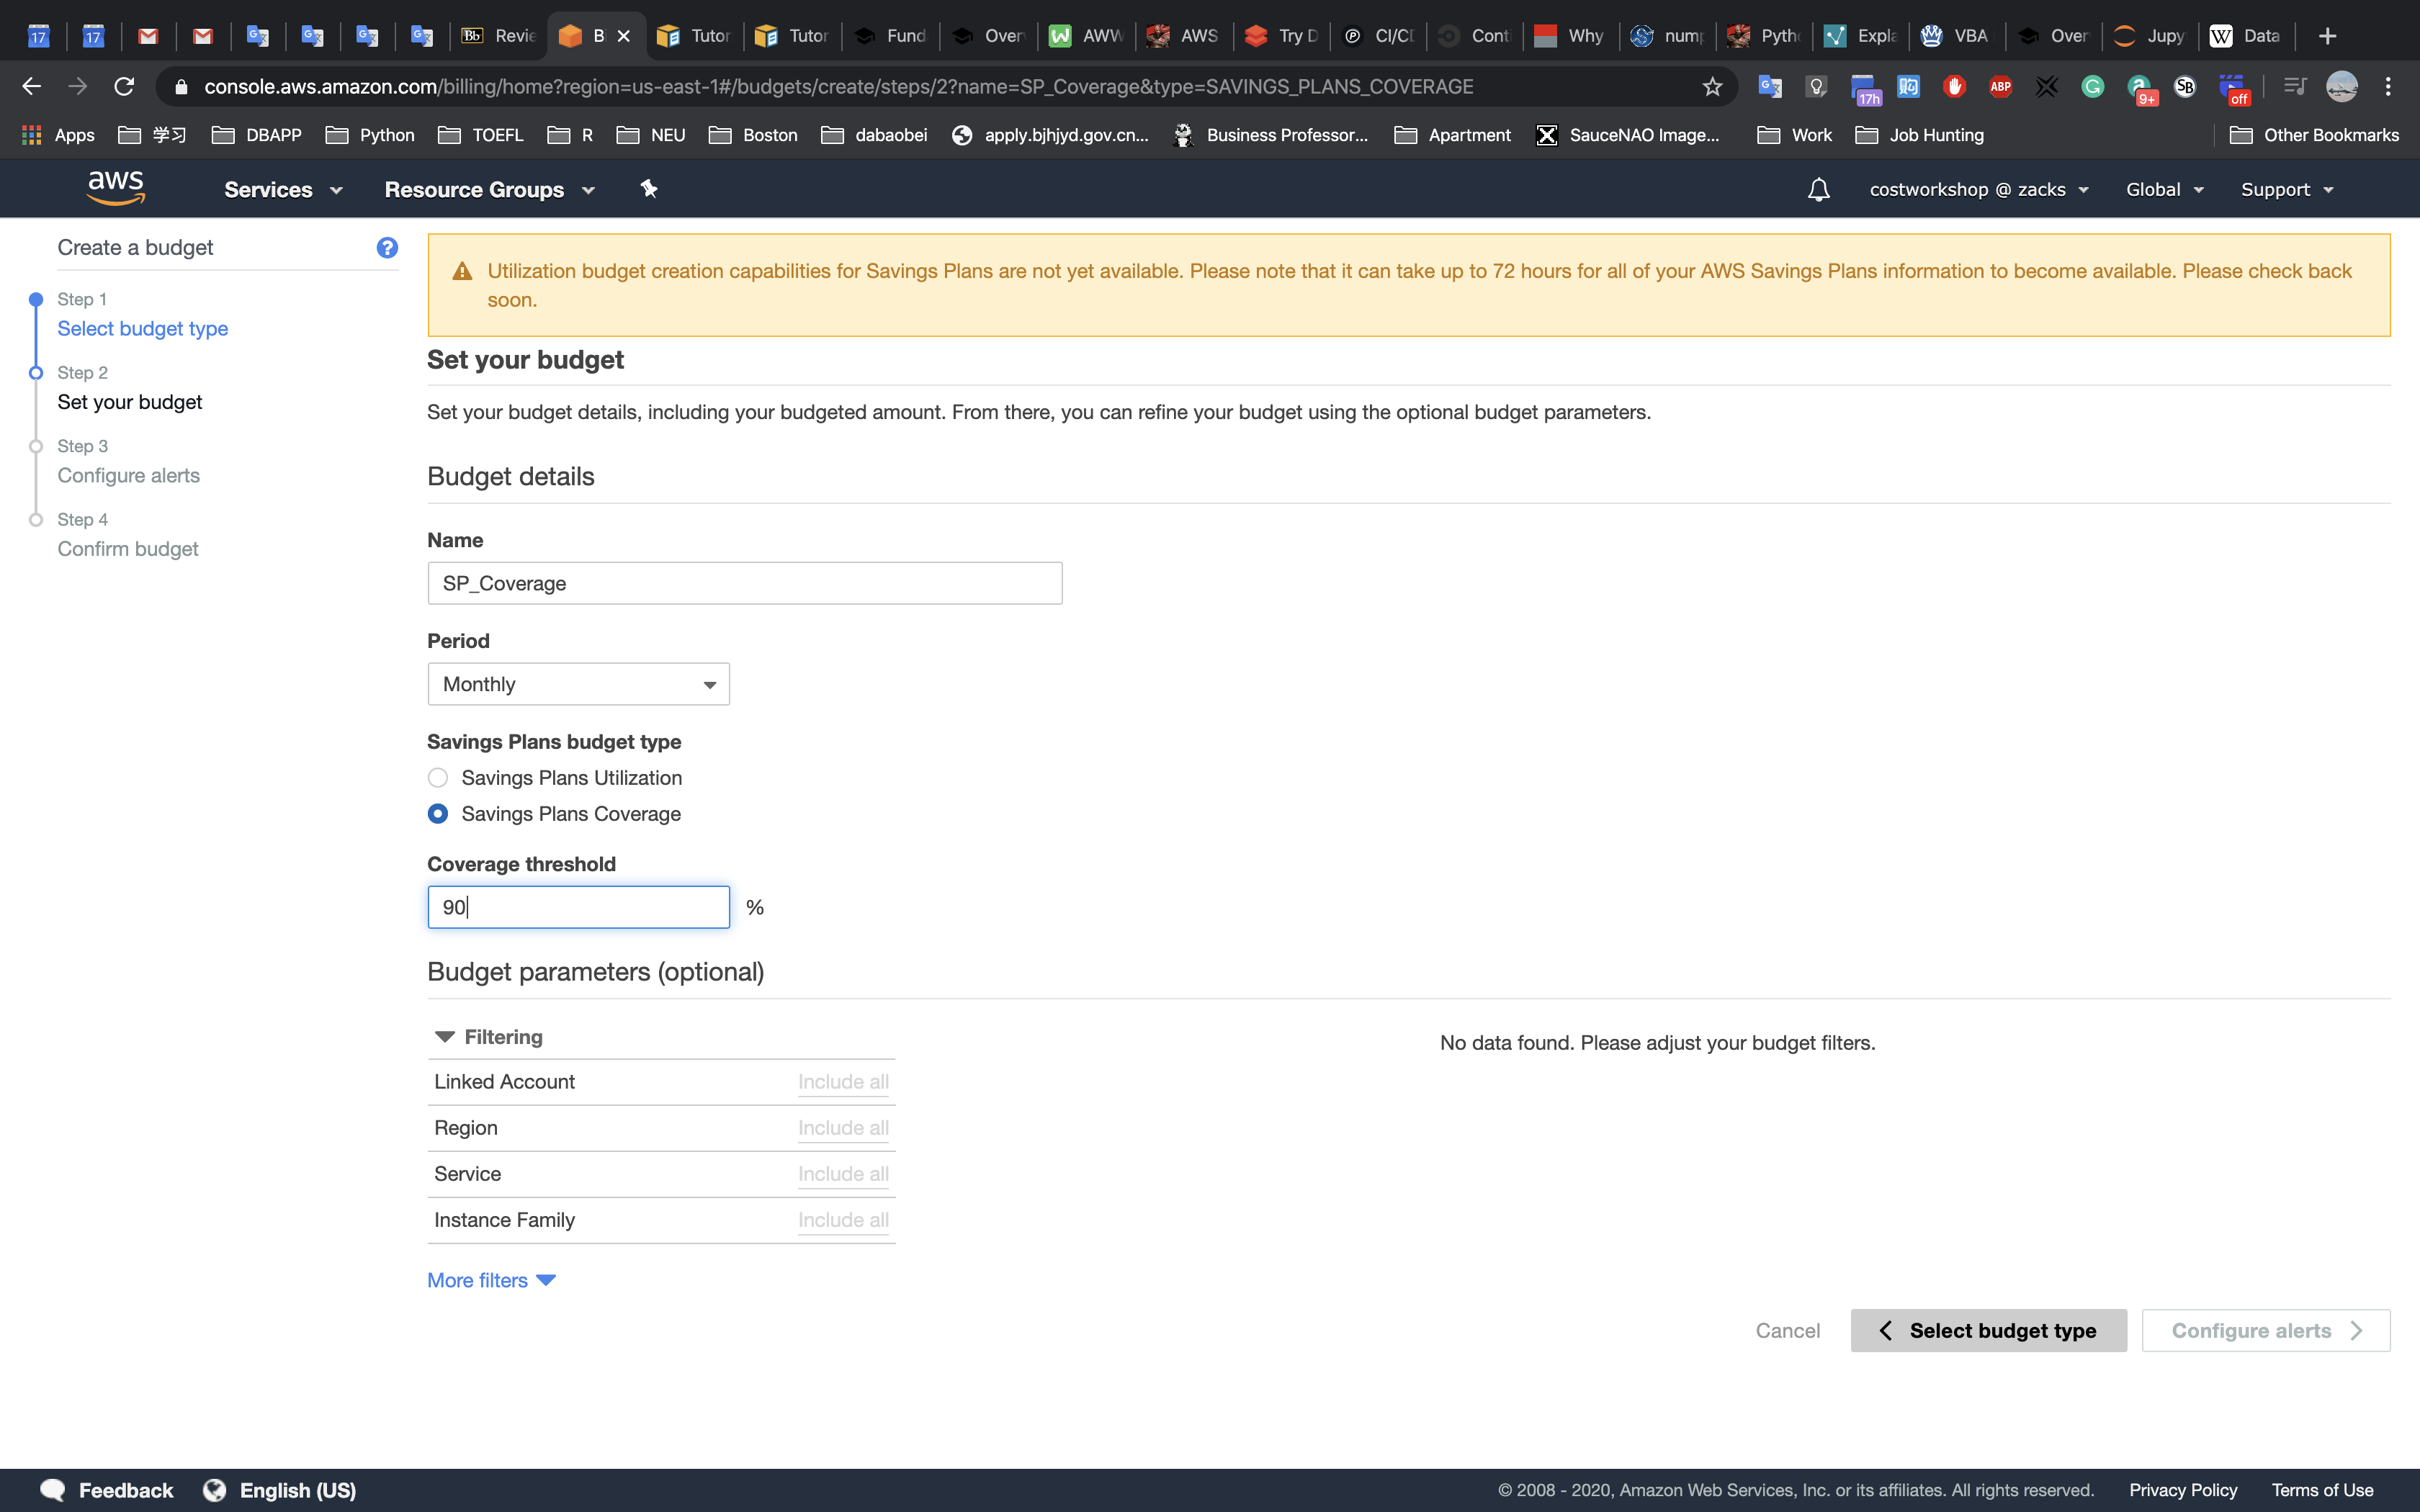
- Name:
Scroll down and click
Configure alerts >: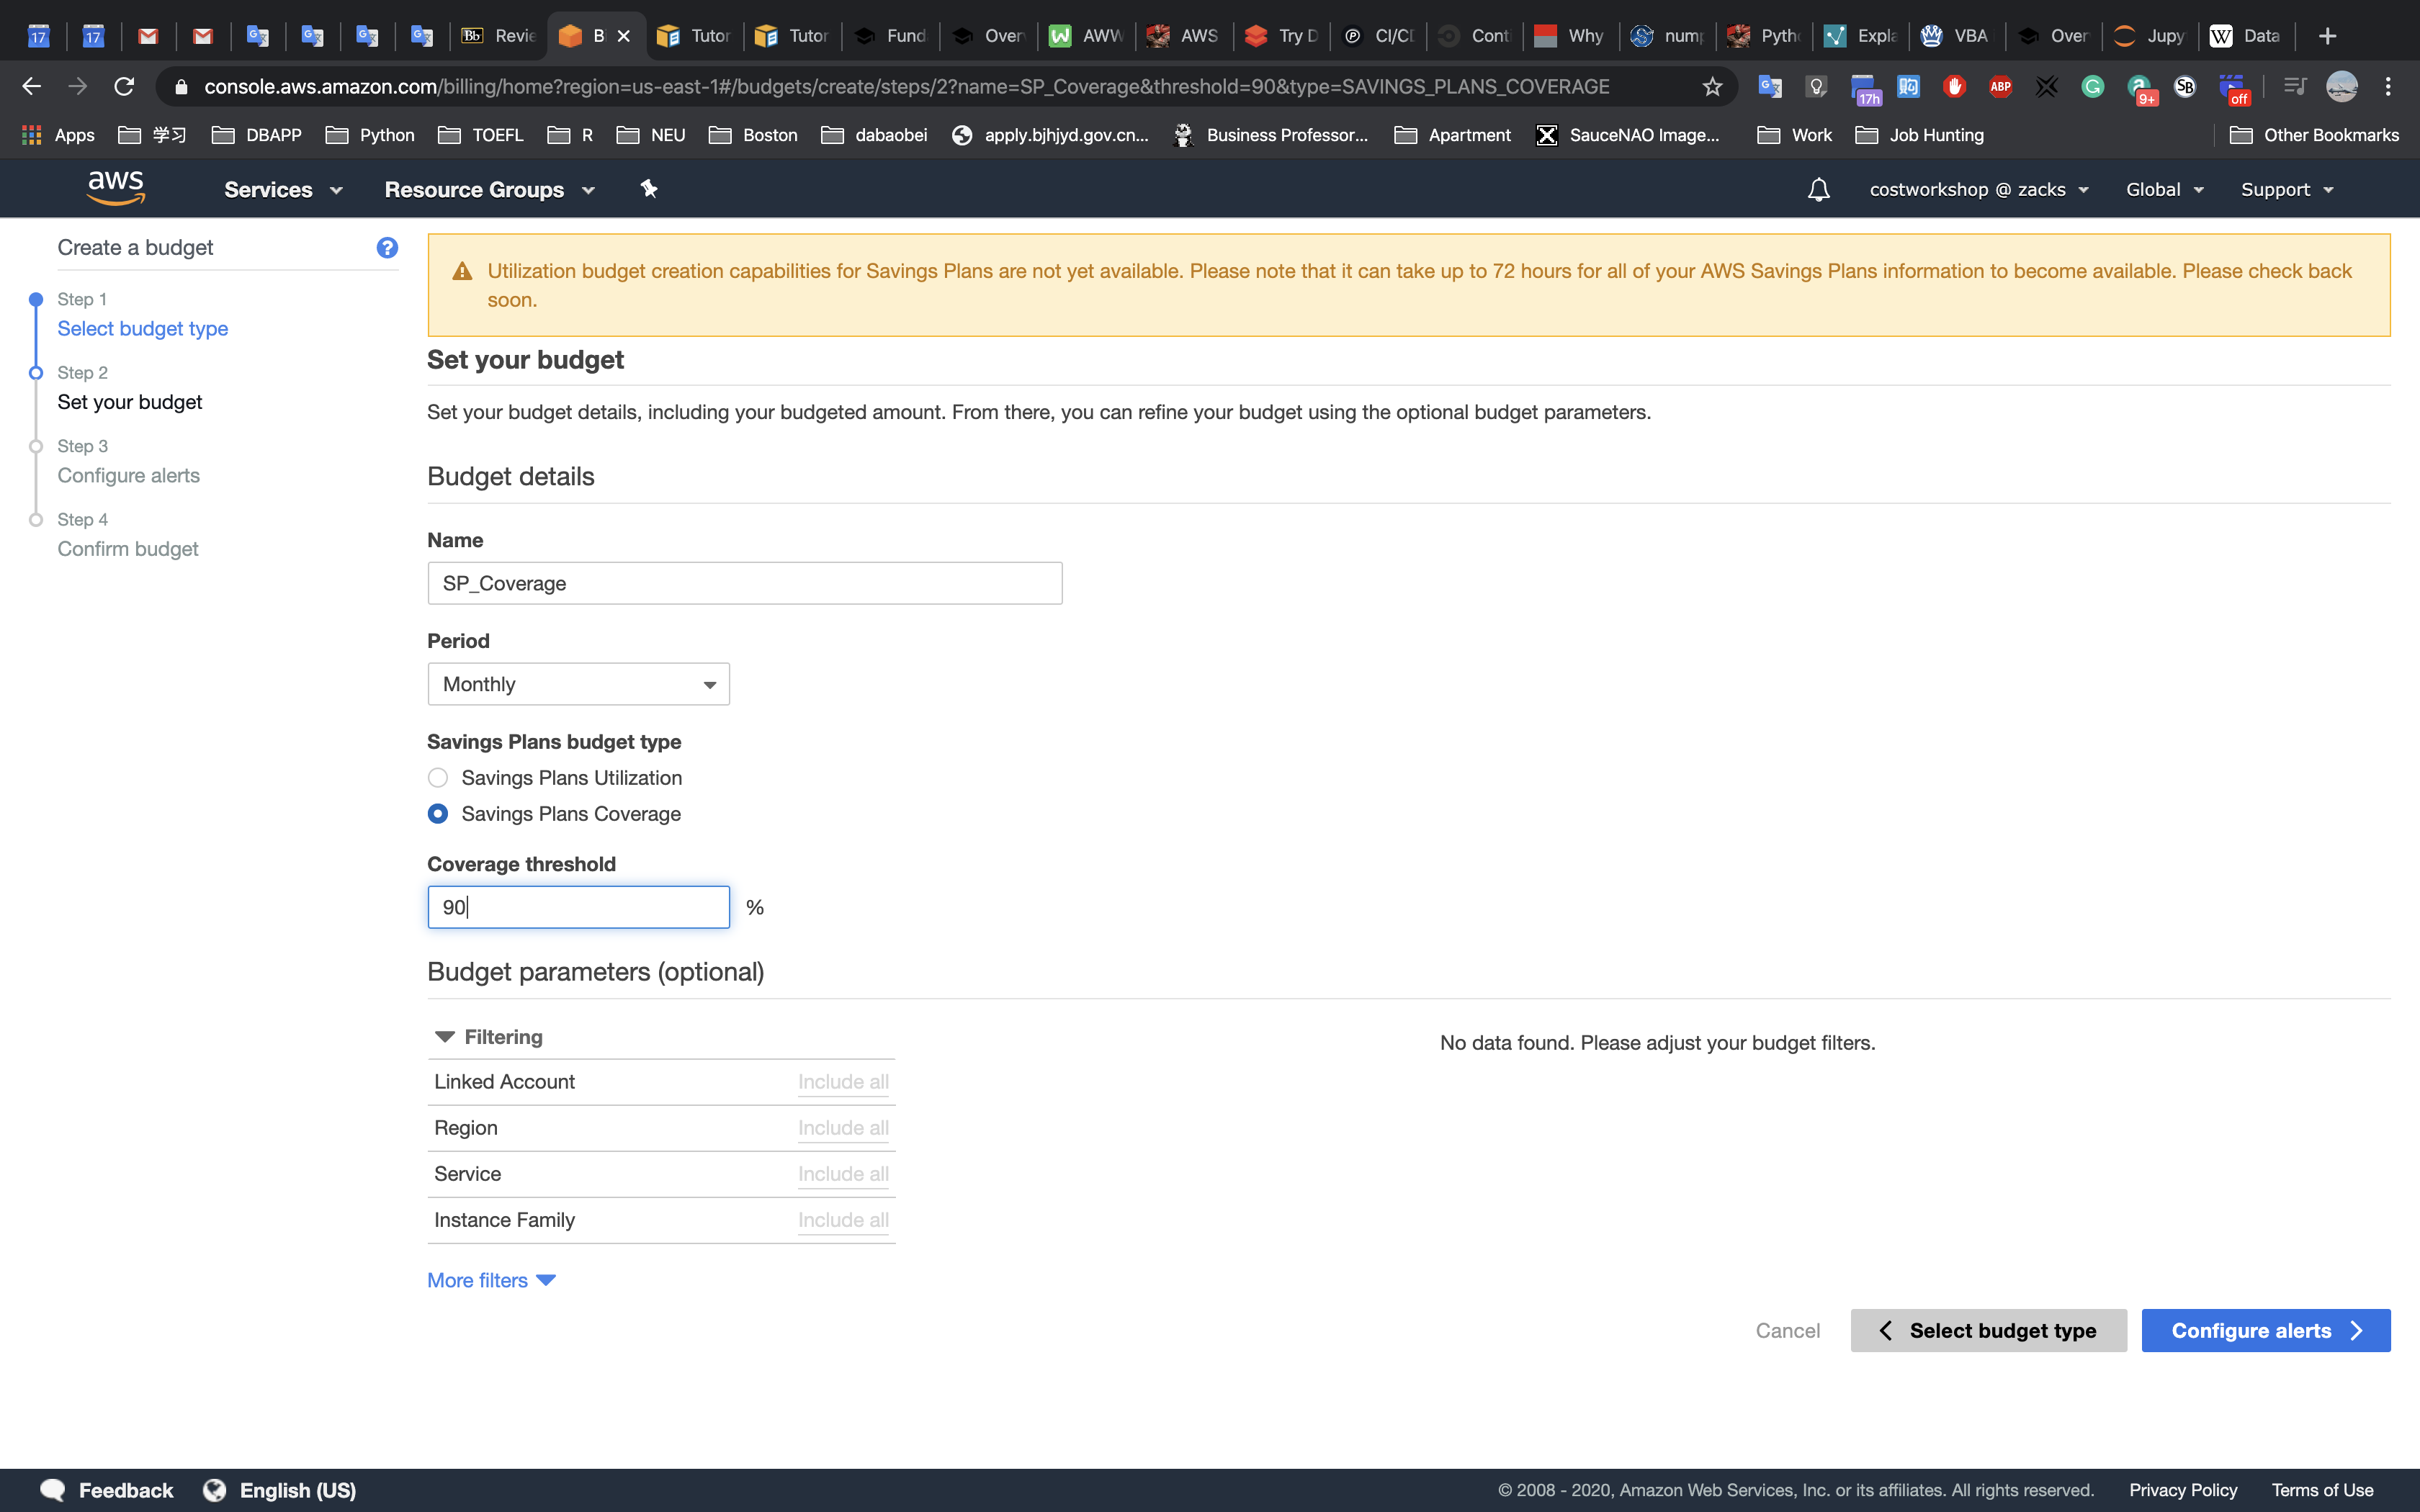
Enter an address for
Email contactsand clickConfirm budget >: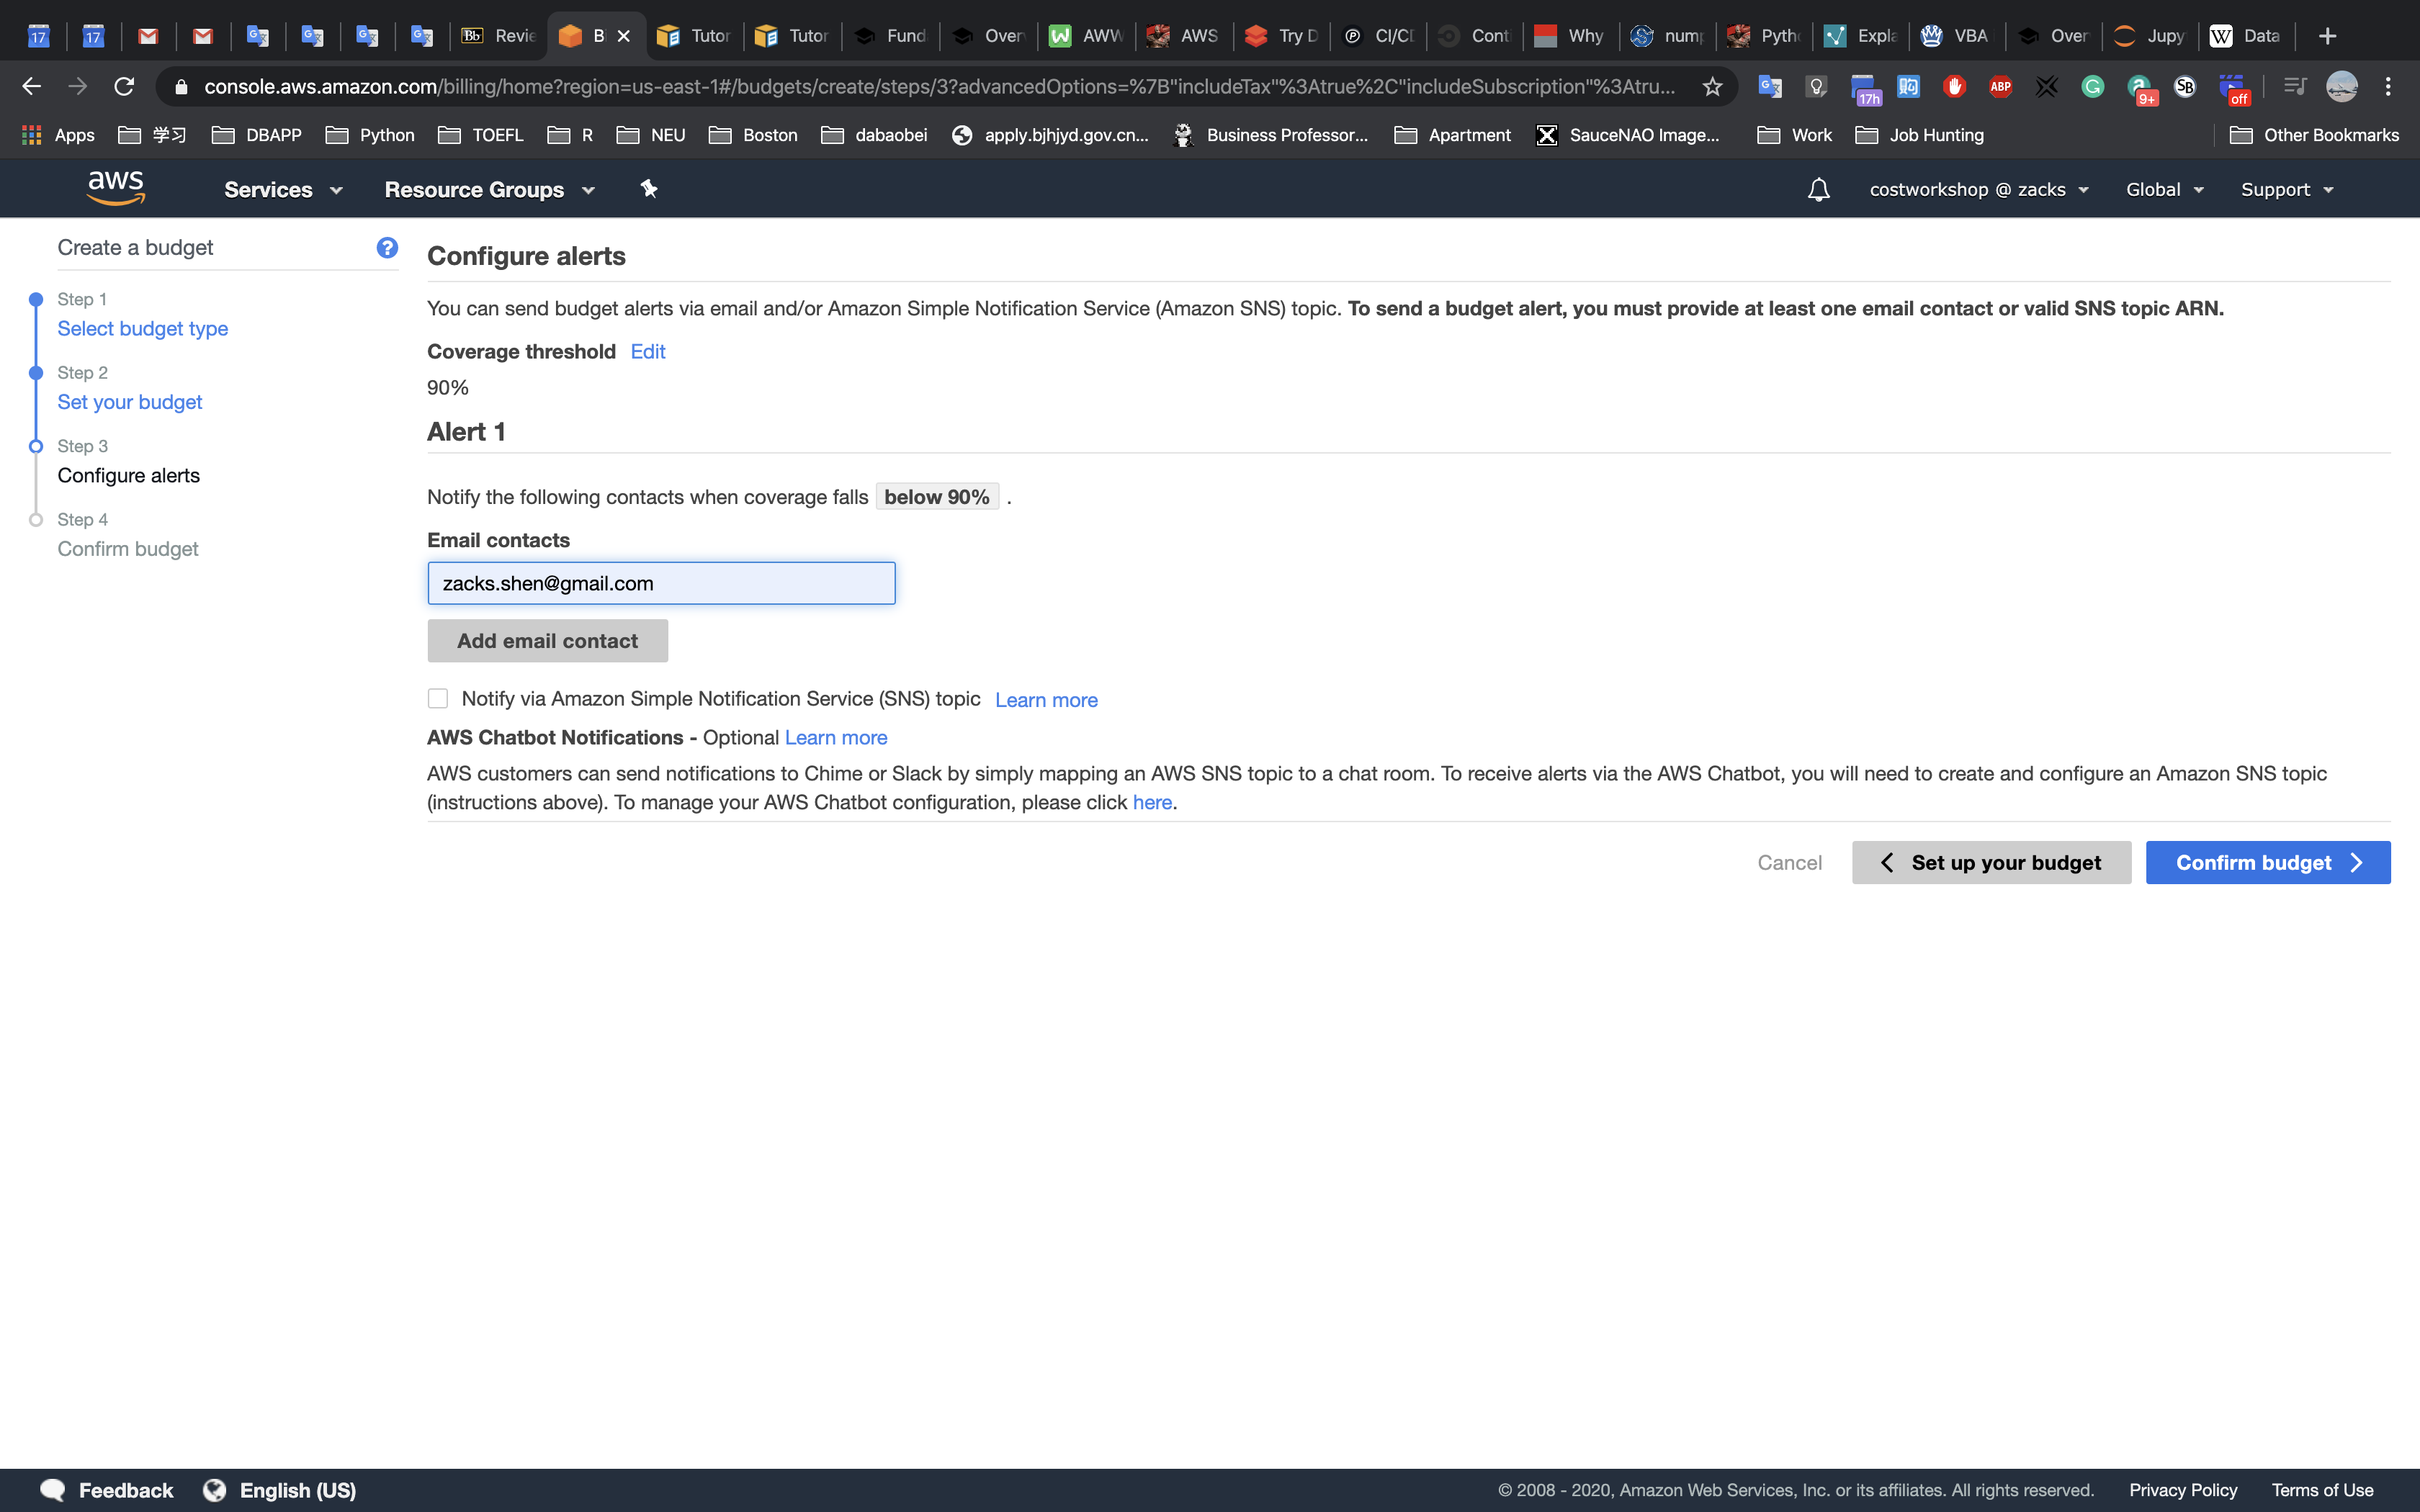
Review the configuration, and click
Createin the lower right: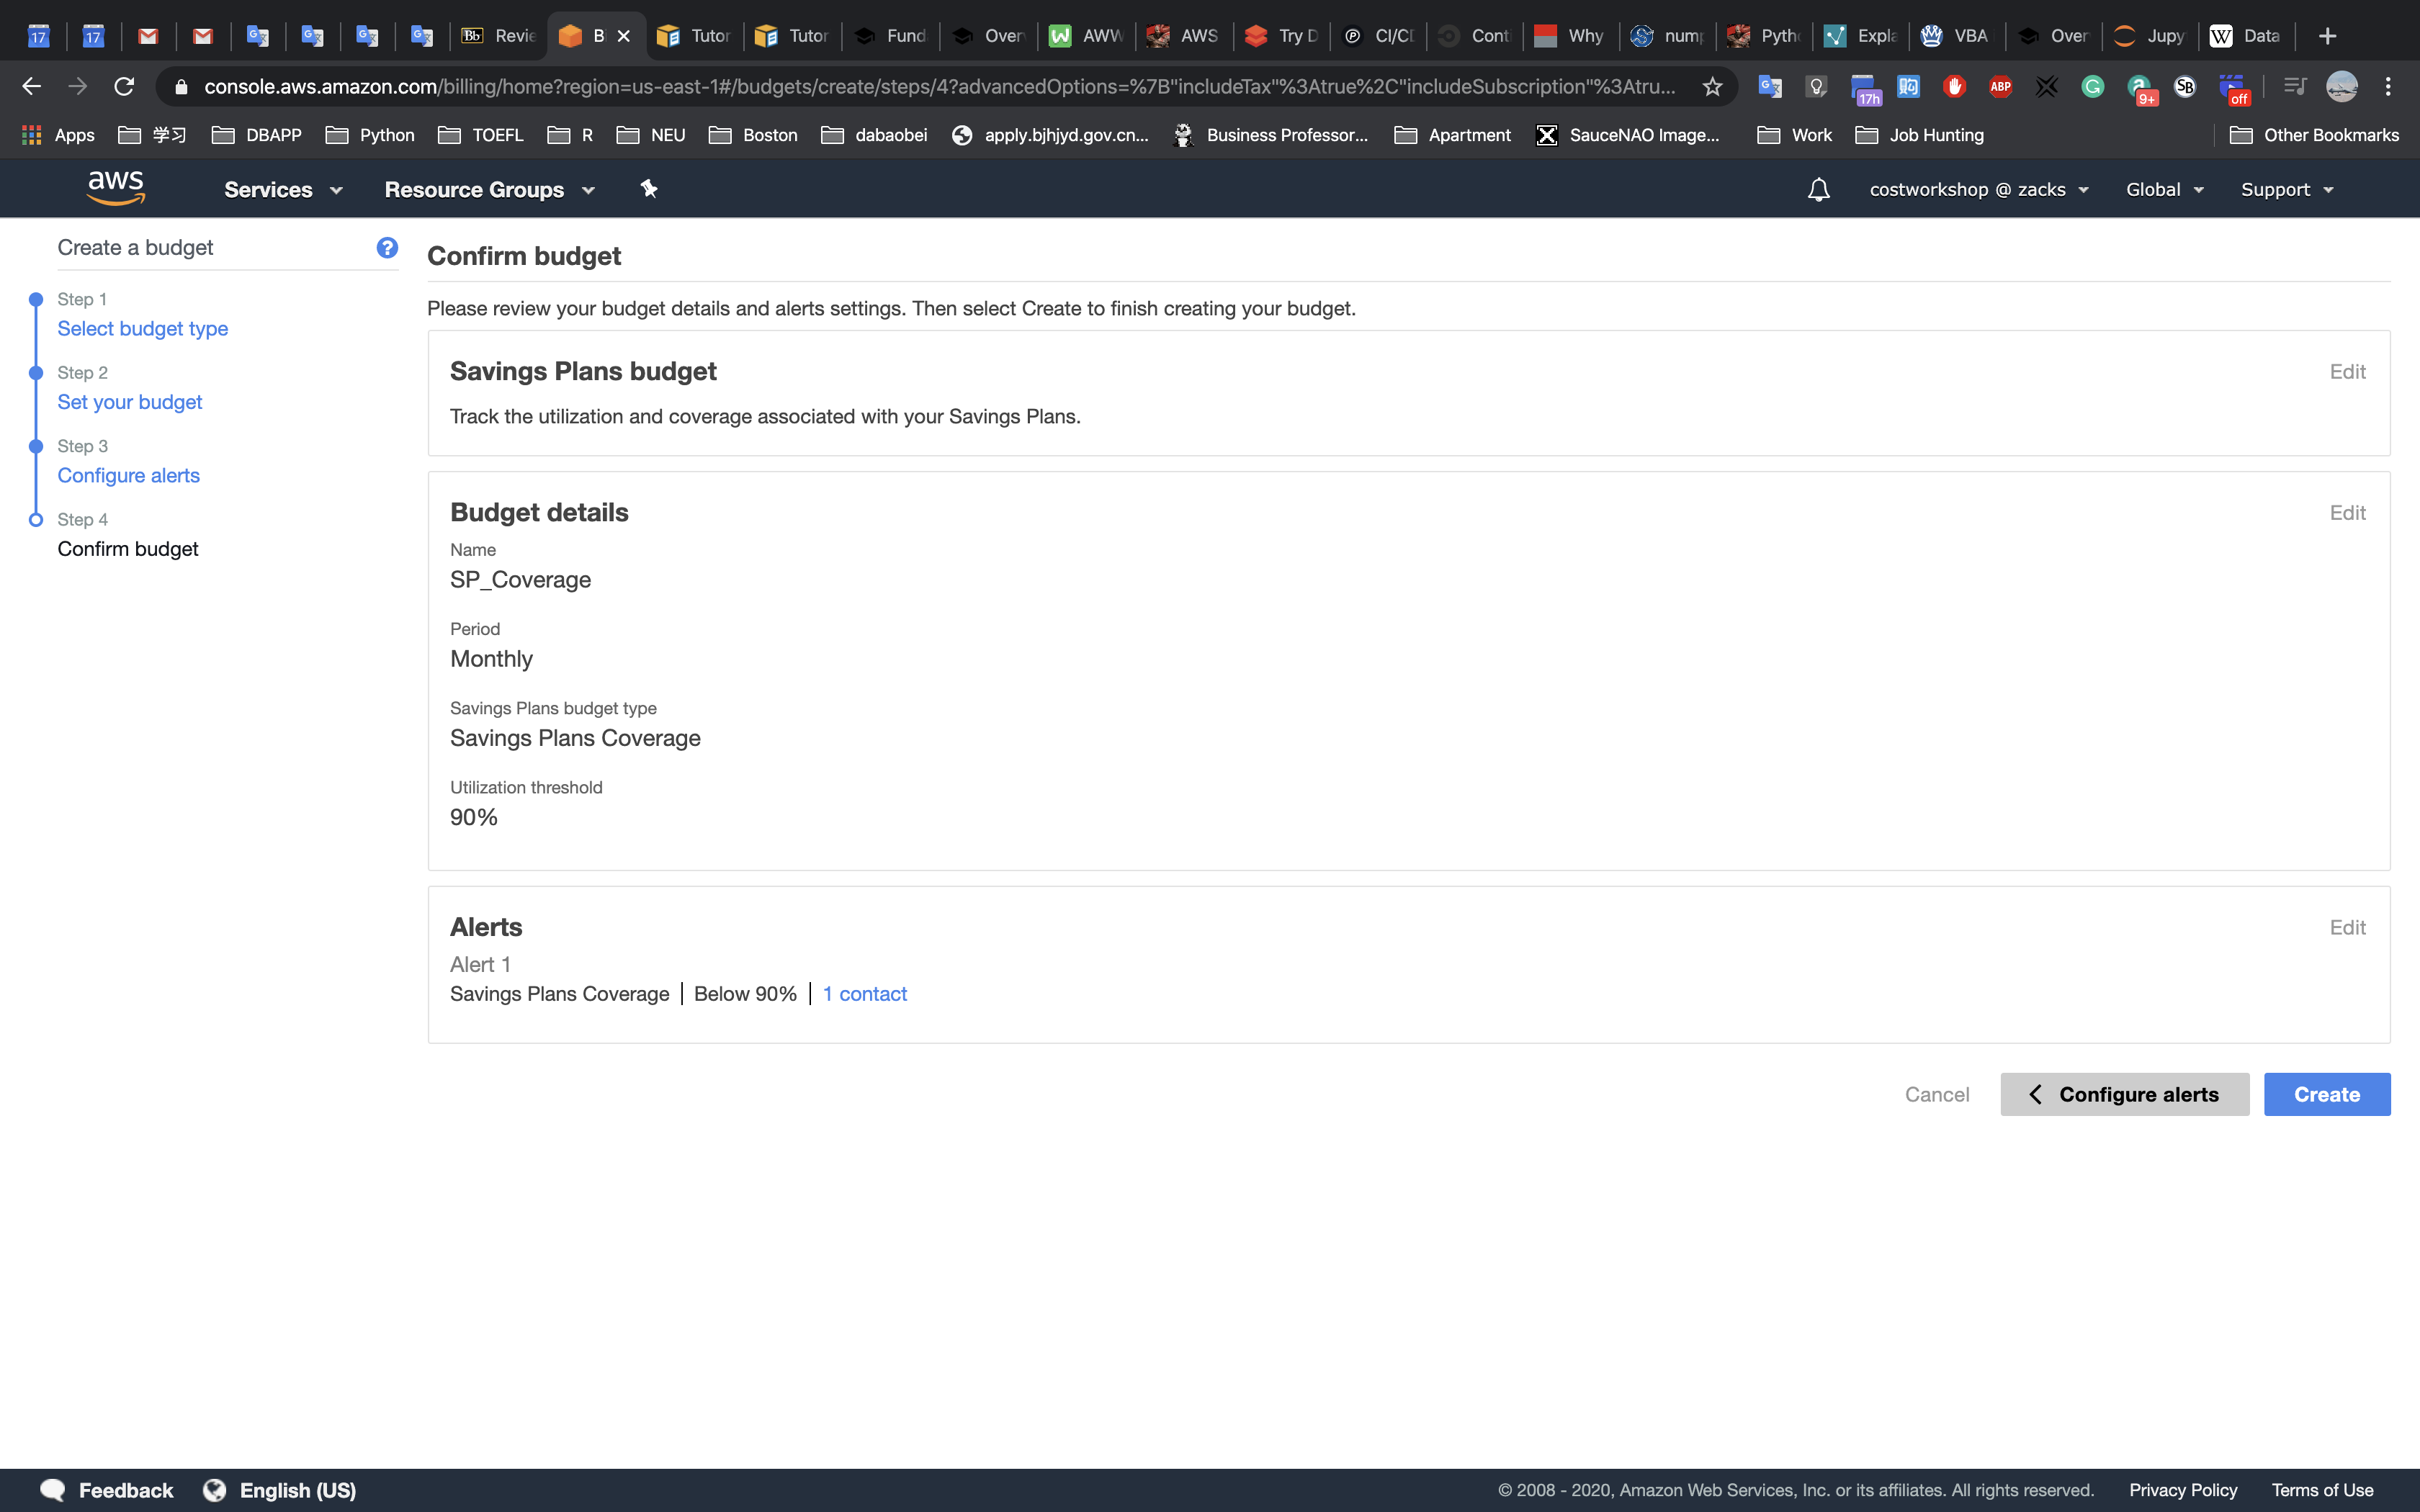
You have created an Savings Plans Coverage budget. High coverage is critical for cost optimization, as it ensures you are paying the lowest price for your resources.
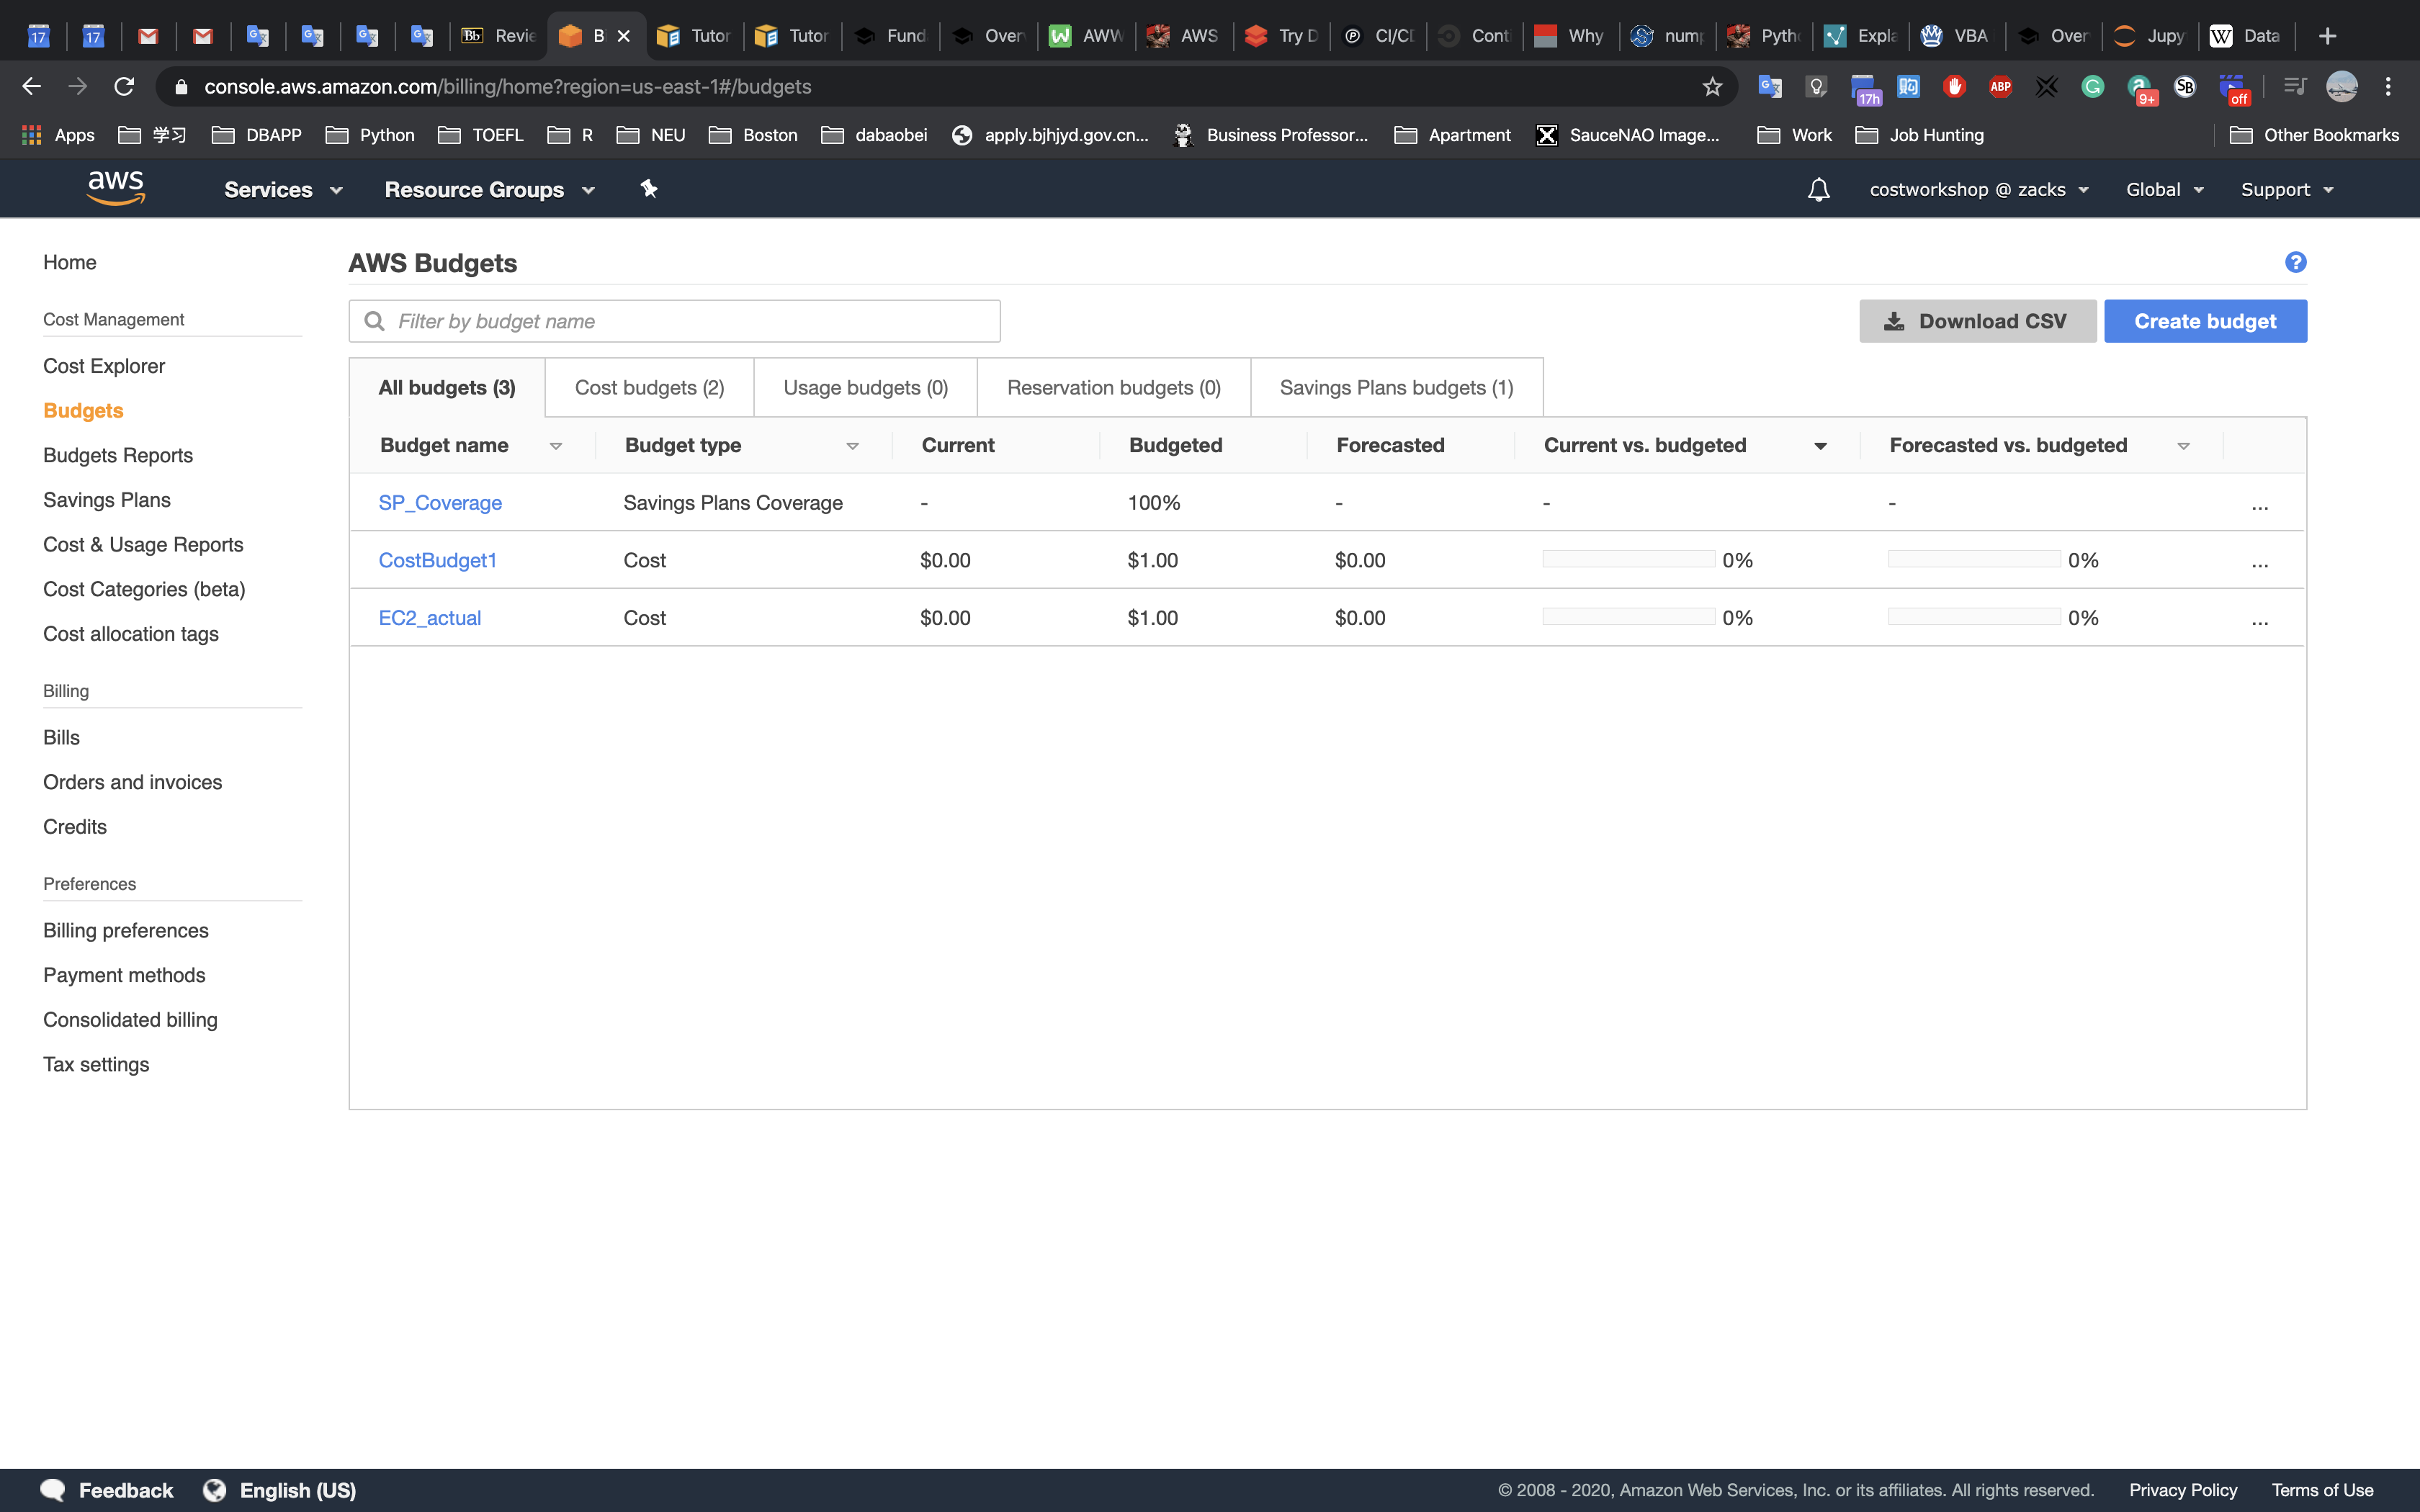
You will receive an email similar to this within a few minutes:
4. Create and implement an AWS Budget Report
AWS Budgets Reports allow you to create and send daily, weekly, or monthly reports to monitor the performance of your AWS Budgets.
From the Budgets dashboard, Click on
Budgets Reports: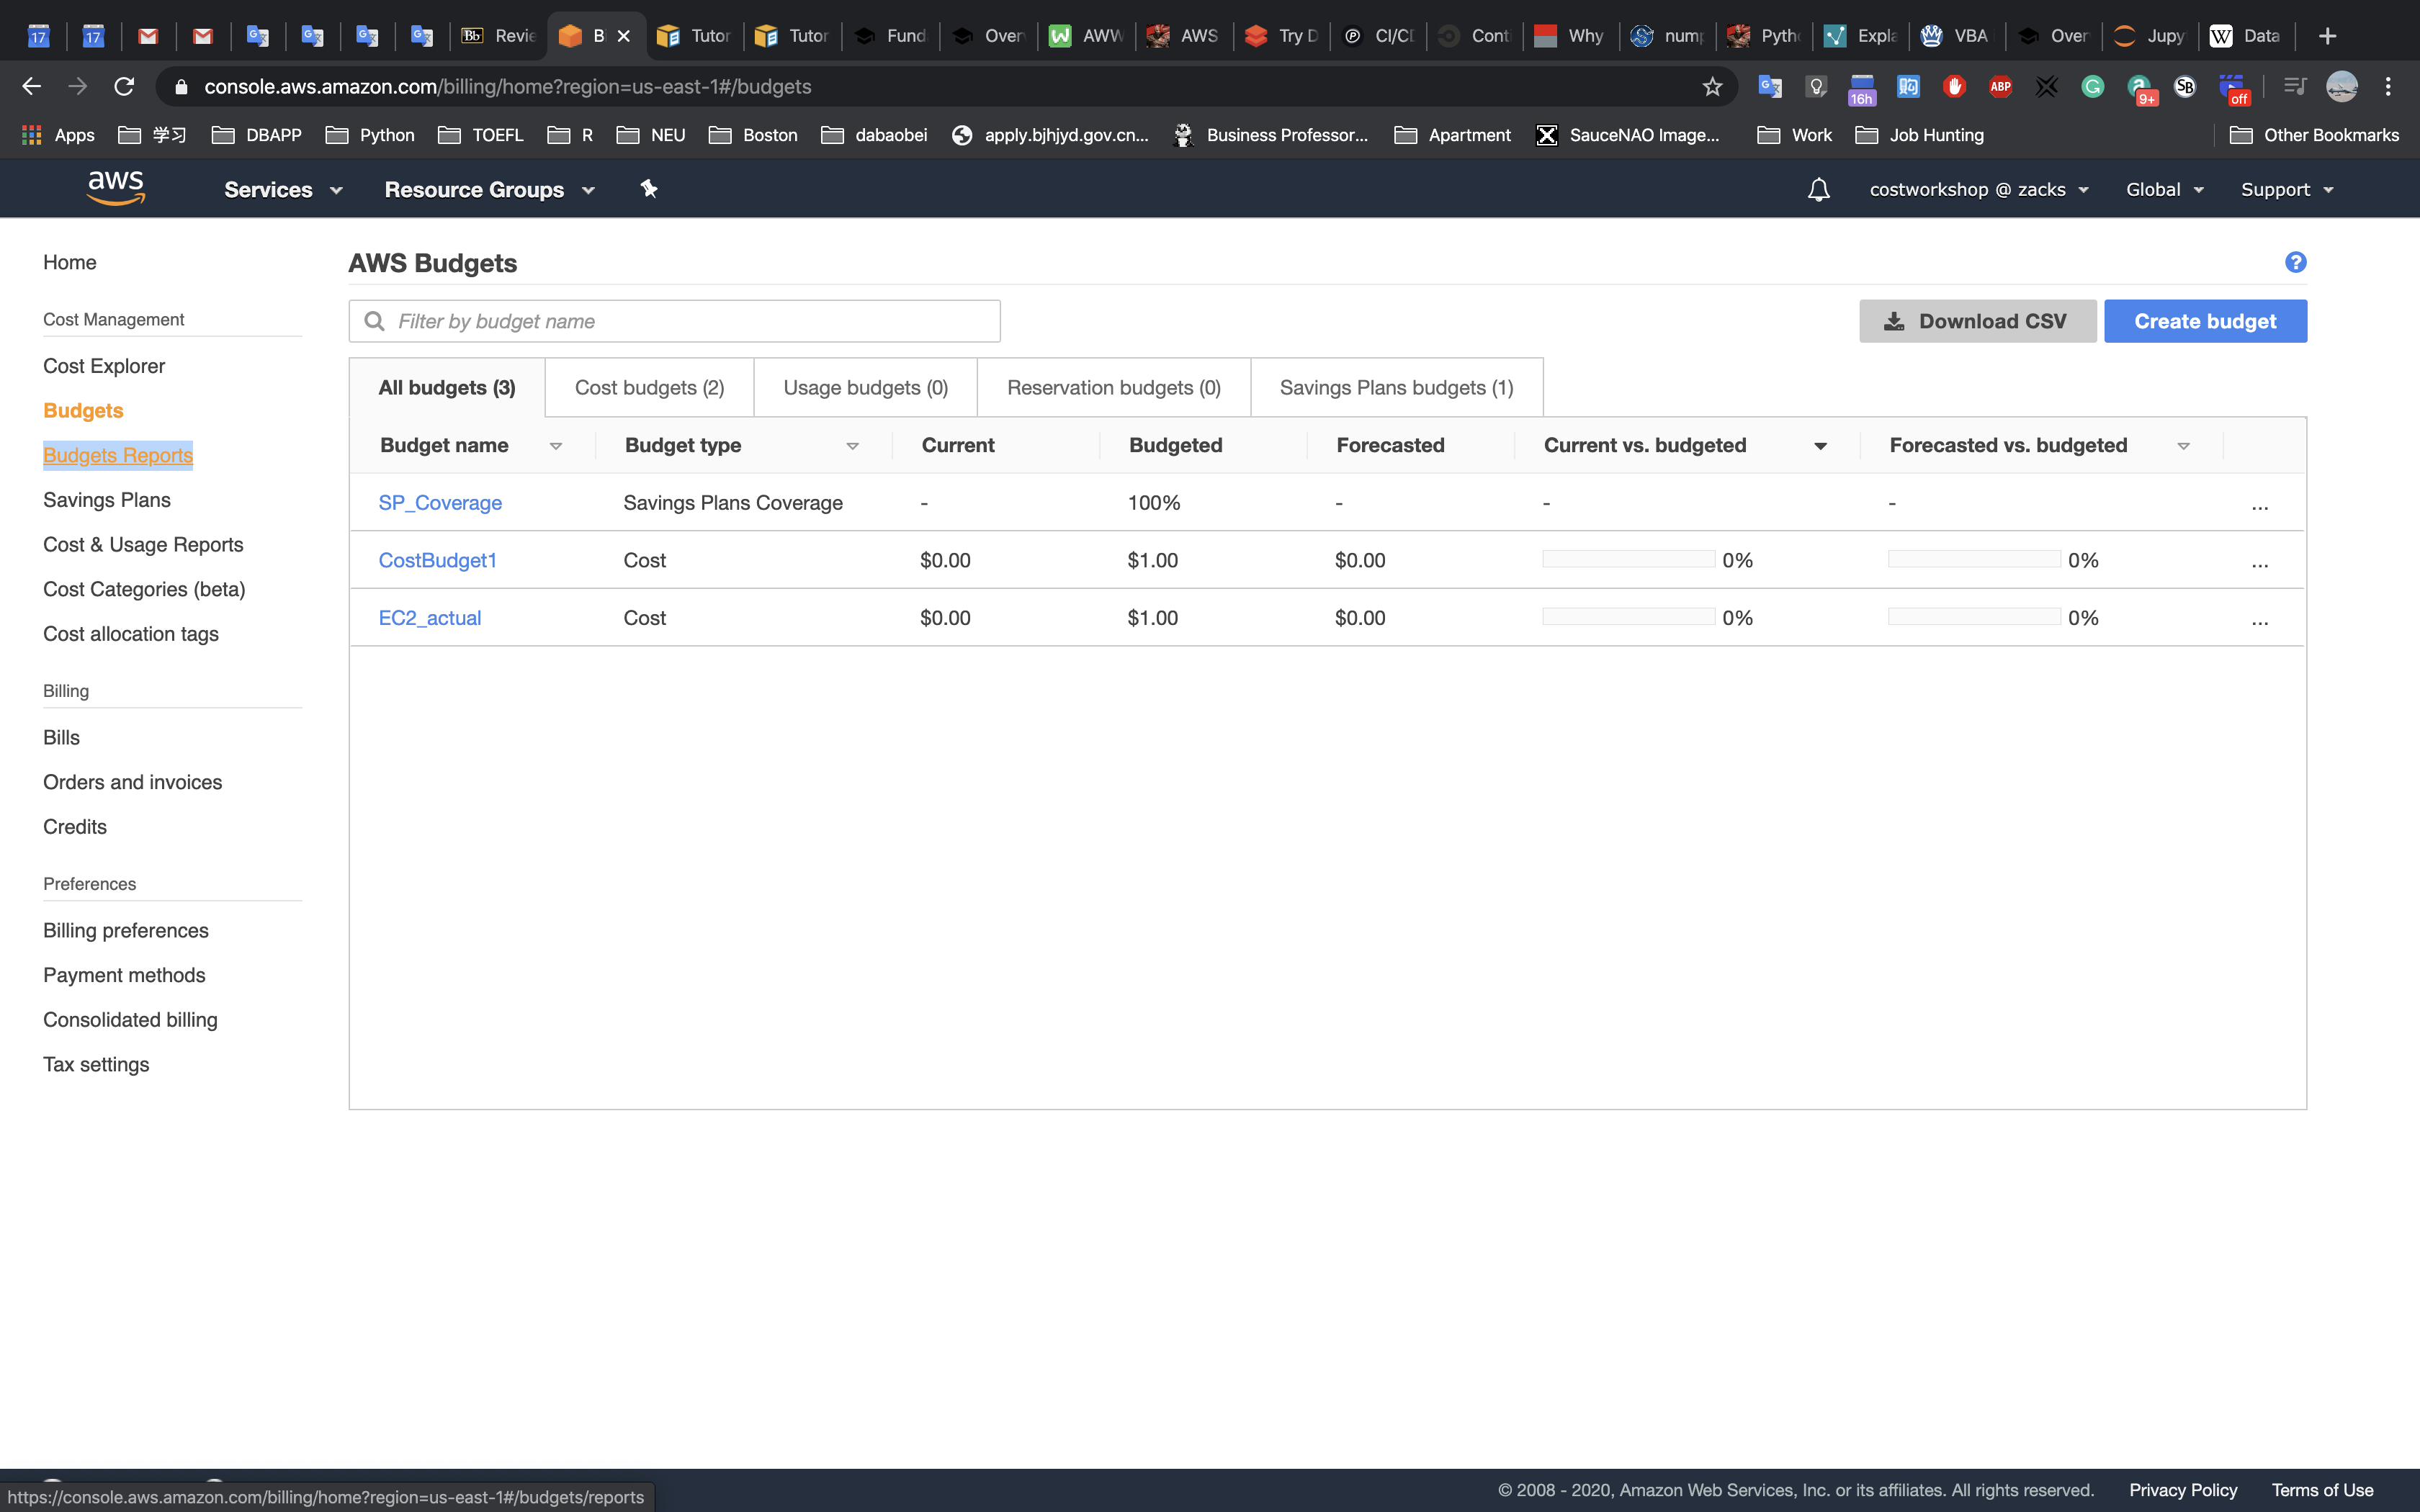
Click
Create budget report: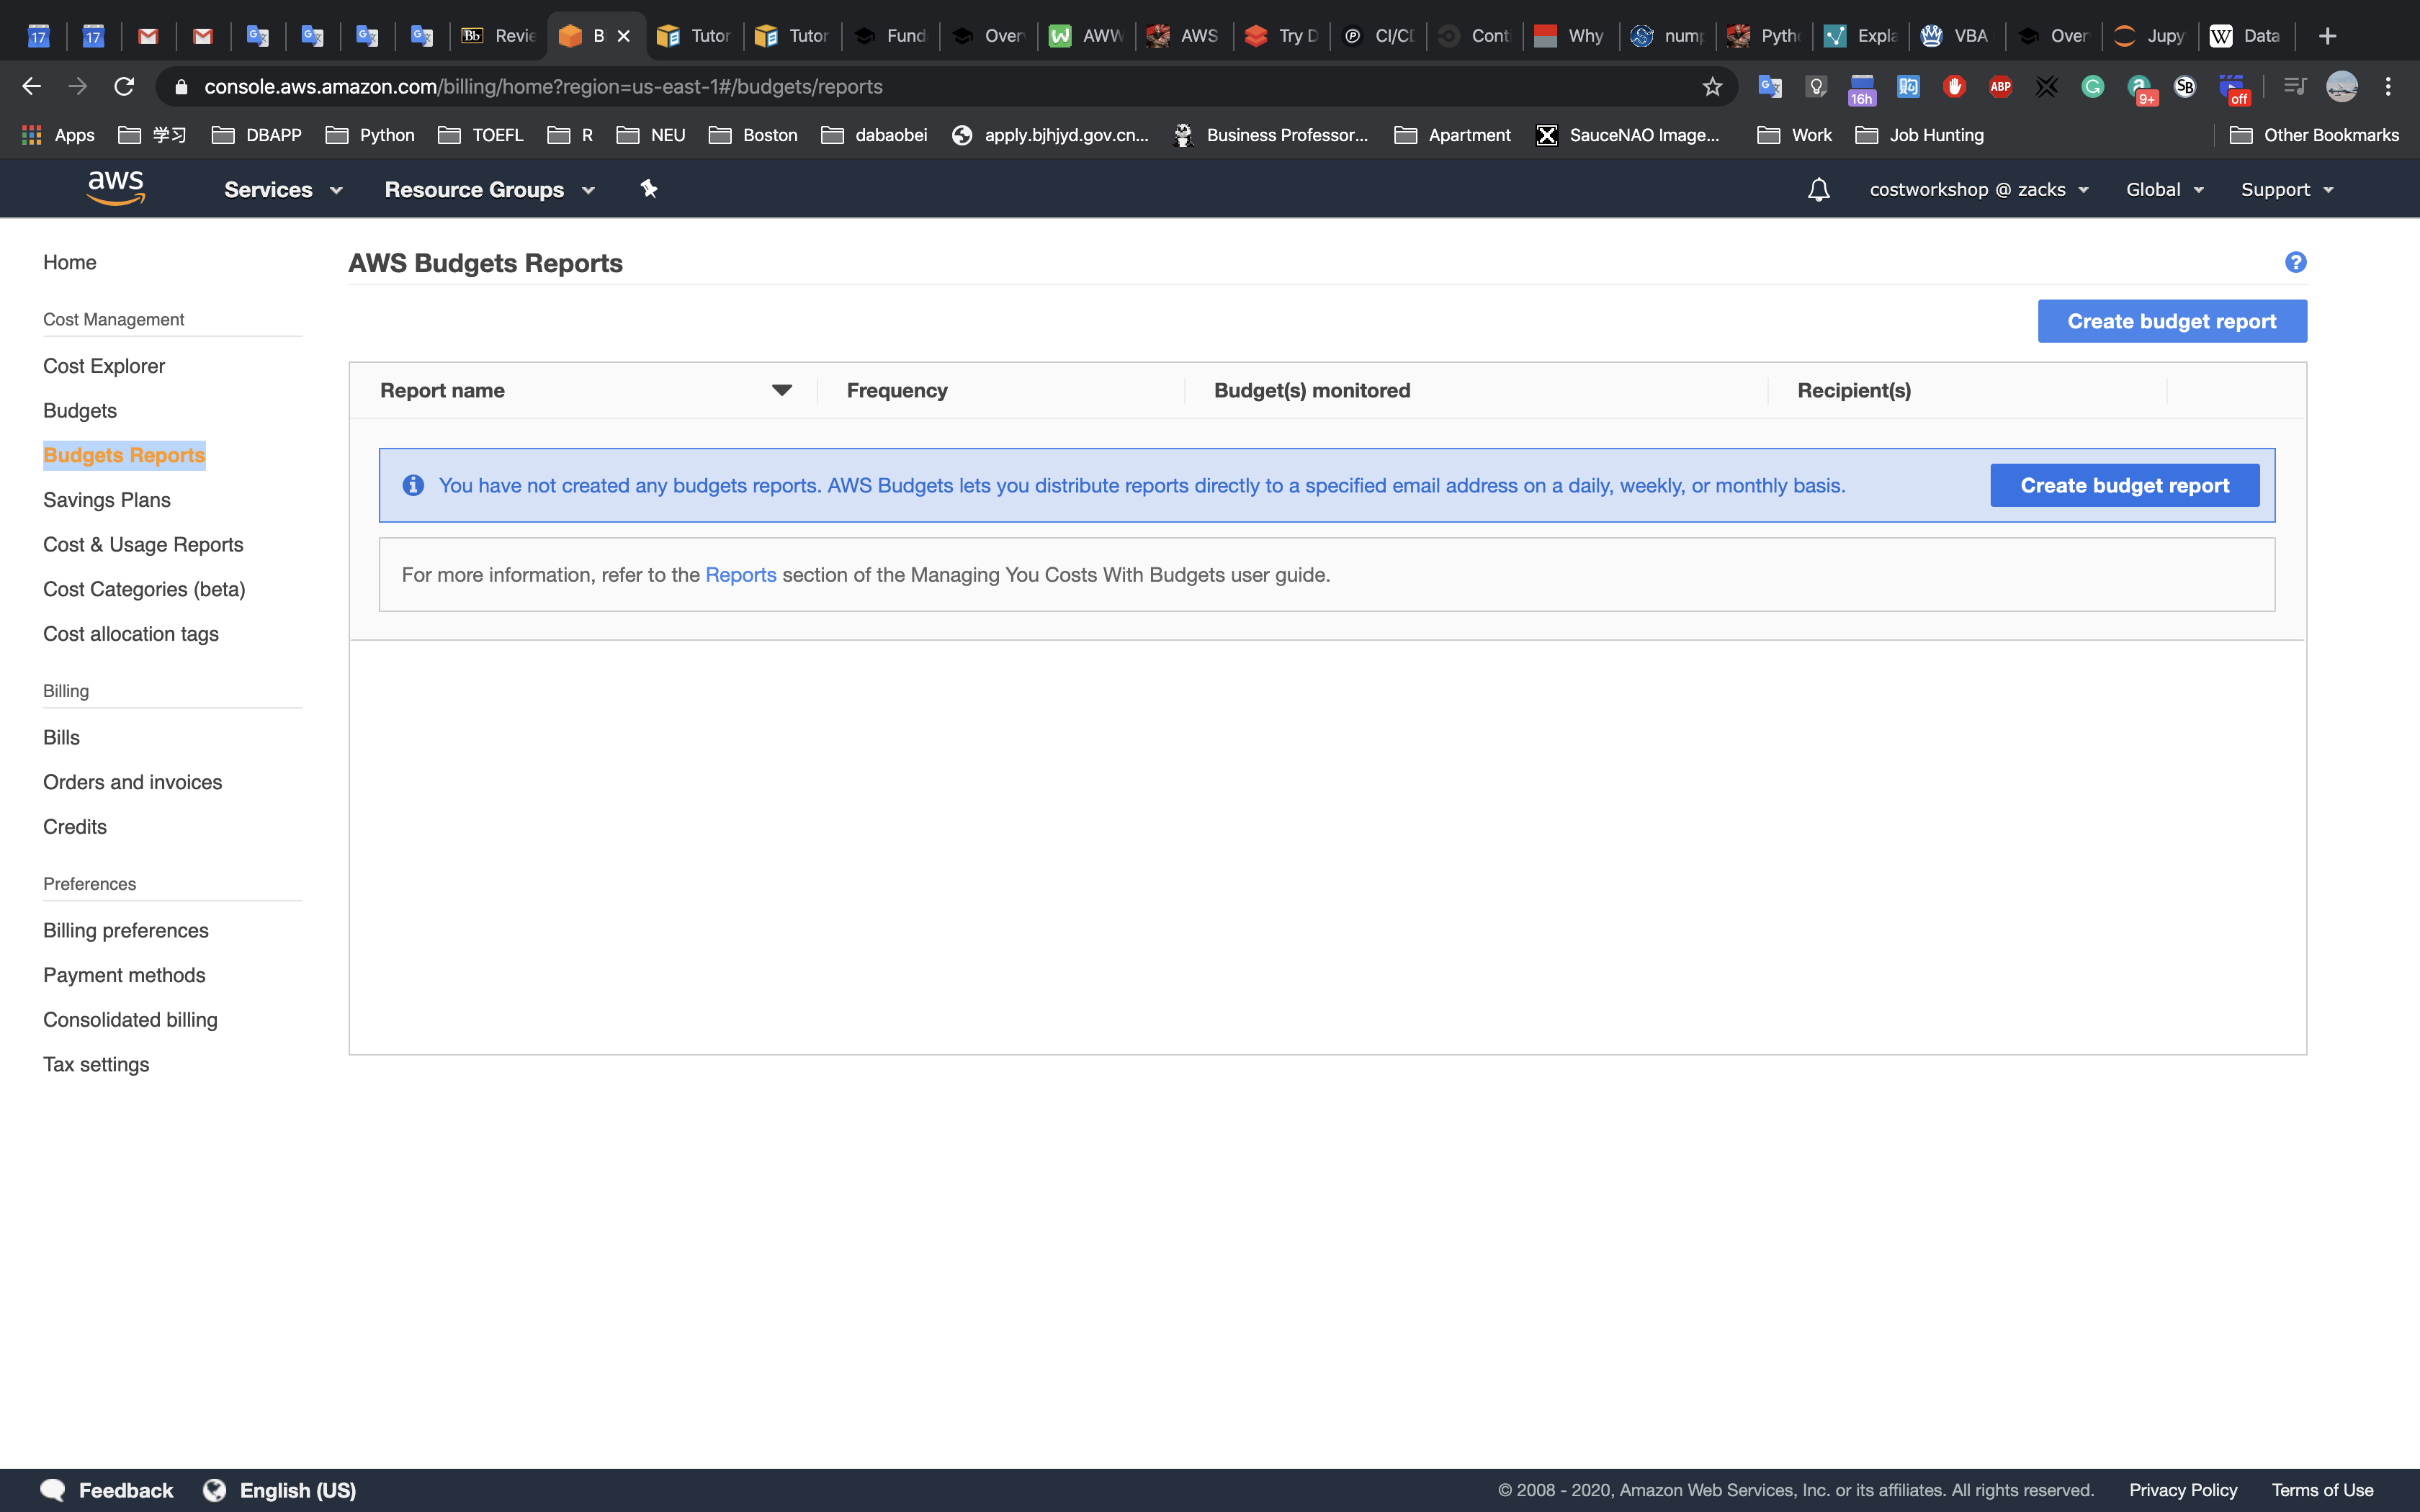
Create a report with the following details:
- Report name:
WeeklyBudgets - Select all budgets
- Report name:
Click
Configure delivery settings >: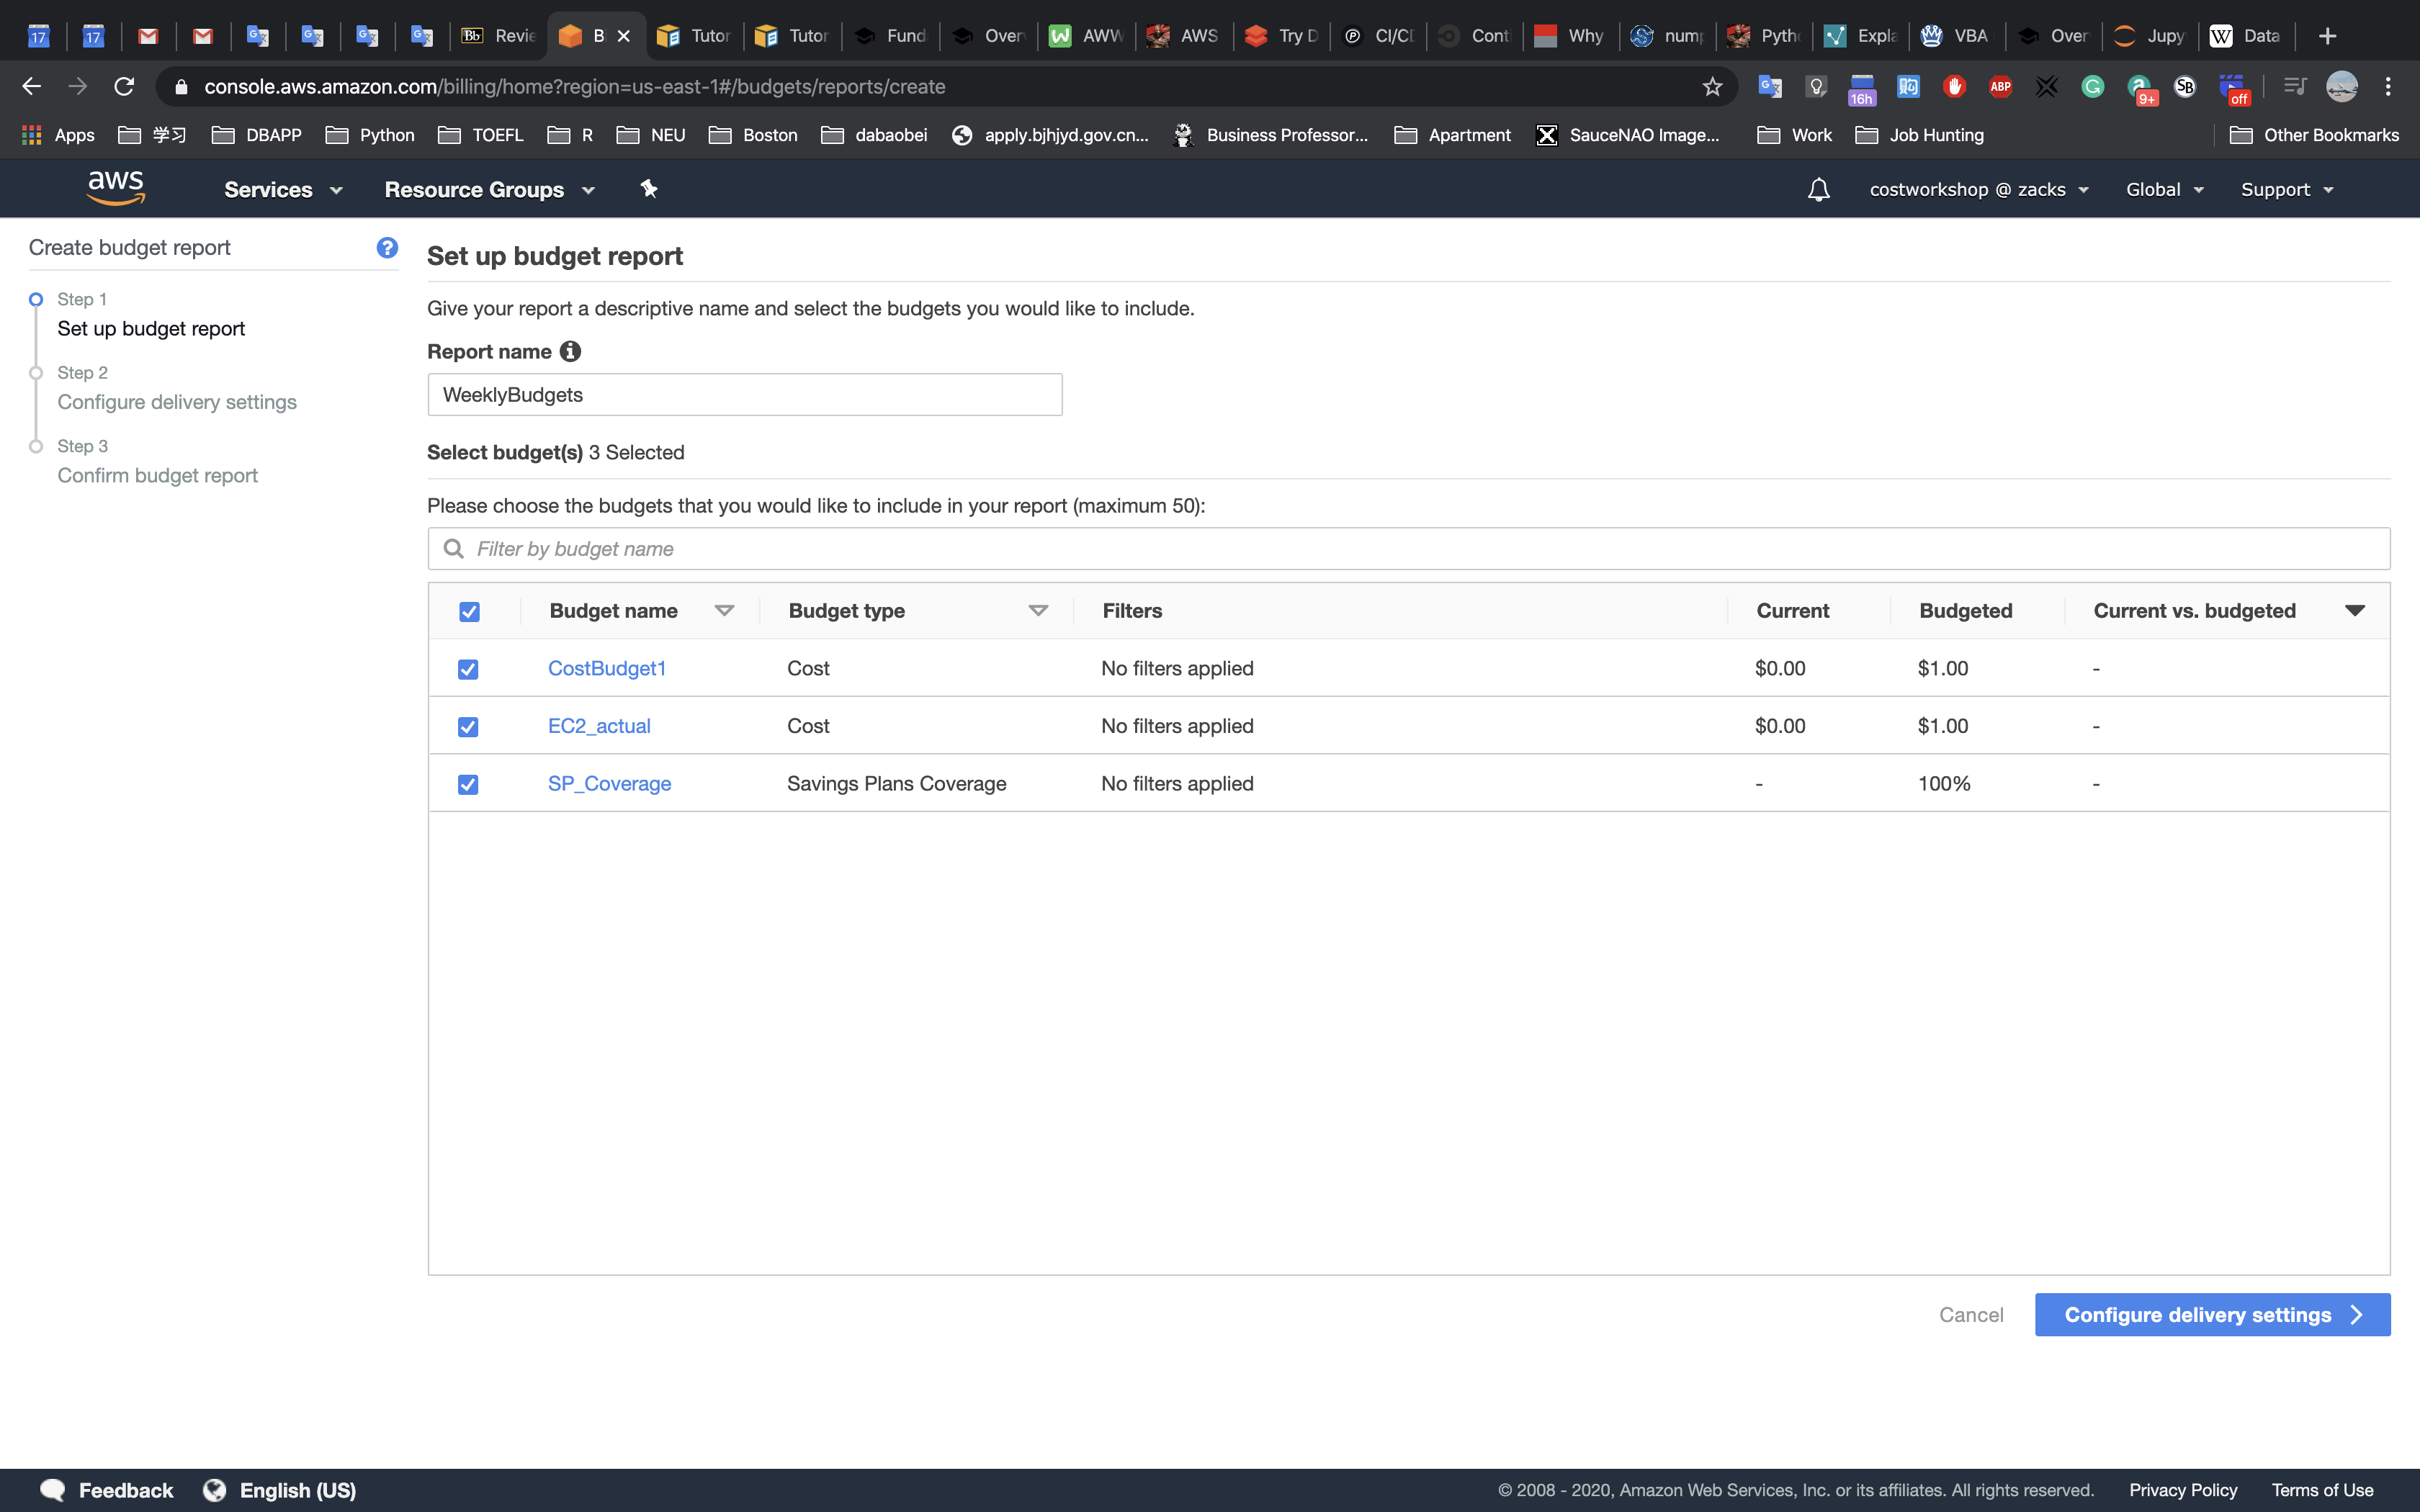
Configure the delivery settings:
- Report frequency: Weekly
- Day of week: Monday
- Email recipients:
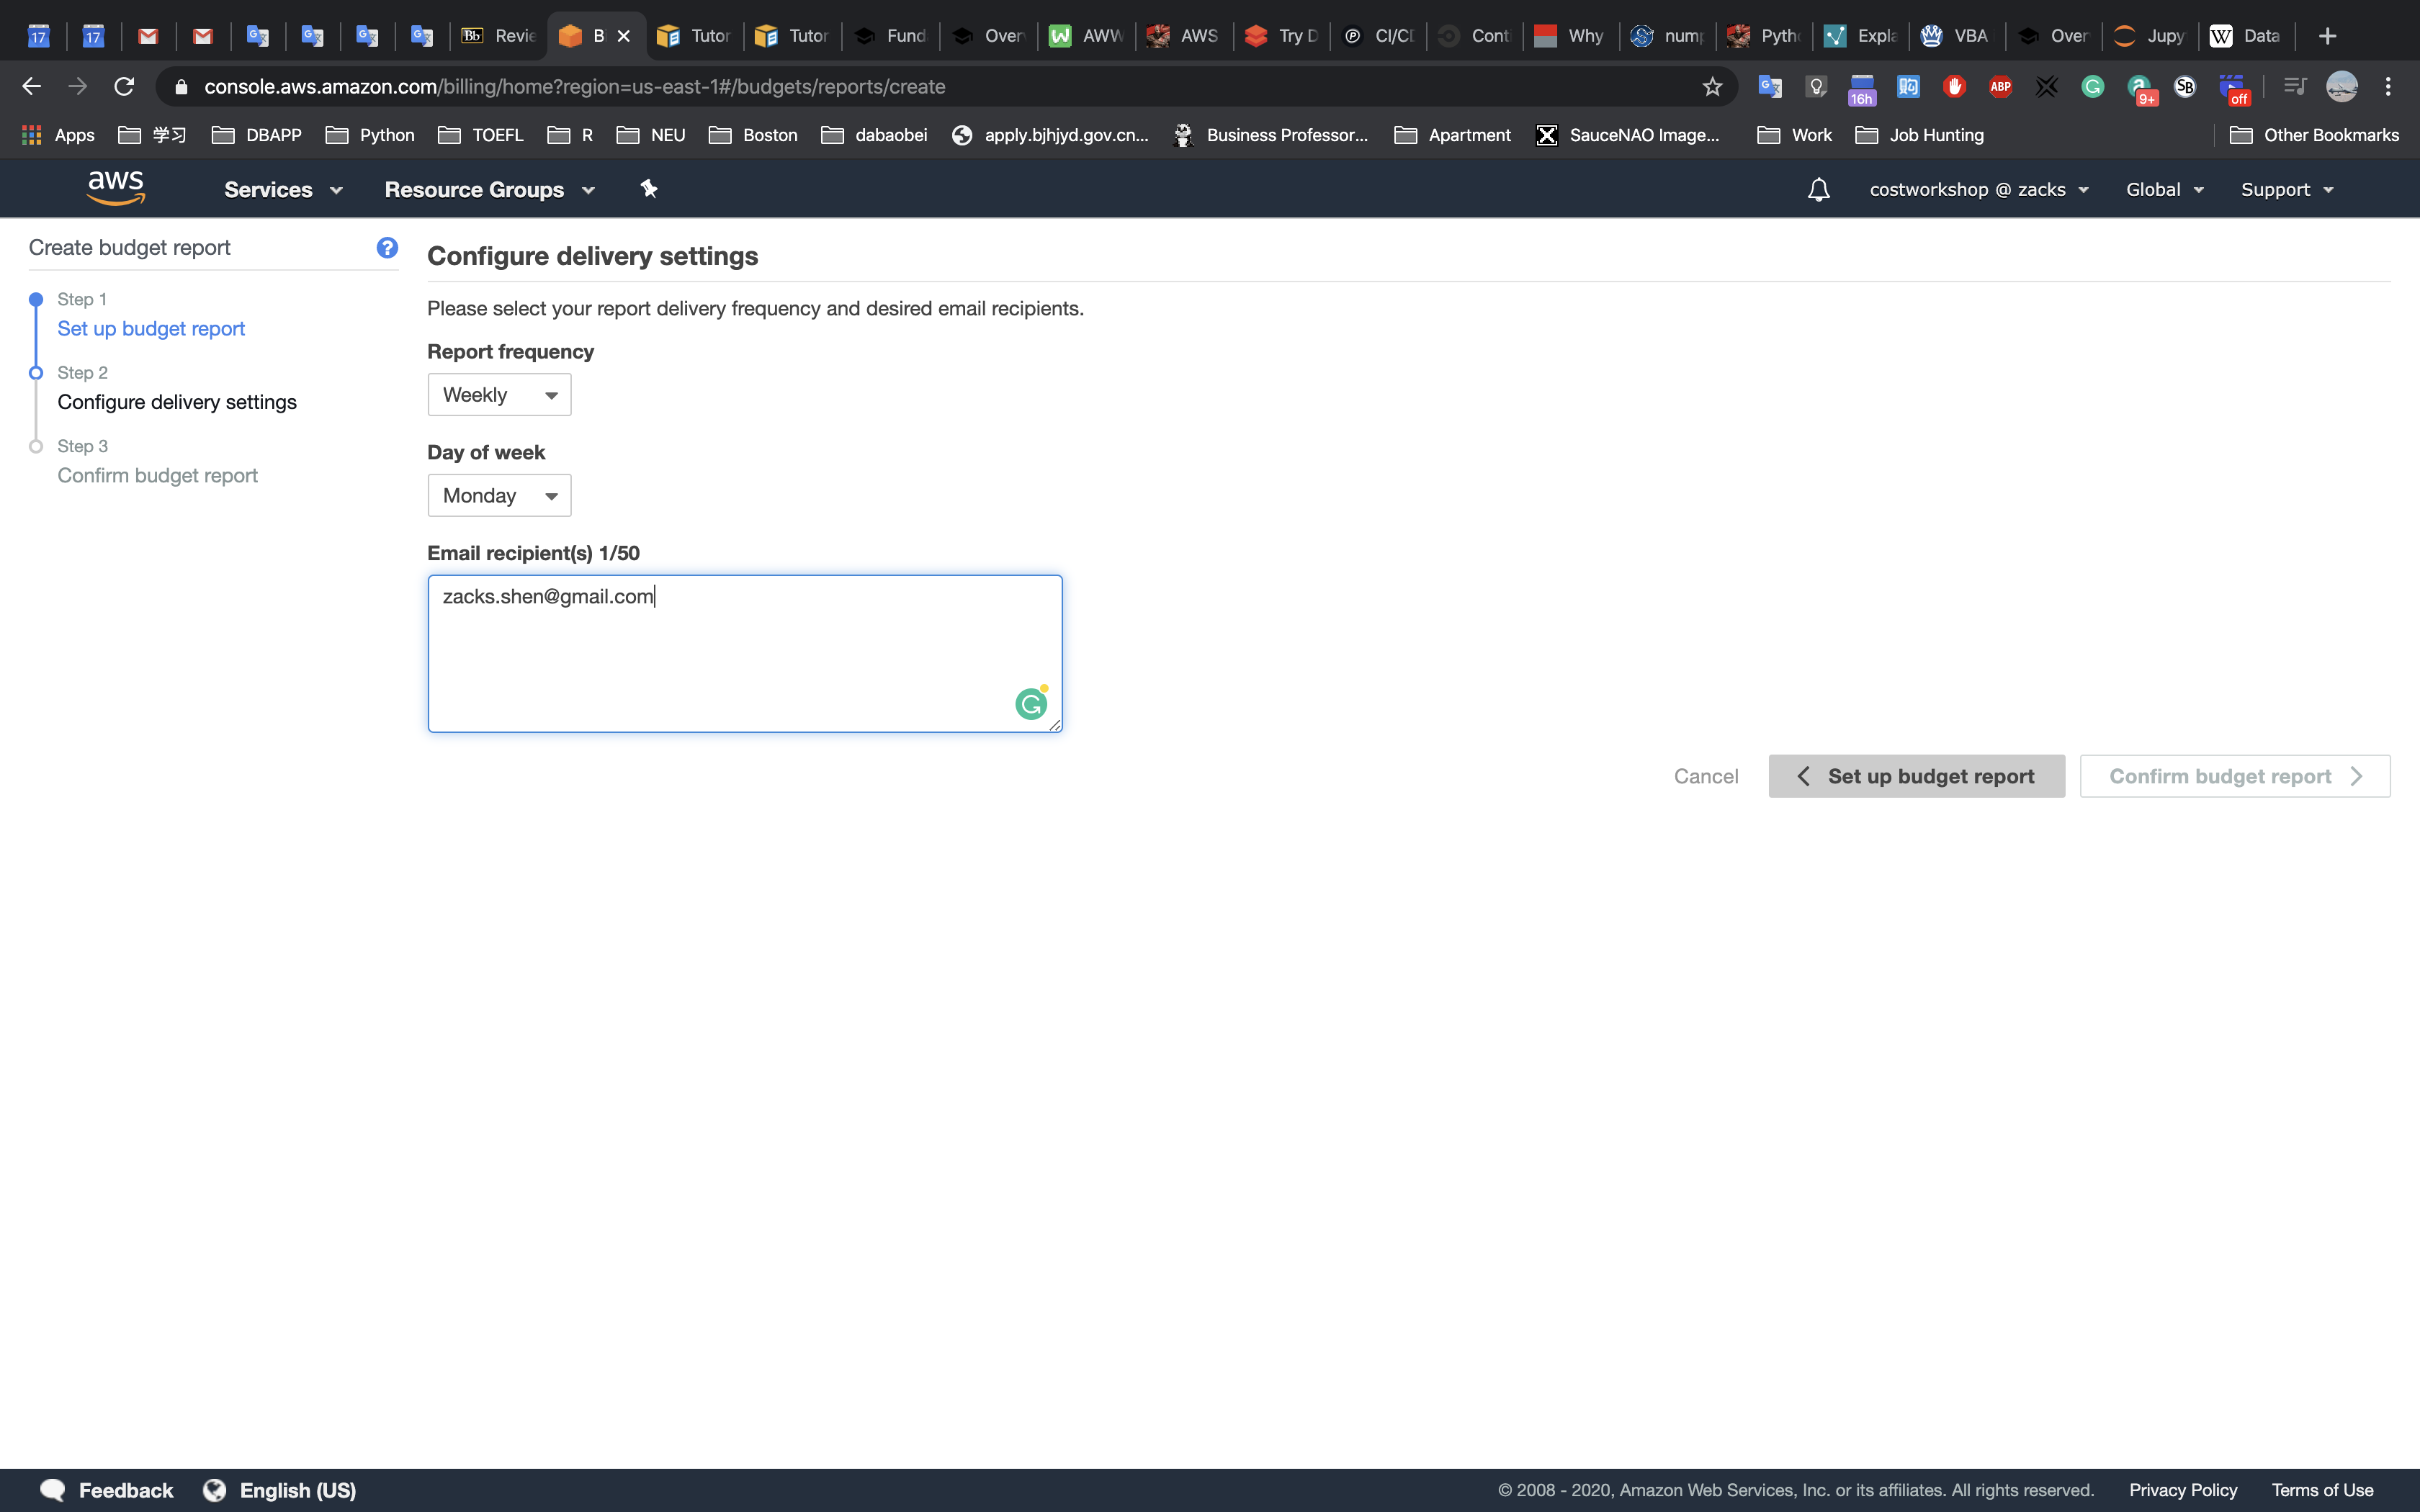
Click
Confirm budget report >: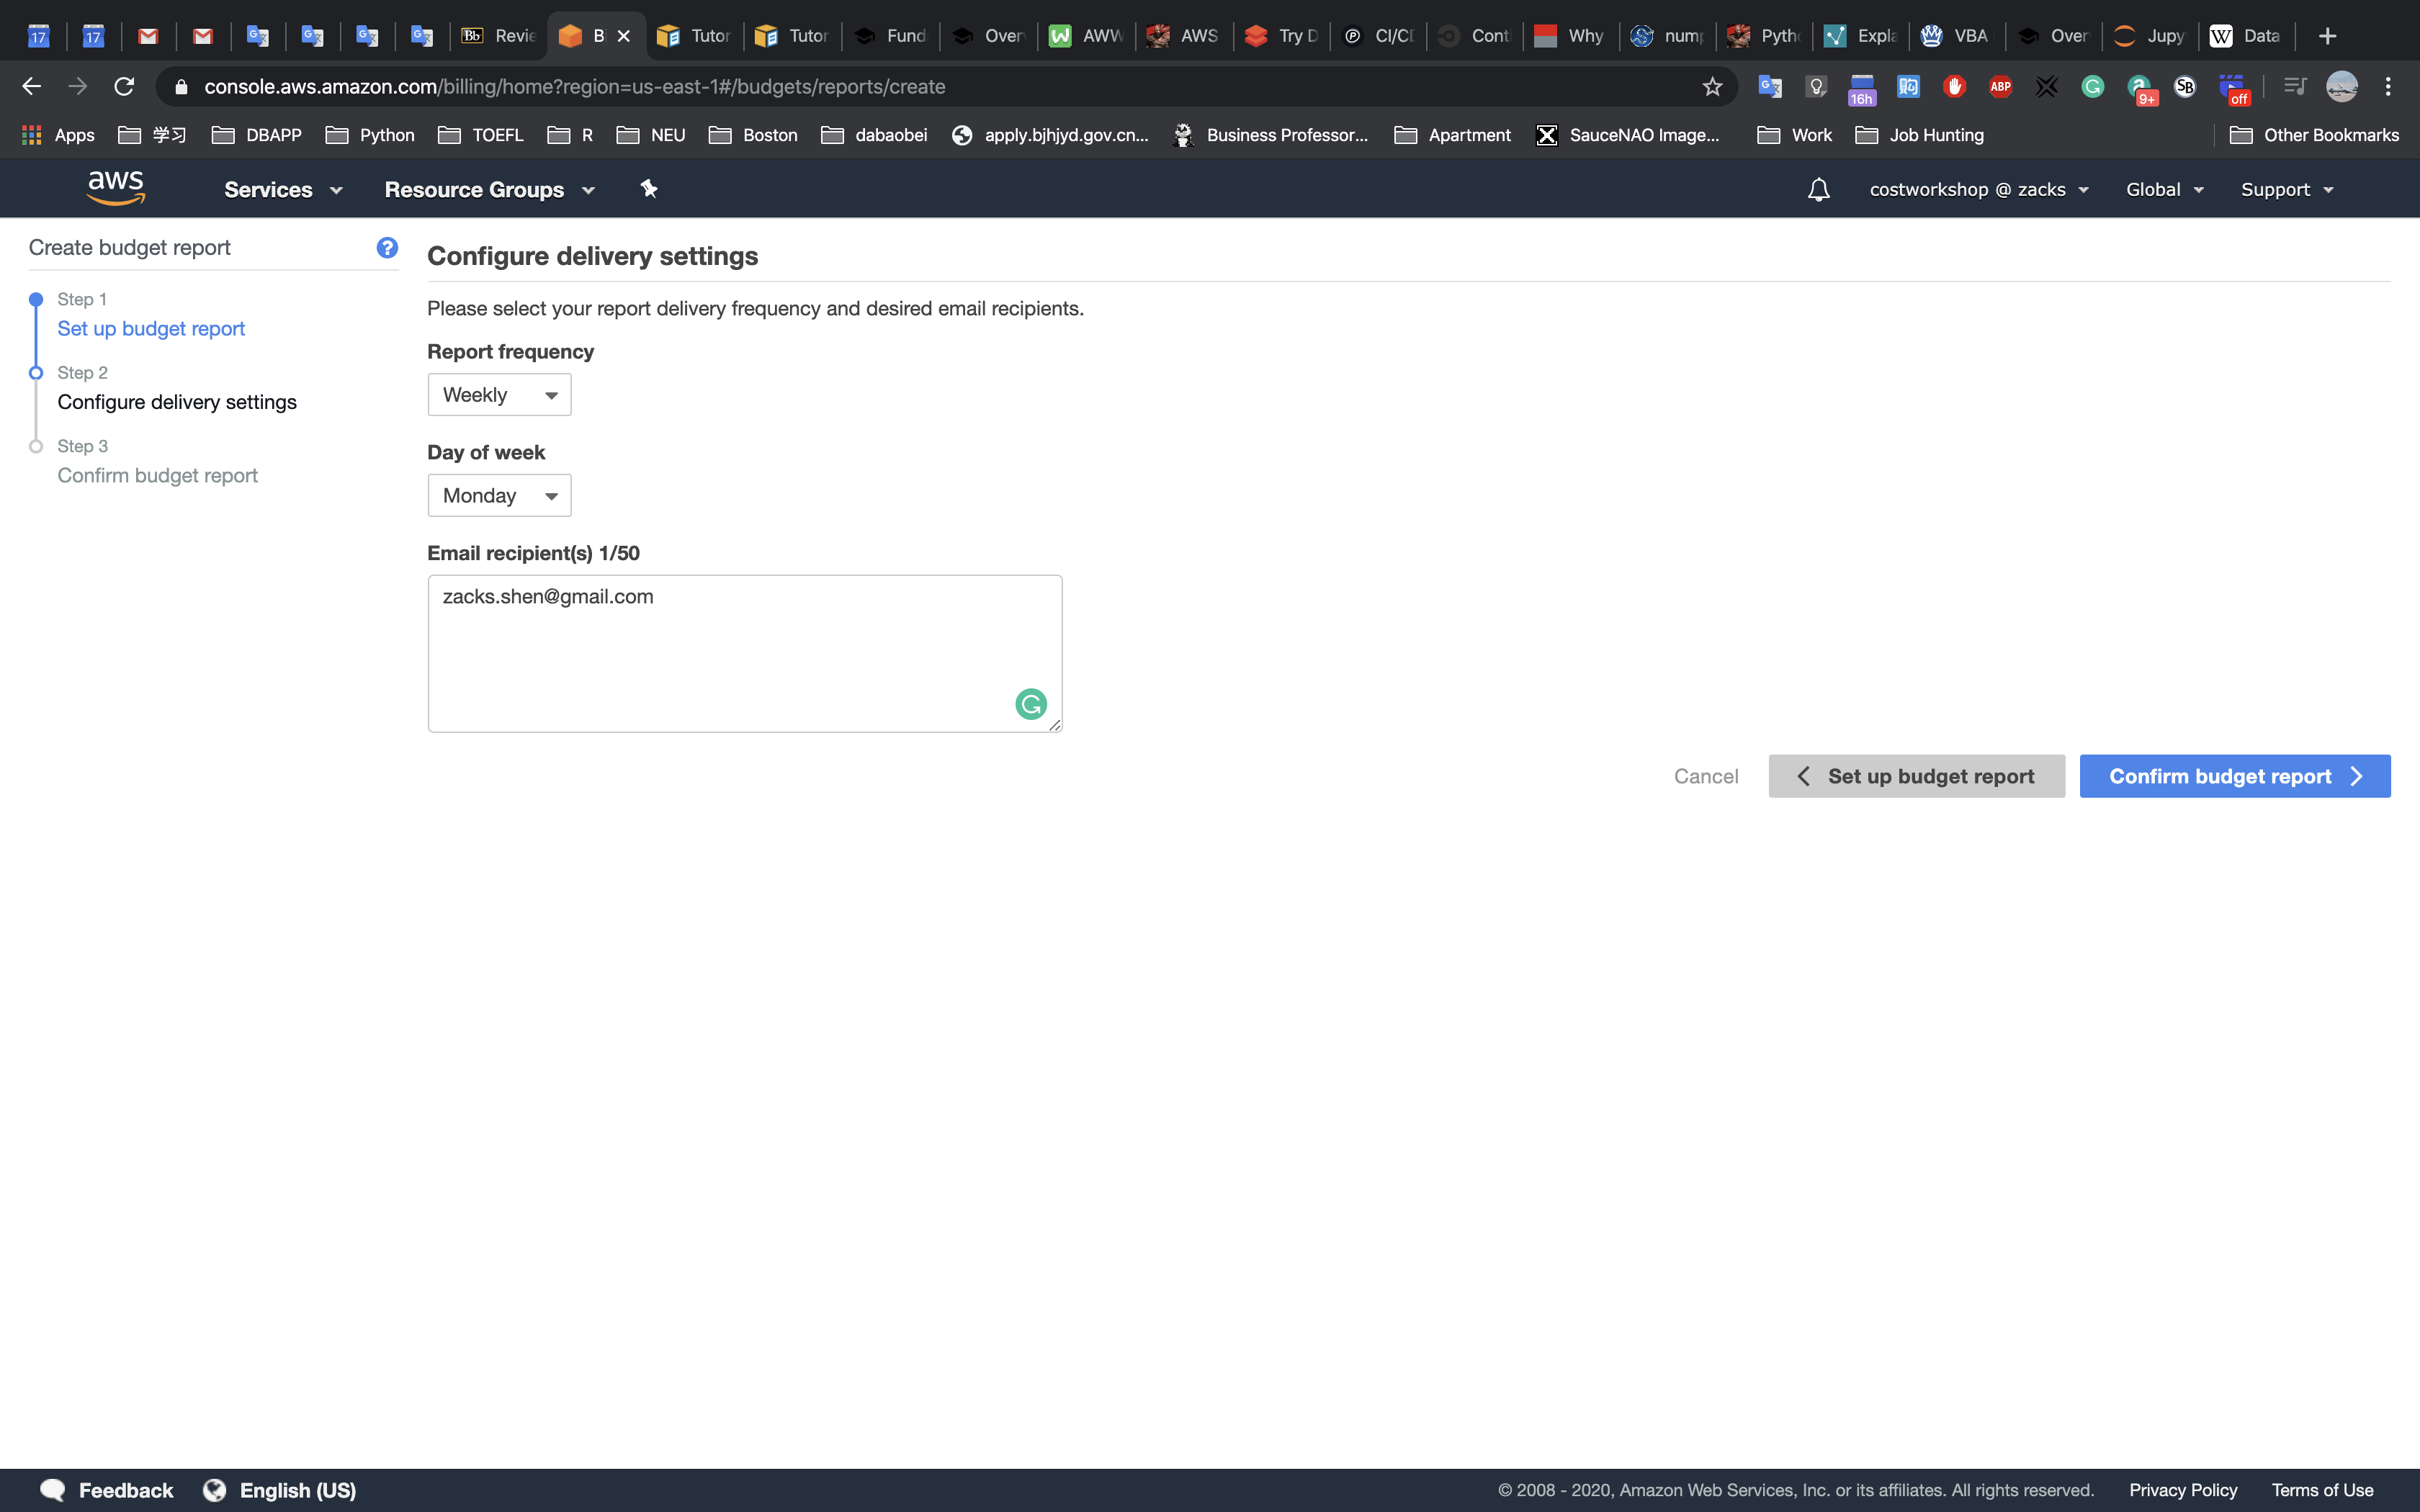
Review the configuration, click
Create: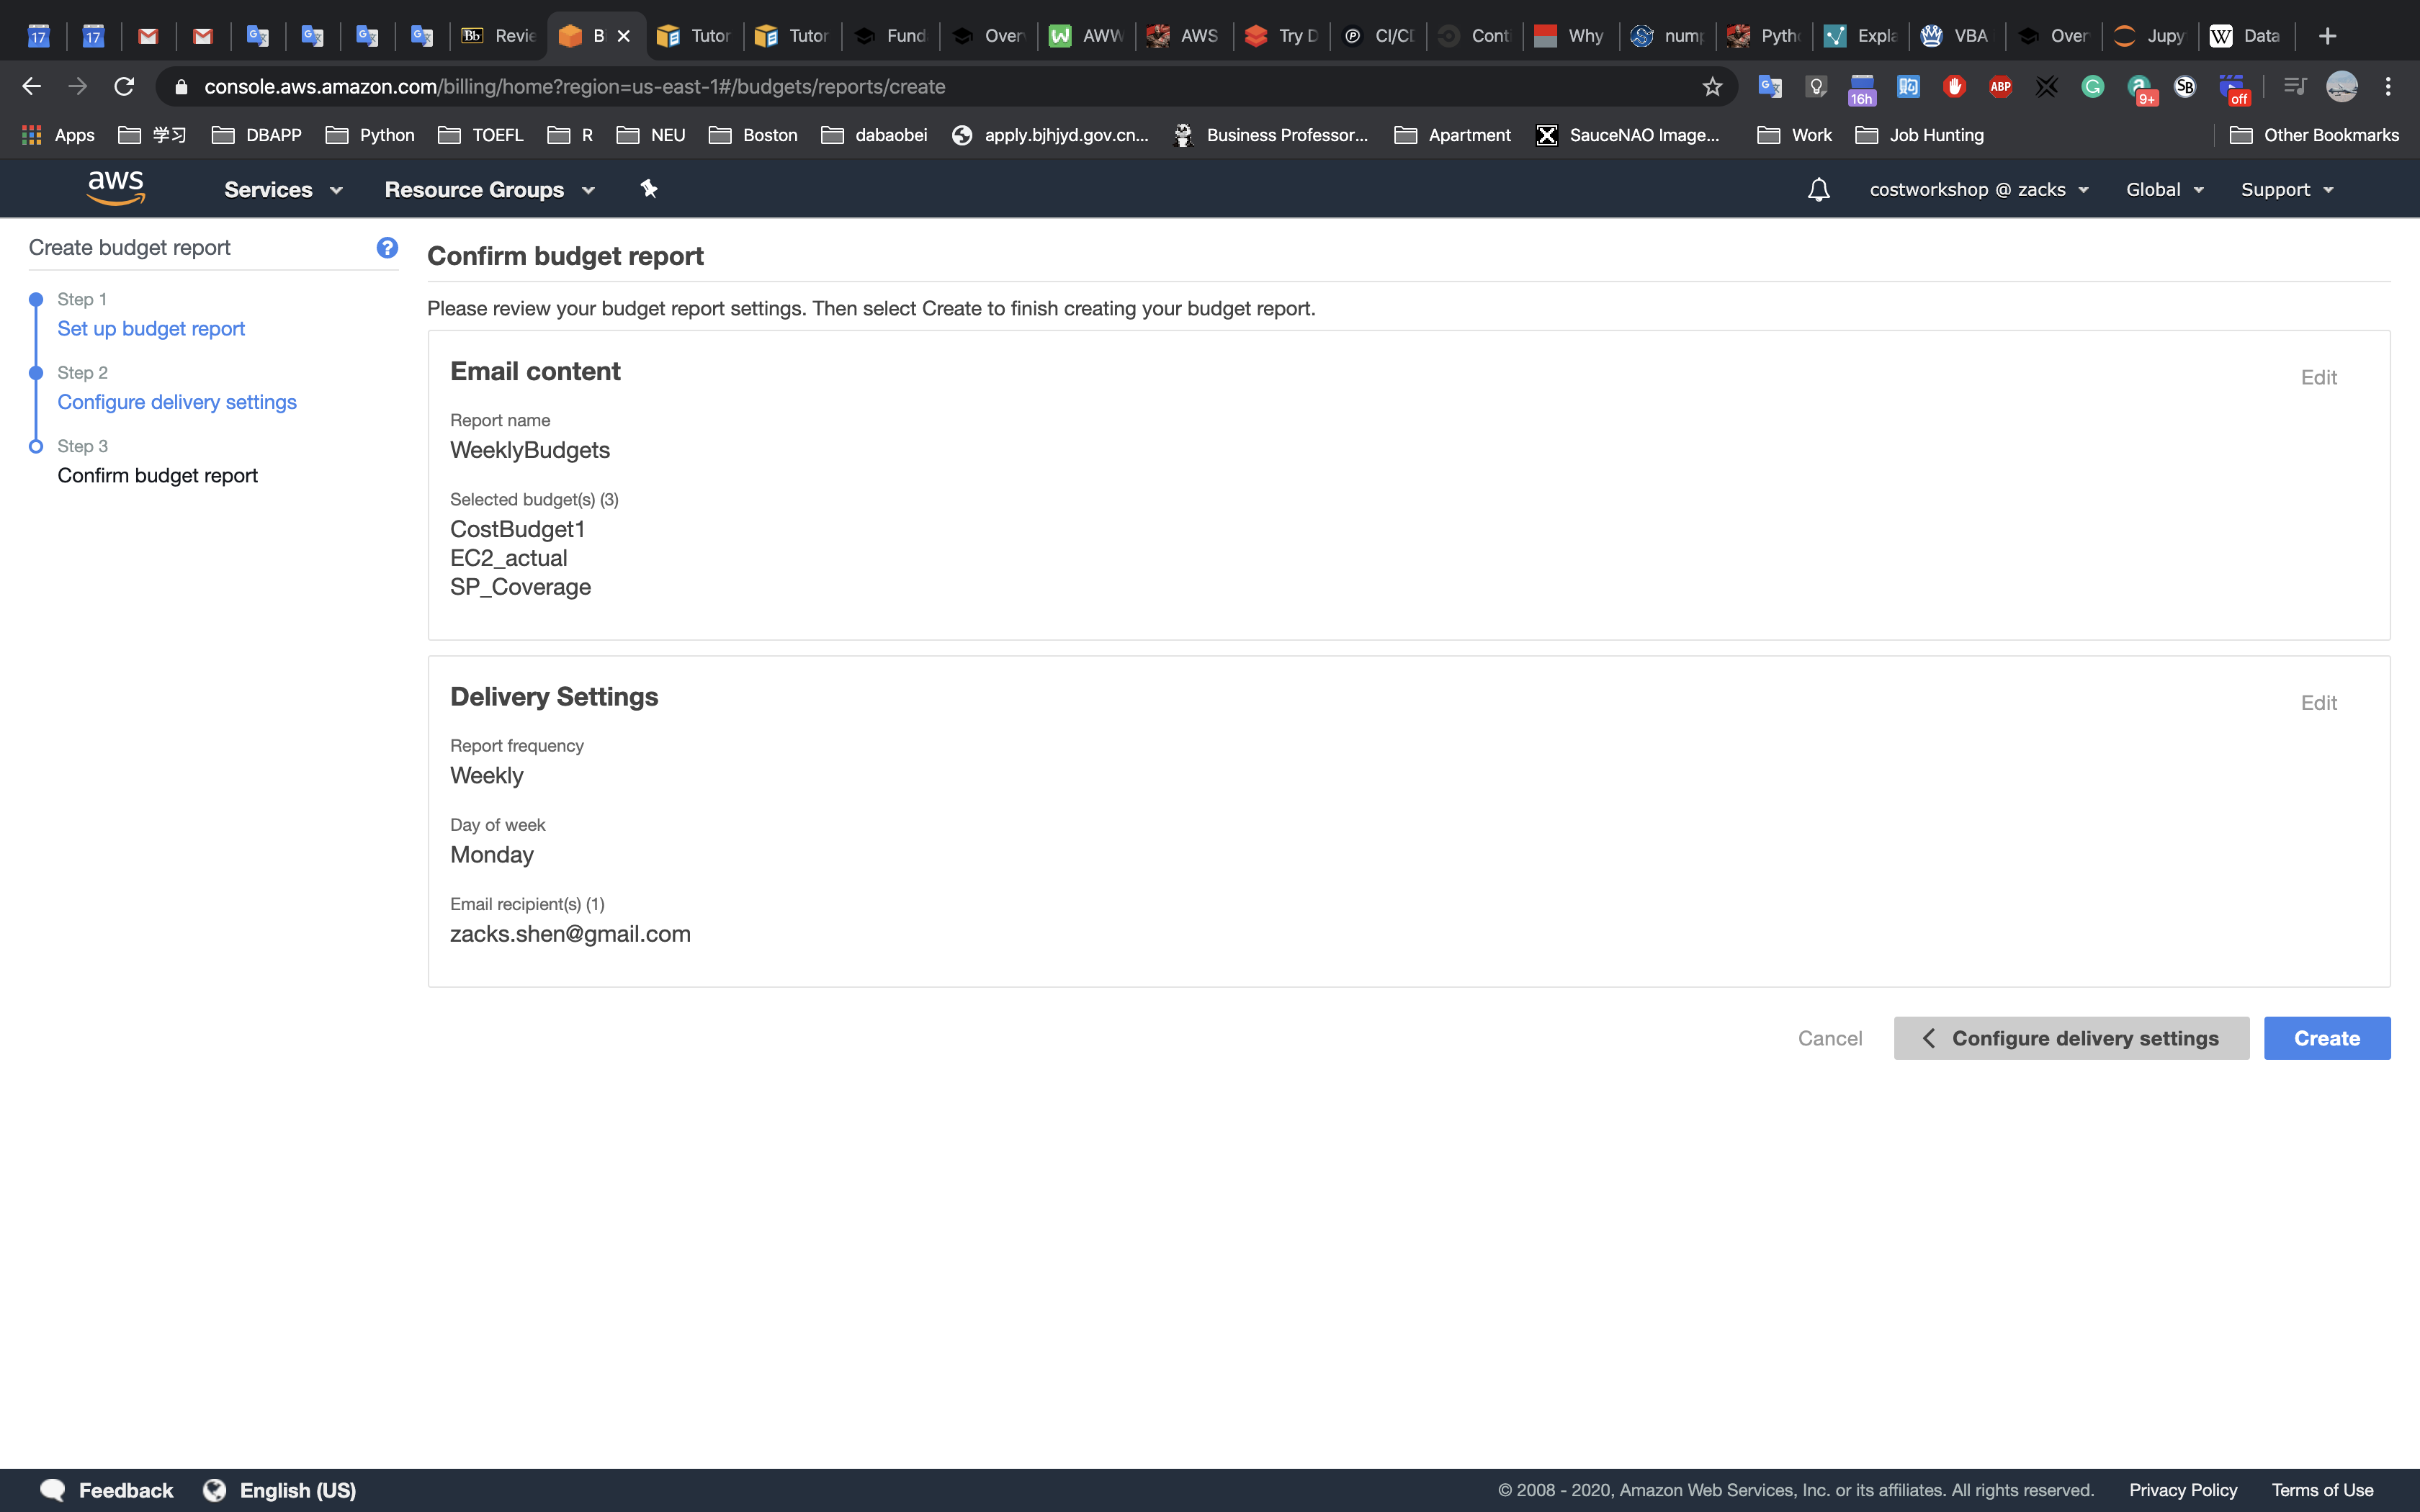
Your budget report should now be complete:
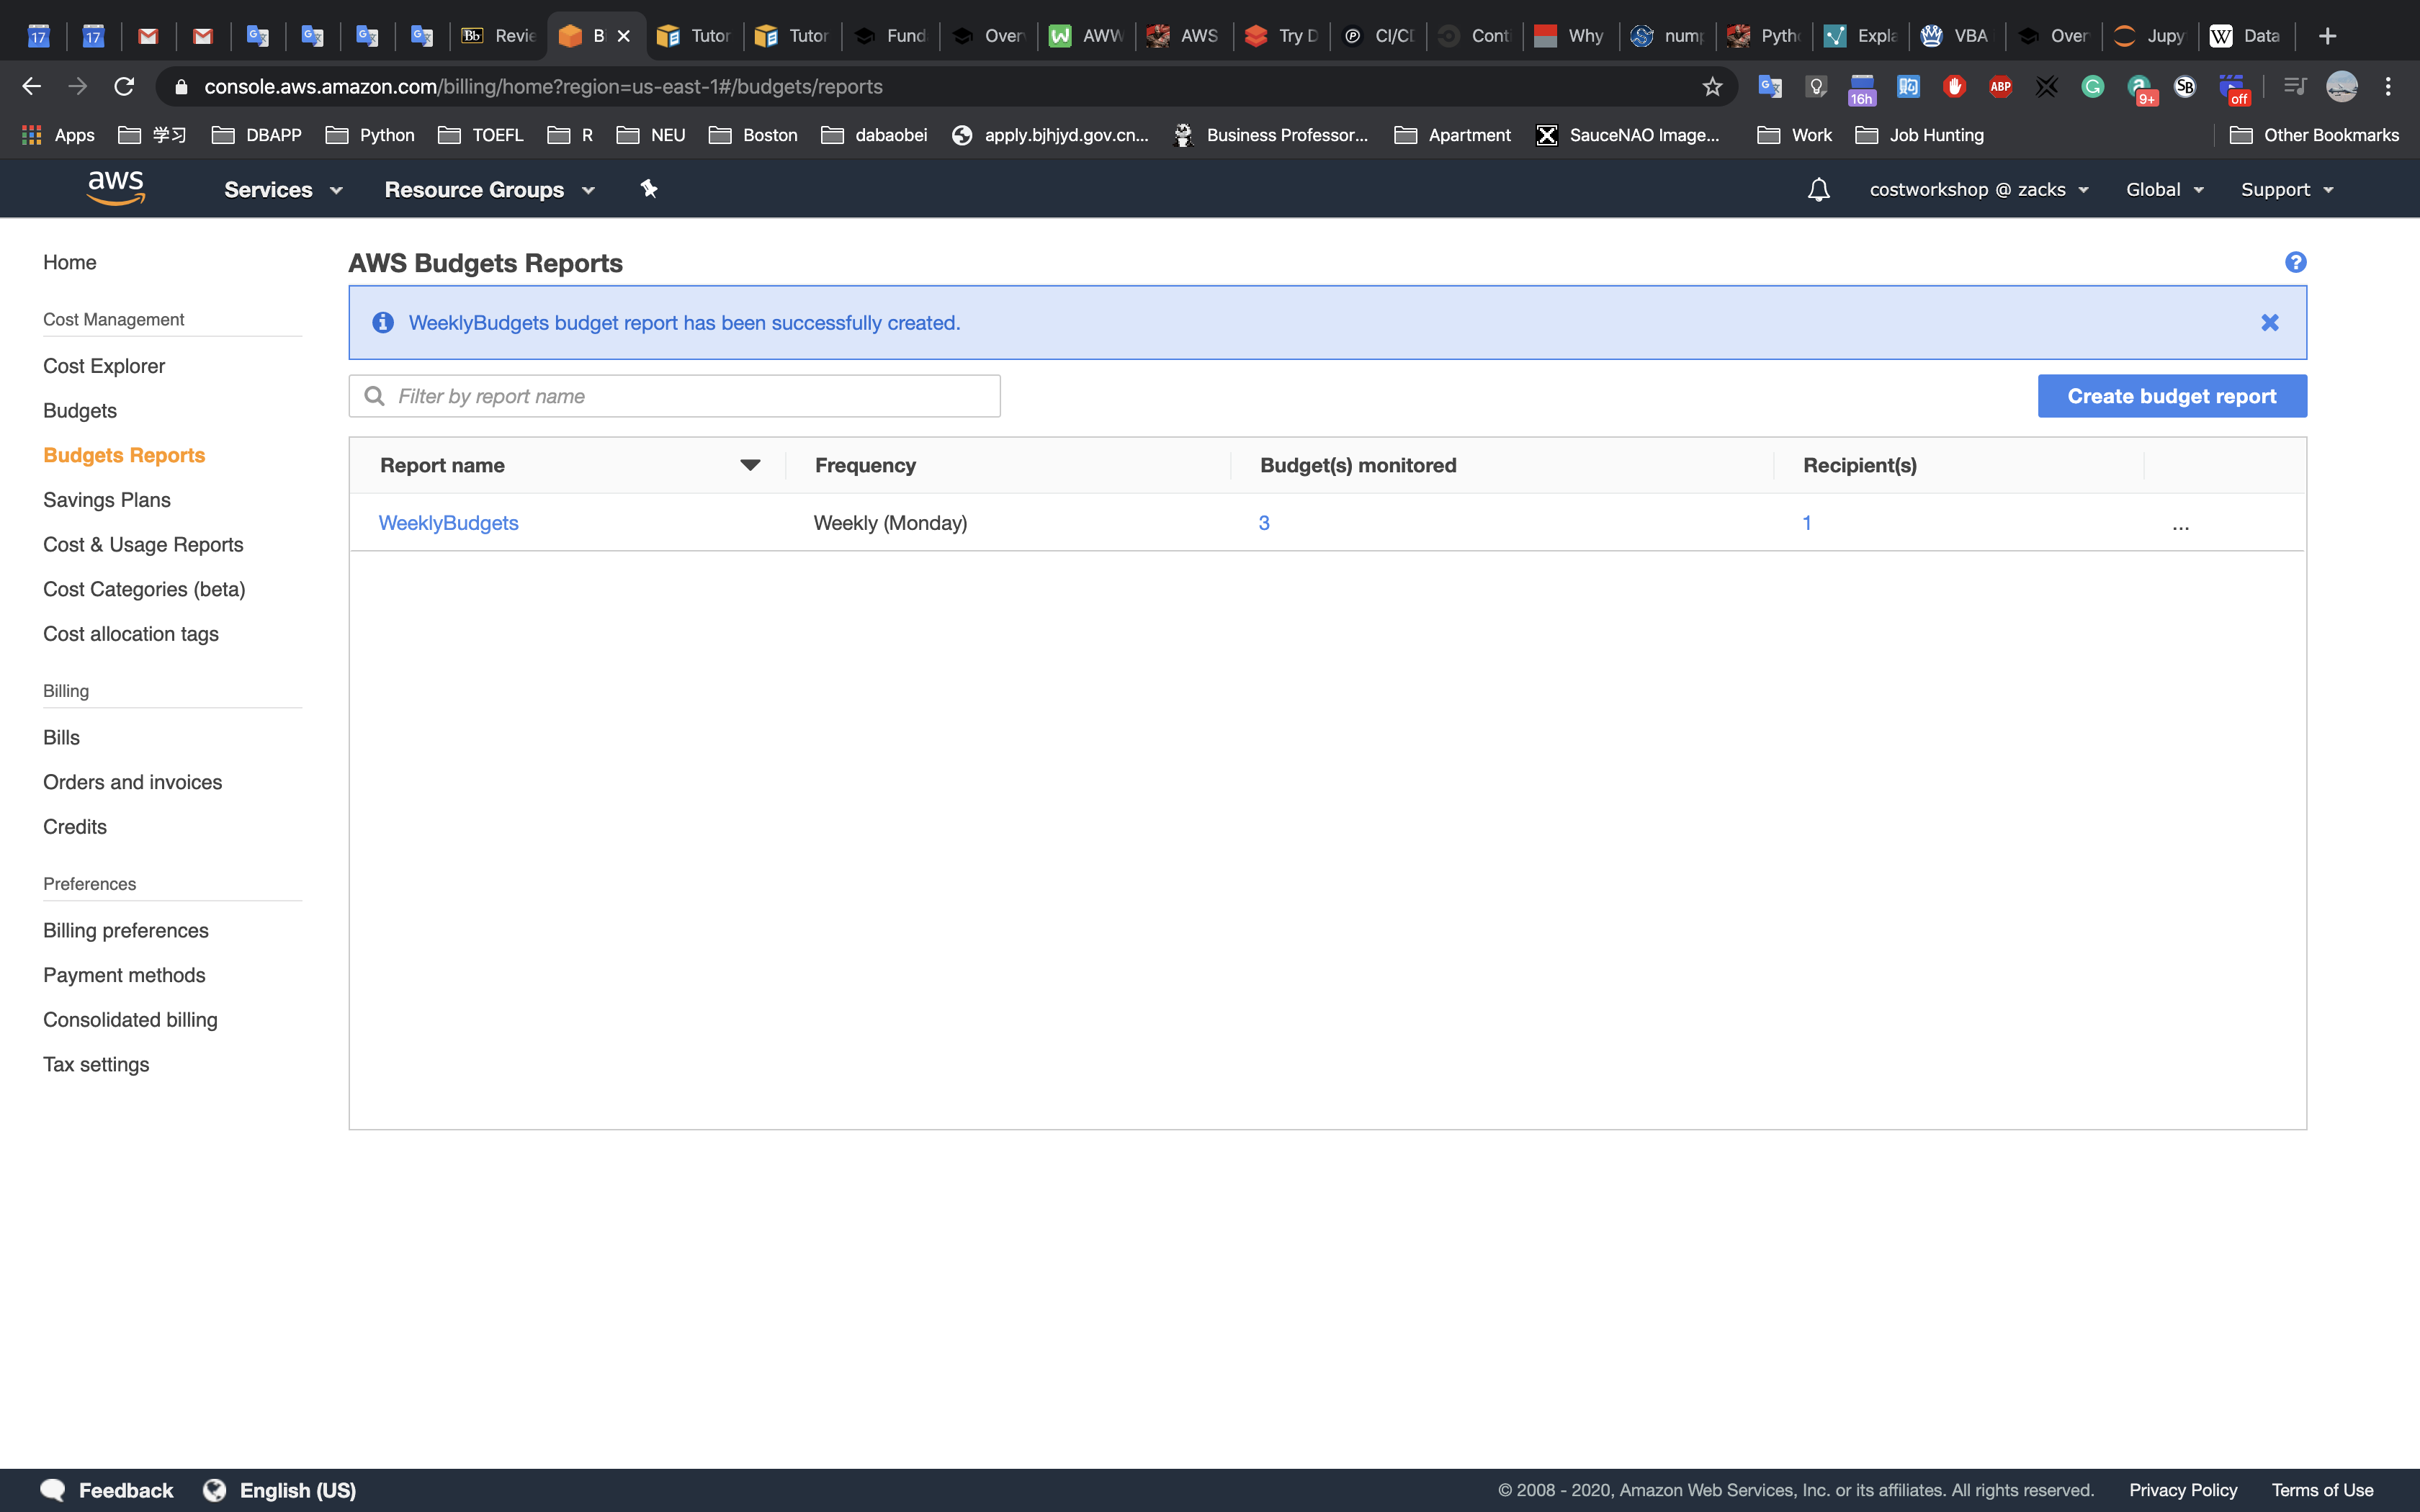
You should receive an email similar to the one below:
5. Tear down
Delete a budget report
We will delete the bugdet report we created in section 4.
From the
Budgets Reportsdashboard, click on the three dots next to theWeekly Budgetsbudget report, and clickDelete: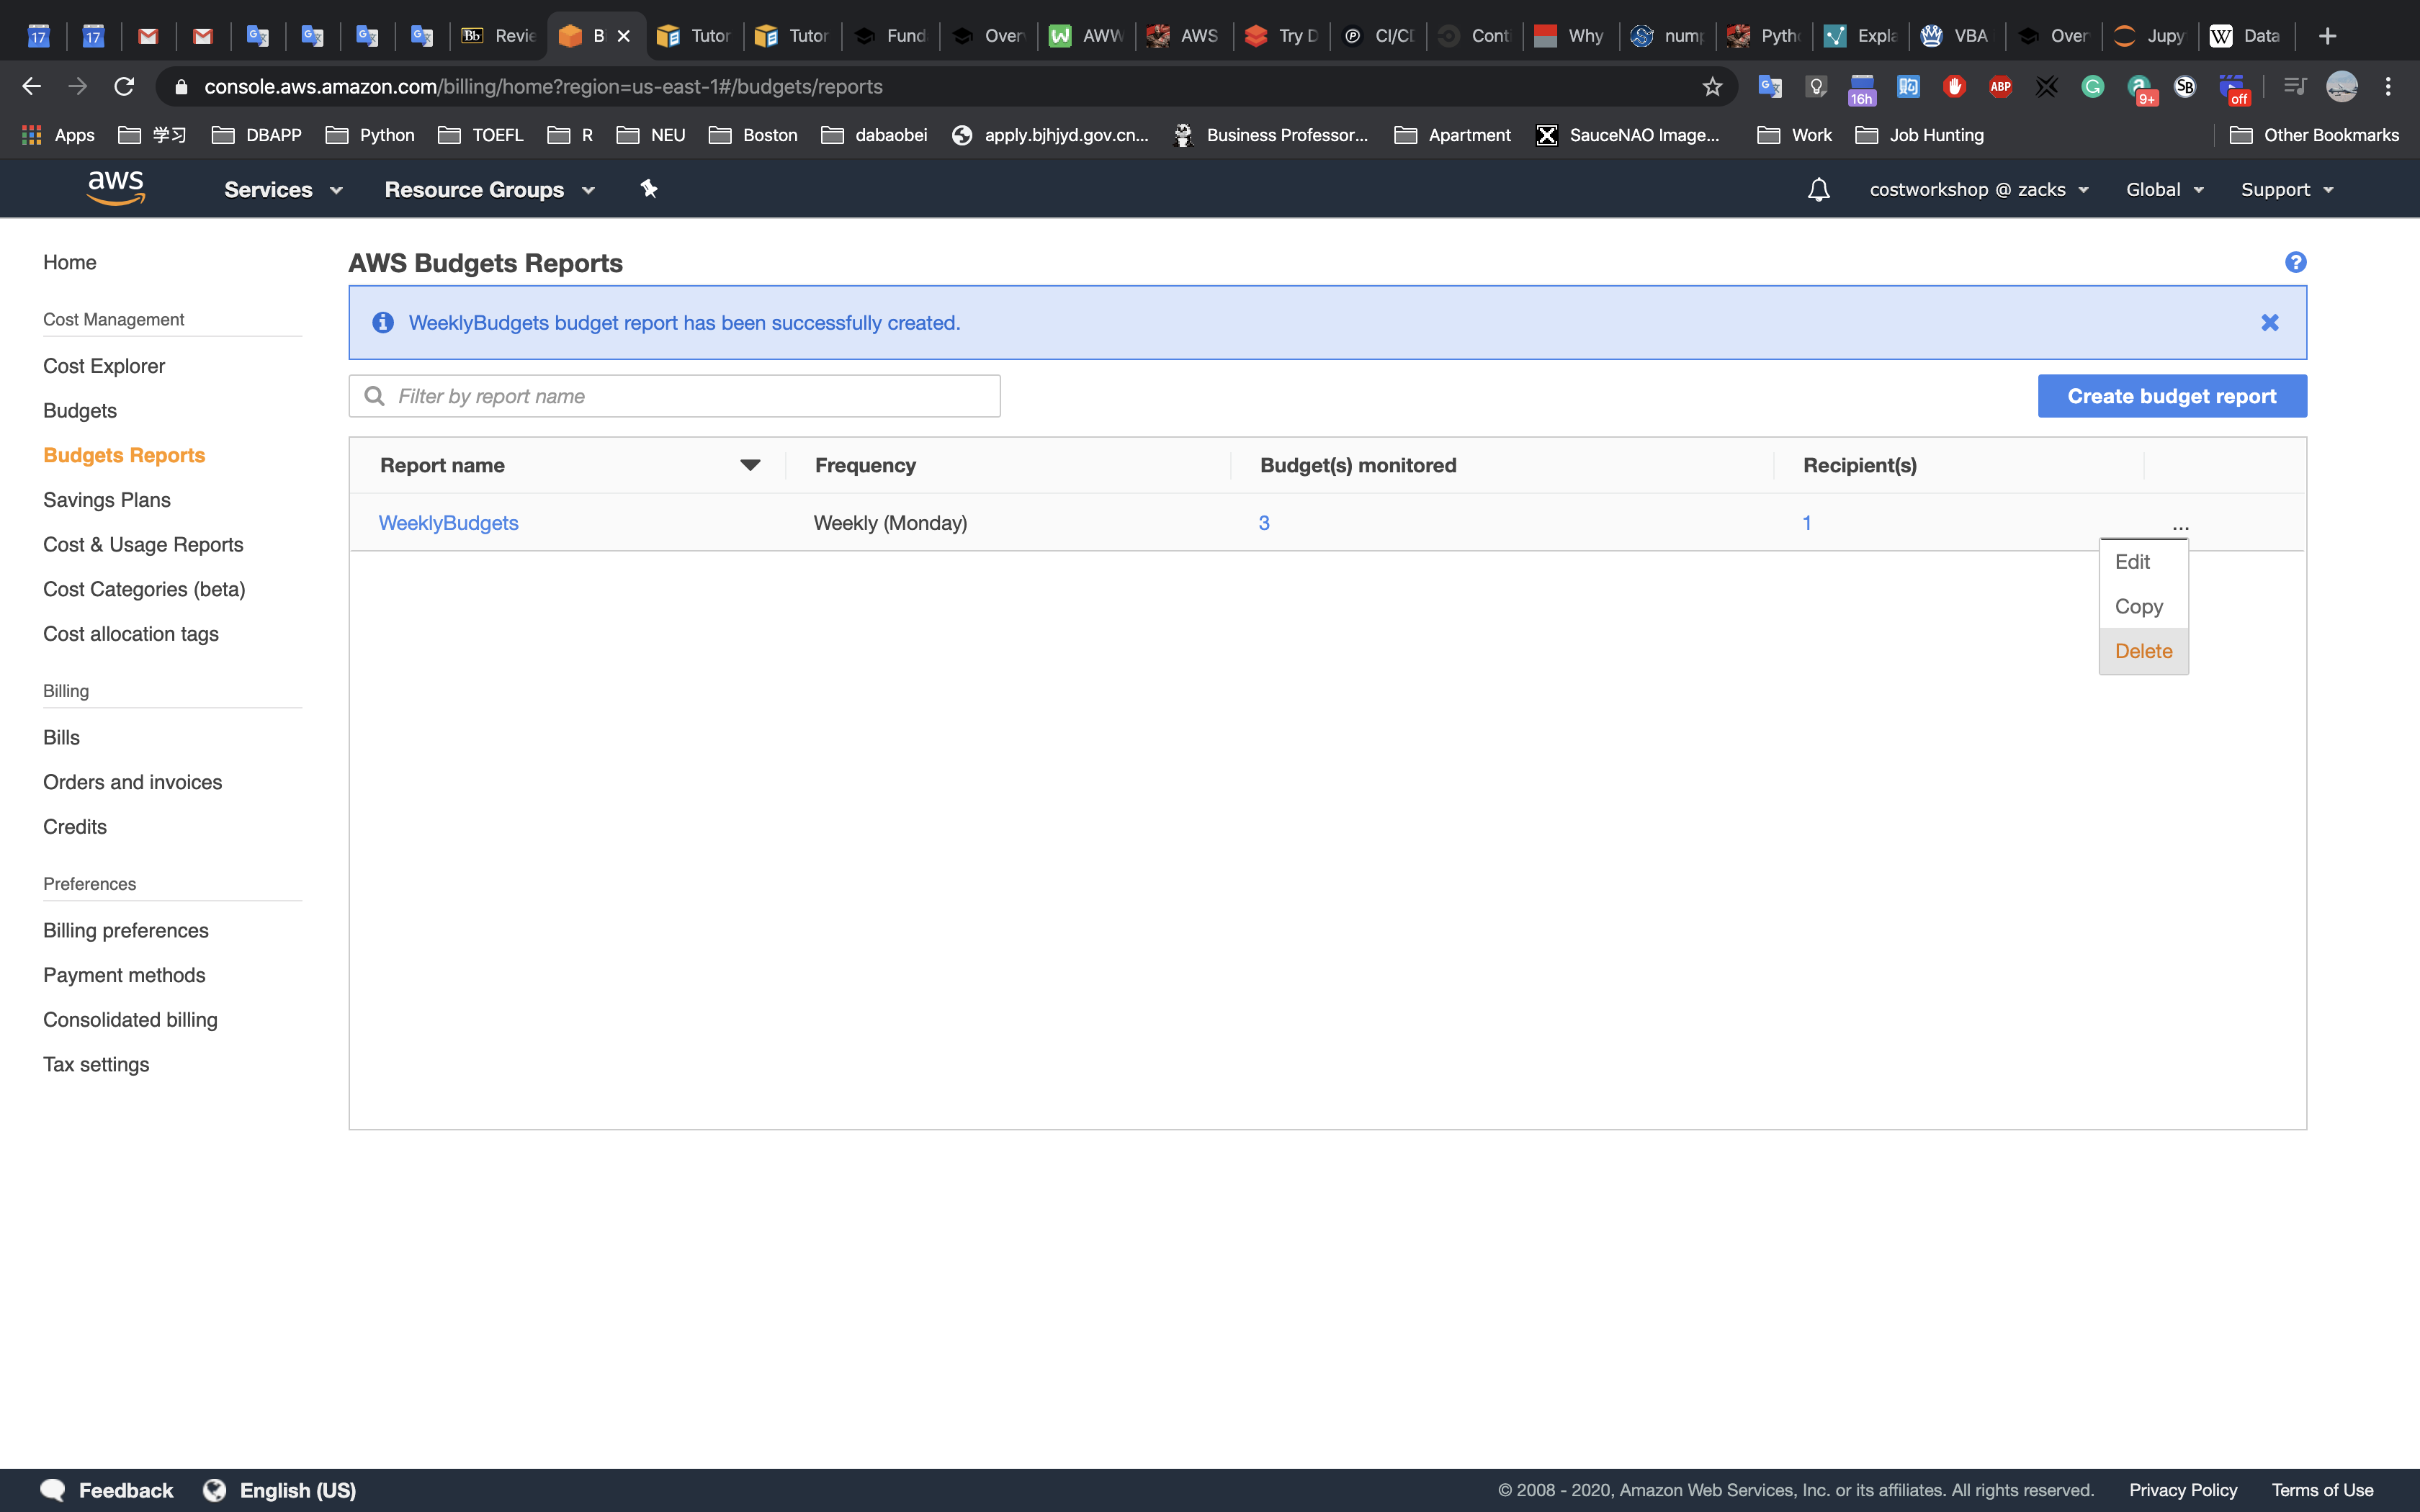
You can see there are no budget reports:
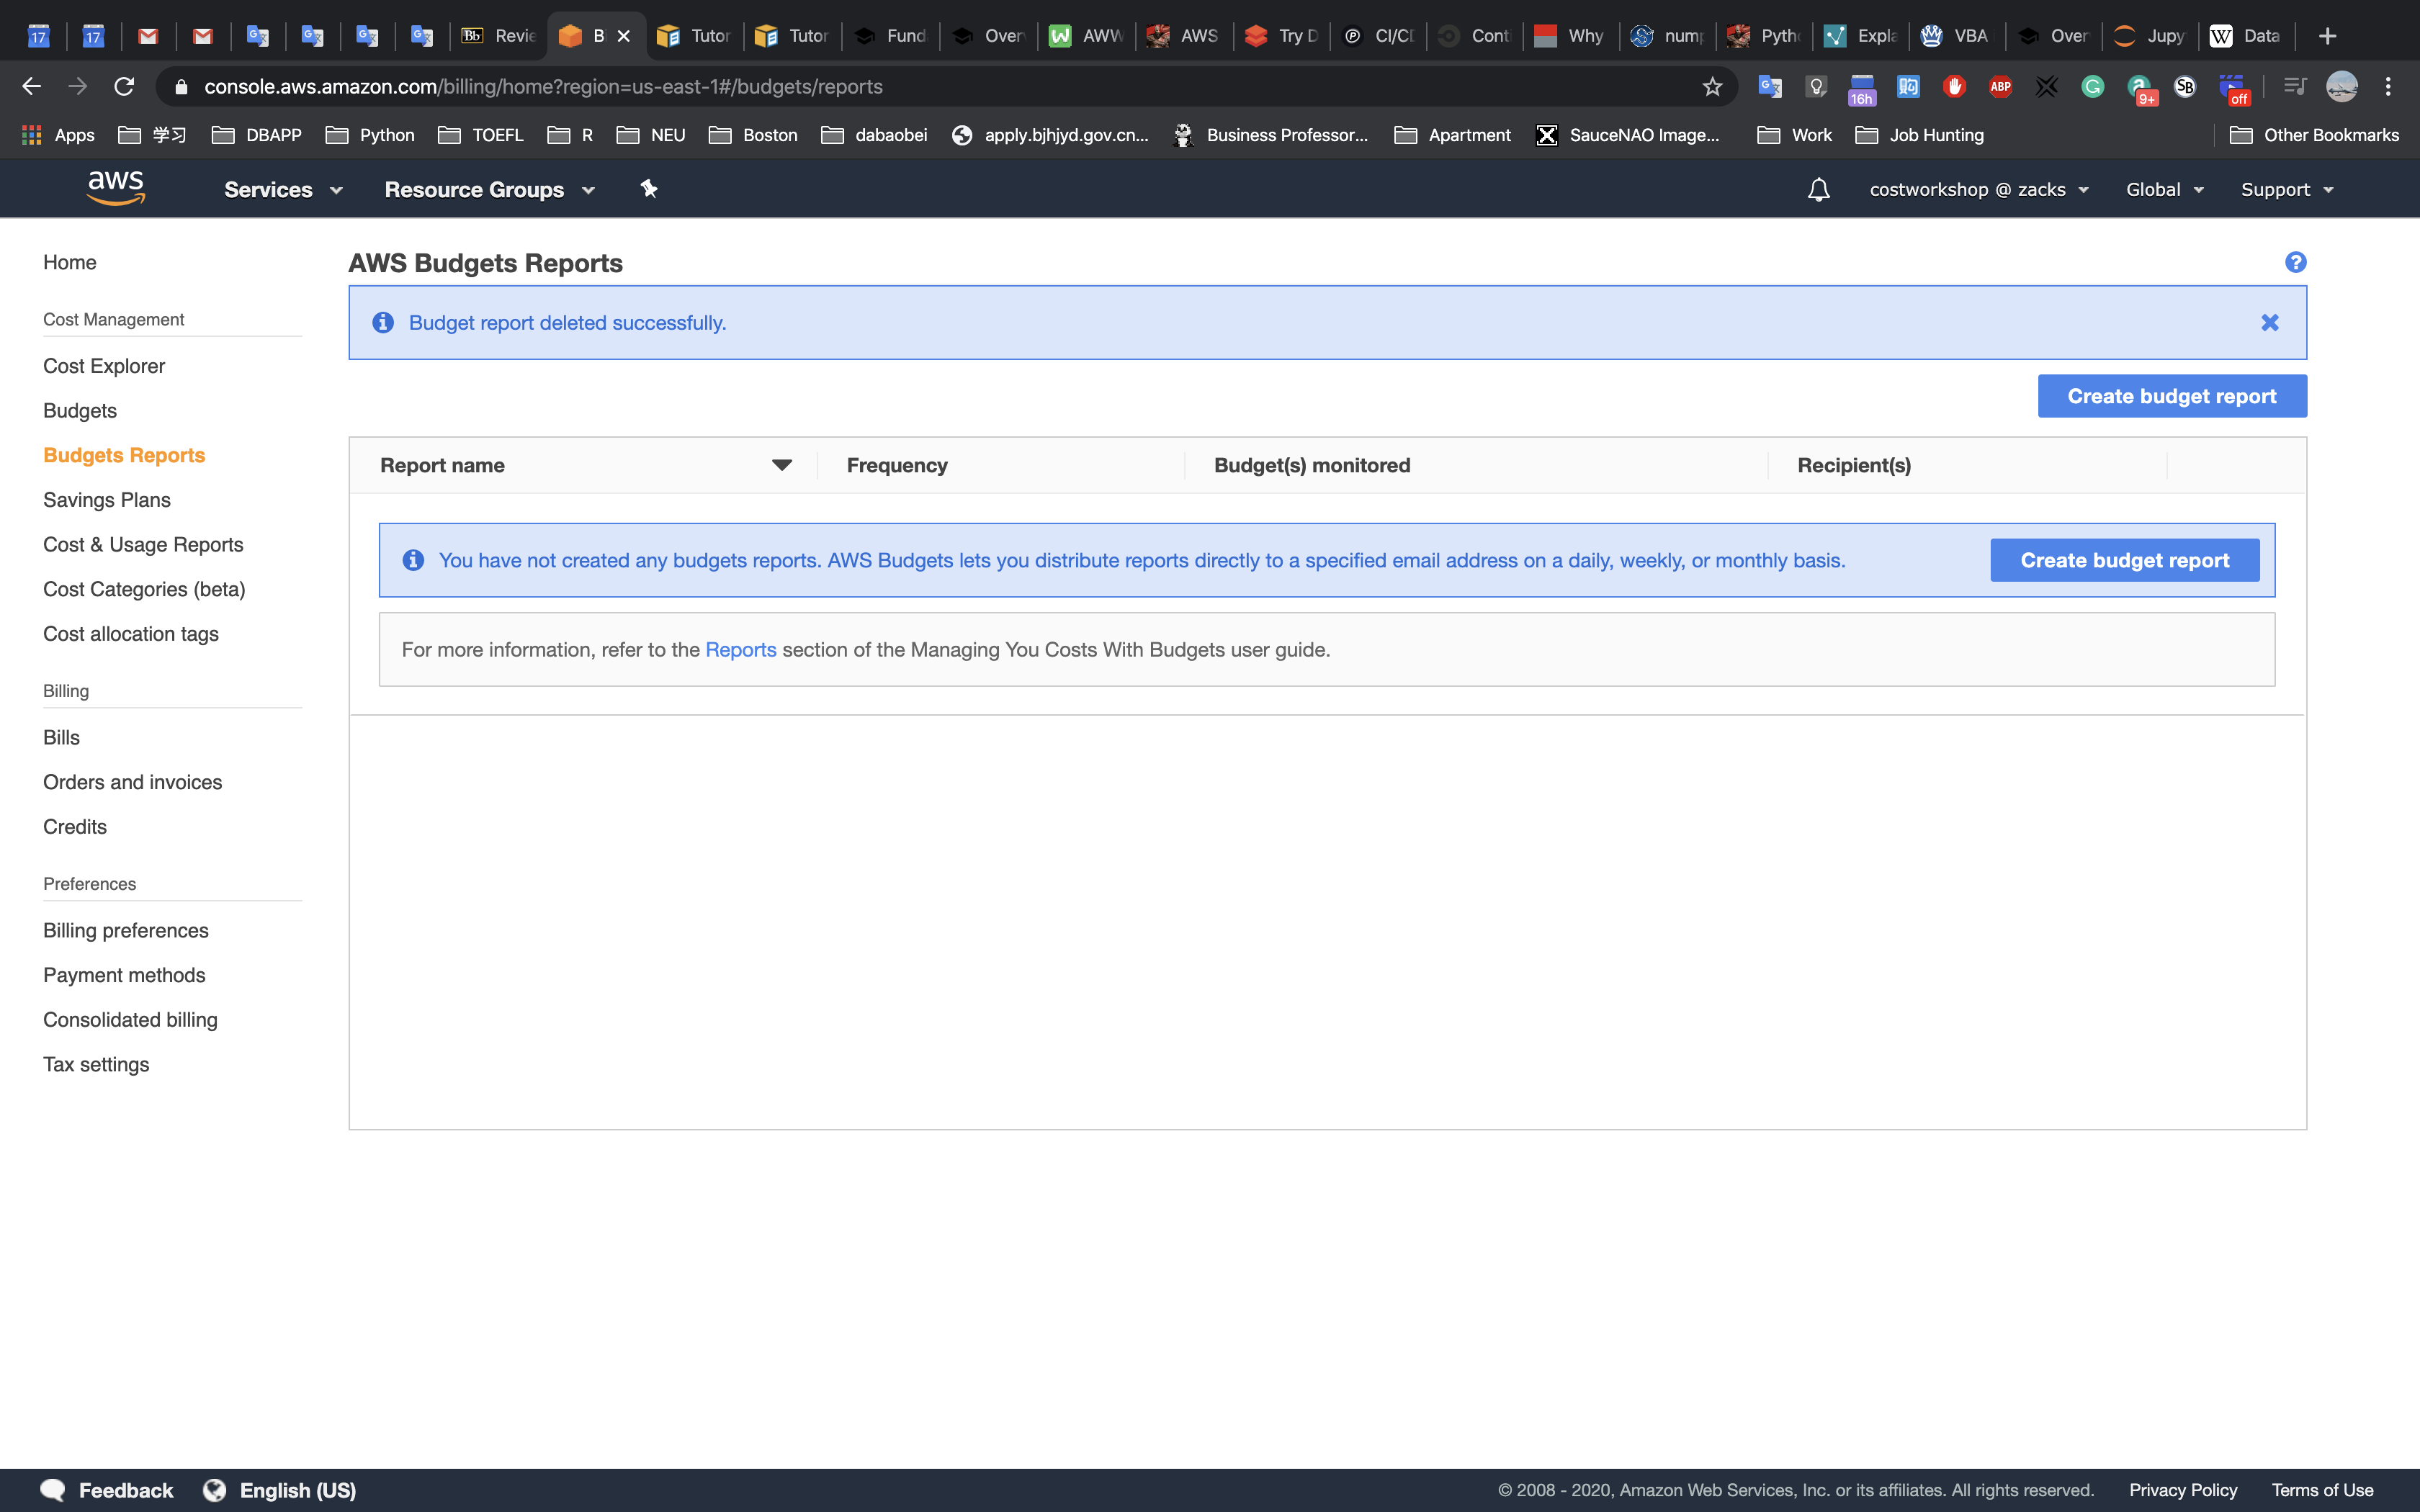
Delete a budget
We will delete all three budgets that were configured in sections 1,2 and 3.
From the Budgets dashboard, click on the budget name CostBudget1:
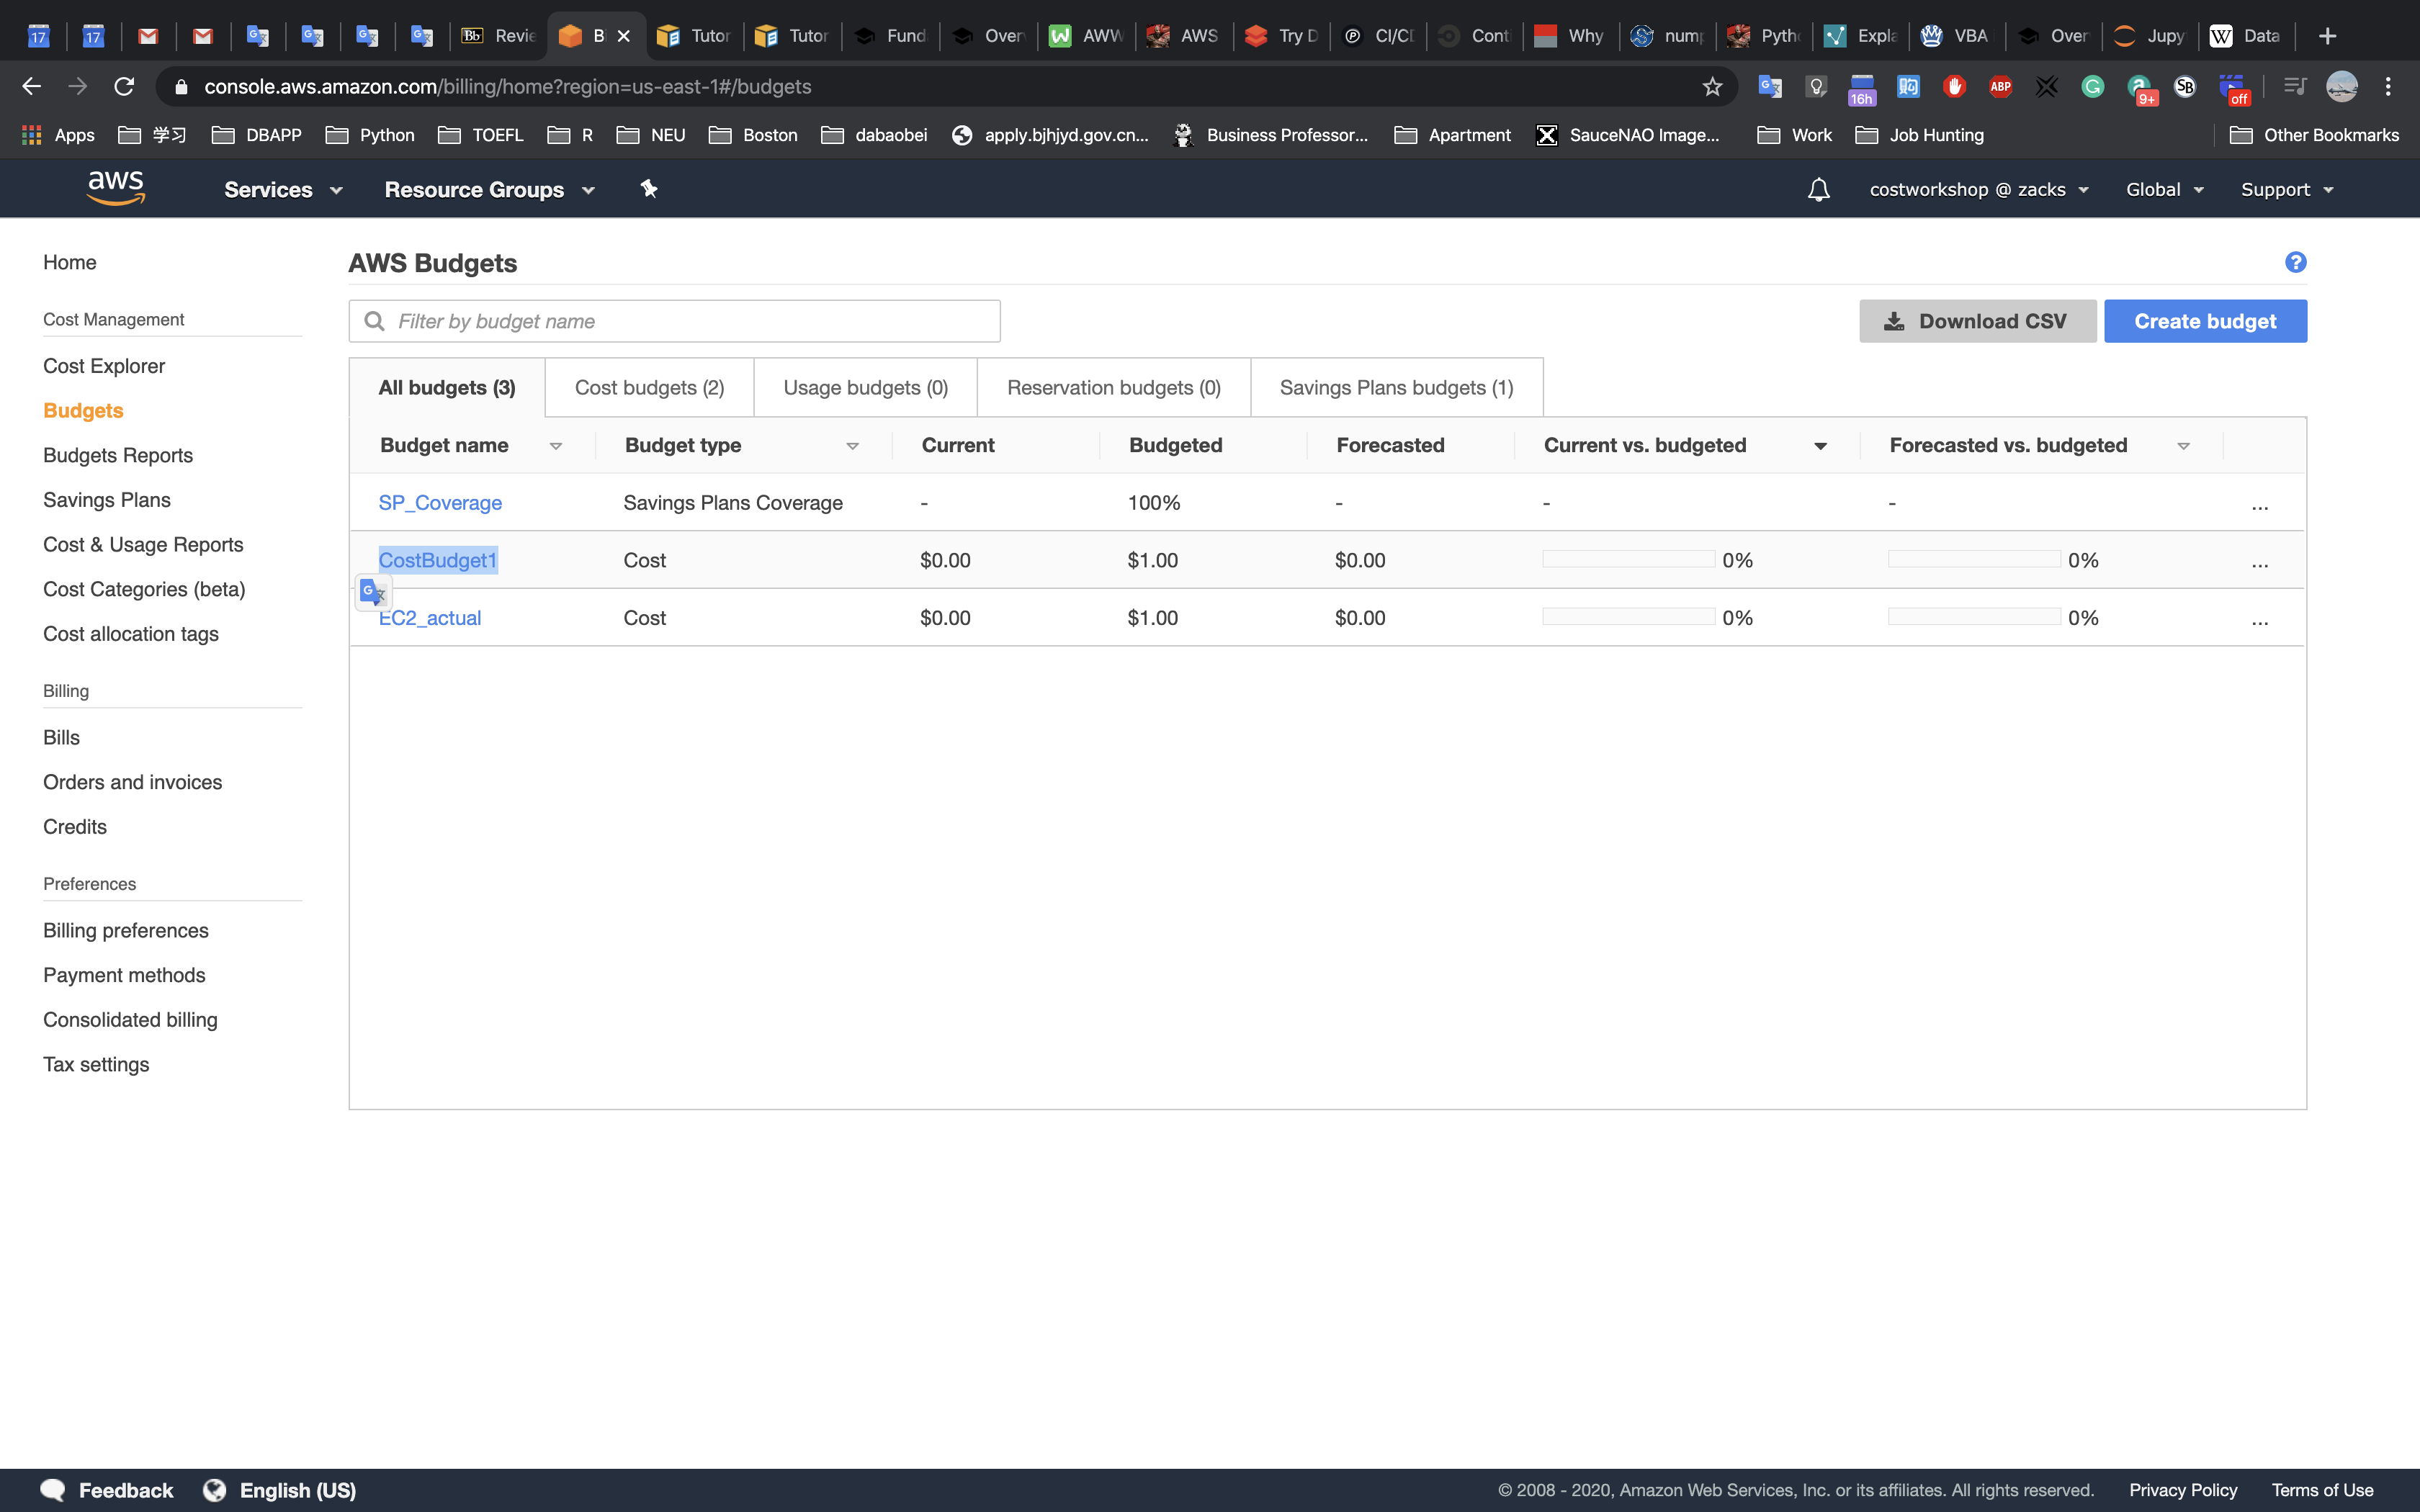
Click on the
3 dot menuin the top right, selectDelete: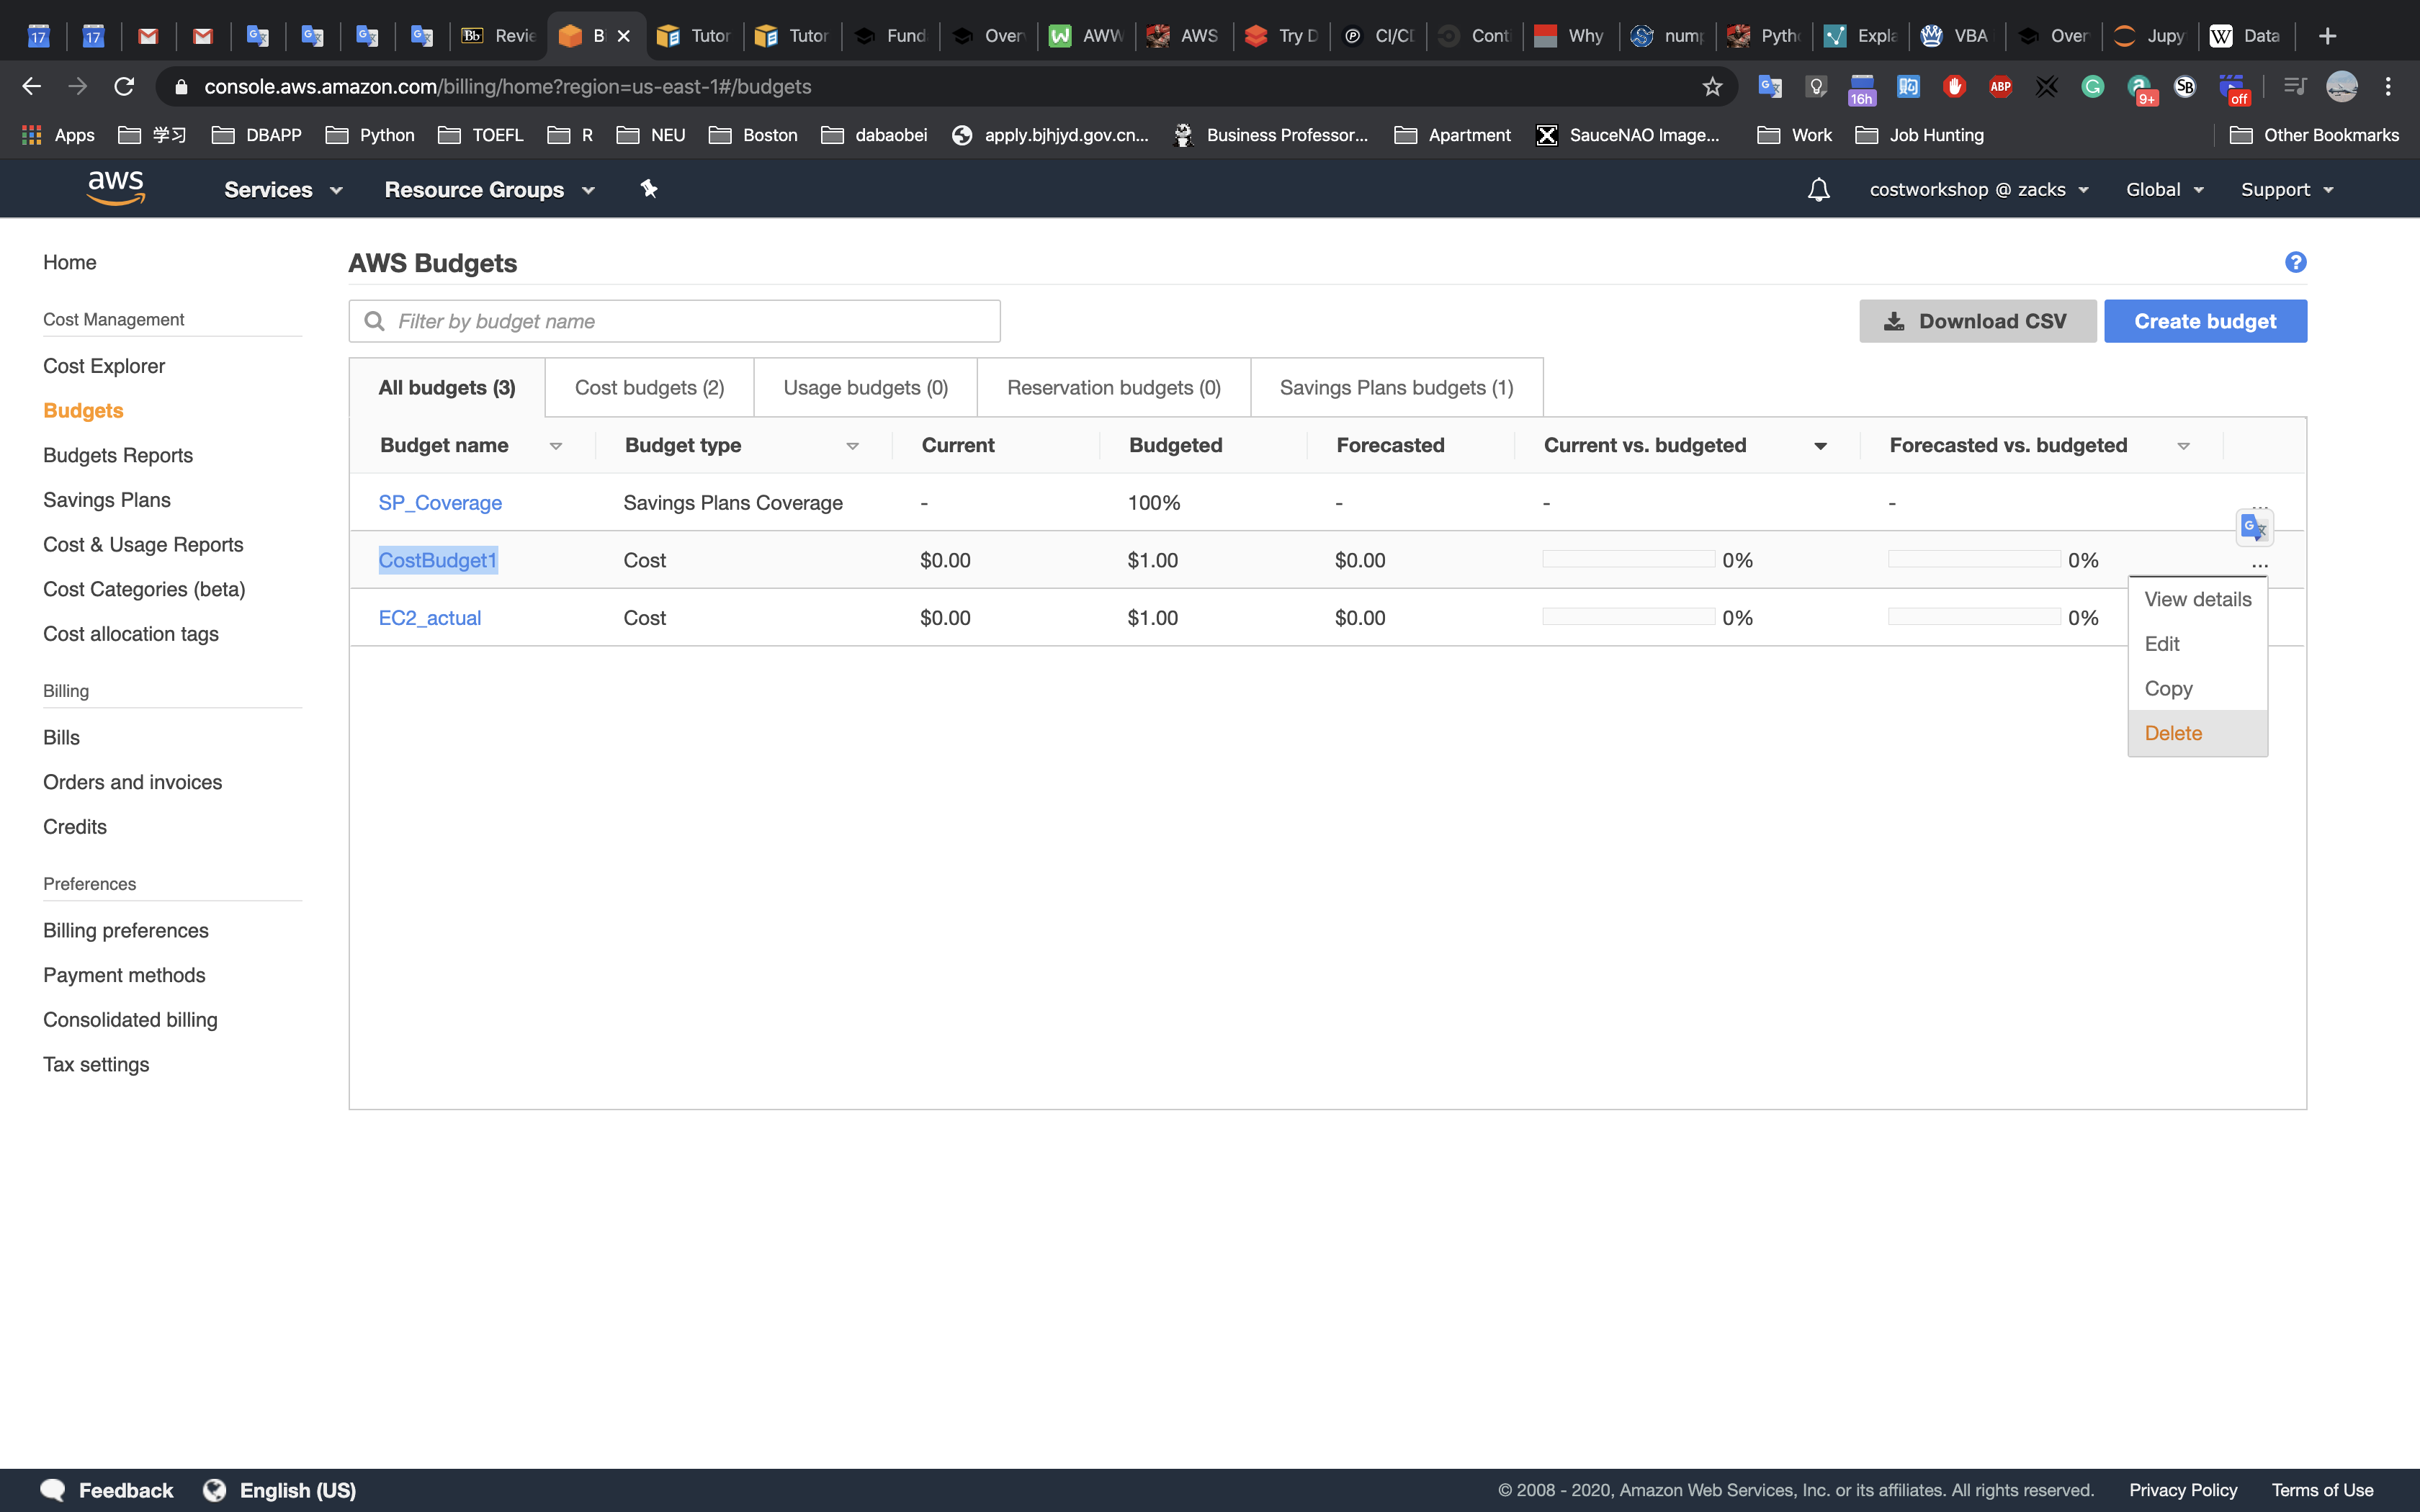
Click on the other budget name
EC2_actual: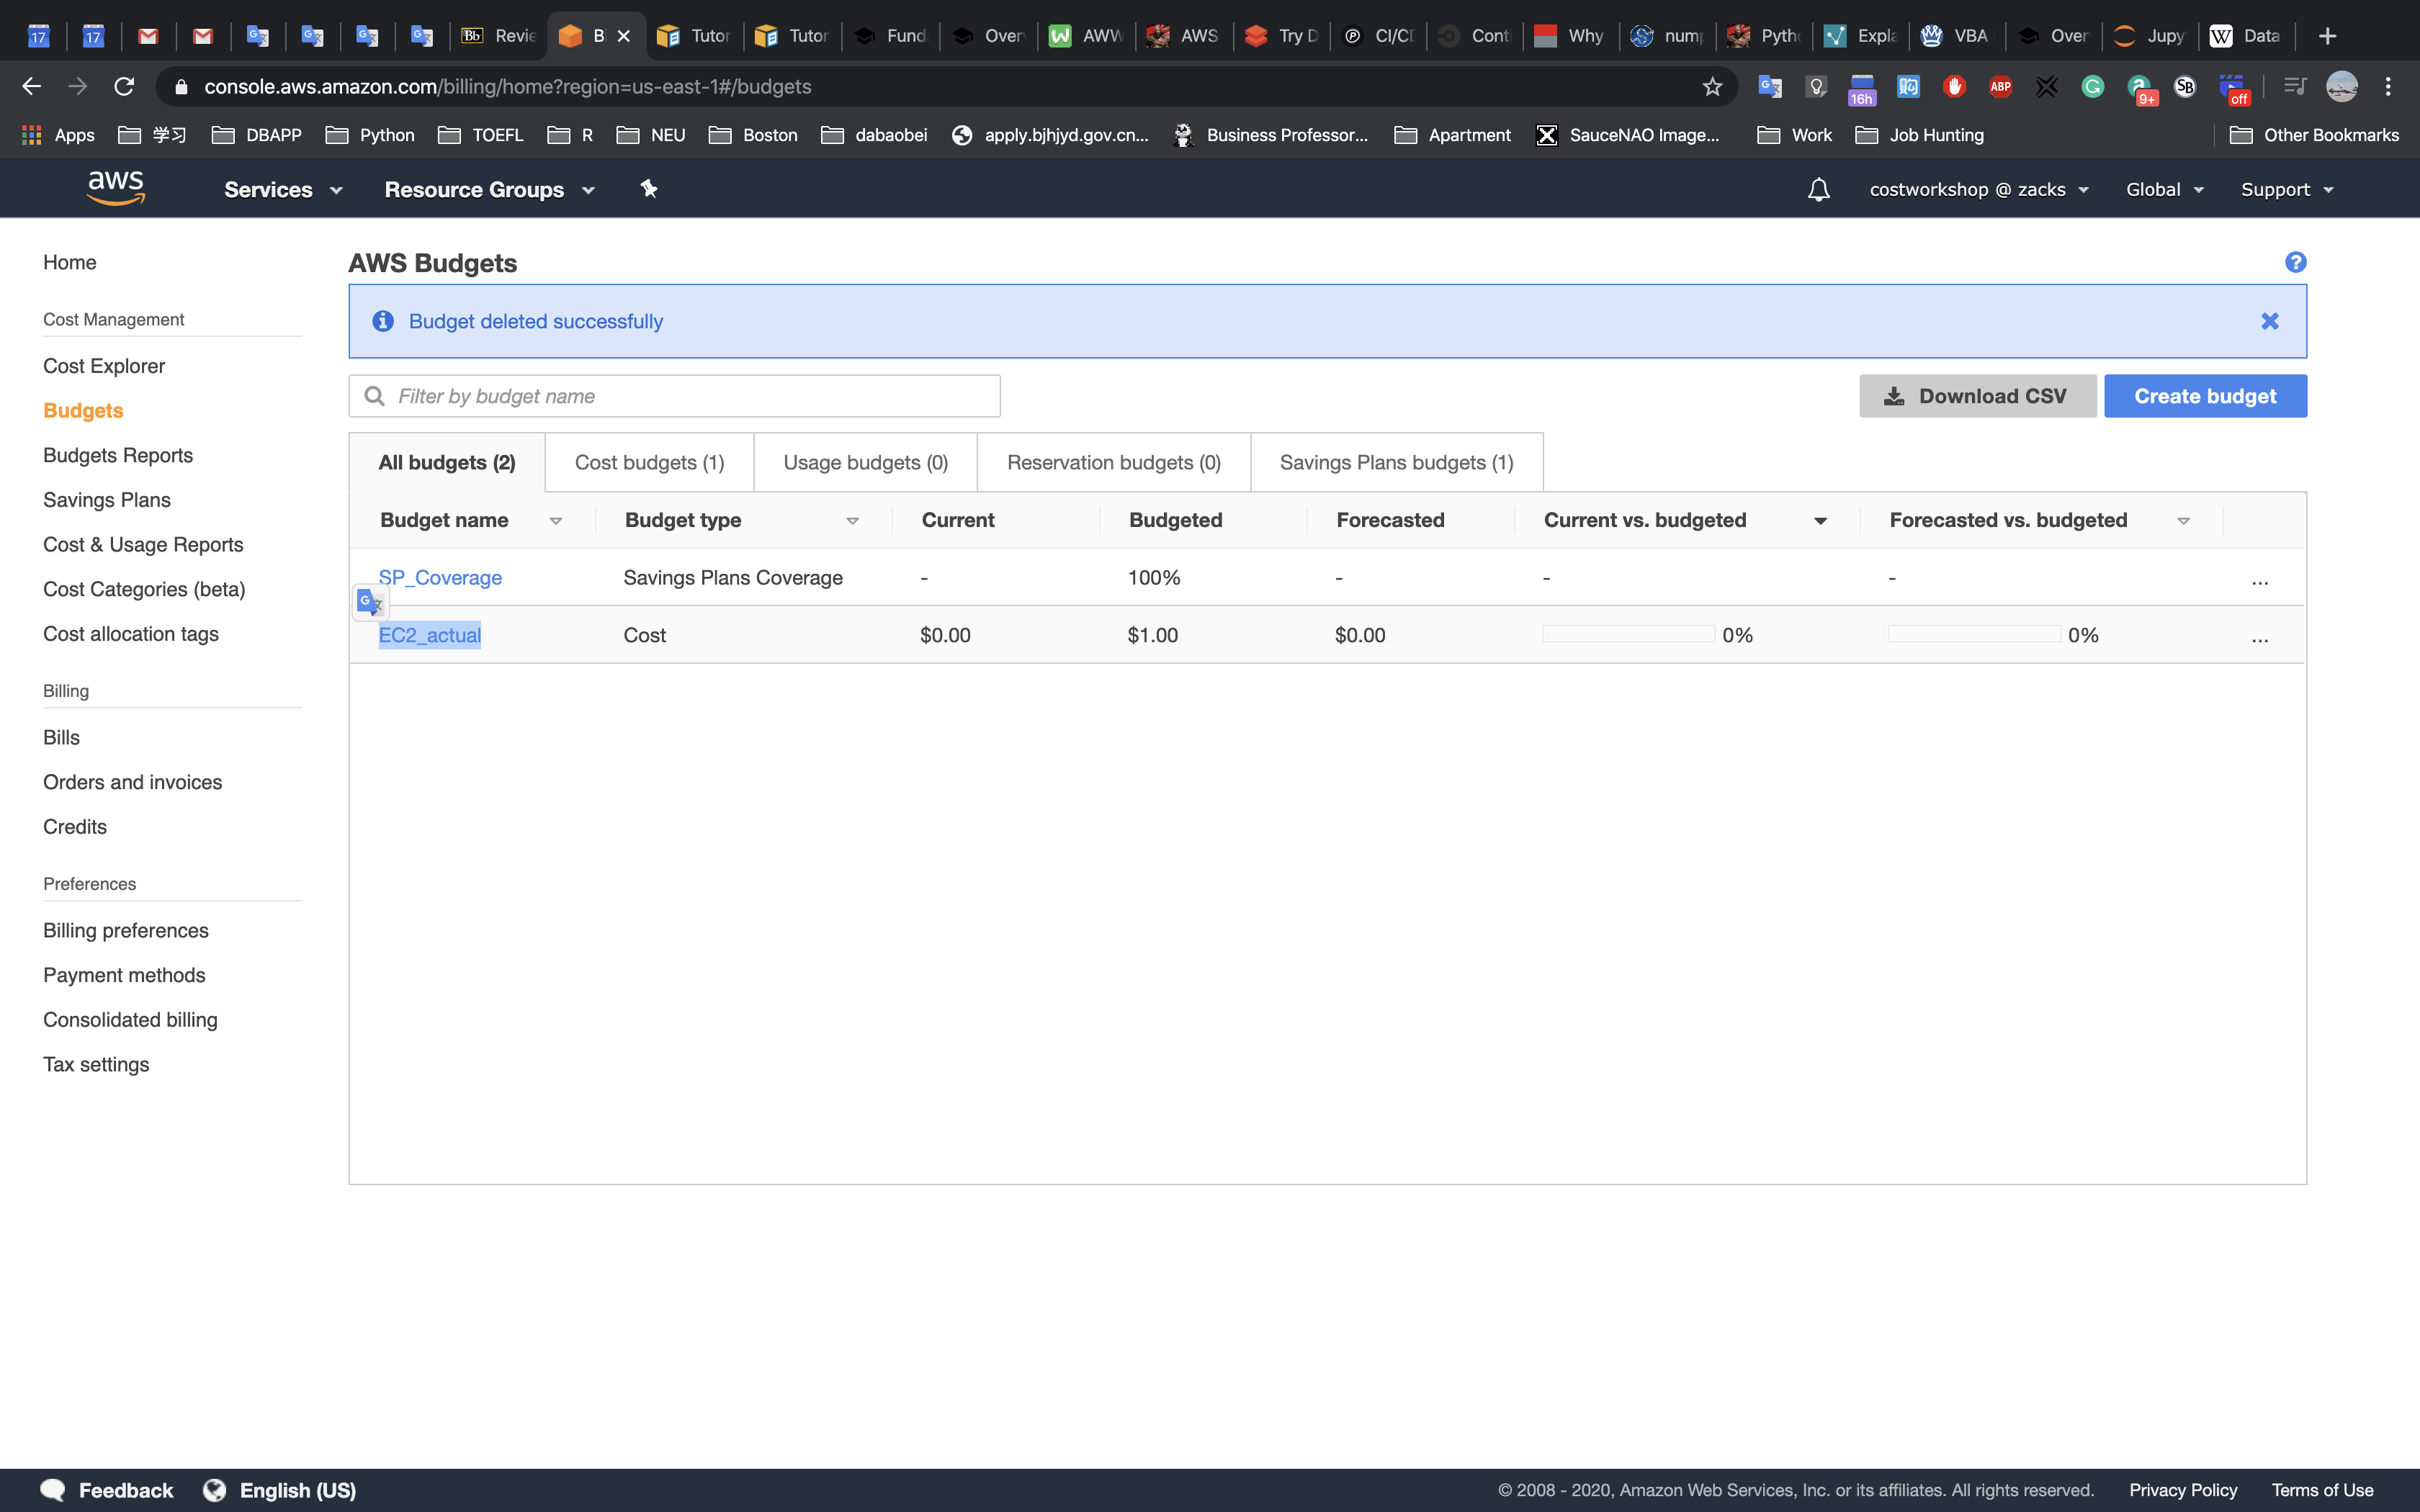
Click on the
3 dot menuin the top right, selectDelete: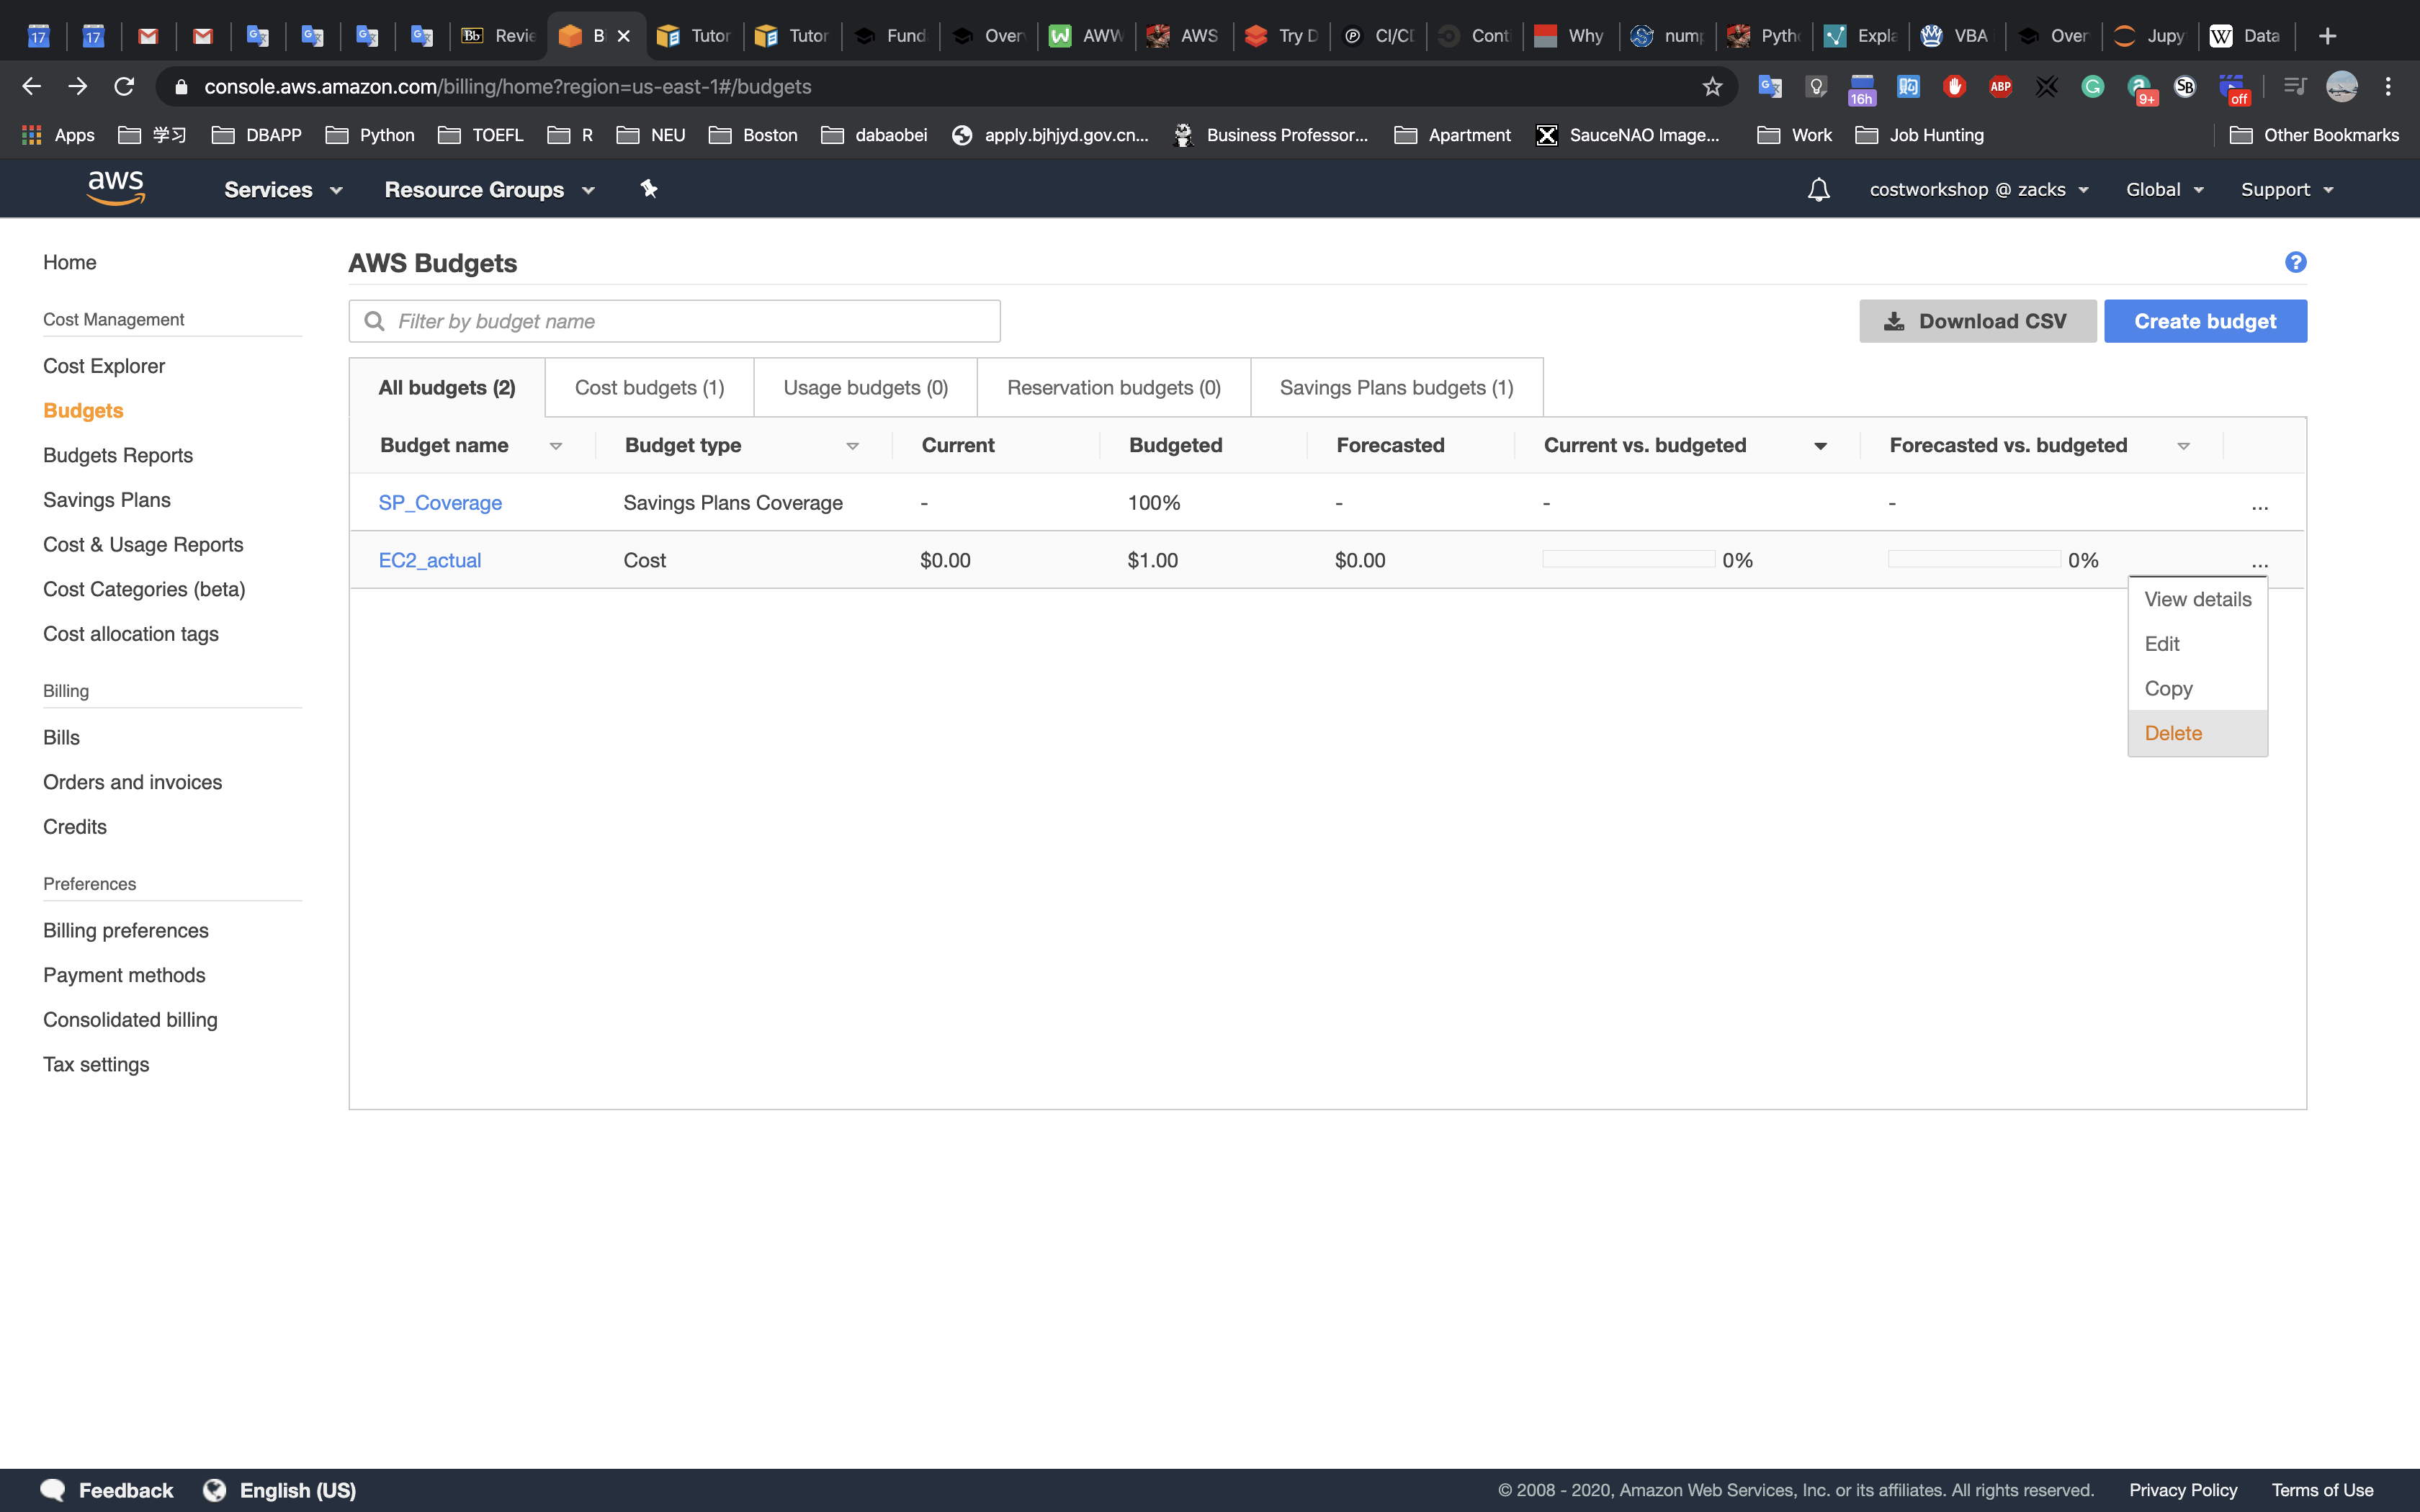
Click on the other budget name
SP_Coverage: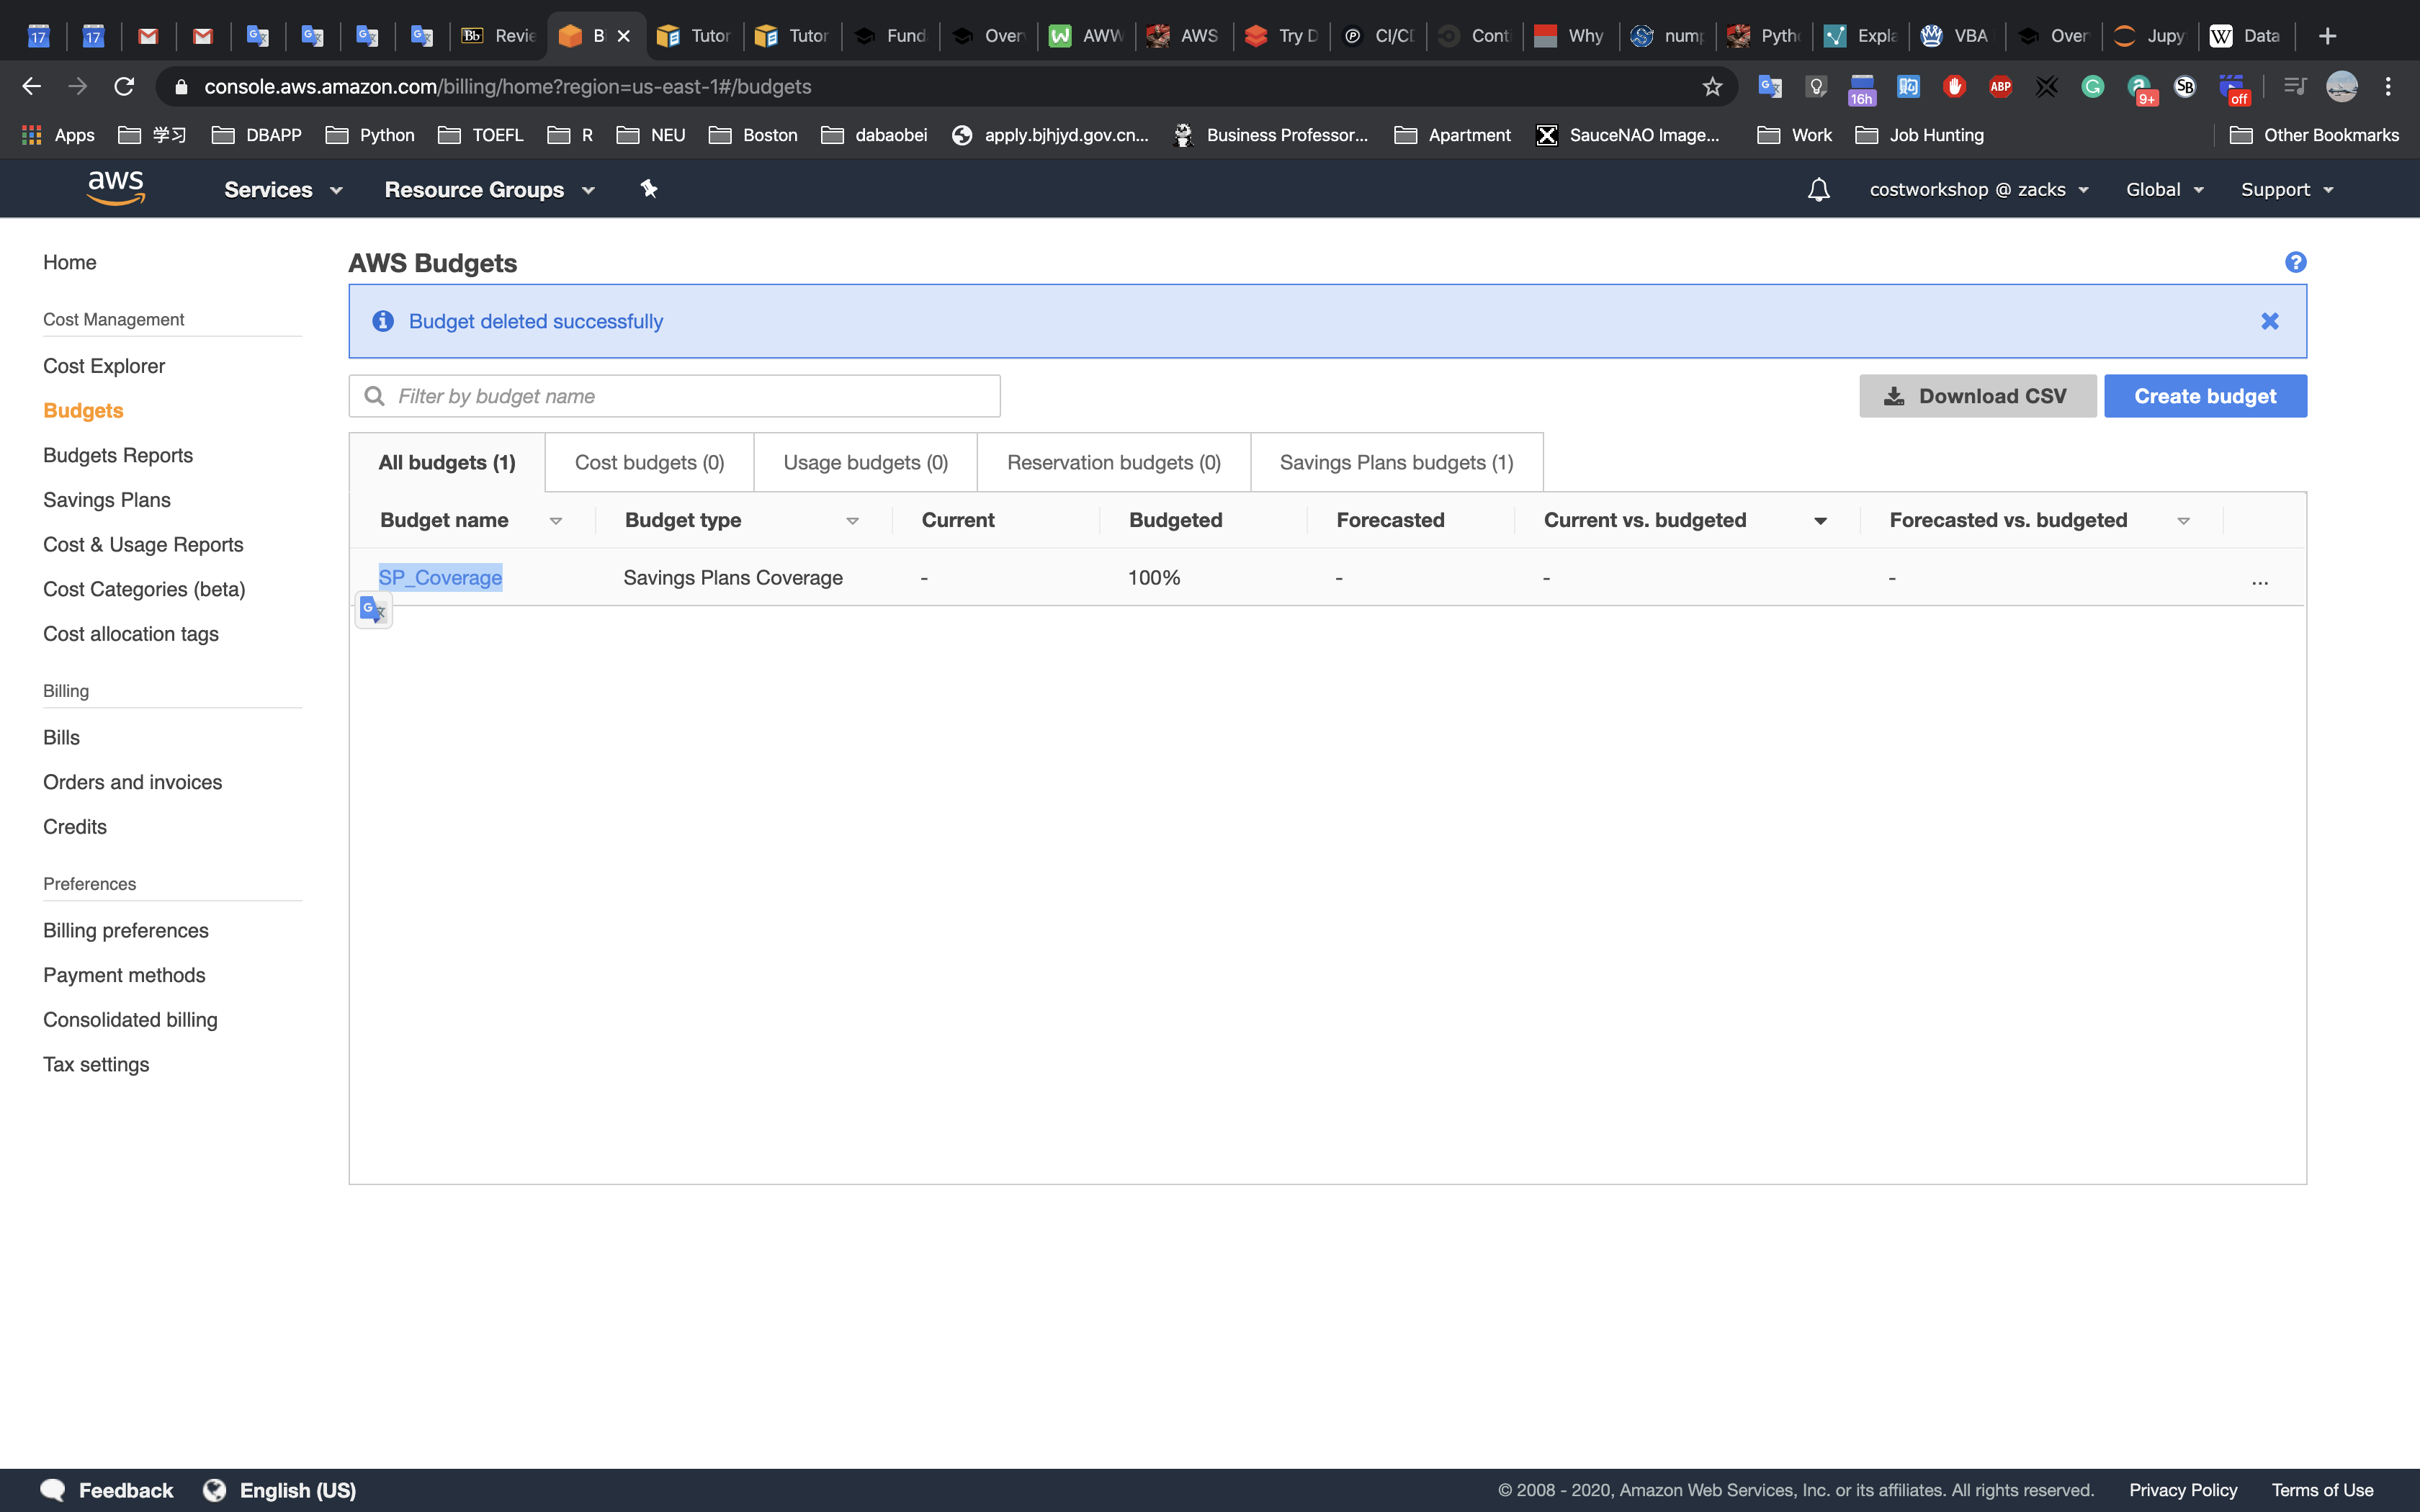
Click on the
3 dot menuin the top right, selectDelete:
All budgets should be deleted that were created in this workshop: